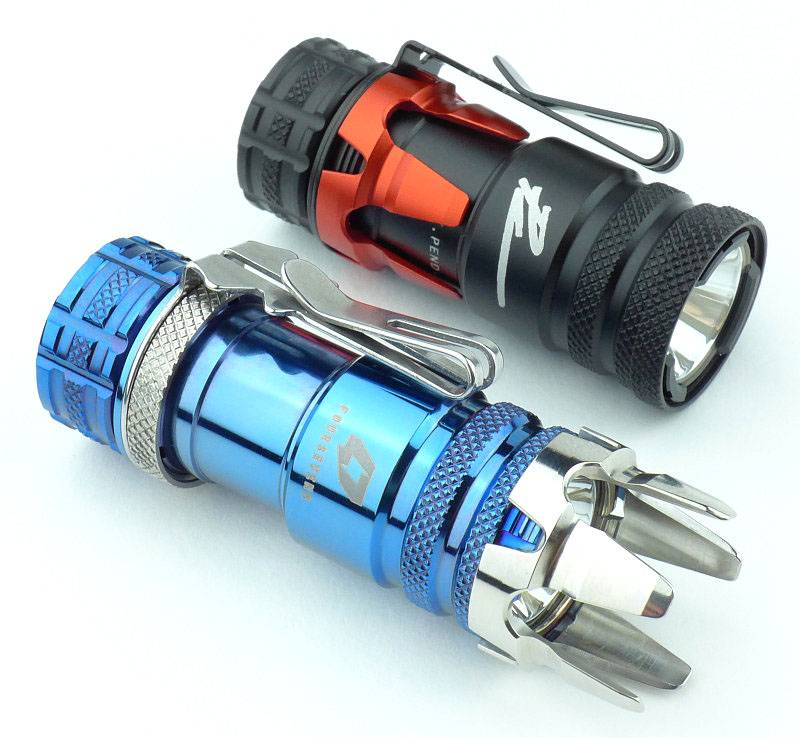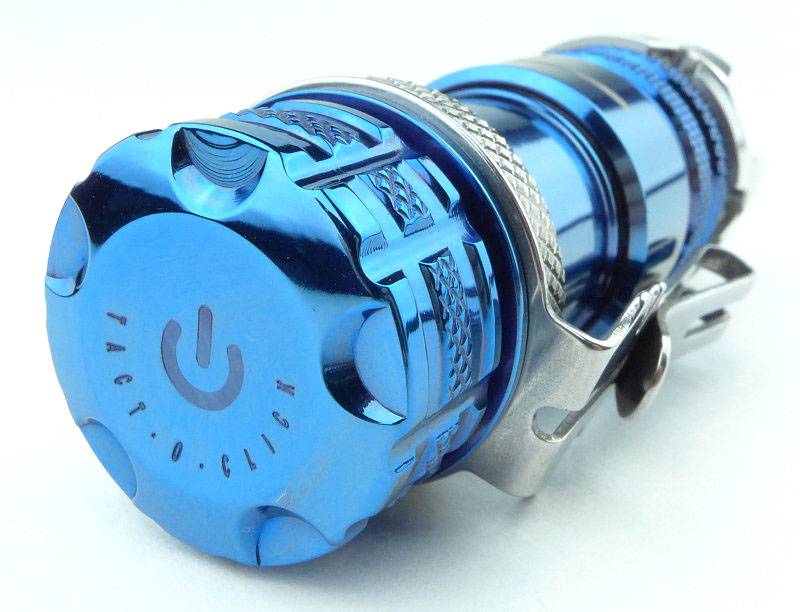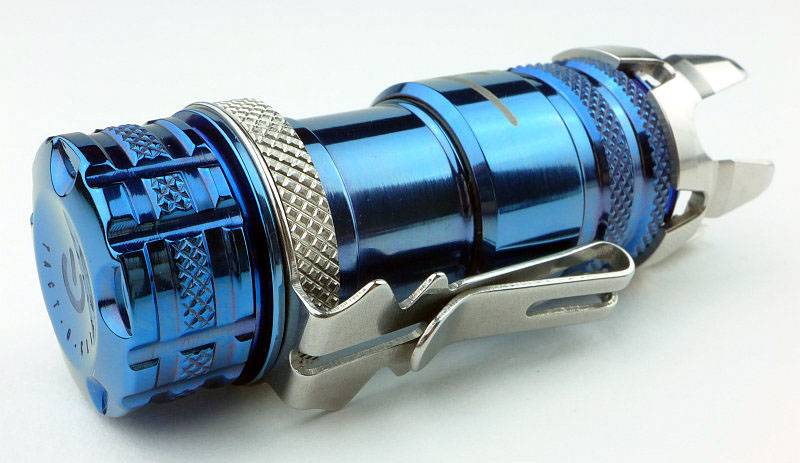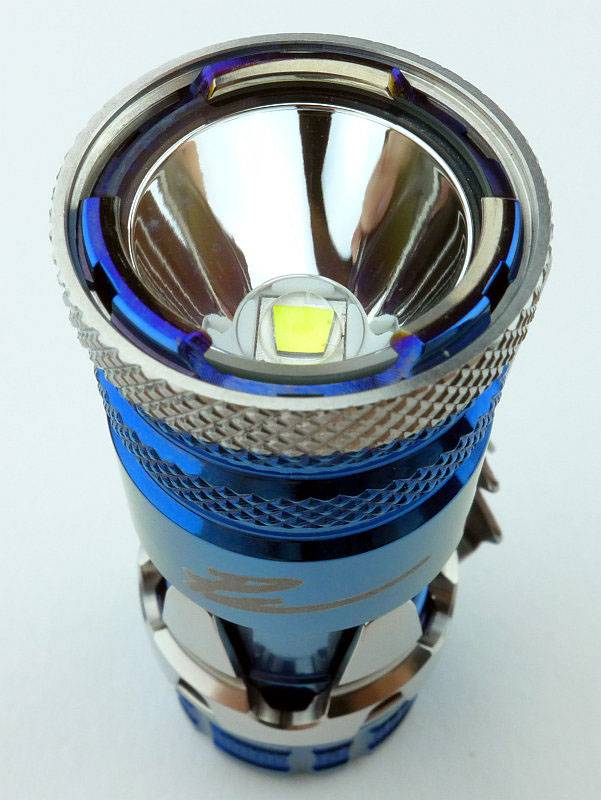
Light Review: Fenix TK15UE (Ultimate Edition)

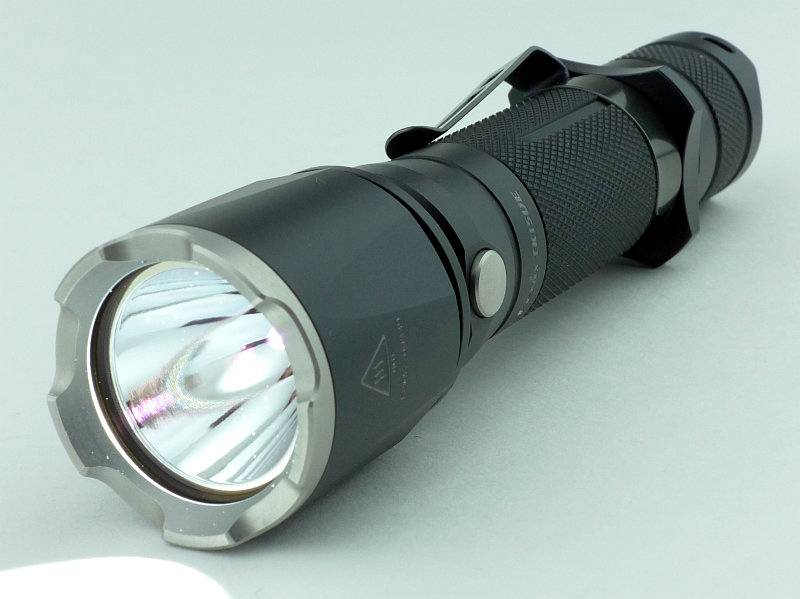
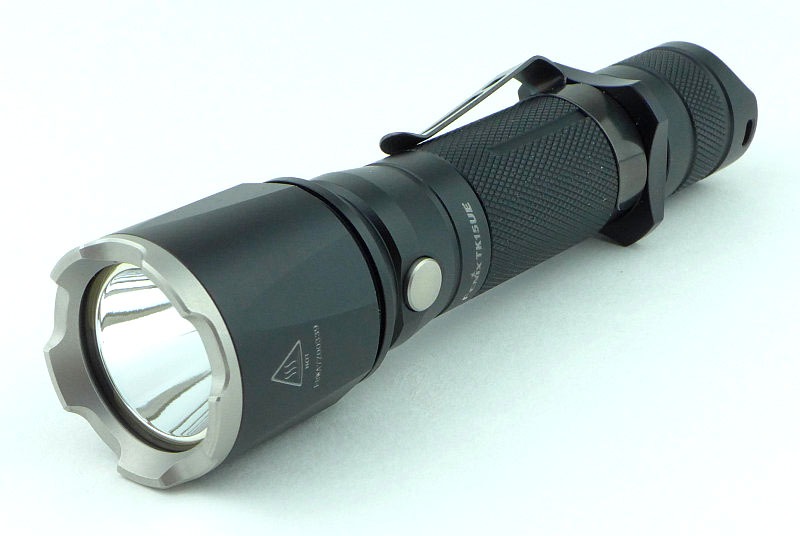
Fenix have been taking classic lights from their range and creating ‘Ultimate Edition’ versions, pushing their performance to the maximum. The TK15 has now been ‘UE’ed to make the TK15UE with uprated output, throw and a new stainless steel bezel.
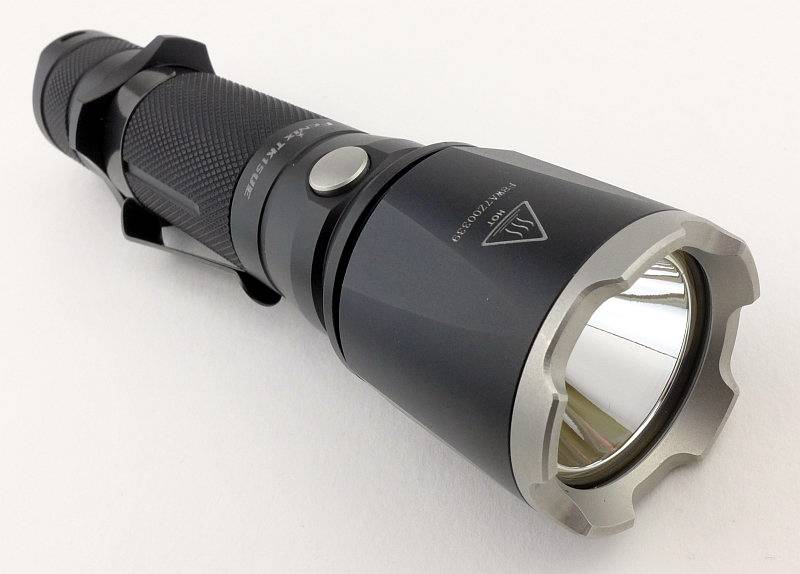
 photo 16 TK15UE trailer P1230848.jpg

Taking a more detailed look:

The TK15UE comes in Fenix’s standard packaging.
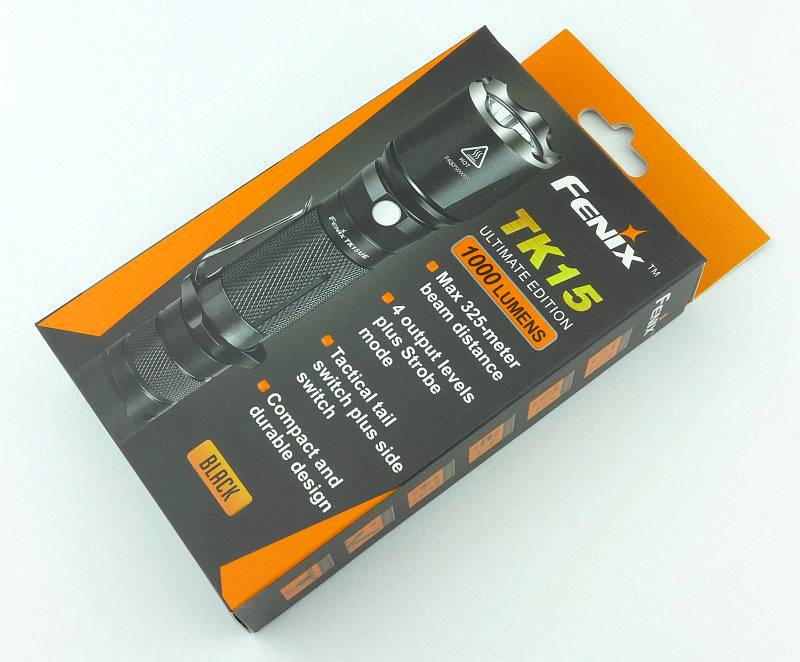
 photo 01 TK15UE Boxed P1230641.jpg

Included with the TK15UE are the instructions, a holster, a lanyard, a couple of O-rings and a spare switch boot.
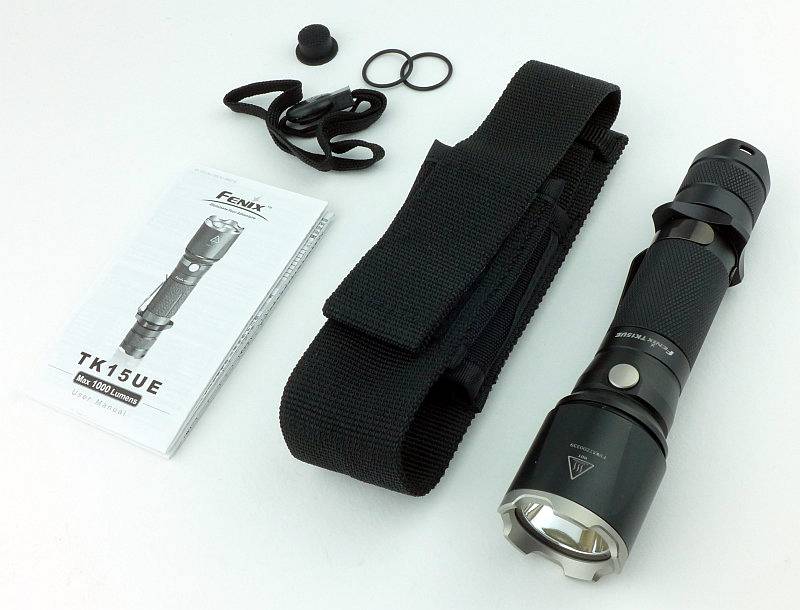
 photo 02 TK15UE Box contents P1230650.jpg

Before we move on, the holster is worth lingering on a little longer.
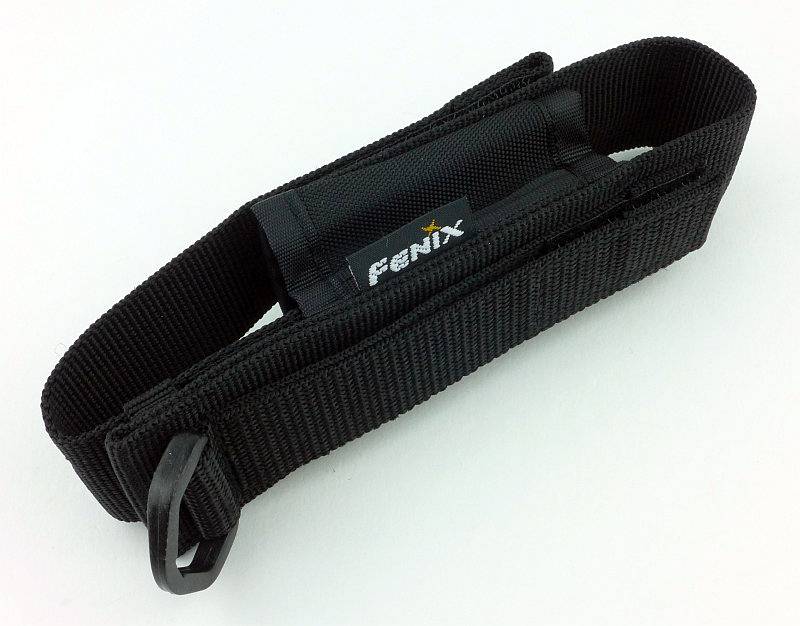
 photo 03 TK15UE holster P1230657.jpg

On the back there is a choice of a D-ring, fixed loop, and Velcro closing loop.
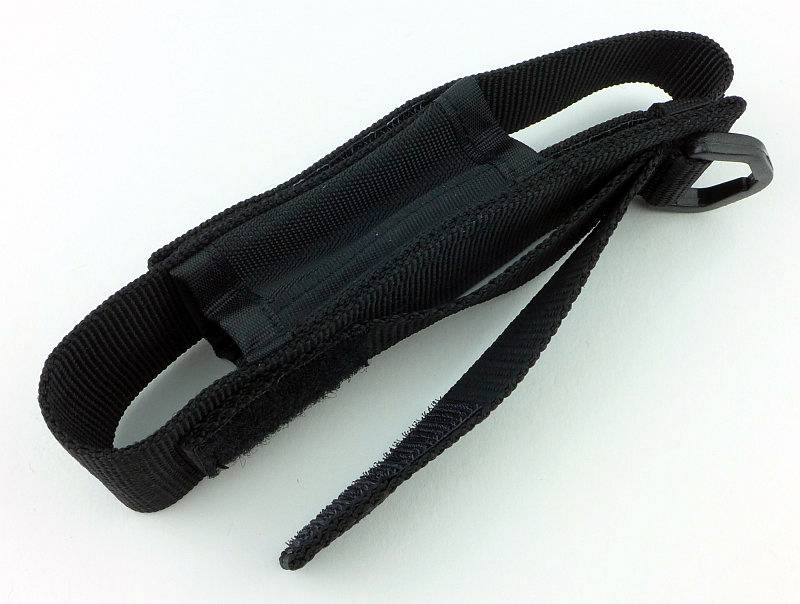
 photo 04 TK15UE holster loops P1230656.jpg

There is something a little different here. The holster flap has a retaining strap over it and inside the holster it is fixed with Velcro.
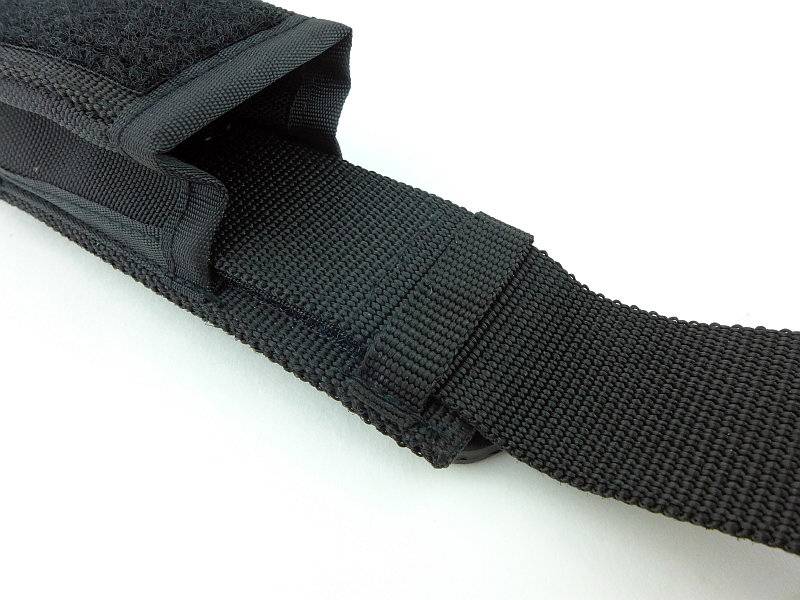
 photo 05 TK15UE holster flap P1230667.jpg

You can just see inside that the flap extends most of the way down the inside of the holster.
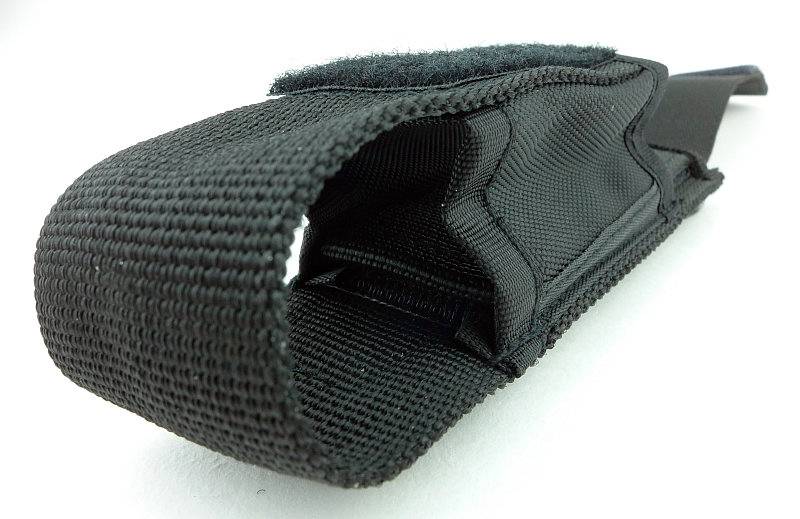
 photo 07 TK15UE holster flap adjust inside P1230678.jpg

The entire flap can be undone and either removed or adjusted to loosen or tighten the fit, or even accommodate a different length light.
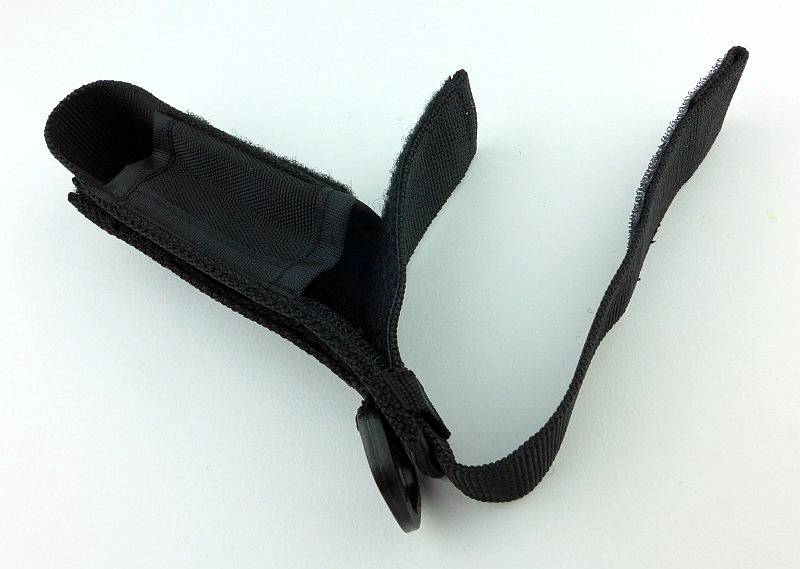
 photo 06 TK15UE holster flap adjust P1230675.jpg

As supplied, the holster is correctly configured for the TK15UE.
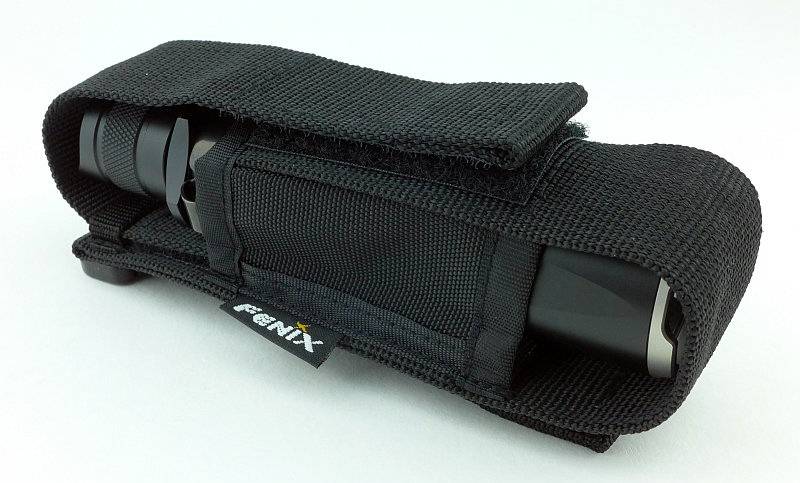
 photo 08 TK15UE in holster P1230680.jpg

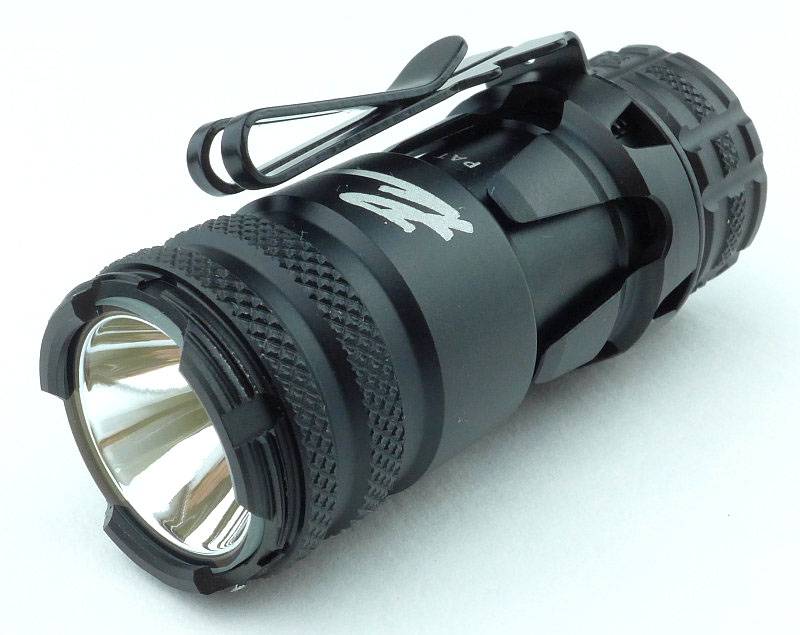
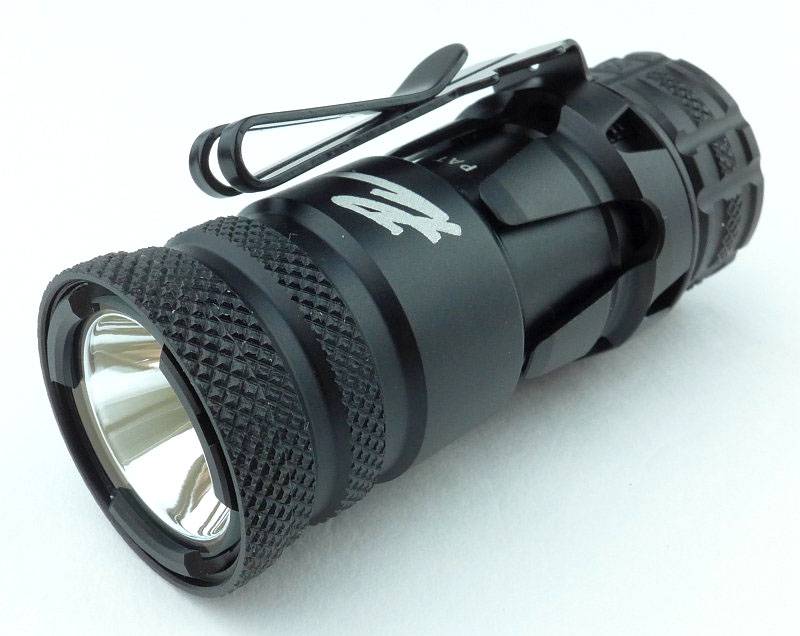
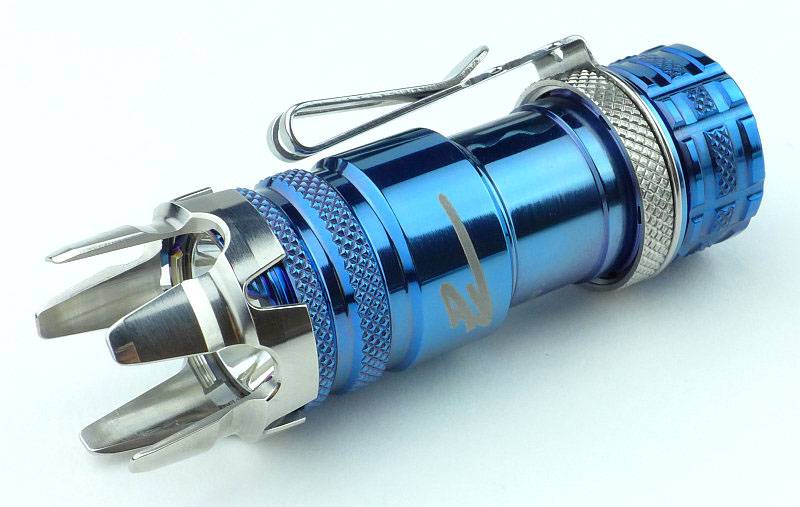
The most obvious sign that this is something a bit different to the previous TK15s is the Stainless Steel bezel.
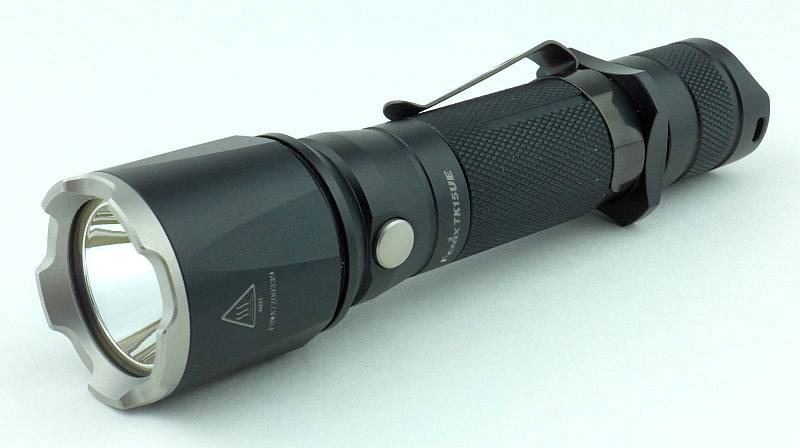
 photo 09 TK15UE angle P1230689.jpg

Let’s have a look at how the TK15UE and an older TK15 compare. This is the TK15C. So the holster is more than the basic one the TK15C comes with.
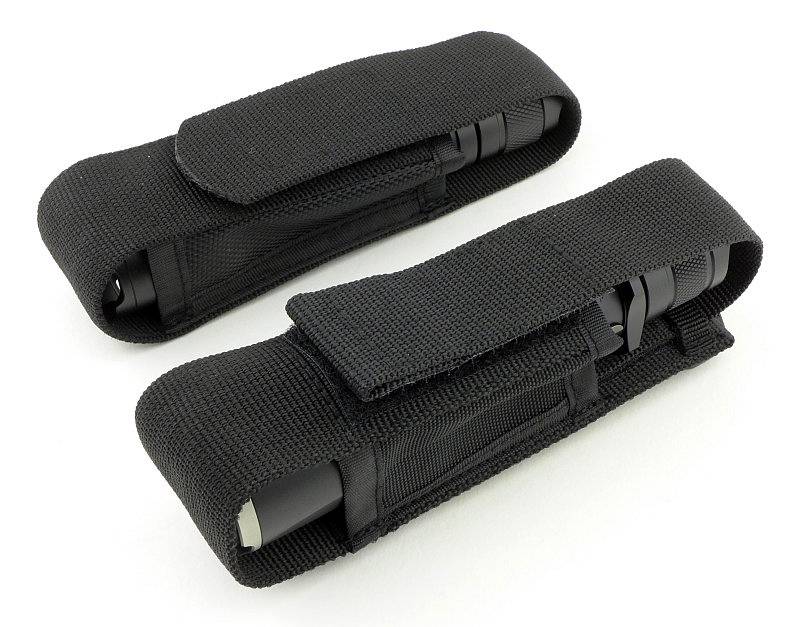
 photo 10 TK15UE compare P1230827.jpg

Dimensions are all very similar. The TK15C I’m comparing with here has had the clip removed as well as the tactical grip ring because it has been used gun-mounted.
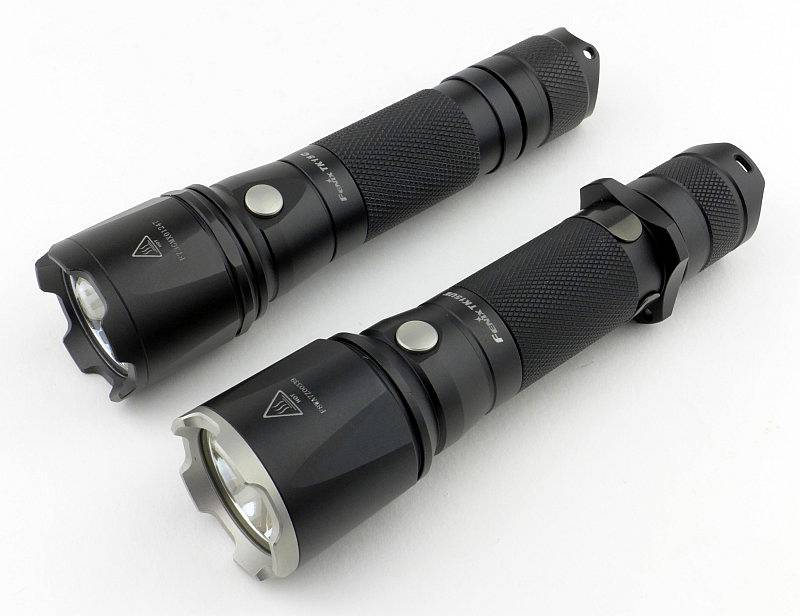
 photo 12 TK15UE compare P1230832.jpg

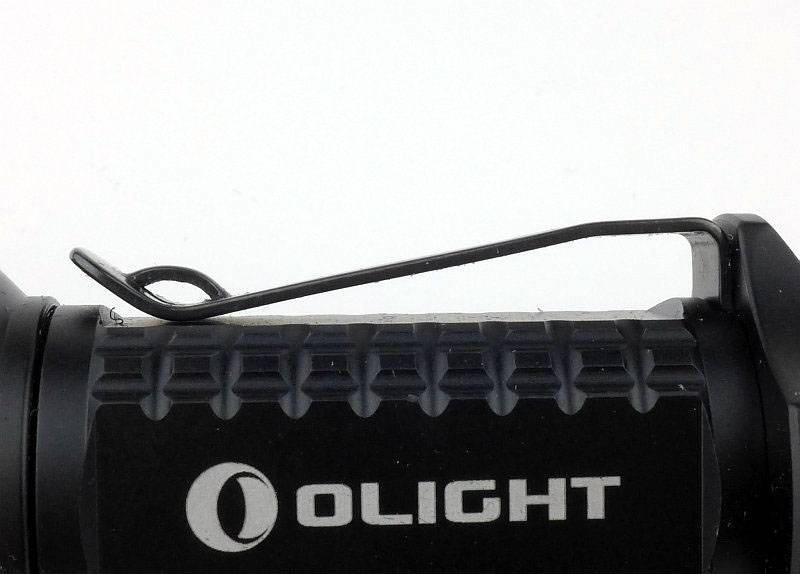
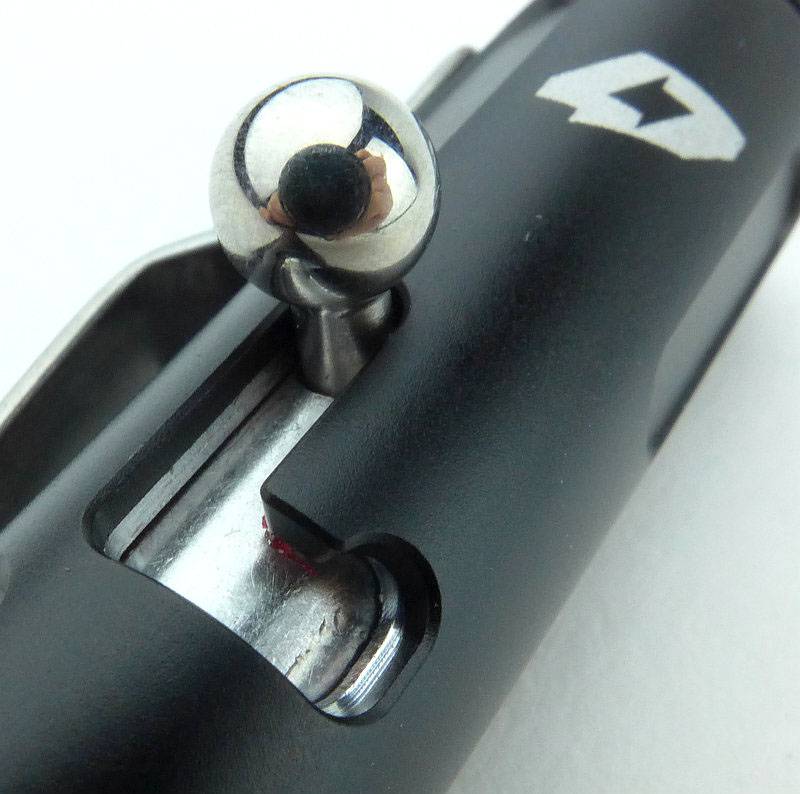
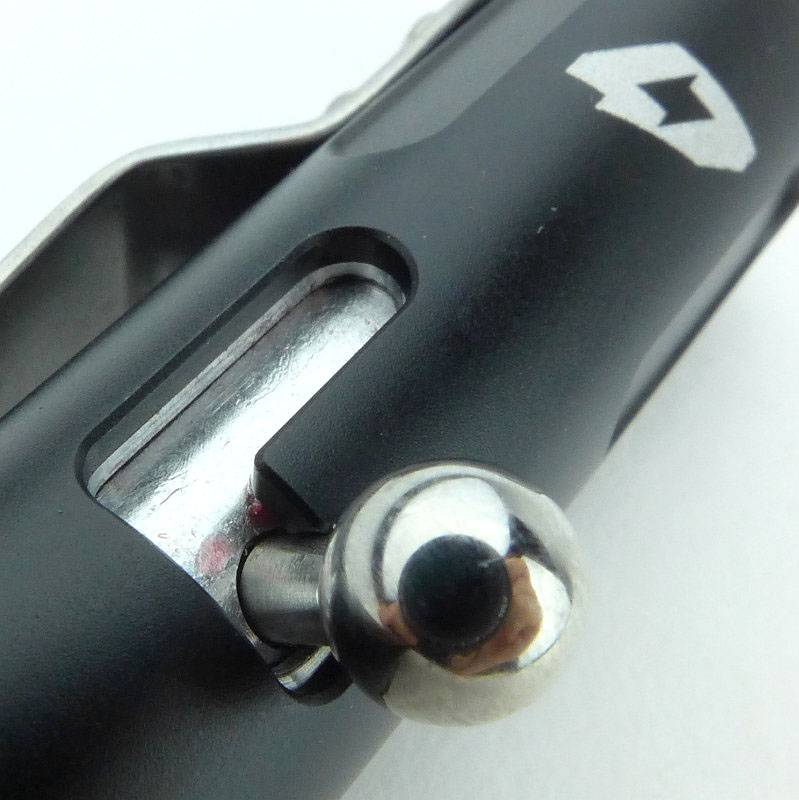
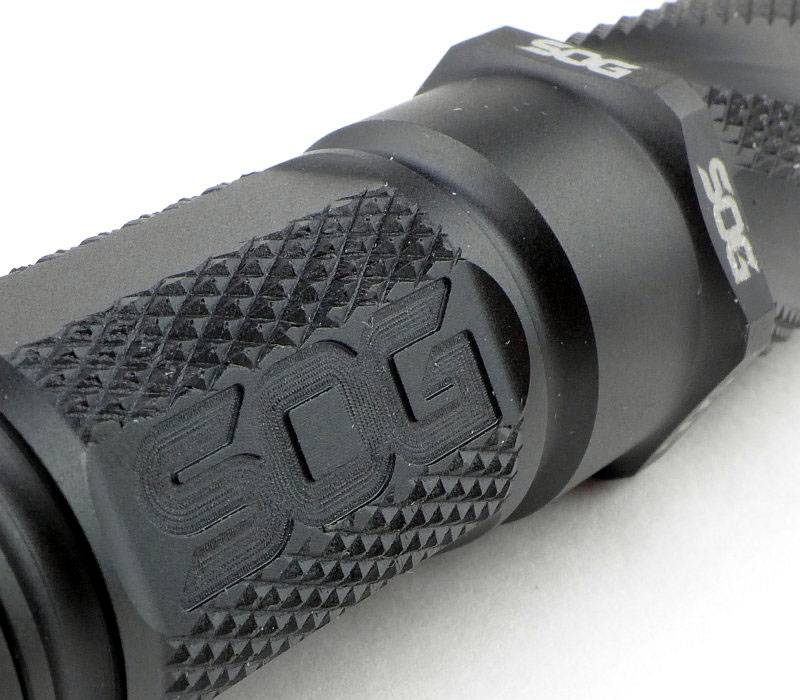
Going in close to the engraving of the model, the knurling and mode switch.
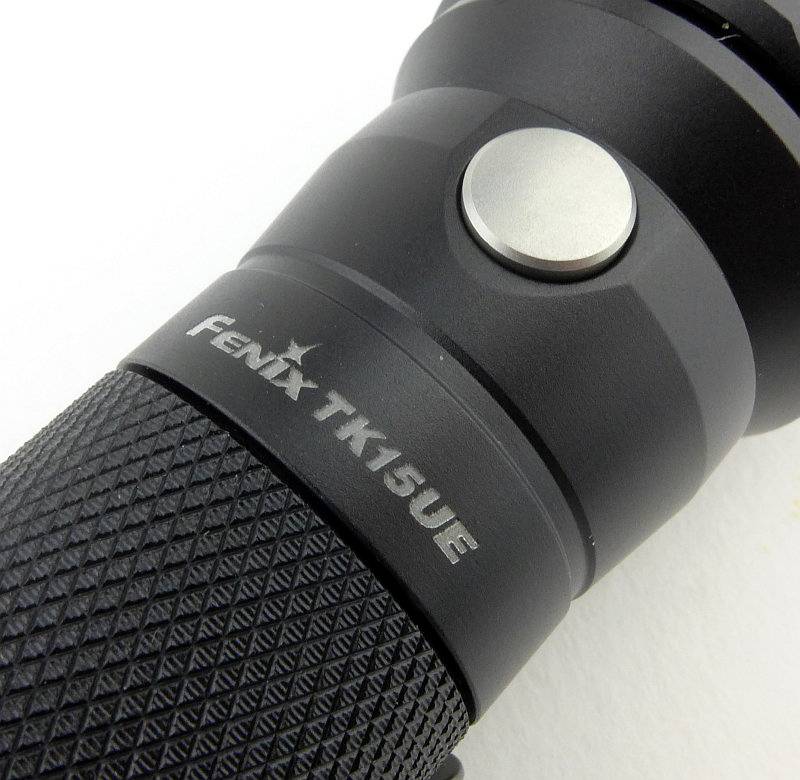
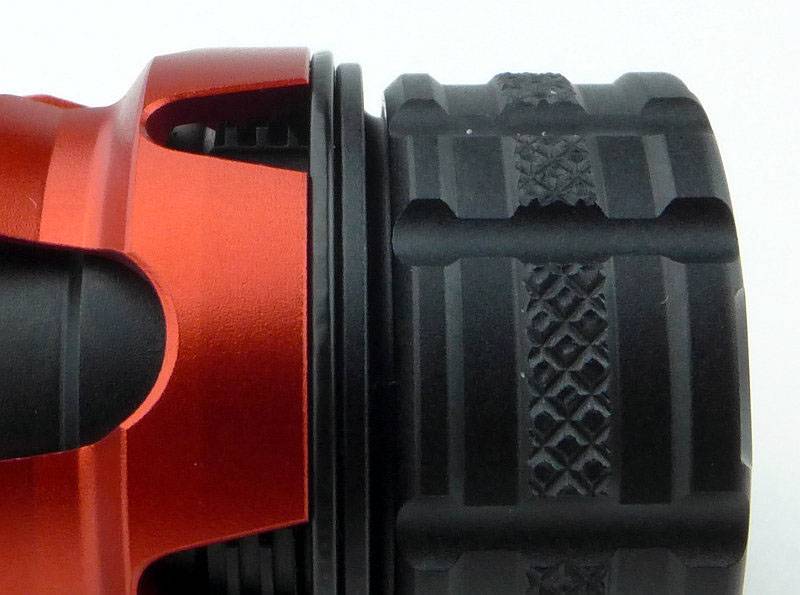
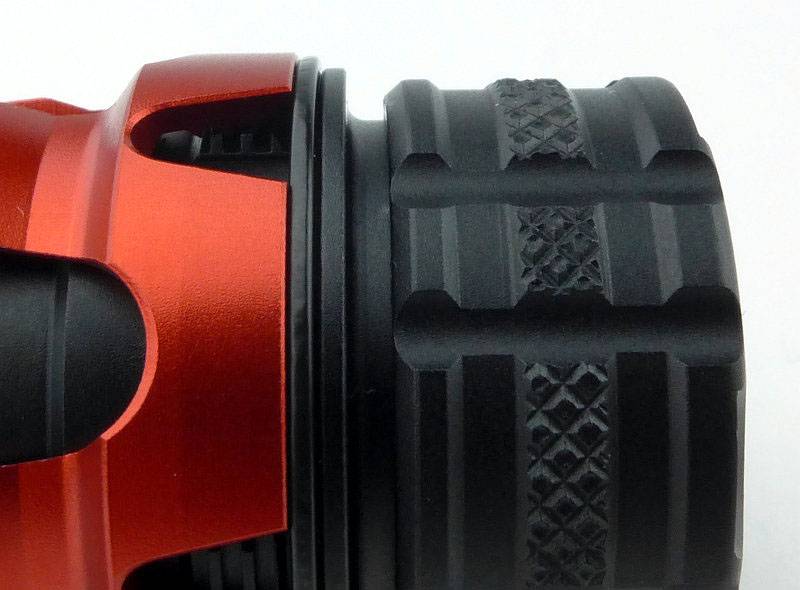
 photo 13 TK15UE switch detail P1230837.jpg

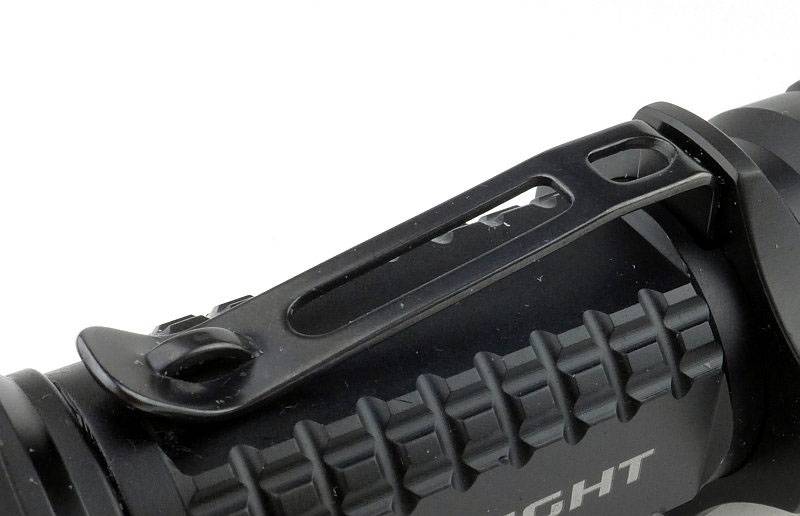
All the edges of the clip are nicely rounded, and there are no sharp corners to eat away at your pockets (just the knurling under the clip).
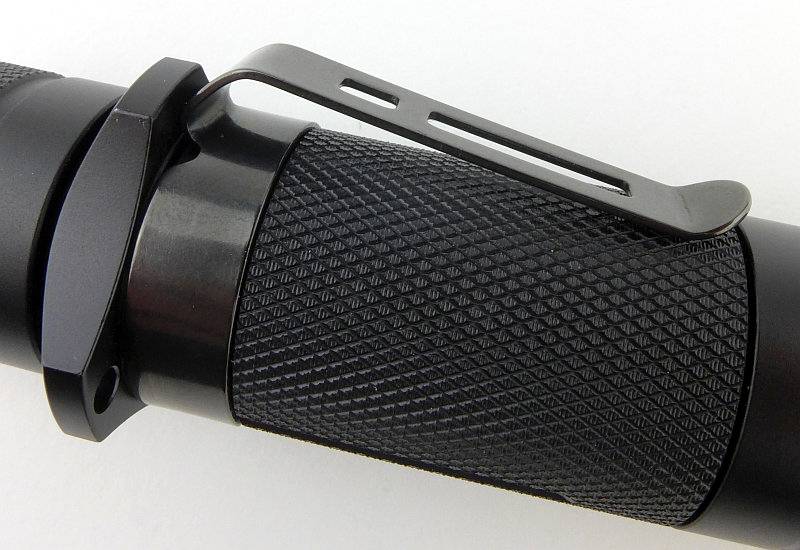
 photo 14 TK15UE clip detail P1230839.jpg

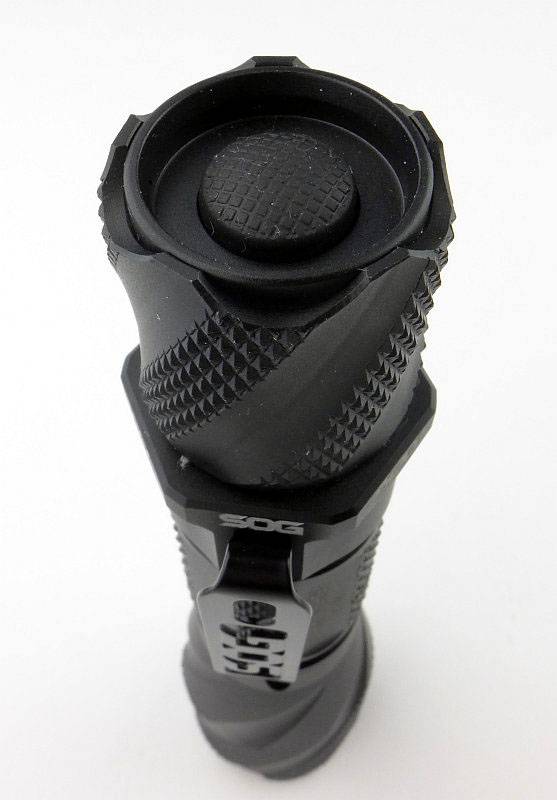
The switch button does protrude, so no tail-standing, and it has two raised areas to provide the switch with some protection from accidental activation.
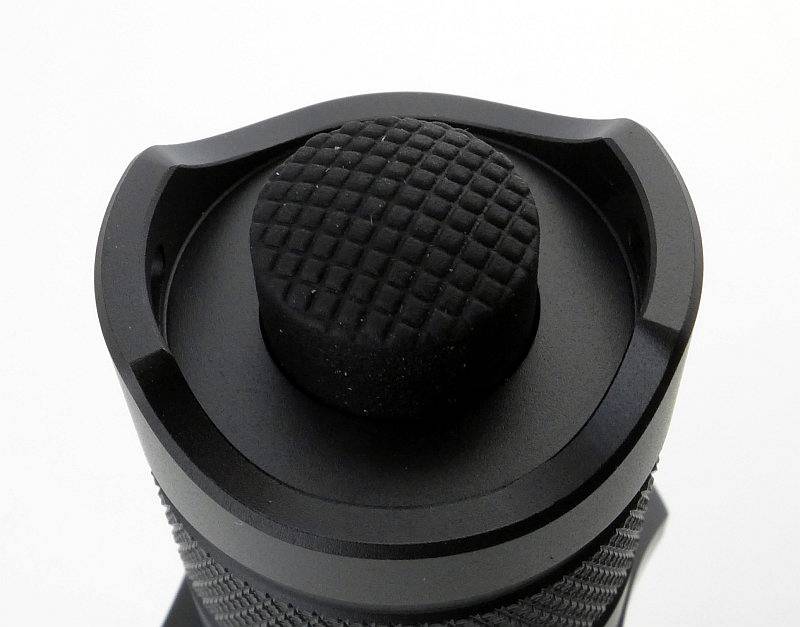
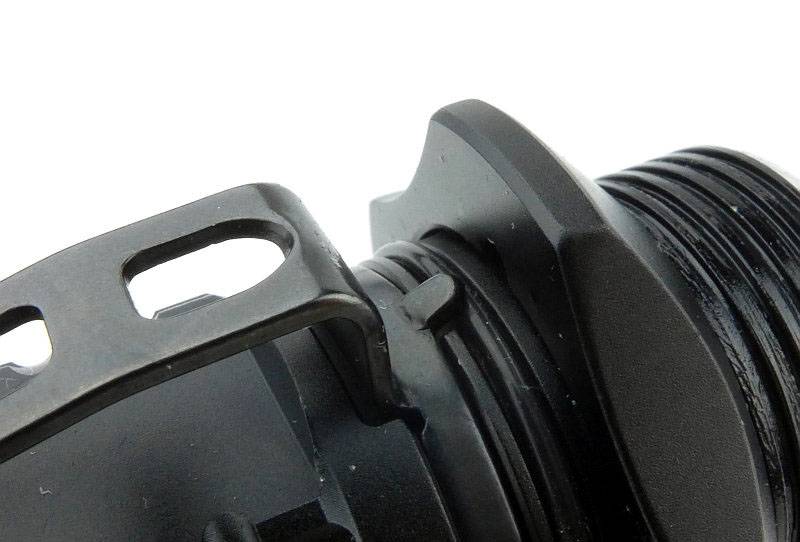
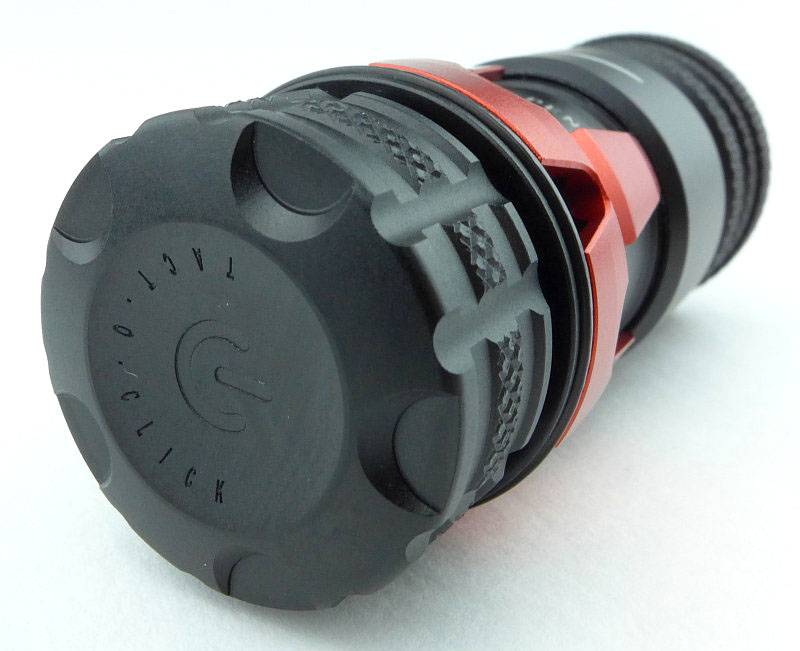
 photo 15 TK15UE tail detail P1230844.jpg

As with the stainless bezels on other Fenix lights, the edges have been bevelled to make them kind to the holster and your pockets.
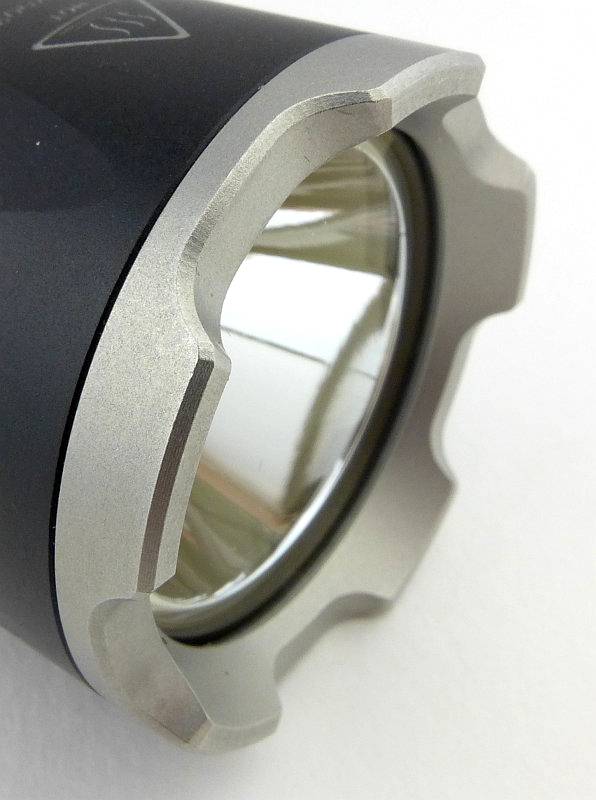
 photo 17 TK15UE bezel P1230849.jpg

The inner edges of the bezel are crisp without being sharp.
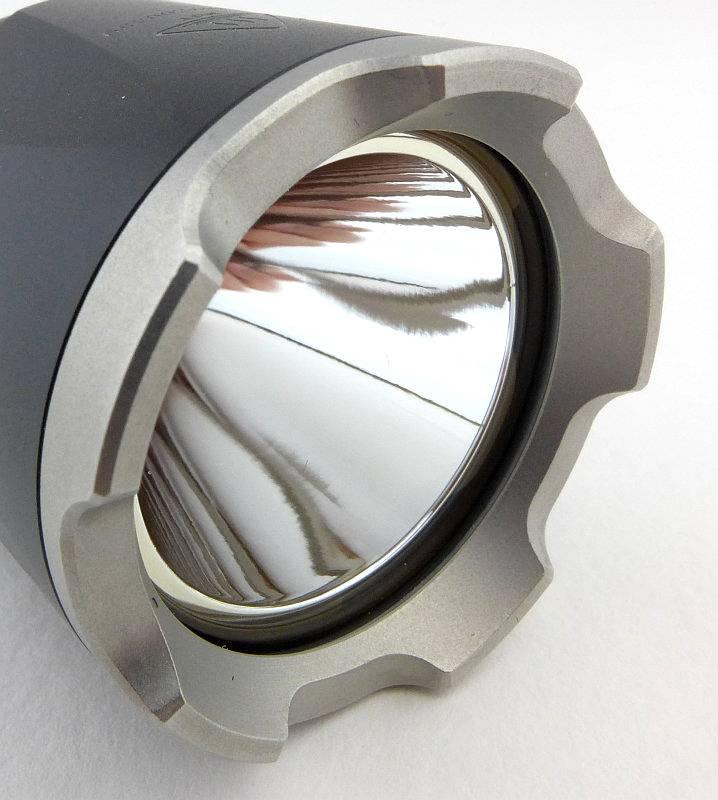
 photo 18 TK15UE bezel P1230852.jpg

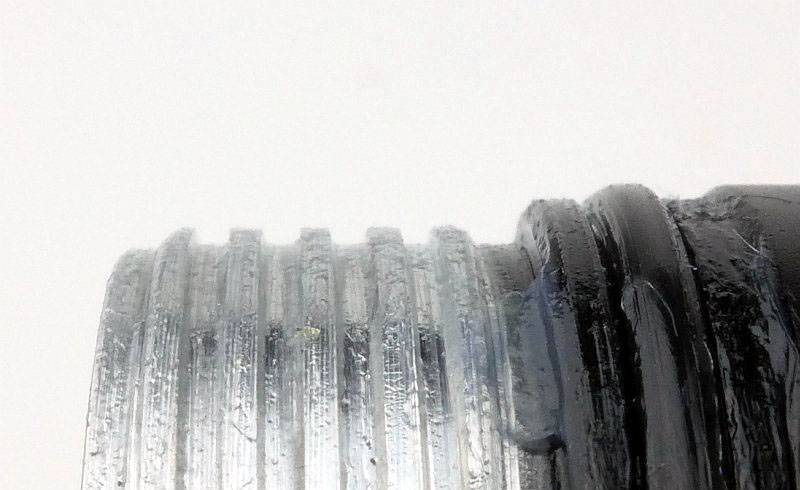
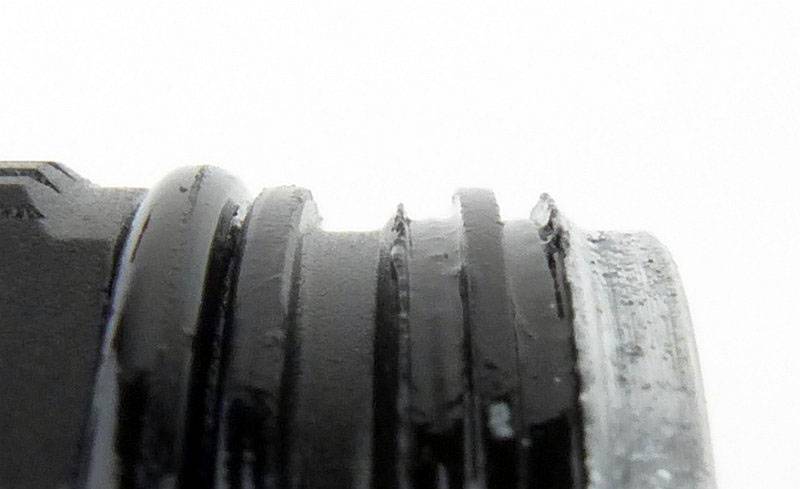
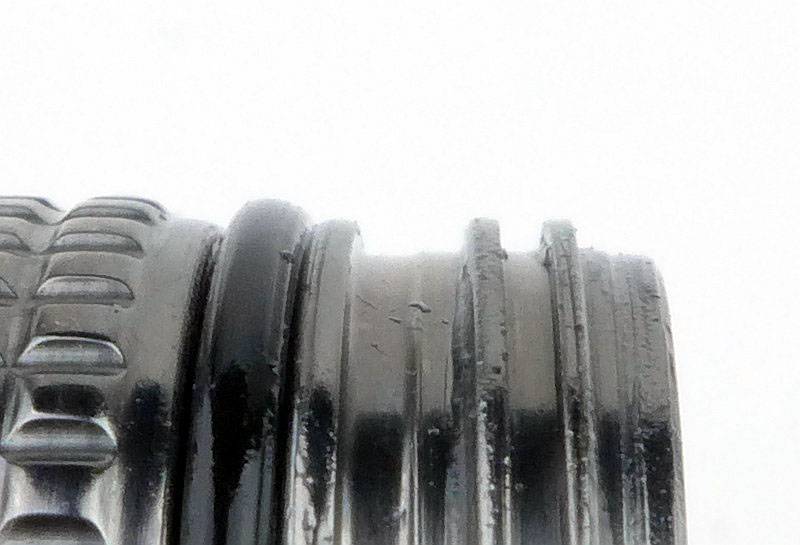
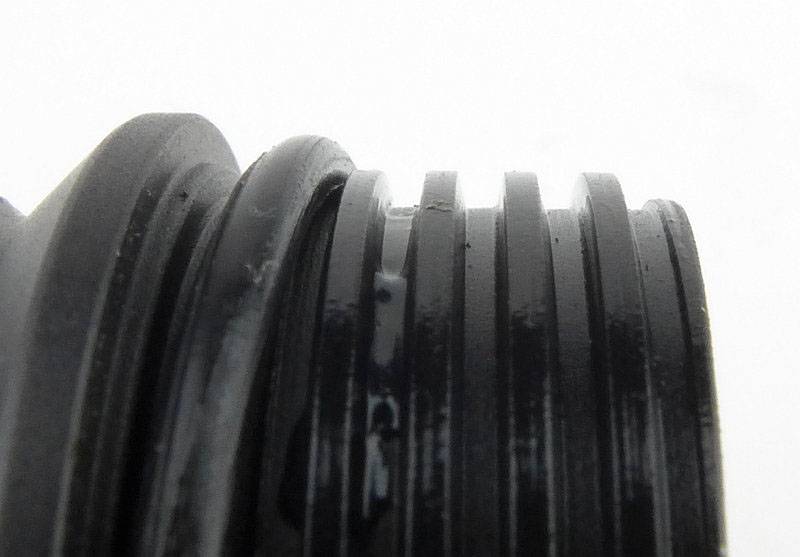
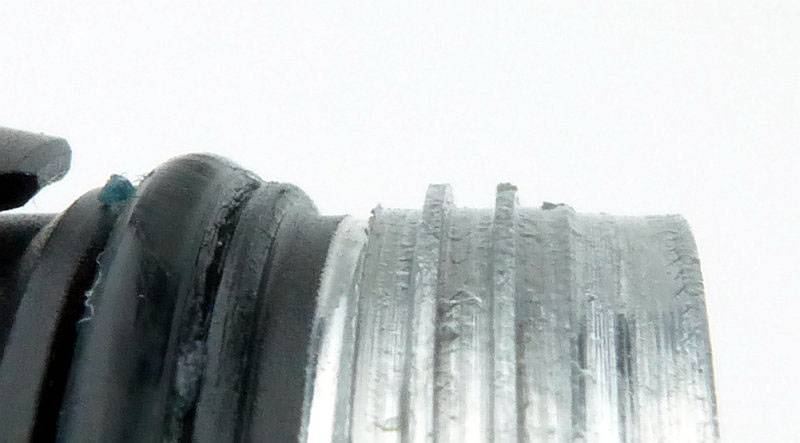
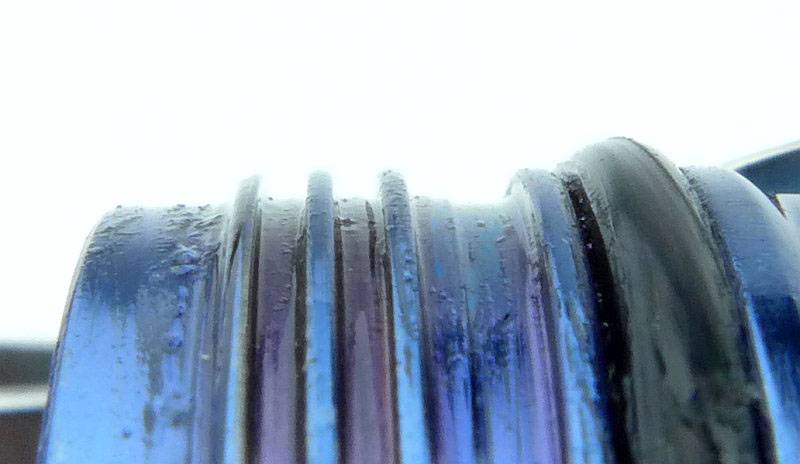
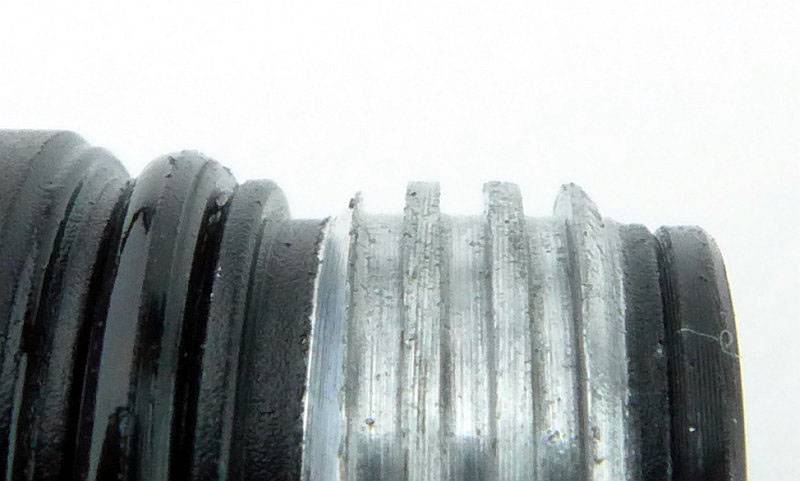
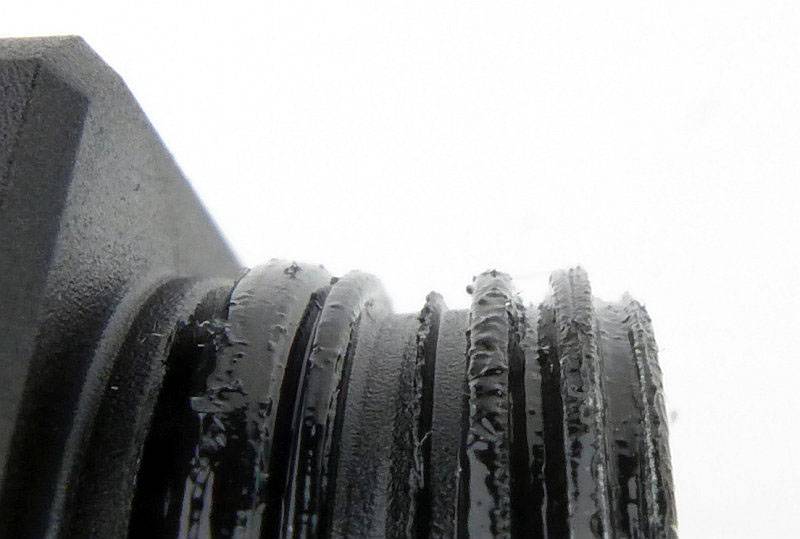
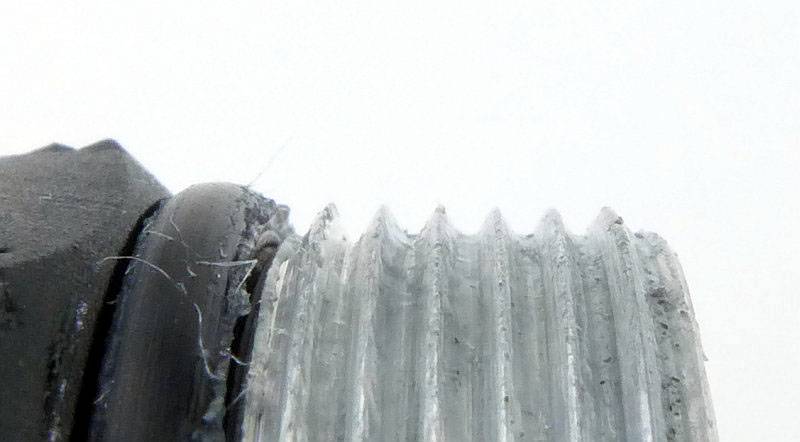
Fenix’s preferred trapezoid threads are used.
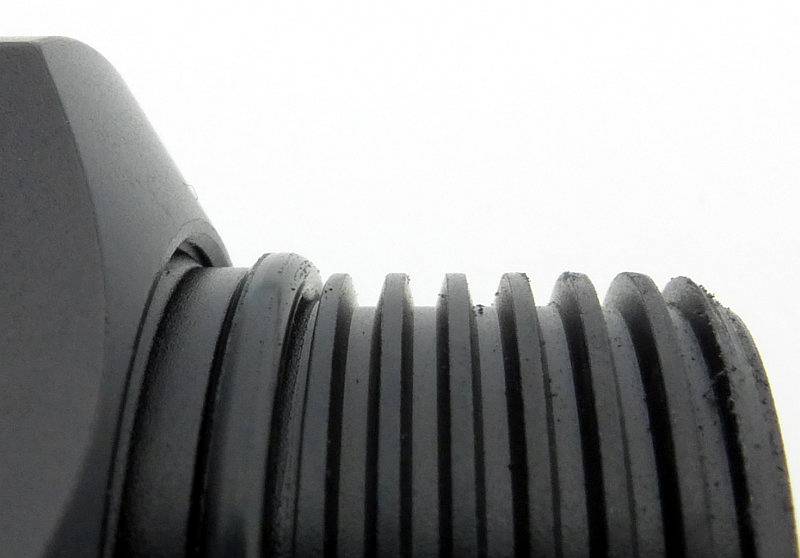
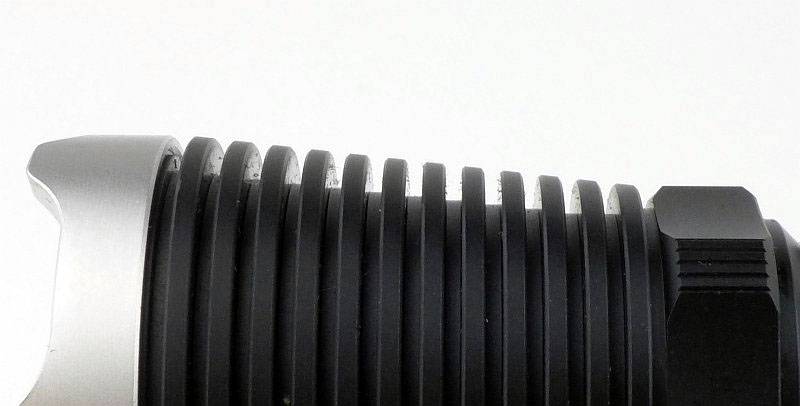
 photo 19 TK15UE threads P1230857.jpg

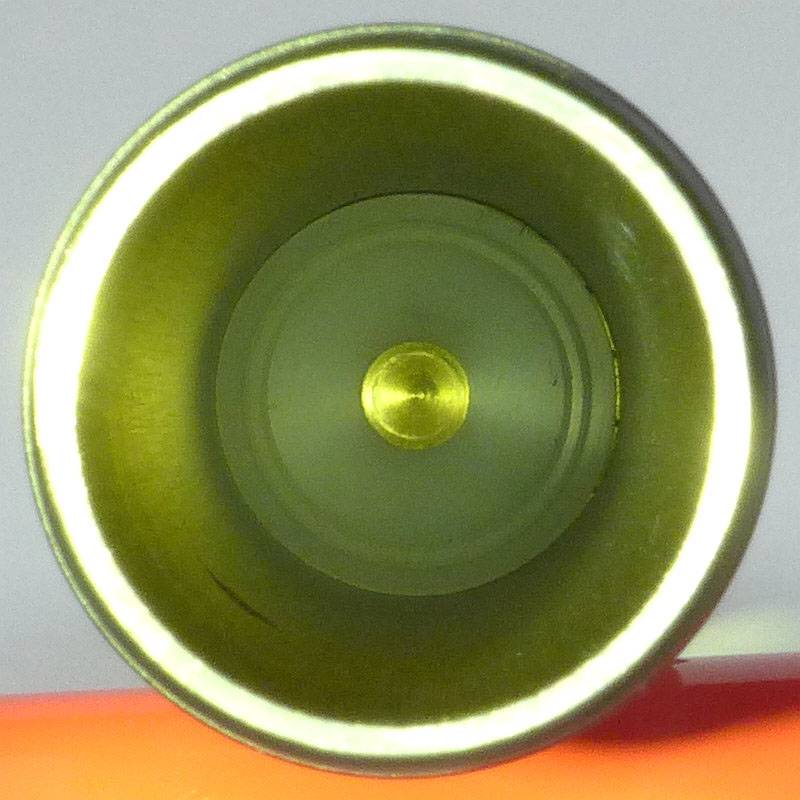
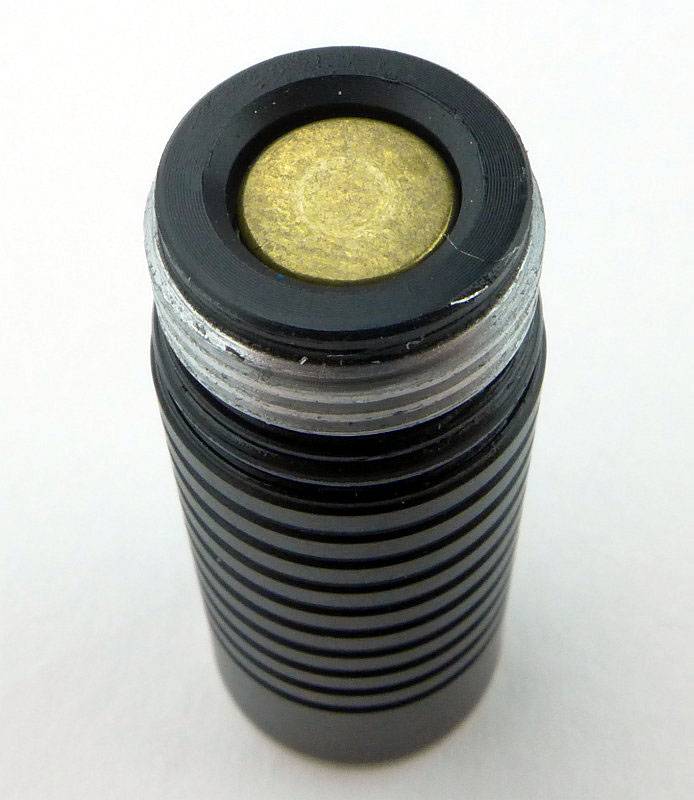
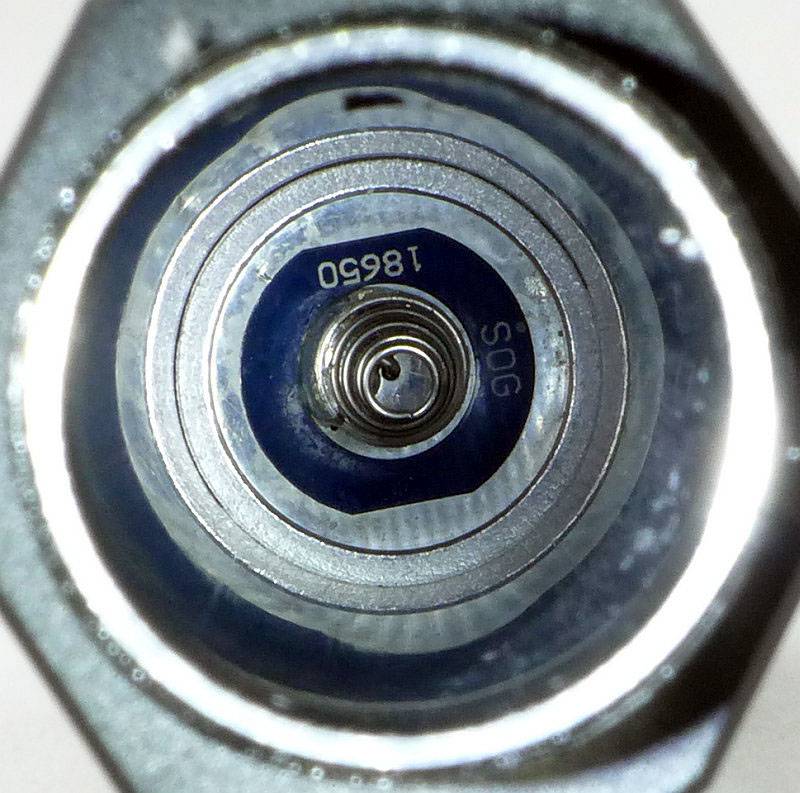
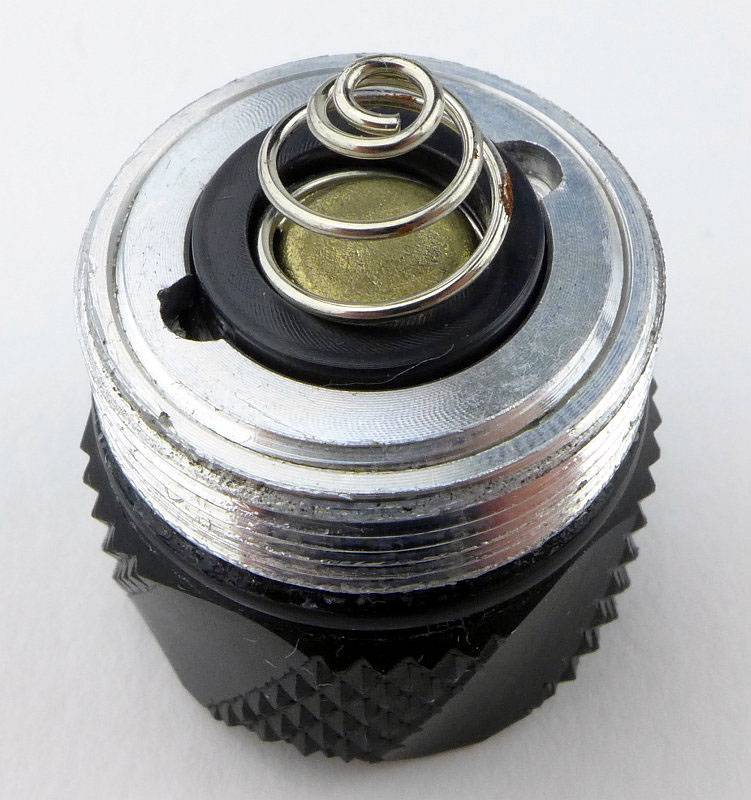
The end of the battery tube is the electrical contact that connects to the tail-cap contact.
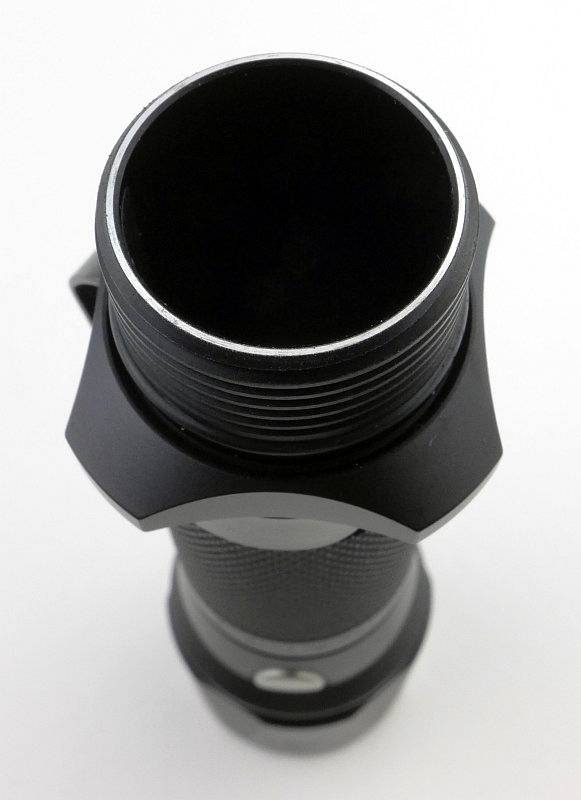
 photo 20 TK15UE tube P1230863.jpg

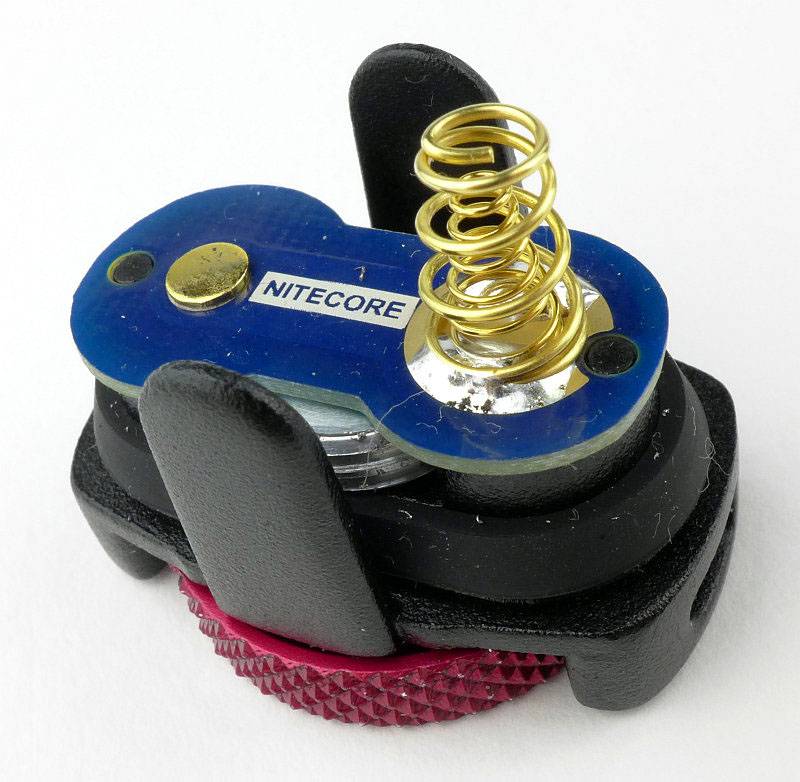
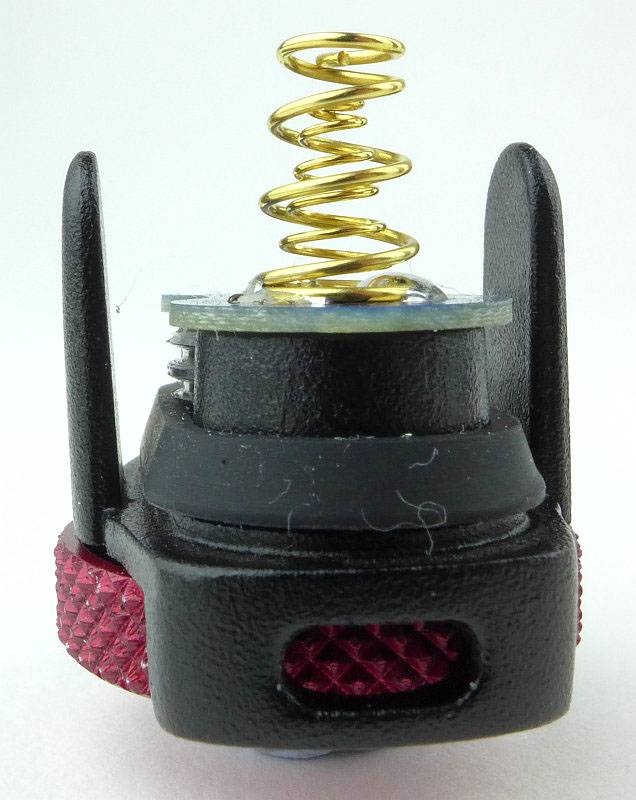
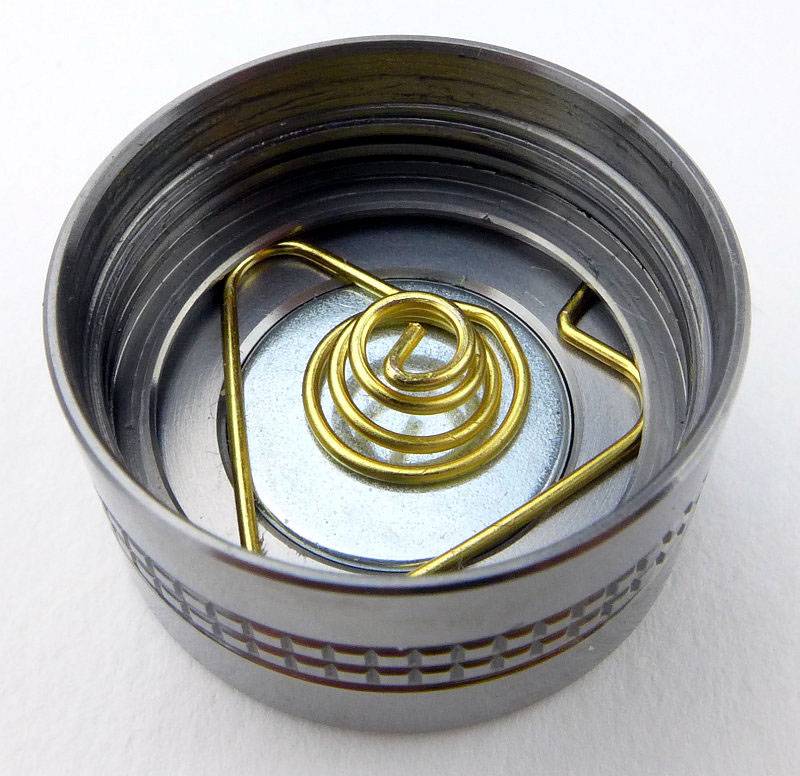
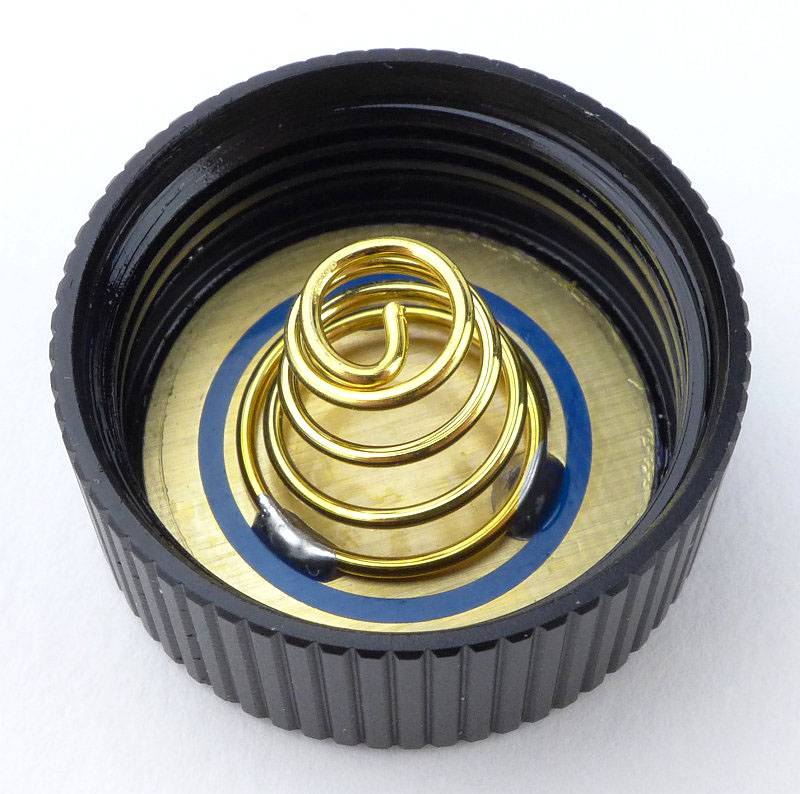
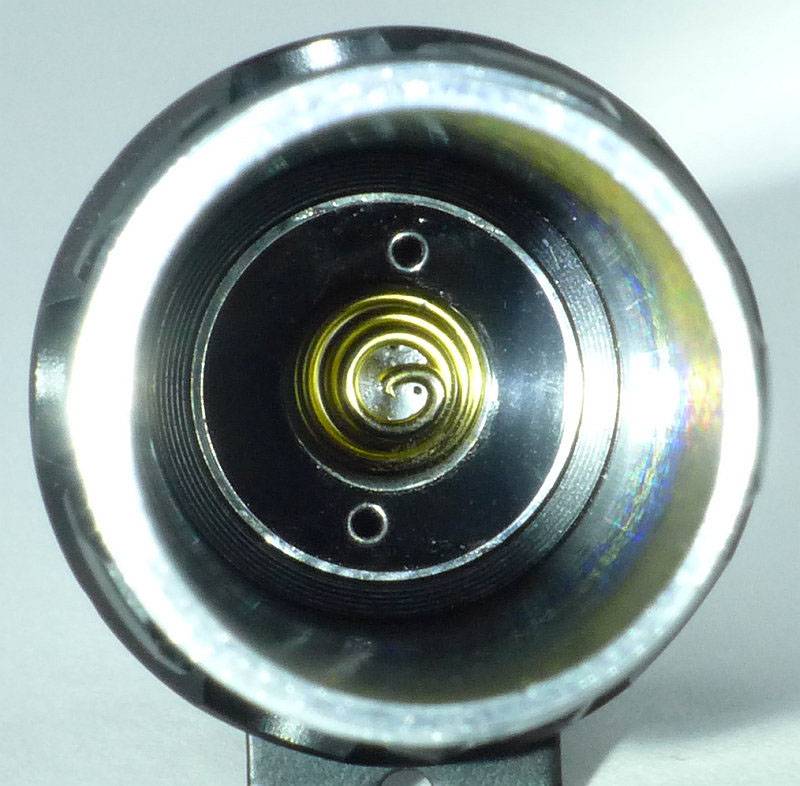
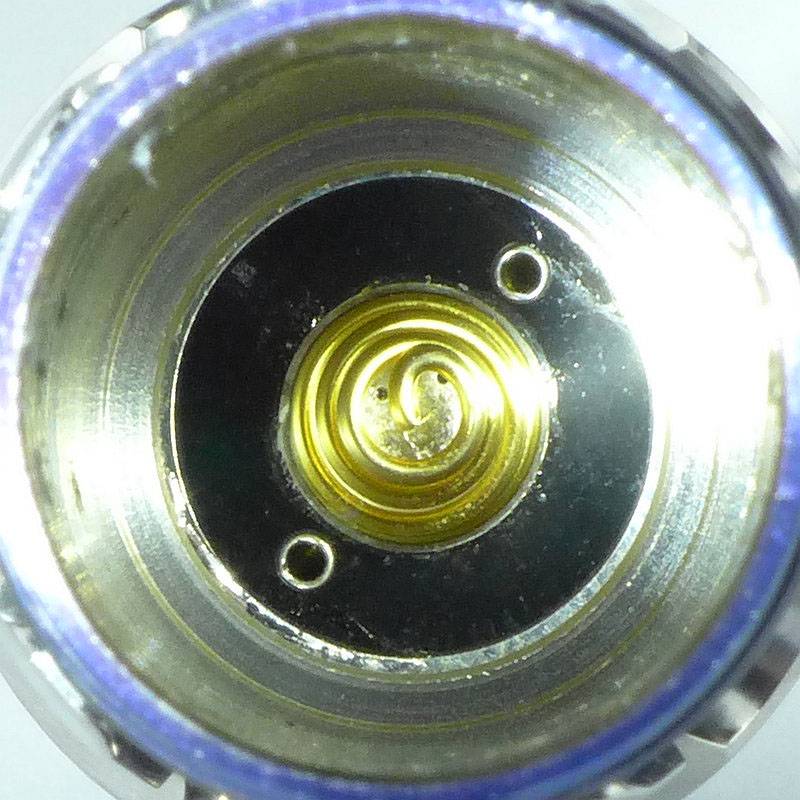
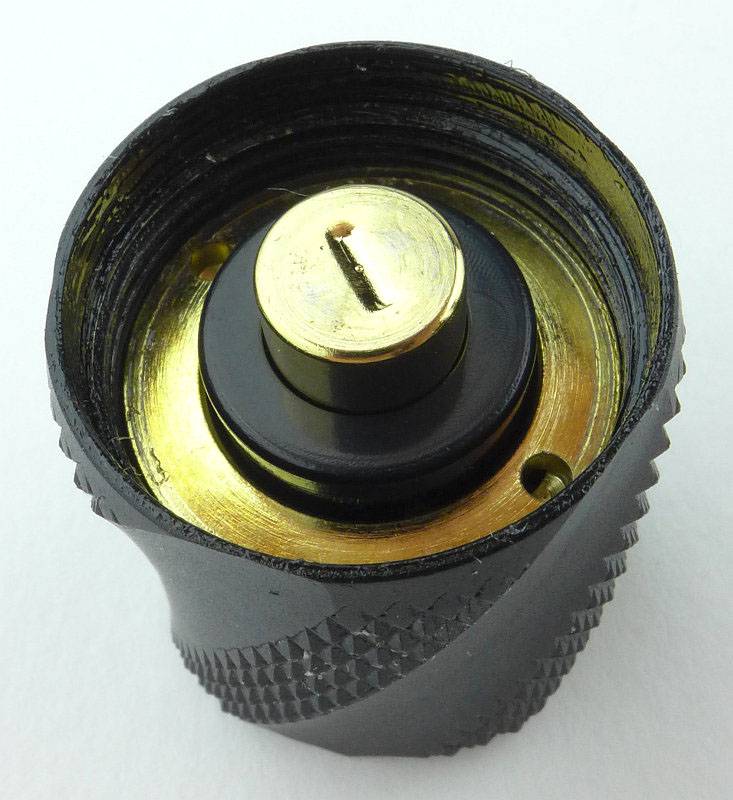
Inside the tail-cap are the battery tube contact and the negative terminal sprung contact.
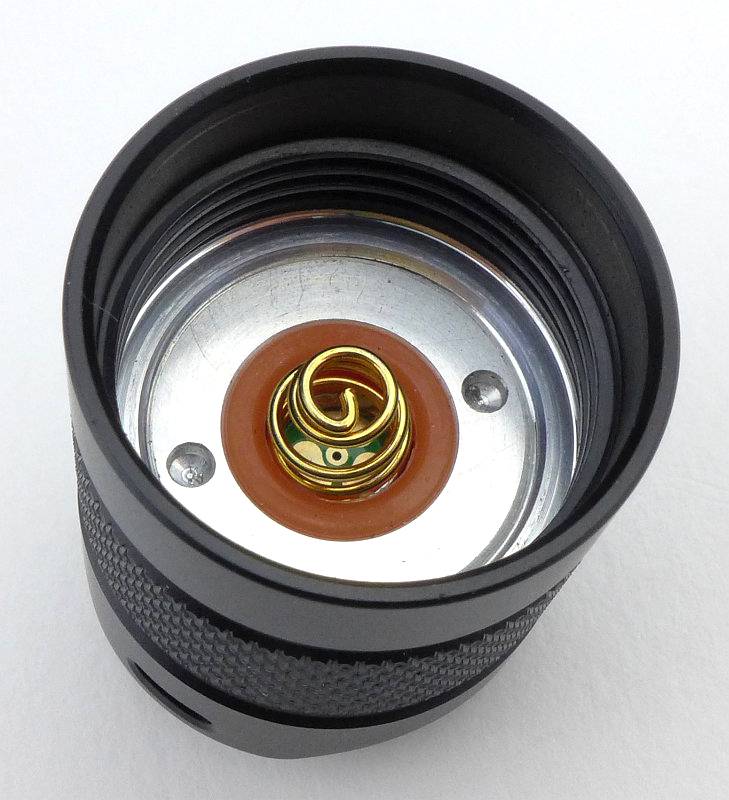
 photo 21 TK15UE tailcap contacts P1230866.jpg

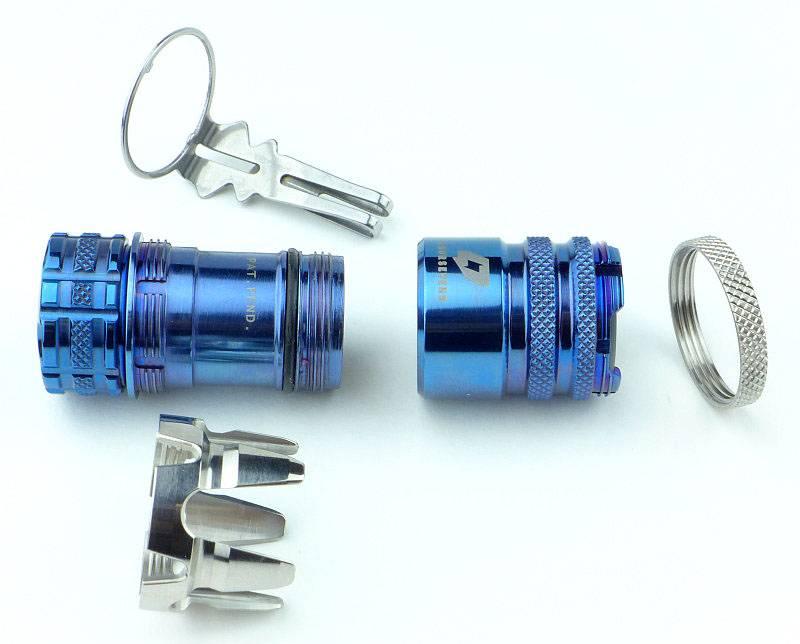
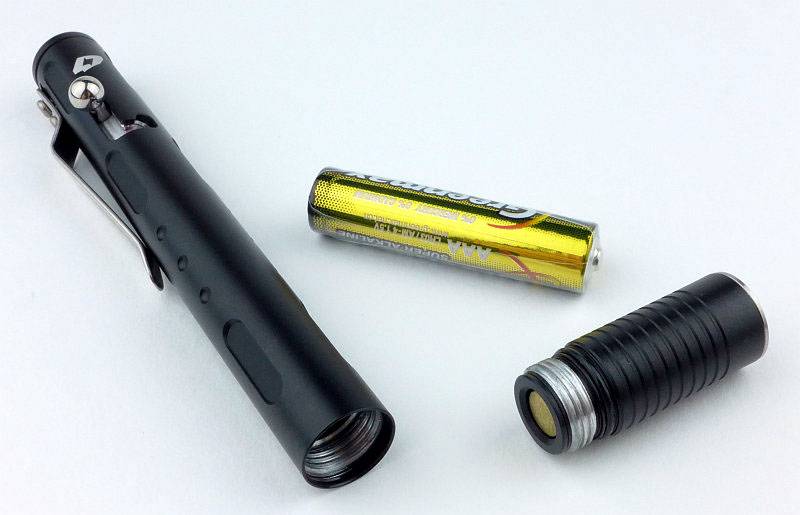
With the TK15UE, the head will unscrew.
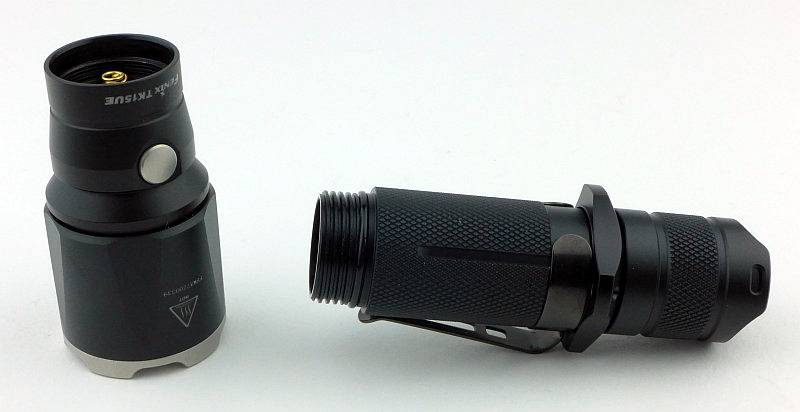
 photo 22 TK15UE head off P1230884.jpg

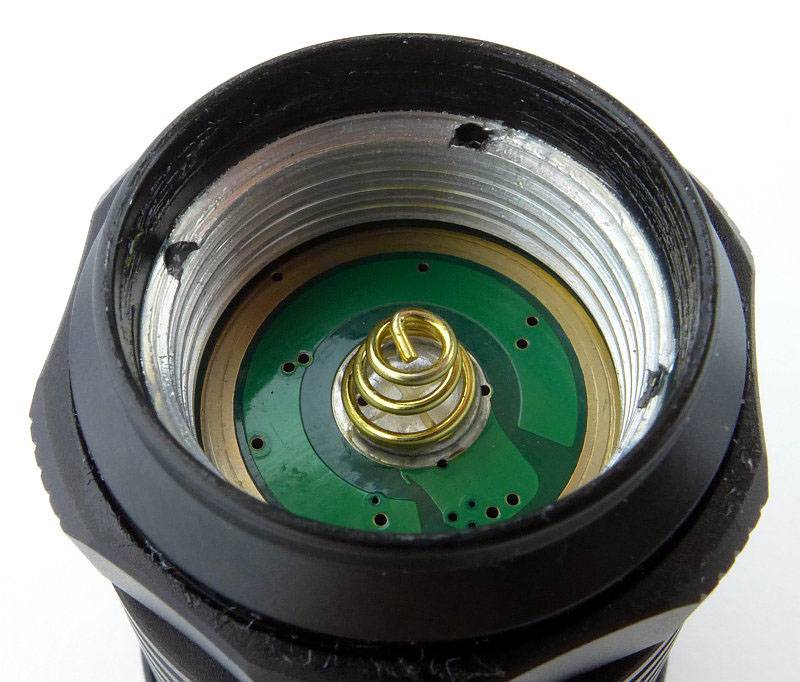
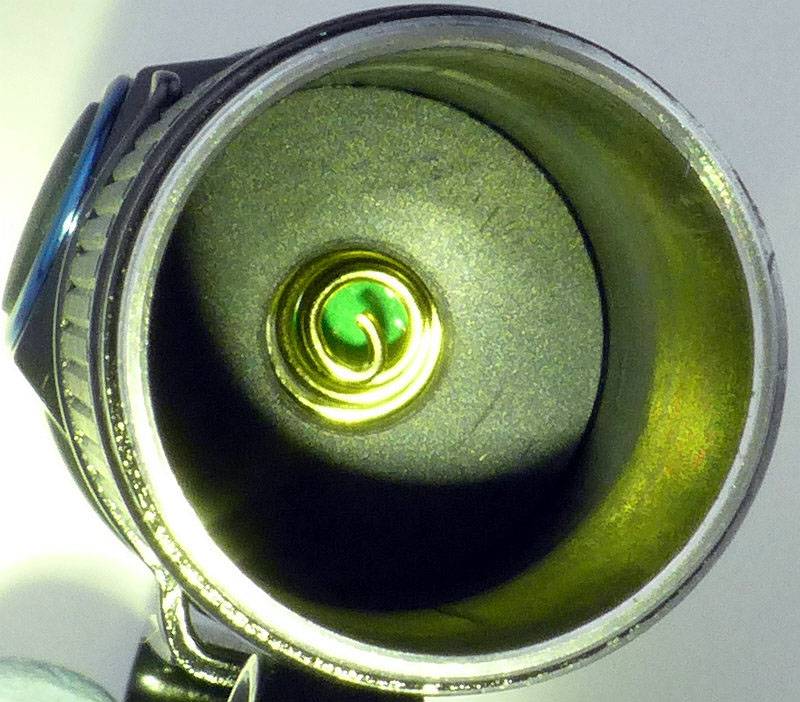
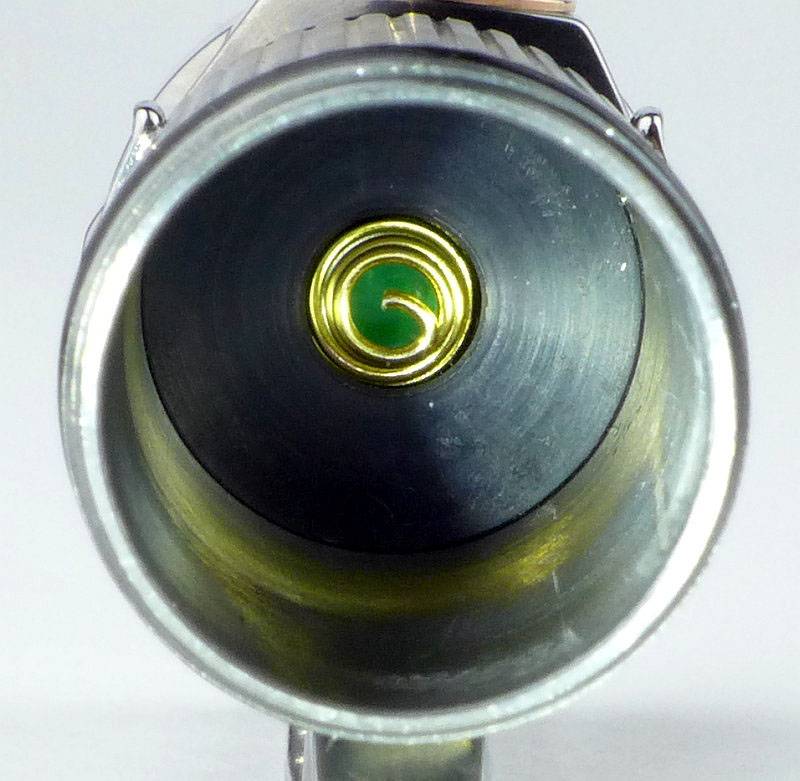
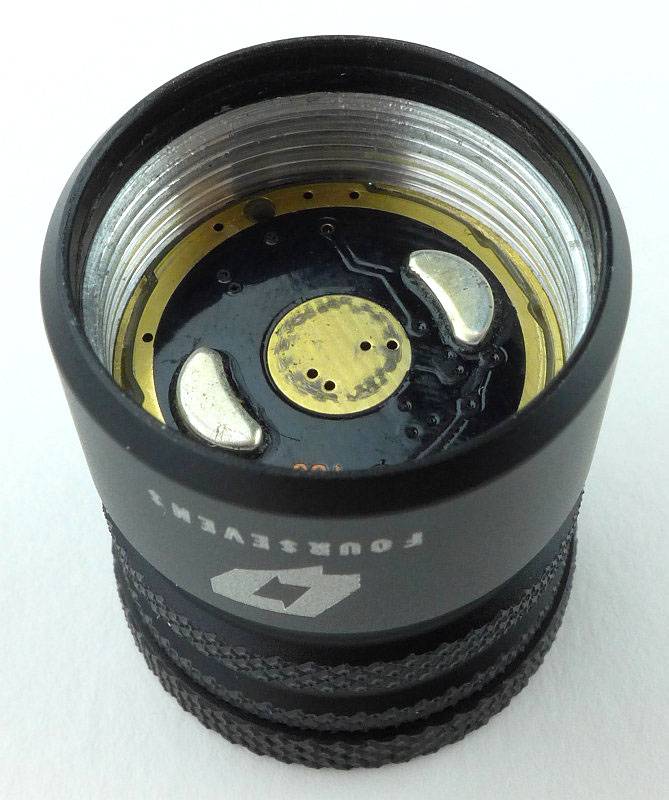
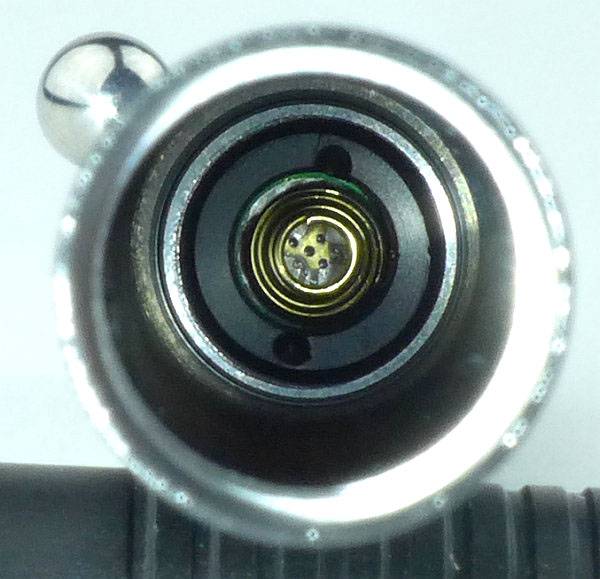
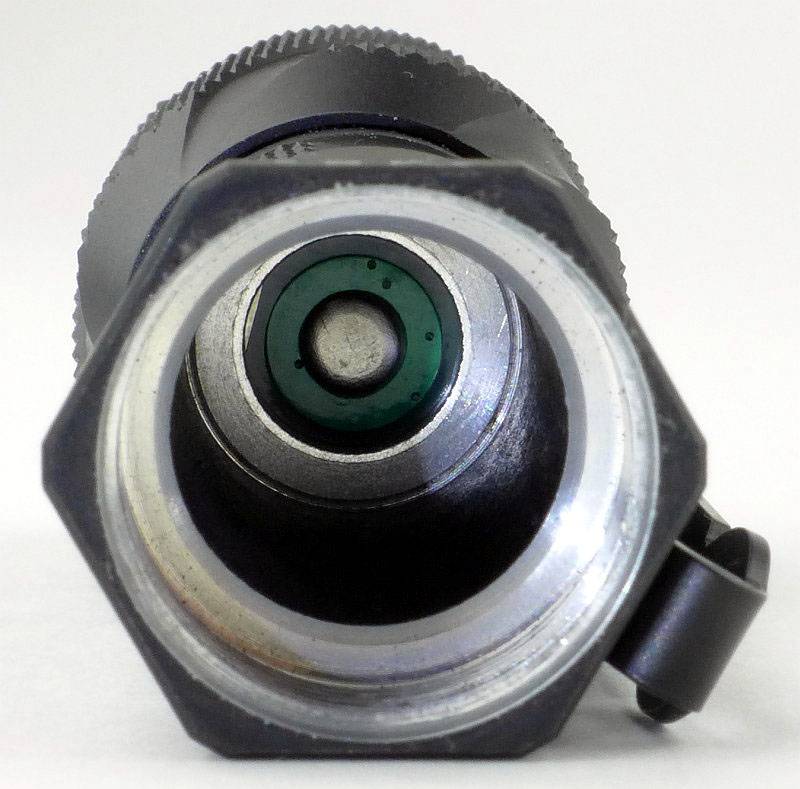
As the battery tube can be removed we can get a good look at those contacts in the head.
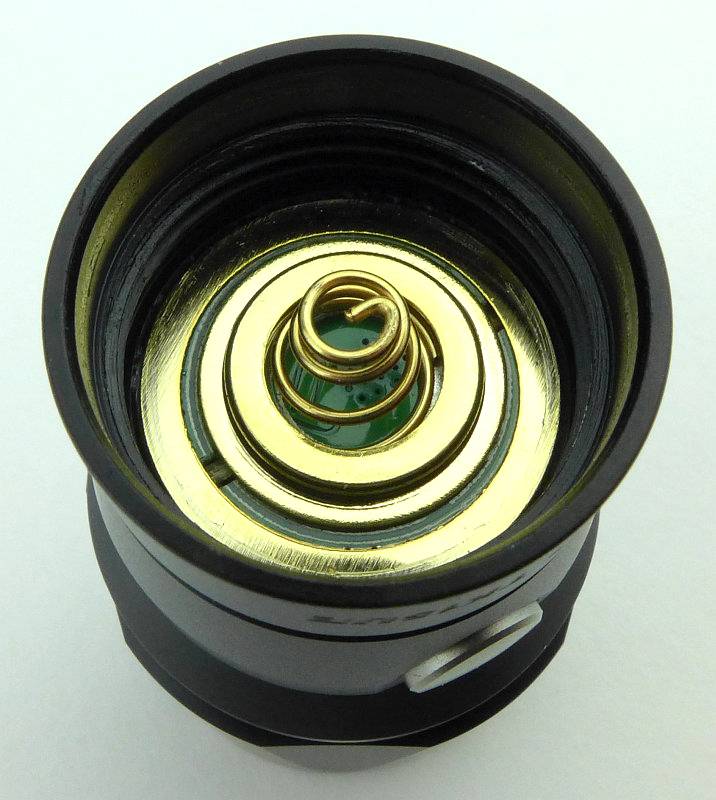
 photo 23 TK15UE head contacts P1230885.jpg

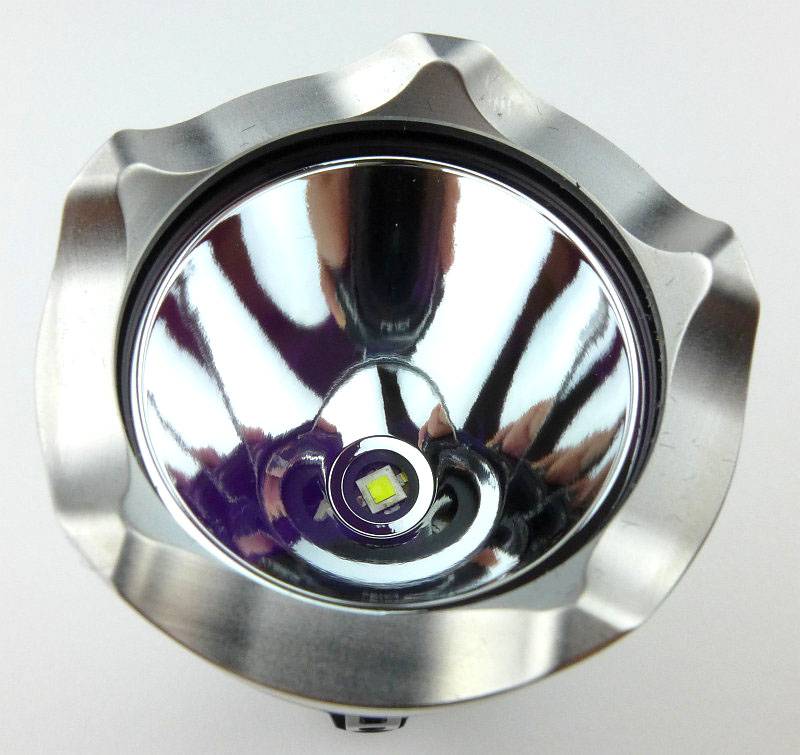
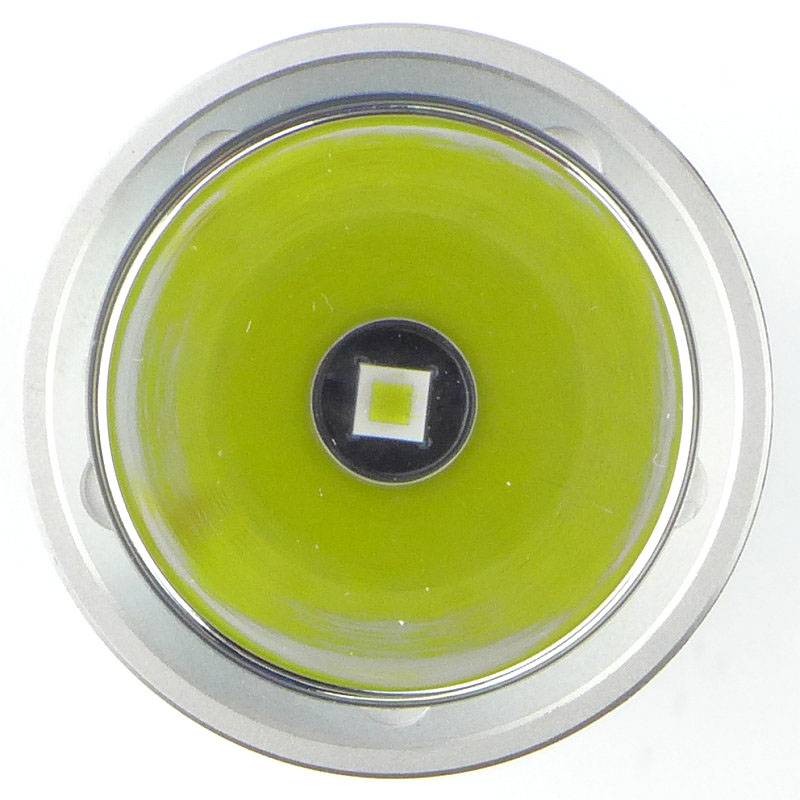
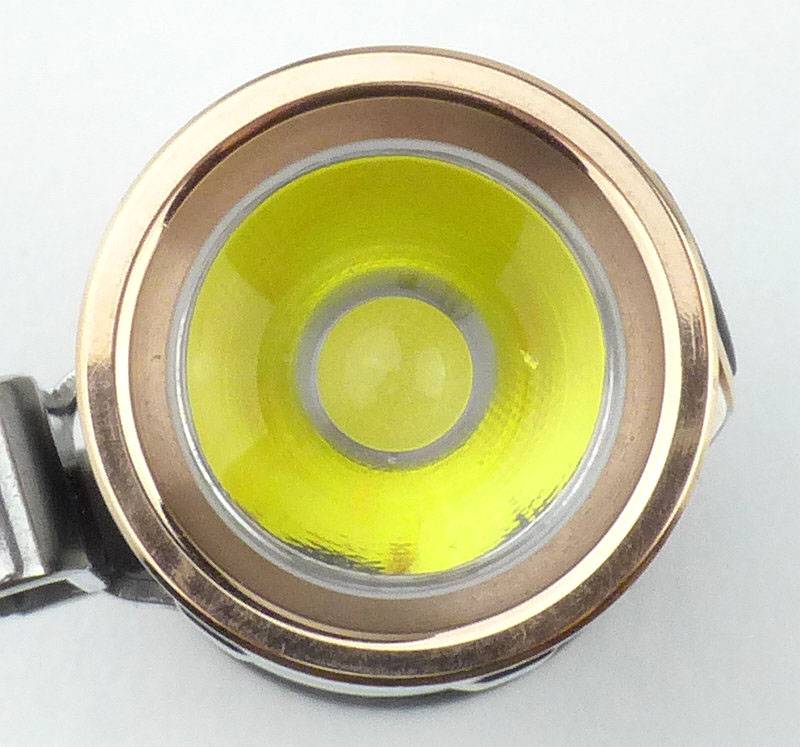
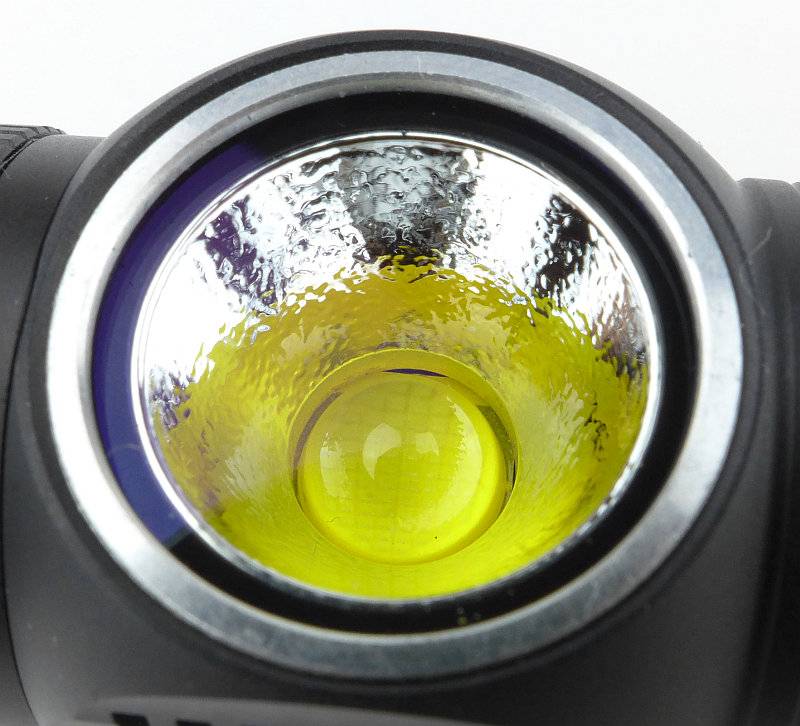
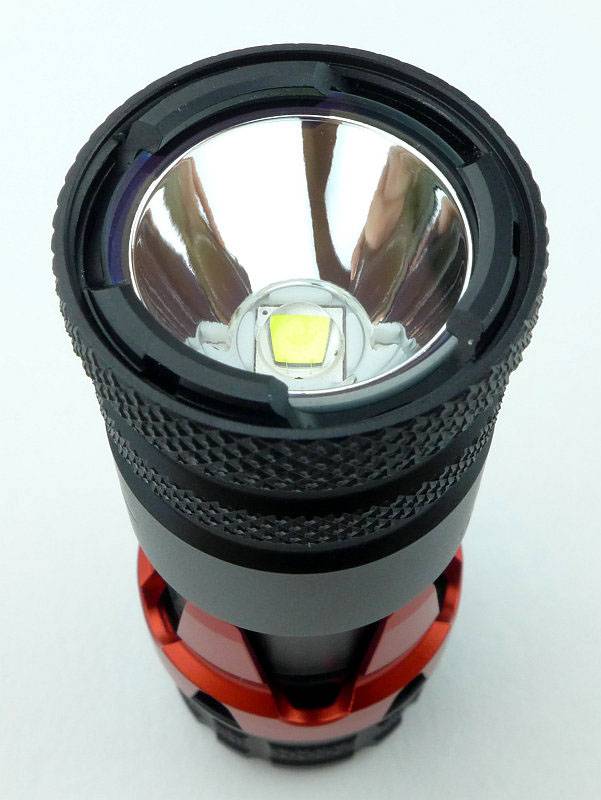
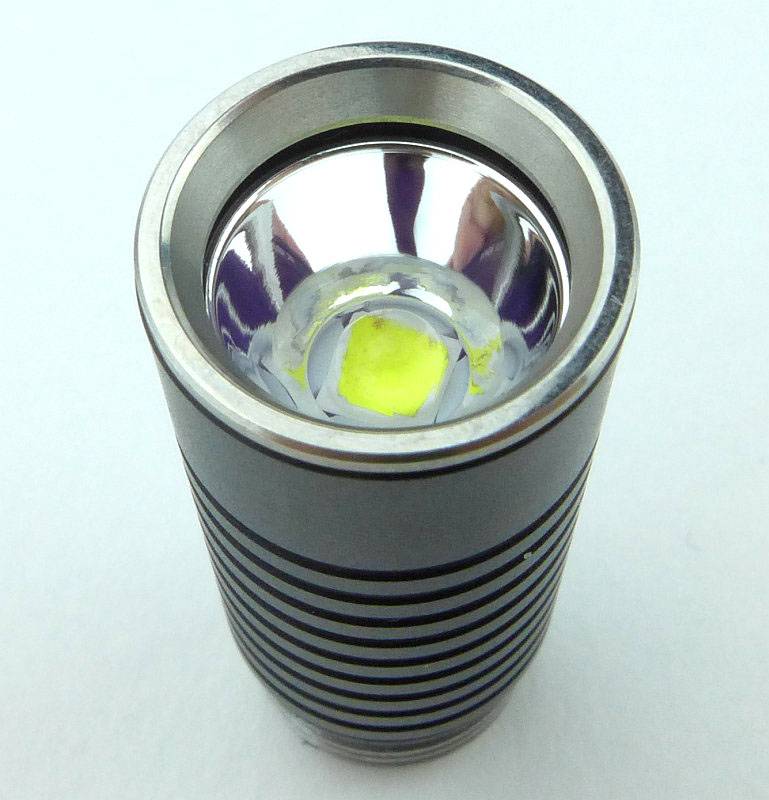
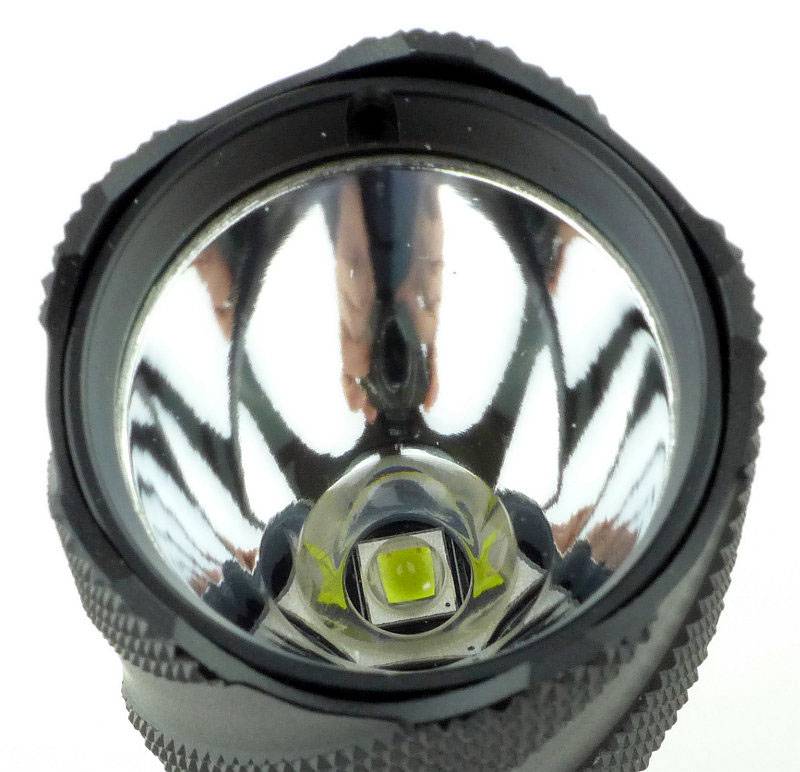
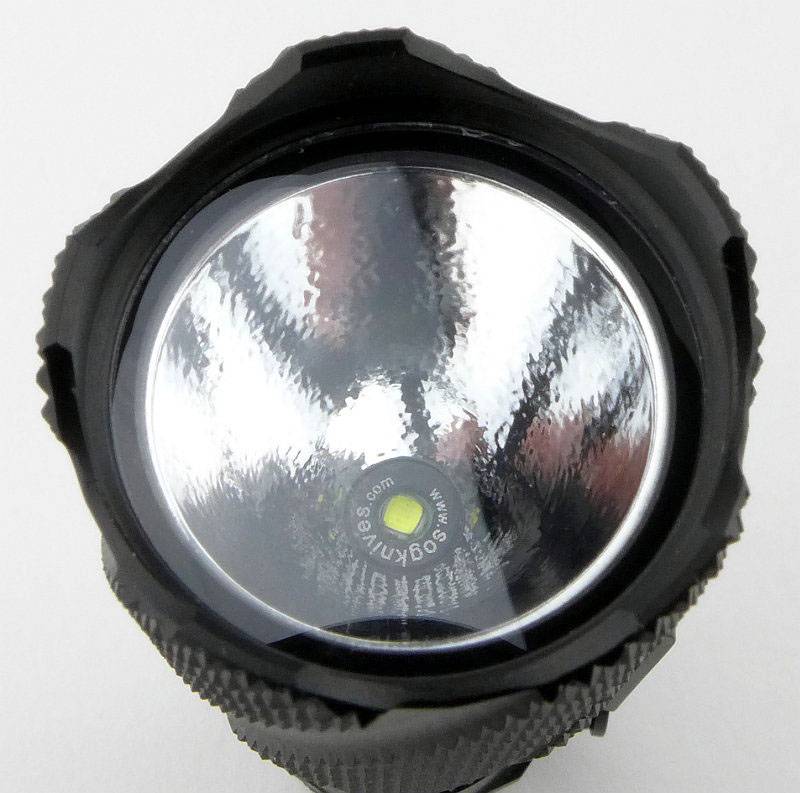
Just like previous TK15 models, the TK15UE has a smooth reflector.
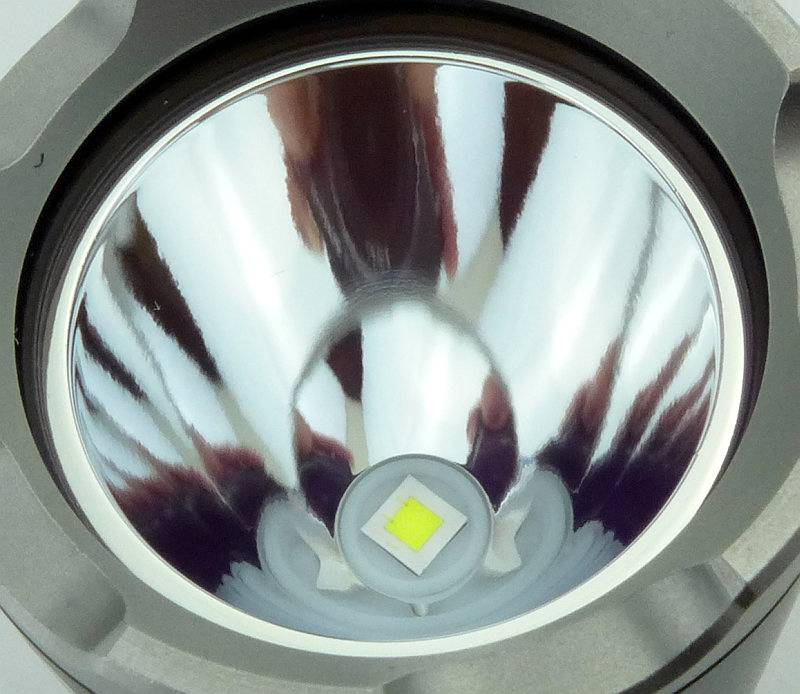
 photo 24 TK15UE reflector P1230888.jpg

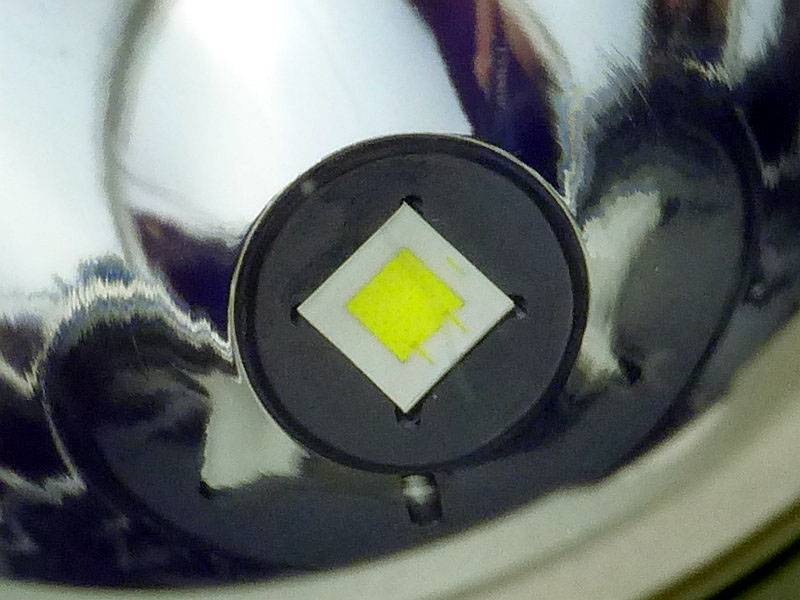
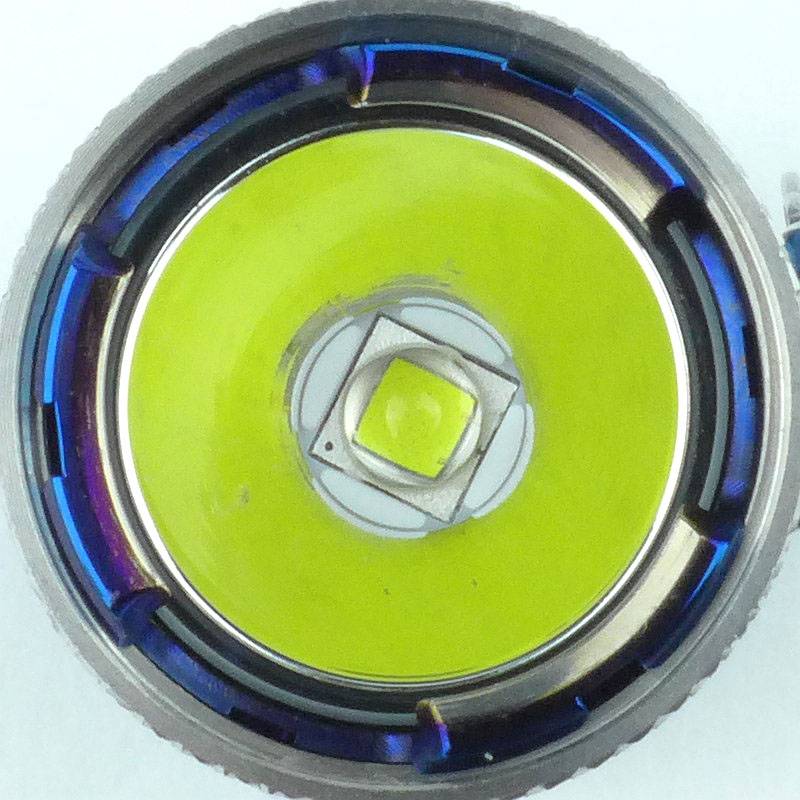
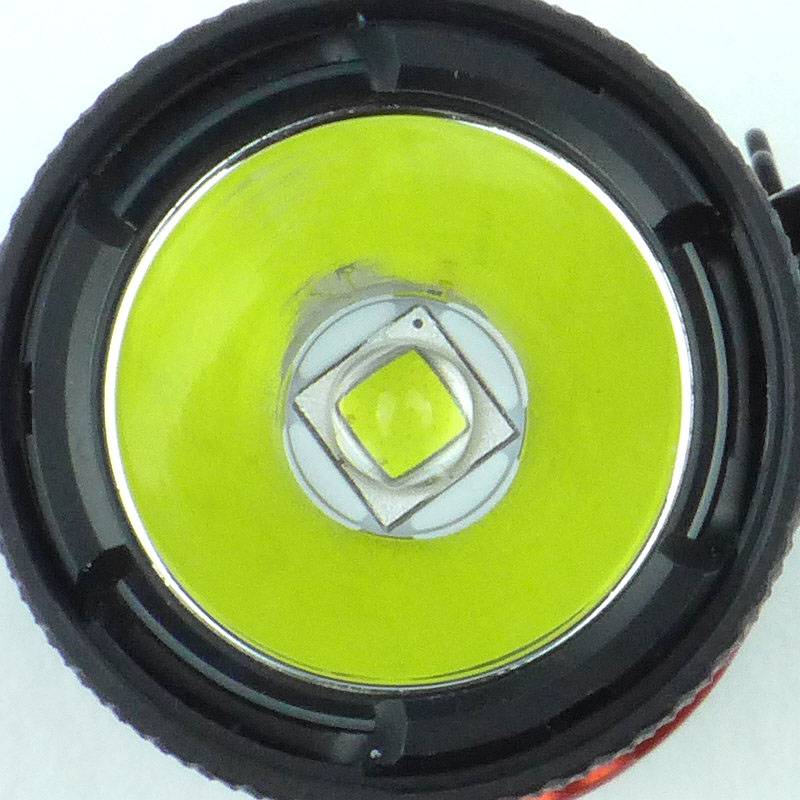
In the centre of that reflector is the CREE XP-L HI V3 LED.
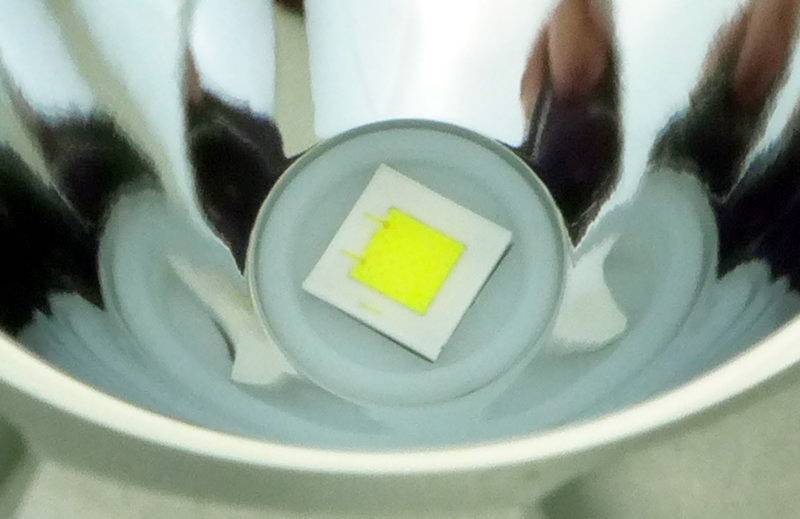
 photo 25 TK15UE LED P1230897.jpg

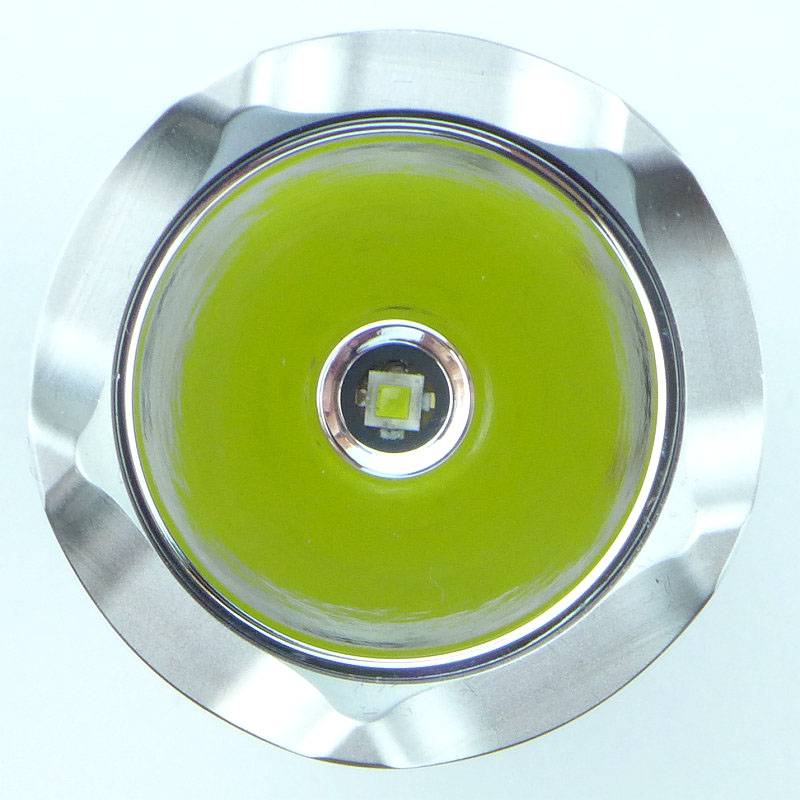
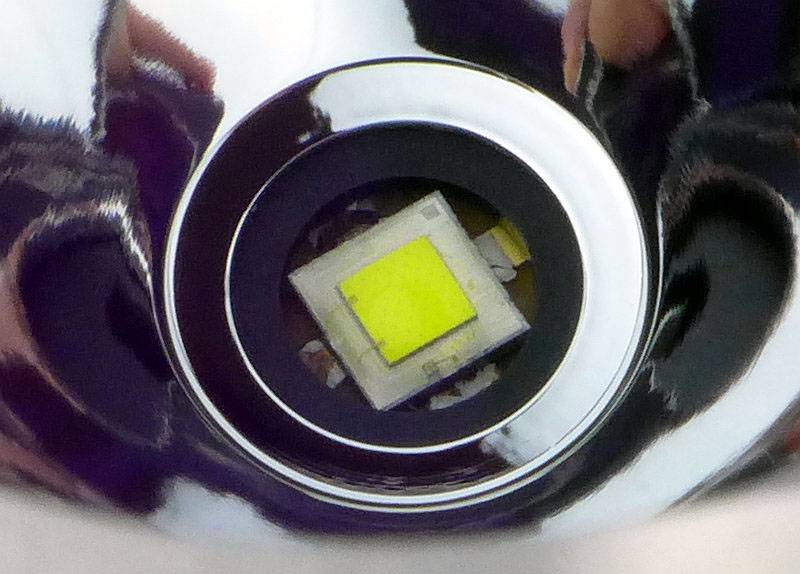
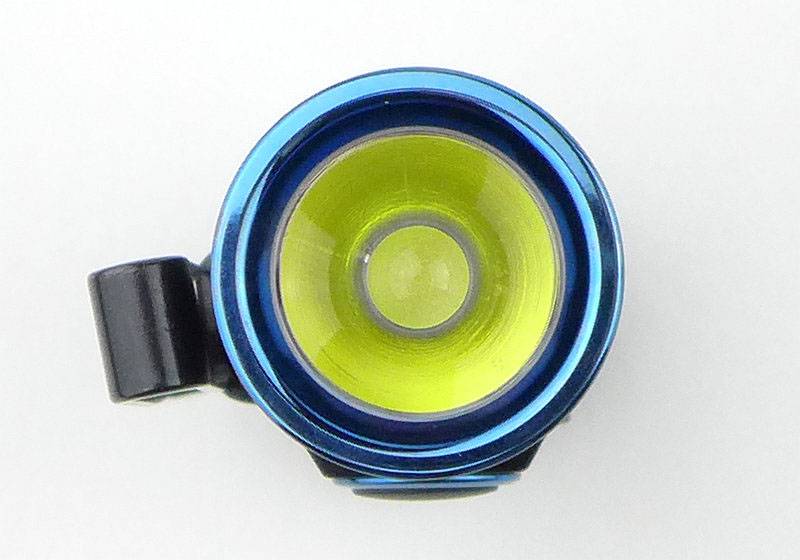
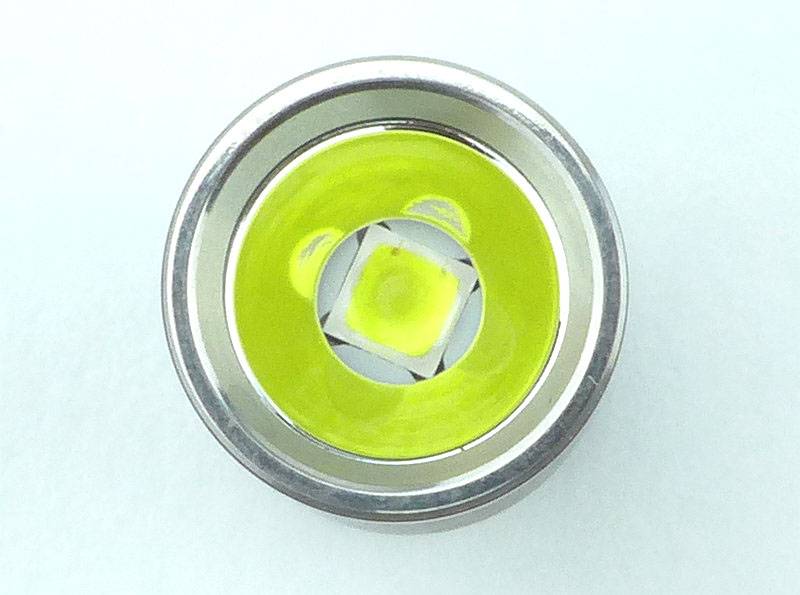
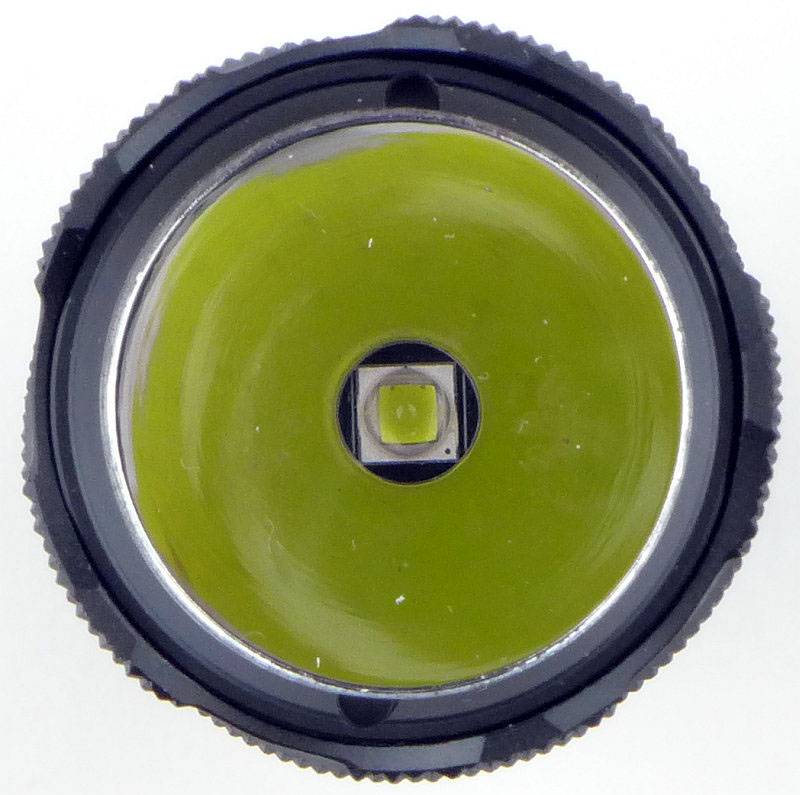
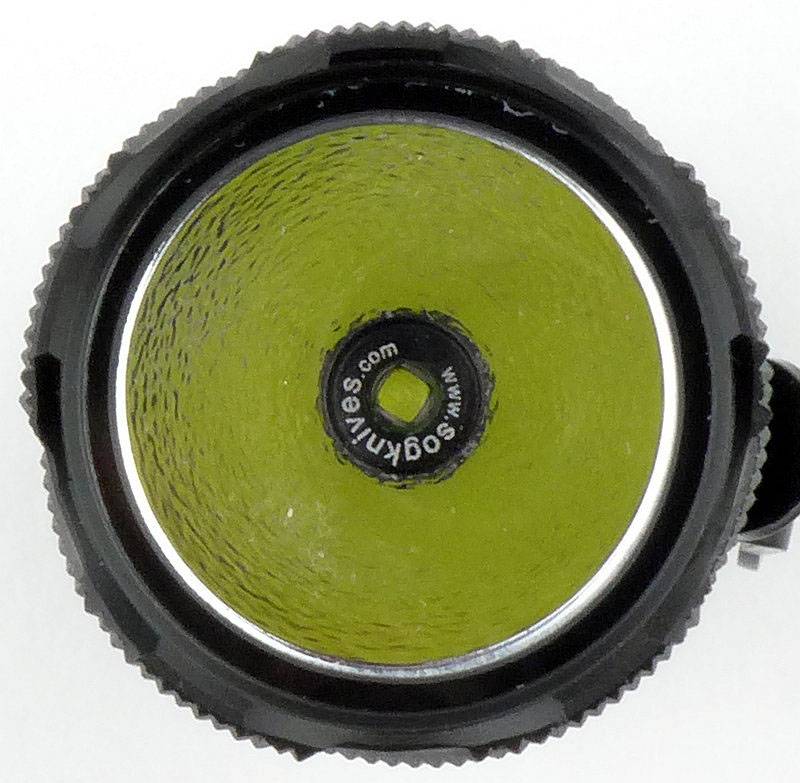
Looking straight into the TK15UE’s reflector.
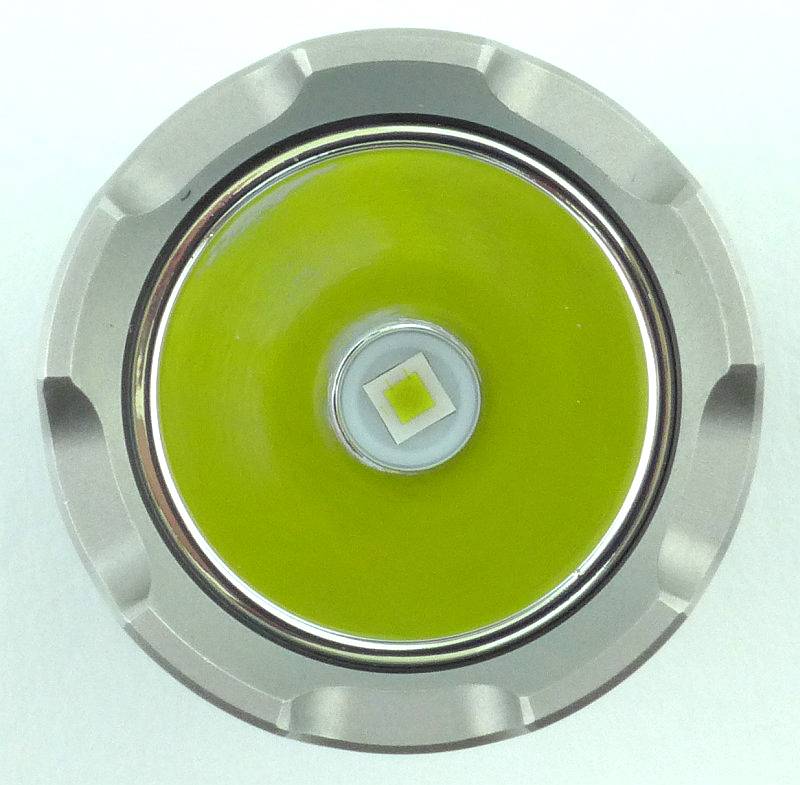
 photo 26 TK15UE LED P1230901.jpg

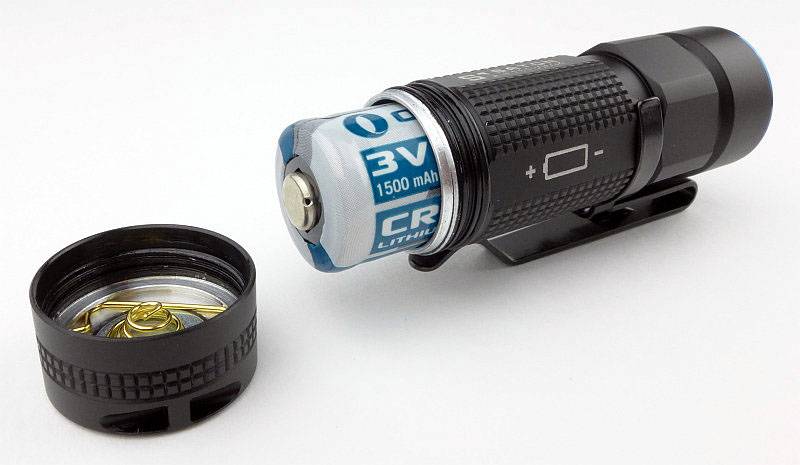
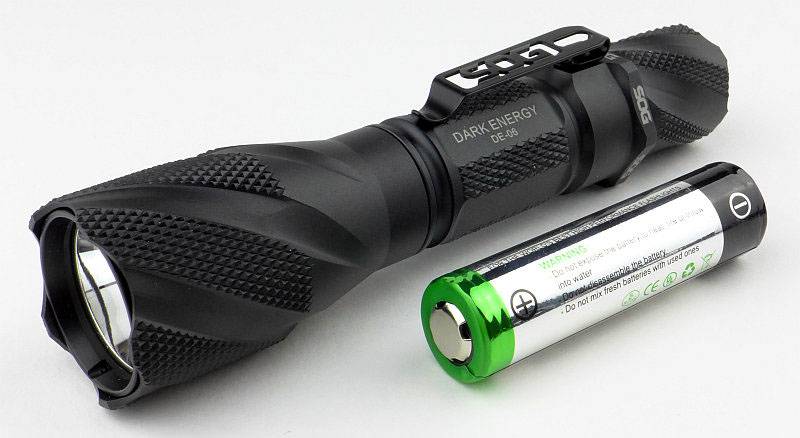
The TK15UE is one of the more compact single 18650 lights. Not as compact as the small-head types such as the PD32, but it does have a big enough reflector to give it some punch.
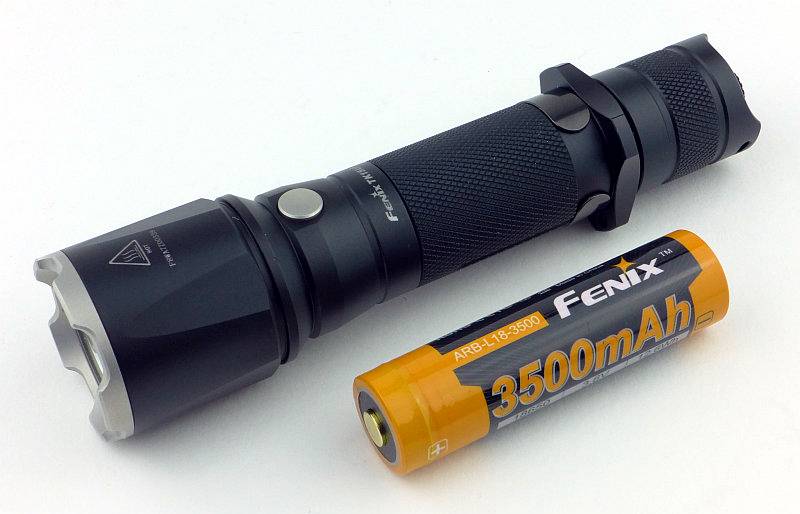
 photo 27 TK15UE with cell P1230904.jpg

You can take off the tactical grip ring by unscrewing it.
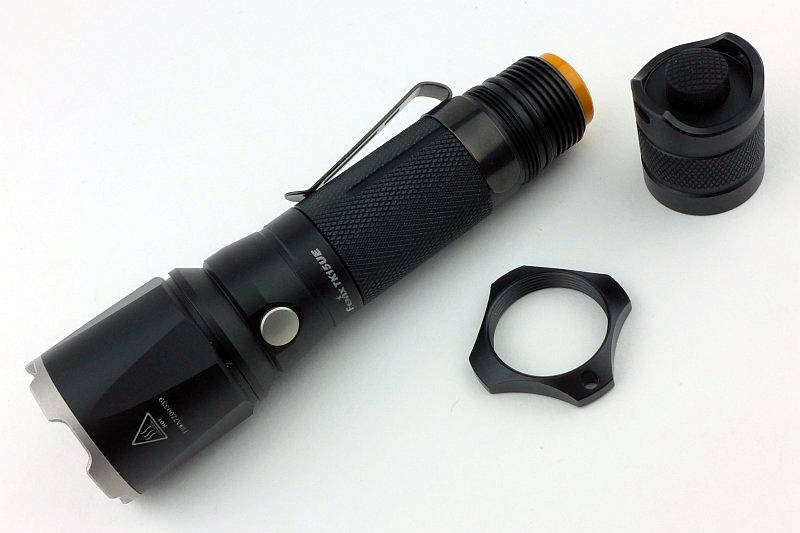
 photo 28 TK15UE ring off P1230910.jpg

Unless you buy the optional thread protector you will see the grip ring threads.
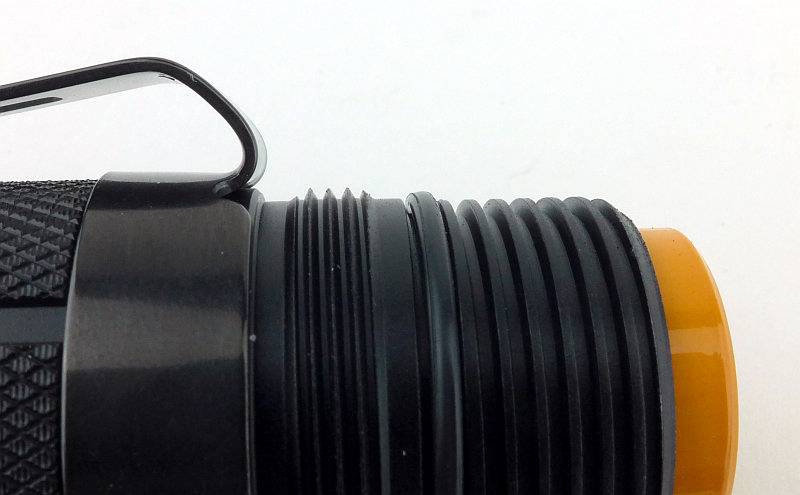
 photo 29 TK15UE ring threads P1230914.jpg

The beam

Please be careful not to judge tint based on images you see on a computer screen. Unless properly calibrated, the screen itself will change the perceived tint.

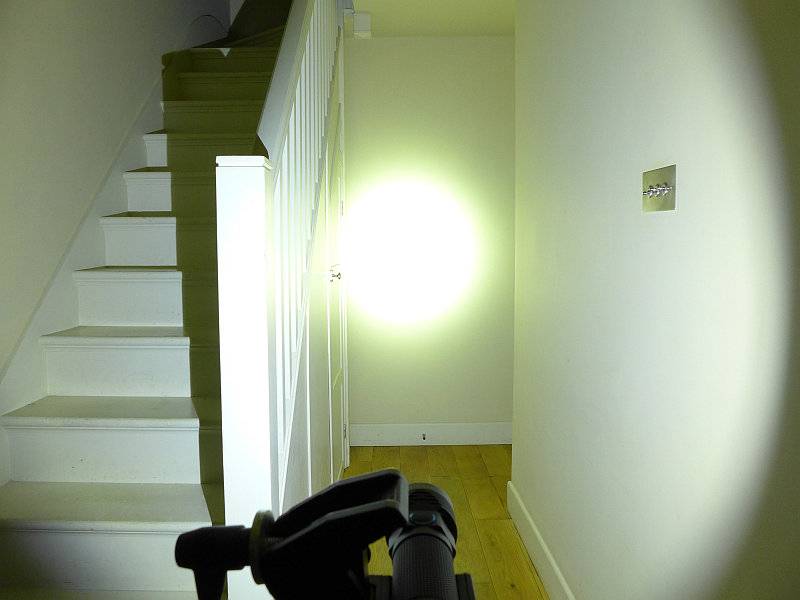
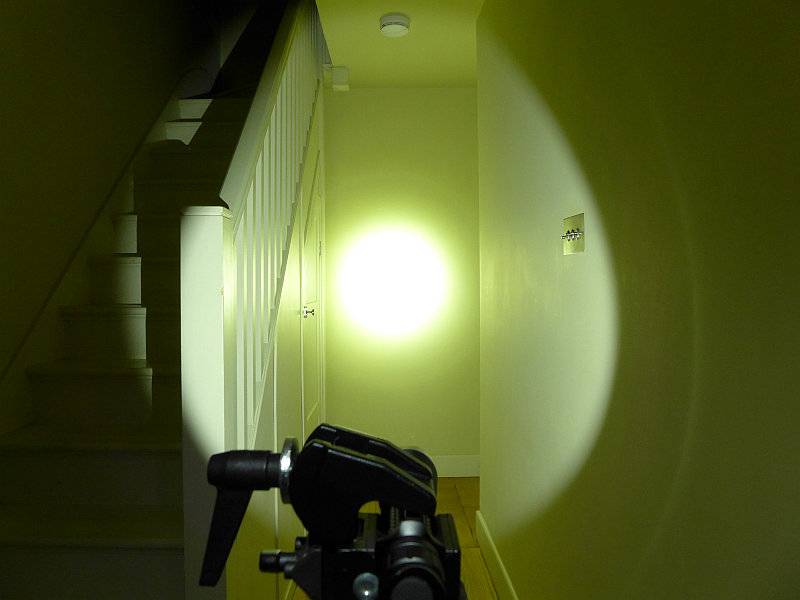
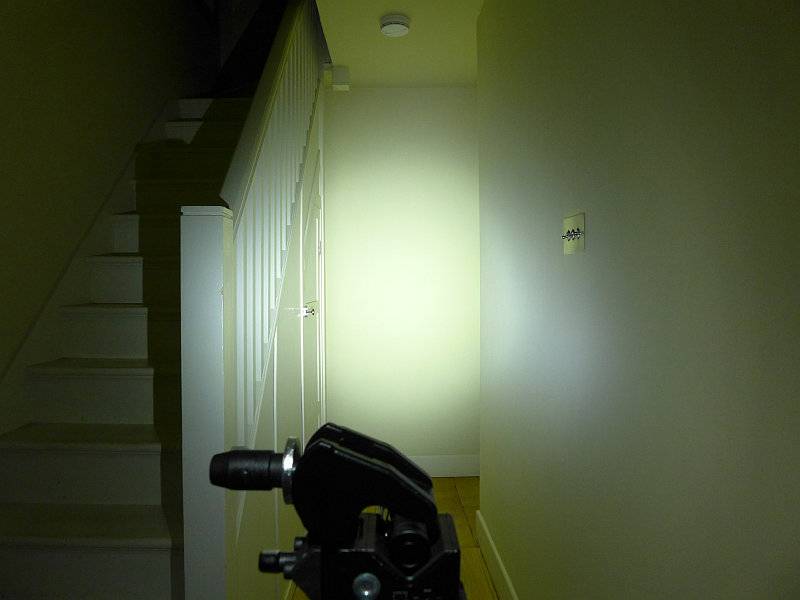
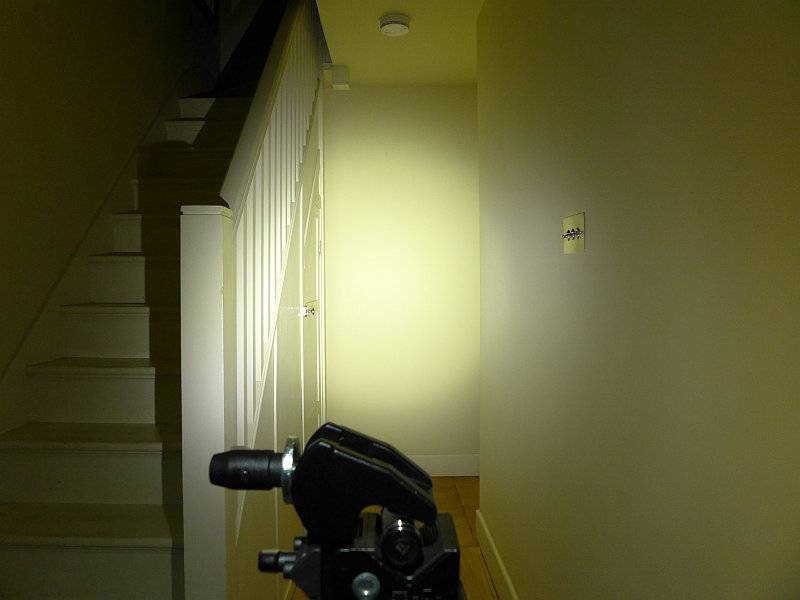
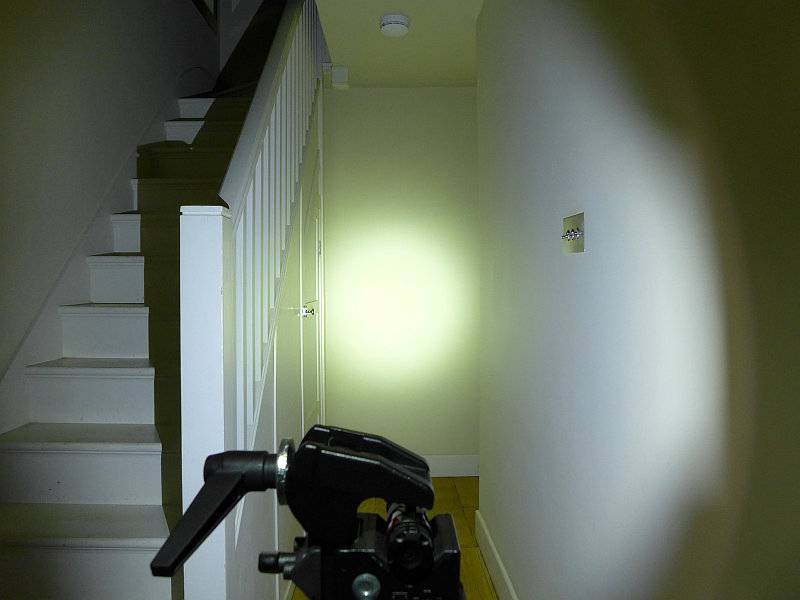
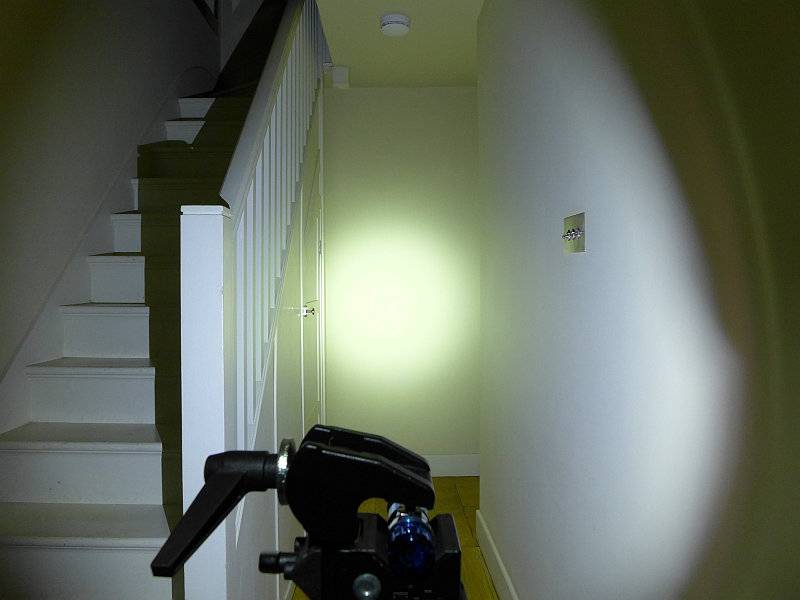
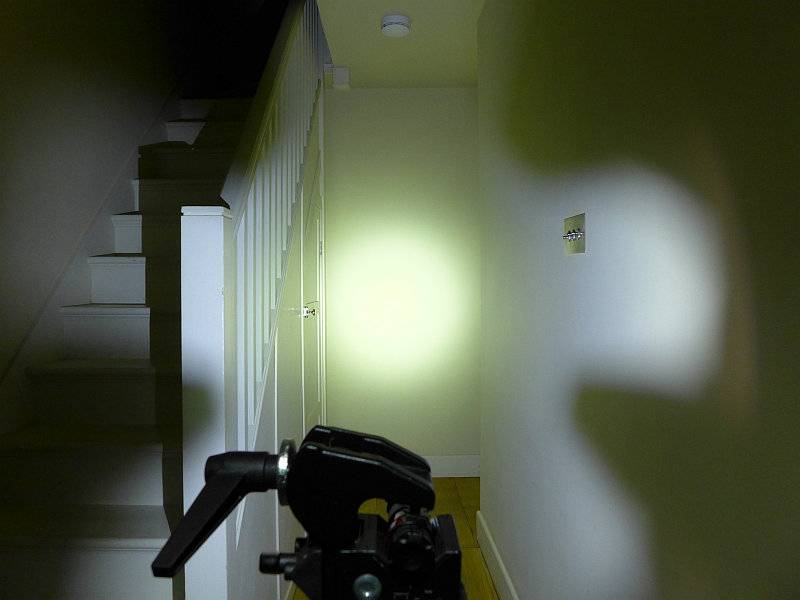
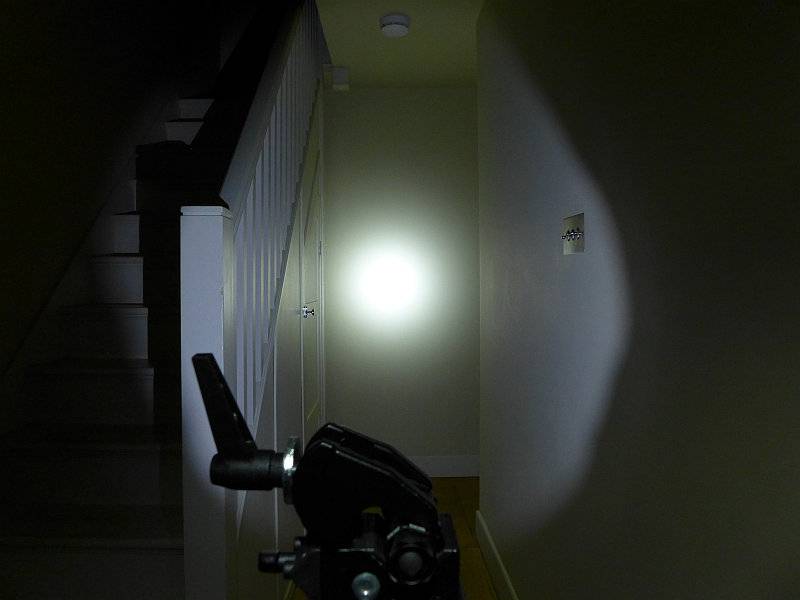
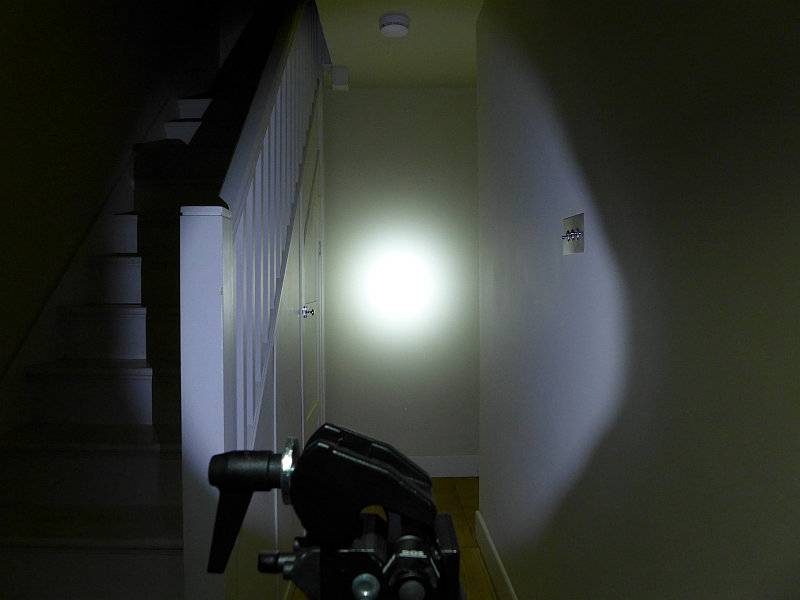
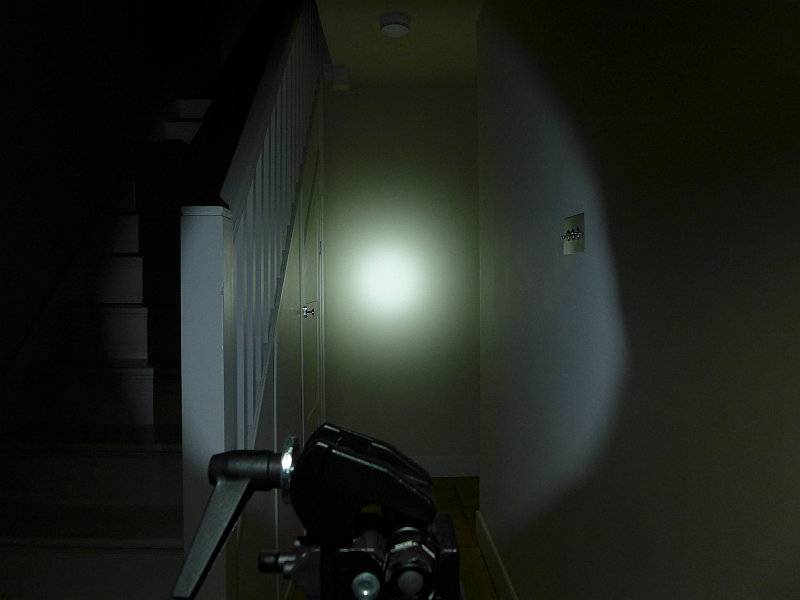
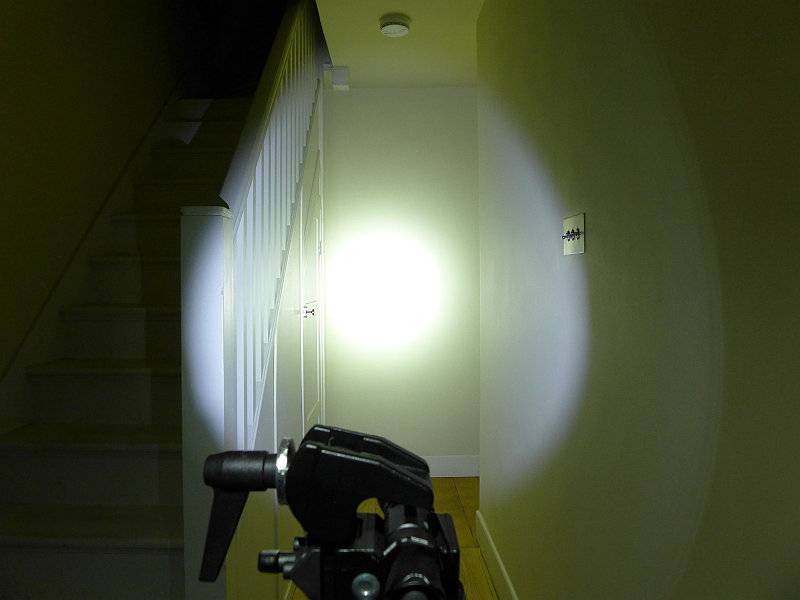
The indoor beamshot is intended to give an idea of the beam shape/quality rather than tint. All beamshots are taken using daylight white balance. The woodwork (stairs and skirting) are painted Farrow & Ball “Off-White”, and the walls are a light sandy colour called ‘String’ again by Farrow & Ball. I don’t actually have a ‘white wall’ in the house to use for this, and the wife won’t have one!

Indoors the TK15UE is not at its best, as it is quite a throw orientated beam. The hotspot is bright and well formed. Spill is relatively dim and narrow but usable. There is enough balance in the beam to make it OK indoors.
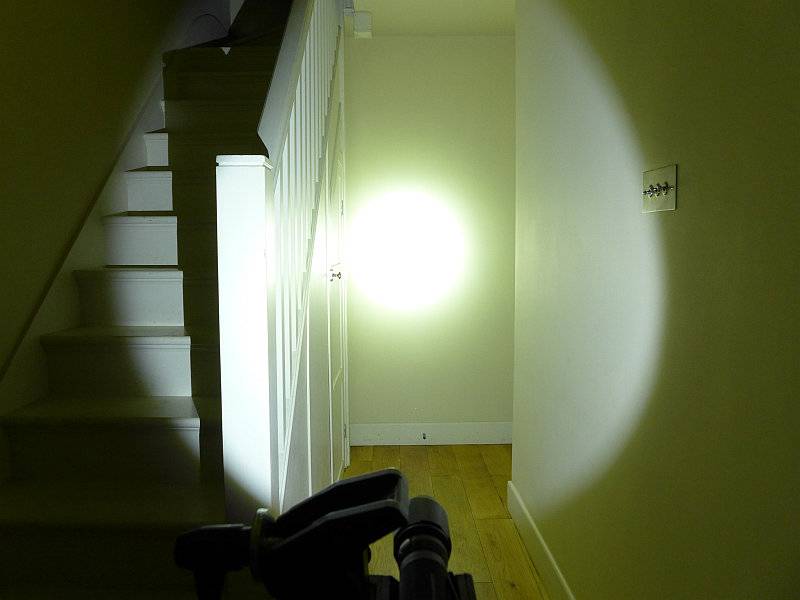
 photo 32 TK15UE indoor P1240716.jpg

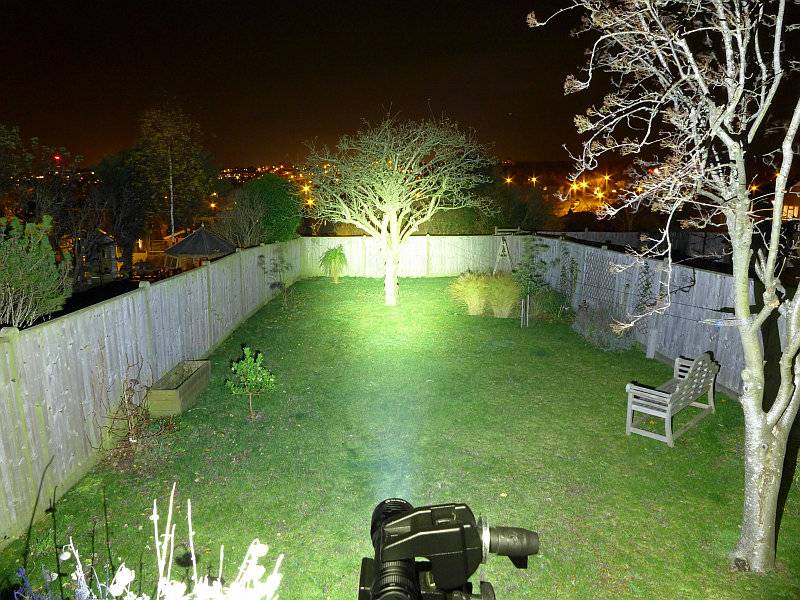
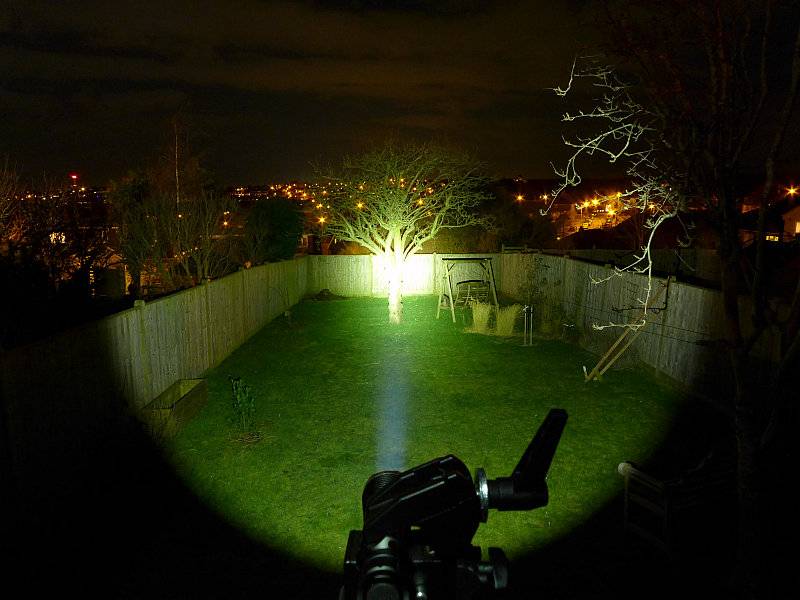
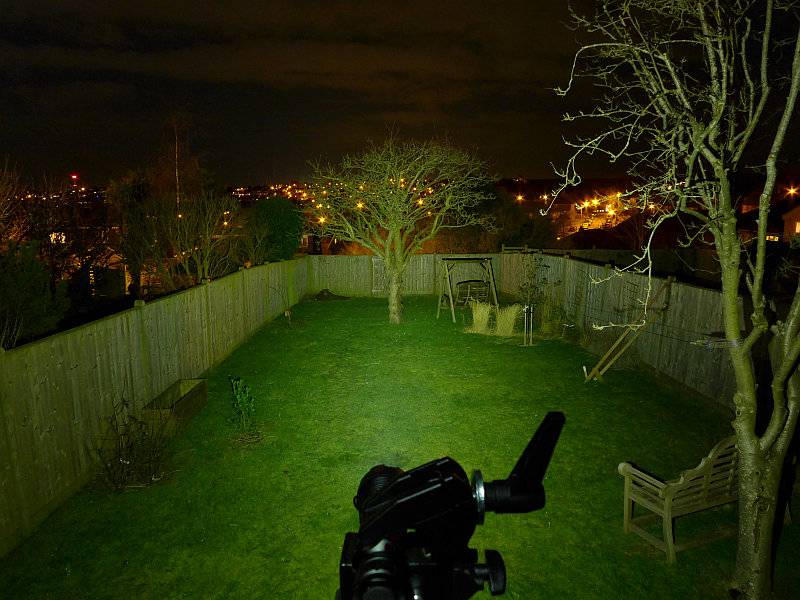
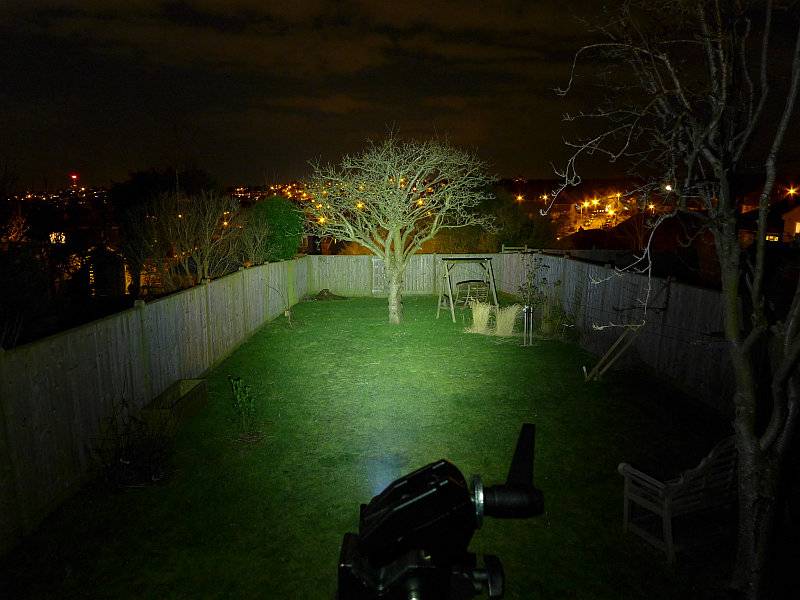
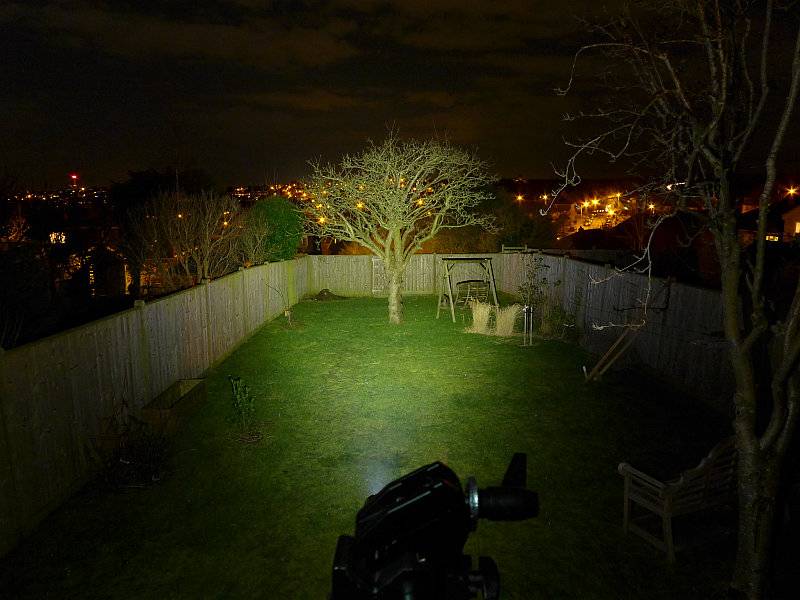
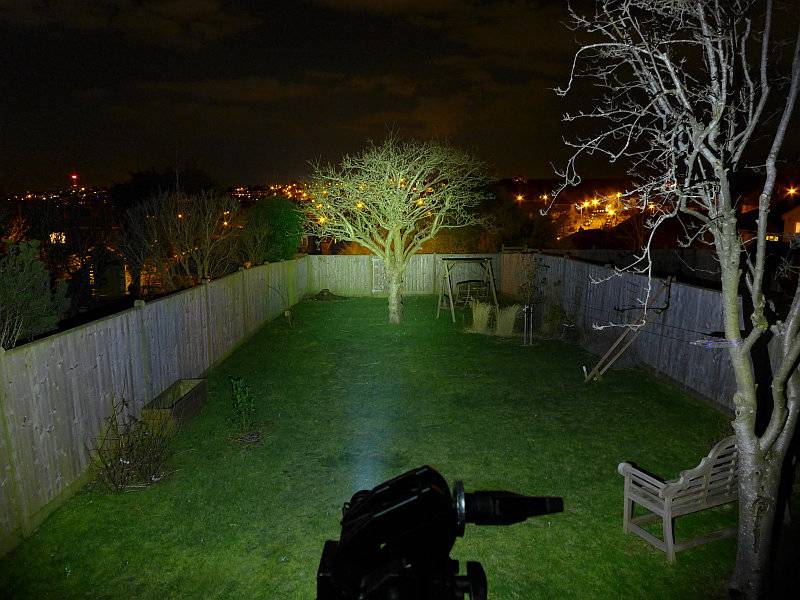
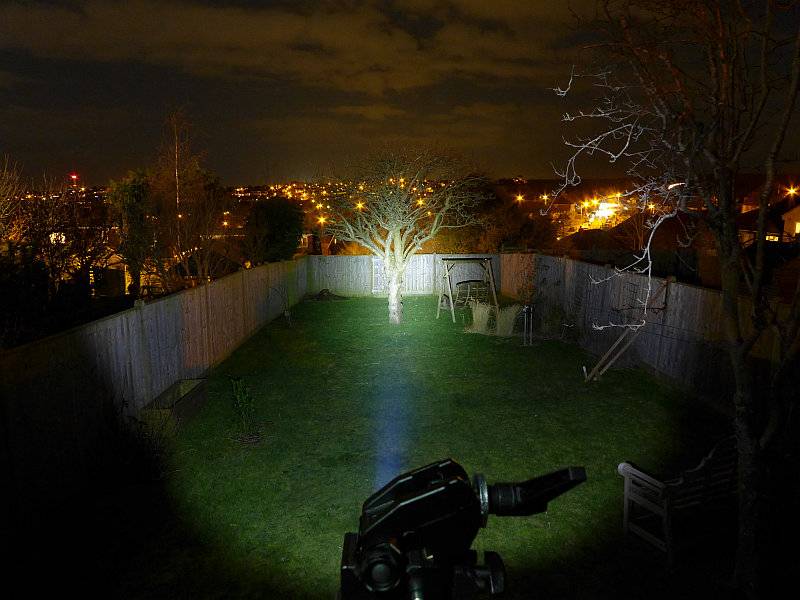
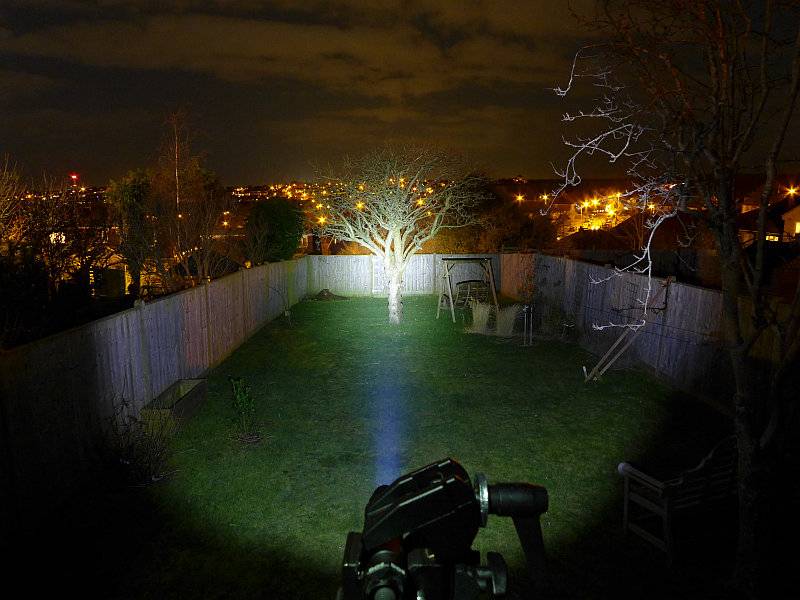
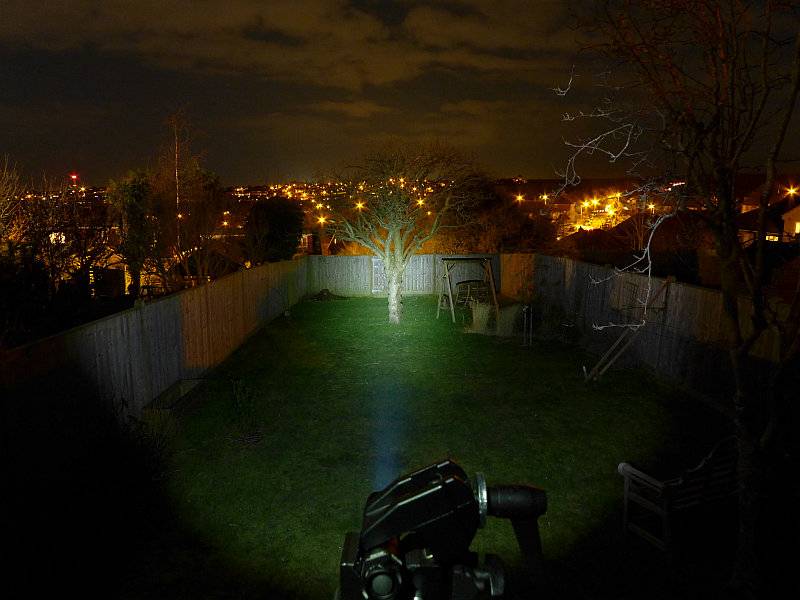
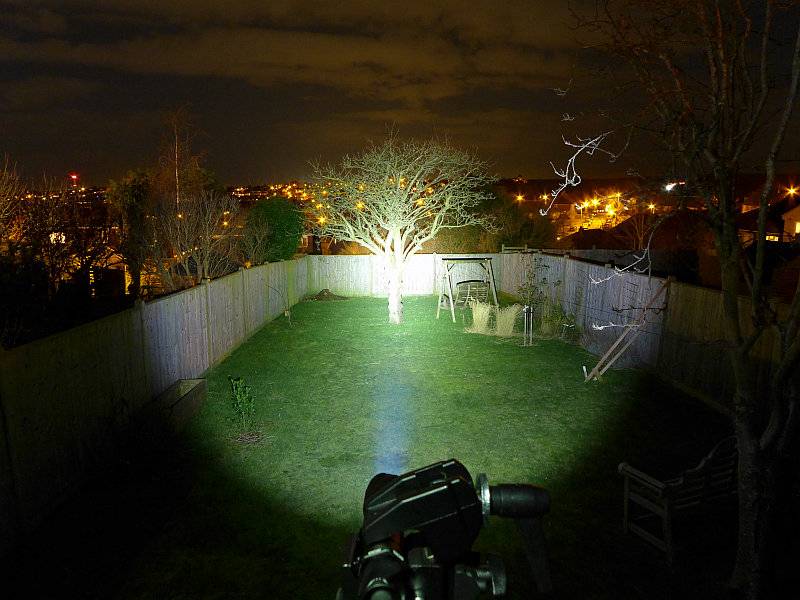
But it is when you get a bit more range that the TK15UE really starts to shows what it is made of. The throw belies its compact size, and with the ‘UE’ upgrade it is a really punchy little light.
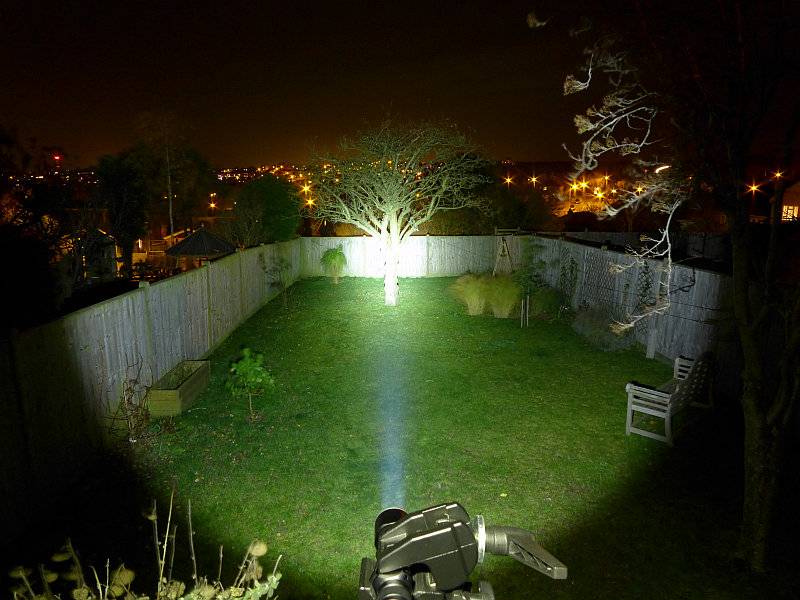
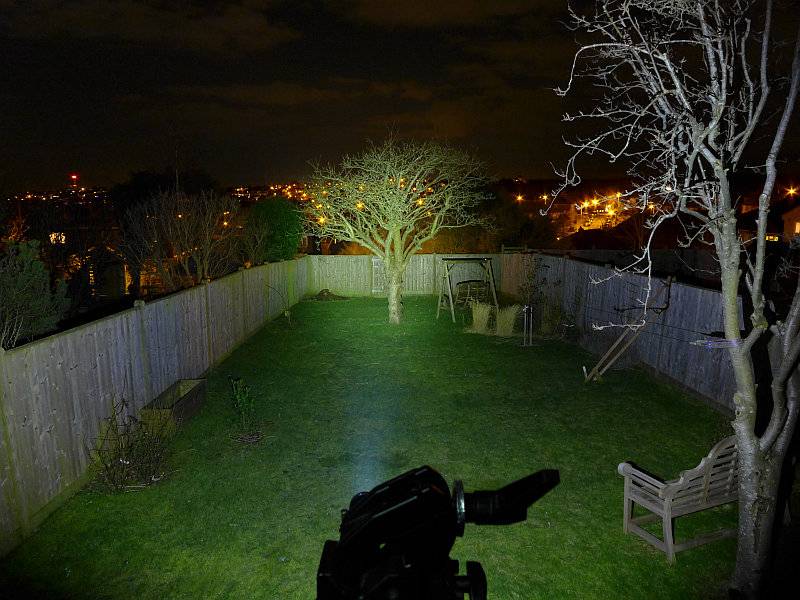
 photo 31 TK15UE outdoor P1240668.jpg

Modes and User Interface:

To control the TK15 UE there is the forward-clicky tail switch, and the mode selection switch just behind the head.

Click ON (or half press for momentary action) the tail switch to access the last used constant mode. With the tail switch on, press the mode button to cycle though the modes.

The standard modes are Low, Medium, High and Turbo.

There is a hidden Strobe mode accessed by holding the modes selection switch in for 1s. Strobe is not memorised as a last used mode.

Batteries and output:

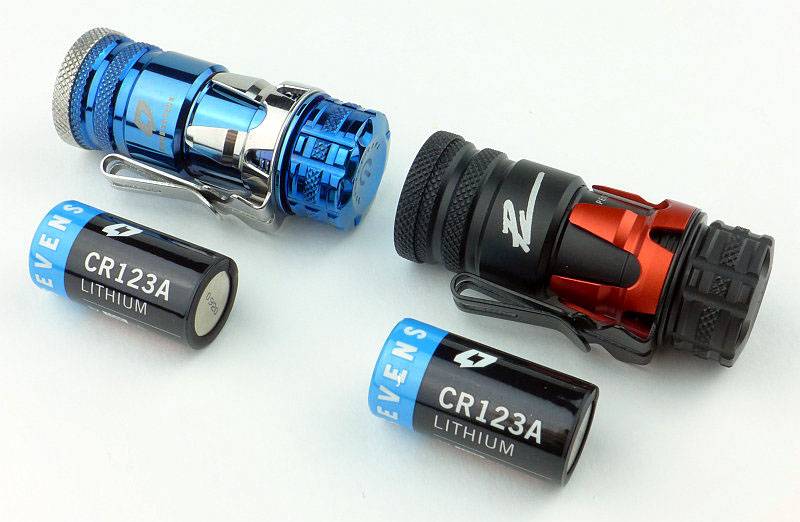
The TK15UE runs on 18650 or 2xCR123.

To measure actual output, I built an integrating sphere. See here for more detail. The sensor registers visible light only (so Infra-Red and Ultra-Violet will not be measured).

Please note, all quoted lumen figures are from a DIY integrating sphere, and according to ANSI standards. Although every effort is made to give as accurate a result as possible, they should be taken as an estimate only. The results can be used to compare outputs in this review and others I have published.

___________________________________________ ________________________________ ________________________________
Fenix TK15UE using specified cell I.S. measured ANSI output Lumens PWM frequency or Strobe frequency (Hz)
___________________________________________ ________________________________ ________________________________
Turbo – Fenix ARB-L18-3500 776 0
High – Fenix ARB-L18-3500 377 0
Medium – Fenix ARB-L18-3500 164 0
Low – Fenix ARB-L18-3500 14 0

* Beacon and Strobe output measurements are only estimates as the brief flashes make it difficult to capture the actual output value.

Peak Beam intensity measured 31100 lx @1m giving a beam range of 353m.

There is no parasitic drain.

I was slightly surprised by the Turbo output runtime trace as unlike most Fenix lights the TK15UE does not appear to run with a regulated output. The trace was recorded using cooling, so it is unlikely that this is due to overheat protection, instead the TK15UE seems to run at maximum output with that output sagging as the cell becomes depleted. However saying that, you do get a full hour of runtime at more than 600lm, so overall the performance is still good. (This was run using Fenix’s latest ARB-L18 3500mAh cell.)
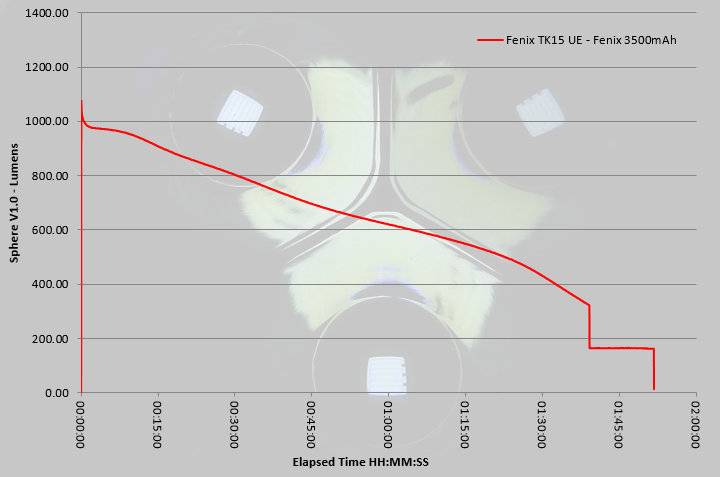
 photo Fenix TK15 UE runtime.jpg

Troubleshooting

This section is included to mention any minor niggles I come across during testing, in case the information helps anyone else.

No issues were encountered during testing.

As per the description of this section, this information is provided in case anyone else finds a similar ‘issue’ that might be fixed in the same way.

The TK15UE in use

By separating the mode selection to a side-switch Fenix have allowed proper momentary use of that forward-clicky tail switch. This makes for a really easy and intuitive interface and keeps things simple for any user.
Fortunately the strobe mode is reasonably well hidden and is not memorised; I’m surprised anyone still includes strobe. As those that follow me will know, I’m certainly no fan of strobe and most true tactical users I know are aware that if you strobe another person, you strobe yourself as well, so your are better off not using it at all. Thankfully with the TK15UE you need never come across strobe and can use the four constant output modes without tripping over strobe.
The TK15UE manages a balance between hotspot and spill that, although it is more oriented towards throw, is still usable at indoor distances.
When using the holster with the TK15UE inserted bezel-down, the bezel does catch in the holster before getting all the way in. Used bezel-up, this does not happen. It seems to be due to the adjustable flap taking up more space inside so the bezel catches on the inside of the holster. To get it all the way into the holster bezel-down you need to twist the TK15UE as you insert it.
There are smaller single 18650 lights, but the TK15UE is still compact enough to make it easy to carry, yet that slightly larger head is enough to give it a nice strong beam. Even with the upgrades to the head and LED, Fenix have kept the character of the TK15 but made it significantly brighter.
I’ve always felt the TK15 was an unsung hero in the Fenix line-up, quietly getting on with the job while others took the glory. In the Ultimate Edition, the TK15UE can now take some of the limelight and hopefully get a bit more recognition.

Review Summary

_______________________________________________ _______________________________________________
Things I like What doesn’t work so well for me
_______________________________________________ _______________________________________________
Significantly boosted output compared to previous TK15 models. Turbo output not regulated.
Excellent throw from a compact head. Bezel catches in holster when used bezel down.
Simple user interface. Can accidentally hit the mode switch especially if wearing gloves.
Stainless Steel Bezel.

 photo 30 TK15UE angle on P1230918.jpg


Discussing the Review:

Please feel free to add comments to the review, but the ideal place to freely discuss these reviews is on a forum. If you started reading the shorter forum version of the review, but followed the link this full exclusive review, please return to that forum to discuss the review there.
If you read the review entirely on Tactical Reviews, please consider one of the following to join in any discussion.

CandlePowerForums – Flashlight Reviews Section (Largest and Friendliest Flashlight Community Forum)

EdgeMatters – Sponsored Reviews (UK based Forum for Knife Makers and Collectors)
Light Review: Olight R50 Seeker

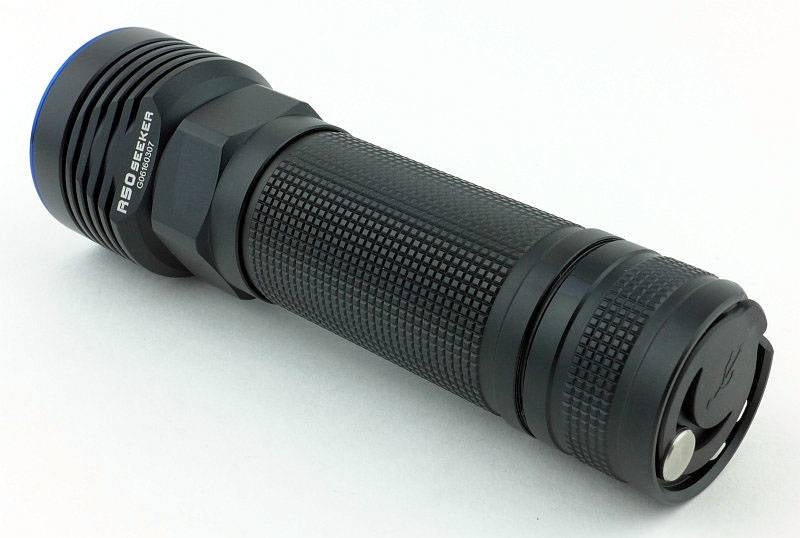
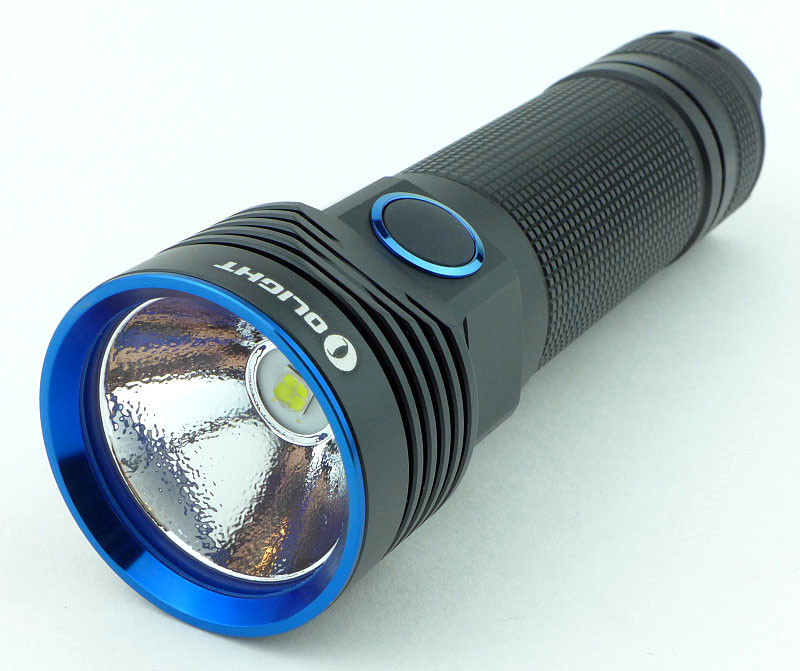
Olight’s R50 Seeker is a handy sized powerhouse using a 26650 cell and the XHP50 LED allowing it to give you 2500lms in an easily carried package; built-in USB charging adds to its flexibility.

 photo 08 Olight R50 angle P1220569.jpg

Taking a more detailed look:

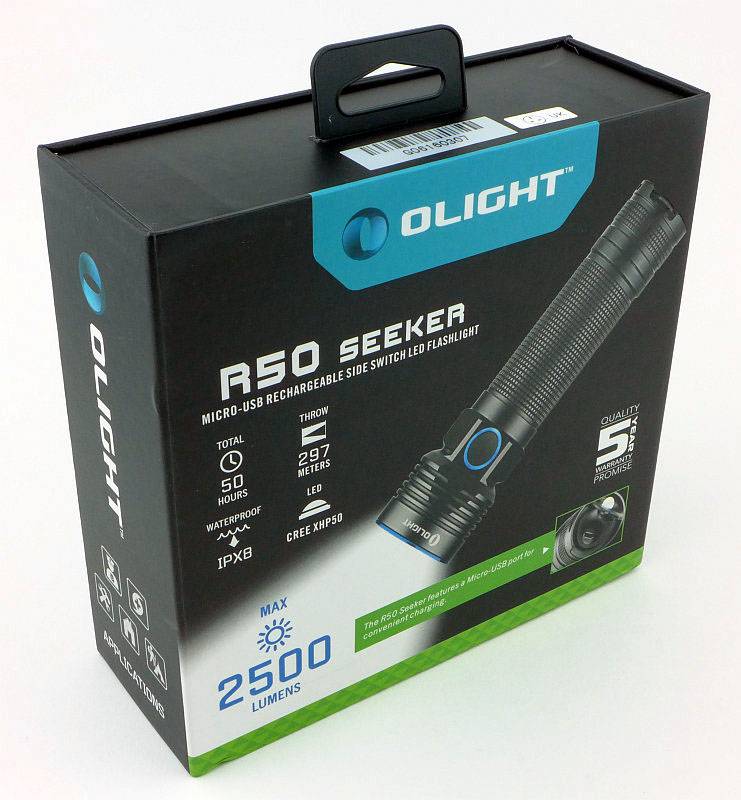
The R50 arrives in something more like a presentation box than just ‘packaging’.
 photo 01 Olight R50 boxed P1220538.jpg

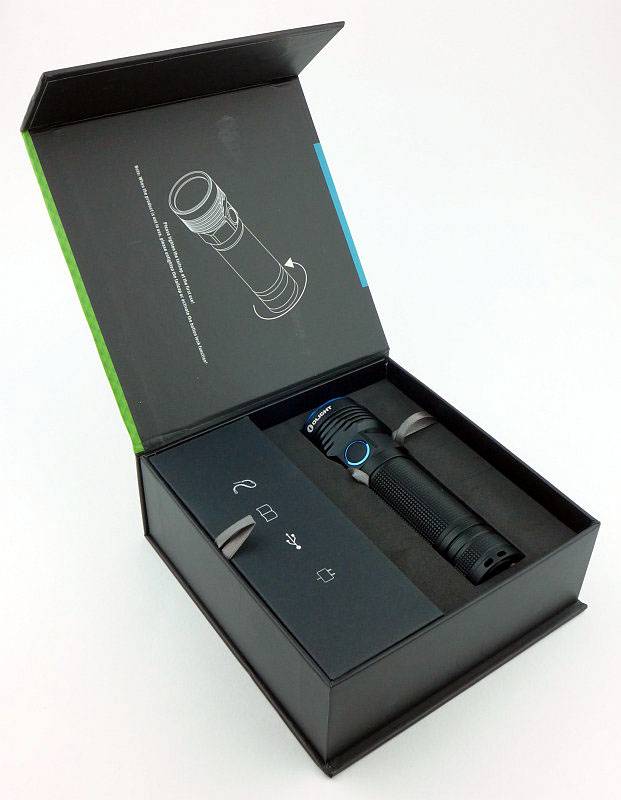
The box has a lid which is held shut with magnets.
 photo 02 Olight R50 box open P1220544.jpg

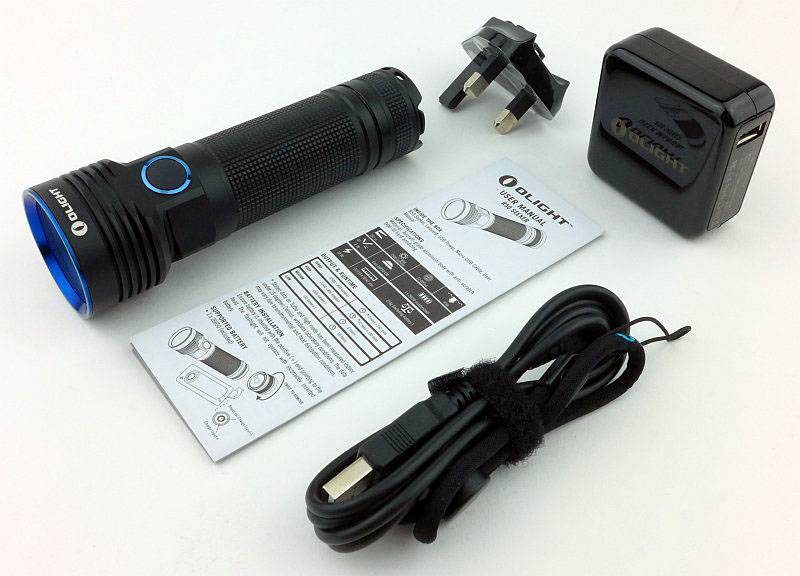
Taking everything out you have the R50, instructions, charger, charger plug adaptor, USB cable and lanyard.
 photo 03 Olight R50 box contents P1220548.jpg

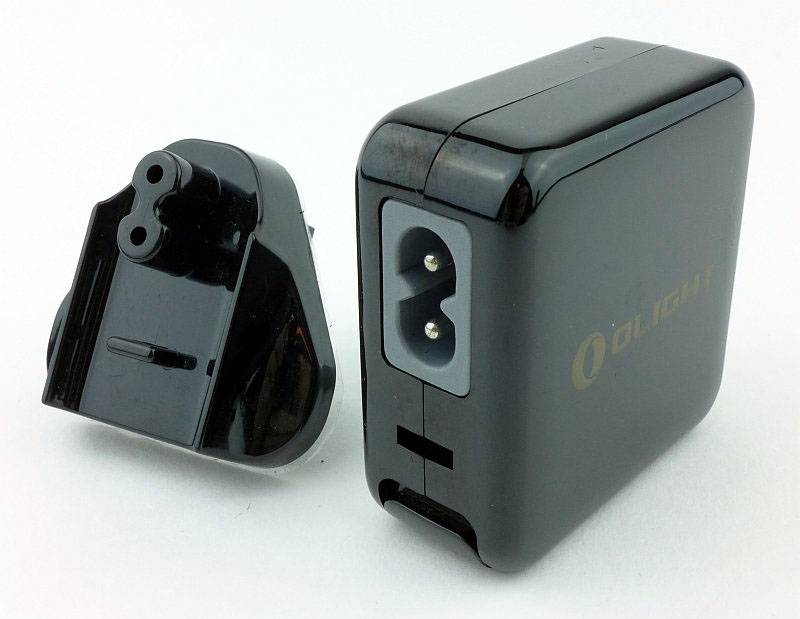
Before you can use the charger you need to fit your local plug adaptor.
 photo 04 Olight R50 charger apart P1220552.jpg

The adaptor clicks into place.
 photo 05 Olight R50 charger together P1220555.jpg

The charger is multi-voltage and with a 2.1A output.
 photo 06 Olight R50 charger info P1220560.jpg

Separating out the USB cable and lanyard. The lanyard has a very nice ‘fabric tube’ wrist loop.
 photo 07 Olight R50 cable lanyard P1220563.jpg

A good looking light with blue bezel an switch rings.
 photo 10 Olight R50 angle P1220576.jpg

Looking from the rear you can see the USB charging port cover in the tail-cap.
 photo 09 Olight R50 rear angle P1220574.jpg

The main power switch is low profile, but big enough to be easy to use.
 photo 11 Olight R50 switch P1220580.jpg

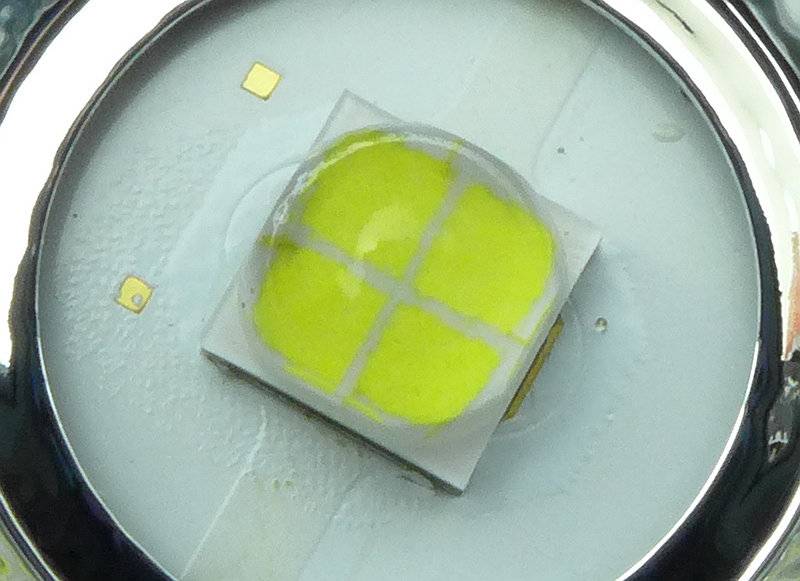
Diving in close to the quad die XHP50 LED.
 photo 13 Olight R50 LED close P1220597.jpg

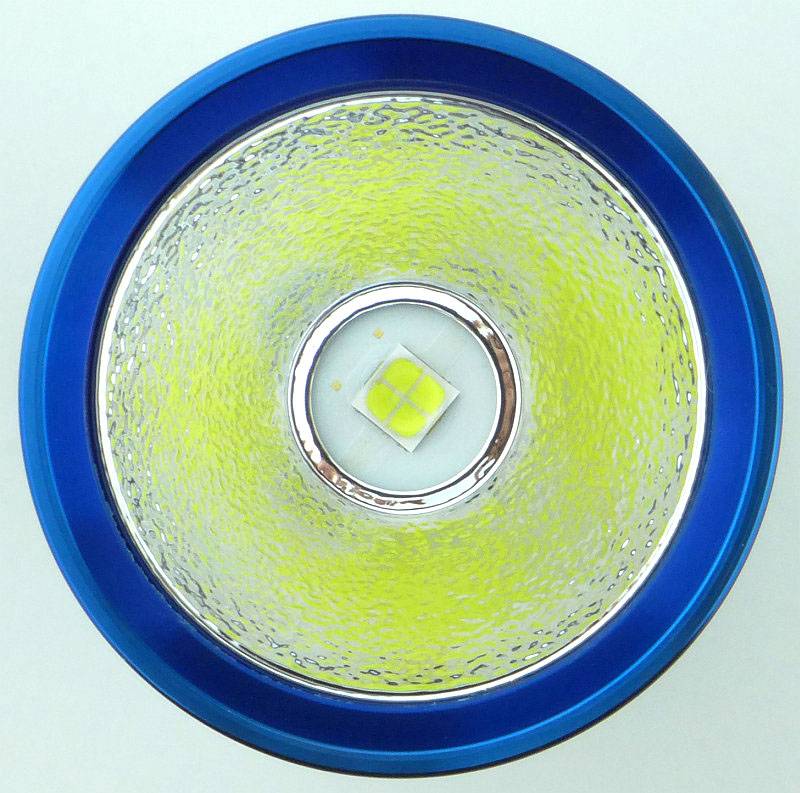
Surrounding the LED is a textured reflector.
 photo 14 Olight R50 reflector P1220606.jpg

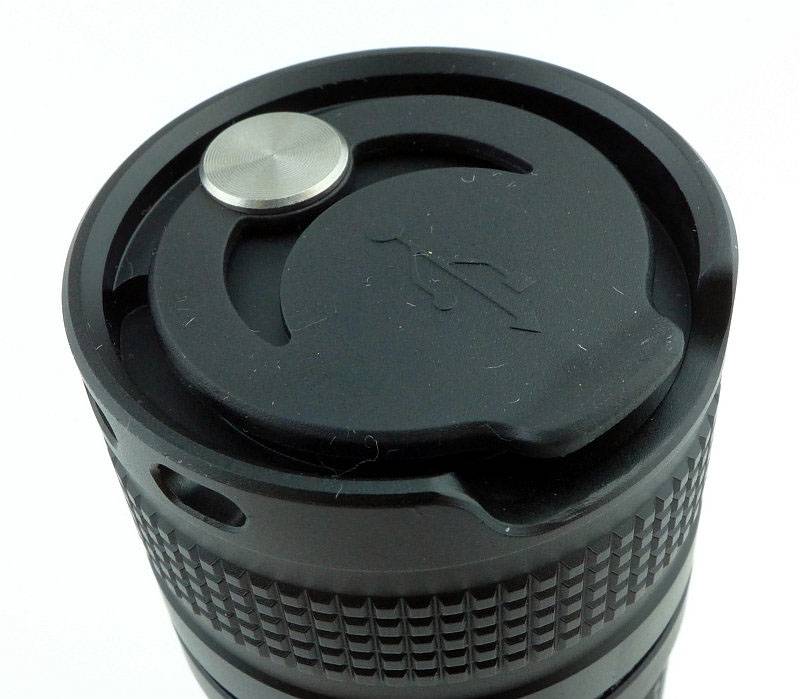
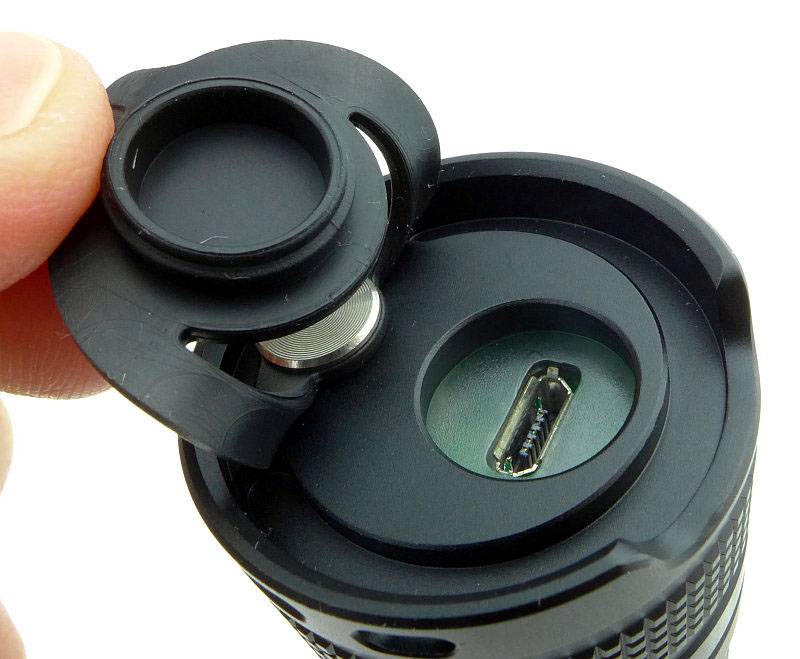
Flipping round to the other end, there is a rubber charging port cover in the tail-cap.
 photo 15 Olight R50 port cover P1220610.jpg

Pulling this aside exposes the micro-USB socket.
 photo 16 Olight R50 port open P1220615.jpg

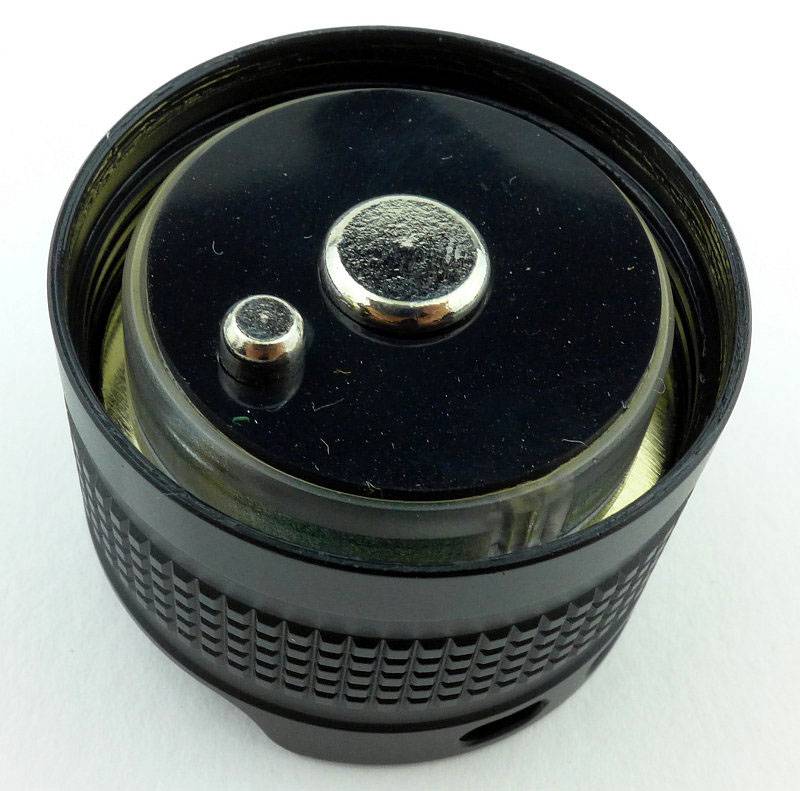
Inside the tailcap, there are three contacts; a ring contact for the end of the battery tube, and two sprung button contacts.
 photo 17 Olight R50 contacts P1220616.jpg

The tail-cap end of the cell has two contacts to match the two in the tail-cap.
 photo 18 Olight R50 cell contacts P1220621.jpg

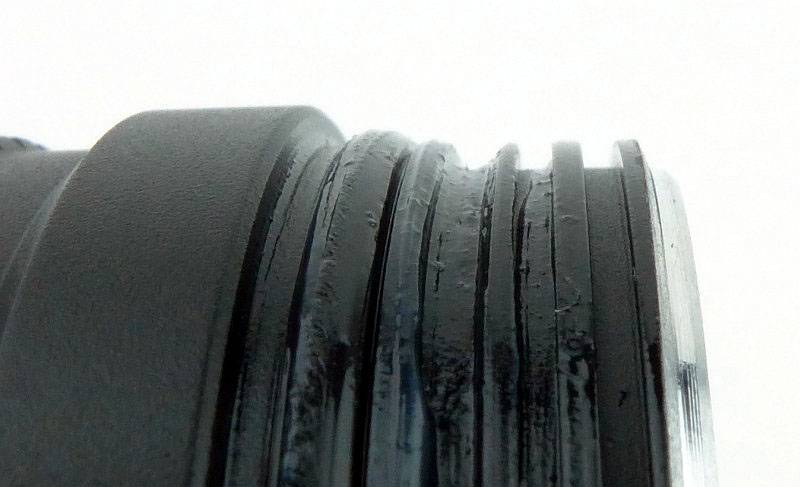
Threads are square cut.
 photo 19 Olight R50 threads P1220624.jpg

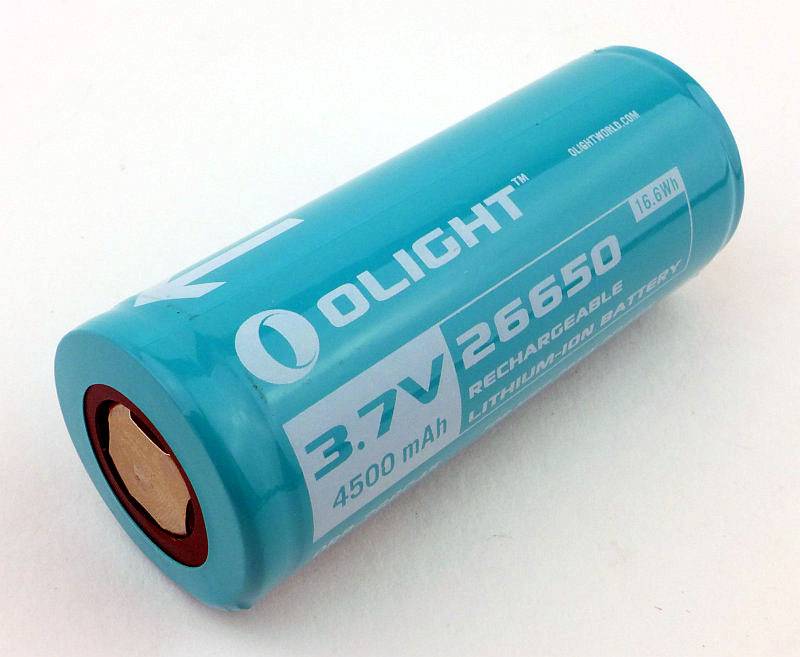
Supplied with the R50 is a proprietary Olight 26650 cell.
 photo 20 Olight R50 cell P1220628.jpg

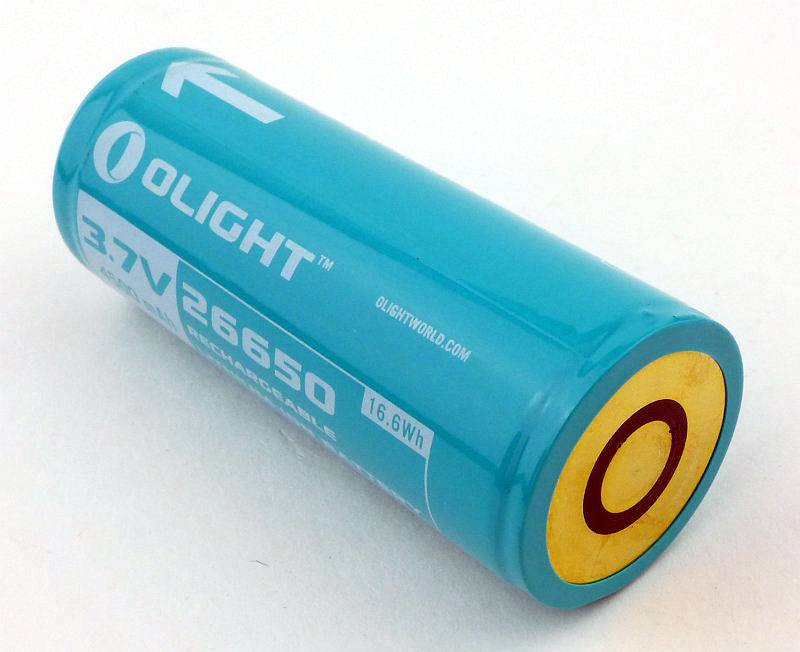
This cell has the twin contacts on the ‘negative’ end of the cell, and an arrow on the side to indicate which way to insert it.
 photo 21 Olight R50 cell P1220630.jpg

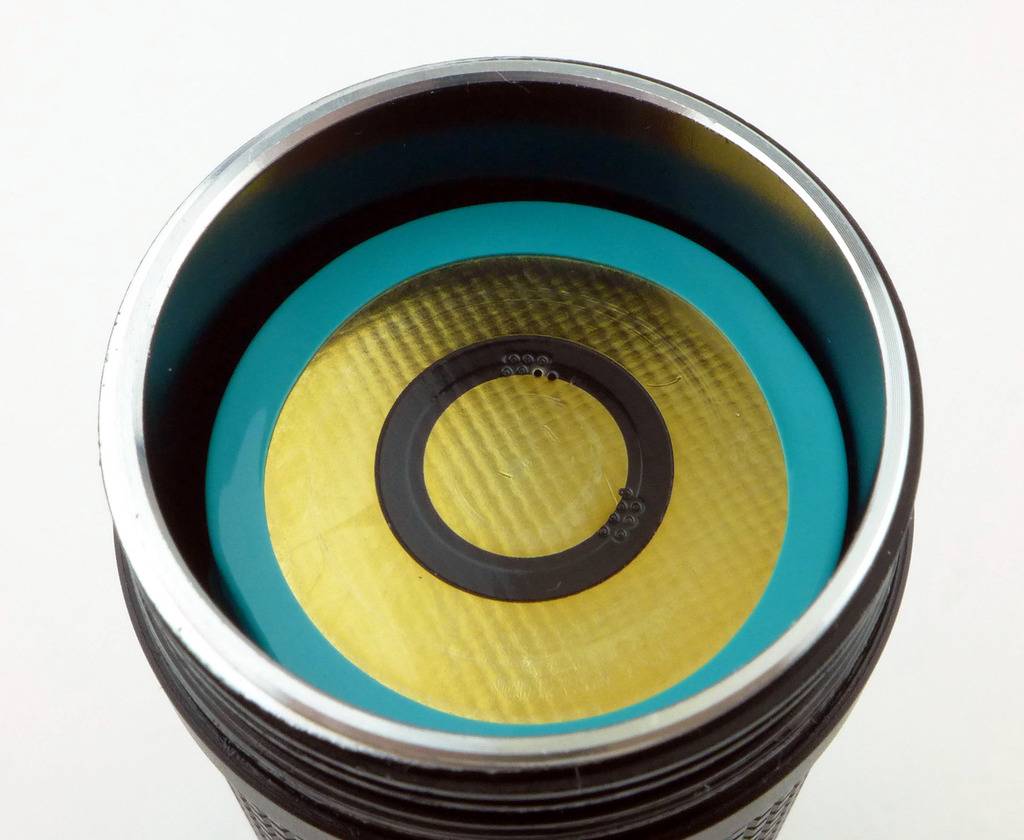
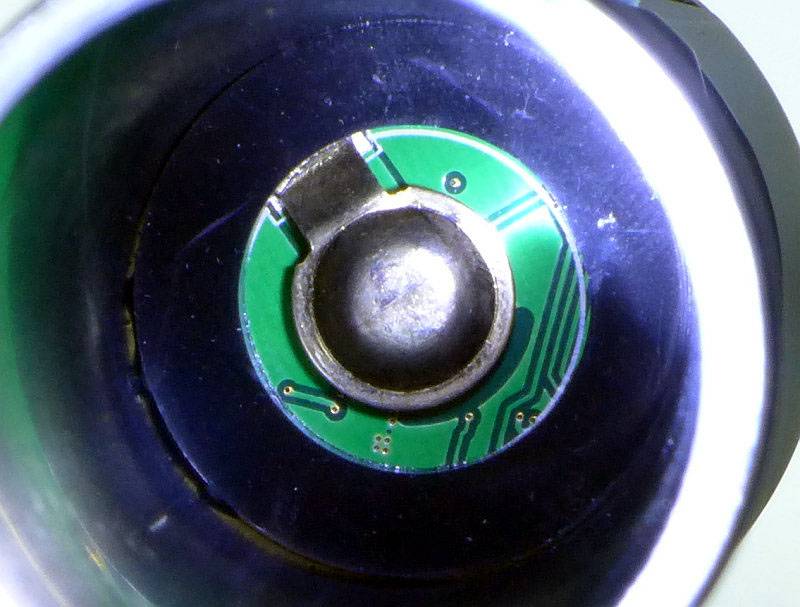
Peering inside the battery tube to look at the positive contact.
 photo 22 Olight R50 internal contact P1220633.jpg

The beam

Please be careful not to judge tint based on images you see on a computer screen. Unless properly calibrated, the screen itself will change the perceived tint.

The indoor beamshot is intended to give an idea of the beam shape/quality rather than tint. All beamshots are taken using daylight white balance. The woodwork (stairs and skirting) are painted Farrow & Ball “Off-White”, and the walls are a light sandy colour called ‘String’ again by Farrow & Ball. I don’t actually have a ‘white wall’ in the house to use for this, and the wife won’t have one!

The R50 manages to combine a very wide spill with a bright hotspot.
 photo 29 Olight R50 indoor beam P1240719.jpg

Taking it outside and that wide beam lights up everything near you and the broad hotspot has good range.
 photo 28 Olight R50 outdoor beam P1240671.jpg

Modes and User Interface:

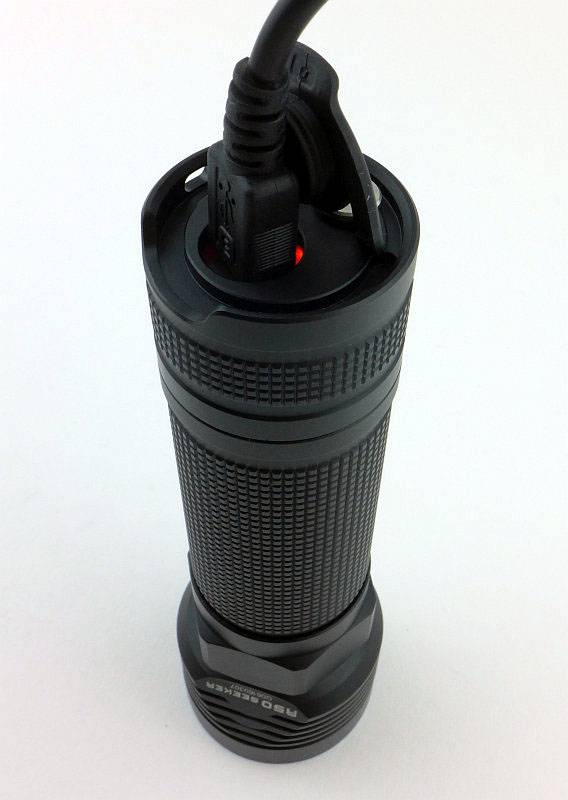
Before we get into the controls, we need to charge the R50. After connecting the USB cable there is a red charging indicator light next to the USB socket.
 photo 25 Olight R50 charging P1220651.jpg

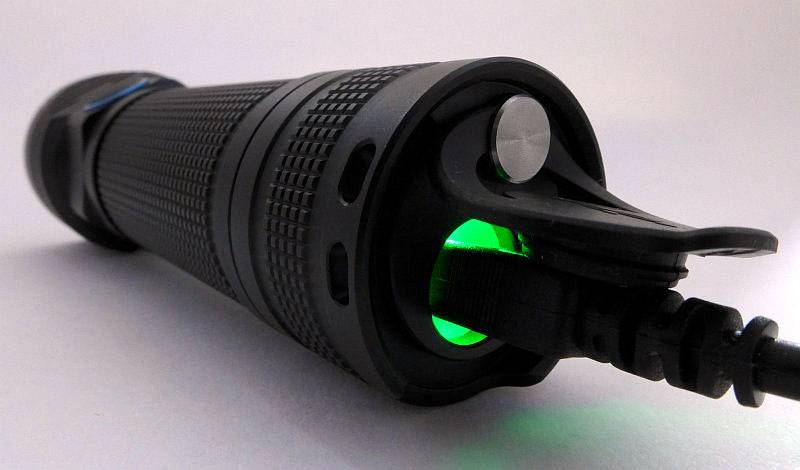
Once fully charged this turns green.
 photo 26 Olight R50 charged P1220668.jpg

To turn ON to the last used constant mode, click the side switch once.
To turn ON to Turbo directly, double-click the side switch.
To turn ON to Strobe, triple-click the side switch.
To turn ON to Low mode directly, press and hold the side switch for 1s.

To change brightness level, with the R50 ON, press and hold the switch to cycle through Low – Medium – High – Low etc.

To turn OFF, click the side switch.

There is a memory for the last used ‘normal’ mode (Low, Medium, or High) but High is only memorised for 10 minutes after which the R50 goes back to Medium.

There are two ways to lockout the R50:
1. Unscrew the tail-cap a half turn.
2. Press and hold the side switch (from OFF) for over 2s. (After 1s the R50 will come onto Low, but after 2s it will go off again as it enters lockout.)

To exit lockout use the corresponding method to the lockouts above:
1. Tighten the tailcap.
2.Press and hold the switch for 3s.

Batteries and output:

The R50 Seeker runs on a proprietary 26650 cell. The instructions do not mention support for standard 26650 cells, however I have tried this and the R50 does function (though does not accommodate very long cells) apart from the charging not working.

To measure actual output, I built an integrating sphere. See here for more detail. The sensor registers visible light only (so Infra-Red and Ultra-Violet will not be measured).

Please note, all quoted lumen figures are from a DIY integrating sphere, and according to ANSI standards. Although every effort is made to give as accurate a result as possible, they should be taken as an estimate only. The results can be used to compare outputs in this review and others I have published.

___________________________________________ ________________________________ ________________________________
Olight R50 using supplied 26650 cell I.S. measured ANSI output Lumens PWM frequency or Strobe frequency (Hz)
___________________________________________ ________________________________ ________________________________
Turbo 2479 0
High 1281 0
Medium 440 0
Low 39 0

* Beacon and Strobe output measurements are only estimates as the brief flashes make it difficult to capture the actual output value.

Peak Beam intensity measured 22000 lx @1m giving a beam range of 297 m.

There is parasitic drain at 52uA. When using the included 4500mAh cell, it will take 9.87 years to drain the cell.

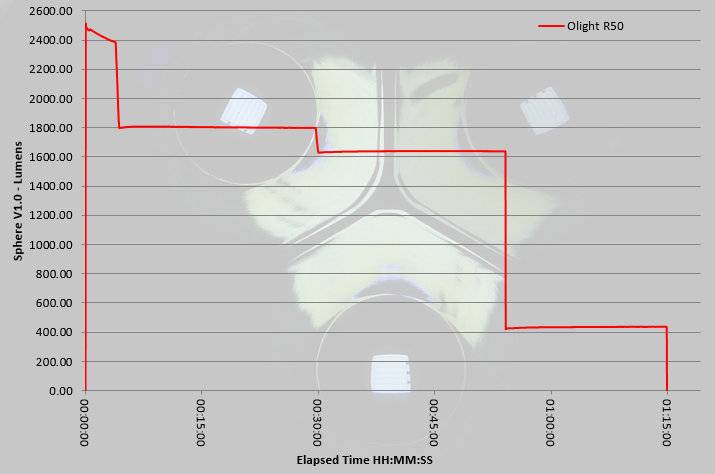
A very impressive output for a compact light. During extended use, the Turbo stepping down from nearly 2500lm to 1800lm is not noticeable and while running at 1800lm starts to generate a good amount of heat. Even with the step down at 30 minutes to around 1650lm you don’t really notice, and it is only once you get to about 50 minutes and the R50 steps down to the medium output of 440lm that you see a drop in output.
 photo Olight R50 runtime.jpg

Troubleshooting

This section is included to mention any minor niggles I come across during testing, in case the information helps anyone else.

No issues were encountered during testing.

As per the description of this section, this information is provided in case anyone else finds a similar ‘issue’ that might be fixed in the same way.

The R50 Seeker in use

For such a usable and useful light I am disappointed Olight did not include a holster. Even though it uses the 26650 cell, so has a thicker tube than the common 18650 size light, Olight have kept the overall size very compact and comfortable to hold. It may not be jeans-pocket sized, it is easily coat-pocket sized.

Output is extremely impressive and does meet the specified 2500lm. This does drop to 1800 after 3 minutes, but that reduction is barely noticeable and the R50 continues to impress. Everyone who has seen me using the R50 has said “that is bright” and asked what it is; a real talking point.

One area where I think Olight has really cracked it, is the interface. It is the same, or very similar, to many of the other Olight lights with a single side switch, so you will recognise the way it works. Giving the user direct access to the maximum and minimum levels, whatever you last used, makes this a real winner. Another nice touch is the way that the ‘normal’ mode (from a single click of the side switch) will not memorise High beyond 10 minutes of being off, it means that whatever you were doing with the R50, worst case you might get Medium if you turn it on without thinking. Not so much you get blinded and yet powerful enough.

These days you won’t really find yourself unable to find a USB charger at work or at home. The R50 comes with a quality 2A charger anyway, but while you are away from home you will be able to top up the R50 easily enough. The instructions specifically don’t mention using any other 26650 cells, but being the rebel I am, I popped one in. Clearly the charging function is not going to work, but the R50 itself did work, so you can carry a spare 26650 if you want. Just beware that the R50’s tube is not that long, so some 26650 cells may be too long. Check it fits before you rely on it.

There is some shaping at the head, but the R50 effectively has no anti-roll feature, you need to put it down head-down or tail-down. It does tail-stand very well.

Running the R50 on Turbo also provides you with a hand-warmer as it does heat up quite a lot. Given a cold evening, this certainly is a welcome feature. If you decide to tail-stand the R50 on Turbo you will hit the over-heat protection, so expect the output to drop if you let it get really hot.

Personally I find the R50 hits a real sweet spot in terms of size, ergonomics and output. Give me a side-switch light any day, add to that a cell which is large enough to sustain a significant output and a great all-rounder beam, keep it small enough to pop into a coat pocket and you have a winner. I’ll forgive it the proprietary cell for the fact that this has convenient built-in USB charging, doesn’t need anything else to be bought to use it, but can use standard 26650 cells, so gets round the normal limitation of proprietary cell lights.

Review Summary

_______________________________________________ _______________________________________________
Things I like What doesn’t work so well for me
_______________________________________________ _______________________________________________
2500lm from a compact light. Requires the proprietary cell for built-in charging.
Excellent UI using an ergonomic side switch. No holster supplied.
Can run on a standard 26650 – Unofficially. No Anti-Roll.
Direct access to Maximum and Minimum modes.
Regulated output.
All-rounder beam.

 photo 24 Olight R50 angle on P1220636.jpg


Discussing the Review:

Please feel free to add comments to the review, but the ideal place to freely discuss these reviews is on a forum. If you started reading the shorter forum version of the review, but followed the link this full exclusive review, please return to that forum to discuss the review there.
If you read the review entirely on Tactical Reviews, please consider one of the following to join in any discussion.

CandlePowerForums – Flashlight Reviews Section (Largest and Friendliest Flashlight Community Forum)

EdgeMatters – Sponsored Reviews (UK based Forum for Knife Makers and Collectors)
Light Review: Surefire Sidekick (Compact Fob Light)

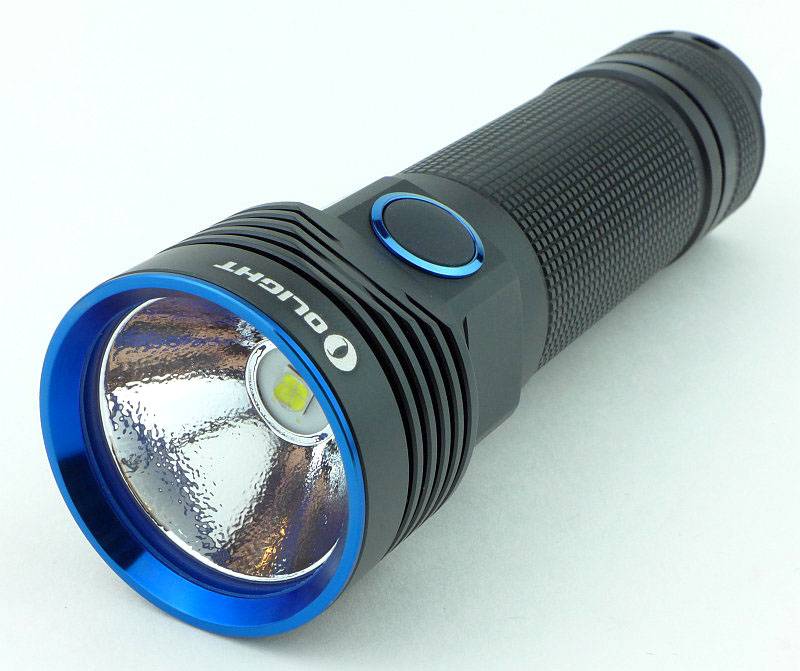
Though not the first to make a USB rechargeable keychain light, Surefire have applied their philosophy of ‘excellence in illumination’ to this EDC essential.

 photo 09 Sidekick on P1170827.jpg

Taking a more detailed look:

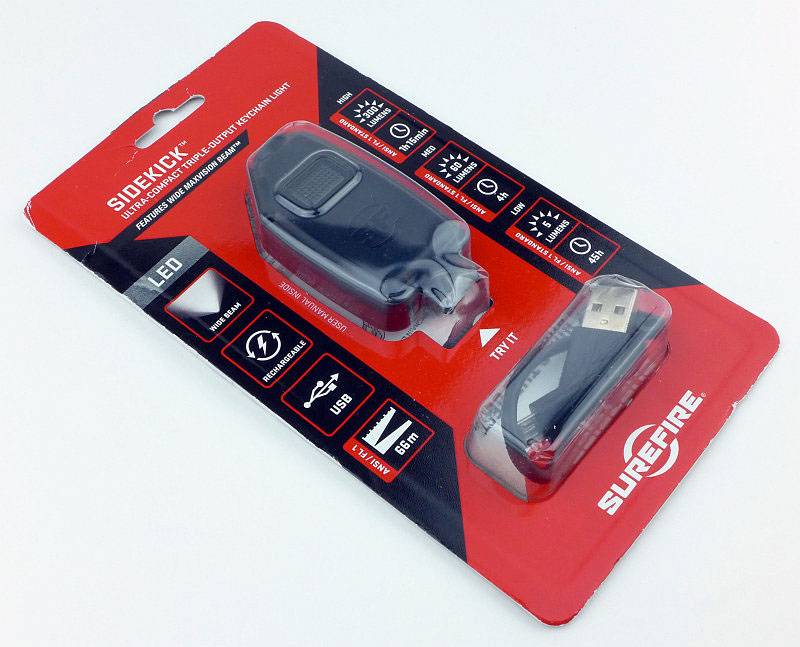
The Sidekick comes in a cardboard blister pack.
 photo 01 Sidekick Boxed P1170798.jpg

Inside is the Sidekick itself, a short USB charging cable, a metal clip and the instructions.
 photo 02 Sidekick Box contents P1170803.jpg

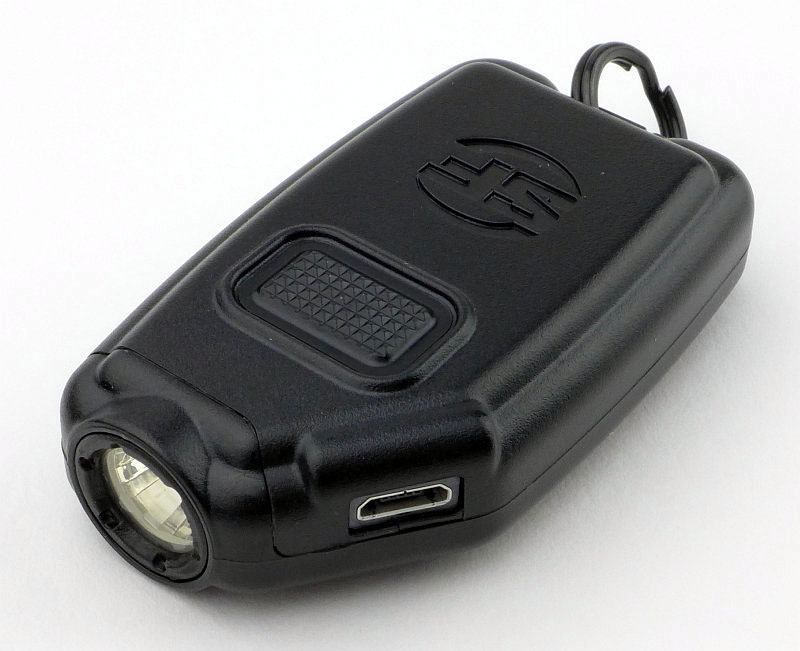
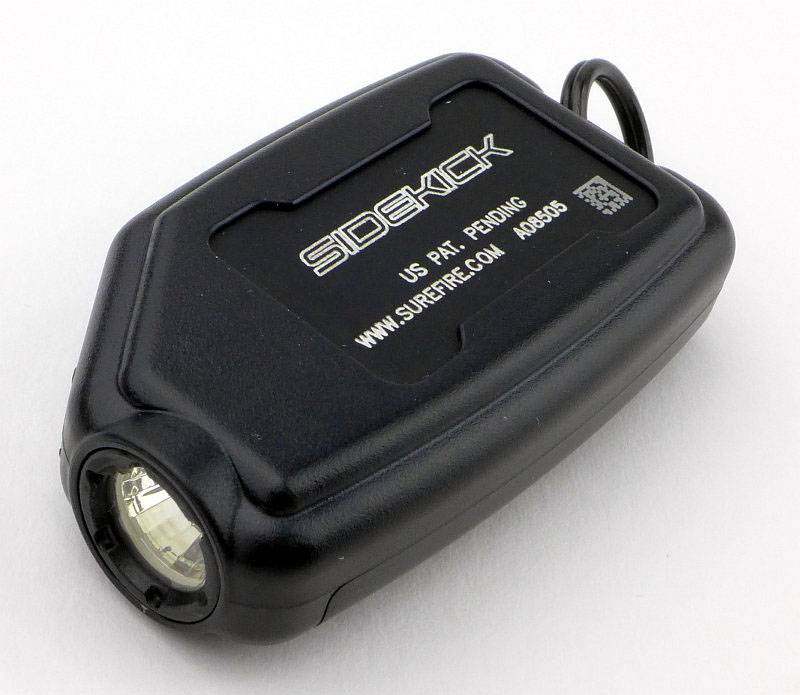
The underside of the Sidekick has a metal heat sink panel with the model engraved onto it.
 photo 03 Sidekick angle P1170808.jpg

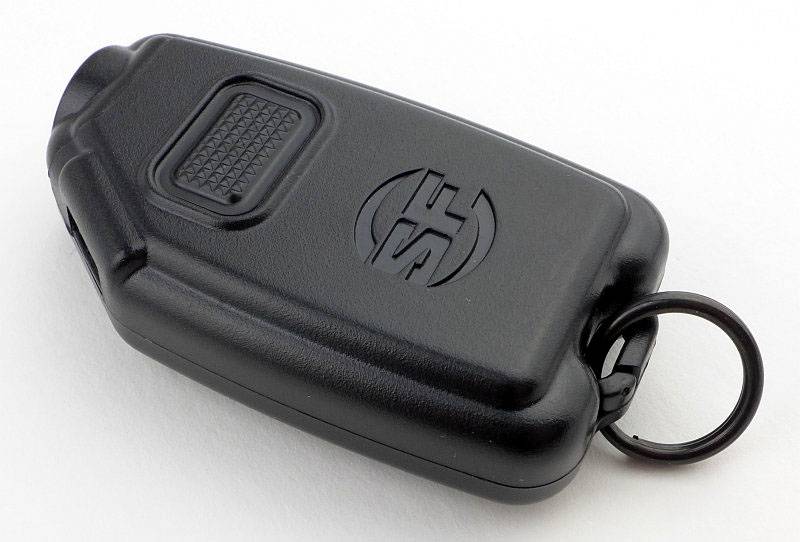
At the top is the power button and a moulded Surefire logo. The main body is a tough plastic and has a split ring at the rear.
 photo 04 Sidekick rear angle P1170812.jpg

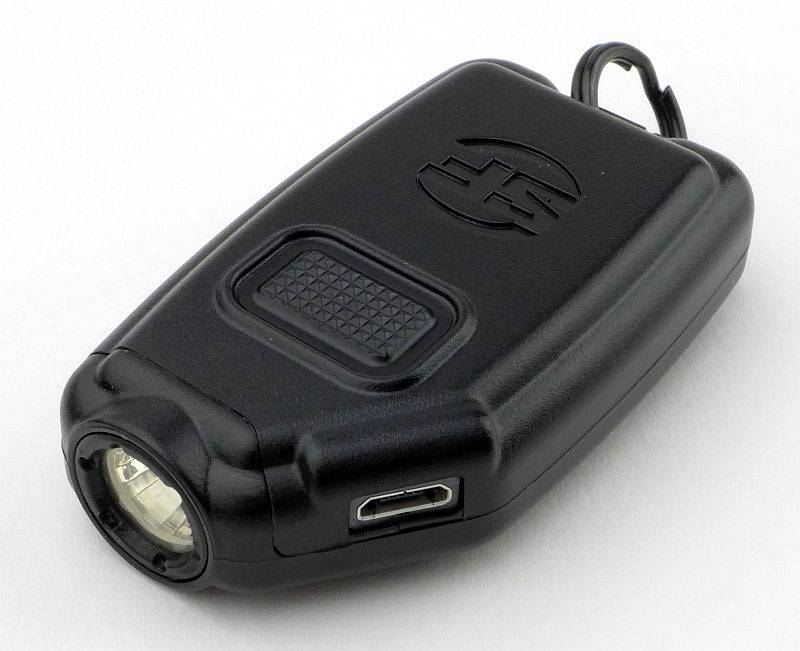
On the angled corner at the front you can see the micro-USB port for charging.
 photo 05 Sidekick port angle P1170815.jpg

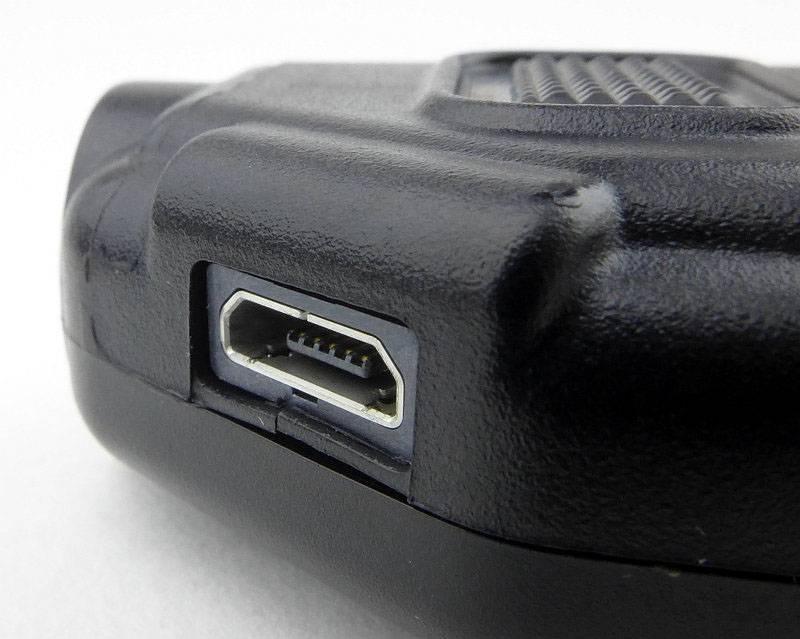
I only noticed the small piece of plastic case under the micro-USB port was cracked when I was preparing these photos. This has not affect the function at all.
 photo 06 Sidekick port close P1170816.jpg

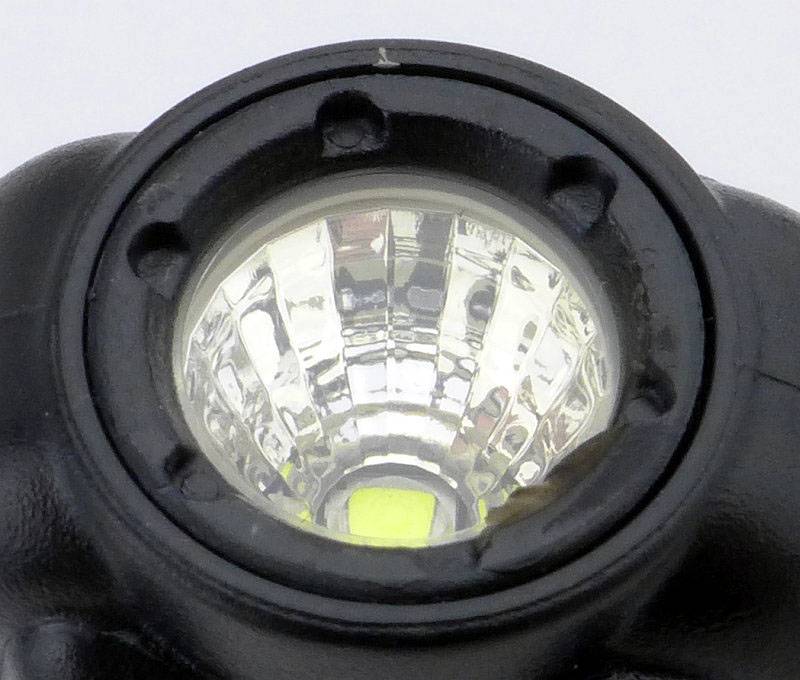
Set into the front is Surefire’s MaxVision Beam reflector assembly. This has a multi-faceted reflector surface to smooth out the beam without the losses of a textured reflector.
 photo 07 Sidekick reflector angle P1170822.jpg

Looking straight into the faceted reflector at the Cree XP-G2 LED. (For some reason Surefire don’t specify the actual LED anywhere in the documentation.)
 photo 08 Sidekick LED P1170824.jpg

Plugging in the micro-USB cable to charge the Sidekick.
 photo 10 Sidekick charging P1170830.jpg

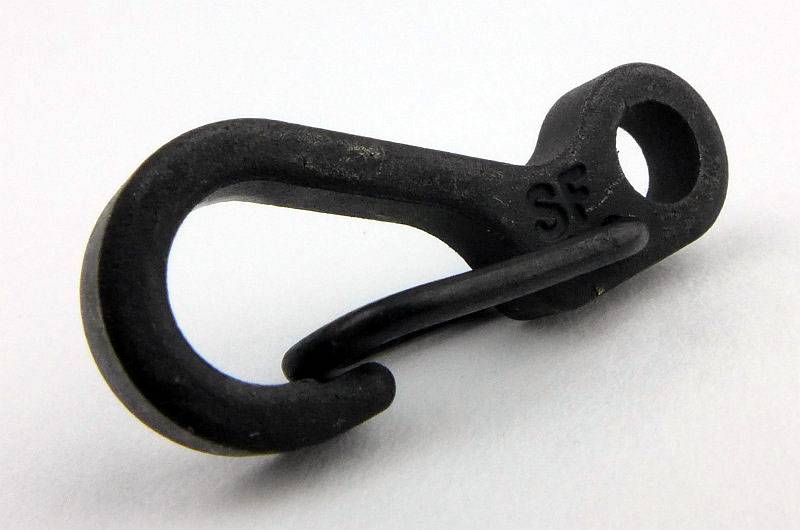
Even the compact metal clip has ‘SF’ on it.
 photo 11 Sidekick clip P1170831.jpg

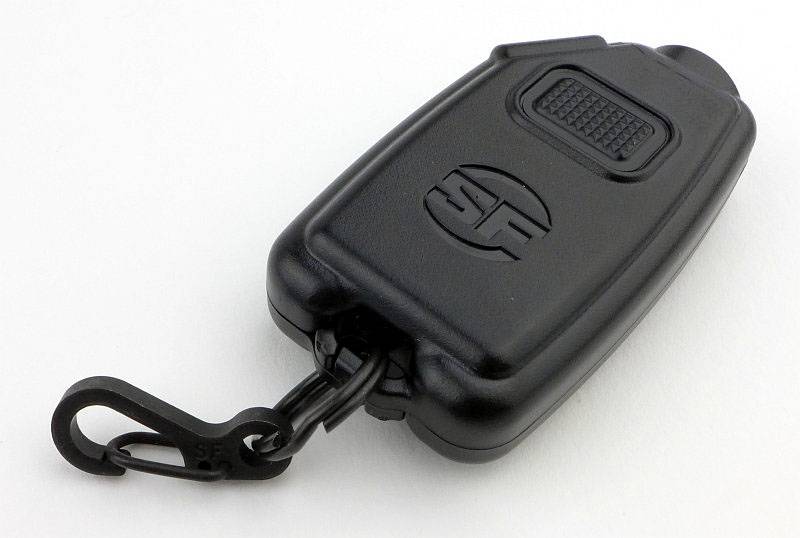
The split ring is very stiff, so getting the clip on isn’t easy, but its not going to come off by mistake.
 photo 12 Sidekick with clip P1170834.jpg

The beam

Please be careful not to judge tint based on images you see on a computer screen. Unless properly calibrated, the screen itself will change the perceived tint.

The indoor beamshot is intended to give an idea of the beam shape/quality rather than tint. All beamshots are taken using daylight white balance. The woodwork (stairs and skirting) are painted Farrow & Ball “Off-White”, and the walls are a light sandy colour called ‘String’ again by Farrow & Ball. I don’t actually have a ‘white wall’ in the house to use for this, and the wife won’t have one!

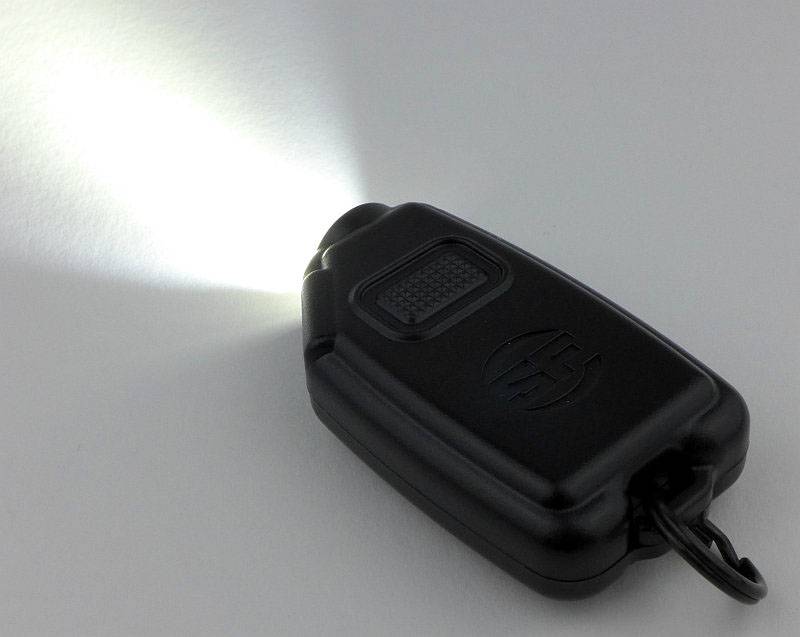
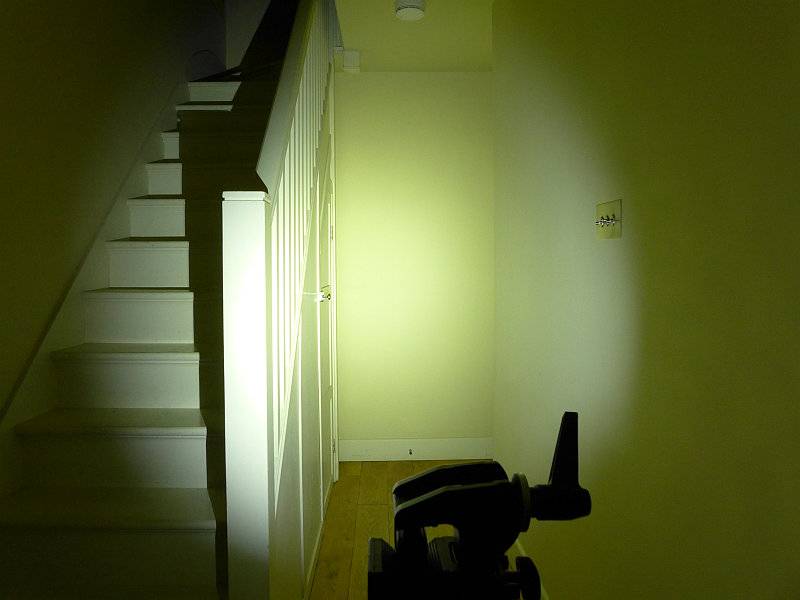
Since the days of the Solitaire keychain light, I’ve always had a compact EDC light on my keys. This shrunk to the photon size button cell type, but those really only served as a last ditch light, so the size I used grew again to include a USB rechargeable or AAA powered light. The beam of the Sidekick is a revelation in keychain lights, with its wide floody beam (with no glare) and plenty of power.

Just look at this beamshot and you probably think we were looking at something you wouldn’t attach to your keys. A really excellent EDC beam.

 photo 14 Sidekick indoor beam P1230310.jpg

Modes and User Interface:

The Sidekick has three output levels Low, Medium, and High.
From OFF, press the power switch to select Low, press again within 2s to change to Medium, press again within 2s of the last press to get High, and once more cycles to OFF.
If you are using either Low or Medium, if you wait over 2s before pressing again, the Sidekick will turn OFF (instead of going to the next mode and then OFF).

There are no indicator lights on the Sidekick, so no charge or low battery indicators. Instead the Sidekick uses its main LED. For low battery, the output simply reduces sharply to a lower level and starts to fade out. There is no sudden turn off, so while there is no actual ‘warning’ it is clear you are low on power.

For charging, the main LED is used as the indicator. With the USB power connected, the LED blinks to indicate the Sidekick is charging. During the charging process the LED sometimes comes on steadily for a few seconds then has a series of blinks. I’ve not so far managed to determine if there is an actual pattern to this. Ultimately, once fully charged the main LED comes on steadily at the low level and stays on as long as power is connected.

The default order of the modes is L-M-H, but this can be reversed to H-M-L by carrying out the following steps:

1. Plug in the charger.
2. Press the switch three times until the High level is activated.
3. Leave the Sidekick On for 5 seconds or more, then press the switch once to turn Off.
4. Unplug from the charger and test the sequence.

To return to L-M-H, repeat the previous steps except in step 2 you press three times to activate Low.
(Stopping on Medium at step 2 does not do anything.)

Batteries and output:

The Sidekick runs on a built-in 640mAh Li-ion battery.

Surefire have commented that the charge rate is fixed around 450mA, but it always seems to charge faster than the instruction manual, or this information, would suggest. In my experience (with a good charger) even fully depleted, it takes less than an hour to charge.

To measure actual output, I built an integrating sphere. See here for more detail. The sensor registers visible light only (so Infra-Red and Ultra-Violet will not be measured).

Please note, all quoted lumen figures are from a DIY integrating sphere, and according to ANSI standards. Although every effort is made to give as accurate a result as possible, they should be taken as an estimate only. The results can be used to compare outputs in this review and others I have published.

___________________________________________ ________________________________ ________________________________
Surefire Sidekick using built-in cell I.S. measured ANSI output Lumens PWM frequency or Strobe frequency (Hz)
___________________________________________ ________________________________ ________________________________
High 320 0
Medium 60 0
Low 3 100

* Beacon and Strobe output measurements are only estimates as the brief flashes make it difficult to capture the actual output value.

There is parasitic drain but as the light is sealed this could not be measured. During normal use over a period of over 6 months, the Sidekick has never noticeably self drained.

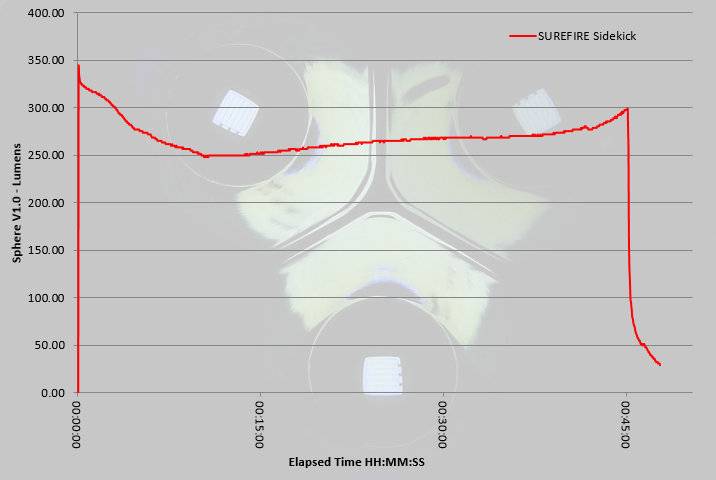
For such a compact lightweight light, the Sidekick has a fantastic performance on High. Not fully regulated, the output does however remain above 250lm for a full 45 minutes – very impressive for a keychain light.
 photo surefire sidekick runtime.jpg

Troubleshooting

This section is included to mention any minor niggles I come across during testing, in case the information helps anyone else.

No issues were encountered during testing.

As per the description of this section, this information is provided in case anyone else finds a similar ‘issue’ that might be fixed in the same way.

The Sidekick in use

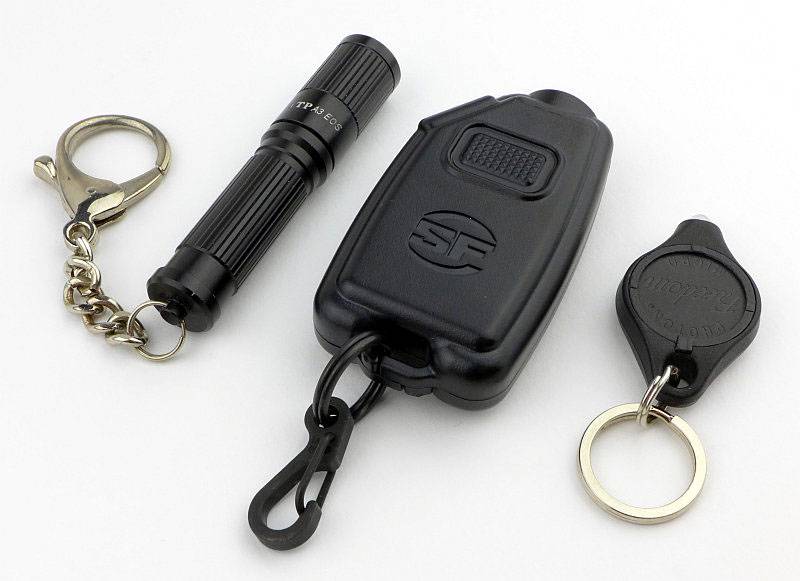
Though it is compact, the Sidekick is relatively large for a keychain light. It gets away with this thanks to not being heavy and the plastic housing seems to help reduce its overall presence. Here it is shown next to a AAA keychain light and a photon button cell light.

 photo 13 Sidekick size P1170838.jpg

With this extra size and relatively high cost (compared to its rivals, and especially in non-US markets), the Sidekick needs to work well to justify itself. The excellent beam and 300lm output do just that.

Ideally I prefer a smaller keychain light, but the extra size does make it more stable to hold, and you just don’t get that kind of output and runtime from something smaller and lighter.

If the housing were 100% plastic there would be heat issues, but Surefire have used a metal side panel which allows it to conduct heat out of the Sidekick. When using the High output this can get quite hot to the touch.

Perhaps the biggest annoyance for me has been that it is very similar in size to my car key, and when reaching into my pocket I now have to do the ‘pocket juggle’ of my keys to identify if I’ve grabbed my car key or the Sidekick.

The power button is quite stiff and has little feel to the click. The stiffness is an advantage in not having accidental activations (none so far, which I cannot say about other keychain lights), and eventually you do get some feel for the subdued click.

Not being a tactical light, the modes being L-M-H is ideal as for general EDC you most often only need a little light. One disappointment is the use of visible PWM in the Low mode. Medium and High have no PWM, and if only that Low mode was the same it would be much better.

Battery capacity is really great with the 640mAh cell always having plenty of output and runtime for everything I’ve thrown at it. Even with some unexpected night time strolls needing the path to be lit, using the full 300lm and plenty of other On/Off cycles to check things, and I’ve not needed to keep on recharging.

Recharging is one of those ‘love it or hate it’ things due to the main beam being used as a charging indicator. As it has never taken more than 1 hour to charge I haven’t needed to charge it overnight, so it is not that the main beam flashing and then going onto Low disturbs my sleep. However, the flashing can be annoying if you are in a room with lowered lighting. I was surprised by the Sidekick turning on the Low output once charging is complete, but actually it is a very clear indication that charging has finished, and even with a good charging circuit, it is never a good idea to leave any device on charge for a long time for no reason. The Sidekick tells you clearly to take it off charge. You can look at this either way, and to start with I thought it was not good, but having got used to it find it works pretty well.

The beam is very good, with a smooth floody profile and a neutral tint, which makes it so much better to use than lights with a 5mm LED or those with a more focused hotspot. This combined with the 300lm output, which is reasonably well maintained for a full 45 minutes of constant runtime, make this a really strong performer and the slight size penalty you pay is worth it.

Review Summary

_______________________________________________ _______________________________________________
Things I like What doesn’t work so well for me
_______________________________________________ _______________________________________________
Excellent MaxVision Beam. Bigger than most keychain lights.
300lm output. Easily confused for a car key.
USB rechargeable. Built-in non replaceable cell.
Lightweight. Main beam flashes then comes on constantly while charging.
45 minutes runtime on High. Visible PWM used in Low
L-M-H mode order.
Comfortable and stable to hold.
Strong, small, metal clip.


Discussing the Review:

Please feel free to add comments to the review, but the ideal place to freely discuss these reviews is on a forum. If you started reading the shorter forum version of the review, but followed the link this full exclusive review, please return to that forum to discuss the review there.
If you read the review entirely on Tactical Reviews, please consider one of the following to join in any discussion.

CandlePowerForums – Flashlight Reviews Section (Largest and Friendliest Flashlight Community Forum)

EdgeMatters – Sponsored Reviews (UK based Forum for Knife Makers and Collectors)
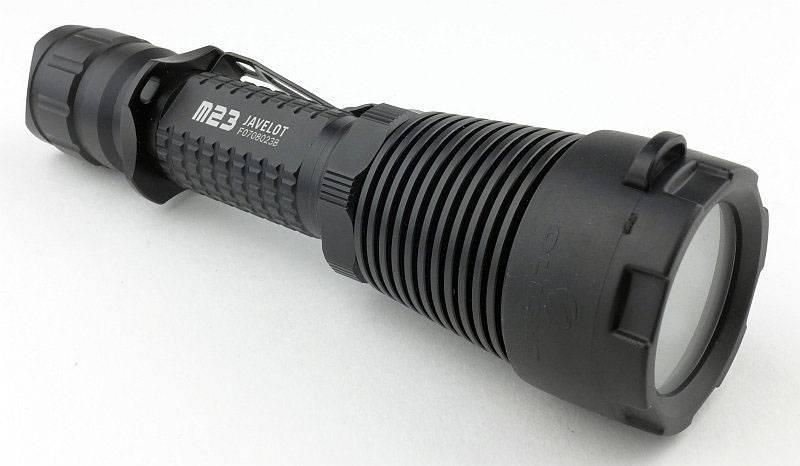
Light Review: Olight M23 JAVELOT

Olight have taken the popular M22 Warrior and updated it by giving it the ‘JAVELOT’ treatment. The result is the M23 JAVELOT. After the success of the first few Javelot models, Olight have been updating a few existing models, like the S30RII and M22 into Javelot versions with uprated emitters and throw.

 photo 09 M23Javelot angle reverse P1160532.jpg

Taking a more detailed look:

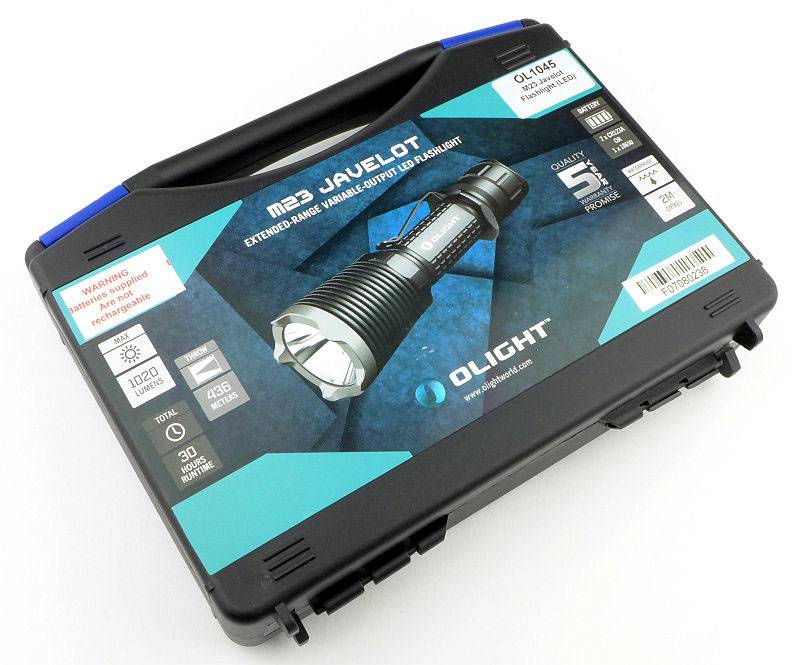
The M23 JAVELOT is supplied in a sturdy plastic case.
 photo 01 M23Javelot boxed P1160500.jpg

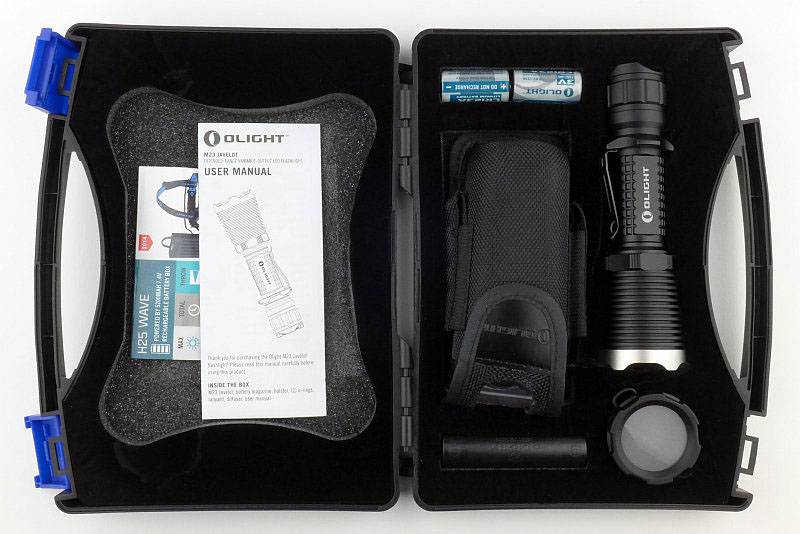
Everything is held in cut-outs in the foam liner.
 photo 02 M23Javelot box open P1160506.jpg

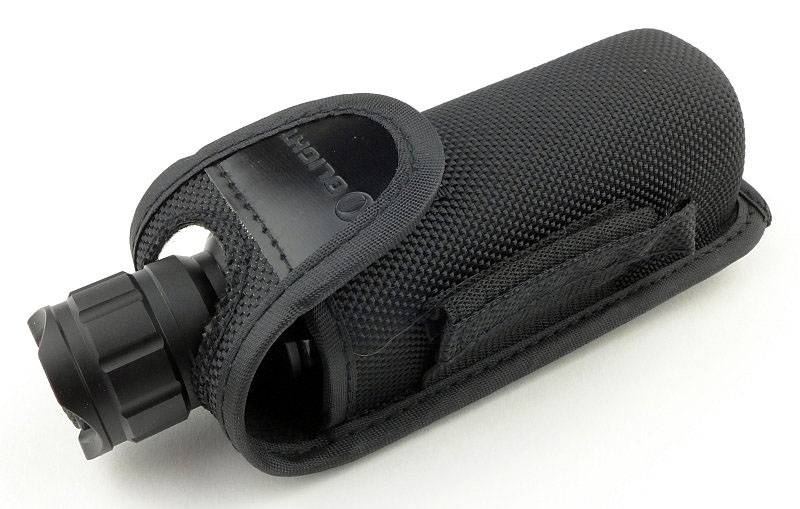
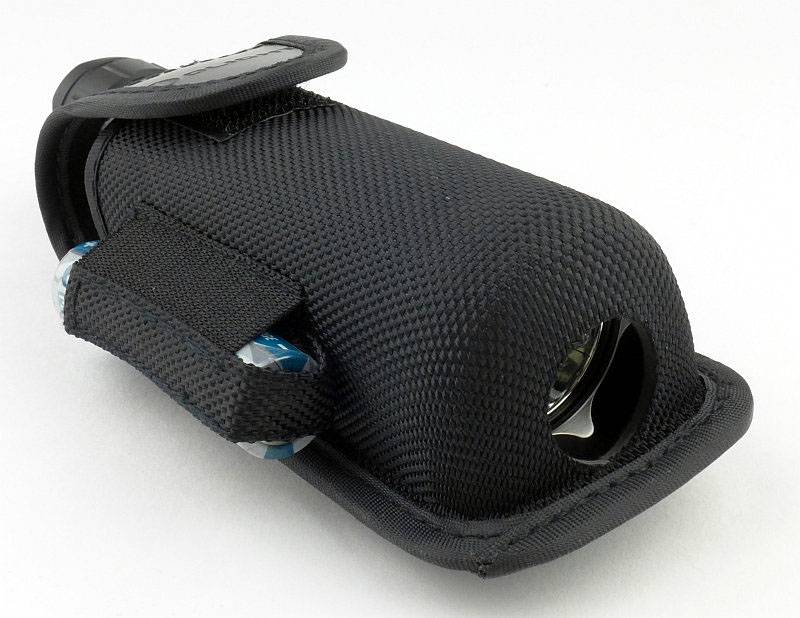
Starting off with a look at the unconventional holster design. The retention flap has a hole cut into it through which the tail-cap protrudes. This gives access to the tail-cap switch.
 photo 03 M23Javelot holstered P1160512.jpg

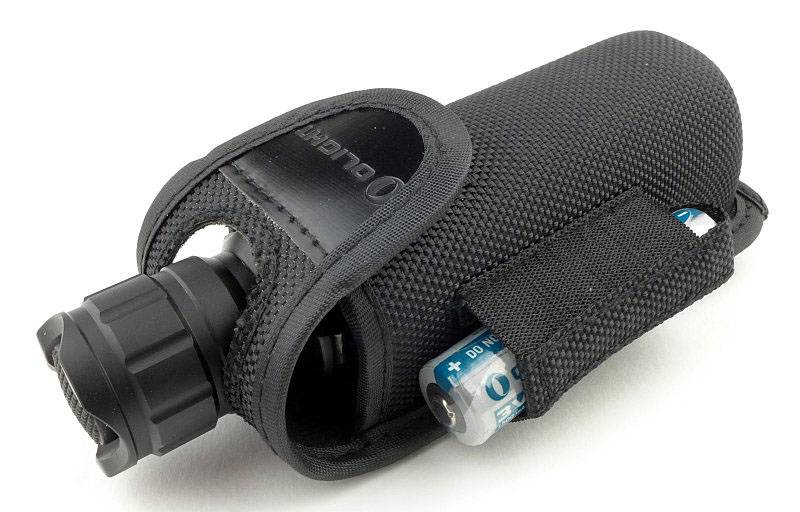
Both sides of the holster feature cell holders. For CR123 these are not that secure, but for 18650 they work well enough (though the cell is partly exposed and could be damaged.
 photo 04 M23Javelot holster cells P1160513.jpg

Now we see why you might want access to the tail-cap switch while the light is in the holster. The bottom of the holster has a hole cut in it allowing the M23 to be used while fully inside the holster.
 photo 05 M23Javelot holster base P1160517.jpg

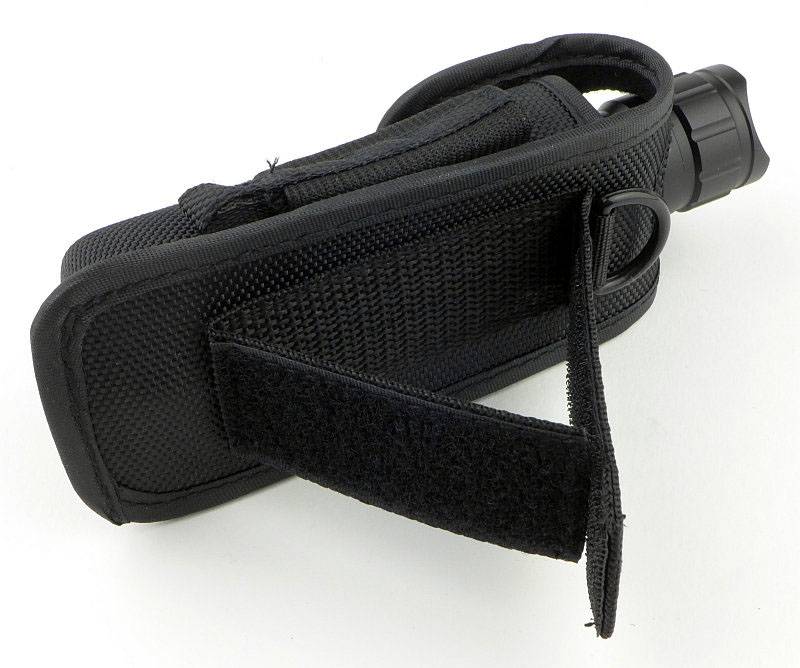
On the back is a Velcro belt-loop and small D-ring.
 photo 06 M23Javelot holster loop P1160519.jpg

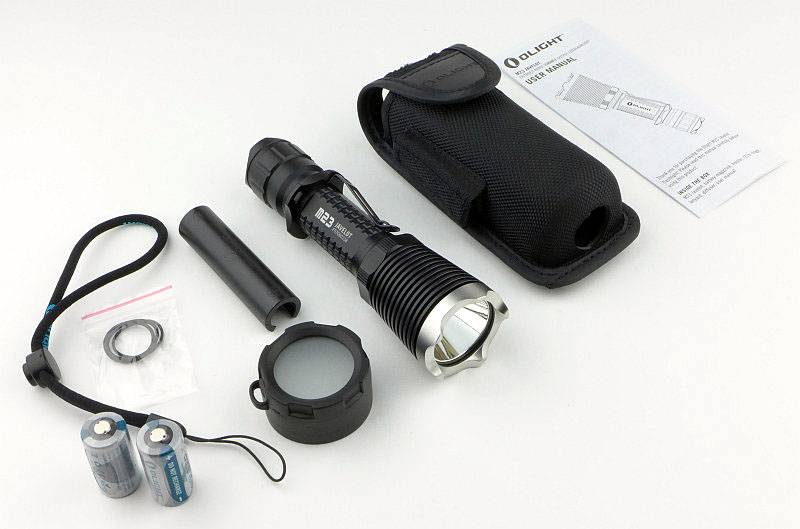
Supplied with the M23 is the holster, CR123 cell holder, diffuser, spare O-rings, a lanyard, the instructions and two CR123 cells.
 photo 07 M23Javelot contents P1160526.jpg

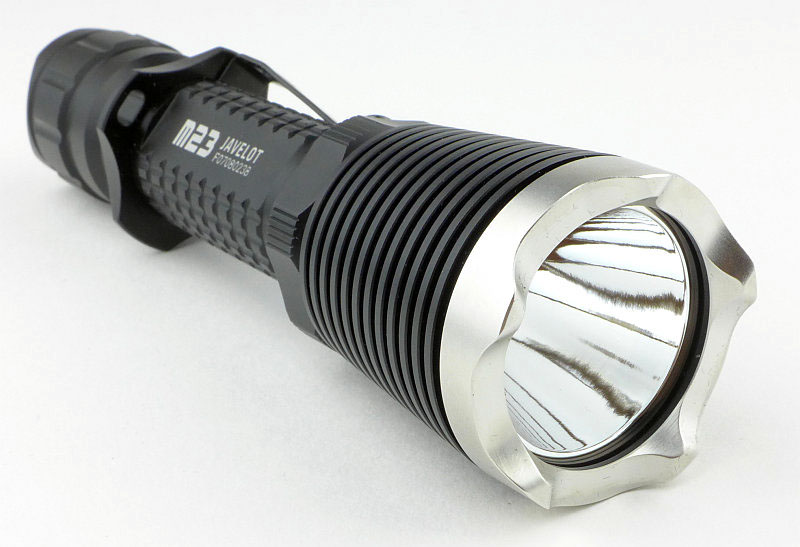
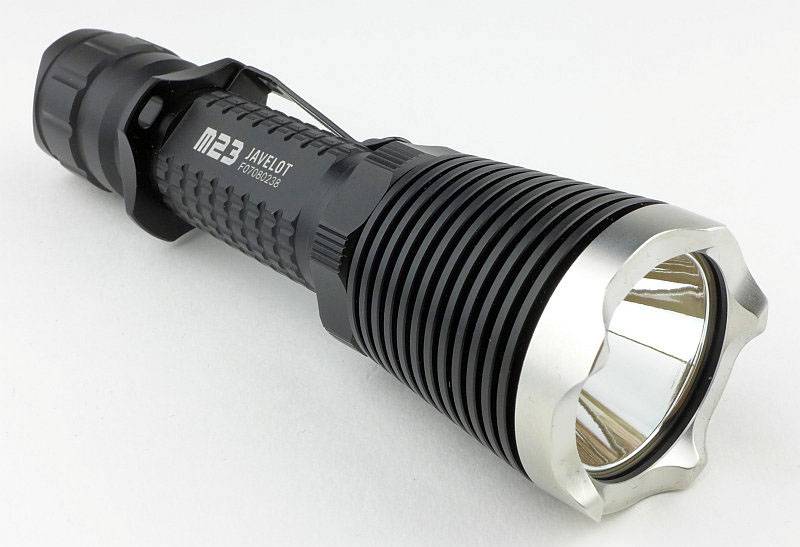
Externally the main difference between the M22 Warrior and the M23 JAVELOT is the stainless steel bezel.
 photo 08 M23Javelot angle P1160528.jpg

The entire head has heat-sink fins along it.
 photo 10 M23Javelot heat sink fins P1160534.jpg

A side view of the steel pocket clip.
 photo 11 M23Javelot clip1 P1160537.jpg

Another view of the strong pocket clip.
 photo 12 M23Javelot clip2 P1160539.jpg

The pocket clip fits into a cut-out on the battery tube, and the grip-ring has a notch in it which fits over a lug on the steel pocket clip. This prevents the pocket clip or grip-ring rotating.
 photo 20 M23Javelot clip fitting P1160564.jpg

With the supplied diffuser fitted, the stainless bezel is hidden. You can’t fit the M23 into its holster like this.
 photo 14 M23Javelot angle diffuser P1160544.jpg

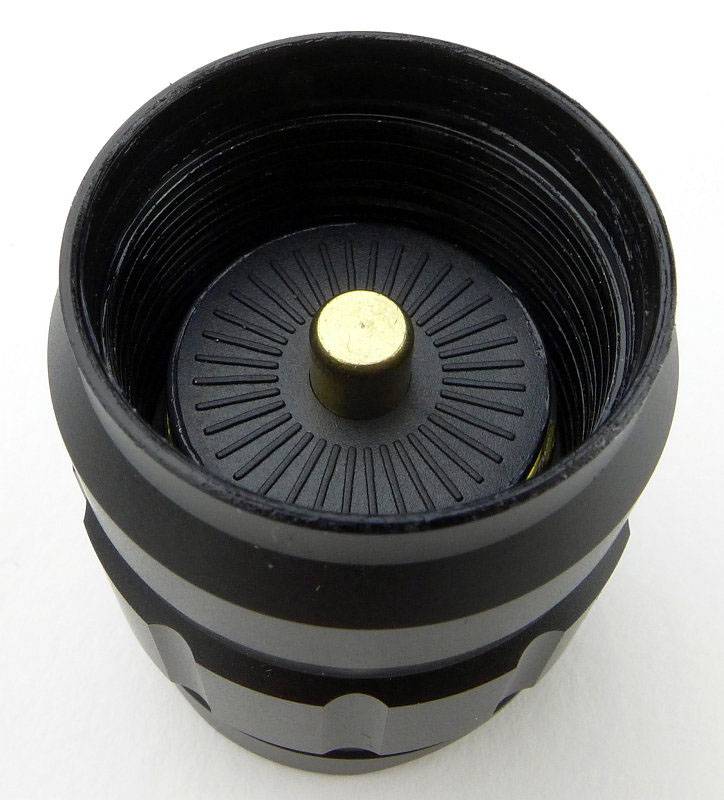
Inside the tail-cap, the negative terminal is a sprung plunger. The tail-cap/battery tube connection is hidden and uses a special design to fit into the conical opening at the end of the battery tube.
 photo 15 M23Javelot tailcap P1160548.jpg

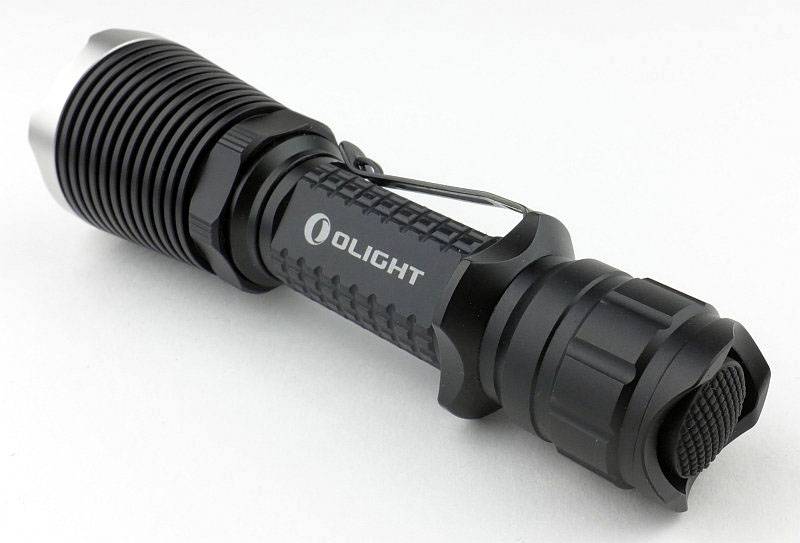
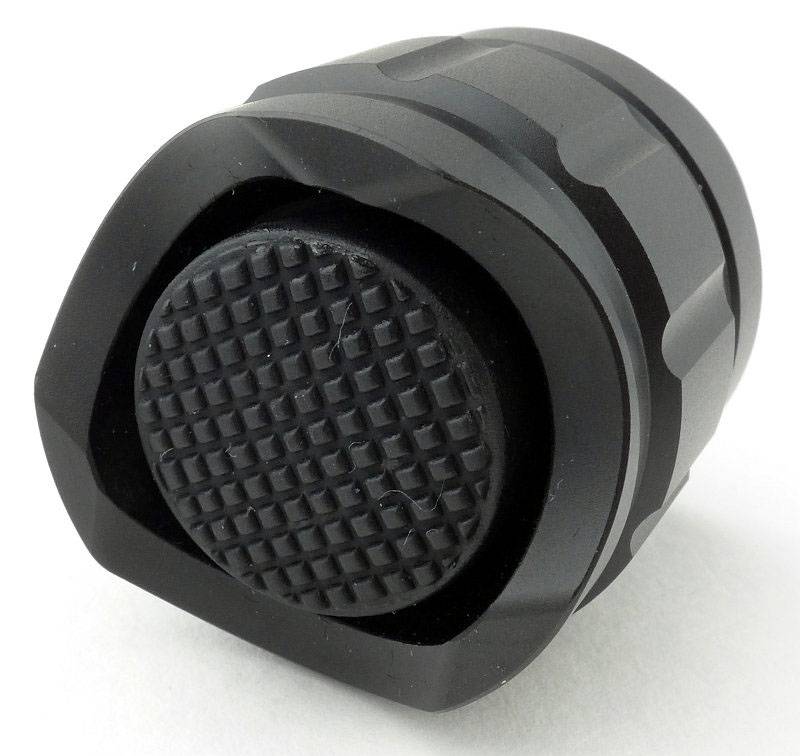
The switch is large and textured.
 photo 16 M23Javelot tailcap switch P1160550.jpg

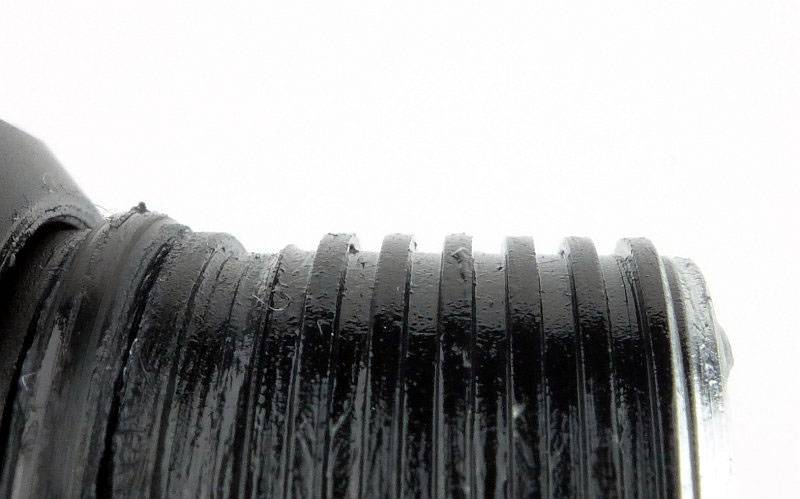
Threads on the tail-cap end of the battery tube are square cut and fully anodised.
 photo 17 M23Javelot threads P1160555.jpg

Threads on the head end of the battery tube are square cut and bare aluminium.
 photo 18 M23Javelot head threads P1160556.jpg

Unscrewing the battery tube fully shows the contacts in the head, with the positive spring-terminal, bare threads plus ring-terminal for the twisty interface.
 photo 19 M23Javelot head contacts P1160561.jpg

For its excellent throw the M23 uses a deep, smooth reflector.
 photo 21 M23Javelot reflector P1160574.jpg

Looking straight into the reflector.
 photo 22 M23Javelot LED P1160580.jpg

And a closer look at that LED. Olight describe this as a ‘customised high intensity CREE XP-L LED’.
 photo 23 M23Javelot LED close P1160586.jpg

The beam

Please be careful not to judge tint based on images you see on a computer screen. Unless properly calibrated, the screen itself will change the perceived tint.

The indoor beamshot is intended to give an idea of the beam shape/quality rather than tint. All beamshots are taken using daylight white balance. The woodwork (stairs and skirting) are painted Farrow & Ball “Off-White”, and the walls are a light sandy colour called ‘String’ again by Farrow & Ball. I don’t actually have a ‘white wall’ in the house to use for this, and the wife won’t have one!

The beam does have a reasonably warm tint and as expected for a JAVELOT light, there is a very strong hotspot. This might be a bit fatiguing to use indoors which is why there is a diffuser supplied.
 photo 24 M23Javelot indoor beam P1170305.jpg

Popping on the diffuser and we have an entirely different experience (the exposure here is the same as without the diffuser).
 photo 25 M23Javelot indoor beam diffused P1170308.jpg

Outdoors it is clear this is a thrower!
 photo 26 M23Javelot outdoor beam P1170240.jpg

And just to see, the result with the diffuser is good (the exposure here is the same as without the diffuser).
 photo 27 M23Javelot outdoor beam diffused P1170243.jpg

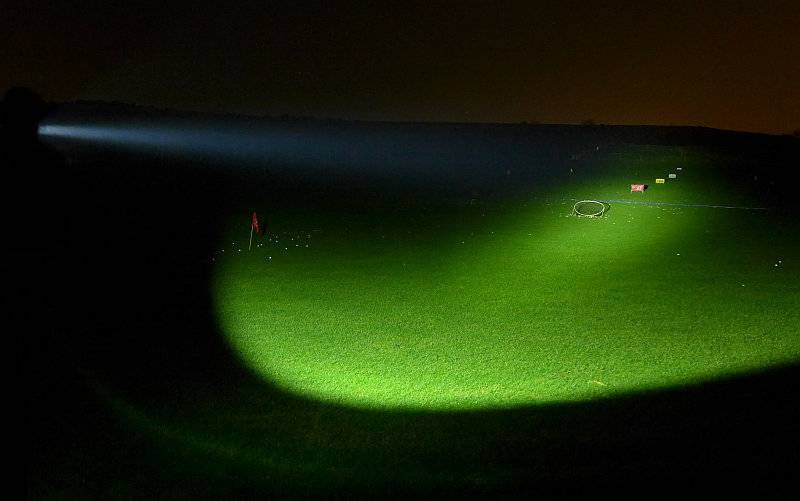
But we need more range, so here we are at a golf driving range with the 250yard marker easily visible, and beyond.
 photo 28 M23Javelot outdoor beam golf P1170221.jpg

Modes and User Interface:

The M23’s output is controlled by the forward-clicky tail-cap switch and twisty interface at the head.

Available modes include High, Medium, Low and Strobe.

From OFF, either click or half-press and hold to turn onto the last-used constant output mode.
From ON, either click the switch or release the half-press to turn OFF.

From OFF, double-tap and click (or hold) the switch to activate High.
From OFF, triple-tap and click (or hold) the switch to activate Strobe. While strobe is activated, the twisty interface does nothing.

From ON, loosen-tighten the head to cycle through High -> Medium -> Low -> High etc. (it is as the head becomes tight again that the mode changes). Tightening the head while the M23 is OFF does nothing.

This operation allows you to set the output to Low, but still have direct access to High (double-tap) and Strobe (triple-tap) via the tail-cap switch alone.

Batteries and output:

The M23 runs on either 1x 18650 or 2x CR123.

To measure actual output, I built an integrating sphere. See here for more detail. The sensor registers visible light only (so Infra-Red and Ultra-Violet will not be measured).

Please note, all quoted lumen figures are from a DIY integrating sphere, and according to ANSI standards. Although every effort is made to give as accurate a result as possible, they should be taken as an estimate only. The results can be used to compare outputs in this review and others I have published.

___________________________________________ ________________________________ ________________________________
Olight M23 JAVELOT using specified cell I.S. measured ANSI output Lumens PWM frequency or Strobe frequency (Hz)
___________________________________________ ________________________________ ________________________________
High – CR123 950 0
Medium – CR123 361 0
Low – CR123 38 0
High – 18650 918 0
Medium – 18650 365 0
Low – 18650 38 0
Diffuser Test High – No Diffuser 861 0
Diffuser Test High – Diffuser 584 0

* Beacon and Strobe output measurements are only estimates as the brief flashes make it difficult to capture the actual output value.

Peak Beam intensity measured 39700 lx @1m giving a beam range of 398 m.

There is no parasitic drain.

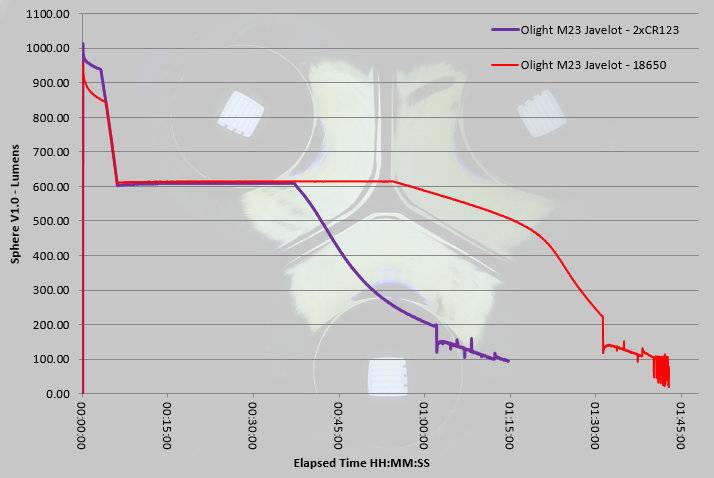
Overlaying the two runtime traces from 2xCR123 and 1×18650 shows that CR123 initially gives a slight boost in output for the first few minutes before the output for both power sources converge. This happens during the controlled output reduction to just over 600lm for the regulated level. CR123 runs out of steam earlier (as expected) falling out of regulation at around 35 minutes. 18650 holds regulation until about 55 minutes with a less sharp fall-off.
Both traces end with a period of inconsistent flickering output instead of cutting out.
 photo Olight M23 Javelot runtime.jpg

Troubleshooting

This section is included to mention any minor niggles I come across during testing, in case the information helps anyone else.

No issues were encountered during testing.

As per the description of this section, this information is provided in case anyone else finds a similar ‘issue’ that might be fixed in the same way.

The M23 in use

I’m going to get the main issue out of the way first – the holster. I can see what was intended with the holster, but for me it presents three main problems in use. Firstly getting the flap over the tail-cap, so you can secure it is far too difficult as it is a tight fit and doesn’t easily go over the M23’s tail-cap. It is possible that as it wears it will become easier, but this will only be due to the material softening and becoming frayed. Secondly the tail-cap switch is exposed, and with the design used for the tail-cap connection, it cannot be locked out; no lock-out and an exposed tailcap is going to lead to accidental activation. Lastly on the holster, though the ability to carry spare cells is welcome, by leaving them partially exposed, they can be lost or damaged; I don’t trust the cells holders myself.

The holster is full of good ideas, but I don’t find them to work terribly well.

Onto the M23 itself, and things swing back to positive – it is a typical single 18650 size light, with solid build quality; you definitely would feel confident that you could use the strike bezel if needed.

Rather than having the typical tail-cap to battery-tube connection that uses a battery tube with a flat end (most common), in the M23, Olight uses a design where the inside of the end of the battery tube is conical and the tail-cap contacts are pushed into the cone as you tighten the tail-cap. This means it is far less likely to break the connection, as the tail-cap needs to move significantly to lose contact. It makes the connection very robust, but does prevent the user from locking-out the M23 by unscrewing the tail-cap.

The pocket clip is very strong, a bit too strong for normal use. If this is going on your load carrier PALS webbing, OK, but for many users it will probably be too stiff.

Of course we must appreciate that JAVELOT beam. The custom XP-L Hi LED certainly does its job with plenty of power and an excellent hotspot. Unlike completely throw-orientated lights, the M23 manages a high beam strength without making the hotspot too small; it seems completely ideal for a light this size.

Normally I’m not keen on using lights with throw at close ranges, but the M23 seems to manage this in a way that is perfectly usable. However as a frosted glass diffuser is supplied, you can easily go full flood (at the expense of 33% loss of output) and have a perfect indoor flood-light beam. With the diffuser fitted it will not fit into the holster.

It is possible to tailstand the M23 even though the large switch boot (18mm) protrudes slightly. The combination of three large cut-outs around the button (giving easy access), and the large button itself make the M23 responsive and reliable to control.

The user interface seems extremely well suited to a ‘tactical’ design. Putting strobe to one side (all serious users of tactical lights I’ve spoken to don’t want strobe as it can be just as disorienting to the person using it), at least it needs a deliberate triple-click to activate it. Unfortunately, if you are ‘signalling’ with the M23 you can accidentally get strobe. Taking just those constant modes, you can easily set the M23 to be effectively a ‘high only’ light or a ‘low-high’ light. Setting high with the twisty interface means that your first press is always high, and if you double-tap the button you still have high. Setting low with the twisty interface means that your first press is always low, and if you double-tap the button you get high. Swapping between these configurations is easy and of course you could also make it ‘medium-high’ as well.

Overall a well thought-out light with solid build and a great beam; another JAVELOT success.

Review Summary

_______________________________________________ _______________________________________________
Things I like What doesn’t work so well for me
_______________________________________________ _______________________________________________
Strong beam with great throw for its size. Holster has issues.
Solid build. No lock-out.
Frosted Glass diffuser included. Strobe can be activated when signaling.
Well though-out UI. Pocket clip too stiff for most users.
Large, easily accessible button.
Can Tail-stand.
Durable tail-cap connection design.


Discussing the Review:

Please feel free to add comments to the review, but the ideal place to freely discuss these reviews is on a forum. If you started reading the shorter forum version of the review, but followed the link this full exclusive review, please return to that forum to discuss the review there.
If you read the review entirely on Tactical Reviews, please consider one of the following to join in any discussion.

CandlePowerForums – Flashlight Reviews Section (Largest and Friendliest Flashlight Community Forum)

EdgeMatters – Sponsored Reviews (UK based Forum for Knife Makers and Collectors)
Light Review: NITECORE EA45S

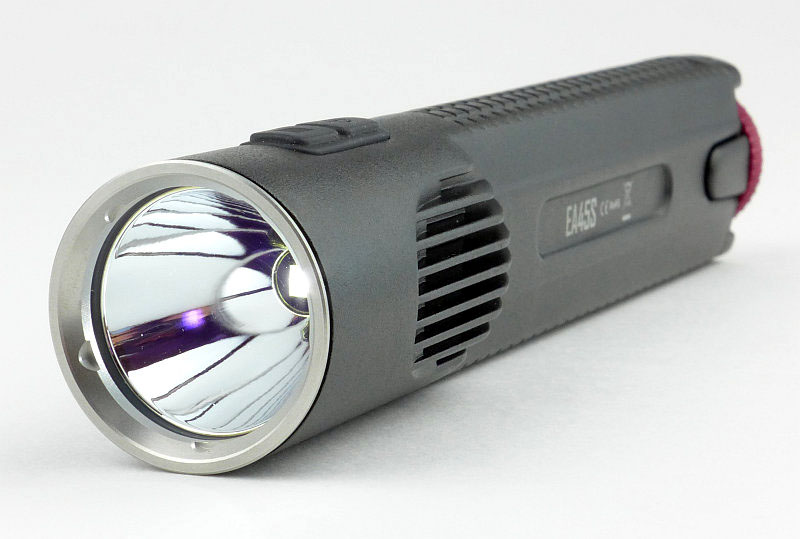
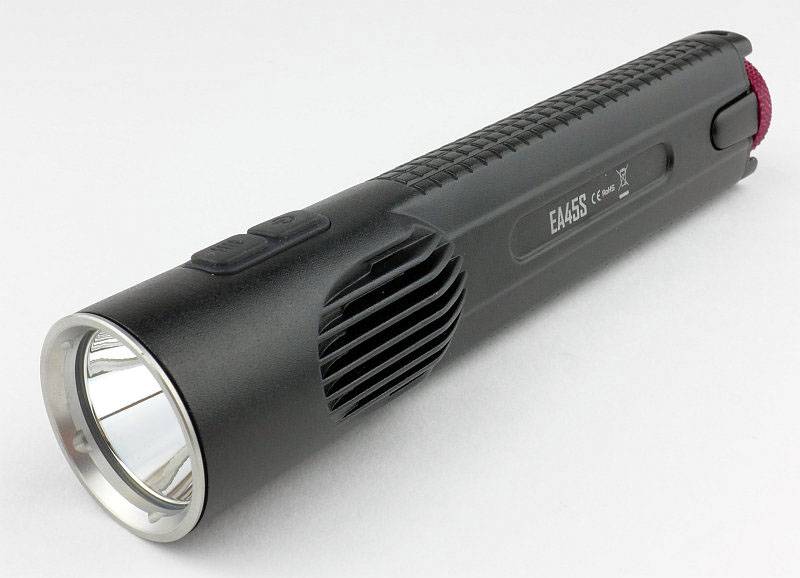
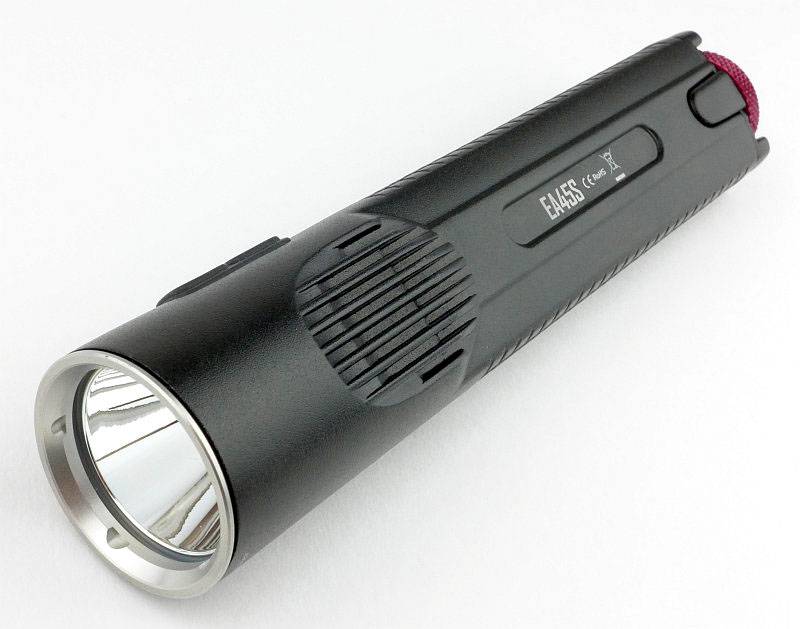
NITECORE’s first die-cast unibody light was the revolutionary EC4 (check the index page for a review link). Developing the idea further, we now have a 4xAA thrower using a similar format die-cast ‘unibody’, the EA45S.

 photo 06 EC45S angle 2 P1150998.jpg

Taking a more detailed look:

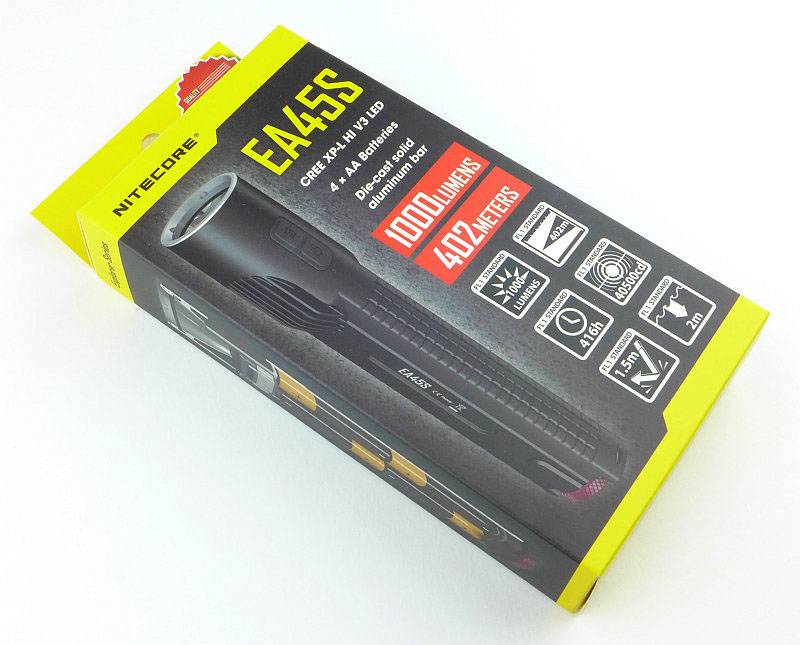
NITECORE’s familiar cardboard packaging is used.
 photo 01 EC45S Boxed P1150979.jpg

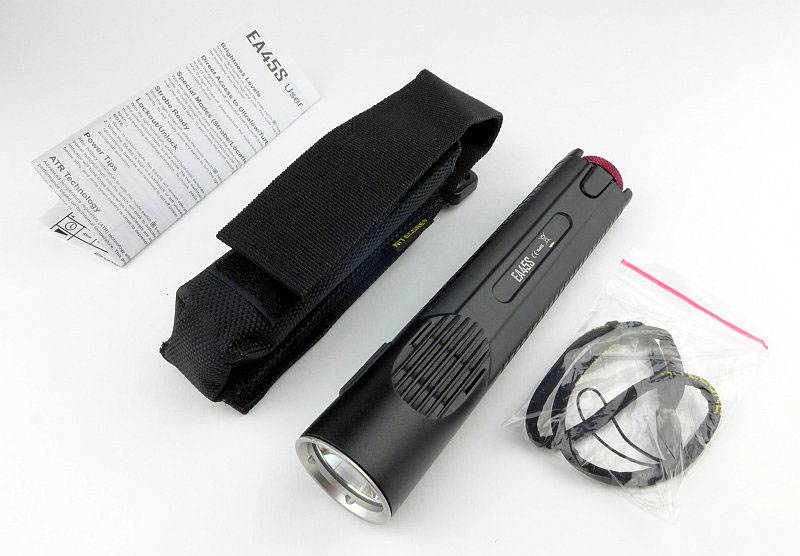
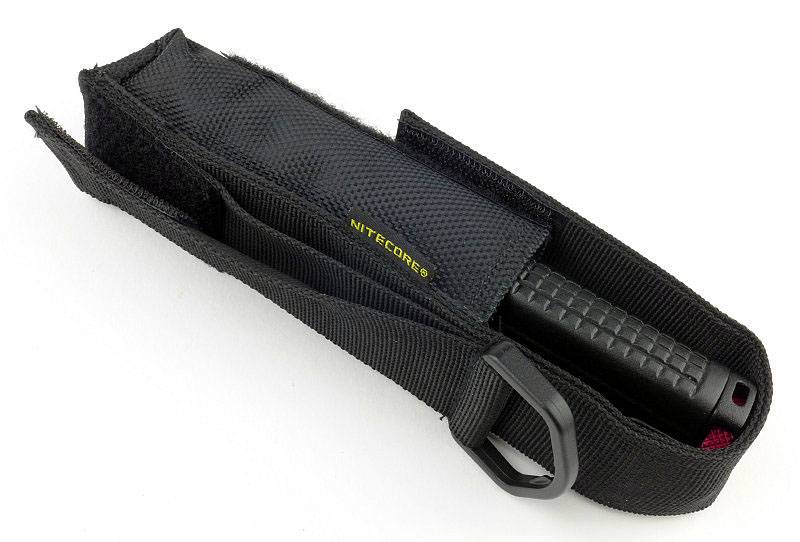
Inside the box is the EA45S, a wrist lanyard, holster and instructions.
 photo 02 EC45S Box contents P1150985.jpg

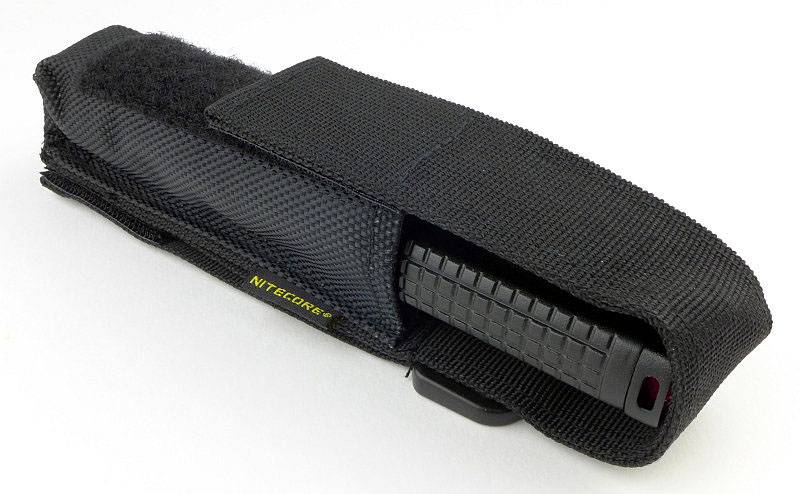
Holsters are always appreciated and this is well made.
 photo 03 EC45S holstered 1 P1150988.jpg

You have the choice of a fixed belt loop, Velcro belt loop and a D-ring.
 photo 04 EC45S holstered 2 P1150991.jpg

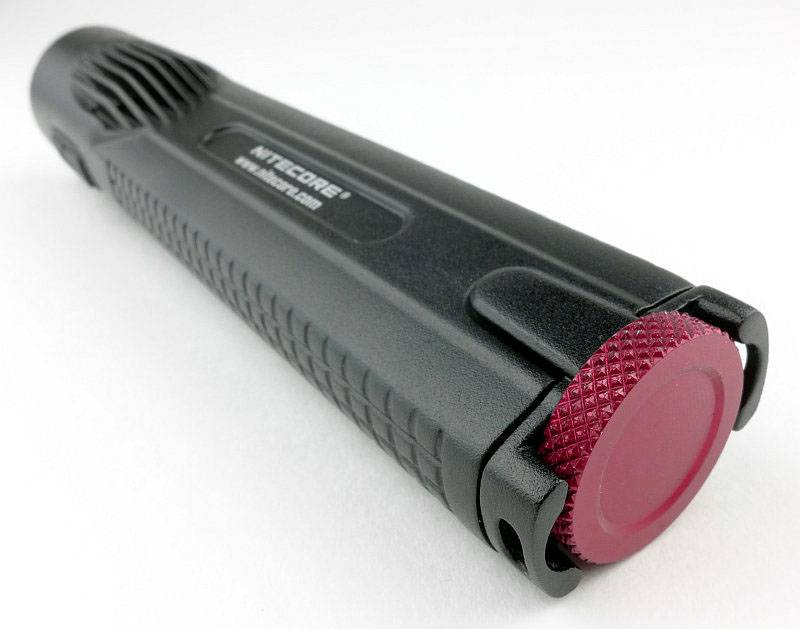
A very distinct feature is the red tail-cap screw that the ‘S’ versions of the die-cast lights have.
 photo 07 EC45S rear angle P1160006.jpg

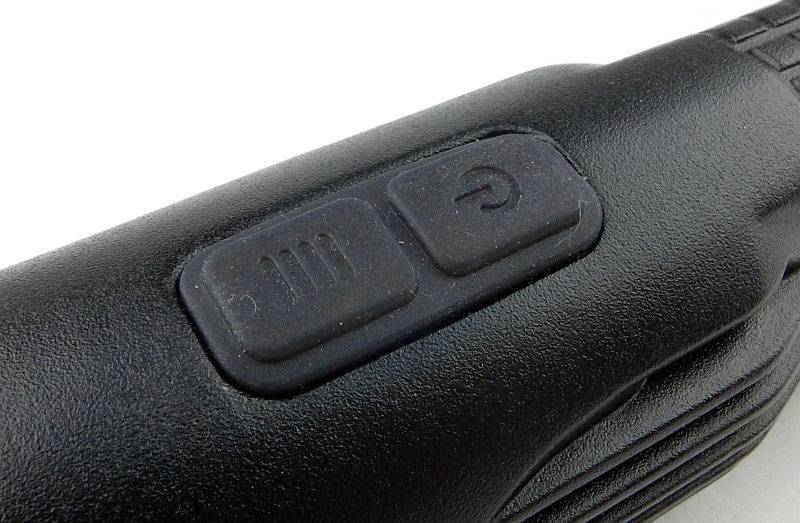
There is a dual side-switch for operating the EA45S.
 photo 08 EC45S switch detail P1160011.jpg

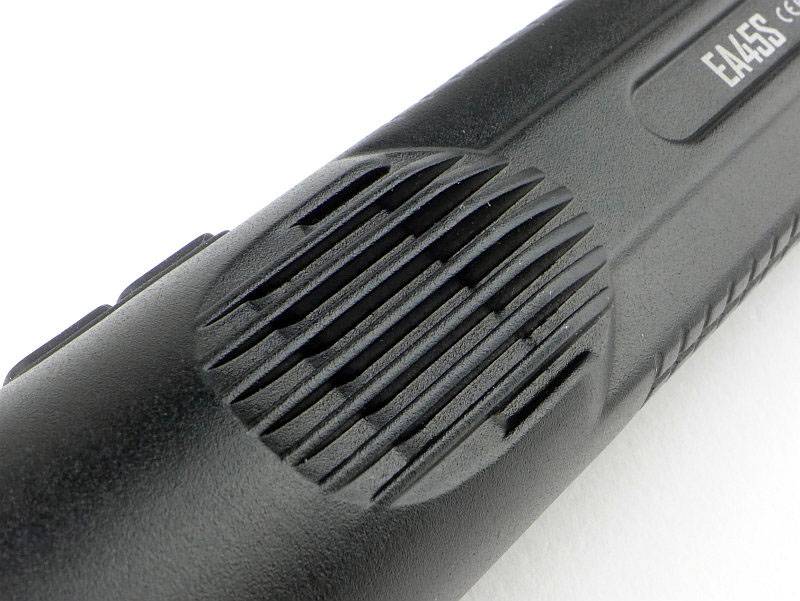
Heat sink fins are cast into the body. Thanks to the die-cast body there is an uninterrupted heat-path from these fins (and the rest of the body) to the LED board mount.
 photo 09 EC45S heat fins P1160012.jpg

At the base of a smooth reflector is the EA45S’s XP-L Hi V3 LED.
 photo 11 EC45S LED P1160016.jpg

Looking more closely at the XP-L Hi V3 LED.
 photo 12 EC45S LED close P1160026.jpg

NITECORE’s die-cast lights use an unusual tail-cap design. It has lugs to engage with the body, the contact board, and a thumbscrew.
 photo 13 EC45S tailcap contacts P1160030.jpg

Looking slightly left of centre in this photo, you can see the threads which are almost entirely hidden.
 photo 14 EC45S tailcap threads P1160032.jpg

Those threads engage with a small section of threading inside the body.
 photo 15 EC45S internal threads P1160035.jpg

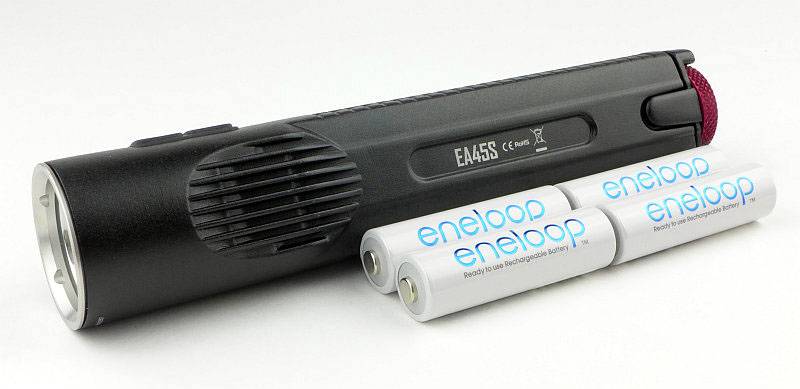
Here you can see the EA45S next to the four AAs it holds.
 photo 16 EC45S with cells P1160042.jpg

The beam

Please be careful not to judge tint based on images you see on a computer screen. Unless properly calibrated, the screen itself will change the perceived tint.

The indoor beamshot is intended to give an idea of the beam shape/quality rather than tint. All beamshots are taken using daylight white balance. The woodwork (stairs and skirting) are painted Farrow & Ball “Off-White”, and the walls are a light sandy colour called ‘String’ again by Farrow & Ball. I don’t actually have a ‘white wall’ in the house to use for this, and the wife won’t have one!

Designed for throw, the EA45S has a very defined and strong hotspot.
 photo 19 EC45S indoor beam P1170299.jpg

Giving it a bit more range to work with, you can clearly see the power of the beam which is very impressive considering its 4xAA power source.
 photo 20 EC45S outdoor beam P1170234.jpg

Modes and User Interface:

The EA45S has a total of five constant modes (Turbo, High, Medium, Low, Ultra-Low) and three flashing modes (Strobe, Beacon and SOS). Like many other NITECORE lights this is controlled by a dual button.

From OFF, to switch ON to the last used steady white output, briefly press the Power switch. When ON, press the Mode switch to cycle through Turbo -> Ultra-Low -> Low -> Mid -> High back to Turbo etc. To switch OFF briefly press the Power switch.

From OFF, for direct access to Ultra-Low, press and hold the Power switch for more than 1s.

From OFF, for direct access to Turbo, press and hold the Mode switch for more than 1s.

To access White flashing modes, from ON, press and hold the Mode switch for more than 1s. This will activate strobe. Press and hold the Mode switch for more than 1s again to switch to Beacon mode. Press and hold the Mode switch for more than 1s once more to activate SOS.
Once activated, pressing the mode switch briefly returns the EA45S to the previous steady mode, or a brief press of the Power switch will turn the EA45S OFF.

There is a ‘Standby’ mode which uses brief low power flashes of the blue switch indicator LED to act as a locator to allow you to find the EA45S in complete darkness. To activate Standby, from ON press and hold the power switch for over 1s until the blue switch light comes on. Although low power, the flashes are bright enough to disturb someone’s sleep. Exiting standby mode is achieved by switching on the EC4. When using Standby mode the drain is increased but the should still last a year in this mode. Turn ON and OFF again to exit standby.

There is a lockout mode included. With the EA45S ON, press and hold both buttons simultaneously for 1s to enter lockout. When entering Lockout, the EA45S will turn off and give a brief flash of the main beam as you release the buttons. Like this the buttons will not turn the EA45S on. Thanks to the button design this can be done easily with the thumb. To exit Lockout press and hold both buttons simultaneously for 1s and the EA45S will turn ON in the last used mode.

Lastly when first inserting cell/s into the EA45S or briefly pressing the mode switch when OFF, the blue switch light will flash to indicate the battery charge level. It flashes once, twice, or three times. Three flashes indicates full power.

Batteries and output:

The EA45S runs on 4xAA, Alkaline or NiMh. NiMh will give the best performance.

To measure actual output, I built an integrating sphere. See here for more detail. The sensor registers visible light only (so Infra-Red and Ultra-Violet will not be measured).

Please note, all quoted lumen figures are from a DIY integrating sphere, and according to ANSI standards. Although every effort is made to give as accurate a result as possible, they should be taken as an estimate only. The results can be used to compare outputs in this review and others I have published.

___________________________________________ ________________________________ ________________________________
NITECORE EA45S using Eneloop AA I.S. measured ANSI output Lumens PWM frequency or Strobe frequency (Hz)
___________________________________________ ________________________________ ________________________________
Turbo 912 0
High 476 0
Medium 238 0
Low 63 0
Ultra-Low 2 0

* Beacon and Strobe output measurements are only estimates as the brief flashes make it difficult to capture the actual output value.

Peak Beam intensity measured 43100 lx @1m giving a beam range of 415 m.

There is parasitic drain at 102.6uA (2.33 years to drain the cells).

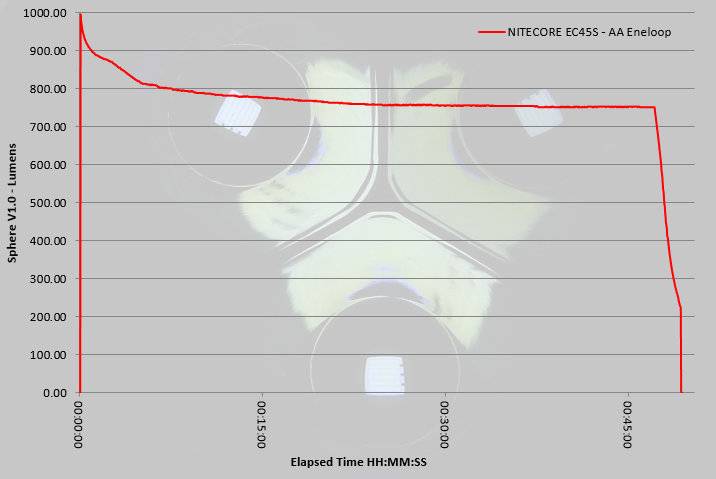
The EA45S does indeed hit 1000lm at switch on, but this drops to a still impressive 912 ANSI lumens. The output gradually declines to around 800lm approximately 7 minutes after switch on, and then remains steady for the remainder of the runtime (just dropping to 750lm) before trailing off sharply once the cells are depleted.
 photo NITECORE EC45S runtime.jpg

Troubleshooting

This section is included to mention any minor niggles I come across during testing, in case the information helps anyone else.

No issues were encountered during testing.

However, I did have a couple of issues with the tail-cap threads not engaging properly. It requires a very firm pressure during the entire fitting of the tail-cap to fit smoothly. The thumb wheel has a convenient smooth depression which allows you to press onto it firmly with your finger while turning the screw.

As per the description of this section, this information is provided in case anyone else finds a similar ‘issue’ that might be fixed in the same way.

The EA45S in use

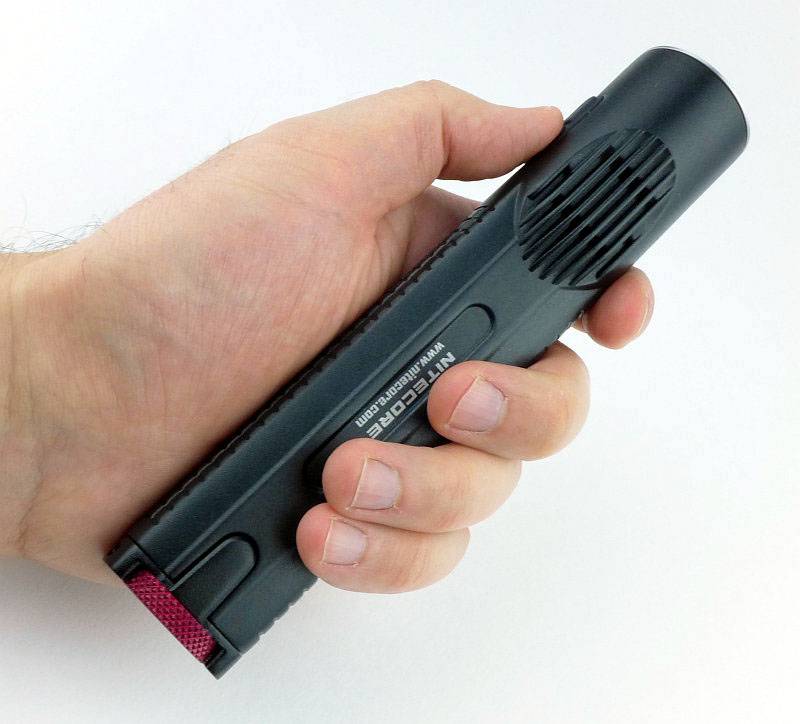
For those that have followed my reviews for a while, you will most likely know I have always loved the 2xAA format for being easy and comfortable to hold. I’ve tested other 4xAA lights which have had the four cells all together (making quite a handful) or 2×2 as in the EA45S. Thanks to the die-cast unibody and lack of cell holder, the EA45S takes this 4xAA format and fits it into a more compact body.

The EA45S has just pushed out the 2xAA as my favourite size/shape, and put itself firmly into pole position with its compact 2×2 4xAA cell layout. It is really comfortable to hold, stable, thanks to the rectangular cross section, and just the right size and weight.

 photo 18 EC45S in hand P1160052.jpg

This is a bigger light than I would EDC, but when I need a step up in performance and runtime without going to something really large, the EA45S fits the bill (and hand) nicely. It is also perfectly reasonable to just throw into a backpack even if you might not need it.

Of course with its throw biased beam, it can be a little fatiguing to use indoors. The Ultra-Low and Low modes are really all you will want to use when inside. Other than that the EA45S’s beam comes into its own. Peering into an engine bay, or deep into storage (loft, or other large space), the throw helps you to see clearly. Outside you can really appreciate the throw the XP-L Hi V3 LED gives you, and how comfortable it is to hold (I might have mentioned that before).

The surface finish on the EA45S is HAIII hard anodised, which can prove challenging on die-cast aluminium, but NITECORE have achieved an excellent quality finish. At first this surface might appear to be a powder-coat due to the graininess, but this is due to having to pre-treat (sand-blast) the die-cast surface before anodising.

A couple of other observations, there is a degree of cell rattle when you knock the EA45S or put it down, but this does not happen with normal handling. Also for use wearing gloves the switches can be a little tricky to hit just right.

Certainly in the sample I have, you have to be careful fitting the tail-cap. Removing it presents no issues, but due to the contact spring strength, it does need constant pressure on it to ensure the threads start and run properly all through the tightening. The thumb-wheel has a shallow smooth depression which makes it easy to apply pressure and turn the wheel to tighten it.

Thanks to the unibody design, heat transfer is managed with ease; nothing gets particularly hot with the entire body acting as a heat-sink.

There are other 4xAA lights with similar output, but NITECORE have delivered it with a superbly ergonomic design. I liked the EC4, but really love the EA45S.

Review Summary

_______________________________________________ _______________________________________________
Things I like What doesn’t work so well for me
_______________________________________________ _______________________________________________
Excellent ergonomics. Tail-cap can be cross-threaded easily.
Over 900lm from four AAs. Beam can be fatiguing at close range.
415m beam range. Parasitic drain could be lower (but is acceptable).
Stable when tail-standing.
Direct access to Ultra-Low and Turbo.

 photo 05 EC45S angle 1 P1150993.jpg


Discussing the Review:

Please feel free to add comments to the review, but the ideal place to freely discuss these reviews is on a forum. If you started reading the shorter forum version of the review, but followed the link this full exclusive review, please return to that forum to discuss the review there.
If you read the review entirely on Tactical Reviews, please consider one of the following to join in any discussion.

CandlePowerForums – Flashlight Reviews Section (Largest and Friendliest Flashlight Community Forum)

EdgeMatters – Sponsored Reviews (UK based Forum for Knife Makers and Collectors)
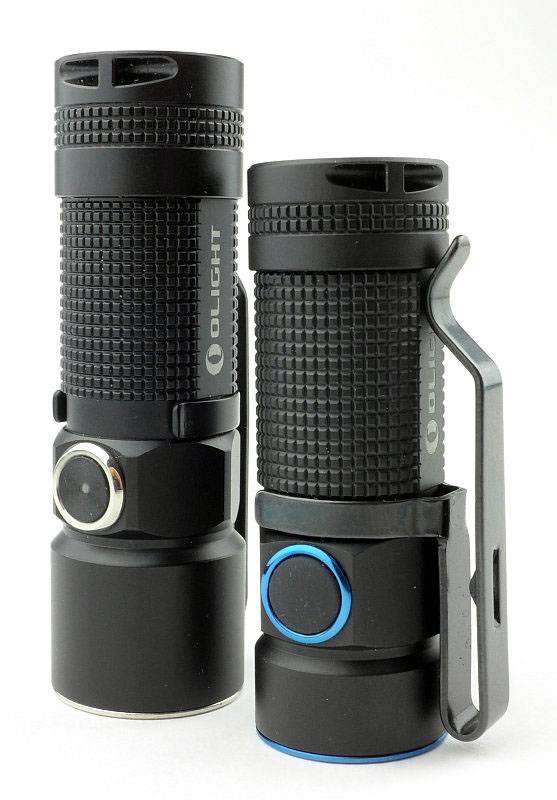
Light Review: Olight S1 plus Special Edition S1 Ti

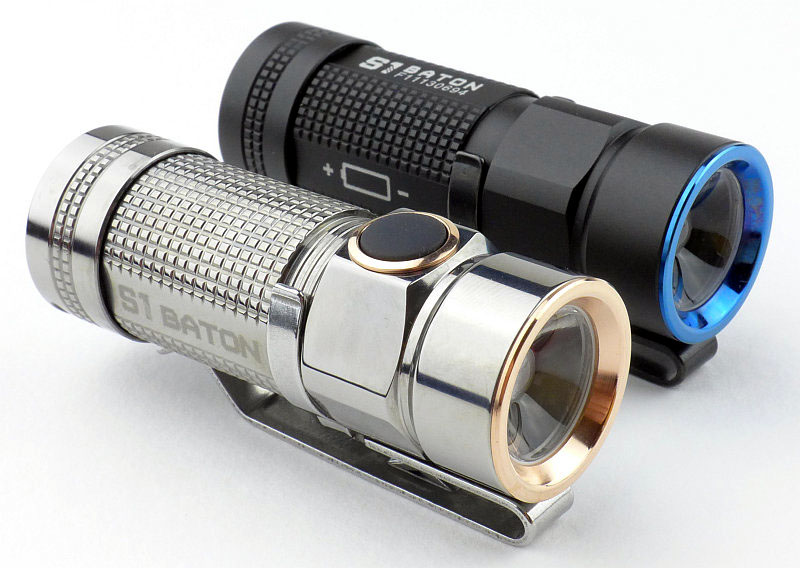
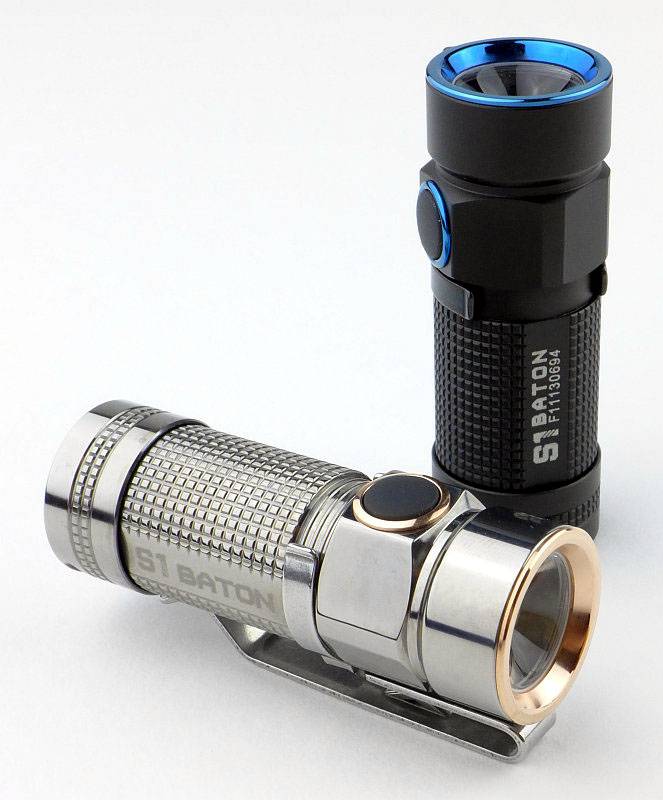
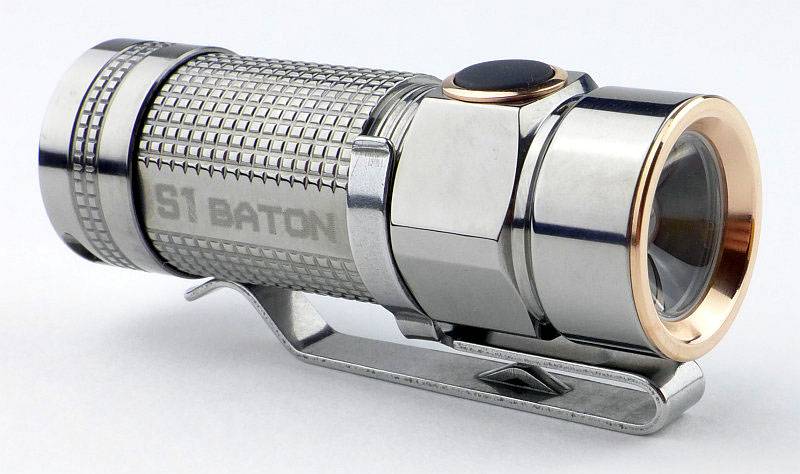
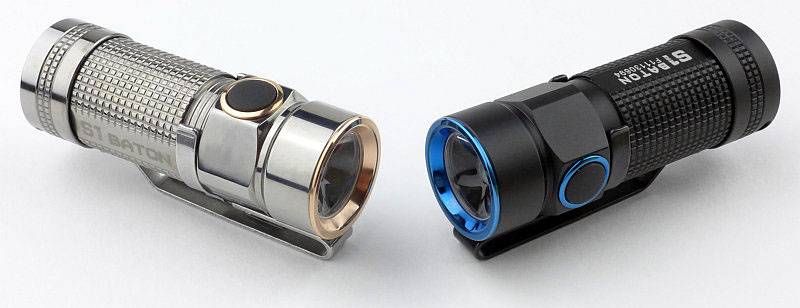
Olight’s S1 is the smallest light they have ever produced with a side switch. Along with the standard aluminium edition, Olight have created quite a storm of interest by also releasing several different Special Editions with different emitters and materials such as Copper, Titanium as well as Gold-plated versions.

 photo 52 S1 twins3 P1150843.jpg

Taking a more detailed look at the S1 (standard Al edition):

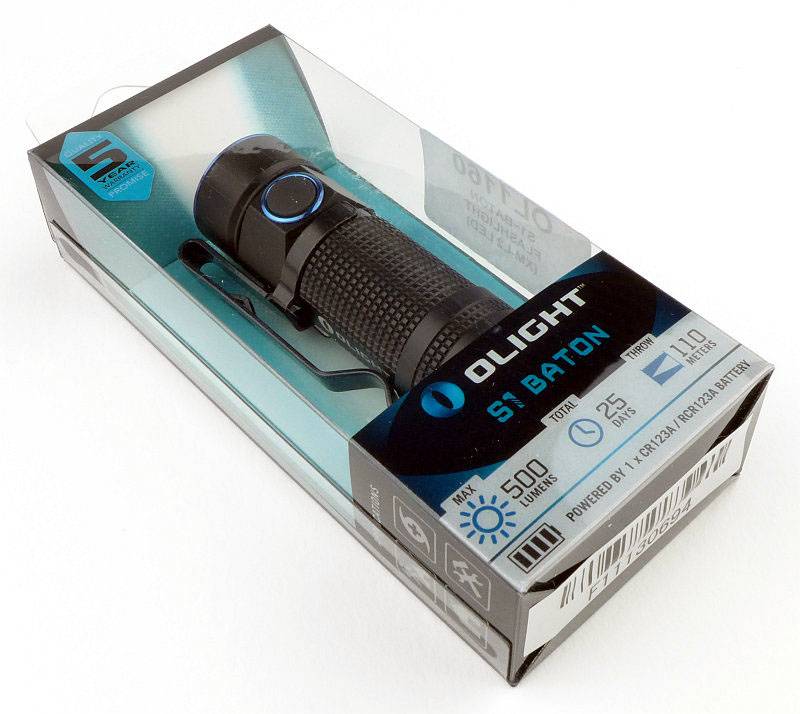
Olight’s standard plastic box packaging displays the S1 nicely.
 photo 01 S1 Al boxed P1150522.jpg

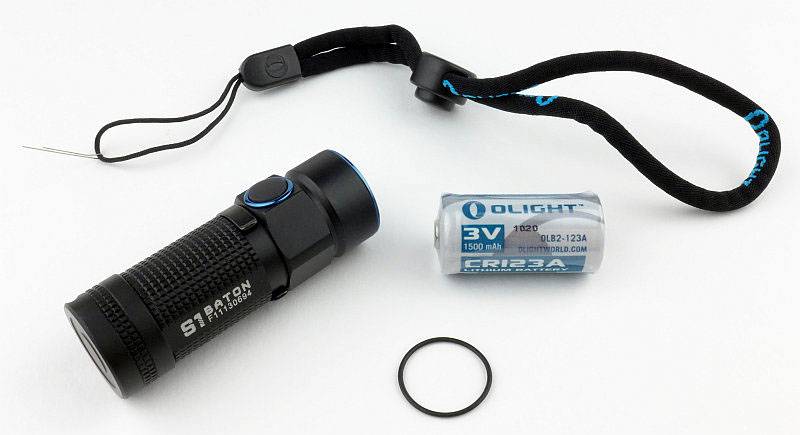
Inside the box is the S1, a CR123 cell, spare O-ring (which is actually used to hold the S1 in place) and a wrist lanyard. A really thoughtful feature is that the lanyard comes with a threading wire fitted to it to make it easy to fit to the S1.
 photo 02 S1 Al box contents P1150526.jpg

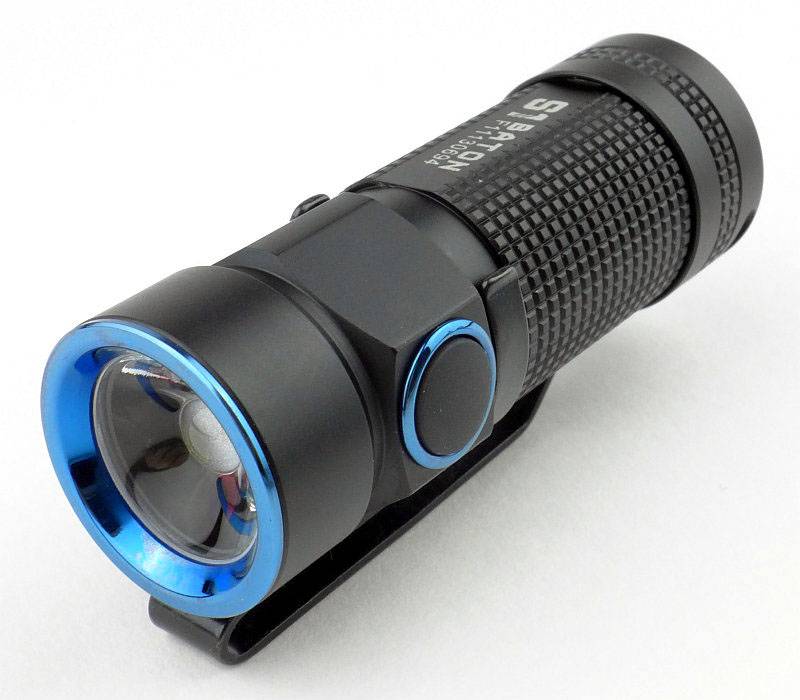
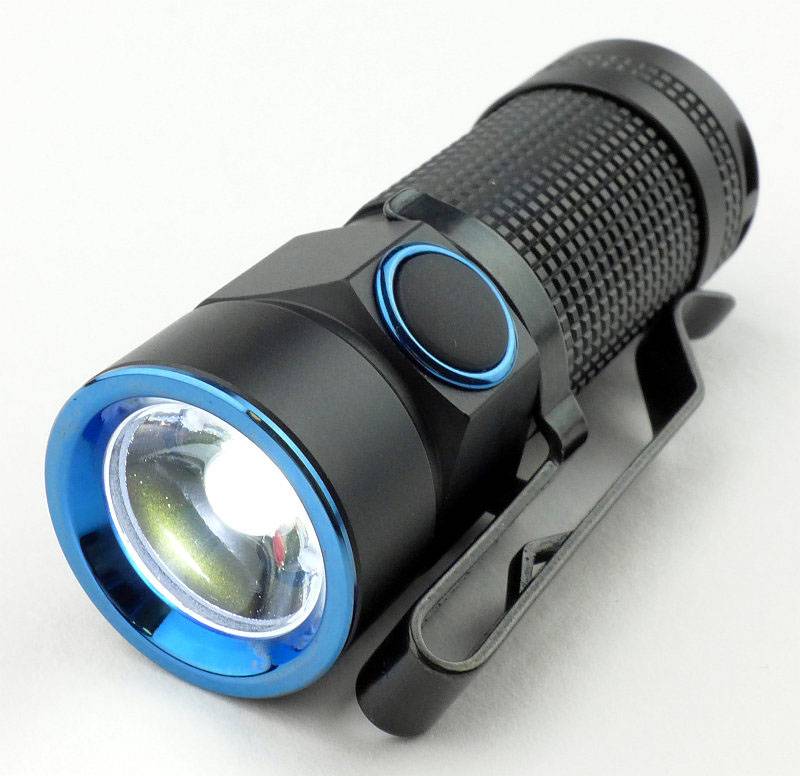
The S1 itself has a stylish two tone appearance with the bezel and switch rings in blue.
 photo 05 S1 Al angle03 P1150532.jpg

Keeping the size down, the tailcap is a very streamlined design. The spring clips into a slot and is used to hold the magnet in place. This makes it easy for the user to remove and replace the magnet.
 photo 06 S1 Al tailcap P1150537.jpg

The threads are square cut and as the body is short, there are not many actual threads.
 photo 07 S1 Al threads P1150539.jpg

Peering inside there is another spring terminal and an anti-rattle closed-cell foam pad.
 photo 08 S1 Al inside P1150549.jpg

Looking dead-on, the S1 has a TIR optic and the actual LED cannot be seen.
 photo 09 S1 Al TIR P1150553.jpg

In a less common format, the cell is inserted negative towards the head and this is clearly marked on the side of the S1.
 photo 11 S1 Al Cell P1150563.jpg

Just to give an idea of how compact this light is, here it is next to the already small Olight S10R (another RCR123 light).
 photo 12 S1 Al S10R compare P1150566.jpg

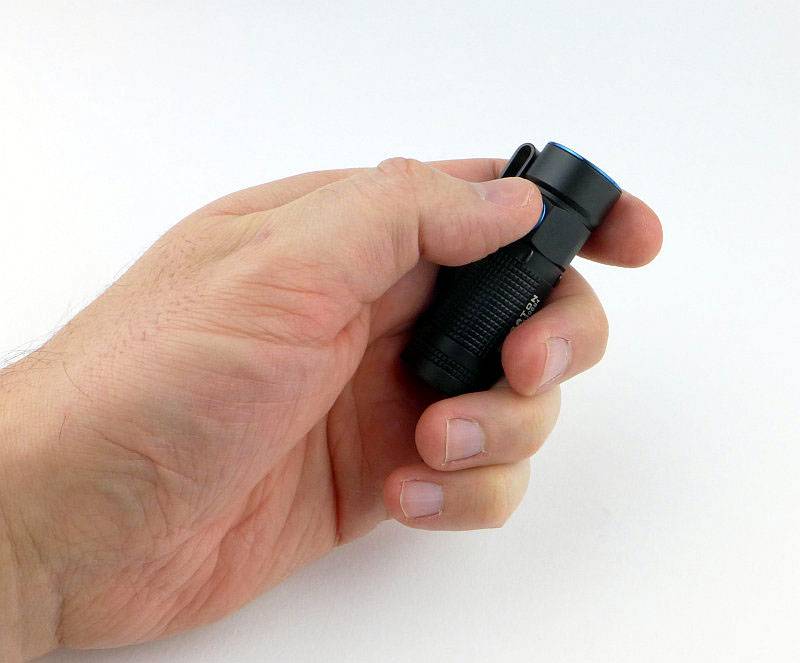
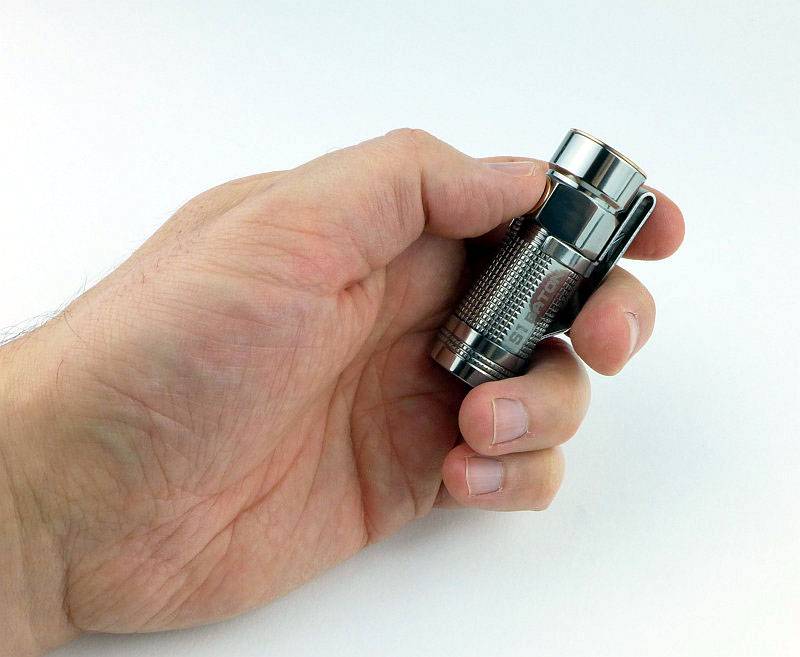
Also for scale here it is in my hand (I take XL gloves)
 photo 13 S1 Al in hand P1160056.jpg

Before moving on to the Special Edition another quick look at those lovely blue PVD trims.
 photo 10 S1 Al TIR lit P1150559.jpg

Taking a more detailed look at the S1 Special/Ti edition:

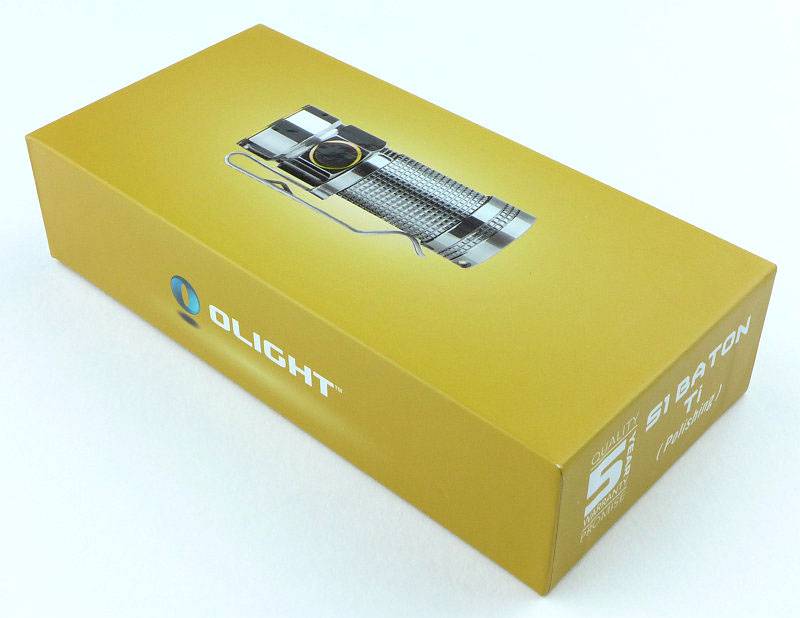
In keeping with its Special Edition status, the Ti S1 gets a different box.
 photo 20 S1 Ti boxed P1150804.jpg

Presentation is excellent.
 photo 21 S1 Ti box open P1150807.jpg

Inside the box is the S1, a CR123 cell, diffuser, instructions and a wrist lanyard. A really thoughtful feature is that the lanyard comes with a threading wire fitted to it to make it easy to fit to the S1.
 photo 25 S1 Ti contents P1150820.jpg

A glorious looking light.
 photo 30 S1 Ti angle3 P1150834.jpg

The clip is removable and reversible.
 photo 24 S1 Ti clip P1150816.jpg

Construction of the tailcap is the same as the standard version with the terminal spring clipped into a groove and used to secure the magnet.
 photo 26 S1 Ti tailcap P1150822.jpg

Square threads are used.
 photo 27 S1 Ti threads P1150824.jpg

Looking inside the internals are the same as the standard version.
 photo 28 S1 Ti inside P1150826.jpg

A Rose Gold plated bezel surrounds the TIR optic.
 photo 29 S1 Ti TIR P1150830.jpg

Without the diffuser fitted.
 photo 31 S1 Ti angle4 P1150837.jpg

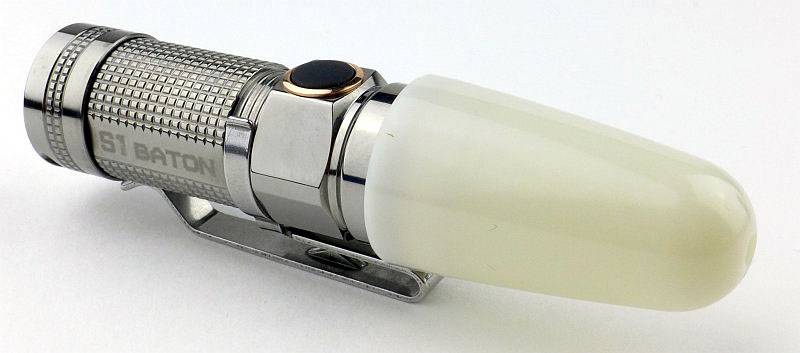
With the diffuser fitted.
 photo 32 S1 Ti diffuser P1150846.jpg

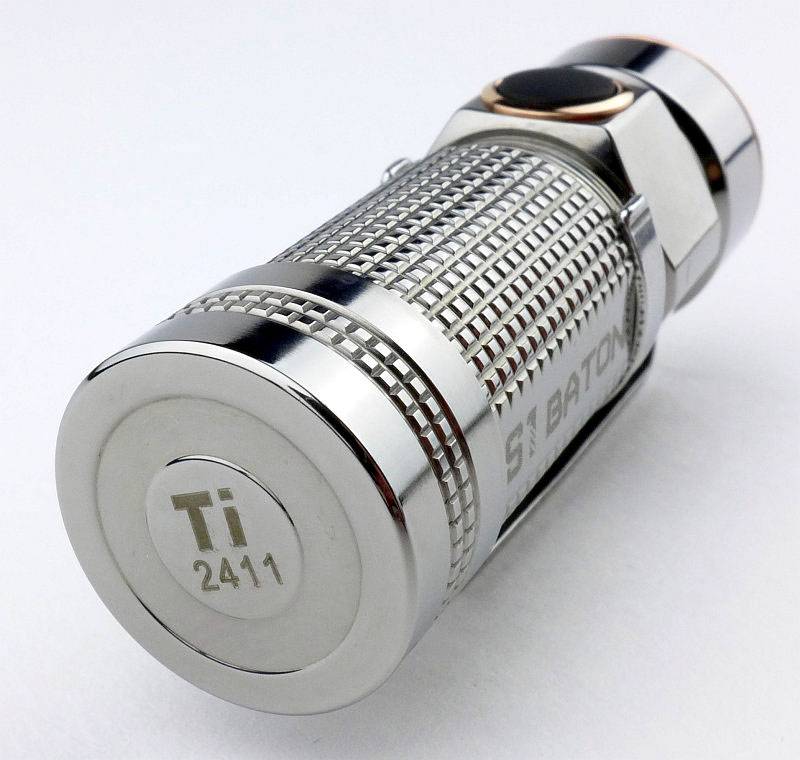
For the special editions they have the identifier ‘Ti’ and a serial number engraved on the tail-cap.
 photo 33 S1 Ti tail view P1150974.jpg

Small, Shiny and Ti, a winning combination.
 photo 34 S1 Ti in hand P1160053.jpg

The beam

Please be careful not to judge tint based on images you see on a computer screen. Unless properly calibrated, the screen itself will change the perceived tint.

The indoor beamshot is intended to give an idea of the beam shape/quality rather than tint. All beamshots are taken using daylight white balance. The woodwork (stairs and skirting) are painted Farrow & Ball “Off-White”, and the walls are a light sandy colour called ‘String’ again by Farrow & Ball. I don’t actually have a ‘white wall’ in the house to use for this, and the wife won’t have one!

Starting indoors with the Standard S1. The wide hotspot transitions into a wide spill giving a great all round beam, and one that works really well for EDC tasks.
 photo 14 S1 Al indoor beam P1170324.jpg

The main difference in the Special Ti Edition is that the LED is neutral white.
 photo 35 S1 Ti indoor beam P1170329.jpg

Fitting the Ti Edition’s diffuser makes a hug difference giving a real lantern like beam.
 photo 36 S1 Ti indoor beam diffused P1170333.jpg

The Diffuser itself is GITD as can be seen here once the test was over.
 photo 37 S1 Ti indoor beam GITD P1170336.jpg

Outdoors, the wide hotspot does well enough up to medium distances.
 photo 15 S1 Al outdoor beam P1170258.jpg

The neutral emitter of the Ti does make the colours appear more natural.
 photo 38 S1 Ti outdoor beam P1170261.jpg

Just to show what happens when the diffuser is fitted – GLARE – lots of glare. On the indoor shot the clamp prevented the glare from hitting the camera, but here it does not. Use the diffuser with caution.
 photo 39 S1 Ti outdoor beam diffused P1170297.jpg

Modes and User Interface:

The S1 has five output modes, High, Medium, Low, Moonlight and Strobe and a single click-switch on the side.

Basic ON/OFF operation is carried out with a single click of the side switch. The S1 will turn on to the last used standard mode (this does not include Moonlight or Strobe).

To change the brightness, while ON, press and hold the switch to cycle through Medium -> High -> Low -> Medium etc. Release the switch once you have the required output.

There are a few special functions:
Moonlight mode – from OFF, press and hold the switch for 1s until the Moon mode is activated.
Direct access to High – from OFF, double-click the switch.
Strobe – From ON, triple-click the switch.
Timer – From ON, double-click the side switch. The S1 will blink one or two times. Once means the 3 minute timer is activated, twice means the 9 minute timer is activated. To swap between 3 and 9 minutes timers, double-click the switch.

Timer mode means that the S1 will turn itself off after the specified time, and this can be started from any mode (including Strobe and Moonlight).

Batteries and output:

The S1 runs on either CR123 or RCR123.

To measure actual output, I built an integrating sphere. See here for more detail. The sensor registers visible light only (so Infra-Red and Ultra-Violet will not be measured).

Please note, all quoted lumen figures are from a DIY integrating sphere, and according to ANSI standards. Although every effort is made to give as accurate a result as possible, they should be taken as an estimate only. The results can be used to compare outputs in this review and others I have published.

___________________________________________ ________________________________ ________________________________
‘Model’ and ‘Mode’ using specified cell I.S. measured ANSI output Lumens PWM frequency or Strobe frequency (Hz)
___________________________________________ ________________________________ ________________________________
S1 Al – High – CR123 428 0
S1 Al – Medium – CR123 92 0
S1 Al – Low – CR123 15 0
S1 Al – Moon – CR123 Below Threshold 0
S1 Al – High – RCR123 555 0
S1 Al – Medium – RCR123 92 0
S1 Al – Low – RCR123 15 0
S1 Al – Moon – RCR123 Below Threshold 0
S1 Ti – High – CR123 461 0
S1 Ti – Medium – CR123 92 0
S1 Ti – Low – CR123 12 0
S1 Ti – Moon – CR123 Below Threshold 0
S1 Ti – High – RCR123 541 0
S1 Ti – Medium – RCR123 91 0
S1 Ti – Low – RCR123 12 0
S1 Ti – Moon – RCR123 Below Threshold 0

* Beacon and Strobe output measurements are only estimates as the brief flashes make it difficult to capture the actual output value.

Peak Beam intensity of the S1 Al measured 3500 lx @1m giving a beam range of 118 m.
Peak Beam intensity of the S1 Ti measured 3000 lx @1m giving a beam range of 110 m.

There is parasitic drain but it is very low. For both the S1 Al and Ti, the drain was 1.1uA (145 years to drain a CR123 cell)

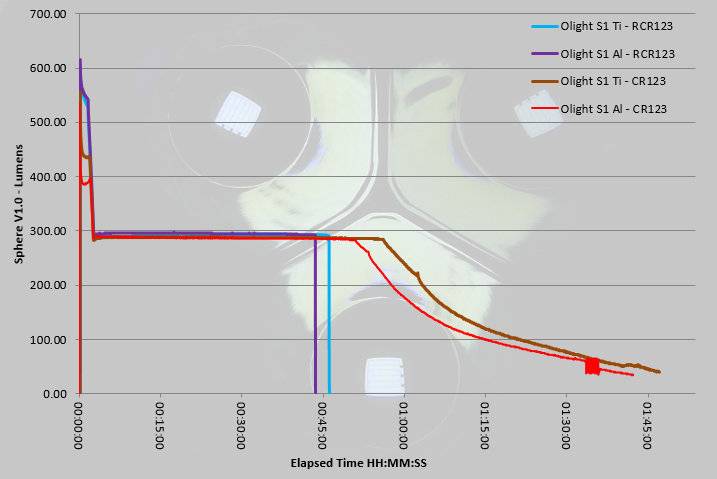
The trace here shows each of the S1 versions running on CR123 and on RCR123. The most distinctive difference is that on RCR123 the initial output is up to 120lm higher than on CR123. Once the light has been running for 3 minutes and the output ramps down to around 300lm, all four traces pretty much overlap. For the RCR123s, there is a sudden shut-off when the cell-protection kicks in. On CR123 the output starts to drop out of regulation at around 50 minutes after turn-on which is approximately halfway through the total ANSI runtime.
 photo Olight S1 runtime.jpg

Troubleshooting

This section is included to mention any minor niggles I come across during testing, in case the information helps anyone else.

No issues were encountered during testing.

As per the description of this section, this information is provided in case anyone else finds a similar ‘issue’ that might be fixed in the same way.

The Olight S1 in use

In reality there is little difference between these two versions in terms of practicality, except perhaps the neutral emitter in the Ti version. Of course the Ti version feels much more special and looks the part, as do any of the S1 special editions.

Regardless of special edition or not, the S1 is an excellent EDC light and won me round straight away. Easy and reliable access to Moon mode, direct access to High and memory of the last standard mode used, all tick the EDC boxes; all this and never forget its super compact size which makes it very easy to carry.

The built in timer is great for giving the light a ‘sleep’ mode so if you are camping or otherwise in need of a period of ‘settling-in’ before going to sleep, but not wanting to then have to turn a light off; it will turn itself off for you. Think of your own uses for this; I really like it even if I don’t use the timer all that much.

Being able to pop out the tailcap spring and remove the magnet is a really clever design. Magnets are useful, but very often I get annoyed with them picking up this and that. Now I can choose to have the magnet or not.

Deciding between CR123 and RCR123 will be personal preference. For heavy users the guilt-free-lumens of RCR123 may be a better match, but check that runtime graph; a sudden cut-off might be a problem for some users. If it is a problem, stick to CR123, as for general light EDC use it will last a long time.

Thanks to the very low parasitic drain, you can be confident that leaving it loaded up with a CR123, the S1 will be ready to go when you need it, and you won’t find it with a run-down cell. If you are super-paranoid, you can lock out the Standard version by unscrewing the tail-cap half a turn. You cannot lockout the Ti Special Edition like this as the threads are not coated.

Although a TIR lens was chosen for better control of the beam shape, it has the added benefit of being pretty much unbreakable. That beam is a general purpose beam which is well suited to closer range typical EDC uses.

Even though I’m use to it, I still have to think twice when putting a new cell in, the ‘negative terminal towards the head’ layout seems a strange choice when convention has the positive terminal towards the head. It does include all the relevant protection in case you get it wrong, but this seems an unnecessary unconventional touch.

The switch is quite low profile and without the clip often needs a bit of ‘hunting’ to find. The clip, which seems relatively large, can act as a guide for finding the button, and also helps stabilise the grip. The S1 is small enough that is can feel insecure to hold, especially when performing multi-clicks of the switch; the clip gives a little something extra to get hold of.

Small, good looking and full of useful modes that are easy to get at. It is no wonder the S1 is proving very popular.

Review Summary

_______________________________________________ _______________________________________________
Things I like What doesn’t work so well for me
_______________________________________________ _______________________________________________
Very compact. Sudden cut-off when using RCR123.
Great UI and selection of modes. Unconventional cell direction.
Takes CR123 or RCR123. Special Edition version cannot be locked out.
Very low parasitic drain.
User removable tail-cap magnet.
‘Proper’ Moon-Mode (with direct access).
Timer mode.

 photo 51 S1 twins2 P1150842.jpg

At the time of posting, the following links are for the Olight S1 on:
Amazon UK
Amazon US


Discussing the Review:

Please feel free to add comments to the review, but the ideal place to freely discuss these reviews is on a forum. If you started reading the shorter forum version of the review, but followed the link this full exclusive review, please return to that forum to discuss the review there.
If you read the review entirely on Tactical Reviews, please consider one of the following to join in any discussion.

CandlePowerForums – Flashlight Reviews Section (Largest and Friendliest Flashlight Community Forum)

EdgeMatters – Sponsored Reviews (UK based Forum for Knife Makers and Collectors)
Light Review: ACEBEAM H10 Headlamp

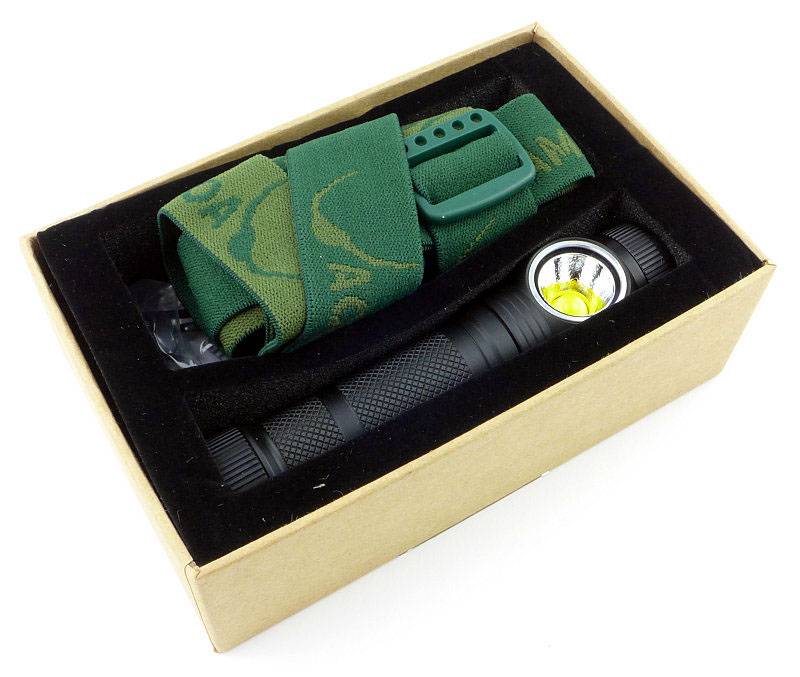
The H10 is ACEBEAM’s most powerful Headlamp with an impressive 2000lm burst mode (using an IMR 18650) and uses the high power MT-G2 LED array.

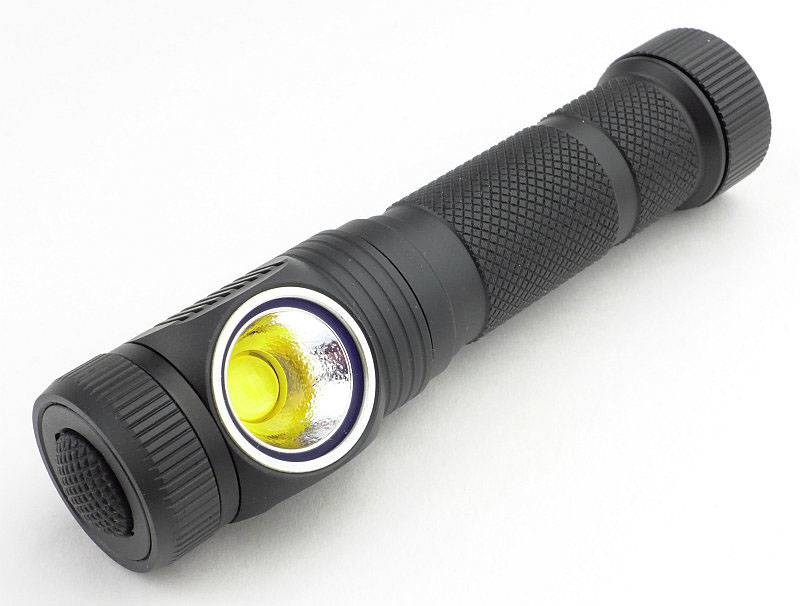
 photo 06 H10 angle P1150631.jpg

Taking a more detailed look:

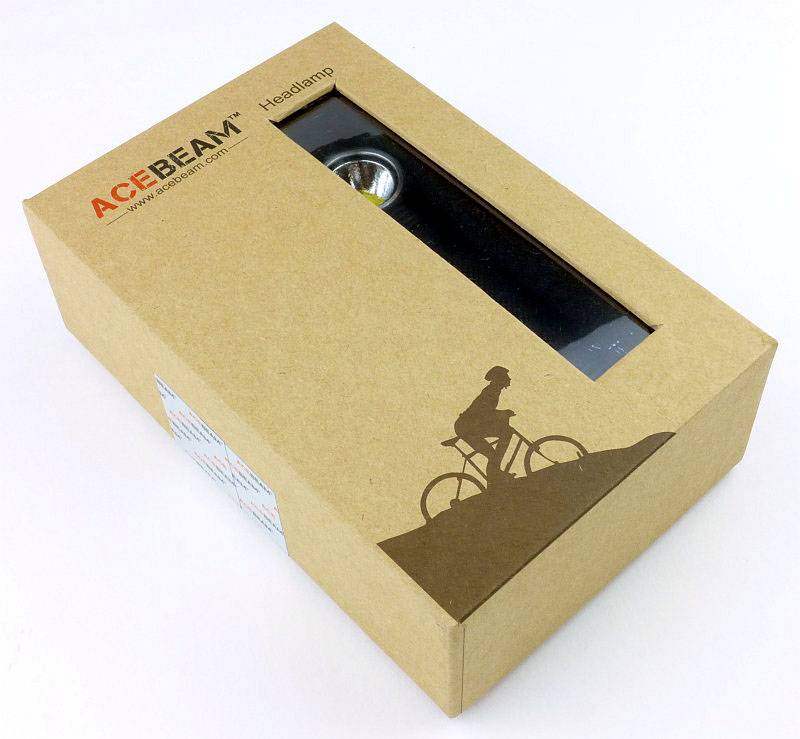
Presentation is good with the ACEBEAM packaging. The box is sealed with a tamper evident tape.
 photo 01 H10 boxed P1150612.jpg

Inside there is a foam liner holding the contents in place.
 photo 02 H10 box open P1150614.jpg

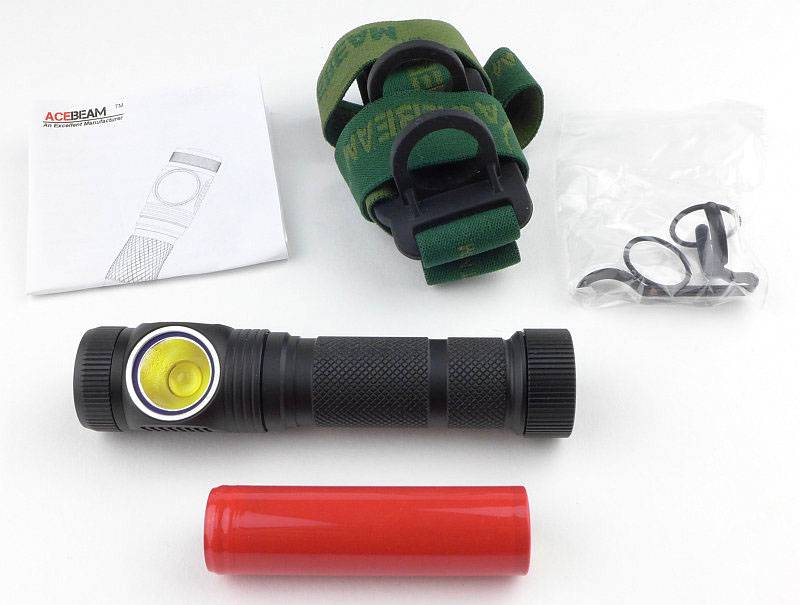
In the box there is the H10 (with unlabelled 18650 inside it), spare O-rings, pocket clip, headband and mount, plus the instructions.
 photo 03 H10 box contents P1150621.jpg

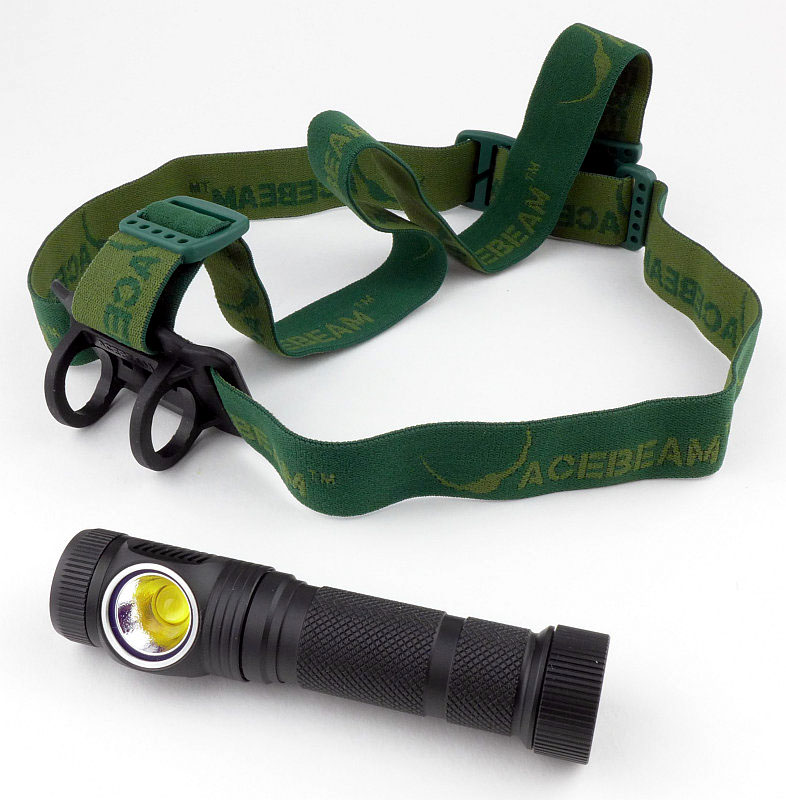
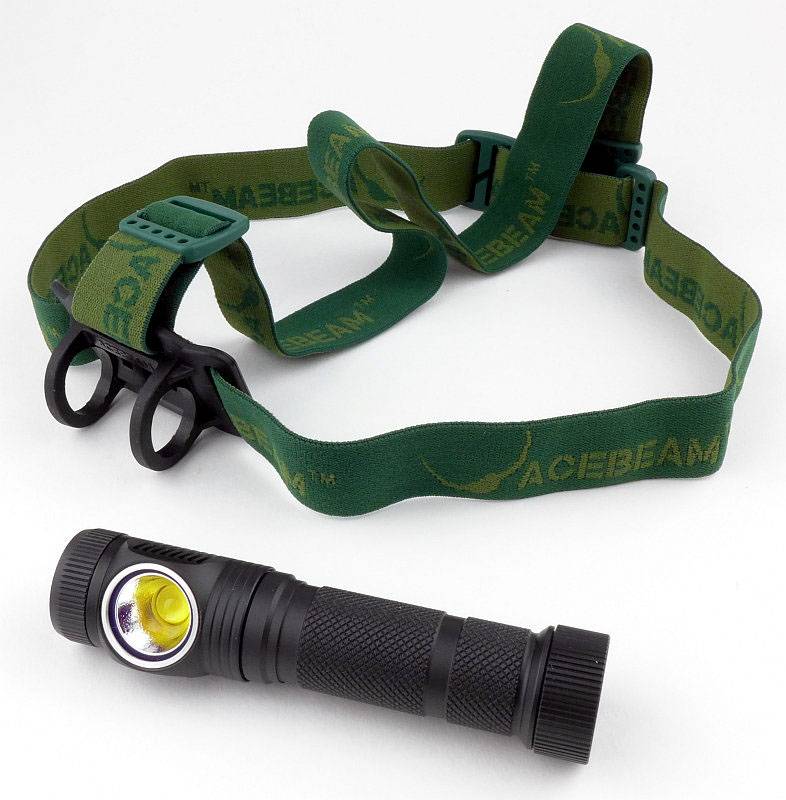
The headband is fully assembled and opens out like this.
 photo 04 H10 headband P1150625.jpg

The headband mount has two retaining rings that line up with grooves in the body of the H10.
 photo 05 H10 holder P1150627.jpg

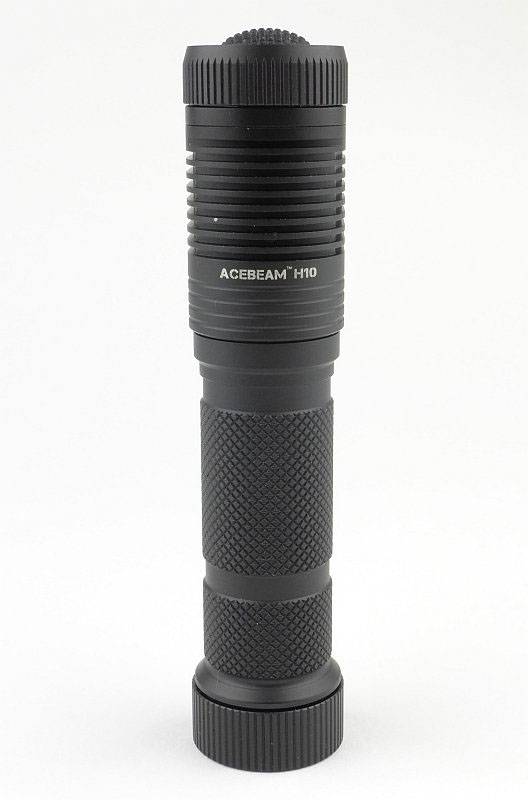
Looking at the back of the H10 you can see the shallow heat sink fins on the head, and the domed switch on top.
 photo 07 H10 tall P1150637.jpg

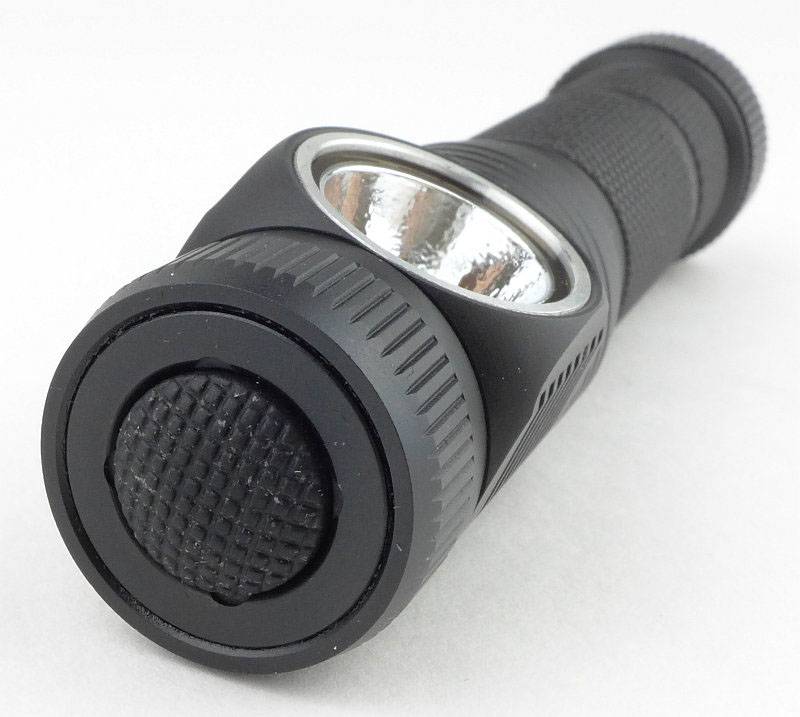
Surrounding the domed switch button is a rotating selector ring.
 photo 08 H10 switch P1150640.jpg

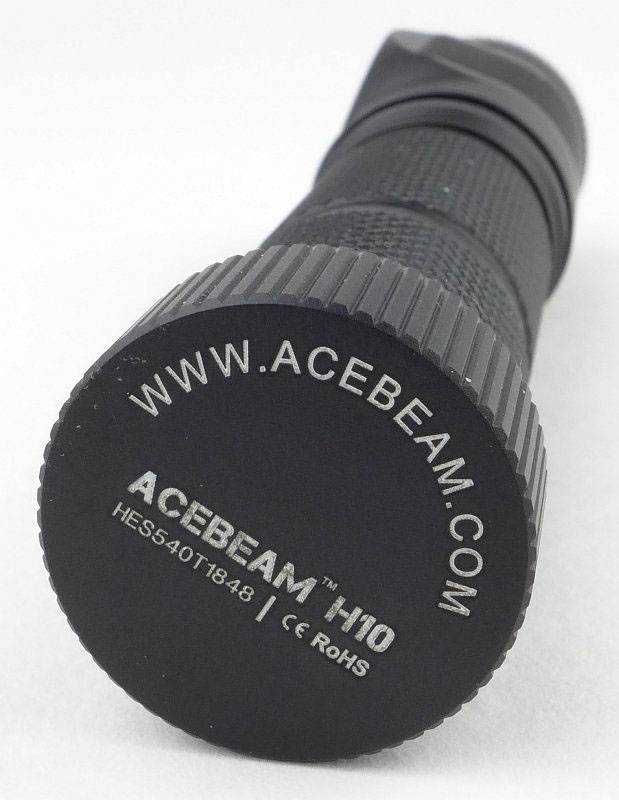
On the battery tube cap, the make, model and serial number are engraved.
 photo 09 H10 tailcap P1150643.jpg

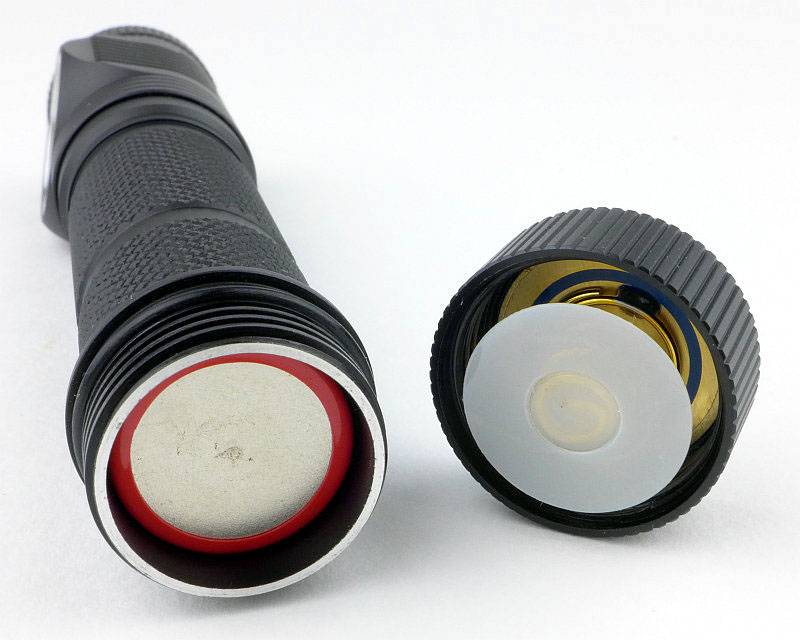
As we will see further on, there is parasitic drain, so for transit (and to prevent accidental activation) as the supplied 18650 is fitted inside the H10, an insulating disc is included to break the circuit and lock-out the H10. You need to discard that white plastic disc to use the H10.
 photo 10 H10 tailcap off P1150644.jpg

Inside the tail-cap the negative terminal is a spring. The top edge of the battery tube makes contact with the gold ring-terminal on the circuit board.
 photo 11 H10 tailcap P1150648.jpg

Peering inside the battery tube there is a simple positive terminal surrounded by a plastic insulator.
 photo 12 H10 inside P1150652.jpg

The threads are almost square, perfectly cut, fully anodised and well lubricated.
 photo 13 H10 threads P1150655.jpg

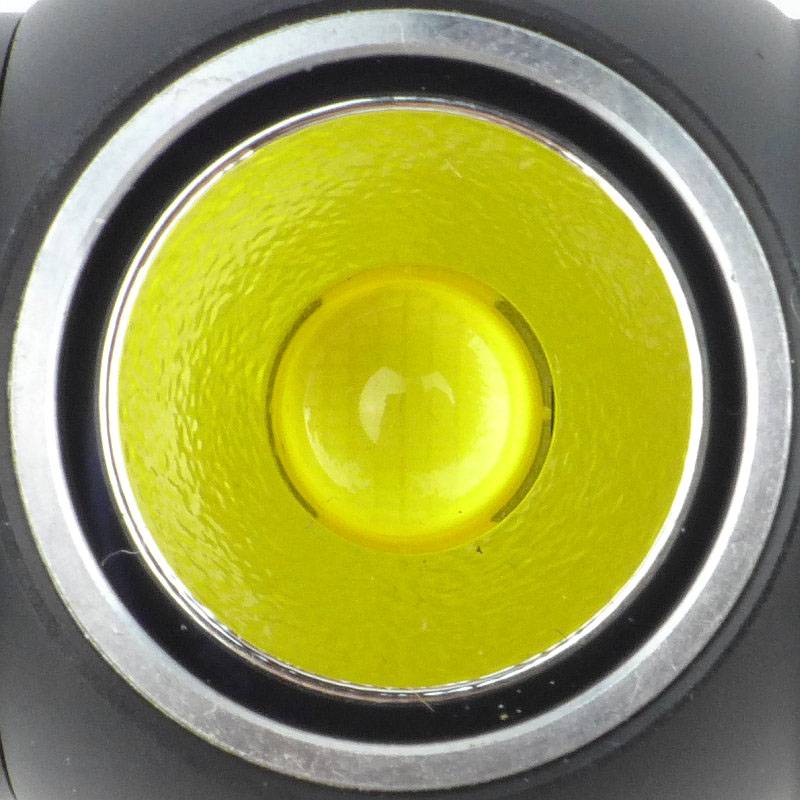
With a large MT-G2 LED the reflector is relatively small and is textured to further smooth the beam.
 photo 14 H10 reflector P1150660.jpg

Looking straight at the MT-G2 LED.
 photo 15 H10 LED P1150662.jpg

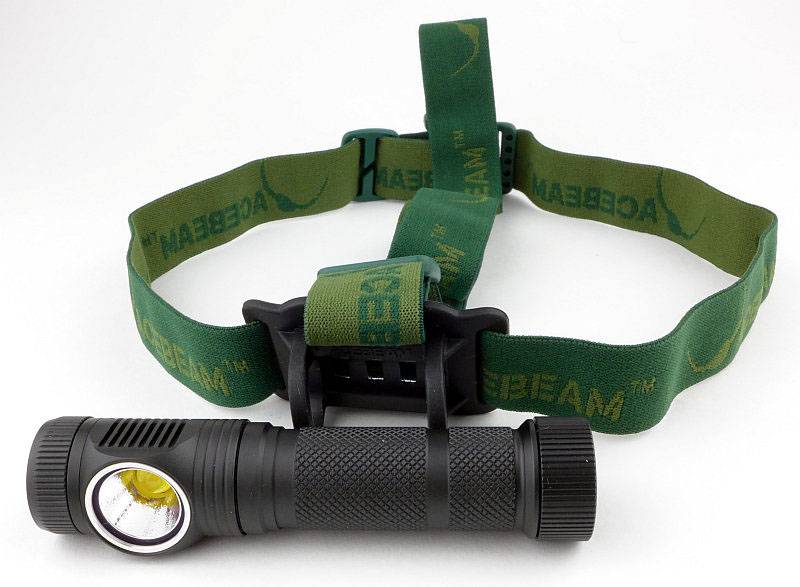
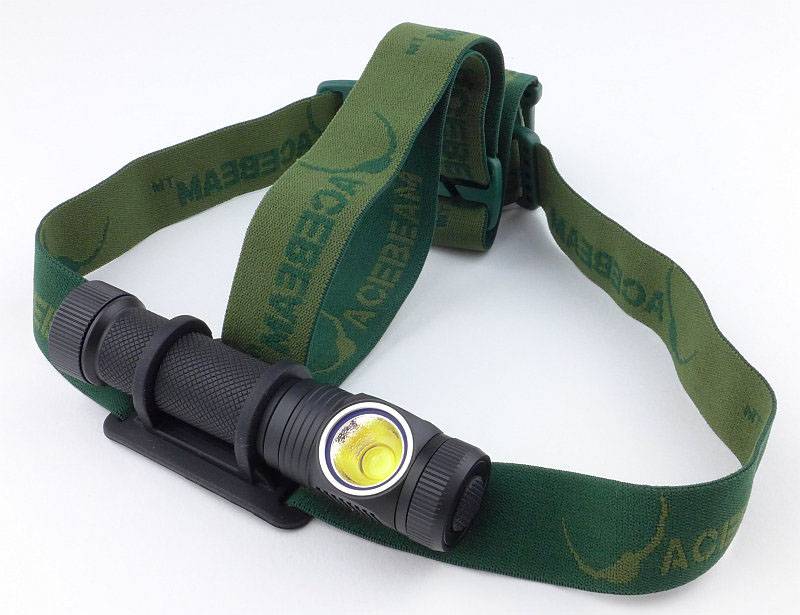
Of course the H10 can be used as a right-angle light, but it is intended as a headlamp. Here it is fitted in the headband mount.
 photo 16 H10 mounted P1150666.jpg

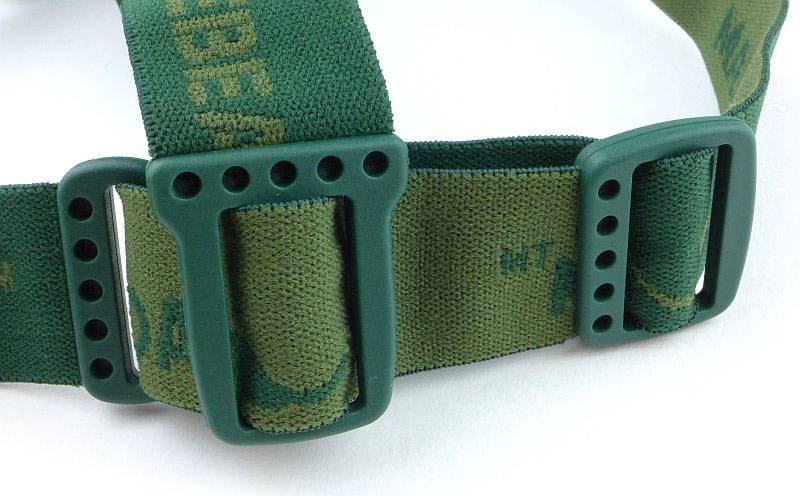
At the back, the top strap fits into the headband adjustment loop to help keep it centred.
 photo 17 H10 strap detail back P1150669.jpg

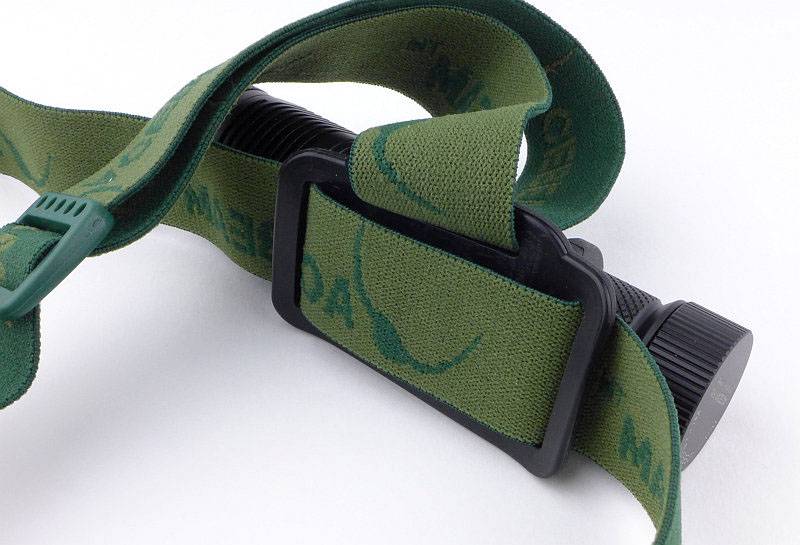
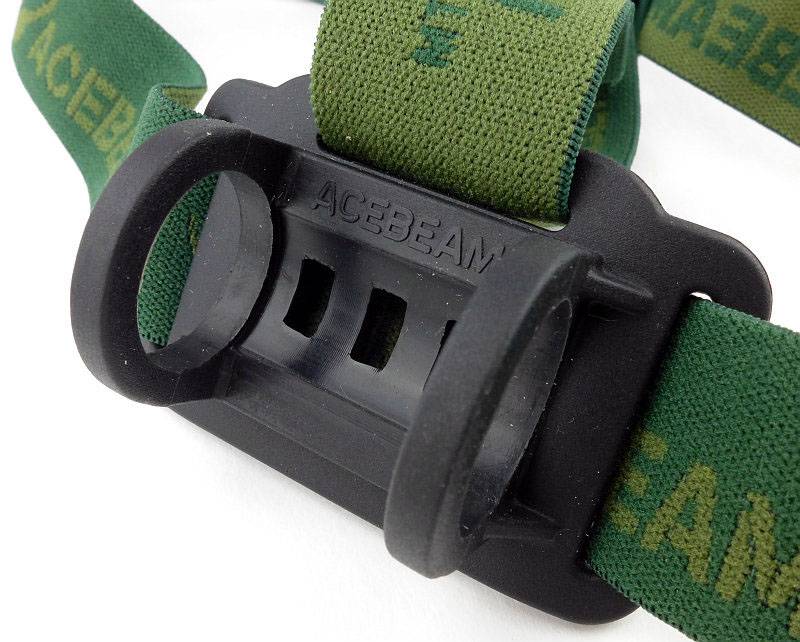
Though the mount is a soft rubber, the strap is threaded through the mount to keep the elastic strap itself against the user’s head. This provides maximum comfort.
 photo 18 H10 mount detail back P1150673.jpg

Some of the detail in the rubber mount’s moulding.
 photo 19 H10 mount detail front P1150682.jpg

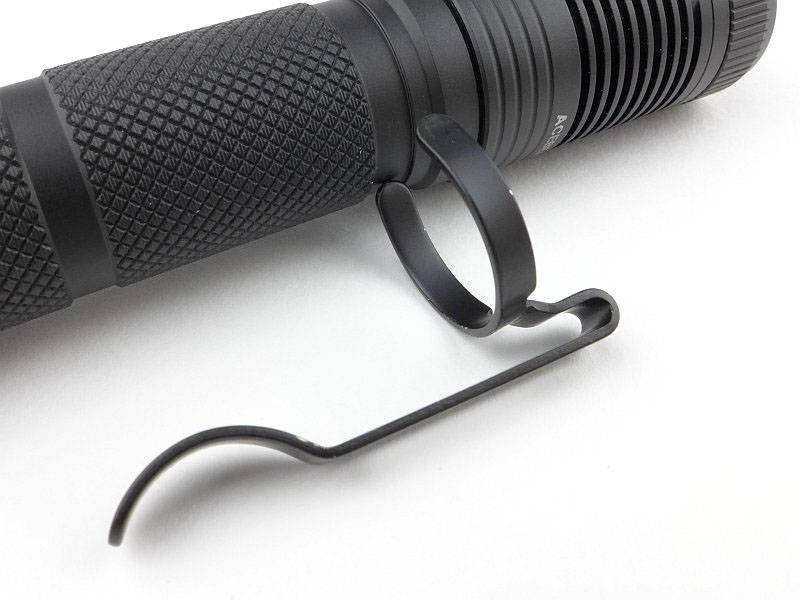
A pocket clip is provided for when the H10 is used out of the headband mount. It clips into either one of the grooves that are used for the headband mount. You cannot leave the clip on and fit it back into the headband mount properly. The clip is stiff to fit and has already marked the anodising.
 photo 20 H10 clip P1150687.jpg

The beam

Please be careful not to judge tint based on images you see on a computer screen. Unless properly calibrated, the screen itself will change the perceived tint.

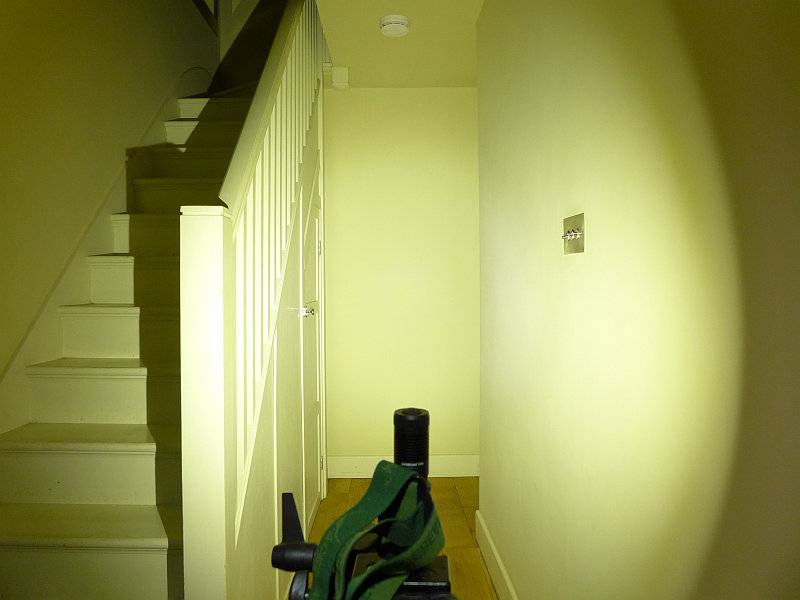
The indoor beamshot is intended to give an idea of the beam shape/quality rather than tint. All beamshots are taken using daylight white balance. The woodwork (stairs and skirting) are painted Farrow & Ball “Off-White”, and the walls are a light sandy colour called ‘String’ again by Farrow & Ball. I don’t actually have a ‘white wall’ in the house to use for this, and the wife won’t have one!

For most purposes, a headlamp benefits from a flood beam, as it is generally used as task light. The H10, with its large LED and small reflector doesn’t disappoint, with a wide and even flood beam.
 photo 22 H10 indoor beam P1170359.jpg

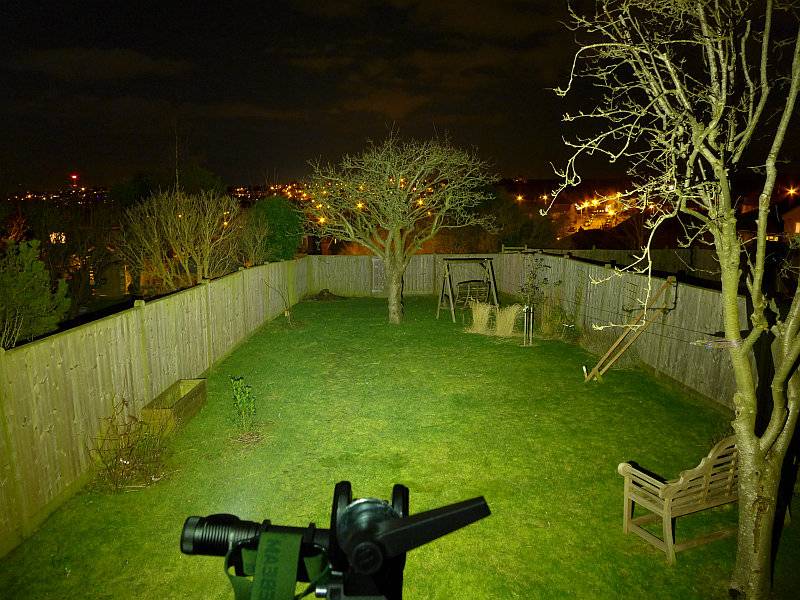
Moving outdoors, this headlamp does have enough power to give it some range despite the flood beam and the area is evenly lit.
 photo 21 H10 outdoor beam P1170276.jpg

Modes and User Interface:

The H10 has a two-stage domed button switch, and surrounding this a selector ring. The selector ring has four tactile stops for the four normal modes (1000lm, 500lm, 200lm, 30lm).

At any time (either from OFF or from any normal mode) a full press of the button gives you the maximum output 2000 lm Burst mode. When the button is released, the H10 returns to the previous state (either from OFF or any normal mode).

To turn onto a normal mode, half-press the button and hold for 2s. The H10 will then come onto the mode set by the selector ring. The mode can be pre-selected before turning on, or selected once the H10 is on.
To turn OFF, half-press the button and hold for 2s.

Batteries and output:

The runs on a supplied LG18650HE2 20A 2500mAh IMR 18650 cell, but can use any button top 18650 or 2xCR123, both of which will limit the maximum output.

To measure actual output, I built an integrating sphere. See here for more detail. The sensor registers visible light only (so Infra-Red and Ultra-Violet will not be measured).

Please note, all quoted lumen figures are from a DIY integrating sphere, and according to ANSI standards. Although every effort is made to give as accurate a result as possible, they should be taken as an estimate only. The results can be used to compare outputs in this review and others I have published.

___________________________________________ ________________________________ ________________________________
ACEBEAM H10 using supplied 20A IMR cell I.S. measured ANSI output Lumens PWM frequency or Strobe frequency (Hz)
___________________________________________ ________________________________ ________________________________
Burst 1940 0
High 998 0
Medium 481 0
Low 211 0
Firefly 31 0

Peak Beam intensity measured 6800 lx @1m giving a beam range of 165 m.

There is parasitic drain at and average of approximately 62uA (it varies between 32 and 93uA) which would mean a fully charged 2500mAh cell will take 4.6 years to drain.

Due to the extreme nature of the 2000lm Burst mode and the requirement to keep the button pressed, the runtime was not measured for this output level. Instead the runtime was for the highest constant output level the 1000lm high mode. This 1000lm output is well regulated for as long as the cell can maintain it; a very good performance.
 photo ACEBEAM H10 runtime.jpg

Troubleshooting

This section is included to mention any minor niggles I come across during testing, in case the information helps anyone else.

No issues were encountered during testing.

As per the description of this section, this information is provided in case anyone else finds a similar ‘issue’ that might be fixed in the same way.

The ACEBEAM H10 in use

Two highlights of the H10 are its lovely smooth flood beam and the neutral/warm tint of the MT-G2 LED. These features allow you to focus entirely on the task you are doing and not even think about the headlamp.

A single 18650 makes for a comfortable weight to have head mounted, and thanks to the use of a top-strap as well, you don’t need to have the headband very tight for it to stay securely in place. A top-strap really does improve comfort. With the strap routed through the mount so that it is the strap itself that is against your forehead, again comfort is very good.

What I don’t like are interfaces that make you wait for the light to come on or go off, and unfortunately, the H10 requires a half-press, wait, and 2s later the light comes on (with the same for off). If you fully press the button by mistake you get the full 2000lm burst output, which is not a nice surprise, and you have to try again to get the H10 to come on. For every day use, I’d much prefer the on/off to be controlled by a simple click, and the burst to require a longer hold, but perhaps only 1s before it activates.

With gloves on, or with cold hands, I found the half-press unreliable, or at least my ability to find the half-press position. 2000lm when you wanted 30lm is not good.
Still, that beam is worth the wait when you are not rushing to do anything, and once on and running, the H10 melts away and you just have light.

Depending on how many lights you use, you might also not hit the right mode first time. There are no marks on the selector ring to indicate which mode you have chosen. A few simple marks would make the pre-selection of modes so much easier. If this was your main light you would quickly learn the positions, and there is a stop at each end of the selections, so you can simply turn it all the way one way until it stops, then count the clicks back to the mode you want.

Parasitic drain is acceptable, but with fully anodised threads you can lock-out the H10 easily.

The optional clip can be fitted into either groove on the body to give up or down positioning. Fitting is very stiff and does mark the anodising, so depending on if this bothers you, you may choose to make it a dedicated right-angle light or leave it as a headlamp. Swapping between the two will scratch the H10.

The H10 gives its specified outputs effortlessly including the impressive 2000lm burst mode (as long as you use IMR), and has not had any issues with heat. In normal use and for indoor jobs, I find the 1000 lm output too high so use it on 500lm or below. When outdoors I have ramped up to the 1000 lm mode but the added airflow seems to cope with the extra heat easily.

The lowest mode is named ‘firefly’…I would not want to meet the firefly that provides 31 lm! that 31 lm output with the flood beam is a great mode, and one I use a lot, but I’d prefer it if there was a 1lm or lower mode as a true firefly level.

Review Summary

_______________________________________________ _______________________________________________
Things I like What doesn’t work so well for me
_______________________________________________ _______________________________________________
2000 lm Burst mode. Half-Press-and-Hold for 2s to turn on and off.
Smooth flood beam. ‘Firefly’ mode a bit bright at 31 lm.
Secure and comfortable to wear. Mode selector ring has no markings.
Well regulated output. Pocket clip scratches the anodising.
Nice tint from the MT-G2 LED. Needs IMR for best performance.
20A IMR cell supplied.
Well spaced modes.

See ACEBEAM’s Website for more of the manufacturer’s specifications


Discussing the Review:

Please feel free to add comments to the review, but the ideal place to freely discuss these reviews is on a forum. If you started reading the shorter forum version of the review, but followed the link this full exclusive review, please return to that forum to discuss the review there.
If you read the review entirely on Tactical Reviews, please consider one of the following to join in any discussion.

CandlePowerForums – Flashlight Reviews Section (Largest and Friendliest Flashlight Community Forum)

EdgeMatters – Sponsored Reviews (UK based Forum for Knife Makers and Collectors)
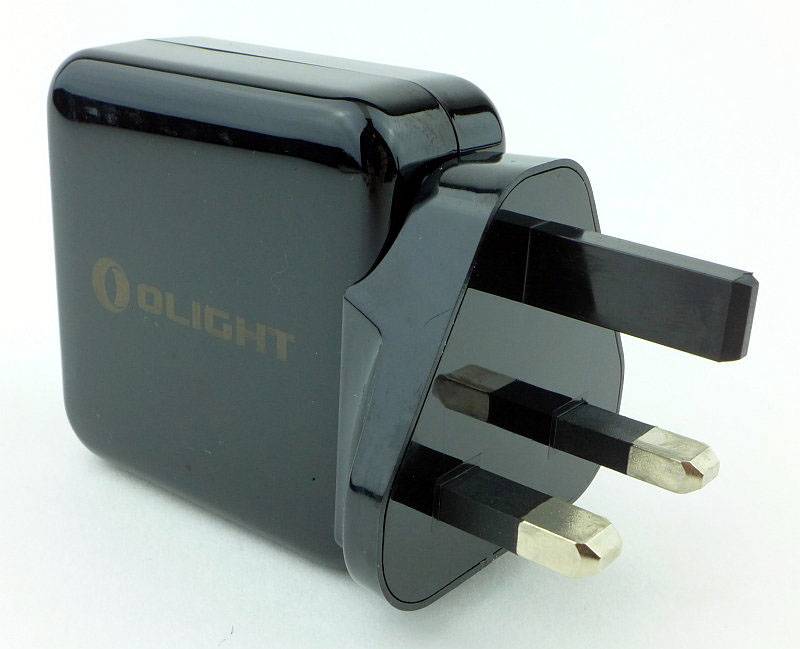
Light Review: FOURSEVENS Knight and Paladin

First revealed at SHOT Show 2015, FOURSEVENS have collaborated with PK (Paul Kim aka the Photon King) to produce these two exciting, fun and altogether usable lights – The Knight and Paladin. These are effectively the same light but the Knight is an Aluminium version and the Paladin is Titanium.

 photo 27 KnightPaladin plain P1170178.jpg

Taking a more detailed look:

FOURSEVENS’ packaging is ideal for showing off the design. Available separately are two versions of the strike bezel (a red one is shown here).
 photo 01 KnightPaladin Boxed P1170036.jpg

In the box you find the light itself, a spare O-ring, a CR123 cell and the front bezel ring which comes separately and not fitted to the light.
 photo 02 KnightPaladin unBoxed P1170053.jpg

So as it comes out of the package, the front bezel threads are exposed. Here the beautiful blue tones of the Paladin’s PVD finish can be seen clearly.
 photo 03 KnightPaladin bezel thread P1170058.jpg

While we are looking at the front, both these lights use a curious lens holder where the edges of the lens are exposed in three places. Once the bezel ring is in place this becomes less noticeable. Also note the small notches through the bezel threads; these allow the pocket clip to be fitted to the front of the light and held in place by the bezel ring.
 photo 04 KnightPaladin lens edge P1170060.jpg

Fitting the bezel ring completes the initial assembly.
 photo 05 KnightPaladin P angle P1170065.jpg

The same goes for the Knight.
 photo 06 KnightPaladin K angle bezel P1170071.jpg

Being all black, the bezel ring blends in more on the Knight.
 photo 07 KnightPaladin K angle P1170079.jpg

The positive and negative terminals in the head are gold plated. Despite the bare threads, these are not used as an electrical path. Physical reverse polarity protection is also included.
 photo 08 KnightPaladin K head P1170083.jpg

The threads are square cut and of a asymmetrical design with the grooves being much wider. This introduces ‘backlash’ into the threads and I suspect this relates to the special tailcap switch, but more on that later…
 photo 09 KnightPaladin K thread P1170086.jpg

A gold plated spring is used for the negative contact.
 photo 10 KnightPaladin K inside P1170087.jpg

Part of the design of the Knight and Paladin is that the light breaks down into several parts which can be swapped around in a Lego-like way to achieve different configurations.
 photo 11 KnightPaladin K apart P1170094.jpg

Swapping the bezel ring and the strike bezel components around creates a very different looking light!
 photo 12 KnightPaladin K crown P1170101.jpg

For the Paladin, the internals are the same in the head.
 photo 13 KnightPaladin P head P1170106.jpg

And when looking into the battery tube.
 photo 14 KnightPaladin P inside P1170111.jpg

As on the Knight, the threads are square and thin in profile.
 photo 15 KnightPaladin P thread P1170115.jpg

Taking the Paladin apart.
 photo 16 KnightPaladin P apart P1170118.jpg

Swapping the bezel ring and the strike bezel components and the Paladin too becomes a very different looking light!
 photo 17 KnightPaladin P crown P1170123.jpg

A couple of the options (not showing the clip fitted to the bezel), with the strike bezel on the front and along the battery tube, as well as the optional red strike bezel substituting the original black one on the Knight.
 photo 18 KnightPaladin configurations P1170134.jpg

Every part of these lights has had a great deal of attention paid to it. A special Tact-O-Click switch is used (more on that in the UI section).
 photo 19 KnightPaladin P Switch P1170138.jpg

The Paladin especially, deserves to be viewed from every angle to take in all the details.
 photo 23 KnightPaladin P reverse P1170154.jpg

A mid-depth reflector is used.
 photo 24 KnightPaladin P reflector P1170164.jpg

The reflector is the same on both models.
 photo 25 KnightPaladin K reflector P1170167.jpg

With an XM-L2 LED for the emitter.
 photo 25 KnightPaladin P LED P1170172.jpg

And the same again for the Knight.
 photo 26 KnightPaladin K LED P1170176.jpg

Though not the smallest of 1 x CR123 lights (with FOURSEVENS own Mini ML and Atom AL lights being smaller), but they are compact enough to be very easy to carry.
 photo 28 KnightPaladin size P1170190.jpg

The beam

Please be careful not to judge tint based on images you see on a computer screen. Unless properly calibrated, the screen itself will change the perceived tint.

The indoor beamshot is intended to give an idea of the beam shape/quality rather than tint. All beamshots are taken using daylight white balance. The woodwork (stairs and skirting) are painted Farrow & Ball “Off-White”, and the walls are a light sandy colour called ‘String’ again by Farrow & Ball. I don’t actually have a ‘white wall’ in the house to use for this, and the wife won’t have one!

With the Knight’s mid-depth reflector a well defined hotspot is present, but the spill is bright, wide and even until you reach the outer spill, where the lens holder cut-outs become visible.
 photo 30 KnightPaladin K indoor plain P1170343.jpg

Unsurprisingly the Paladin’s beam is the same.
 photo 33 KnightPaladin P indoor plain P1170338.jpg

If you fit the strike bezel to the front, the effect on the beam is just a little noticeable.
 photo 31 KnightPaladin K indoor crown P1170347.jpg

Outdoors (with the Knight) that hotspot gives you some reasonable range, and the bright spill fills in the rest well enough.
 photo 32 KnightPaladin K outdoor P1170267.jpg

Snap! the Paladin’s beam looks the same outdoors.
 photo 34 KnightPaladin P outdoor P1170264.jpg

Modes and User Interface:

A special TACT-O-CLICK switch is used for these lights. It combines a rotary and momentary click-switch into one design. The threads used for the switch have approximately 0.5-1mm play in them, and under this switch cap there is a momentary click switch.
 photo 20 KnightPaladin K Switch P1170143.jpg

If you tighten the switch cap it presses on the switch and turns the light on and keeps it on.
 photo 21 KnightPaladin K SwitchON P1170185.jpg

If you loosen the switch cap about 1/4 of a turn the light will go off, but there is sufficient movement in the switch cap that you can press on it and click the switch to turn the light on. Like this it operates as a non-latching momentary click switch.
Should you click the light on and wish to keep it on, you can then simply keep pressure on the switch and tighten the switch cap.
When loosening the switch cap, at slightly under one full turn, you reach a ‘stop’ where the switch cap is ‘tight’ against that stop. Like this the light is locked out, and pressure on the switch cap will not operate it.
 photo 22 KnightPaladin K SwitchOFF P1170182.jpg

You have two sets of modes available, Regular and Special. The last used mode is remembered if the light is left off for 1s.
Regular: High – Low
Special: Strobe – Medium – SOS – Beacon (High) – Beacon (Low)
To access the special modes you must first cycle through the Regular modes three times within 1.5 seconds
(Last used Regular or Special) – Low/High – High/Low – Low/High – High/Low – Low/High – Strobe – SOS – Medium – Beacon (High) – Beacon (Low) – (back to Low)

If your last used mode was a Special mode, then it counts as a regular mode when you count the clicks to access the special modes (the same number of clicks is used to access each special mode whatever mode was last used).

From OFF this becomes:

Strobe – 6 clicks
SOS – 7 clicks
Medium – 8 clicks
Beacon (High) – 9 clicks
Beacon (Low) – 10 clicks

Batteries and output:

Both the Knight and Paladin run on CR123 and RCR123.

To measure actual output, I built an integrating sphere. See here for more detail. The sensor registers visible light only (so Infra-Red and Ultra-Violet will not be measured).

Please note, all quoted lumen figures are from a DIY integrating sphere, and according to ANSI standards. Although every effort is made to give as accurate a result as possible, they should be taken as an estimate only. The results can be used to compare outputs in this review and others I have published.

___________________________________________ ________________________________ ________________________________
Knight/Paladin using specified cell I.S. measured ANSI output Lumens PWM frequency or Strobe frequency (Hz)
___________________________________________ ________________________________ ________________________________
Knight – High – CR123 449 0
Knight – Low – CR123 22 0
Knight – High – AW RCR123 585 0
Knight – Low – AW RCR123 22 0
Paladin – High – CR123 443 0
Paladin – Low – CR123 26 0
Paladin – High – AW RCR123 582 0
Paladin – Low – AW RCR123 26 0

* Beacon and Strobe output measurements are only estimates as the brief flashes make it difficult to capture the actual output value.

Peak Beam intensity of the Knight measured 3800 lx @1m giving a beam range of 123 m.
Peak Beam intensity of the Paladin measured 3600 lx @1m giving a beam range of 120 m.

There is no parasitic drain.

The main part of the runtime is almost identical for both lights and both CR123 and RCR123. RCR123 give a higher ‘burst’ part of the output (the initial 3 minutes of higher output). When using RCR123, these lights do not change their voltage response for the tailing off of the output; the result is that when using RCR123 the output will suddenly cut out when the protection activates.
 photo FourSevens Knight Paladin Runtime.jpg

Troubleshooting

This section is included to mention any minor niggles I come across during testing, in case the information helps anyone else.

No issues were encountered during testing.

As per the description of this section, this information is provided in case anyone else finds a similar ‘issue’ that might be fixed in the same way.

The Knight and Paladin in use

Nothing in the design of these lights has just ‘happened’, everything is designed for function or aesthetics.

Take the pocket clip for example. It is a double-action clip so will clip on in either direction without being turned around. Each ‘side’ of the clip will accommodate thicker or thinner material (thicker next to the body and thinner on the outer part). The two points sticking out sideways either side of the clip provide grip on the pocket and also grip for the user when unscrewing the battery tube. The groove cut into each end of the clip allows a lanyard to be threaded through. Finally inside the clip ring which fits over the body of the light are two tabs which fit into corresponding notches on the body or bezel to prevent it rotating. Details.
 photo 23 KnightPaladin P reverse P1170154.jpg

Also highly functional is the TACT-O-CLICK switch. Once you have got used to the ideal positions for the switch cap to click (1/4 turn undone from the fully ON position) or lockout (3/4 turn from fully ON), and swapping between these (so from lock-out to click is a half turn), the UI comes to life and the click or twist of the switch cap just fits the task at hand.

Personally I find the strike bezel to be more of a decorative item than anything practical, due to the length of the crenellations (not to mention the short overall length of the light). They are too long to be strong enough on the aluminium versions, and even the stainless steel strike bezel will bend if used with any real force (as you would if defending yourself). They are also too long to leave fitted all the time as they just stick into things. So are you really going to take the light apart to swap the bezel ring for the strike bezel ‘if’ you feel threatened? Not likely. BUT, who cares?! They Look great! (And you have an executive toy to play with.)

Ignoring the Special modes, the two Regular modes have covered what I need almost entirely. Those two light levels of 25lm and 450lm, though seemingly a long way apart, work perfectly with the beam profile. For my indoor, round-the-house use, the 22lm setting is ideal, especially as it is backed up by the 450lm. Using the Tact-O-Click switch in the momentary press-and-hold approach, with the two modes you can quickly bump it up or down depending on the distance you are looking at. I’ve not personally ever felt the need for the Medium mode (or Strobe or SOS), but have dipped into the Beacon modes for marking a location. What would improve it for me is adding a moonlight mode into the Special modes.

The timing for the mode changes works really well and I’ve not changed mode by mistake so far. Speaking of the Tact-O-Click switch again, the ability to lock the output on while you are using it as a momentary switch, is useful and can be achieved one handed. Also, by simply backing the switch cap off a bit you lock out the light means the lockout is a specific feature of the light and doesn’t require loosening any other parts. Like this, when you come to turn it on, you just twist it on as normal without having to remember to tighten the tailcap first.

A true fusion of function and aesthetics, even if not every feature is entirely practical.

Review Summary

_______________________________________________ _______________________________________________
Things I like What doesn’t work so well for me
_______________________________________________ _______________________________________________
Tact-O-Click switch (twist/click interface combined). Strike Bezel too long.
Can use CR123 or RCR123 Activates protection circuit when using RCR123.
Excellent all-rounder beam profile. No Moon mode.
Mode-change timing works very well. Strike Bezel strongly affects the beam shape.
Well chosen ‘Regular’ Modes.
Lego-like changes in a single light.


Discussing the Review:

Please feel free to add comments to the review, but the ideal place to freely discuss these reviews is on a forum. If you started reading the shorter forum version of the review, but followed the link this full exclusive review, please return to that forum to discuss the review there.
If you read the review entirely on Tactical Reviews, please consider one of the following to join in any discussion.

CandlePowerForums – Flashlight Reviews Section (Largest and Friendliest Flashlight Community Forum)

EdgeMatters – Sponsored Reviews (UK based Forum for Knife Makers and Collectors)
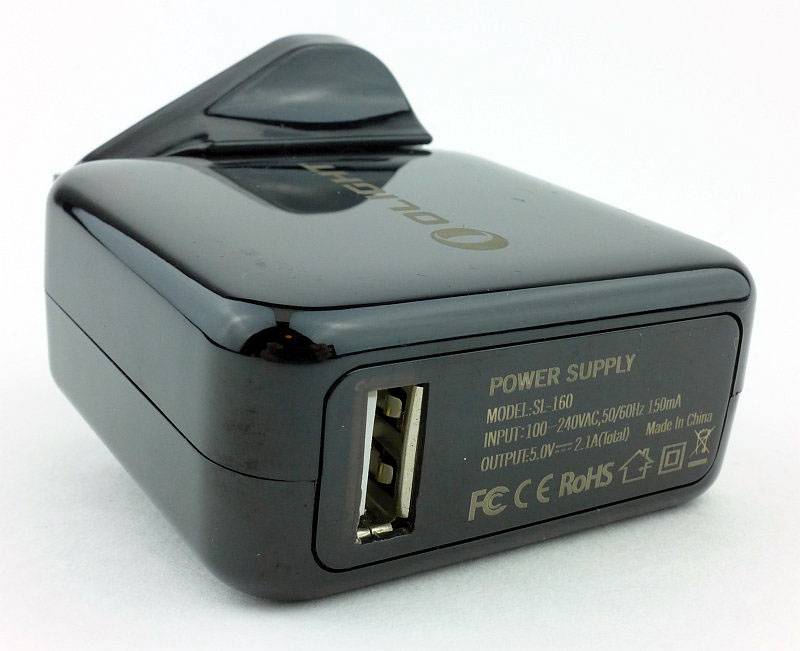
Light Review: FOURSEVENS Bolt-Mini

Following on from the uncompromising design of the original Bolt-Action BLR2 from FOURSEVENS (check the Light Reviews Index for a review of this light), there has been demand for a smaller version running on a common cell. Enter the new AAA powered Bolt-Mini from Foursevens.

 photo 04-BoltMini angle2 P1160890.jpg

FOURSEVENS’ original Bolt-Action light is the product of a three-way collaboration; FOURSEVENS partnering with Fellhoelter (designers of the Bolt-Action pen) and Tuff-Writer. Incorporating the unique bolt-action mechanism into a light required thinking out-of-the-box. Consideration of the overall size, performance and power options, all led to the final specifications of the BLR2 Bolt-Action flashlight, but some of those choices were criticised.

With the new Bolt-Mini, we have a much more pen-sized Bolt-Action light more in keeping with the Bolt-Action Pen.

Taking a more detailed look:

FOURSEVENS’ packaging shows off the light nicely.
 photo 01-BoltMini boxed P1160873.jpg

As well as the Bolt-Mini, two spare O-rings, an Alkaline AAA and the instructions are included.
 photo 02-BoltMini unboxed P1160883.jpg

A very sleek looking light.
 photo 03-BoltMini angle P1160886.jpg

Our first real look at the bolt, as well as the side view of the pocket clip. If you look closely you can see that the top of the pocket clip isn’t quite sitting in the cut out where it is screwed onto the body. This doesn’t affect the function, though it will have increased the clip tension slightly.
 photo 06-BoltMini reverse angle P1160894.jpg

The stainless steel clip is held in place with two screws and has ‘Fellhoelter’ inscribed on it.
 photo 07-BoltMini clip P1160897.jpg

A much closer look at the bolt in the OFF position.
 photo 08-BoltMini bolt off P1160904.jpg

And in the ON position.
 photo 09-BoltMini bolt on P1160907.jpg

To open the Bolt-Mini, the head unscrews.
 photo 12-BoltMini head off P1160920.jpg

It has square cut threads.
 photo 13-BoltMini threads P1160923.jpg

Peering inside you can see the spring terminal for the negative contact.
 photo 14-BoltMini inside P1160924.jpg

Even in this compact light, an XP-L is used with a compact reflector.
 photo 17-BoltMini reflector P1160937.jpg

Looking straight at the XP-L LED.
 photo 18-BoltMini LED P1160942.jpg

Showing the disassembled Bolt-Mini with its AAA cell.
 photo 15-BoltMini apart P1160929.jpg

Comparing the Bolt-Mini to the original Bolt-Action you can see it is much slimmer.
 photo 10-BoltMini bolts P1160911.jpg

Using the AAA cell makes it a much more pocketable pen-light.
 photo 11-BoltMini bolts2 P1160913.jpg

Another comparison with each Bolt-Light’s power source shown as well.
 photo 16-BoltMini bolts with cells P1160932.jpg

The beam

Please be careful not to judge tint based on images you see on a computer screen. Unless properly calibrated, the screen itself will change the perceived tint.

The indoor beamshot is intended to give an idea of the beam shape/quality rather than tint. All beamshots are taken using daylight white balance. The woodwork (stairs and skirting) are painted Farrow & Ball “Off-White”, and the walls are a light sandy colour called ‘String’ again by Farrow & Ball. I don’t actually have a ‘white wall’ in the house to use for this, and the wife won’t have one!

The small reflector and large LED make for a lovely broad beam great for all close range and indoor use. An outdoor beamshot is not shown as the floody beam was too diffuse to show properly.
 photo 19-BoltMini indoor beam P1170367.jpg

Modes and User Interface:

So it is all about this – the Bolt
 photo 08-BoltMini bolt off P1160904.jpg

Operation is simple. Slide the bolt forward and near the end of the travel the light comes on. Quickly releasing and sliding the bolt changes mode, and once you have the output you want, you simply rotate the bolt to lock it on.
 photo 09-BoltMini bolt on P1160907.jpg

Flicking the spring loaded handle sideways knocks it out of the locked position and turns it off.

The Bolt-Mini has 5 configurations with different sets of modes.
Configuration 1: High (factory default)
Configuration 2: ‘Previous’ – High – Low
Configuration 3: ‘Previous’ – High – Strobe
Configuration 4: ‘Previous’ – Low – Medium – High – Strobe
Configuration 5: ‘Previous’ – Low – Medium – High – Strobe – SOS – Beacon (High) – Beacon (Low)

In normal operation (starting from OFF), the Bolt-Mini (if left off for 5-6s) will come onto the ‘Previous’ or last-used mode, then, if cycling through the modes, it will start at the first mode in the configuration mode set.
– ‘Previous’ can be any mode.
– ‘Previous’ only occurs once the first time when cycling rapidly through these modes.
– If the ‘Previous’ mode is the first mode in the current mode set, it will not be repeated. For example if you last used Low in configuration 5, when you turn it on you will get Low, then Medium (not Low then Low).

So, from off, this means on repeated switching of the Bolt in Configuration 5 you get:
‘Previous’ – Low – Medium – High – Strobe – SOS – Beacon (High) – Beacon (Low) – Low – Medium – High – Strobe – SOS – Beacon (High) – Beacon (Low) etc

Once you have the desired mode, simply hold and rotate the bolt to lock it in that mode.

Changing configuration:
To change the configuration you need to turn the light ON and OFF 10 times within 2s. On the 10th activation hold the bolt in the ON position without locking it in place. The Bolt-Mini will flash between 1 and 5 times to indicate the current configuration. Quickly turn the light OFF and ON again to change to the next configuration and repeat until you have the one you want. Turn the light OFF for 5s to confirm the setting.

Batteries and output:

The Bolt-Mini runs on one AAA Alkaline or NiMh.

To measure actual output, I built an integrating sphere. See here for more detail. The sensor registers visible light only (so Infra-Red and Ultra-Violet will not be measured).

Please note, all quoted lumen figures are from a DIY integrating sphere, and according to ANSI standards. Although every effort is made to give as accurate a result as possible, they should be taken as an estimate only. The results can be used to compare outputs in this review and others I have published.

___________________________________________ ________________________________ ________________________________
Bolt-Mini using AAA Eneloop I.S. measured ANSI output Lumens PWM frequency or Strobe frequency (Hz)
___________________________________________ ________________________________ ________________________________
High 142 950
Medium 68 950
Low 7 950
Strobe Not Measured 8
Beacon High Not Measured 0.07
Beacon Low Not Measured 0.07

* Beacon and Strobe output measurements are only estimates as the brief flashes make it difficult to capture the actual output value.

Peak Beam intensity measured 200 lx @1m giving a beam range of 28 m.

As I’m also testing the Preon P1 and P2, I’ve put all three output traces together to allow the AAA lights to be compared. Like the P1, the Bolt-Mini runs on only a single AAA. You can clearly see the ‘Burst’ mode operating, with the initial part of the trace being at 100% output, and then dropping to around 70% after 3 minutes.

Troubleshooting

This section is included to mention any minor niggles I come across during testing, in case the information helps anyone else.

No issues were encountered during testing.

As per the description of this section, this information is provided in case anyone else finds a similar ‘issue’ that might be fixed in the same way.

The Bolt-Mini in use

When I first heard about the Bolt-Action light I was very sceptical. What was the point? Well actually it is very usable. The bolt-action makes for a great momentary interface and locking on or off is extremely intuitive.

The original Bolt-Action is more powerful and the bolt has an easier action, but it is bigger than a pen, so becomes more noticeable to EDC. Still a great light though (and remember I found it would run on a 14500 as well as the officially supported 2xCR2). However, the Bolt-Mini takes this design into a new league altogether as it now sits in a pocket and alongside pens without standing out.

Unfortunately the action feels quite a bit stiffer and the smaller ball on the lever can dig in a bit on repeated use, making it less comfortable to use than its bigger brother, but you forgive that for the smaller size and with it being much easier to feed with a normal AAA.

Having to wait around 6s from turning it off to turning it back on again if you want to avoid mode changes is a little frustrating. I’d prefer that a much more rapid on/off cycle was needed to change mode.

The ‘Previous’ mode memory is useful, as is the fact that the next mode will then be the first of the current configuration’s mode set. With the interface working in this way, I have chosen configuration 5 (with the most modes), as in general use I never have to cycle through the flashing modes unless I want to use them.

So, some might say that this is a very large single AAA light, and compared to most 1xAAA lights it is much longer. But, and this is an important ‘but’, this is a pen sized EDC light with a unique and satisfying ‘bolt’ interface,… and it happens to use a single AAA for power. Don’t think of it in a simple direct comparison to other single AAA lights, but instead for its distinctive character.

With FOURSEVENS usually not using PWM, I was a little disappointed to find it was utilised in the Low, Medium and High modes, and at 950Hz is on the edge of being noticed. I have high sensitivity to PWM and have found that 1000Hz is the point where the effects start to become less and less noticeable. It means that most of the time I don’t see any effects, but occasionally do. Any effects are most noticeable in Low (as the width of the PWM peaks is the narrowest), much less in Medium and pretty much gone in High.

Generally I don’t like pocket clips as they can be very abrasive and destructive. On the Bolt-Mini, the clip is a polished finish and the tube it sits against is smooth, so it slides on and off a pocket lip nicely. There is plenty of tension in the clip to keep it secure, but as seen early in the review, the pocket clip isn’t quite sitting in the cut-out where it is screwed to the body and this has increased the clip tension. If the clip were sitting flat as it should, the tension will be slightly less.

Another advantage to the bolt-action switch is that you can operate it completely silently. Having previously selected Low, you have a silent operation light to keep by your bed. The Low mode isn’t a moon mode, but again, thanks to the design, you can turn the Bolt-Mini on with the head tucked into your hand or wrist and control how much light can be seen.

The original Bolt-Action light is an interesting concept, if perhaps targeted more at the enthusiast (needing specialist cells), but the Bolt-Mini opens this concept to all. The smaller size is much easier to carry and taking the humble AAA makes it easy to feed. FOURSEVENS have listened to their customers and made the bolt-action design accessible to all.

Review Summary

_______________________________________________ _______________________________________________
Things I like What doesn’t work so well for me
_______________________________________________ _______________________________________________
Bolt-Action switch interface. The Switch action is stiffer than the original Bolt-Action light.
User selectable configuration. Pocket clip isn’t fitted properly.
Excellent close range beam. Occasionally noticeable PWM.
XP-L LED.
AAA power.


Discussing the Review:

Please feel free to add comments to the review, but the ideal place to freely discuss these reviews is on a forum. If you started reading the shorter forum version of the review, but followed the link this full exclusive review, please return to that forum to discuss the review there.
If you read the review entirely on Tactical Reviews, please consider one of the following to join in any discussion.

CandlePowerForums – Flashlight Reviews Section (Largest and Friendliest Flashlight Community Forum)

EdgeMatters – Sponsored Reviews (UK based Forum for Knife Makers and Collectors)
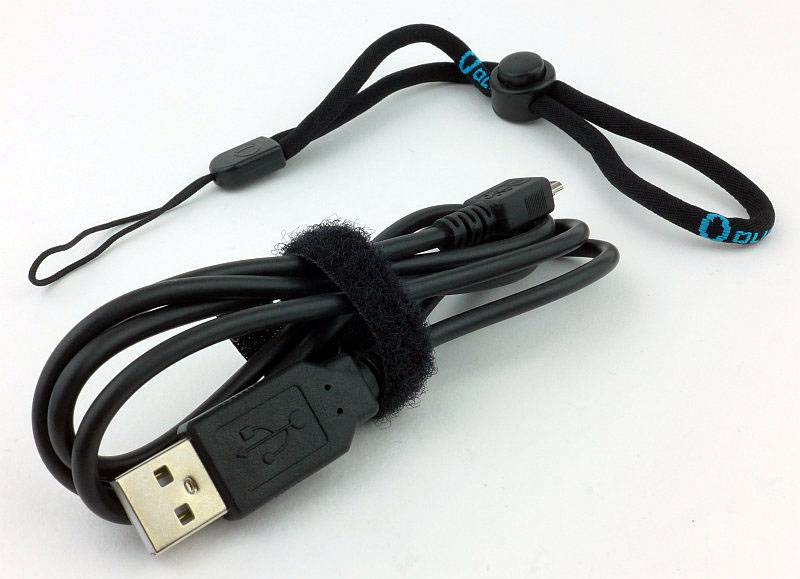
Light Review: SOG Dark Energy Group Review (DE-01, DE-02, DE-03 and DE-06)

As well as the hybrid SOG Bladelights I reviewed recently, SOG also have a line of dedicated lights named ‘Dark Energy’. I have four of them on test, the DE-01, DE-02, DE-03 and DE-06 to compare the different power options and their performance.

 photo 02 SOG DE unboxed P1160779.jpg

In case you notice that the DE-03 (AA powered) looks a little worn, that particular light has been a show demo light and was supplied in well used condition alongside the other new, boxed, models.
 photo 01 SOG DE boxed P1160594.jpg

As each light is built around the power source, the sizes vary accordingly. From left to right, the DE-06 uses 1×18650, DE-02 uses 2xCR123, DE-03 uses 1xAA and the DE-01 with a CR123.
 photo 03 SOG DE size P1160780.jpg

Taking a more detailed look at the DE-06:

Of the four models on test, three have very similar details (DE-01, DE-02 and DE-03) but the DE-06 is different so needs its own section.

SOG’s presentation is excellent with a distinctive bevelled edge box.
 photo 01 SOG DE06 boxed P1160715.jpg

Even with the DE-06, which is the only rechargeable model, the contents are minimal. As well as the DE-06 there is a Nextorch branded 2600mAh 18650 cell and a single bay charger with mains adapter.
 photo 02 SOG DE06 box contents P1160720.jpg

The basic single bay charger with cell fitted.
 photo 03 SOG DE06 charger P1160722.jpg

Immediately you can see the strong SOG styling of the Dark Energy series with more knurling than most lights, including the head.
 photo 04 SOG DE06 angle P1160725.jpg

SOG offer engraving on just about all their products, so you will notice some customisation on these samples.
 photo 05 SOG DE06 reverse angle P1160727.jpg

The wide clip is attachedto the side of the light with two screws.
 photo 06 SOG DE06 clip P1160733.jpg

You can tailstand these lights and the switch boot is recessed. With gloves it can be more difficult to operate the switch.
 photo 07 SOG DE06 switch P1160736.jpg

A broad gold-plated sprung-plunger acts as the negative terminal and the battery tube contact is gold-plated as well.
 photo 08 SOG DE06 tailcap contacts P1160739.jpg

In the DE-06 only, the threads are fully anodised meaning you can lock-out the light. The threads are well lubricated and nearly square.
 photo 09 SOG DE06 threads P1160741.jpg

Looking inside the battery tube, the positive contact is a spring terminal.
 photo 10 SOG DE06 inside P1160747.jpg

Though not specified on the packaging, the LED is an XM-L2.
 photo 12 SOG DE06 LED P1160755.jpg

Unlike the other models, the DE-o6 uses a smooth reflector.
 photo 13 SOG DE06 reflector P1160757.jpg

As well as the laser engravings on the DE-06, it also has ‘SOG’ machined into the side prior to anodising.
 photo 14 SOG DE06 engravings P1160758.jpg

Just for scale, this is the DE-06 next to its 18650 cell.
 photo 15 SOG DE06 size P1160764.jpg

Taking a more detailed look at the DE-01:

This one has been chosen to represent several models as the details of the DE-01, DE-02 and DE-03 are all very similar (apart from battery tube length).

SOG’s packaging is the same for the entire series and other SOG products as well.
 photo 01 SOG DE01 boxed P1160638.jpg

Even simpler than the DE-06, the DE-o1 simply comes with a CR123 primary cell with SOG branding.
 photo 02 SOG DE01 box contents P1160639.jpg

All of the Dark Energy lights have extensive aggressive knurling and here you can see traces of the packaging that the knurling on the head has scratched off. There are no flaws in the anodising, what you see is debris from the packaging.
 photo 03 SOG DE01 angle P1160641.jpg

A closer view of this knurling.
 photo 04 SOG DE01 head knurling P1160645.jpg

The DE-01 uses a slimmer pocket clip which is fixed to the side with two screws.
 photo 05 SOG DE01 clip P1160647.jpg

Even on the smallest of the lights, the custom engraving has been fitted on.
 photo 06 SOG DE01 reverse angle P1160651.jpg

Looking closer, the engraving is still clear enough despite being reduced to a very compact size.
 photo 07 SOG DE01 engraving P1160654.jpg

As with the DE-06 the switch is slightly recessed and tail standing is possible.
 photo 08 SOG DE01 switch P1160657.jpg

Where the DE-01, DE-02 and DE-03 really differ from the DE-06 is with the tailcap. A very different configuration with an exposed spring terminal and bare threads.
 photo 09 SOG DE01 tailcap P1160658.jpg

Bare aluminium standard threads are used.
 photo 10 SOG DE01 threads P1160661.jpg

Inside the battery tube, the positive terminal is not sprung.
 photo 11 SOG DE01 inside P1160663.jpg

Textured reflectors are used for the smaller models. This is more suited to EDC tasks.
 photo 12 SOG DE01 reflector P1160671.jpg

There is a SOG identifier around the XP-G R5 LED.
 photo 13 SOG DE01 LED P1160675.jpg

The beam

Please be careful not to judge tint based on images you see on a computer screen. Unless properly calibrated, the screen itself will change the perceived tint.

The indoor beamshot is intended to give an idea of the beam shape/quality rather than tint. All beamshots are taken using daylight white balance. The woodwork (stairs and skirting) are painted Farrow & Ball “Off-White”, and the walls are a light sandy colour called ‘String’ again by Farrow & Ball. I don’t actually have a ‘white wall’ in the house to use for this, and the wife won’t have one!

All exposure have been kept the same for this series of indoor and outdoor beamshots to allow a direct comparison of the different outputs to be made.

Despite the textured reflector of the smaller lights, there is still a bright hotspot in the DE-01’s beam. The spill is relatively dim and the outer spill shows the shaping of the bezel.
 photo SOG DE01 indoor beam P1170317.jpg

Moving to the DE-02 the main difference here is that the output is higher; the beam characteristics are the same.
 photo SOG DE02 indoor beam P1170314.jpg

Again with the DE-03 (the dimmest of all being AA powered) the beam characteristics are the same as the previous two.
 photo SOG DE03 indoor beam P1170320.jpg

With its smooth reflector and larger emitter, the DE-06 has a better beam overall with wide hotspot and much more usable spill.
 photo SOG DE06 indoor beam P1170311.jpg

Moving outdoors the DE-01’s beam shows the benefit of the small hotspot as it gives the beam a reasonable range for its output.
 photo SOG DE01 outdoor beam P1170251.jpg

As the DE-02 has 2x CR123 it is simply a brighter version of the DE-01.
 photo SOG DE02 outdoor beam P1170248.jpg

At the extended range and only having a single AA for power, the DE-03 starts to run out of steam.
 photo SOG DE03 outdoor beam P1170254.jpg

The combination of 18560 (li-ion) power, a larger smooth reflector and a powerful XM-L2 LED gives the DE-06 much more punch that the smaller lights.
 photo SOG DE06 outdoor beam P1170245.jpg

Modes and User Interface:

All the Dark Energy lights use a very intuitive dual function tail-cap switch. It operates like both a forward-clicky and reverse-clicky at the same time.

From OFF, using the momentary operation, you get High mode every time and you can tap the switch as many times and as quickly as you like, you only get High.
Once clicked ON, now if you tap the switch (half press) you cycle through the available modes.
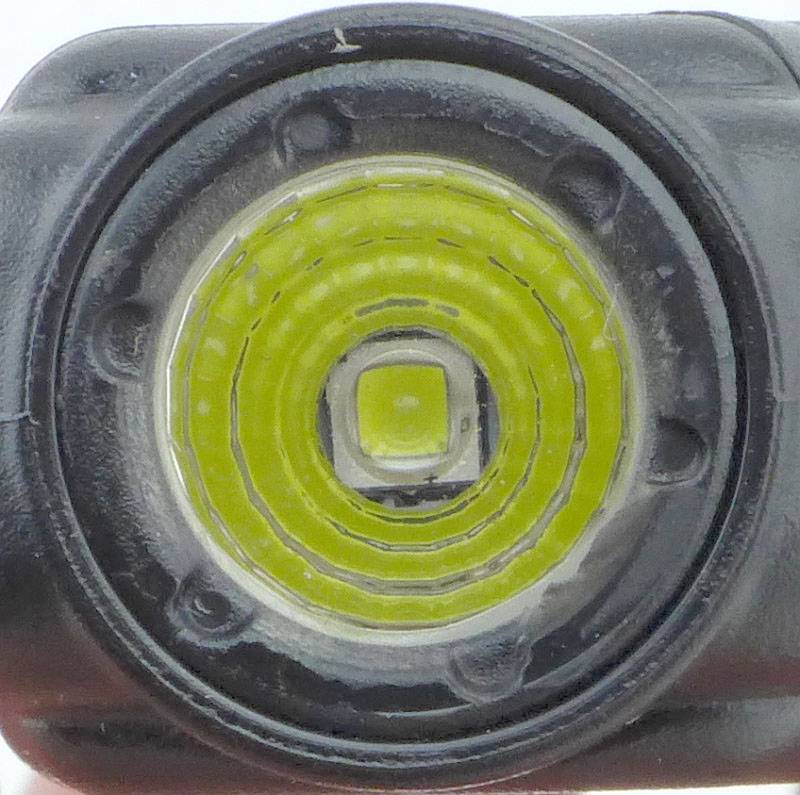
Once you switch OFF, you will then get High on the first press every time.

For the DE-01, DE-02 and DE-03, the modes are High -> Low -> Strobe -> High etc…
For the DE-06 the modes are High -> Medium -> Low -> Strobe -> High etc…

Simple, intuitive and predictable.

Batteries and output:

The DE-01 runs on 1xCR123.
The DE-02 runs on 2xCR123.
The DE-03 runs on 1xAA.
The DE-06 runs on 1×18650 (also 2xCR123 and 1×17670).

To measure actual output, I built an integrating sphere. See here for more detail. The sensor registers visible light only (so Infra-Red and Ultra-Violet will not be measured).

Please note, all quoted lumen figures are from a DIY integrating sphere, and according to ANSI standards. Although every effort is made to give as accurate a result as possible, they should be taken as an estimate only. The results can be used to compare outputs in this review and others I have published.

___________________________________________ ________________________________ ________________________________
Model/Mode using specified cell I.S. measured ANSI output Lumens PWM frequency or Strobe frequency (Hz)
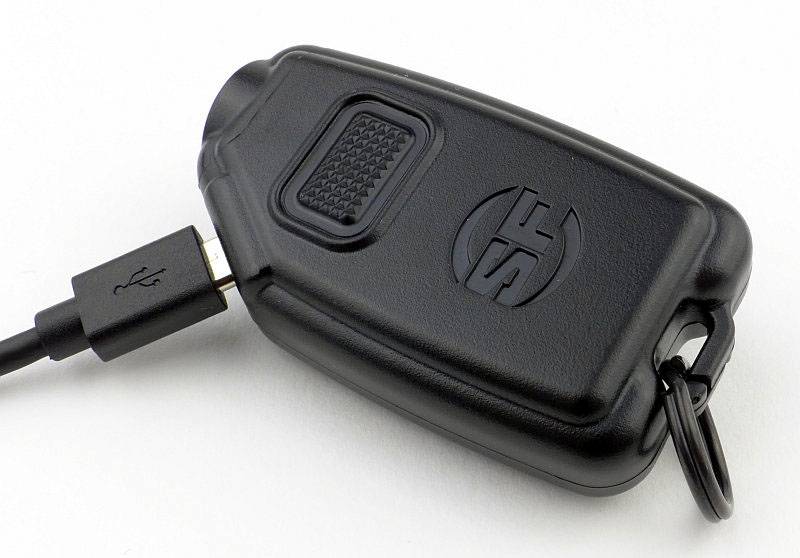
___________________________________________ ________________________________ ________________________________
DE-01/High – CR123 199 0
DE-01/Low – CR123 79 760
DE-01/Strobe – CR123 55 9.8
DE-02/High – 2xCR123 252 0
DE-02/Low – 2xCR123 91 760
DE-02/Strobe – 2xCR123 70 10.2
DE-03/High – AA Eneloop 115 0
DE-03/Low – AA Eneloop 43 740
DE-03/Strobe – AA Eneloop 33 9.8
DE-06/High – Supplied 2600mAh 18650 716 0
DE-06/Medium – Supplied 2600mAh 18650 255 2940
DE-06/Low – Supplied 2600mAh 18650 21 1420
DE-06/Strobe – Supplied 2600mAh 18650 377 8.3

* Beacon and Strobe output measurements are only estimates as the brief flashes make it difficult to capture the actual output value.

DE-01 peak Beam intensity measured 5400 lx @1m giving a beam range of 147m.
DE-02 peak Beam intensity measured 7100 lx @1m giving a beam range of 169m.
DE-03 peak Beam intensity measured 2700 lx @1m giving a beam range of 104m.
DE-06 peak Beam intensity measured 14500 lx @1m giving a beam range of 241m.

There is parasitic drain in all models:
In the DE-01, drain was 8uA (averaged as it varied from 3-12uA) giving 19.96 years to drain the cell.
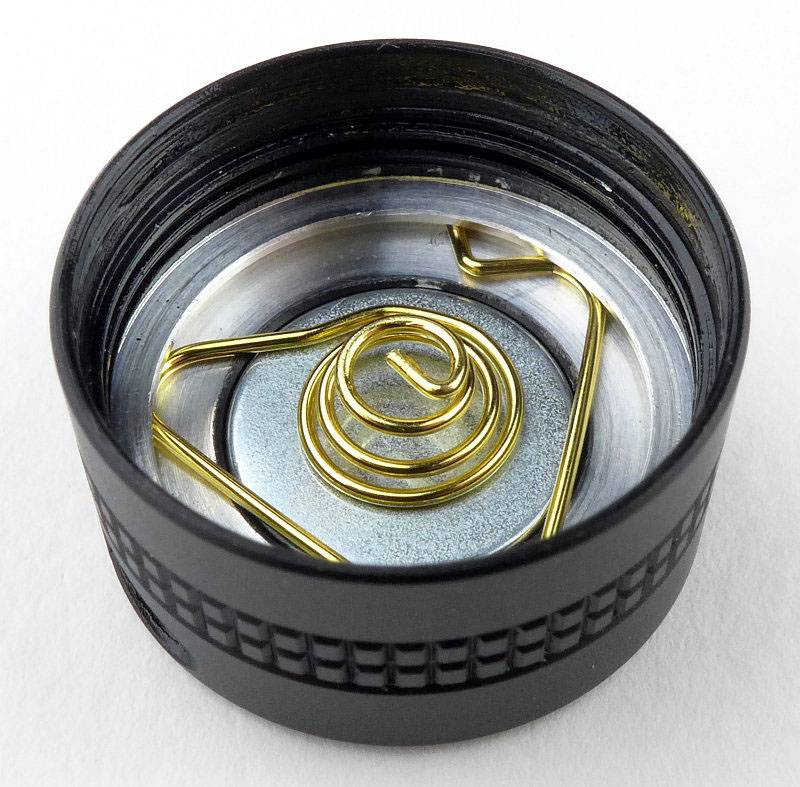
In the DE-02, drain was 6.8uA giving 23.49 years to drain the cell.
In the DE-03, drain was 24uA (averaged as it varied from 4-44uA) giving 9.03 years to drain the cell.
In the DE-06, drain was 5uA giving 77.57 years to drain the cell.

Both CR123 powered lights show good regulation and the AA powered DE-03 has a reasonably consistent output. Though always much higher in output than the other lights, the DE-06 is not regulated (or not able to maintain regulation with the supplied cell).
 photo SOG DE runtime.jpg

Troubleshooting

This section is included to mention any minor niggles I come across during testing, in case the information helps anyone else.

No serious issues were encountered during testing.
However, I did find the switch on the DE-06 failed to latch at times. With the recessed switch design I found I ended up pushing the switch sideways as well as in and when doing this occasionally had the issue. Pressing the switch straight in always worked correctly, so it was the sideways pressure that caused the occasional issue.

As per the description of this section, this information is provided in case anyone else finds a similar ‘issue’ that might be fixed in the same way.

The Dark Energy lights in use

My personal lighting requirements generally mean I want to start on low, but reliably starting on high is important for many users, and with the excellent dual function switch these Dark Energy lights allow you to know every time you pick them up you get maximum output on the first press every time.

With that usage in mind, I would have preferred a protruding switch to make it easy to hit the button gloved or not.

The extensive knurling is aggressive and abrasive but ensures a very firm grip whatever your hands or the light are covered in and wherever you grab it. Storage and carry need some consideration as it will wear through fabrics fairly fast.

Especially with this feature of the knurling, the lack of a holster is a disappointment as a properly matched holster would take away the problem of finding a suitable carry solution for these lights.

For each model the output levels are sensible and do not push the cells too hard. In these days of lumen chasing SOG have taken a good approach as you get a good balance of output and runtime.

With relatively limited outputs, the smaller Dark Energy lights use a more focused beam which extends their usable range. This choice does mean they are not so good for close range and indoor uses as you can get hotspot tunnel vision.

In the output measurements you will see that the lower levels use PWM. Fortunately this has been set at a reasonably high frequency. Despite my PWM hypersensitivity, I did not notice the DE-06 giving any PWM effects. For the DE-01, DE-02 and DE-03 the frequency is a bit lower and this did result in me noticing a few PWM effects, but it was not bad. (1000Hz is the critical point where above this I can’t visually detect PWM and below this I can – 300Hz and below becomes very noticeable)

In a crowded market, the outstanding features of this series of lights is the dual function switch and resulting user interface, and the distinctive all-over knurling with super secure grip that this gives you.

Review Summary

_______________________________________________ _______________________________________________
Things I like What doesn’t work so well for me
_______________________________________________ _______________________________________________
Excellent Dual-Function switch. No Holster provided.
Superb grip from all-over knurling. Knurling is very abrasive.
Reliably switches onto Maximum output. Recessed switch sometime difficult to fully press.
Choice of power sources and sizes. Occasional PWM effects on low mode (except DE-06).
Quality personalisation engraving available.


Discussing the Review:

Please feel free to add comments to the review, but the ideal place to freely discuss these reviews is on a forum. If you started reading the shorter forum version of the review, but followed the link this full exclusive review, please return to that forum to discuss the review there.
If you read the review entirely on Tactical Reviews, please consider one of the following to join in any discussion.

CandlePowerForums – Flashlight Reviews Section (Largest and Friendliest Flashlight Community Forum)

EdgeMatters – Sponsored Reviews (UK based Forum for Knife Makers and Collectors)