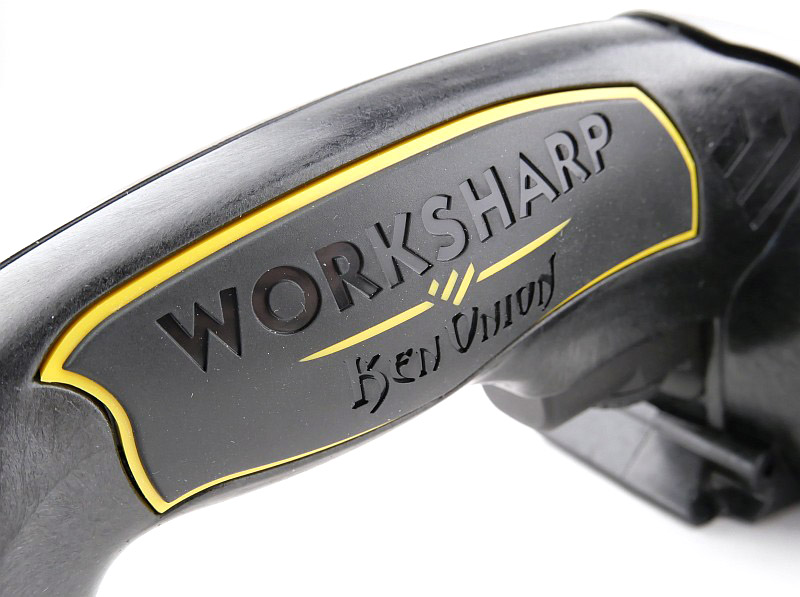
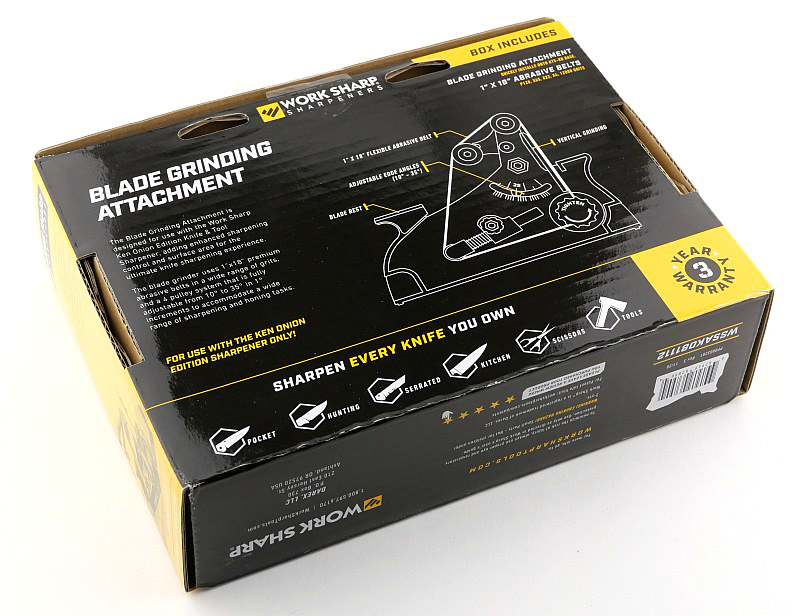
What should I be calling this review? It is actually a review of the optional add-on Blade Grinding Attachment for the Work Sharp Ken Onion Edition Sharpener, which is getting to be quite a mouthful! However although the Blade Grinding Attachment is an add-on accessory for the Ken Onion Edition Sharpener and can’t be used without it, I have titled the review as being a review of the “Work Sharp Blade Grinding Attachment” because for me it is what the attachment brings to the table that is the main feature.
I’ve had my eye on the Work Sharp Ken Onion edition for a long time. For me it wasn’t quite right (though I still think this is excellent as is) until I tried the optional Blade Grinding attachment.
For my needs it is the Blade Grinding Attachment that transforms the Ken Onion Edition Sharpener into a real workhorse sharpening system.
The Blade Grinding Attachment effectively adds a mini bench belt grinder to the Work Sharp, and this was the clincher for me. I’ve been using a 1″ belt grinder with an angle setting guide I made and added to it myself for 99% of my sharpening. Now, thanks to Work Sharp I’ve got a much more compact and specifically knife edge focused tool.
This fantastic sharpener is now being used to create the Tactical Reviews ‘WORK SHARP Sharp’ standard for all my knife testing.
Join me in this detailed look at the optional add-on Blade Grinding Attachment for the Work Sharp Ken Onion Edition Sharpener.
Review Videos
Starting with a short format sixty second review:
Onto a full video review covering many more details:
A little more Background:
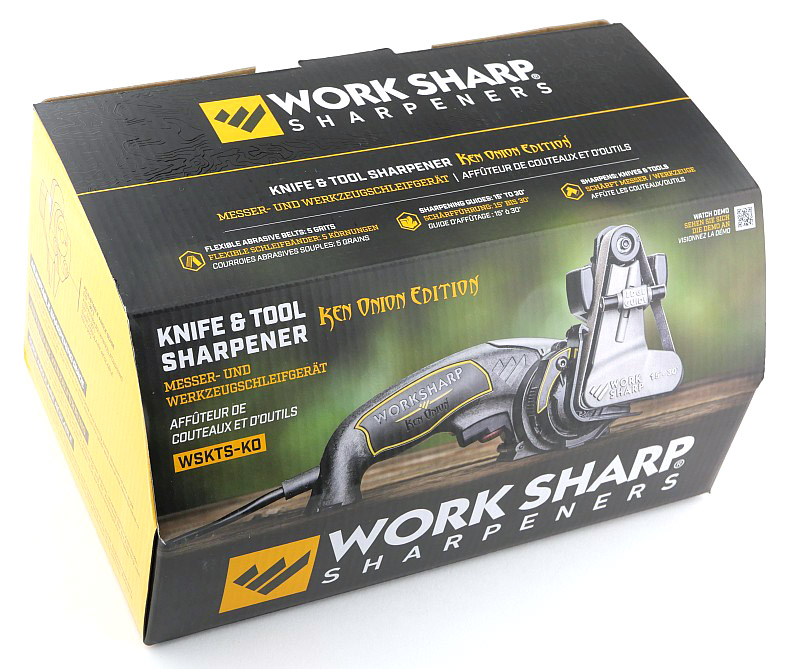
Before diving in to the image galleries, in effect there are two reviews combined here. The Work Sharp Ken Onion Edition Sharpener, and the separate Blade Grinding Attachment for this sharpener. This combination is also sold as a kit version called the Work Sharp Elite Knife Sharpening Solution.
A few more details:
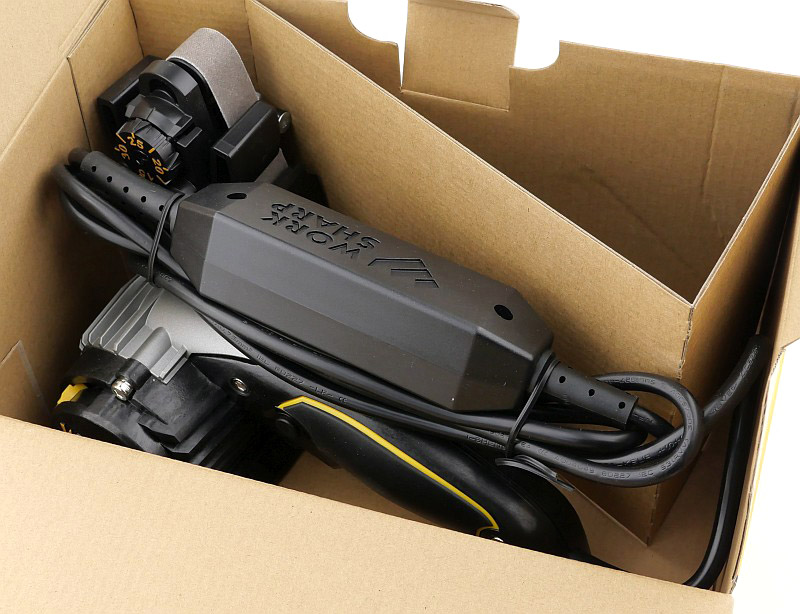
What’s in the box? – Ken Onion Edition Sharpener:
This is the foundation sharpener, which is complete in itself.

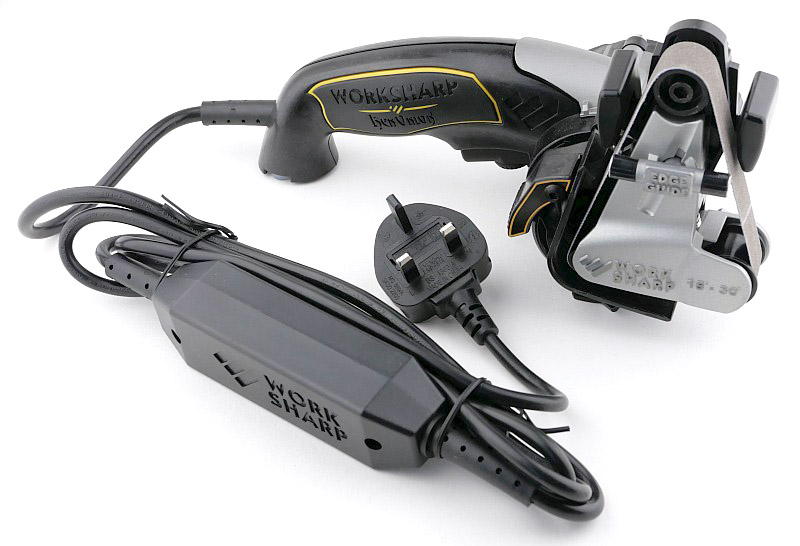
A good look round the Ken Onion Edition Sharpener – Things to look out for here are:
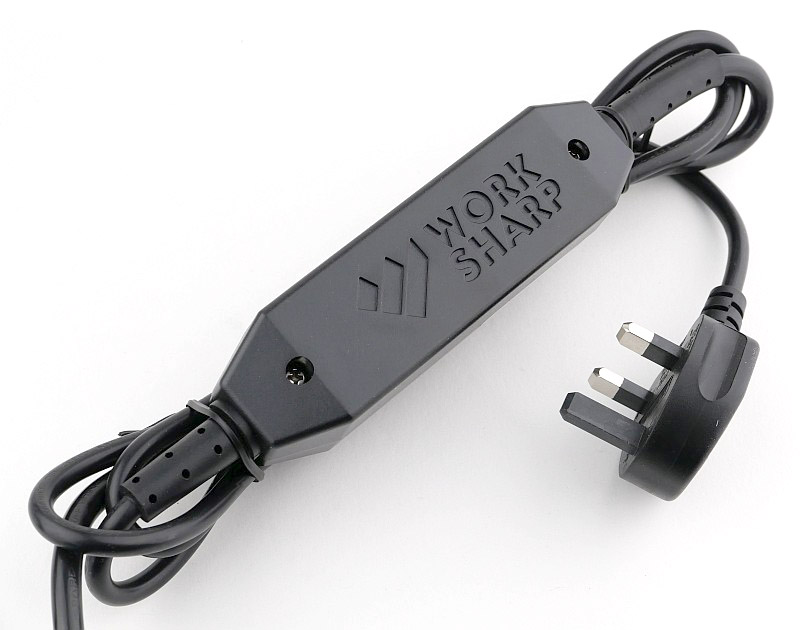
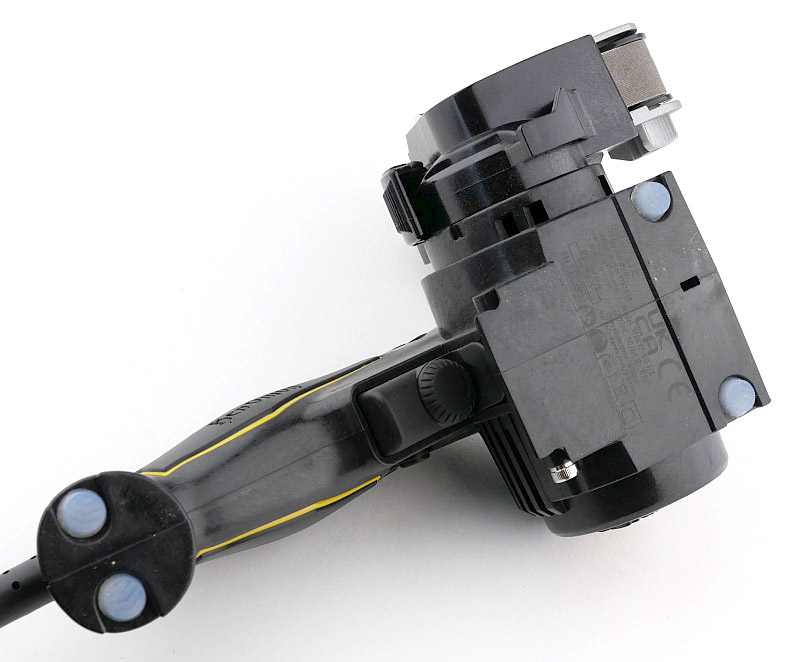
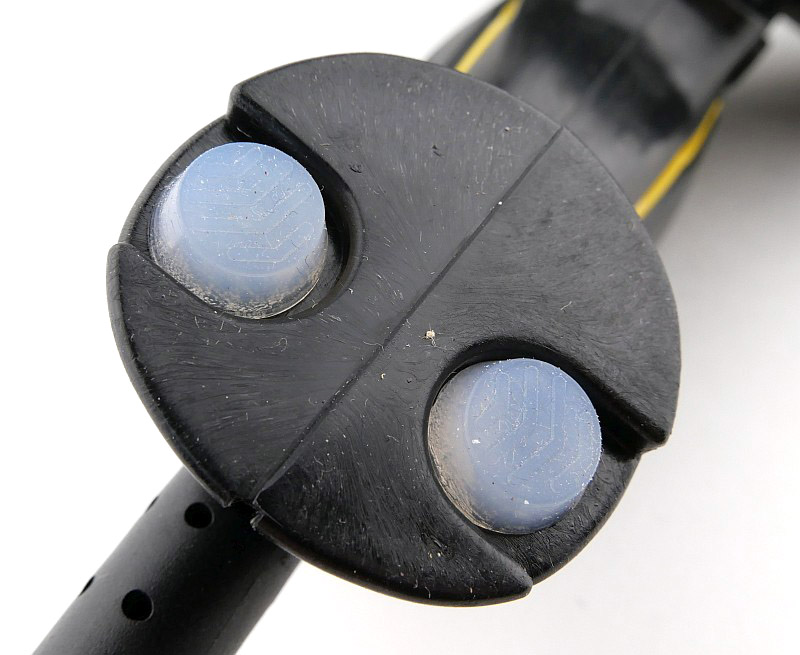
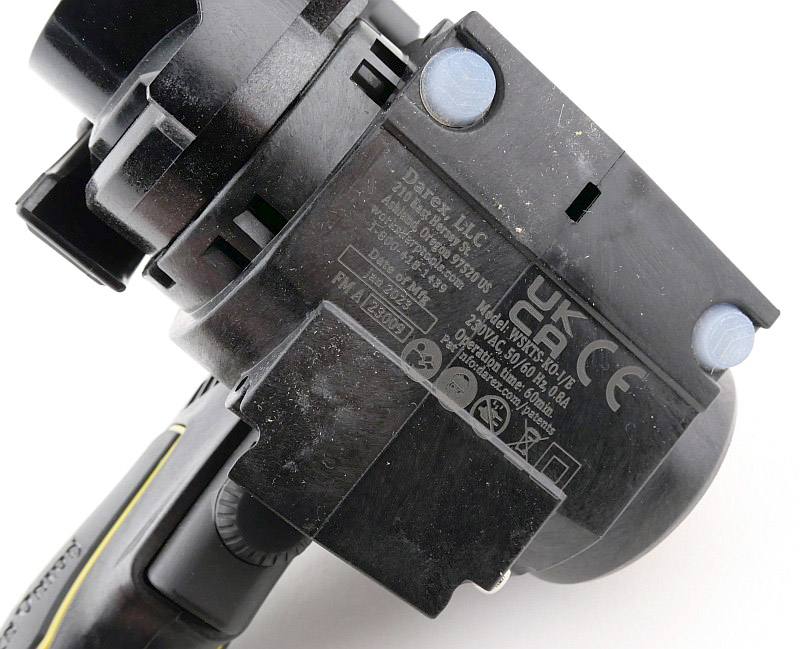
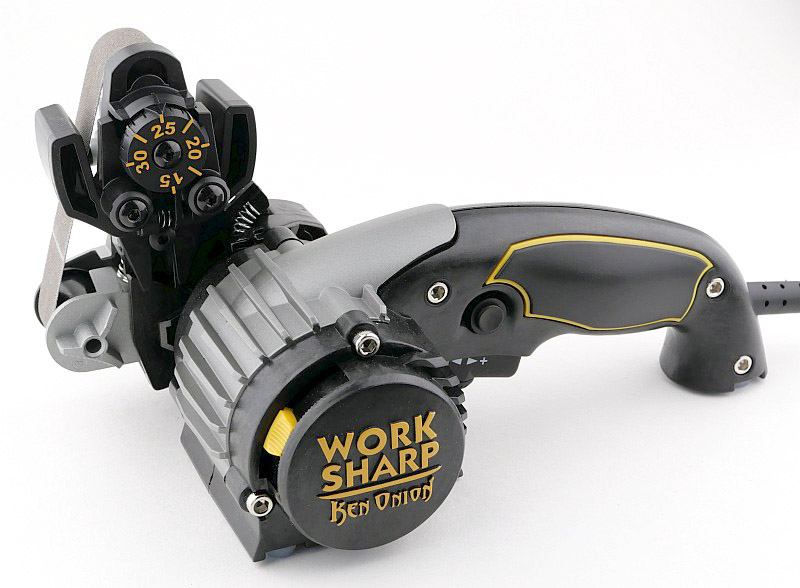
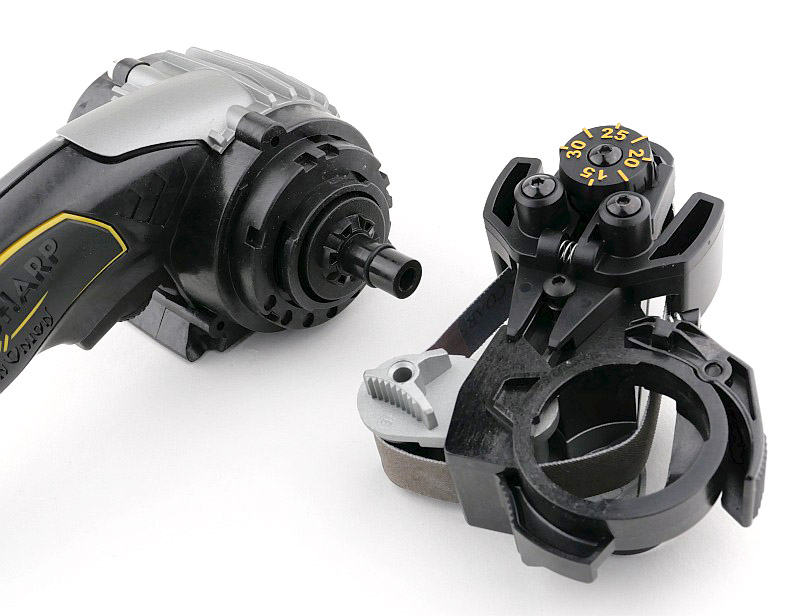
Using an in-line transformer makes for a very tidy setup, and of course it will have the mains plug suitable for your country. Though it looks like a single machine, the sharpener is a motor/control unit, and a belt sharpening head that fits onto the motor assembly (this is important later when it comes to the blade grinding attachment).
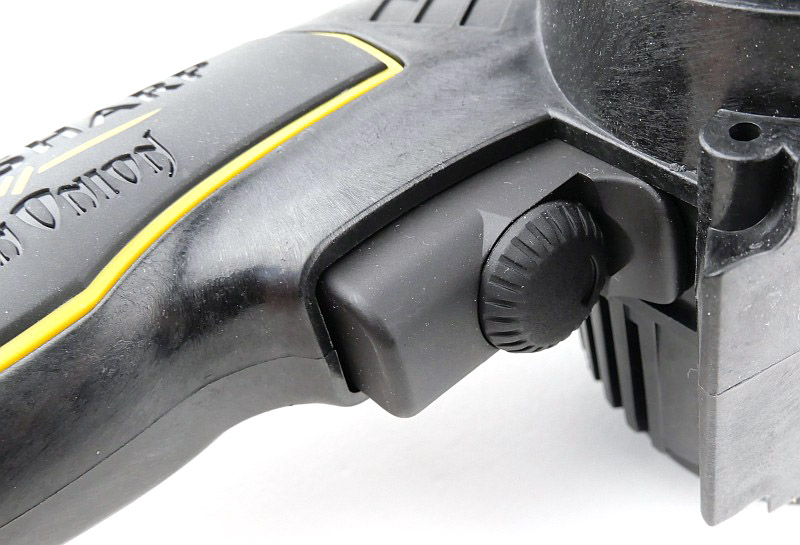
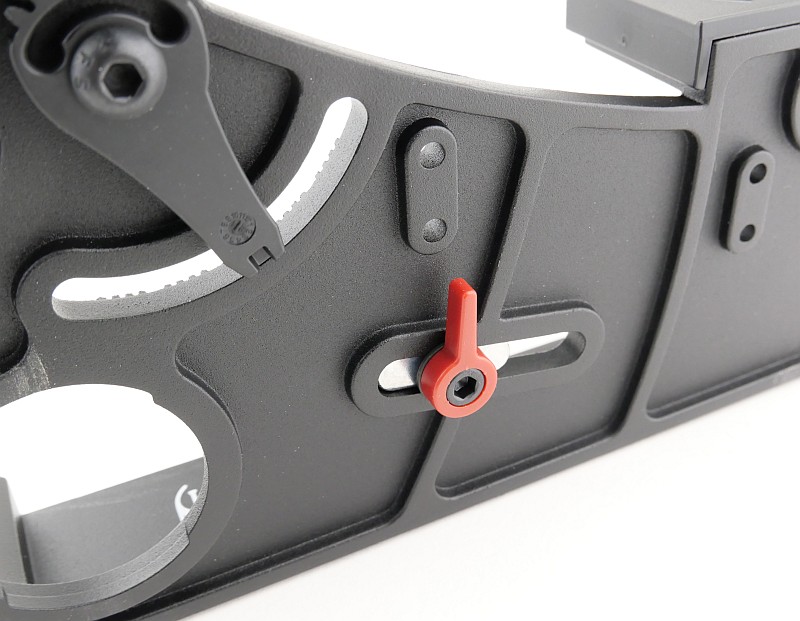
The Ken Onion Edition Sharpener head has a pair of angle guides plus an edge guide to support the blade. To control the speed of the belt, the motor unit has a trigger with rotating maximum speed dial. The trigger also has a locking button so you can set it running and not need to hold the trigger switch, leaving you both hands free.
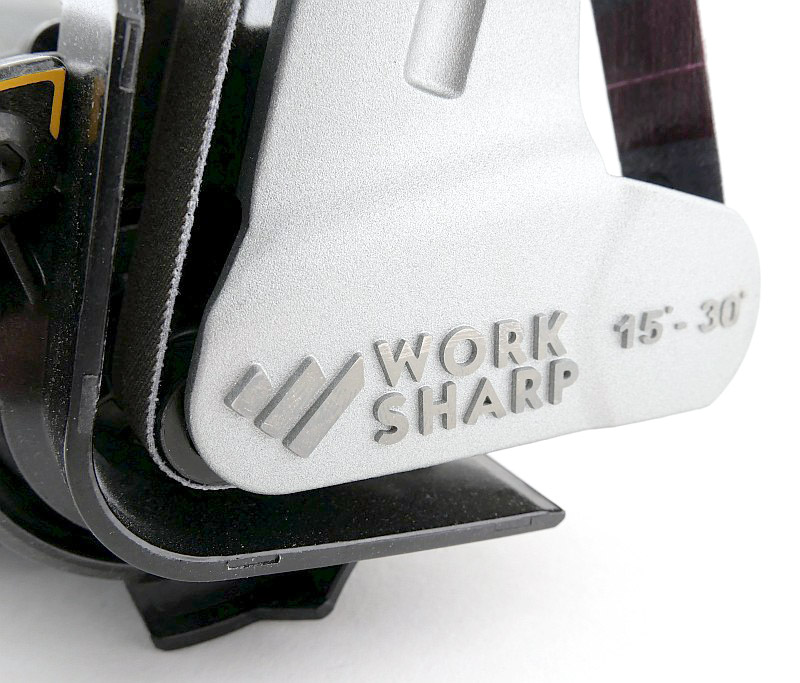
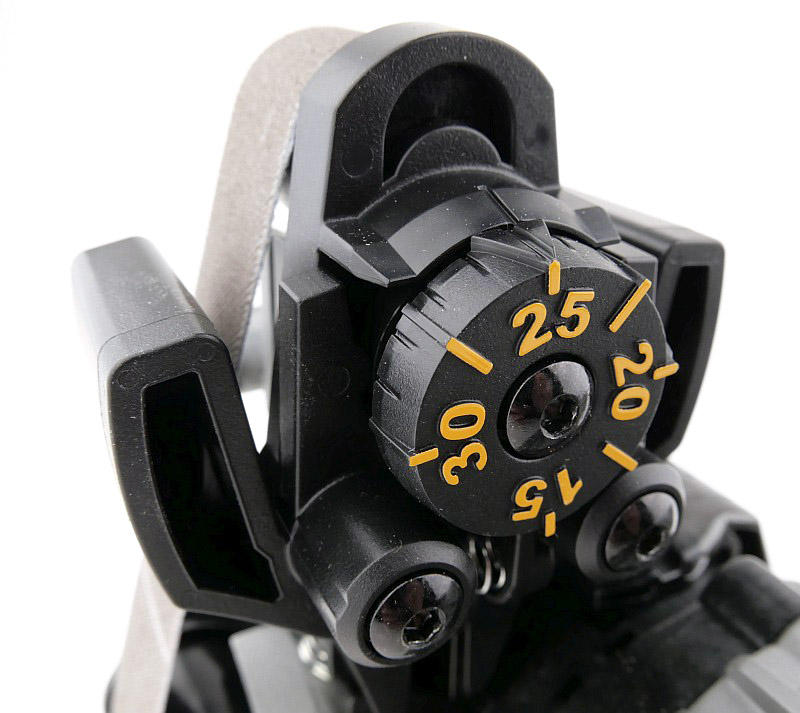
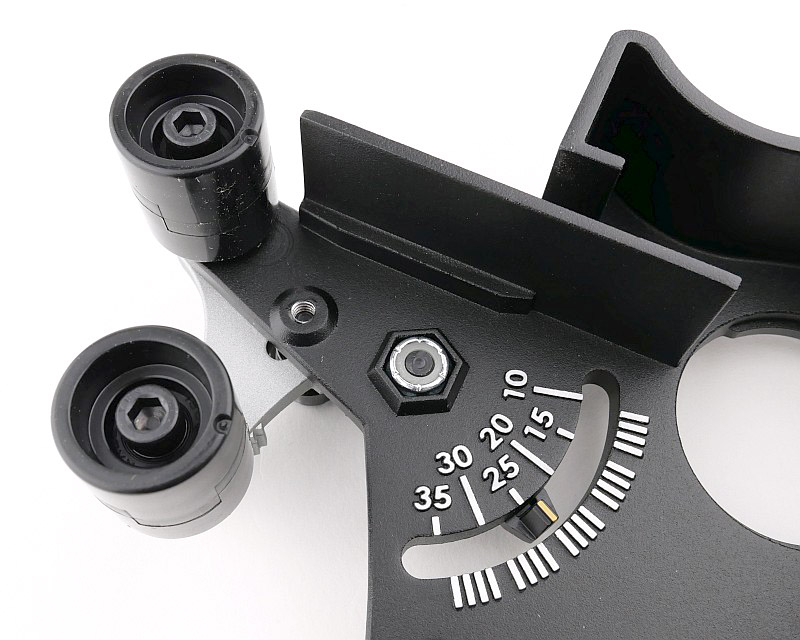
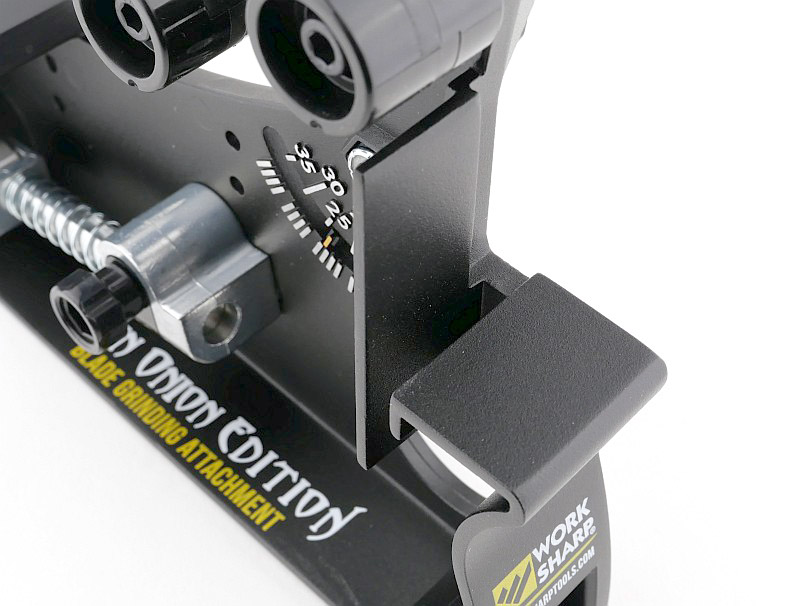
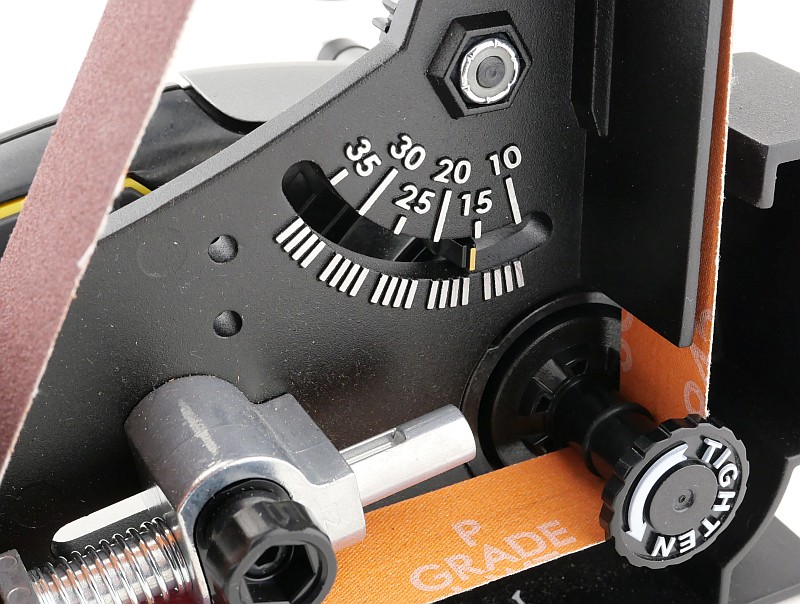
Sharpening angle is set using a dial adjuster with clearly marked angles from 15 to 30 degrees. The last image in the gallery with the spring showing is the belt tensioning roller.
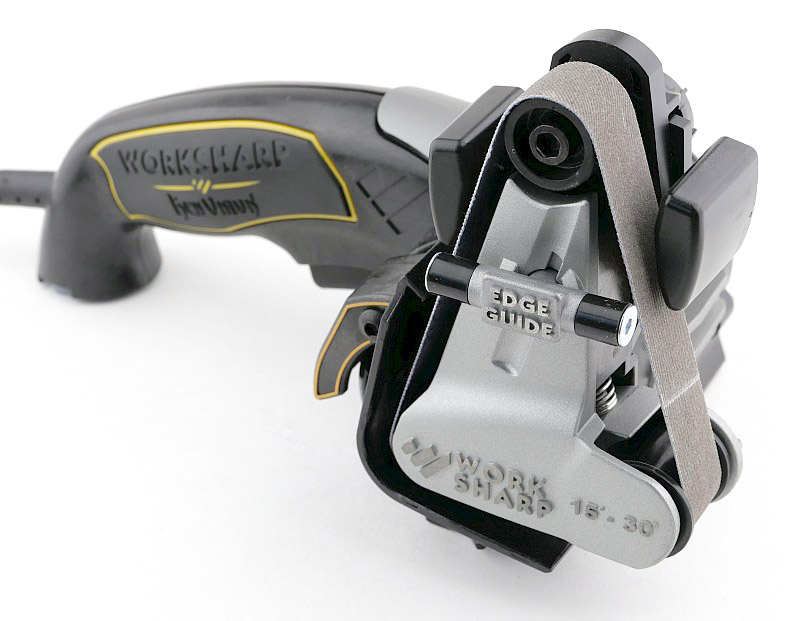

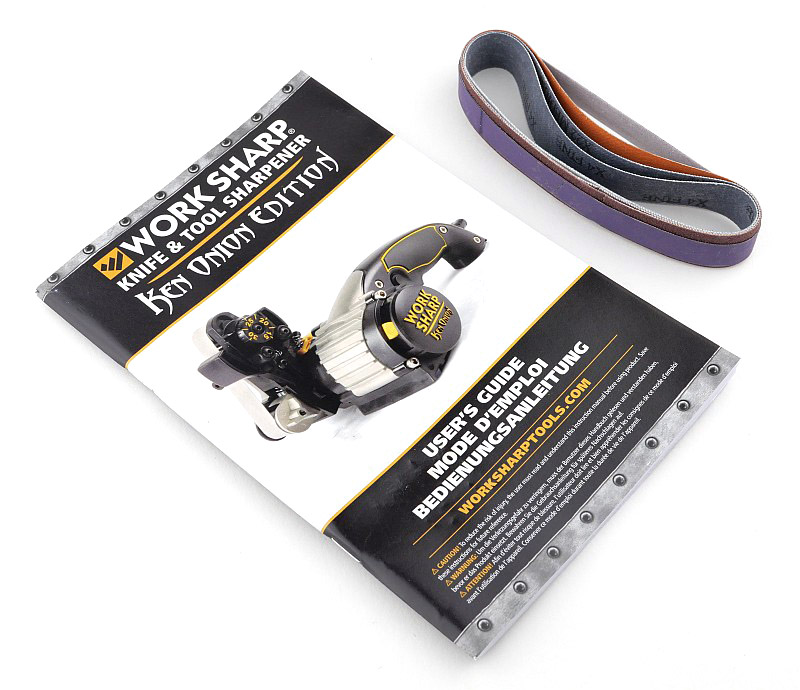
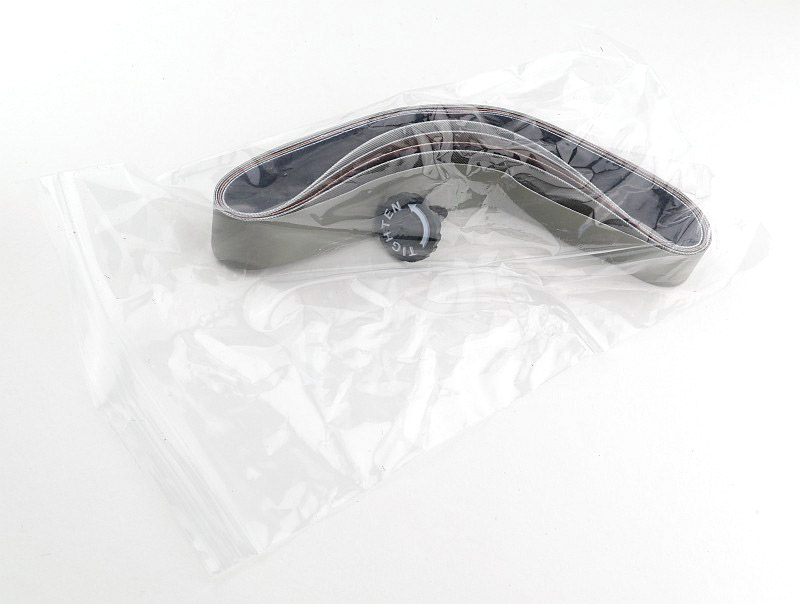
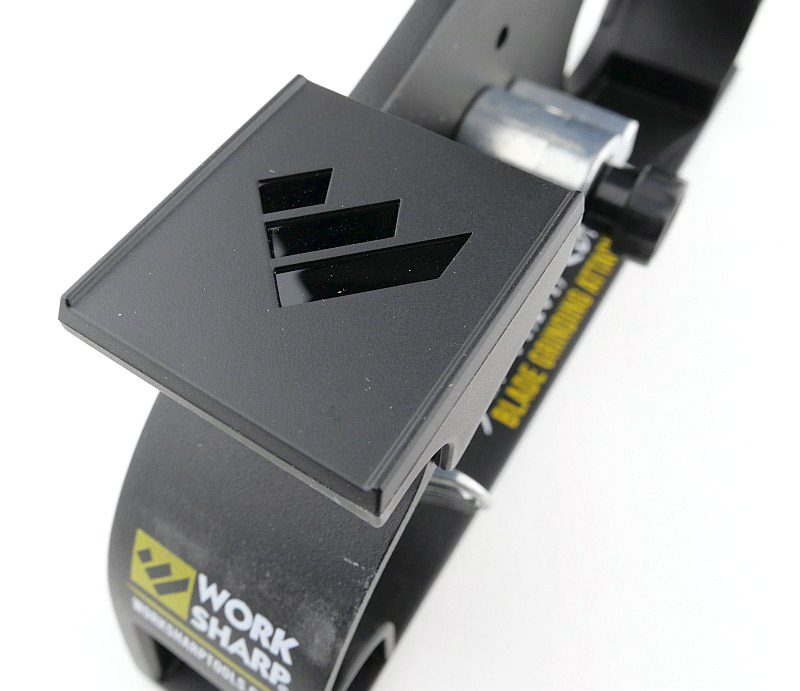
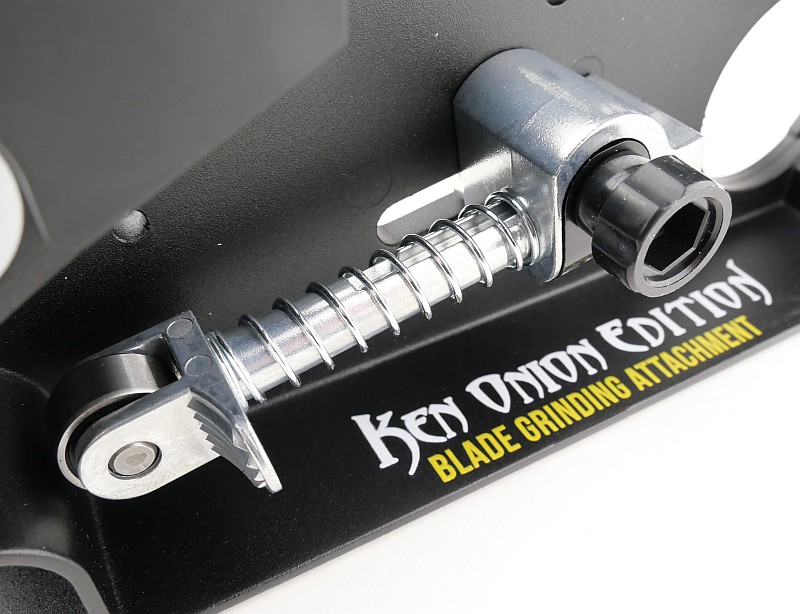
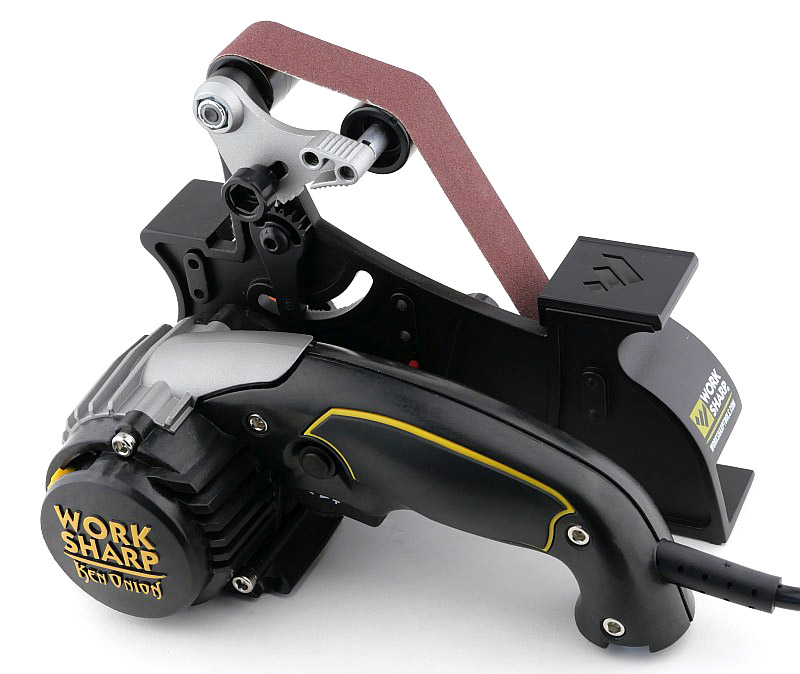
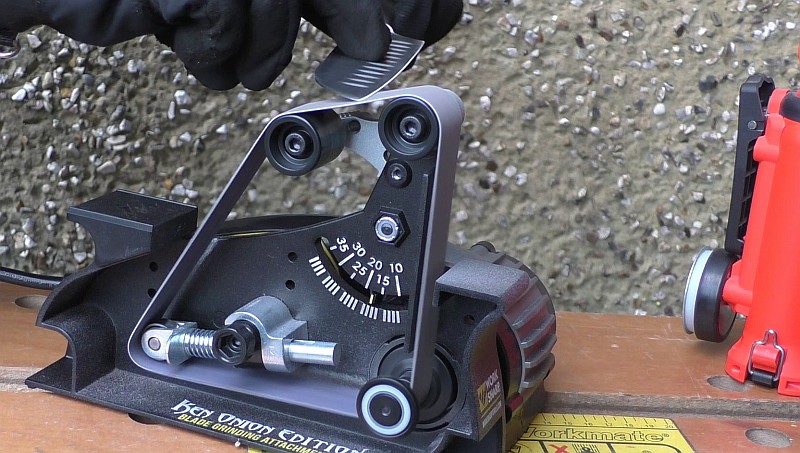
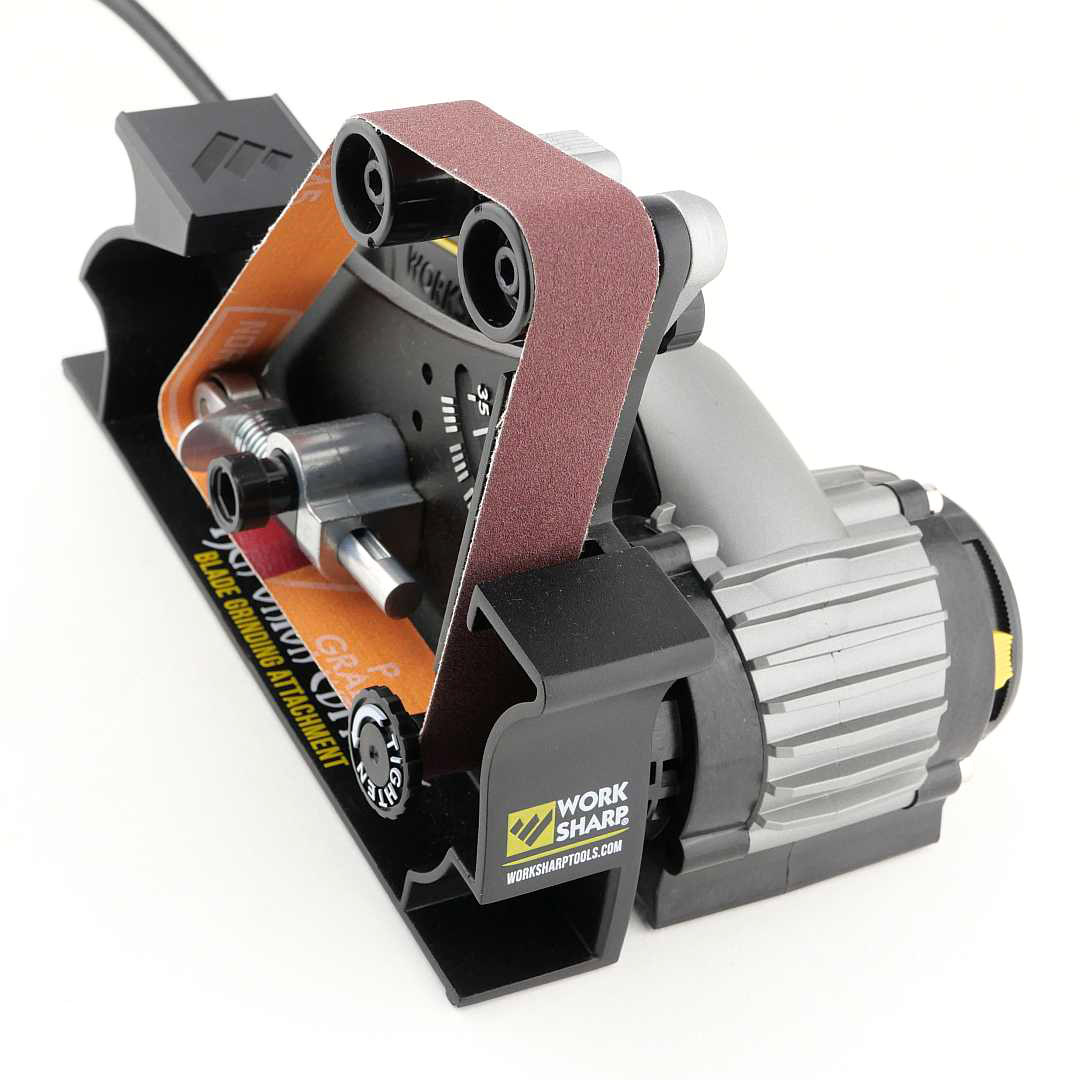
What’s in the box? – Blade Grinding Attachment:
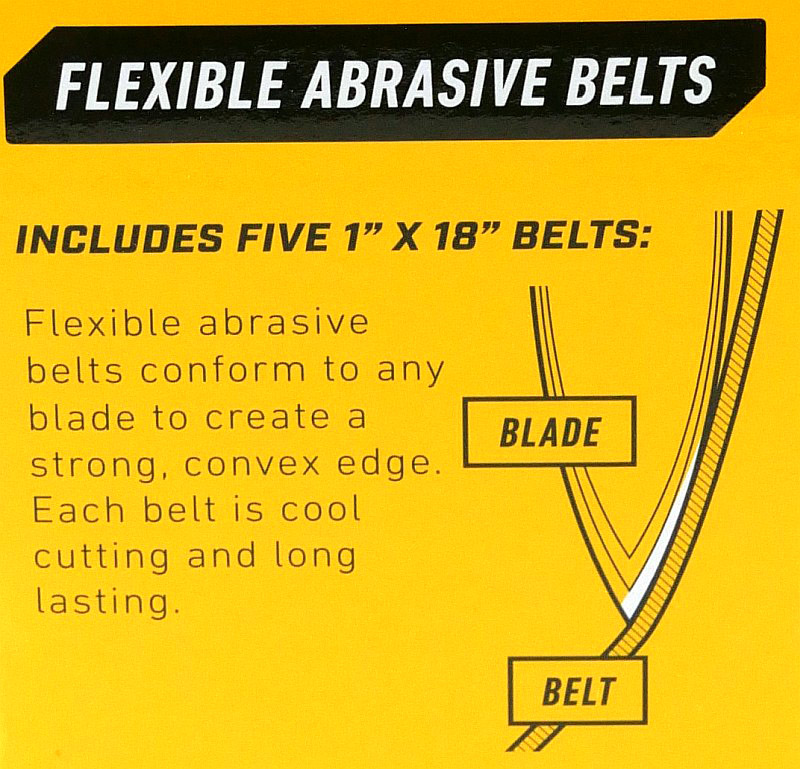
As well as the main sharpener, the Blade Grinding Attachment also has an unsupported, or ‘slack’ belt, so will create a convex edge. In the box are the attachment and a set of belts for it, as these are a different size/length compared to the main sharpener’s belts.

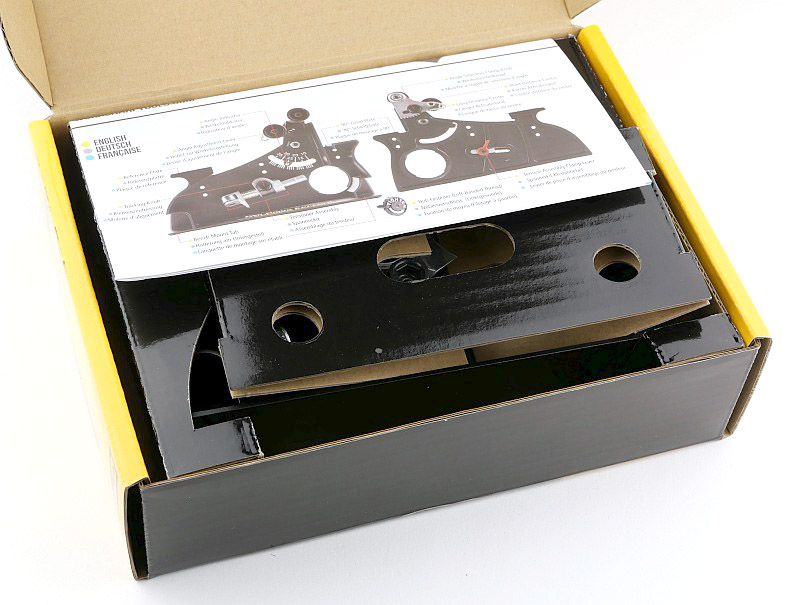
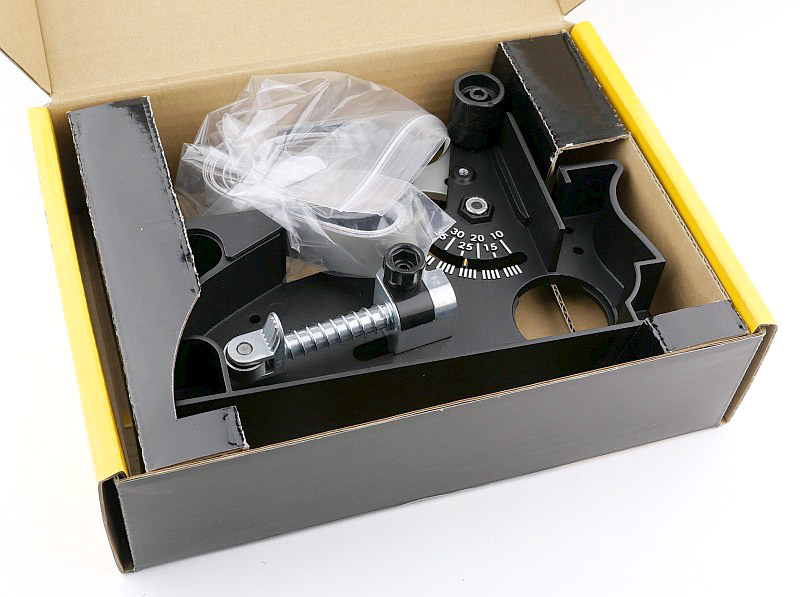
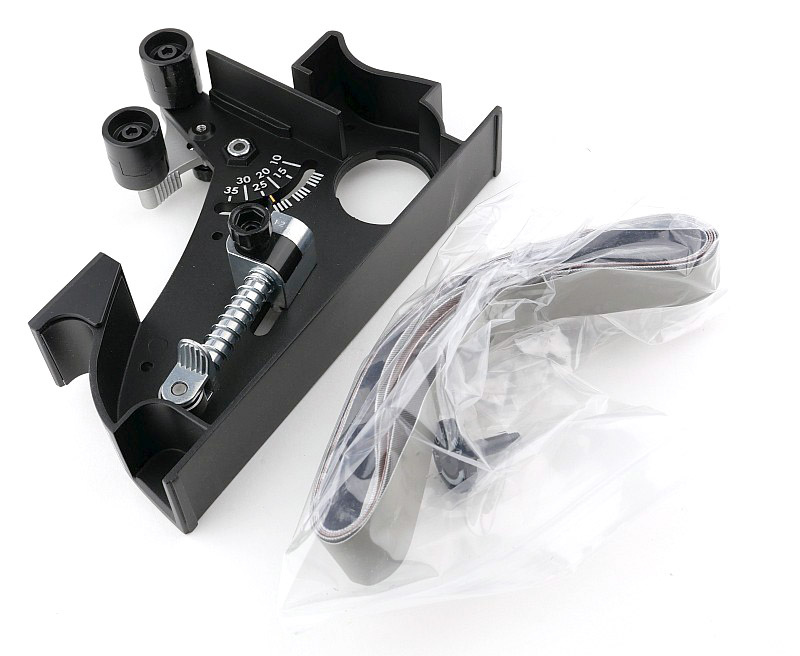
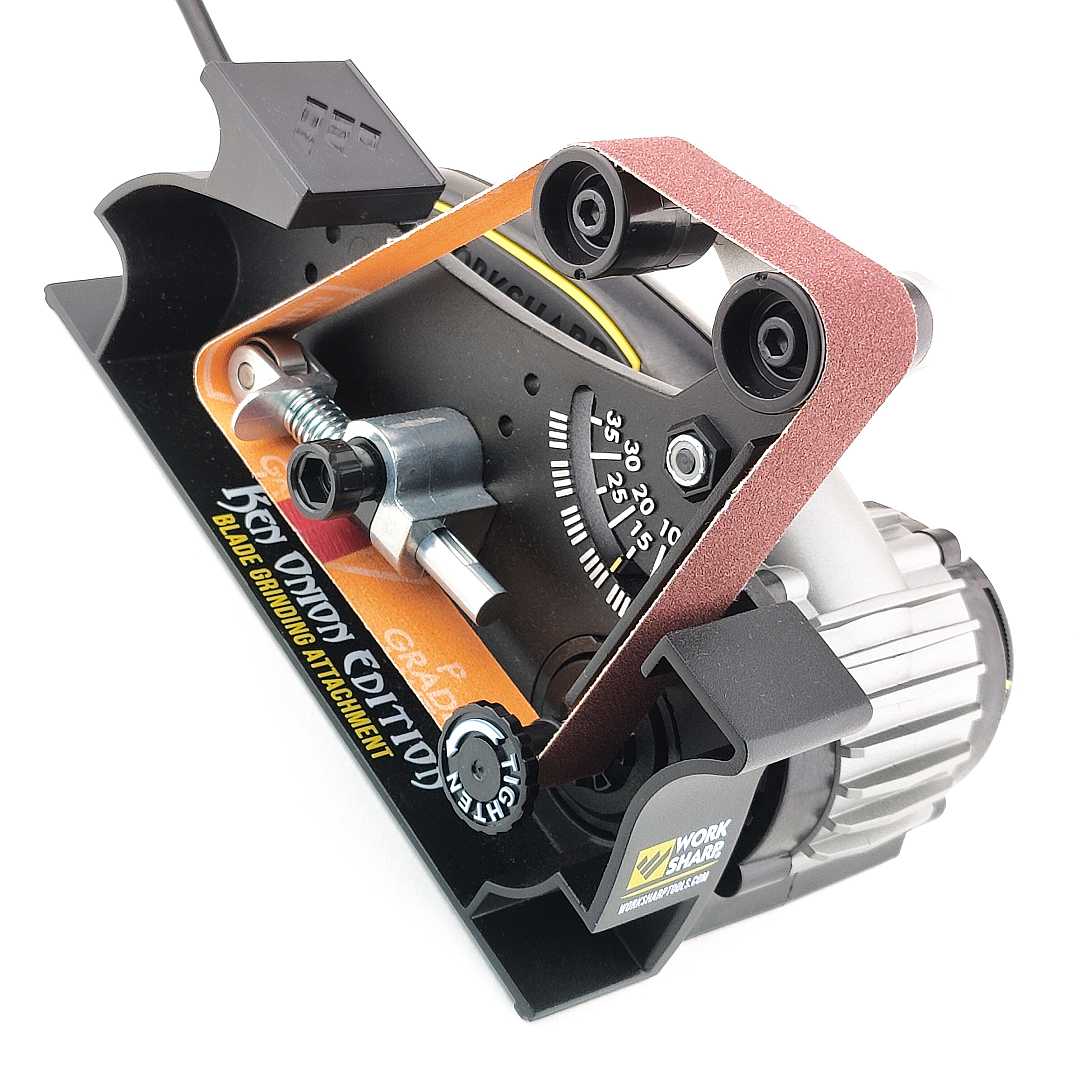
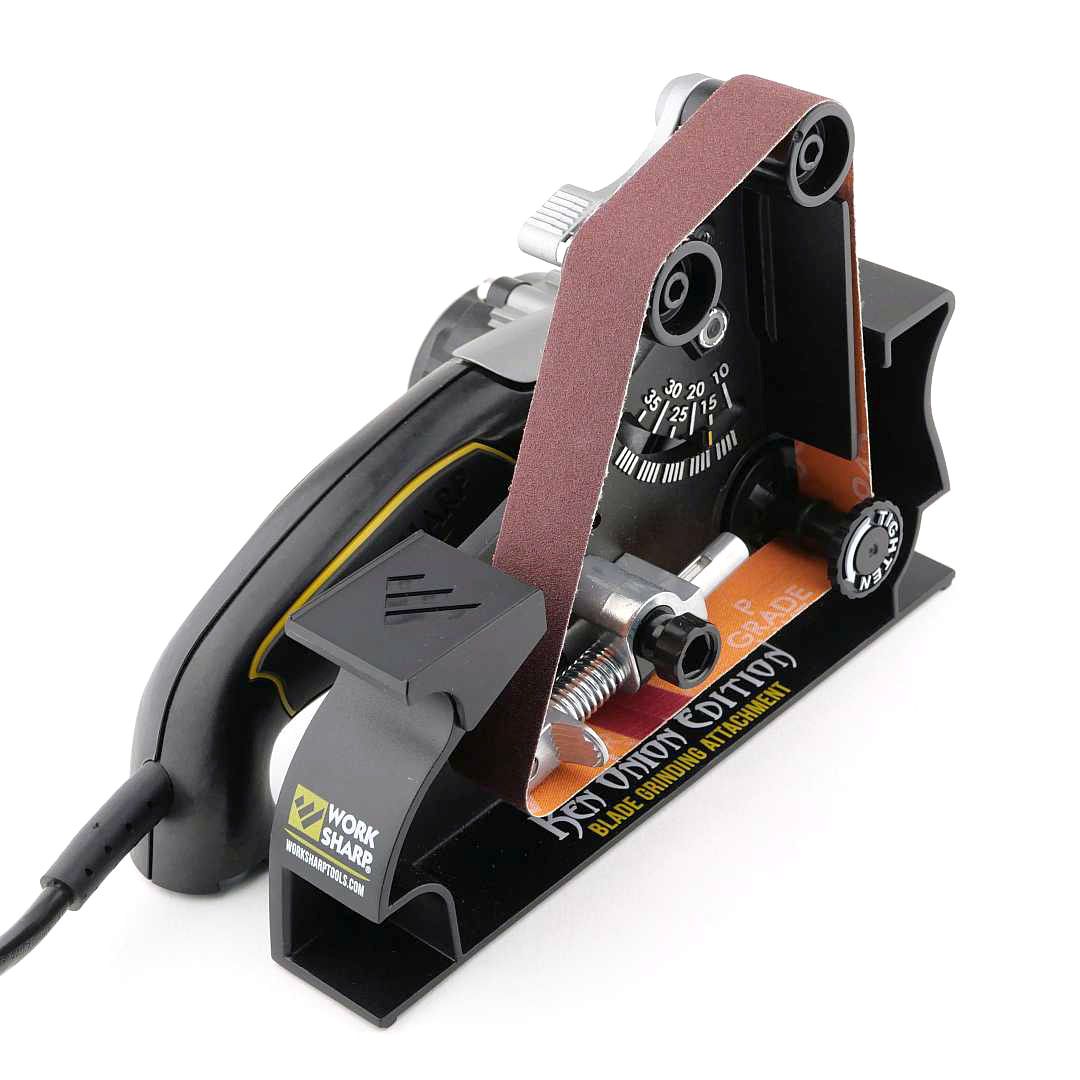
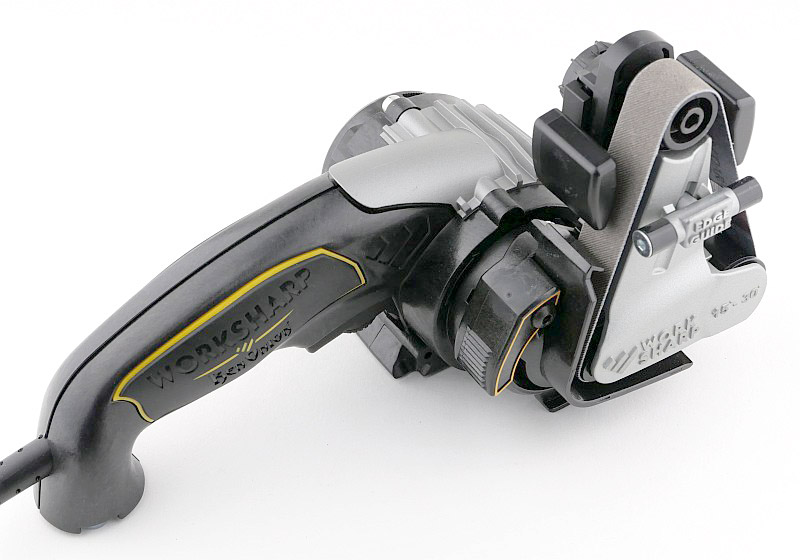
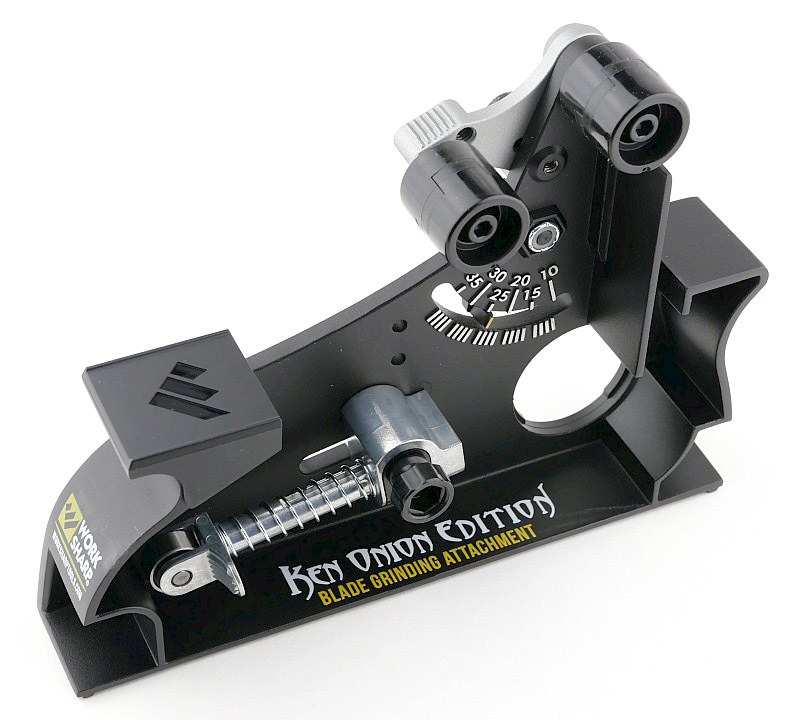
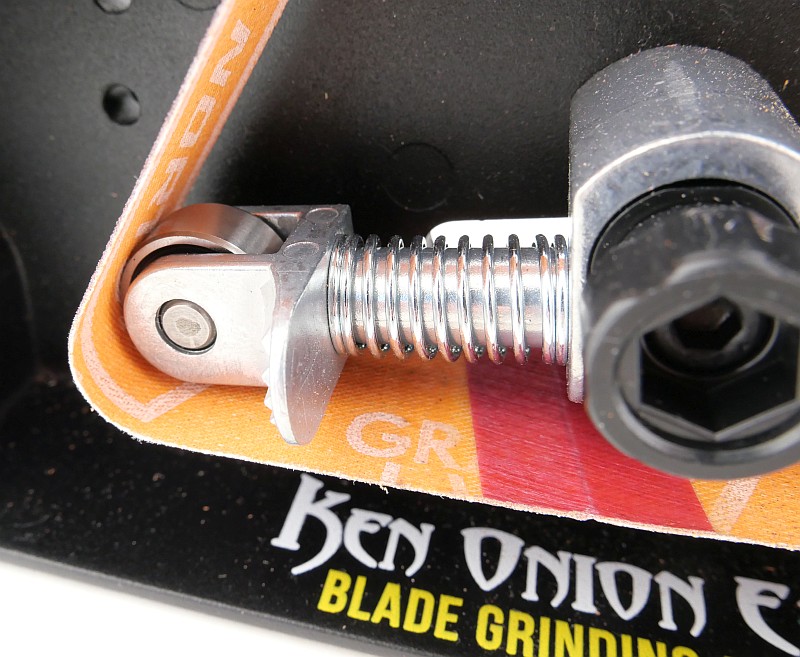
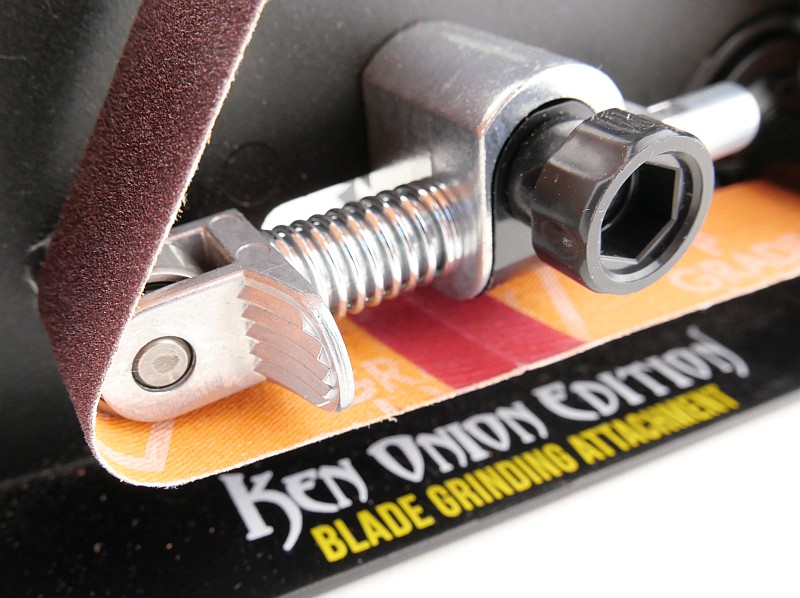
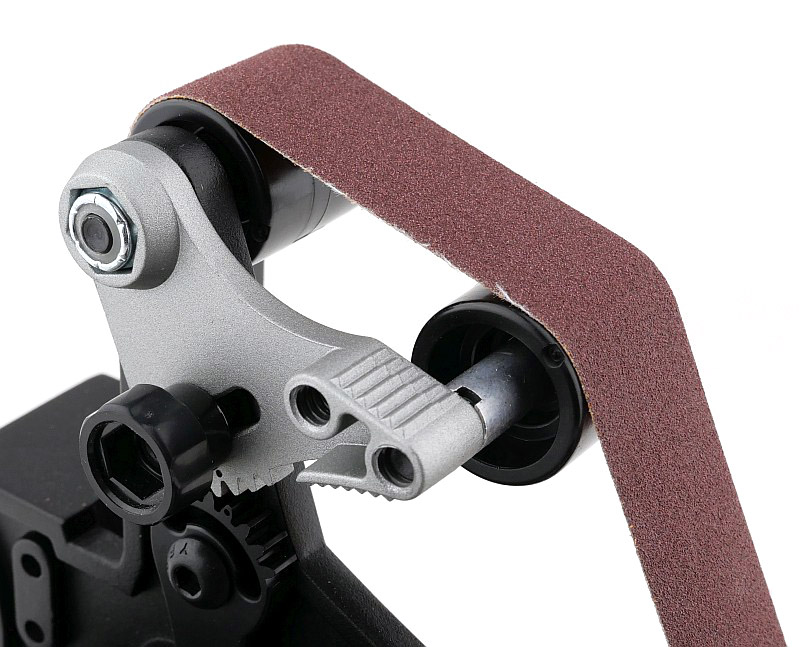
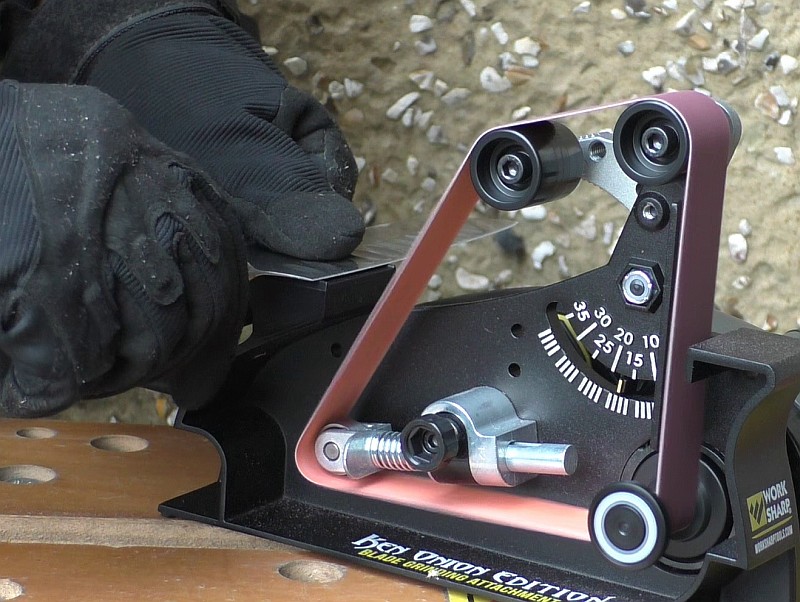
A good look round the Blade Grinding Attachment – Things to look out for here are:
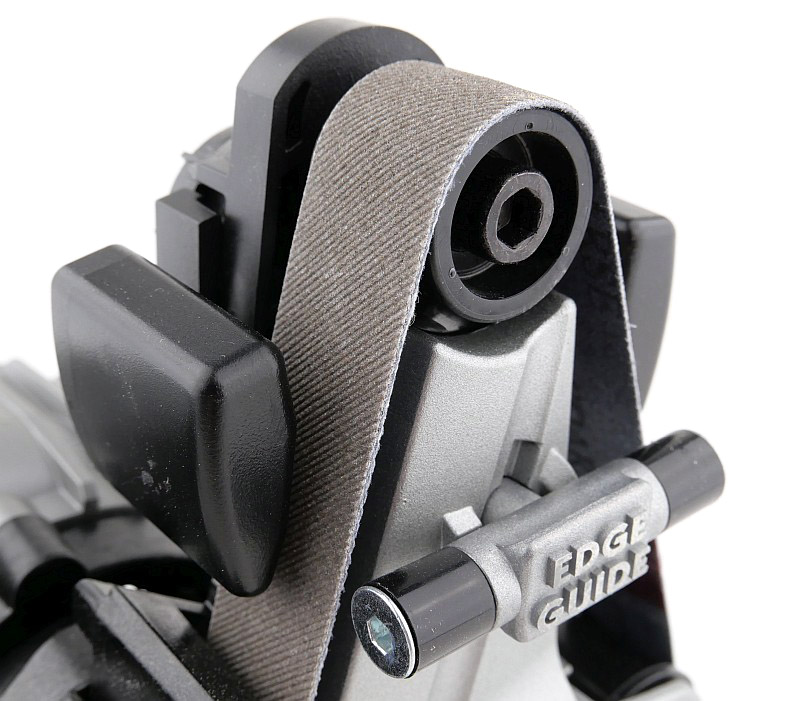
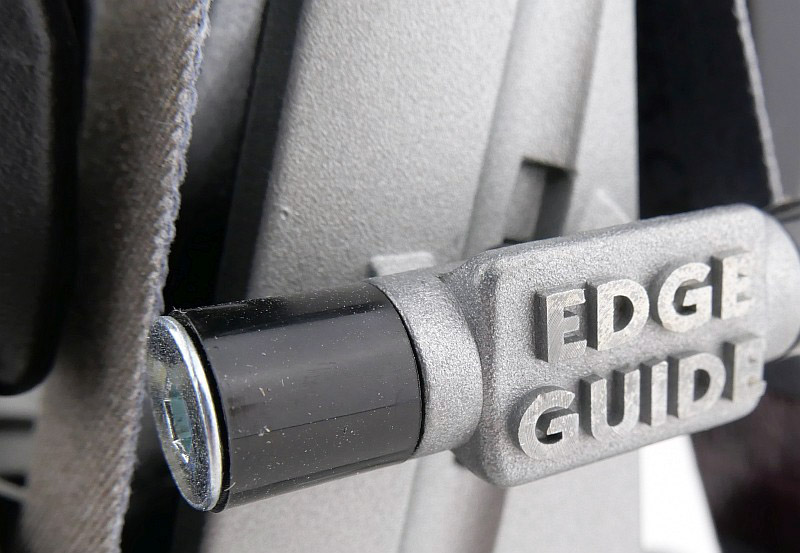
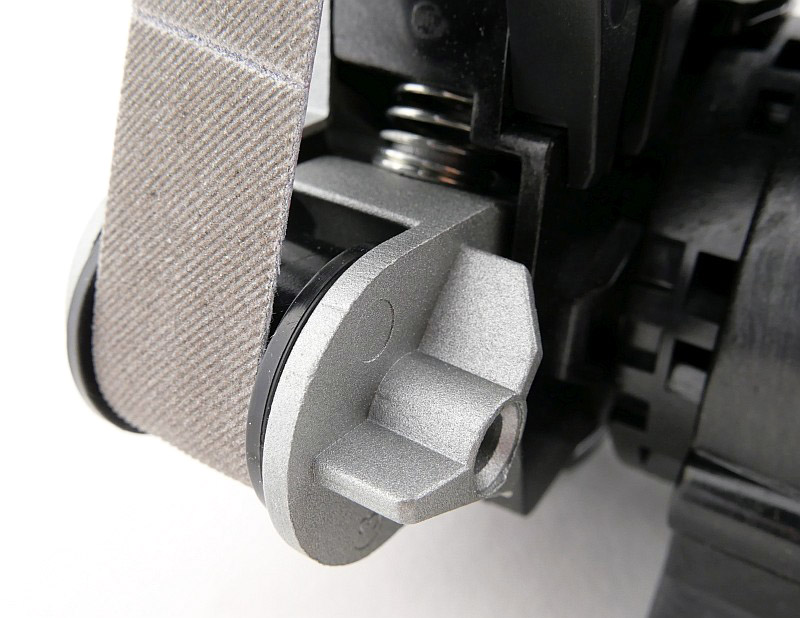
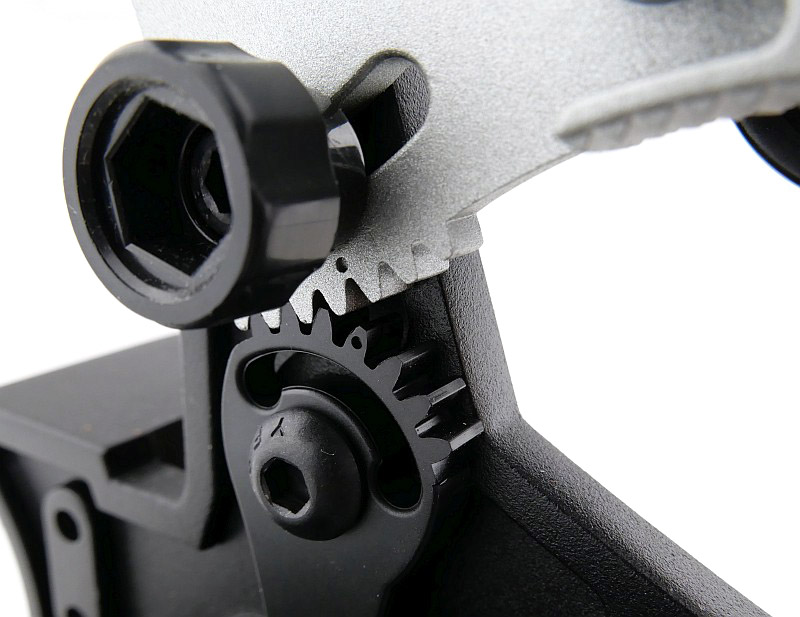
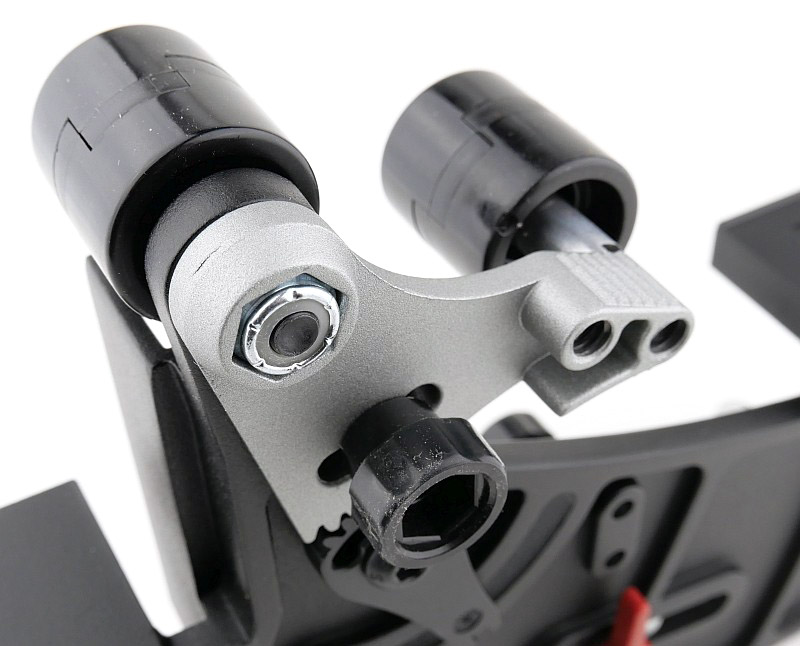
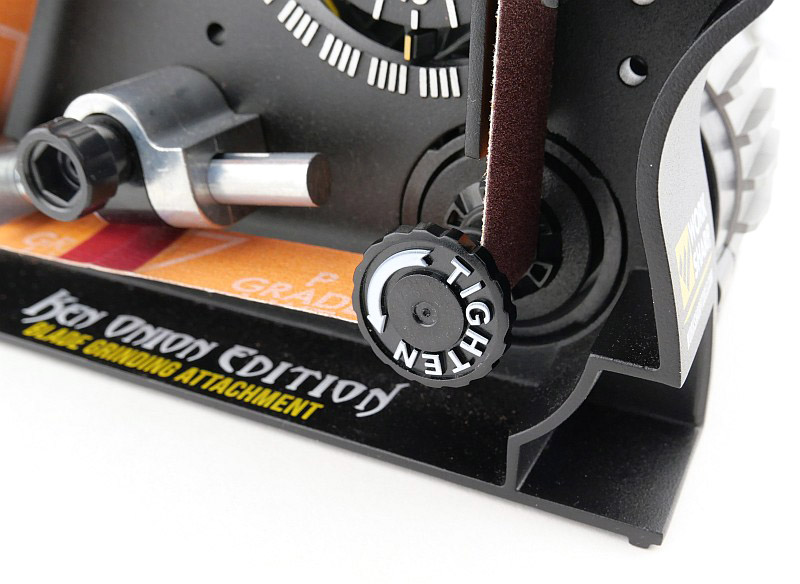
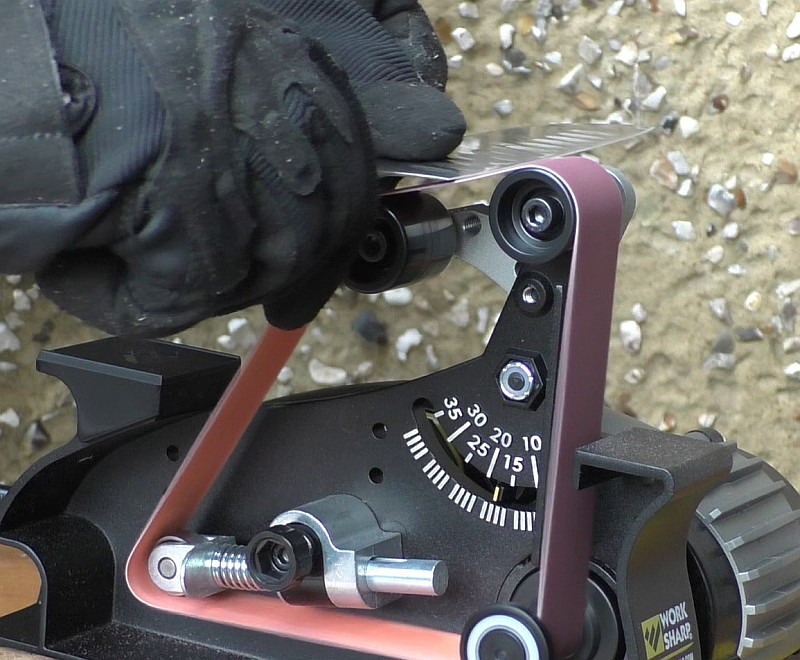
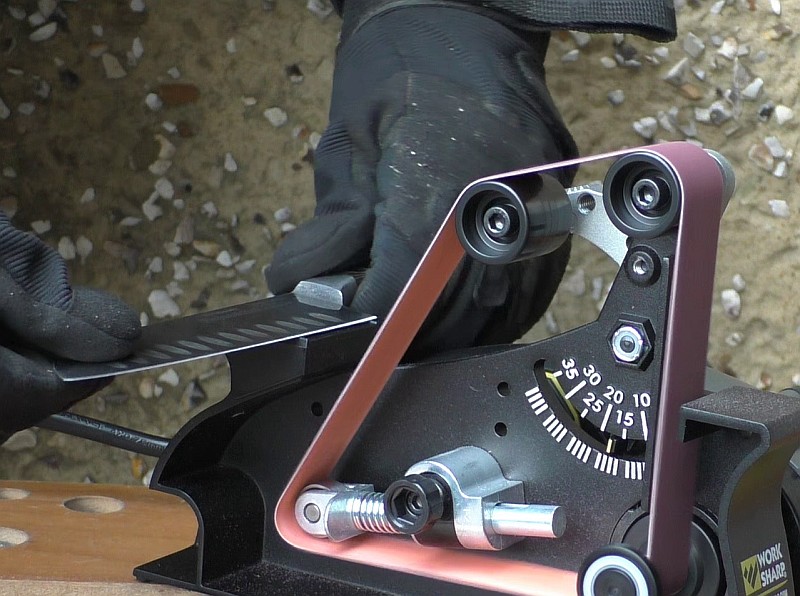
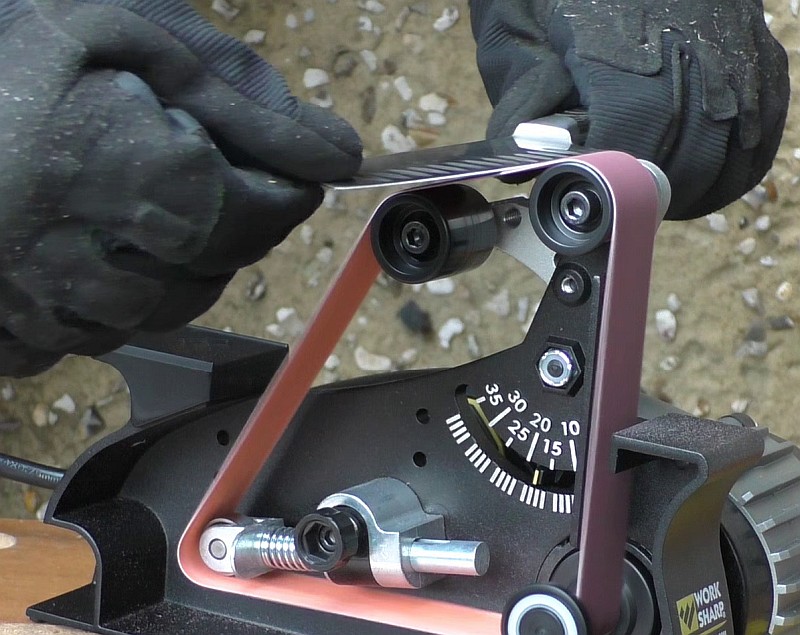
One of the belt rollers is the motor spindle itself, so on its own it might appear that one belt roller is missing (but isn’t). The Blade Grinding Attachment has three rollers; one tensioning roller, and an angle adjustable set of twin rollers that give you the edge angle you want. A shelf at the front of the Blade Grinding Attachment gives you the zeroing position of the blade angle relative to the adjustable angle section of the belt. The set of twin rollers is moved to the desired angle and the locking screw on the back tightened to maintain this setting. There are two positions for one of the twin rollers that allow you to effectively change how ‘slack’ the belt is. The knob on the tensioner provides tracking adjustments for the different belts. There is even a small support shelf at the rear of the Blade Grinding Attachment for using as a mini belt grinder. Fitting to the motor is via a bayonet style of locking ring.
What it is like to use?
In this gallery, the first thing I am doing is taking off and discarding the sharpening head for the Ken Onion Edition Sharpener to leave just the motor assembly (no offense to the Ken Onion Edition). Then on goes the Blade Grinding Attachment. Now you can see how the motor spindle (which has a left-hand screw belt retainer fitted into it) then completes the belt roller path.
The tensioning roller has a finger tab for you to push on and it rotates and locks into a retracted position. Like this the belt pops on and off easily, and with the new belt in place, a quarter turn on the finger tab and the tensioner unlocks and grabs the belt.
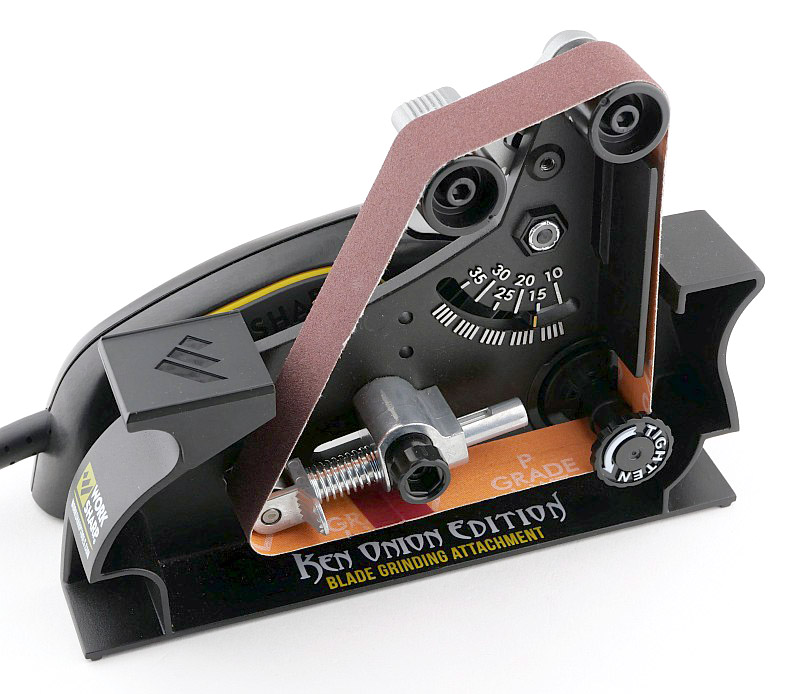

Although the Blade Grinding Attachment has clamping points, I’ve been using the sharpener sitting under its own weight, and it hasn’t moved or needed to be secured.
The process of using the angled section of the belt, is to first lay the blade on the reference surface at zero degrees, then move up and to the belt. This sequence is showing the process on one side, then the other, and then going to a finer belt and repeating. The last photos in the gallery has an orange item on the right, which is an LED light used to help show the burr that has been raised on the edge.
In this gallery the two rollers that set the angle for the belt are shown in their widest spacing, however, since these images were taken I have changed to the narrower spacing as I prefer the slightly firmer belt tension this creates between the rollers.
Powered sharpeners give you such a massive time saving over manual sharpeners, but it is also possible to make mistakes faster too.
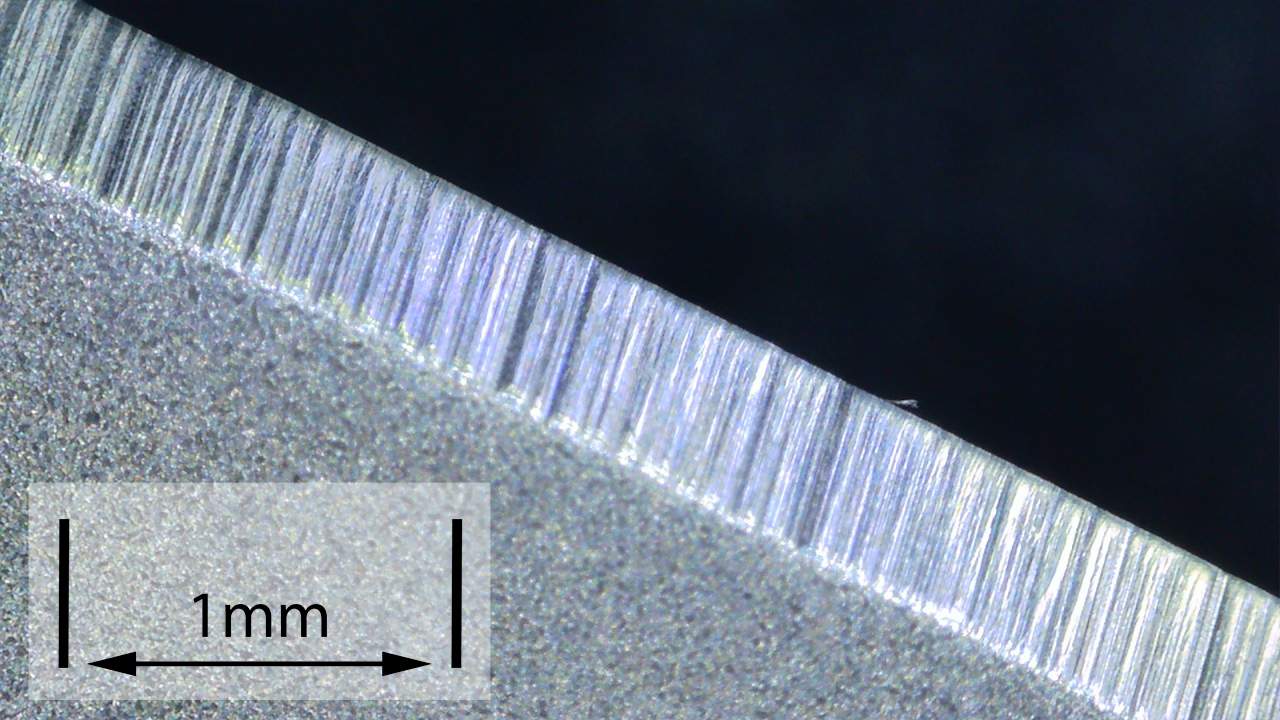
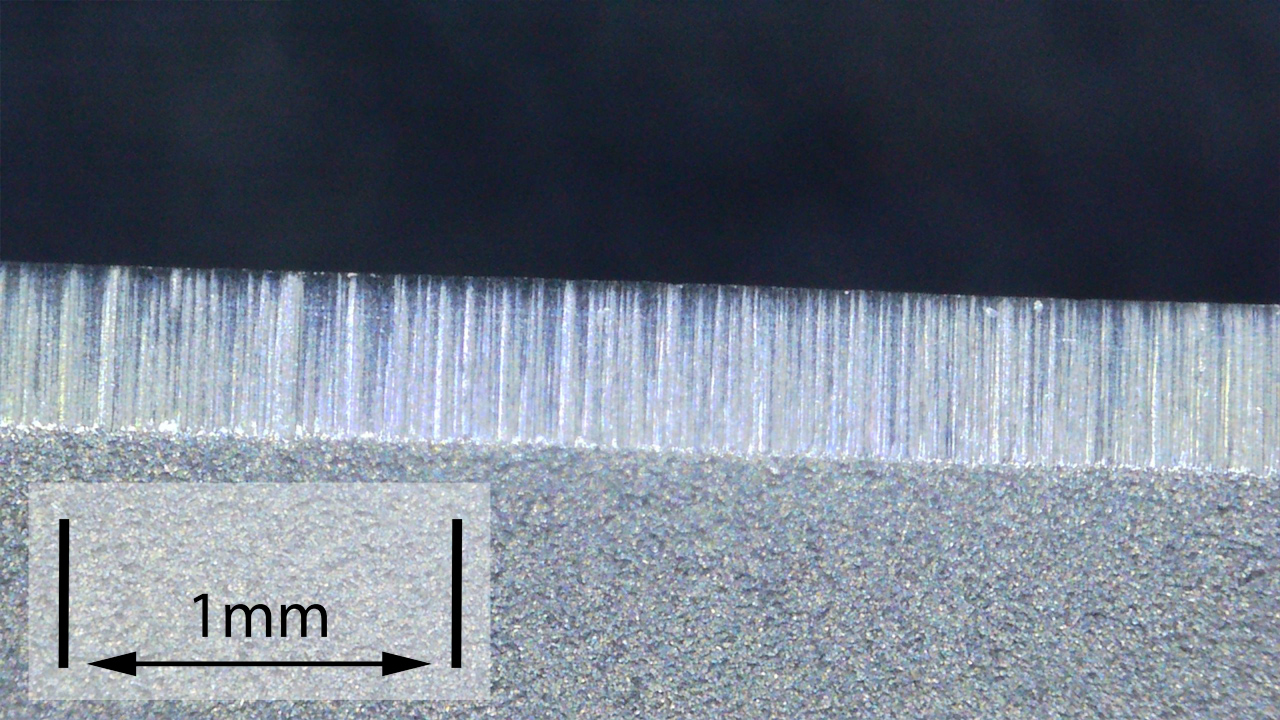
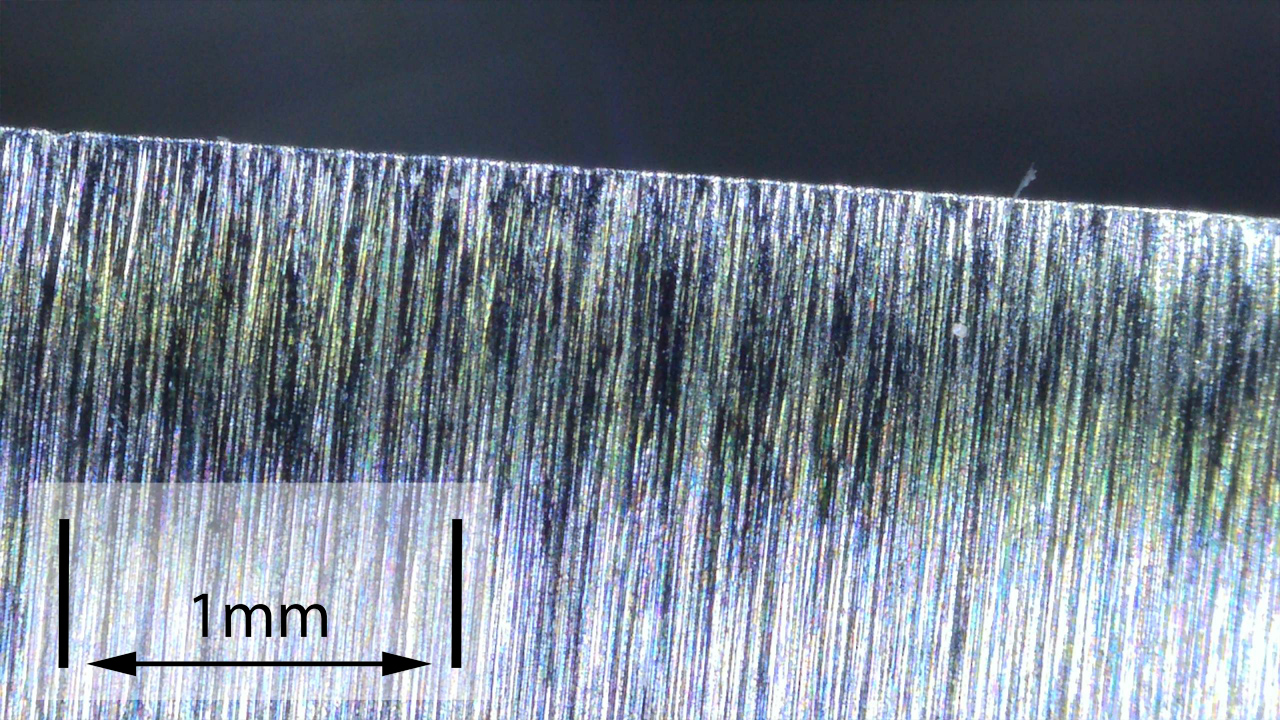
Here I have take on an edge bevel re-profile from a 70 degree inclusive angle to 35 degrees inclusive. The primary grind angle on this blade is quite wide, so as the edge bevel angle was halved, the edge bevel width has increased significantly. In fact the entire edge bezel does not fit in the magnified view.
This re-profiled edge was done using a very light pressure onto the 120 grit belt, followed by a strop using a metal polishing compound. The result was nicely hair popping.
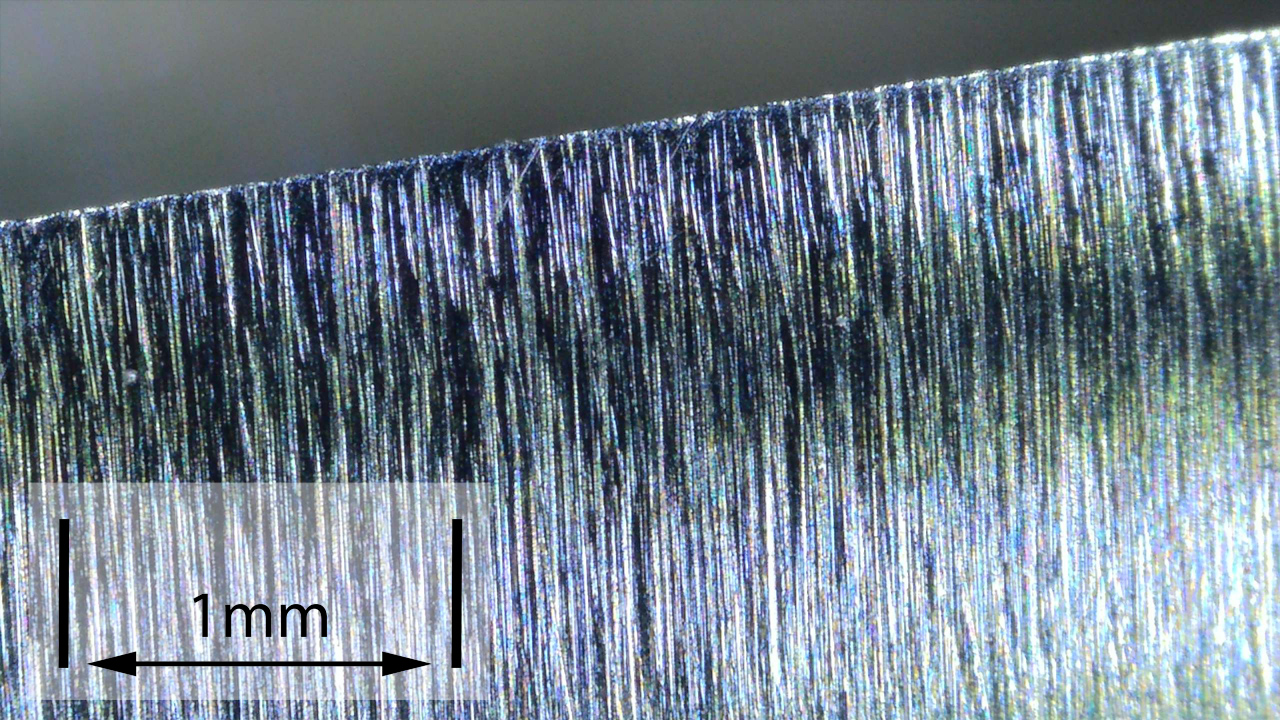
Both the Work Sharp Ken Onion standard sharpening head and the Blade Grinding Attachment use a ‘unsupported belt’. There is no platen behind the section of belt used for sharpening. This is also termed a ‘slack belt’. A consequence of this is that the edge created by the Work Sharp is convexed. You can vary how much the edge is convexed in a couple of ways. With the Blade Grinding Attachment, the rollers that set the angle of the belt can be positioned closer (less convexed edge) or wider apart (more convexed edge). As the belt is ‘slack’ you can also increase pressure onto the belt, which will deflect it more and produce an edge with more pronounced convexing.
All of this allows you to play around with settings and pressure to find the edge bevel shape you prefer; always slightly convexed, but you can decide how much.
I am now going to back to that point about time saving with a powered sharpener; you will either save a lot of time making a knife very sharp, or ruin it in double quick time. No sharpening system is fool-proof. Sharpening, as a process, relies on removing metal and forming a fine cutting edge. Just like sharpening a pencil, you can over sharpen and use the pencil up much faster than needed. A powered pencil sharpener can eat up the entire pencil in no time.
Sharpening is a skill you need to learn, whatever system you use. Work Sharp, with the Ken Onion Edition, or this extra enhancement of the Blade Grinding Attachment give you an excellent tool, which you will get more and more out of as you learn to work with it.
With a good powered system, and the Work Sharp is excellent, you can concentrate on the skill and control of positioning the blade, without the repeated effort of grinding the metal away yourself. The powered movement of the abrasive allows you to finesse your technique.
Tactical Reviews new standard in sharpness is now ‘WORK SHARP Sharp’ thanks to the Ken Onion Edition Sharpener with Blade Grinding Attachment.
Review Summary
The views expressed in this summary table are from the point of view of the reviewer’s personal use. I am not a member of the armed forces and cannot comment on its use beyond that covered in the review.
Something that might be a ‘pro’ for one user can be a ‘con’ for another, so the comments are categorised based on my requirements. You should consider all points and if they could be beneficial to you.
_______________________________________________
What doesn’t work so well for me
_______________________________________________
Very easy to misshape the blade tip (requires good technique to avoid).
The vertical belt section is also not supported and flexes.
_______________________________________________
Things I like
_______________________________________________
Complete control of belt speed.
Quick and easy belt changes.
Long duty cycle (rated for 1 hour continuous running).
Allows for varying amount of edge convexing.
Angle of belt set by movable roller assembly.
Very compact for a high quality mini belt grinder.
Super fast sharpening and re-profiling.
Solid build quality.
Very quickly get your edges ‘WORK SHARP Sharp’.
Discussing the Review:
Something new – will it work? A Tactical Reviews Subreddit.
TacticalReviewsChat on Reddit
Please visit there and start/join the conversation.