Nitecore’s Tiny Monsters have always been punchy performers, from the first one I tested, (the TM11) all the way through to another Monster light that is Tiny compared to its output. Join me in this Nitecore TM20K review, 20K being the 20,000 Lumens, yes, 20,000 Lumens output from a palm sized light. As well as a look round the TM20K, this review includes output measurements, runtime graphs, and beamshots to give you the true story of its performance. It really is a Monster!
Video Overview
This video is an overview of the TM20K with a first look over the light before we get onto more details and the measurements.
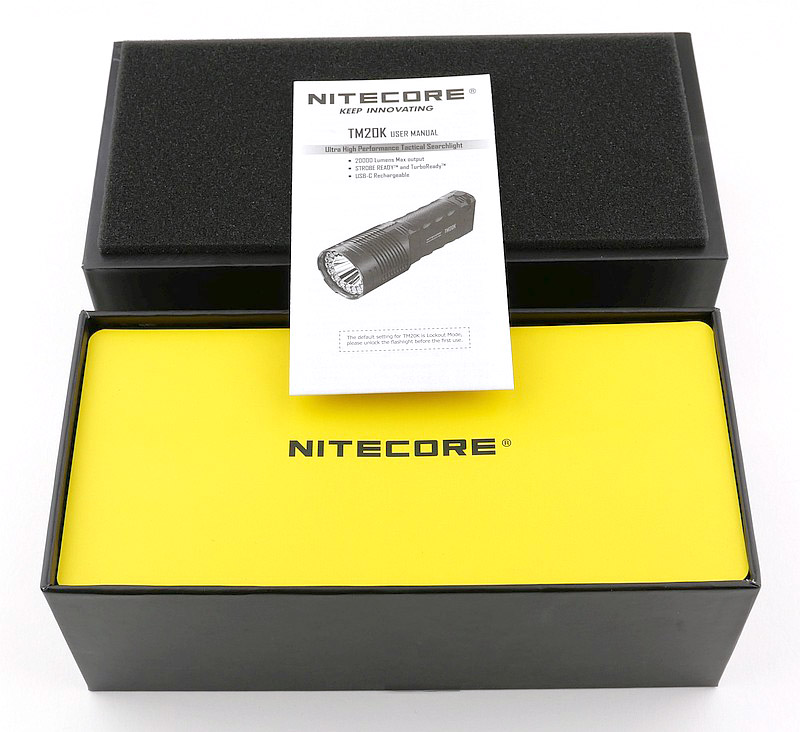
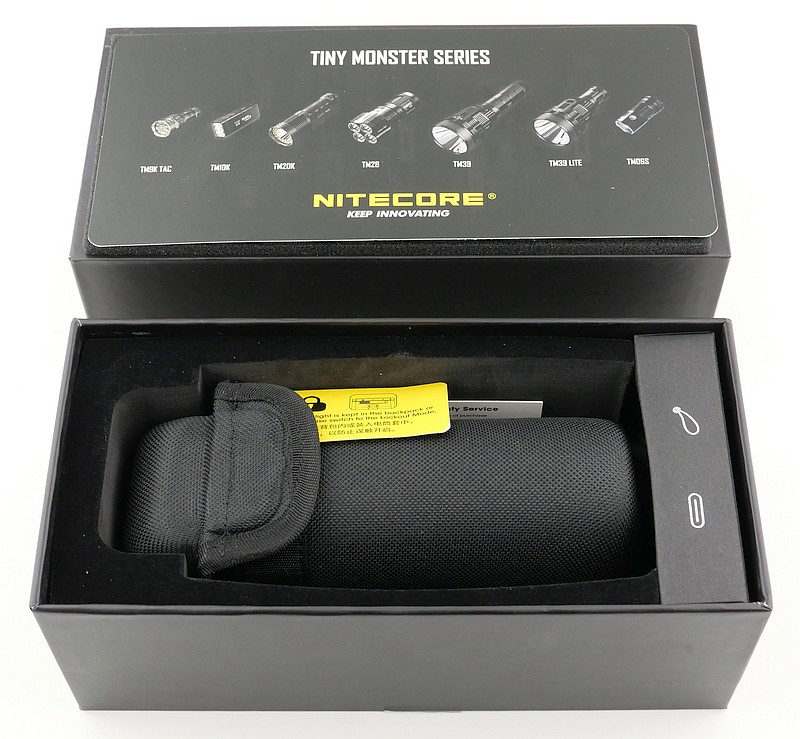
What is in the box?:
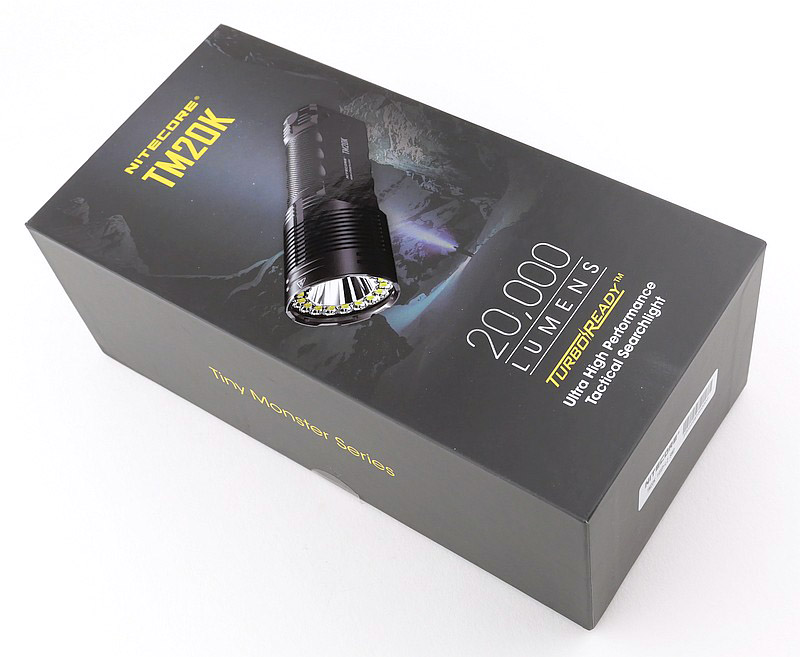
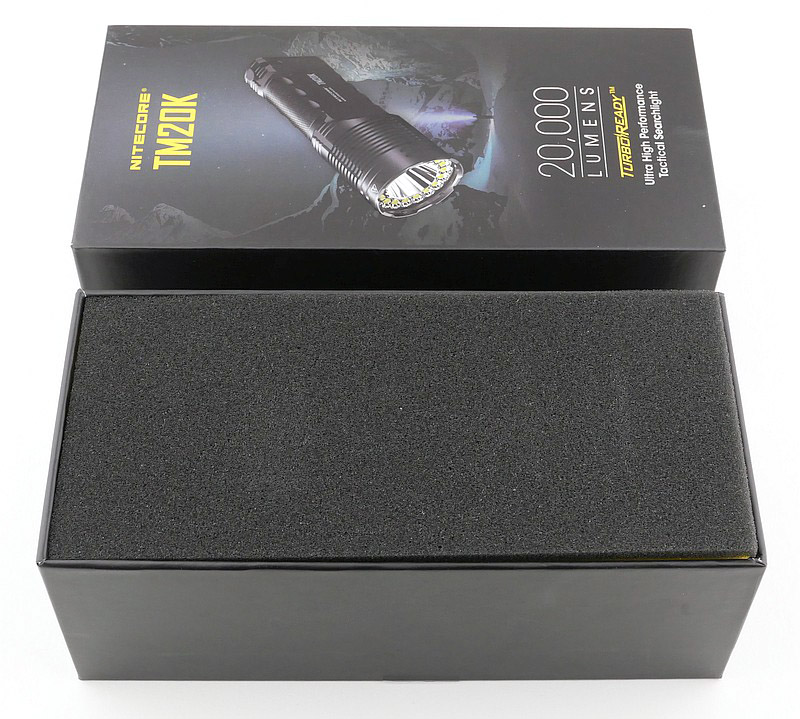
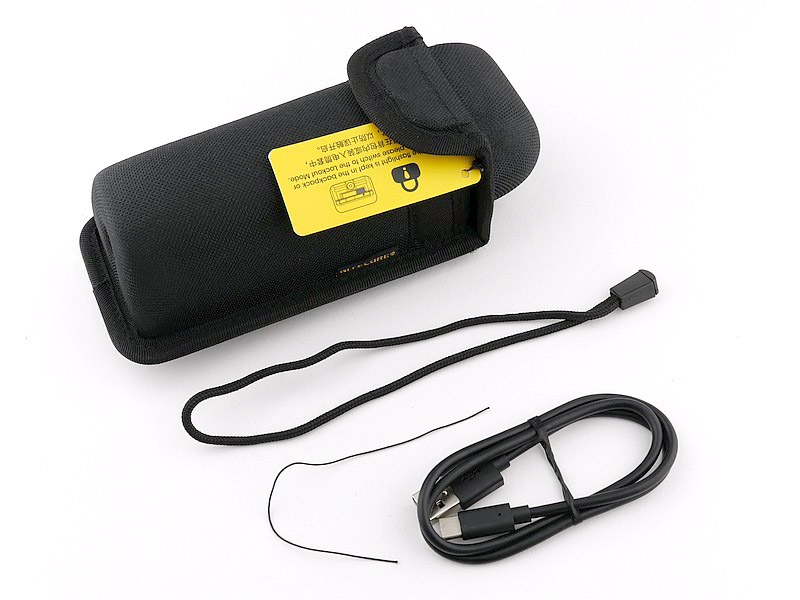
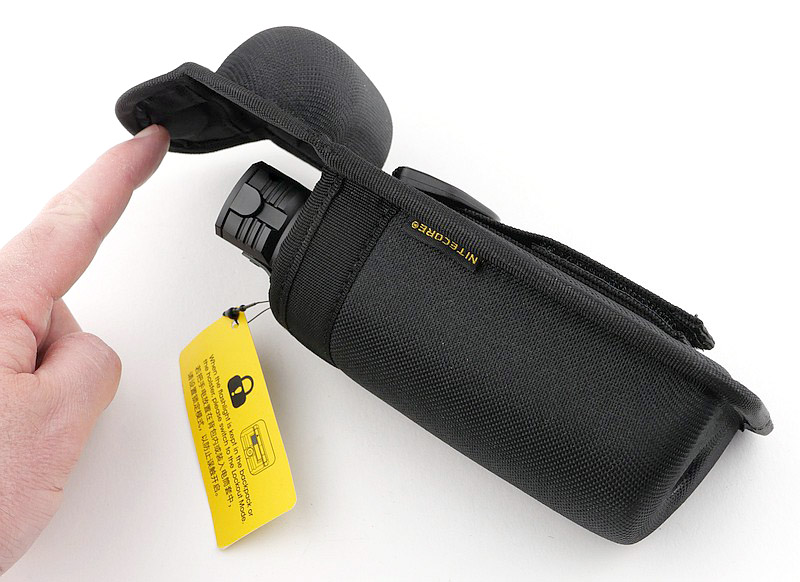
This gallery shows the TM20K’s packaging and what is included. The holstered TM20K, a USB-C charging cable, a lanyard, and a thin cord for threading the lanyard.
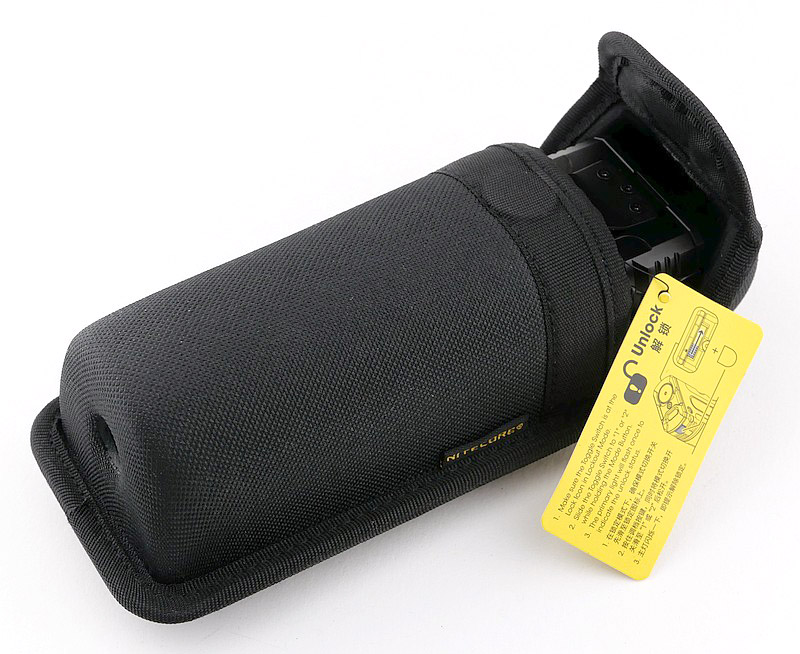
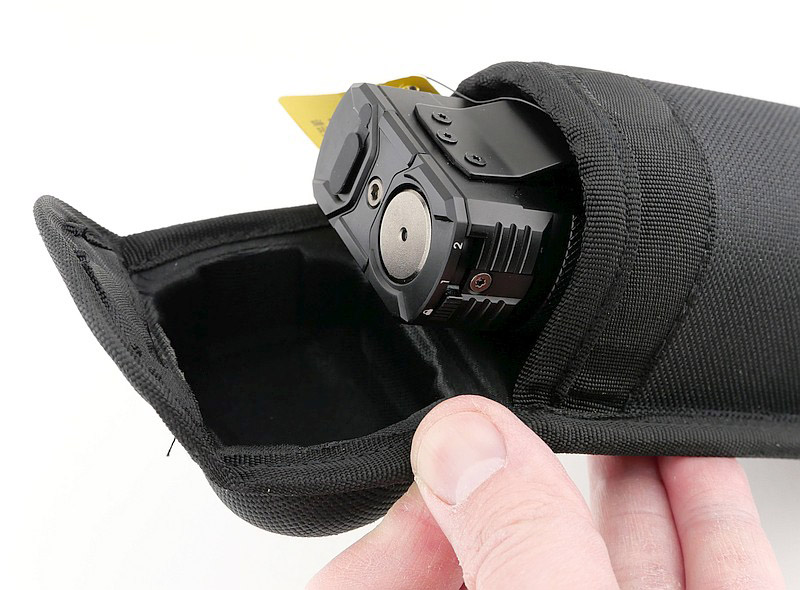
There is also a look over the belt holster and how the top flap opens.
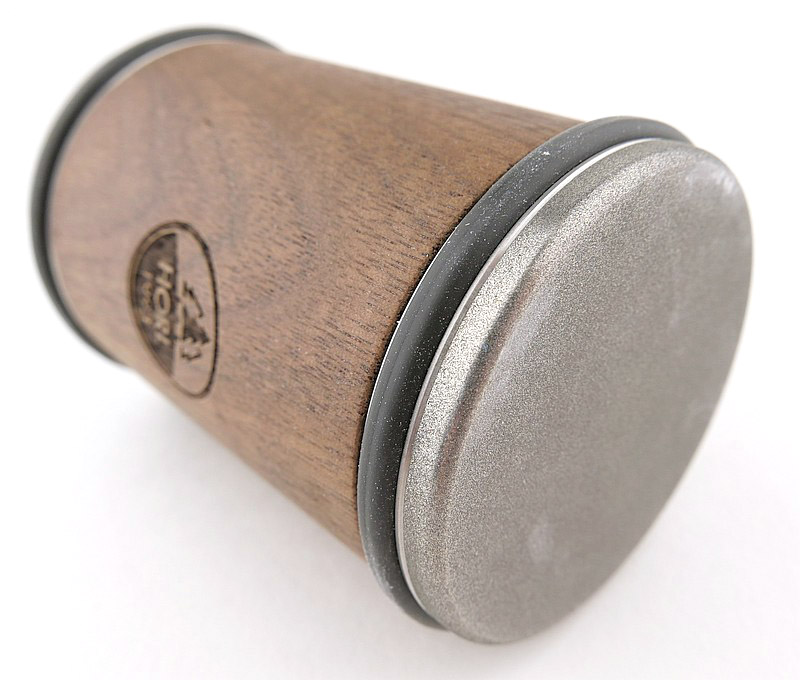
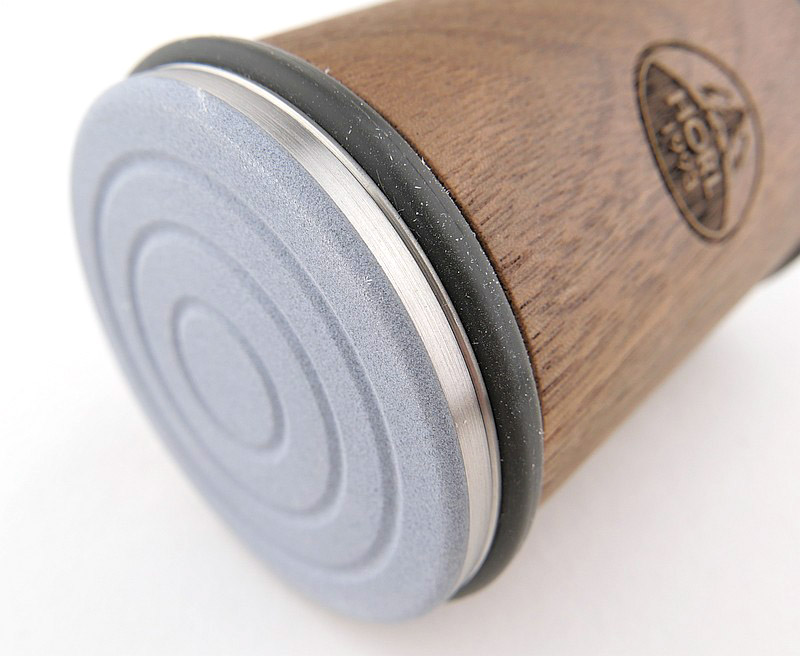
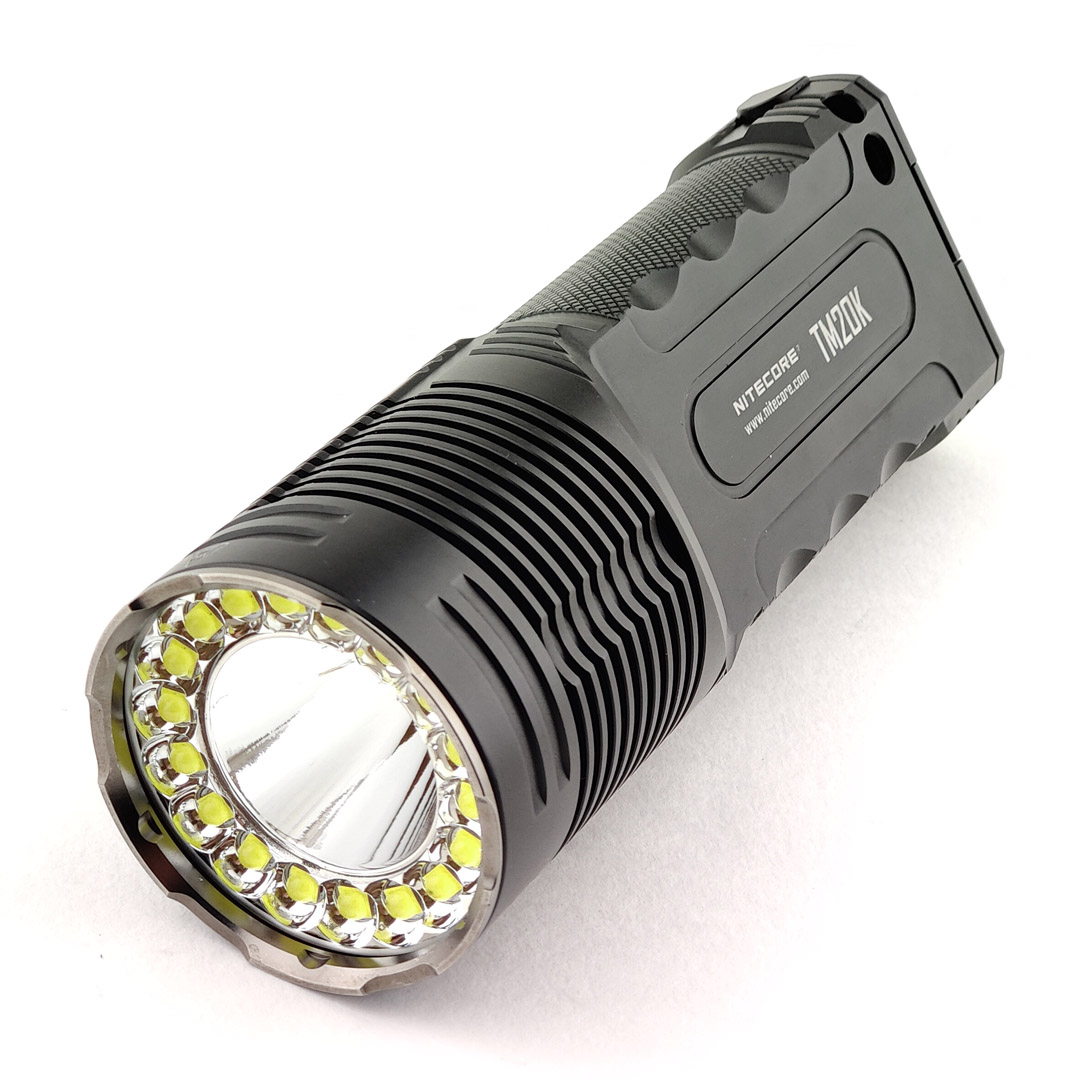
A good look round the TM20K – Things to look out for here are:
First, do not turn the TM20K straight on out of the box! There is a blue protective plastic film over the lens that will melt and make a mess of the front of the light, so make sure to take this off.
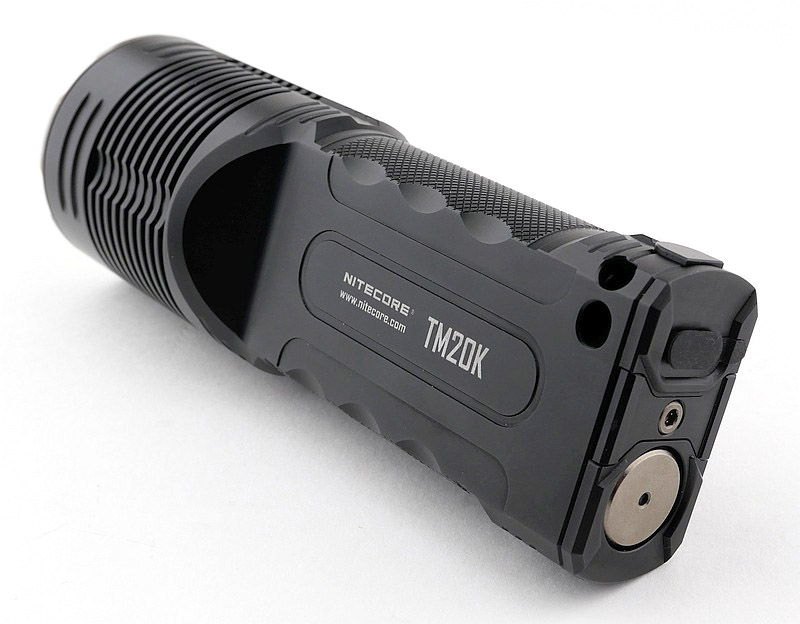
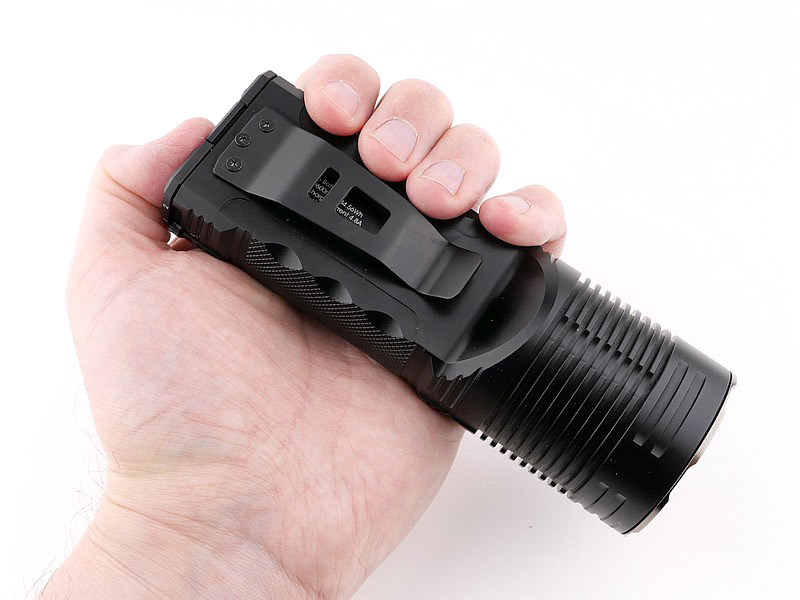
The body of the TM20K is a single piece, and this is not broken by any battery doors, as the TM20K has a built-in battery and is USB-C rechargeable.
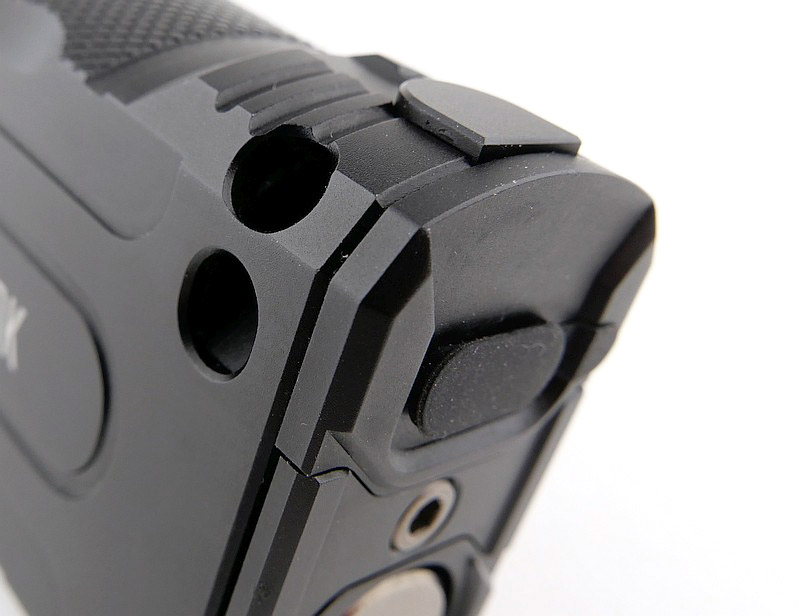
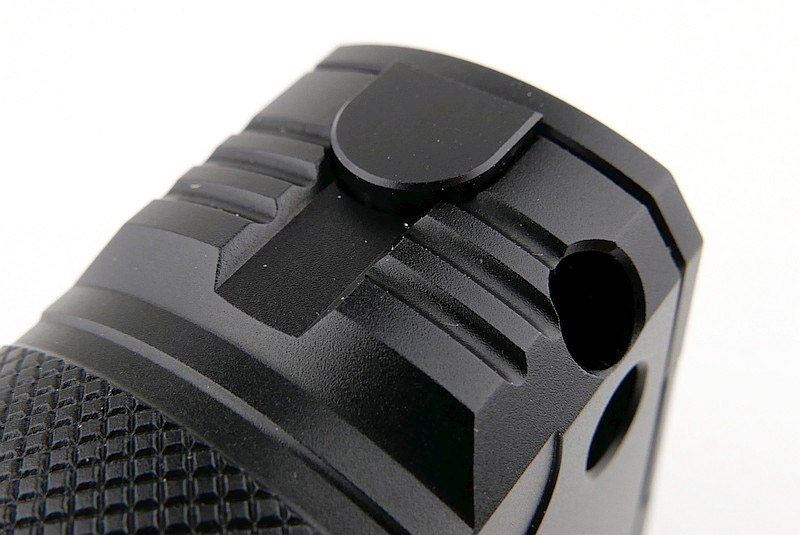
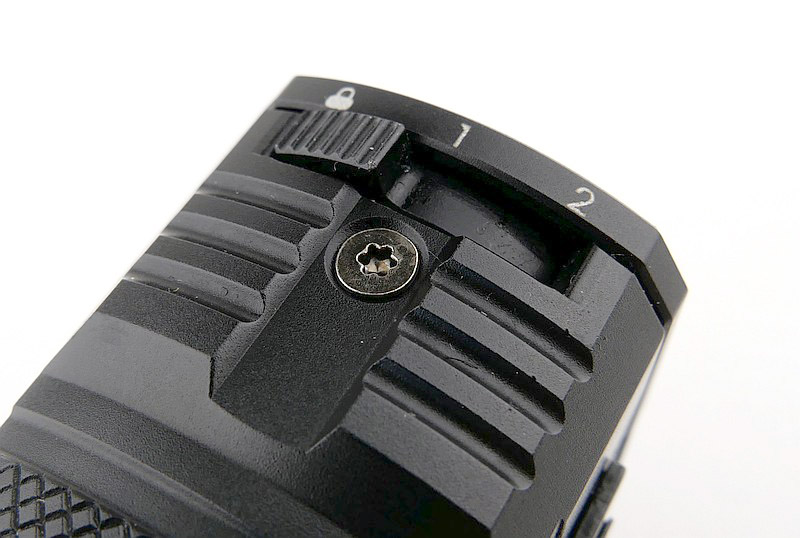
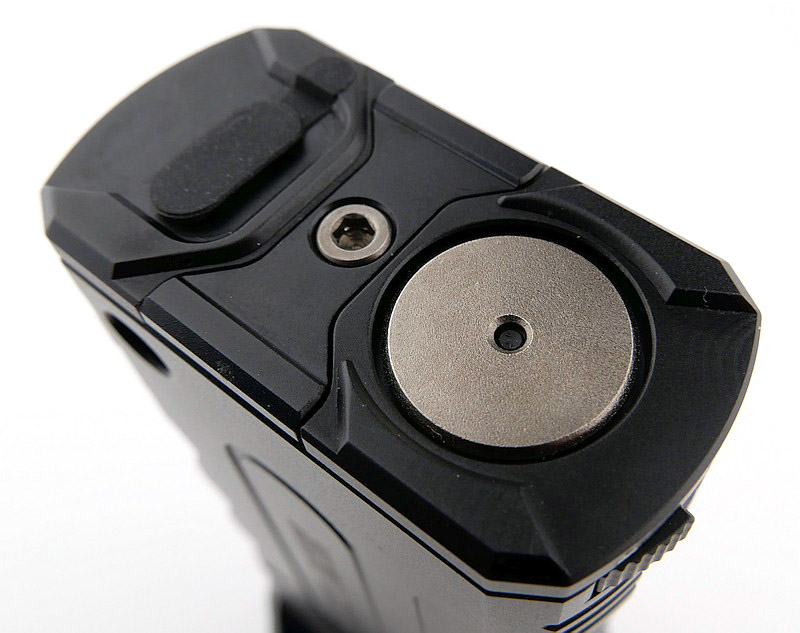
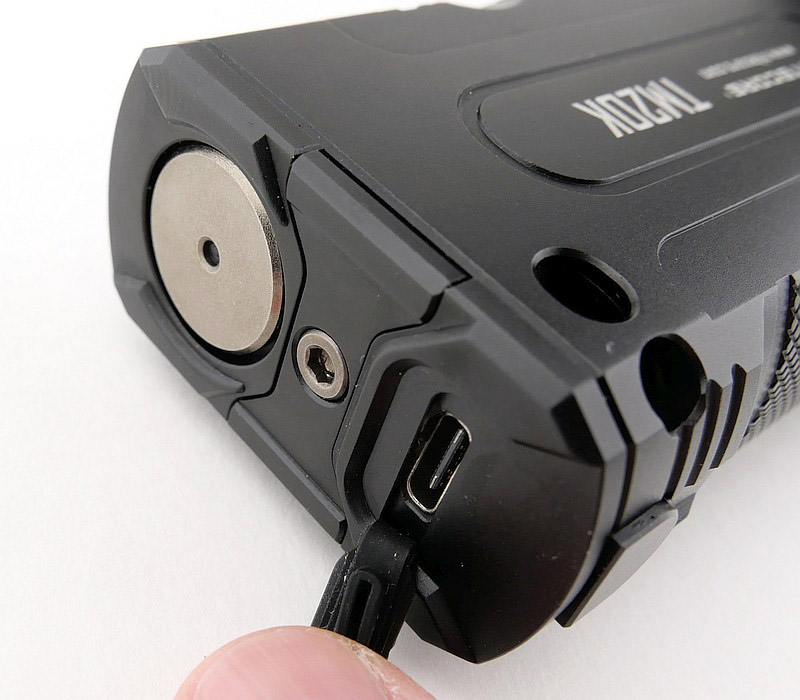
The lanyard hole is next to the charging port and mode switch. On the opposite side to the mode switch is the selector toggle switch with lockout setting.
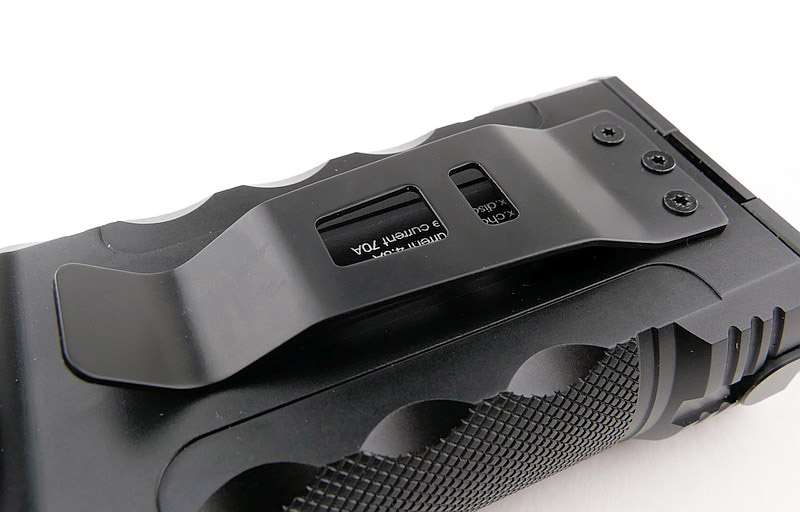
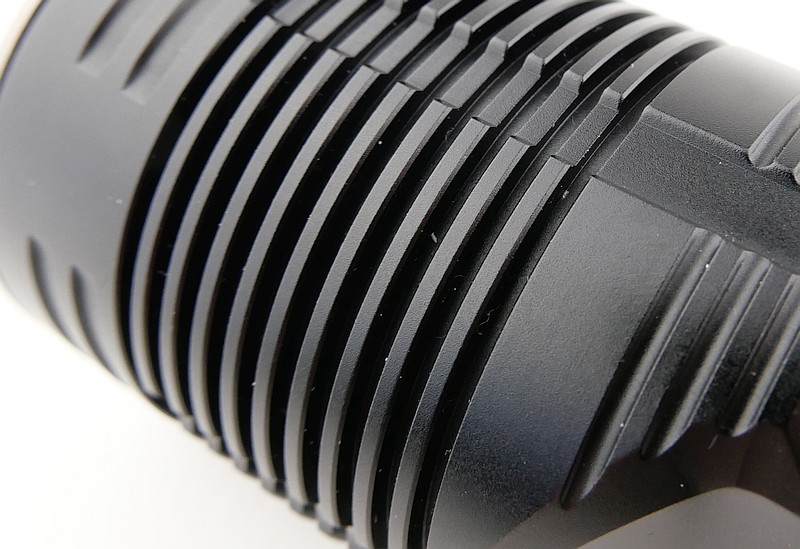
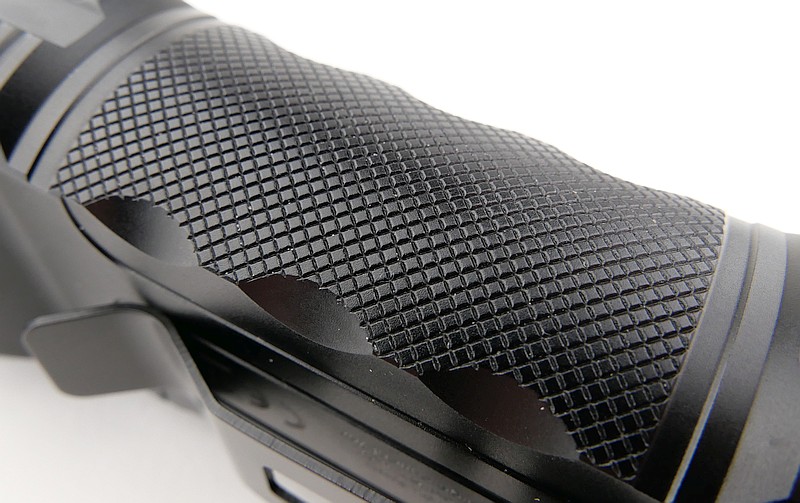
One of the flat sides has a wide steel belt clip. Also shown are the small heat sink fins and grip knurling.
On the tail of the TM20K you find the power button, tactical switches and the charging port.
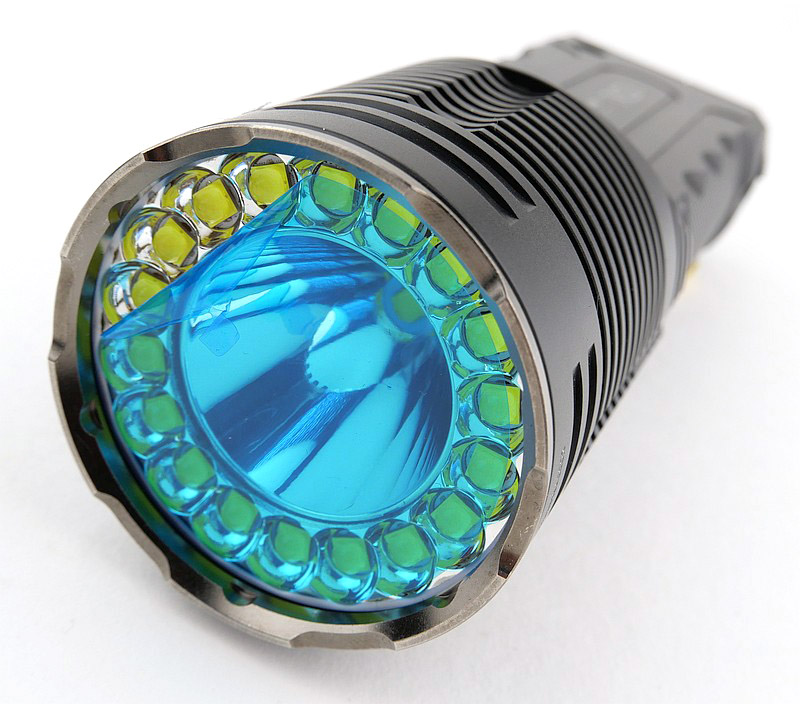
The beam
Please be careful not to judge tint based on images you see on a computer screen. Unless properly calibrated, the screen itself will change the perceived tint.
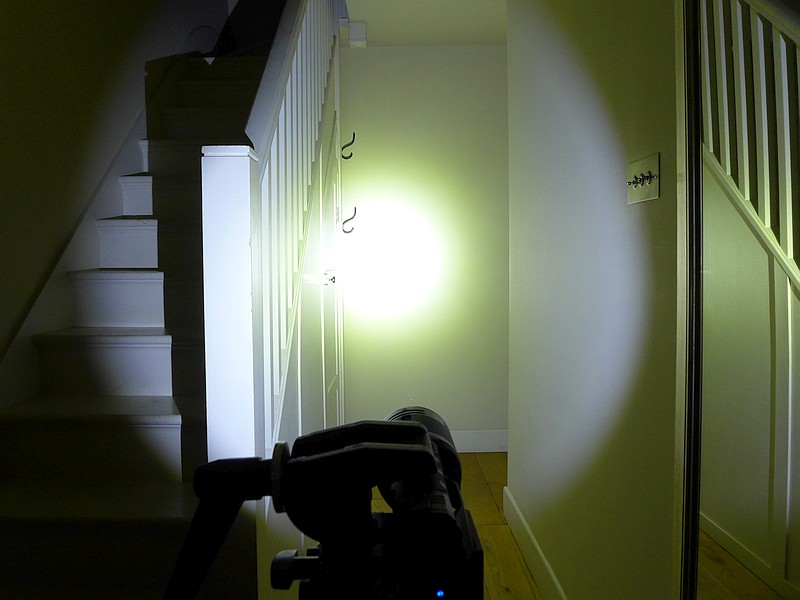
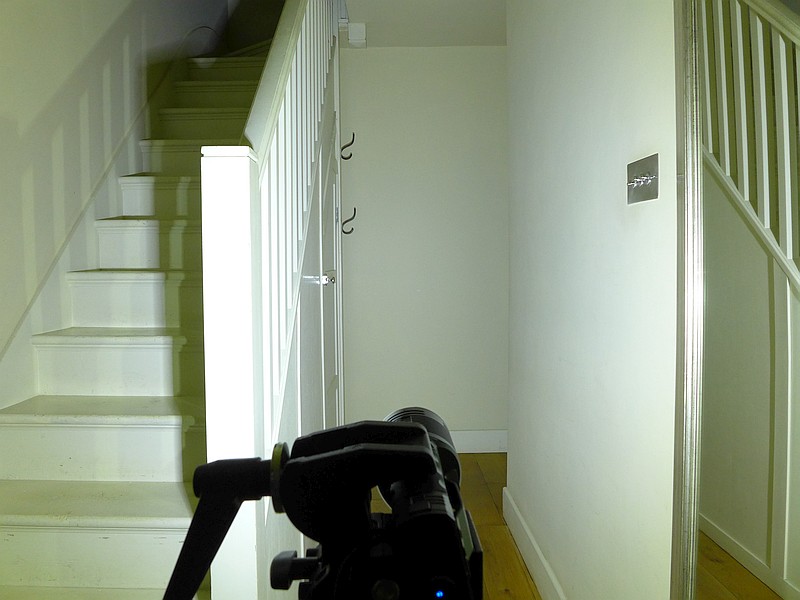
The indoor beamshot is intended to give an idea of the beam shape/quality rather than tint. All beamshots are taken using daylight white balance. The woodwork (stairs and skirting) are painted Farrow & Ball “Off-White”, and the walls are a light sandy colour called ‘String’ again by Farrow & Ball. I don’t actually have a ‘white wall’ in the house to use for this, and my wife won’t have one!
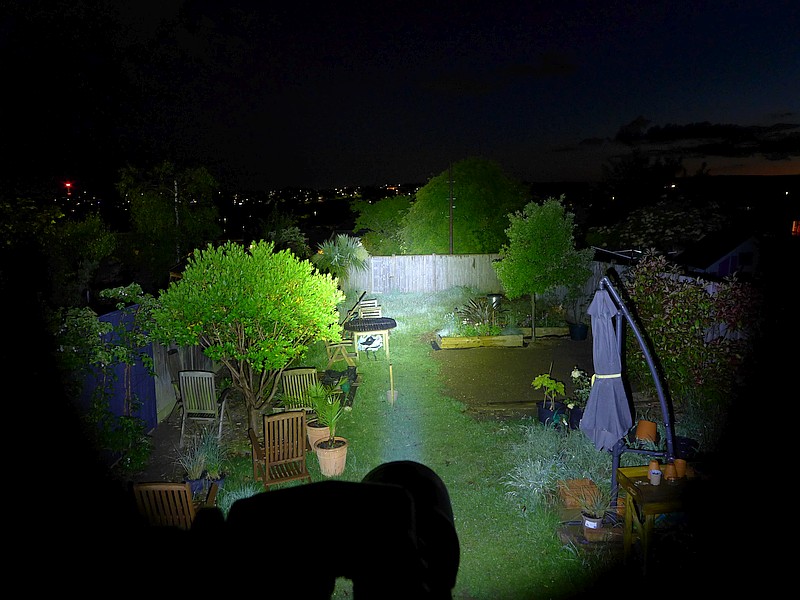
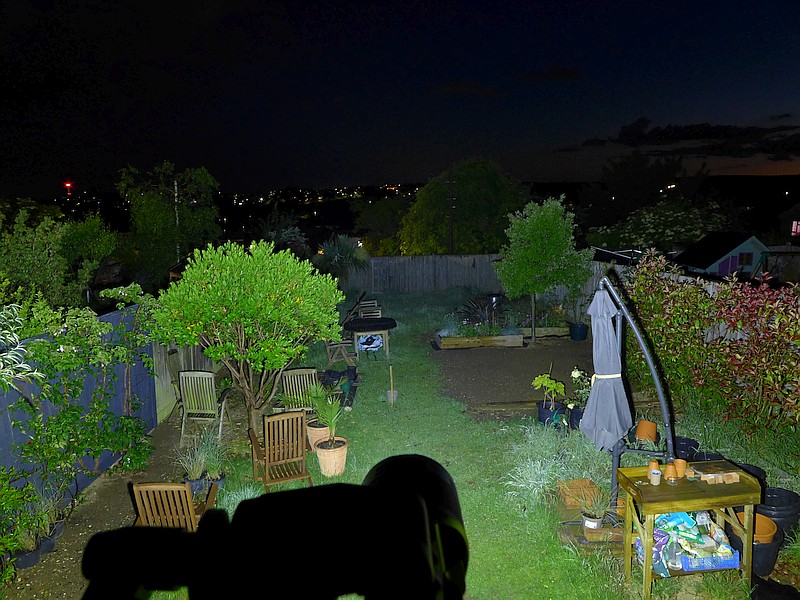
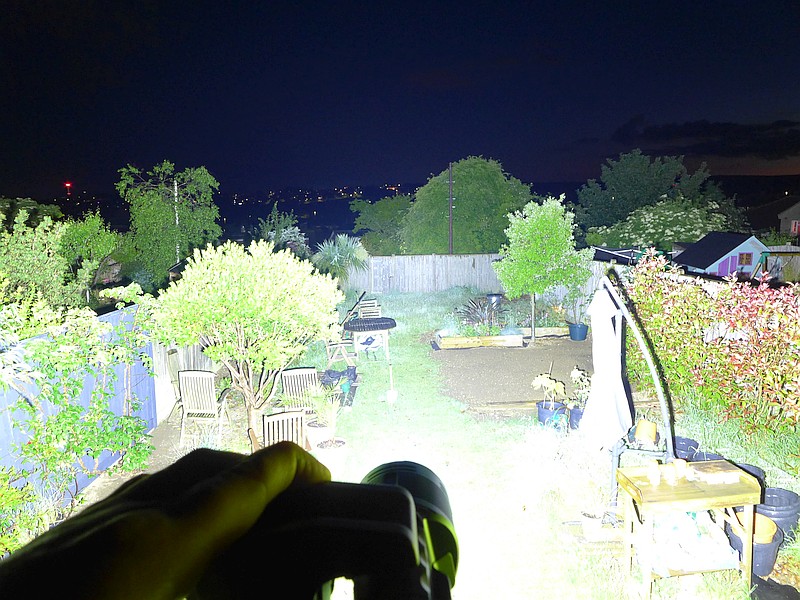
For the beamshot comparison I used three output modes. The Daily mode ‘Floodlight’ and ‘Spotlight’ special output levels plus the ‘Turbo’ 20,000 Lumen mode.
Indoors are only the ‘Floodlight’ and ‘Spotlight’ modes as Turbo is too bright. Then moving outdoors with the same modes (around the 2,000 Lumen level), and then with the same exposure, the Turbo output. 20,000 lumens really lights things up!!
Batteries and output:
The TM20K runs on a built in battery made of 2 x 21700 4800mAh cells.
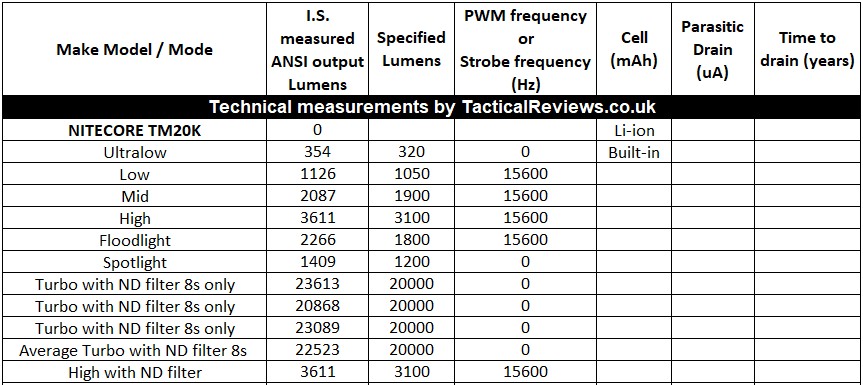
Please note, all quoted lumen figures are from a DIY integrating sphere, and according to ANSI standards. Although every effort is made to give as accurate a result as possible, they should be taken as an estimate only. The results can be used to compare outputs in this review and others I have published.
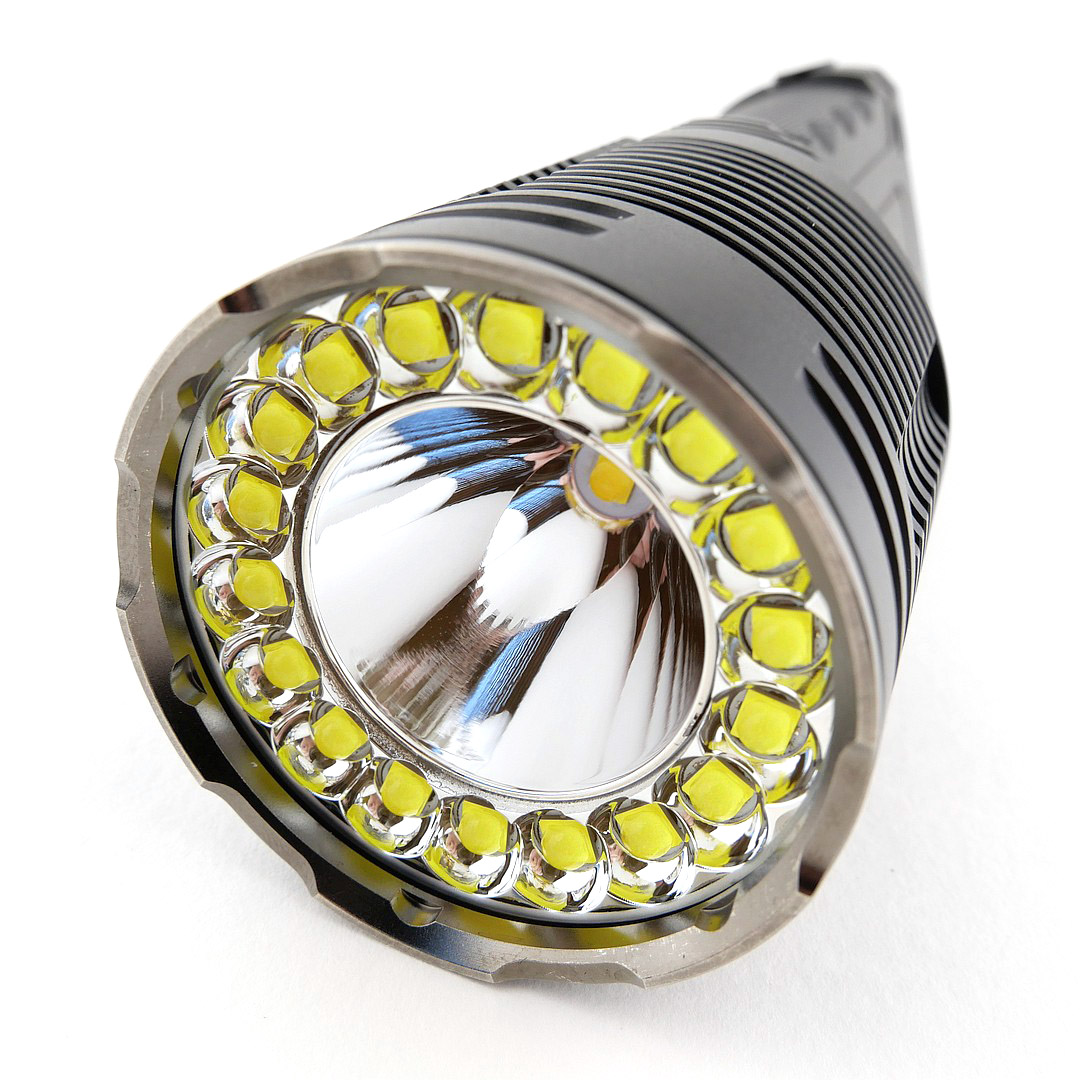
19 XP-L2 LEDs to blast out 20,000 lumens.
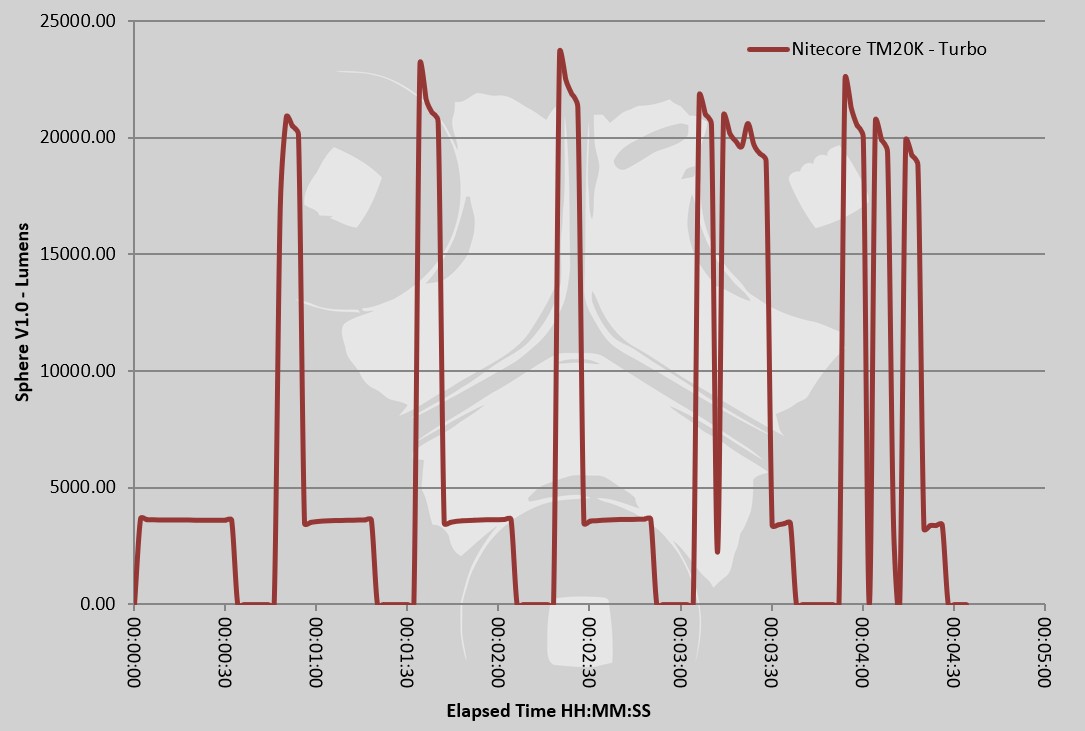
When working with any lights with an output over 5,000 lumens, I need to make modifications to the integrating sphere. For the TM20K, due to the extreme output and small size, it is limited to short bursts of the 20,000 lumen Turbo output. So the output table is a little different to most of the reviews I carry out.
Half the table is normal, then where it starts to list an ND filter, this is a ‘neutral density’ filter that simply cuts the light reaching the sensor by approximately 90%. Reference readings are taken to ensure the filter factor is correct, and a set of measurements were taken. With the short 8s burst of Turbo, several readings were taken and averaged. All of this is included in the table.
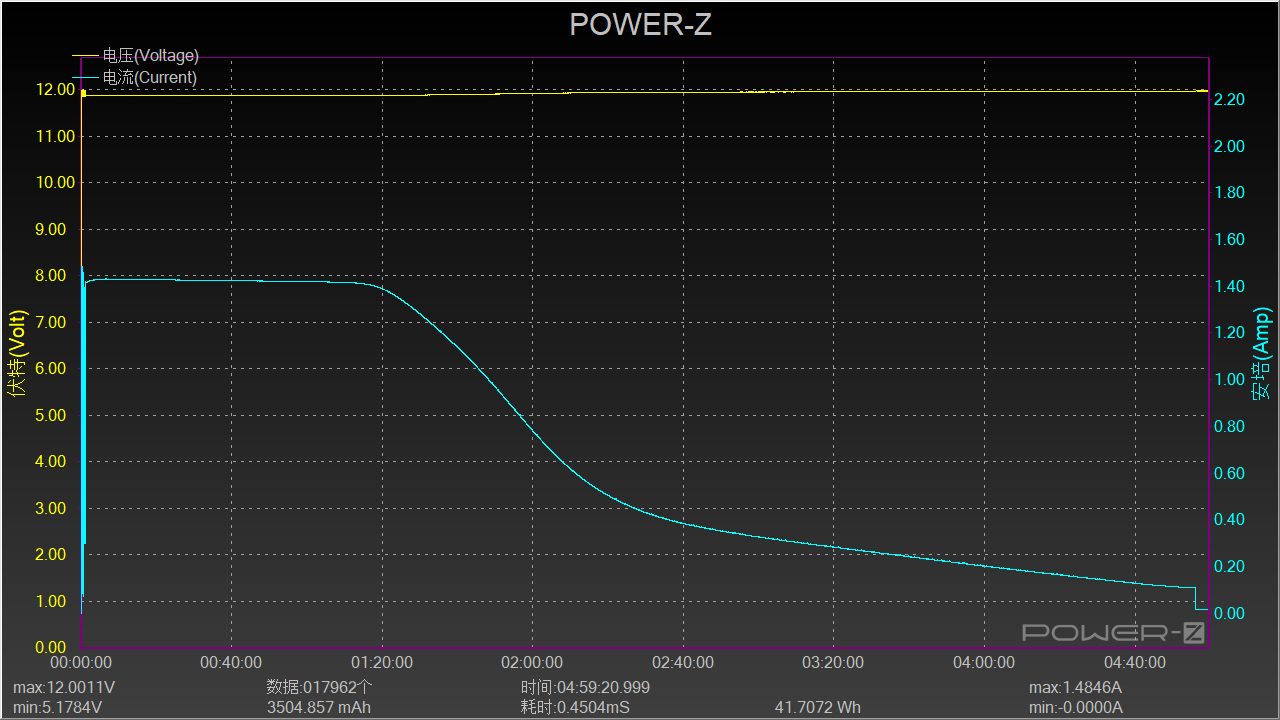
The graphs in this gallery show a few different things. First is a trace of the charging current consumed when charging the TM20K.
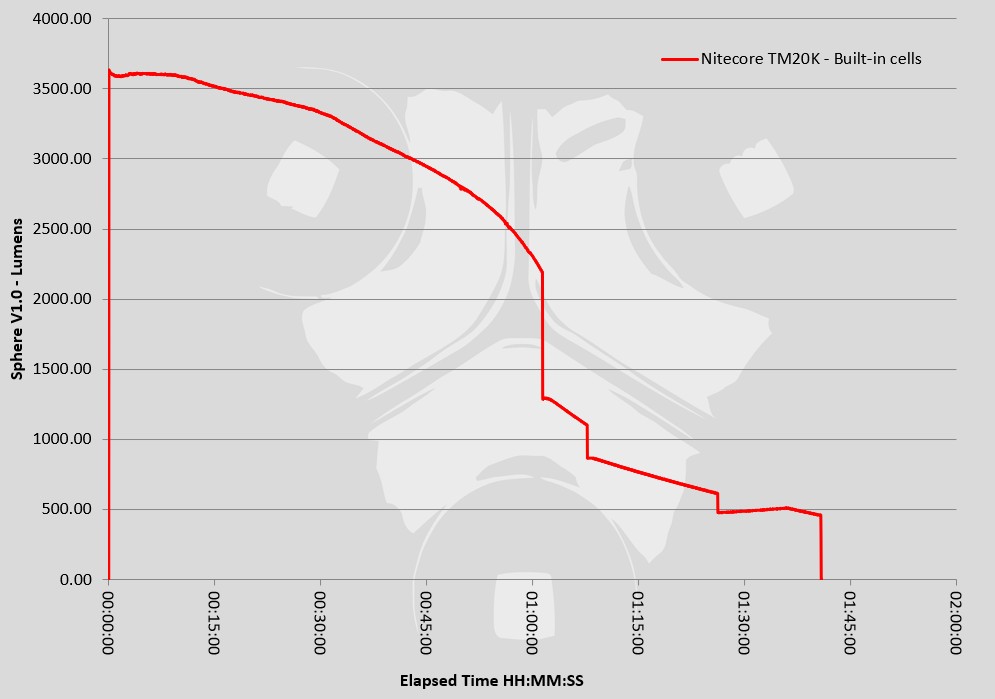
Next up is the runtime trace for High output. Due to the Turbo output being a burst mode only, for the full runtime, the graph shows the output for the high output level.
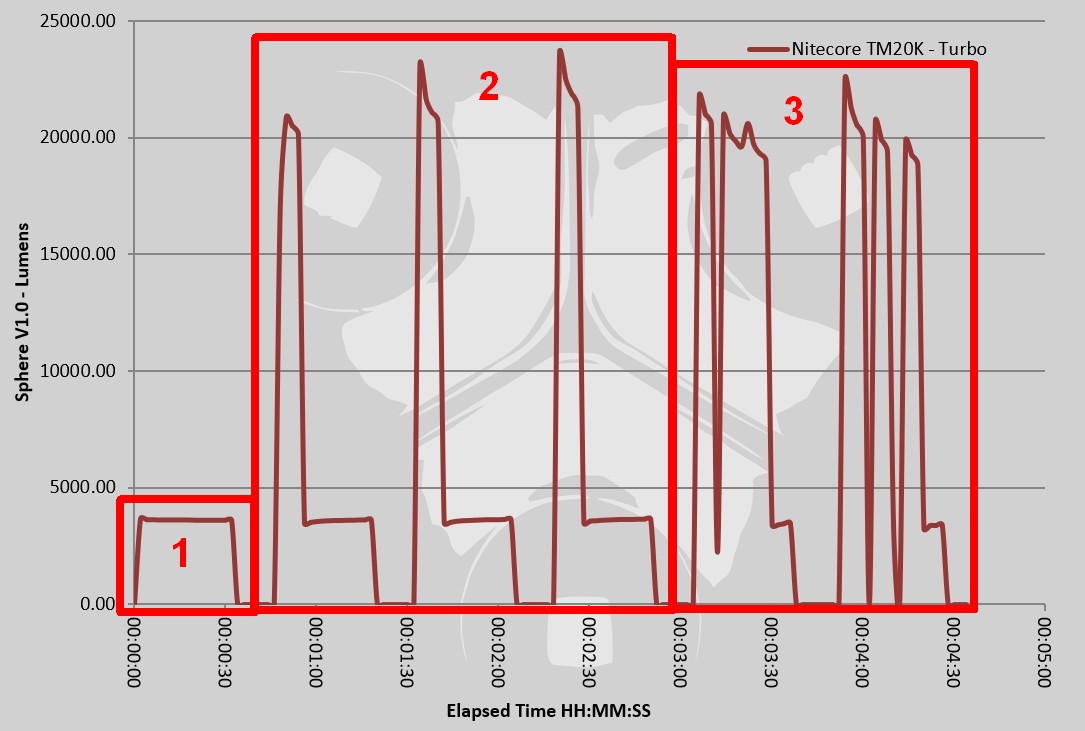
Now we have two copies of the same graph, the first shows all the traces taken to check the behaviour during the ANSI 30 second measurement time.
Shown first is an initial ‘High’ ANSI output trace (Section 1), then the Turbo button held for 30s (Section 2) where the output drops to High after 8s. Section 3 shows what happens when you intentionally use Burst, Burst, Burst until the TM20K won’t output Turbo any more.
As the ANSI output should be measured at 30s, the 8s Turbo output would mean ‘ANSI Turbo’ measurement was 3611 lm, so this means we can’t actually state an ANSI Turbo output and instead I have gone for ‘max at switch on’ for the value of Turbo, and this is what was used in the output table.
The TM20K in use
20,000 lumens in the palm of your hand, here it is:
And as a starting point I have to say the TM20K is scary bright! As well as that it heats up so quickly on Turbo you really know this is pumping out the power.
Being about the size of a 2x 18650 light used to be, the TM20K is noticeably heavier and more dense than this older class of light, a sign it is packed with performance.
The supplied holster is very nicely made and is a rigid style with flip-top lid style opening. When belt mounted you need to pull the holster body away from you to allow the lid to hinge open far enough to get the TM20K out. This might have worked better flipping open away from you. The magnetic closure is a nice touch and allows for silent opening (without the ‘tearing’ sound of Velcro).
One of the most important features for a light like this is the lockout; yes the ‘not outputting any light’ feature. Absolutely critical as the output is so high, if contained it will be dangerous.
Lockout should always be easier to activate than to deactivate, and Nitecore have made it very easy. Slide the toggle switch to the padlock and once it has been there for 2s the TM20K is locked.
While locked, if you slide the toggle to 1 or 2, the power button flashes five times to let you know it is locked. Unlocking requires two switches to be used at the same time. Holding the mode switch down as you slide the toggle switch from lockout to position 1 or 2 with the beam turning on briefly to let you know unlocking was successful.
All of that to talk about the TM20K not outputting anything, well, you will be very happy about this feature.
In terms of handling and the interface, although the TM20K lists ‘tactical’ modes, the layout of buttons and ease of access to them would not be my choice for use in a pressured situation. General use, and even search and rescue use, but not reaction or time critical scenarios where you might miss buttons or press ones you didn’t mean to.
Onto those 20,000 lumens. You get a burst of 8s at this level. If you immediately reactivate Turbo, you can do this two further times (three times before a cooling off period) where the thermal protection prevents the TM20K from going above High mode even using the Turbo button. So from cold, 24 consecutive seconds of 20,000 lumen output. Measured and confirmed as shown in the output table and graphs, all from a palm sized light. This is seriously impressive.
Going to the other extreme, I would have preferred a mode lower than 350lm. This is the ‘ultra-low’ mode on the TM20K. Even if you are breaking out the Tiny Monster, there is still a practical lower level for every day use and 350lm is too high, so this is a light to bring out when you want a lot of light.
Considering the size, that performance on High giving a hour of solid output, 45 minutes of which is over 3000lm, does make this a workhorse, even if you ignore the Turbo output.
Not forgetting my previous comments about the tactical mode, the momentary output in this mode is great for searching especially when other people are around and you don’t want to blind them.
My preference is always for removable/replaceable batteries, but the other side to this is the guaranteed performance of the cells chosen by Nitecore to power this Tiny Monster, and the simplification of the design as it doesn’t need a battery door. Being a super high performance light, the cell characteristics are critical, so we can take the built-in cells as a positive point.
20,000 lumens is shocking and astounding from a pocket sized light, well done Nitecore.
Review Summary
The views expressed in this summary table are from the point of view of the reviewer’s personal use. I am not a member of the armed forces and cannot comment on its use beyond that covered in the review.
Something that might be a ‘pro’ for one user can be a ‘con’ for another, so the comments are categorised based on my requirements. You should consider all points and if they could be beneficial to you.
_______________________________________________
What doesn’t work so well for me
_______________________________________________
‘Ultra-low’ mode is still 350 lumens.
Holster lid opening into your body is a bit awkward.
_______________________________________________
Things I like
_______________________________________________
20,000 Lumen burst output.
Excellent Lockout implementation.
Momentary and latching operation.
Fixed Flood and Spot special modes.
Instant access twin Turbo switches.
Very compact for the output performance.
Quality holster included.
19 XP-L2 LEDs.