Knife Review: Extrema Ratio MAMBA

Extrema Ratio are well known for making knives that are built like a tank; heavy duty fixed blades and folders that will take everything you can throw at them in their stride.
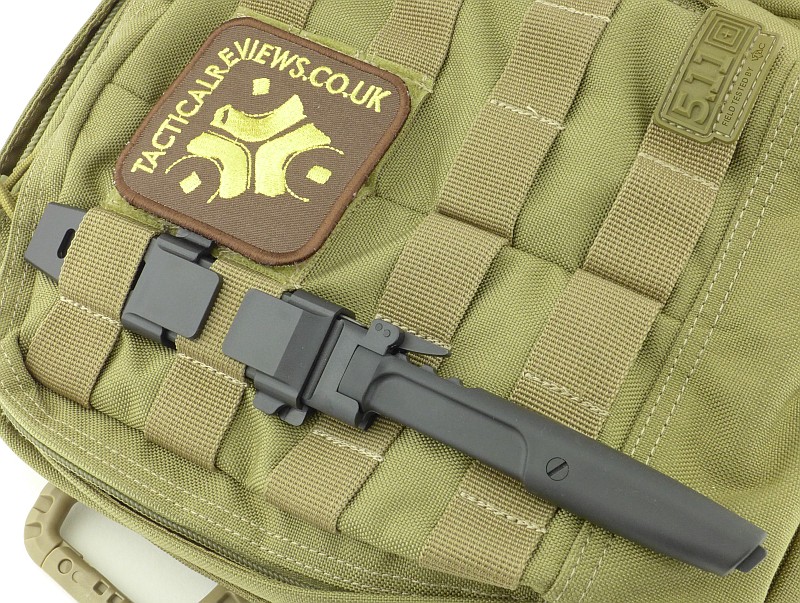
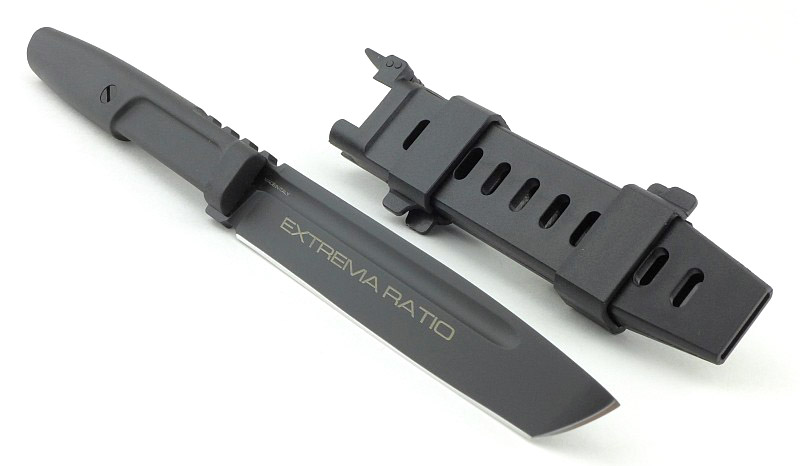
When the new Mamba arrived for testing it was clear this was something quite different; I was struck by how slim this knife is, and by the special sheath with quick release lever locking system – a sheath so slim it is MOLLE compatible because slides directly into the loops of PALS webbing.
The Blade and Handle Geometry:

Most knife specifications have a basic description of the blade geometry, but in this section I will be taking a more detailed look at geometry and balance.
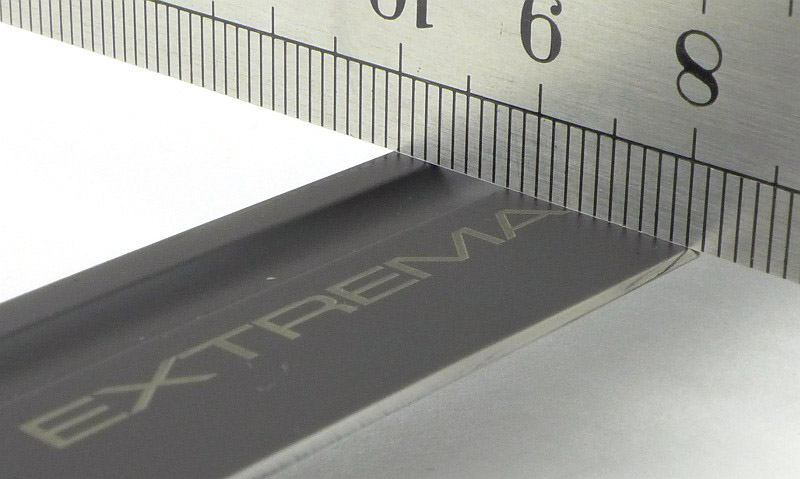
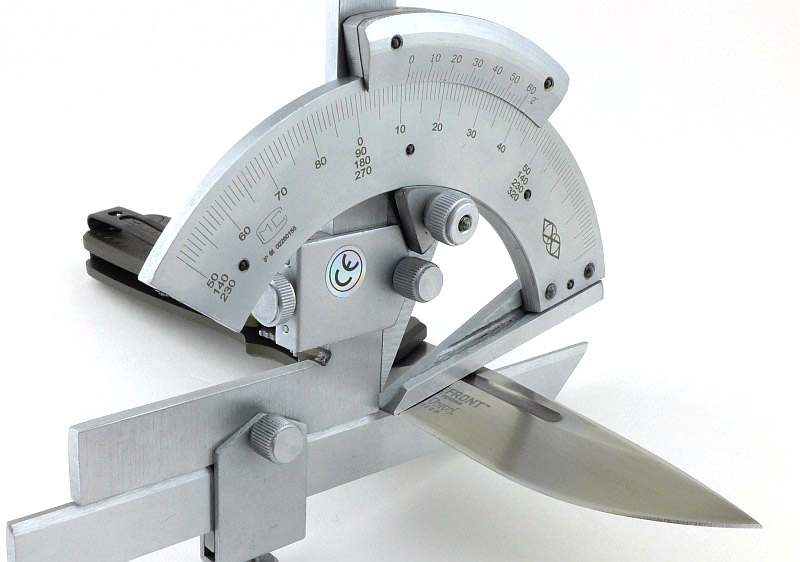
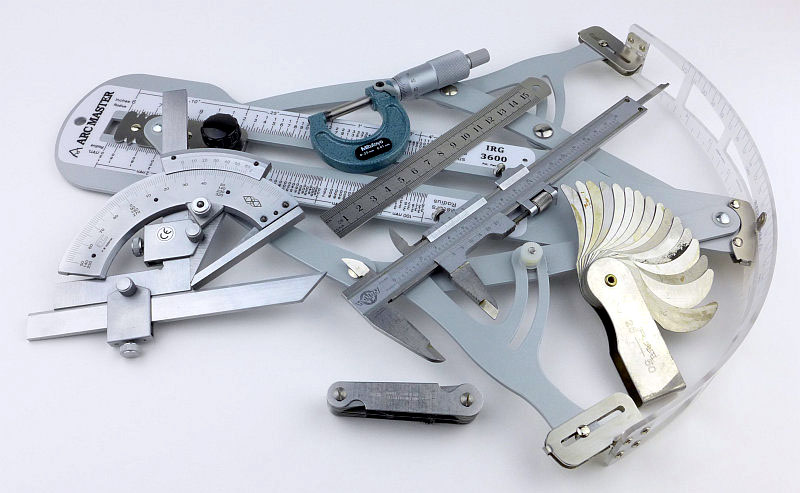
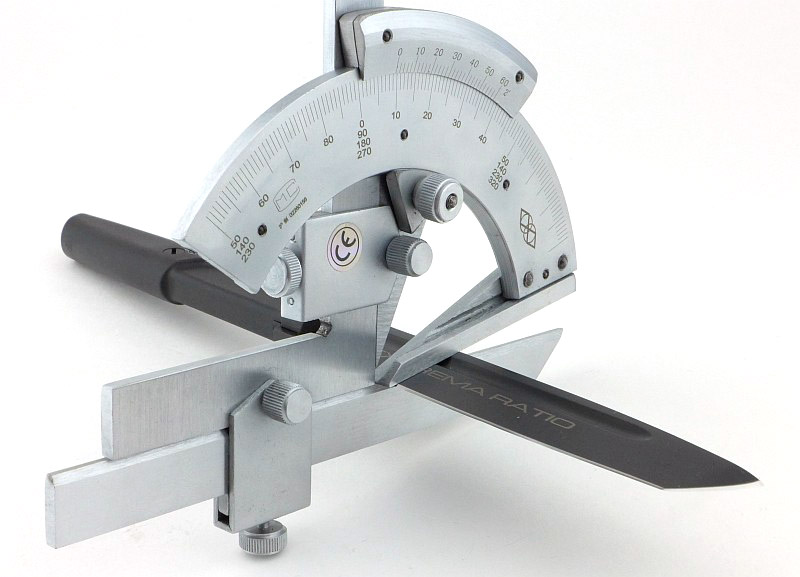
Using a set of gauges and precision measuring equipment including a Vernier protractor, callipers, fixed radius gauges and the unique Arc Master adjustable radius gauge (the one that looks like a crossbow).
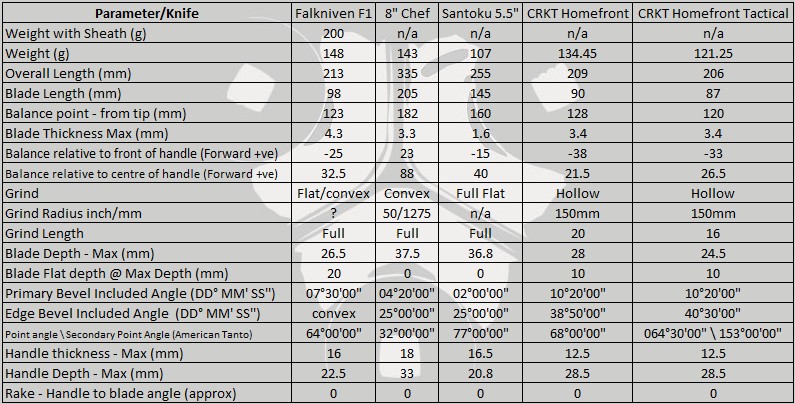
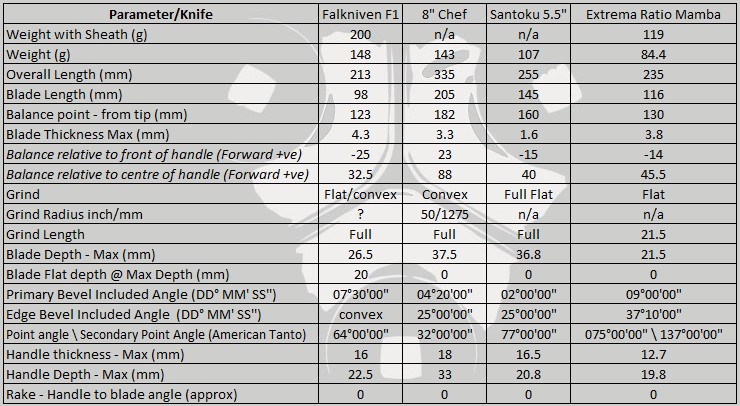
These measurements have been tabulated and are presented along with a few reference blades (8″ Chef’s Knife, 5.5″ Santoku and the popular Fällkniven F1).

Key aspects such as the primary bevel angle, grind type, blade depth, blade thickness, length, weight are detailed, along with balance information.
The ‘Balance relative to the front of the handle’ tells you if the knife will feel front heavy, or if the weight is in your hand (a positive value means the weight is forward of the front of the handle). The ‘Balance relative to the centre of the handle’ indicates how close to a ‘neutral balance’ the knife has in the hand.

In the case of full convex grinds the approximate centre of the grind is used for the primary bevel angle estimate.
The blade is made from ACCIAIO BöHLER N690 (58HRC) steel.

A few more details:

The slimmest Extrema Ratio box I’ve come across.
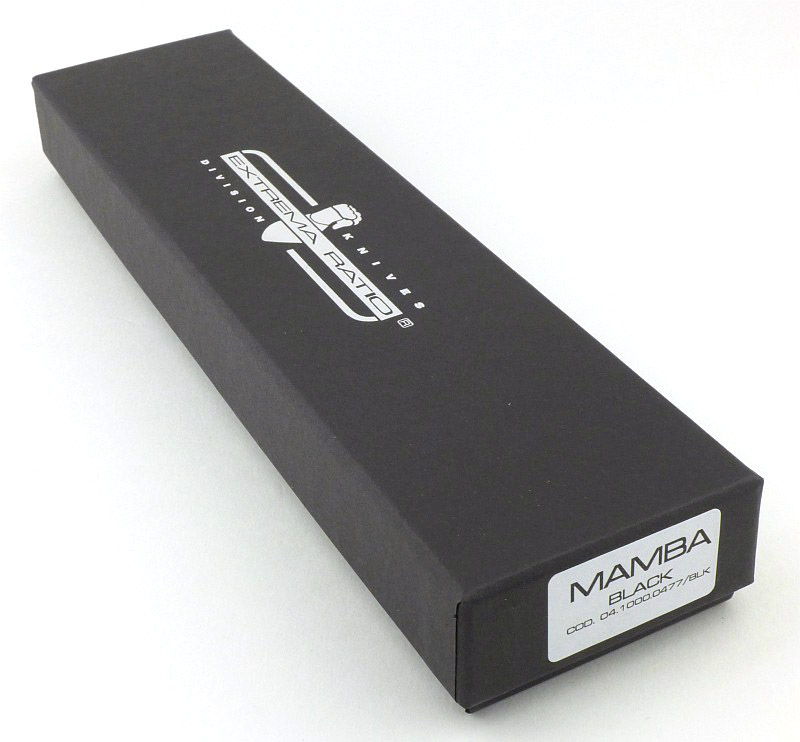
Taking the lid off; this is how the Mamba arrives.
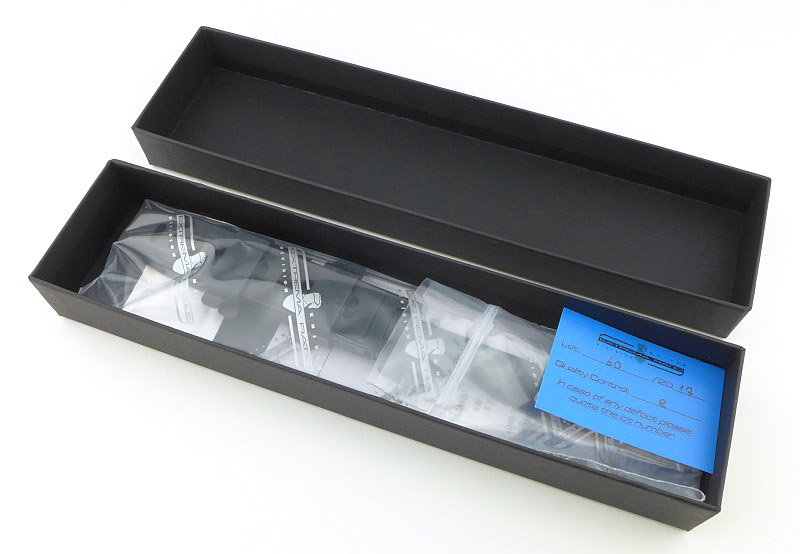
Included is the Mamba and sheath, with a quality control card and a couple of leaflets.
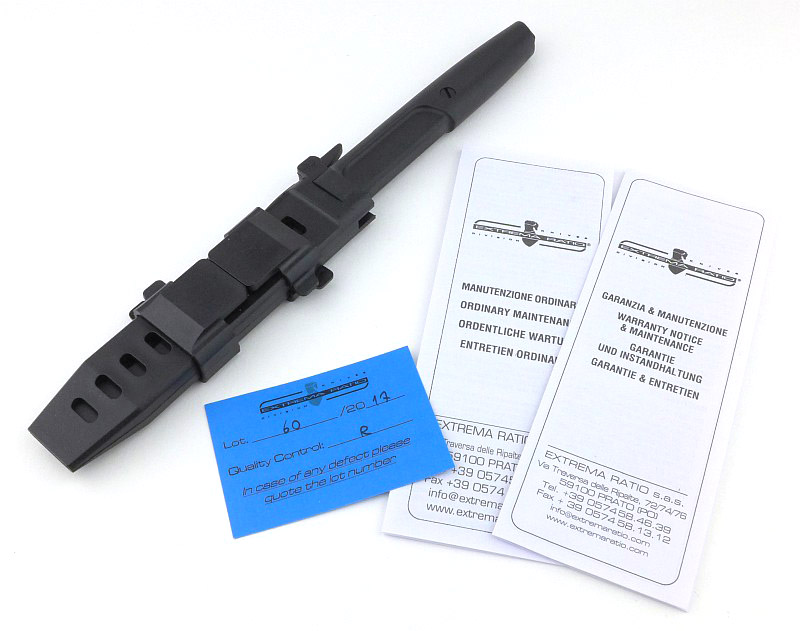
This really is something different from Extrema Ratio. Recognisable in styling, but definitely distinct.
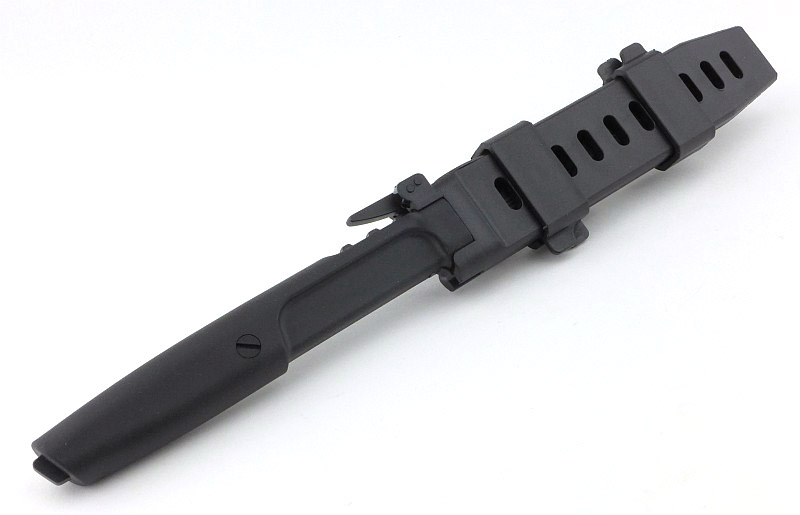
One of the outstanding features of the Mamba is the quick release lever locking system. This is not a new system as it is used in many diving knife sheaths and a few specialist designs, but it is one I’m a real fan of. Easy and quick to use and very secure.
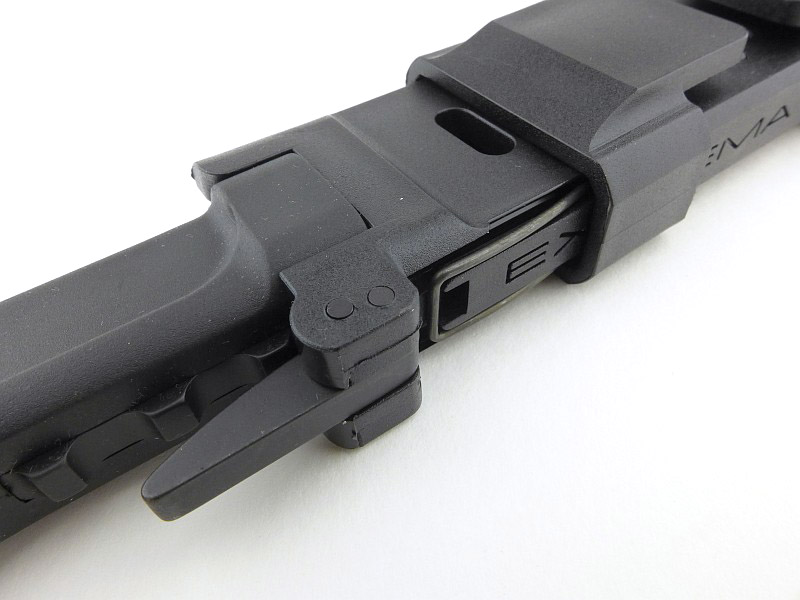
Simply press the lever inwards to release the knife. With the lever pressed in, its wire spring is pushed away from the sheath slightly.
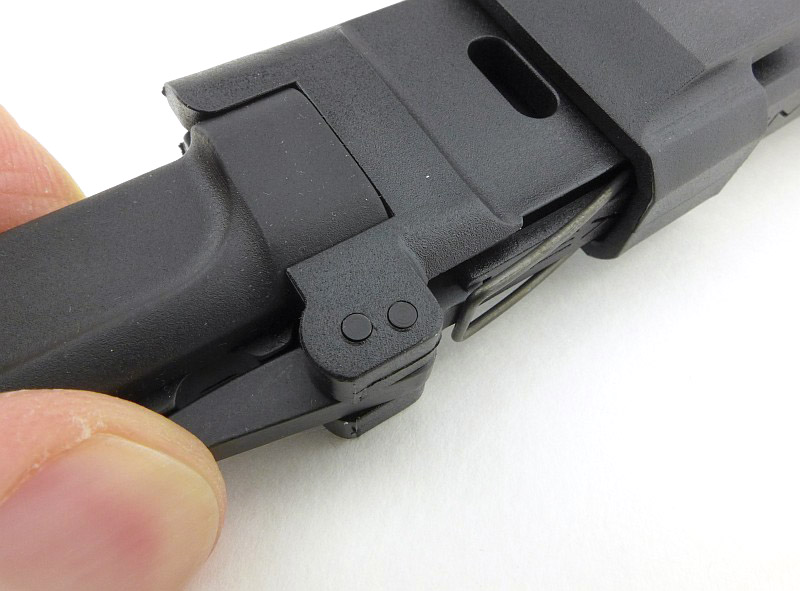
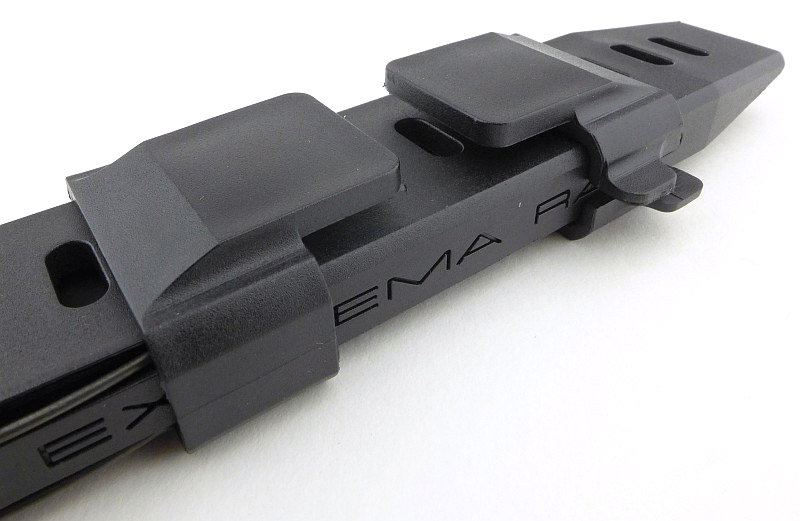
The very unusual sheath has two adjustable plastic clips. They can also be reversed to make the sheath left or right handed. Of course these are used to secure the sheath in place when inserted into PALS webbing.
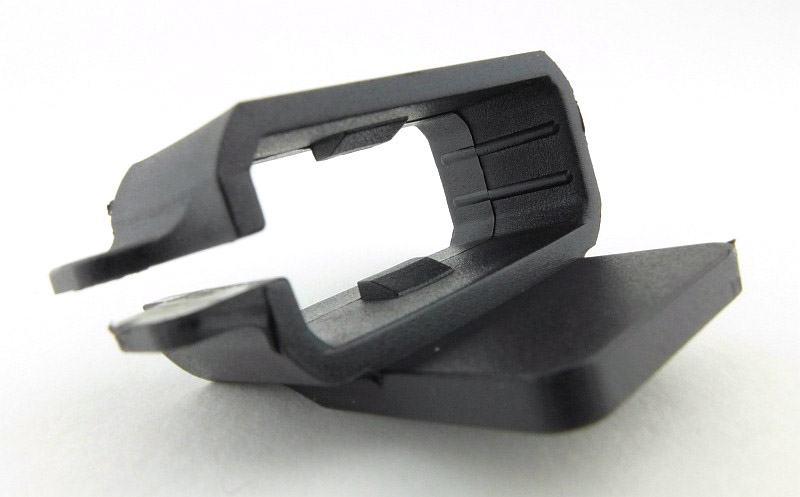
With the clip removed from the sheath you can see the internal locking lugs. One side is open and has finger tabs to allow you to open it further for adjustment or removal.
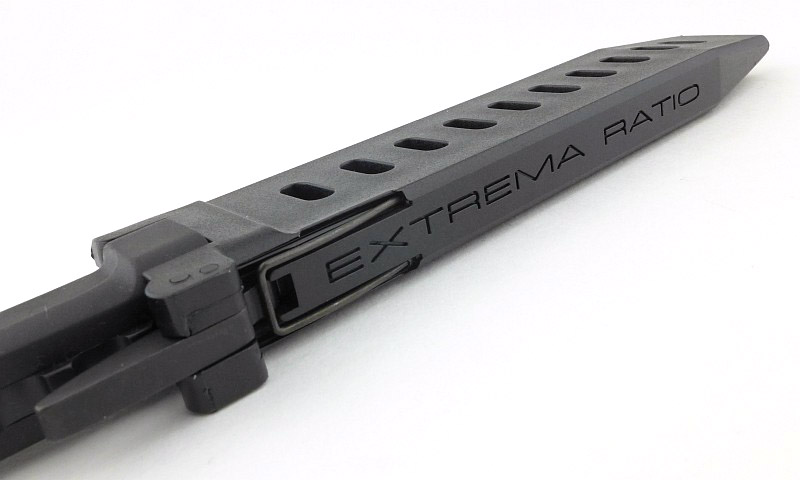
All along the sheath are holes for the adjustable clips to lock into. Should you just want a super low profile knife, you can take the clips off and use the sheath like this.
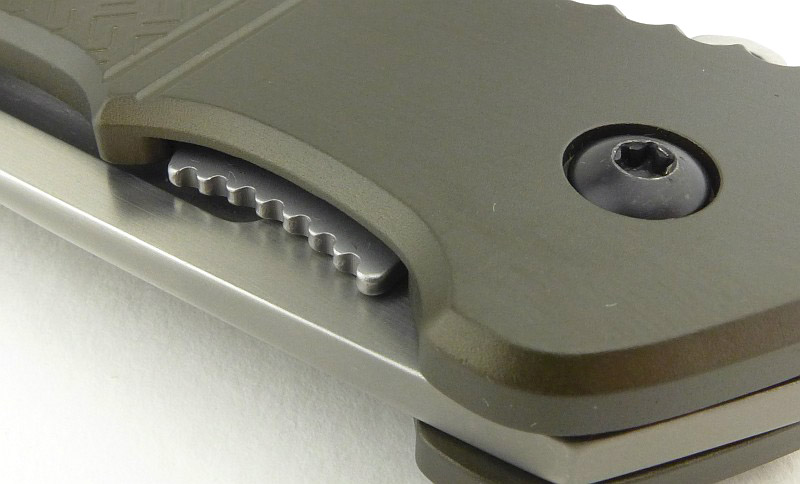
A distinctive design feature of Extrema Ratio knives is the finger grip recess in the Forprene handle.
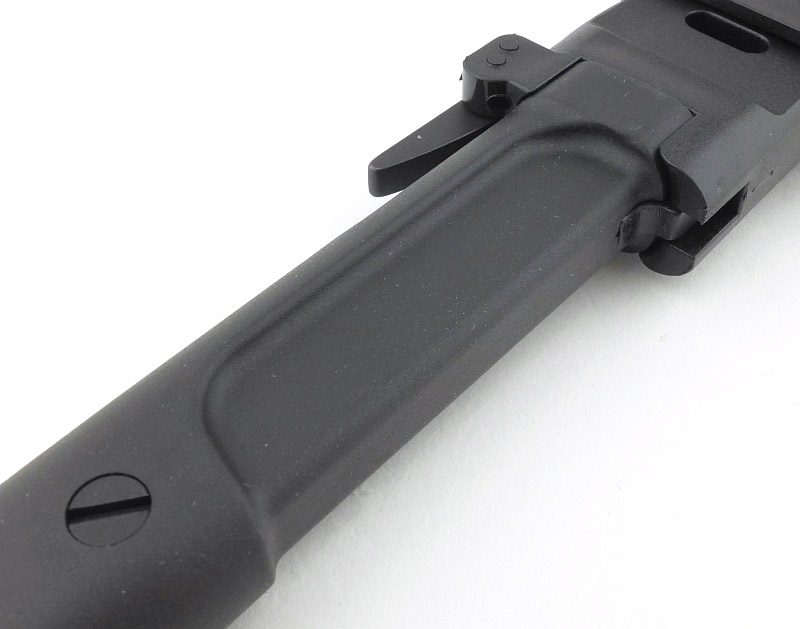
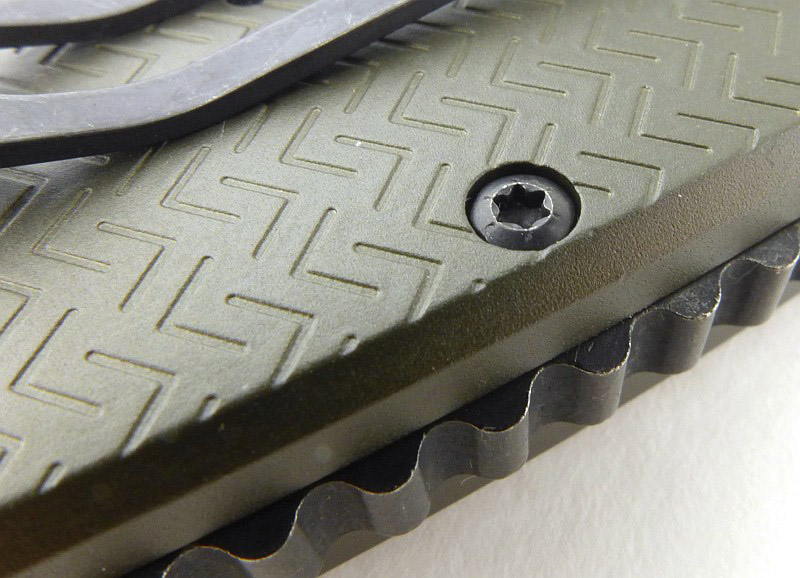
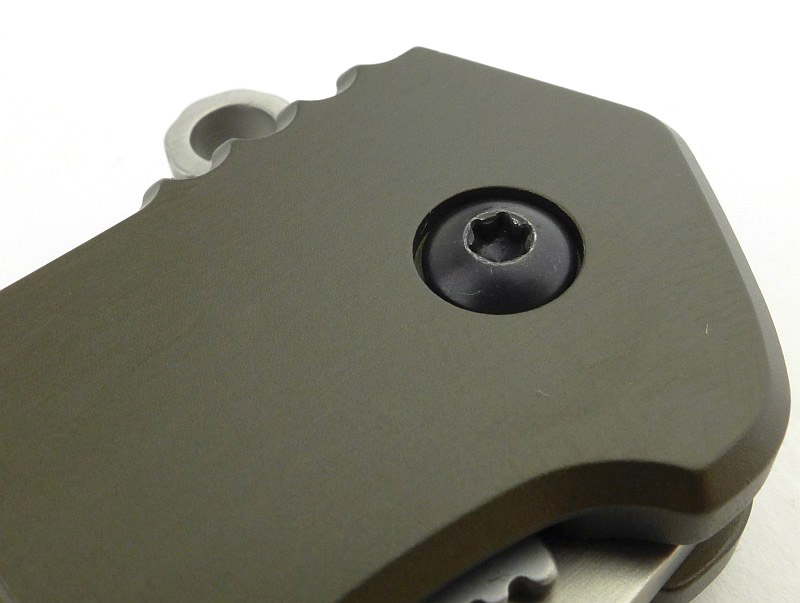
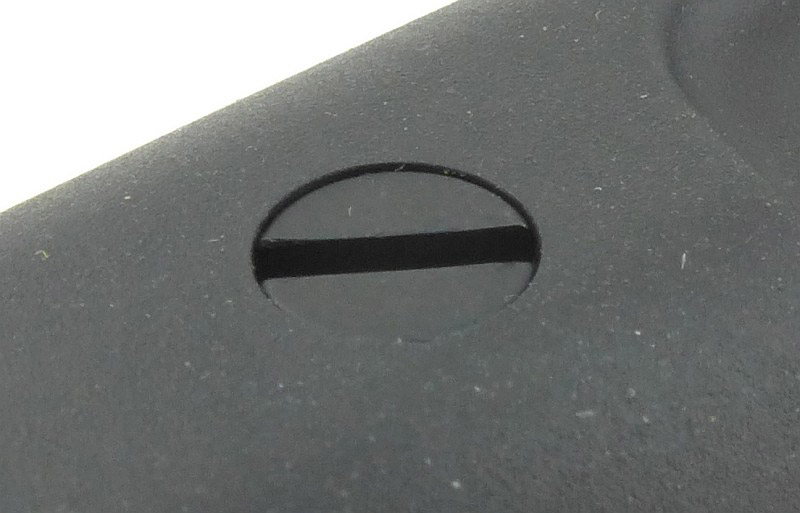
There is a single bolt holding the Forprene handle in place. The screw is a tight fit, and even when fully loosened does not fall out; you will have to undo it and pry it out to take the handle off the full tang.
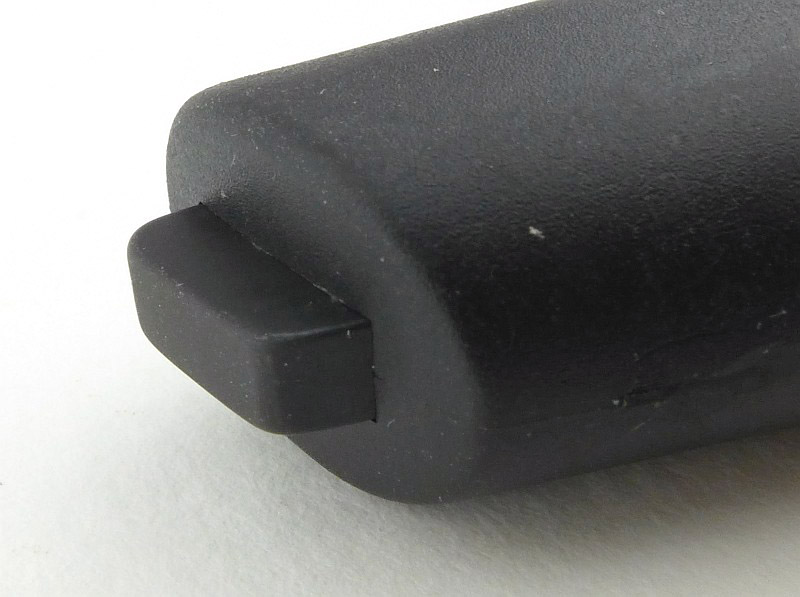
The full tang protrudes slightly from the end of the handle giving you a small striking surface.
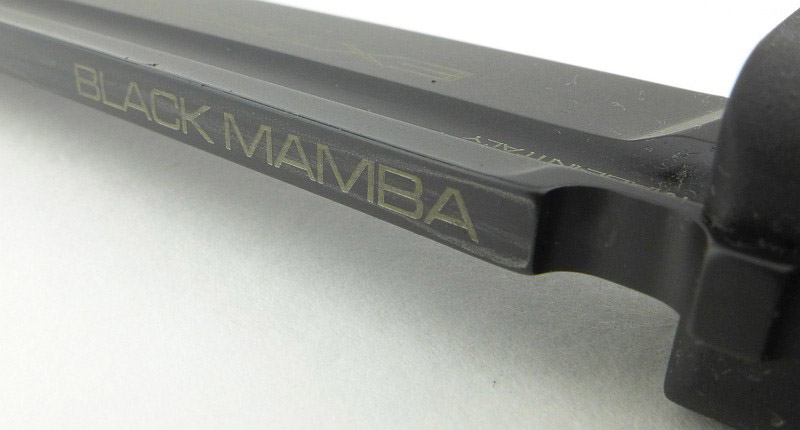
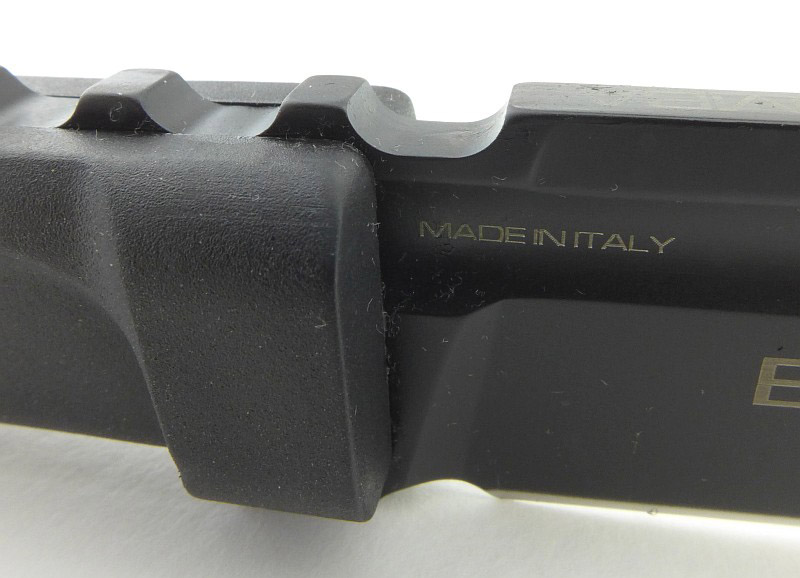
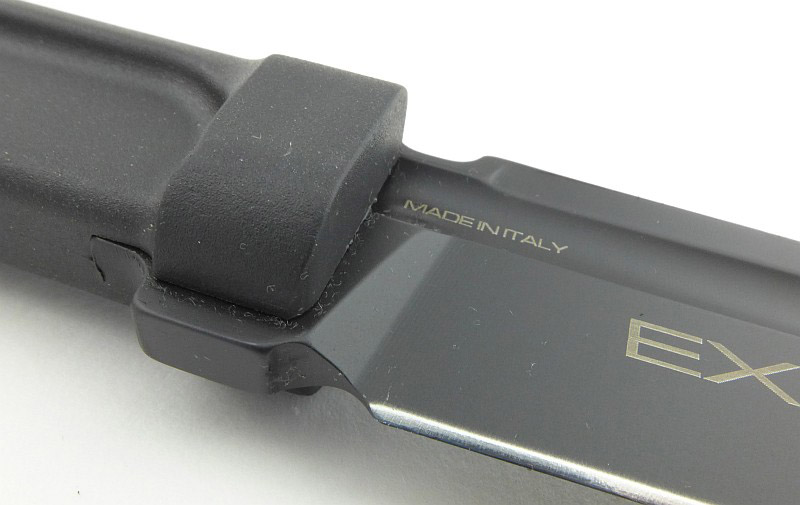
On the spine, near the handle, the model is printed onto the black MIL-C-13924 burnished blade finish, and next to this is the notch that the locking lever fits into to hold the knife in the sheath.
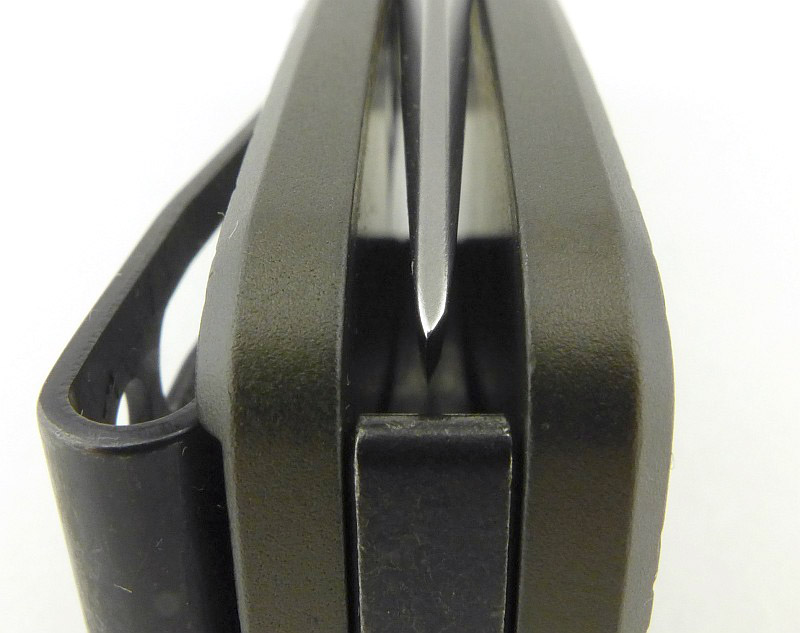
The spine is flat for its entire length. This is an important detail in the operation of the lever lock.
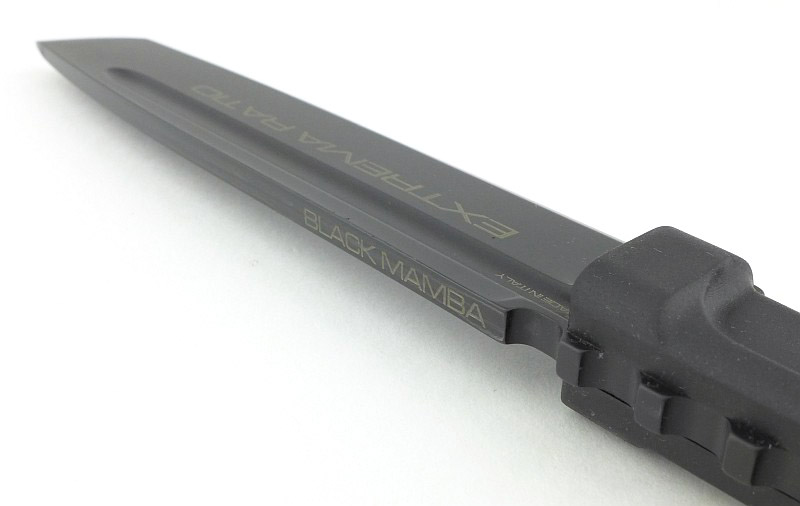
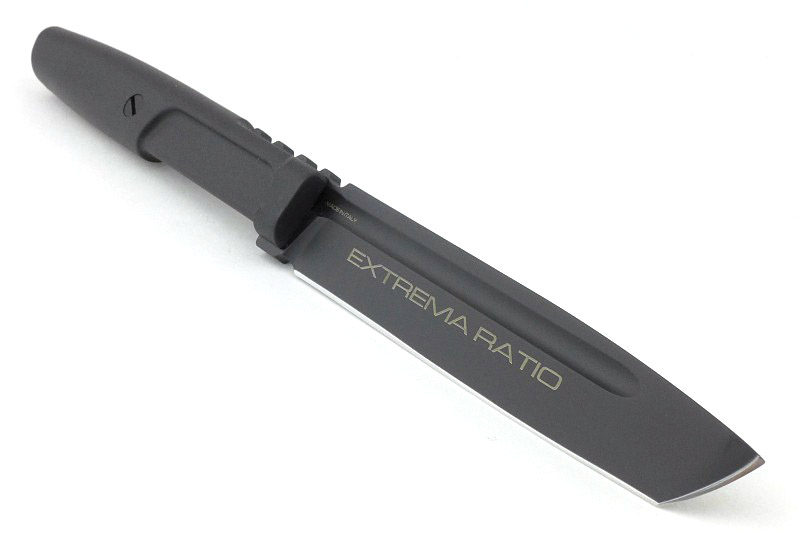
On the right side of the blade it has ‘Extrema Ratio’ printed onto the black finish.
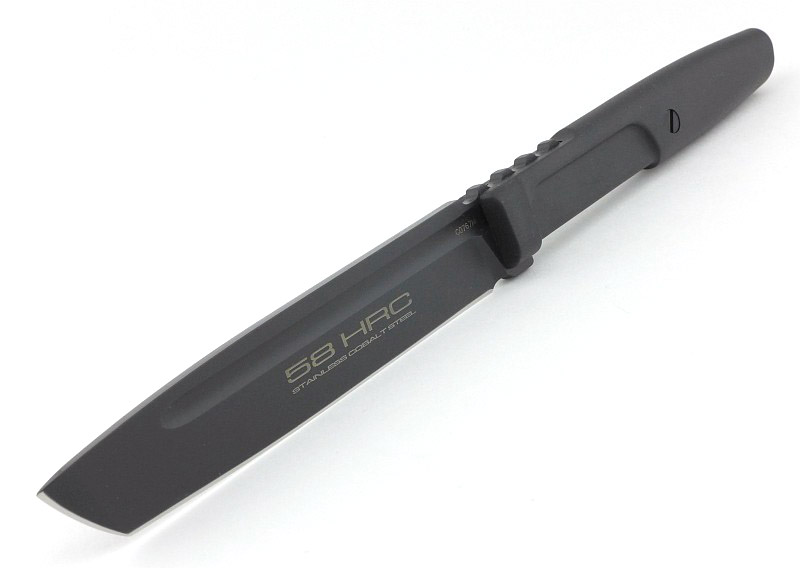
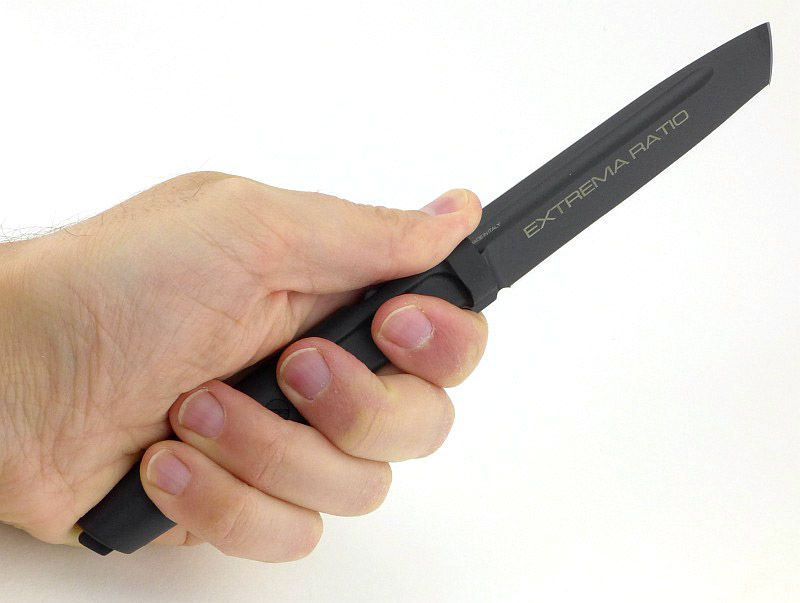
And on the left “58 HRC” is prominently printed with ” Stainless Cobalt Steel” printed underneath.
As a key design characteristic of the Mamba is that it fits into PALS webbing loops, the sheath is the starting point for this design. With the sheath fitted in PALS webbing, you want quick access to the blade and one-handed operation, both of which make the lever lock an ideal choice.
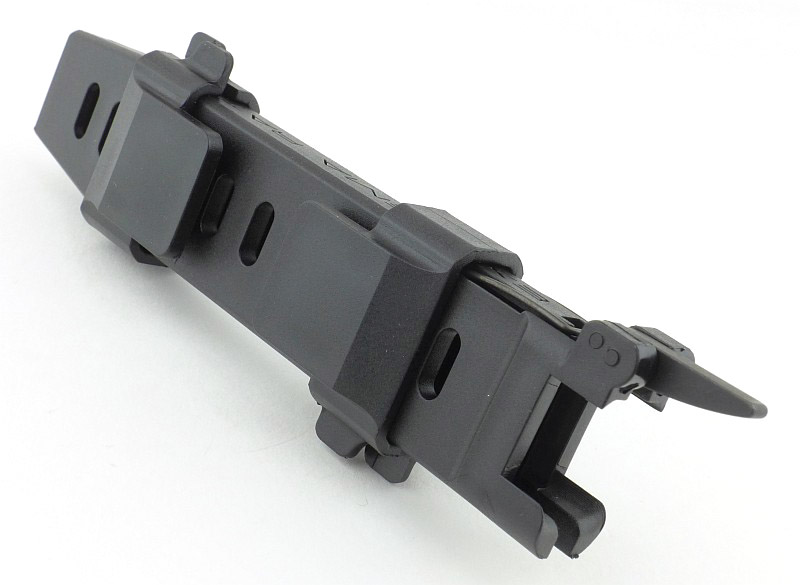
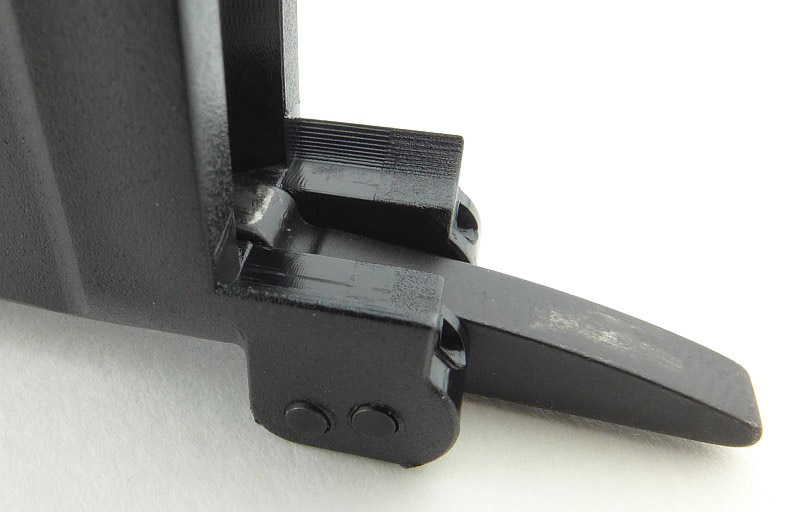
Taking a close look at the side of the lever that touches the knife, you can see several details. The lever has a pivot pin as well as a second pin to restrict the rotation of the lever. At the left end of the lever is the locking lug that fits into the notch in the blade spine. This lug is showing wear of the black coating where it rubs against the spine. Also showing wear is an area to the right of the lever where it gets pressed into the jimping when releasing the knife. Also note the shaping of the plastic sheath which supports and holds the blade end of the handle closely when the knife is locked in place.
When seen with the deep jimping on the spine, the locking notch doesn’t stand out at all as it is the same size and shape as the rest of the notches in the thumb grip.
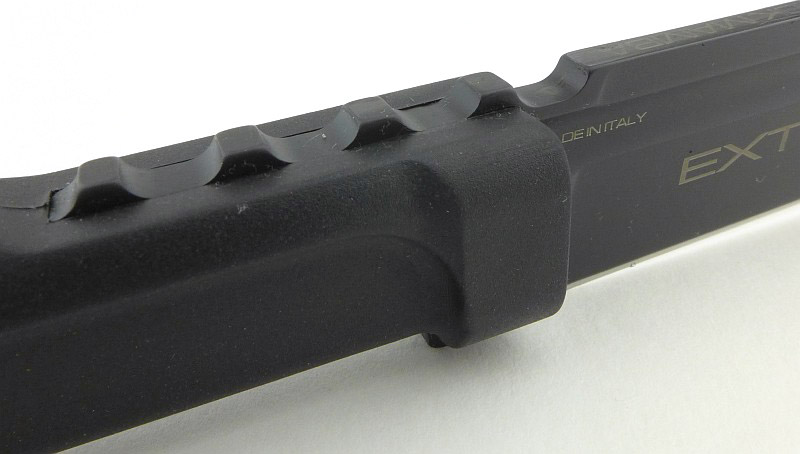
Another view of that locking notch.
Though a relatively slim blade, there is a full length fuller cut into the full flat grind.
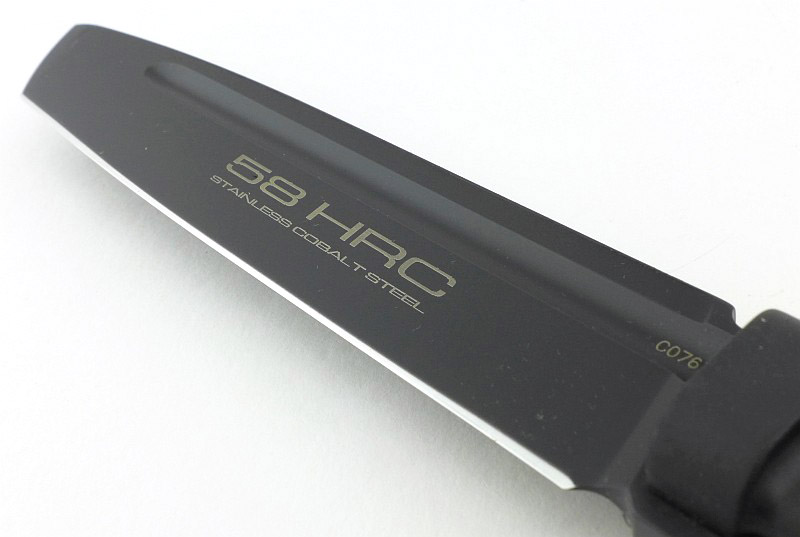
Having a strong Tanto tip, the edge bevel does widen towards the very tip.
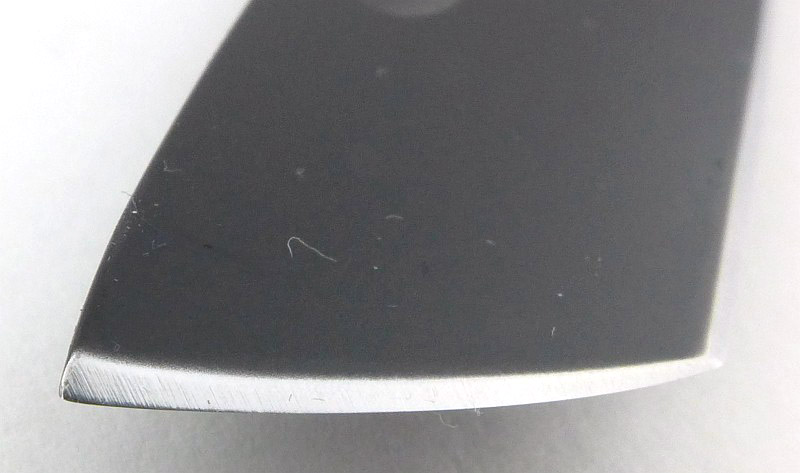
Even in this slim blade there are refinements including a nicely angled plunge line and sharpening choil.
What it is like to use?

For a couple of main reasons, the Mamba has been a bit of a revelation. When I first saw it, I didn’t think all that much of it, but I was wrong, it really works.

The first of those reasons – the quick release lever lock. I’m so pleased to see this in a non-diving knife as it is one of those features I’ve been crying out for in ‘normal’ sheath knives.
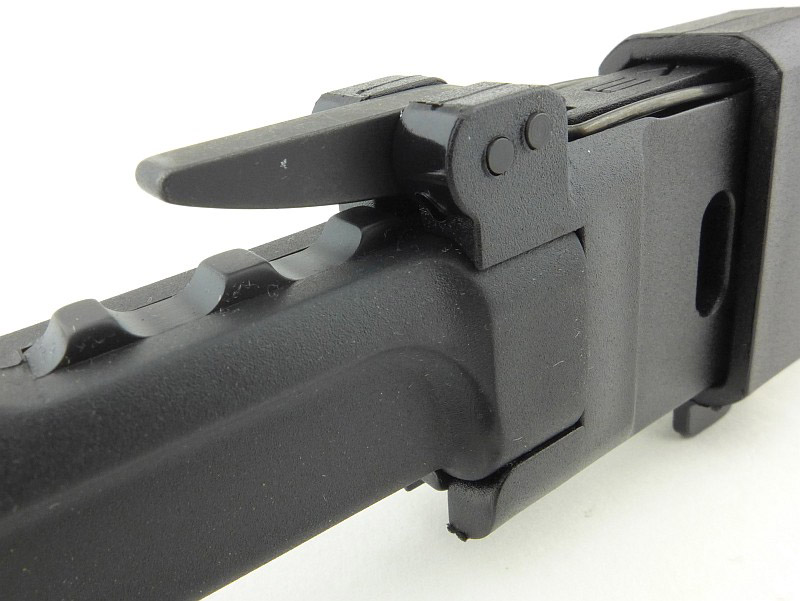
A thumb release lever lock is so intuitive and easy to use as you basically free the blade just taking a normal hold on the handle. Your thumb sits onto the lever instead of the jimping and you squeeze to withdraw the blade.
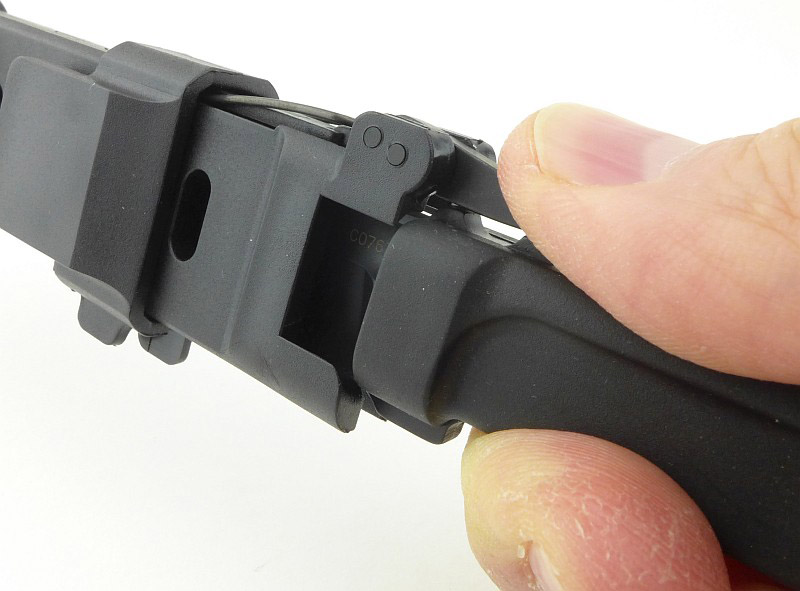
The lever lock does require a slightly different technique when withdrawing or inserting the blade into the sheath. I mentioned this earlier in relation to the full flat spine. You need to keep the spine pressed into the locking lever as you withdraw or insert the blade. If you don’t, the sprung lever pushes the cutting edge into the opposite side of the sheath, both dragging on the blade, and cutting into the plastic. A slight pressure of the blade spine onto the lever and the blade glides in and out easily.

While mentioning ‘gliding’; actually the finish on the blade when new is so matt, it is slightly rough and in certain circumstances, this does actually cause some drag during a cut or when wiping clean. The surface finishing from Extrema Ratio is excellent, and hard wearing, so this ‘feature’ may simply be more noticeable on the finer blade of the Mamba than it is on larger, heavier knives.

There is one major disadvantage with the lever lock design; should you accidentally insert the blade into the sheath the wrong way round, the cutting edge runs directly onto and along the metal locking lever which will seriously damage the cutting edge.

Once in the hand, the Mamba is similar in size to flatware (a table knife) but is clearly something much more serious.
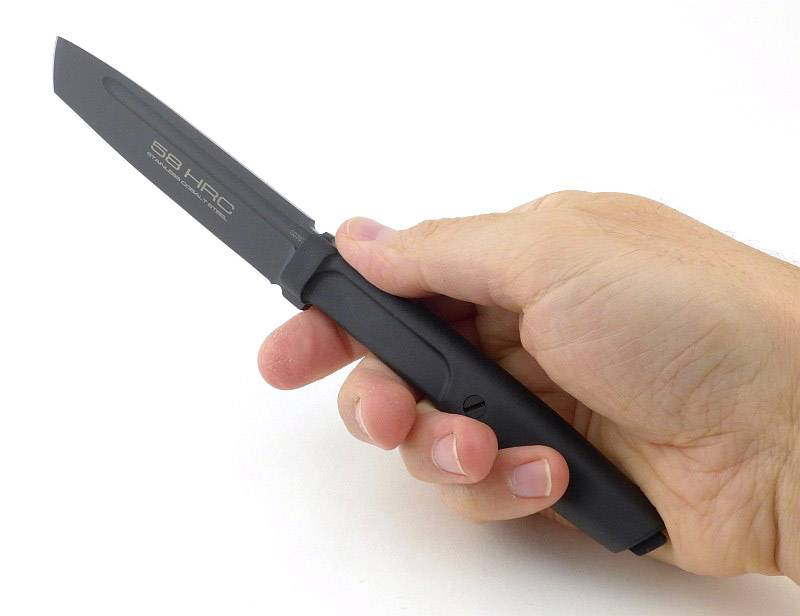
Though it has a slim grip, the finger grip in the handle, combined with the deep jimping under the thumb, give you a really secure hold on the knife.
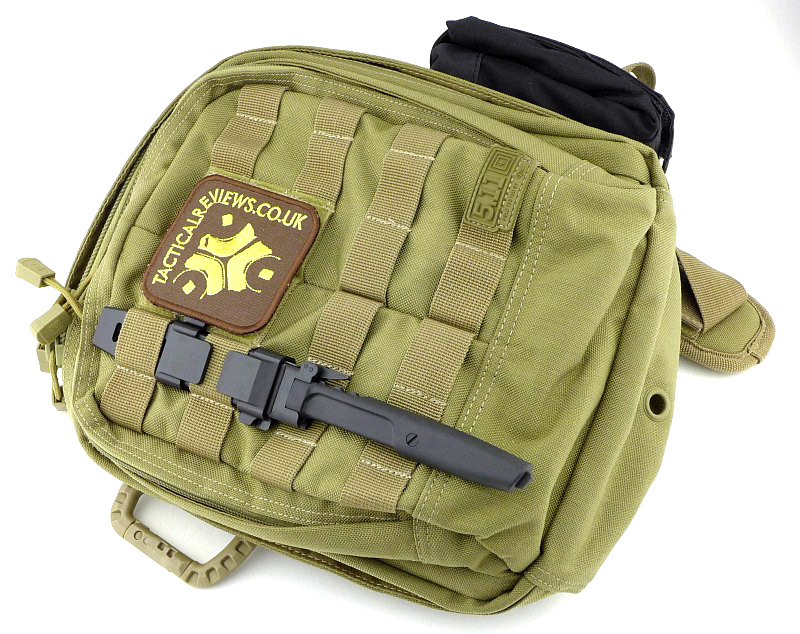
Of course the main reason for the slim design of the Mamba is so that it, and its sheath, can fit into PALS webbing (so is MOLLE compatible) for ease of integration into your gear. Many people carry a knife in their PALs webbing, but either have a folder clipped onto it, a large knife with MOLLE compatible sheath, or (something that makes me cringe) in some cases an unsheathed knife slipped into the loops.
Here I’ve got it fitted to a MOAB 6 bag, but it works even better on the shoulder strap of a backpack.
Before fitting, take off the clips and try the sheath in the position you are considering, and check your thumb will land on the locking lever. Then refit the clip nearest to the handle and try once more to check it all works. There is a good reason for checking how well it works at this point.
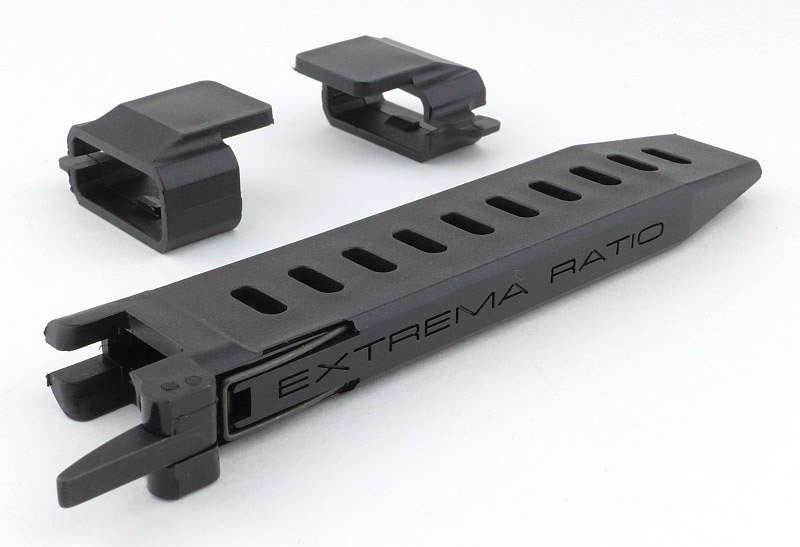
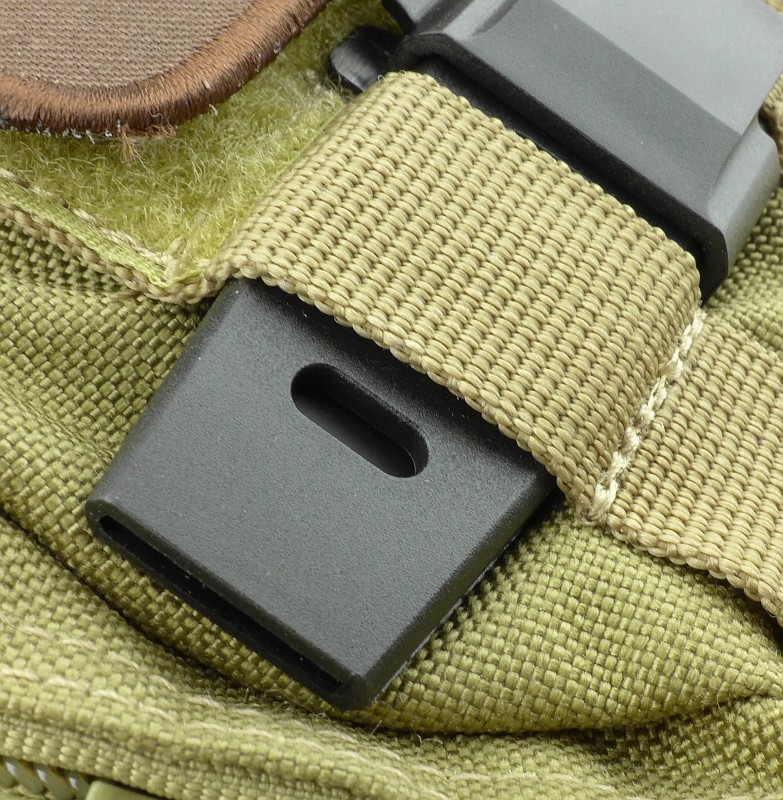
When mounted, the adjustable clips are positioned so that they hold onto one line of webbing. The clips need to be opened on both sides of the sheath to be able to slide, so fitting can be a bit awkward. This is due to the clip near the tip of the sheath having very little room to move as it is pressed against the bag/load carrier on one side. You don’t want to have to do this many times, hence the earlier trial fitting I mentioned.
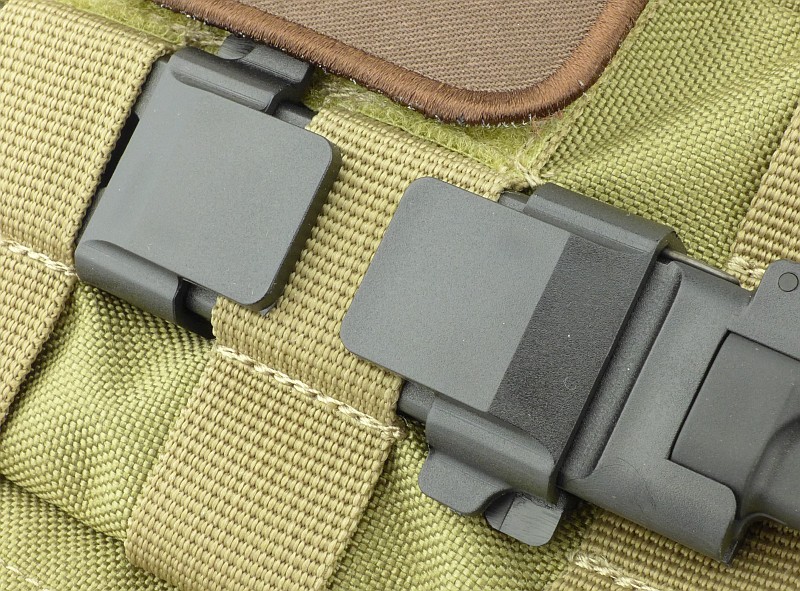
Although you have to fight with one of the clips to fit the Mamba into PALS webbing, the tapered tip of the sheath slides through the loops very easily.
So, being designed to fit into PALS webbing, compared to the Extrema Ratio ‘standard build’ for a knife, it is quite a bit smaller. To give an idea of this, here it is next to the Extrema Ratio TASK J.
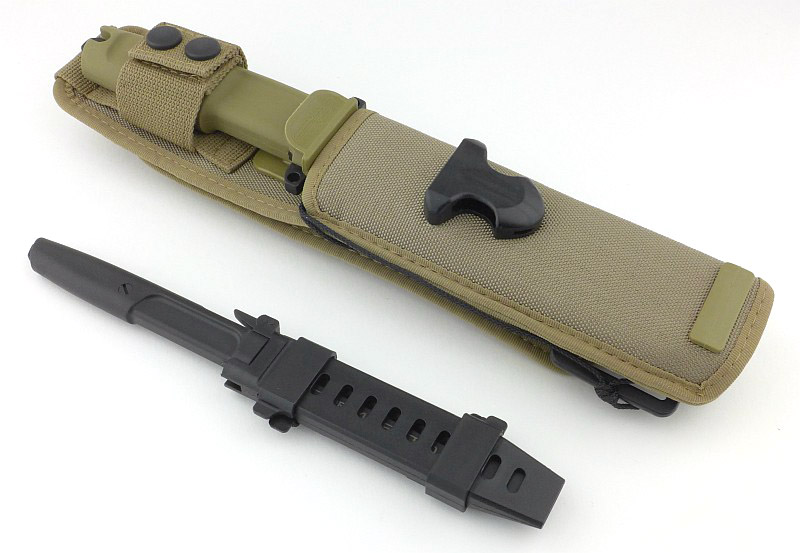
And unsheathed as well.
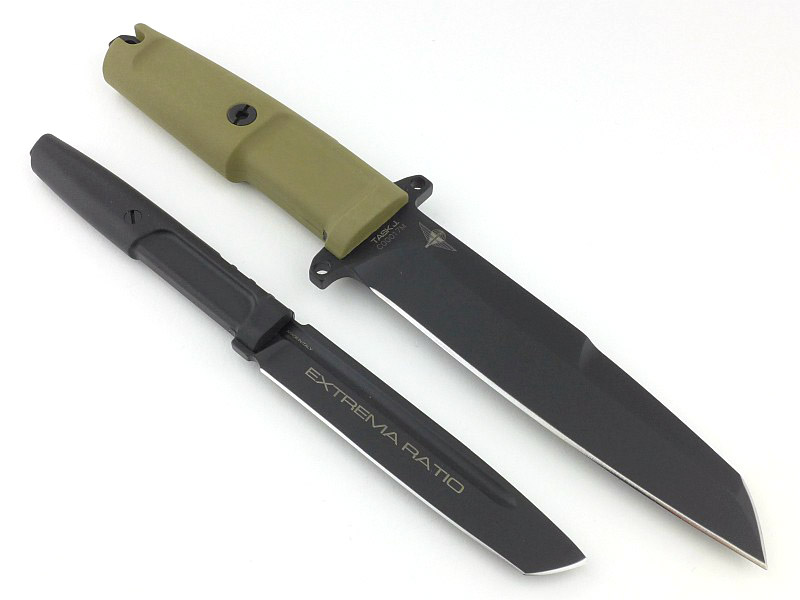
Initially the Mamba is not a knife I would have been that excited about; a slim knife designed to fit into PALS webbing. Useful maybe, but not that exciting. This is certainly not how I feel about it now after spending time with it.

In many ways, Extrema Ratio got me hooked with this one by using the lever lock. I just hope they introduce this for a few other models, including the larger knives. On top of that is the fact that the more you use knives, the more you realise you don’t need as much knife as you thought you might. So, often people carry around seriously heavy duty tools that are never really put to use. In terms of cutting power, the Mamba is more than capable of most everyday jobs and its slimmer blade (though not weak at 3.8mm thick) makes many cutting jobs easier. It really is a multi-purpose ‘utility blade’, in all the best possible meanings of that term.

If only Extrema Ratio could include a belt loop fitting, perhaps sliding over the sheath like the MOLLE clips do, as I would like to be able to carry the Mamba securely without a load carrier or backpack. Light, slim, easy to work with and an excellent quick release lever lock for sheath retention, I’ll be carrying this whenever I can.

Review Summary

The views expressed in this summary table are from the point of view of the reviewer’s personal use. I am not a member of the armed forces and cannot comment on its use beyond a cutting tool or field/hunting knife.

Something that might be a ‘pro’ for one user can be a ‘con’ for another, so the comments are categorised based on my requirements. You should consider all points and if they could be beneficial to you.

_______________________________________________ _______________________________________________
Things I like What doesn’t work so well for me
_______________________________________________ _______________________________________________
Quick Release Lever Lock used to retain the knife. Can be very difficult to adjust the MOLLE clips when fitted into the PALS webbing.
Slim and Versatile Blade. Handles as easily as flatware. No Belt Loop.
The Sheath fits Directly into PALS webbing loops. Black Blade finish can ‘drag’ when cutting.
Secure Grip provided by the finger groove and heavy jimping. Inserting the blade the wrong way round can blunt the blade.
Ambidextrous.


Discussing the Review:

The ideal place to discuss this reviews is on a forum. If you started reading the shorter forum version of the review, but followed the link this full exclusive review, please return to that forum to discuss the review there.
If you read the review entirely on Tactical Reviews, please consider one of the following to join in any discussion.

EdgeMatters – Sponsored Reviews (UK based Forum for Knife Makers and Collectors)

BladeForums – Knife Reviews (US based Forum for Knife Discussion)

CandlePowerForums – Knife Reviews Section (Largest and Friendliest Flashlight Community Forum)

Light Review: Nextorch GLO-TOOB, GT-AAA, GT-AAA Pro and GT-LITHIUM

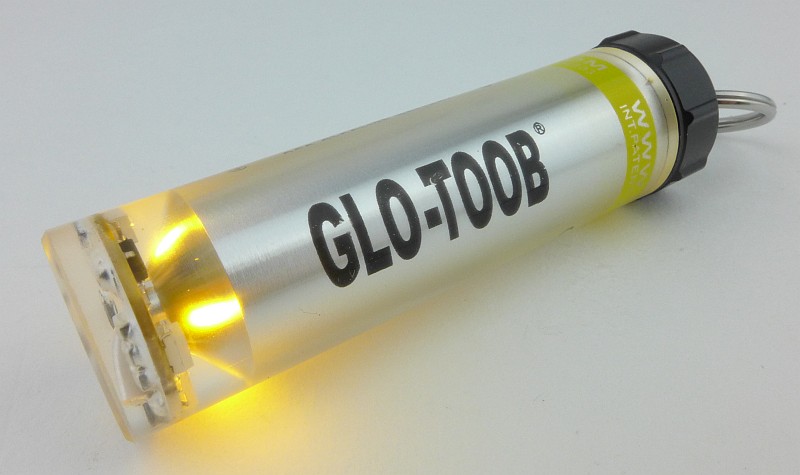
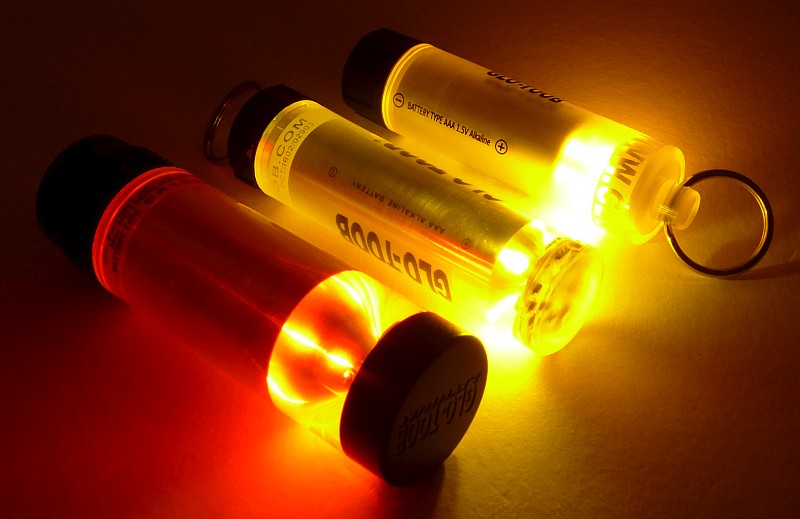
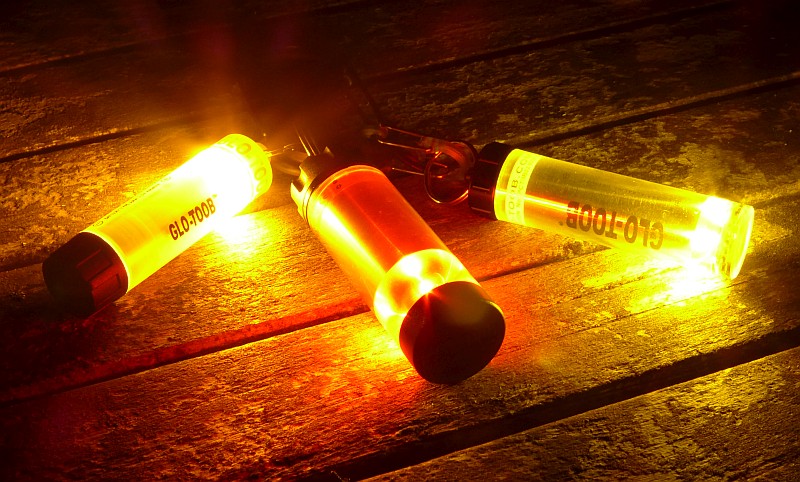
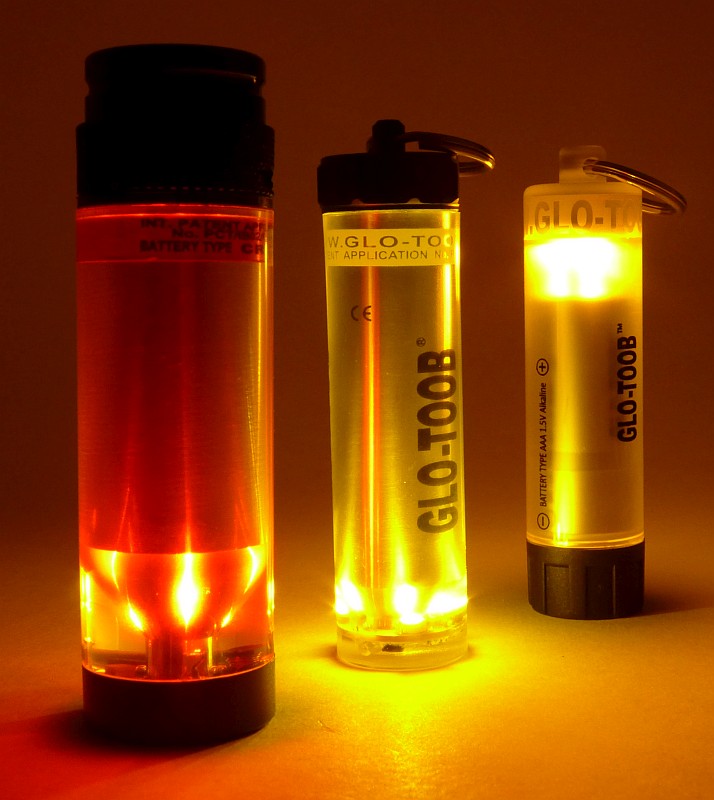
Who doesn’t like a light-stick? Apart from the need for emergency marker lights, there is something great about a tube that just glows, and the main problem with chemical light sticks is that when they are on, they are on; until they go out forever. Nextorch have taken the light-stick and made it battery powered and even more versatile with its GLO-TOOB range. Now the reusable super durable emergency / safety marker light has an on-off switch and flashing modes, and can survive immersion up to depths of 3500m!

Taking a more detailed look at the GT-AAA:

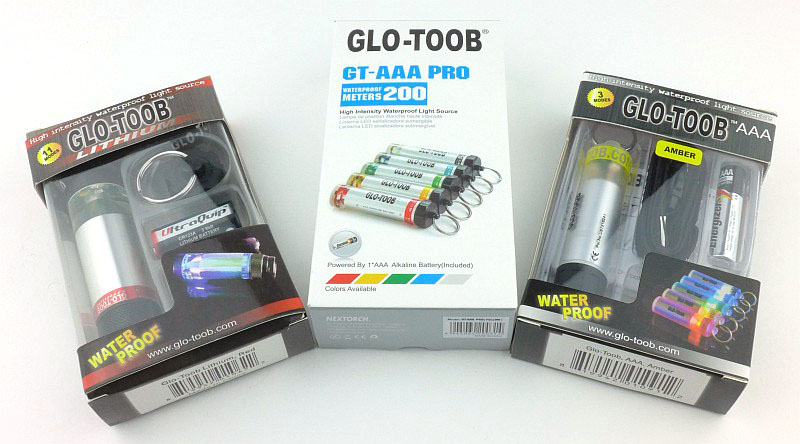
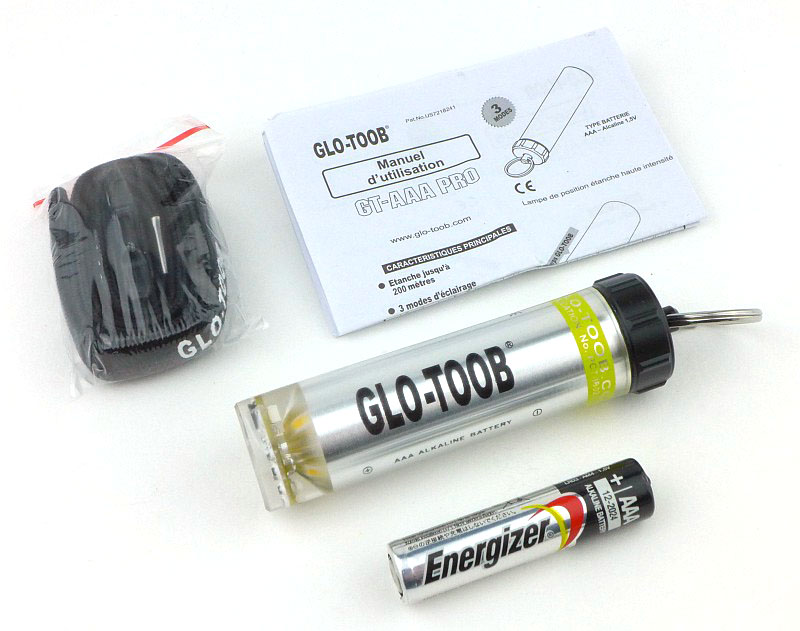
We are going to start with the standard AAA model the GT-AAA, but first here are the three that are on test in their boxes. The Lithium and AAA models are in the older packaging, with the Lithium being the original model. The GT-AAA Pro is a more recent addition and uses updated packaging. One crucial difference between the models is their depth rating for waterproofing. The GT-AAA has the lowest rating at 60m, the GT-AAA Pro is good to 200m, and the ultimate is the GT-LITHIUM which will go to 3500m. (That is not a typo it really is three thousand five hundred metres.)

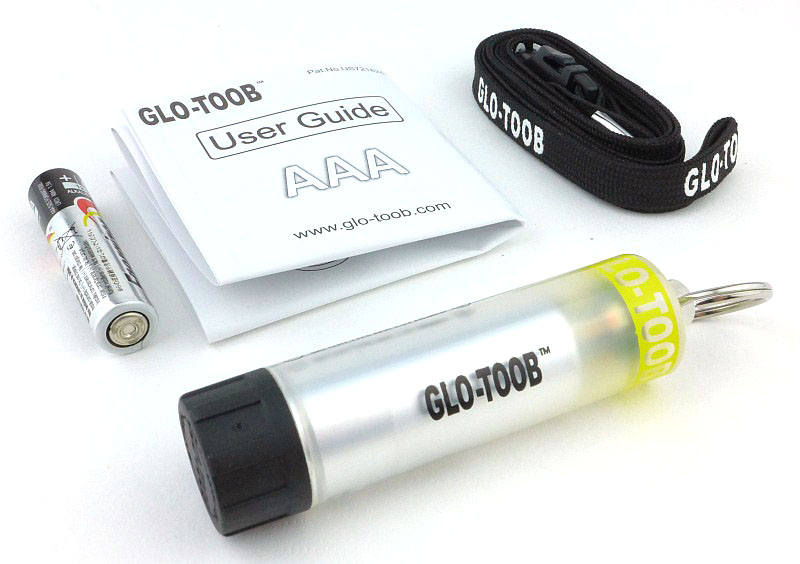
Back to the GT-AAA, the simplest and cheapest model, and this is what is in the box.

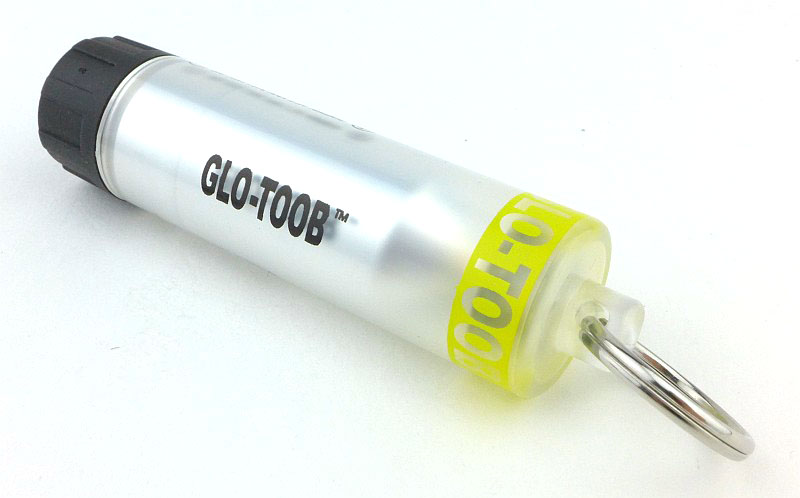
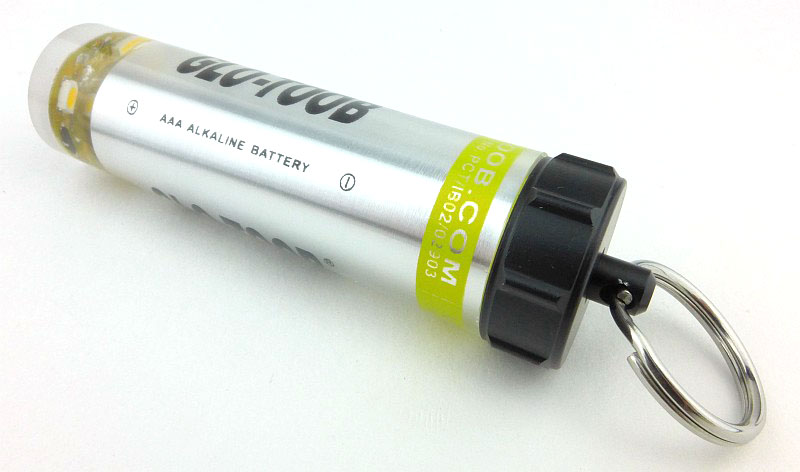
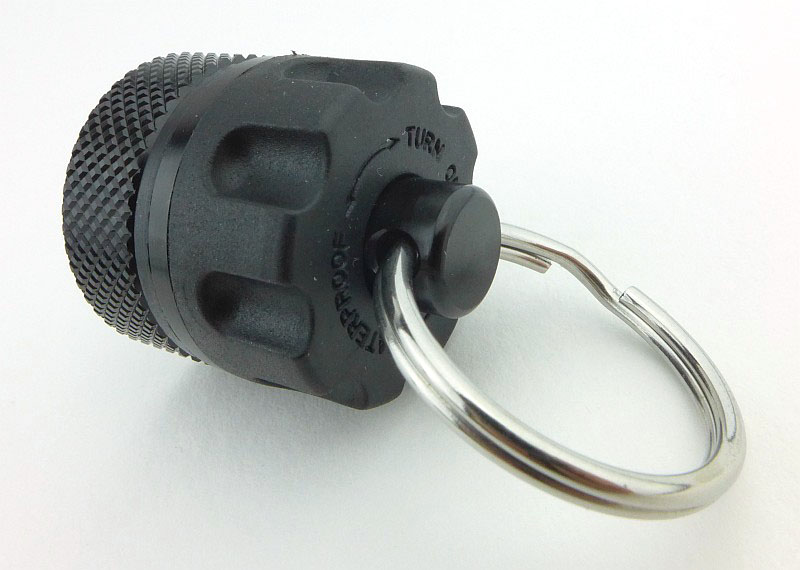
With a frosted casing, the GT-AAA has a keyring on one end and the black twist cap on the other.

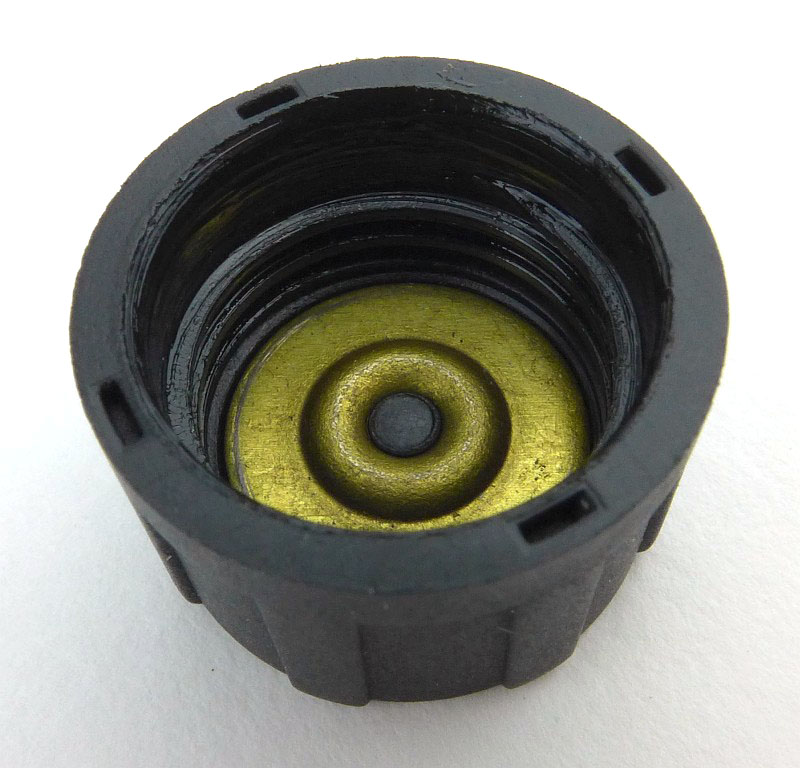
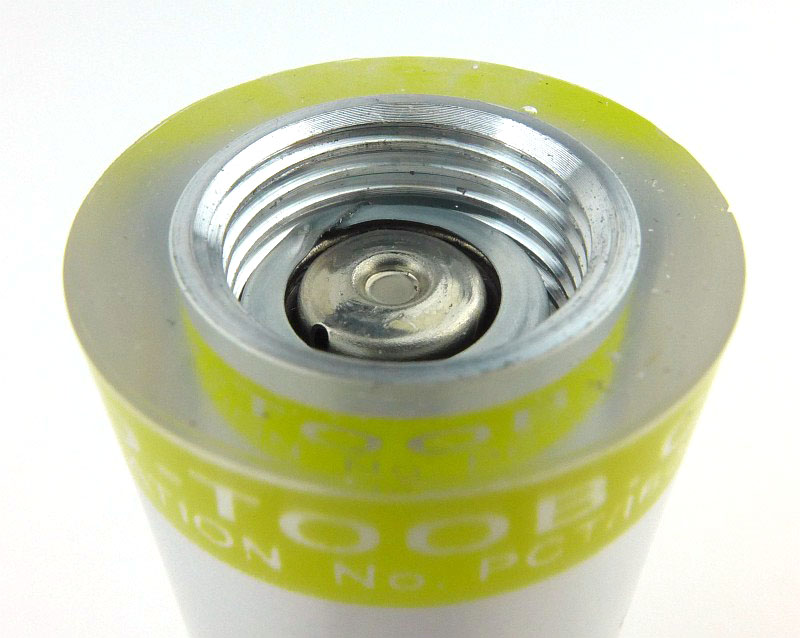
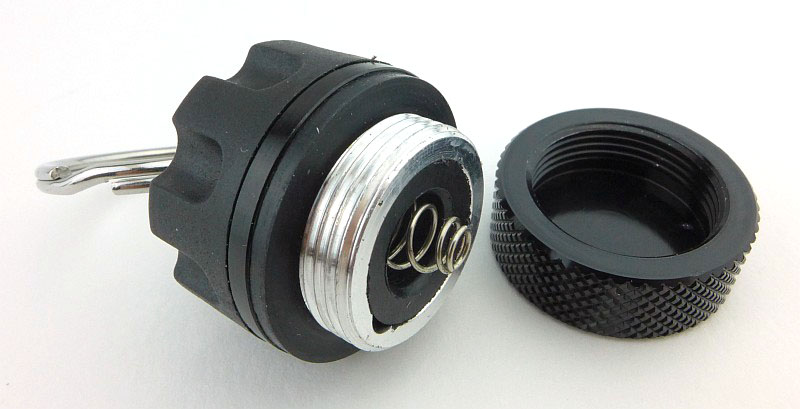
Taking that black twist cap off, there is a very simple metal contact disk with raised centre.

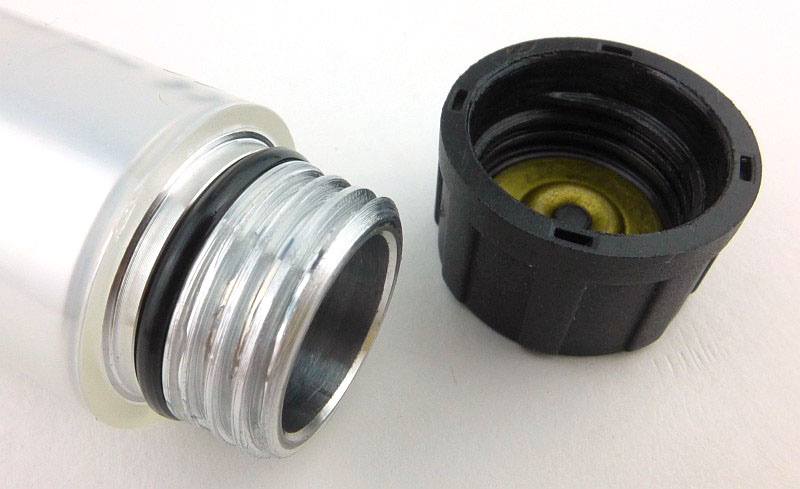
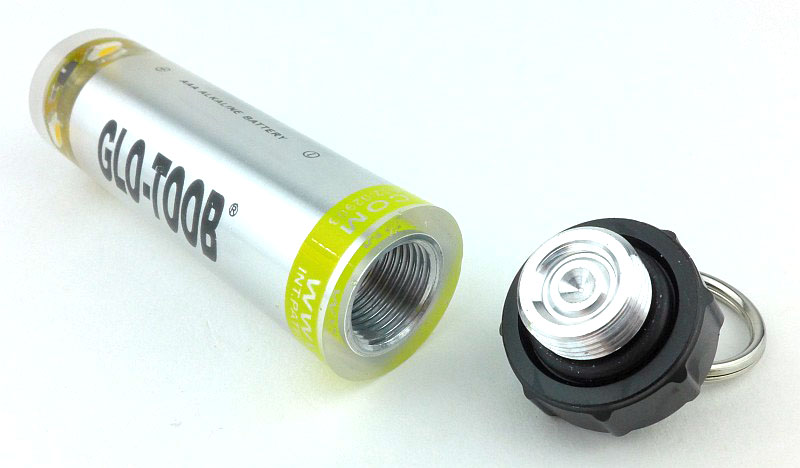
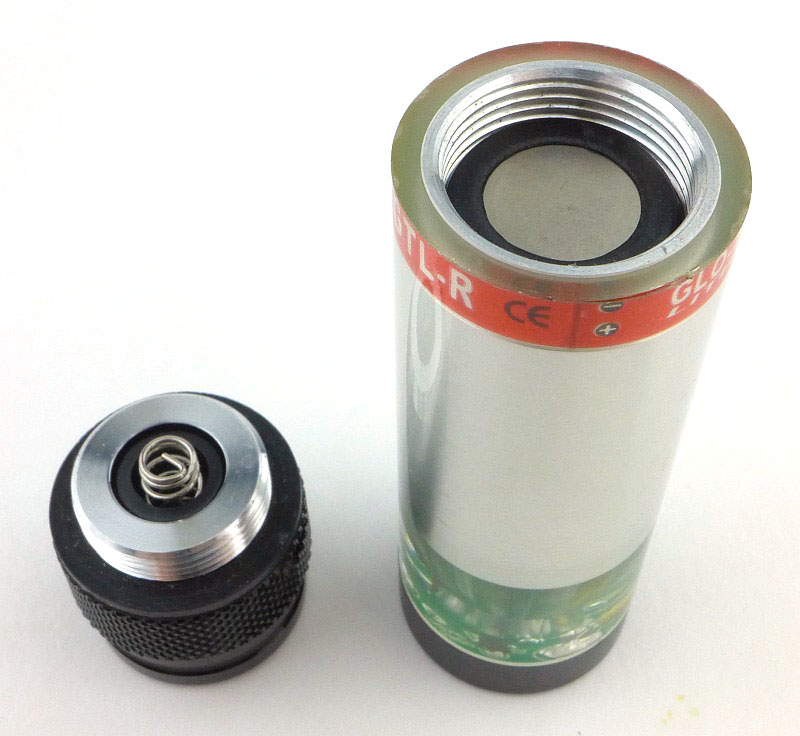
The twist-cap’s plastic threads fit onto the aluminium threads of the battery tube.

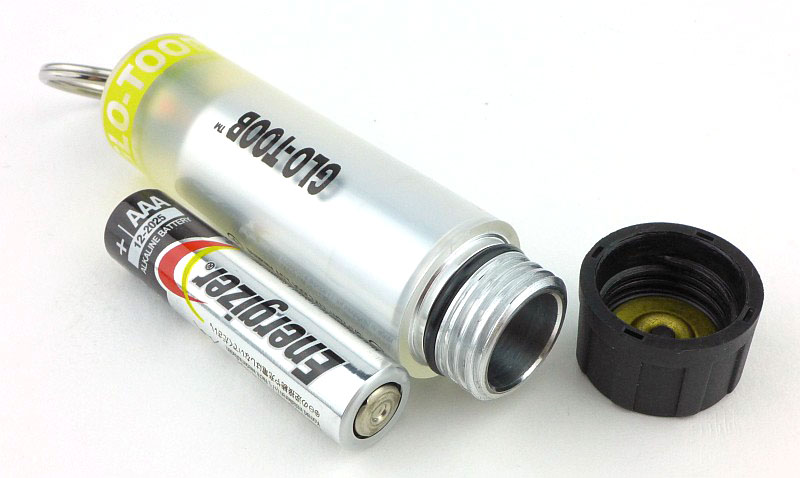
With an AAA cell next to the GT-AAA you see how big it is.

With the cell inserted, its end slightly protrudes due to the internal spring. This forms part of the ultra simple switching mechanism.

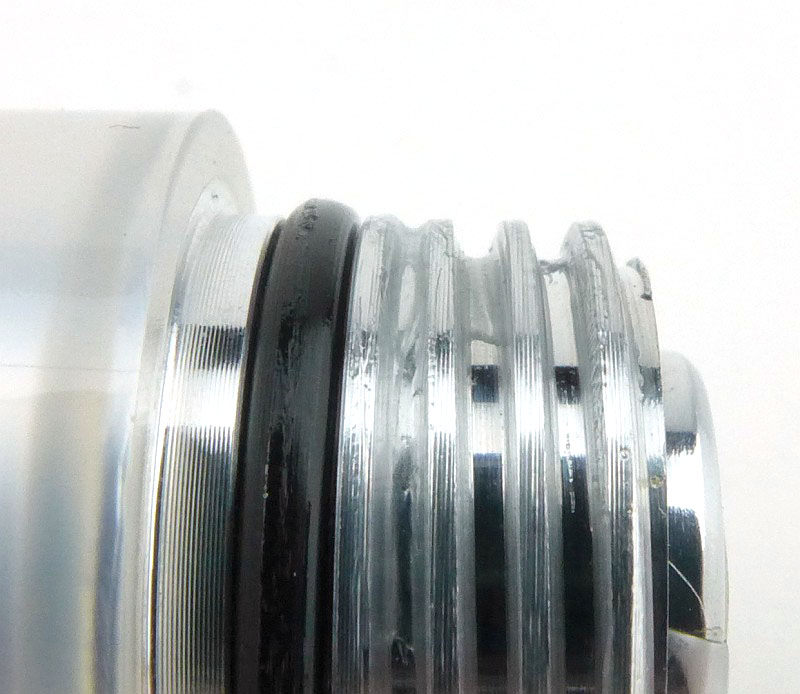
A close up of the threads and O-ring (the end of the battery is also just visible).

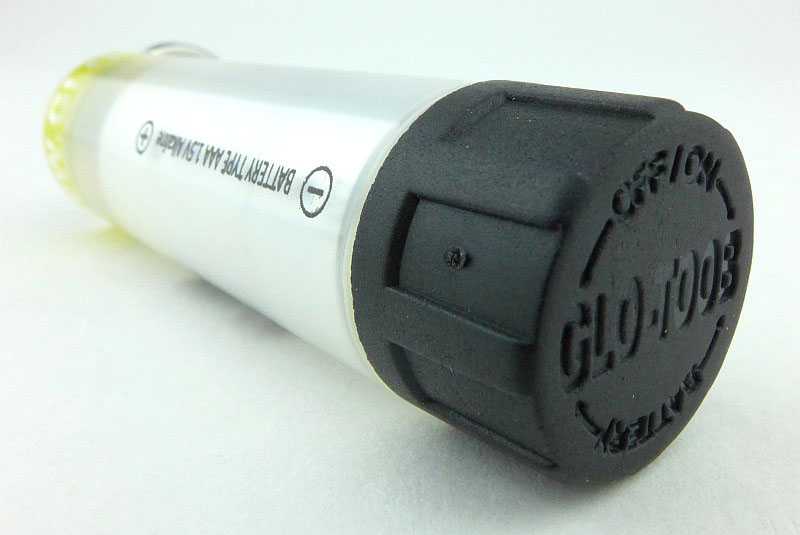
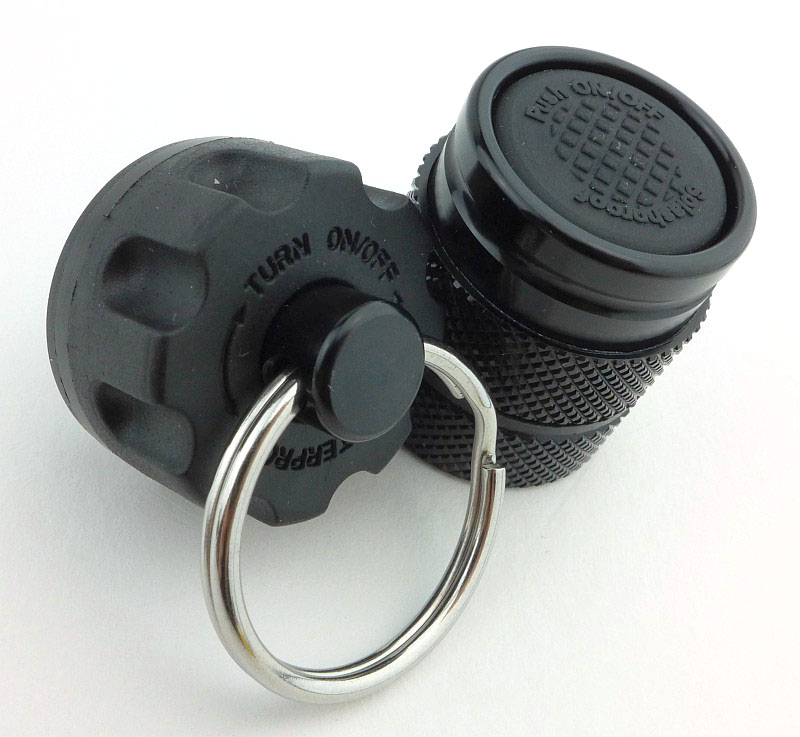
Directions for turning the light on and off are marked in the twist-cap.

The LEDs are at the opposite end to the battery cap \ switch which is the keyring end of the GT-AAA.

Taking a more detailed look at the GT-AAA Pro:

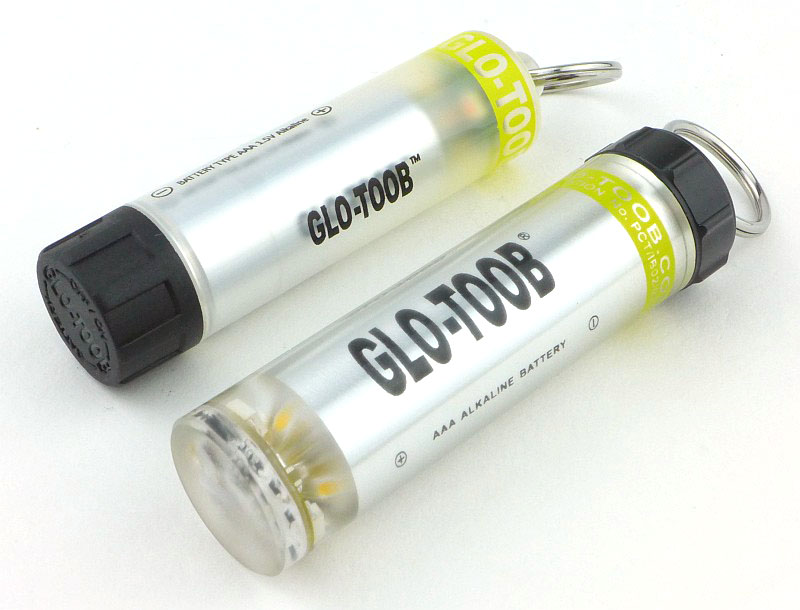
There is nothing wrong with the basic AAA model, but the GT-AAA Pro immediately looks much more serious with its clear body and metal battery cap / switch.

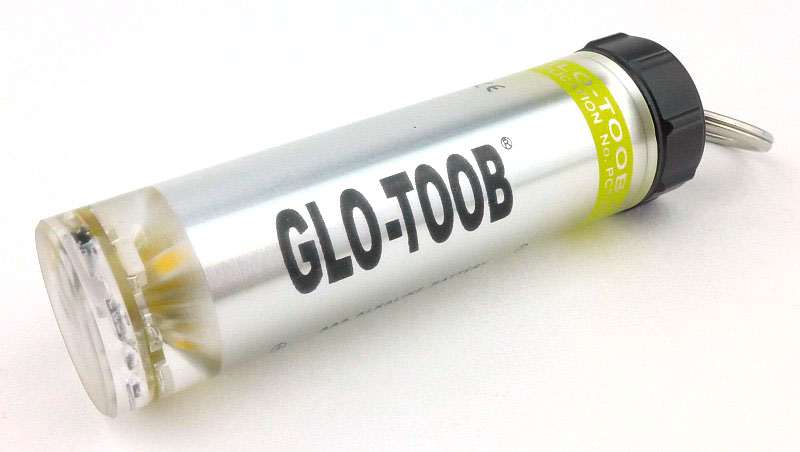
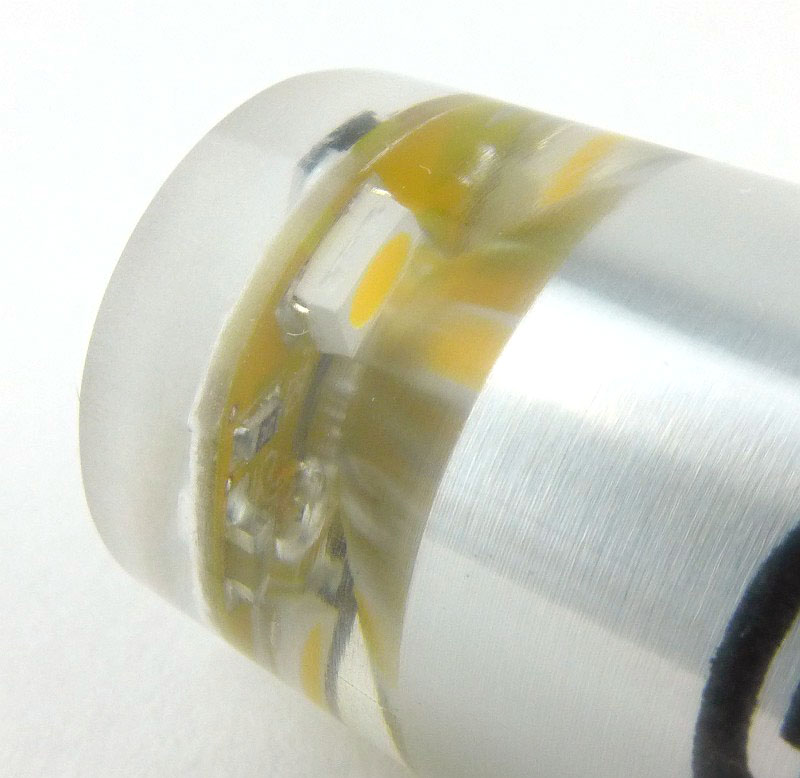
Thanks to the clear body, you can see a bit more about what makes the GT-AAA Pro tick (or glow).

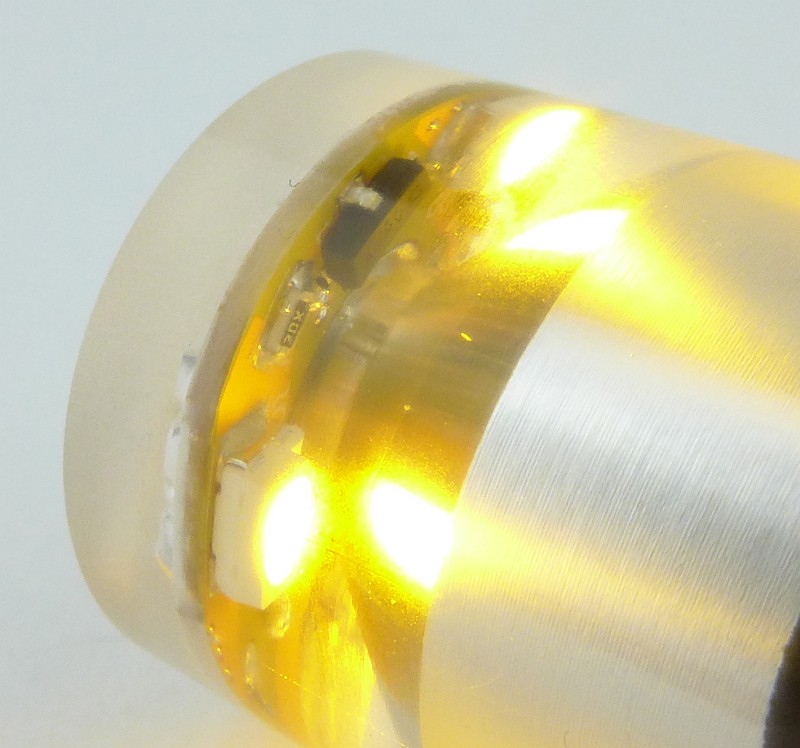
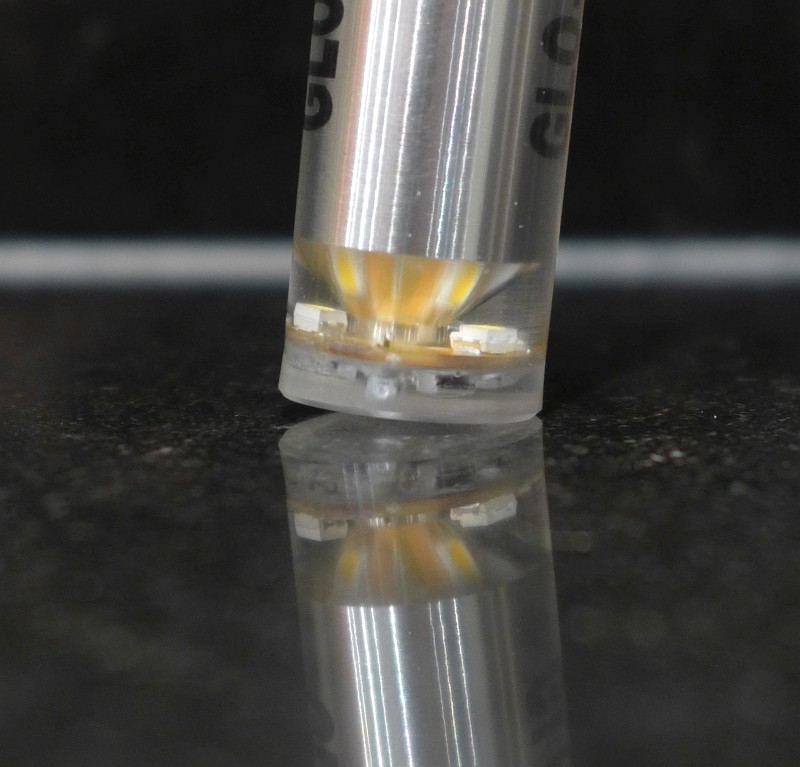
You can make out the PCB and LEDs through the casing.

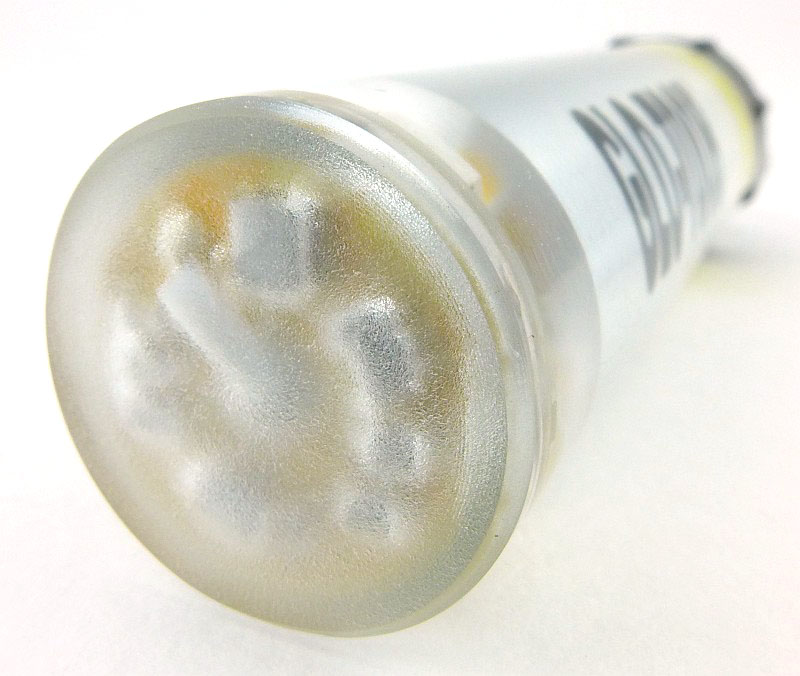
The very end is a frosted finish, and this disguises the other side of the PCB.

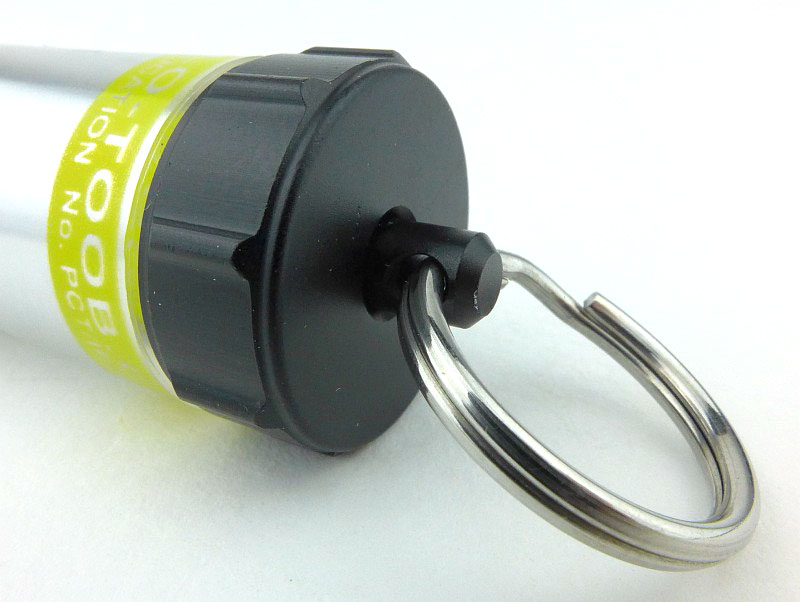
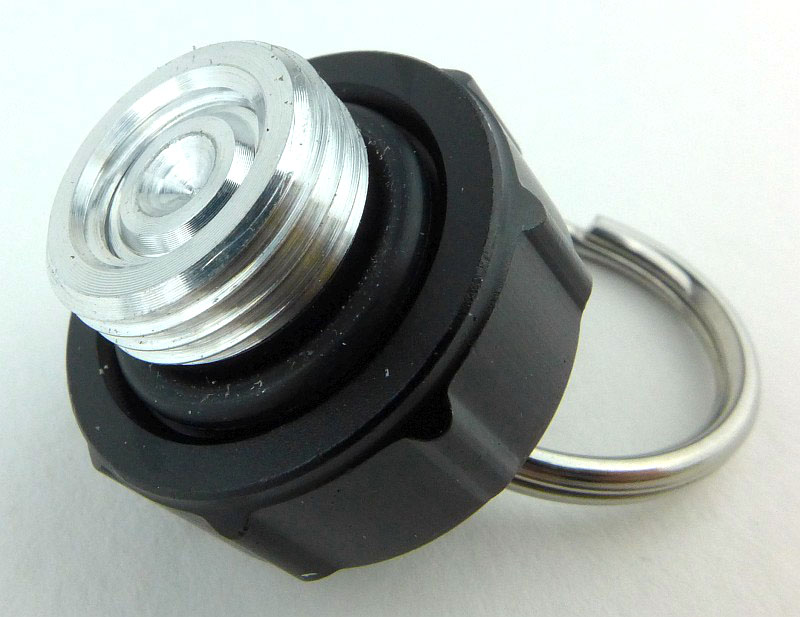
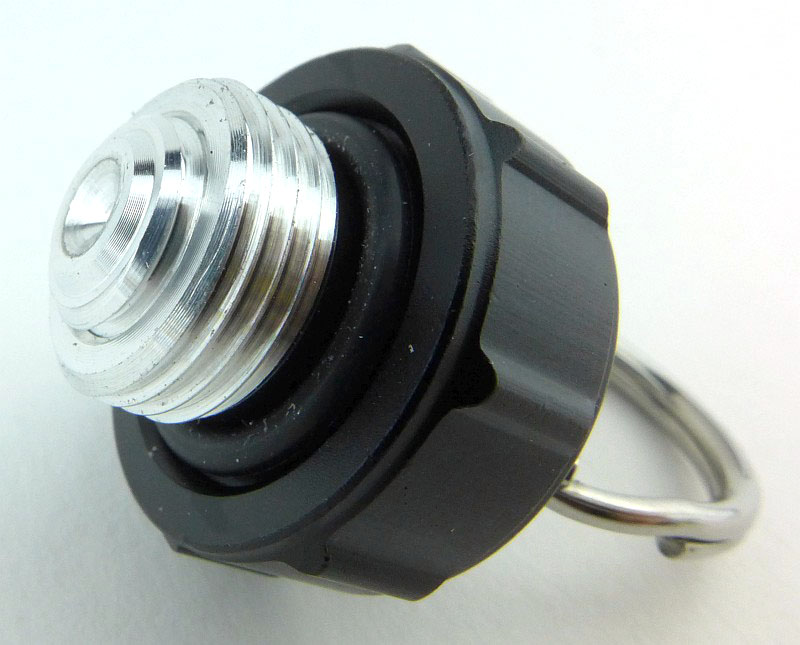
In the case of the GT-AAA Pro, the keyring is fitted to a metal post making it much more robust. This also forms part of the switch mechanism; instead of the entire cap being rotated, the keyring and its post are twisted to activate the light.

The entire end cap is metal, so has metal threads instead of plastic.

Look at the middle of the cap. This is the cap in the OFF position.

Twisting the keyring pushes the middle of the cap forward and turns it ON.

With the battery fitted you can see how the middle of the battery cap will make contact with the battery terminal when it pushes out. The cell wrapper acts as an insulator allowing this switching method to work.

On the side are markings to confirm which way round the battery goes in. This follows the almost universal ‘positive terminal in’ direction.

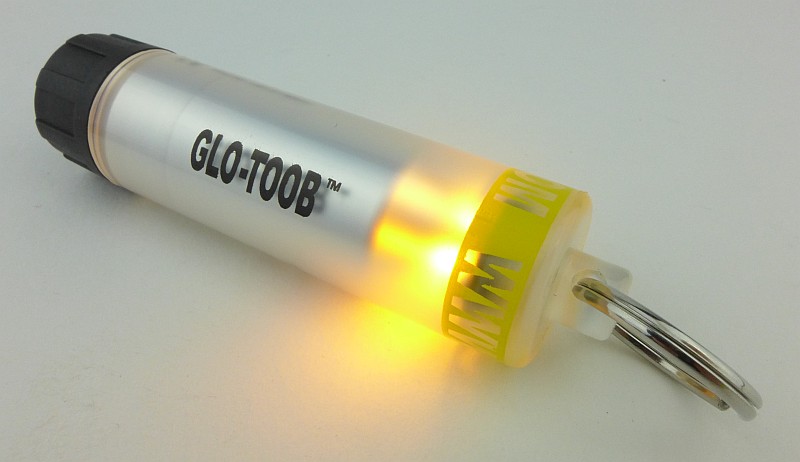
The GT-AAA Pro switched ON.

A closer look at the lit up LEDs.

Taking a more detailed look at the GT-LITHIUM:

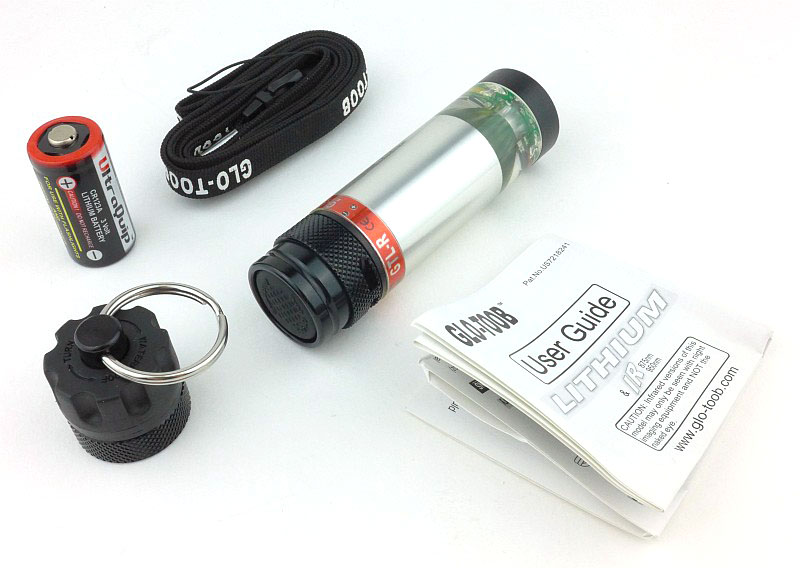
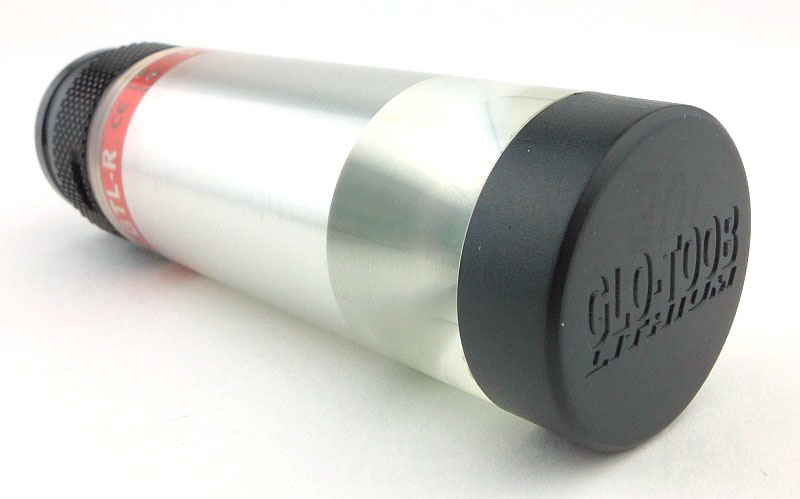
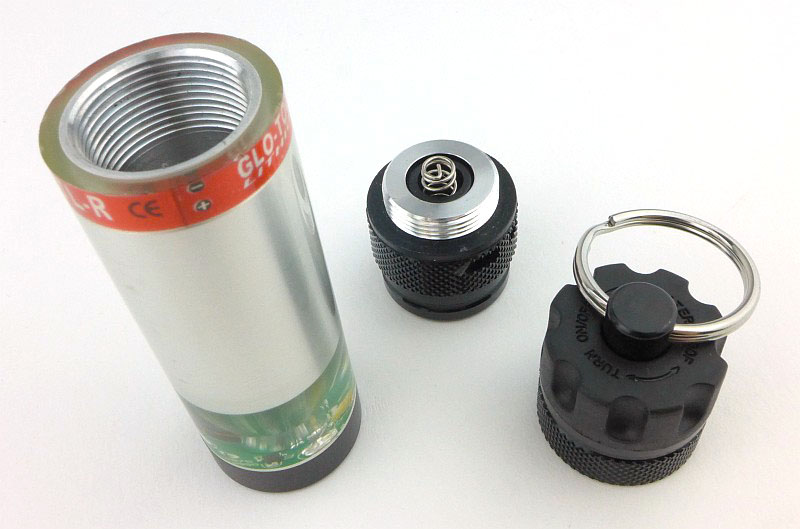
Last up is the most serious of all of the GLO-TOOBs, the LITHIUM. Notice that there is a switch cap already fitted, plus a second cap with keyring.

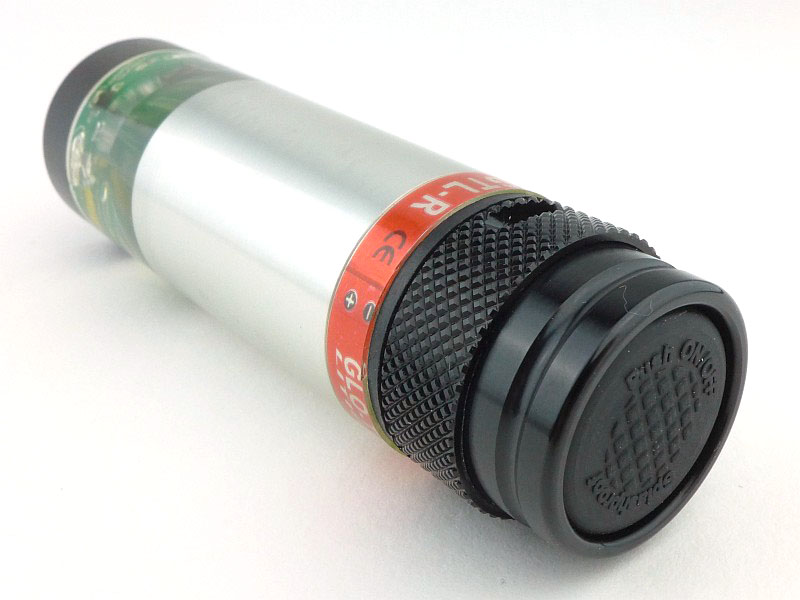
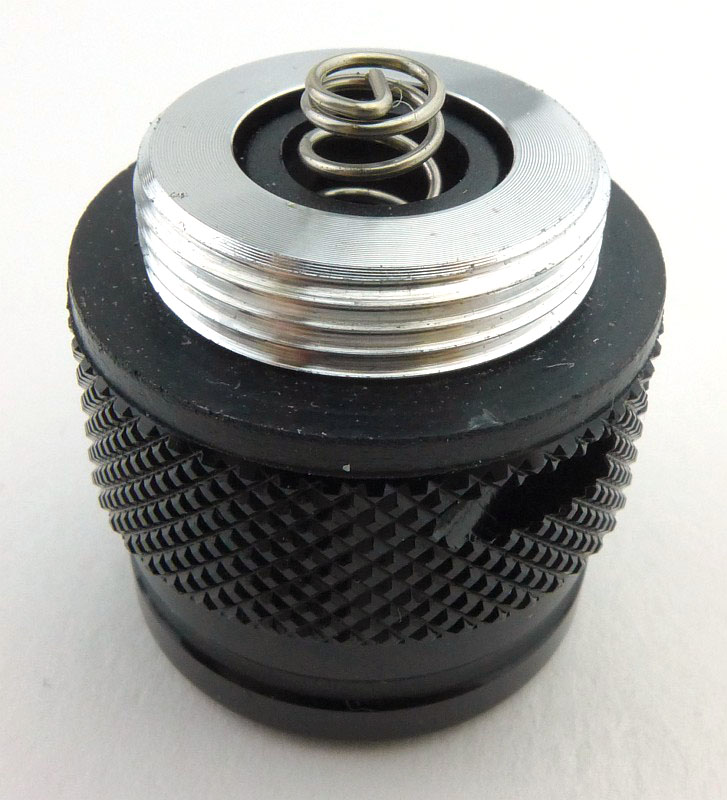
Already fitted to the GLO-TOOB LITHIUM is a click switch. This is mostly metal, but with a rubber switch boot.

On the opposite end of the GLO-TOOB is a black plastic end cap which the other models don’t have.

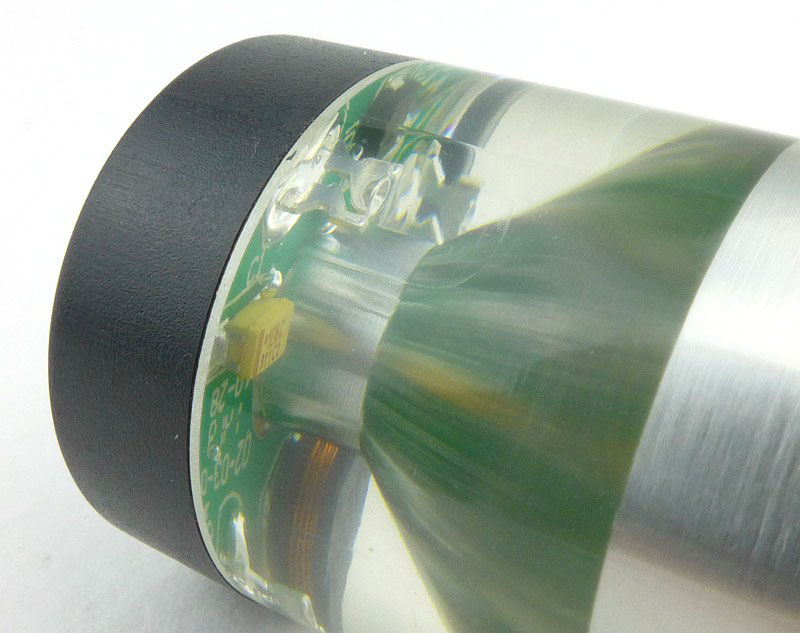
Having a clear body, like the GT-AAA Pro, you can look inside at the LEDs. In this case 5mm type LEDs are used, but the LED’s clear casing almost disappears in the clear resin used for the body of this light.

The click cap might be easy to use, but for the ultimate in resilience you need to use the diving cap switch (twist switch with keyring), so let’s swap them over.

While we are swapping them over, the contacts on the click switch look like this.

Unlike the GT-AAA Pro, here the keyring and its post are fixed (and you use them to screw the cap into place), with a plastic rotating switch ring instead.

To keep the contacts totally fresh, there is a metal protective cap supplied with the twist switch cap.

Now the protective cap is fitted to the click switch.

A CR123 fitted into the GT-LITHIUM. Battery orientation is marked in the red coloured band.

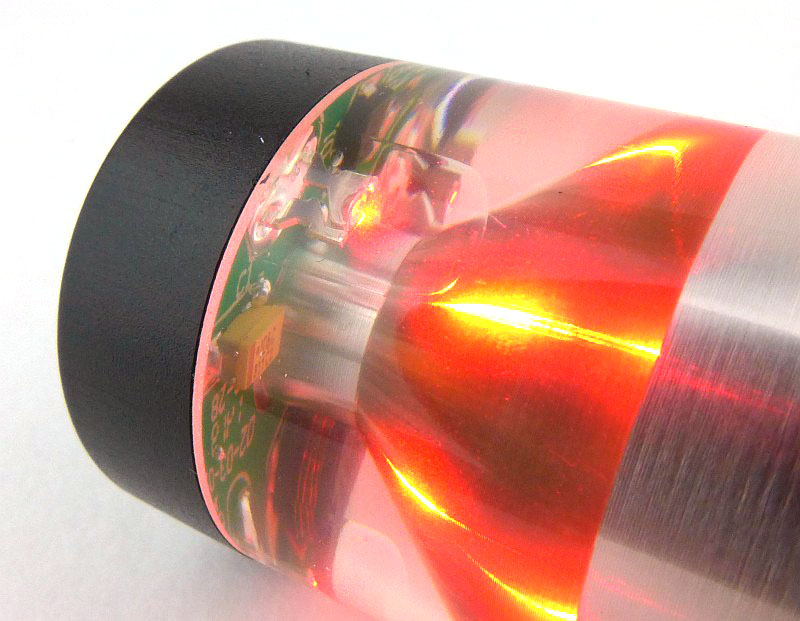
This version is the Red LED one.

A closer look at the lit up LED.

The beam

Please be careful not to judge tint based on images you see on a computer screen. Unless properly calibrated, the screen itself will change the perceived tint.

The indoor beamshot is intended to give an idea of the beam shape/quality rather than tint. All beamshots are taken using daylight white balance. The woodwork (stairs and skirting) are painted Farrow & Ball “Off-White”, and the walls are a light sandy colour called ‘String’ again by Farrow & Ball. I don’t actually have a ‘white wall’ in the house to use for this, and the wife won’t have one!

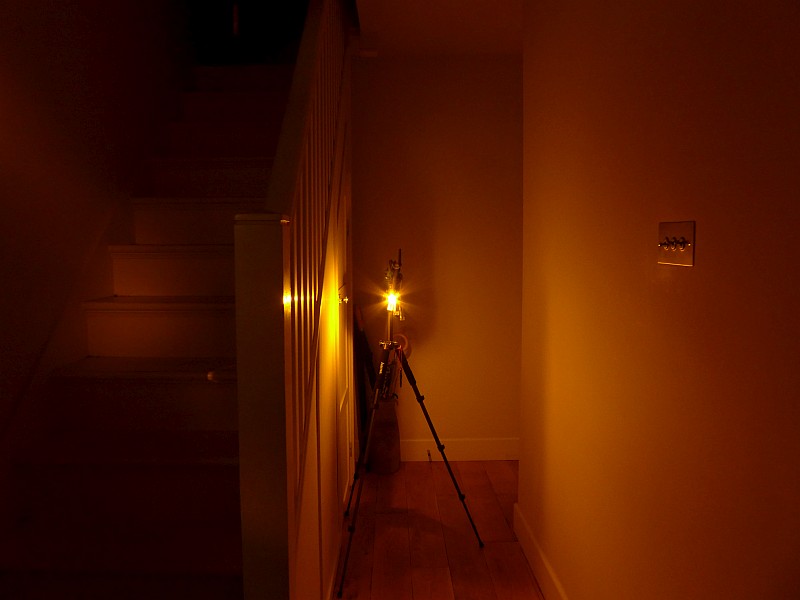
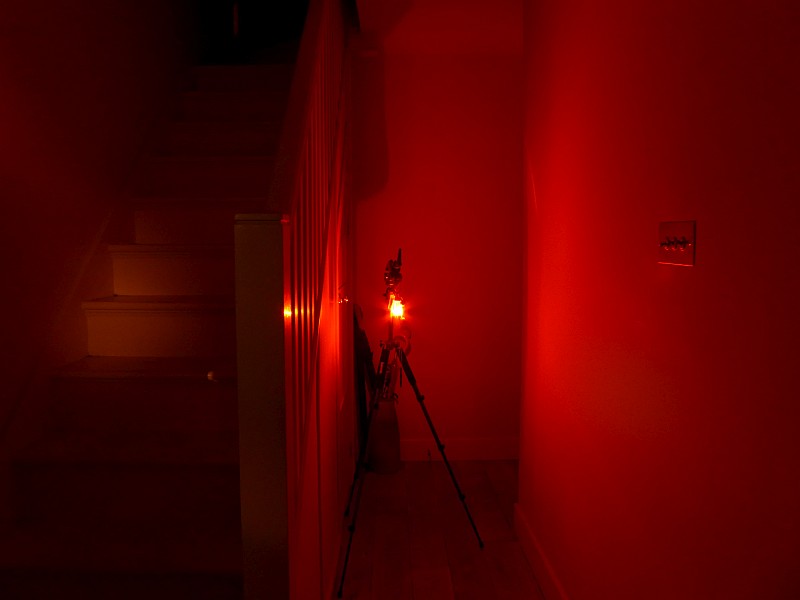
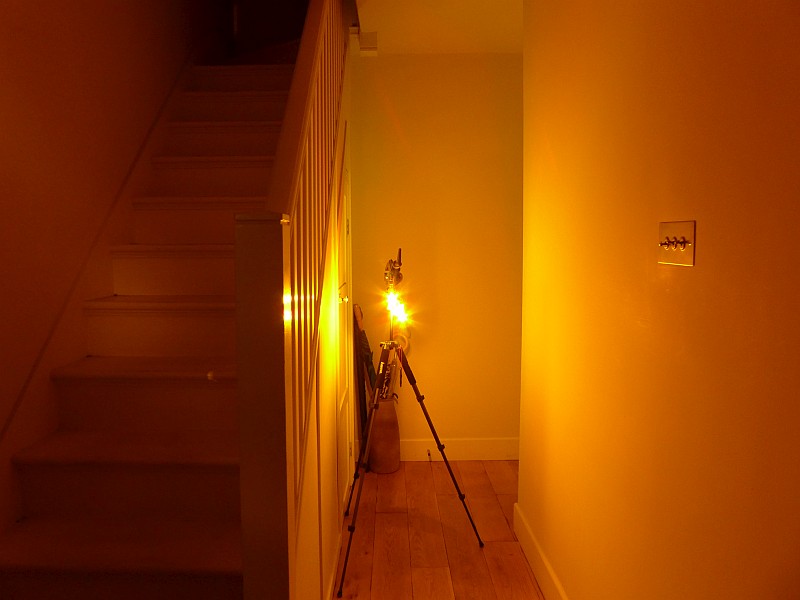
Clearly, being light-stick style, marker lights, there is not really a ‘beam’ to show, instead I’m showing each one at a short distance (3-4m) from the camera.

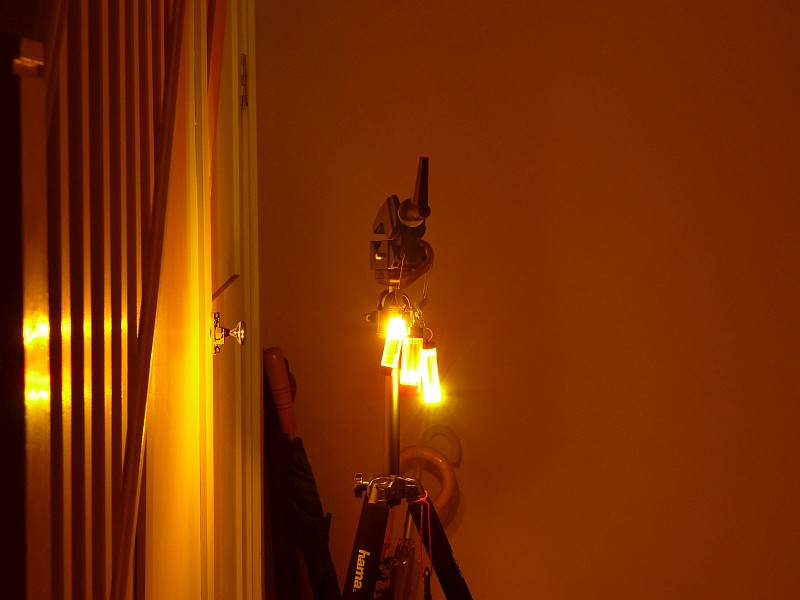
This is the GT-AAA; actually all three are hanging next to each other on a clip.

At the same exposure, this is the GT-LITHIUM.

With the GT-AAA Pro up last. This appears quite a bit brighter than the GT-AAA.

All of them on at the same time. The red of the GT-LITHIUM is a bit drowned out.

The camera is set to daylight WB (as is the case with all my beamshots) to try to make colour and tint as clear as possible. The amber GT-AAA and GT-AAA Pro take over, masking the GT_LITHIUM’s red colour.

Modes and User Interface:

Each of the GLO-TOOBs is slightly different in its operation so we’ll take them one at a time:

The GT-AAA has three modes, High, Low(25%) and Flash.
To switch ON, tighten the entire end cap.
To cycle through the available modes twist-ON, then twist-OFF, and back on again within 2s and repeat to change from High – Low – Flash – High etc.
To Switch OFF, loosen the entire end cap.

The GT-AAA Pro has three modes, High, Low(25%) and Flash.
To switch ON, turn the keyring as if tightening a screw.
To cycle through the available modes twist-ON, then twist-OFF, and back on again within 2s and repeat to change from High – Low – Flash – High etc.
To Switch OFF, turn the keyring as if loosening a screw.

The GT-LITHIUM has 11 modes, Equal Flash, Beacon Strobe, Fast Strobe, Slow Strobe, SOS, Pulse, Half Flash, Bounce, Ramp Up, 100% Constant On and 25% Constant On.
To switch ON to the memorised mode, either click the switch or turn the end cap.
To switch OFF, either click the switch or turn the end cap.
To set the current output mode, switch ON, count 5s, then switch OFF and ON again. Now you can cycle through the available modes (in the order above) by turning it OFF and ON again until you get to the one you want. To ‘fix’ that mode, simply leave it ON for 4s and it will be memorised.

Batteries and output:

The GT-AAA and GT-AAA Pro run on a single AAA Alkaline cell, and the GT-LITHIUM runs on a CR123.

To measure actual output, I built an integrating sphere. See here for more detail. The sensor registers visible light only (so Infra-Red and Ultra-Violet will not be measured).

Please note, all quoted lumen figures are from a DIY integrating sphere, and according to ANSI standards. Although every effort is made to give as accurate a result as possible, they should be taken as an estimate only. The results can be used to compare outputs in this review and others I have published.

___________________________________________ ________________________________ ________________________________
GLO-TOOB model using specified cell I.S. measured ANSI output Lumens PWM frequency or Strobe frequency (Hz)
___________________________________________ ________________________________ ________________________________
GT-AAA High – AAA Alkaline 10 0
GT-AAA Low – AAA Alkaline 2 166
GT-AAA Strobe – AAA Alkaline 10 10.5
GT-AAA Pro High – AAA Alkaline 9 0
GT-AAA Pro Low – AAA Alkaline 3 0
GT-AAA Pro Strobe – AAA Alkaline 9 4
GT-AAA Lithium High – CR123 3 0
GT-AAA Lithium Low – CR123 1 500

* Beacon and Strobe output measurements are only estimates as the brief flashes make it difficult to capture the actual output value.

There is no parasitic drain on any model.

With such low outputs and long runtimes I have not included a runtime graph for any model.

Troubleshooting

This section is included to mention any minor niggles I come across during testing, in case the information helps anyone else.

There was one slightly odd observation with the GT-AAA Pro. During the first few full runs (turning it onto high with a fresh cell, and leaving it to run until is went off) the PCB end of it started to dome out, as if there was some pressure building inside. It was also observed when fitting a mostly depleted cell and then leaving it on high.
I suspect the cell might have been gassing, and this pressure blowing the PCB out a little.
It was not observed after the fourth cell was used, so might have been connected to something on the PCB creating a pressure build up.
Not being able to replicate it any further, I asked Nextorch about it and they replaced the GLO-TOOB. The replacement did not exhibit this behaviour at all.

As per the description of this section, this information is provided in case anyone else finds a similar ‘issue’ that might be fixed in the same way.

The GLO-TOOBs in use

With the GLO-TOOB lights being marker lights, in general, to use them you simply attach the light to whatever you want to mark. The main aspects to discuss here are the user interfaces and battery change.

Each of the three models in the review is constructed differently so despite being similar overall they do feel quite different in use.

Starting with the lowest end model, the GT-AAA, and to operate this you have to turn the entire black cap. Of all three this is the stiffest to operate, and though not requiring much force to turn it, it does require reasonable force to be able to grip the cap strongly enough that you can turn it. This is due to the cap being relatively smooth to hold.

The operation is simple, very immediate and easy to judge as the cap position is obvious. The High output level is clear and has a useful level of light, but in comparison to the other GLO-TOOBs in this review, the Low uses a low frequency PWM making it quite obvious, and the flashing mode is a bit manic, being more of a strobe than a beacon.

Stepping up to the GT-AAA Pro, and there is a leap in performance and build. This time the battery cap is metal, and has a central threaded post which is used to operate the light. Starting with a battery change, you then screw in the cap, and tighten fully; at all times this cap is fully tightened. Now to operate the light, you twist that threaded post using the keyring (or you can hold the ring in place and twist the body. This action is super smooth and possibly the easiest action of all the GLO-TOOBs. It does seem a little vague though as it lacks any real feel until the unit comes on. At this point the action stiffens and becomes a bit grindy; I am slightly worried about over tightening this switch as it might crush the battery.

In terms of output, the High mode is great, making it so much nicer to use. And when it comes to the flashing mode, though not quite a ‘beacon’ the flashes are much slower than the GT-AAA and so much easier to be around. The increased waterproofing and the significantly better low and flashing modes make this Pro model a worthy upgrade to the GT-AAA.

Lastly, the much more serious Lithium model. It is more expensive than the AAA models, but one important reason you might consider this the ‘serious’ version, comes from the CR123A cell’s shelf life. You can put a fresh CR123 in this and leave it for 10 years and it will work. I’d certainly not expect the same out of an alkaline cell. In addition to the power source, the build of the GT-LITHIUM is seriously strong, and it has a ‘diving’ switch cap designed to make this usable to 3500m depth. Not many people will even use that level of waterproofing, but it does mean that overall you are getting a massively robust light. Optionally you can also use the click switch cap instead for a different way of using it.

Now we also have 11 modes to choose from, and my biggest complaint is finding it hard to choose one, as they each provide a different mix of visibility and attention grabbing. My favourite visible but not too manic is the ‘pulse’ mode, with another that works well for me is ‘Bounce’. The others are each so good, you have trouble choosing between them; the only one I’ll never use is the Fast Strobe. Depending on your application, battery life might be a consideration, so the total time the LEDs are lit are a factor. In this case the Slow Strobe or Beacon Strobe would be good choices.

Both switch cap types are equally easy to use. In some ways the click cap makes mode selection easier, but doesn’t have the solid hanging ring or levels of waterproofing as the diving switch cap does. The twist action is a smooth ‘detent’ 1/4 turn to go between on and off. Grip is very good with the deep scallops round the ring.

Unlike the GT-AAA Pro, when fitting the diving switch to the GT-LITHIUM, you now use the keyring to twist the cap on tightly; you can’t use the twist ring itself as it moves.

One of my main reasons to use this type of marker light is as additional safety lighting when cycling. Typically attached to something behind me, I don’t get to see it, so because I like these, I am constantly looking for an excuse to use them. Things like tent marking, or even leaving a slow strobe on my car dashboard when parking the car at night in a public car park are amongst the ‘excuses’ I’ve come up with.

If you like light sticks then these GLO-TOOBs should be on your shopping list.

Review Summary

_______________________________________________ _______________________________________________
Things I like What doesn’t work so well for me
_______________________________________________ _______________________________________________
‘On-Demand’, reusable light stick. GT-AAA uses PWM for low mode.
Incredible 3500m waterproofing on the GT-LITHIUM. Light not as evenly spread along the length as a chemical light stick.
GT-LITHIUM has 11 modes to choose from. Currently limited to AAA or CR123 cells (an AA option would be great).
Choice of 3 modes for the AAA versions.
Keyring makes it easy to attach.
Super tough and resilient.


Discussing the Review:

The ideal place to discuss this reviews is on a forum. If you started reading the shorter forum version of the review, but followed the link this full exclusive review, please return to that forum to discuss the review there.
If you read the review entirely on Tactical Reviews, please consider one of the following to join in any discussion.

CandlePowerForums – Flashlight Reviews Section (Largest and Friendliest Flashlight Community Forum)

EdgeMatters – Sponsored Reviews (UK based Forum for Knife Makers and Collectors)

Knife Review: CRKT Homefront and Homefront Tactical with ‘Field Strip’ Technology

CRKT are full of interesting and innovative ideas, and with the Homefront and Homefront Tactical bring us ‘Field Strip’ Technology, or in other words tool-less disassembly. The design comes from world renowned Ken Onion and has been a work in progress for many years. Now thanks to this technology you can clean out a build up of grit and dirt wherever you are without any tools. Take your Homefront folder anywhere knowing you don’t need anything else with you to carry out a full strip and clean.

The Blade and Handle Geometry:

Most knife specifications have a basic description of the blade geometry, but in this section I will be taking a more detailed look at geometry and balance.

Using a set of gauges and precision measuring equipment including a Vernier protractor, callipers, fixed radius gauges and the unique Arc Master adjustable radius gauge (the one that looks like a crossbow).

These measurements have been tabulated and are presented along with a few reference blades (8″ Chef’s Knife, 5.5″ Santoku and the popular Fällkniven F1).

Key aspects such as the primary bevel angle, grind type, blade depth, blade thickness, length, weight are detailed, along with balance information.

The ‘Balance relative to the front of the handle’ tells you if the knife will feel front heavy, or if the weight is in your hand (a positive value means the weight is forward of the front of the handle). The ‘Balance relative to the centre of the handle’ indicates how close to a ‘neutral balance’ the knife has in the hand.

In the case of full convex grinds the approximate centre of the grind is used for the primary bevel angle estimate.

The Homefront blade is made from AUS 8 steel and the Homefront Tactical from 1.4116 steel (also known as 420MoV or X50CrMoV15).

Explained by the Maker:

The reasons for certain design choices may not be clear when simply looking at an object, so this section is intended to give an insight into the thinking behind a design by speaking to the designer themselves.

Unfortunately I can’t always get time with the designer so will use this section to include relevant information about the knife and its designer.

A little description from CRKT’s of the Homefront:

“It might look like your grandpa’s classic WWII knife, but it’s got an impressive secret. The new Homefront™ knife is the first in our fleet to feature “Field Strip” technology. This in-field, no-tool take apart capability lets you purge your most reliable companion of a hard day’s grime right where you are, without ever returning to your workbench.

The breakthrough “Field Strip” innovation comes from the shop of world-renowned knife craftsman Ken Onion and has been over ten years in the making. To disassemble the Homefront™ when the knife is in the closed position, push the front release lever away from the blade, then spin the turn release wheel on the rear of the handle away from the pivot shaft. Once you feel the handle release, pull it up and away from the blade. Reassembly is as easy as reversing the procedure, al-lowing for practical, quick maintenance where you stand.

From his shop in Kaneohe, HI, Ken Onion designed the tactically inspired, everyday carry Homefront™ knife to stay true to its vintage roots. The bayonet lug-style flipper sets off the smooth open action of the 3.5” modified drop point blade, while tank jimping on the backstrap sits snugly against your palm.

It stands up to the looks of a WWI heirloom, and it sure as hell stands up to any job it encounters. The handles are made from 6061 aircraft-grade aluminium and house an impressively beefy AUS 8 stainless steel blade.”

A few more details of the Homefront:

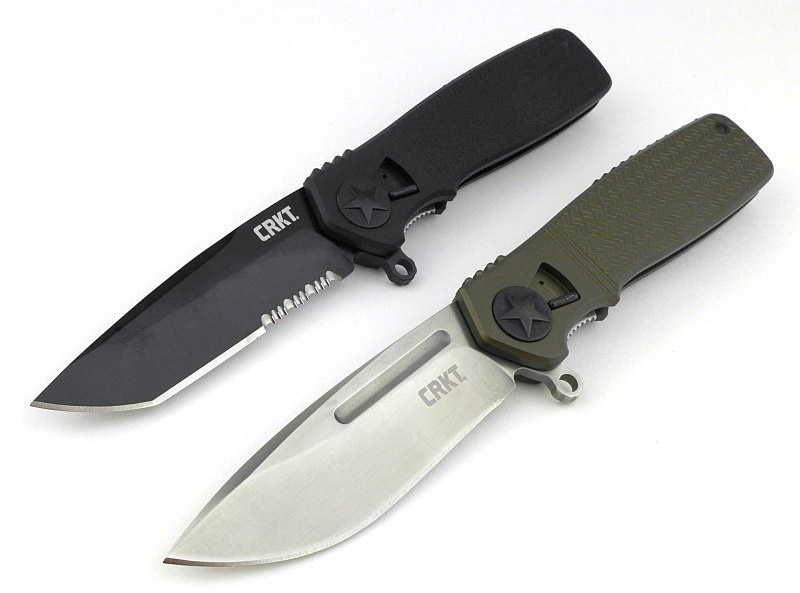
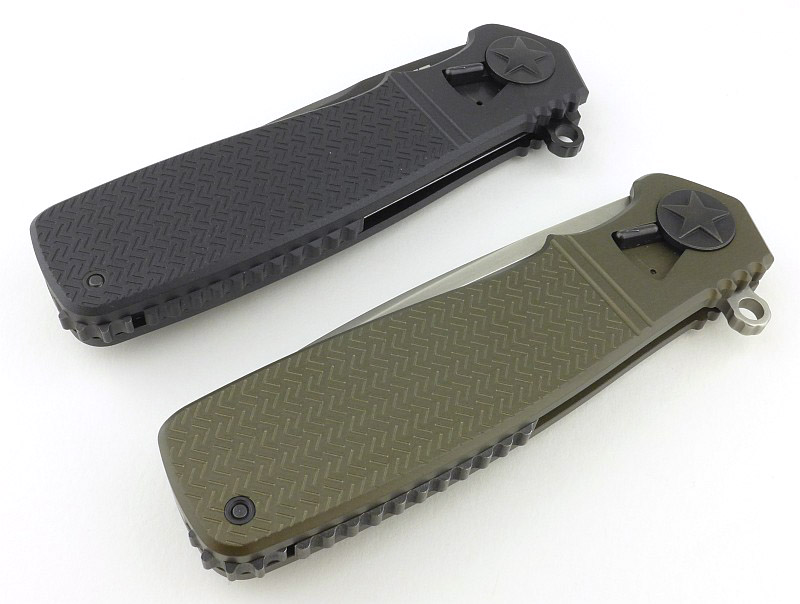
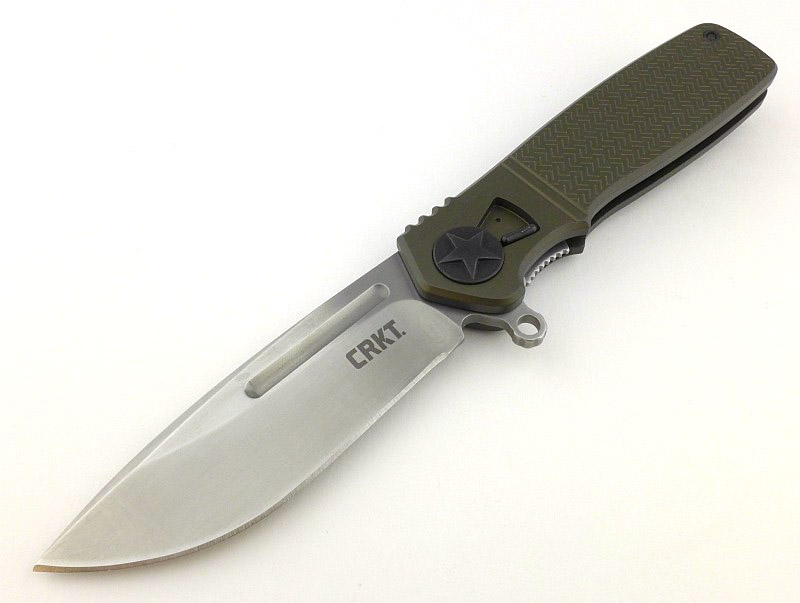
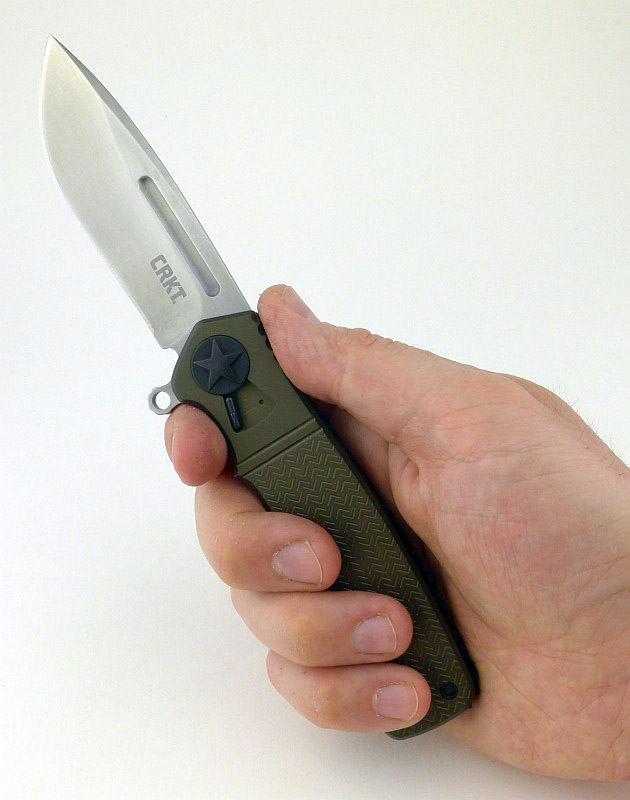
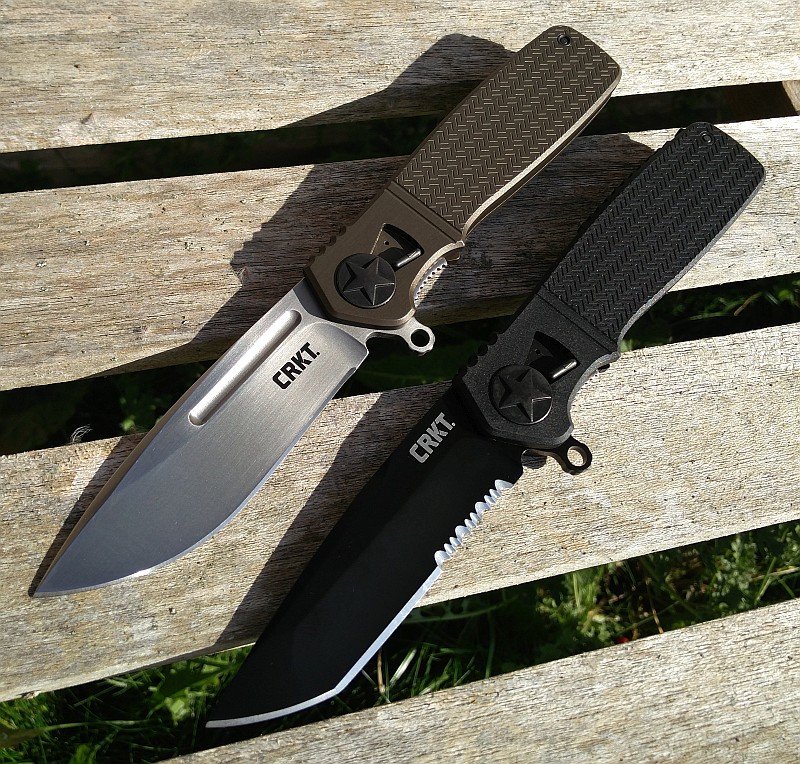
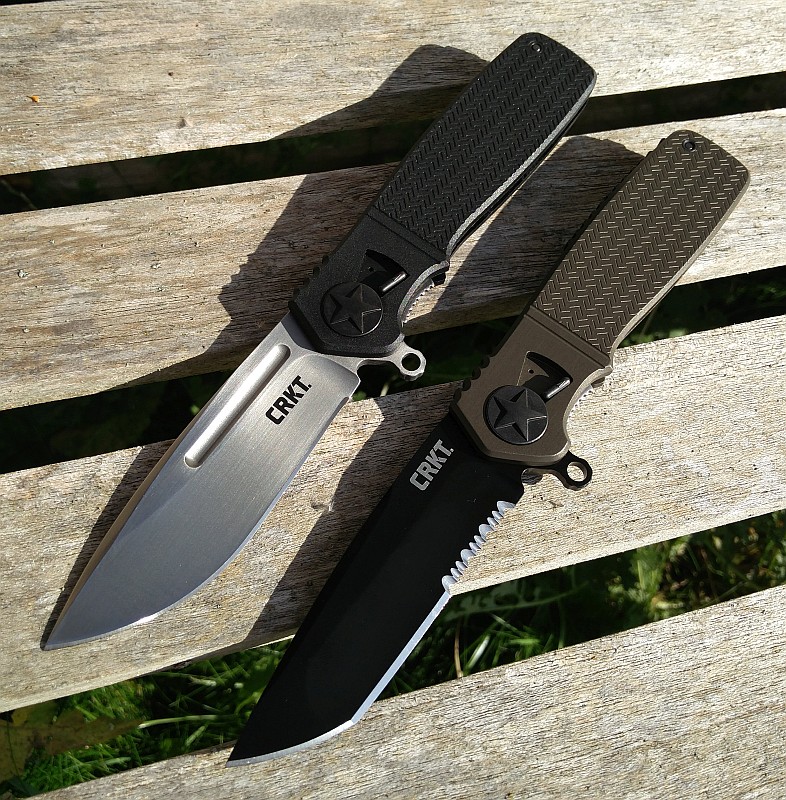
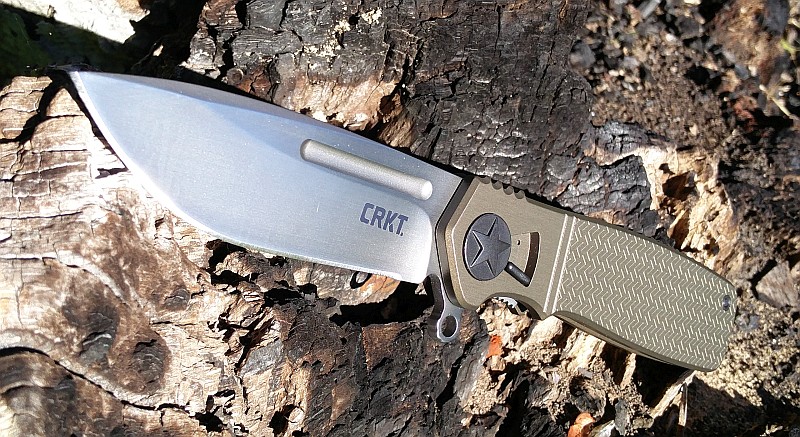
This review covers the Homefront (green handle) and Homefront Tactical (black handle), but we are going to look at the original Homefront first. There are no boxes as these knives came straight from the CRKT IWA 2017 display stand at the end of the show. They have been handled and used.

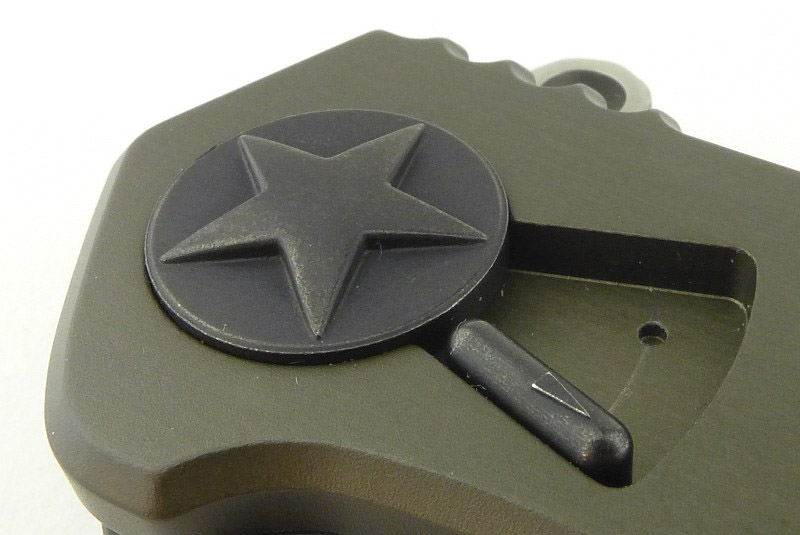
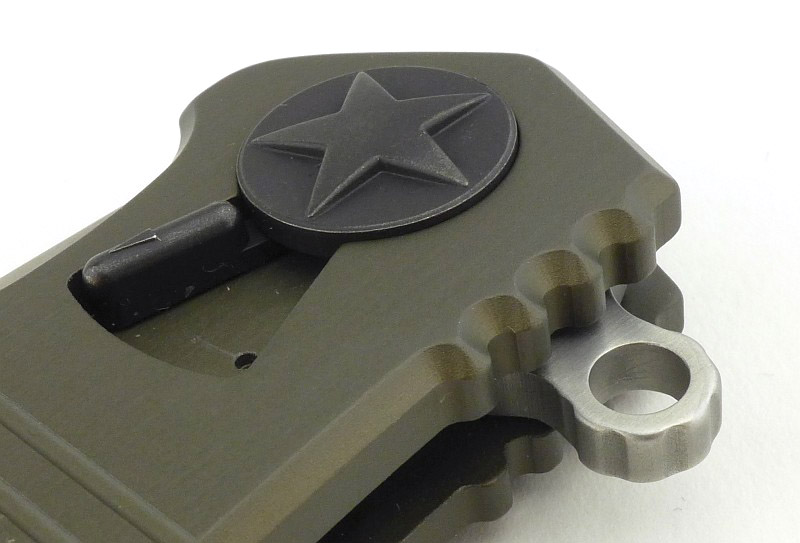
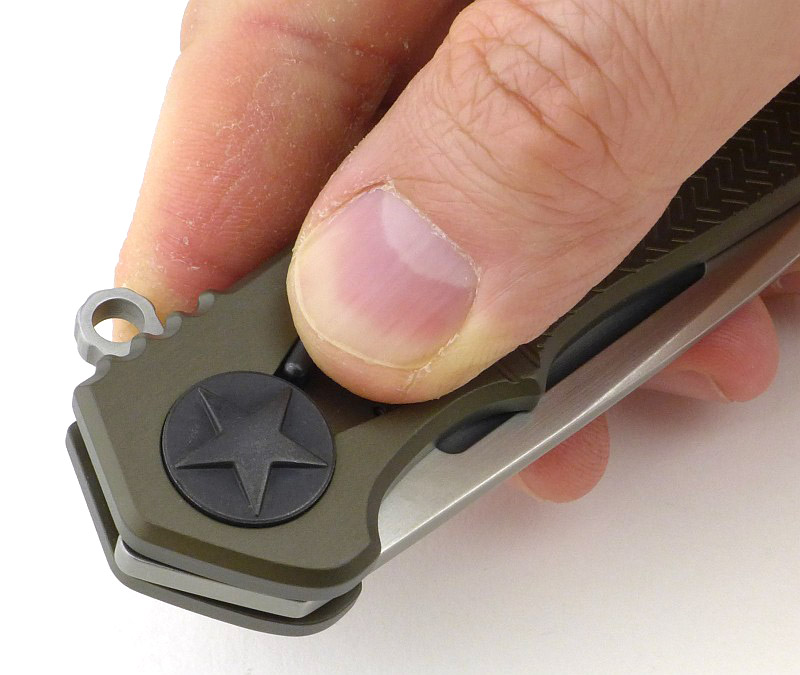
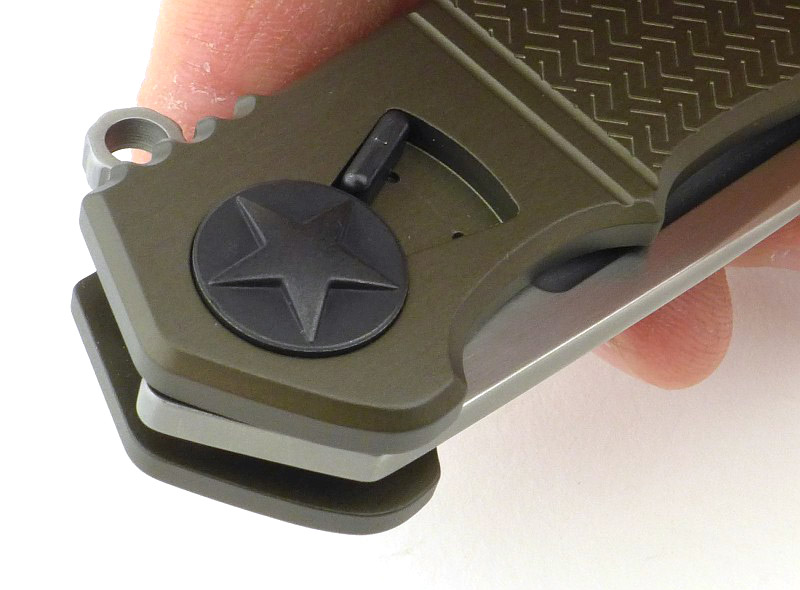
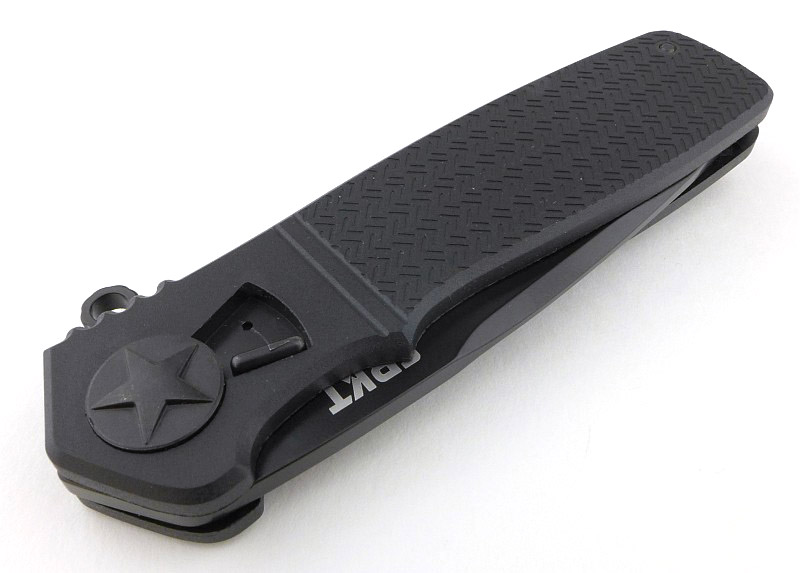
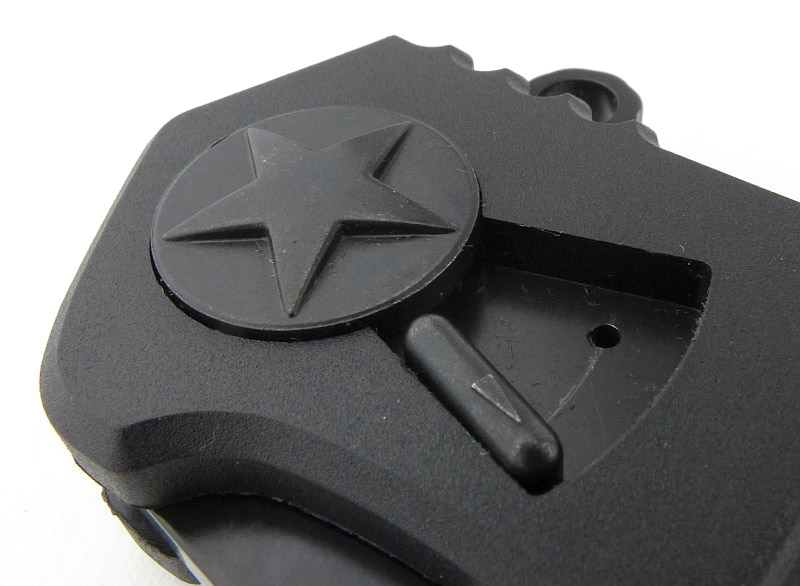
The pivot has what appears to be the standard US aircraft star insignia (as used from 1942). The lever next to this is where the magic is hidden.

Apparently styled after a bayonet lug, the flipper tab has a hole in it. (Do not try to attach a lanyard here!)

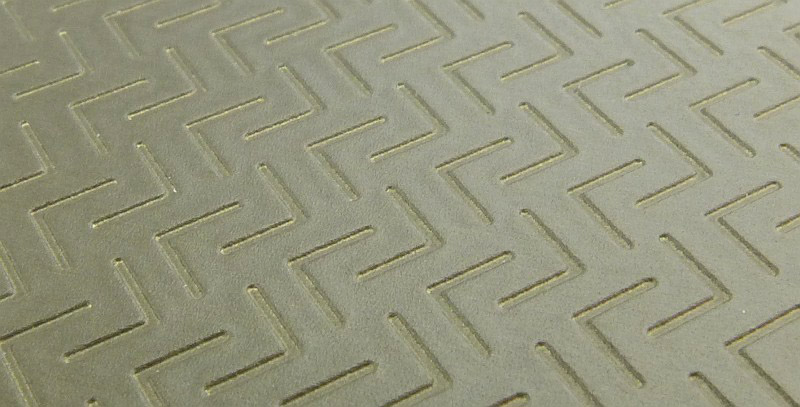
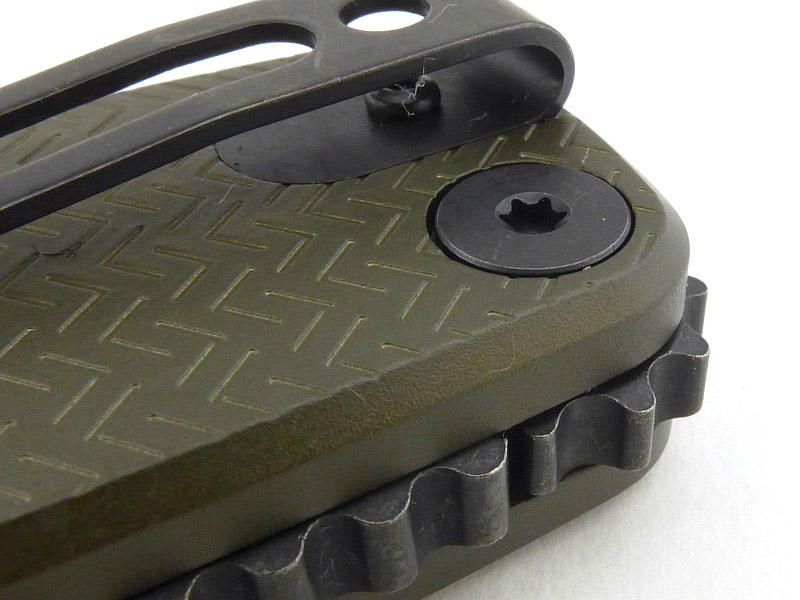
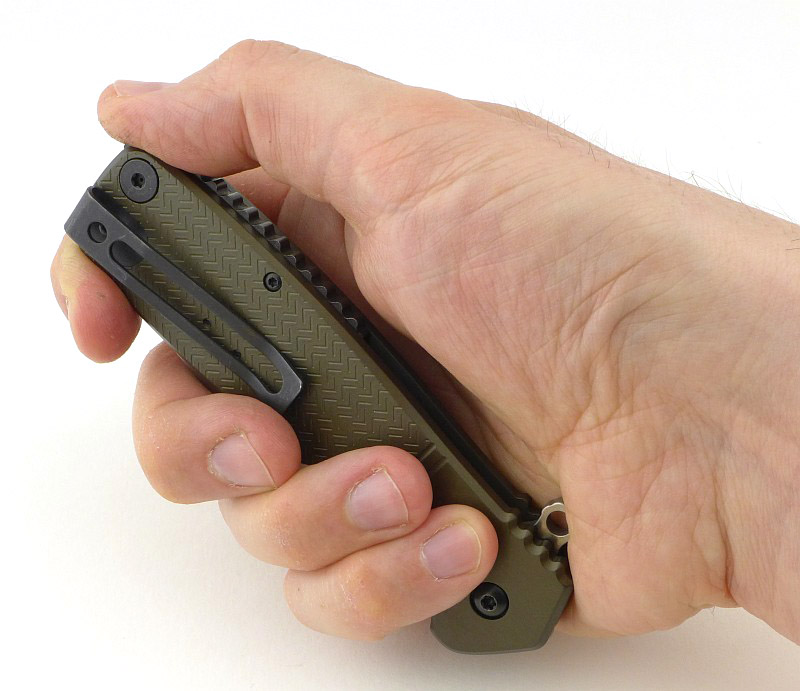
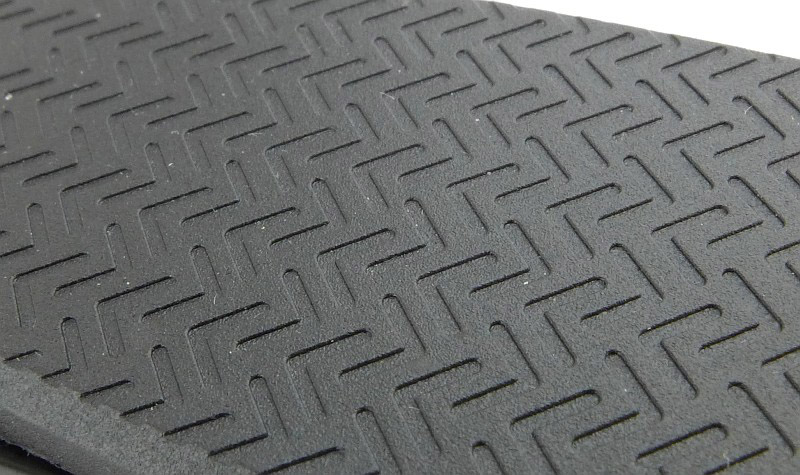
Both handles have a subtle grip pattern. This appears to have been laser etched into the surface before anodising.

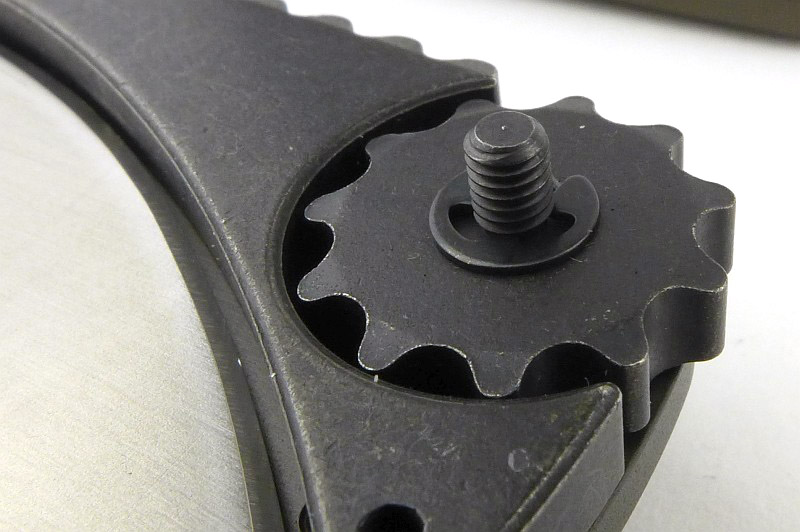
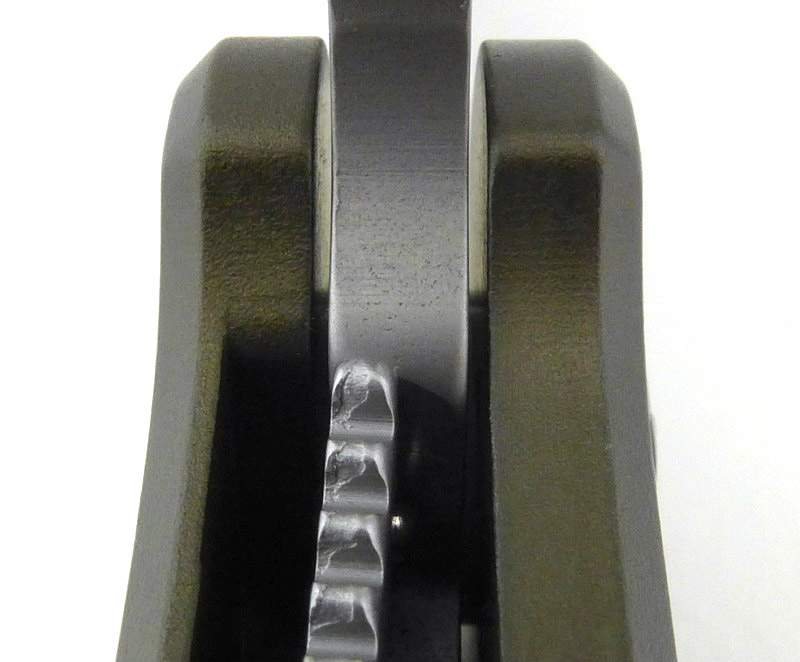
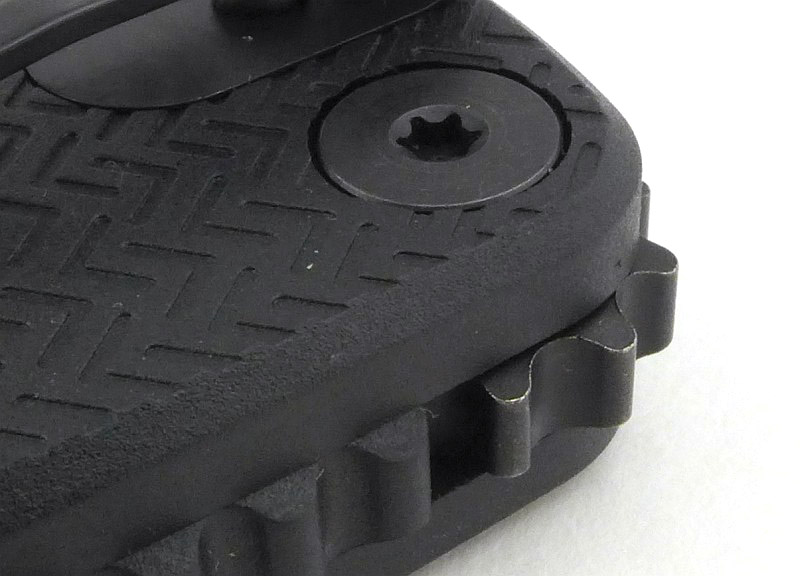
The other bit of magic, comes from the thumb-wheel screw that holds the butt of the knife together.

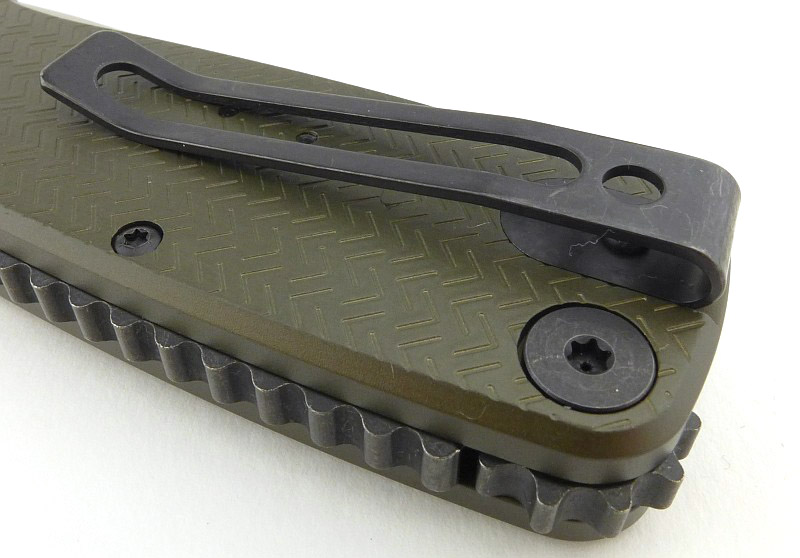
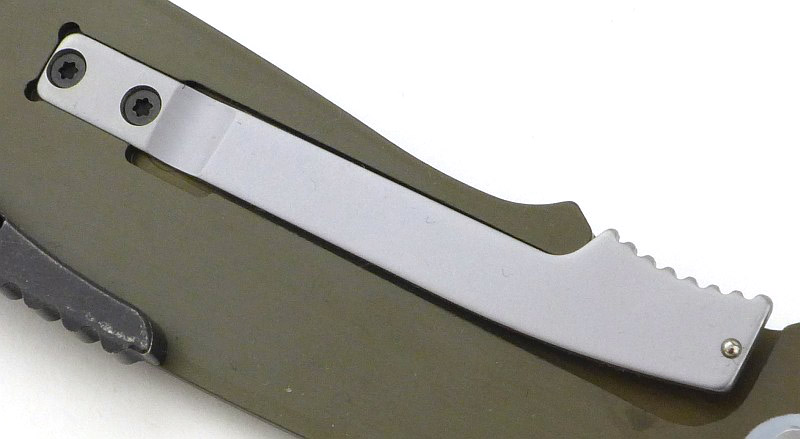
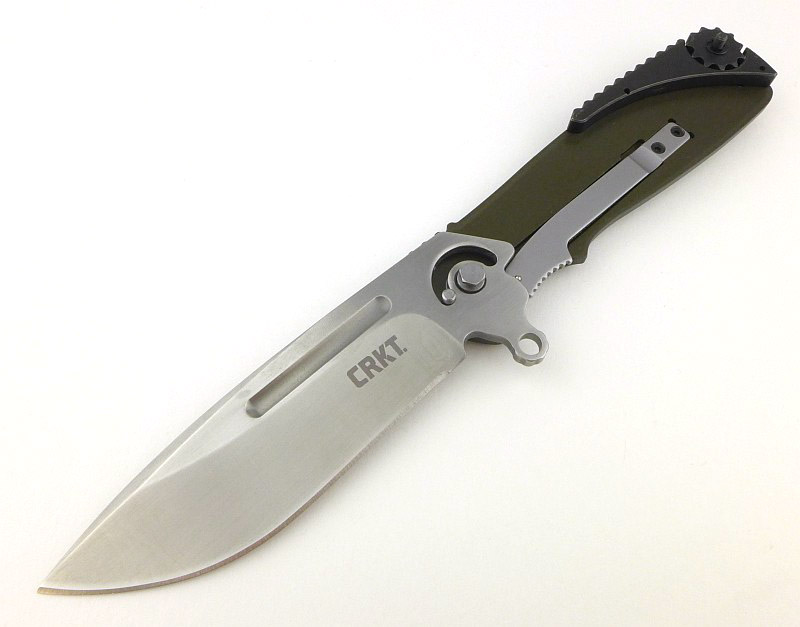
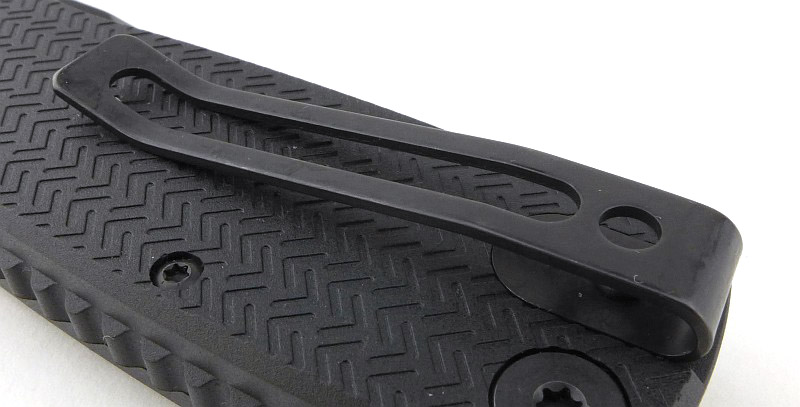
A steel pocket clip also gives you a hole for attaching a lanyard should you wish to.

Though not strictly a ‘liner-lock’, tucked neatly into the inner side of the Homefront’s aluminium handle is a sprung steel locking lever.

Blade centring is good, with the tip appearing slightly off due to the edge grind.

A Torx screw holds the jimped handle spacer in place on one side.

On the opposite side to the star insignia, the pivot has an adjustment screw that sets the height of the pivot bolt.

Right! Let’s take this knife apart. First loosen the thumb-wheel screw by pushing it away from the pivot. Keep going until the thread ‘clicks’ to indicate it is fully undone.

Flip the knife round and push the locking lever towards the flipper tab (with the knife folded).

Now, as you lift your thumb, the handles spring apart at the pivot.

As we had already loosened the thumb-wheel, the handle can now be lifted away, fully exposing the folded blade.

A closer look at the thumb-wheel while we can. Note the circlip; the wheel fits over the threaded bolt, and there is a little bit of play, with the wheel having some movement even when the connector is fully tightened.

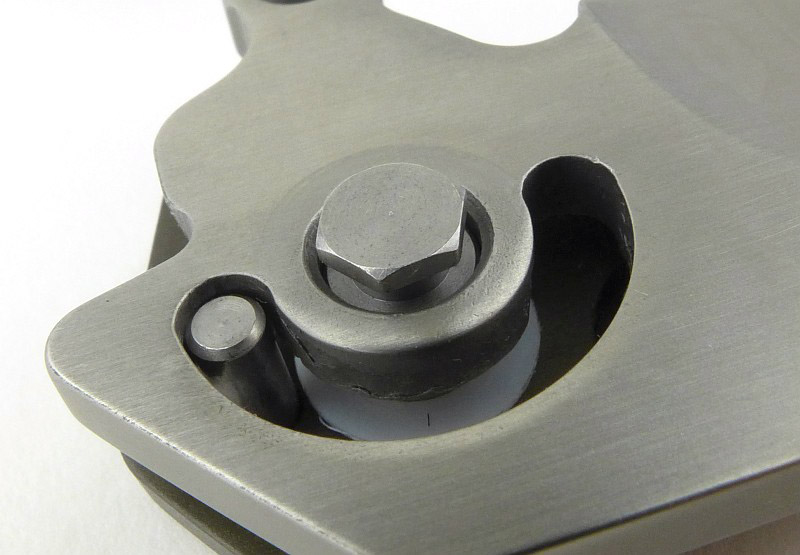
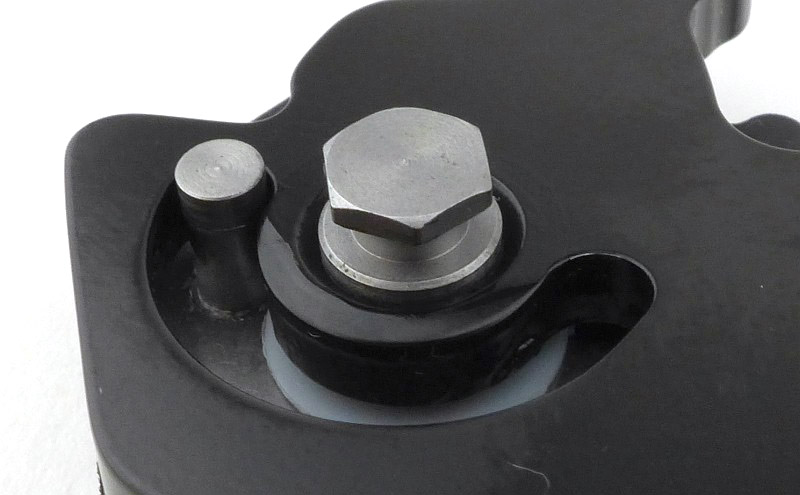
And this is the magic pivot that lets it all happen. Note the hex-shaped head. The homefront also uses a concealed stop pin which limits the open and closed positions of the blade.

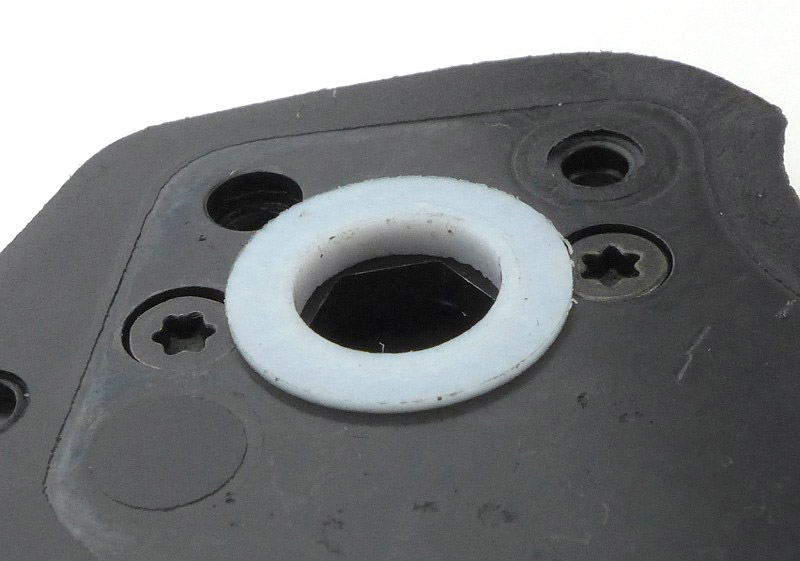
Look into the hole of the handle we removed first, and you can see the hex shaped hole that locks onto the top of the special pivot bolt.

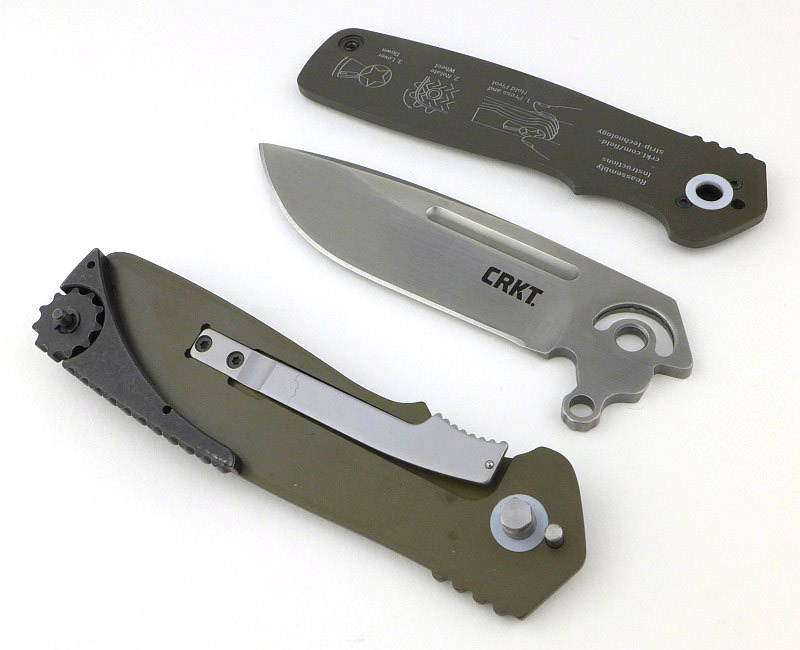
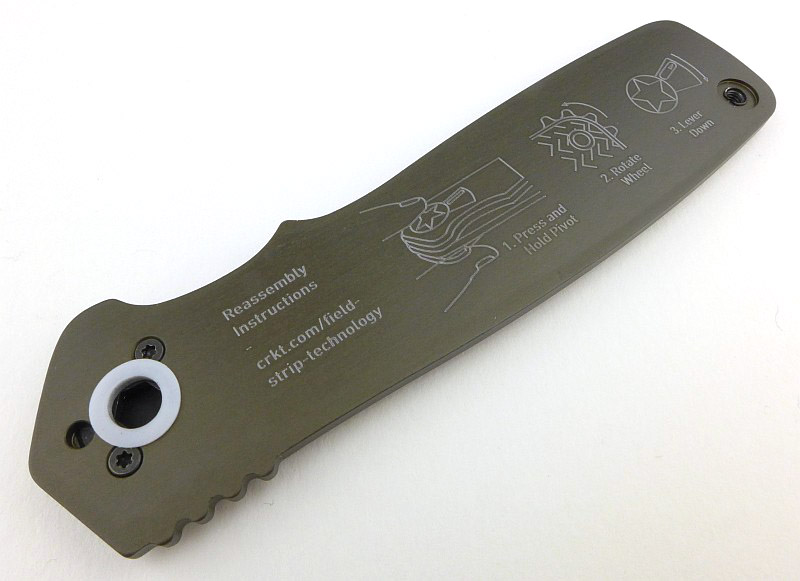
If you forget how you took it apart, or somehow it just ‘came apart in your hands’, inside the handle is a set of instructions for putting it back together again.

When stripped you have the three main components, the master handle (with pivot, stop pin, lock bar and thumb wheel screw), the blade, and the second handle.

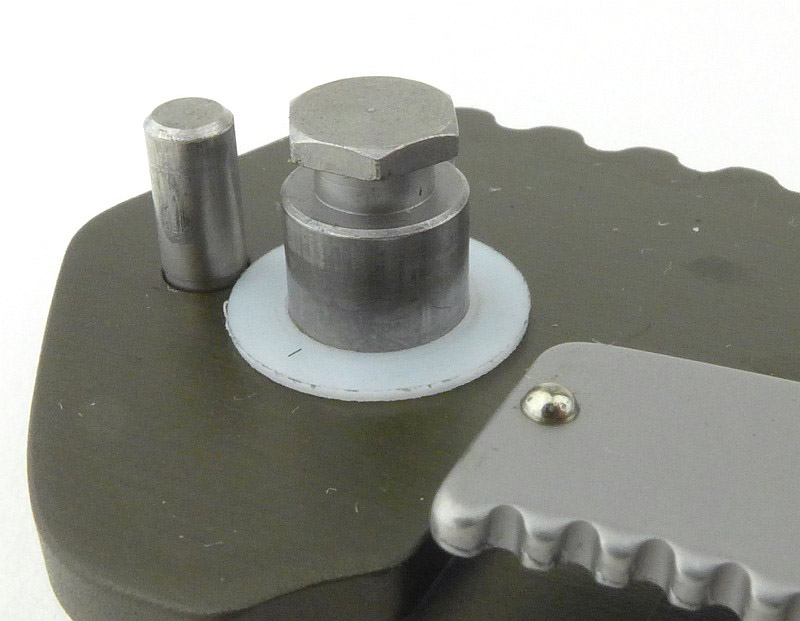
While it is fully stripped this is a closer look at the special pivot, stop pin and the detent ball on the end of the lock bar.

So, not a ‘liner’ , this lock bar is inset into the aluminium handle, but functions exactly as a liner lock.

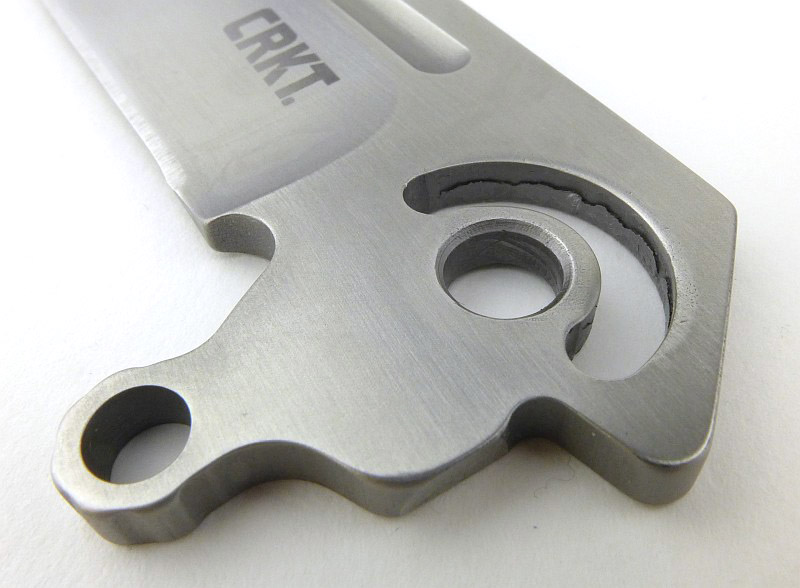
The blade tang has the pivot hole and a semi-circular stop pin slot. The markings in the hole suggest this is a stamping and is not water jet cut.

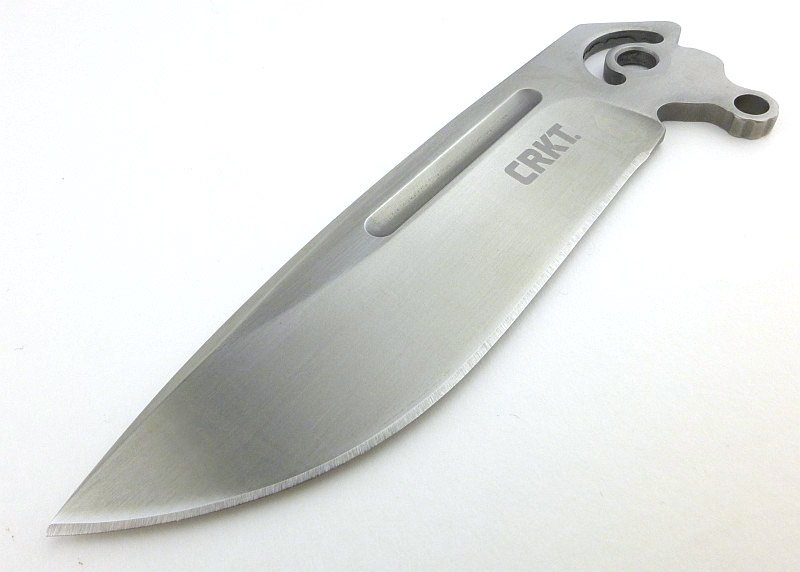
A really good looking blade with swell near the tip and a fuller, giving it a classic look.

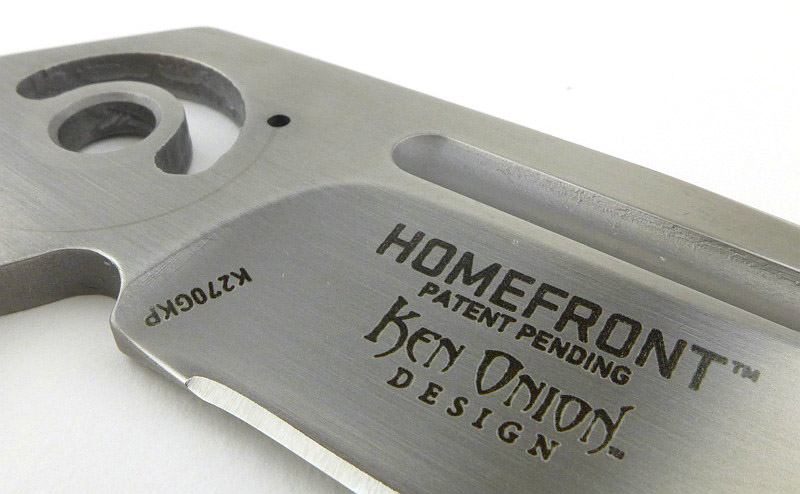
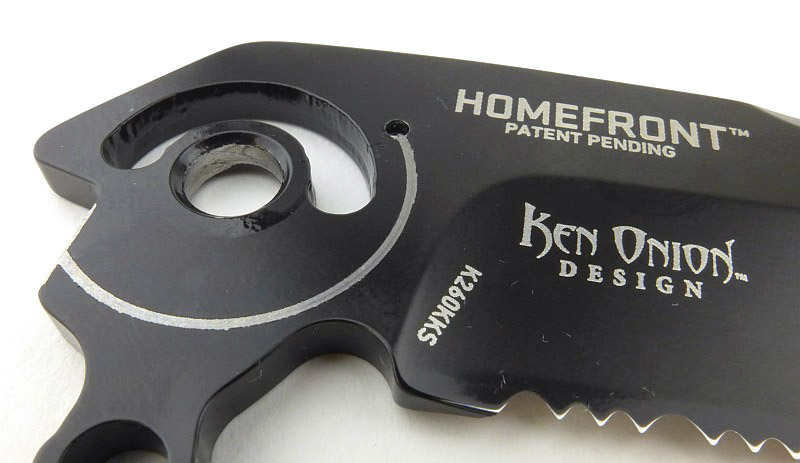
Ken Onion is credited on the blade. On this side of the blade you can see the detent hole.

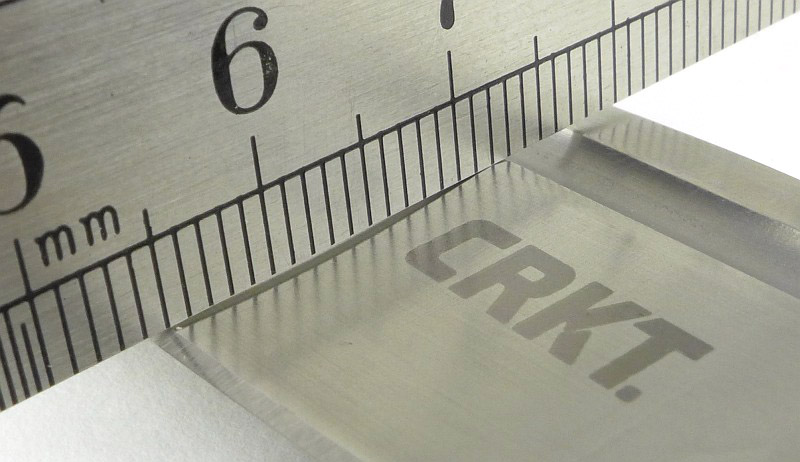
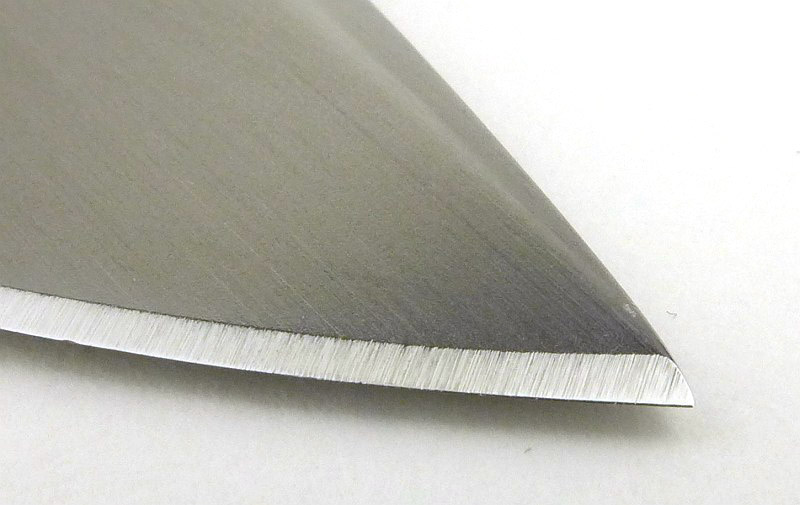
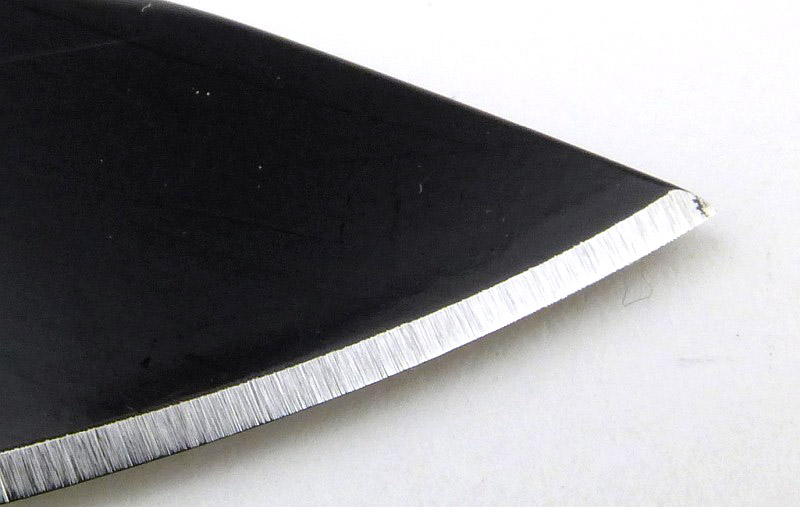
A close-up of the blade tip, showing the contrast in surface finish and the edge bevel grind.

With one handle removed you get a cut-away view of the workings of this knife.

Lock engagement is good with the entire lock bar touching the blade tang with a firm snap-open.

And in no time at all it is all back together.

The Homefront achieves a real vintage look, despite not looking like any historical knife I’ve found.

A few more details of the Homefront Tactical:

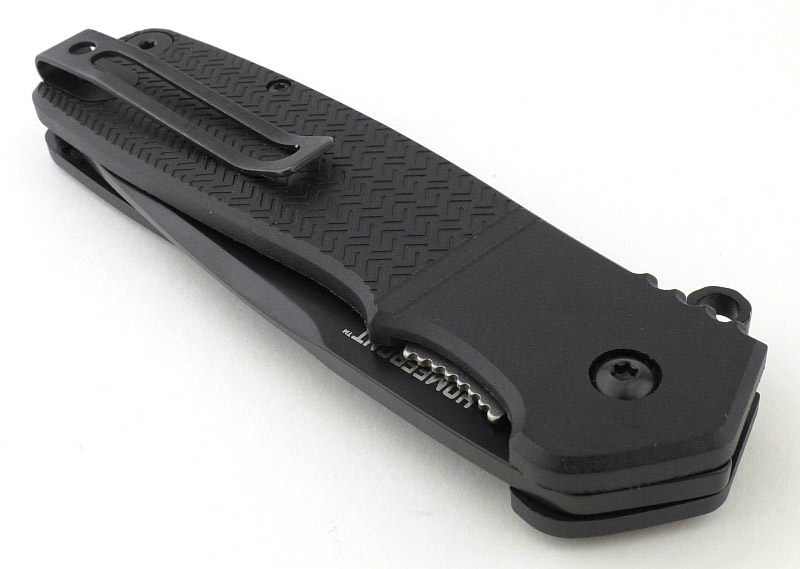
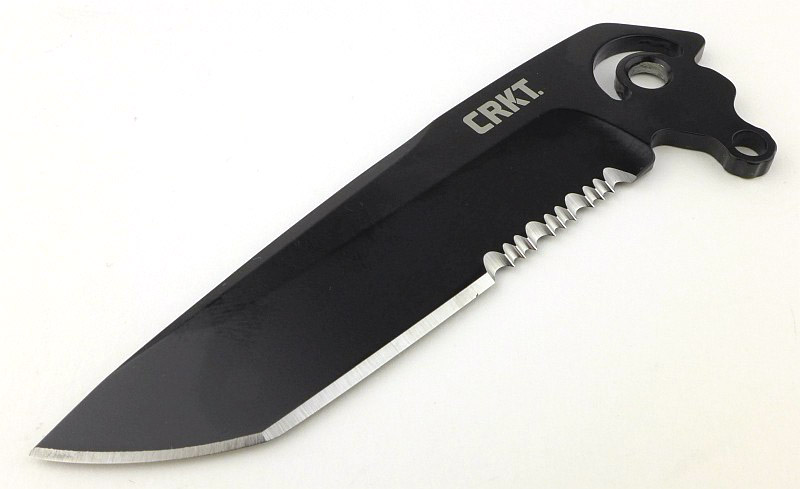
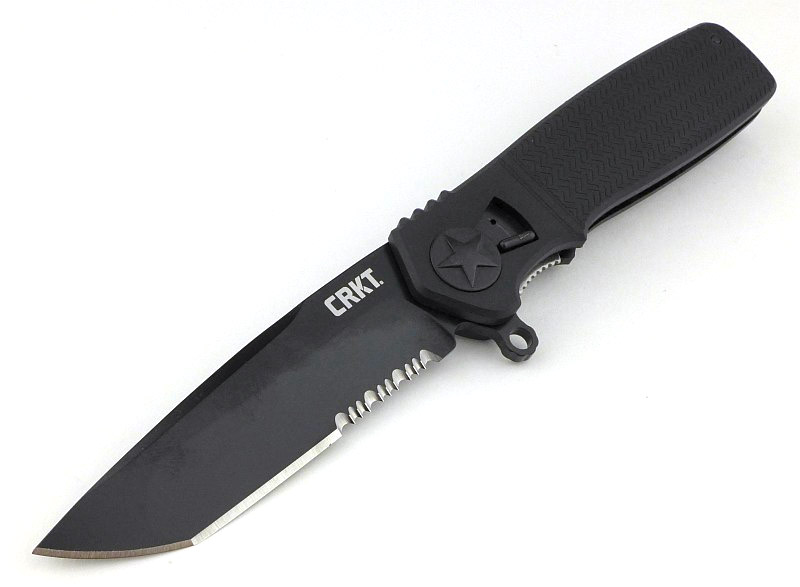
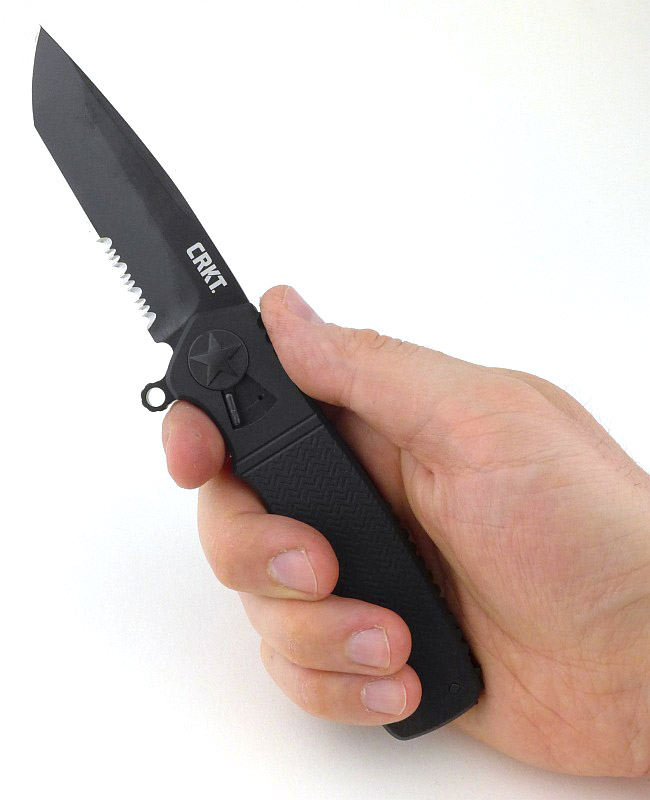
Next we have one of the second wave of Homefront models where instead of the aluminium handles, these have Glass Reinforced Nylon handles and a different blade steel. This is the Homefront Tactical, with a part-serrated Tanto blade

The design and shape of the handle is the same as the original Homefront, including the pivot star insignia.

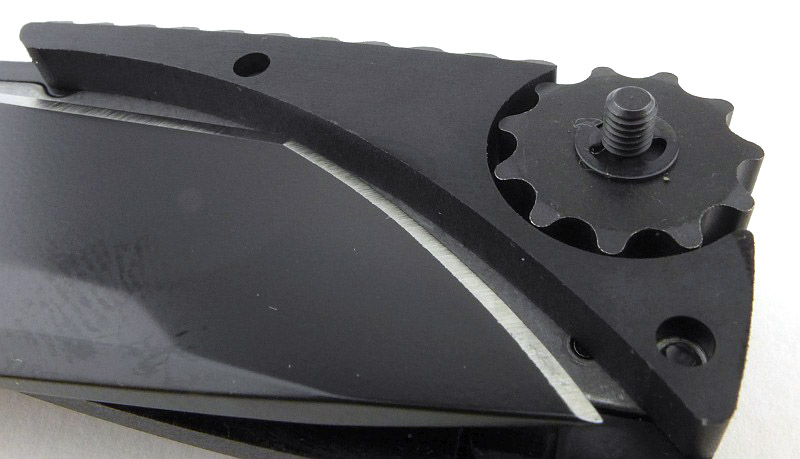
In terms of the function and design the GRP handled version is basically the same. Here we have the thumb wheel.

And the same steel clip.

That bayonet lug flipper. However note that this time the blade is black. It has an EDP finish (electronically deposited paint, which is baked on).

A hint of bare steel with the lock bar. We will see that this time it is actually a liner.

Although the same grip pattern is used, in this version the width of each line is wider than on the original Homefront. Of course, in this case it is moulded into the surface instead of being laser etched.

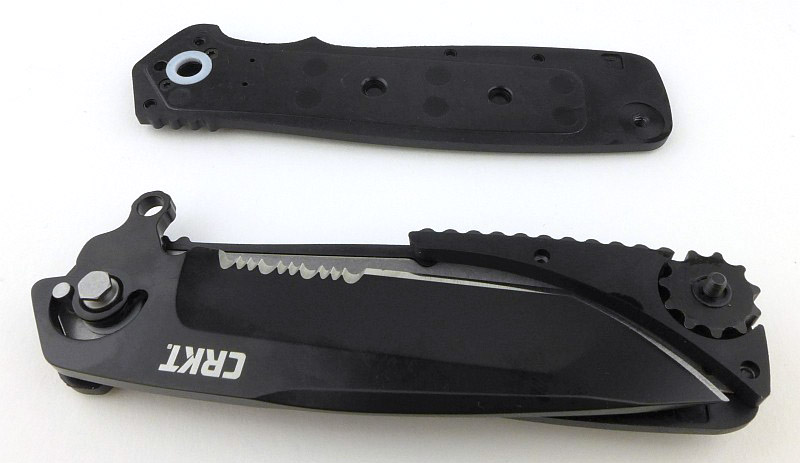
Going straight for a field strip, exactly as with the Homefront; here the handle is off.

The internal curve of the handle spacer is a match to the Homefront’s blade, but here we have a tanto. Clearance is still good. The spacer is also now GRP instead of metal.

As before, the pivot has a hex shaped head.

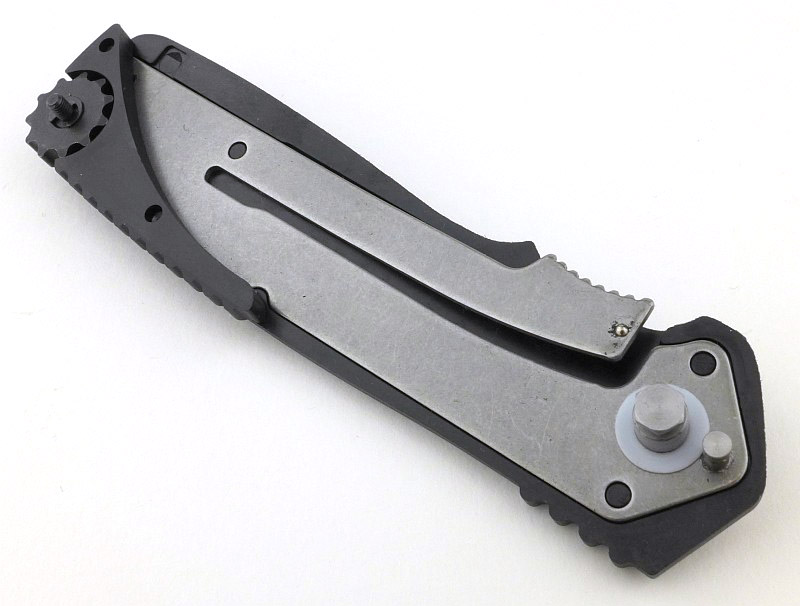
Now we see one of the major differences. With the handle being plastic, it cannot have the lock bar screwed to it. Instead there is a full metal liner moulded into the inside of the handle.

This full metal liner also has the stop pin fixed to it and supports the pivot. The dirt around the detent ball on the lock bar is worn off paint from the blade.

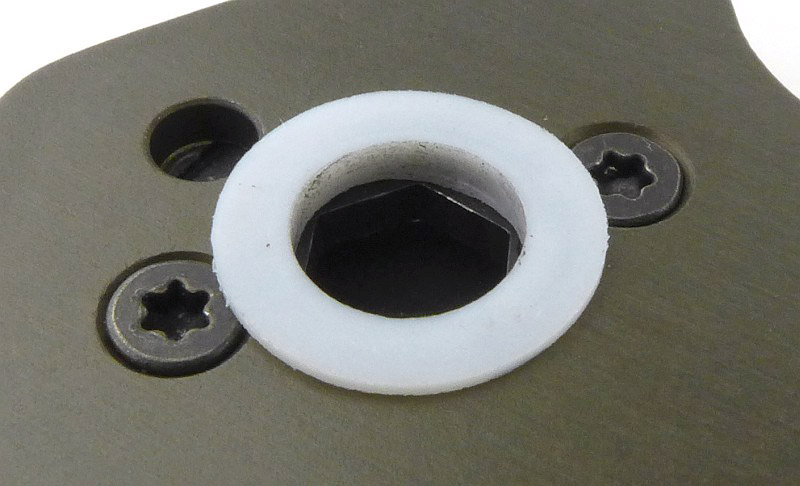
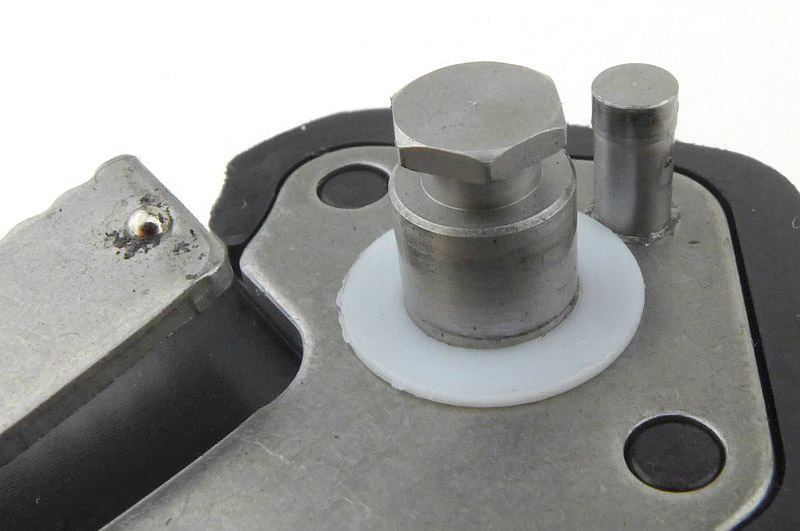
A Teflon bushing acts as the pivot washer. You can see the outline of a metal liner inside the moulded handle. Two screws hold the pivot locking mechanism together.

Apart from the cutting edge, the entire blade is EDP coated.

EDP is just paint, so where the detent ball rubs on the blade tang, the paint has been scratched off.

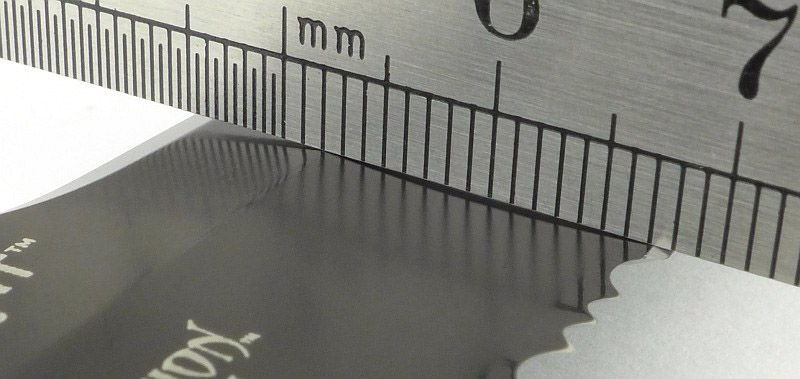
Looking at the finish on the edge bevel grind.

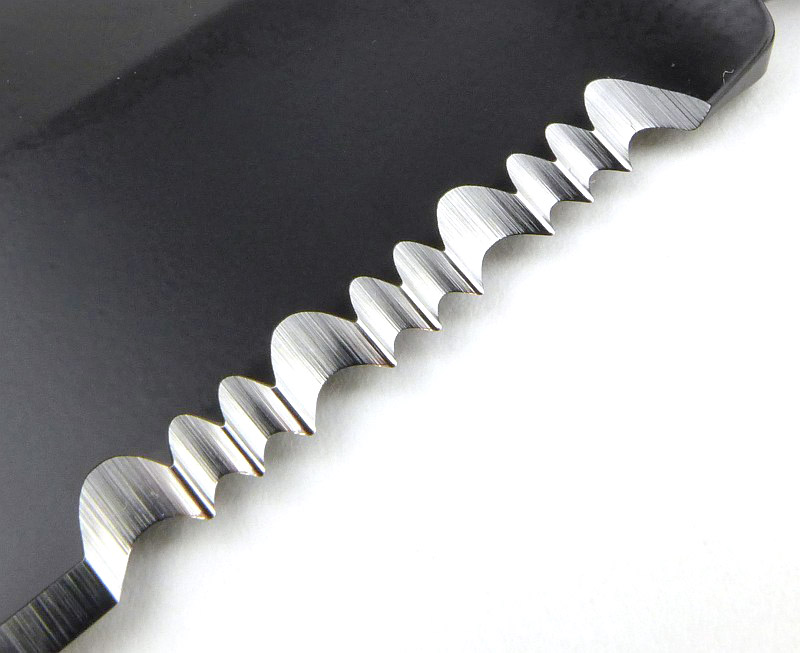
There are part serrations near the handle which are a chisel grind (single bevel) and have two sizes of scallop.

The all black Homefront Tactical.

And there is more when you put these two together…

What are they like to use?

Headlined as a ‘field strip’ technology, it could also be an ‘easy disassembly’ feature. You can take the Homefront apart anywhere, but you can also pop it apart any time for a quick service, not only when it needs a major overhaul. By making the deep-clean a super easy process, you are much more likely to keep these knives in top condition all the time.

The styling of these knives is mentioned prominently by CRKT. The Homefront is described as a remake of grandpa’s WWII, and the Tactical as a classic WWI knife and though there is a vintage look; firstly I suspect the WWI reference is a mistake as the US Airforce aircraft marking Star Insignia was a WWII design, and secondly I would disagree that it is like any WWII folder, certainly none I’ve ever seen.

Let me make it very clear that I really like the design and styling, which definitely has a vintage look, and incorporates design features that do give a modern interpretation of a WWII knife. My disagreement is with the statement that it looks like grandpa’s knife, show me a knife from WWII that looks like this and I’ll happily eat my words.

This is really not a negative as, in particular, I like the choice of colour for the handle of the Homefront along with the finish of the blade steel and the inclusion of a fuller. Overall a really stylish design that stands out from the crowd.

Moving on to how it is in the hand, that most crucial aspect, and this is a good sized folder with plenty of handle to give a stable grip. The handle has an area of grip positioned perfectly for the thumb to sit on when using a saber style grip. It is a relatively slim aluminium slab handle, yet its shaping allows it to fit into the hand very comfortably. Not so well that I’d want to do a lot of heavy cutting with it, but well enough to find it regularly in my pocket.

The Homefront Tactical has the same ergonomics, as the handle shape is exactly the same, but the nylon GRP material gives it a different feel, warmer, slightly lighter and a slightly different balance. It does not feel diminished compared to the original Homefront, just a different option. It may only be around 13g lighter, but does feel easier to carry.

Talking of options, should you have more than one of the Homefront models you can mix things up a bit and try a different blade or handle. Have a look at this short video to see this and the ‘field strip’ in action.

Video Edited with – Cyberlink Director Suite 5 (PowerDirector 16 and AudioDirector 7)
Camera – Panasonic HC-V770    Microphone – Tonor TN120308BL

Here the Homefront and Homefront Tactical have their original blades.

After a quick strip down and shuffle around, the blades are swapped over.

It is true that the fit and lock-up of the swapped blades are not perfect, with the GRP handle taking either blade with no issues, but the aluminium handle lacks the totally secure lock-up. Actually even with its original blade, the Homefront would benefit from a little adjustment of the end of the lock bar to increase lock engagement. This in turn would make the Tactical blade work better in this handle.

One potential weakness in the design is that the lever that is used to release the pivot could itself be fouled and prevented from operating. If this happens you might find you can’t field strip the knife after all; a consequence of having a ‘mechanism’ for releasing the pivot, as any mechanism can be fouled and jam.

With the popularity of the super slick flipper, the Homefront knives have a much more laid back action. With the (presumably) Teflon washers, the action is smooth but not super slick. The Homefront Tactical won’t lock without a flick of the wrist, and the Homefront needs a quick finger to get lock-up without a flick. Some might think this is a negative, but I like the relaxed feel, and a blade that doesn’t flop around easily when closing the blade.

Stylish, functional and so easy to maintain – I find myself taking it apart just because I can.

Review Summary

The views expressed in this summary table are from the point of view of the reviewer’s personal use. I am not a member of the armed forces and cannot comment on its use beyond a cutting tool or field/hunting knife.

Something that might be a ‘pro’ for one user can be a ‘con’ for another, so the comments are categorised based on my requirements. You should consider all points and if they could be beneficial to you.

_______________________________________________ _______________________________________________
Things I like What doesn’t work so well for me
_______________________________________________ _______________________________________________
Take apart with no tools (Field Strip). Potential for pivot release lever to be jammed with dirt.
Stylish, vintage design. Fixed pocket clip cannot be relocated.
Comfortable in the hand.
Smooth action.
Zero blade play (despite the Field Strip mechanism)


Discussing the Review:

The ideal place to discuss this reviews is on a forum. If you started reading the shorter forum version of the review, but followed the link this full exclusive review, please return to that forum to discuss the review there.
If you read the review entirely on Tactical Reviews, please consider one of the following to join in any discussion.

EdgeMatters – Sponsored Reviews (UK based Forum for Knife Makers and Collectors)

BladeForums – Knife Reviews (US based Forum for Knife Discussion)

CandlePowerForums – Knife Reviews Section (Largest and Friendliest Flashlight Community Forum)
Light Review: Olight Valkyrie PL-1 II Pistol Light

The PL-1 II is Olight’s refined and upgraded version of the original PL-1 weapon light. After a year of development Olight have dramatically increased the strength of the mounting mechanism which they claim will NEVER become loose or fall off of any firearm that has a rail.

Taking a more detailed look:

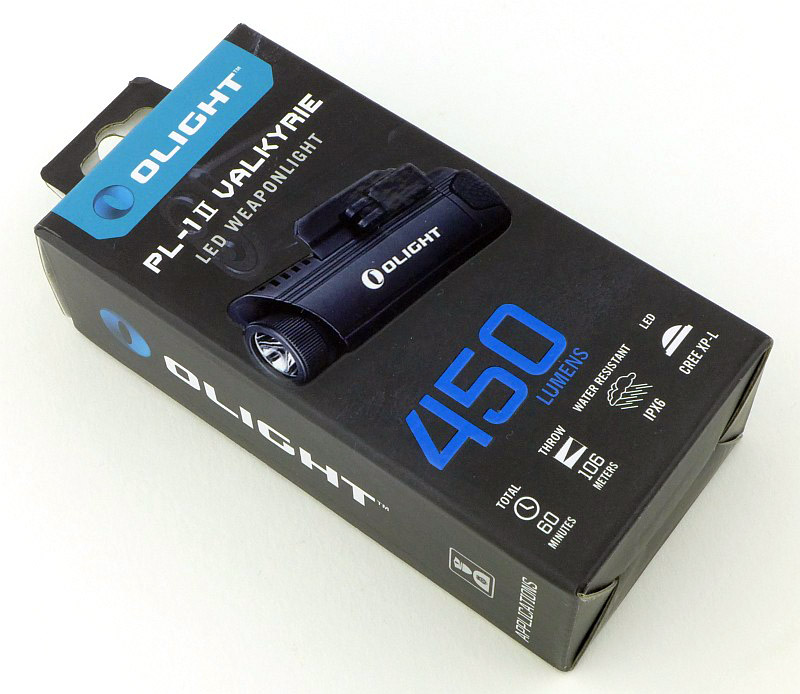
The PL-1 II Arrives in a cardboard box.

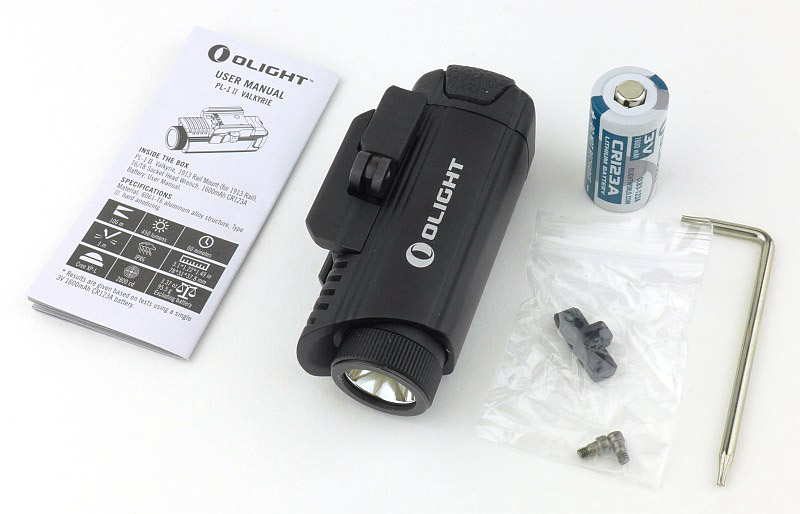
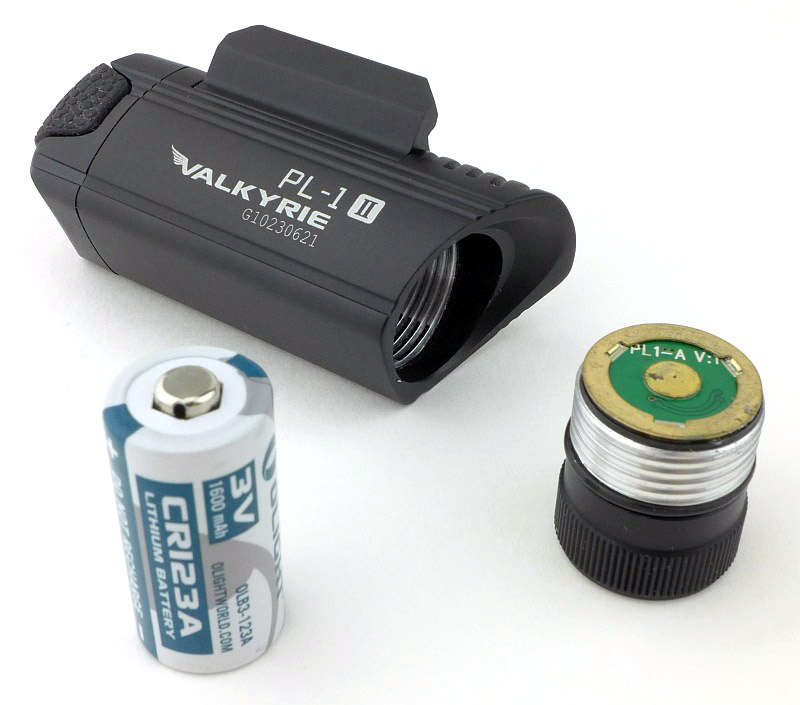
Inside the box is the PL-1 II, the instructions, a CR123 cell, a Torx wrench, and a 1913 rail key. The PL-1 II arrives with a Glock rail key already fitted.

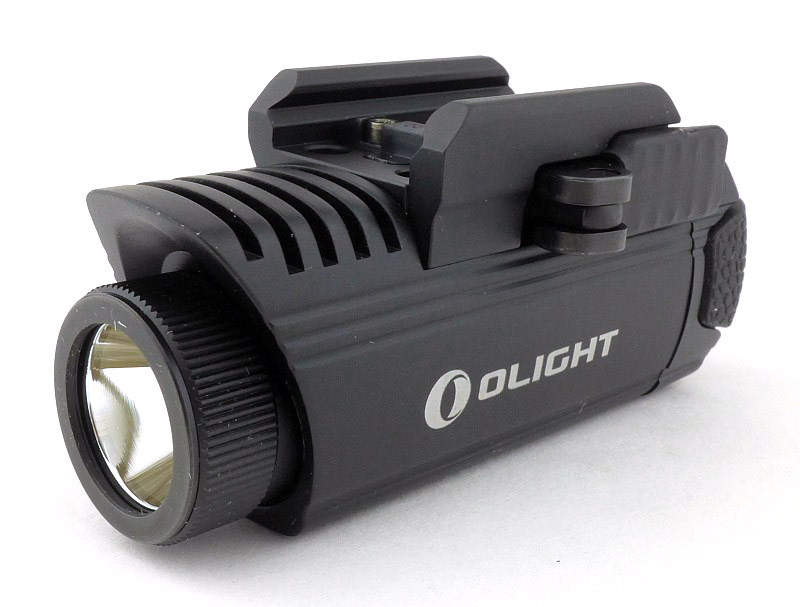
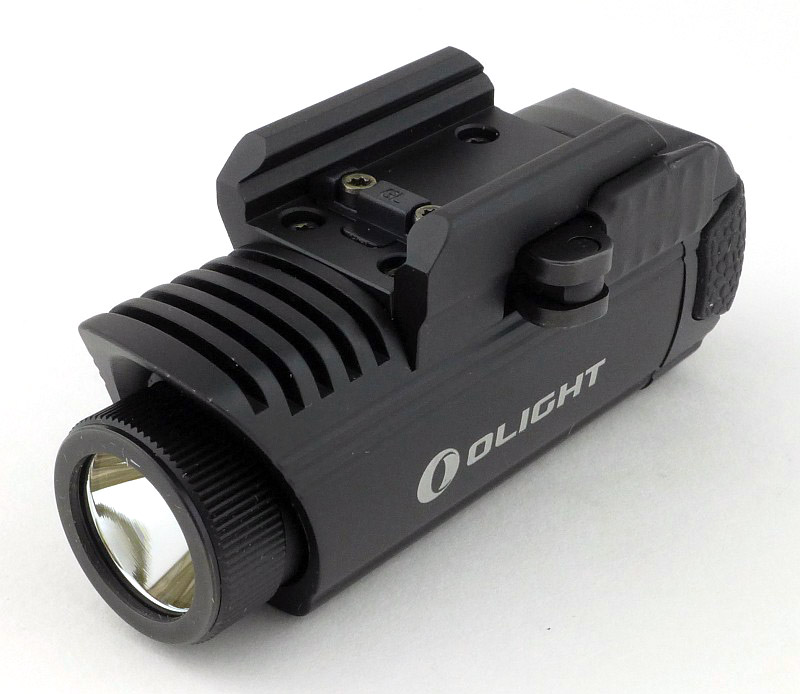
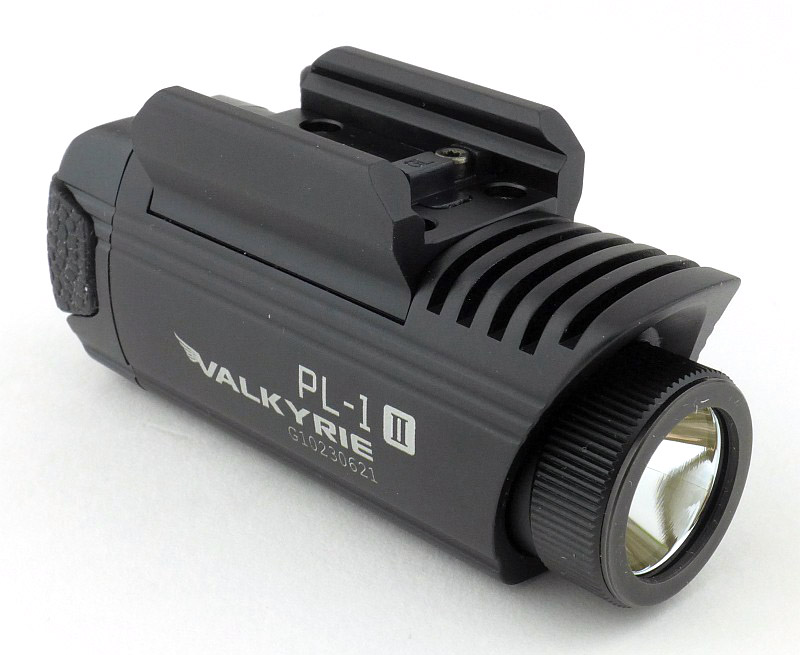
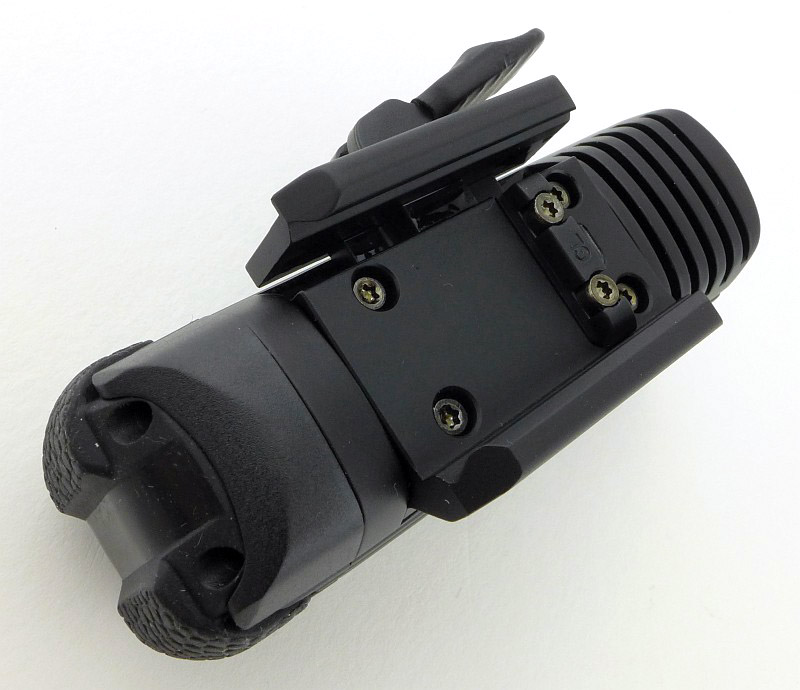
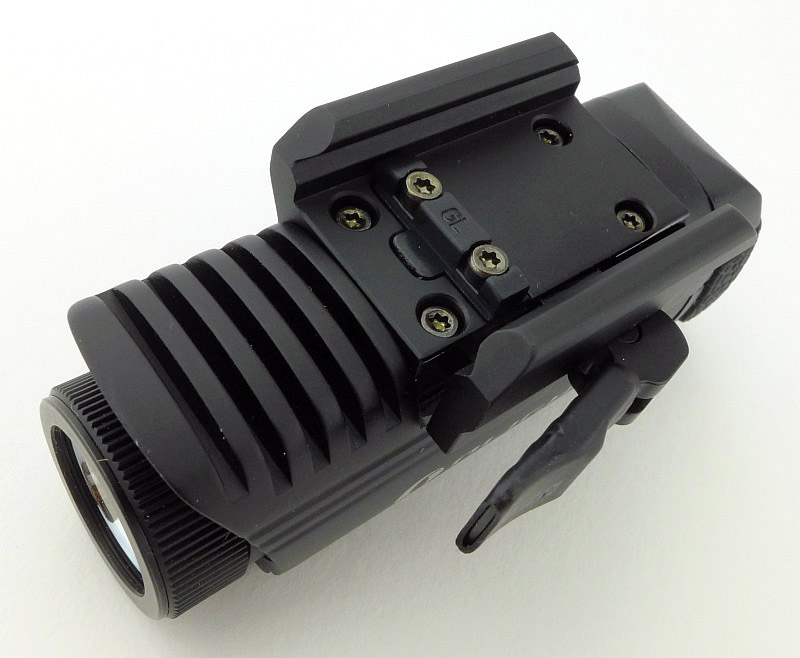
Being a pistol/gun light, the PL-1 II is a (mostly) snag free shape with a rail mount on the top. This side has the rail lock lever.

On the other side the rail clamp jaw is fixed.

Rotating the lever 180 degrees to the front opens the rail clamp.

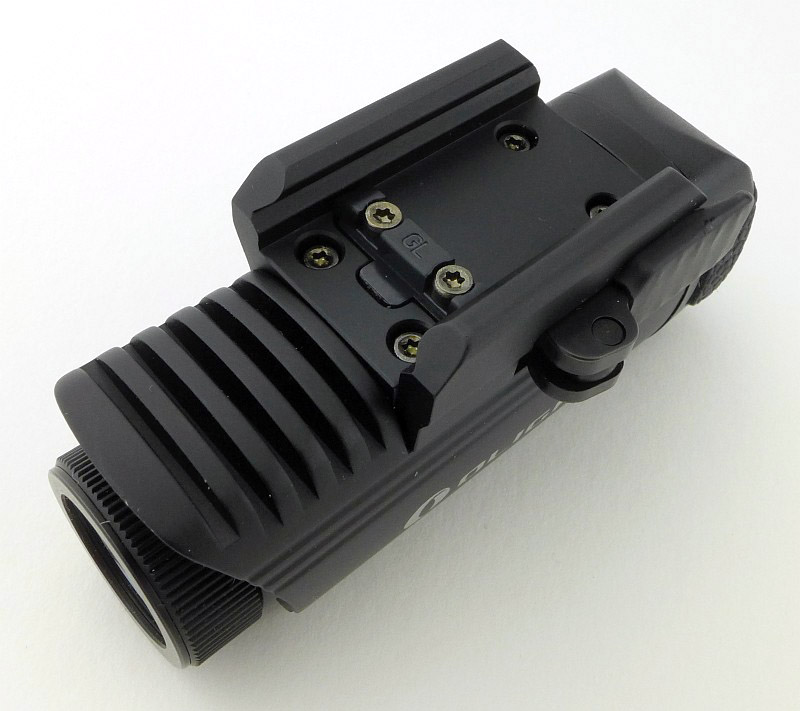
Already fitted is the GL (Glock) universal rail key. You can use this on just about any rail, but if you want the 1913 rail key for a more secure fit, this is supplied and is easily swapped out.

Rotate the locking lever 180 degrees to the rear to lock the clamp jaws in place.

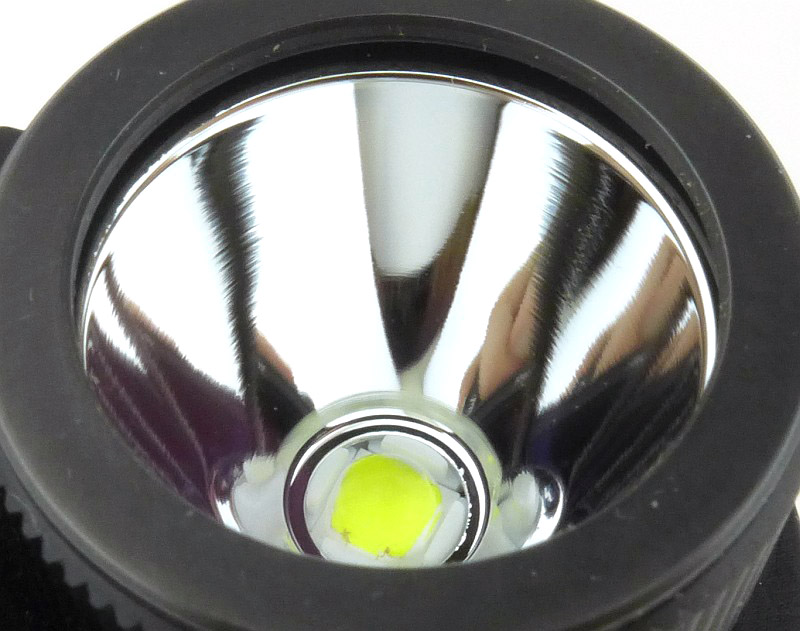
Limited by the size of the light, the reflector needs to focus the beam sufficiently for the ranges you are likely to need.

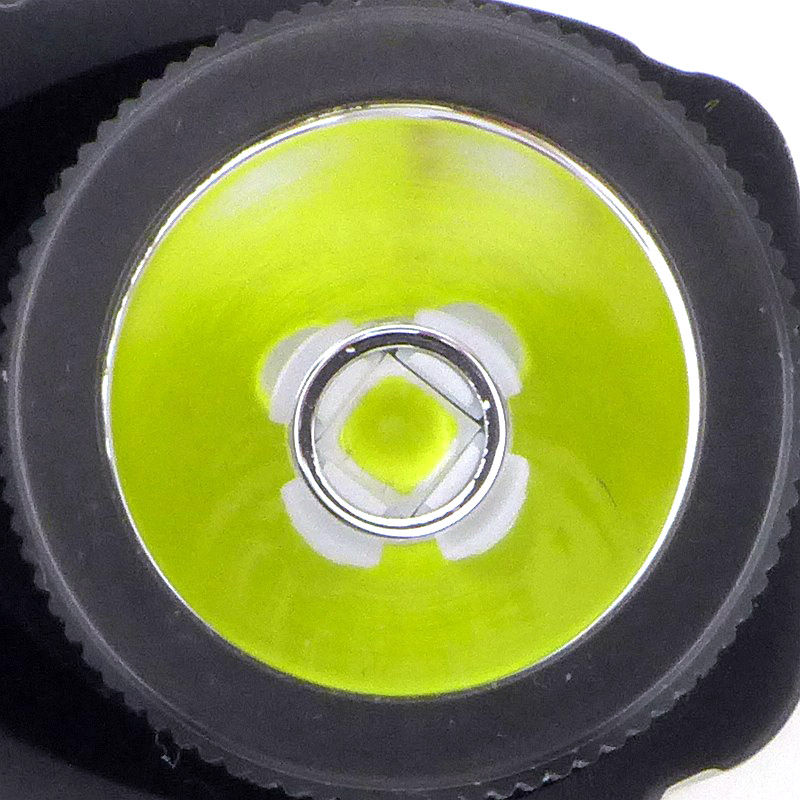
A Cree XP-L LED is used.

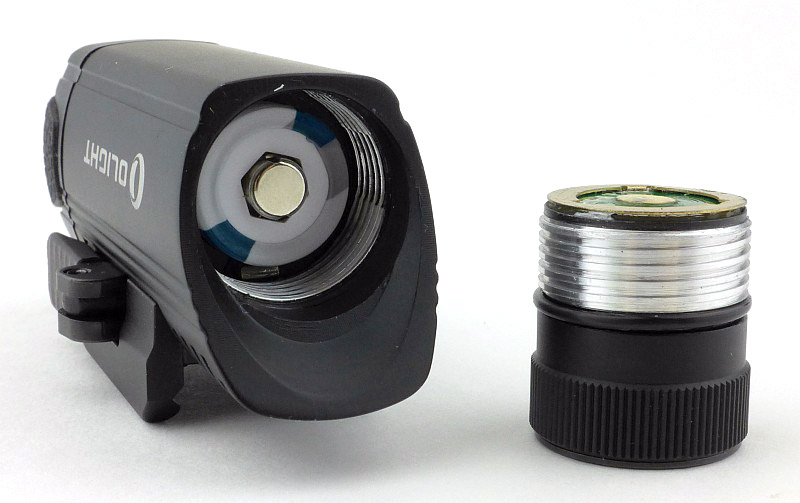
To insert the CR123 cell, unscrew the lens bezel to remove the LED / reflector assembly.

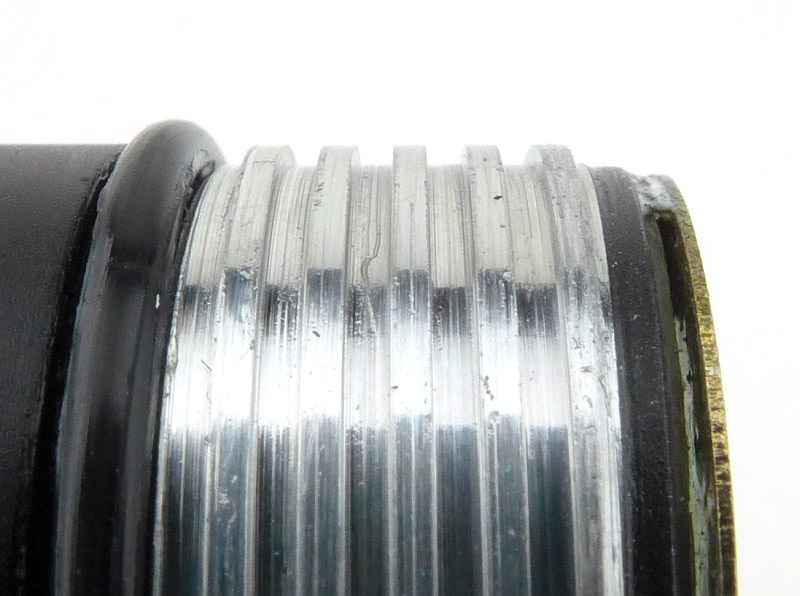
The threads are a nice square cut, bare aluminium, thread.

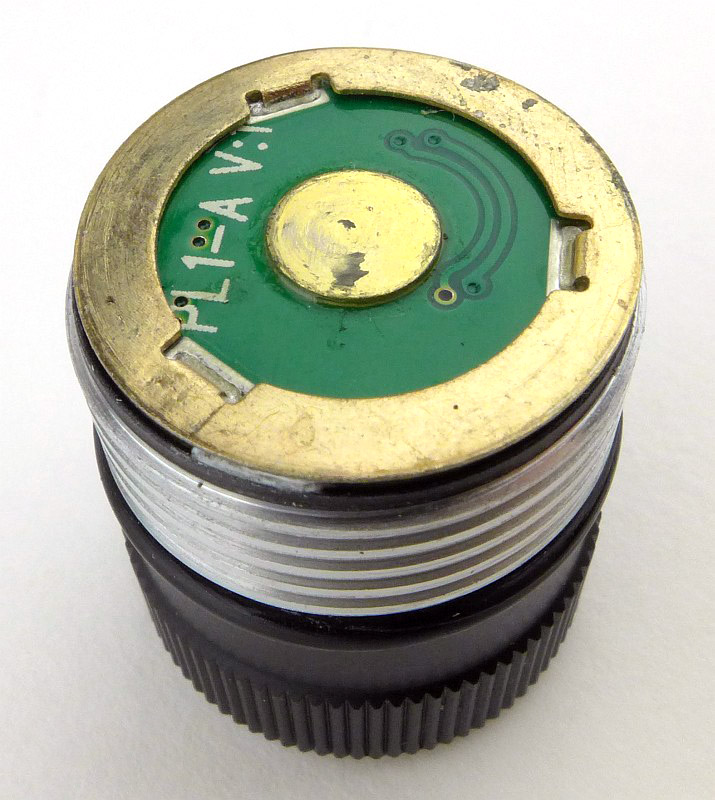
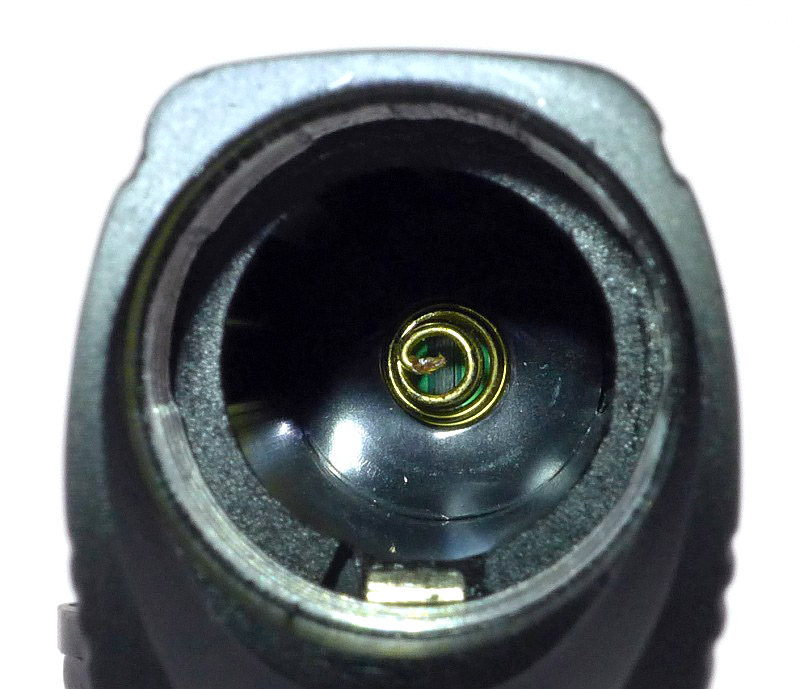
Robust solid metal contacts are used to connect to the cell positive terminal and to the body contact. These will not scratch off or wear out due to recoil forces.

Inside the light the negative contact is a spring. Also note that surrounding the spring is a rubber buffer pad.

A cell is inserted with the head ready to screw back in.

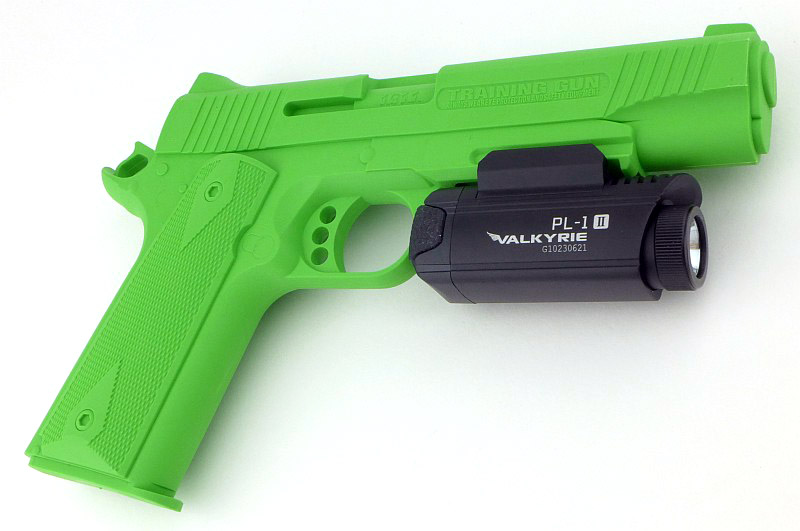
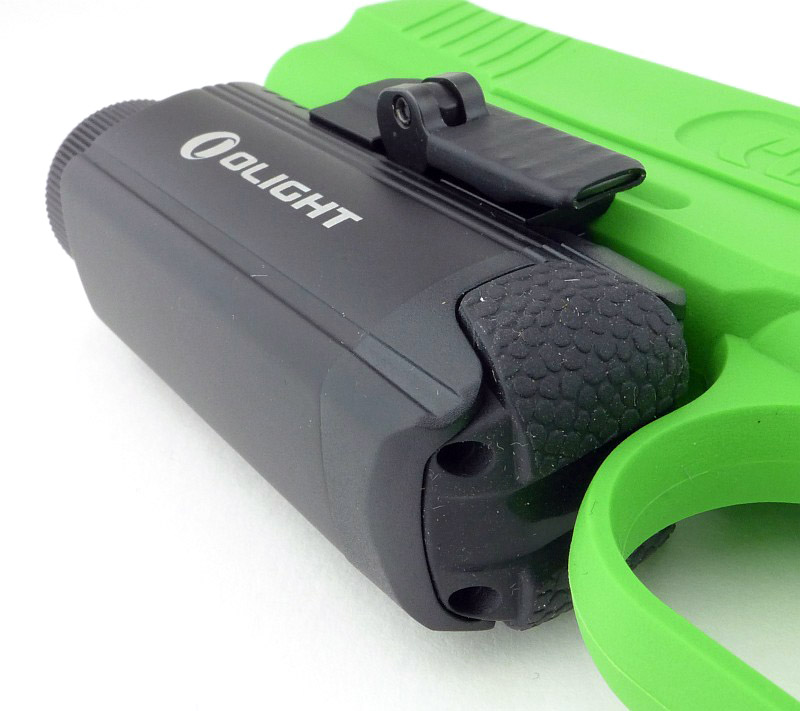
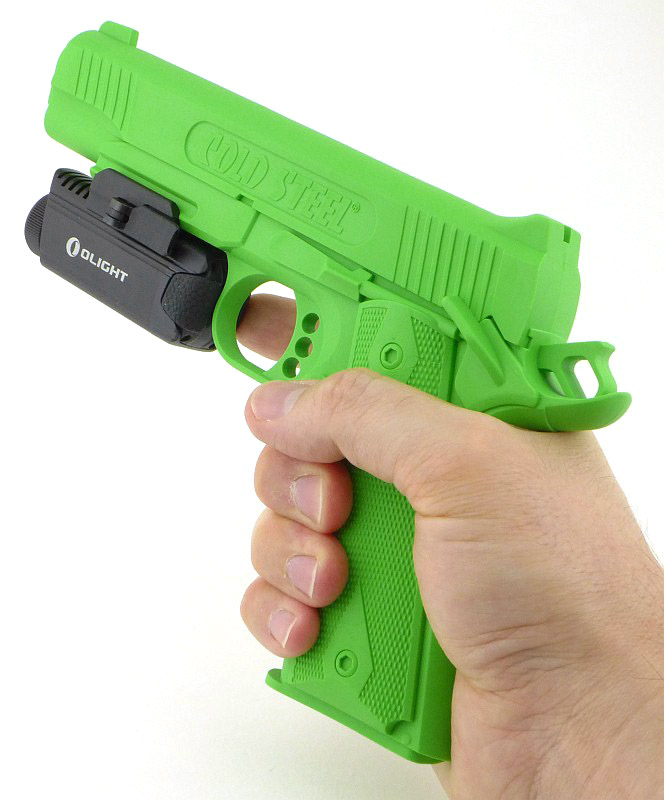
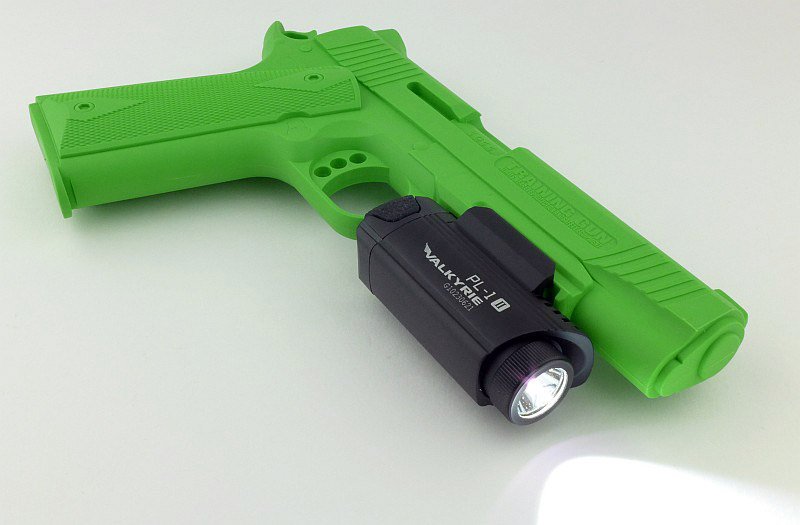
Here the PL-1 II is mounted on a 1911 training gun (to most obviously show the PL-1 II).

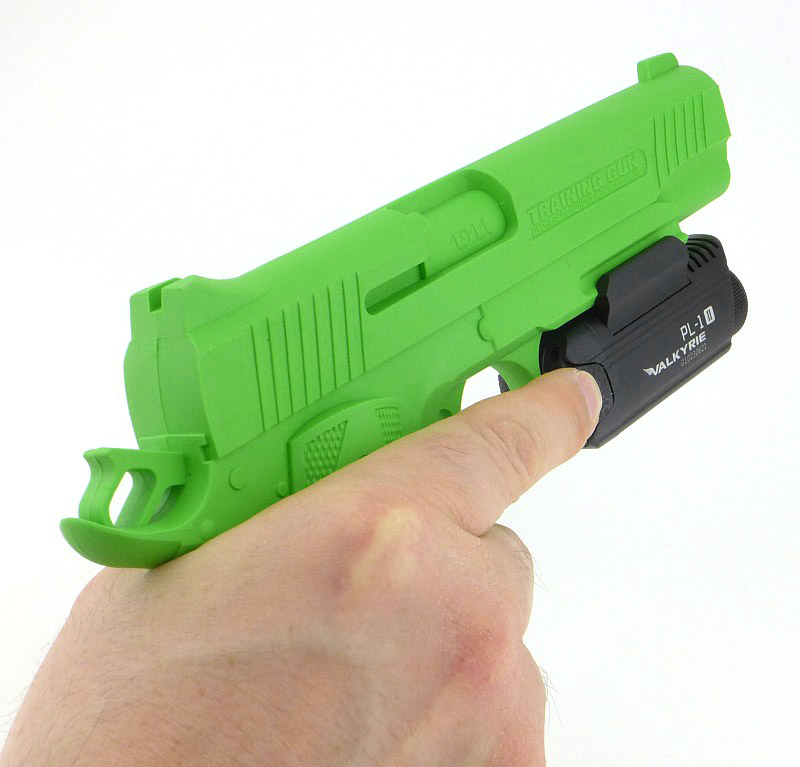
The switches are positioned just in front of the trigger guard, one on each side.

The beam

Please be careful not to judge tint based on images you see on a computer screen. Unless properly calibrated, the screen itself will change the perceived tint.

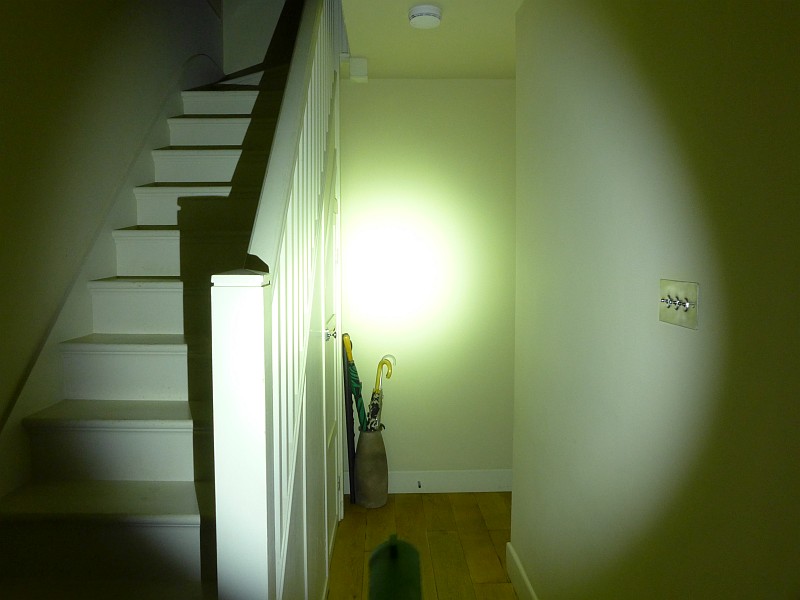
The indoor beamshot is intended to give an idea of the beam shape/quality rather than tint. All beamshots are taken using daylight white balance. The woodwork (stairs and skirting) are painted Farrow & Ball “Off-White”, and the walls are a light sandy colour called ‘String’ again by Farrow & Ball. I don’t actually have a ‘white wall’ in the house to use for this, and the wife won’t have one!

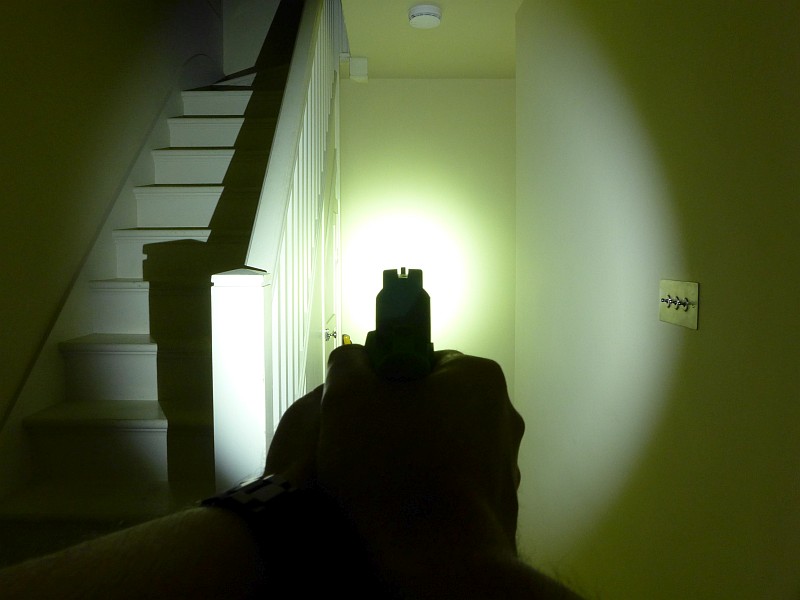
There will be more beamshots in the ‘In Use’ section, but here we can see a nice wide and bright hotspot with good width spill.

Modes and User Interface:

Control of the PL-1 II is intentionally very simple. There are three ‘modes’, Constant ON, Momentary ON and Strobe. There are two switches, one on each side.

To turn the PL-1 II ON, briefly press either side switch. To turn OFF, briefly press either side switch.

To turn the PL-1 II ON Momentarily, press and hold either side switch. While you hold the switch the light will remain ON, and will switch off again when you release the switch (as long as the press is at least approx. 0.2s or longer).

For Strobe, press both side switches at the same time. To switch OFF briefly press either side switch.

Batteries and output:

The PL-1 II runs on one CR123.

To measure actual output, I built an integrating sphere. See here for more detail. The sensor registers visible light only (so Infra-Red and Ultra-Violet will not be measured).

Please note, all quoted lumen figures are from a DIY integrating sphere, and according to ANSI standards. Although every effort is made to give as accurate a result as possible, they should be taken as an estimate only. The results can be used to compare outputs in this review and others I have published.

___________________________________________ ________________________________ ________________________________
PL-1 II using specified cell I.S. measured ANSI output Lumens PWM frequency or Strobe frequency (Hz)
___________________________________________ ________________________________ ________________________________
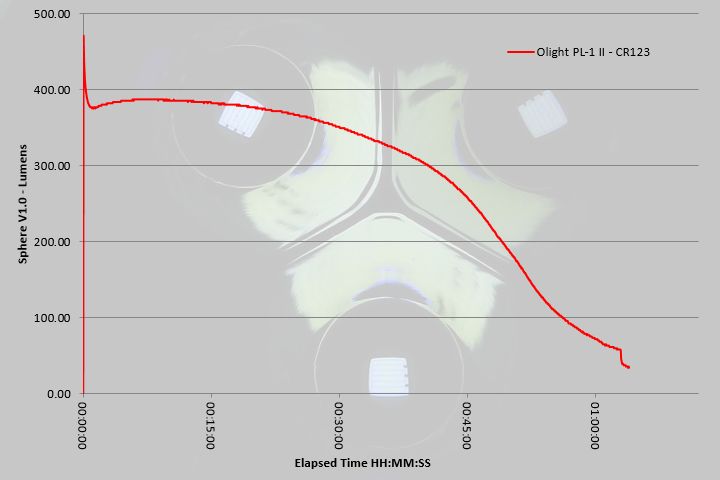
High – CR123 387 0

* Beacon and Strobe output measurements are only estimates as the brief flashes make it difficult to capture the actual output value.

There is parasitic drain but is incredibly low. When using CR123, the drain was 0.2uA (798 years to drain the cells) making it negligible as the cell will degrade long before it is run down.

You get a solid 30 minutes of good runtime, and a further 15 minutes where the output is still strong, before the output starts to really decline. Considering you won’t be using this light as a general light (as you only want to point this at potential targets) and won’t have it on all the time, this balance of output and runtime is a good match for how it will be used.

Troubleshooting

This section is included to mention any minor niggles I come across during testing, in case the information helps anyone else.

No issues were encountered during testing.

As per the description of this section, this information is provided in case anyone else finds a similar ‘issue’ that might be fixed in the same way.

The PL-1 II in use

Crucial for any truly ‘tactical’ light (and a pistol light really is the definition of a tactical light) is that it is easy to use. In stressful situations you won’t be ‘thinking’ about how to use something, it must be instinctive.

Here the PL-1 II excels as the user interface is so simple you will be using it right out of the box. The only thing I found out from the instructions was how to activate the strobe. Regular readers will know I don’t have much time for strobe, so I wasn’t looking for it anyway.

It is important to stress that during testing, no part of the PL-1 II shook loose, but I must point out that compared to other similar products, the toolless mount, and screw-in head used in this light have the potential to work loose or be caught on something (in fact my laptop bears the scar of the PL-1 II coming off the gun due to the locking lever catching). This is a very small likelihood, but as other gun lights require tools to tighten the mounts, and won’t open the battery compartment unless removed from the rail, you need to consider both sides of the argument for quick release. Of course, with a toolless mount, you can easily take the PL-1 II on and off the gun (if your holster won’t accommodate a gun light) and you can change the battery while it is still mounted (though I would not recommend it, considering the easy of dismounting this).

The PL-1 II sits very naturally under the frame in front of the trigger guard.

If your hands are big enough, you can activate the switch with your trigger finger, so not requiring a two handed grip to switch the light on. (Clearly not how you would use it in momentary output).

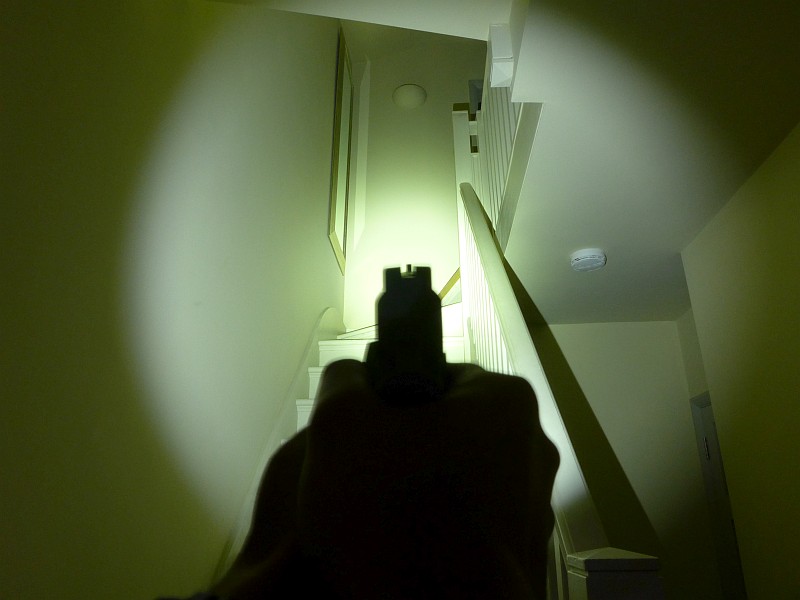
Now, moving onto the sight picture you get with the PL-1 II. Nicely aligned, the sights fall centrally to the hotspot, making pointing extremely natural.

Maintaining your sight alignment and tracking for targets is easy, and at shorter ranges you can use the hotspot as a broad ‘laser sight’ so even if not fully behind your sights the hotspot provides a good guide to the shot placement. These images really speak for themselves.

There is no significant change in balance in the gun as the PL-1 II is light enough at 95g not to weigh down the muzzle.

Overall the PL-1 II gives you and affordable, simple and apparently robust option for a rail mounted pistol/gun light.

Review Summary

_______________________________________________ _______________________________________________
Things I like What doesn’t work so well for me
_______________________________________________ _______________________________________________
Simple to use. The mount’s locking lever could catching on something releasing the rail clamp.
Robust build.
Good beam profile.
Fully ambidextrous.
Inexpensive compared to other options.
Easily mounted and removed.
Runs on a CR123.


Discussing the Review:

The ideal place to discuss this reviews is on a forum. If you started reading the shorter forum version of the review, but followed the link this full exclusive review, please return to that forum to discuss the review there.
If you read the review entirely on Tactical Reviews, please consider one of the following to join in any discussion.

CandlePowerForums – Flashlight Reviews Section (Largest and Friendliest Flashlight Community Forum)
EdgeMatters – Sponsored Reviews (UK based Forum for Knife Makers and Collectors)