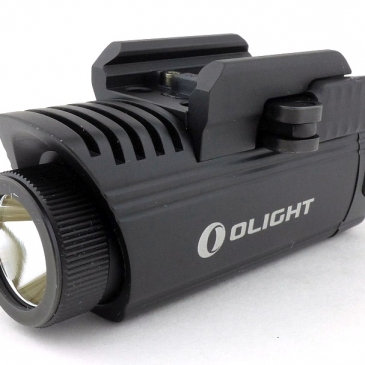
The PL-1 II is Olight’s refined and upgraded version of the original PL-1 weapon light. After a year of development Olight have dramatically increased the strength of the mounting mechanism which they claim will NEVER become loose or fall off of any firearm that has a rail.
Taking a more detailed look:
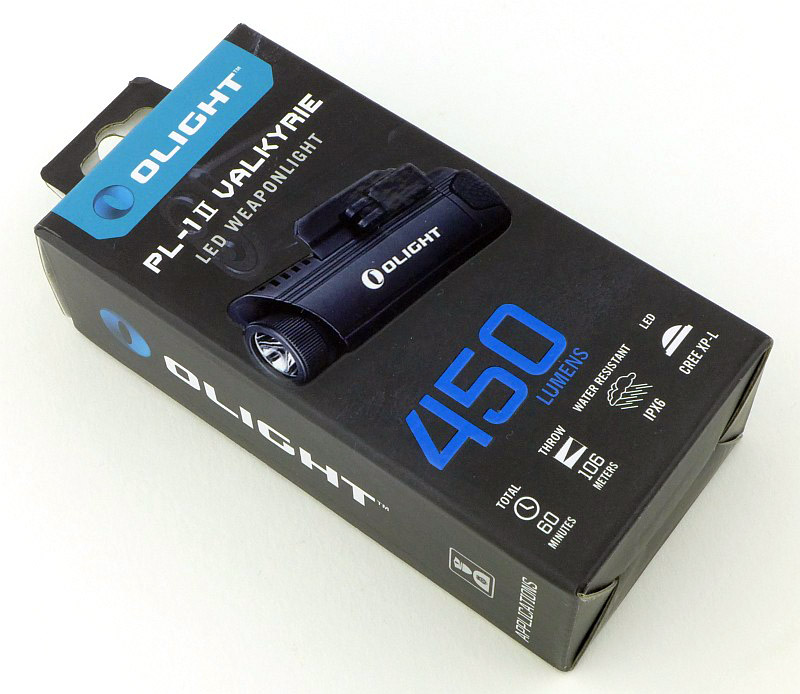
The PL-1 II Arrives in a cardboard box.
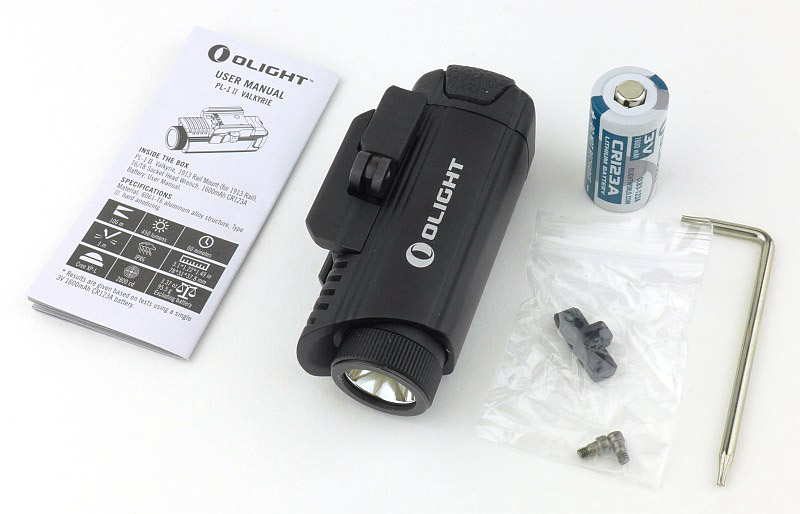
Inside the box is the PL-1 II, the instructions, a CR123 cell, a Torx wrench, and a 1913 rail key. The PL-1 II arrives with a Glock rail key already fitted.
Being a pistol/gun light, the PL-1 II is a (mostly) snag free shape with a rail mount on the top. This side has the rail lock lever.
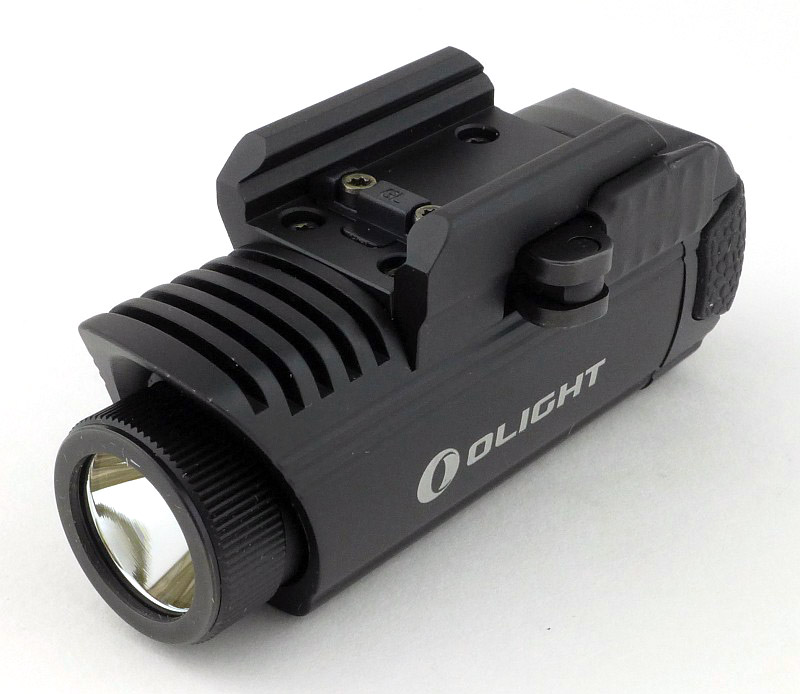
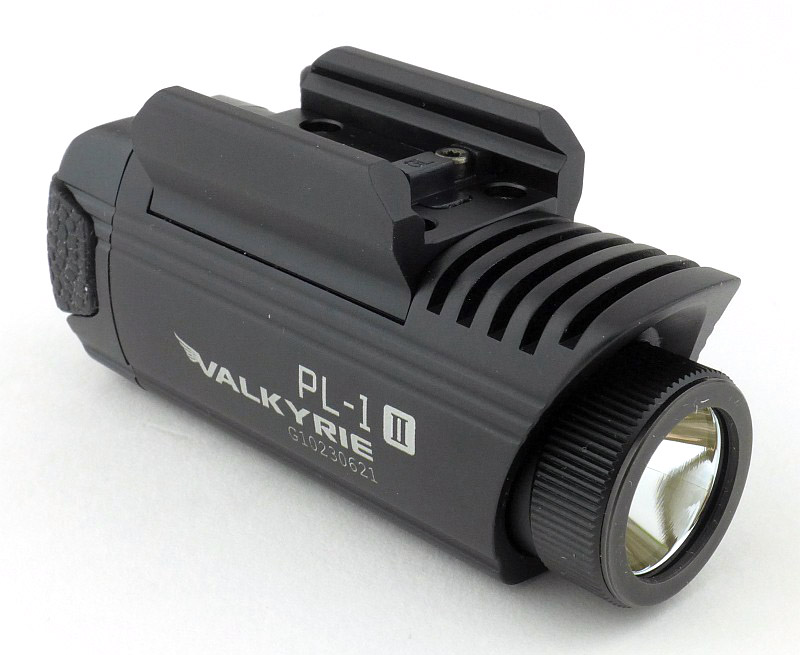
On the other side the rail clamp jaw is fixed.
Rotating the lever 180 degrees to the front opens the rail clamp.
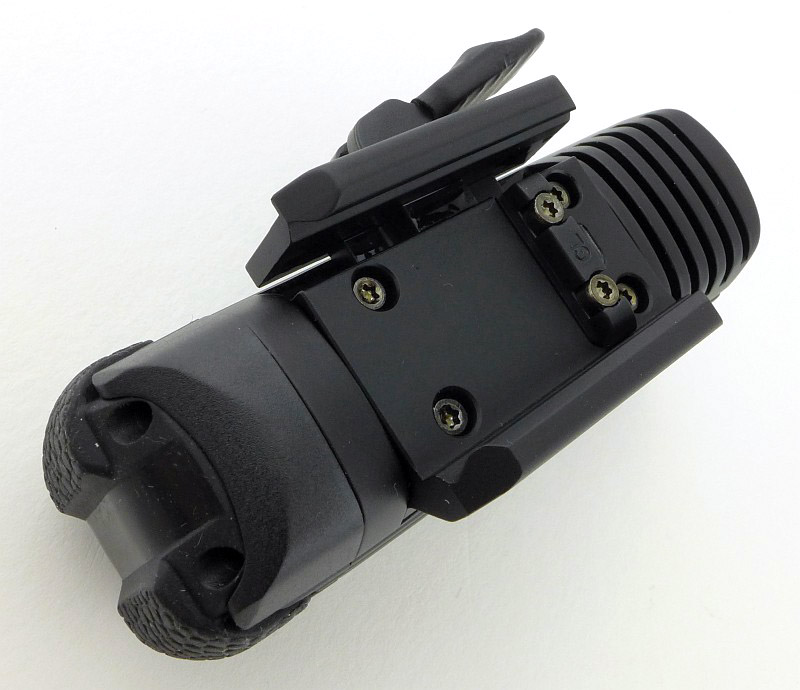
Already fitted is the GL (Glock) universal rail key. You can use this on just about any rail, but if you want the 1913 rail key for a more secure fit, this is supplied and is easily swapped out.
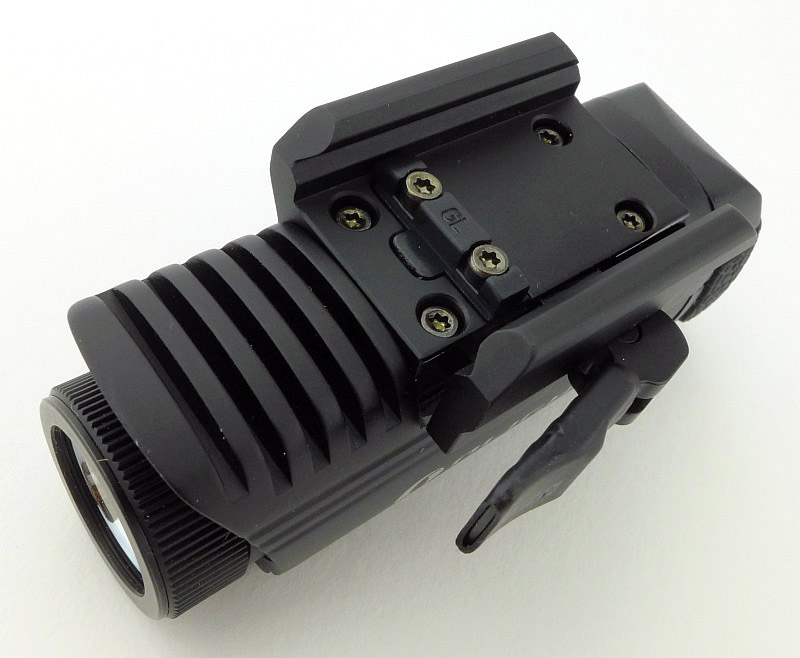
Rotate the locking lever 180 degrees to the rear to lock the clamp jaws in place.
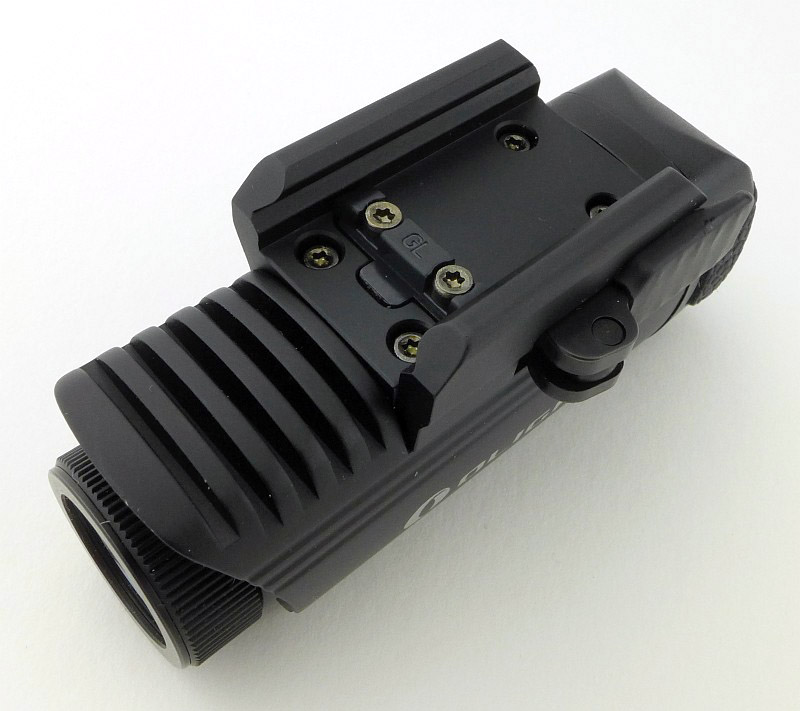
Limited by the size of the light, the reflector needs to focus the beam sufficiently for the ranges you are likely to need.
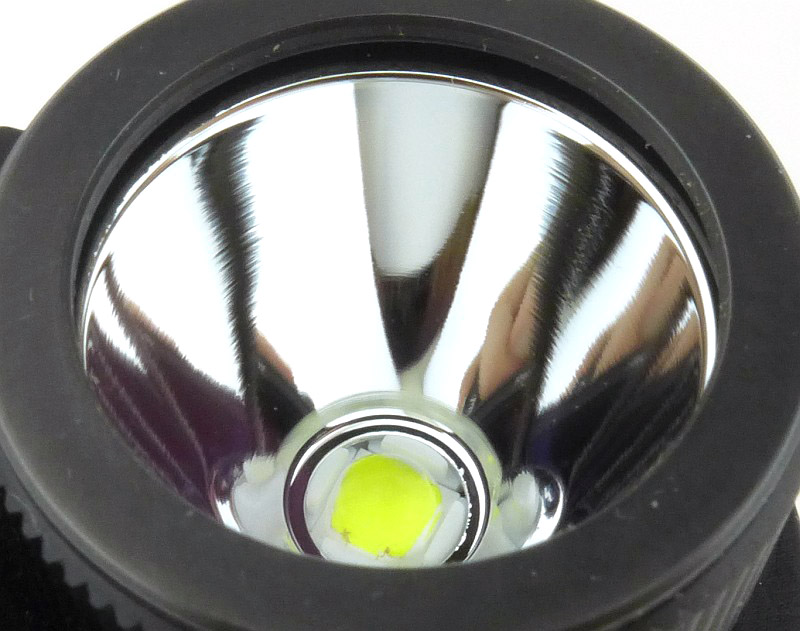
A Cree XP-L LED is used.
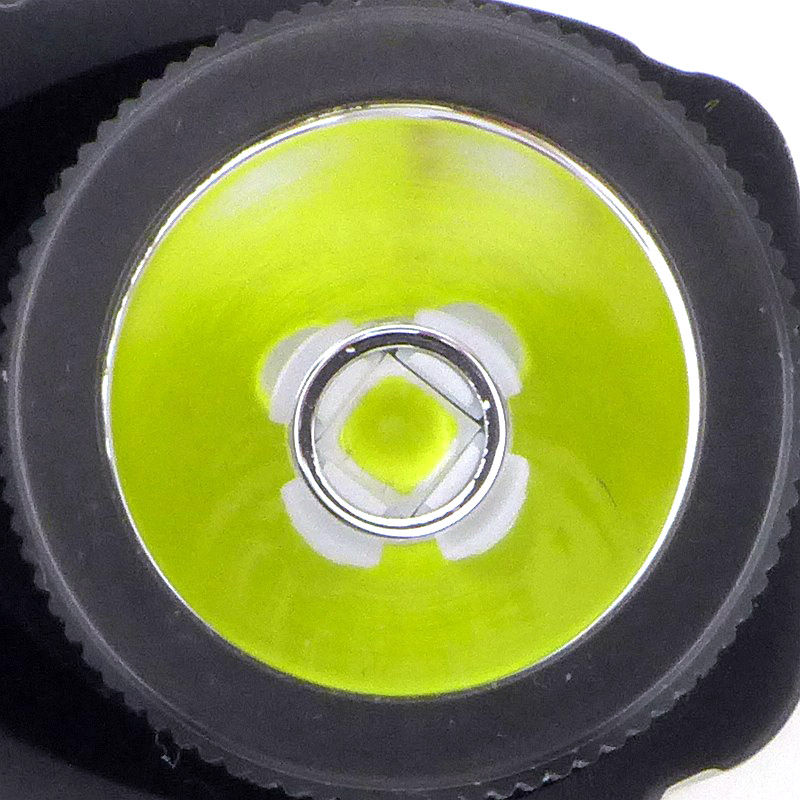
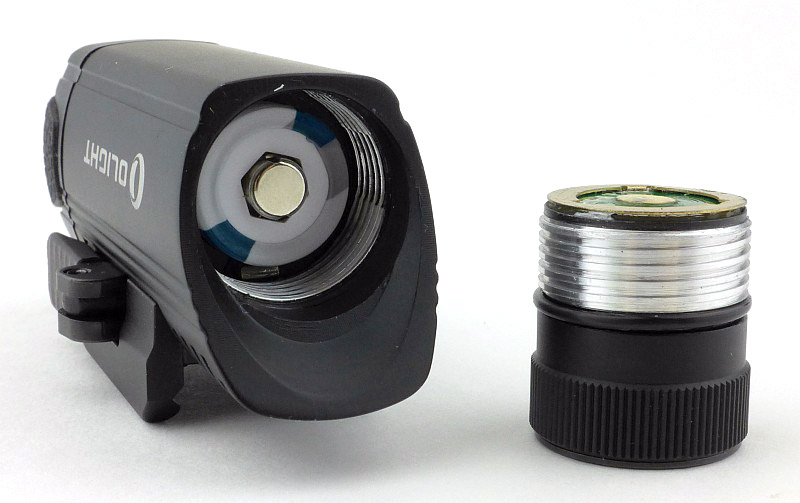
To insert the CR123 cell, unscrew the lens bezel to remove the LED / reflector assembly.
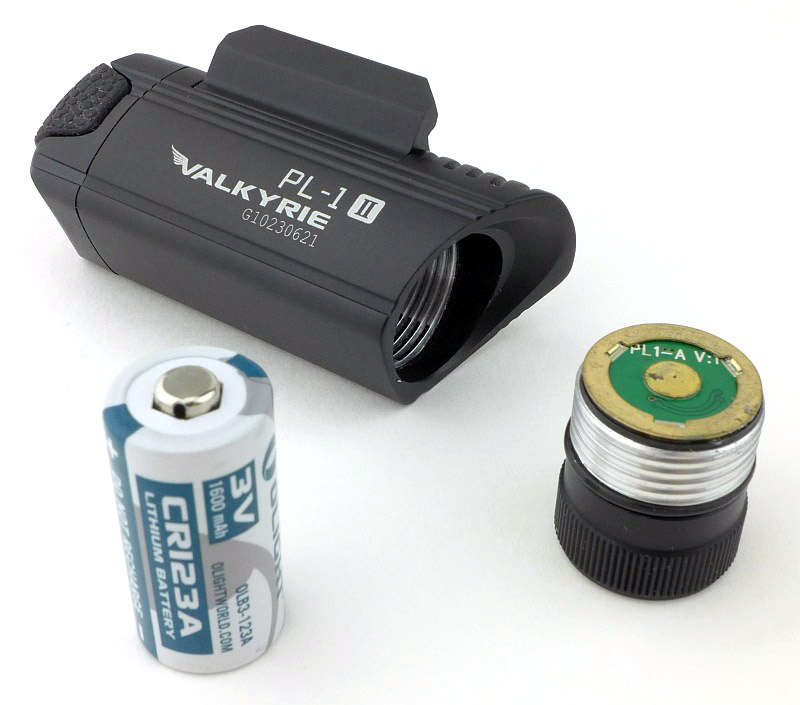
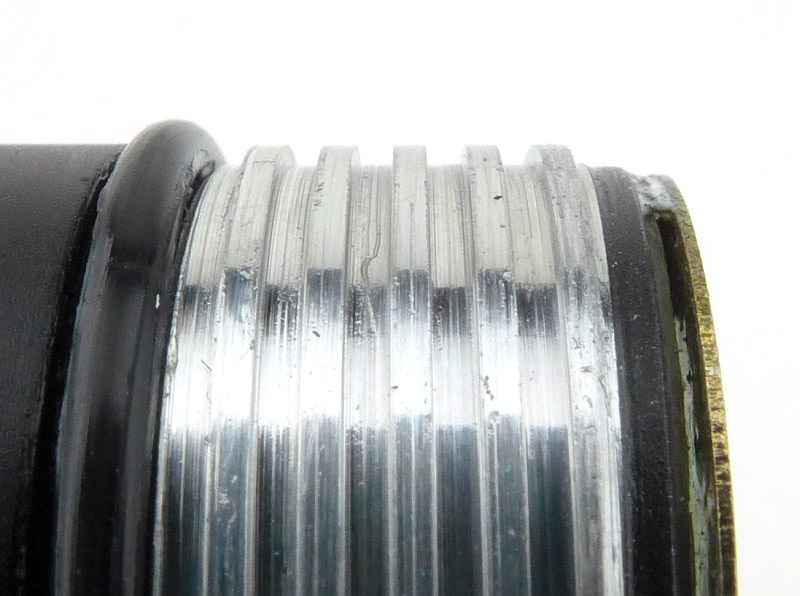
The threads are a nice square cut, bare aluminium, thread.
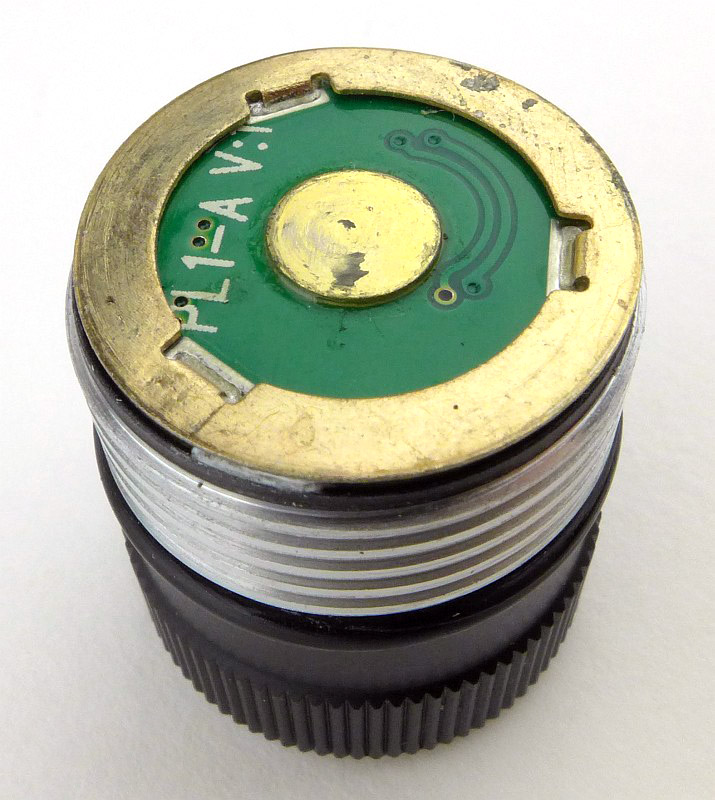
Robust solid metal contacts are used to connect to the cell positive terminal and to the body contact. These will not scratch off or wear out due to recoil forces.
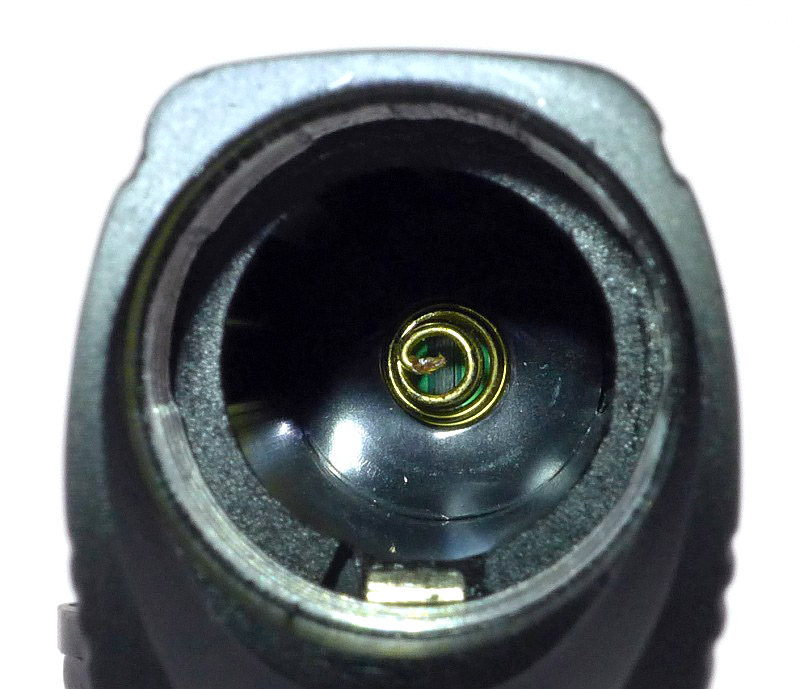
Inside the light the negative contact is a spring. Also note that surrounding the spring is a rubber buffer pad.
A cell is inserted with the head ready to screw back in.
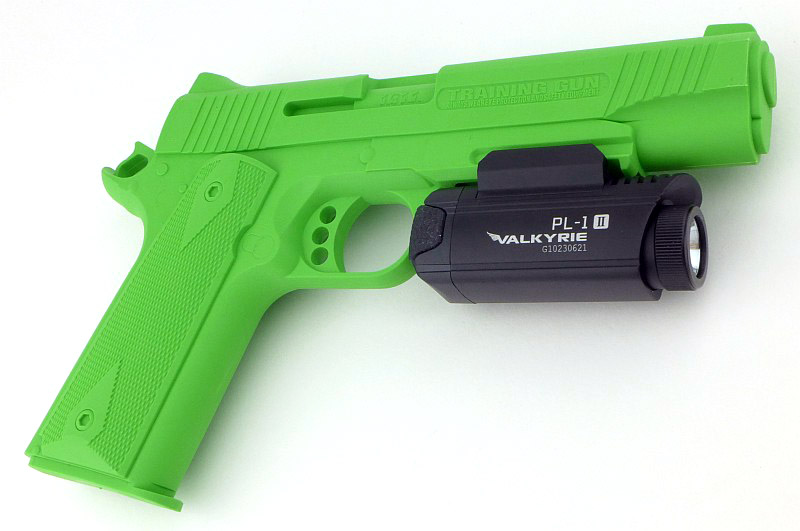
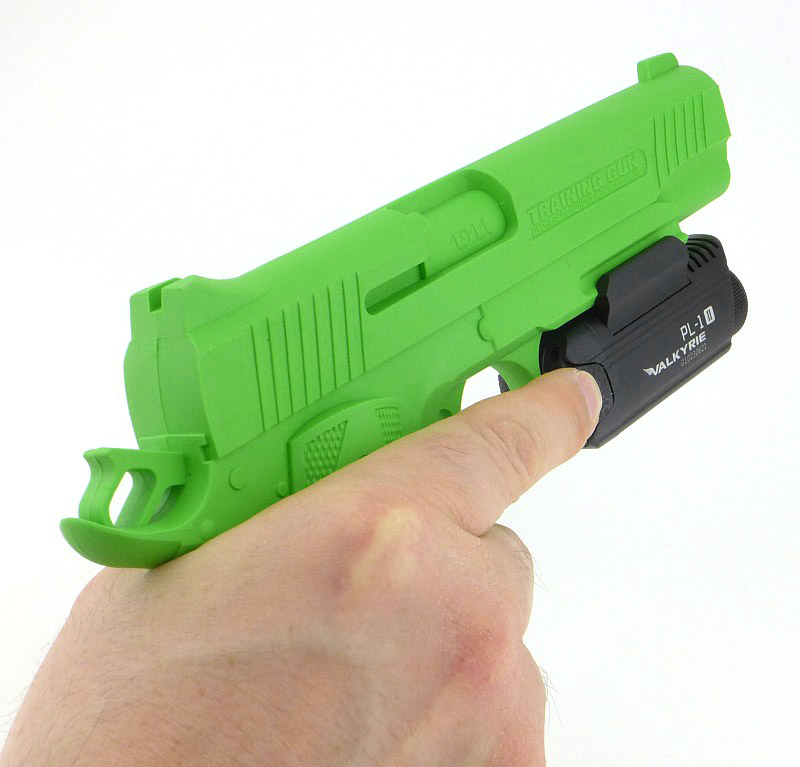
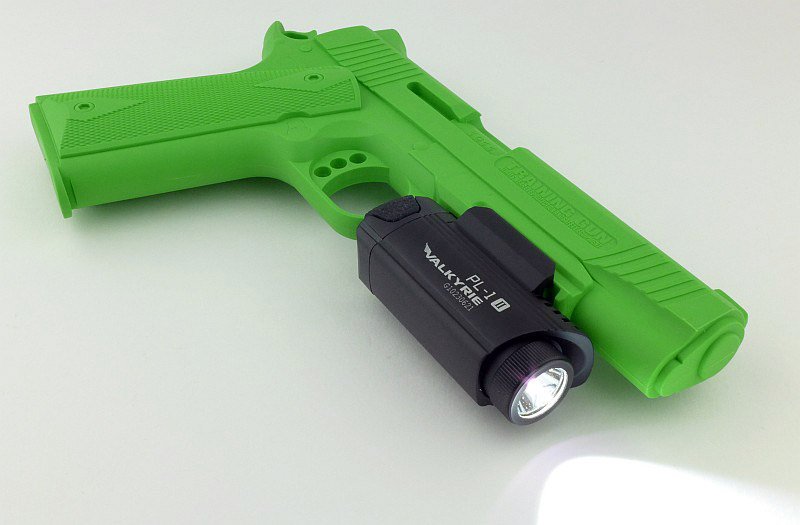
Here the PL-1 II is mounted on a 1911 training gun (to most obviously show the PL-1 II).

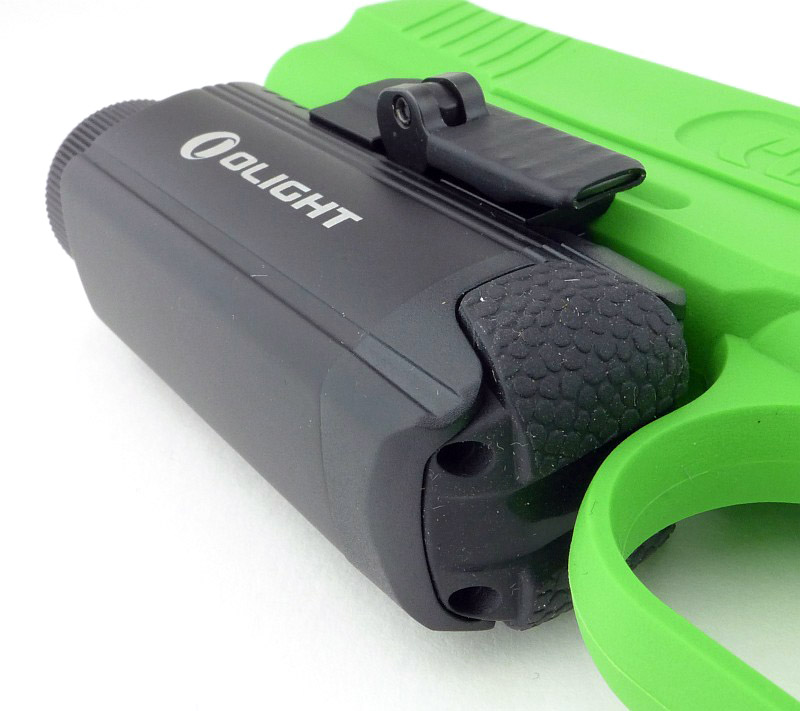
The switches are positioned just in front of the trigger guard, one on each side.
The beam
Please be careful not to judge tint based on images you see on a computer screen. Unless properly calibrated, the screen itself will change the perceived tint.
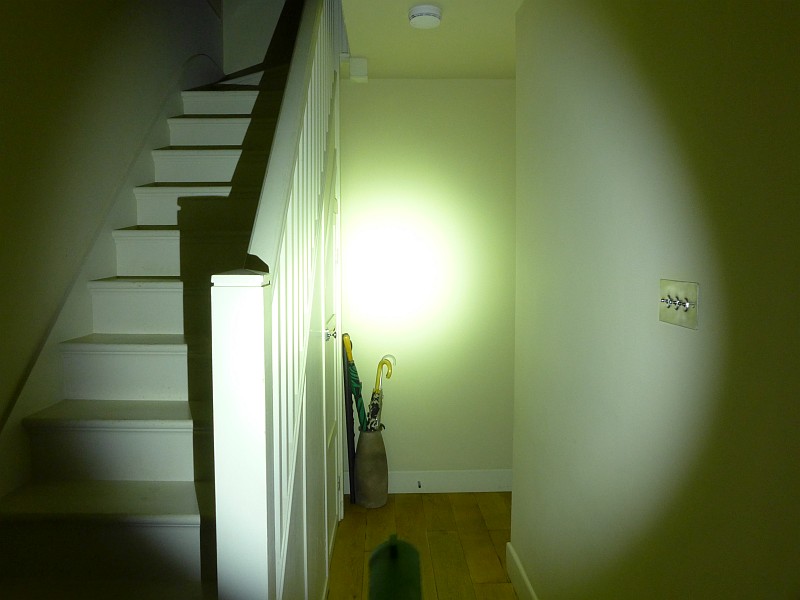
The indoor beamshot is intended to give an idea of the beam shape/quality rather than tint. All beamshots are taken using daylight white balance. The woodwork (stairs and skirting) are painted Farrow & Ball “Off-White”, and the walls are a light sandy colour called ‘String’ again by Farrow & Ball. I don’t actually have a ‘white wall’ in the house to use for this, and the wife won’t have one!
There will be more beamshots in the ‘In Use’ section, but here we can see a nice wide and bright hotspot with good width spill.
Modes and User Interface:
Control of the PL-1 II is intentionally very simple. There are three ‘modes’, Constant ON, Momentary ON and Strobe. There are two switches, one on each side.
To turn the PL-1 II ON, briefly press either side switch. To turn OFF, briefly press either side switch.
To turn the PL-1 II ON Momentarily, press and hold either side switch. While you hold the switch the light will remain ON, and will switch off again when you release the switch (as long as the press is at least approx. 0.2s or longer).
For Strobe, press both side switches at the same time. To switch OFF briefly press either side switch.
Batteries and output:
The PL-1 II runs on one CR123.
To measure actual output, I built an integrating sphere. See here for more detail. The sensor registers visible light only (so Infra-Red and Ultra-Violet will not be measured).
Please note, all quoted lumen figures are from a DIY integrating sphere, and according to ANSI standards. Although every effort is made to give as accurate a result as possible, they should be taken as an estimate only. The results can be used to compare outputs in this review and others I have published.
| ___________________________________________ | ________________________________ | ________________________________ |
| PL-1 II using specified cell | I.S. measured ANSI output Lumens | PWM frequency or Strobe frequency (Hz) |
| ___________________________________________ | ________________________________ | ________________________________ |
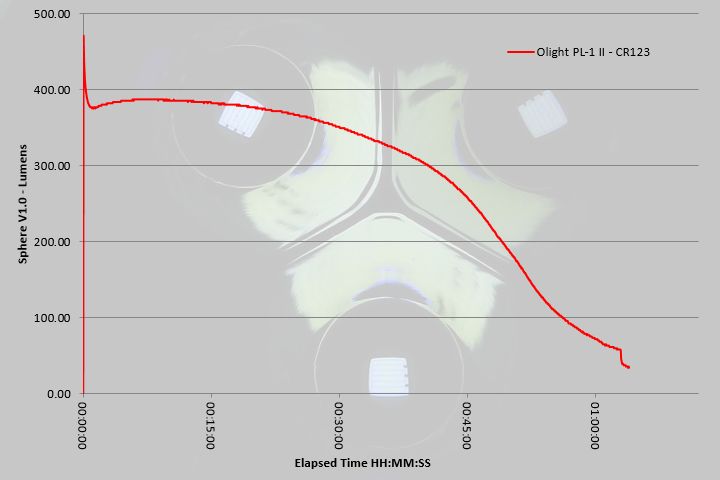
| High – CR123 | 387 | 0 |
* Beacon and Strobe output measurements are only estimates as the brief flashes make it difficult to capture the actual output value.
There is parasitic drain but is incredibly low. When using CR123, the drain was 0.2uA (798 years to drain the cells) making it negligible as the cell will degrade long before it is run down.
You get a solid 30 minutes of good runtime, and a further 15 minutes where the output is still strong, before the output starts to really decline. Considering you won’t be using this light as a general light (as you only want to point this at potential targets) and won’t have it on all the time, this balance of output and runtime is a good match for how it will be used.
Troubleshooting
This section is included to mention any minor niggles I come across during testing, in case the information helps anyone else.
No issues were encountered during testing.
As per the description of this section, this information is provided in case anyone else finds a similar ‘issue’ that might be fixed in the same way.
The PL-1 II in use
Crucial for any truly ‘tactical’ light (and a pistol light really is the definition of a tactical light) is that it is easy to use. In stressful situations you won’t be ‘thinking’ about how to use something, it must be instinctive.
Here the PL-1 II excels as the user interface is so simple you will be using it right out of the box. The only thing I found out from the instructions was how to activate the strobe. Regular readers will know I don’t have much time for strobe, so I wasn’t looking for it anyway.
It is important to stress that during testing, no part of the PL-1 II shook loose, but I must point out that compared to other similar products, the toolless mount, and screw-in head used in this light have the potential to work loose or be caught on something (in fact my laptop bears the scar of the PL-1 II coming off the gun due to the locking lever catching). This is a very small likelihood, but as other gun lights require tools to tighten the mounts, and won’t open the battery compartment unless removed from the rail, you need to consider both sides of the argument for quick release. Of course, with a toolless mount, you can easily take the PL-1 II on and off the gun (if your holster won’t accommodate a gun light) and you can change the battery while it is still mounted (though I would not recommend it, considering the easy of dismounting this).
The PL-1 II sits very naturally under the frame in front of the trigger guard.
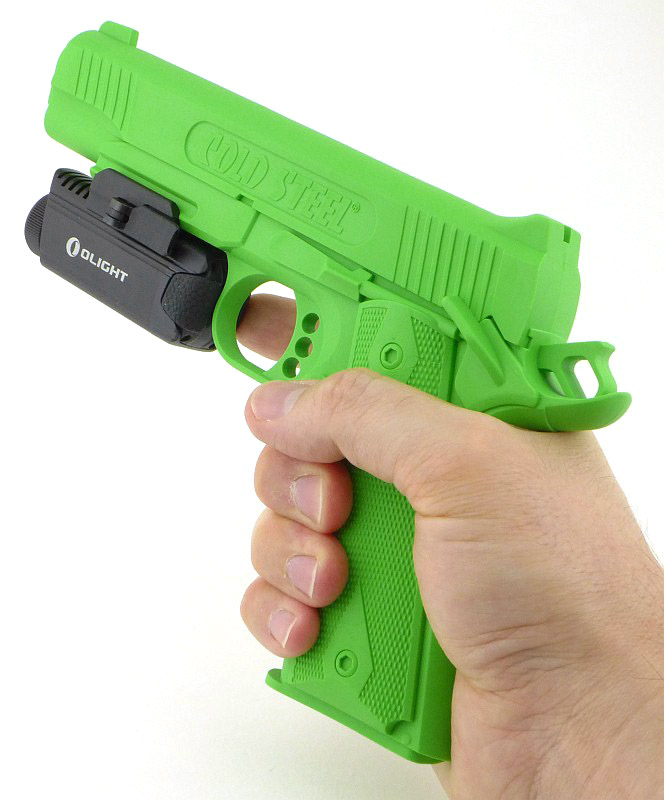
If your hands are big enough, you can activate the switch with your trigger finger, so not requiring a two handed grip to switch the light on. (Clearly not how you would use it in momentary output).
Now, moving onto the sight picture you get with the PL-1 II. Nicely aligned, the sights fall centrally to the hotspot, making pointing extremely natural.
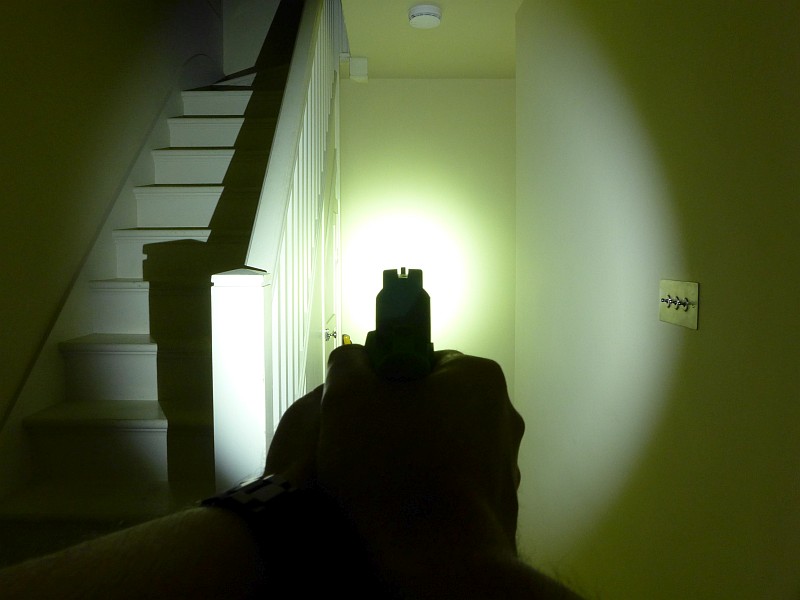
Maintaining your sight alignment and tracking for targets is easy, and at shorter ranges you can use the hotspot as a broad ‘laser sight’ so even if not fully behind your sights the hotspot provides a good guide to the shot placement. These images really speak for themselves.
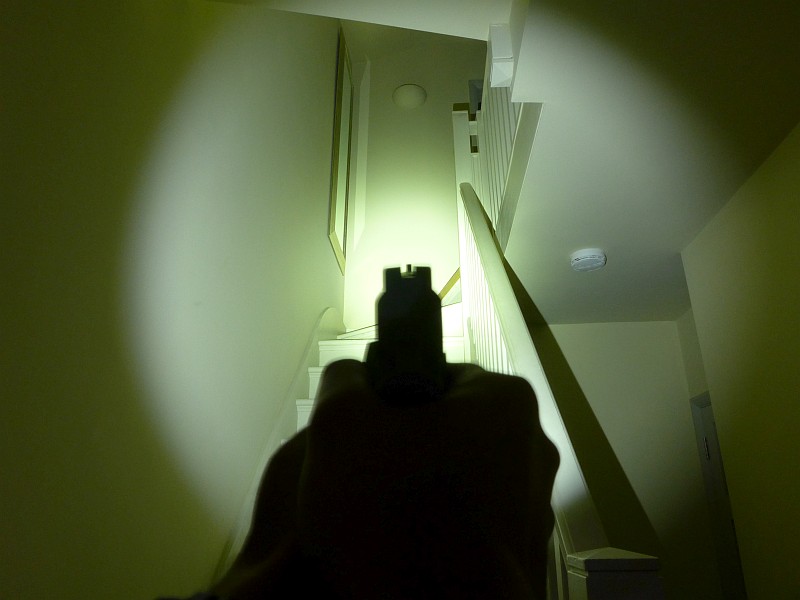
There is no significant change in balance in the gun as the PL-1 II is light enough at 95g not to weigh down the muzzle.
Overall the PL-1 II gives you and affordable, simple and apparently robust option for a rail mounted pistol/gun light.
Review Summary
| _______________________________________________ | _______________________________________________ |
| Things I like | What doesn’t work so well for me |
| _______________________________________________ | _______________________________________________ |
| Simple to use. | The mount’s locking lever could catching on something releasing the rail clamp. |
| Robust build. | |
| Good beam profile. | |
| Fully ambidextrous. | |
| Inexpensive compared to other options. | |
| Easily mounted and removed. | |
| Runs on a CR123. |
Discussing the Review:
The ideal place to discuss this reviews is on a forum. If you started reading the shorter forum version of the review, but followed the link this full exclusive review, please return to that forum to discuss the review there.
If you read the review entirely on Tactical Reviews, please consider one of the following to join in any discussion.
CandlePowerForums – Flashlight Reviews Section (Largest and Friendliest Flashlight Community Forum)
EdgeMatters – Sponsored Reviews (UK based Forum for Knife Makers and Collectors)

