In this detailed review of the Olight Javelot Turbo 2 a long-range torch / flashlight, Tactical Reviews presents a close look at this super-thrower search light. Join me in this Olight Javelot Turbo 2 Review for all the details.
Included in the review is the ‘kit’ which includes coloured filters and magnetic gun / weapon mount.
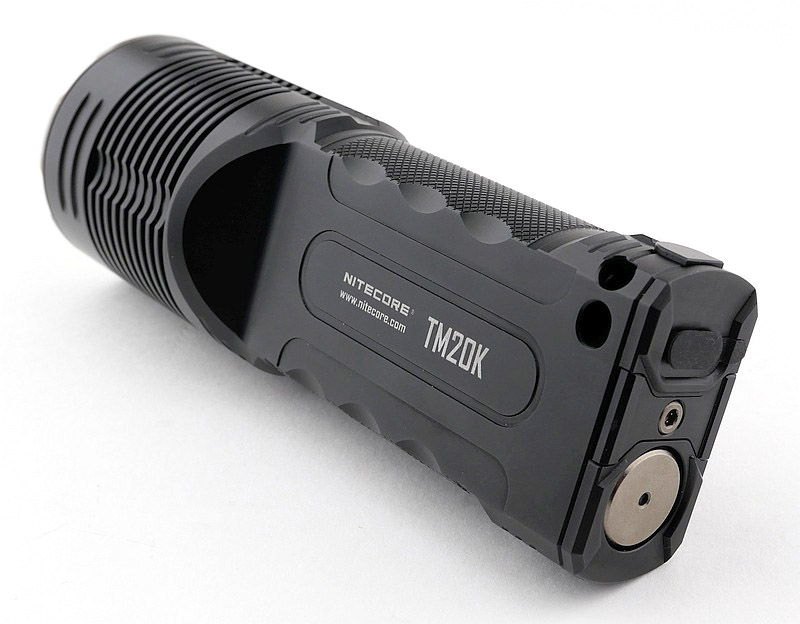
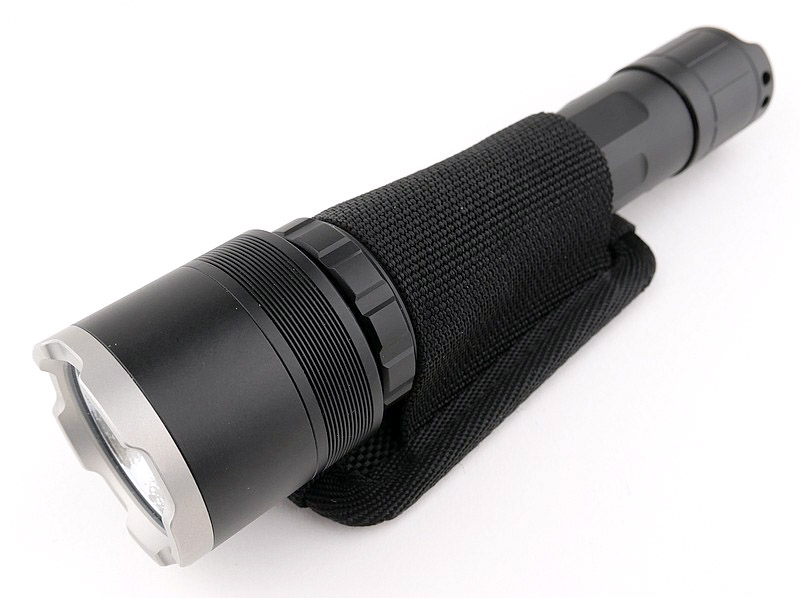
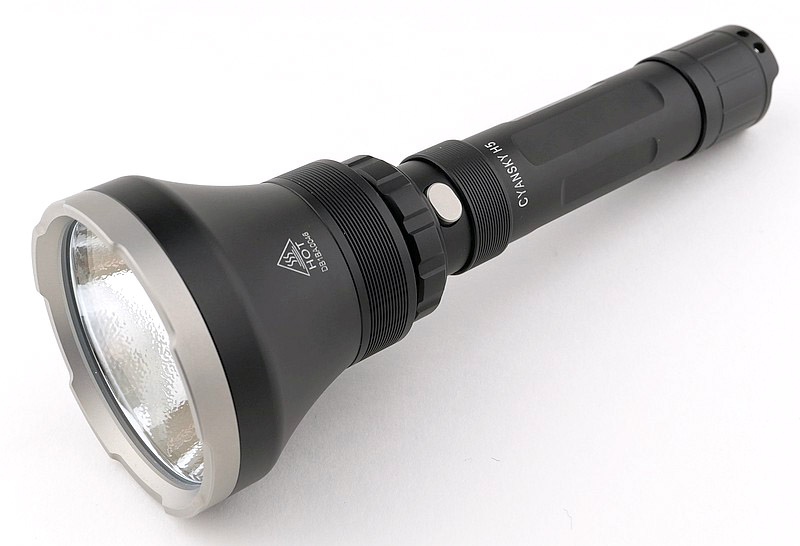
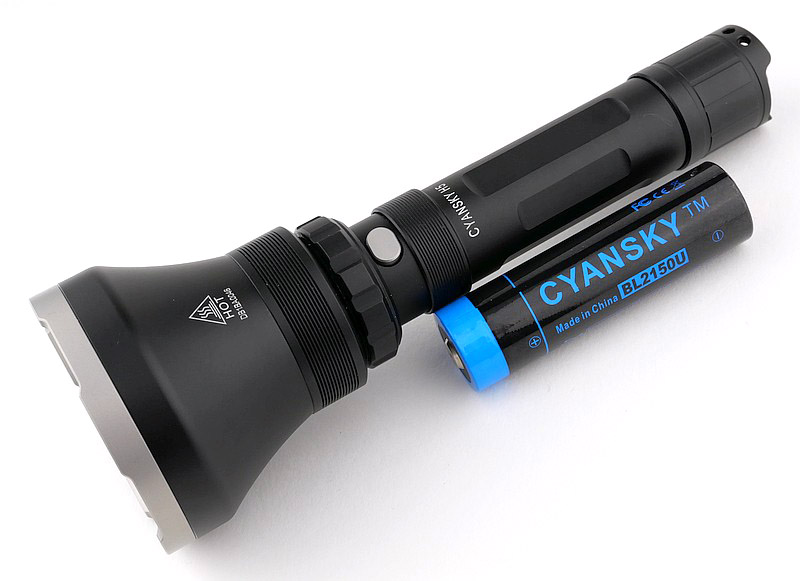
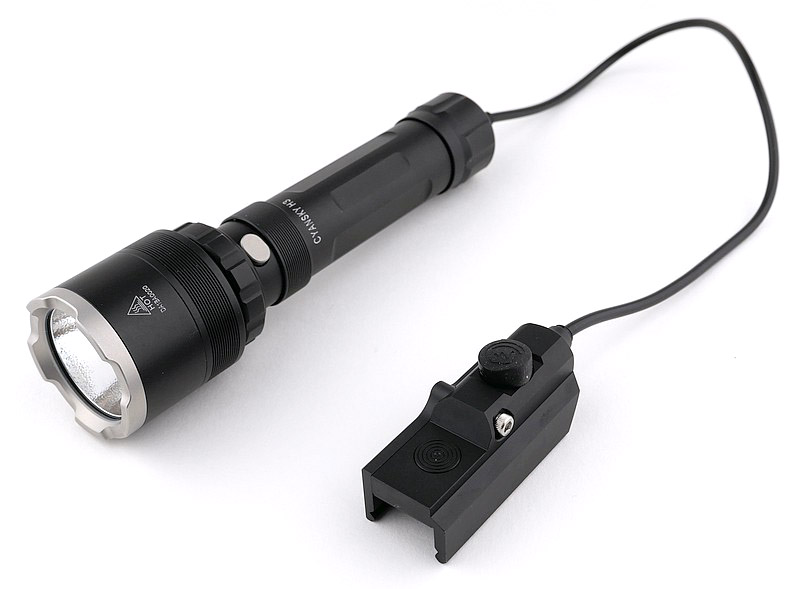
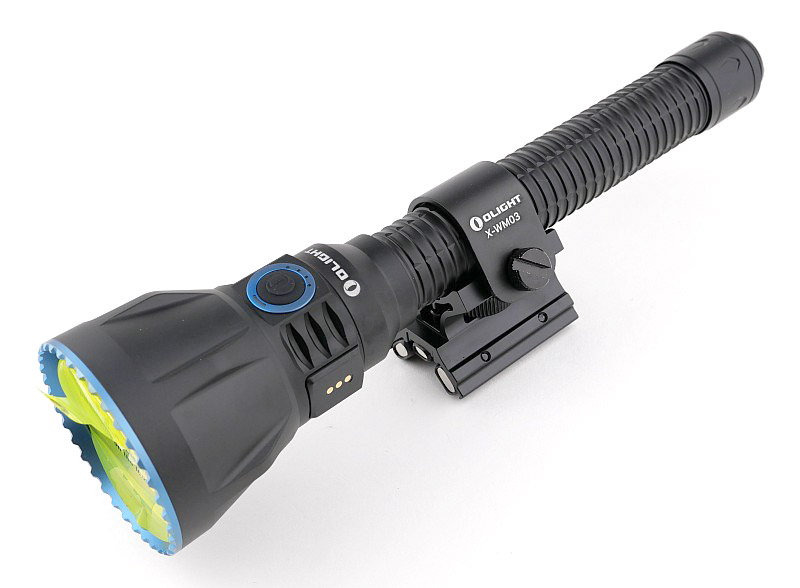
The Javelot Turbo 2 is a full-size, long-range torch/flashlight designed for hunting or search-and-rescue applications. At maximum output, it can throw a focused beam of 1,800 lumens up to 1,500 meters away (as per Olight’s product specifications). Furthermore, the light can pair with a wireless remote, allowing control from 8 meters away. The magnetic dock on the torch secures the remote control and simultaneously charges it.
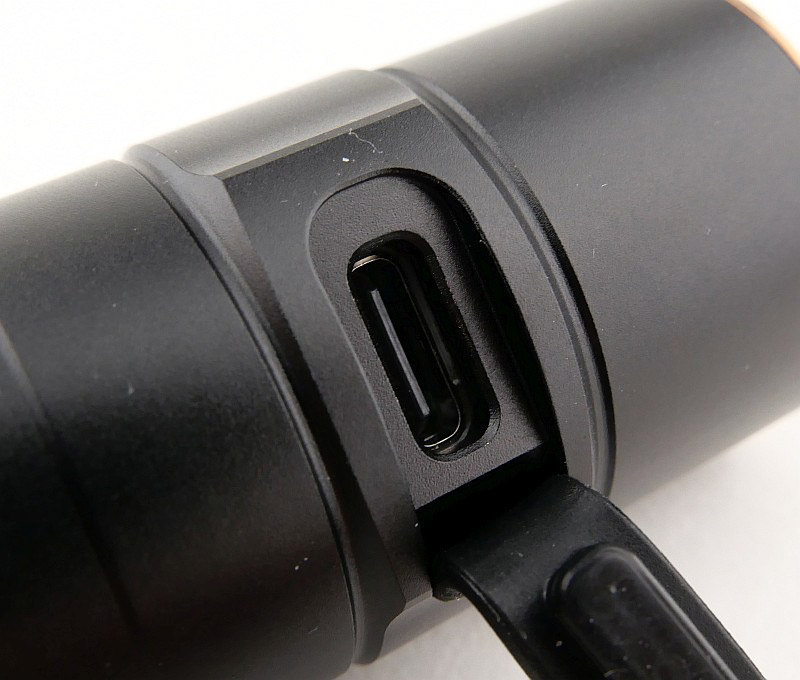
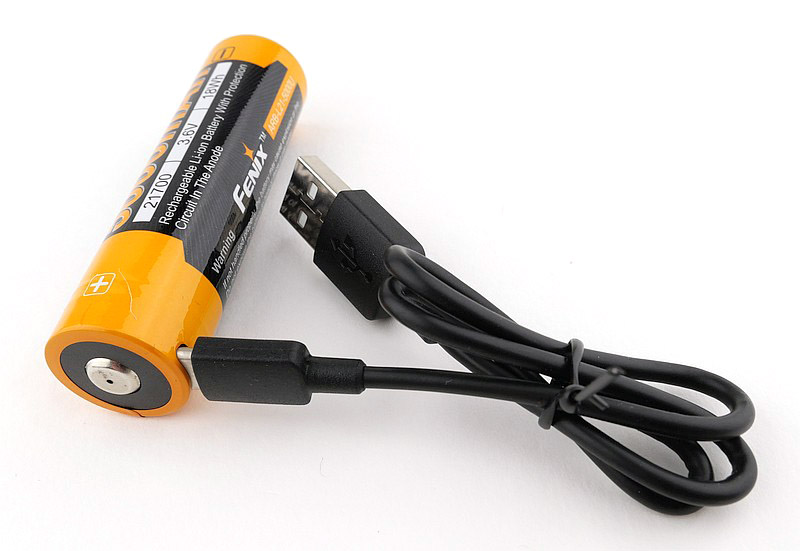
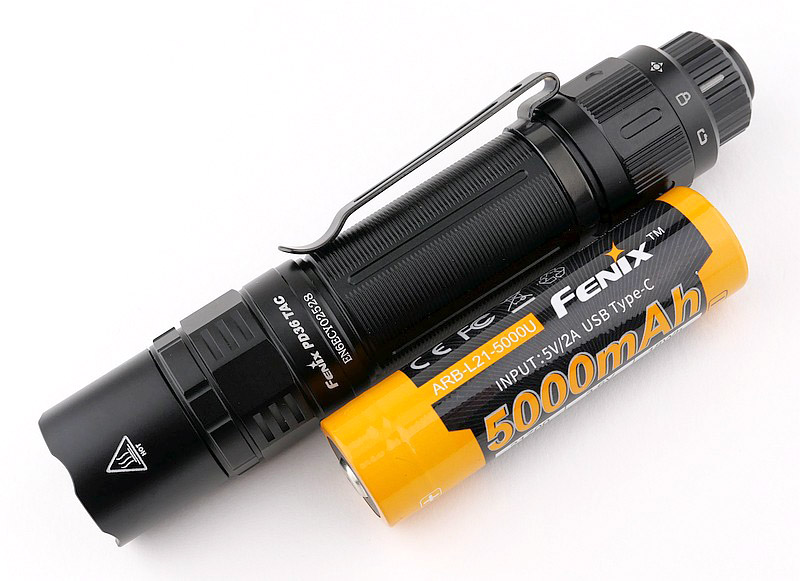
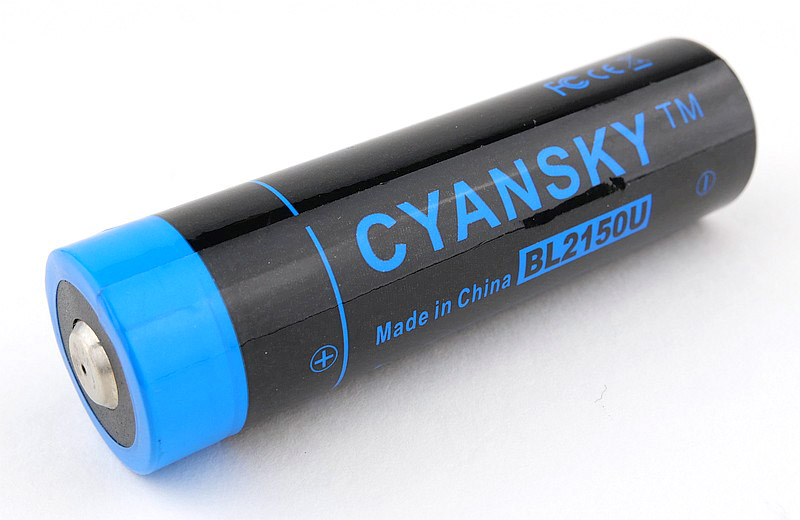
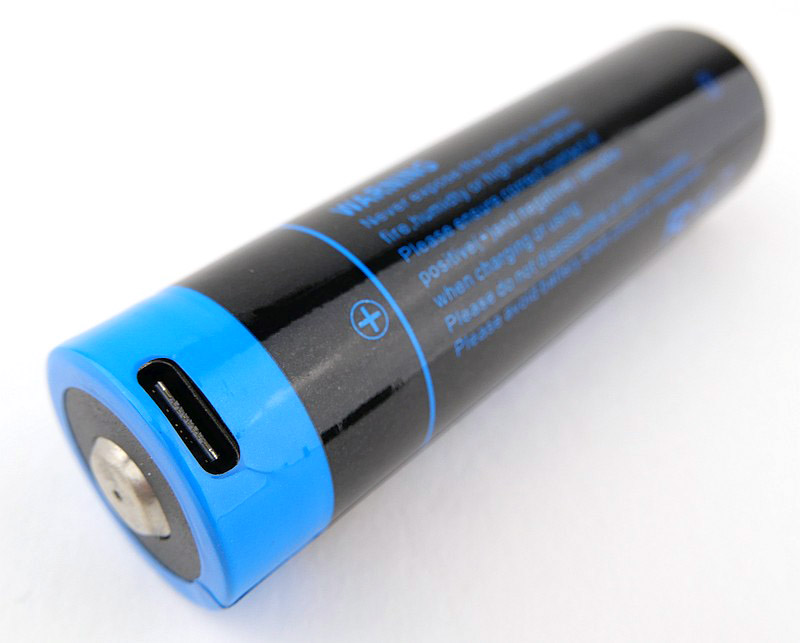
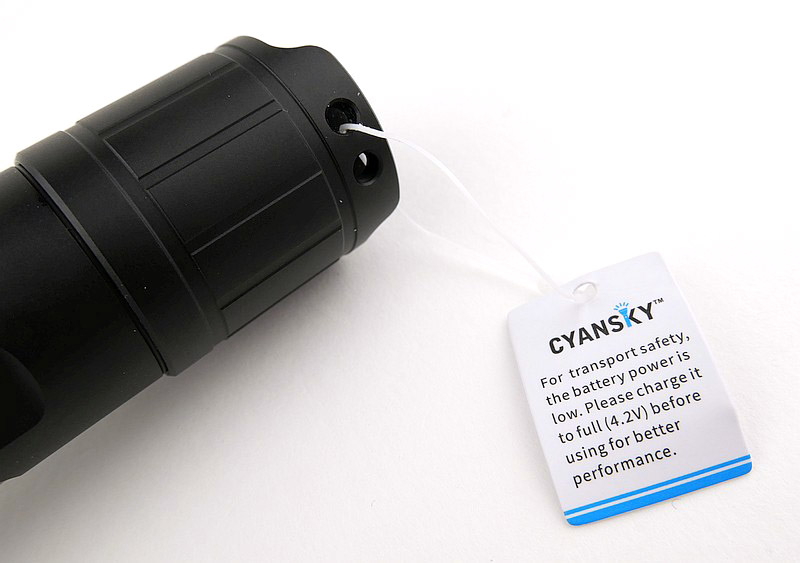
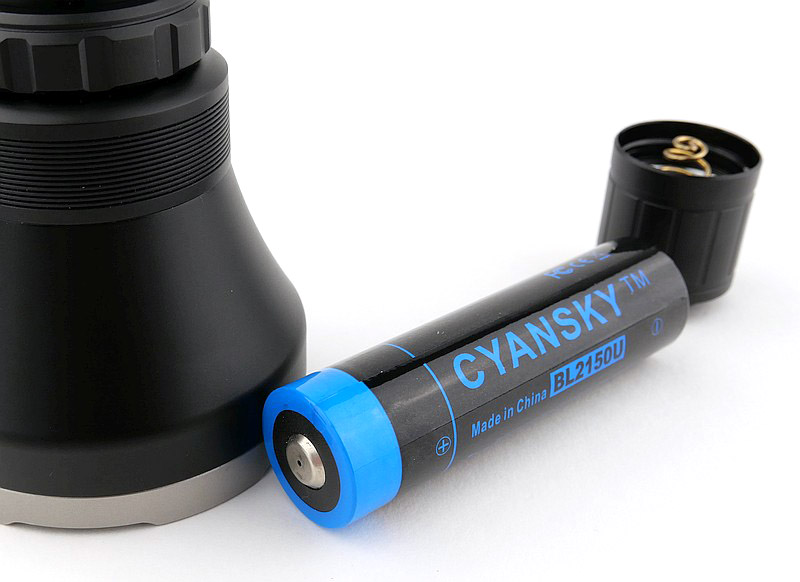
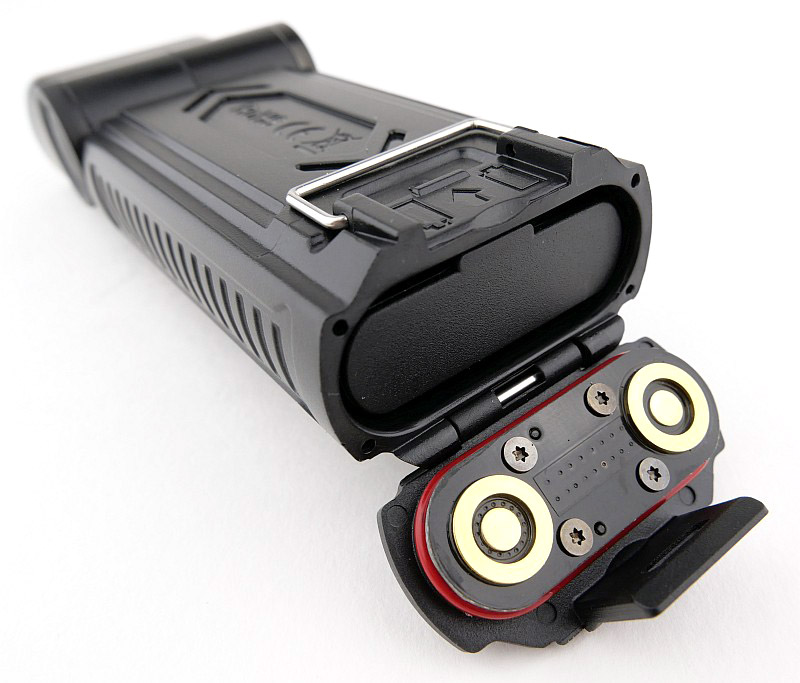
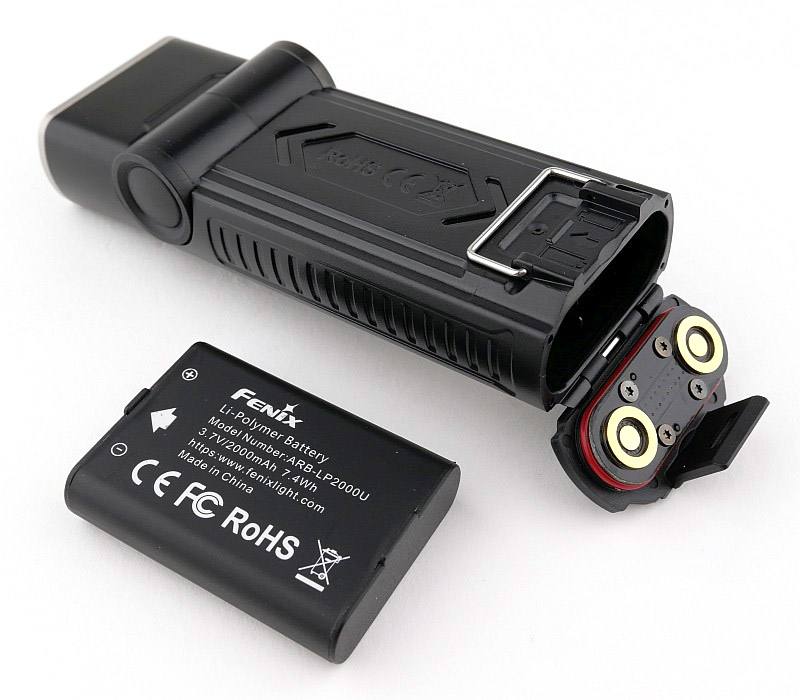
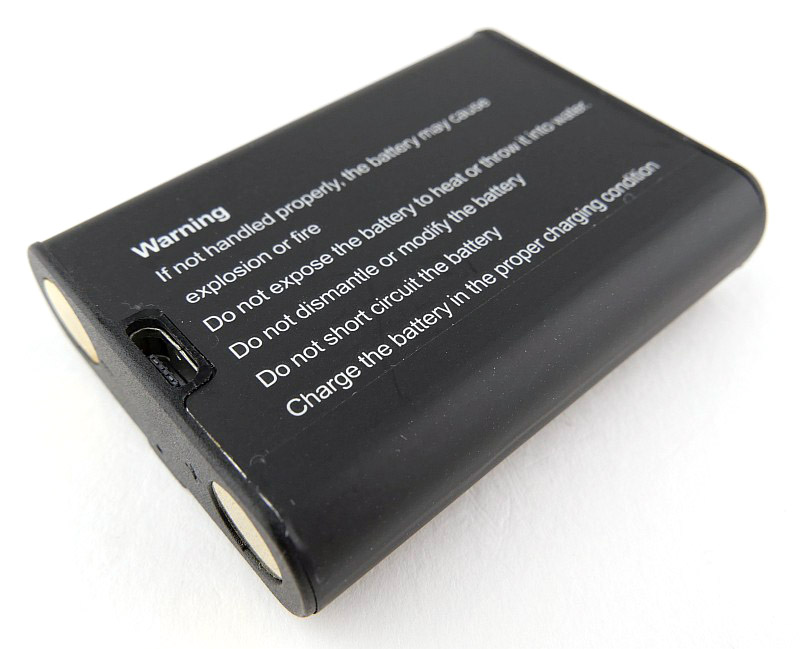
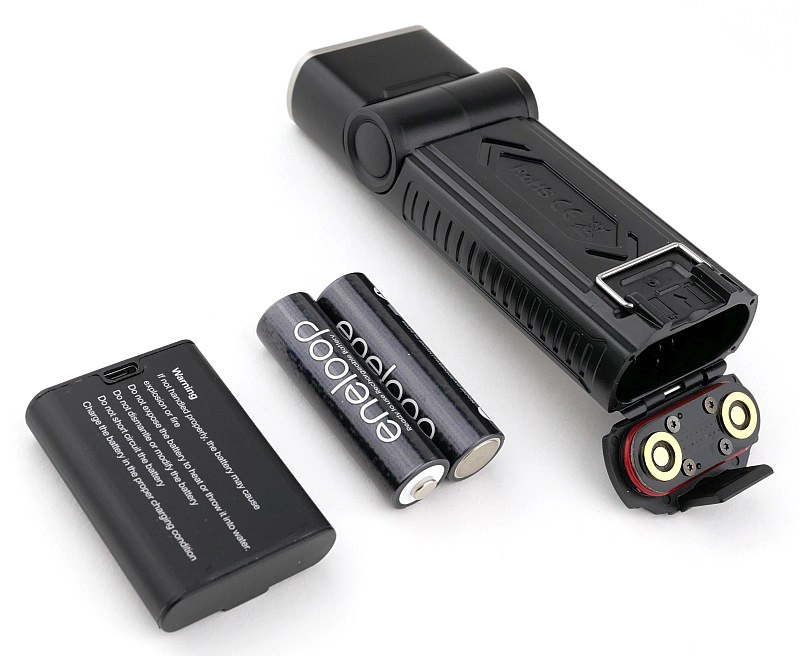
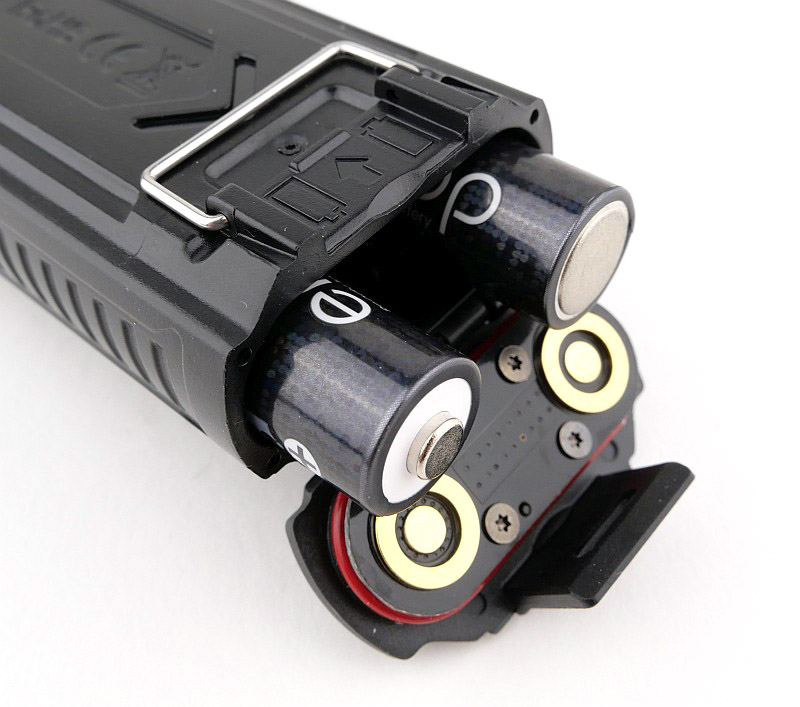
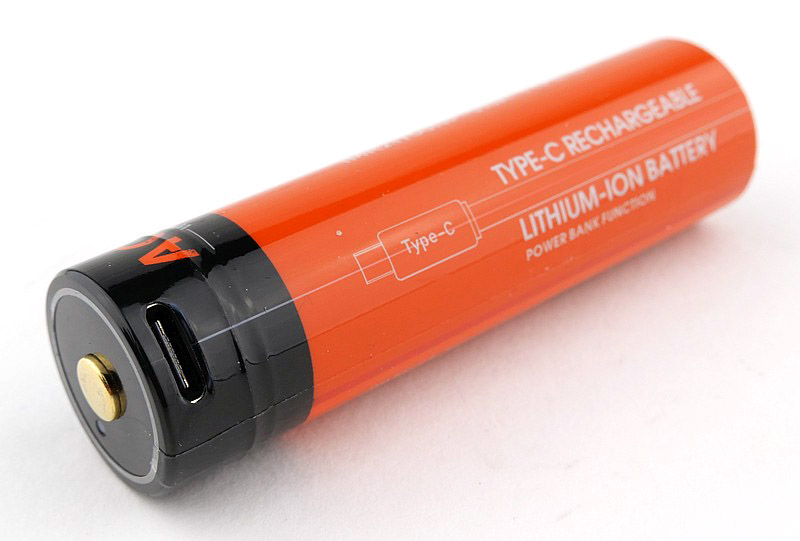
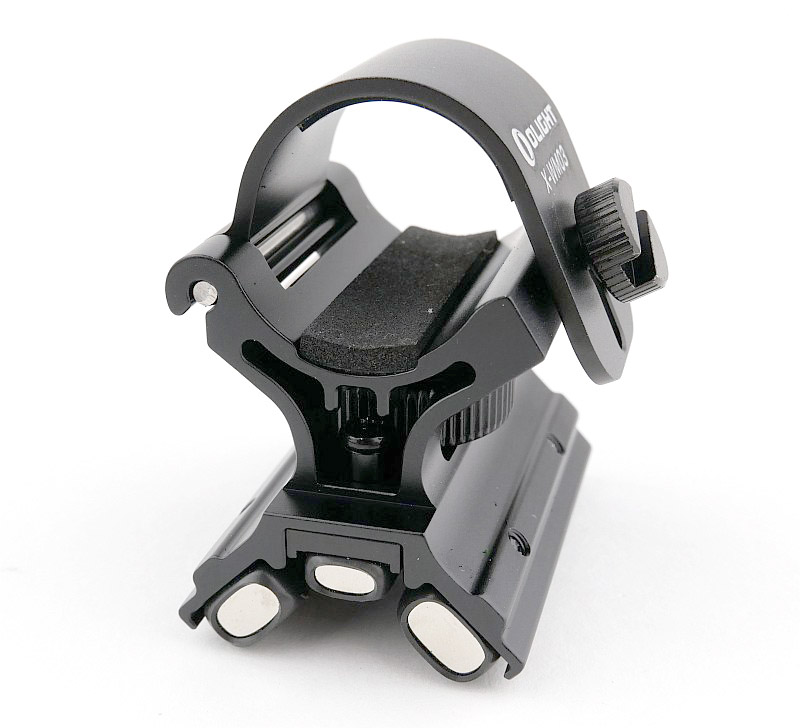
Powered by a 5,000 mAh battery pack, it offers up to 272 hours of runtime on the lowest level and can be easily replaced by unscrewing the tail cap. With both USB-C and magnetic charging capabilities, the Javelot Turbo 2 provides charging flexibility. It can also be mounted using the X-WM03 magnetic mount, transforming it into a super long-range Weapon Mounted Light.

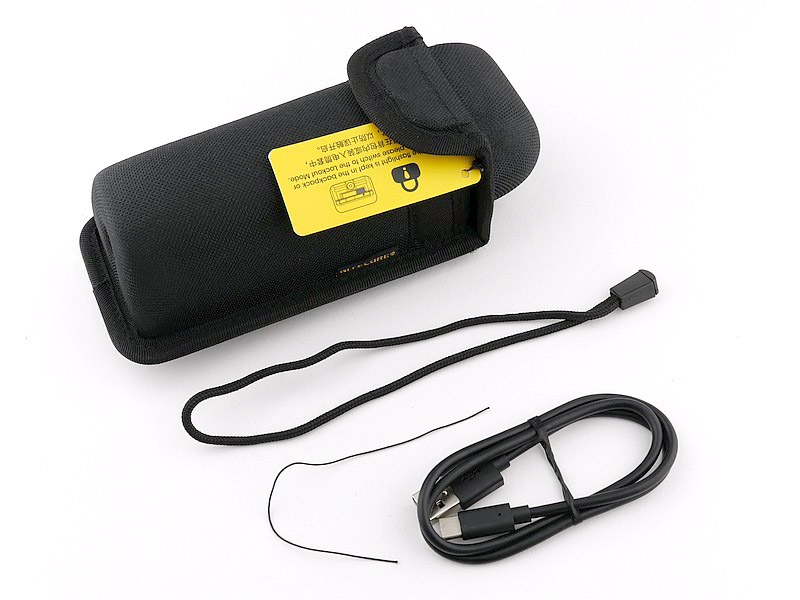
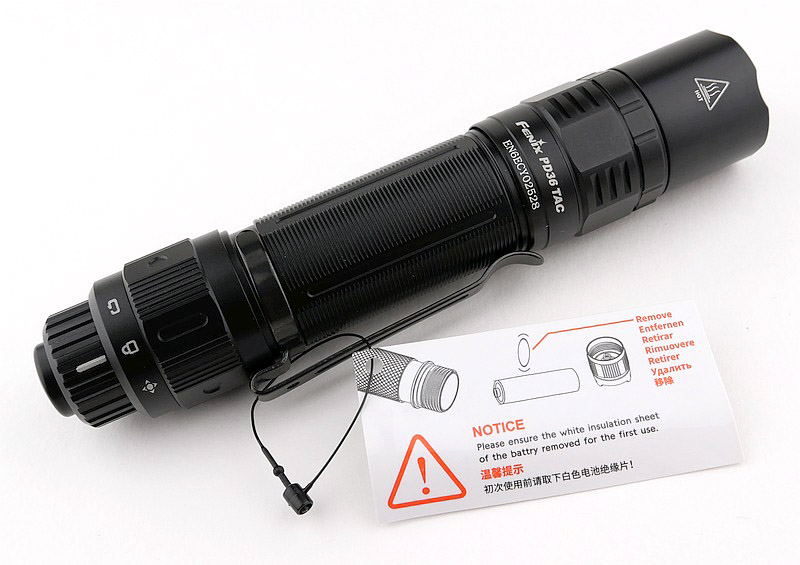
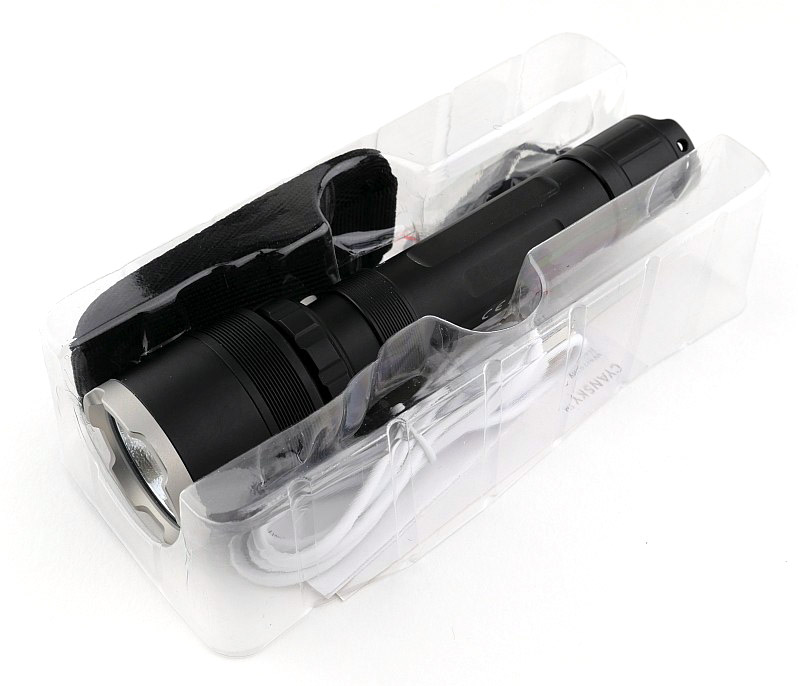
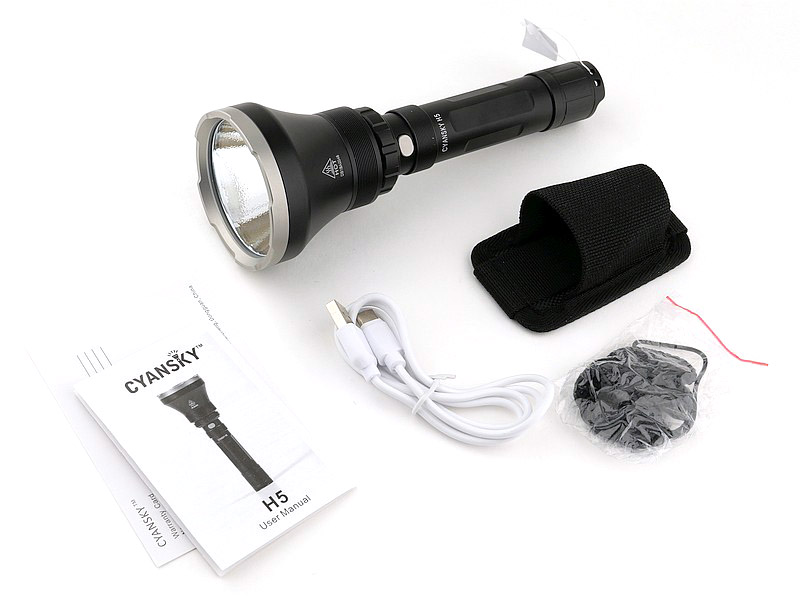
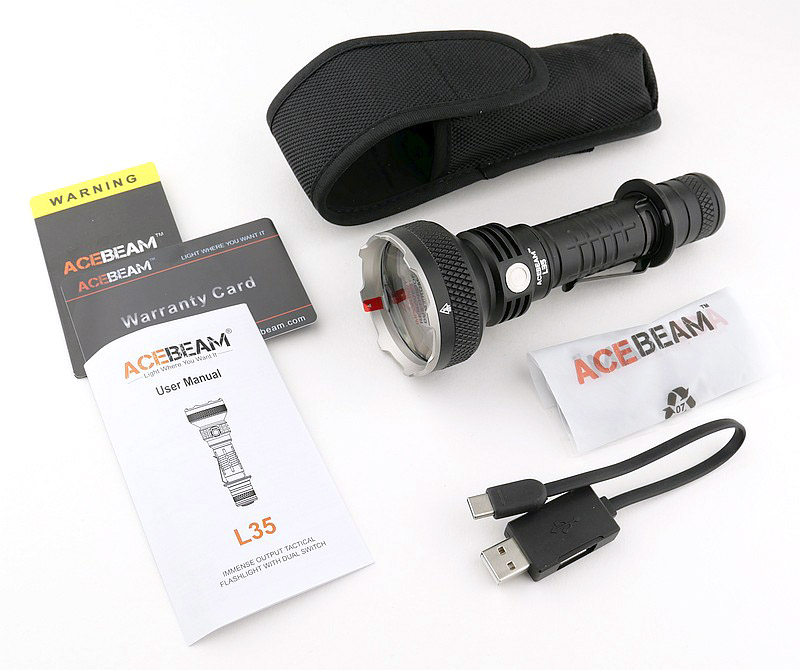
What is in the box?:
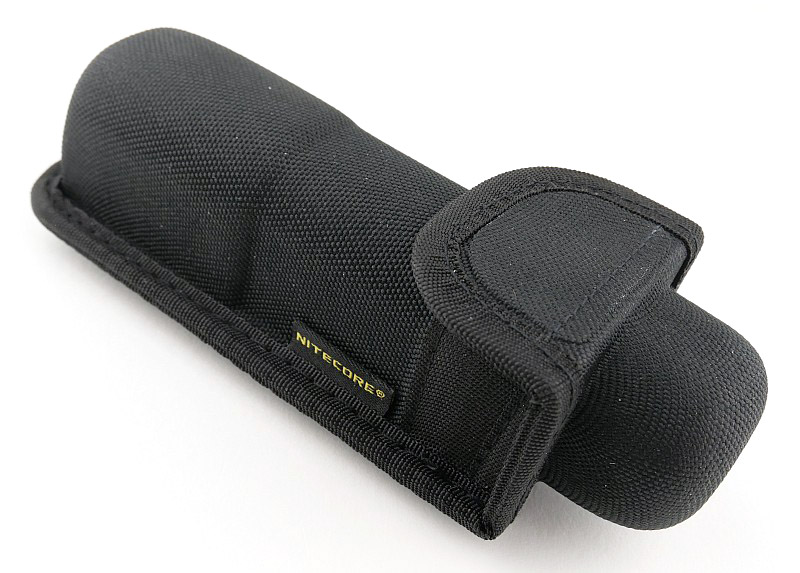
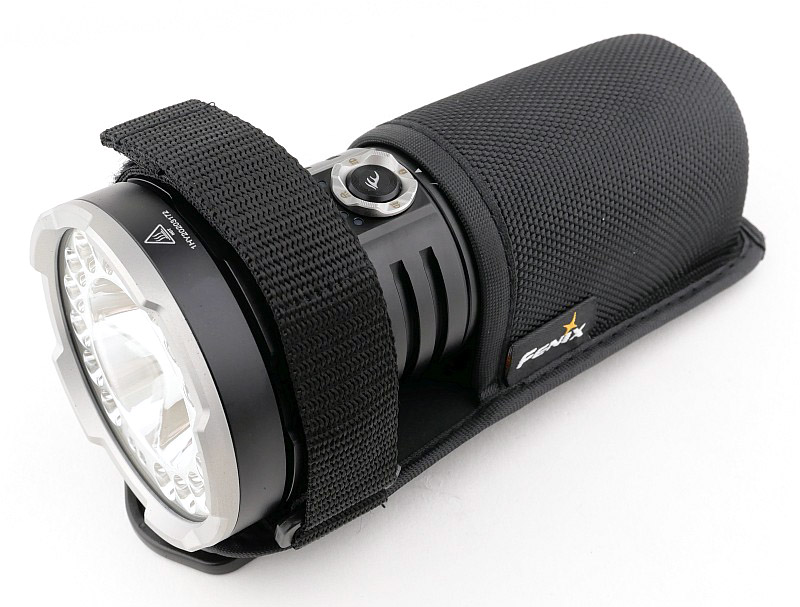
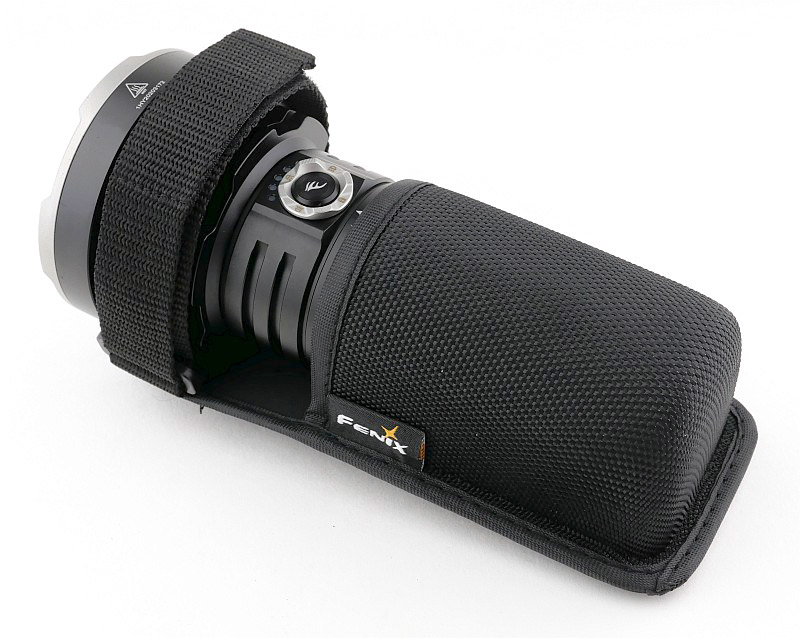
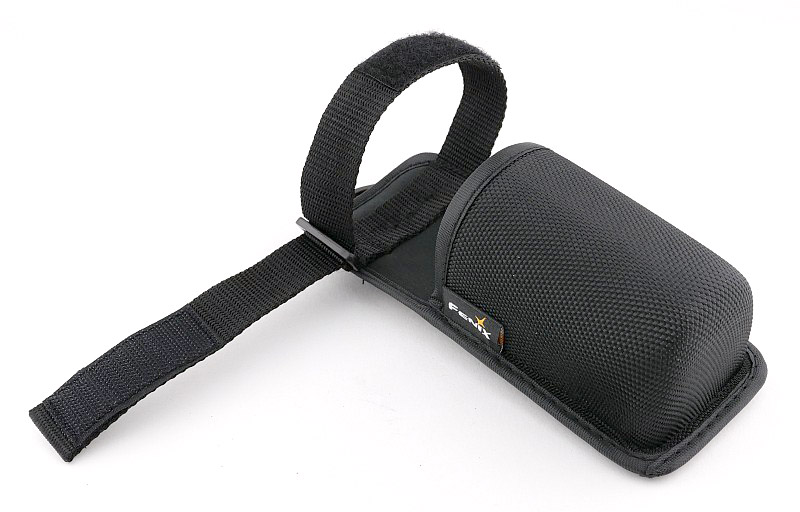
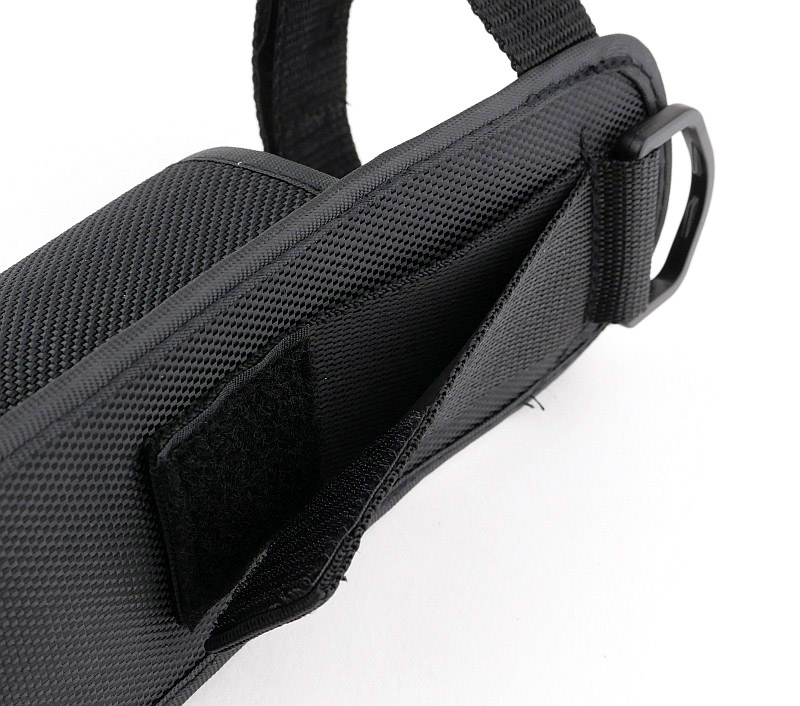
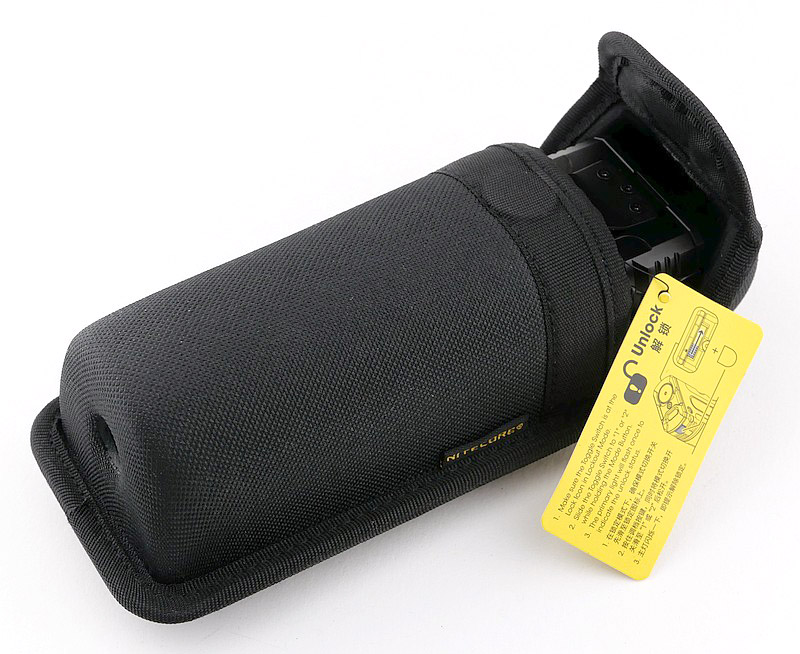
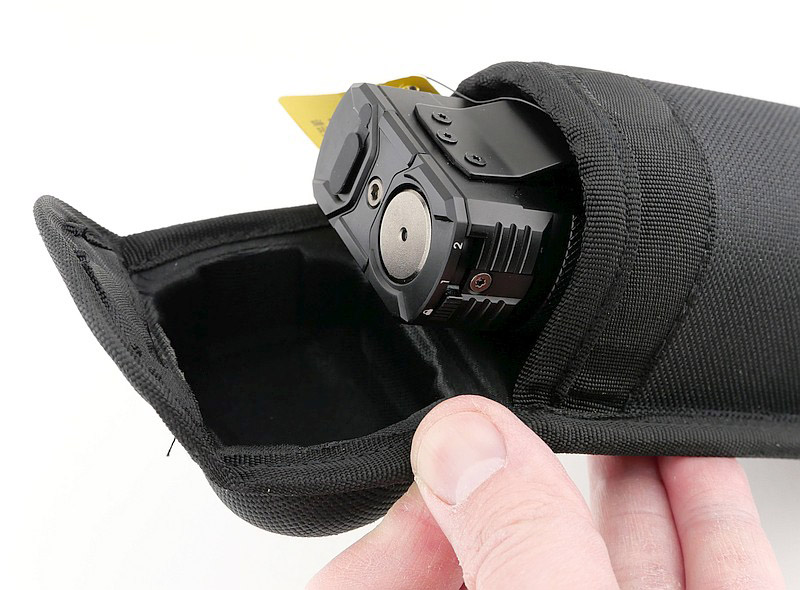
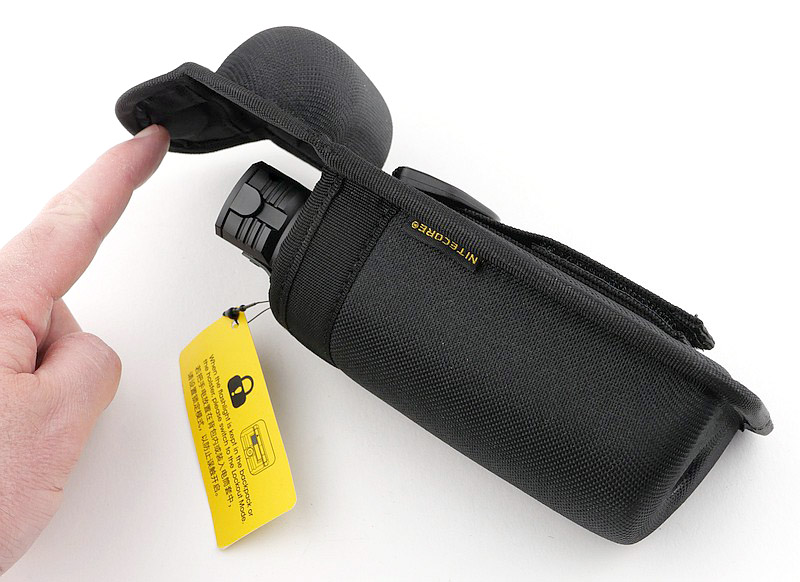
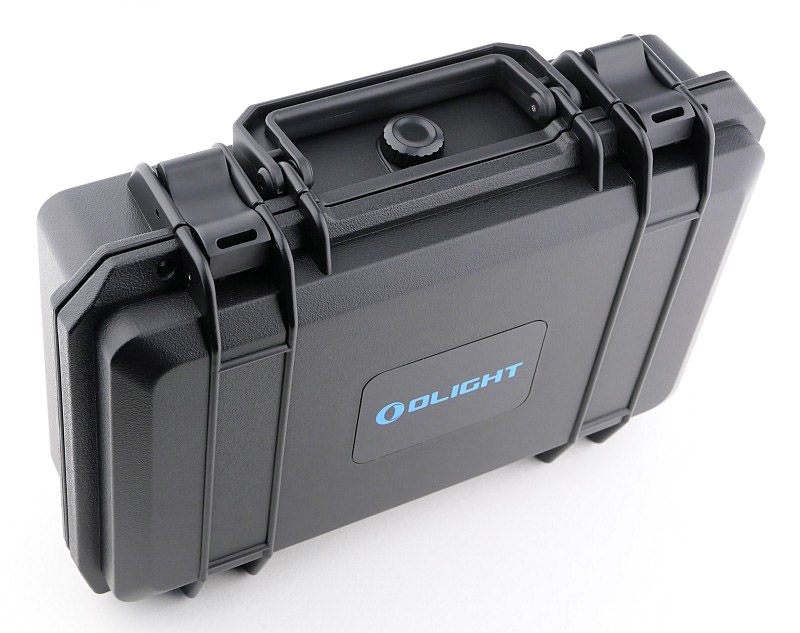
In fact this section should be called ‘What is in the waterproof protective case?’ as the Javelot Turbo 2 comes in a nice quality rugged case with pressure equalisation valve. Something you can either keep the Javelot Turbo 2 in, or re-purpose for anything else you would find more useful if the torch is constantly in use.
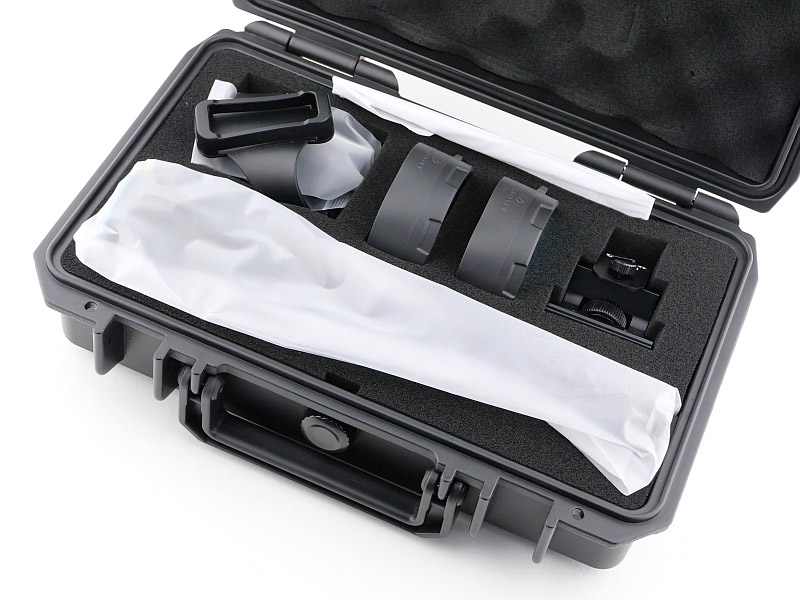
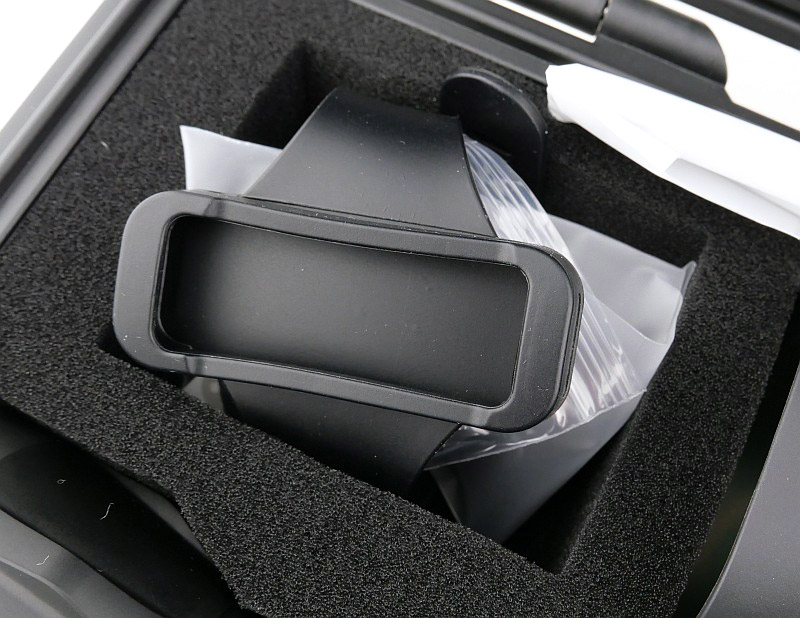
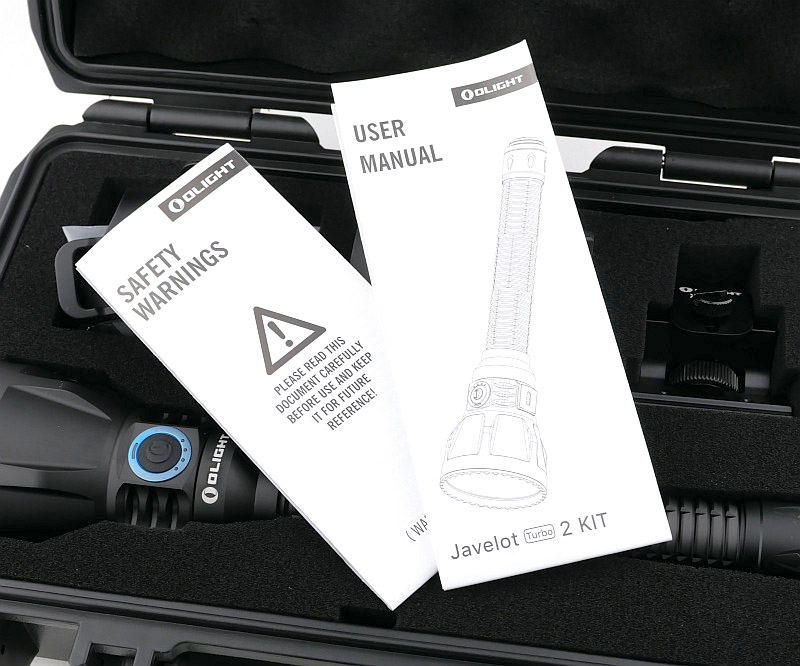
Opening the case you initially find the torch, instructions and remote in plastic bags. This is the Kit form of the Javelot Turbo 2 so the case also houses a magnetic gun mount (or ‘weapon’ mount, depending on your preference), along with two coloured glass filters for hunting.


A good look round the Javelot Turbo 2 Kit accessories – Things to look out for here are:
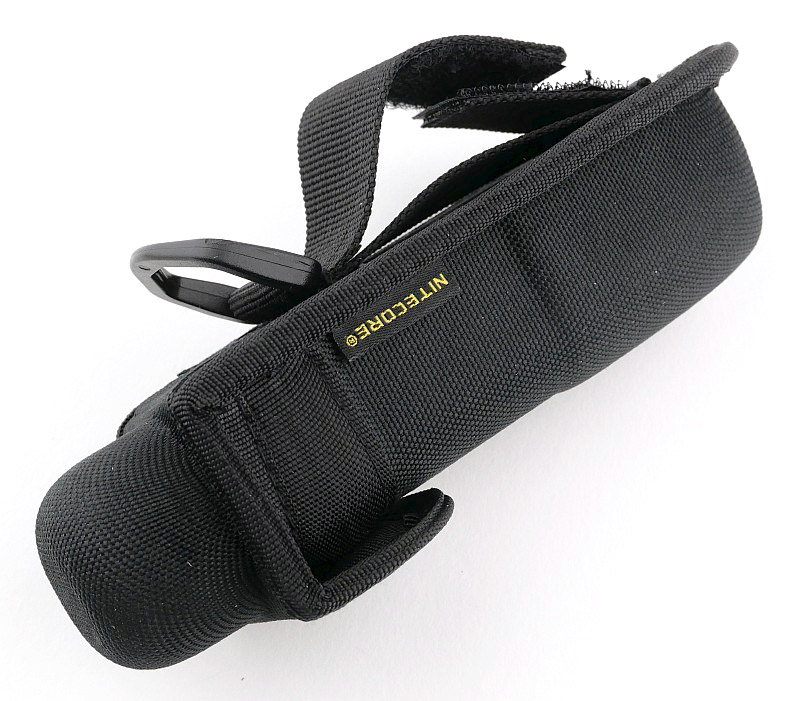
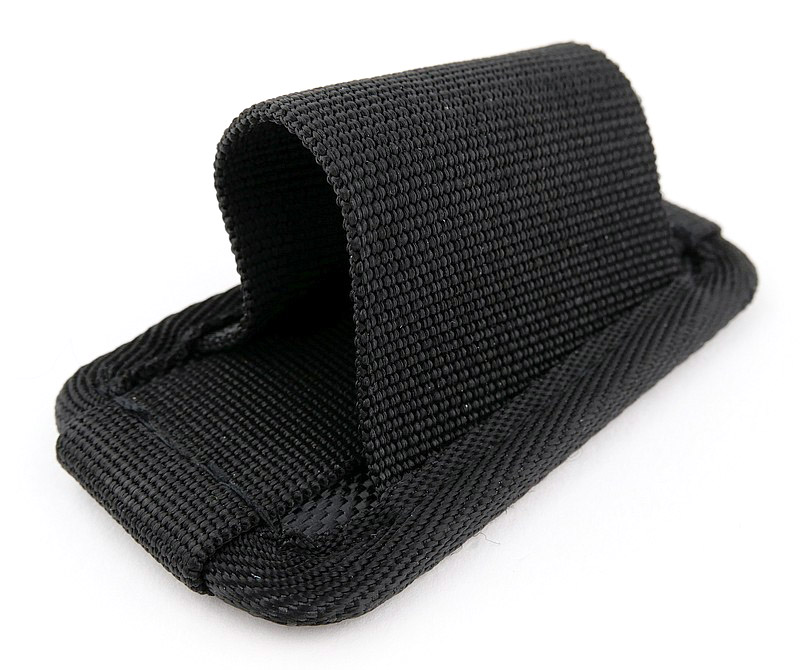
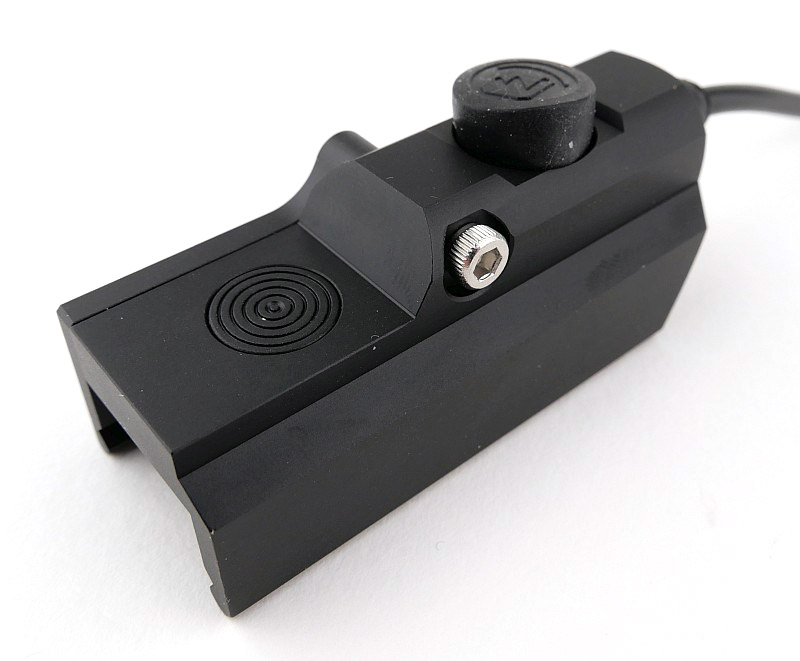
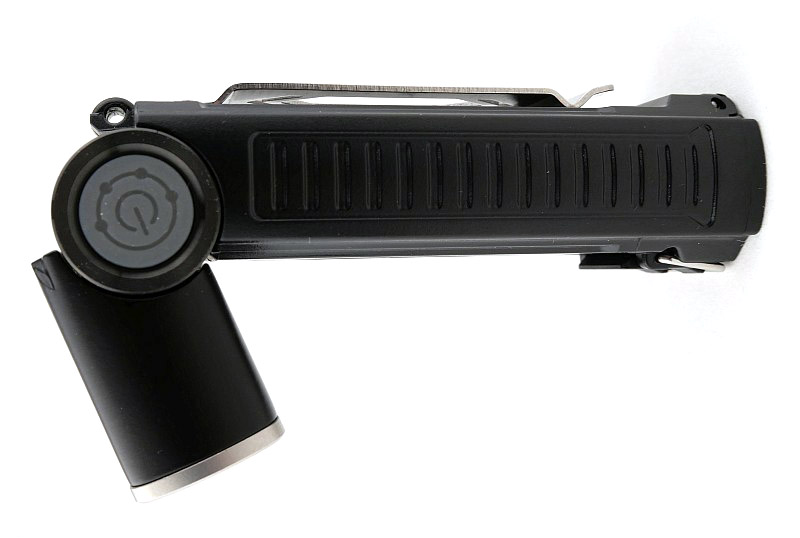
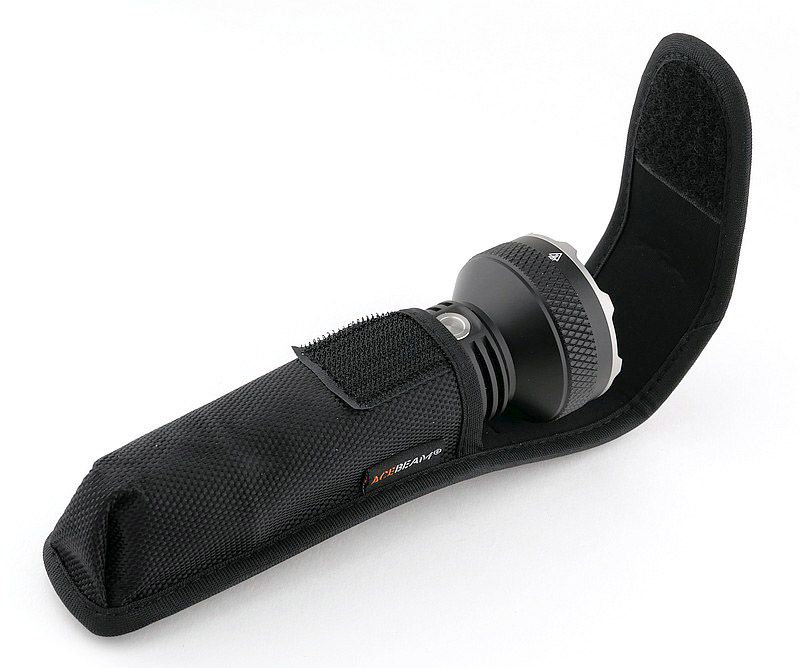
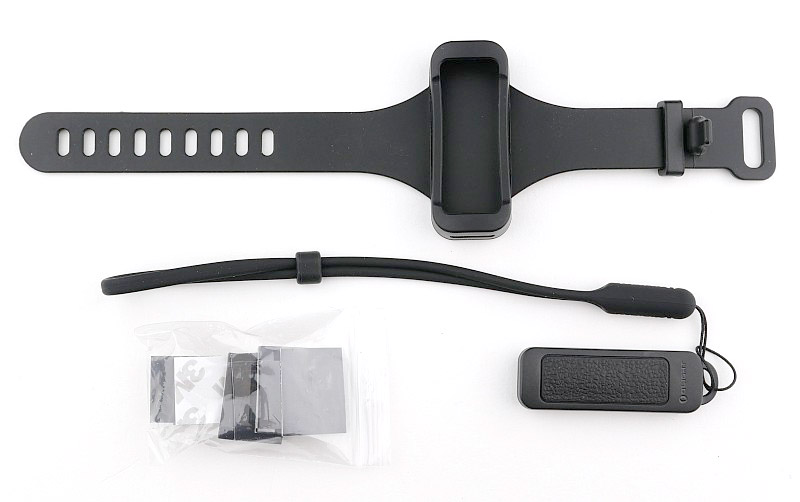
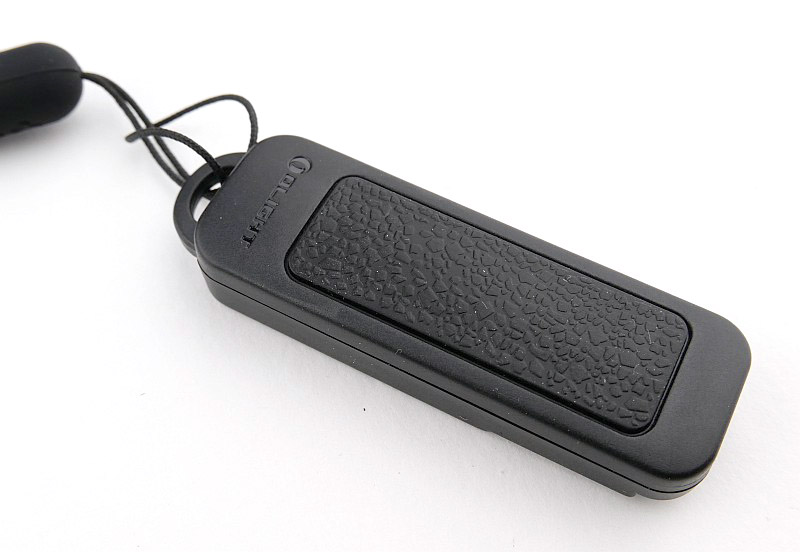
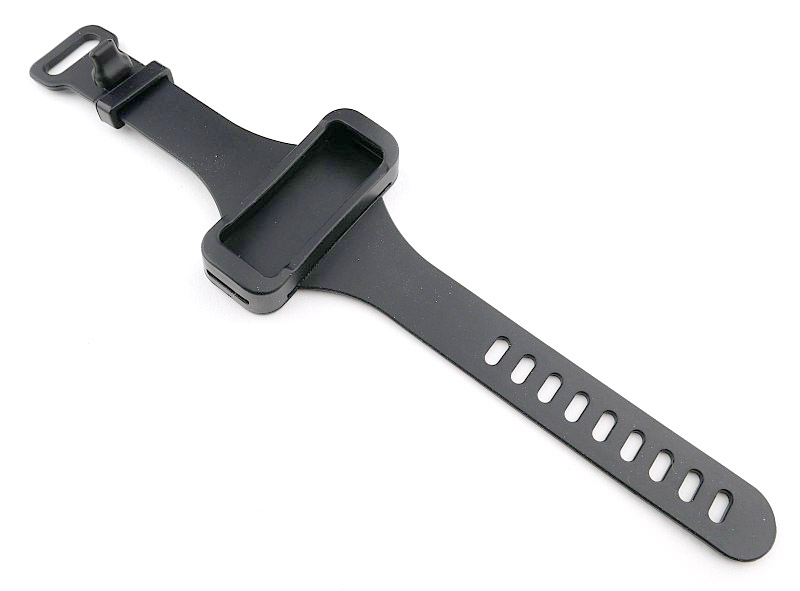
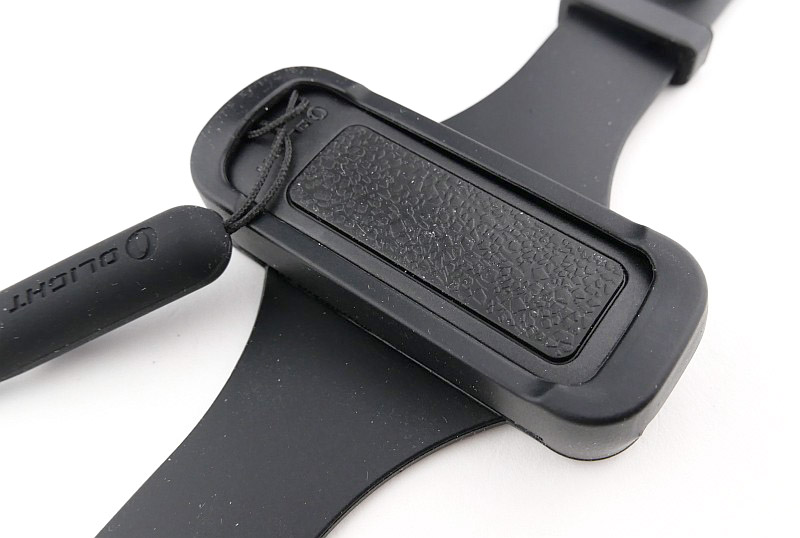
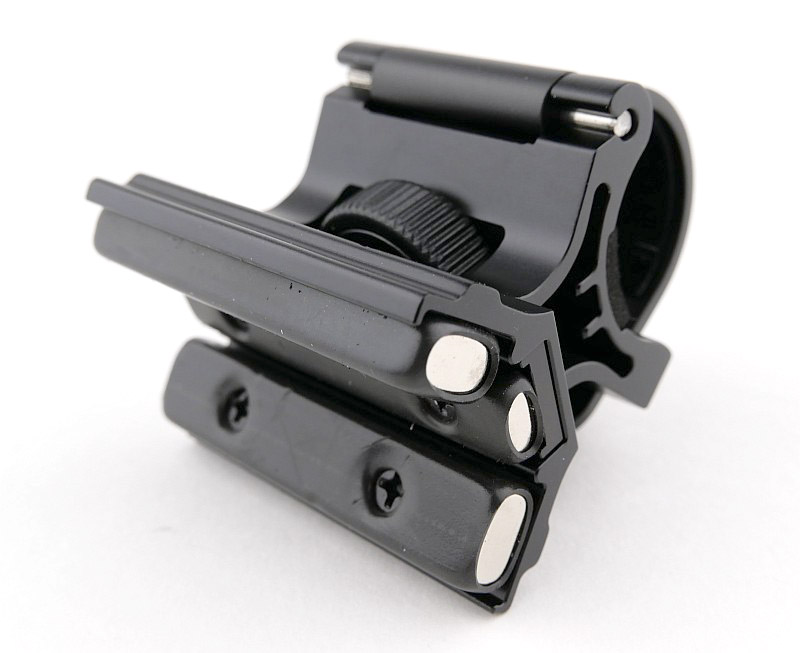
Before looking at the light, there are a number of Kit components to look at. Starting with the wireless remote switch, which has a wrist lanyard and a watch strap style switch holder. Included with these parts is a bag of self-adhesive rubber spacers that are intended to be used with the magnetic gun mount.
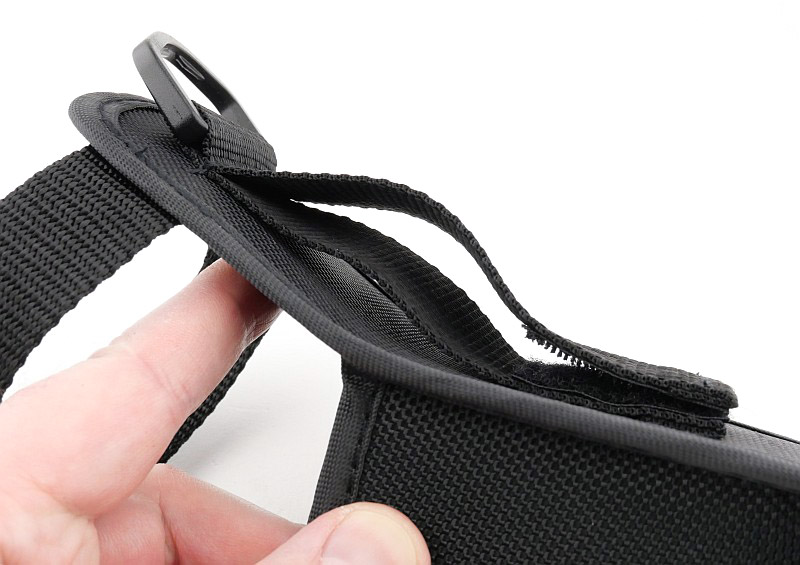
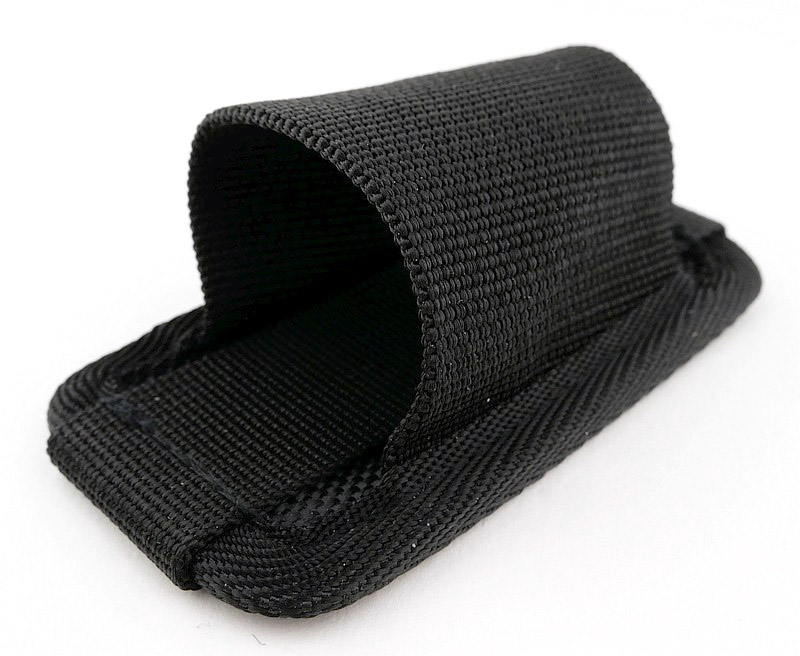
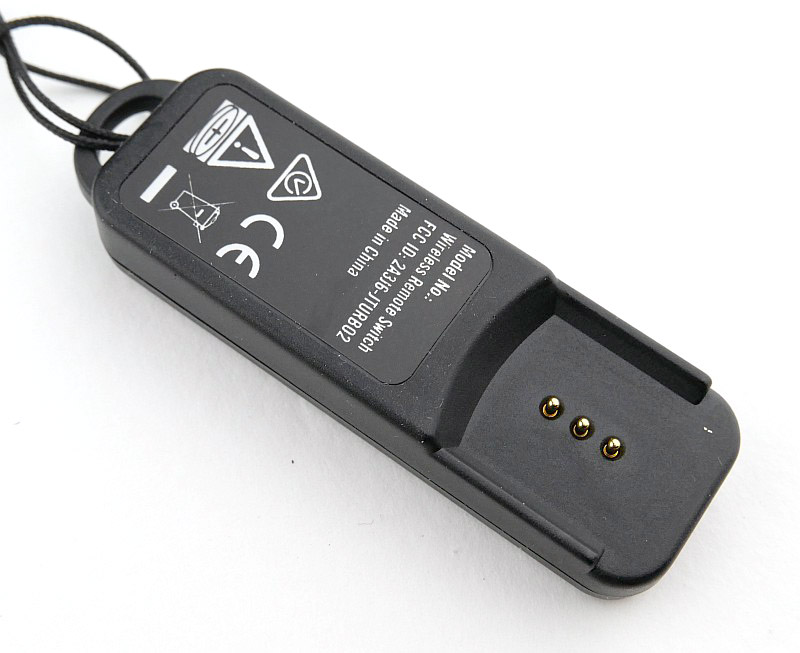
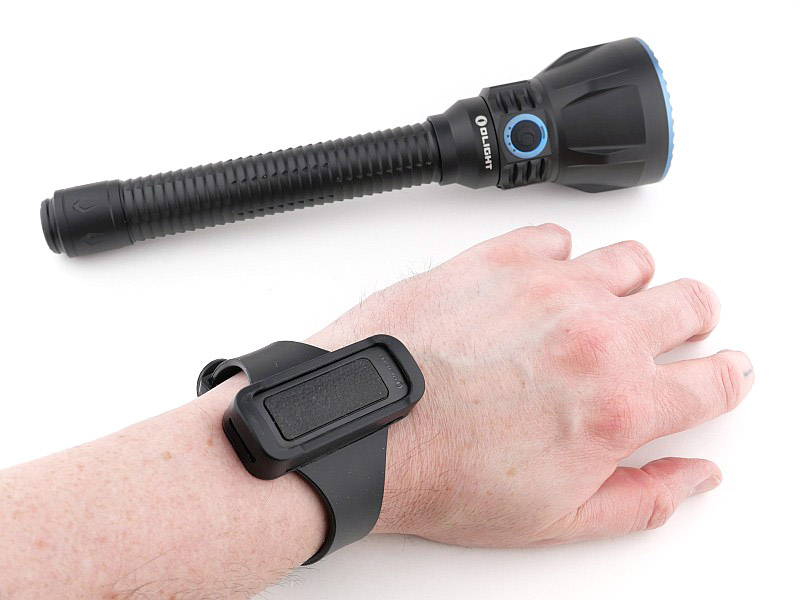
The wireless remote has a single elongated textured button. There is a lanyard hole on one end and flipping it over shows the three pin contacts for it to leech-charge from the main light. For gun and wrist mounting a silicone watch strap holder is also included that the remote can be slotted into. Here I fitted it without removing the lanyard, but you would normally remove the lanyard if using the wrist holder.
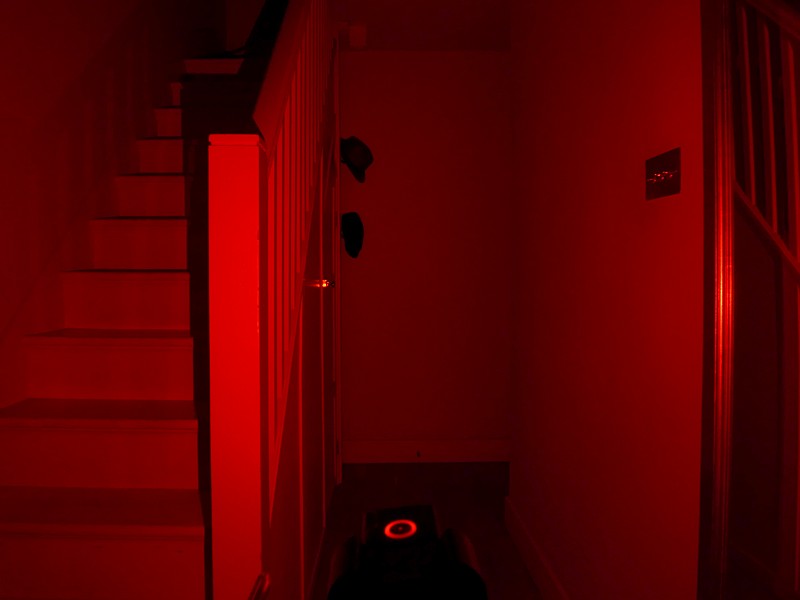
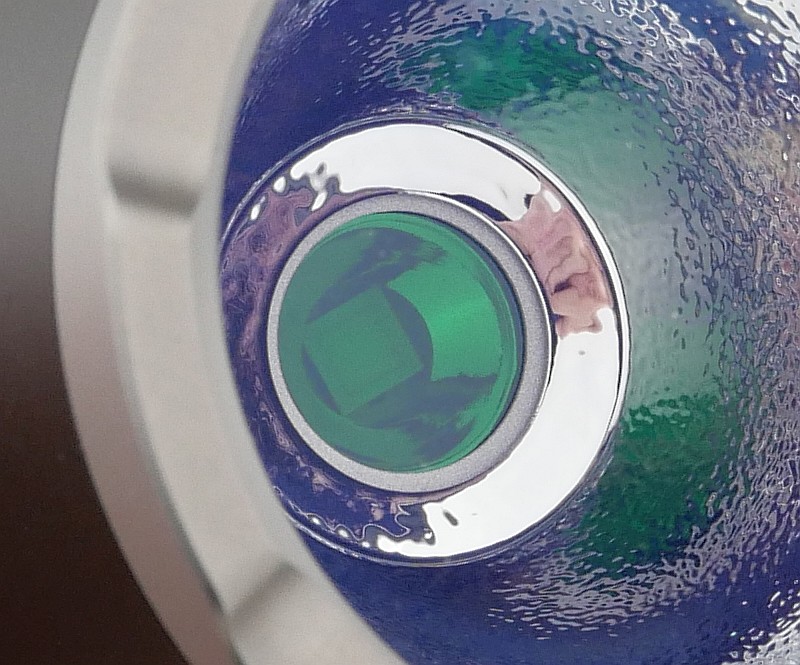
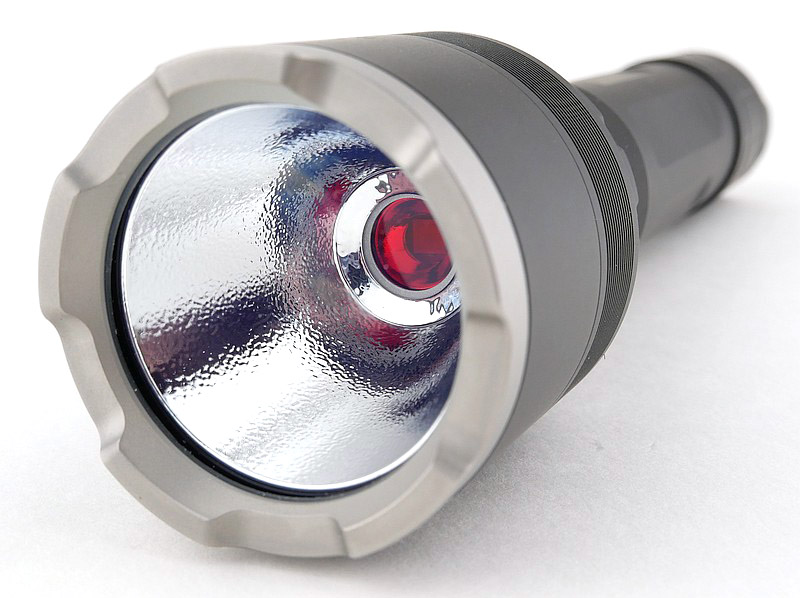
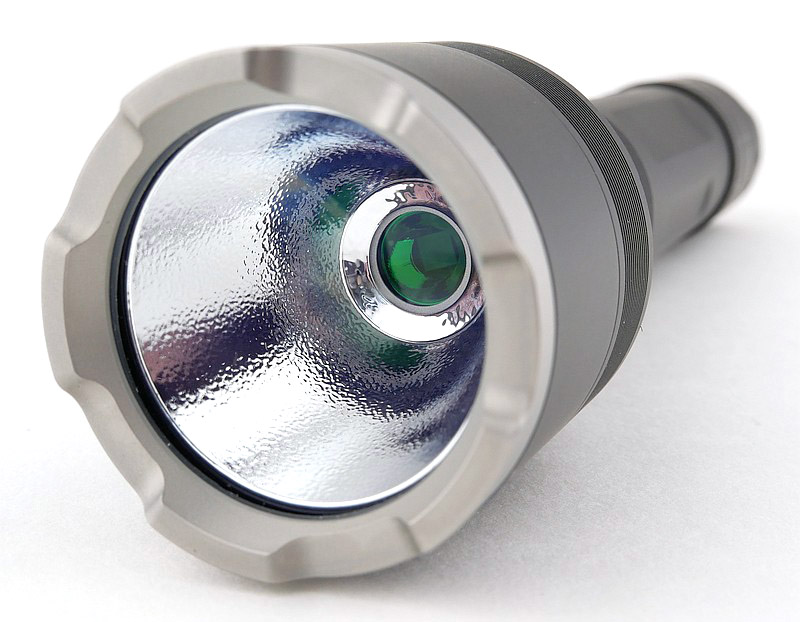
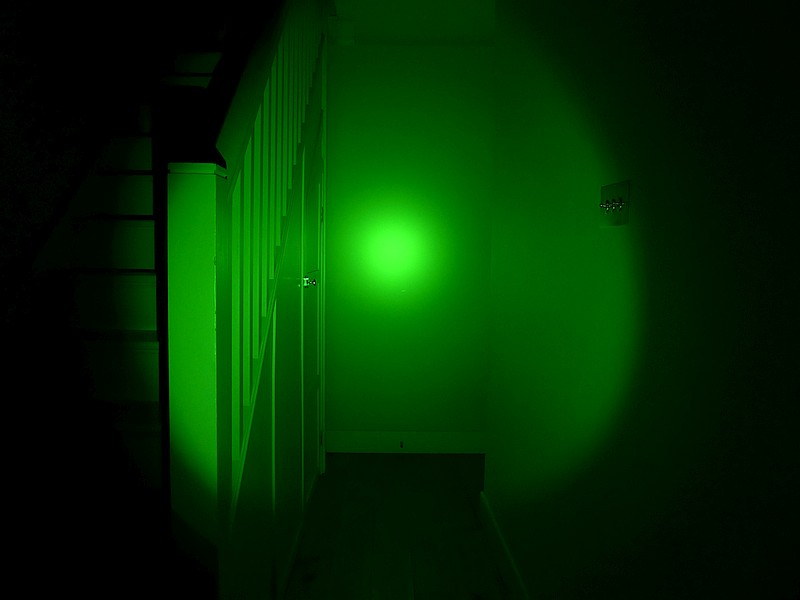
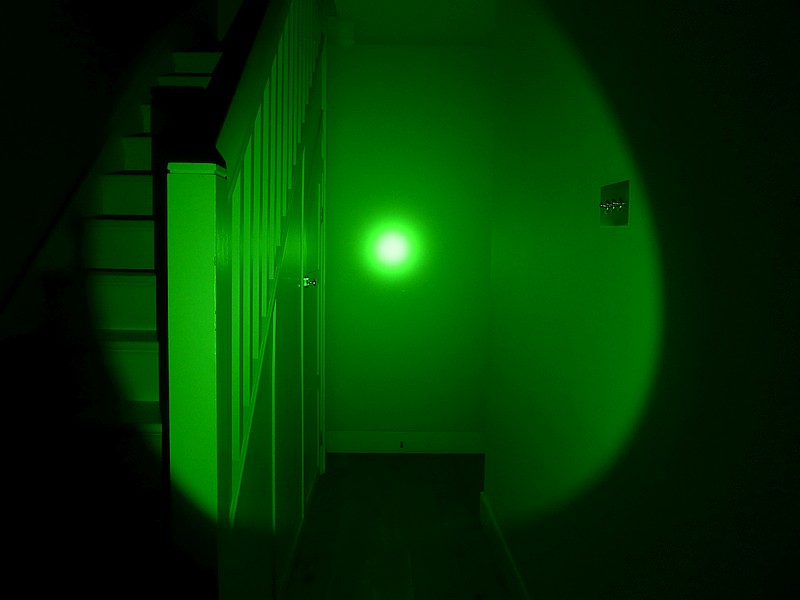
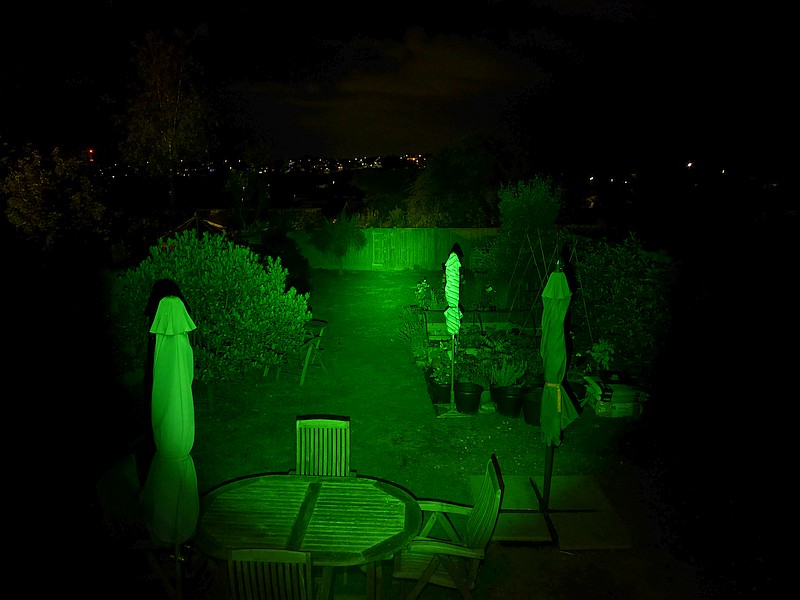
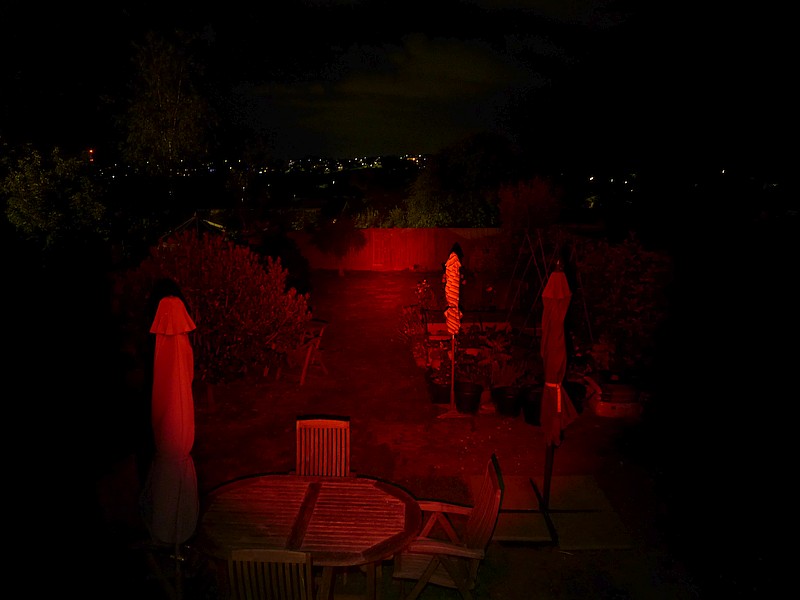
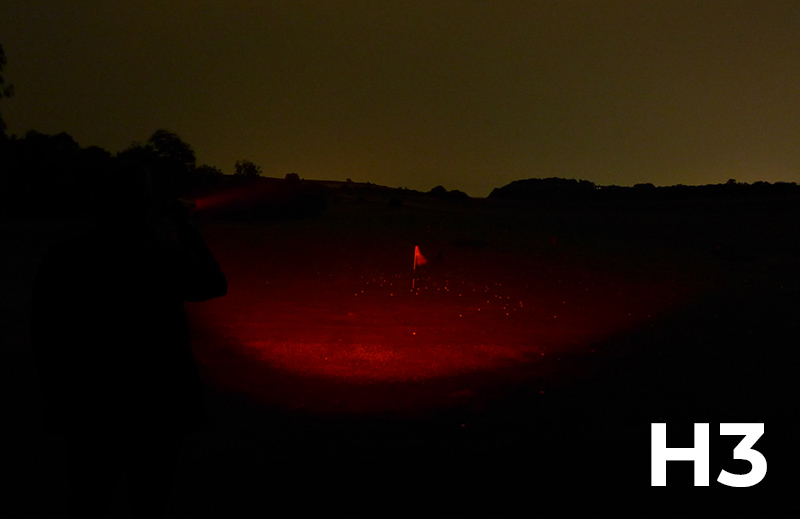
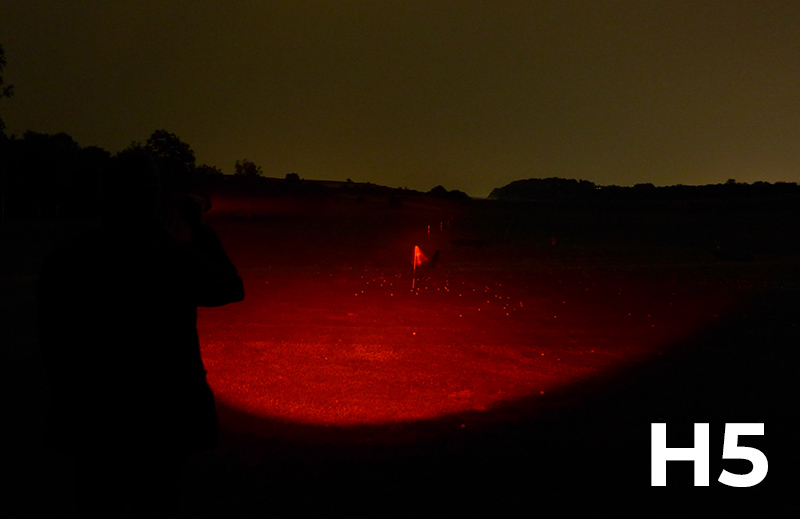
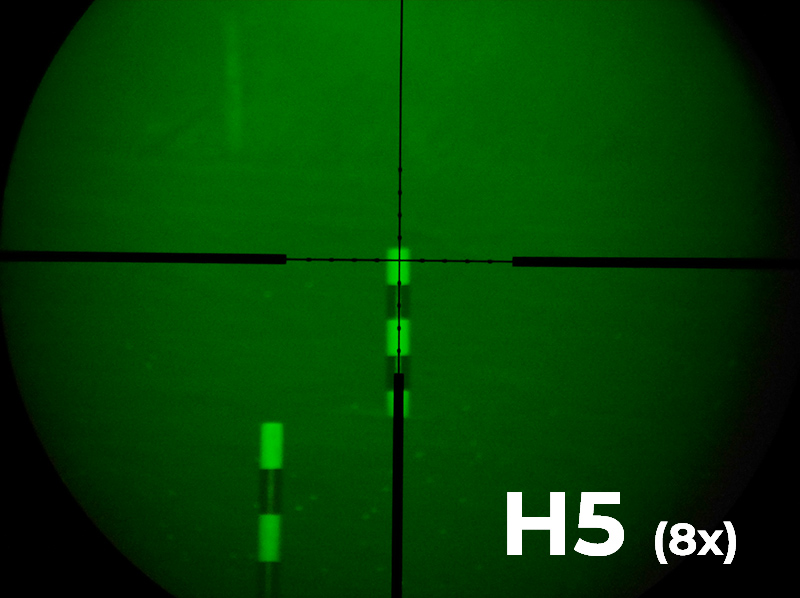
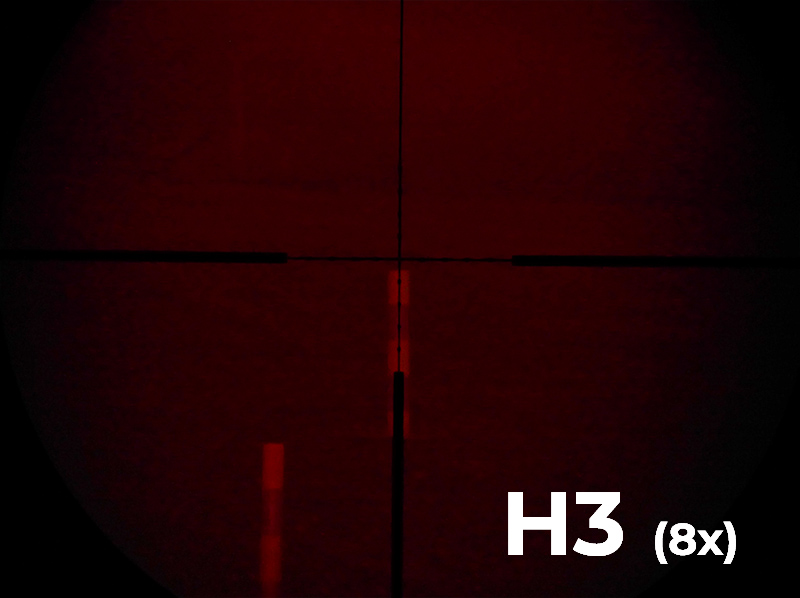
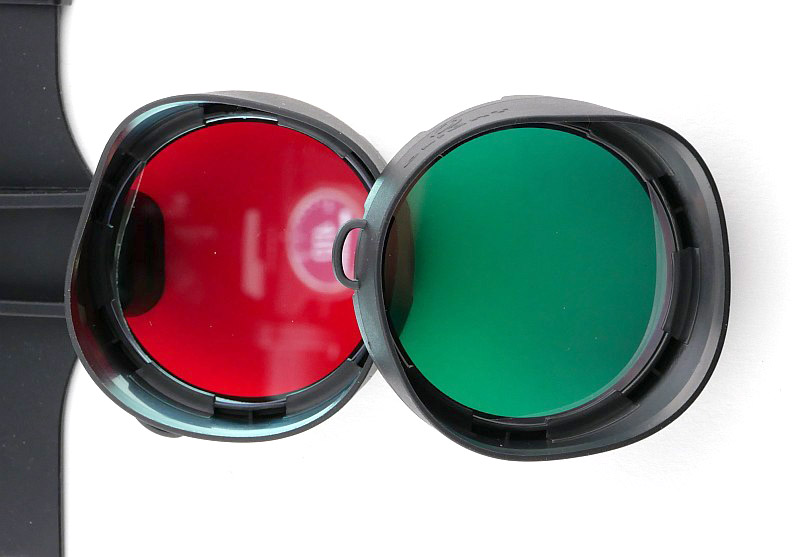
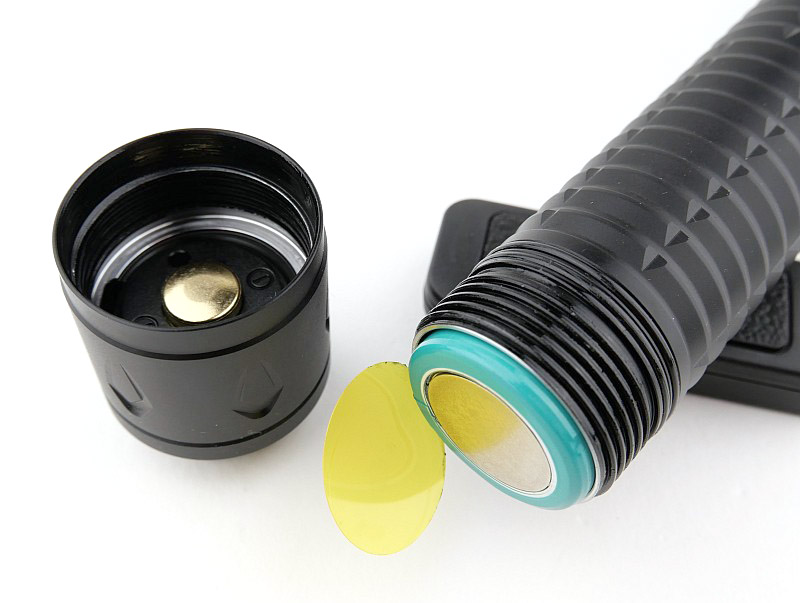
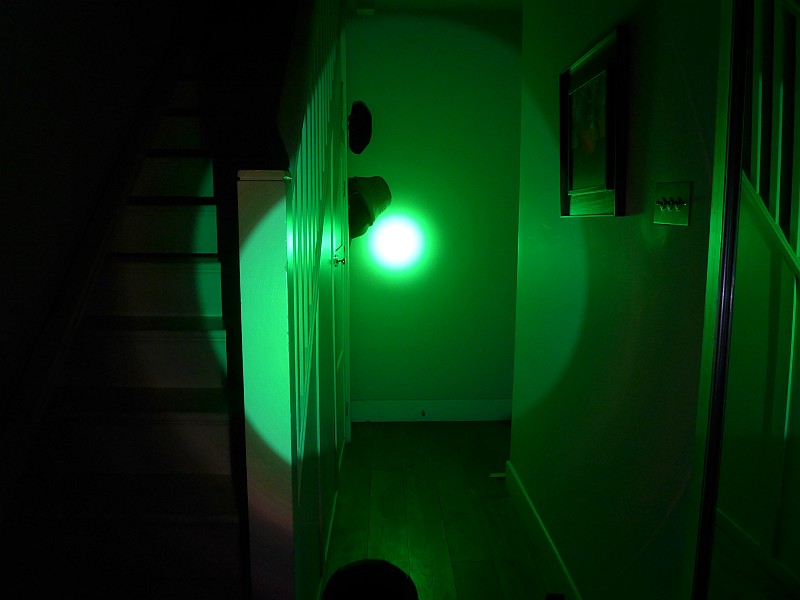
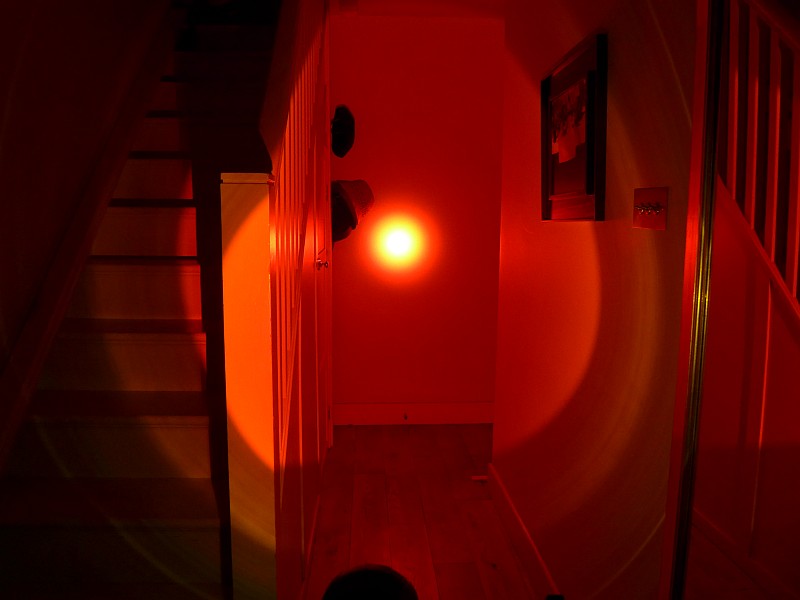
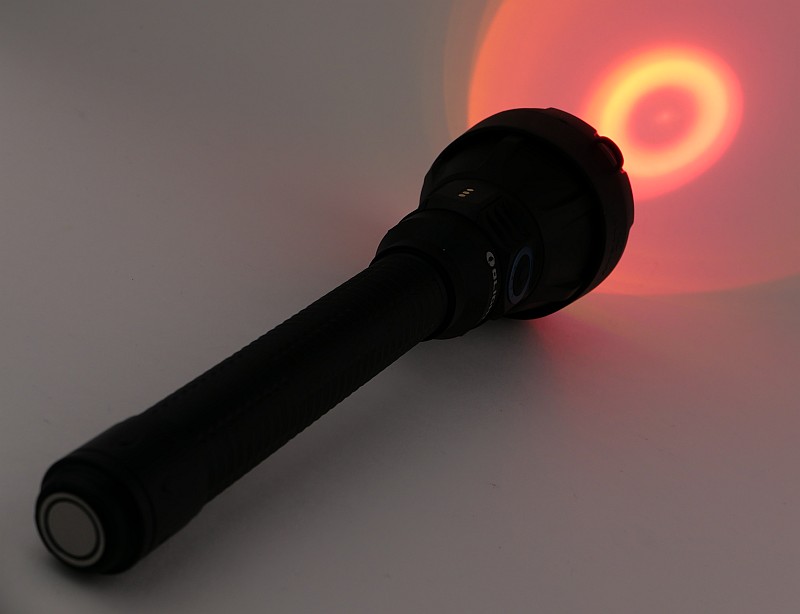
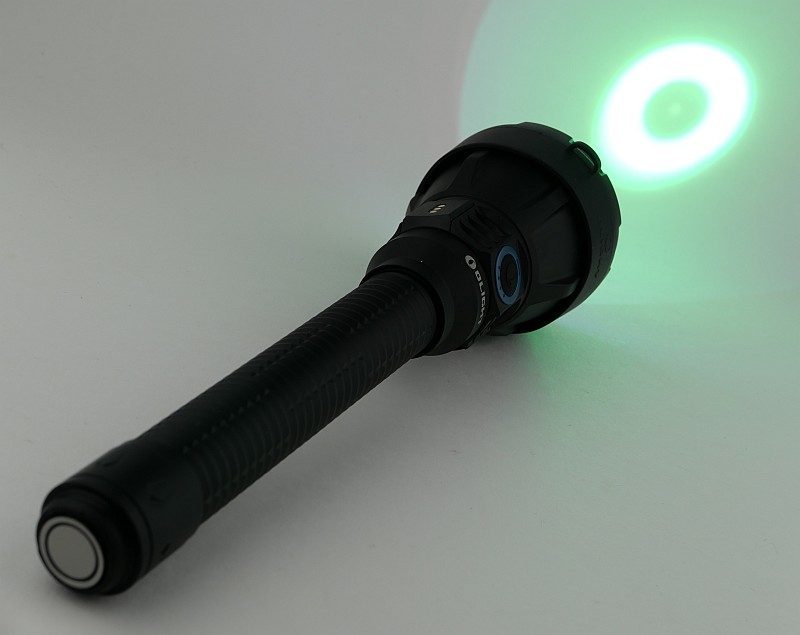
Also included are Red and Green coated glass filters with a elastic TPU lens cone holder that ensures it will stay in place. The coating of the glass appears to be a dichroic filter giving the mirror like appearance until you look directly through the filter when the colour filtering can be seen.
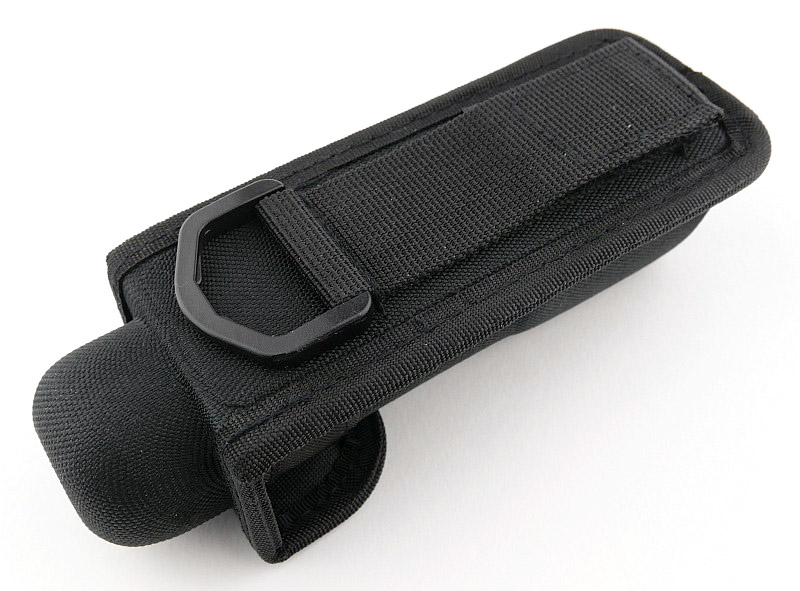
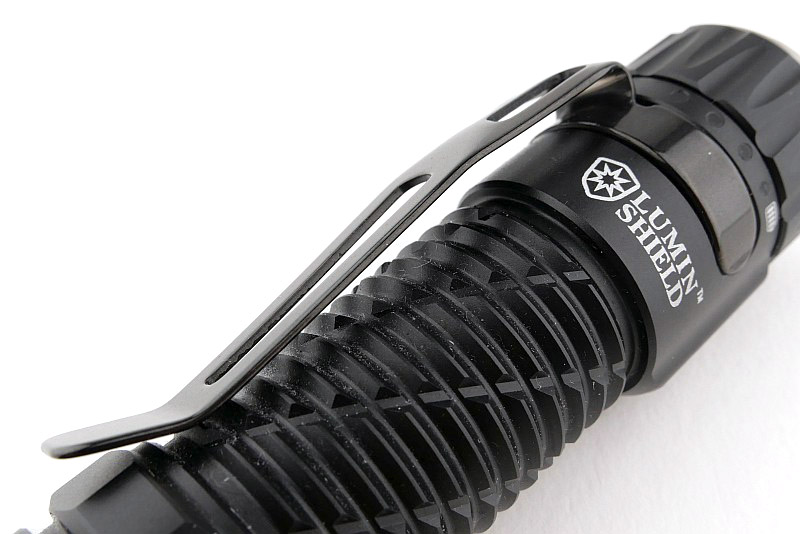
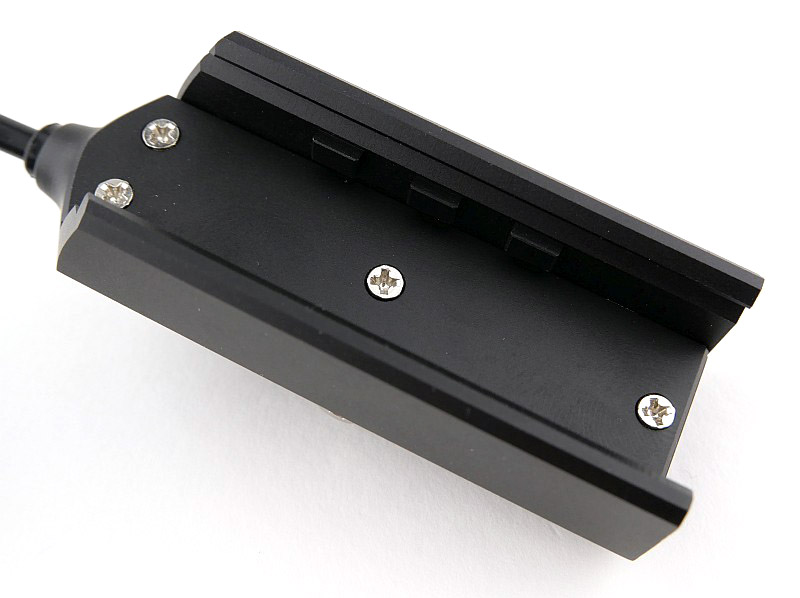
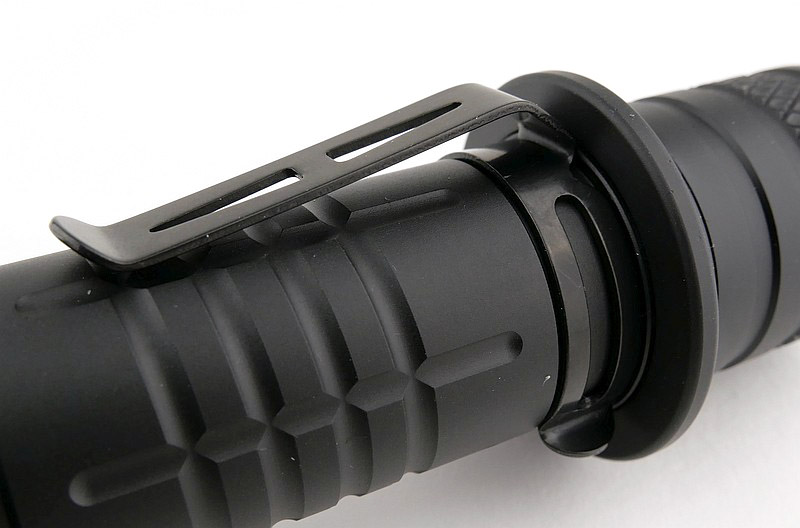
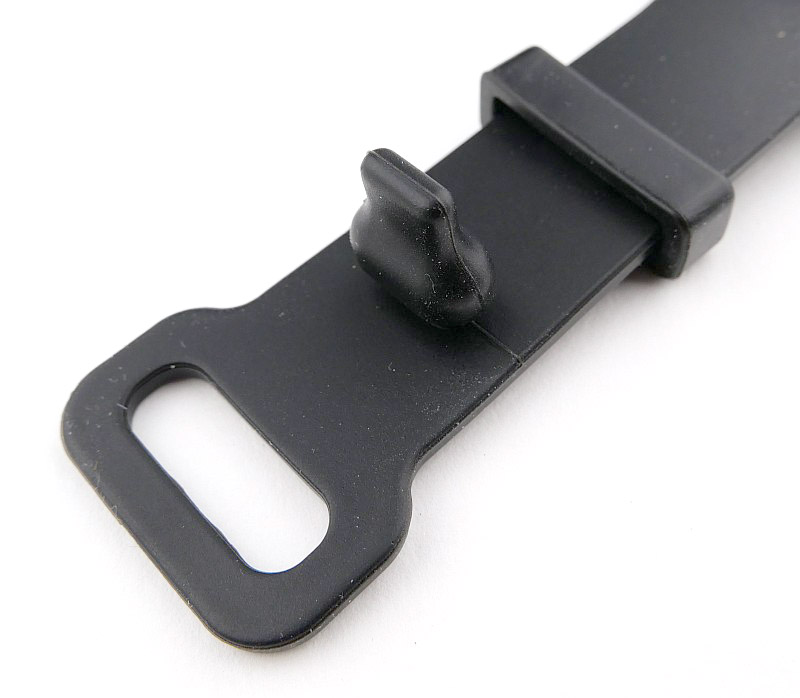
Finally we have the magnetic gun mount. This has a flip-top gate clamp with thumb screw for quick, easy, tool free fitting. Dense closed cell foam lines the inside of the clamp to protect the surface finish of the light. Underneath the mount has three long magnets which have heat shrink tubing on them to protect the gun from direct contact. The large central thumb wheel moves the middle magnet up and down so you can adjust it for different size barrels.


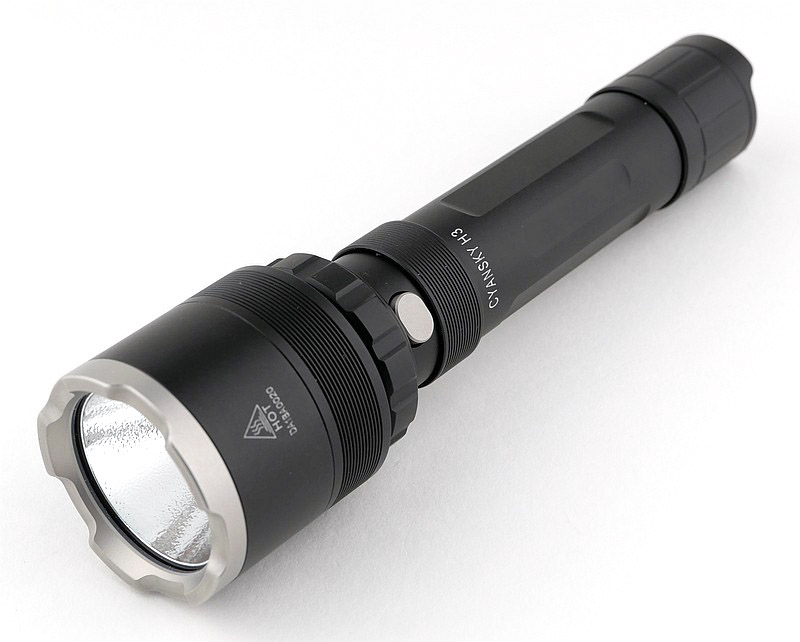
Taking a more detailed look at the Javelot Turbo 2:
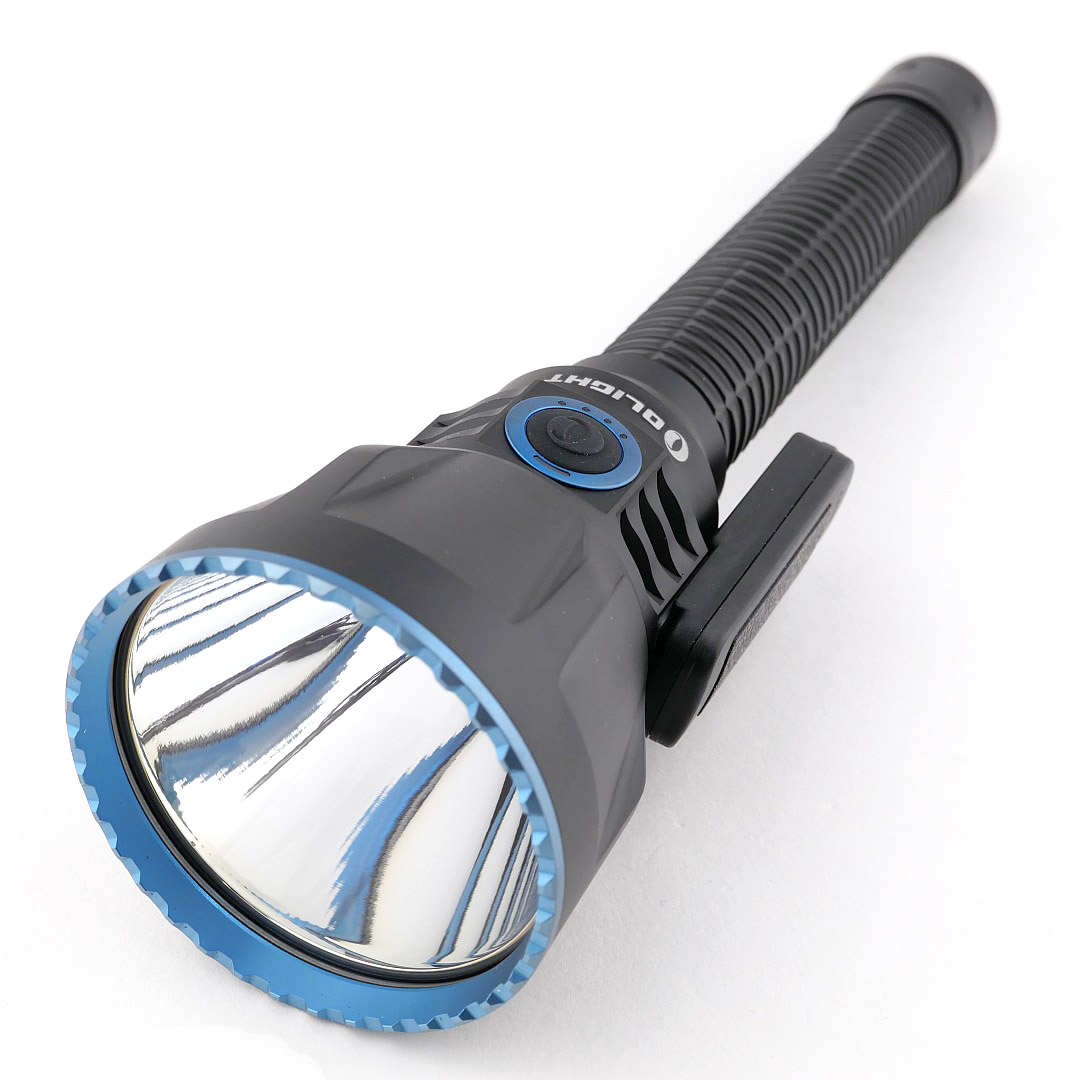
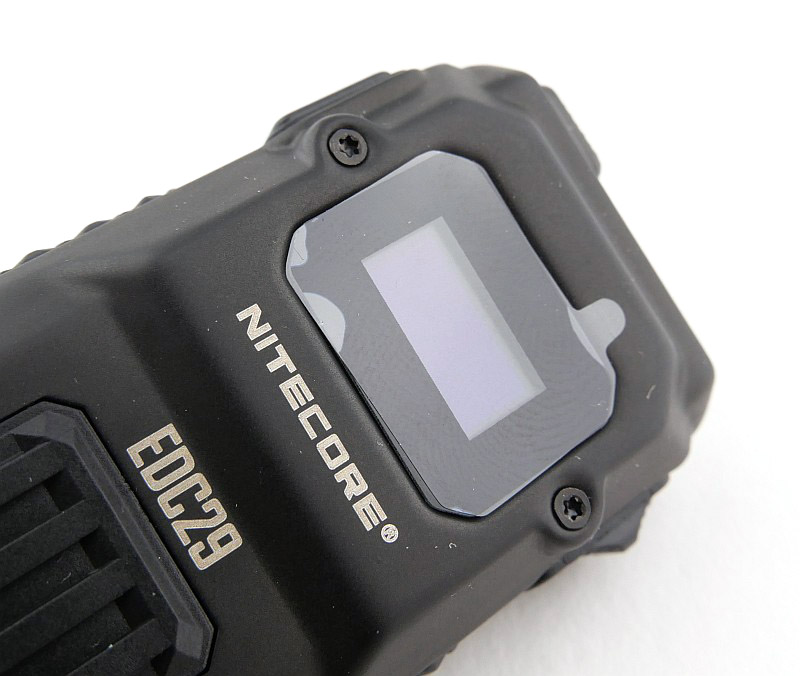
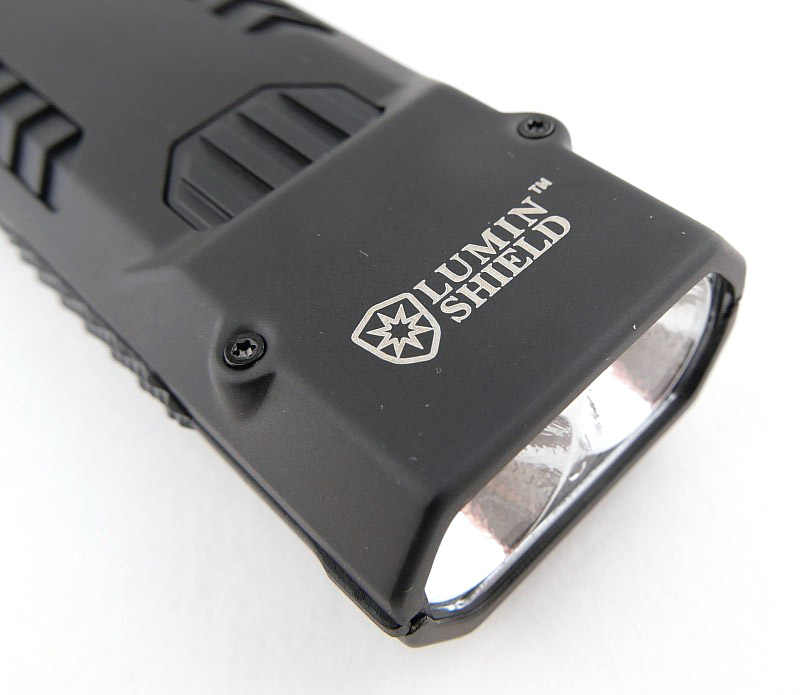
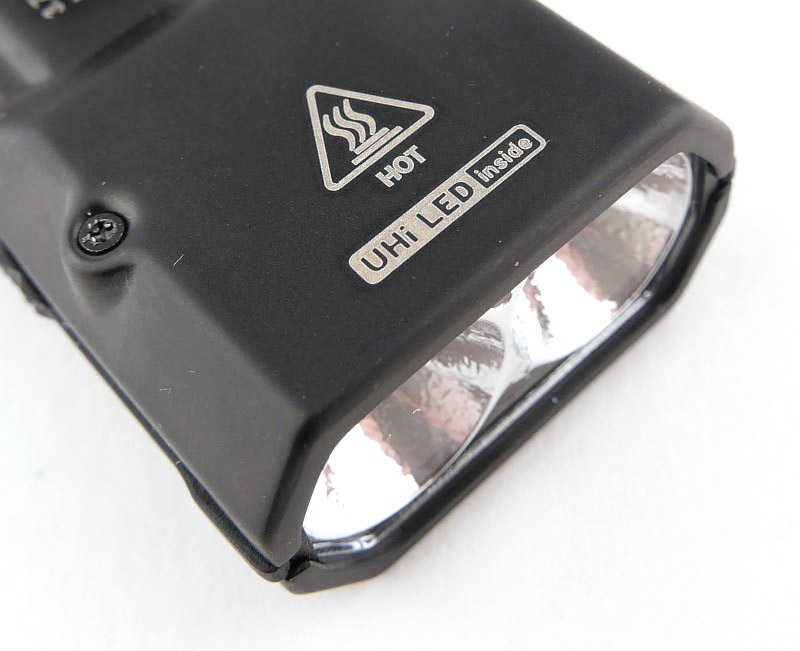
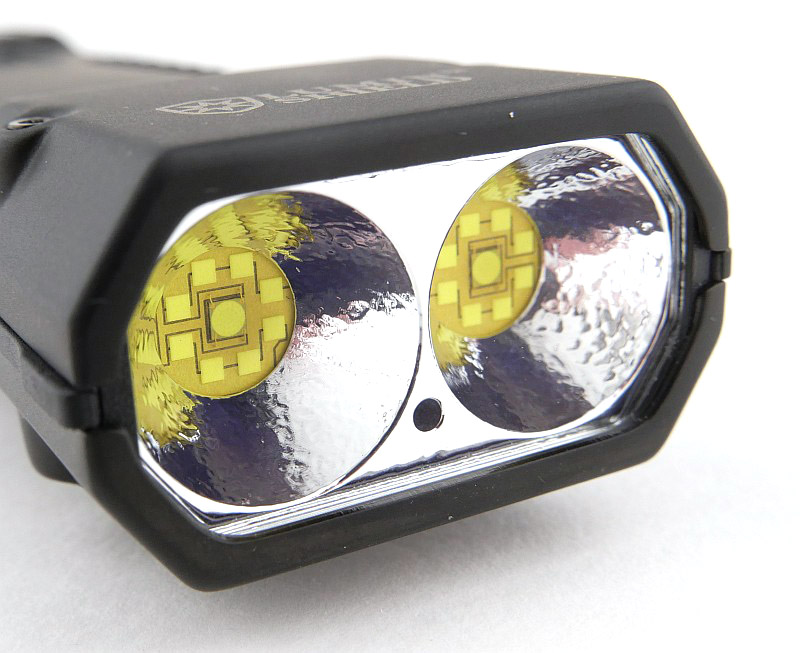
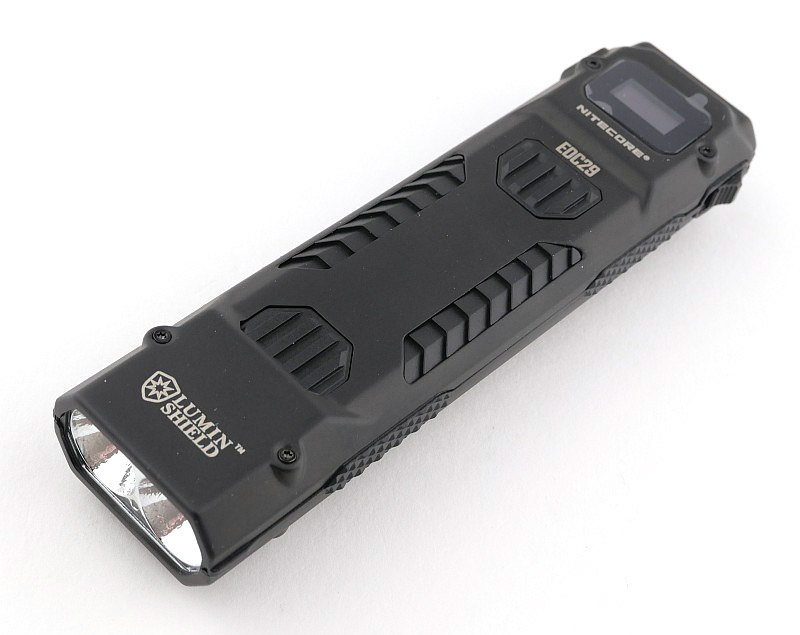
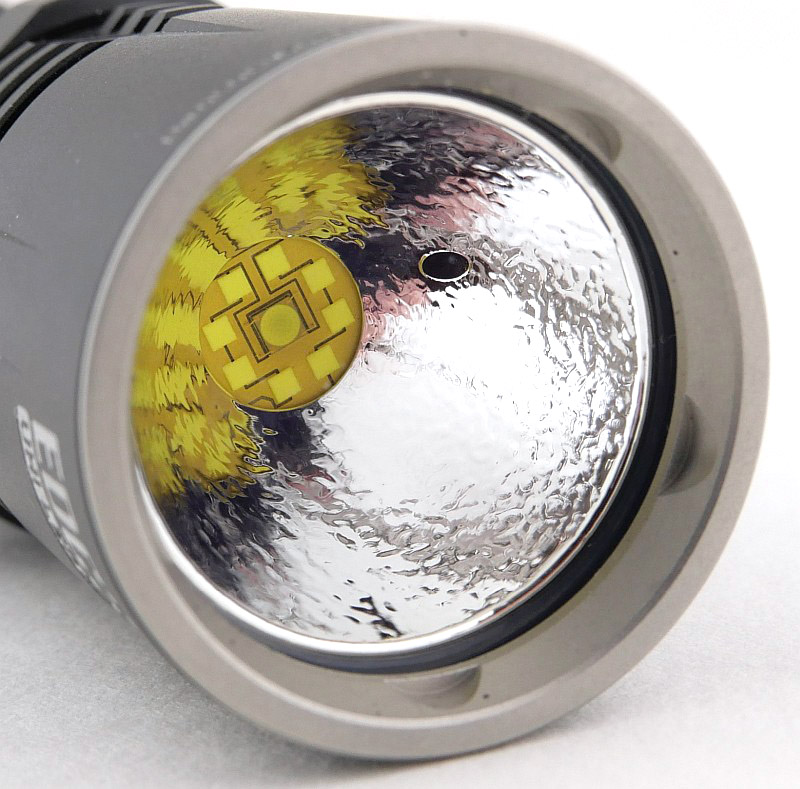
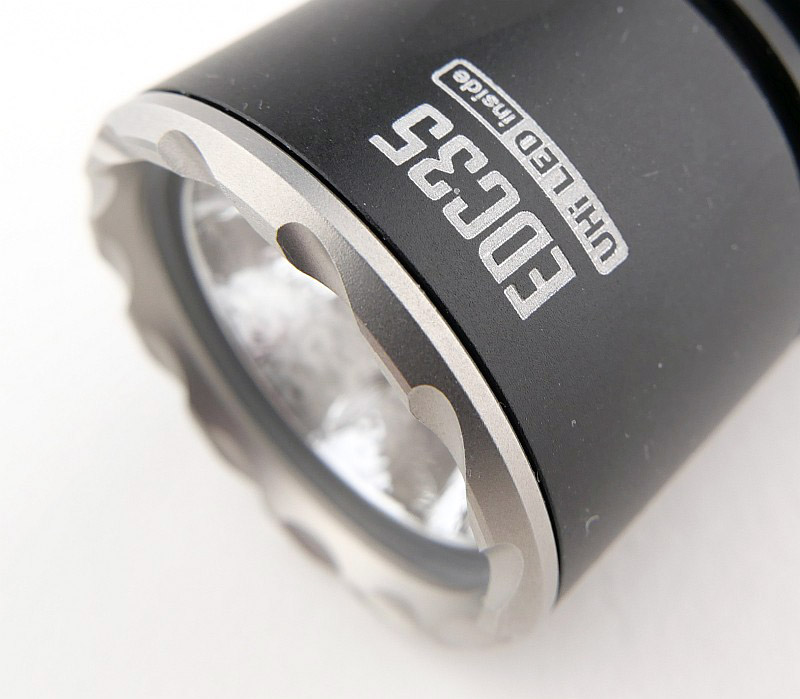
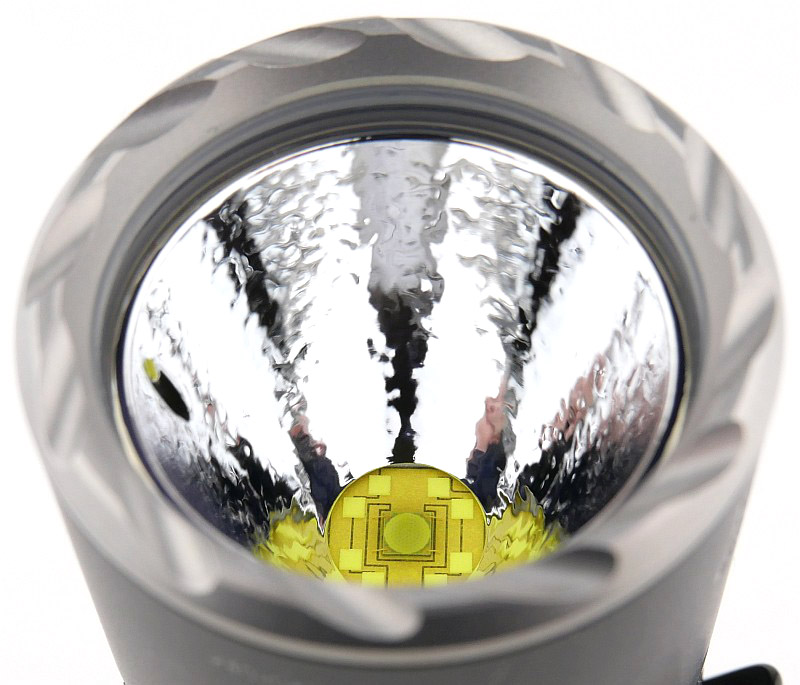
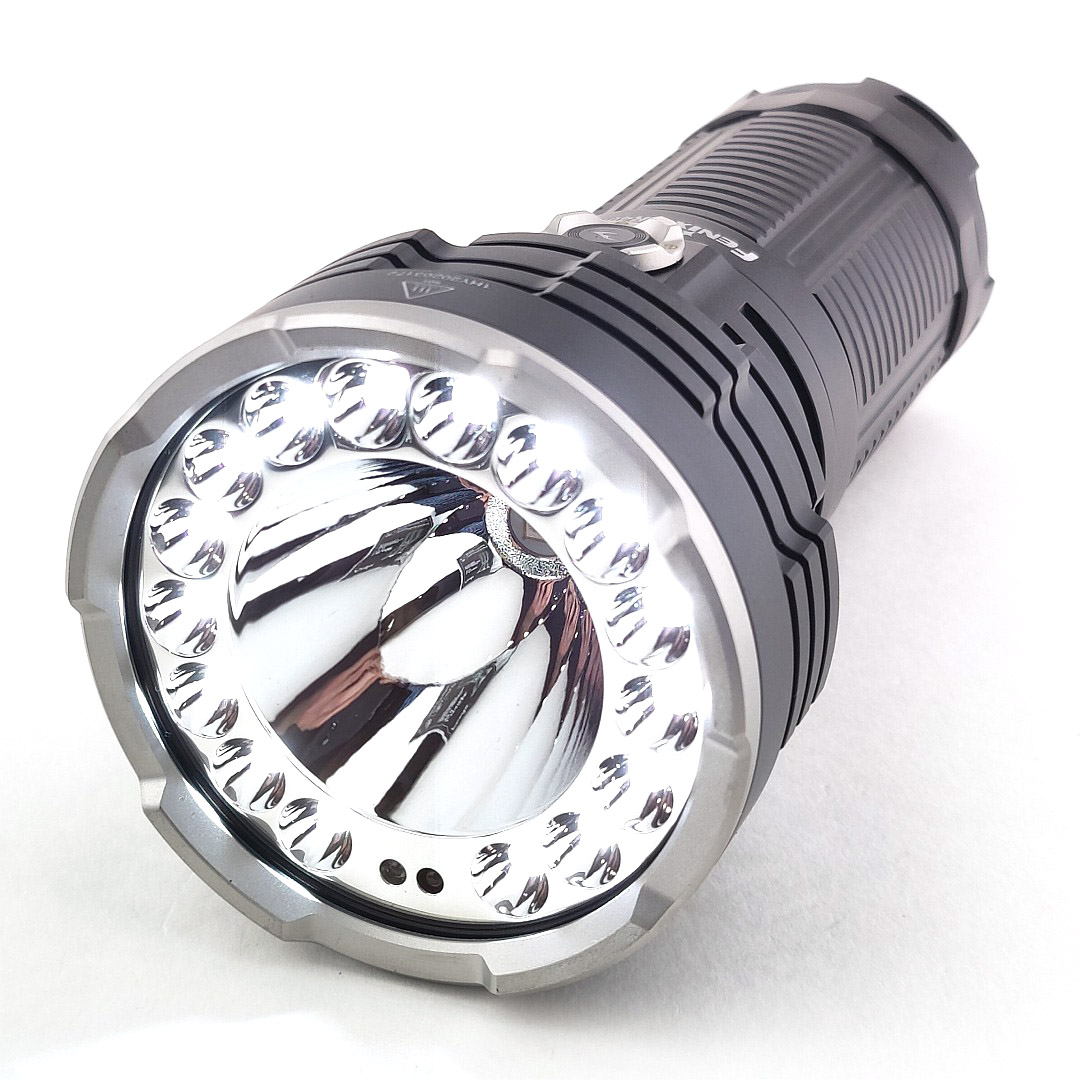
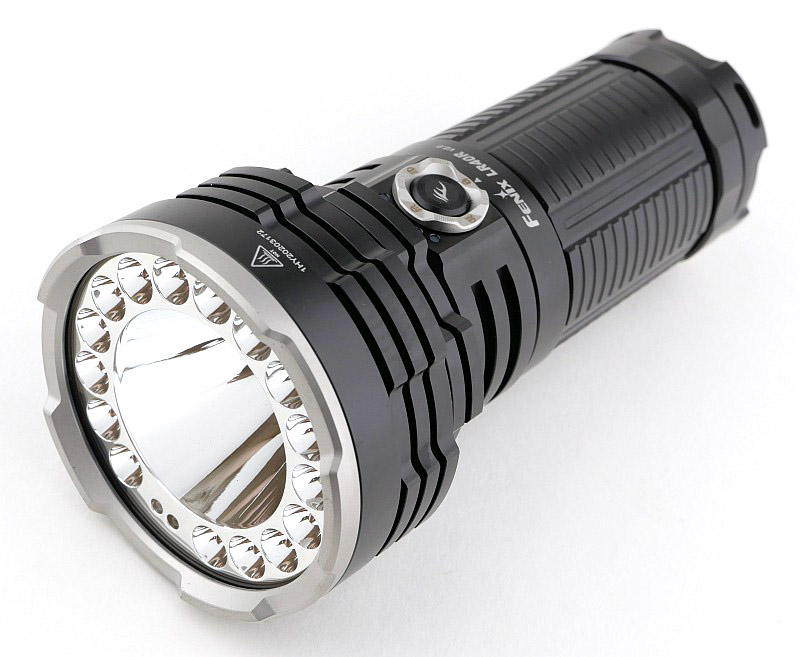
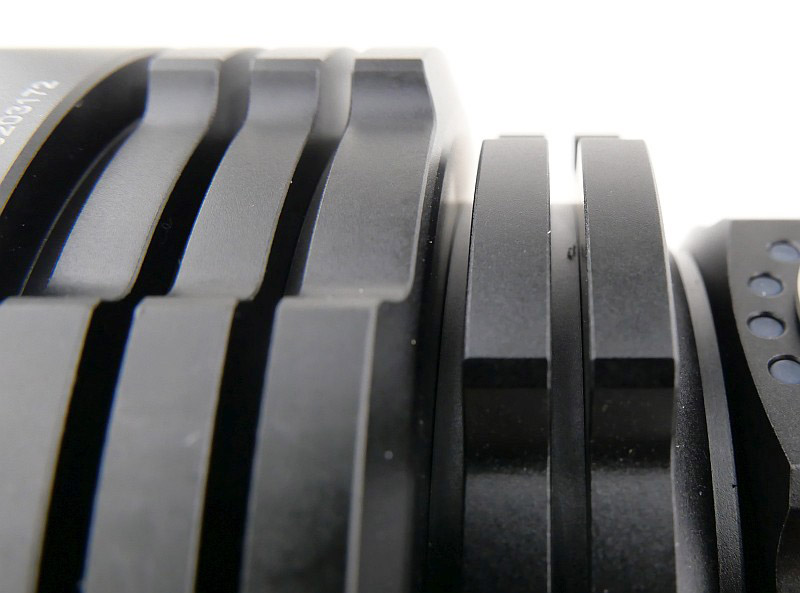
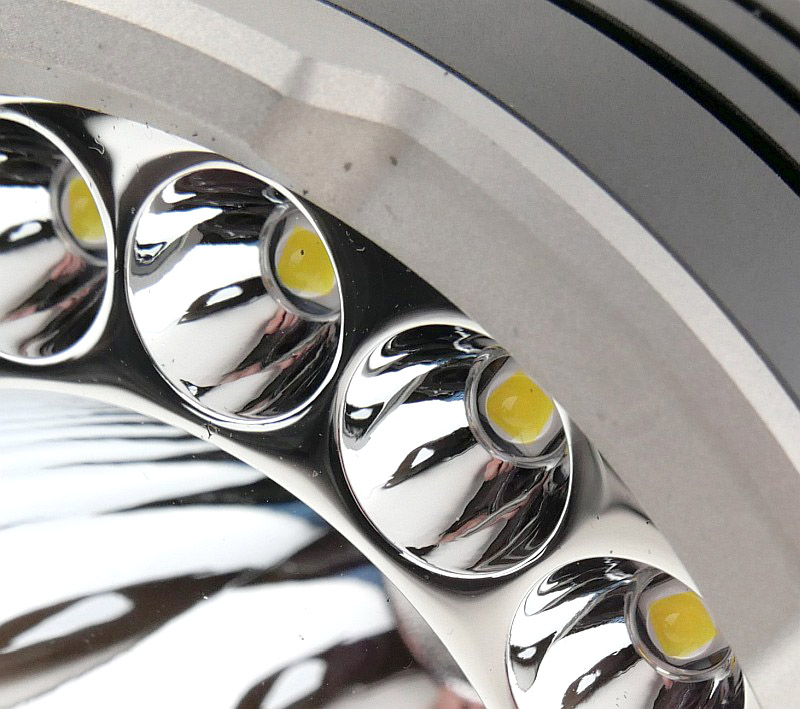
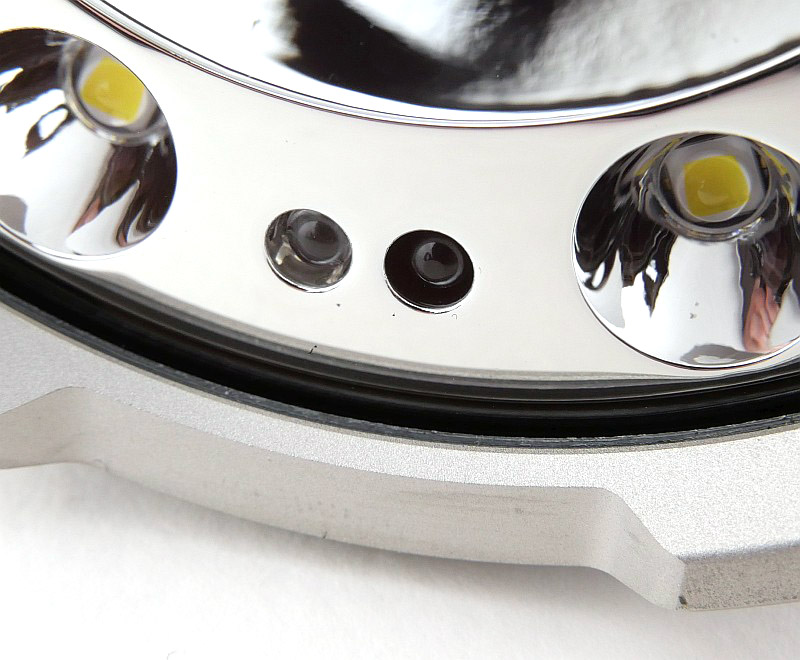
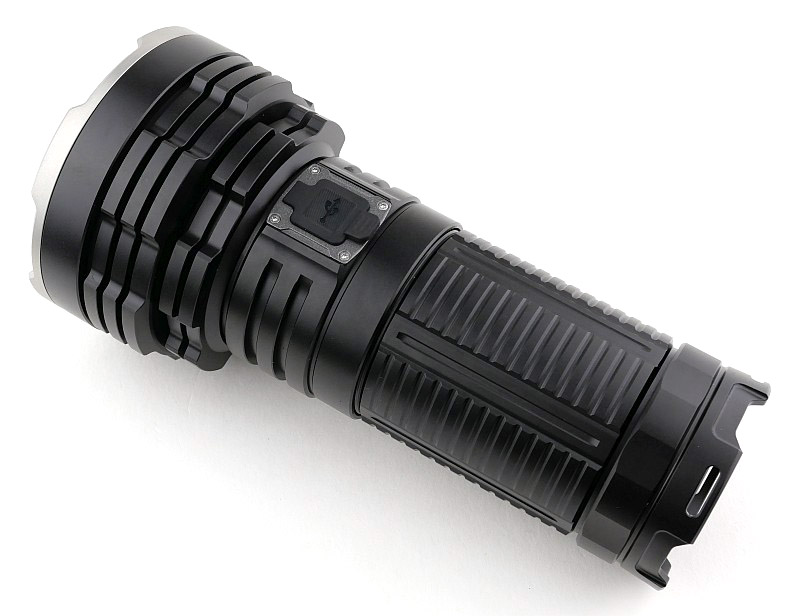
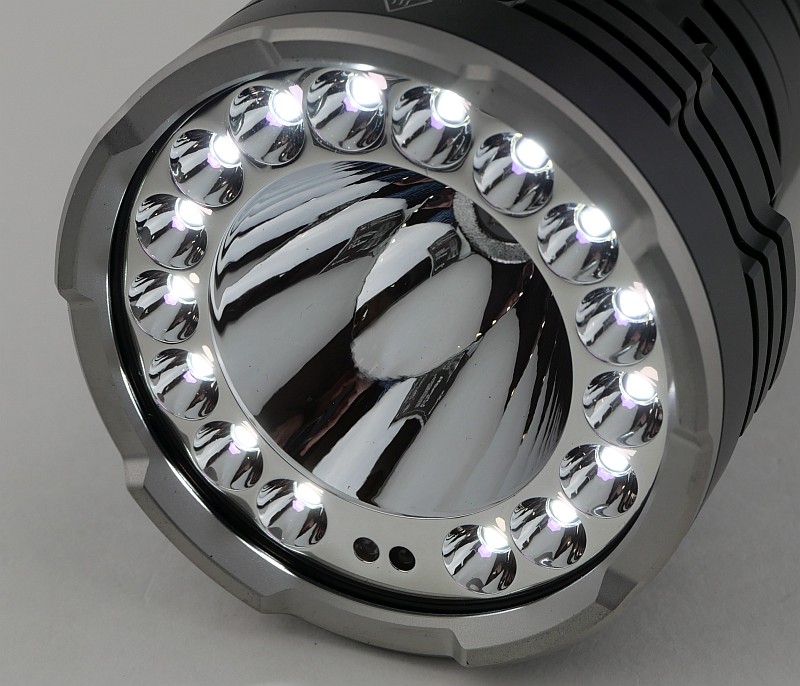
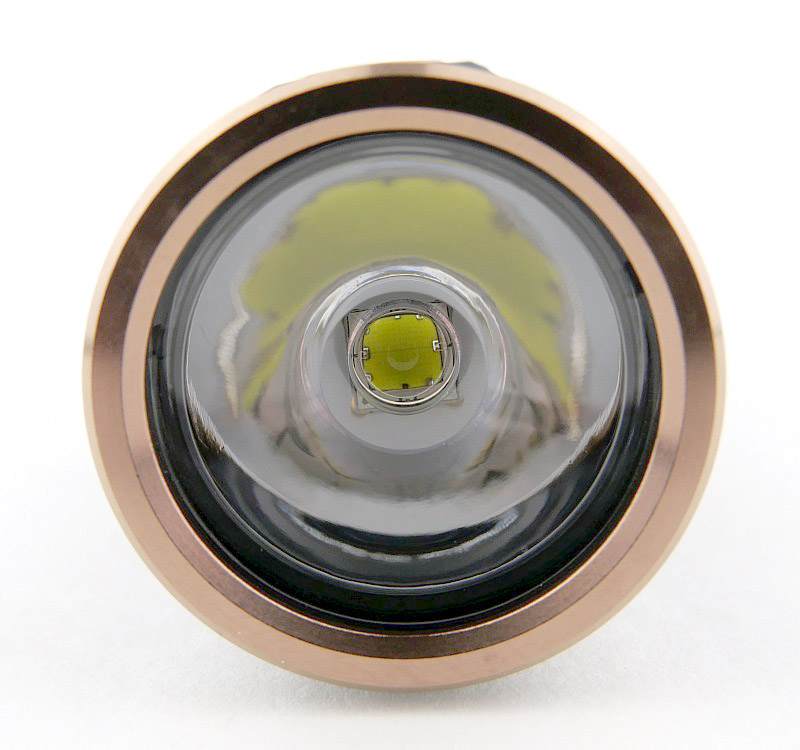
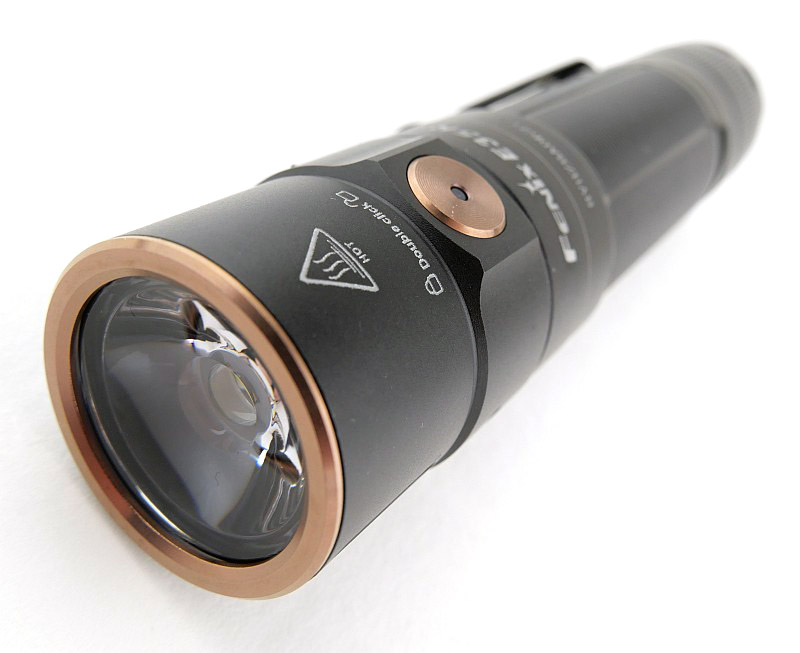
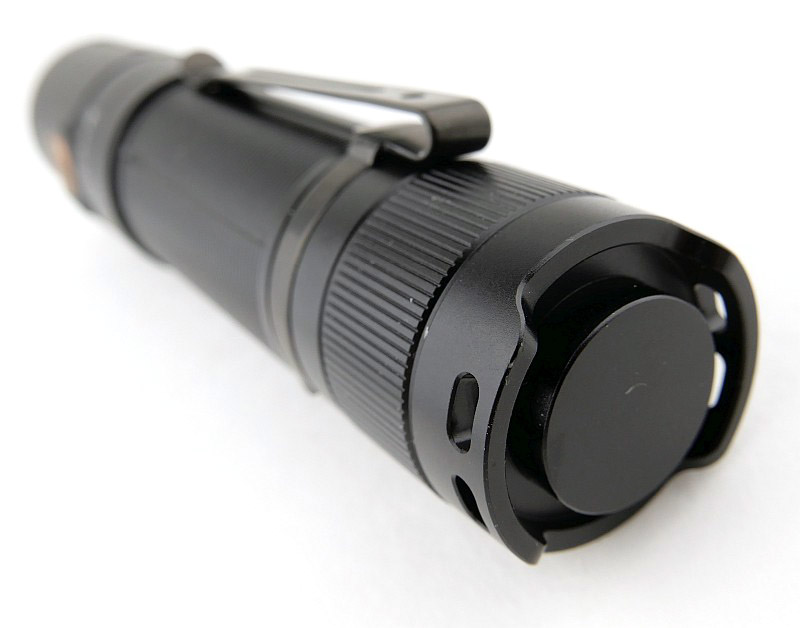
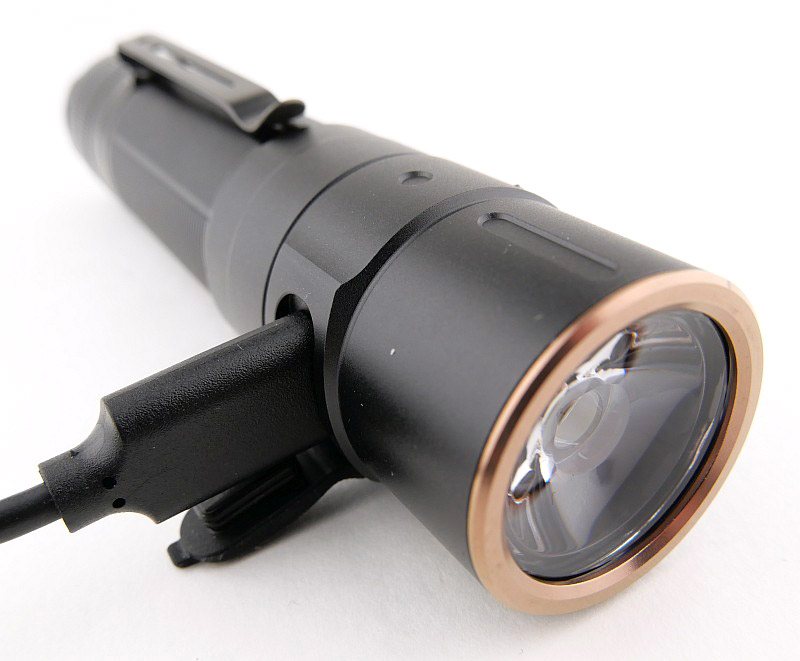
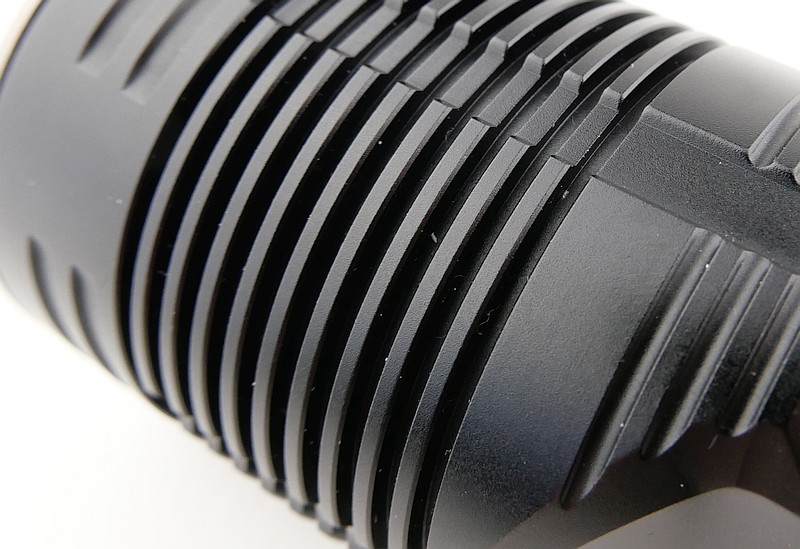
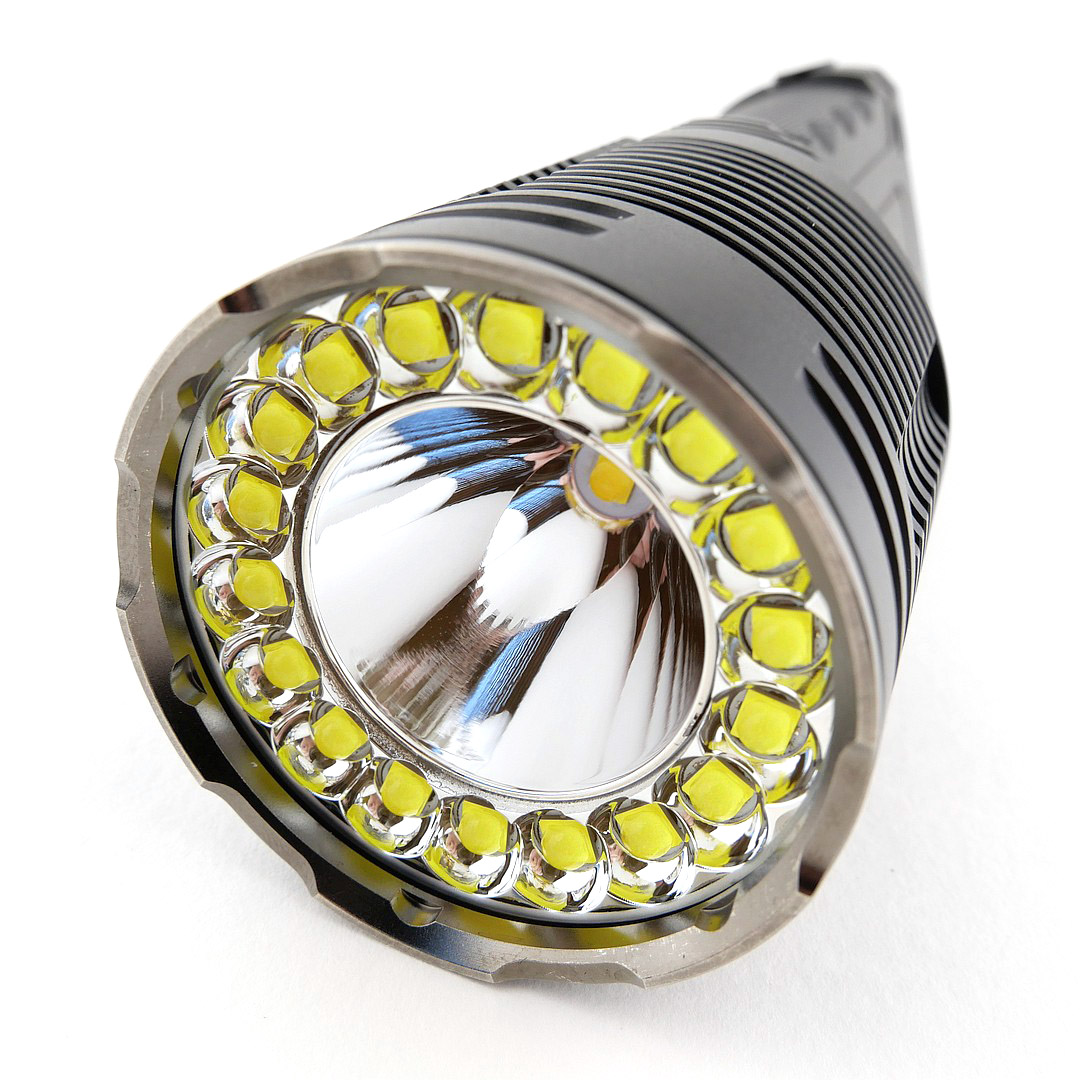
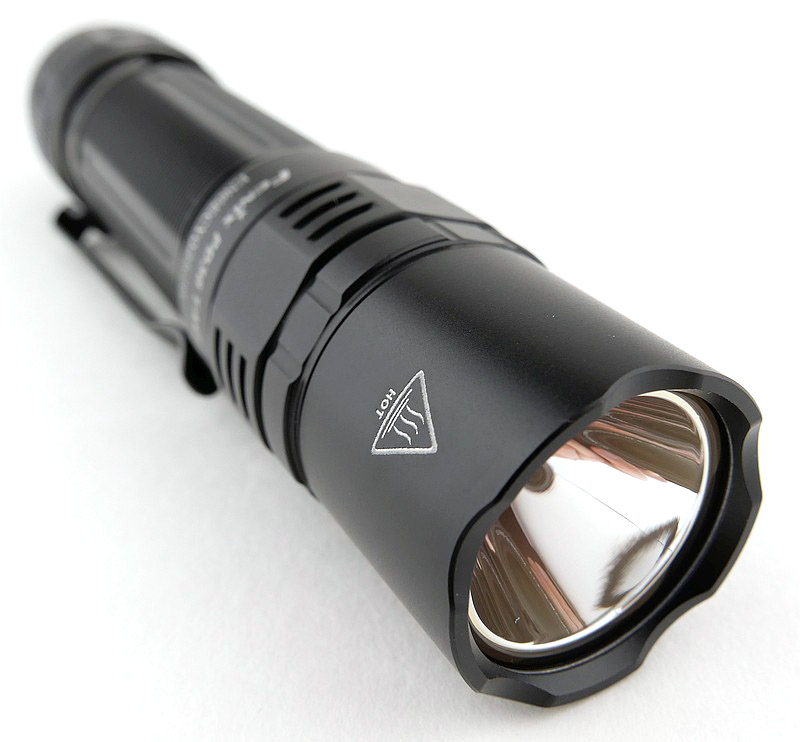
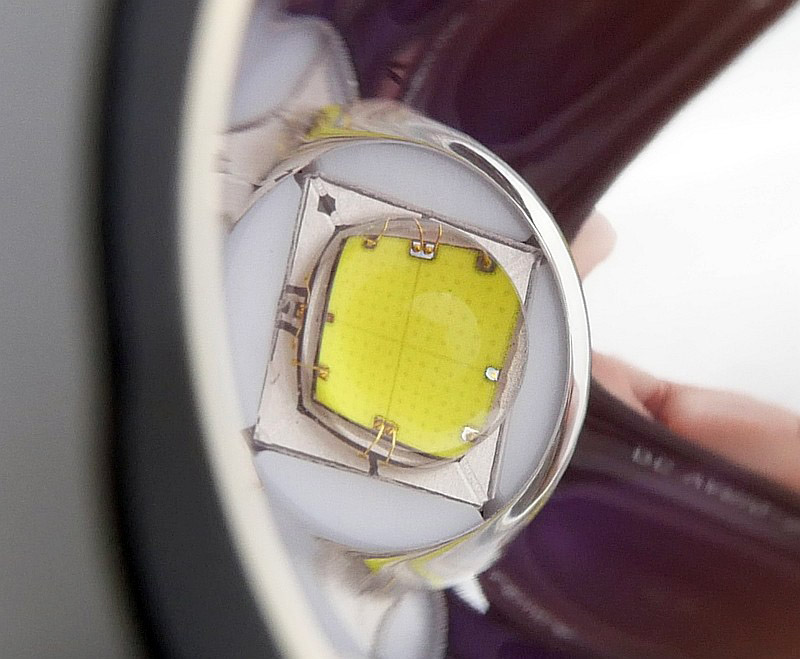
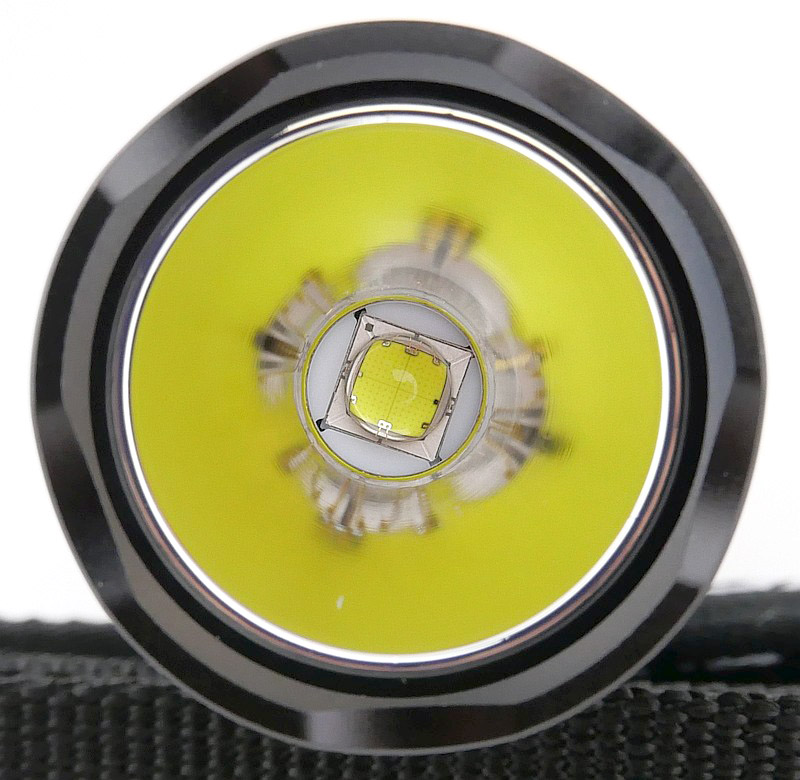
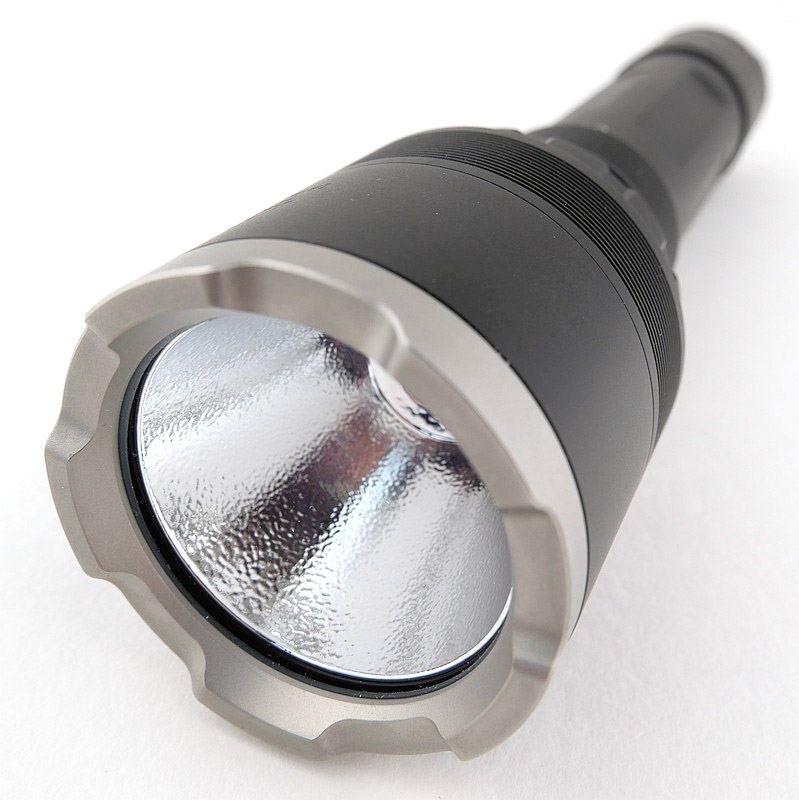
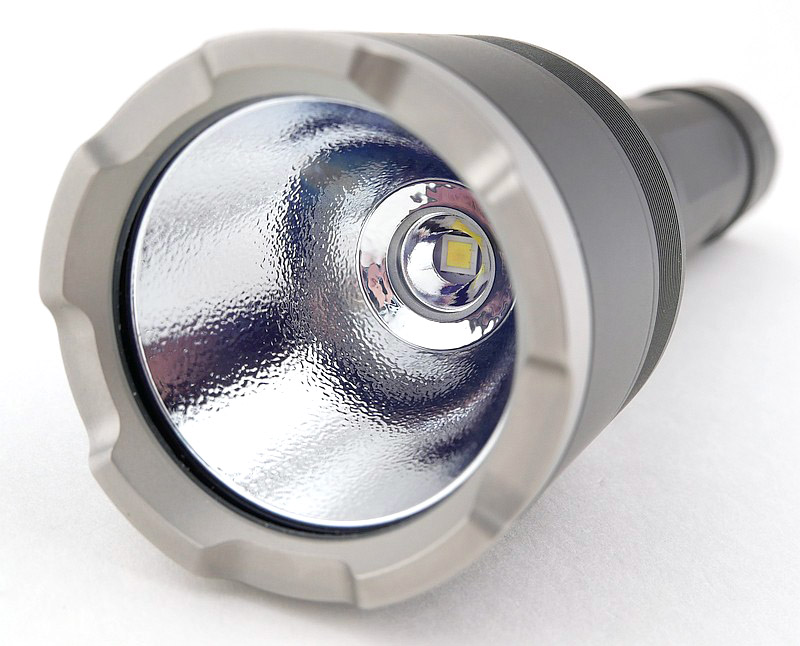
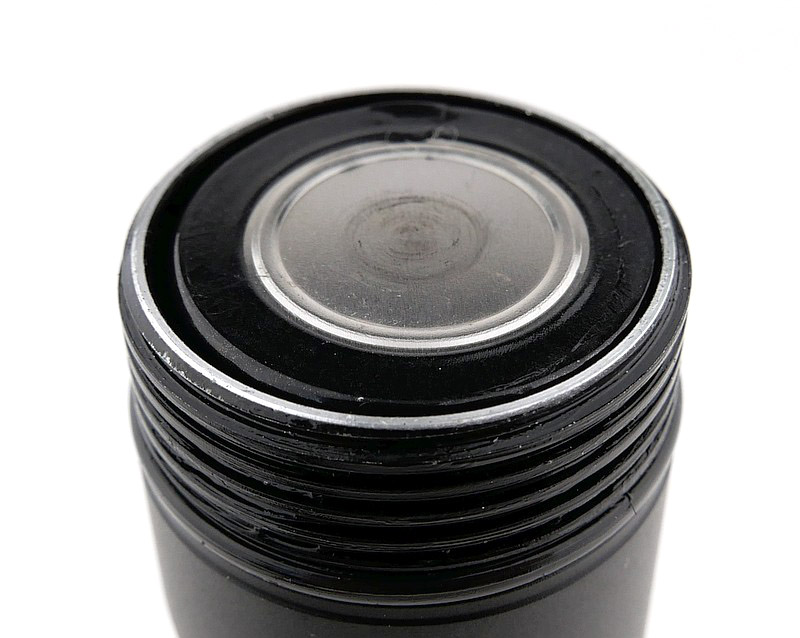
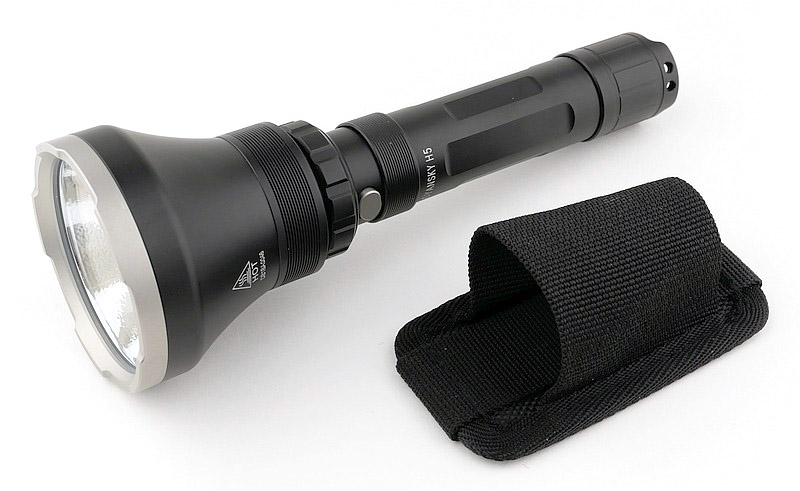
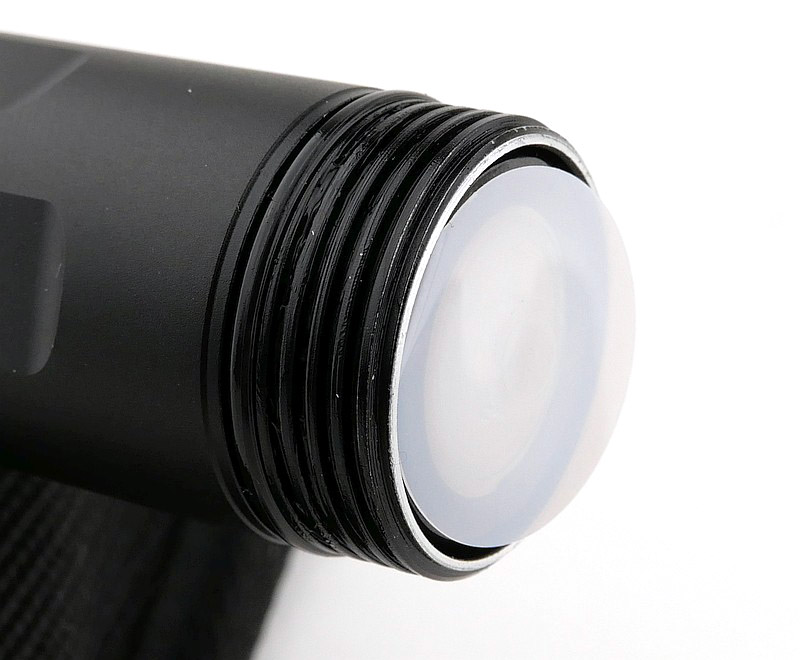
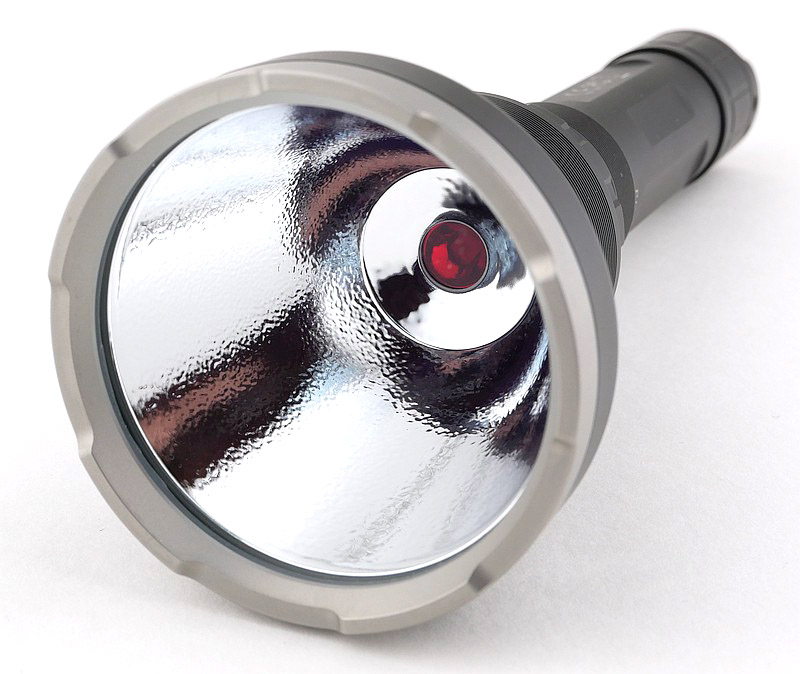
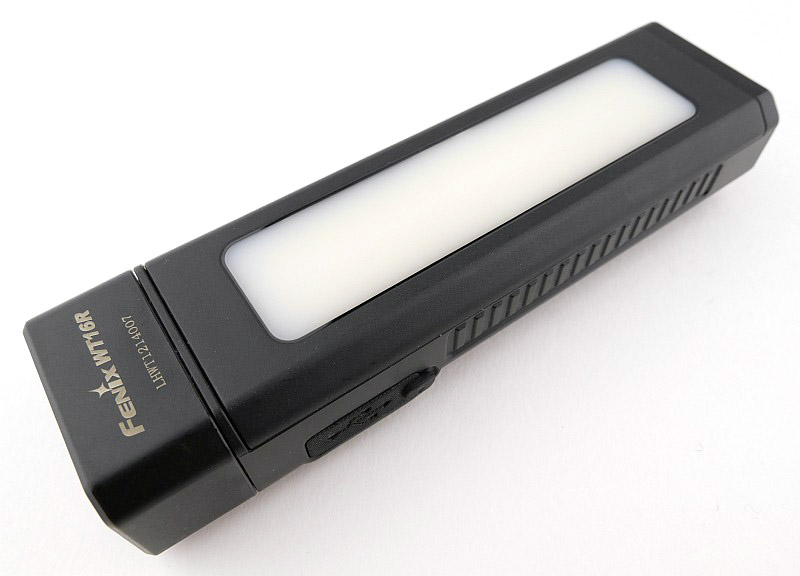
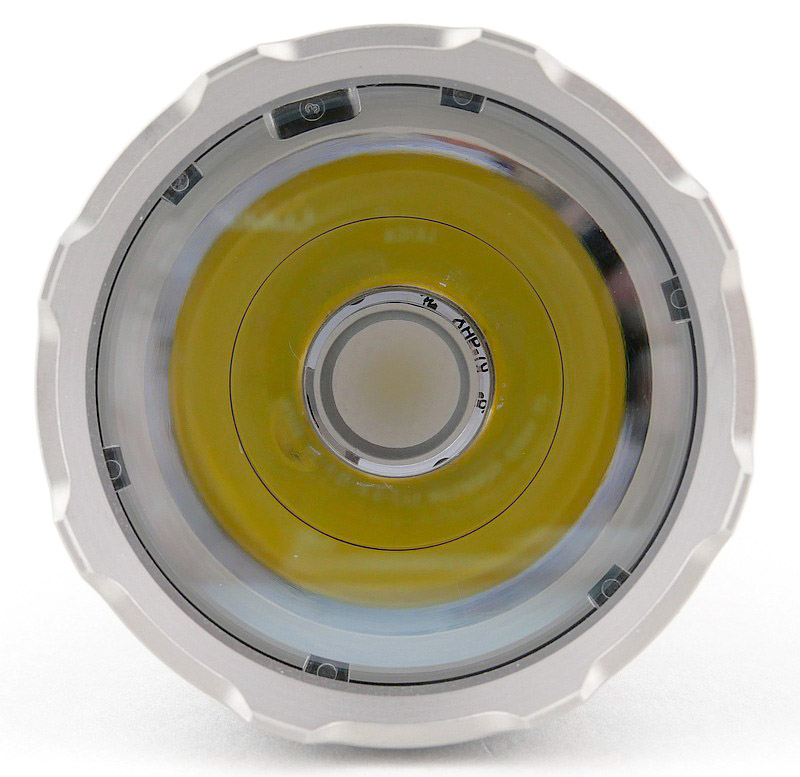
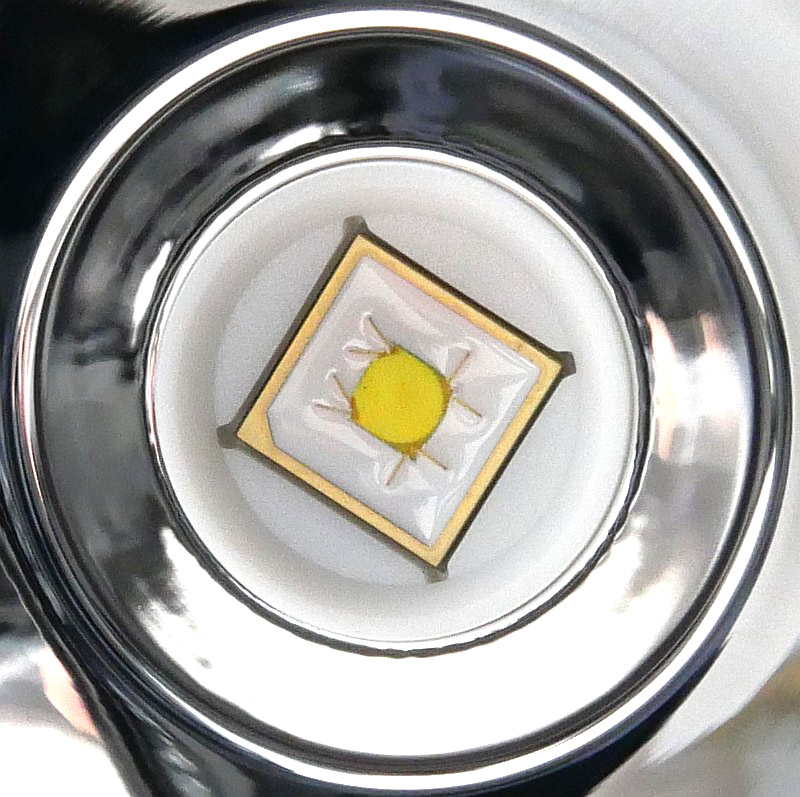
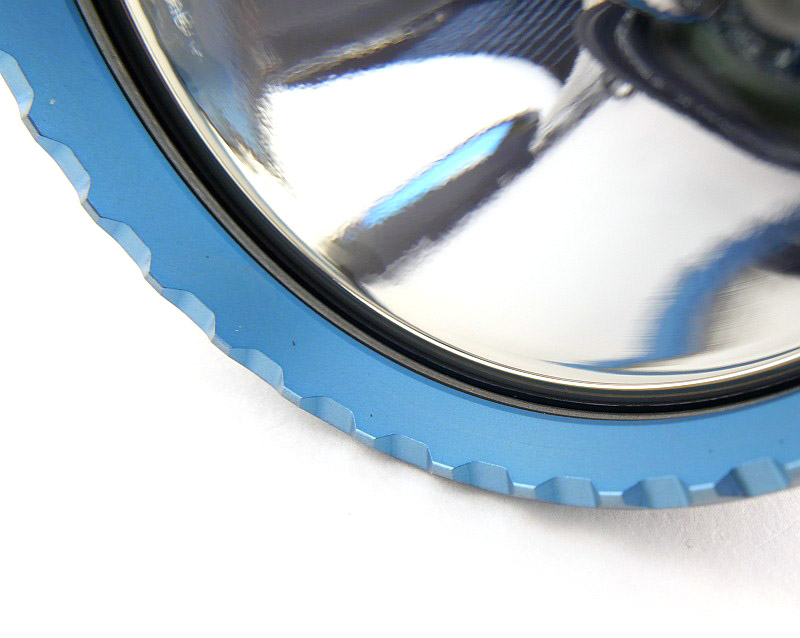
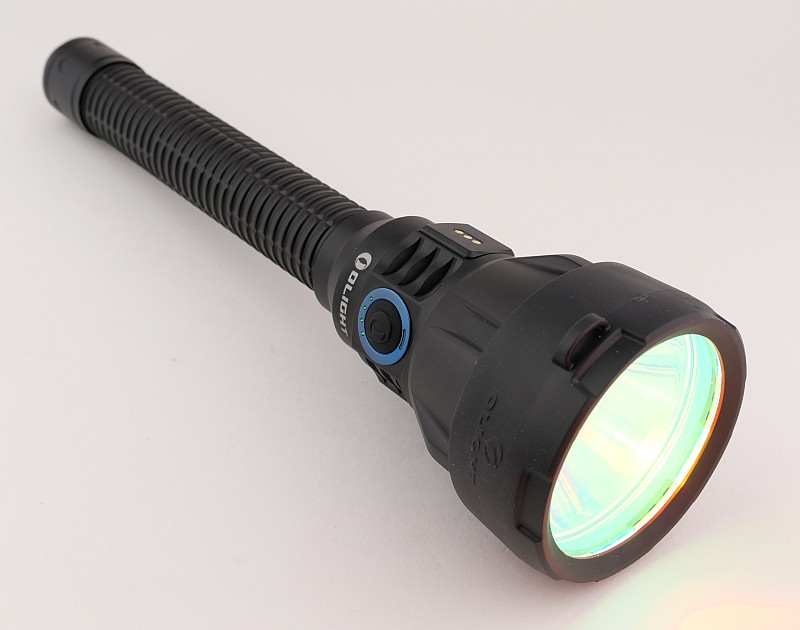
And now onto the main feature; the Javelot Turbo 2 itself. Straight out of the box, the front lens has a yellow plastic protector in place. Make sure you remove this before turning the light on, unless you like smelly melted plastic film over your main lens. And now we see that wide, deep reflector that gives the Javelot lights their fantastic beam range. At the heart of this light is a 27.5W LED, oddly otherwise not given a specification.
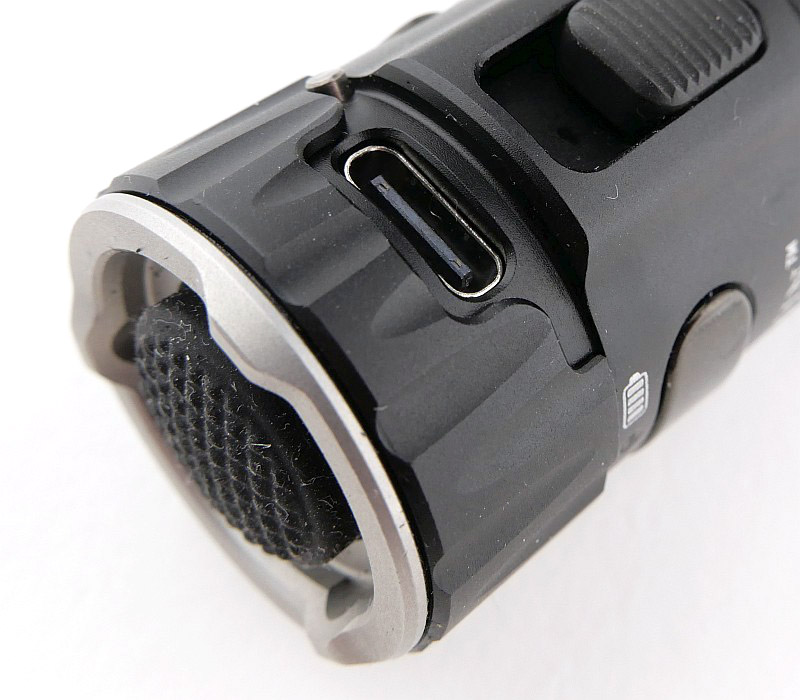
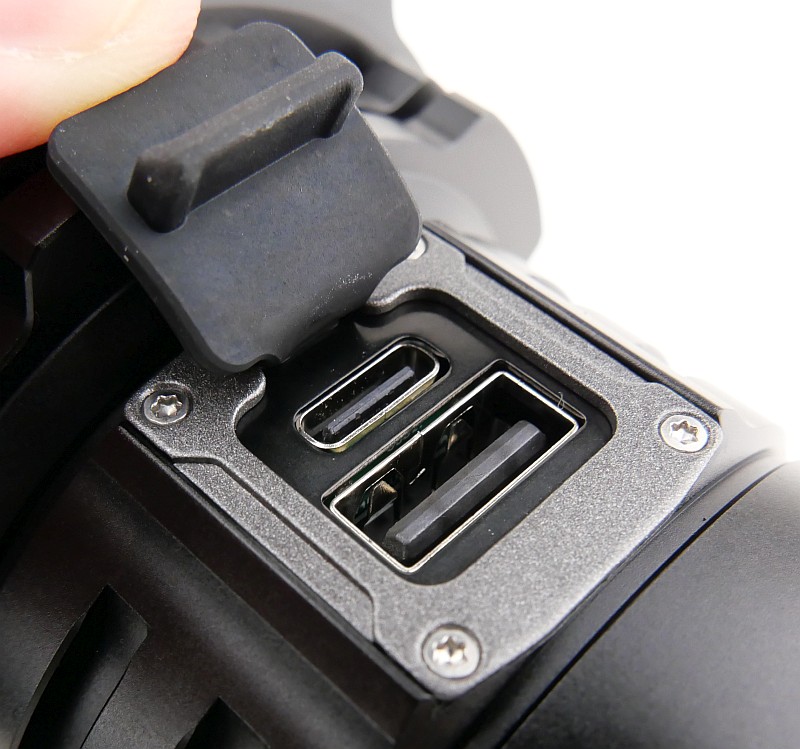
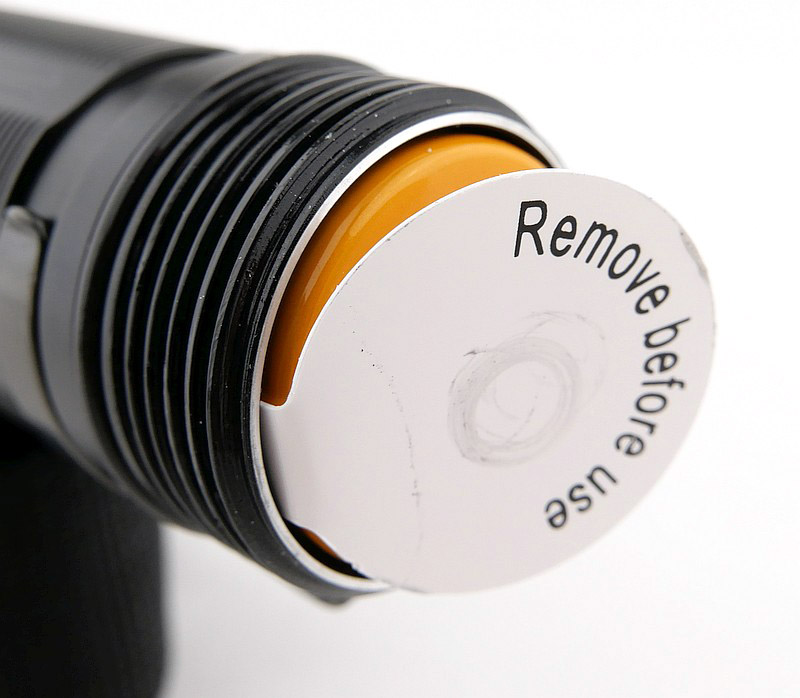
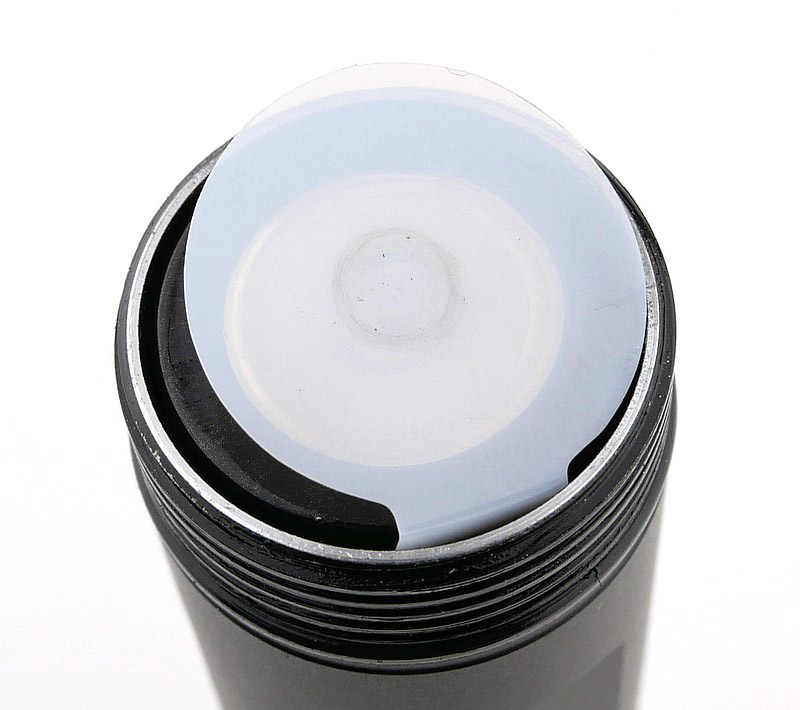
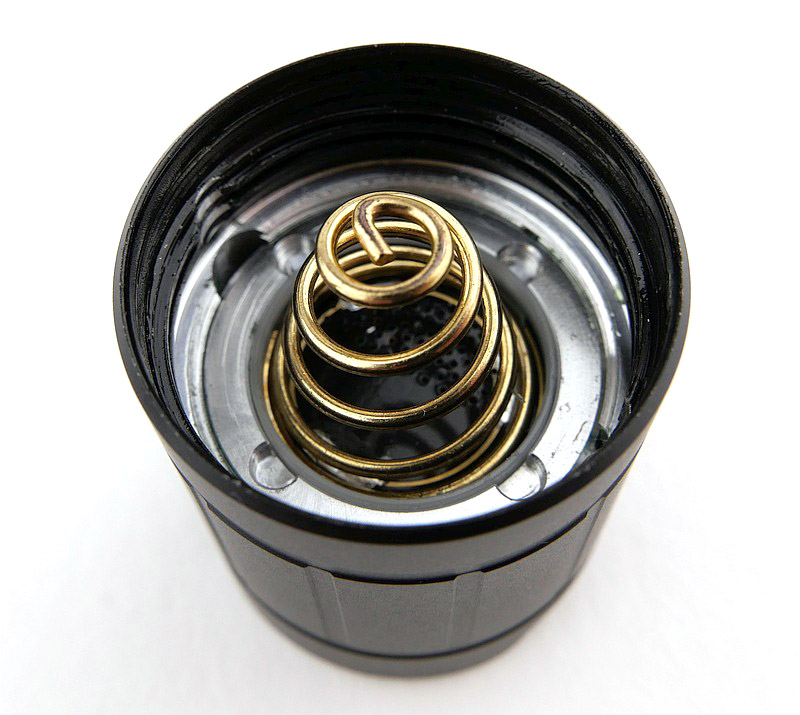
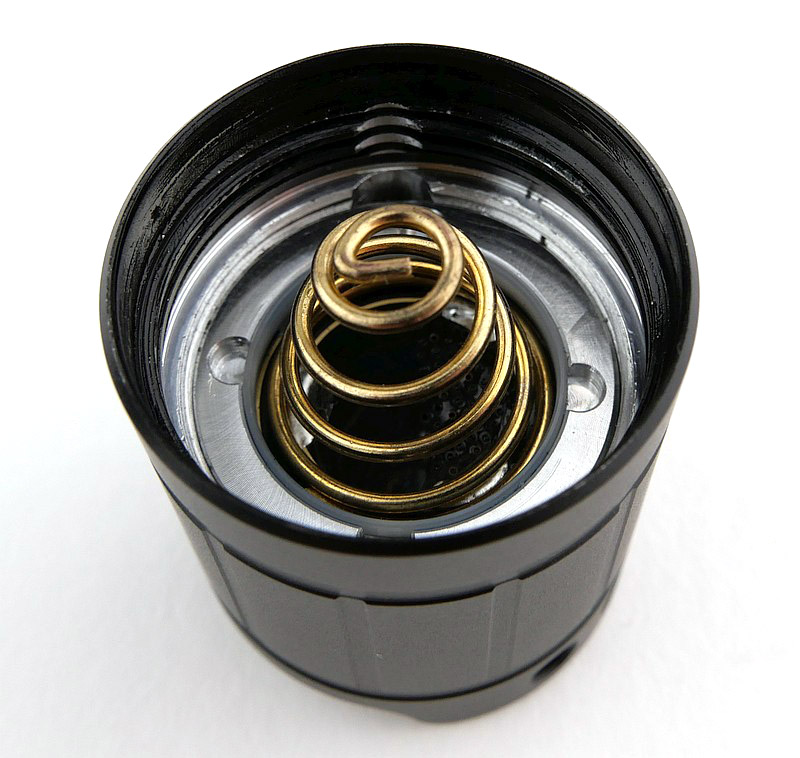
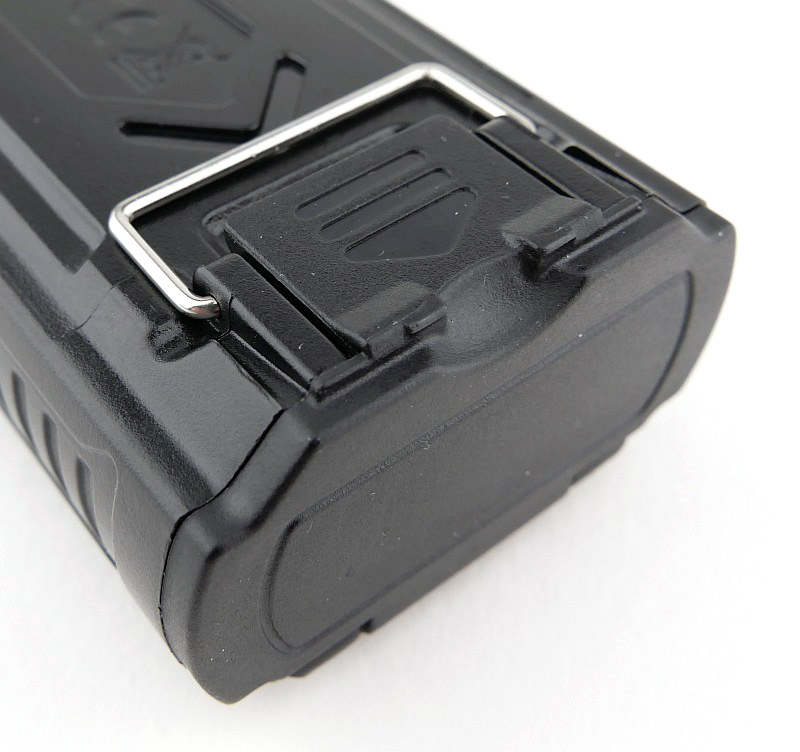
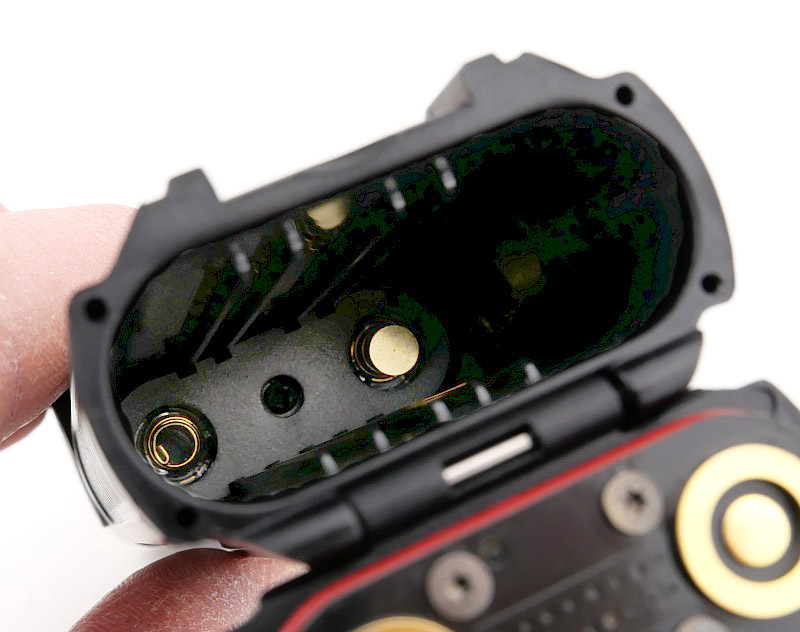
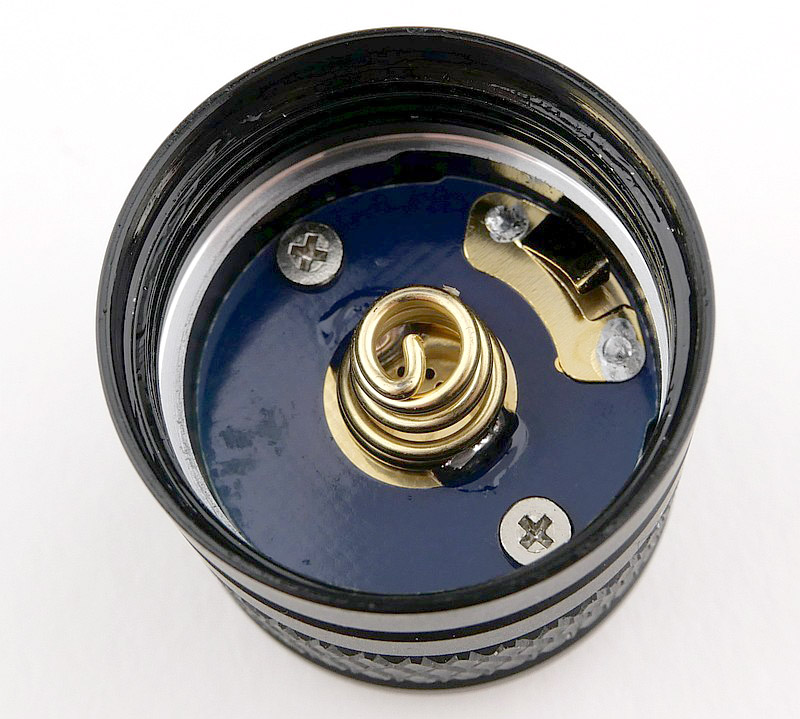
However, you can’t accidentally turn on the light right out of the box, as an insulator is fitted to prevent accidental activation of the light during transport, so you need to unscrew the tail-cap and take out the battery fully to remove this safety insulator. While doing so you can admire the contacts and battery, as afterwards you will most likely not see them again thanks to the built in USB-C charging.
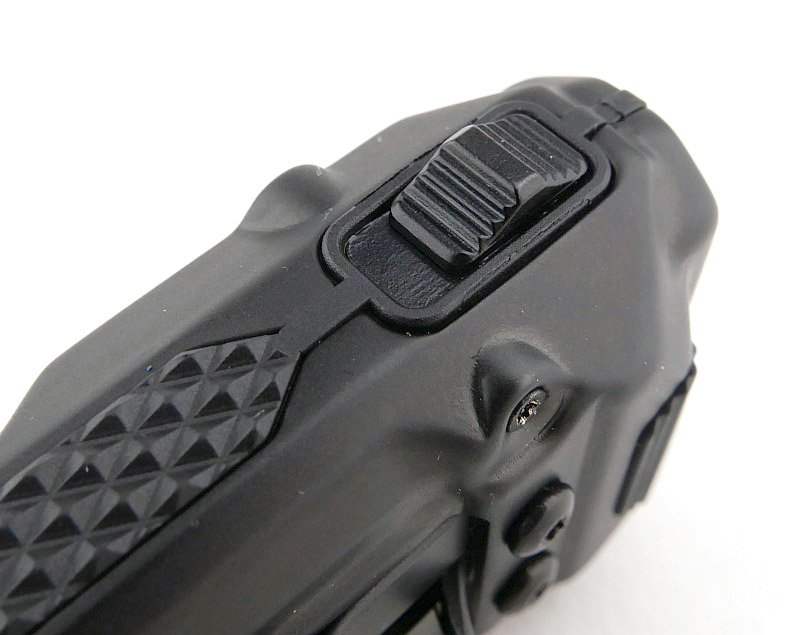
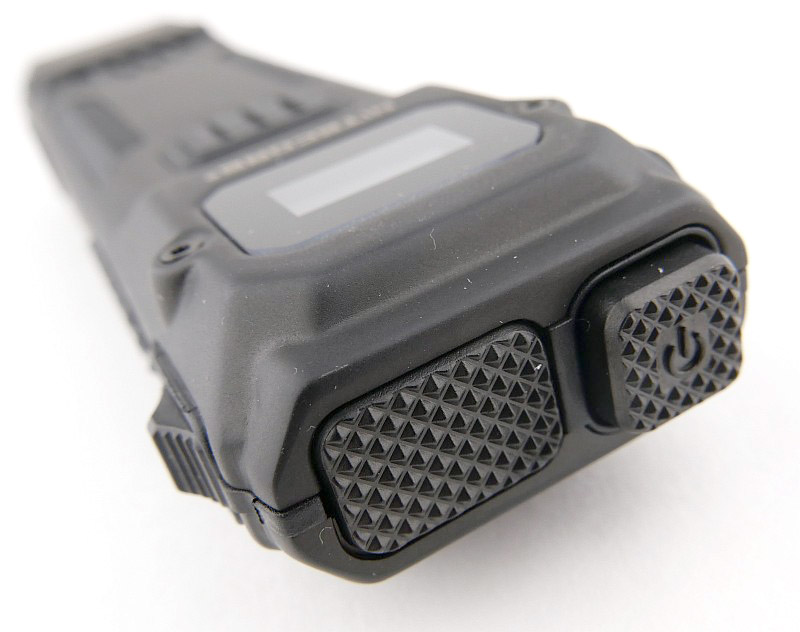
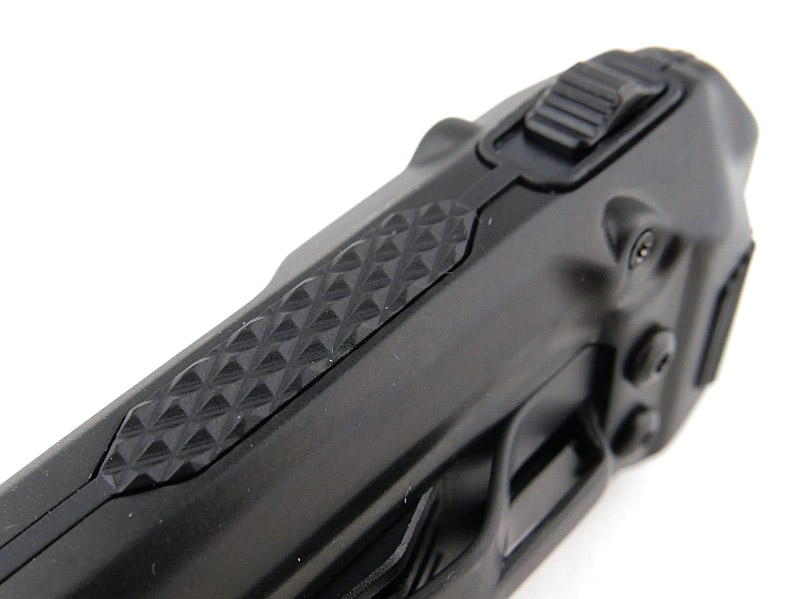
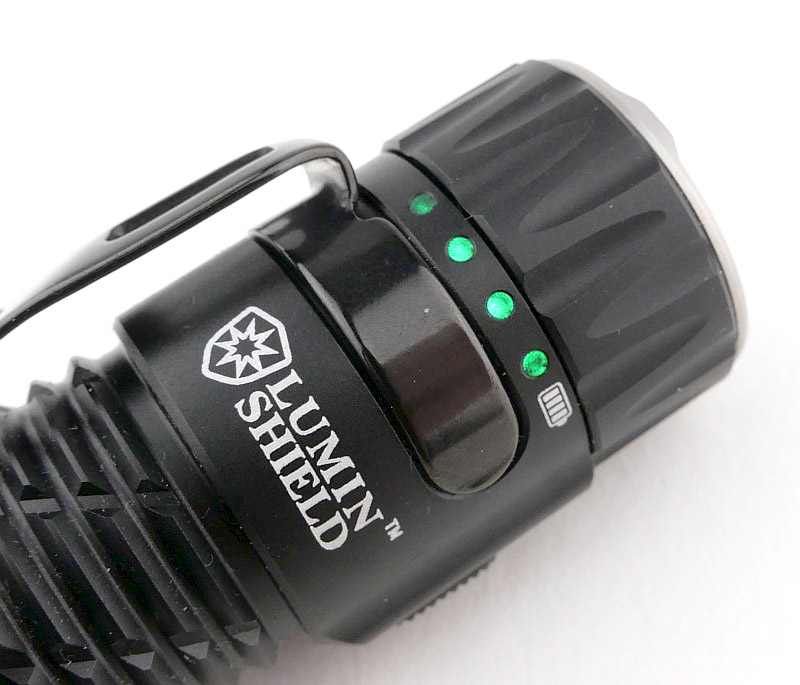
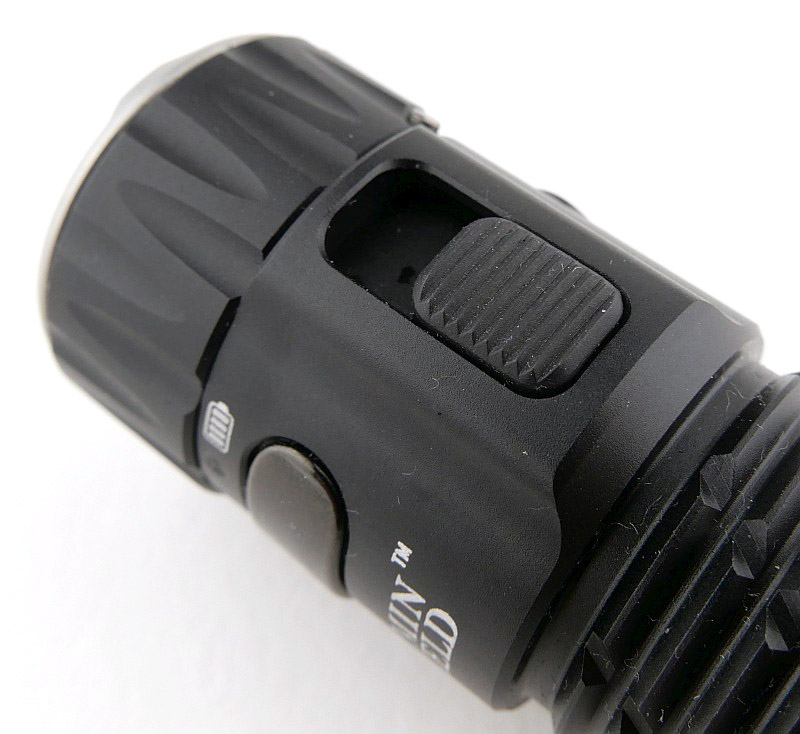
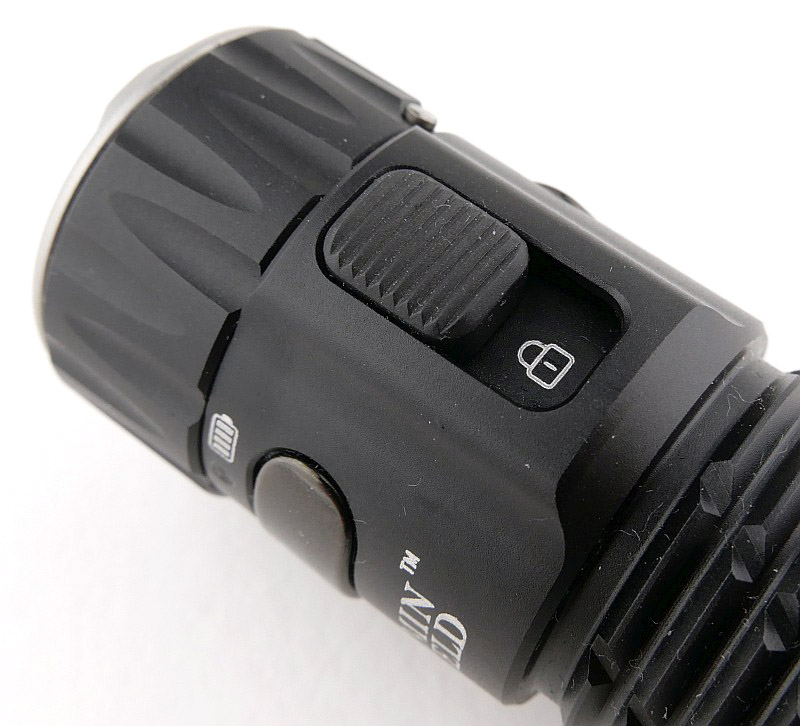
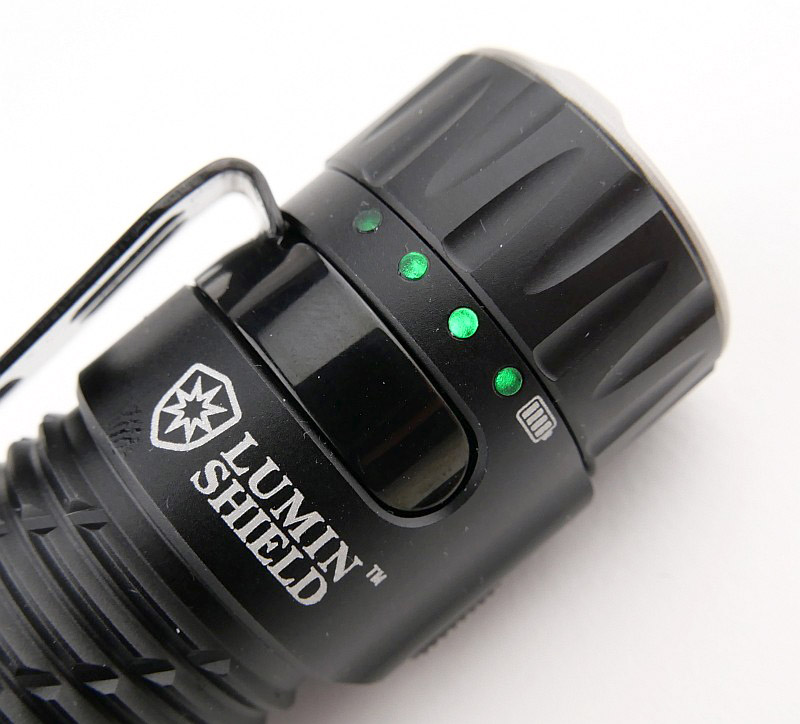
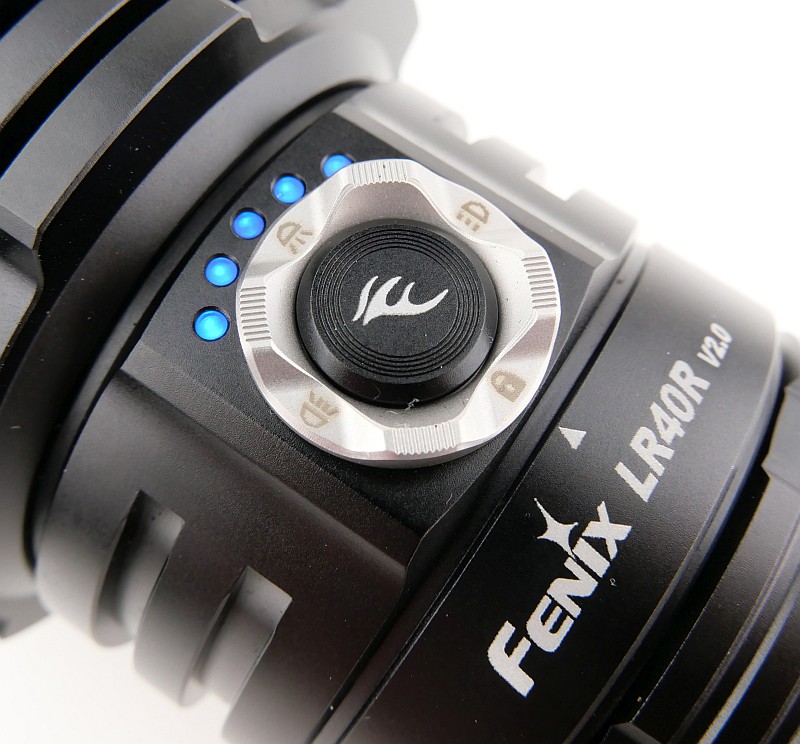
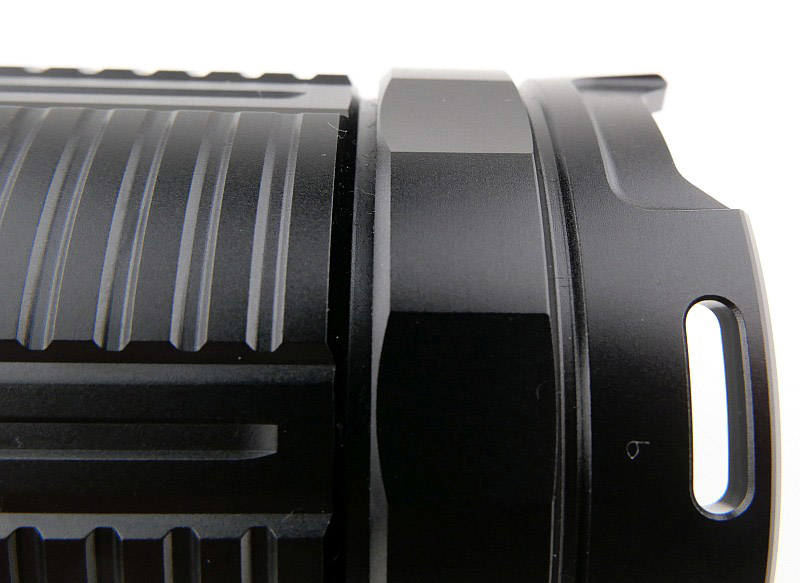
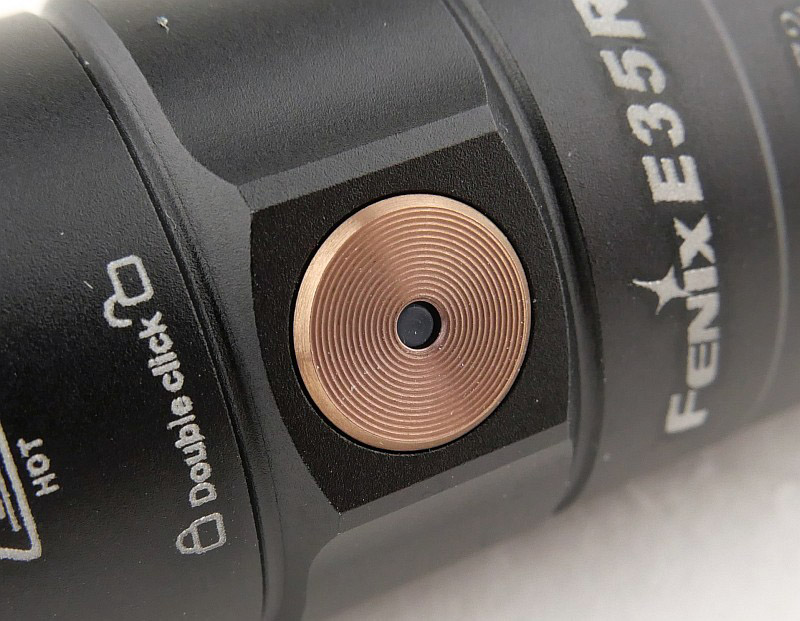
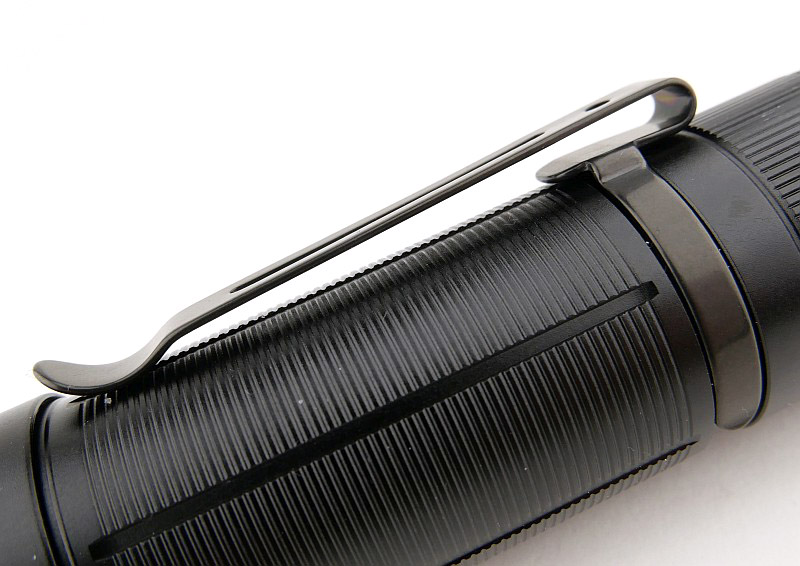
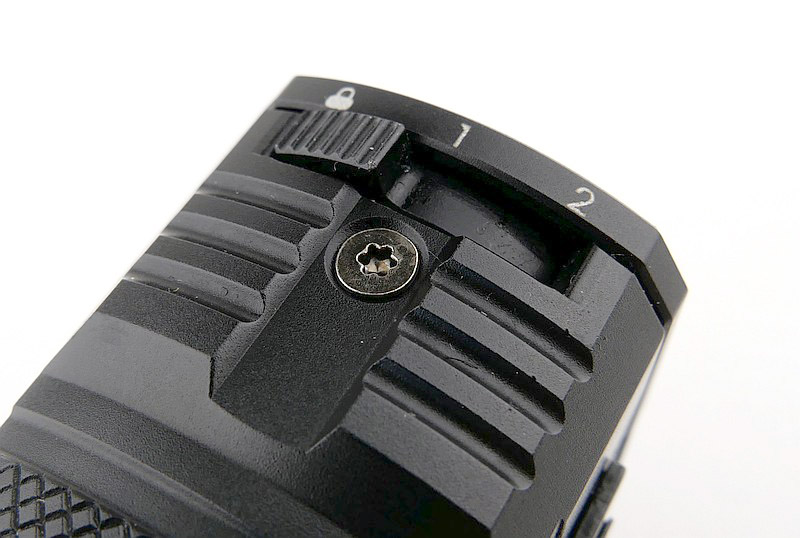
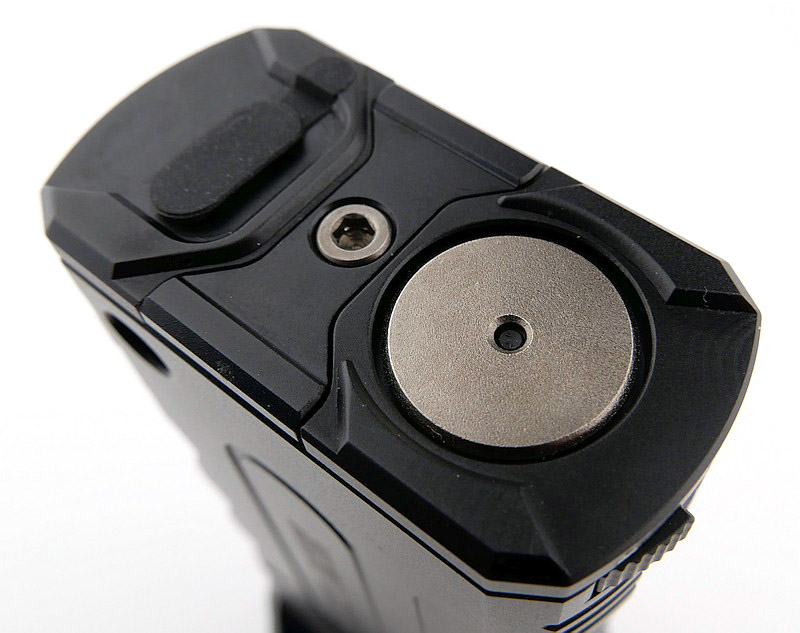
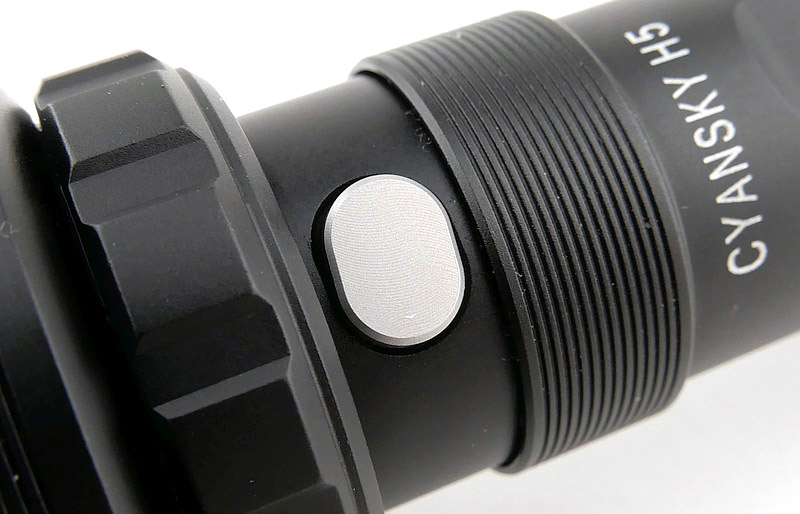
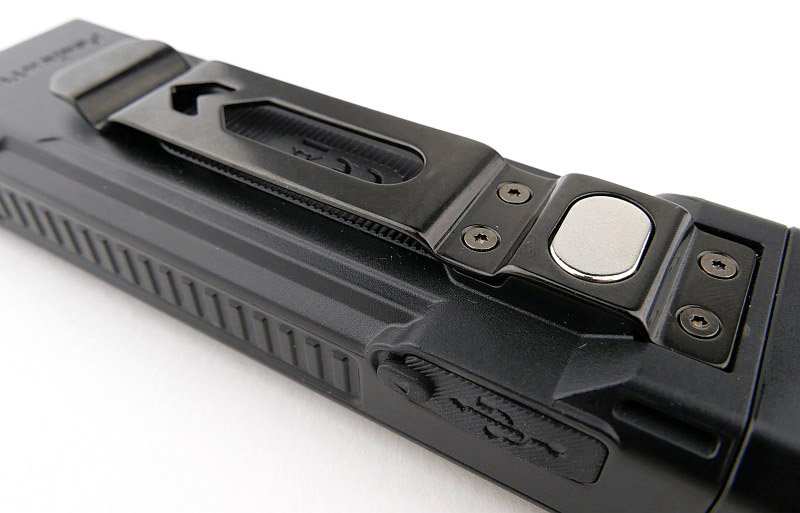
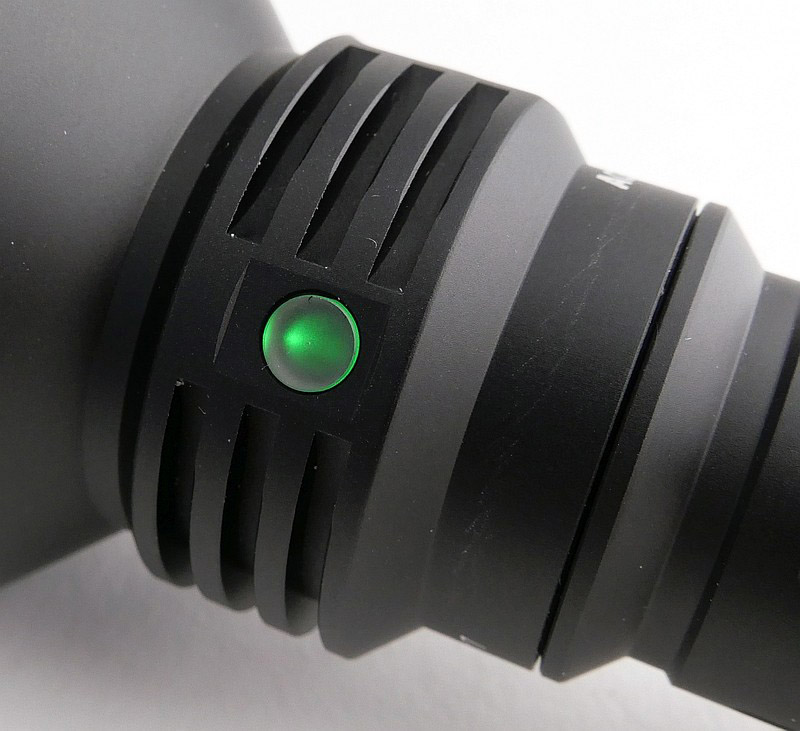
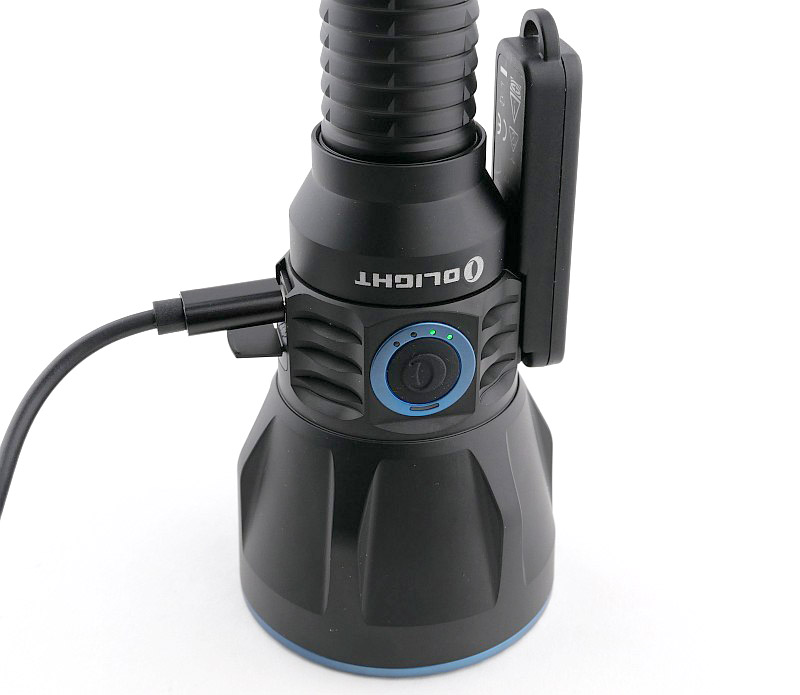
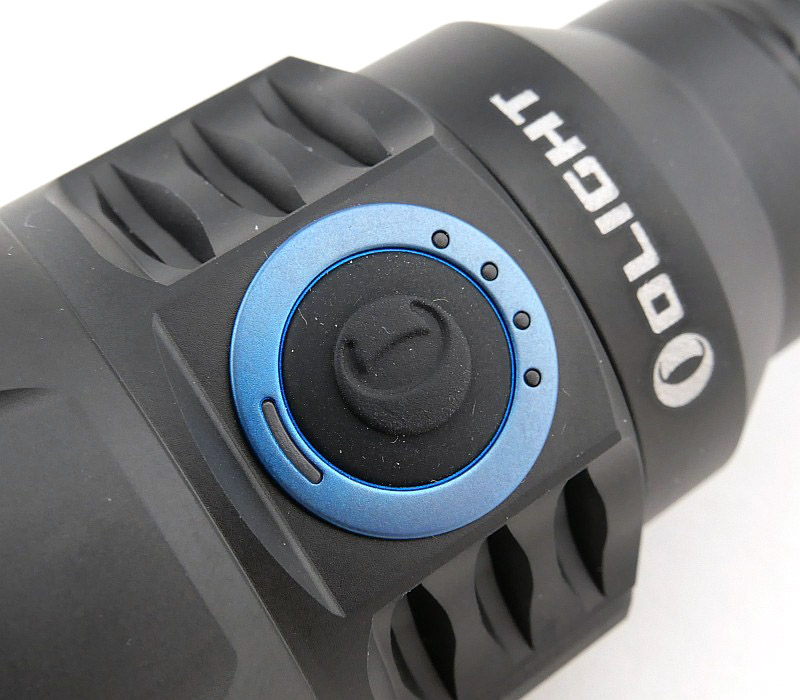
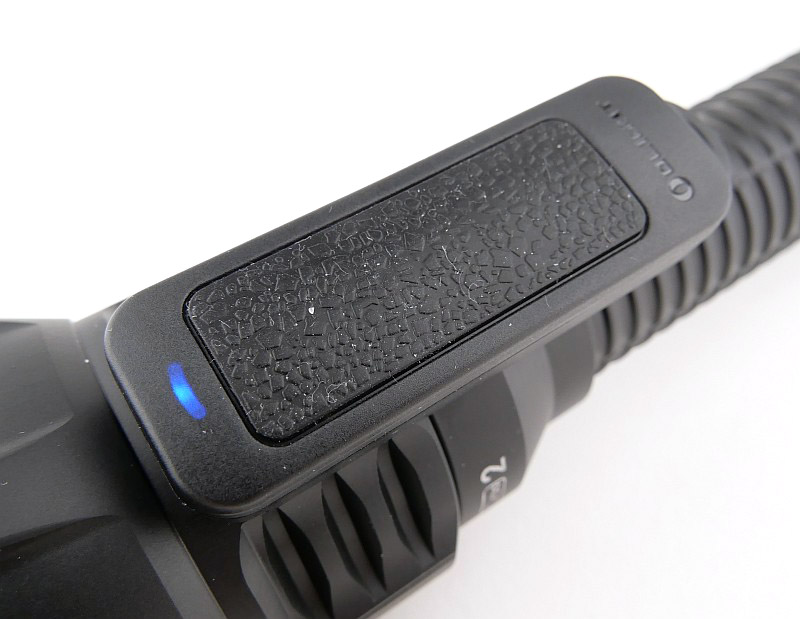
Featuring blue highlights for the main bezel and side switch surround to give Olight’s signature look. The side switch has four battery level indicators and a remote switch activity indicator.
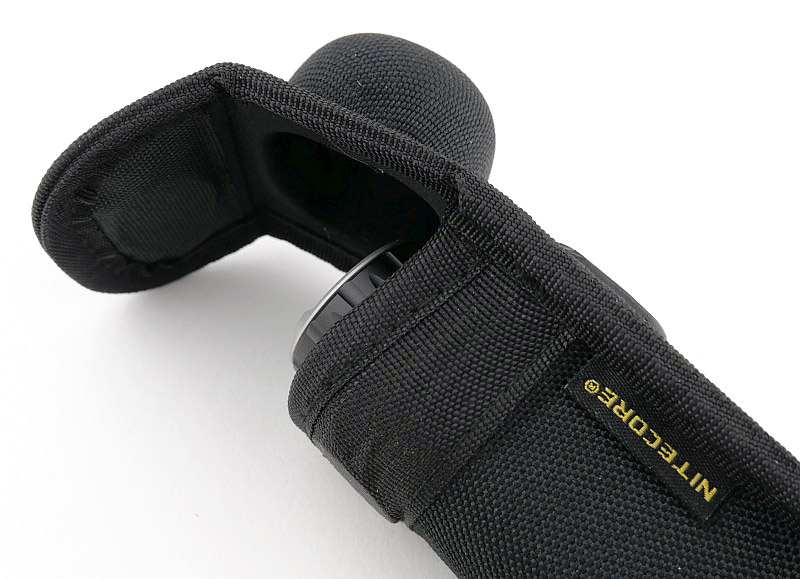
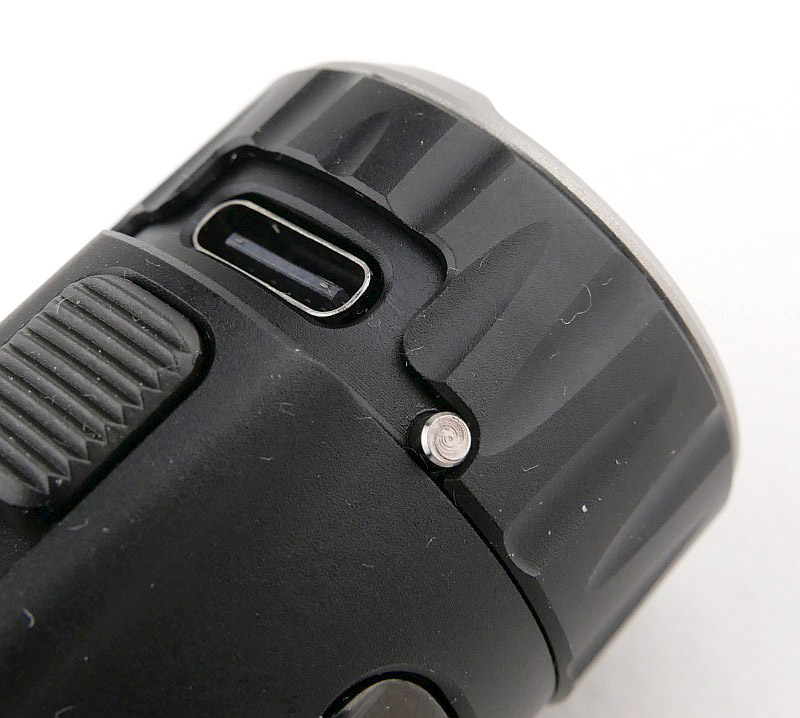
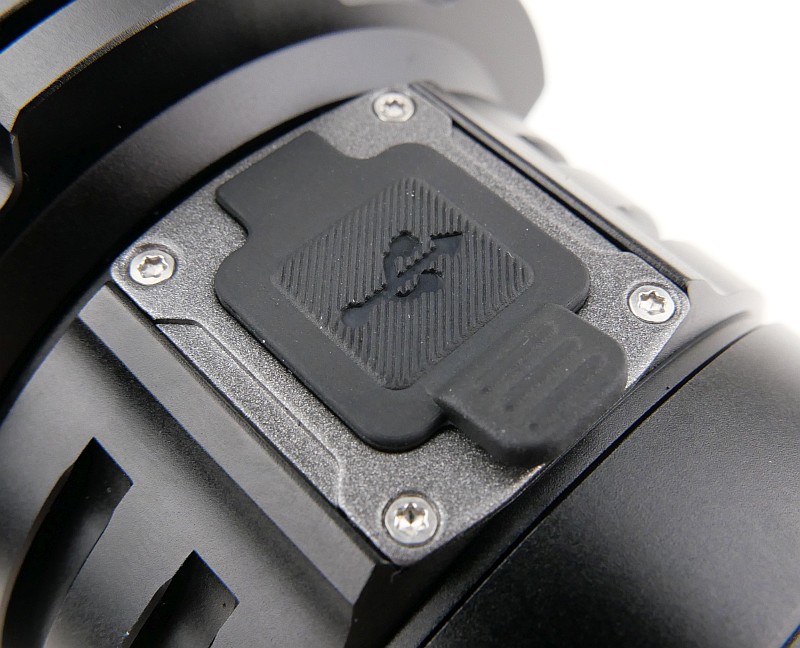
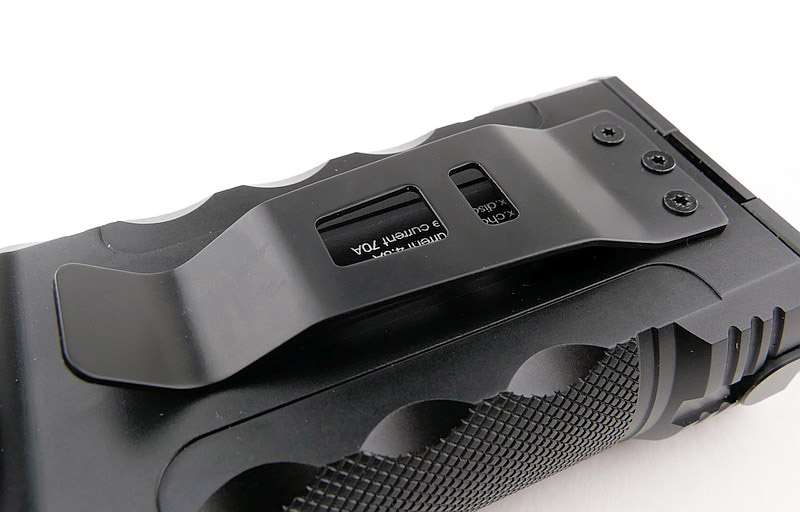
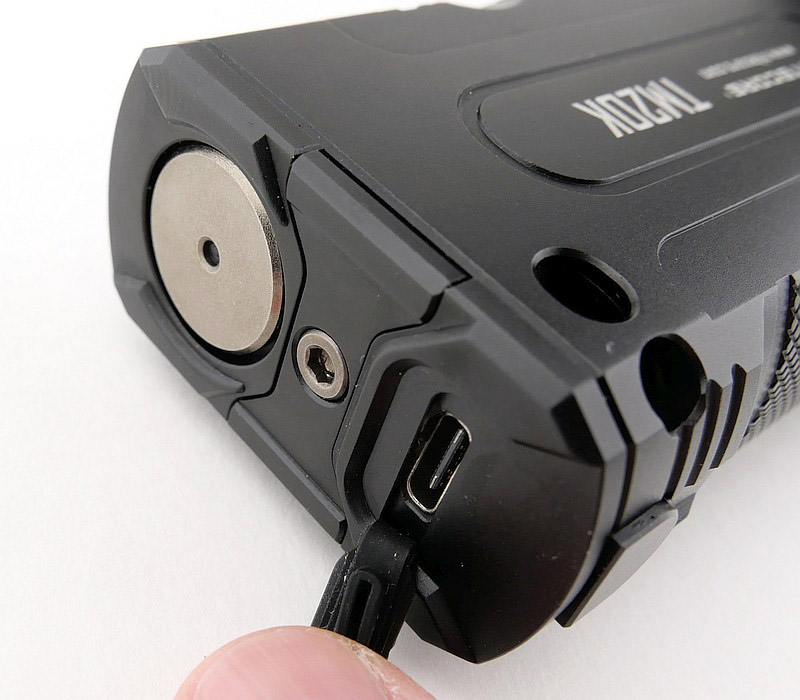
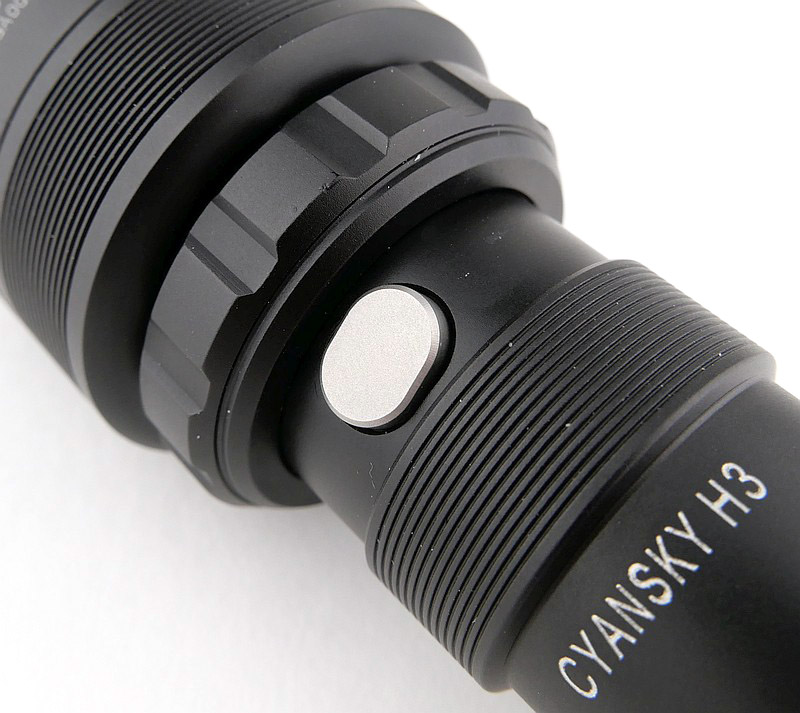
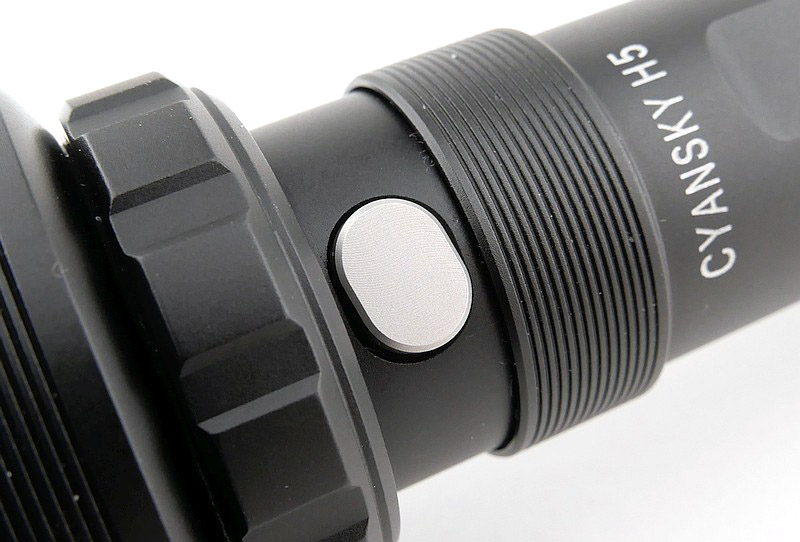
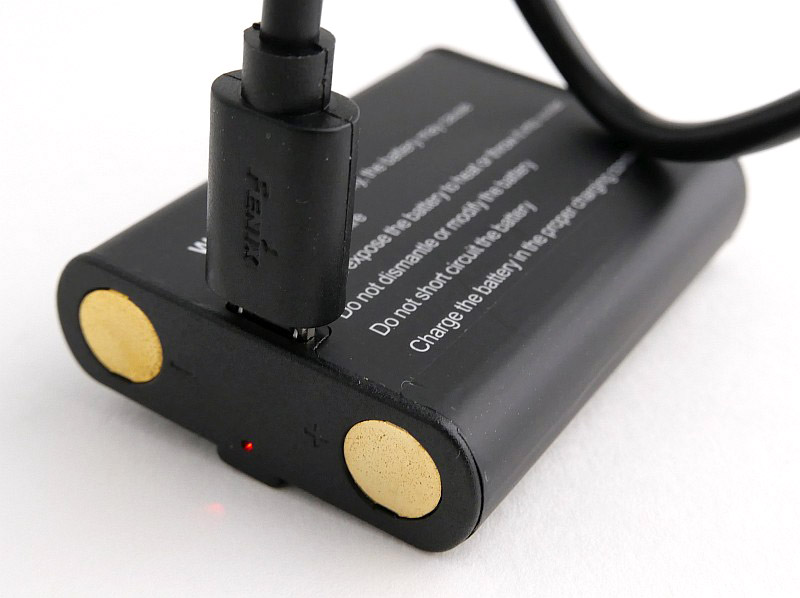
On the opposite side of the light to the side switch is the remote switch dock, using three contacts to charge and pair the remote switch.
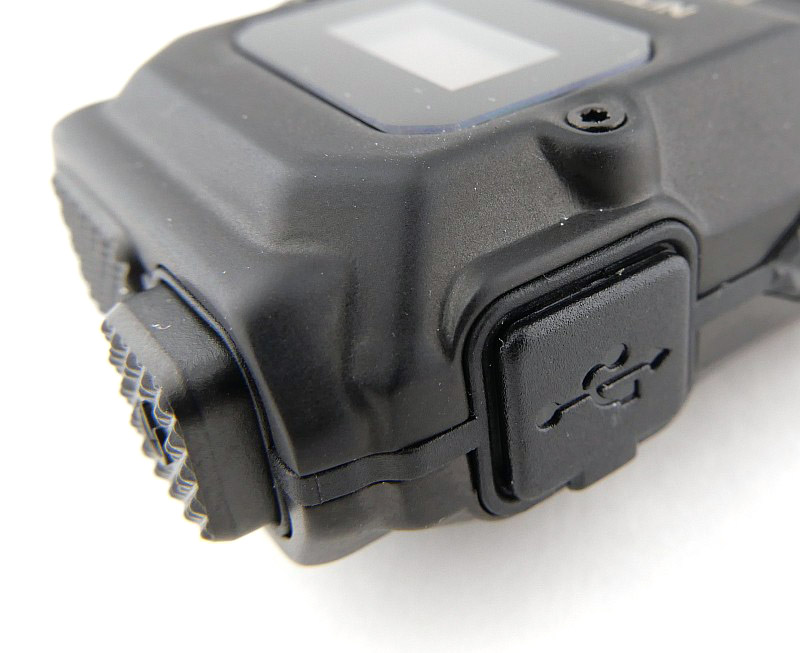
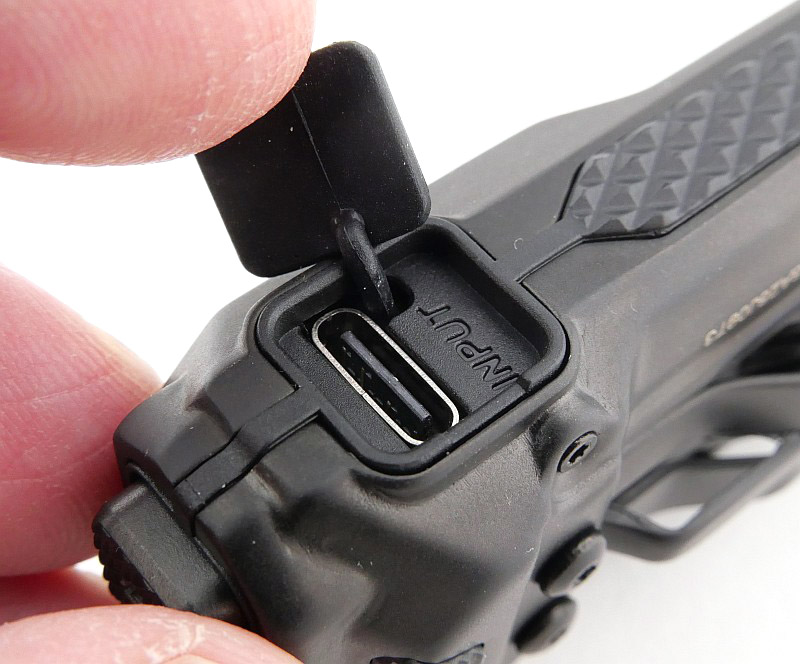
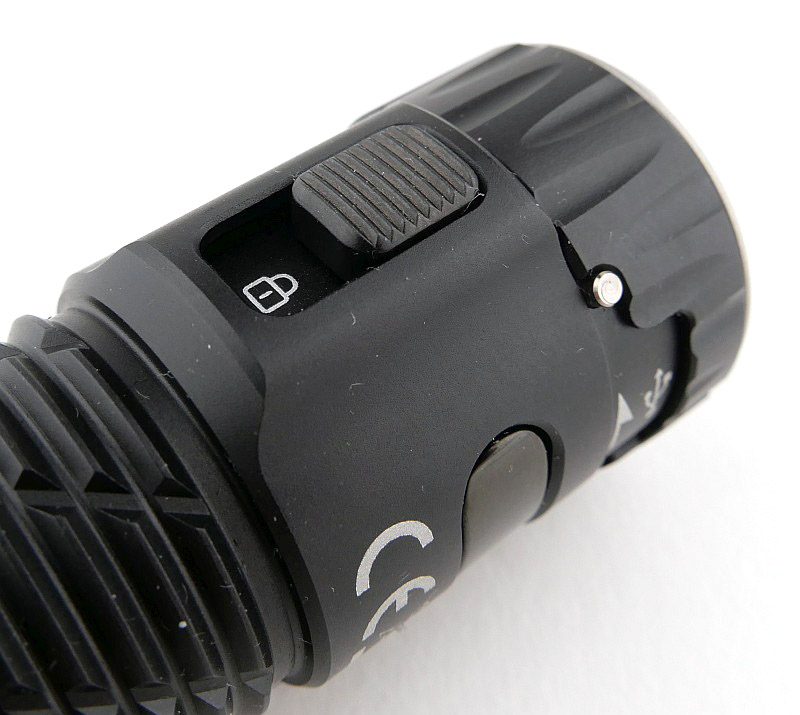
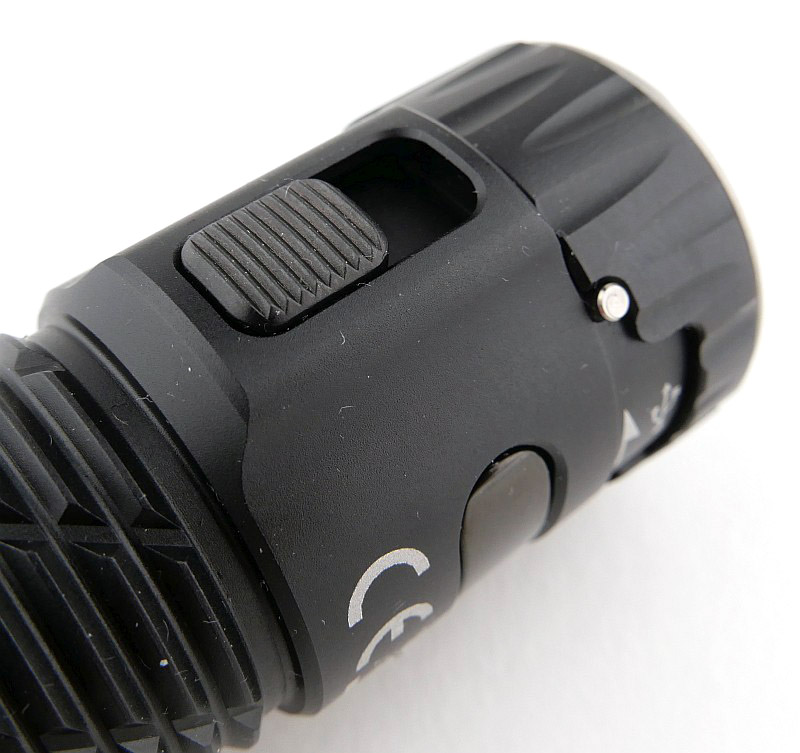
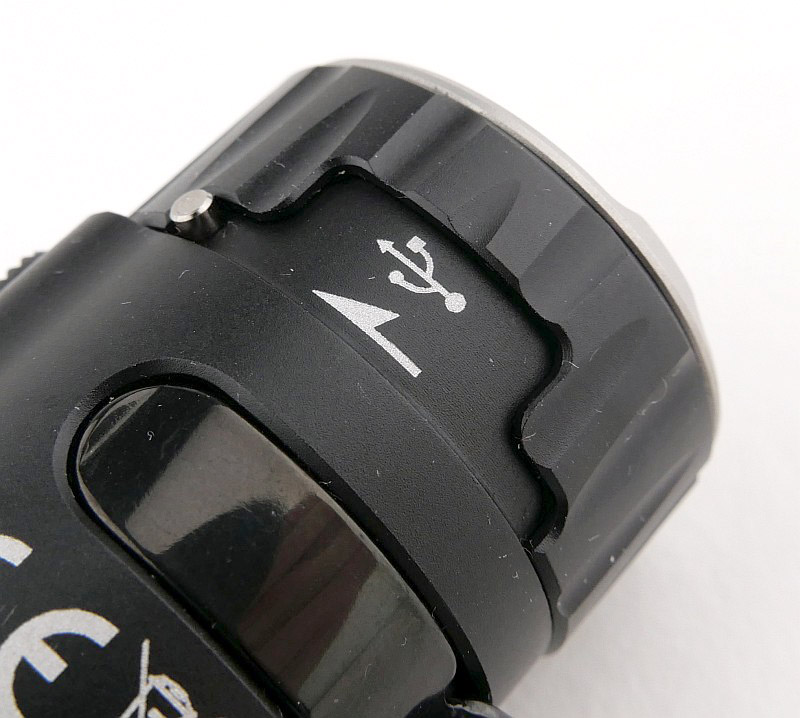
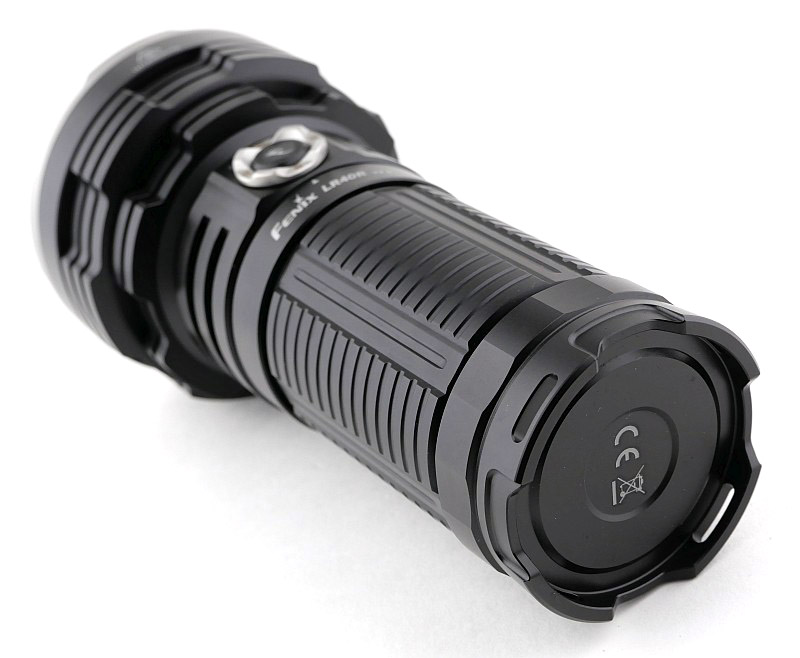
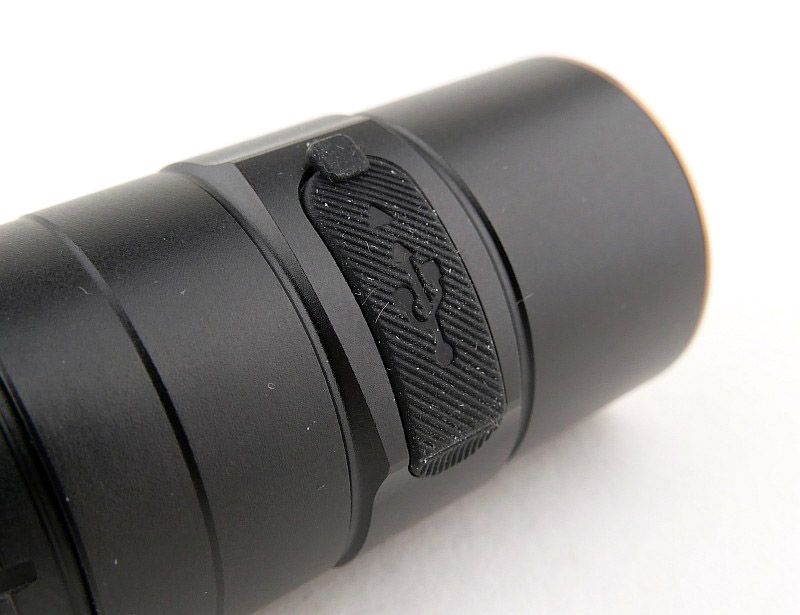
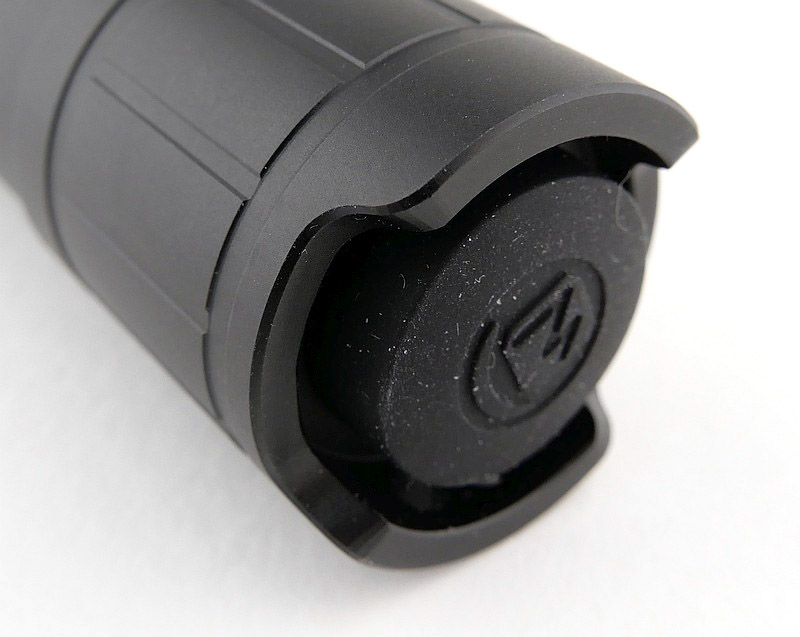
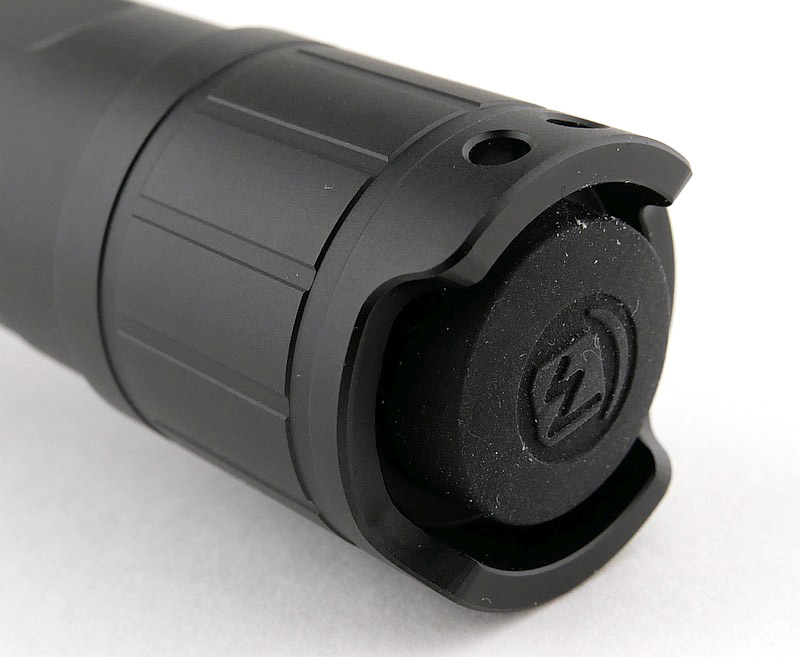
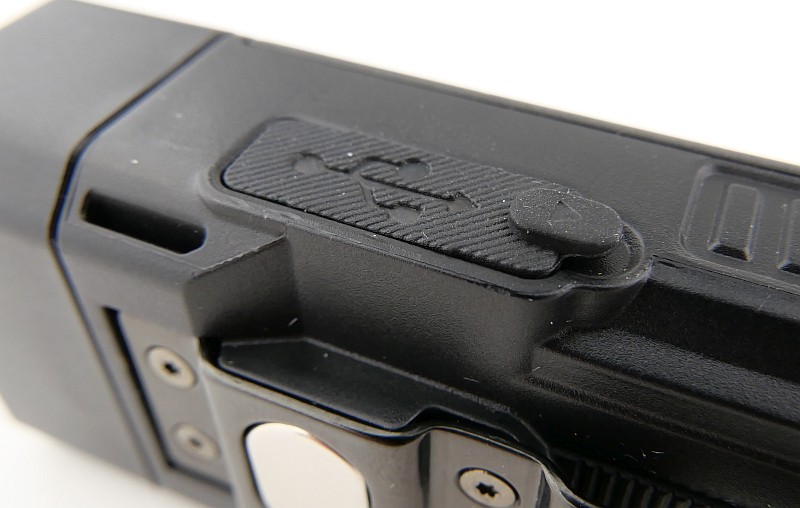
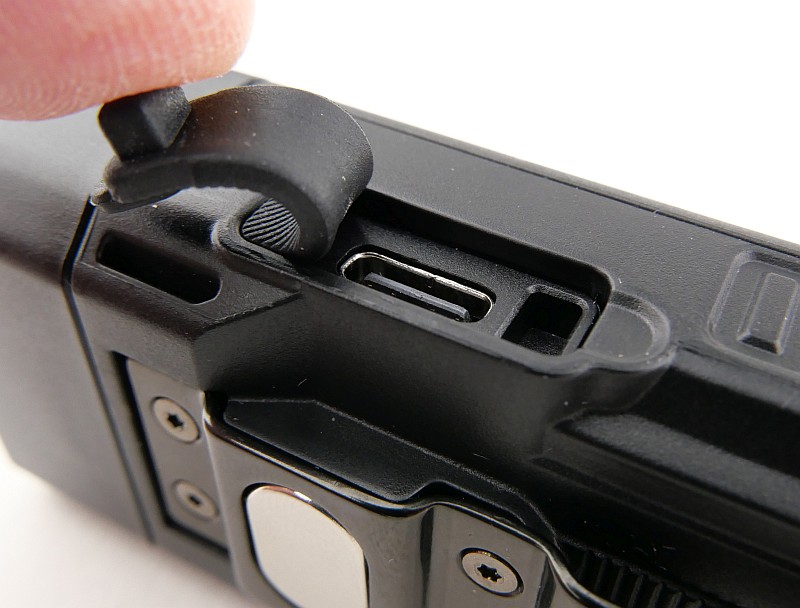
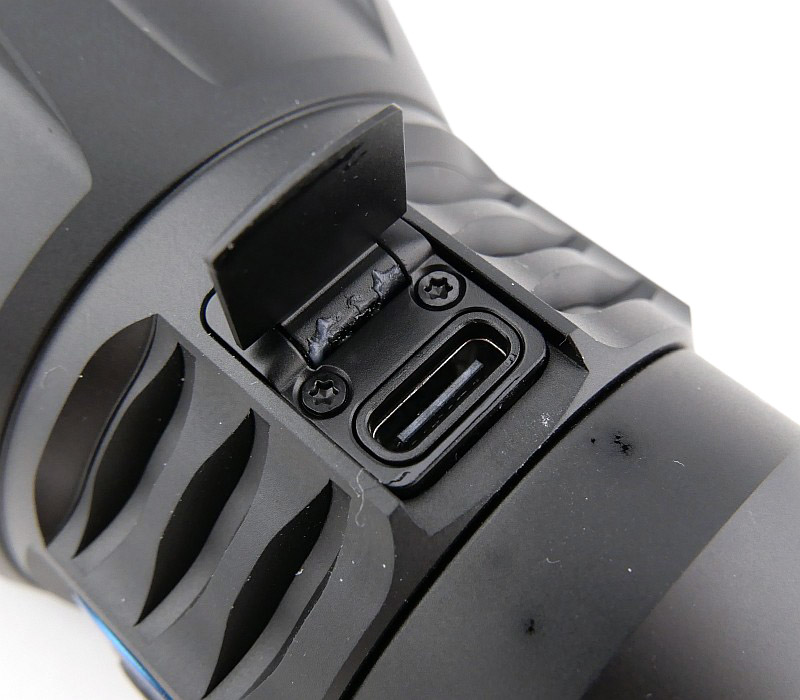
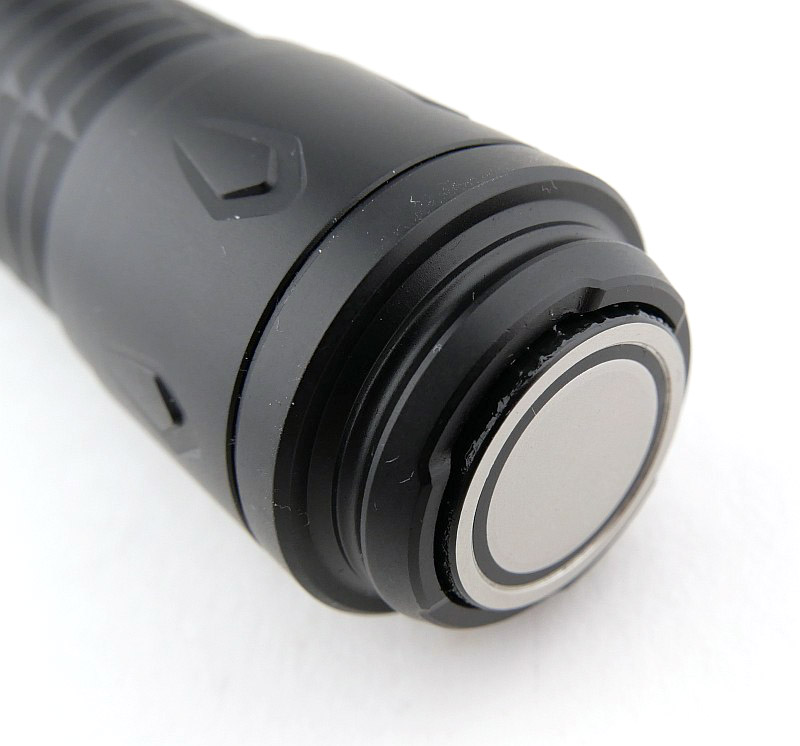
A hinged metal flap covers the USB-C port when not in use. Lastly in this gallery, the tail-cap switch, which has Olight’s magnetic charging contacts, but this cable is not included.


The beam
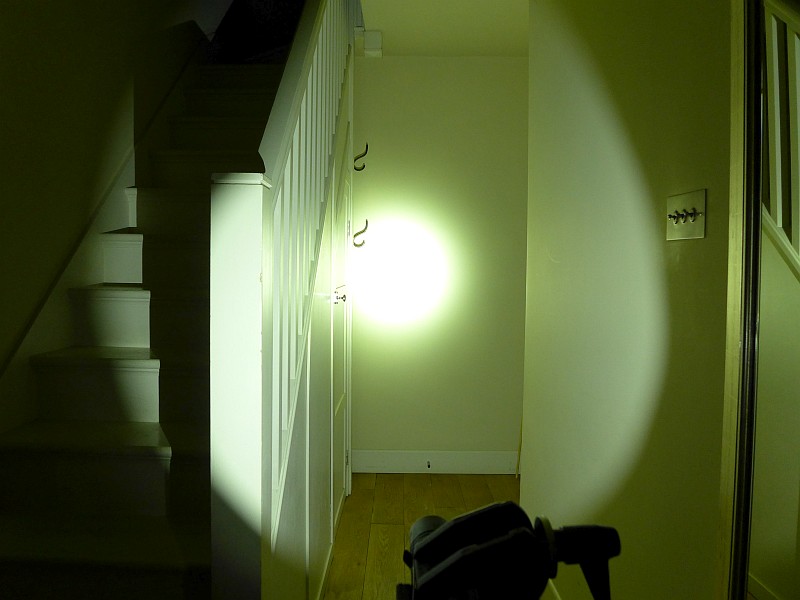
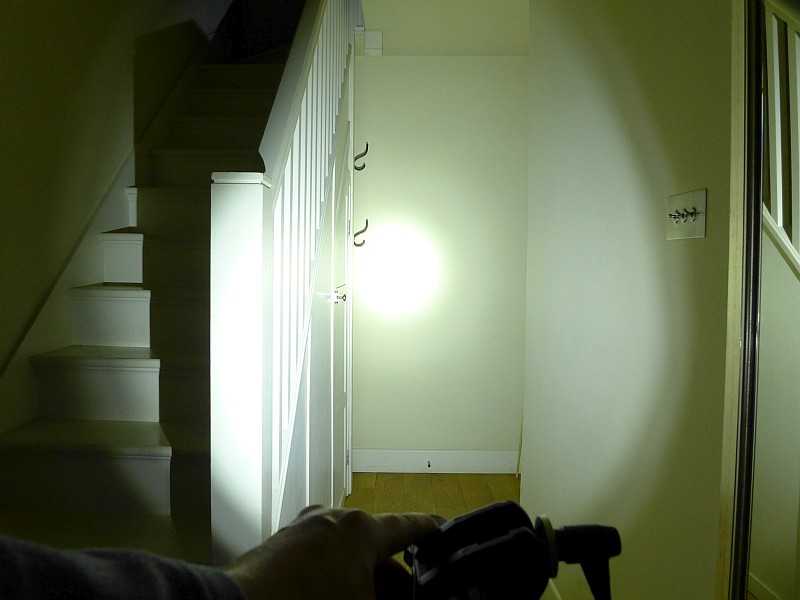
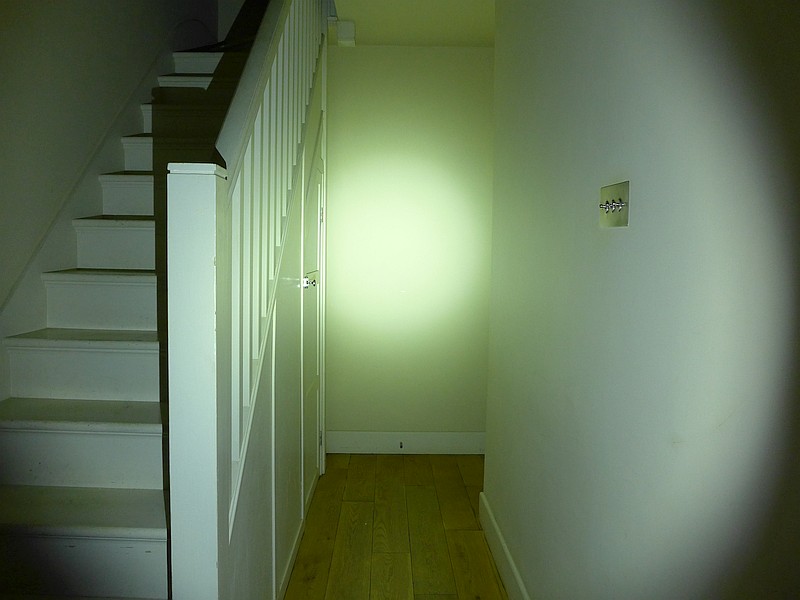
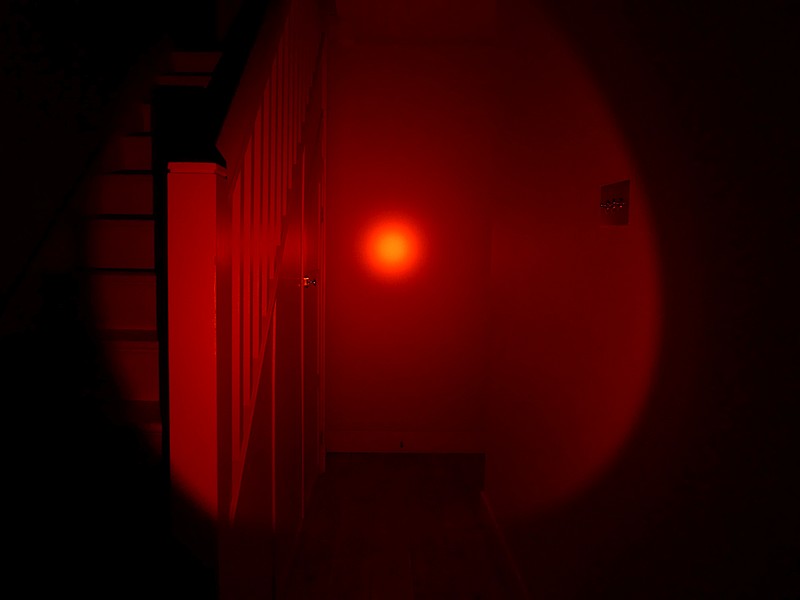
Please be careful not to judge tint based on images you see on a computer screen. Unless properly calibrated, the screen itself will change the perceived tint.
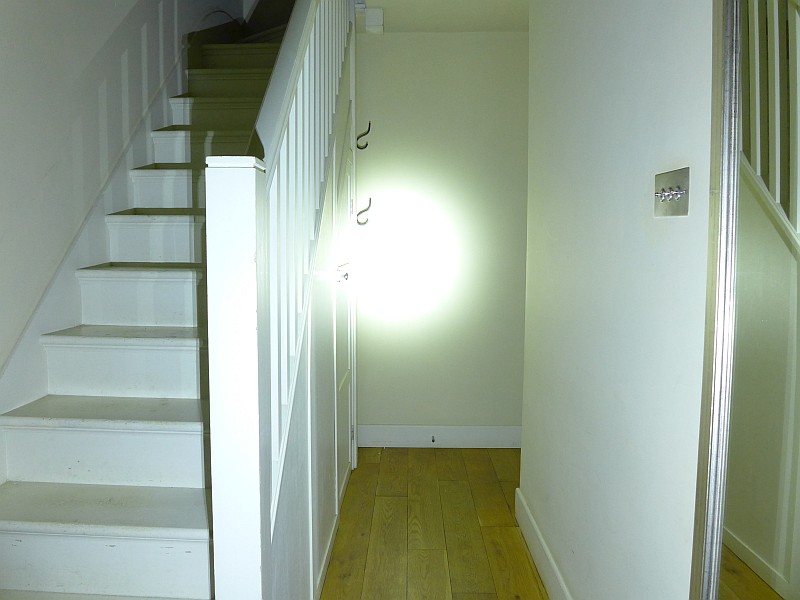
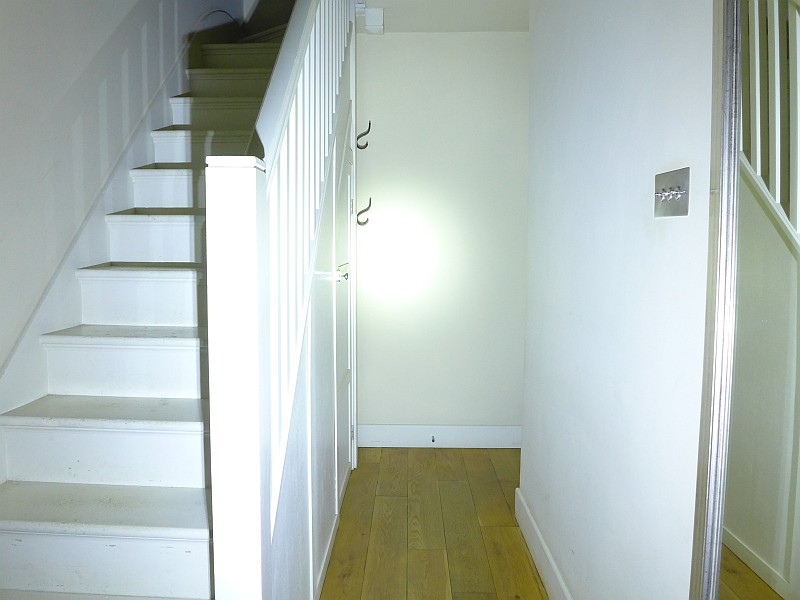
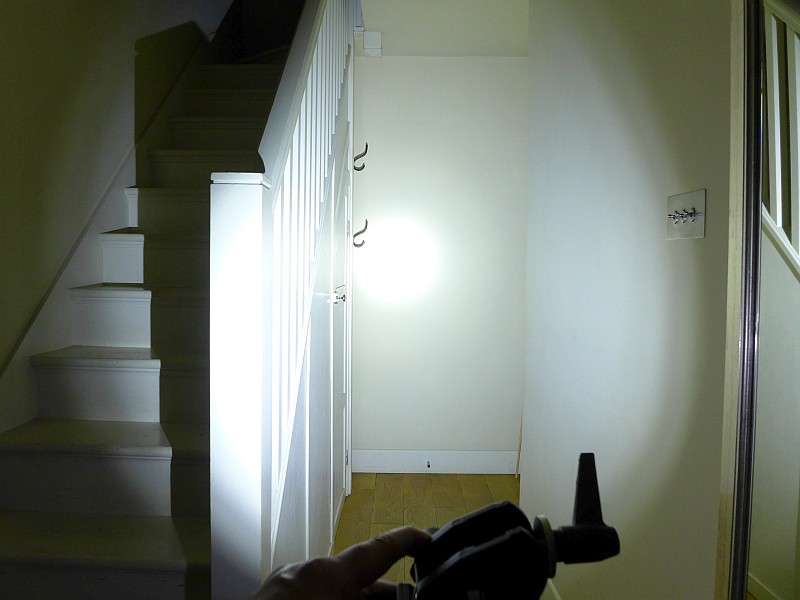
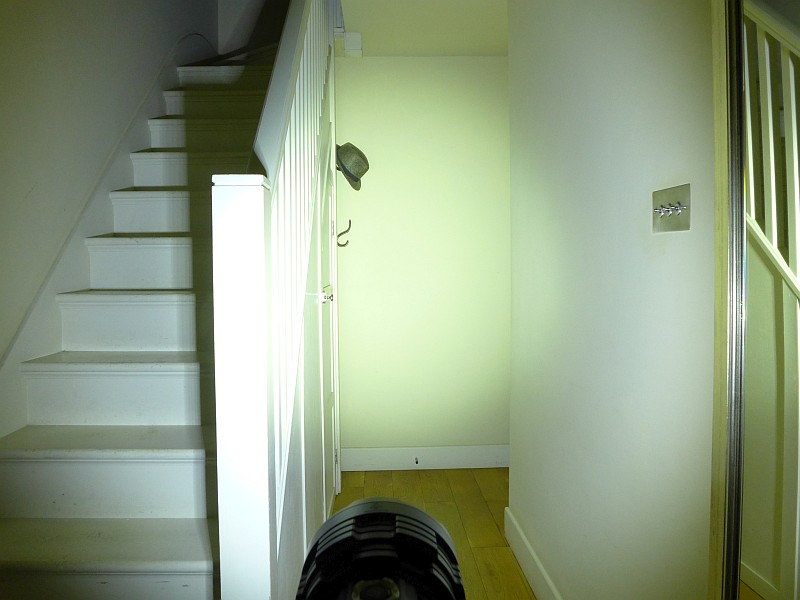
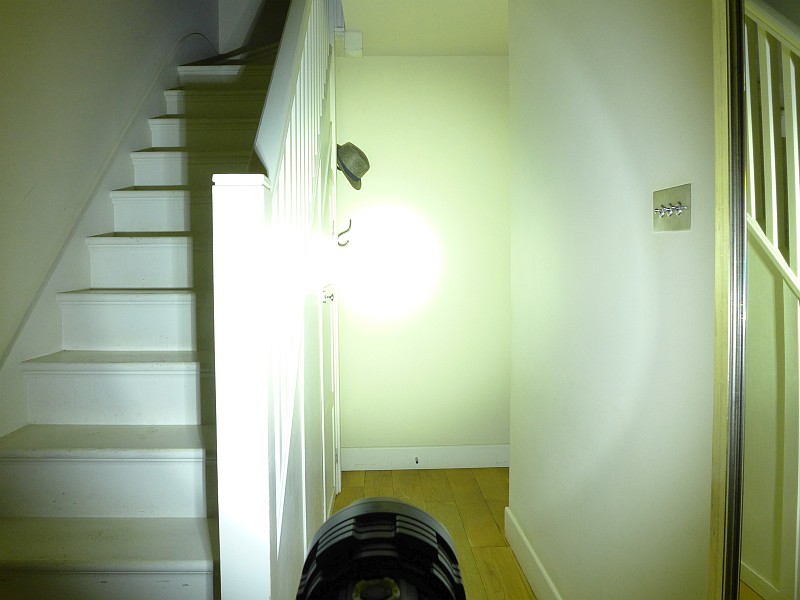
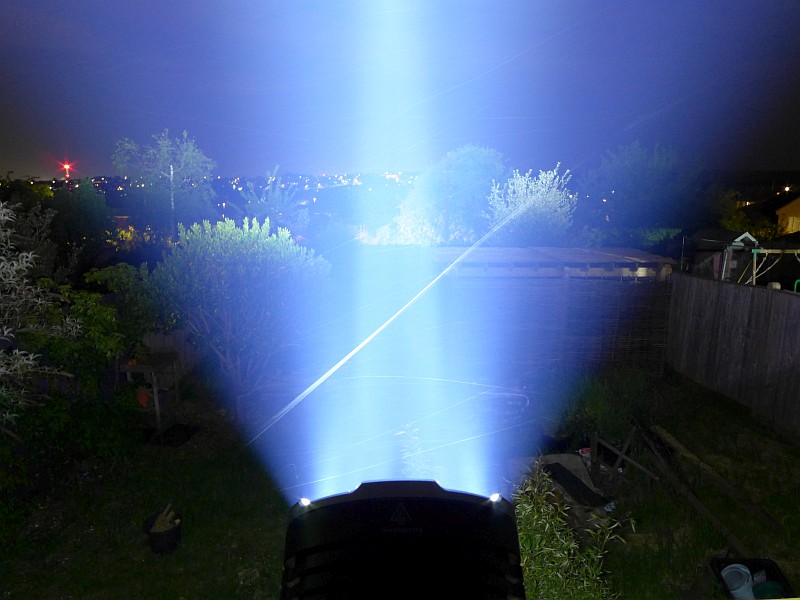
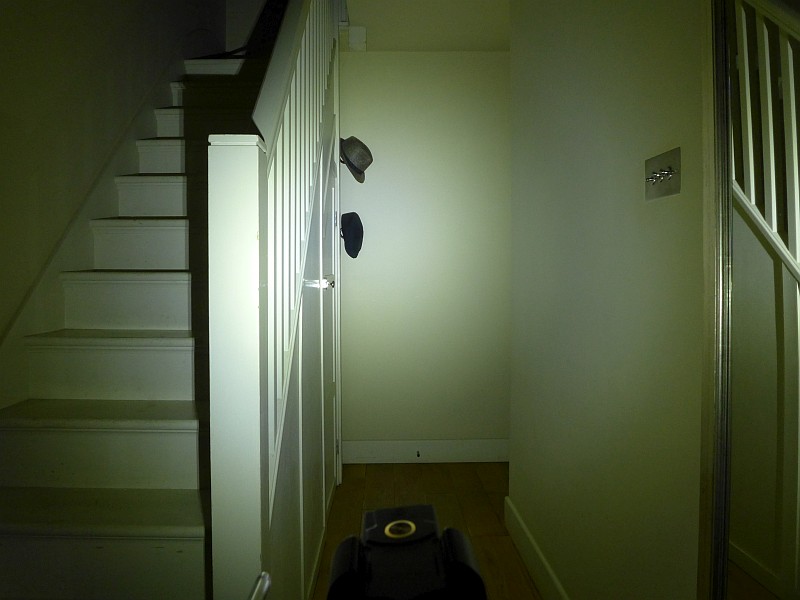
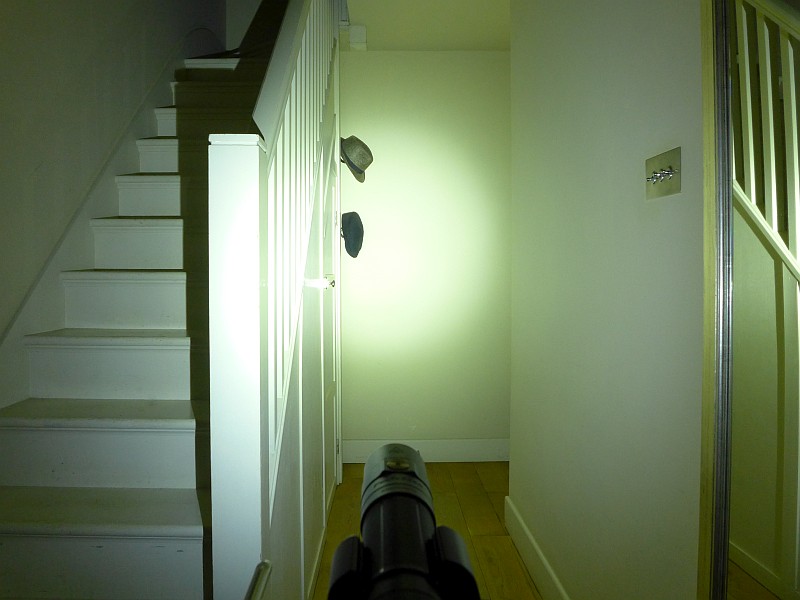
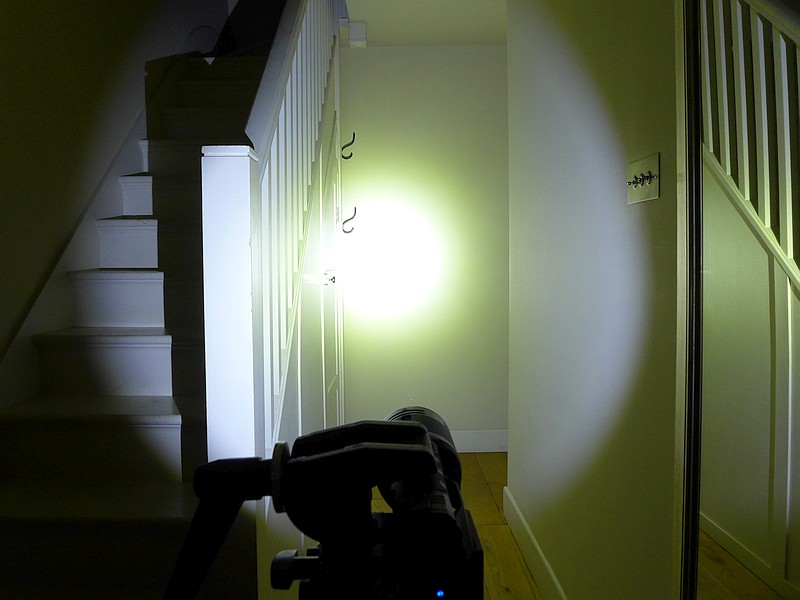
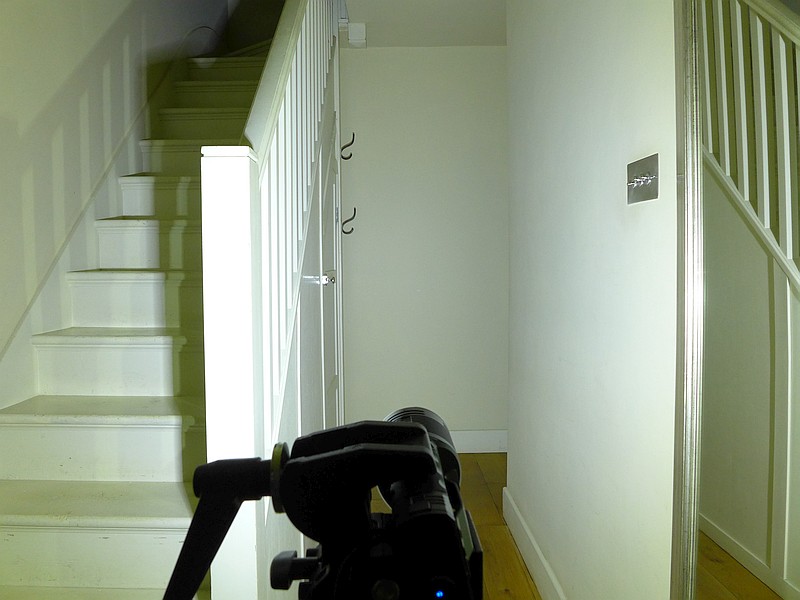
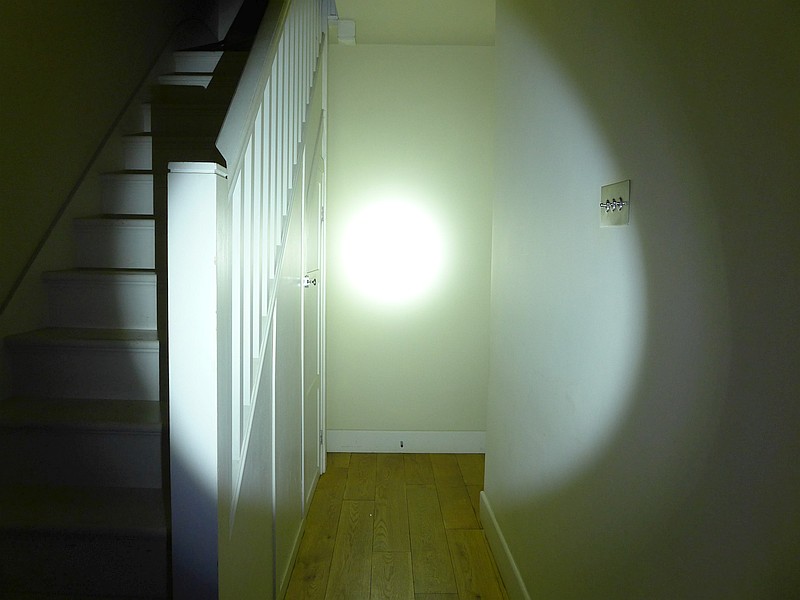
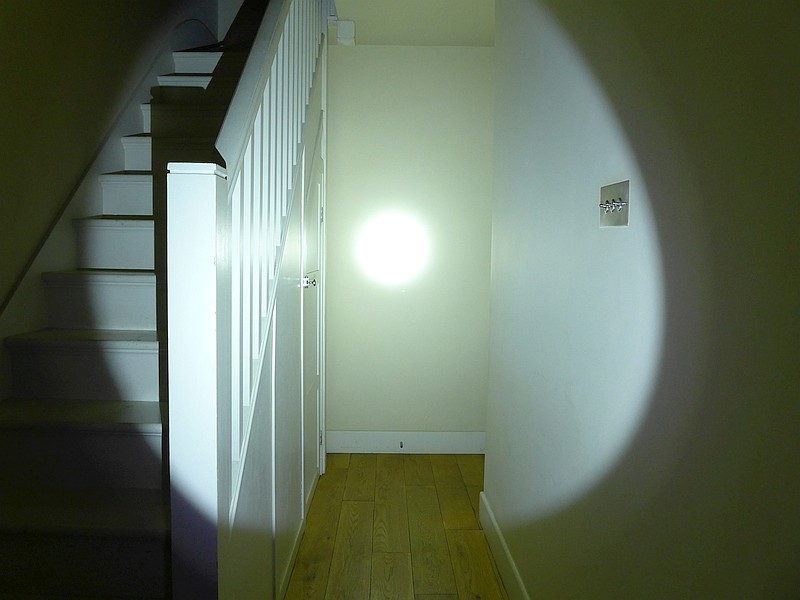
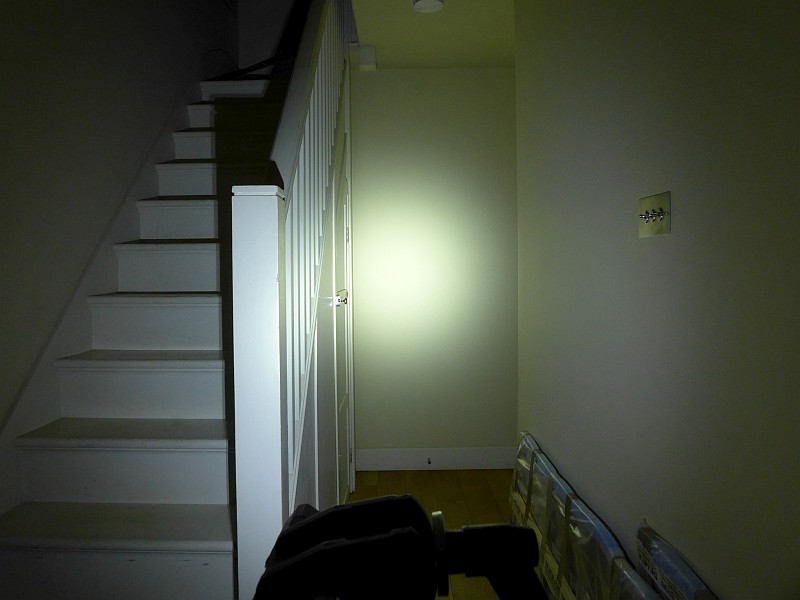
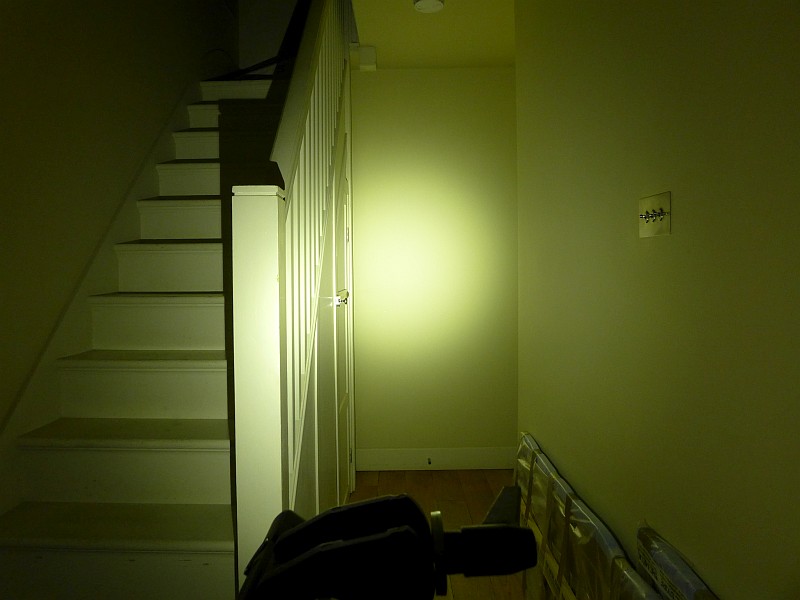
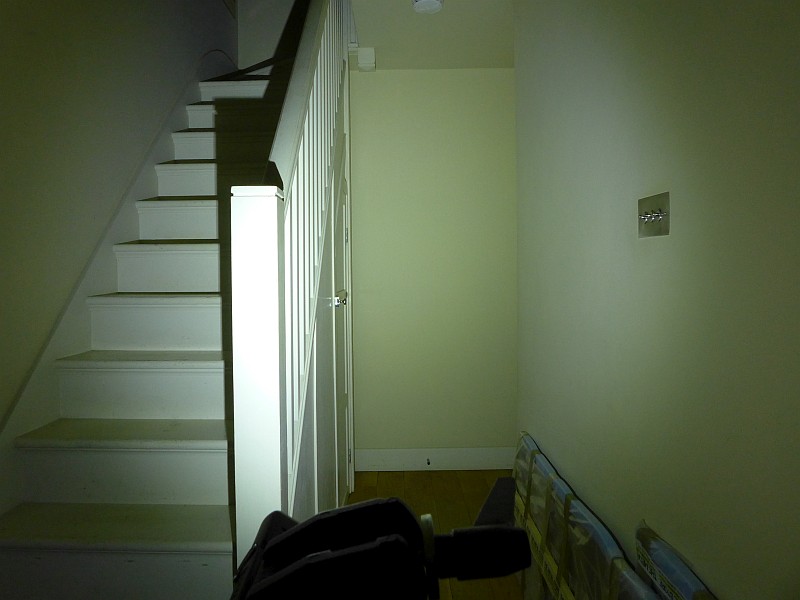
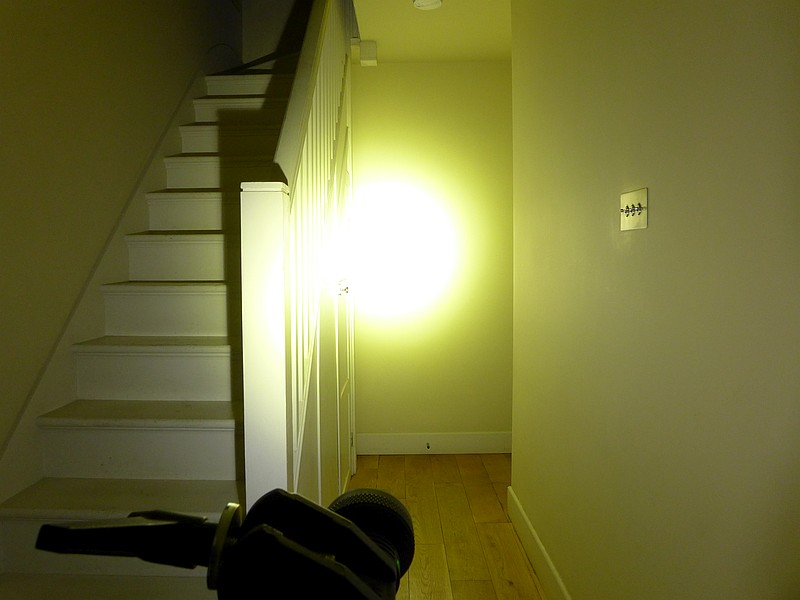
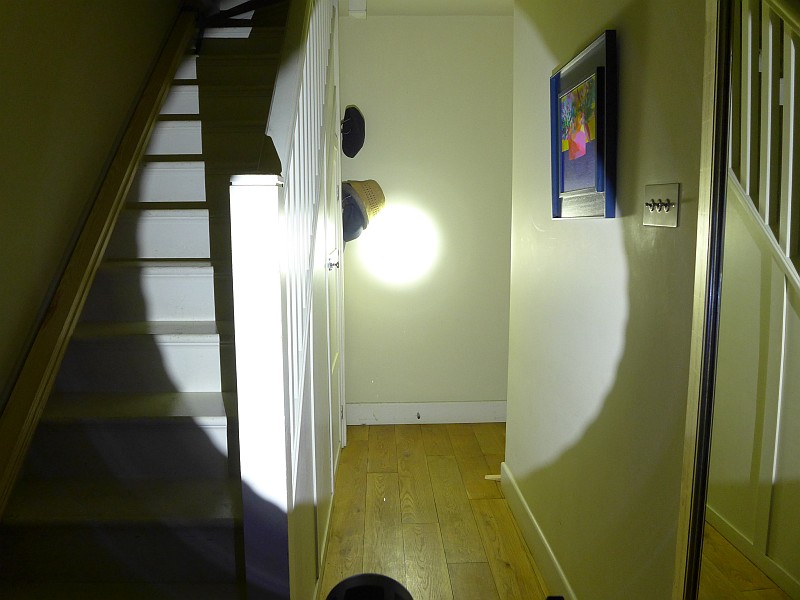
The indoor beam shot is intended to give an idea of the beam shape/quality rather than tint. All beam shots are taken using daylight white balance. The woodwork (stairs and skirting) are painted Farrow & Ball “Off-White”, and the walls are a light sandy colour called ‘String’ again by Farrow & Ball. I don’t actually have a ‘white wall’ in the house to use for this, and my wife won’t have one!
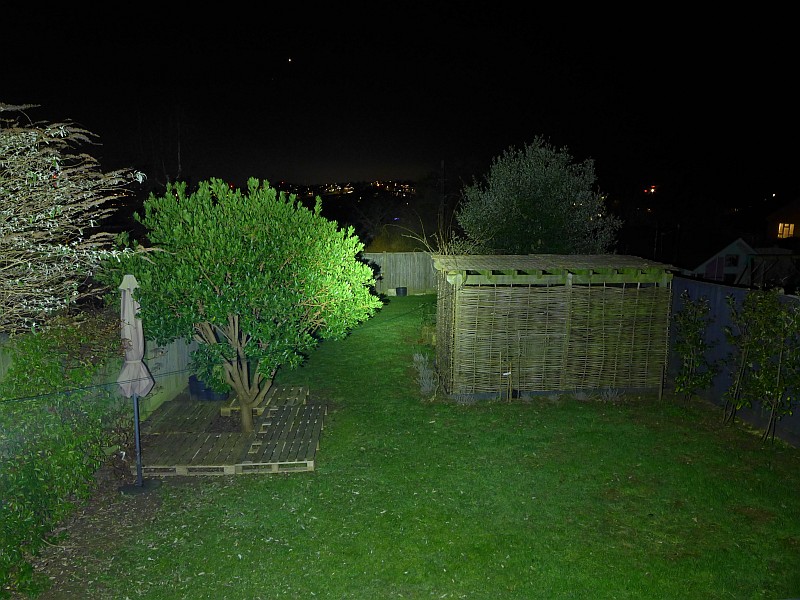
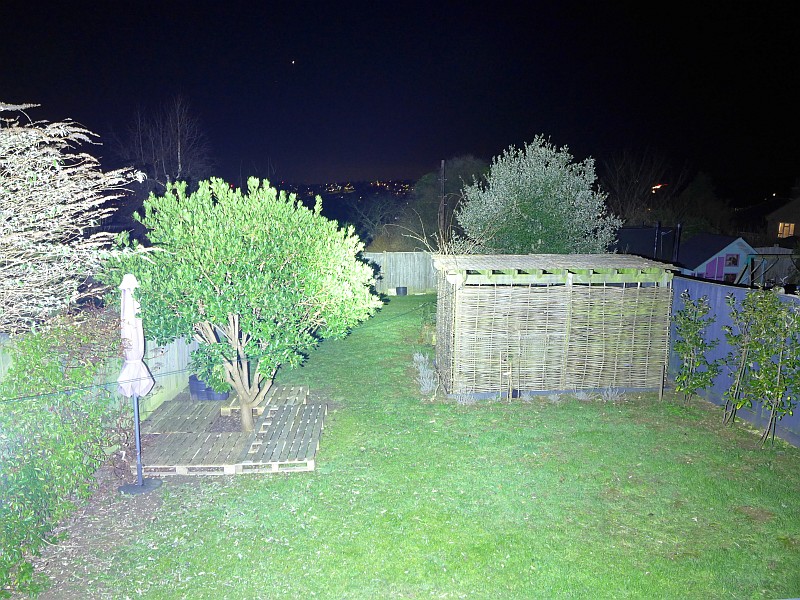
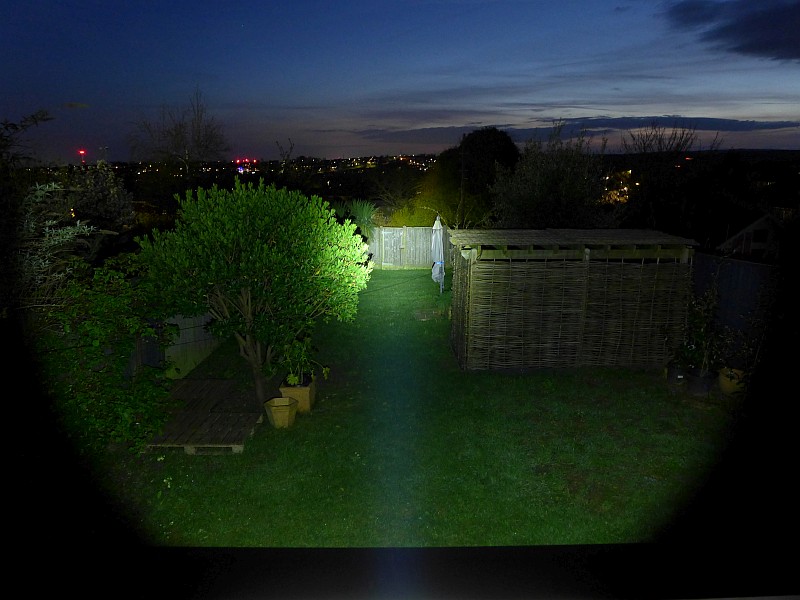
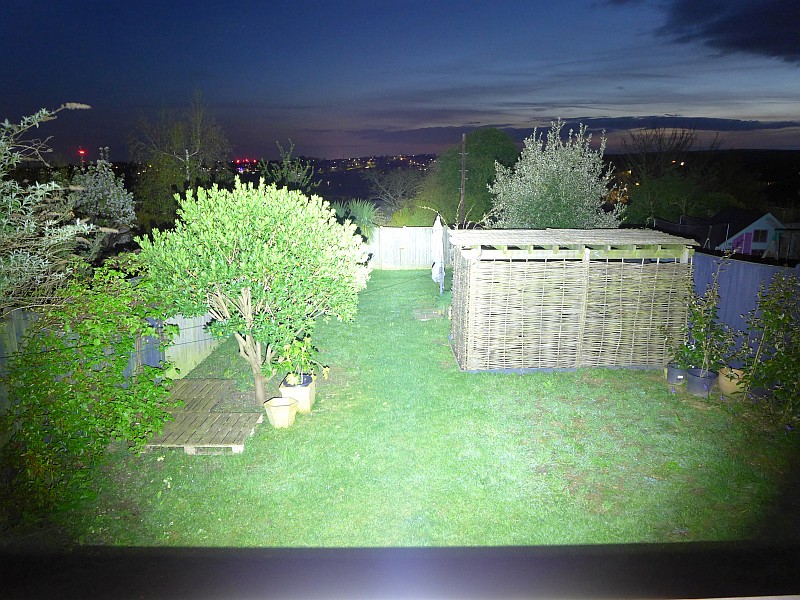
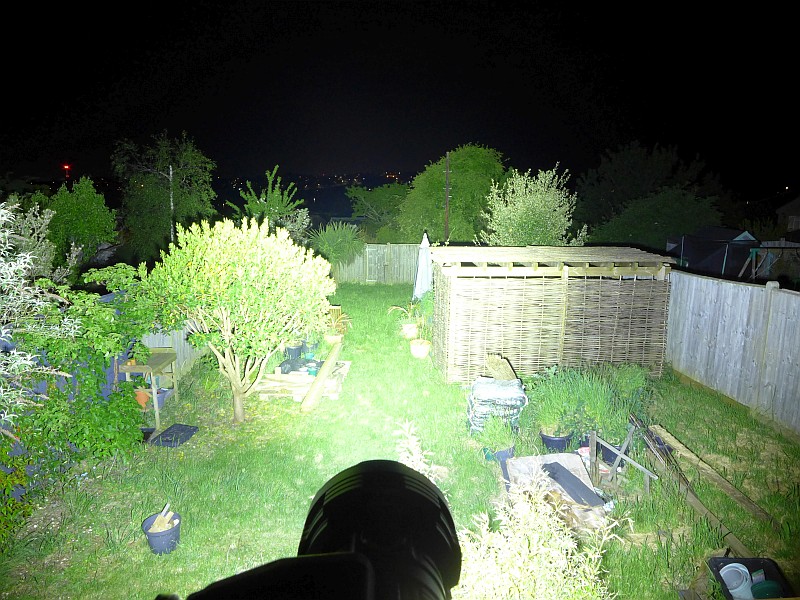
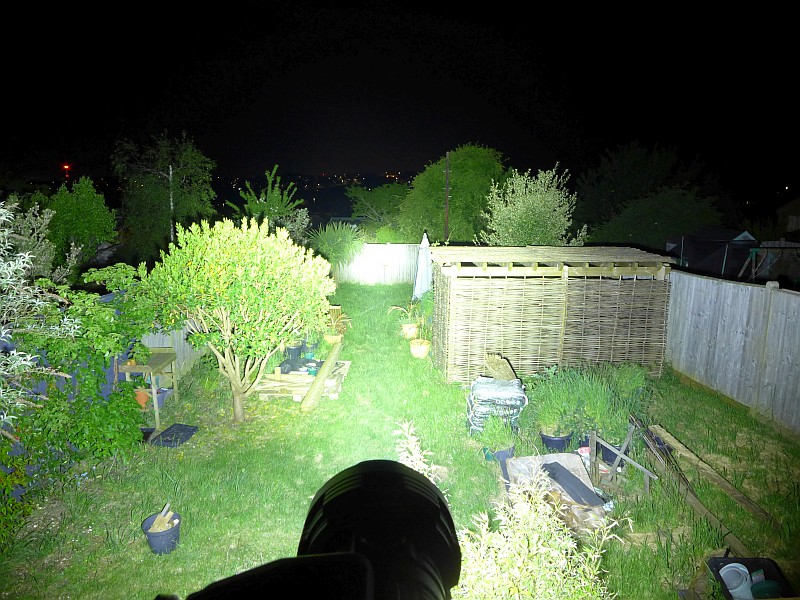
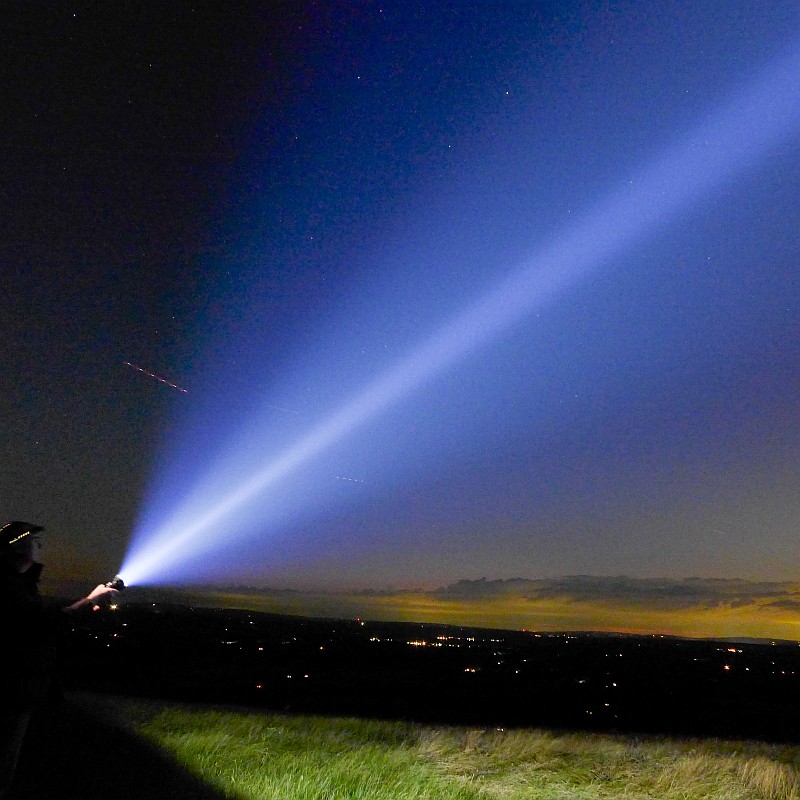
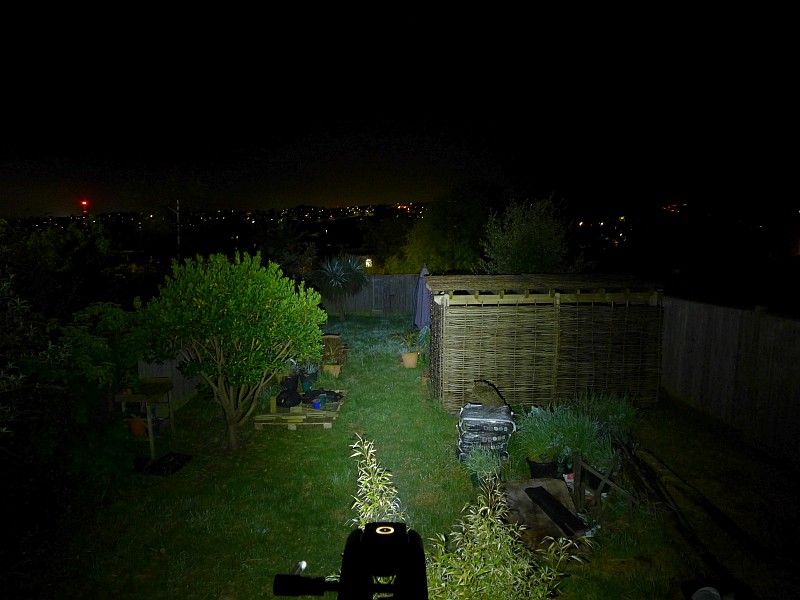
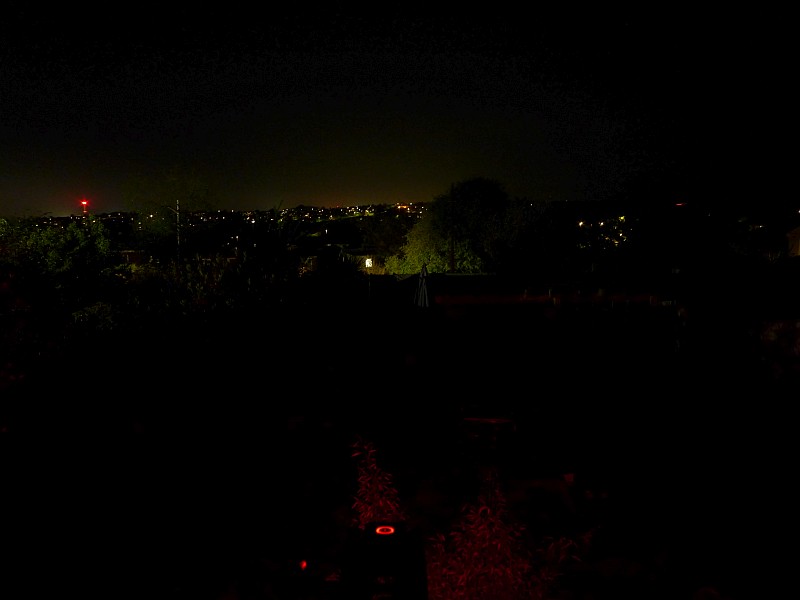
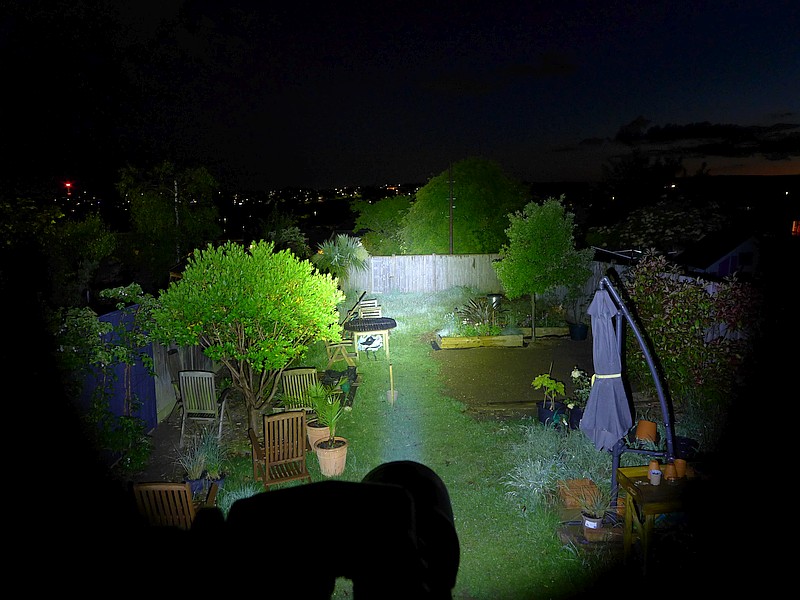
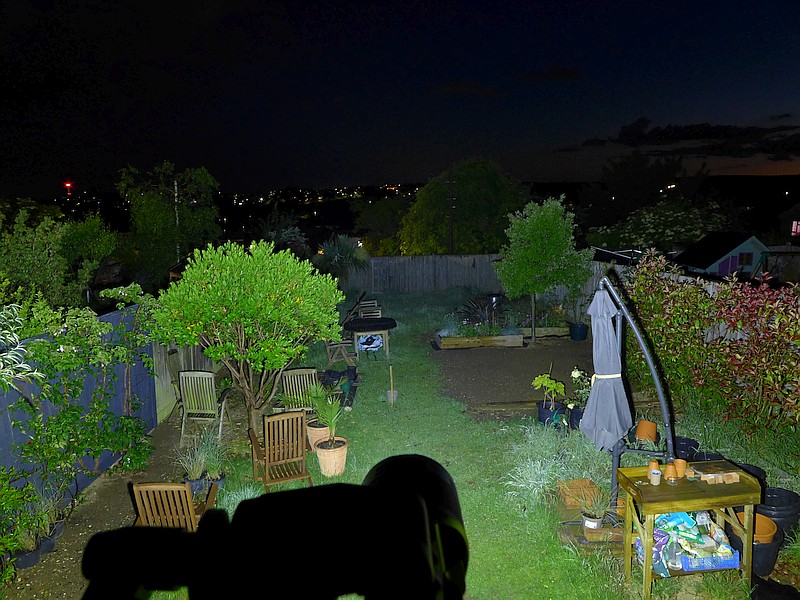
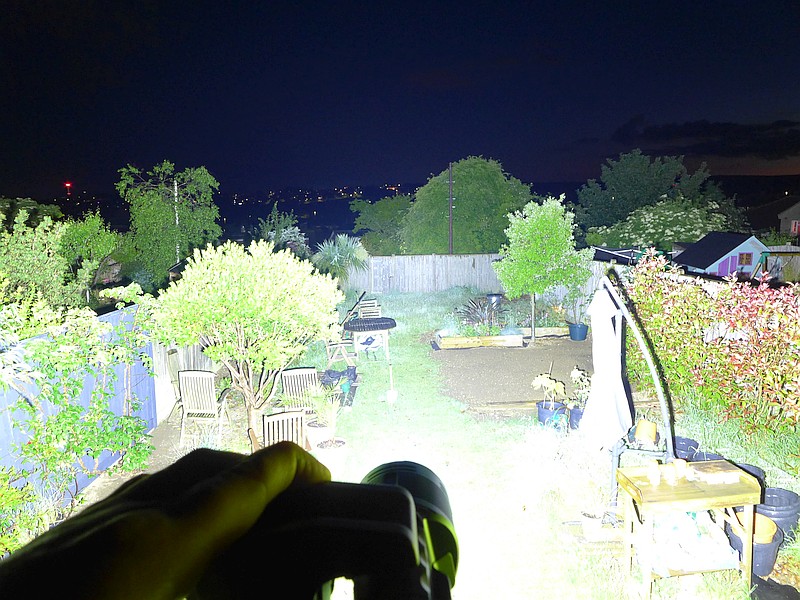
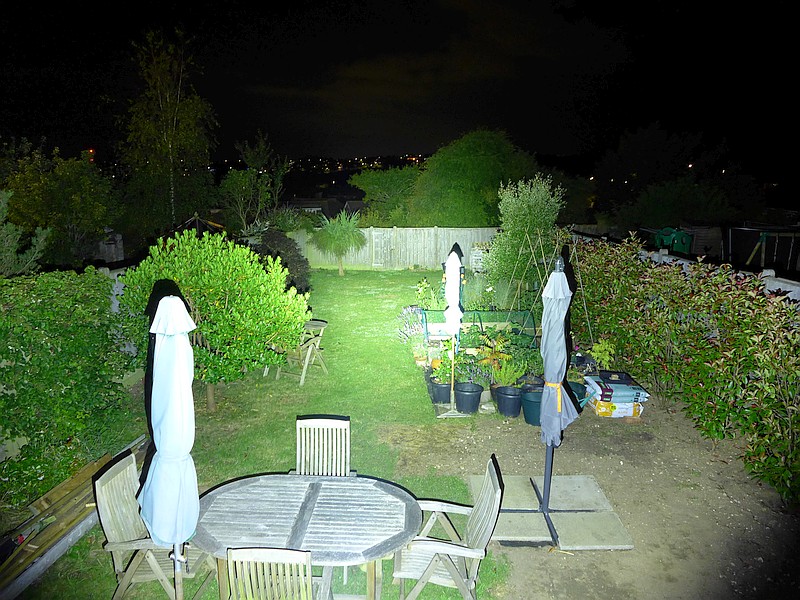
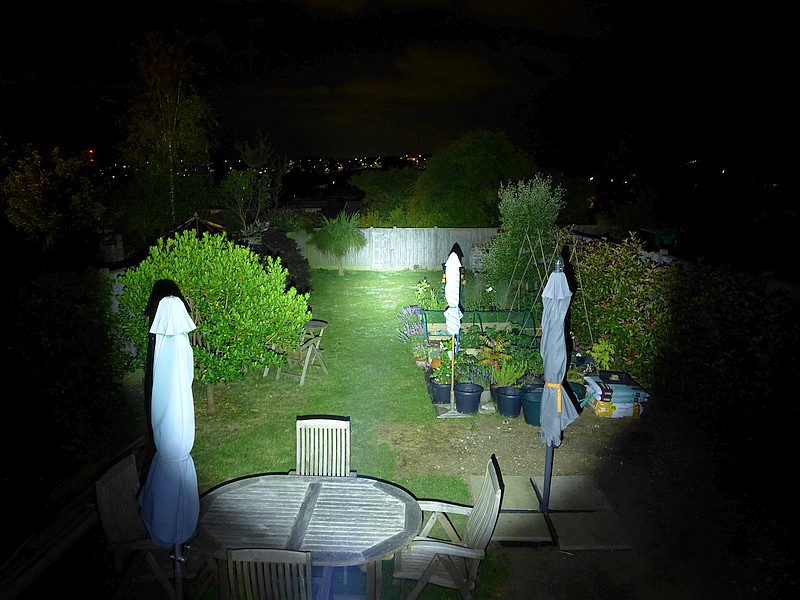
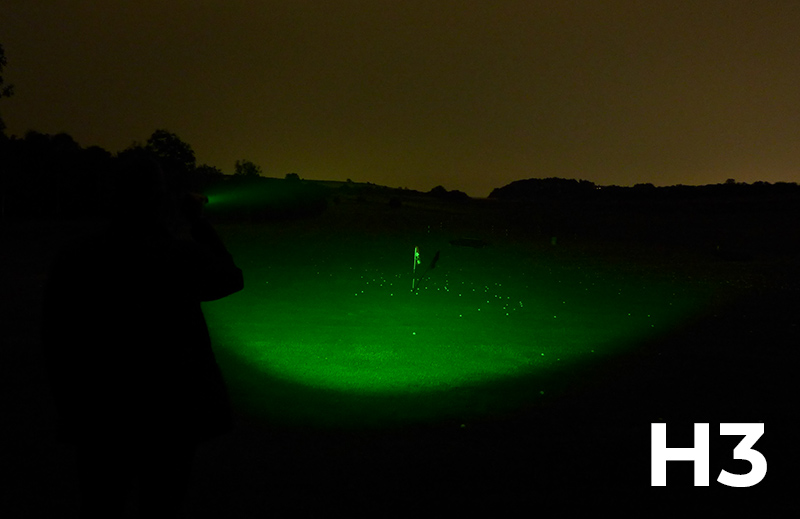
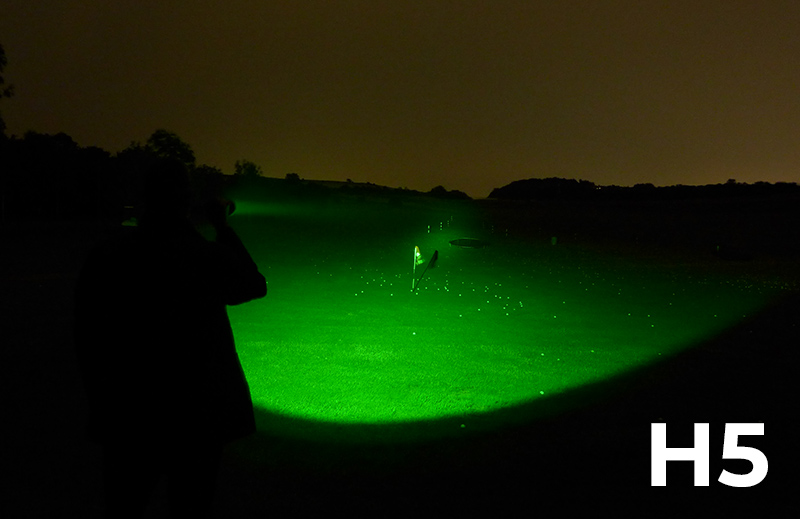
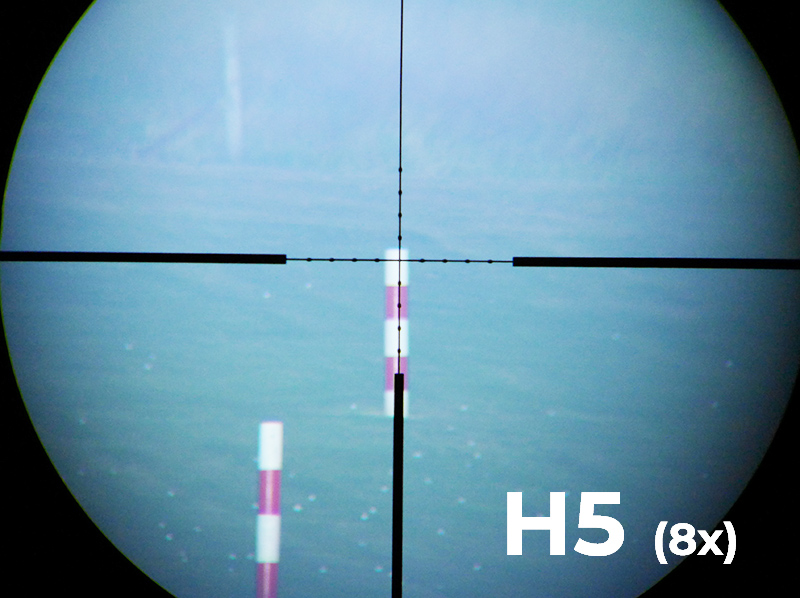
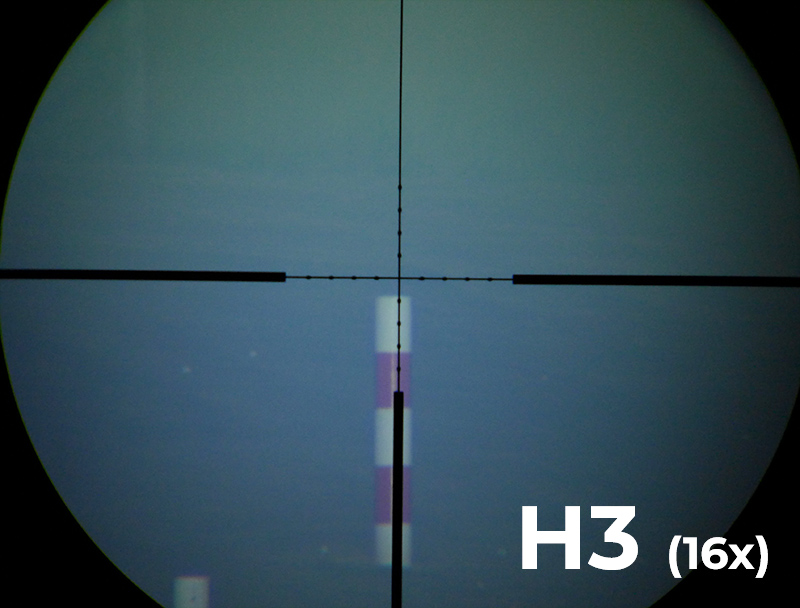
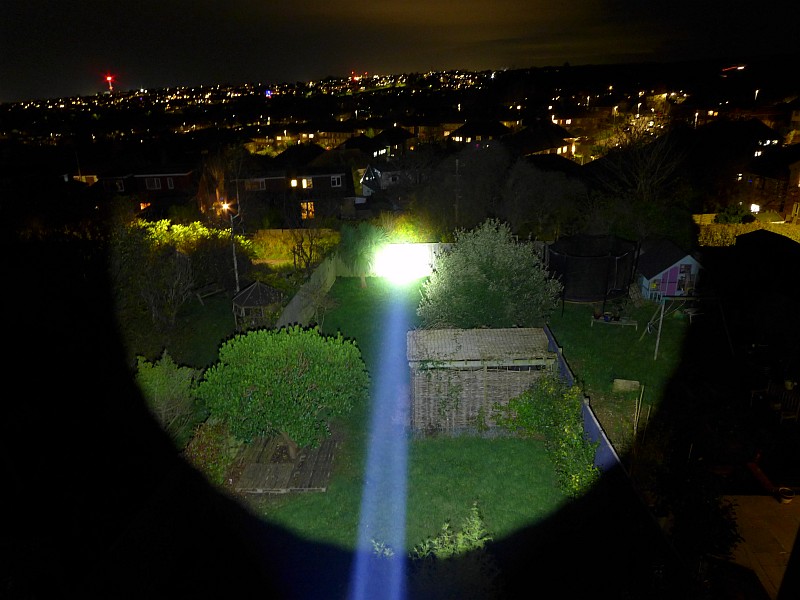
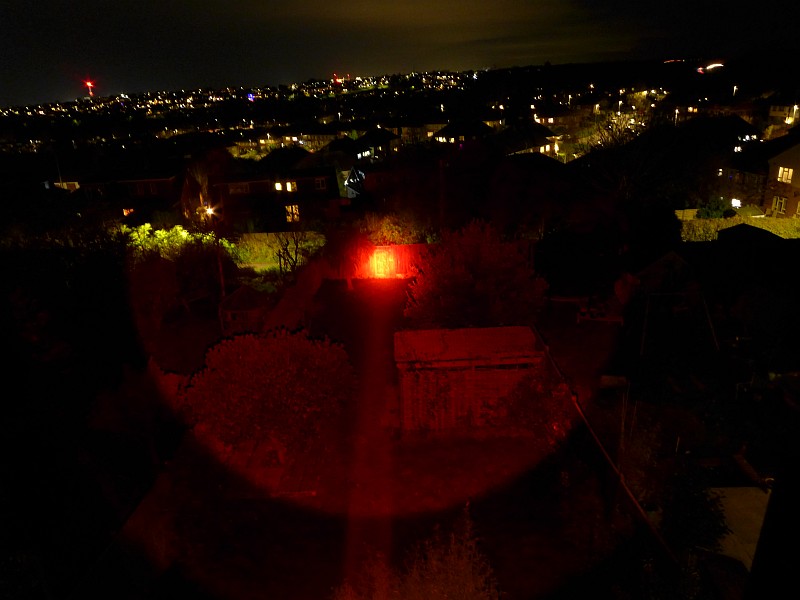
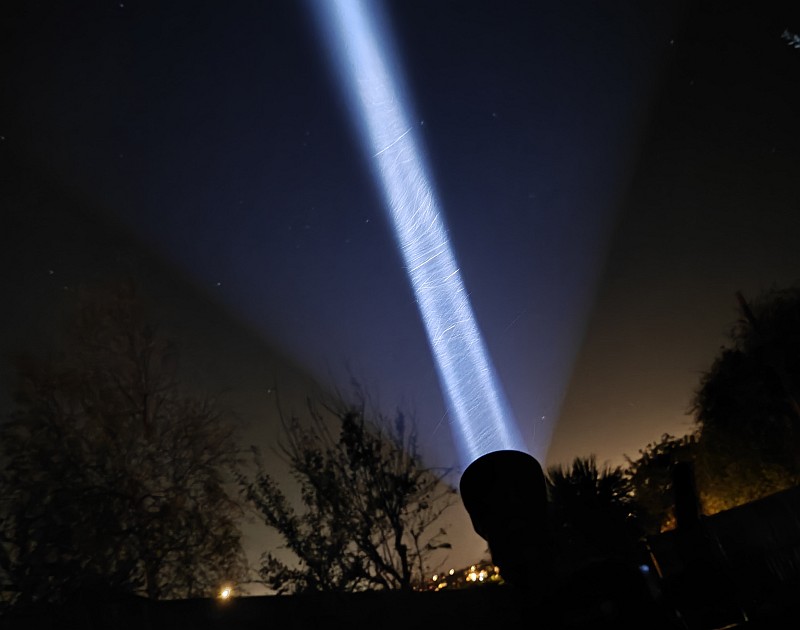
Any long time followers of Tactical Reviews might be familiar with the outdoor beam shots, but a new perspective has become necessary from a higher vantage point; the fence is at a distance of 32m.
The same exposure is used for the coloured filter beam shots to show the relative light levels for indoors and outdoors.

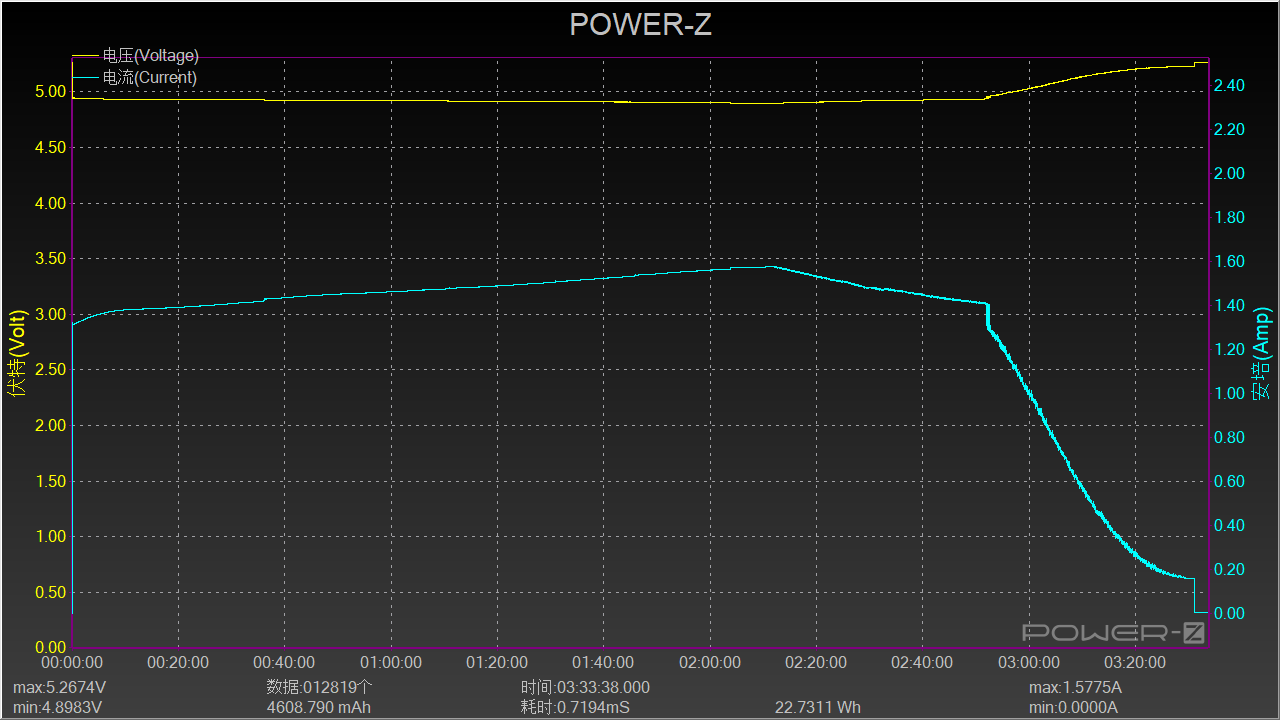
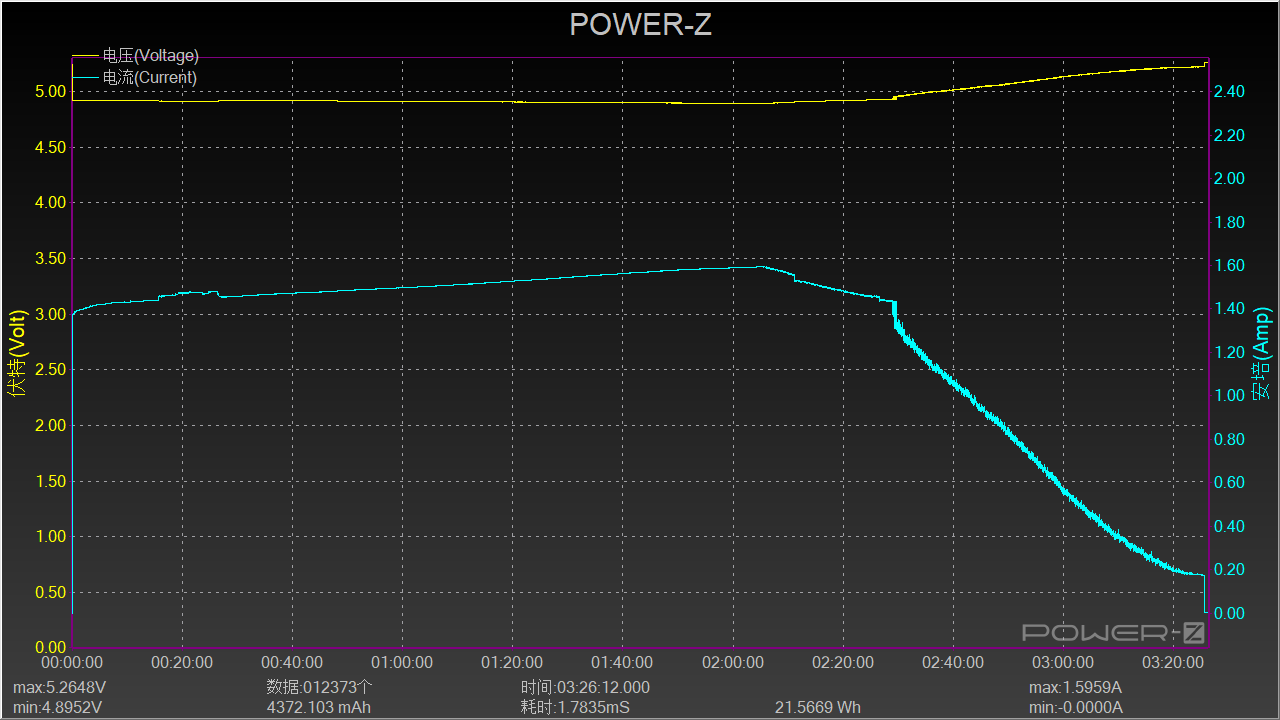
Batteries and output:
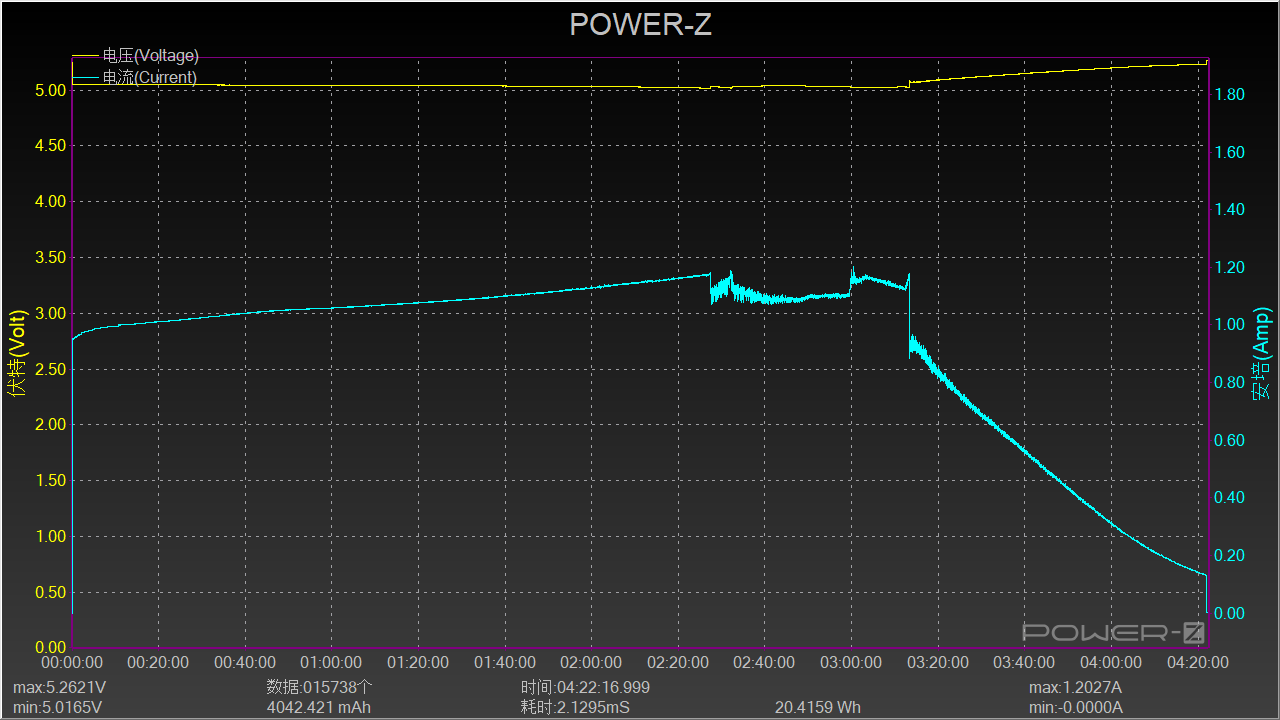
The Javelot Turbo 2 runs on a proprietary battery which needs to be charged in the light.
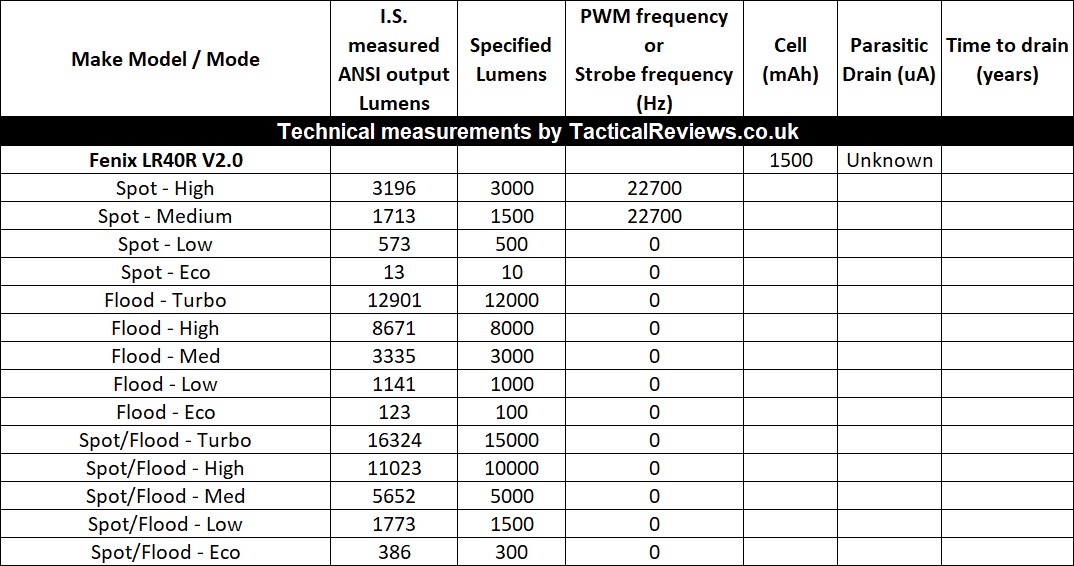
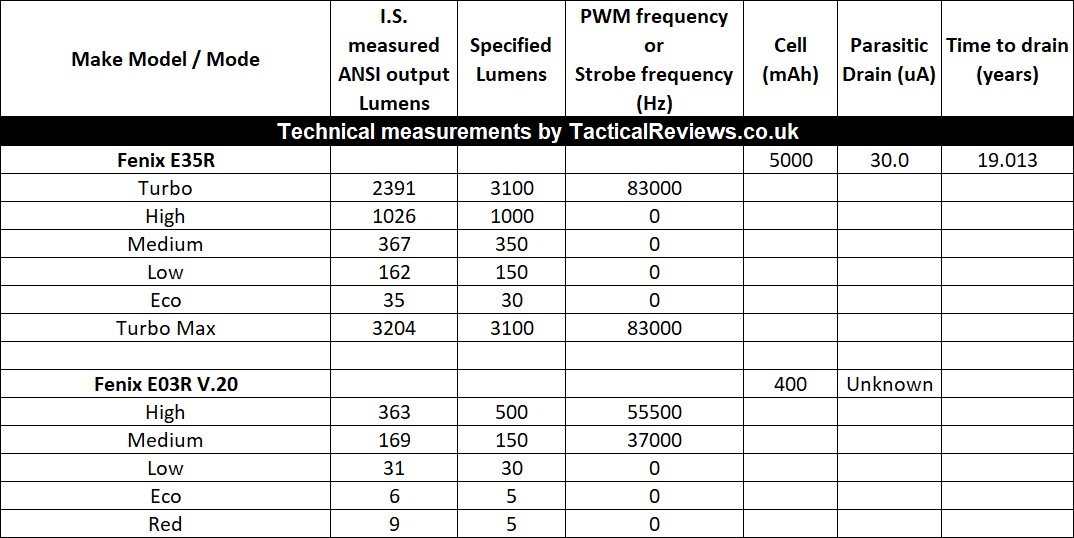
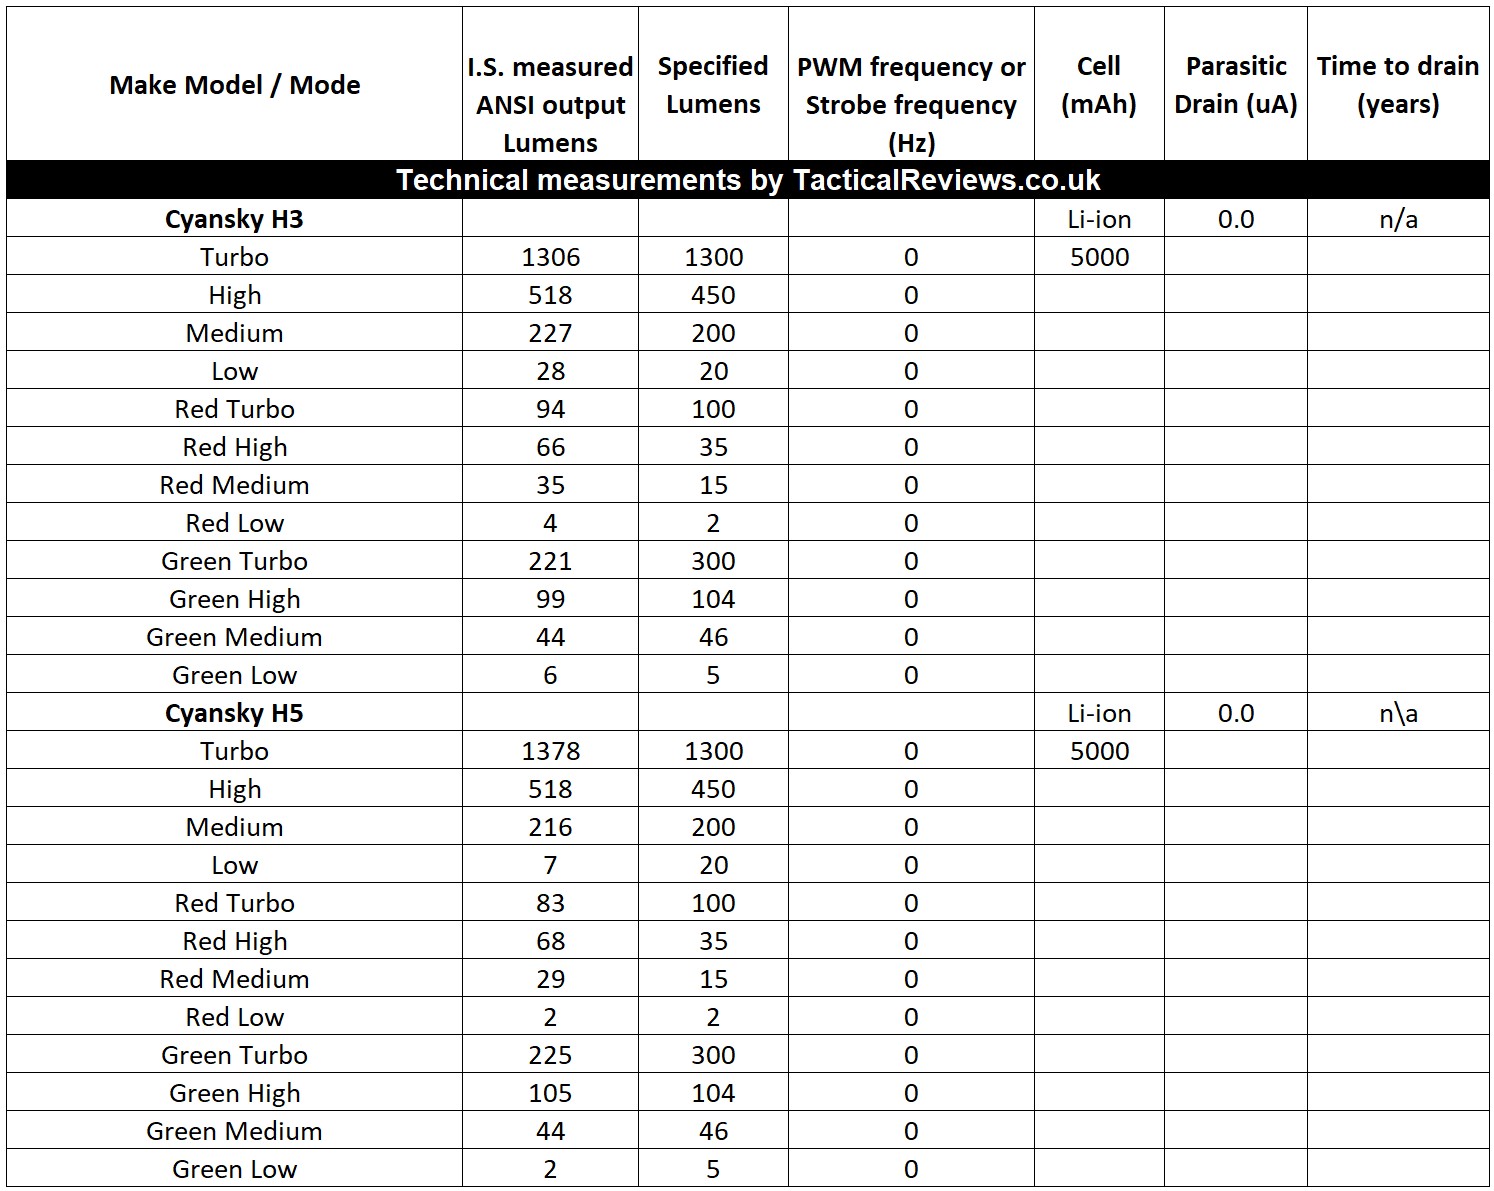
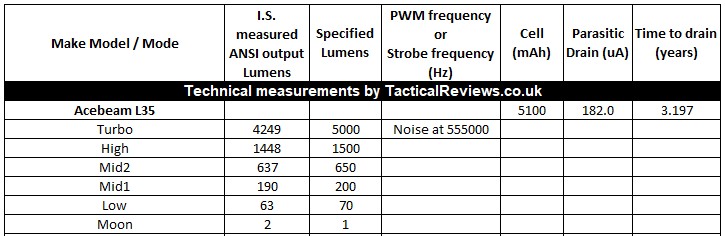
Please note, all quoted lumen figures are from a DIY integrating sphere, and according to ANSI standards. Although every effort is made to give as accurate a result as possible, they should be taken as an estimate only. The results can be used to compare outputs in this review and others I have published.
For full details of the tests and measurements carried out and an explanation of the results, see the page – Light Testing Information.
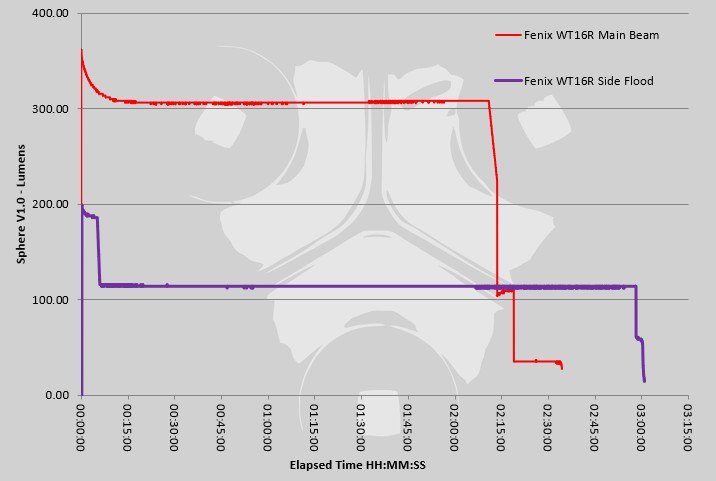
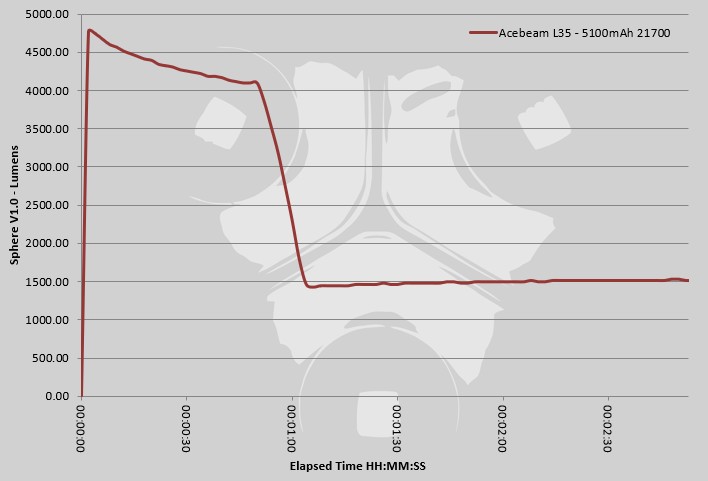
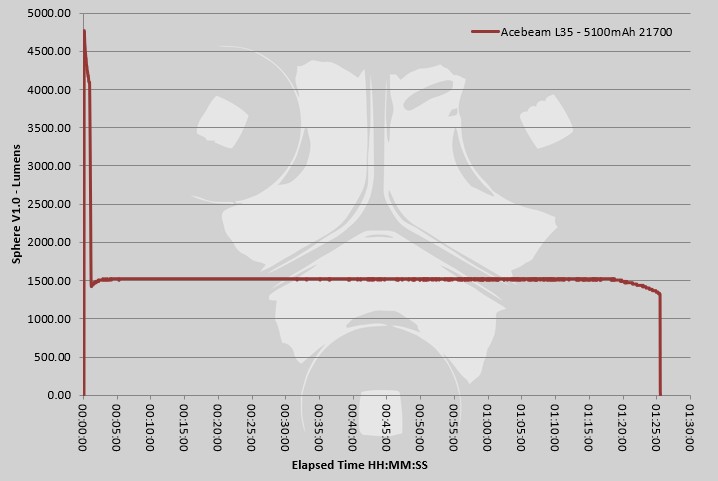
Measured output correlated incredibly well with the official specifications, including the beam range.
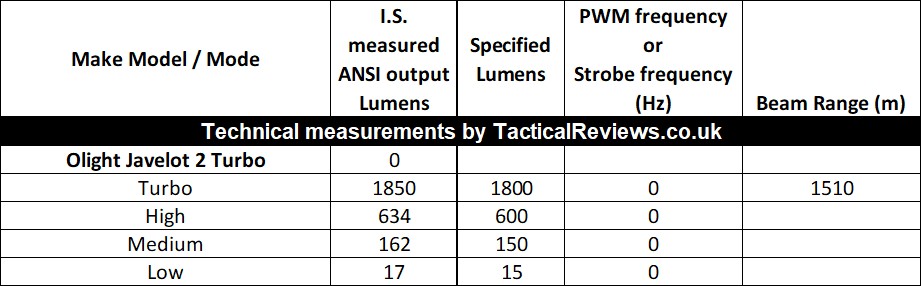
* Beacon and Strobe output measurements are only estimates as the brief flashes make it difficult to capture the actual output value.
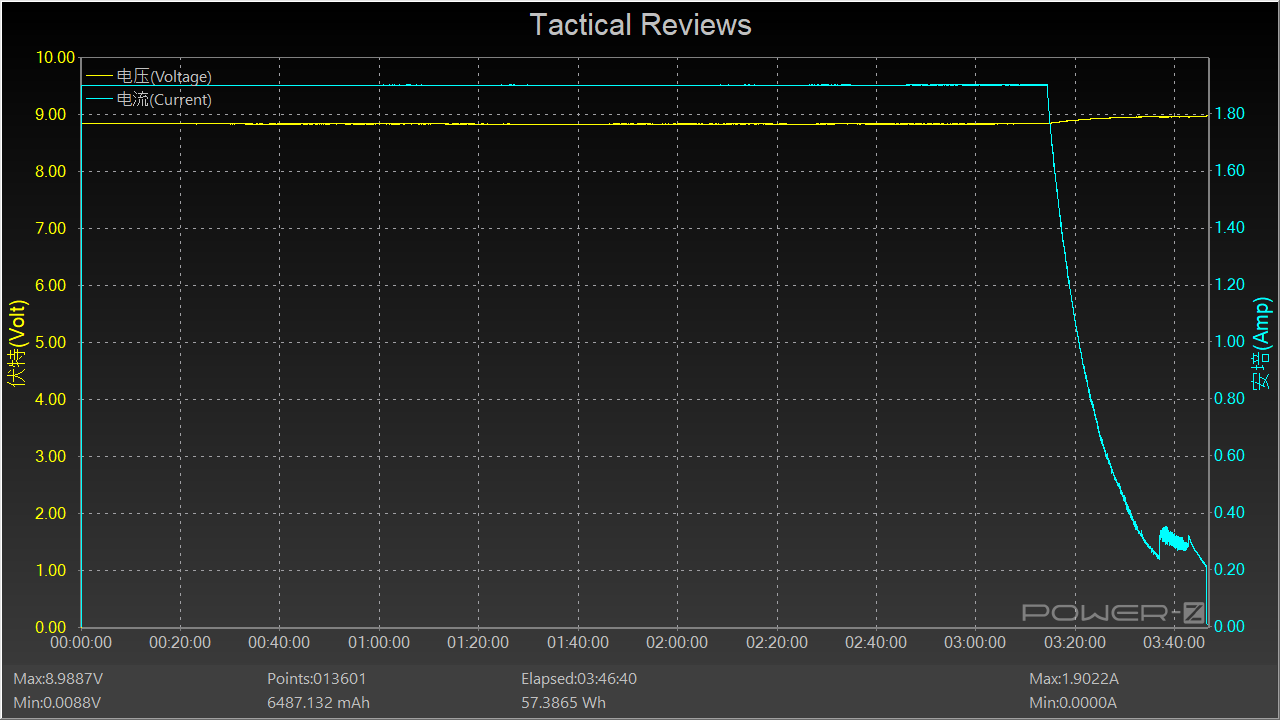
The runtime trace is equally impressive with 1200lm maintained for 1h 30m, and plenty of warning provided with the step downs, so you won’t be let down.

Troubleshooting
This section is included to mention any minor niggles I come across during testing, in case the information helps anyone else.
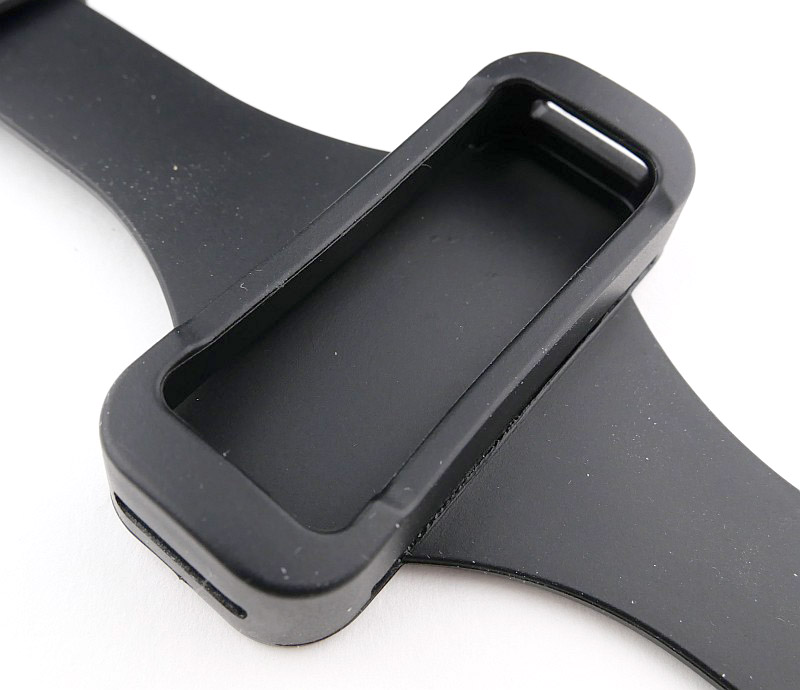
The only issue I encountered was with the switch mount / wrist strap for the remote switch. The post provided to allow the strap size to be set was very difficult to fit, and on the first attempt to remove it broke. I will be cutting off the broken post and fitting a metal Sam Browne stud in its place (a leatherworking fixing). Hopefully Olight will update this design.

As per the description of this section, this information is provided in case anyone else finds a similar ‘issue’ that might be fixed in the same way.
The Javelot Turbo 2 in use
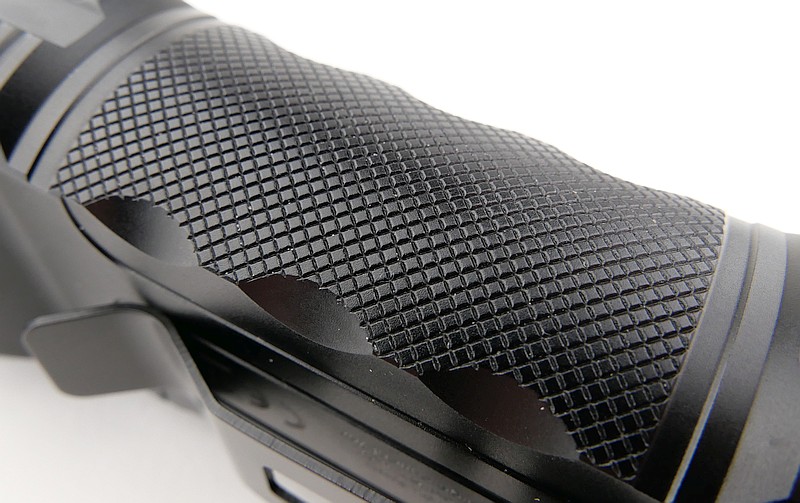
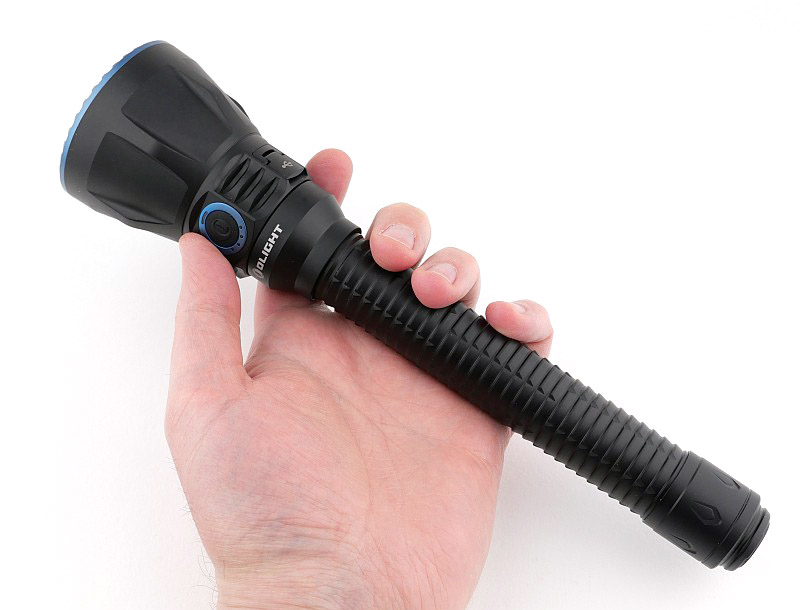
For a super-thrower, the Javelot Turbo 2 is easy to handle and combines its large reflector, and long battery tube into a practical package. Yes, it is long, but this makes it easy to hold and gives it excellent balance too.
Three completely different switching options adds to the versatility immensely. The side switch is one of the most natural controls when holding the Javelot Turbo 2 normally. Move into a tactical-grip with your thumb over the tail-switch, and again more intuitive control. And then yet another option, the bluetooth remote switch.
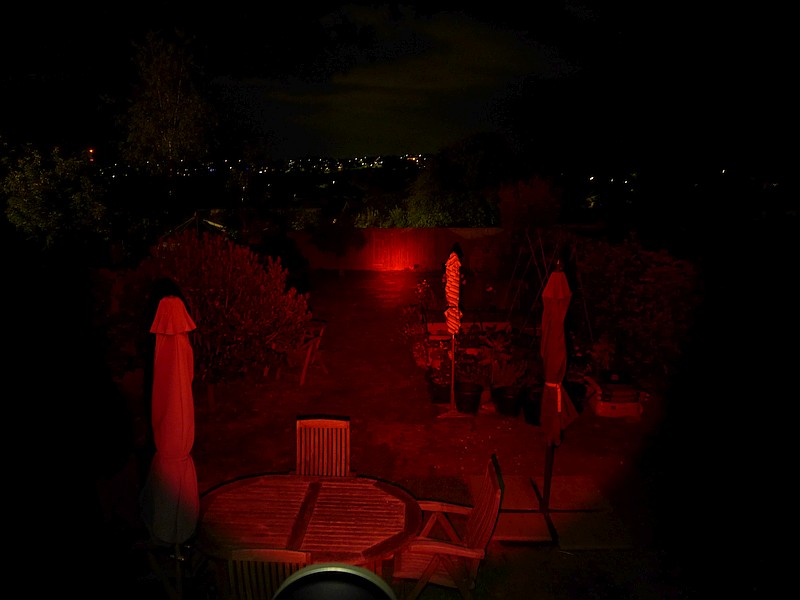
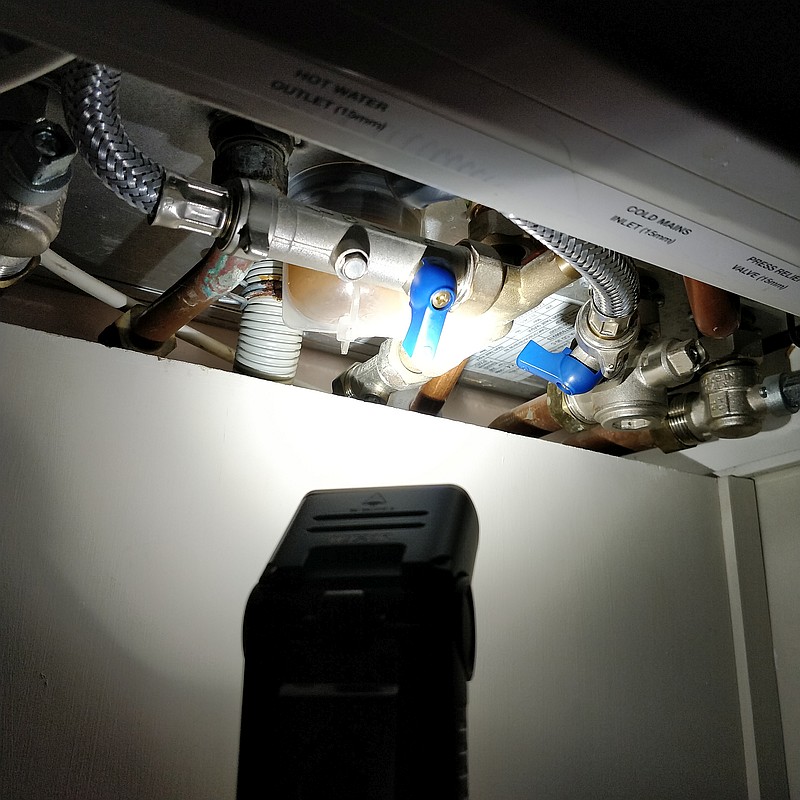
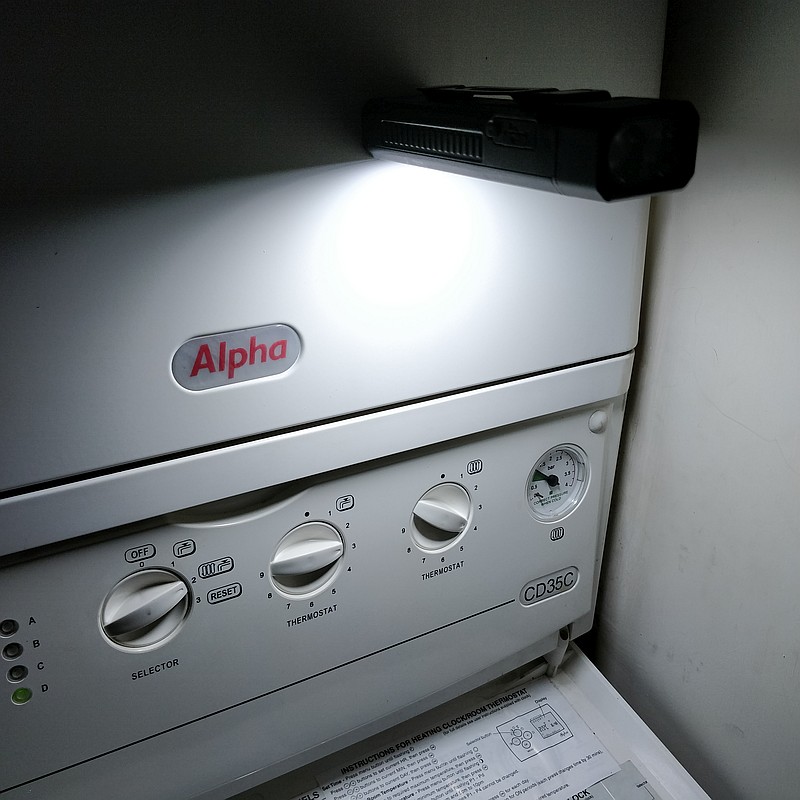
I’ll admit, that initially I thought this was a gimmick. However, I am now a convert for a couple of reasons; firstly, yes gun / weapon mounting and not having a wire to activate the light is very convenient. The switch mount can be used for gun mounting or as a wrist strap, or you can keep the switch in a pocket or hanging from the lanyard. What I found really useful too was having the Javelot Turbo 2 set up to be used hands free and then remotely controlled. Something I even did for lighting up the garden at night, leaving the Javelot Turbo 2 outside and being able to turn it on and off from inside the house. A really useful option to have.
I did not use the magnetic gun mount; convenient it might be, but secure and stable it is not. Olight’s own videos show the mount moving under recoil. This means you have only a couple of shots before needing to re-adjust. It also means the mount rubbing over the gun’s surface finish (which I normally keep lightly oiled) and any grit or dirt that happens to be on the surface. So I chose not to test this or show it. The mount would be useful for other fixed lighting tasks.
On this basis I also did not use the switch mount strap on a gun. I’m not keen on strapping a switch to a gun, usually using an adhesive strip to fit the switch as this allows precise placement anywhere, but with the Javelot Turbo 2, the remote switch needs to be fitted to the torch to recharge, so you can’t stick it to the gun. You could used some stick-on hook/loop fixings, as long as you ensure you don’t prevent the docking of the remote switch on the light. The switch holder also needs the size adjustment post issue sorted. A stick-on, rather than strap-on, holder would be a good addition if Olight decide to include it in future.


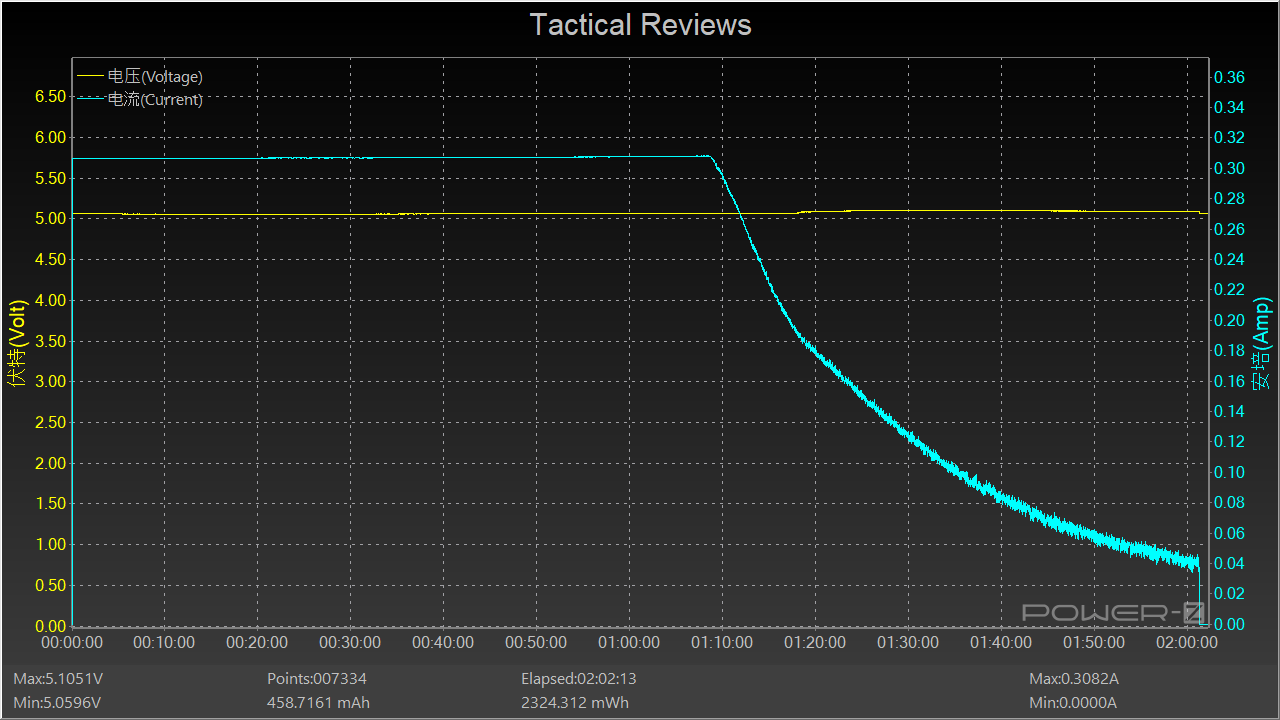
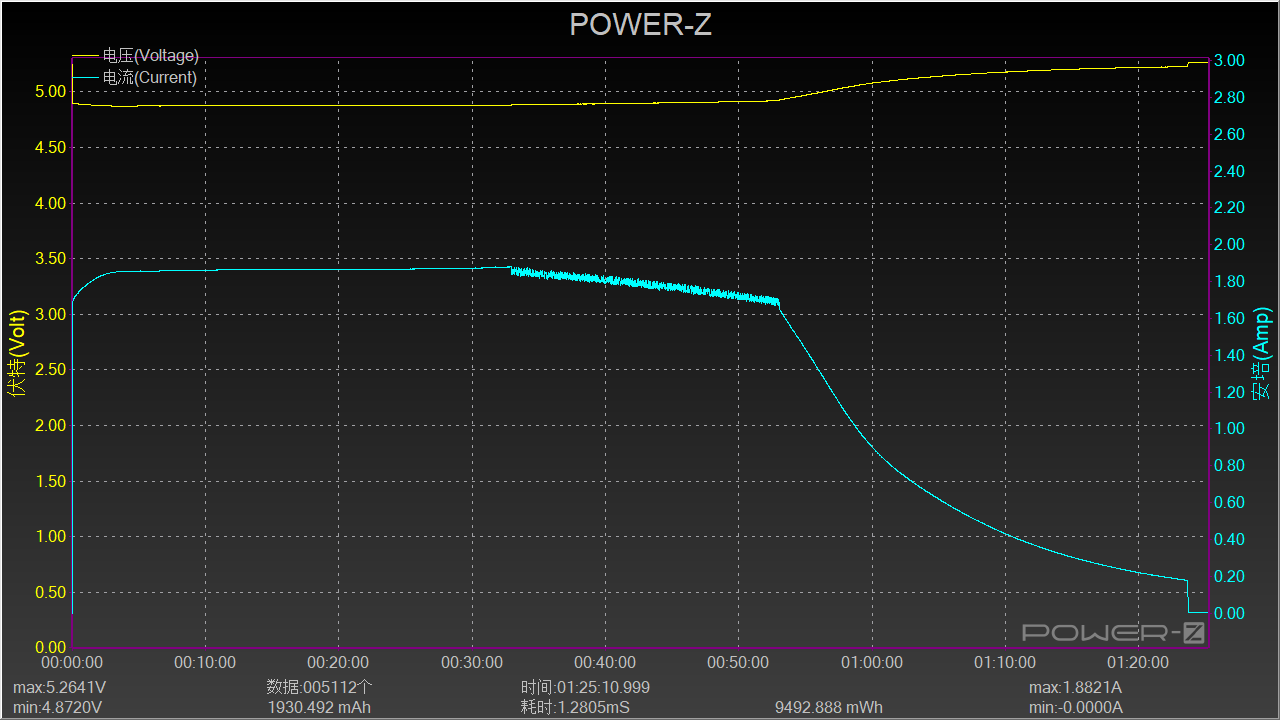
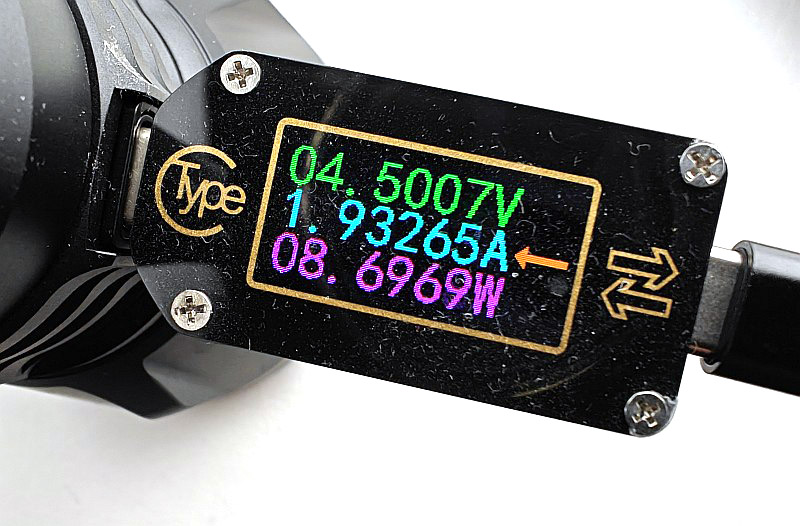
A quick check of the charging rate, and it’s taking 2A at 5V off my normal charger, so a healthy charge rate as specified. Having the coloured filters is crucial for hunting use as all animals are spooked by white light. Different species respond far less to red or green which makes these critical options. The filter mount is a flexible TPU that grips the head firmly and provides additional bump protection. I’m actually tempted to pop the green filter glass out and use the TPU holder as a bump cushion (for my use, the red is much more important).
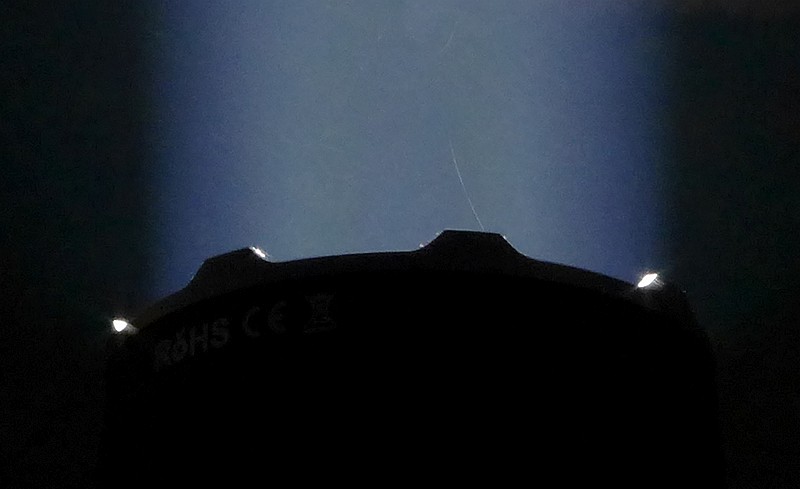
Olight have always done an excellent job with the beam focus on the Javelot range, and I still have the original Javelots with de-domed LEDs. The Javelot Turbo 2 keeps this excellence and you can see from the lightsaber-like beam how strong this focus is. It measured right on specification, with my own measurements coming in at a beam range of 1510m; it certainly cuts a swathe through the darkness.

Olight Javelot Turbo 2 Review Summary
The views expressed in this summary table are from the point of view of the reviewer’s personal use. I am not a member of the armed forces and cannot comment on its use beyond that covered in the review.
Something that might be a ‘pro’ for one user can be a ‘con’ for another, so the comments are categorised based on my requirements. You should consider all points and if they could be beneficial to you.
_______________________________________________
What doesn’t work so well for me
_______________________________________________
Remote switch mount adjuster broke on first use.
Magnetic gun mount moves under recoil.
Olight did not include the magnetic charging cable.
_______________________________________________
Things I like
_______________________________________________
Wireless remote switch.
1510m beam range measured and confirmed.
1850lm Turbo output measured and confirmed.
Three switching options (side switch, tail switch, remote switch).
Remote switch charges directly off the light.
Good balance and handling.
Strong waterproof case included.
Quality red/green coloured filters.
Useful 15lm Low mode.
Olight Javelot Turbo 2 Review Videos
Starting with a short format sixty second review:
Onto a full video review covering many more details:
Discussing the Olight Javelot Turbo 2 Review:
Something new – will it work? A Tactical Reviews Subreddit.
TacticalReviewsChat on Reddit
Please visit there and start/join the conversation.