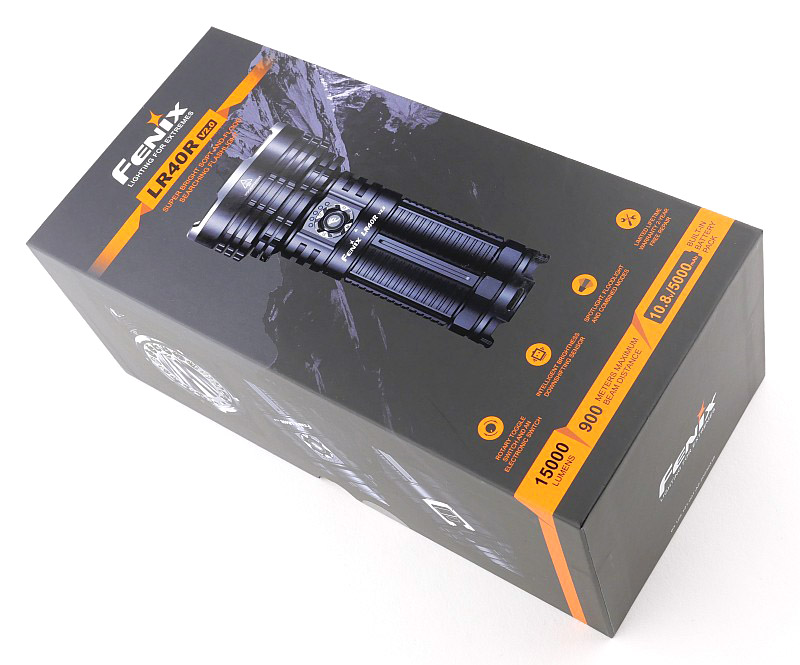
Fenix are updating and upgrading the already impressive LR40R, bringing us the LR40R V2.0. New, intuitive, combined rotary and push button switching design, uprated maximum output power in both light and power bank functions, and a new built-in battery pack with 3 x 5000mAh cells, taking onboard power to the max. Join me in this review of the Fenix LR40R V2.0 to see how it performs.
Review Videos
Starting with a short format sixty second review:
Onto a full video review covering many more details:
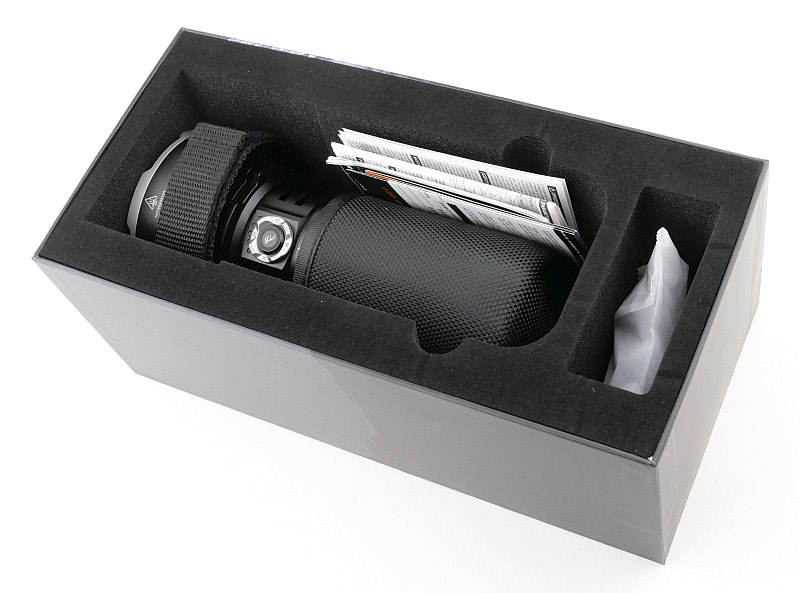
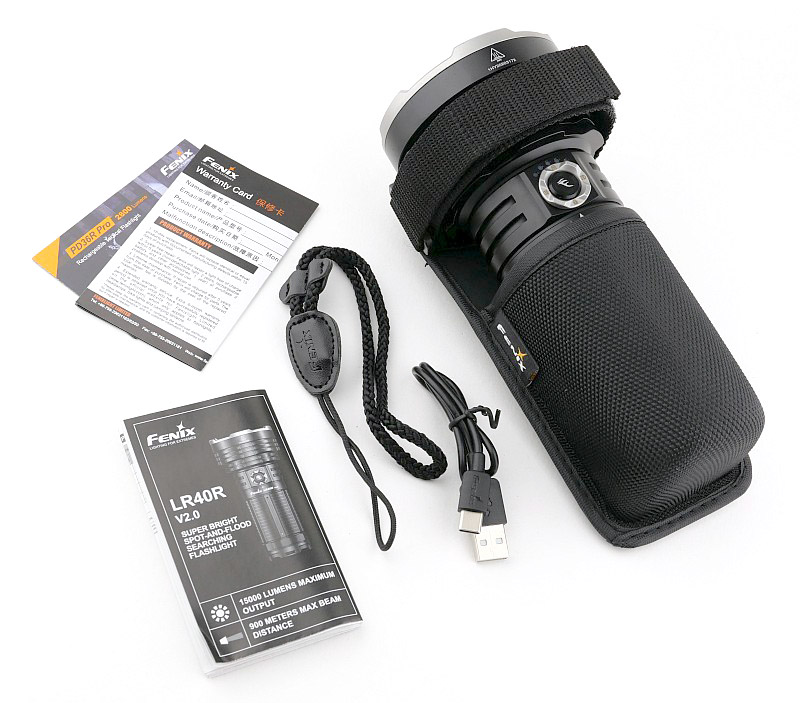
What is in the box?:
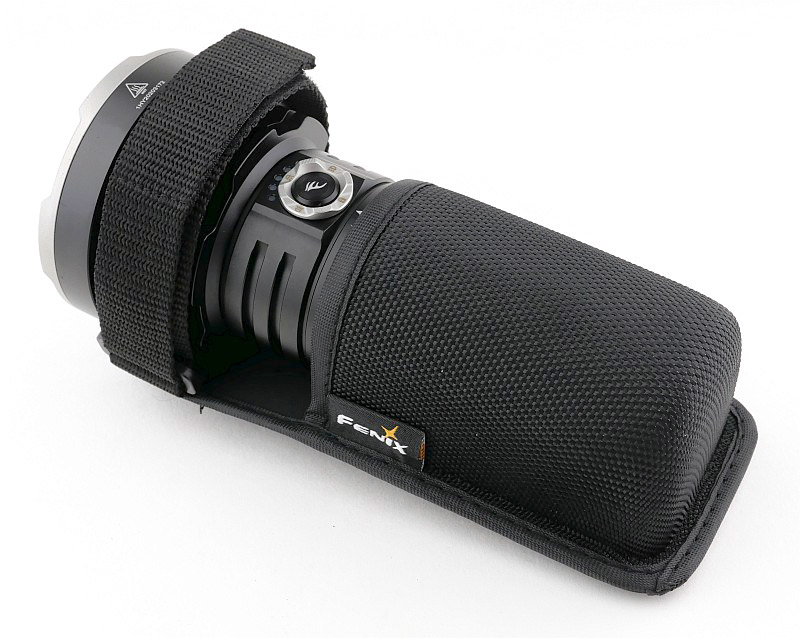
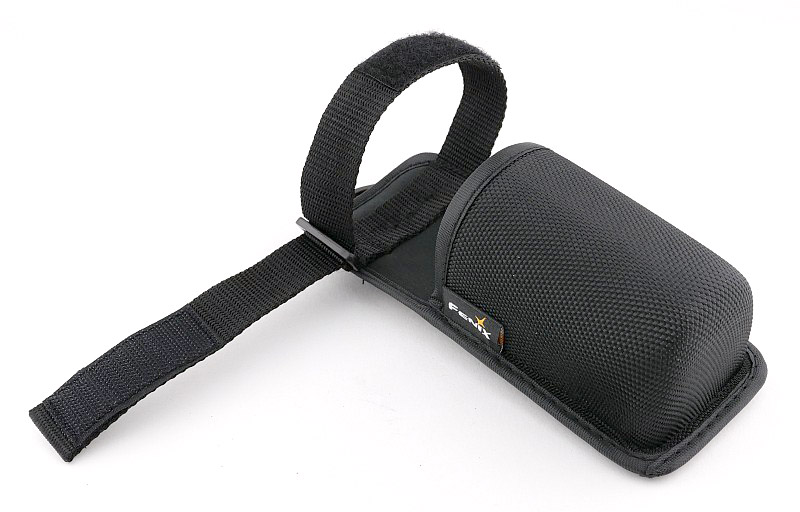
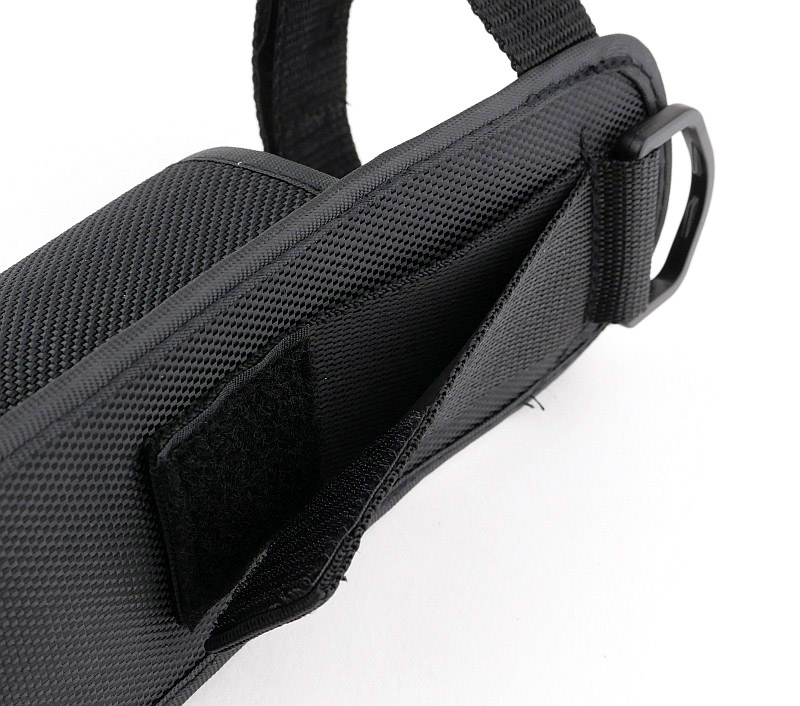
A good look round the LR40R V2.0’s holster – Things to look out for here are:
This is a holster style Fenix have used on several lights with larger heads, from the TK35 and many more. There is an adjustable band that fits round the head and can be left snug, or tightened right down. The body of the light slips into a tubular pouch. The holster has a fixed belt loop, Velcro belt loop and a D-loop hanger.
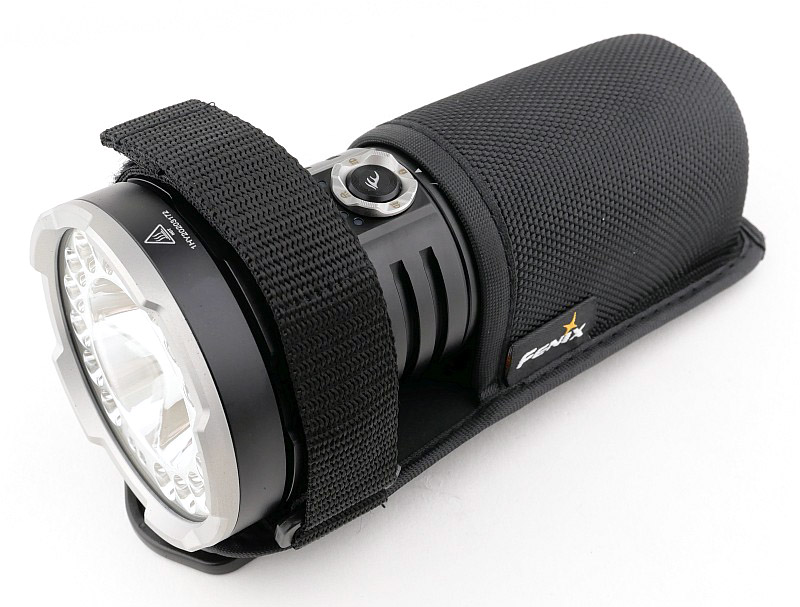


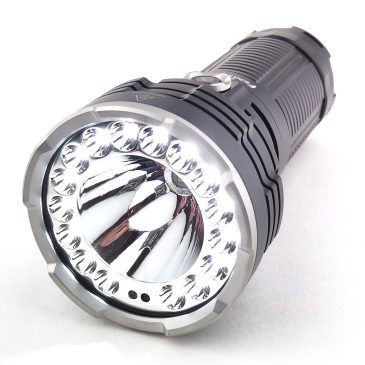
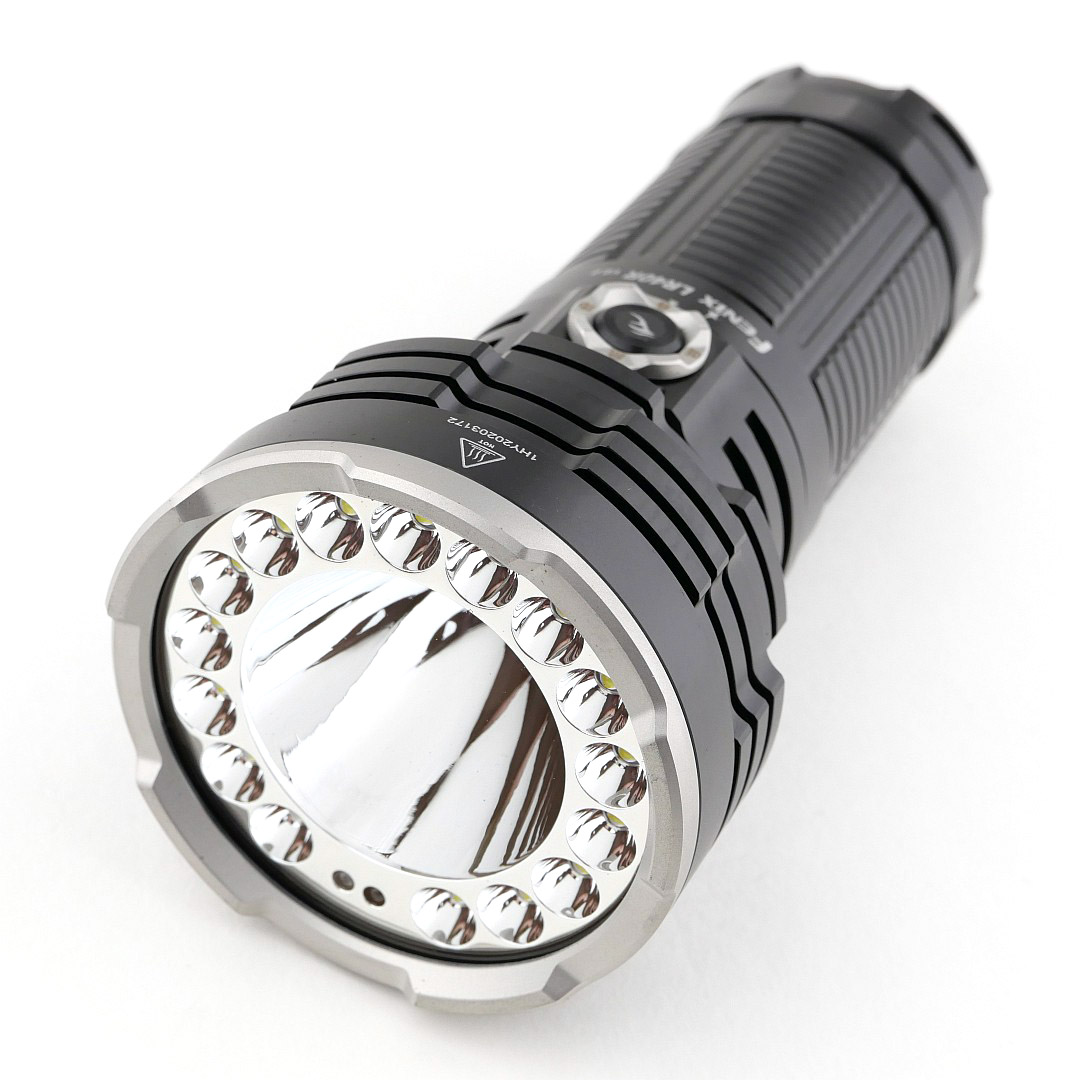
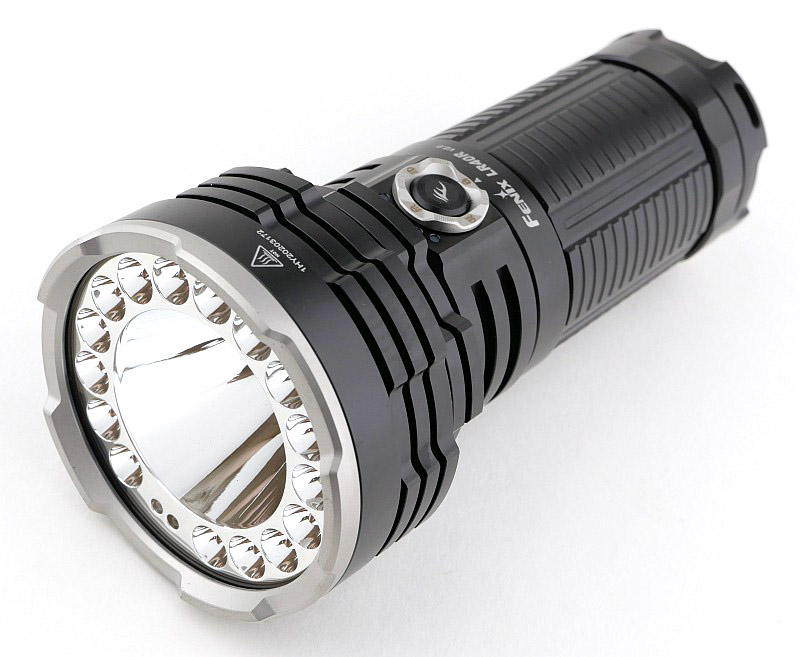
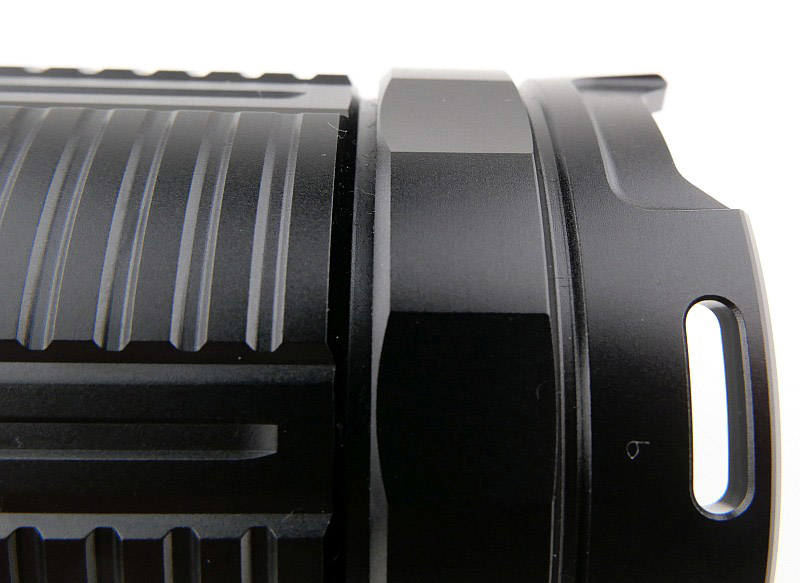
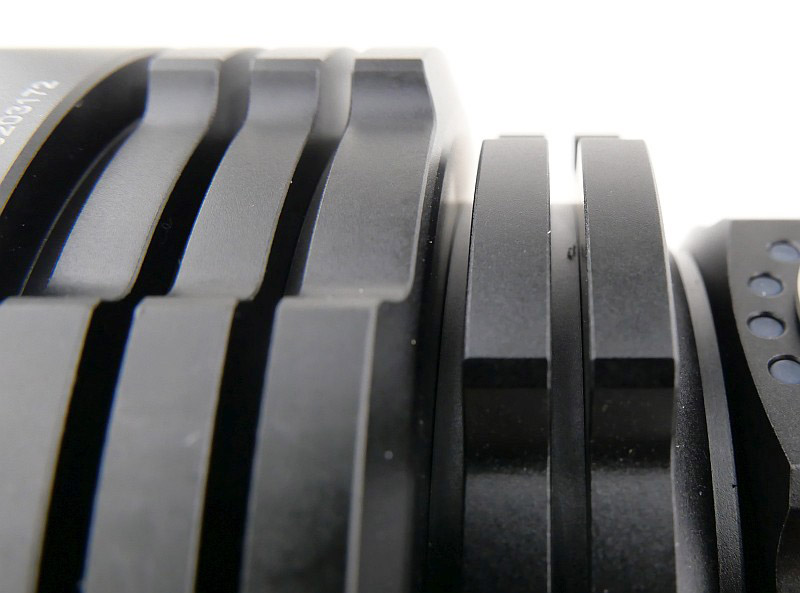
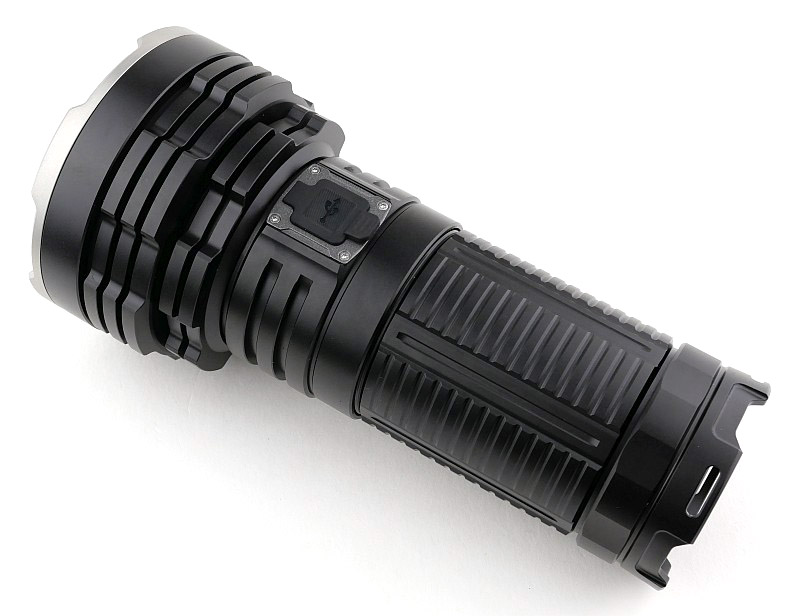
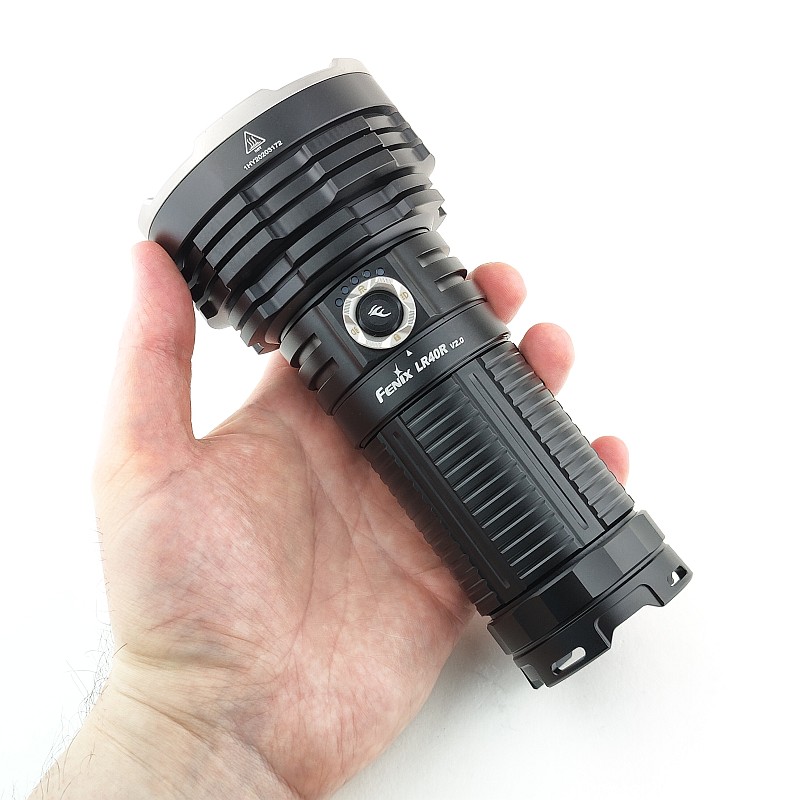
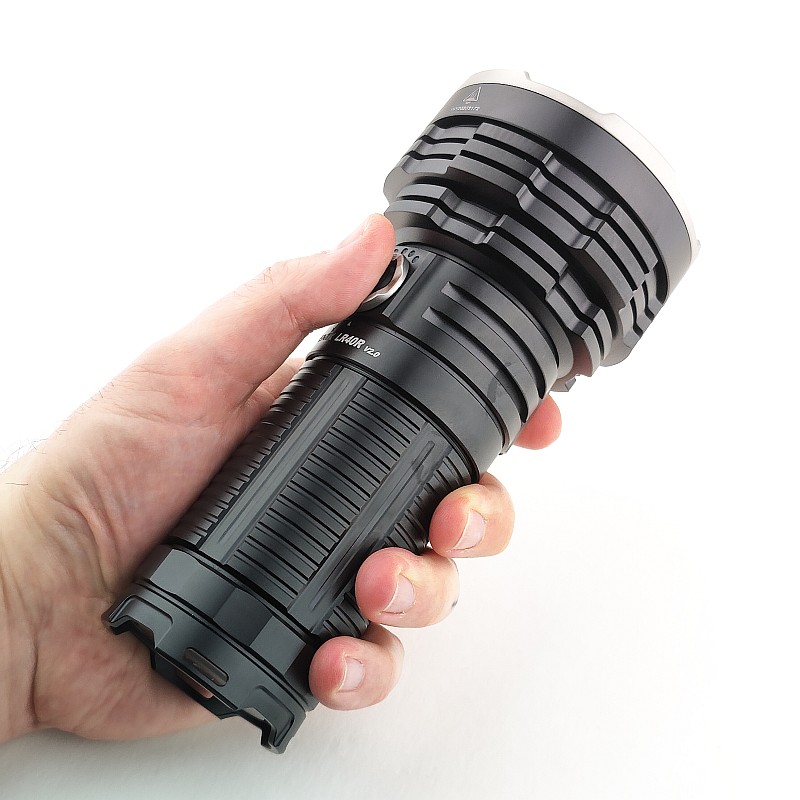
A good look round the LR40R V2.0 – Things to look out for here are:
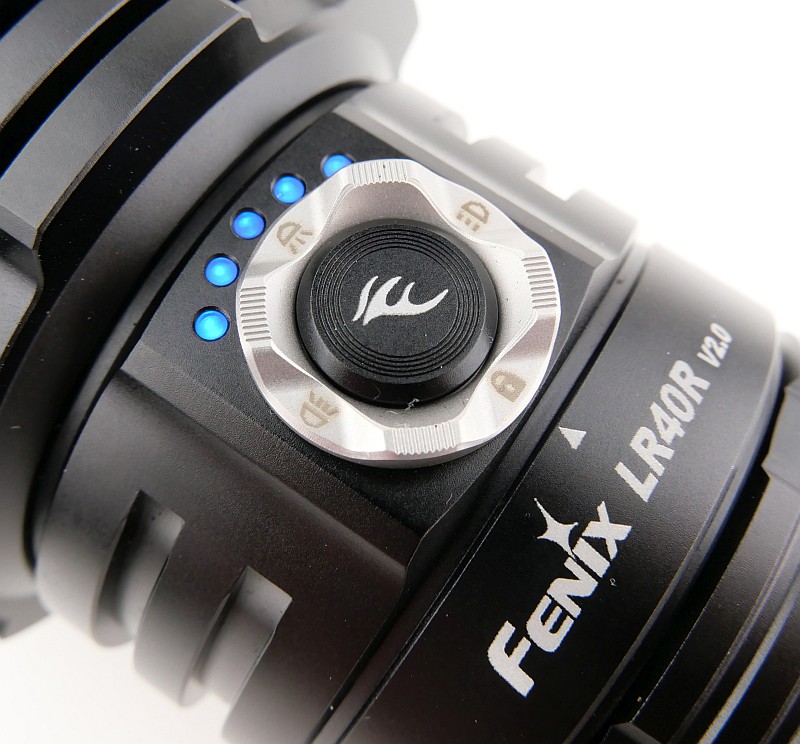
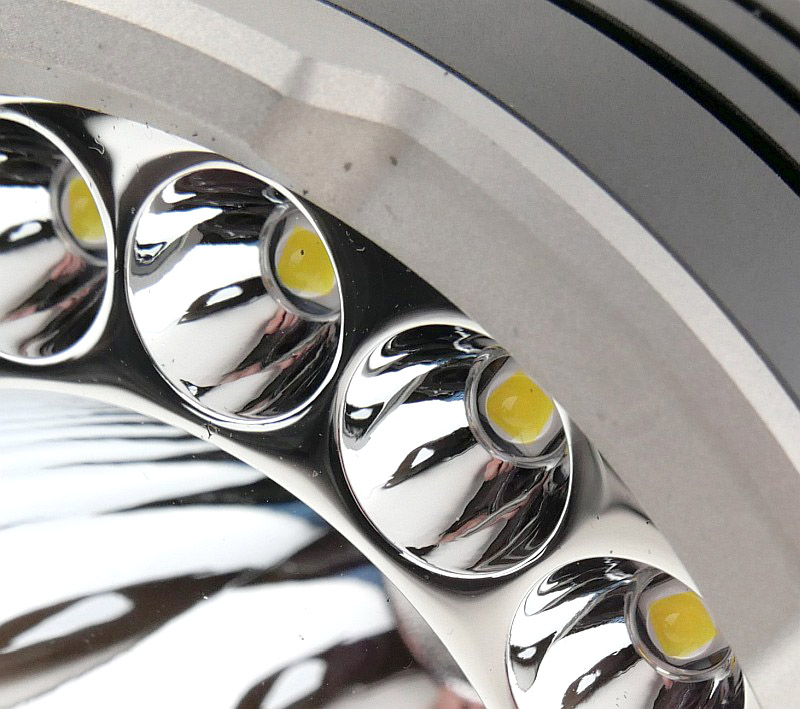
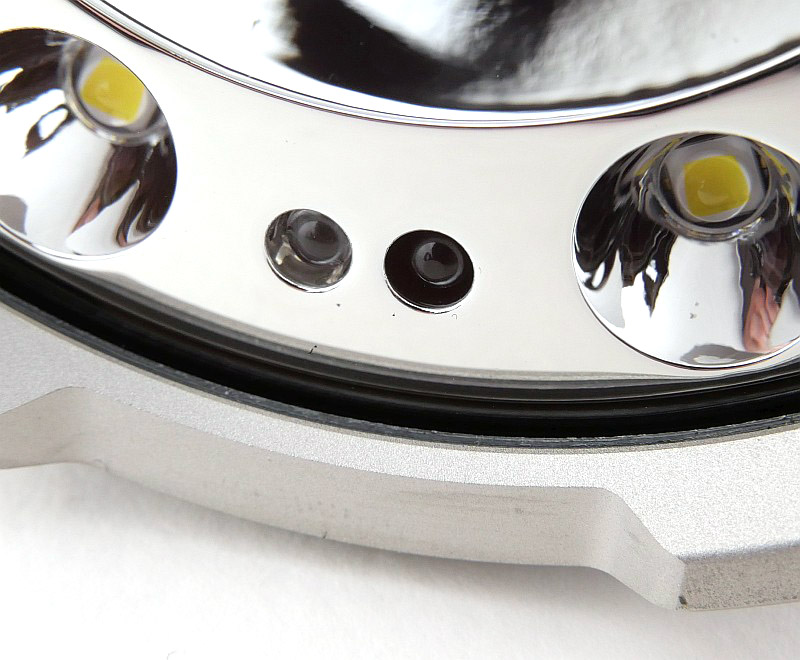
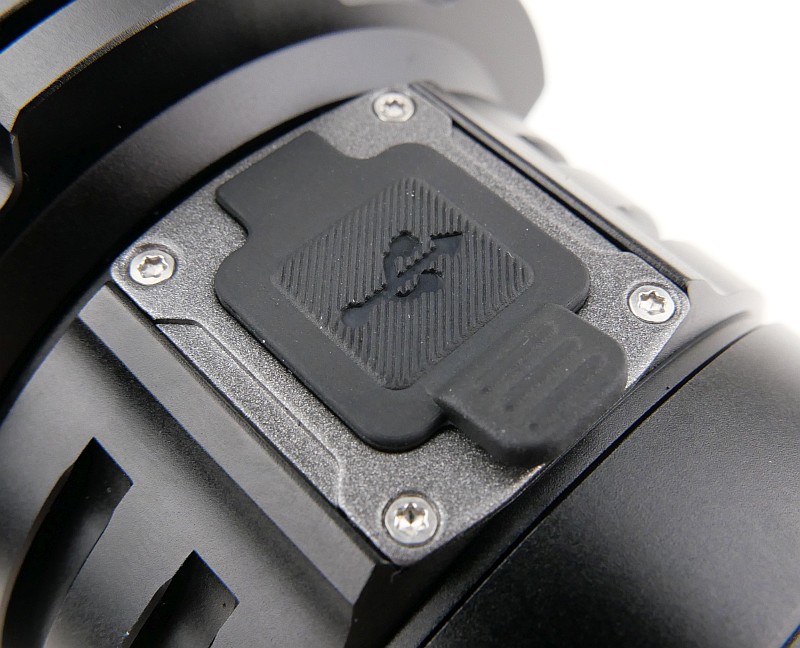
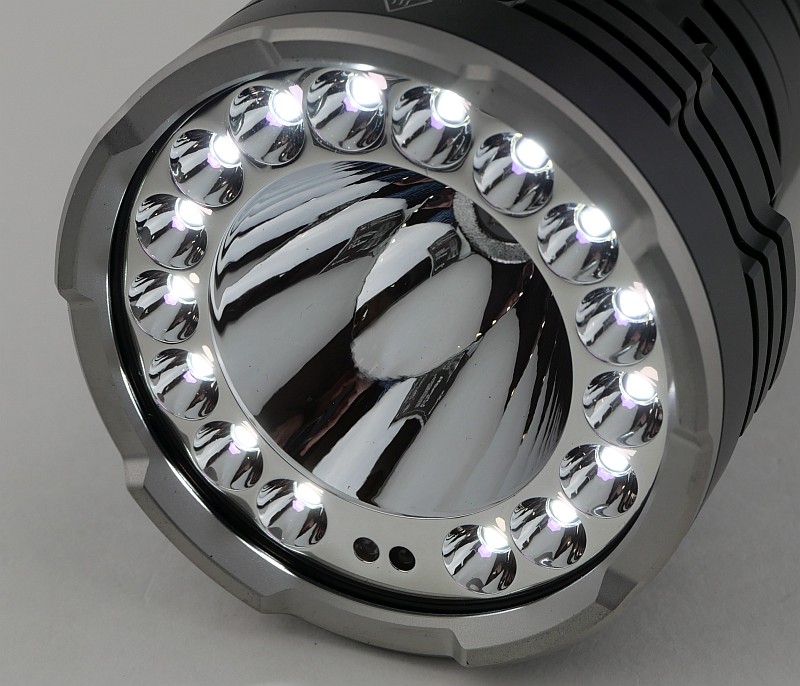
There is a lot to see here. Quickly focusing in on the combined rotary and click switch with charge indicator before moving onto some details of the finish and shaping of the body. Heat-sink fins are thick and shallow, making them very tough. Then the LED and Bezel details, showing the different flood and spot LEDs, plus the safety sensors that you can activate to protect the LR40R V2.0 from damaging object coming too close to it.
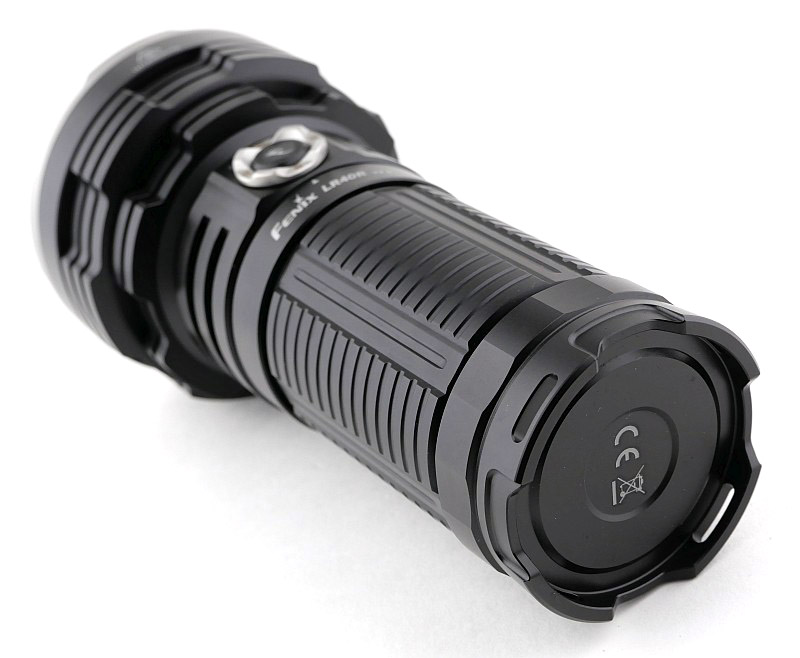
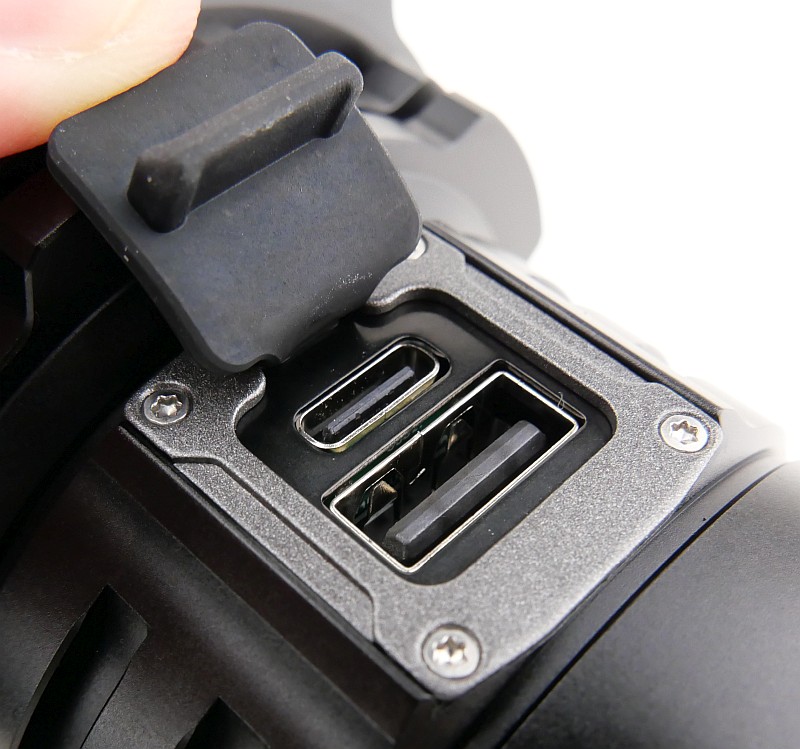
Lastly a few shots of the combined charging and power bank port.


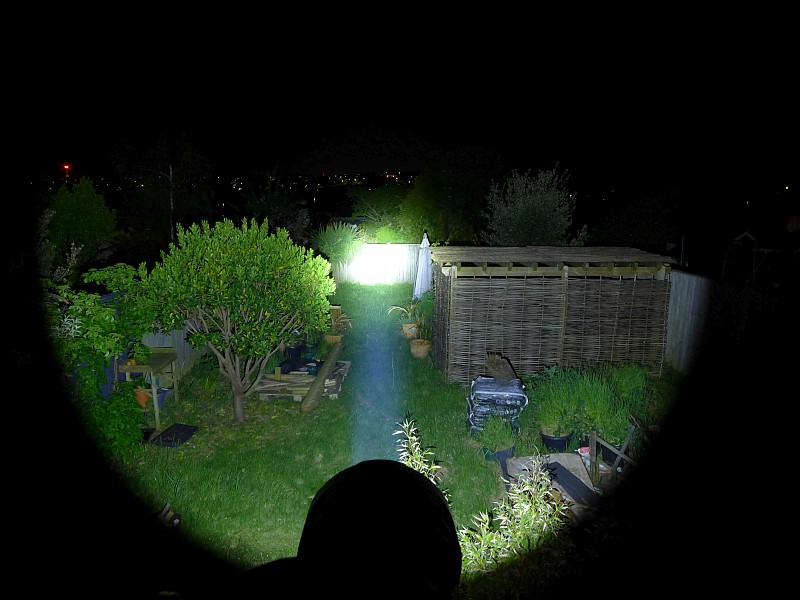
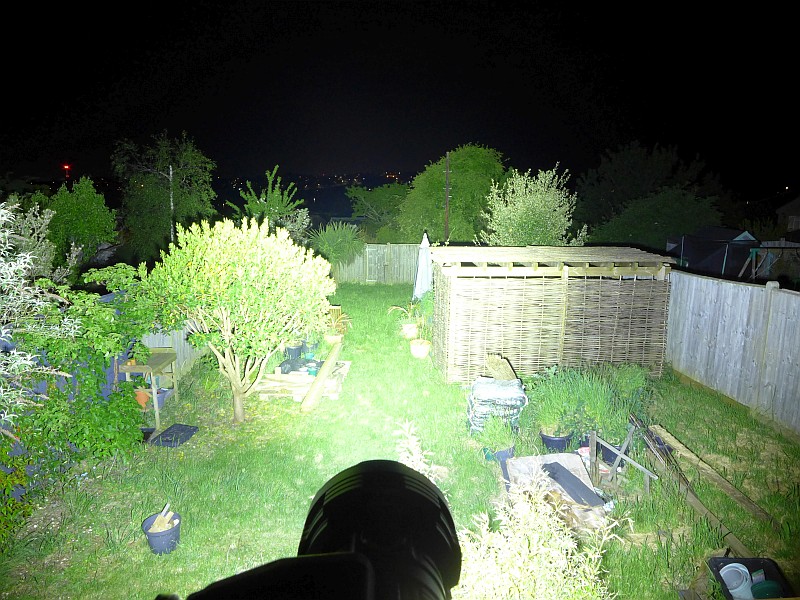
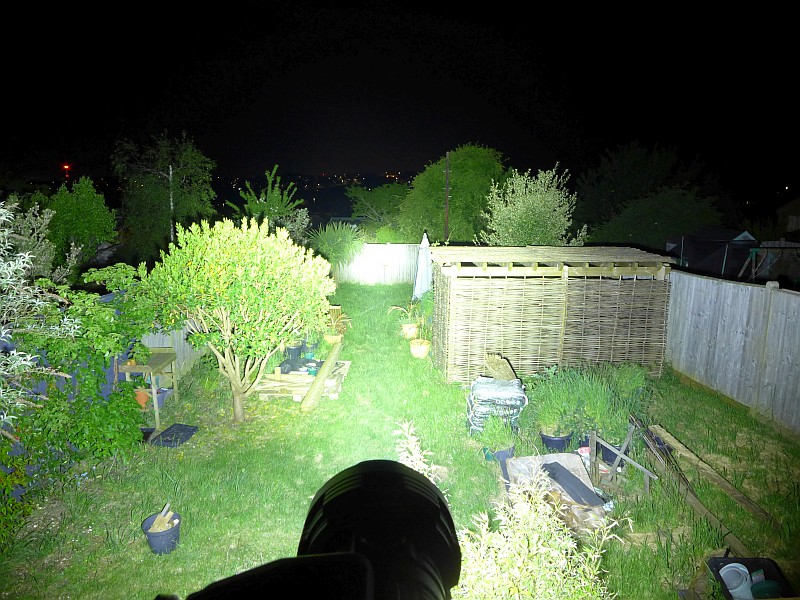
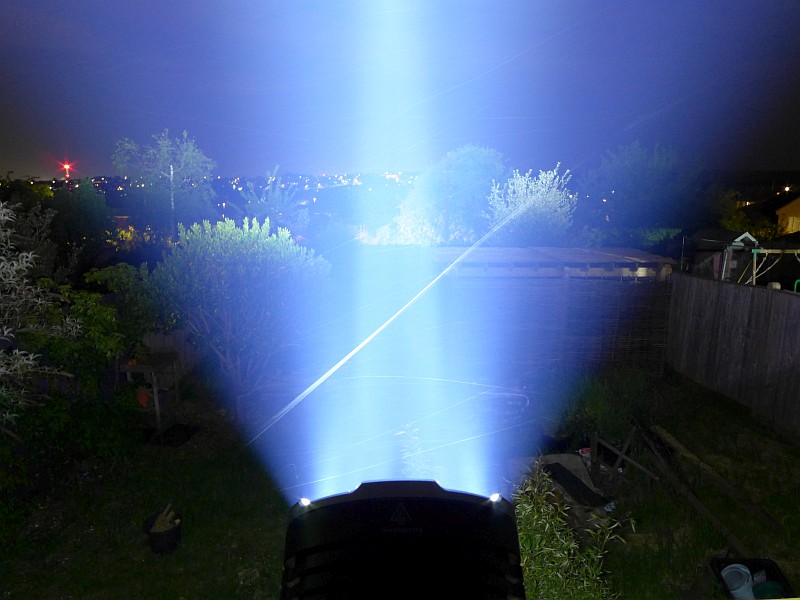
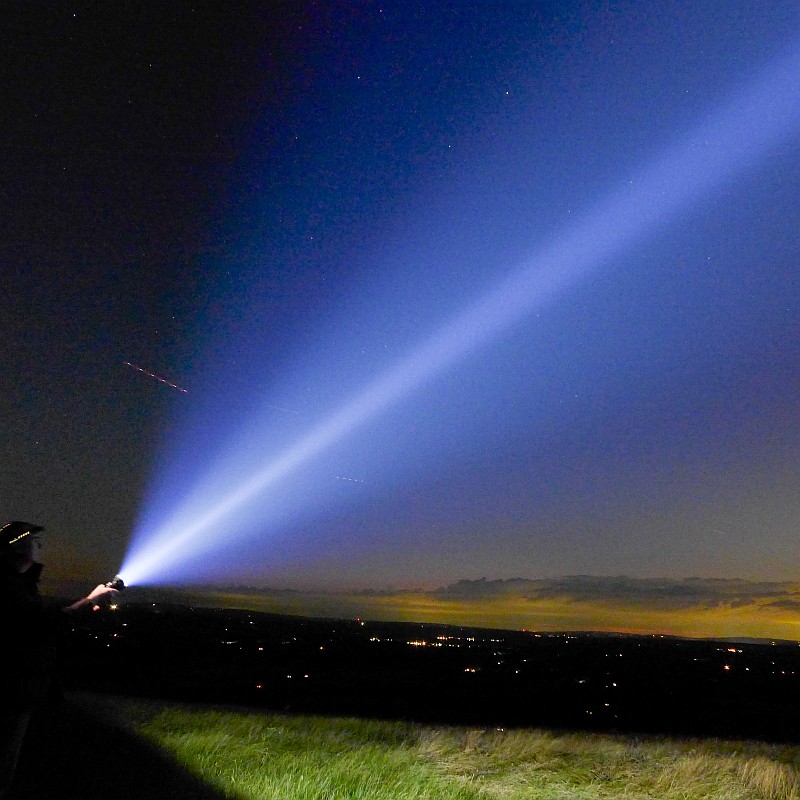
The beam
Please be careful not to judge tint based on images you see on a computer screen. Unless properly calibrated, the screen itself will change the perceived tint.
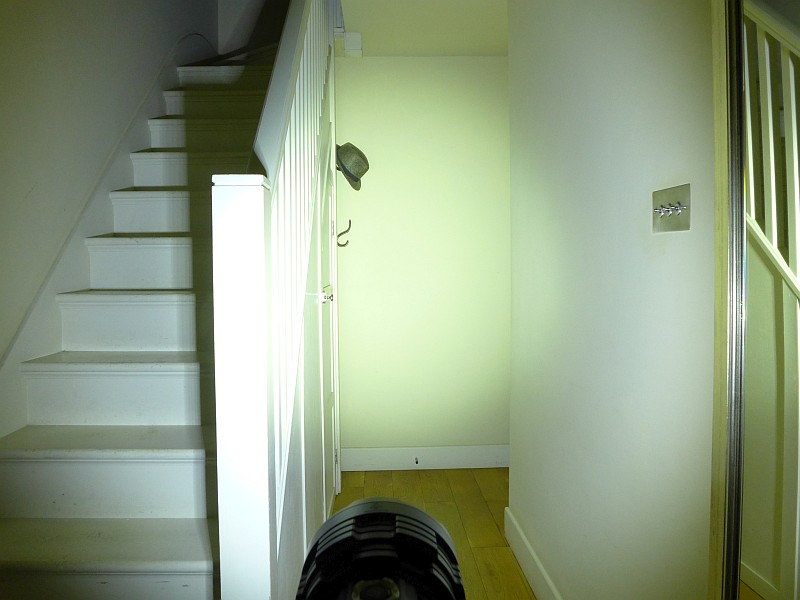
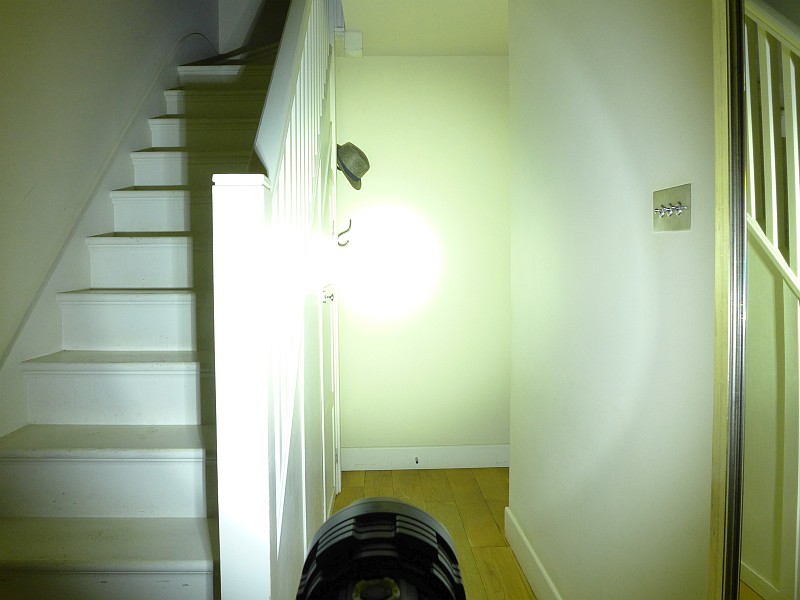
The indoor beamshot is intended to give an idea of the beam shape/quality rather than tint. All beamshots are taken using daylight white balance. The woodwork (stairs and skirting) are painted Farrow & Ball “Off-White”, and the walls are a light sandy colour called ‘String’ again by Farrow & Ball. I don’t actually have a ‘white wall’ in the house to use for this, and my wife won’t have one!
For the LR40R V2.0 beamshots there are the individual spot, flood and then combined flood plus spot beamshots. In all cases the relative exposures are the same to show how the beams compare separately and combined.

Batteries and output:
The LR40R V2.0 runs on a built-in battery pack (3x5000mAh) designed to maximise performance for over size (not needing a battery caddy).
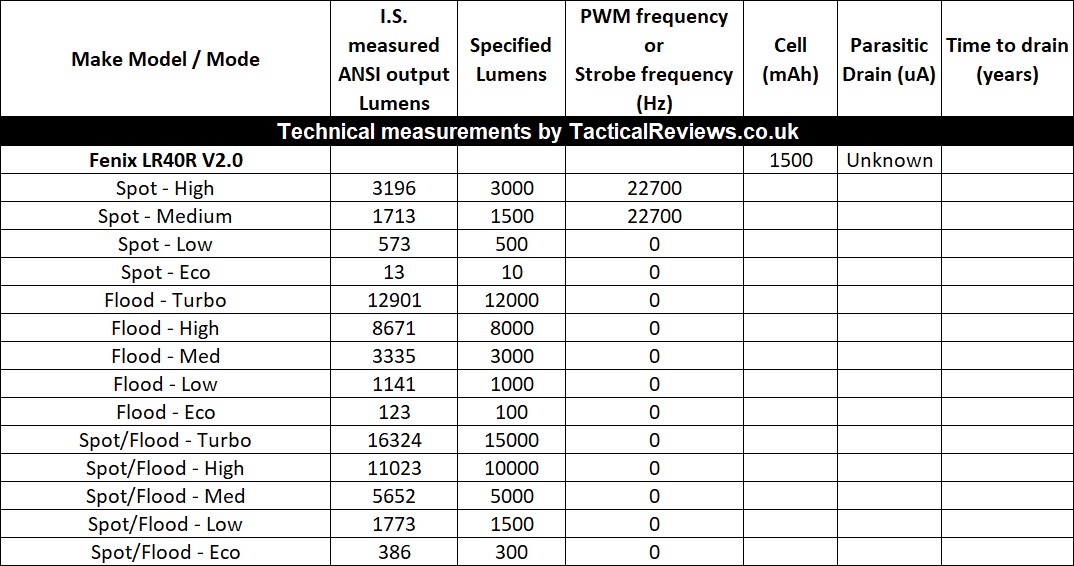
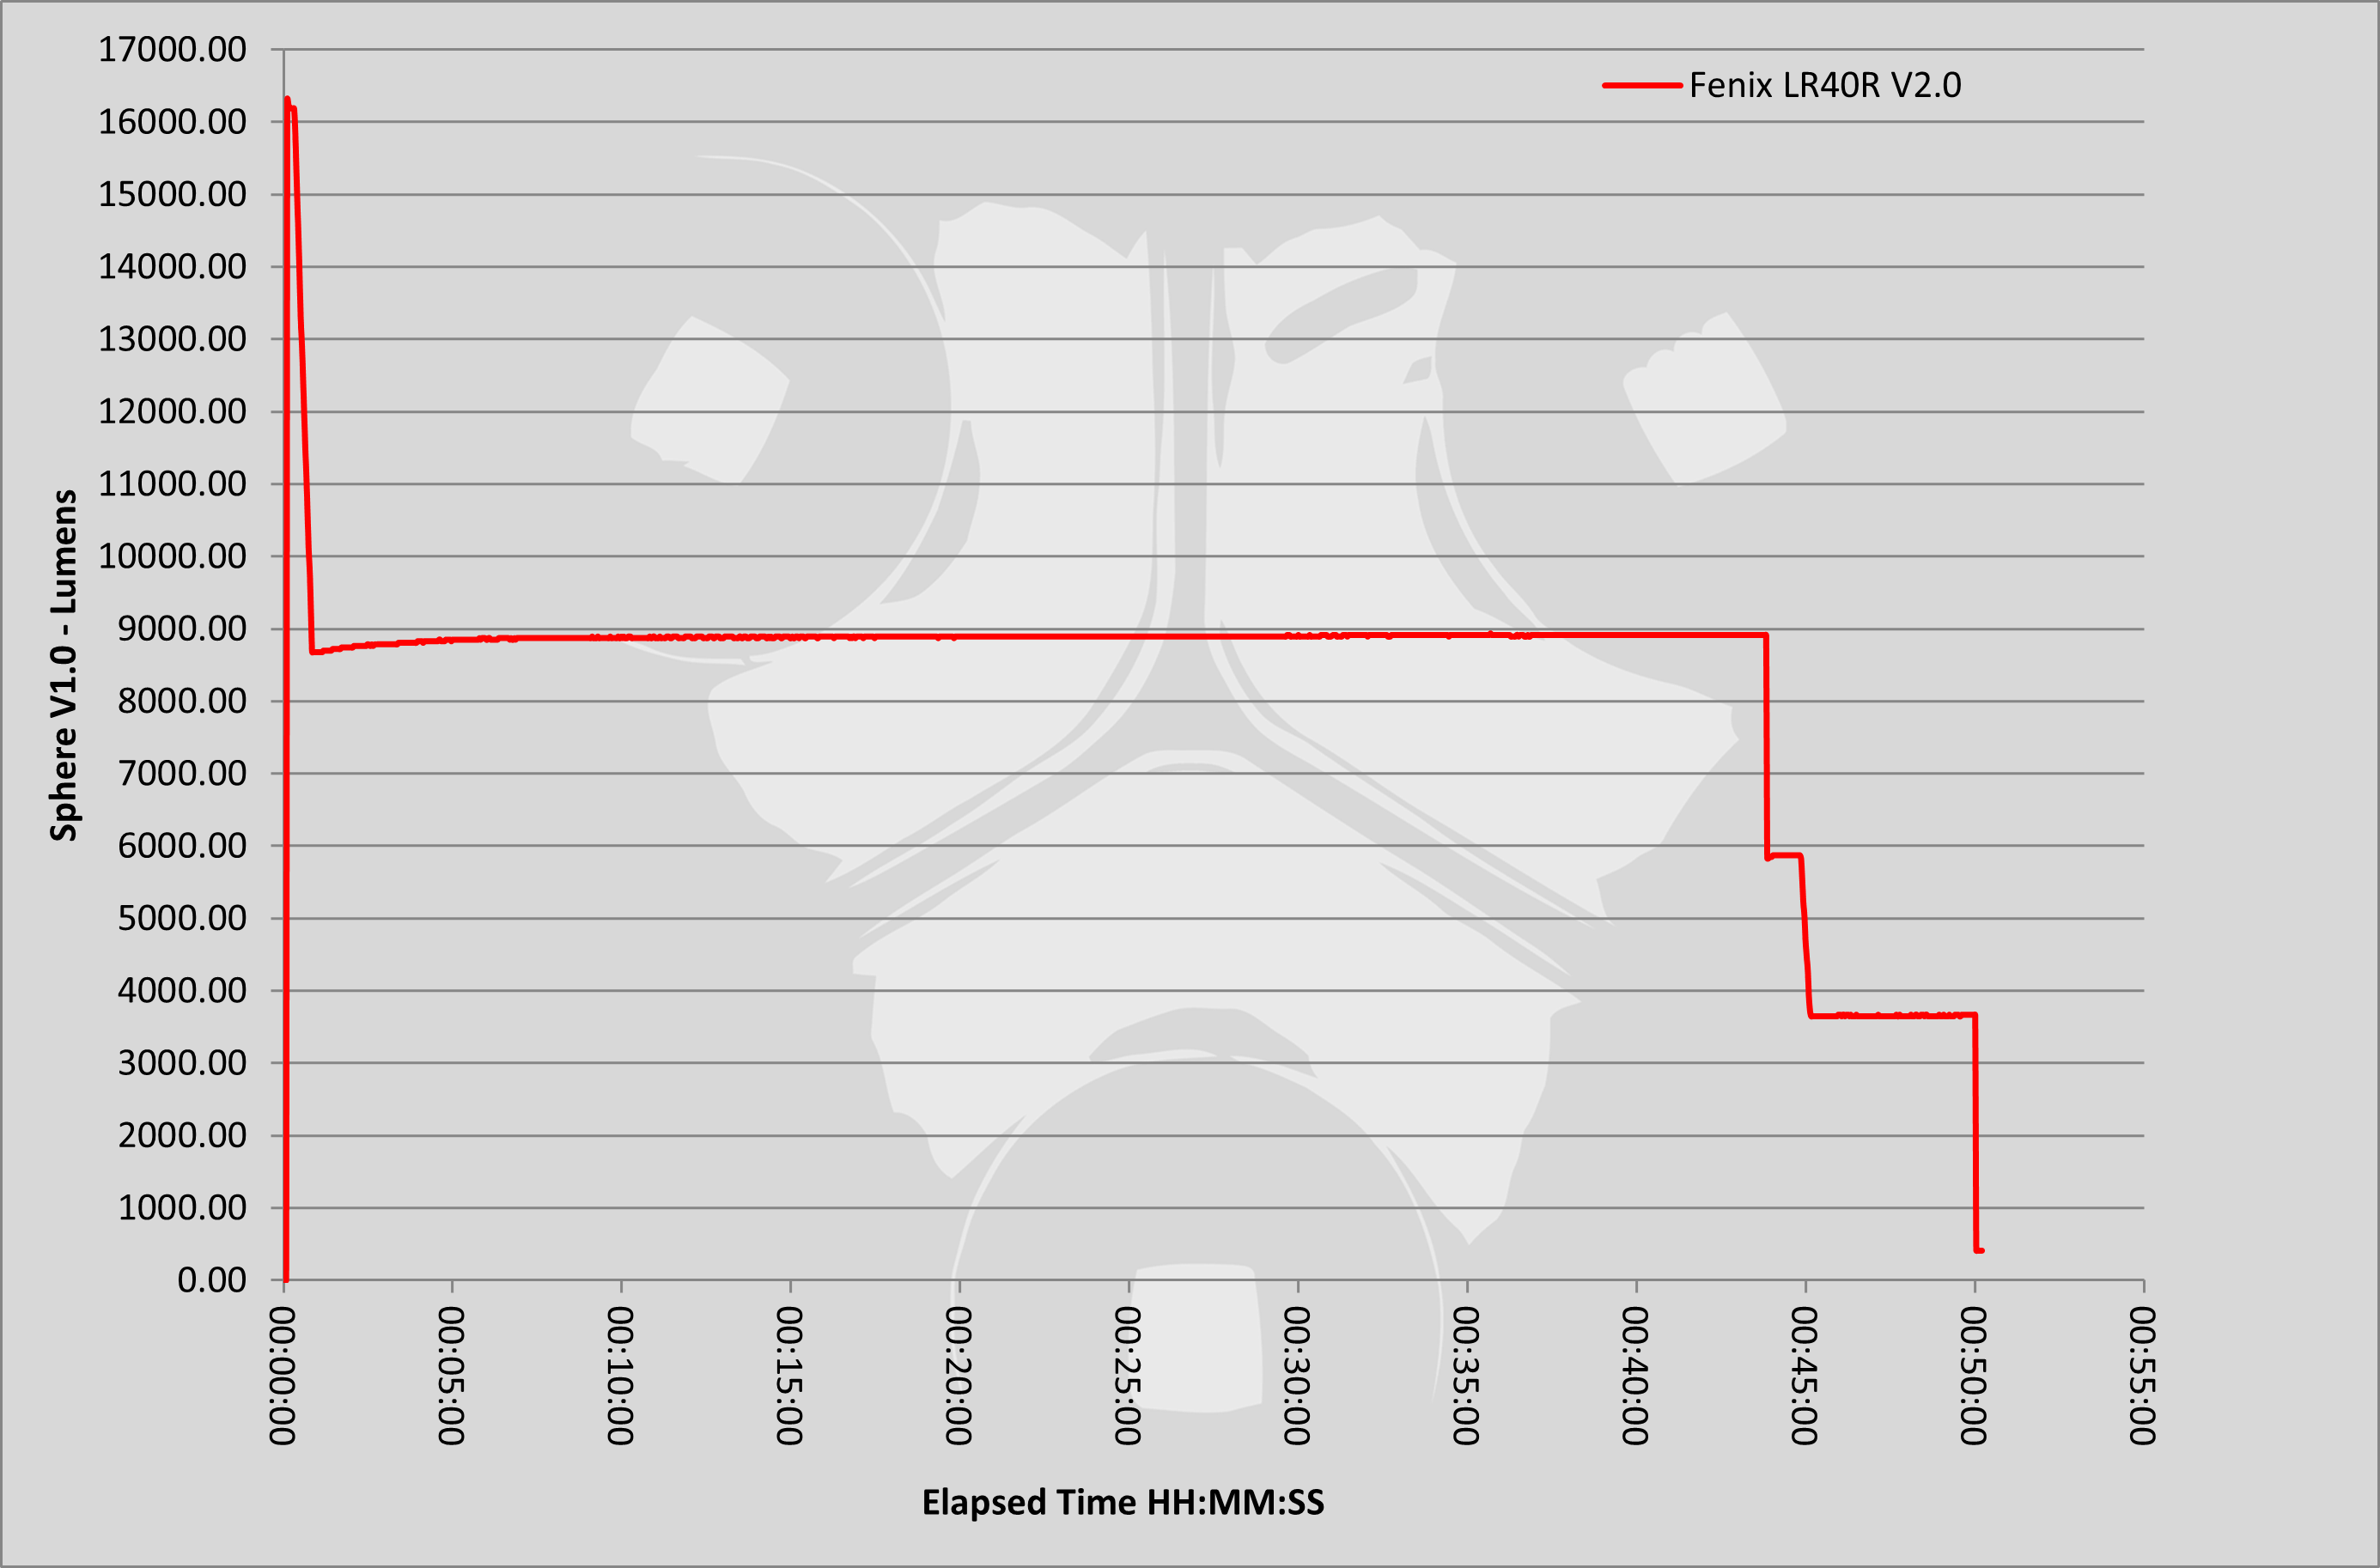
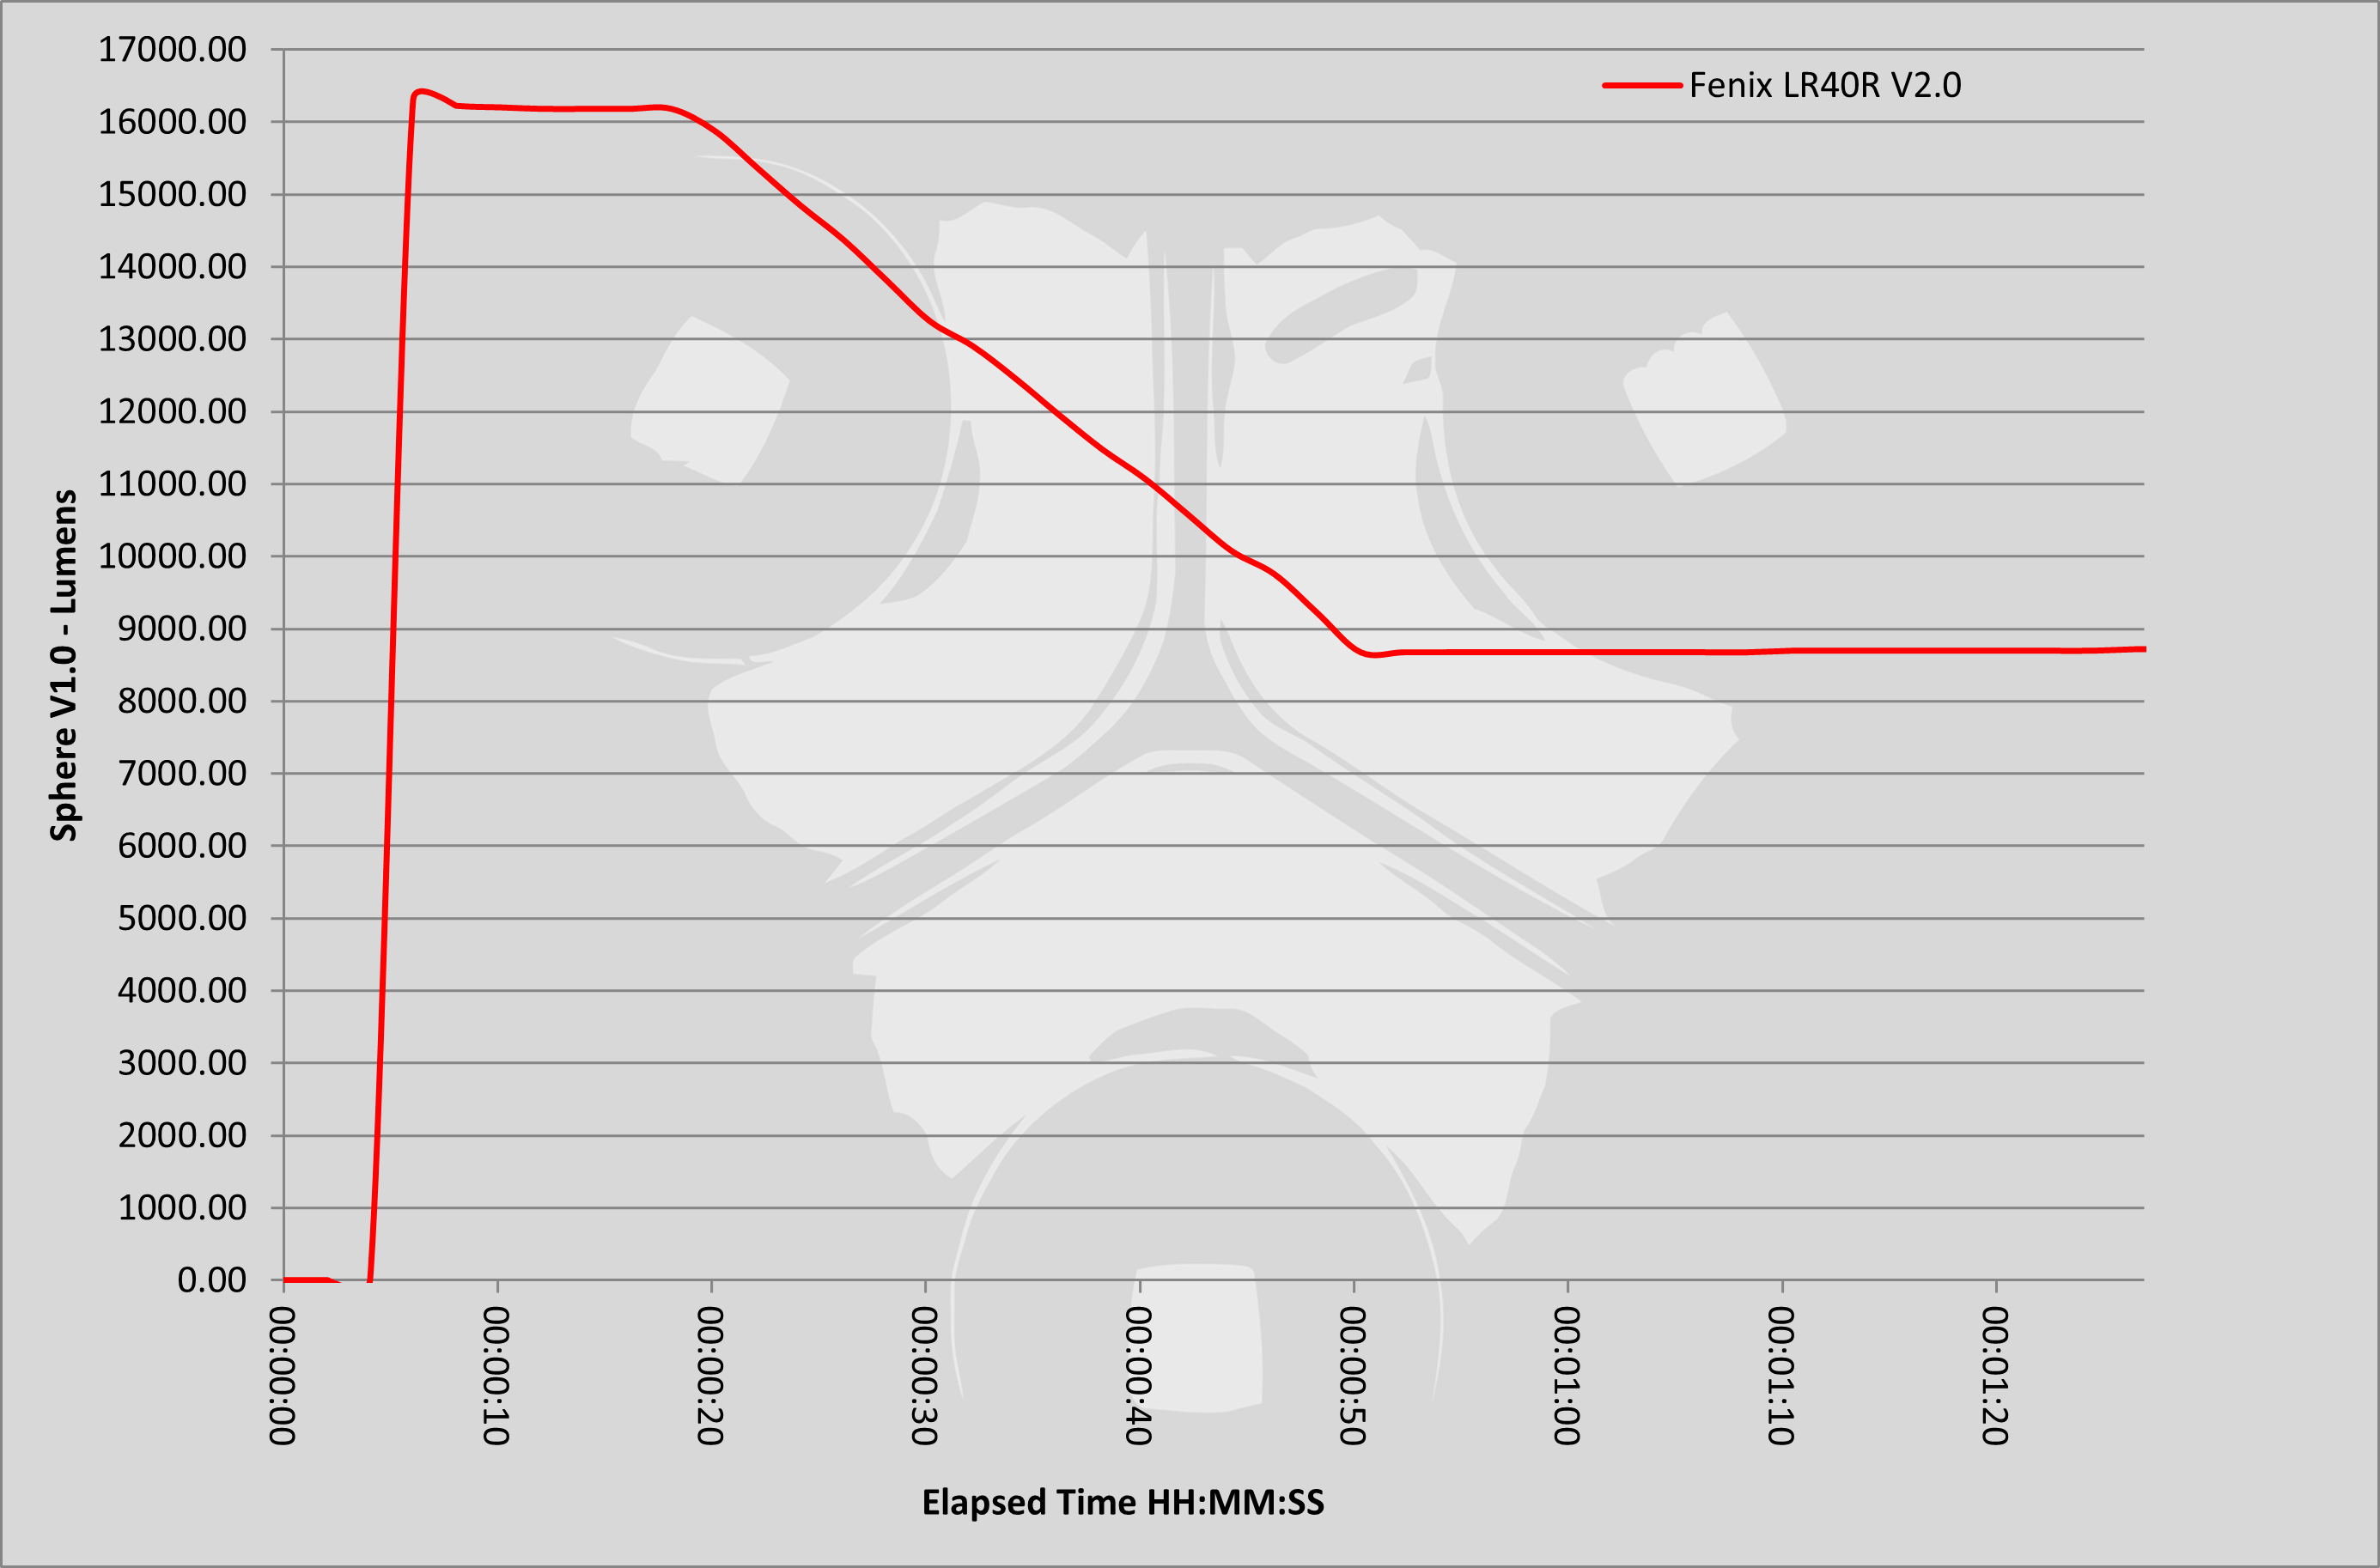
Please note, all quoted lumen figures are from a DIY integrating sphere, and according to ANSI standards. Although every effort is made to give as accurate a result as possible, they should be taken as an estimate only. The results can be used to compare outputs in this review and others I have published.
Take a close look at the headline figure for Spot/Flood Turbo!!
This gallery is packed with performance information.
First is the USB input charging trace, taking the LR40R V2.0 to full charge.
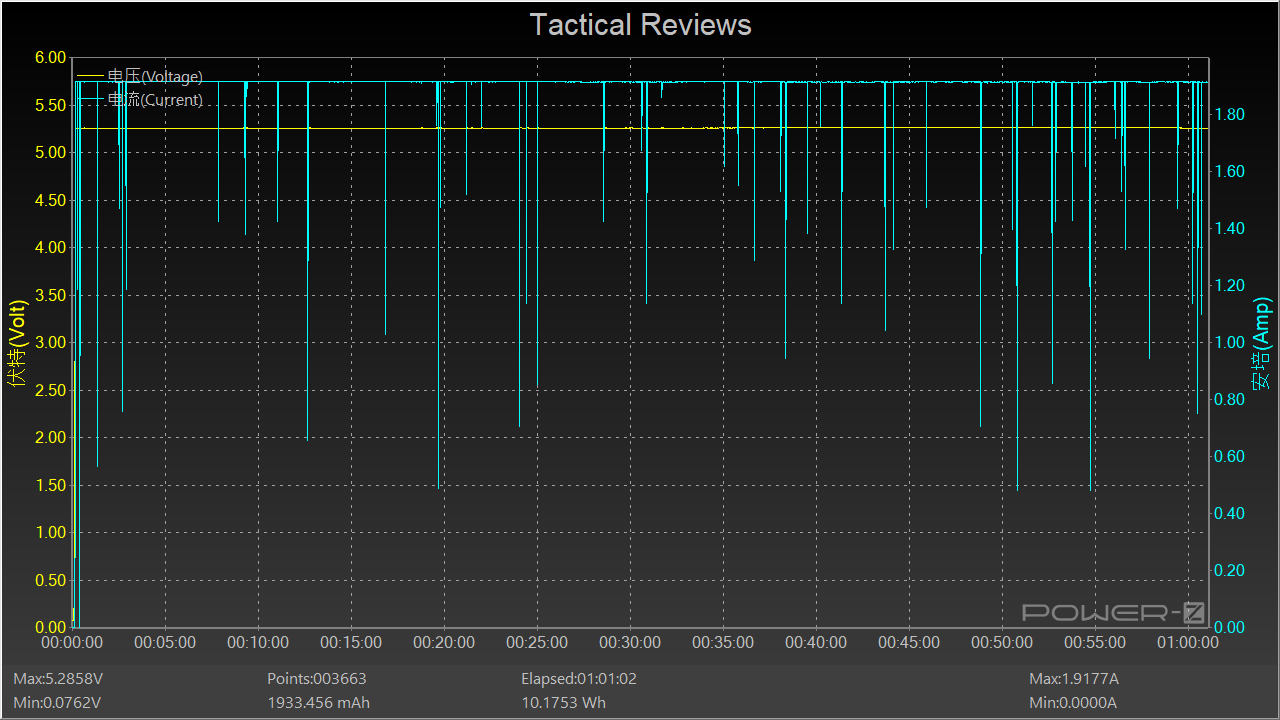
The next USB power trace is the power bank output from the LR40R V2.0, in this case used to charge a Oneplus 9 Pro phone. This is only part of the capacity of both phone and LR40R V2.0 and is only to represent the power bank output.
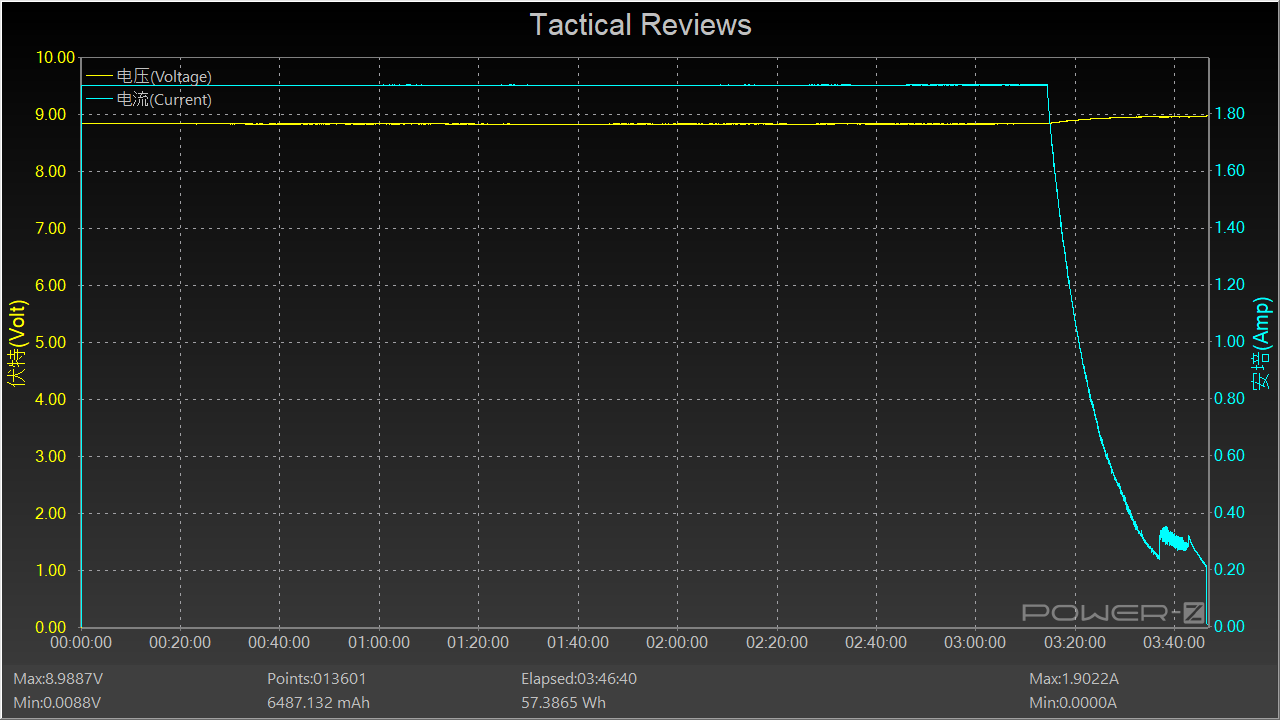
Now comes the full maximum output runtime trace, followed by just the first 60s of the same output.
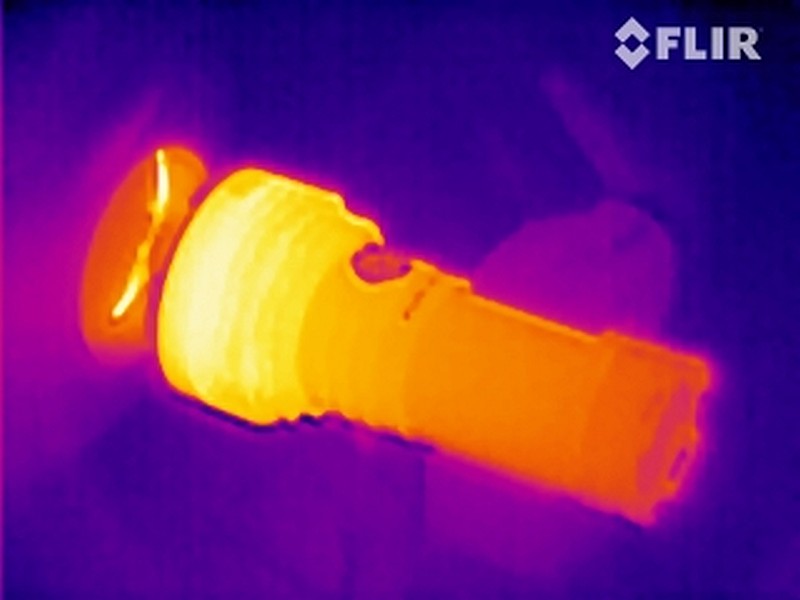
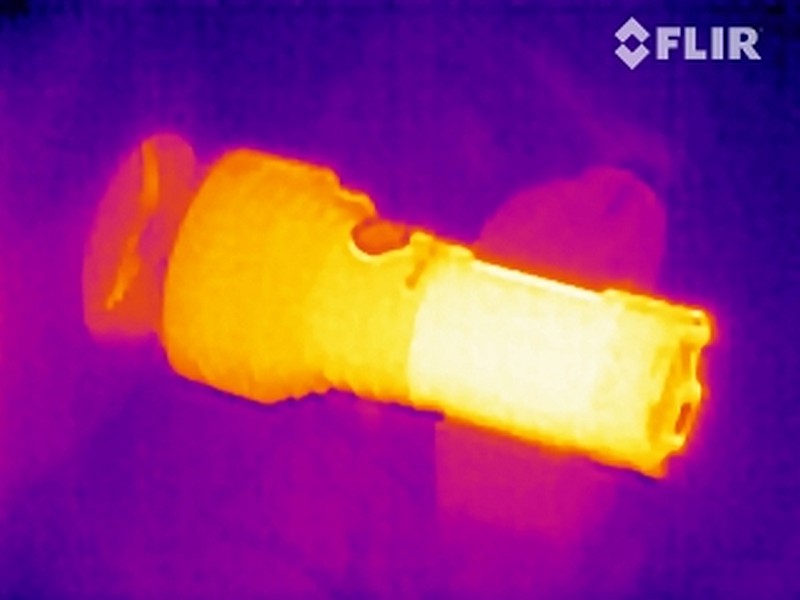
Last are two thermal images, one from the start of runtime where the head of the LR40R V2.0 is hottest, then one which comes near the end of the runtime where in fact the battery pack is hotter than the head as the cells give their last bit of power.
The LR40R V2.0 in use
It is a serious light, for serious use and is both large and heavy, but at the same time, considering its performance, it is very compact. The next gallery below, showns the LR40R V2.0 in my hand (I take XL size gloves), it is perfectly comfortable while being completely hand filling. The weight is were this can become a bit tiring for more extended use. 850g isn’t much carried in a bag or on your belt, but nearly a kilogram filling your hand, and I’ve tended to do a bit of hand swapping when carrying for more than a few minutes.
Just like when deciding if a large camp knife or axe is worth carrying the weight when out in the wild, you will need to positively decide you want to carry the weight of the LR40R V2.0. If you want that 16000lm output, then it is worth the weight.
Multi-function devices tend to make compromises and I do prefer dedicated gear. However, with the LR40R V2.0 the only compromise made with regard to the inclusion of the power bank function is that if you do use this you are taking away your lighting capacity. The power bank output is excellent, the LR40R V2.0 as a power bank is far too heavy for this to ever be a primary function, but as an ‘can also do’ feature is well implemented. I would always prioritise the battery capacity of the LR40R V2.0 for light output, and only if there was really no other choice would I use it as a power bank.
Despite being familiar enough with the controls, I still find myself ‘hunting’ for the output I want. The switch labels are too small to easily distinguish the padlock from the parallel beam lines, spread beam lines or combined straight and spread lines, so whatever setting the ring switch is actually on, you end up turning it one way or the other to find the one you want.
Once you have decided on the rotary switch position you want to use, then swapping to the central click switch (press-and-hold for on and again for off) simplifies the choice enormously, just leaving the brief press (while on) to change output level.
Setting the ring to lockout (padlock) resets the controls, so when you then unlock, you can only initially rotate the selector ring to spot. From locked, this will always go on to the lowest spot mode, a useful reset (however the flood mode and combined flood/spot does remember the level it was last used on).
When you have so much power in such a small package, you do have potential for things to go wrong. The first level of protection is the lockout position on the mode ring. Carrying this light in a bag could be hazardous if it were to switch on, but the LR40R V2.0 has a simple lockout mode.
Add to this another protection feature that is built-in; a feedback sensor, measuring light reflected back at the LR40R V2.0 when the head is too close to a surface. When this protection is activated (it can be disabled), the maximum output is reduced when the feedback sensor is triggered, and automatically increases again once the head of the LR40R V2.0 moves far enough away from the obstruction. This is toggled on and off while in lockout mode; press and hold for 5-10s and two flashes means the protection is enabled, eight flashes means it has been turned off.
16,000 lumens gives you a true wall of light. These output levels totally eclipse the biggest performers of a few years ago. Yes the 16,000 lumens is a burst mode, but the LR40R V2.0 then settles on a solid 9,000 lumens for an extended run – this is the really impressive feat of the LR40R V2.0.
Review Summary
The views expressed in this summary table are from the point of view of the reviewer’s personal use. I am not a member of the armed forces and cannot comment on its use beyond that covered in the review.
Something that might be a ‘pro’ for one user can be a ‘con’ for another, so the comments are categorised based on my requirements. You should consider all points and if they could be beneficial to you.
_______________________________________________
What doesn’t work so well for me
_______________________________________________
Barely distinguishable mode label engravings.
Holster’s head securing strap can be a little fiddly.
Built-in battery ultimately restricts product lifetime.
_______________________________________________
Things I like
_______________________________________________
16,000 lumens burst.
Solid extended run at 9,000 lumens!
Clear 5 segment battery level indicator.
Safety ‘feedback sensor’ output downshifting.
Power bank function (USB-A).
Fast charging via USB-C (QC 2.0 and PD2.0)
Spot mode resets to low after being locked.
Belt holster included.
