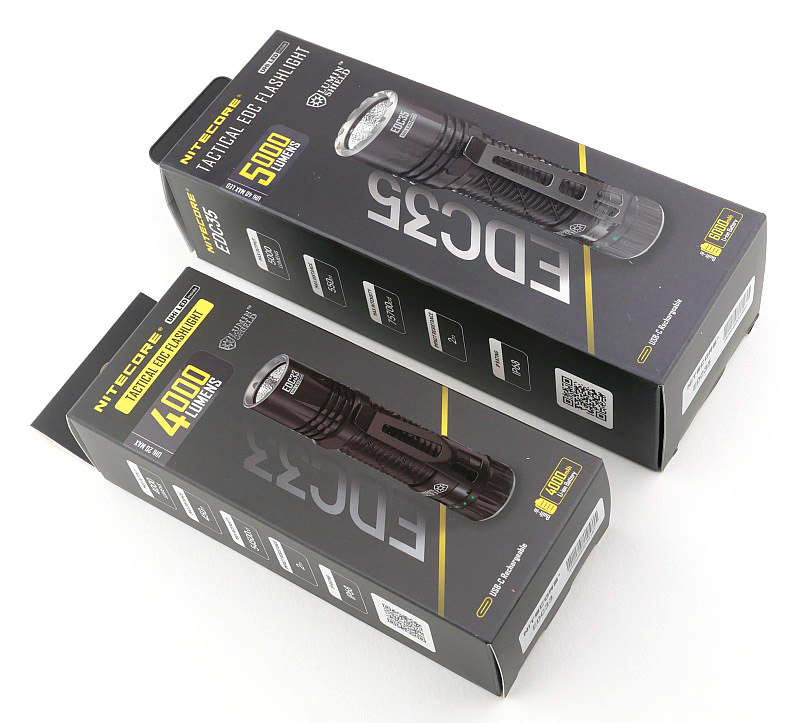
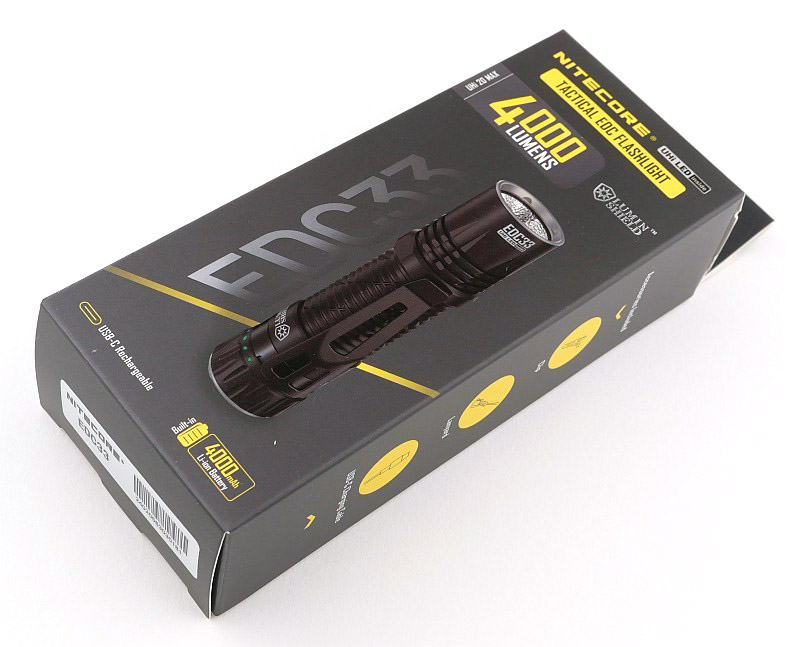
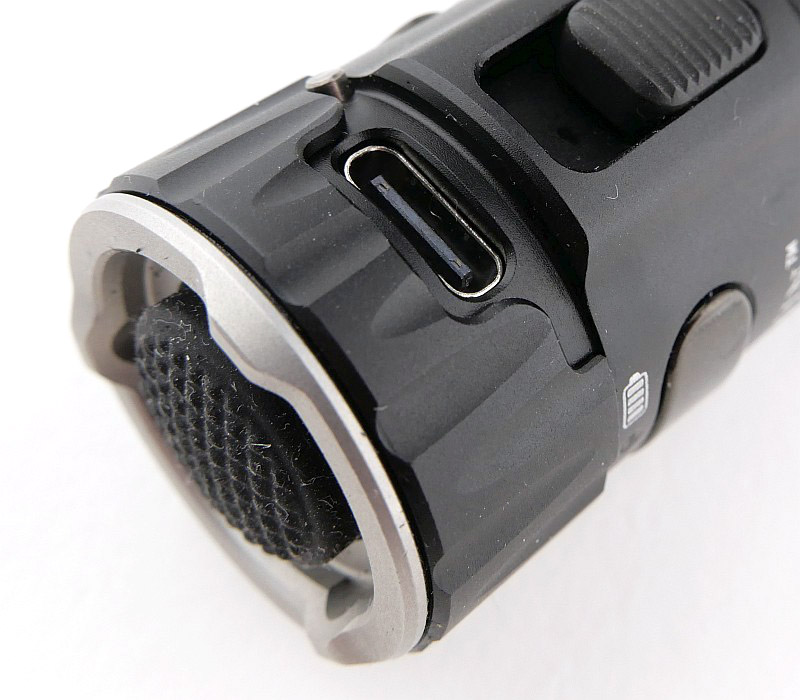
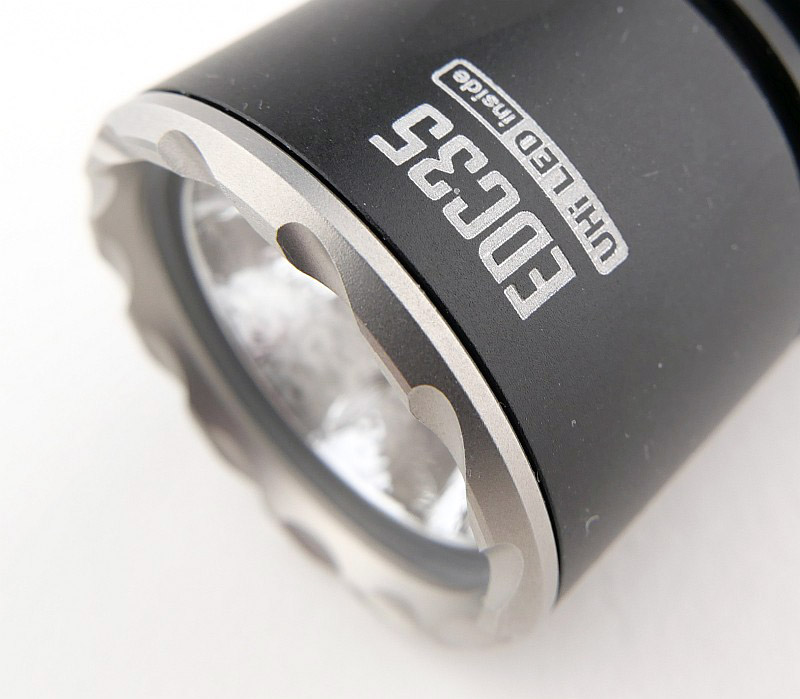
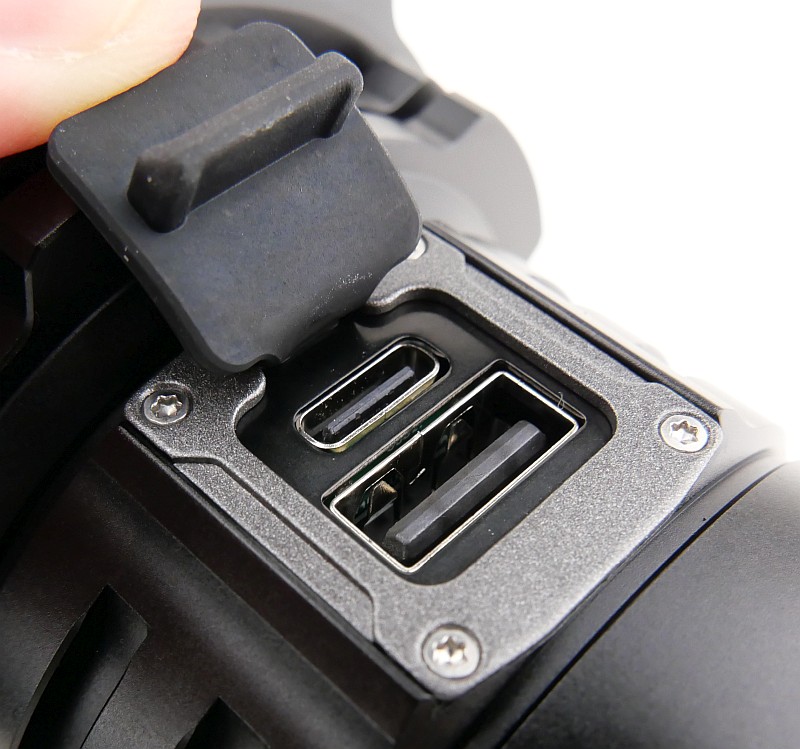
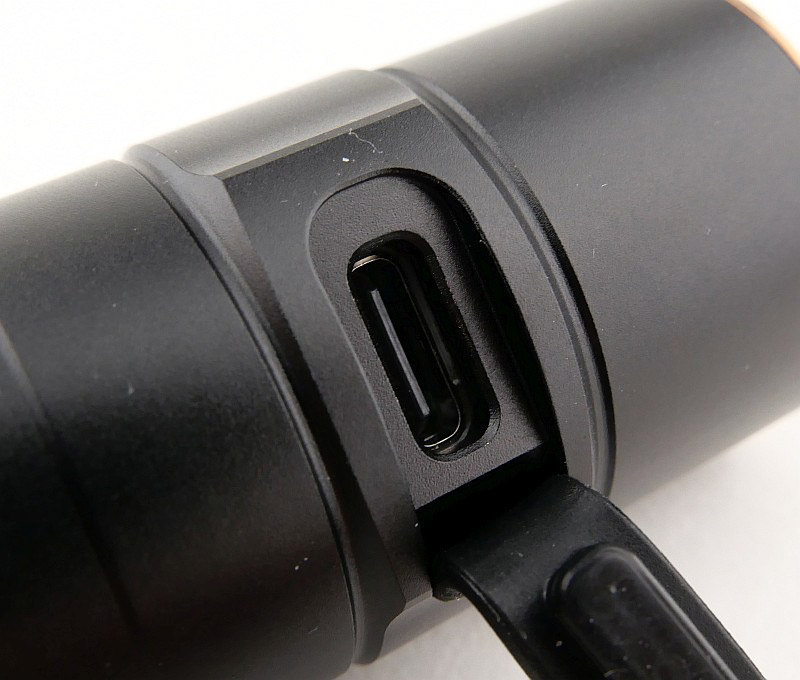
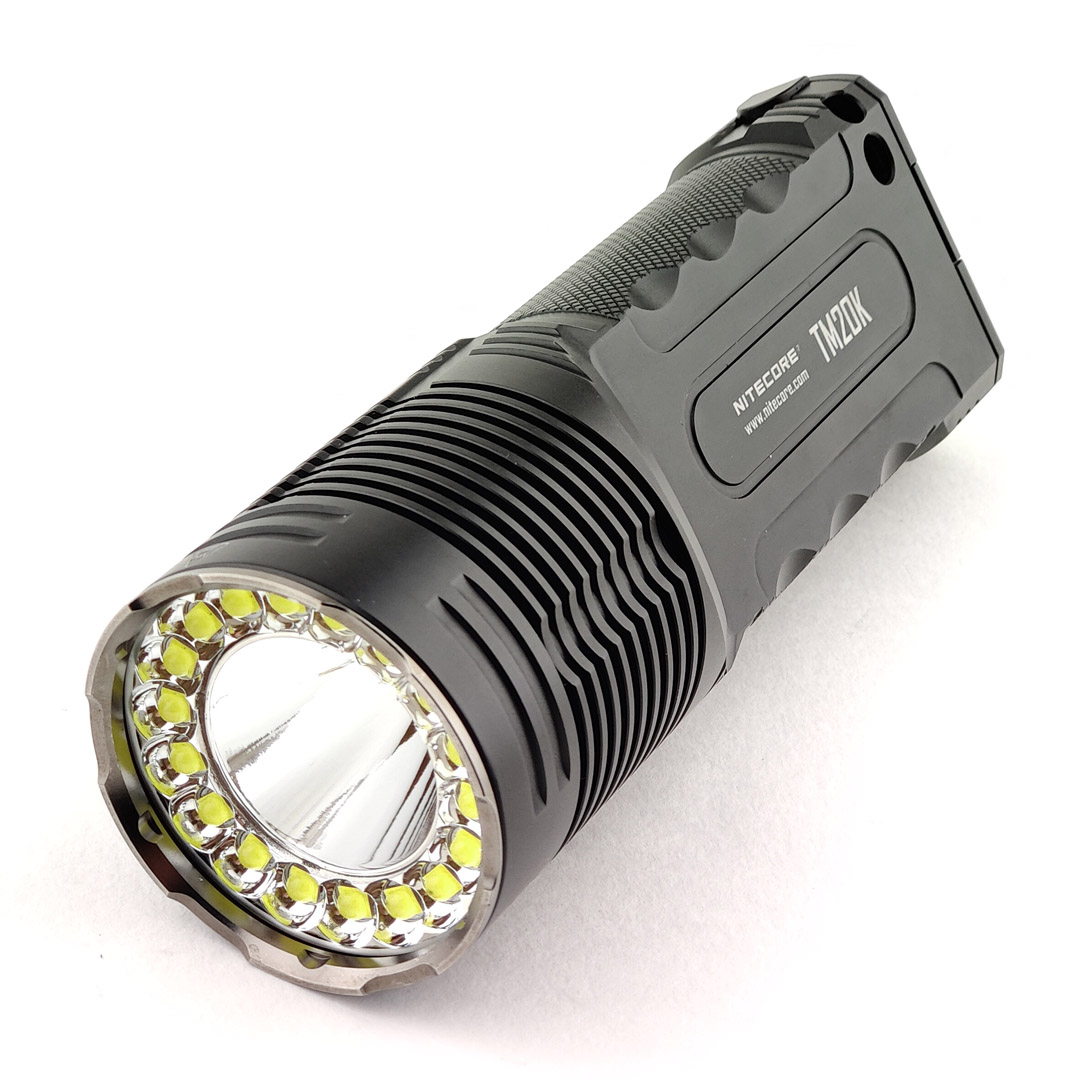
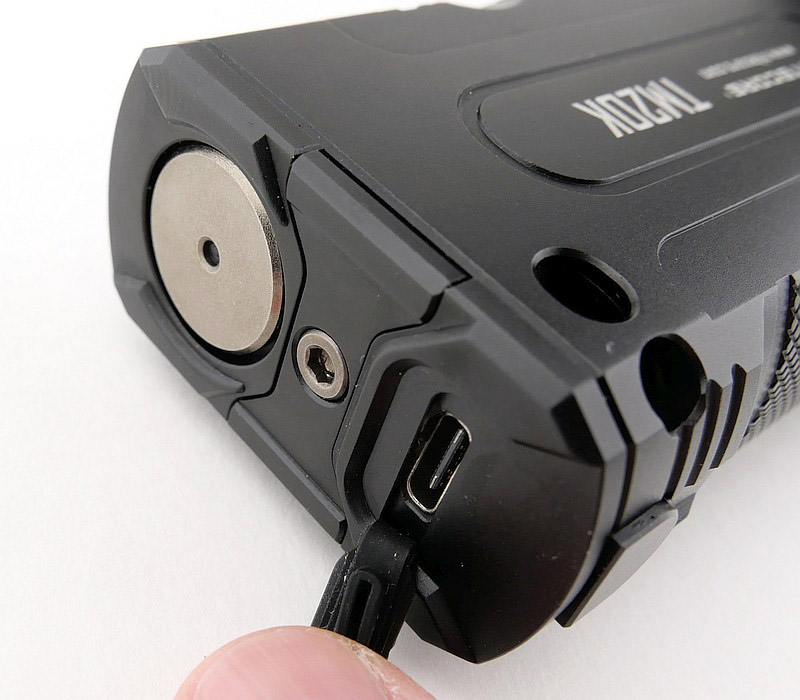
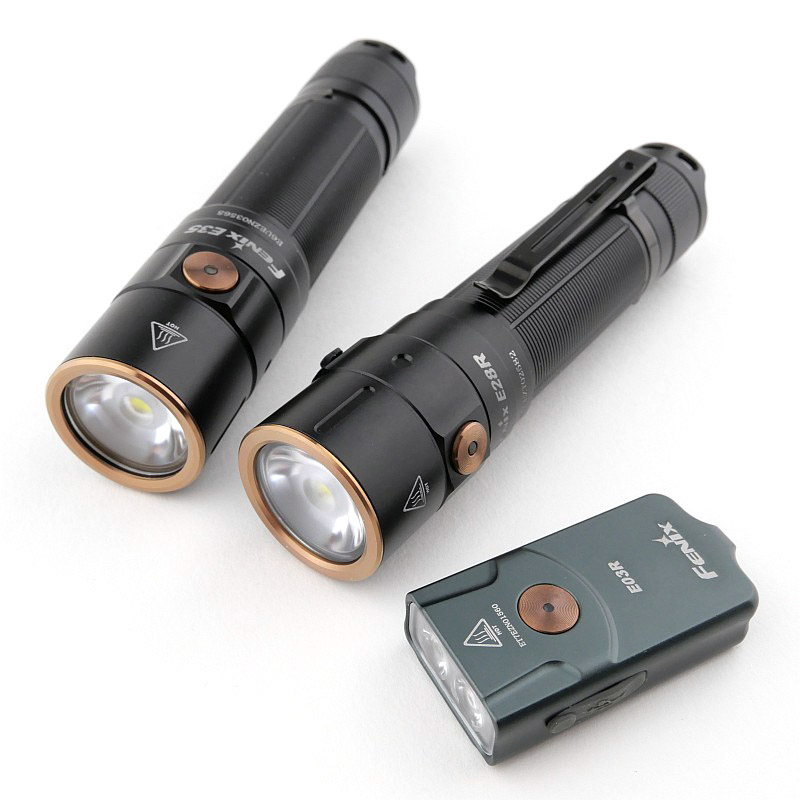
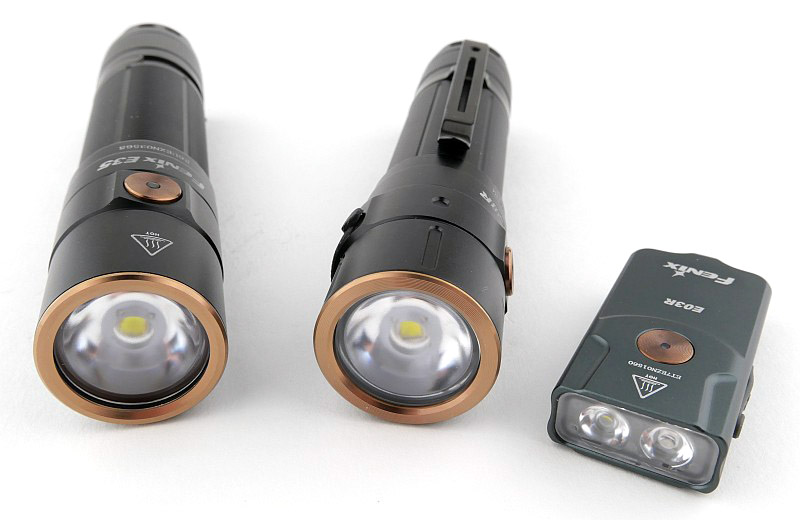
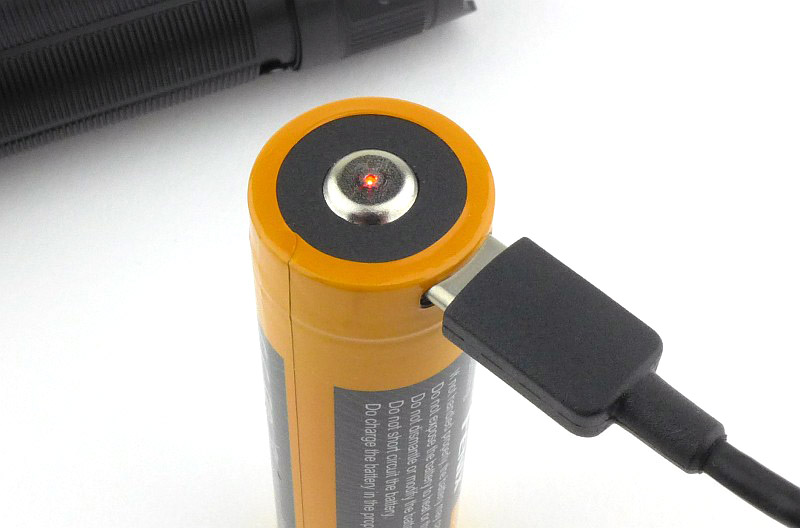
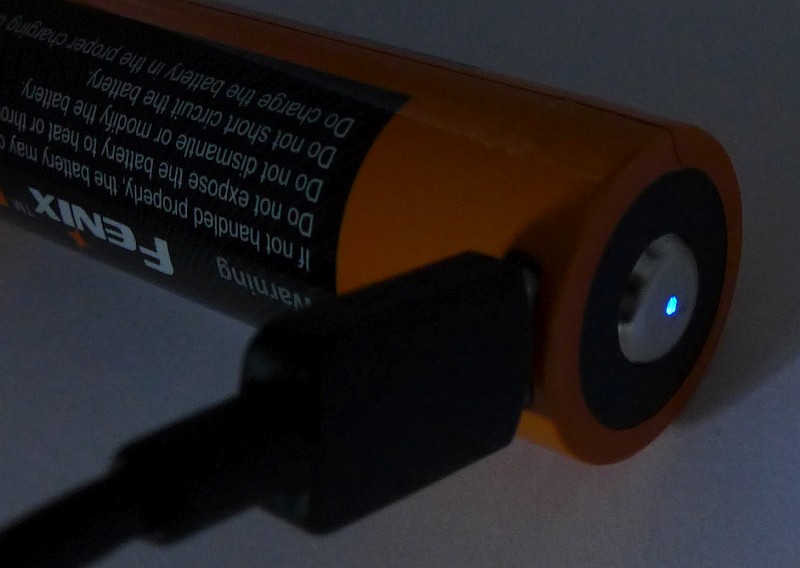
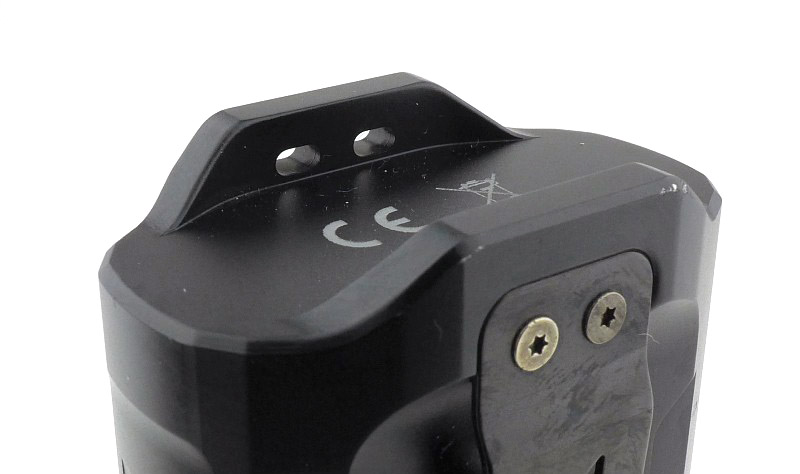
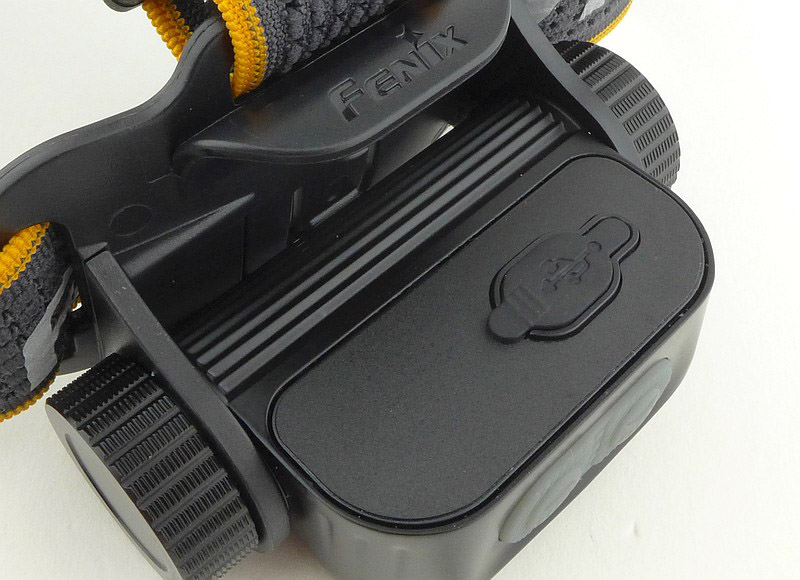
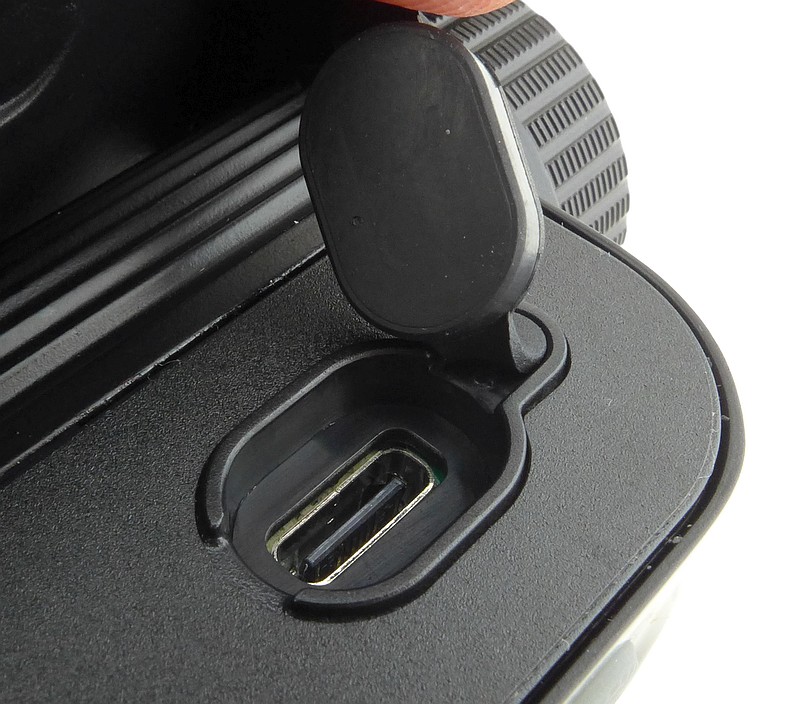
This is a detailed review of the Nitecore EDC33 and EDC35, two new Tactical EDC torches / flashlights featuring the NiteLab UHi 20 Max LED and UHi 40 MAX LED respectively. Each are powered by a built-in li-ion battery with USB-C charging port under a rotary cover.
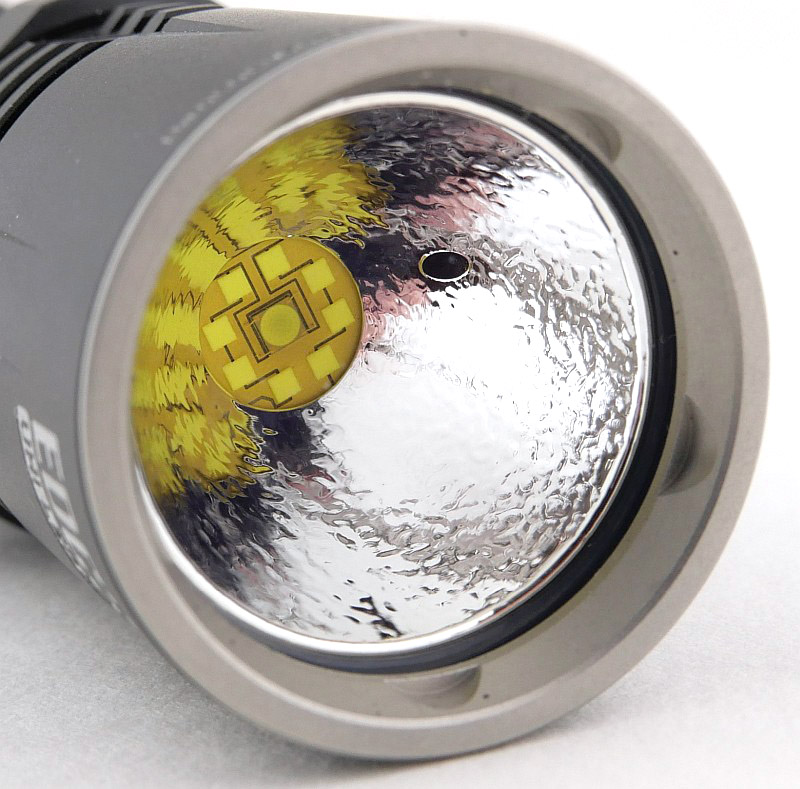
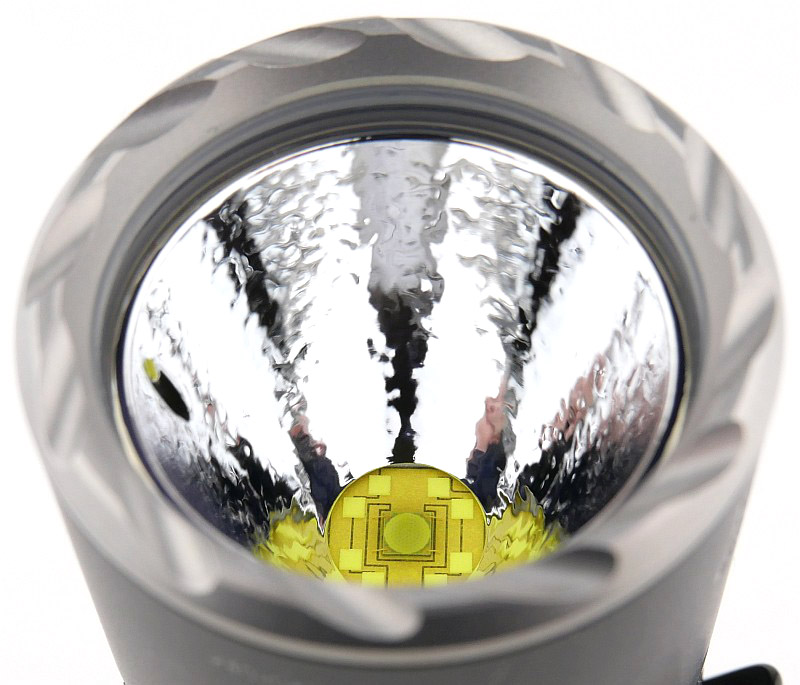
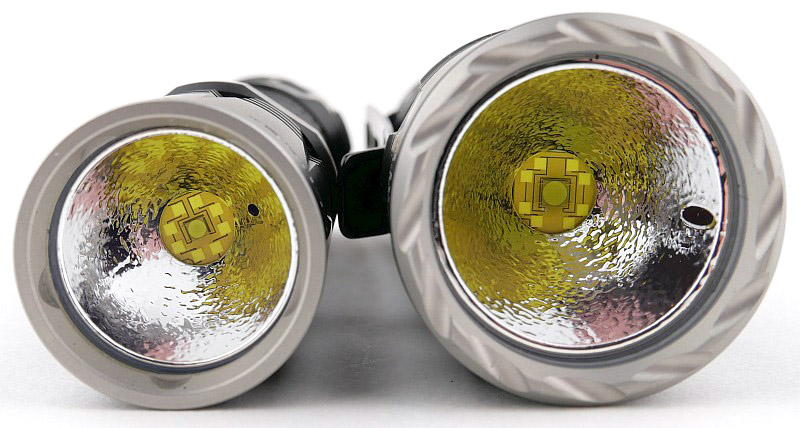
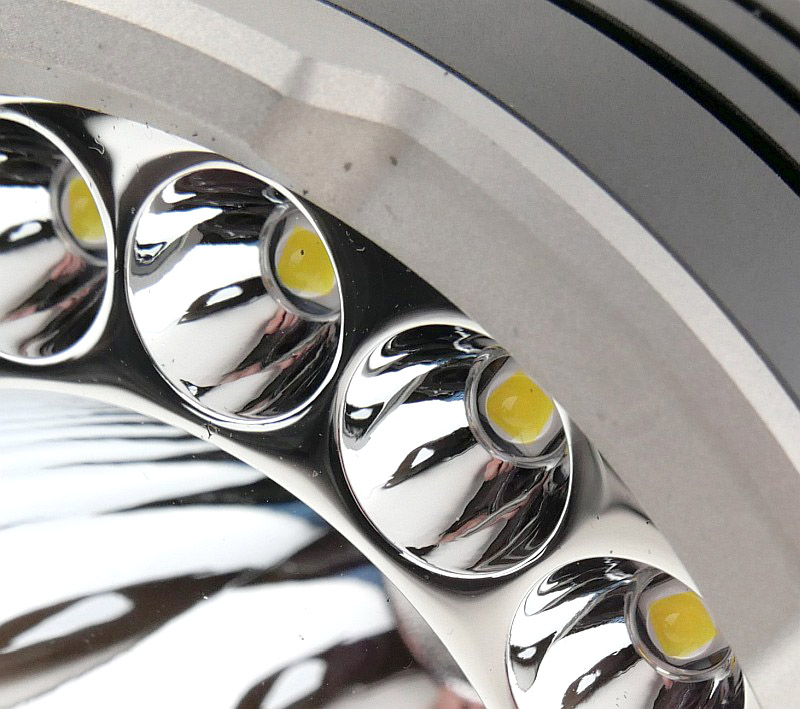
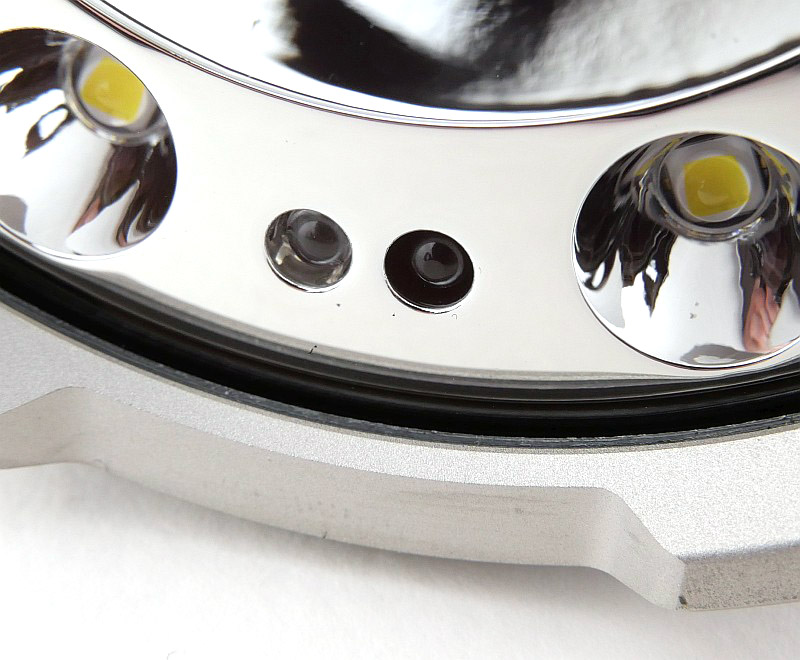
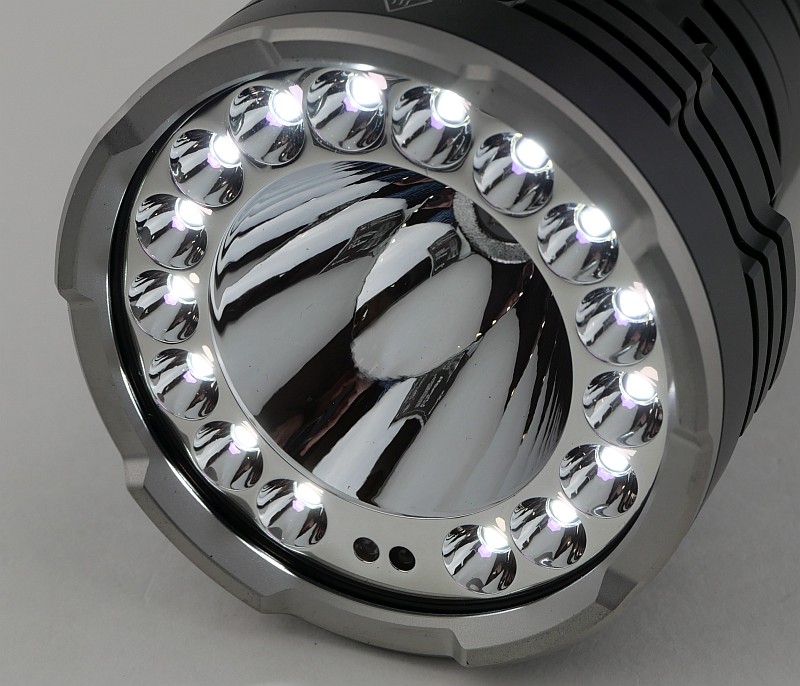
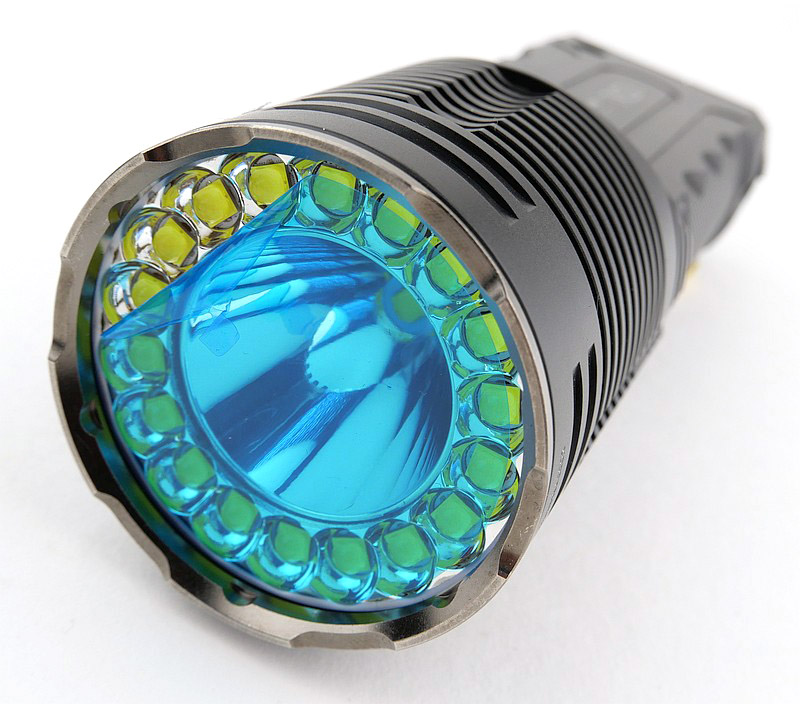
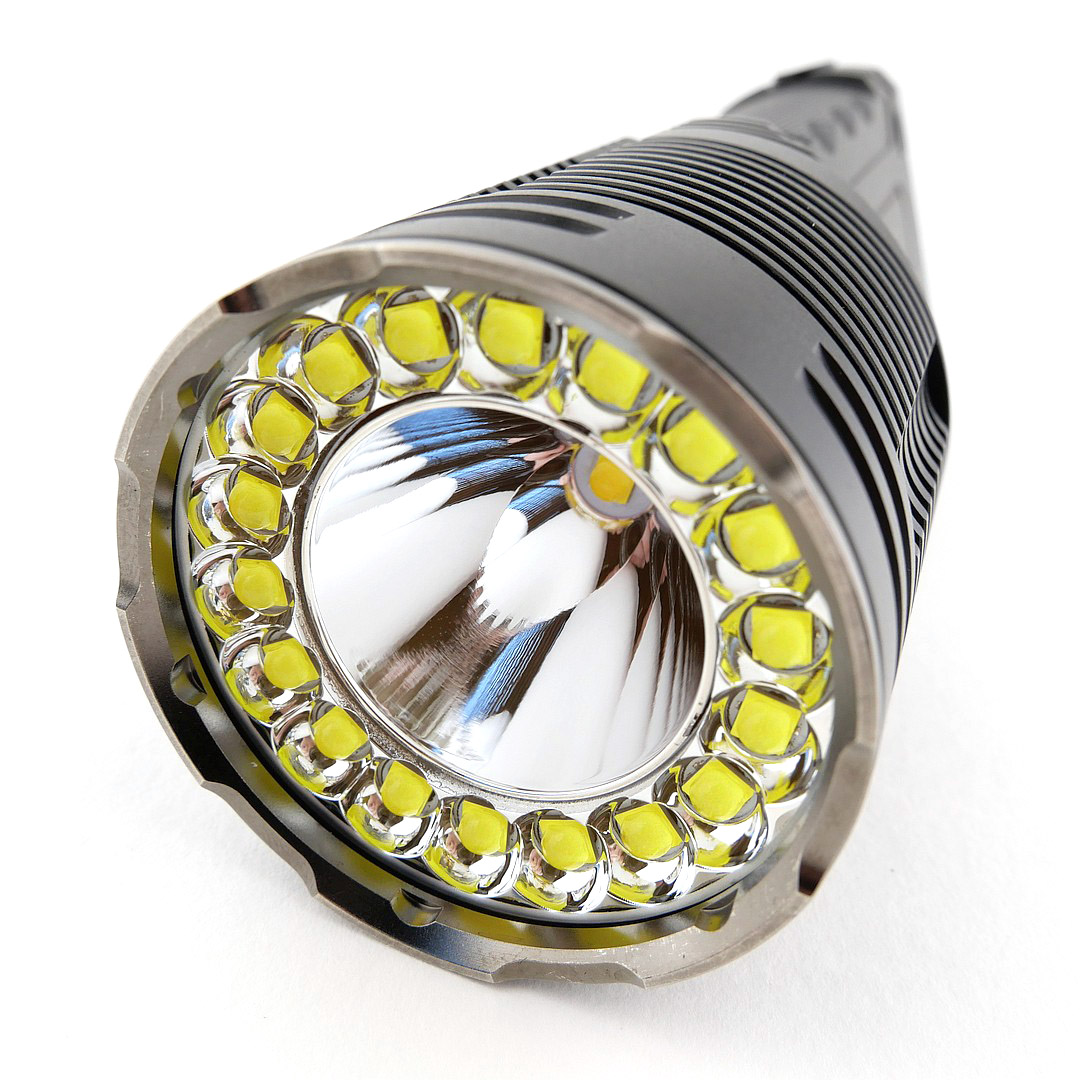
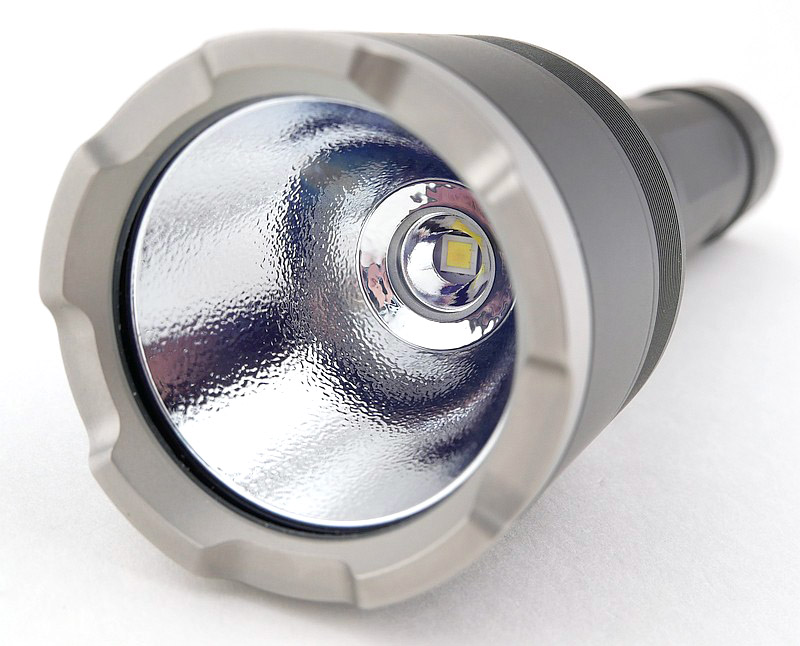
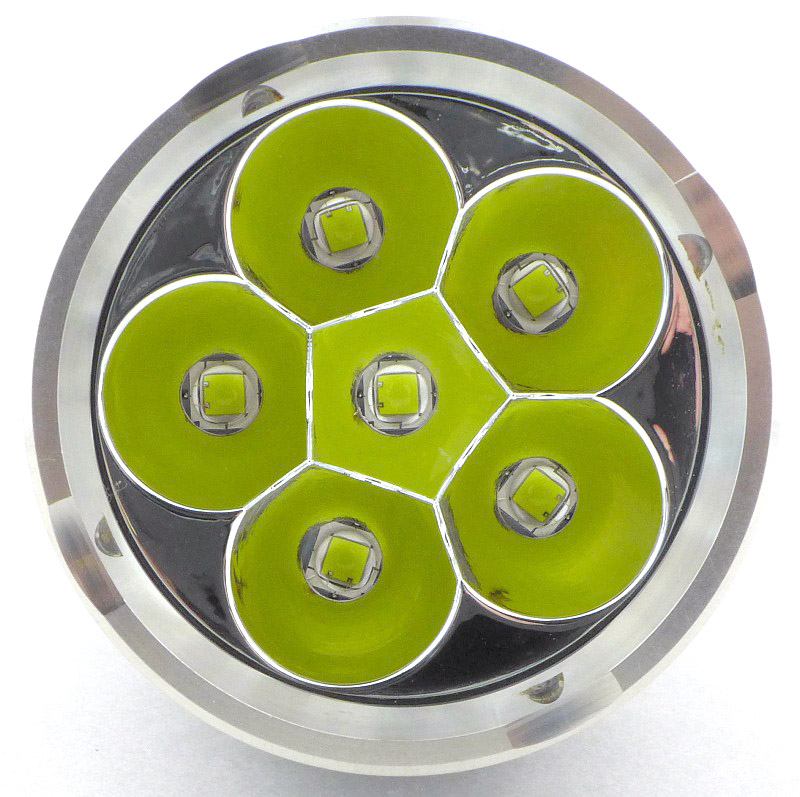
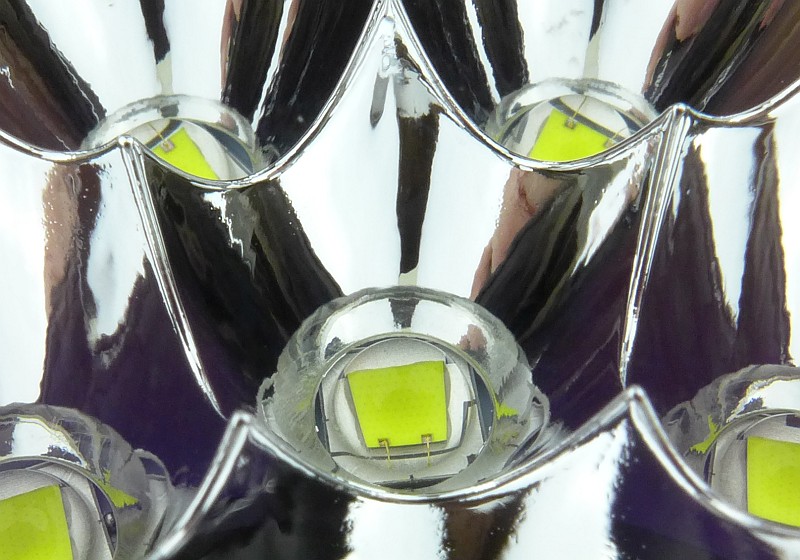
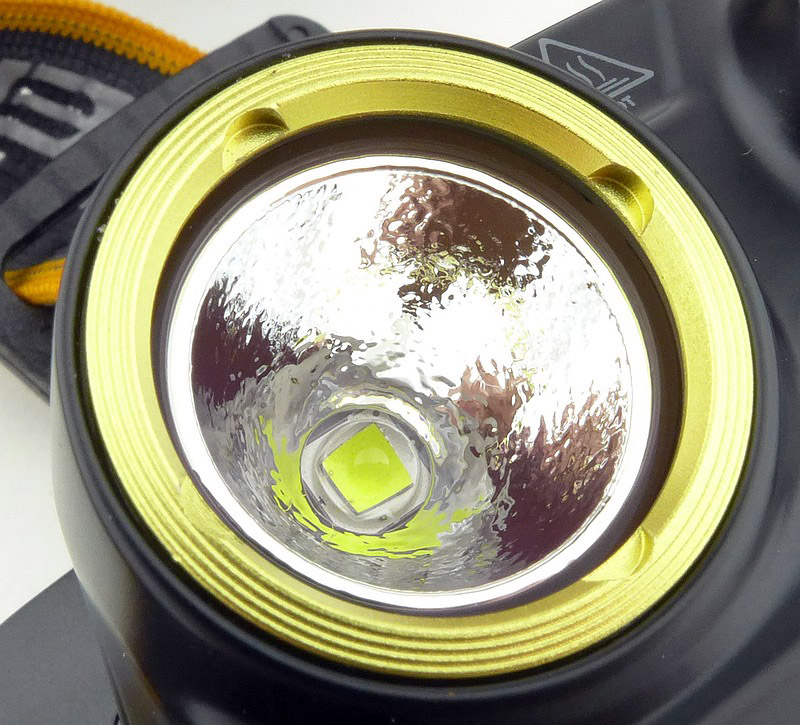
The UHi MAX LEDs combine a small but high-intensity main core with 8 auxiliary cores arrayed together into a single LED, offering long-range coverage, extreme brightness and the ability to seamlessly switch between spot and floodlight.
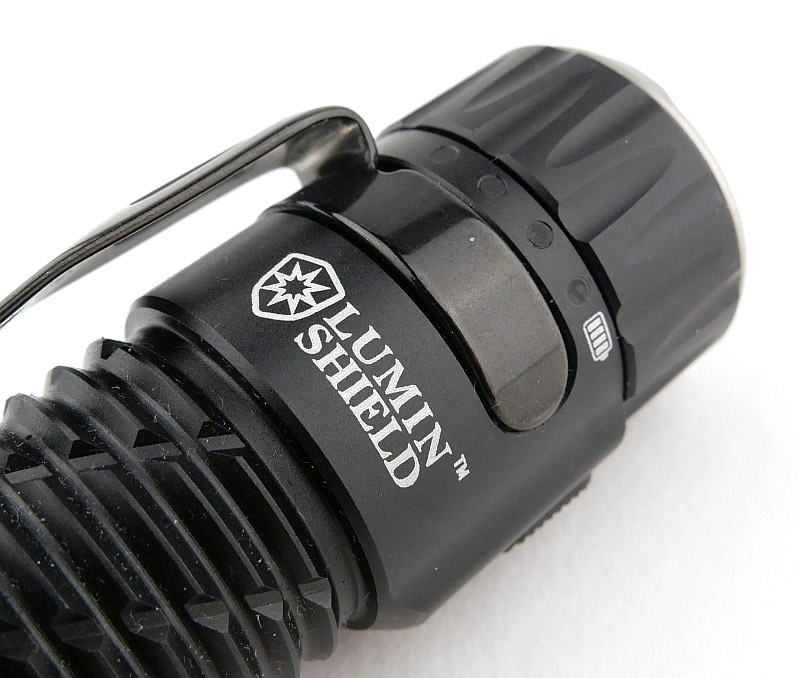
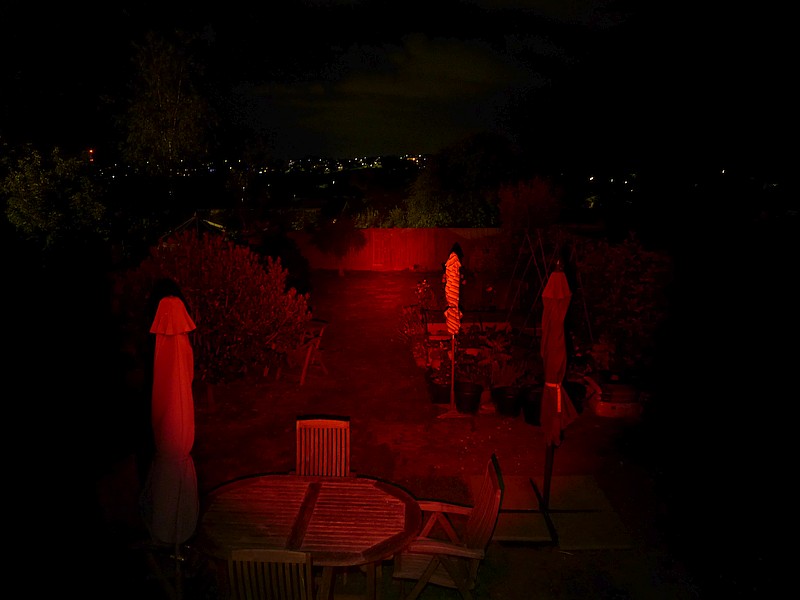
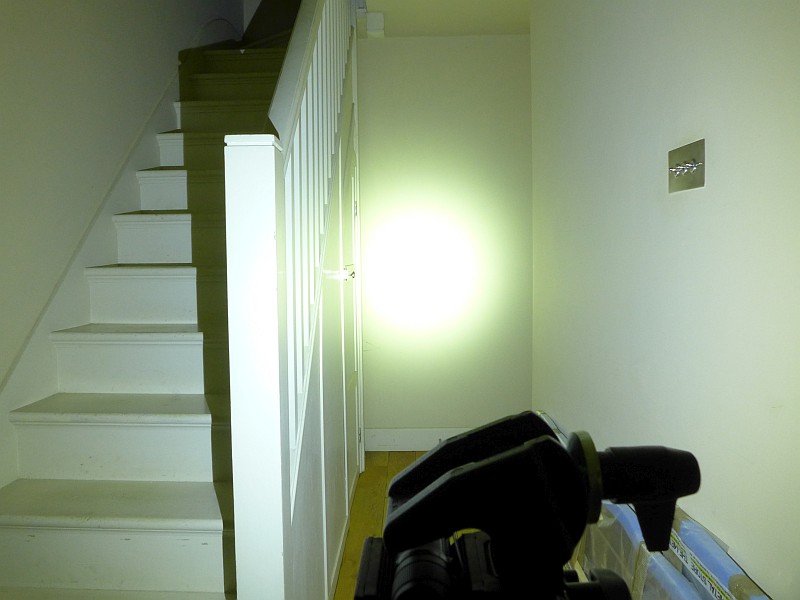
The “Lumin Shield” mode blasts an stunning 4000/5000 lumen maximum output wall of light.
Review Videos
Starting with a short format sixty second review:
Onto a full video review covering many more details:
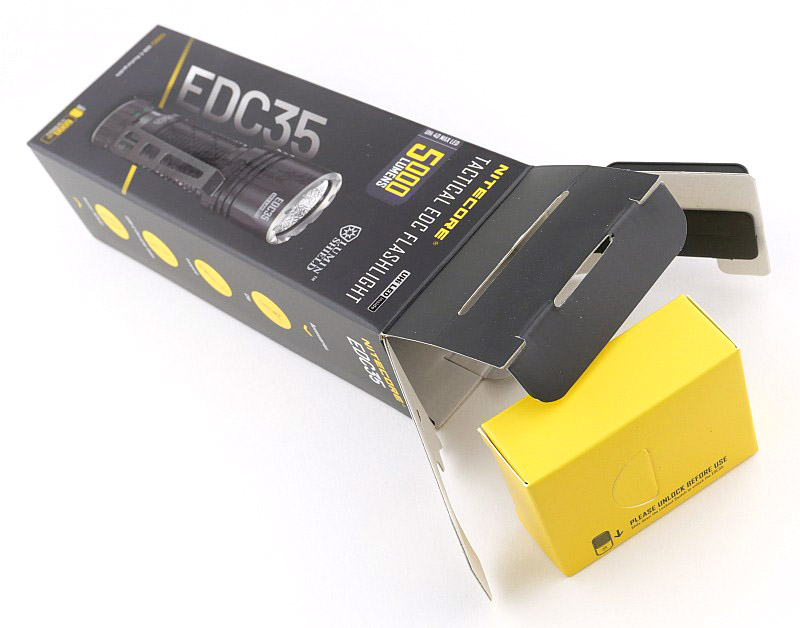
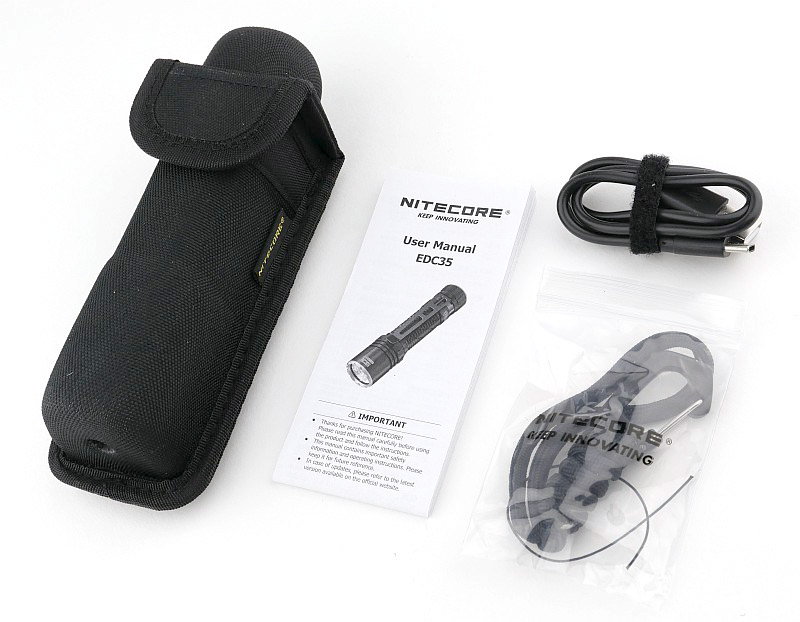
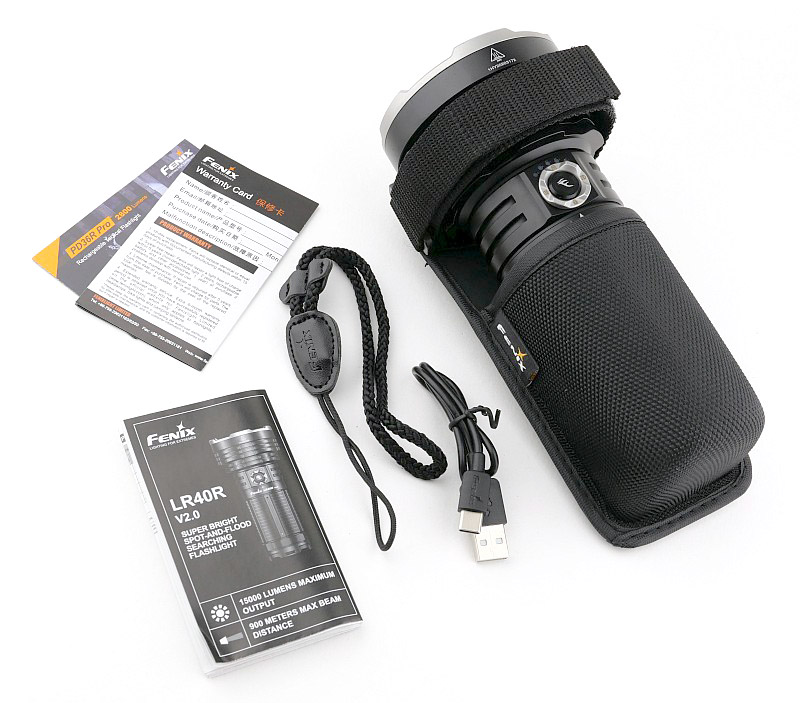
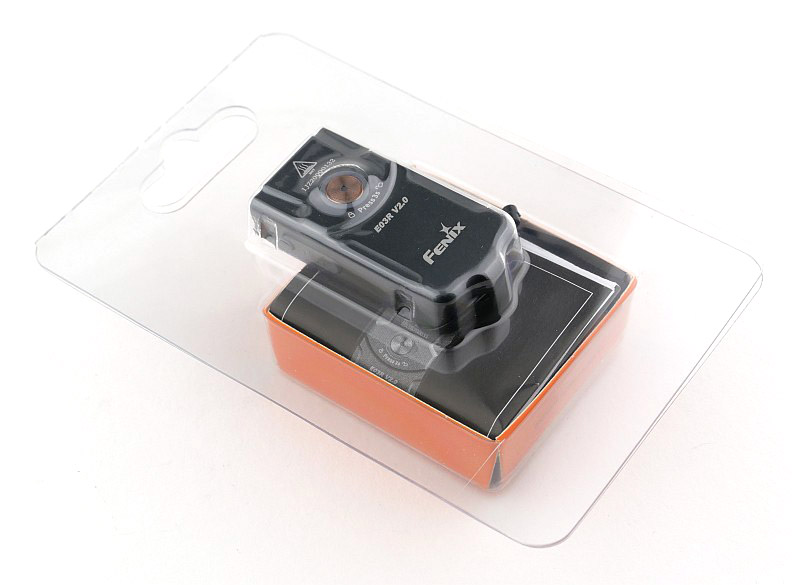
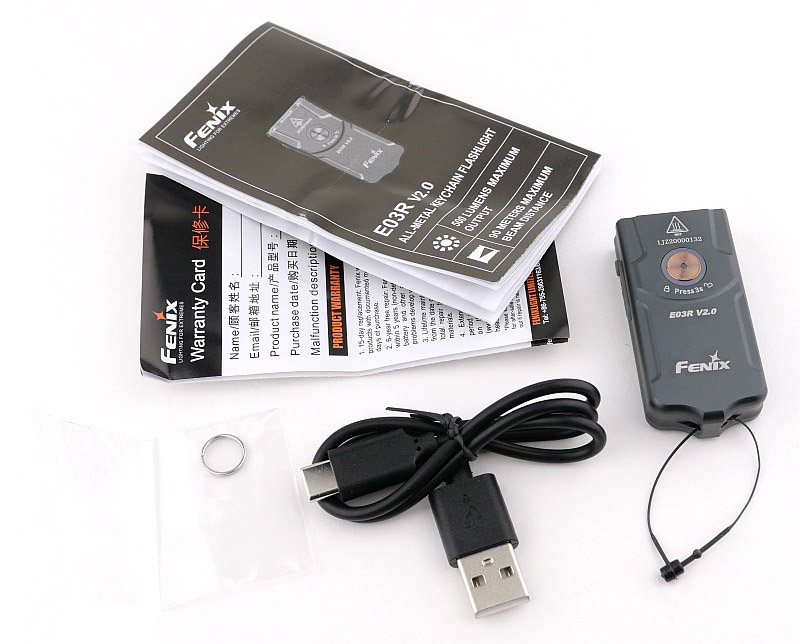
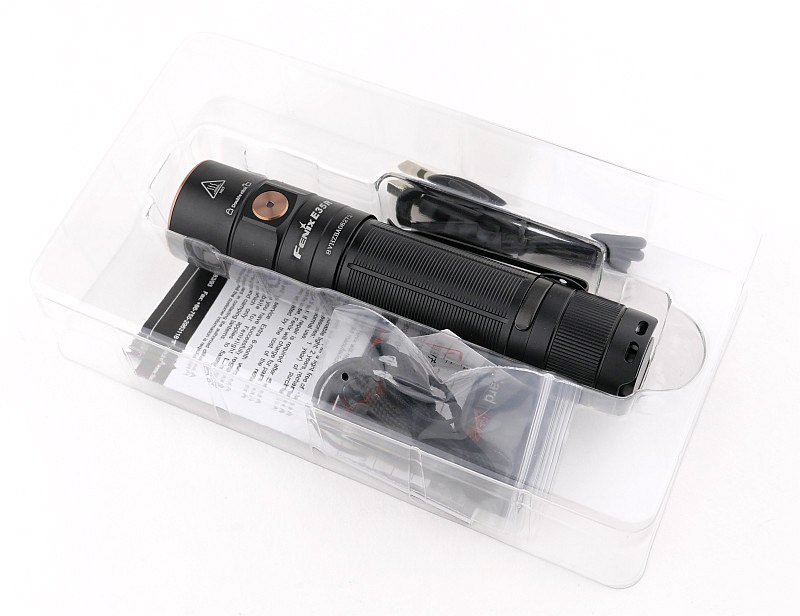
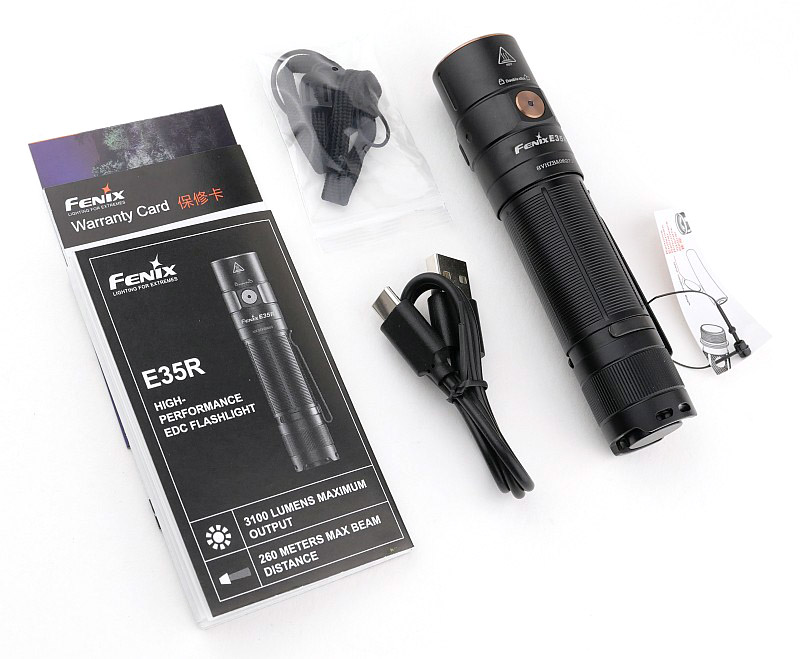
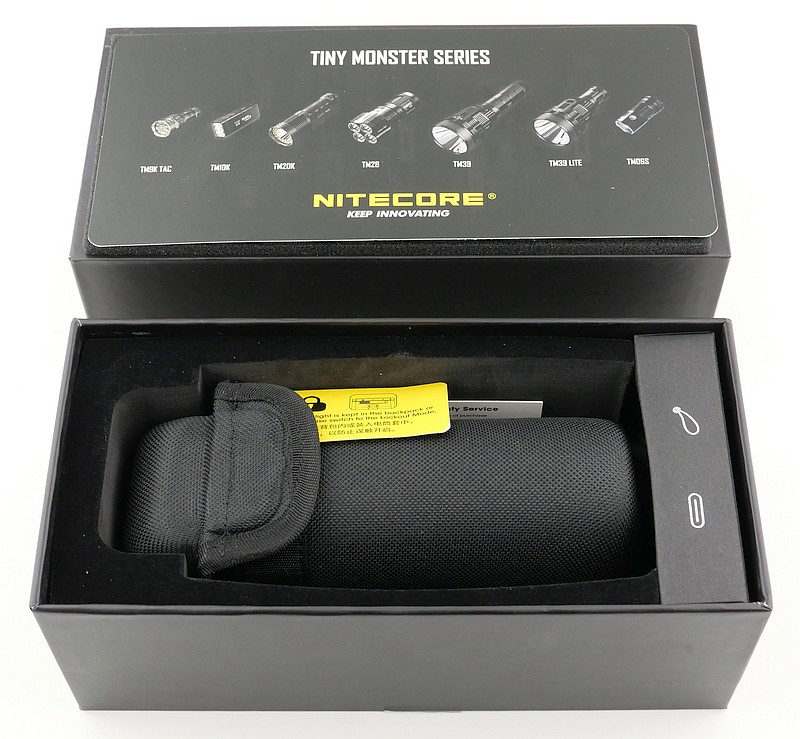
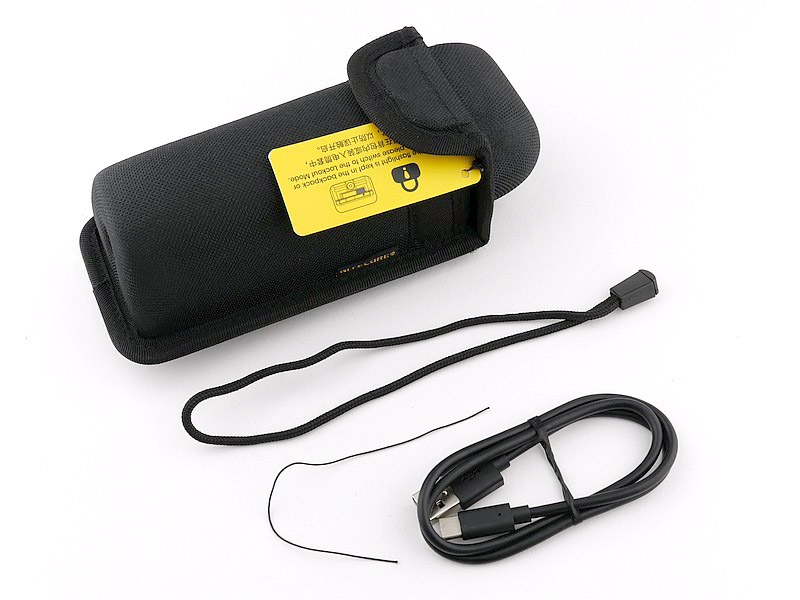
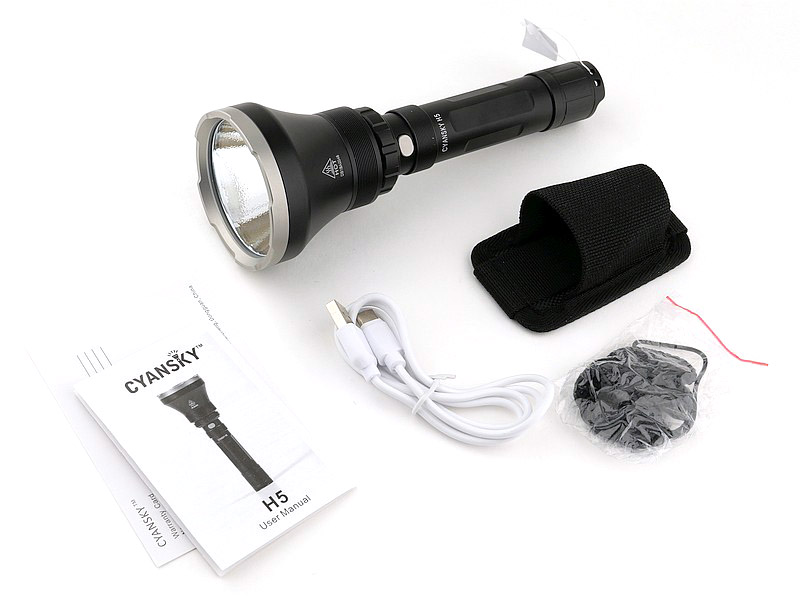
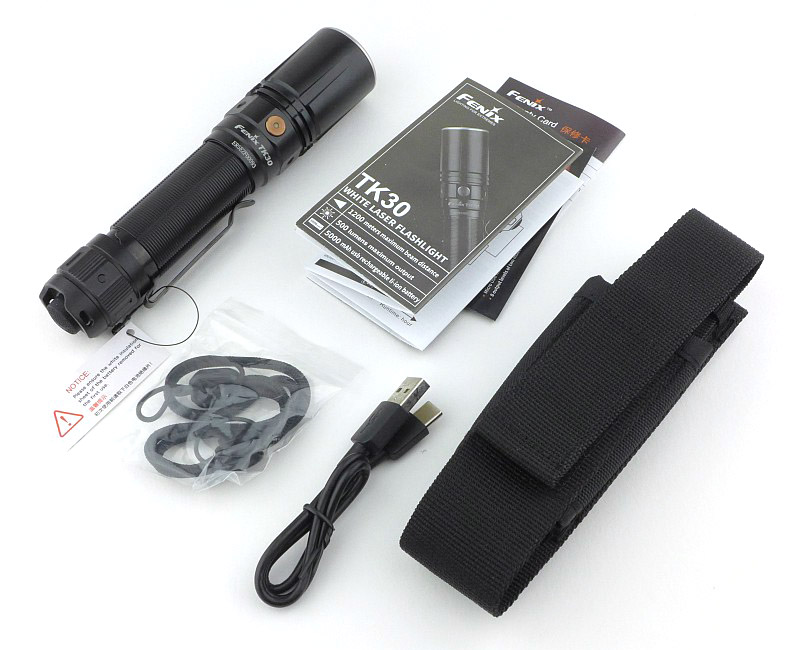
What is in the box?:
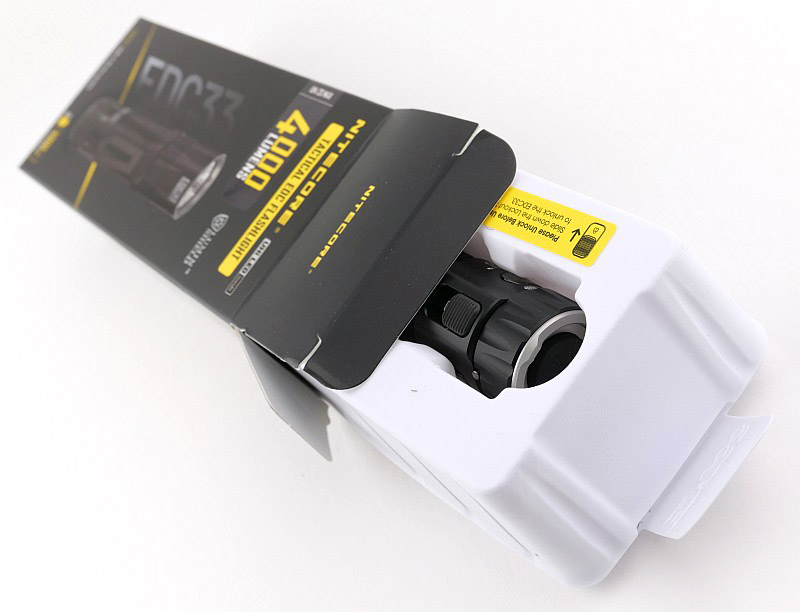
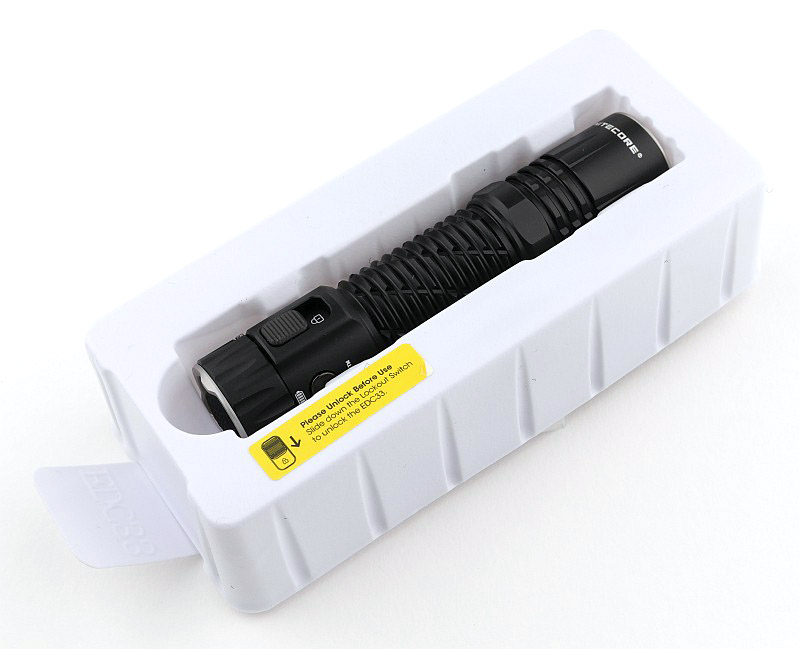
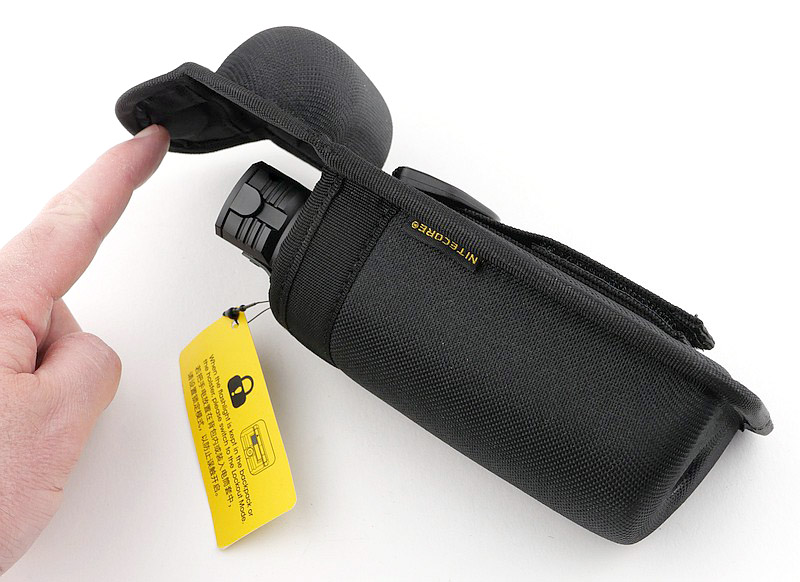
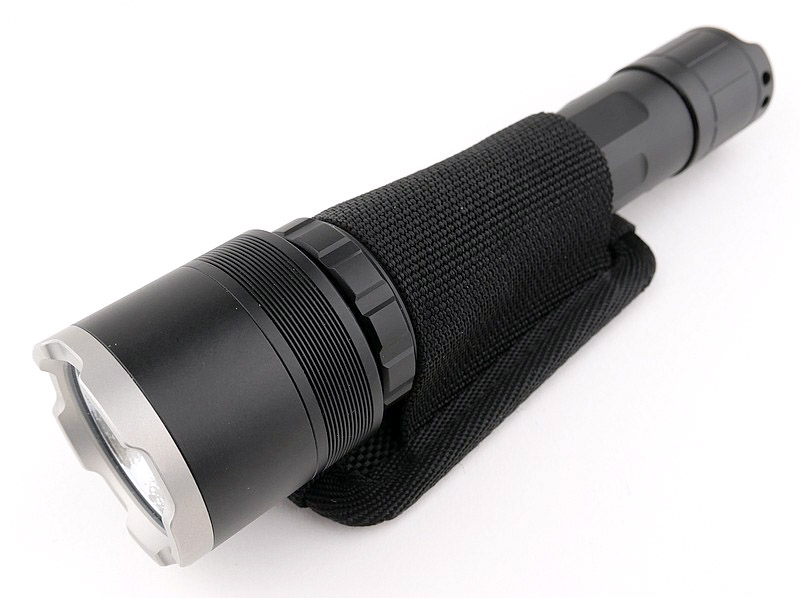
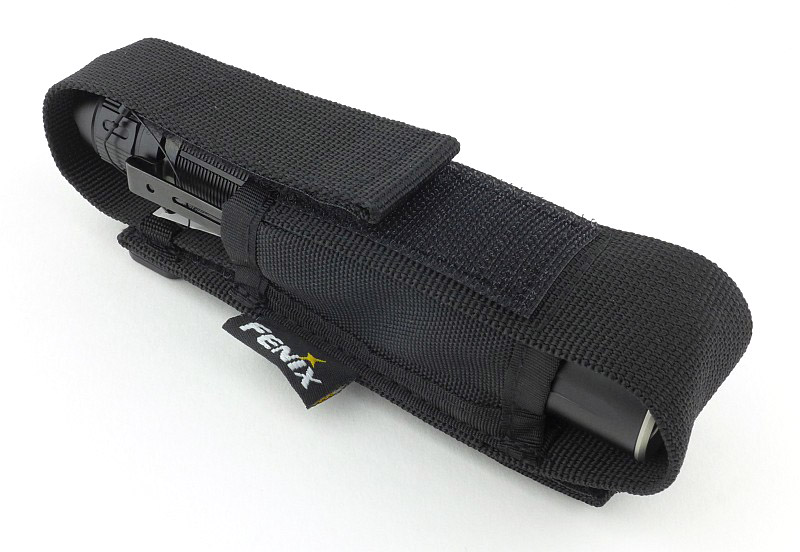
With the EDC35 also having a belt holster, the unboxing is a bit different as the EDC35 arrives in the holster. The EDC33 doesn’t have a holster and comes in a slide out plastic tray.


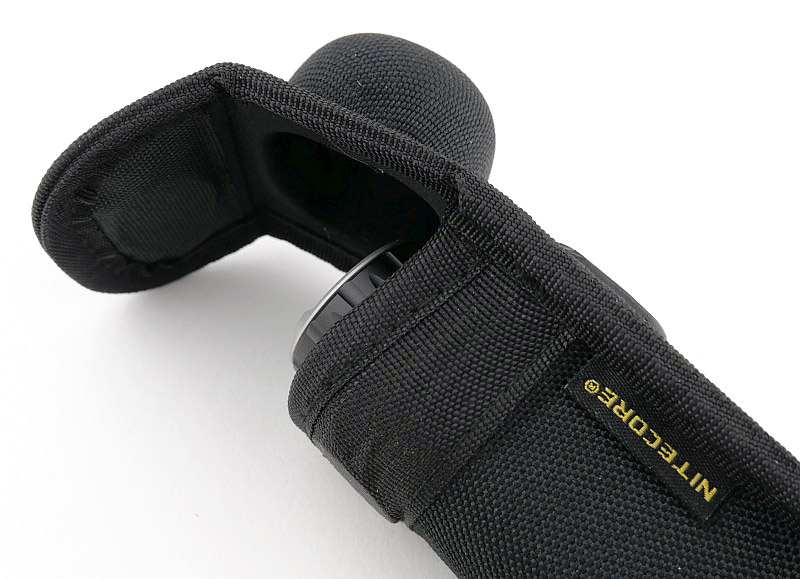
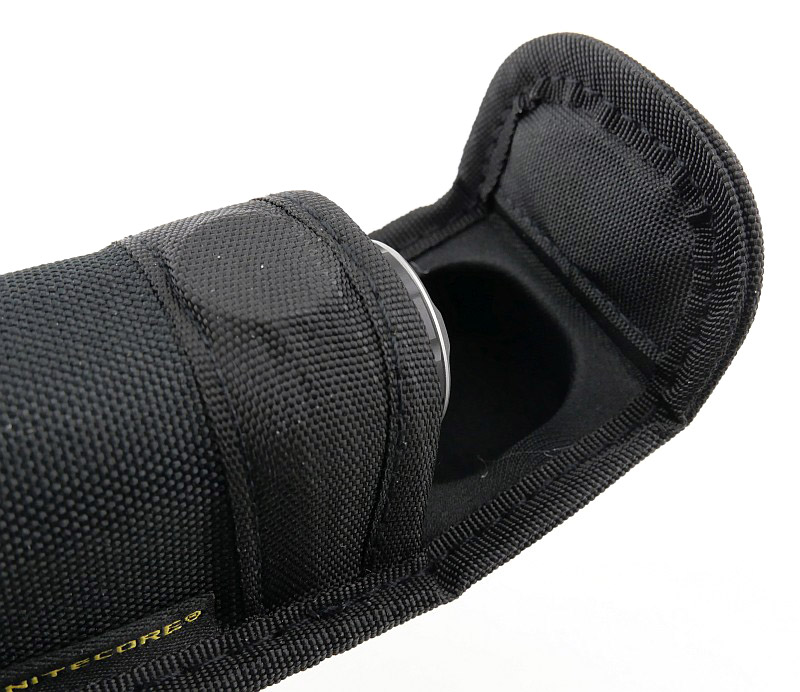
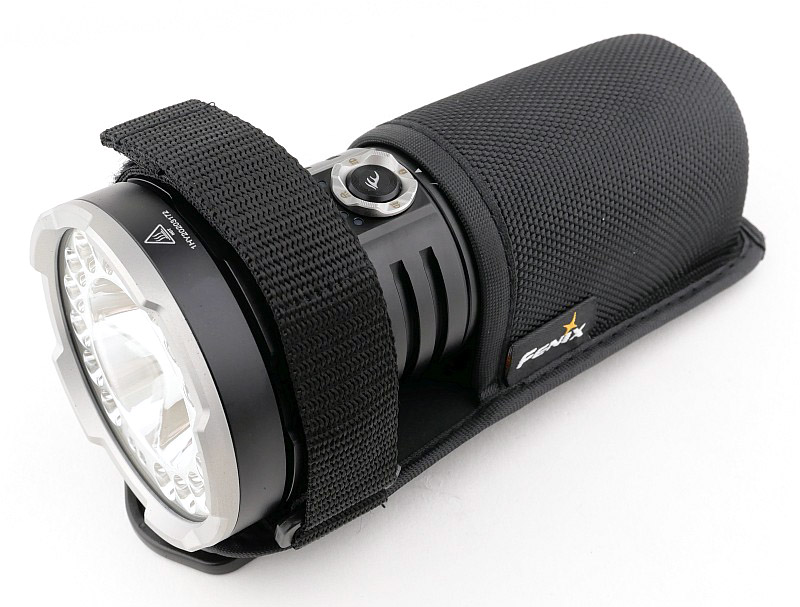
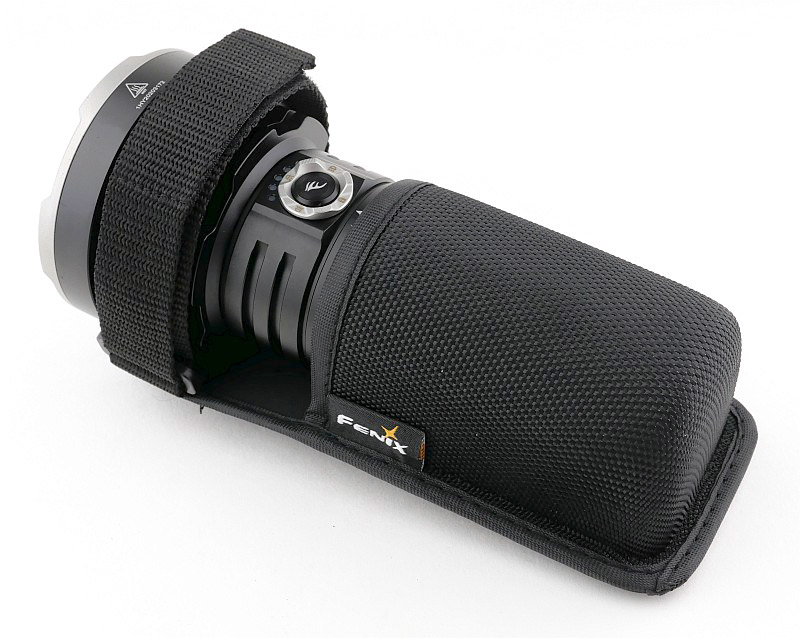
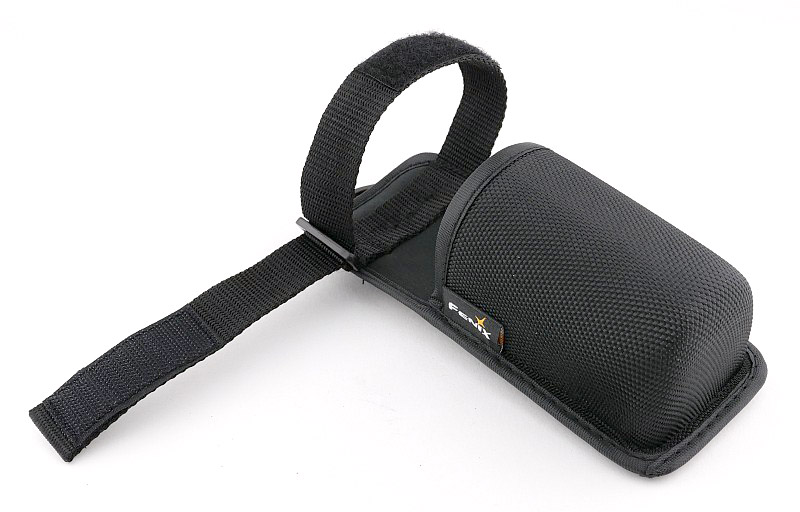
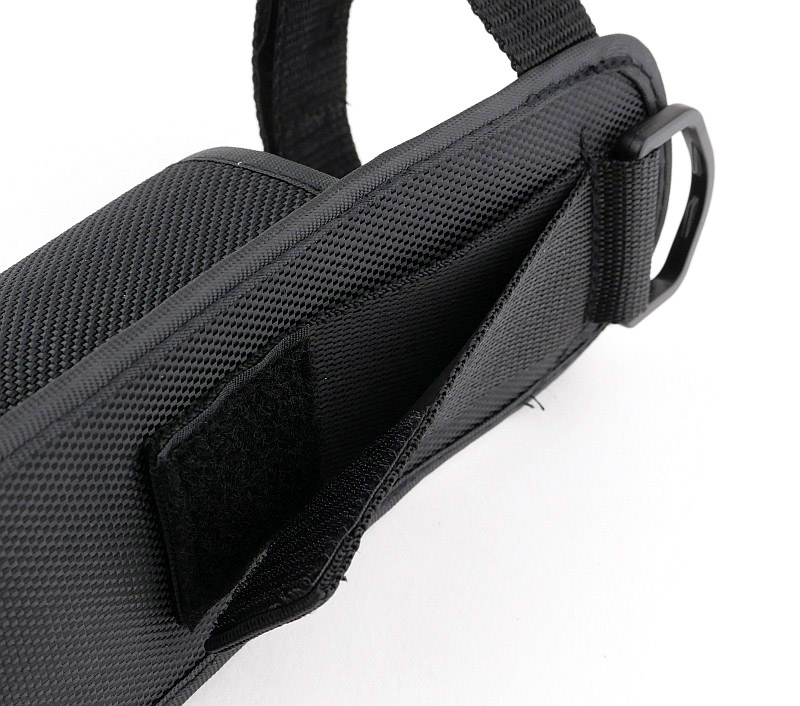
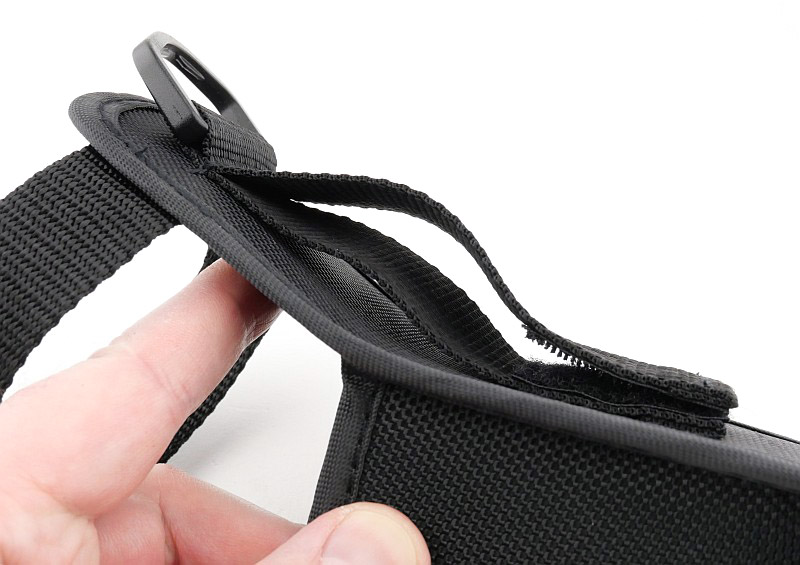
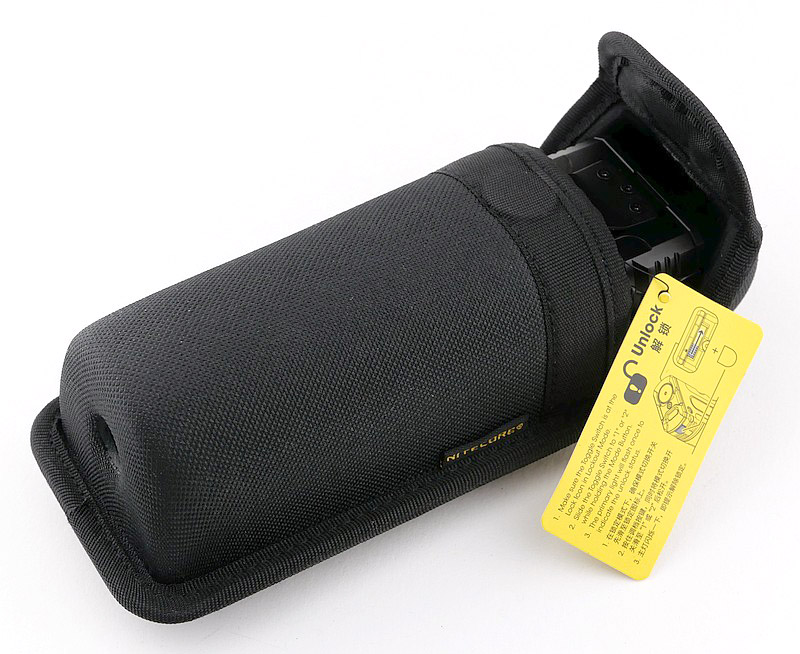
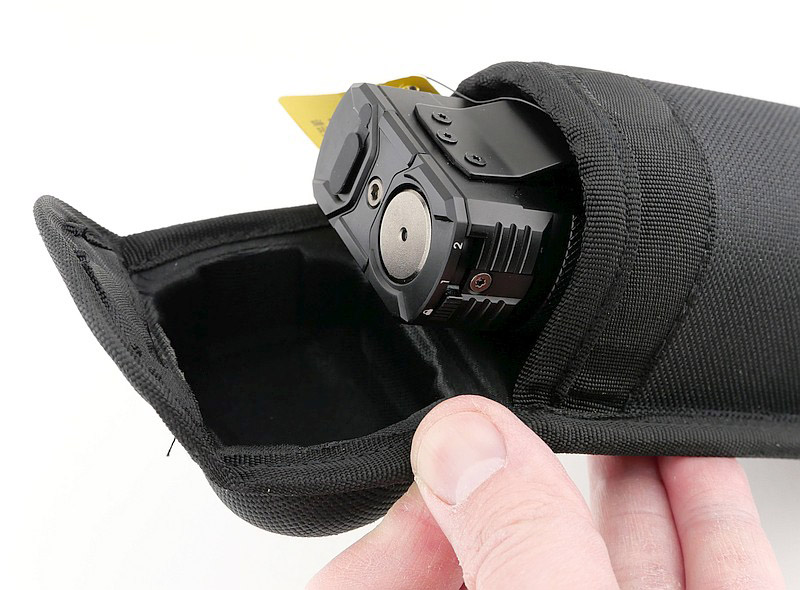
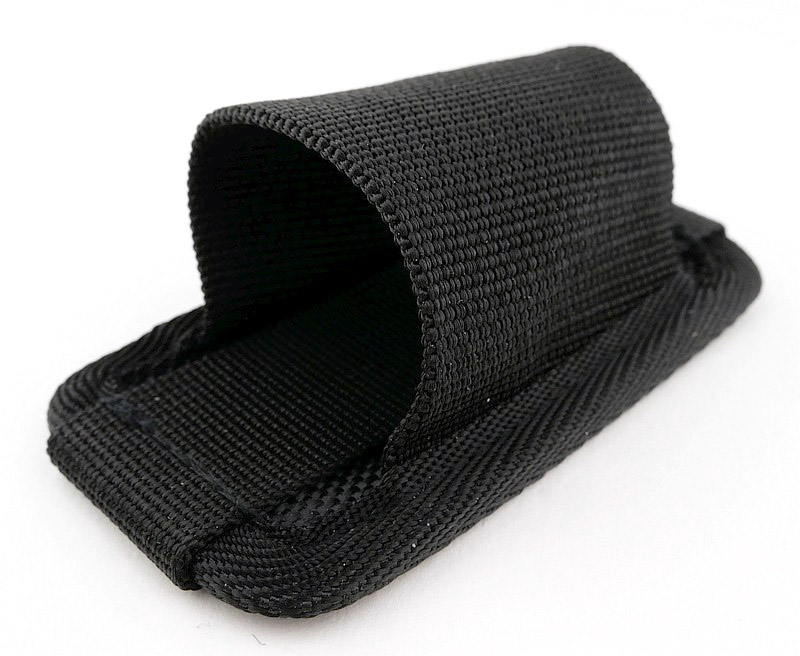
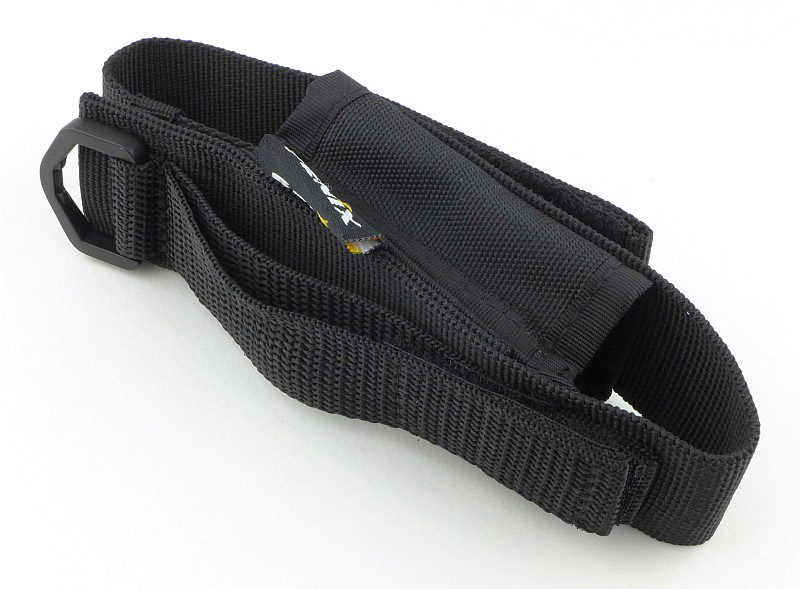
A good look round the EDC35 belt holster – Things to look out for here are:
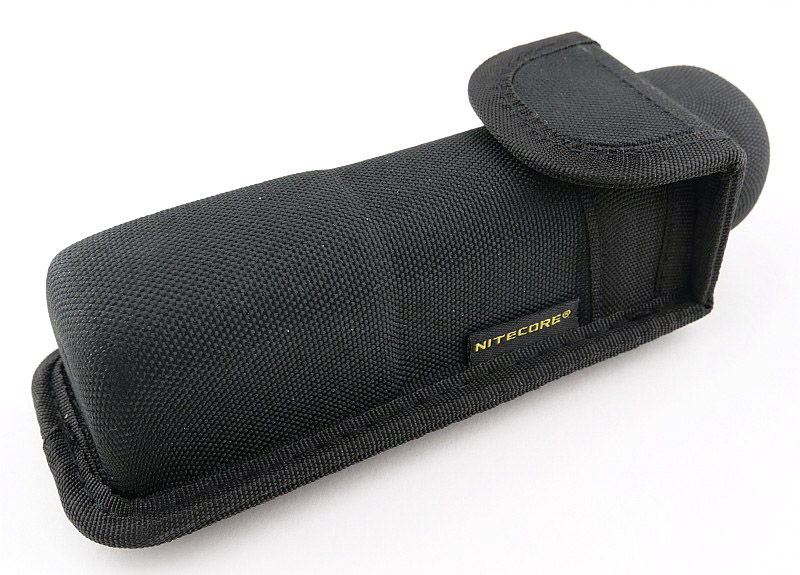
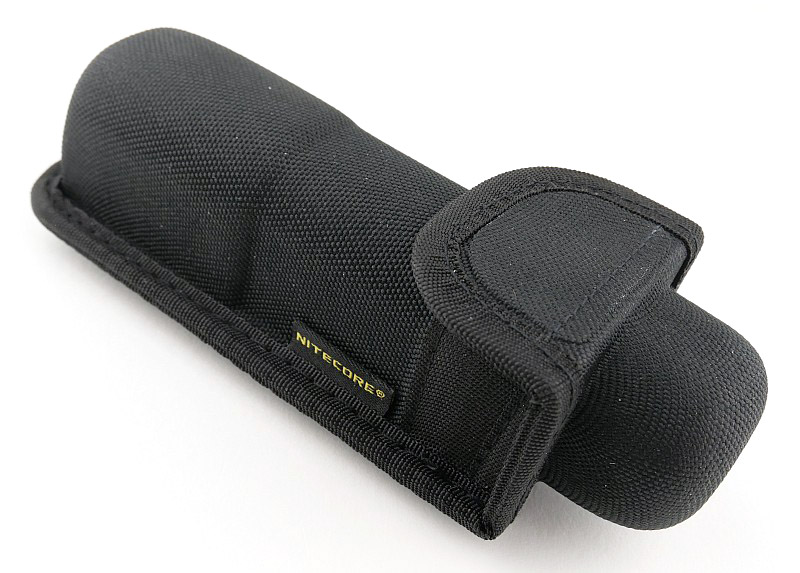
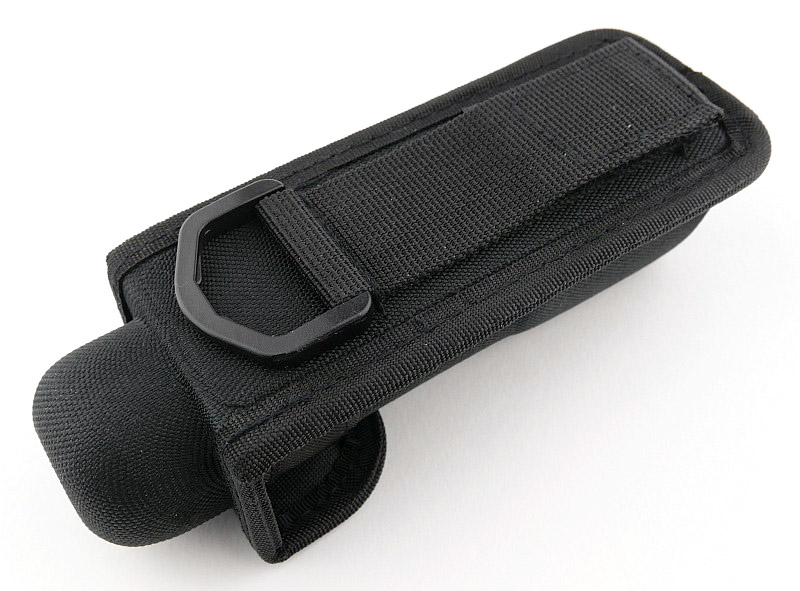
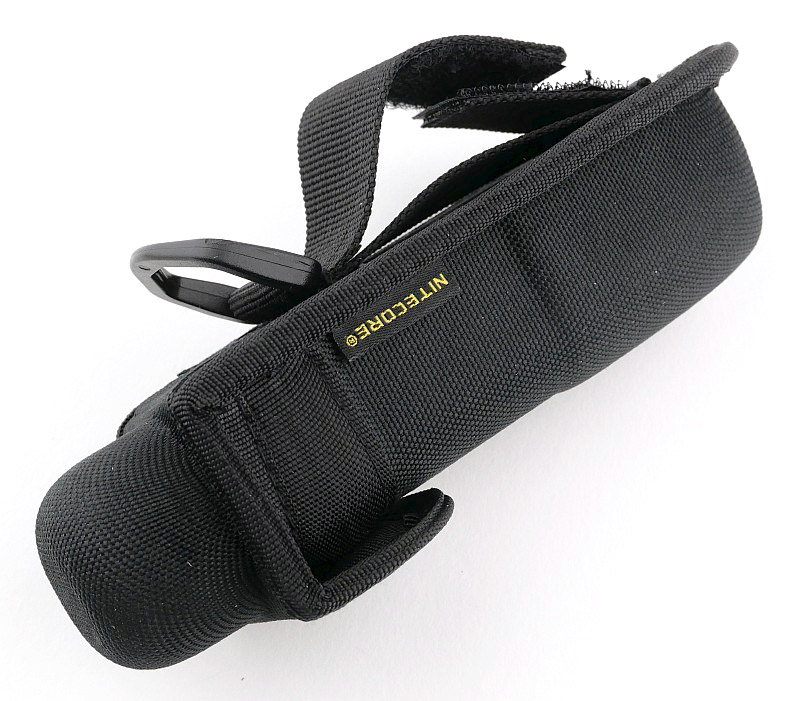
This is a semi-rigid type of holster, so when empty is the same size as when the light is inside it. There is a magnetically secured flip-top opening which hinges towards the belt loop.
A D-loop hanger, fixed belt loop and Velcro closing belt loop provide options for mounting/carry.

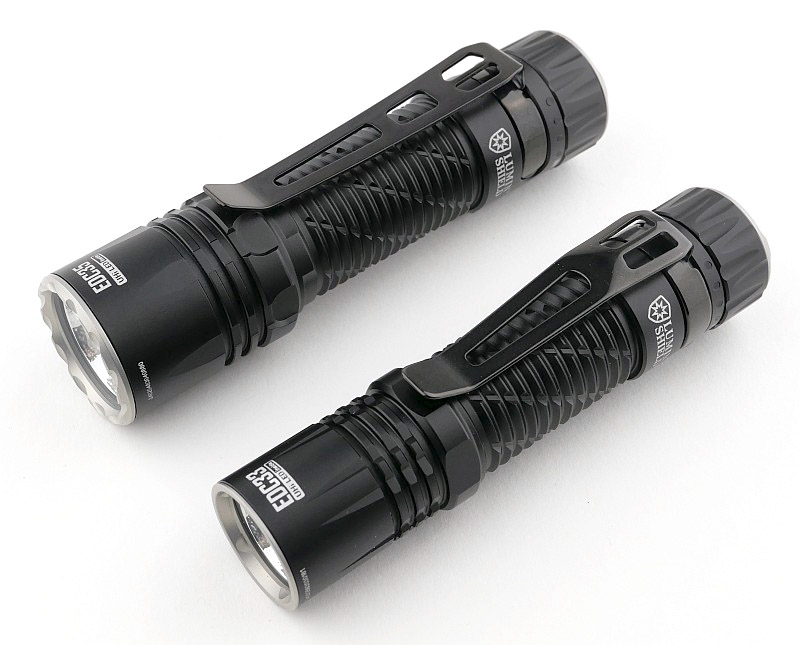
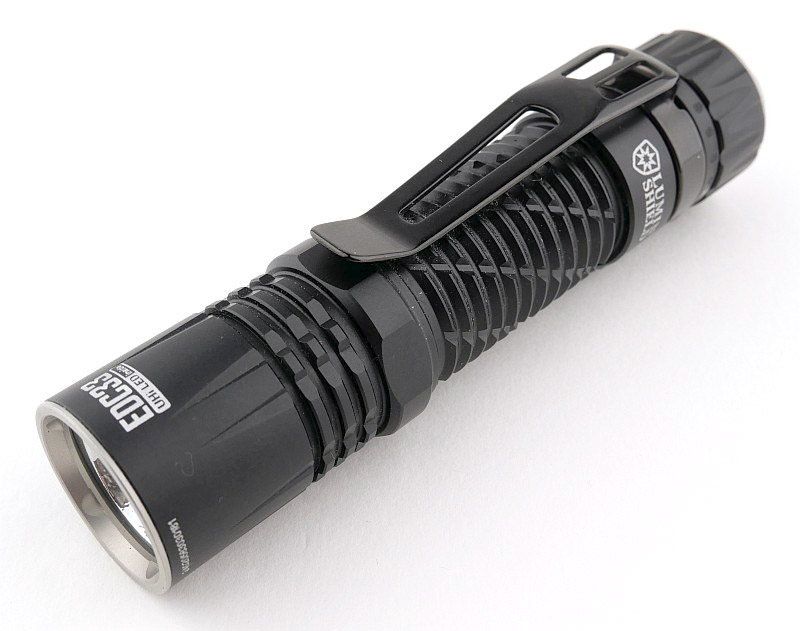
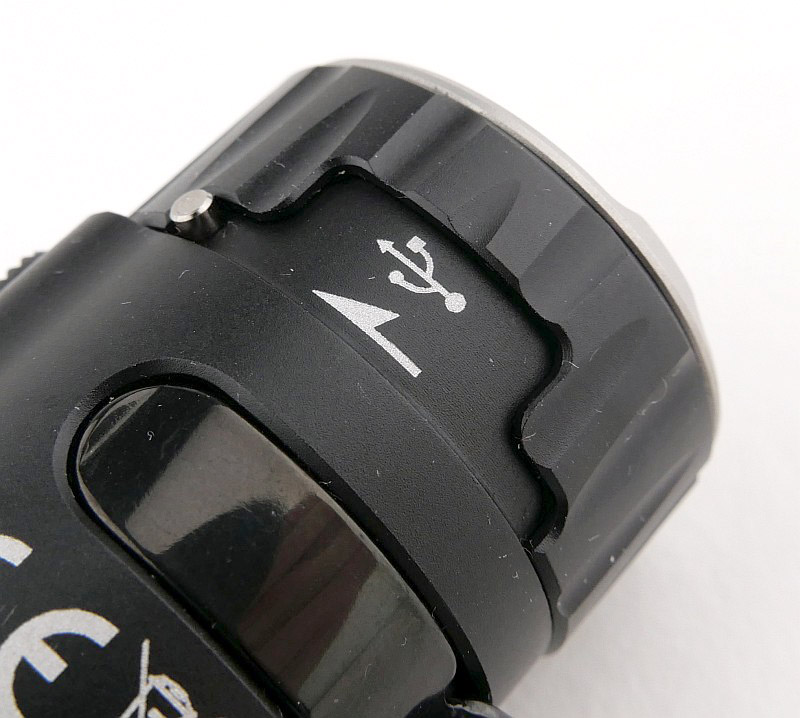
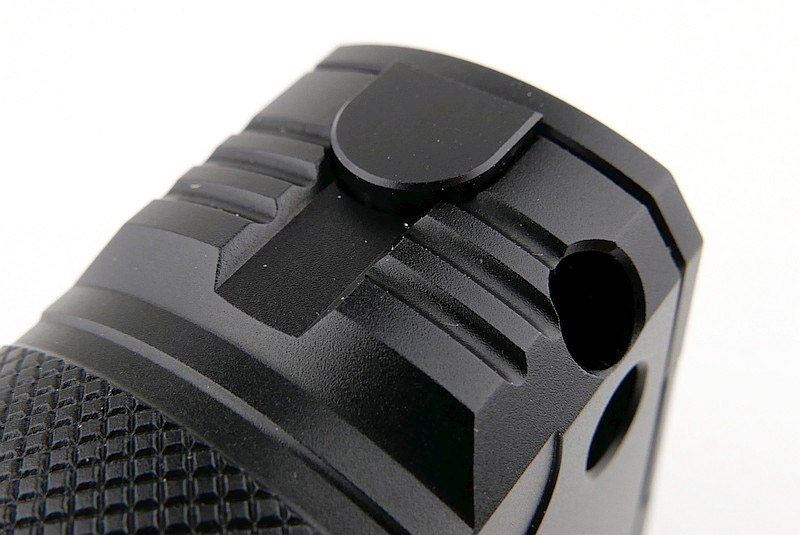
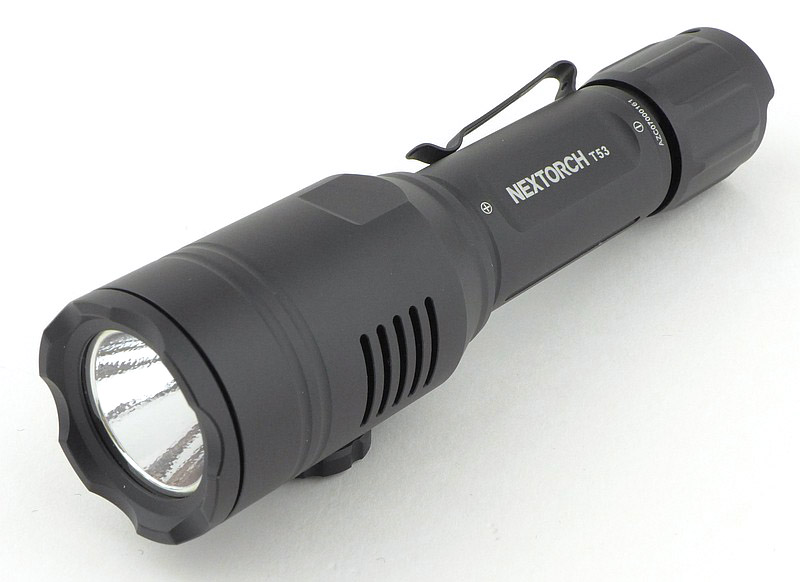
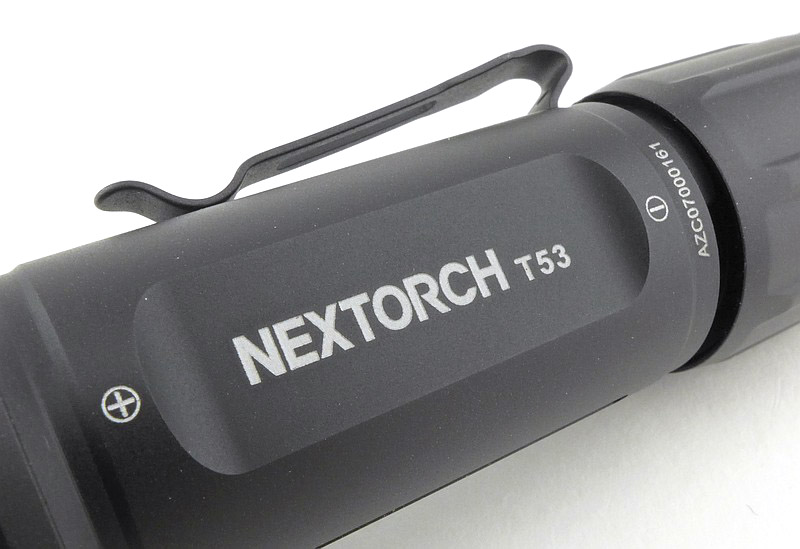
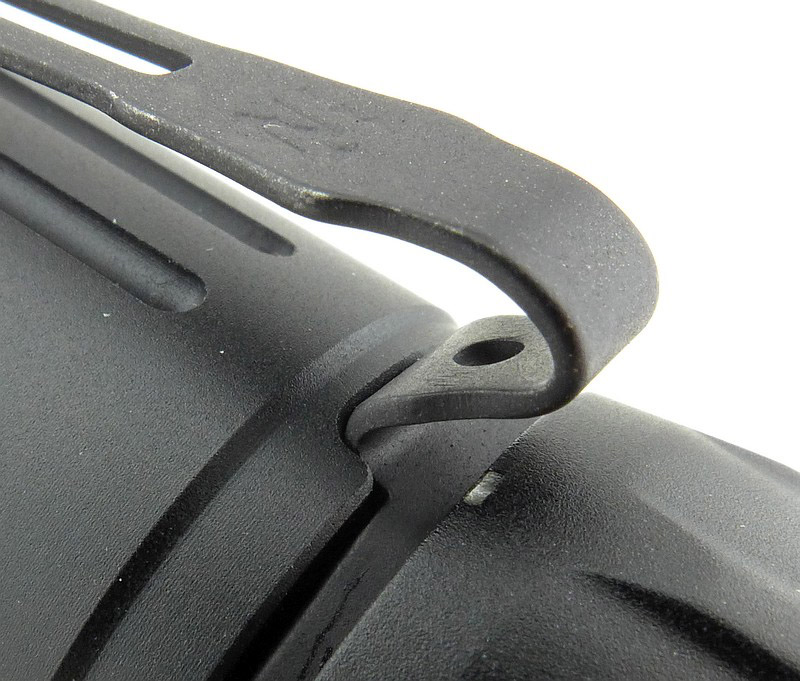
A good look round the EDC33 – Things to look out for here are:
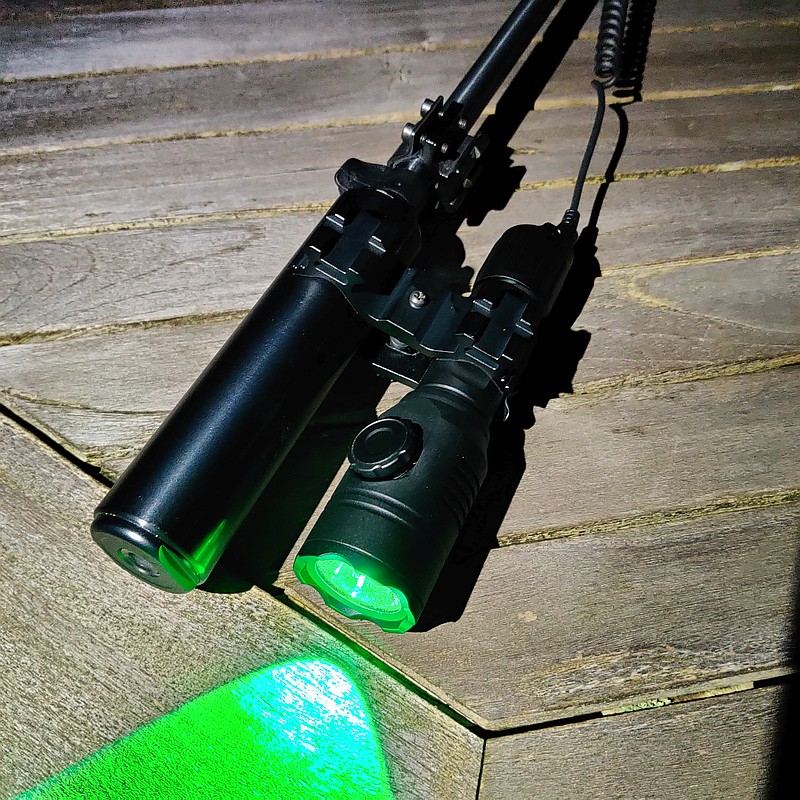
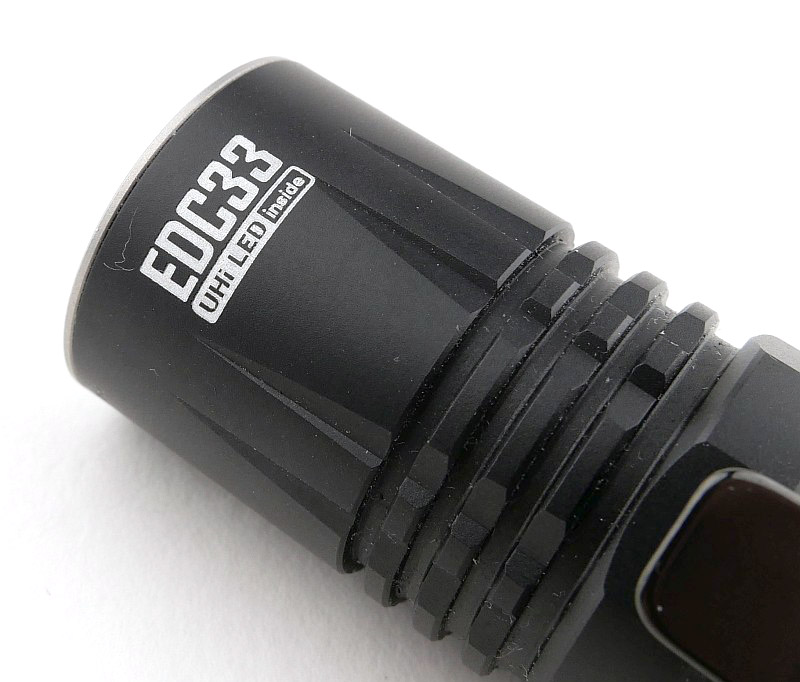
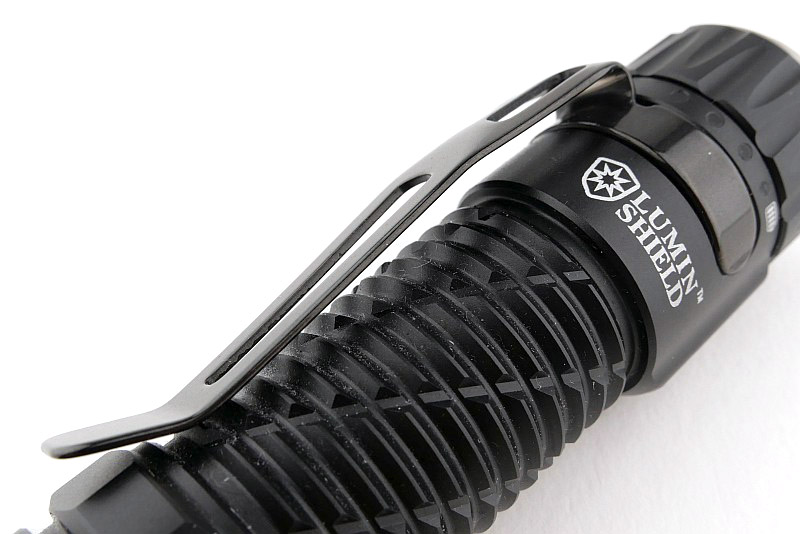
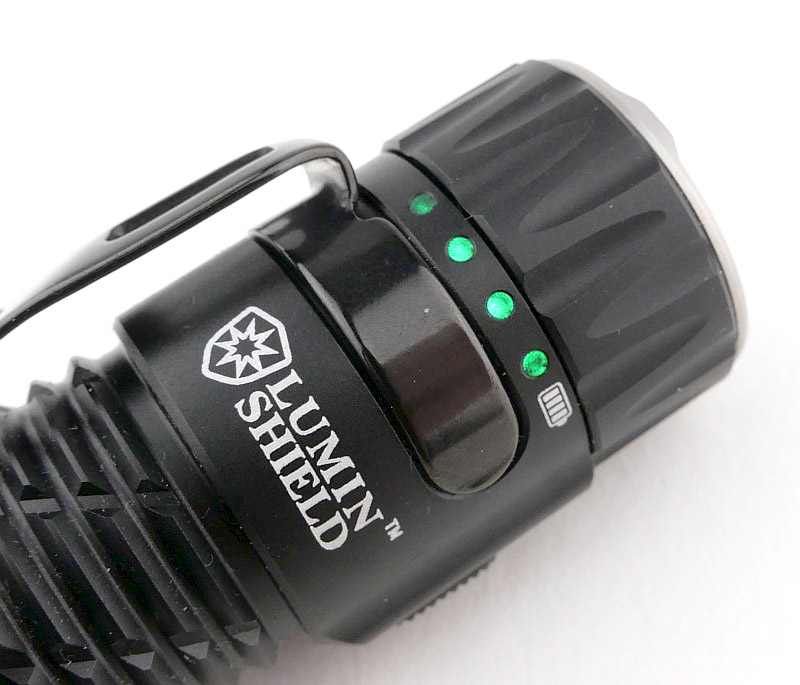
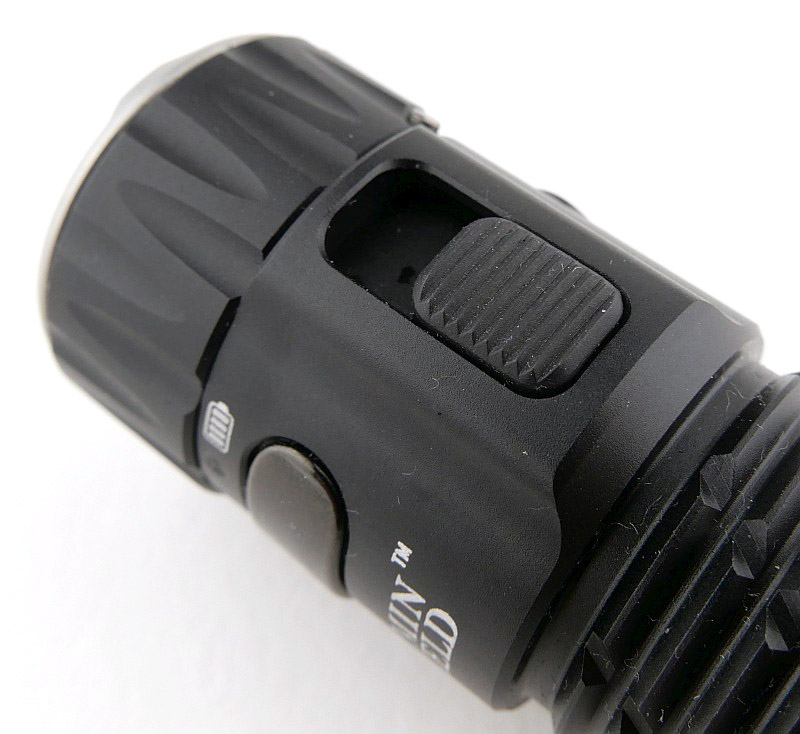
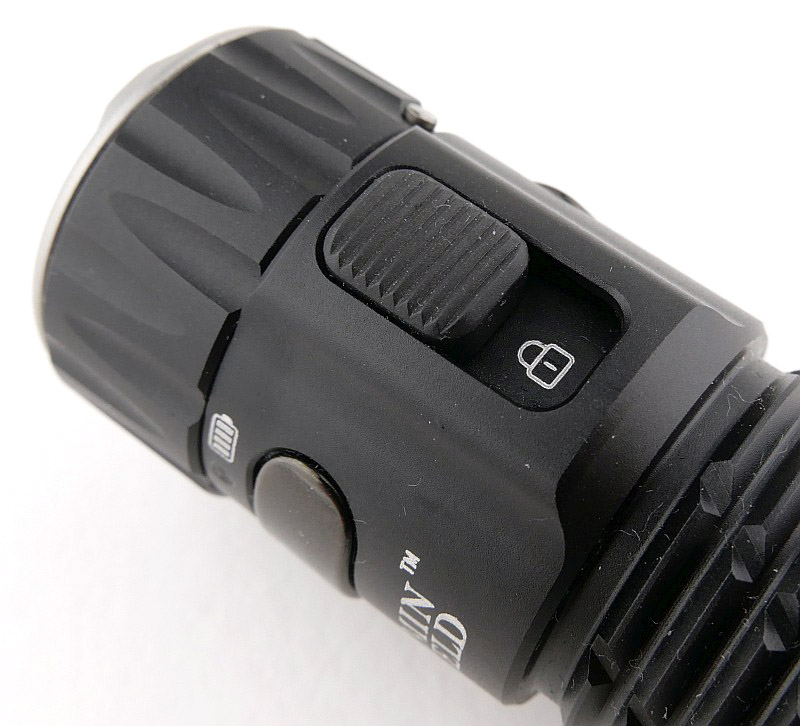
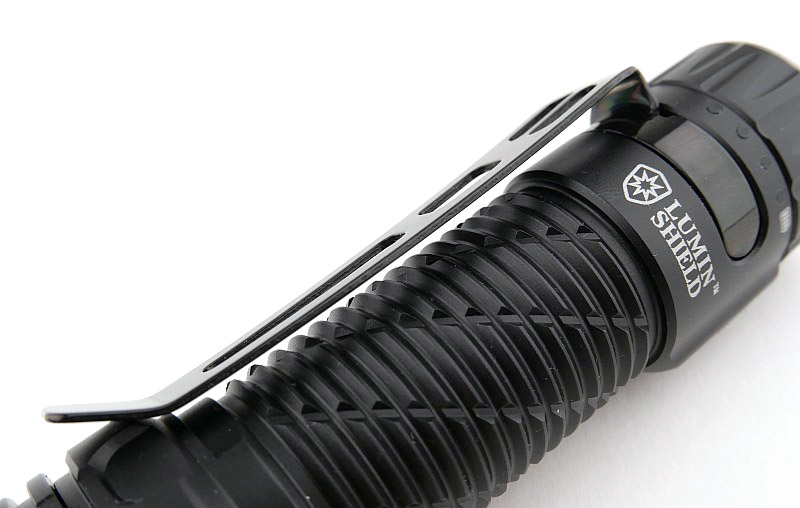
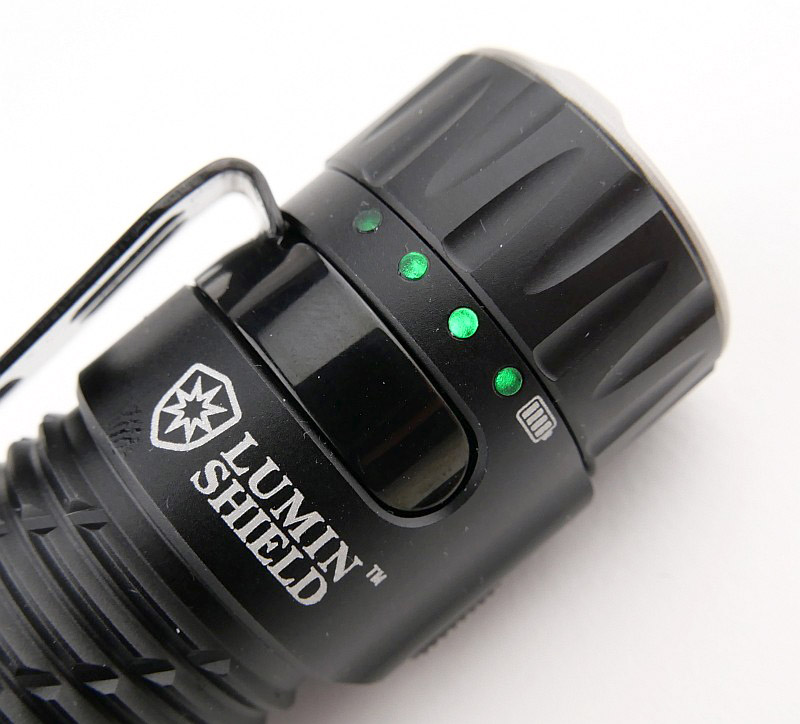
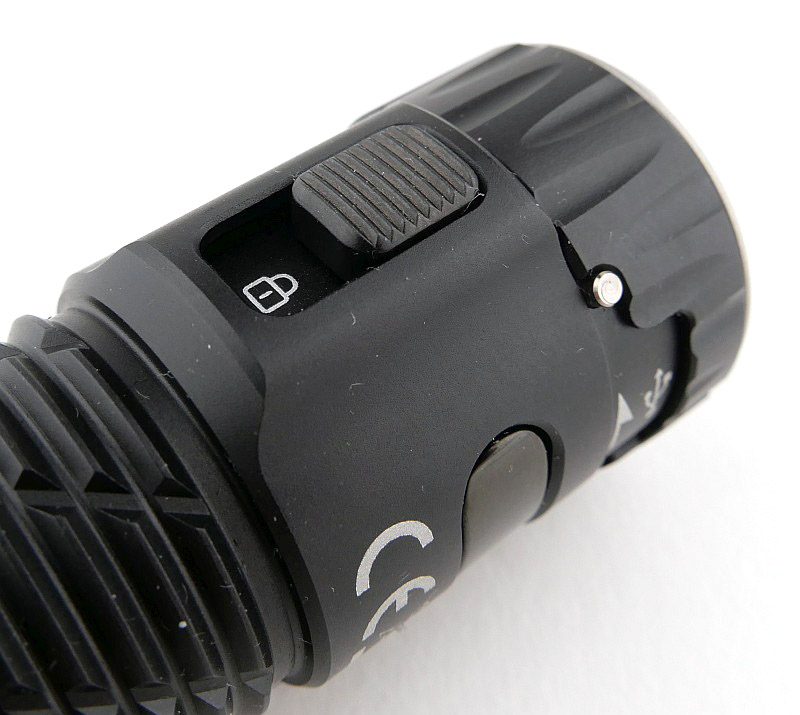
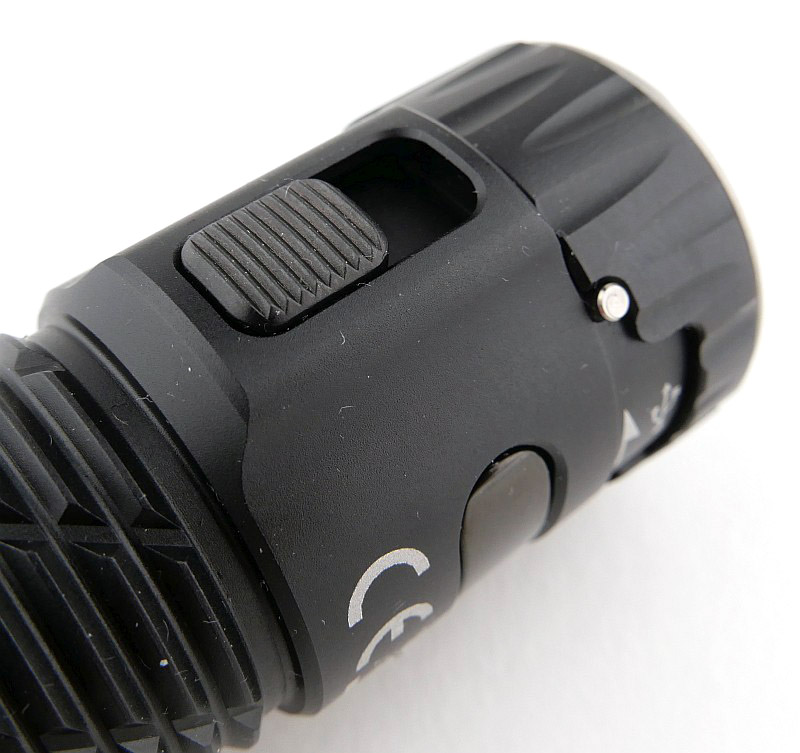
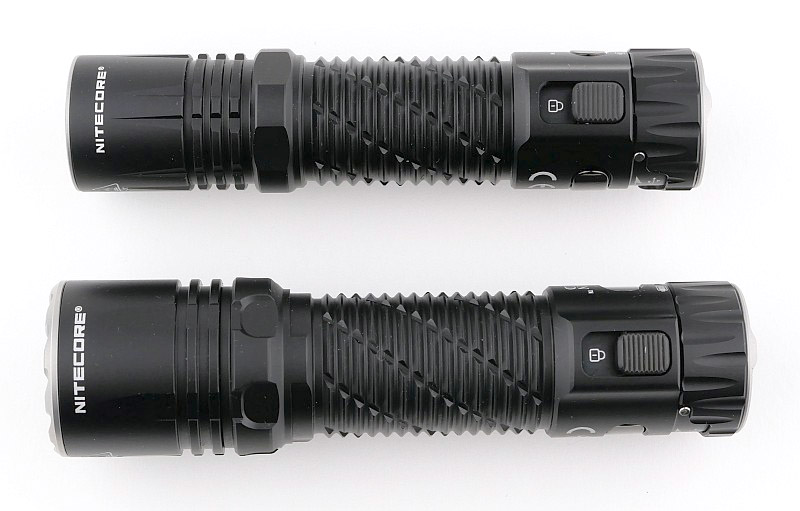
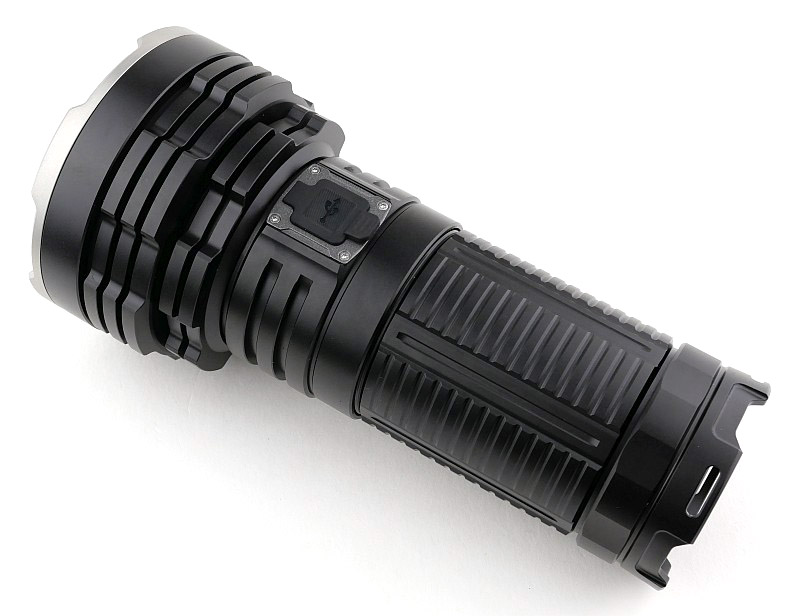
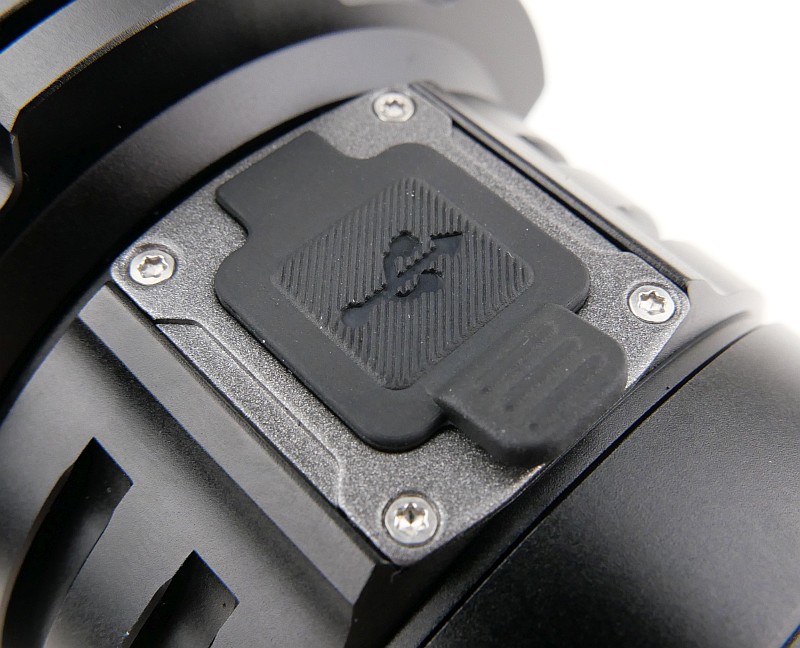
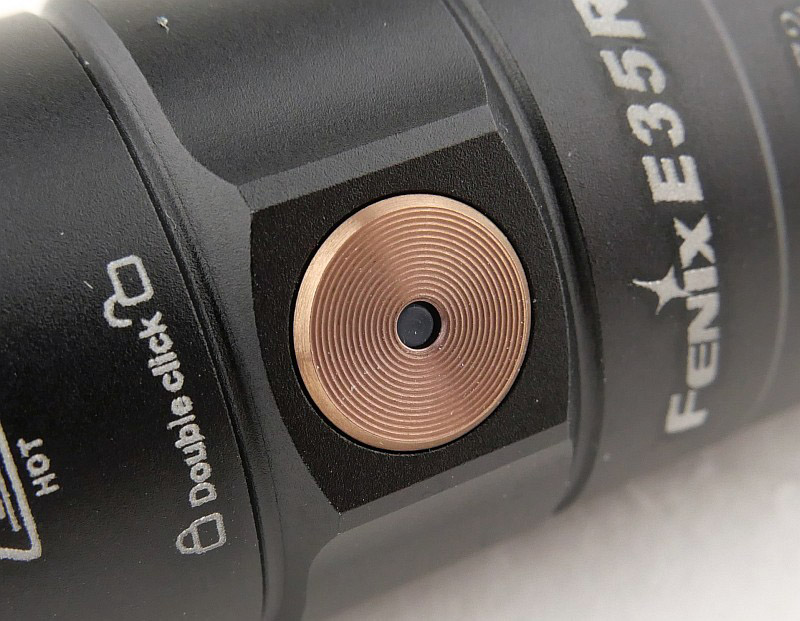
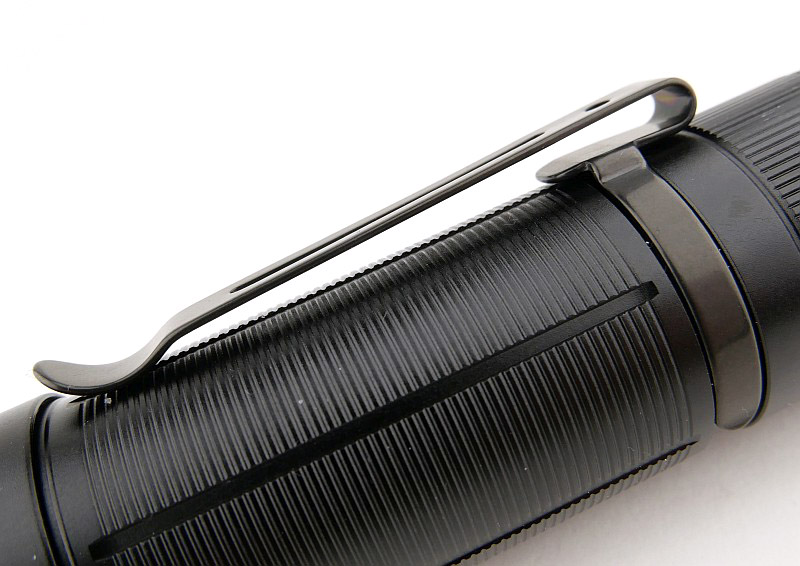
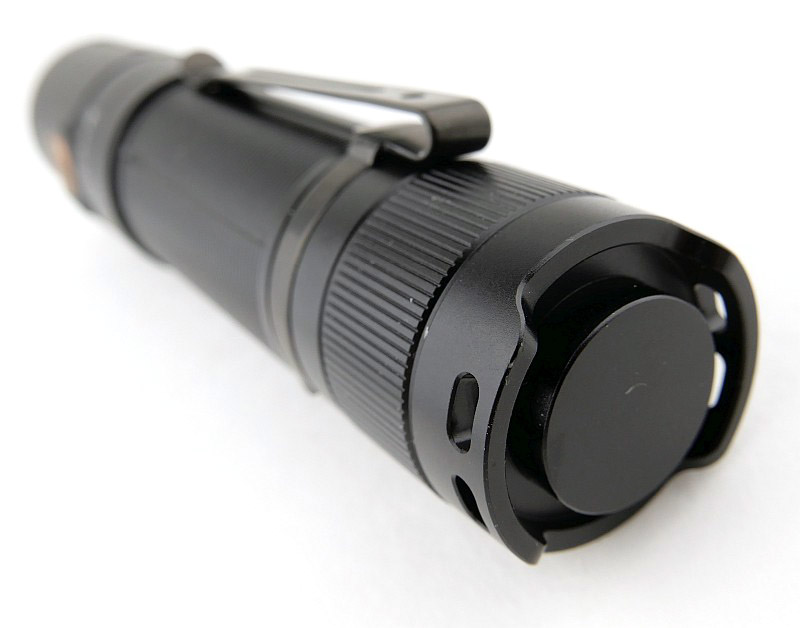
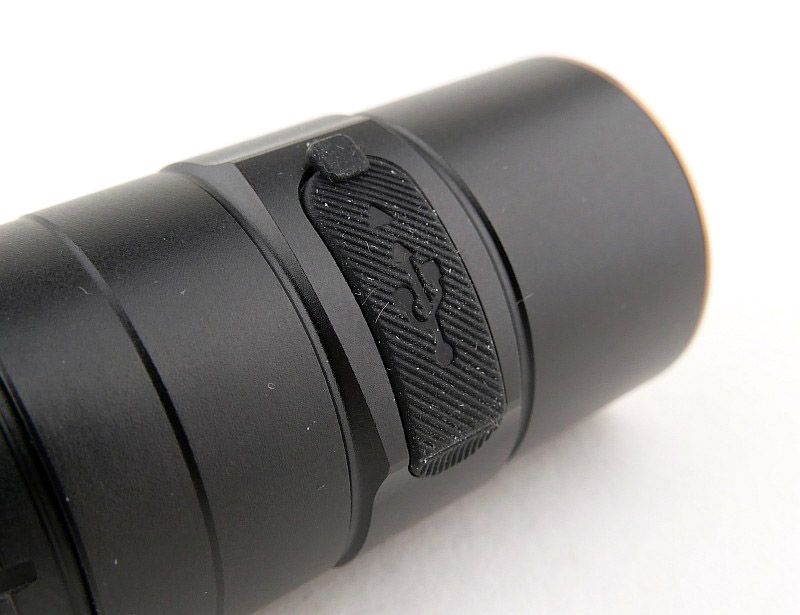
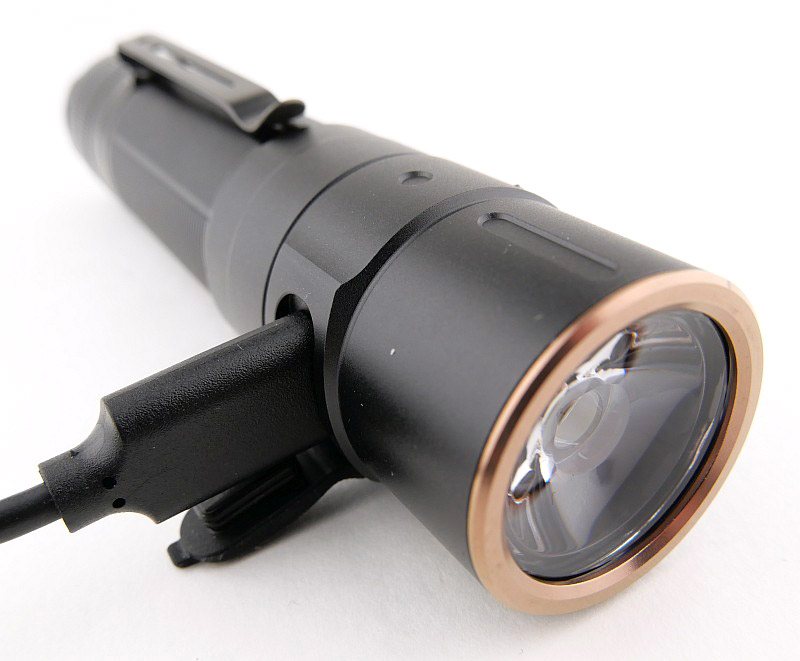
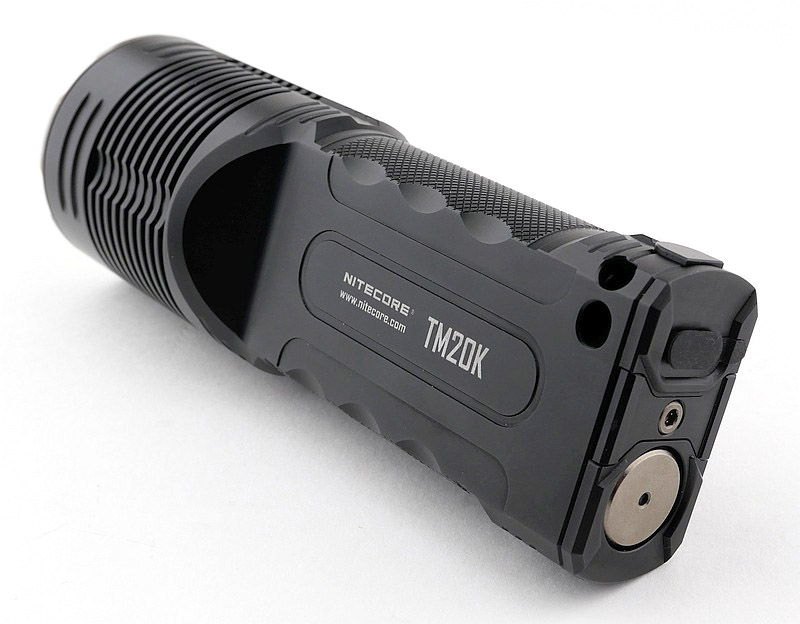
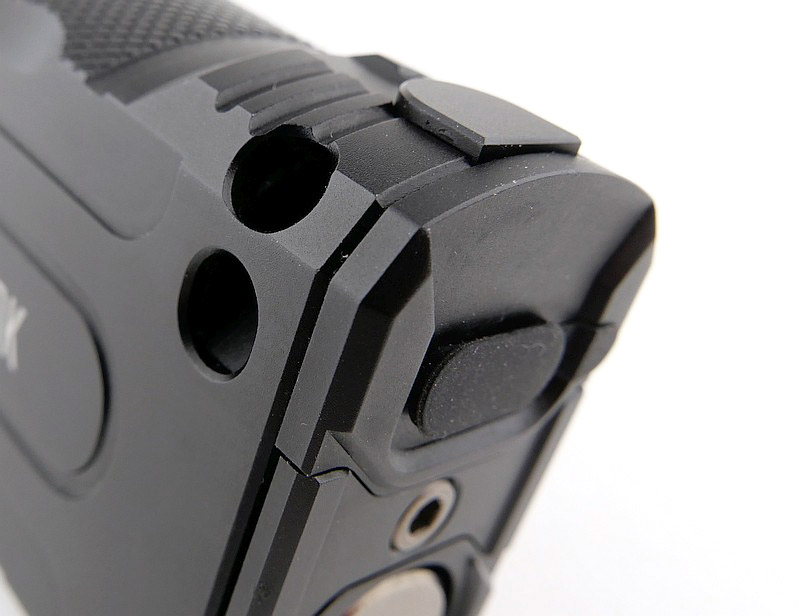
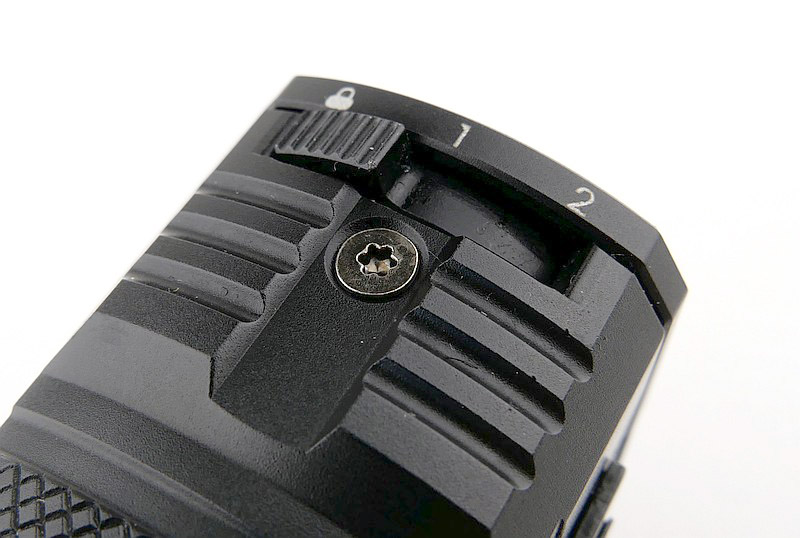
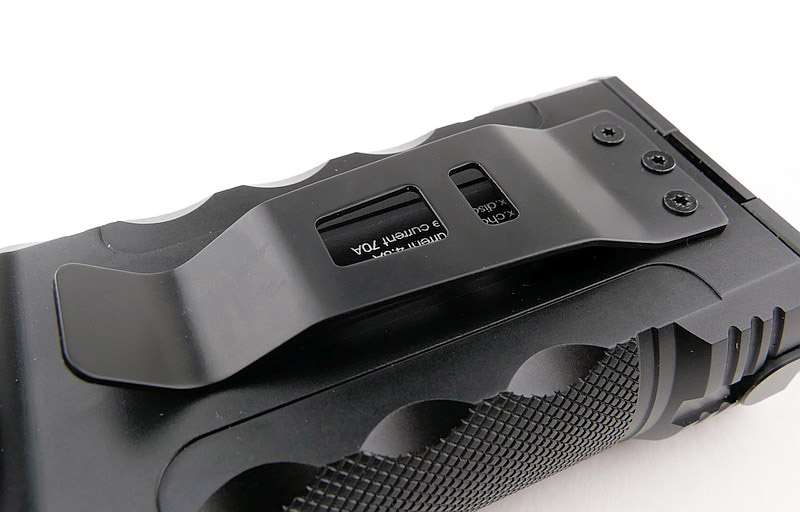
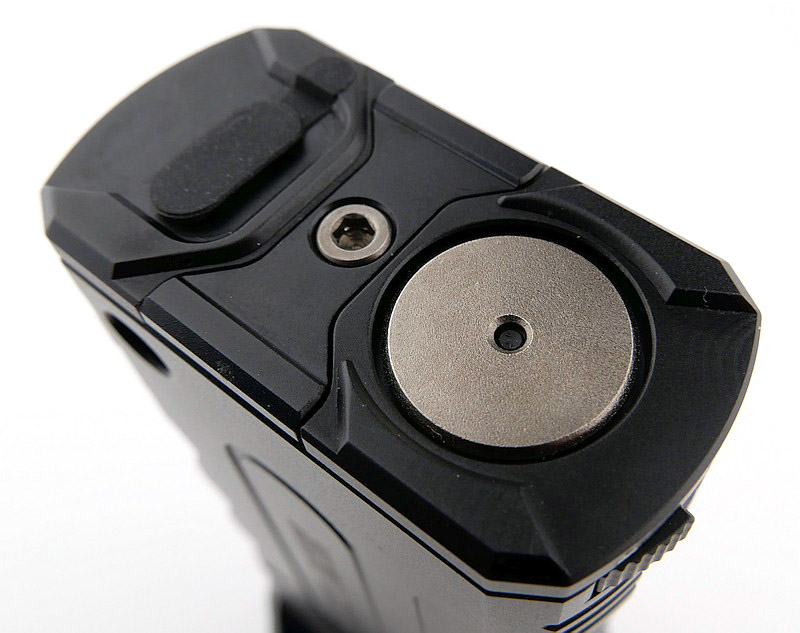
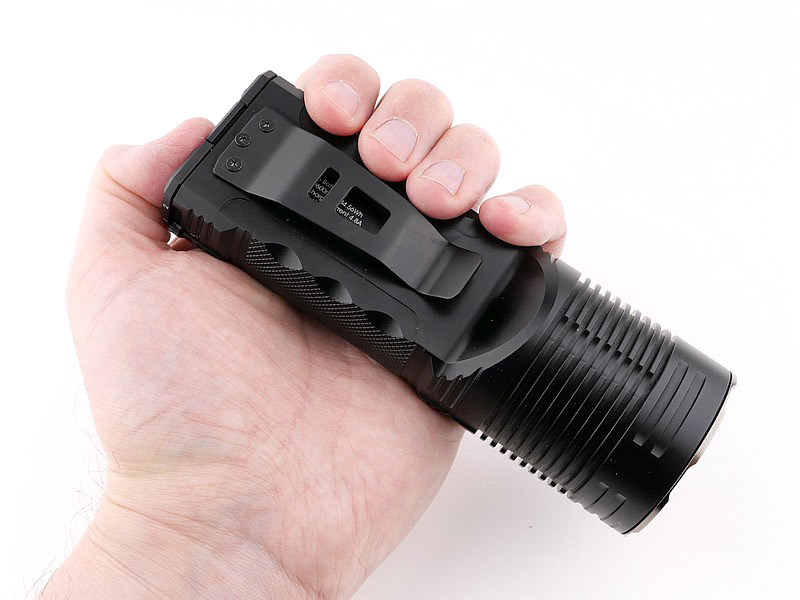
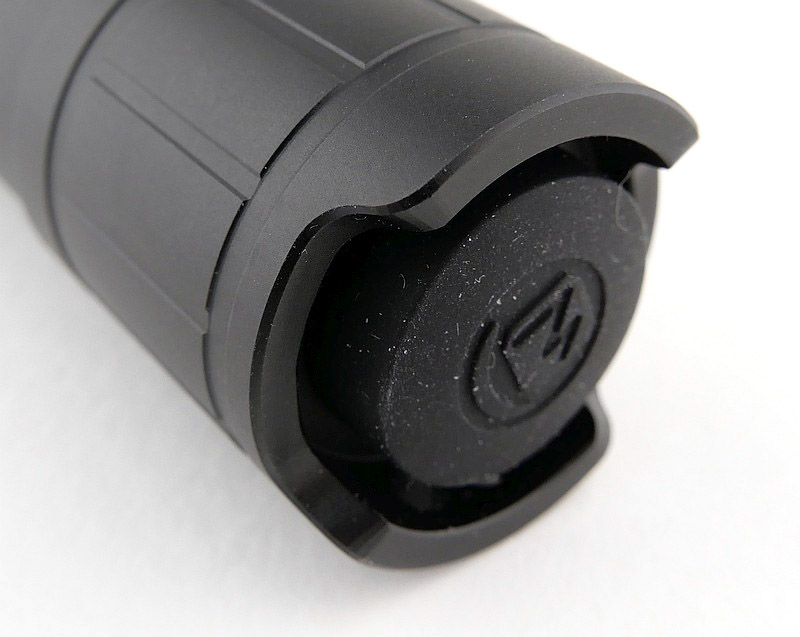
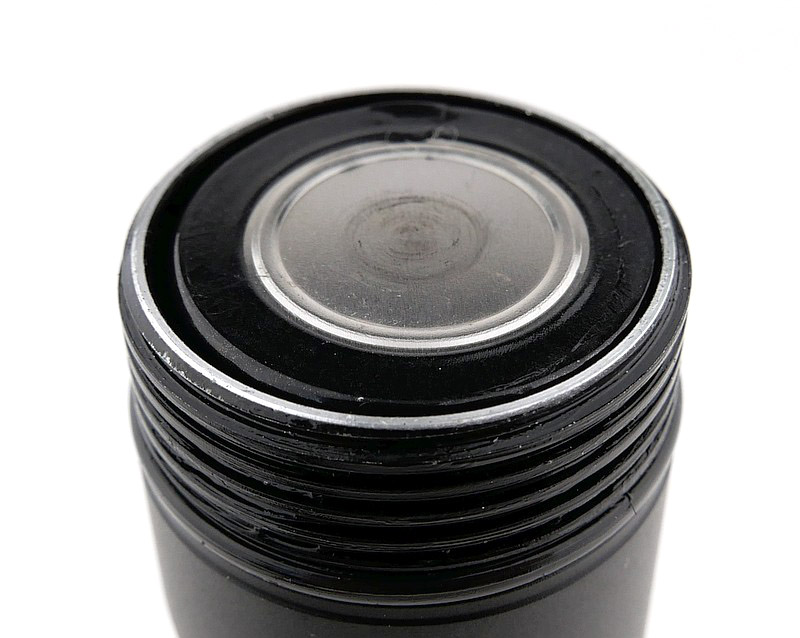
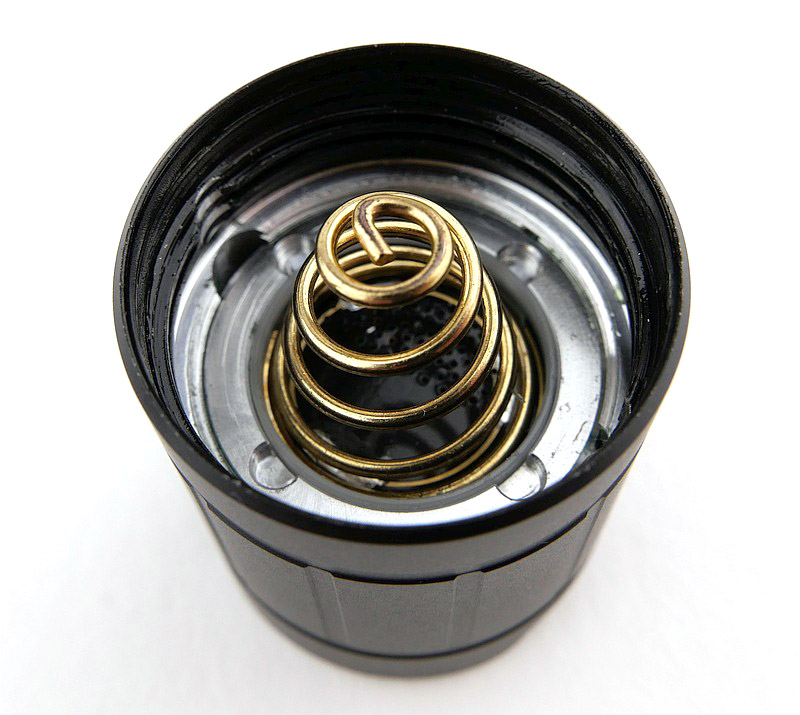
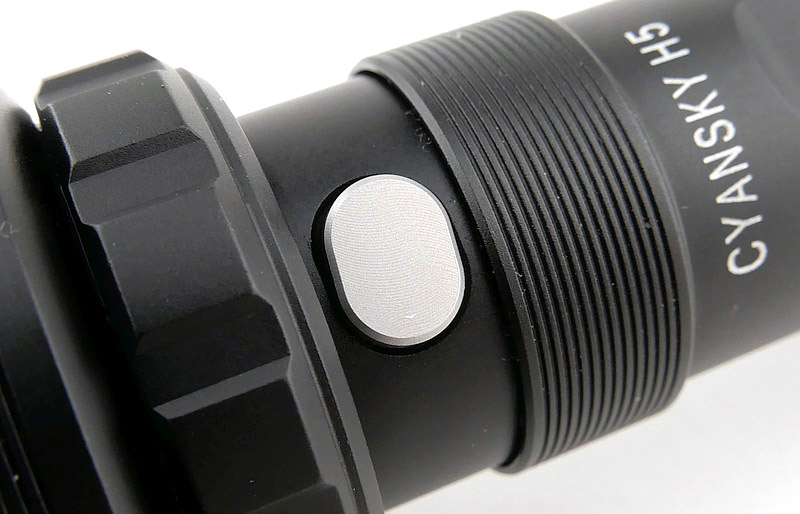
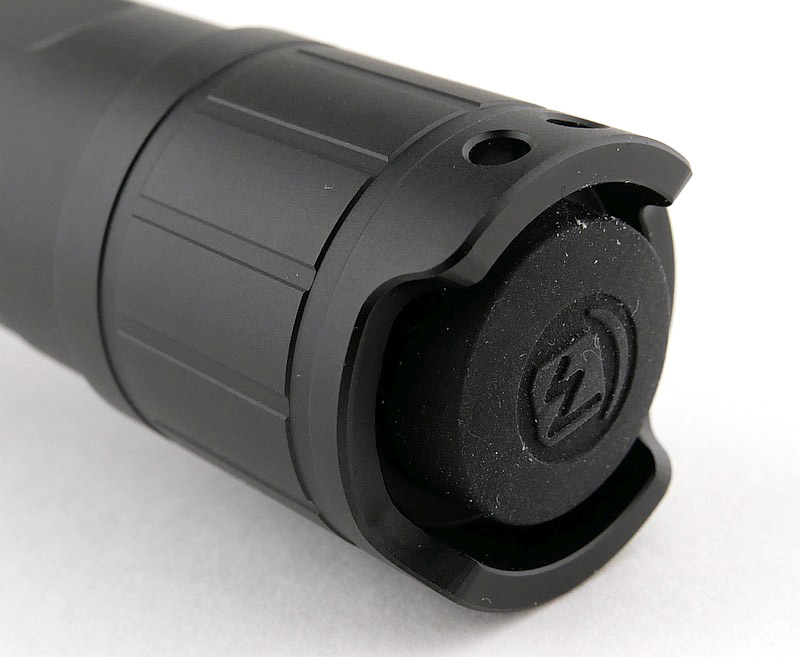
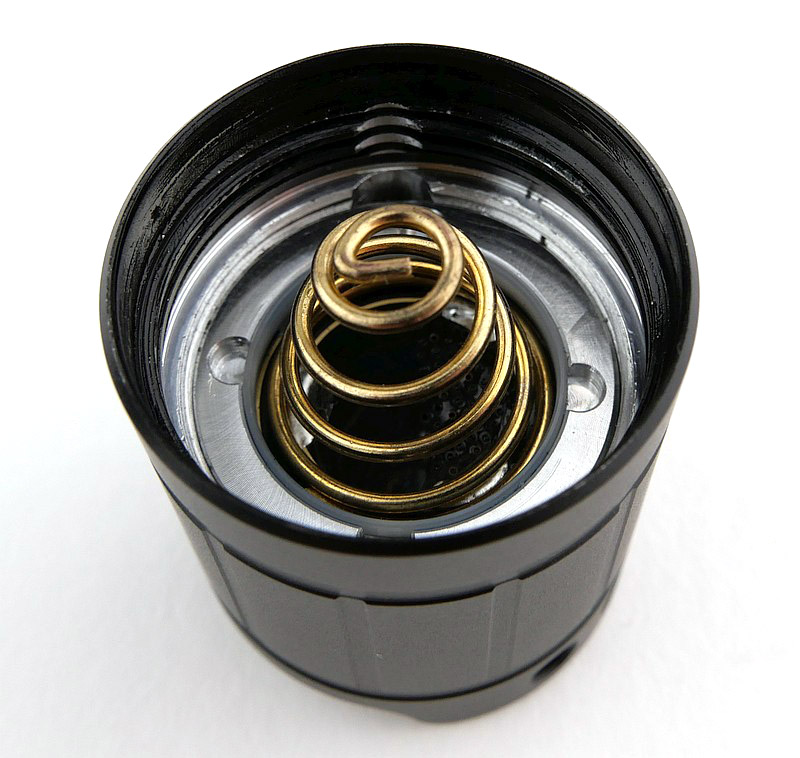
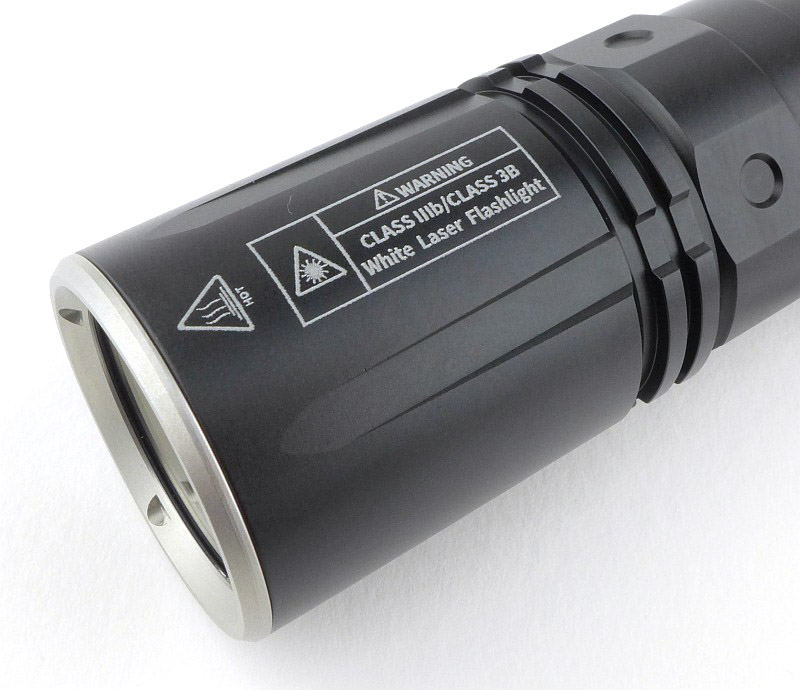
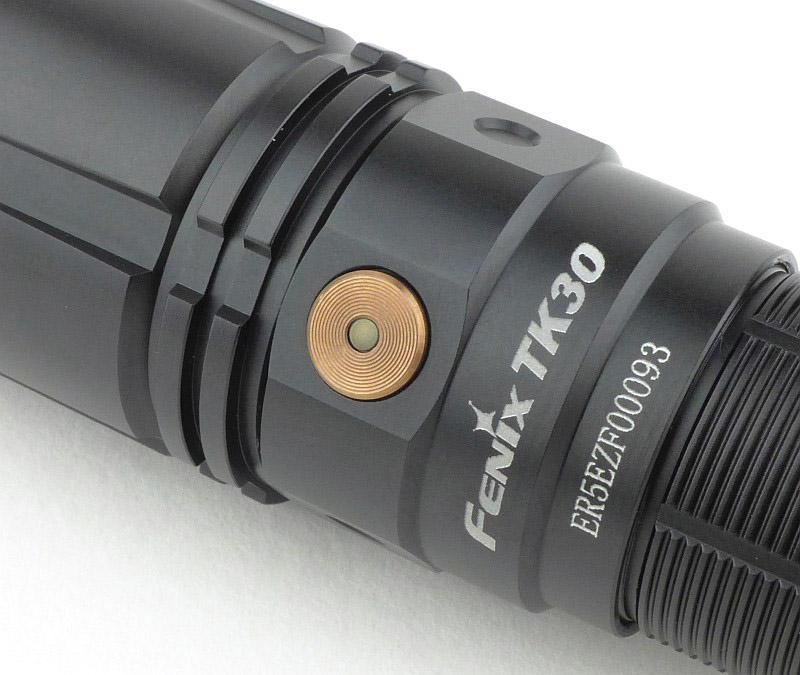
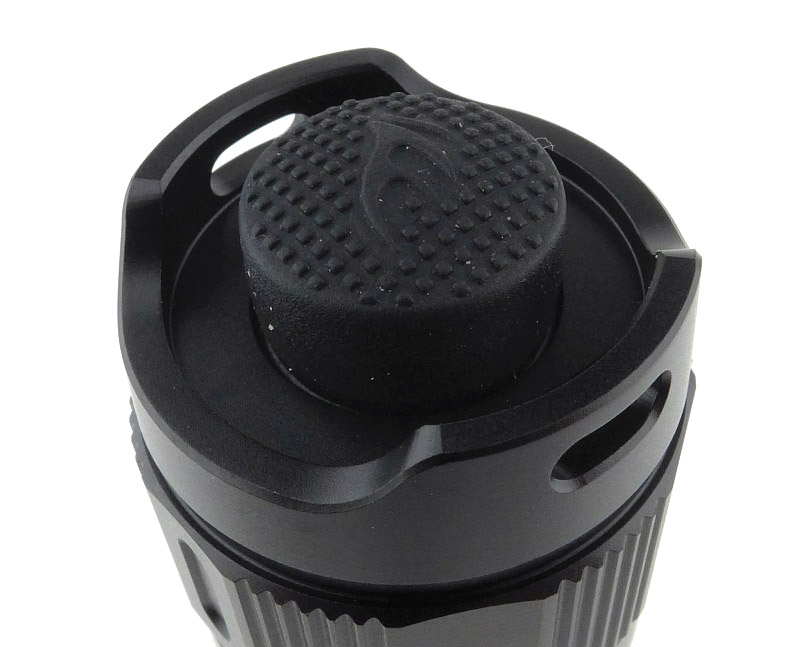
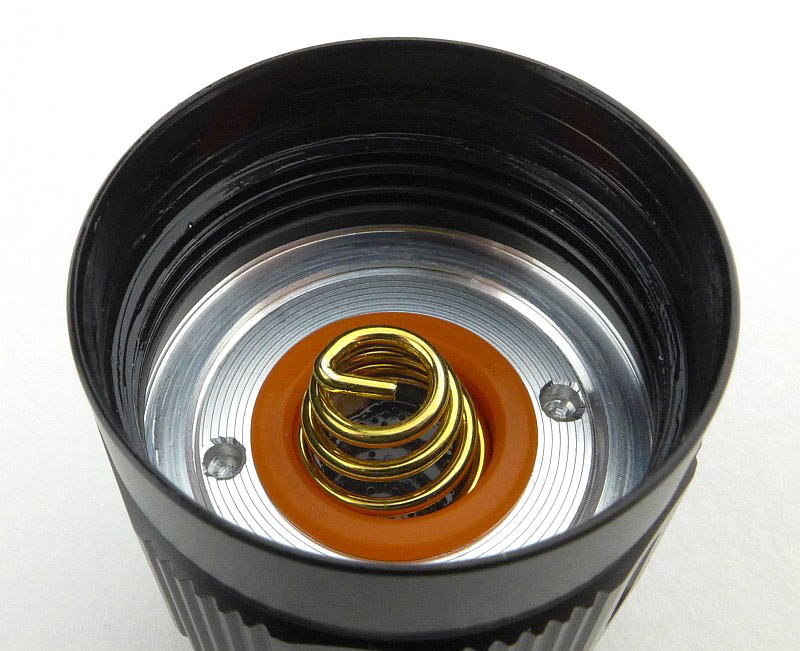
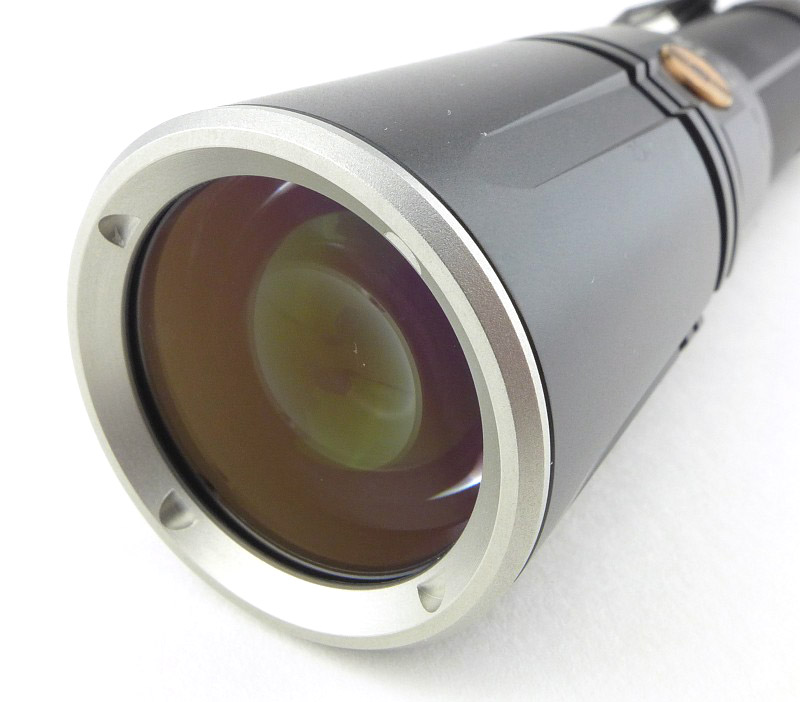
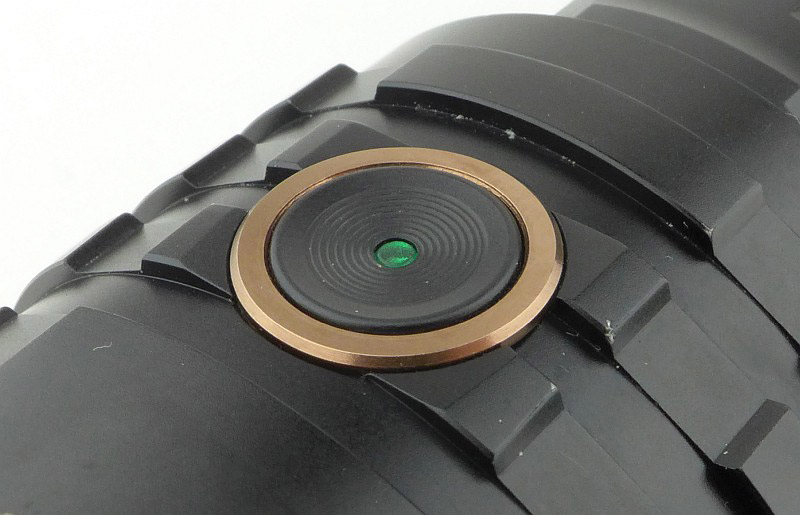
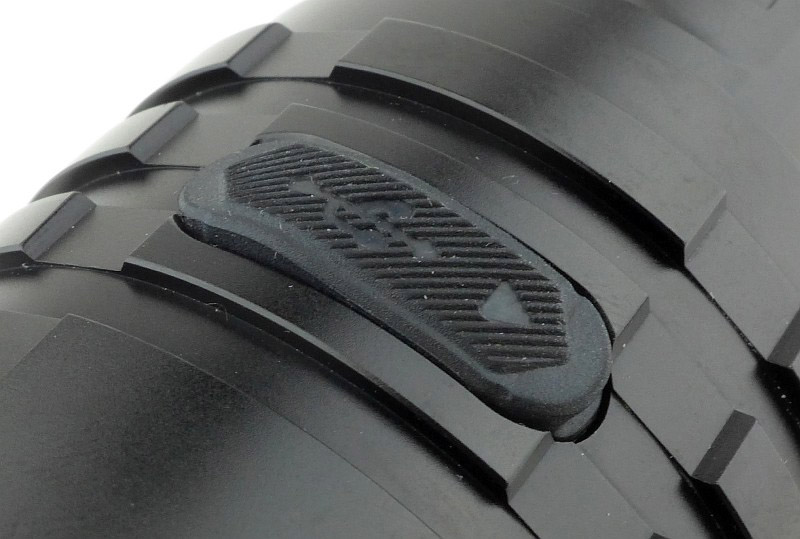
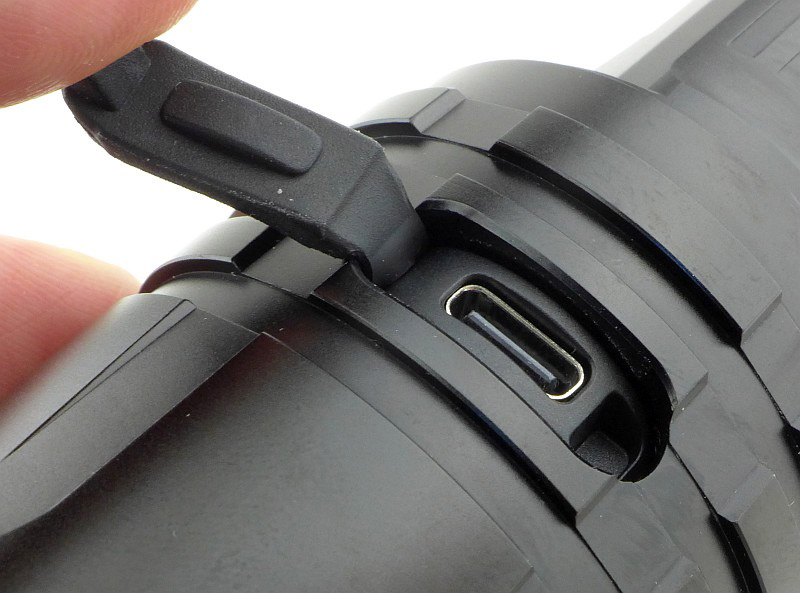
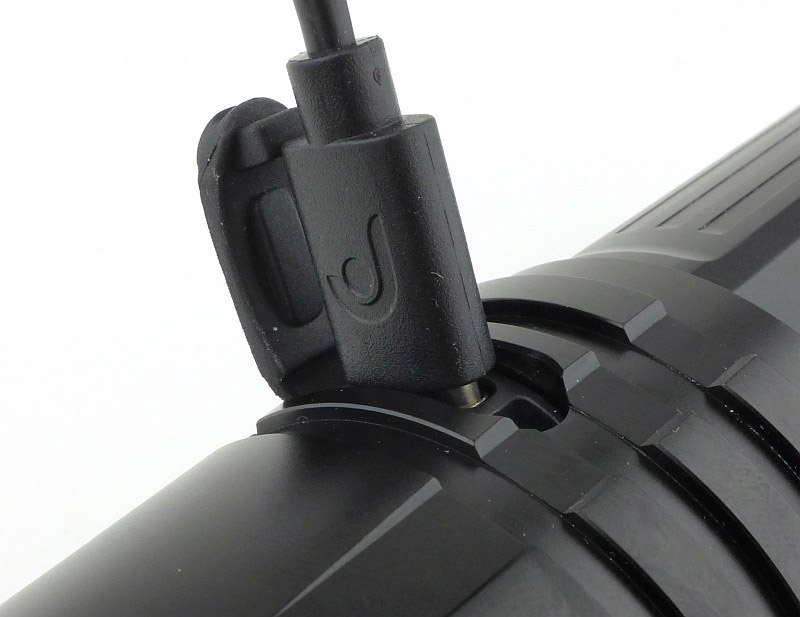
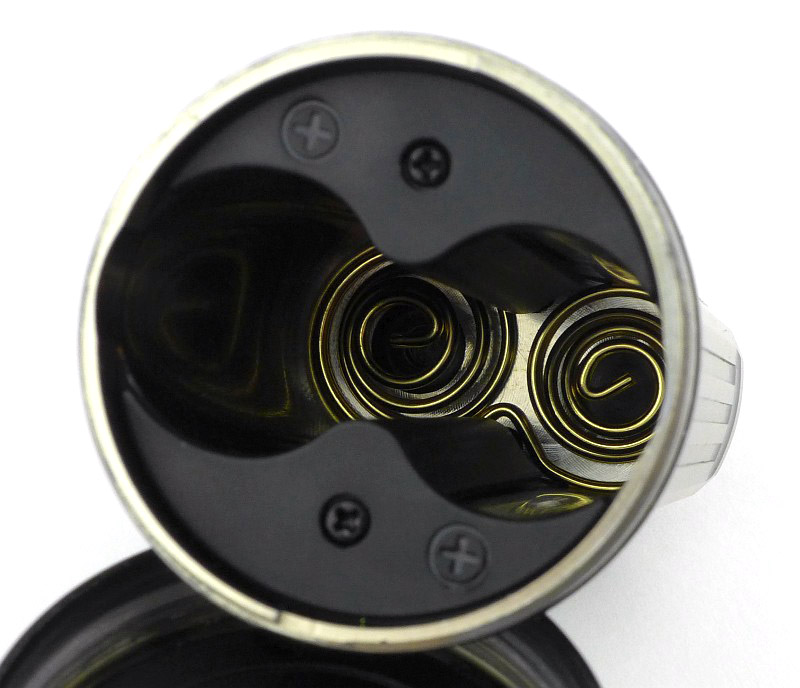
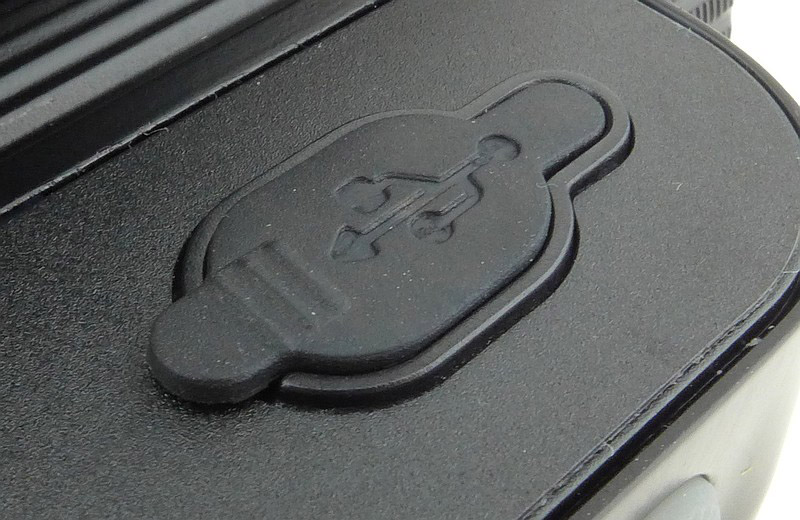
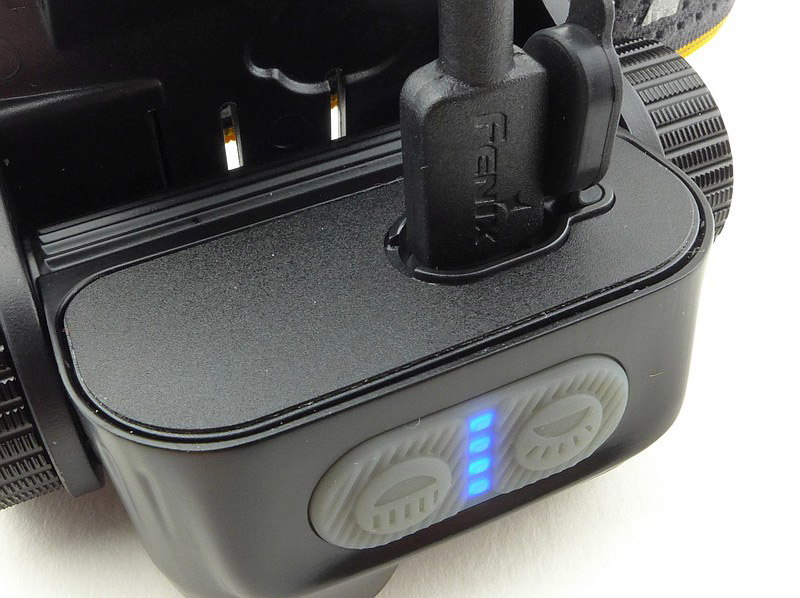
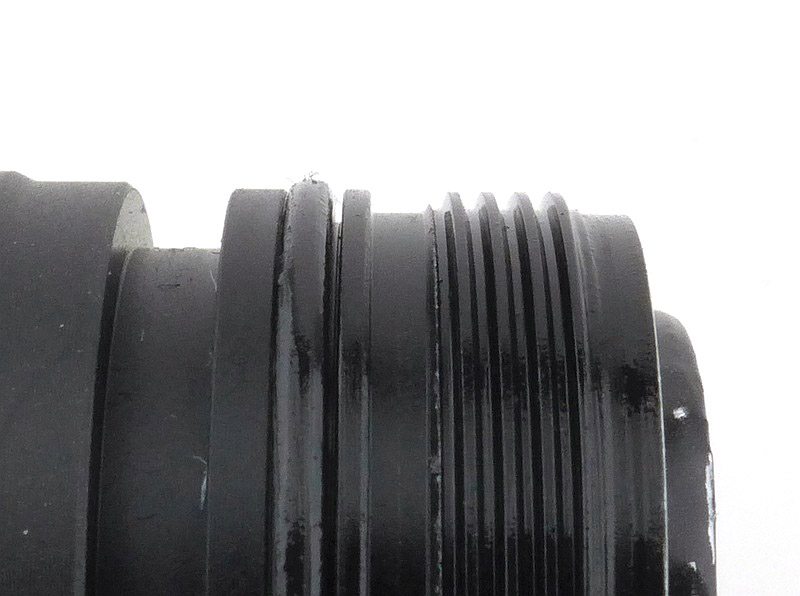
The smaller of the two models on test here (based around an 18650), the EDC33 is a straight tube layout with generous size pocket clip. A set of four battery charge level indicator lights sit just beneath the rotating USB-C port cover. The EDC33 has a sliding toggle lockout switch and a two-stage forward-clicky tailcap switch. The EDC33 uses a NiteLab UHi 20 Max LED.


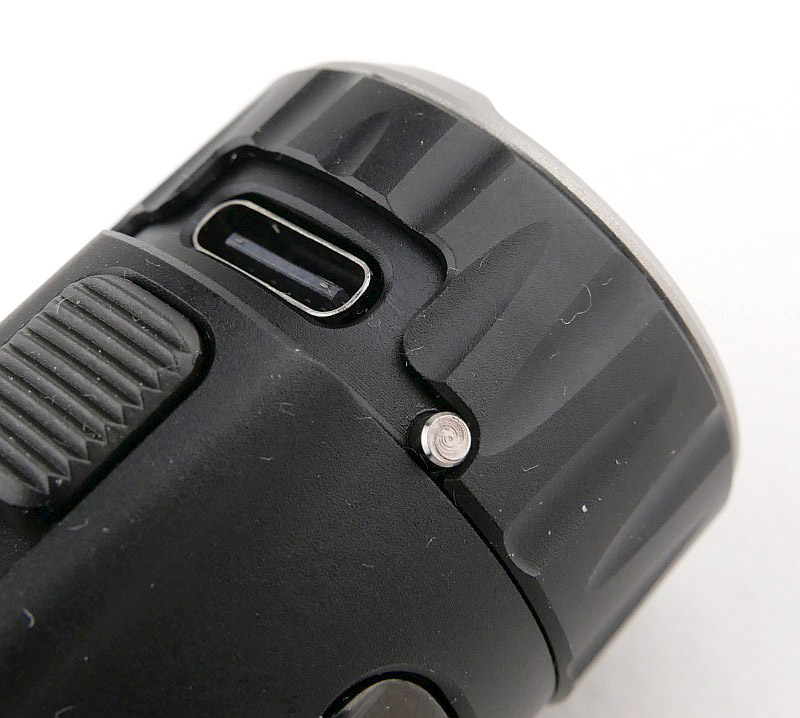
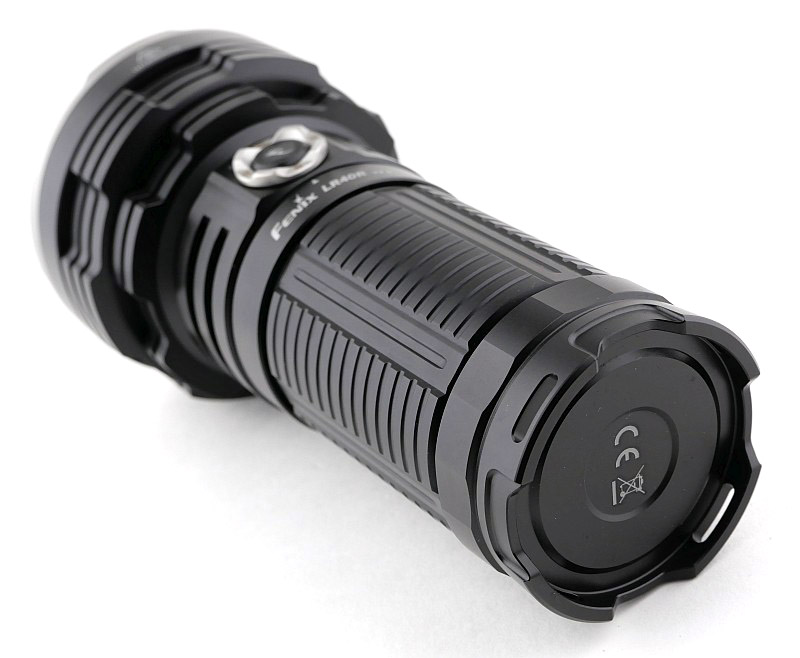
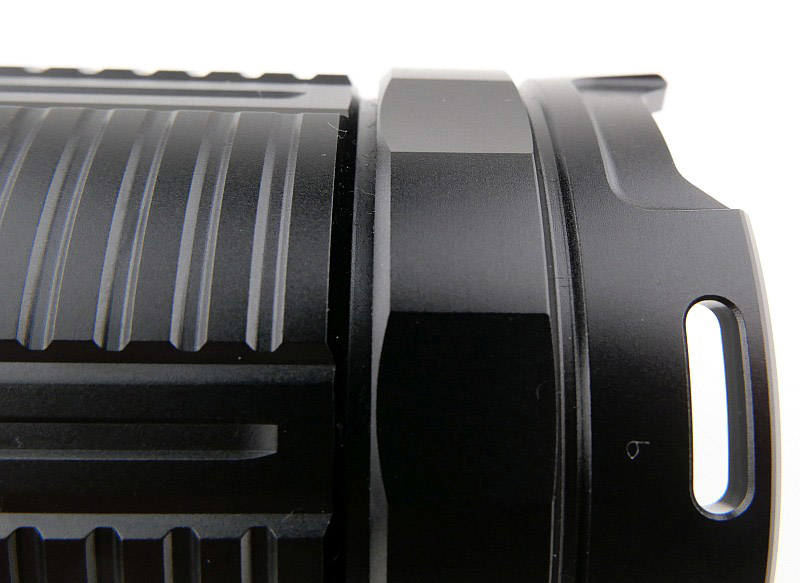
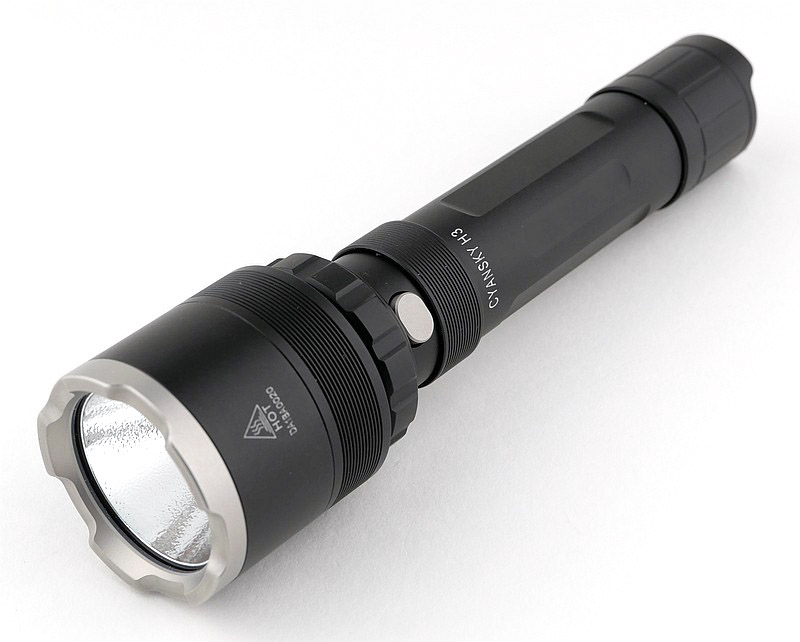
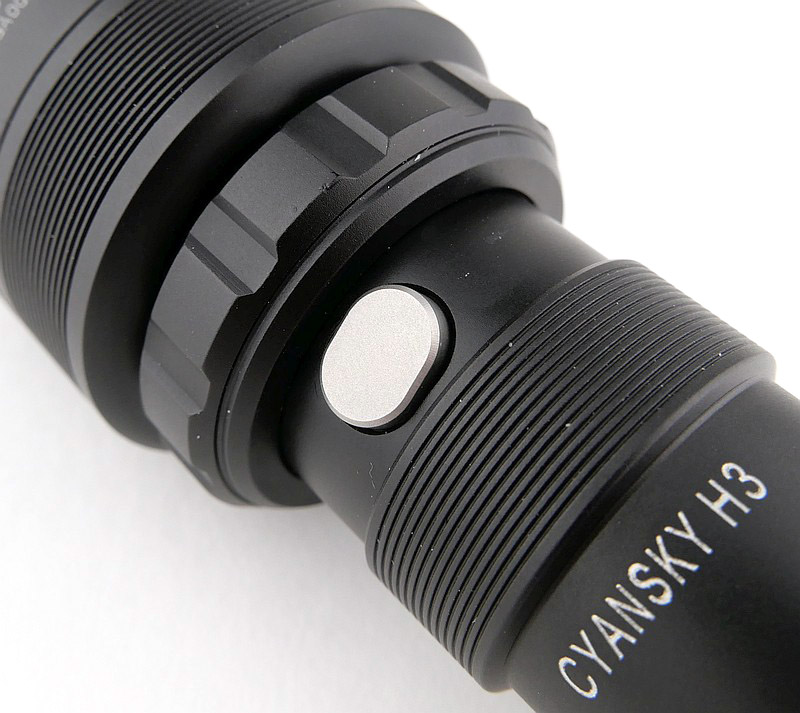
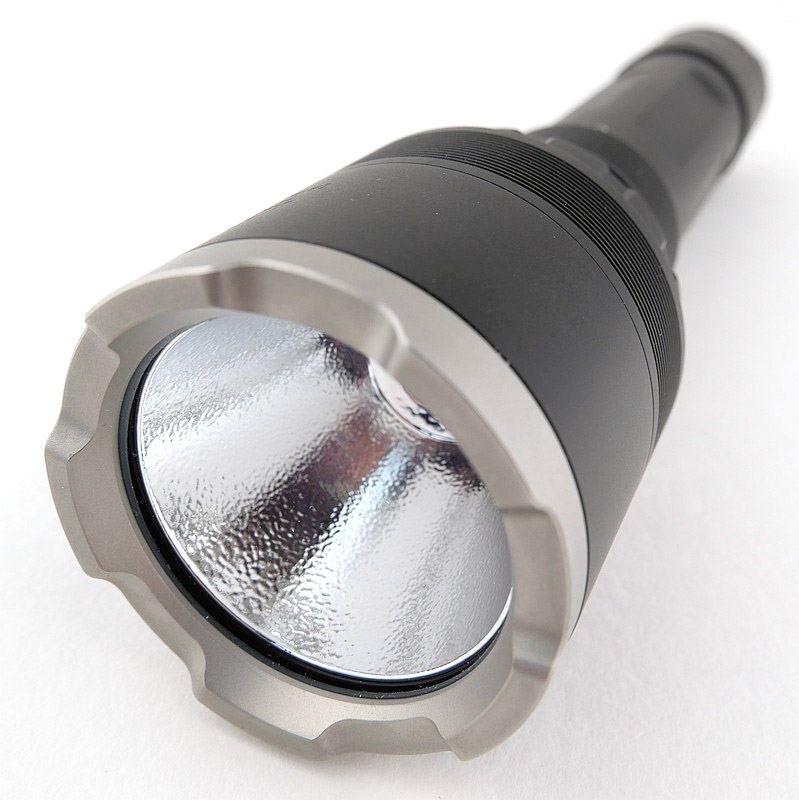
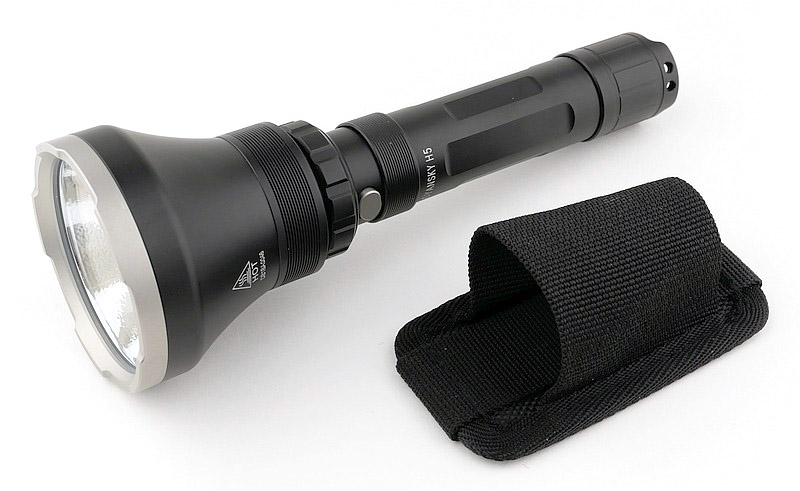
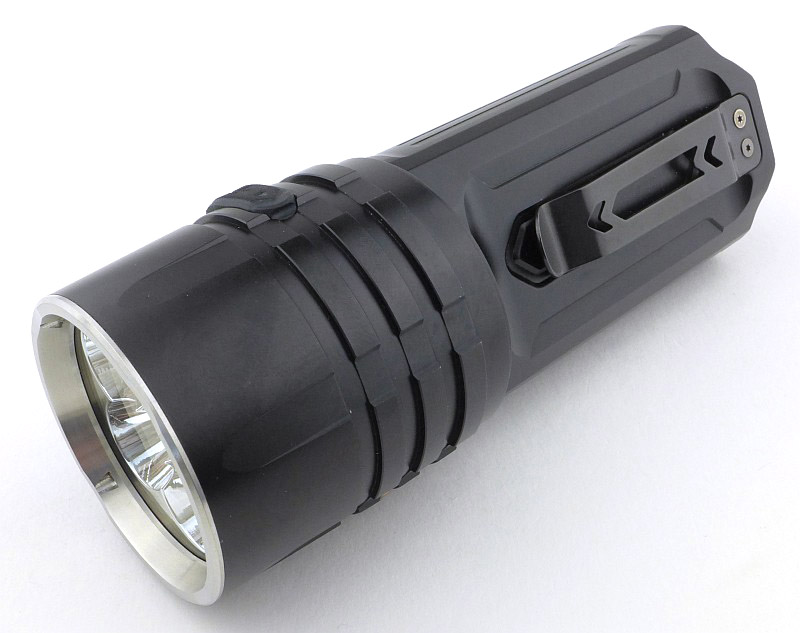
A good look round the EDC35 – Things to look out for here are:
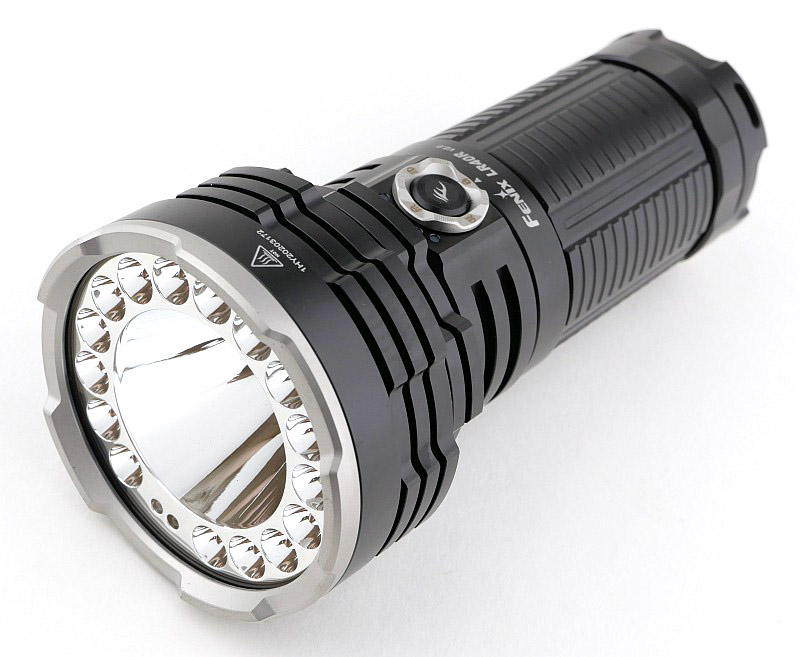
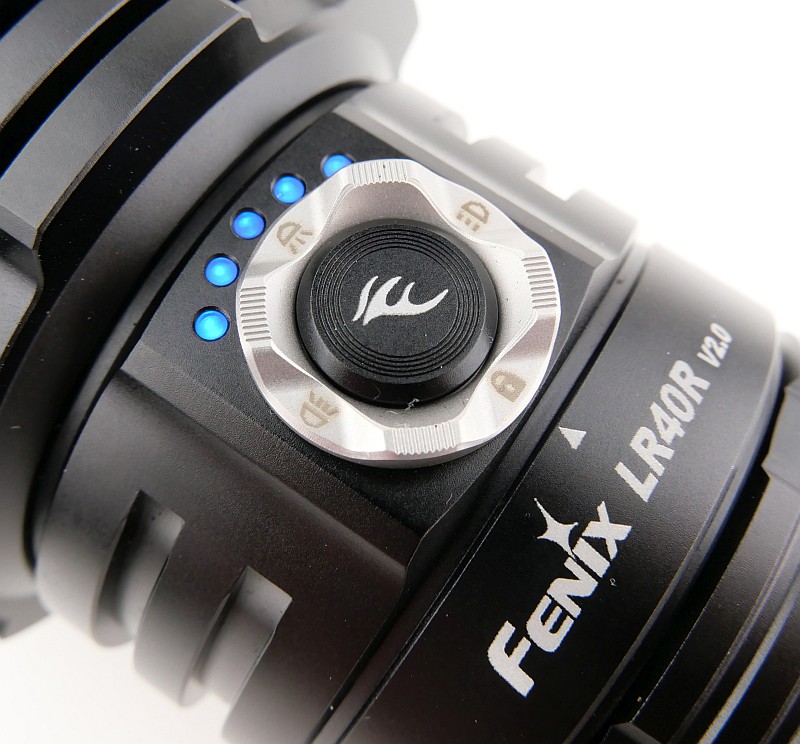
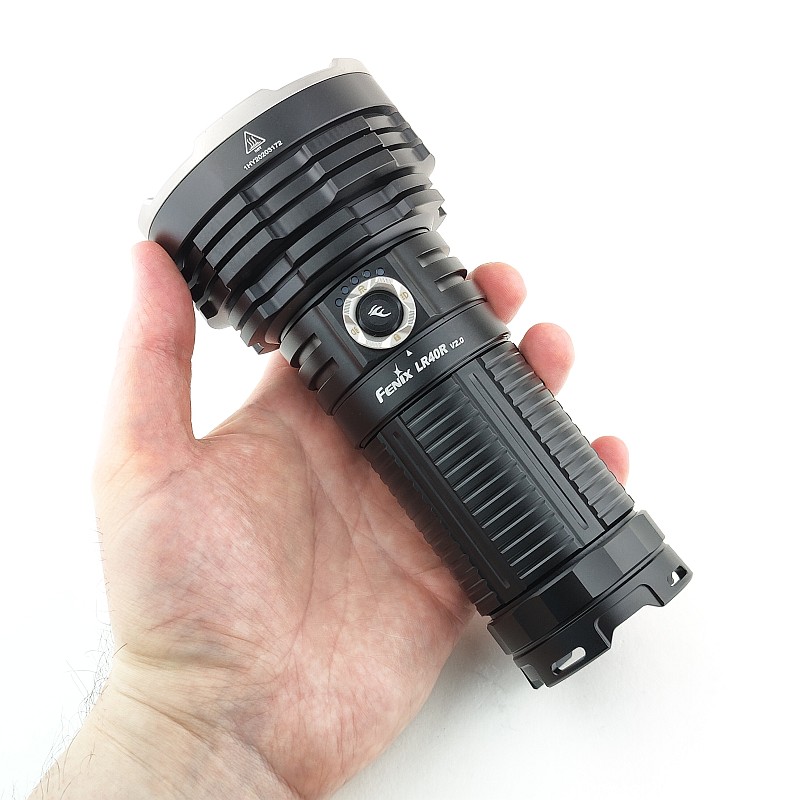
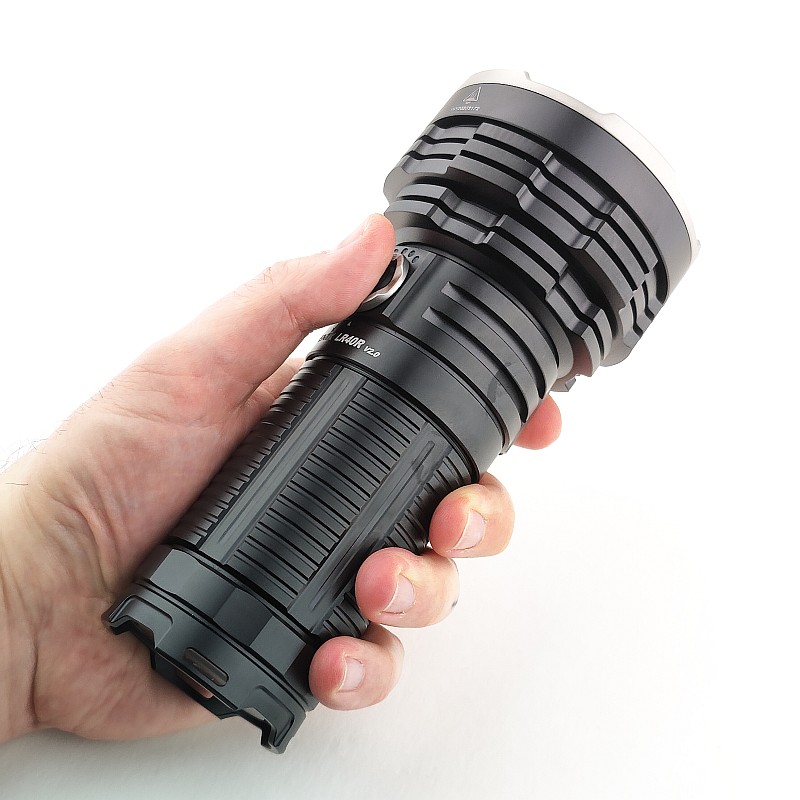
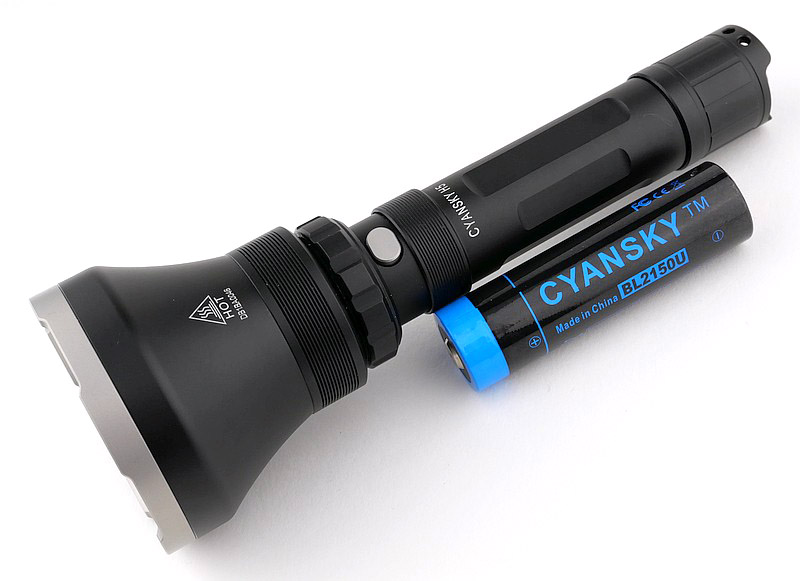
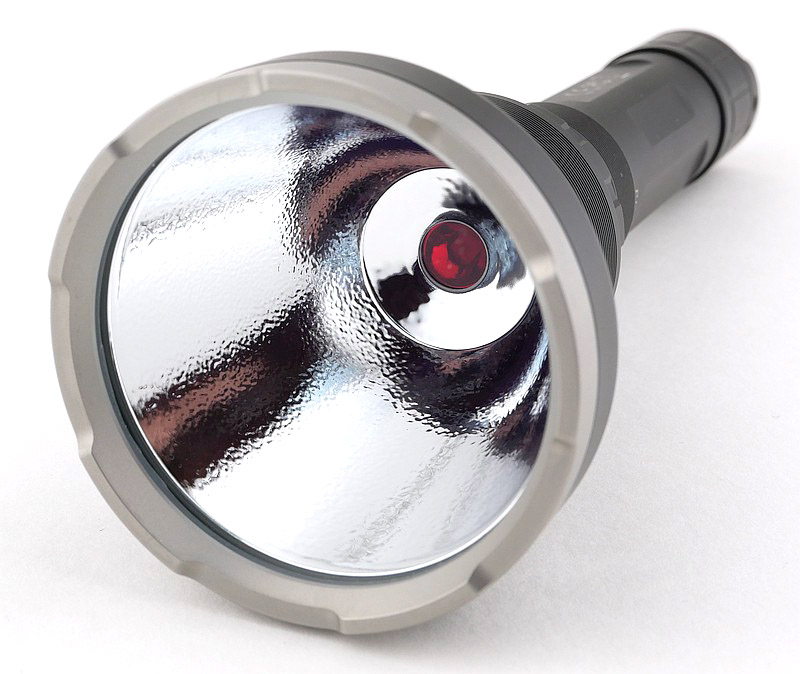
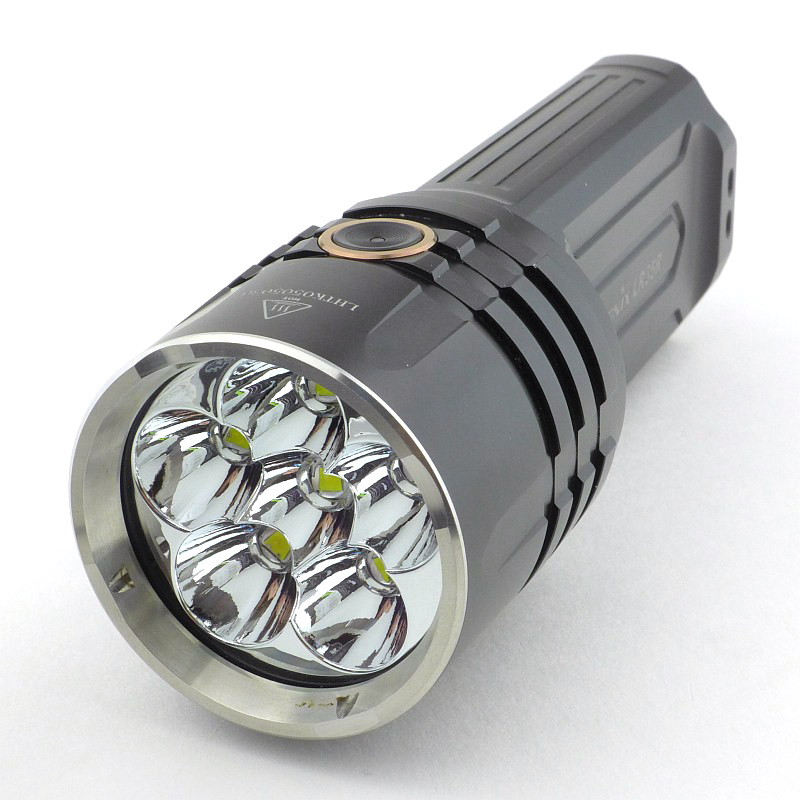
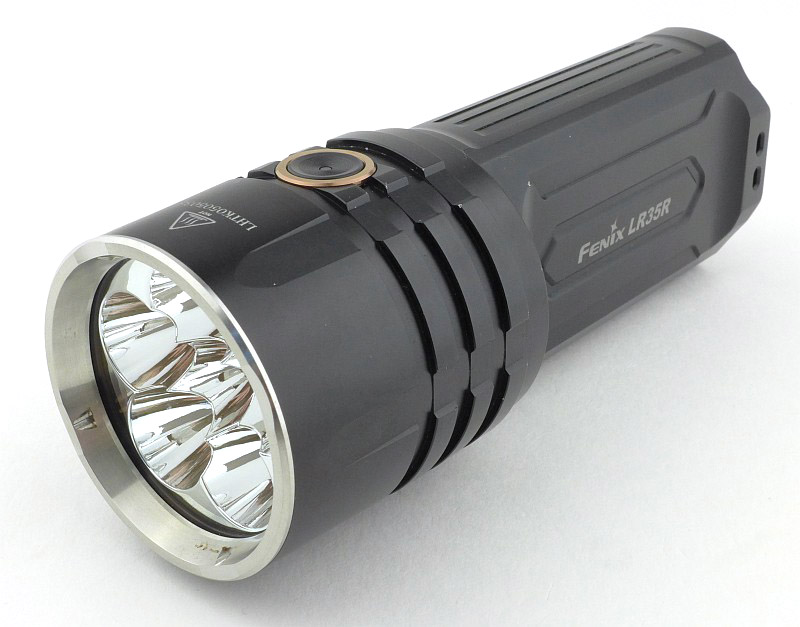
The larger of the two models on test here (based around an 21700), the EDC35 has a head larger than the body to allow for a bigger reflector to accommodate the higher output, and also includes a generous size pocket clip. A set of four battery charge level indicator lights sit just beneath the rotating USB-C port cover. The EDC35 also has a sliding toggle lockout switch and a two-stage forward-clicky tailcap switch. The EDC35 uses a NiteLab UHi 40 Max LED.


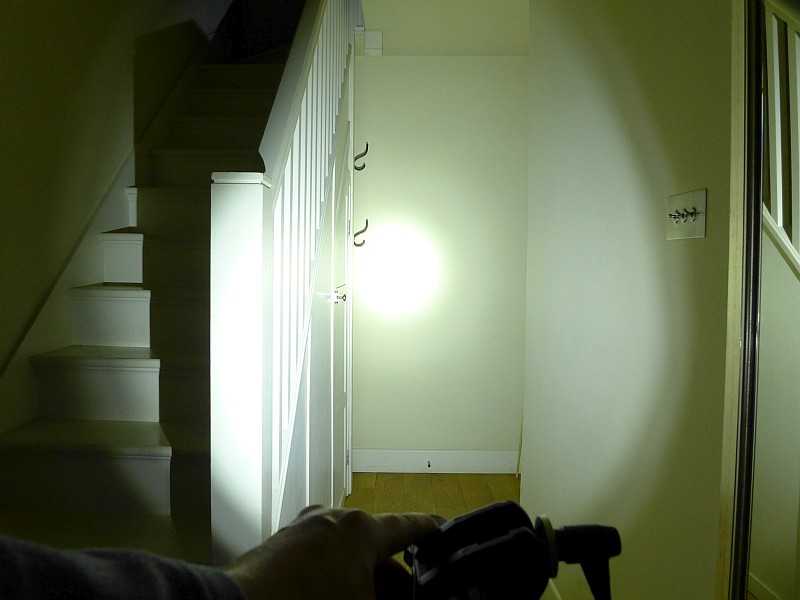
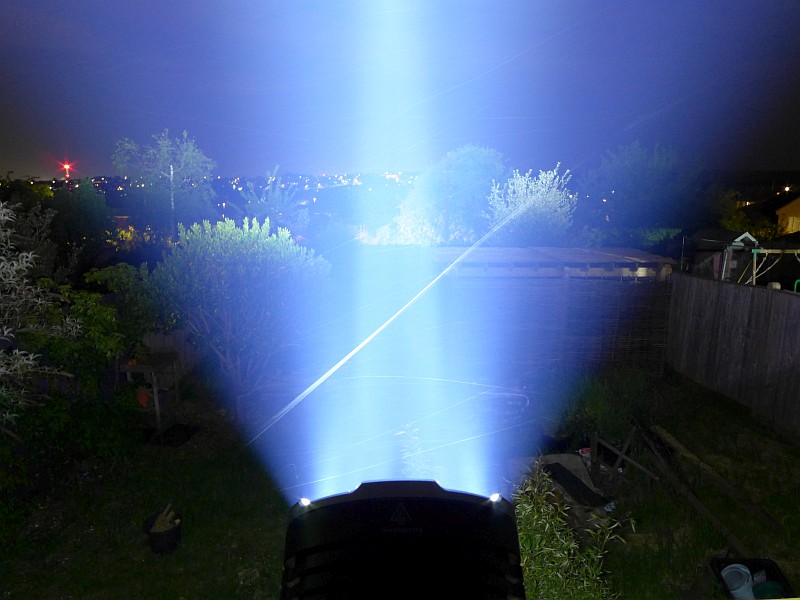
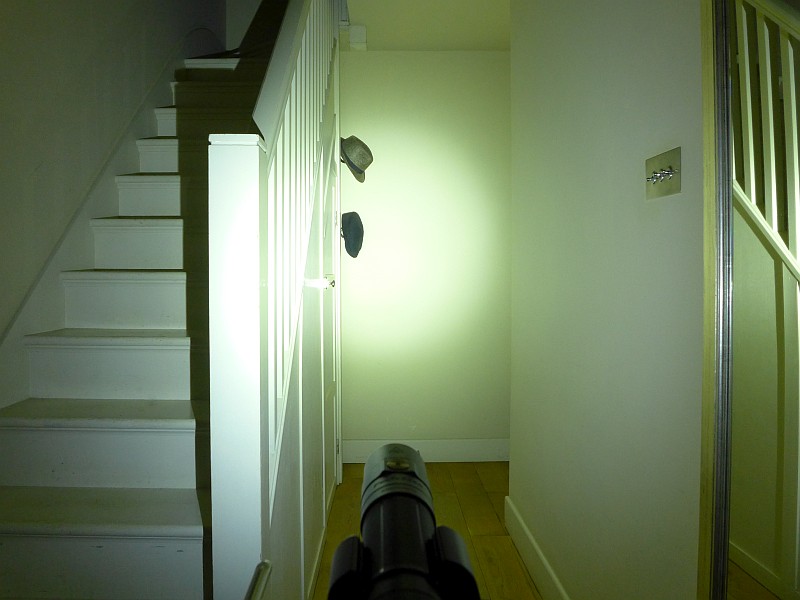
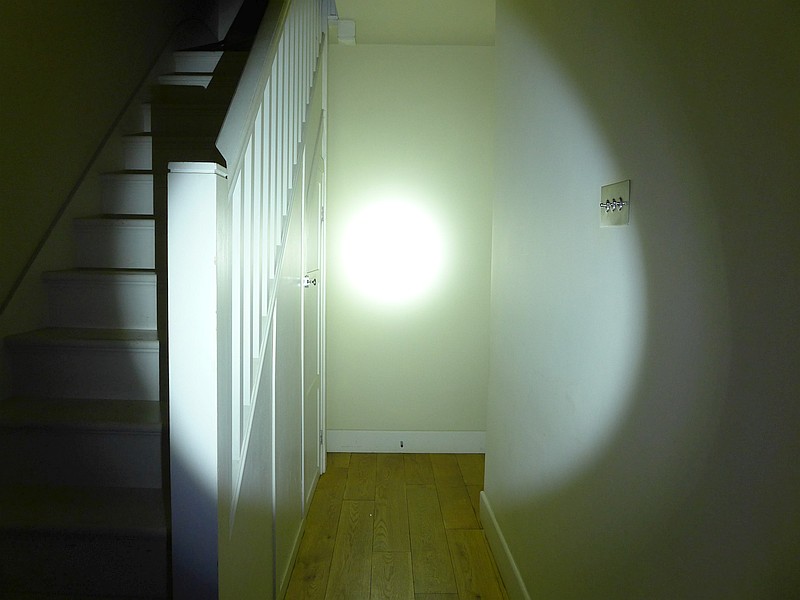
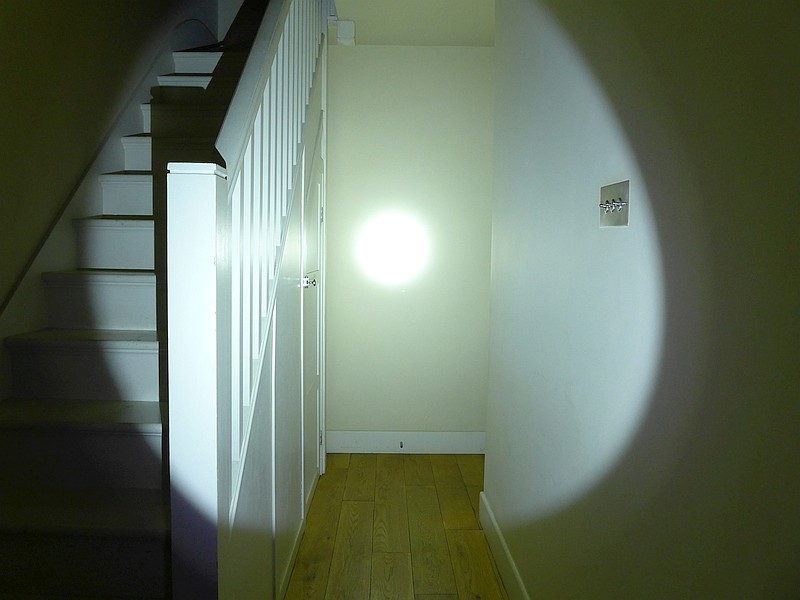
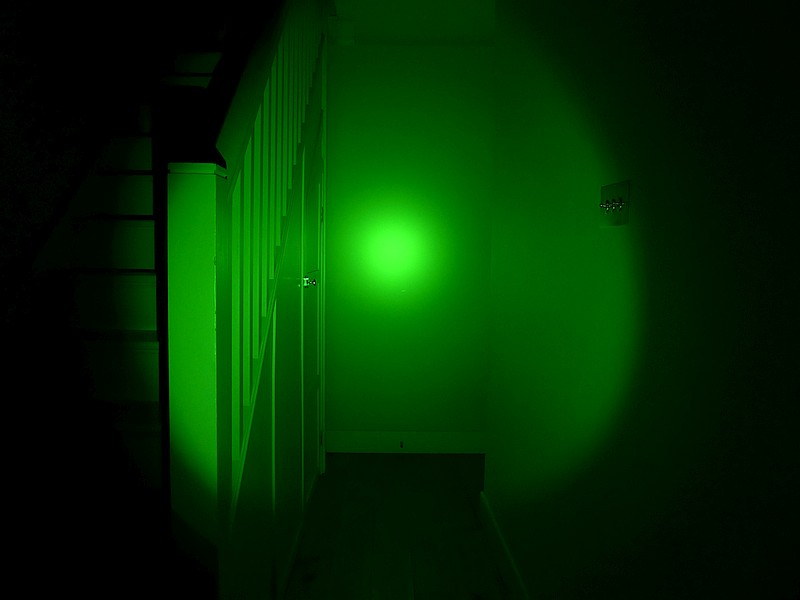
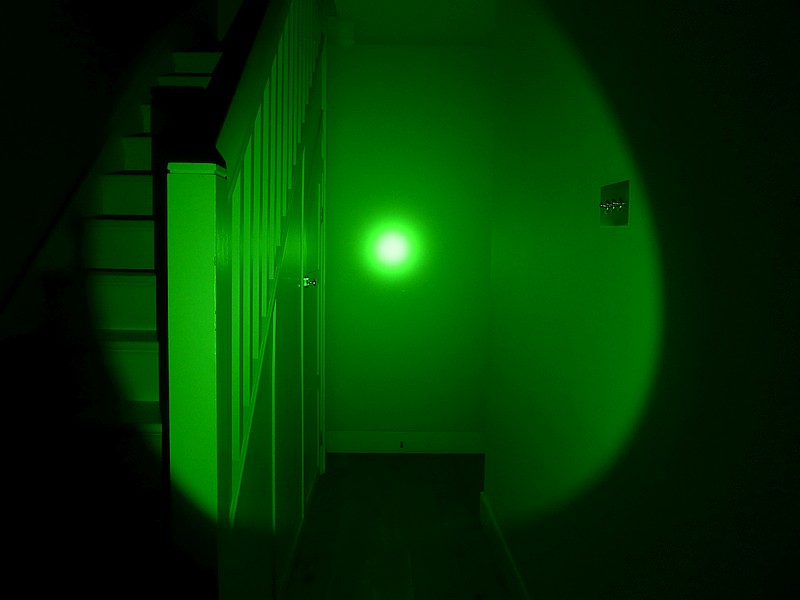
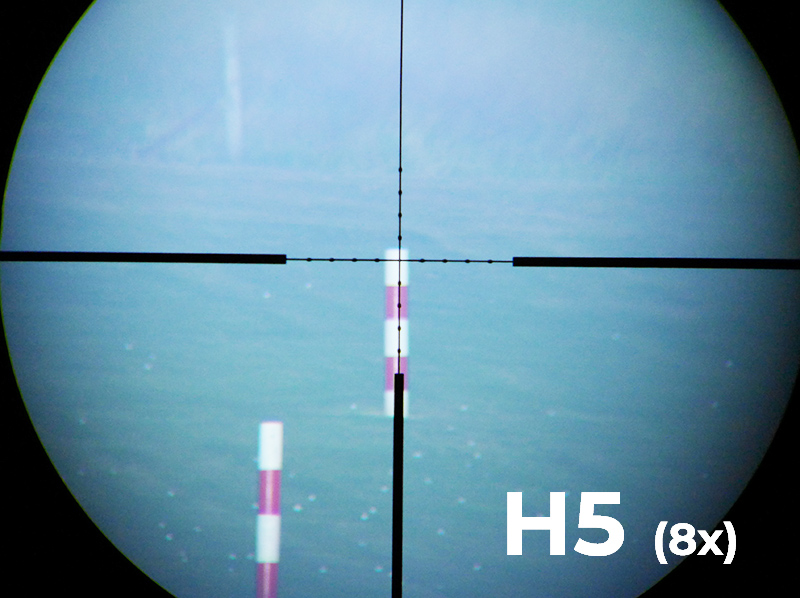
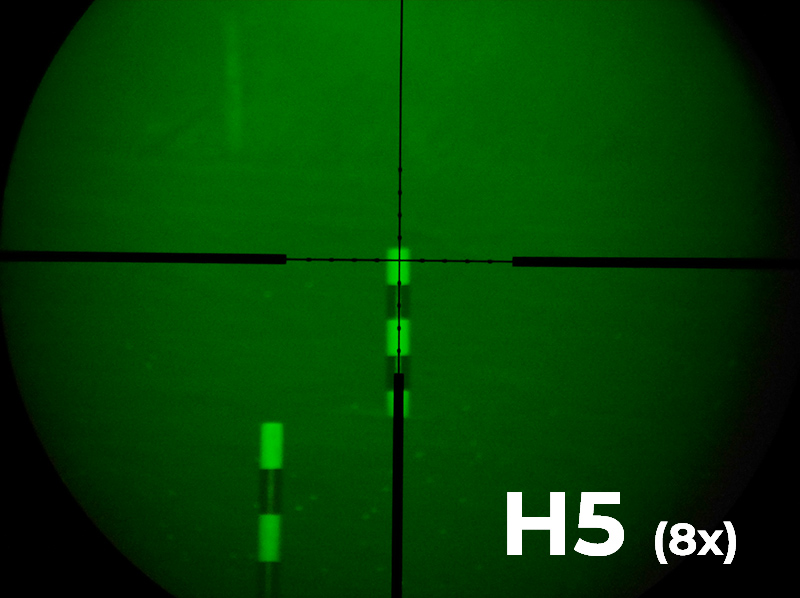
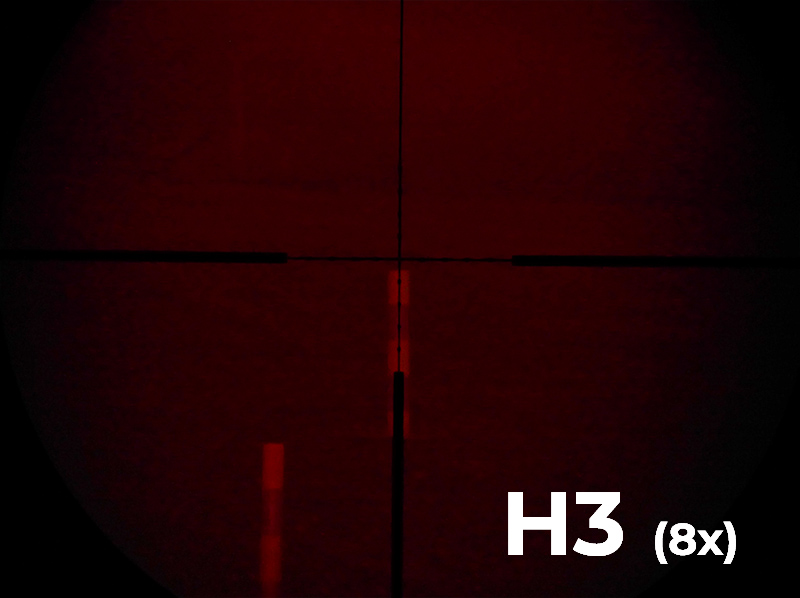
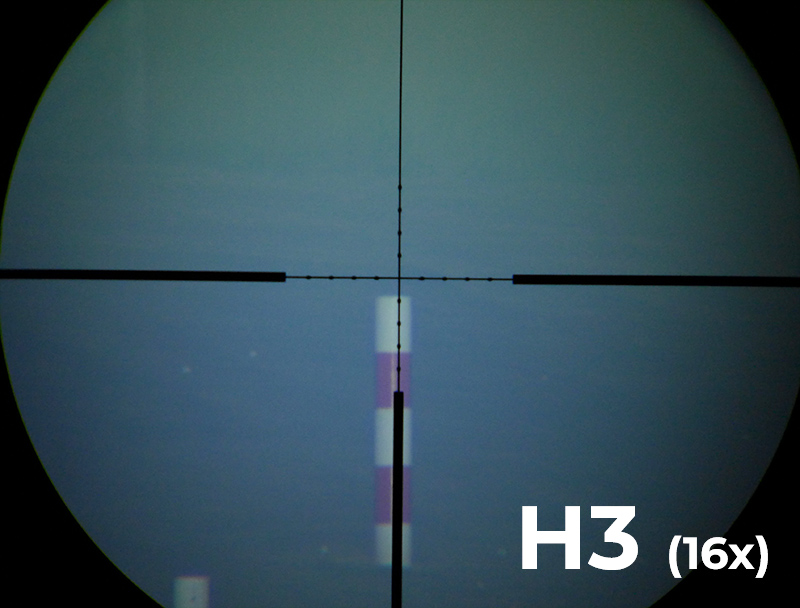
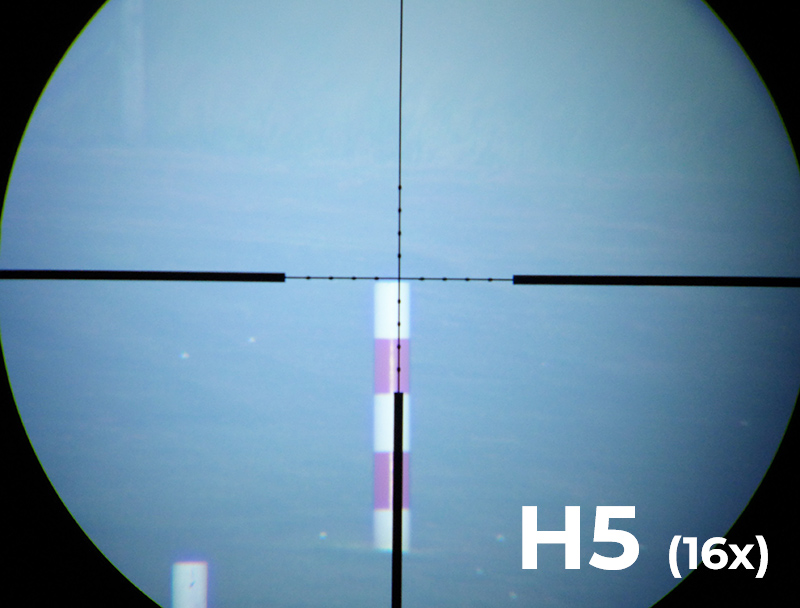
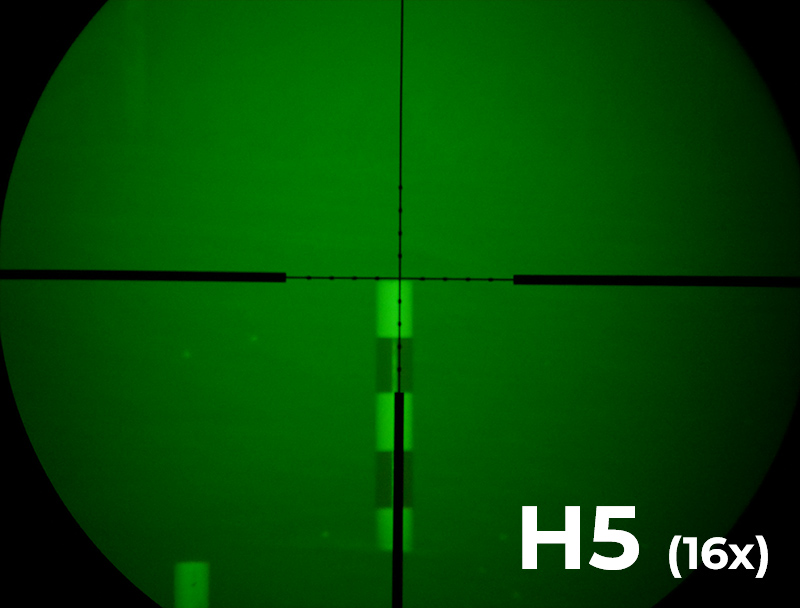
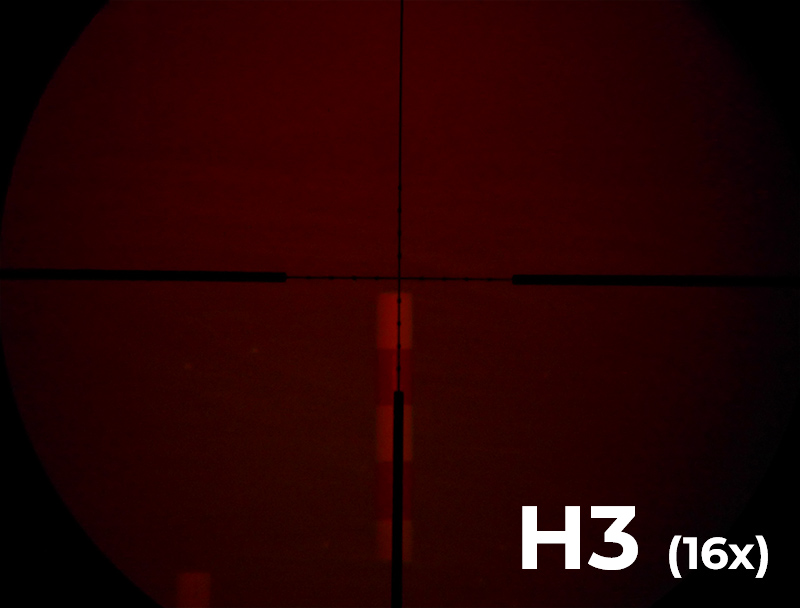
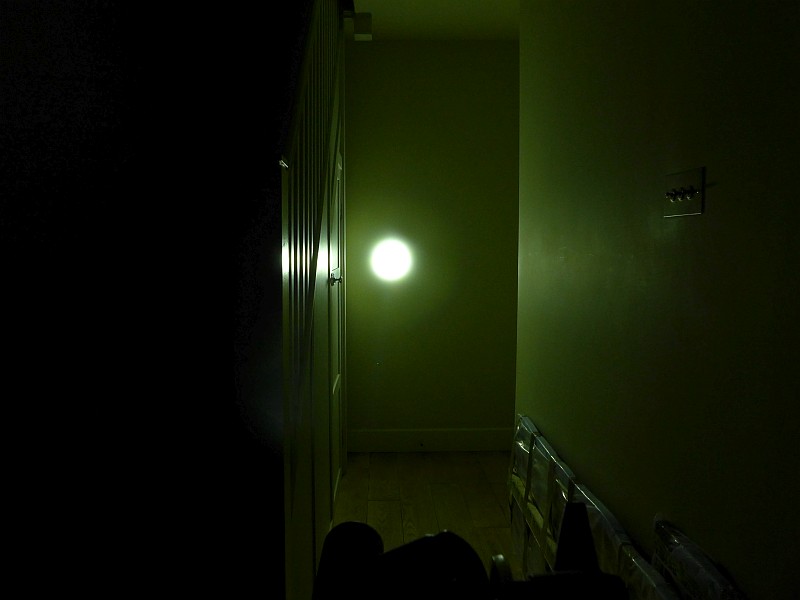
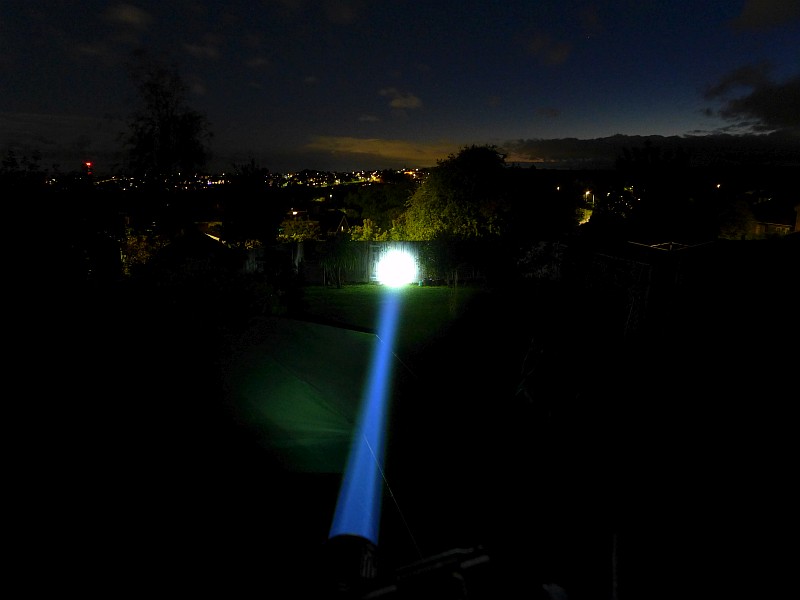
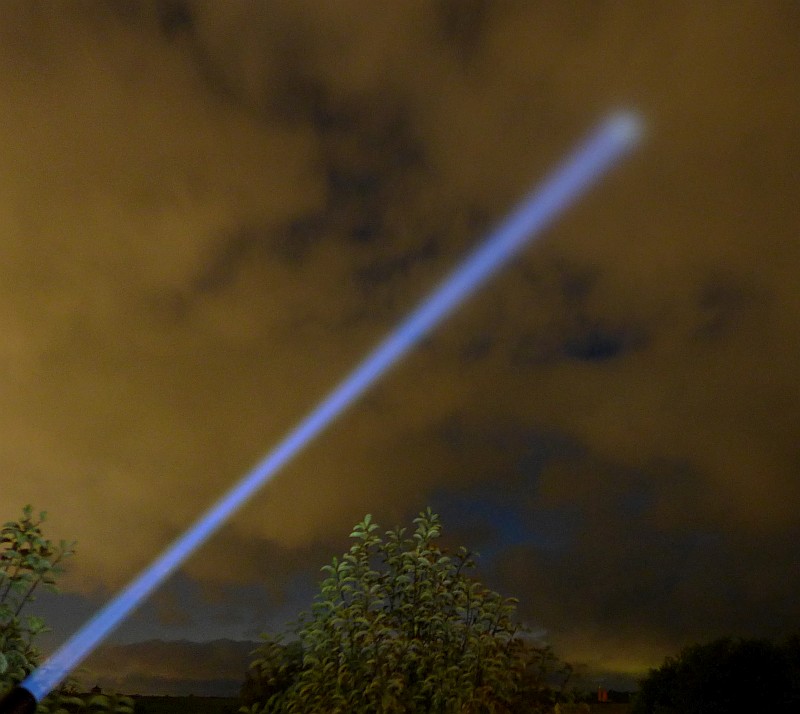
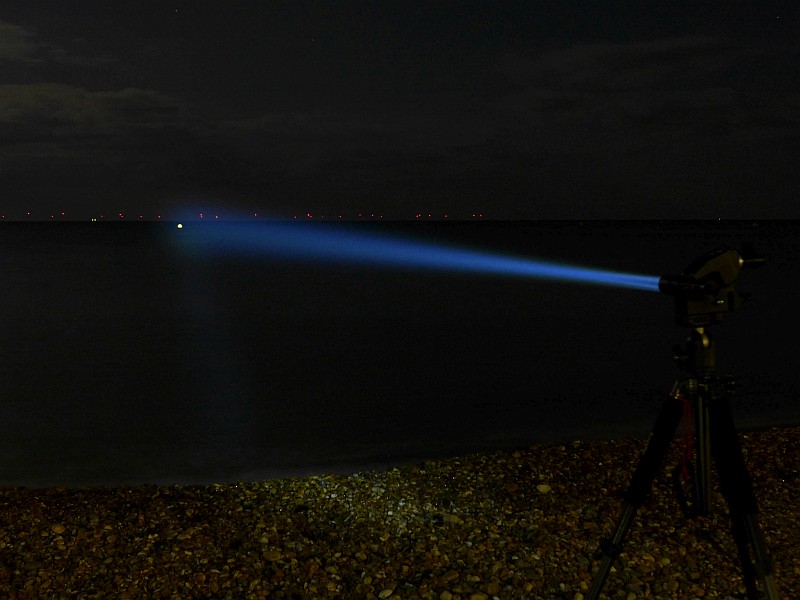
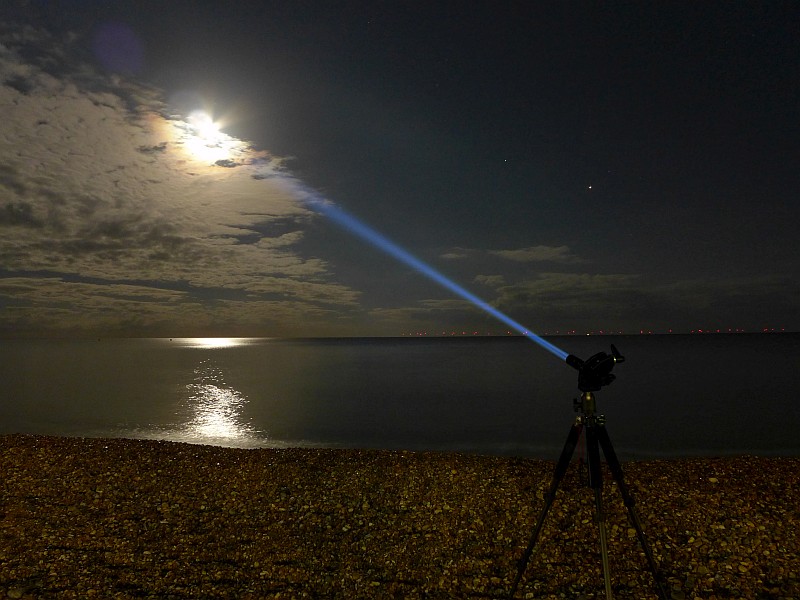
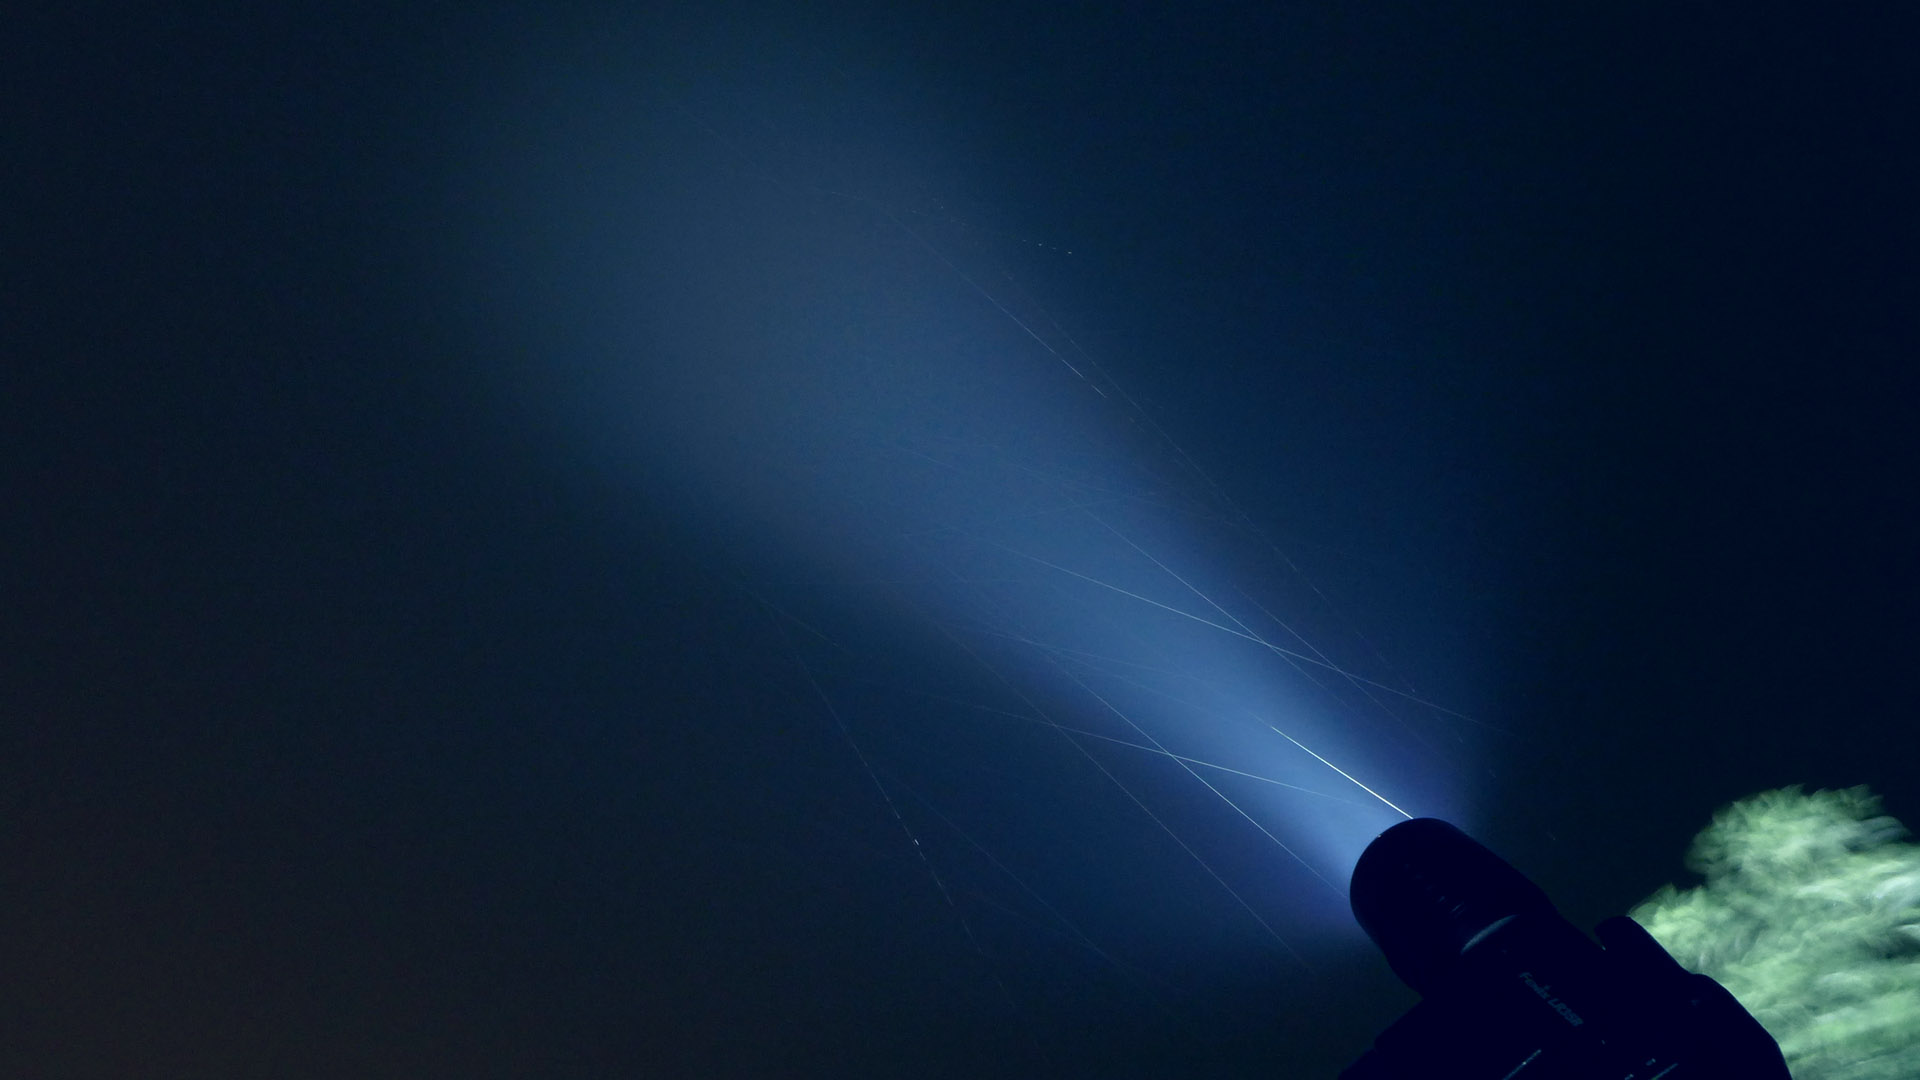
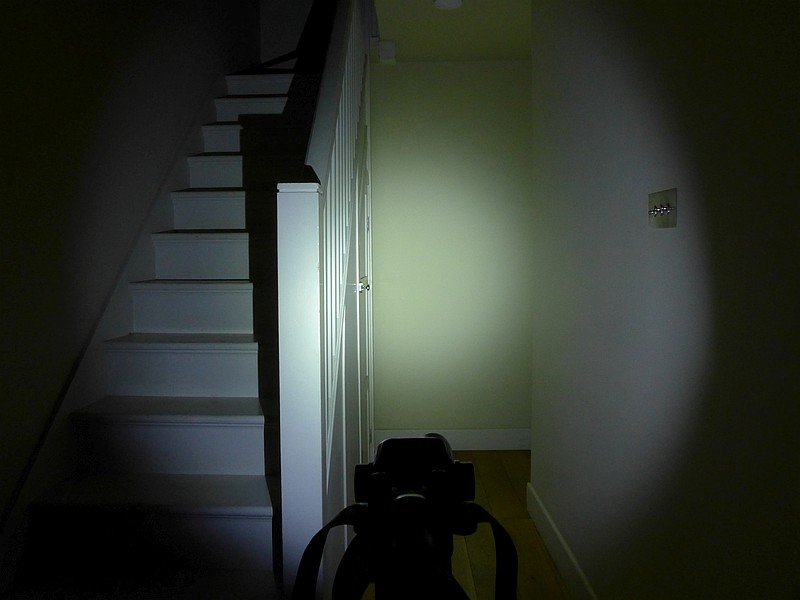
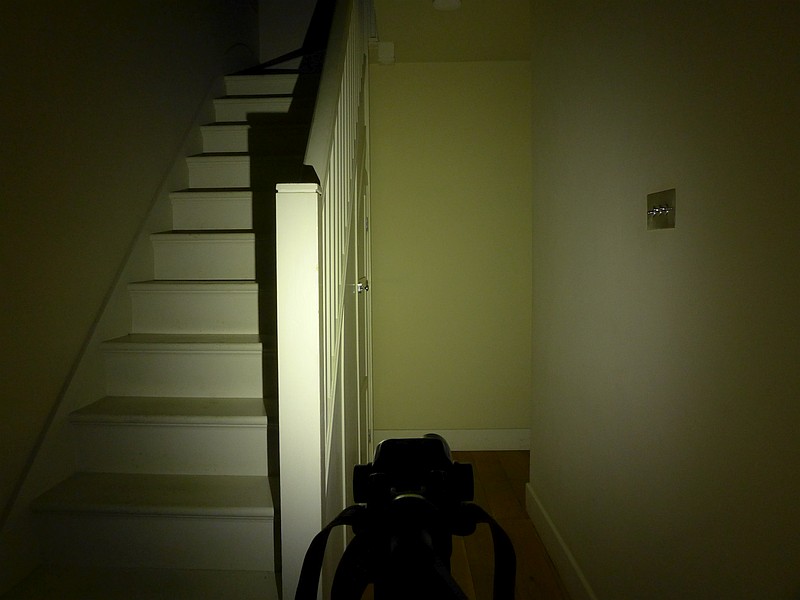
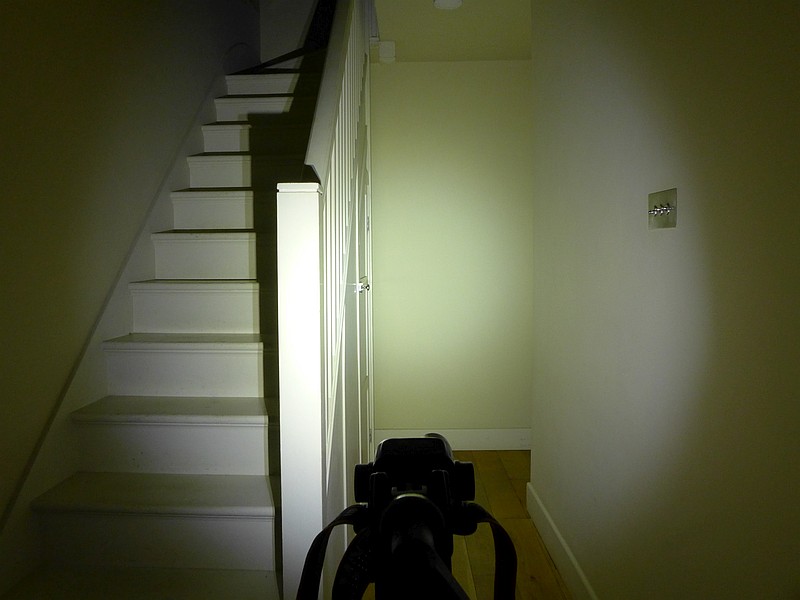
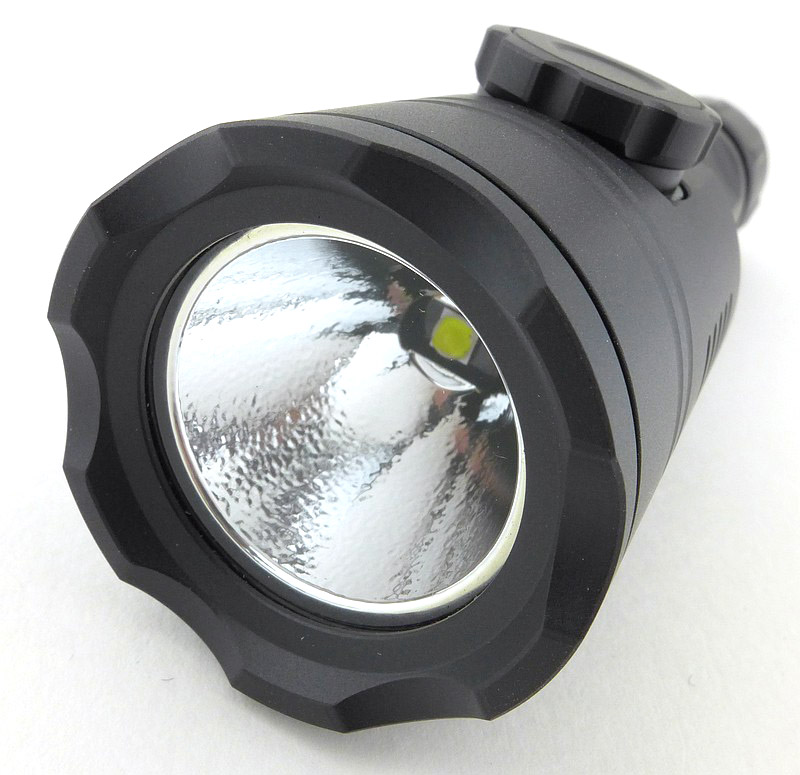
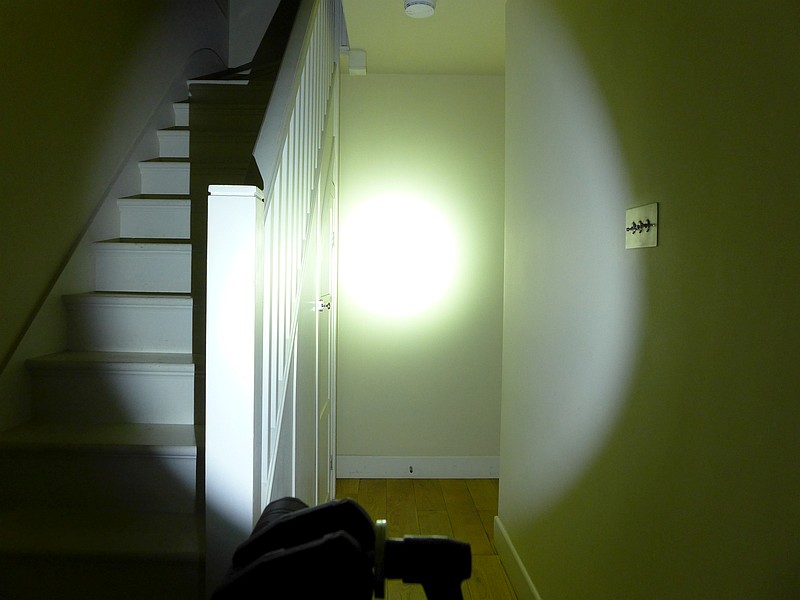
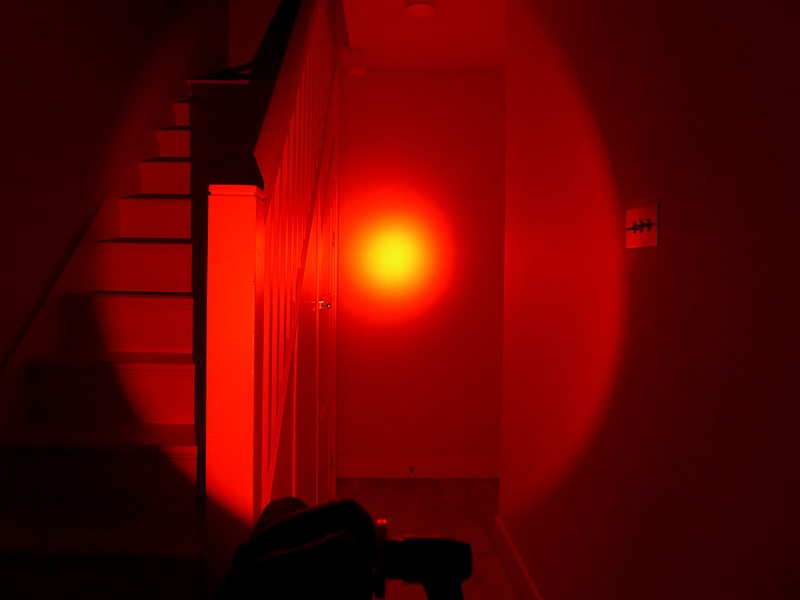
The beam
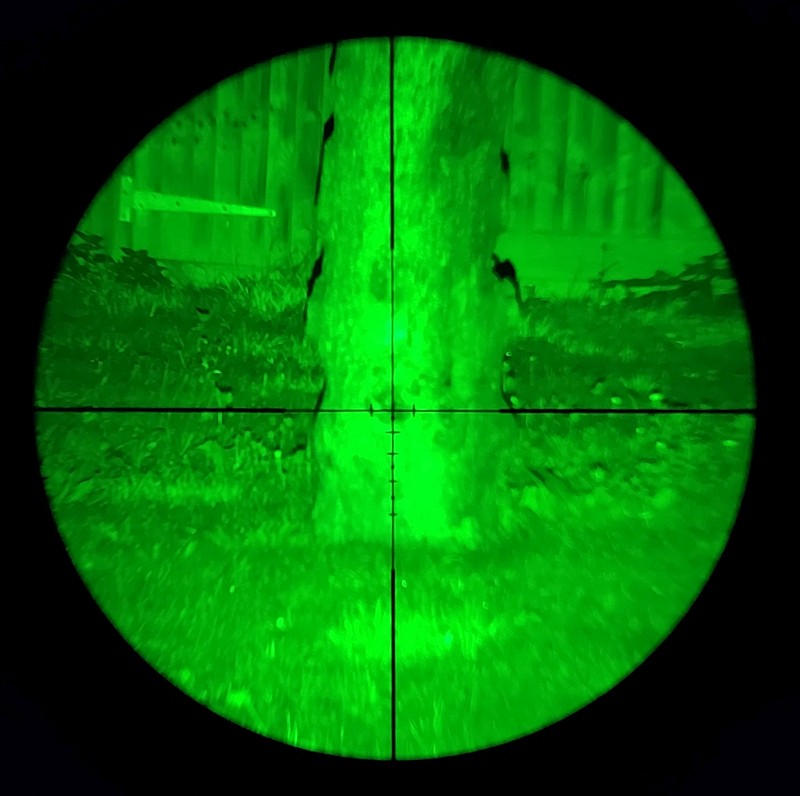
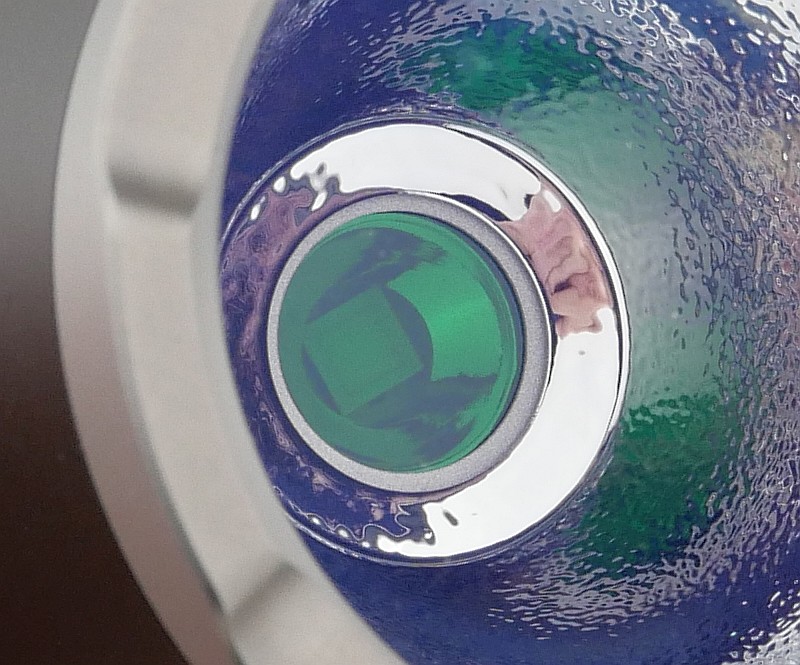
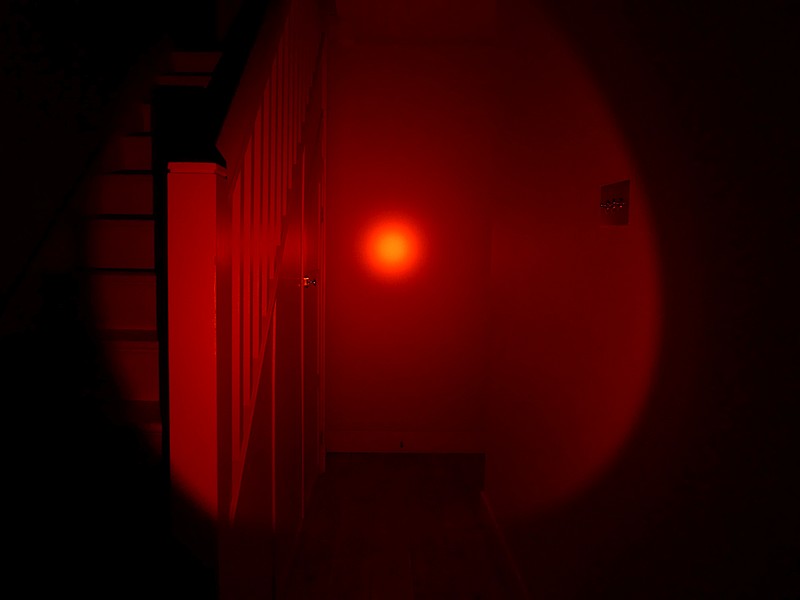
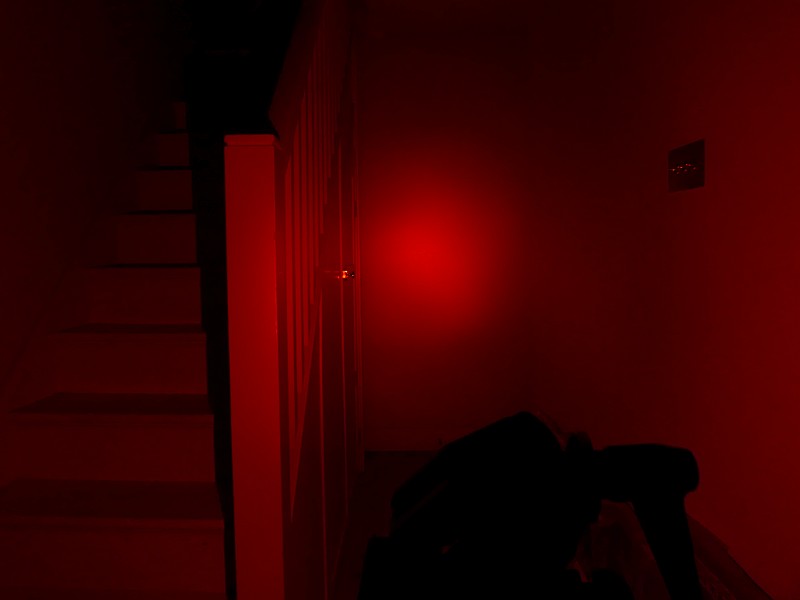
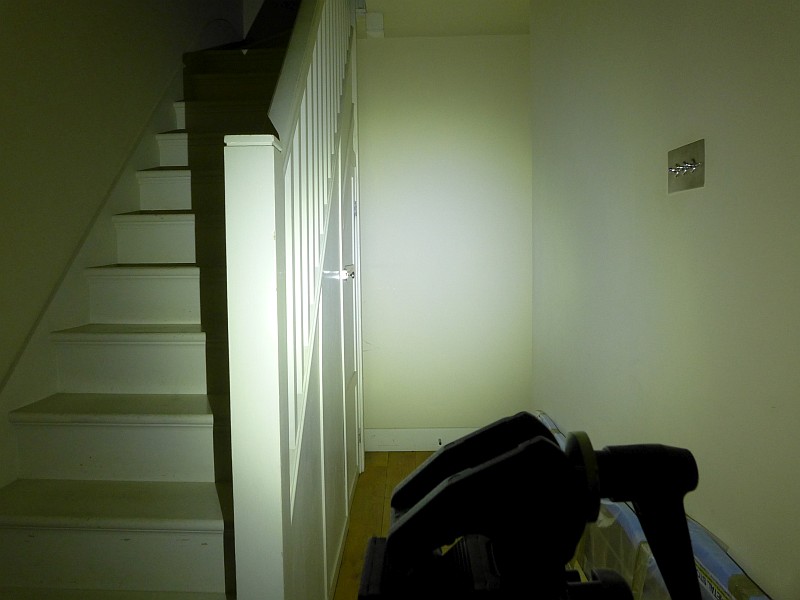
Please be careful not to judge tint based on images you see on a computer screen. Unless properly calibrated, the screen itself will change the perceived tint.
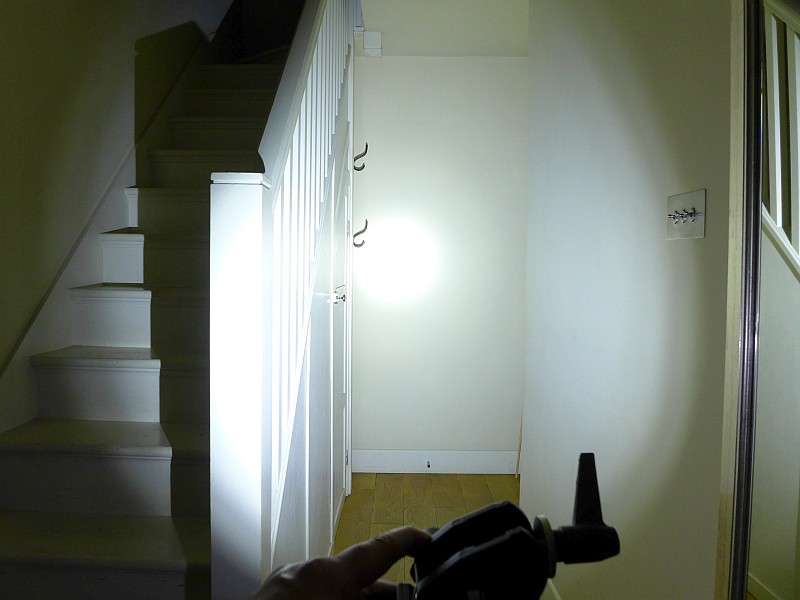
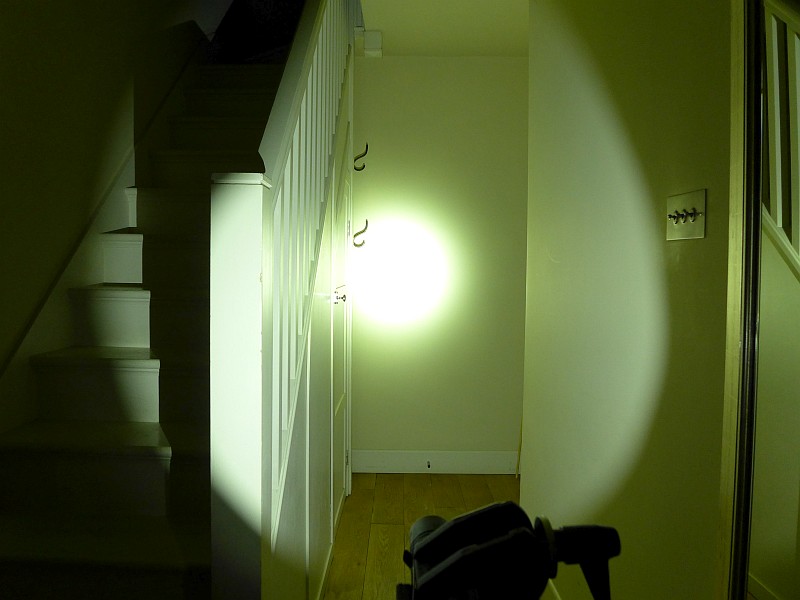
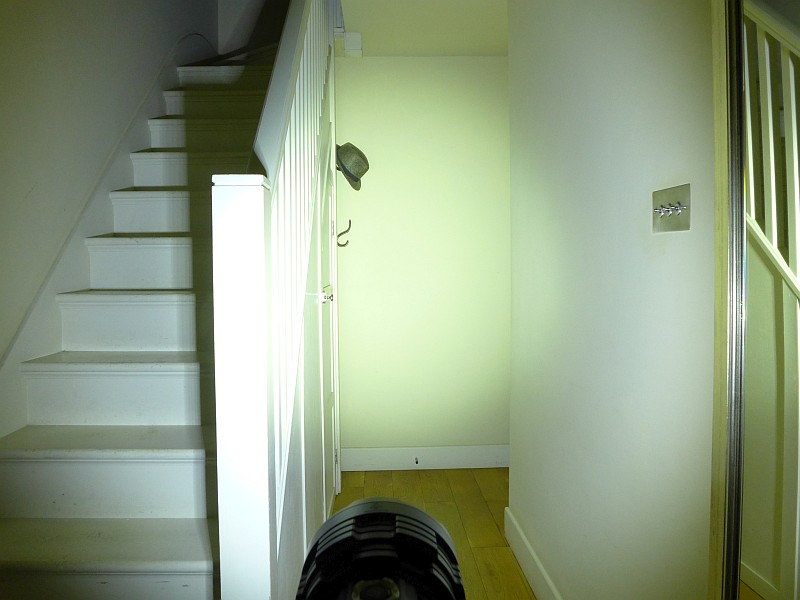
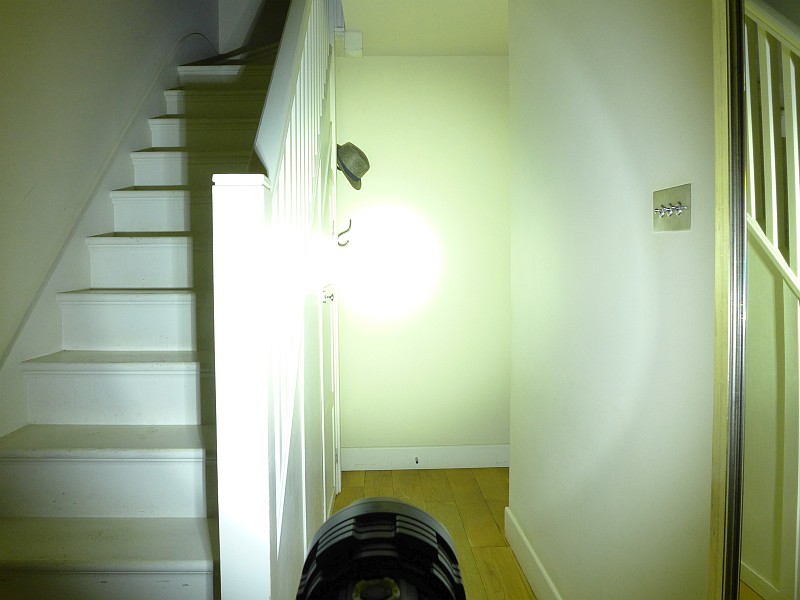
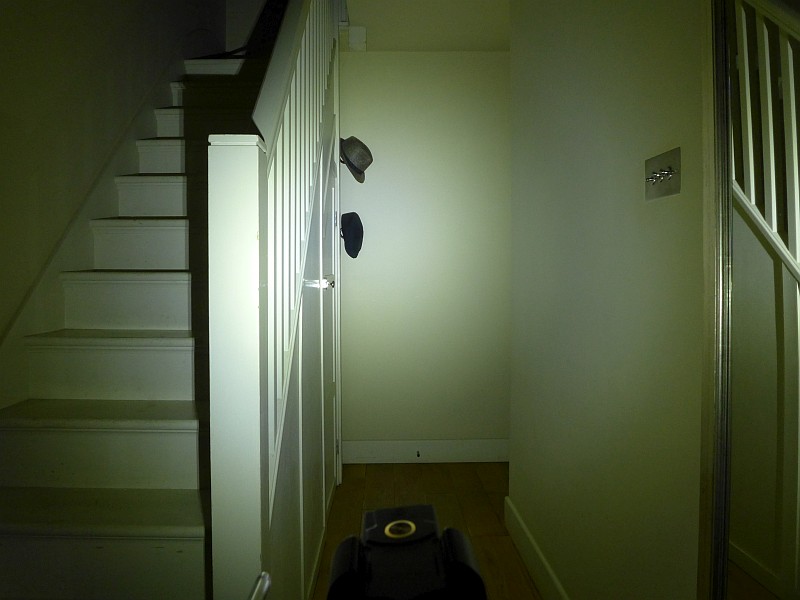
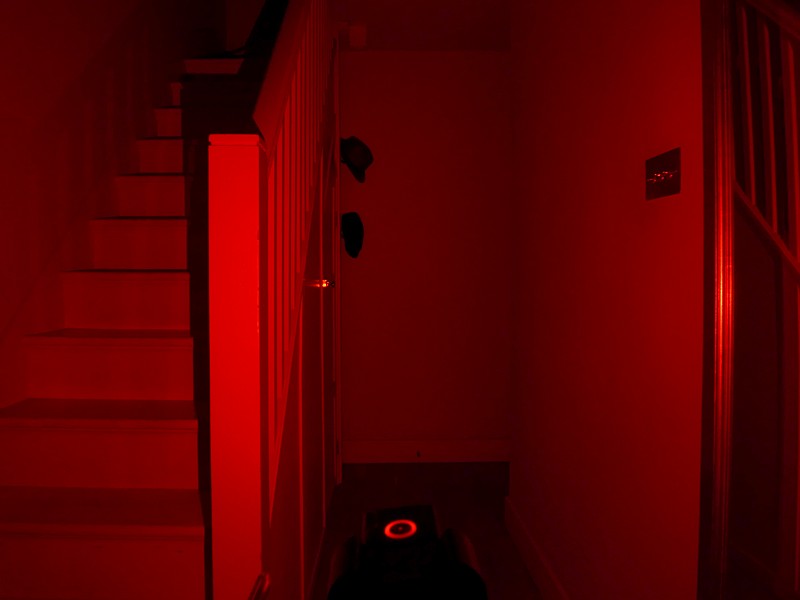
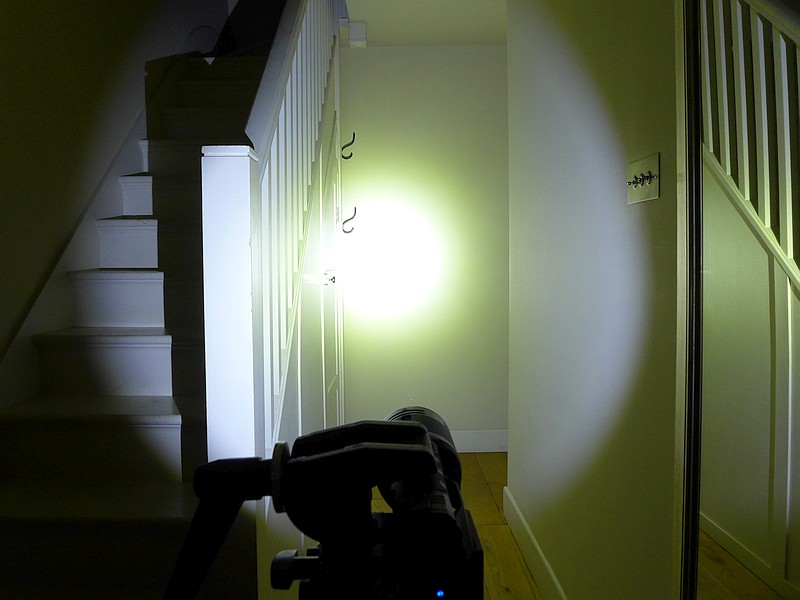
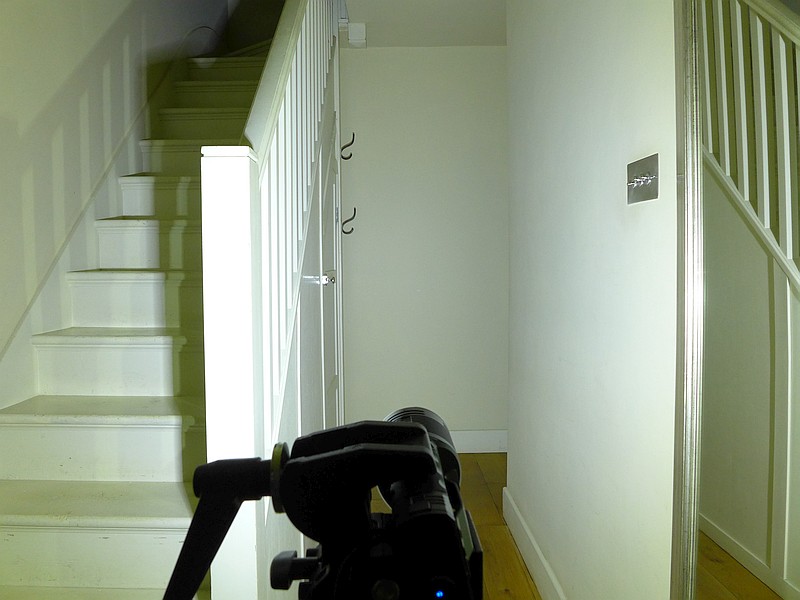
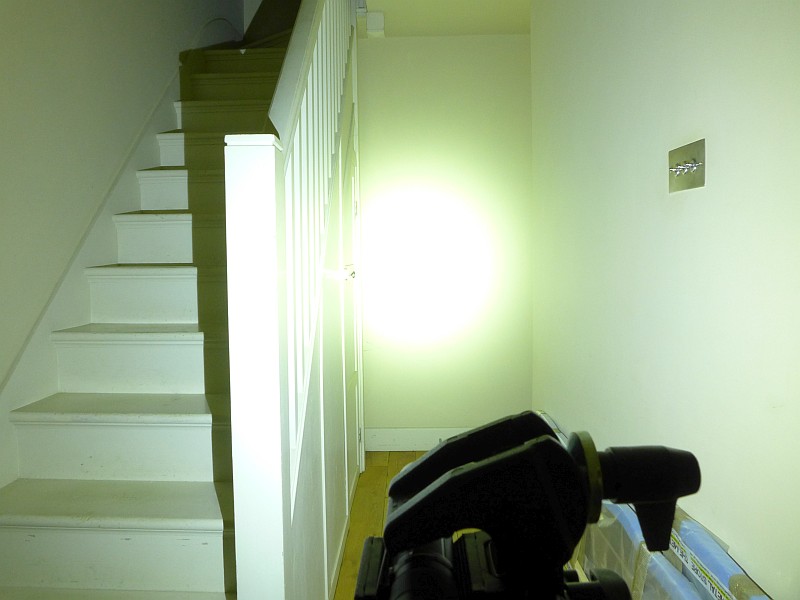
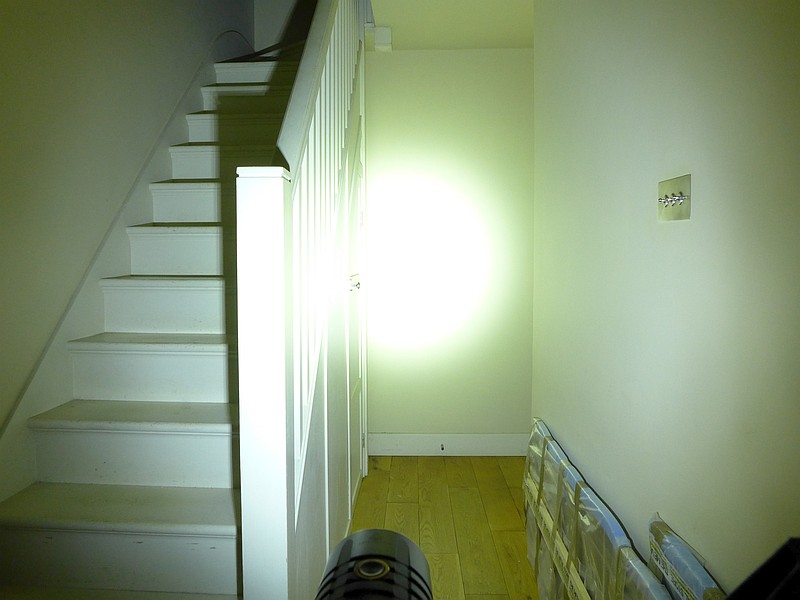
The indoor beamshot is intended to give an idea of the beam shape/quality rather than tint. All beamshots are taken using daylight white balance. The woodwork (stairs and skirting) are painted Farrow & Ball “Off-White”, and the walls are a light sandy colour called ‘String’ again by Farrow & Ball. I don’t actually have a ‘white wall’ in the house to use for this, and my wife won’t have one!
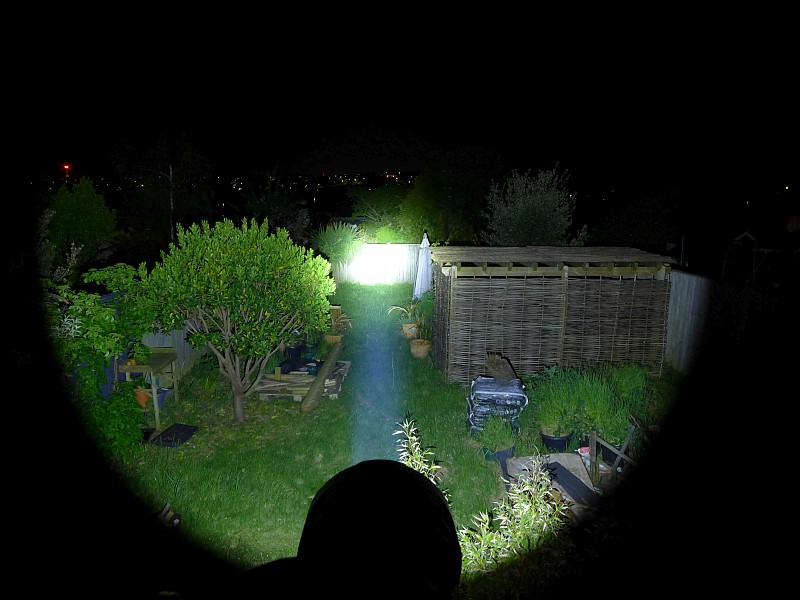
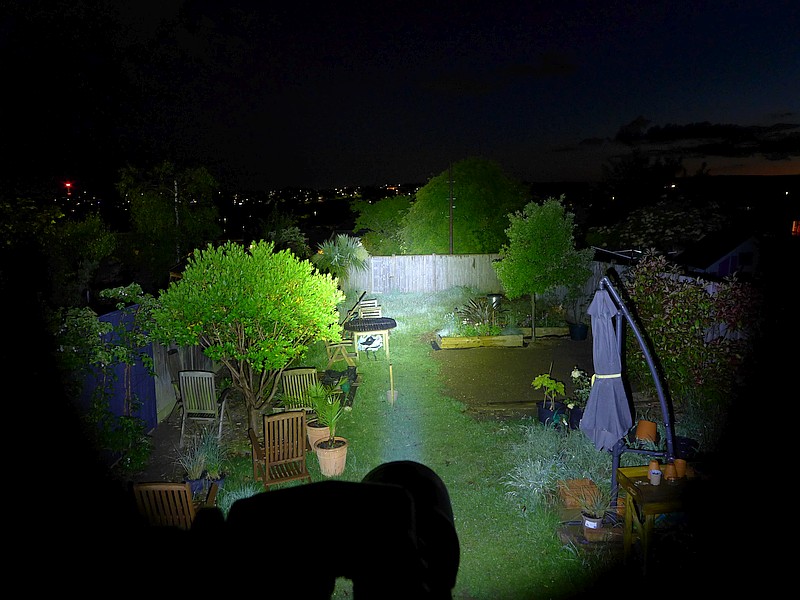
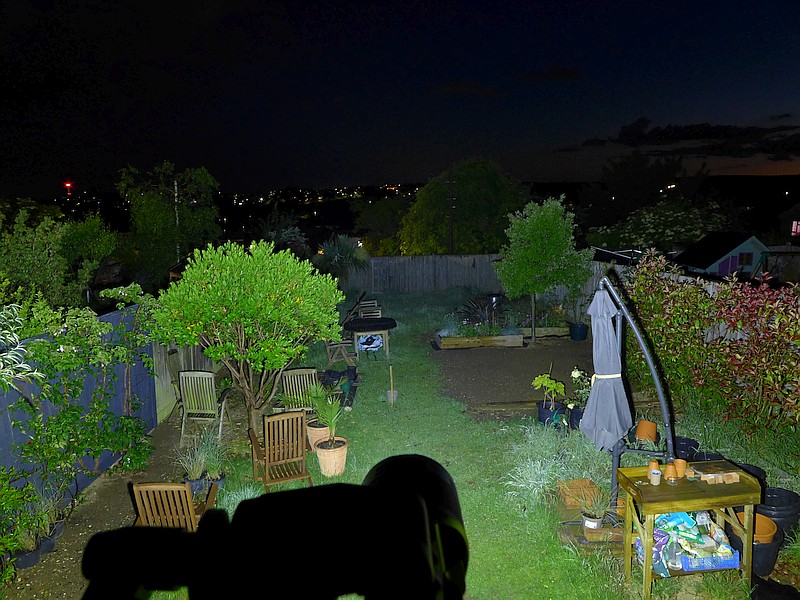
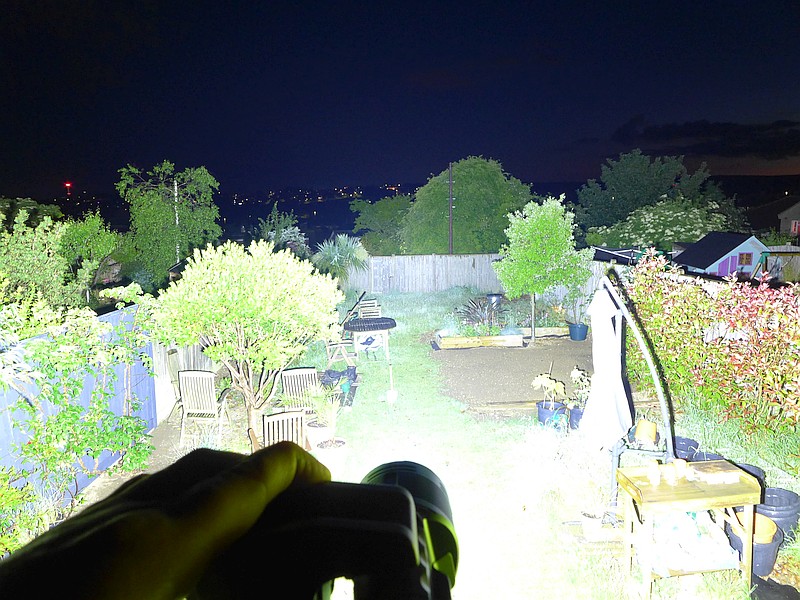
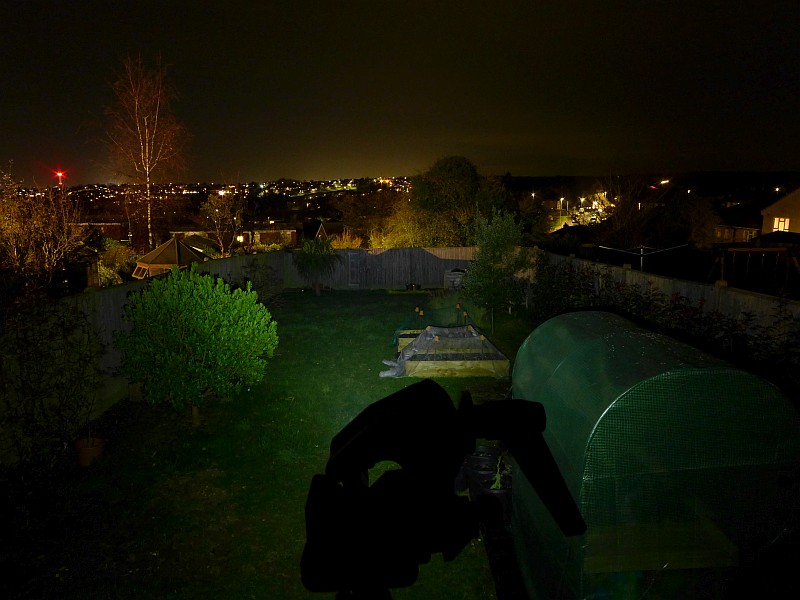
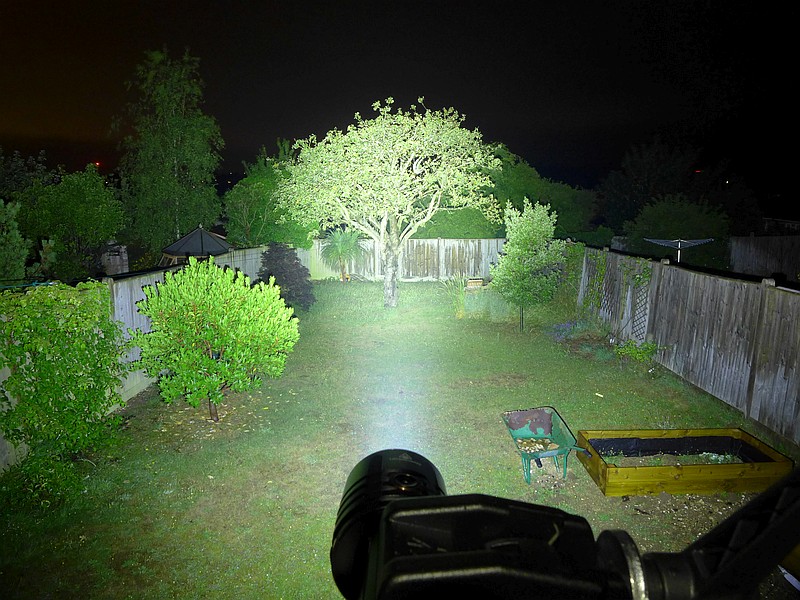
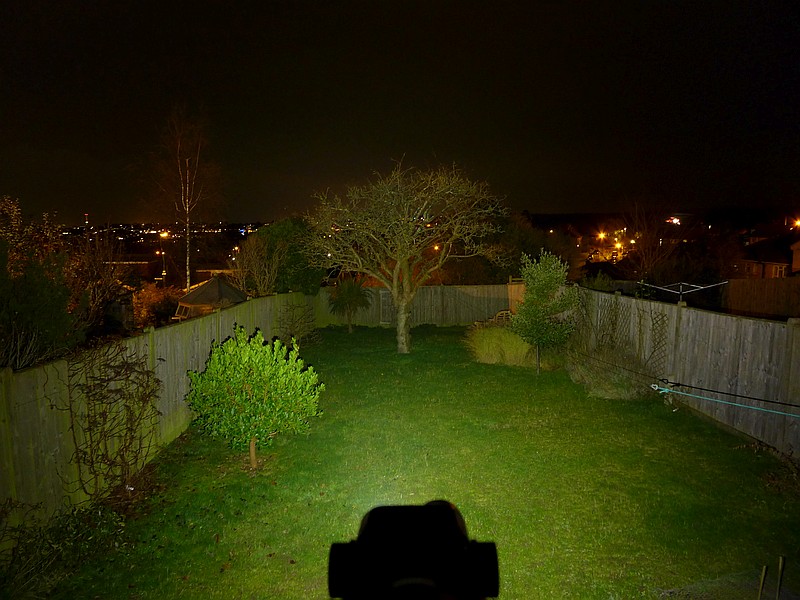
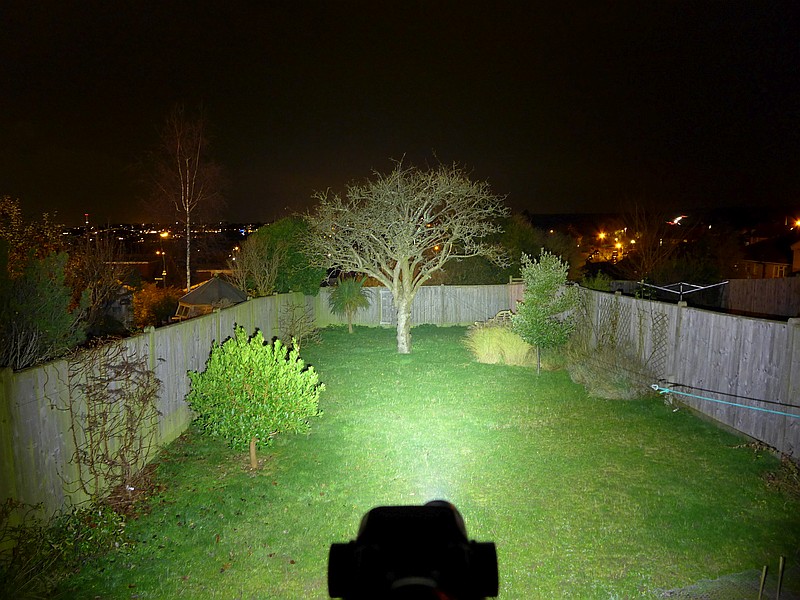
Exposures are not identical throughout the galleries – images are intended to show the beam shape and impression of what you see, rather than a brightness measurement.
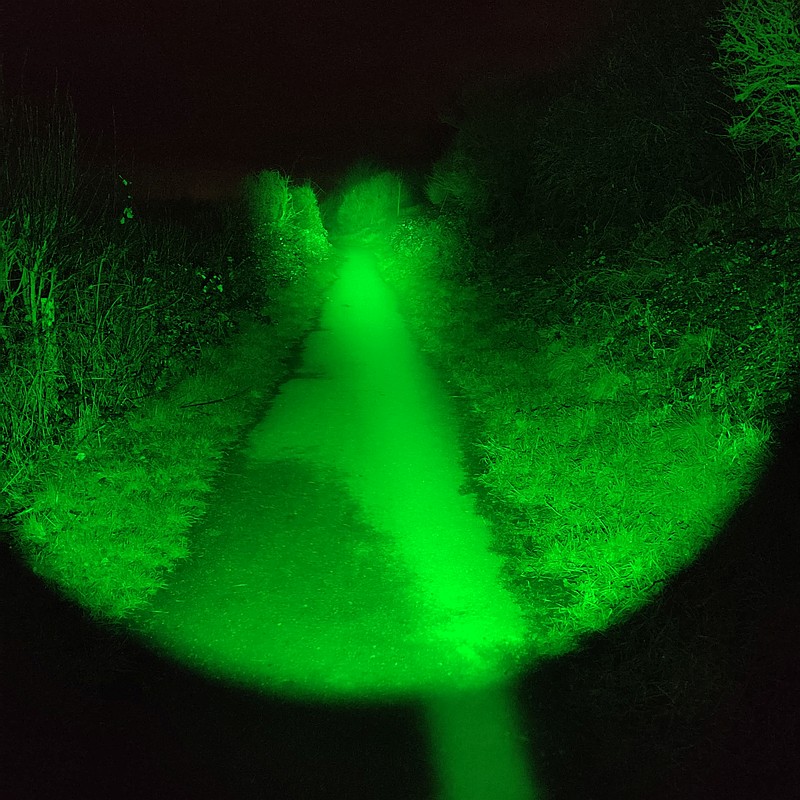
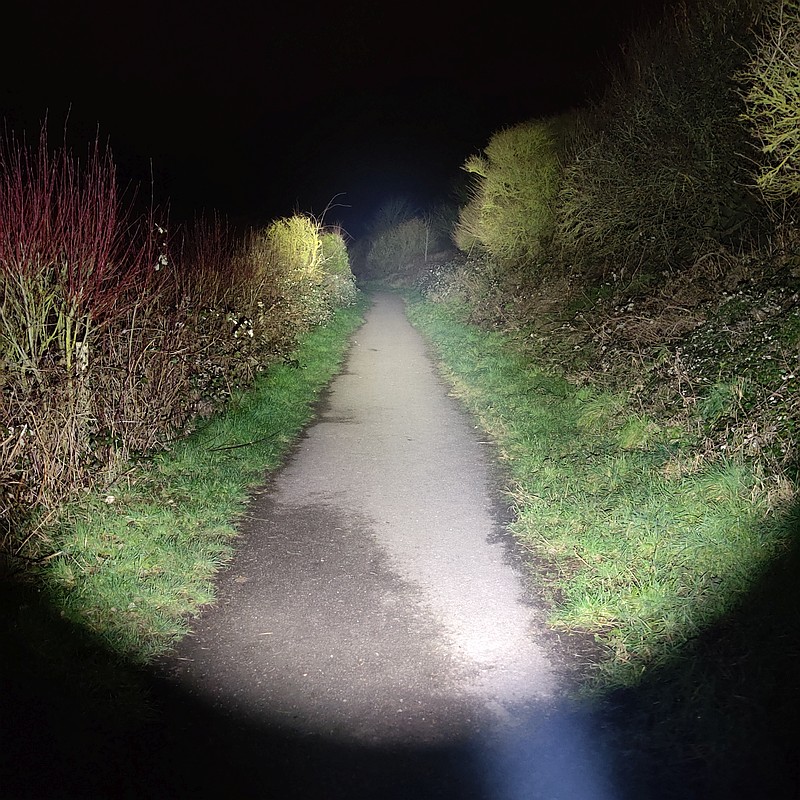
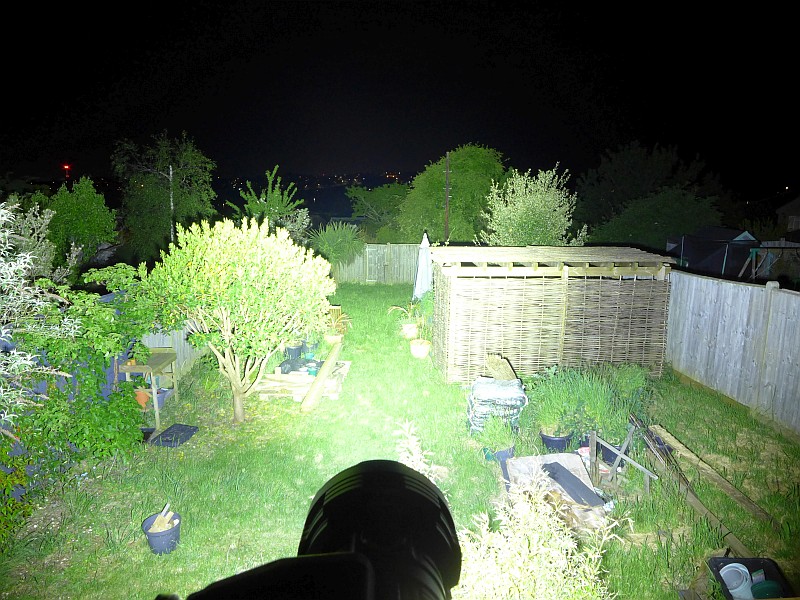
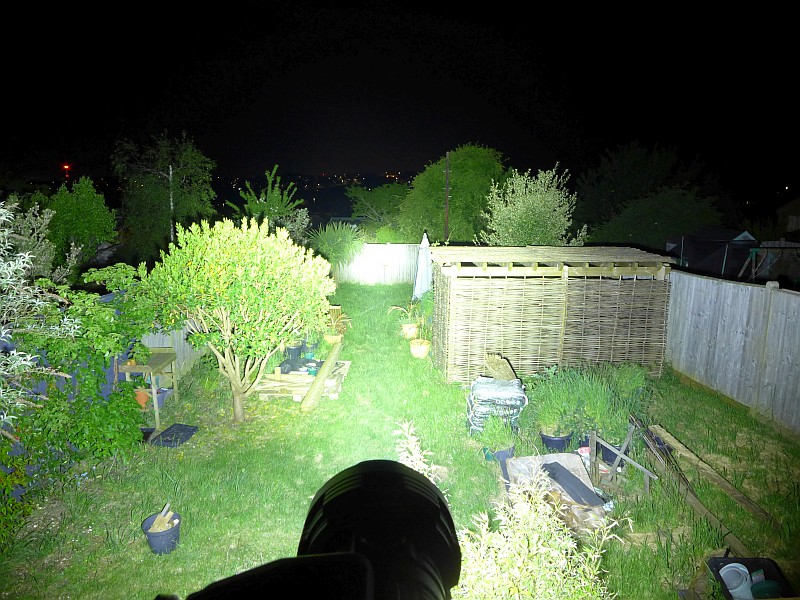
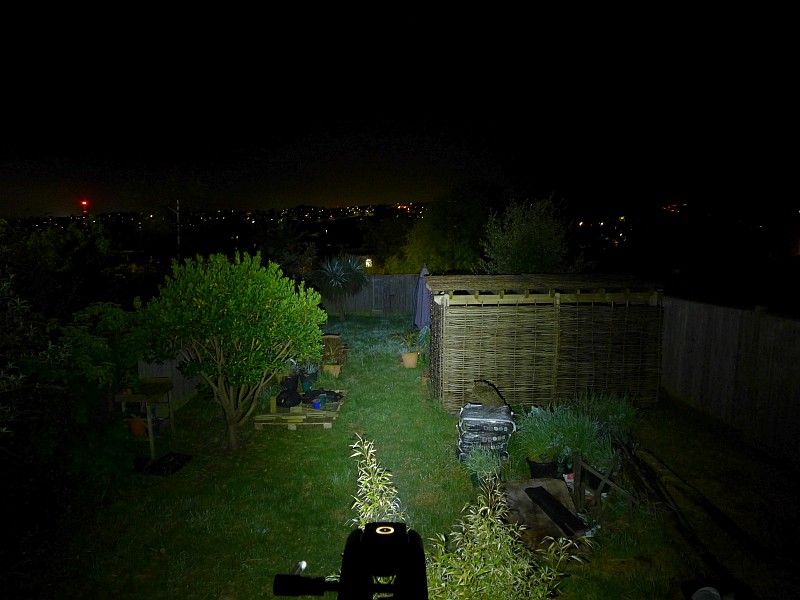
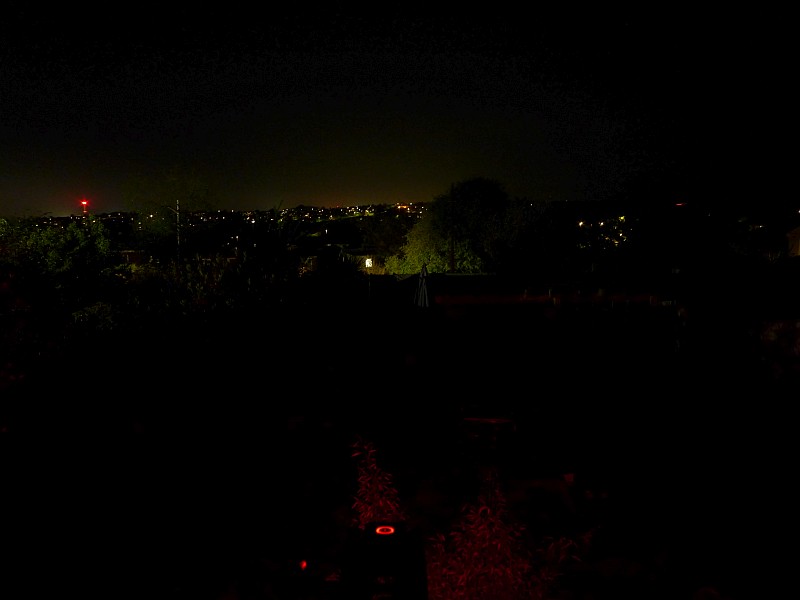
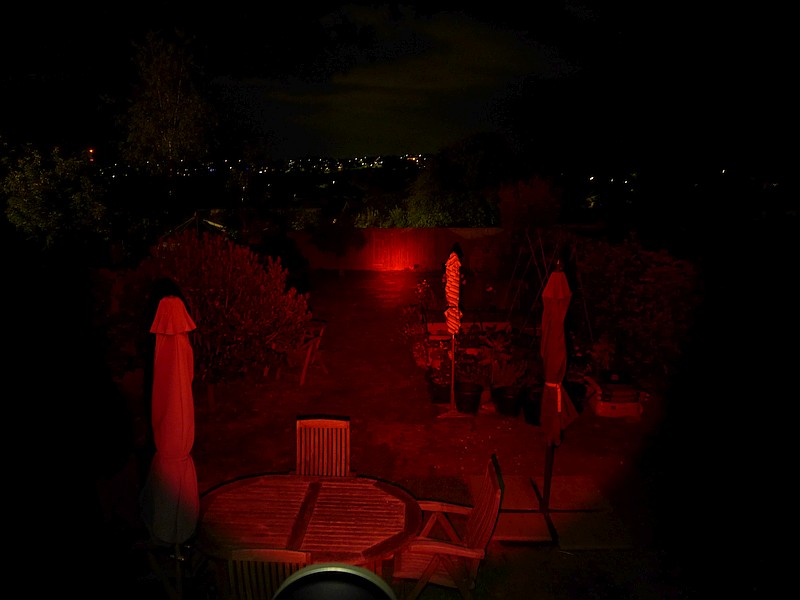
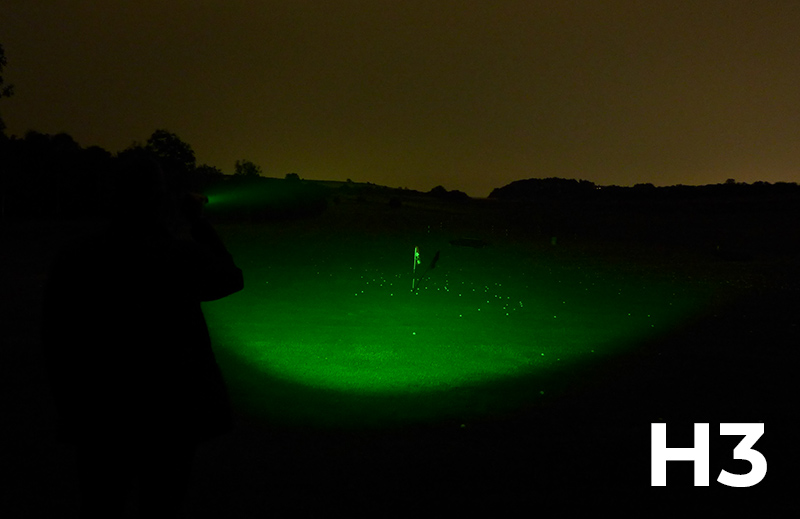
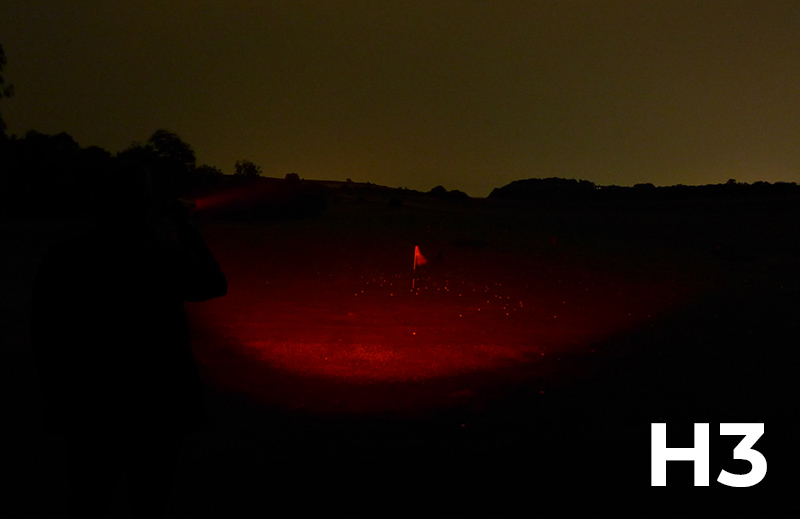
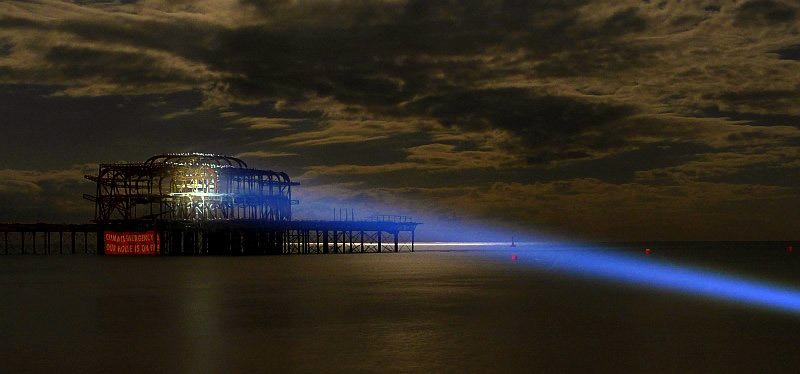
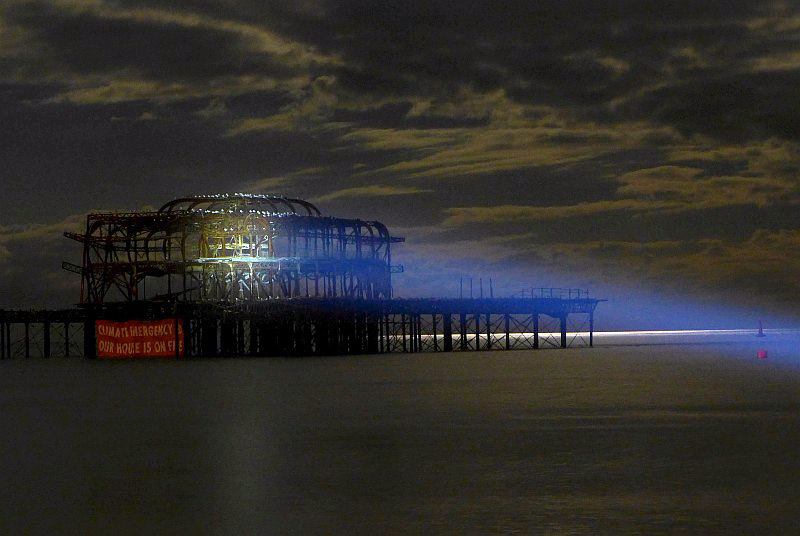
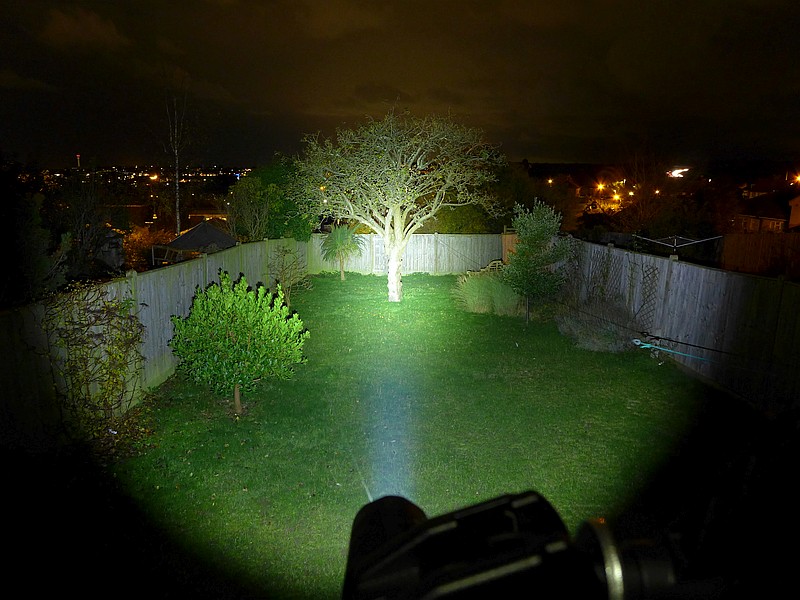
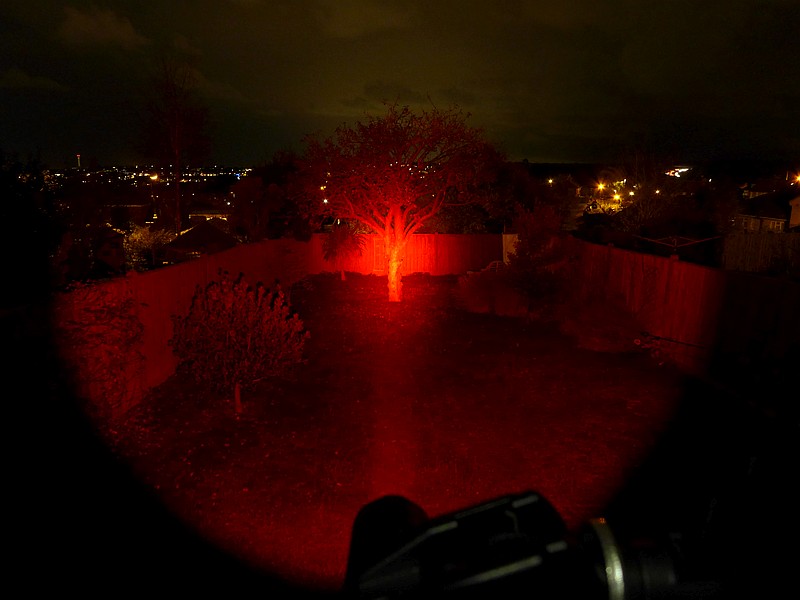
EDC33 Beamshots:
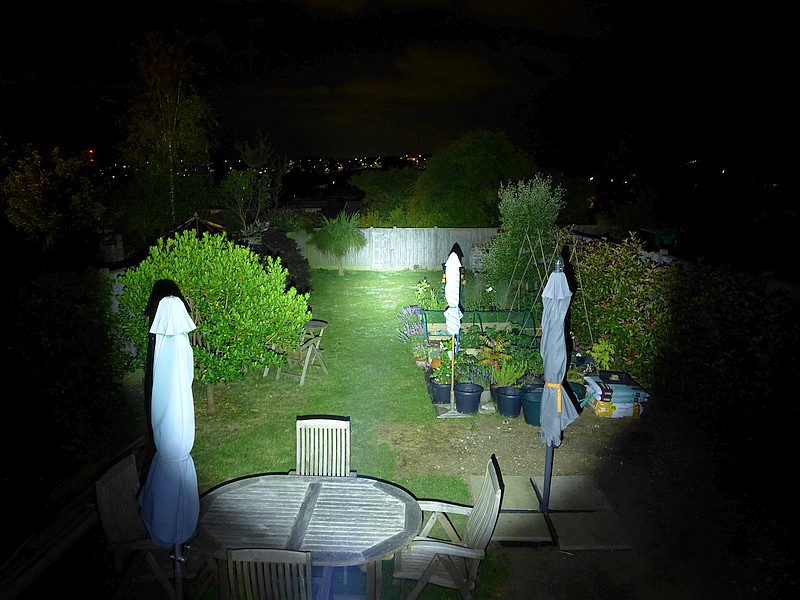
Both for indoor and outdoor, the spot beam is shown first, then the ‘Lumin Shield’ beam.

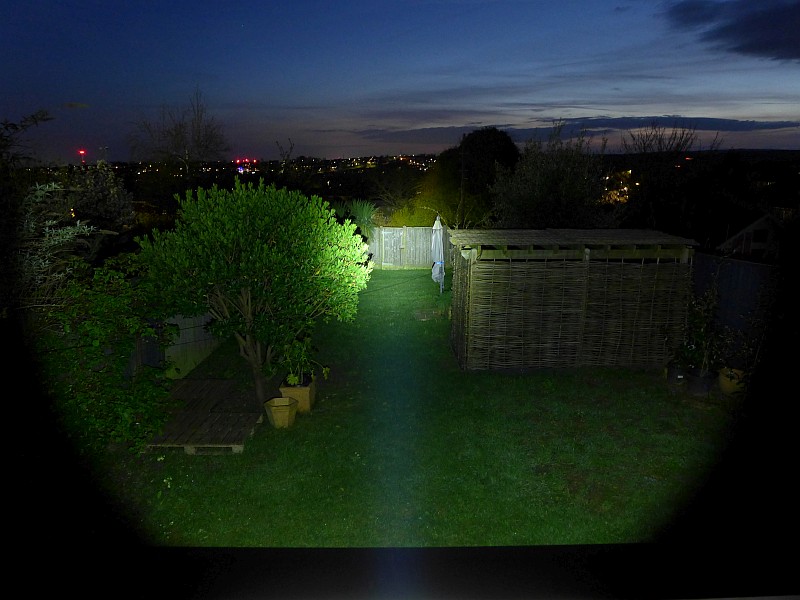
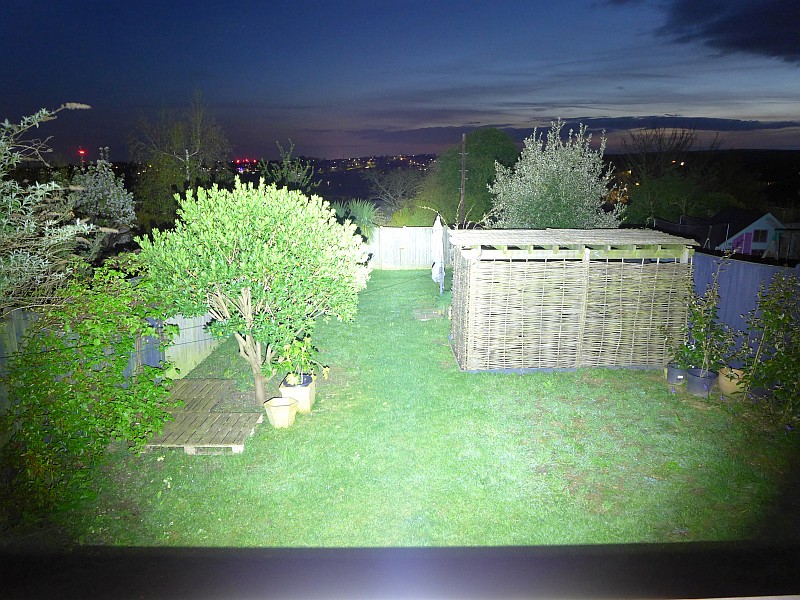
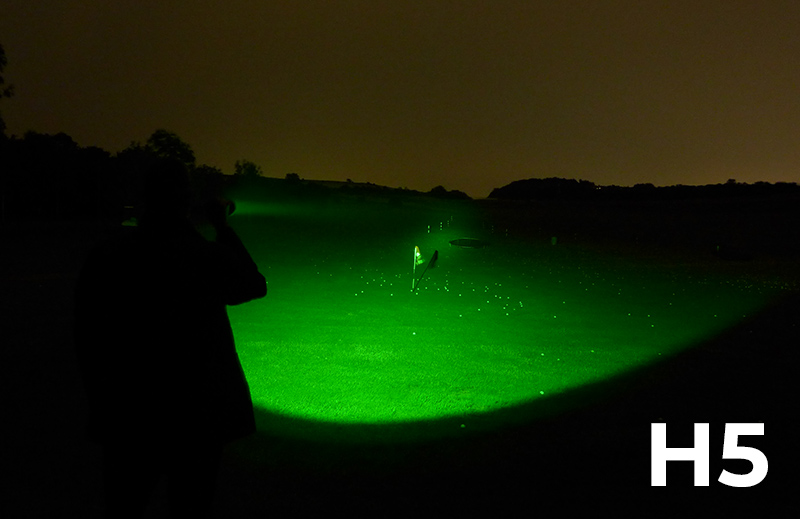
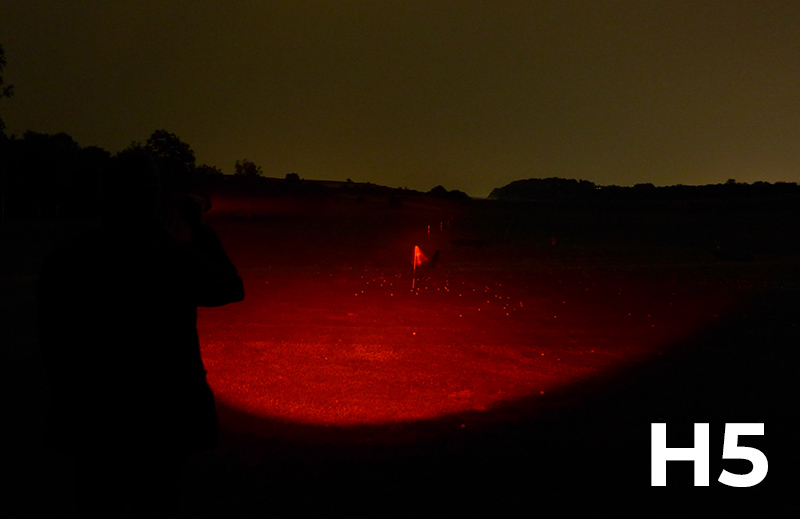
EDC35 Beamshots:
Both for indoor and outdoor, the spot beam is shown first, then the ‘Lumin Shield’ beam.


EDC33 and EDC35 Beamshots:
This gallery uses all the previous images but groups them into comparative pairings for the EDC33 then EDC35 with each type of beam. As before this is the spot beam shown first followed by the ‘Lumin Shield’ beam for the indoor images and then the outdoor.
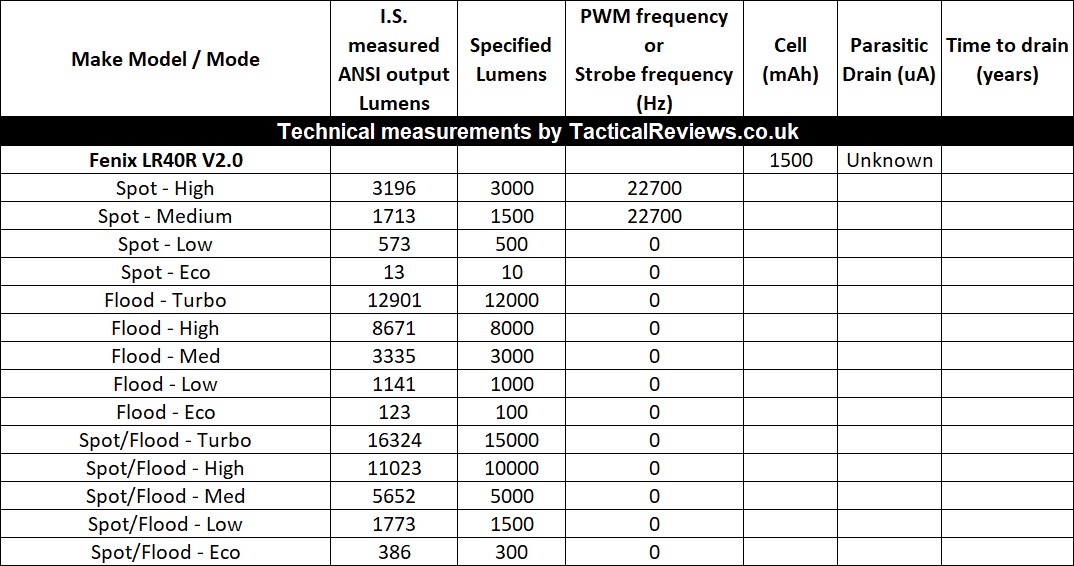
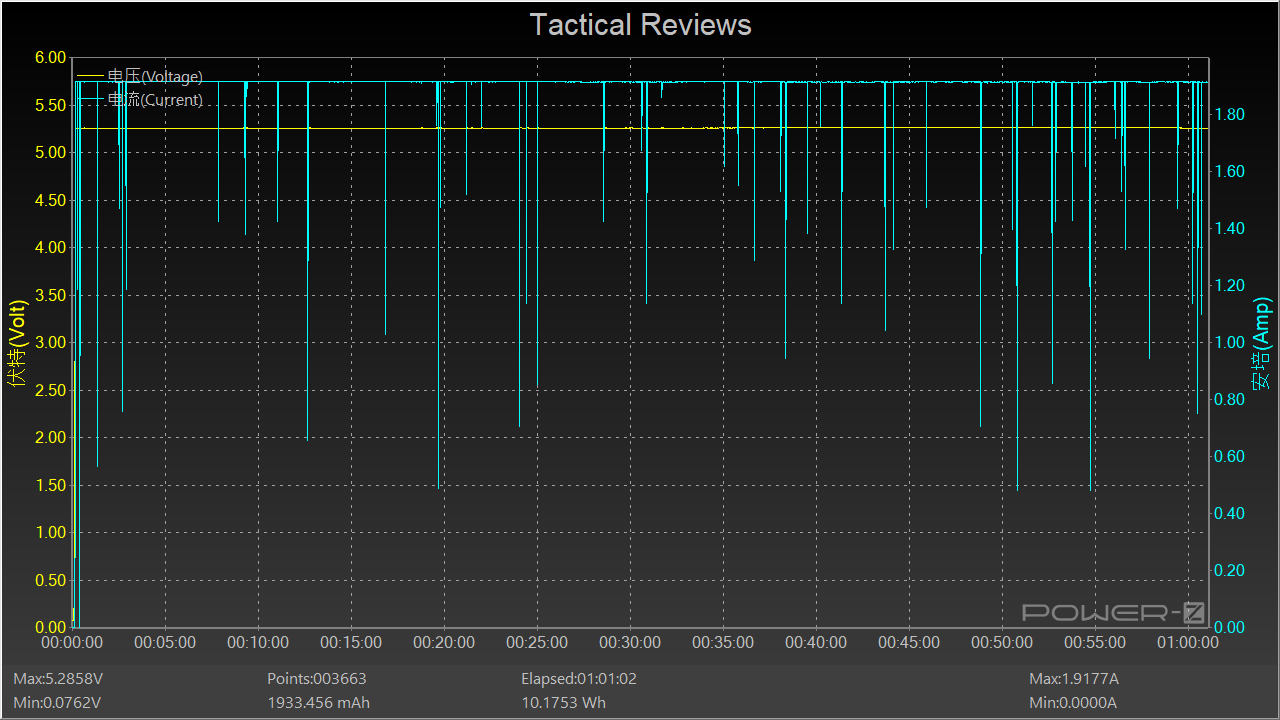
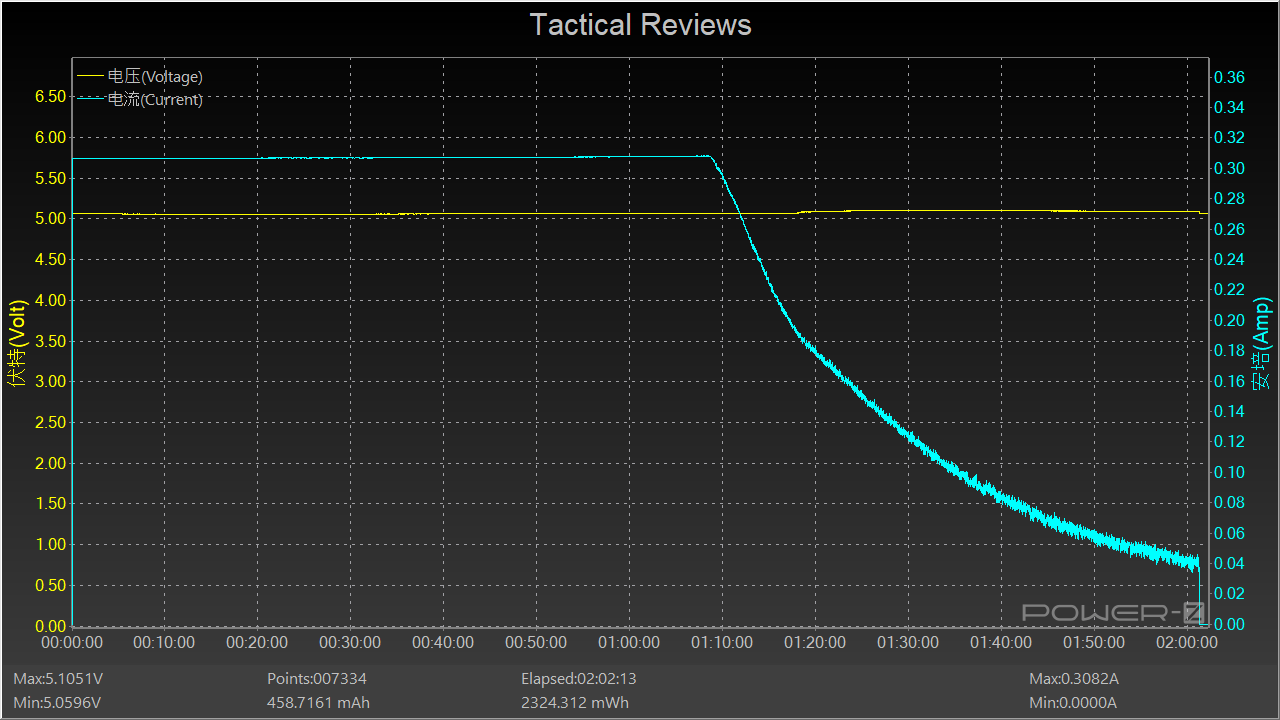
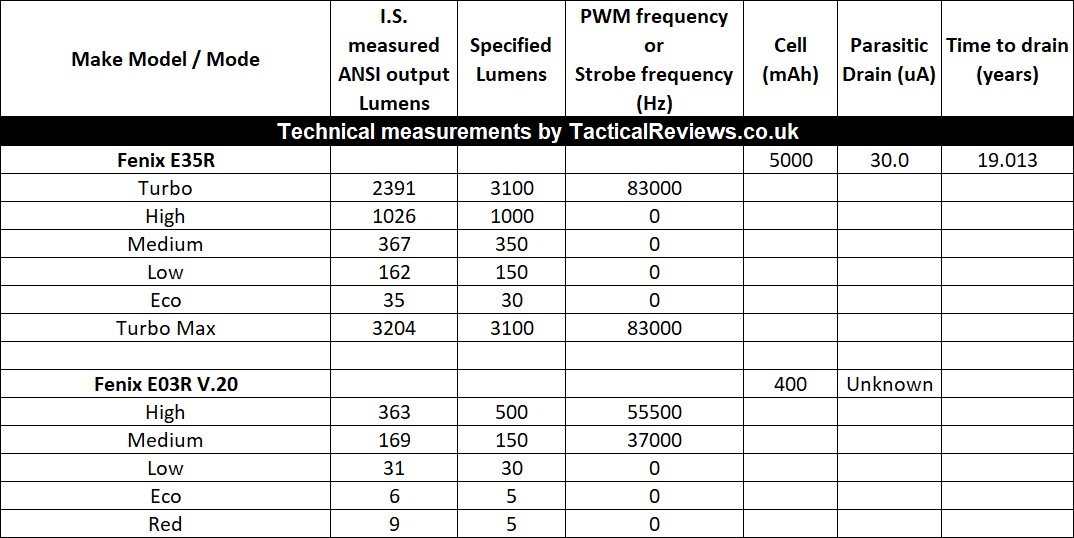
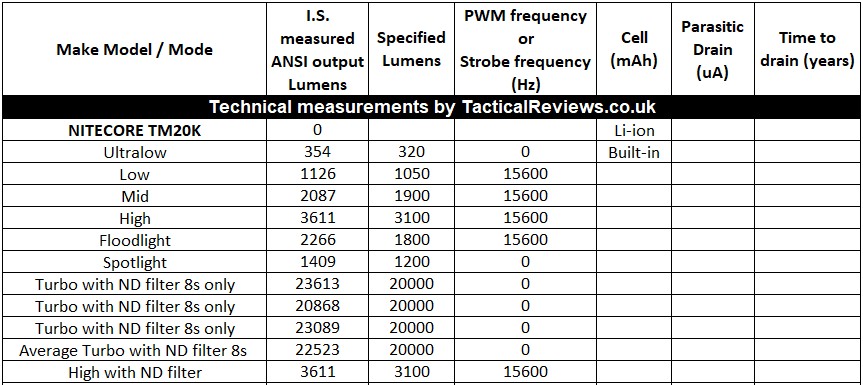
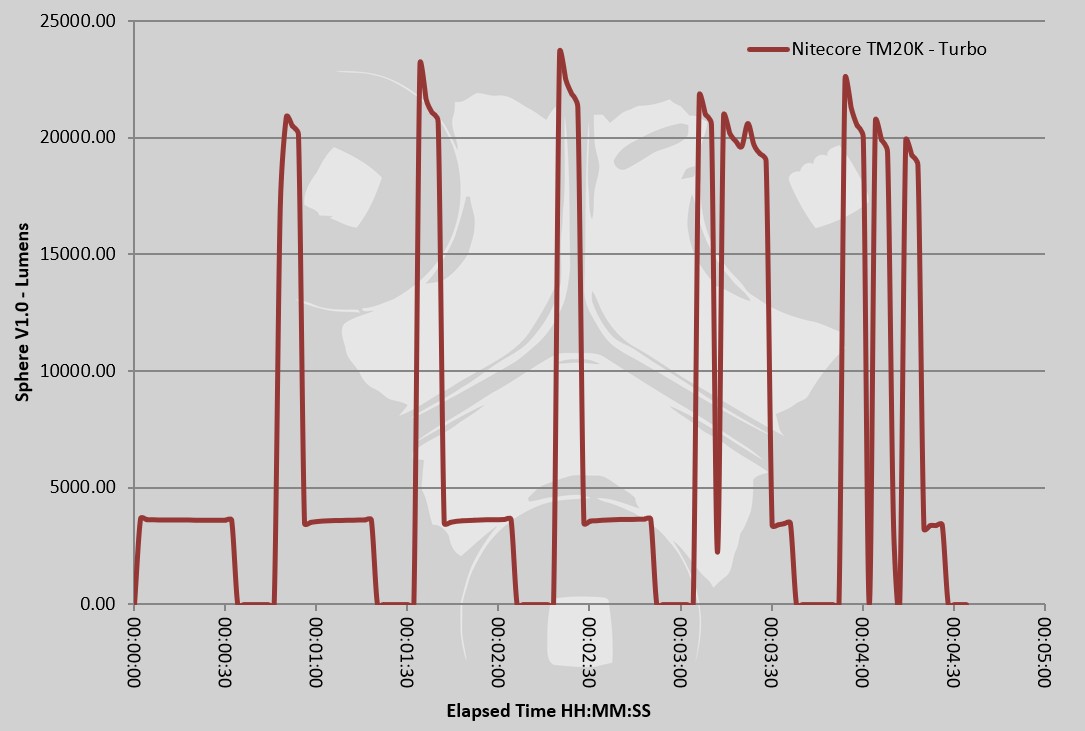
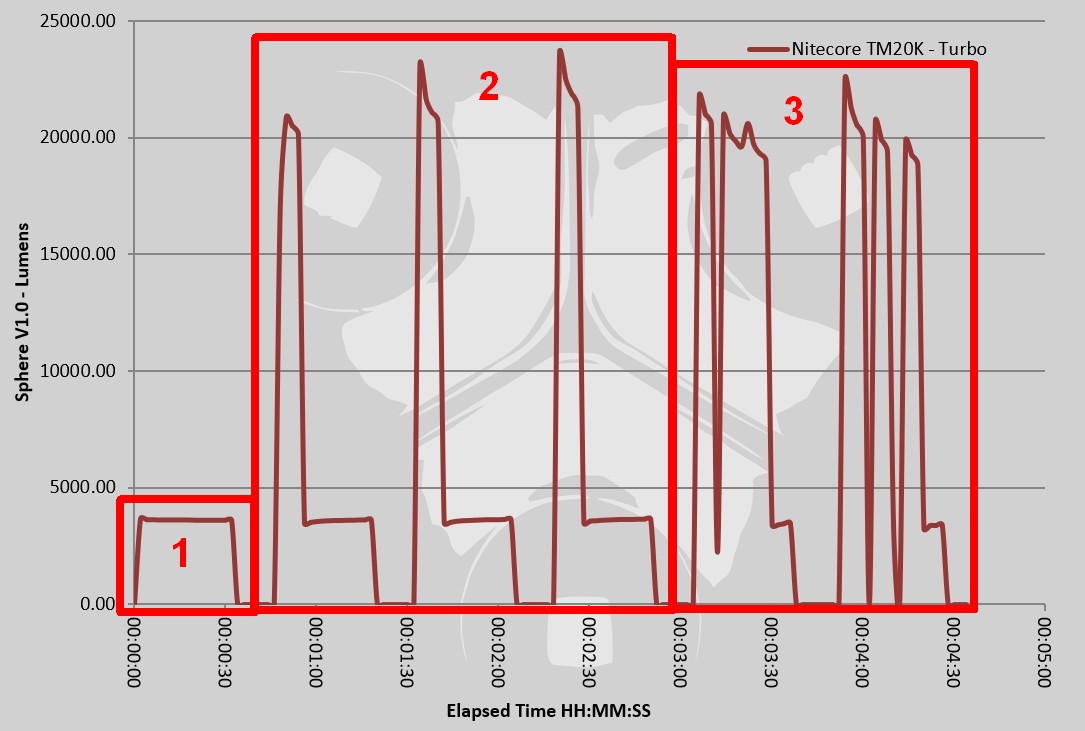
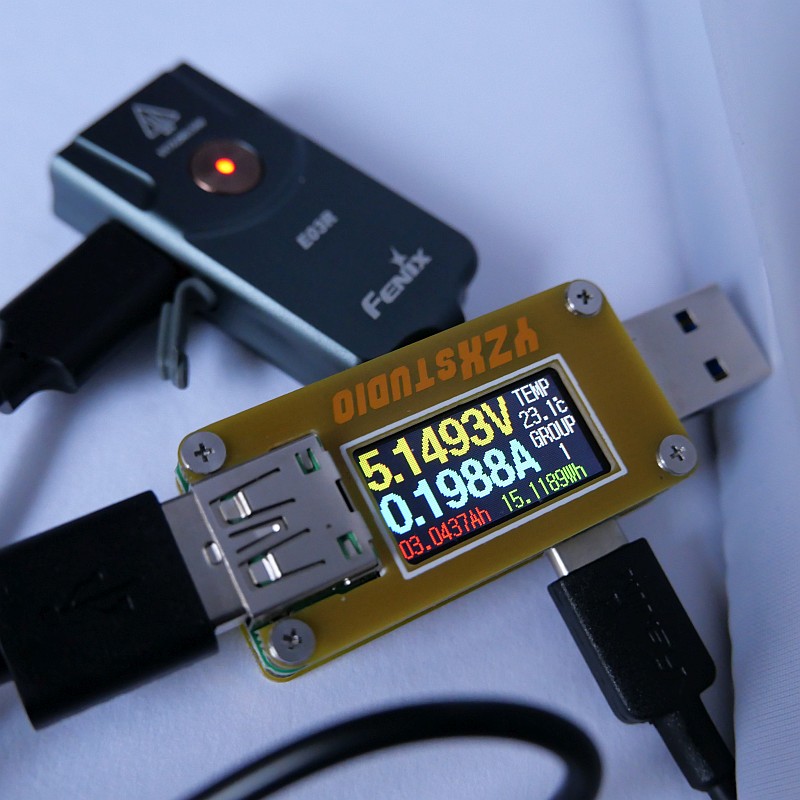
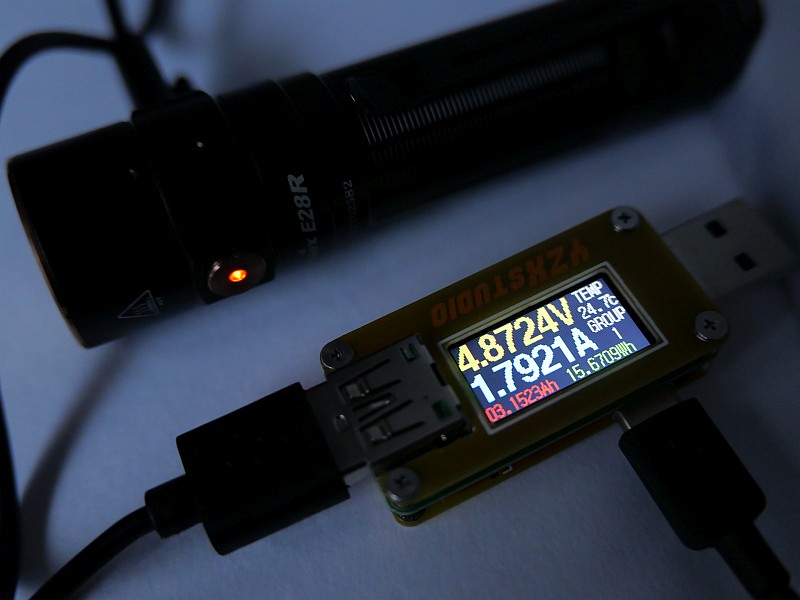
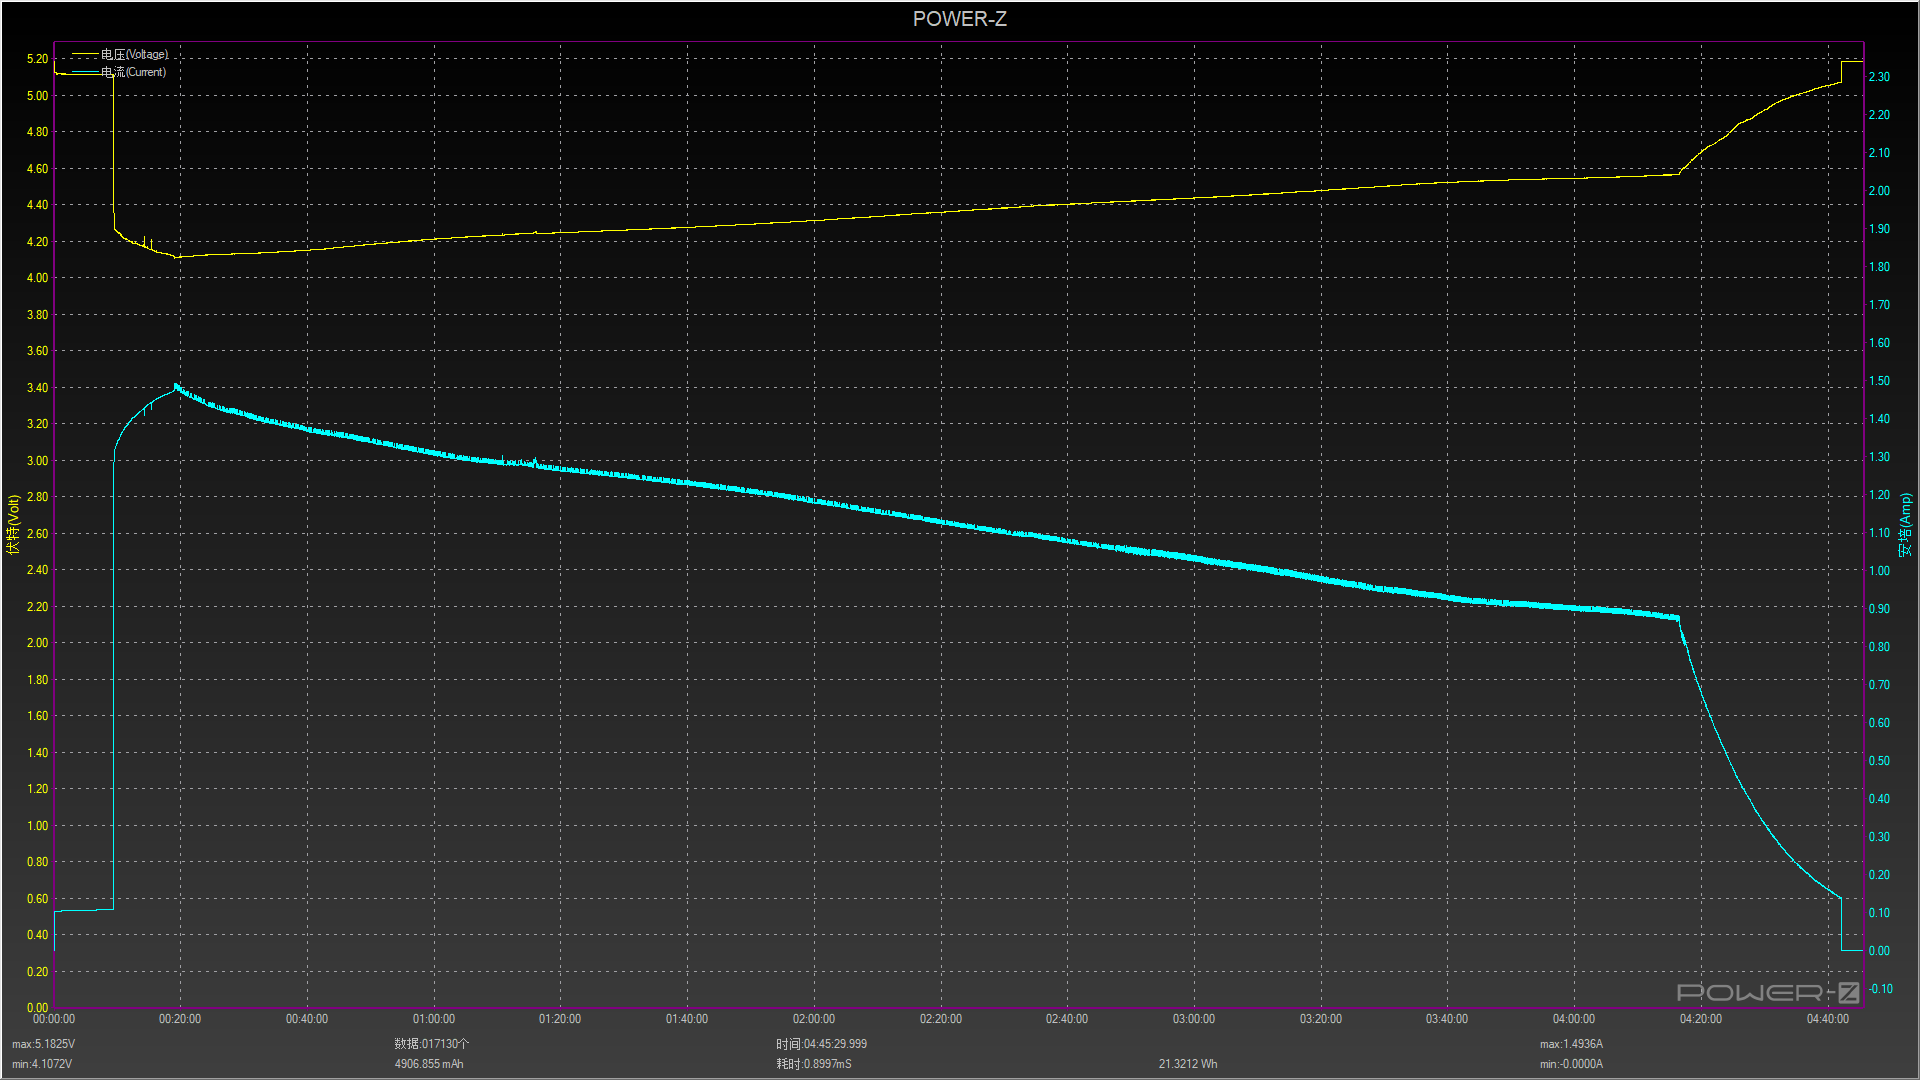
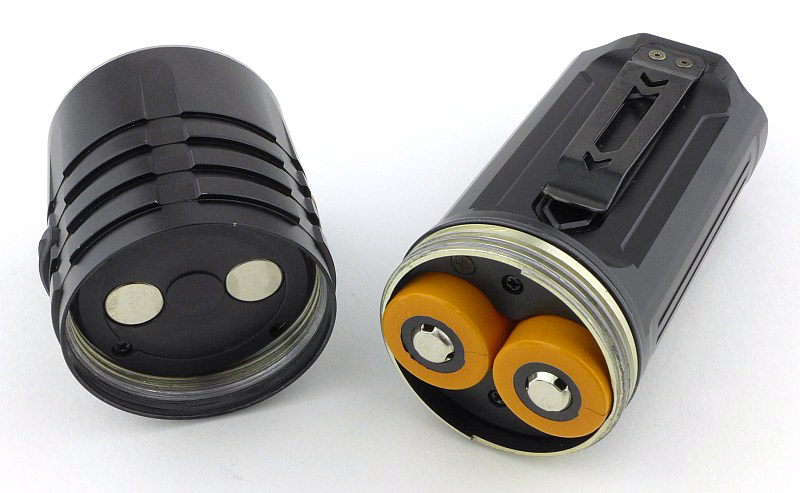
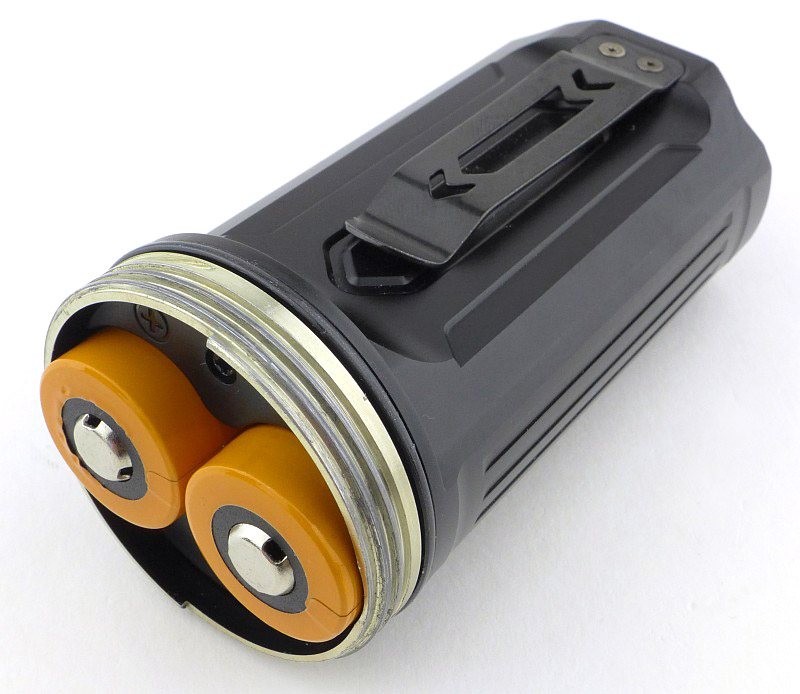
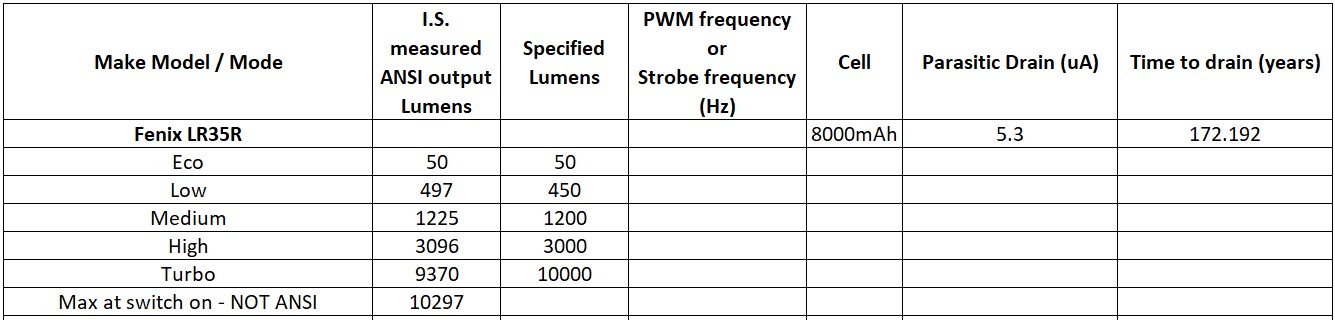
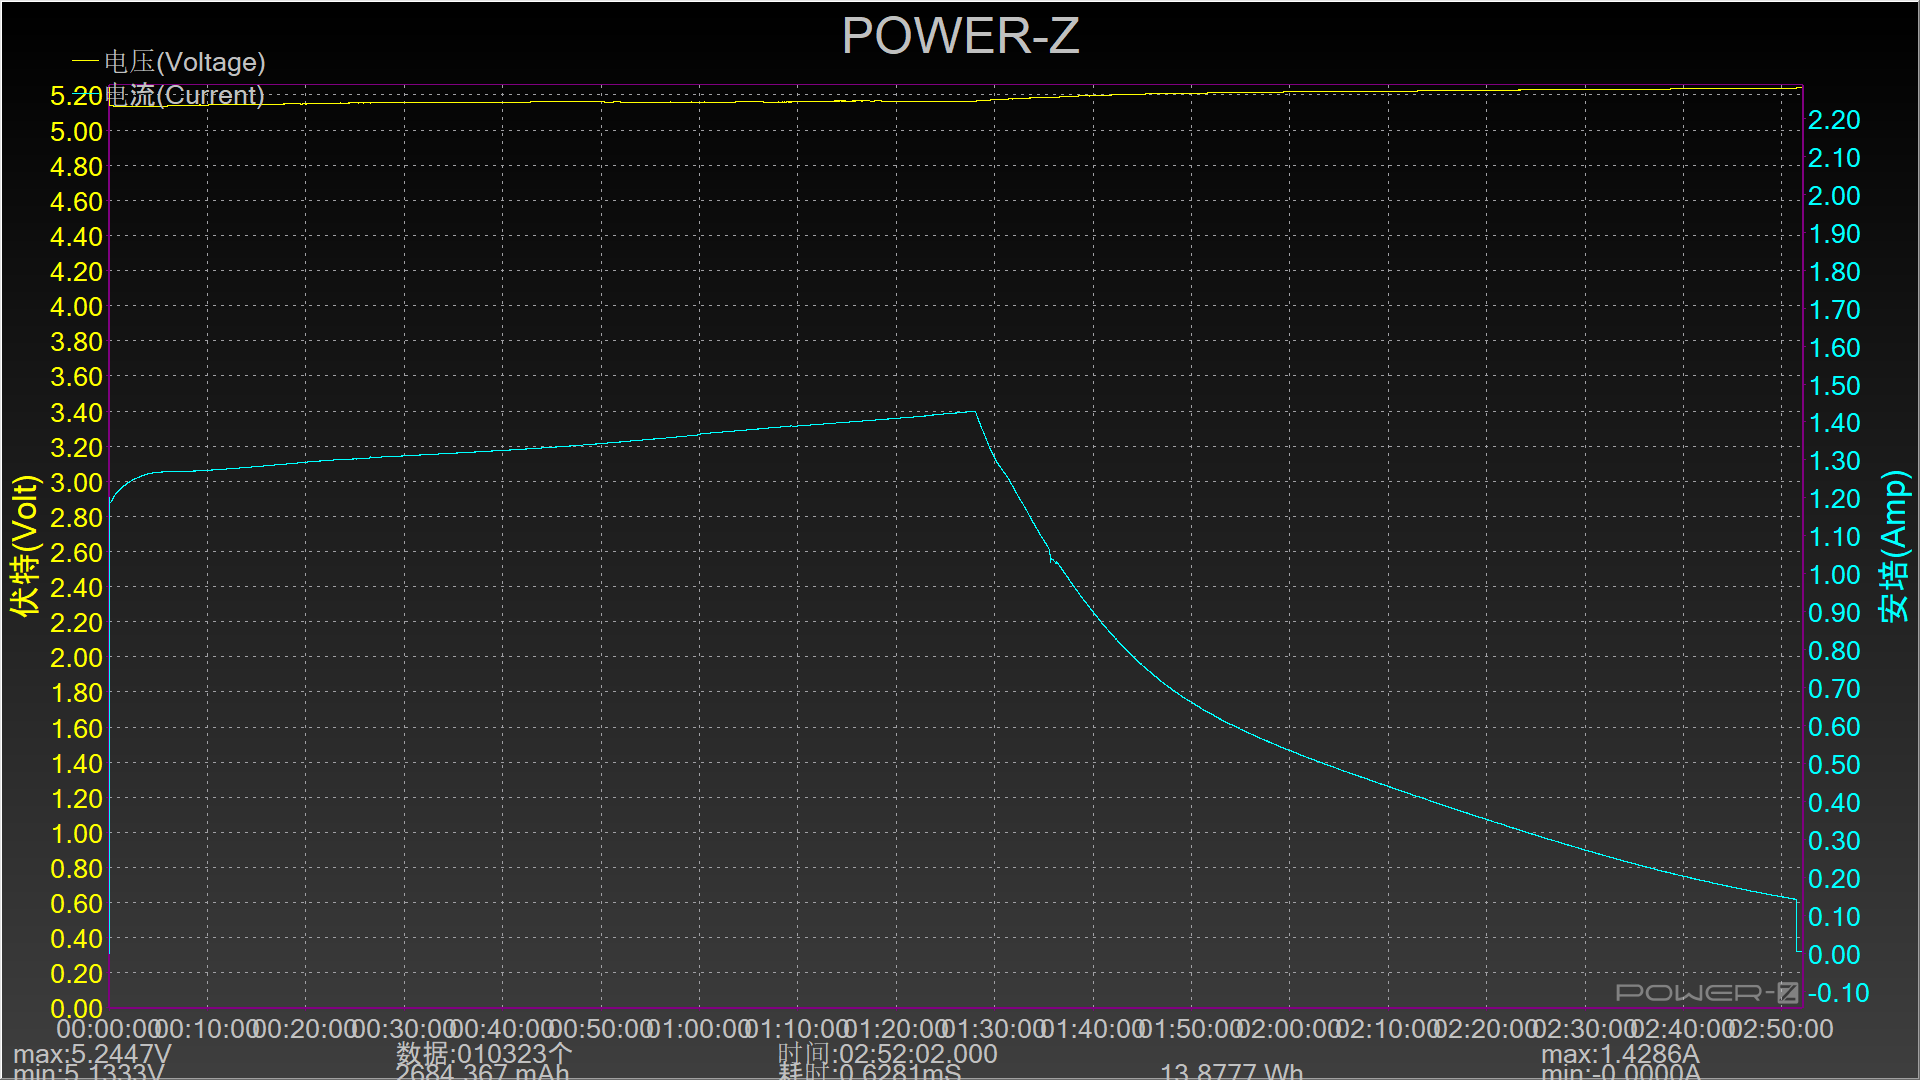
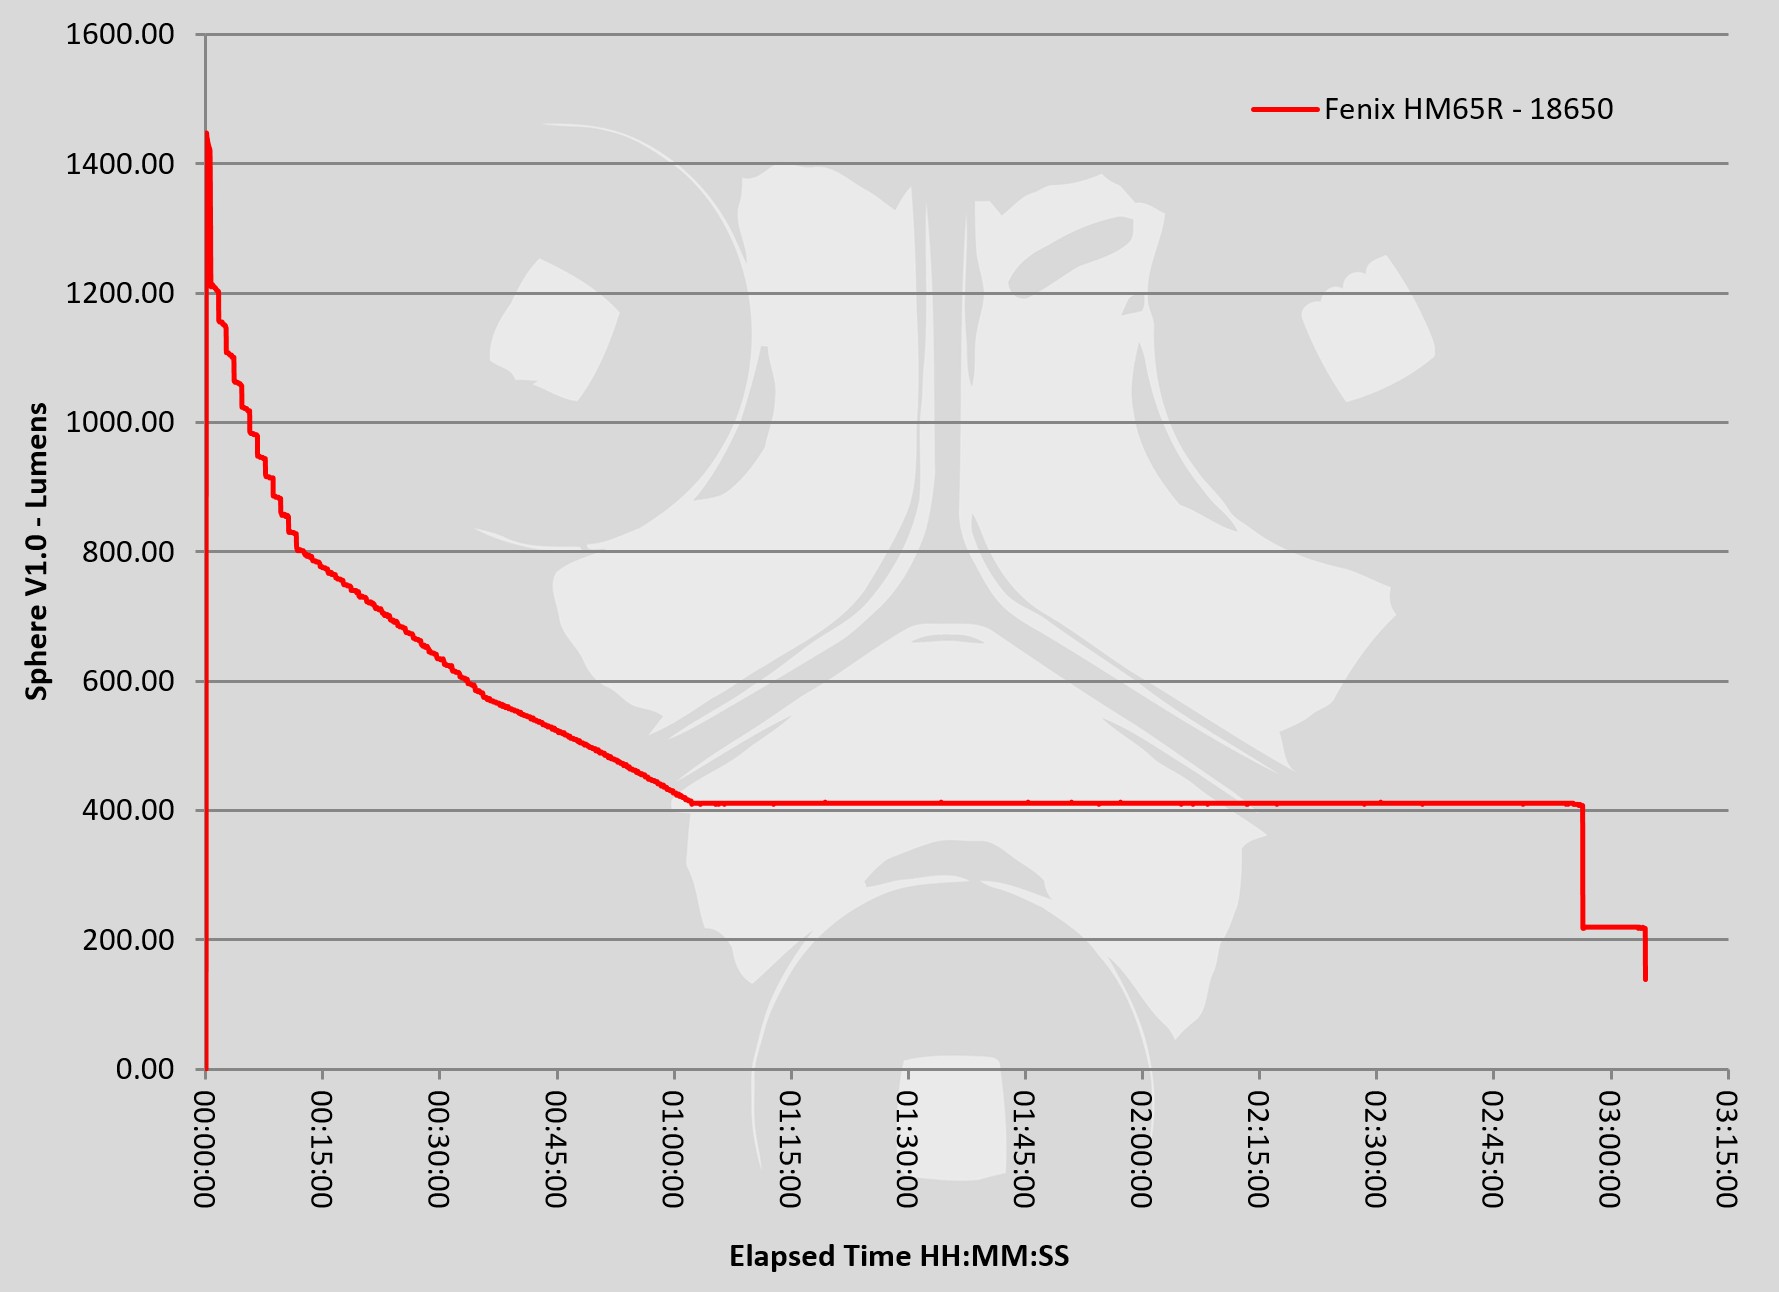
Batteries and output:
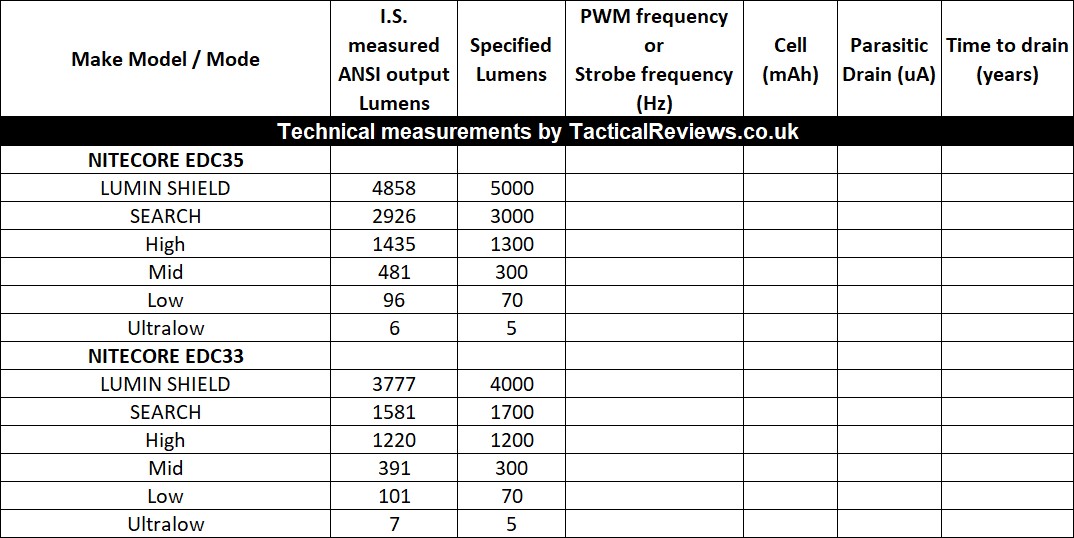
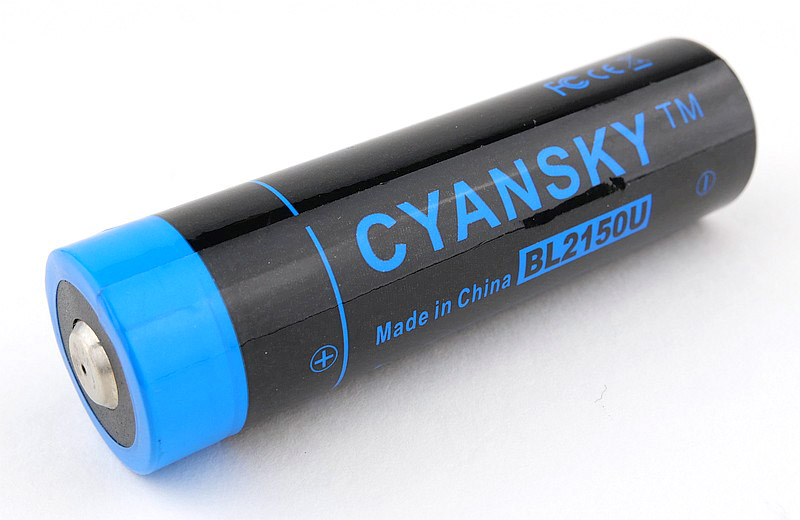
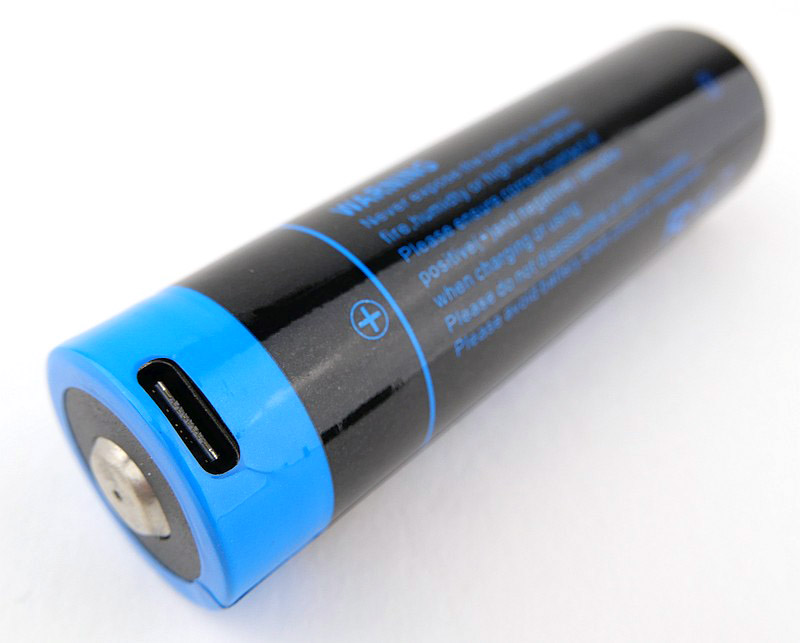
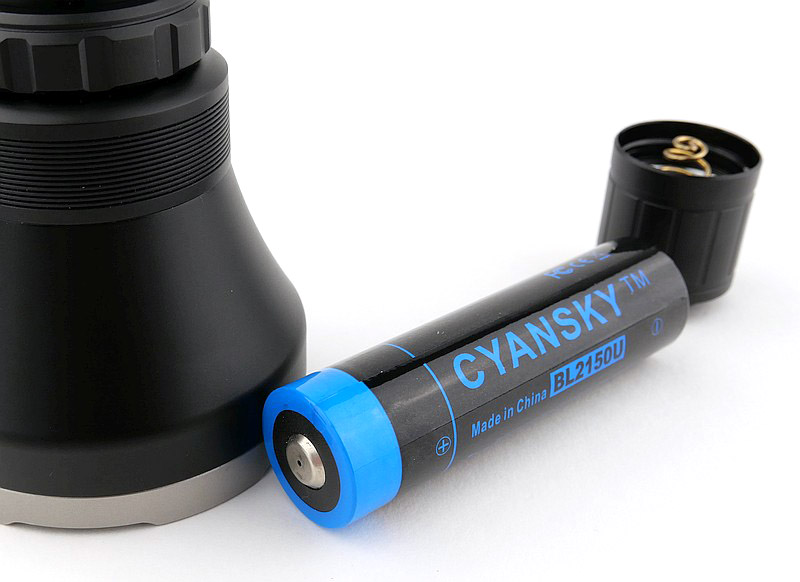
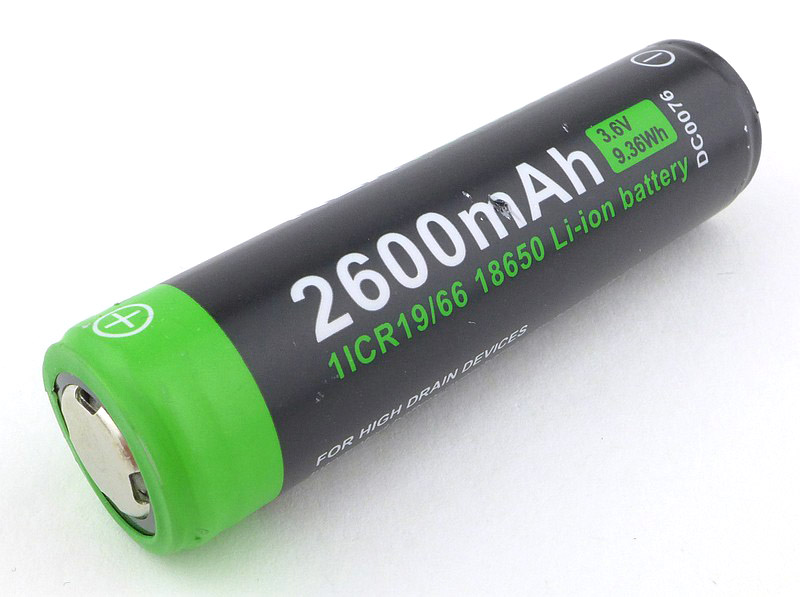
The EDC33 has a built-in 18650 cell and the EDC35 a built-in 21700 cell. Parasitic drain cannot be measured.
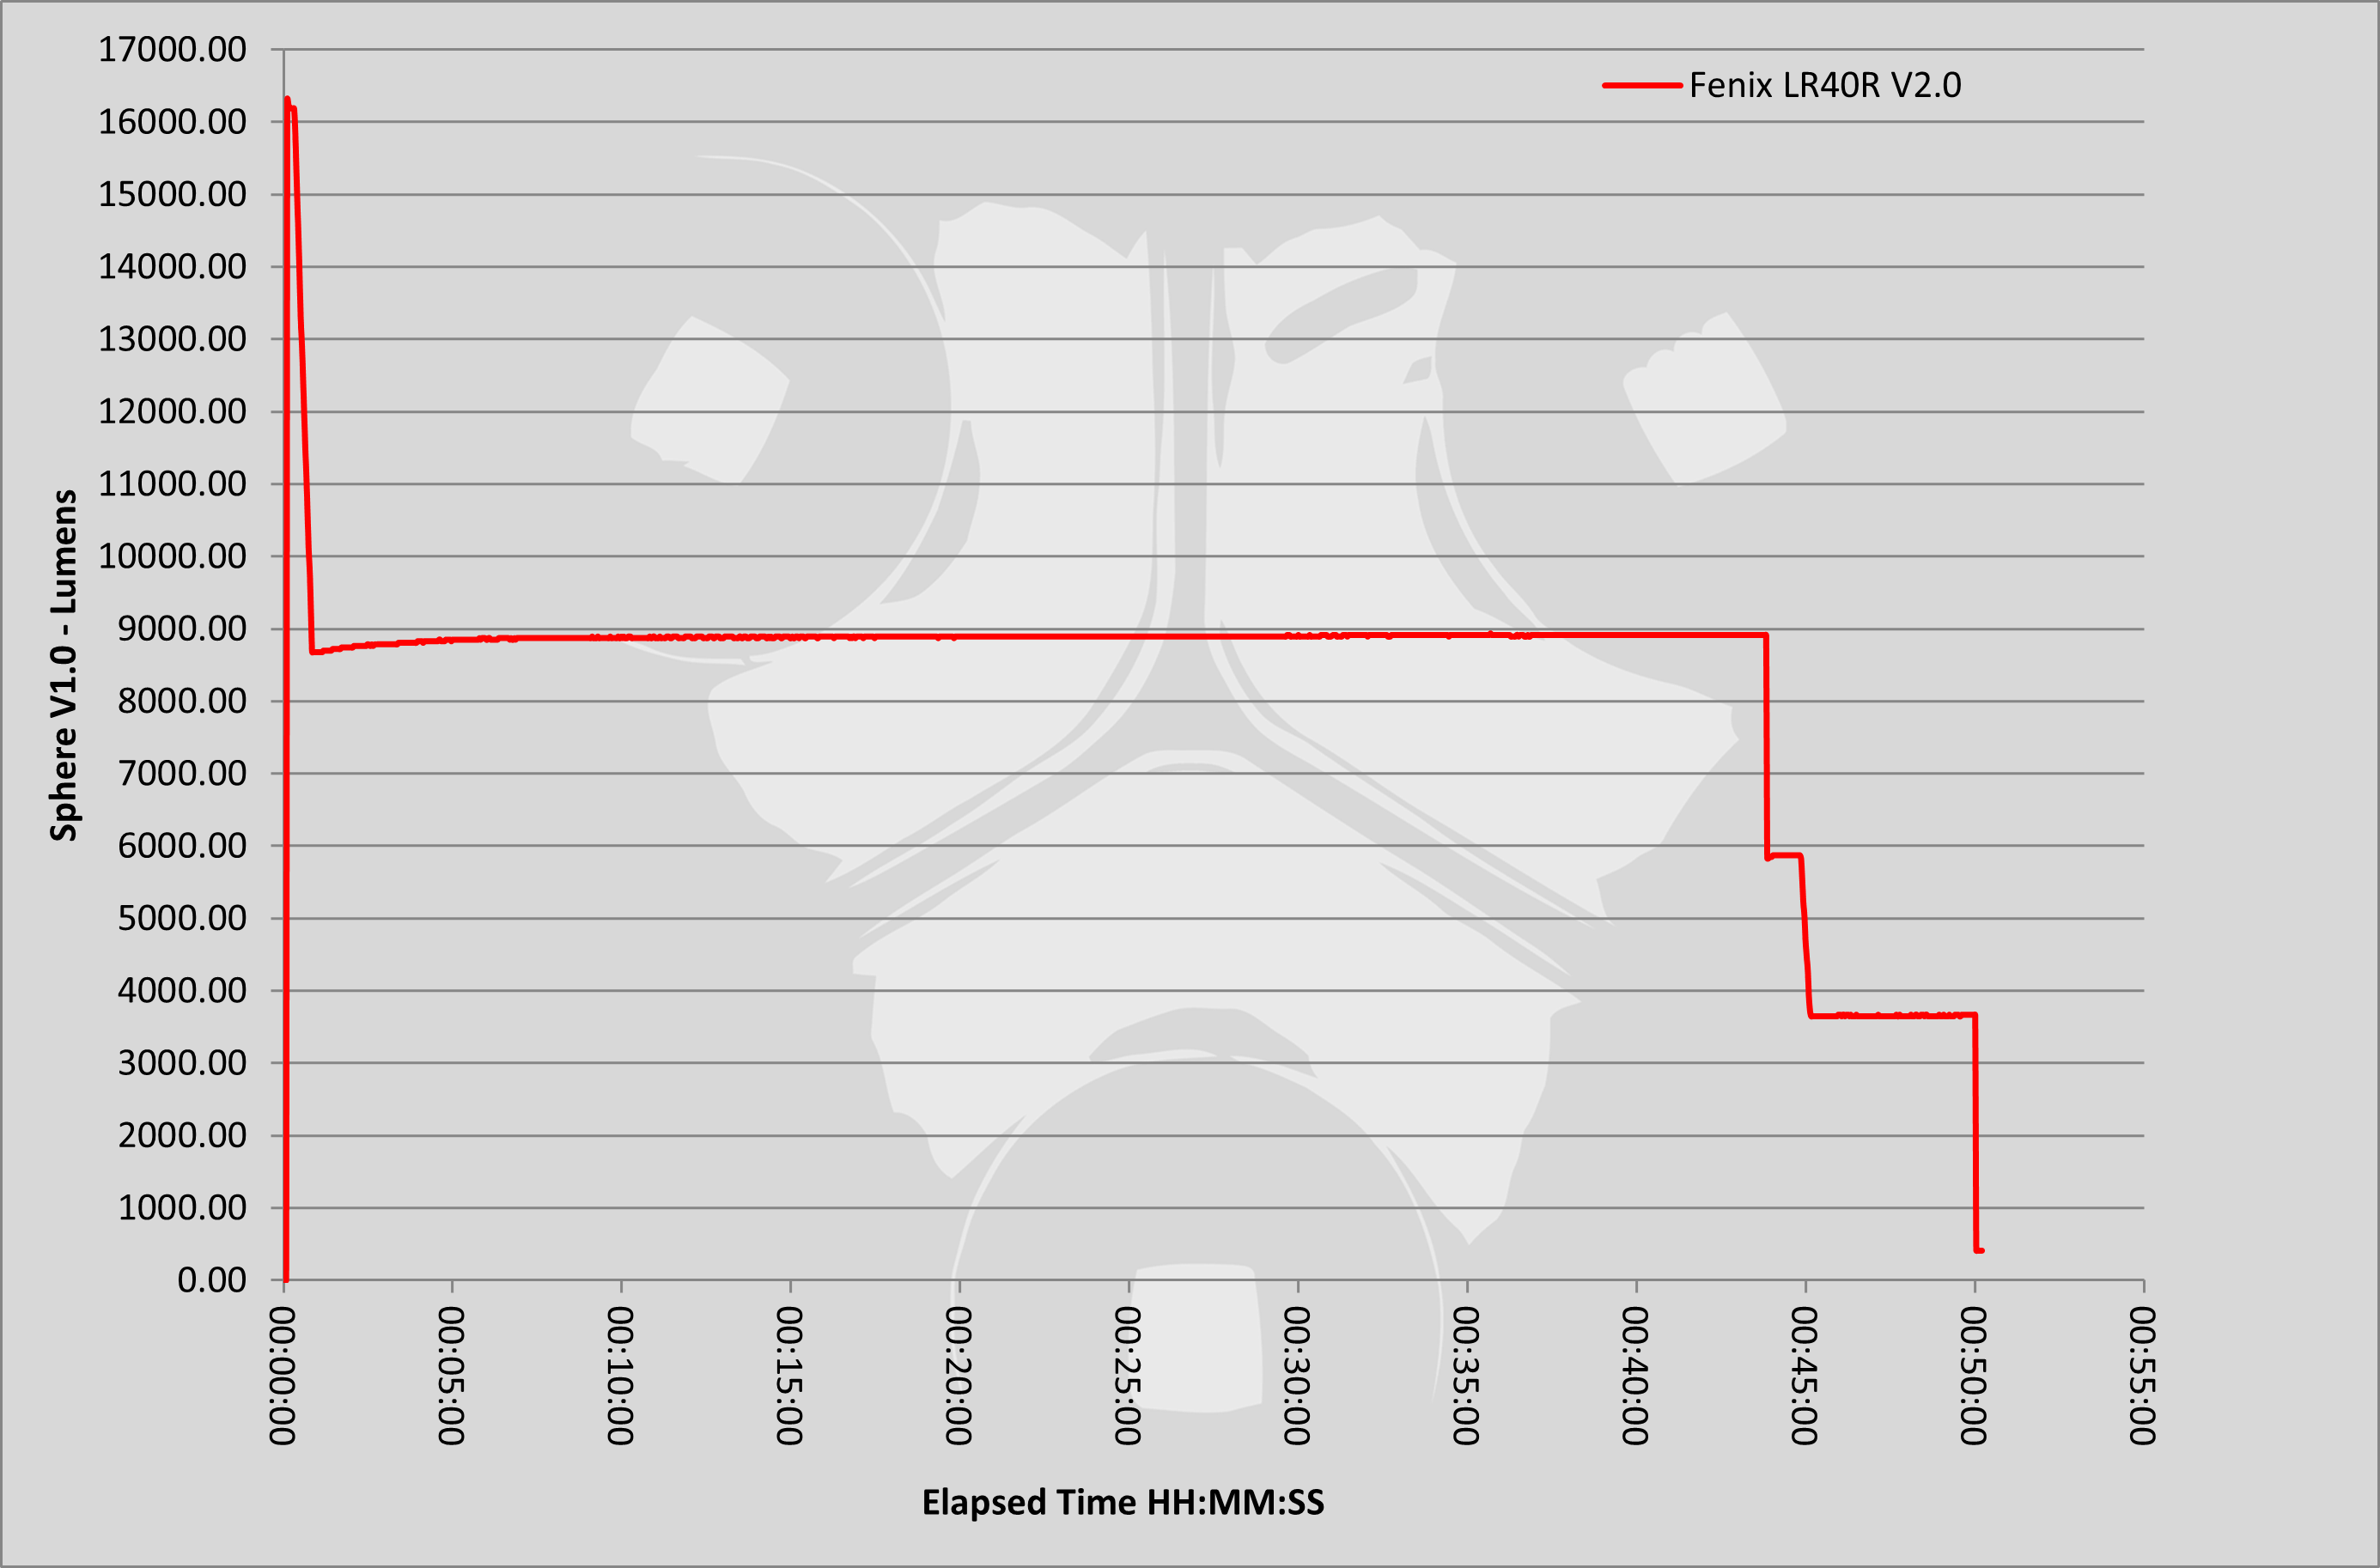
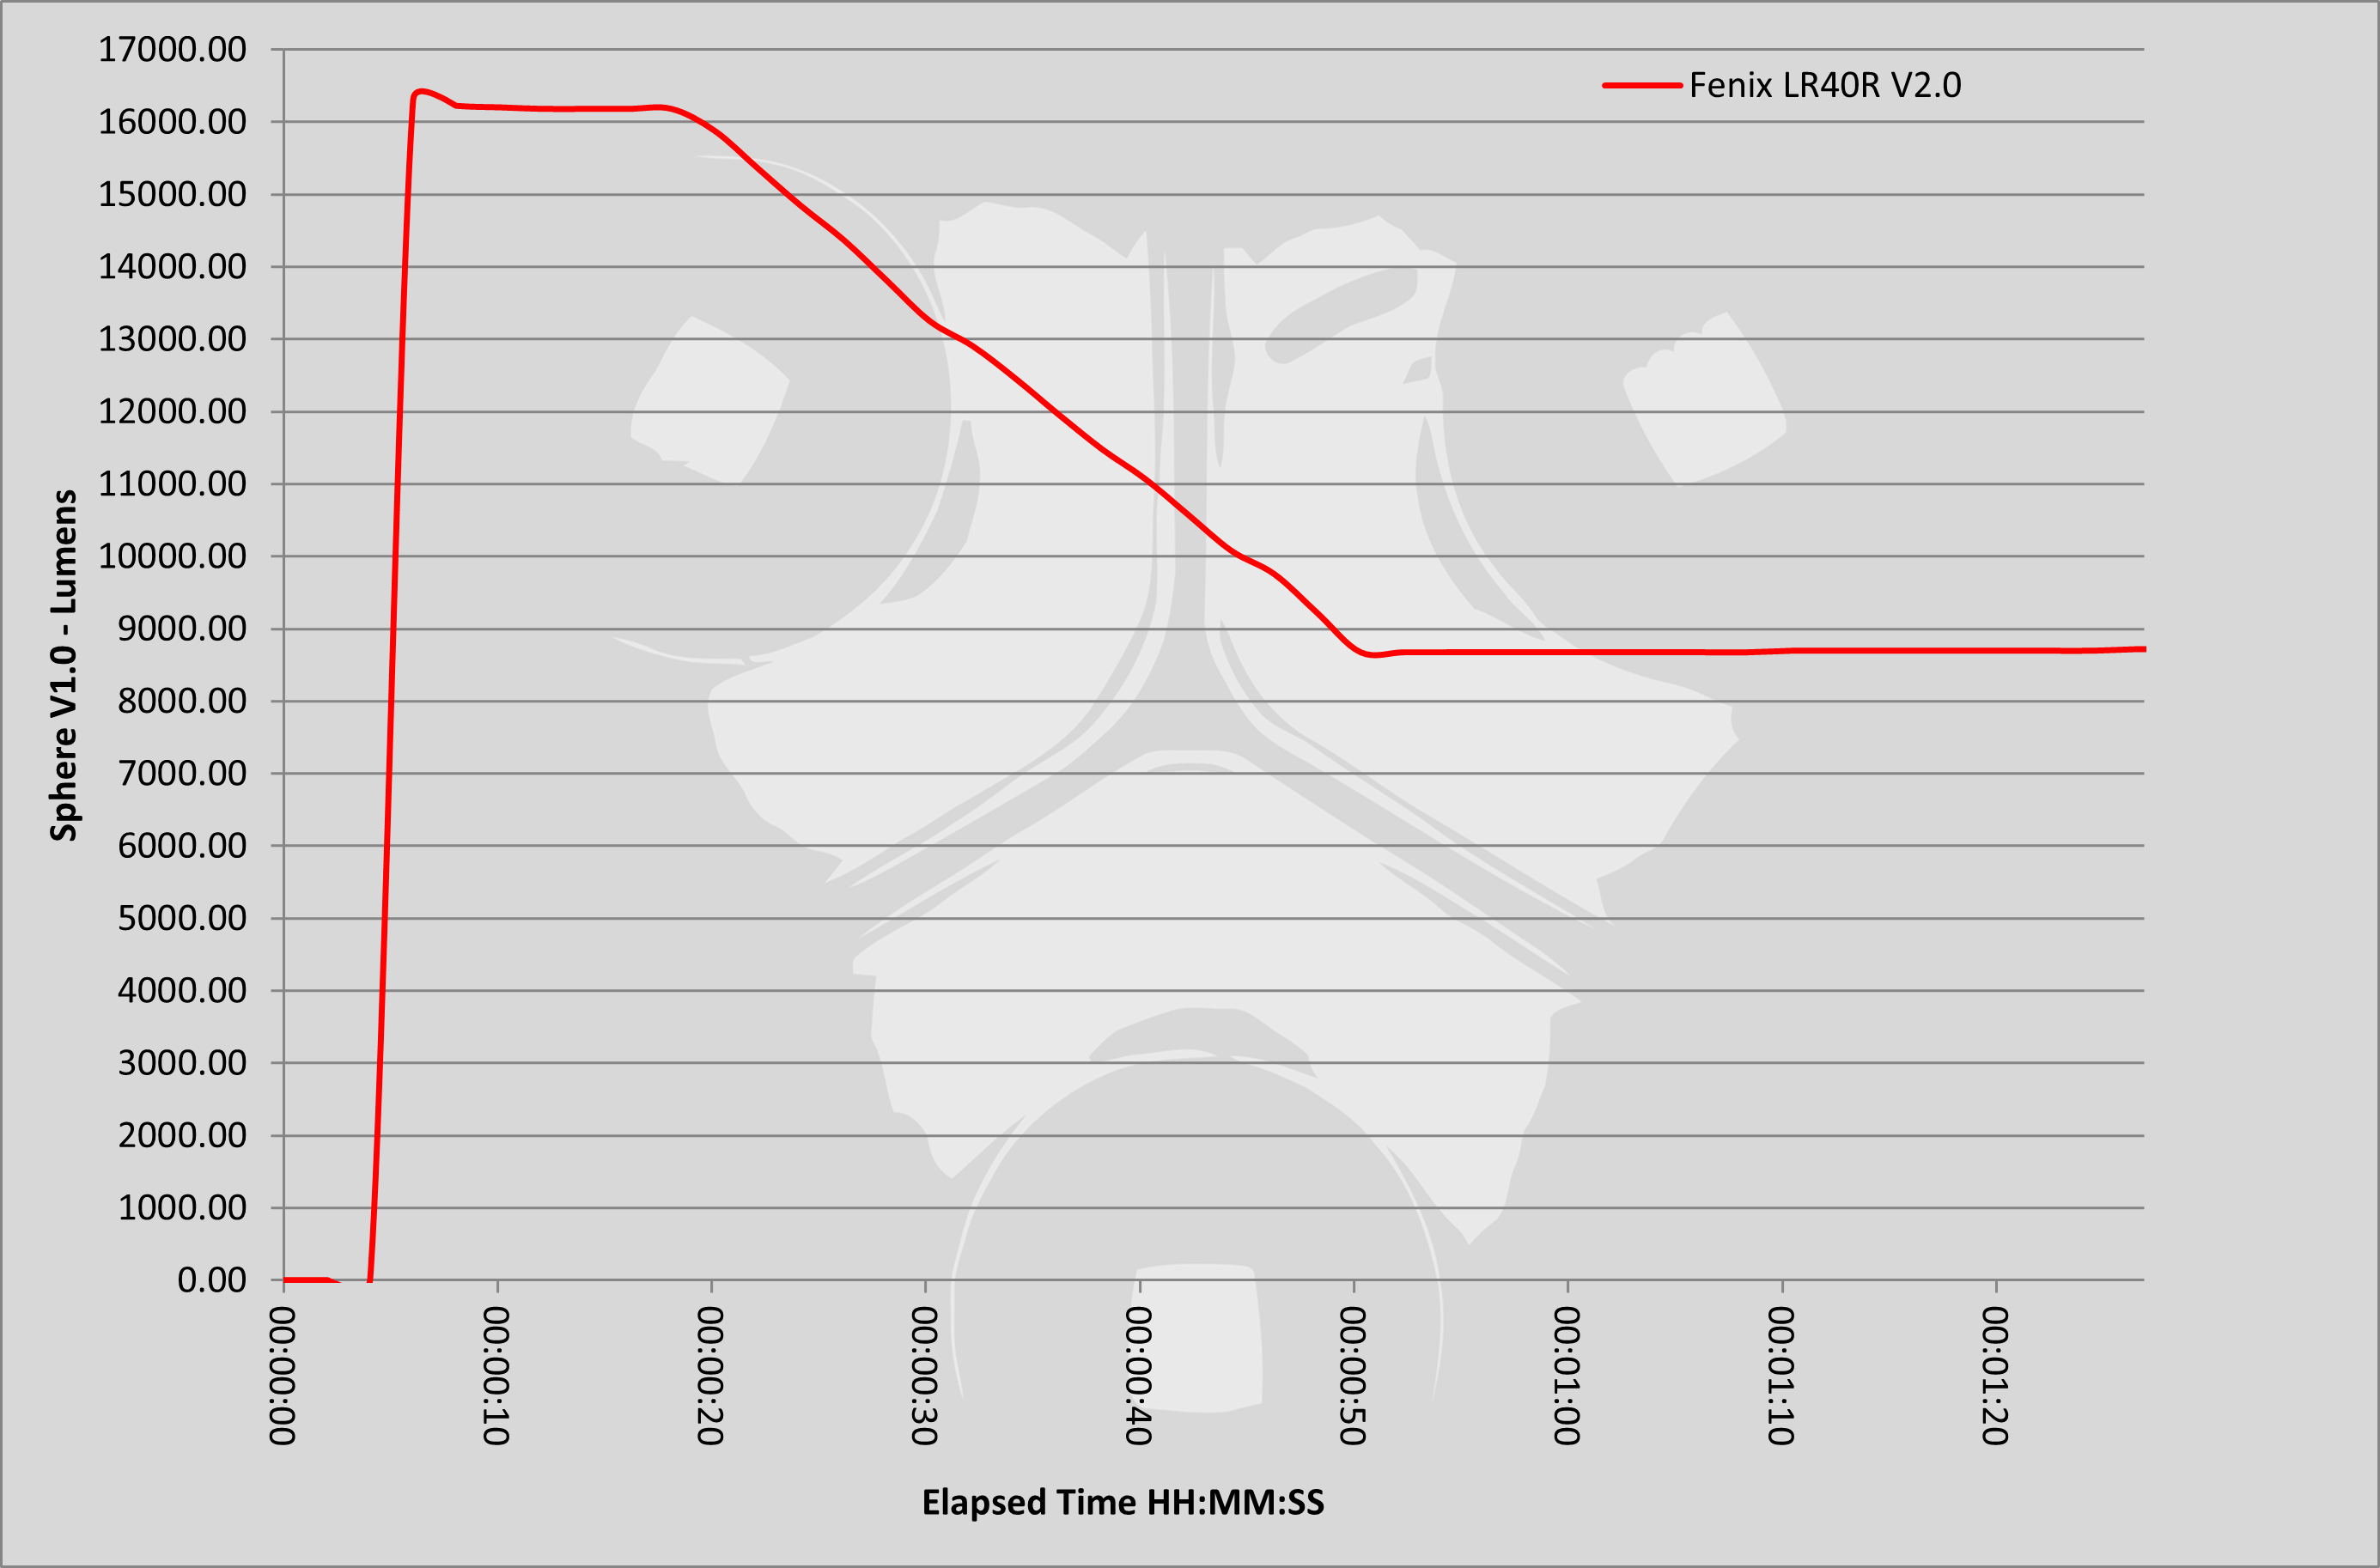
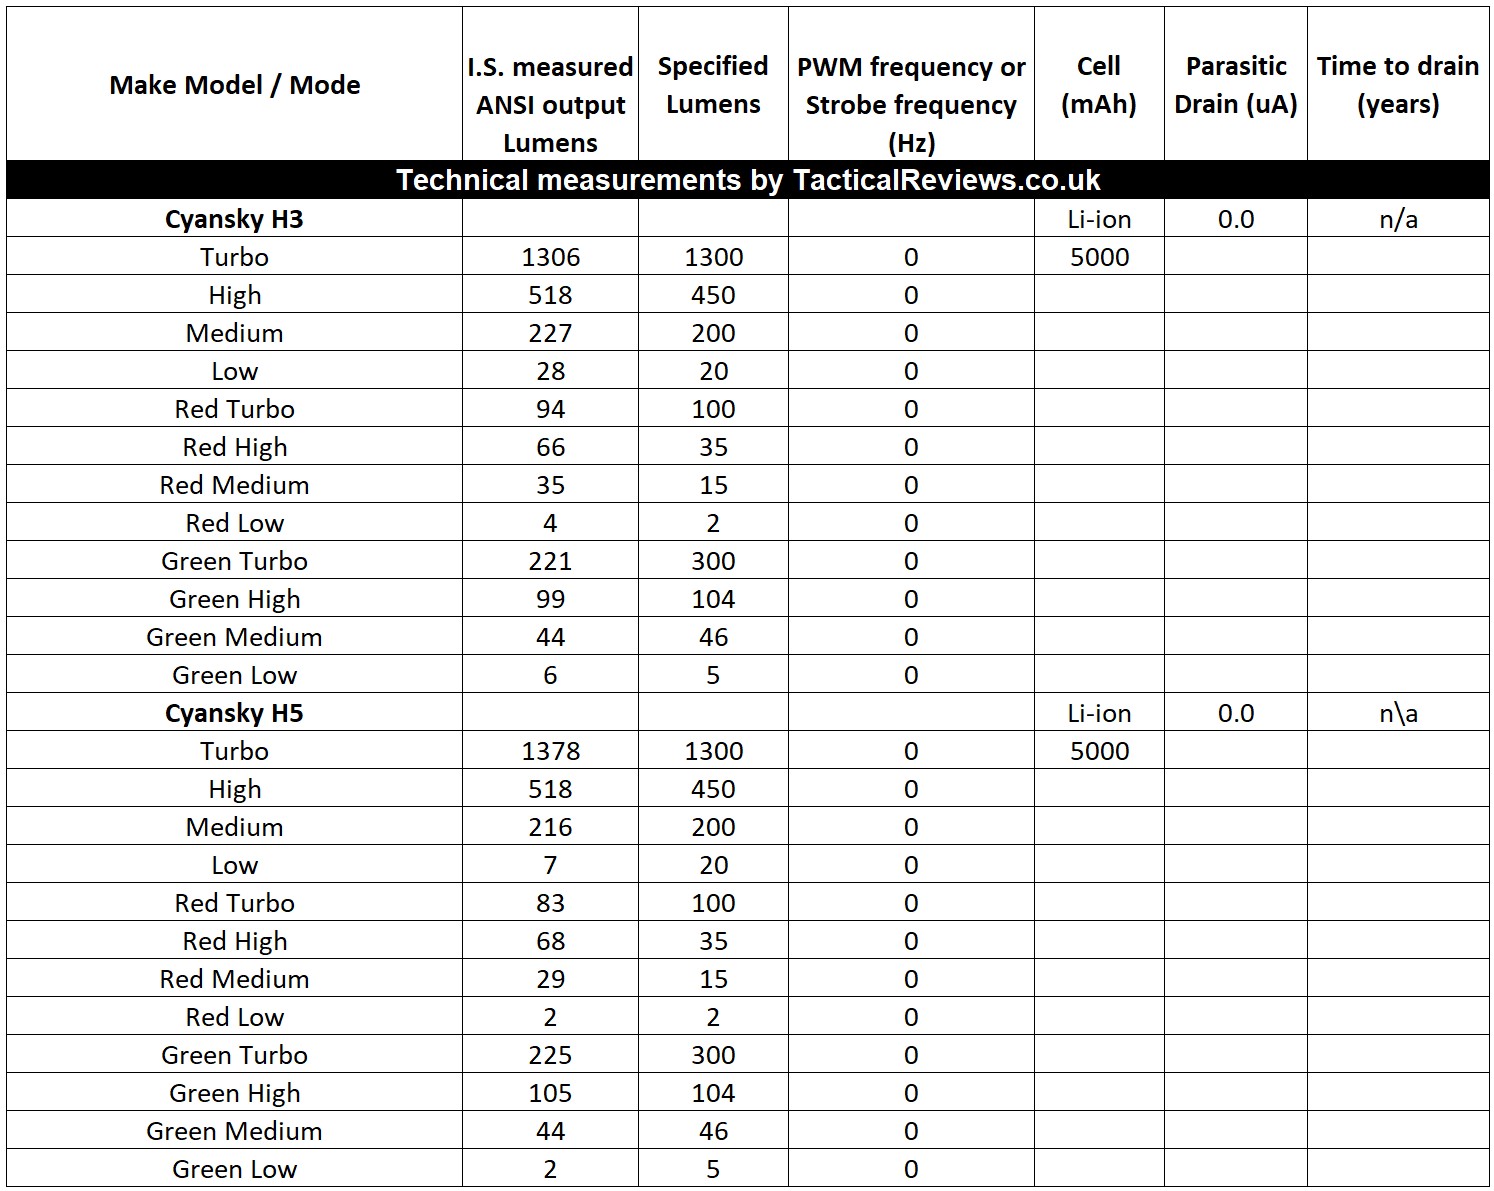
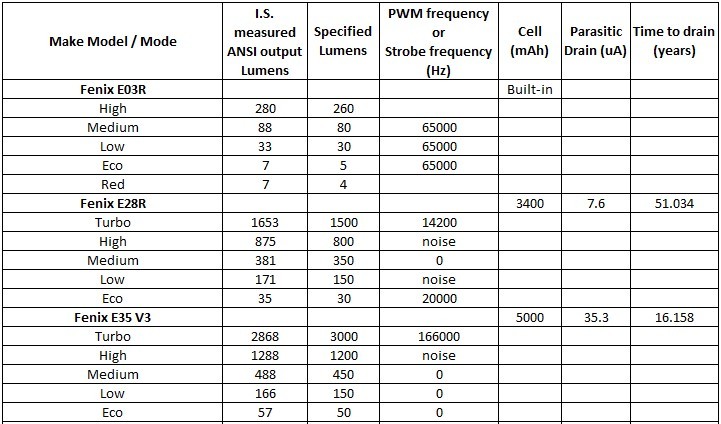
Please note, all quoted lumen figures are from a DIY integrating sphere, and according to ANSI standards. Although every effort is made to give as accurate a result as possible, they should be taken as an estimate only. The results can be used to compare outputs in this review and others I have published.
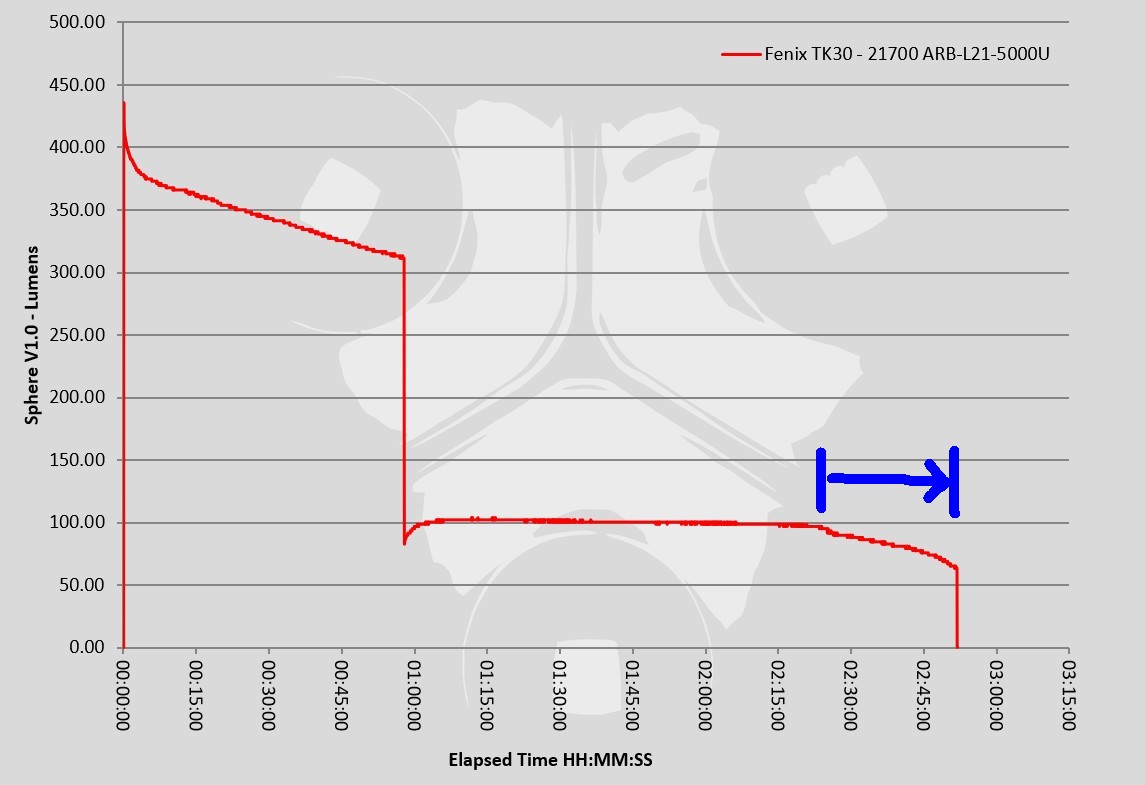
This table compares measured and specified outputs for each mode.
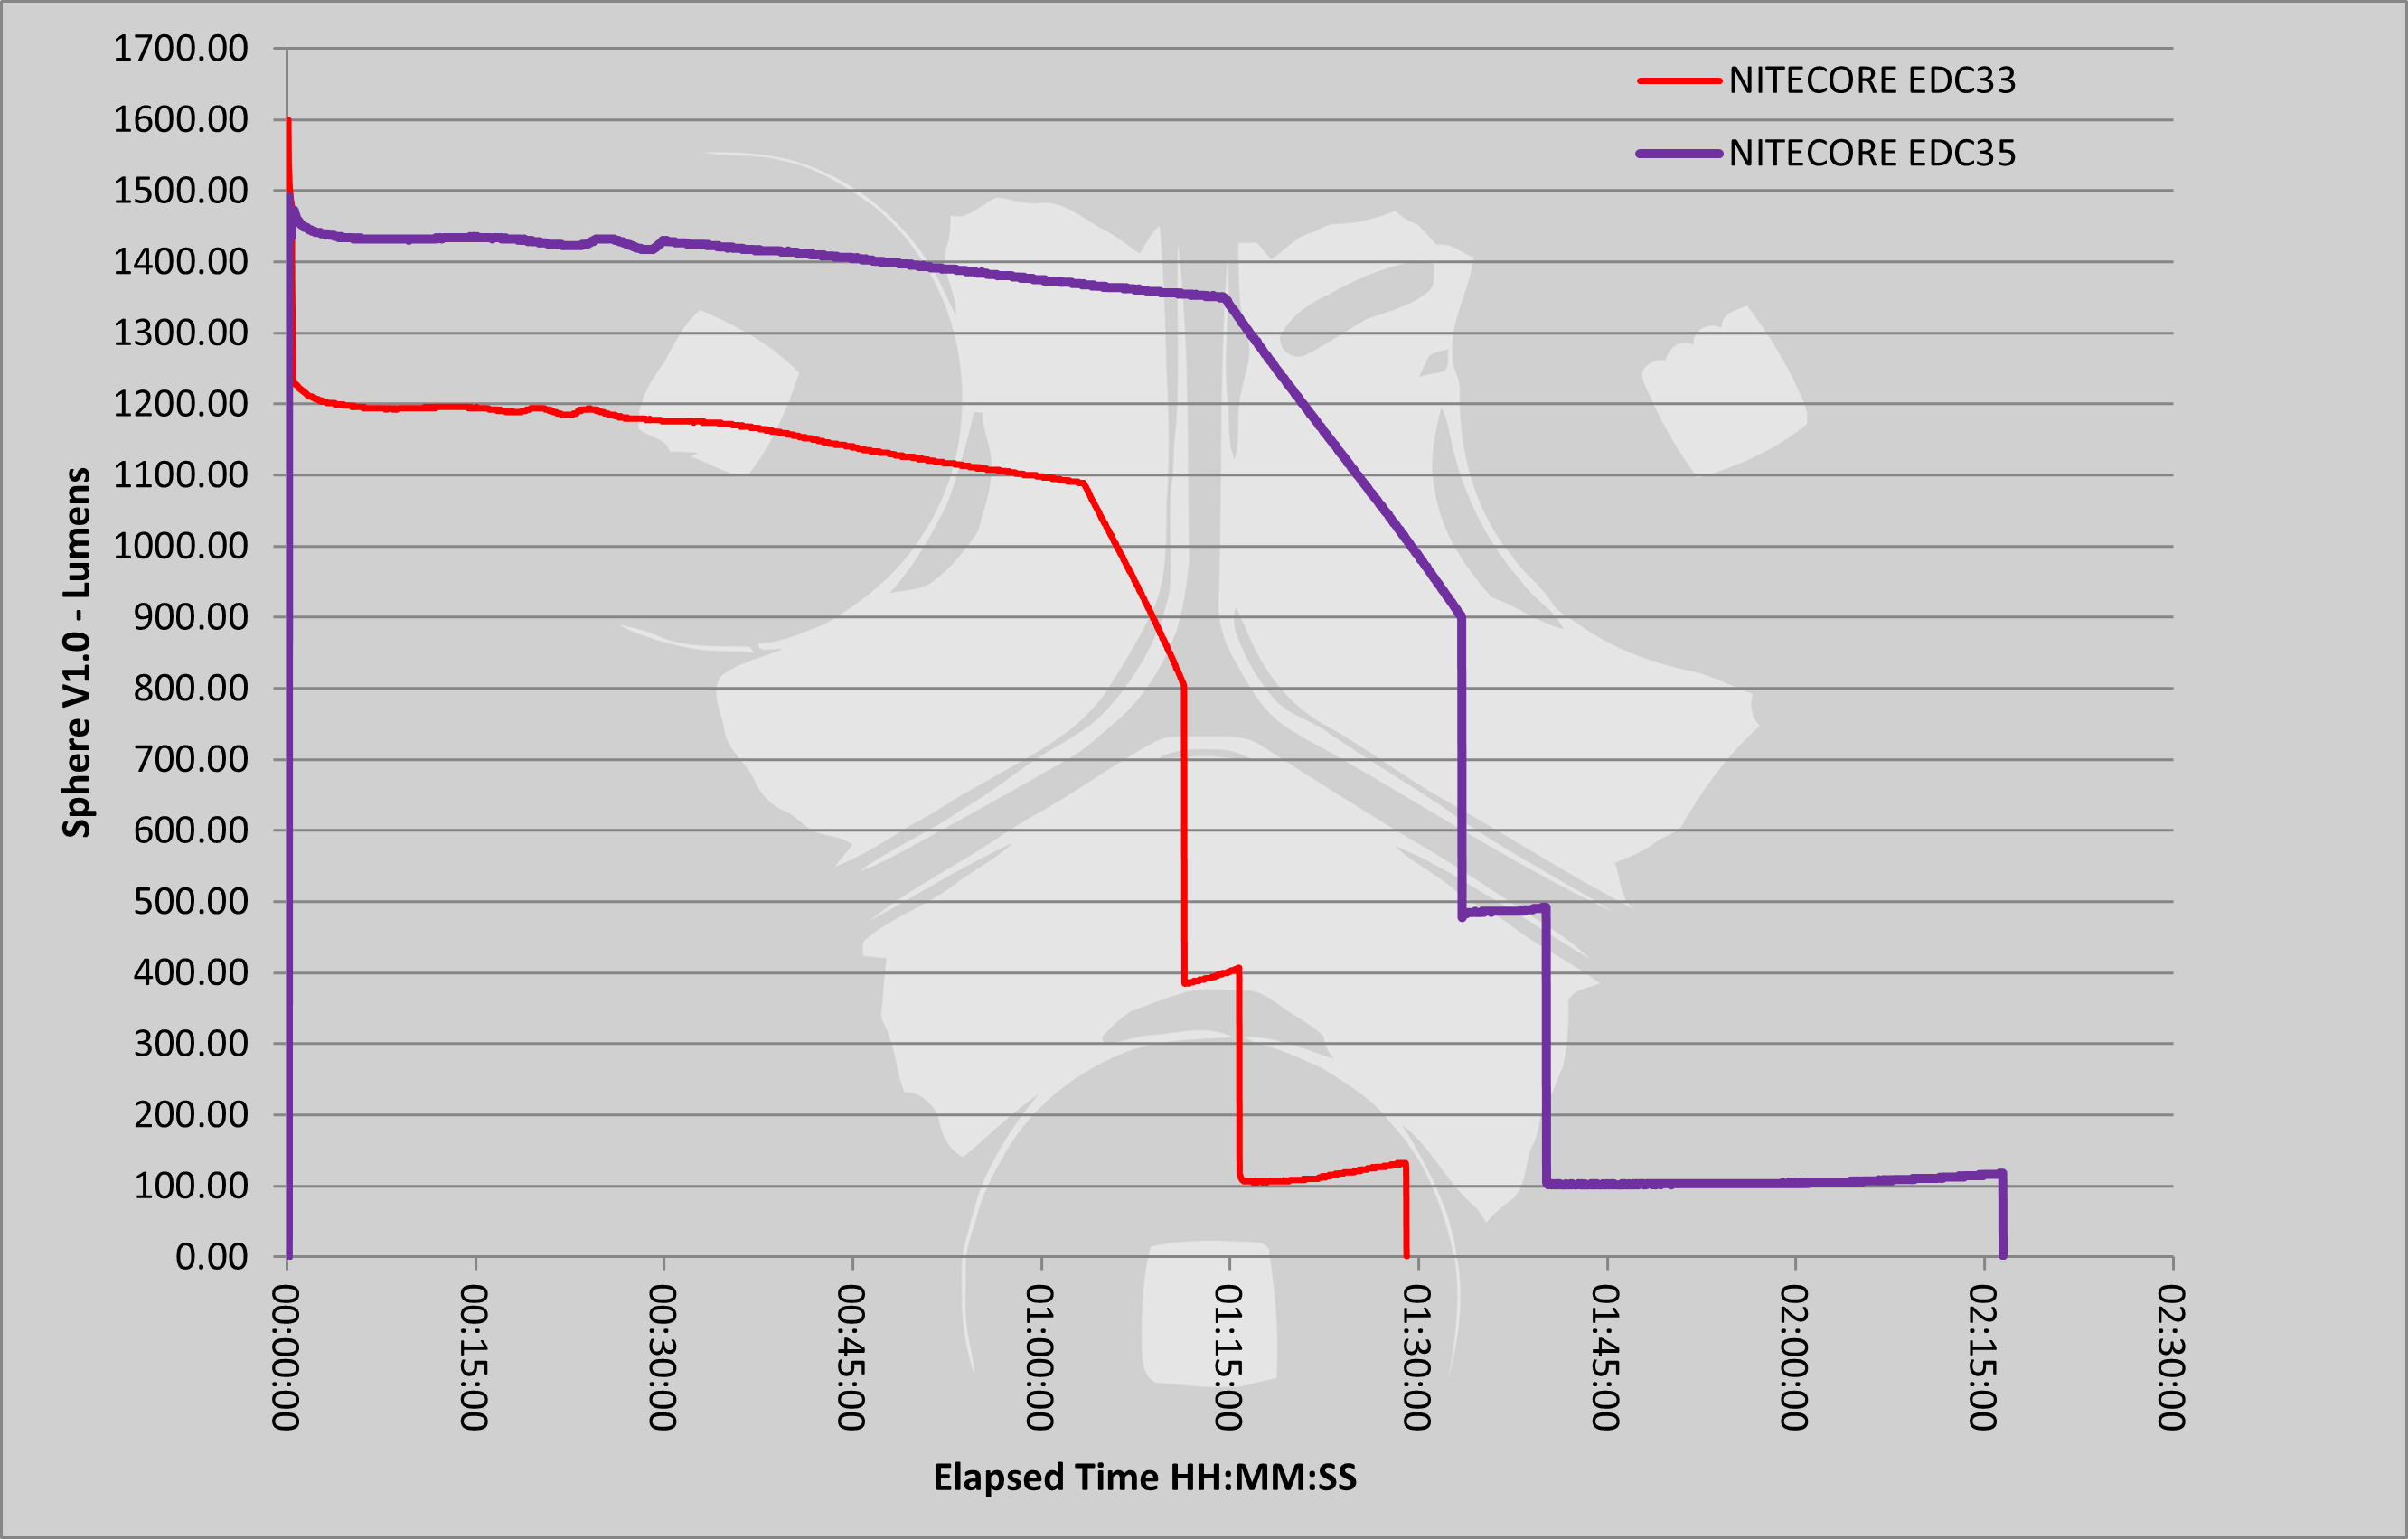
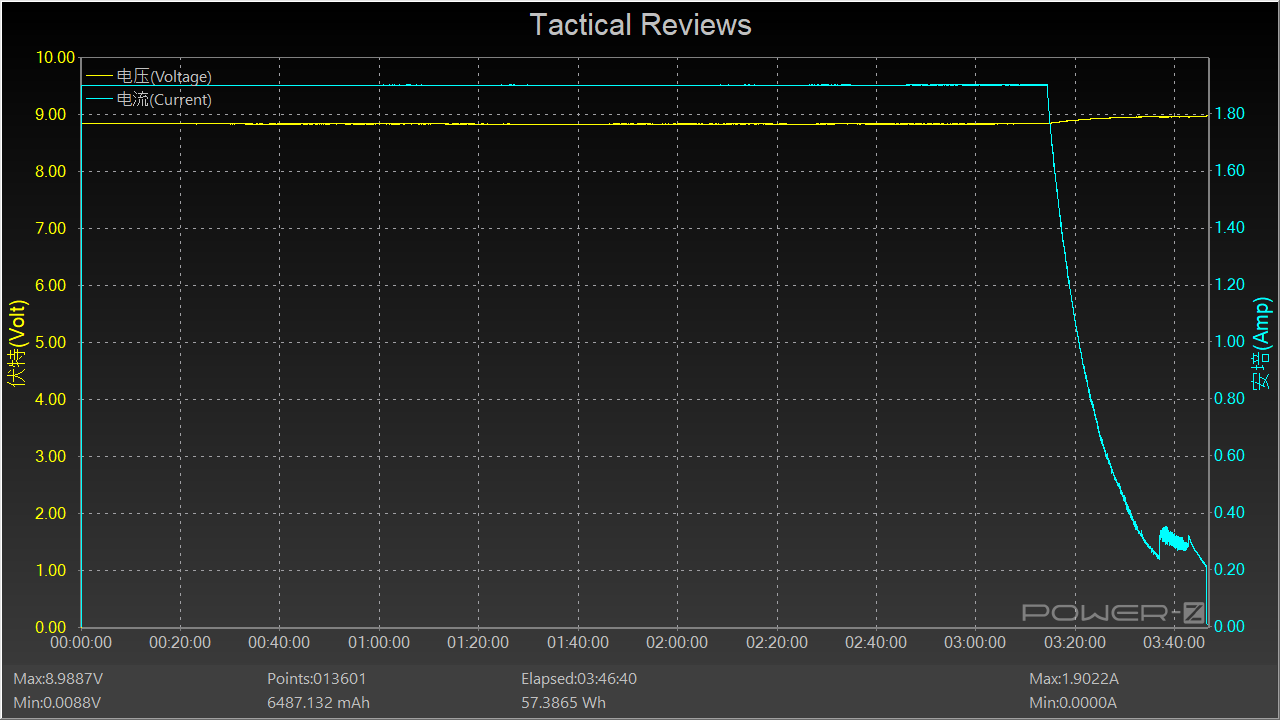
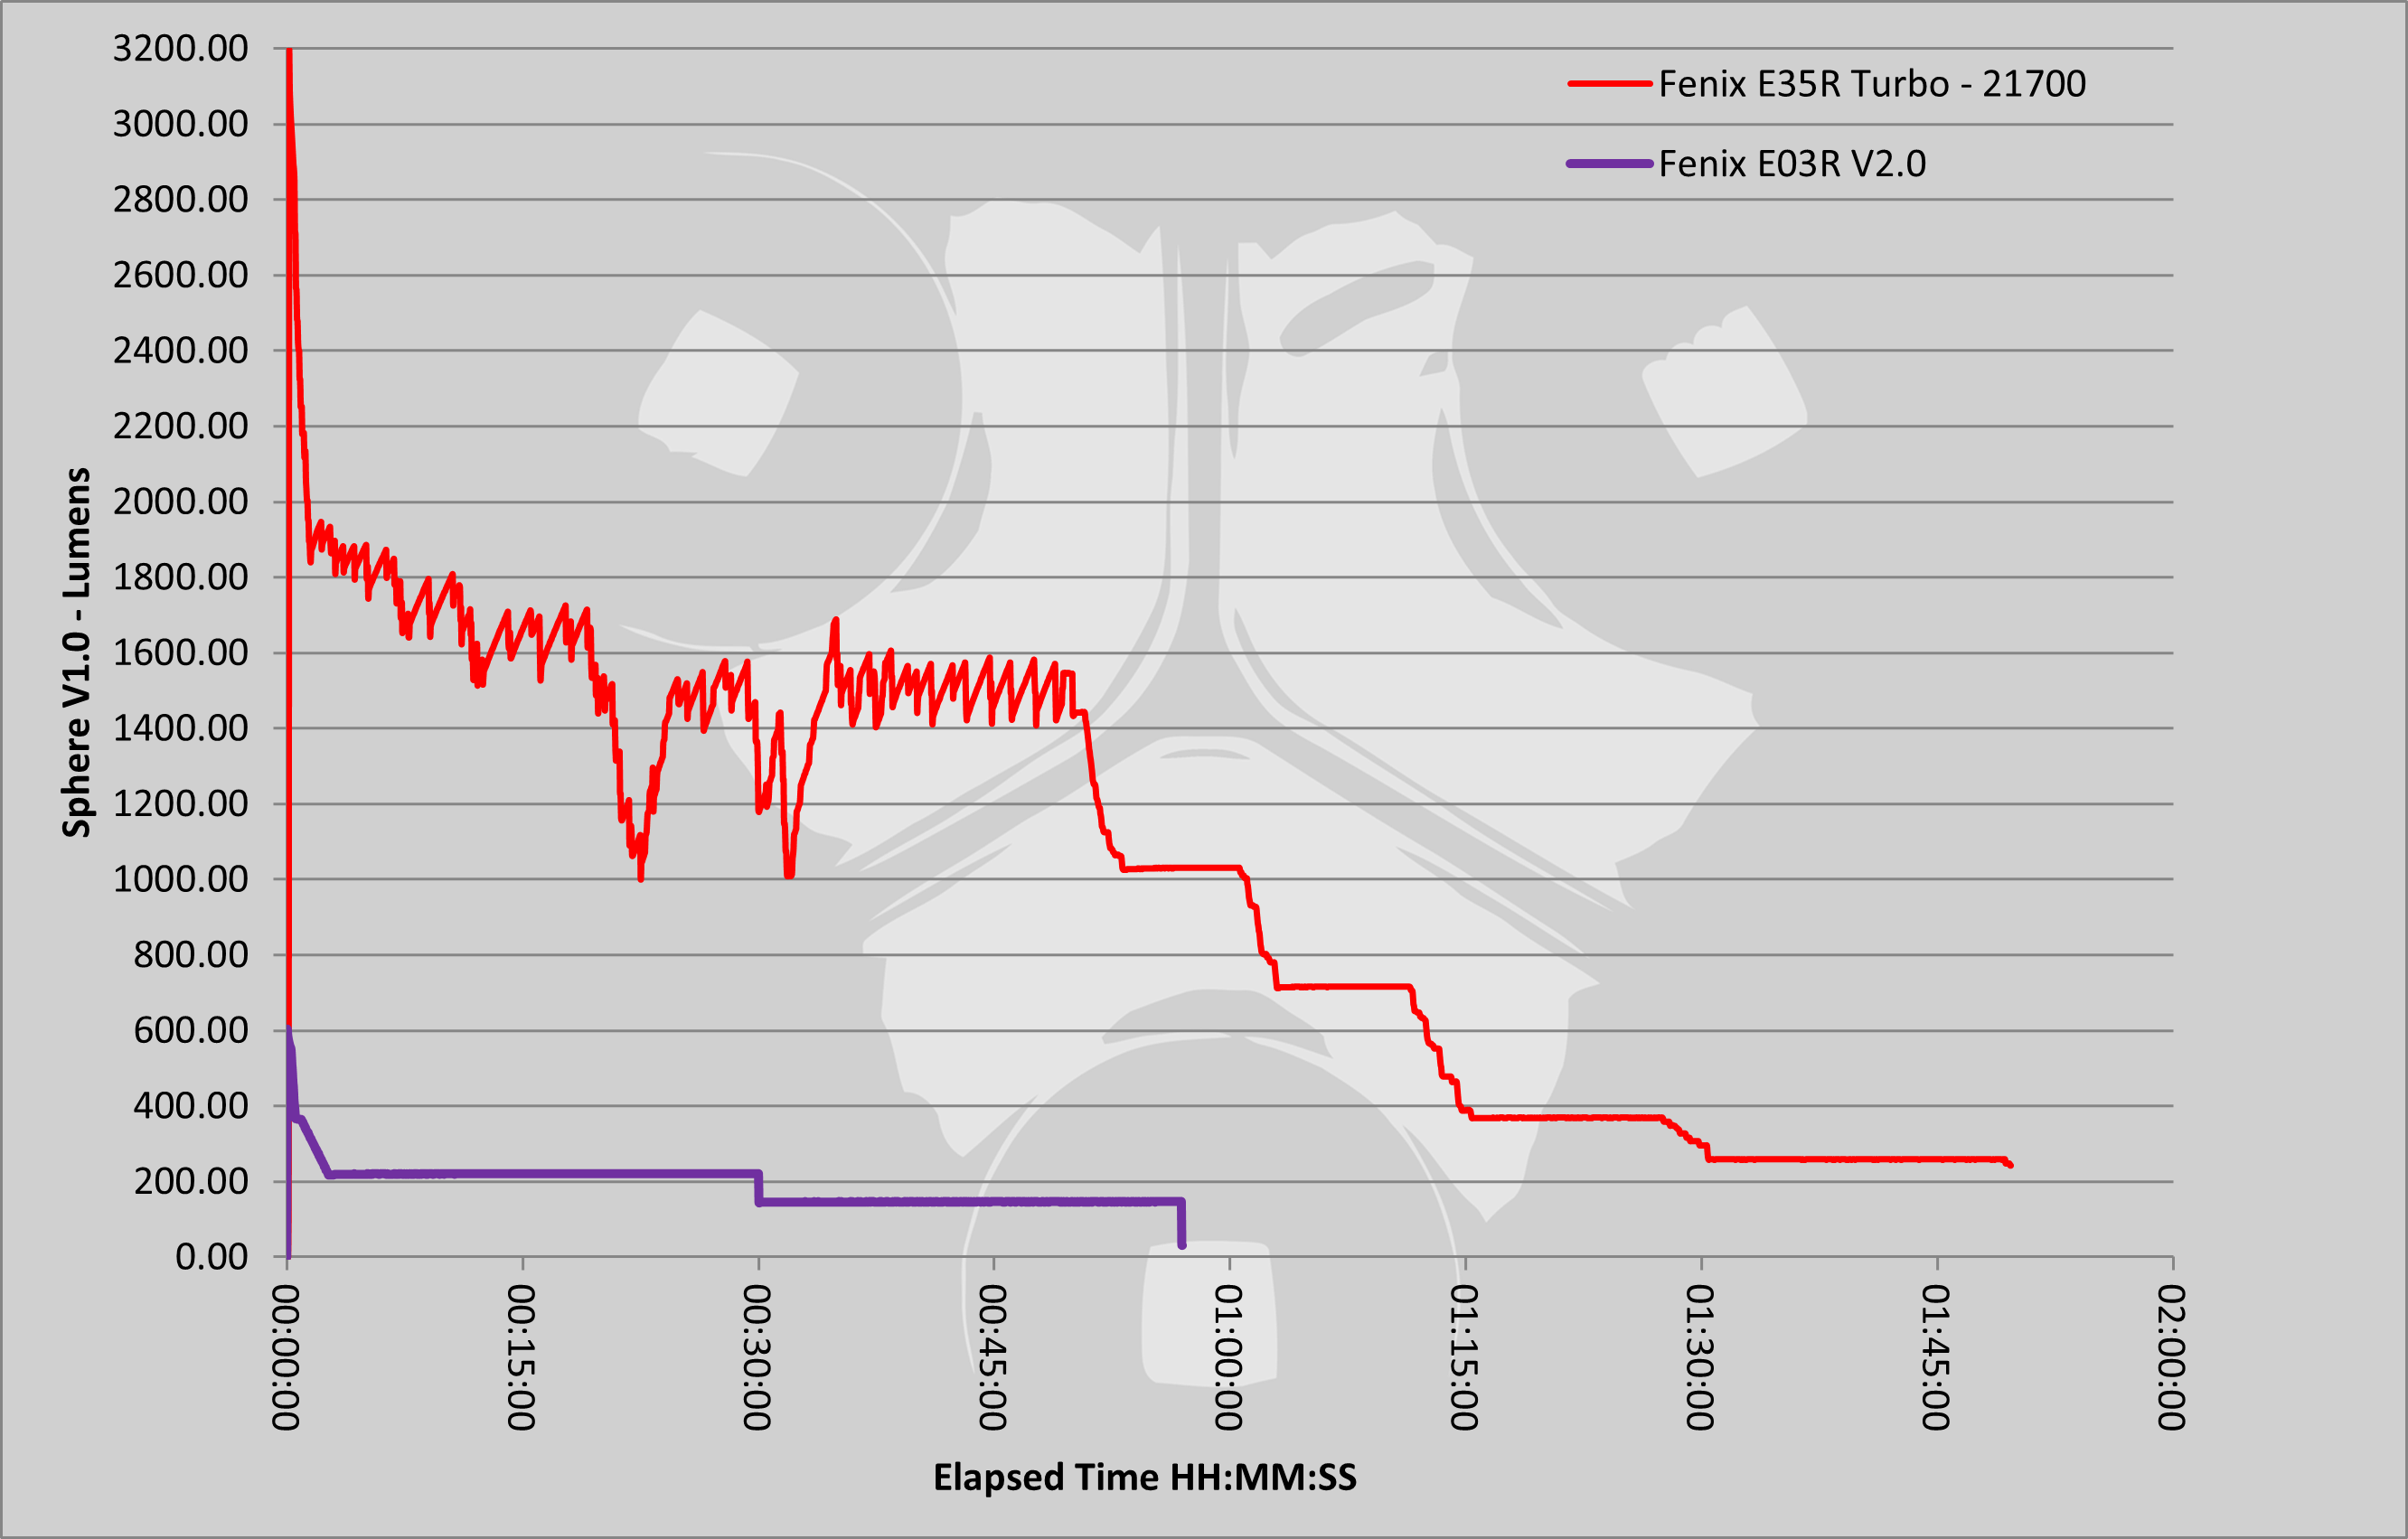
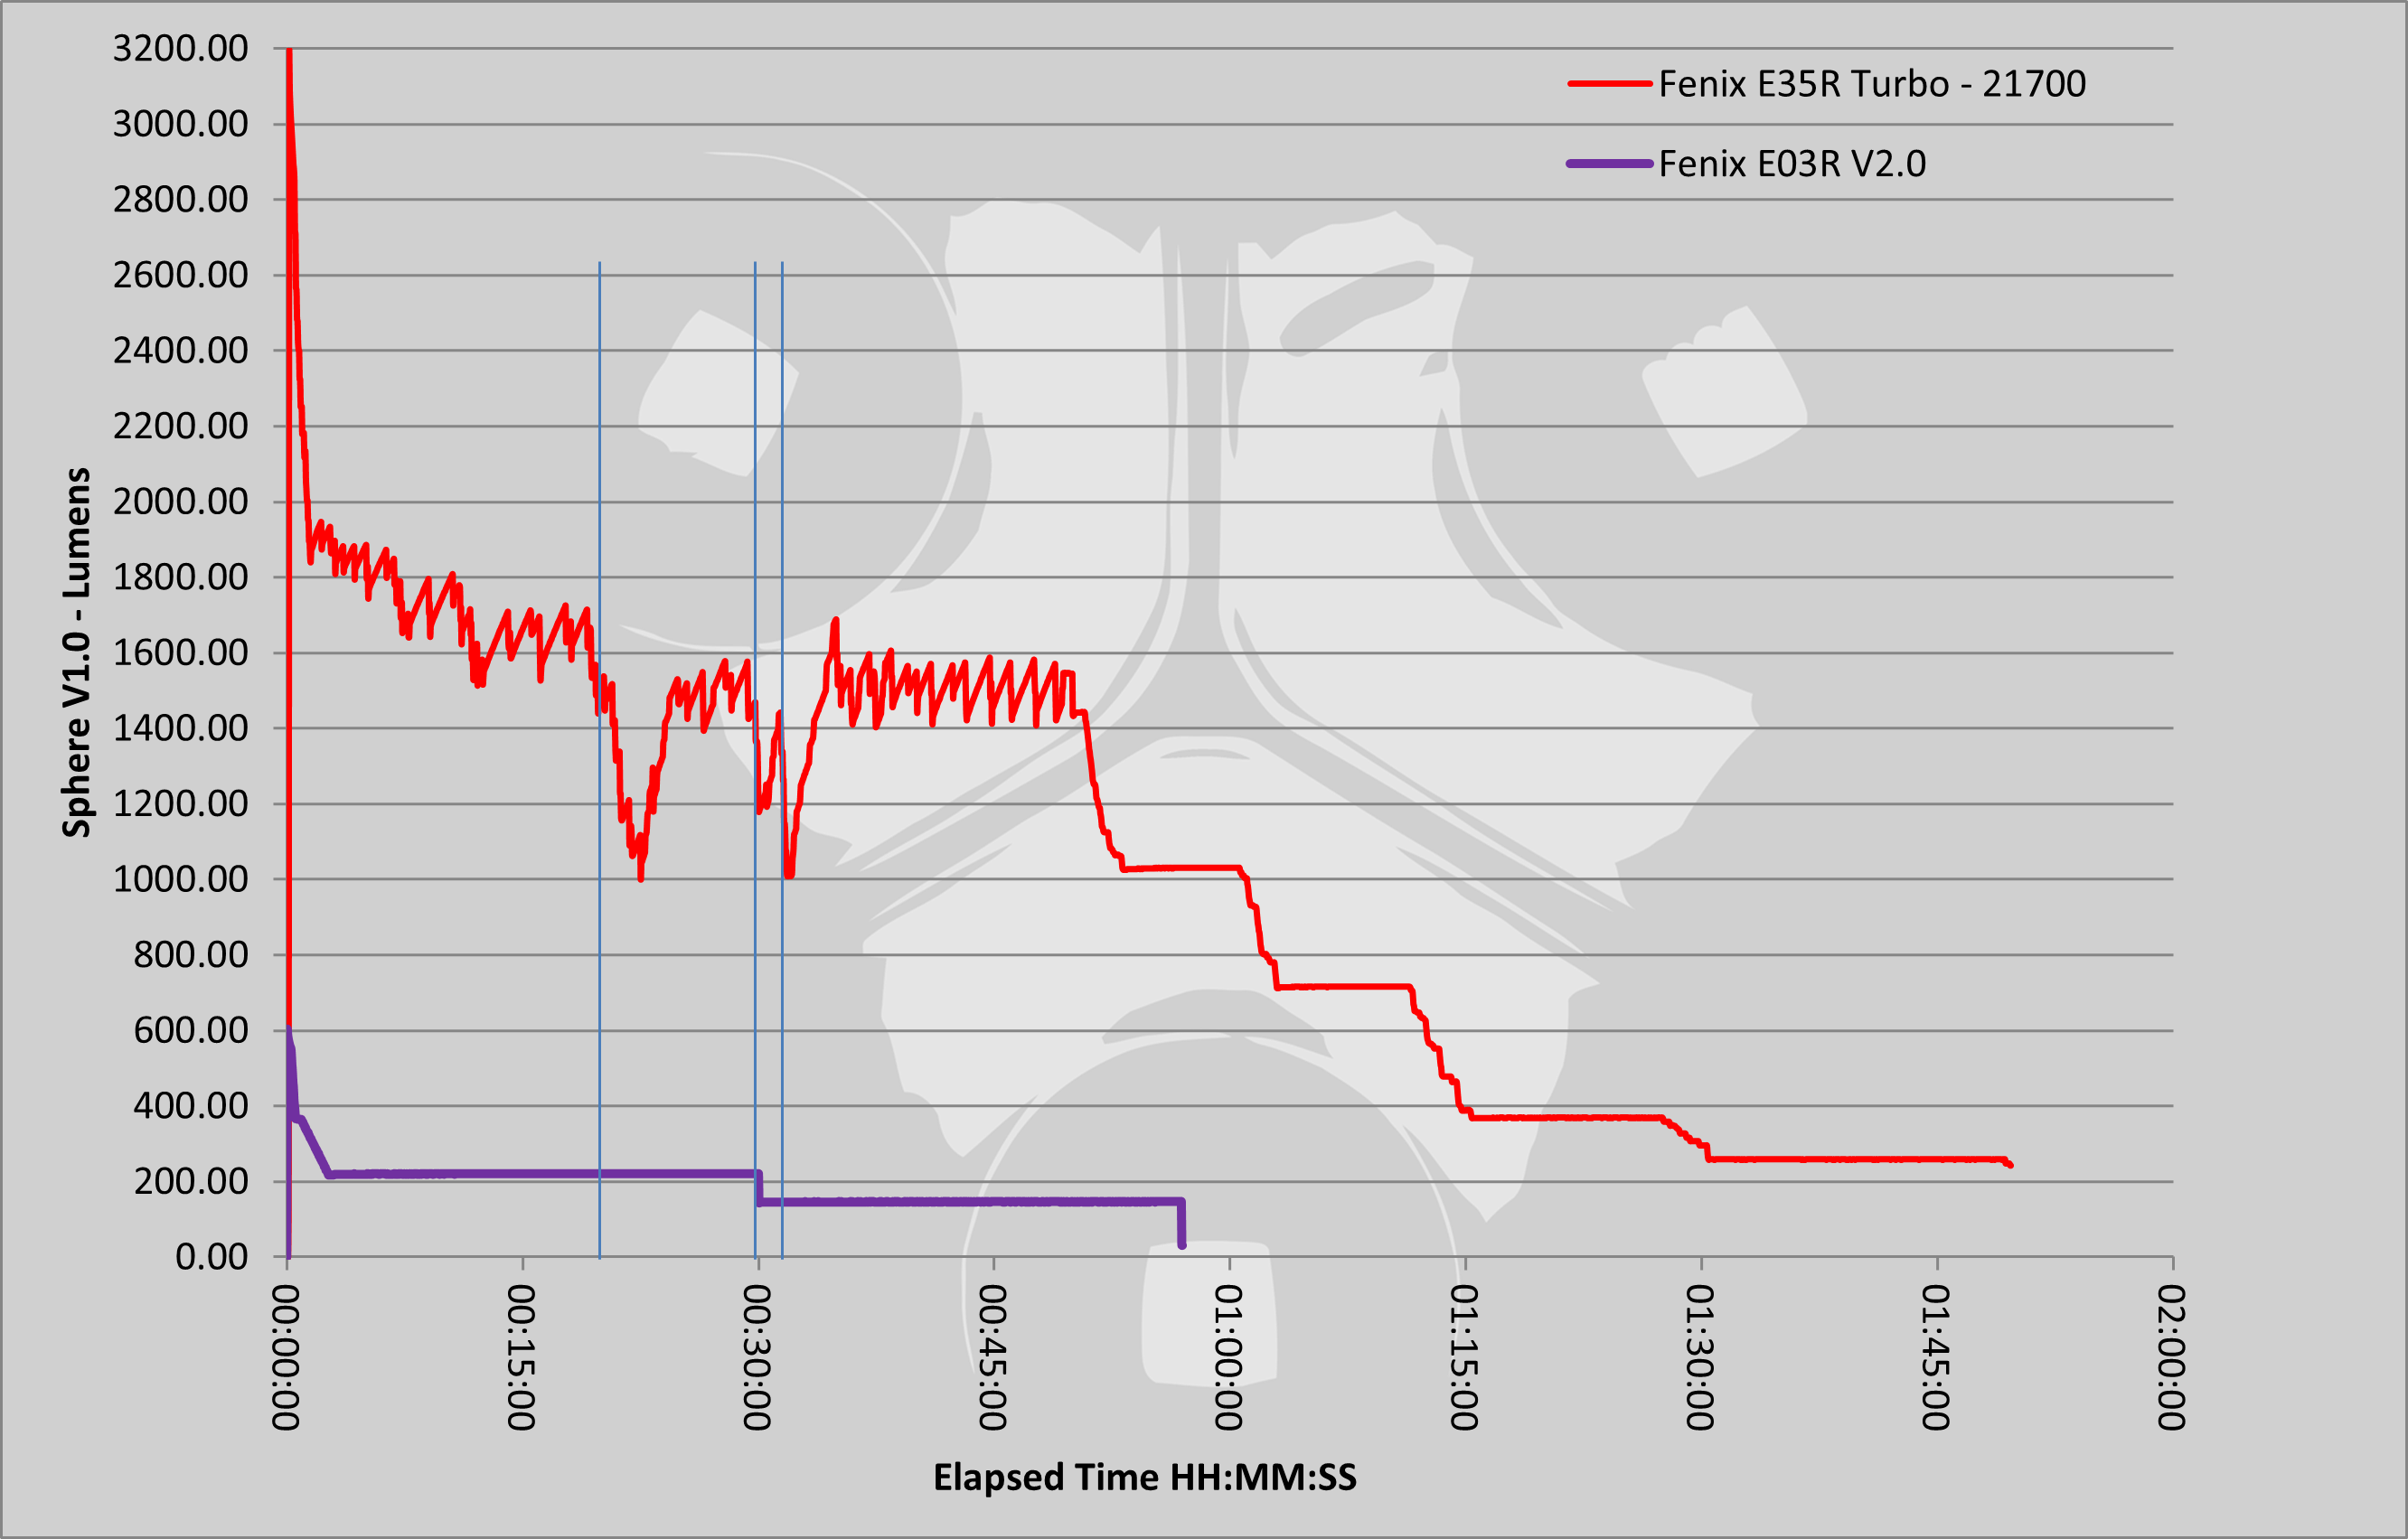
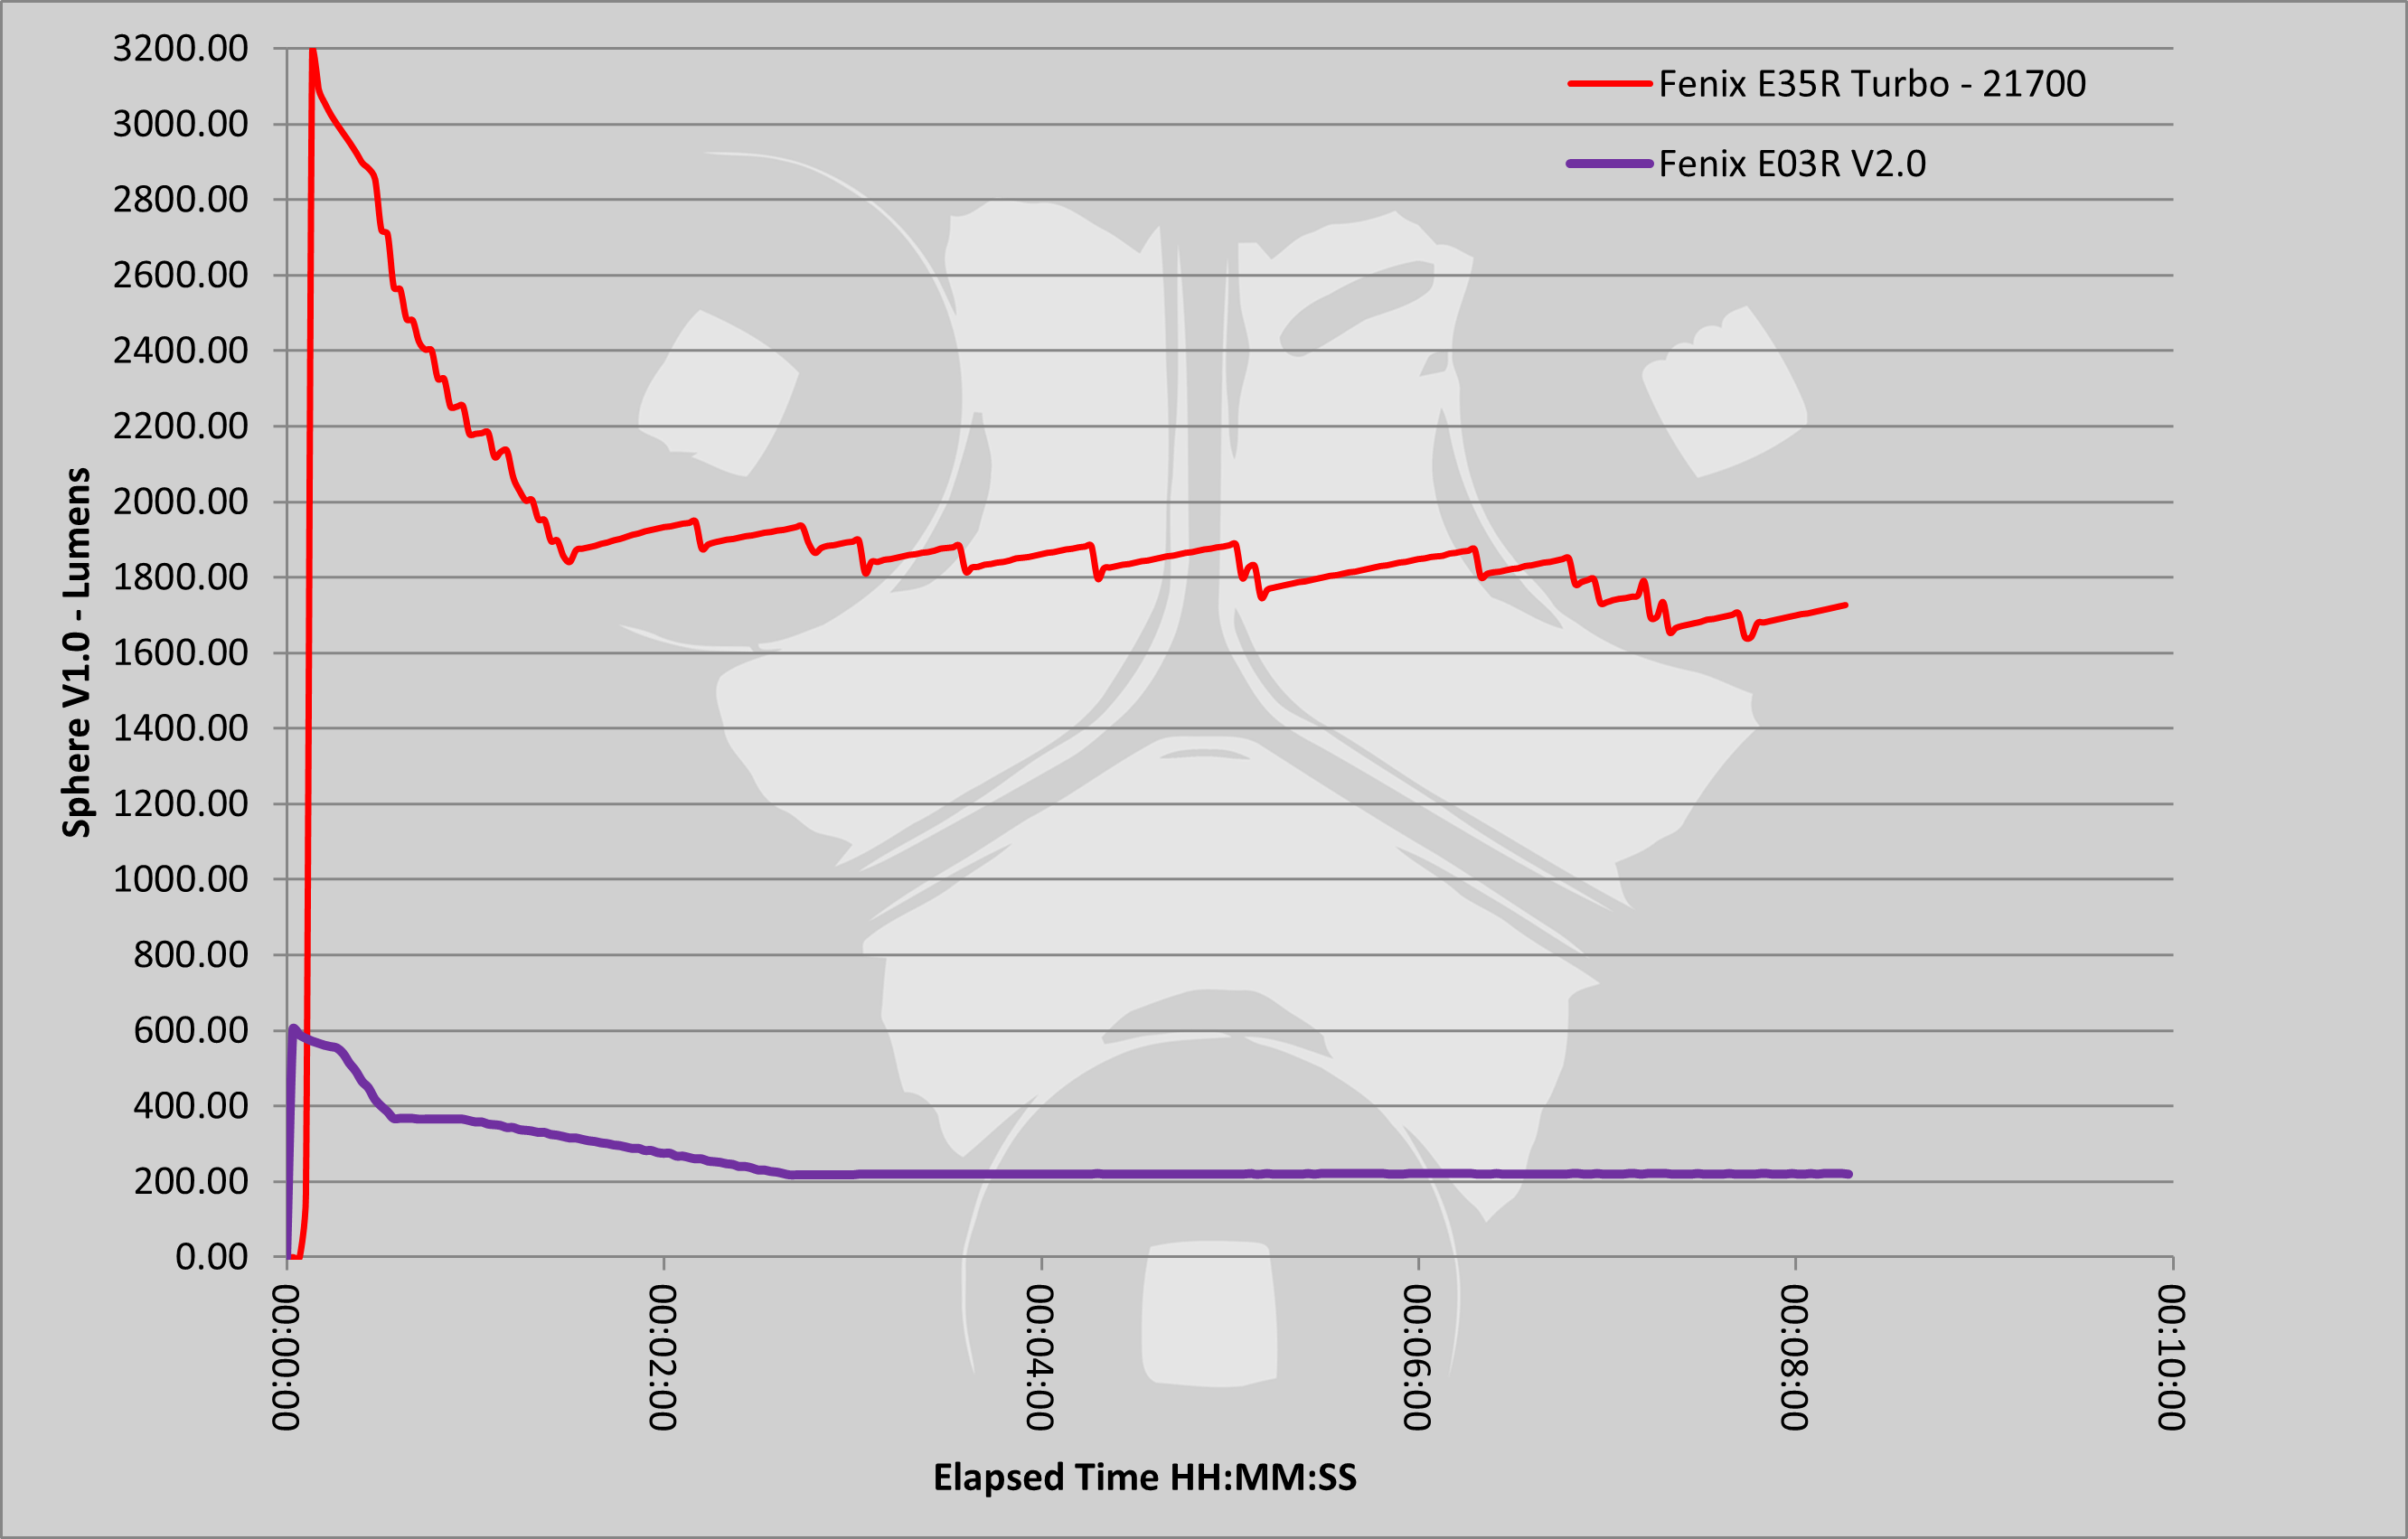
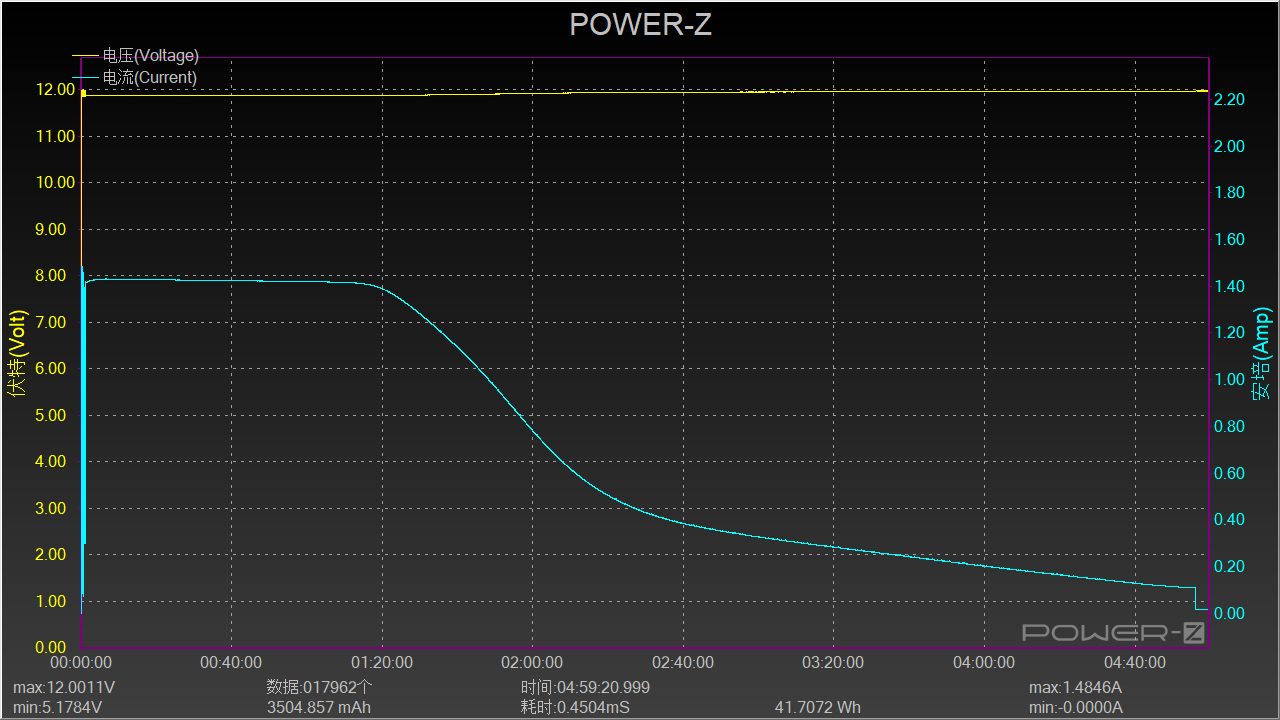
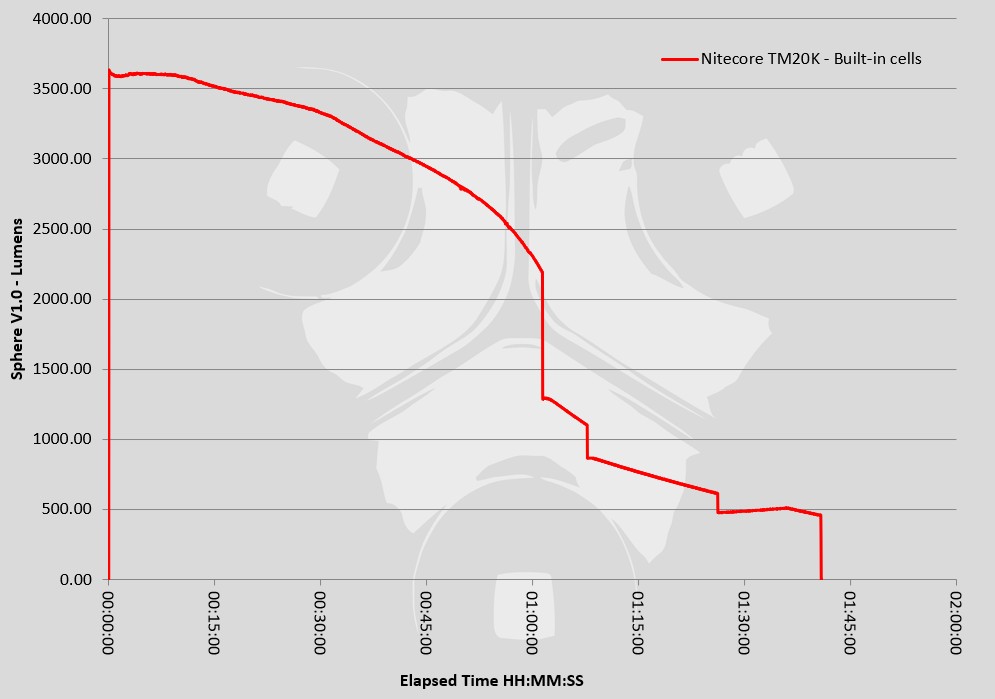
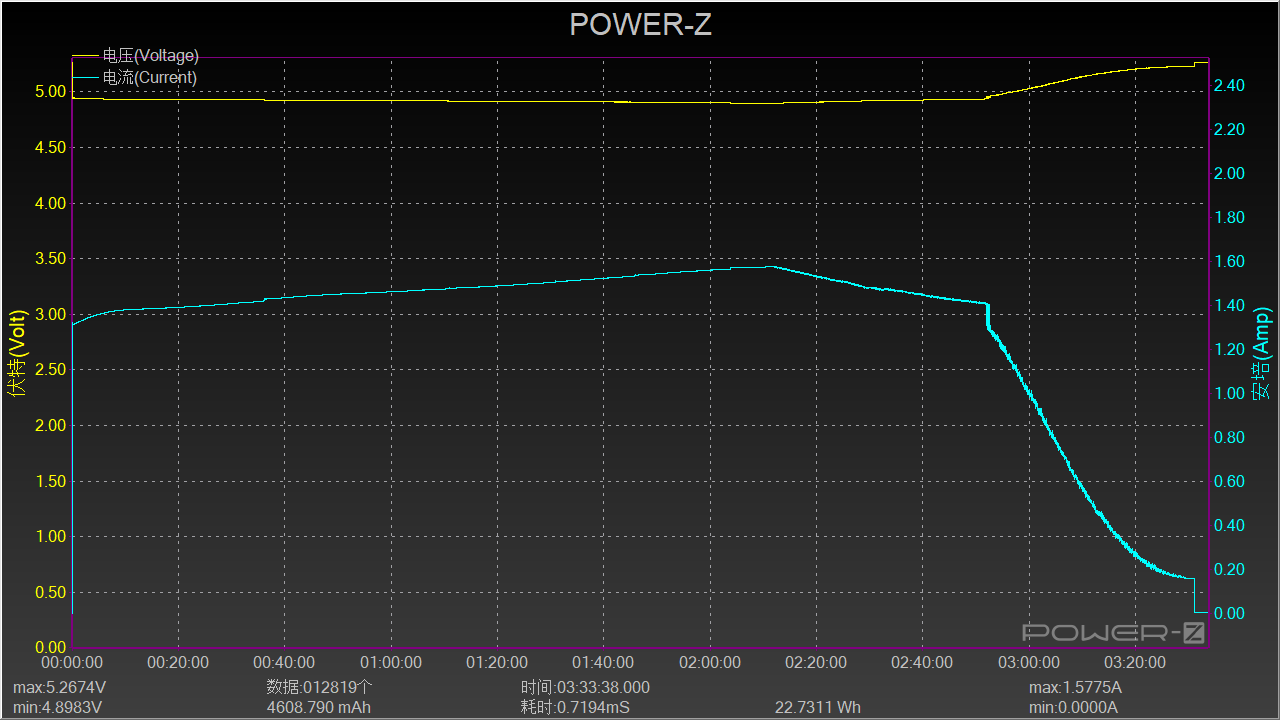
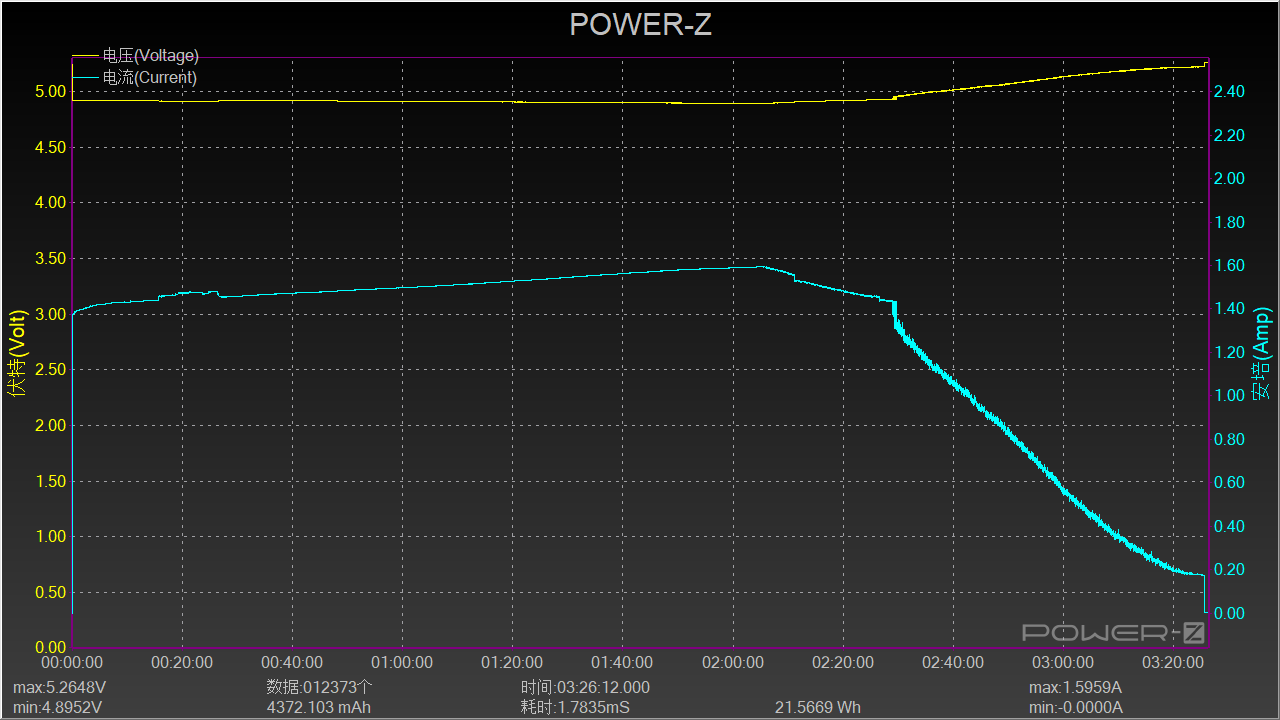
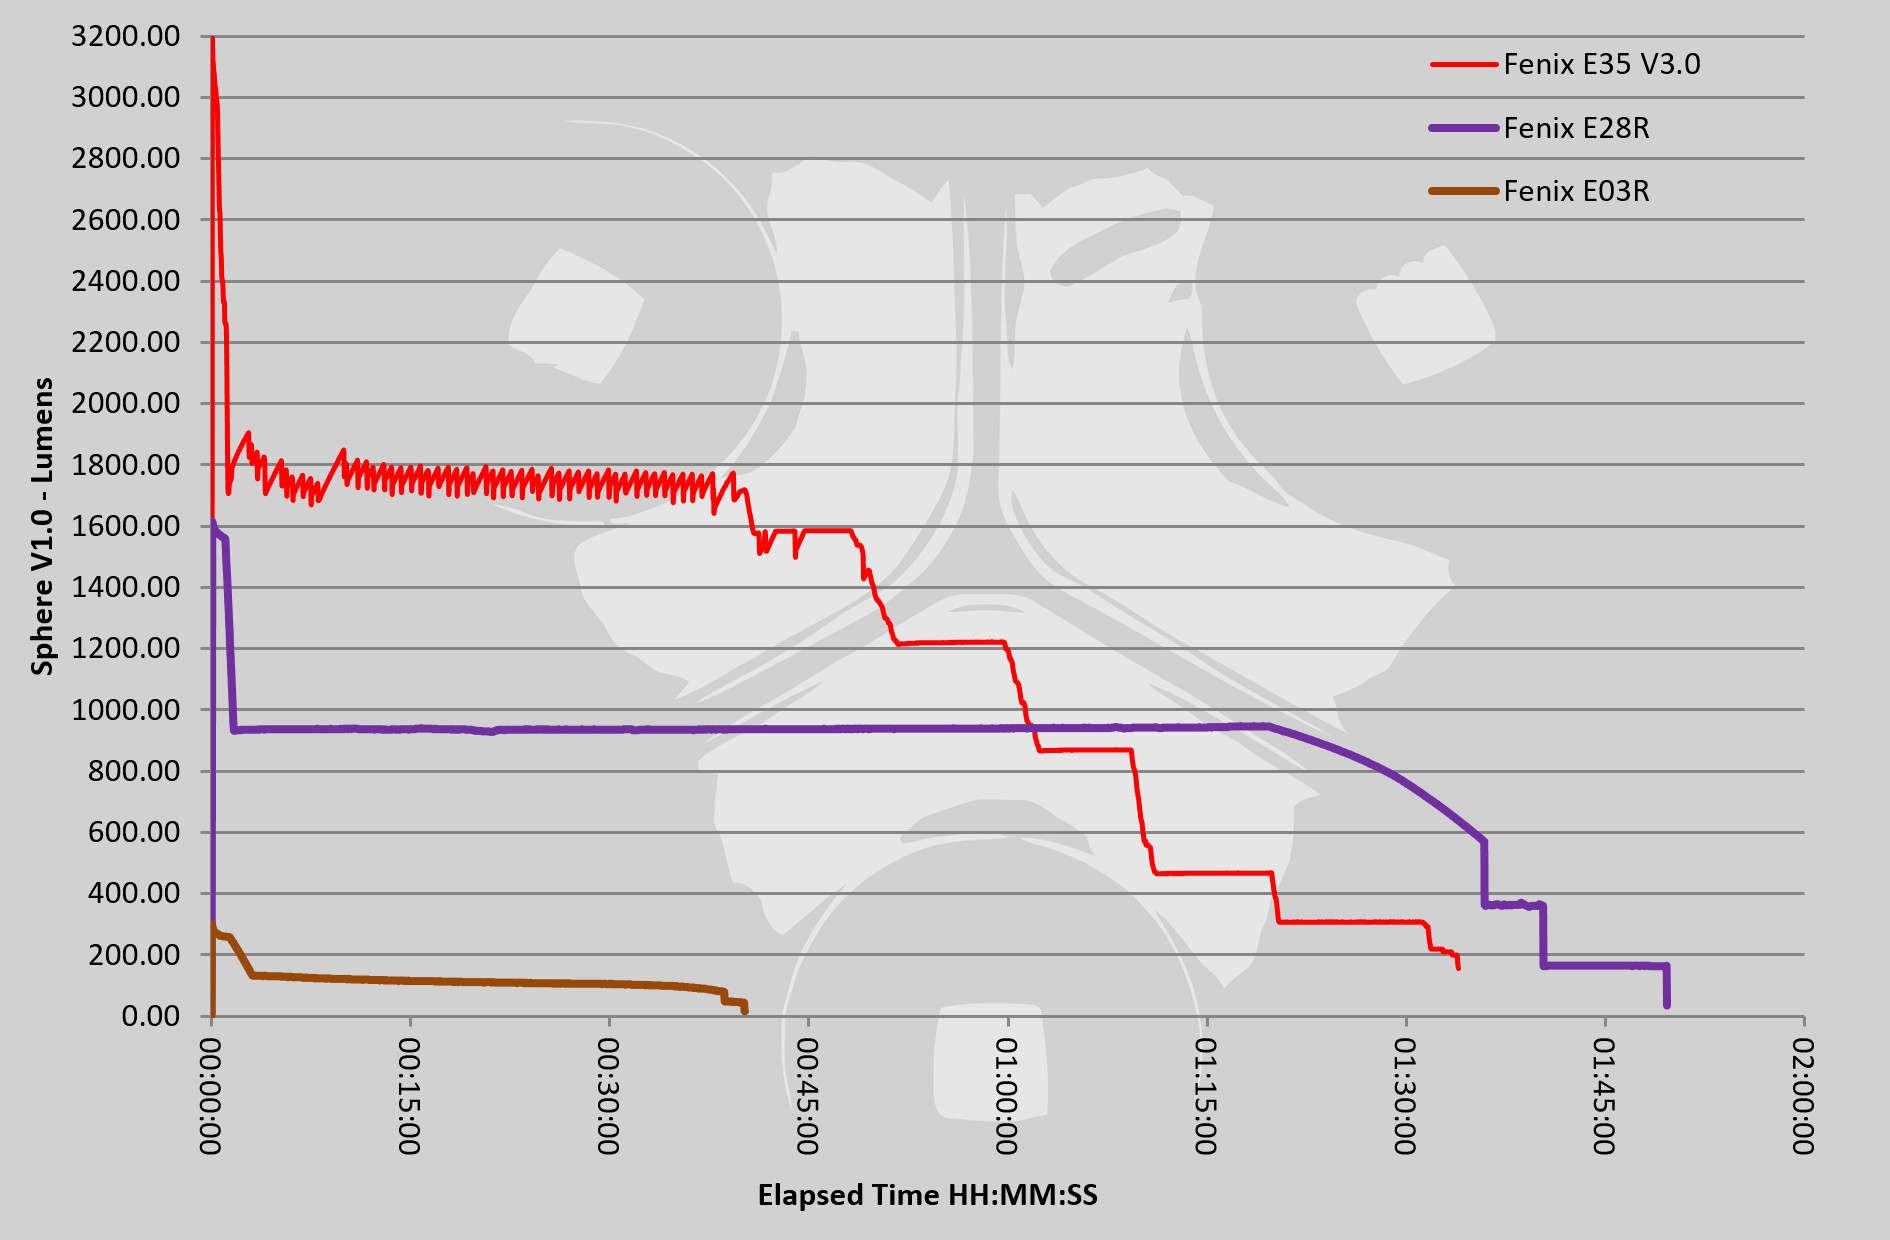
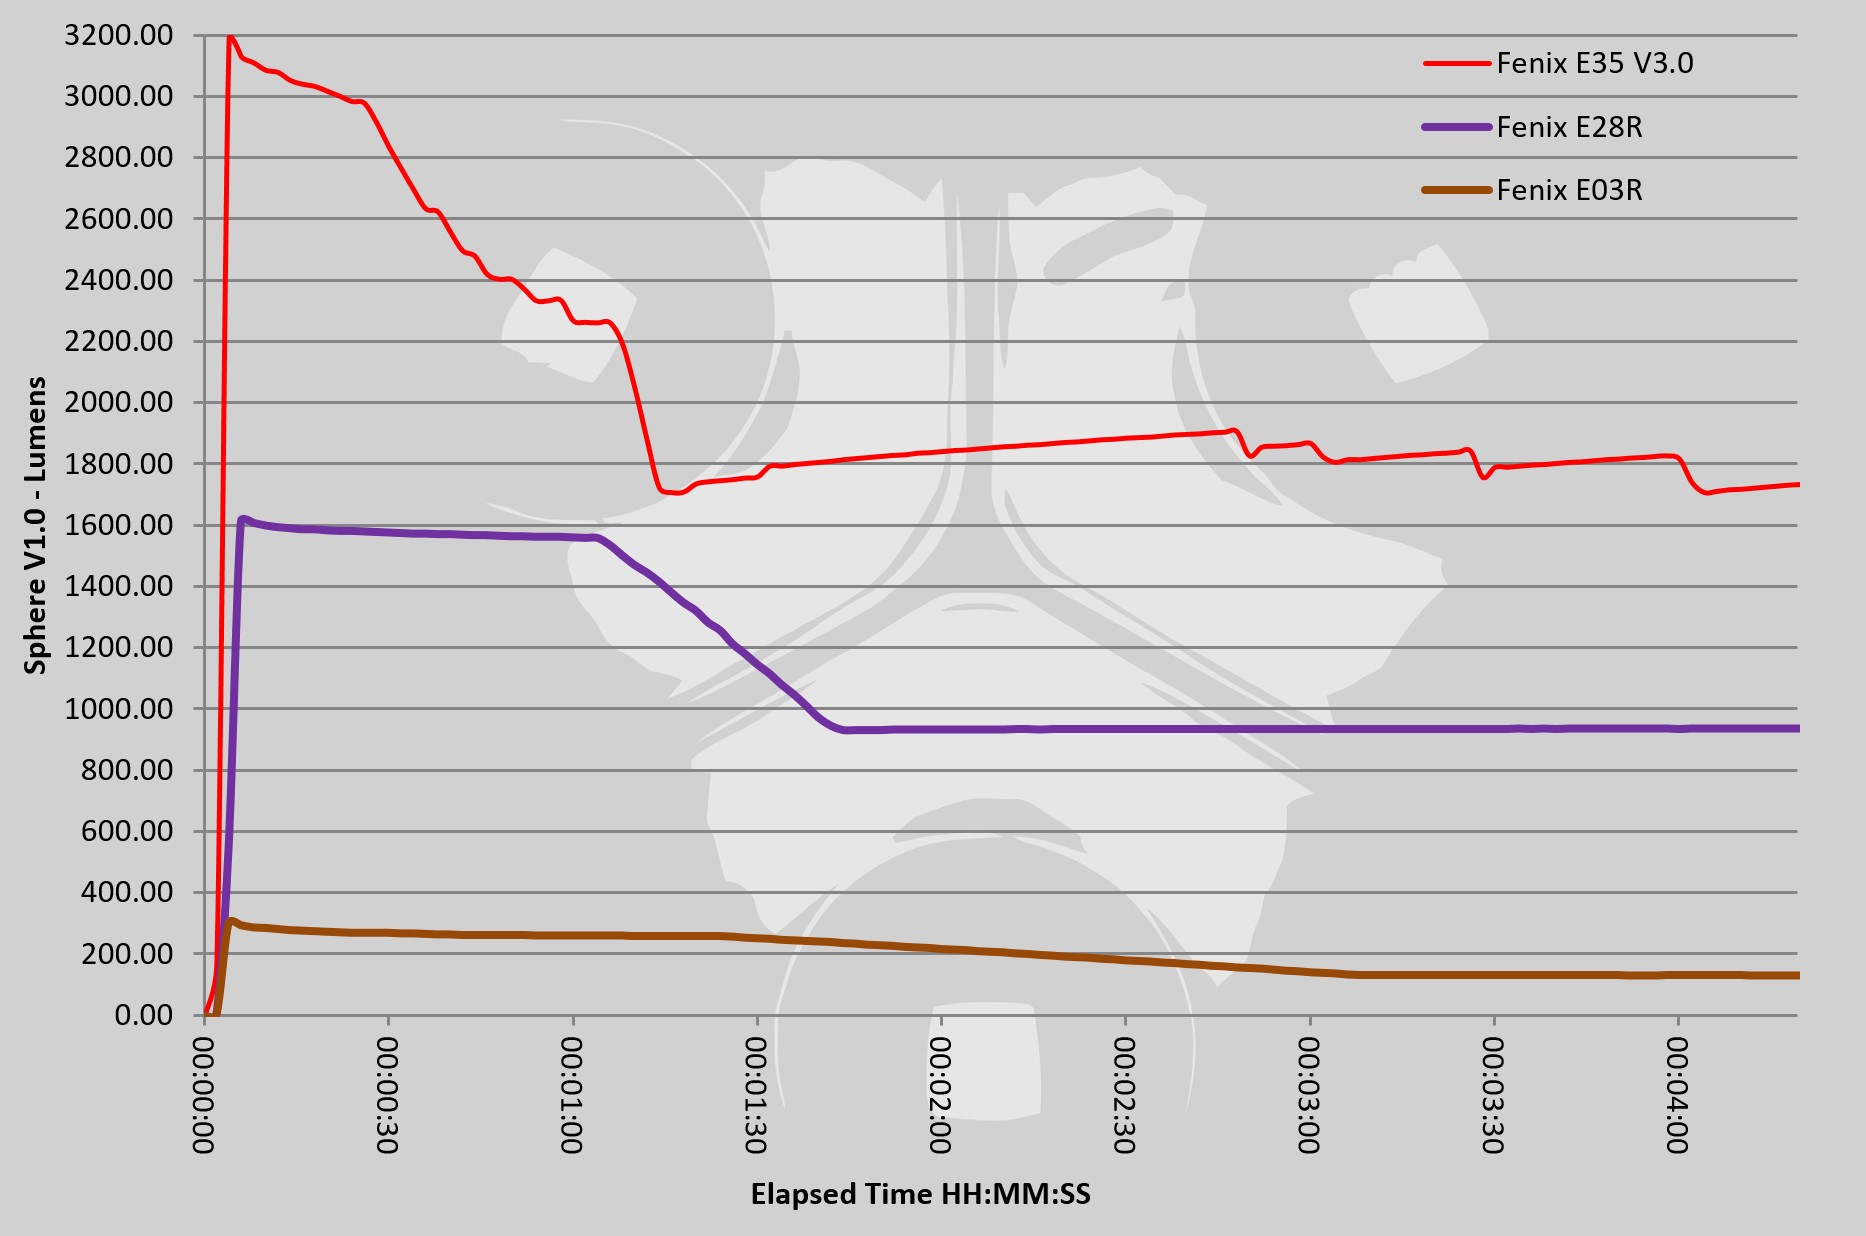
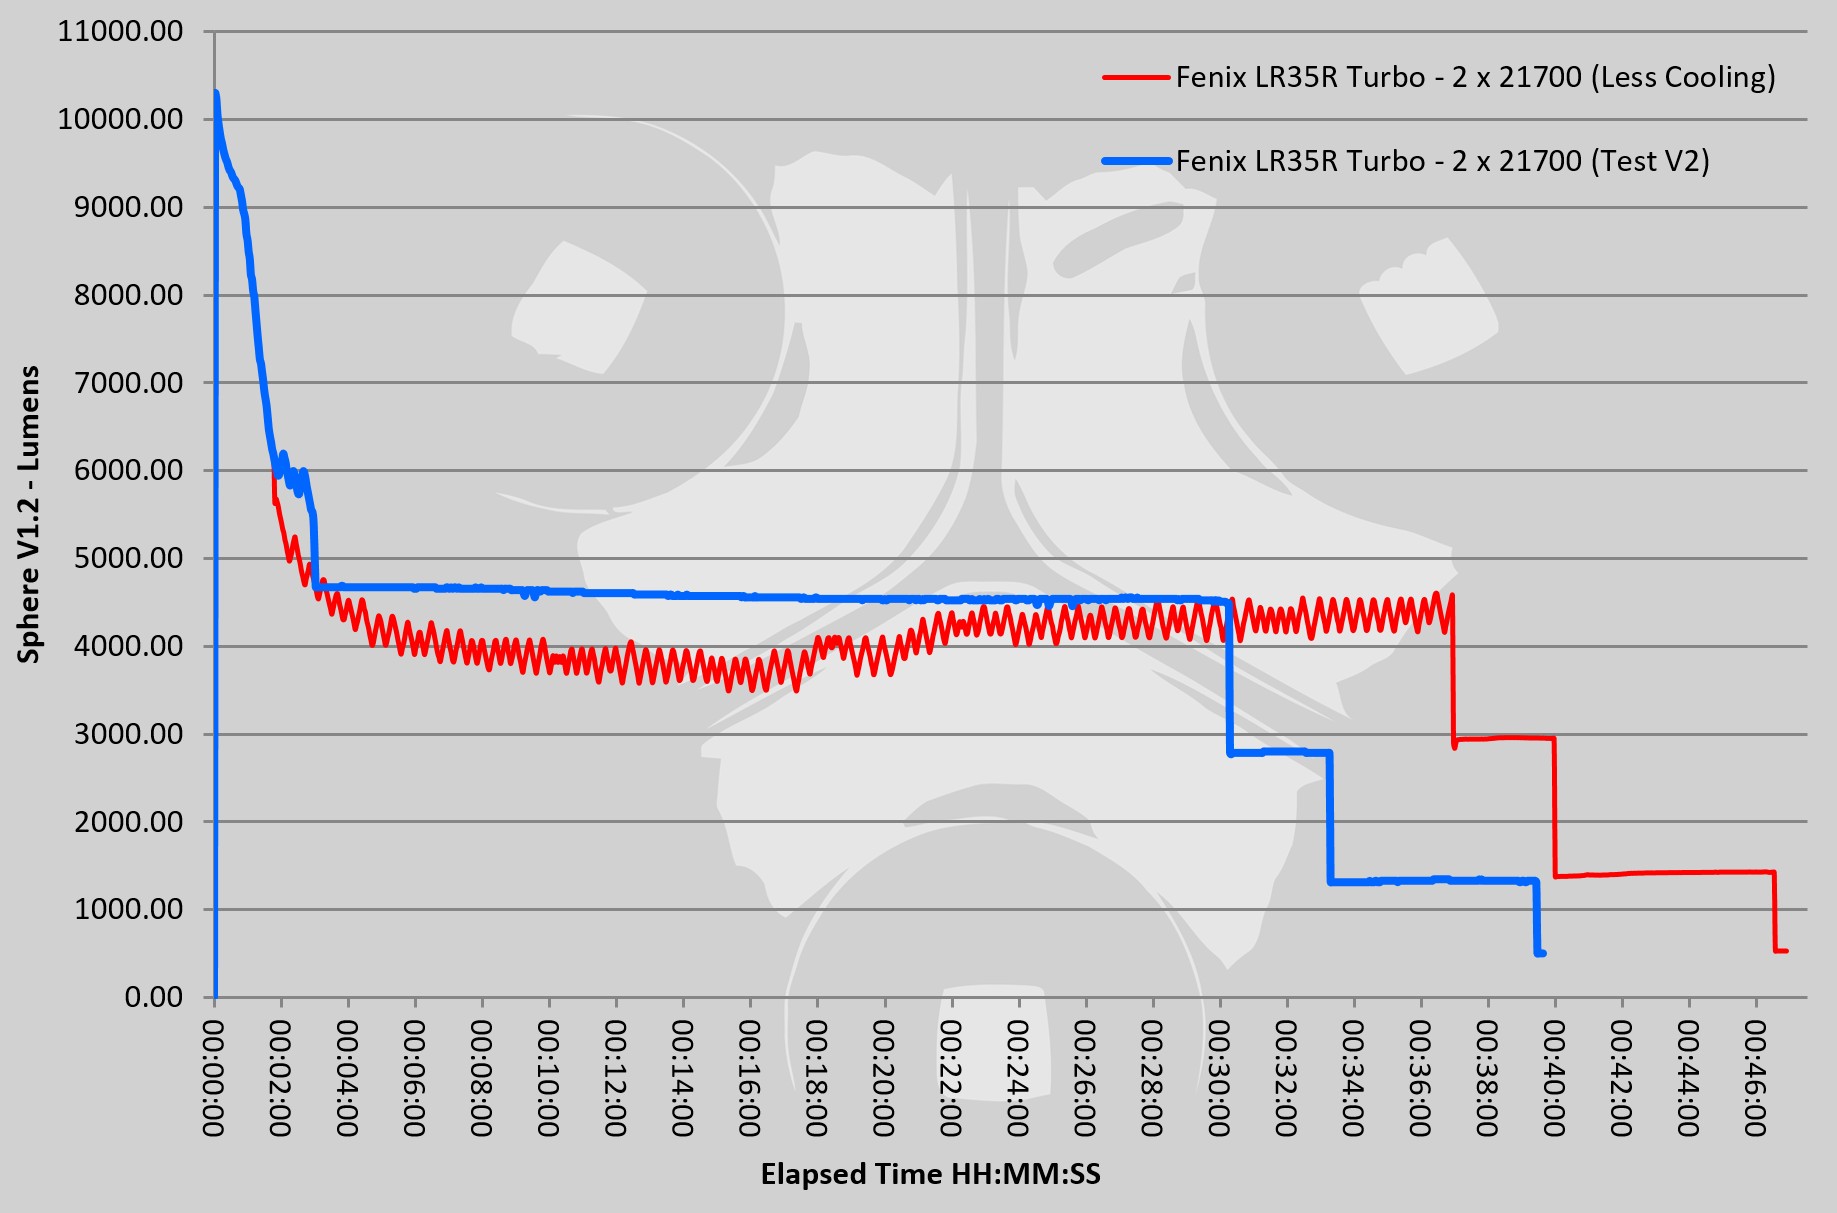
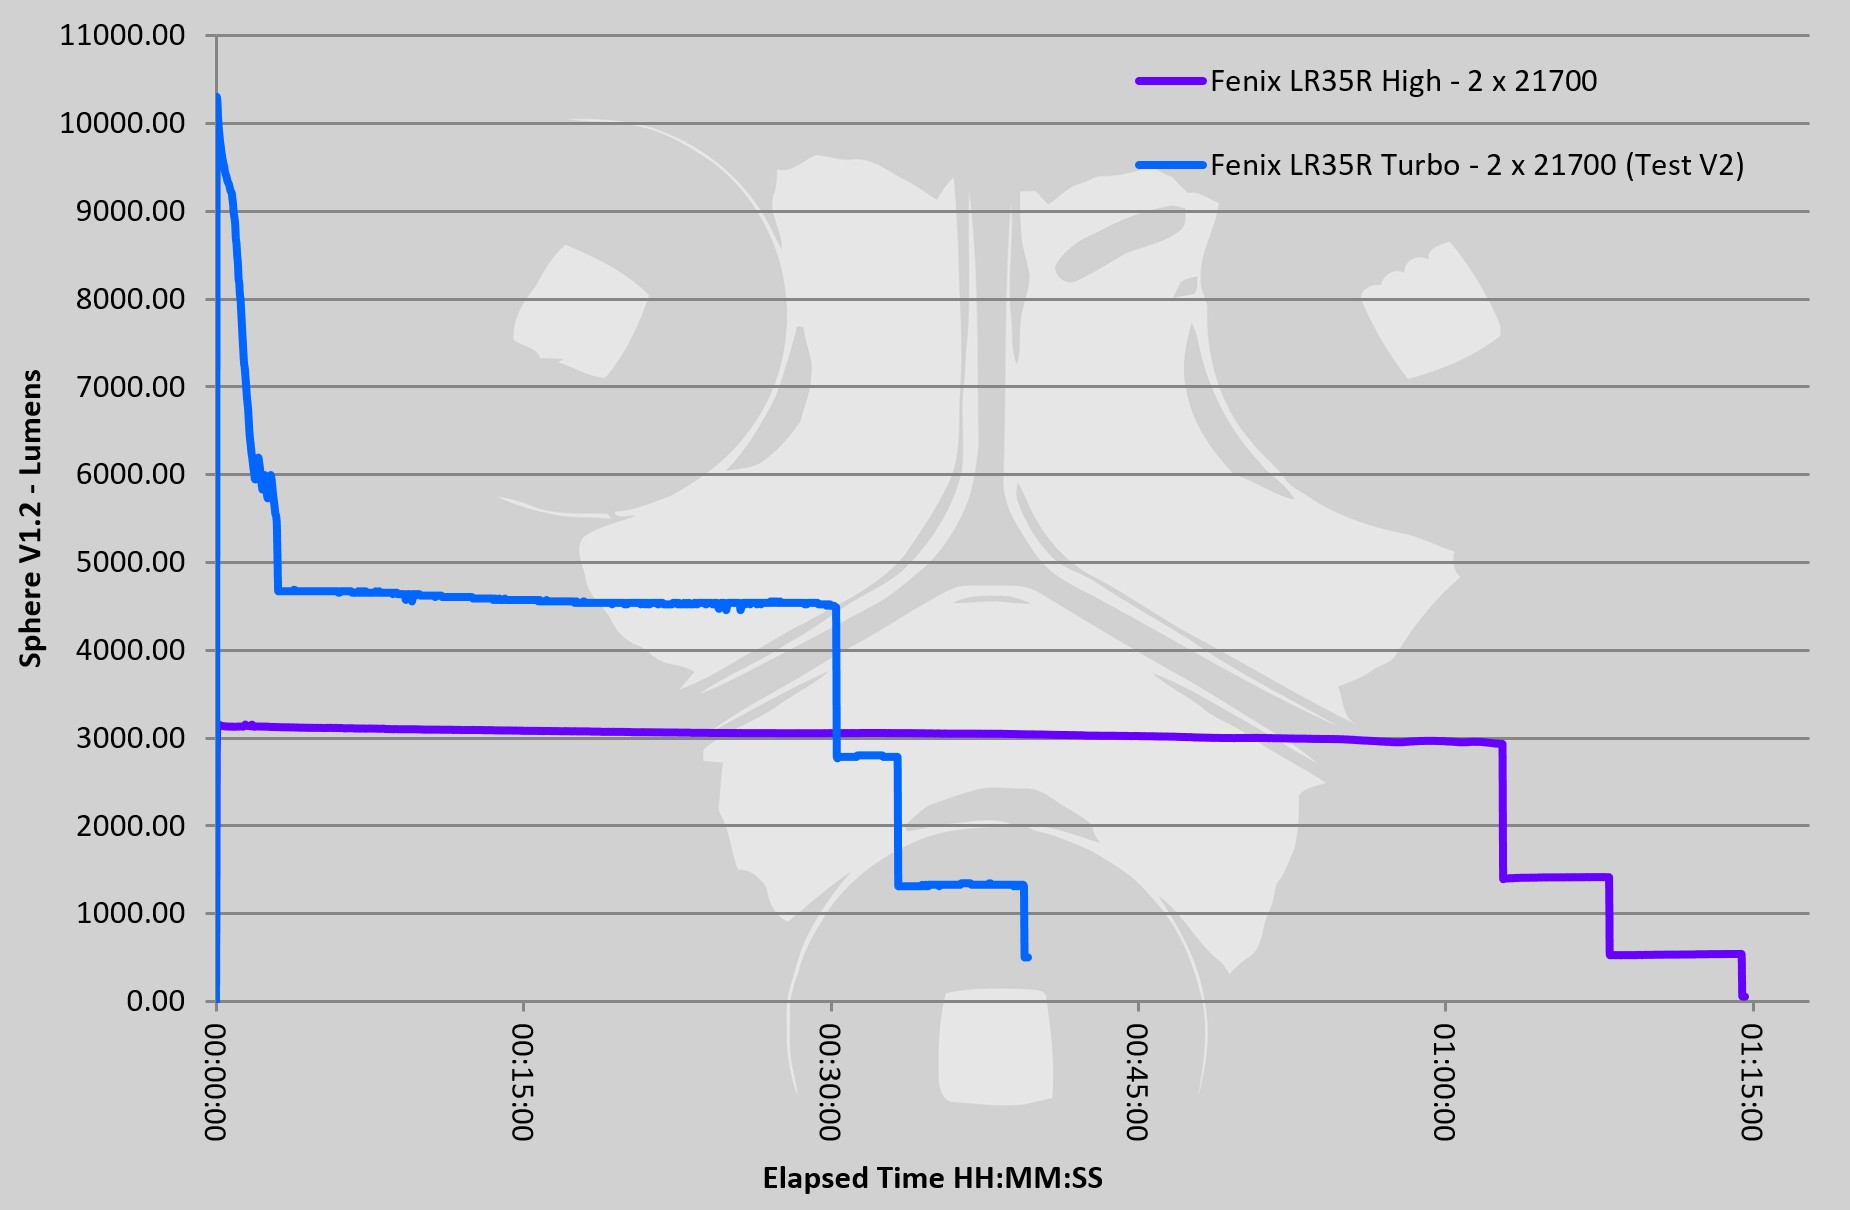
Runtime traces for each model on ‘High’.
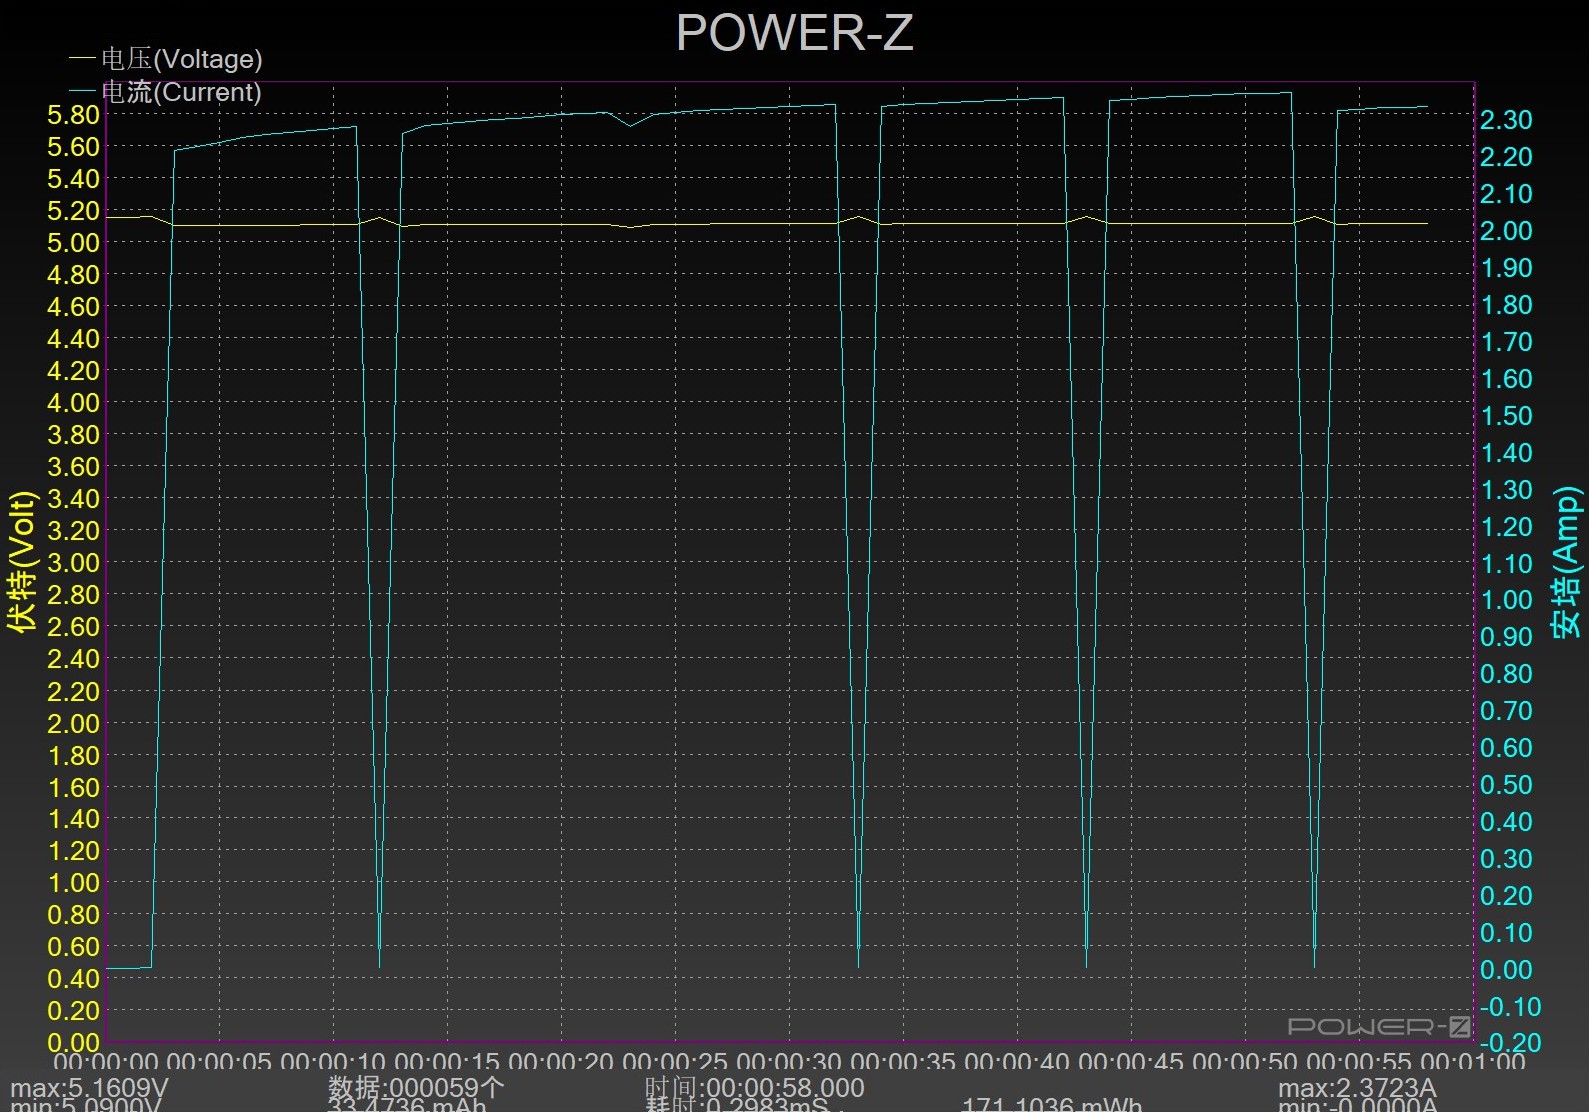
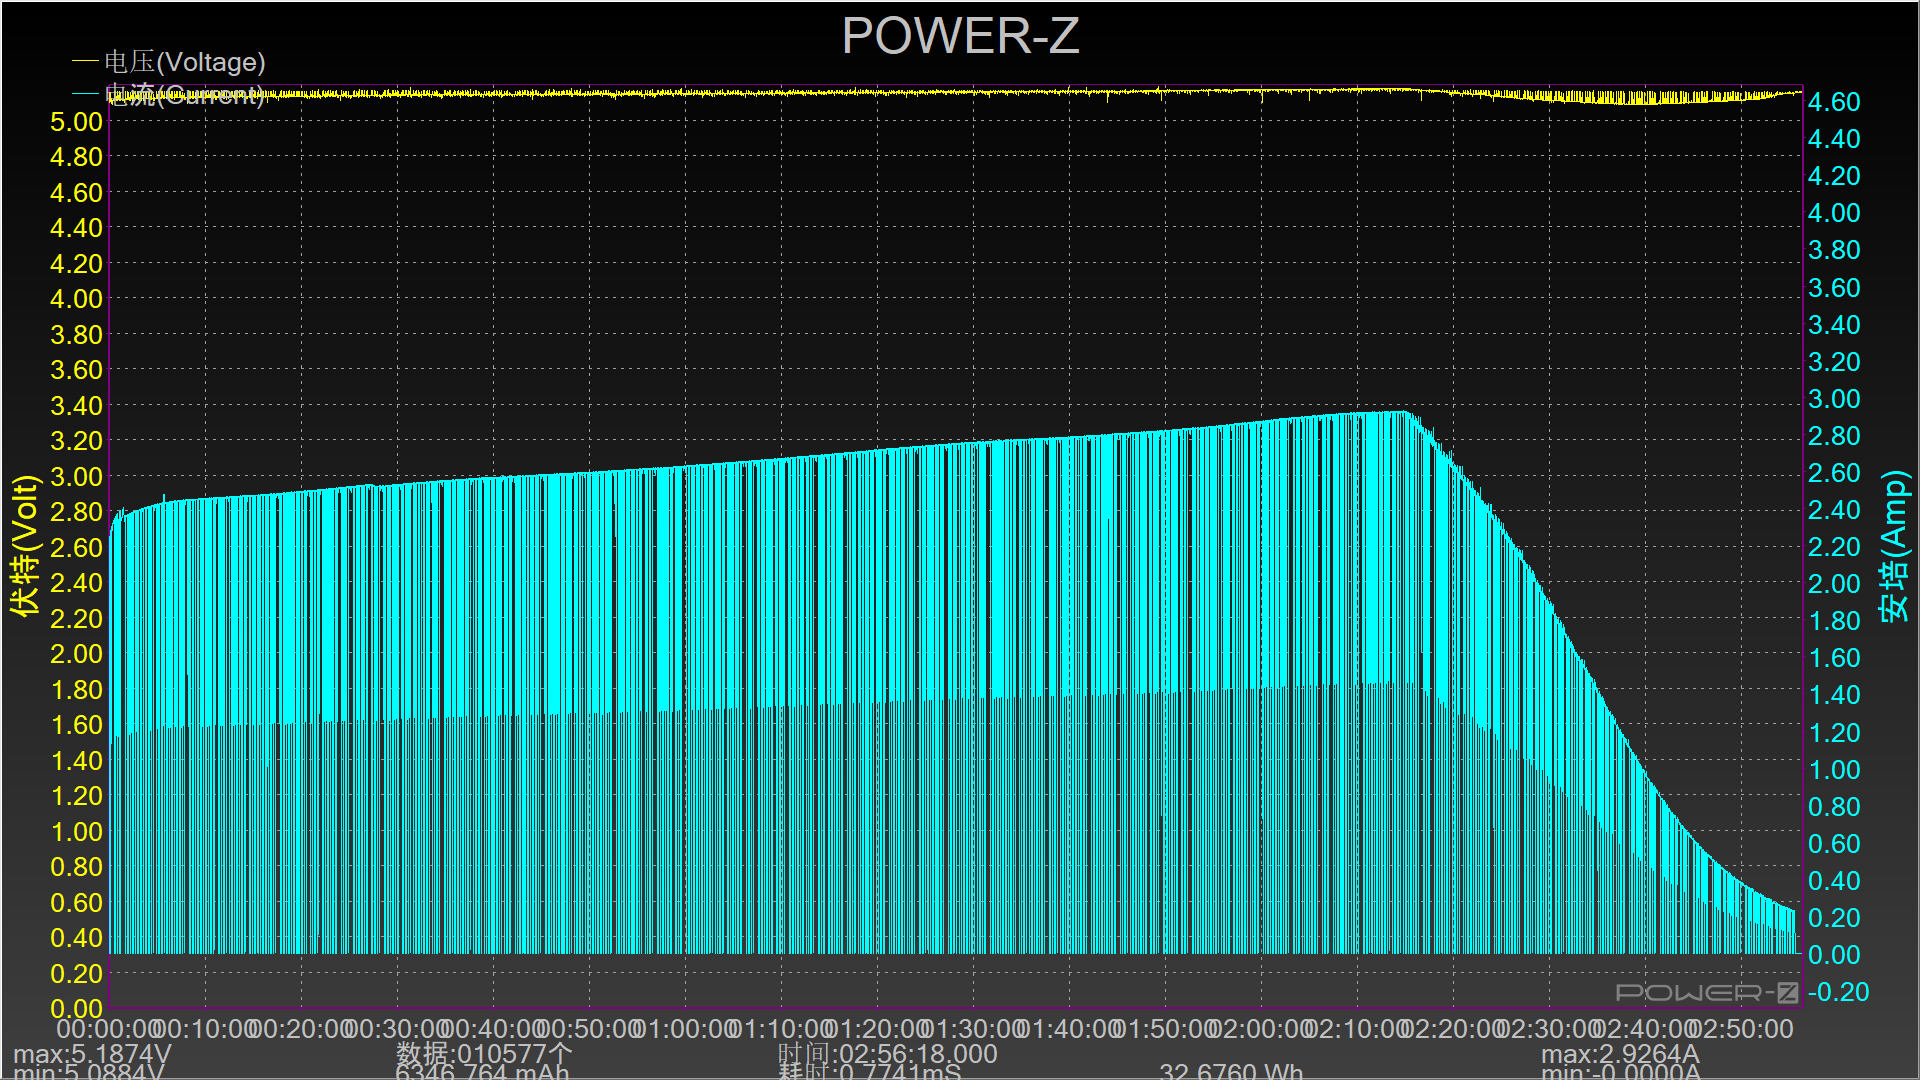
Also included in the gallery are the charging capacity measurements after recharging from the end of the runtime testing (show in Wh and Ah).


The EDC33 and EDC35 in use
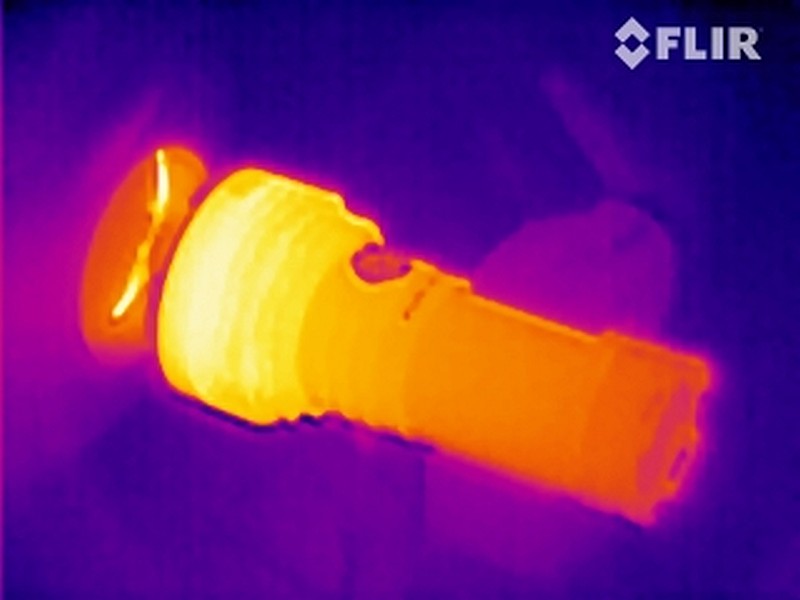
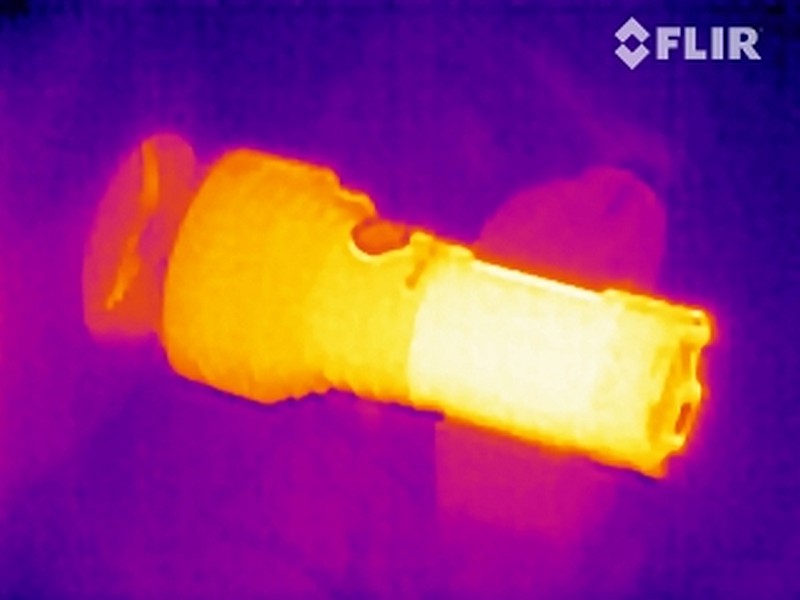
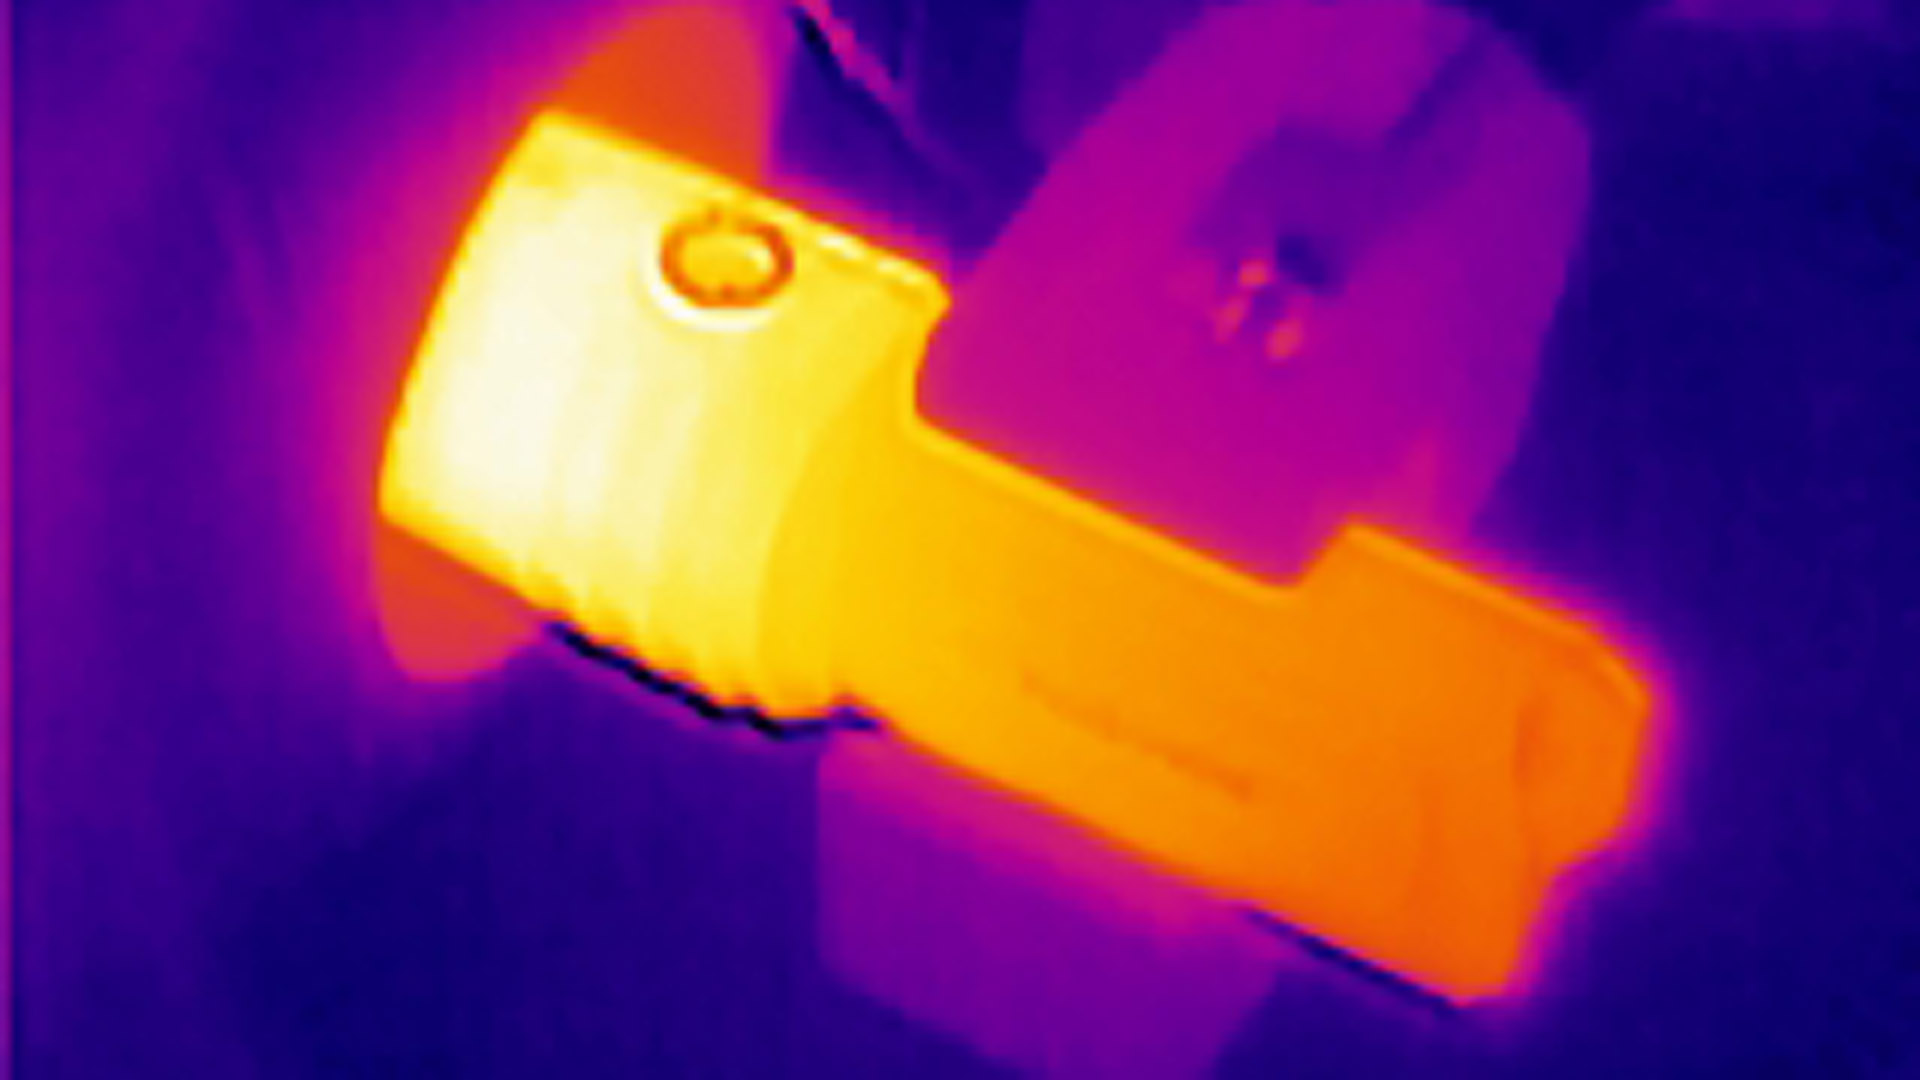
These lights are BRIGHT! The Lumin Shield does exactly what it promises and blasts a wall of light. The power output is made all the more obvious by the heat generated in the head of each light, especially the smaller EDC33 where the head heats up very fast using Lumin Shield. The EDC35 has more mass and the heating is less immediate which does give you more working time with this mode before it becomes uncomfortable in a bare hand.
This leads me to suggest the main choice between the EDC33 and EDC35, with this being how much you want to use the higher or maximum outputs. The EDC35 has more mass to manage the heat produced, and larger battery capacity.
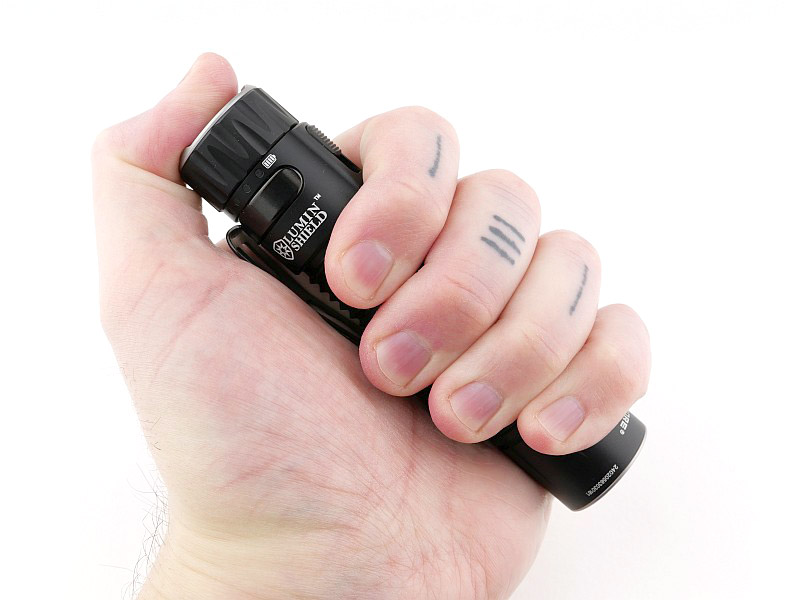
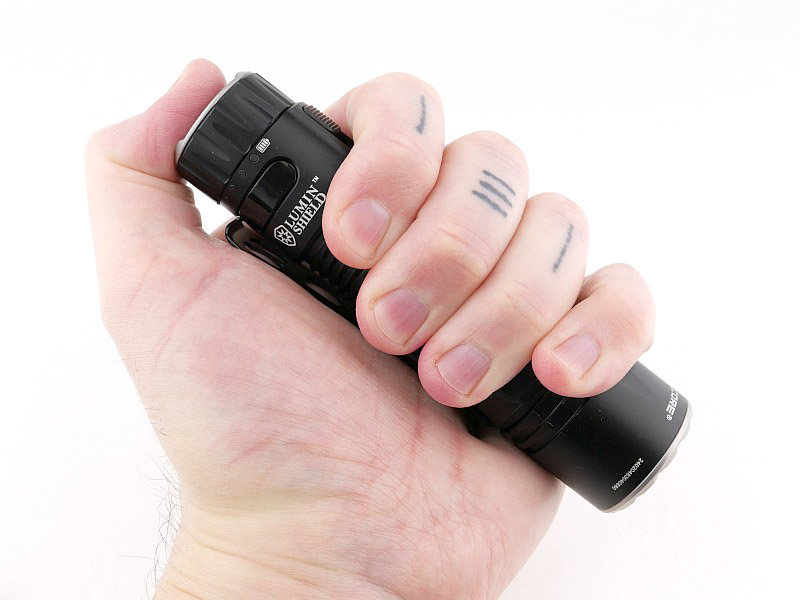
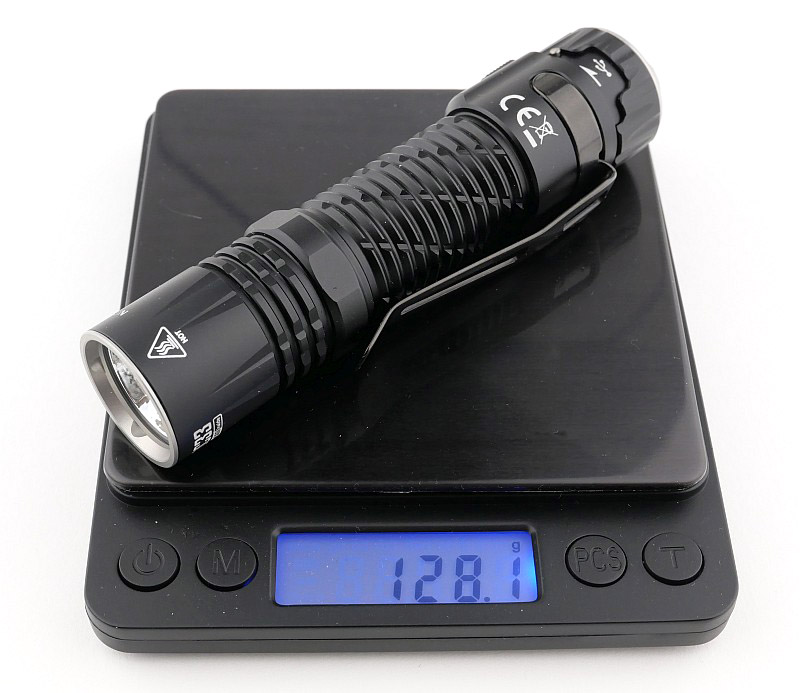
The next gallery shows the size of each in the hand (I take XL size gloves). In terms of weight, the EDC35 is 150% the weight of the EDC33, plus the holster and general bulk. This weight and size penalty gives you a longer runtime and ability to make use of the higher output for longer.


The choice of more comfortable use of maximum output, or ease of carry will then guide you to the right choice for you.
Though the EDC33 heats up fast on Lumin Shield, it does still give you a wall of light in a compact package, so as a backup this is extremely capable.
For my own use, I use lower outputs about 90% of the time, so this leads me to one of my main observations about using the EDC33 and EDC35, and that is it takes al lot of practice to reliably avoid triggering the Lumin Shield when in fact you really wanted the ultra-low output. Linger just a little too long on the tail switch, and instead of 5 lumen you get 4000 or 5000, or while trying to avoid that you fail to turn it on at all.
Clearly, the ‘Lumin Shield’ wall of light is the headline tactical defence function of these lights, and for that they are excellent. This mode is easily activated (almost too easily) and in the half-lockout is the mode still available. Take this as the primary function and you can then consider the lower outputs as a bonus.
To best manage the accidental activation of the Lumin Shield, I make sure to briefly close my eyes when trying to activate the daily modes, especially when I want the ultra low, and if I do accidentally unleash the 5000 lumens I don’t getting the full effect as I will have let go of the switch before I open my eyes.
Likewise for switching off when using lower modes, I don’t touch the tailcap, instead using the lockout switch to turn it off completely safely, as this will definitely not activate any other output mode.
Making the minor adjustments to how you operate the EDC33 and EDC35 allows the lower mode use to be smoother and not jar, and you still have the potential defensive wall of light ready to go if needed.
Review Summary
The views expressed in this summary table are from the point of view of the reviewer’s personal use. I am not a member of the armed forces and cannot comment on its use beyond that covered in the review.
Something that might be a ‘pro’ for one user can be a ‘con’ for another, so the comments are categorised based on my requirements. You should consider all points and if they could be beneficial to you.
_______________________________________________
What doesn’t work so well for me
_______________________________________________
Easy to accidentally activate the Lumin Shield.
Lowest mode still not that low at 5 Lm.
_______________________________________________
Things I like
_______________________________________________
Stunning ‘Wall of Light’ with Lumin Shield mode.
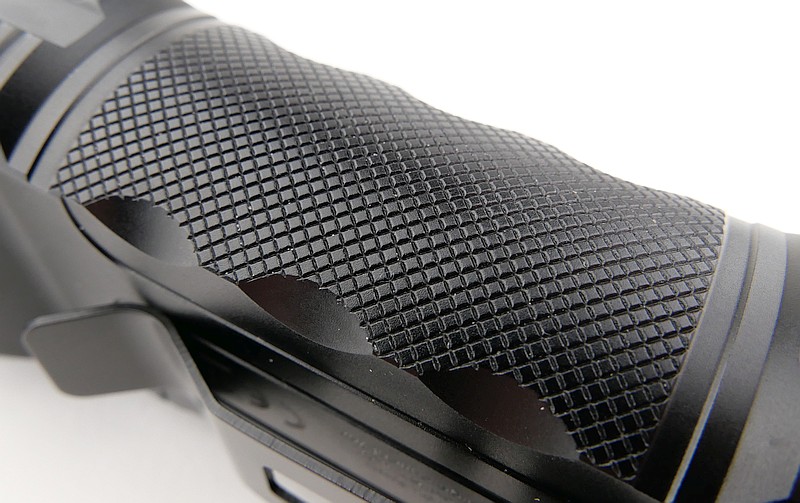
Secure grip pattern.
USB-C built-in charging port.
EDC35 has an extra large capacity 21700 cell.
EDC33 provides a smaller lighter option but with near 4000lm output.
Ultra-High output from the UHi 20 Max and UHi 40 MAX LEDs.
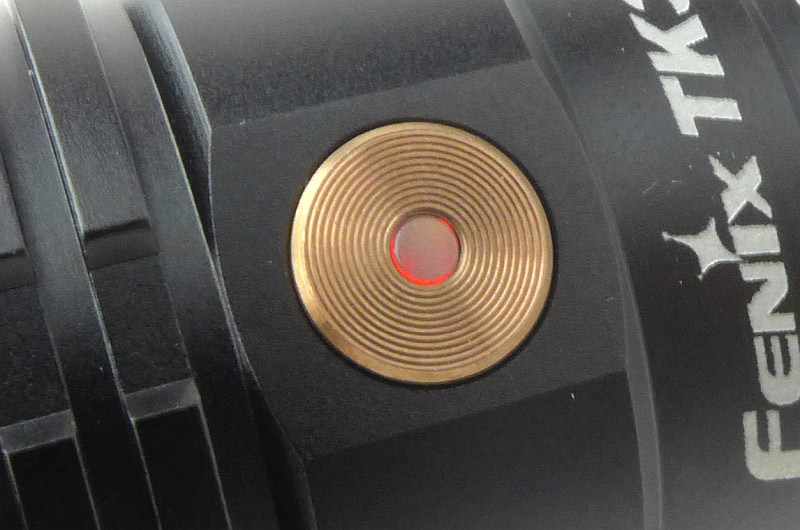
Safety sensor to detect obstructions.


.")