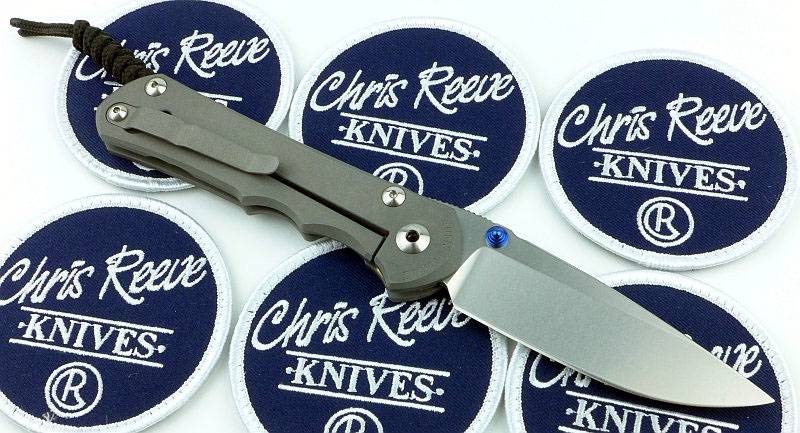
Instagram Giveaway CLOSED! (Ends 10 Mar 2017)

This Giveaway is a combined celebration of passing the 10k mark and of IWA 2017. There will be two winners.

The two prizes are, a Morakniv Companion Heavy Duty (you must be over 18 years old to win this), and a Nitecore T360 Headlamp. Also included will be a Fenix and Chris Reeve patch, plus a Spyderco pin for the first winner. The first winner can choose which main prize they get.

To enter, complete BOTH steps below:

1. Comment on this post and ‘@ Mention’ a Friend. (Mentioning a company or spoof account will invalidate your entry.)
2. Like the Giveaway post.

You must be following @tacticalreviews to have a valid entry. (One standard entry per Instagram account.) Full rules (and bonus entry information) can be found here: Full Competition Rules

The closing date for entries is 10th March 2017 or if I reach 20k followers.

Thanks to everyone who has followed Tactical Reviews. Good Luck!

By entering you agree that Instagram has no responsibility for this Giveaway.
This Giveway is in no way sponsored, endorsed or administered by, or associated with, Instagram.

EDC Gear Review: Leatherman MUT Multi-tool

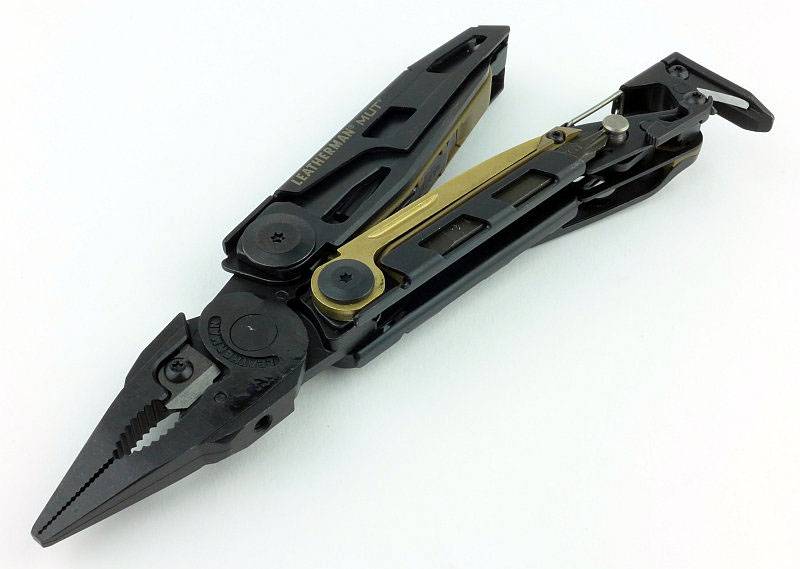
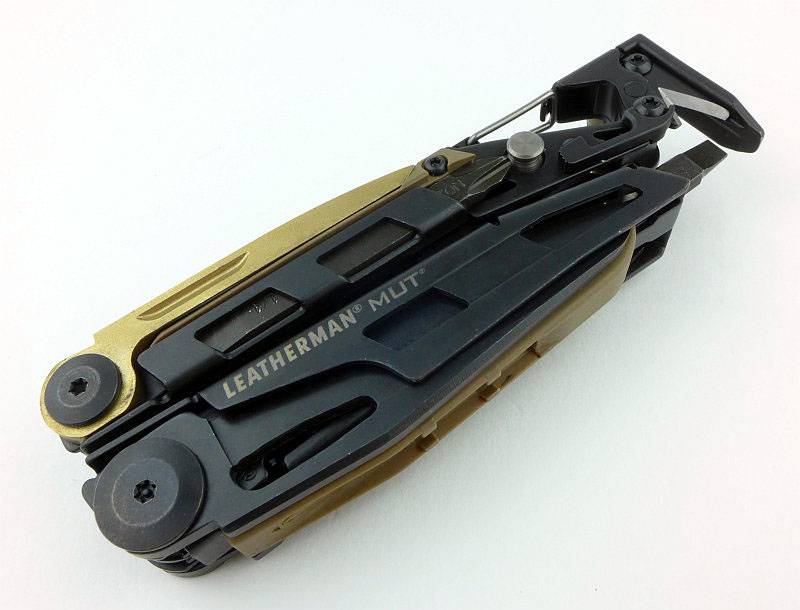
The MUT (Military Utility Tool) is billed by Leatherman as “the first multi-tool that functions as both a tactical and practical tool for military, LE, or civilian shooters” and is packed full of functions not found in other multi-tools.
With so much detail to cover, this review has turned into a rather extended look at this interesting multi-tool, so has even more images than I normally include!
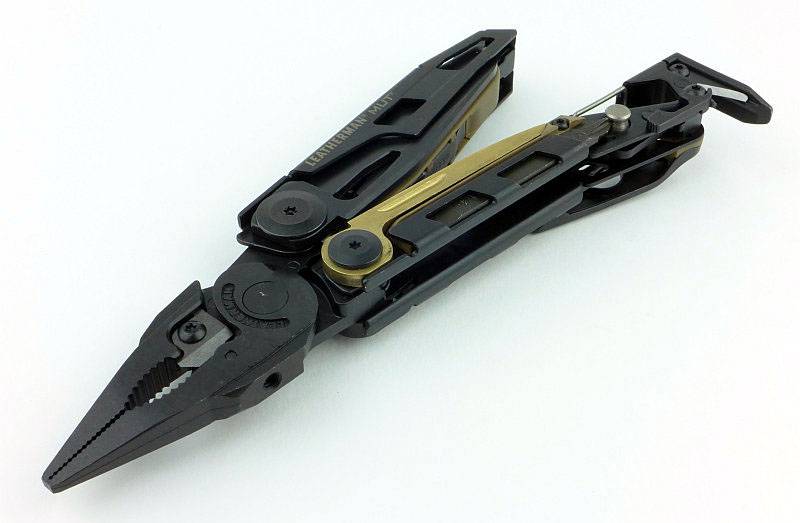
 photo 00 MUT feature P1200868.jpg

Talking through the features:

Before diving into all the detail, I wanted to have a look at a few more of the descriptions and specifications from Leatherman.

“The MUT features multiple areas on the tool threaded for cleaning rods and brushes and all the screwdriver bits are sized for standard military and civilian sighting adjustment work.”
When it comes to cleaning rod/brush use, you have the choice of two main connection points, the threaded hole in the side of the MUT and the threaded post onto which the punch screws. Either can act as a substitute handle for a rod or brush. This is pretty good in theory, but in practice, for myself, it did not work terribly well. All my multi-part rods are based on the handle having the first rod section permanently attached to it. If you are missing this first part (so need the MUT as a handle), the rod will be too short to reach all the way through the barrel. Still a useful feature, as a brush can be directly fitted and used to scrub areas round the breech and into the chamber, and that in itself is worth it.

“Also built into the design of the tool is the flexibility to replace the most commonly used parts on the spot, using a simple Torx #8, keeping down-time to a minimum.”
This is an excellent feature. Also included with the review sample was the maintenance kit (details to follow), and this allows for replacement of the wire-cutter blades, punch, scraper and line cutter, so you can happily give all these plenty of use, knowing it is easy to bring them back to like-new performance once they wear out. Designing in replaceable parts, means you can buy the tool knowing it is a long term investment and can be maintained.

“With all this, a MOLLE sheath and scope adjustment wrench included, the Leatherman MUT may very well be the most efficient and useful piece in your kit.”
Unfortunately, despite the well designed sheath, the fact that the sight adjustment wrench is a separate item means it can more easily be lost.

On Leatherman’s website (at the time of writing), officially the specification is that the MUT has 16 tools (plus an additional wrench/sight tool). The first six items in the list, Needle-nose Pliers, Regular Pliers, Premium Replaceable Wire Cutters, Premium Replaceable Hard-wire Cutters, Stranded-wire Cutters and Electrical Crimper, are all aspects of the main pliers in the MUT.
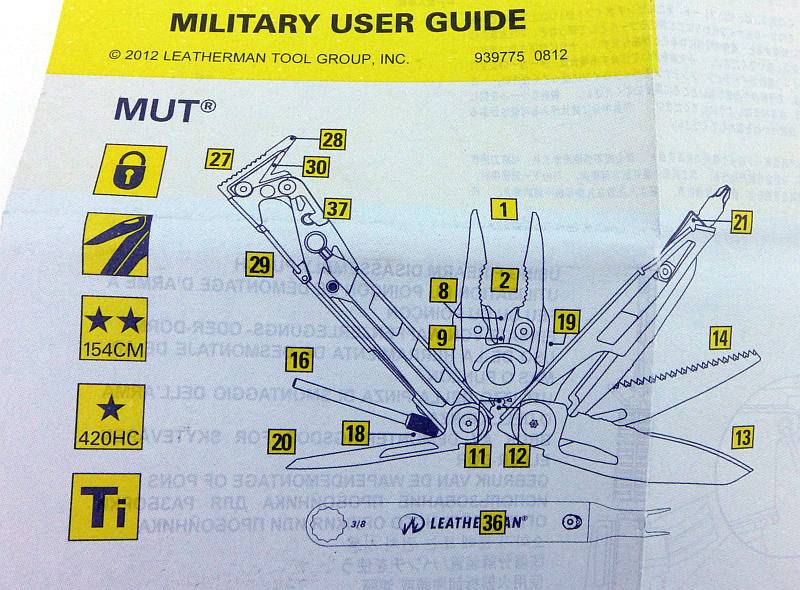
 photo 78 MUT diagram P1210064.jpg

The rest of the list refers to more distinct tools, and is in fact a little light on detail. Taking those straight forward features first, you have the 420HC Combo Knife, Wood Saw, Replaceable Cutting Hook, Hammer, Bolt Override Tool, Replaceable Bronze Carbon Scraper, #8-32 Cleaning Rod/Brush Adapter, Replaceable Firearm Disassembly Punch, Karabiner/Bottle Opener, and a separate 3/8” Wrench and Front-Sight Adjustment Accessory.

One of the less understood features is the Bolt Override Tool. Really all this consists of is a strong hook that you can use to drag back the bolt on an AR instead of using the charging handle (or something more dangerous like a knife), to free up a jammed cartridge. Thanks to the design of the MUT you can easily apply a lot of force to the bolt for those stubborn jams that require this.

The last feature which is underplayed somewhat is the Large Bit Driver, which is a bit holder for the three double-ended screwdriver bits that are included in the MUT. The bits are the short PH1-2 + 3/16 Flat, plus the two long double-ended bits which have T15 + Hex 7/64, PH2 + 1/4 Flat. Of course with the Leatherman bit set, you can expand on this selection of bits.

Lastly for this section a few notes on some of the materials used in the MUT. The blade is made from 420HC Stainless Steel, an improved, high-carbon (HC) form of 420 stainless steel. The replaceable wire cutter blades are made from 154CM Stainless Steel. To prevent damage to steel parts, the carbon fouling scraper is made from Bronze. Then there is the tool coating of Black Oxide; Black oxide is a powder-based metal coating effective in reducing glare and reflection.

A few more details:

Before really getting our teeth into this review, I will mention once again that the full review has a total of 84 images in it, so shows a great deal of detail. If you want a close look at this tool, here it is.

The MUT’s very yellow box.
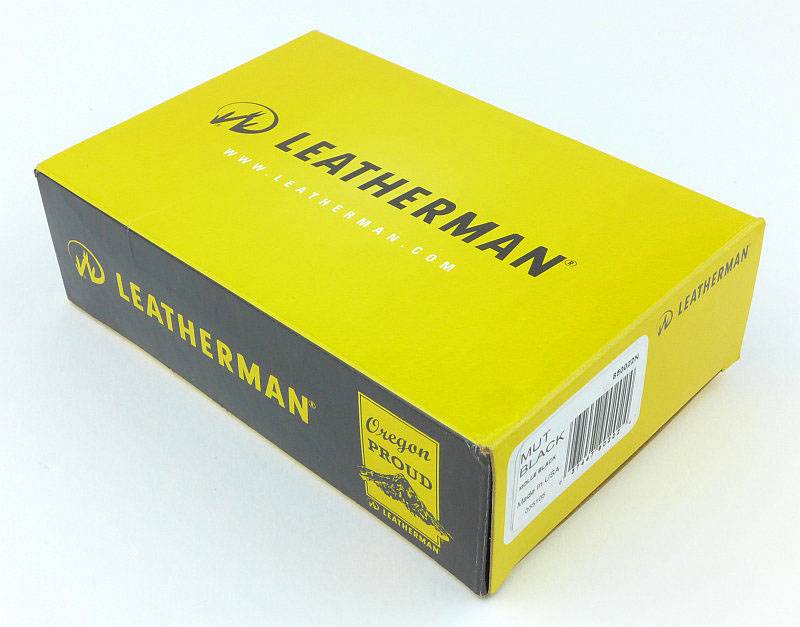
 photo 01 MUT boxed P1200708.jpg

In the box, there is a separate compartment for the tool.
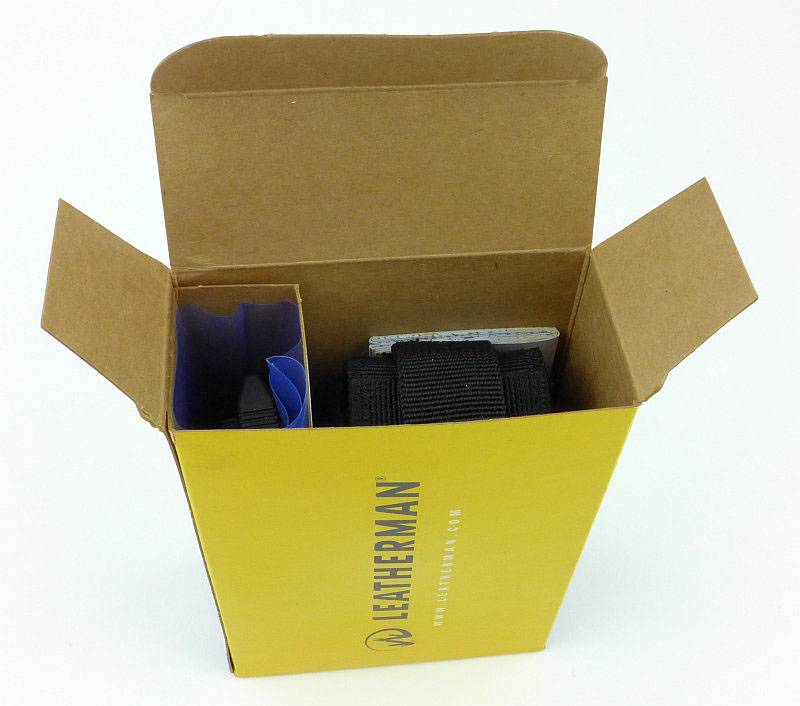
 photo 02 MUT box open P1200712.jpg

Here are the box contents laid out. You get the MUT, sight tool, holster, instructions and a sticker.
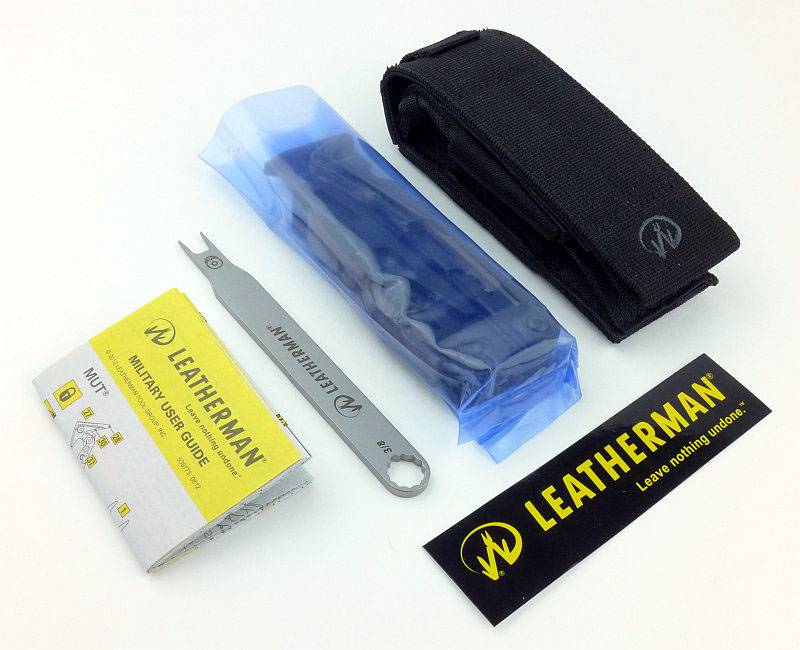
 photo 03 MUT box contents P1200716.jpg

Personally I find the holster/sheath of a tool can make or break the user experience. In this case Leatherman have included a well made, versatile holster for the MUT. This is the holster fresh out of the box and with nothing inside it.
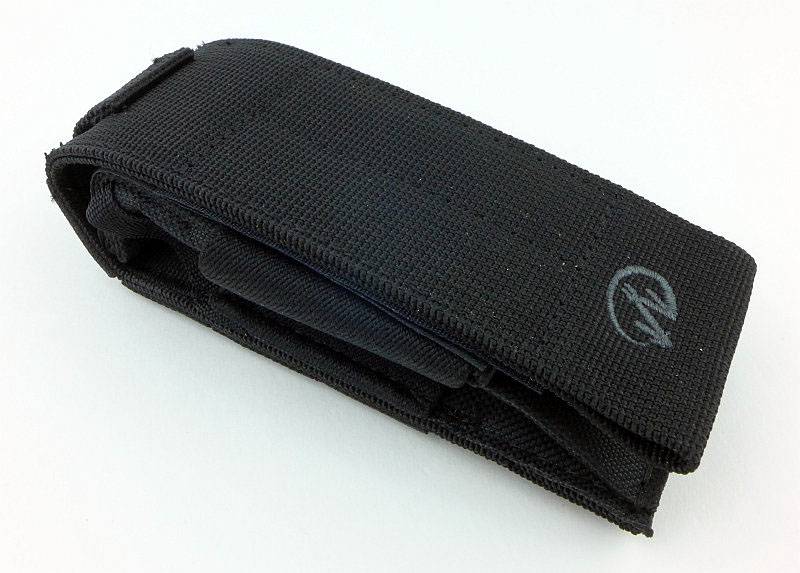
 photo 04 MUT holster P1200719.jpg

The side has an elasticated part to keep the holster in shape.
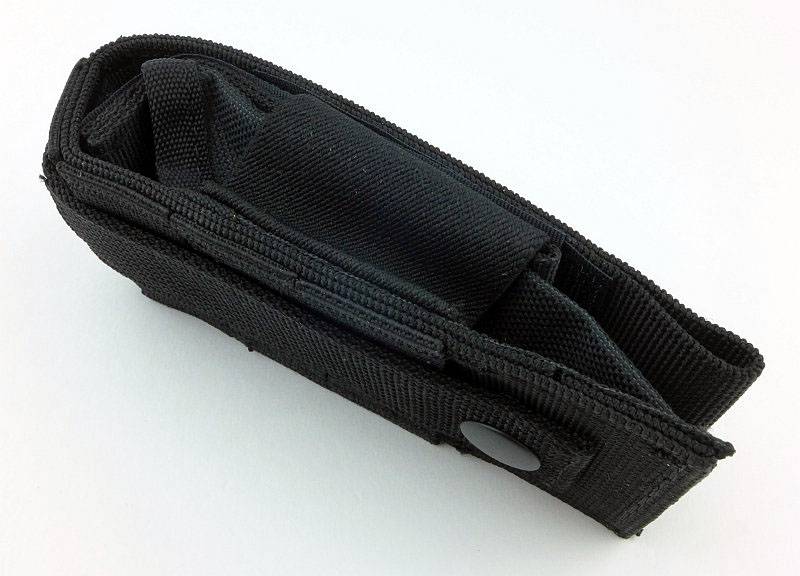
 photo 05 MUT holster side P1200722.jpg

On the back is a PALS/MOLLE mounting that doubles as an adjustable width belt loop.
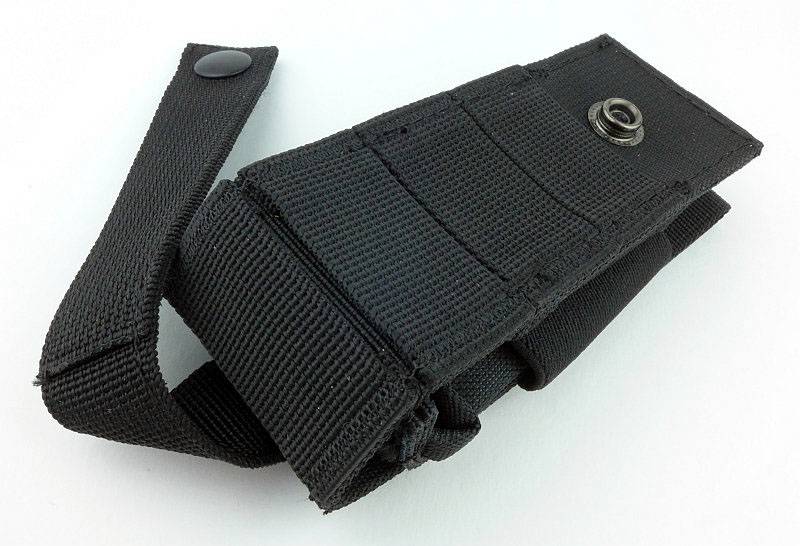
 photo 07 MUT holster MOLLE P1200730.jpg

With the MUT inside the sheath the package is very neat.
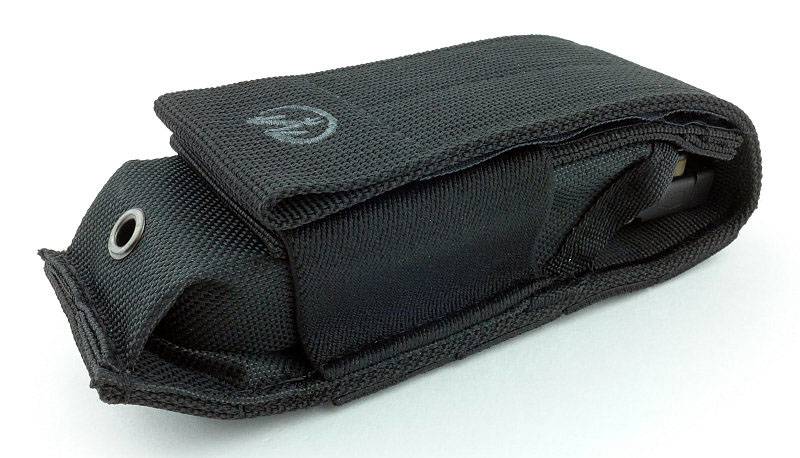
 photo 10 MUT holstered P1200741.jpg

And here we have it, the MUT. We will cover more details as we go, but this is the side of the tool with the knife blade and carbon scraper.
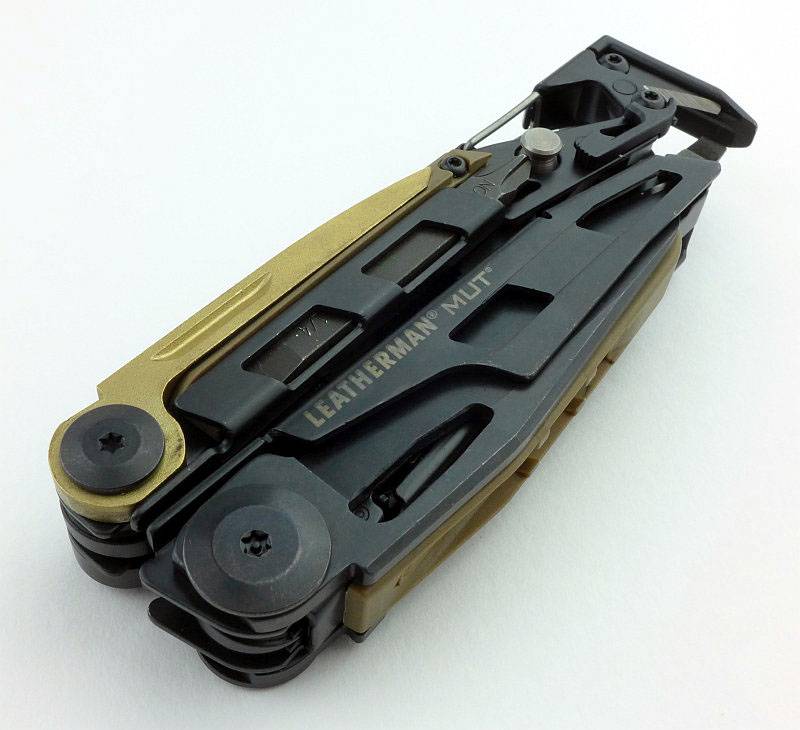
 photo 13 MUT angle P1200749.jpg

Flipping it over and on this side we have the saw and punch.
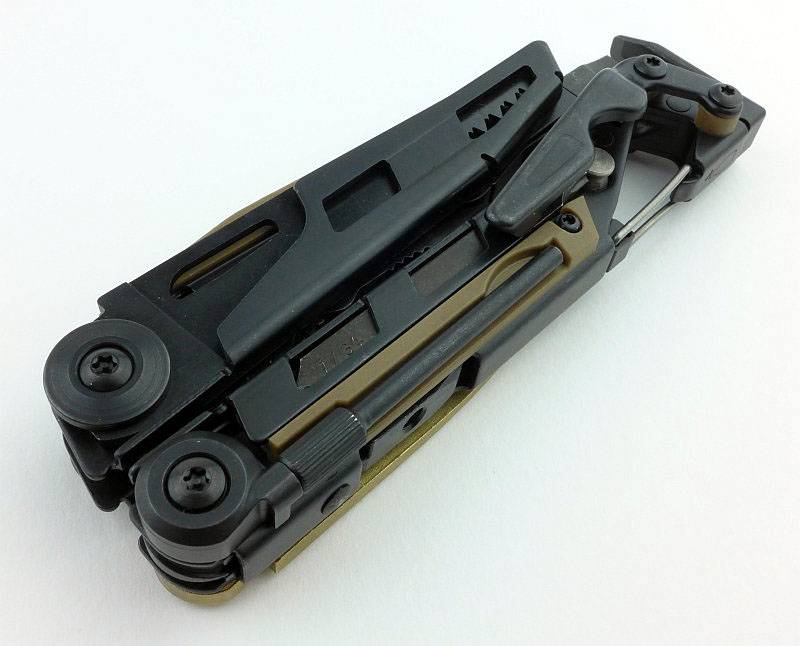
 photo 14 MUT angle reverse P1200751.jpg

On one edge we have one cleaning rod attachment point and clip/bottle opener.
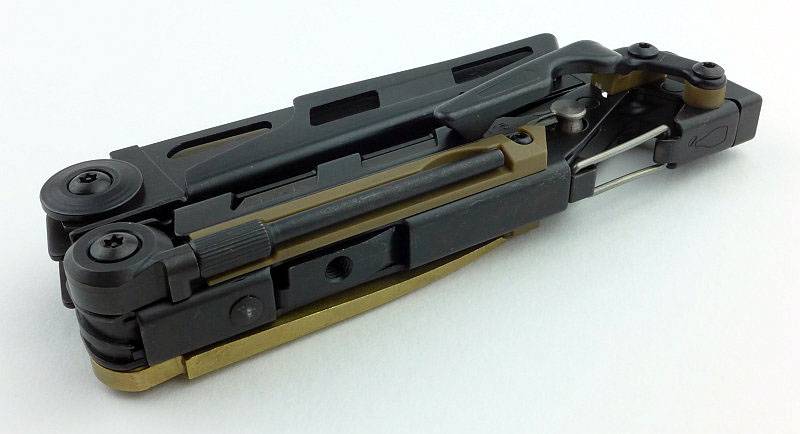
 photo 15 MUT side P1200756.jpg

The other edge has a slot to hold the small double-ended bit (here the bit is fitted into the bit holder). Also note the pocket clip which I found far too stiff to be of any real use.
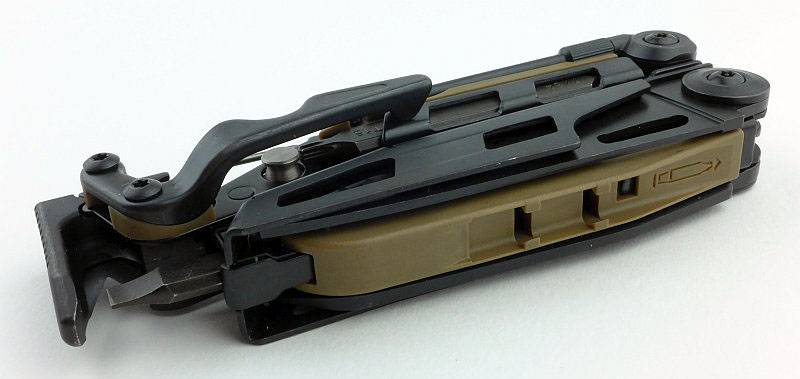
 photo 16 MUT side2 P1200760.jpg

The MUT is basically held together by the main pliers pivot bolts.
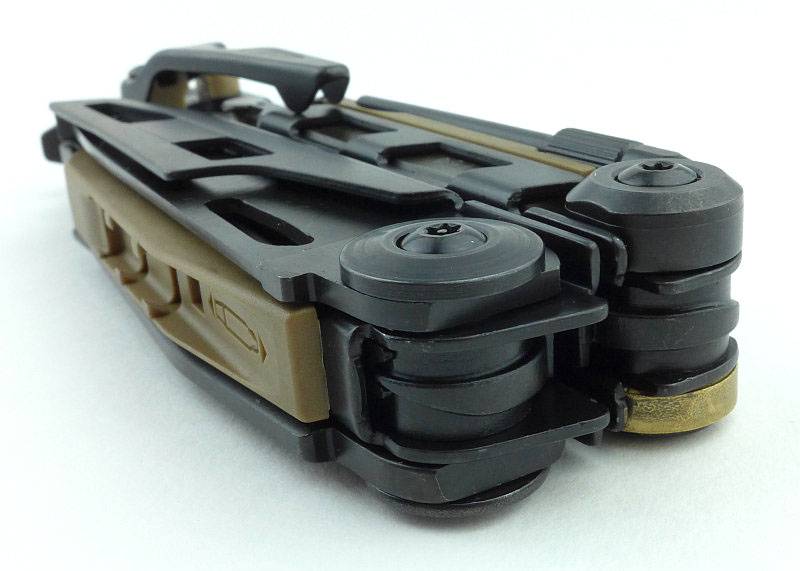
 photo 17 MUT main pivot P1200763.jpg

Integrated into the hammer/bolt-override tool is a replaceable cutter held in place with one T8 bolt.
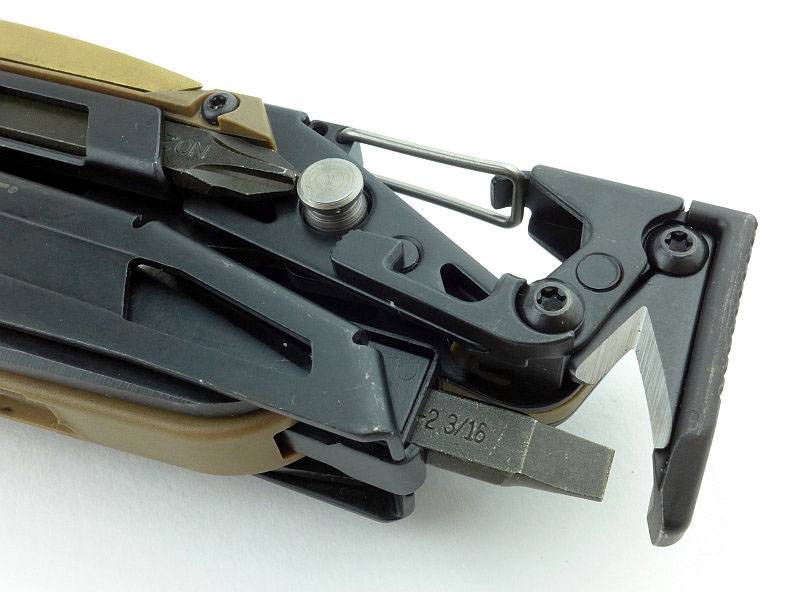
 photo 18 MUT cutter P1200767.jpg

There are grip grooves cut into the hammer face, especially important as the hammer face is not that big.
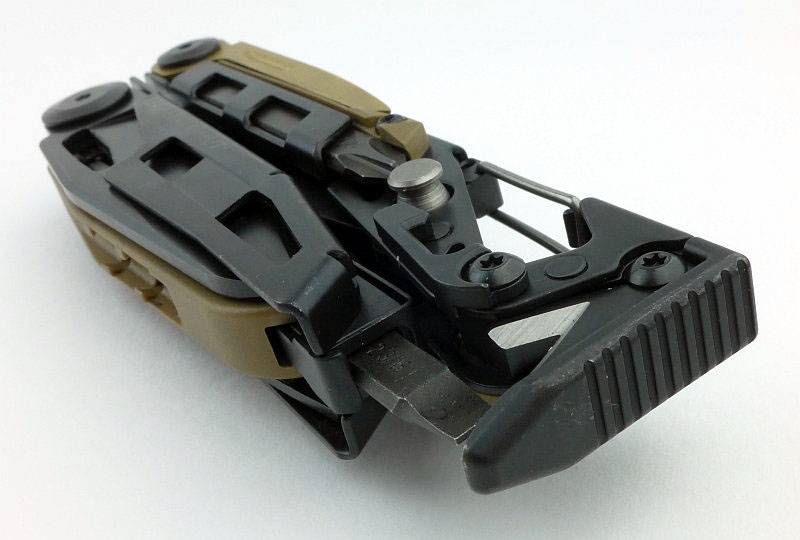
 photo 19 MUT hammer P1200770.jpg

A karabiner style clip is integrated into the MUT allowing very easy attachment to cord loops or trouser belt loops (if they are strong enough). It also doubles as a bottle opener.
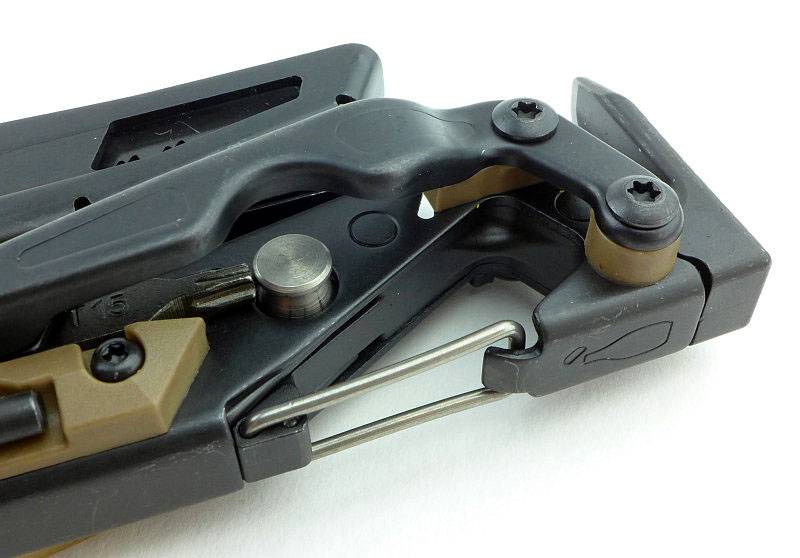
 photo 20 MUT clip P1200773.jpg

Located at the opposite end of the MUT to the hammer face, one of the main folding tools is a 1/8″ firearm disassembly punch.
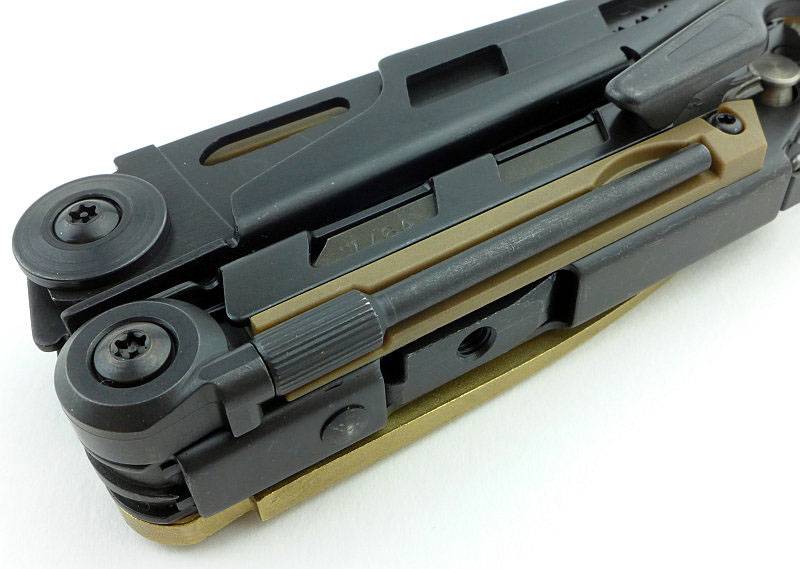
 photo 21 MUT punch P1200777.jpg

Getting in really close to the threaded hole (actually in the pliers jaw) allowing the MUT to be used as a handle for certain cleaning rods.
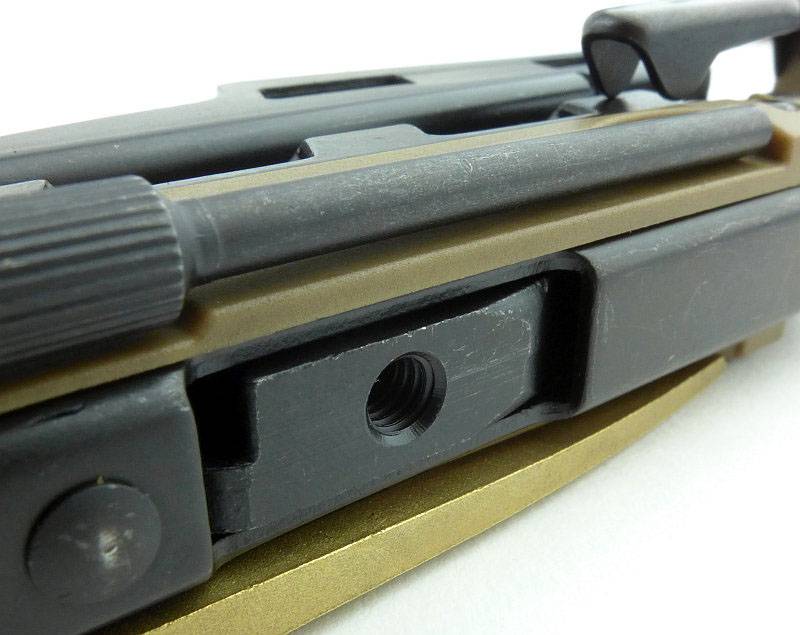
 photo 22 MUT cleaning rod P1200778.jpg

A plastic part on the opposite side is for holding the small screwdriver bit.
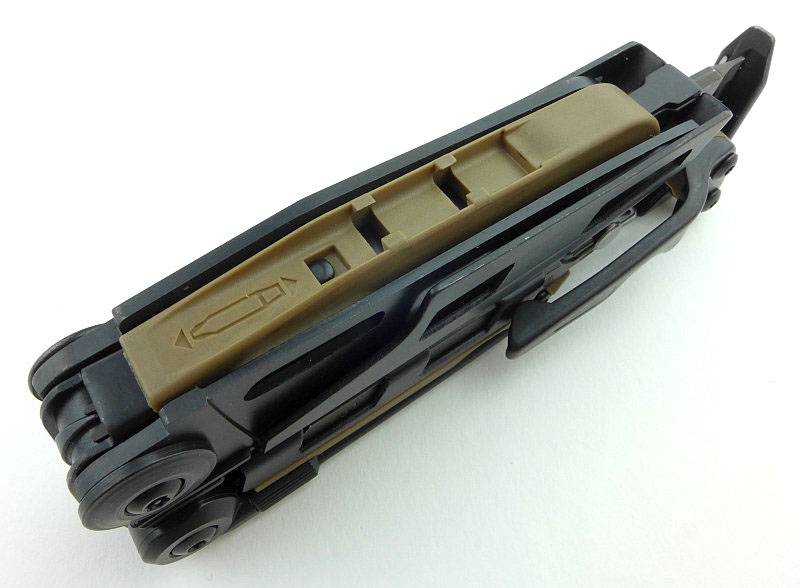
 photo 23 MUT bit channel P1200783.jpg

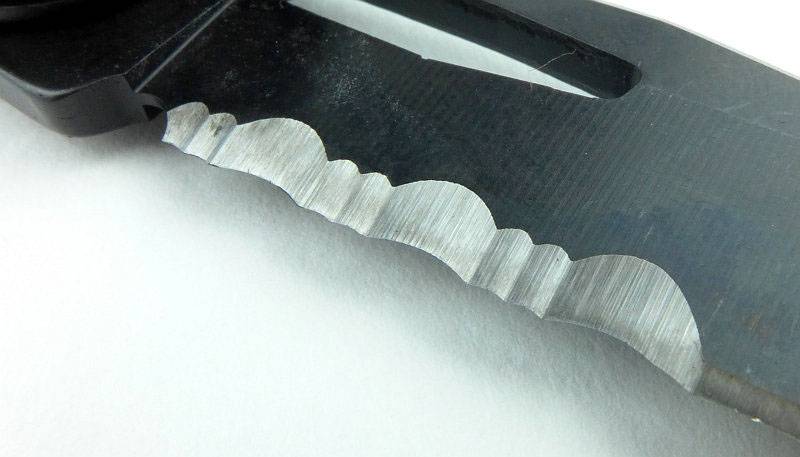
For its knife blade, the MUT uses a part serrated edge.
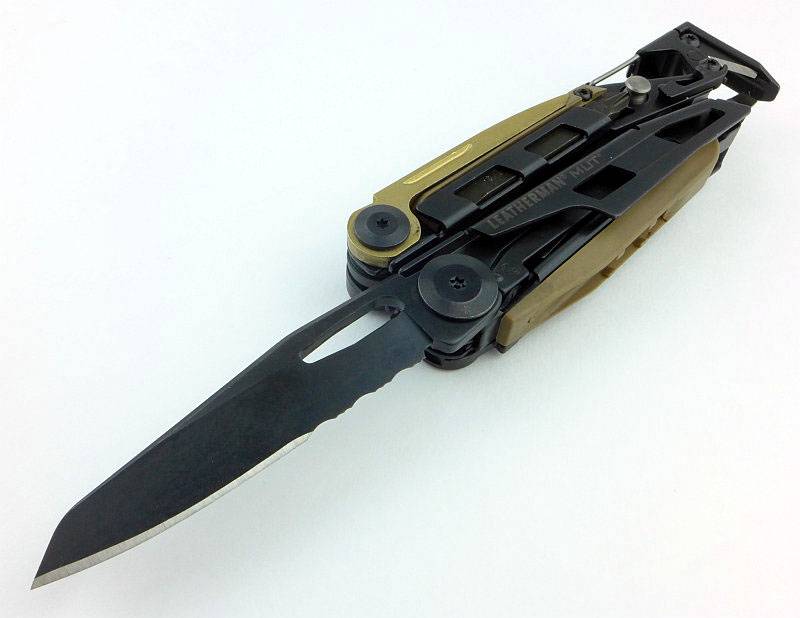
 photo 24 MUT main blade P1200789.jpg

To lock the blade, the MUT uses a liner-lock style sprung locking bar.
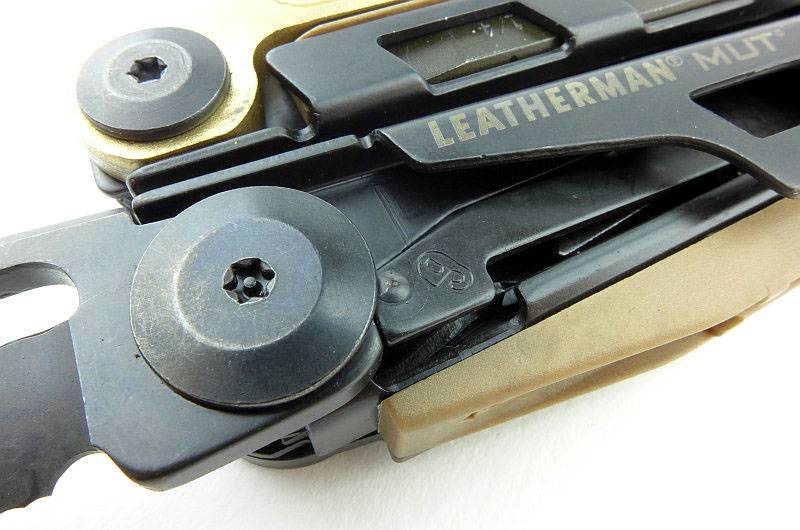
 photo 25 MUT main blade lock P1200793.jpg

Viewed from the other side, you can now see that the plain edge is a double-sided bevel, but the serrated portion is a chisel grind.
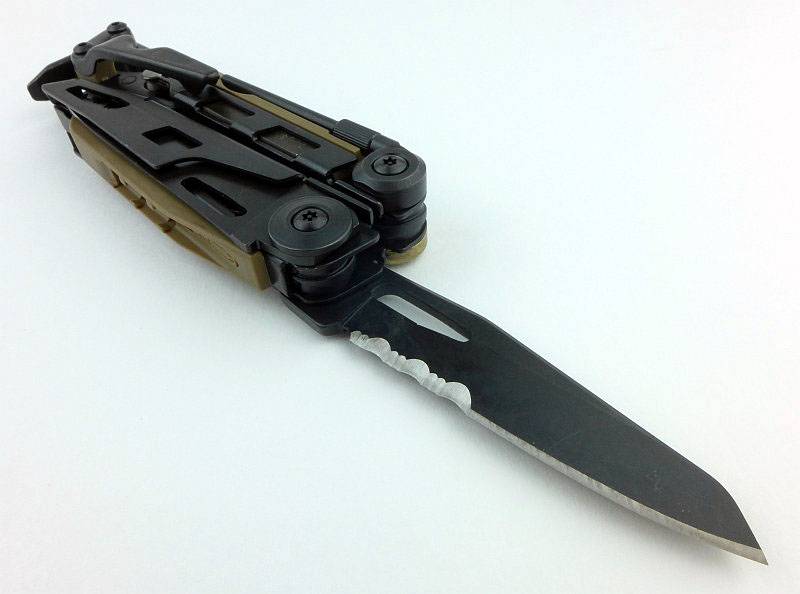
 photo 26 MUT main blade P1200796.jpg

Close-up of the serrations.
 photo 27 MUT serrations P1200798.jpg

Opposite the knife blade is a similar sized wood saw.
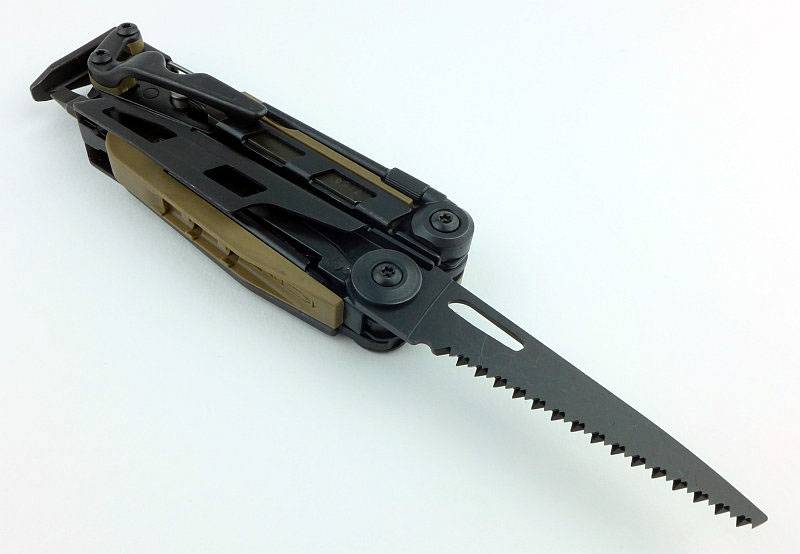
 photo 29 MUT saw blade P1200805.jpg

Those saw teeth are unfortunately not as sharp as a well known SAK maker produces.
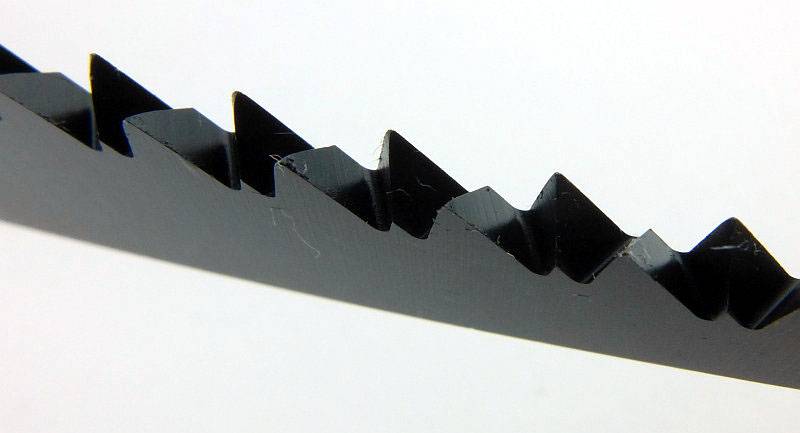
 photo 29 MUT saw teeth P1210020.jpg

The same liner-lock design is used for the saw.
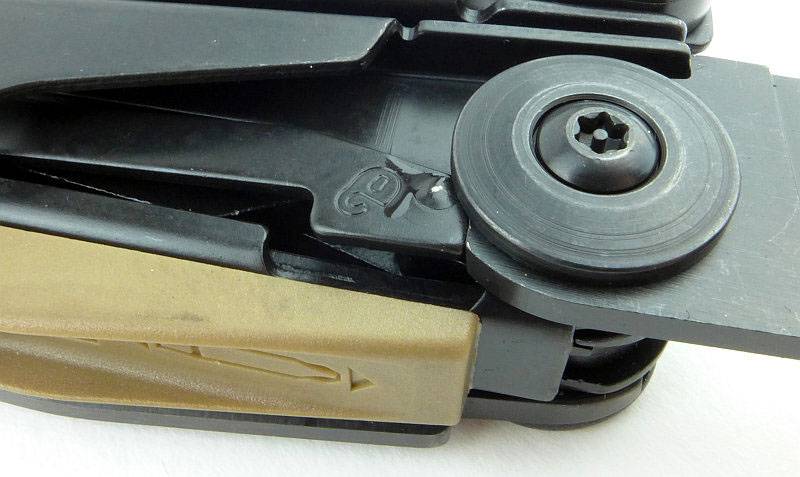
 photo 30 MUT saw blade lock P1200807.jpg

Here that punch is fully open and you can push out roll-pins. If needed you can tap out stubborn pins by hitting the MUT’s hammer face.
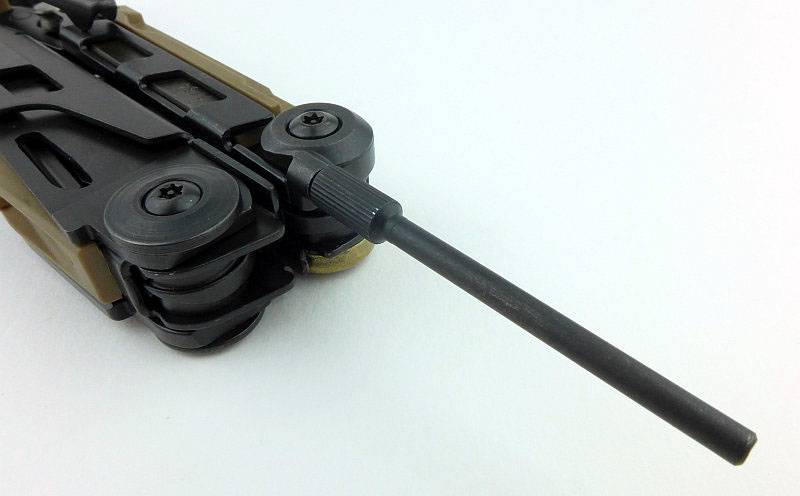
 photo 31 MUT punch P1200811.jpg

However, you can remove the punch itself and then use the MUT’s own hammer to knock out the pin. The screw-post which holds the punch in place can also be used for some cleaning brushes and rods.
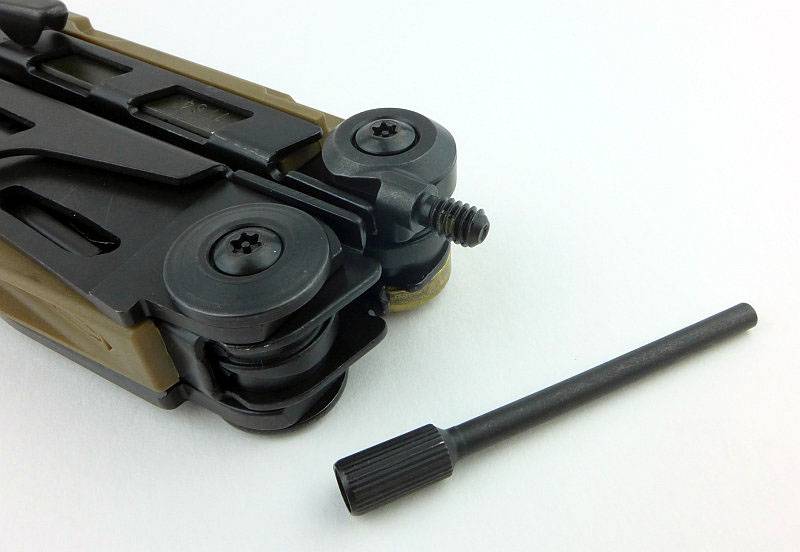
 photo 32 MUT punch off P1200814.jpg

A great deal of thought has been put into the MUT and another aspect that shows this is the use of bronze for the carbon scraper. You can use this on steel parts without worrying about damaging the steel. As the bronze is intentionally soft, it will wear and is intended to be easily replaced by the user with the MUT accessory kit of replaceable parts.
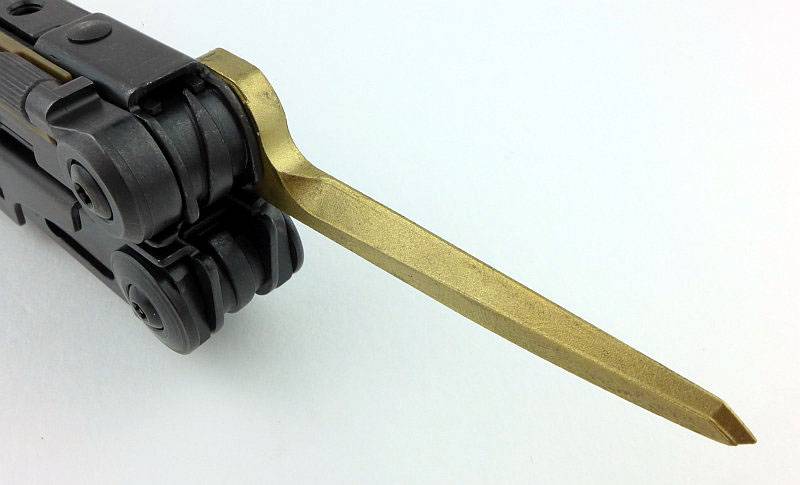
 photo 33 MUT scraper P1200820.jpg

On the other side of the scraper is a thumb-nick for opening it out.
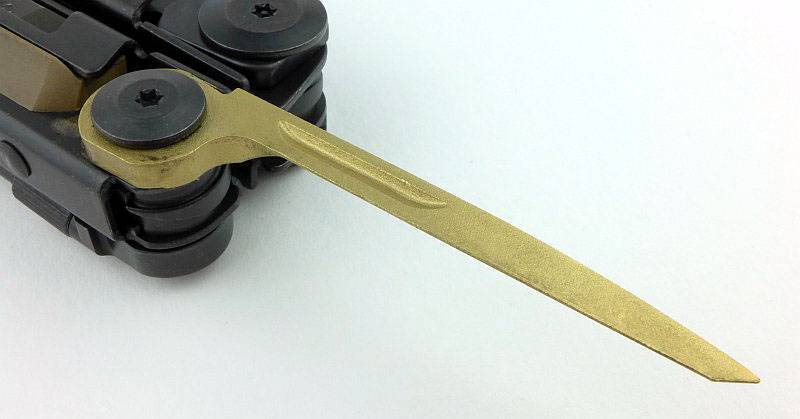
 photo 34 MUT scraper front P1200823.jpg

The karabiner style clip also doubles as a bottle opener.
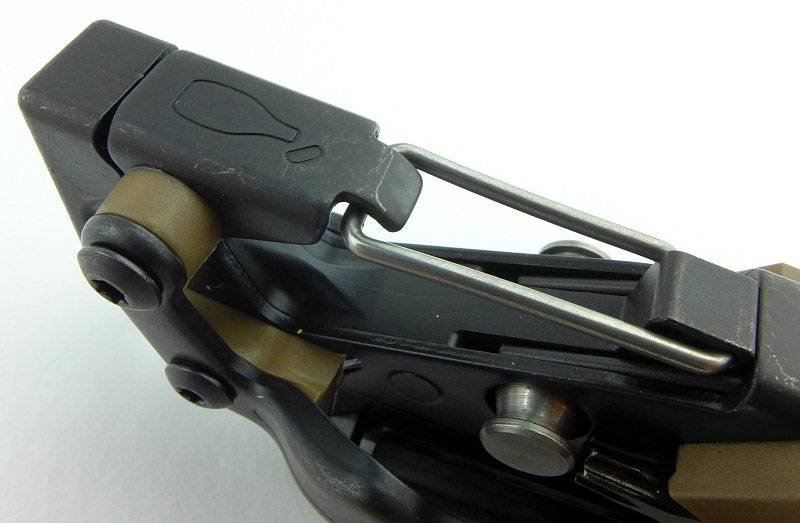
 photo 35 MUT bottle open P1200827.jpg

Perhaps more intended for use once the MUT has seen some wear and the pivots are no longer as tight, there is a handle-lock included in the MUT. Here it is shown in the locked position with the locking hook clipped into the other handle. Of course if you are not using the holster and have it clipped onto something, using this lock ensures the MUT handles stay closed.
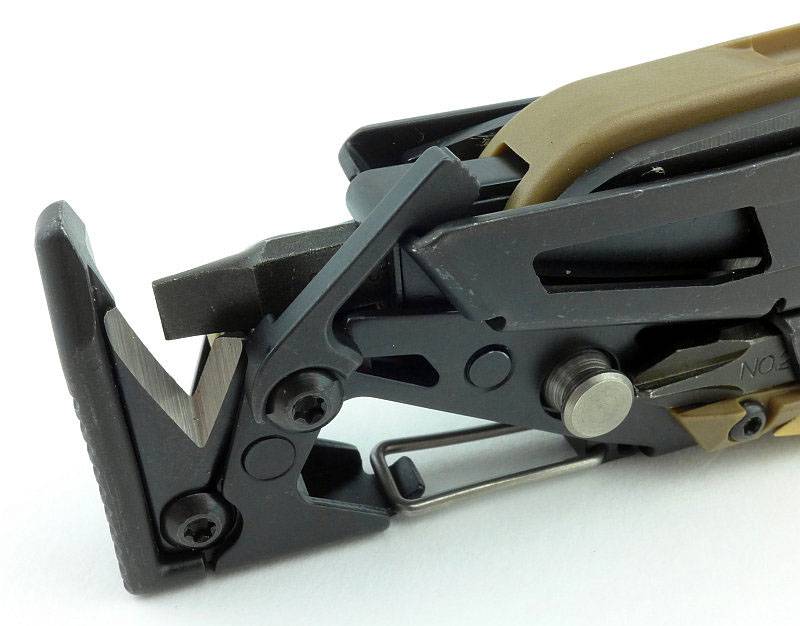
 photo 36 MUT main lock P1200831.jpg

The handle lock is released by pulling it out like this.
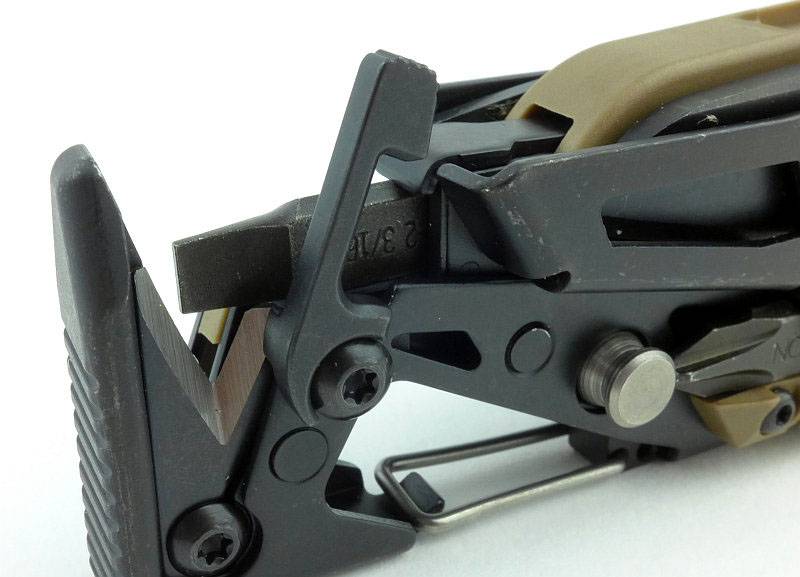
 photo 37 MUT main lock released P1200834.jpg

When not in use the handle lock folds out of the way.
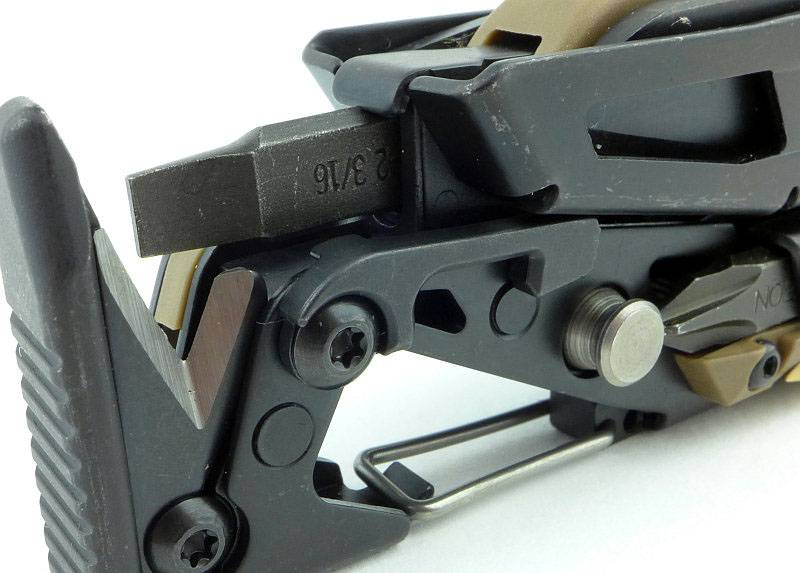
 photo 38 MUT main lock folded P1200835.jpg

To access the bit holder the handle needs to be opened out as it can’t be used with the handles folded.
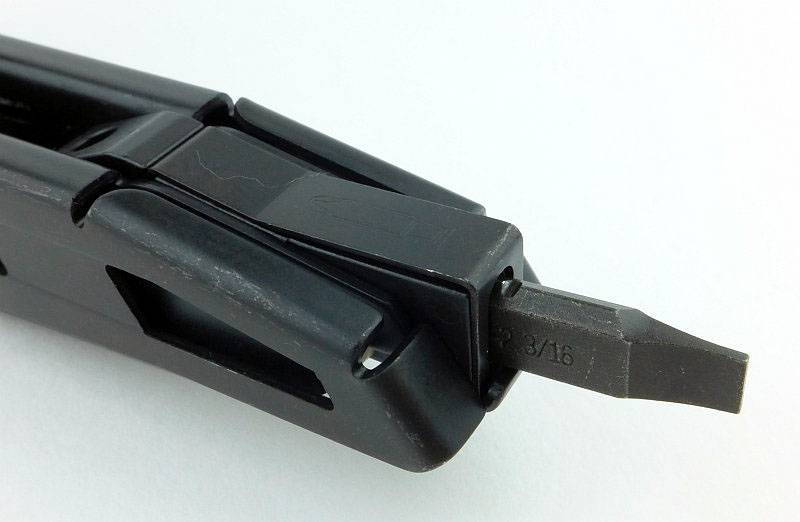
 photo 39 MUT bit holder P1200839.jpg

Each bit has a couple of small grooves either side which allow the bit holder to secure the bit.
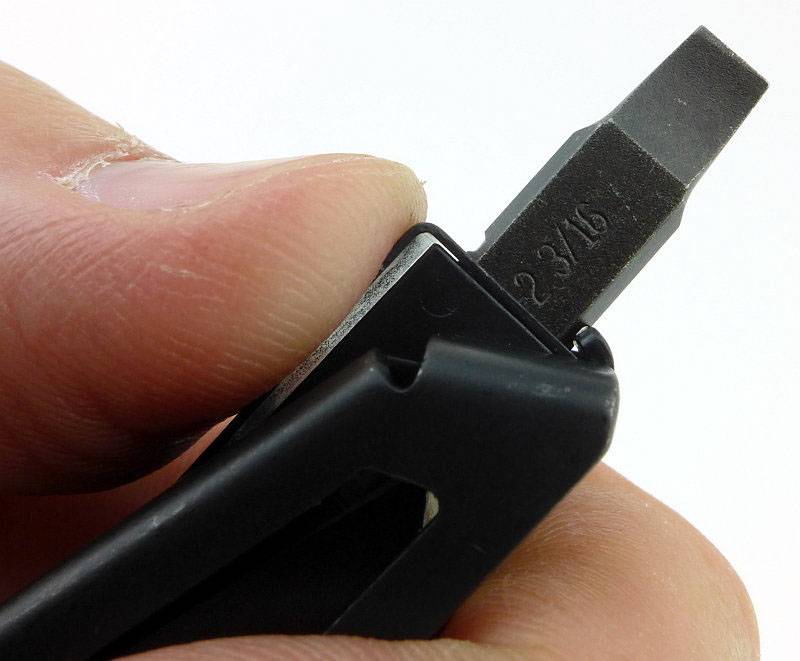
 photo 41 MUT bit holder locked P1200852.jpg

Pressing on the release plate pushes the bit hook away from the bit so that it can be pulled out of the holder.
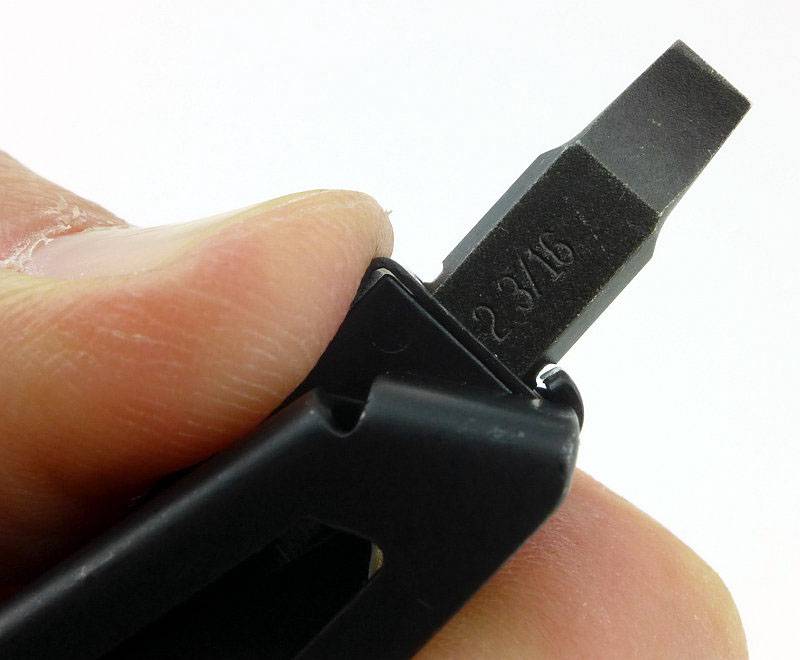
 photo 42 MUT bit holder unlocked P1200854.jpg

The bit can then be put back into place on the side of the MUT.
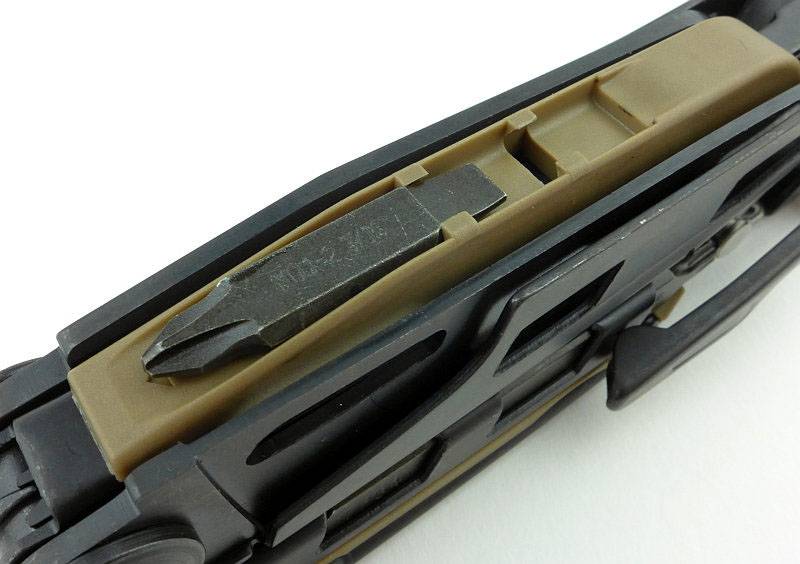
 photo 43 MUT bit channel P1200857.jpg

Requiring a very firm press the bit slides fully into place.
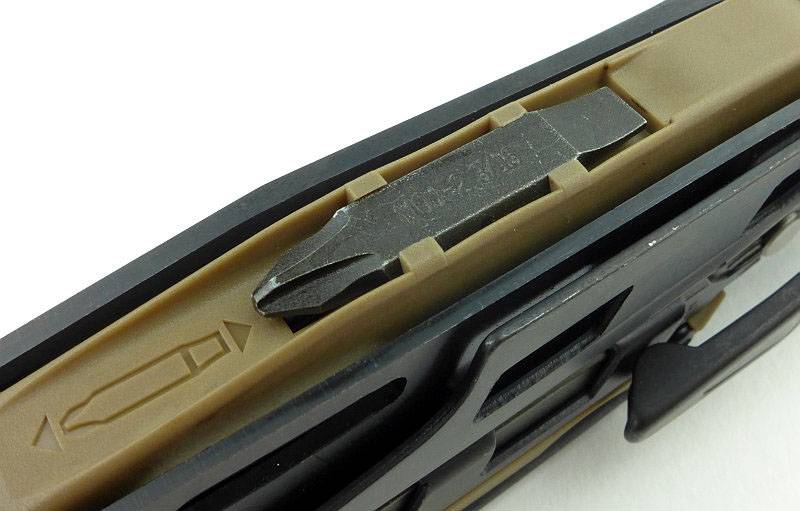
 photo 44 MUT bit channel filled P1200860.jpg

OK, time to get onto the pliers.
 photo 45 MUT pliers open P1200870.jpg

Leatherman use a hybrid jaw which is a blend of needle-nose and standard pliers.
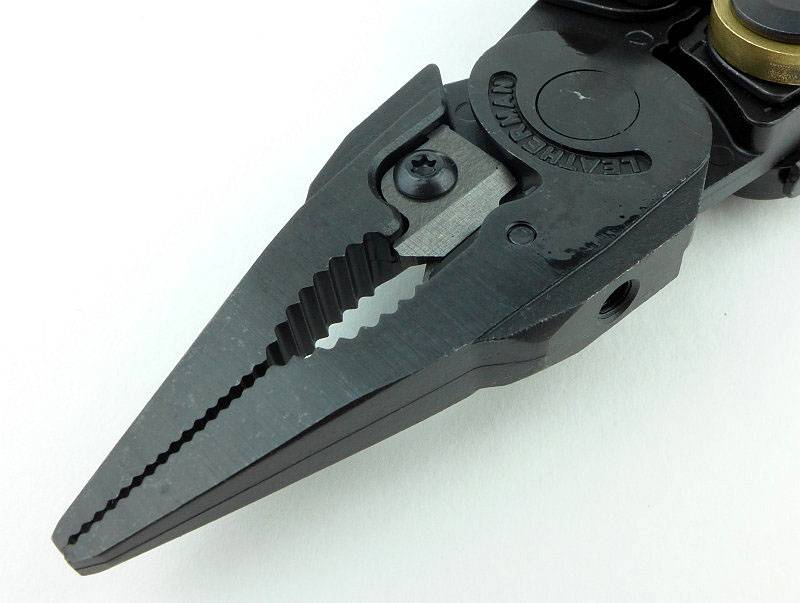
 photo 46 MUT jaws P1200875.jpg

The jaw tips are well aligned and the very tip touches to give tweezer like gripping.
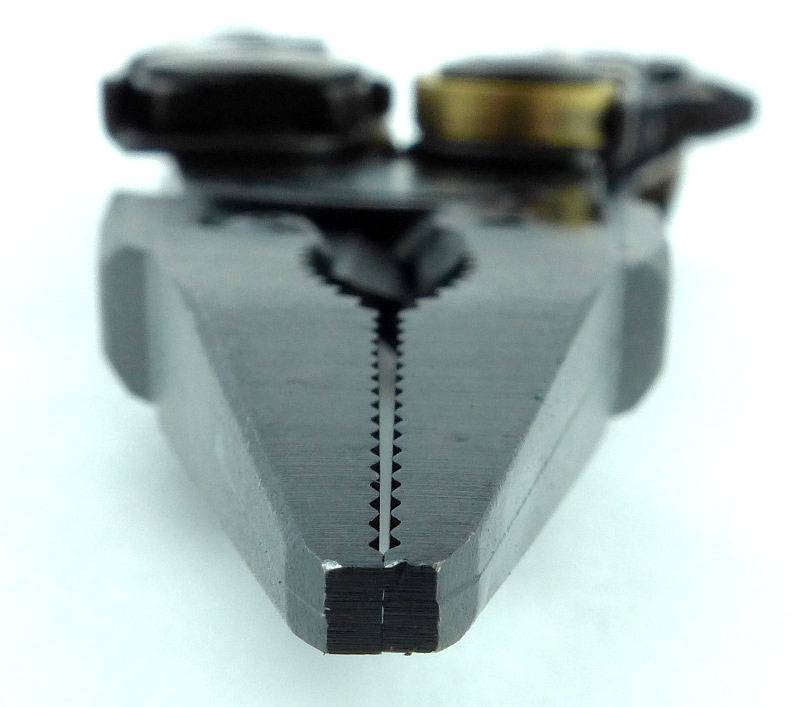
 photo 47 MUT jaw tips P1200877.jpg

A massive improvement over pliers with cutters that are formed directly from the jaw steel, is to use replaceable cutters. There are two benefits, with the first being that once blunted the pliers are not ruined, and the other being that the cutter material can be specifically chosen for higher performance. 154CM has been used for these cutters which is very tough and wear resistant. There is a step in the cutter edges that allows the cutter to grip and hold tougher wires that might slip forwards and keep them as close to the pivot as possible (for the best leverage), making the cut much easier.
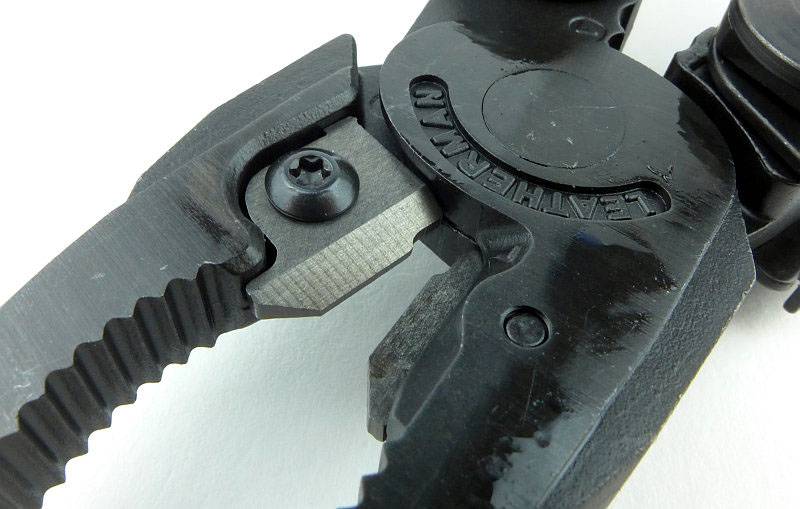
 photo 48 MUT cutters P1200881.jpg

The last features of the pliers are a stranded wire cutter and crimping tool which sit the handle side of the jaws.
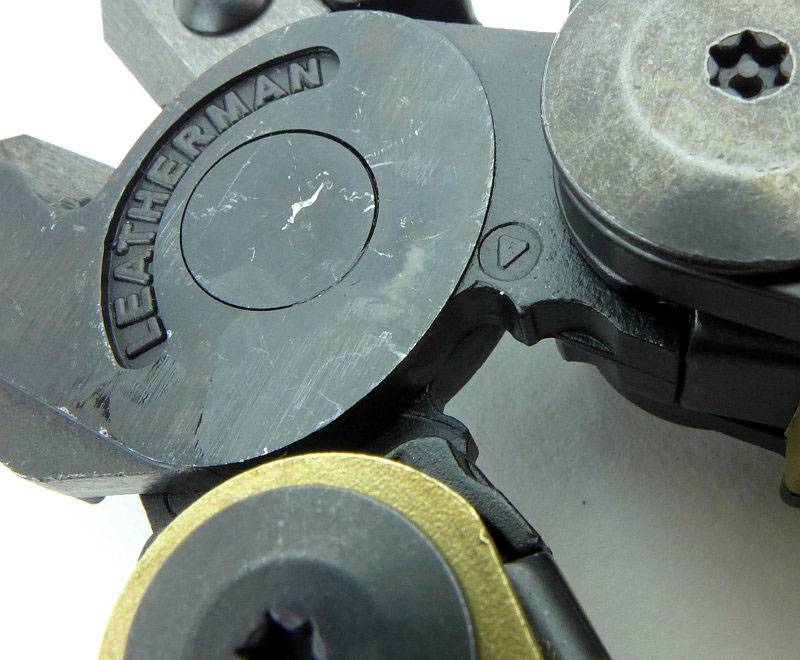
 photo 74 MUT crimpers P1210048.jpg

Fitted within the structure of the MUT are three double-ended screwdriver bits. We have already seen the one held in a plastic side panel, but there are two more that slide into one of the MUT’s handles. To keep them in place, there is a sliding button that clicks into place to block the driver bits falling out. Here it is preventing the bit from coming out.
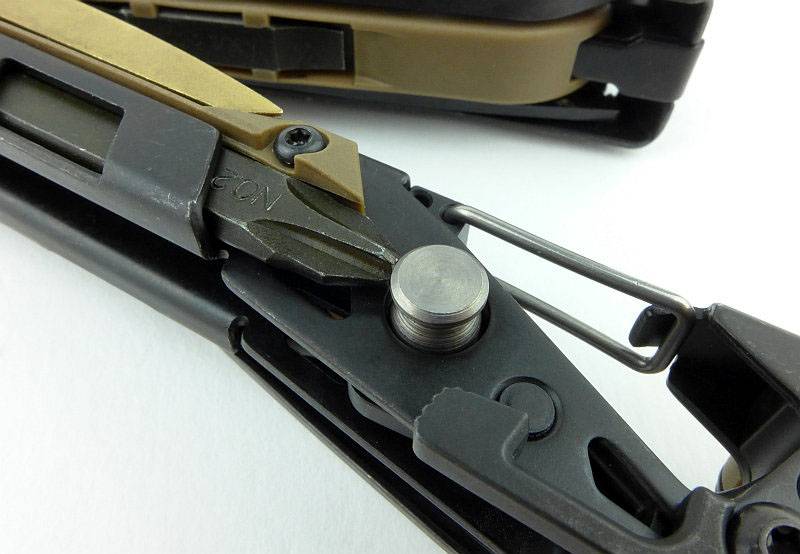
 photo 50 MUT bit button P1200896.jpg

Pressing on the button moves it out of the way of the driver bit.
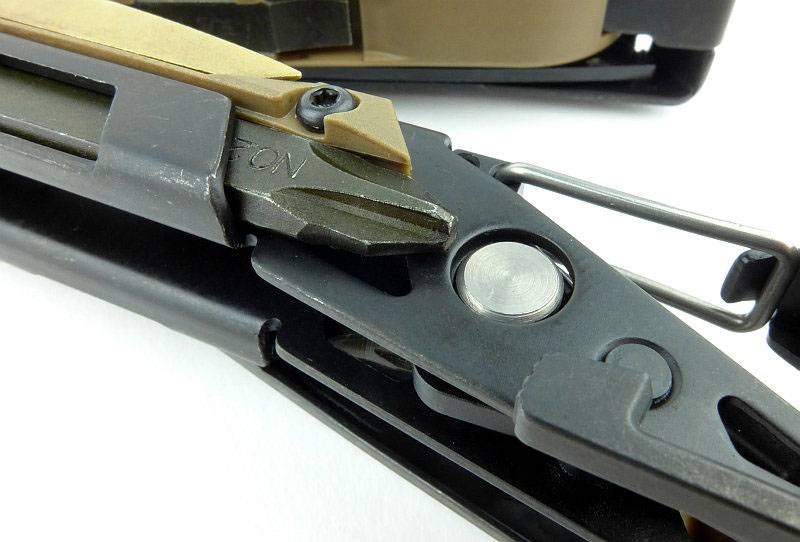
 photo 51 MUT bit button 2 P1200900.jpg

Which can then slide out so you can use it.
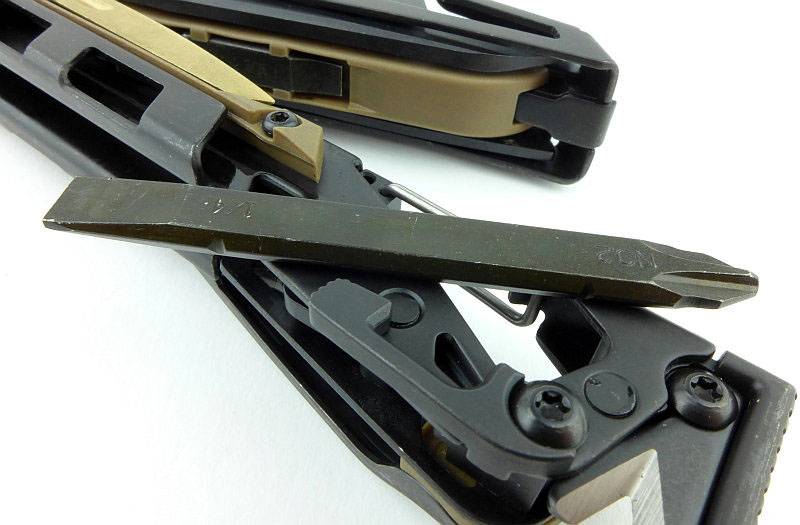
 photo 52 MUT long bit P1200903.jpg

These long bits are too long to leave in place with the MUT handles folded, and give you extra reach for recessed screws.
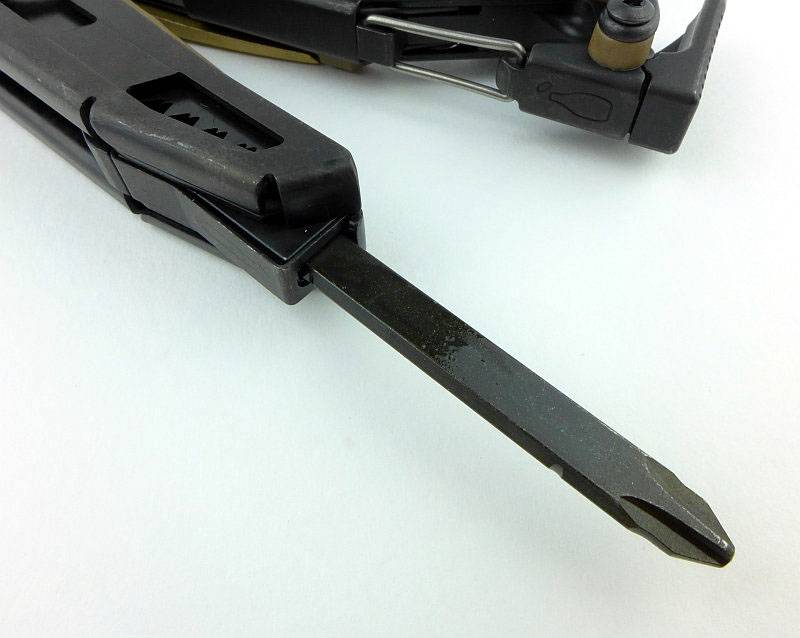
 photo 53 MUT long bit fitted P1200906.jpg

Turning the MUT over, the second long driver bit is hidden under the pocket clip. The same button holds this bit in place.
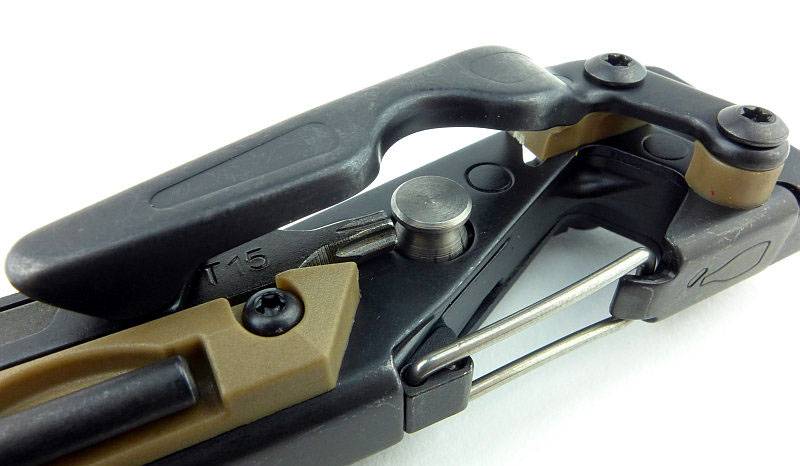
 photo 54 MUT bit button B P1200910.jpg

Pushing the button down allows this bit to slide out from under the pocket clip.
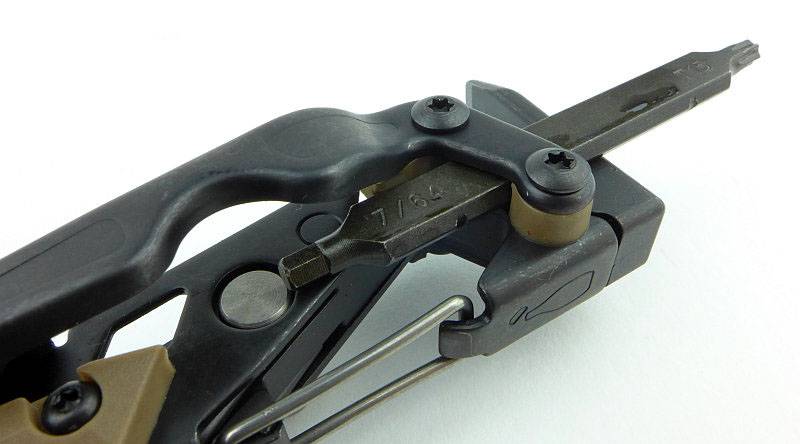
 photo 55 MUT long bit 2 P1200915.jpg

Here the second long bit is fitted into the bit holder.
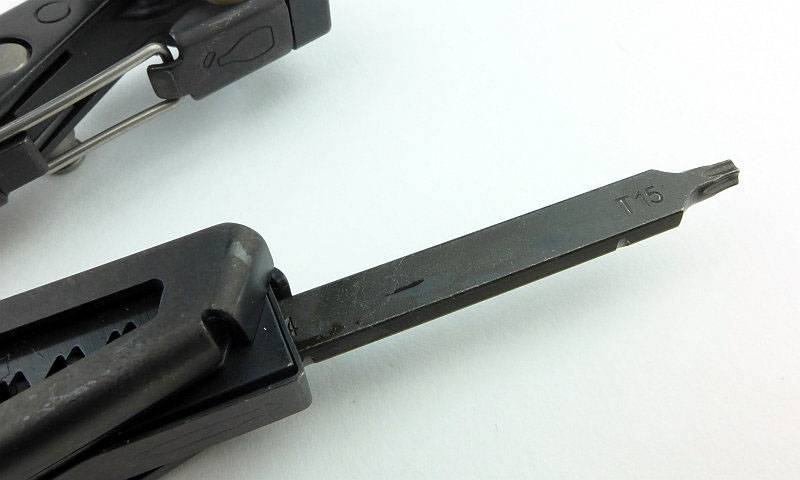
 photo 56 MUT long bit fitted 2 P1200916.jpg

Taking a close look at the double-ended button used to hold the two long driver bits in place. To clicks to the left or right depending on the bit you want to access.
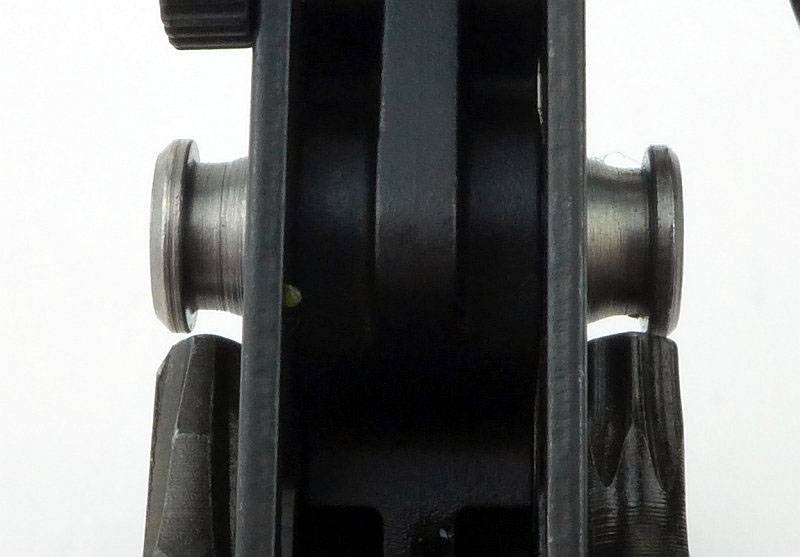
 photo 57 MUT bit button side P1200921.jpg

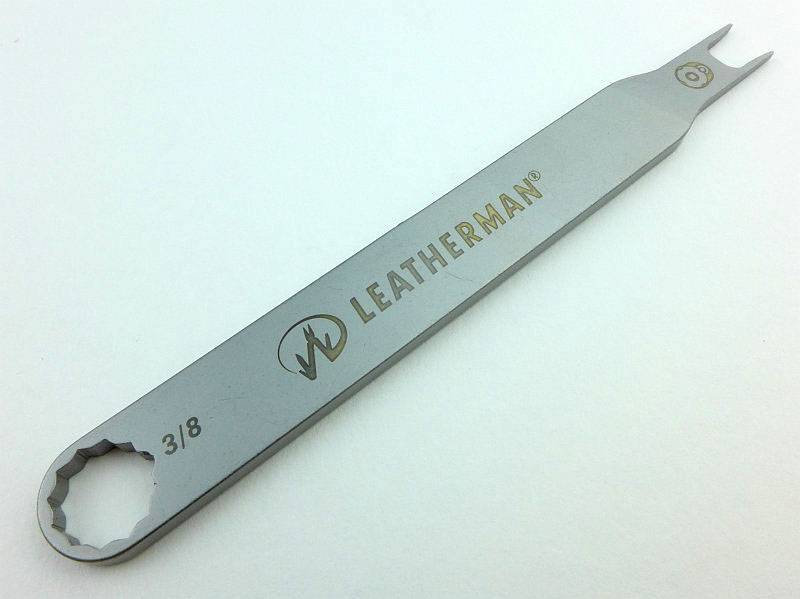
The sight tool is a separate item.
 photo 75 MUT sight tool P1210054.jpg

One end of this tool is a 3/8 wrench.
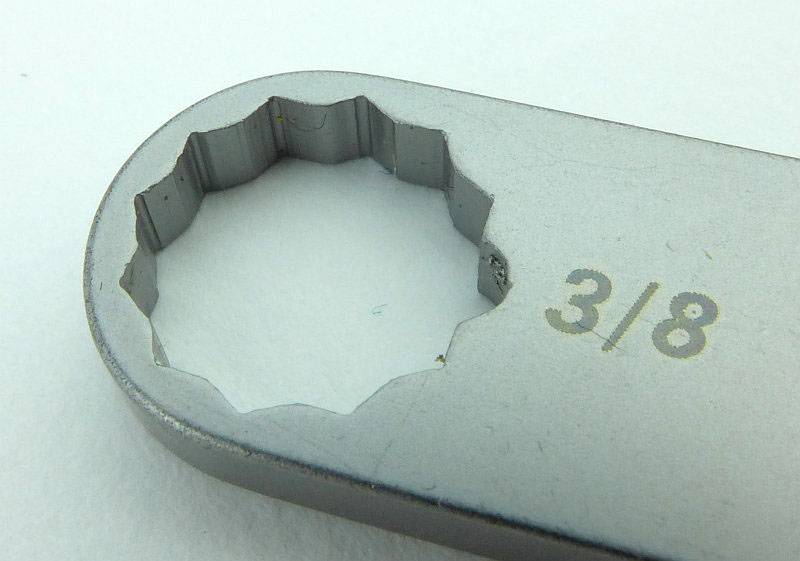
 photo 76 MUT sight tool end 1 P1210057.jpg

The other end is a foresight adjustment tool.
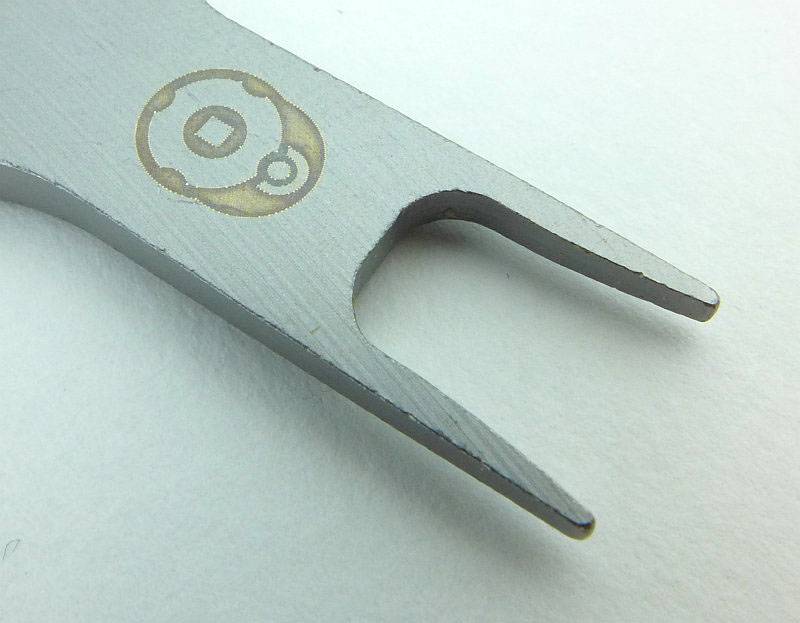
 photo 77 MUT sight tool end 2 P1210058.jpg

And there we have it, the MUT’s features covered, so next we are going to have a look at a couple of accessories.
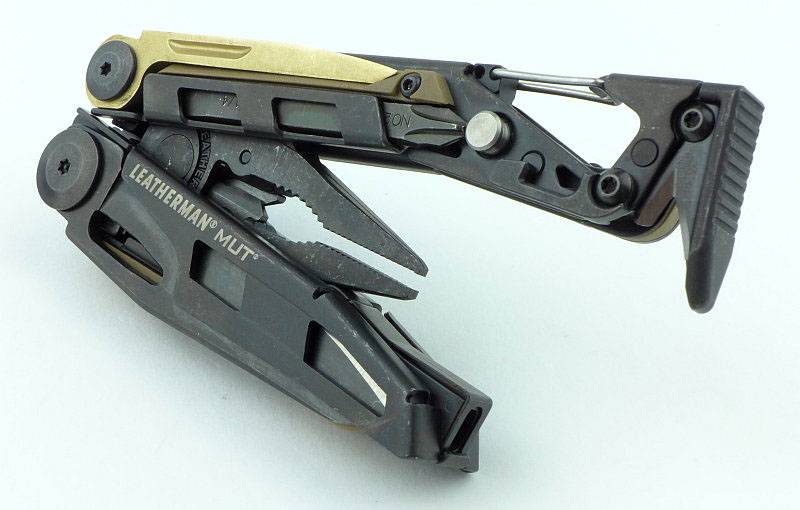
 photo 71 MUT part open P1210010.jpg

A few more details of the MUT’s accessories:

Along with the MUT, the additional bit-kit and MUT accessory kit were supplied.
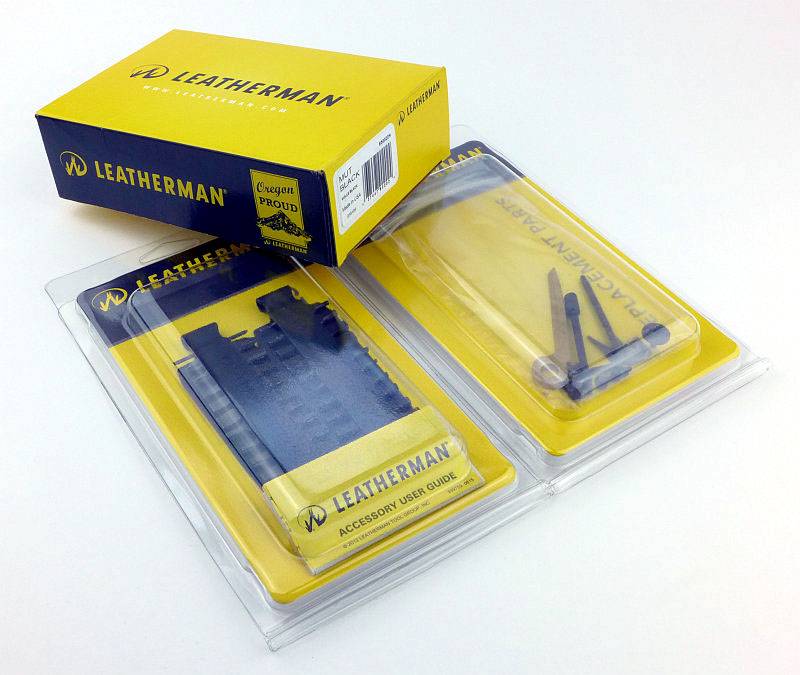
 photo 58 MUT accessories boxed P1200933.jpg

The bit-kit has two strips of bits that fit the MUT’s bit holder and the accessory kit has a bag of several parts for the MUT.
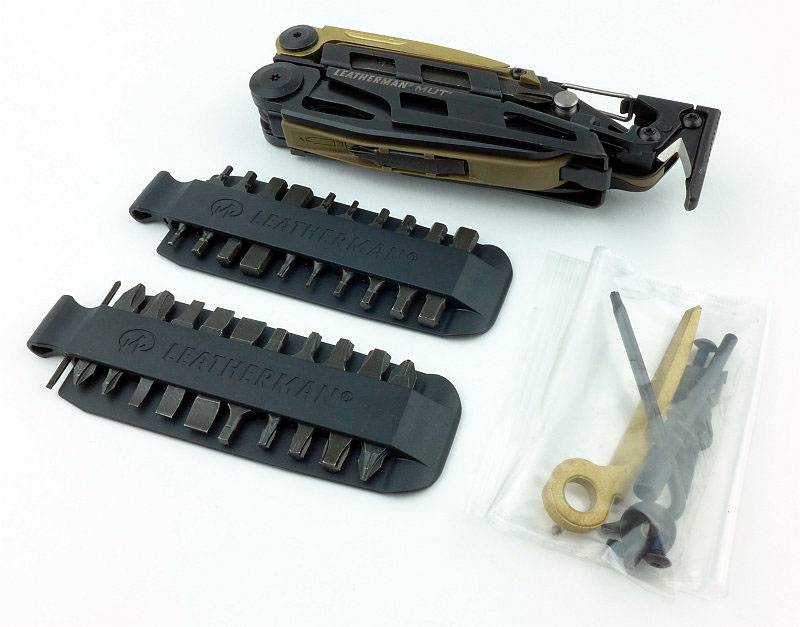
 photo 61 MUT with accessories P1200952.jpg

Laying this all out, the accessory kit has all the replaceable parts, cutter, wire-cutters, punch and scraper, plus replacement screws for fixing all of these parts.
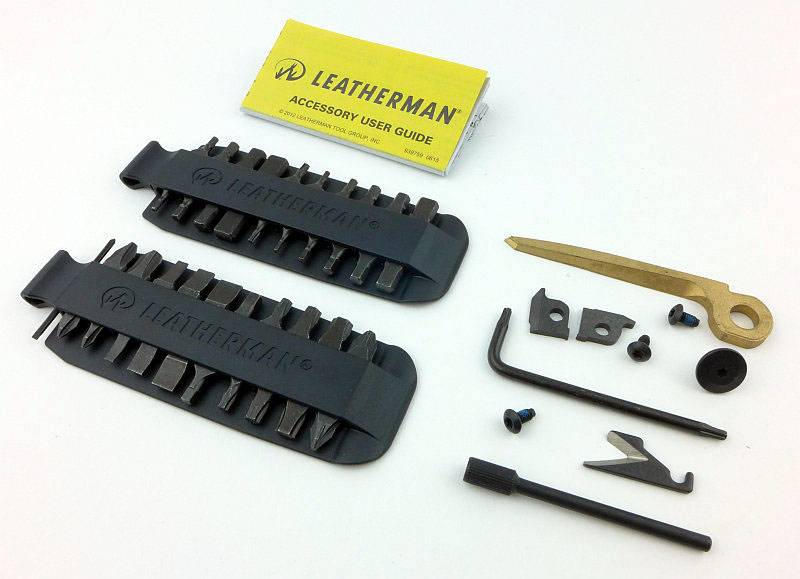
 photo 59 MUT accessories unboxed P1200937.jpg

The screws even have a pre-application of thread-lock on them.
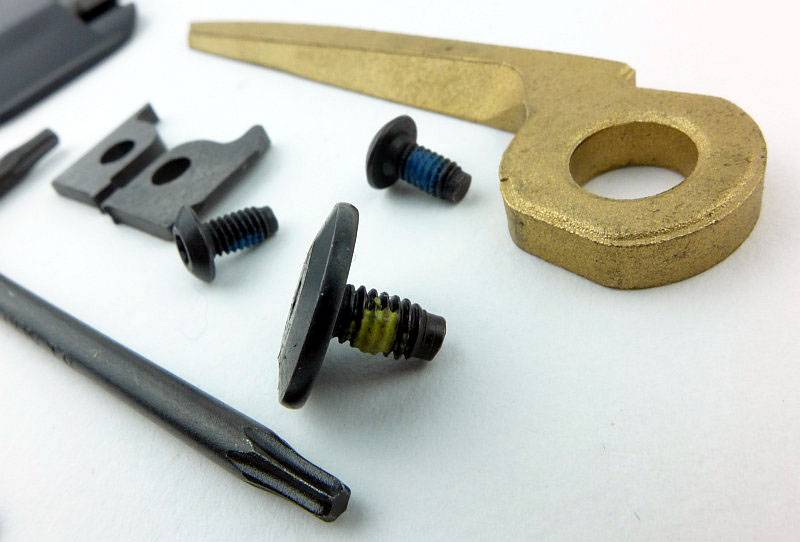
 photo 60 MUT accessories detail P1200948.jpg

Having the bit-kit massively enhances how useful the MUT’s screw driving capability is.
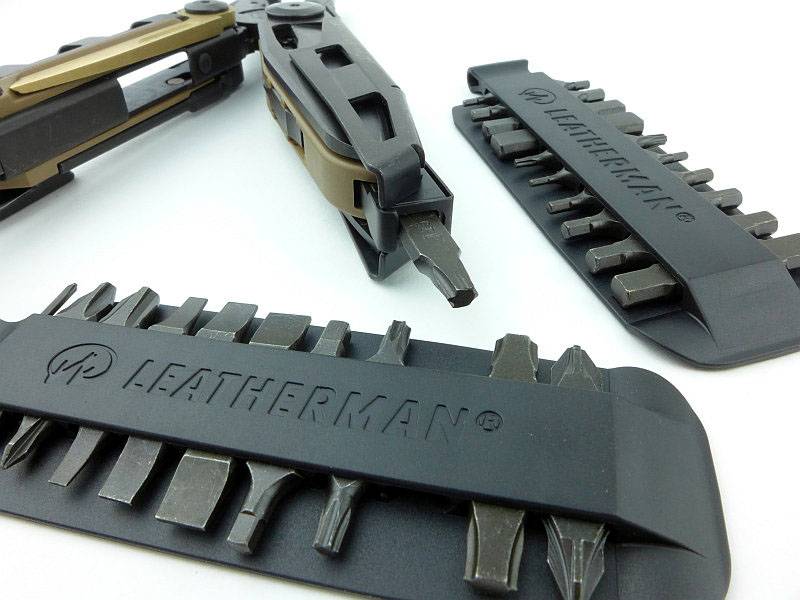
 photo 66 MUT bit set P1200970.jpg

What it is like to use?

Starting from the first moment you get your hands on the MUT, I’ll have to talk about that Black Oxide coating! So, out of the box, you are going to get nice black hands. It certainly looks very anti-reflective when new, but part of that is the loose surface of black dust. Four or five baby wipes later and the MUT is looking slightly less black, but now isn’t shedding black onto your hands and everything it touches. My advice would be to give it a good wipe down before you do anything else. If you are jumping straight into cleaning a very dirty gun, then you will end up with black hands anyway, but it is worth the initial cleanup.

When you pick up the MUT it is clear this is a heavy duty multi-tool. It is not the largest I’ve used, but it certainly feels tough. (I take XL sized gloves.)
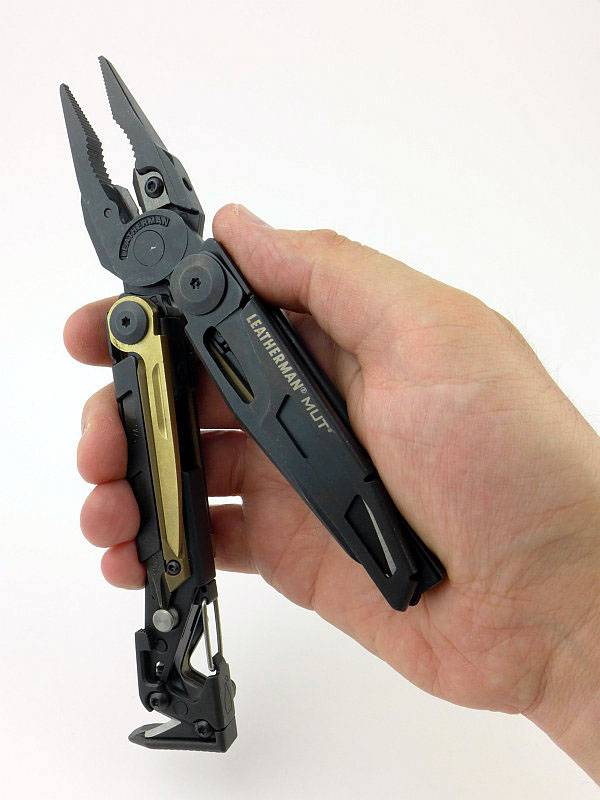
 photo 70 MUT in hand a P1200892.jpg

The knife in the MUT is a reasonable size, locks firmly and the blade is a sensible thickness too. This is one multi-tool blade that can do a reasonable amount of work. Unfortunately as a UK resident, this locking knife is something of a potential issue with EDC so I’ll take another look at that later.
An important thing to note here is the position of my little finger, and how it lines up with the cutter notch next to the hammer. If your finger starts to slip into the cutter notch, you certainly can get cut by it. If it were the other way round this would not be the case, as your palm could not get deep enough into the cutter notch. Just beware your finger doesn’t slip in under heavy use or when hammering.
NOTE: Leaving the small screwdriver bit in the bit holder helps guard against this happening.
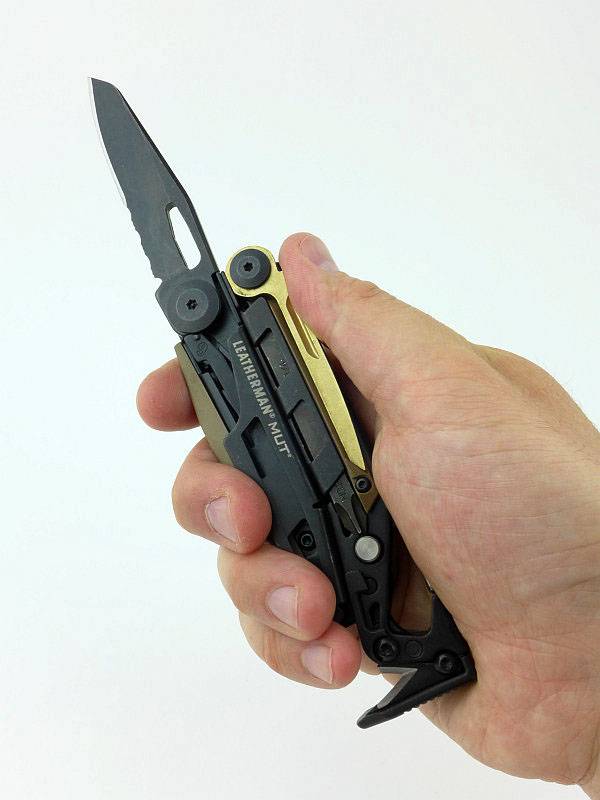
 photo 70 MUT in hand knife P1210004.jpg

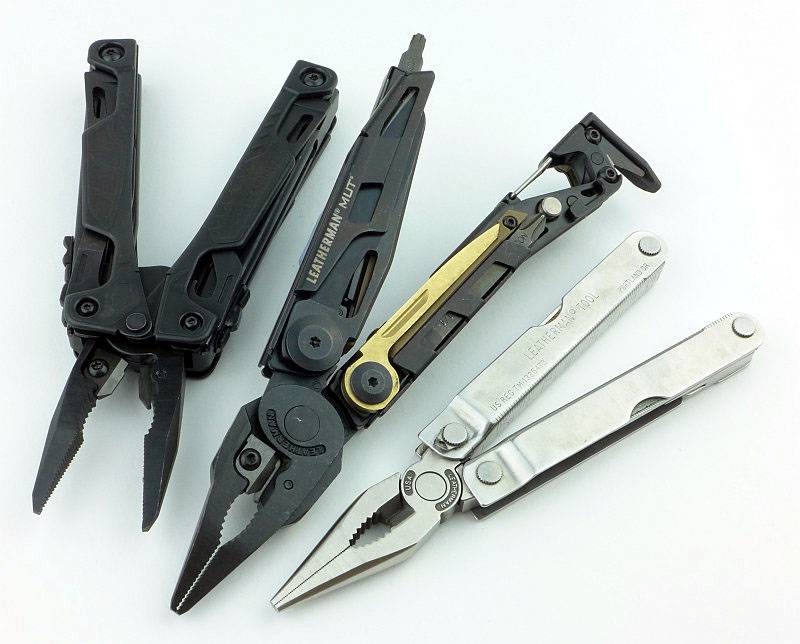
We’ve seen it in the hand, but here is a little size comparison between an original PST, the MUT and the OHT. Due to its out-the-front pliers deployment, the OHT looks quite large, but its build is not as heavy. The PST is quite compact and closer in size to the average multi-tool.
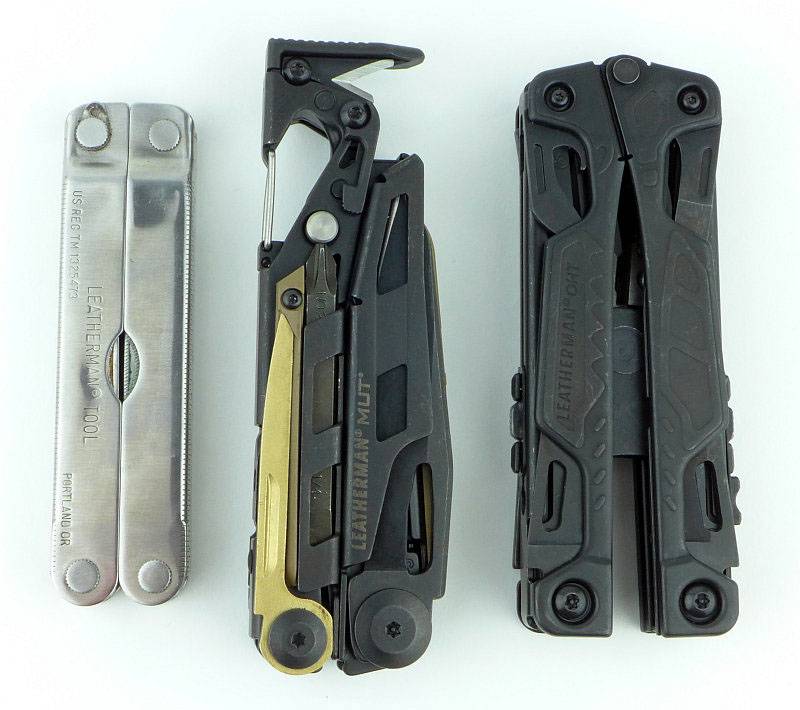
 photo 69 MUT size P1200995.jpg

Then we unfold them all.
 photo 67 MUT size P1200984.jpg

Despite the OHT initially looking quite big, with the MUT fully open, its presence is clearer.
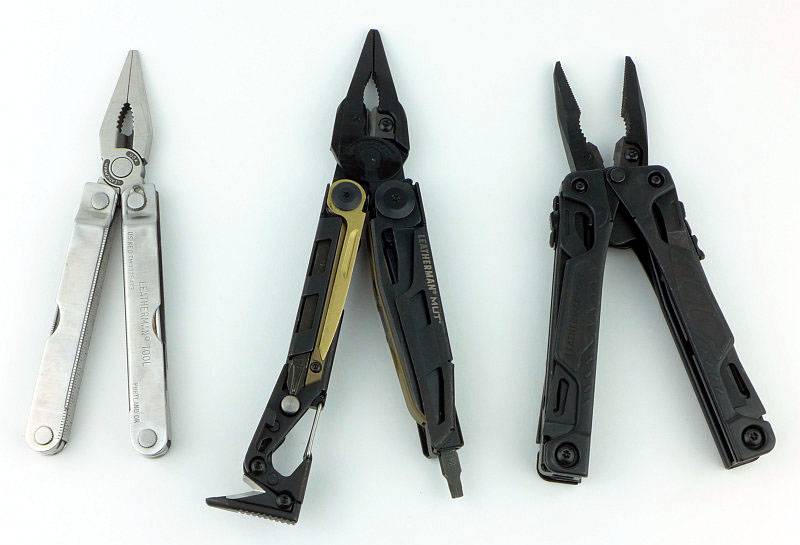
 photo 68 MUT size P1200991.jpg

The MUT includes a safety feature that is used in other Leatherman multi-tools, but you might not have noticed. There is a safety lock to prevent the knife blade being opened when you are using the pliers.
You might have spotted the cams which are included on the pliers’ handle pivots in some of the other photos. What you might not have seen is the metal arm which sits against one cam. Here the lower arrow shows the cam, and the upper arrow points to the safety lock arm. As you rotate the handle open to deploy the pliers, the safety lock rides up the cam slope, pushing the metal arm sideways.
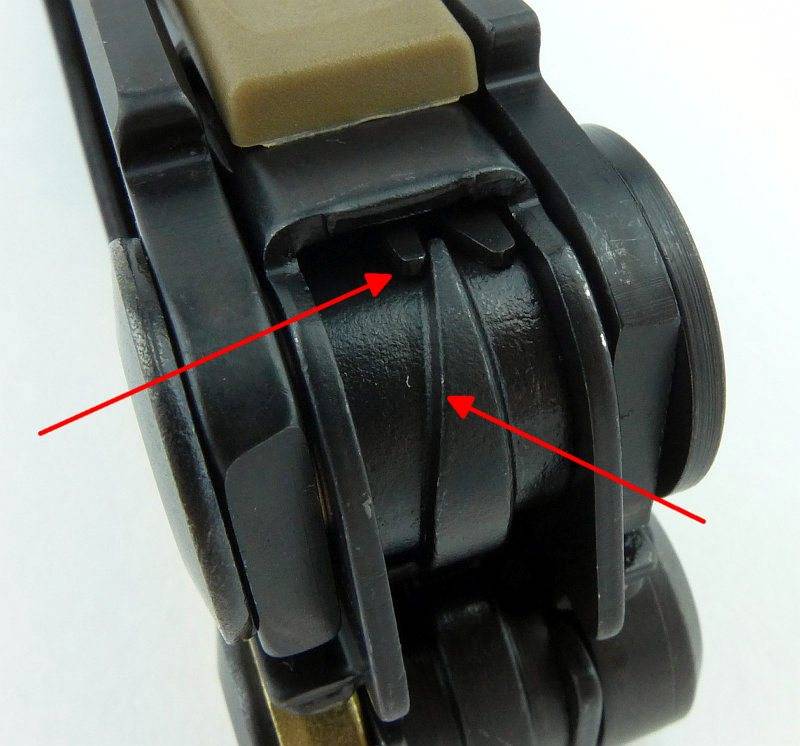
 photo 73 MUT blade safety lock cam P1210025 002.jpg

With the handles closed, and the knife blade able to open, if you look inside the opening hole, there is a small metal pin sitting back inside the handle as shown by the arrow.
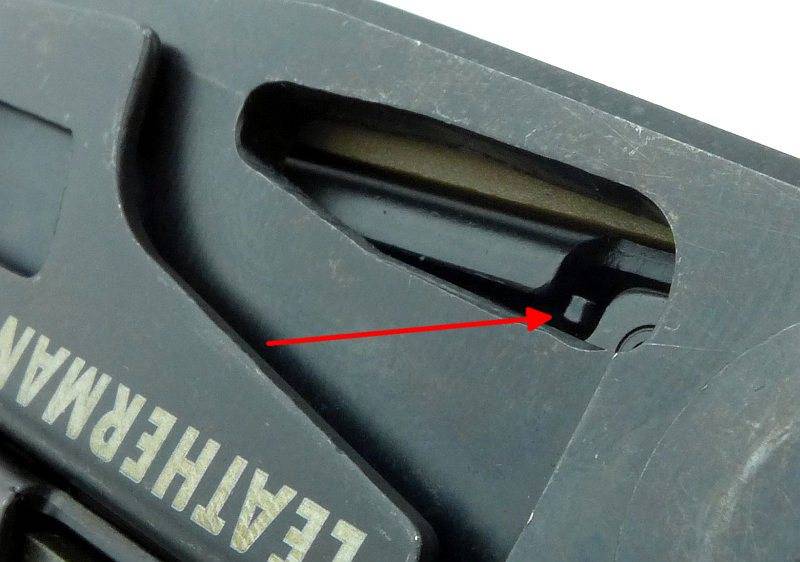
 photo 63 MUT blade safety lock off arrow P1200963.jpg

When the handles are opened, that cam pushes the safety lock out, placing the pin inside the opening hole. Like this you can’t open the blade as it is blocked. A small detail, but a really important one that stops what could be a nasty accident if the blade opened when using the pliers.
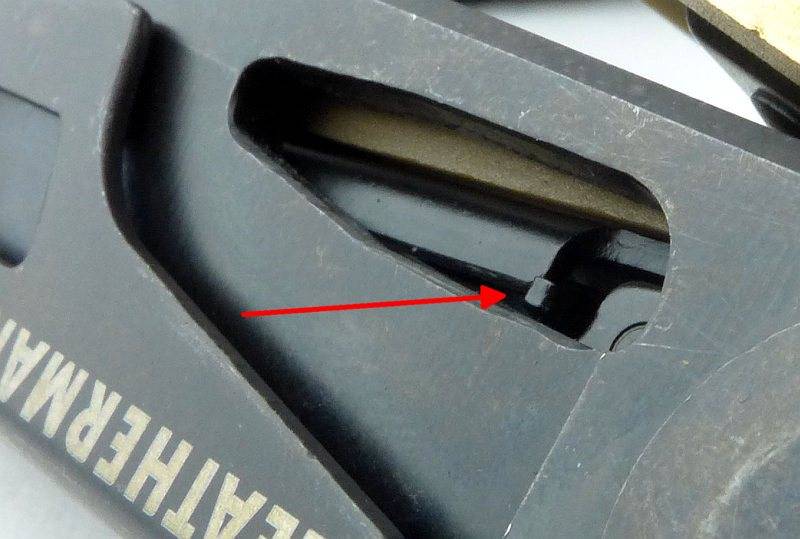
 photo 64 MUT blade safety lock on P1200964 002.jpg

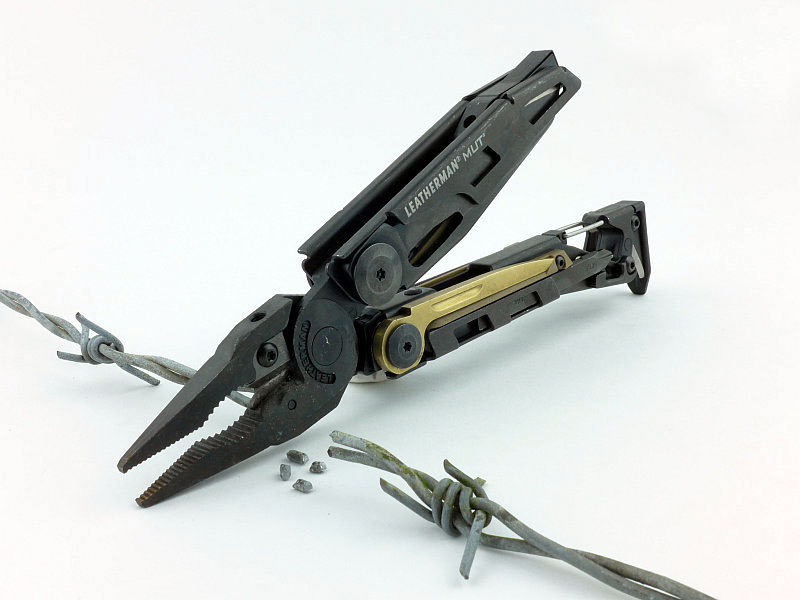
Taking the MUT out into the field and amongst the jobs it was needed for was some tidying up of barbed wire. Two gauges were being cut, a high tensile 2.5mm and a smaller 1.6mm.
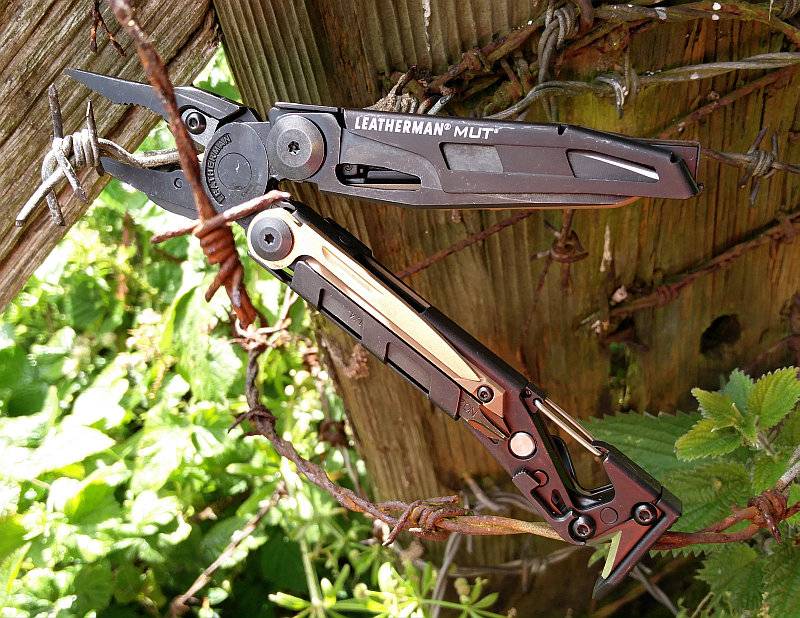
 photo 83 MUT in the wild IMG_20160702_162230.jpg

The MUT breezed through the 1.6mm, but the 2.5mm required a but more grunt, after a while I started to need to nip through one wire at a time purely due to fatigue.
What was very impressive is the state of the 154CM cutters after a lot of work, they looked like this, pretty much untouched.
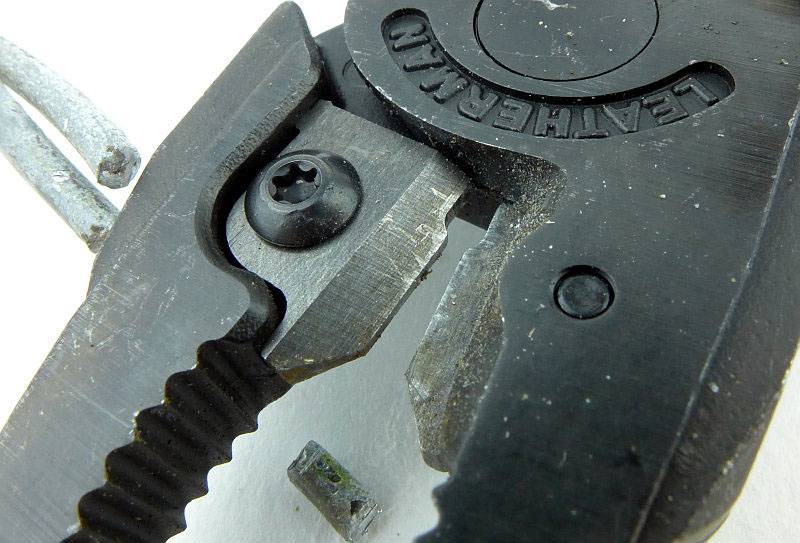
 photo 82 MUT barbed wire close P1210789.jpg

Carrying the MUT to be as fully prepared as possible means carrying the sight tool and extra bits. The sight tool fits into the pouch much better if laid next to the pocket clip like this before inserting it.
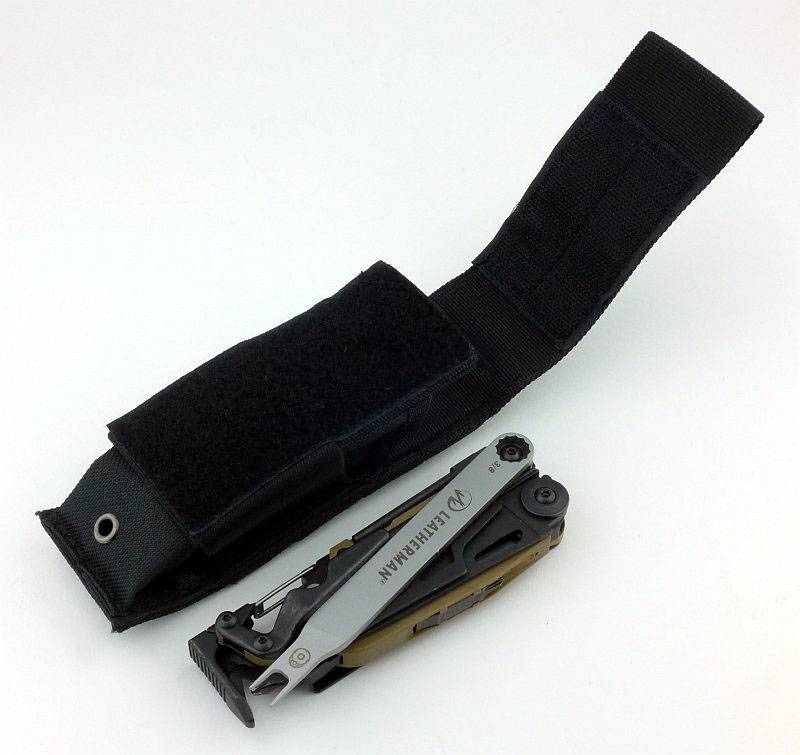
 photo 84 MUT sight tool holster P1250290.jpg

The front of the holster does have a pocket that nicely holds one of the bit sets, so here we have the MUT, sight tool, and one bit set.
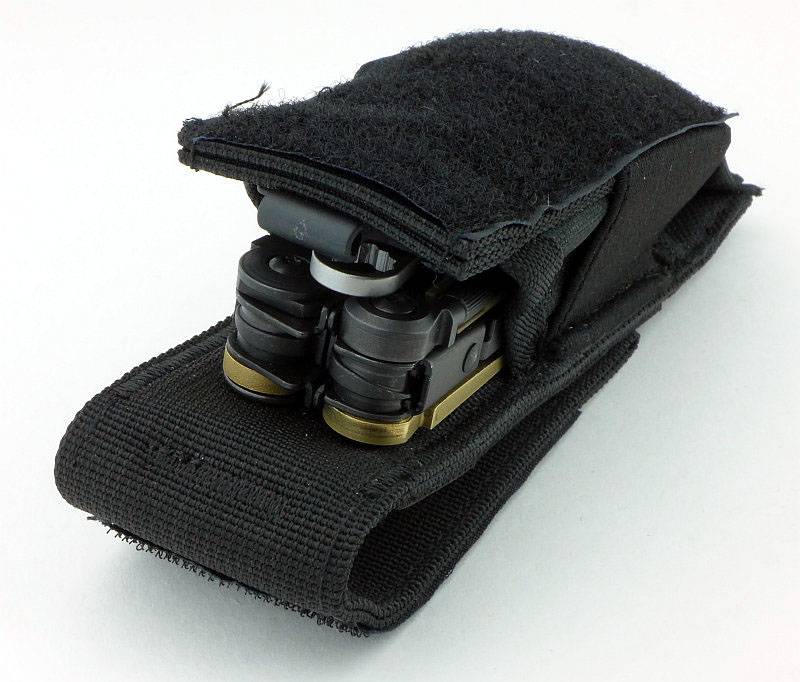
 photo 85 MUT sight tool bits holster P1250295.jpg

Compared to the earlier photo of the MUT when it was on its own in the holster, the flap now sits higher up on the pouch front, but remains perfectly secure.
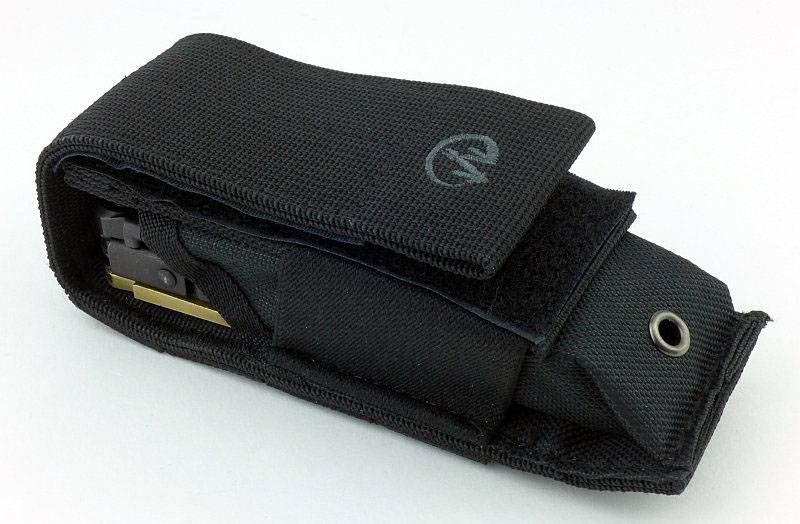
 photo 86 MUT holster full P1250296.jpg

If used for firearms maintenance, the fact the MUT has a knife blade in it is not really of any consequence as you have a gun with you. However I wanted to carry the MUT at all times, not just when out shooting. Being a UK resident, this means considering the knife carry laws, and being a locking knife the MUT is effectively classed as a fixed blade – so not UK EDC friendly.
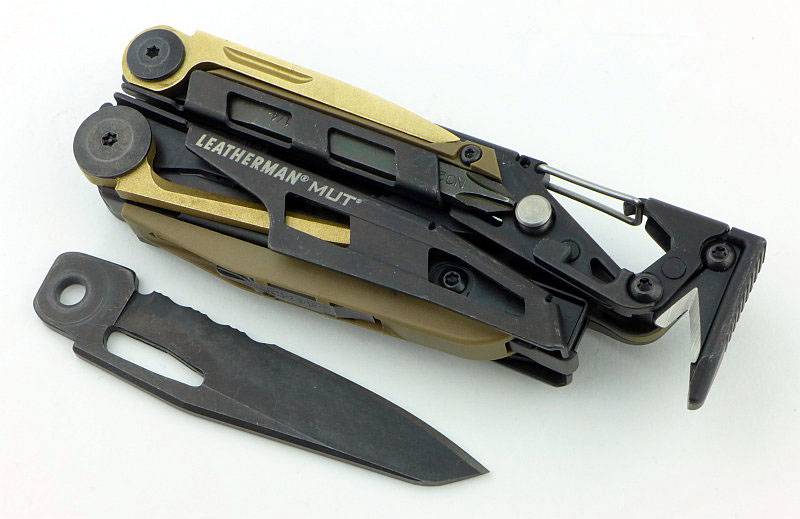
 photo 87 MUT edc convert P1250309.jpg

It turned out to be a very easy conversion, especially as the accessory kit has a spare bronze scraper which very nicely substitutes the knife blade.
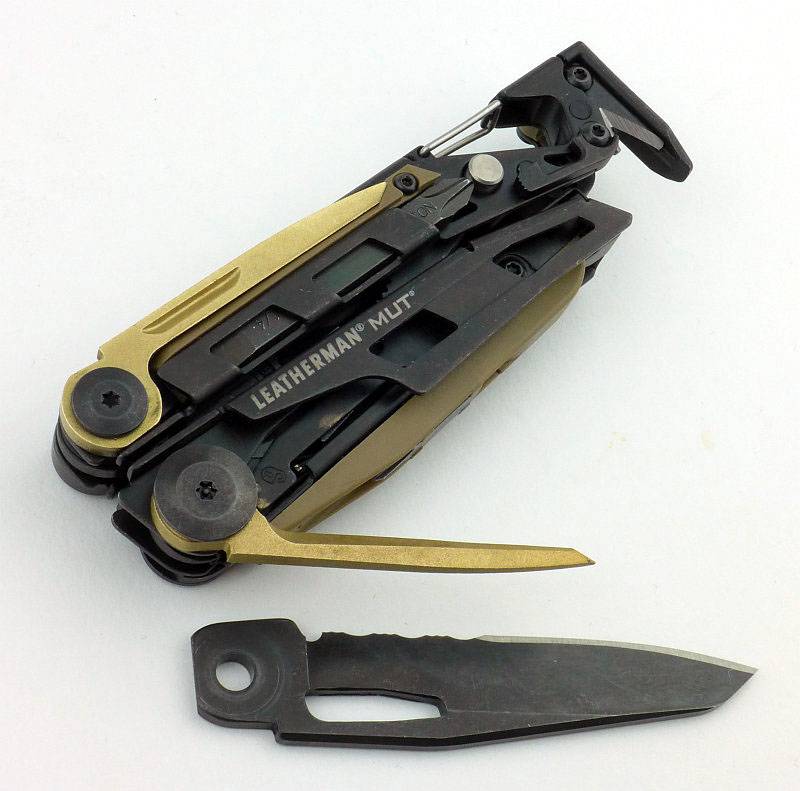
 photo 88 MUT edc convert P1250324.jpg

If you want to do this, you will need two T10 security bits to be able to undo the knife pivot. After doing this it is easy to substitute the knife blade for the spare scraper. You could use a couple of washers or something else to fill the space the knife blade occupied, so you don’t need to have the accessory kit to do this conversion (but you do need to add a spacer of some sort).
There is one thing to look out for if you use the scraper or similar long substitute. The blade safety lock still operates as you open the handles to use the pliers, so it needs space to move into. The scraper’s nail-nick works perfectly for this, so long as you line it up properly (as shown here). If you used washers, this wouldn’t be any concern.
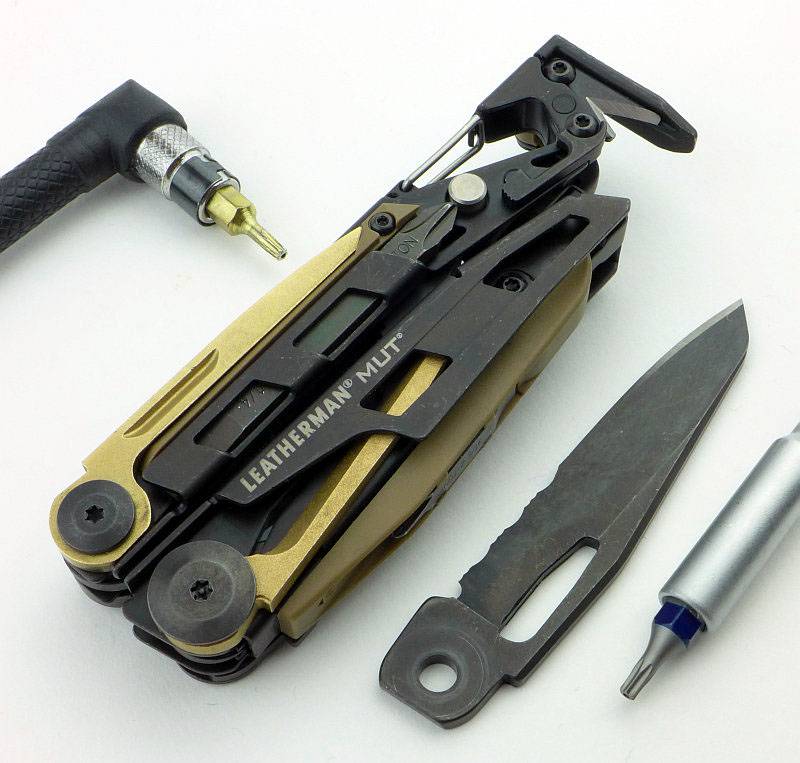
 photo 89 MUT edc convert P1250319.jpg

While undoing parts of the MUT, I decided to try out the ‘replaceable’ parts on it. Starting with the scraper and using the supplied T8 torx key, I hit a snag. The screw was very stiff, so much so that the T8 key stripped (with no damage to the screw). The supplied key had seemed a slightly loose fit, so I moved up to the next level; a mini screwdriver set which had T8, T9 and T10 bits. Actually the T9 was the best fit. This was a mini screwdriver, so not designed for heavy work, and after applying more and more force, the handle of the screwdriver started to turn around the shaft and the MUT’s screw still wasn’t moving.
So onto the next level and out to the garage. Going to a full sized screwdriver and in this case a T10 bit pressed very firmly into the screw, and finally it moved. The thread-lock used makes the turning motion very sticky, but the screw certainly won’t fall out on its own.
The moral of this story is not to rely on the Torx key provided with the accessory kit, and don’t go blindly for T8, but try out the T8, T9, and T10 bits you have to find the best fit.
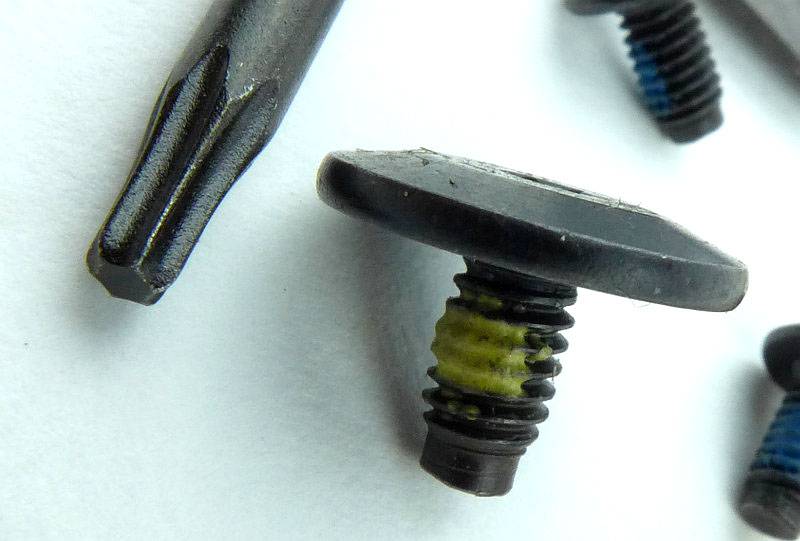
 photo 91 MUT replace P1200947.jpg

It has done plenty of heavy work, so how about something more delicate. I had a small sheet-metal Star Wars model to construct, and needed some needle-nose pliers. Roll in the MUT. Not necessarily the tool you might have though of for the job, but it did everything I asked it to. Here the MUT has shaped and assembled the pilot/cockpit of an X-wing fighter – pretty fiddly job, but the whole thing came together as well as it could.
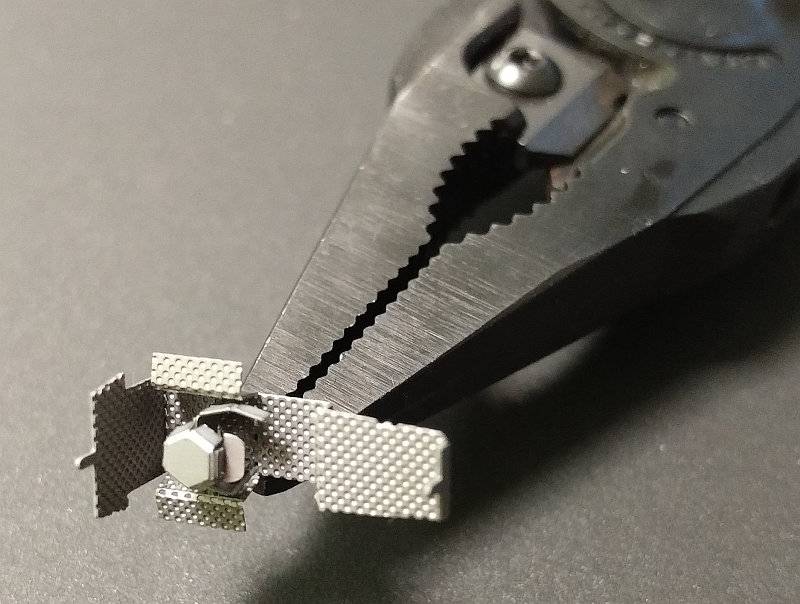
 photo 90 MUT pilot IMG_20170104_171203.jpg

Review Summary

The views expressed in this summary table are from the point of view of the reviewer’s personal use. I am not a member of the armed forces and cannot comment on its use beyond a cutting tool or field/hunting knife.

Something that might be a ‘pro’ for one user can be a ‘con’ for another, so the comments are categorised based on my requirements. You should consider all points and if they could be beneficial to you.

_______________________________________________ _______________________________________________
Things I like What doesn’t work so well for me
_______________________________________________ _______________________________________________
Firearm orientated multi-tool. Handles are initially very stiff.
Heavy-duty build and performance. Pocket clip almost immovable.
All cutters are replaceable. Supplied Torx key in the accessory kit is not up to the job.
Strong knife blade. Sight tool is a separate piece.
Excellent holster. Saw is not very effective (but OK on green wood).
The unusual tools included are very effective – Punch, Hammer and Scraper. A finger can drop into the cutter notch.
Bit Holder extends functionality.
Powerful hybrid pliers.
Useful cleaning brush/rod attachment points.

 photo 00 MUT intro angle P1200745.jpg


Discussing the Review:

Please feel free to add comments to the review, but the ideal place to freely discuss these reviews is on a forum. If you started reading the shorter forum version of the review, but followed the link this full exclusive review, please return to that forum to discuss the review there.
If you read the review entirely on Tactical Reviews, please consider one of the following to join in any discussion.

EdgeMatters – Sponsored Reviews (UK based Forum for Knife Makers and Collectors)

BladeForums – Knife Reviews (US based Forum for Knife Discussion)

CandlePowerForums – Knife Reviews Section (Largest and Friendliest Flashlight Community Forum)

EDC Gear Review: NITECORE Utility and Daily Pouches – NUP10/20 and NDP10/20

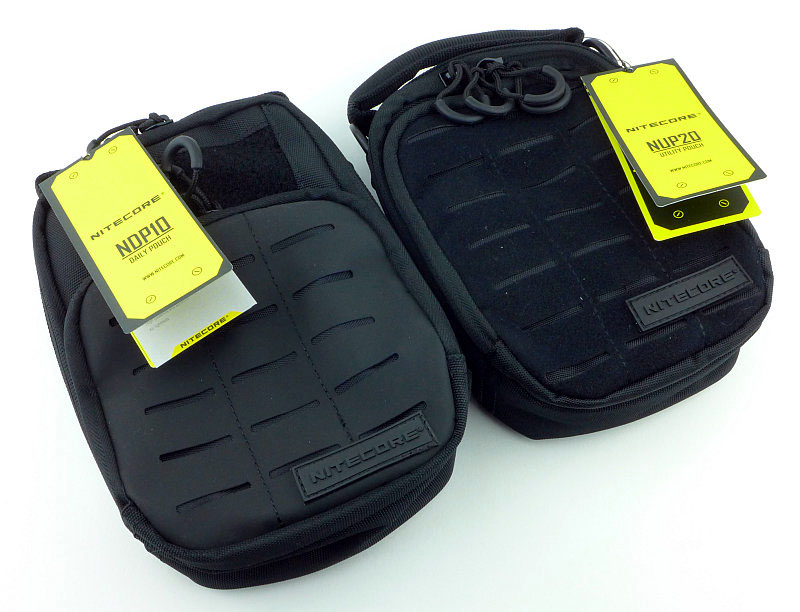
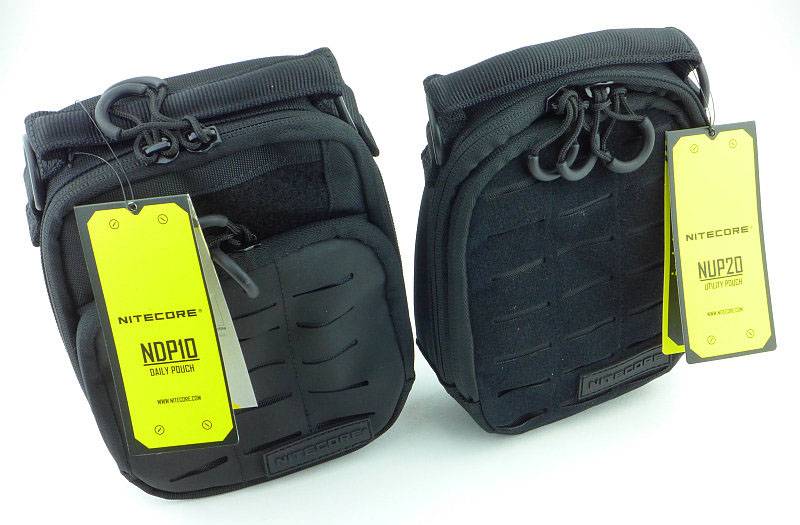
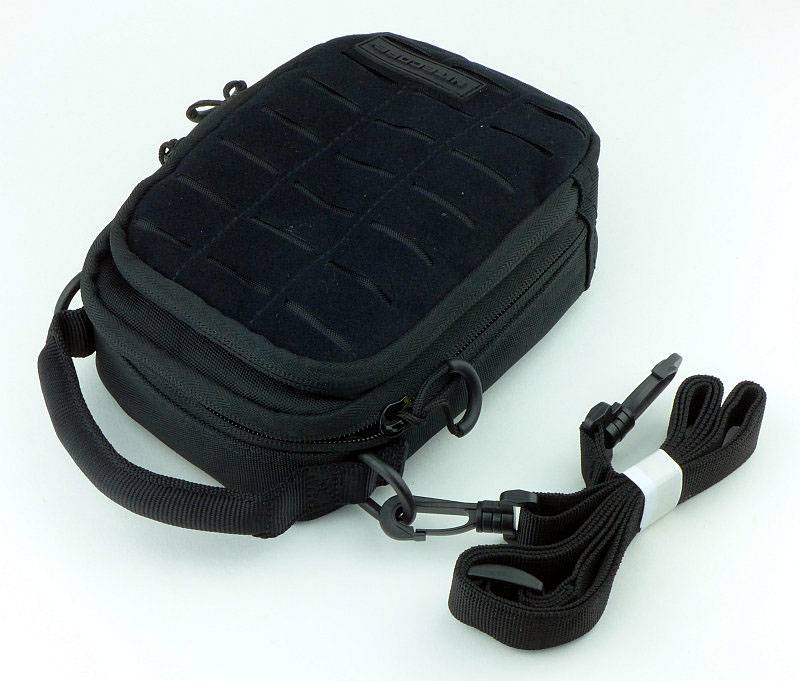
NITECORE have gone beyond just portable lighting and have started designing products for EDC and daily carry. We now have the NUP10/20 Utility Pouch and the NPD10/20 Daily Pouch which give you plenty of carry options for all those essential bits of EDC gear.

 photo 00 NC Pouches intro P1230459.jpg

The details:

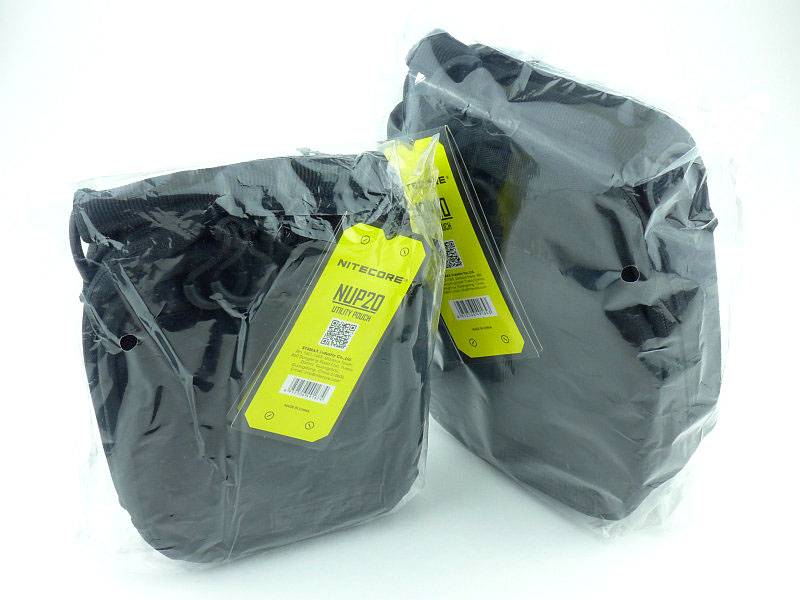
On test in this review are two of the four versions of these pouches, the NUP20 and NDP10. They arrive (like most bags) in a cellophane over-wrap.
 photo 01 NC Pouches wrapped P1230428.jpg

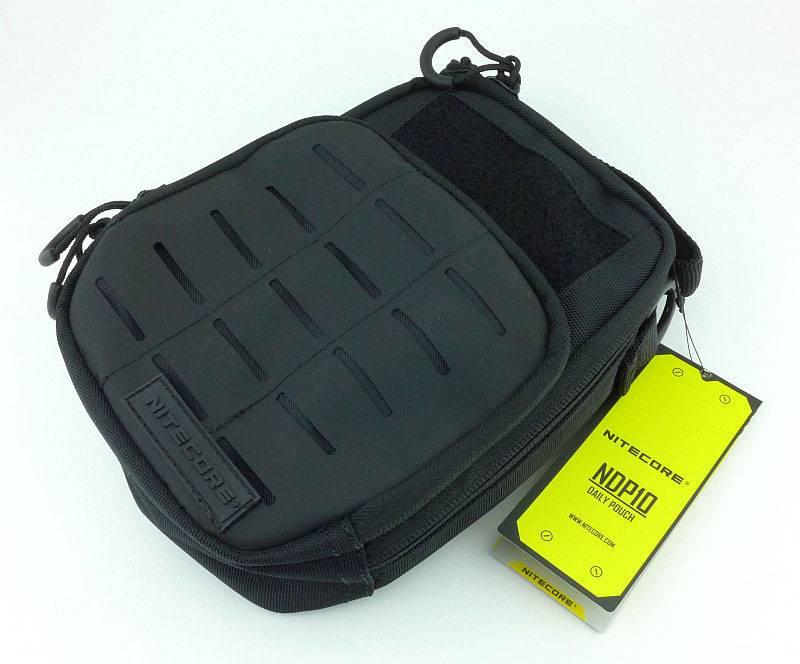
Starting with the NDP10, firstly let’s just cover the naming convention for these pouches. The NDP part means that this is the NITECORE Daily Pouch, and the NDP is either the 10 or 20 depending on the front panel. If this is 10, it has a ‘Hypalon’ Synthetic Rubber panel, or if 20, it has a ‘Velveteen’ Synthetic fabric front panel.
 photo 03 NC Pouches NPD10 P1230468.jpg

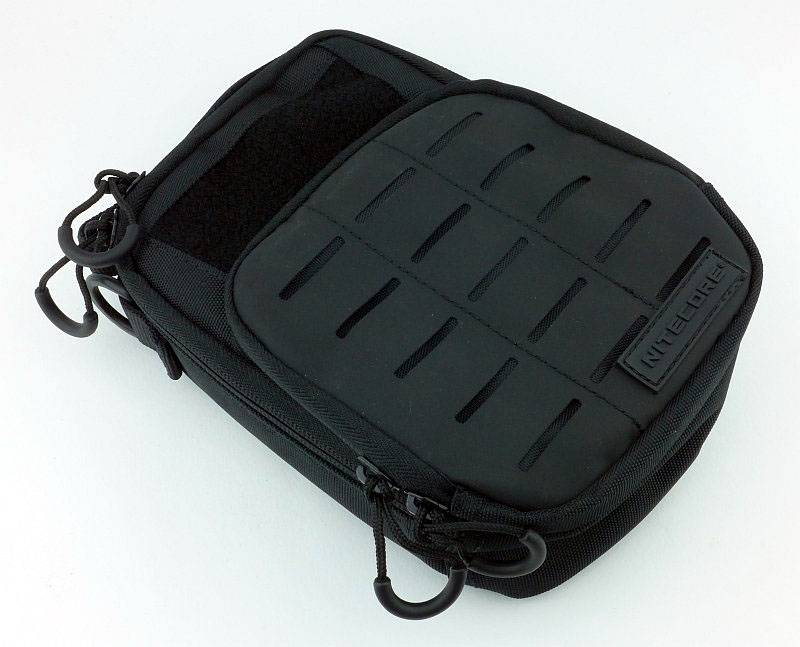
So this NDP10 pouch is the larger ‘Daily Pouch’ and it has the ‘Hypalon’ front panel.
 photo 05 NC Pouches NPD10 zip pulls P1230481.jpg

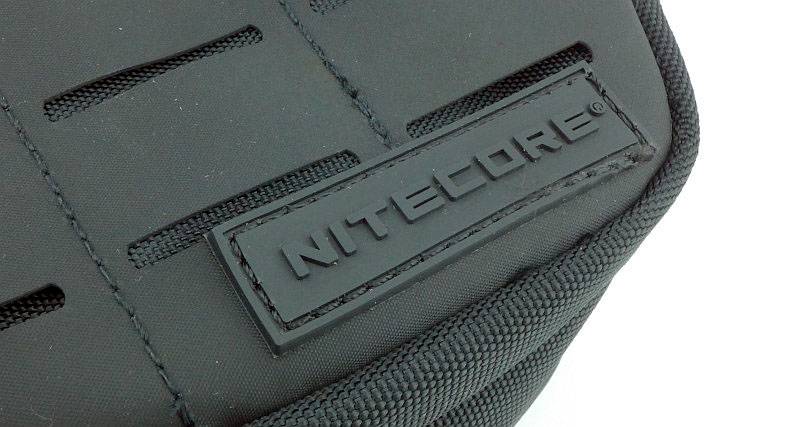
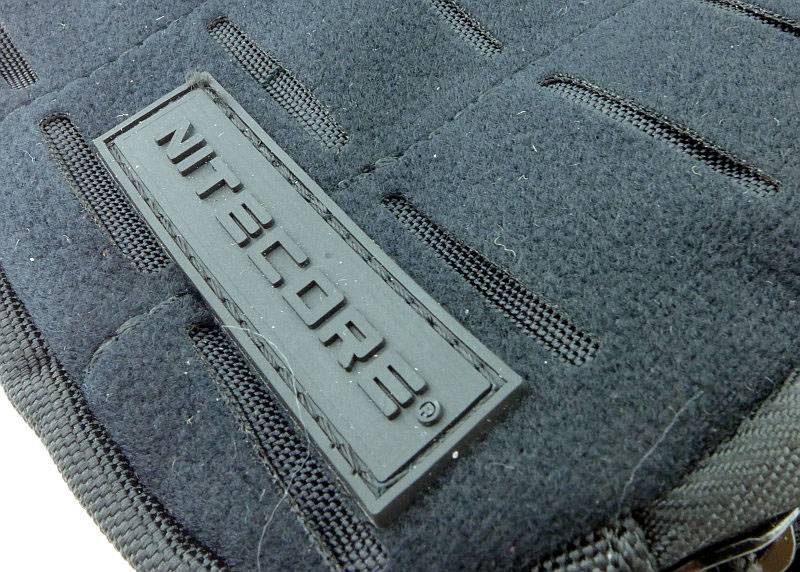
In keeping with the stealth appearance of the pouches, the rubber NITECORE logo has none of the usual yellow colouring.
 photo 06 NC Pouches NPD10 brand P1230484.jpg

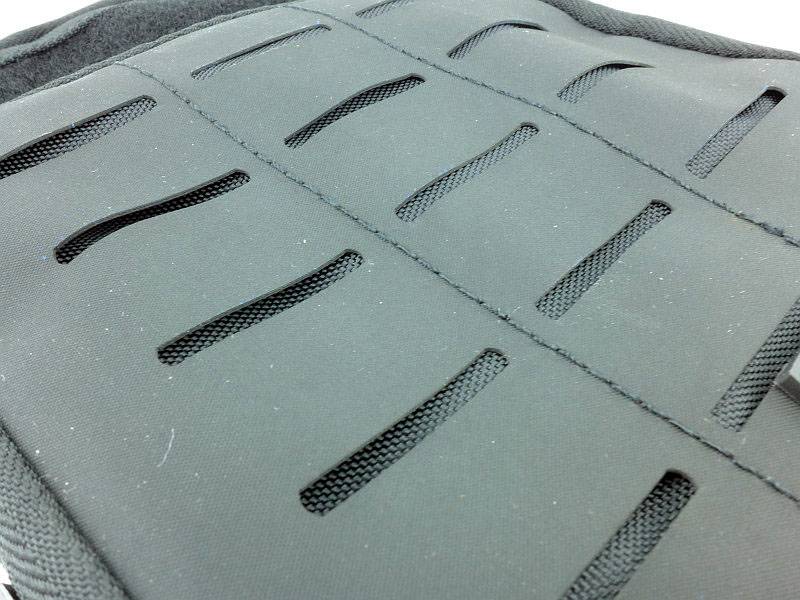
If you haven’t come across Hypalon before, it is a synthetic rubber made of chlorinated and sulphonated polyethylene, noted for its resistance to chemicals, temperature extremes, and ultraviolet light.
 photo 07 NC Pouches NPD10 hypalon P1230487.jpg

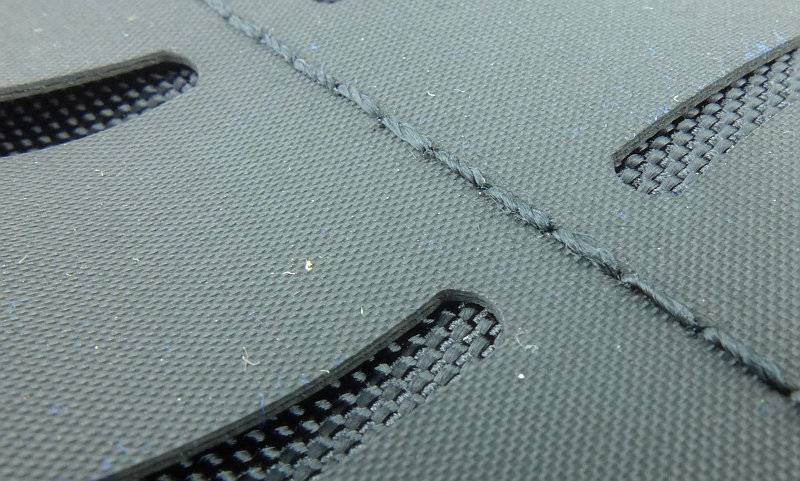
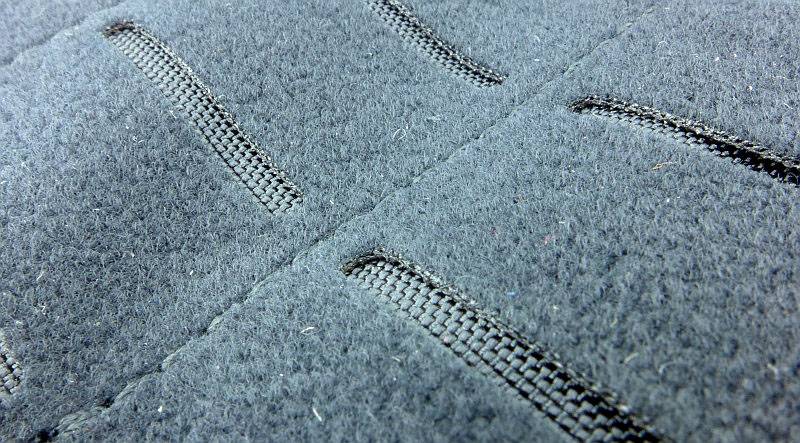
A detail of the Hypalon’s surface and cut-outs.
 photo 08 NC Pouches NPD10 hypalon P1230489.jpg

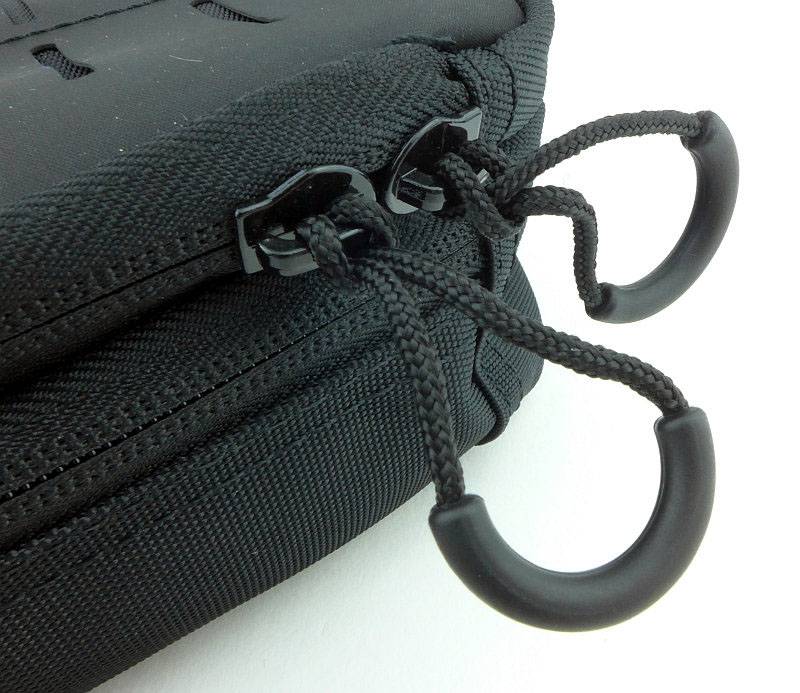
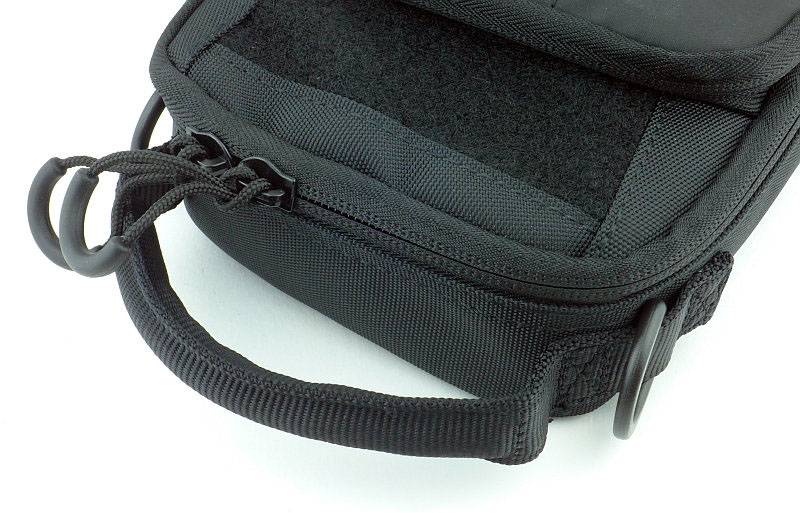
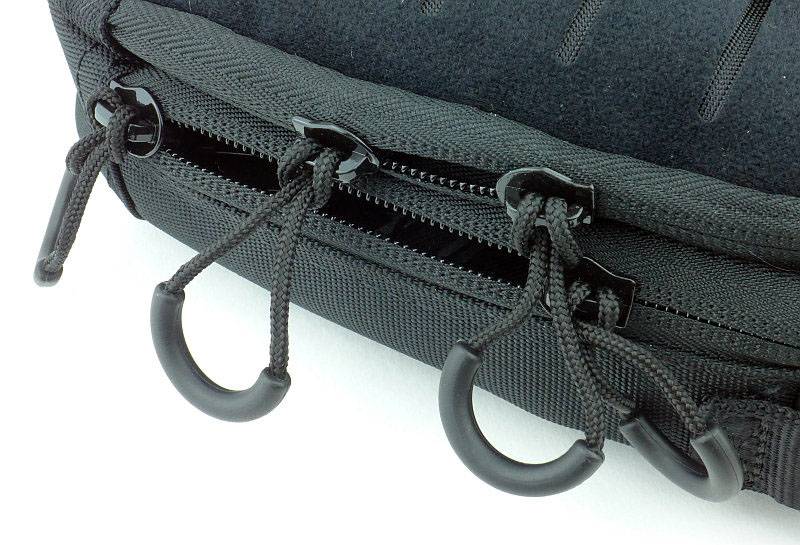
Access to the comparments is via the zip closures, and NITECORE have made these zips very easy, with large zip-pulls having a semi-circular moulded loop.
 photo 09 NC Pouches NPD10 zip pulls P1230492.jpg

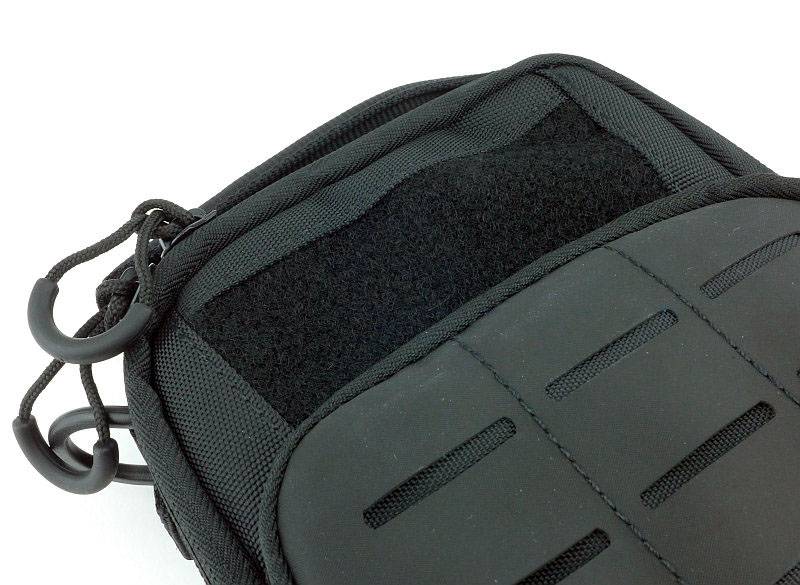
On this larger Daily Pouch, there is a small hook and loop patch-panel for personalising your pouch. On the NPD20 you can fix patches to the entire front panel, but the Hypalon prevents this on the NPD10.
 photo 10 NC Pouches NPD10 patch panel P1230495.jpg

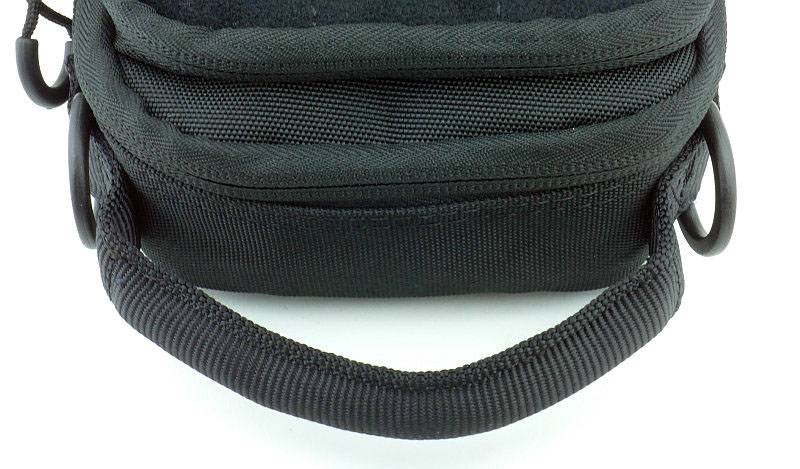
There is a padded carry handle on the top of the pouch so it can be held like a small bag.
 photo 11 NC Pouches NPD10 handle P1230502.jpg

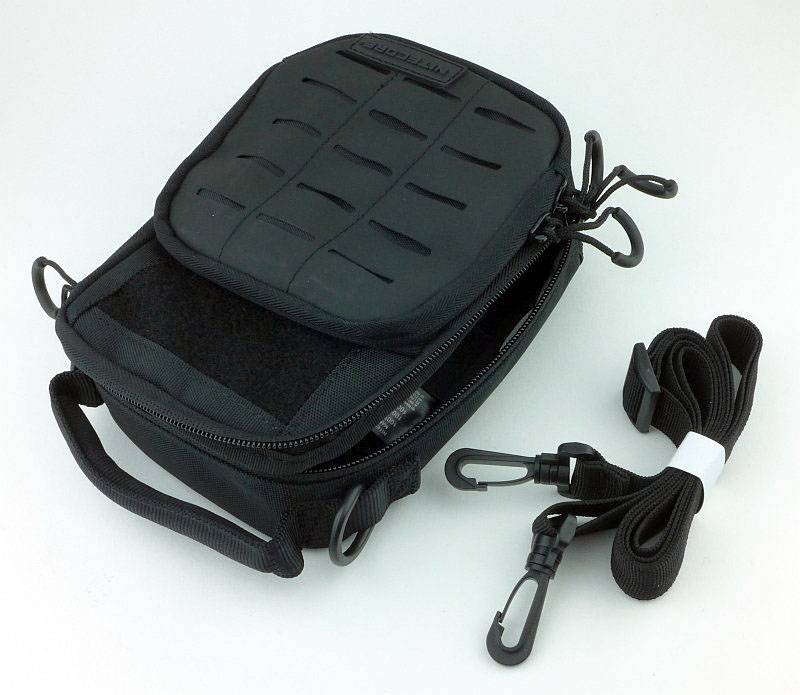
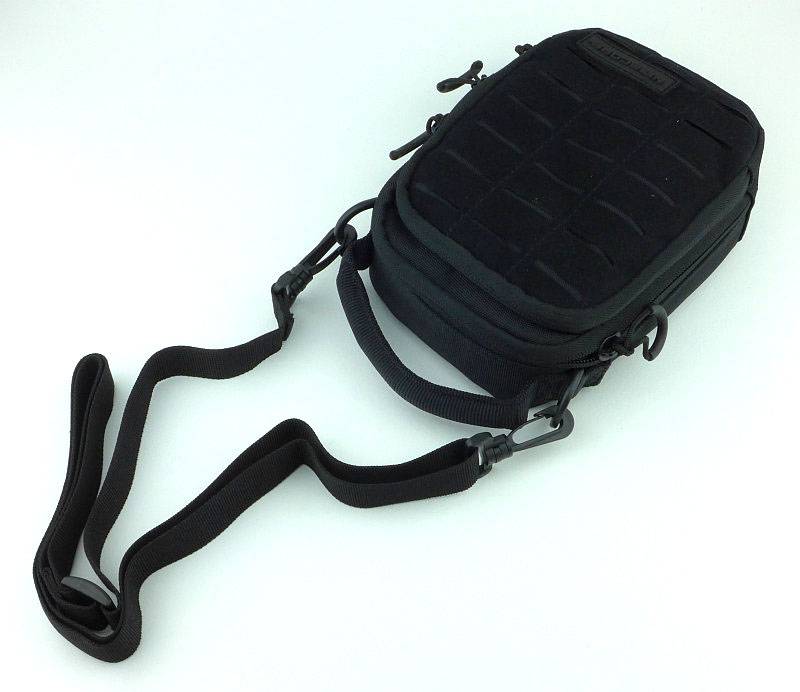
It also comes with a shoulder strap.
 photo 12 NC Pouches NPD10 plus strap P1230505.jpg

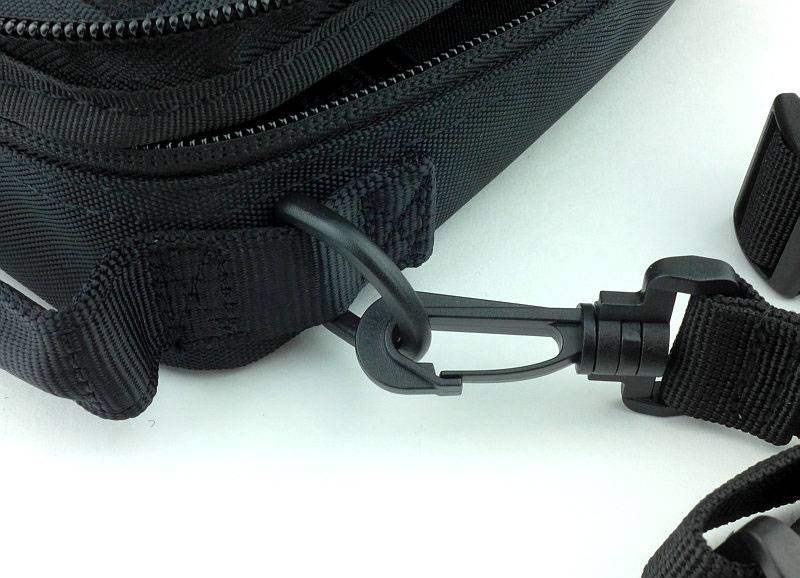
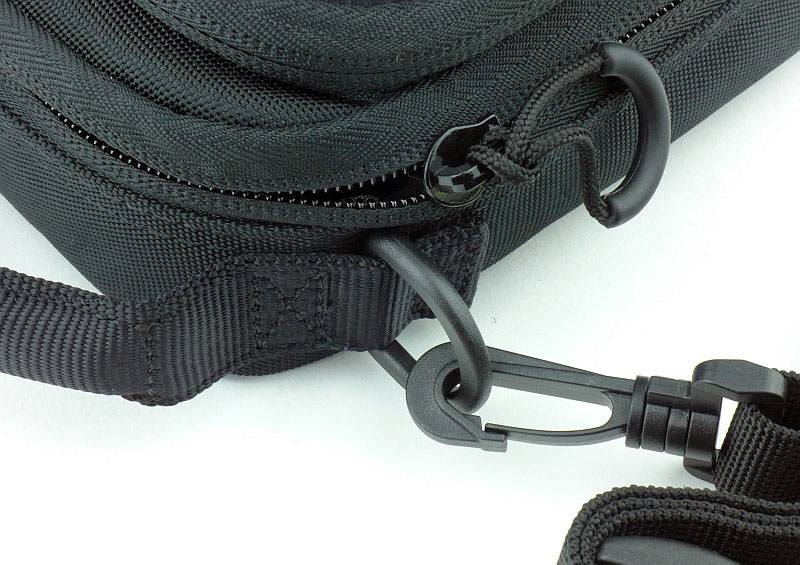
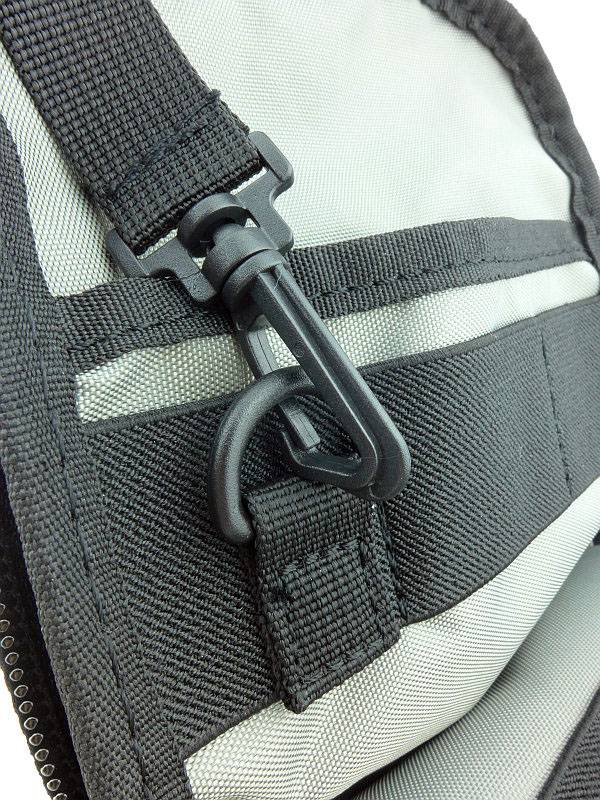
The shoulder strap clips onto D-rings either side of the handle.
 photo 13 NC Pouches NPD10 strap clip P1230509.jpg

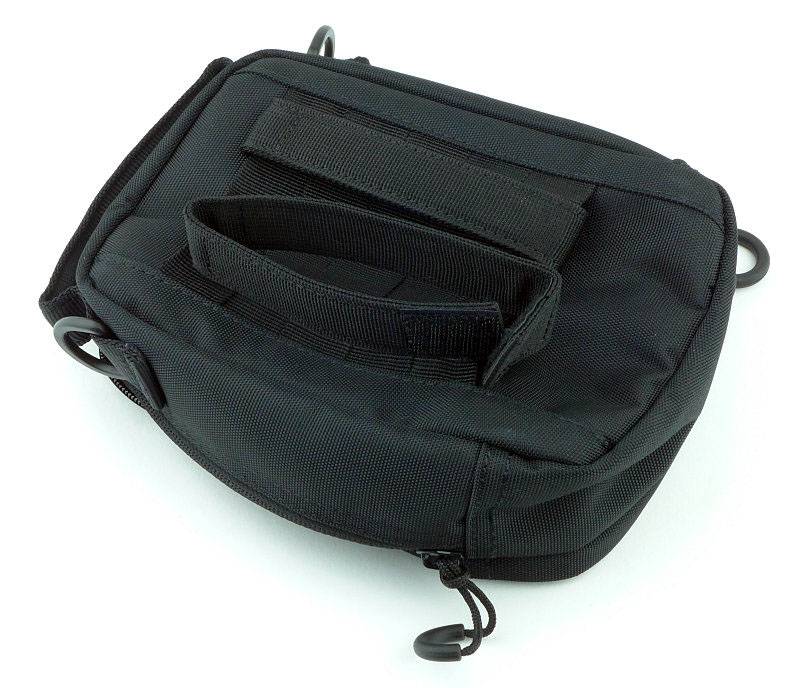
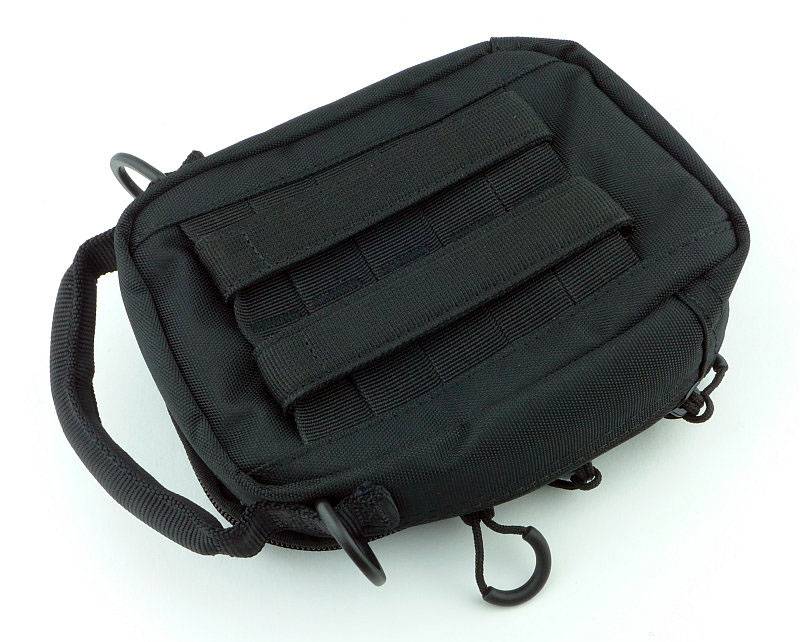
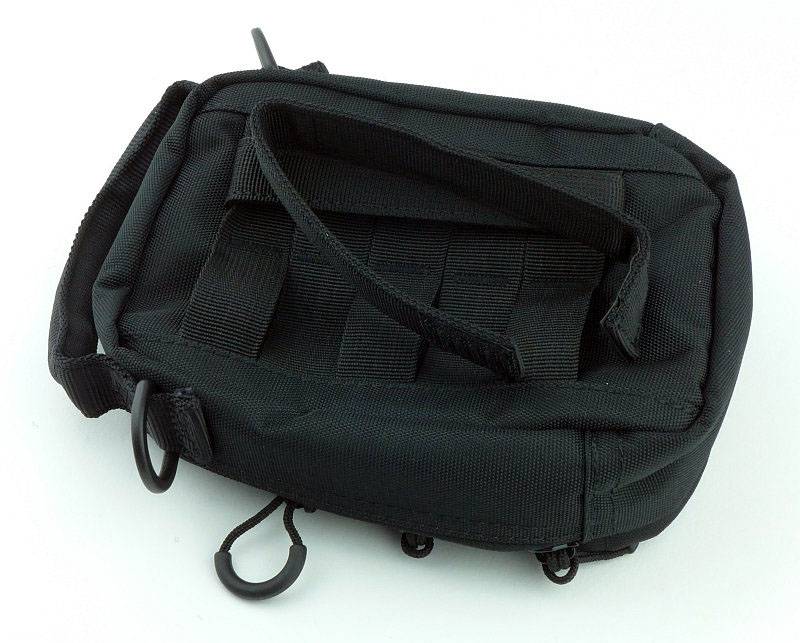
On the back there is a PALS webbing attachment which is compatible with PALS/MOLLE systems.
 photo 04 NC Pouches NPD10 pals P1230471.jpg

Supplied with the NPD10 are two PALS connection strips which have a Velcro closure.
 photo 14 NC Pouches NPD10 PALS P1230514.jpg

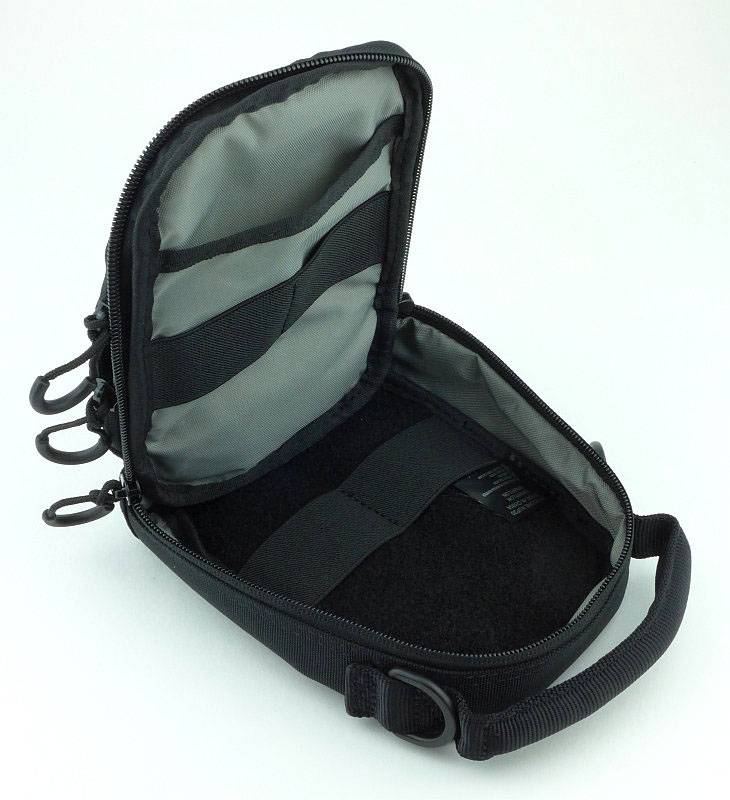
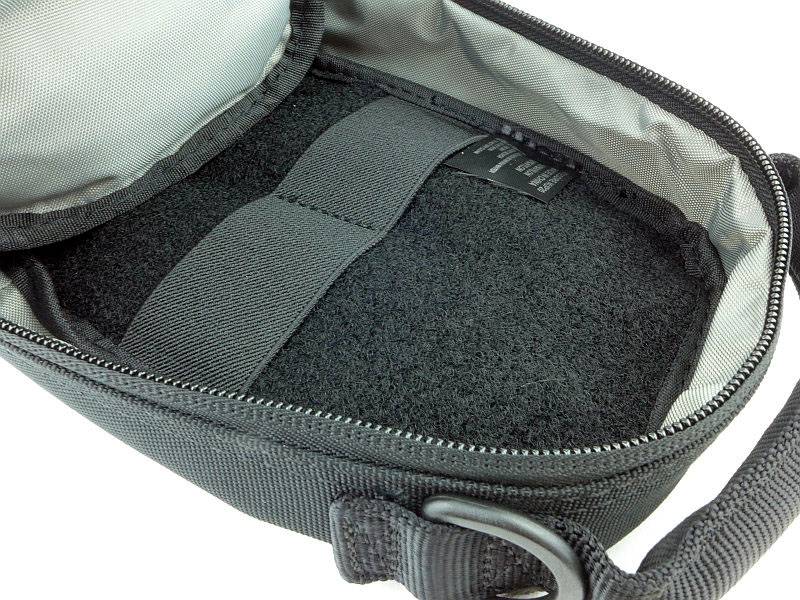
Opening the main compartment, there is a pocket fixed to the front with an elastic organiser strip, and the rear of the main compartment has a full hook and loop surface for additional flexibility, plus another elastic organiser strip.
As the zips run all the way from one side to the other and have double zip-pulls, the access to these pouches is ambidextrous.
 photo 15 NC Pouches NPD10 main P1230518.jpg

The hook and loop organiser surface in the main compartment.
 photo 17 NC Pouches NPD10 main inside P1230534.jpg

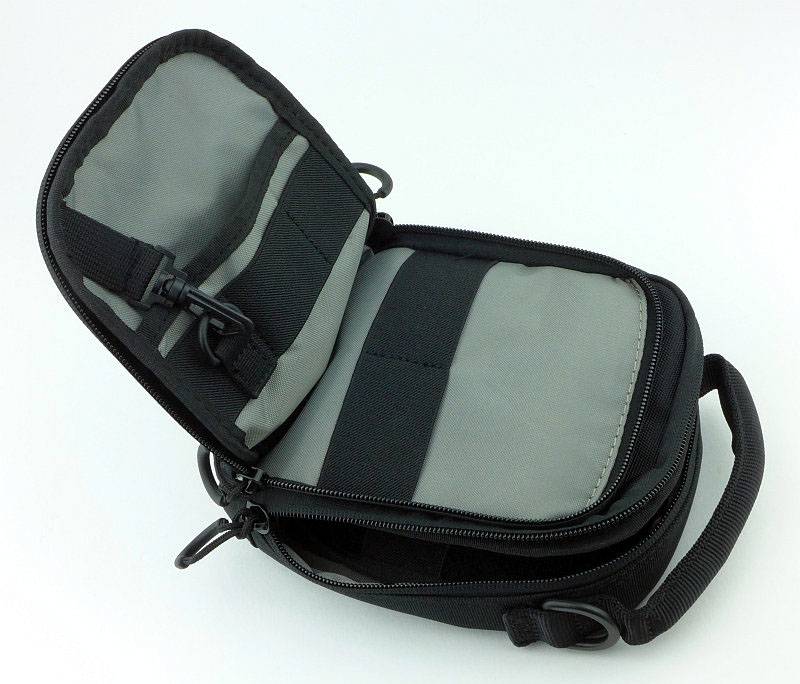
Inside the front compartment, there is even more organisation for small items. Two elastic strips, a front pocket and a clip/D-ring fixing point for keys etc.
 photo 16 NC Pouches NPD10 front P1230527.jpg

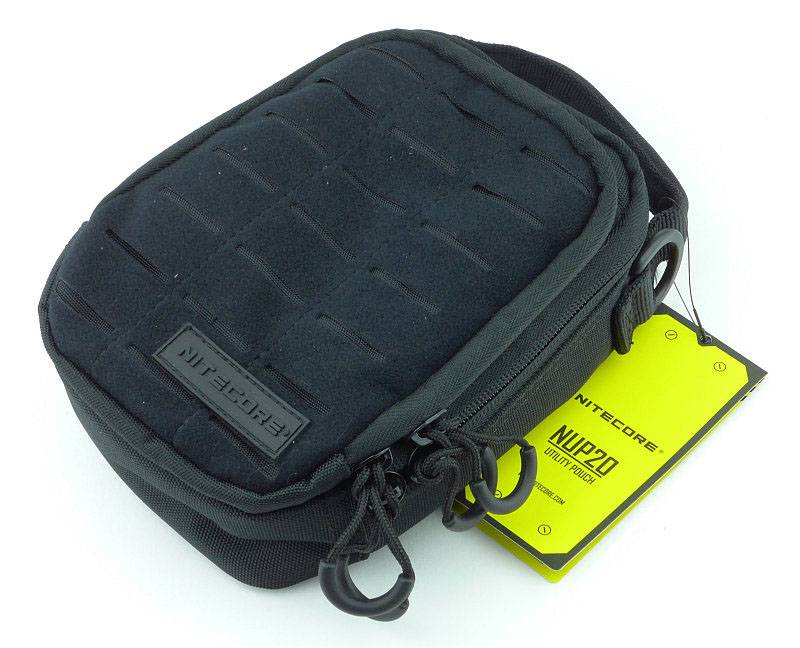
Now we switch to the smaller NUP20. NITECORE Utility Pouch with ‘Velveteen’ Synthetic fabric front panel.
 photo 18 NC Pouches NUP20 P1230540.jpg

Again, in keeping with the stealth appearance of the pouches, the rubber NITECORE logo has none of the usual yellow colouring.
 photo 19 NC Pouches NUP20 logo P1230543.jpg

A closer look at the plush Velveteen Synthetic fabric front panel.
 photo 20 NC Pouches NUP20 patch front P1230547.jpg

As on all of the NITECORE pouches there are large zip-pulls for easy access.
 photo 21 NC Pouches NUP20 zip pulls P1230551.jpg

There is a padded carry handle on the top of the pouch so it can be carried like a small bag.
 photo 22 NC Pouches NUP20 handle P1230556.jpg

The Utility Pouch also has a shoulder strap.
 photo 23 NC Pouches NUP20 strap P1230560.jpg

This too clips onto D-rings each side of the handle.
 photo 24 NC Pouches NUP20 strap clip P1230561.jpg

The strap is a generous size so should accommodate wearing it over even large coats.
 photo 25 NC Pouches NUP20 strap fitted P1230566.jpg

On the back of the NUP20 is the same PALS attachment system as used on the Daily pouches.
 photo 26 NC Pouches NUP20 PALS P1230570.jpg

As before the PALS connection strips have a Velcro closure.
 photo 27 NC Pouches NUP20 PALS P1230574.jpg

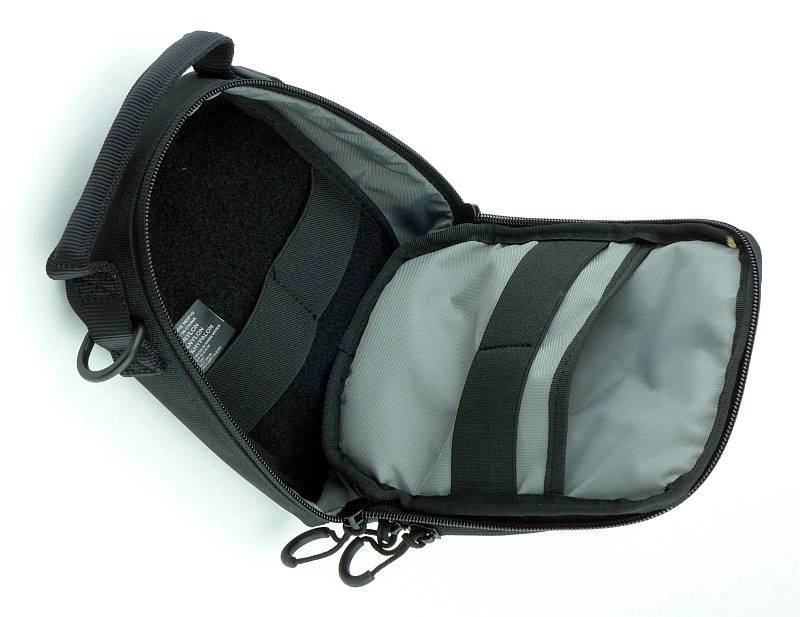
In the main compartment, the layout is the same as with the Daily pouch, but the compartment is just smaller.
 photo 28 NC Pouches NUP20 main P1230578.jpg

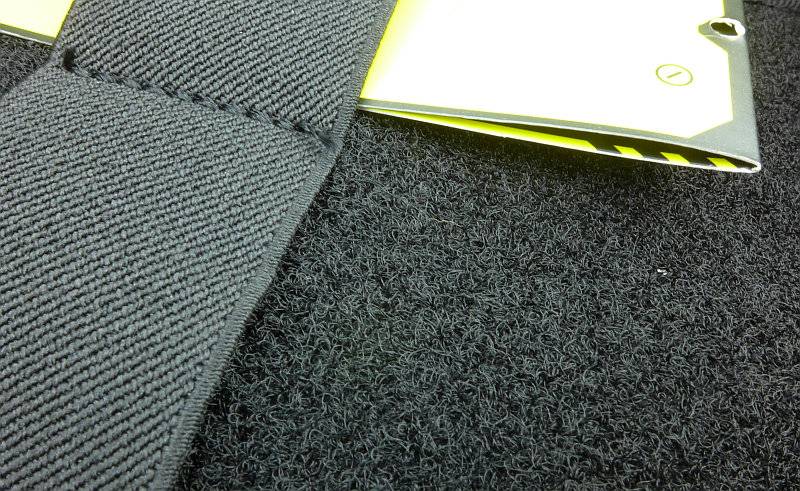
It too has the hook and loop rear panel inside the main compartment.
 photo 29 NC Pouches NUP20 main detail P1230580.jpg

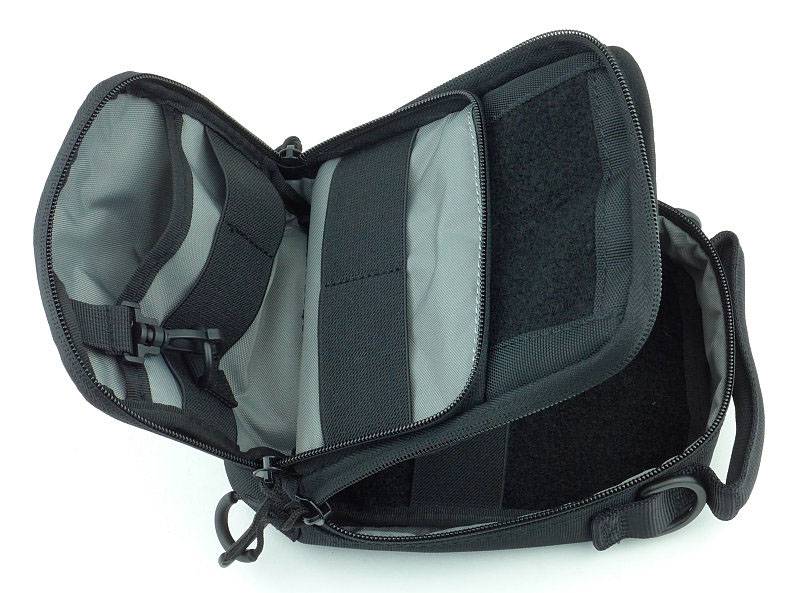
Using the same configuration as the NDP pouches the NUP 20 has two elastic strips, a front pocket and a clip/D-ring fixing point for keys etc. inside the front compartment.
 photo 30 NC Pouches NUP20 front P1230589.jpg

A closer look at the clip/D-ring.
 photo 31 NC Pouches NUP20 front clip P1230591.jpg

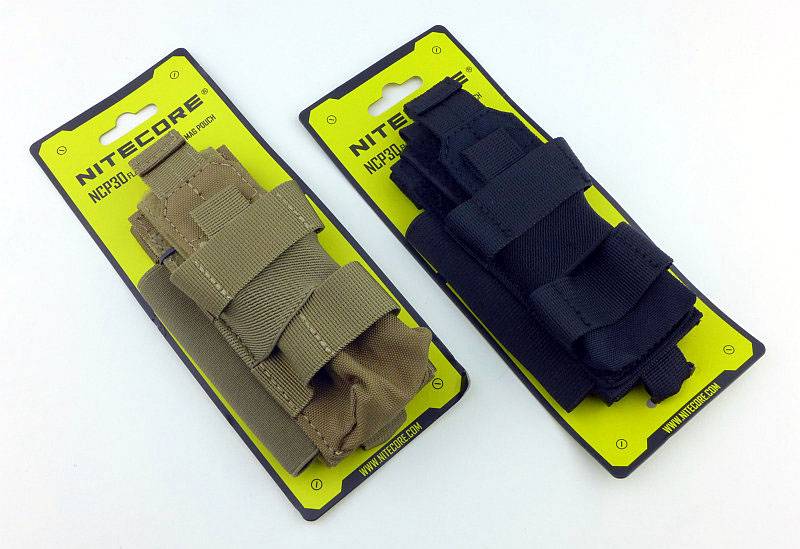
A very brief aside here looking at a couple of other NITECORE pouches/holsters, the NCP30, as one of these will appear in the next section.
 photo 32 NC Pouches NCP30 P1230597.jpg

What are they like to use?

The way you choose to carry your EDC gear is as personal as your choice of the gear itself. What you are doing and where you are going also completely changes the requirements of your carry system, so you will need a few options to suit these differing requirements. For any scenario, no one bag/pouch/system will suit everyone, and the way you fill that carrying system will also be unique. So really the best thing you can have are options, and the NITECORE pouches give you options.

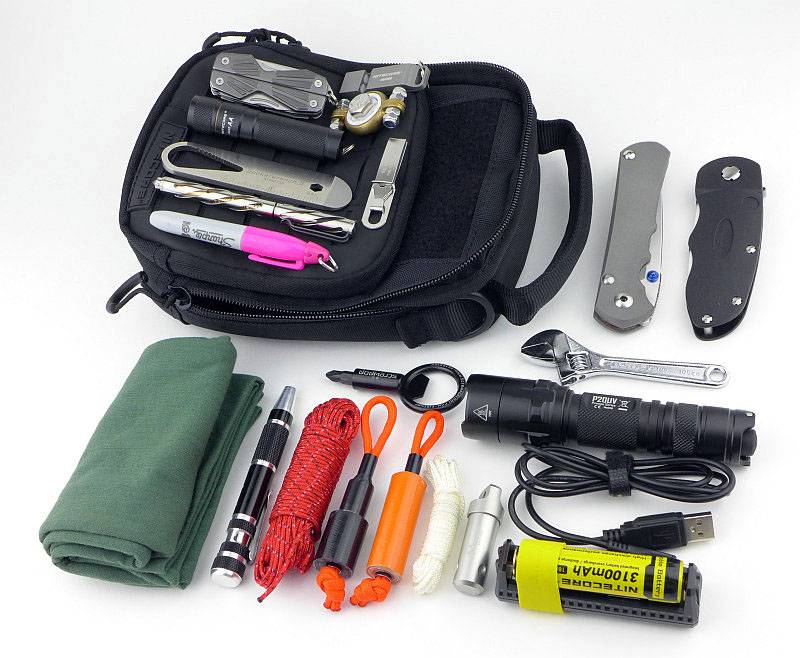
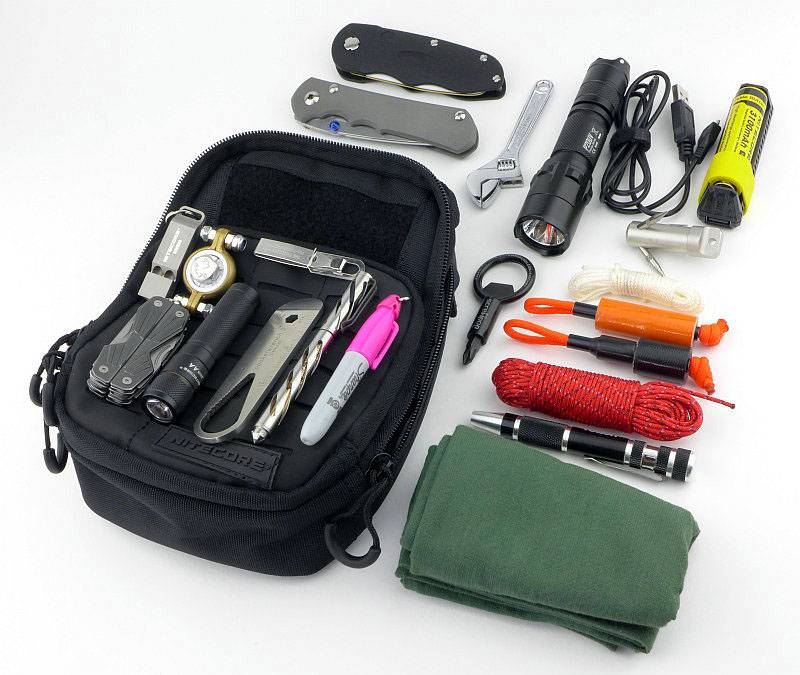
Taking the larger Daily Pouch the NDP10, here I’ve shown one example of a set of gear I’ve been carrying.
 photo 33 NC Pouches NPD10 contents P1230765.jpg

This is a snapshot of a set of gear that changes depending on, well, the day. This is not an over-stuffed pouch as I don’t like ramming things to full capacity as it just makes it more difficult to find things, but the list here includes:

A fire-resistant Buff
Mini screwdriver set
3mm cord hank
Gorilla tape mini roll
Jaffa Gaffa tape mini roll
2mm cord hank
CountyComm Pico Grappling hook
NITECORE F1 charger/powerbank
NITECORE NL188 3100mAh 18650 cell
NITECORE USB cable
NITECORE P20UV
Mini adjustable spanner
Screwpop Magnetic Screwdriver
Chris Reeve Knives Large Inkosi
Fällkniven Flipstone Sharpener
NITECORE NWS20 Titanium Whistle
NITECORE NTP10 Titanium Pen
Sharpie Mini Marker
NITECORE SENS AA
Uncle Bill’s Sliver Gripper Tweezers
Burketek Pocket Wrench II
Gerber Bear Girls compact multi-tool
A ‘peak_wanderer’ Unseen Ring Spinner

Not too shabby, and prepared for the odd eventuality. Remember this was not crammed full, but was accessible.

Like this I was carrying the NDP10 inside a larger bag, using at as an organiser, and also separately with the shoulder strap. I found it a bit dense/heavy for PALS/MOLLE mounting.

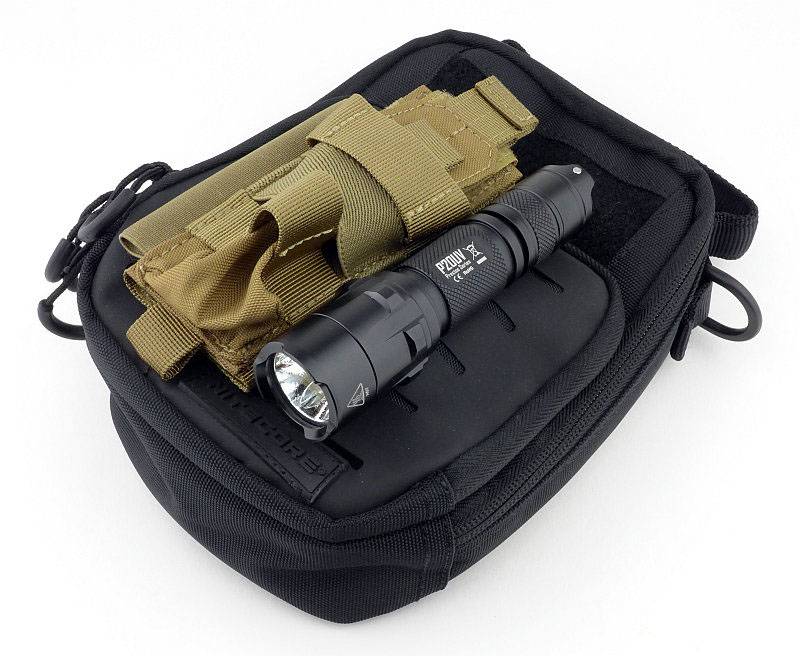
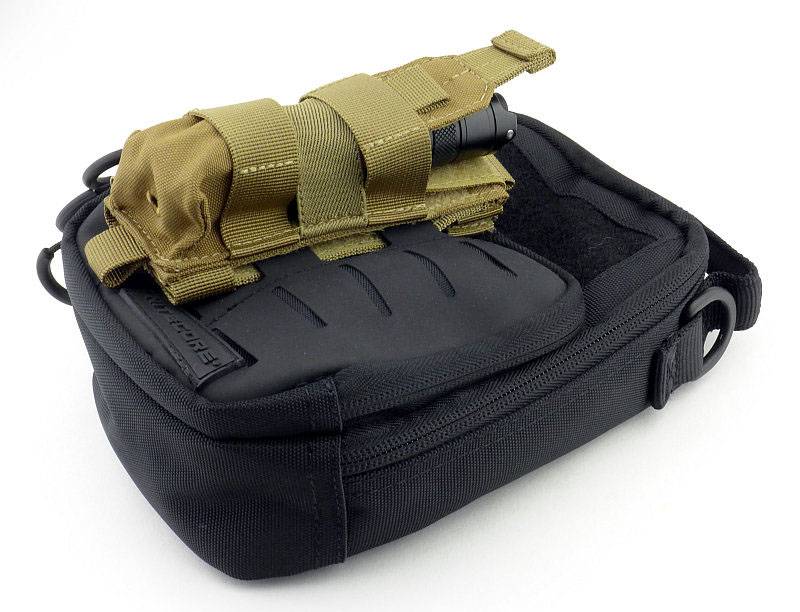
As a bit of an aside, to free up a bit of space inside and to make access to the bigger light easier I decided to use the PALS feature on the front to fit the NCP30 pouch onto the NDP10.
 photo 35 NC Pouches NPD10 with pouch P1230791.jpg

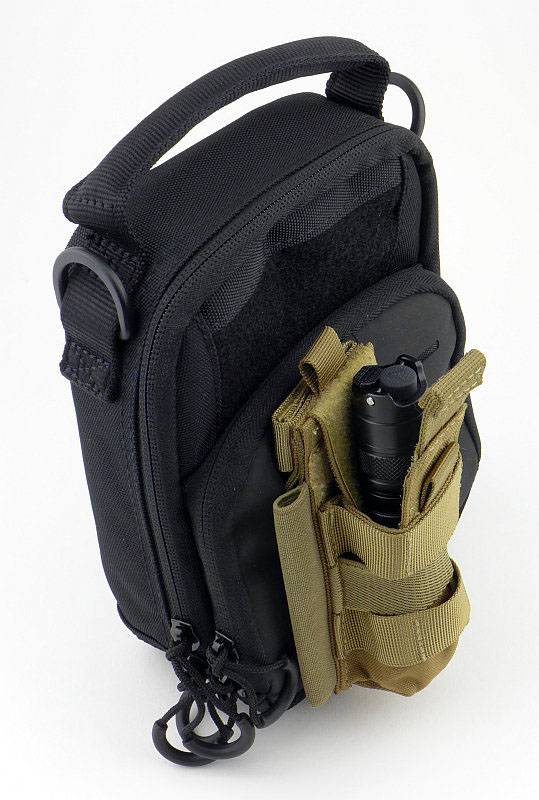
From this angle you can see the PALS connection strap woven through the PALS panel.
 photo 36 NC Pouches NPD10 with pouch P1230793.jpg

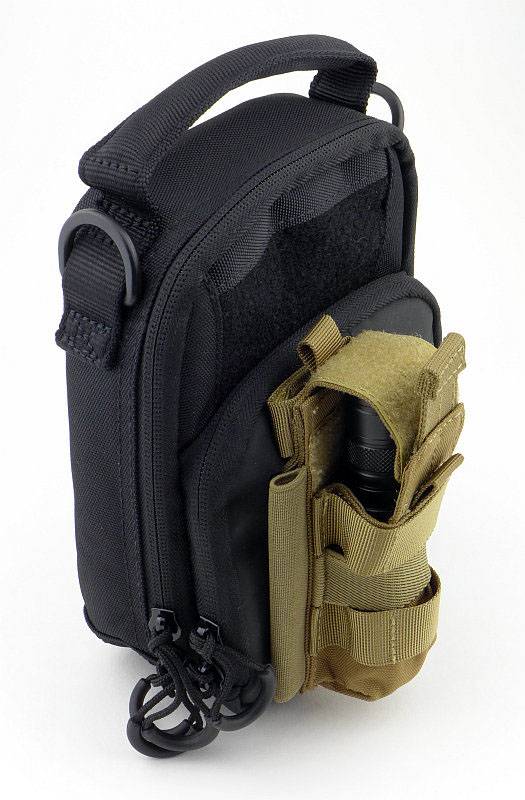
The NCP30 has an elasticated body that holds onto the light so you don’t need to have a top flap covering it.
 photo 37 NC Pouches NPD10 with pouch open P1230799.jpg

If you are concerned though, you can bring a retaining flap out of the NCP30 to fully secure the light.
 photo 38 NC Pouches NPD10 with pouch closed P1230804.jpg

So, these NITECORE pouches give you options for organisation and carry of those essential EDC bits and pieces. In-bag carry, direct carry, on-bag carry and shoulder-strap carry options for sensible sized pouches that are small enough to be convenient and large enough to be useful.

Review Summary

The views expressed in this summary table are from the point of view of the reviewer’s personal use. I am not a member of the armed forces and cannot comment on its use beyond a cutting tool or field/hunting knife.

Something that might be a ‘pro’ for one user can be a ‘con’ for another, so the comments are categorised based on my requirements. You should consider all points and if they could be beneficial to you.

_______________________________________________ _______________________________________________
Things I like What doesn’t work so well for me
_______________________________________________ _______________________________________________
Choice of two pouch sizes that are small enough to be convenient and large enough to be useful. Would benefit from more dividers/separators inside main compartment.
Multi carry options – Shoulder, PALS/MOLLE, handle. Zip-pull loops can catch on things accidentally and be pulled open.
Smaller pouches can be attached to the front of these using hook/loop or PALS/MOLLE. PALS/MOLLE connection strips not the most secure with hook/loop closure.
Choice of front panel material.
1000D Corduroy construction.

 photo 34 NC Pouches NPD10 contents P1230775jpg.jpg


Discussing the Review:

Please feel free to add comments to the review, but the ideal place to freely discuss these reviews is on a forum. If you started reading the shorter forum version of the review, but followed the link this full exclusive review, please return to that forum to discuss the review there.
If you read the review entirely on Tactical Reviews, please consider one of the following to join in any discussion.

EdgeMatters – Sponsored Reviews (UK based Forum for Knife Makers and Collectors)

BladeForums – Knife Reviews (US based Forum for Knife Discussion)

CandlePowerForums – Knife Reviews Section (Largest and Friendliest Flashlight Community Forum)

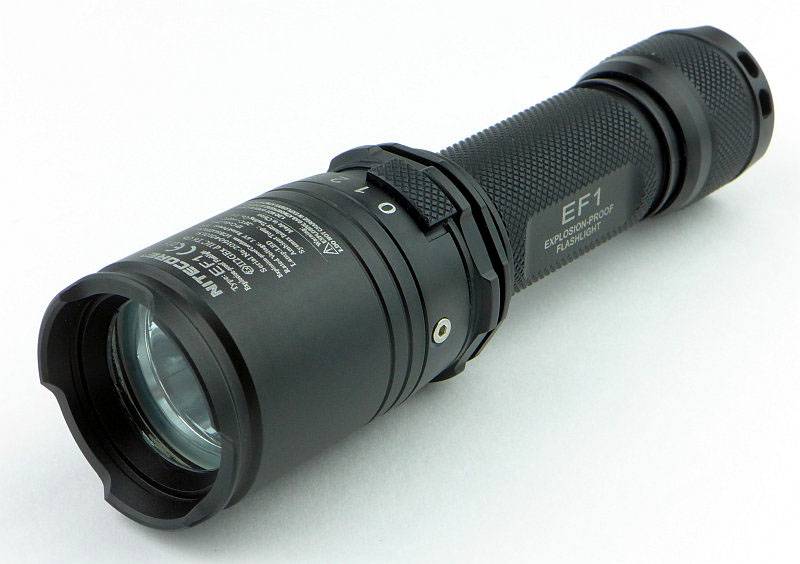
Light Review: Nitecore’s Explosion Proof EF1

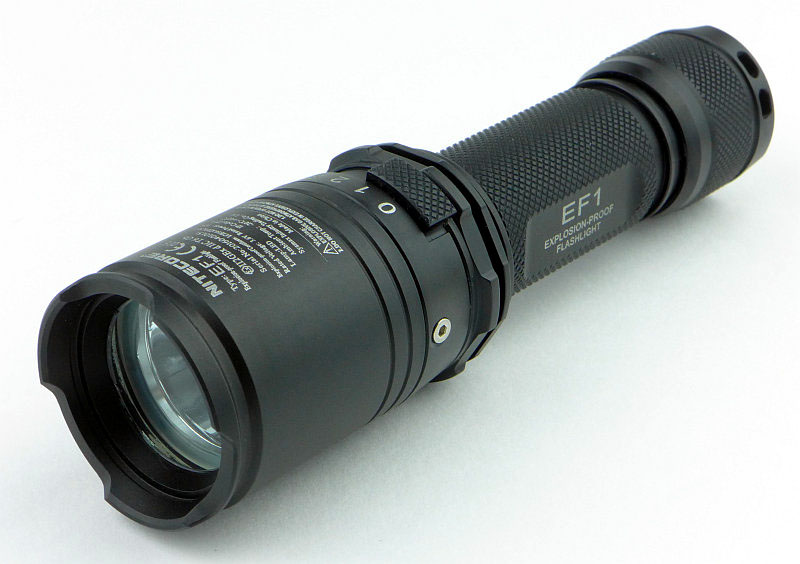
With the EF1, NITECORE have confidently entered the market for hazardous environment equipment, with a light which can be used in the petroleum exploration, petrochemical and chemical industries, as it is rated as a Type II non-mine explosion-proof electrical appliance.

 photo 00 EF1 Feature P1200195.jpg

Taking a more detailed look:

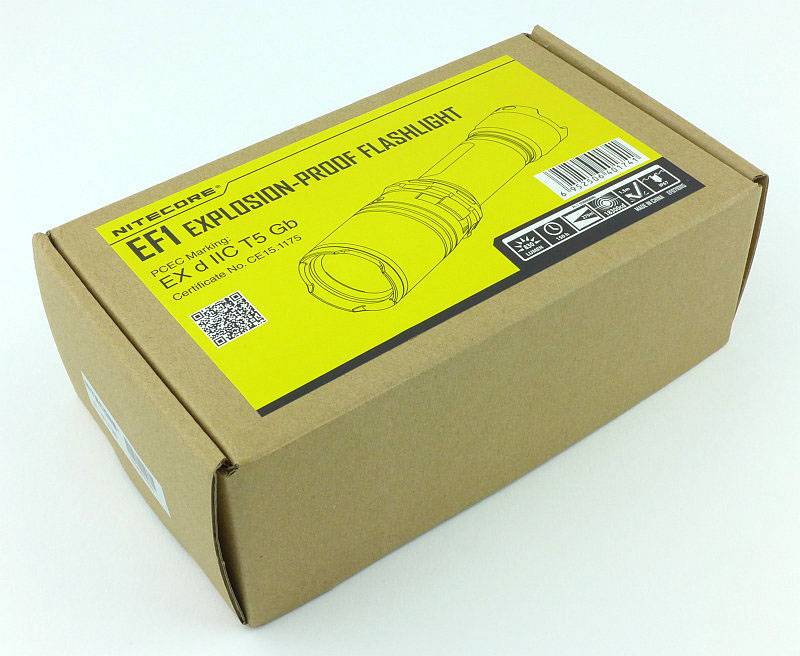
The EF1 arrives in a box like the ones used for the TM series.
 photo 01 EF1 boxed P1200173.jpg

Closed cell foam is used as the liner.
 photo 02 EF1 box open P1200177.jpg

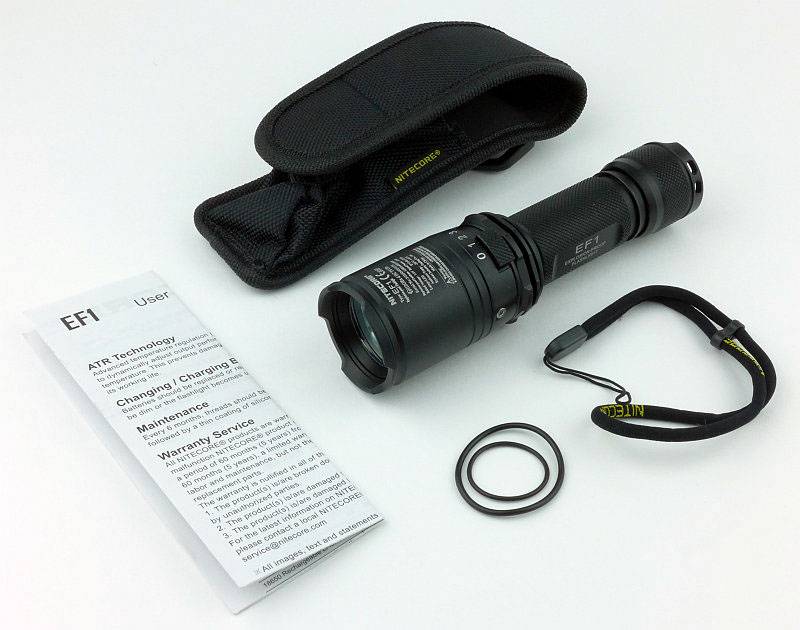
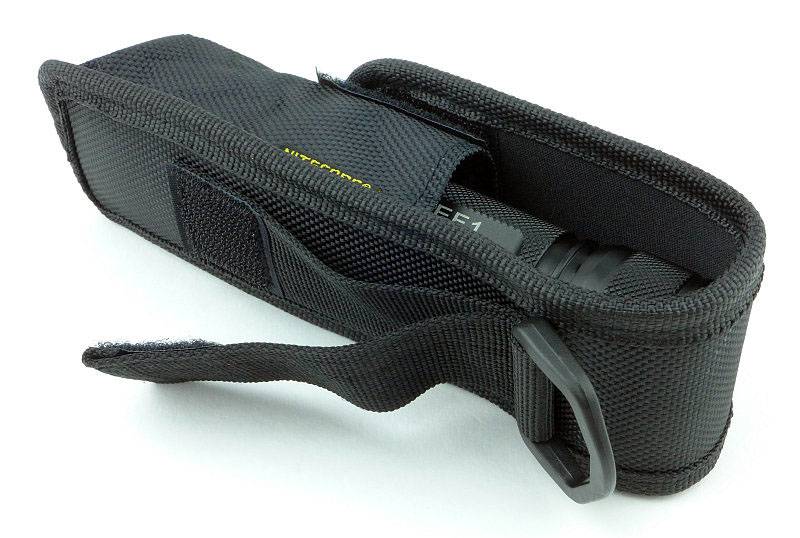
With the EF1 you get a holster, lanyard, spare o-rings and the instructions.
 photo 03 EF1 box contents P1200185.jpg

The EF1 in its holster.
 photo 04 EF1 holster P1200188.jpg

On the back it has a fixed loop, a D-loop and a Velcro closed loop.
 photo 05 EF1 holster loops P1200191.jpg

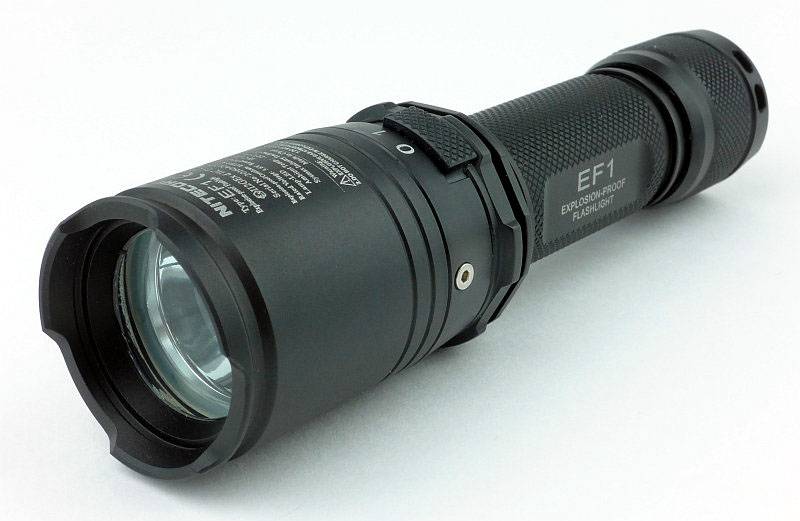
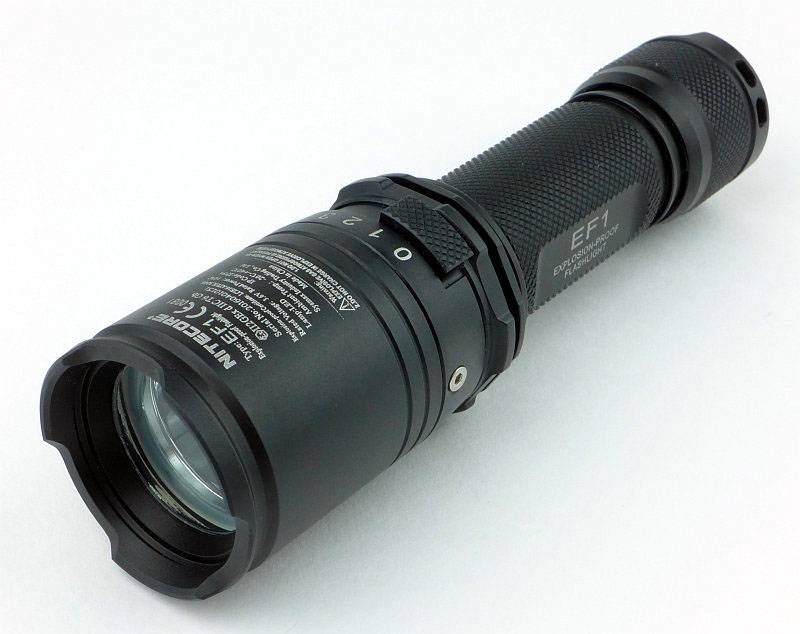
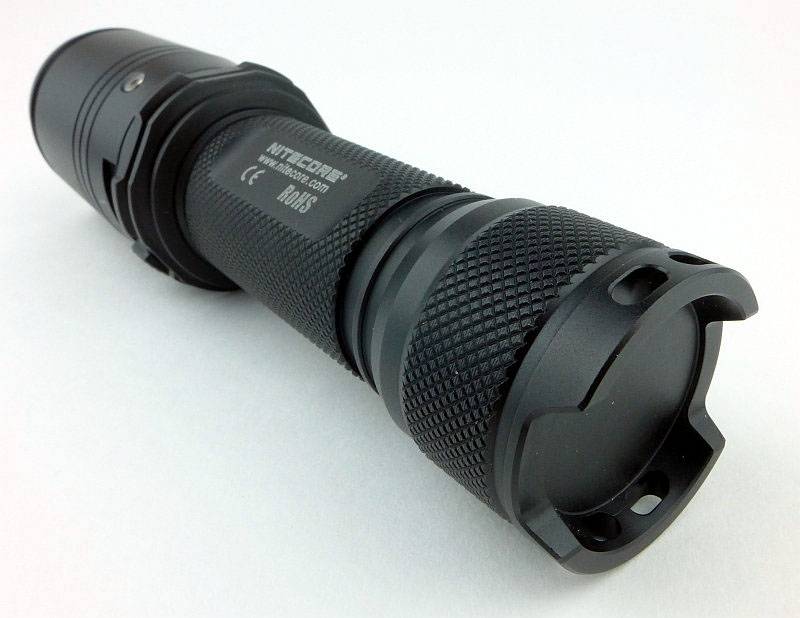
It is a chunky light, but that is due to its heavy build for the Explosion Proof rating.
 photo 06 EF1 angle P1200197.jpg

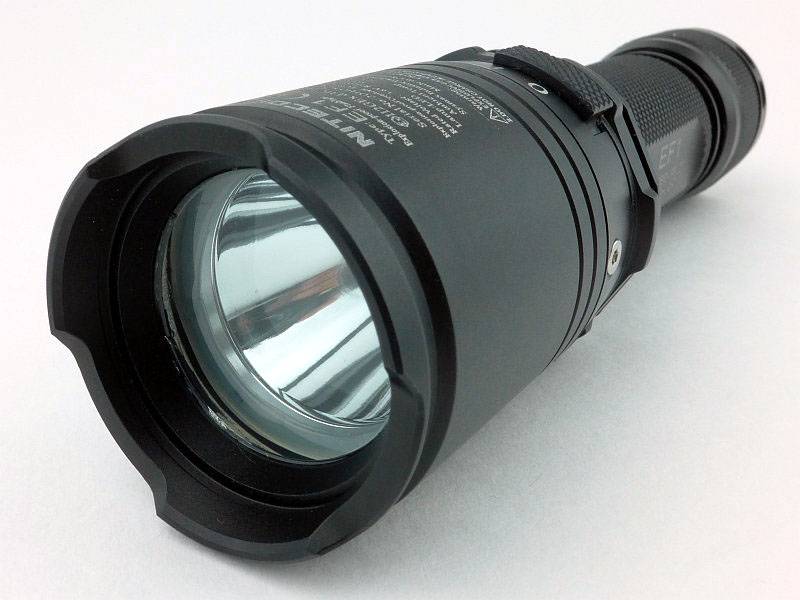
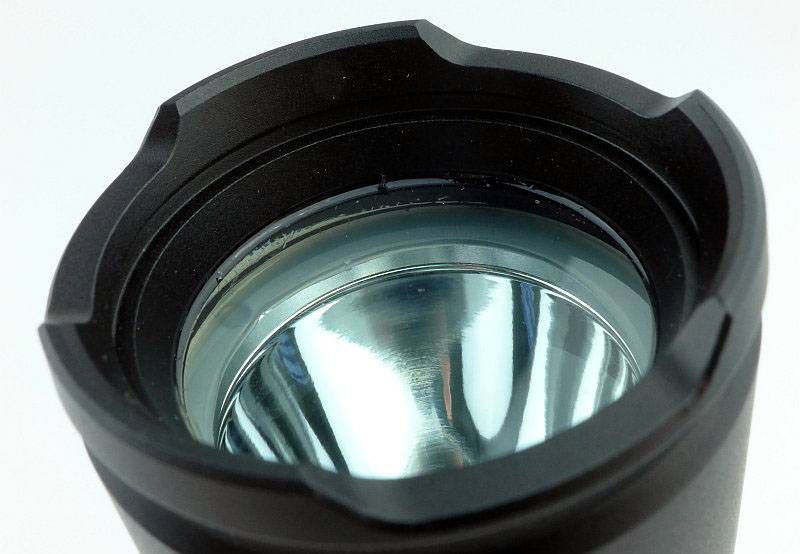
The lens is very thick making it look like a dive light.
 photo 07 EF1 lens P1200203.jpg

On the side it proudly states its explosion proof status.
 photo 08 EF1 engraving P1200205.jpg

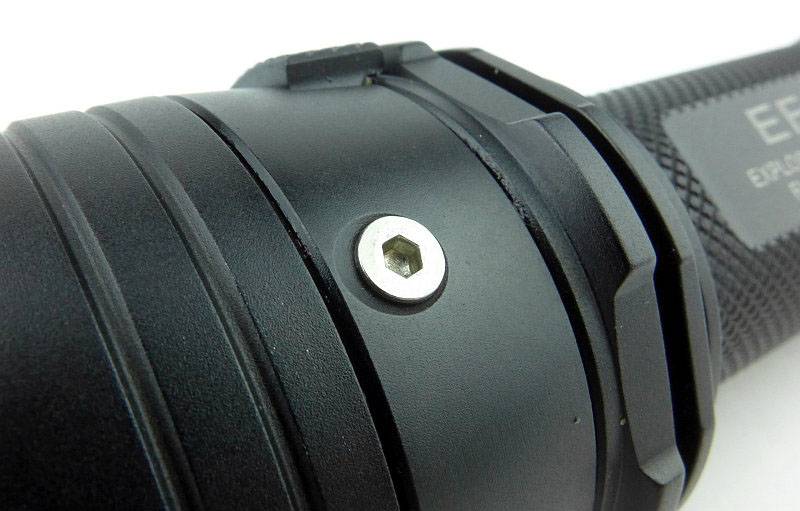
There are a couple of exposed screws on the head that seem to hold parts of the magnetic switch together.
 photo 09 EF1 screw P1200207.jpg

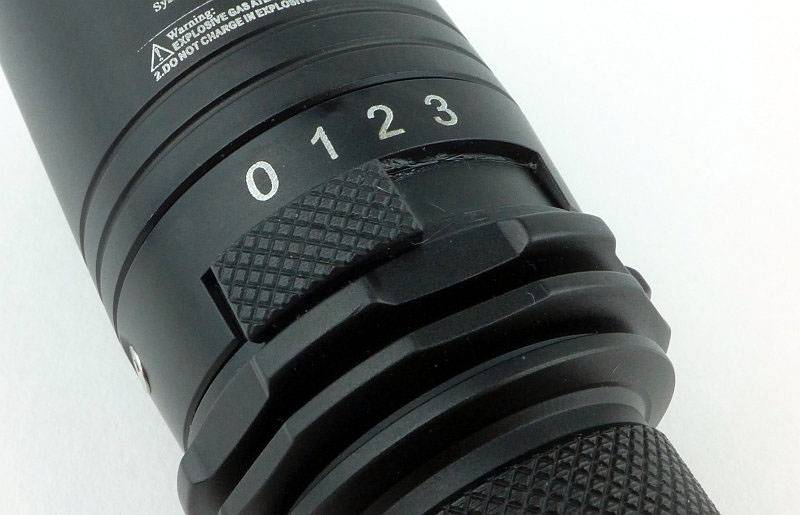
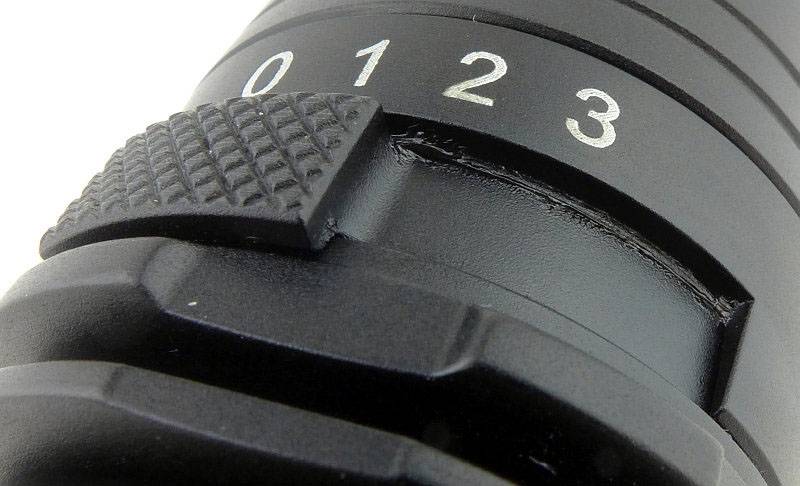
The switch is a rotating/sliding switch with four positions.
 photo 10 EF1 switch P1200210.jpg

It is difficult to really show how thick this lens is, but it is thick – 10mm thick.
 photo 11 EF1 lens P1200220.jpg

A view from the tail-cap end.
 photo 12 EF1 tail view P1200227.jpg

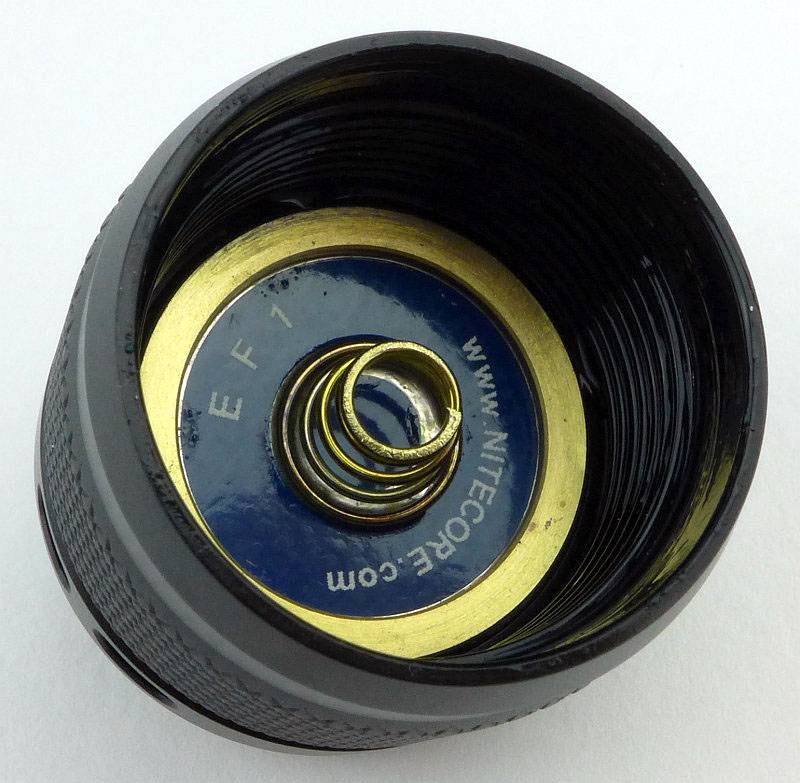
Inside the tail-cap is a spring and ring terminal.
 photo 13 EF1 tail contacts P1200235.jpg

That is one thick battery tube with a minimum thickness of 3mm.
 photo 14 EF1 battery tube P1200237.jpg

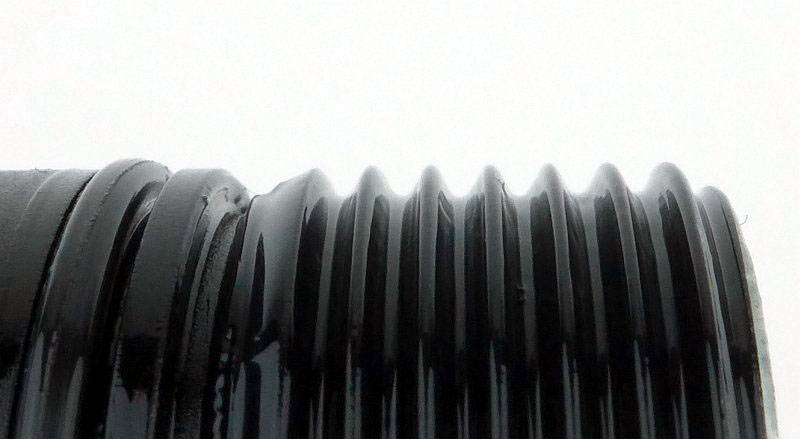
A long section of well lubricated standard threads are used for the tail-cap. They are fully anodised, so you can physically lock out the EF1 by unscrewing the tail-cap slightly.
 photo 15 EF1 battery threads P1200245.jpg

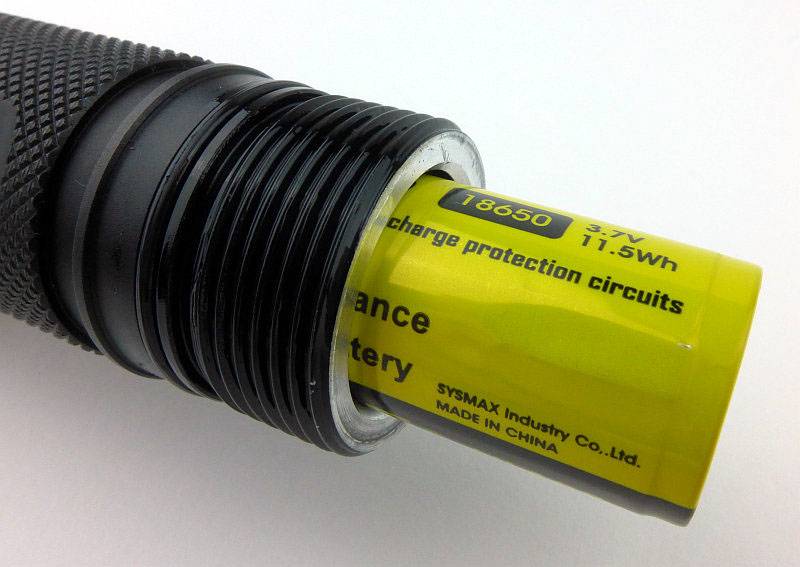
With a battery being inserted you see how thick that battery tube is.
 photo 16 EF1 battery insert P1200248.jpg

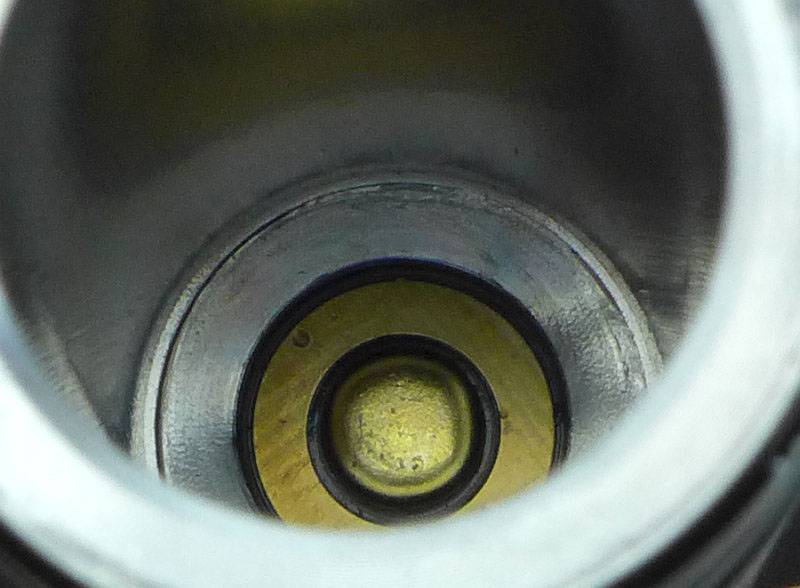
Peering deep into the battery tube for a view of the positive contact.
 photo 17 EF1 head contacts P1200256.jpg

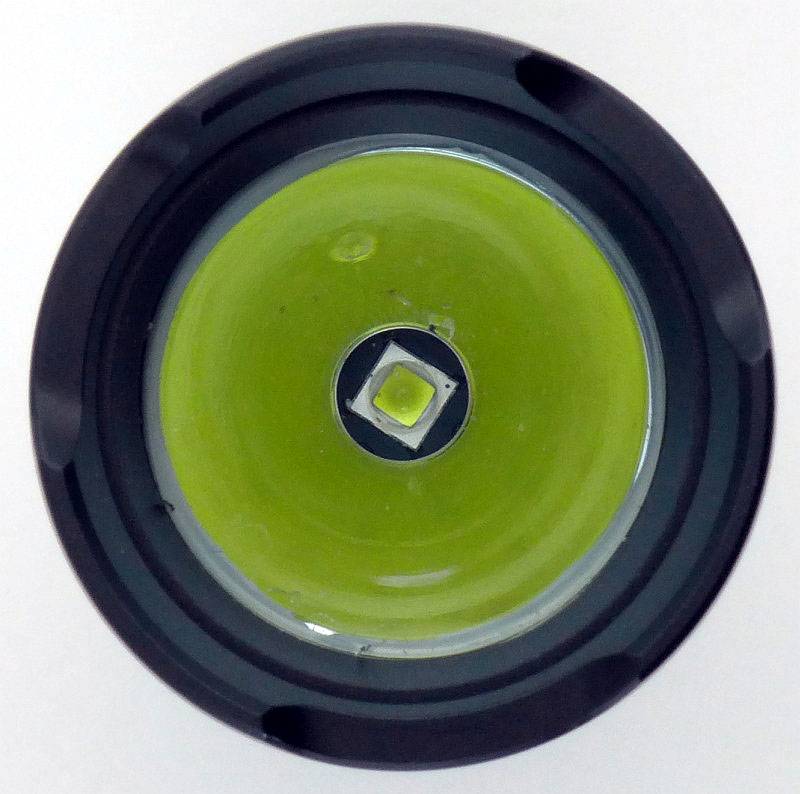
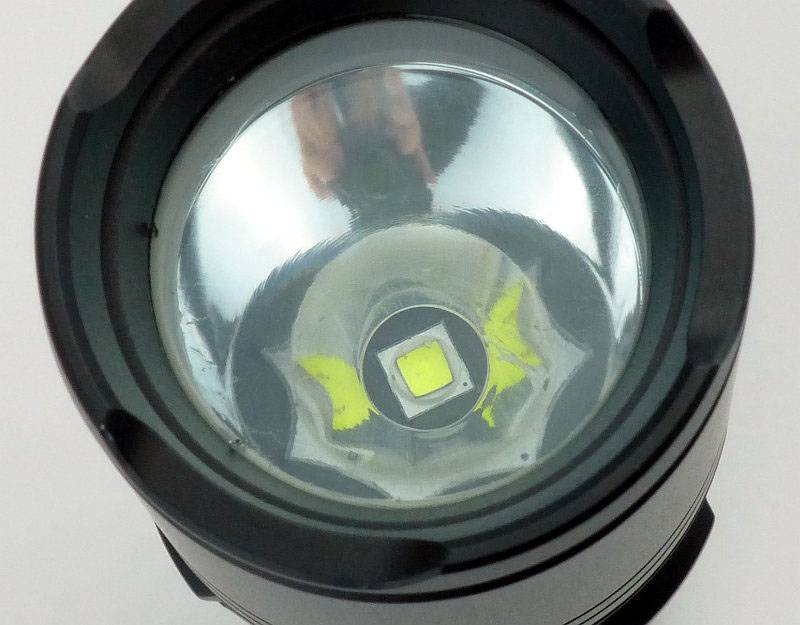
The XM-L2 U3 LED sits in a smooth reflector.
 photo 18 EF1 LED P1200261.jpg

It is a relatively deep reflector to focus the beam.
 photo 18 EF1 reflector P1200264.jpg

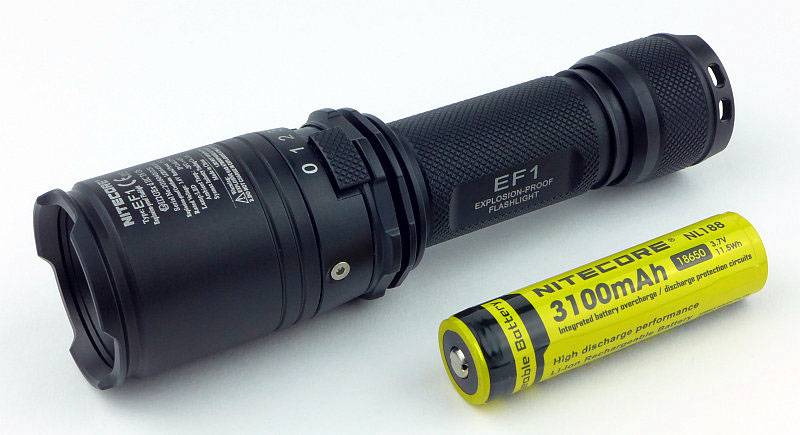
Next to an 18650 cell you can see the heavy build of this light.
 photo 19 EF1 size P1200286.jpg

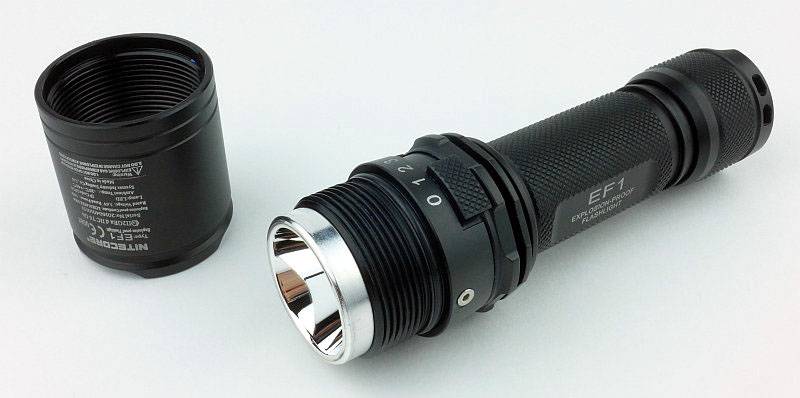
Slightly surprisingly, the head does unscrew giving access to the reflector and LED. This may be to provide access to the o-ring to allow it to be inspected.
 photo 20 EF1 head off P1200290.jpg

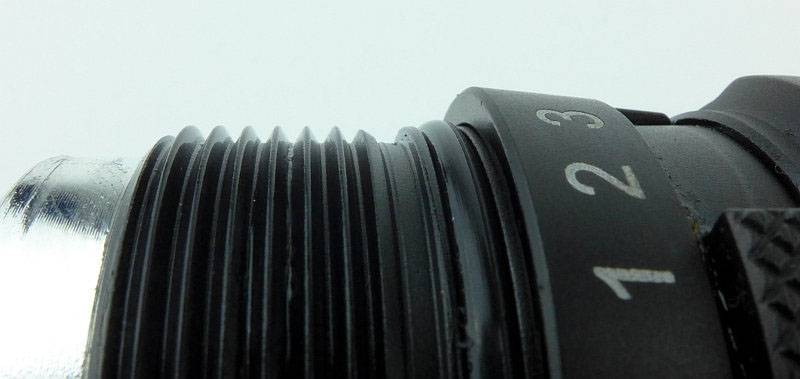
The detail of those threads for the front part of the light.
 photo 21 EF1 head threads P1200291.jpg

The beam

Please be careful not to judge tint based on images you see on a computer screen. Unless properly calibrated, the screen itself will change the perceived tint.

The indoor beamshot is intended to give an idea of the beam shape/quality rather than tint. All beamshots are taken using daylight white balance. The woodwork (stairs and skirting) are painted Farrow & Ball “Off-White”, and the walls are a light sandy colour called ‘String’ again by Farrow & Ball. I don’t actually have a ‘white wall’ in the house to use for this, and the wife won’t have one!

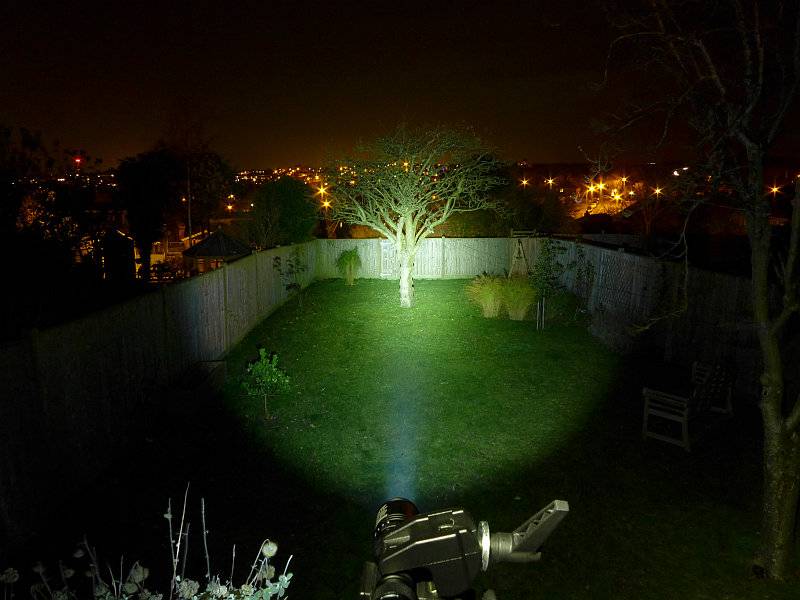
Starting off indoors, the EF1’s beam is narrow overall. There is a relatively average sized hotspot, but only a very narrow spill around this. This appears much more suited to inspection duties than general lighting for getting around.
 photo 23 EF1 indoor beam P1230323.jpg

Giving it some more range outdoors and that narrow spill is still an obvious characteristic.
 photo 28 EF1 outdoor beam P1240708.jpg

Modes and User Interface:

Nitecore have kept the interface of the EF1 very simply. There is a four position sliding switch, OFF (0), Low (1), Medium (2) and High (3).

Simply slide the switch to the position you want. There is nothing more to it.

Batteries and output:

The EF1 runs on either 1x 18650 or 2x CR123.

To measure actual output, I built an integrating sphere. See here for more detail. The sensor registers visible light only (so Infra-Red and Ultra-Violet will not be measured).

Please note, all quoted lumen figures are from a DIY integrating sphere, and according to ANSI standards. Although every effort is made to give as accurate a result as possible, they should be taken as an estimate only. The results can be used to compare outputs in this review and others I have published.

___________________________________________ ________________________________ ________________________________
EF1 using specified cell I.S. measured ANSI output Lumens PWM frequency or Strobe frequency (Hz)
___________________________________________ ________________________________ ________________________________
High – NL189 729 0
Medium – NL189 341 100
Low – NL189 5 217

* Beacon and Strobe output measurements are only estimates as the brief flashes make it difficult to capture the actual output value.

Peak Beam intensity measured 13900 lx @1m giving a beam range of 236m.

There is parasitic drain which varies between 2.68 and 1.2 mA. When using a 3100mAh 18650 it will take 48-108 days to drain the cell. This is very bad for a standby light.

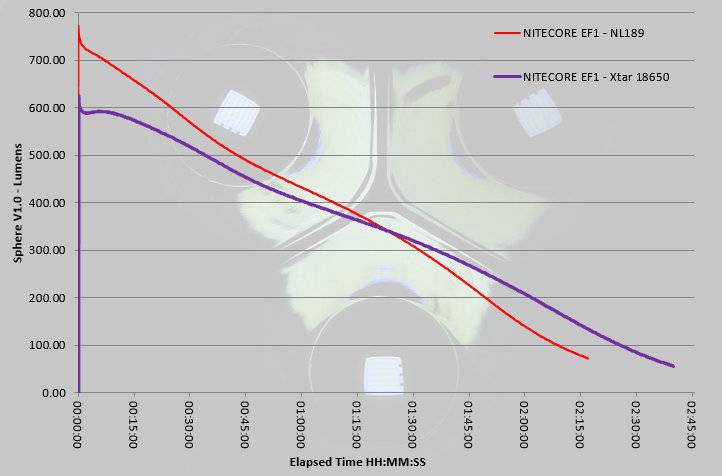
Initially I was testing the EF1 with an Xtar 3100mAh 18650, but the output figures were not up to specification. Subsequently I re-ran these tests with a Nitecore NL189. With the NL189 the ANSI output was higher, but as you can see the runtime was overall lower. Output is not regulated and drops off during the entire run. In the environments in which you would use this light, you definitely don’t want a sudden drop in output at the wrong time, so this is a better runtime profile to have.
 photo EF1 runtime plus Xtar.jpg

Troubleshooting

This section is included to mention any minor niggles I come across during testing, in case the information helps anyone else.

No issues were encountered during testing.

As per the description of this section, this information is provided in case anyone else finds a similar ‘issue’ that might be fixed in the same way.

The EF1 in use

Before we get any further we must clarify what ‘Explosion proof’ actually means. Firstly, it does not mean you can drop a bomb on it! Instead it relates to the world of hazardous environment equipment, for which there are many different and very specific standards for the various classifications of hazard. The safest equipment are ‘Intrinsically Safe’ devices which are intrinsically incapable of igniting hazardous atmospheres even if destroyed, as no component within them can achieve ignition, including the cells. Then there are the ‘Explosion-Proof’ ratings where the device does indeed contain enough energy to ignite explosive gasses, but critically, should the device have been opened in that hazardous atmosphere and contain an explosive mixture which can be ignited, if there is a small explosion within the device, that explosion is completely contained and cannot propagate into the surrounding atmosphere. The ‘Explosion Proof’ rating is protection from internal explosions.

Now we have got that clear, a direct consequence of the explosion proof rating is that the build is very heavy. Putting the EF1 next to a two cell light, the P36 shows how even though it is a single 18650 light, it really has presence. We are looking at one very tough light.
 photo 22 EF1 size p36 P1200296.jpg

With it being a very solid build, and having a sliding switch, actually the EF1 could also be very suited to diving use. While carrying out my Dive Knives 2016 – Mega Test Review I also took the EF1 with me, but wasn’t able to get any in-use shots. It was ceratinly taken to depths greater than the 1.5m specified, but not more than 10m where I was diving.
One thing I did put the EF1 through was the dive knife corrosion testing (details in the Dive Knives 2016 – Mega Test Review) and this is what happened to the EF1.
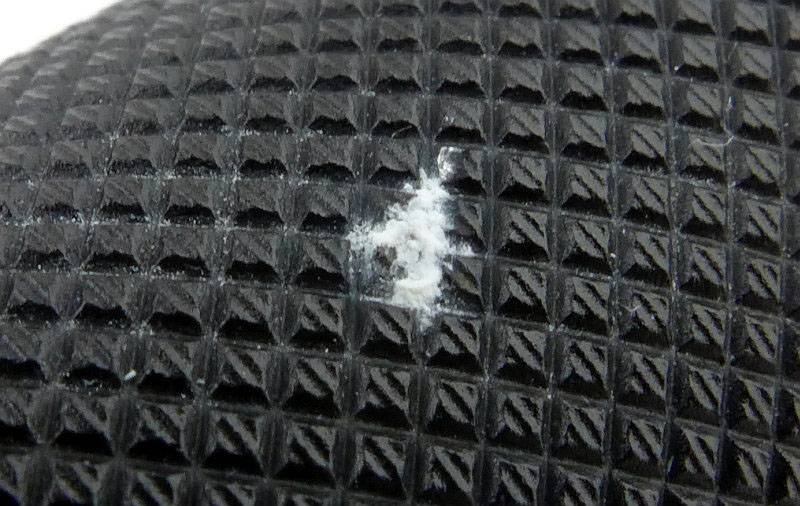
Taking in the overall view, the most obvious sign is a small white patch on the handle.
 photo 24 EF1 corrosion P1230810.jpg

Going in closer we can see this is a patch of aluminium corrosion from the salt water exposure. There must have been a small flaw in the anodising for this to have happened.
 photo 25 EF1 corrosion P1230823.jpg

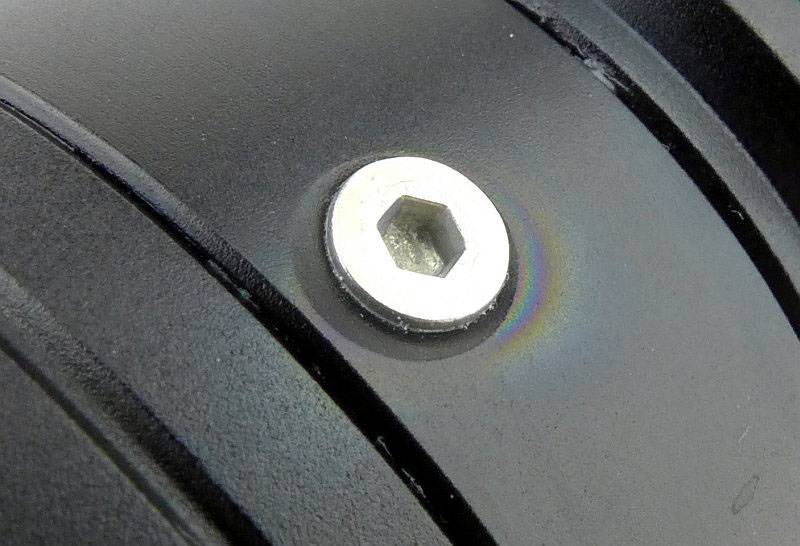
Just next to one screw on the head was a rainbow like colouring on the anodising looking like an oil film. It was perfectly dry and free of oil, and this was only visible after the corrosion test.
 photo 26 EF1 corrosion P1230817.jpg

The last visible effect was that the grease around the sliding switch turned a dark brown/black colour, so was not an inert grease.
 photo 27 EF1 corrosion P1230820.jpg

There were no issues with the EF1 following this intensive corrosion test, and it is still functioning perfectly.

Though we tend to prefer smaller and easier to carry lights, there is a certain satisfaction to carrying the tank-like EF1. Its weight is comforting and there is nothing fragile about it. The slider switch is positive and simple to use and needs no explanation. There is a noticeable delay in the switch response, most notable when switching the EF1 on from OFF. It is probably only 0.3s or thereabouts, but you move the switch, then the EF1 turns on after that brief pause. The same when changing levels.

For my own use, the biggest issue is the mode spacing. It has a useful 5lm Low mode, but then jumps to 341lm. It definitely could have done with something around 80lm-100lm mark instead of jumping right up to 340lm. When the 5lm is not enough, that jump can be blinding.

Not working in a hazardous environment myself, I can’t say if the beam profile is a good fit for this type of use. It certainly seems to be an inspection type of beam rather than one for general use and getting about. I found it too narrow for navigating on rough ground as the hotspot was giving peripheral blindness when shining it at the ground. It is fine for longer distances, just not good closer up.

For the domestic user, there is the attraction of the Explosion Proof rating particularly in case of gas leaks. Personally I have several gas-safe lights including intrinsically safe lights. Those intrinsically safe lights however are all AA Alkaline powered, so the EF1 with its Li-ion power means the output is much higher, and I would consider it totally safe to use in a domestic gas leak situation. Some users would argue that any waterproof light will be safe to use, but this is wrong. If you change the battery and the explosive atmosphere gets inside the light, turning it on could create an explosion that would break out of a normal waterproof light. It would have been fine if you hadn’t opened it, but you did. With the EF1 this would not matter, as if this internal explosion did occur, the EF1 can withstand it – I know what I’d rather be holding.

Review Summary

_______________________________________________ _______________________________________________
Things I like What doesn’t work so well for me
_______________________________________________ _______________________________________________
Explosion Proof rating. Big jump in output from Low (5lm) to Medium (341lm).
Simple sliding switch. High parasitic drain – remember to lock out the tail-cap.
Predictable gradual drop in output (no sudden cut-out). Narrow spill limits versatility.
Extremely solid build. PWM used on Medium and Low modes.
Excellent corrosion resistance.
Holster supplied.

 photo 00 EF1 Feature P1200217.jpg


Discussing the Review:

Please feel free to add comments to the review, but the ideal place to freely discuss these reviews is on a forum. If you started reading the shorter forum version of the review, but followed the link this full exclusive review, please return to that forum to discuss the review there.
If you read the review entirely on Tactical Reviews, please consider one of the following to join in any discussion.

CandlePowerForums – Flashlight Reviews Section (Largest and Friendliest Flashlight Community Forum)

EdgeMatters – Sponsored Reviews (UK based Forum for Knife Makers and Collectors)

Knife Review: Chris Reeve Knives Large Inkosi

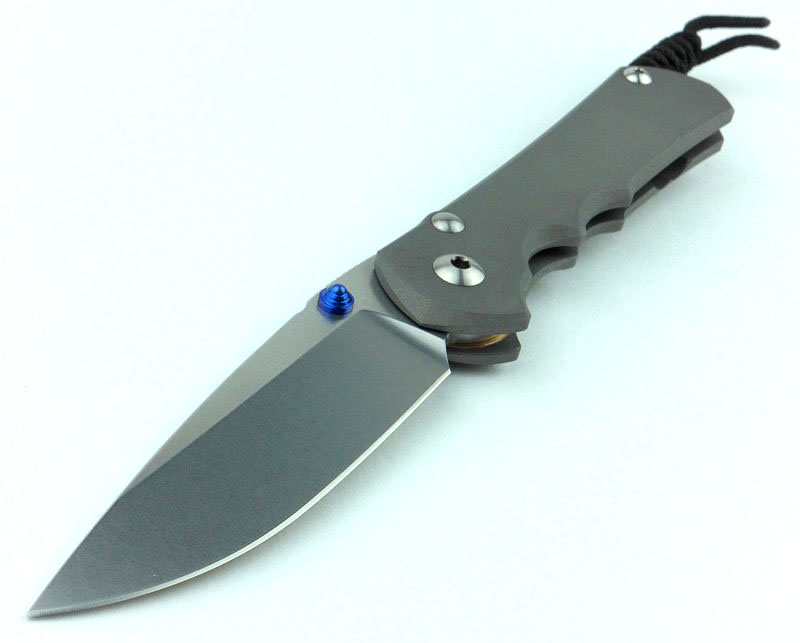
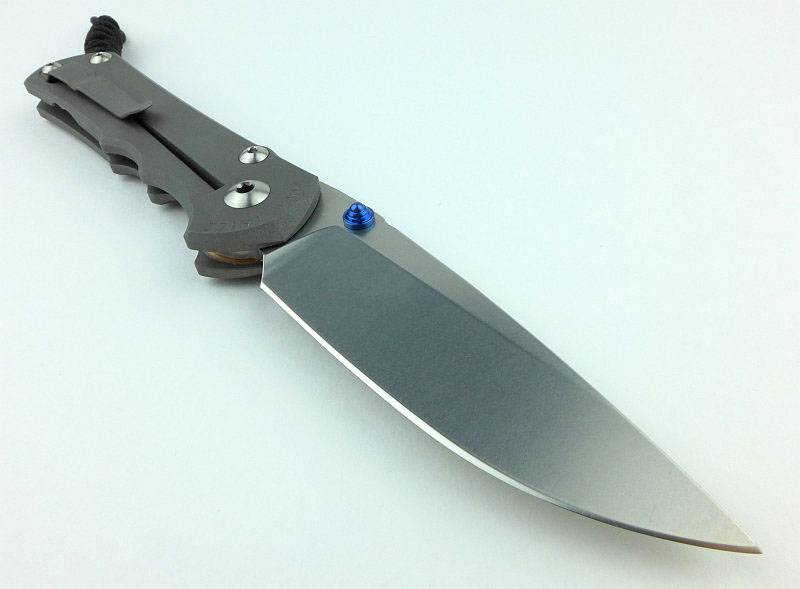
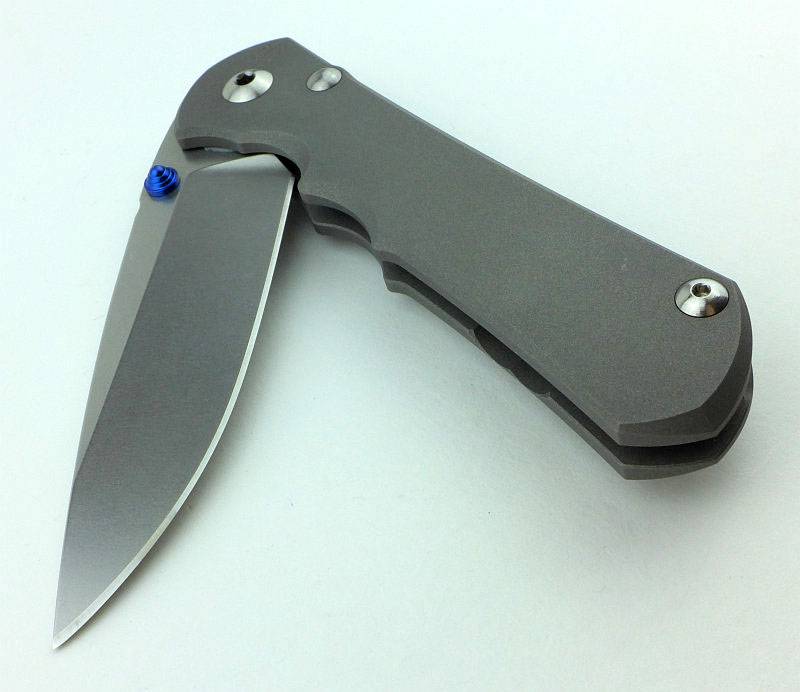
The original Inkosi was launched at Blade Show 2016, and was designed to include improvements to Chris Reeve’s already tried and tested (and industry changing) Sebenza models. Never one to stand still, Chris knew he could improve on his original design with certain key changes to the pivot, bearing, frame and lock. Rather than apply all these changes to the established formula of the Sebenza models, a new line was created to allow these features to be incorporated into the most advanced Chris Reeve folding knife yet. With a trend to smaller more pocketable models, the first Inkosi was created as a compact folding knife, but demand has been strong for a larger version of this knife, and here it is. The Large Inkosi now replaces the Sebenza 25.
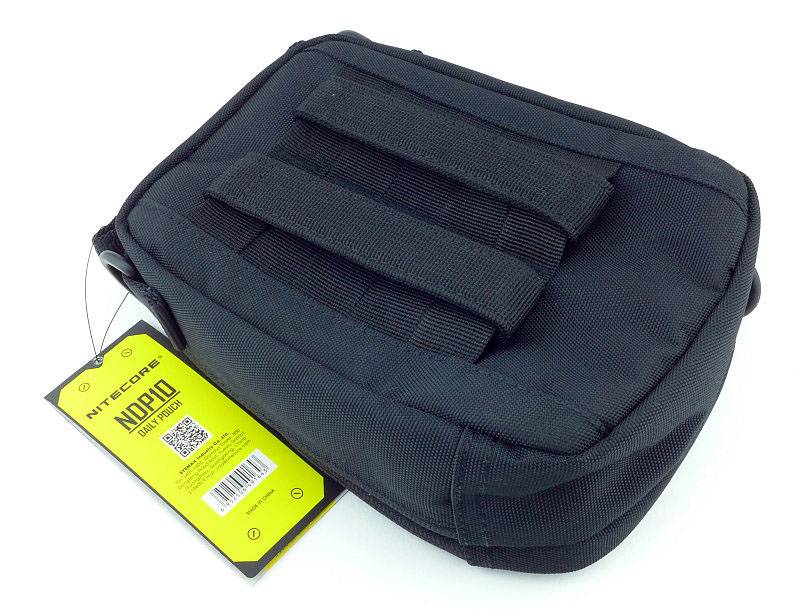
 photo 28 L Inkosi angle open P1200420.jpg

The Blade and Handle Geometry:

Most knife specifications have a basic description of the blade geometry, but in this section I will be taking a more detailed look at geometry and balance.
 photo 56 L Inkosi grind measure P1200597.jpg

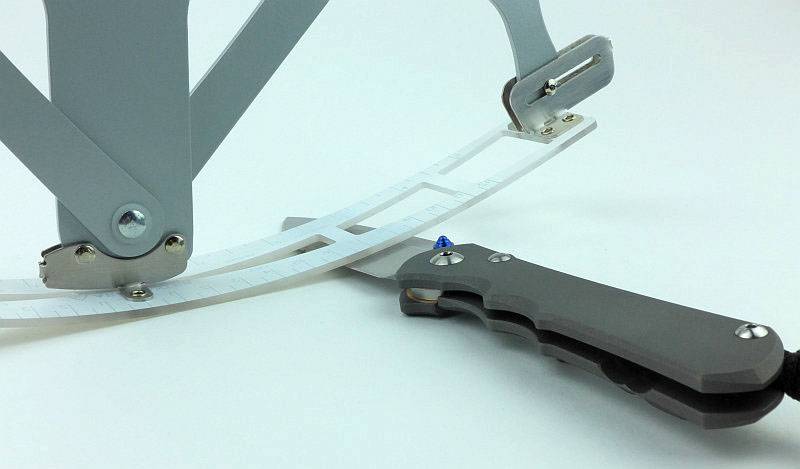
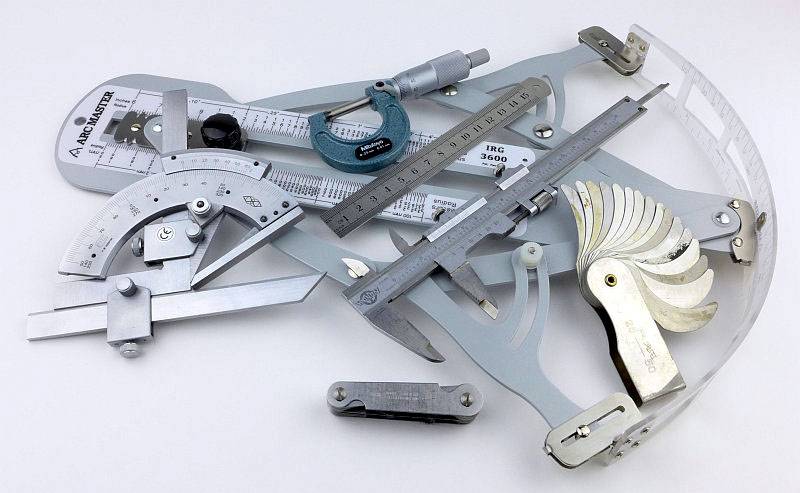
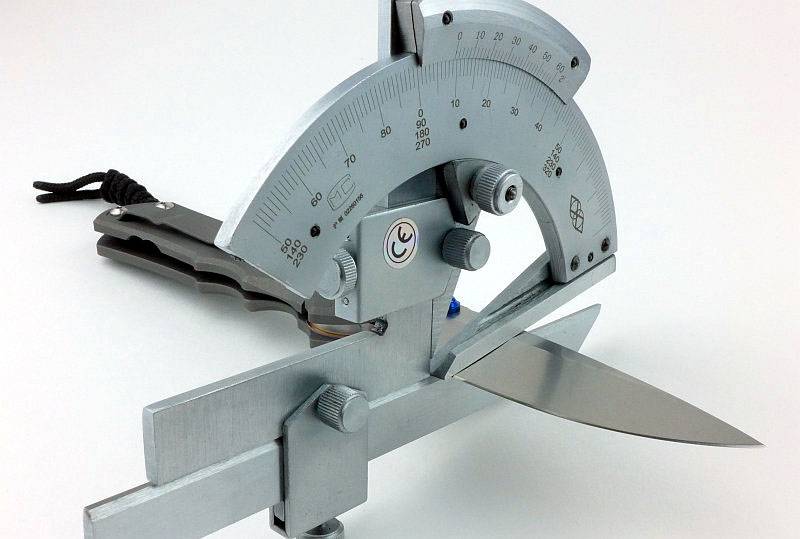
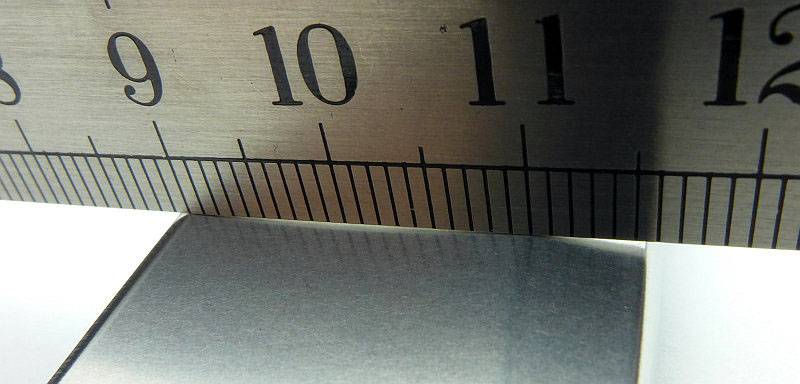
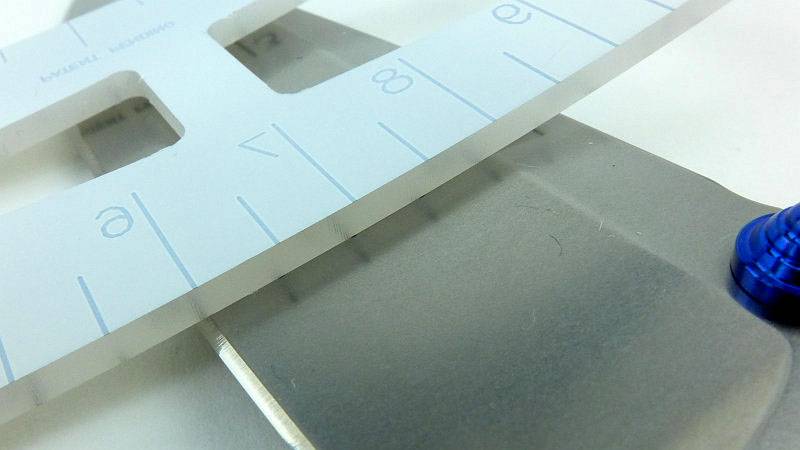
Using a set of gauges and precision measuring equipment including a Vernier protractor, callipers, fixed radius gauges and the unique Arc Master adjustable radius gauge (the one that looks like a crossbow).
 photo Knife measuring P1180483.jpg

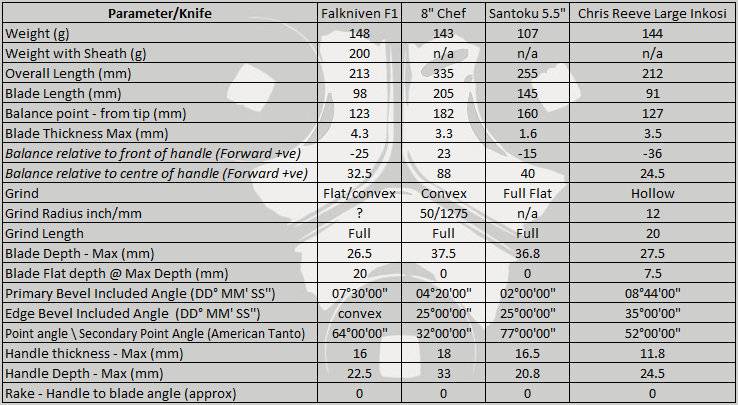
These measurements have been tabulated and are presented along with a few reference blades (8″ Chef’s Knife, 5.5″ Santoku and the popular Fällkniven F1).

Key aspects such as the primary bevel angle, grind type, blade depth, blade thickness, length, weight are detailed, along with balance information.
 photo 58 L Inkosi grind angle P1200604.jpg

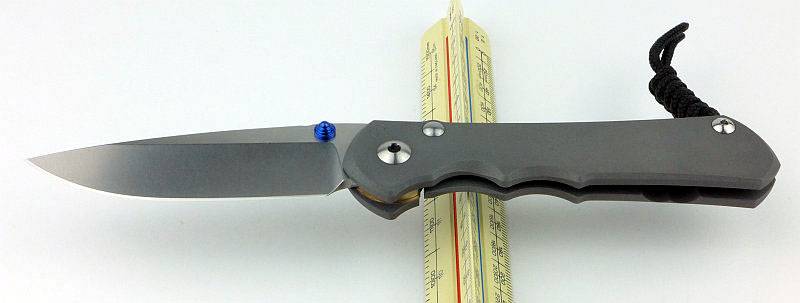
The ‘Balance relative to the front of the handle’ tells you if the knife will feel front heavy, or if the weight is in your hand (a positive value means the weight is forward of the front of the handle). The ‘Balance relative to the centre of the handle’ indicates how close to a ‘neutral balance’ the knife has in the hand.
 photo 53 L Inkosi balance P1200569.jpg

In the case of full convex grinds the approximate centre of the grind is used for the primary bevel angle estimate.

 photo CRK Large Inkosi Parameters.jpg
The blade is made from S35VN steel at 59-60RC.

Explained by the Maker:

The reasons for certain design choices may not be clear when simply looking at an object, so this section is intended to give an insight into the thinking behind a design by speaking to the designer themselves.

Unfortunately I can’t always get time with the designer so will use this section to include relevant information about the knife and its designer.

The history of this review goes back to before the release of the Large Inkosi and to IWA 2016 where I was fortunate to be able to speak to Tim Reeve about the Inkosi. It was during this discussion that Tim told me the Large Inkosi was in development. My own preference is for a larger lock knife, so I couldn’t wait for the Large Inkosi to be released.

Tim talked me through the design improvements introduced with the Inkosi which actually include all the major parts, the pivot, bearing, frame and lock.

There is one feature of the Large Inkosi which is not new, but is worthy of mentioning as it is now a CRK design feature that was introduced in the Sebenza 25, the ‘Large Hollow Grind’. The shape of this grind is itself not new, having been common when you go back to older production methods. Before grinding wheels were mass produced in smaller sizes, blades were ground on much larger wheels than are generally used today. Modern grinders tend to have smaller diameter wheels, so hollow grinds have become deeper and more pronounced. This has given the hollow grind its very sharp thin edge, but a blade which hangs up on the shoulders of the hollow grind when cutting deeply. With the growing popularity of the full flat grind, thanks to its smooth cutting action, the modern hollow grind has been losing traction.

That said, both hollow and flat grinds have their place and individual benefits. When looking to make the folding knife as useful as possible, CRK didn’t just follow the trend of going one way or the other, but instead wanted a blade that blends the best of hollow and flat grinds. Using a much larger wheel to grind the blade results in a ‘Large Hollow Grind’ which is almost flat, but slightly hollowed. This stops the blade hanging like a hollow grind would, and allows for more sharpening cycles before the blade edge starts to thicken up. This image (borrowed from CRK) shows how the ‘Large Hollow Grind’ fits between flat and hollow grinds.

 photo largehollowgrindweb.jpg

Here you can see the slight dip of the grind with a flat edge lying across it.
 photo 54 L Inkosi grind P1200578.jpg

In the previous section ‘The Blade and Handle Geometry:’ you could see the size of the hollow grind being measured with the Arc Master radius gauge. This is a closer look at the measuring arc sitting in the hollow grind with the gauge set at 12″ radius, so a 24″ wheel has been used for this grind.
 photo 57 L Inkosi grind measure close P1200593.jpg

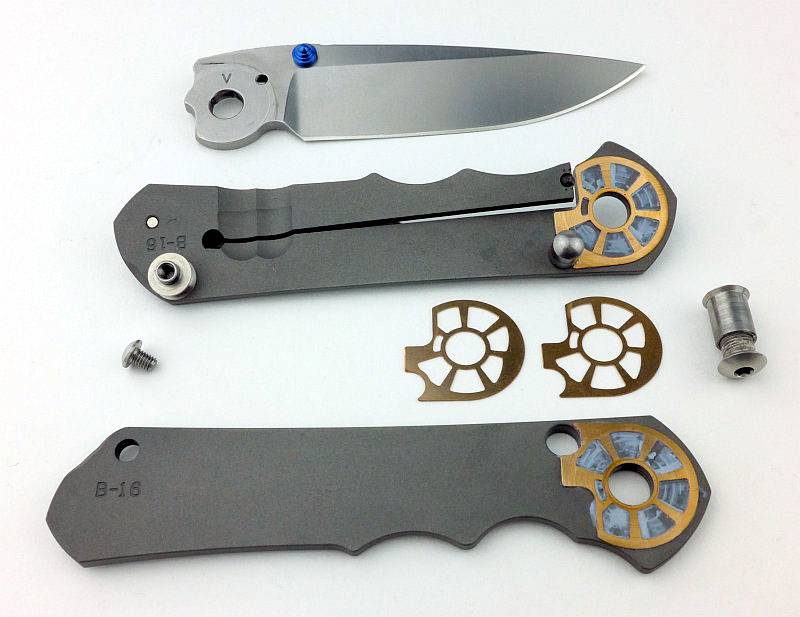
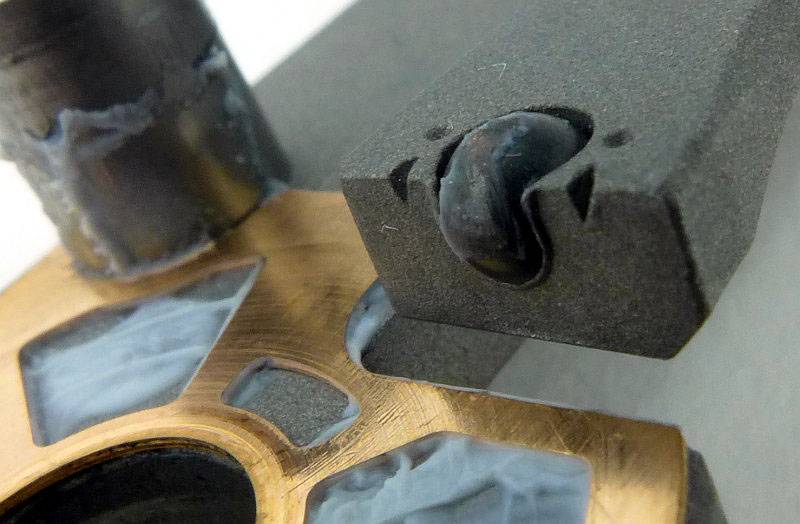
This next image is a big hit of detail as it shows the Large Inkosi almost fully disassembled. For the moment there are two specific details I’d like to focus on and they are the large pivot and shaped phosphor bronze washers.
In earlier designs, the size of the washer on the lock side was limited by the end of the lock bar and if the washer were to have a cut out, it might rotate and then interfere with the lock. In turn, the size of the washer limited the size of the blade pivot, as if the pivot were made larger, the washer would become smaller and provide less support to the blade.
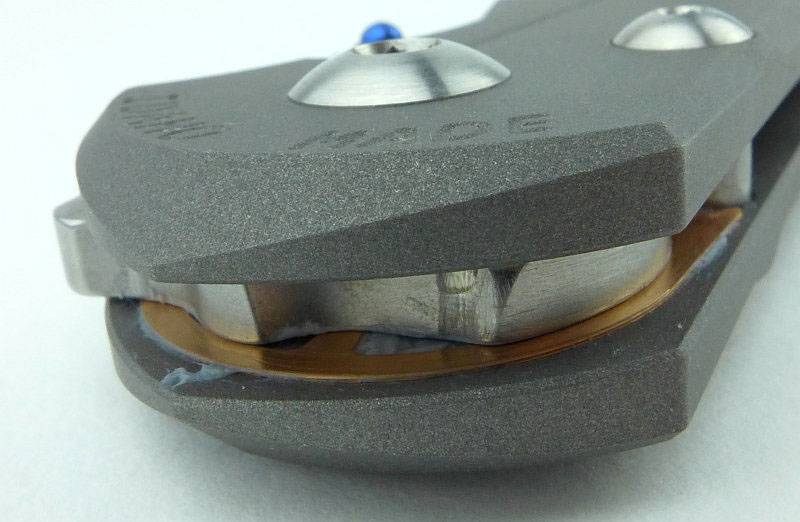
Taking the washer to the maximum size allowed by the handles means it can then be shaped to locate on the blade stop pin and not rotate into the way of the lock bar. It also allows the washers to be the same both sides bringing equal stability to each side of the blade.
Now that the washer has broken free of the earlier limits, it is possible to increase the size of the blade pivot and so increase the strength of this joint.
However, all this extra contact area increases friction with the blade tang, making the knife more difficult to open, so large perforations have been added to the washers to reduce friction without weakening the support of the blade. The perforations also store more lubricant and offer space for small particles of dirt to move away from the contact surfaces of the blade and washer, helping to prevent blade from stiffening up over time.
 photo 14 InkosiWasher Step all parts plus new P1230240.jpg

Only with the knife fully disassembled can you get a really good look at another design feature, the ceramic ball used in the lock.
Other integral locks use either the titanium itself or an insert of hardened steel for the locking surface. Looking to improve on both if these and increase the service life, CRK have employed some of the hardest material available, ceramic.

A one-eighth inch ceramic ball with hardness of 97RC acts as the interface between the lock bar and the blade tang. It also doubles up as the detent ball that holds the blade in the closed position. Due to the detent now becoming the locking surface as well, you get a uniquely smooth feel when opening the Inkosi. For just about every other integral/liner lock, when the blade is nearing fully open, the detent ball clicks as it drops off the locking surface of the blade tang. Only after this pre-lock click does the actual lock click into place. It means you get this double click as the blade is opened into the locked position. With the Inkosi, when you start to use it, you’ll notice the absence of this pre-lock click as it is not what you are used to. You open the blade and the only click is the lock bar falling into place. This is only possible with the dual purpose ceramic ball.
 photo 32 Inkosi details lock ball P1230233.jpg

Unlike a standard lock interface, which uses two flat surfaces, we now have a round ceramic ball which would create a point-contact on the blade tang, so instead of having a flat locking surface on the blade tang, the Inkosi has a rounded groove with the same curvature as the ball.
 photo 23 L Inkosi washer lock groove P1200402.jpg

The ball and groove mate securely and this interface also stabilises the lock bar as it can’t flex away from the handle. (NOTE: since the review sample was provided, CRK have found the ball track groove on the tang to be unnecessary, so it is no longer included on current production Inkosi knives.)
 photo 33 L Inkosi ceramic ball P1200442.jpg

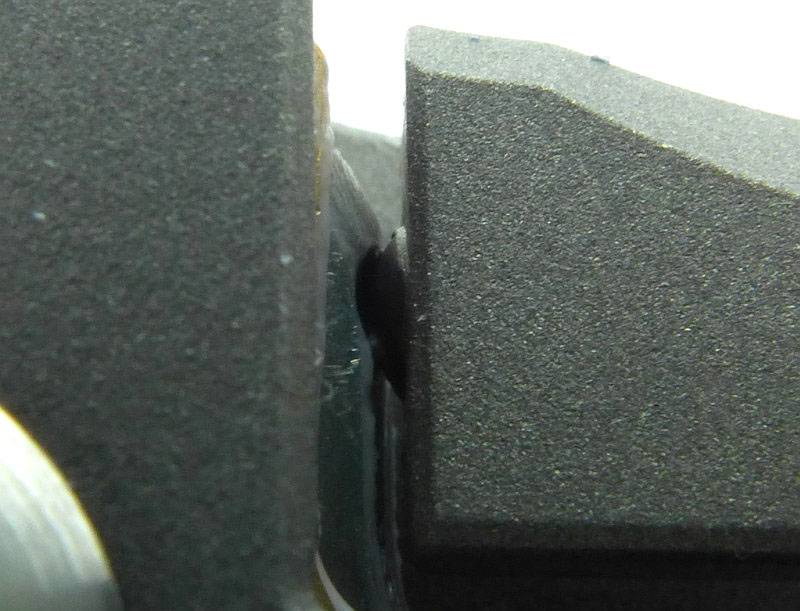
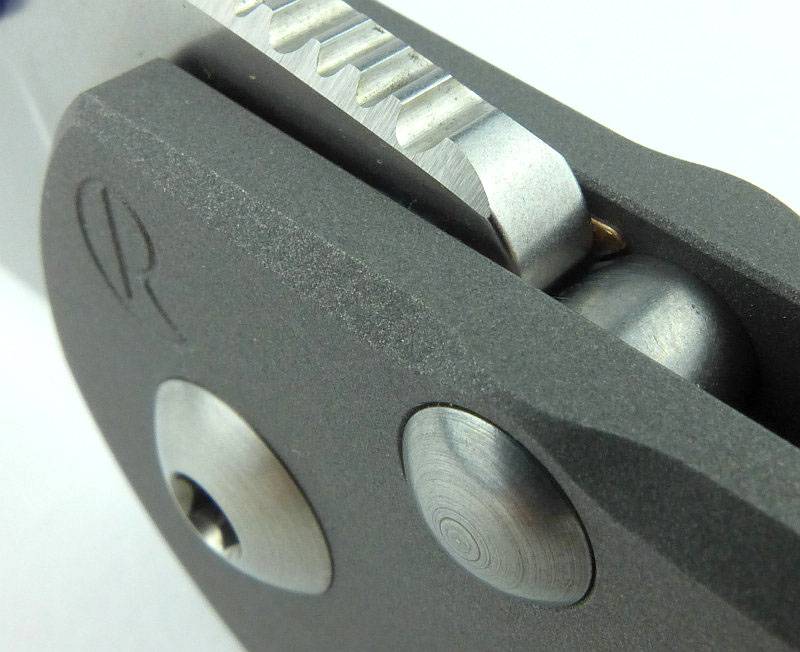
Another innovation in the Inkosi is the slip-through stop-pin in the frame. One end of the stop-pin is secured to one side of the frame with a bolt, but the other end simply fits through a hole in the front of the frame and is not fixed in place.
Of course this only works as well as it does due to the high precision of the fit of the stop-pin on the floating side, and this configuration provides an excellent advantage in the operation of the knife.
Traditionally the stop sleeve, which spaces the frame/handle parts, needed to be very precisely sized to ensure that the fit of the assembled knife was tight, but not too tight. If that stop sleeve is a touch too wide you get blade play.
With the slip-through stop-pin, the advantage is that the front face of the handle can move along it as you set your pivot tension. The Sebenza has a stop sleeve that has to be machined to a width accurate within a few tenths of a thousandth requiring a lot of fitting to ensure the knife operates as it should.
From a manufacturing perspective, this feature removes the need for the fitting of the stop sleeve, however, the main advantage is really for the owner of the knife, as the slip-through stop-pin guarantees that even once the knife wears in, the action can always be set perfectly, with no blade play and perfect washer contact, just by adjusting the pivot; the stop-pin will never need any adjustment because it is self adjusting.
 photo 37 L Inkosi stop pin contact P1200454.jpg

A few more details:

Amazing how this box generates a real sense of anticipation and excitement. (NOTE: CRK have subsequently updated the packaging.)
 photo 01 L Inkosi box P1200318.jpg

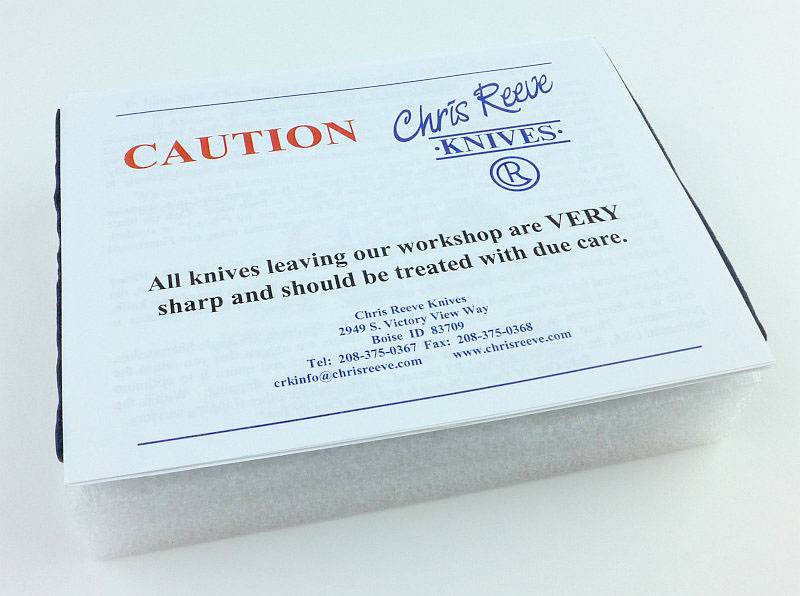
Personally, I’m not sure a knife should come with a warning it is sharp, but there it is.
 photo 02 L Inkosi warning P1200320.jpg

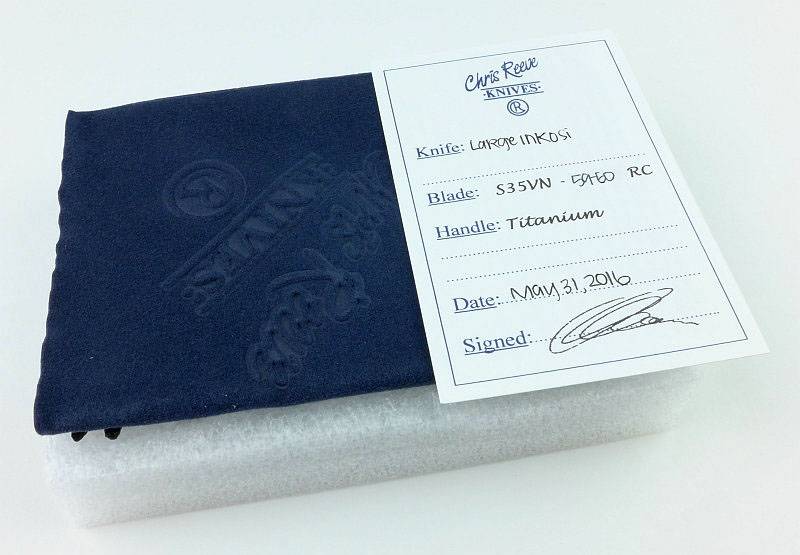
The birth certificate of one of the first Large Inkosi knives.
 photo 03 L Inkosi certificate P1200325.jpg

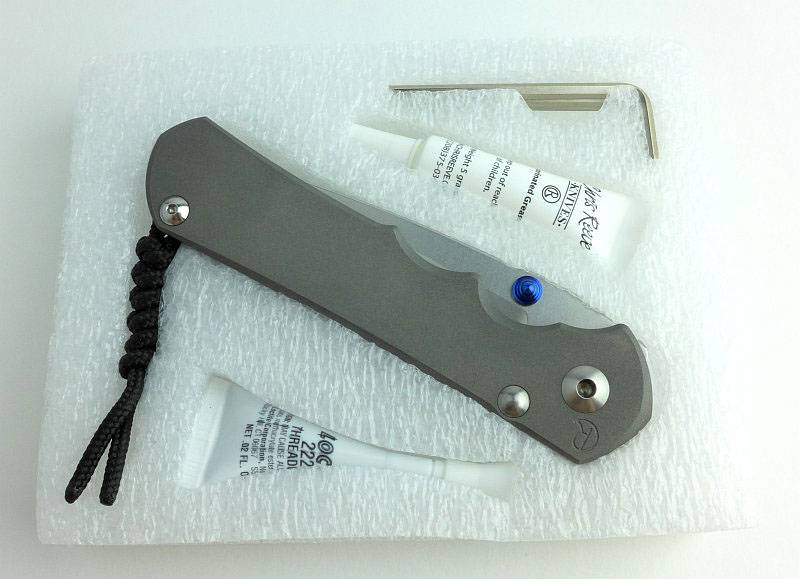
Nestled into a foam liner is the Large Inkosi and some accessories.
 photo 04 L Inkosi box tray P1200331.jpg

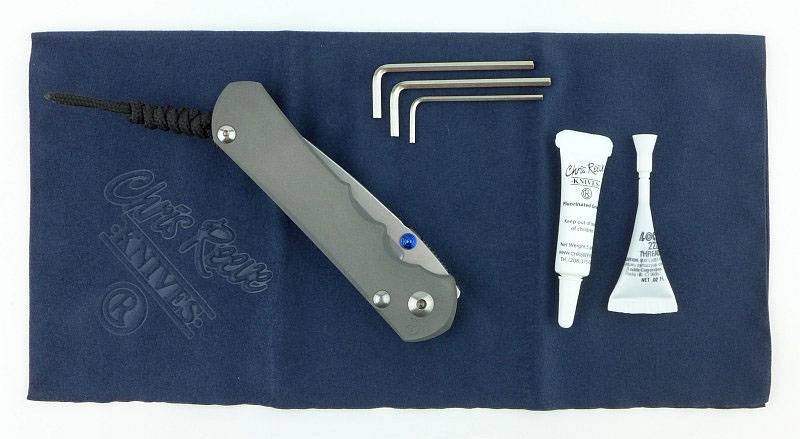
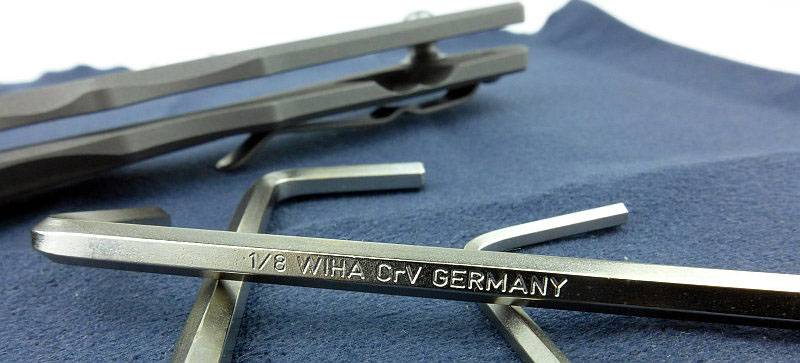
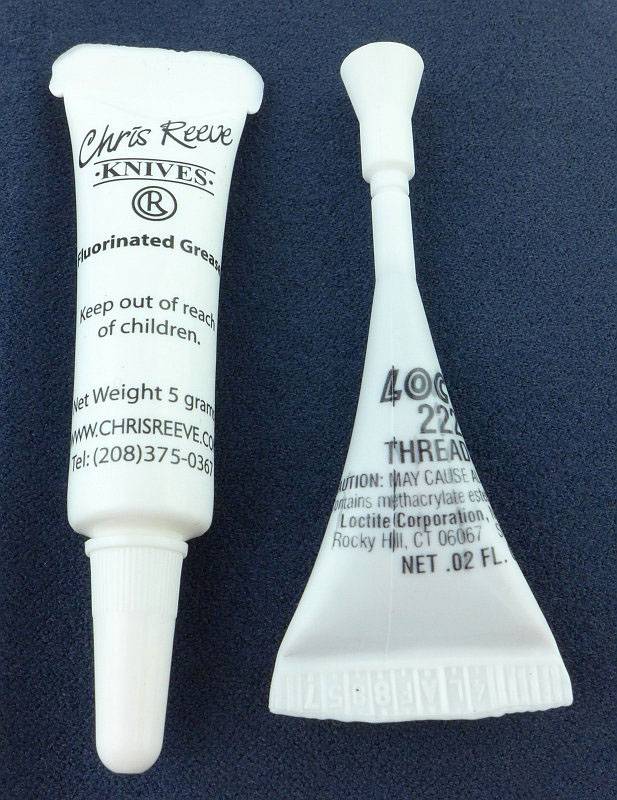
Along with the Large Inkosi you get a CRK cleaning cloth, two Allen keys for the pivot and one for the spacer and stop-pin bolts. there is also a tube of grease and thread-lock, giving you a full service kit.
 photo 05 L Inkosi box contents P1200337.jpg

Not to skip over this too soon, please note that these are not unbranded tools, you get WIHA Allen keys.
 photo 02 InkosiWasher tools P1230169.jpg

The grease is a fluorinated grease and thread-lock is Loctite 222.
 photo 06 L Inkosi tubes P1200340.jpg

There is something special about that box-fresh CRK knife.
 photo 07 L Inkosi cloth P1200349 copy.jpg

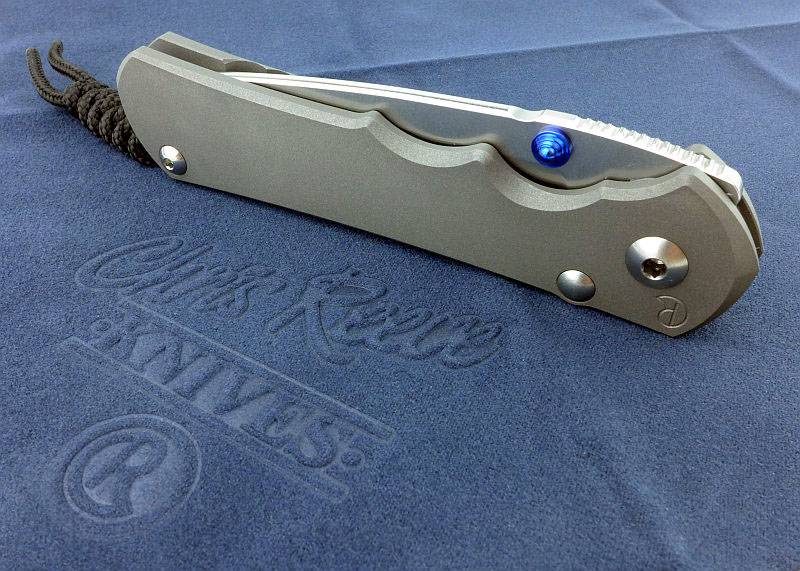
The Large Inkosi arrives with a knotted cord lanyard already fitted to the knife.
 photo 08 L Inkosi cloth2 P1200353.jpg

As with the Sebenza 25, the Inkosi has finger grooves in the handle.
 photo 09 L Inkosi angle P1200355.jpg

Fit, and finish is flawless, just as you would expect with CRK.
 photo 12 L Inkosi pivot pin stud P1200364.jpg

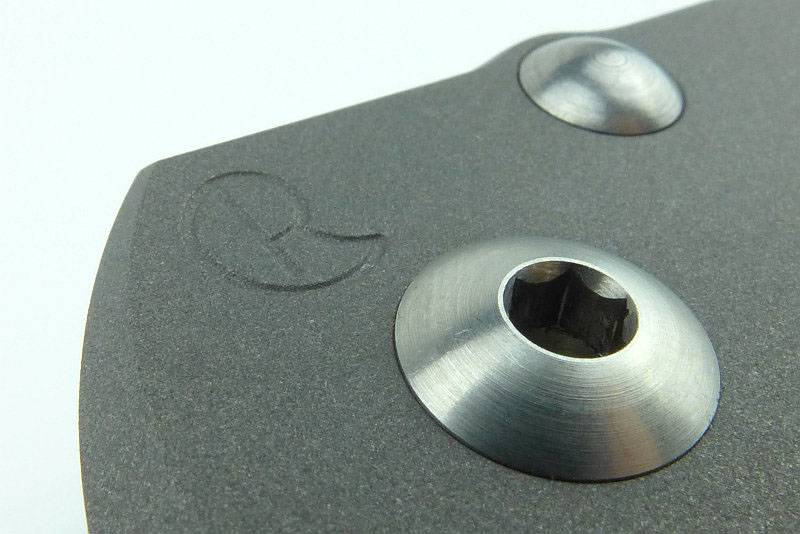
The understated logo sits next to the large pivot bolt.
 photo 13 L Inkosi pivot logo P1200368.jpg

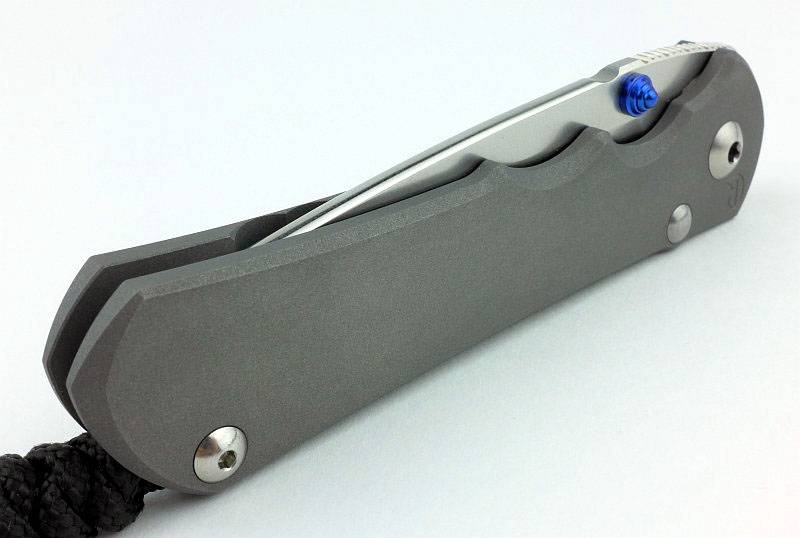
Switching to the back of the frame and you can see the left-hander’s thumb stud, but there is less space between it and the lock bar than for the right-handed thumb stud.
 photo 14 L Inkosi lock side P1200369.jpg

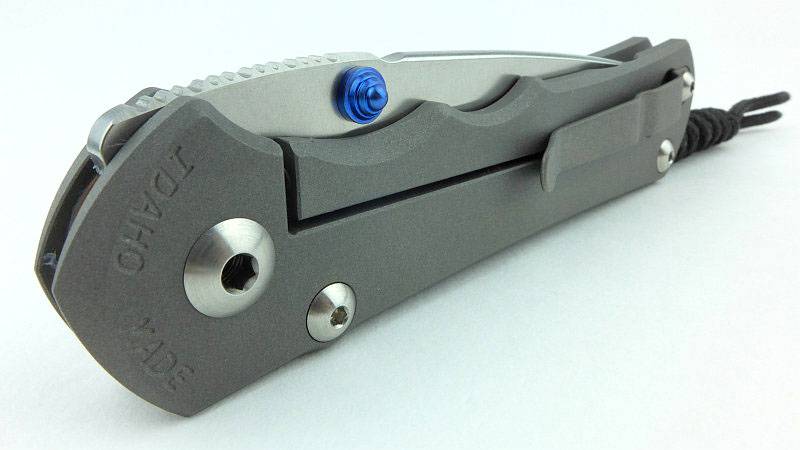
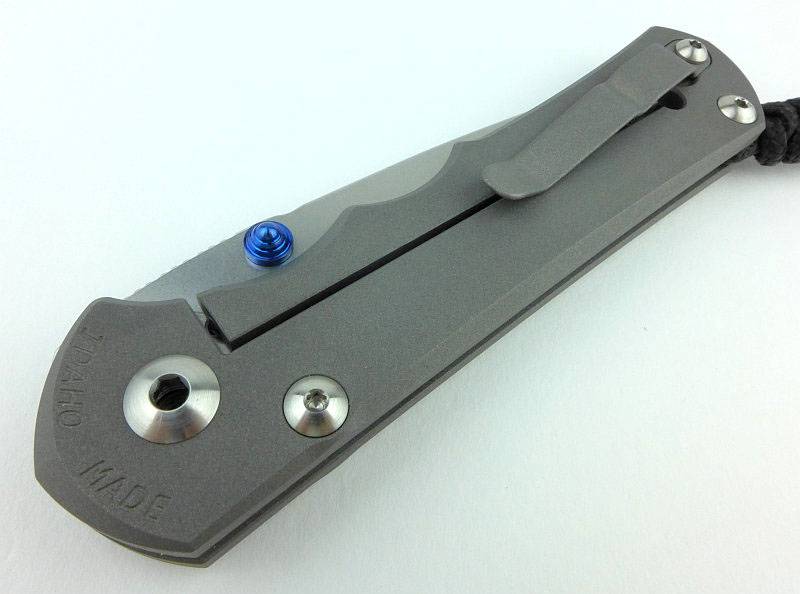
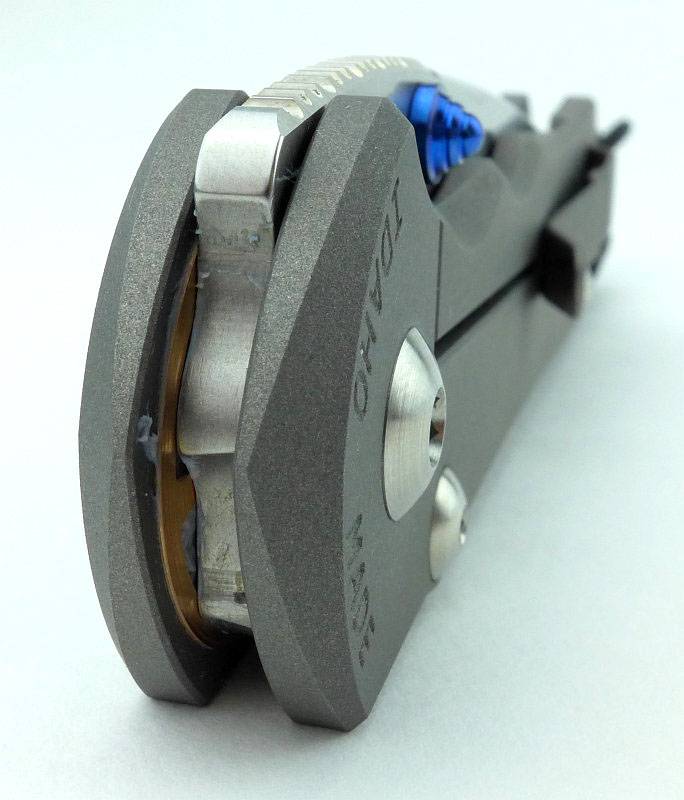
On the back, the pivot bolt looks identical. You can also see the stop-pin bolt as the stop-pin is only fixed to the back of the frame.
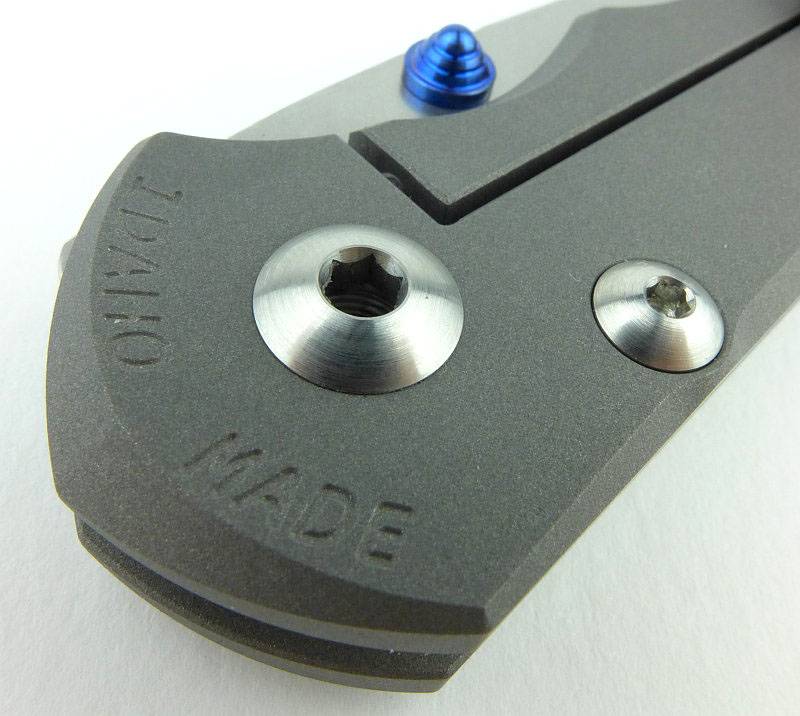
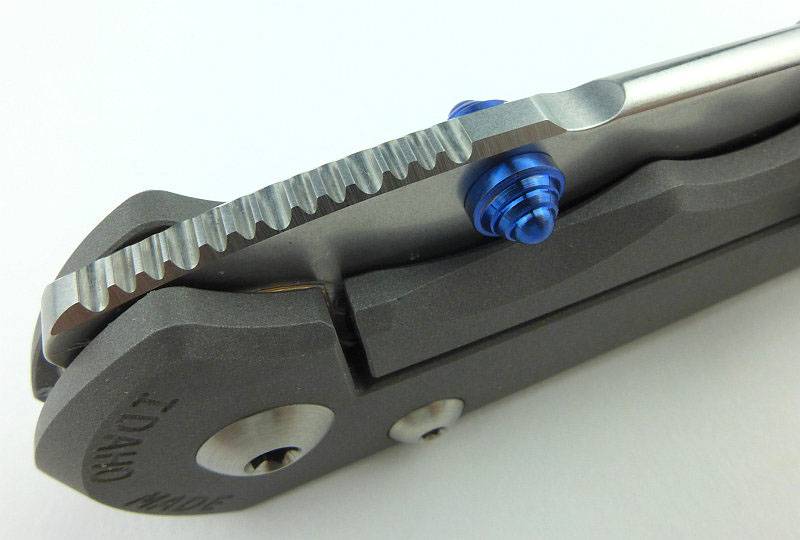
 photo 15 L Inkosi Idaho made P1200373.jpg

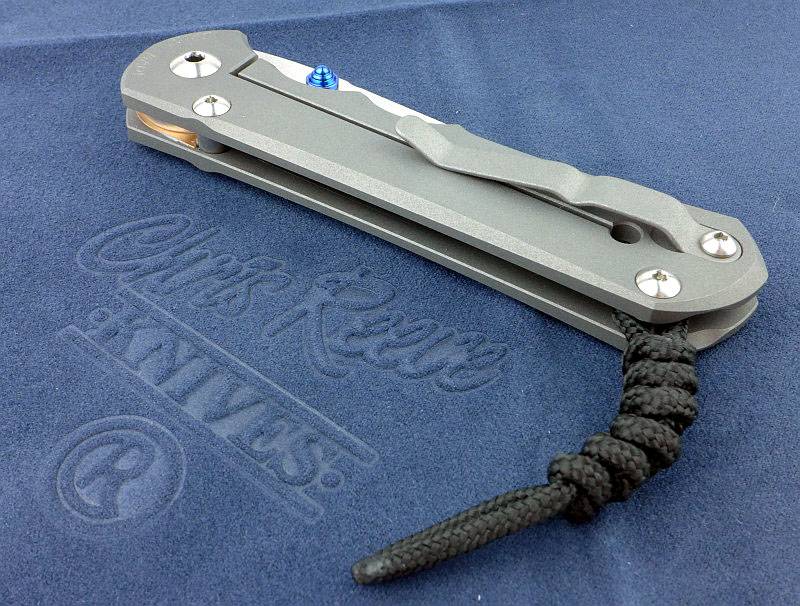
Start casting your eyes towards that pocket clip.
 photo 16 L Inkosi full lock side P1200375.jpg

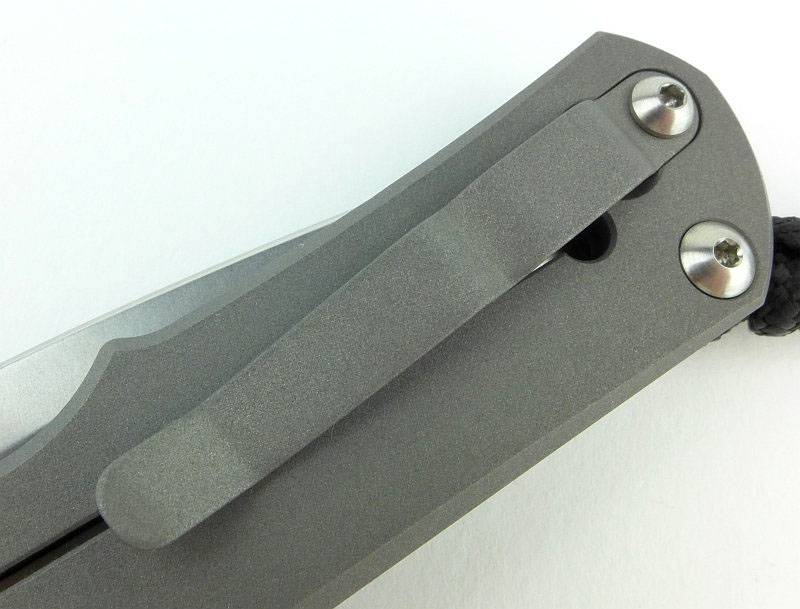
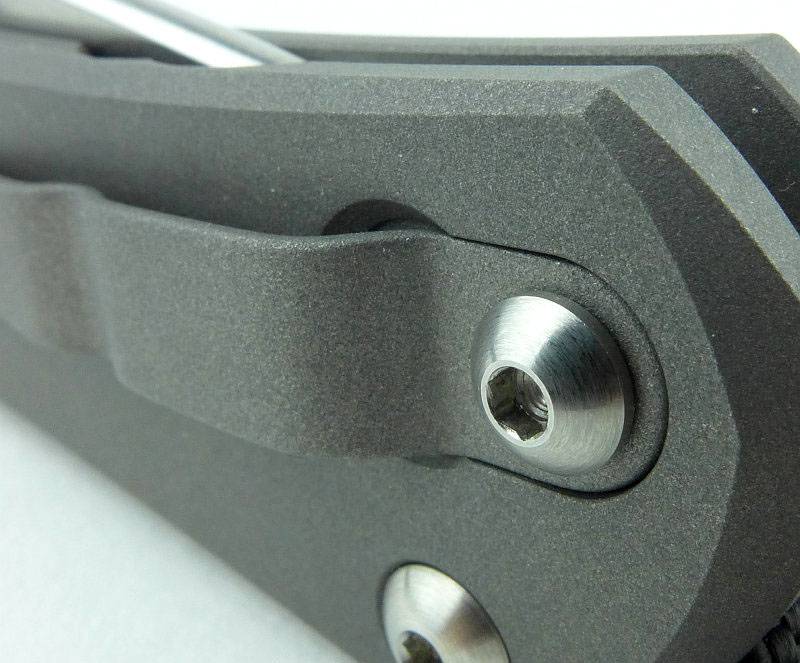
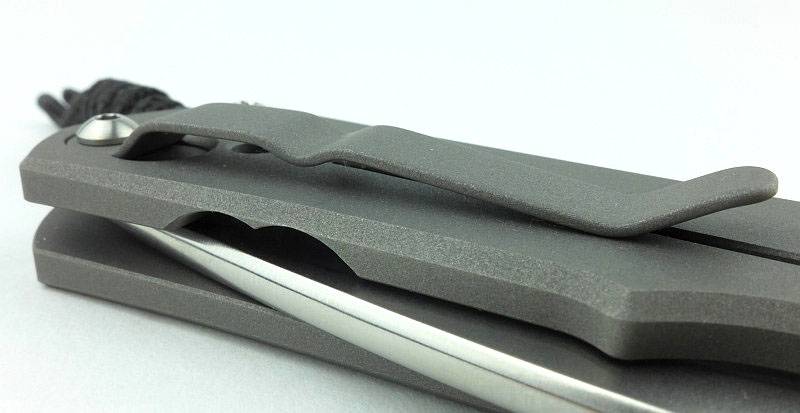
Another part of the CRK folder design that has changed is the movement of the clip so that it sits directly onto the frame instead of onto the lock bar. This ensures no additional pressure on the lack bar which might make opening the knife more difficult.
 photo 17 L Inkosi clip angle P1200376.jpg

Giving excellent grip, there is a section of asymmetrical pattern jimping on the thumb ramp.
 photo 19 L Inkosi jimping P1200384.jpg

A single bolt holds the clip in place and can easily be removed if you prefer not to have a clip.
 photo 20 L Inkosi clip fixing P1200387.jpg

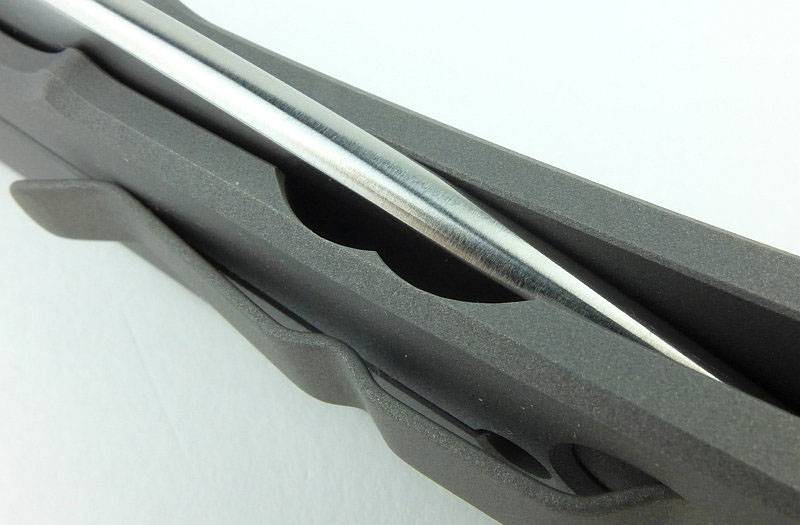
To create the lock bar spring, two large radius scallops are cut out of the bar.
 photo 21 L Inkosi lock spring P1200391.jpg

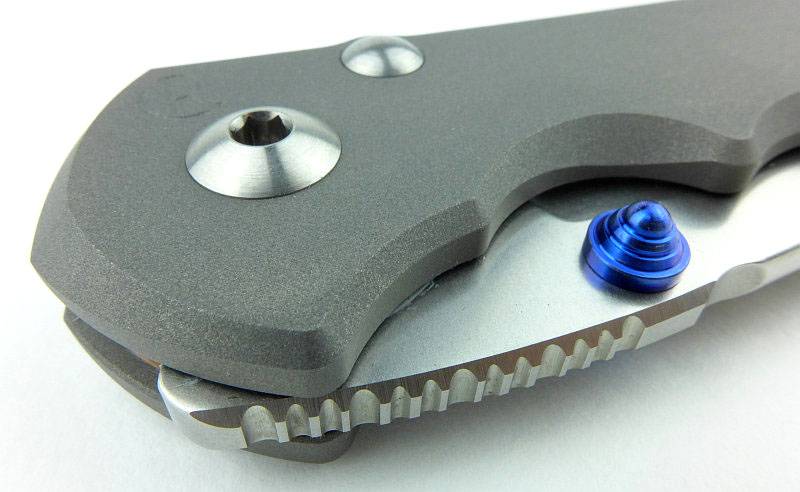
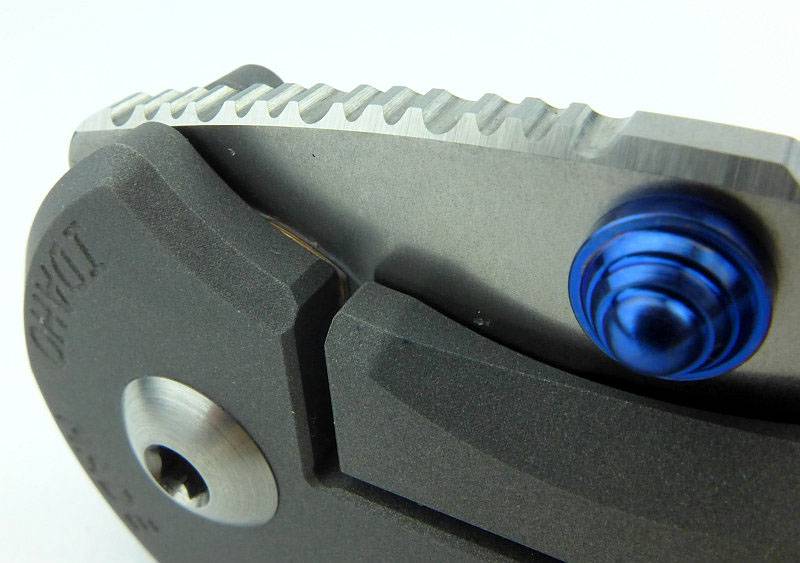
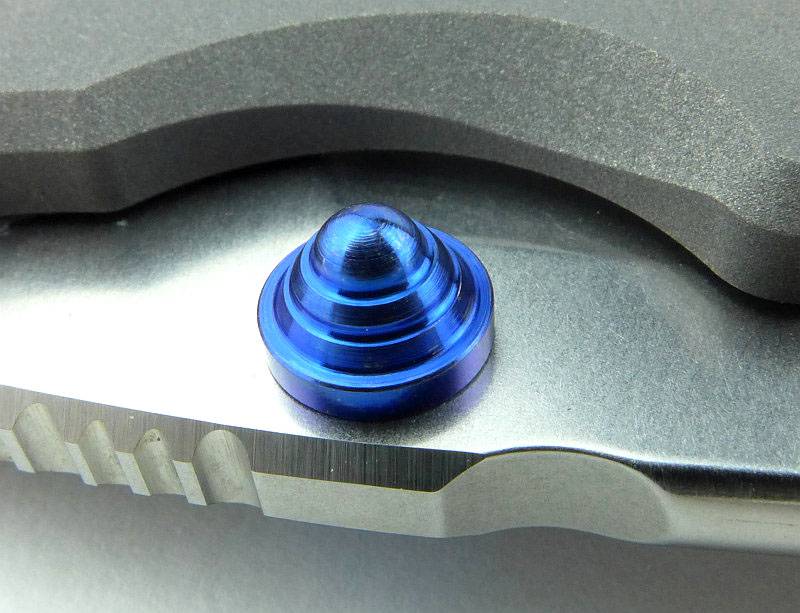
Providing the spot of colour, the ambidextrous thumb stud is blue PVD finish.
 photo 25 L Inkosi stud spine P1200408.jpg

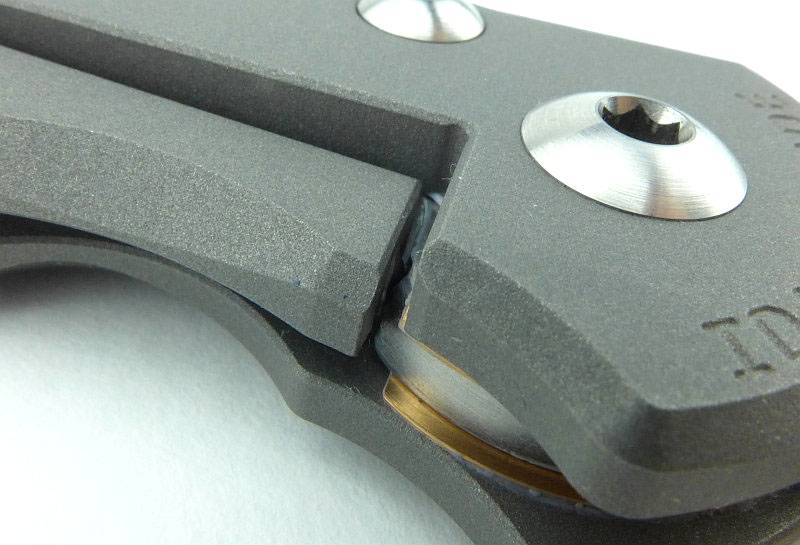
With the blade partway open, here you can see the ceramic ball is out of the detent hole and sitting on the side of the blade tang. Like this the lock bar now stands slightly proud of the frame.
 photo 26 L Inkosi lock bar out P1200415.jpg

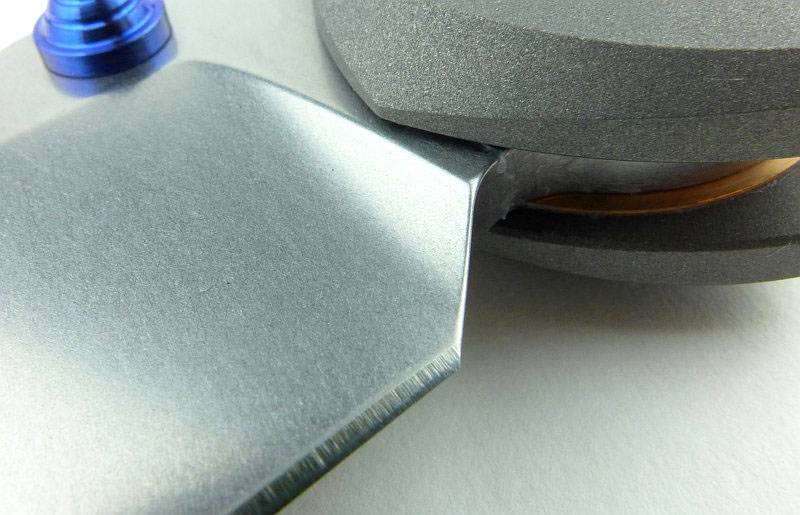
When the lock engages, the lock bar has clearly moved into the frame. Also note here how the washer is actually larger than the blade tang.
 photo 27 L Inkosi lock bar engaged P1200419.jpg

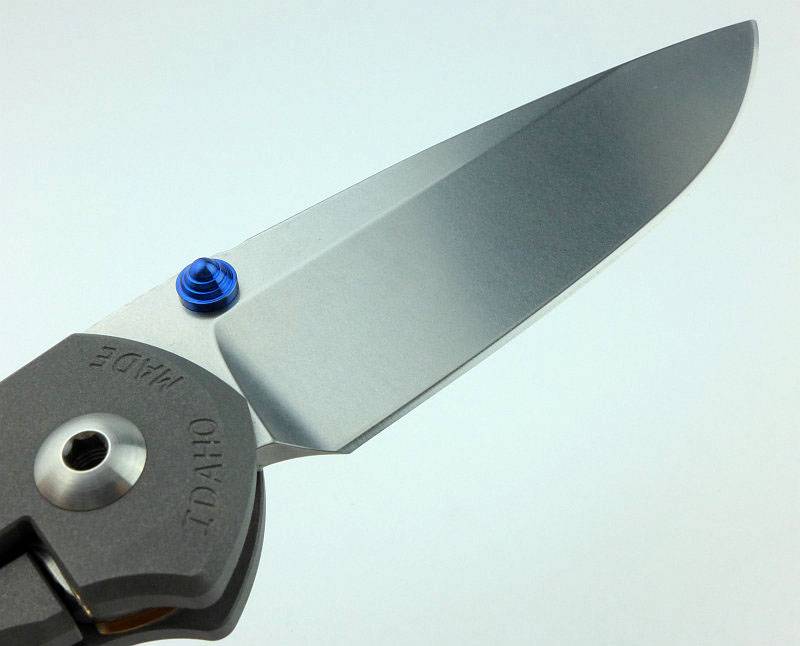
The blade has a beautifully even stonewash finish.
 photo 28 L Inkosi angle open P1200420.jpg

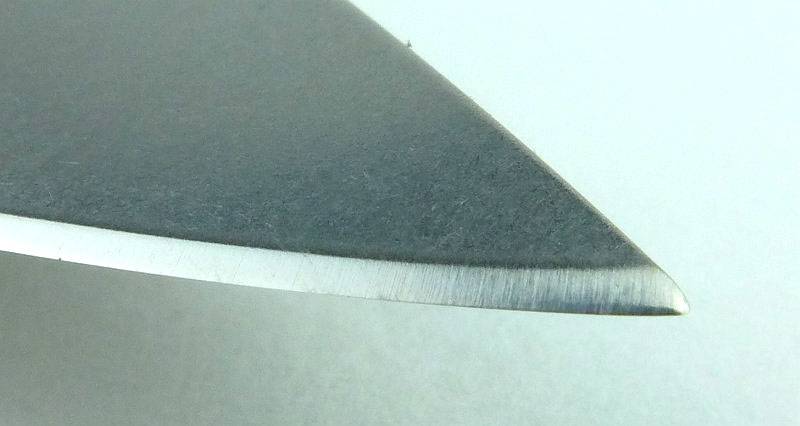
Zooming in to the blade tip.
 photo 29 L Inkosi blade tip P1200422.jpg

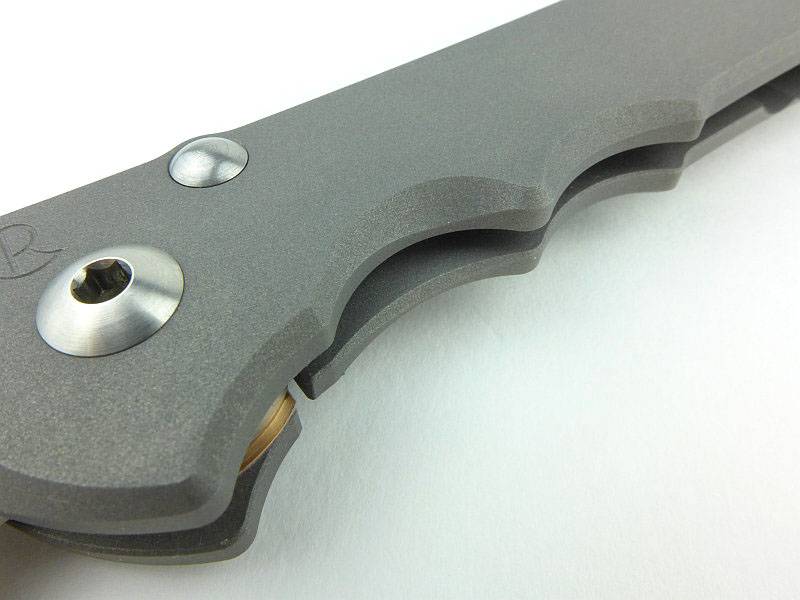
With the blade now open, both sides of the finger grooves can be seen. The first finger groove is deeper on the front of the frame giving right-handers easier access to the thumb stud.
 photo 31 L Inkosi finger grooves P1200434.jpg

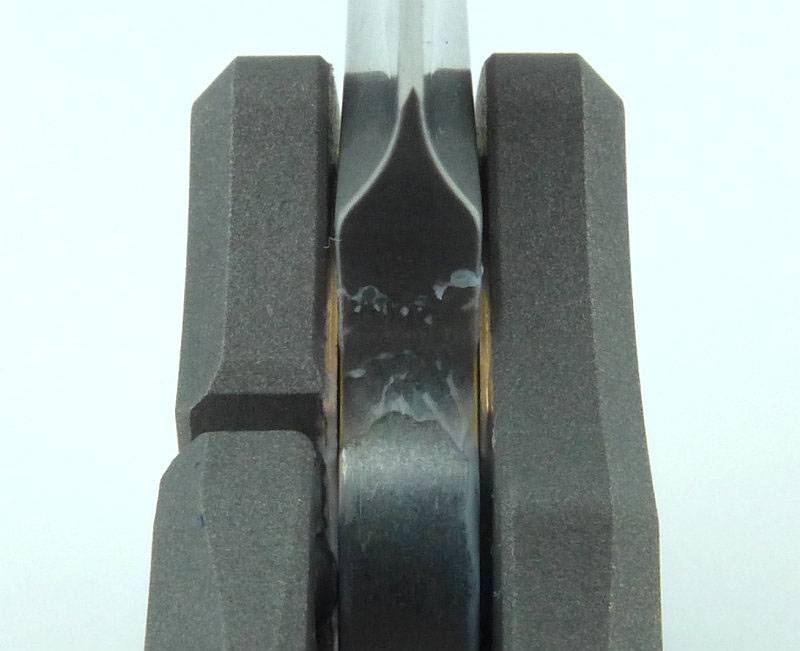
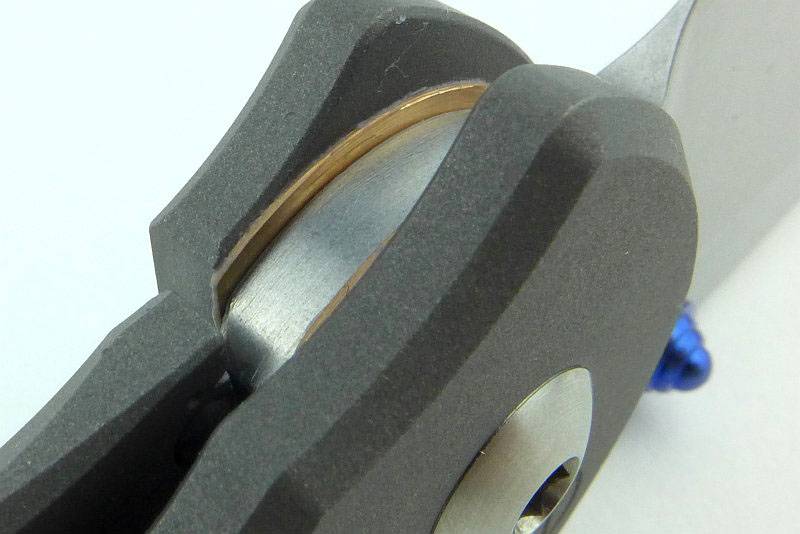
In the assembled knife you can see how the over-sized washers are fitted to the lock bar cutout in the frame.
 photo 32 L Inkosi washer cut P1200437.jpg

A nicely radiused plunge line takes you from the blade grind to the full thickness of the blade tang.
 photo 39 L Inkosi plunge line P1200467.jpg

Though it looks almost like a flat grind, the large hollow grind is noticeable as the light plays on the blade. (Of course it would help if this image was animated, but it is not.)
 photo 40 L Inkosi large hollow P1200473.jpg

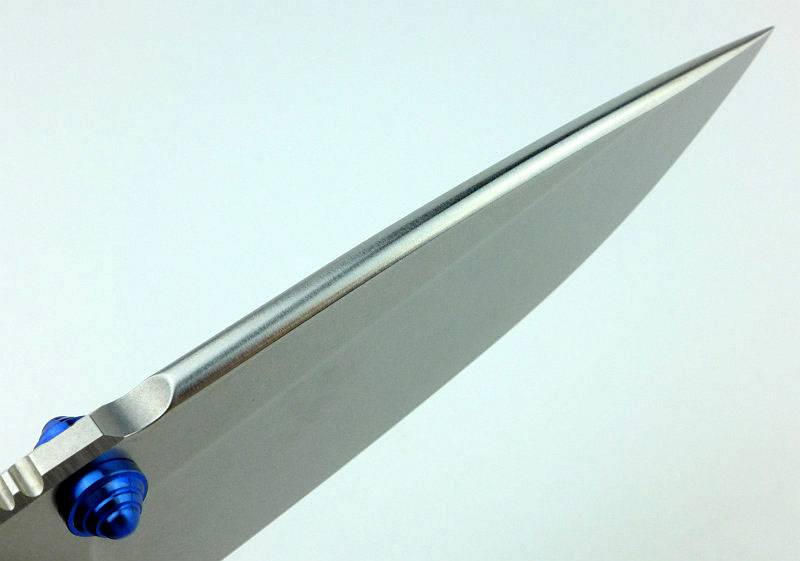
There is a gentle curve to the blade spine which is very comfortable to press on. It does mean you won’t be striking sparks of a ferro-rod with it.
 photo 41 L Inkosi spine P1200476.jpg

A close-up look at the thumb stud.
 photo 44 L Inkosi thumb stud P1200499.jpg

On the first run of Large Inkosi knives the washer perforations were a little too large and could be seen when the blade is closed. Not a functional issue, but a potential point for dirt to collect. This washer design has been updated now.
 photo 45 L Inkosi blade tang P1200504.jpg

CRK have really got it spot on with the pocket clip. I generally don’t like them because they are never quite right, mainly too aggressive. In this case the tension is soft enough to be easy to use, but strong enough to hold. The bead blasted surface finish of the frame and clip give plenty of hold without being too abrasive.
 photo 46 L Inkosi clip P1200516.jpg

What it is like to use?

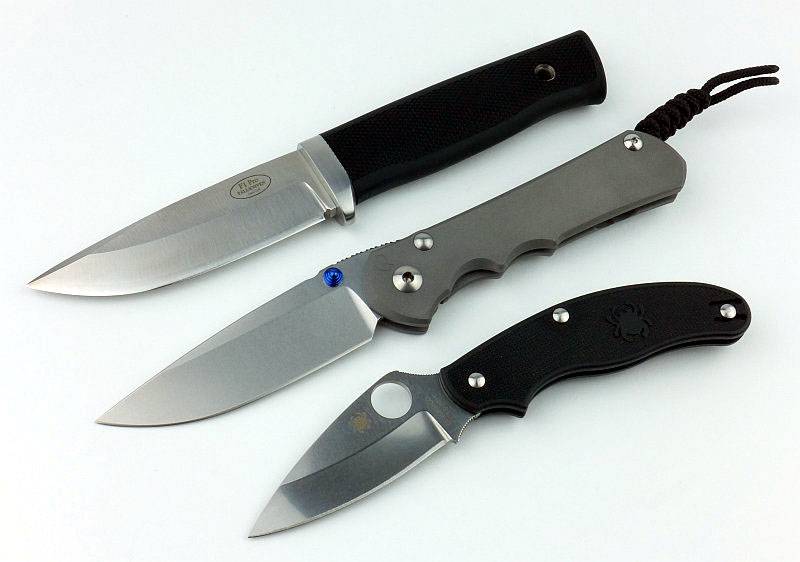
Ok, so this is the Large Inkosi, but how big is ‘Large’? I’ll start with my standard comparison, so here it is next to the Fällkniven F1 and a Spyderco UK Pen Knife.
 photo 52 L Inkosi size P1200557.jpg

Then just for gratuitous CRK viewing, here it is with a Pacific.
 photo 50 L Inkosi with Pacific P1200531.jpg

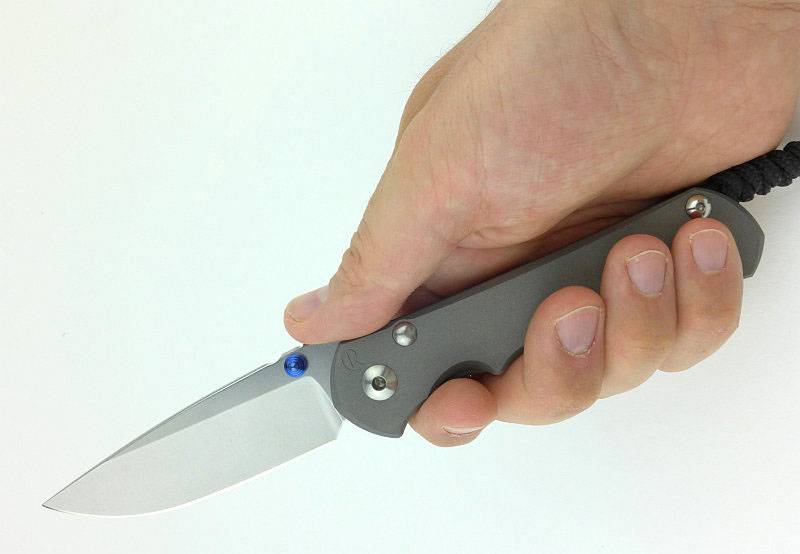
And in the hand. (I take XL size gloves). So it is not really all that large, it is just the larger size of CRK folder. While we are looking at it in the hand, I’m going to mention those finger grooves. It often seems that the Sebenza 21 vs 25 debate has been very polarising with owners being adamant that the they love or hate the 25’s finger grooves. I was concerned they might be problematic, but for my XL size hands, I can happily say that in all the time I’ve been using this knife I have actually not noticed the finger grooves. Clearly this is a good sign as the knife was secure in my hand but without anything digging in.
 photo 38 L Inkosi in hand P1200460.jpg

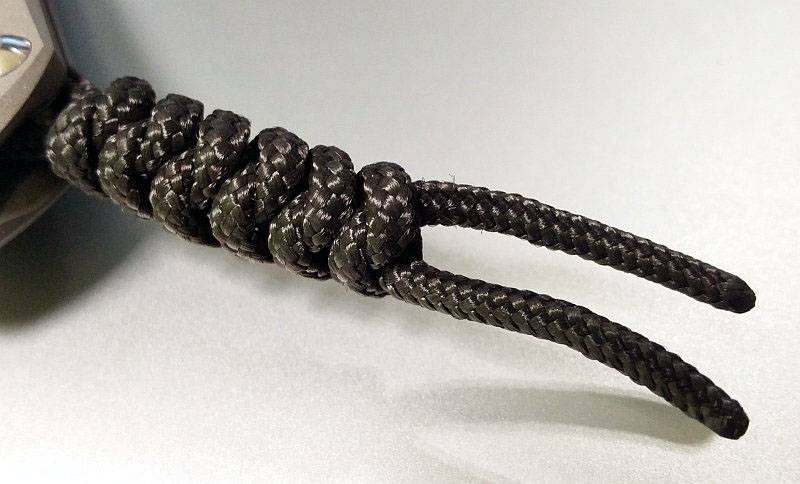
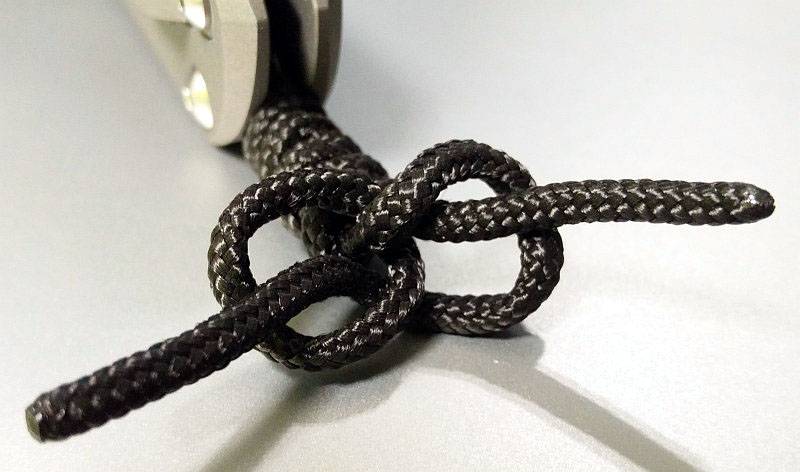
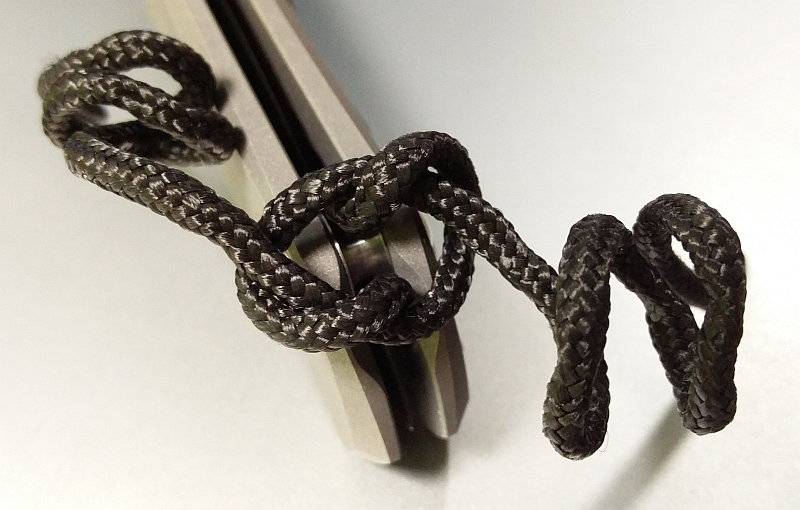
Lanyards, hmmm. Not my thing. So this was to come off, but I thought I would just note down how it was tied so I could put it back.
 photo 60 L Inkosi lanyard IMG_20160628_160656.jpg

Loosening the first knot shows it is tied like this.
 photo 61 L Inkosi lanyard IMG_20160628_161111.jpg

And repeated all the way back to the first knot round the frame spacer. And with that removed I started putting the knife to work.
 photo 62 L Inkosi lanyard IMG_20160628_161641.jpg

Although serviceable, I’m afraid the factory edge didn’t have quite enough bite for my liking, so it had a session on the Wicked Edge. Much better!
 photo 67 L Inkosi wicked edge P1250279.jpg

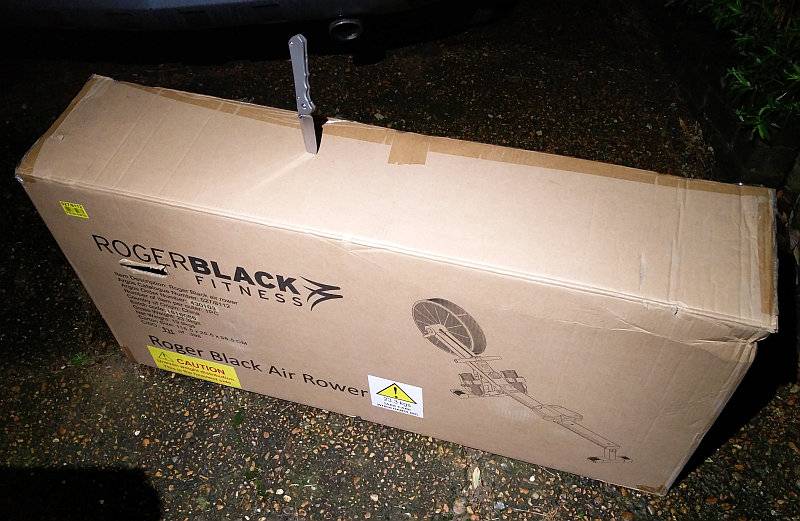
Recycling day was much more interesting now. Here was a large heavy duty box needing to be broken down. Made from ‘BC’-Flute double-wall heavy duty shipping cardboard, this was a bigger job than the average box.
 photo 63 L Inkosi recycling IMG_20170116_183445.jpg

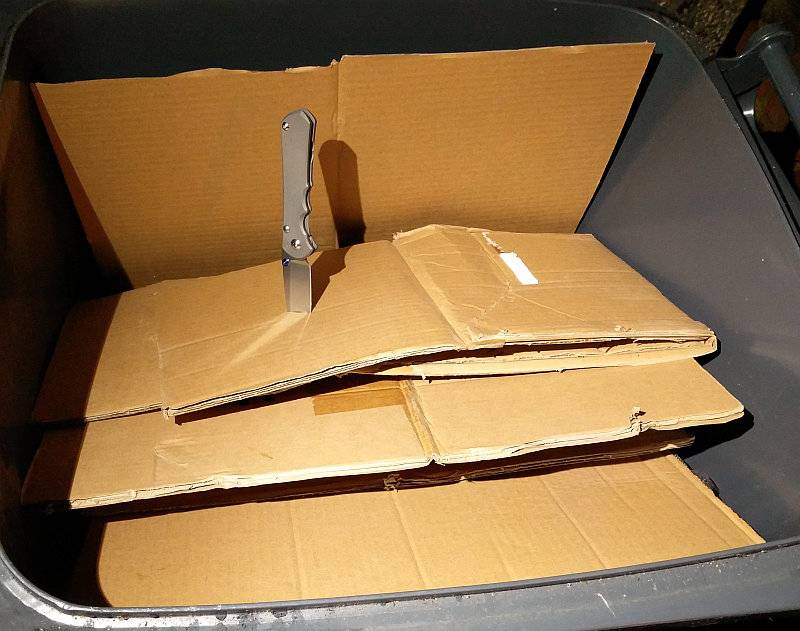
Done. That was easy and enjoyable. Give me another to do.
 photo 64 L Inkosi recycling IMG_20170116_184731.jpg

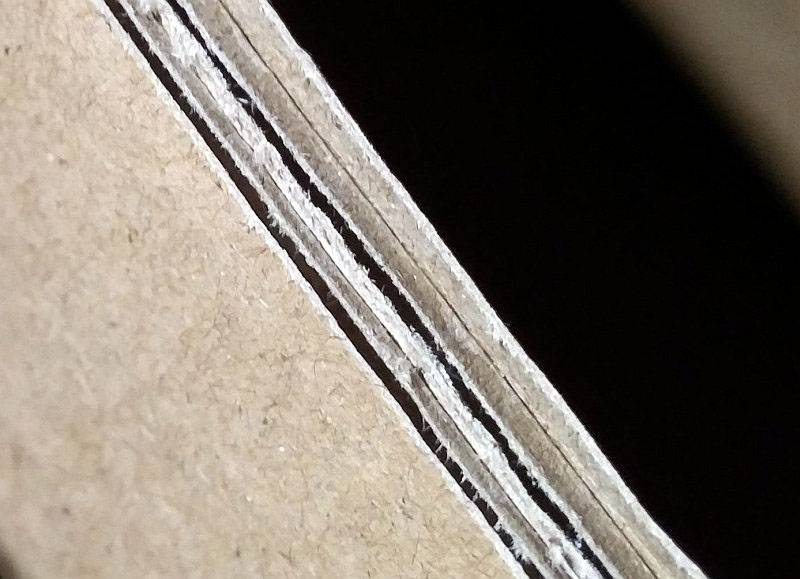
The last cut through this was crisp as the blade slid through with ease. Feeling just as smooth in the cut as a full flat grind, possibly even smoother as there is less blade to material contact than with a FFG.
 photo 65 L Inkosi recycling cut IMG_20170116_184810.jpg

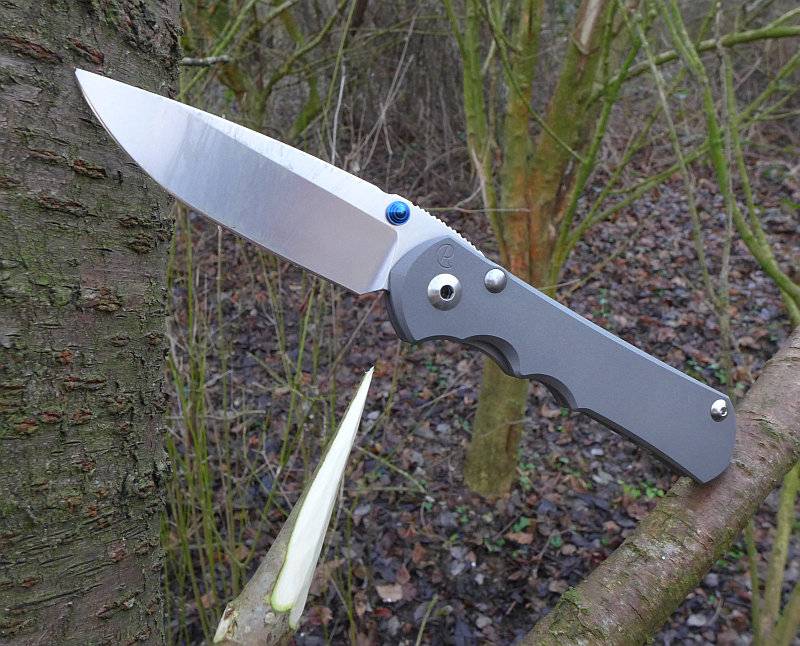
Outdoors and the Large Inkosi makes quick work of wood carving. Even when applying a good force to the cut, the finger grooves in the handle were not noticeable.
 photo 66 L Inkosi in the woods P1250177.jpg

CRK have taken their already time-tested design and made several improvements to it, improvements you might never actually notice in real world use, unless you push the knife to its absolute limits. I suspect many CRK owners appreciate knowing that the knife is as good as it can be and that if they really did need to push it further than normal, it won’t let them down.

The Large Inkosi is the next generation of a classic folding knife from CRK, and has been designed with such a thorough and thoughtful attention to function and detail that it is more than just a knife; it is a highly desirable object and a pleasure to use.

Review Summary

The views expressed in this summary table are from the point of view of the reviewer’s personal use. I am not a member of the armed forces and cannot comment on its use beyond a cutting tool or field/hunting knife.

Something that might be a ‘pro’ for one user can be a ‘con’ for another, so the comments are categorised based on my requirements. You should consider all points and if they could be beneficial to you.

_______________________________________________ _______________________________________________
Things I like What doesn’t work so well for me
_______________________________________________ _______________________________________________
CRK Build Quality. Slim metal handle not ideal for extended use.
Ceramic ball lock interface. Thumb stud access poor for left-handers.
Large pivot. Exposed washer perforations can accumulate dirt.
Oversized phosphor-bronze washers provide enhanced blade support.
Slip-Through Stop-Pin ensures perfect frame/washer/tang alignment.
Large Hollow Grind gives a blend of flat-grind and hollow-grind benefits.
Only two bolts need to be undone to service the knife.
Finger grooves and thumb-ramp jimping give excellent grip.

 photo 51 L Inkosi patches P1200543.jpg


Discussing the Review:

Please feel free to add comments to the review, but the ideal place to freely discuss these reviews is on a forum. If you started reading the shorter forum version of the review, but followed the link this full exclusive review, please return to that forum to discuss the review there.
If you read the review entirely on Tactical Reviews, please consider one of the following to join in any discussion.

EdgeMatters – Sponsored Reviews (UK based Forum for Knife Makers and Collectors)

BladeForums – Knife Reviews (US based Forum for Knife Discussion)

CandlePowerForums – Knife Reviews Section (Largest and Friendliest Flashlight Community Forum)