Light Review: Rofis TR20

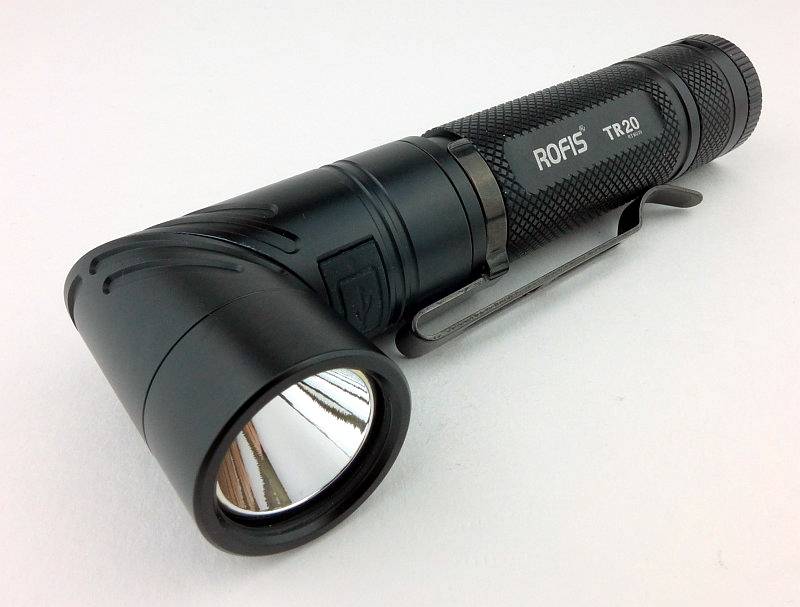
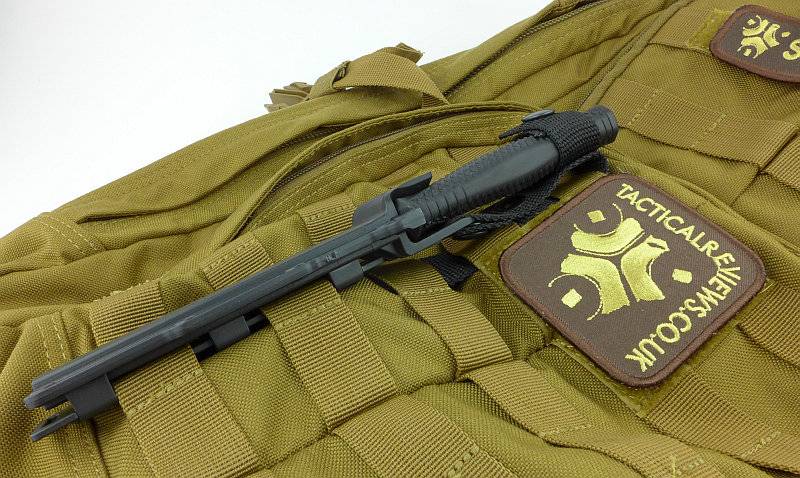
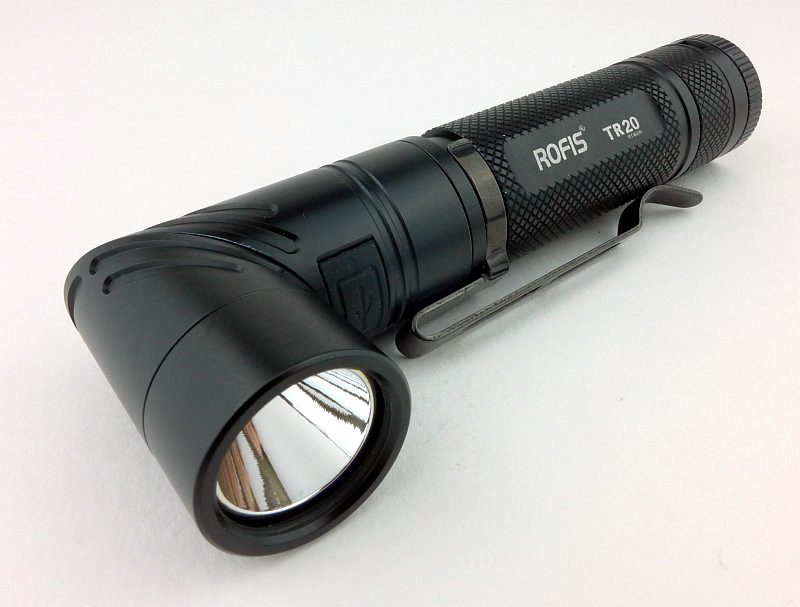
Rofis were the first manufacturer I came across which have made a standard tubular light that transforms into a right-angle light. They have applied the same principle to a couple of different models, and in this review we are looking at the TR20, which is an 18650 powered model with built in USB charging, making it an all-in-one lighting solution.
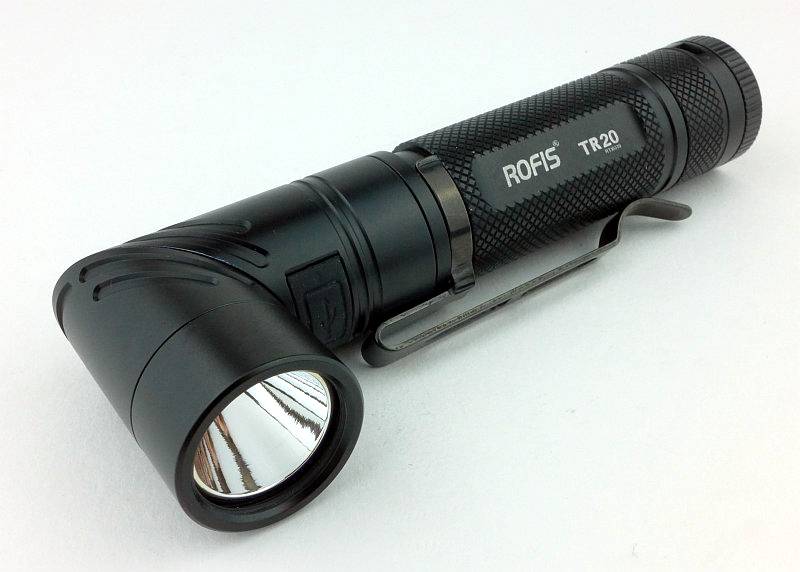
 photo 00 Rofis TR20 feature P1240405.jpg

Taking a more detailed look:

The TR20’s box.
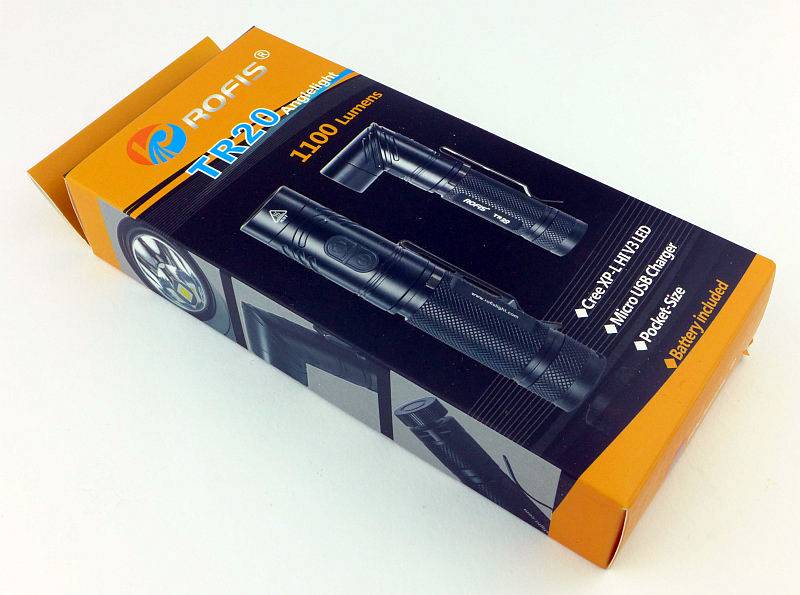
 photo 01 Rofis TR20 box P1240376.jpg

Included in the box is the TR20 (with 3400mAh cell inside), holster, USB cable, wrist lanyard, two o-rings, a spare USB port cover and the instructions.
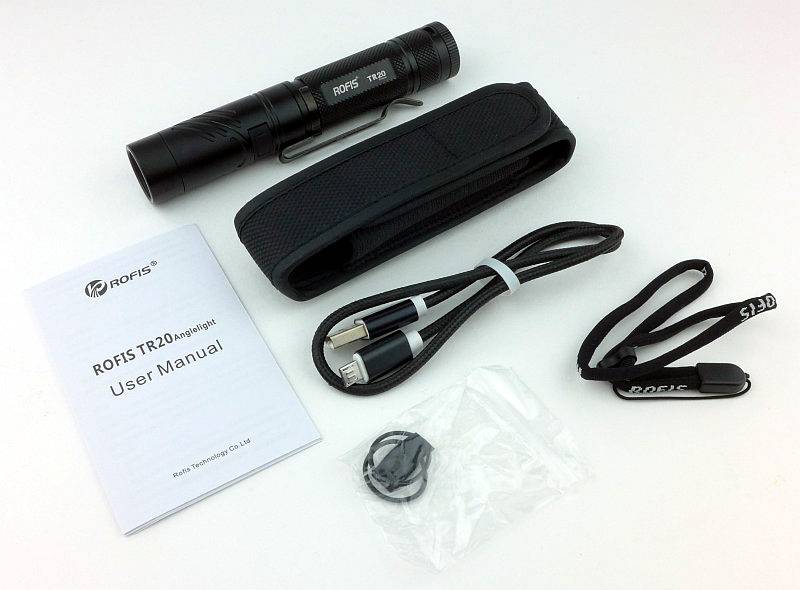
 photo 02 Rofis TR20 box contents P1240379.jpg

The UBS cable is of a nice quality with metal plugs and a braided cable.
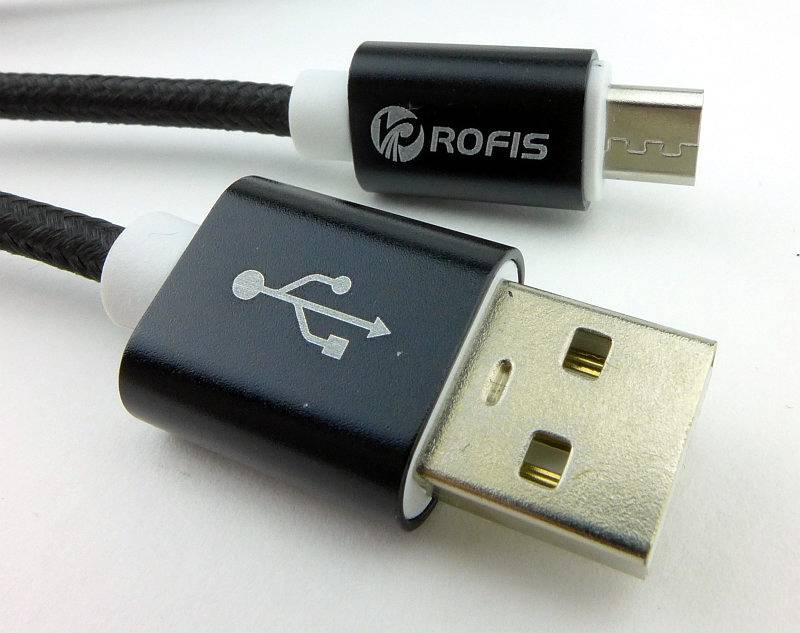
 photo 03 Rofis TR20 USB Cable P1240385.jpg

On the holster there is an apparently overly long patch of Velcro, but we shall see about that later.
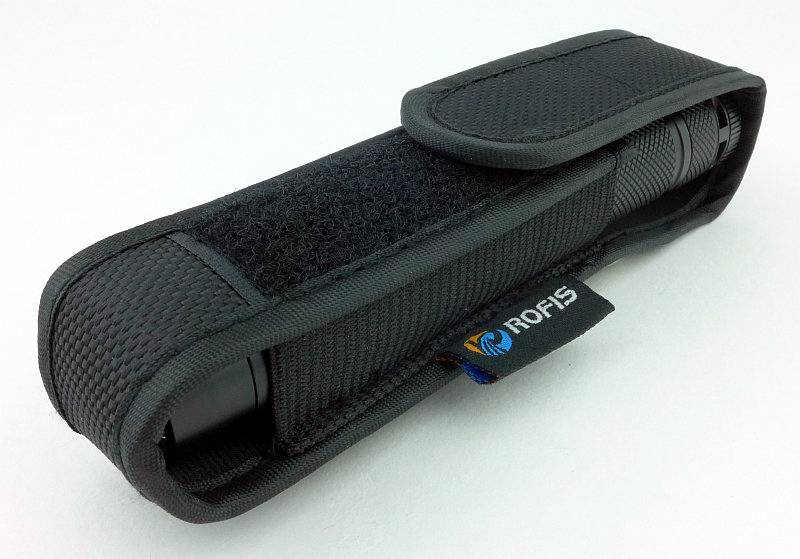
 photo 04 Rofis TR20 holster P1240389.jpg

There are three loops on the holster, a D-ring, a fixed belt loop and a loop secured with a press-stud.
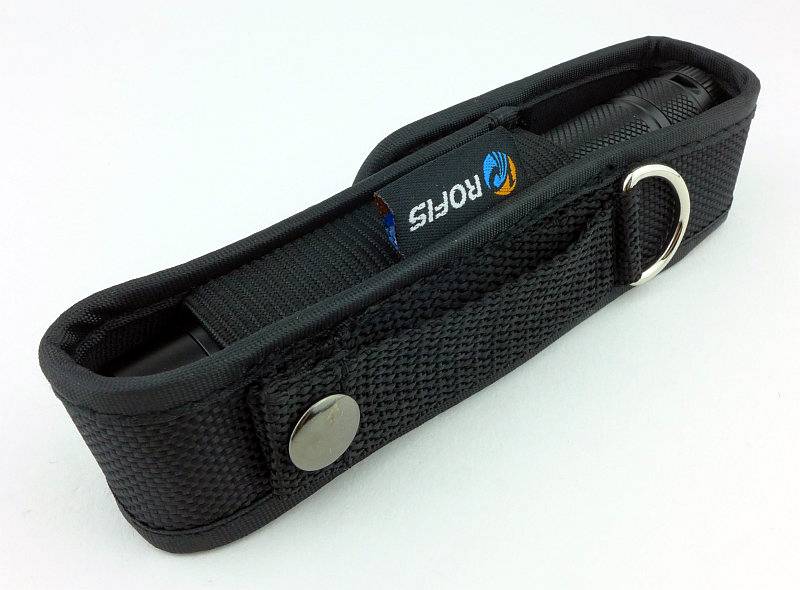
 photo 05 Rofis TR20 holster loops P1240393.jpg

And here we have the TR20 in its ‘normal’ tubular configuration.
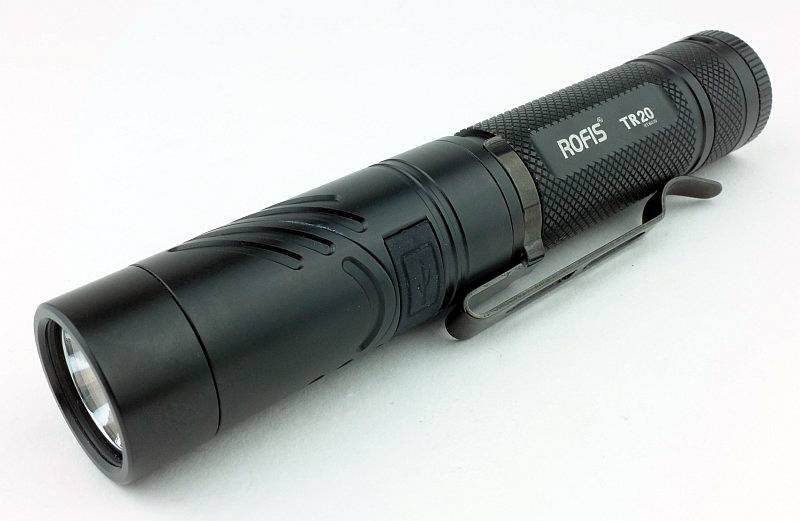
 photo 06 Rofis TR20 angle P1240396.jpg

Switching round for a different view.
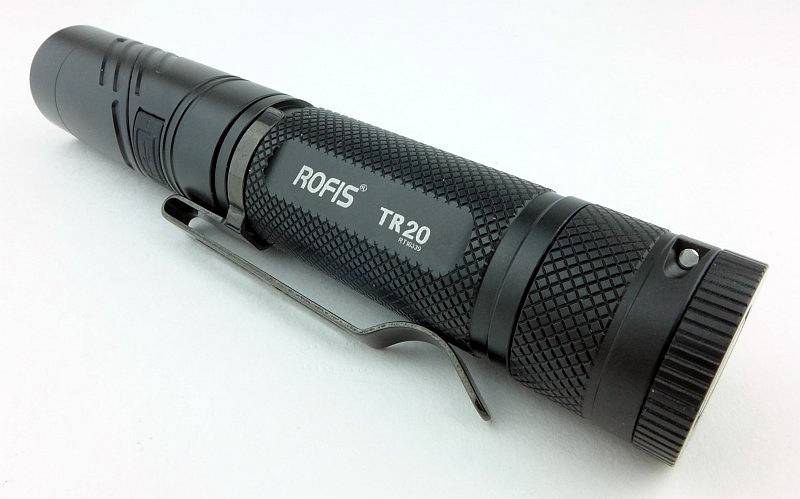
 photo 08 Rofis TR20 rear angle P1240415.jpg

Fitted to the TR20 is a long steel pocket clip.
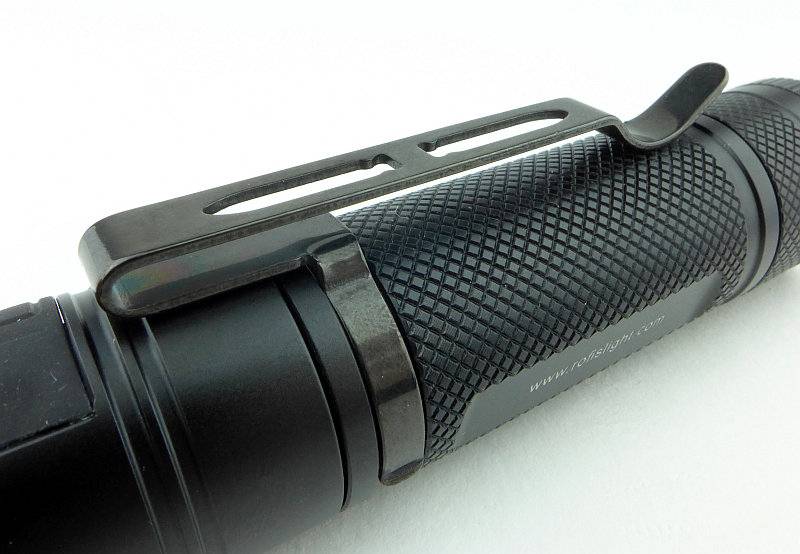
 photo 09 Rofis TR20 clip P1240418.jpg

The tail-cap has a plain appearance, but the very end looks slightly different.
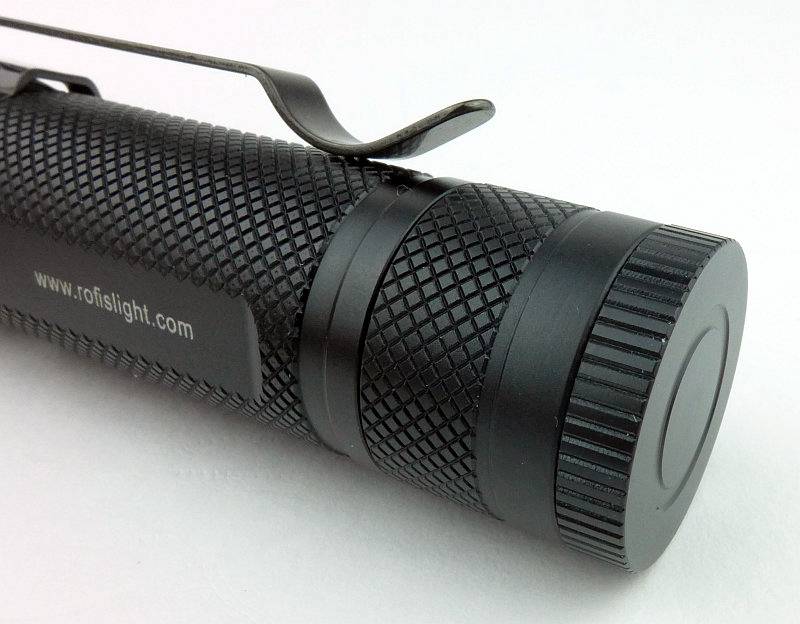
 photo 10 Rofis TR20 tail P1240421.jpg

The explanation for the way the tail-cap looks is that screwed onto the end is a removable magnet.
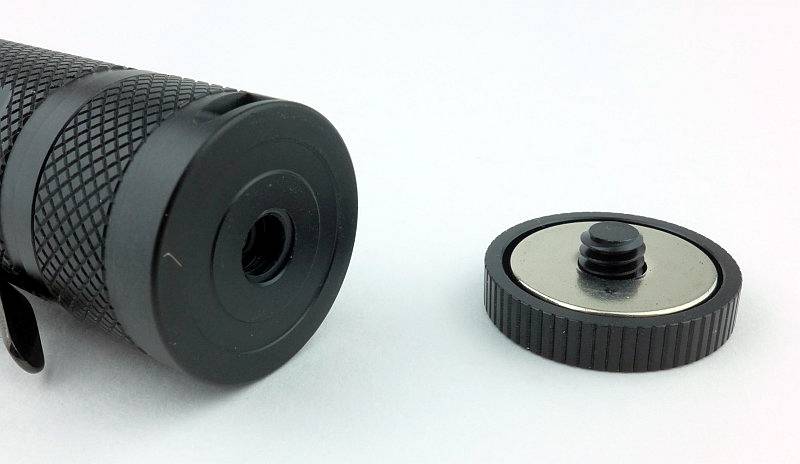
 photo 11 Rofis TR20 magnet off P1240425.jpg

Inside the tail-cap there is a gold plated spring contact. Bare threads mean there is no physical lock-out.
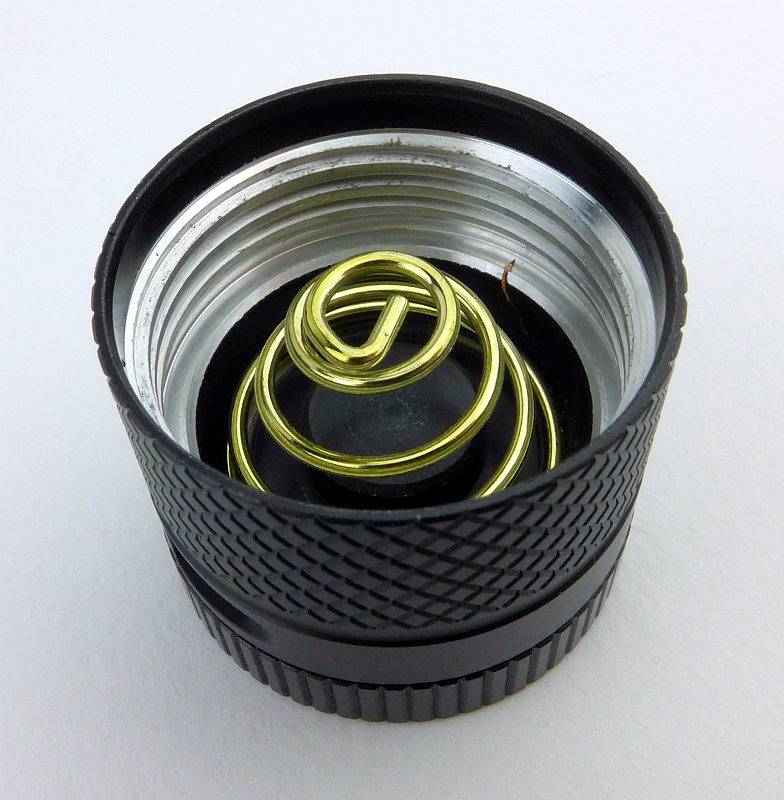
 photo 12 Rofis TR20 tail contacts P1240430.jpg

As the TR20 ships with the 18650 inside, it comes with an insulator which you need to remove.
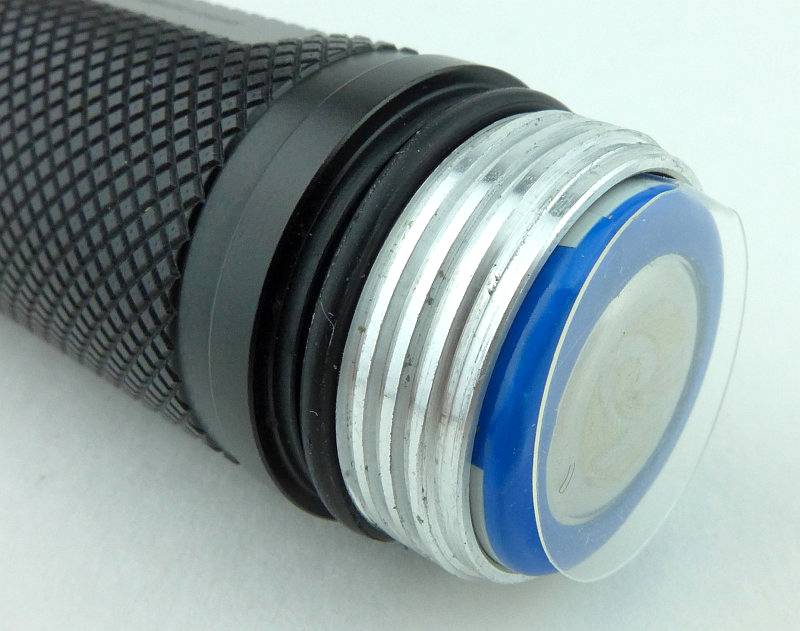
 photo 13 Rofis TR20 insulator P1240434.jpg

Square cut threads are used for the tail-cap.
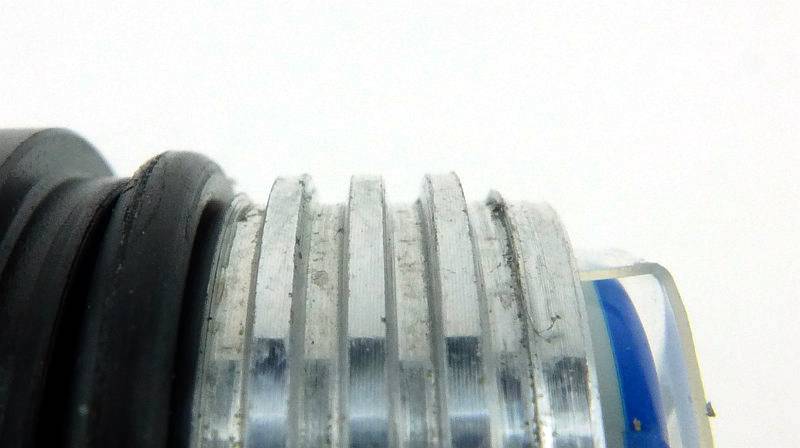
 photo 14 Rofis TR20 threads P1240437.jpg

It is a Rofis branded cell that is included.
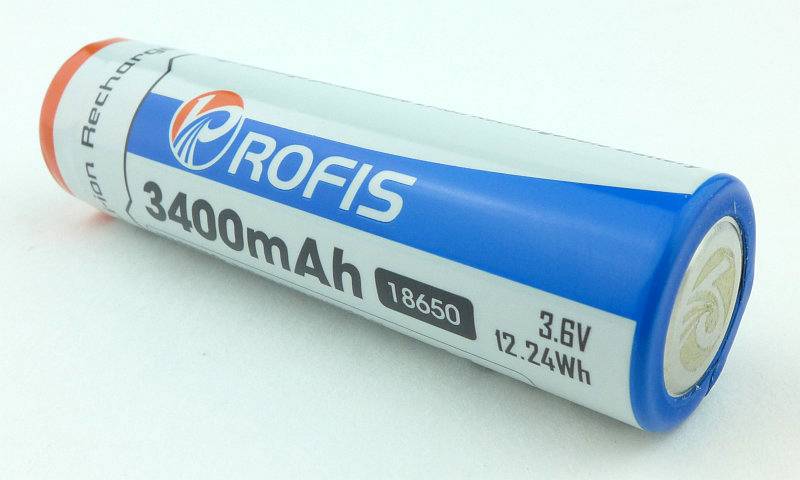
 photo 15 Rofis TR20 cell P1240440.jpg

An unnecessary detail, but a nice touch is that the negative terminal has the Rofis logo etched into it.
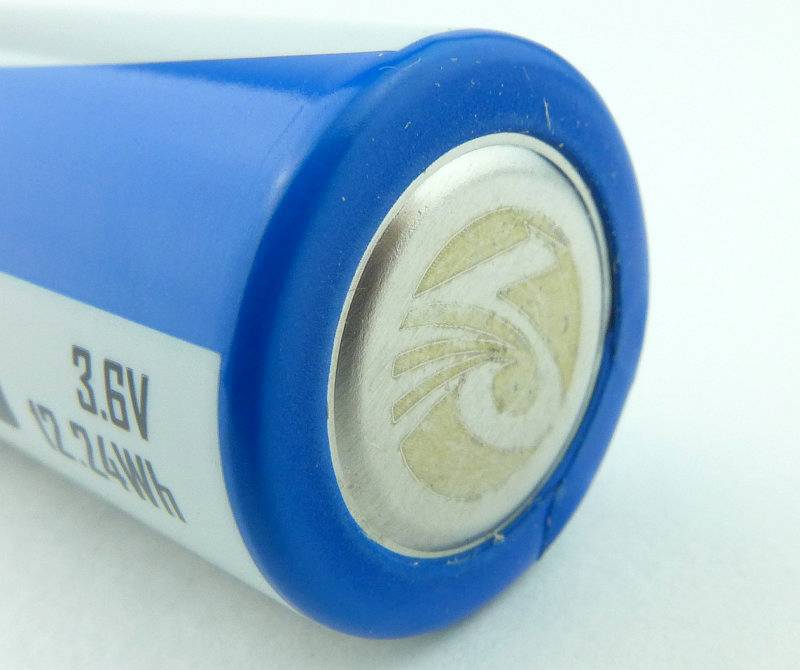
 photo 16 Rofis TR20 cell logo P1240442.jpg

The positive terminal is gold plated.
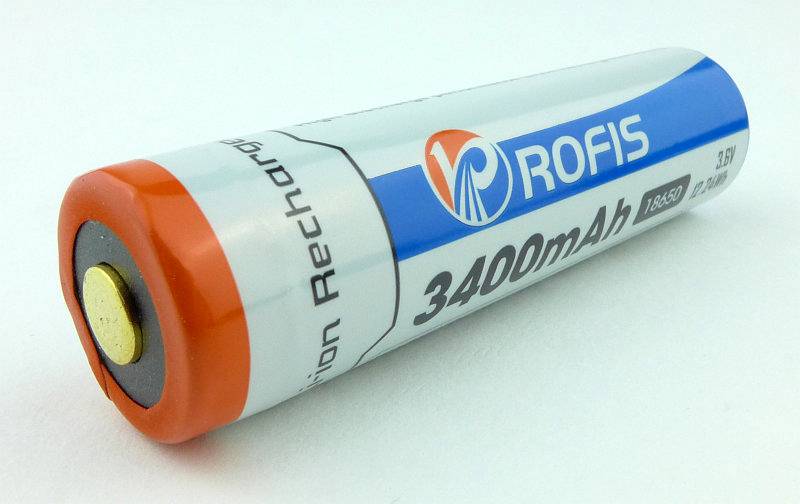
 photo 17 Rofis TR20 cell positive P1240446.jpg

Opposite the control switches is the rubber USB port cover.
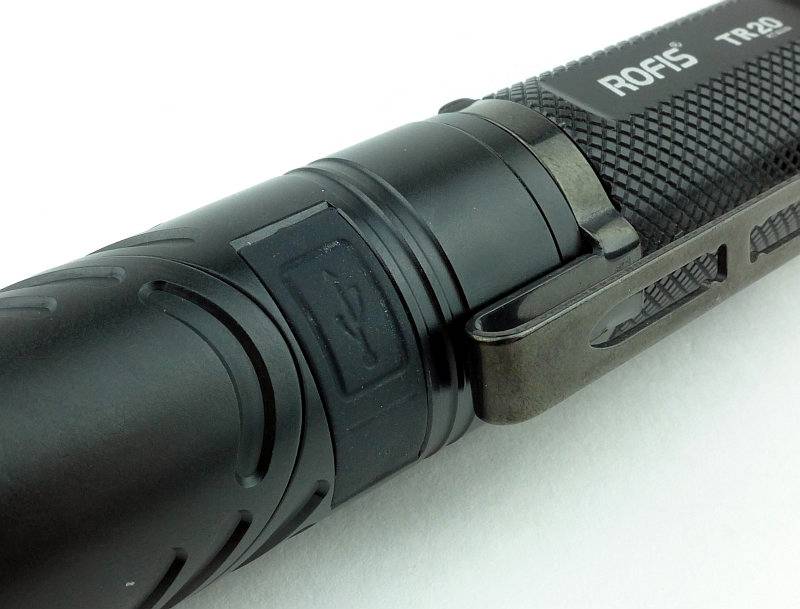
 photo 18 Rofis TR20 USB cover P1240449.jpg

Using your nail, you prise the hinged cover out.
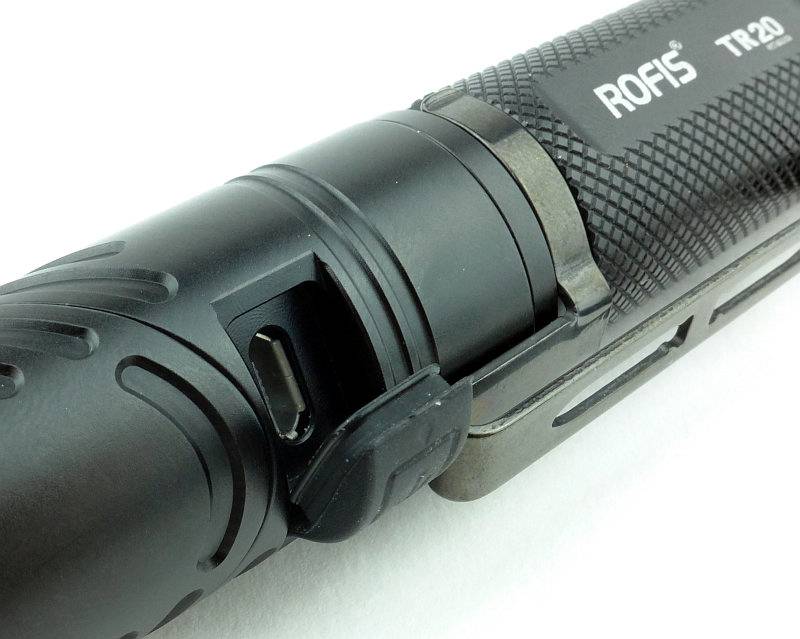
 photo 19 Rofis TR20 USB cover open P1240452.jpg

Here the supplied USB cable has been plugged in for charging.
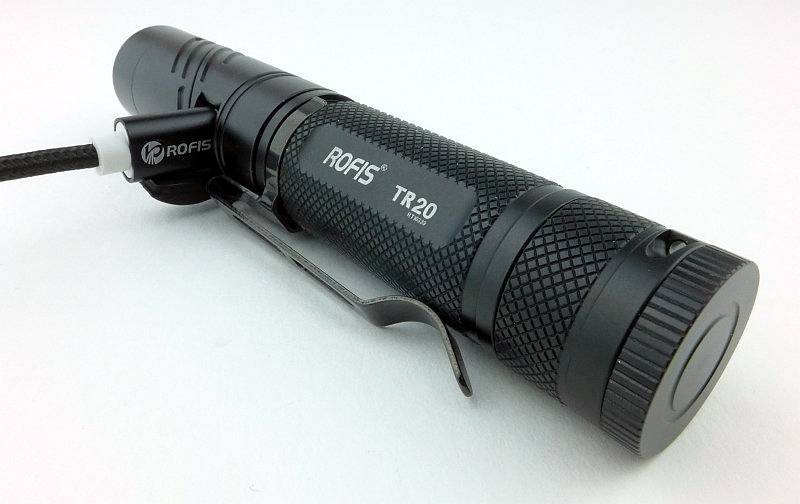
 photo 20 Rofis TR20 USB connect P1240462.jpg

While charging, the red indicator light in the dual switch is on. Once charged this will go green. Also note the dual switch where the front part is the mode change switch and the rear part is the power switch.
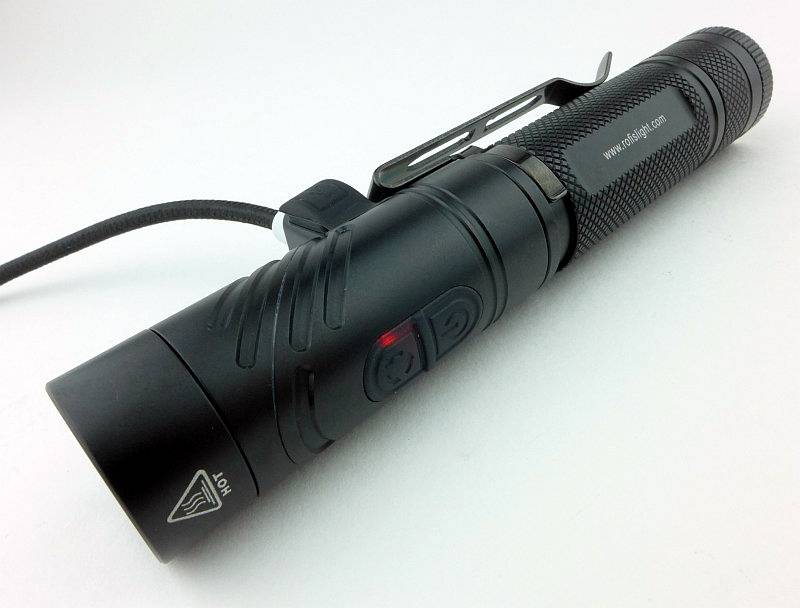
 photo 21 Rofis TR20 USB charging P1240458.jpg

The smooth reflector does have a few visible machining marks in it, but these don’t aversely affect the beam.
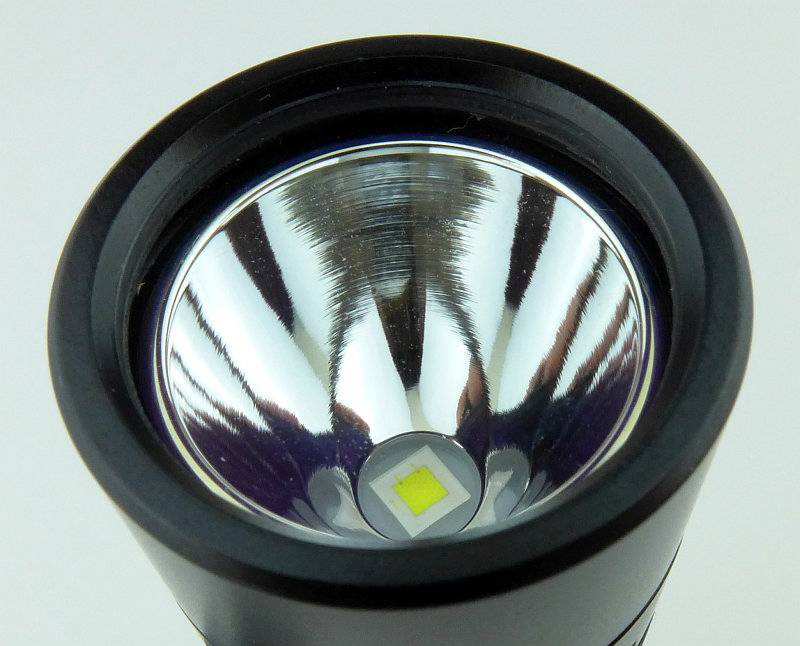
 photo 22 Rofis TR20 reflector P1240463.jpg

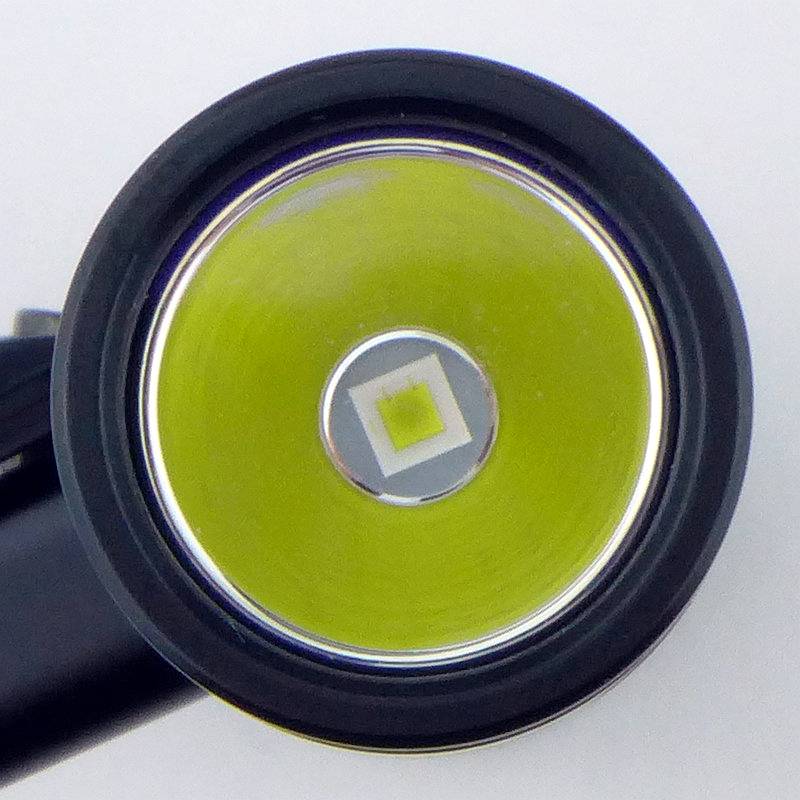
A XP-L Hi V3 LED is used.
 photo 23 Rofis TR20 LED P1240473.jpg

So, the reason for the extended Velcro area on the holster is so that when the TR20 is transformed into a right-angle light the flap folds over further and still fits the TR20 perfectly with the lens sticking out sideways.
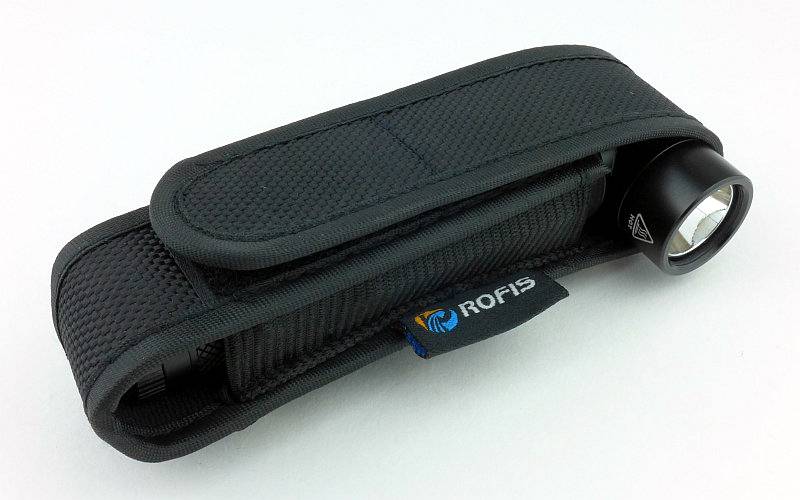
 photo 24 Rofis TR20 holster 90 P1240475.jpg

The beam

Please be careful not to judge tint based on images you see on a computer screen. Unless properly calibrated, the screen itself will change the perceived tint.

The indoor beamshot is intended to give an idea of the beam shape/quality rather than tint. All beamshots are taken using daylight white balance. The woodwork (stairs and skirting) are painted Farrow & Ball “Off-White”, and the walls are a light sandy colour called ‘String’ again by Farrow & Ball. I don’t actually have a ‘white wall’ in the house to use for this, and the wife won’t have one!

Starting indoors, the TR20 does have a bright hot spot, but the transition to the spill is smooth and the spill is sufficiently bright that the beam does not appear unbalanced.
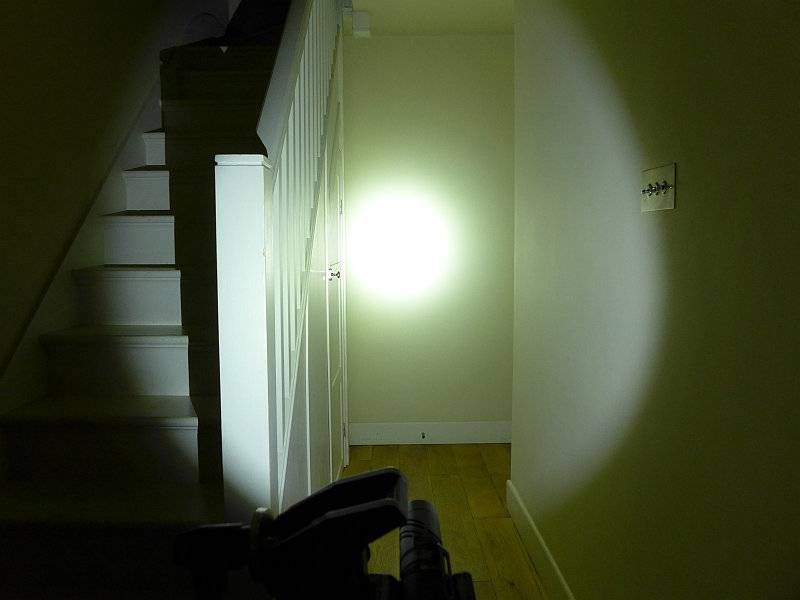
 photo 25 Rofis TR20 indoor beam P1240743.jpg

Moving outdoors you can see how the spill is nice a bright and gives a good view. Though not a flood beam, the beam has a good useful width.
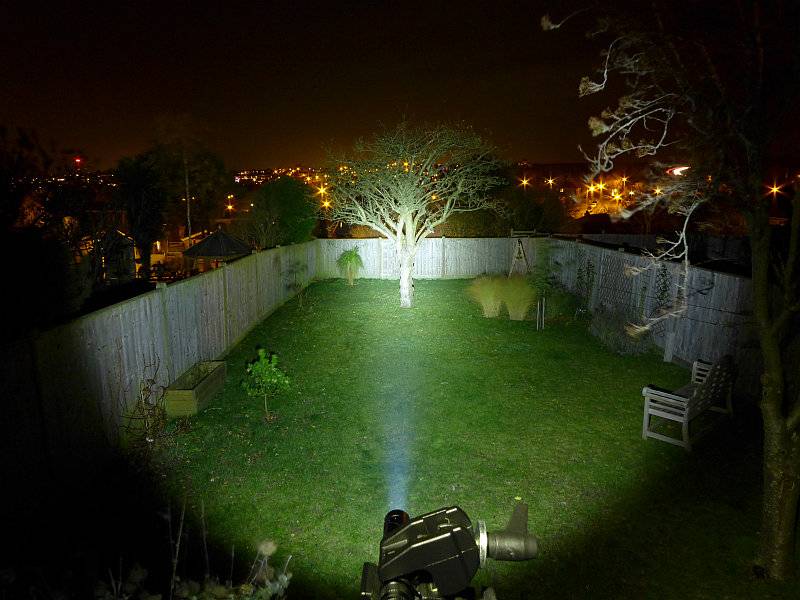
 photo 26 Rofis TR20 outdoor beam P1240696.jpg

Modes and User Interface:

The TR20 has 6 constant output modes (Turbo, High, Mid, Low, Lower and Ultra-Low) and three flashing modes (Strobe/Beacon/SOS) controlled by a dual button.

From OFF, to switch ON to the last used constant output (not including directly accessed modes), briefly press the Power switch. When ON, press the Mode switch to cycle through Turbo -> Ultra-Low -> Low -> Mid -> High back to Turbo etc. To switch OFF briefly press the Power switch.

From OFF, for direct access to Turbo, press and hold the Power switch for more than 1s.

From OFF, for direct access to Ultra-Low, press and hold the Mode switch for more than 1s.

To access flashing modes, from ON, press and hold the Mode switch for more than 1s. This will activate strobe. Press and hold the Mode switch for more than 1s again to switch to Beacon mode. Press and hold the Mode switch for more than 1s once more to activate SOS.
Once activated, pressing the mode switch briefly returns the TR20 to the previous steady mode, or a brief press of the Power switch will turn the TR20 OFF.

The TR20 is Strobe-Ready and to activate Strobe directly from OFF, double-click the mode switch.

There is a lockout mode included. With the TR20 OFF, press and hold both buttons simultaneously for 3s to enter lockout. When entering Lockout, the TR20’s red indicator light in the dual switch will come on to indicate Lockout has been activated. Like this the buttons will not turn the TR20 on. To exit Lockout press and hold both buttons simultaneously for 3s and the TR20 will turn ON in Low mode.

Lastly when turning the TR20 ON, or changing mode, after 3s the dual power switch will light up to indicate the remaining battery power. This will light green if there is more than 50% battery left, red if there is less than 50% and will flash red if the battery is low.

Batteries and output:

The TR20 runs on a standard 18650 which is supplied.

To measure actual output, I built an integrating sphere. See here for more detail. The sensor registers visible light only (so Infra-Red and Ultra-Violet will not be measured).

Please note, all quoted lumen figures are from a DIY integrating sphere, and according to ANSI standards. Although every effort is made to give as accurate a result as possible, they should be taken as an estimate only. The results can be used to compare outputs in this review and others I have published.

___________________________________________ ________________________________ ________________________________
Rofis TR20 using specified cell I.S. measured ANSI output Lumens PWM frequency or Strobe frequency (Hz)
___________________________________________ ________________________________ ________________________________
Turbo – Rofis 3400mAh 18650 883 0
High – Rofis 3400mAh 18650 503 0
Medium – Rofis 3400mAh 18650 199 0
Low – Rofis 3400mAh 18650 72 0
Lower – Rofis 3400mAh 18650 19 0
Ultra Low – Rofis 3400mAh 18650 9 0

* Beacon and Strobe output measurements are only estimates as the brief flashes make it difficult to capture the actual output value.

Peak Beam intensity measured 15600 lx @1m giving a beam range of 250 m.

There is parasitic drain at 83.8uA. When using a 3400mAh cell it will take 4.63 years to drain the cell.

At switch-on the near 900lm output is short lived and after only around 30s starts to decline to the 750 running output. There are some unexplained dips around the 15 minute mark where the output briefly drops to 560lm but then goes back up to 750lm again. After 20 minutes from switch-on the TR20 no longer maintains regulation and the output starts a steady decline until the end of the ANSI runtime at 2h 15m.
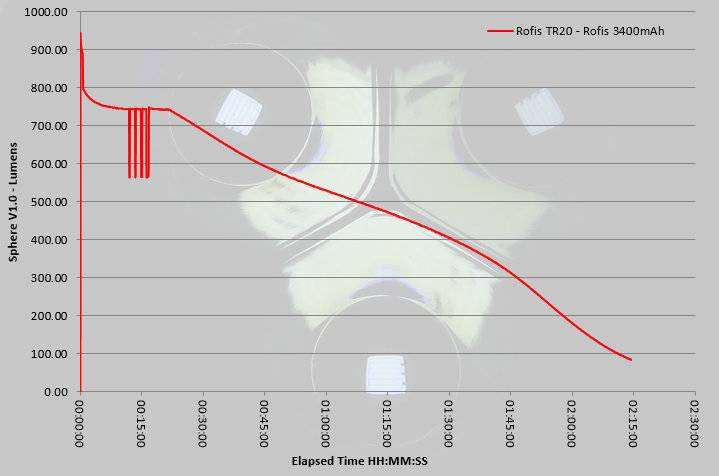
 photo Rofis TR20 runtime.jpg

Troubleshooting

This section is included to mention any minor niggles I come across during testing, in case the information helps anyone else.

No issues were encountered during testing.

As per the description of this section, this information is provided in case anyone else finds a similar ‘issue’ that might be fixed in the same way.

The TR20 in use

Right-angle lights are incredibly useful and bring an added dimension to the function of a light. Personally I find the variety of grip options they bring make them amongst the most comfortable to use, with a natural pointing of the beam as well as allowing various arm and hand positions that still direct the beam forward where you want it. If I had to choose between a straight or right-angle light it would be a right-angle that I would choose, but there is a definitely a place for the straight tube light. Why have to choose one or the other when you can have both?
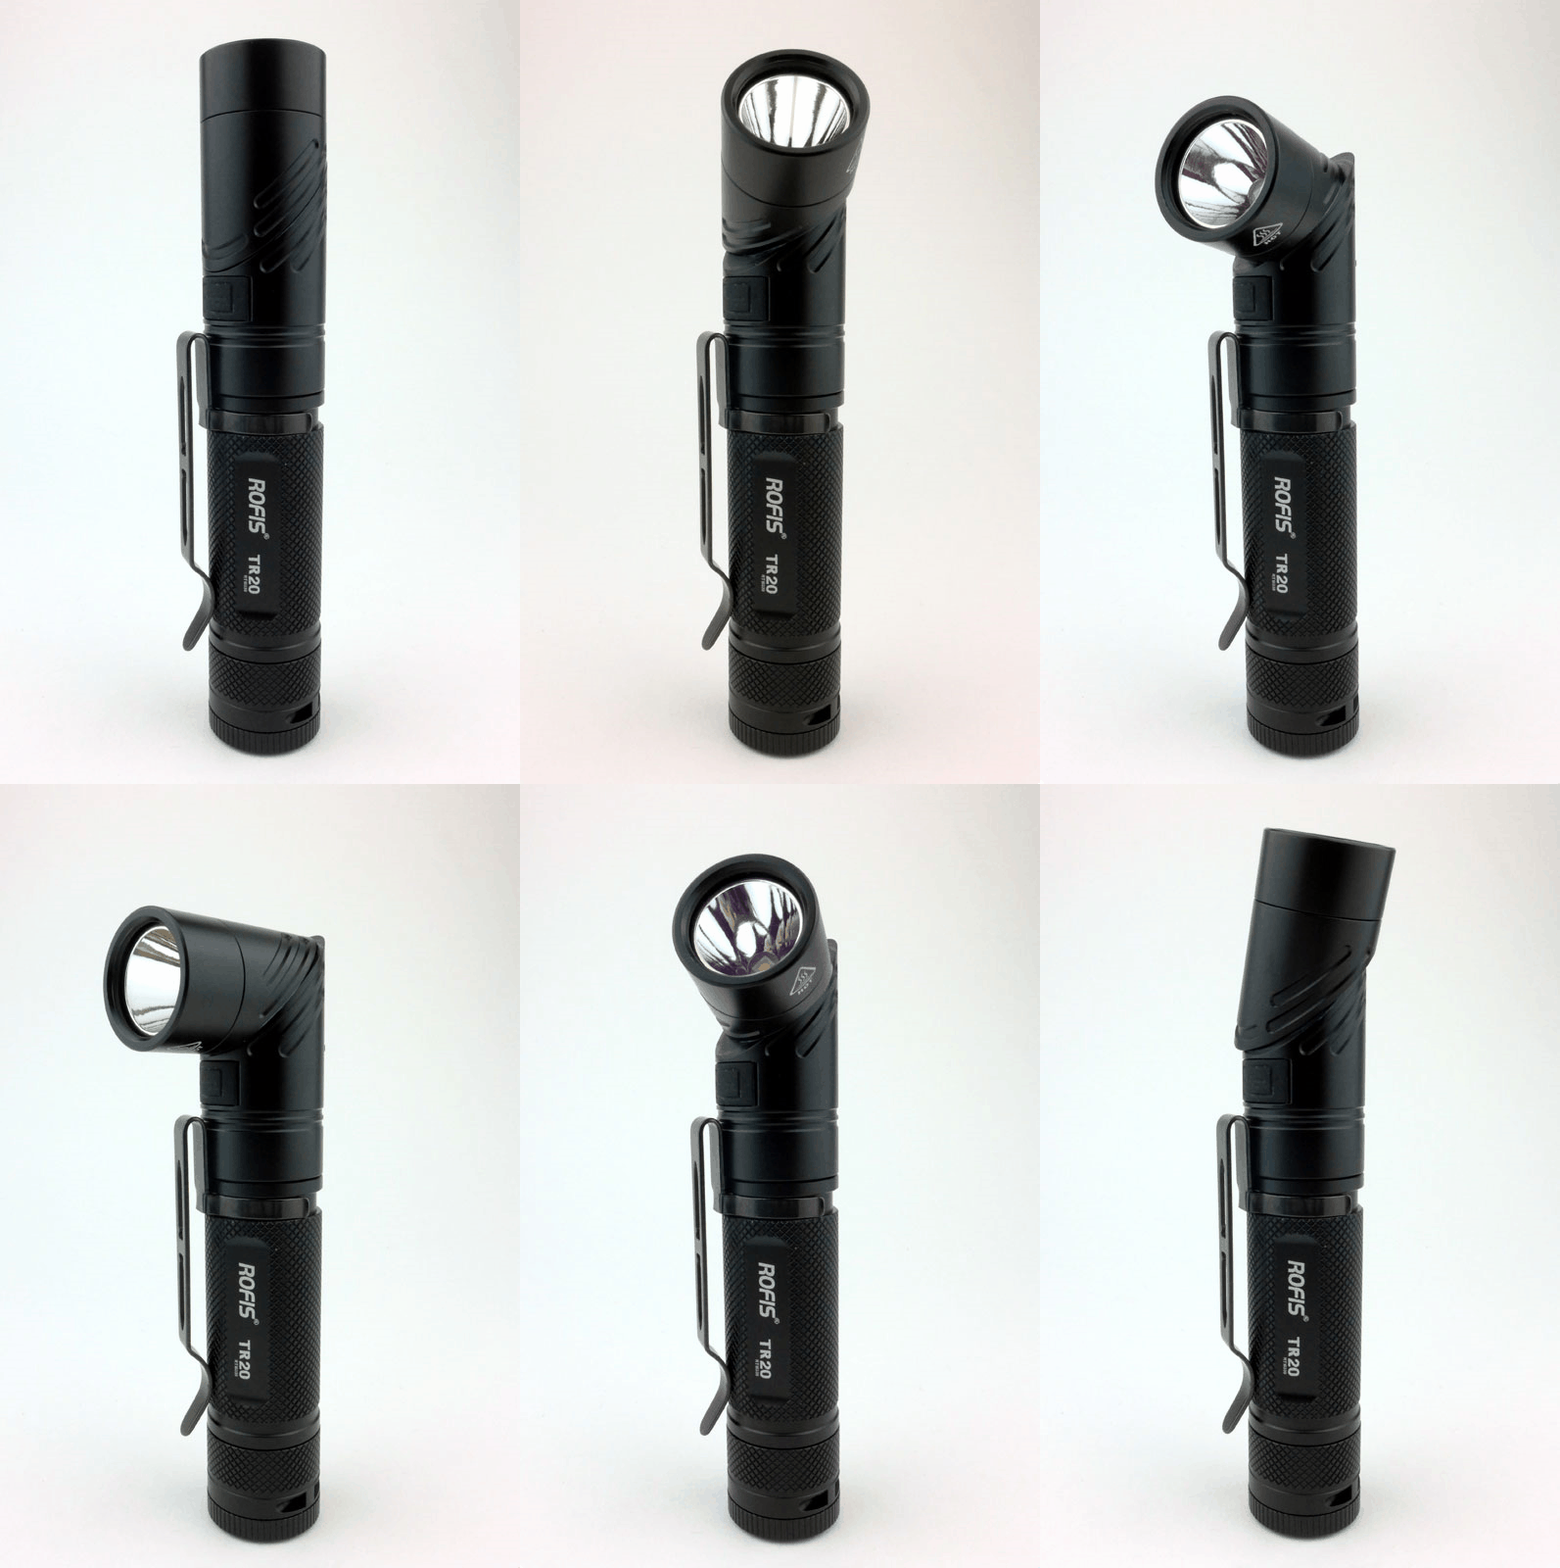
 photo TR20 500ms.gif

Having a dual-switch does make the UI very functional, but these types of switches don’t work so well when using gloves as you can’t feel the two parts of the switch. For gloved hands the two switch parts are a bit small so you can miss the part you meant to press. Gloved use may not be the highest priority because this light is not a tactical light, it is a utility light.

Another example of how functional this light is, is the holster that adjusts to the straight or right-angle configurations. But there is more. When in the right-angle configuration, the control buttons now line up with the gap on the side of the holster opposite the lens. In this way you can operate the TR20 when it is still in the holster giving you easy access and hands free use; this is the real benefit.
 photo 24 Rofis TR20 holster 90 P1240475.jpg

USB charging and the use of a standard 18650 cell adds convenience and ease of carrying a spare cell. The power indicator which tells you ‘Over 50%’, ‘Under 50%’ and ‘Empty’ is better than nothing, but might tend to lead you to keep topping up once you hit ‘Under 50%’. At least you only need to flip the USB port cover aide and hook it up to your USB charger.

One aspect that very much surprised me, and it is one I’ve heard others have found, is that the rotation of the head to transform to and from the right-angle configuration is very stiff. I’m known for a pretty strong grip and am the person at the archery club who is asked to pull out the arrows others can’t. I say this as I feel that if I find this too stiff, I think there are plenty of people who would struggle with it. Clearly you don’t want the head swing back round to straight, and this certainly won’t, but you do want to be able to transform it easily. Another way to look at it though, is that any concerns that the articulation of the head might introduce a weakness certainly doesn’t seem to be the case.

The instructions say that the last used output mode is memorised, but doesn’t mention that this does not include a mode activated by the direct access option. Only the mode set when the TR20 is on and the mode switch pressed to choose the level is memorised. As I typically use the Ultra-Low level, this is the reason I’ve become aware of this. To be sure you get the lowest level you will need to use the direct access method for Ultra-Low rather than relying on the ‘last used’ mode. This behaviour is good as you end up with direct access to one additional mode; if you have memorised medium, but have used the direct access to get ultra-low, simply switching it off and on again gets you back to medium.

Magnetised lights leave me in two minds; I find them more annoying than useful as they stick to everything I didn’t want them to, the TR20 completely removes this annoyance by making it very easy to remove the magnet, and not only that, but the threaded hole left where the magnet was will fit onto a tripod.

A quick observation about the lockout mode; As the only indication you have entered lockout is a flash of the red indicator in the dual switch, when you are pressing both parts of the dual switch, your fingers mostly hide the red light. It would be easier to see if the main LED was given a brief flash to let you know it was going into lockout.

Pocket clips are normally something I strip off straight away, largely because they are often too stiff and damage the pocket. Rofis have got this clip spot on. It is long and stable, yet the spring force is low enough not to be harsh and damaging. Add to this the right-angle configuration and the pocket clip is much more practical than on many lights.

Overall, the ability to transform the light into two different configurations overrides any minor quibbles with this light and makes it very attractive and very useful.

Review Summary

_______________________________________________ _______________________________________________
Things I like What doesn’t work so well for me
_______________________________________________ _______________________________________________
Transforms from a straight to right-angled configuration. Head is very stiff.
Direct access to Turbo, Ultra-low and Strobe. Dual button is difficult to use with gloves.
Removable Magnet. Lockout indication not clear.
Tripod mount.
Excellent clip.
Holster adjusts to straight or right-angle configuration.
Built in USB charging.


Discussing the Review:

Please feel free to add comments to the review, but the ideal place to freely discuss these reviews is on a forum. If you started reading the shorter forum version of the review, but followed the link this full exclusive review, please return to that forum to discuss the review there.
If you read the review entirely on Tactical Reviews, please consider one of the following to join in any discussion.

CandlePowerForums – Flashlight Reviews Section (Largest and Friendliest Flashlight Community Forum)

EdgeMatters – Sponsored Reviews (UK based Forum for Knife Makers and Collectors)

Light Review: Olight S2A Baton

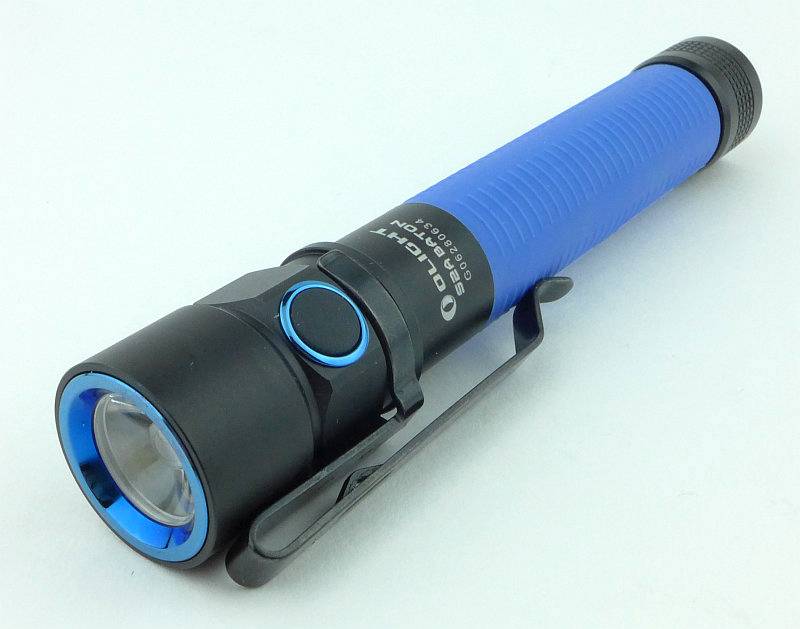
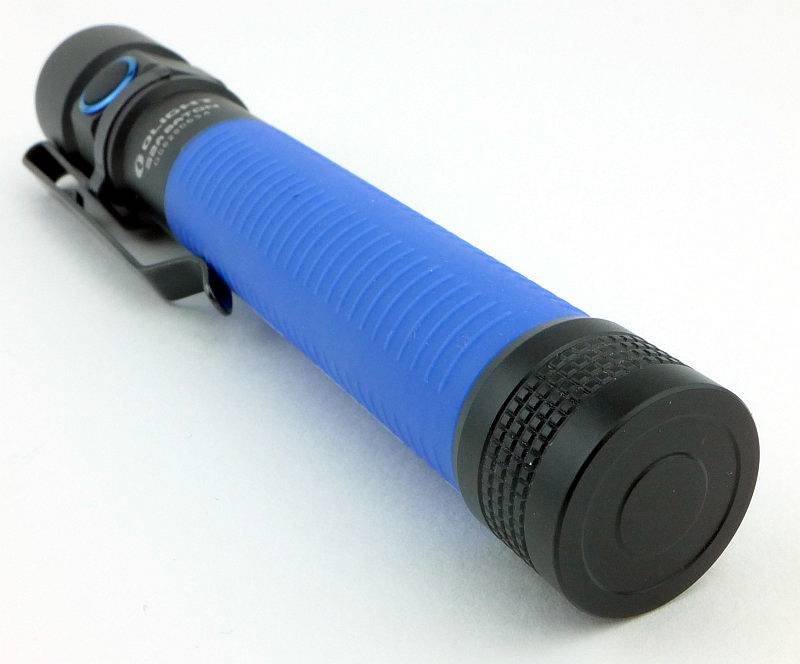
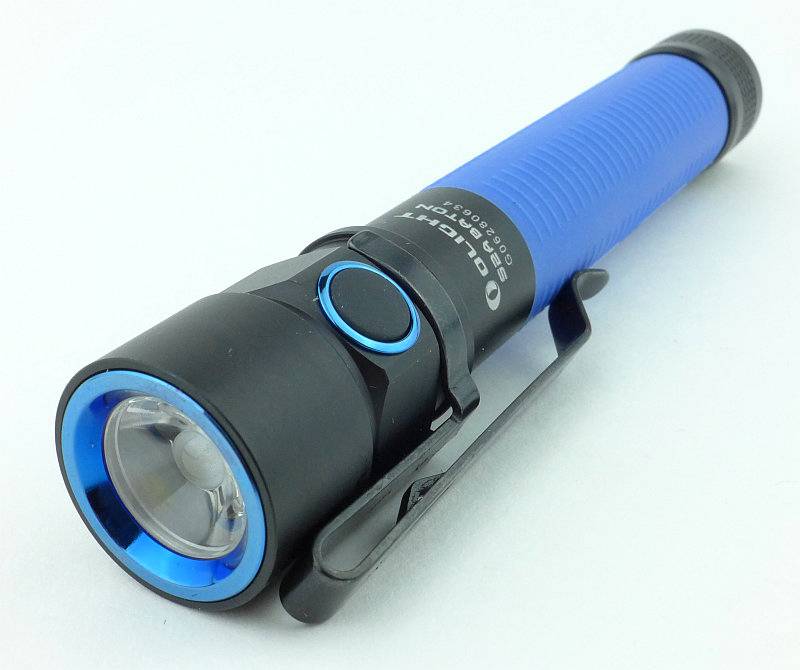
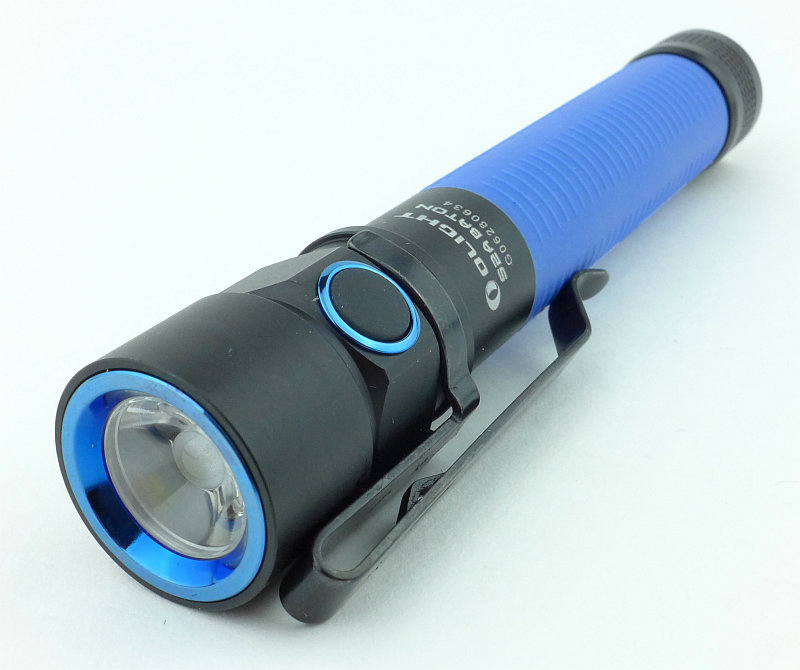
Olight’s Baton line-up gets a 2xAA powered version at last. Though the beautifully compact S1 is a fantastic light (previously reviewed) my personal ideal form factor is the 2xAA for ease of holding yet remaining compact. It also has the added advantage that AA cells are the easiest to come by, so travelling with or gifting this light is trouble free.

 photo 05 Olight S2A angle P1220461.jpg

Taking a more detailed look:

Looking very sharp in a clear plastic box with cardboard insert, you get a good look at the light even before you get your hands on it.
 photo 01 Olight S2A boxed P1220449.jpg

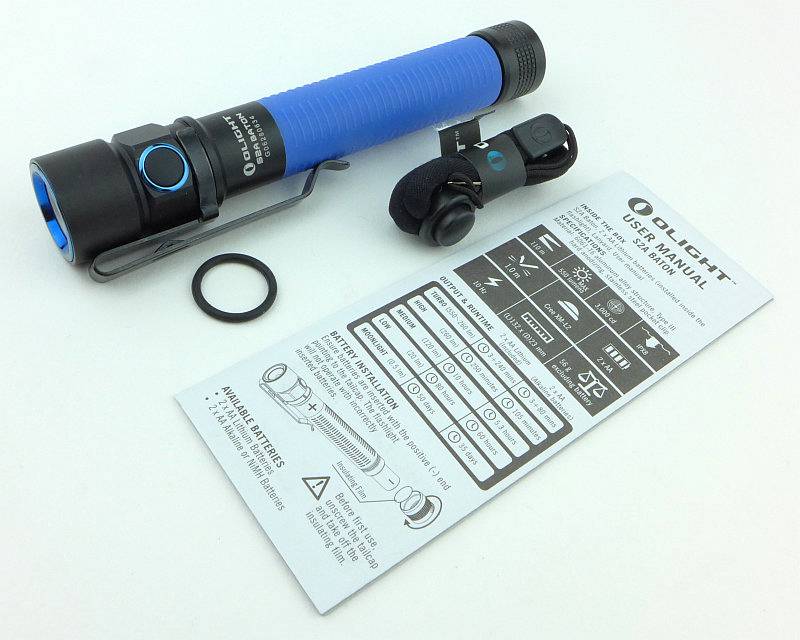
Inside the box is the S2A, a spare o-ring, a lanyard and the instructions.
 photo 02 Olight S2A box contents P1220454.jpg

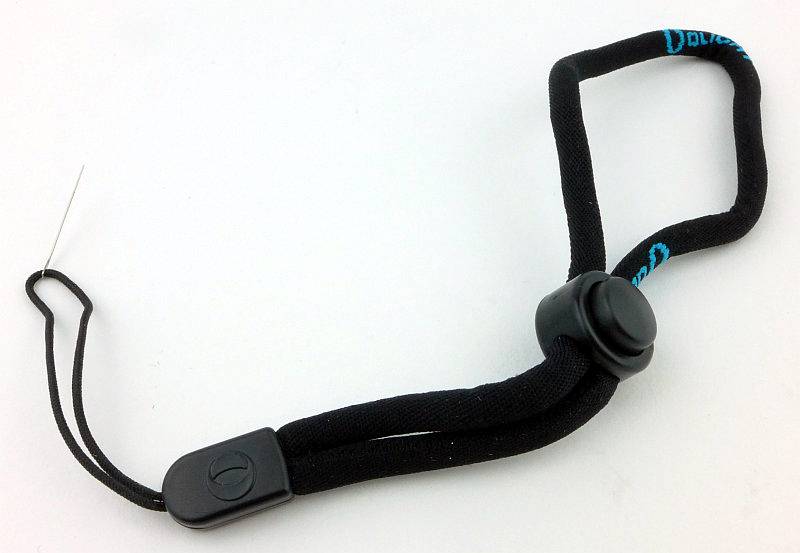
The lanyard has a really nice fabric tube cord and what is that we can see on the attachment loop?
 photo 03 Olight S2A lanyard P1220457.jpg

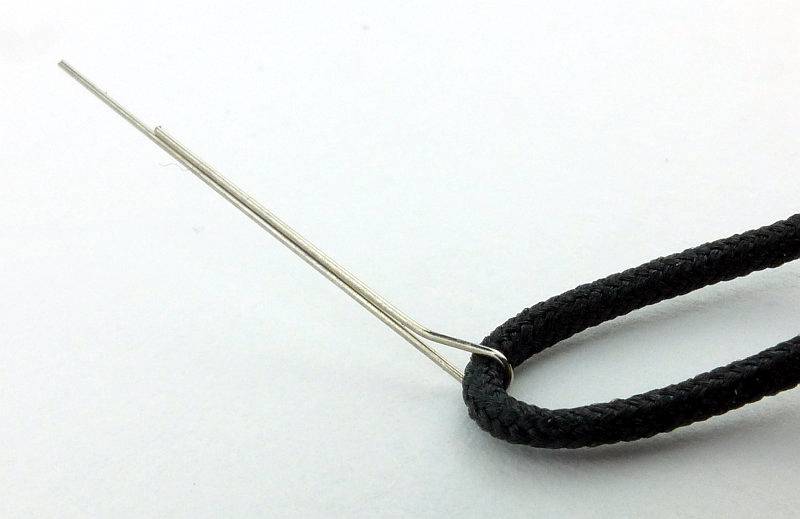
Thank you Olight! It is a wire puller for fitting the lanyard through the small hole in the tailcap. A thoughtful addition and makes life easier. Of course you can do something similar yourself (as I have for some time) but here it is ready to go.
 photo 04 Olight S2A lanyard puller P1220459.jpg

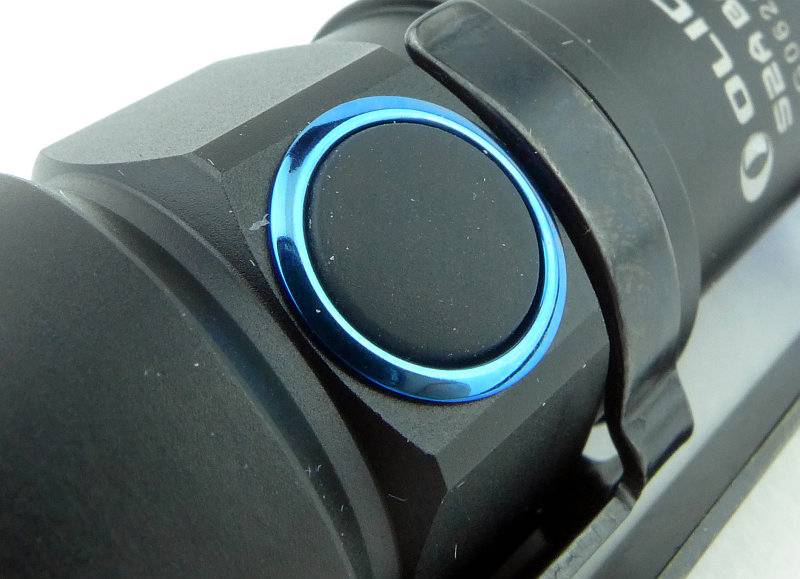
Surrounding the side-switch is a blue PVD ring which matches the bezel.
 photo 06 Olight S2A switch P1220466.jpg

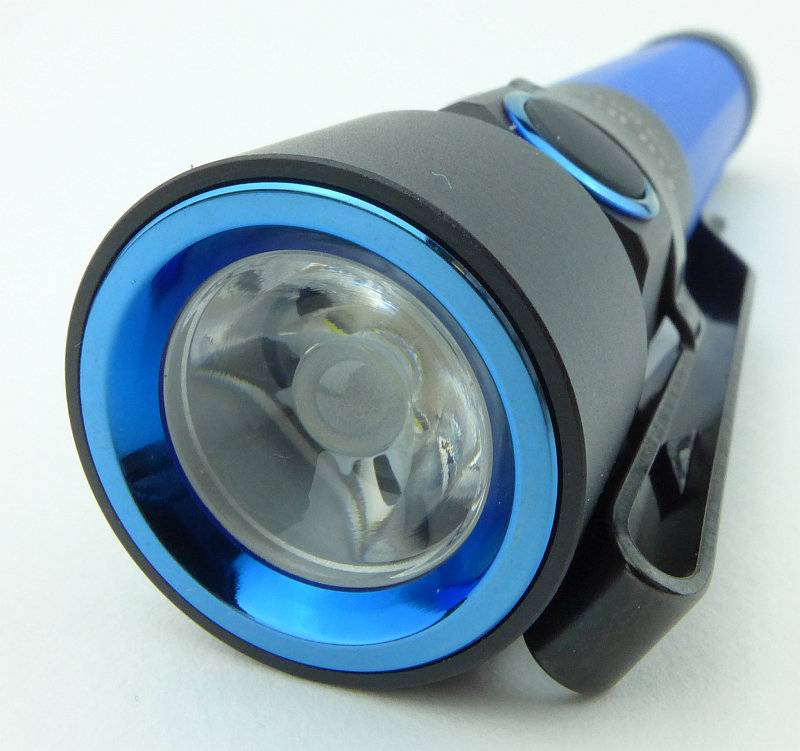
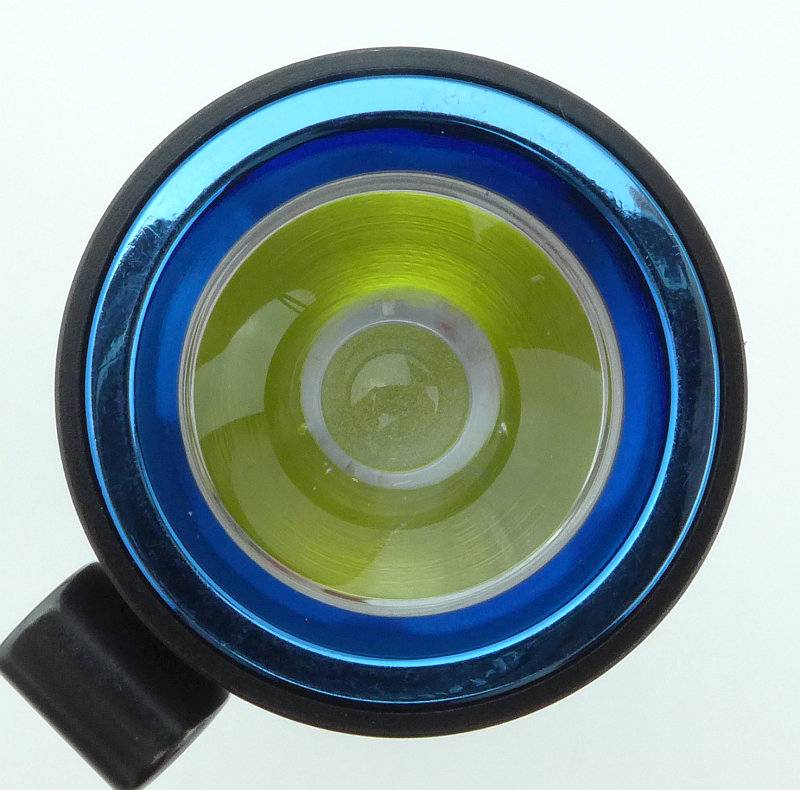
The blue PVD bezel ring surrounds the S2A’s TIR optic.
 photo 08 Olight S2A optic P1220477.jpg

The S2A comes with a deep pocket carry clip which can be removed or swivelled to any position to help you locate the power switch.
 photo 09 Olight S2A clip P1220480.jpg

A very plain and compact tail-cap is used as there is no switch to accommodate.
 photo 10 Olight S2A tailcap P1220483.jpg

Behind that TIR optic is a XM-L2 LED.
 photo 11 Olight S2A led P1220486.jpg

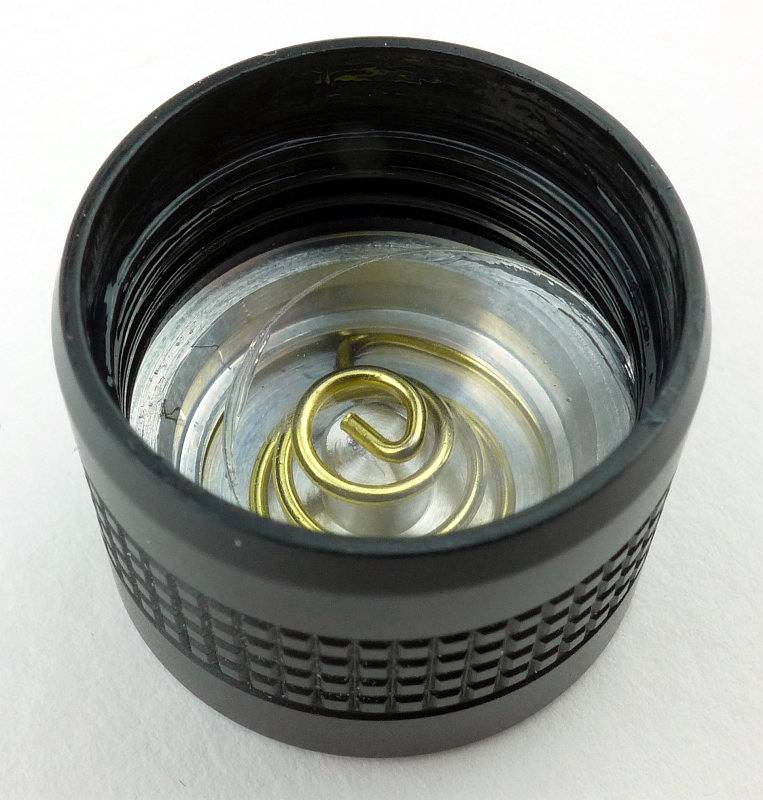
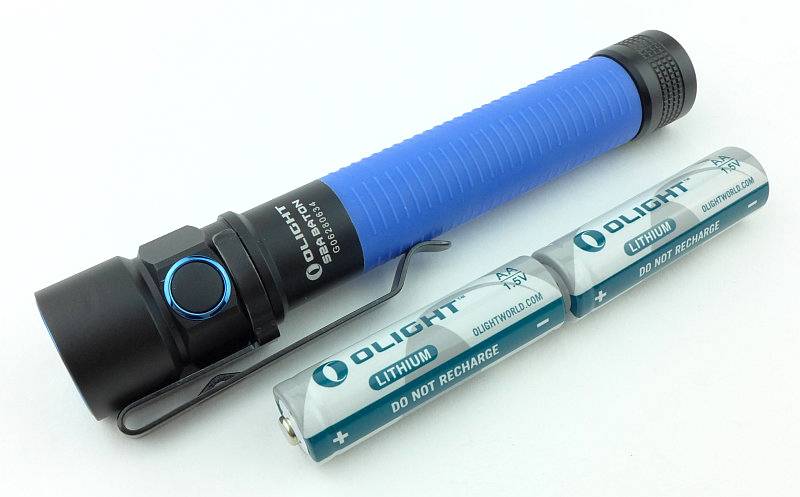
Looking inside the tail-cap. Note, that unlike the S1, the S2A has no magnet, and also shown here is a plastic insulator disc which is present when you get the S2A, as it comes with 2xAA Lithium cells loaded inside.
 photo 12 Olight S2A tail contact P1220496.jpg

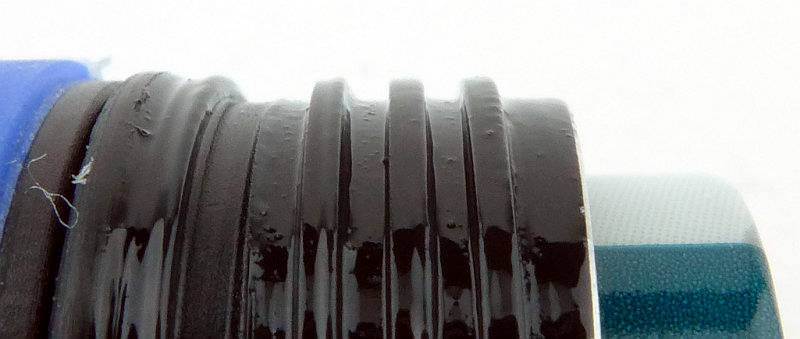
Very neatly cut fully anodised square threads are used.
 photo 13 Olight S2A threads P1220501.jpg

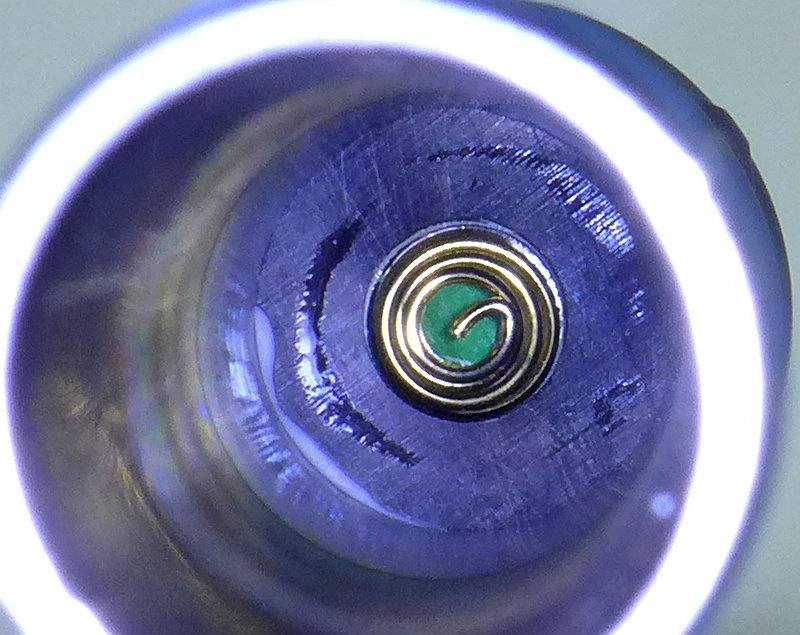
Peering inside the battery tube you can make out the positive contact spring.
 photo 15 Olight S2A head contact P1220510.jpg

It really isn’t much bigger than the two AA cells that power it.
 photo 14 Olight S2A with cells P1220506.jpg

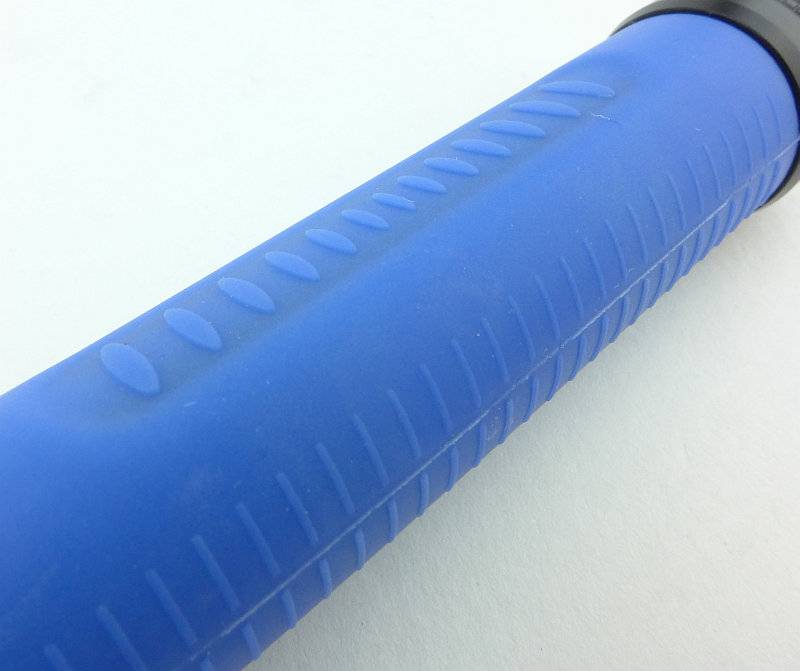
Over the battery tube is a silicon rubber skin-safe grip (more on that later).
 photo 16 Olight S2A grip P1220520.jpg

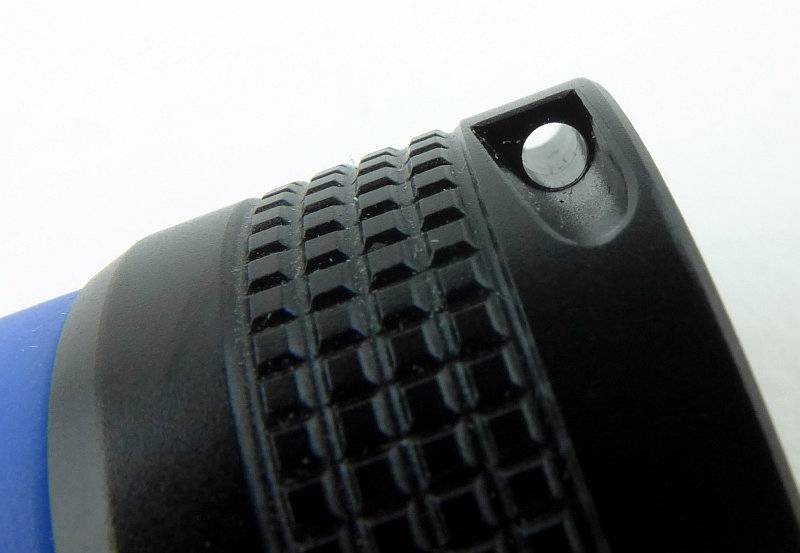
An excellent quality of finish even under closer scrutiny. Here is the lanyard hole in the tail-cap.
 photo 17 Olight S2A lanyard hole P1220523.jpg

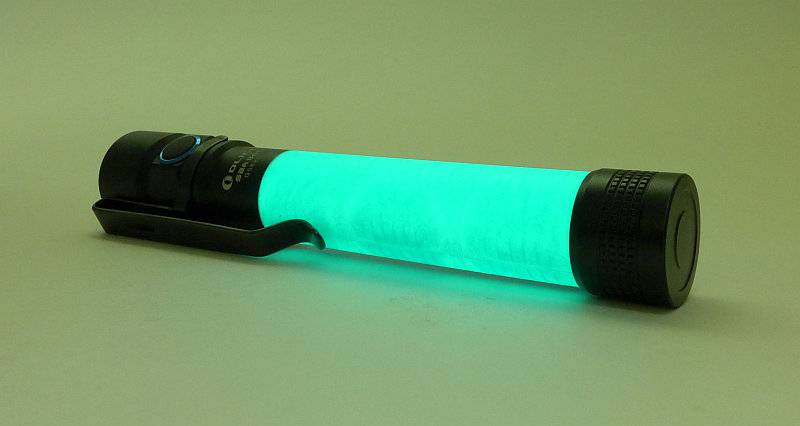
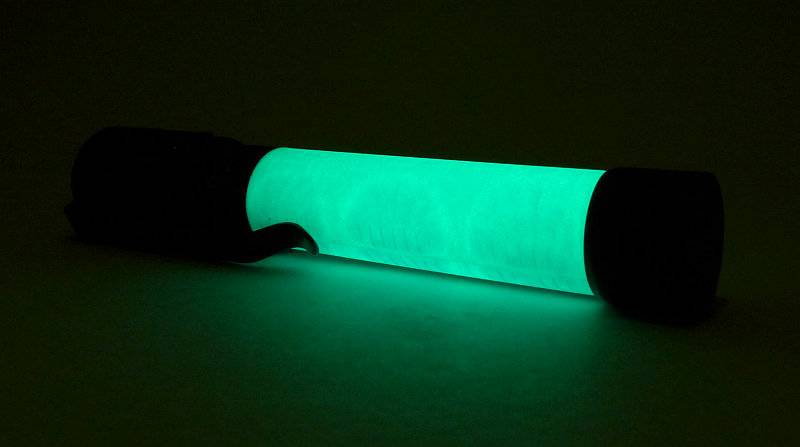
I said we would be coming back to this, the rubber grip. Well, what a nice surprise it was to see that it glows!
 photo 20 Olight S2A glowing grip P1230337.jpg

The GITD grip is a very useful location feature.
 photo 21 Olight S2A glowing grip P1230339.jpg

The beam

Please be careful not to judge tint based on images you see on a computer screen. Unless properly calibrated, the screen itself will change the perceived tint.

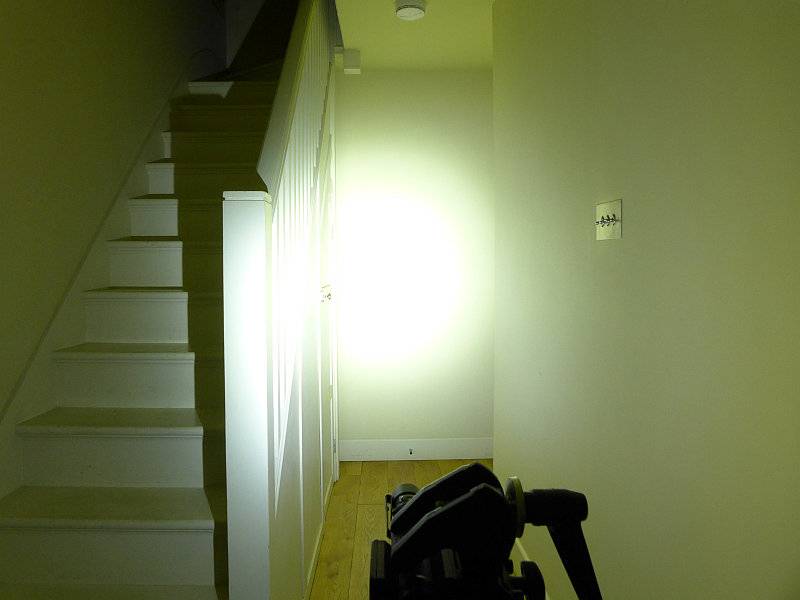
The indoor beamshot is intended to give an idea of the beam shape/quality rather than tint. All beamshots are taken using daylight white balance. The woodwork (stairs and skirting) are painted Farrow & Ball “Off-White”, and the walls are a light sandy colour called ‘String’ again by Farrow & Ball. I don’t actually have a ‘white wall’ in the house to use for this, and the wife won’t have one!

Starting off indoors, the 600lm beam is way more than you need at this range. There is a defined hot-spot with a very wide spill round it.
 photo 18 Olight S2A indoor beam P1230327.jpg

For a 2xAA light the 600lm gives it very good mid-range ability, though the spill becomes much less useful out here, with the hot-spot taking over.
 photo 19b Olight S2A outdoor beam P1240692.jpg

Modes and User Interface:

The S2A has six output modes, Turbo, High, Medium, Low, Moonlight and Strobe and a single click-switch on the side.

Basic ON/OFF operation is carried out with a single click of the side switch. The S2A will turn on to the last used constant mode including moonlight (this does not include Strobe).

To change the brightness, while ON, press and hold the switch to cycle through Low-> Medium -> High -> Low -> Medium etc. Release the switch once you have the required output.

There are a few special functions:
Moonlight mode – from OFF, press and hold the switch for 1s until the Moon mode is activated.
Direct access to Turbo – from OFF, double-click the switch.
Strobe – From ON or OFF, triple-click the switch.
Timer – From ON, double-click the side switch. The S2A will blink one or two times. Once means the 3 minute timer is activated, twice means the 9 minute timer is activated. To swap between 3 and 9 minutes timers, double-click the switch.

Timer mode means that the S2A will turn itself off after the specified time, and this can be started from any mode (including Strobe and Moonlight).

Batteries and output:

The S2A runs on 2xAA cells either Alkaline, NiMh, or AA Lithium.

To measure actual output, I built an integrating sphere. See here for more detail. The sensor registers visible light only (so Infra-Red and Ultra-Violet will not be measured).

Please note, all quoted lumen figures are from a DIY integrating sphere, and according to ANSI standards. Although every effort is made to give as accurate a result as possible, they should be taken as an estimate only. The results can be used to compare outputs in this review and others I have published.

___________________________________________ ________________________________ ________________________________
Olight S2A using specified cell I.S. measured ANSI output Lumens PWM frequency or Strobe frequency (Hz)
___________________________________________ ________________________________ ________________________________
Turbo – AA Eneloop 596 0
High – AA Eneloop 282 0
Medium – AA Eneloop 132 0
Low – AA Eneloop 17 0
Moon – AA Eneloop Below Threshold 0
Turbo – AA Lithium 546 0

* Beacon and Strobe output measurements are only estimates as the brief flashes make it difficult to capture the actual output value.

Peak Beam intensity measured 3500 lx @1m giving a beam range of 118 m.

There is parasitic drain but is incredibly low at 1uA (216 years to drain the cells).

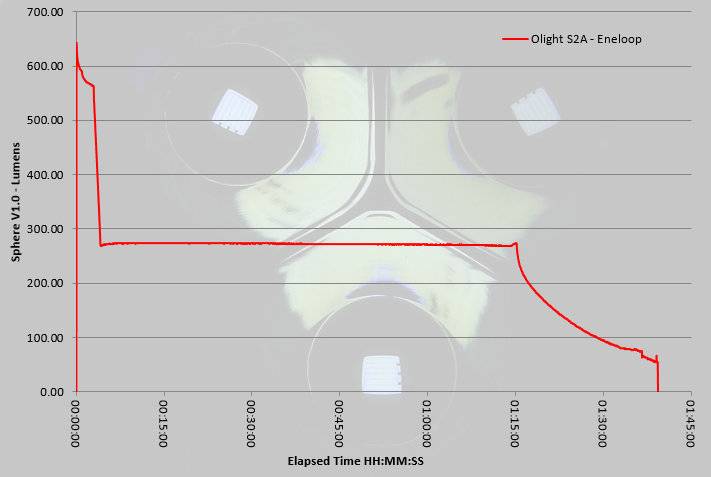
What is very impressive with the S2A is that 600lm Turbo output. This is pushing it for 2xAA, and only with the Eneloops did I get this peak measurement. Like many other lights, the output drops after 3 minutes down to its much more normal 270lm level which the AAs can keep up with. This output is very well regulated for 1h 15m, after which is starts to drop off. There is a sharp cut off around 1h 40m, but you get plenty of warning the output is dropping.
 photo Olight S2A runtime.jpg

Troubleshooting

This section is included to mention any minor niggles I come across during testing, in case the information helps anyone else.

No issues were encountered during testing.

As per the description of this section, this information is provided in case anyone else finds a similar ‘issue’ that might be fixed in the same way.

The S2A in use

For anyone that has read my other reviews of the Olight Batons, you will already know I think they have got the UI spot on. For non-tactical use, the side switch is king, falling nicely under your thumb and being very natural to use. Then there is the simple control options but that give your direct access to moonlight, Turbo, Strobe and last used modes; what more could you want?

I wouldn’t have thought it, but the timer mode has also proven useful letting you get tucked up in a sleeping bag, or even to give you a way of keeping a rough track of time. I’ve certainly used it that way when only wanting to be out for so long and getting easily distracted, the 9 minute timer switches the light off which I pop straight on again and head back. You are sure to find several uses once you try it out.

Having the rubber grip does make it very secure to hold, and stops it from feeling cold when temperatures are low. The best part of this is the GITD feature. The glow does last several hours, but you will need dark adapted eyes to see it after an hour or so, and it might not make it through a long night. Even so this is a great addition.

The brightness of the hot-spot did surprise me a little as I was hoping for a beam with slightly more flood. (This is a personal preference as unless I want a thrower, I always find full flood easier to use for my needs.) Indoors I have felt some hot-spot blinding and have had to use a ceiling bounce instead of direct illumination. Outside that hotspot does become useful, so there is a good balance making this an all-rounder.

Negligible parasitic drain allows for this to be loaded up and on standby without worrying if your cells are running down, so I applaud Olight for that excellent 1uA drain; I won’t be worried in 216 years time that the cells have run down!

Although I also have a preference for single cell lights, as you don’t have to cell match, the 2xAA format does give you quite a bit more power and runtime plus the benefit of being a good size to hold. This really hits a sweet spot for me in format and usability and is now a favourite EDC light.

Review Summary

_______________________________________________ _______________________________________________
Things I like What doesn’t work so well for me
_______________________________________________ _______________________________________________
600lm output (from 2xAA). No holster supplied.
Side switch. Hot-spot can be too bright indoors.
Direct access to Moonlight, Turbo and Strobe.
Timer function.
Glow-in-the-Dark rubber grip.
AA powered.

 photo 00 Olight S2A feature P1220465.jpg


Discussing the Review:

Please feel free to add comments to the review, but the ideal place to freely discuss these reviews is on a forum. If you started reading the shorter forum version of the review, but followed the link this full exclusive review, please return to that forum to discuss the review there.
If you read the review entirely on Tactical Reviews, please consider one of the following to join in any discussion.

CandlePowerForums – Flashlight Reviews Section (Largest and Friendliest Flashlight Community Forum)

EdgeMatters – Sponsored Reviews (UK based Forum for Knife Makers and Collectors)
Knife Review: Gerber Strongarm

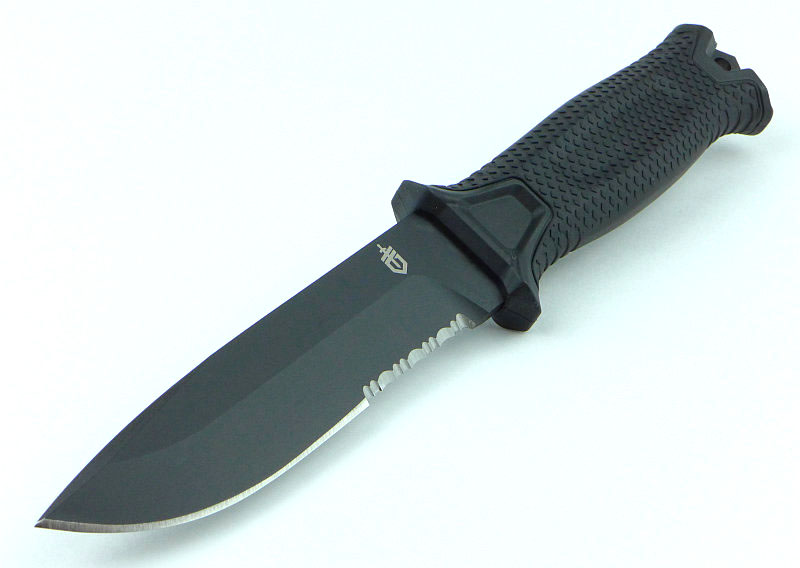
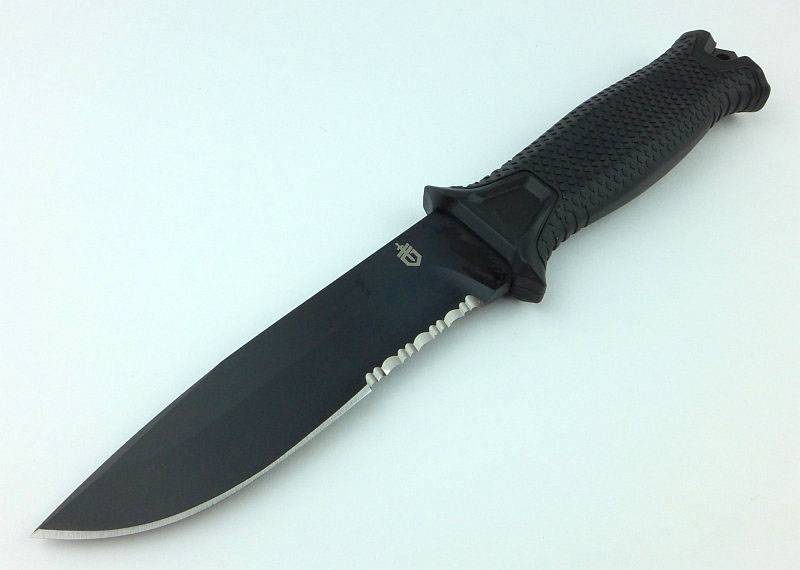
Gerber’s latest incarnation of the military/tactical survival knife has taken its evolution to another level. Paring down each element of the design to provide the essential functions without any excess bulk has resulted in a tool that works with you and remains totally reliable.

 photo 00 Strongarm feature P1190485v2.jpg

The Blade and Handle Geometry:

Most knife specifications have a basic description of the blade geometry, but in this section I will be taking a more detailed look at geometry and balance.
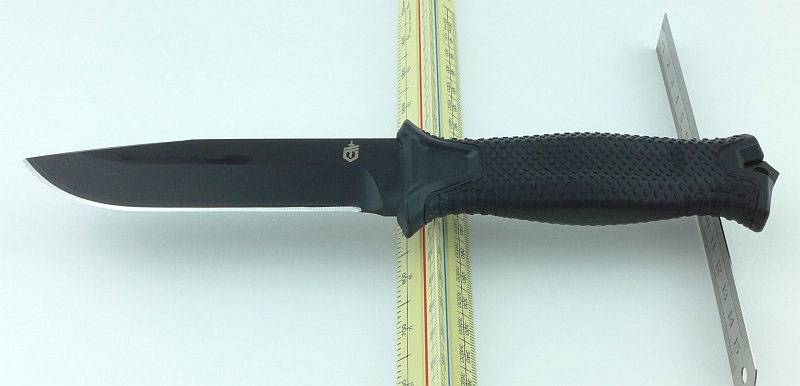
 photo 47 Strongarm grind P1200587.jpg

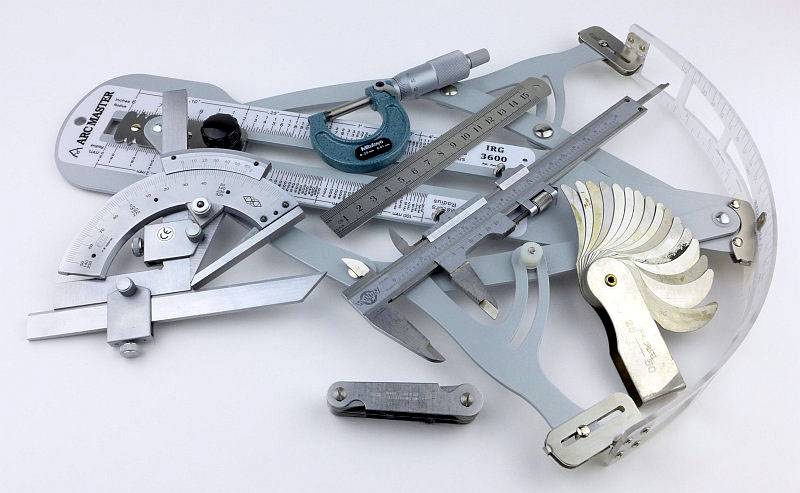
Using a set of gauges and precision measuring equipment including a Vernier protractor, callipers, fixed radius gauges and the unique Arc Master adjustable radius gauge (the one that looks like a crossbow).
 photo Knife measuring P1180483.jpg

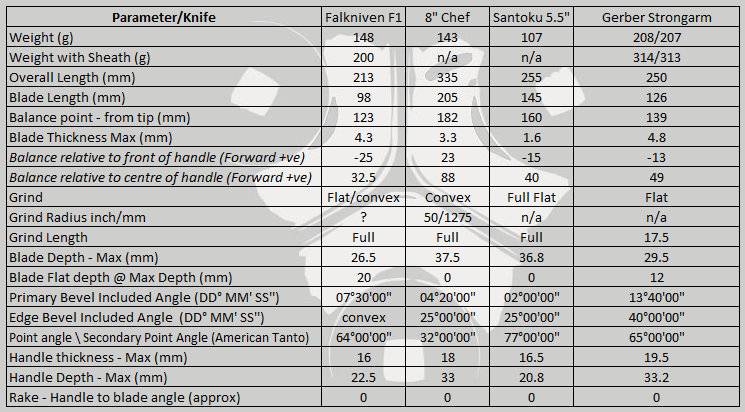
These measurements have been tabulated and are presented along with a few reference blades (8″ Chef’s Knife, 5.5″ Santoku and the popular Fällkniven F1).

Key aspects such as the primary bevel angle, grind type, blade depth, blade thickness, length, weight are detailed, along with balance information.

The ‘Balance relative to the front of the handle’ tells you if the knife will feel front heavy, or if the weight is in your hand (a positive value means the weight is forward of the front of the handle). The ‘Balance relative to the centre of the handle’ indicates how close to a ‘neutral balance’ the knife has in the hand.
 photo 46 Strongarm balance P1200560.jpg

In the case of full convex grinds the approximate centre of the grind is used for the primary bevel angle estimate.

 photo 51 Strongarm Parameters.jpg

The blade is made from 420HC steel.

Explained by the Maker:

The reasons for certain design choices may not be clear when simply looking at an object, so this section is intended to give an insight into the thinking behind a design by speaking to the designer themselves.

Unfortunately I can’t always get time with the designer so will use this section to include relevant information about the knife and its designer.

The Strongarm is the result of an evolution of Gerber’s survival knives which I can trace back through several models. In this section I’d like to share a personal perspective of the evolution that has lead to the Strongarm. This might not be how Gerber would chart its development, but is based on my own knives and experience.

As any child of the 80s will know, the 1982 film ‘Rambo – First Blood’ has been one of the most influential films in terms of interest in survival and in knife design at the time. With Lyle knives way out of reach, I ended up owning some of the rather nasty cheap hollow handle Rambo style knives. There were other more serious designs available but pricing also made them out of reach.

Still hankering after a decent and stylish blade I was struck by the appearance of one in another film from 1988 staring Sidney Poitier and Tom Berenger – Deadly Pursuit (Shoot to Kill). In this film Tom Berenger’s character is carrying a Gerber BMF (Basic Multi-Function) in its original pattern with 8″ blade, and this was the saw back version that wasstill in fashion at the time. I loved it and knew this was the knife I had to have. Unfortunately with the UK market starved of this knife I had to wait for one to arrive, and when it did changes had been made to the size and grind. It now had a 9″ blade and the one I found didn’t have the saw-back. It was still a meaty solid knife, so had to do. The BMF was produced by Gerber between 1986 and 1998 and had several ‘updates’ during this time.

In the following evolution photographs is the original pattern BMF I eventually found only a couple of years ago (and this one has been on active duty in war zones).

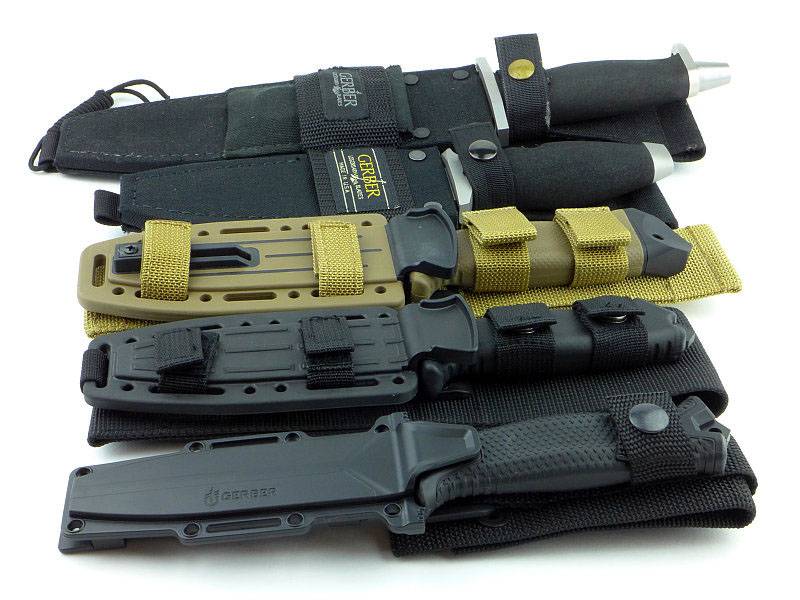
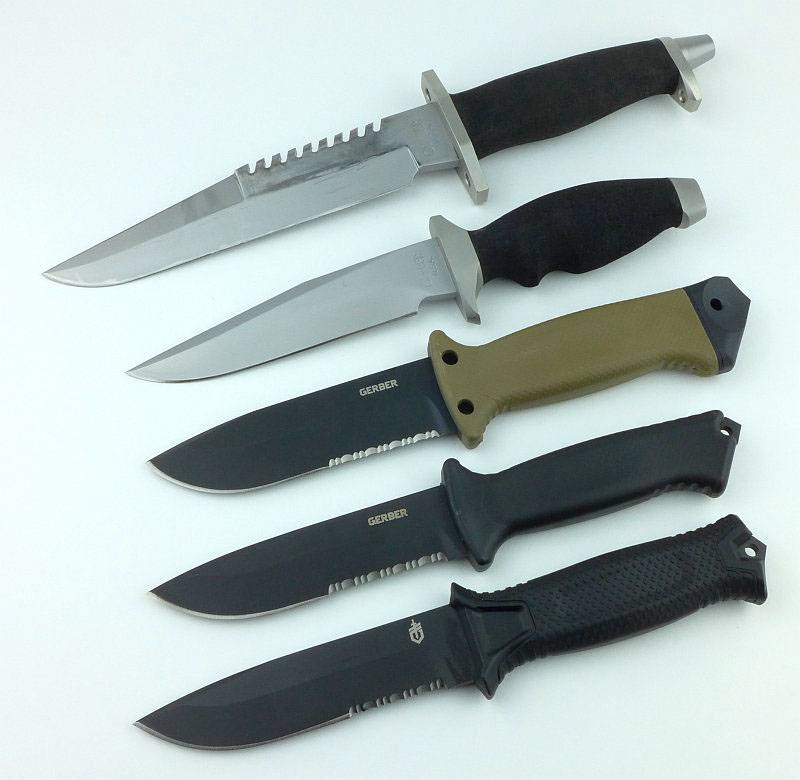
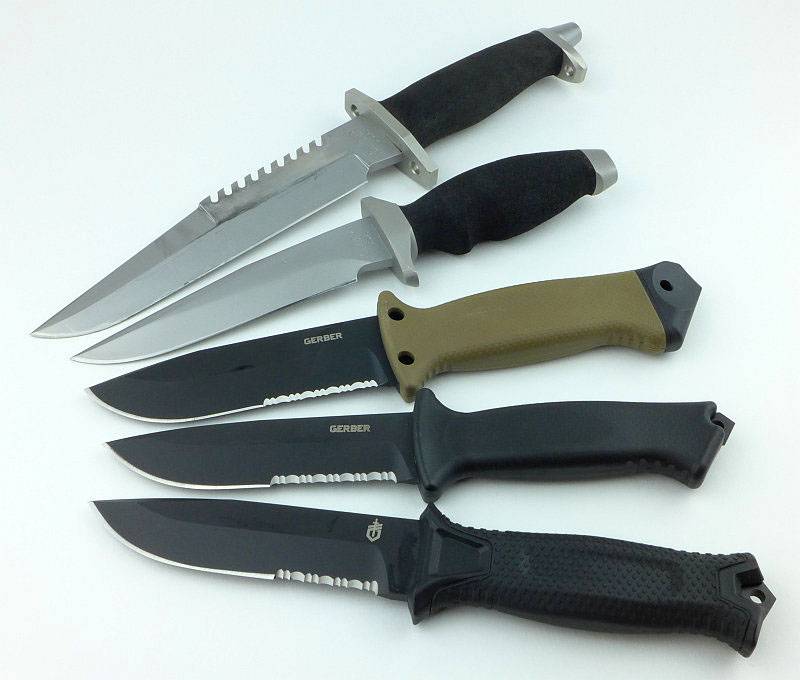
The sheath is as important as the knife in providing the overall package, so starting here we can see all the knives in this evolution in their sheaths. The knives shown are the BMF 8″ saw-back, then a LMF, the LMF II, a Prodigy and finally the Strongarm.
 photo 41 Strongarm evolution P1190818.jpg

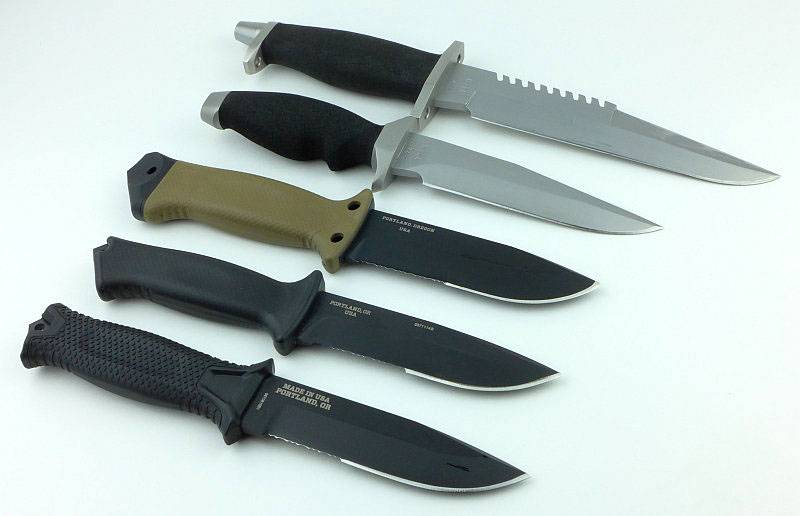
With the BMF (first made in 1986) being a big knife there was demand for a similar design but smaller. In 1988 Gerber released the LMF (Light Multi-Function). In its first year the LMF had a full flat grind, but from 1989 onwards (until 1997 when it was discontinued) it was the style shown here. The original LMF had the bias towards blade length as a proportion of overall length. After a few years, the LMF was reborn in May 2005 as the LMF II designed specifically as a military survival knife. Becoming known as the standard by which all survival knives should be judged, many found the LMF II a little too big, so a smaller alternative was made with the name Prodigy. Working hard to make this knife all the more versatile, Gerber designed the multi-mount and tweaked the design further to create the Strongarm.

 photo 43 Strongarm evolution P1190839.jpg

Following the evolution series you can see how blade and handle lengths changed over time.
 photo 45 Strongarm evolution P1190832.jpg

A few more details:

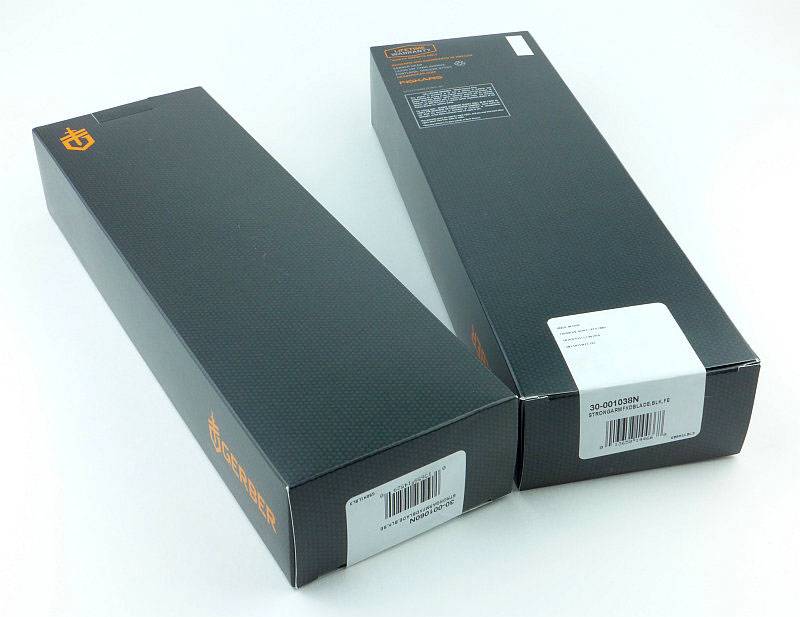
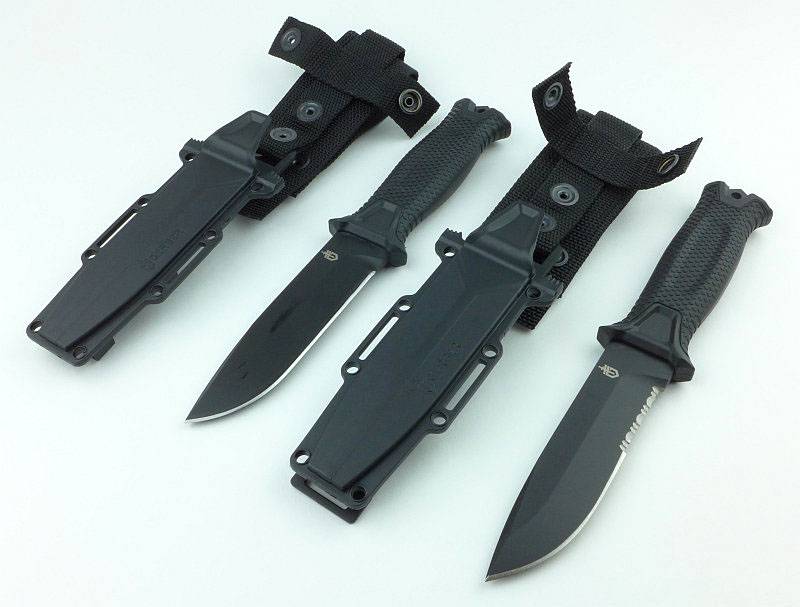
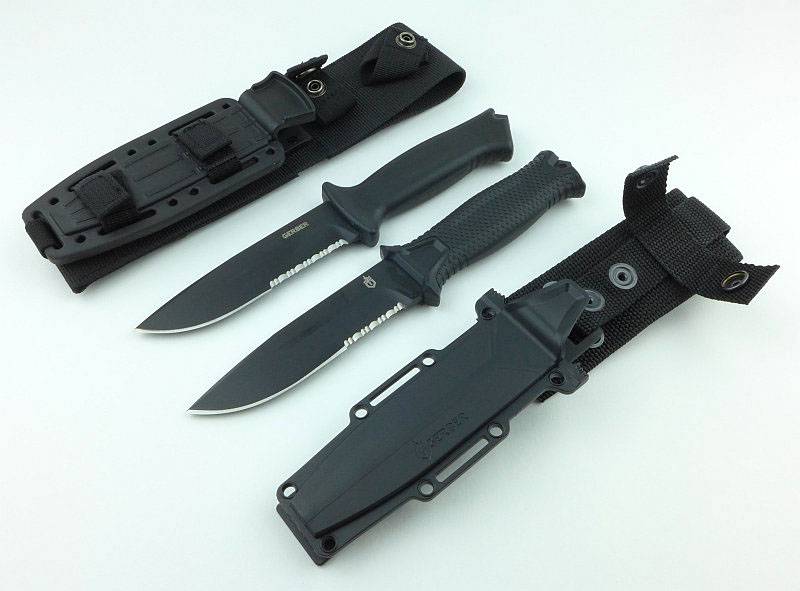
Both the plain edge and part-serrated version were provided for review, hence the two boxes.
 photo 01 Strongarm boxed P1190423.jpg

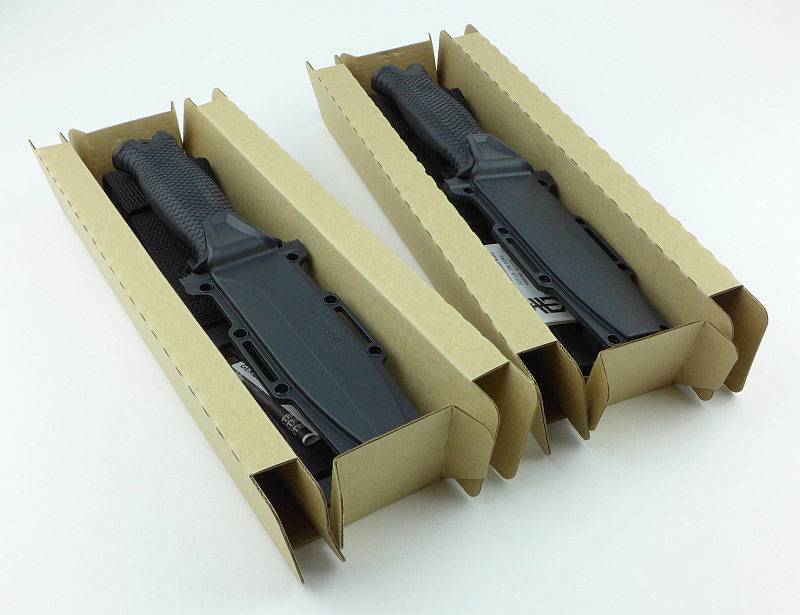
A cardboard insert keep the knife in place and prevents the striker pommel breaking through the outer box.
 photo 02 Strongarm unboxing P1190424.jpg

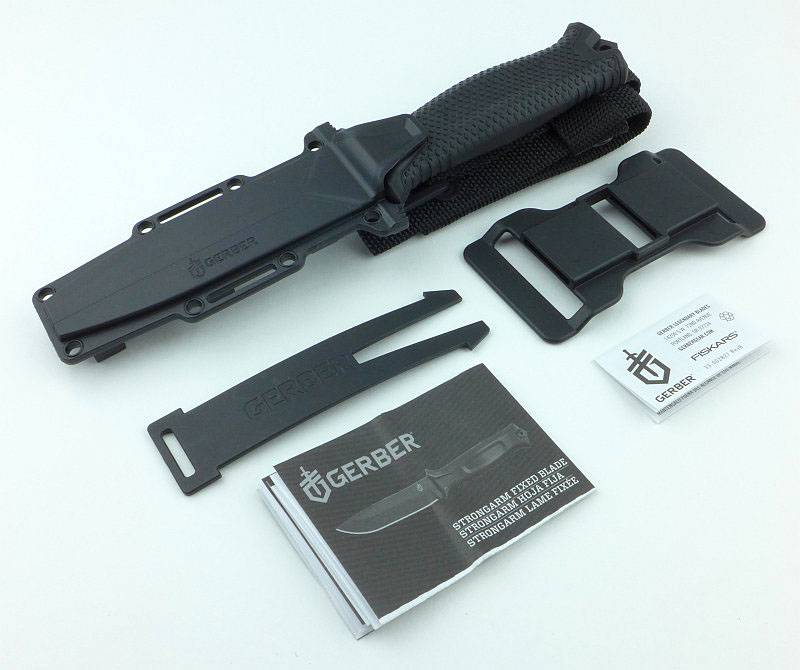
Fresh out of the box, and as well as the sheathed knife there is the PALS webbing clip, a horizontal belt loop adapter and the instructions.
 photo 03 Strongarm unboxed P1190431.jpg

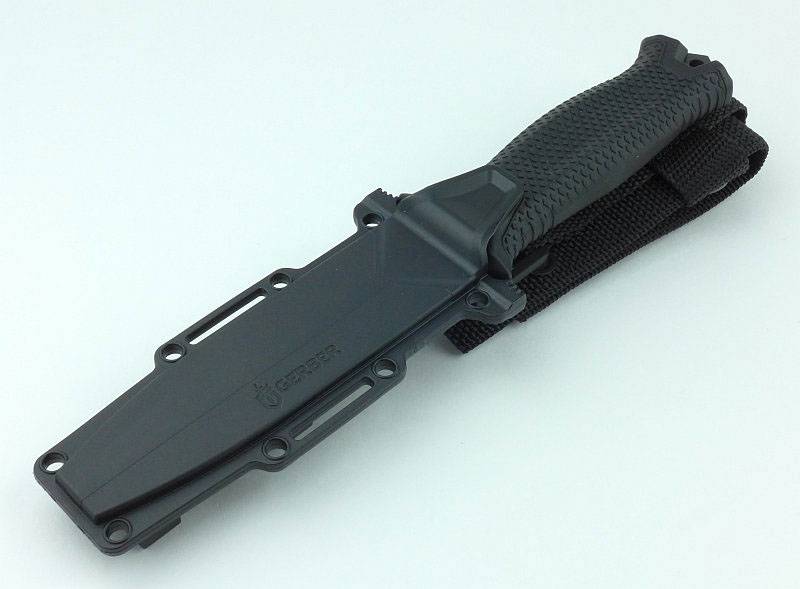
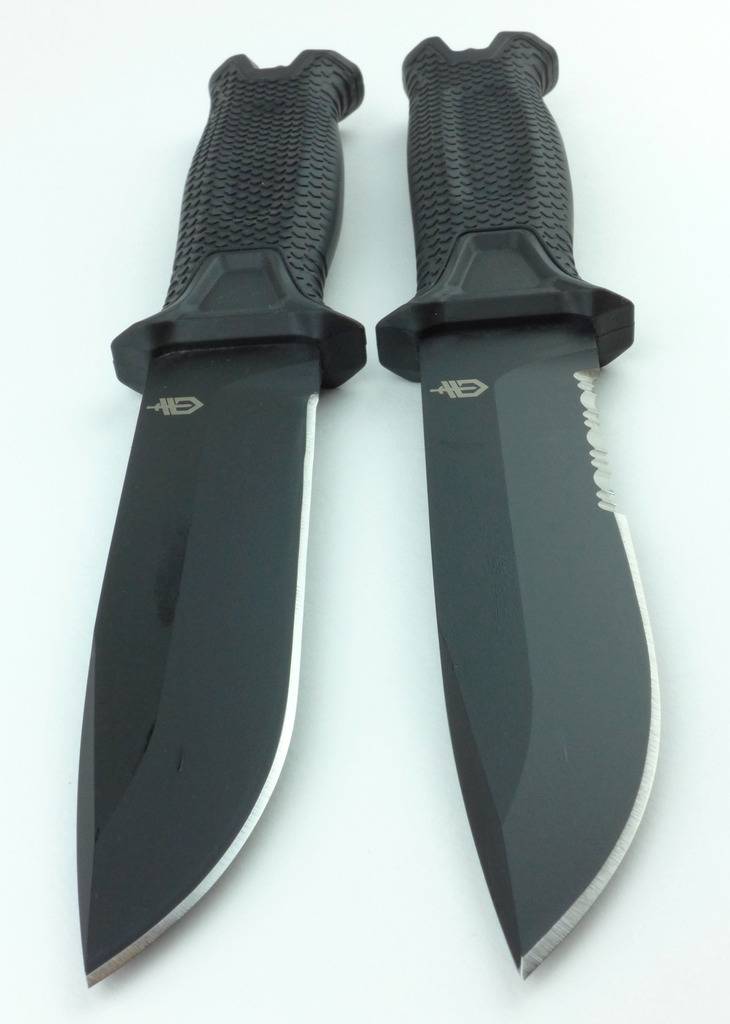
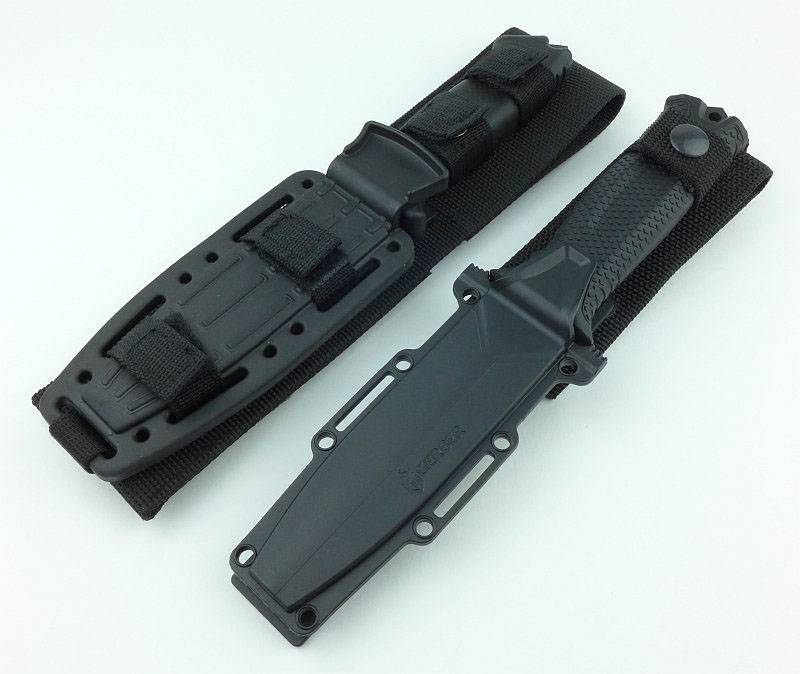
It is immediately obvious how much more streamlined Gerber have made the Strongarm compared to earlier knives in the line.
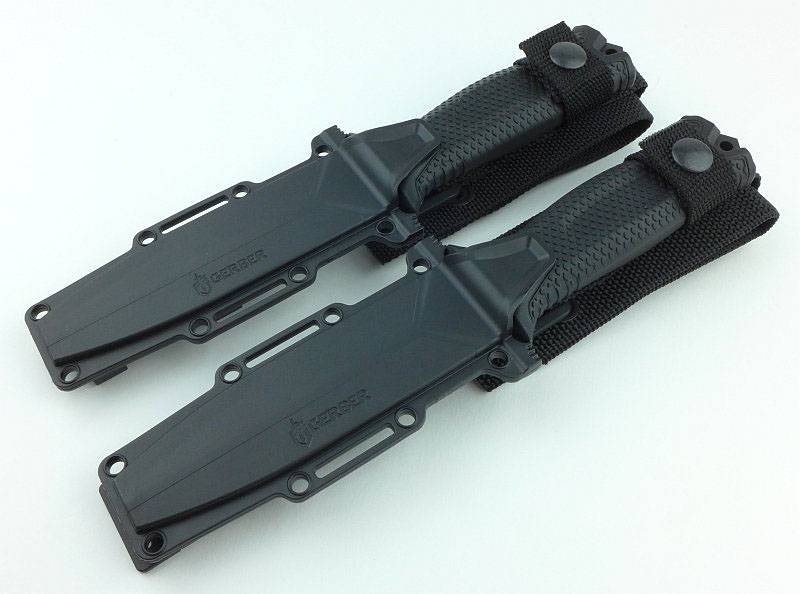
 photo 04 Strongarm sheathed P1190440.jpg

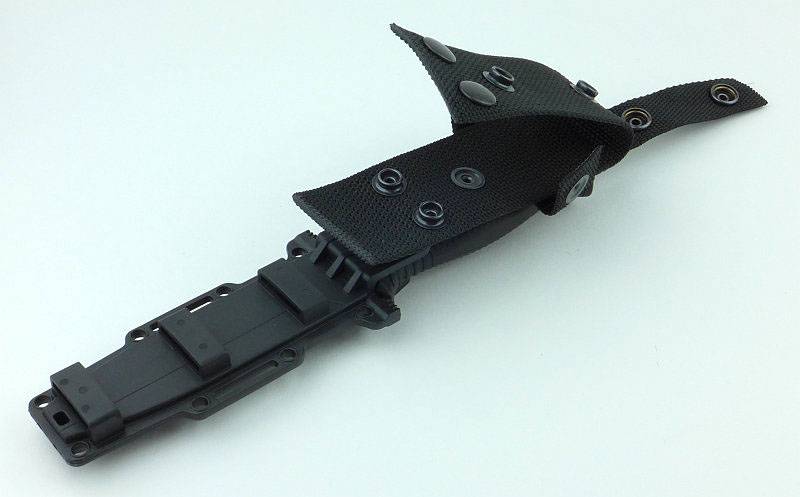
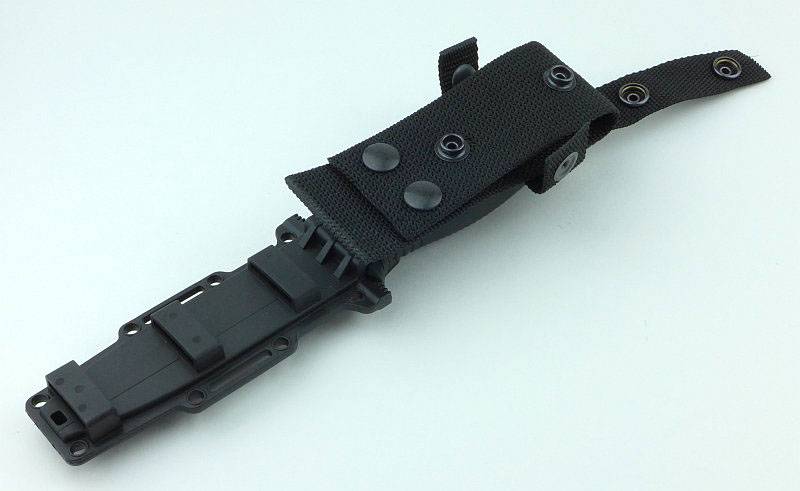
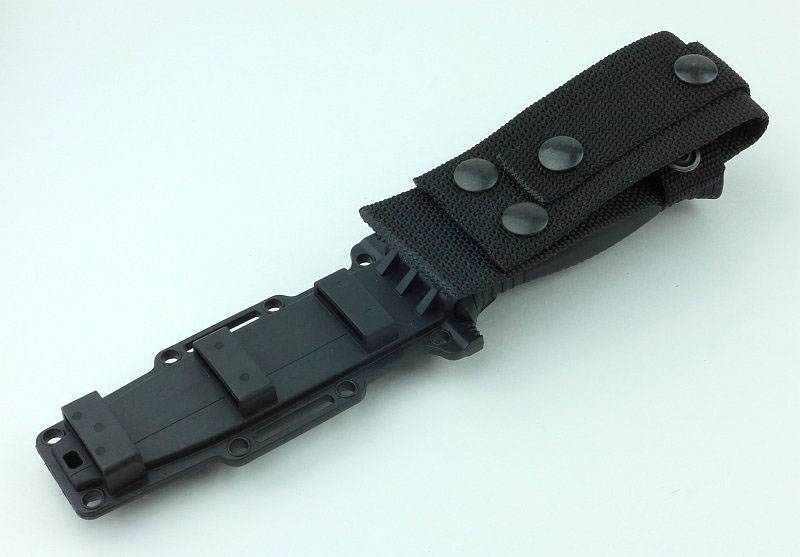
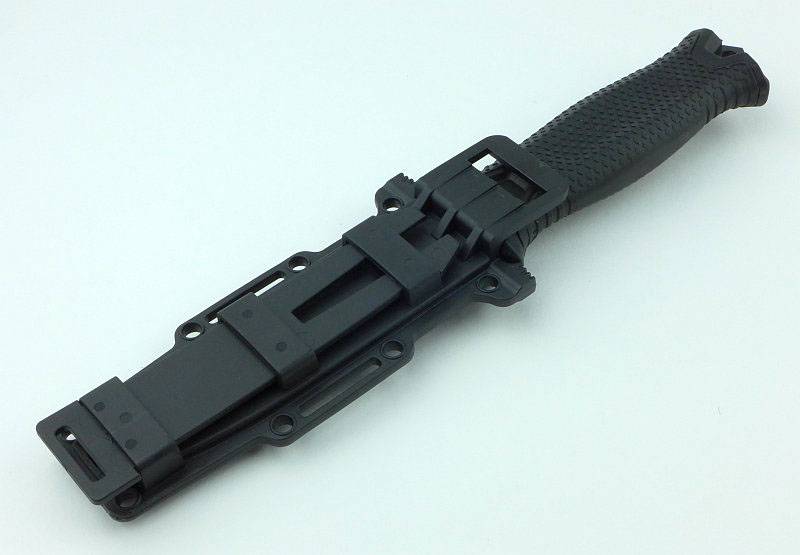
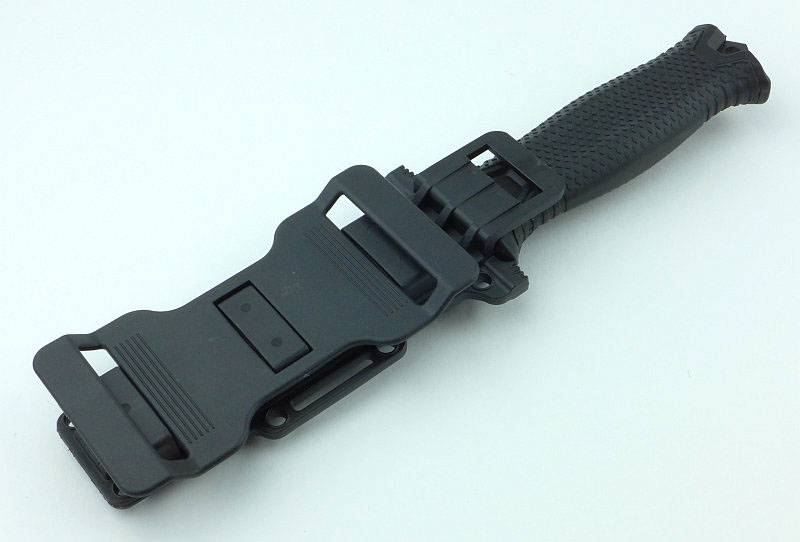
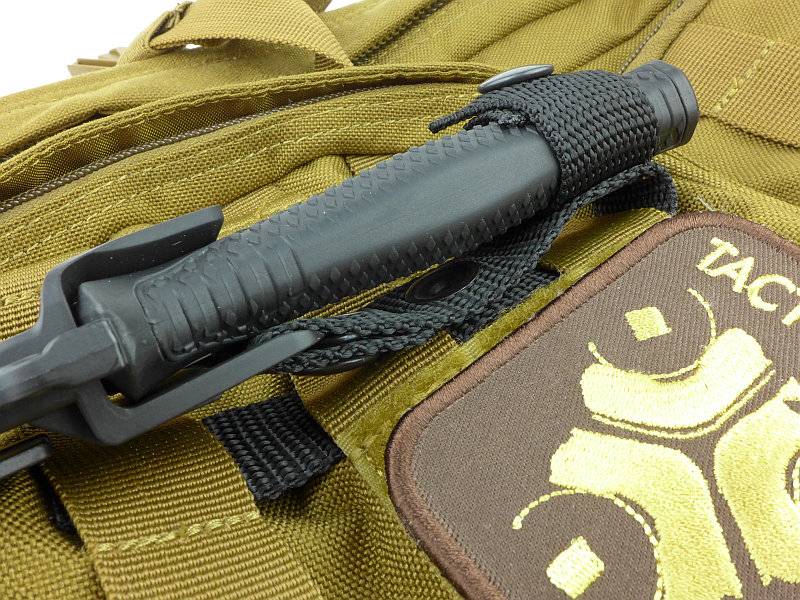
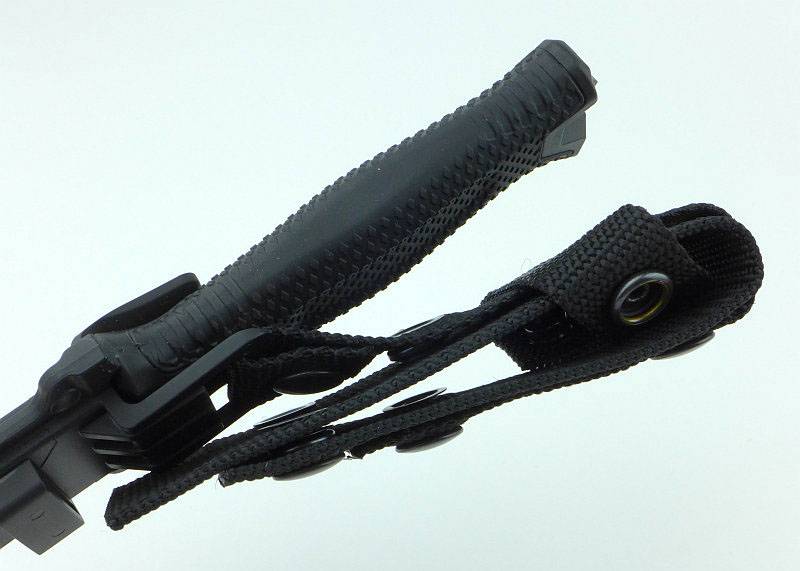
The moulded plastic sheath is suspended by a webbing hanger. For those sharp eyed readers you might notice that only a single press-stud is used for the hanger loop on the sheath, but even if this were to become un-popped, it cannot come out of the sheath while the knife is in the sheath.
 photo 05 Strongarm hanger P1190443.jpg

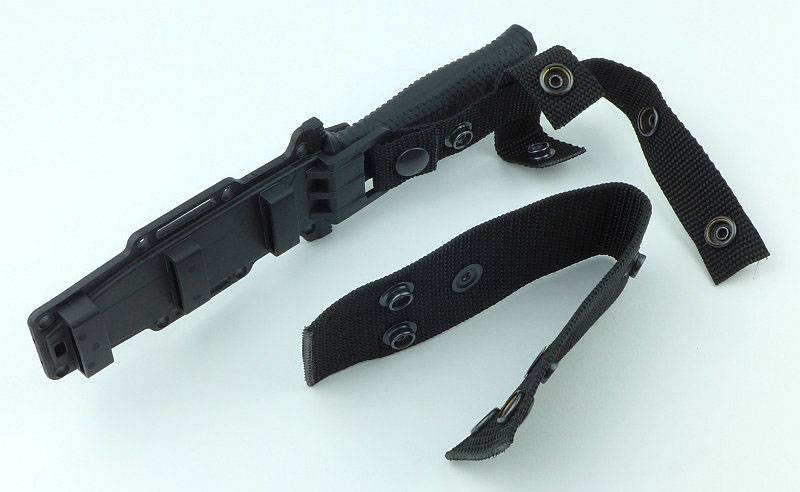
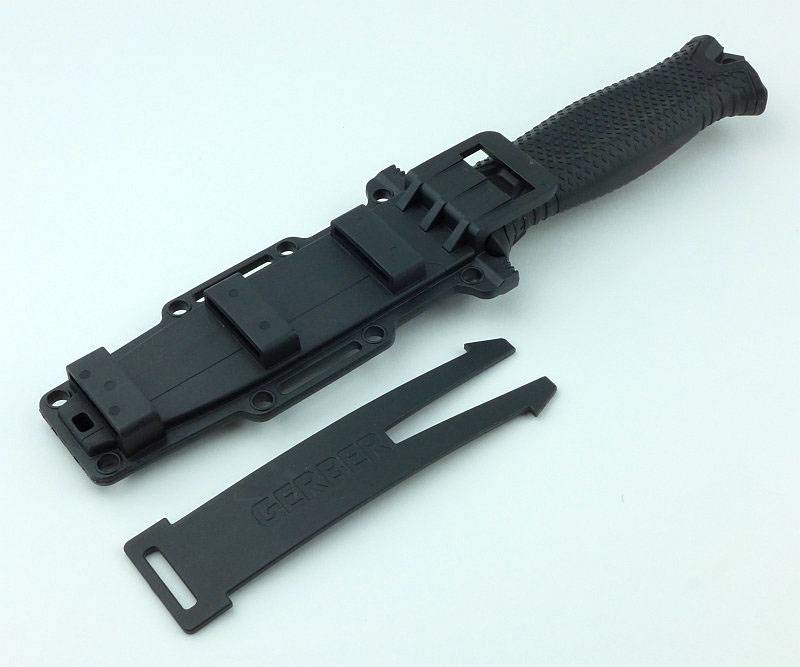
These are the parts of the sheath hanger/belt loop.
 photo 06 Strongarm hanger parts P1190445.jpg

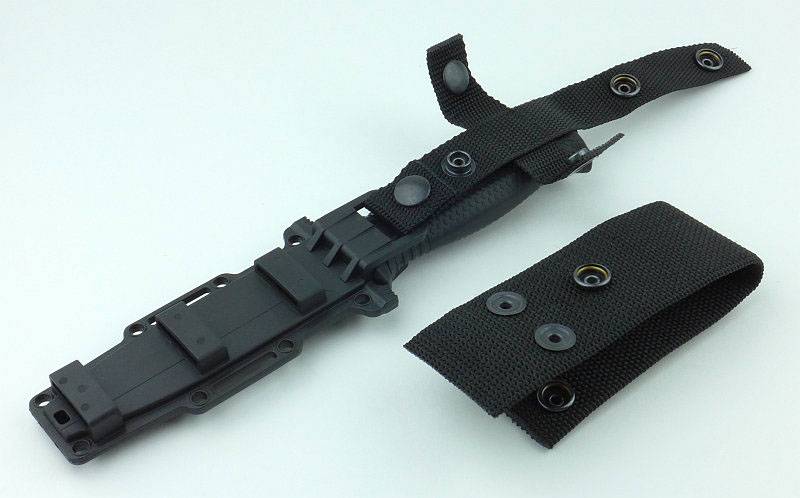
To replace the belt loop, lay out the hanger strap as shown. (The cross piece is a knife retention strap for added security)
 photo 07 Strongarm hanger parts assemble P1190449.jpg

Fit the belt loop in place with the single press-stud on the underneath.
 photo 08 Strongarm hanger parts assemble P1190452.jpg

Close the belt loop with its two press-studs.
 photo 09 Strongarm hanger parts assemble P1190455.jpg

Then lay the hanger strap over the top and secure the two press-studs.
 photo 10 Strongarm hanger parts assemble P1190457.jpg

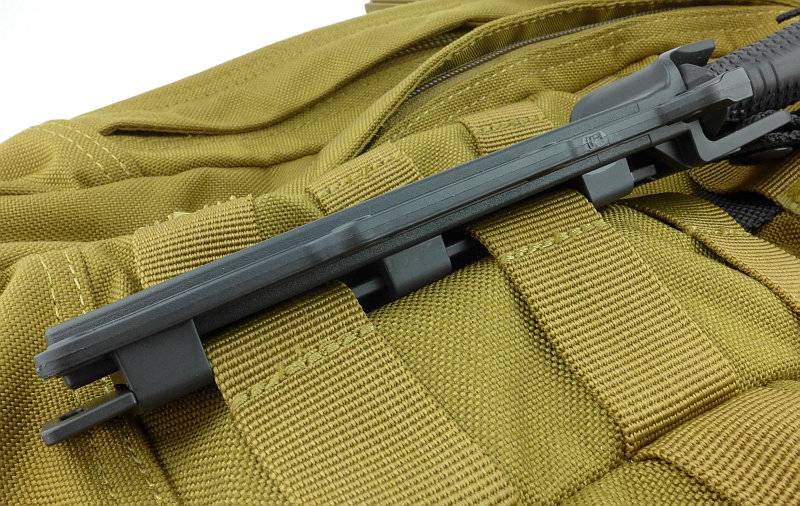
Taking the hanger off for clarity, here we are looking at the moulded sheath’s PALS fixing.
 photo 11 Strongarm PALS P1190460.jpg

Once in place over the PALS webbing you slide the locking bar through the loops to attach it.
 photo 12 Strongarm PALS P1190463.jpg

The PALS fixing can also be used to fit the horizontal belt loops.
 photo 13 Strongarm horiz Belt P1190466.jpg

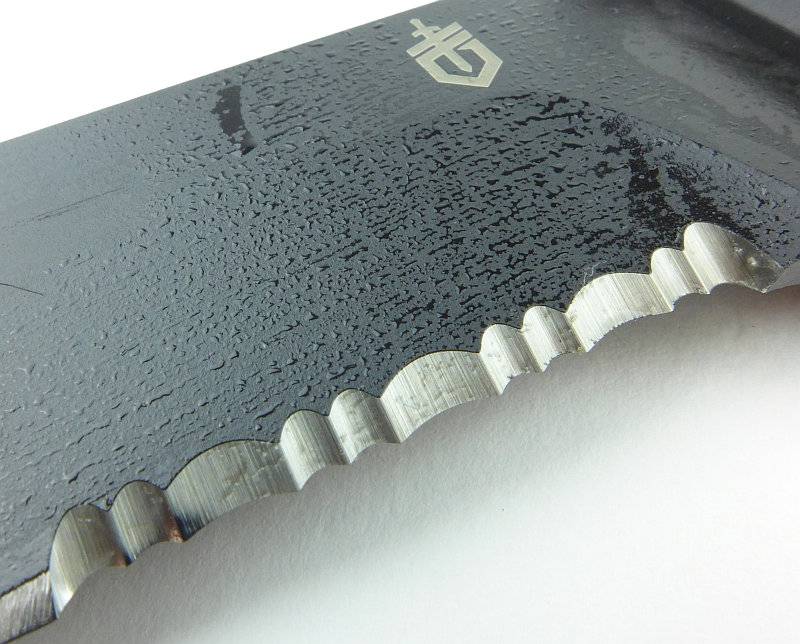
Despite the blade being stainless steel, and having a black ceramic coating the Strongarm arrived with an oiled blade.
 photo 14 Strongarm oil P1190468.jpg

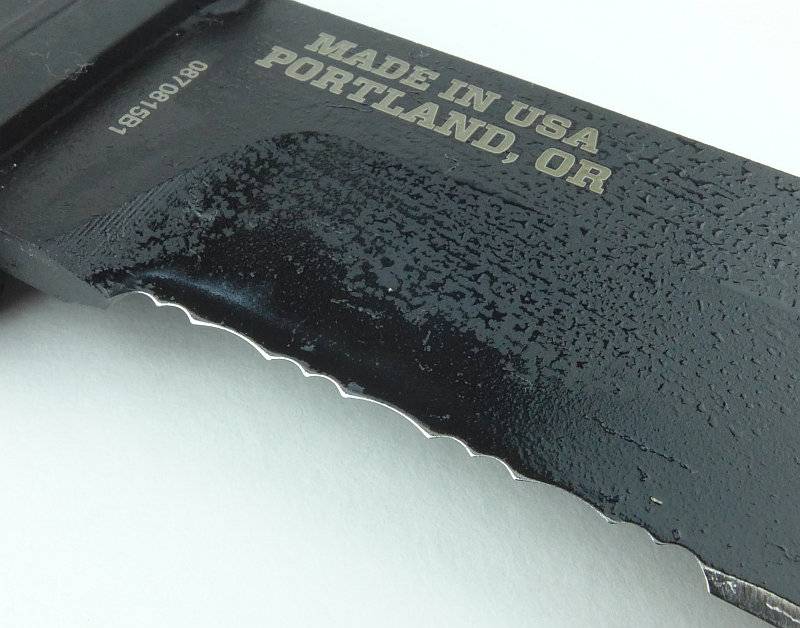
Each knife has a serial number and “Made in USA Portland, OR” proudly inscribed on the blade.
 photo 15 Strongarm serration back P1190472.jpg

The ceramic coating seems to have a slight non-stick effect as the oil beads up on it.
 photo 16 Strongarm serration front P1190481.jpg

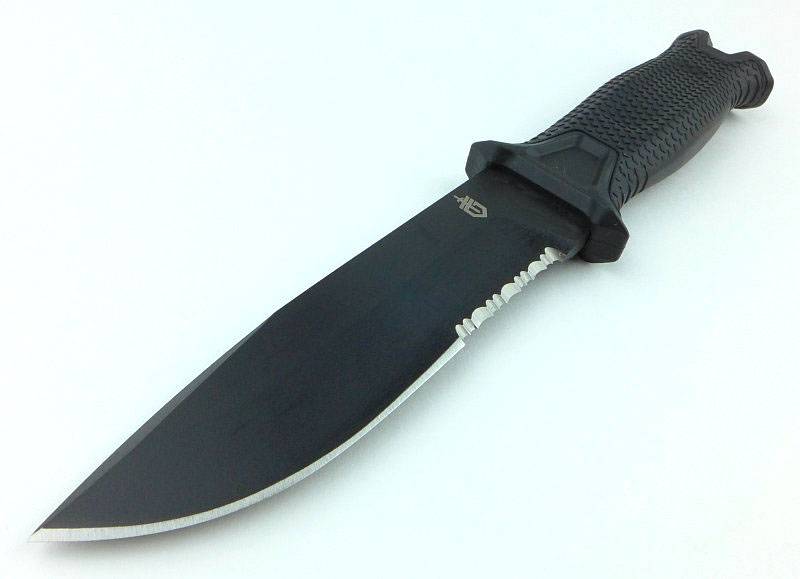
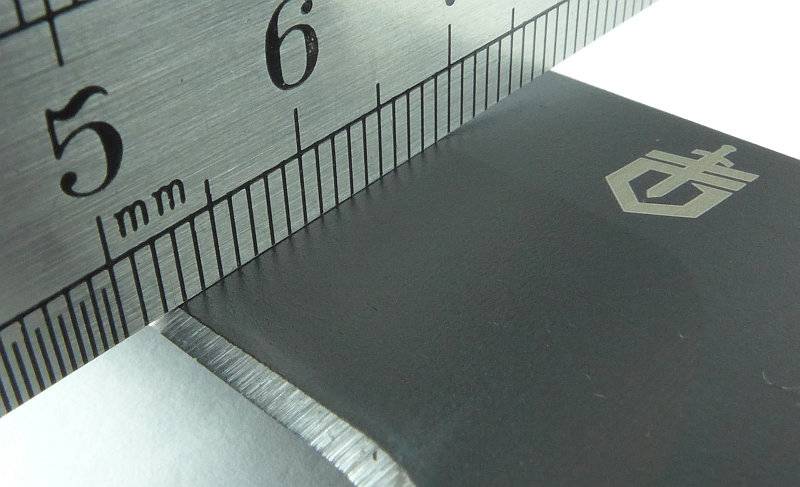
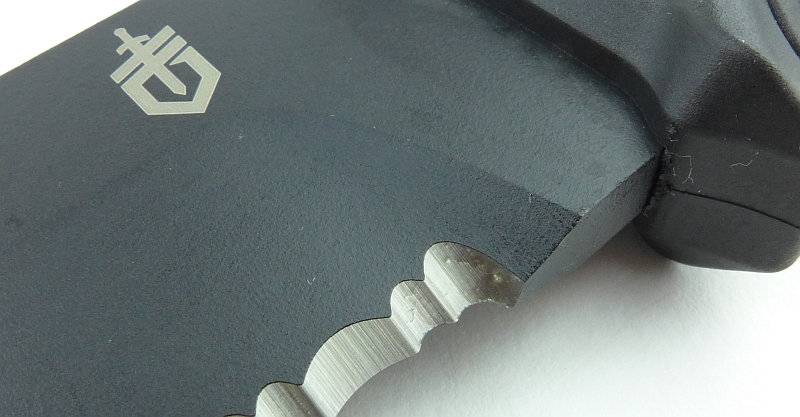
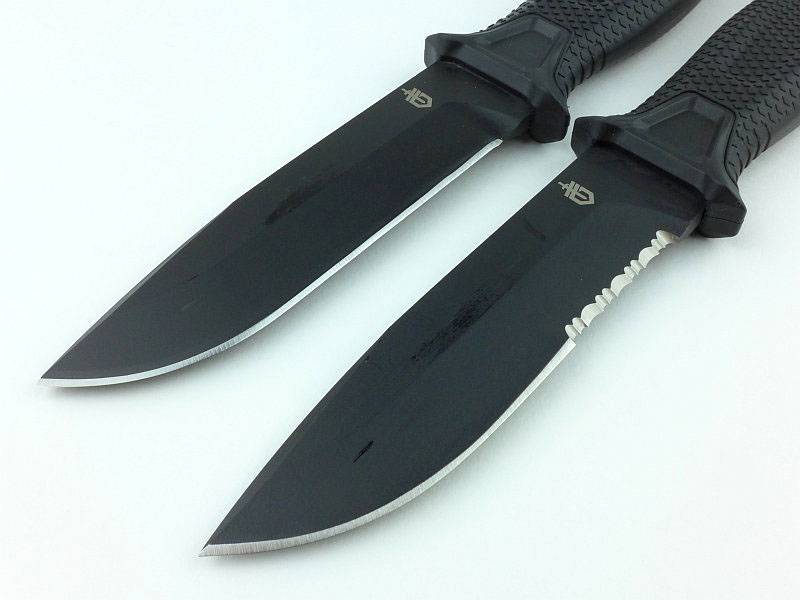
You might also note that the length of the serrations is less than one third of the blade’s cutting edge.
 photo 17 Strongarm angle P1190484.jpg

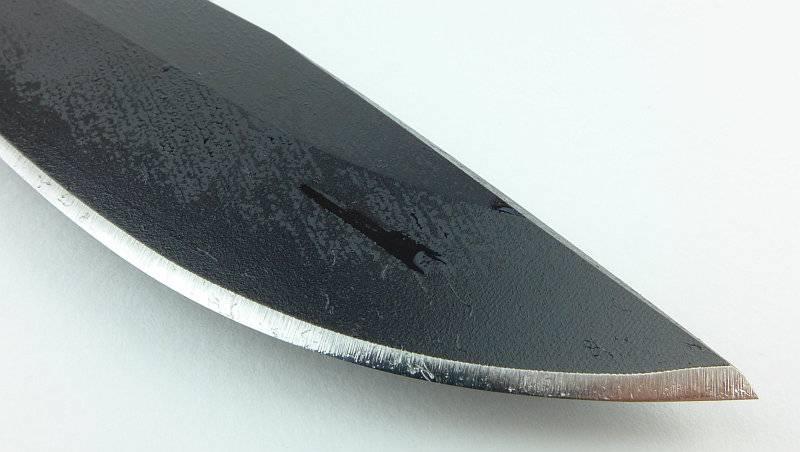
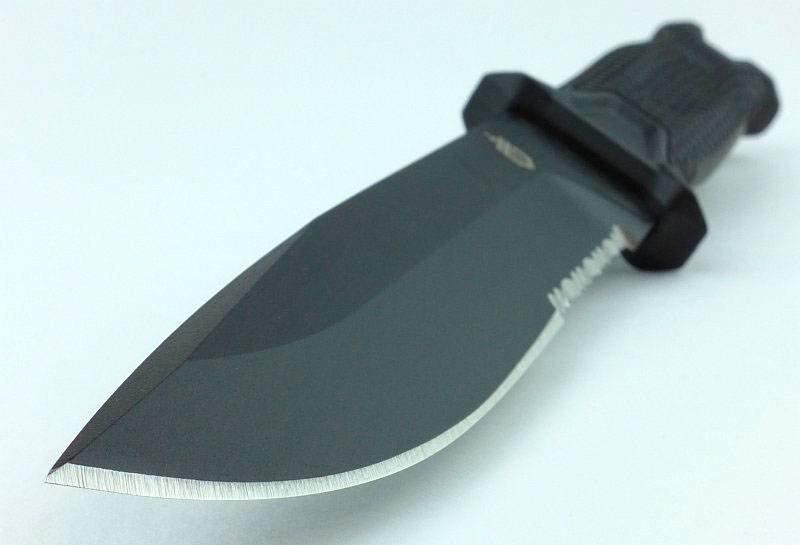
The grind provides a powerful and strong point to the knife.
 photo 22 Strongarm tip P1190724.jpg

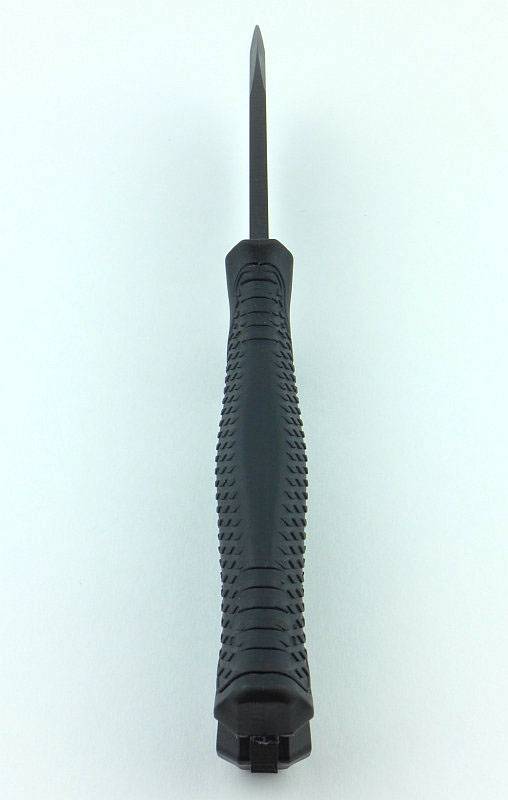
Despite the grip looking quite flat when in the sheath, you can see there is a definite palm swell.
 photo 23 Strongarm swell P1190725.jpg

The full tang protrudes from the handle providing a lanyard hole and glass breaking point.
 photo 24 Strongarm glass breaker P1190728.jpg

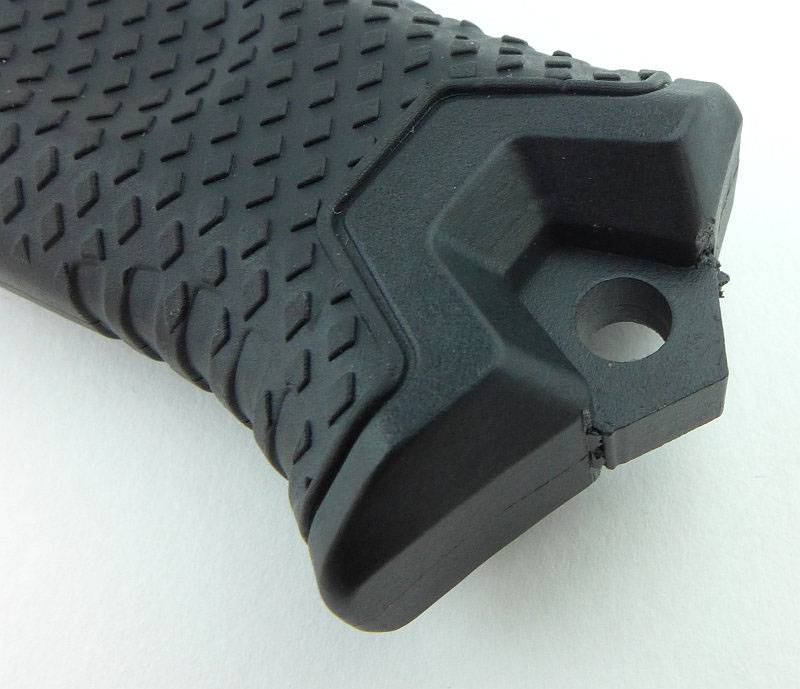
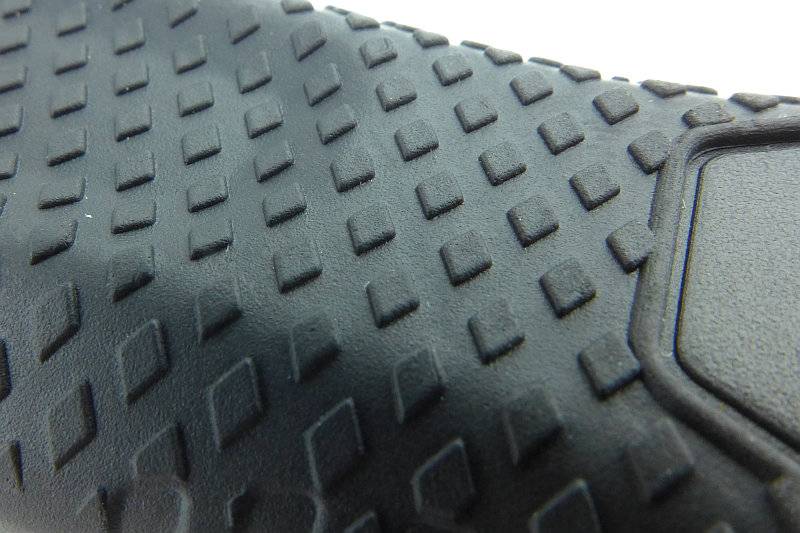
There is a rubber over-mould on the glass-filled nylon handle which has a diamond-shaped raised grip pattern.
 photo 25 Strongarm grip P1190735.jpg

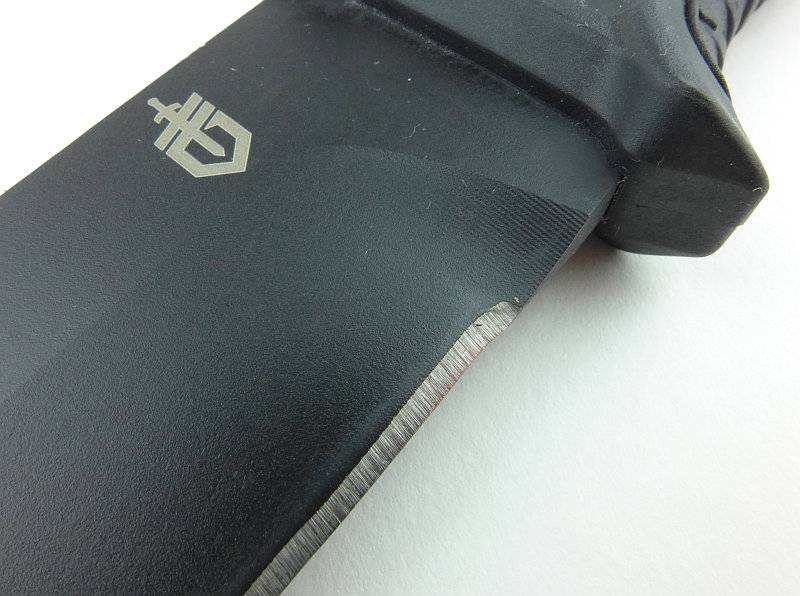
Keeping the blade strength to the maximum the plunge line is a smooth curve transitioning from cutting edge to ricasso.
 photo 26 Strongarm plunge P1190738.jpg

Looking at how the cutting edge terminates for the plain edge version. I shall probably be adding a sharpening choil myself to this one.
 photo 40 Strongarm plain edge P1190804.jpg

As you would expect, when sheathed there is no visible difference between the plain and part-serrated versions.
 photo 28 Strongarm both P1190763.jpg

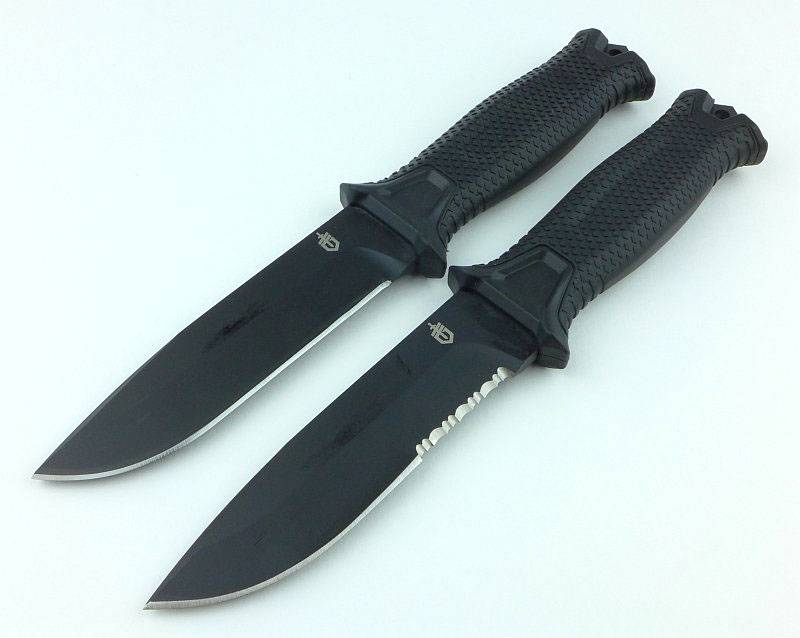
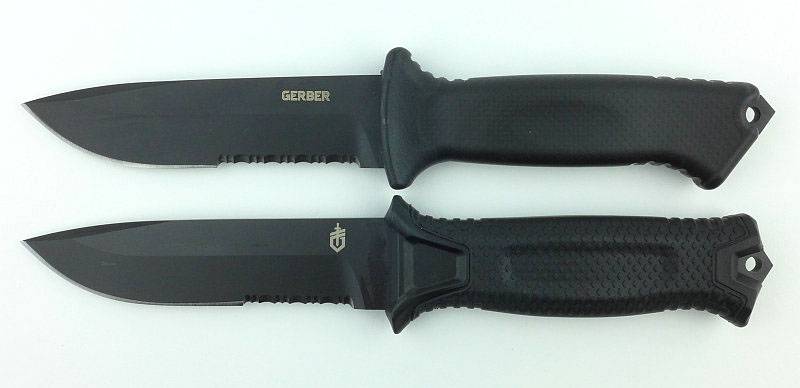
Let’s have a quick look over the difference between them.
 photo 29 Strongarm both P1190768.jpg

Starting with a simple side-by-side.
 photo 30 Strongarm both P1190770.jpg

Of course, the blades are made from exactly the same blade blank.
 photo 31 Strongarm both P1190771.jpg

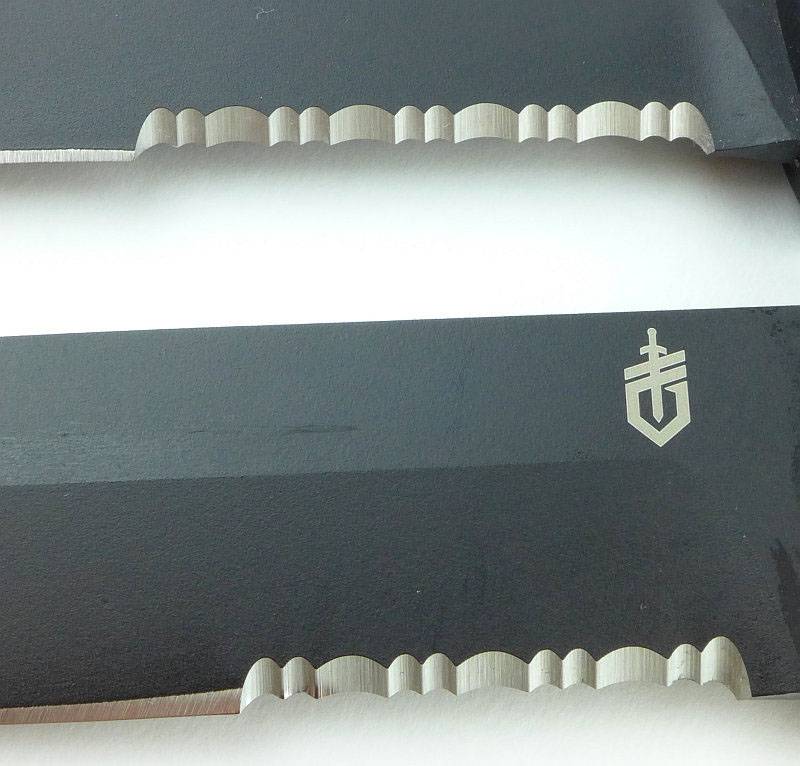
Having that part-serrated edge always seems to make that version look as if it has more ‘belly’ near the front of the blade. This is because the serrations have to be cut quite deeply into the blade due to being a single bevel grind.
 photo 32 Strongarm both P1190774.jpg

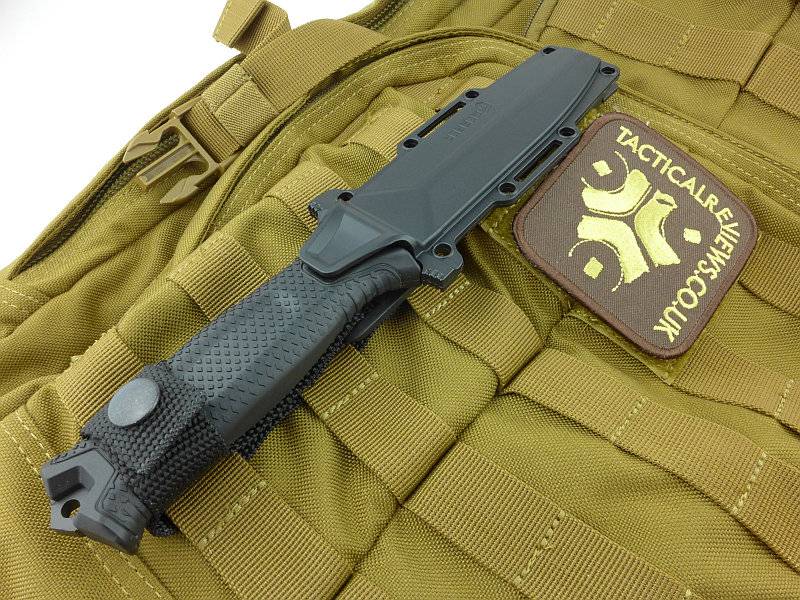
Now we have had a good look over the Strongarm, it is time for that PALS attachment. Thanks to the secure retention system in the sheath, the knife can be happily mounted tip up or down.
 photo 18 Strongarm PALS P1190716.jpg

When PALS mounting you remove the belt loop and use the hanger strap to keep the handle from flapping. This hanger strap has one press-stud to secure it to the webbing and the rest of the strap needs to be tucked out of the way.
 photo 19 Strongarm PALS detail P1190713.jpg

The plastic sheath fits into the PALS webbing like this.
 photo 20 Strongarm PALS detail P1190710.jpg

A very neat PALS compatible system and far more compact than the LMF II or Prodigy.
 photo 21 Strongarm PALS detail P1190706.jpg

What it is like to use?

I’d like to start this section with a little comparison to its most closely related sibling, the Prodigy. I really like the LMF II and Prodigy, so if there are any comments that sound anti-either of them it is only by way of saying how the Strongarm has improved on them.

The most obvious difference is the size of the sheath and the retention tab. The new retention system is secure, but much easier to use. Overall the force required to remove the knife is slightly less with the Strongarm, but still plenty strong enough to keep the knife in place. There are also two thumb tabs moulded into the sheath to give you a leverage point for bringing the knife out of the sheath under much more control than just pulling it out. The streamlining of the sheath makes a huge difference to the apparent size of the knife when carrying it.
 photo 33 Strongarm prodigy compare P1190778.jpg

Once the Prodigy and Strongarm are out of their sheaths they are more similar in appearance but with several key differences that we will take a look at.
 photo 34 Strongarm prodigy compare P1190784.jpg

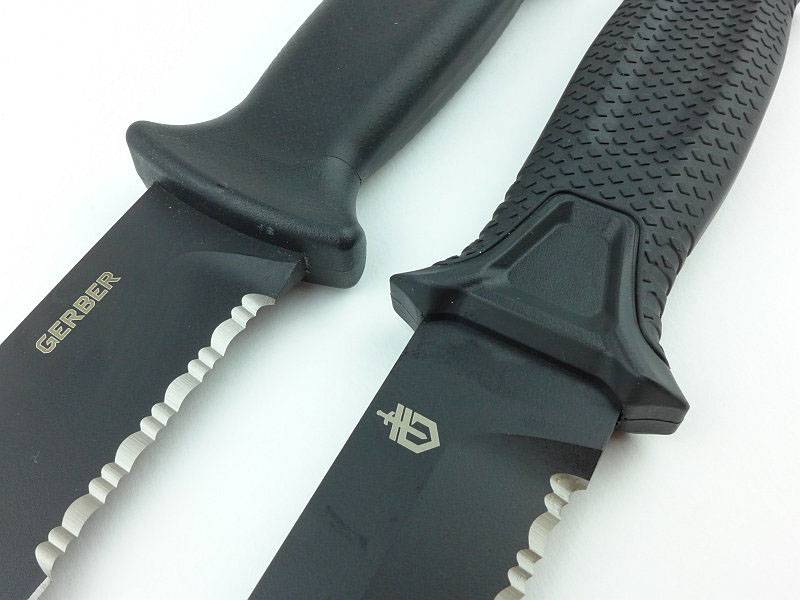
The area of the handle where the retention system holds the knife is quite different. For the older Prodigy, the normal moulded guard is gripped by the sheath, but in the Strongarm a clearly dedicated section of the guard is specifically shaped for the sheath to click into. In this way, instead of the sheath needing to grip the ‘normal’ handle, the new Strongarm has had the retention system designed into the knife handle making it much more precise.
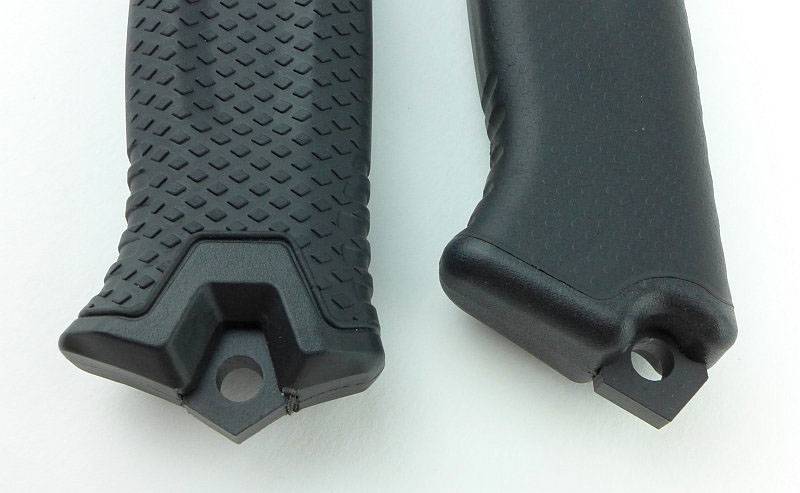
Also of note is the handle texture on the Strongarm; while the Prodigy feels very comfortable and has good grip, the grip pattern of the Strongarm makes it feel rough and like it is positively holding onto you.
 photo 36 Strongarm prodigy compare P1190789.jpg

The part-serrated portion of the blade on the Strongarm has been reduced. This is most welcome as the serrated part of the Prodigy blade did seem to dominate it.
 photo 37 Strongarm prodigy compare P1190792.jpg

Two features we can notice here are the position of the striker on the pommel, and the grip length. The striker on the Strongarm is more central than on the Prodigy making it more natural to strike on target. Though the handle itself is the same overall length, the grip hook has been pushed further along the handle effectively making the grip longer giving more room for a gloved hand.
 photo 38 Strongarm prodigy compare P1190794.jpg

Finishing up in this comparison with an overhead shot which shows how similar the overall dimensions are to the older Prodigy.
 photo 39 Strongarm prodigy compare overall P1190801.jpg

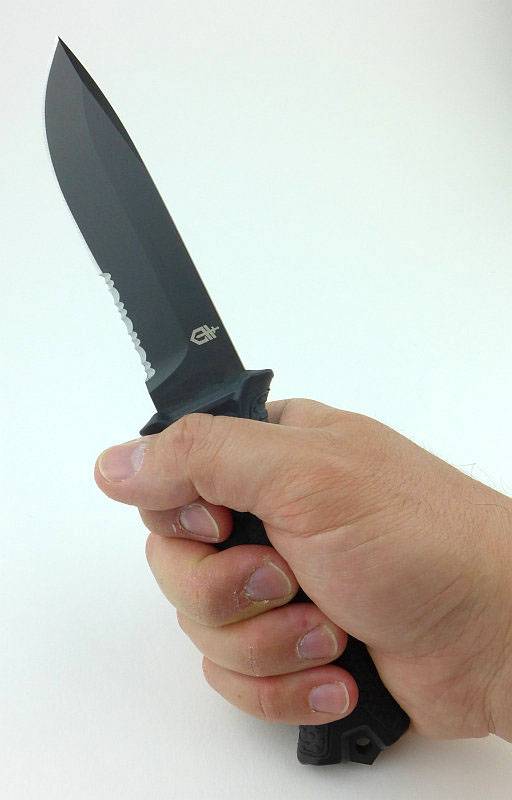
In the Strongarm, Gerber have pitched the size bang-on for an easily carried but still capable survival knife. For reference, I take XL size gloves. Personally I prefer a little more body to the grip, but this does need to work well for the average hand and I can still get a good grip without it feeling too small.
 photo 27 Strongarm in hand P1190747.jpg

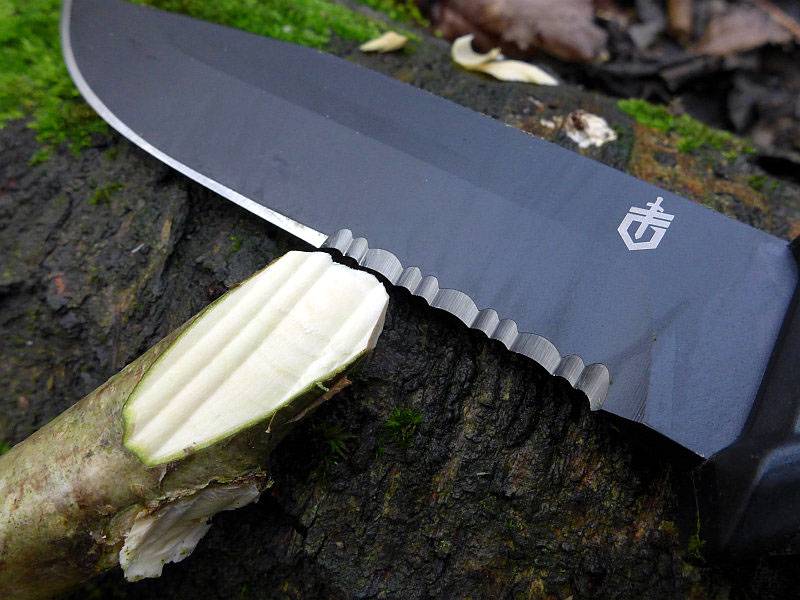
I don’t have the facilities to test the Strongarm in an escape/rescue/breaching scenario so instead have to focus on more of the survival and camping aspects. Both the plain edge and part-serrated version are on test, and personally I favour the plain edge as a general working tool, but do see a place for the part-serrated as a backup tool. One of the reasons I don’t like the part-serrated blade is for the wood preparation and carving round the camp. As shown here the serrations make significant shaping in those power cuts carried out close to the handle. It certainly cuts well, but serrations cuts best when slicing and not so well in push cuts. Also if your uses are for cutting a lot of fibrous material and ropes/cords, then the serrations are going to be a real boon.
 photo 48 Strongarm whittle P1250185.jpg

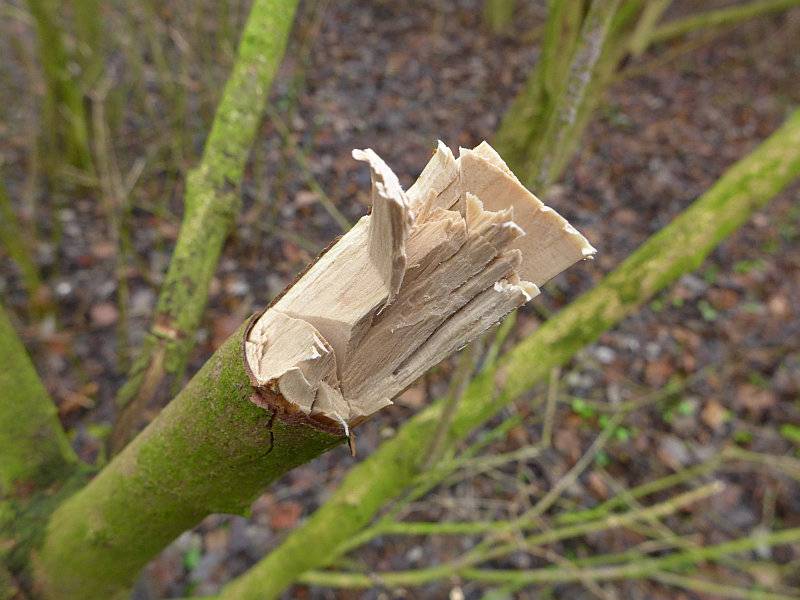
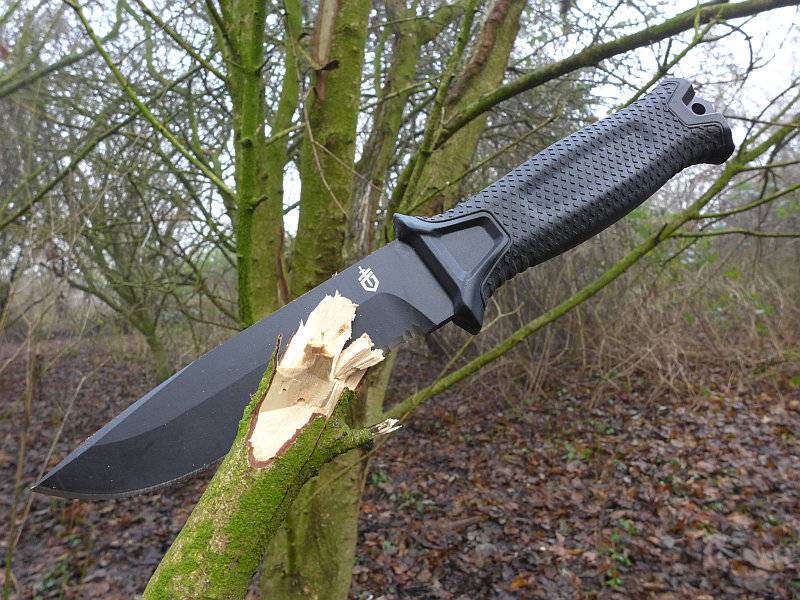
Thanks to the thick blade stock, the Strongarm’s blade has enough weight in it to work on its own hacking into branches. Here is a rather untidy job on some dormant wood and is my first attempt while I was getting a feel for the best grip to use (two or three finger).
 photo 49 Strongarm hack P1250188.jpg

So even before you have found yourself a baton, it gets through some smaller branches easily enough. More fatiguing than a bigger heavier knife, but it will do the job.
 photo 50 Strongarm hack P1250198.jpg

Having followed the evolution of the Gerber line to the Strongarm, there isn’t a single feature I would undo and want to revert to an earlier version. I still like and use the earlier knives, but the Strongarm is an improvement over them in every way, not least the ease of carry. Remember the ‘best’ survival knife is the one you have on you, so where I might not carry the LMF II, I would carry the Strongarm.

Review Summary

The views expressed in this summary table are from the point of view of the reviewer’s personal use. I am not a member of the armed forces and cannot comment on its use beyond a cutting tool or field/hunting knife.

Something that might be a ‘pro’ for one user can be a ‘con’ for another, so the comments are categorised based on my requirements. You should consider all points and if they could be beneficial to you.

_______________________________________________ _______________________________________________
Things I like What doesn’t work so well for me
_______________________________________________ _______________________________________________
Simple and effective blade retention system. Retention strap press-stud was initially too stiff and caused fraying of the strap.
Part-serrated and Plain Edge versions available. Blade a little too thick for good food preparation.
Multi-mount sheath with belt, horizontal and PALS options.
Full Tang.
Ambidextrous sheath.
Enough weight in the blade to chop.


Discussing the Review:

Please feel free to add comments to the review, but the ideal place to freely discuss these reviews is on a forum. If you started reading the shorter forum version of the review, but followed the link this full exclusive review, please return to that forum to discuss the review there.
If you read the review entirely on Tactical Reviews, please consider one of the following to join in any discussion.

BladeForums – Knife Reviews (US based Forum for Knife Discussion)

CandlePowerForums – Knife Reviews Section (Largest and Friendliest Flashlight Community Forum)

Gear Review: DMT Aligner ProKit and DuoSharp 10″ Bench Stone

 photo 00-DMT-featureV2-P1180049.jpg

It is possible to put a great edge onto a knife with very basic equipment and a lot of time. However, with the ever harder and more abrasion resistant steels, diamond stones make it much easier and faster to achieve that edge. DMT are one of the best, if not the best, makers of diamond sharpening stones. If you have checked my ‘Recommended’ page you will have seen that DMT was actually already my favourite diamond sharpener brand, with a pair of DiaFolds (Coarse/Extra Coarse and Fine/Extra Fine) always with me for field maintenance.

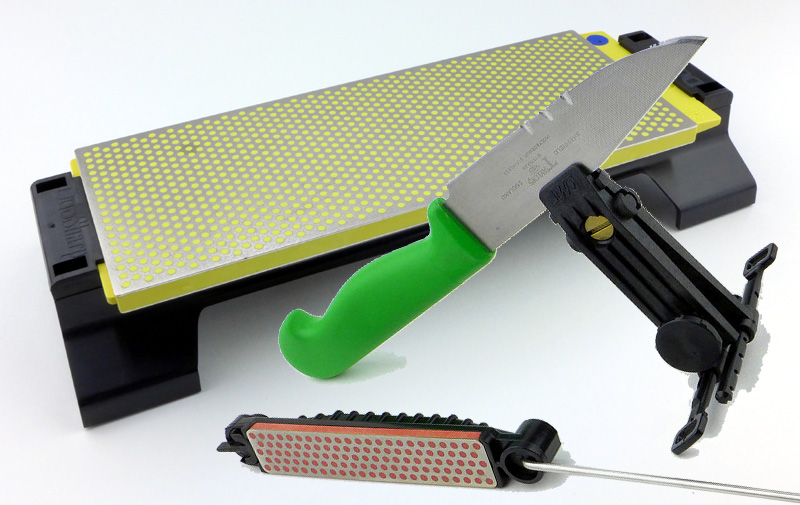
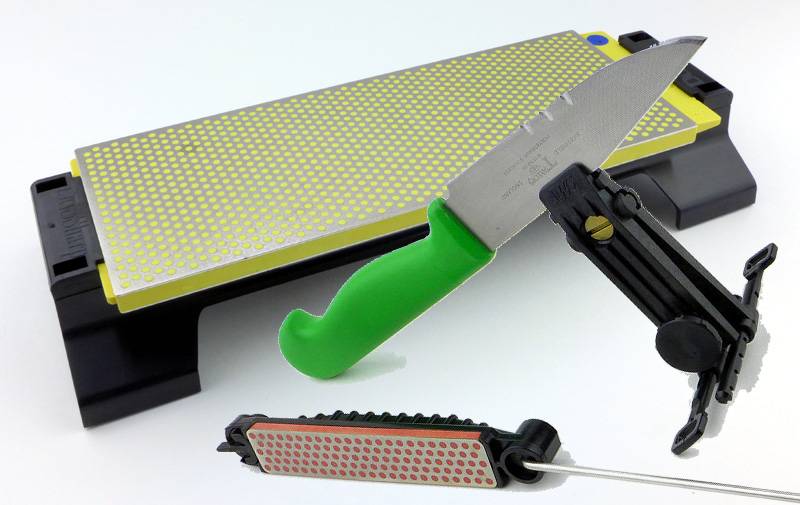
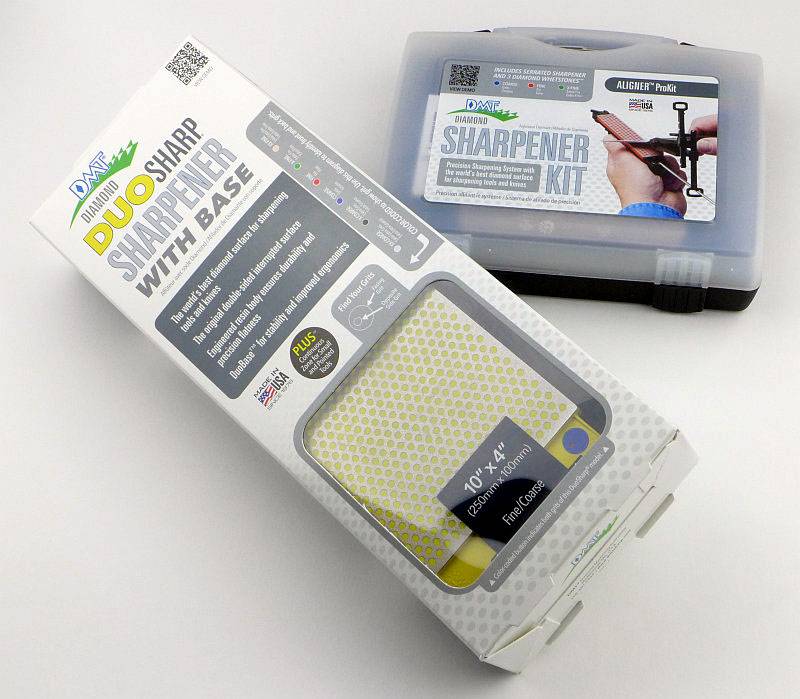
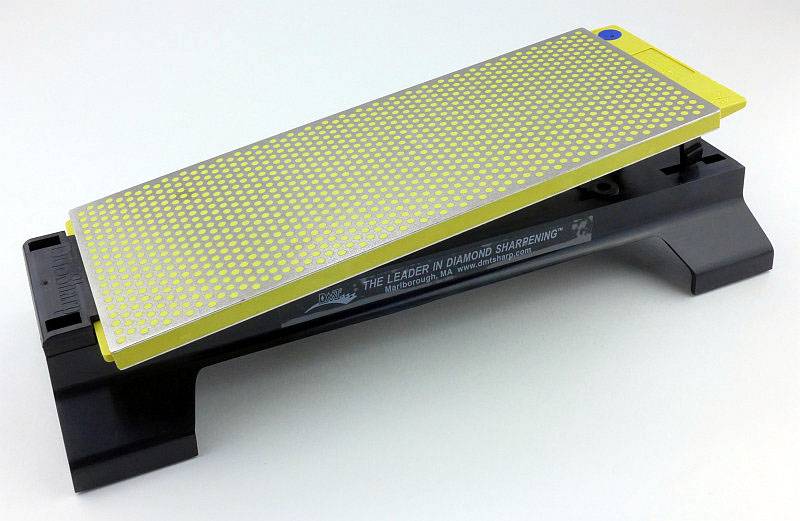
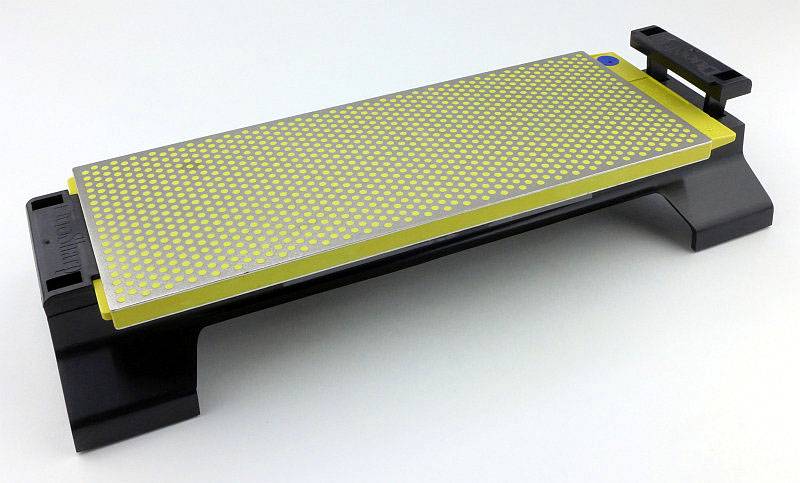
In this review I’m looking at two very different sharpeners, a large bench stone (Duo Sharp 10″ Bench Stone) and a guided precision sharpening system (Aligner ProKit).

 photo 00 DMT both P1170999.jpg

“Getting your EDGE back”:

There are so many variations in knife design, size and purpose, and I shall continue to try and review as many as I can, but the one thing that they all have in common is a cutting edge, and it is that edge which makes a knife into a tool. When you buy a knife, the factory put an edge on the blade, but this can vary considerably in quality even from good manufacturers. Relying on the factory edge is like buying a car and only driving it as far as the original tank of fuel will take you. You can transform the performance of a knife, so it is worth investing in quality sharpening equipment.

Actually this section title uses the name of a sharpening service I offer to neighbours (100% going to charity), and is absolutely appropriate for anyone who wants to have the best performance from their cutting tools.

I’ve used just about every method of sharpening, both manual methods and powered. These range from the humble carborundum bench-stone to high-end guided sharpening systems, as well as various wet/dry grinders and belt sanders. Manual sharpening does take longer, but gives you greater control and removes less metal. Where Diamond sharpeners really stand out is the speed they cut, and a quality diamond stone can cut 6-10 times faster than other stones. That is a lot fewer strokes you need to make.

There are many diamond stones to choose from with very different prices. DMT claim the flattest sharpening surfaces with the highest quality of diamond particle and density of coating. I can’t examine this to confirm or deny their claim, but what I can say is that where other diamond stones have let me down and worn out quickly, the DMT stones I have, have worked very very hard and are still going strong.

A few more details of the Aligner ProKit:

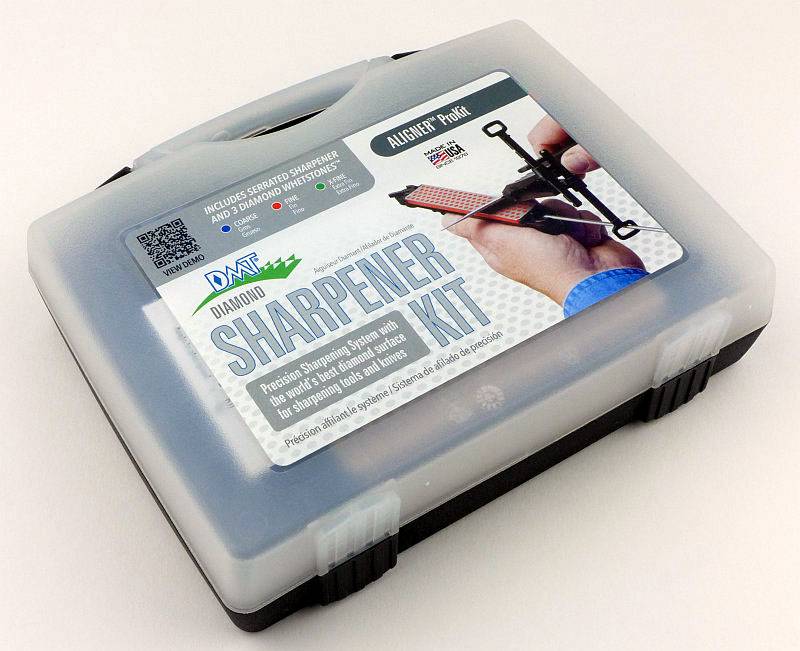
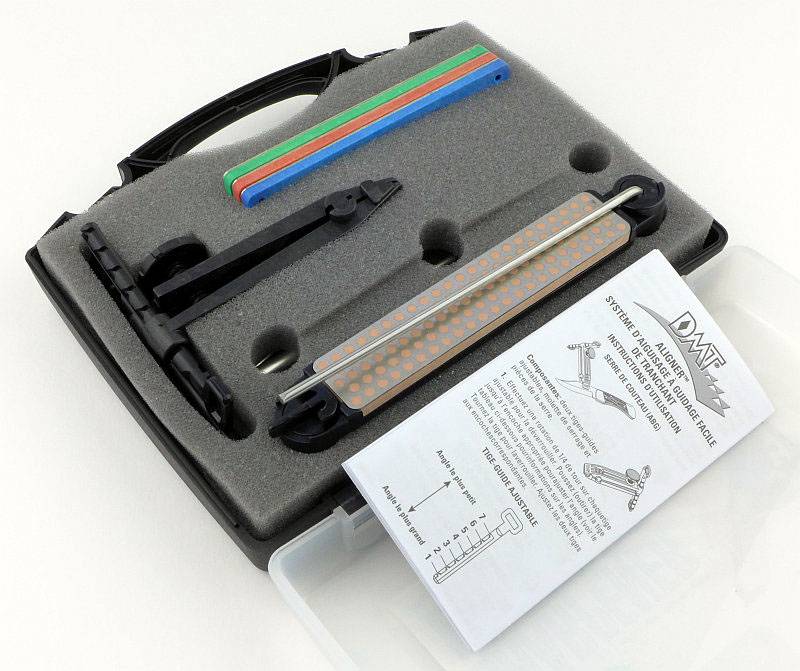
The Aligner ProKit comes in a storage/carry case.
 photo 01 DMT Aligner Box P1180054.jpg

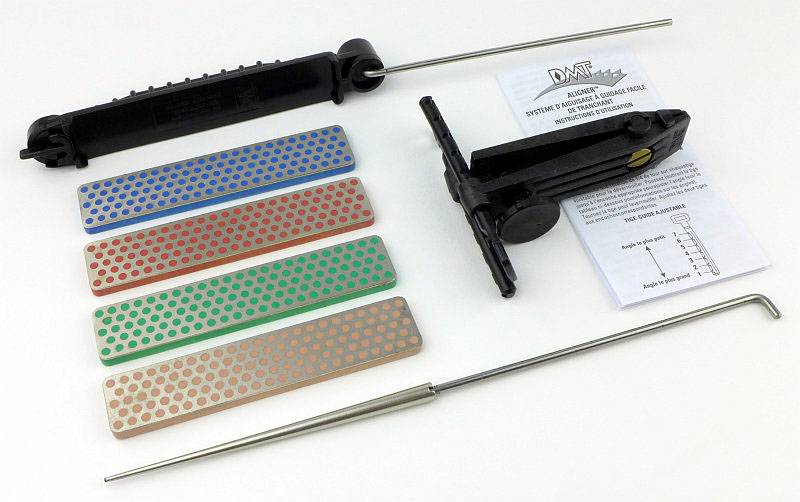
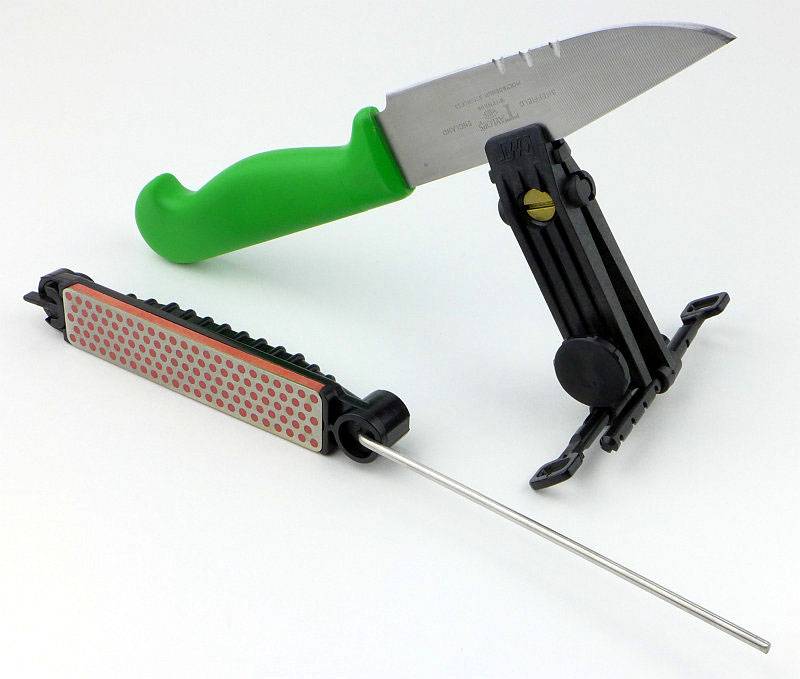
For this review DMT have also included the Extra-Extra-Fine stone (pink colour) so this is not normally in the ProKit pack. What is included are the three grits Coarse, Fine and Extra Fine, the stone holder/guide-rod, the Aligner adjustable clamp and guide, a tapered serration sharpening diamond coated rod plus the instructions.
 photo 02 DMT Aligner Box open P1180056.jpg

Laying everything out, this is what is in the box (remember the pink stone is not part of the ProKit).
 photo 03 DMT Aligner Box contents P1180061.jpg

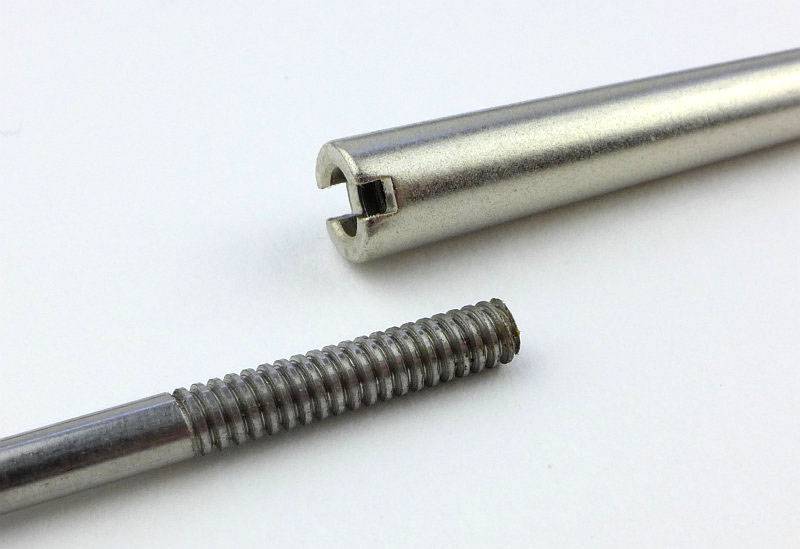
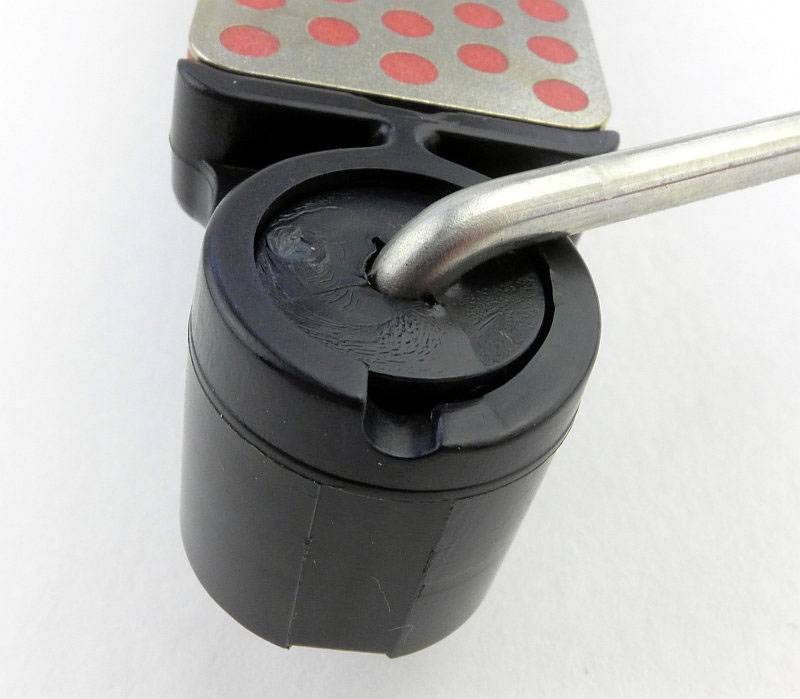
As it can’t be fitted into the stone holder, the tapered rod has its own guide rod which screws into the widest end.
 photo 04 DMT Aligner serration rod thread P1180063.jpg

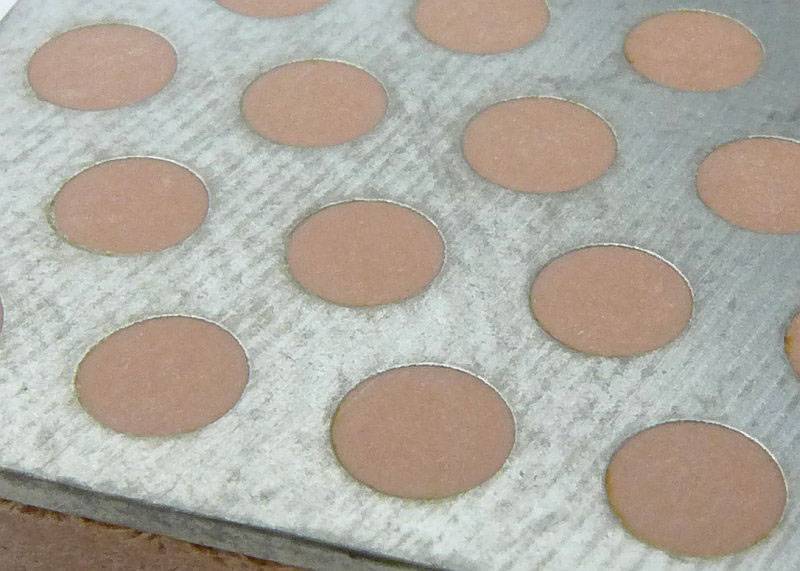
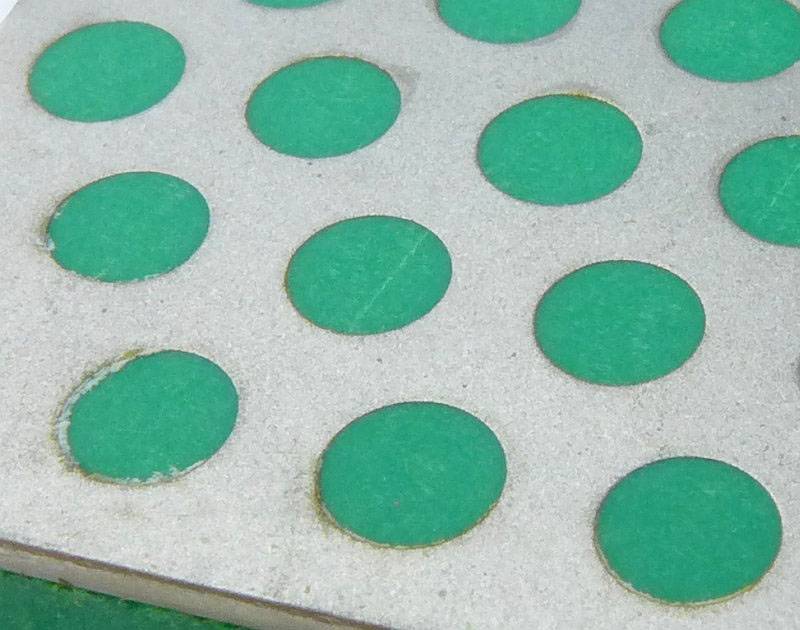
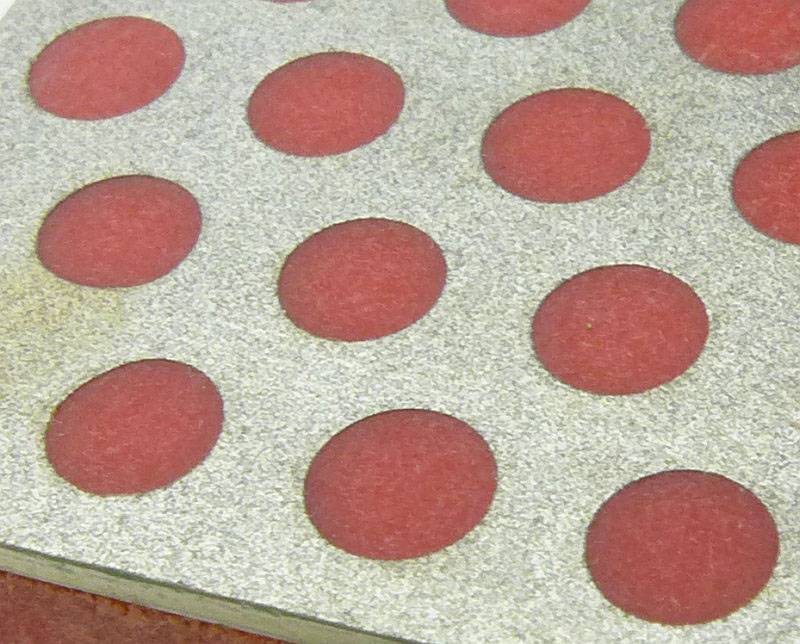
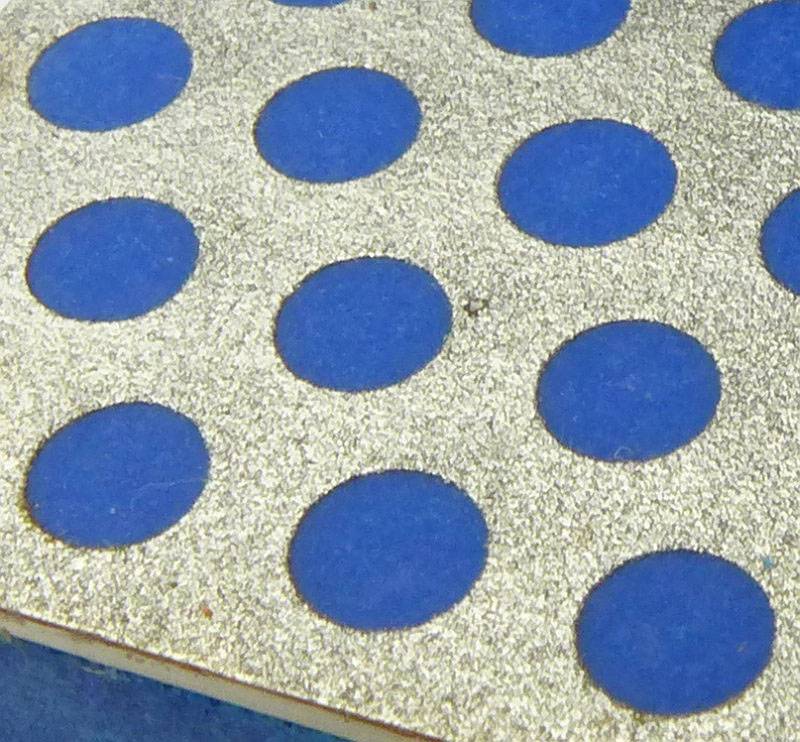
I don’t have a microscope to really go in ultra-close to the different grit stones, but this series of images at the same scale give an indication of the different grits.
First up is the Extra-Extra-Fine where the surface appears almost as if there were no particles in it.
 photo 05 DMT Aligner extra fine P1180066.jpg

Moving up to Extra-Fine and the surface is starting to take on a textured appearance.
 photo 06 DMT Aligner fine P1180067.jpg

With Fine you can see the grainy surface.
 photo 07 DMT Aligner medium P1180068.jpg

Finally with Coarse there is a distinct texture to the surface of the stone.
 photo 08 DMT Aligner coarse P1180069.jpg

Each of the different grit stones are fitted into the holder for use.
 photo 09 DMT Aligner holder P1180071.jpg

The stone is pressed into the pocket in the holder.
 photo 10 DMT Aligner holder P1180073.jpg

Then the lock at the end of the holder is turned to hold the stone securely in place.
 photo 11 DMT Aligner holder P1180074.jpg

A closer look at the rotating lock. Initially the fit of the stones into the holder is snug enough to not need the lock, but as you use it more they loosen up slightly and you do need to use the lock.
 photo 12 DMT Aligner holder lock P1180075.jpg

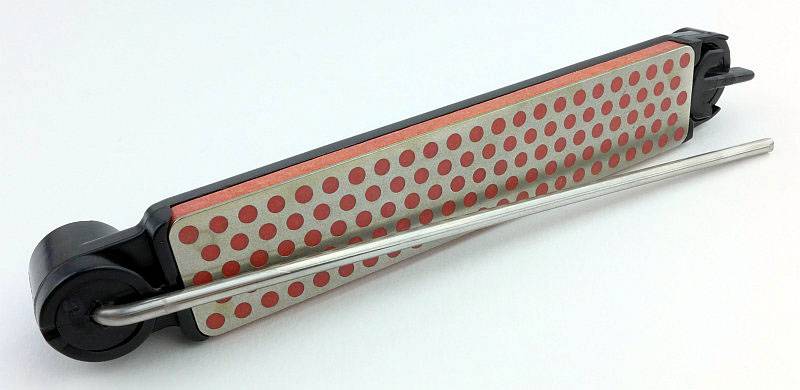
Being a portable kit, the stone holder has a folding guide rod. Here it is folded over the stone.
 photo 13 DMT Aligner holder folded rod P1180078.jpg

The rod hinges round and locks into place in the open position.
 photo 14 DMT Aligner holder rod hinge P1180079.jpg

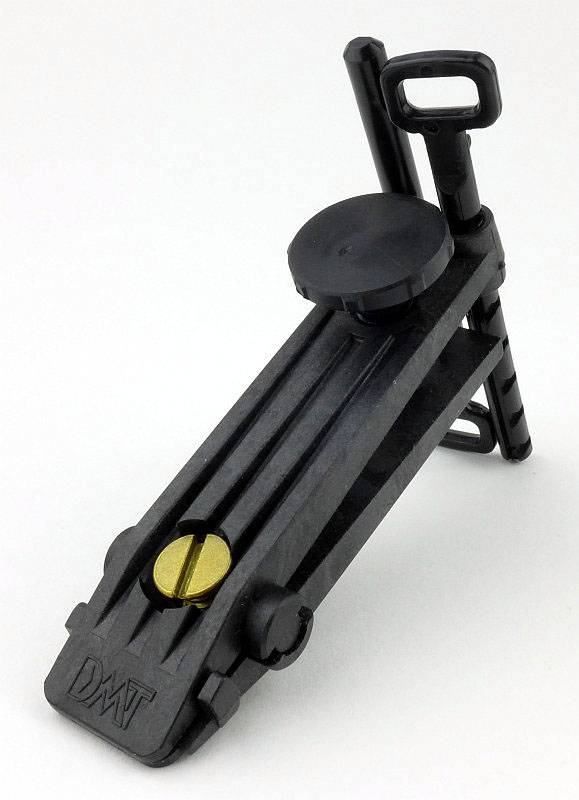
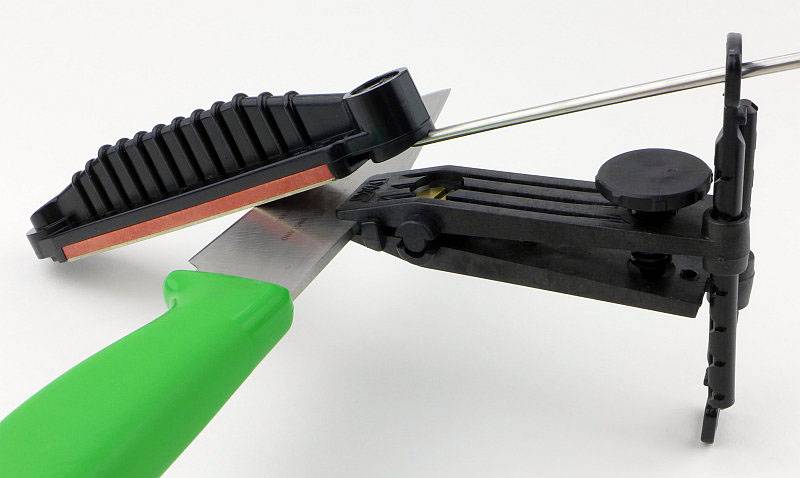
Then we have the crucial part of a guided system, the guide itself. This is a clamp which fits onto the blade spine and has adjustable guide rings for the guide rods to run in.
 photo 15 DMT Aligner clamp P1180082.jpg

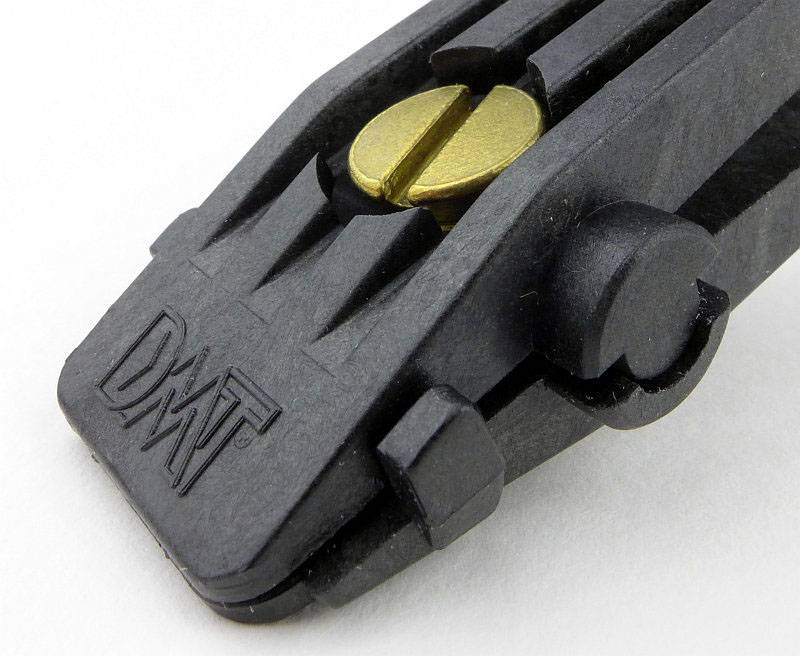
Looking in close at the clamp jaws. There is a brass screw for adjusting the width of the jaws.
 photo 16 DMT Aligner clamp jaws P1180084.jpg

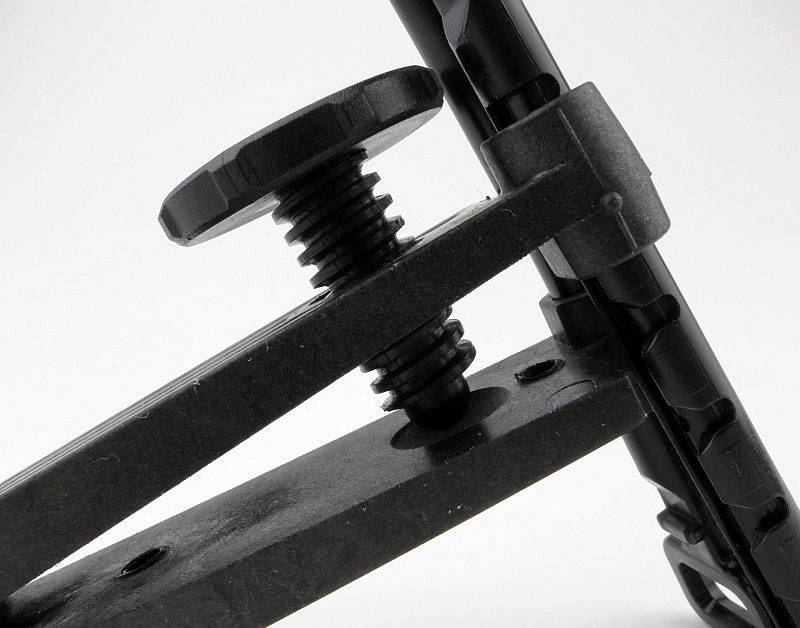
With the jaws adjusted to the right size, a locking screw is used to tighten the jaws onto the blade.
 photo 17 DMT Aligner clamp lock screw P1180085.jpg

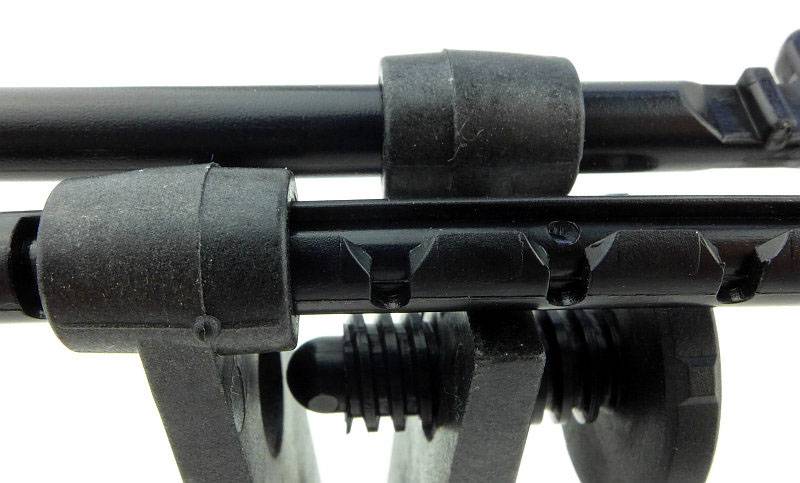
Each of the two guides have a number of positions they can be set to. Each of these positions has a groove moulded into the guide arm.
 photo 18 DMT Aligner clamp guide adjuster P1180087.jpg

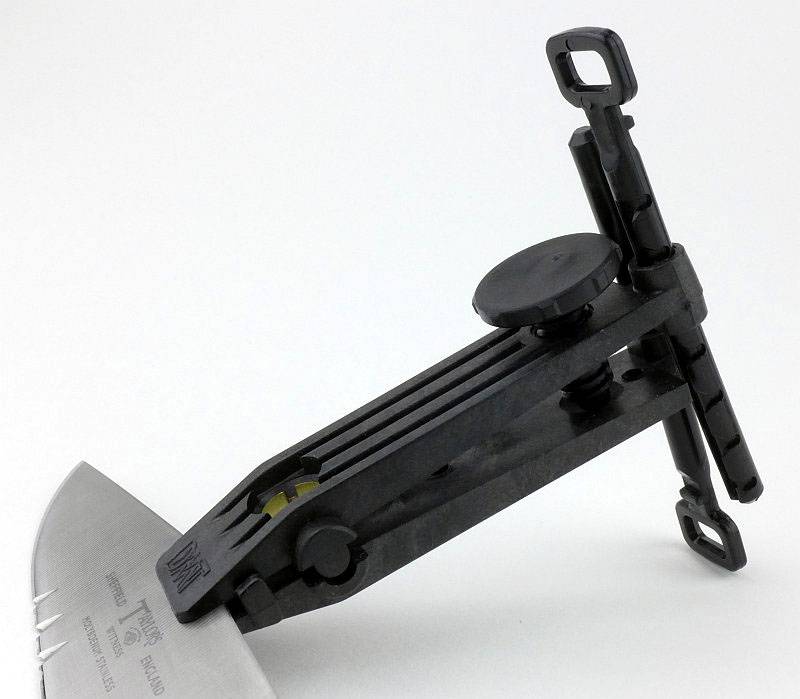
Here we have the clamp fitted onto a blade and the guides set to position 3.
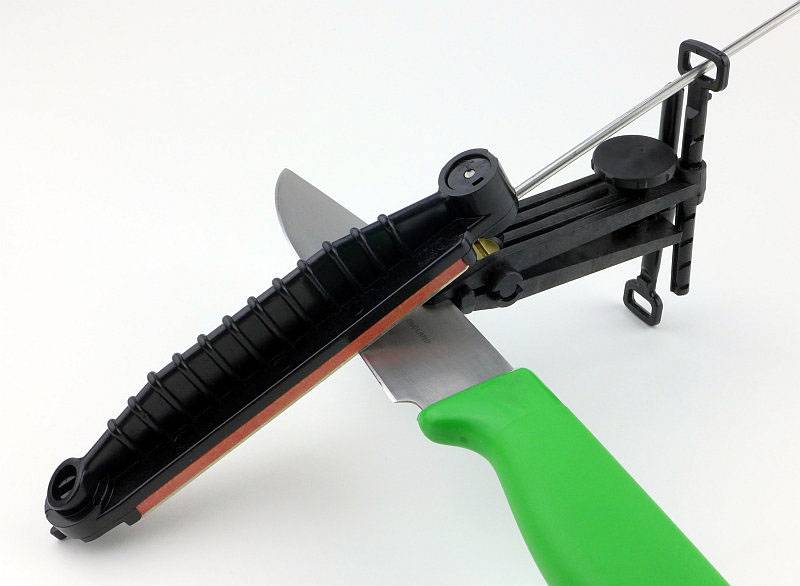
 photo 19 DMT Aligner clamp fitted P1180095.jpg

A few more details of the DuoSharp Bench Stone:

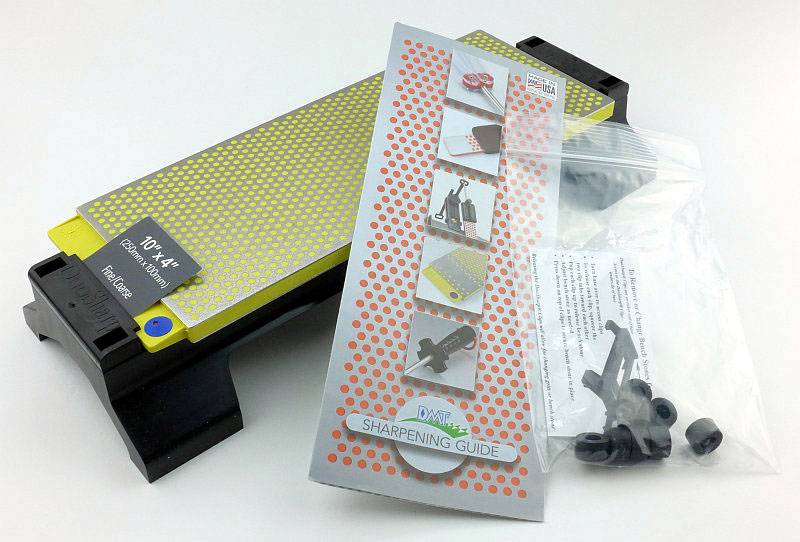
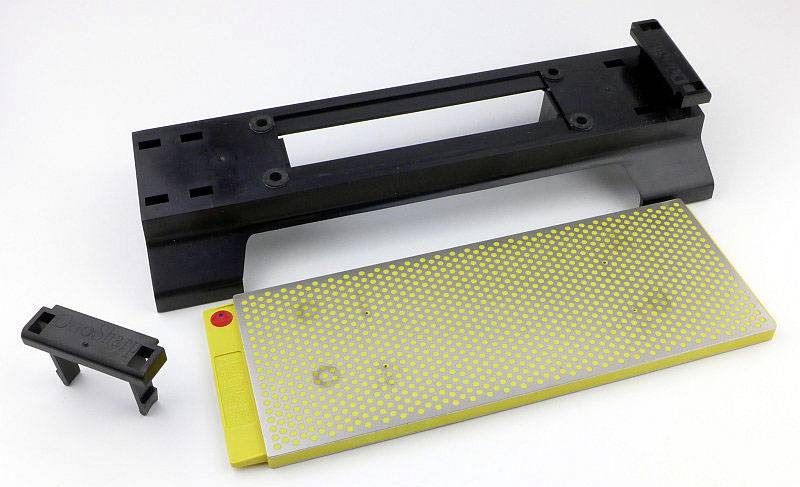
The box was shown earlier along with the Aligner ProKit. Inside the box you get the DuoSharp, a sharpening guide (showing other DMT products) and a set of rubber feet.
 photo 01 DMT Benchstone contents P1180008.jpg

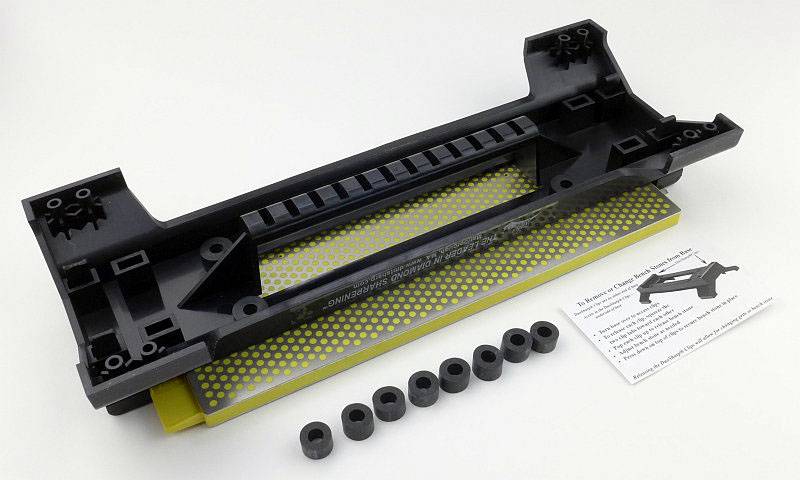
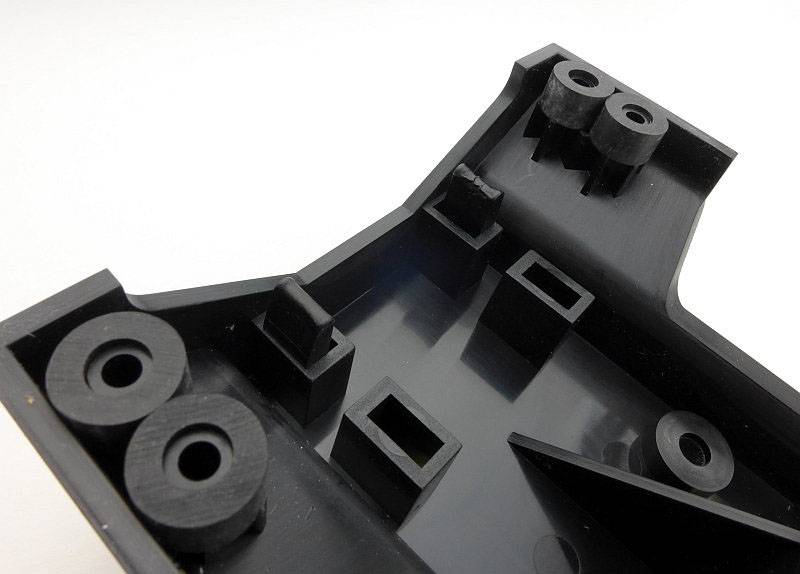
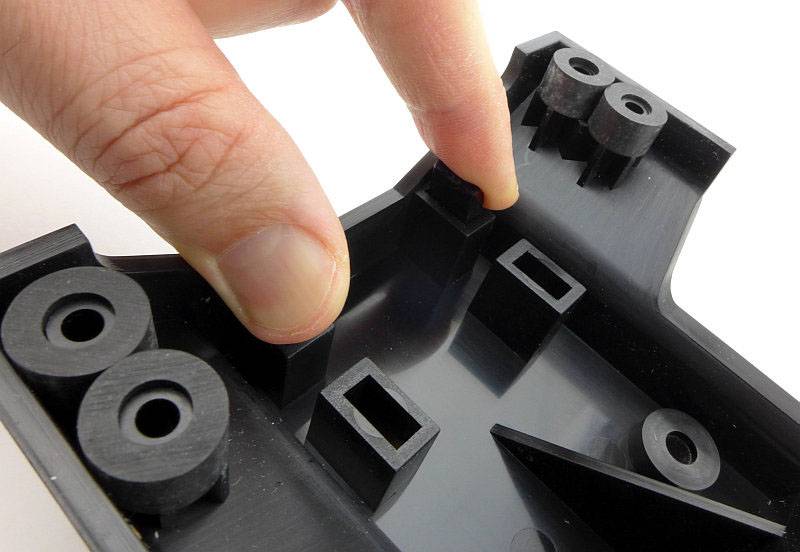
There are eight feet which need to be fitted to the eight pegs (two in each corner).
 photo 02 DMT Benchstone feet P1180012.jpg

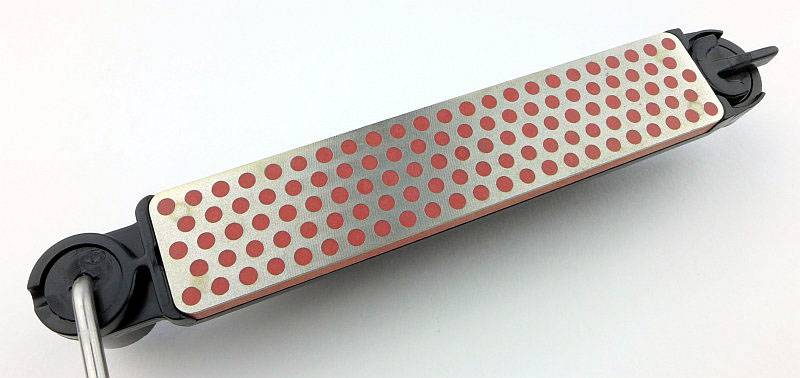
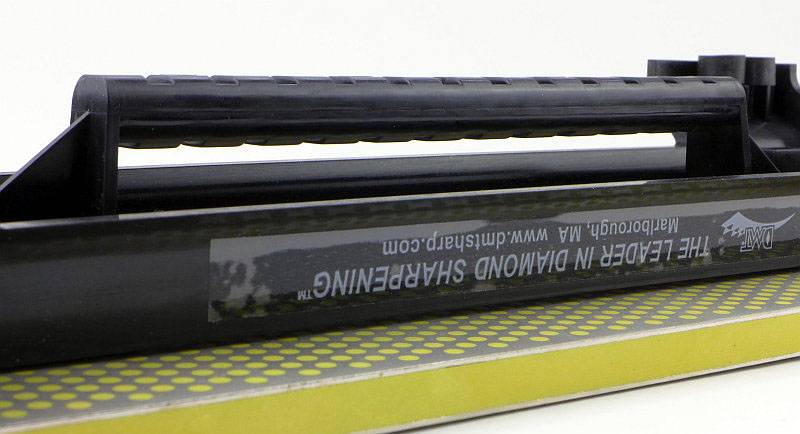
While the bench stone is upside-down one of its stand-out features can be seen – a handle. This is part of the DuoBase design.
 photo 03 DMT Benchstone handle P1180014.jpg

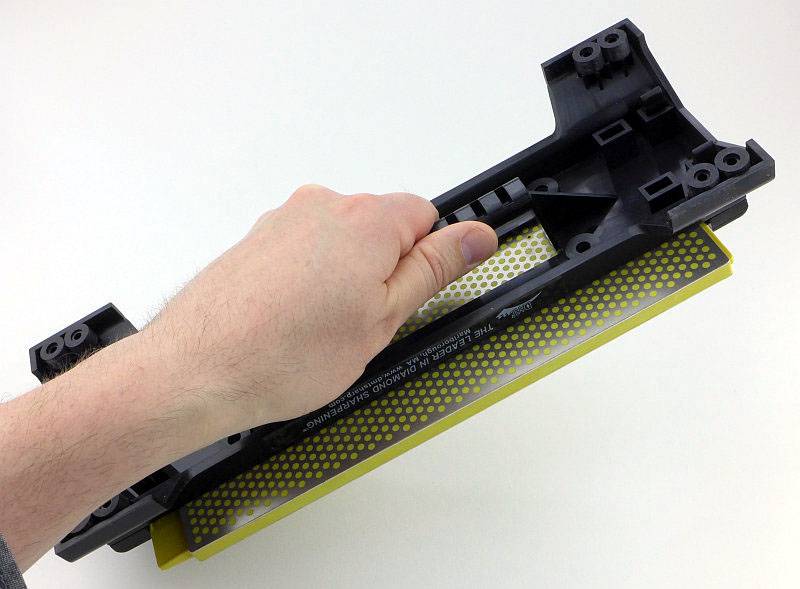
The handle means that you can take the stone to the blade instead of the blade to the stone. For larger blades this is ideal and makes the DMT benchstone pretty unique. Later on I show an example of exactly this with a ham knife.
 photo 04 DMT Benchstone handle P1180017.jpg

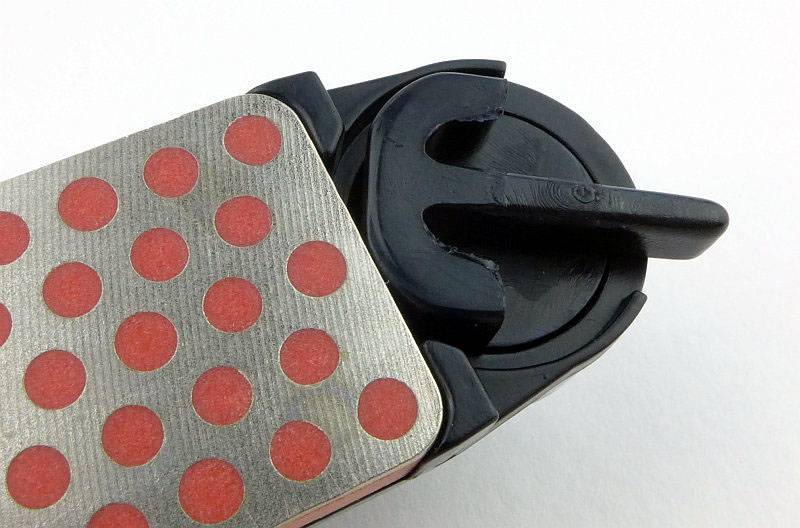
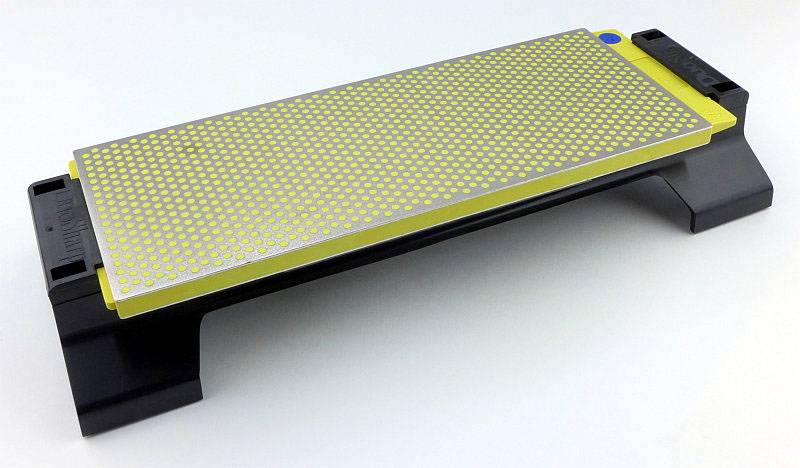
The Diamond stone slab is double-sided, so for the other grit you need to flip it over. It is held onto the base with two plastic clamps. Turning the base over you can see the two tabs that click into place. (you can also see the positions these can be put for the smaller 8″ stone.)
 photo 05 DMT Benchstone clamp P1180021.jpg

Simply pinch these together to release the stone clamp.
 photo 06 DMT Benchstone clamp release P1180023.jpg

You only need to remove one of the clamps to allow the stone to come free.
 photo 07 DMT Benchstone off P1180024.jpg

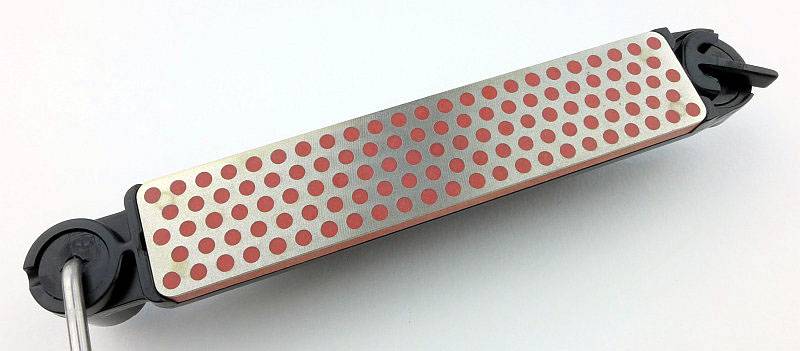
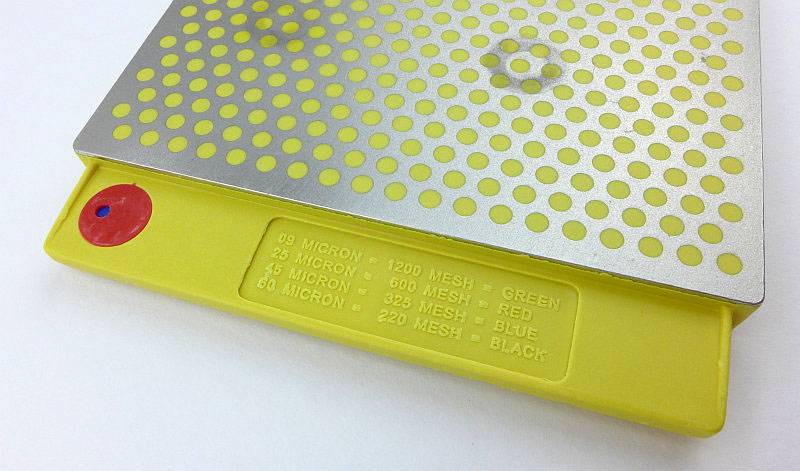
Fitting in with the colour coding across the DMT range the Red dot represents the Fine grit. The smaller blue dot shows what grit the other side of the stone has – in this case Blue/Coarse.
 photo 08 DMT Benchstone grit indicator P1180028.jpg

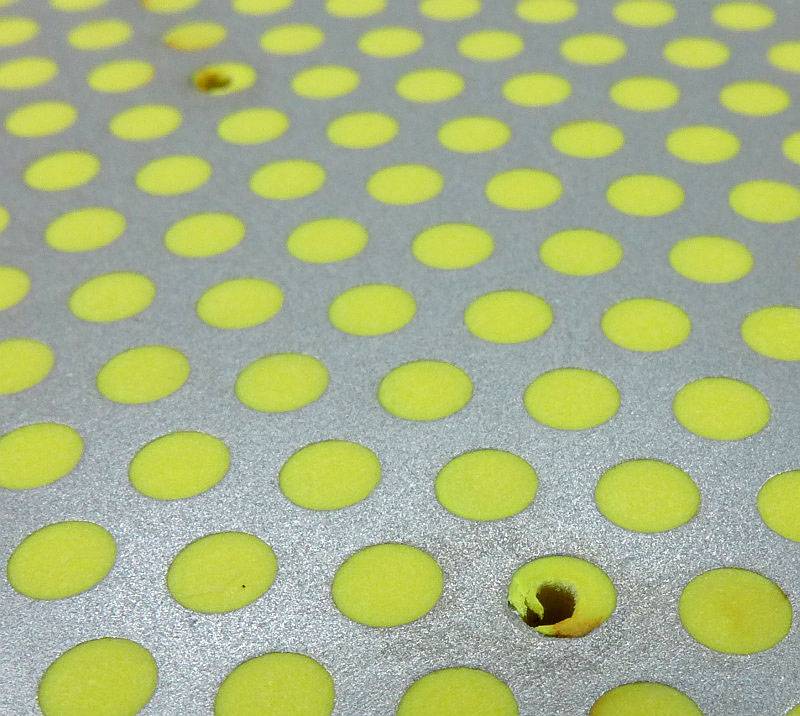
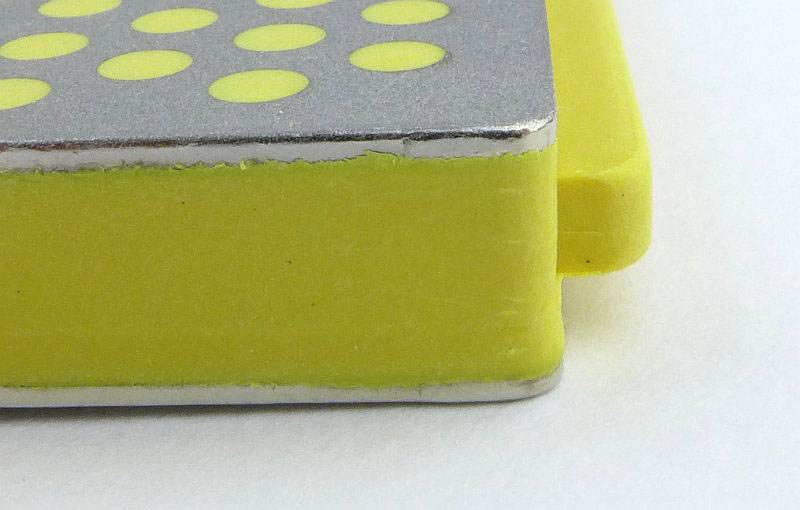
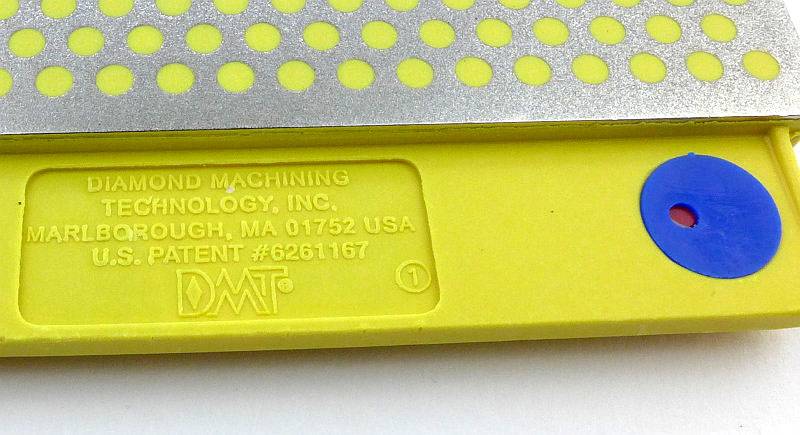
The DuoSharp 10″ benchstone has an ‘interrupted’ surface which helps clear the filings produced during use. There are a couple of pin marks into the plastic which probably relate to location pins used during the moulding of the plastic part.
 photo 10 DMT Benchstone holes P1180033.jpg

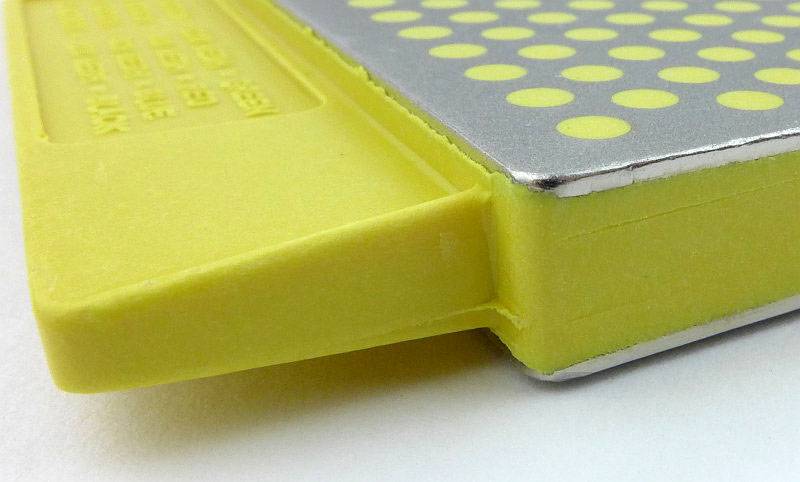
You can see how the diamond surface has been moulded into a plastic base-plate. One end has the elongated tab, only part of which fits under the stone clamp.
 photo 11 DMT Benchstone corner P1180036.jpg

The other end has a smaller tab for the stone clamp to hold.
 photo 12 DMT Benchstone other end P1180037.jpg

Flipping the stone over you can see the Blue grit indicator spot, this time with the smaller Red dot for the other side’s grit.
 photo 13 DMT Benchstone other grit P1180041.jpg

Fixing the stone back onto the base, first slide the tab under one stone clamp.
 photo 14 DMT Benchstone fitting P1180044.jpg

Then fit the second stone clamp.
 photo 15 DMT Benchstone fitting P1180047.jpg

Press the clamp down until it clicks into place.
 photo 16 DMT Benchstone fitting P1180049.jpg

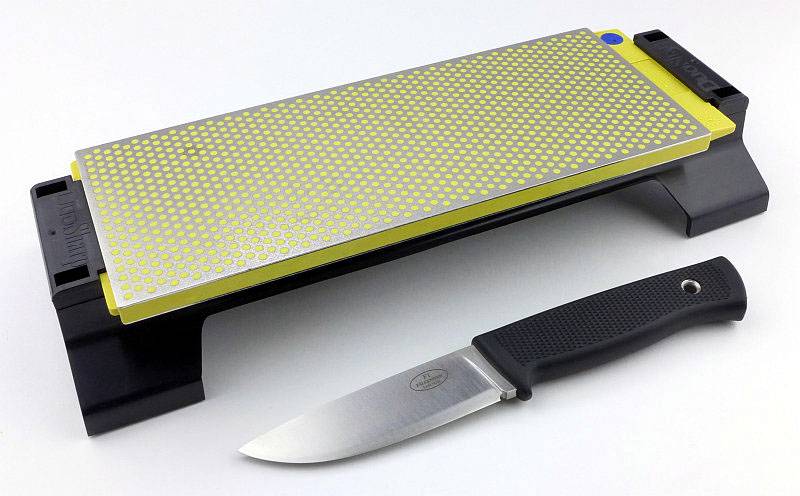
For an idea of scale, here is the stone next to a Fällkniven F1. At 10″, this is a good sized stone.
 photo 17 DMT Benchstone size P1180050.jpg

What are they like to use?

Firstly, the Aligner fully packed in its box is not only compact, but is also light weight. This makes it a great kit to take with you on trips, to keep in the car, or to use to sharpen friends/relatives knives. With DMT diamond stones being used dry you also don’t need to carry any oils or lubricants, so overall it is very convenient.

Clamp based sharpening systems are limited by the capacity of the clamp. The Aligner’s clamp has a 6.5mm capacity if the adjustment screw is fully removed and reinserted one half turn. I’d prefer more than half a turn, so I think a 6mm blade thickness is a more realistic maximum.

It is best to have an ‘approach’ to keep your results consistent. In this case what I’m referring to is the clamp position. Moving this along the blade will change the angle the stone runs on the edge. So far my approach has been to fit the clamp in the centre of the cutting edge of the blade on every blade I sharpen. Working in this way, in future you will put the clamp into the same position for subsequent sharpening sessions.

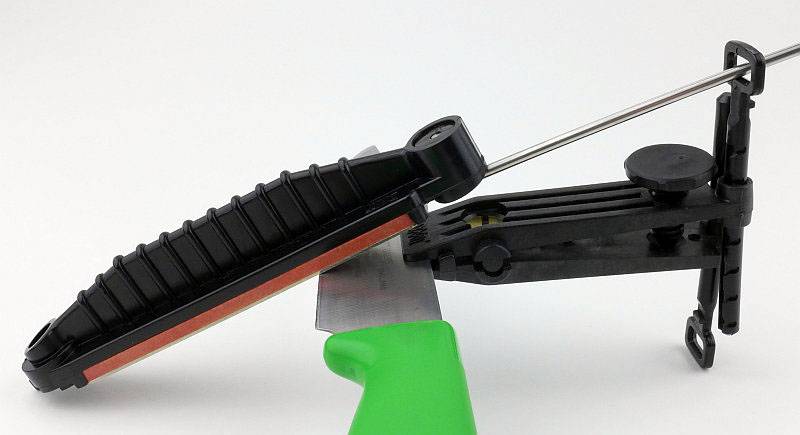
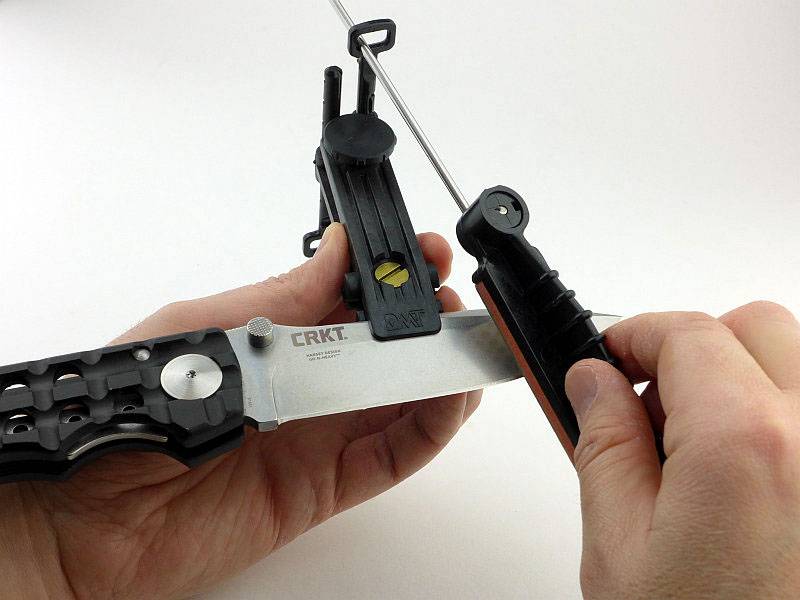
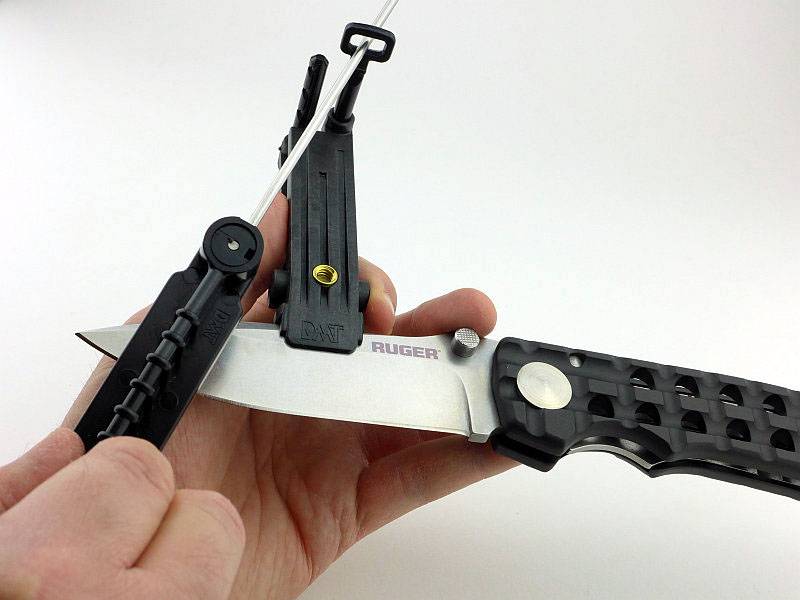
As with this type of guided sharpening, once the clamp is fitted to the blade spine and locked on, sliding the guide rod into the guide ring you can now move the stone across the knife edge at a consistent angle.

If you are not used to working with this can be a little awkward. The instructions say to hold the knife handle in one hand and the stone holder in the other; personally I find it easier to hold the clamp in my left hand (I’m right handed) with the blade sitting on my hand. The feel is the same for both sides of the blade. If you have to hold the knife handle it means swapping round an moving the stone with your non-handed hand as well.
 photo 20 DMT Aligner sharpening P1180096.jpg

For narrow blades you should check for clearance (keeping the stone from wearing into the clamp). In this case there is plenty of room, but the blade is not narrow.
 photo 21 DMT Aligner sharpening P1180097.jpg

To select the right angle you can use the ‘Sharpie’ method (using a marker pen to blacken the edge bevel and check where the stone is cutting) and if necessary adjust the position of the guide rings. If you are using different settings for different blades, you will want to keep a note of the positions used for each blade to allow you to sharpen it properly next time without changing the bevel angle.
 photo 22 DMT Aligner sharpening P1180103.jpg

Once you are done, I find it best to leave the clamp on the blade when you test the edge in case you need to work on the edge a little more.
 photo 23 DMT Aligner done P1180105.jpg

Overall the Aligner is light and efficient, and the DMT diamond stones cut very well.

Update 20 Jan 2017
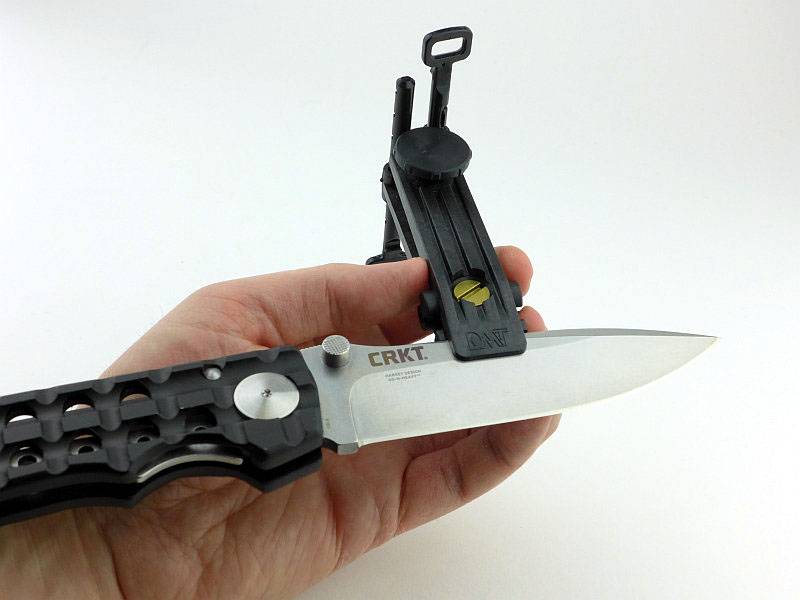
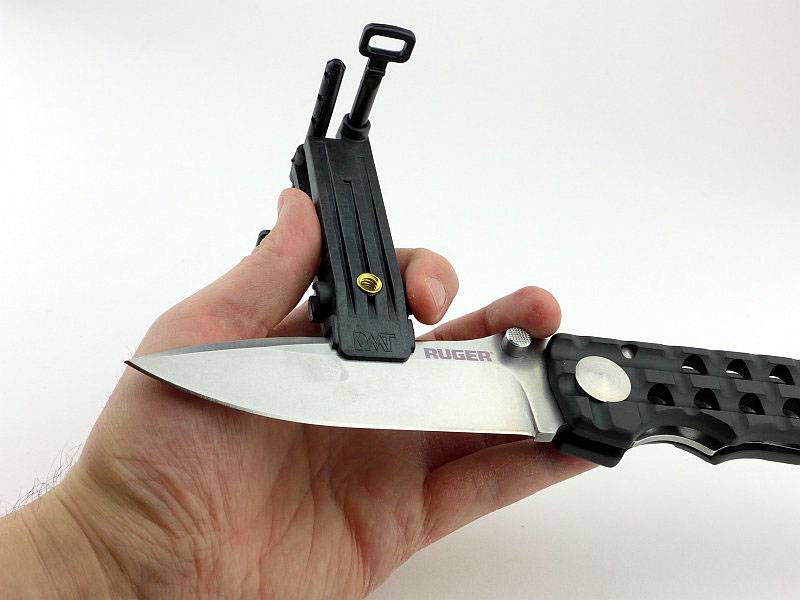
Following some discussions on the clamp being liable to flex as it is plastic, I wanted to show more clearly how I use the Aligner and similar guided sharpeners. In the instructions for the Aligner it show the stone being held under the knife and the knife being moved over the stone in a similar way to using a bench stone. This means you are holding the knife by its handle and pressing down onto the stone. Like this there is maximum room for flexing. However I have always used this type of guide differently.

I hold the clamp and allow the handle to rest onto my wrist for this side of the blade.
 photo 32 Aligner holding P1250263.jpg

And for the other side I again hold the clamp and support the handle (or blade depending on the blade length) with my third and fourth finger. This way round the blade also sits onto the pad of my thumb.
 photo 33 Aligner holding P1250265.jpg

In this way it is possible to support where the clamp holds onto the blade while you bring the stone to the blade.
 photo 30 Aligner holding and using P1250260.jpg

And the other way. Hopefully this show clearly why I haven’t had any actual issue with flexing from the plastic clamp.
 photo 31 Aligner holding and using P1250258.jpg

End of Update 20 Jan 2017

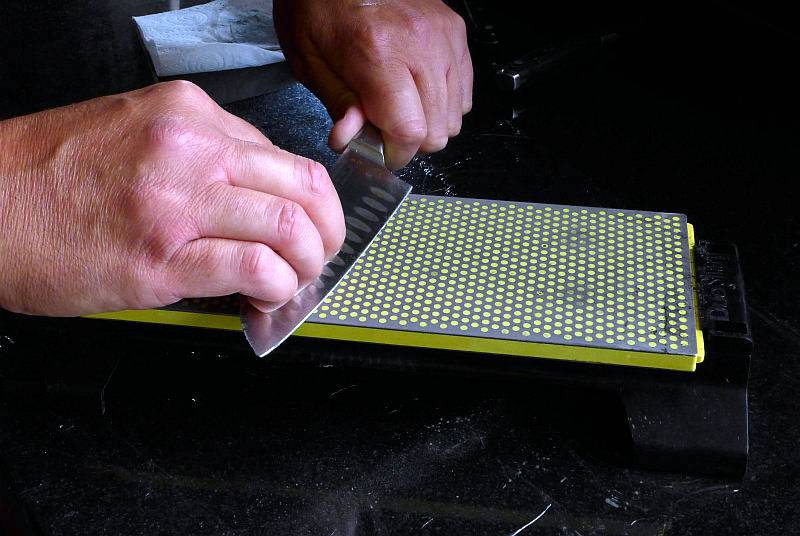
Now we move onto the DuoSharp Bench stone and the technique requiring most user skill. However due to its wide flat surface and diamond cutting efficiency it certainly seems to make sharpening this way much easier than on the carborundum stones I learnt on.
 photo 18 DMT Benchstone kitchen P1220149.jpg

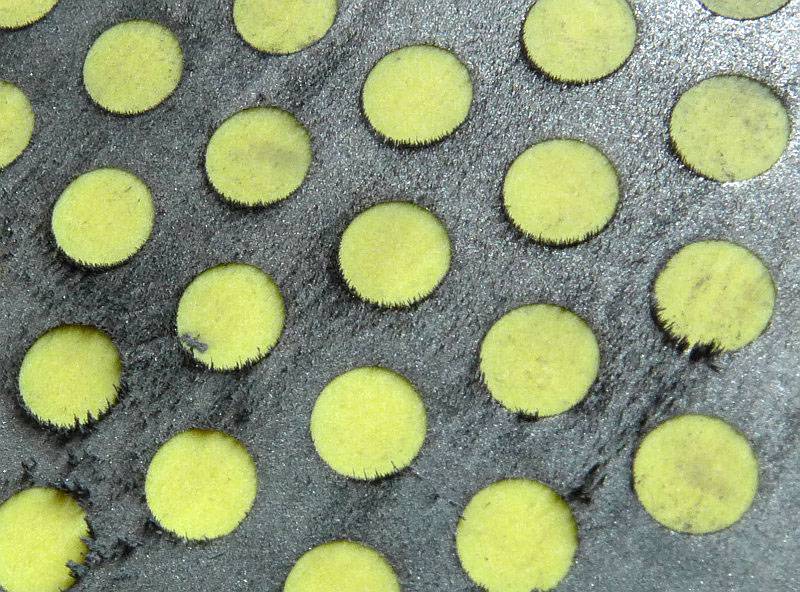
The kitchen knives being sharpened are slightly magnetised due to being stored on a magnetic rack. The filings stand themselves up like this due to being magnetic themselves. A wipe over with a damp rag clears these off nicely.
 photo 19 DMT Benchstone kitchen filings P1220161.jpg

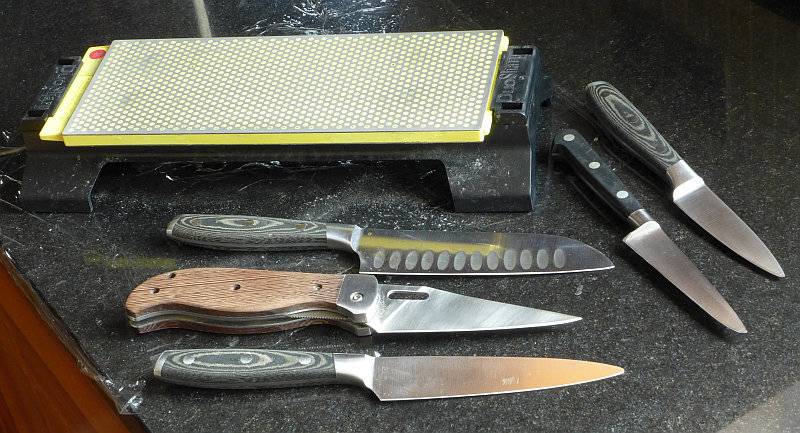
A few of the knives this stone breezed through.
 photo 20 DMT Benchstone kitchen knives P1220169.jpg

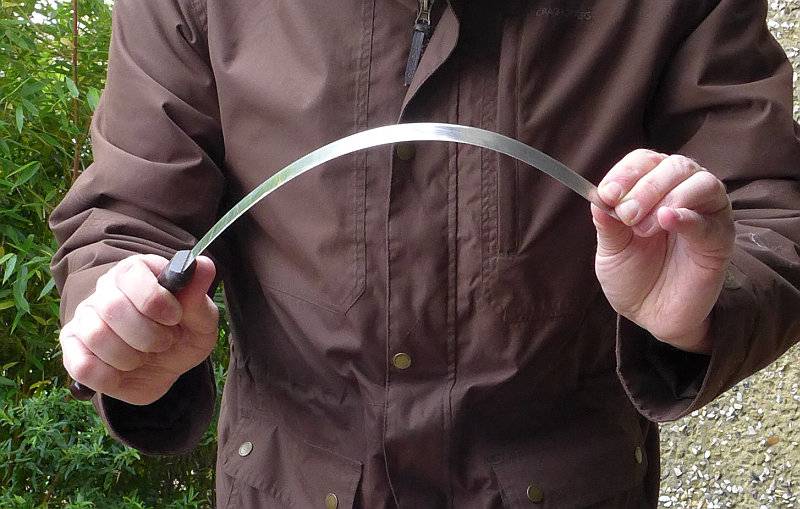
Now onto something a little more challenging, a 16″ ham knife. Ham knives are super flexible and thin, so are not easy to work onto a stone with.
 photo 21 DMT Benchstone ham knife P1230617.jpg

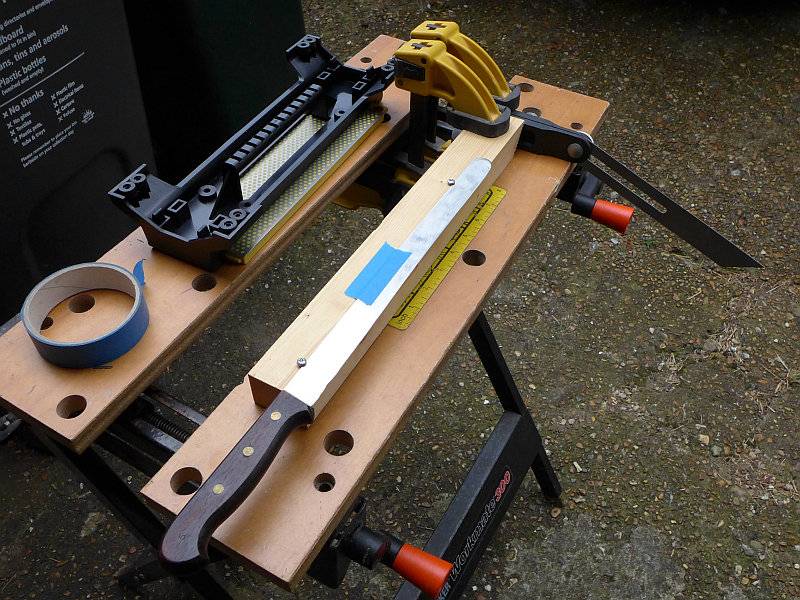
This blade had seen some abuse in the past and the edge was a bit wavy. I wanted to tidy it up and put together a very simple jig to keep the blade straight. A couple of stop-screws on a wooden base and some masking tape to keep it in place. To the right you can see an angle guide I setup for reference to help me stay on track.
 photo 22 DMT Benchstone ham knife jig P1230623.jpg

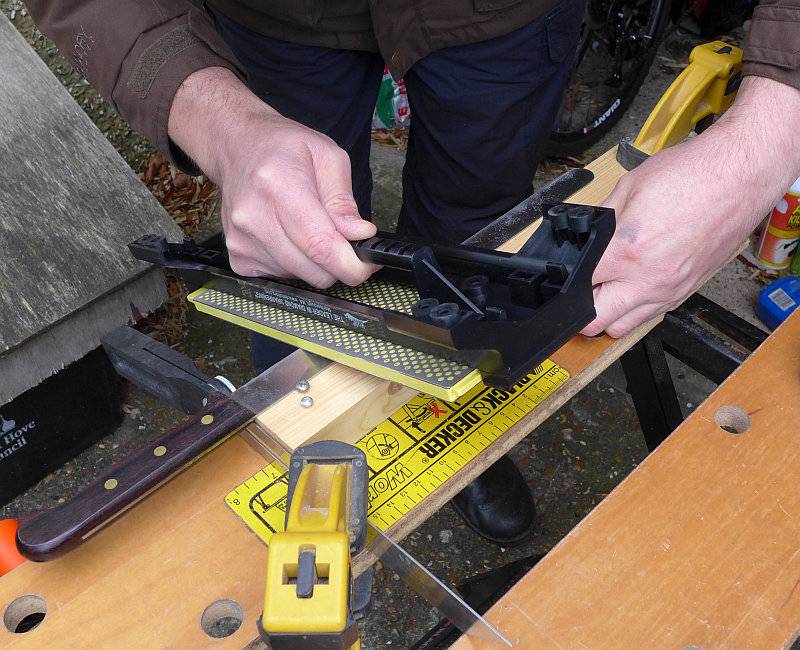
Using the handle on the back of the base I then used the bench stone hand-held. Working on the long and flexible blade in this way was so much easier and resulted in a corrected and hair-splitting edge (after a final strop).

The only real limitation with a large flat bench stone like this is with the recurve section of some blades. Those concave recurve sections just won’t get to touch the diamonds, but that is always the difficulty of a recurve blade.

Being able to hand hold the DuoSharp bench stone was an unexpected benefit of the DMT design and makes it much more versatile.

Review Summary

The views expressed in this summary table are from the point of view of the reviewer’s personal use. I am not a member of the armed forces and cannot comment on its use beyond a cutting tool or field/hunting knife.

Something that might be a ‘pro’ for one user can be a ‘con’ for another, so the comments are categorised based on my requirements. You should consider all points and if they could be beneficial to you.

_______________________________________________ _______________________________________________
Things I like What doesn’t work so well for me
_______________________________________________ _______________________________________________
Aligner package is lightweight for easy transport. Aligner guide clamp will only fit blades up to 6-6.5mm thick.
Aligner ensures you maintain a consistent angle. Aligner – One side of the blade is more awkward to work on than the other.
Aligner – Easy swapping of grits. Aligner – Clamp needs to be fitted tightly and can flex if pressing too hard.
Bench Stone – Large flat surface. Bench Stone – Large surface prevents recurve blades being sharpened.
Bench Stone – Handle included to allow hand-held use. Bench Stone – Rubber feet can fall off.
Bench Stone – Easily identifiable grits.
DMT stones can be used dry.
DMT diamond surface cuts very well.

 photo 00-DMT-featureV2-P1180049.jpg


Discussing the Review:

Please feel free to add comments to the review, but the ideal place to freely discuss these reviews is on a forum. If you started reading the shorter forum version of the review, but followed the link this full exclusive review, please return to that forum to discuss the review there.
If you read the review entirely on Tactical Reviews, please consider one of the following to join in any discussion.

EdgeMatters – Sponsored Reviews (UK based Forum for Knife Makers and Collectors)
BladeForums – Knife Reviews (US based Forum for Knife Discussion)
CandlePowerForums – Knife Reviews Section (Largest and Friendliest Flashlight Community Forum)