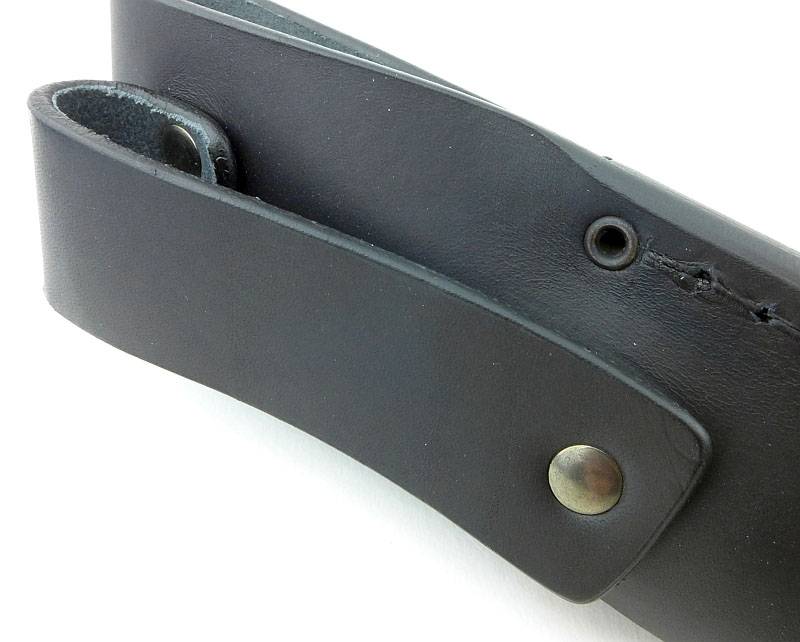
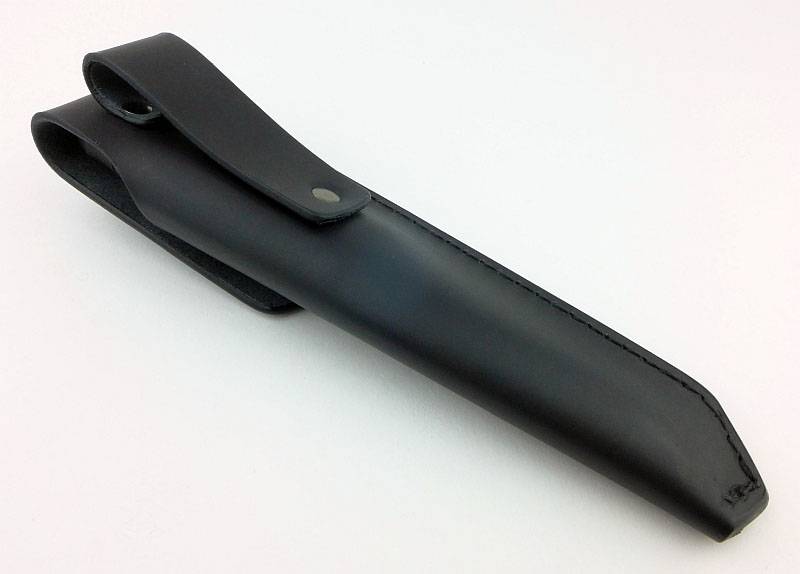
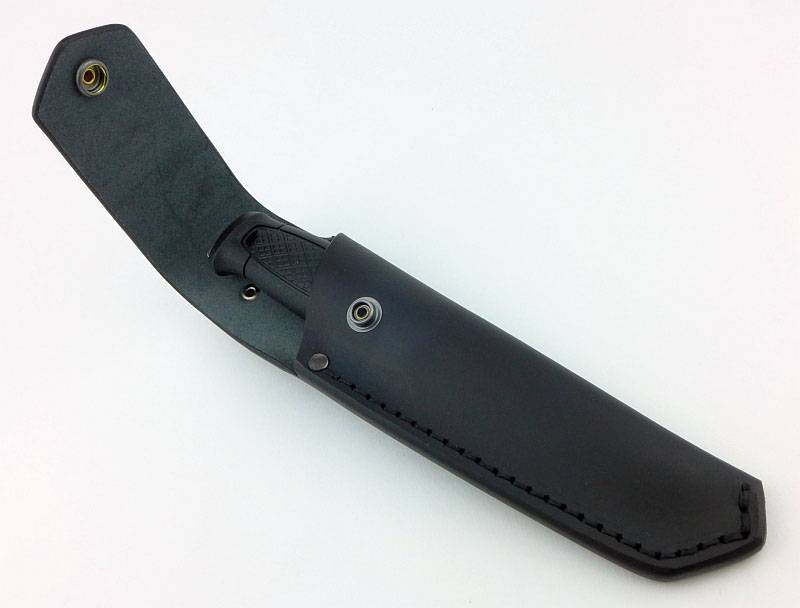
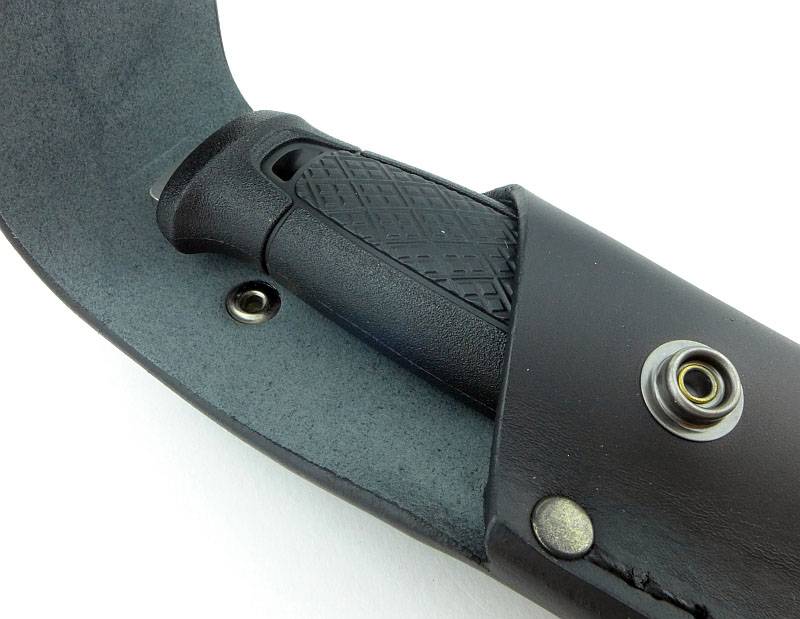
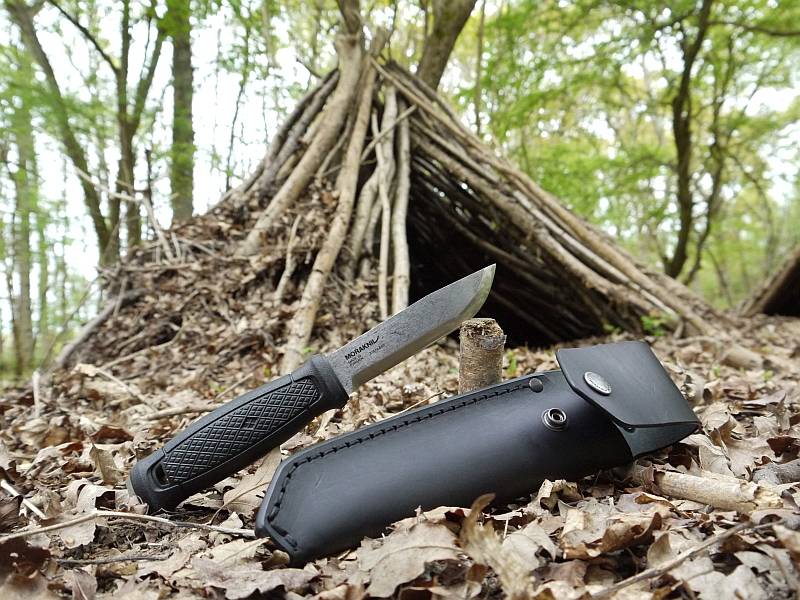
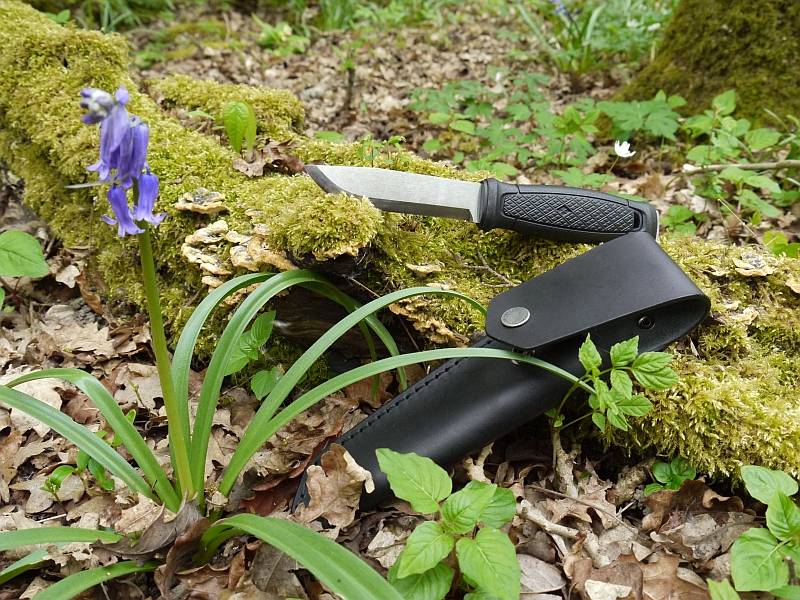
Knife Review: Morakniv Kansbol with Multi-Mount

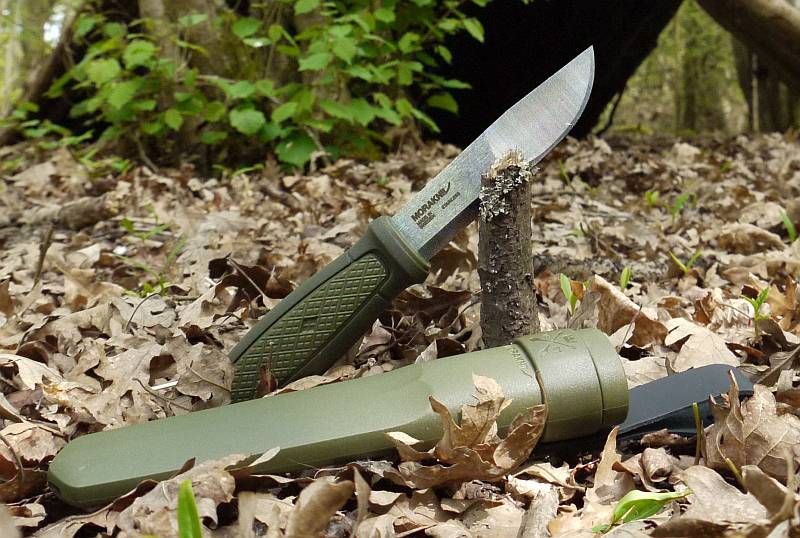
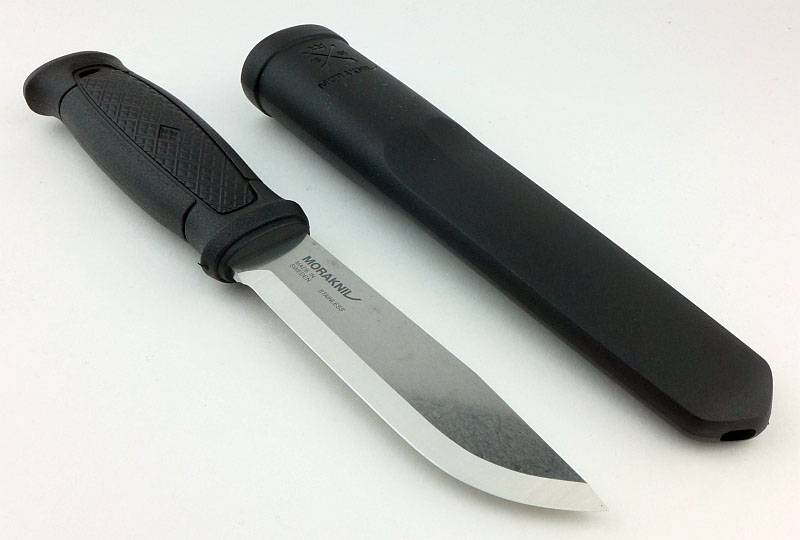
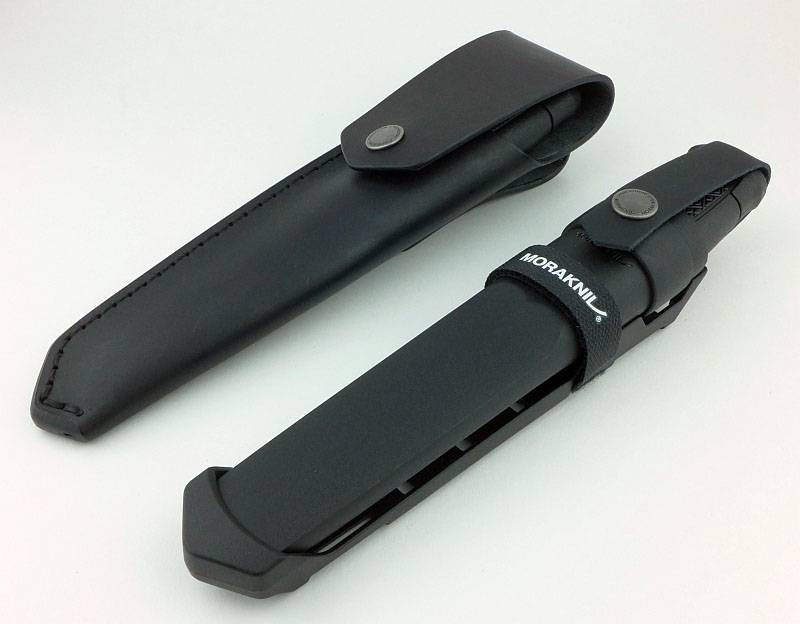
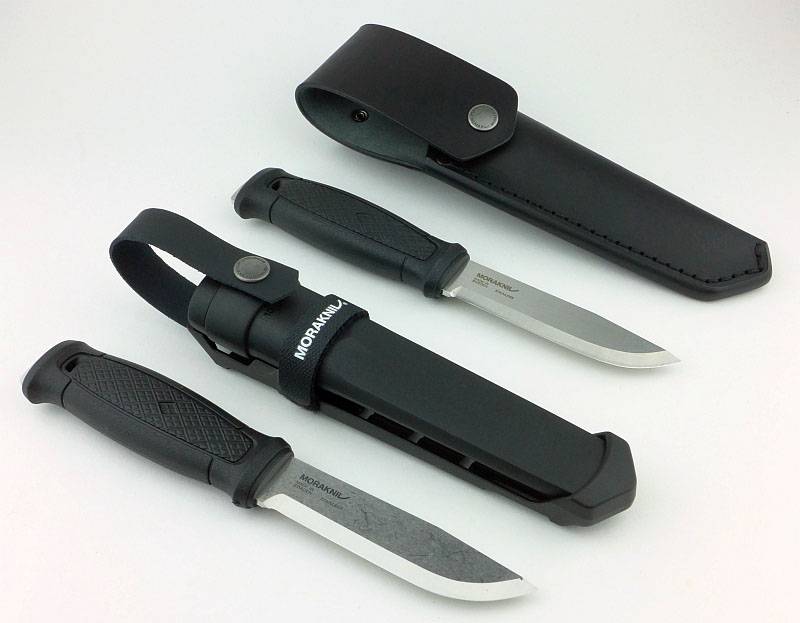
Released along with Morakniv’s Garberg and Eldris models, this knife is actually an update of their classic and very popular ‘2000’ Hunting knife. Headlined as Morakniv’s “Primary All Round Knife” – meet Kansbol.
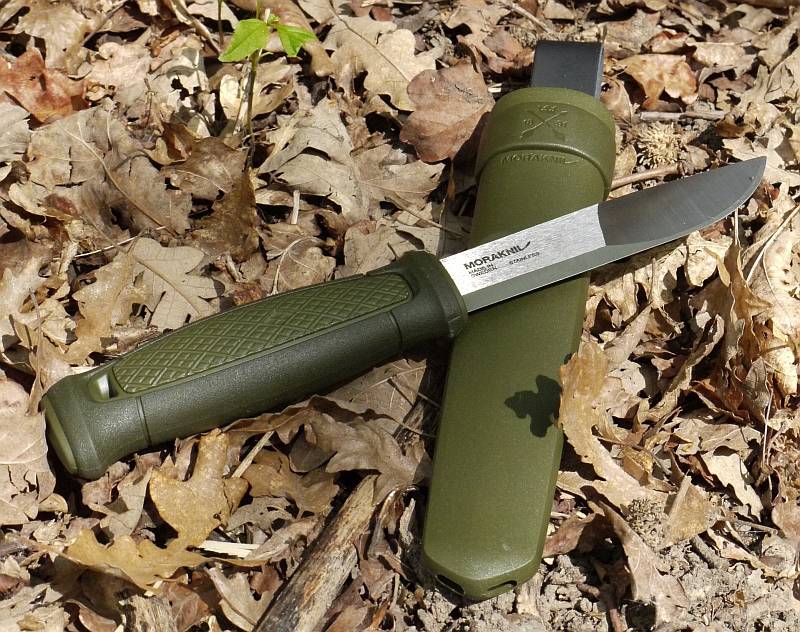
 photo 00 Kansbol Forest P1060917.jpg

The Blade and Handle Geometry:

Most knife specifications have a basic description of the blade geometry, but in this section I will be taking a more detailed look at geometry and balance.
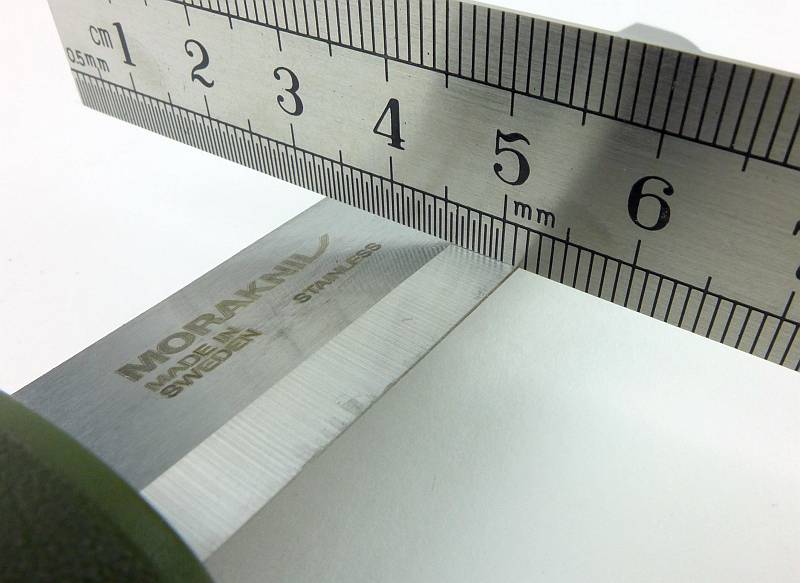
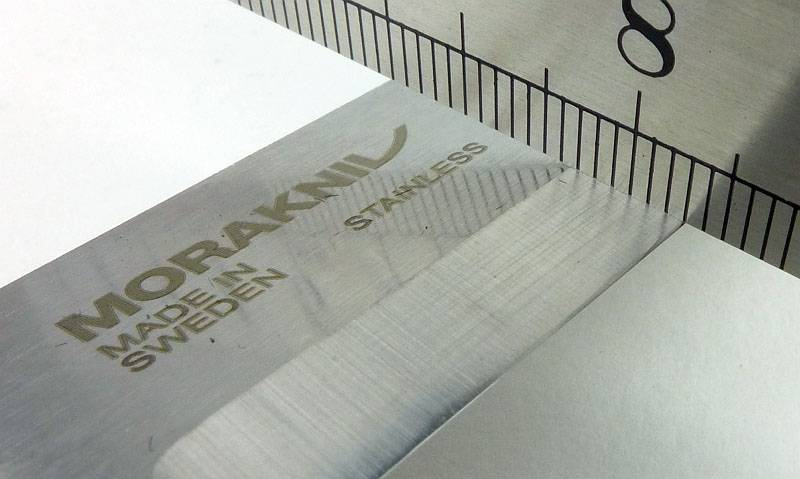
 photo 16 Kansbol grind P1250033.jpg

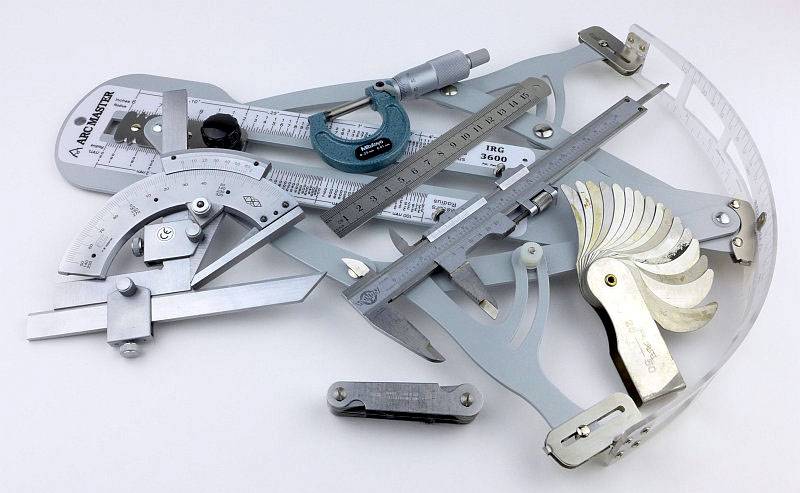
Using a set of gauges and precision measuring equipment including a Vernier protractor, callipers, fixed radius gauges and the unique Arc Master adjustable radius gauge (the one that looks like a crossbow).
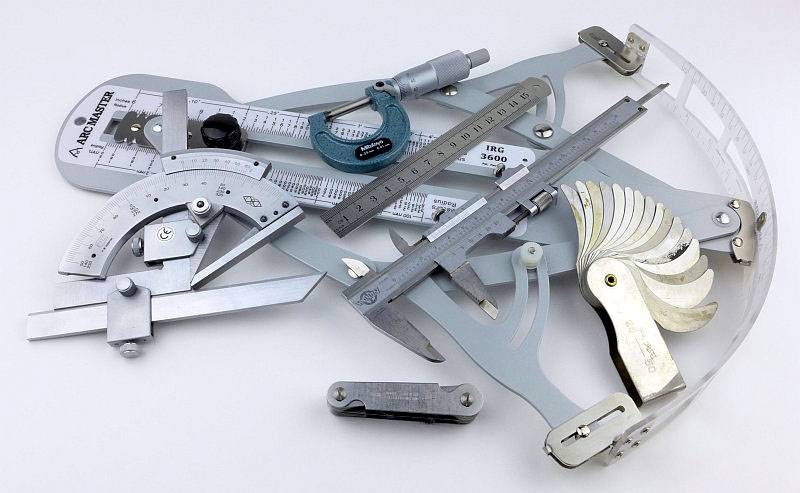
 photo Knife measuring P1180483.jpg

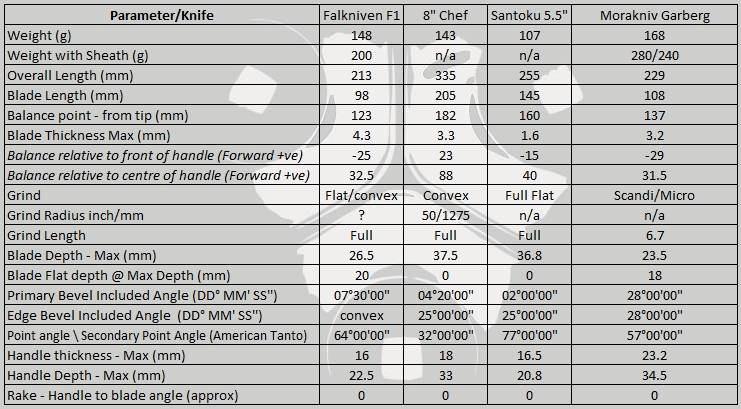
These measurements have been tabulated and are presented along with a few reference blades (8″ Chef’s Knife, 5.5″ Santoku and the popular Fällkniven F1).

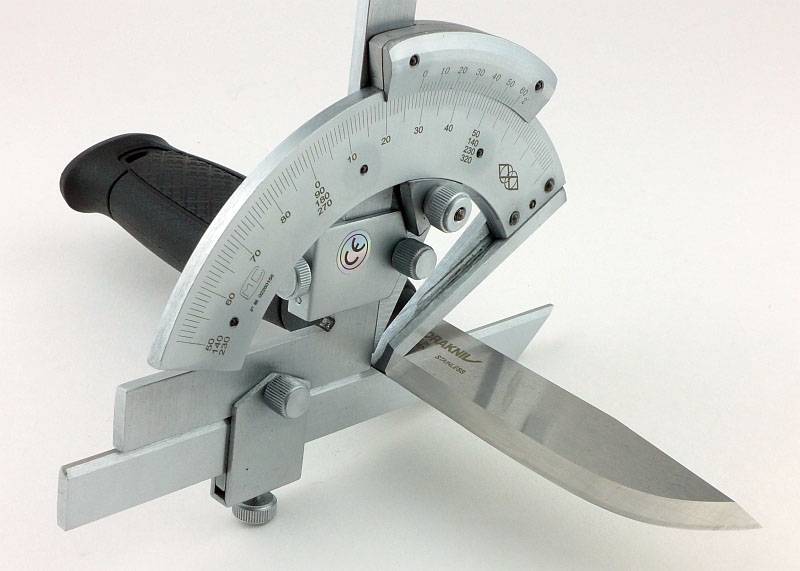
Key aspects such as the primary bevel angle, grind type, blade depth, blade thickness, length, weight are detailed, along with balance information.
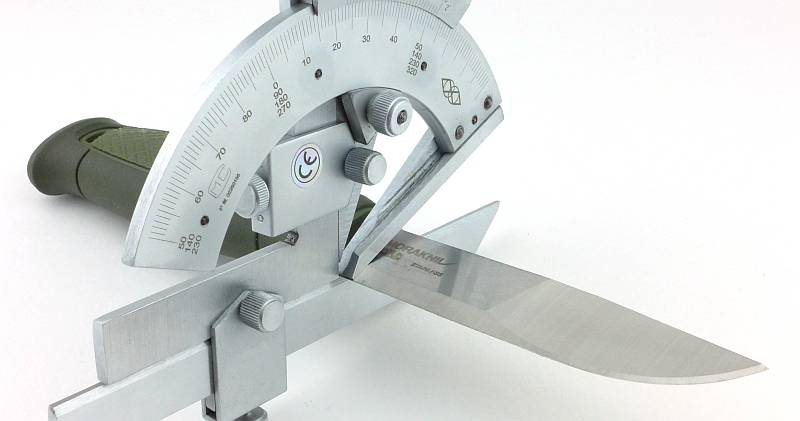
 photo 17 Kansbol angle P1250040.jpg

The ‘Balance relative to the front of the handle’ tells you if the knife will feel front heavy, or if the weight is in your hand (a positive value means the weight is forward of the front of the handle). The ‘Balance relative to the centre of the handle’ indicates how close to a ‘neutral balance’ the knife has in the hand.
 photo 15 Kansbol balance P1250032.jpg

In the case of full convex grinds the approximate centre of the grind is used for the primary bevel angle estimate.
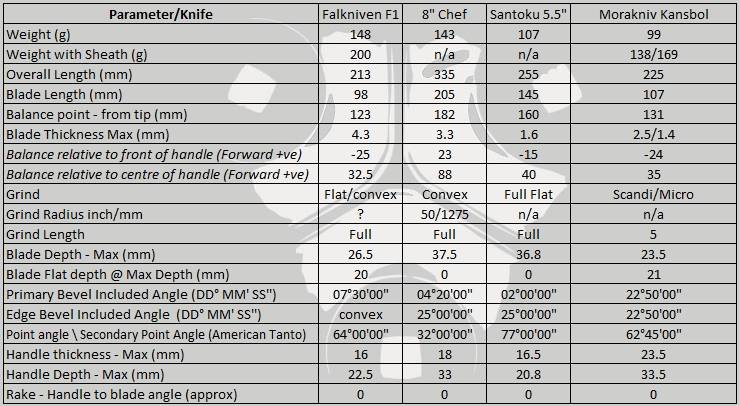
 photo Kansbol parameters.jpg

The blade is made from 2.5mm Swedish stainless steel 12C27.

Explained by the Maker:

The reasons for certain design choices may not be clear when simply looking at an object, so this section is intended to give an insight into the thinking behind a design by speaking to the designer themselves.

Unfortunately I can’t always get time with the designer so will use this section to include relevant information about the knife and its designer.

This is an interview by Tactical Reviews with ‘Head of Production’ at Morakniv, Thomas Eriksson, from IWA 2017.
The discussion includes how the factory edge is created, maintained and also includes micro-bevels and zero-grinds. It is 16 minutes long, so you might want to come back to this after reading the rest of the review.

Video Edited with – Cyberlink Director Suite 5 (PowerDirector 15 and AudioDirector 7)
Camera – Panasonic HC-V770    Microphone – Tonor TN120308BL and/or Takstar SGC-598

A few more details:

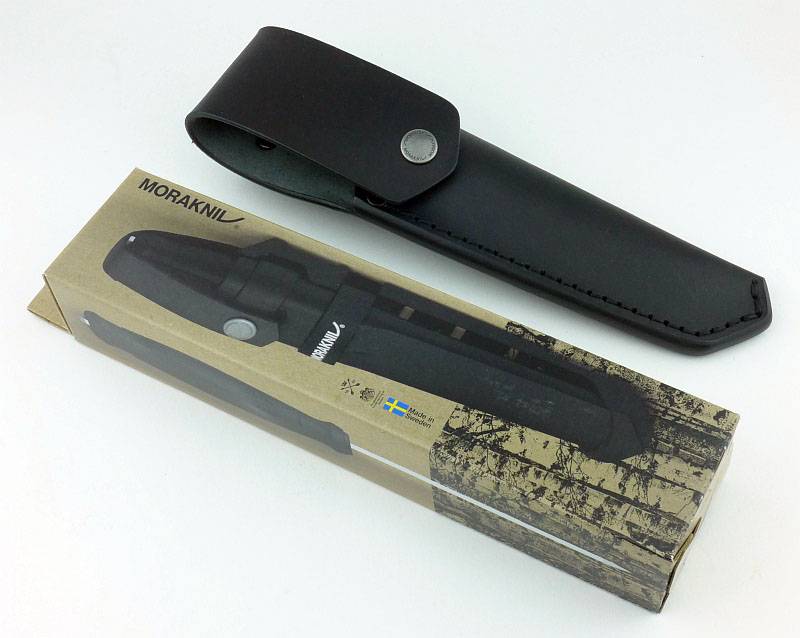
As with the recently reviewed Garberg the Kansbol has a standard , and Multi-Mount version. As before, the standard version shows the knife on the front of the box, and the Mulit-Mount version, the knife in its sheath and mount.
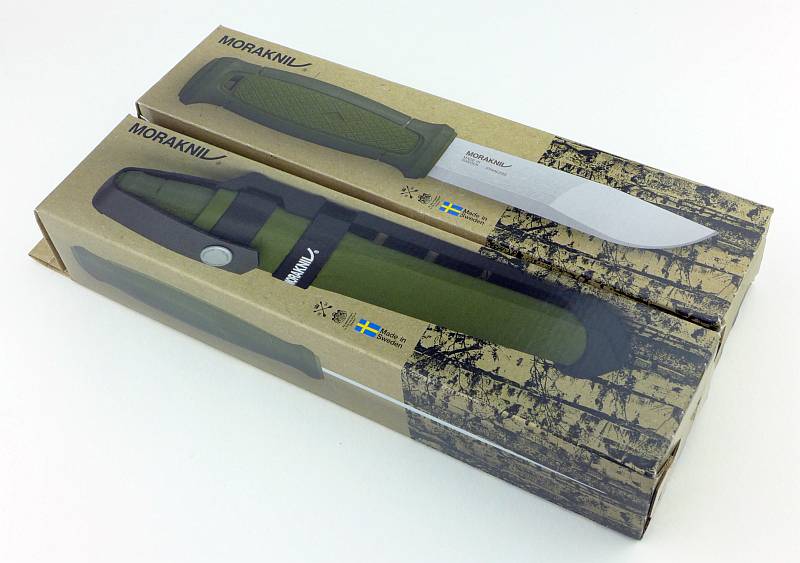
 photo 01 Kansbol boxed P1240609.jpg

Starting with the standard version, out of the box, the belt loop is not locked into place.
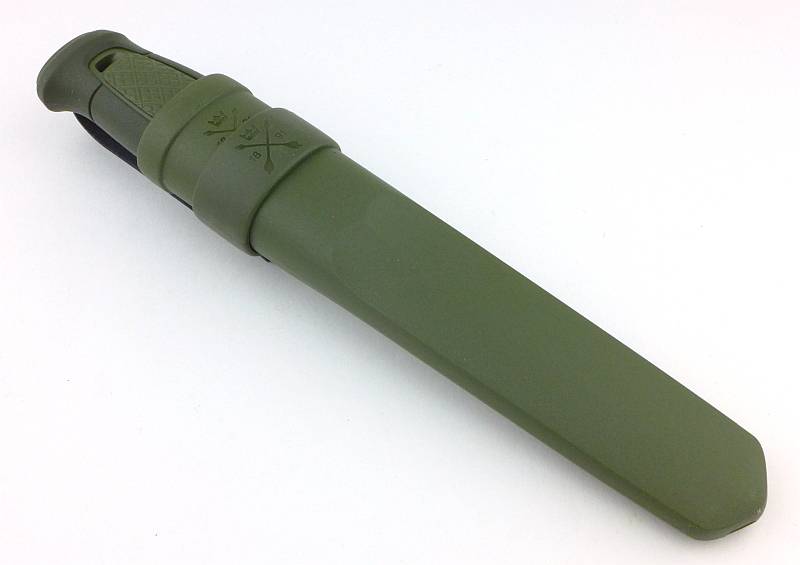
 photo 02 Kansbol unboxed P1240612.jpg

You can see the proudly displayed ‘1891’ (the date when it all started for Morakniv).
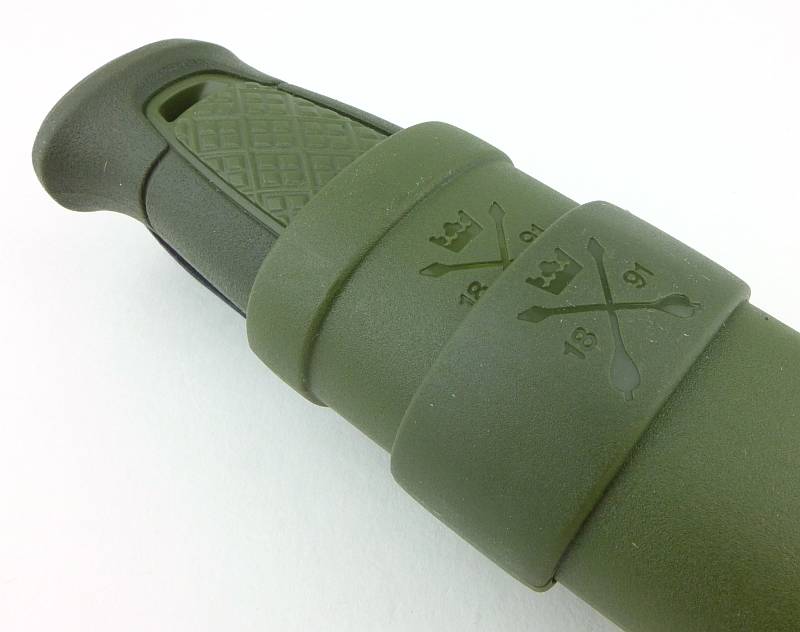
 photo 03 Kansbol 1891 P1240613.jpg

The belt loop can easily be removed if you would like to use the click-lock sheath on its own. (Click-lock is a system where lugs in the sheath click into corresponding depressions in the middle of the handle to securely hold the knife in the sheath, even when worn round the neck.)
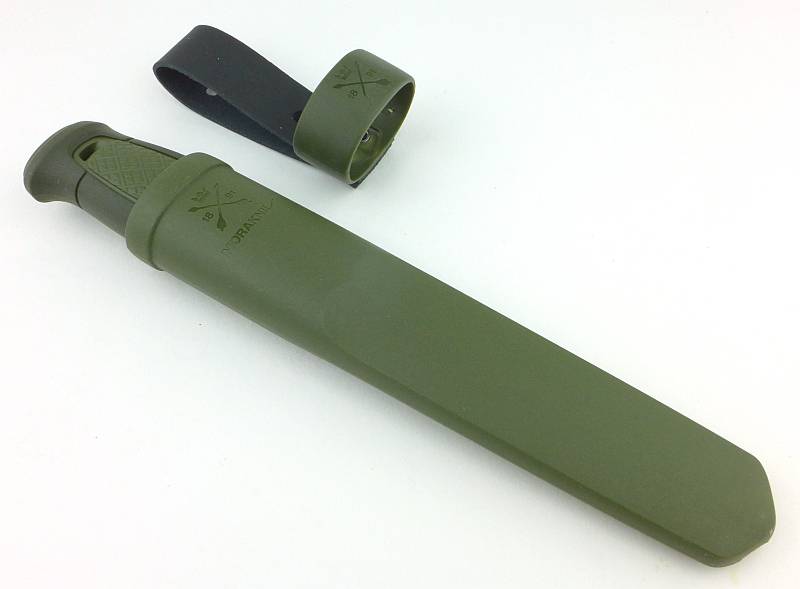
 photo 04 Kansbol belt loop P1240617.jpg

For normal belt mounting, just push the belt loop all the way to the top until it clicks into place. Once fitted to your belt, you can pop the sheath out of the belt-loop ring leaving the belt loop on your belt so you can stow the knife elsewhere.
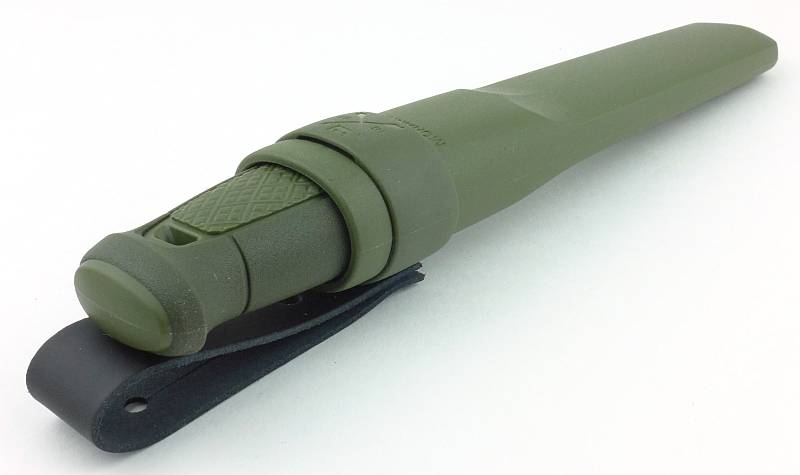
 photo 05 Kansbol belt loop on P1240620.jpg

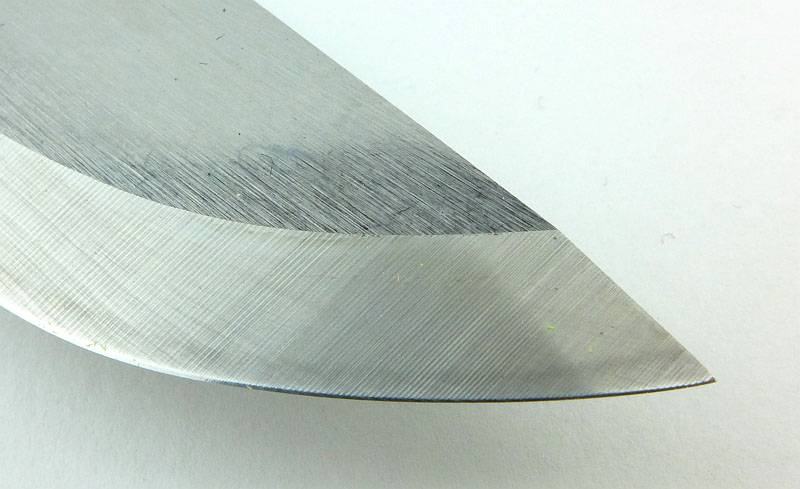
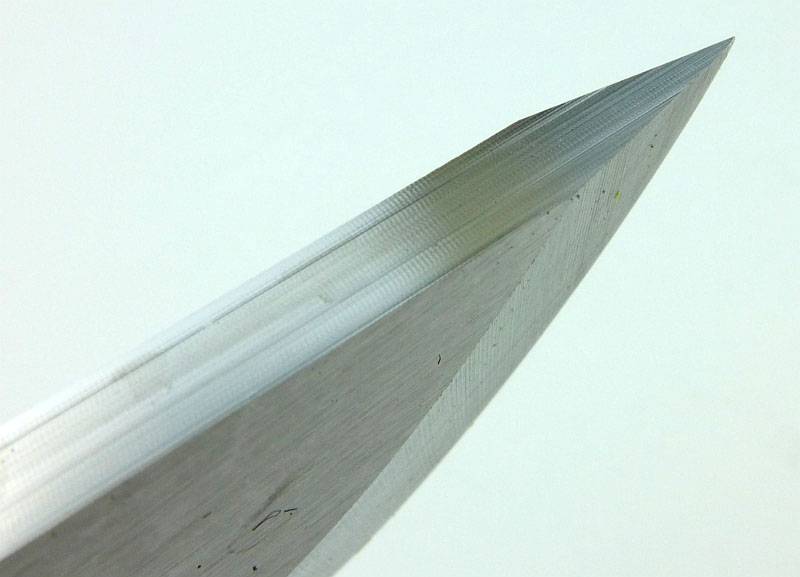
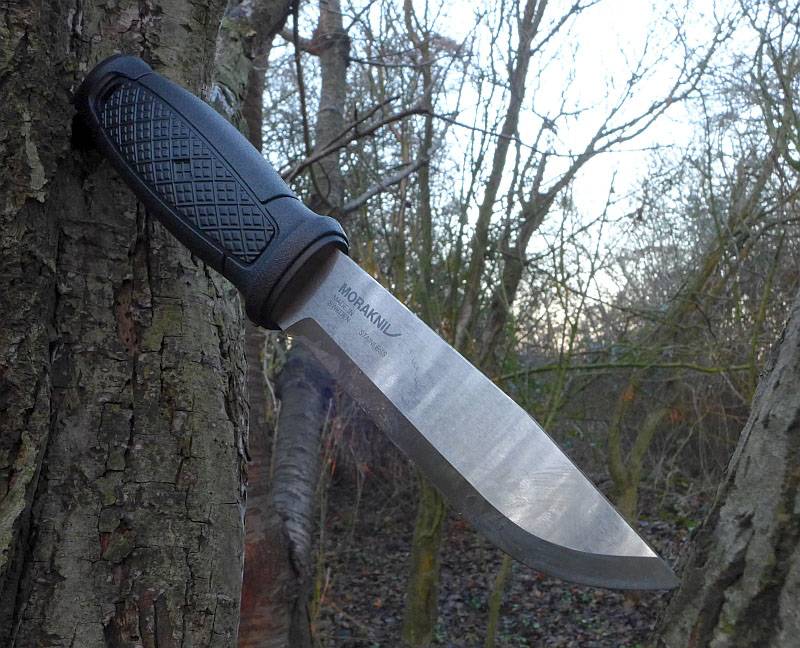
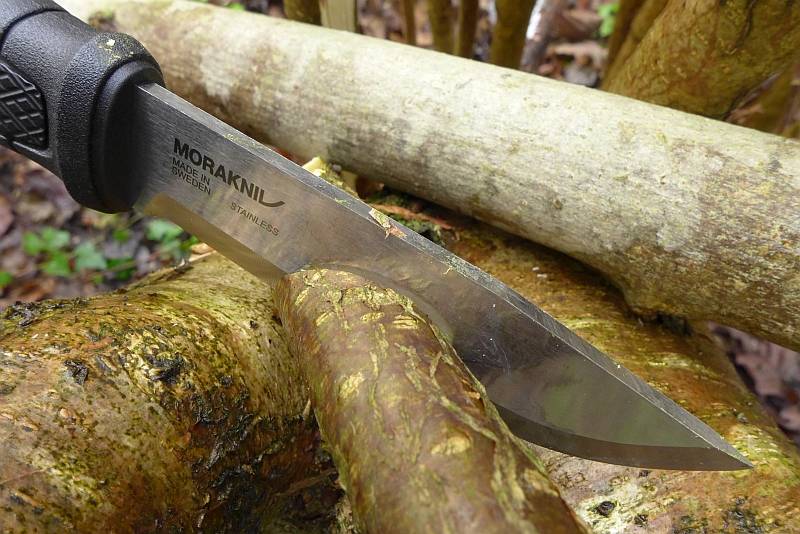
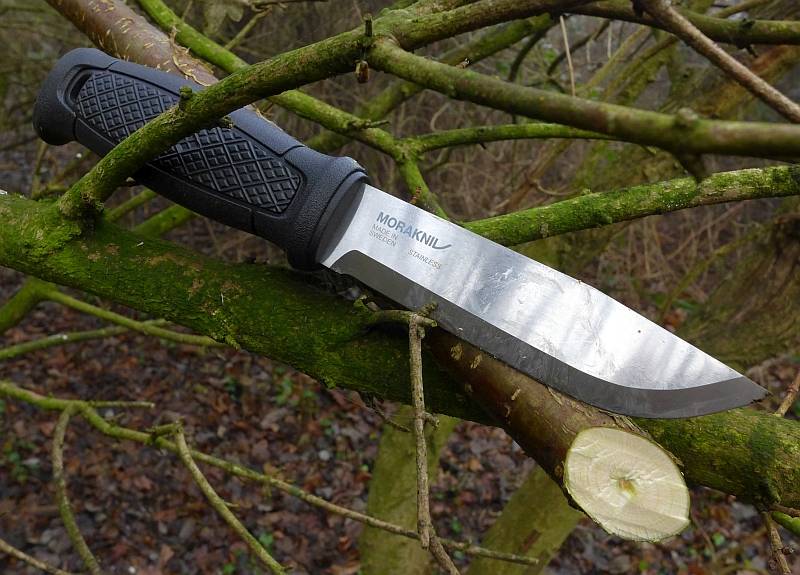
Immediately distinctive, even within the Morakniv range, the dual-grind all-round blade of the Kansbol.
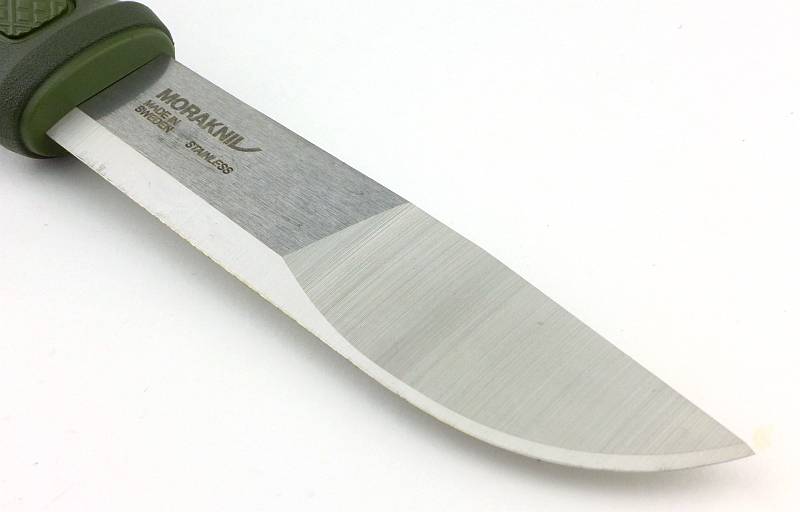
 photo 06 Kansbol blade P1240637.jpg

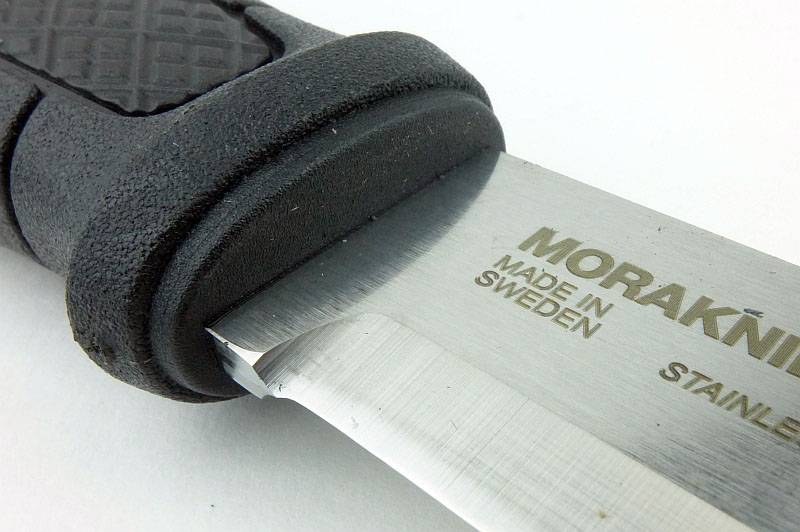
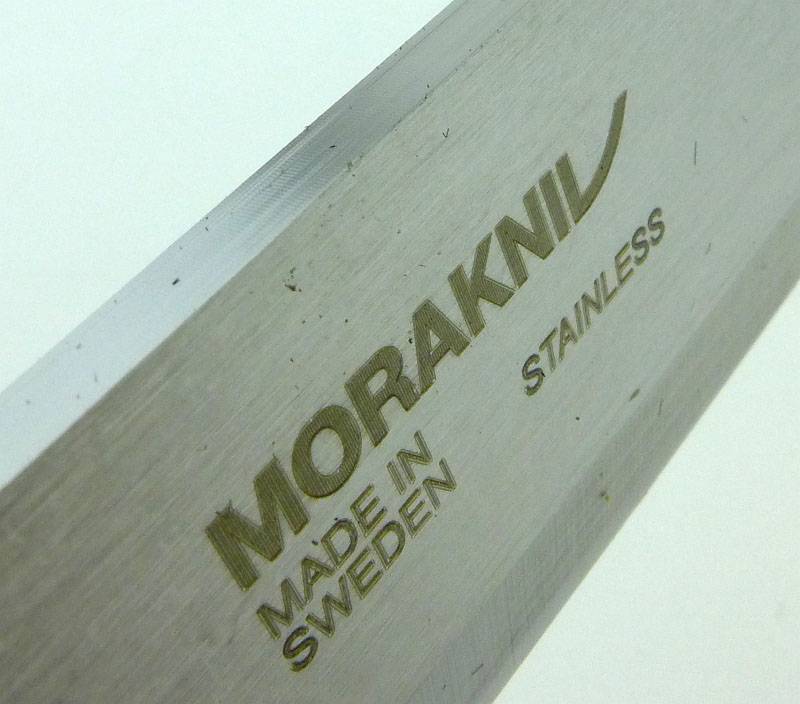
The spine has been ground to have sharp corners for striking sparks from ferrocerium rods.
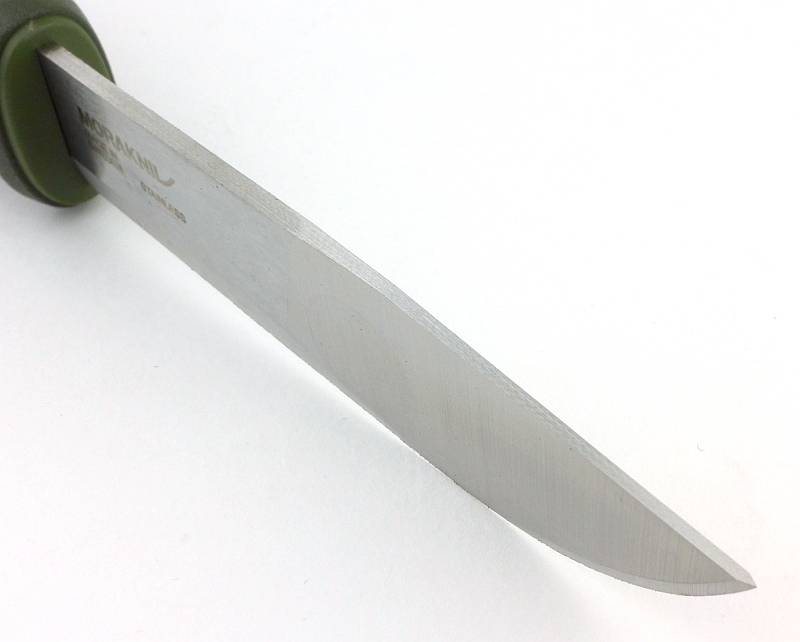
 photo 07 Kansbol blade spine P1240638.jpg

With its Scandi-grind, thanks to the additional profiling that thins the front section of blade, it gives the blade a very different appearance to the standard Scandi-grind blade we are used to.
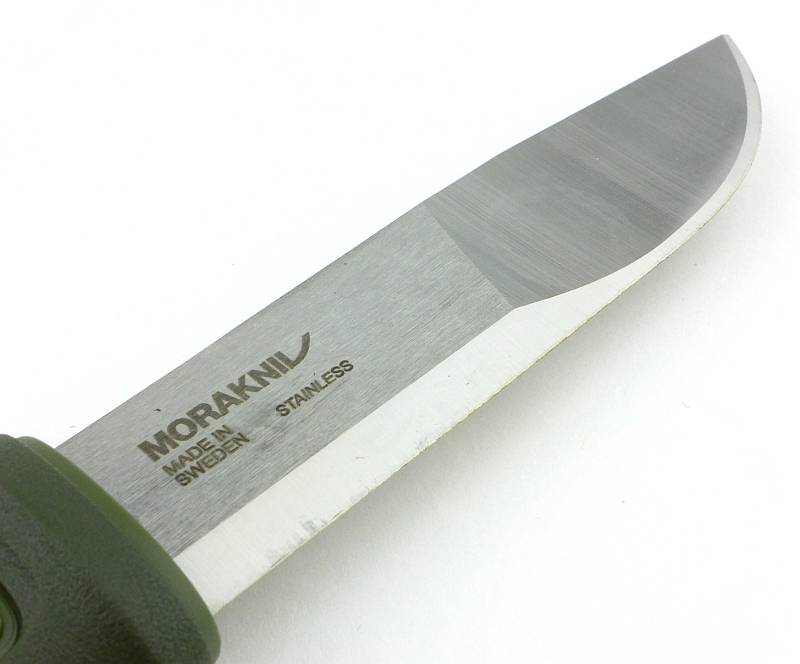
 photo 08 Kansbol blade P1240641.jpg

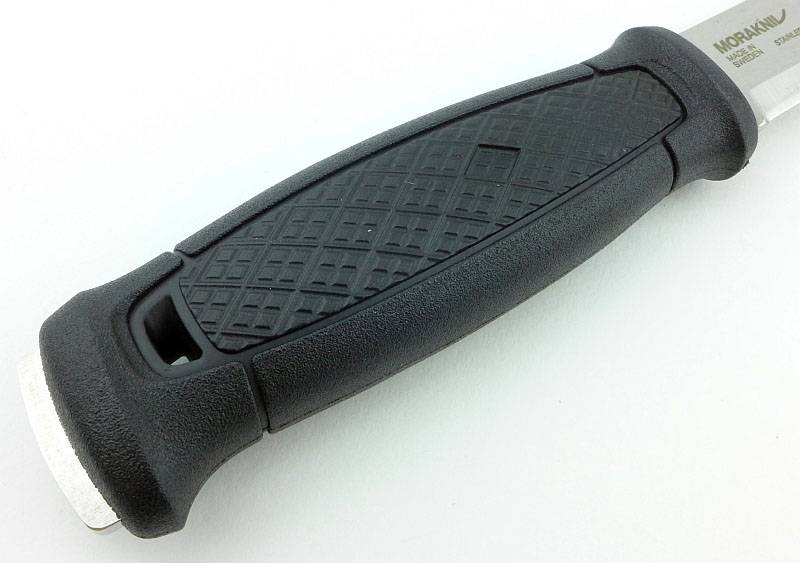
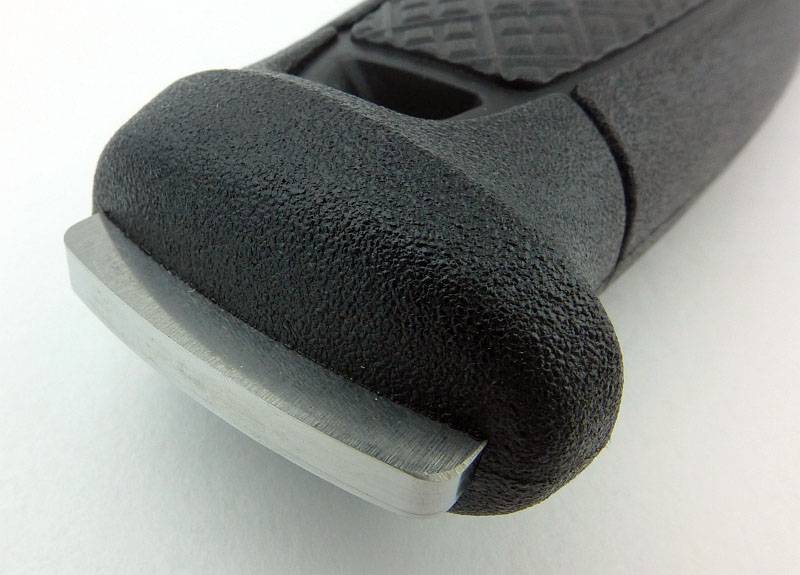
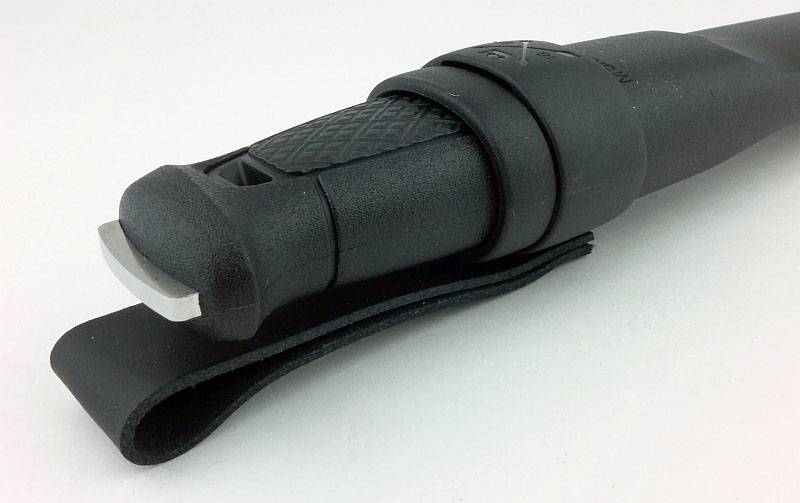
Much like the Garberg, the Kansbol has the symmetrical handle that allows for forward or reverse grips, but the Kansbol also has a TPE (a rubbery polymer) coating over the polypropylene handle core.
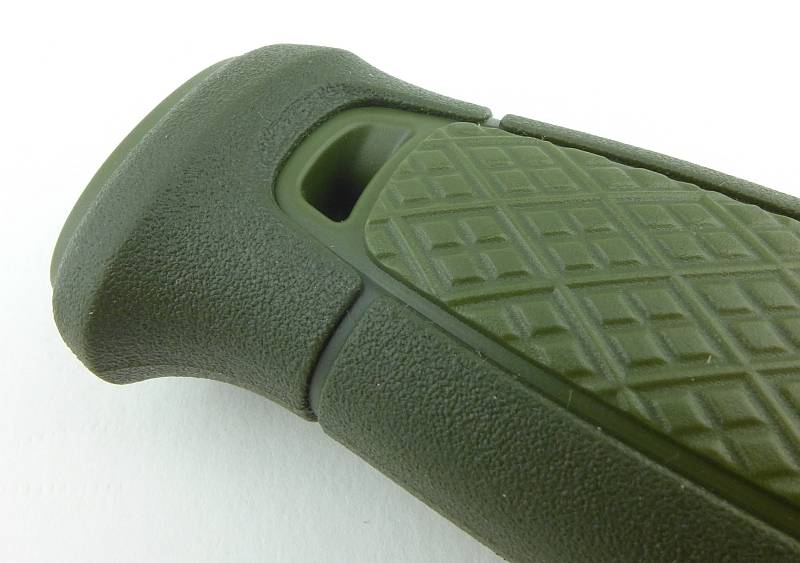
 photo 09 Kansbol butt P1240642.jpg

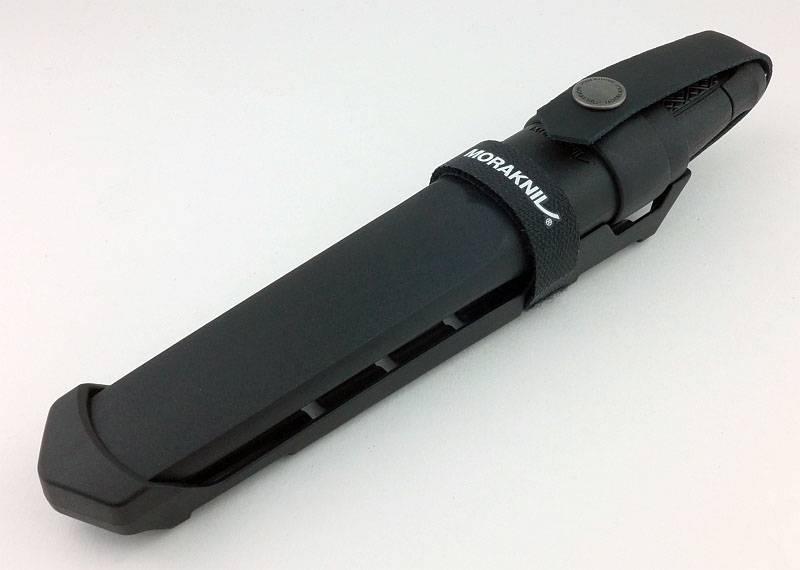
Next up is the Multi-Mount version. In the box, all the components are slotted together.
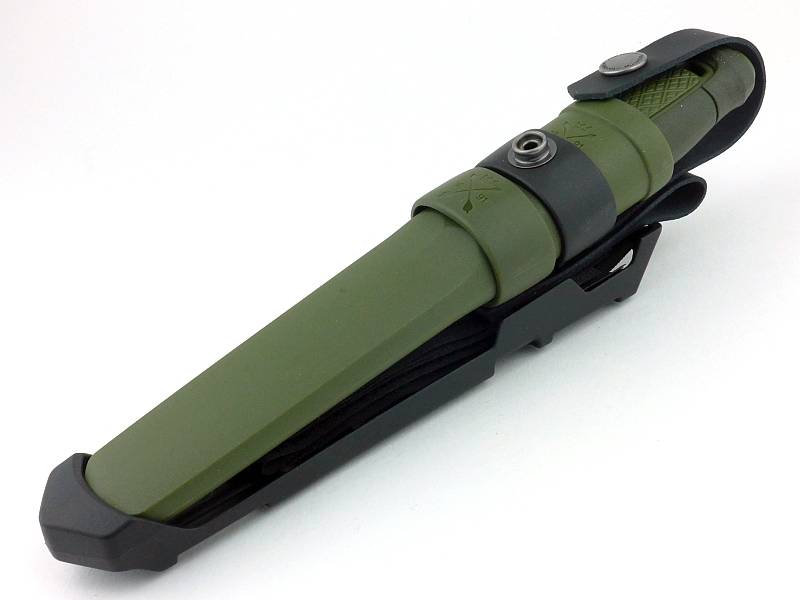
 photo 10 Kansbol MM out of box P1240652.jpg

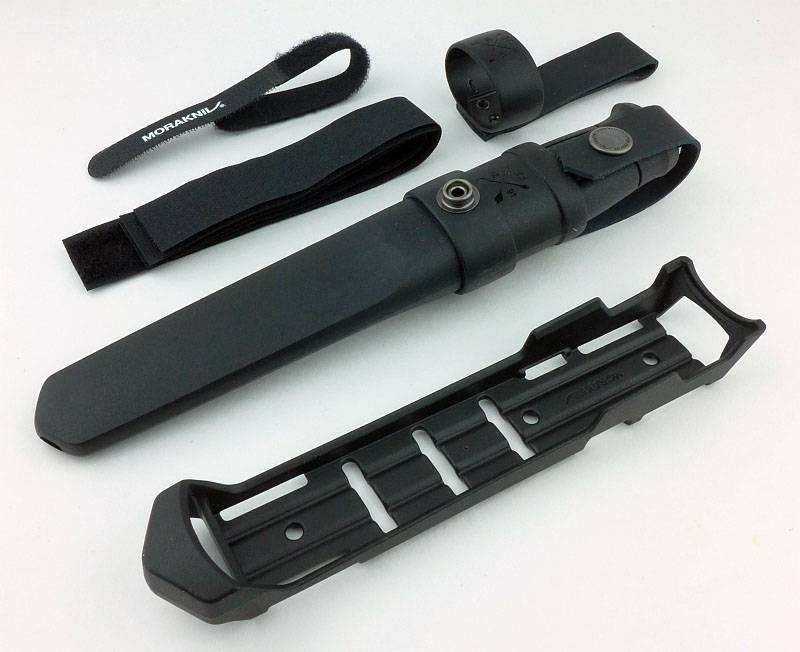
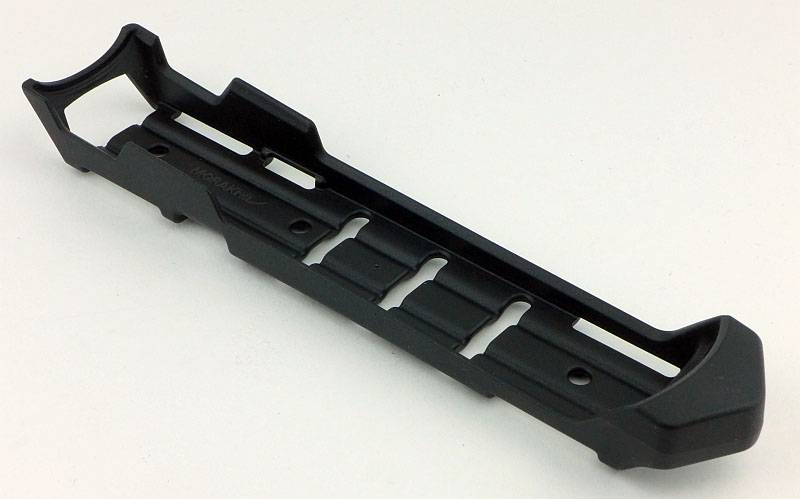
Included are the plastic holster, a belt loop, a locking strap, three hook and loop straps and the multi-mount itself.
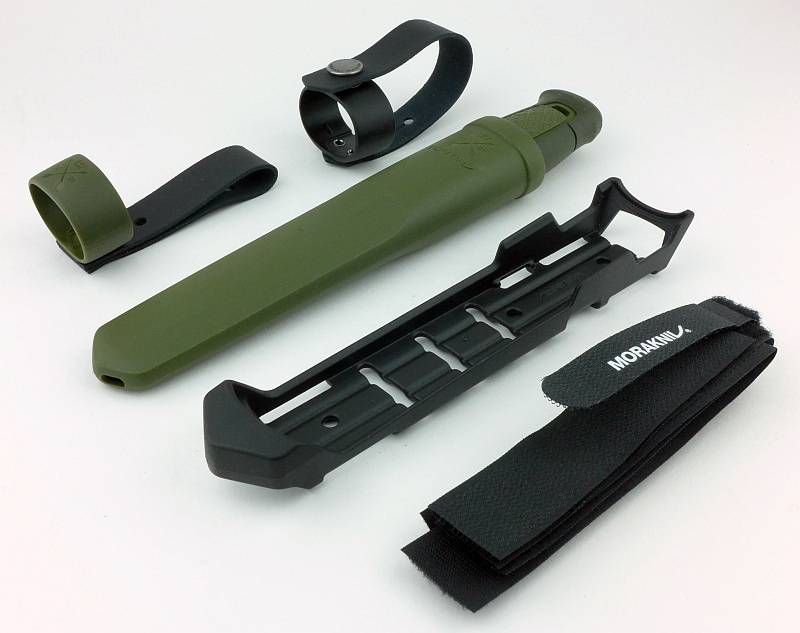
 photo 11 Kansbol MM parts P1240657.jpg

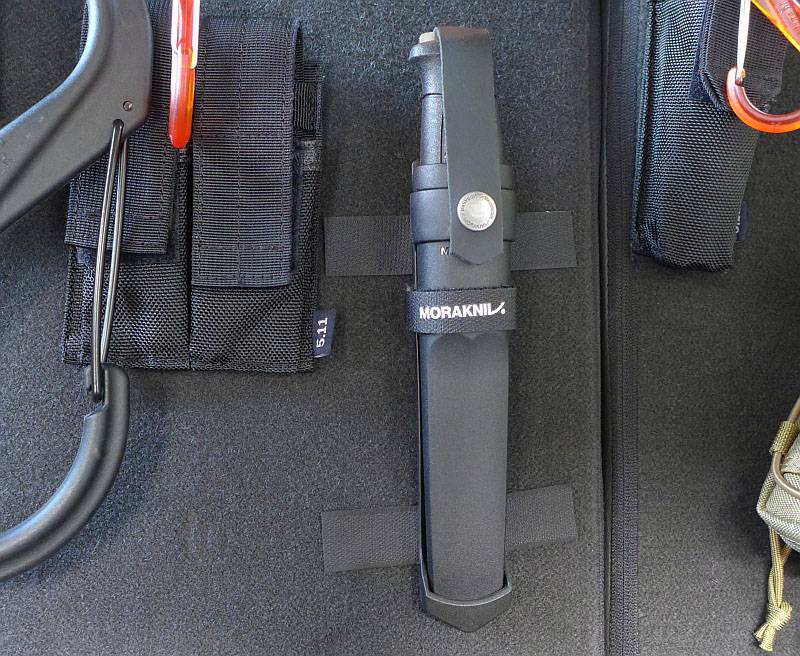
The simplest configuration you can use the Multi-Mount, is to have the bare sheath held in the mount with a hook and loop strap. The click-lock of the sheath keeps the knife in place.
 photo 12 Kansbol MM basic P1240769.jpg

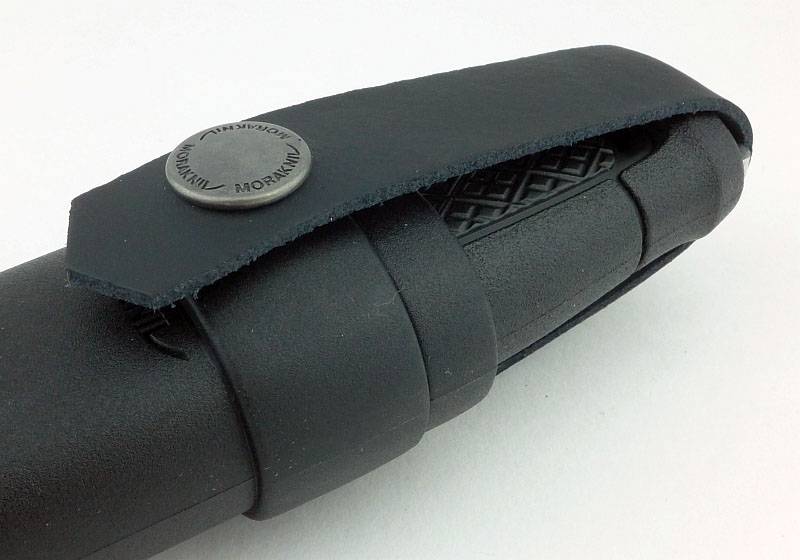
For total security, the locking strap can be added.
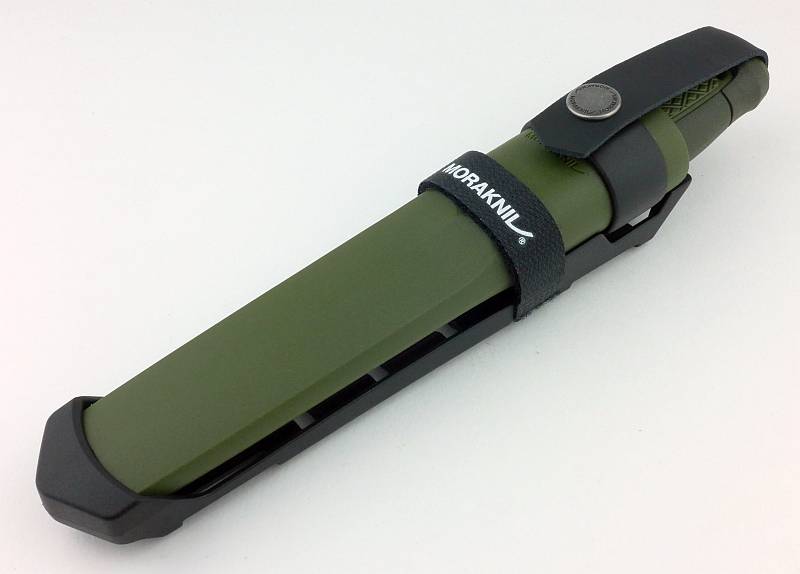
 photo 13 Kansbol MM locking P1240775.jpg

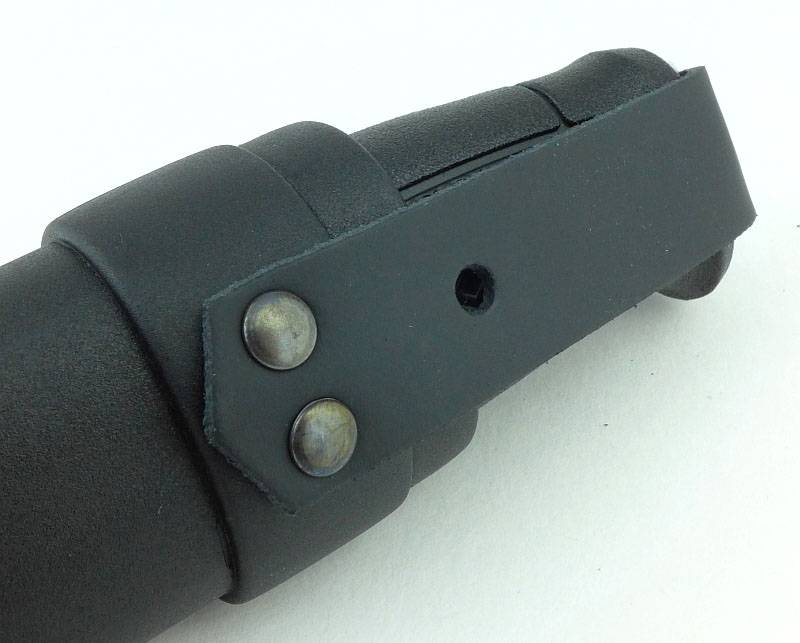
Turning the Multi-Mount over, you can see how the locking strap is fed through the mount and will keep everything in place even if the hook and loop strap failed.
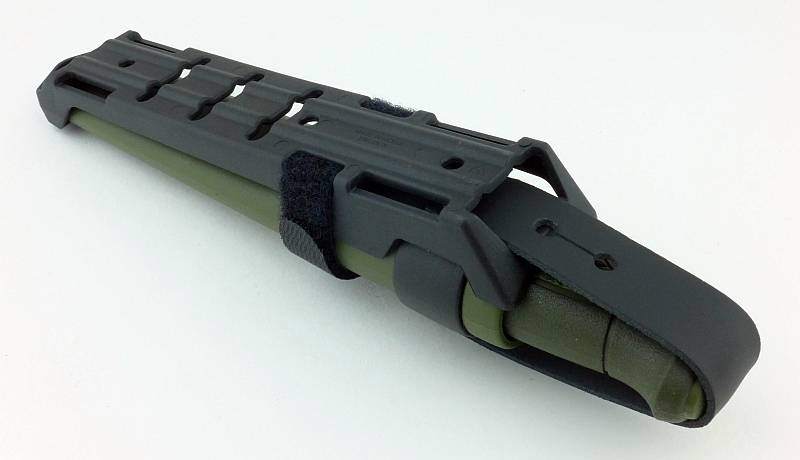
 photo 14 Kansbol MM locking under P1240778.jpg

What it is like to use?

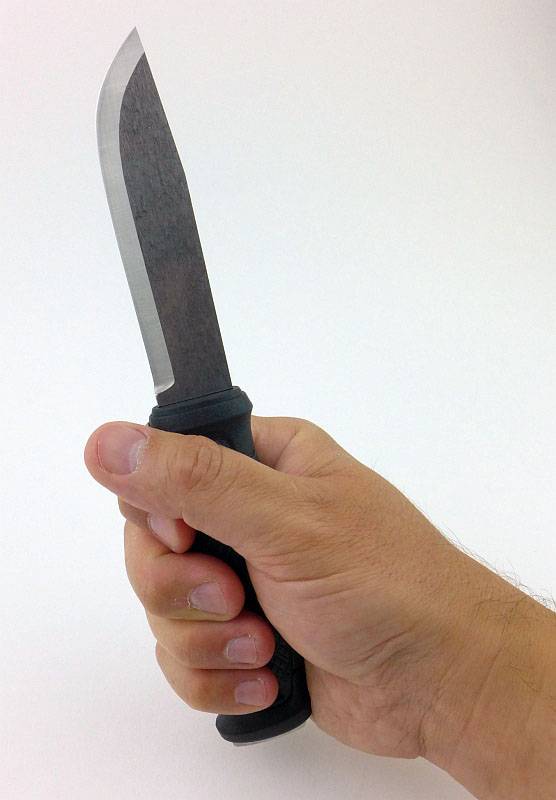
Morakniv are extremely good at making comfortable knives, and though the Kansbol’s handle is not shaped in the way the Companion and Bushcraft models are, you can work with it for hours on end. The handle is a size that will work well for almost anyone (I take XL size gloves), and in line with many of the other Morakniv knives, the blade length is easy to wield for all those every day tasks.
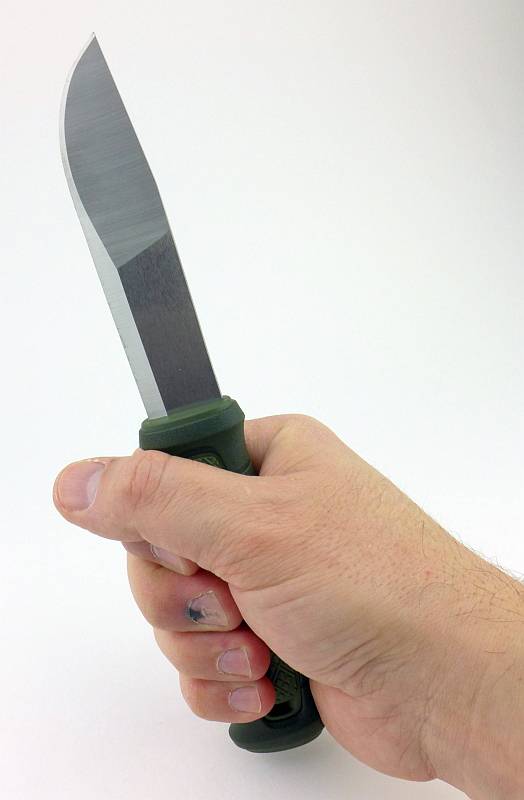
 photo 10 Kansbol in hand P1240645.jpg

As you would expect, the Scandi-grind of the Kansbol takes all things wood related in its stride. What is not shown here is the fact that the additional profiling of the forward section of the blade makes it well suited to many tasks a standard Scandi-grind blade is not. This includes food preparation, and game preparation where the slimmer blade cuts deeply much more easily.
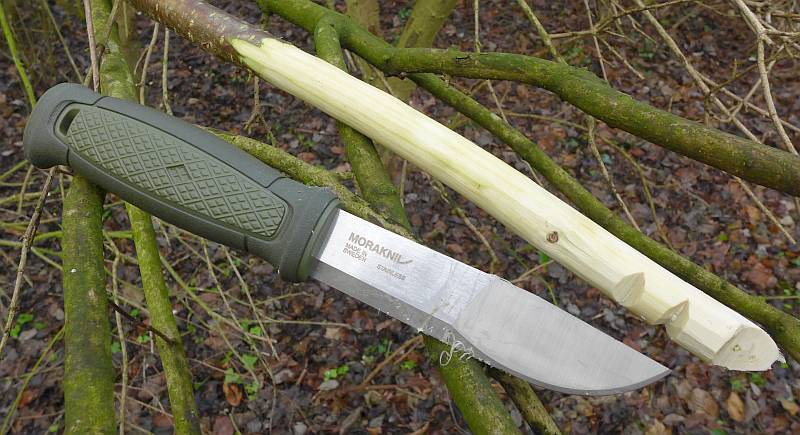
 photo 18 Kansbol whittle P1250215.jpg

Before jumping to the Multi-Mount, something to mention about the belt loop, is that thanks to its click-fit to the sheath, you can easily remove the sheath from the loop, and stow the knife in you pack, leaving just the loop on your belt.
In the Garberg review, I showed the Multi-Mount fitted to the back of the rear seats of my car. As the Multi-Mount is so versatile and opens up so many options, there are far too many to show, but to illustrate just one, in this case I’ve used the hook and loop straps to fit it to a walking stick.
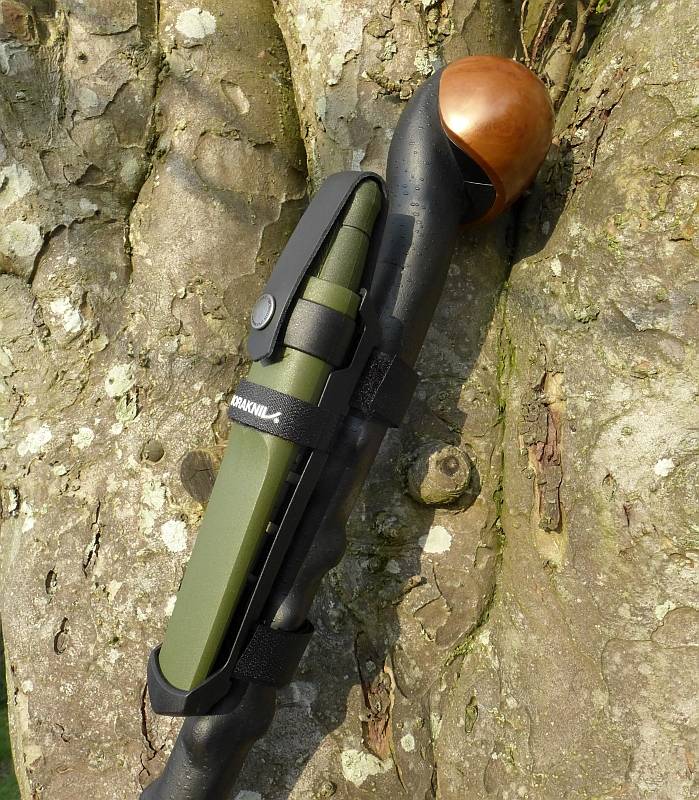
 photo 19 Kansbol MM stick P1260339.jpg

I’ve been appreciating how useful it is to have the knife to hand like this, but in the UK this is really only suitable in more rural areas where the sight of a working tool does not cause distress to anyone.
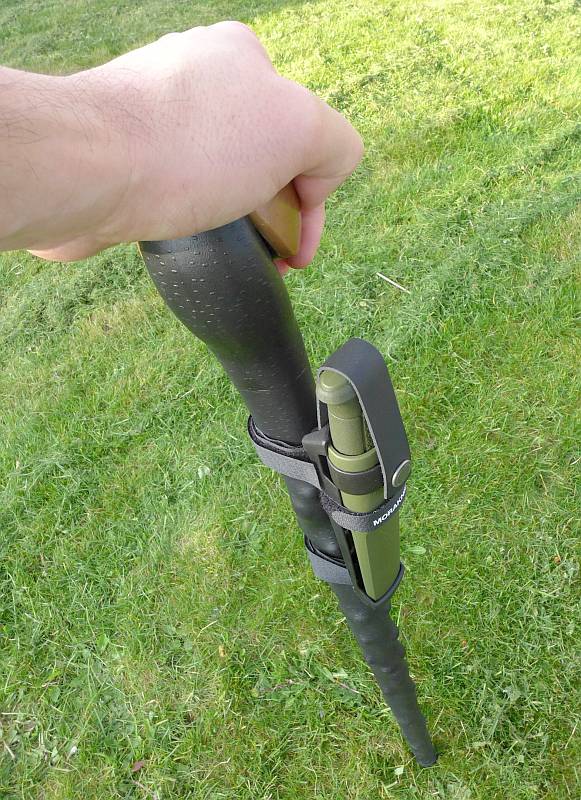
 photo 20 Kansbol MM stick P1260344.jpg

Although the Kansbol will work hard, I’d not choose to be batoning with it too much. Given its proper place as a general purpose knife, it does this job fantastically well. Hopefully by re-launching this knife blade (from the ‘2000’ model), Morakniv will bring the benefits of the profiled blade more into the limelight.
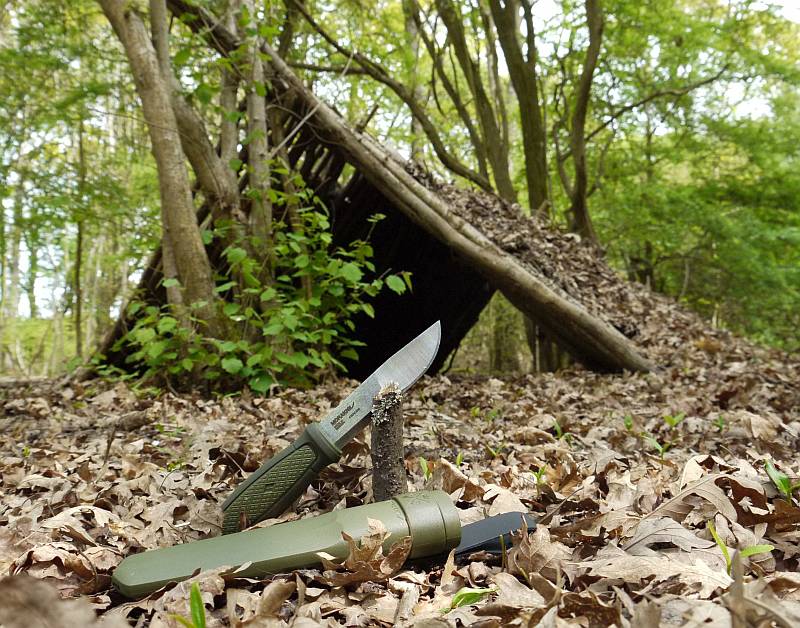
 photo 00 Kansbol shelter P1060926v6.jpg

Tactical Reviews – Review Summary

The views expressed in this summary table are from the point of view of the reviewer’s personal use. I am not a member of the armed forces and cannot comment on its use beyond a cutting tool or field/hunting knife.

Something that might be a ‘pro’ for one user can be a ‘con’ for another, so the comments are categorised based on my requirements. You should consider all points and if they could be beneficial to you.

_______________________________________________ _______________________________________________
Things I like What doesn’t work so well for me
_______________________________________________ _______________________________________________
Additional blade profiling makes this an excellent all-rounder. Considering the high value for money of this knife, adding anything in this column would be simply for the sake of it. In true terms there really isn’t anything to knock this down on.
Tough and lightweight.
Flexible mounting options.
Ambidextrous.
Comfortable for extended use.

 photo 00 Kansbol Forest P1060926v3.jpg


Discussing the Review:

The ideal place to discuss this reviews is on a forum. If you started reading the shorter forum version of the review, but followed the link this full exclusive review, please return to that forum to discuss the review there.
If you read the review entirely on Tactical Reviews, please consider one of the following to join in any discussion.

EdgeMatters – Sponsored Reviews (UK based Forum for Knife Makers and Collectors)

BladeForums – Knife Reviews (US based Forum for Knife Discussion)

CandlePowerForums – Knife Reviews Section (Largest and Friendliest Flashlight Community Forum)

Gear Review: Spyderco Tri-Angle Sharpmaker (Sharpener)

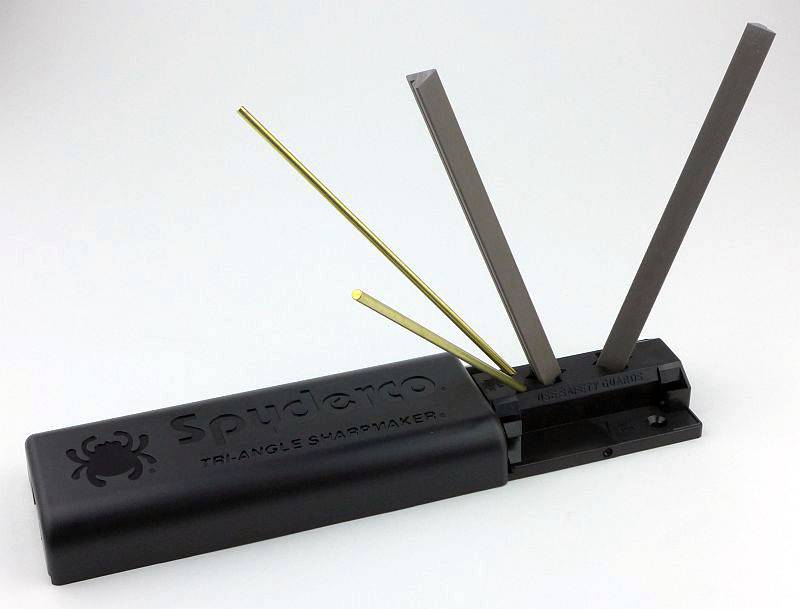
Spyderco’s Tri-Angle Sharpmaker is a surprisingly versatile sharpening system (based on the V-sharpener concept), designed to be simple to use, and make it easy to maintain a consistent sharpening angle.

The details:

Let’s dive into the details and talk about it more in the next section.

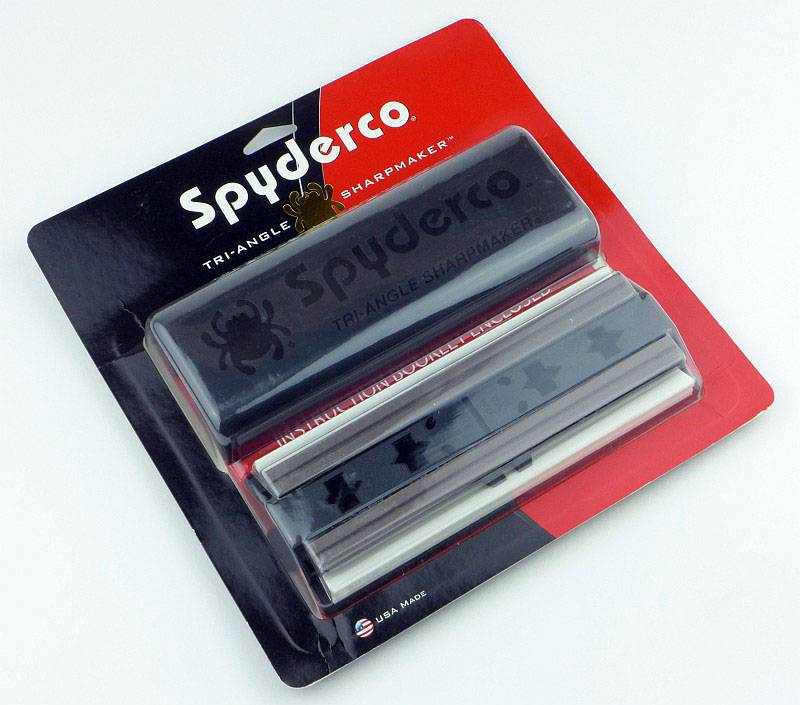
The Tri-Angle Sharpmaker arrives in a combined cardboard/blister pack.
 photo 01 Sharpmaker boxed v2 P1170441.jpg

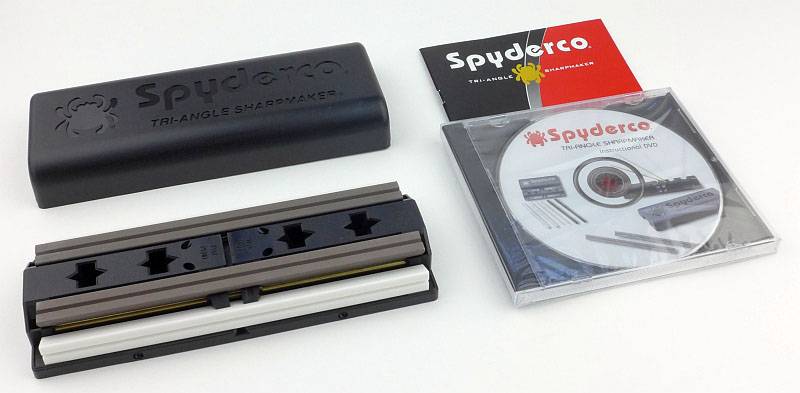
Included with the Sharpmaker is a set of instructions and an instructional DVD.
 photo 02 Sharpmaker box contents v2 P1170448.jpg

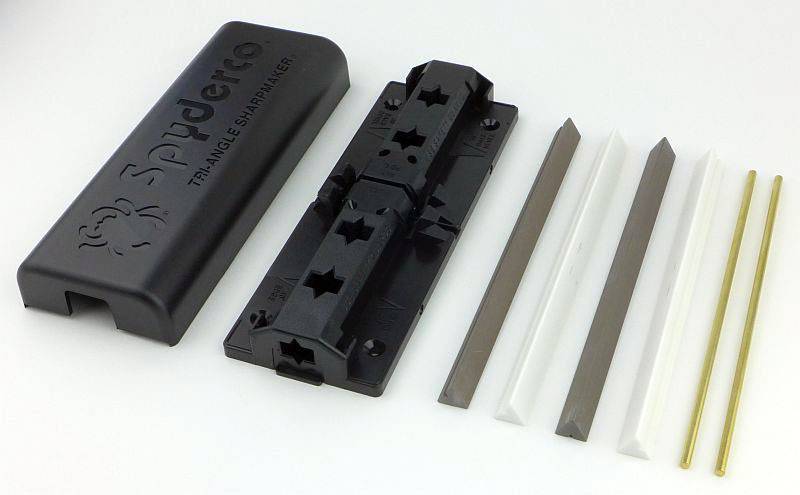
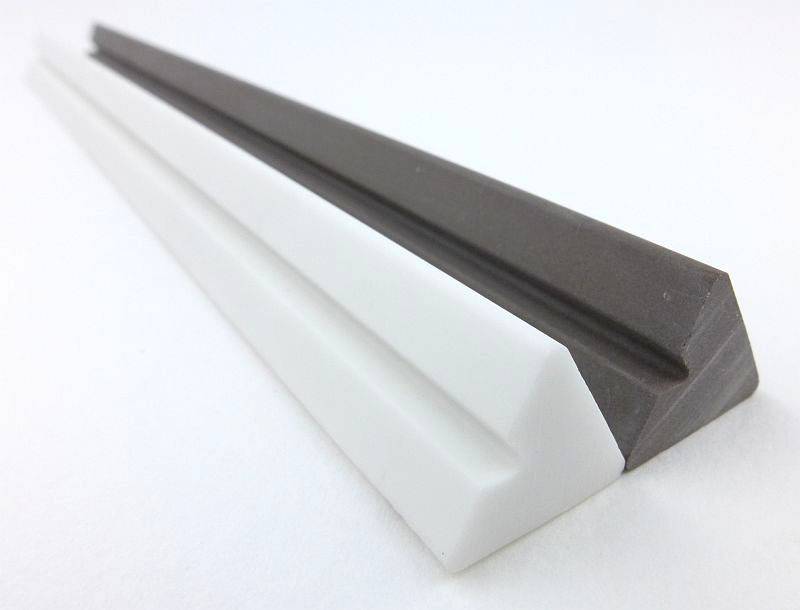
Breaking out all the parts, we have a lid to keep all the components in place, a base plate with various shaped holes, four high alumina ceramic stones/rods (a pair of brown/grey medium grit, and a pair of white fine grit) and very importantly two brass safety guard rods.
 photo 03 Sharpmaker parts P1170452.jpg

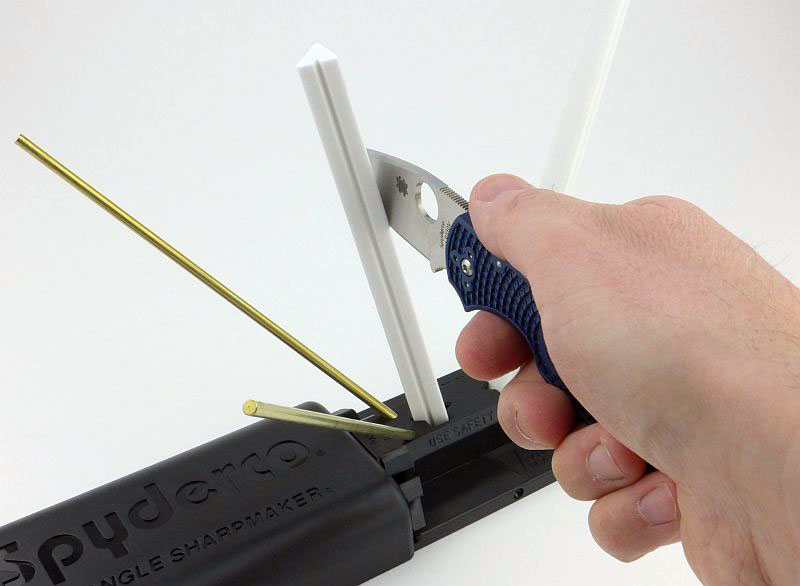
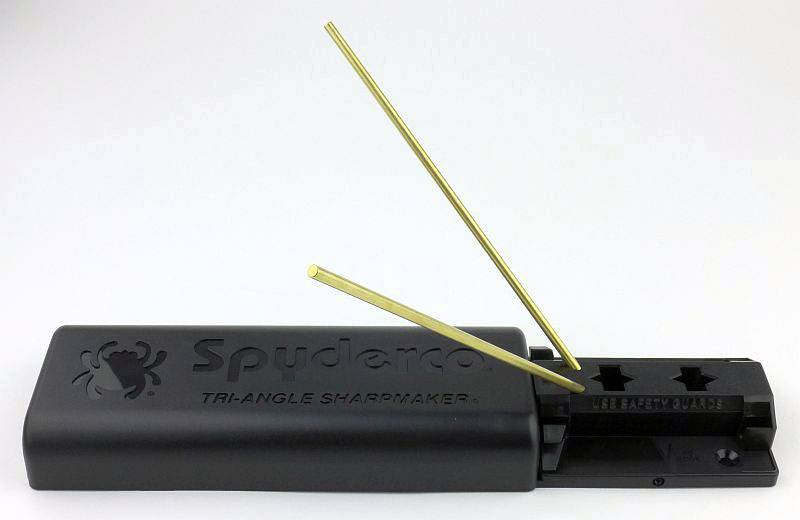
The FIRST thing you should do is to fit the guard rods (for whichever angle you are working to). Notice how the lid fits over the base at a halfway point to act as a handle.
 photo 04 Sharpmaker guards P1170458.jpg

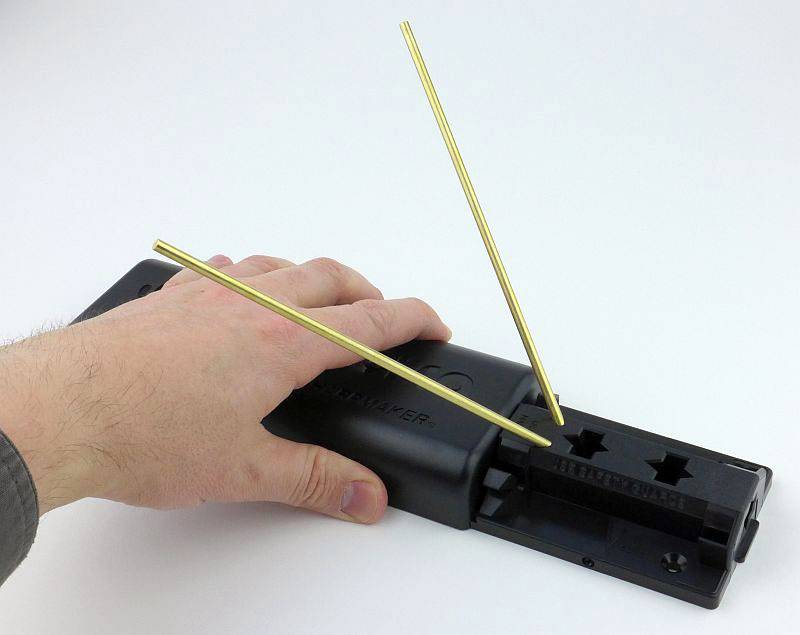
These guard rods angle back over the user’s hand to prevent stray sharpening strokes testing the edge on your hand. This is all the more important for experienced users as they tend to work faster and with less care.
 photo 05 Sharpmaker holding P1170461.jpg

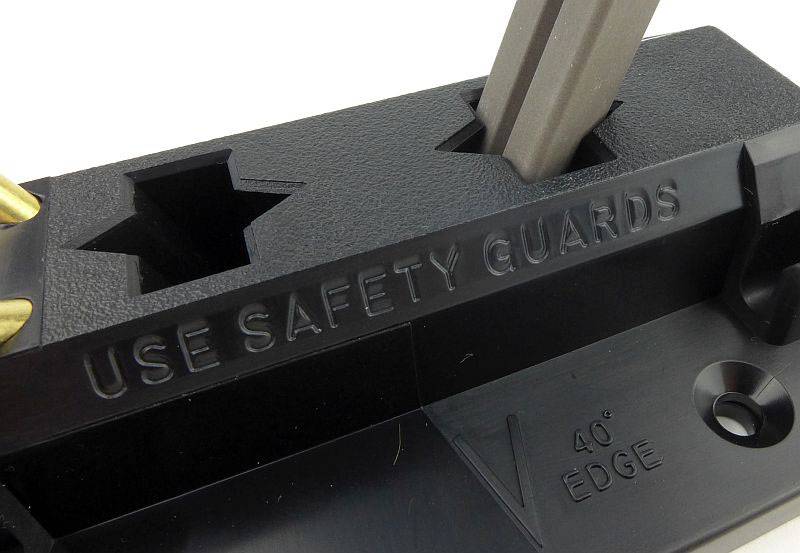
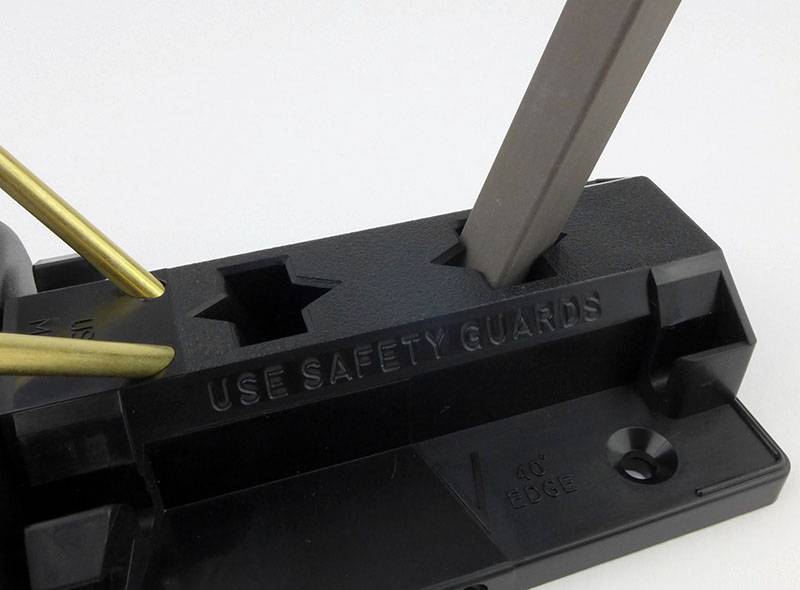
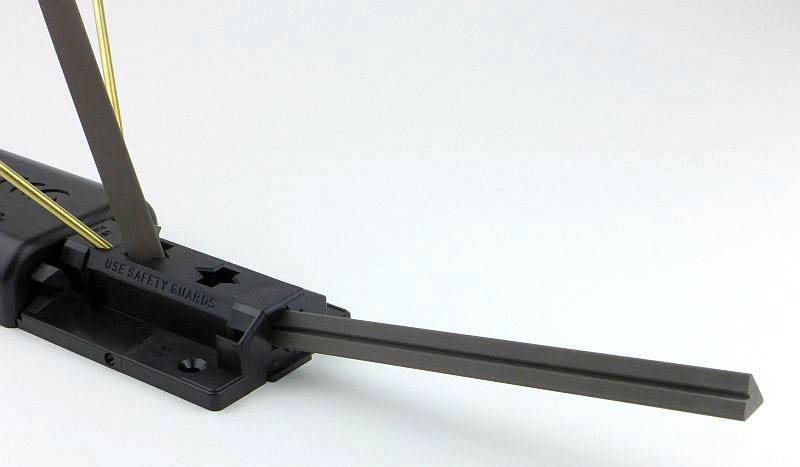
Just in case you forget – ‘USE SAFETY GUARDS’.
 photo 06 Sharpmaker reminder P1170463.jpg

The two types of stone included with the Sharpmaker (shown here in perfectly clean and unused condition).
 photo 18 Sharpmaker stones P1170503.jpg

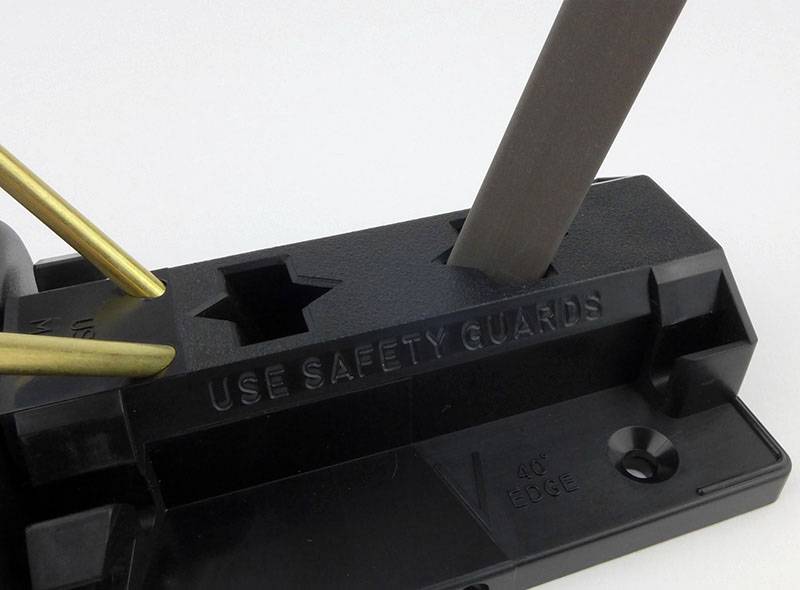
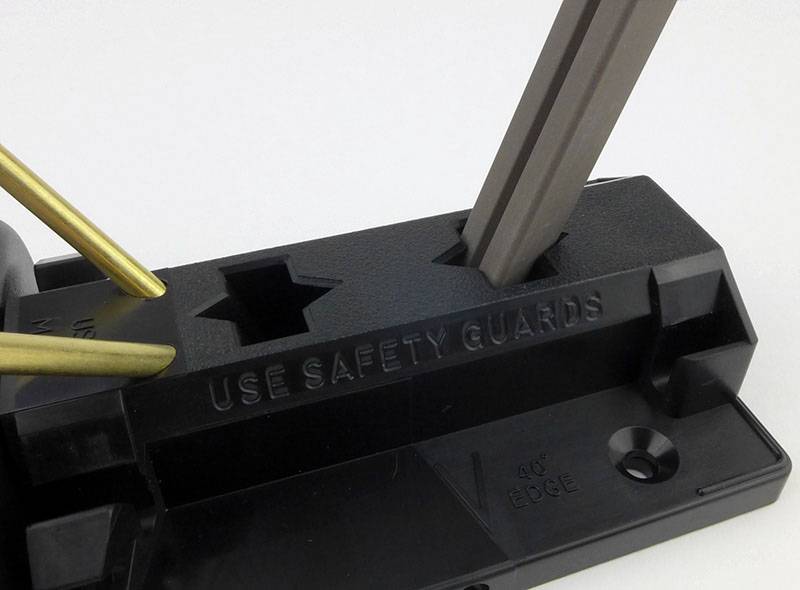
So why are those holes the shape they are? It’s all very clever actually. The Tri-Angle Sharpmaker, comes with …. yes, tri-angular stones. The stones also have a groove in them for hooks and other pointed objects.
This means we have three different working surfaces on the stones, the flat side, a pointed corner, and the groove. Here we have the stone fitted into the base so that we use the flat surface.
 photo 08-Sharpmaker-stone-rotation-1-P1170470.jpg

Now, taking the stone out and rotating it, it can be fitted back into the base with the corner as the working surface.
 photo 09-Sharpmaker-stone-rotation-2-P1170471.jpg

Lastly the grooved flat surface is presented for working with. All with one hole that holds the stone at the correct angle.
 photo 10-Sharpmaker-stone-rotation-3-P1170472.jpg

Here we are, fully assembled with ‘stage one’ sharpening (the coarsest arrangement) and on the 40 degree inclusive angle.
 photo 11 Sharpmaker assembled P1170475.jpg

What it is like to use?

Some of my most used sharpening stones are a set of Spyderco pocket stones, so I know how well the Spyderco ceramic stones perform. However, once you start using diamond stones they can seem a little slow, especially on some of the super-steels.

Though not strictly a guided system, I’m going to consider it one to mention the very specific benefit of these systems, which even people with considerable sharpening experience should not dismiss. Quite simply, guided systems help reduce the amount of steel you need to remove to restore an edge. This means that as well as making the sharpening process easier for everyone, it also makes it more efficient. You only remove as much steel as is needed which prolongs the life of the blade and makes sharpening quicker.

With the triangular stones, this is one of the few systems that can sharpen serrations, and is also happy working on hawksbill and recurve blades. To understand fully why, we need only look at the four ‘grades’ of sharpening that are achieved from the two stones.

In order, from most coarse to finest, we have these configurations of the stones:

1. Brown/Grey stone Corners – Coarse edge reshaping
2. Brown/Grey stone Flats – Producing a utility edge (how Spyderco say that most new knives come)
3. White stone Corners – To achieve ‘butcher’ sharp.
4. White stone Flats – for the finest razor edge.

The Sharpmaker base also has two sets of holes which give an inclusive angle of 30 degrees or 40 degrees. In the design of the Sharpmaker, the 30 degree angle is primarily intended to be used for creating a ‘back bevel’ (to thin out the edge). Though some knives might be sharpened to this 30 degree angle, the 40 degree angle is considered by Spyderco to be the best compromise for most blades.

Serrations can be sharpened thanks to the corners of the stones, meaning steps 1 and 3 can be used. Spyderco recommend that only the step three (white stone corners) is used, as step one is a bit too aggressive. Serrations need a slightly different technique, as generally they are formed with a single bevel (chisel) grind. In this case you work only on one side for three or four strokes, then use a single stroke on the other side to remove the burr that forms.

For flexible blades, you only use the corners (steps 1 and 3) as it is difficult to keep the edge sitting on the flat surfaces.

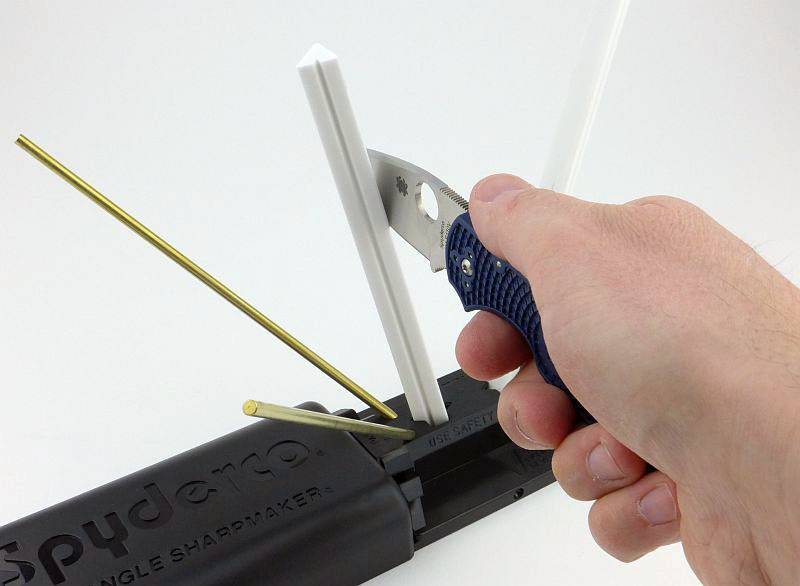
Having covered some of the theory, let’s get back to looking at the way you use the Sharpmaker. Here is a knife in mid-stroke having started at the plunge/ricasso and being draw down and backwards towards the tip, to run the entire edge over the stone on one side.
 photo 13 Sharpmaker knife P1170484.jpg

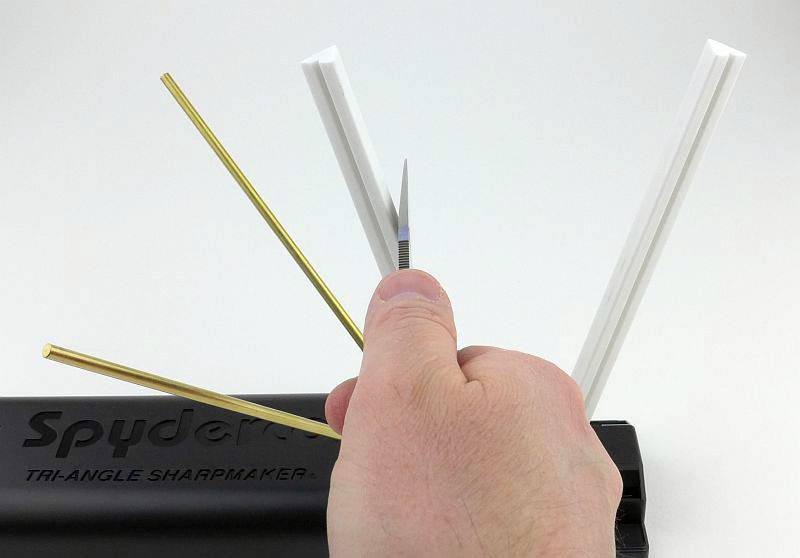
Looking directly from behind the knife, this is the critical aspect for the Sharpmaker – you keep the blade held vertically at all times, the stone angle is then determined by the Sharpmaker. Visually, keeping the blade vertical is the easiest position to judge, much easier than any other angle.
 photo 14 Sharpmaker knife P1170485.jpg

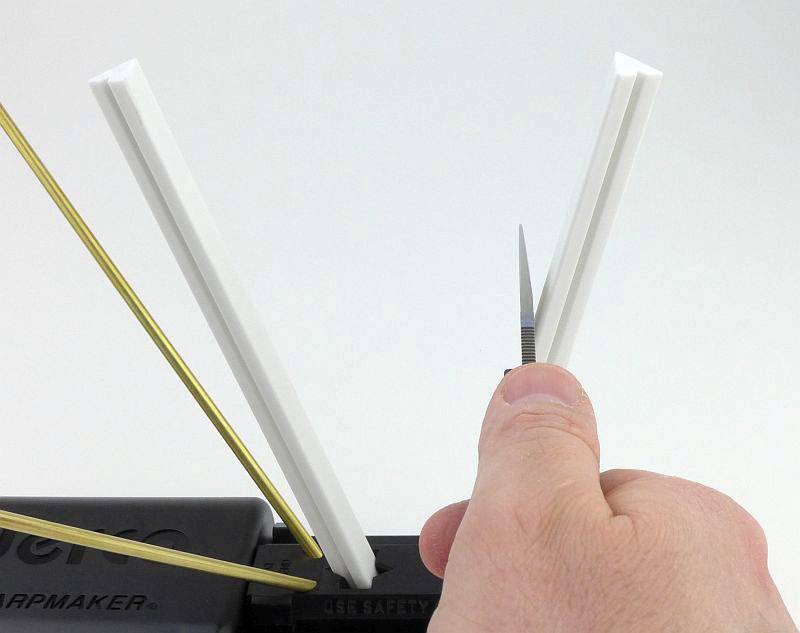
Having given one side of the blade a stroke, swap to the other side. Then just keep alternating sides for each stroke. Once you have given each side 20 strokes, you can move to the next stone configuration, refining the edge each time.
 photo 15 Sharpmaker knife side 2 P1170488.jpg

MAKE SURE YOU USE THE SAFETY GUARDS – Can’t stress this enough. I’ve hit them several times during the testing for this review, and would have cut my hand if I had not fitted them.

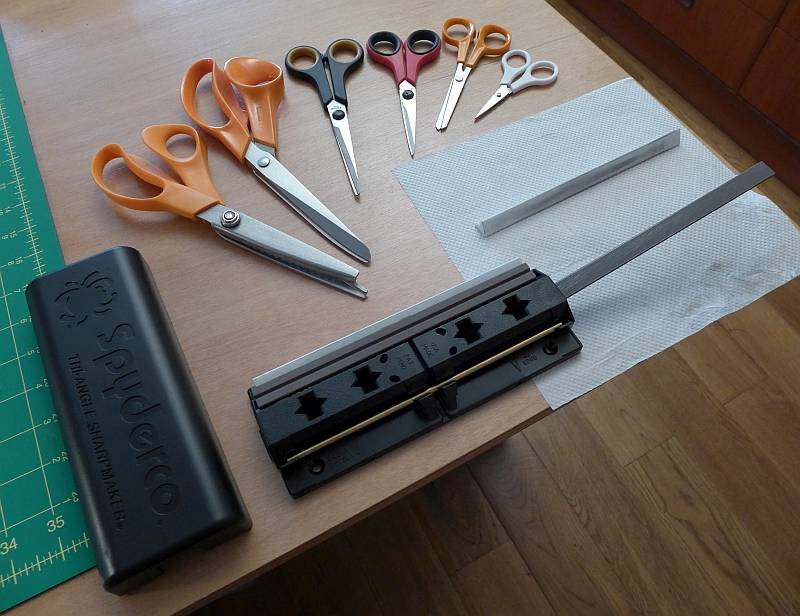
In one end of the Sharpmaker is another hole for a stone, this time using only one stone at a much lower angle. With a single stone mounted in this position you can sharpen scissors in the same way as you sharpen a knife. Keeping the scissors vertical and stroking the blade across the stone. To take off the burr on scissors you need to use the other stone like a file and lay it onto the blade flat. Doing this will give you a better burr removal than just closing the scissors.
 photo 12 Sharpmaker scissors P1170479.jpg

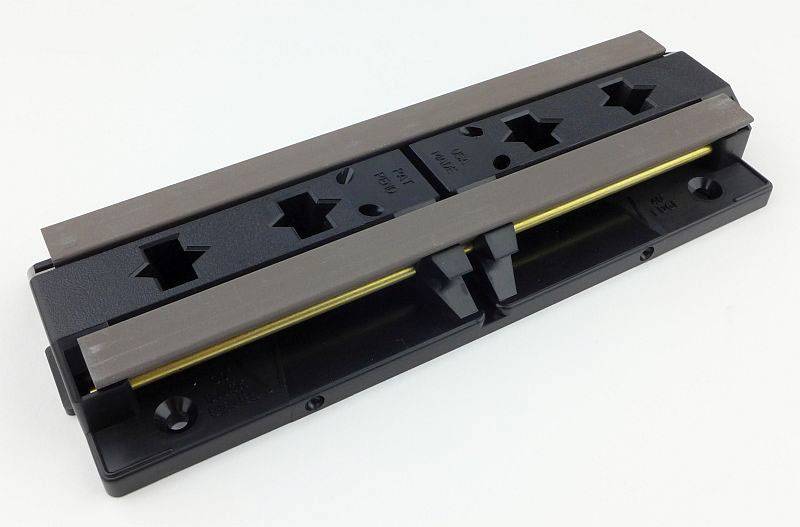
Also included in the design are two bench-stone options. Using the top channels in the base gives you a wide stone surface for large blades.
 photo 16 Sharpmaker bench stone P1170489.jpg

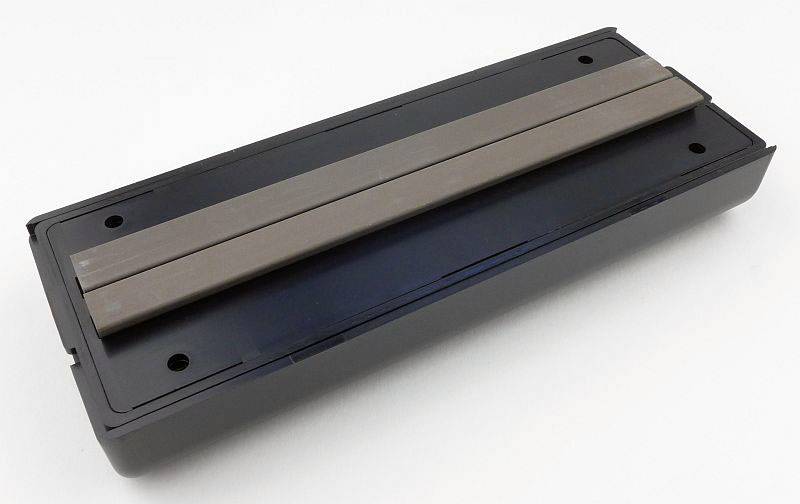
Flipping the base over and it has two grooves that are close together for sharpening smaller tools like chisels.
 photo 17 Sharpmaker bench stone narrow P1170494.jpg

I’ve already mentioned a couple of characteristics of the Sharpmaker that become quite relevant to start with. Especially compared to diamond, the ceramic stones are not the fastest cutters, and add to this a design that helps keep the overall removal of metal to a minimum by maintaining the angle, and you get a sharpener that can be hard work if you need to reprofile a steep edge angle.

(NOTE: When new, the brown/grey stones have a slight glaze that initially slows the cutting down. This glaze will wear through after a few sharpening sessions, but you can rub the two new stones together to speed this up and improve the cutting performance sooner.)

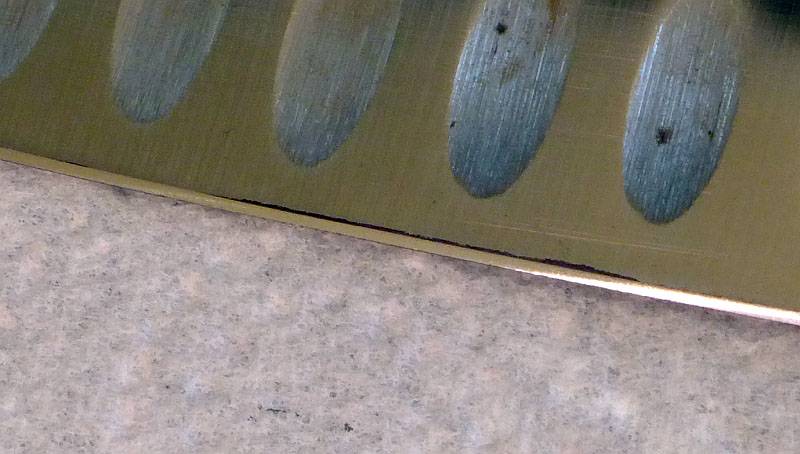
When starting to use the Sharpmaker, your bevel might not be at 40 degrees, so you can use the marker pen test to see if your bevel angle matches the Sharpmaker. If your initial bevel angle is less than 40 degrees, then you can just touch up the very edge and you don’t need to fully reprofile. Here the remnants of the marker pen are visible where the stones have taken off the ink from the full edge bevel itself. If you find the 40 degree stone angle is only working on the back bevel you are going to need to reprofile.
 photo 19 Sharpmaker check P1250574.jpg

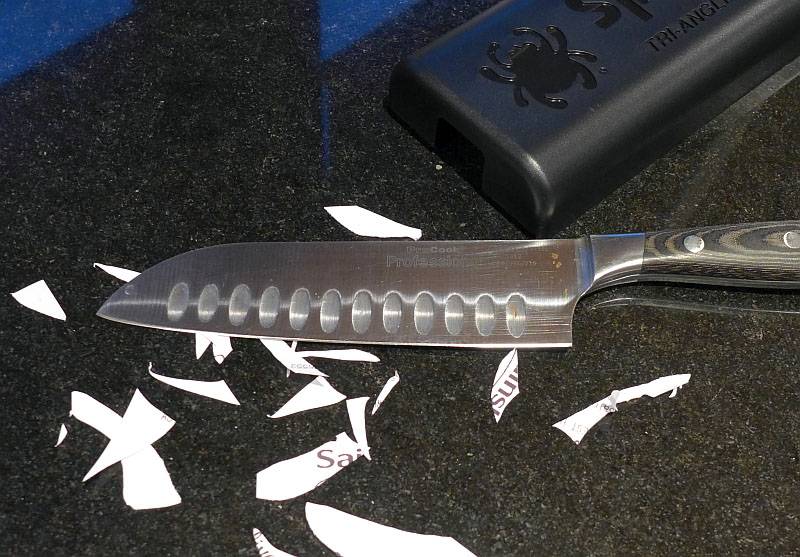
This knife which had a badly damaged edge (from being thrown in with the rest of the washing up) has been restored by running through all four stages and then tested with some thermal receipt paper which simply fell apart on the edge.
 photo 20 Sharpmaker test40 P1250590.jpg

As mentioned above, most sharpening systems actually improve with use, and it was during this session of sharpening a set of sewing scissors that the stones of the Sharpmaker really developed some bite. The difference is significant and you can feel the stones cutting much more aggressively than when new. Perhaps more so than with knives, the process of keeping the blade vertical and drawing it across the stone makes it so easy to sharpen scissors. It only took around 20 minutes in total to get all of these scissors cutting beautifully.
 photo 21 Sharpmaker Scissors P1260926.jpg

Not only is the Sharpmaker simple to use, it is simple to transport and set up. The ceramic stones are used dry so there is no oil/water mess while working, and you use normal kitchen/bathroom cleaning products to clean the stones when clogged. I take it with me to friends and family and into the office kitchen to touch up the edged casualties and give them new life.

The Tri-Angle Sharpmaker is NOT just a knife sharpener and I recommend you watch the Spyderco videos that show just how versatile this sharpener is.

Spyderco Sharpmaker – Introduction (1 of 4)

Spyderco Sharpmaker – Part 2 of 4

Spyderco Sharpmaker – Part 3 of 4

Spyderco Sharpmaker – Part 4 of 4

Review Summary

The views expressed in this summary table are from the point of view of the reviewer’s personal use. I am not a member of the armed forces and cannot comment on its use beyond a cutting tool or field/hunting knife.

Something that might be a ‘pro’ for one user can be a ‘con’ for another, so the comments are categorised based on my requirements. You should consider all points and if they could be beneficial to you.

_______________________________________________ _______________________________________________
Things I like What doesn’t work so well for me
_______________________________________________ _______________________________________________
Very easy to use – just keep the knife blade vertical. Can be a bit slow, especially on harder steels.
Extremely Portable. Initially requires reprofiling the edge to 40 degrees.
Hugely versatile sharpener for almost any cutting tool. Only two bevel angles available.
Ceramic stones need no oil or water in use and are easy to clean.
Minimum metal removal lengthens blade life.

 photo 11 Sharpmaker assembled P1170475.jpg


Discussing the Review:

The ideal place to discuss this reviews is on a forum. If you started reading the shorter forum version of the review, but followed the link this full exclusive review, please return to that forum to discuss the review there.
If you read the review entirely on Tactical Reviews, please consider one of the following to join in any discussion.

EdgeMatters – Sponsored Reviews (UK based Forum for Knife Makers and Collectors)

BladeForums – Knife Reviews (US based Forum for Knife Discussion)

CandlePowerForums – Knife Reviews Section (Largest and Friendliest Flashlight Community Forum)
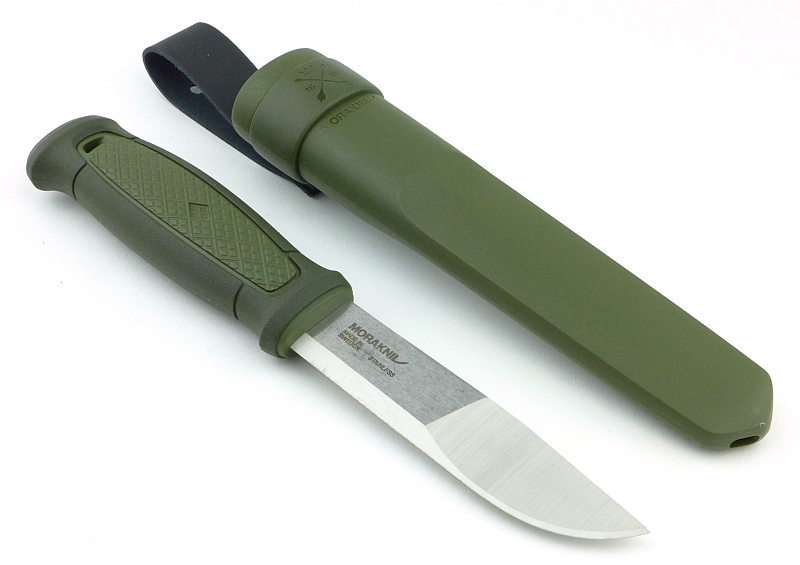
Knife Review: Morakniv Garberg with Leather Sheath and Multi-Mount

Morakniv have released their first (long awaited) full tang knife, the Garberg. Dedicated Morakniv users have been asking for a full tang knife, as they want a hard-use version of the much loved Companion.
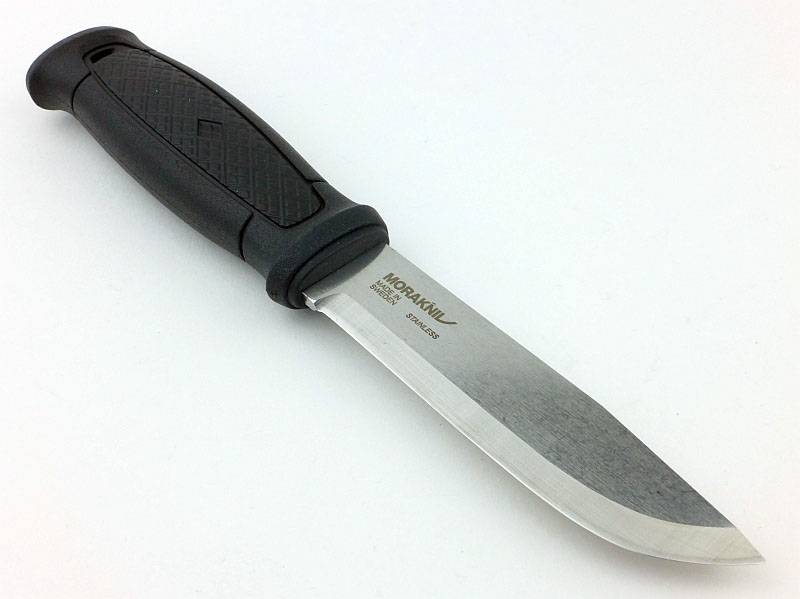
 photo 29 Garberg comparing P1240819.jpg

The Blade and Handle Geometry:

Most knife specifications have a basic description of the blade geometry, but in this section I will be taking a more detailed look at geometry and balance.
 photo 32 Garberg grind P1250050.jpg

Using a set of gauges and precision measuring equipment including a Vernier protractor, callipers, fixed radius gauges and the unique Arc Master adjustable radius gauge (the one that looks like a crossbow).
 photo Knife measuring P1180483.jpg

These measurements have been tabulated and are presented along with a few reference blades (8″ Chef’s Knife, 5.5″ Santoku and the popular Fällkniven F1).

Key aspects such as the primary bevel angle, grind type, blade depth, blade thickness, length, weight are detailed, along with balance information.
 photo 31 Garberg angle P1250046.jpg

The ‘Balance relative to the front of the handle’ tells you if the knife will feel front heavy, or if the weight is in your hand (a positive value means the weight is forward of the front of the handle). The ‘Balance relative to the centre of the handle’ indicates how close to a ‘neutral balance’ the knife has in the hand.
 photo 30 Garberg balance P1250042.jpg

In the case of full convex grinds the approximate centre of the grind is used for the primary bevel angle estimate.

 photo Garberg parameters.jpg

The blade is made from Swedish Stainless Steel (14C28N) steel.

Explained by the Maker:

The reasons for certain design choices may not be clear when simply looking at an object, so this section is intended to give an insight into the thinking behind a design by speaking to the designer themselves.

Unfortunately I can’t always get time with the designer so will use this section to include relevant information about the knife and its designer.

This is an interview with ‘Head of Production’ at Morakniv, Thomas Eriksson, from IWA 2017.
The discussion includes how the factory edge is created, maintained and also includes micro-bevels and zero-grinds. It is 16 minutes long, so you might want to come back to this after reading the rest of the review.

Video Edited with – Cyberlink Director Suite 5 (PowerDirector 15 and AudioDirector 7)
Camera – Panasonic HC-V770    Microphone – Tonor TN120308BL and/or Takstar SGC-598

A few more details:

Morakniv did not stop at just making the Garberg full-tang. There are two versions of the Garberg available; one with a full flap leather sheath, and the other with Morakniv’s Mulit-Mount sheath system. The first to arrive at Tactical Reviews was the leather sheath.
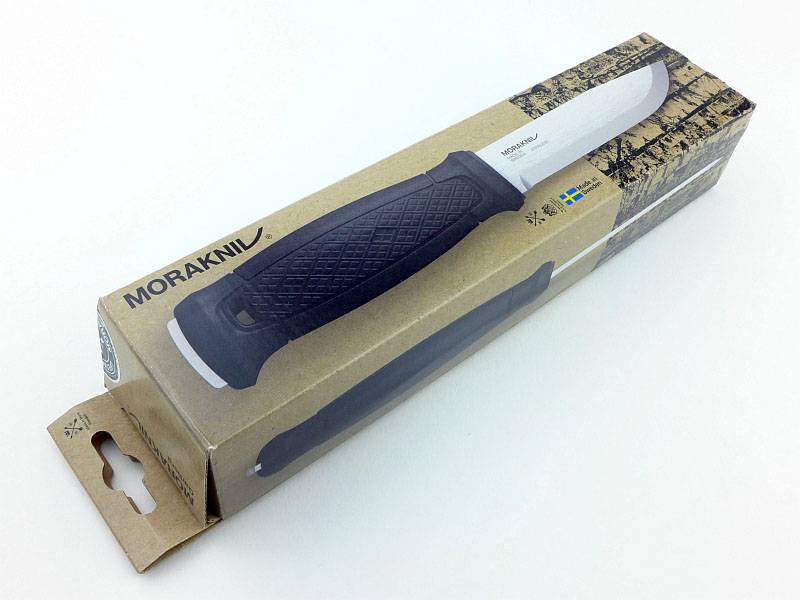
The image on the front of the box for the leather sheath version just shows the knife. The Multi-Mount’s box shows the sheathed knife.
 photo 01 Garberg boxed P1220689.jpg

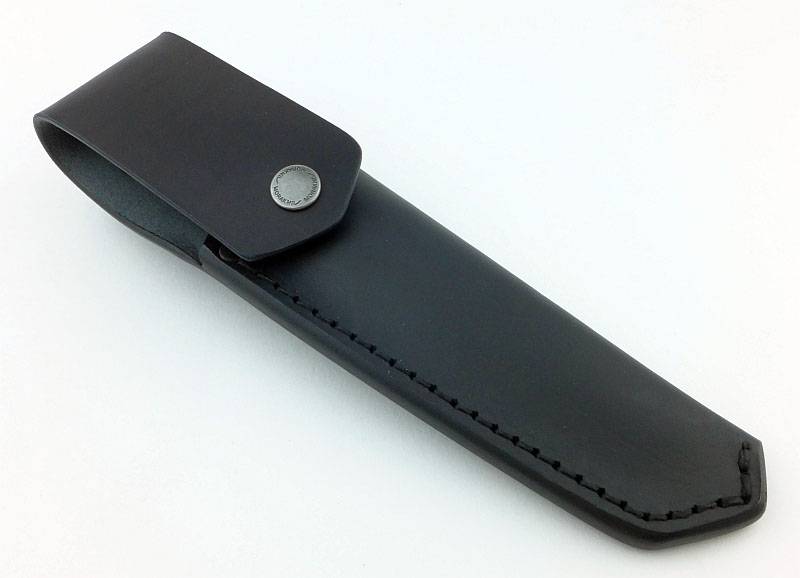
Straight out of the box the knife is hidden by the premium quality leather flap sheath. It is obvious straight away this is a very good quality sheath.
 photo 02 Garberg unboxed P1220692.jpg

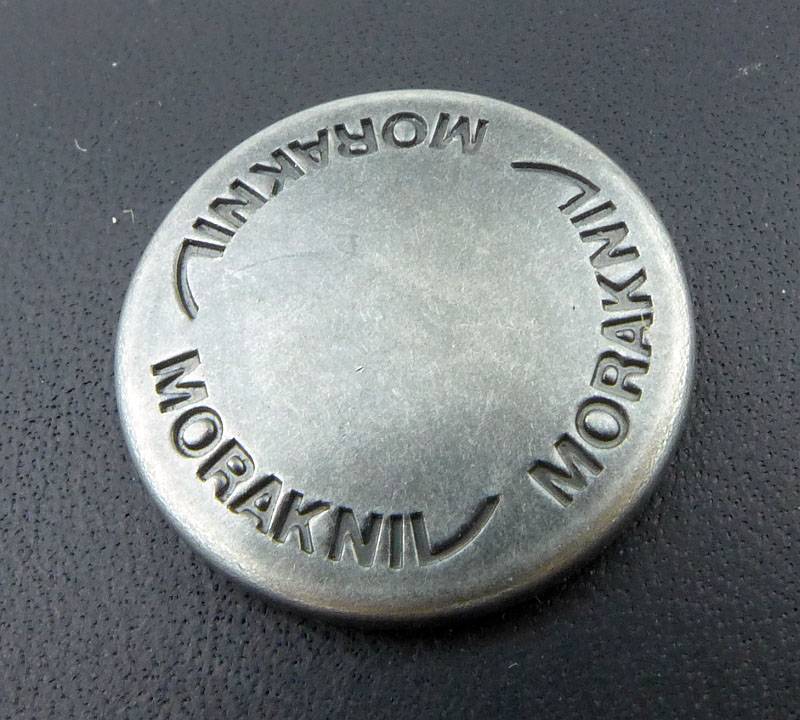
A close-up look at the press stud shows the attention to detail with the Morakniv logo embossed around the edges.
 photo 03 Garberg press-stud P1220695.jpg

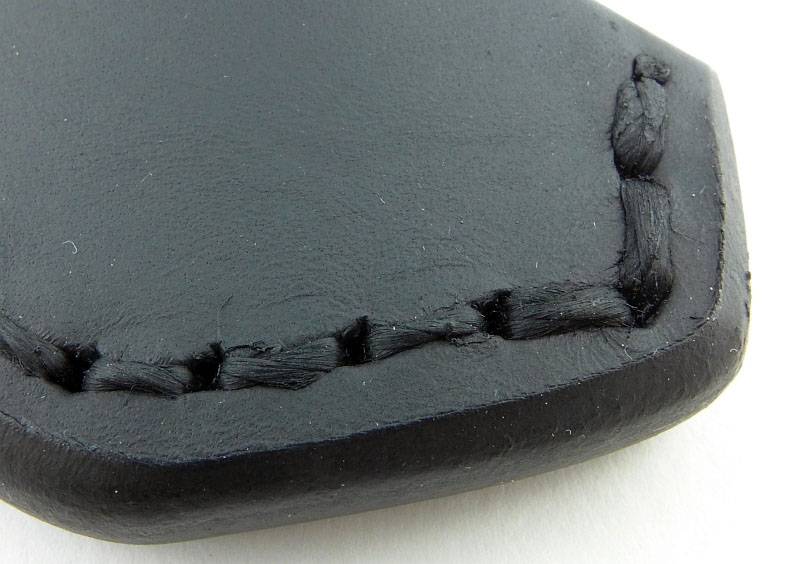
The stitching uses a heavy duty 1mm thread, cleanly punched though the 3mm leather and the welt.
 photo 04 Garberg stitching P1220698.jpg

On the back, the belt loop is made of the same thick leather as the rest of the sheath.
 photo 06 Garberg belt loop P1220706.jpg

The top of the belt loop is fixed with two rivets, and the bottom with a single rivet.
 photo 07 Garberg sheath back P1220709.jpg

Lifting the flap shows that the main sheath is a deep/full sheath.
 photo 08 Garberg sheath open P1220711.jpg

At the top of the sheath opening, the stitching is complemented with a rivet to prevent the stitching at the top from being cut and unravelling the sheath.
 photo 09 Garberg sheath open P1220715.jpg

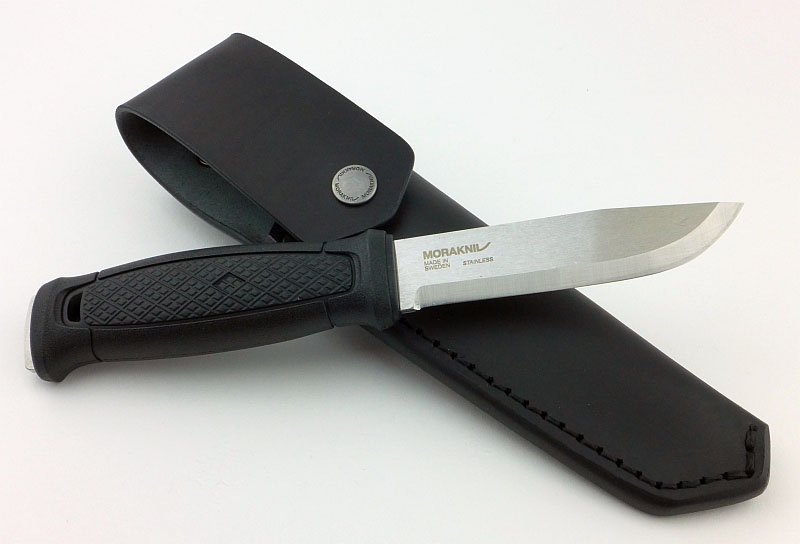
And here we are, the Garberg.
 photo 10 Garberg knife P1220718.jpg

Moving in close to the tip you can see the Scandi-grind and the polished cutting edge’s micro-bevel (see the video with Thomas Eriksson, from IWA 2017).
 photo 11 Garberg tip P1220722.jpg

Unlike most of the Morakniv knives, the Garberg has a ricasso, and a nicely radiused Scandi-plunge-line.
 photo 12 Garberg plunge P1220726.jpg

With the Garberg being intended as a hard-use knife, the handle material is not just any plastic, it is a specially chosen extra-rugged Polyamide.
 photo 13 Garberg handle P1220728.jpg

The full tang is exposed at the butt allowing for maximum strength and hammering without damaging the handle.
 photo 14 Garberg butt P1220733.jpg

To make it ideal for use with ferrocerium rods, the spine has been ground to have sharp corners. The logo is laser engraved onto one of the blade flats.
 photo 15 Garberg spine1 P1220737.jpg

This sharp edged spine extends the entire length to the tip.
 photo 16 Garberg spine2 P1220741.jpg

Not long after, the multi-mount version arrived. Note the picture on the box shows the knife sheathed in the multi-mount instead of the knife on its own.
 photo 20 Garberg multi P1240783.jpg

This time there are many more parts in the box. Included are the plastic holster, a basic belt loop, a locking strap, three hook and loop straps and the multi-mount itself.
 photo 21 Garberg multi contents P1240786.jpg

Taking the most basic components, the knife and plastic sheath.
 photo 23 Garberg multi sheath P1240796.jpg

Your first mounting option is the belt loop. This loop is fixed to a plastic ring that slides up the sheath and clicks into place.
 photo 24 Garberg multi loop P1240799.jpg

Next up is the locking-strap used to ensure the Garberg can’t come out of the sheath whatever angle it is mounted. This strap can be used with the multi-mount for the highest security (but not with the belt loop).
 photo 25 Garberg multi flap P1240802.jpg

The locking strap is made of leather for maximum performance and durability.
 photo 26 Garberg multi flap back P1240805.jpg

The multi-mount has many holes and slots to give you a great many fixing options, from screw holes to MOLLE/PALS.
 photo 22 Garberg multi base P1240791.jpg

A hook and loop strap is used to hold the sheath in the multi-mount. The locking strap also threads through part of the multi-mount so will keep the sheath securely in the multi-mount even if the hook and loop strap fails. You can also use cable ties in place of the hook and loop straps for a more permanent fixing.
 photo 27 Garberg in mount P1240808.jpg

What it is like to use?

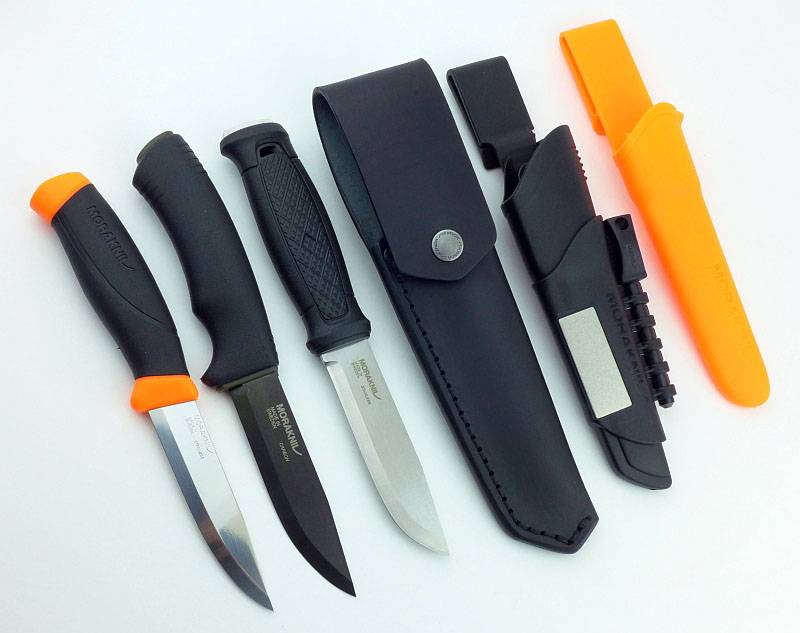
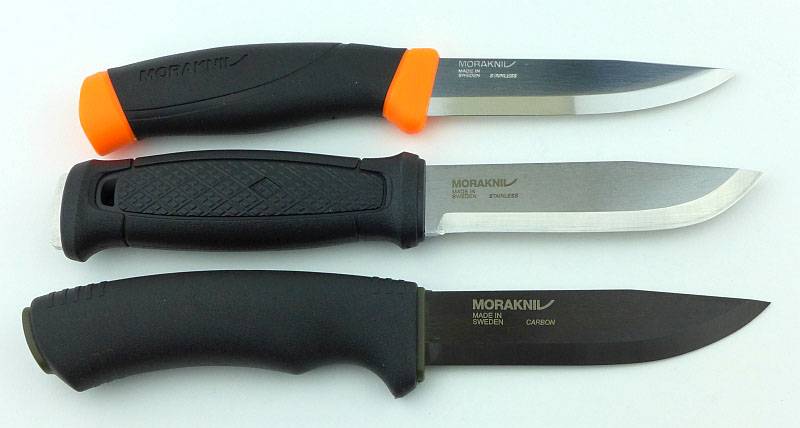
To start to understand where the Garberg fits in, in terms of how it feels to use, let’s start by looking at in alongside the Companion and Bushcraft Black.
 photo 17 Garberg compared P1220761.jpg

Immediately obvious is the Garberg’s symmetrical handle. This is not an accident, the Garberg’s handle has been specifically designed to allow it to be held in a forward or reverse grip for greater versatility. Overall it is no bigger than the Bushcraft model, but does feel much more solid. The extra weight of the full tang gives the knife a very different feel, even though the blade stock is the same at 3.2mm.
The line of the spine is very similar to the Bushcraft, but the blade of the Garberg has more belly which adds a little more forward weight and reduces the tip angle. We’ll get onto more of it ‘in use’ a little later.
 photo 18 Garberg compared2 P1220765.jpg

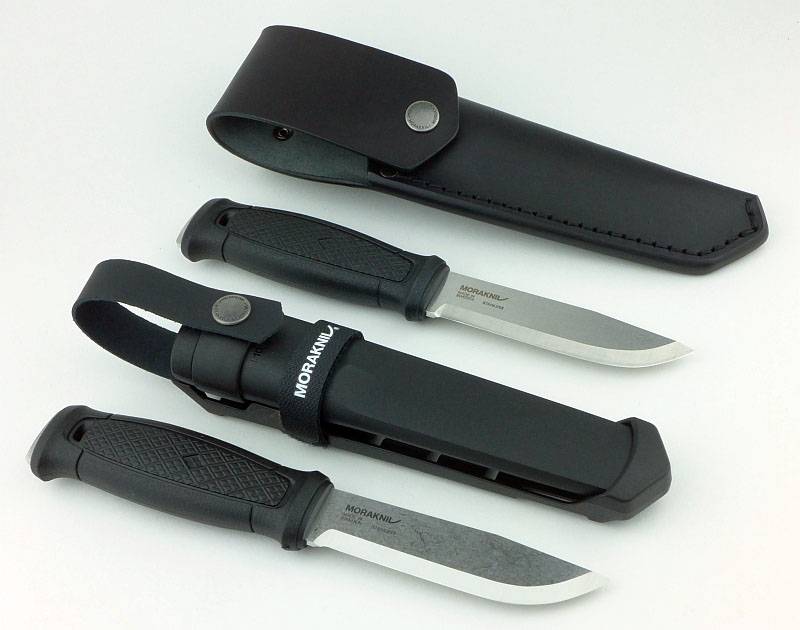
Just looking at the two versions of the Garberg, how do you choose between them?
 photo 28 Garberg comparing P1240812.jpg

Clearly the knives are identical, so it all comes down to the way you want to carry it. For belt carry it has to be the leather sheath every time. This is a hard wearing and comfortable sheath and simply won’t let you down. Traditional materials that have proven themselves ideal for the task have been used, and Morakniv have not scrimped on this, using only premium 3mm thick leather.
The multi-mount covers just about any other carry option and even has a belt loop suitable for occasional use.
 photo 29 Garberg comparing P1240816.jpg

Following the huge success of the Companion and other Morakniv knives, the Garberg is an ideal all-round size. A comfortable size and weight which is up to as much work as you would ever really want to put a knife to. Any more blade length starts to bring you into chopping territory and reduced agility for finer tasks, any less and you start to lose wood processing ability.
 photo 19 Garberg in hand P1220770.jpg

Out into its natural habitat.
 photo 33 Garberg outdoor P1250152.jpg

Batoning can be carried out with no concerns at all thanks to the full tang. The sharp edged blade spine gives good grip on the baton, but it does mean the baton gets chewed up faster. The only reason this strike did not go all the way through in one hit, is that I didn’t want to cut into the limb I was resting it on.
 photo 34 Garberg baton P1250202.jpg

You would barely notice that I had been batoning away with this for nearly an hour, apart from a slight smear of sap there is not a mark on it.
 photo 35 Garberg cut P1250211.jpg

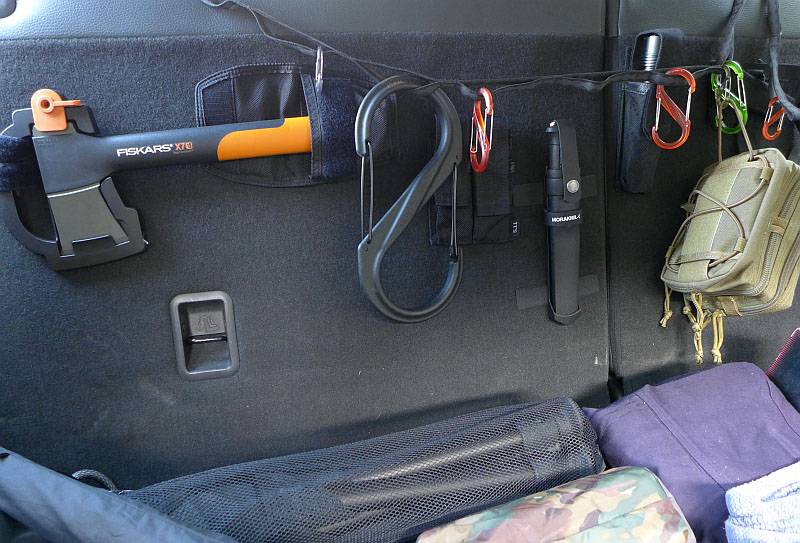
Possible mounting locations for the Multi-Mount are so numerous, I’ll just leave you to think of a few yourself, but here is where the Multi-Mount Garberg is currently residing.
In this photo I’ve pushed the rear seats of my car forward slightly to make it easier to photograph. Amongst a few other bits of kit the Multi-Mount is held onto the seat back with the hook part of the large hook and loop straps. Make sure you leave room to lift the knife out of the sheath.
 photo 37 Garberg car P1250356.jpg

In this instance mounting it horizontally resulted in the mount gradually working its way downward due to bumps in the road slowly splitting the hook fastner away from the seat back. Mounted vertically this doesn’t happen. The main downside I see to the Multi-Mount is that it is mainly suited to permanent or semi-permanent mounting and may be slow to move to another location or bag.
 photo 38 Garberg car P1250360.jpg

Throughout the heavy workout I gave the Garberg, there was no evidence of edge chipping or rolling, so it looks like Morakniv have got the hardness and toughness just right. I’m happy to give this a hard time, much more so than the half tang models.
 photo 40 Garberg shelter P1060923.jpg

Review Summary

The views expressed in this summary table are from the point of view of the reviewer’s personal use. I am not a member of the armed forces and cannot comment on its use beyond a cutting tool or field/hunting knife.

Something that might be a ‘pro’ for one user can be a ‘con’ for another, so the comments are categorised based on my requirements. You should consider all points and if they could be beneficial to you.

_______________________________________________ _______________________________________________
Things I like What doesn’t work so well for me
_______________________________________________ _______________________________________________
Knife – Full tang making this the most robust Morakniv knife. Knife – Thick blade less suited to fine work and food preparation.
Knife – 3.2mm blade stock gives very high strength.
Knife – Scandi grind well suited to wood processing.
Knife – Symmetrical handle allows for a variety of grip options.
Leather sheath – High quality construction. Leather sheath – Flap can slow down re-sheathing.
Leather sheath – Hard wearing 3mm leather used throughout.
Multi-Mount – Incredibly versatile mounting solution. Multi-Mount – Mainly suited to permanent mounting and can be slow to relocate.
Multi-Mount – The system also includes a standard belt hanger.

 photo 39 Garberg forest P1060909.jpg


Discussing the Review:

The ideal place to discuss this reviews is on a forum. If you started reading the shorter forum version of the review, but followed the link this full exclusive review, please return to that forum to discuss the review there.
If you read the review entirely on Tactical Reviews, please consider one of the following to join in any discussion.

EdgeMatters – Sponsored Reviews (UK based Forum for Knife Makers and Collectors)

BladeForums – Knife Reviews (US based Forum for Knife Discussion)

CandlePowerForums – Knife Reviews Section (Largest and Friendliest Flashlight Community Forum)