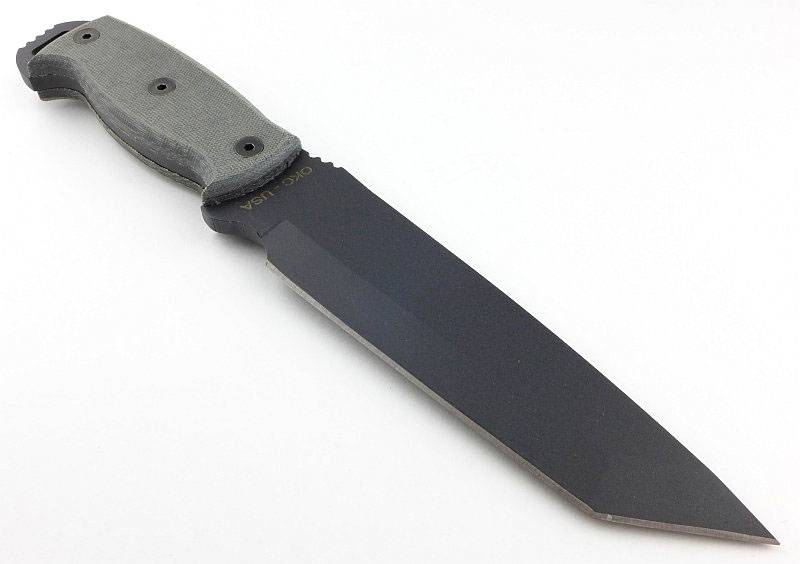
Light Review: SOG Dark Energy Group Review (DE-01, DE-02, DE-03 and DE-06)

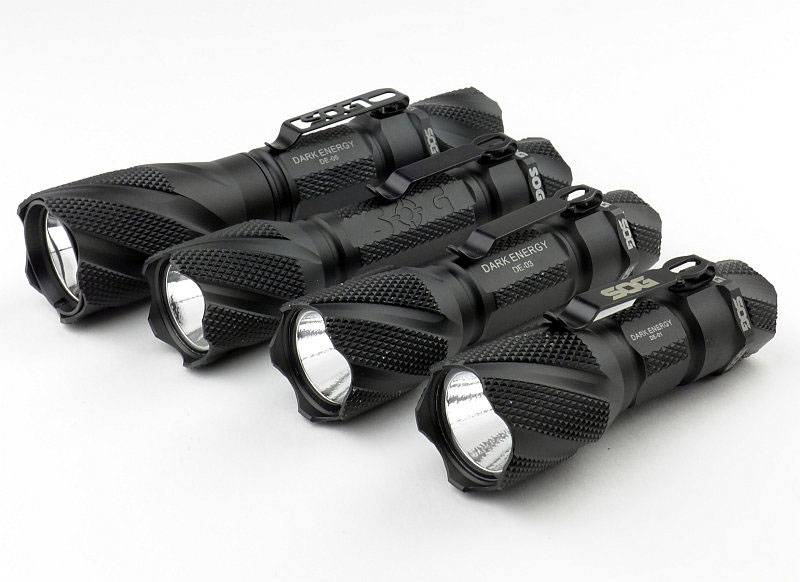
As well as the hybrid SOG Bladelights I reviewed recently, SOG also have a line of dedicated lights named ‘Dark Energy’. I have four of them on test, the DE-01, DE-02, DE-03 and DE-06 to compare the different power options and their performance.
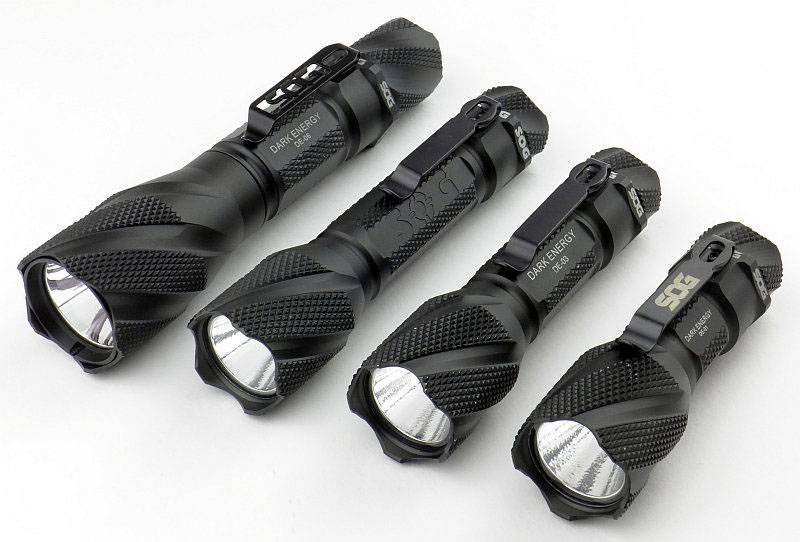
 photo 02 SOG DE unboxed P1160779.jpg

In case you notice that the DE-03 (AA powered) looks a little worn, that particular light has been a show demo light and was supplied in well used condition alongside the other new, boxed, models.
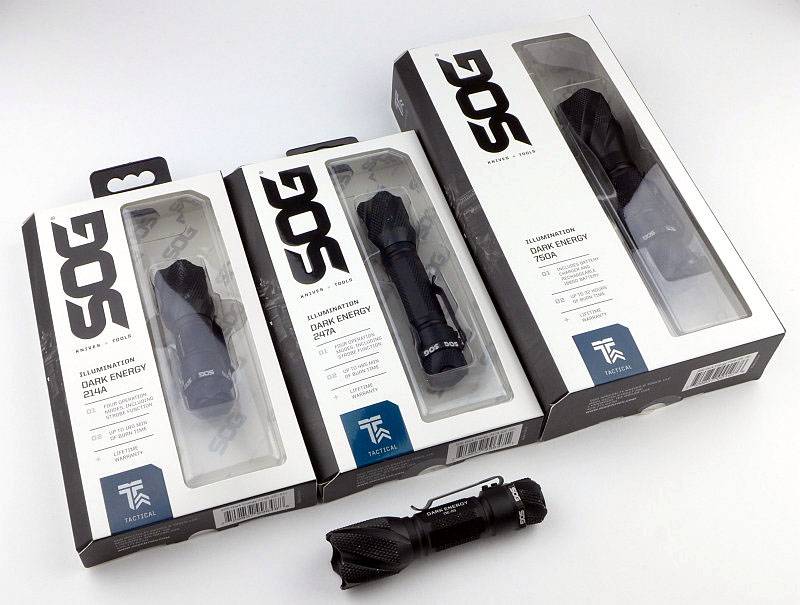
 photo 01 SOG DE boxed P1160594.jpg

As each light is built around the power source, the sizes vary accordingly. From left to right, the DE-06 uses 1×18650, DE-02 uses 2xCR123, DE-03 uses 1xAA and the DE-01 with a CR123.
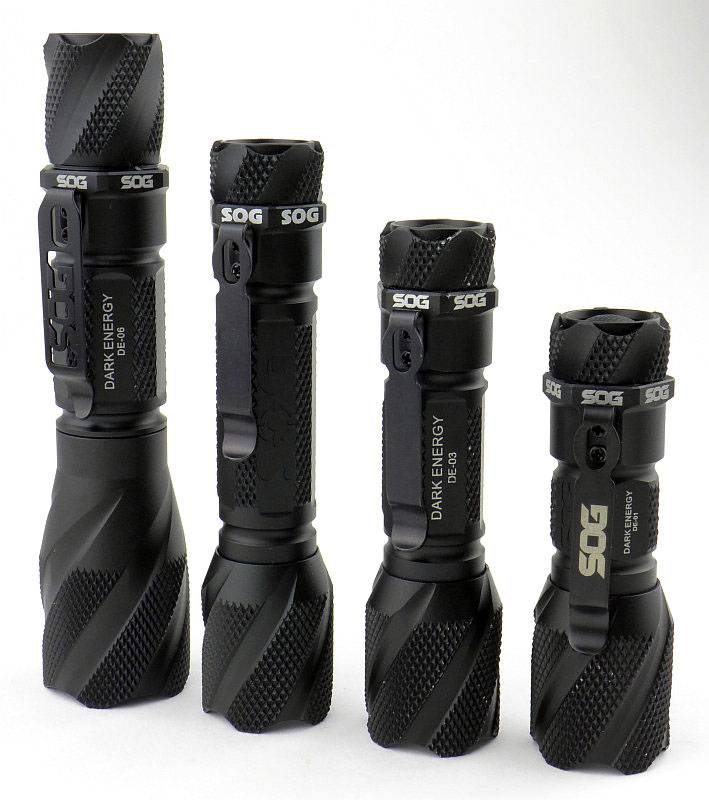
 photo 03 SOG DE size P1160780.jpg

Taking a more detailed look at the DE-06:

Of the four models on test, three have very similar details (DE-01, DE-02 and DE-03) but the DE-06 is different so needs its own section.

SOG’s presentation is excellent with a distinctive bevelled edge box.
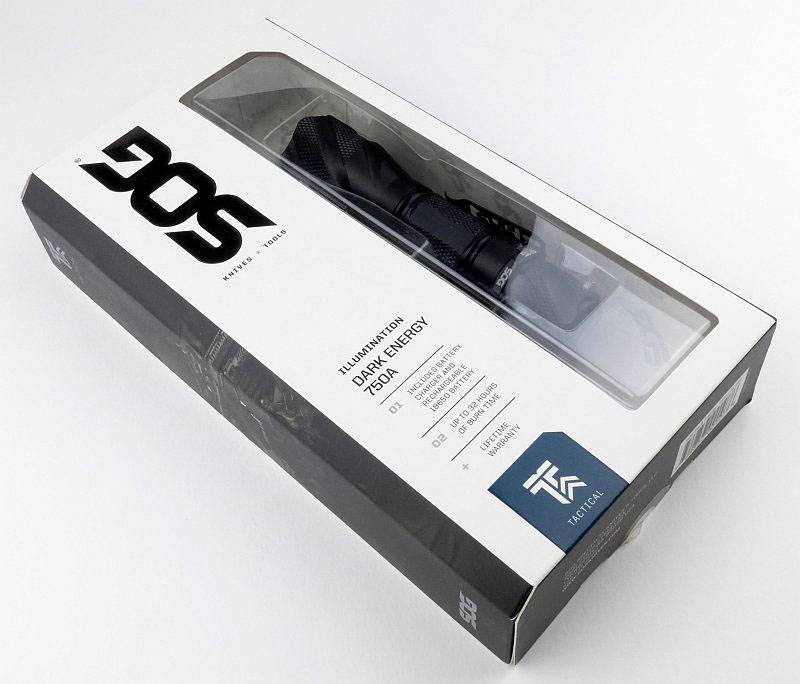
 photo 01 SOG DE06 boxed P1160715.jpg

Even with the DE-06, which is the only rechargeable model, the contents are minimal. As well as the DE-06 there is a Nextorch branded 2600mAh 18650 cell and a single bay charger with mains adapter.
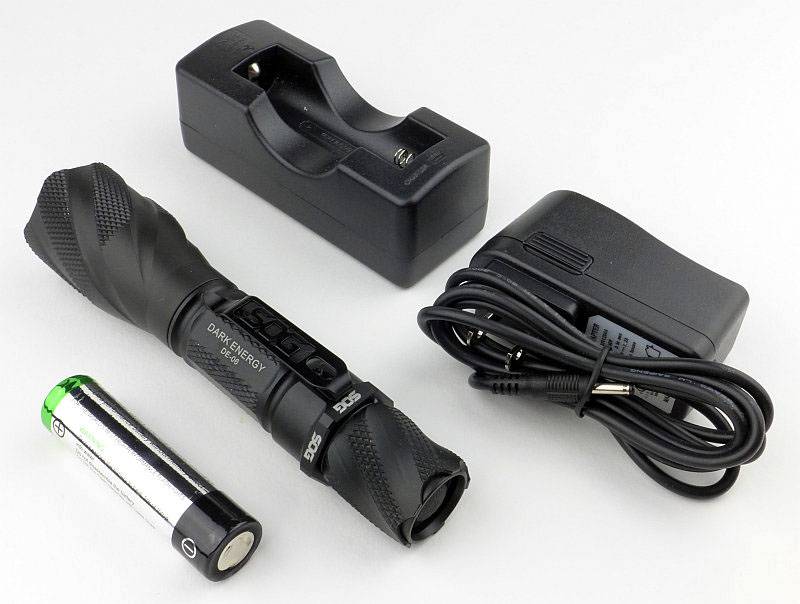
 photo 02 SOG DE06 box contents P1160720.jpg

The basic single bay charger with cell fitted.
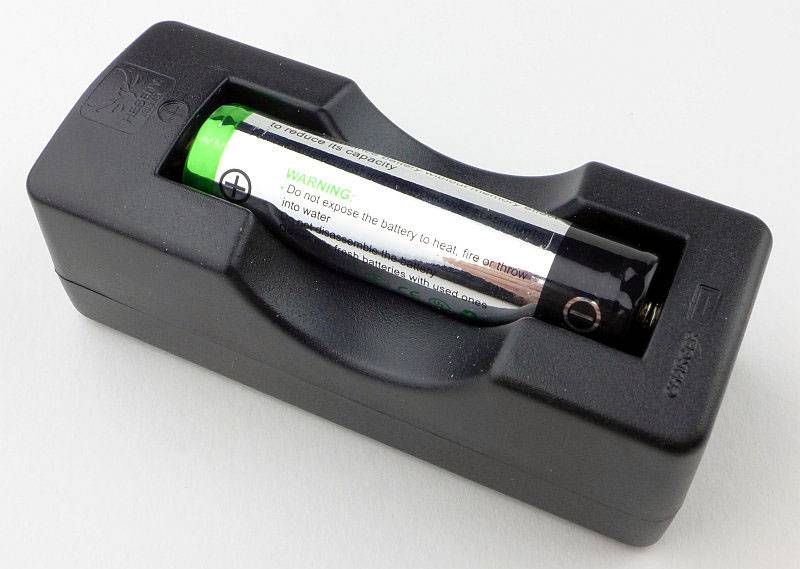
 photo 03 SOG DE06 charger P1160722.jpg

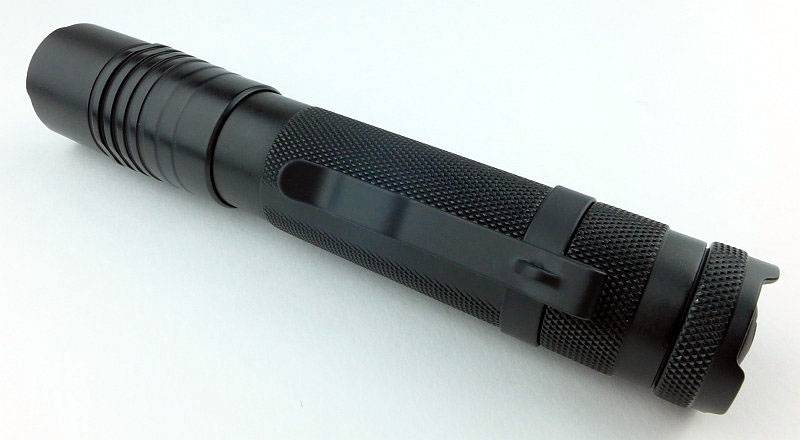
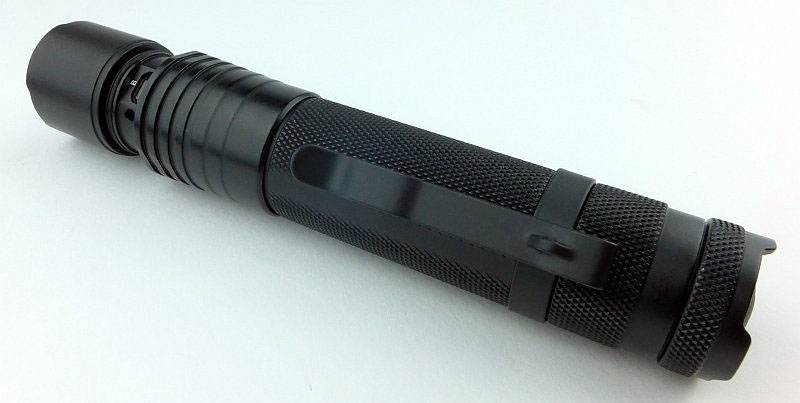
Immediately you can see the strong SOG styling of the Dark Energy series with more knurling than most lights, including the head.
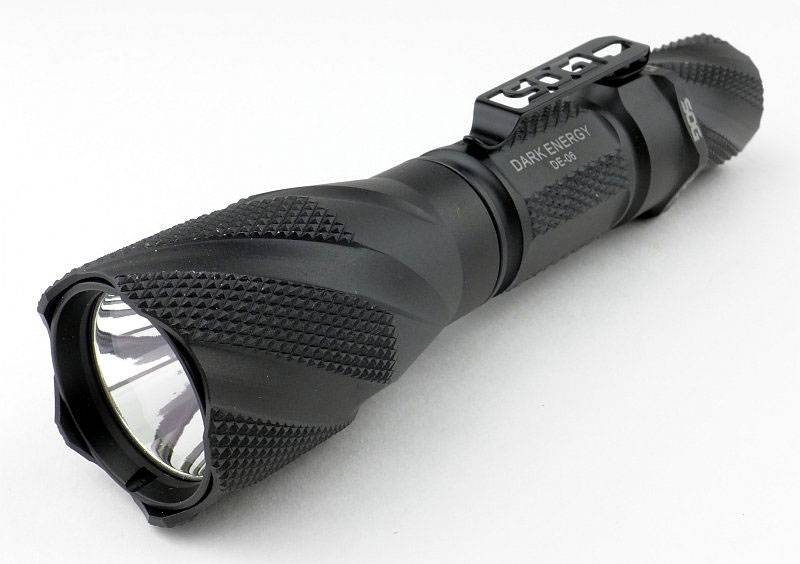
 photo 04 SOG DE06 angle P1160725.jpg

SOG offer engraving on just about all their products, so you will notice some customisation on these samples.
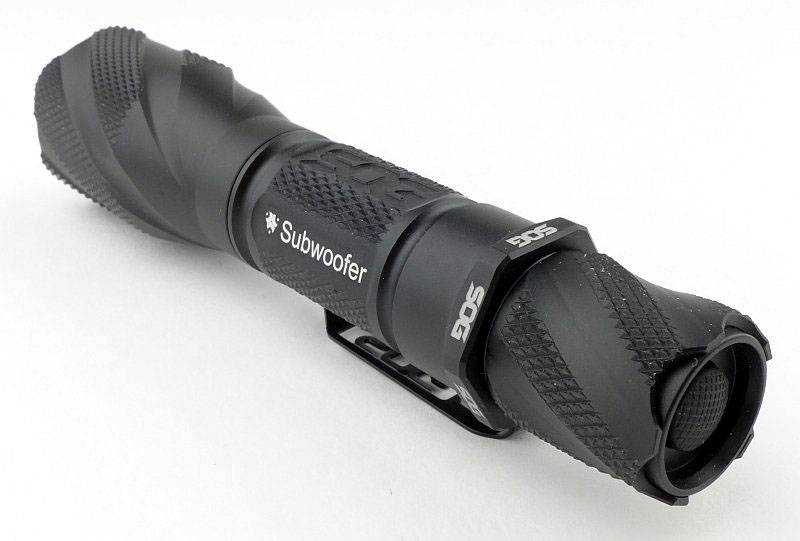
 photo 05 SOG DE06 reverse angle P1160727.jpg

The wide clip is attachedto the side of the light with two screws.
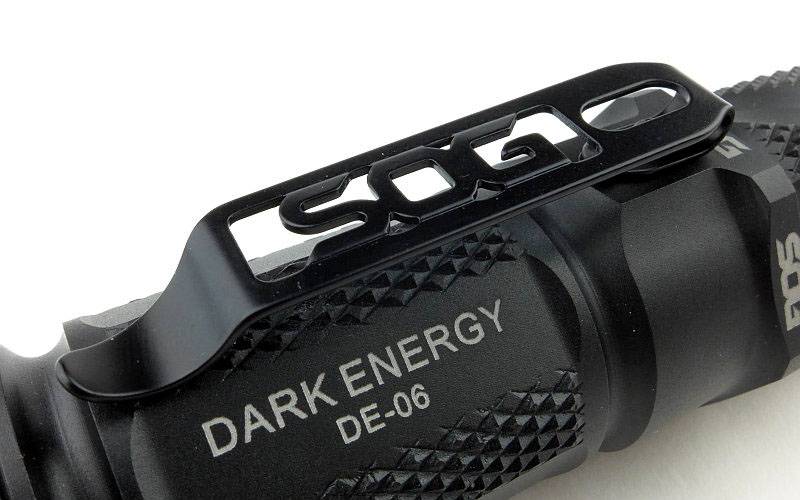
 photo 06 SOG DE06 clip P1160733.jpg

You can tailstand these lights and the switch boot is recessed. With gloves it can be more difficult to operate the switch.
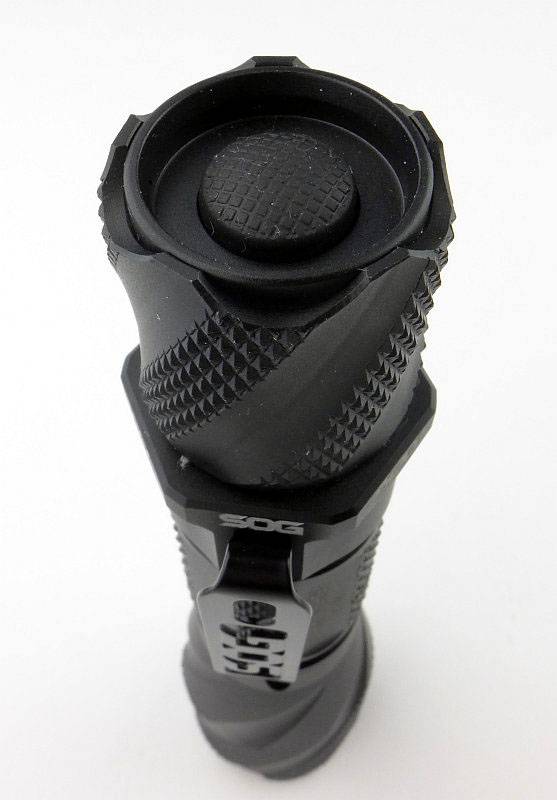
 photo 07 SOG DE06 switch P1160736.jpg

A broad gold-plated sprung-plunger acts as the negative terminal and the battery tube contact is gold-plated as well.
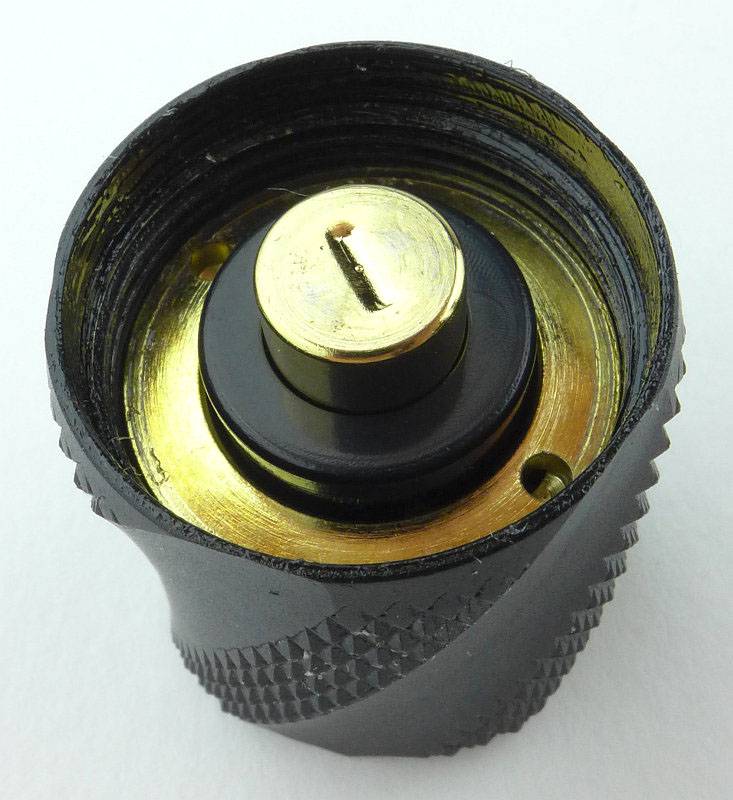
 photo 08 SOG DE06 tailcap contacts P1160739.jpg

In the DE-06 only, the threads are fully anodised meaning you can lock-out the light. The threads are well lubricated and nearly square.

 photo 09 SOG DE06 threads P1160741.jpg

Looking inside the battery tube, the positive contact is a spring terminal.
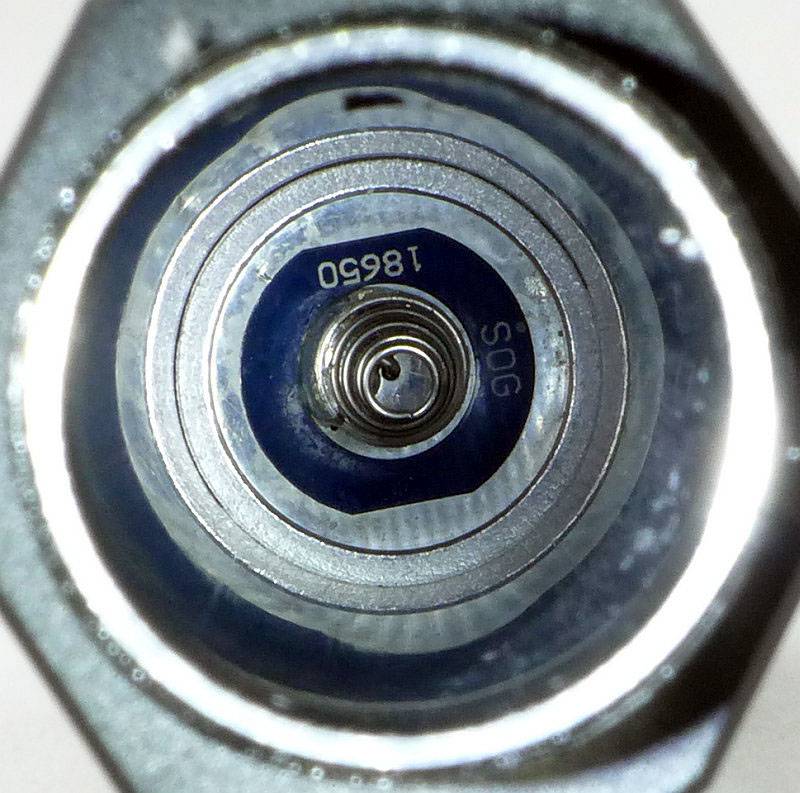
 photo 10 SOG DE06 inside P1160747.jpg

Though not specified on the packaging, the LED is an XM-L2.
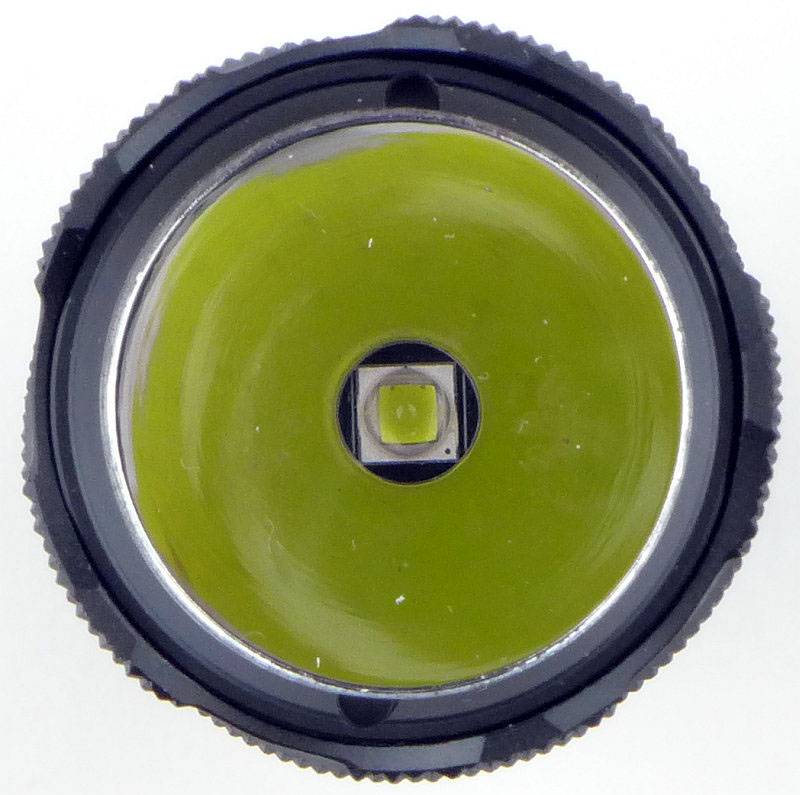
 photo 12 SOG DE06 LED P1160755.jpg

Unlike the other models, the DE-o6 uses a smooth reflector.
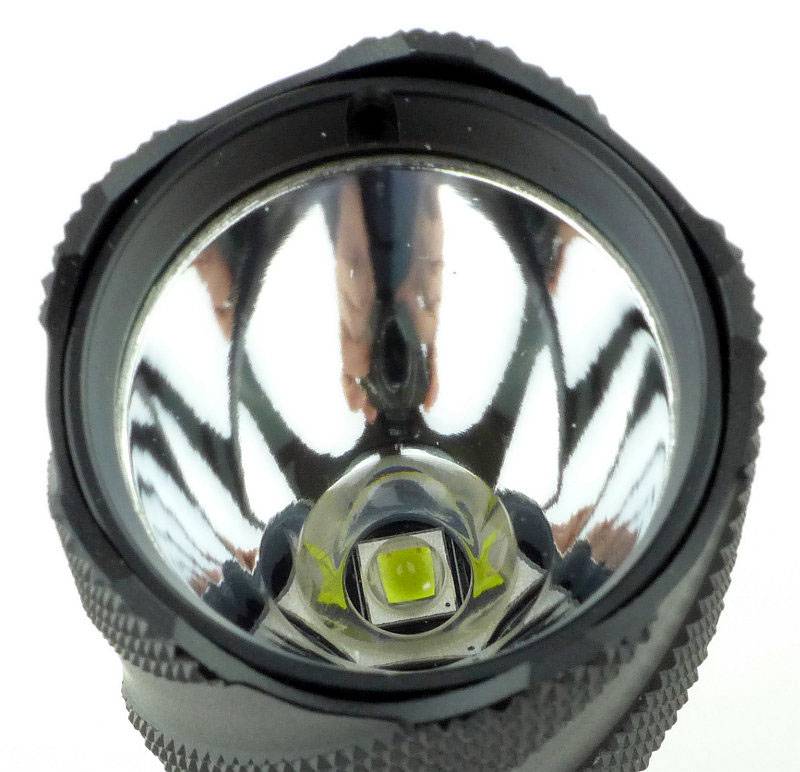
 photo 13 SOG DE06 reflector P1160757.jpg

As well as the laser engravings on the DE-06, it also has ‘SOG’ machined into the side prior to anodising.
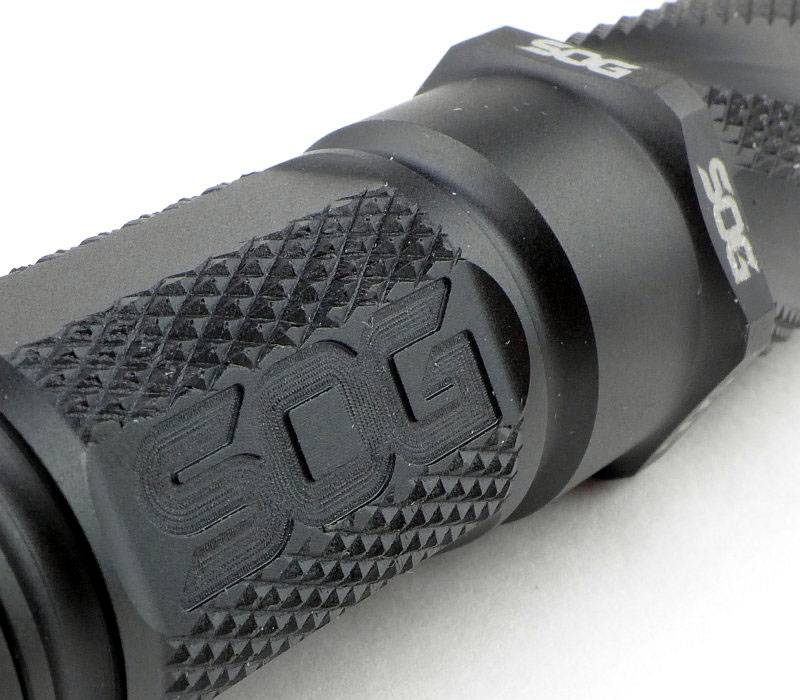
 photo 14 SOG DE06 engravings P1160758.jpg

Just for scale, this is the DE-06 next to its 18650 cell.
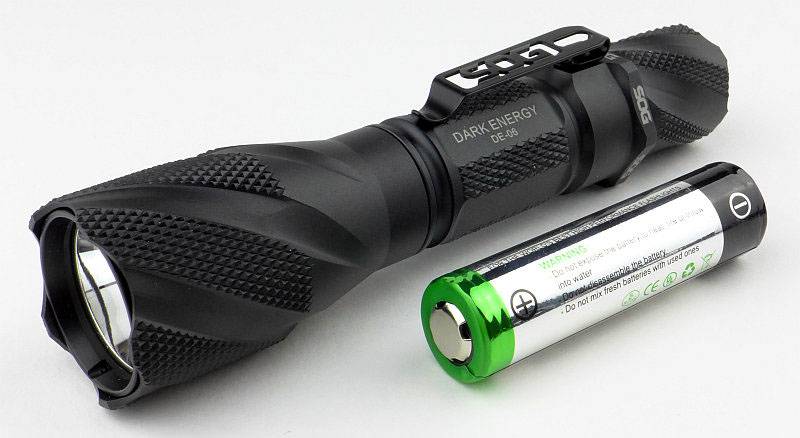
 photo 15 SOG DE06 size P1160764.jpg

Taking a more detailed look at the DE-01:

This one has been chosen to represent several models as the details of the DE-01, DE-02 and DE-03 are all very similar (apart from battery tube length).

SOG’s packaging is the same for the entire series and other SOG products as well.
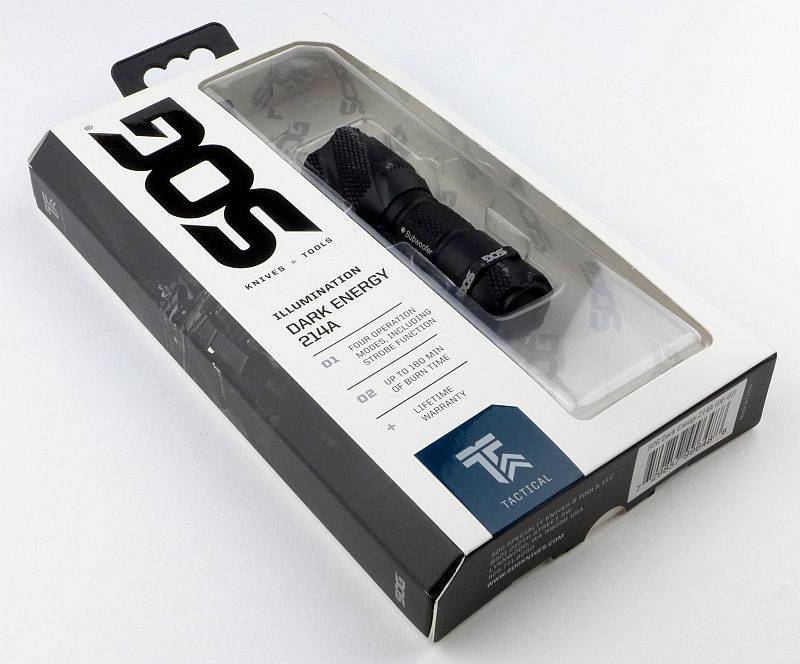
 photo 01 SOG DE01 boxed P1160638.jpg

Even simpler than the DE-06, the DE-o1 simply comes with a CR123 primary cell with SOG branding.
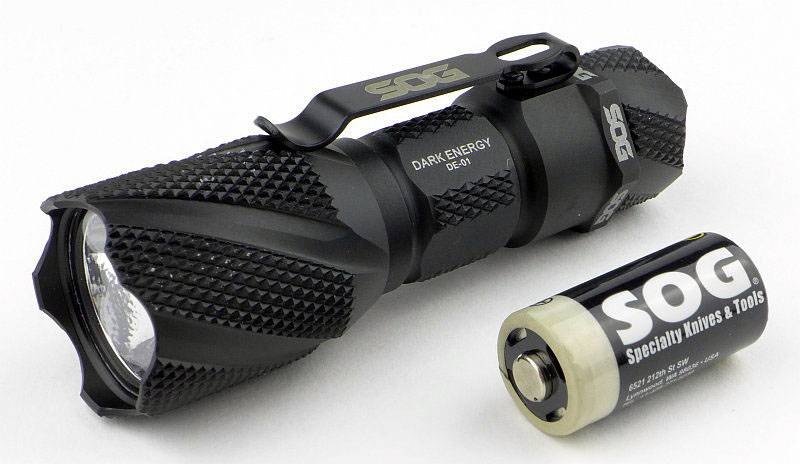
 photo 02 SOG DE01 box contents P1160639.jpg

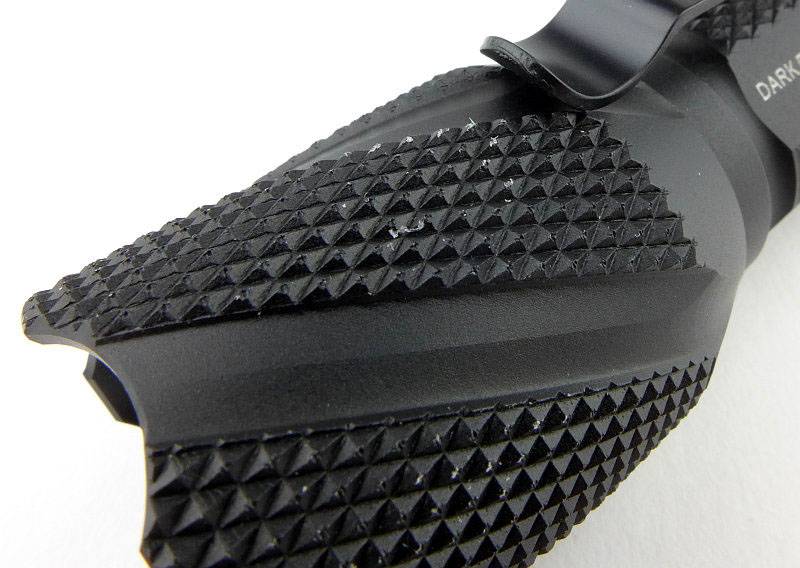
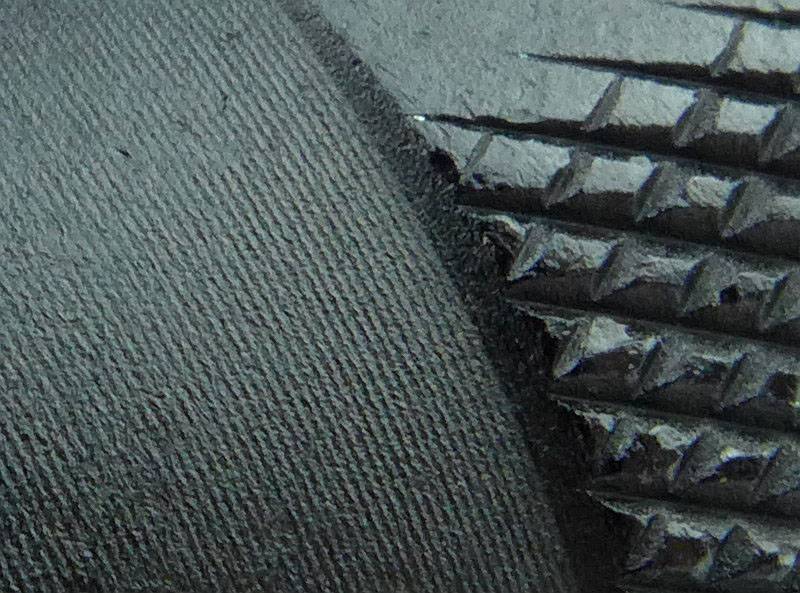
All of the Dark Energy lights have extensive aggressive knurling and here you can see traces of the packaging that the knurling on the head has scratched off. There are no flaws in the anodising, what you see is debris from the packaging.
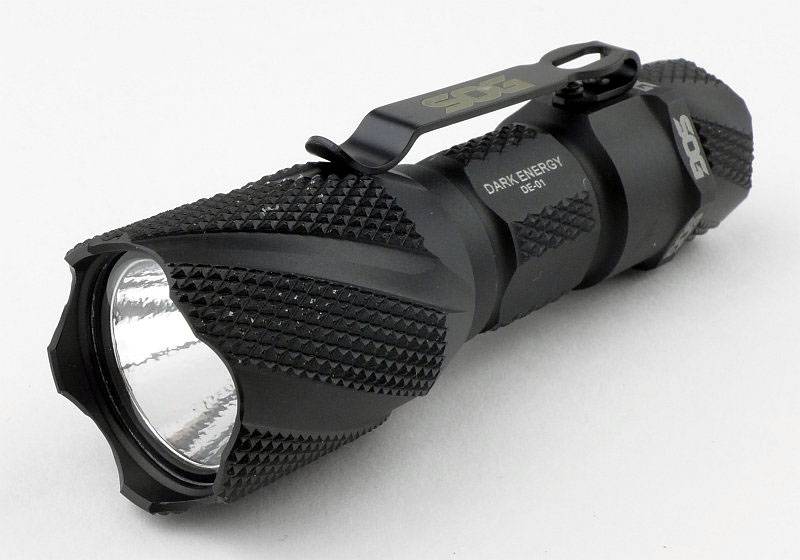
 photo 03 SOG DE01 angle P1160641.jpg

A closer view of this knurling.
 photo 04 SOG DE01 head knurling P1160645.jpg

The DE-01 uses a slimmer pocket clip which is fixed to the side with two screws.
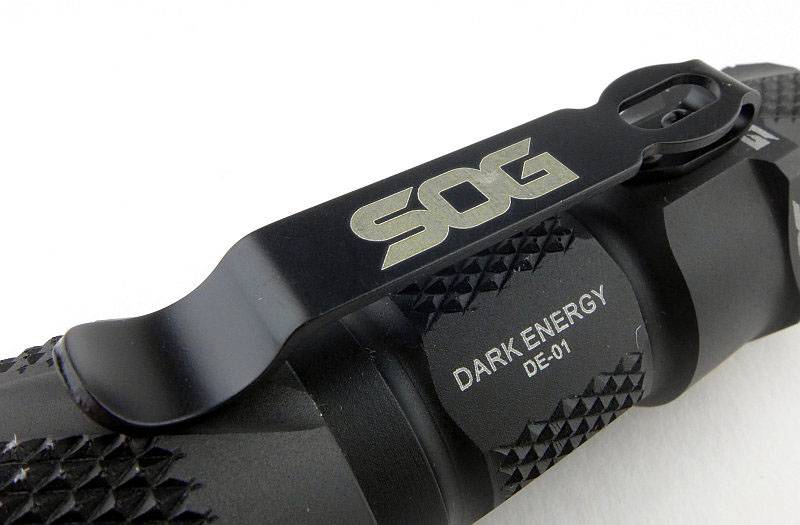
 photo 05 SOG DE01 clip P1160647.jpg

Even on the smallest of the lights, the custom engraving has been fitted on.
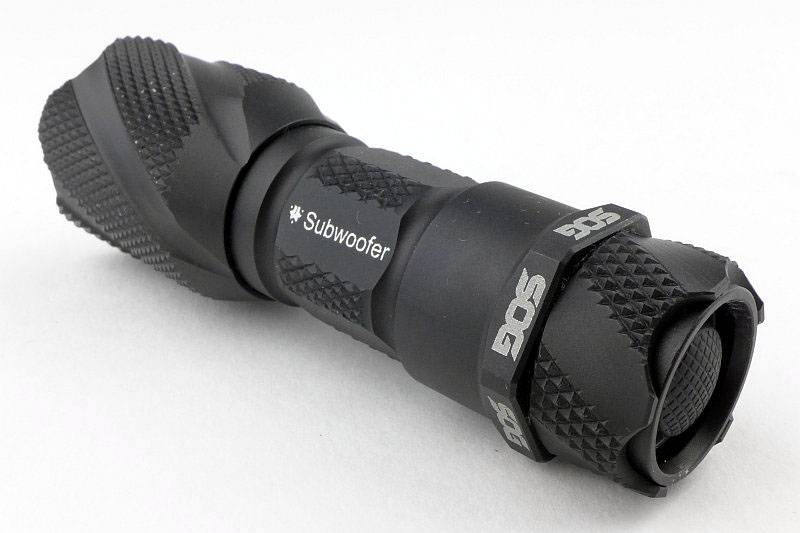
 photo 06 SOG DE01 reverse angle P1160651.jpg

Looking closer, the engraving is still clear enough despite being reduced to a very compact size.
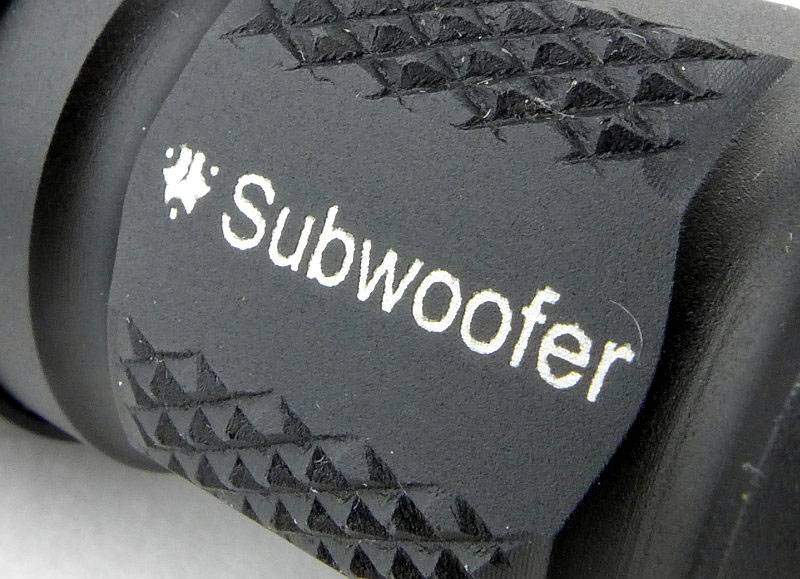
 photo 07 SOG DE01 engraving P1160654.jpg

As with the DE-06 the switch is slightly recessed and tail standing is possible.
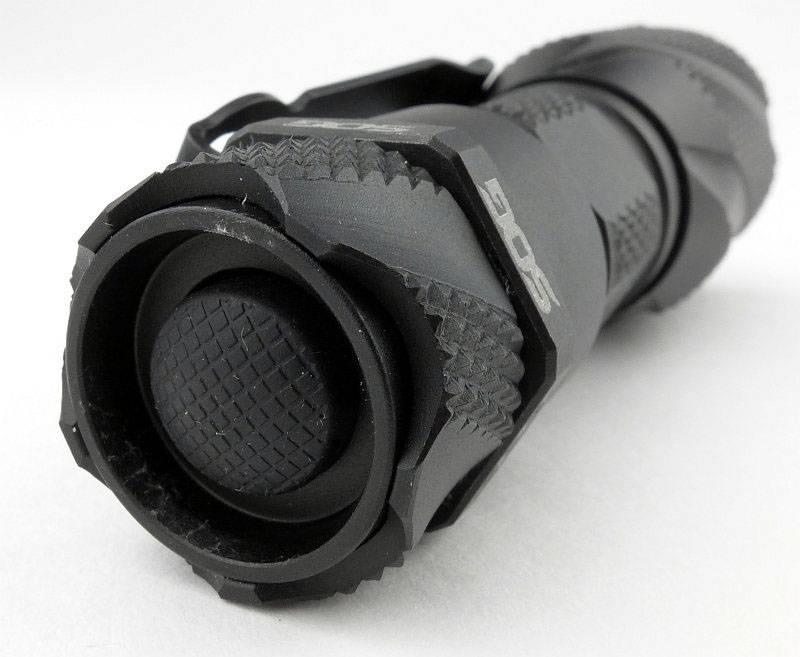
 photo 08 SOG DE01 switch P1160657.jpg

Where the DE-01, DE-02 and DE-03 really differ from the DE-06 is with the tailcap. A very different configuration with an exposed spring terminal and bare threads.
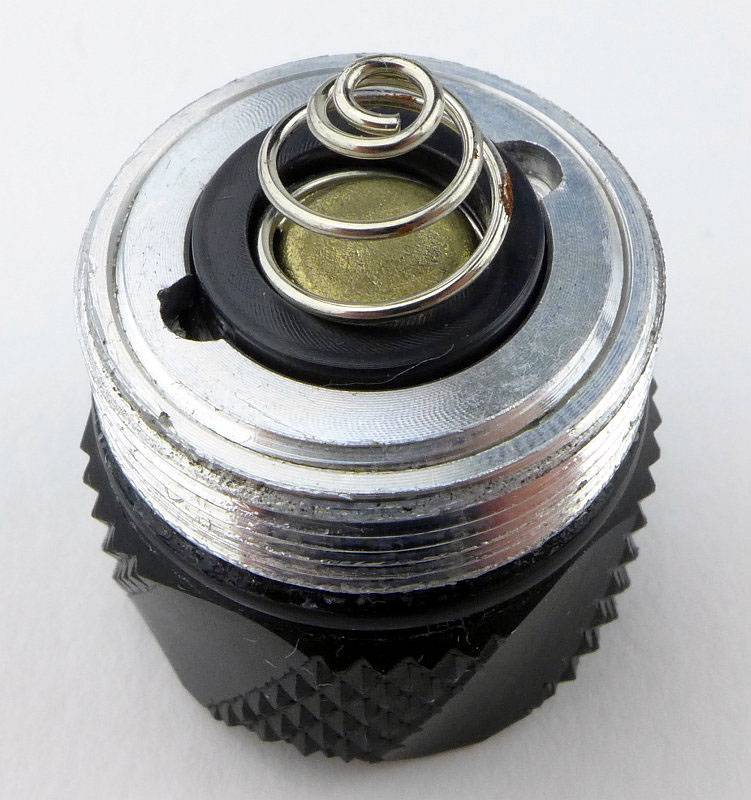
 photo 09 SOG DE01 tailcap P1160658.jpg

Bare aluminium standard threads are used.
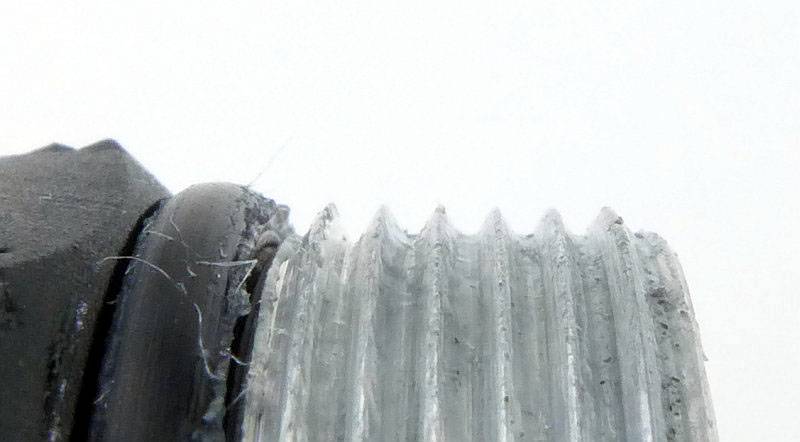
 photo 10 SOG DE01 threads P1160661.jpg

Inside the battery tube, the positive terminal is not sprung.
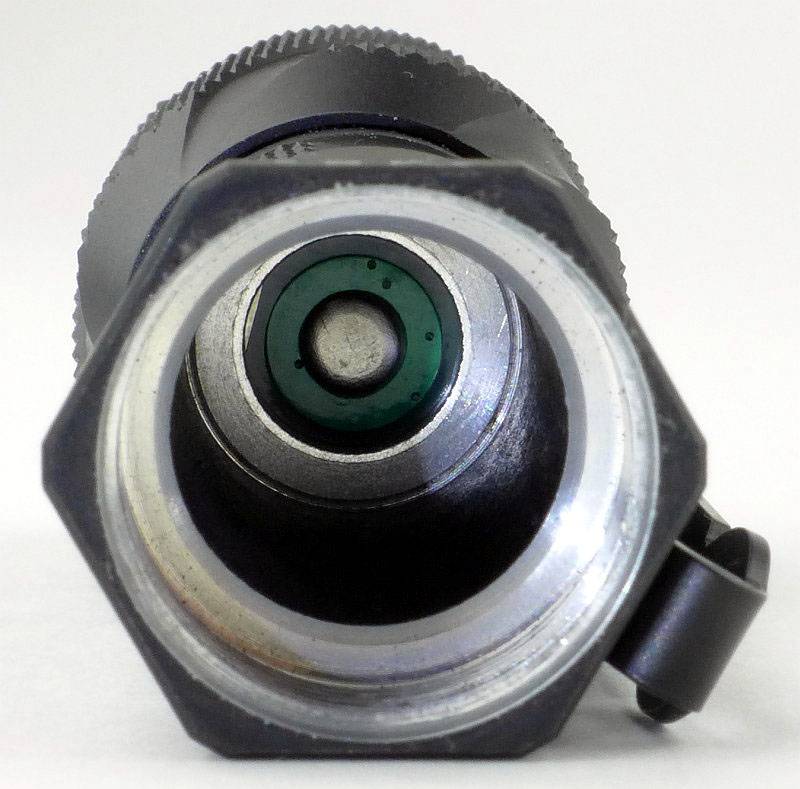
 photo 11 SOG DE01 inside P1160663.jpg

Textured reflectors are used for the smaller models. This is more suited to EDC tasks.
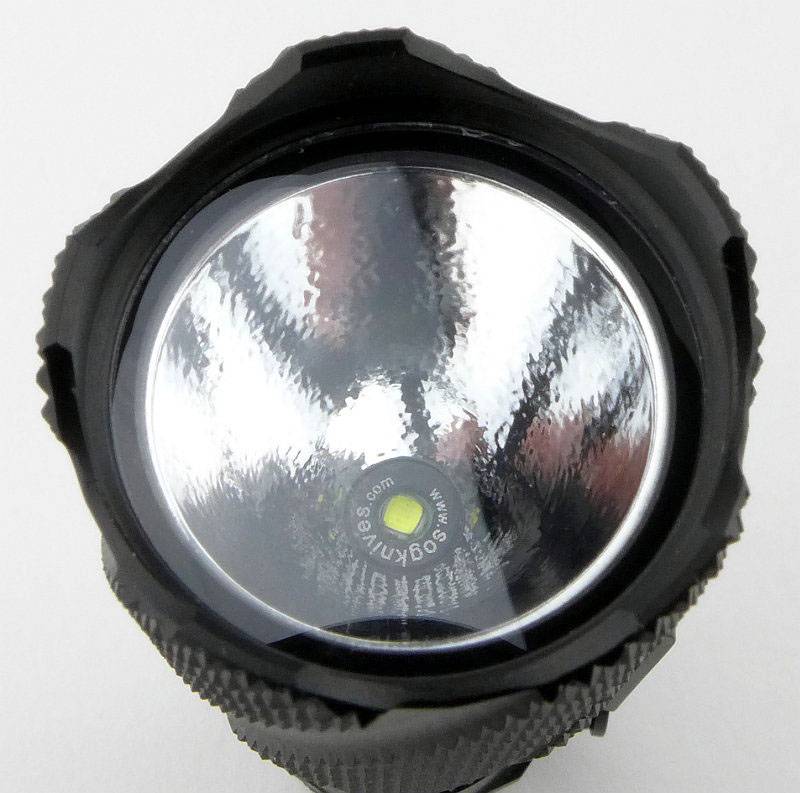
 photo 12 SOG DE01 reflector P1160671.jpg

There is a SOG identifier around the XP-G R5 LED.
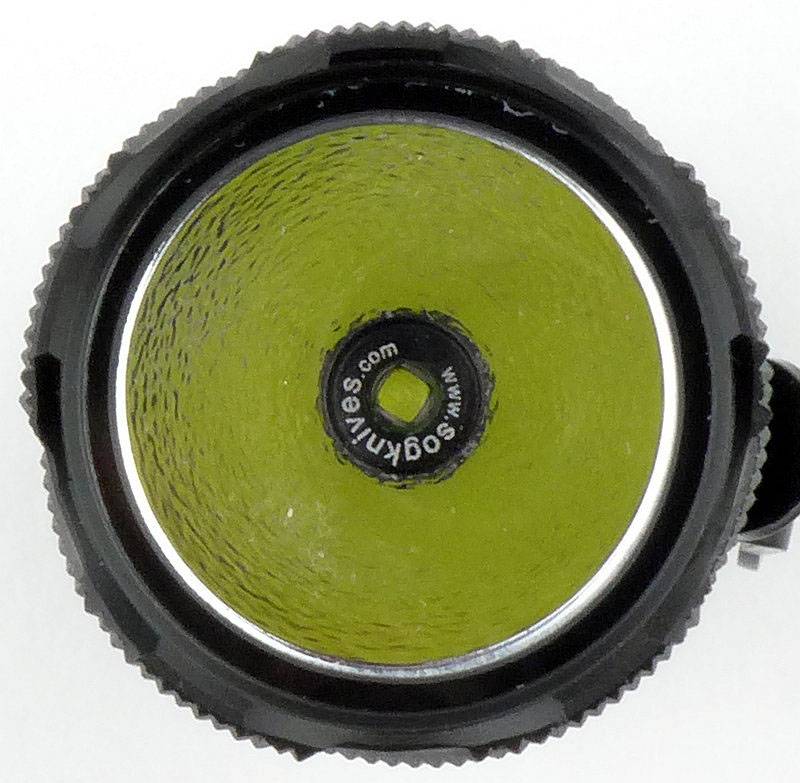
 photo 13 SOG DE01 LED P1160675.jpg

The beam

Please be careful not to judge tint based on images you see on a computer screen. Unless properly calibrated, the screen itself will change the perceived tint.

The indoor beamshot is intended to give an idea of the beam shape/quality rather than tint. All beamshots are taken using daylight white balance. The woodwork (stairs and skirting) are painted Farrow & Ball “Off-White”, and the walls are a light sandy colour called ‘String’ again by Farrow & Ball. I don’t actually have a ‘white wall’ in the house to use for this, and the wife won’t have one!

All exposure have been kept the same for this series of indoor and outdoor beamshots to allow a direct comparison of the different outputs to be made.

Despite the textured reflector of the smaller lights, there is still a bright hotspot in the DE-01’s beam. The spill is relatively dim and the outer spill shows the shaping of the bezel.
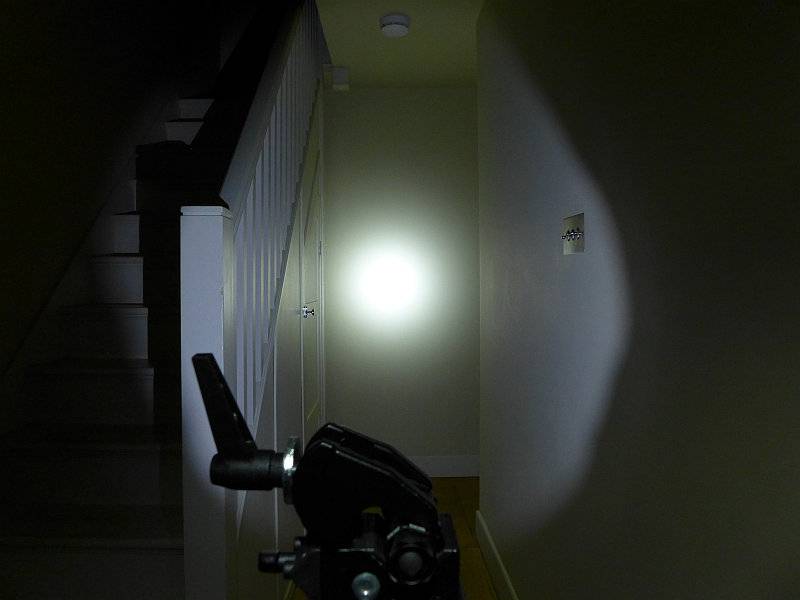
 photo SOG DE01 indoor beam P1170317.jpg

Moving to the DE-02 the main difference here is that the output is higher; the beam characteristics are the same.
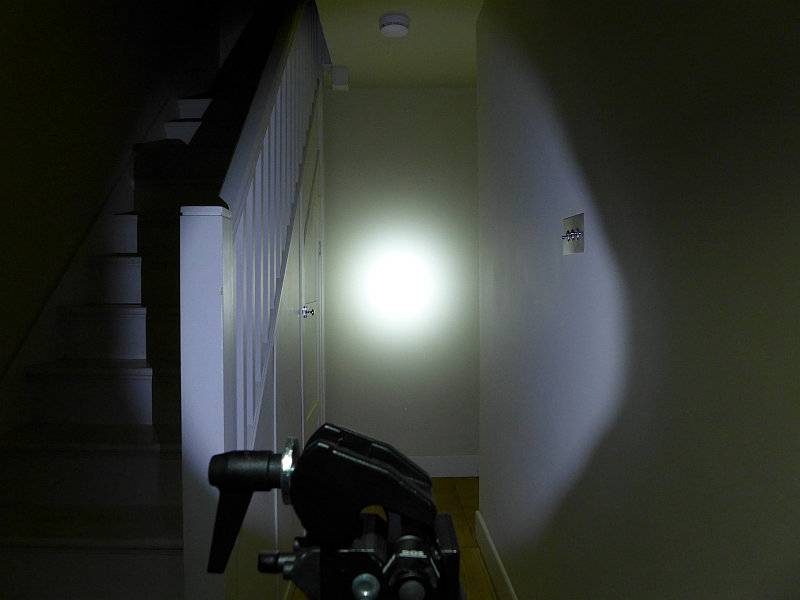
 photo SOG DE02 indoor beam P1170314.jpg

Again with the DE-03 (the dimmest of all being AA powered) the beam characteristics are the same as the previous two.
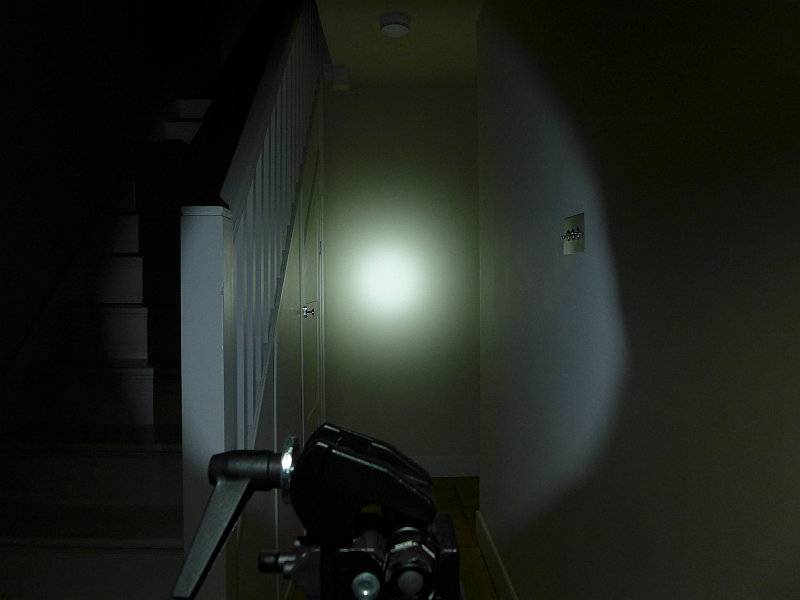
 photo SOG DE03 indoor beam P1170320.jpg

With its smooth reflector and larger emitter, the DE-06 has a better beam overall with wide hotspot and much more usable spill.
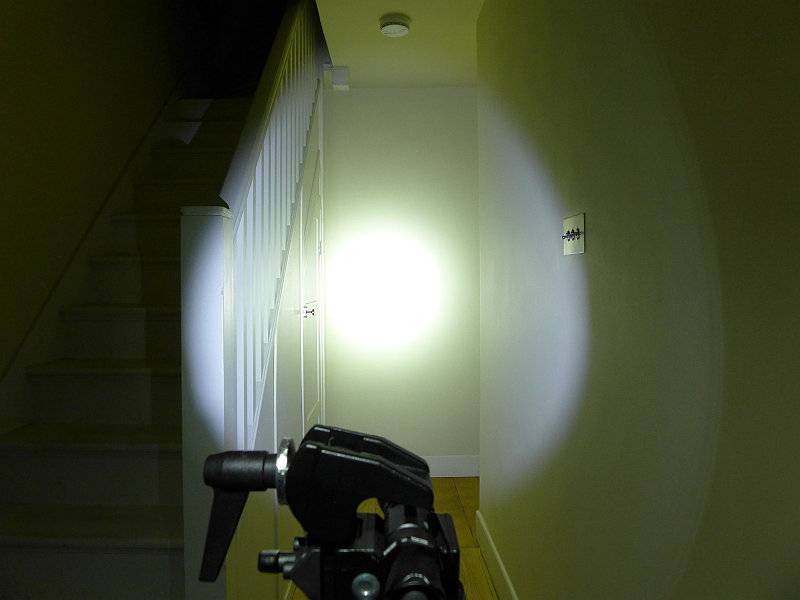
 photo SOG DE06 indoor beam P1170311.jpg

Moving outdoors the DE-01’s beam shows the benefit of the small hotspot as it gives the beam a reasonable range for its output.
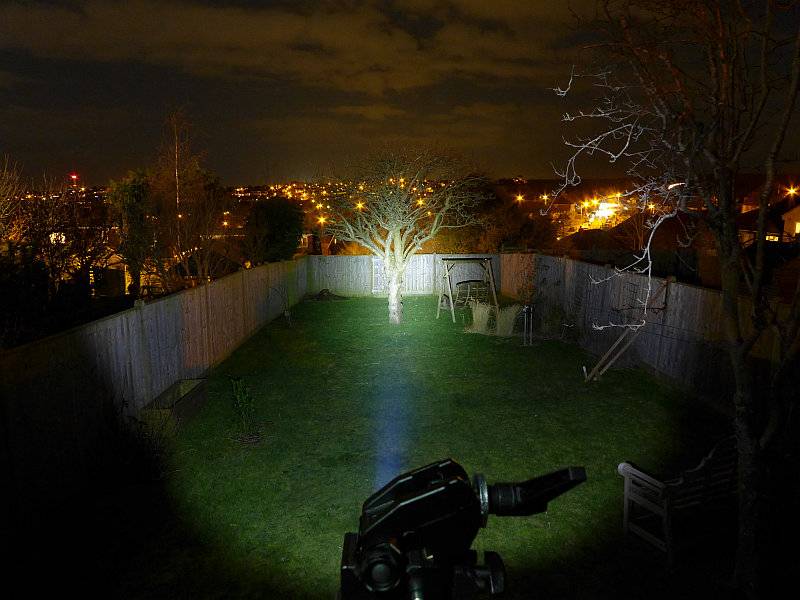
 photo SOG DE01 outdoor beam P1170251.jpg

As the DE-02 has 2x CR123 it is simply a brighter version of the DE-01.
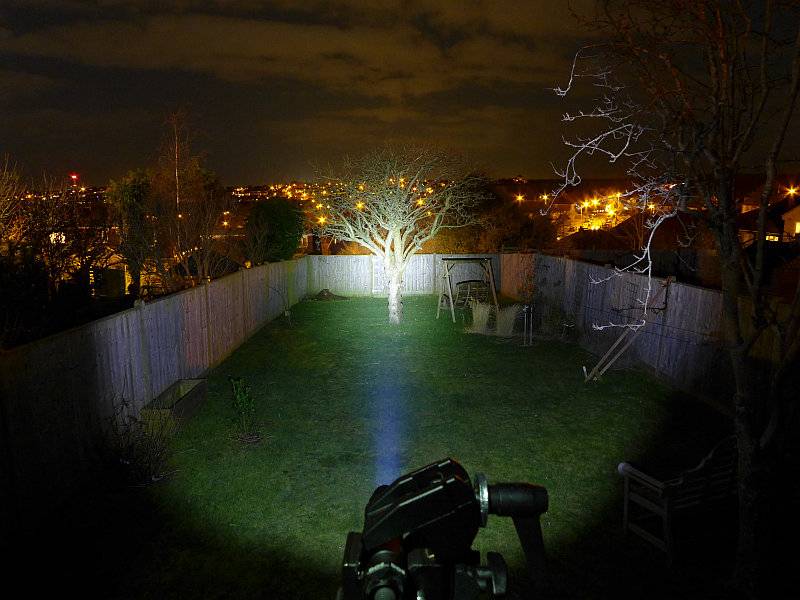
 photo SOG DE02 outdoor beam P1170248.jpg

At the extended range and only having a single AA for power, the DE-03 starts to run out of steam.
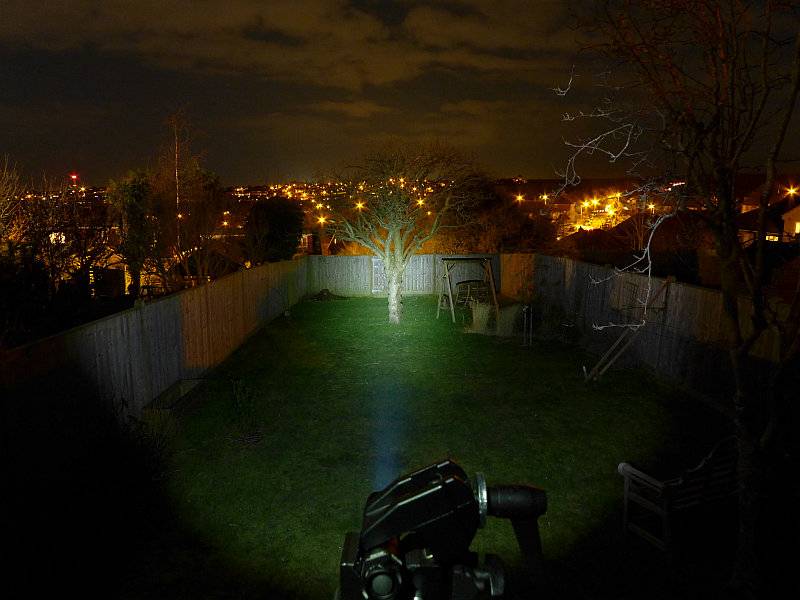
 photo SOG DE03 outdoor beam P1170254.jpg

The combination of 18560 (li-ion) power, a larger smooth reflector and a powerful XM-L2 LED gives the DE-06 much more punch that the smaller lights.
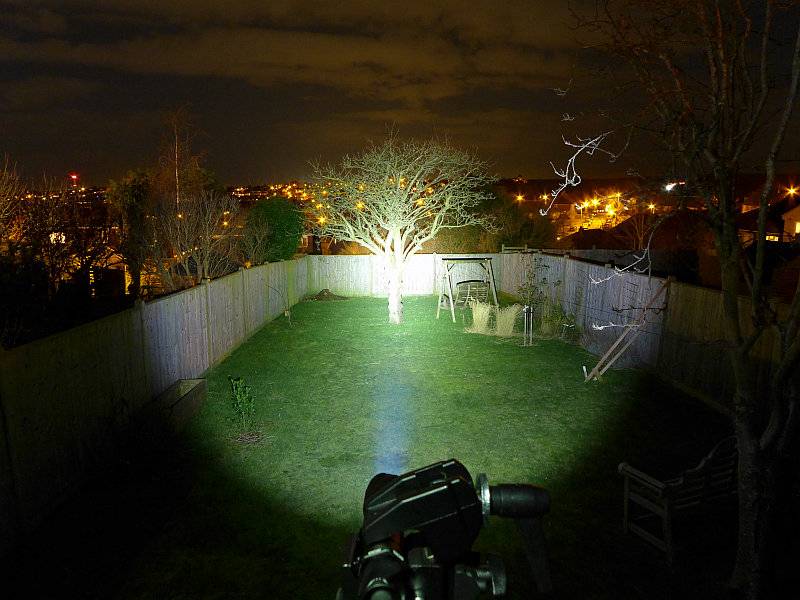
 photo SOG DE06 outdoor beam P1170245.jpg

Modes and User Interface:

All the Dark Energy lights use a very intuitive dual function tail-cap switch. It operates like both a forward-clicky and reverse-clicky at the same time.

From OFF, using the momentary operation, you get High mode every time and you can tap the switch as many times and as quickly as you like, you only get High.
Once clicked ON, now if you tap the switch (half press) you cycle through the available modes.
Once you switch OFF, you will then get High on the first press every time.

For the DE-01, DE-02 and DE-03, the modes are High -> Low -> Strobe -> High etc…
For the DE-06 the modes are High -> Medium -> Low -> Strobe -> High etc…

Simple, intuitive and predictable.

Batteries and output:

The DE-01 runs on 1xCR123.
The DE-02 runs on 2xCR123.
The DE-03 runs on 1xAA.
The DE-06 runs on 1×18650 (also 2xCR123 and 1×17670).

To measure actual output, I built an integrating sphere. See here for more detail. The sensor registers visible light only (so Infra-Red and Ultra-Violet will not be measured).

Please note, all quoted lumen figures are from a DIY integrating sphere, and according to ANSI standards. Although every effort is made to give as accurate a result as possible, they should be taken as an estimate only. The results can be used to compare outputs in this review and others I have published.

___________________________________________ ________________________________ ________________________________
Model/Mode using specified cell I.S. measured ANSI output Lumens PWM frequency or Strobe frequency (Hz)
___________________________________________ ________________________________ ________________________________
DE-01/High – CR123 199 0
DE-01/Low – CR123 79 760
DE-01/Strobe – CR123 55 9.8
DE-02/High – 2xCR123 252 0
DE-02/Low – 2xCR123 91 760
DE-02/Strobe – 2xCR123 70 10.2
DE-03/High – AA Eneloop 115 0
DE-03/Low – AA Eneloop 43 740
DE-03/Strobe – AA Eneloop 33 9.8
DE-06/High – Supplied 2600mAh 18650 716 0
DE-06/Medium – Supplied 2600mAh 18650 255 2940
DE-06/Low – Supplied 2600mAh 18650 21 1420
DE-06/Strobe – Supplied 2600mAh 18650 377 8.3

* Beacon and Strobe output measurements are only estimates as the brief flashes make it difficult to capture the actual output value.

DE-01 peak Beam intensity measured 5400 lx @1m giving a beam range of 147m.
DE-02 peak Beam intensity measured 7100 lx @1m giving a beam range of 169m.
DE-03 peak Beam intensity measured 2700 lx @1m giving a beam range of 104m.
DE-06 peak Beam intensity measured 14500 lx @1m giving a beam range of 241m.

There is parasitic drain in all models:
In the DE-01, drain was 8uA (averaged as it varied from 3-12uA) giving 19.96 years to drain the cell.
In the DE-02, drain was 6.8uA giving 23.49 years to drain the cell.
In the DE-03, drain was 24uA (averaged as it varied from 4-44uA) giving 9.03 years to drain the cell.
In the DE-06, drain was 5uA giving 77.57 years to drain the cell.

Both CR123 powered lights show good regulation and the AA powered DE-03 has a reasonably consistent output. Though always much higher in output than the other lights, the DE-06 is not regulated (or not able to maintain regulation with the supplied cell).
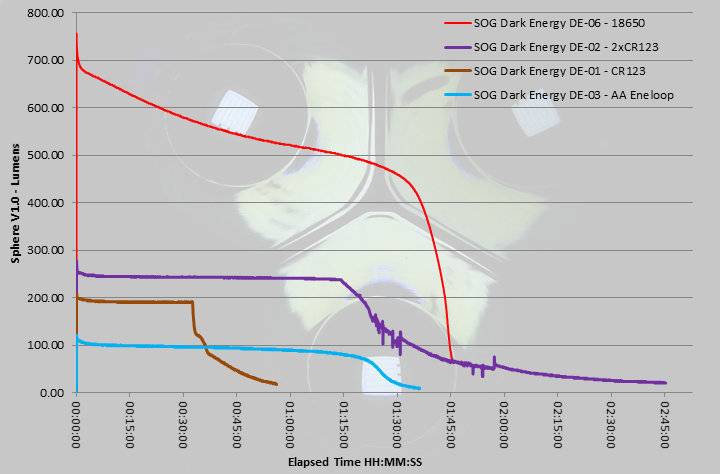
 photo SOG DE runtime.jpg

Troubleshooting

This section is included to mention any minor niggles I come across during testing, in case the information helps anyone else.

No serious issues were encountered during testing.
However, I did find the switch on the DE-06 failed to latch at times. With the recessed switch design I found I ended up pushing the switch sideways as well as in and when doing this occasionally had the issue. Pressing the switch straight in always worked correctly, so it was the sideways pressure that caused the occasional issue.

As per the description of this section, this information is provided in case anyone else finds a similar ‘issue’ that might be fixed in the same way.

The Dark Energy lights in use

My personal lighting requirements generally mean I want to start on low, but reliably starting on high is important for many users, and with the excellent dual function switch these Dark Energy lights allow you to know every time you pick them up you get maximum output on the first press every time.

With that usage in mind, I would have preferred a protruding switch to make it easy to hit the button gloved or not.

The extensive knurling is aggressive and abrasive but ensures a very firm grip whatever your hands or the light are covered in and wherever you grab it. Storage and carry need some consideration as it will wear through fabrics fairly fast.

Especially with this feature of the knurling, the lack of a holster is a disappointment as a properly matched holster would take away the problem of finding a suitable carry solution for these lights.

For each model the output levels are sensible and do not push the cells too hard. In these days of lumen chasing SOG have taken a good approach as you get a good balance of output and runtime.

With relatively limited outputs, the smaller Dark Energy lights use a more focused beam which extends their usable range. This choice does mean they are not so good for close range and indoor uses as you can get hotspot tunnel vision.

In the output measurements you will see that the lower levels use PWM. Fortunately this has been set at a reasonably high frequency. Despite my PWM hypersensitivity, I did not notice the DE-06 giving any PWM effects. For the DE-01, DE-02 and DE-03 the frequency is a bit lower and this did result in me noticing a few PWM effects, but it was not bad. (1000Hz is the critical point where above this I can’t visually detect PWM and below this I can – 300Hz and below becomes very noticeable)

In a crowded market, the outstanding features of this series of lights is the dual function switch and resulting user interface, and the distinctive all-over knurling with super secure grip that this gives you.

Review Summary

_______________________________________________ _______________________________________________
Things I like What doesn’t work so well for me
_______________________________________________ _______________________________________________
Excellent Dual-Function switch. No Holster provided.
Superb grip from all-over knurling. Knurling is very abrasive.
Reliably switches onto Maximum output. Recessed switch sometime difficult to fully press.
Choice of power sources and sizes. Occasional PWM effects on low mode (except DE-06).
Quality personalisation engraving available.


Discussing the Review:

Please feel free to add comments to the review, but the ideal place to freely discuss these reviews is on a forum. If you started reading the shorter forum version of the review, but followed the link this full exclusive review, please return to that forum to discuss the review there.
If you read the review entirely on Tactical Reviews, please consider one of the following to join in any discussion.

CandlePowerForums – Flashlight Reviews Section (Largest and Friendliest Flashlight Community Forum)

EdgeMatters – Sponsored Reviews (UK based Forum for Knife Makers and Collectors)

Light Review: Streamlight ProTac HL USB and Portable USB Charger

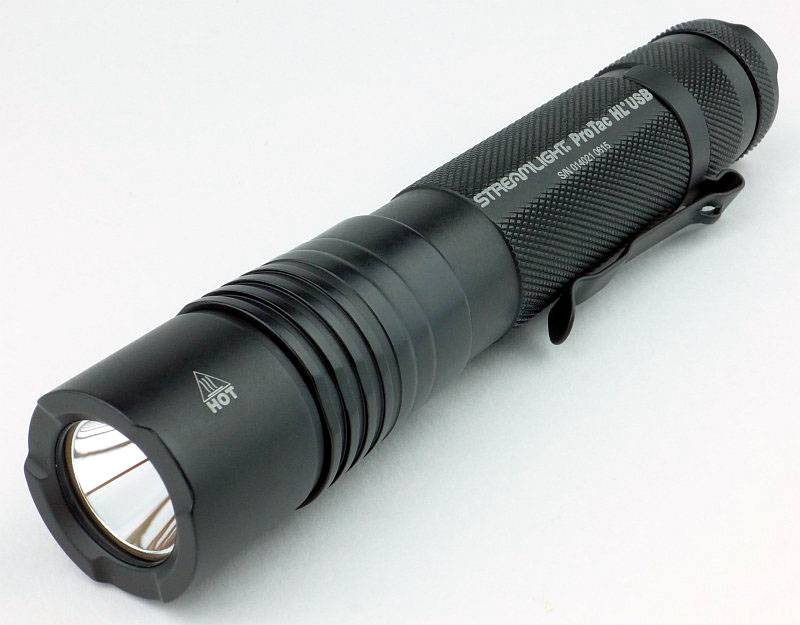
Streamlight have been adding USB power into their range and in this review we take a look at the ProTac HL USB along with the Portable USB Charger

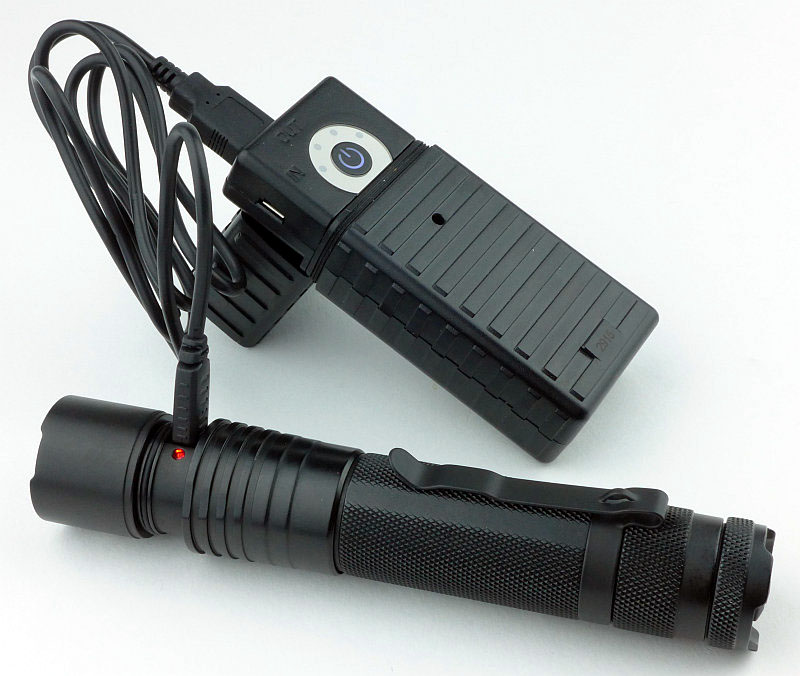
 photo 23 Protac HL USB plus charger P1170014.jpg

Taking a more detailed look:

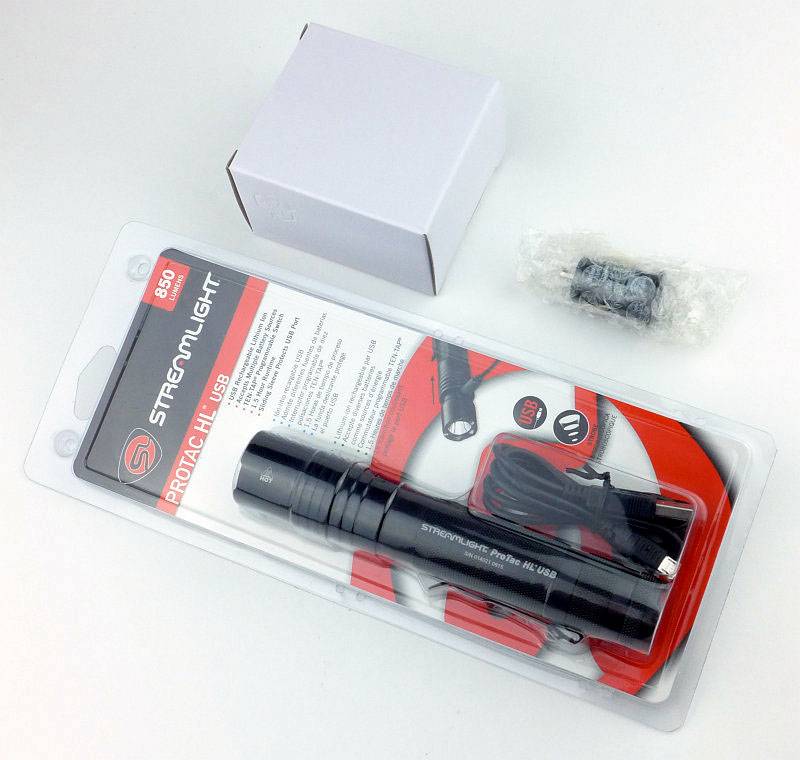
Everything shown here actually came in a completely plain white outer cardboard box (which didn’t really show up in these white background photos).
 photo 01 Protac HL USB boxed P1160952.jpg

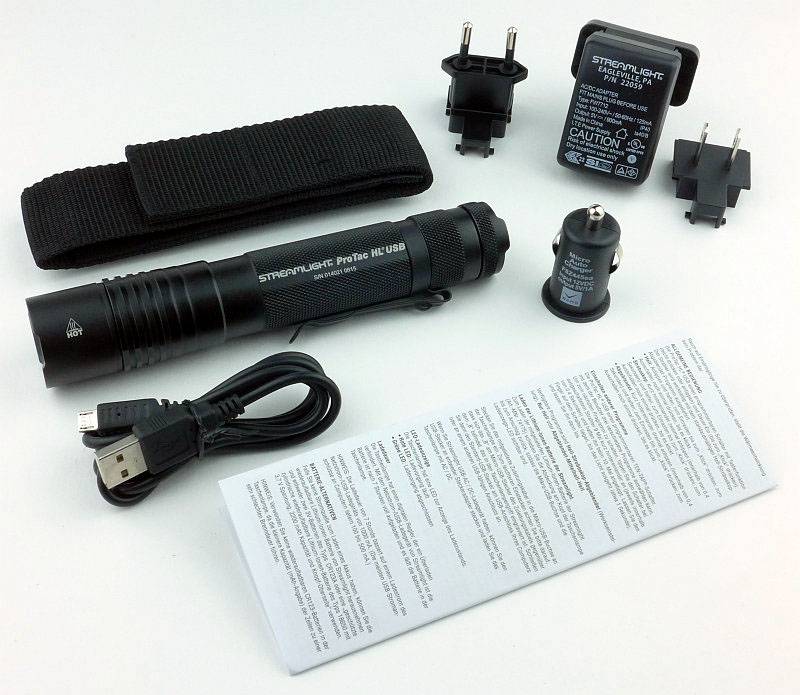
The package is comprehensive as it includes the ProTac HL USB, a holster, USB cable, mains USB charger and 12v Car USB charger.
 photo 02 Protac HL USB unboxed P1160958.jpg

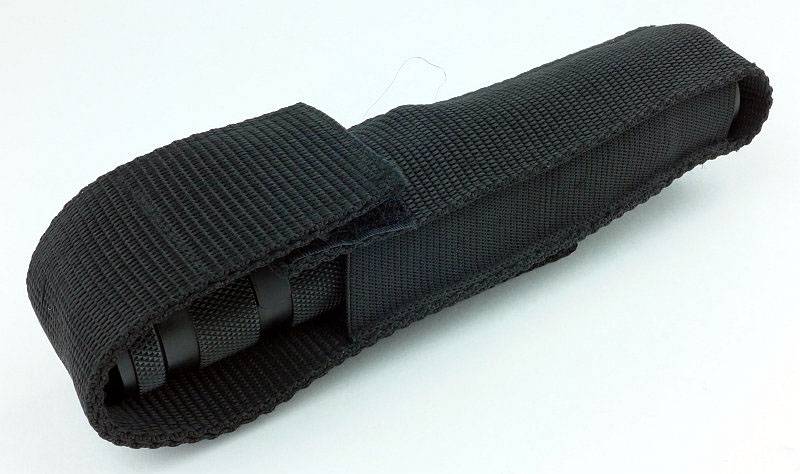
A simple holster is provided.
 photo 03 Protac HL USB holster1 P1160961.jpg

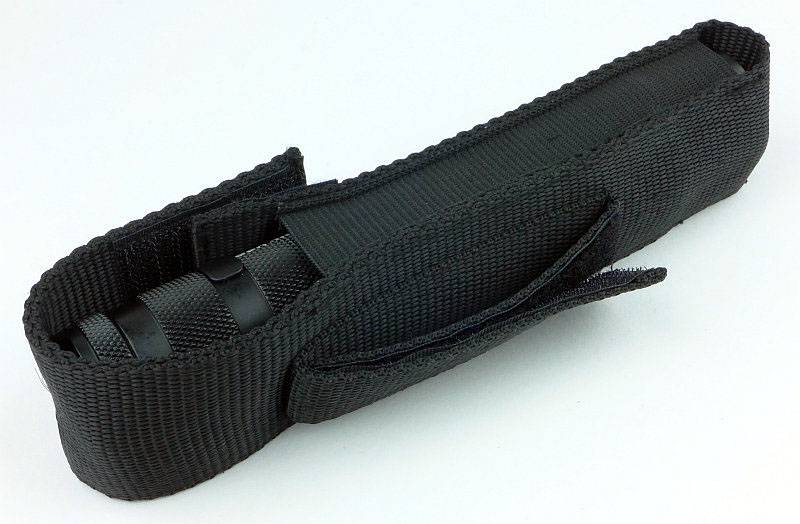
The belt loop has a Velcro closure so it can be fitted without taking your belt off.
 photo 04 Protac HL USB holster2 P1160963.jpg

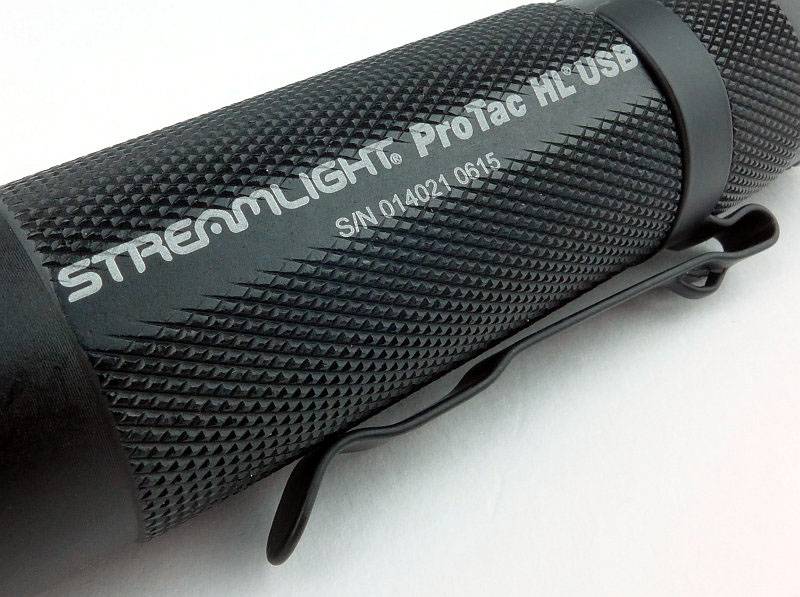
Laser-engraved on the side is the model and serial number. There is not enough flat space for the writing so it spills over onto the knurling.
 photo 06 Protac HL USB engraving P1160971.jpg

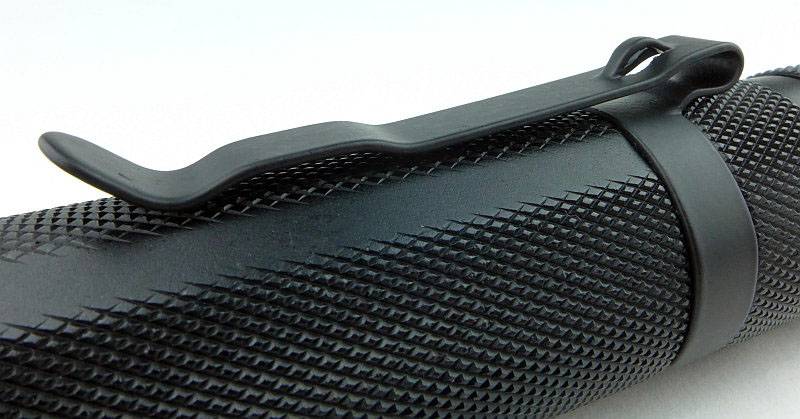
Already fitted is a removable, powder-coated, pocket clip.
 photo 07 Protac HL USB clip P1160974.jpg

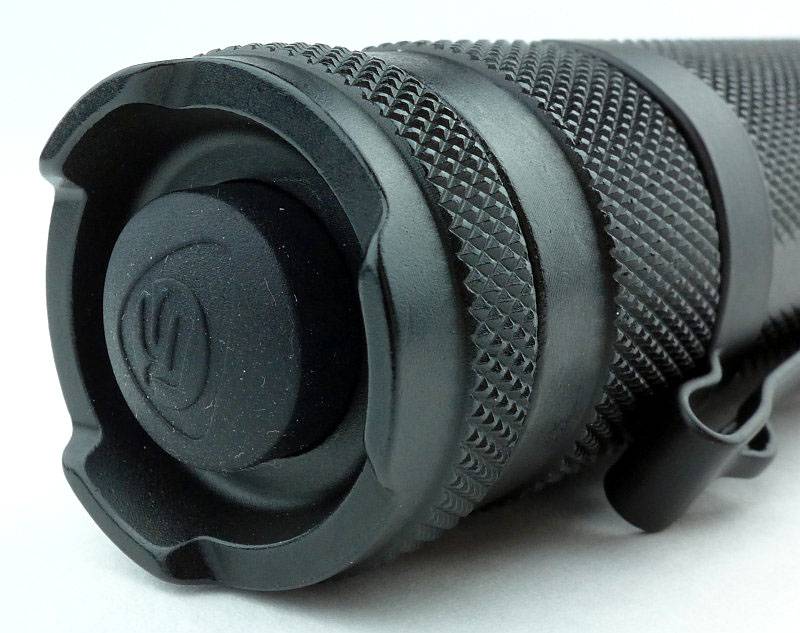
As with most Streamlight lights, the main switch has the Streamlight logo.
 photo 08 Protac HL USB switch P1160977.jpg

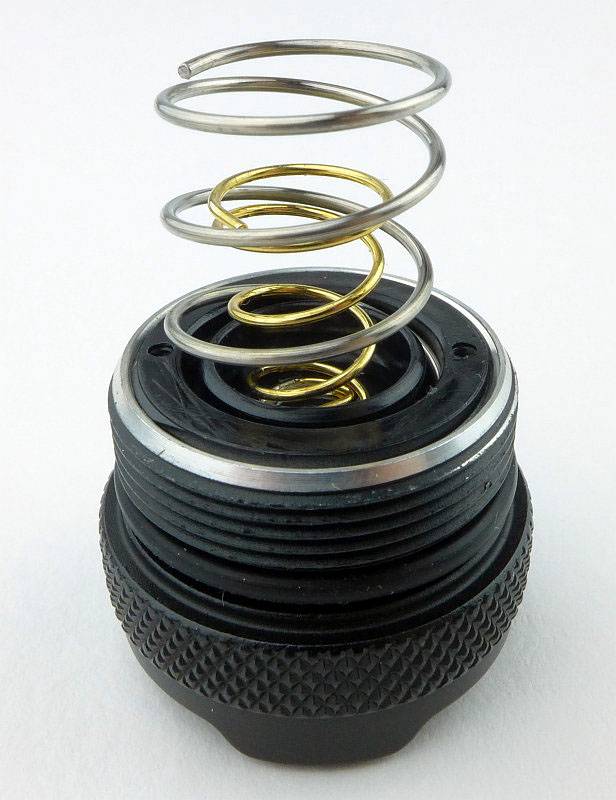
Taking the tailcap out reveals its long twin-springs. This is part of a special design catering for the use of the Streamlight proprietary 18650, standard 18650s and CR123 cells.
 photo 09 Protac HL USB tailcap P1160982.jpg

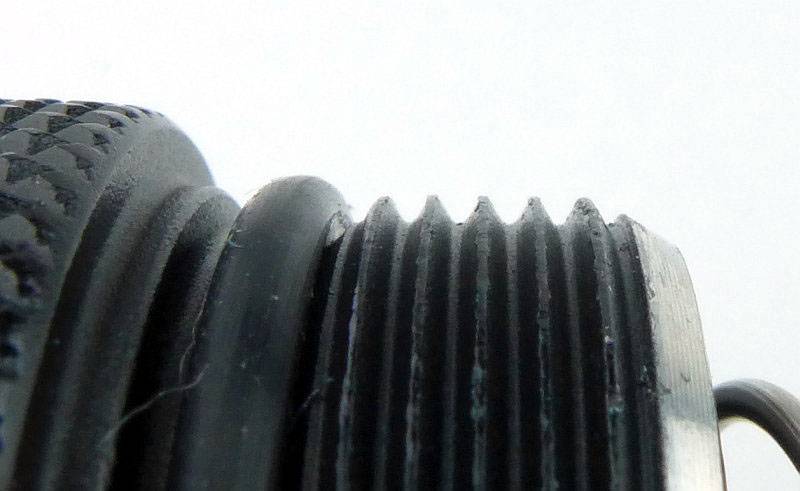
Standard fully-anodised threads are used.
 photo 10 Protac HL USB threads P1160984.jpg

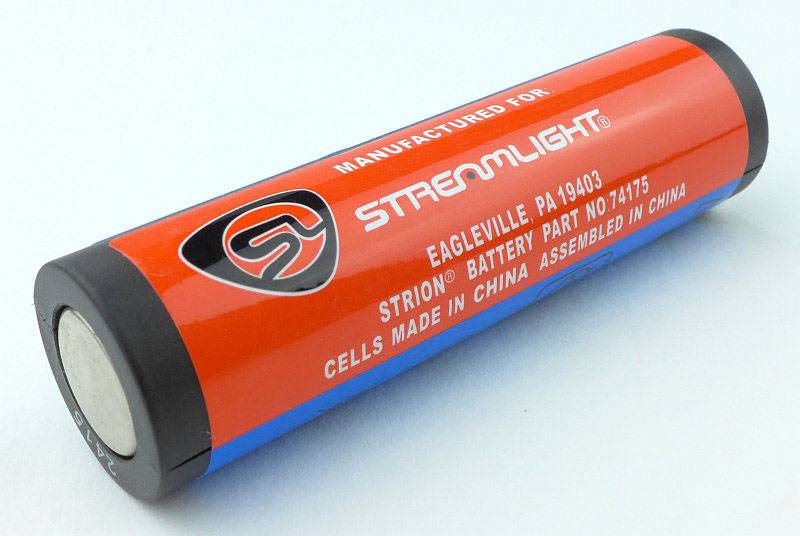
Streamlight’s proprietary 18650 cell has a full plastic casing with one standard negative terminal.
 photo 11 Protac HL USB battery1 P1160988.jpg

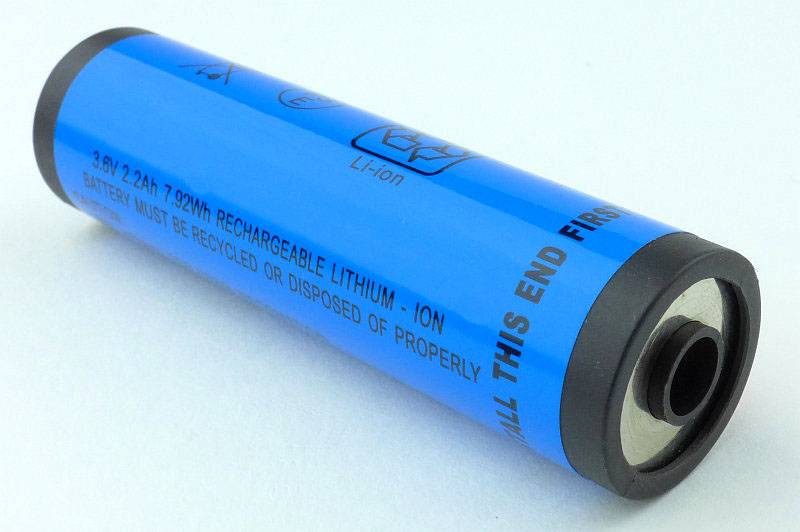
Swapping round to the front end of the cell, there is a dual pole contact system which relates to the built-in USB charging of the Protac HL USB.
 photo 12 Protac HL USB battery2 P1160990.jpg

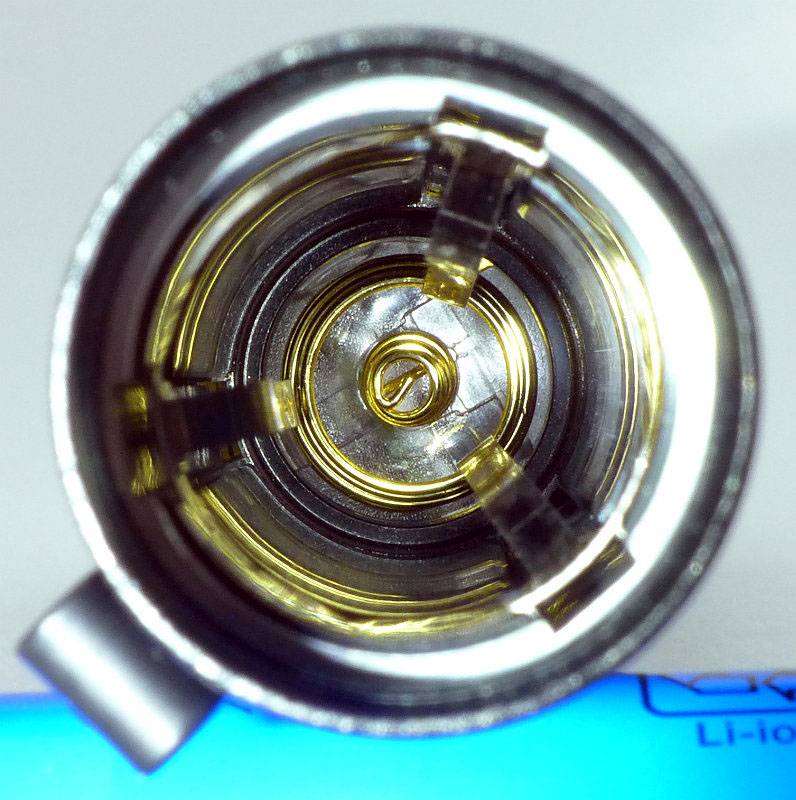
For an 18650 light, the Protac HL uses a slightly larger tube than most, but this is due to the clever system to accommodate 18650 and CR123 cells without any rattle. Inside the battery tube are three sprung strips which keep whatever cells are being used securely in place.
 photo 13 Protac HL USB battery tube P1160994.jpg

While we are looking very closely, the surface texture has a subtle sheen.
 photo 14 Protac HL USB surface P1170003.jpg

So where is the USB part? Starting here with a reverse angle view with the USB port cover closed.
 photo 15 Protac HL USB reverse angle P1170006.jpg

Then with the port cover pulled back.
 photo 16 Protac HL USB reverse angle port P1170007.jpg

Under the port cover is a micro USB port and a charging indicator light.
 photo 17 Protac HL USB chaging port P1170011.jpg

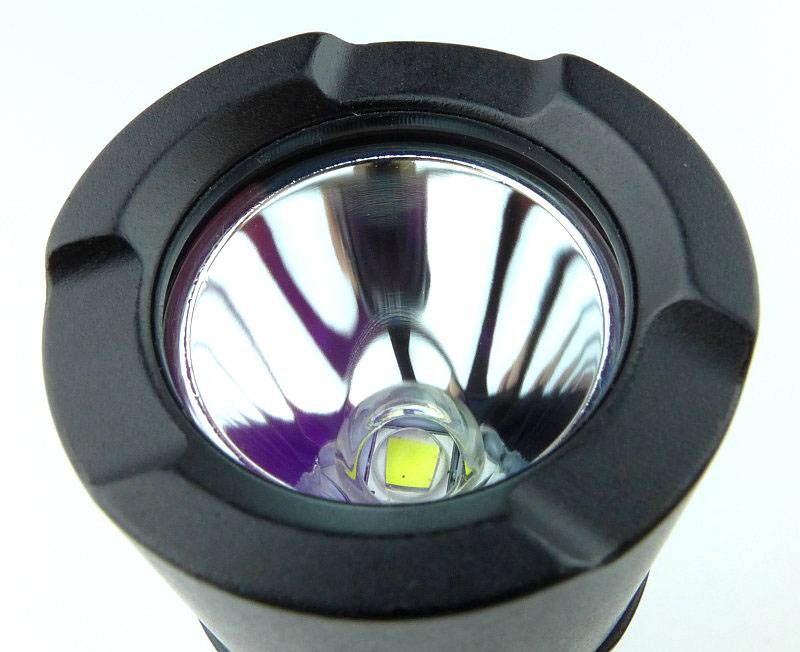
Oddly the Protac HL doesn’t make full use of the size of the head, instead having a thick bezel and smaller reflector. For its diameter the reflector is relatively deep.
 photo 18 Protac HL USB reflector P1170015.jpg

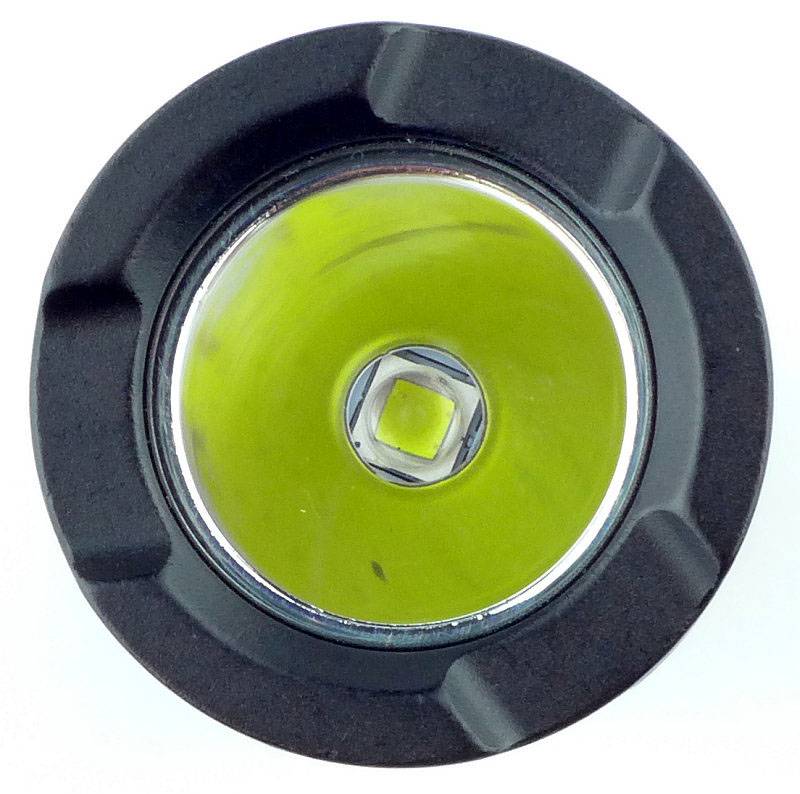
Though Streamlight never specify the actual LED used, this sample has an XM-L2 LED.
 photo 19 Protac HL USB LED P1170024.jpg

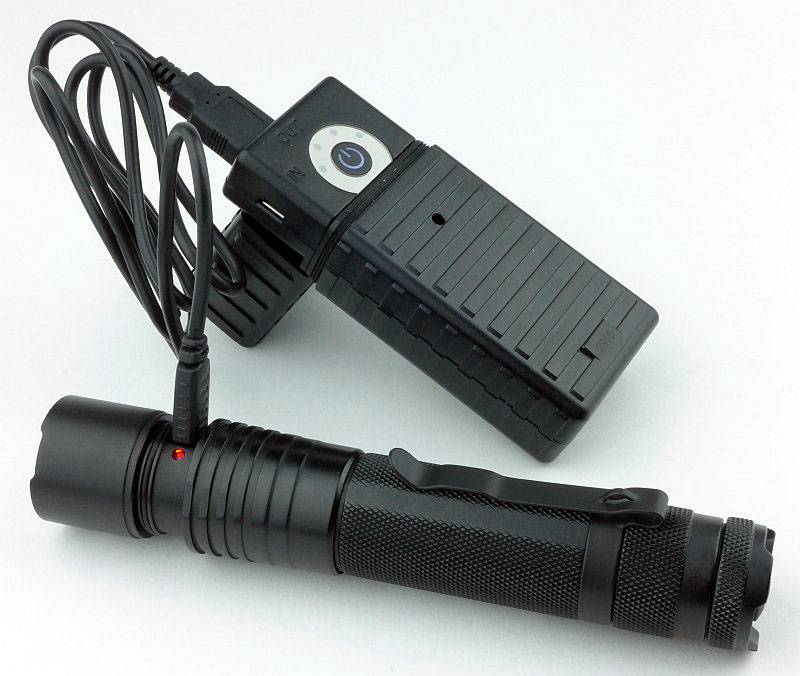
Of course, if you are out and about with no mains or car charger available, a Portable USB Charger is ideal for topping up the battery.
 photo 20 Protac HL USB charging P1170030.jpg

Taking a more detailed look at the Portable USB Charger:

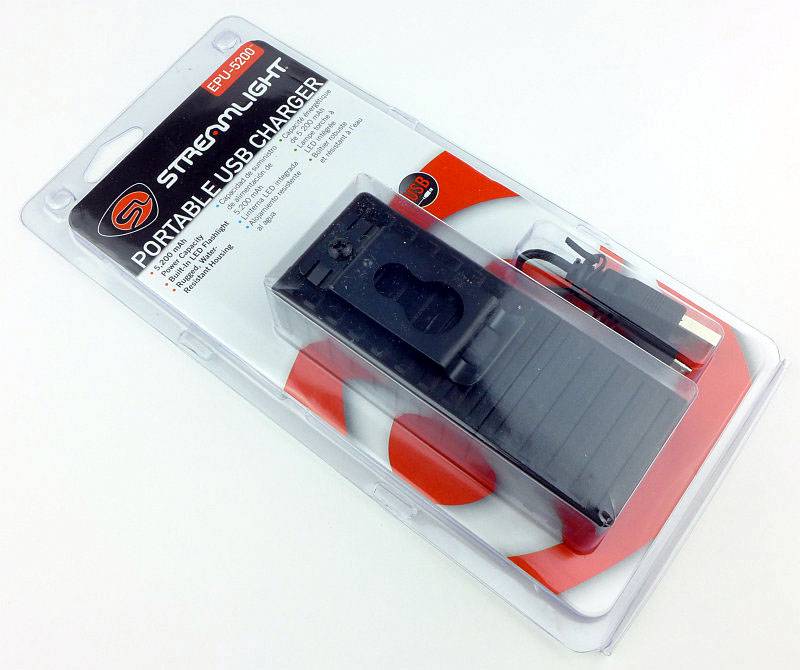
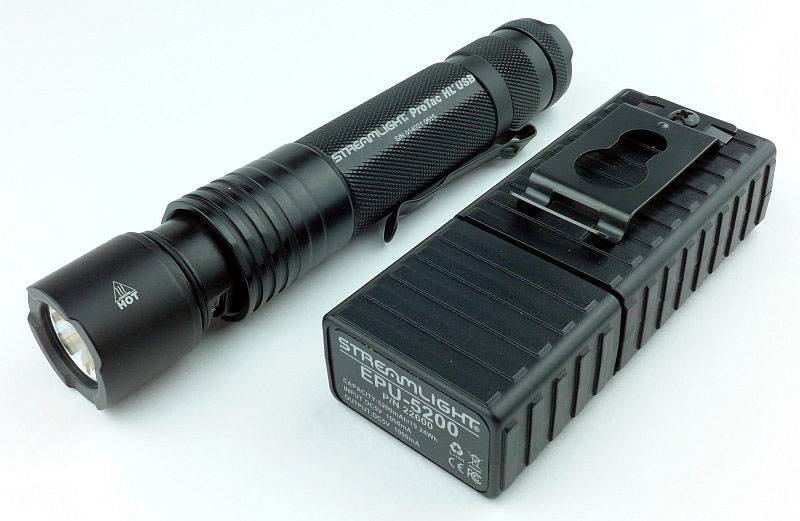
Taking a slight digression from the Protac HL USB light and onto the Streamlight Portable USB Charger. This is how it arrives.
 photo 01 Stream USB boxed P1120294.jpg

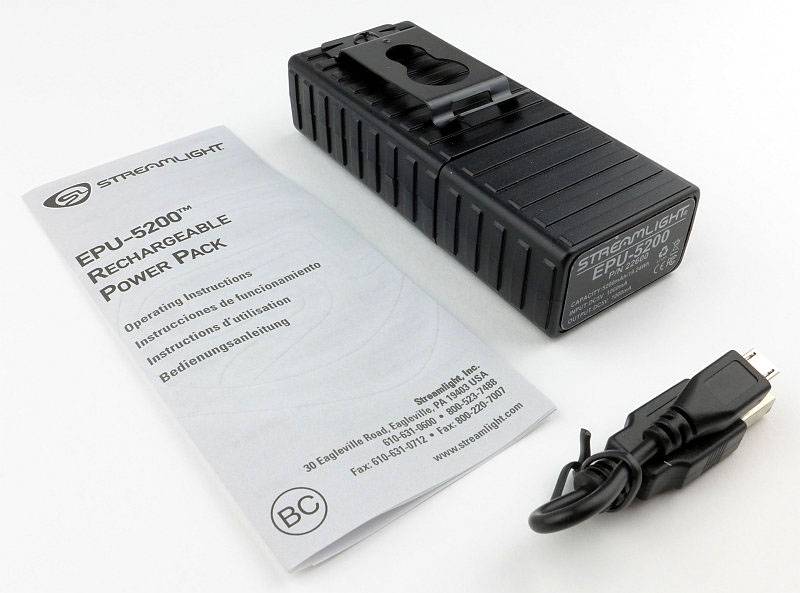
There is a short USB cable which you can use to charge it, or charge other devices, and the instructions.
 photo 02 Stream USB unboxed P1120297.jpg

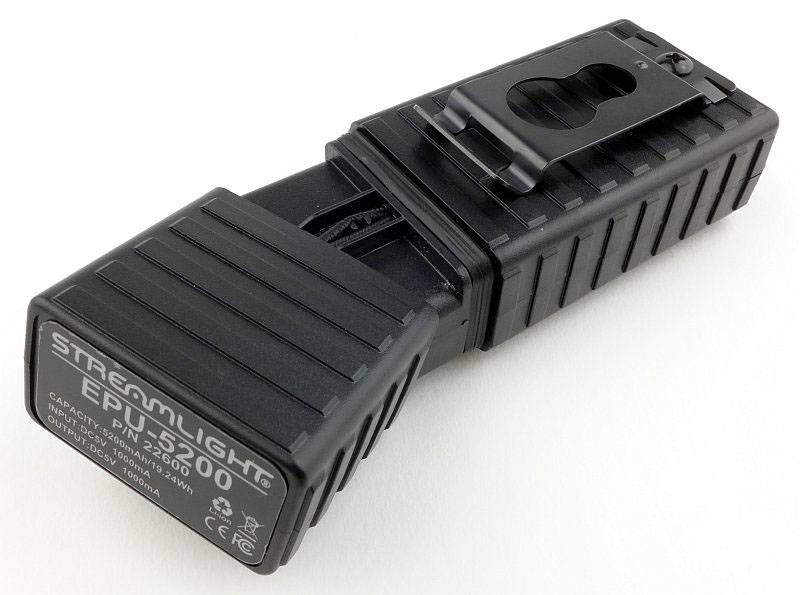
A nice feature of the Streamlight powerbank is that is has a weatherproof cover over the ports. The cover is held on with an elasticated cord, so you need to positively pull it off.
 photo 03 Stream USB opening P1120305.jpg

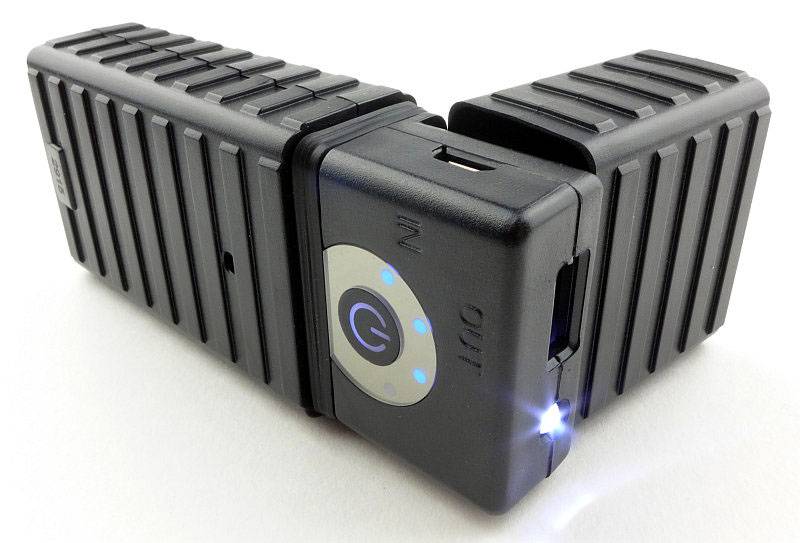
Once opened the cover stays at an angle and cannot be lost. There is a 5mm LD built in which allows this to be used as a basic light and this has been switched on in this photo.
 photo 04 Stream USB open P1120320.jpg

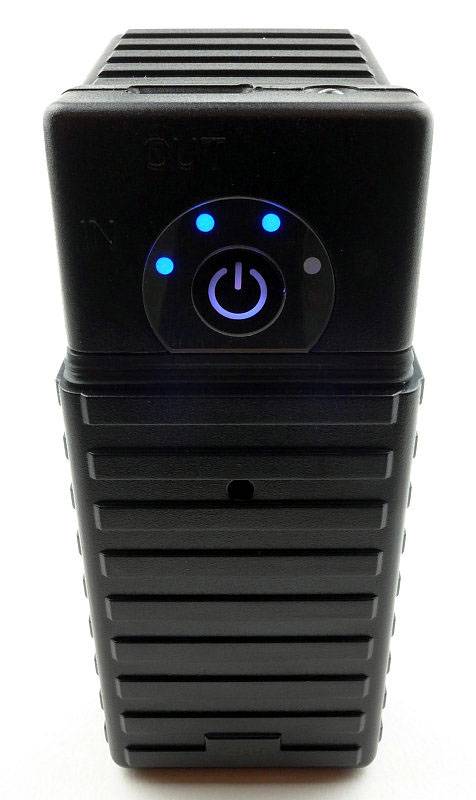
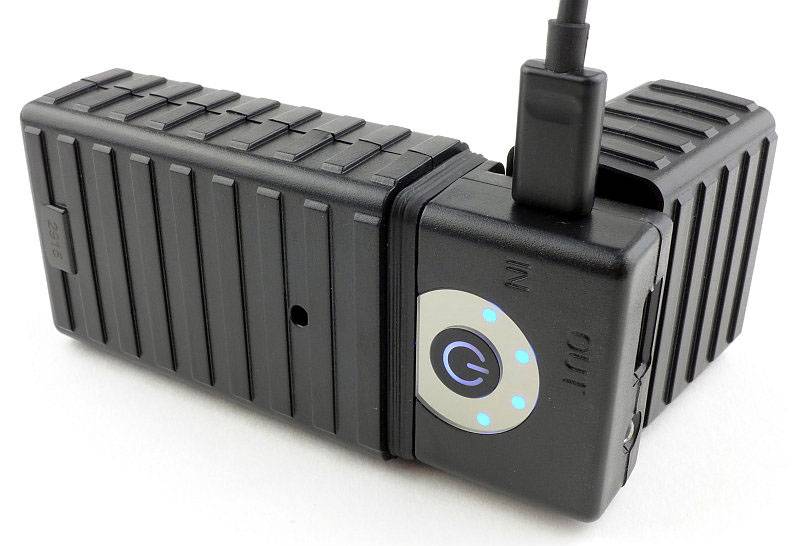
When you turn it on with a click of the power switch, there are four lights to indicate the state of charge. This is showing approximately 75% remaining.
 photo 05 Stream USB lights P1120316.jpg

Though not specified as fully waterproof, the seal has a triple flange.
 photo 06 Stream USB seal P1120328.jpg

Thought it looked familiar? Well yes, it is rather reminiscent of the Streamlight Sidewinder.
 photo 07 Stream USB sidewinder P1120339.jpg

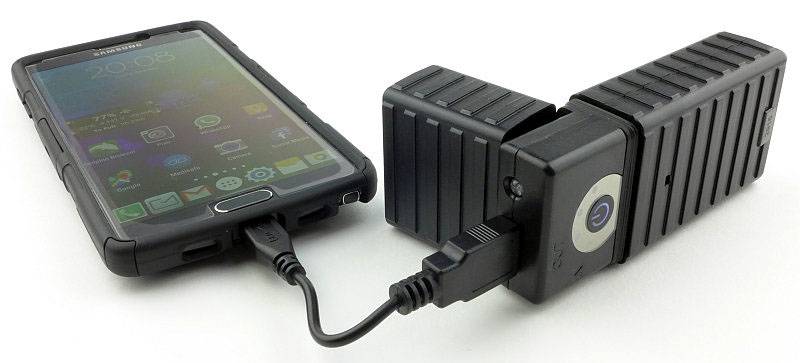
Any standard USB device can be charged.
 photo 08 Stream USB output P1120347.jpg

When charging the USB Portable Charger, the indicator lights tick up to show it is charging, with each 25% LED staying lit once that level of charge has been reached, and then all stay on once fully charged.
 photo 09 Stream USB input P1120857.jpg

Back to the ProTac HL USB …

The beam

Please be careful not to judge tint based on images you see on a computer screen. Unless properly calibrated, the screen itself will change the perceived tint.

The indoor beamshot is intended to give an idea of the beam shape/quality rather than tint. All beamshots are taken using daylight white balance. The woodwork (stairs and skirting) are painted Farrow & Ball “Off-White”, and the walls are a light sandy colour called ‘String’ again by Farrow & Ball. I don’t actually have a ‘white wall’ in the house to use for this, and the wife won’t have one!

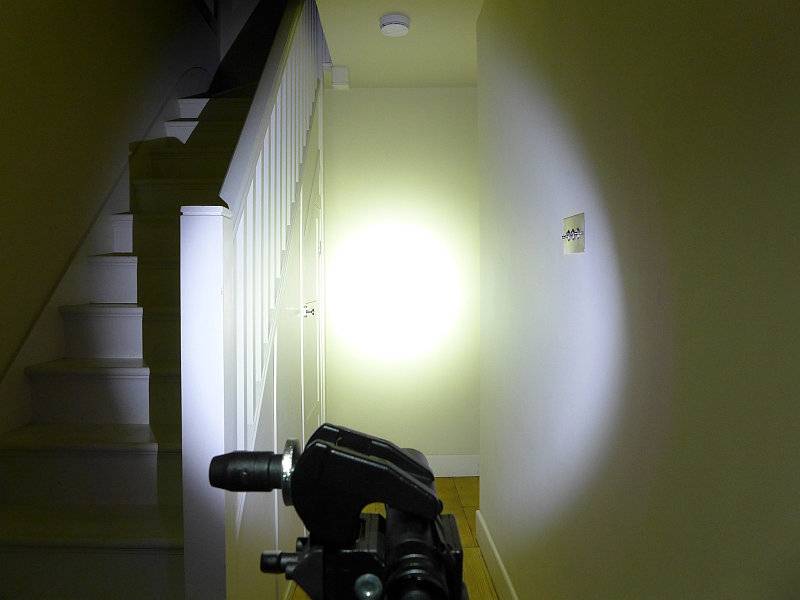
The beam is a pretty good all-rounder. There is a wide hotspot and usable spill.
 photo 22 Protac HL USB indoor beam P1170302.jpg

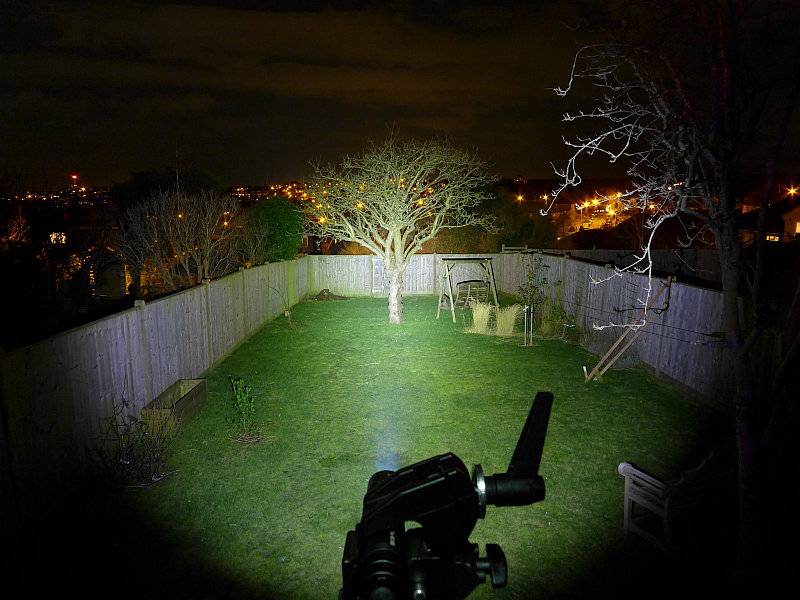
Giving it a bit of range and the beam smoothes out further and give a nice field of view.
 photo 21 Protac HL USB outdoor beam P1170237.jpg

Modes and User Interface:

Thanks to Streamlight’s TEN TAP programming, you have the choice of three different mode sets. These are:
High – Strobe – Low (Factory default)
High Only
Low – Medium – High

There is no mode memory so every time you use it, it will start from the first mode in the set. To access sub-modes, you use rapid half-presses of the switch.
For example, on the factory default mode set, one press gives you High, a rapid double tap gives you Strobe, and a rapid triple tap for Low.

The switch is a momentary ‘forward-clicky’ so once you have the mode you want, you can fully press the switch to click the mode on.

TEN TAP programming is simple. To cycle through the available mode sets, rapidly press the switch 9 times and then on the tenth hold it on. Continue to hold until the light goes off then release the switch. Doing this moves you to the next mode set, so simply repeat until you have the one you want.

Batteries and output:

The ProTac HL USB runs on its own rechargeable 18650 cell, any standard button top 1860 or 2x CR123. The manual also mentions not using RCR123, but only due to the lower capacity, not because it will damage the light.

To measure actual output, I built an integrating sphere. See here for more detail. The sensor registers visible light only (so Infra-Red and Ultra-Violet will not be measured).

Please note, all quoted lumen figures are from a DIY integrating sphere, and according to ANSI standards. Although every effort is made to give as accurate a result as possible, they should be taken as an estimate only. The results can be used to compare outputs in this review and others I have published.

___________________________________________ ________________________________ ________________________________
ProTac HL USB using supplied cell I.S. measured ANSI output Lumens PWM frequency or Strobe frequency (Hz)
___________________________________________ ________________________________ ________________________________
High 856 0
Medium 360 0
Low 92 0

* Beacon and Strobe output measurements are only estimates as the brief flashes make it difficult to capture the actual output value.

Peak Beam intensity measured 8700 lx @1m giving a beam range of 187m.

There is no parasitic drain.

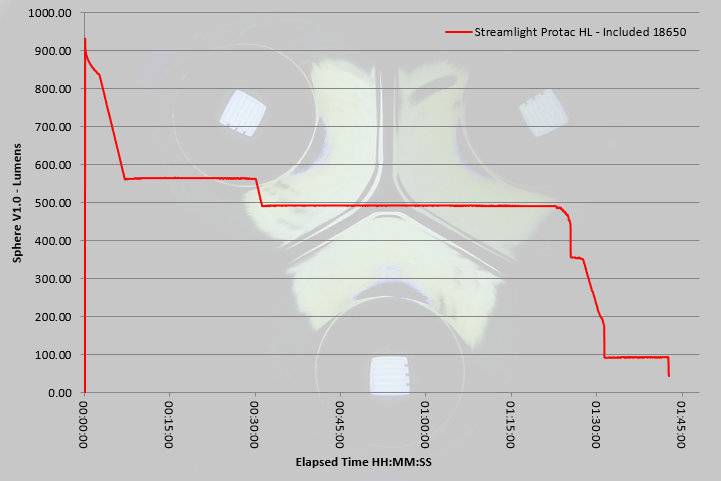
Maximum output is delivered in a burst format, lasting around 3 minutes before making a controlled reduction. Turning the light off and on again restarts the 3 minute burst. If left on permanently (as in this runtime test) the output initially reduces and then remains well regulated until it steps down slightly after 30 minutes. The remaining runtime is also well regulated right up to the point the cell runs low and output quickly drops.
 photo Streamlight Protac HL runtime.jpg

Troubleshooting

This section is included to mention any minor niggles I come across during testing, in case the information helps anyone else.

No issues were encountered during testing.

As per the description of this section, this information is provided in case anyone else finds a similar ‘issue’ that might be fixed in the same way.

The ProTac HL USB in use

Though the ProTac HL USB uses a wider battery tube than most 18650 lights, by keeping the head roughly the same size as the battery tube, overall the light is not overly bulky. With my XL glove sized hands, I find the ProTac HL USB a very comfortable size.

Tailstanding can be a useful feature, and the tailcap design allows for this, but what it means is that the switch is relatively recessed and can become a little difficult to press and click-on, especially when wearing gloves. It requires more of a stab with the tip of your thumb than a press with the pad.

I’ve always like the Streamlight TEN TAP programming, and wish there were more mode-sets available. My preference is for the Low-Medium-High mode set. What I really do like is that when then choosing your output level, this system keeps it very simple; you have a single tap, double tap, or 3 or more taps. If you rapidly press the switch 5 or 6 times you still get the third output level in the mode set. Timing on the mode changes seems to work very well and I always managed to get the mode I want.

Access to the USB charging port is easy as the cover is a simple slider. What does worry me is that the cover is retained only by the o-rings at each end. Once these o-rings wear the cover may not stay in place securely, so it might be better if there was a screw thread to hold it in place. This is a trade off between ease of use and reliability.

Great news is that in the ProTac HL USB Streamlight have not used PWM. All output levels are current controlled and a pleasure to use.

The included 18650 is only 2200 mAh; comparing this to current ‘normal’ capacities of 3400mAh it is somewhat behind the rest. There may be some reliability in a lower capacity cell, but this is slightly disappointing. Of course you can pop a 3400mAh 18650 in and use it, but you can’t charge it in the ProTac HL USB.

Being able to also use standard 18650 (button top) and CR123 cells is a great feature as you are not tied into the proprietary Streamlight cell and can carry backup cells. If you want to use the built-in charger then you have to use the Streamlight cell, but you get one with it so that is not a big issue. Streamlight’s anti-rattle battery tube works very well (but can be a bit tight on some 18650s) and stops CR123s making the light feel cheap as they don’t rattle about.

It may not be outstanding in terms of overall output, or for being compact, but the ProTac HL USB is a workhorse of a light and the package gives you a full kit of parts which can be used for other purposes. I use the mains and 12V USB chargers for my phone and the Portable USB Charger as well as the ProTac HL USB. Simple, programmable and rechargeable.

Review Summary

_______________________________________________ _______________________________________________
Things I like What doesn’t work so well for me
_______________________________________________ _______________________________________________
USB Rechargeable. Switch can be a little difficult to press.
Can use standard 18650 and CR123 cells. Charging port cover only held closed by o-rings.
No PWM. Supplied 18650 only 2200mAh
TEN TAP Programming.
Anti-Rattle battery tube.

 photo 05 Protac HL USB angle P1160965.jpg


Discussing the Review:

Please feel free to add comments to the review, but the ideal place to freely discuss these reviews is on a forum. If you started reading the shorter forum version of the review, but followed the link this full exclusive review, please return to that forum to discuss the review there.
If you read the review entirely on Tactical Reviews, please consider one of the following to join in any discussion.

CandlePowerForums – Flashlight Reviews Section (Largest and Friendliest Flashlight Community Forum)

EdgeMatters – Sponsored Reviews (UK based Forum for Knife Makers and Collectors)
Knife Review: Ontario Knife Company Black Bird SK-5

The Ontario Knife Company Black Bird SK-5 review is the third of a three-knife review series featuring the Black Bird SK-5, RD Tanto and RTAK II. (See – OKC Group Review.)

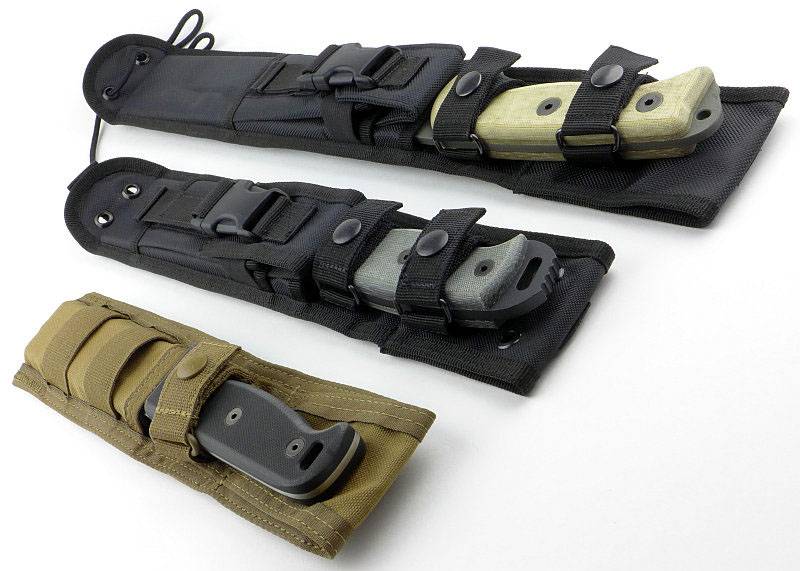
 photo 01 OKCtrio sheathed P1140542.jpg

The Black Bird SK-5 is a survival knife designed by Paul Scheiter and is intended to be highly functional and yet very simple.

 photo 13 Blackbird angle2 P1130908.jpg

The Blade and Handle Geometry:

Most knives specifications have a basic description of the blade geometry, but in this section I will be taking a more detailed look at geometry and balance.
 photo 30 Blackbird measuring2 P1140190.jpg

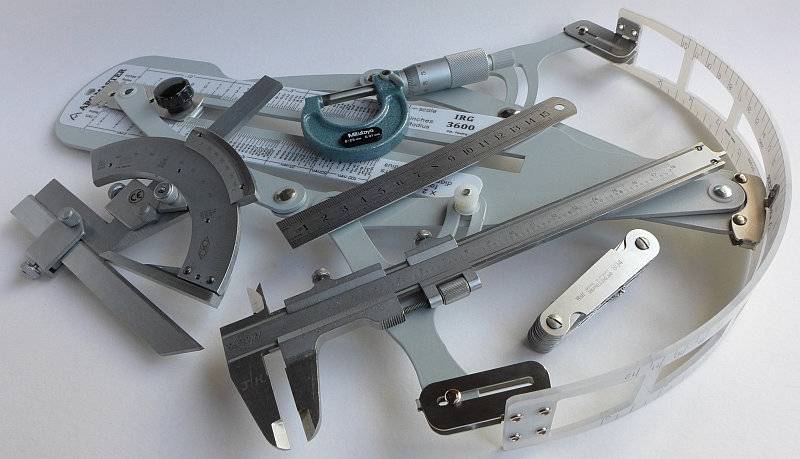
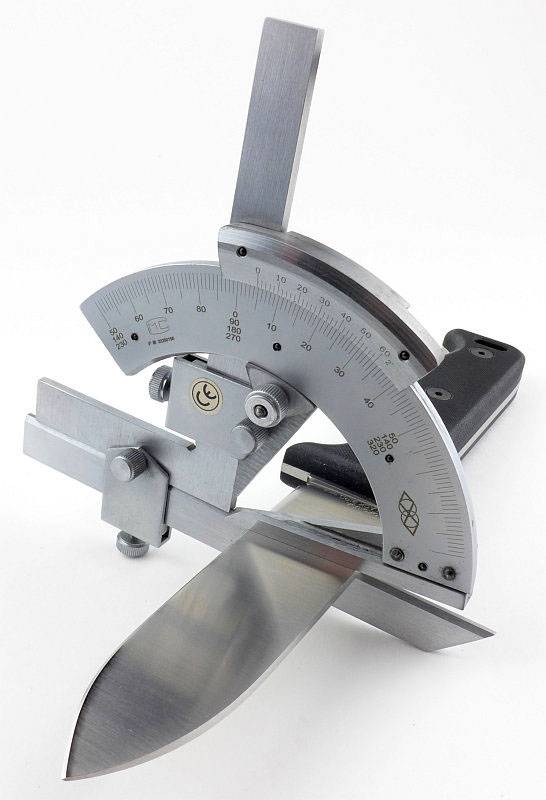
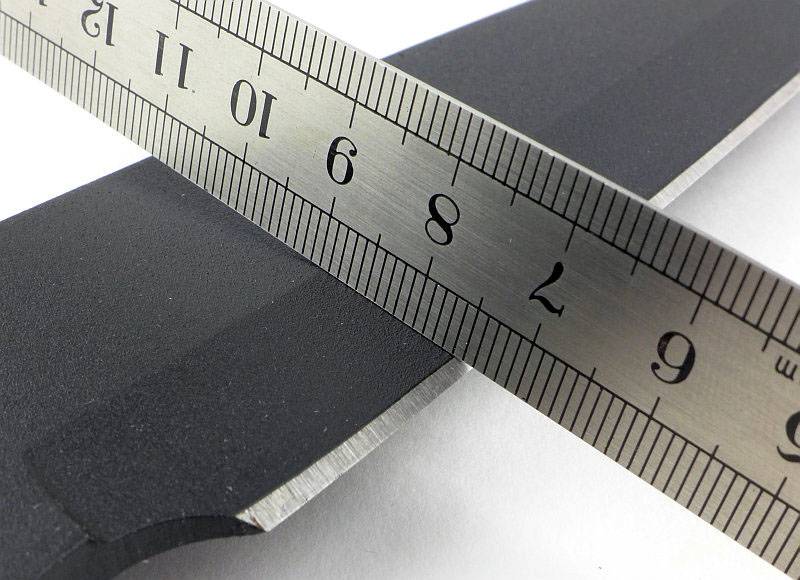
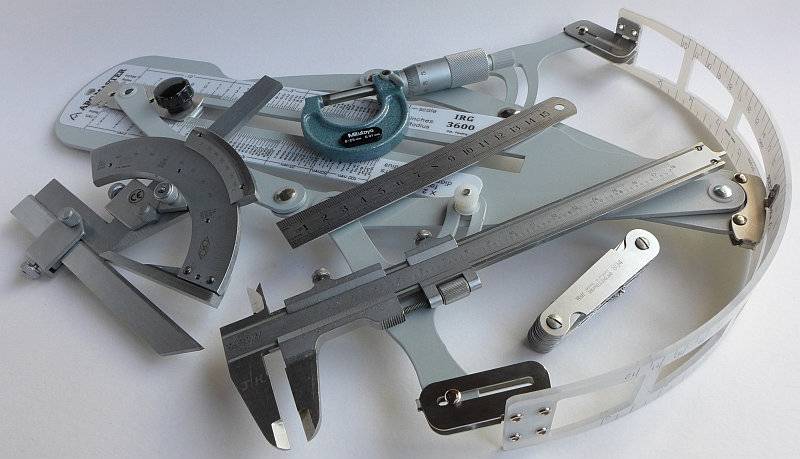
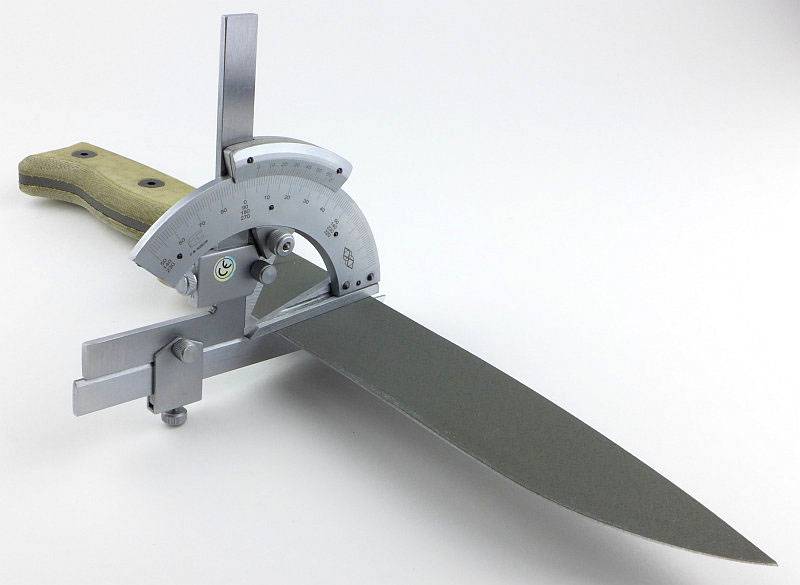
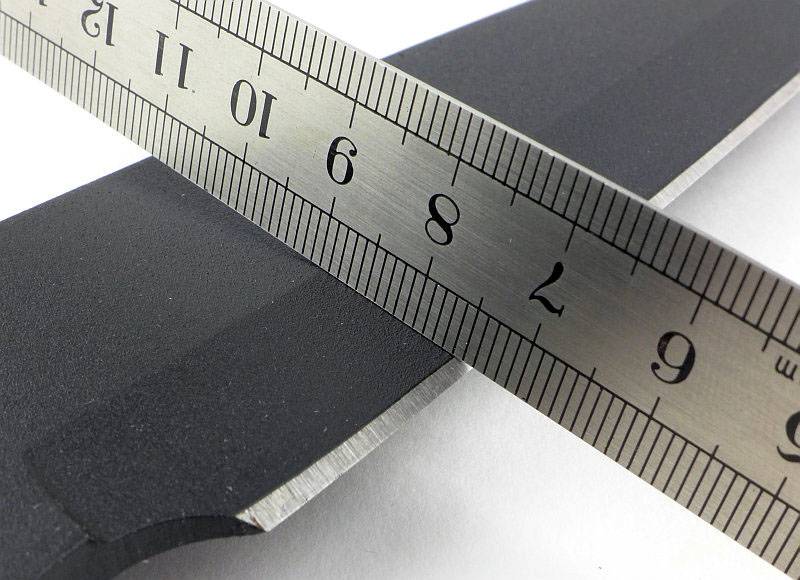
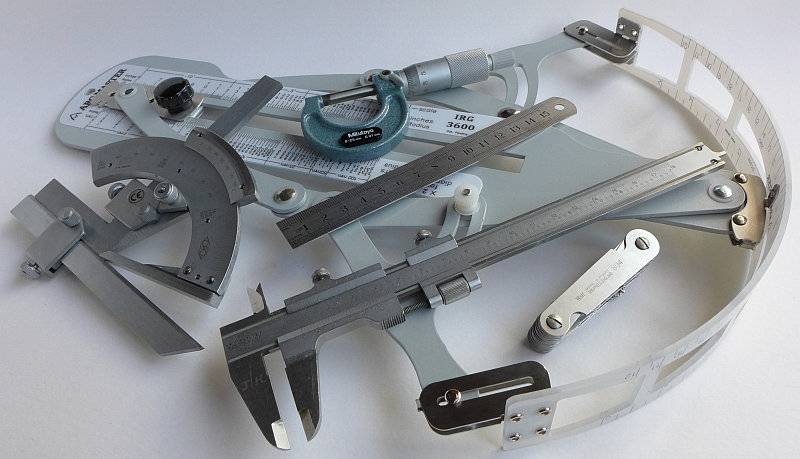
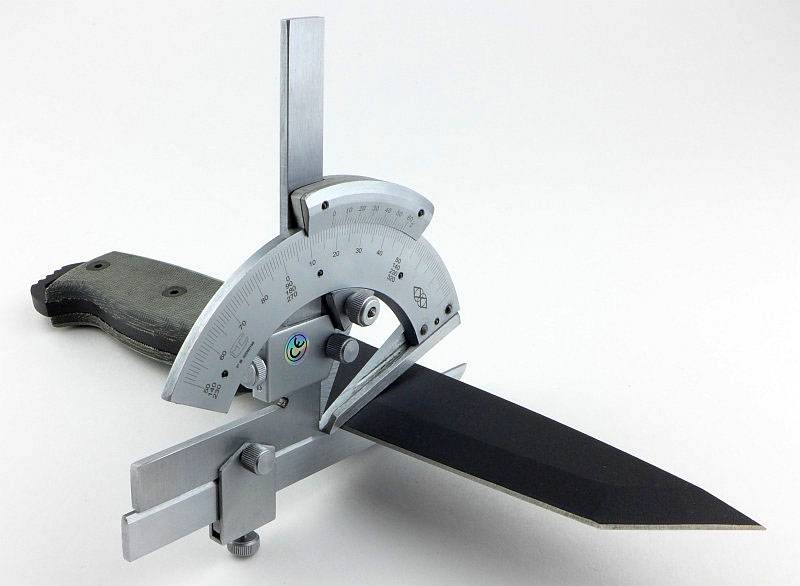
Using a set of gauges and precision measuring equipment including a Vernier protractor, callipers, fixed radius gauges and the unique Arc Master adjustable radius gauge (the one that looks like a crossbow).

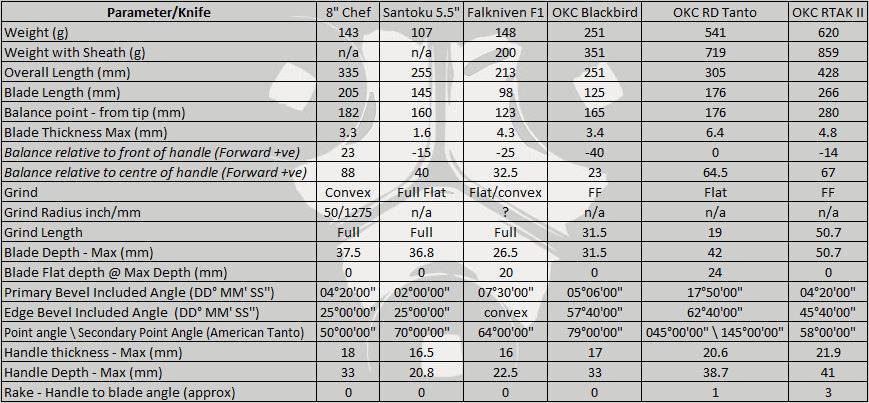
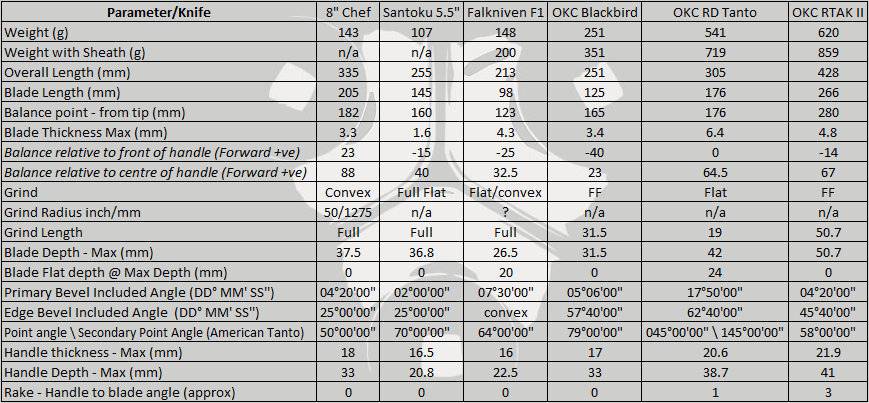
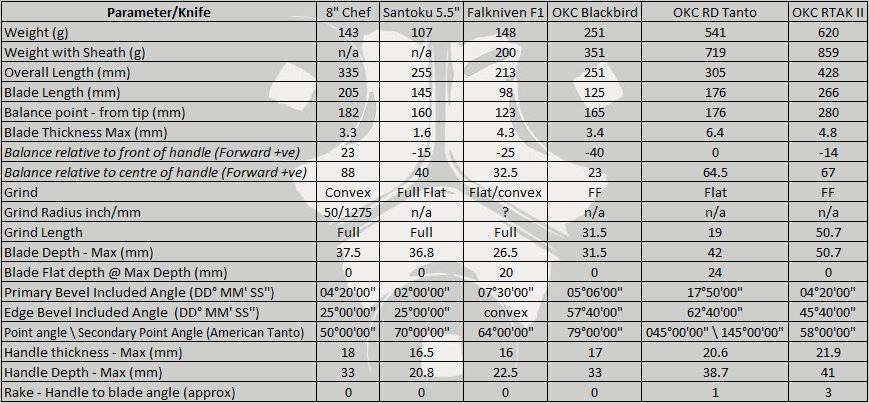
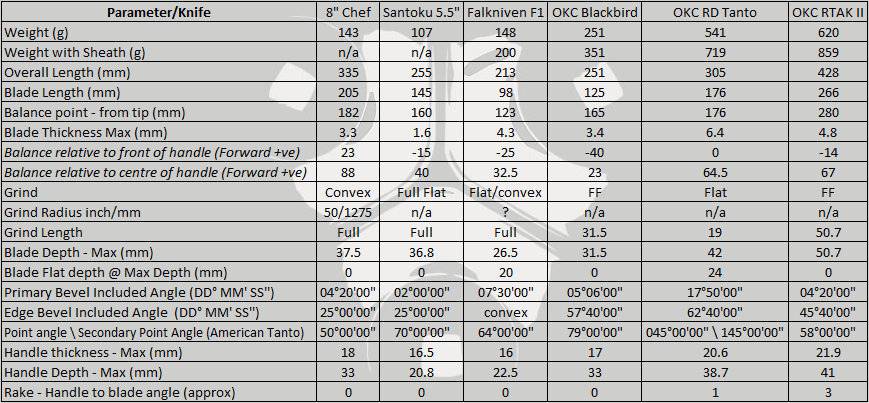
These measurements have been tabulated and are presented along with a few reference blades (8″ Chef’s Knife, 5.5″ Santoku and the popular Fällkniven F1).

Key aspects such as the primary bevel angle, grind type, blade depth, blade thickness, length, weight are detailed, along with balance information.
 photo 29 Blackbird measuring P1140186.jpg

The ‘Balance relative to the front of the handle’ tells you if the knife will feel front heavy, or if the weight is in your hand (a positive value means the weight is forward of the front of the handle). The ‘Balance relative to the centre of the handle’ indicates how close to a ‘neutral balance’ the knife has in the hand.
 photo 31 Blackbird balance P1140196.jpg

In the case of full convex grinds the approximate centre of the grind is used for the primary bevel angle estimate.

 photo OKC Parameters BlackbirdRDTantoRTAKII.jpg

The blade is made from 154CM steel.

Explained by the Maker:

The reasons for certain design choices may not be clear when simply looking at an object, so this section is intended to give an insight into the thinking behind a design by speaking to the designer themselves.

Unfortunately I can’t always get time with the designer so will use this section to include relevant information about the knife and its designer. The following information was noted from an interview with Paul Scheiter by Adam from Equip2Endure

Starting with the name, why is it the SK-5? Well, the ‘SK’ of ‘SK-5’ stands for Survival Knife and the ‘5’ is for its 5 inch blade length, so SK-5 allows for a possible future series with an SK-4 and SK-3.

The concept of this knife is to have sheer simplicity and to achieve maximum function because of that. There is nothing gadgety on the knife, and it only has the bare basics. This gives a knife that has everything it needs and nothing that it doesn’t.

The result is something that is very comfortable in the hand which you can use for hours on end. There are no abrupt angle changes anywhere that your hand would come in contact with, so you are not going to get hotspots and blisters. This is really important for a survival knife where you will be doing a lot of wood processing and splitting.

A notable point is the steel choice of 154CM; in addition to there being a good compromise of edge retention and corrosion resistance, it allows for there not to be a powder-coat on the blade. Amongst other things, not having the powder-coat makes it easy to strike a ferro-rod.

The full flat grind gives the ideal cutting geometry; it stays as thin as possible for as long as possible, and reduces the calories used when cutting wood.

A spear point tip puts a little more metal behind the point, making it less prone to breaking if it gets torqued. The tip itself is placed in the dead centre line of the blade making tasks, such as the initial shaping of a bow drill pit, straightforward as this knife will drill very nicely.

The pommel of the knife is flat and perpendicular to the blade so that if you wanted to use it as a spear head (which would not be recommended, but sometimes it may be a necessity), you can carve a shelf into a piece of wood so the pommel seats perfectly onto this, giving you thrusting power, then you put the lashing around the handle to complete the spear.

Blade stock thickness at 0.13 inches was chosen as a sweet spot where you can confidently baton with it but not take away too much from wood carving which is the primary intention.

At various shows, Paul has noted that people have generally been surprised that it is a lot lighter than it looks.

On a final note about how to carry the knife, Paul Sheiter’s preferred carry option is not to wear the knife on his belt but to use a high over-the-shoulder strap/band (like a cross-body sling bag) as it allows the knife to be kept in sight to the front of the body and if wearing a winter coat you don’t have to lift the coat to access the sheath.

A few more details:

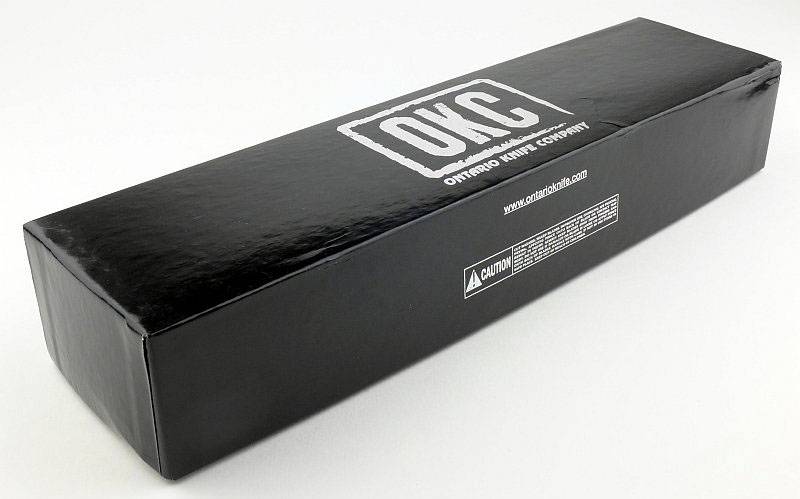
Just as with the others in this series, the Black Bird SK-5 comes in Ontario Knife Company’s standard knife box.
 photo 01 Blackbird boxed P1130826.jpg

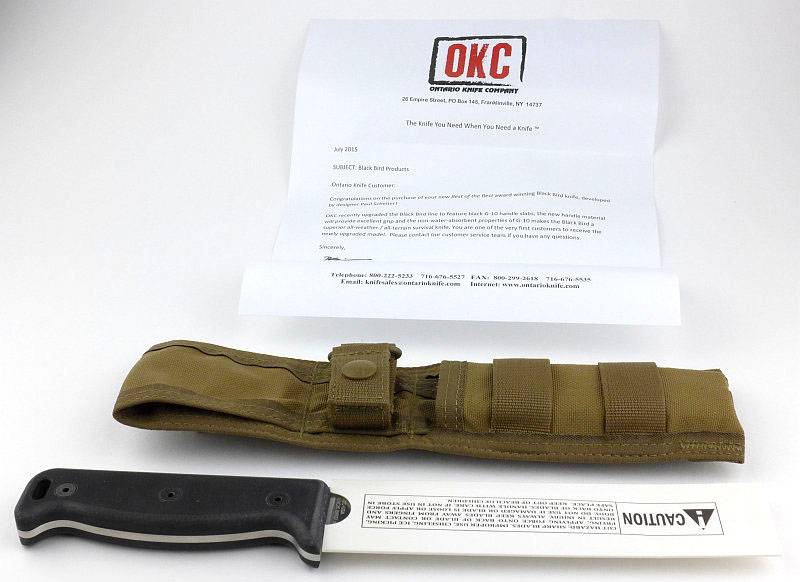
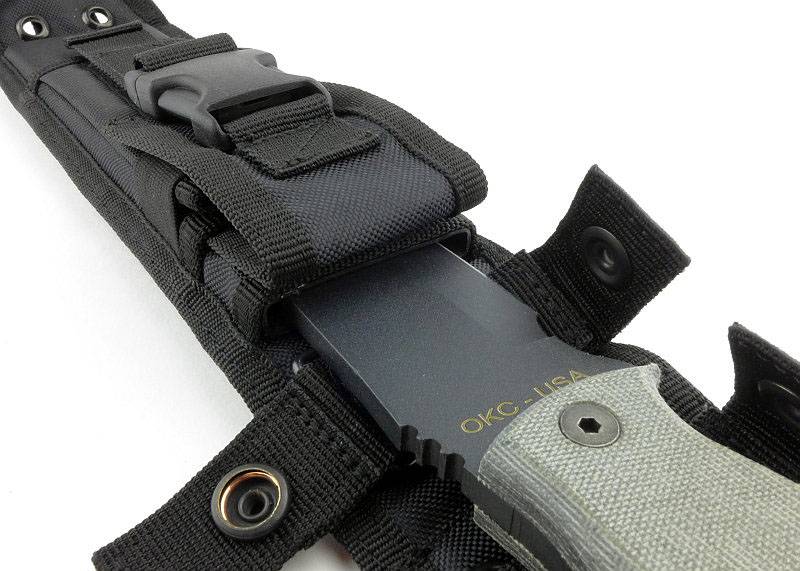
Inside the box the knife has a cardboard protector over the blade, and the knife is not fitted into the sheath. There was also a letter explaining that this knife had upgraded G-10 handle slabs.
 photo 02 Blackbird box contents P1130833.jpg

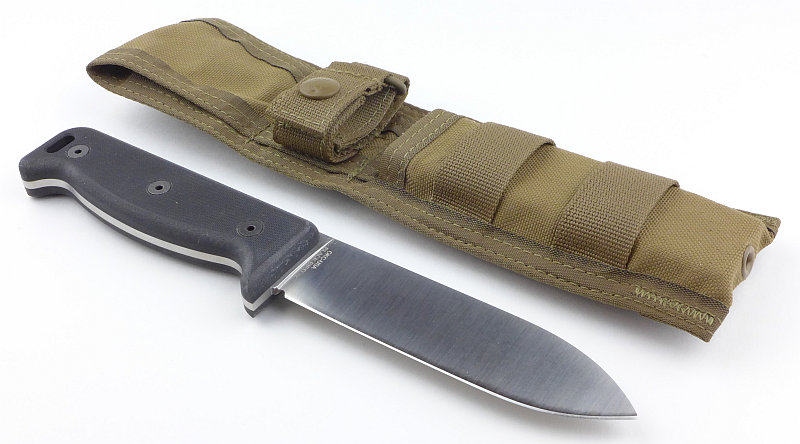
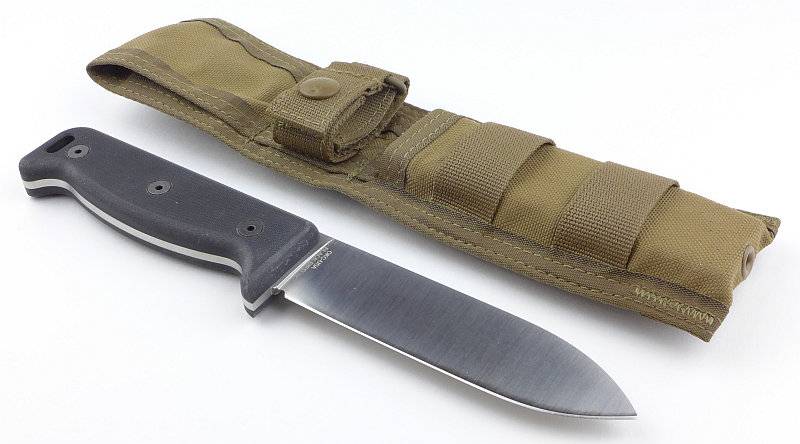
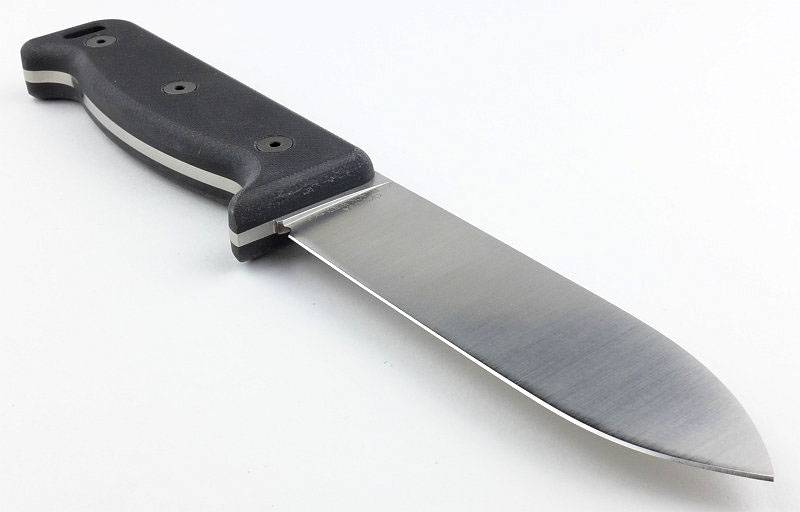
The first proper view of the Black Bird and its sheath.
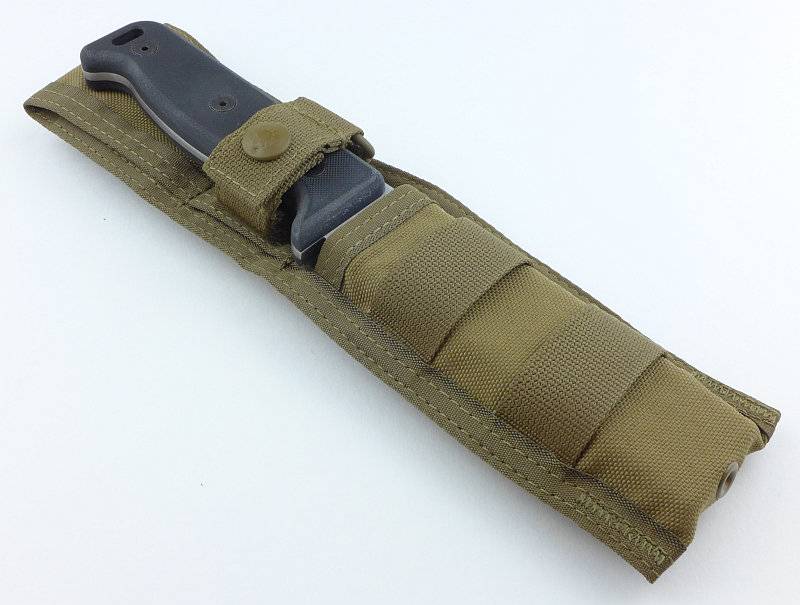
 photo 04 Blackbird with sheath2 P1130851.jpg

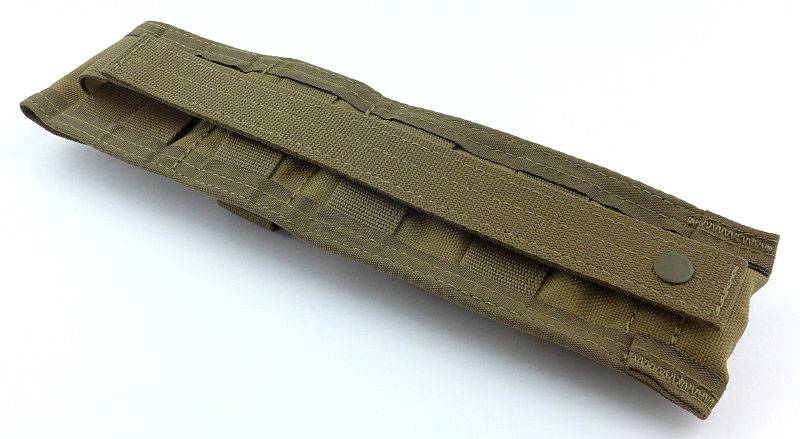
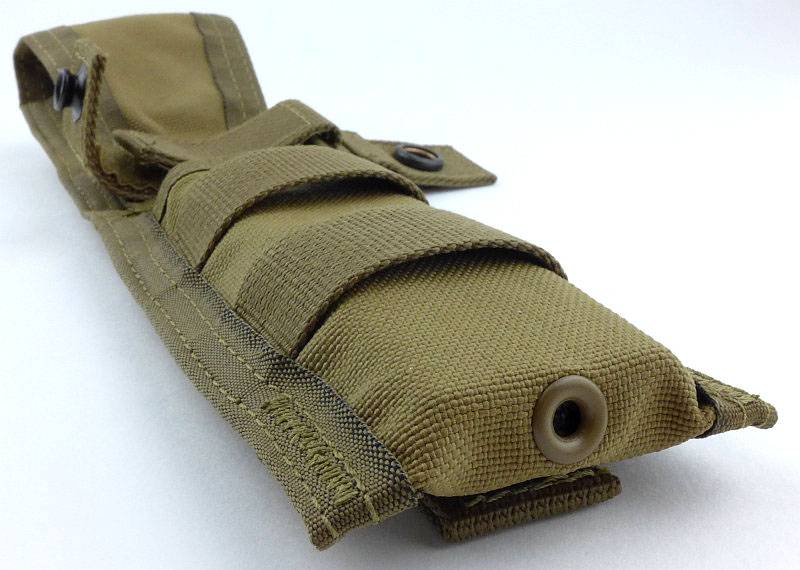
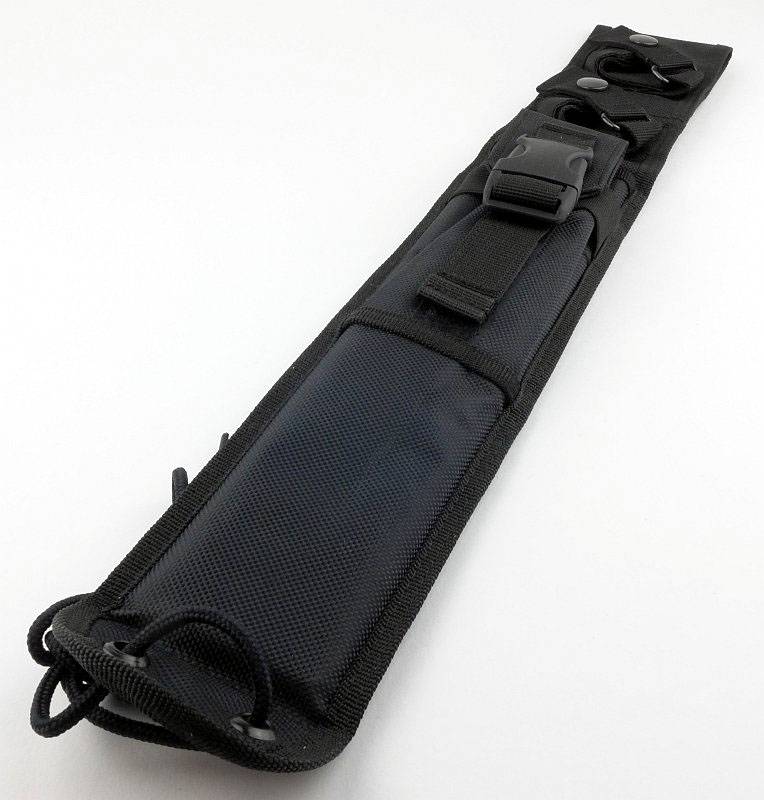
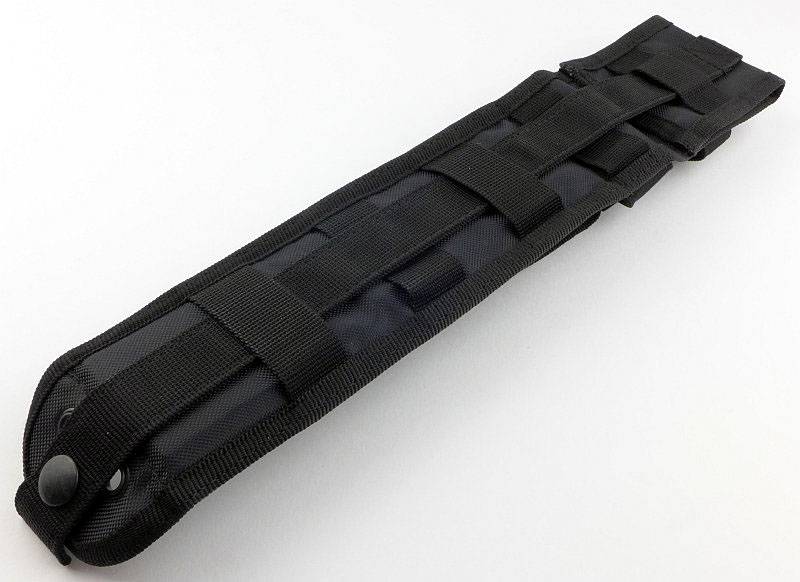
Before going back to the knife, a quick look at a few details of the sheath. On the back, the sheath has a PALS/MOLLE strap for mounting on a pack, vest or load carrier.
 photo 05 Blackbird sheath back P1130856.jpg

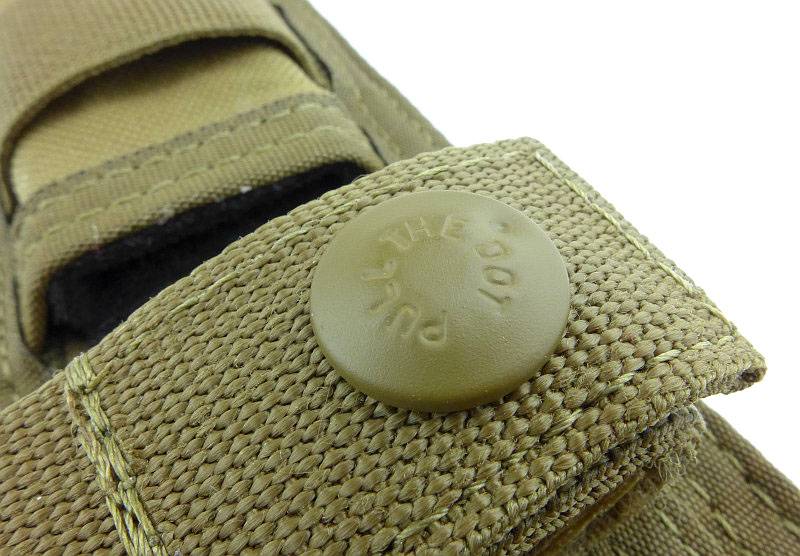
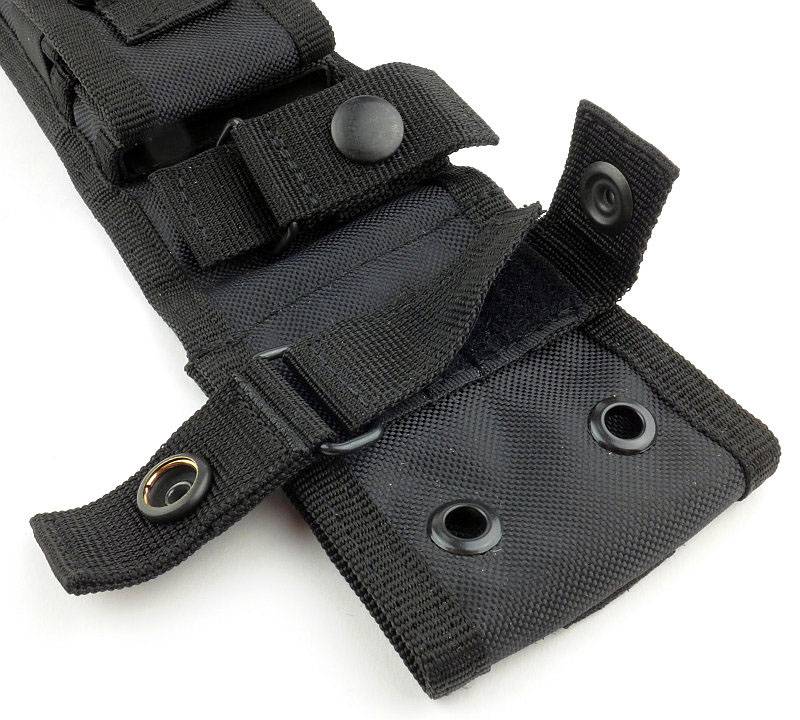
The press stud used on the retention strap is a military specification type where you can only release it from one direction.
 photo 06 Blackbird sheath popper P1130860.jpg

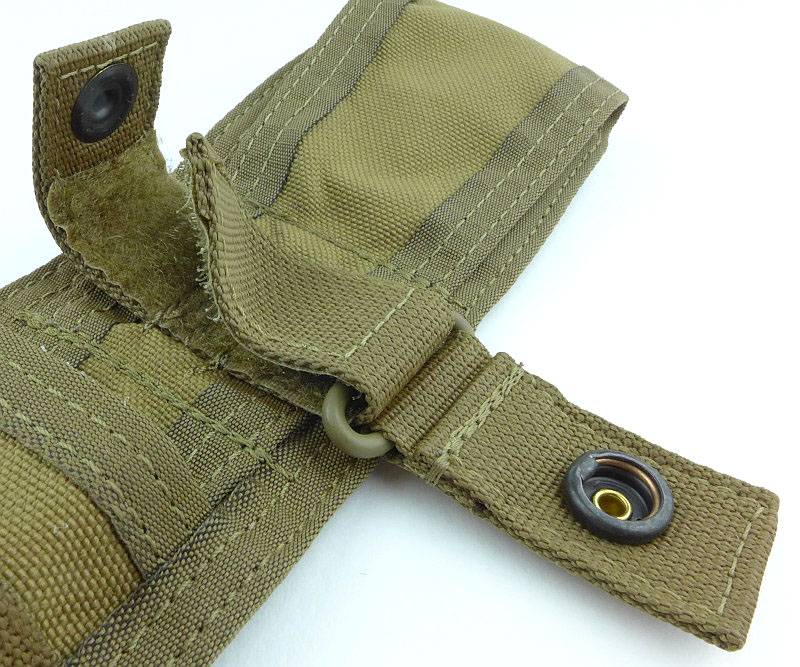
It is possible to change the fit of the retention strap using the Velcro adjustment.
 photo 07 Blackbird sheath detail P1130866.jpg

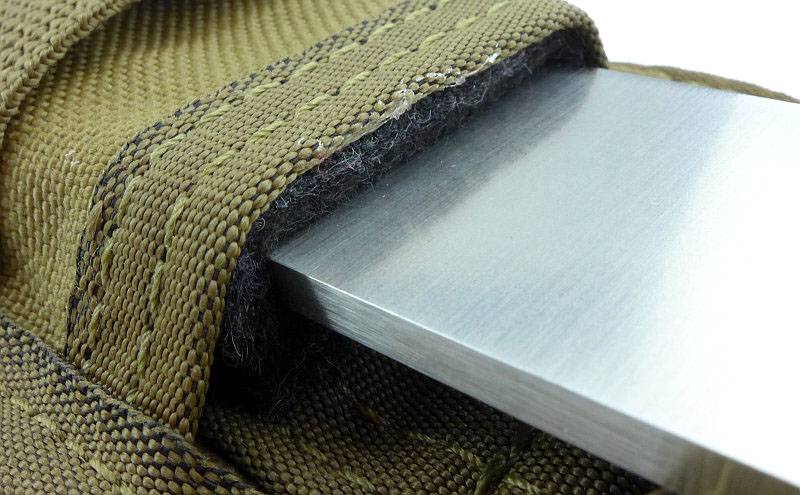
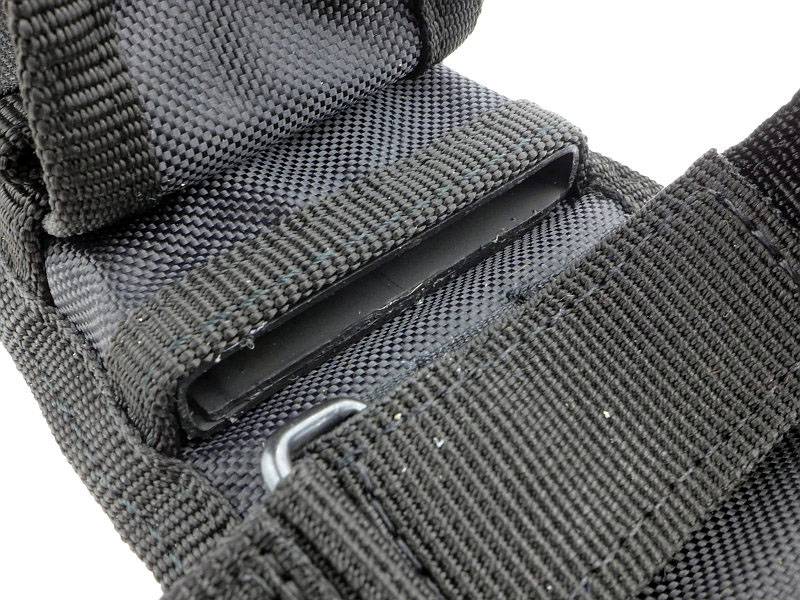
Inside the sheath is a felt liner.
 photo 08 Blackbird sheath liner P1130878.jpg

As well as there being PALS webbing on the front of the sheath, here you can also see the drainage hole at the bottom to allow water out.
 photo 09 Blackbird sheath drainage P1130885.jpg

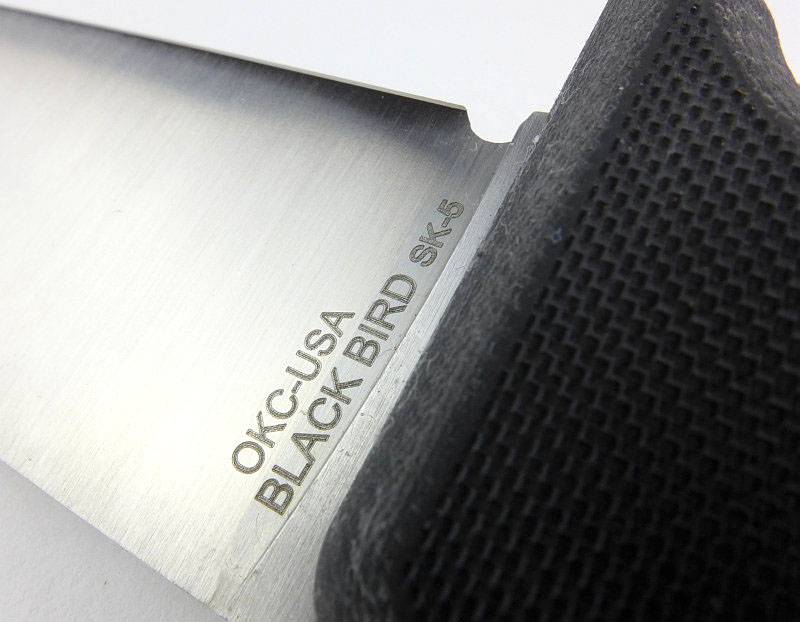
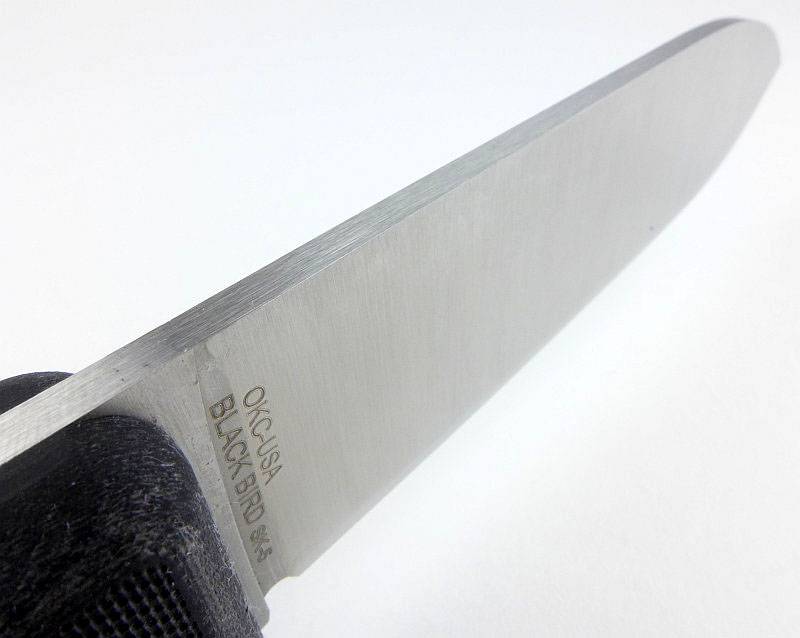
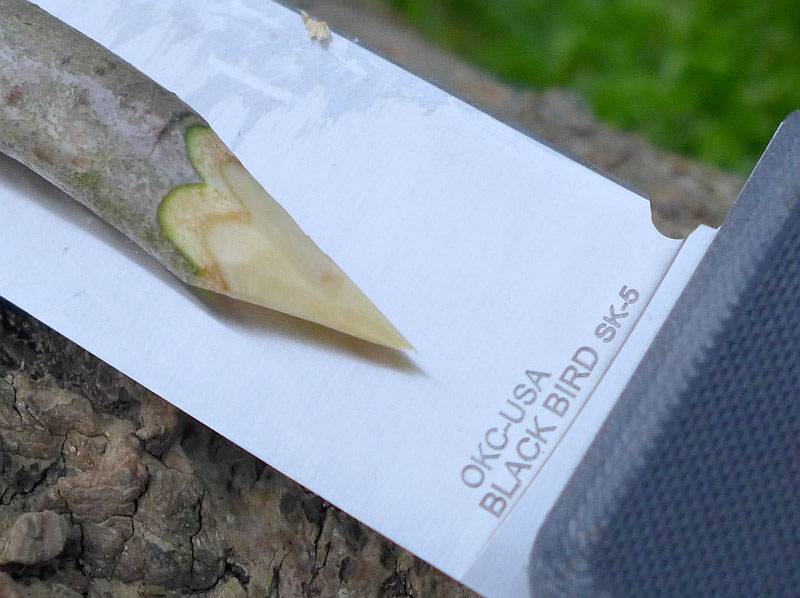
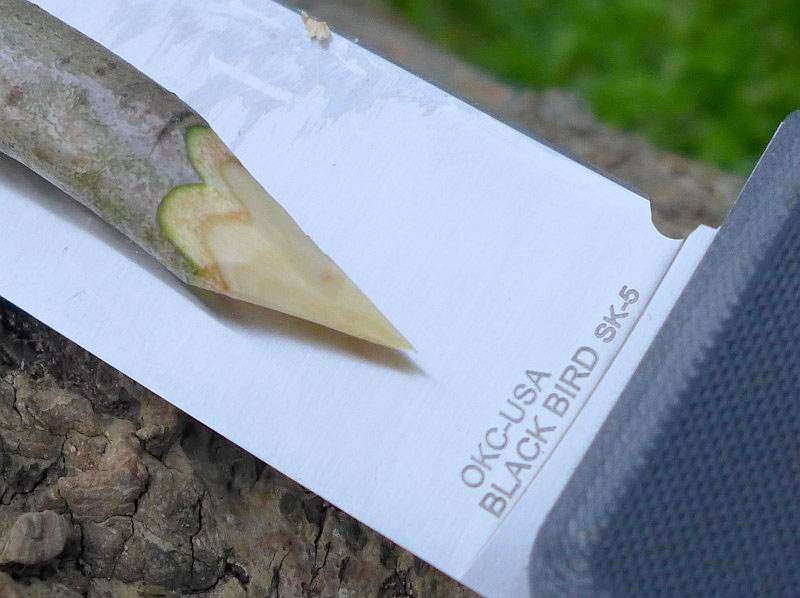
Back to the knife and its details. On one side the maker and model are engraved on the blade near next to the handle.
 photo 10 Blackbird engraving P1130889.jpg

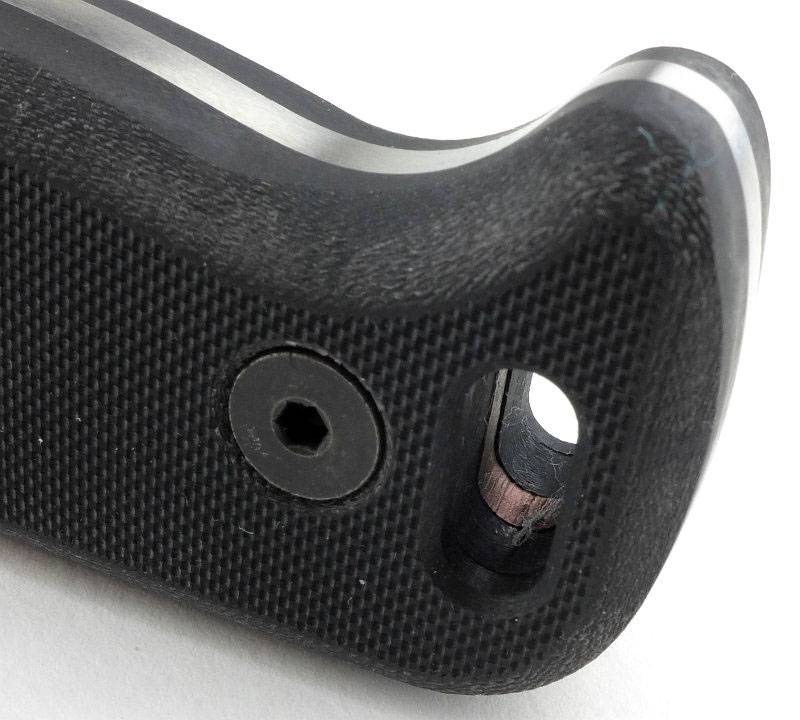
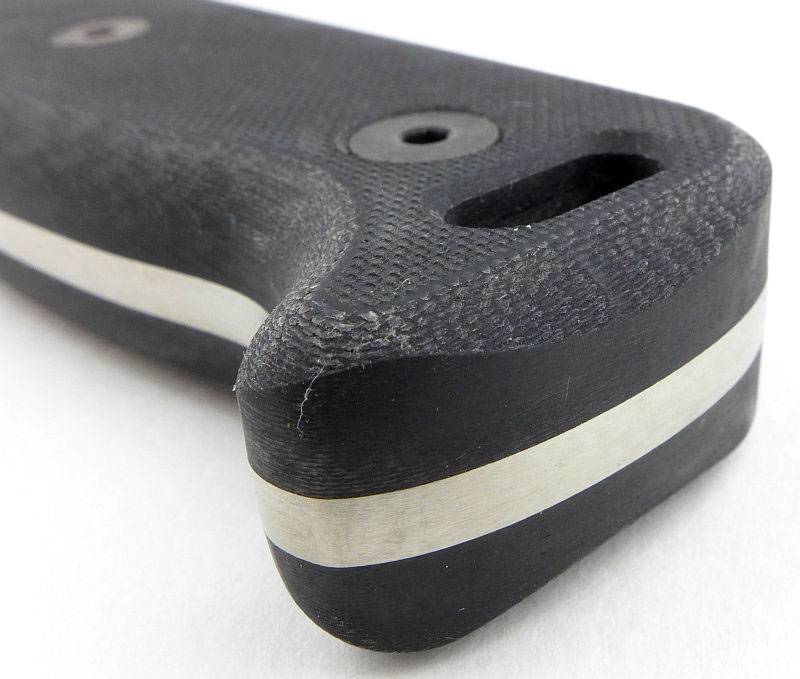
There are three details I’d like focus on in this photograph:
– The generous lanyard hole allows for easy fitting of a lanyard.
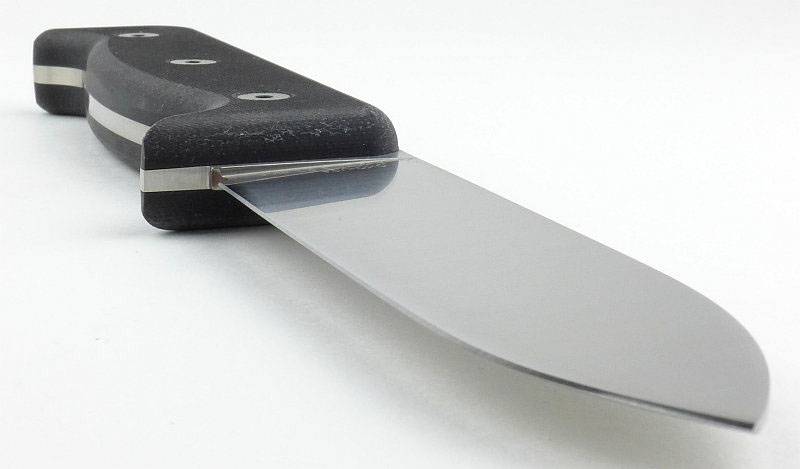
– Inside the lanyard you can see evidence of the water-jet cutting and slightly imperfect fit of the handle material, but on the outer edges of the handle and blade tang have been ground to a smooth finish.
– We are looking at the handle grip hook which gives plenty of purchase for all tasks.
 photo 11 Blackbird hook detail P1130897.jpg

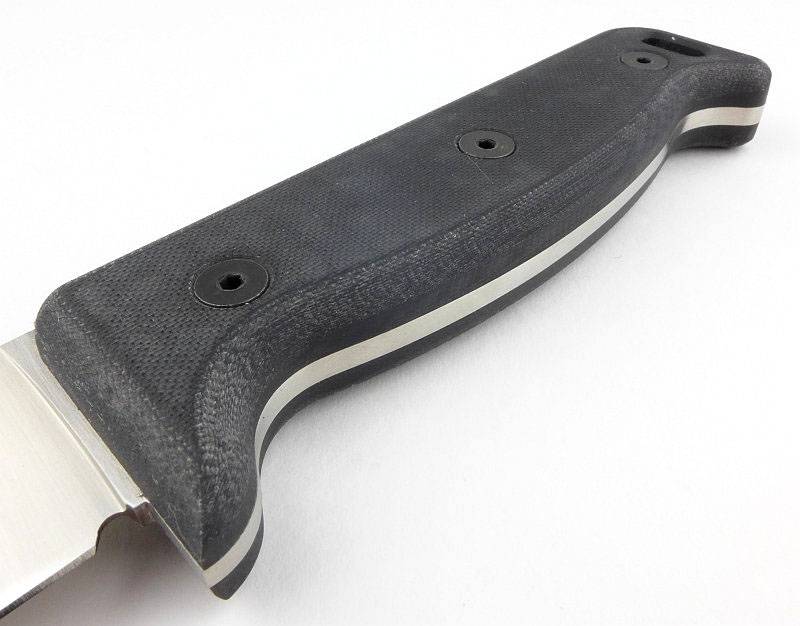
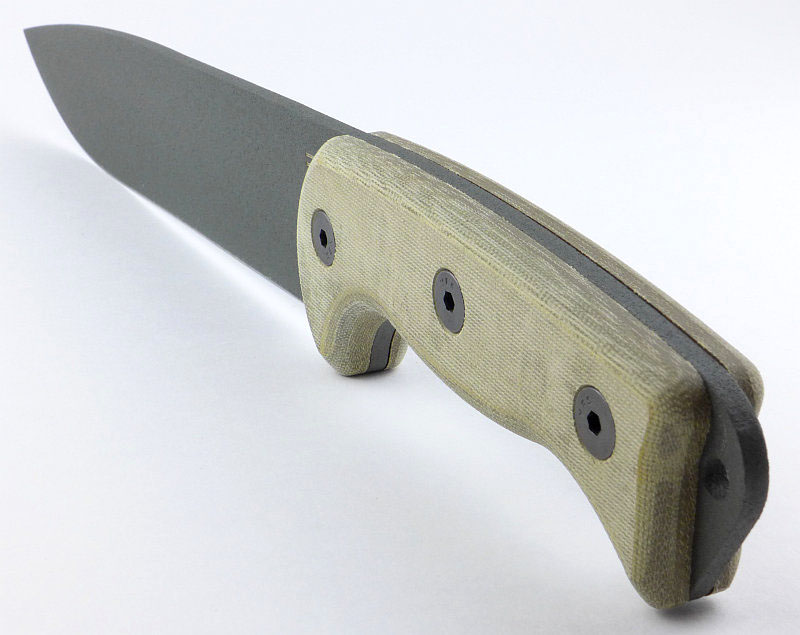
Although the handle slabs are flat sided, they have been well rounded to remove sharp edges. Three bolts are used to secure the grips.
 photo 14 Blackbird grip P1130910.jpg

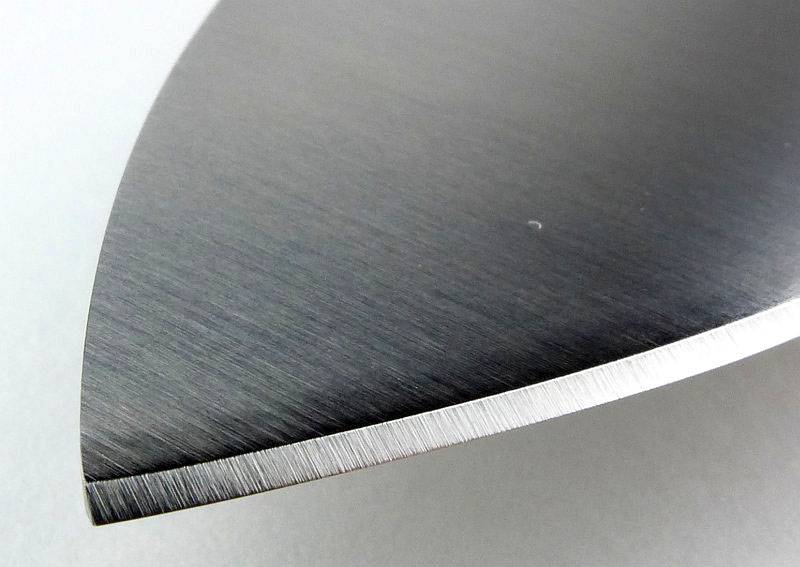
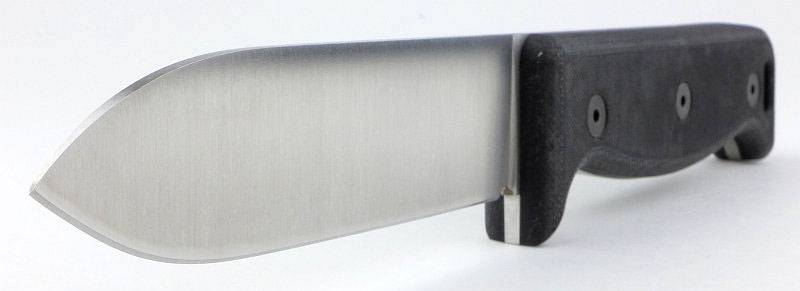
A close look at the blade tip showing the blade-flat surface finish as well as the factory edge and its finish.
 photo 15 Blackbird tip detail P1130917.jpg

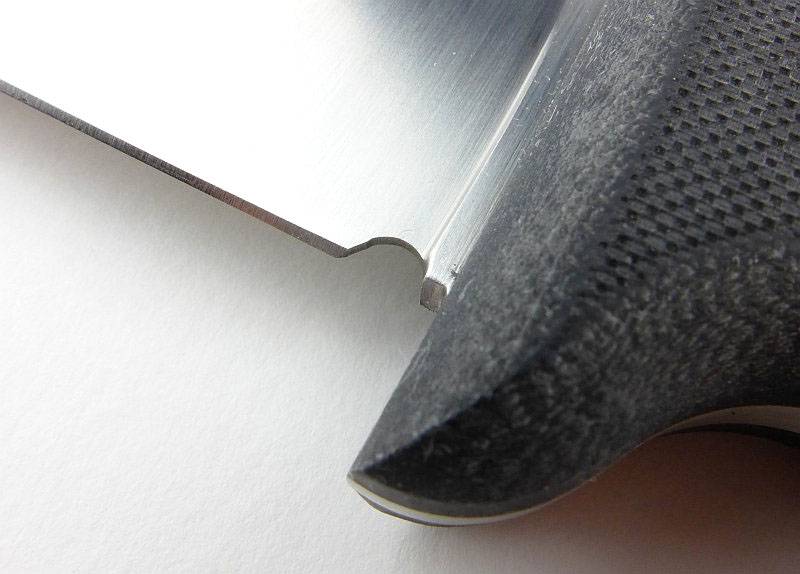
One of my personal preferences, a sharpening choil.
 photo 16 Blackbird choil P1130919.jpg

As mentioned earlier, the handle slabs and blade tang are ground/sanded to a completely flush fit.
 photo 17 Blackbird grip detail P1130924.jpg

A sharp edge is left all along the spine meaning you can strike a ferro-rod from any part of the spine that suits you.
 photo 19 Blackbird along the blade P1130936.jpg

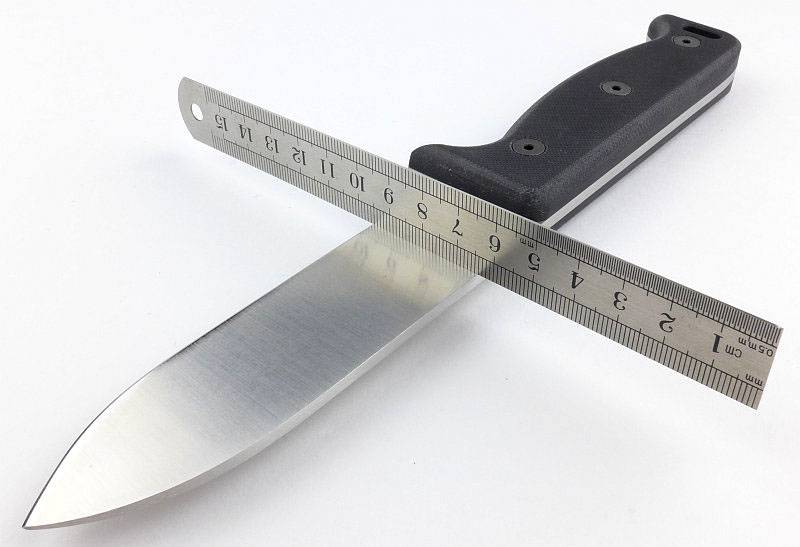
Though not a mirror finish, you can see the reflection of the handle on the blade flat so you could use the knife for signaling.
 photo 21-27 Blackbird along the blade flat P1140162.jpg

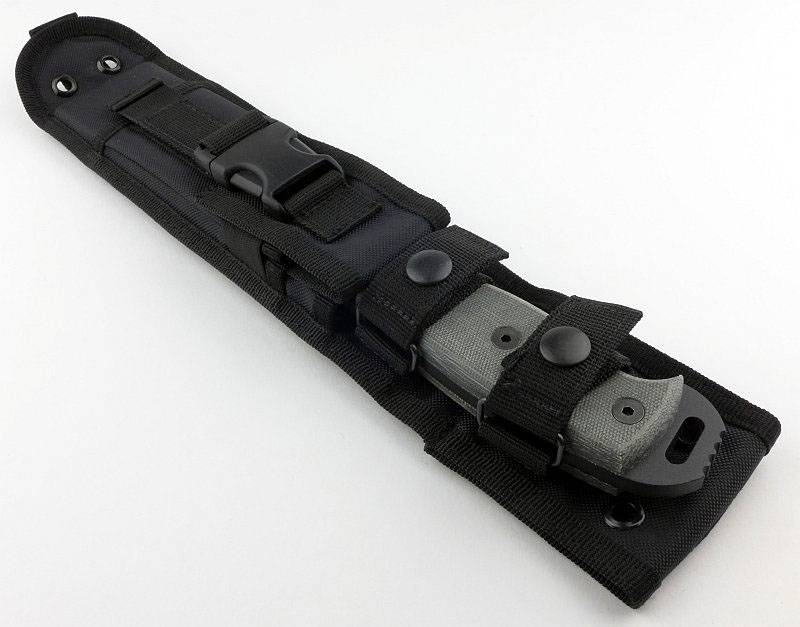
Unlike the other OKC knives in this series of reviews, the Black Bird’s sheath has only a single retaining strap. There is enough room for the knife to come about half an inch out of the sheath with the retaining strap closed.
 photo 22 Blackbird sheathed P1130972.jpg

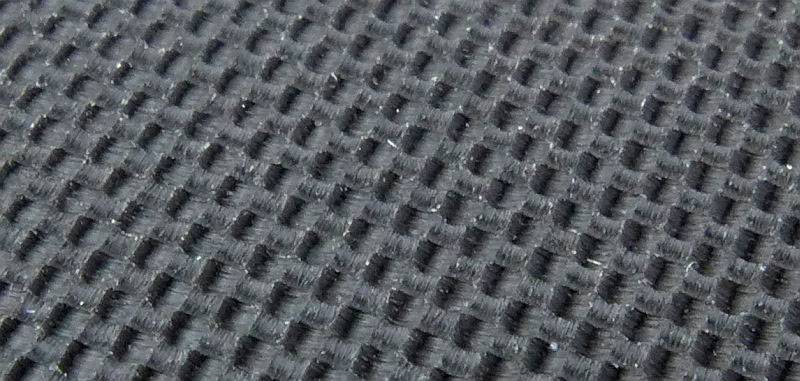
For the last photo in this section, we have en extremely close view of the peely-ply G-10 handle texture.
 photo 26 Blackbird texture P1140138.jpg

What it is like to use?

As the designer Paul Scheiter noted earlier, the SK-5 does feel lighter in the hand than you would expect – immediately manoeuvrable and easy to use. This is largely thanks to the full flat grind keeping just enough steel in the blade for strength without being overly thick and heavy.

There is no ‘ideal blade length’, as everyone has their own preferences, but being the only Black Bird so far, the choice of 5 inches for a general purpose survival knife is really hitting the spot for me.

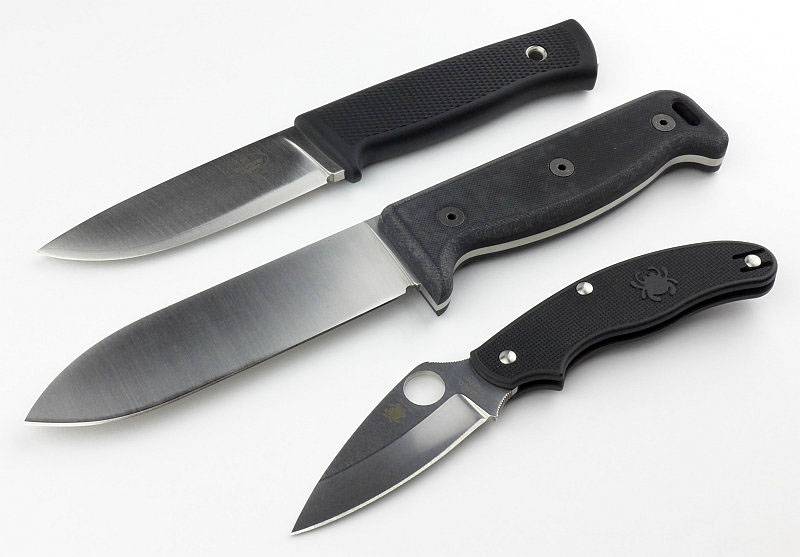
To give an idea of scale, here it is next to the Fällkniven F1 and a Spyderco UK Pen Knife.
 photo 23 Blackbird size P1130984.jpg

At 5″, the blade is half the overall length of the knife. Combining this with the full flat grind and full tang, even though the blade is 5″, the balance point is brought right back into the hand (see ‘The Blade and Handle Geometry:’ section), and this is the reason it feels light and easy to handle.

With this blade length you still have great control over the point and enough length to make batoning easy (if you need more than 5″ to baton, you should probably choose smaller wood or be making wedges for splitting instead).

Overall the package is small enough to carry easily, immediately making it more likely to be your survival knife (as a ‘survival knife’ is the knife you have with you when you need it).

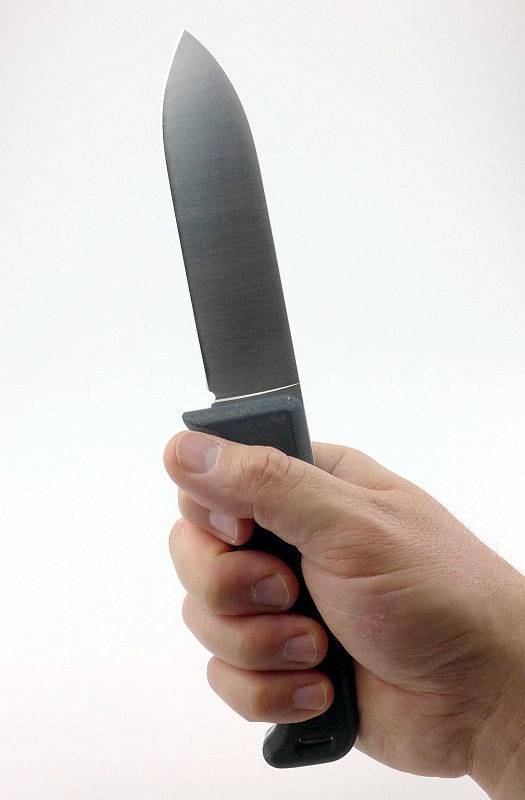
The Black Bird is extremely comfortable in the hand, though the grip is a little boxy due to the flat sides.
 photo 32 Blackbird in hand P1140303.jpg

Not to get started on the subject of factory edges (which by necessity have to be created quickly, typically with belt sanders, and are usually not the best edge that knife can have), but in this case I need to mention the factory edge on the Black Bird sample I received. Check back to the measurements I took and you see it was a 58 degree inclusive angle out of the box; this is more like an angle you might choose for an axe. My initial testing was with the factory edge including comparing it to the other OKC knives. (OKC said this was an anomaly as the factory edge is not normally that steep)

Despite such a large edge angle it still cut very well just requiring a higher angle of attack for each cut. Unsurprisingly it was by far the most controlled carver of all three.
 photo 08 OKCtrio Blackbird stick P1160293.jpg

Despite not needing a sharpen at this point, I wasn’t satisfied with the factory edge angle, so decided to reprofile to around 38 degrees. Even using DMT diamond stones, the 154CM steel proved to be very hard to work and the reprofiling took me a good four hours. The edge bevel is around three times as wide as the original factory edge. Was it worth it? Well, YES, a complete transformation!

Reprofiling the edge has taken a capable cutter and made it supremely efficient and eager. On a simple paper cut test it now glides through with a push cut where previously it cut perfectly well but needed some drawing across the edge. In wood I have to be careful not to over-cut. (Remember to sharpen your knives to suit you and don’t be afraid to change the edge angle)

Another characteristic this knife has is its inoffensive look. By this I mean the fact that it has a SAK style spear point which makes it look more utilitarian than many ‘survival’ knives on the market. If other people are more comfortable when they see the knife you are more likely to carry it and have it with you when you need it (if you are bothered what others might think). Obviously when sheathed you can’t see this, but overall it is easy to carry unobtrusively. If you take it out to whittle or use it for frivolous cutting tasks it doesn’t look like a weapon. It might seem a minor point, but so far I’ve found this knife getting more positive reactions than any other I’ve carried.

Review Summary

The views expressed in this summary table are from the point of view of the reviewer’s personal use. I am not a member of the armed forces and cannot comment on its use beyond a cutting tool or field/hunting knife.

Something that might be a ‘pro’ for one user can be a ‘con’ for another, so the comments are categorised based on my requirements. You should consider all points and if they could be beneficial to you.

_______________________________________________ _______________________________________________
Things I like What doesn’t work so well for me
_______________________________________________ _______________________________________________
Excellent Handling and Balance. Grip could be more contoured.
Comfortable for extended use. Factory Edge too steep.
154CM steel with great edge retention. 154CM is harder to sharpen than other steels.
Full Flat Grind.
Showers sparks from ferro-rods.
Aftermarket sheaths available.

 photo 28 Blackbird angle4 P1140165.jpg


Discussing the Review:

Please feel free to add comments to the review, but the ideal place to freely discuss these reviews is on a forum. If you started reading the shorter forum version of the review, but followed the link this full exclusive review, please return to that forum to discuss the review there.
If you read the review entirely on Tactical Reviews, please consider one of the following to join in any discussion.

EdgeMatters – Sponsored Reviews (UK based Forum for Knife Makers and Collectors)
BladeForums – Knife Reviews (US based Forum for Knife Discussion)

CandlePowerForums – Knife Reviews Section (Largest and Friendliest Flashlight Community Forum)

Knife Review: Ontario Knife Company – Group Review

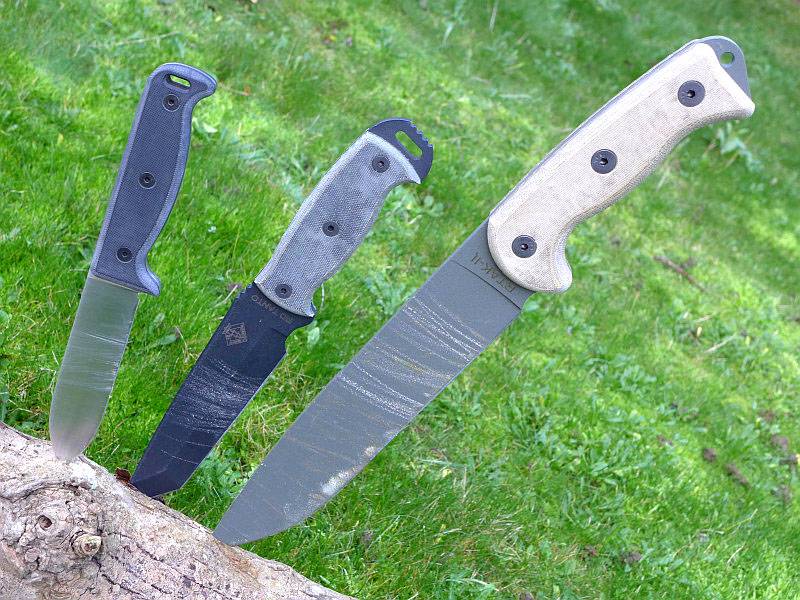
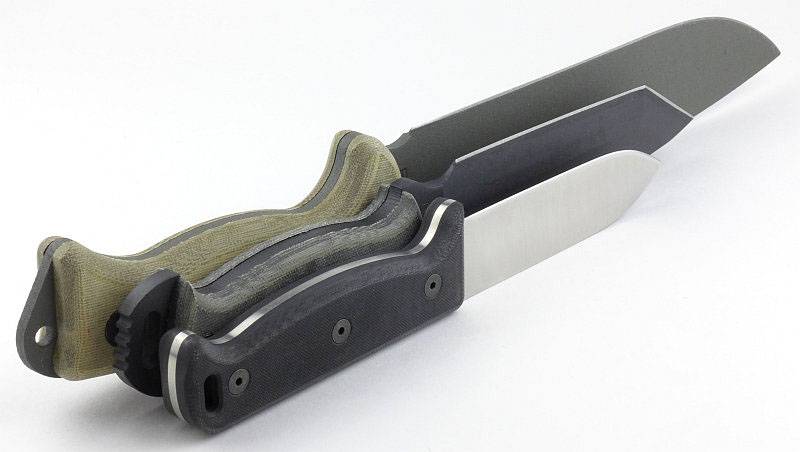
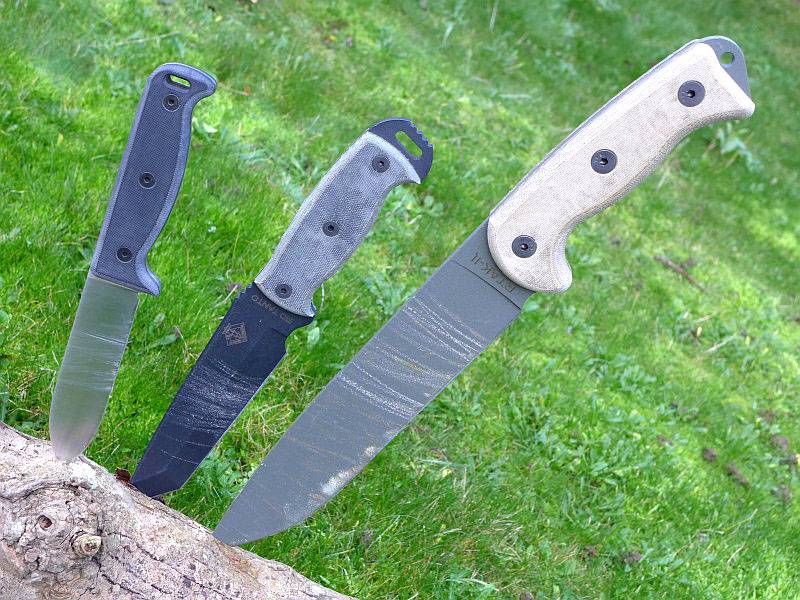
After selecting a set of three knives I felt represented what Ontario Knife Company bring to the market (Blackbird SK-5, Ranger RD Tanto and RTAK-II), I originally intended to present a single group review.
As I have got to know them better, I found that individual reviews would work better, so this page is to tie together the review series and provide a single point of reference to link to all three reviews, plus provide a few group shots for comparison.
This article includes some exclusive images and comments, so is worth getting to the end of before going to an individual review.

03 Apr 2016 – ‘Ranger’ RD Tanto
06 Apr 2016 – RTAK-II
18 Apr 2016 – Blackbird SK-5

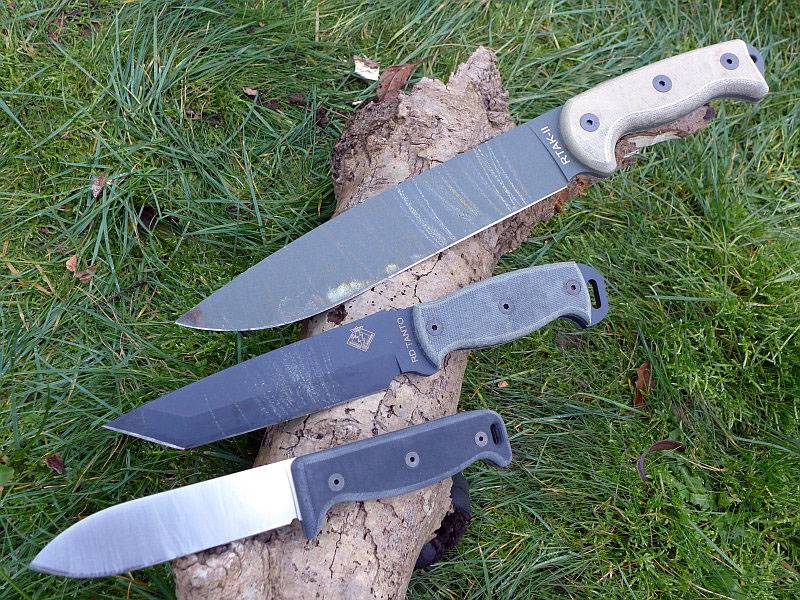
 photo 01 OKCtrio sheathed P1140542.jpg

 photo 09 OKCtrio in log P1160300.jpg

Explained by the Maker:

The reasons for certain design choices may not be clear when simply looking at an object, so this section is intended to give an insight into the thinking behind a design by speaking to the designer themselves.

See individual reviews for this exclusive information.

A few more details:

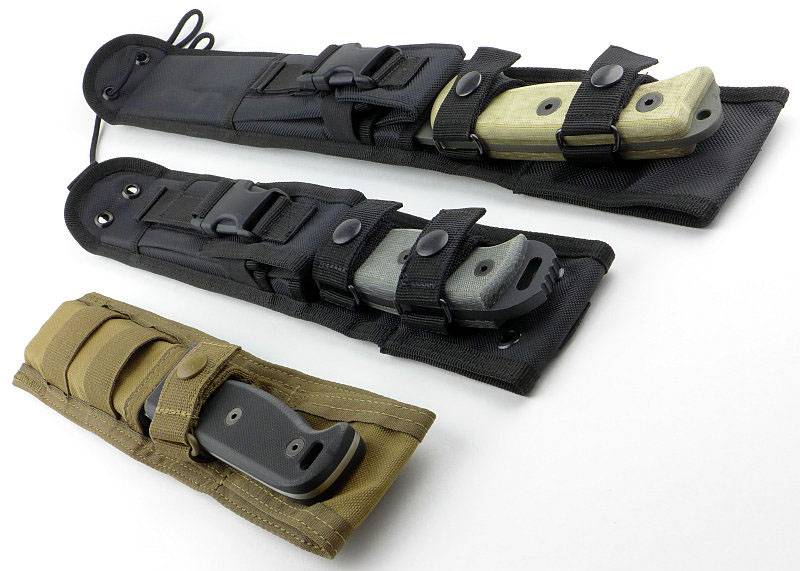
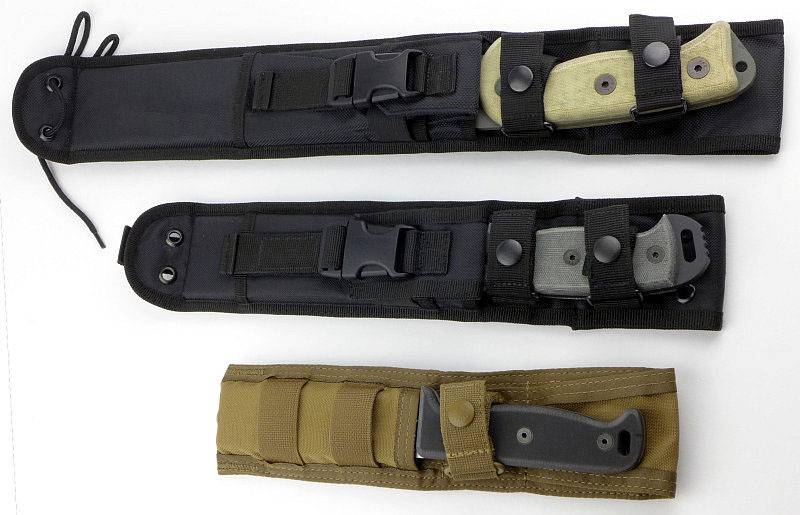
The images at the beginning of this group review page show the unsheathed knives together. This image better shows how the sheathed knives compare in size.
 photo 02 OKCtrio sheathed P1140548v2.jpg

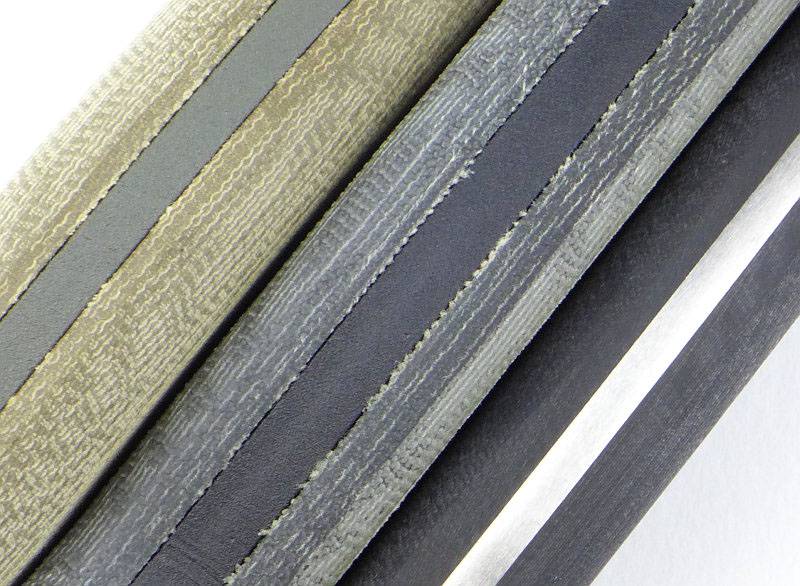
Looking at blade stock thickness, top left is the RTAK-II, middle RD Tanto and bottom right is the Blackbird SK-5.
 photo 03 OKCtrio blade thickness P1140571.jpg

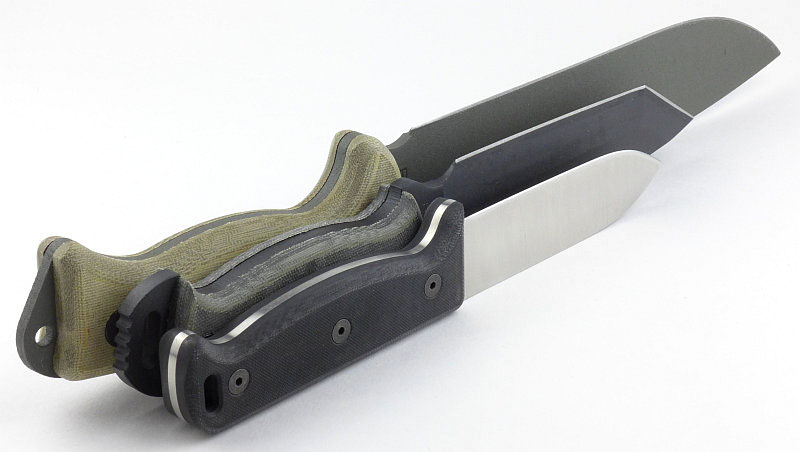
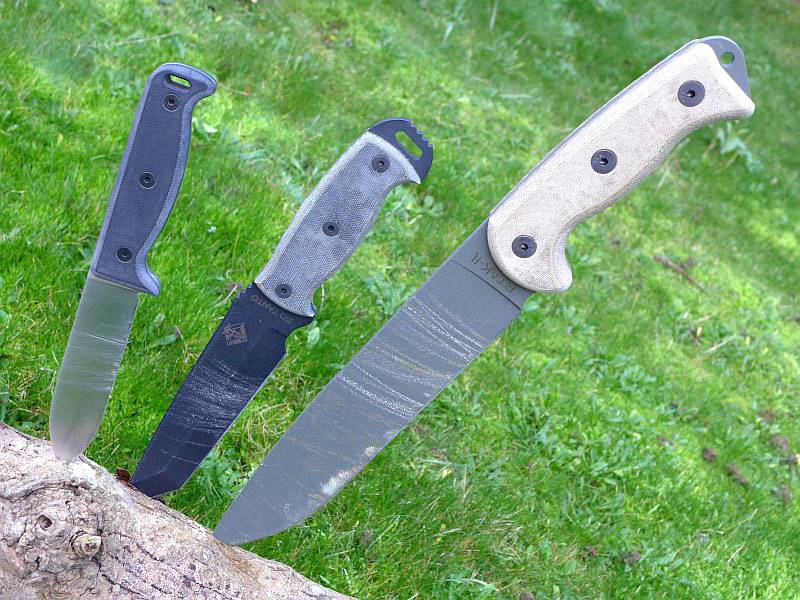
Moving back to show the three blades sitting next to each other.
 photo 04 OKCtrio comparison P1140575.jpg

The Blade and Handle Geometry:

Most knives specifications have a basic description of the blade geometry, but in this section I will be taking a more detailed look at geometry and balance.

 photo 36 RD Tanto flat grind P1140603.jpg

Using a set of gauges and precision measuring equipment including a Vernier protractor, callipers, fixed radius gauges and the unique Arc Master adjustable radius gauge (the one that looks like a crossbow).

These measurements have been tabulated and are presented along with a few reference blades (8″ Chef’s Knife, 5.5″ Santoku and the popular Fällkniven F1).

Key aspects such as the primary bevel angle, grind type, blade depth, blade thickness, length, weight are detailed, along with balance information.
 photo 32 RTAK II angle P1140389.jpg

The ‘Balance relative to the front of the handle’ tells you if the knife will feel front heavy, or if the weight is in your hand (a positive value means the weight is forward of the front of the handle). The ‘Balance relative to the centre of the handle’ indicates how close to a ‘neutral balance’ the knife has in the hand.
 photo 31 Blackbird balance P1140196.jpg

In the case of full convex grinds the approximate centre of the grind is used for the primary bevel angle estimate. This table includes the parameters for all the OKC knives in this series of reviews.
 photo OKC Parameters BlackbirdRDTantoRTAKII.jpg

What they are like to use?

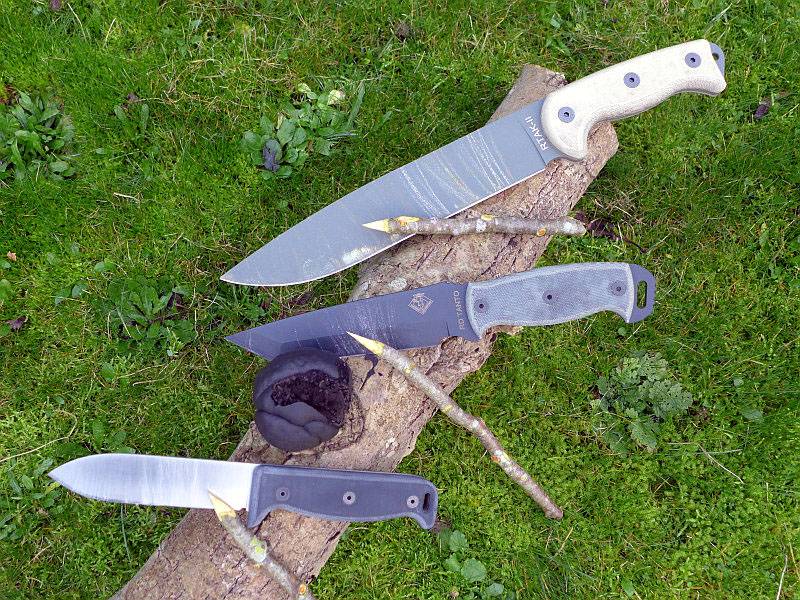
There is too much detail to describe each of these blades strengths and weaknesses in detail, so I’ll just use this opportunity to show the pointed-stick comparison side-by-side
 photo 05 OKCtrio whittlers P1160278.jpg

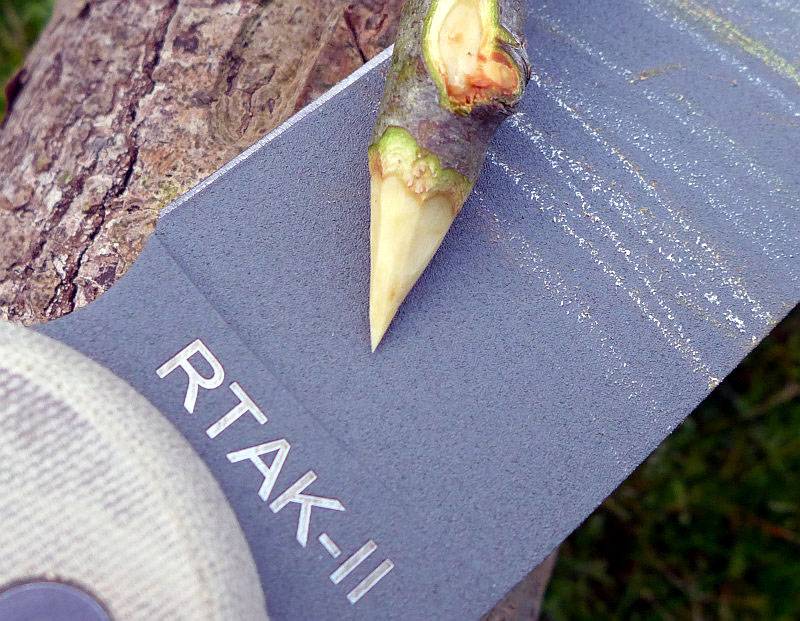
The RTAK-II is an excellent cutter.
 photo 06 OKCtrio RTAKII stick P1160289.jpg

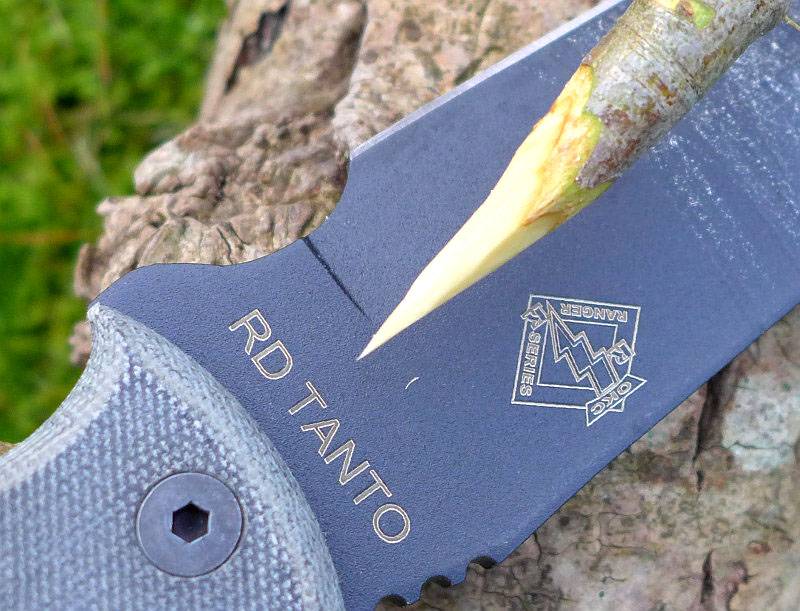
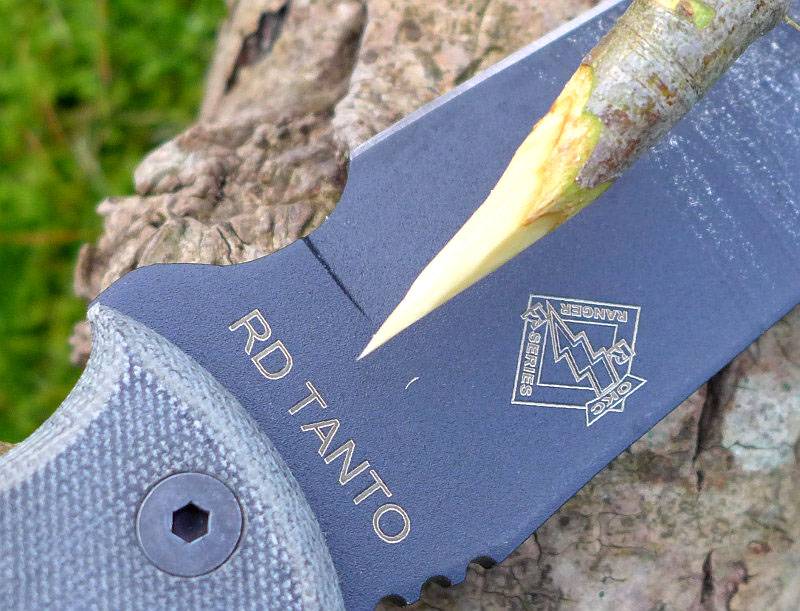
As a super tough extraction/digging/rescue tool, the RD Tanto struggles a bit for some basic cutting. It excels at heavy tasks though.
 photo 07 OKCtrio RDTANTO stick P1160291.jpg

With the factory edge the Blackbird works well enough, but the edge angle is steep. This photo is from before an edge reprofiling after which the SK-5 cuts furiously well.
 photo 08 OKCtrio Blackbird stick P1160293.jpg

Review Summary

The views expressed in this summary table are from the point of view of the reviewer’s personal use. I am not a member of the armed forces and cannot comment on its use beyond a cutting tool or field/hunting knife.

Something that might be a ‘pro’ for one user can be a ‘con’ for another, so the comments are categorised based on my requirements. You should consider all points and if they could be beneficial to you.

Here I’ve included a very basic summing up of each knife. See individual reviews for detailed information.

_______________________________________________ _______________________________________________
Knife In a nutshell
_______________________________________________ _______________________________________________
Blackbird SK-5 No-nonsense survival knife
Ranger RD Tanto Super tough extraction/rescue tool
RTAK-II Fantastic all-rounder

 photo 10 OKCtrio on log P1160316.jpg


If you enjoyed my reviews, please remember to ‘Like’ me on Facebook and follow me on Twitter to get all the latest updates and news. You can also find exclusive insights on Instagram and Pinterest

Knife Review: Ontario Knife Company RTAK-II

The Ontario Knife Company RTAK II review is the second of a three-knife review series featuring the Blackbird SK-5, RD Tanto and RTAK II. (See – OKC Group Review.)

 photo 09 OKCtrio in log P1160300.jpg

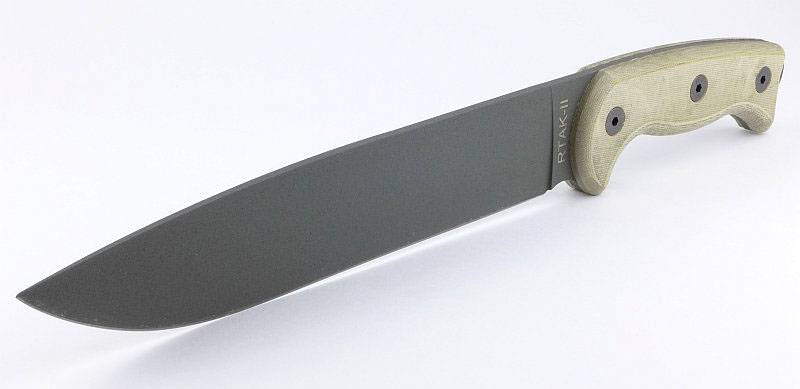
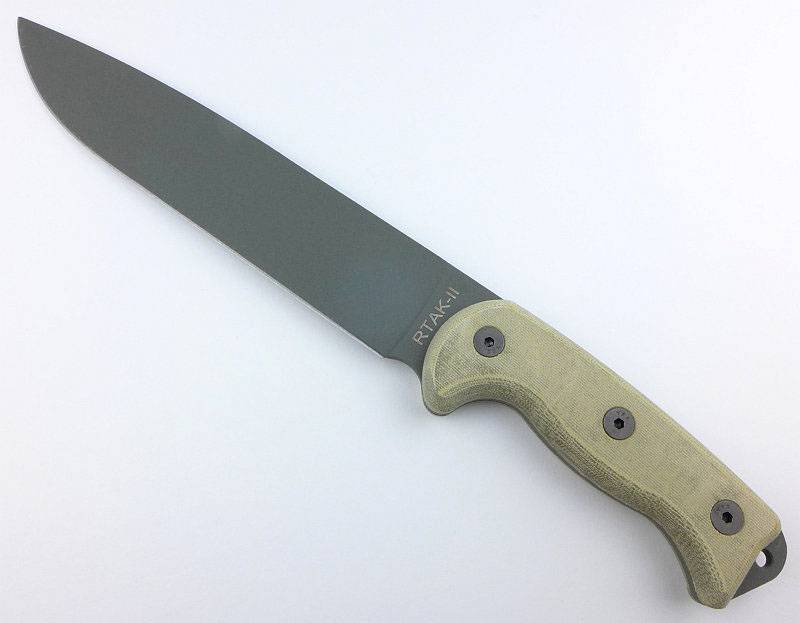
Part of the OKC RAT series, and designed by Jeff Randall and Mike Perrin of ‘Randall’s Adventure and Training’, the RTAK II (Randall’s Training and Adventure Knife) is the largest of the series. This review is looking at the plain edge variant (you can also get a part-serrated version).

 photo 28 RTAK II angle P1140355.jpg

The Blade and Handle Geometry:

Most knives specifications have a basic description of the blade geometry, but in this section I will be taking a more detailed look at geometry and balance.

 photo 31 RTAK II flat grind P1140382.jpg

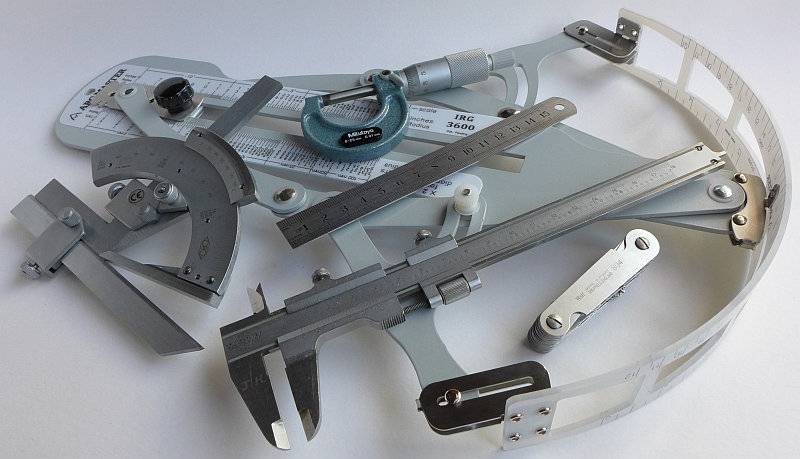
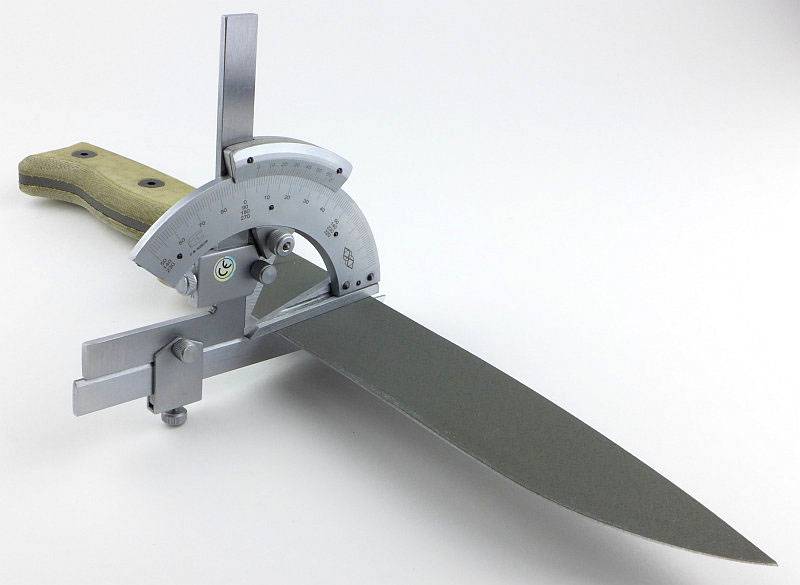
Using a set of gauges and precision measuring equipment including a Vernier protractor, callipers, fixed radius gauges and the unique Arc Master adjustable radius gauge (the one that looks like a crossbow).

These measurements have been tabulated and are presented along with a few reference blades (8″ Chef’s Knife, 5.5″ Santoku and the popular Fällkniven F1).

Key aspects such as the primary bevel angle, grind type, blade depth, blade thickness, length, weight are detailed, along with balance information.
 photo 32 RTAK II angle P1140389.jpg

The ‘Balance relative to the front of the handle’ tells you if the knife will feel front heavy, or if the weight is in your hand (a positive value means the weight is forward of the front of the handle). The ‘Balance relative to the centre of the handle’ indicates how close to a ‘neutral balance’ the knife has in the hand.
 photo 30 RTAK II balance P1140378.jpg

In the case of full convex grinds the approximate centre of the grind is used for the primary bevel angle estimate. This table includes the parameters for all the OKC knives in this series of reviews.
 photo OKC Parameters BlackbirdRDTantoRTAKII.jpg

The blade is made from 5160 steel.

Explained by the Maker:

The reasons for certain design choices may not be clear when simply looking at an object, so this section is intended to give an insight into the thinking behind a design by speaking to the designer themselves.

 photo 21 RTAK II with sheath P1140289.png

Though this knife is well established, and Jeff Randall is no longer directly associated with OKC, he was kind enough to give me a few insights into the history and design of this knife.

The RTAK was designed based on Jeff’s and Mike’s experiences in the jungle back in the mid-90s. There were no specific plans when designing the knife, as at the time R.A.T. were simply designing a knife that would be a compromise between a full length machete and a fixed blade. Machetes are still the preferred tool in jungle environments but shorter fixed blades work better for finer work. The RTAK was Jeff’s and Mike’s vision of that compromise.
Before moving to Ontario Knife Company to be able to increase production capacity, the first RTAKs were made by Wicked Knife Company (Newt Livesay).
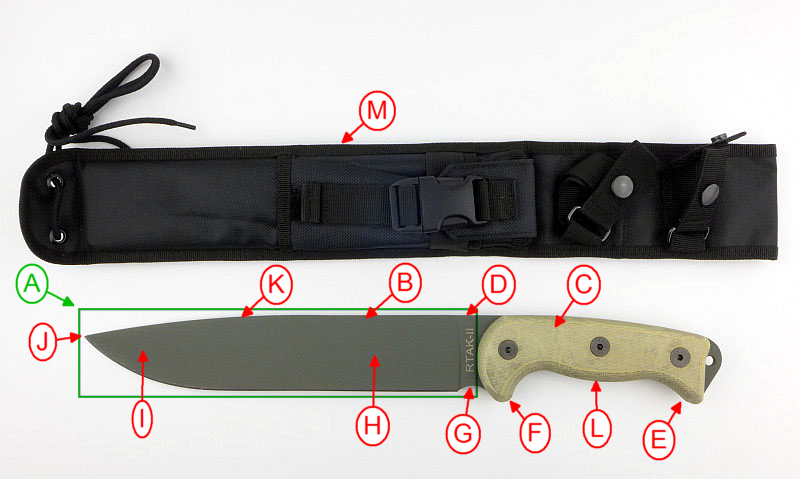
Mike and Jeff had been running around in the jungle and using knives enough to know what felt good in the hand. Basically they knew nothing about making a knife when they came up with the RTAK and simply based the blade length (A) and other design aspects on what works, nothing more.
The problem with a lot of big knives is the steel is too thick for the width of the blade, even on full flat grinds. This causes a geometry issue with regard to cutting efficiency, and the choice of a 3/16″ blade thickness (B) and a full flat grind (H) for the RTAK II is a compromise between toughness and cutting efficiency. A machete works so well because its overall blade geometry is thin.
When talking about the handle material / style (C) and the fact that this is seen on many OKC knives, Jeff commented that R.A.T. had introduced this handle style to OKC. Simple to produce and doesn’t have a lot of bumps and hotspots that will fatigue you during extended use.
As it is a large knife, choking up to do finer work means moving your control hand out towards the point and pinch gripping the blade; for this reason, jimping was not worth adding to the spine near the handle (D), so it was left plain. It is possible to use the choil (G) for choking up on the blade, but it was not intended for that purpose; it was mainly put in as an edge grind relief.
A long finger guard (F) and grip hook (E) come from various machete designs. Considering the finger guard specifically, after using a large knife for a while under tough conditions you want as much protection as you can get. Overall the grip and palm swell (L) were made a generous size as large handles stress you less on extended use.
Using a drop-point (I) goes back to the compromise between a fixed blade and machete; drop points do well for most tasks in the field.

A few more details:

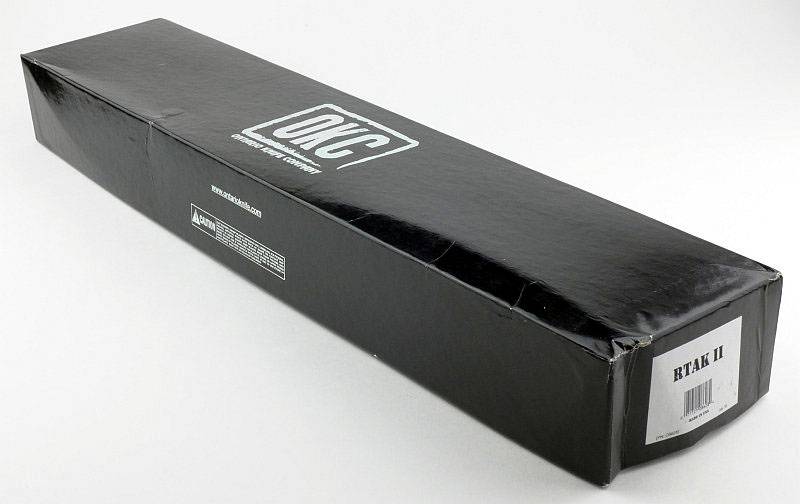
Ontario Knife Company’s standard knife box.
 photo 01 RTAK II boxed P1140203.jpg

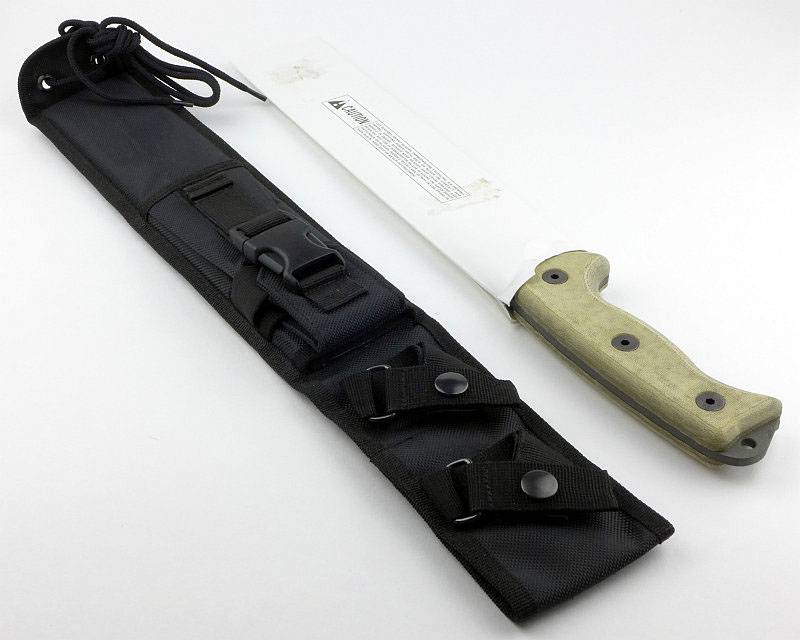
Inside the box the knife has a cardboard protector over the blade, and the knife is not fitted into the sheath.
 photo 02 RTAK II unboxed P1140209.jpg

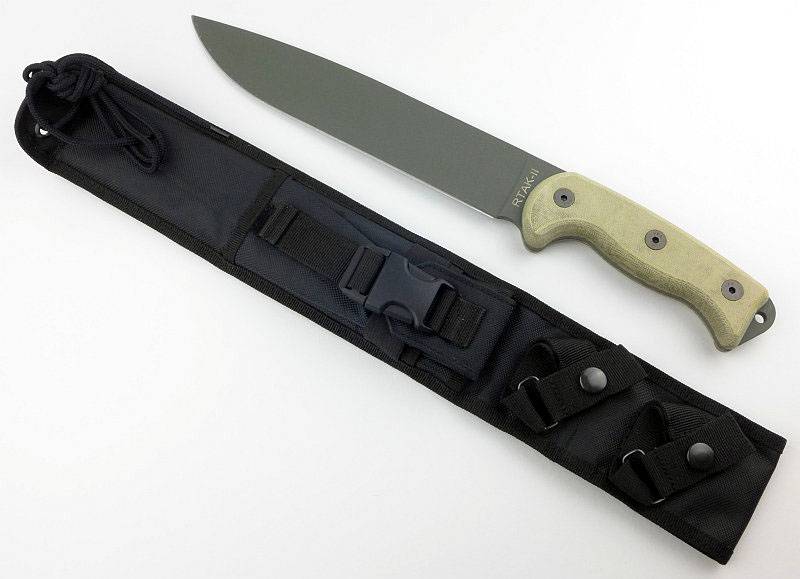
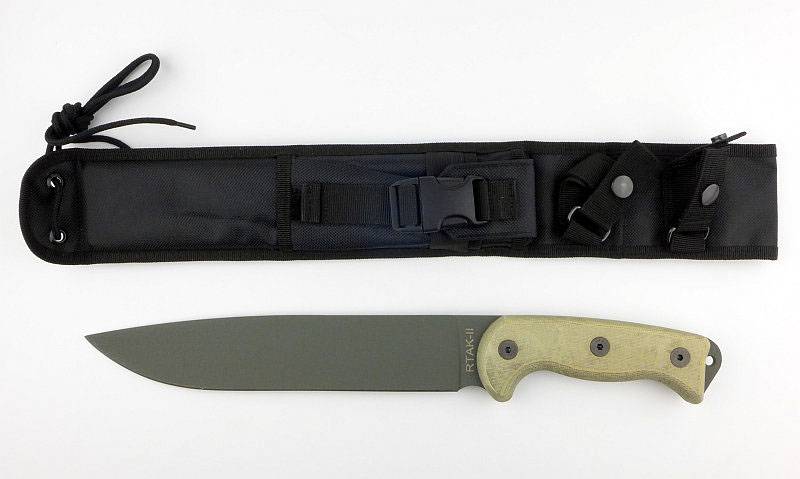
The first view of the RTAK II – now THAT is a knife!
 photo 03 RTAK II revealed P1140220.jpg

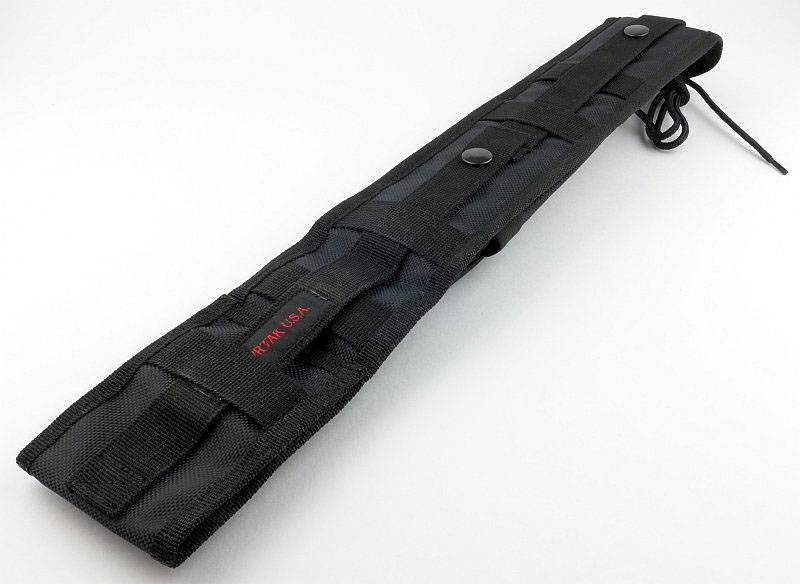
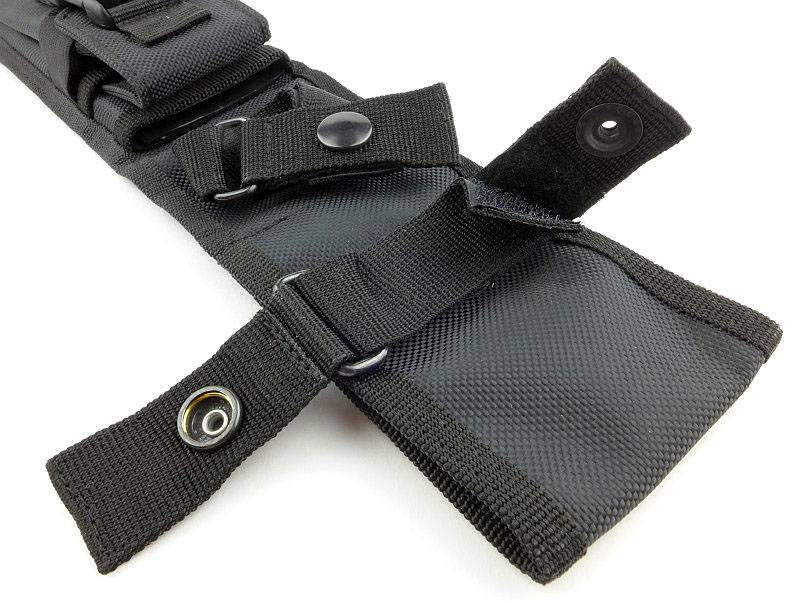
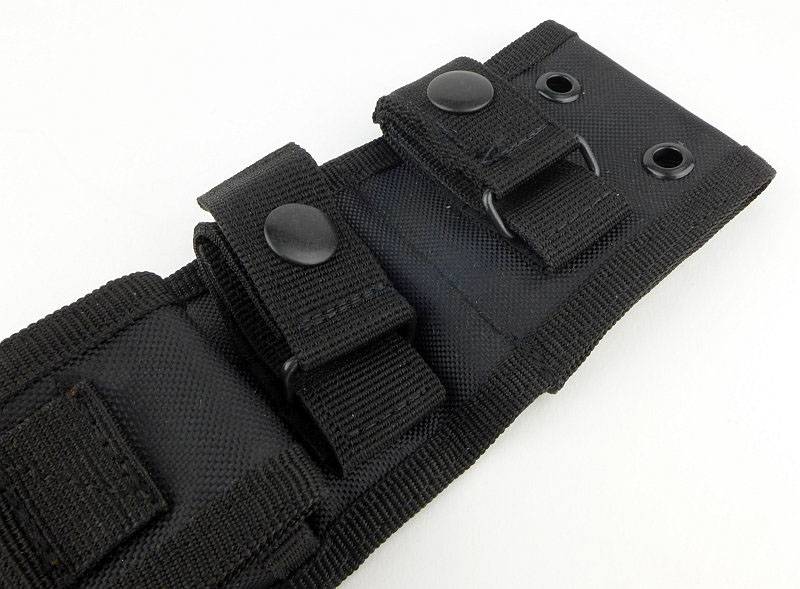
Before going back to the knife, a quick look at a few details for the sheath. On the back, the sheath has a combination PALS/MOLLE/belt loop system. Effectively you use the top PALS strap for a belt loop and can change the placement and size using the webbing.
 photo 04 RTAK II sheath back P1140223.jpg

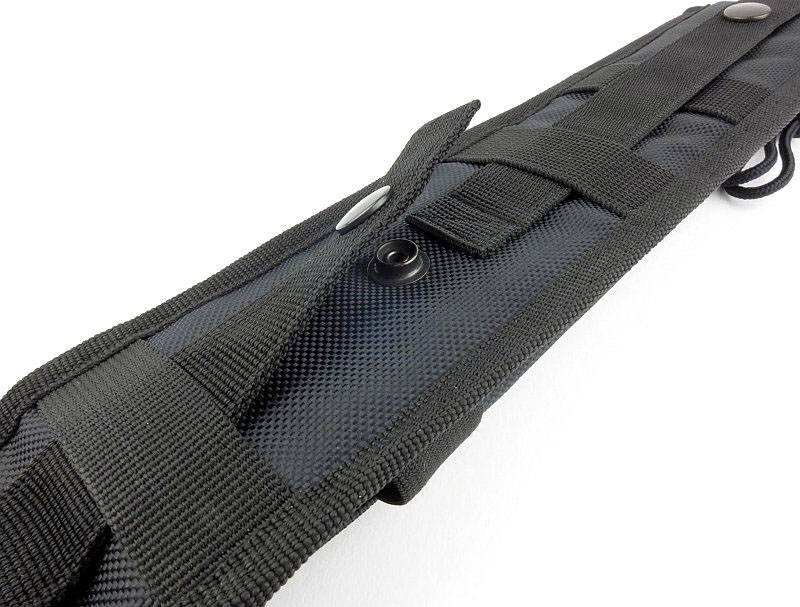
There are two PALS straps as the sheath is very long. Both using poppers to secure the end of the strap.
 photo 05 RTAK II sheath PALS P1140227.jpg

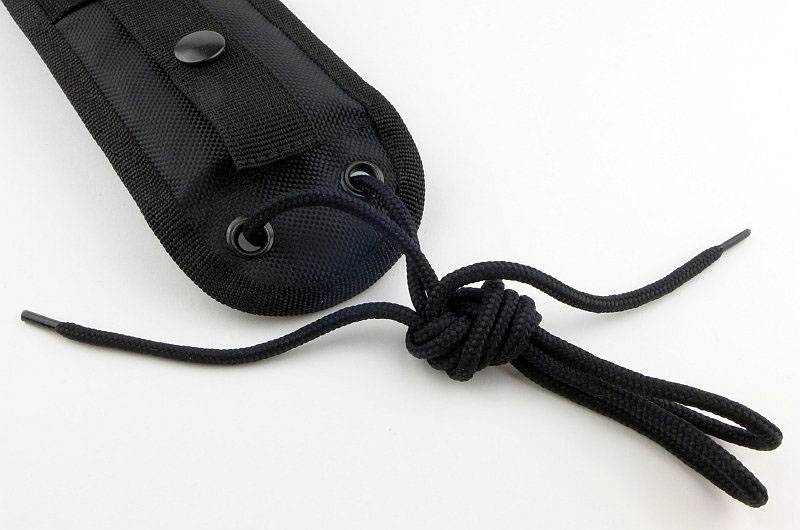
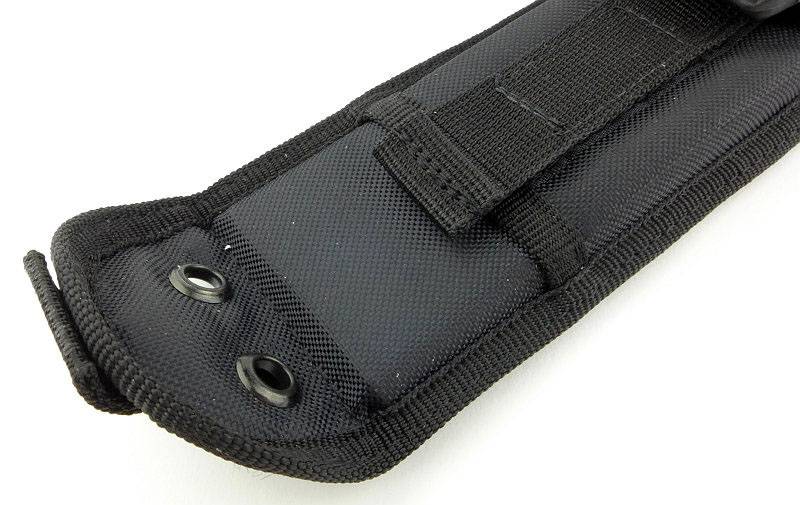
Metal eyelet holes are provided for a leg tying point and it comes with a lace fitted through the holes.
 photo 06 RTAK II sheath leg lace P1140230.jpg

This is a long sheath, and has a pocket and twin straps to hold the handle.
 photo 07 RTAK II sheath front P1140233.jpg

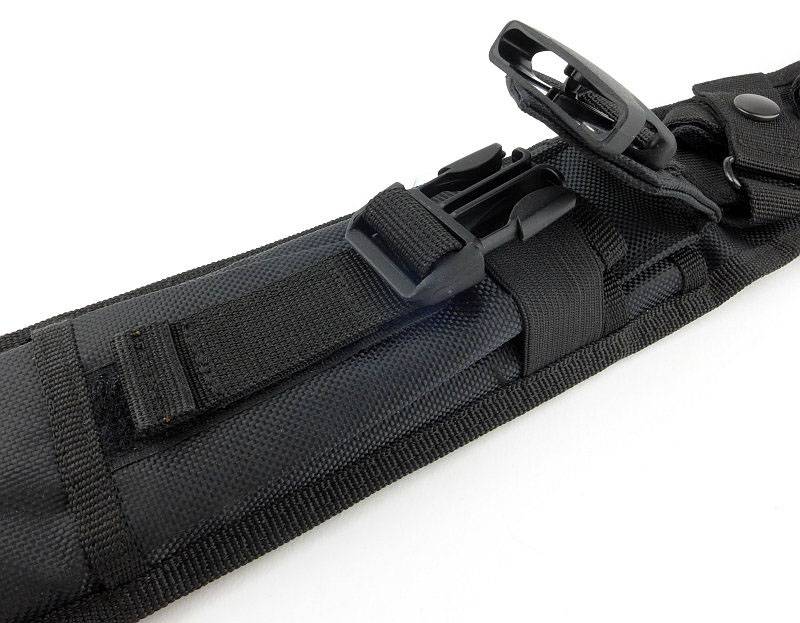
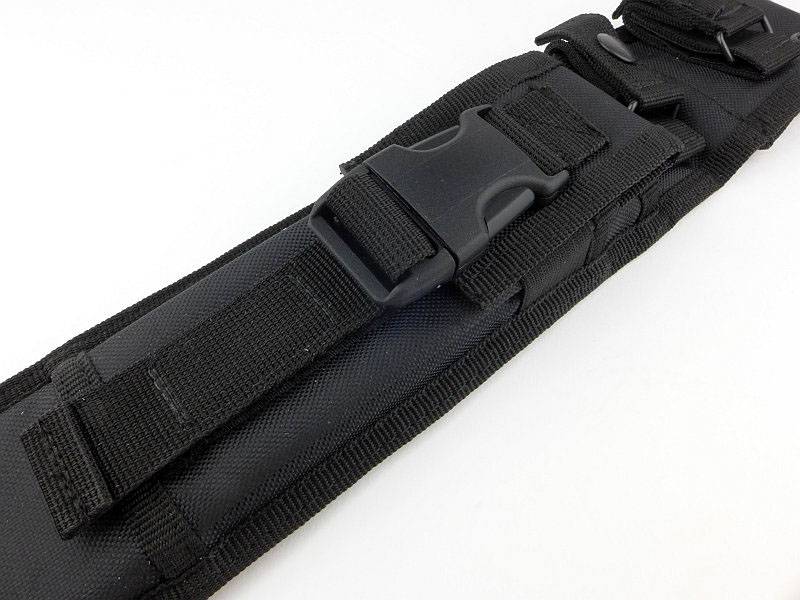
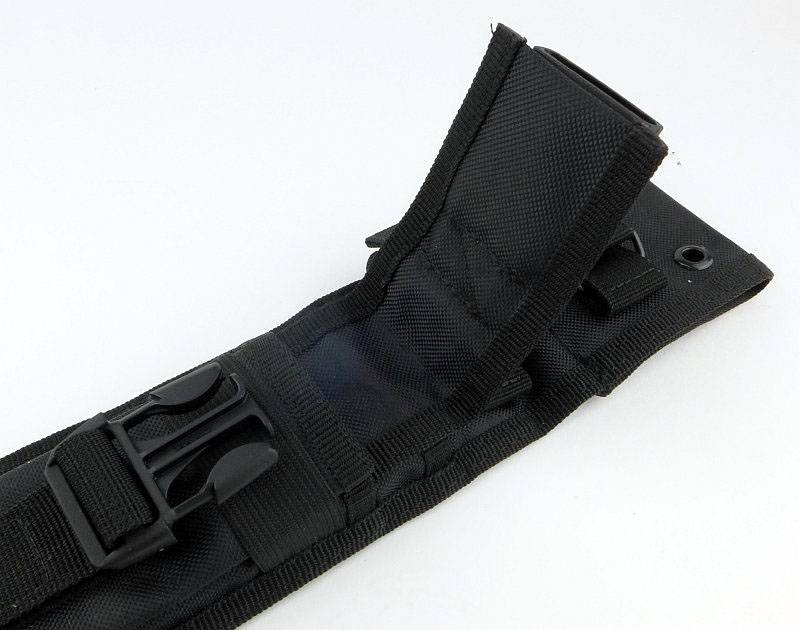
Exactly as with the RD Tanto, an expanding pocket is kept closed with a plastic snap-buckle. Opening the pocket shows a fixed elastic strap keeps the pocket neat and tight onto whatever is held in the pouch.
 photo 08 RTAK II sheath pocket P1140238.jpg

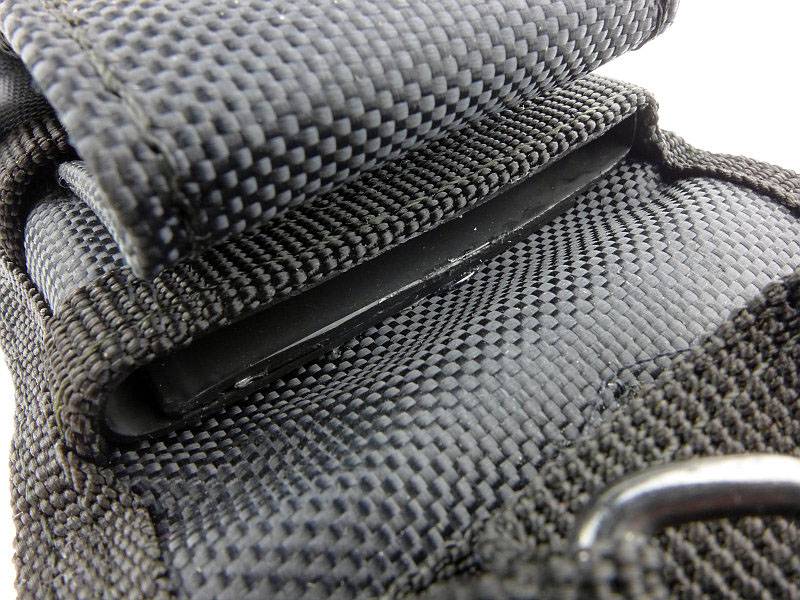
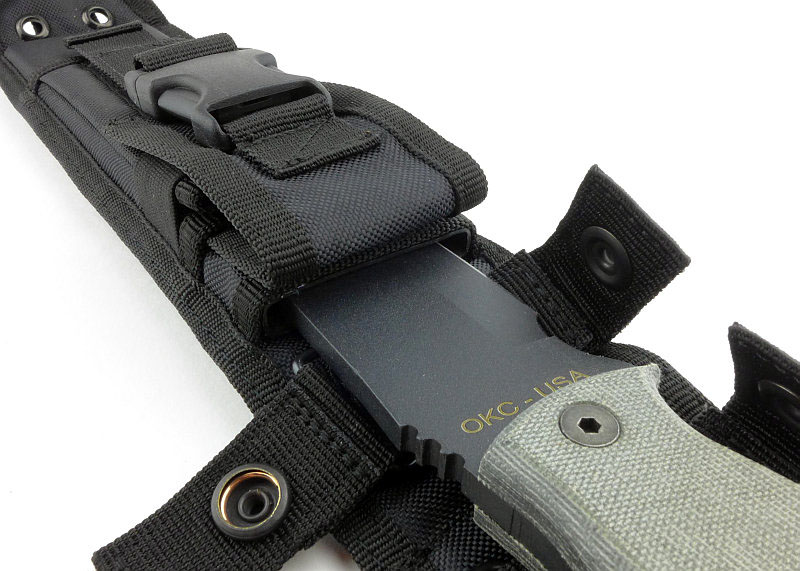
A kydex liner is provided in the sheath, and in this case the blade fits easily without rubbing.
 photo 09 RTAK II sheath liner P1140240.jpg

Both the knife retention straps are adjustable to allow the user to tighten or loosen the grip on the knife to suit.
 photo 10 RTAK II sheath straps P1140246.jpg

Overall a substantial package.
 photo 21 RTAK II with sheath P1140289.jpg

Fit of the blade to the sheath is just right.
 photo 24 RTAK II inserting P1140336.jpg

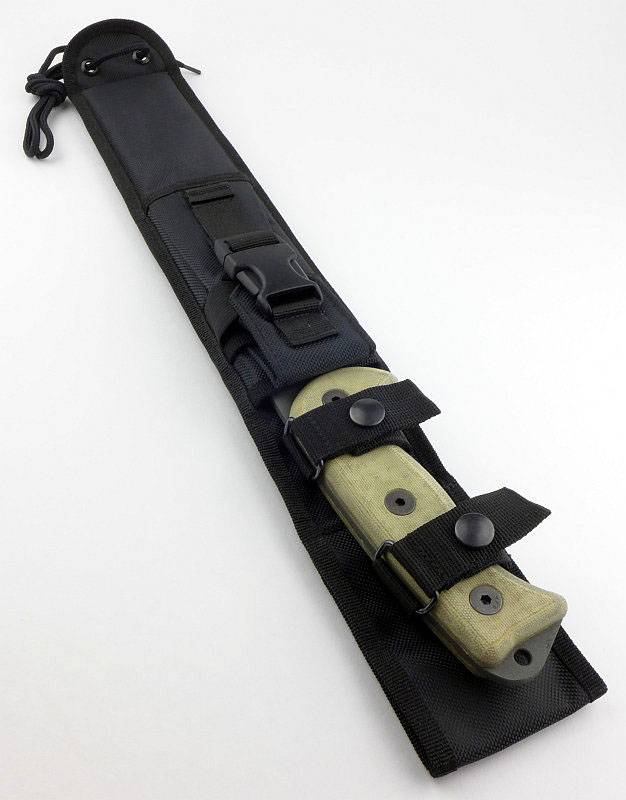
Two straps with popper closures are used to secure the handle when in the sheath.
 photo 25 RTAK II in sheath P1140338.jpg

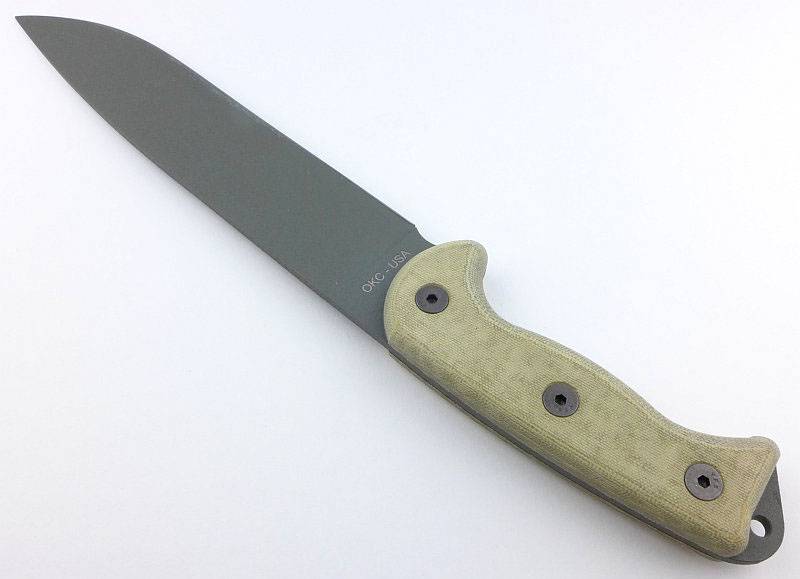
Despite its size everything looks nicely in proportion.
 photo 11 RTAK II angle P1140249.jpg

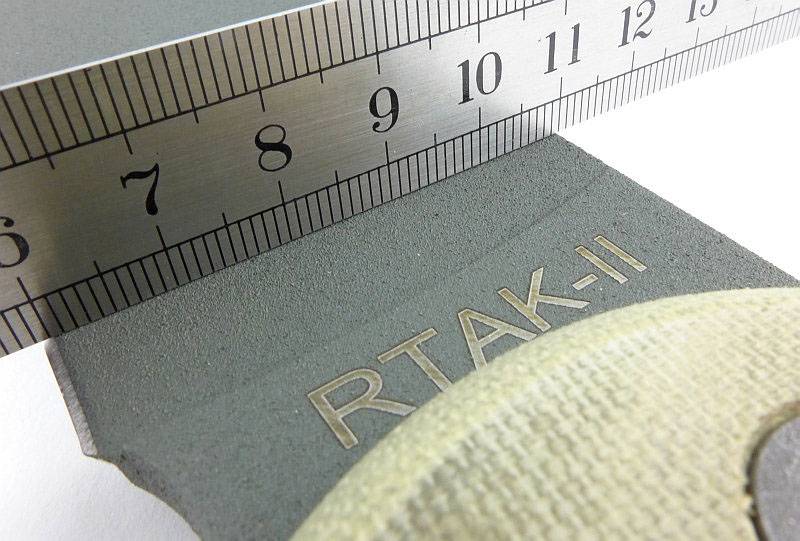
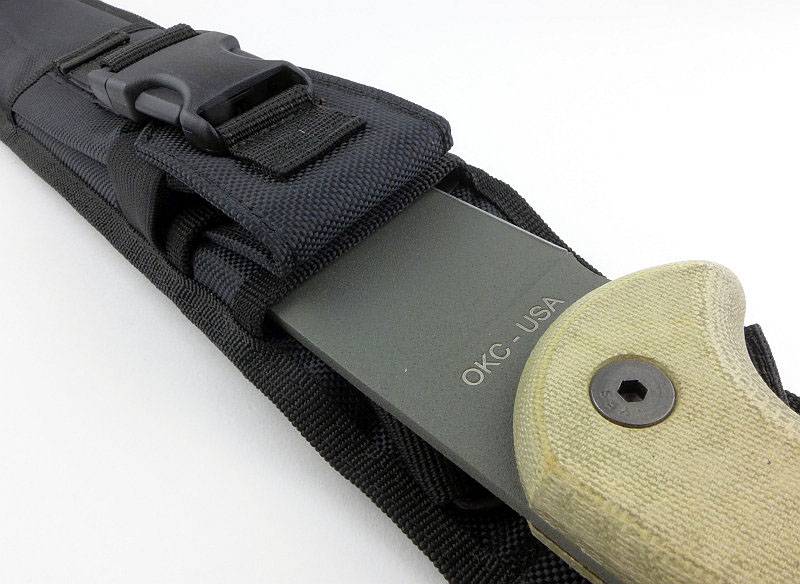
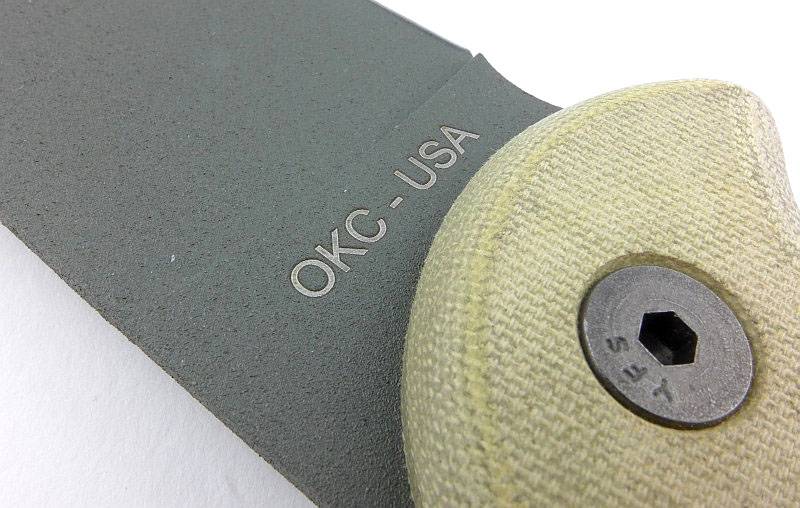
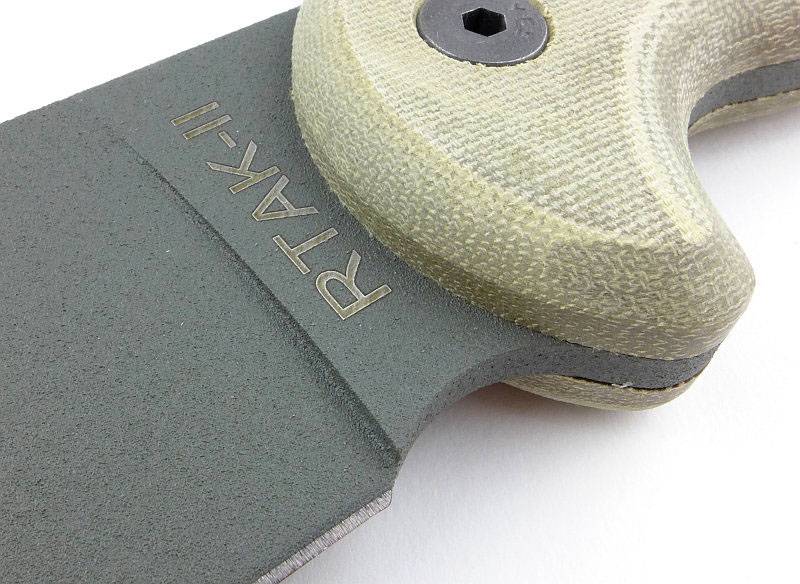
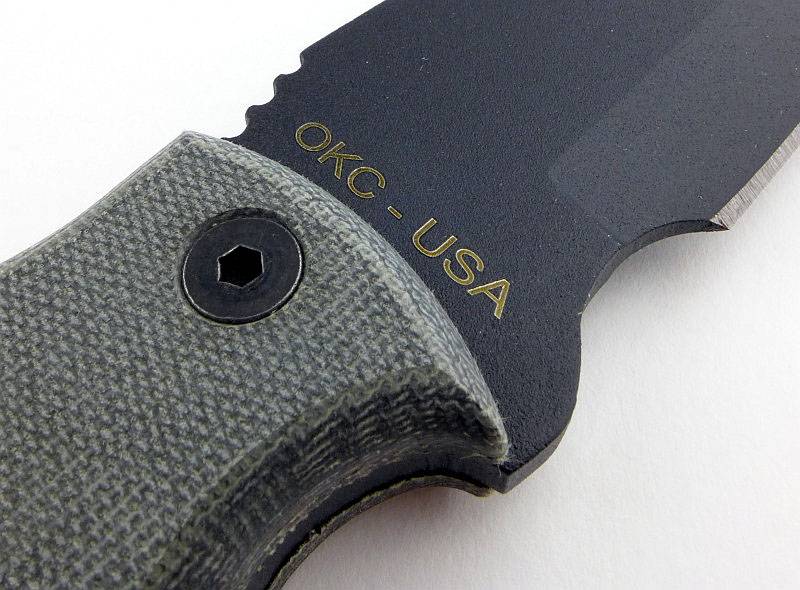
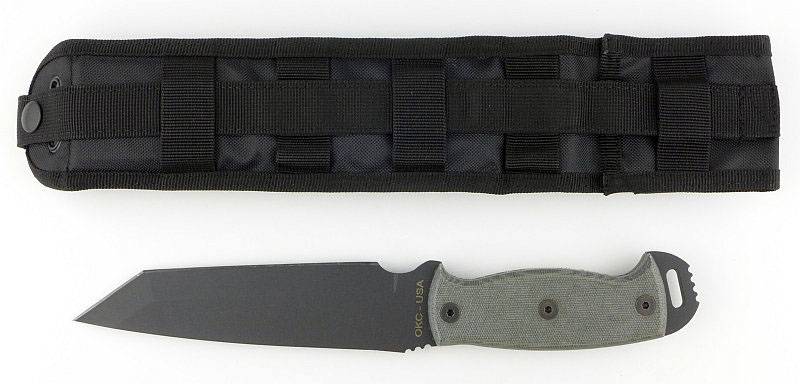
OKC-USA is stamped into the blade coating on one side.
 photo 12 RTAK II detail logo P1140253.jpg

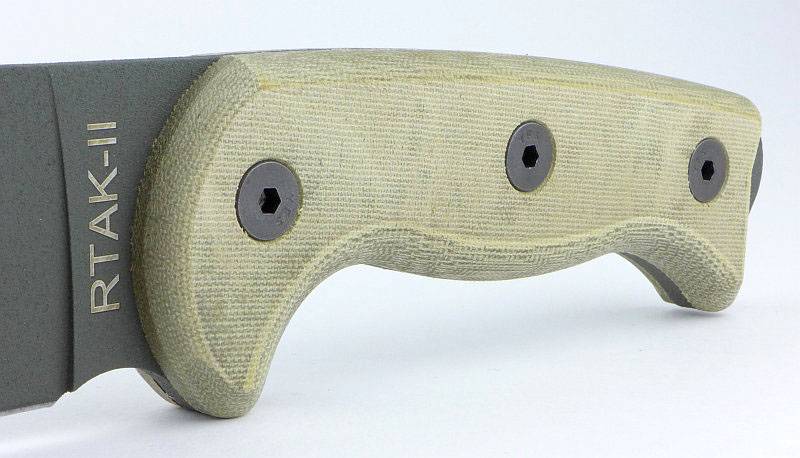
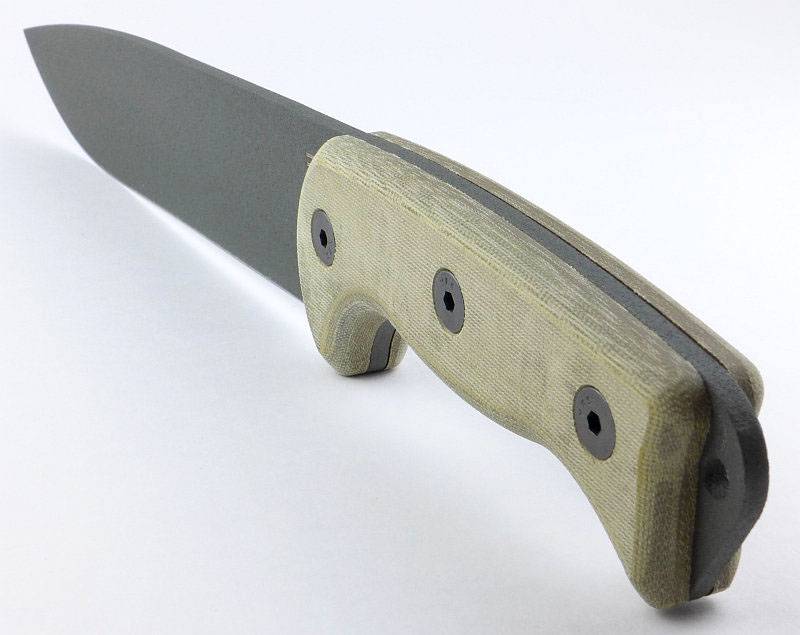
The micarta handle slabs are secured with three bolts.
 photo 29 RTAK II detail handle contour P1140363.jpg

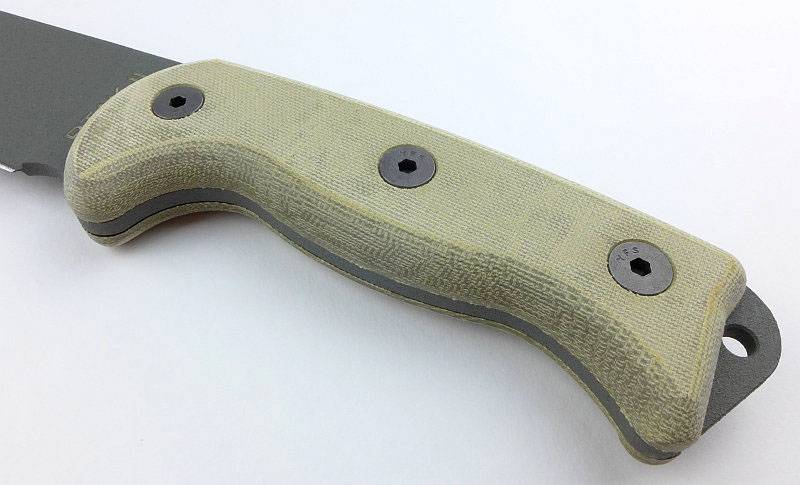
All handle edges are nicely rounded over making the grip very comfortable.
 photo 16 RTAK II detail handle contouring P1140265.jpg

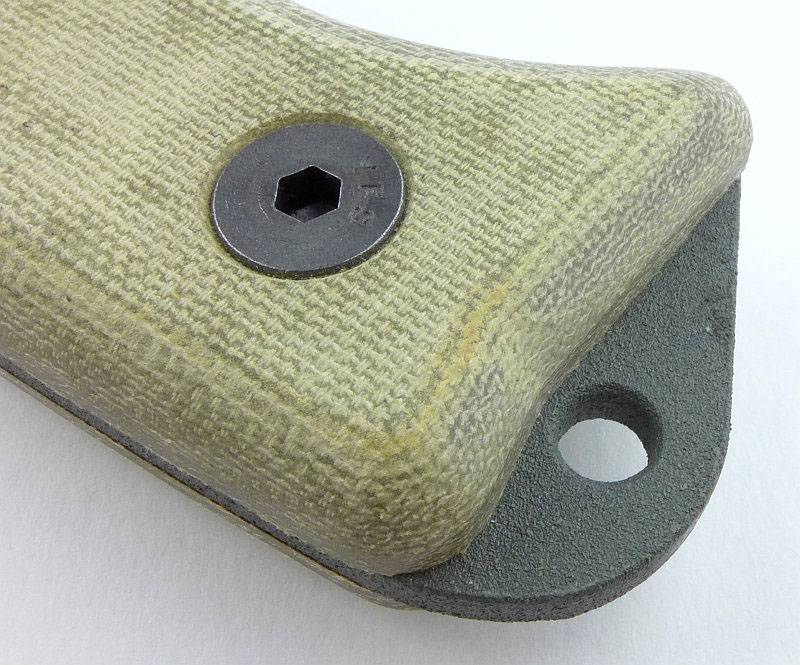
A lanyard hole is included in the exposed pommel.
 photo 14 RTAK II detail handle lanyard P1140257.jpg

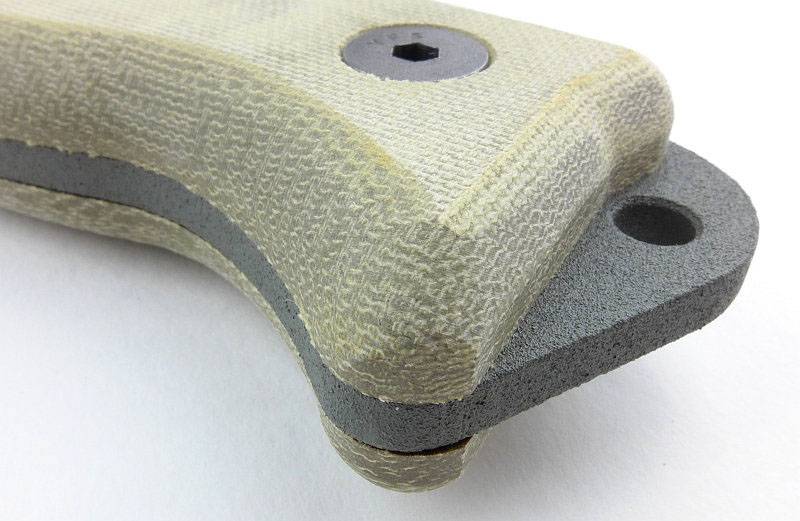
There is a slight overlap of the handle slabs which are shaped separately to the blade tang. You don’t notice this in use.
 photo 17 RTAK II detail handle fit P1140266.jpg

Not intended as a finger choil, here is the edge relief choil and its relationship to the plunge line.
 photo 18 RTAK II detail choil P1140274.jpg

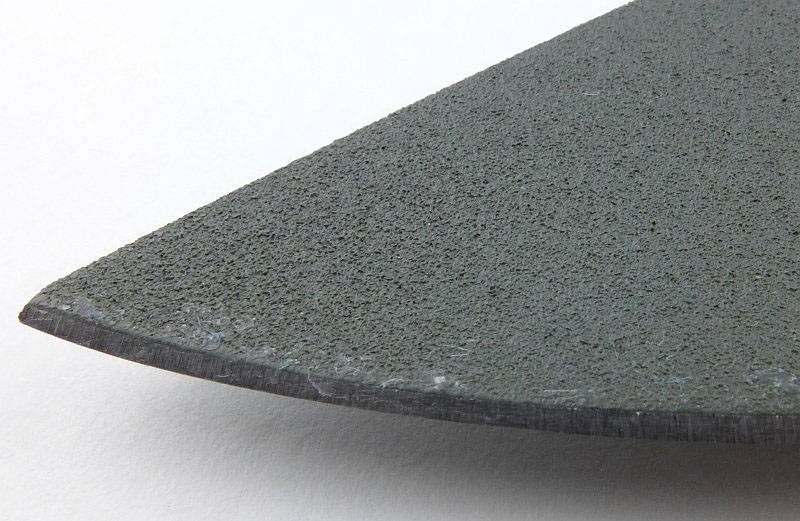
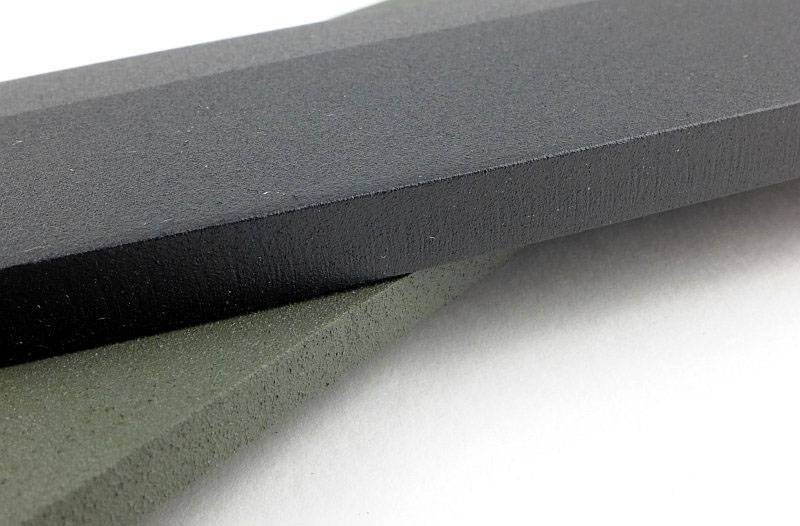
For corrosion resistance, there is a blade coating. It was much rougher than I expected and is somewhat abrasive. (Any marks on the edge are due to there being a waxy protective film on the blade.)
 photo 19 RTAK II detail coating P1140280.jpg

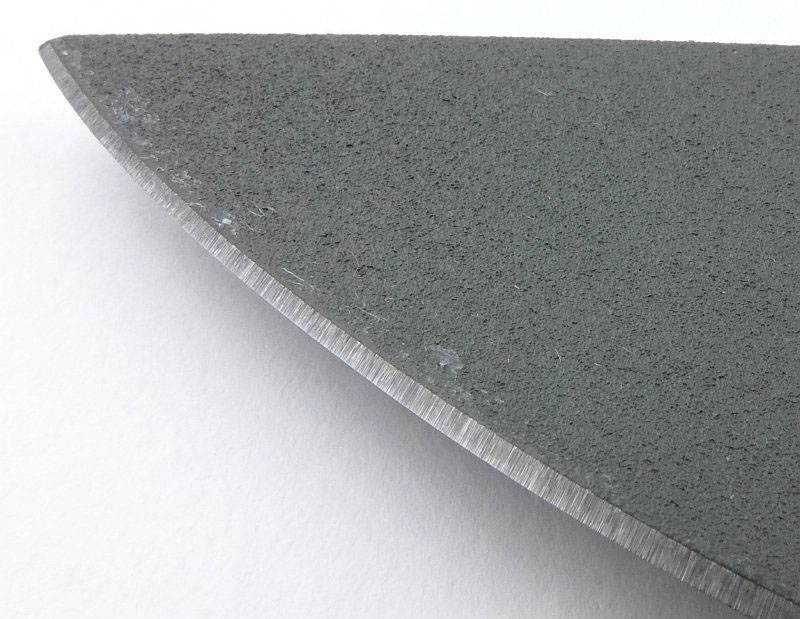
This RTAK II arrived with a great working edge.
 photo 20 RTAK II detail edge P1140282.jpg

Once you pick it up, that large blade feels like it has shrunk and is as manoeuvrable as a much smaller blade.
 photo 27 RTAK II angle reverse P1140351.jpg

What it is like to use?

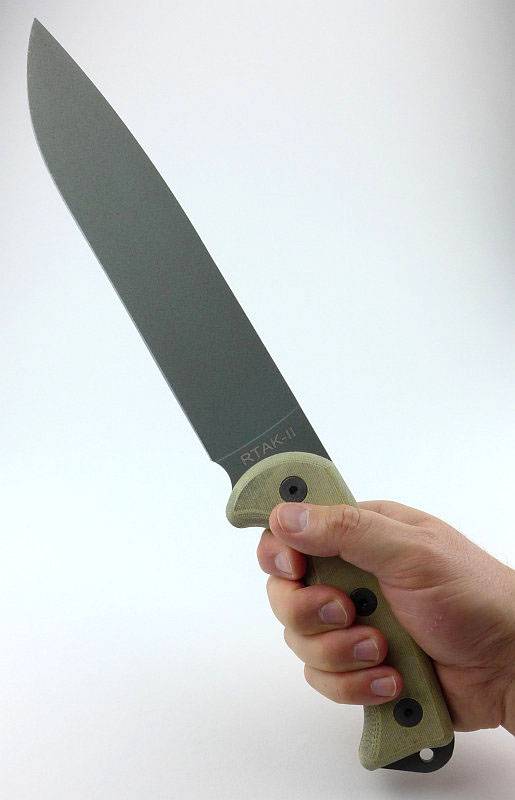
The first thing that struck me, as soon as I had the RTAK II in my hand, was how much lighter than expected it felt for a knife this large. Immediately I could see myself being able to do a lot of work with minimal effort. It is a big knife but simply doesn’t feel big. Here you can see it in my hand (I take XL sized gloves) and the grip fills my hand well, and despite being one of the largest grips I’ve used, doesn’t feel a stretch.
 photo 22 RTAK II in hand P1140300.jpg

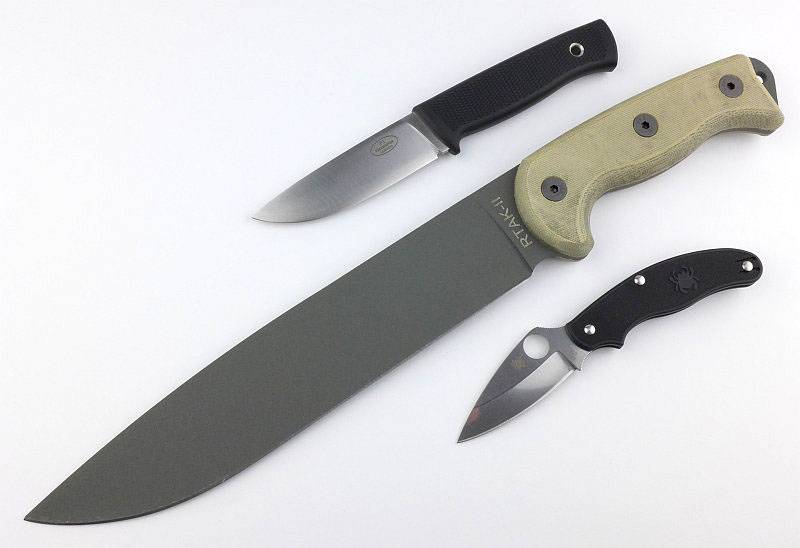
To give another idea of scale, here it is next to the Fällkniven F1 and a Spyderco UK Pen Knife. (Yes, they do look tiny next to the RTAK II.)
 photo 23 RTAK II size P1140328.jpg

Taking the RTAK II out for a few woodland tasks, it was in its element; chopping, carving, slicing, splitting, feathering all done with ease. The only real issue I could see was that rough blade coating and its tendency to pick up ‘rubbings’ (for want of a better word). This would make it less than ideal to follow up with food prep, as it will have contamination in the coating and is not easy to clean.

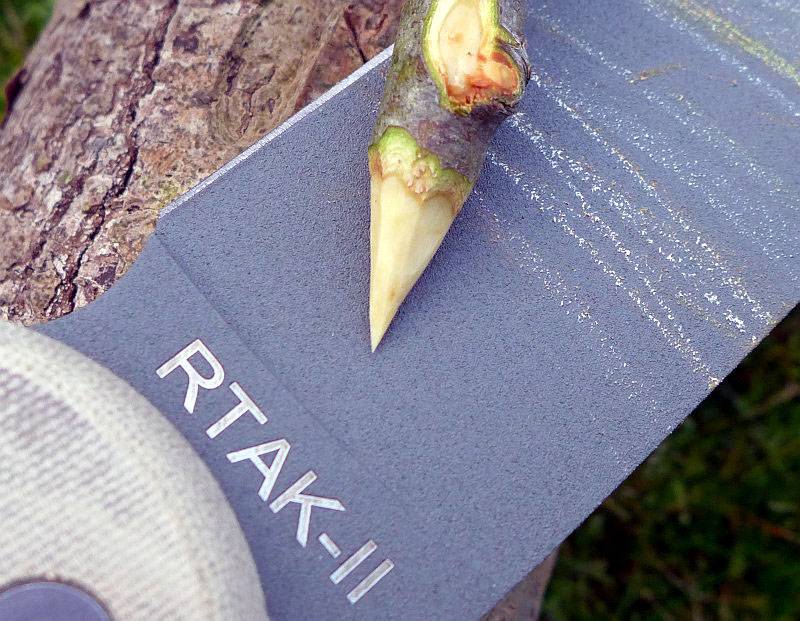
One of the comparisons I made to the other OKC knives was in putting a point on a stick. Due to the full flat grind, the RTAK II cut extremely well letting you chose the cut direction easily. The edge bites well, eagerly getting stuck into all woodland tasks.
 photo 06 OKCtrio RTAKII stick P1160289.jpg

Review Summary

The views expressed in this summary table are from the point of view of the reviewer’s personal use. I am not a member of the armed forces and cannot comment on its use beyond a cutting tool or field/hunting knife.

Something that might be a ‘pro’ for one user can be a ‘con’ for another, so the comments are categorised based on my requirements. You should consider all points and if they could be beneficial to you.

_______________________________________________ _______________________________________________
Things I like What doesn’t work so well for me
_______________________________________________ _______________________________________________
Fantastic handling. You know this knife is strapped to your leg.
Can work comfortably for long periods. Rough blade coating.
Great slicer. Grip could be too large for some.
Curent version is 5160 steel
‘Feels’ light
Big enough to slash, small enough for fine work.

 photo 15 RTAK II angle2 P1140262.jpg


Discussing the Review:

Please feel free to add comments to the review, but the ideal place to freely discuss these reviews is on a forum. If you started reading the shorter forum version of the review, but followed the link this full exclusive review, please return to that forum to discuss the review there.
If you read the review entirely on Tactical Reviews, please consider one of the following to join in any discussion.

EdgeMatters – Sponsored Reviews (UK based Forum for Knife Makers and Collectors)
BladeForums – Knife Reviews (US based Forum for Knife Discussion)

CandlePowerForums – Knife Reviews Section (Largest and Friendliest Flashlight Community Forum)

Knife Review: Ontario Knife Company’s Ranger RD Tanto

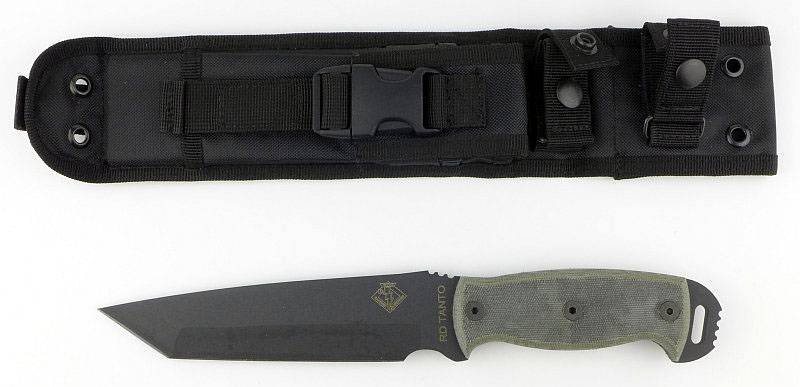
The Ontario Knife Company RD Tanto is the first of a three-knife review series featuring the Blackbird SK-5, RD Tanto and RTAK II. (See – OKC Group Review.)

 photo 09 OKCtrio in log P1160300.jpg

The RD Tanto is one of the ‘Ranger series’ of OKC knives, a heavy duty high performance range of knives designed by Justin Gingrich.
 photo 11 RD Tanto angle P1140443.jpg

The Blade and Handle Geometry:

Most knives specifications have a basic description of the blade geometry, but in this section I will be taking a more detailed look at geometry and balance.

 photo 36 RD Tanto flat grind P1140603.jpg

Using a set of gauges and precision measuring equipment including a Vernier protractor, callipers, fixed radius gauges and the unique Arc Master adjustable radius gauge (the one that looks like a crossbow).

These measurements have been tabulated and are presented along with a few reference blades (8″ Chef’s Knife, 5.5″ Santoku and the popular Fällkniven F1).

Key aspects such as the primary bevel angle, grind type, blade depth, blade thickness, length, weight are detailed, along with balance information.

 photo 38 RD Tanto angle P1140623.jpg

The ‘Balance relative to the front of the handle’ tells you if the knife will feel front heavy, or if the weight is in your hand (a positive value means the weight is forward of the front of the handle). The ‘Balance relative to the centre of the handle’ indicates how close to a ‘neutral balance’ the knife has in the hand.
 photo 37 RD Tanto balance P1140616.jpg

In the case of full convex grinds the approximate centre of the grind is used for the primary bevel angle estimate. This table includes the parameters for all the OKC knives in this series of reviews.
 photo OKC Parameters BlackbirdRDTantoRTAKII.jpg

The blade is made from 5160 steel.

Explained by the Maker:

The reasons for certain design choices may not be clear when simply looking at an object, so this section is intended to give an insight into the thinking behind a design by speaking to the designer themselves.

Though no longer directly involved with OKC, Justin Gingrich was happy to talk to me about the RD Tanto, how it came into being, and some of the design’s details.

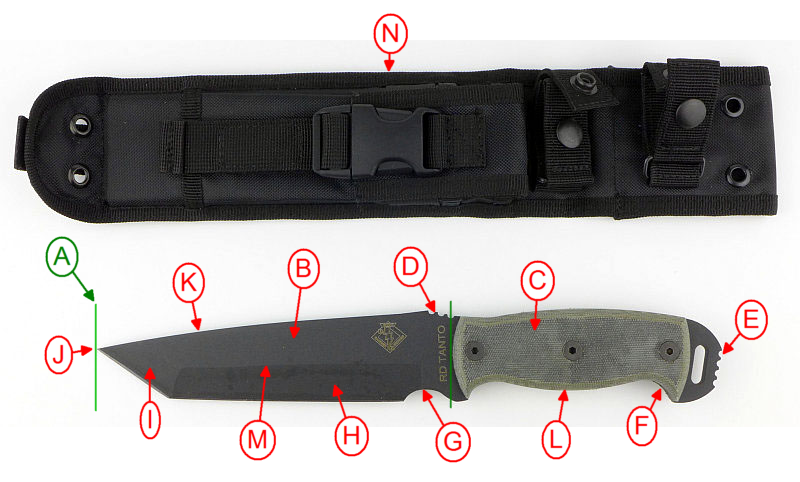
As this was done by phone to help our discussion I sent this marked up image and include it now so I can use the same reference labels in the description.
 photo 24 RD Tanto with sheath front P1140515 002 002.png

The entire OKC Ranger series comes from Justin’s original company ‘Ranger Knives’ which he started in 2002 and eventually sold to OKC in 2008. Under OKC, Ranger Knives became the ‘Ranger series’. All Ranger Series knives have been designed by Justin and the original Ranger Series included four knives, the RD-4, 6, 7 and 9 as well as two versions of the RD Hawk. Justin continued to design the Ranger Series for around three years after selling Ranger Knives to OKC, and the RD Tanto was one of the knives designed for the OKC Ranger series.

During the time he worked with OKC, Justin continued to design various different knives and presented them to OKC for consideration. The Tanto was added as he had received a lot of demand for this style of knife.

With the RD Tanto being an additional design to an existing series, many of the design parameters were already set. Specifications such as the blade stock being 1/4 inch thick and using 5160 steel, as well as the handle design and materials, were kept the same to maintain continuity.

The final blade length (A) was chosen for a couple of reasons, but the main one actually being aesthetics. It had to look in proportion to the RD series handle and 6 1/2 – 7 inches was a sweet spot for this blade. To better understand the purpose of this blade length you need to consider that it doesn’t really fit into the category of a fine-work blade or a heavy-work blade. This blade length is a hybrid of the two and though it won’t do anything really well, it will do everything moderately well. For the person who doesn’t want to carry more than one knife, and doesn’t want to carry a heavy tomahawk or hatchet, the 6-7 inch blade allows them to more-or-less do anything they need to do, without it being too bulky to carry.
Looking at the very heavy blade stock (B), though this was carried over from the other knives in the Ranger series, the intention is to allow it to be a heavy duty tool with powerful stabbing ability. The design needed to be suitable to open a can of beans, dig, carry out extraction work such as prying open car doors or interior doors and to allow the user to really be able to lever on that blade without fear of it breaking.
Handle style (C) is something Justin has gone over with OKC a lot as he would prefer there to be more rounding on the handle slabs to increase comfort. The design originally comes from a time when the slab style of handle was very popular as a straightforward Tactical design. When working on the Ranger knives, Justin had just come out of the military so this tactical style was the one he adopted, however, his original knives had a more rounded handles than the current OKC versions.
Next to the handle, a thumb ramp with jimping (D) is included to provide additional grip strength when thrusting the knife.
Though the exposed pommel (E) allows the knife to be hammered with or hammered on, the jimping on it is not to stabilise the hammer strikes but is intended to keep your thumb in place when using a reverse grip for digging or stabbing.
There are well pronounced hooks front and back of the handle (F) as well as a palm swell (L), asking Justin how these were sized and spaced he explained that the handle shape and size came about because he designs so that it is comfortable for him to use with or without gloves.
Though views vary about the safety of using a choil (G) such as this for choking up on, Justin specifically did design this to be used for a finger to sit in and change the grip for finer work. It was sized for comfort and to enable one finger to sit in it without riding up onto the edge. He was careful not to go too big as it does increase the overall length of the blade. Asking Justin about the choil pushing the cutting edge further from the handle, he responded that with a 6 inch blade you won’t be doing a lot of food prep type cutting and if you are holding the handle you are going to be chopping, digging and slashing. For finer work where you want the edge as close to your first finger as possible you choke up on the blade and use the finger choil to get you back right up on the edge so you can apply more pressure. With a choil, when choking up on it, the change in grip takes a 6 inch blade and brings the blade back to a more manageable 4-5 inch length. Not leaving this subject right now, I pressed Justin as to why not just leave the choil out and bring the edge back to the handle? His reply was that removing the choil increases the blade length making it more daunting to do tip work with. The choil gives you two blade lengths in one knife for greater control in finer tasks.
A flat grind (H) was chosen simply for strength though this can bind or stick when chopping wood.
When asking about the use of a Tanto point (I), as mentioned earlier, there was a high demand for a Tanto design, so this piece was specifically added to fill that gap in the series.
Placing the tip position (J) directly in line with centre of grip was to make the tip as effective as possible. Whether stabbing/thrusting or using the tip as a drill, you get the most power behind the tip when it is in the centre line. If the tip is off centre the point has a tendency to travel in the direction it is already going.
The spine (K) has been kept plain and with no swedges partly for strength, but mainly to give you better purchase if you baton with it. A swedge grind chews up the baton and does not provide any real weight reduction.
Grind line position (M); though the steepness of the primary grind limits slicing sharpness, the more material there is behind the edge the less likely you are to chip that edge. When you are doing tasks like cutting through car doors, prying or processing a lot of wood, with all the material behind it you are less likely to chip the edge. You can still cut paper with it and you can still shave with it if you take the time to hone the edge, but it is not meant for super fine cutting tasks.
In the design specification, the steel is 5160. Though 1095 is a proven blade steel and has been around forever, 5160 is much tougher than 1095, and has the same or better edge retention as 10 series steel. At 56-58 HRC you will be hard pressed to break the knife because it is made from a spring steel. Typically 5160 is used for truck leaf springs as it is meant to take repeated abuse, back and forth motion, and flexing of the blade without forming stress risers or stress cracks in the steel that would lead to catastrophic failure. Failure should never happen with a knife made of 5160 and it should flex/come back, flex and come back for the life of the user.
Lastly looking at the Sheath (N), this is a standard item used by OKC and by Justin when working as Ranger Knives. It is a nylon sheath with a pouch and snap closures, plus a plastic liner to stop you cutting through it if you fall or drop the sheath. Working to a price point, the compromise of using a relatively basic but serviceable sheath was made rather than pushing the price up with a spectacular sheath.

A few more details:

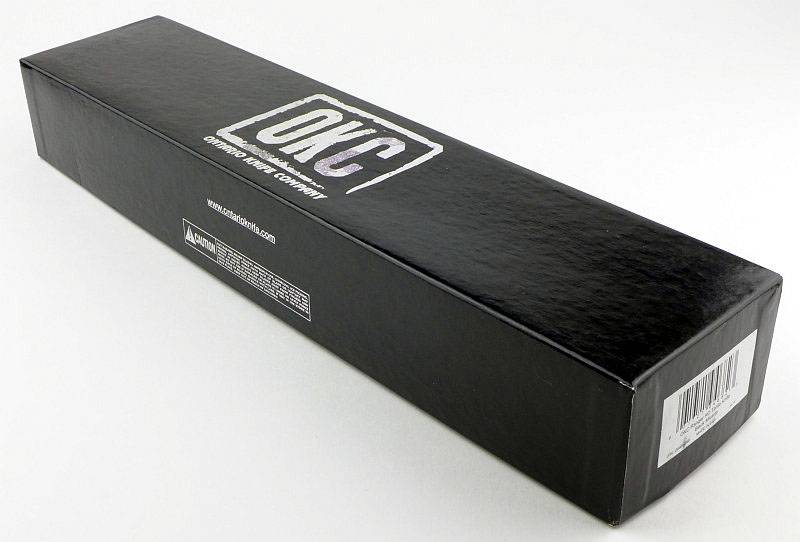
Ontario Knife Company’s standard knife box.
 photo 01 RD Tanto Boxed P1140397.jpg

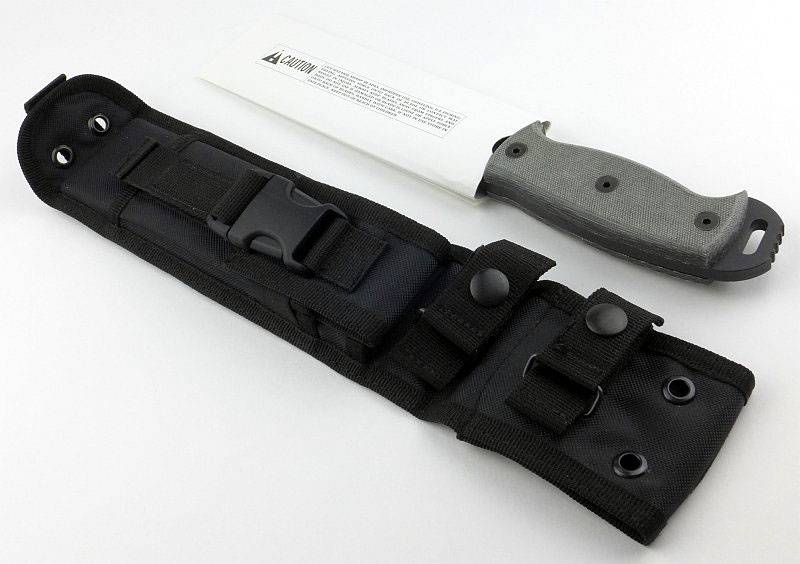
Inside the box the knife has a cardboard protector over the blade, and the knife is not fitted into the sheath.
 photo 02 RD Tanto UnBoxed P1140407.jpg

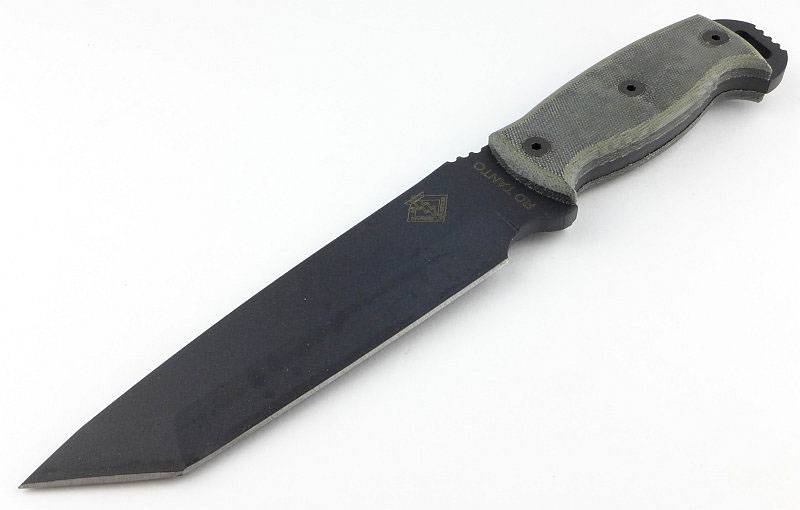
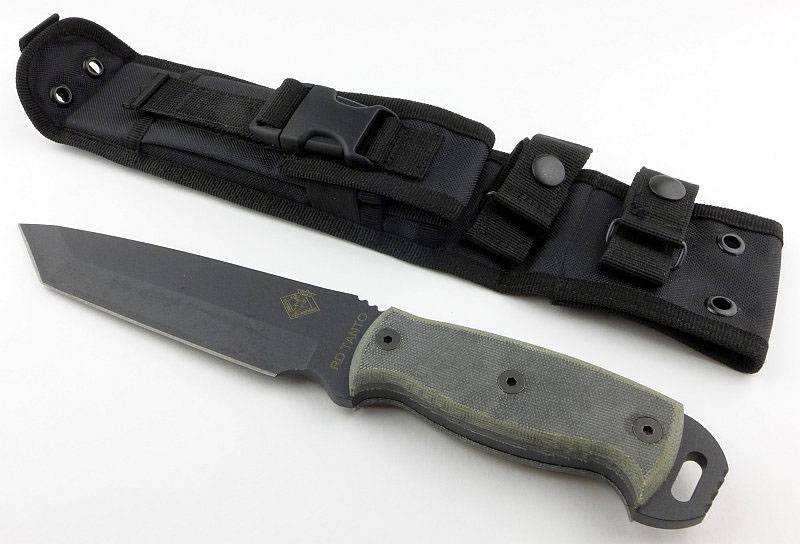
The first view of the RD Tanto – Heavy Duty! (Any marks on the blade are due to there being a waxy protective film on the blade.)
 photo 03 RD Tanto revealed P1140415.jpg

Before going back to the knife, a quick look at a few details for the sheath. Metal eyelet holes are provided for a leg tying point.
 photo 04 RD Tanto sheath detail 01 P1140421.jpg

An expanding pocket is kept closed with a plastic snap-buckle.
 photo 05 RD Tanto sheath detail 02 P1140422.jpg

Opening the pocket shows a fixed elastic strap keeps the pocket neat and tight onto whatever is held in the pouch.
 photo 07 RD Tanto sheath detail 04 P1140424.jpg

Two straps with popper closures are used to secure the handle when in the sheath.
 photo 06 RD Tanto sheath detail 03 P1140423.jpg

Both the knife retention straps are adjustable to allow the user to tighten or loosen the grip on the knife to suit.
 photo 08 RD Tanto sheath detail 05 P1140431.jpg

A kydex liner is provided in the sheath. Due to the thickness of the blade, the fit is snug.
 photo 09 RD Tanto sheath detail 06 P1140434.jpg

The back of the sheath has PALS webbing (MOLLE compatible).
 photo 10 RD Tanto sheath detail 07 P1140441.jpg

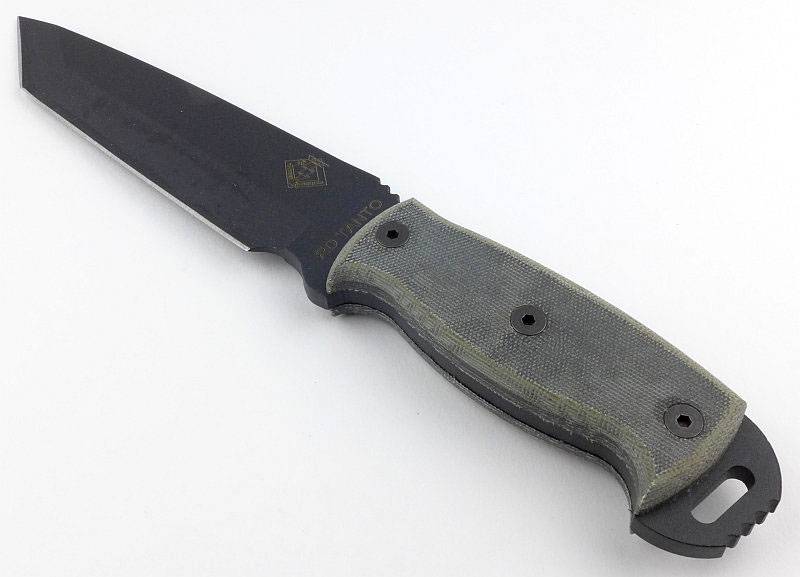
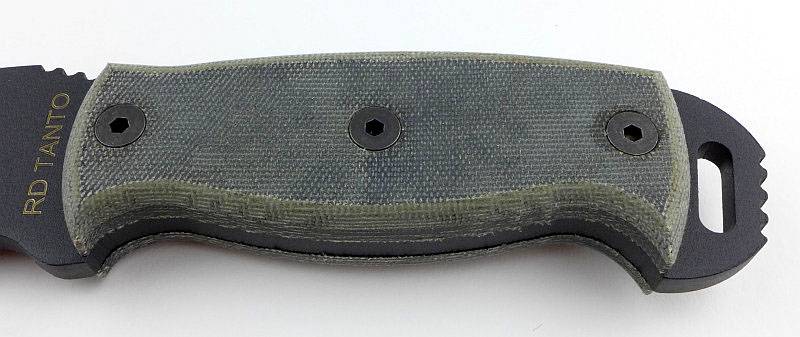
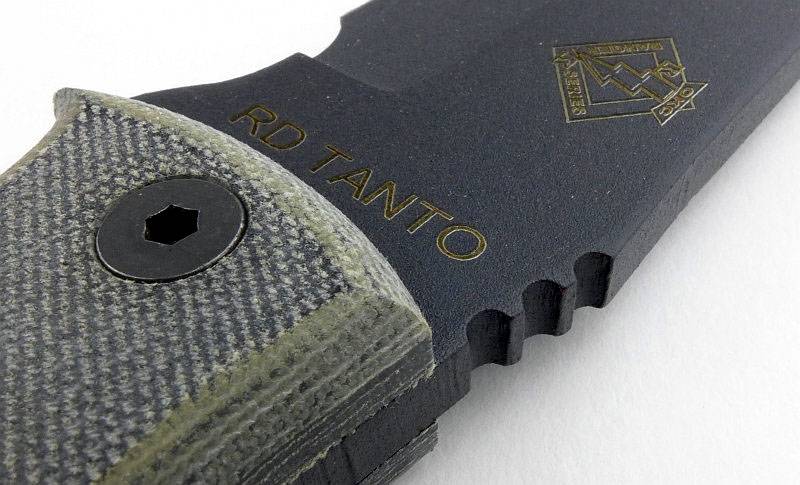
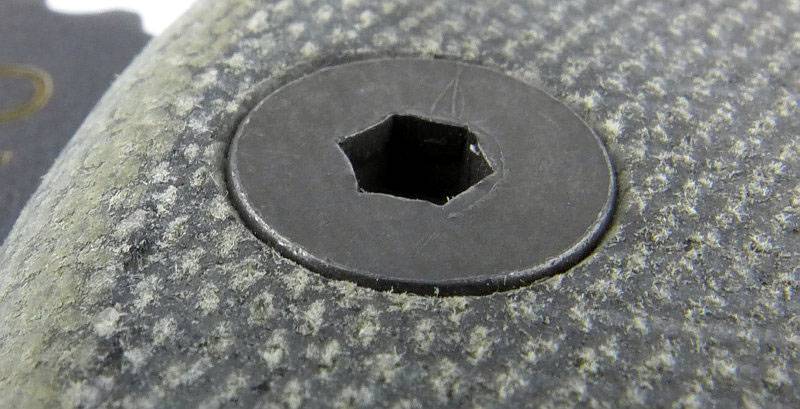
Enough of the sheath, back to the RD Tanto. Each slab handle is held in place with three screws.
 photo 12 RD Tanto angle reverse P1140445.jpg

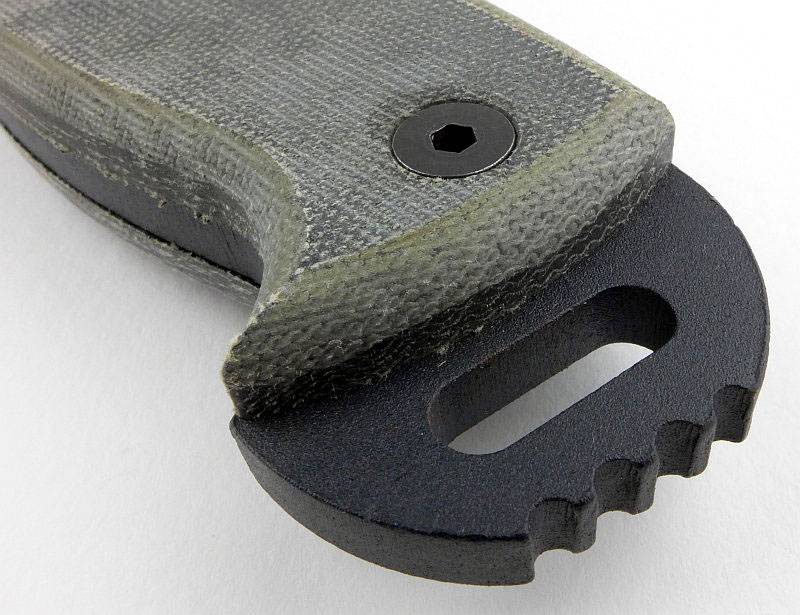
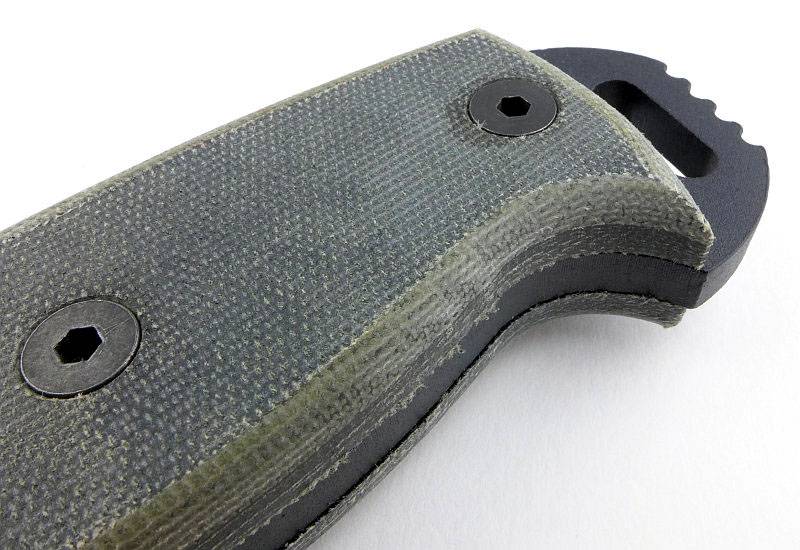
The RD Tanto has an exposed pommel with thumb-grip jimping. You can also see the texture and layers in the micarta handle slabs.
 photo 13 RD Tanto detail butt P1140448.jpg

The Ranger Series handle around which this Tanto was designed.
 photo 14 RD Tanto detail handle P1140450.jpg

A finger choil allows you to choke up the grip for finer work.
 photo 15 RD Tanto detail choil P1140453.jpg

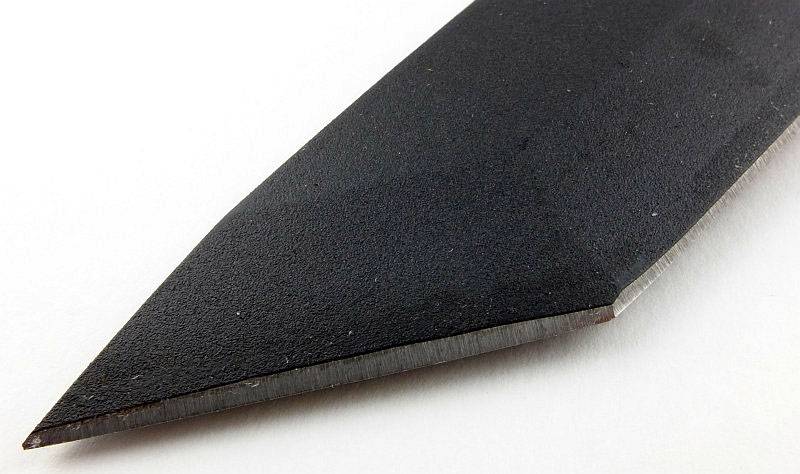
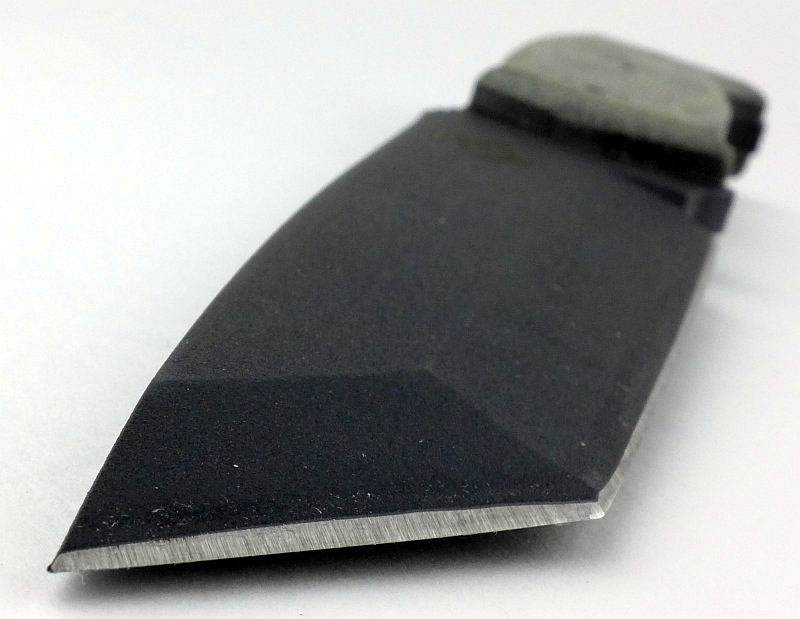
With the 1/4″ blade stock and V-grind, this tanto has a very strong point.
 photo 16 RD Tanto detail point P1140462.jpg

Another look at the grip hook. Here you can also see the micarta handle slabs extend slightly beyond the tang.
 photo 18 RD Tanto detail hook P1140472.jpg

At the front of the handle is a similar hook forming the finger guard, and in front of that the finger choil.
 photo 20 RD Tanto detail choil P1140481.jpg

Jimping on the thumb ramp is coarse but effective.
 photo 21 RD Tanto detail jimping P1140483.jpg

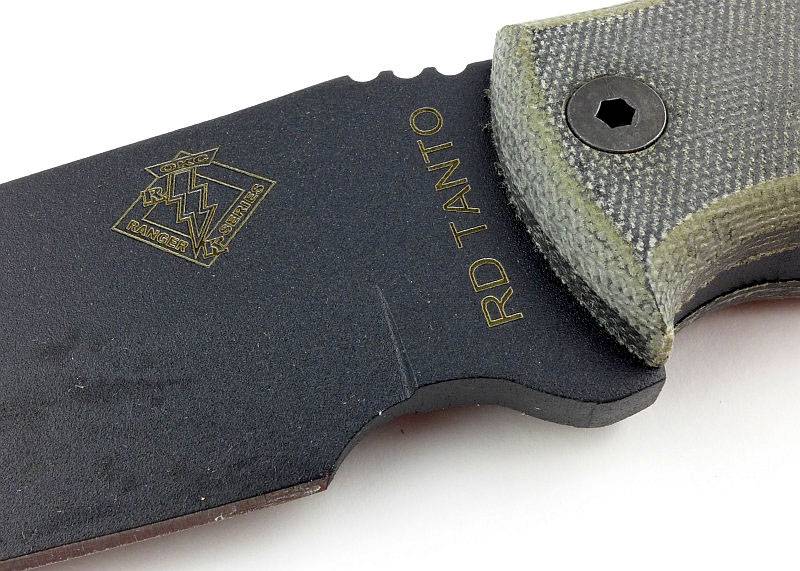
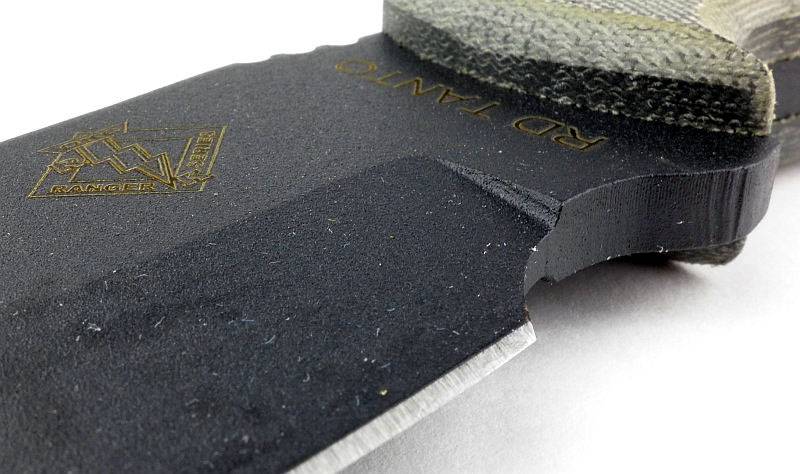
There is slight rounding on the plunge line. You can also see some evidence of the water-jet cutting used to create the basic blade shape.
 photo 22 RD Tanto detail plunge line P1140497.jpg

A closer look at one of the handle bolts and the raw sanded surface of the micarta grip.
 photo 27 RD Tanto detail grip texture P1140529.jpg

This is a HEAVY DUTY blade!
 photo 23 RD Tanto detail phat blade P1140504.jpg

Next to the sheath for an overall view of the RD Tanto and the front of the sheath.
 photo 24 RD Tanto with sheath front P1140515.jpg

Flipping both over to check the other side.
 photo 25 RD Tanto with sheath back P1140512.jpg

Due to its thick blade stock, the RD Tanto rubs all the way in when inserting into the sheath.
 photo 28 RD Tanto detail inserting P1140532.jpg

With both straps closed there is no chance of this knife coming loose.
 photo 29 RD Tanto sheathed P1140537.jpg

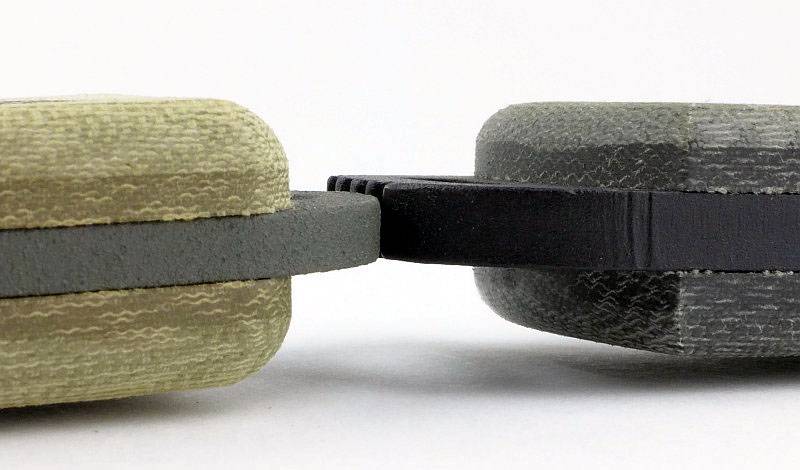
We will see more comparisons of blade thickness in other reviews in this OKC series, but here is a comparison to the RTAK II. The RD Tanto is substantially thicker.
 photo 30 RD Tanto thickness P1140552.jpg

Placed pommel to pommel, the RTAK II and RD Tanto compared again.
 photo 31 RD Tanto thickness2 P1140558.jpg

What it is like to use?

With a seriously heavy duty knife such as the RD Tanto, before looking at what it is like to use, it is important to consider your expectations for a knife like this and what it will give you.

There is little finesse in a knife of such heavy build – it is a bruiser and unashamed of that. Built for those jobs you would balk at using a knife for, but you want to be prepared for and can only justify carrying one knife/tool.

So if you want to do some delicate whittling and sophisticated food preparations but still want to be able to breeze through a fire door or release someone trapped in a vehicle, you will be disappointed.

For everyday tasks this knife is vastly over engineered and will disappoint most with its cutting characteristics. But, this is NOT why you choose a knife like this.

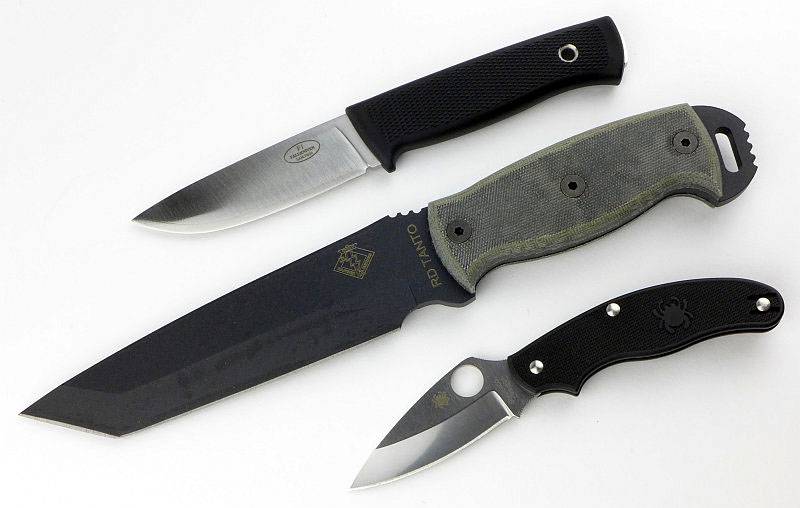
Look at it next to the Fällkniven F1 and a Spyderco UK Pen Knife. This photo doesn’t do justice of the heavy build in relation to those other knives.
 photo 32 RD Tanto size P1140581.jpg

Having put aside the notion that this might go on your belt or pack for ‘normal’ knife work, we can move onto its more serious purpose – Heavy Work.

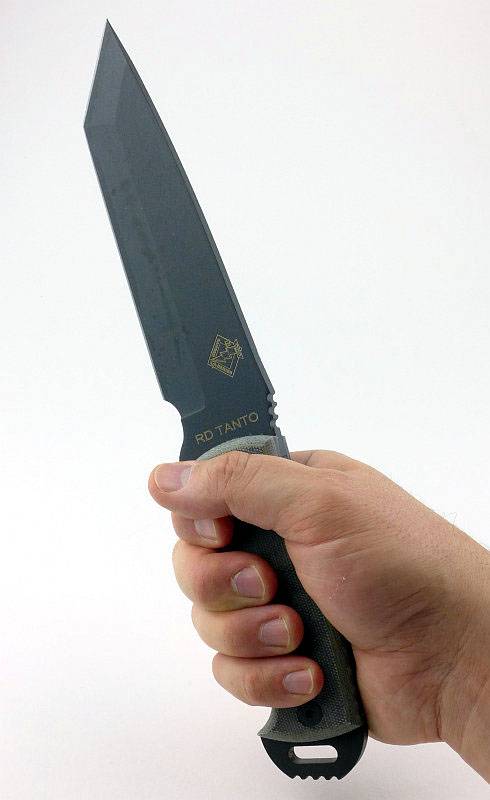
My hands take XL sized gloves and the grip fills my hand well. When you are really going to be beating a knife the last thing you want is a slim grip, so a good handful makes for a solid grip.
 photo 33 RD Tanto in hand P1140587.jpg

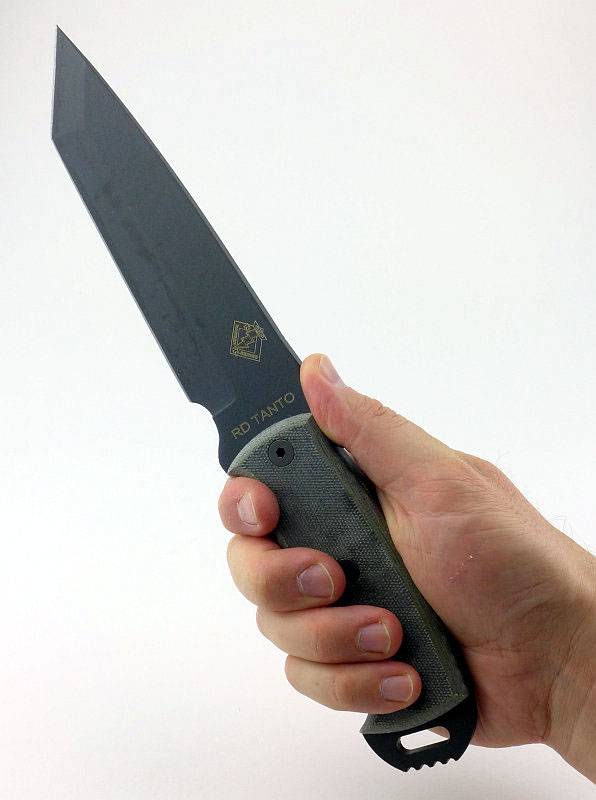
As penetration is a Tanto’s strong point (pun intended) the thumb ramp combined with deep hooks on the grip gives you a great power behind the thrust.
 photo 34 RD Tanto in hand2 P1140589.jpg

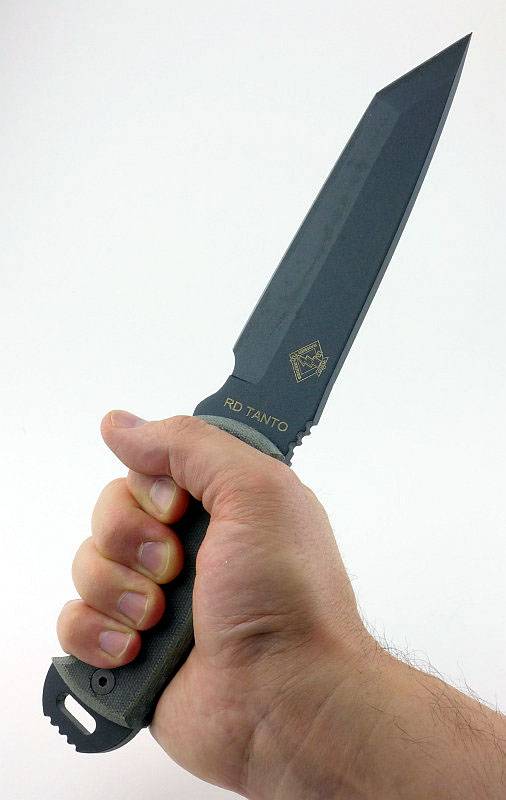
You can either hammer on the exposed pommel or in this case give something a good pounding with it.
 photo 35 RD Tanto in hand3 P1140596.jpg

Taking the RD Tanto out for a few woodland tasks it was surprisingly capable, but does feel heavy. One of the comparisons I made to the other OKC knives was in putting a point on a stick. Due to the steep edge bevel, the RD Tanto had a tendency to slide off the stick and this resulted in a long point which was formed like this due to the cutting action tending to push away from the centre of the stick. The edge itself is sharp and cuts cleanly but needs to be angled far more ‘into’ the material than most.
 photo 07 OKCtrio RDTANTO stick P1160291.jpg

Will you want a knife like this? If you want to be prepared for all eventualities, then yes I would say you do. It would not be my every day choice, but it is a choice I want to have and a knife I continue to grab when preparing for certain situations.

To date I’ve not had any doors to demolish, or vehicles to gain entry to, but can tell you this is a tool I would happily take for the task. During some severe weather, which was threatening structural damage to buildings, the tool I kept within arm’s length at all times during the threat was the RD Tanto, and it gave me confidence to know I had it.

Review Summary

The views expressed in this summary table are from the point of view of the reviewer’s personal use. I am not a member of the armed forces and cannot comment on its use beyond a cutting tool or field/hunting knife.

Something that might be a ‘pro’ for one user can be a ‘con’ for another, so the comments are categorised based on my requirements. You should consider all points and if they could be beneficial to you.

_______________________________________________ _______________________________________________
Things I like What doesn’t work so well for me
_______________________________________________ _______________________________________________
Super Heavy Duty Build in 1/4″ blade stock ‘Feels’ too heavy for daily tasks
5160 spring steel Steep edge angle
Tanto point penetration Edge can bind during wood preparation
You can confidently work this knife hard!

 photo 19 RD Tanto angle P1140474.jpg


Discussing the Review:

Please feel free to add comments to the review, but the ideal place to freely discuss these reviews is on a forum. If you started reading the shorter forum version of the review, but followed the link this full exclusive review, please return to that forum to discuss the review there.
If you read the review entirely on Tactical Reviews, please consider one of the following to join in any discussion.

EdgeMatters – Sponsored Reviews (UK based Forum for Knife Makers and Collectors)
BladeForums – Knife Reviews (US based Forum for Knife Discussion)
CandlePowerForums – Knife Reviews Section (Largest and Friendliest Flashlight Community Forum)