Knife Review: Heinnie Special Editions – CRKT Pilar, MKM Isonzo and Penfold

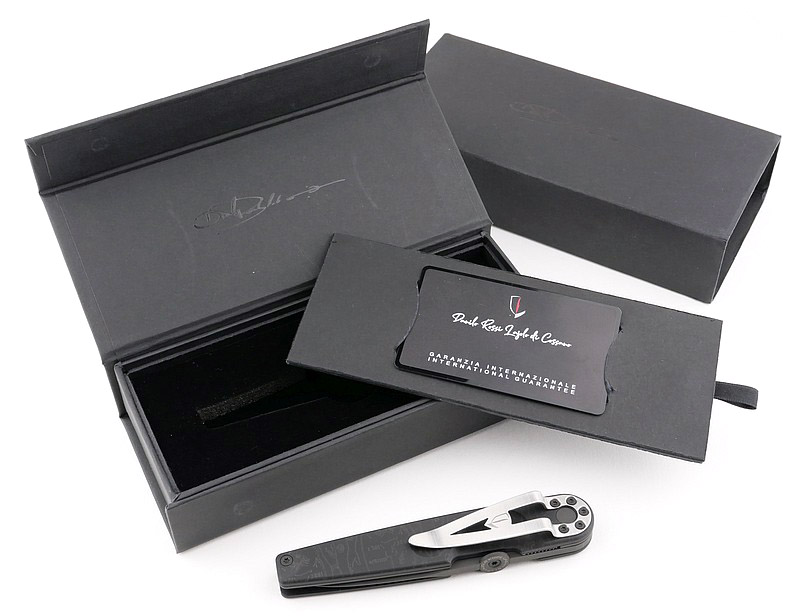
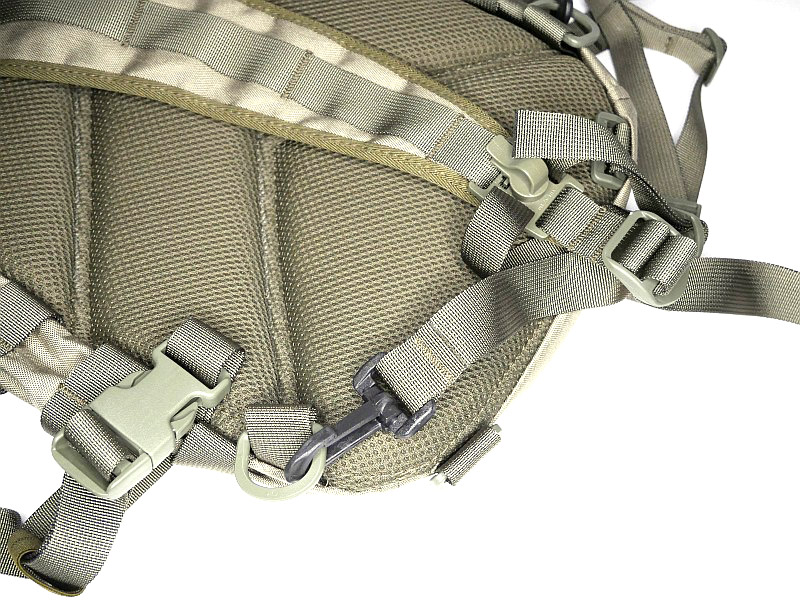
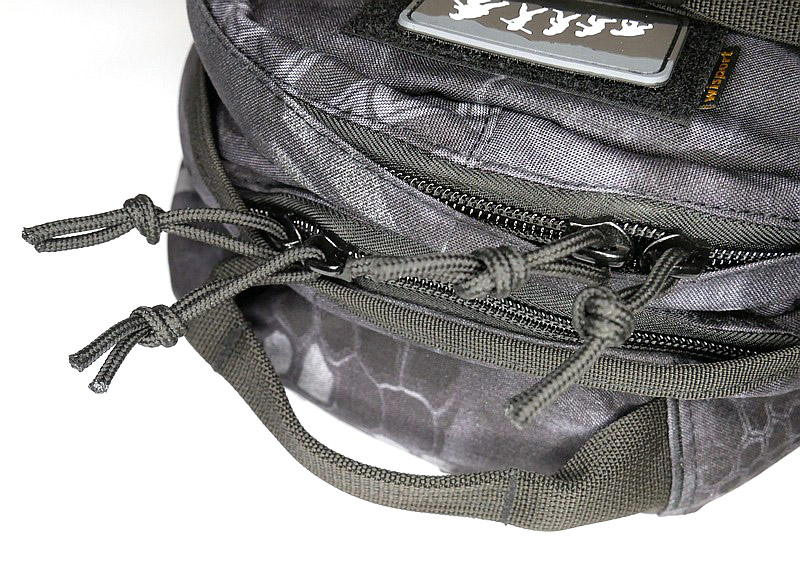
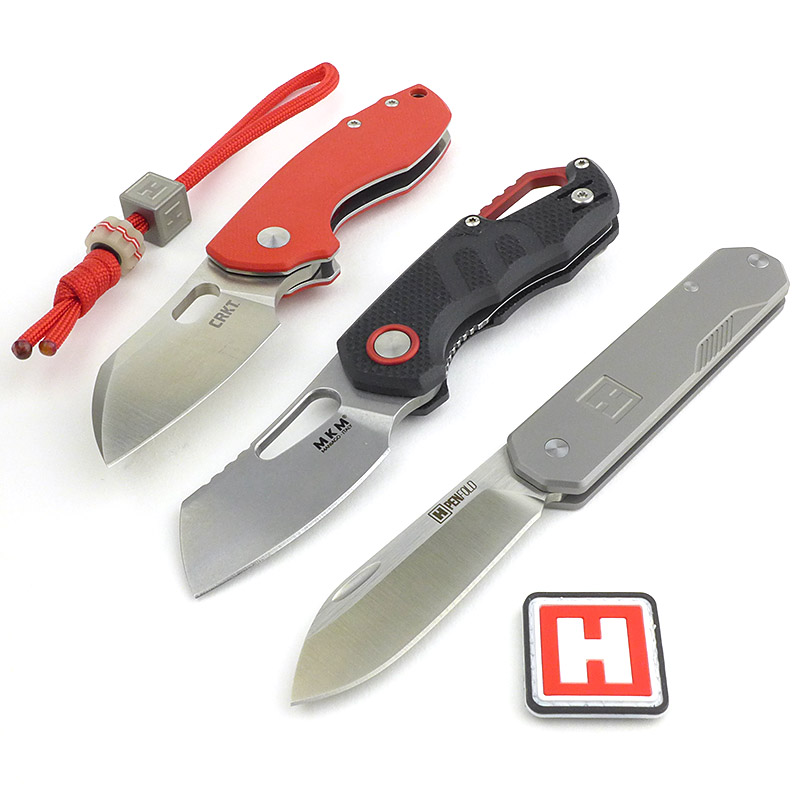
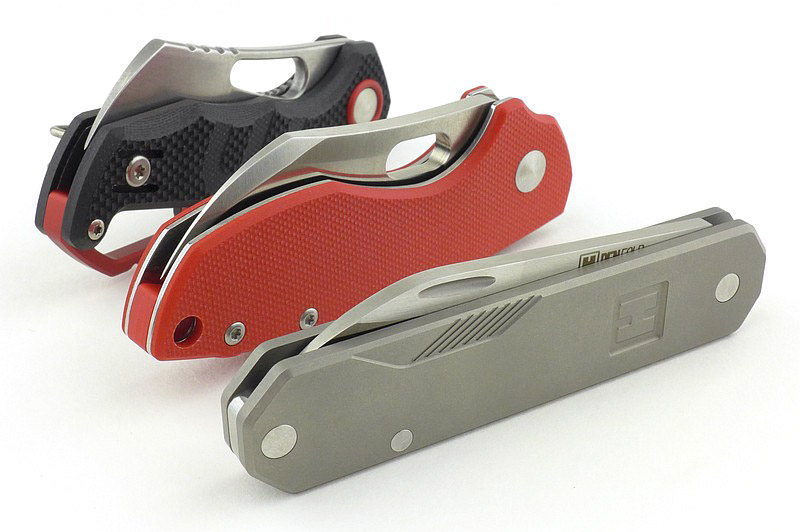
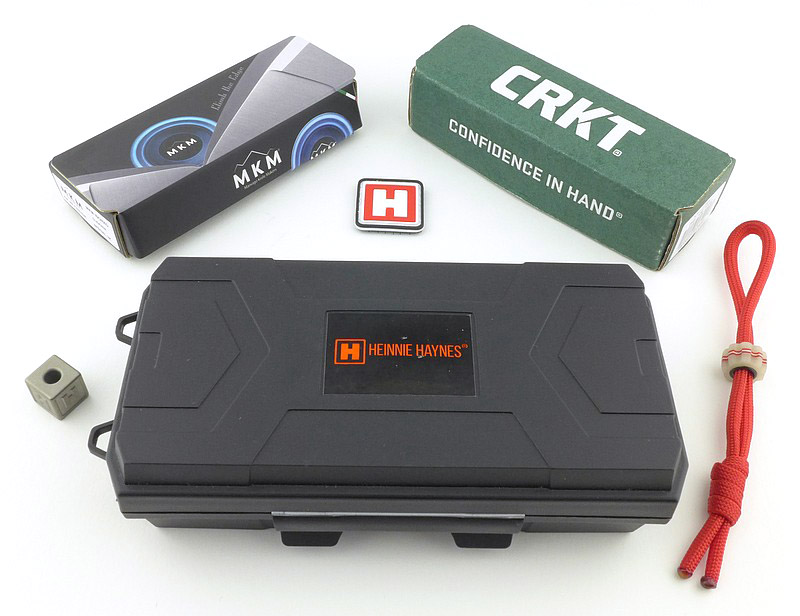
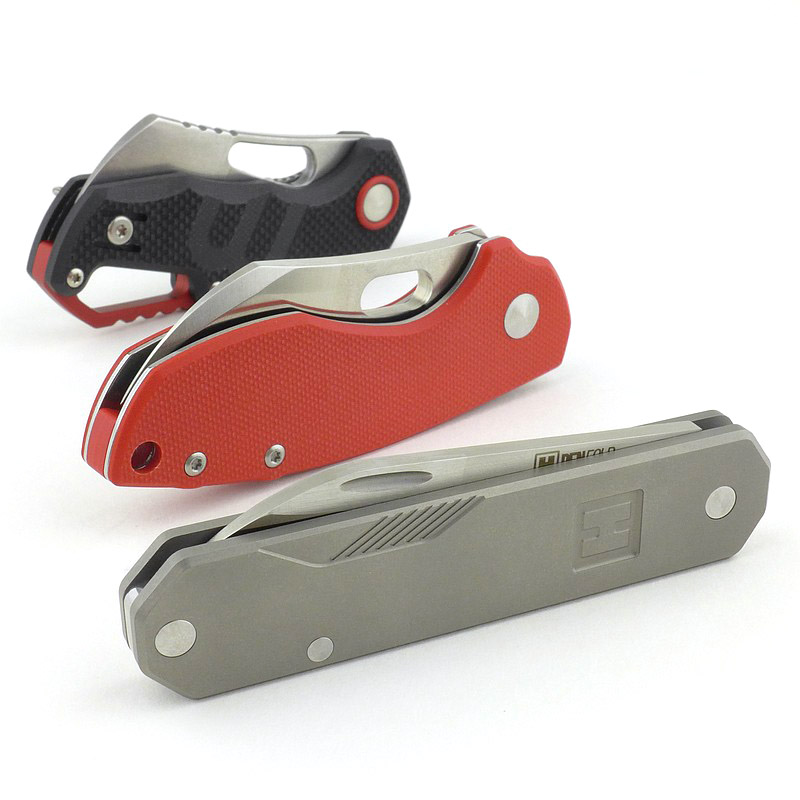
In the UK, Heinnie Haynes is an institution and essential in the search for knives as well as outdoor and EDC gear. Having been a specialist in knives for so long, not satisfied with just selling standard production knives, Heinnie Haynes have been commissioning customised and enhanced special editions, many of which are slip-joint conversions of lock knives (to allow UK EDC). In this review we are taking a look at three of these Heinnie special editions – a slip-joint conversion of the CRKT Pilar and MKM Isonzo, plus a the sleek Heinnie designed Penfold.

The details:

This video has a quick look at the Heinnie Penfold and MKM Isonzo, and then a much more detailed examination of the CRKT Pilar.


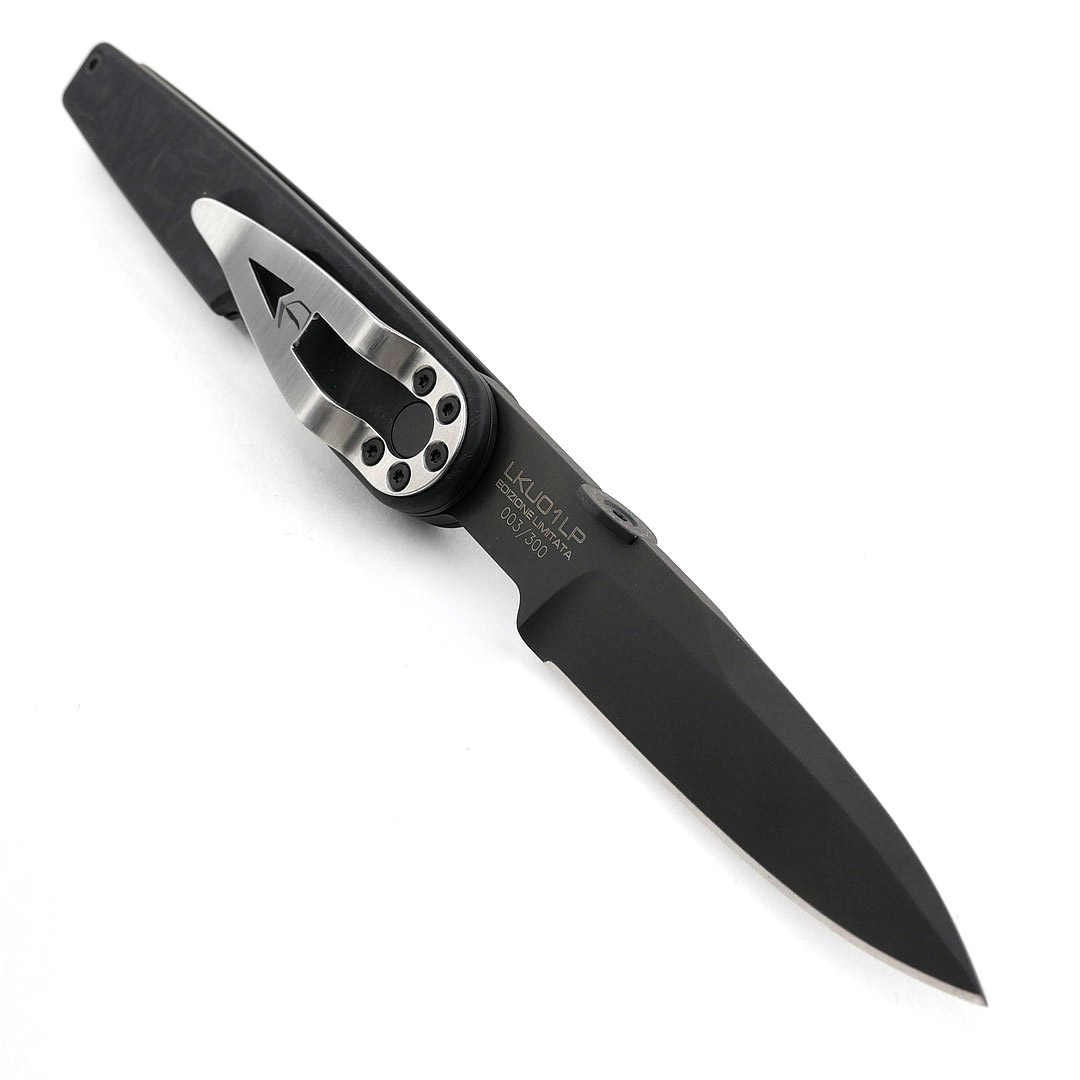
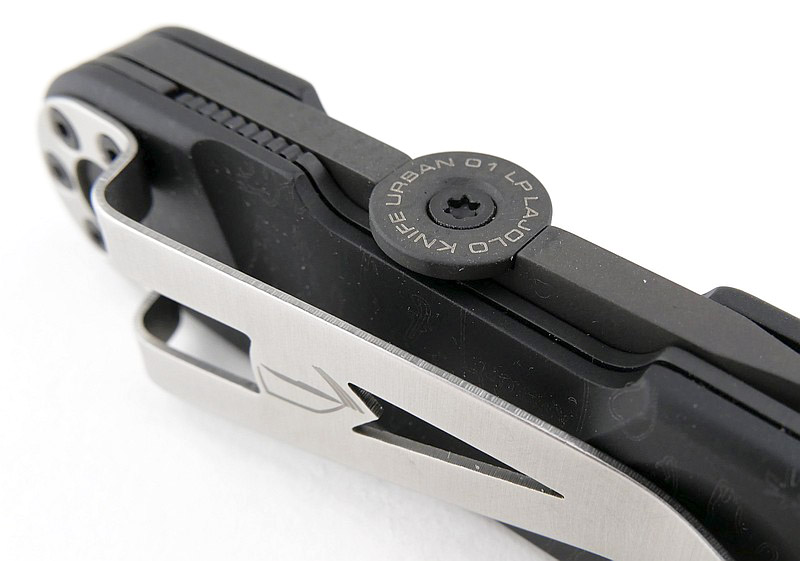
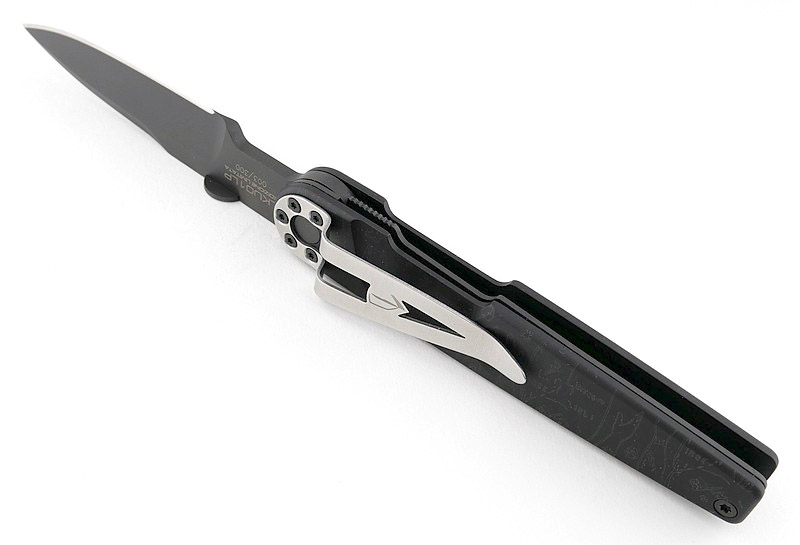
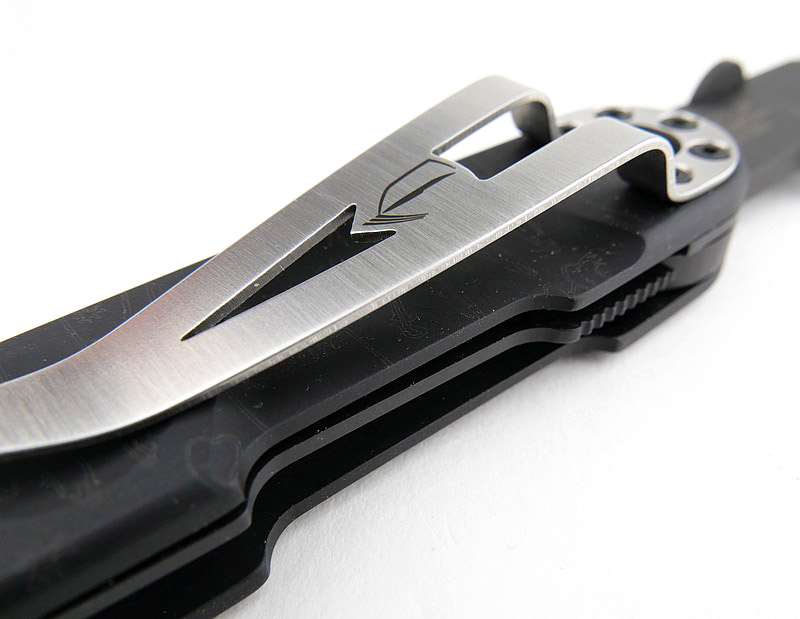
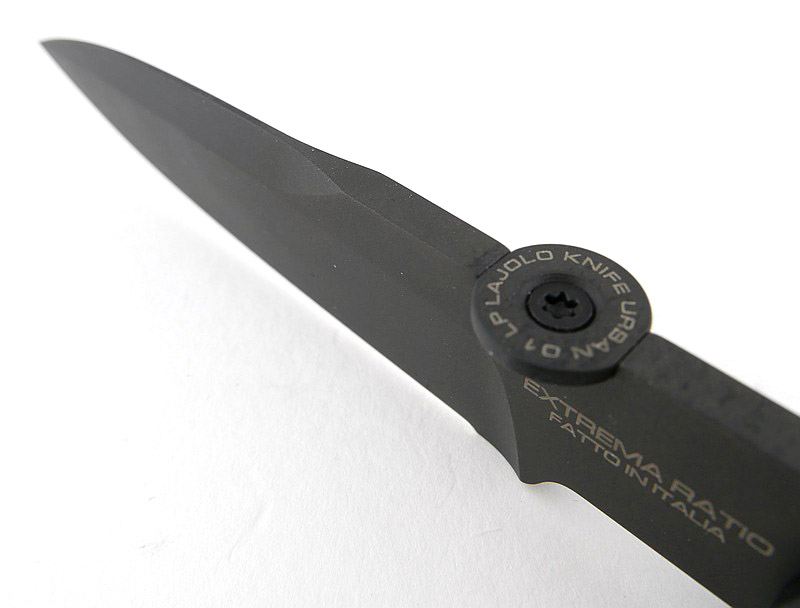
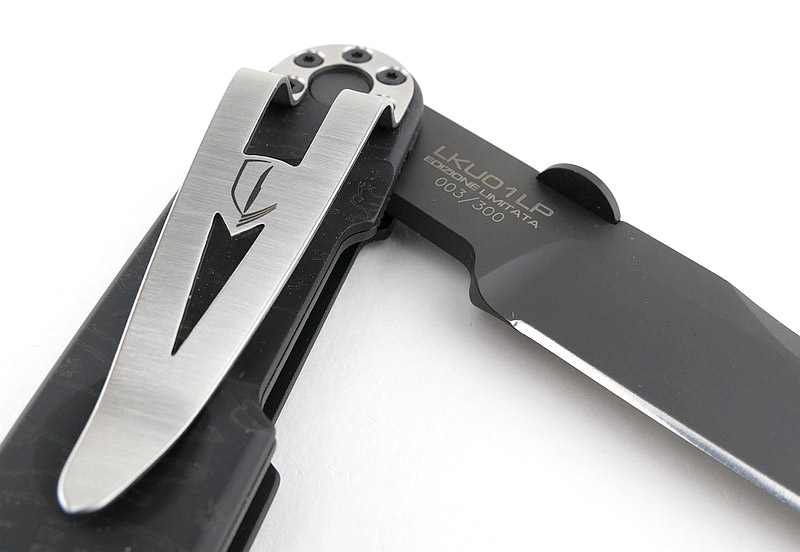
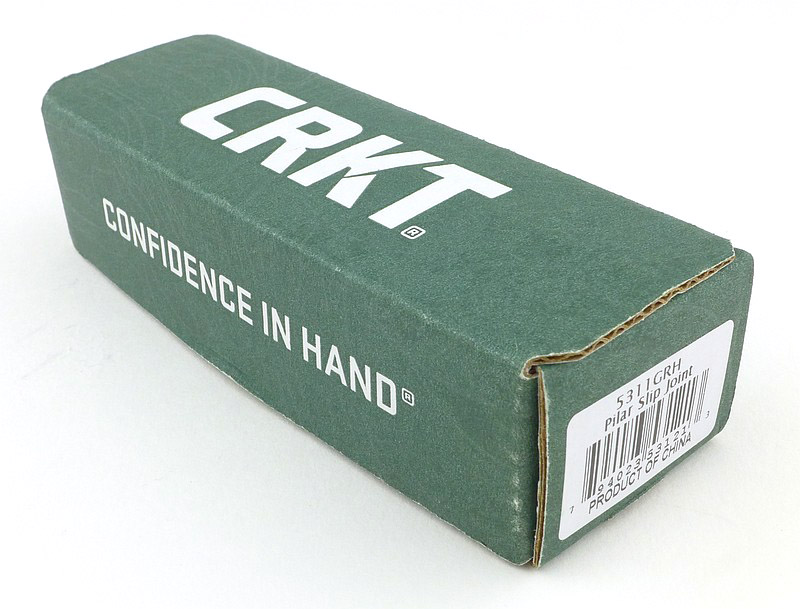
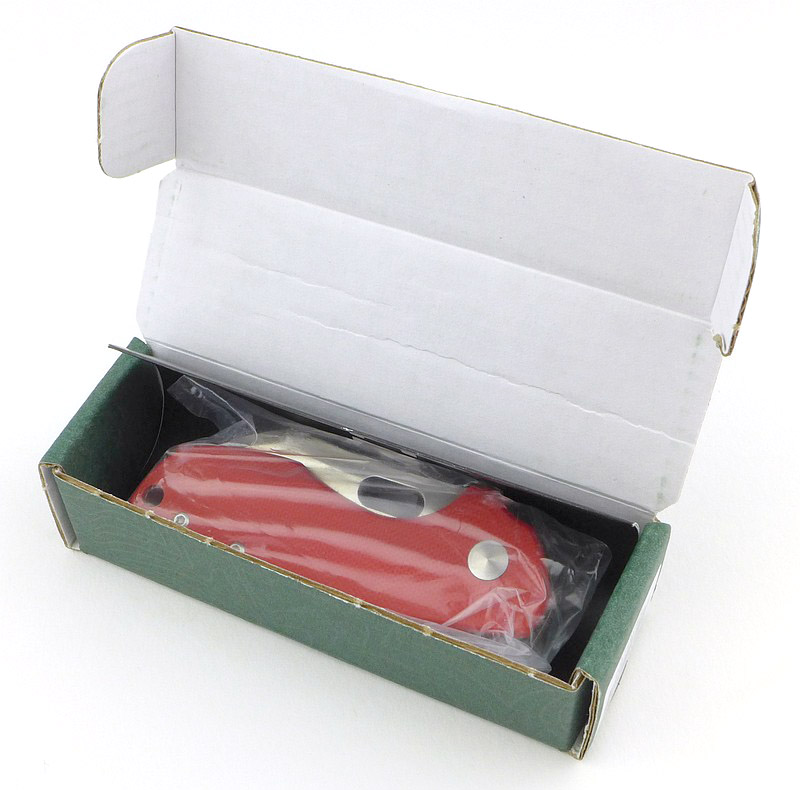
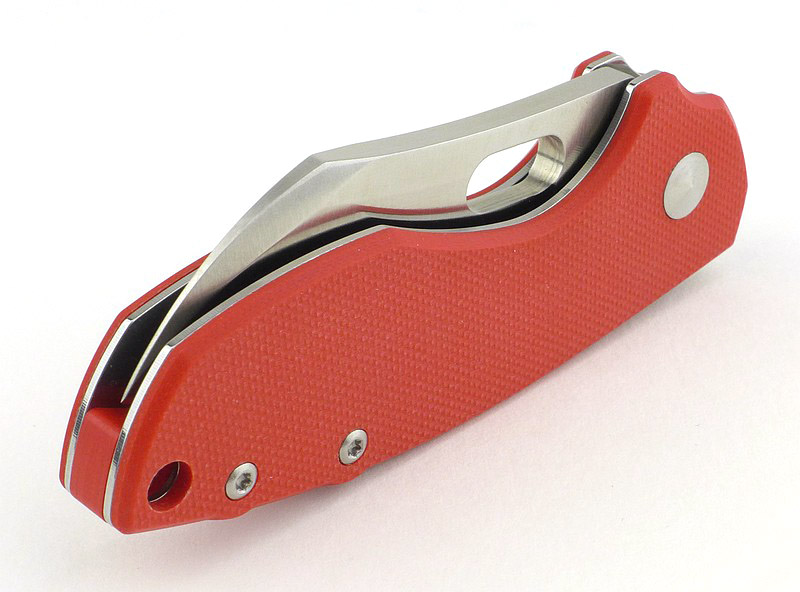
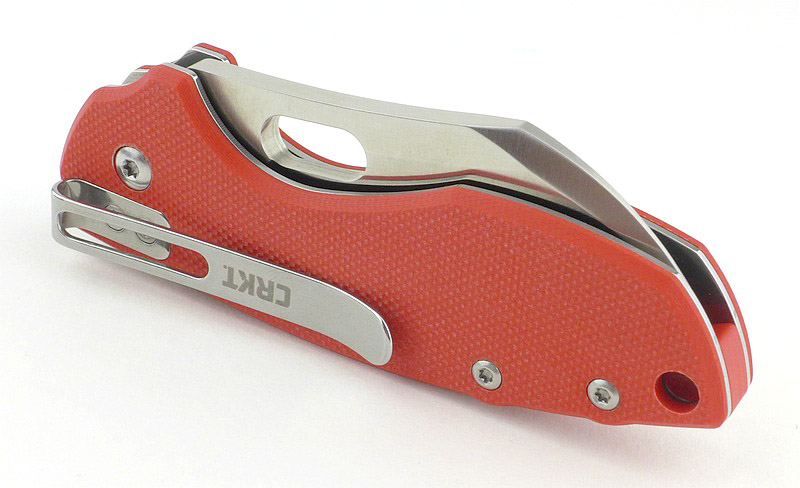
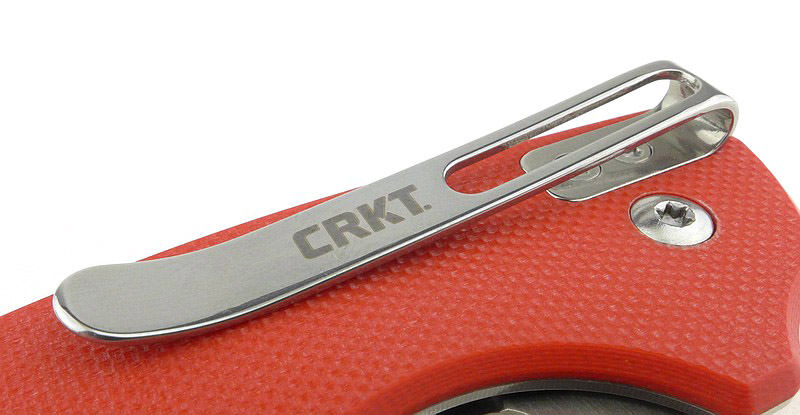
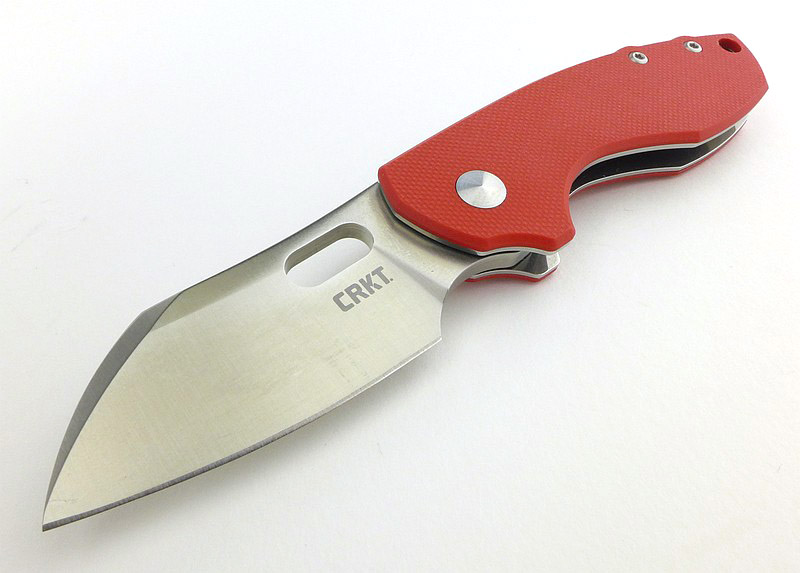
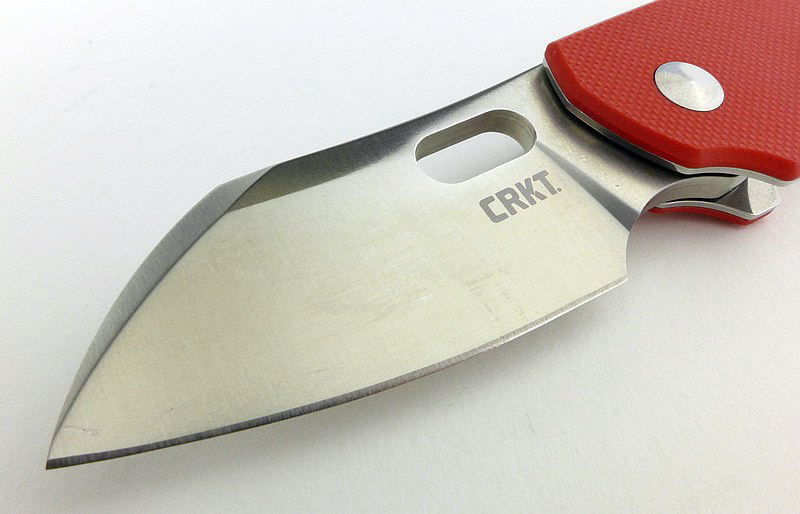
A good look round the Heinnie CRKT Pilar – Things to look out for here are:
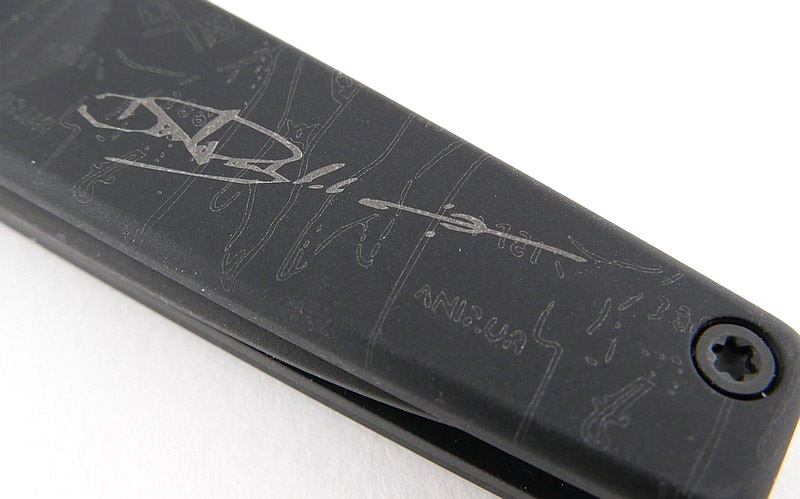
The exclusive special edition features include the G10 scales and spacer in Heinnie red, plus the conversion to slip-joint using a double spring-and-detent concealed within the handle.


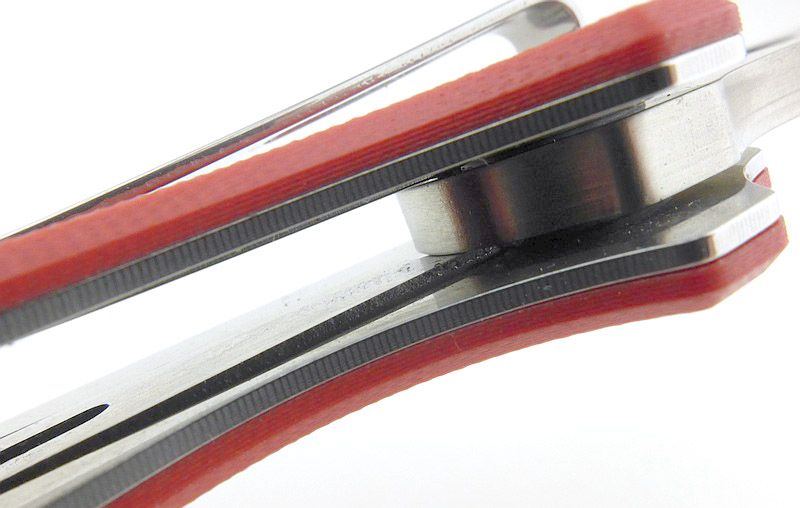
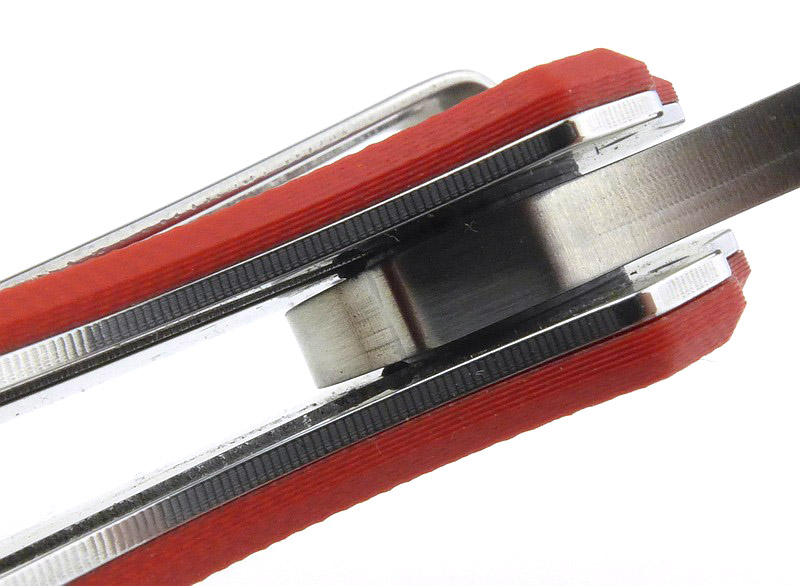
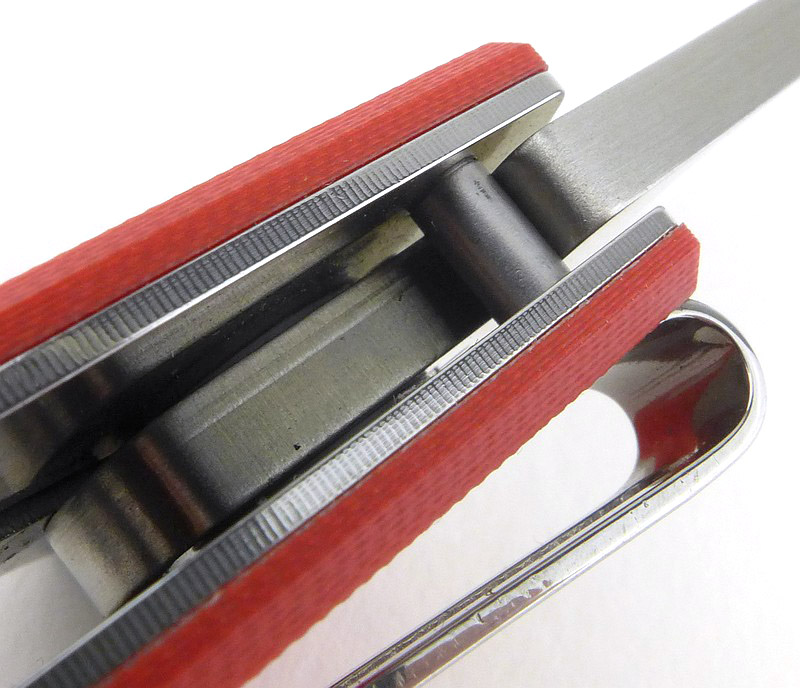
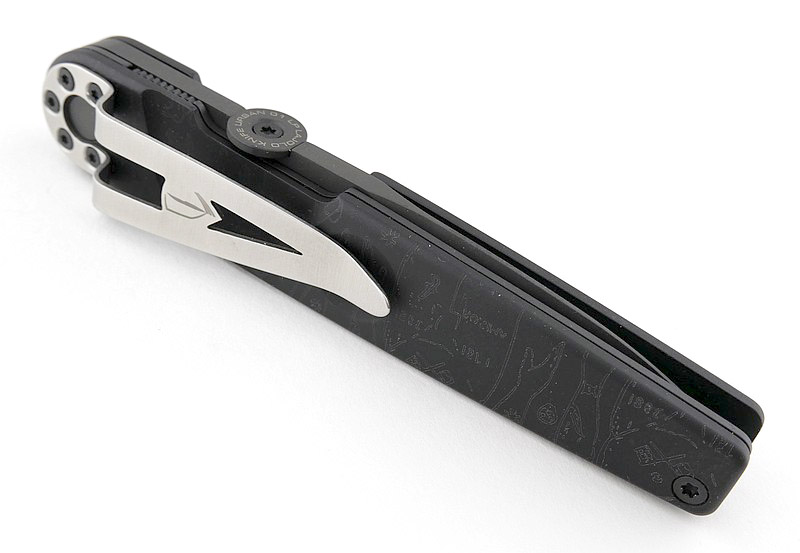
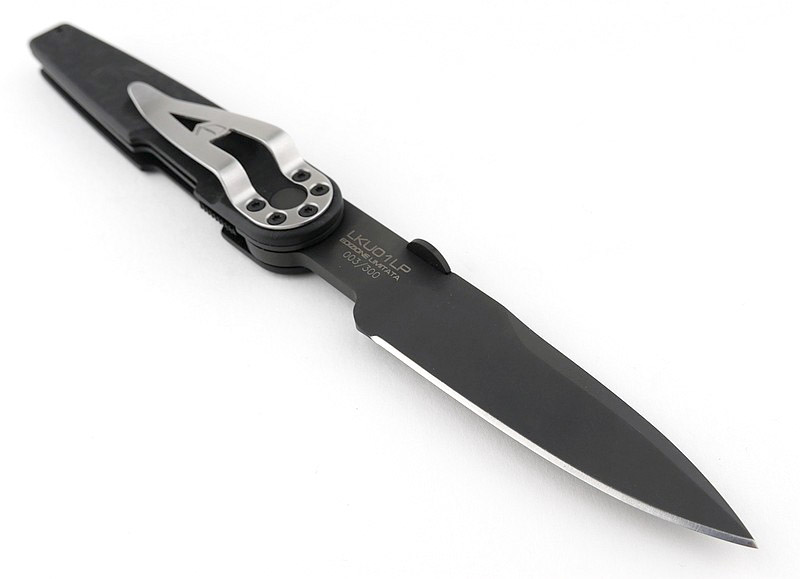
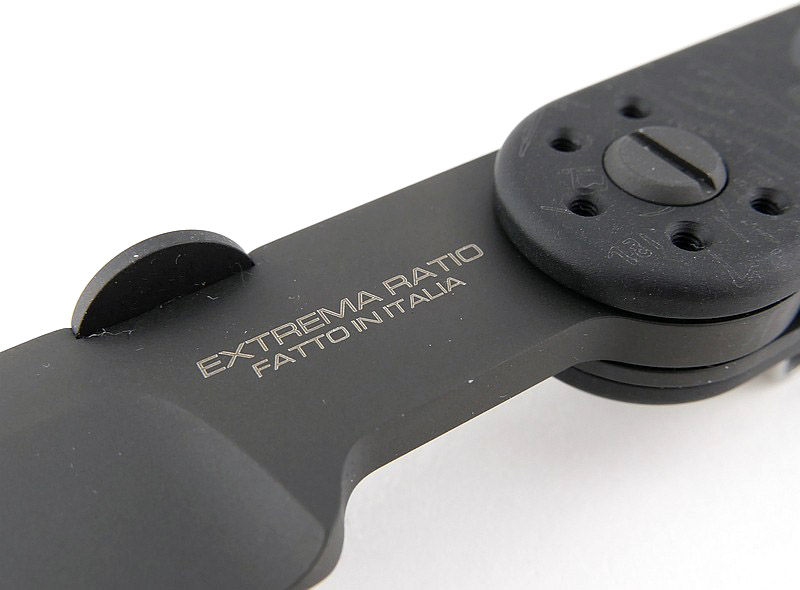
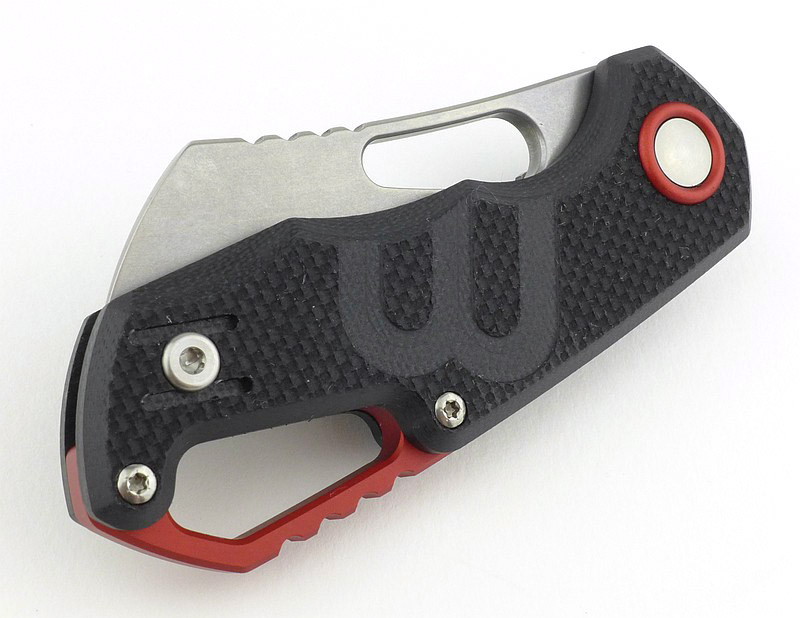
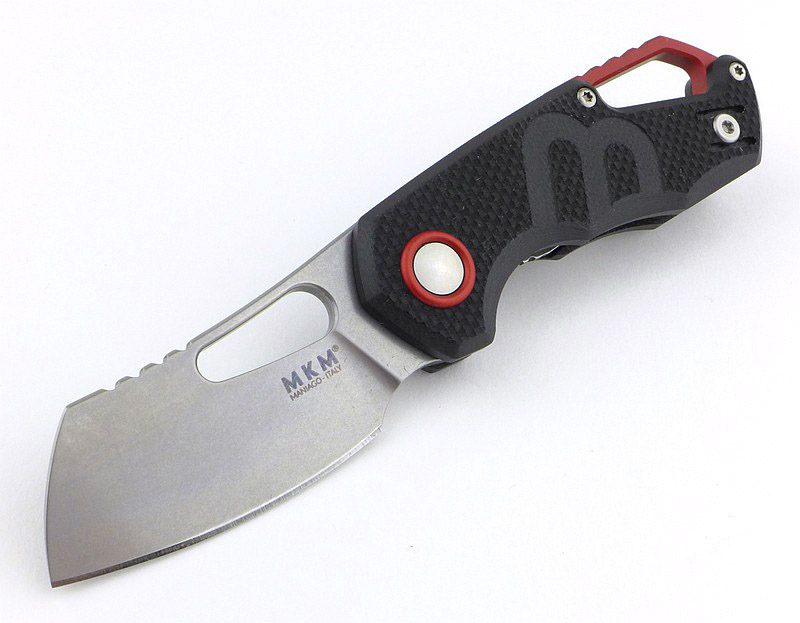
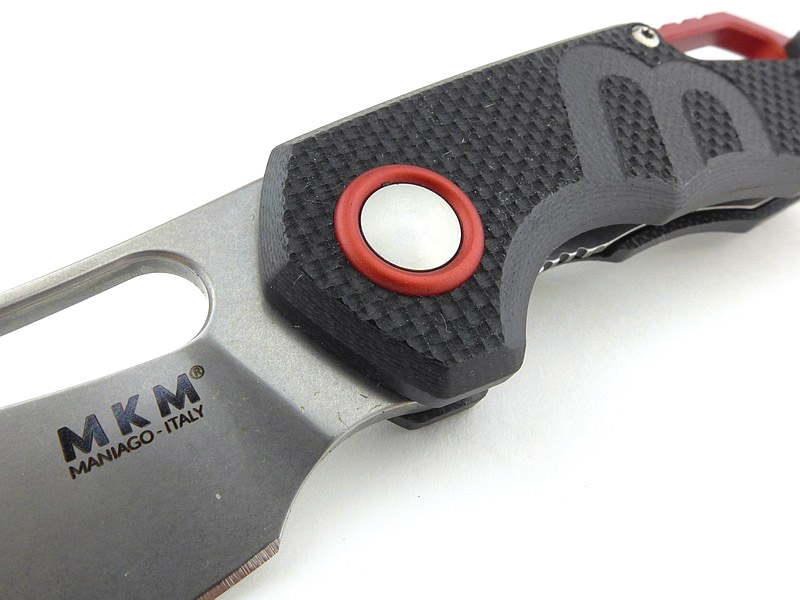
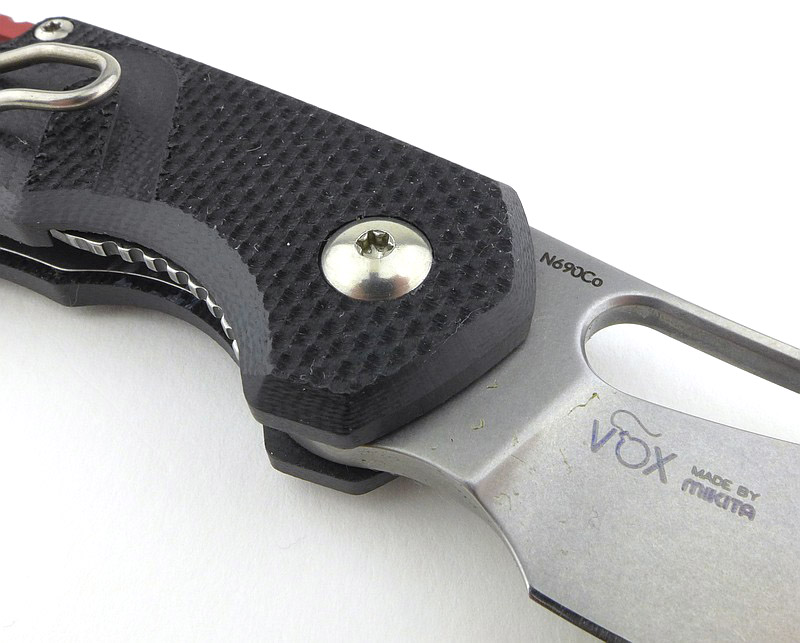
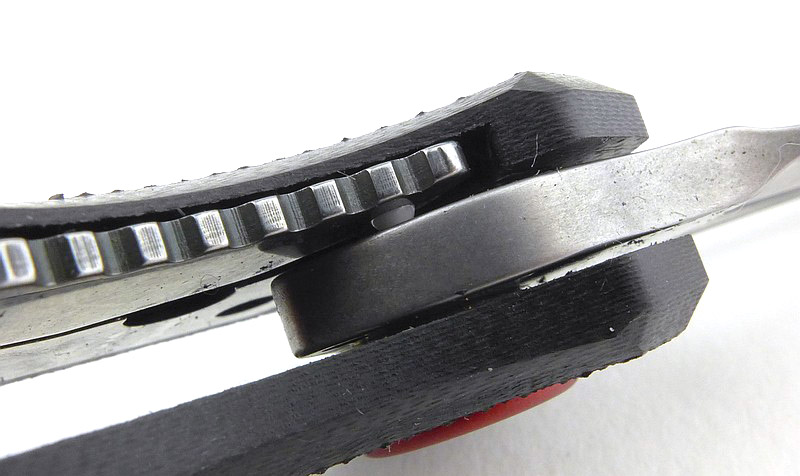
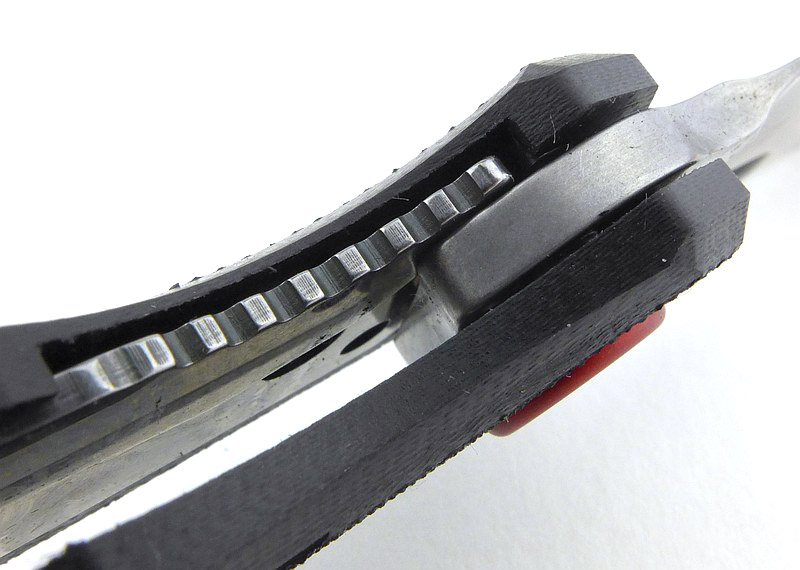
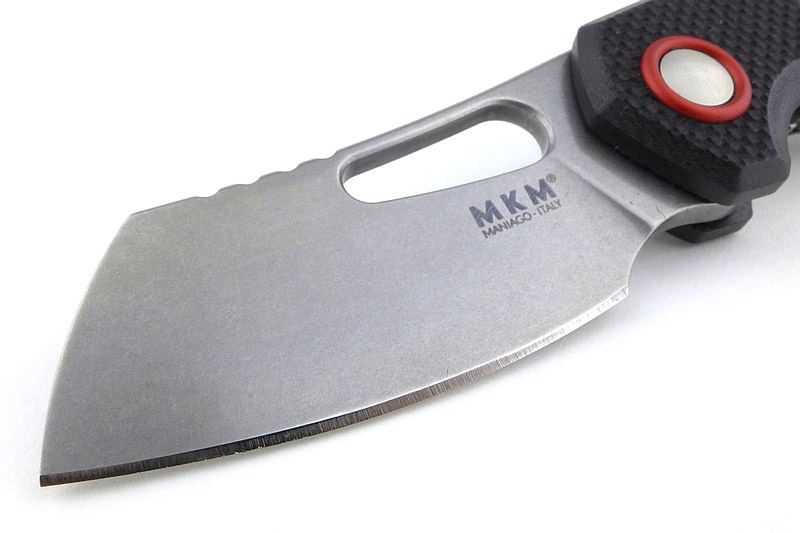
A good look round the Heinnie MKM Isonzo (Cleaver blade)- Things to look out for here are:
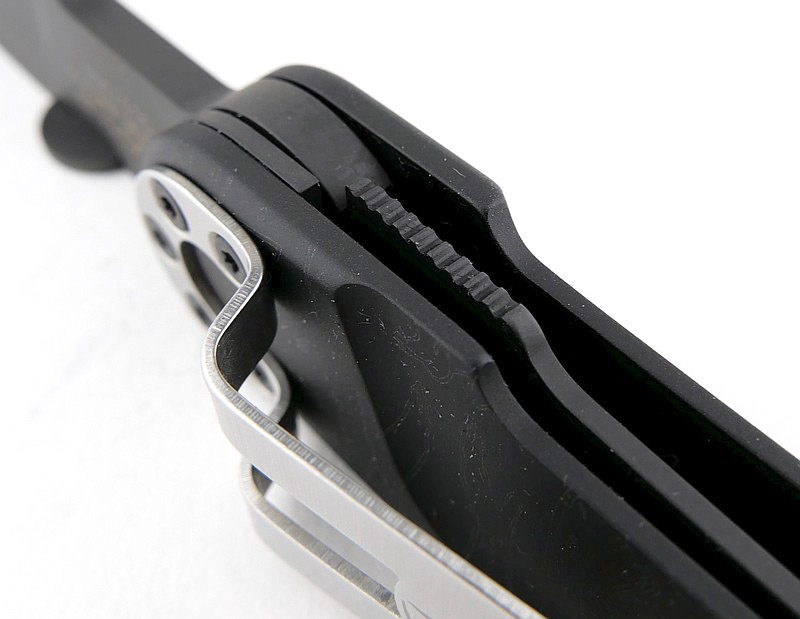
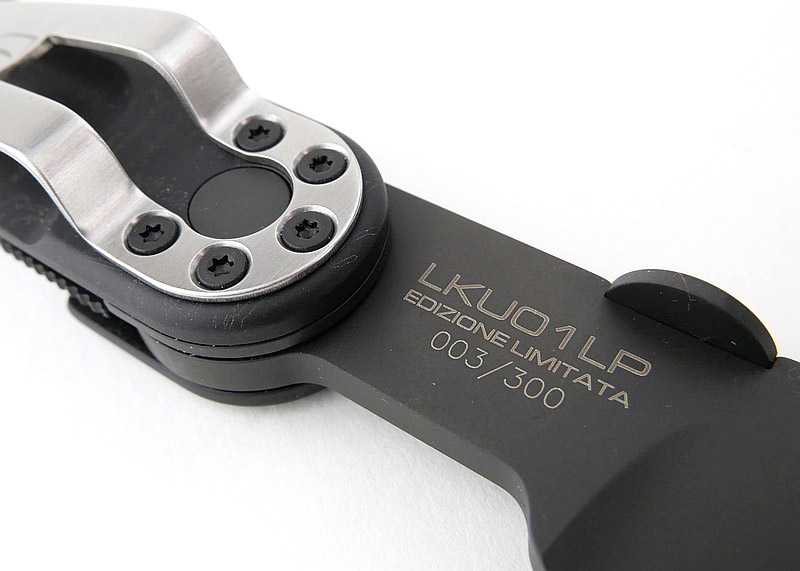
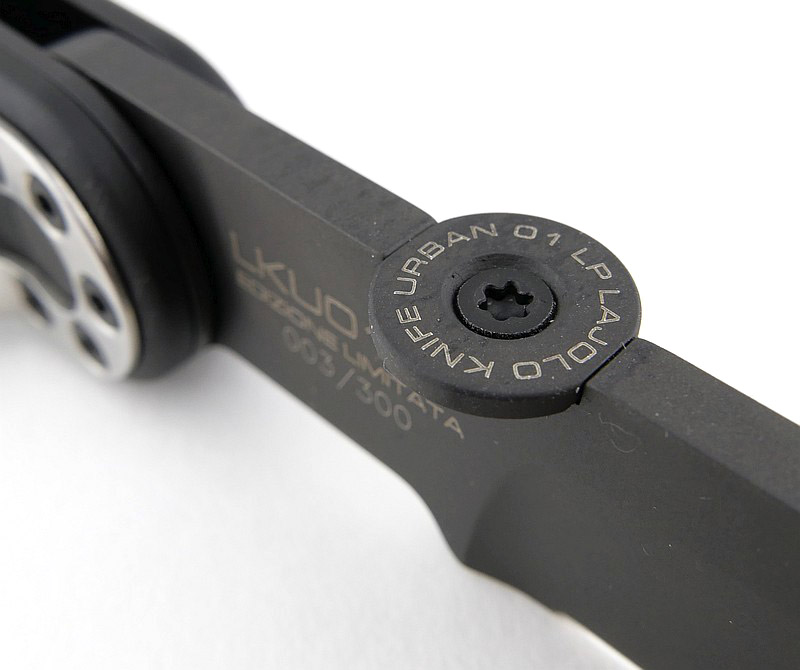
Originally using a liner lock, the remains of this lock are clearly visible, but with the addition of a detent on the sprung bar (previously the lock bar). Highlights of Heinnie red let you know this is the special edition.


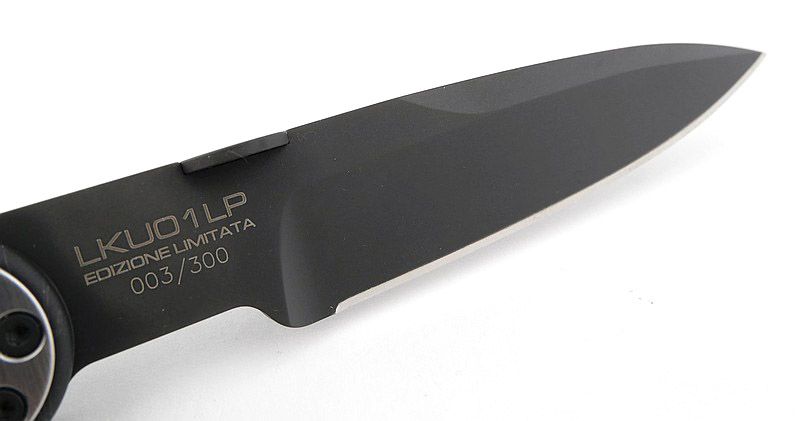
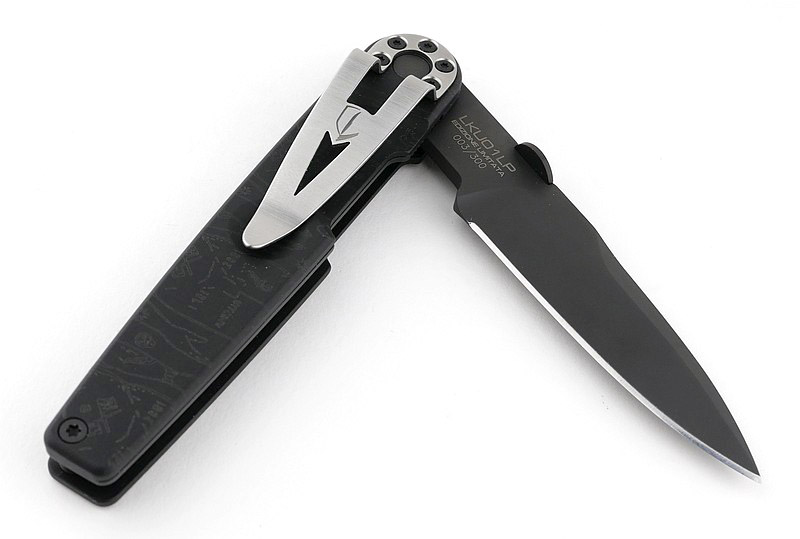
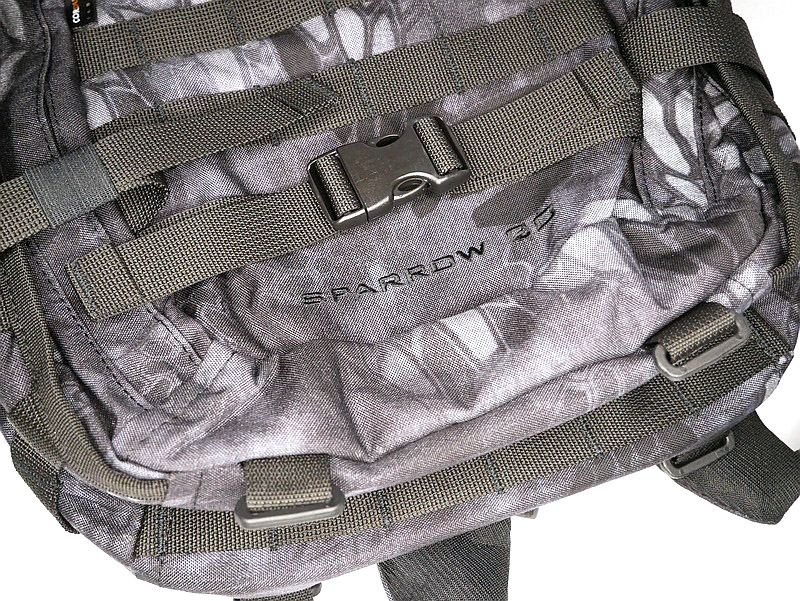
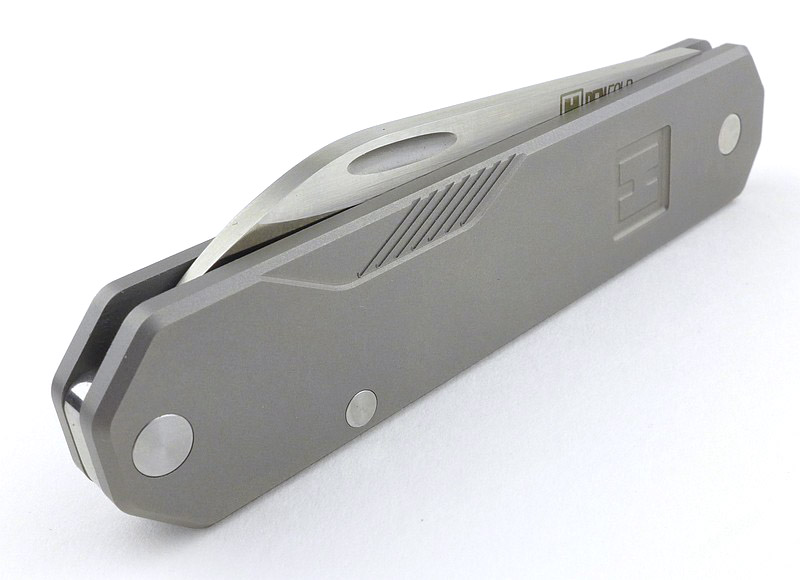
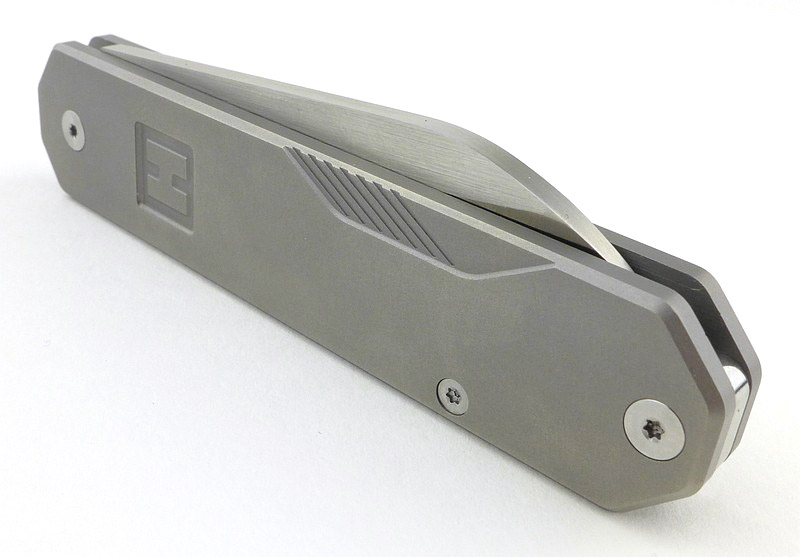
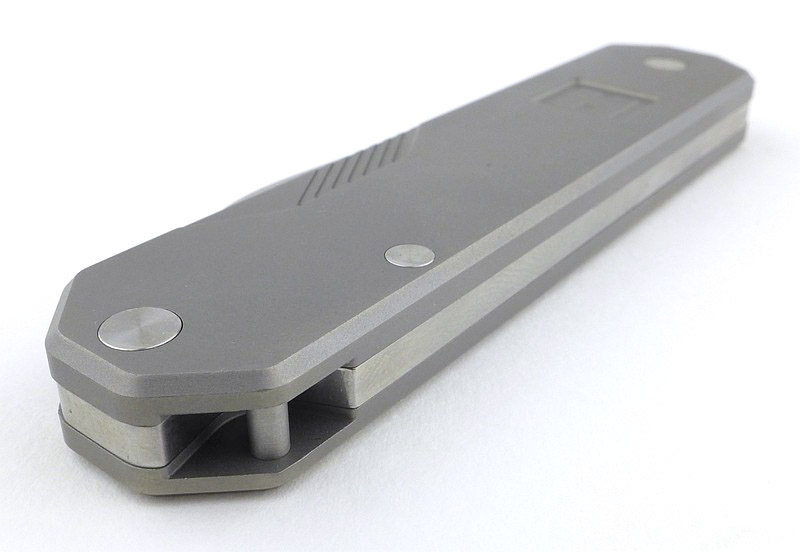
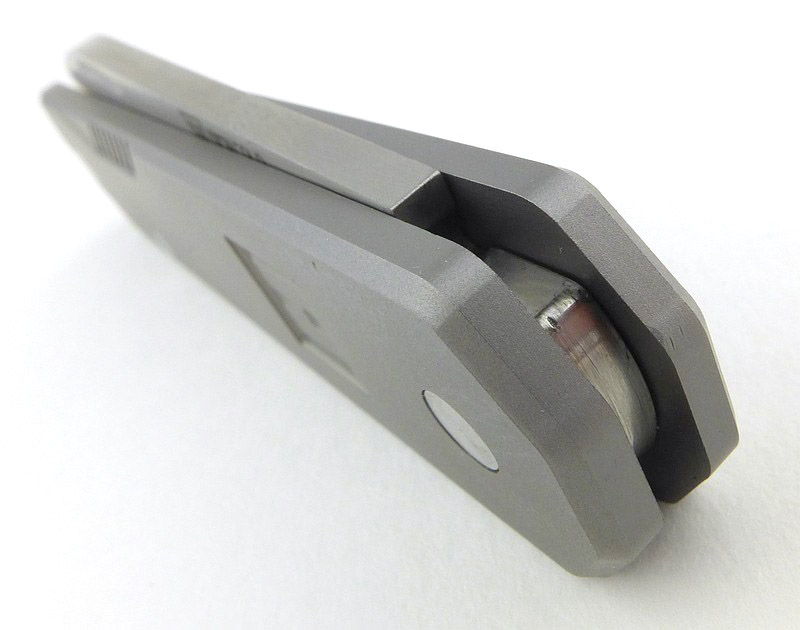
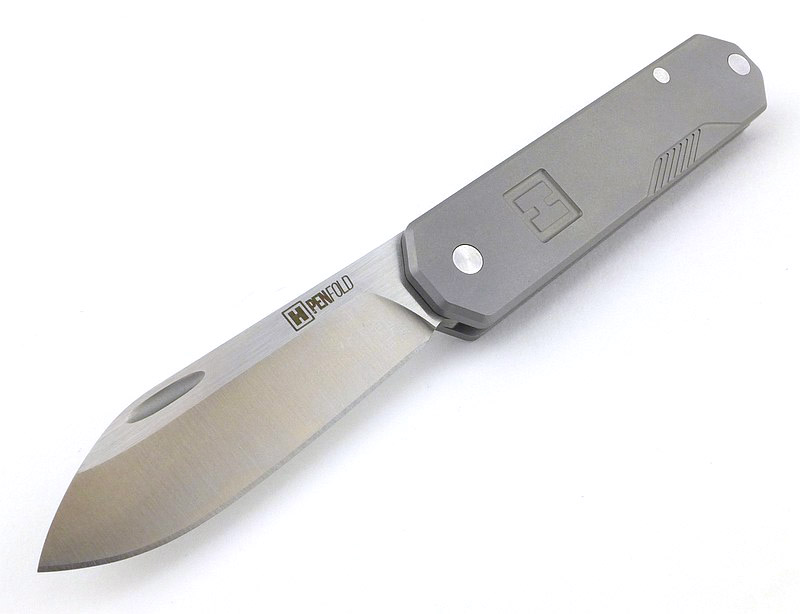
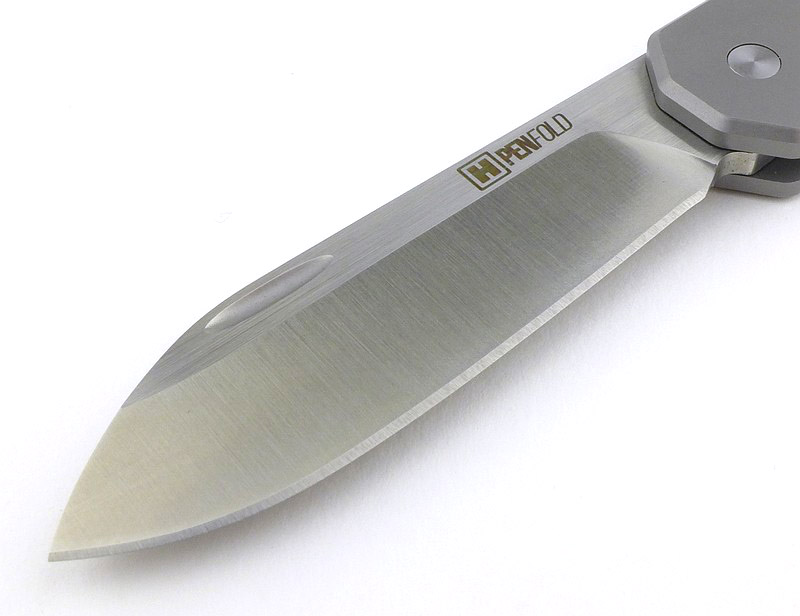
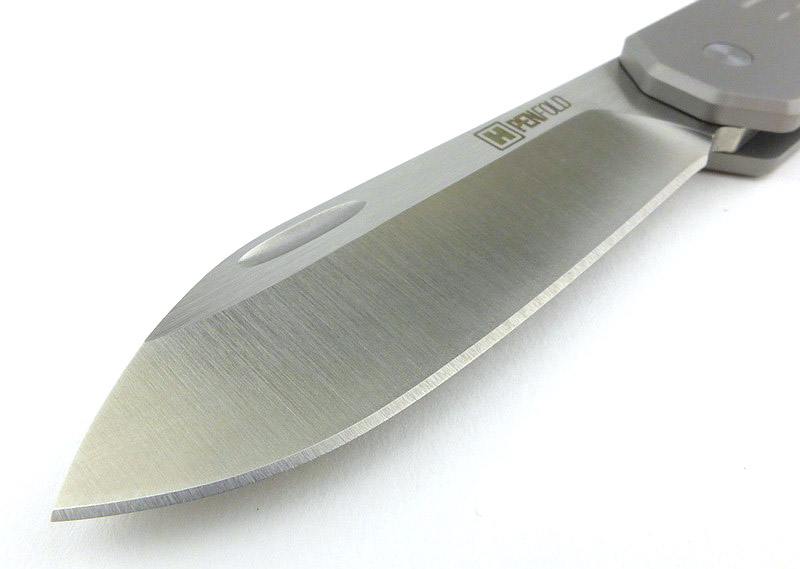
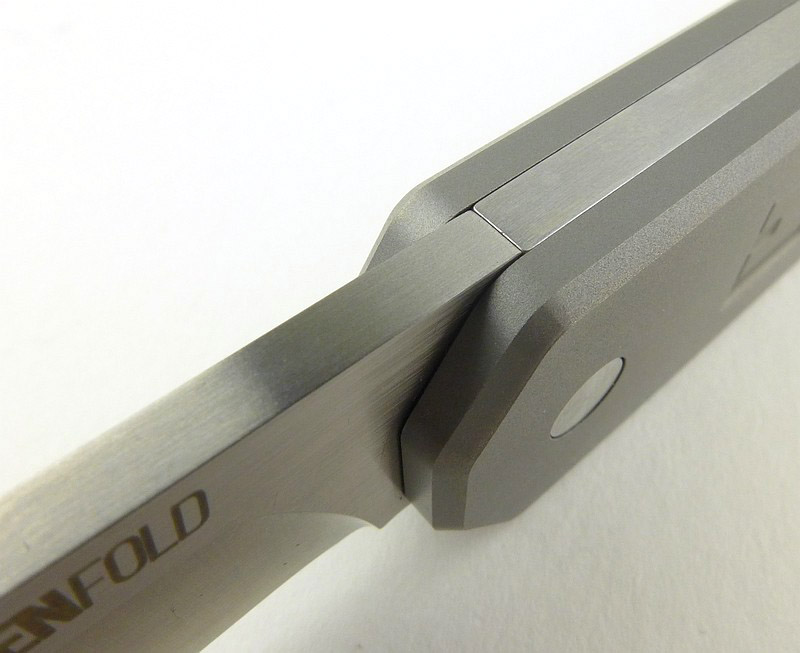
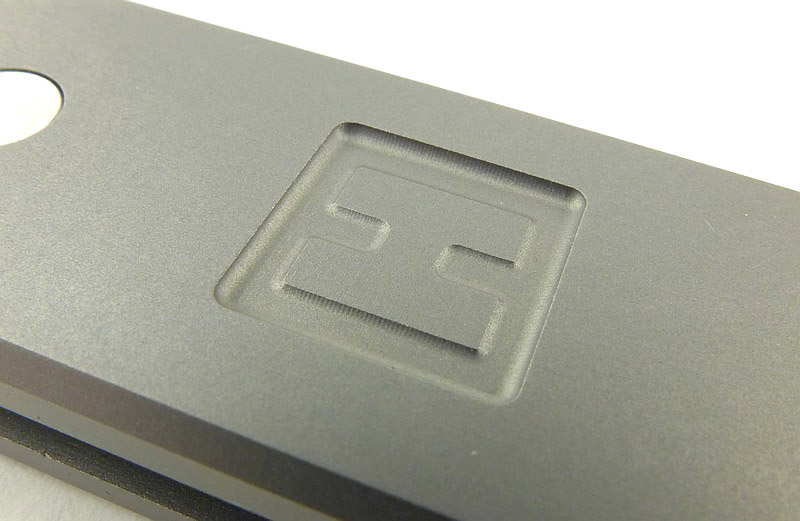
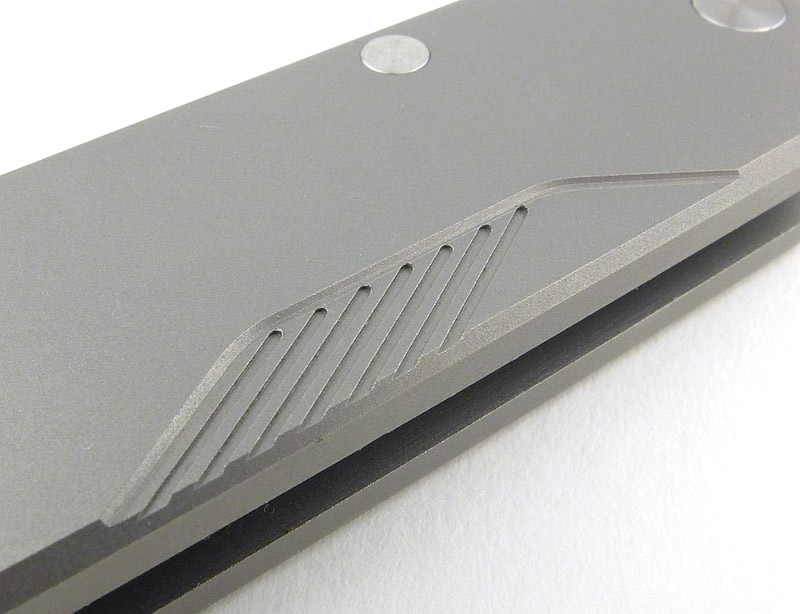
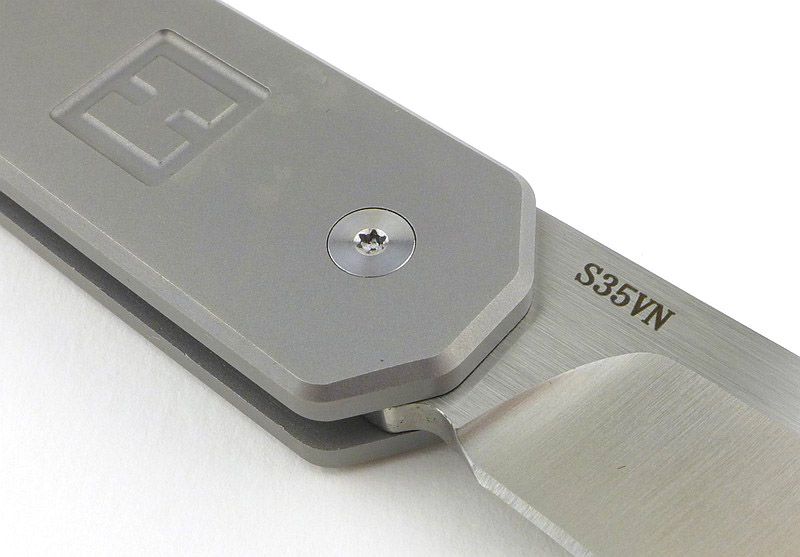
A good look round the Heinnie Penfold – Things to look out for here are:
Entirely a Heinnie design, the Penfold takes the classic pocket-spring slip-joint knife, and streamlines it with a beautiful simplicity and clean look.


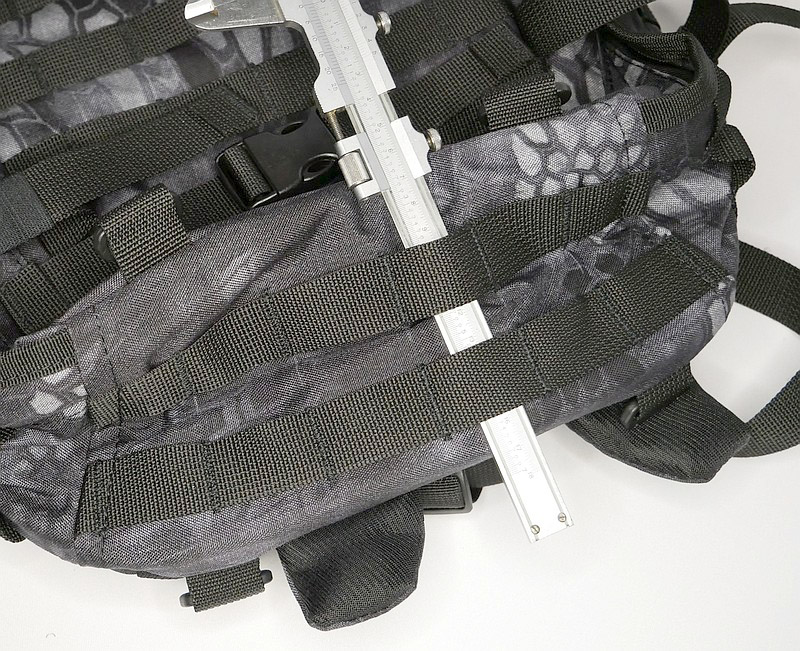
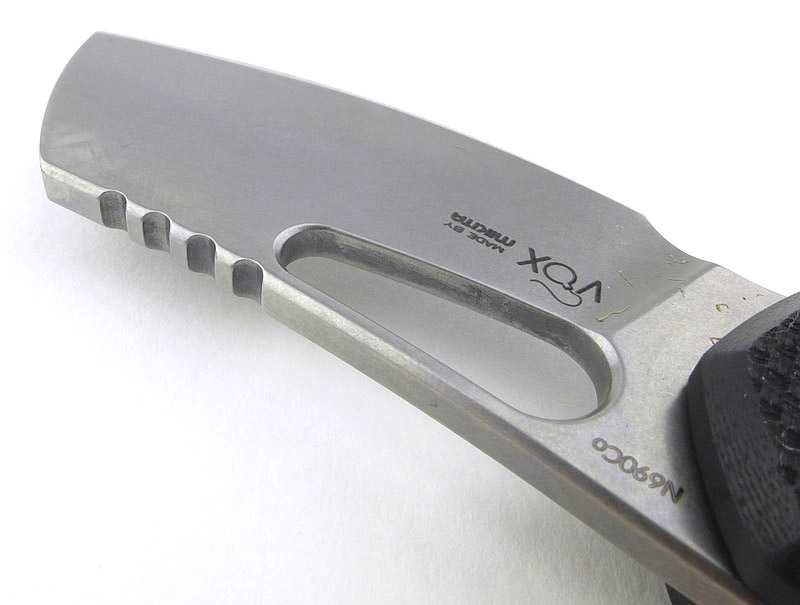
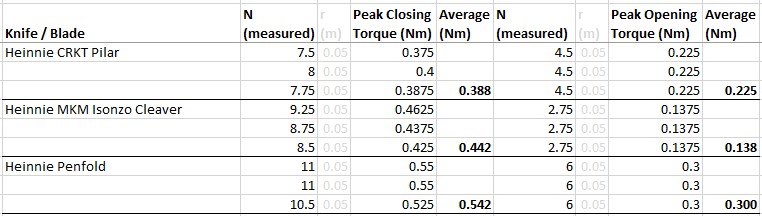
The Blade and Handle – Detailed Measurements:
For full details of the tests and measurements carried out and an explanation of the results, see the page – Knife Technical Testing – How It’s Done.


The Torque measurement:


What is it like to use?

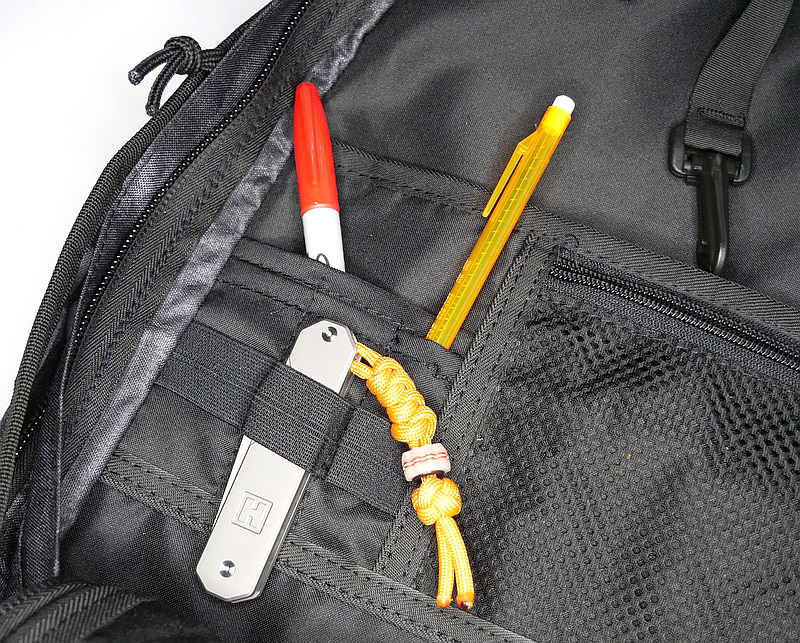
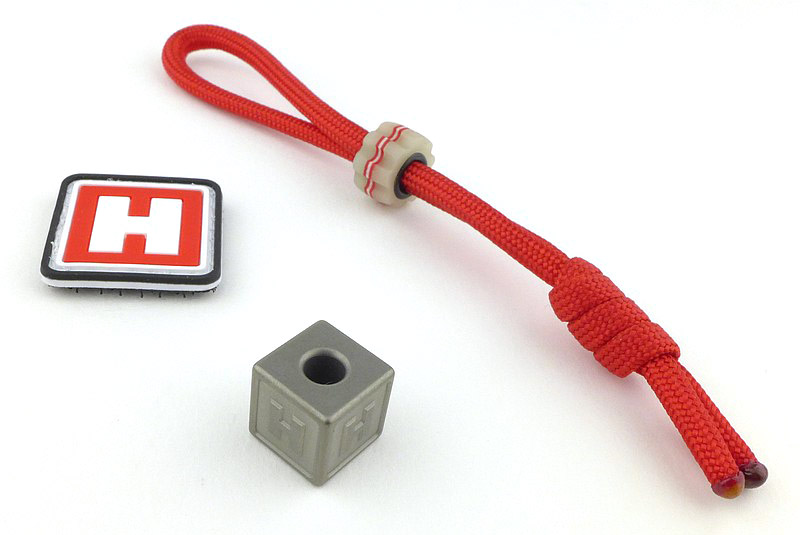
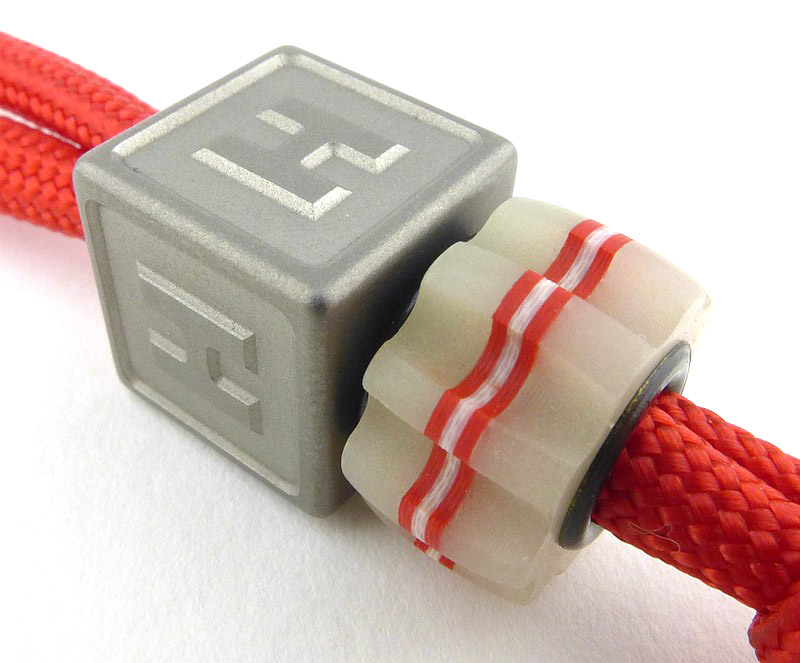
As a little ‘cherry on top’ I’ve added a couple of Heinnie beads onto paracord lanyards.


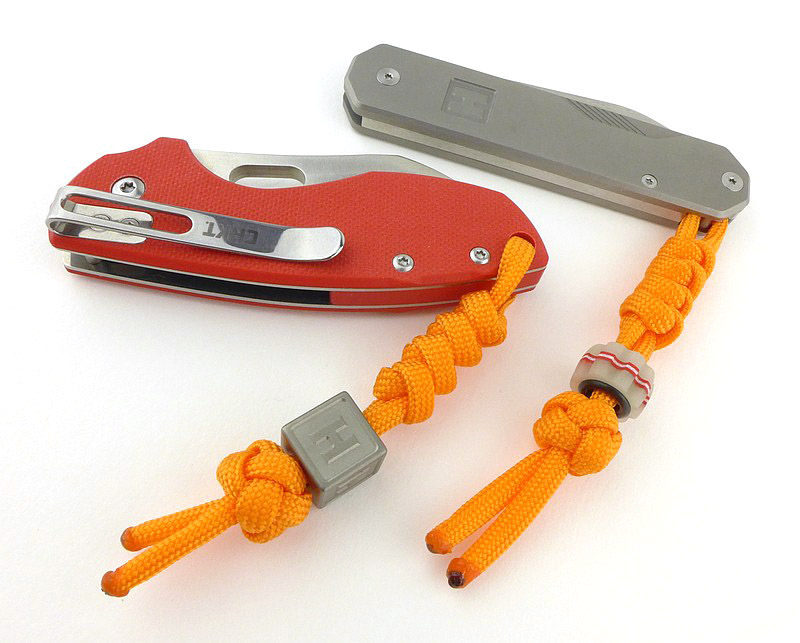
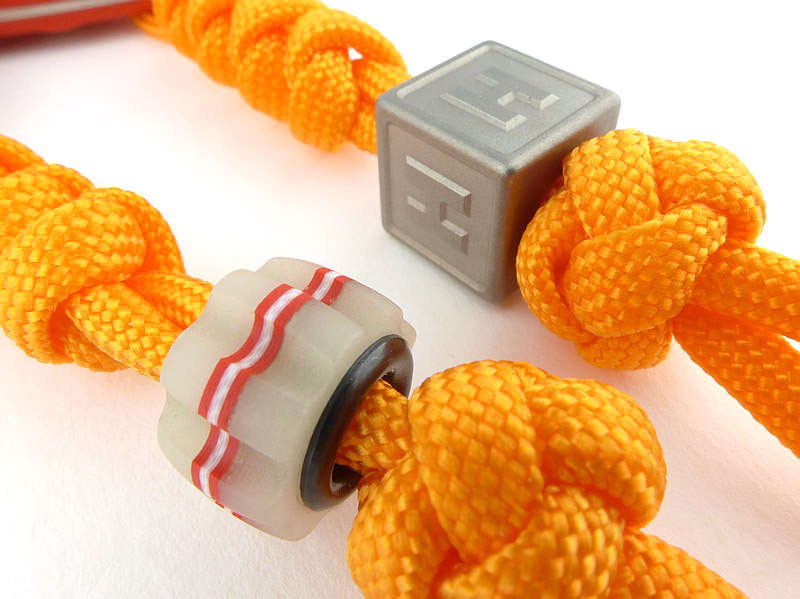
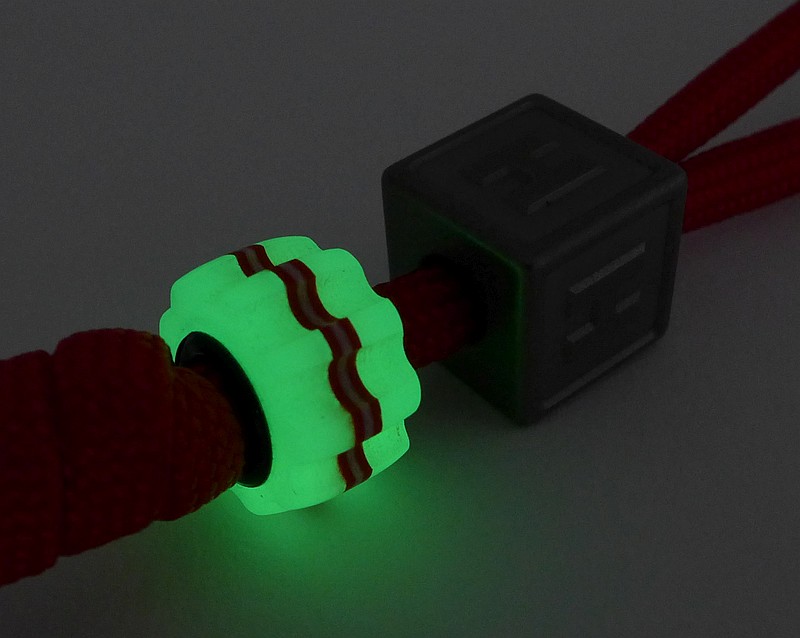
This led me to make a how-to video for the lanyards I like to tie. See Tutorial Page Here.


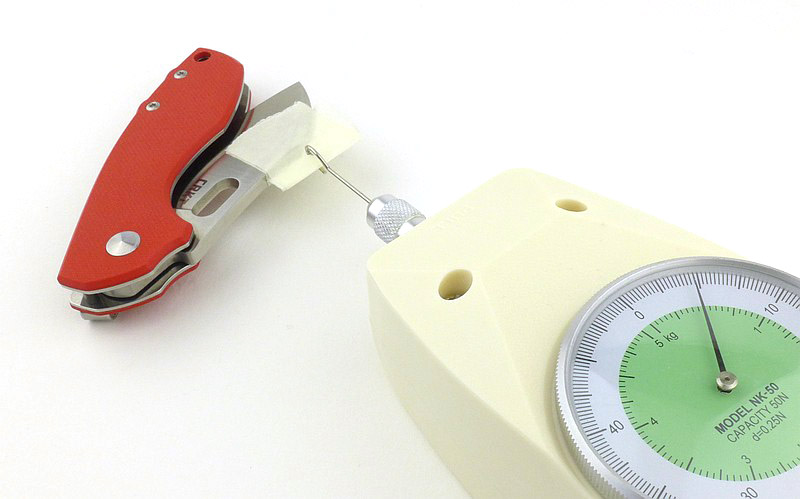
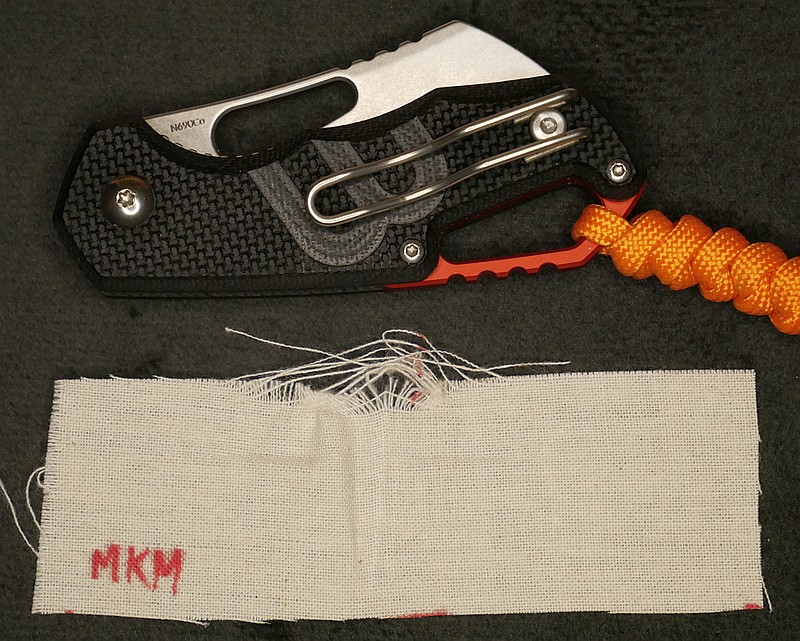
Inspired by the rasp-like grip texture of the MKM Isonzo handles (plus noticing other ‘pocket ripping knives’ over the years), a new test was born – the pocket-shredder test. Taking some raw calico and fitting and removing the knife’s pocket clip onto the calico fabric as if it were a pocket edge. This was done only 5 times; here you can see the comparison of how aggressive the pocket clip grip is. The MKM is a shredder!


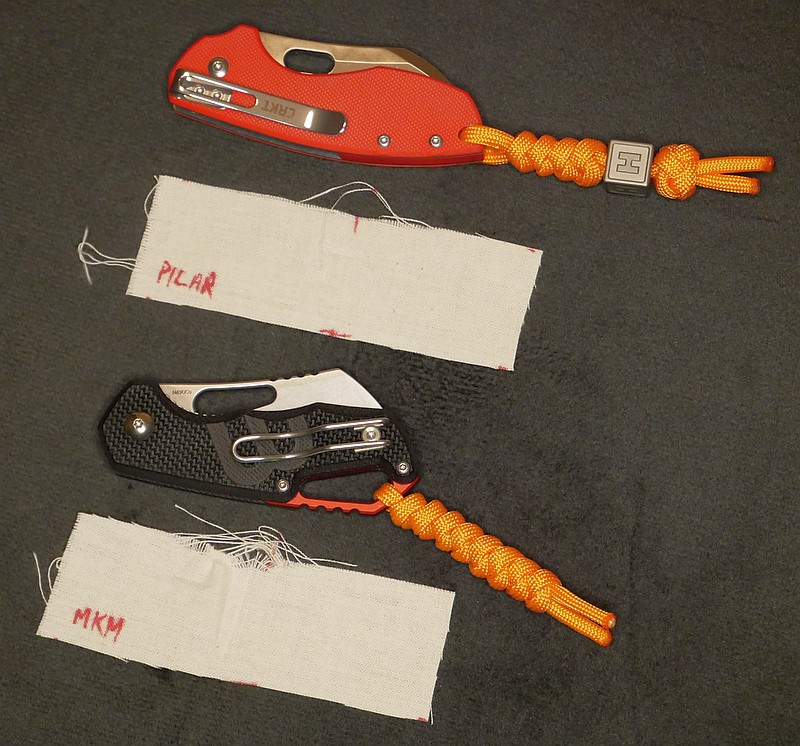
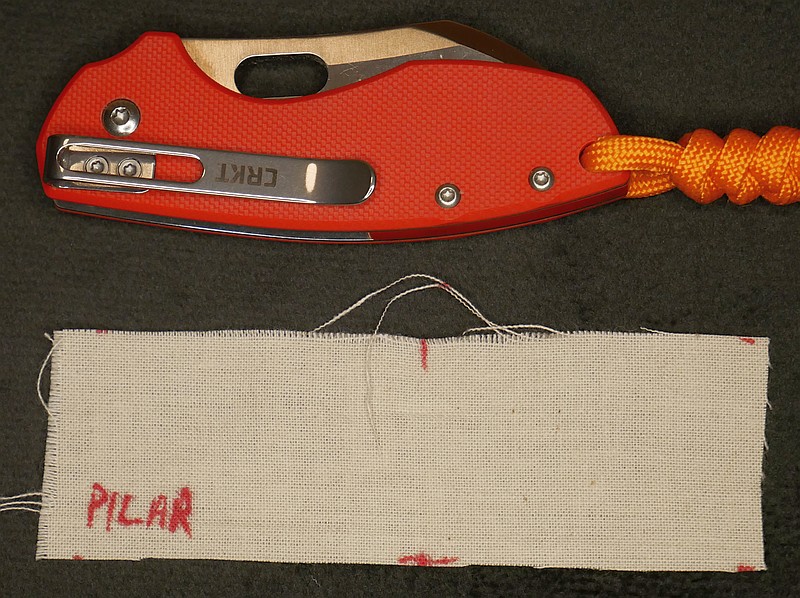
Heinnie Edition CRKT Pilar – It’s a compact knife, three-finger-grip size, so, frustrating for it to be a lock knife where carry restrictions prevent EDCing a locker. Heinnie Haynes special slip-joint edition makes this a lovely, and EDCable, working knife. It is a slight disappointment that it only has a tip-down pocket clip. I initially thought this might be a deal breaker and this does conflict slightly with the lanyard hole, as to use the pocket clips means stuffing the lanyard into your pocket, opposite to how it should be. However, thanks to its small size and ease of handling it actually hasn’t been a real issue.
The sheepsfoot blade shape is very practical, presenting the tip and edge nicely for draw cuts.
One-handed-opening is easy and the slip-joint detent is firm enough (assuming correct cutting technique). Thanks to the vision of Heinnie Haynes, we have a super usable, easy to carry, and inexpensive EDC pocket knife.

Heinnie Edition MKM Isonzo Cleaver – This knife drew me in as soon as I saw it, Jesper Voxnæs’ distinctive design, which was also originally a liner-lock knife. With Heinnie Haynes stepping in and arranging for a slip-joint conversion to open up this excellent knife’s EDC-ability.
In this version, it has the ‘cleaver’ blade (although effectively this is really a slightly deeper sheepsfoot shape), with the characteristic downward presentation of the tip, making it a very practical cutter.
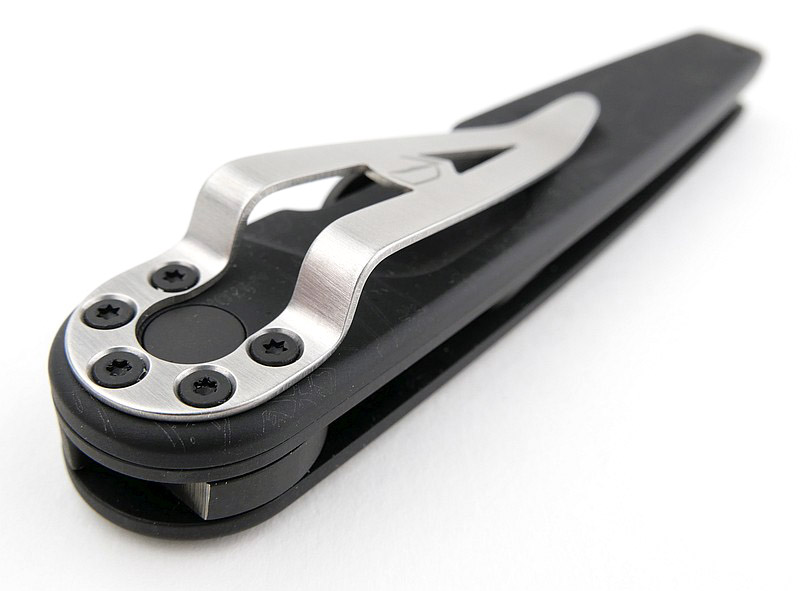
The peeled G10 scales have a texture that almost reminds me of the rasp side of a box grater (the one you end up skinning your finger joints on). This texture is super grippy, and I feel I could keep hold of this despite oil or anything else slippery on my hands.
For its overall size, the Isonzo is quite wide when folded; wide enough I could not fit it into any of the knife belt pouches I have. The secure grip from the rough handle texture is actually really good, and feels fine for general use, so I definitely want to carry this. Despite being my preferred tip-up clip position, its ferocious grip texture makes the pocket clip something I won’t use, as it will rip pockets to shreds; so, I just popped it into the bottom of whatever pocket or pouch/bag I had.
With a deep full flat grind, the blade had the narrowest primary bevel angle of the three in this review, and proved a great slicer with lots of control.

Heinnie Penfold – Those sleek lines make the Penfold beautiful in its simplicity. This is a knife imbued with elegance and sophistication, and a joy to behold every time you bring it out. When this arrived, I got out an old leather belt pouch I’ve had for probably over 25 years, and it’s been on my belt every day since then (with the Penfold in it of course).
Initially I was a little put off by the thickness of the blade. In terms of visual design, the thick blade looks super, but a thick blade loses out in slicing ability, so I didn’t have high hopes for the usability. Well, I could not have been more wrong; every task I’ve used it for has been completed with ease and not impeded by the blade thickness. There will be some cutting jobs the blade thickness may end up slowing down, but so far this has proven a cracking daily carry!

Review Summary

The views expressed in this summary table are from the point of view of the reviewer’s personal use. I am not a member of the armed forces and cannot comment on its use beyond a cutting tool or field/hunting knife.

Something that might be a ‘pro’ for one user can be a ‘con’ for another, so the comments are categorised based on my requirements. You should consider all points and if they could be beneficial to you.

_______________________________________________
What doesn’t work so well for me
_______________________________________________

Pilar – tip-down clip position.
Isonzo – pocket shredding grip texture.
Penfold – thick blade and steep primary grind angle.
Penfold – lanyard point fiddly and a tight fit for 7-strand paracord.

_______________________________________________
Things I like
_______________________________________________

Pilar – converted to a slip-joint for EDC.
Pilar – sheepsfoot blade shape.
Pilar – compact and easy to carry.
Isonzo – converted to a slip-joint for EDC.
Isonzo – super grippy handle texture.
Isonzo – very easy to one-hand-open.
Penfold – elegant and stylish design.
Penfold – S35VN and Titanium.
Penfold – slim and narrow making it a low profile carry.

 
Discussing the Review:
The ideal place to discuss this review is on the Tactical Reviews Facebook Page
Please visit there and start/join the conversation.

As well as the Tactical Reviews Facebook Page, please consider visiting one of the following to start/join in any discussion.

BladeForums – Knife Reviews (US based Forum for Knife Discussion)

CandlePowerForums – Knife Reviews Section (Largest and Friendliest Flashlight Community Forum)

The BESS Exchange – A forum discussing technical aspects of sharpness and truly understanding your sharpening process.

Knife Showcase: Lajolo Knife Urban 01 LP “La Prima” Limited run of 300

This Knife Showcase takes a close look at the Lajolo Knife Urban 01 LP “La Prima”, a limited edition of only 300 pieces, produced and distributed by Extrema Ratio.

The knife was designed by the master of arms Danilo Rossi Lajolo of Cossano, who created the World Calix Academy in 2007.

You can find the knife at the “The Factory” along with lots more.

SHOWCASE VIDEO:

SHOWCASE GALLERY:


Discussing the Showcase:
The ideal place to discuss this showcase is on the Tactical Reviews Facebook Page
Please visit there and start/join the conversation.

Light Review: Fenix E03R, E28R and E35 V3.0

A set of three EDC type of lights from Fenix (see MyFenix in the UK). This is a review of the Fenix E03R, E28R and E35 v3.0 covering a range of power and capacity options. Of these, the E03R has been available for the longest, with the E28R being a recent release and the E35 updated to V3.0 and using the 21700 cell with huge 5000mAh capacity.

What is in the box?:


The beam

Please be careful not to judge tint based on images you see on a computer screen. Unless properly calibrated, the screen itself will change the perceived tint.

The indoor beamshot is intended to give an idea of the beam shape/quality rather than tint. All beamshots are taken using daylight white balance. The woodwork (stairs and skirting) are painted Farrow & Ball “Off-White”, and the walls are a light sandy colour called ‘String’ again by Farrow & Ball. I don’t actually have a ‘white wall’ in the house to use for this, and my wife won’t have one!

The beamshots are divided into two sets with the indoor and outdoor beams for a more direct comparison. In the indoor set the E03R is first shown with the red beam and then onto the E03R white followed by E28R and E35 V3.0. The same order (minus the red) is used for the outdoor beams.


Batteries and output:

This gallery shows the measured charging current for the E03R, the E28R built-in charging, and the USB-chargeable cell supplied with the E35.

Please note, all quoted lumen figures are from a DIY integrating sphere, and according to ANSI standards. Although every effort is made to give as accurate a result as possible, they should be taken as an estimate only. The results can be used to compare outputs in this review and others I have published.

Parasitic drain of the E03R cannot be measured.

This gallery has two runtime graphs. the first shows all three lights together for the entire ANSI run, the second is just to show the first few minutes of the run.
The E35 is showing clear thermal regulation as it hovers around the 1800lm mark.


Troubleshooting

This section is included to mention any minor niggles I come across during testing, in case the information helps anyone else.

The E28R displays a slight flicker in the main beam once the cell has reached a low enough level that the red switch warning flash is shown. At this point the output is very low and the cell needs to be recharged. The output is still usable but the flicker noticeable. As long as the low battery warning is not displayed this does not happen.

As per the description of this section, this information is provided in case anyone else finds a similar ‘issue’ that might be fixed in the same way.

The E03R, E28R and E35 V3.0 in use

Firstly a look at the relative sizes of these three options. On its own, the E03R is almost too small and easy to drop, but is intended to be attached to something (keys, zipper etc) and once it is, it suddenly comes to life in ease of use. For the other two, Fenix has nicely created the E28R and E35 to be only slightly bigger than the cells they use to power them, so your choice is almost more about the size and capacity of cell you want to have.


The interfaces of all the lights is basically the same apart from the E03R having red light instead of strobe. Press and hold to turn on, tap to change mode and press and hold to turn off. The last used output is memorised apart from the E03R which always starts on low.
A little trick to get the E28R and E35 to start on low is to use the lockout feature (double tap when off, and then double tap again to unlock) as the lowest output is selected when coming out of lockout.
Personally I would prefer an option to allow a single click to turn on as the press and hold is less immediate when using it.
The switch is relatively low profile on all three models, and just by feel, can be tricky to find. The E03R can just be held in a pinch grip and even if the button is underneath it will operate. For the E20R and E35, I found the pocket clip essential for ‘indexing’ my grip and finding the power switch. The clip is free to rotate around the tube, so the alignment can be off if you are not careful. I do like a side switch for daily use.
Beam tint is nicely neutral to warm, with the TIR optics giving a easy to use beam.
When you have the convenience of the built-in USB charging port, the drag of having to unscrew the light to charge the battery (E35) becomes more apparent. Perhaps the E35 v4.0 will have the USB-C charging built into the head like the E28R? Of course this is balanced by the cell having a healthy 5000mAh capacity, so unless you are always blasting the highest output level you should have a good time between charges.
A little note on the E03R red beam. Typically you want to keep light levels low when using red, so it is a pity there is no direct to red option. However, this is easily worked-around by simply holding the front of the E03R against your hand/leg/whatever while holding the power button, and do this long enough to reach the red output before using it. As the majority of use is most likely white anyway, it is no real hardship to do this when red output is needed.

Review Summary
The views expressed in this summary table are from the point of view of the reviewer’s personal use. I am not a member of the armed forces and cannot comment on its use beyond that covered in the review.

Something that might be a ‘pro’ for one user can be a ‘con’ for another, so the comments are categorised based on my requirements. You should consider all points and if they could be beneficial to you.

_______________________________________________
What doesn’t work so well for me
_______________________________________________

Power button difficult to find by feel.
Press to hold delay in switching on and off.
Lowest mode not low enough.

_______________________________________________
Things I like
_______________________________________________

Excellent general purpose smooth EDC beams.
Super tough TIR optics.
Very powerful.
USB-C charging – no separate charger needed.
E03R has choice of red or white beams.
Low parasitic drain.
EDC friendly side-switch.
Lightweight, simple and easy to carry.

 
Discussing the Review:
The ideal place to discuss this review is on the Tactical Reviews Facebook Page
Please visit there and start/join the conversation.

As well as the Tactical Reviews Facebook Page, please consider visiting one of the following to start/join in any discussion.

CandlePowerForums – Flashlight Reviews Section (One of the best known Flashlight Community Forums)
BudgetLightForum.com…where Frugal meets with Flashlight!

Gear Review: Wisport Sparrow 16 and 20 Rucksacks

Inspired by a project to assemble an urban emergency grab-bag / evac-bag / bug-out-bag / go-kit using a maximum 20l rucksack, I chose the Wisport (from Military 1st) Sparrow 16 and 20 rucksacks. This review is to take a detailed look at these bags and their features. As well as the photo galleries there is also a video showing the features of each bag. (Keep an eye out for the emergency bag article, or subscribe for updates to make sure you get notified.)

Diving into the details:
Starting with the smaller Sparrow 16 and the images are split into three galleries to cover the main external features, carry strap details, and the bag’s compartments.

External features:
The Sparrow 16 shows how even a small bag, with a few extras on it, can have a pretty impressive carrying ability. Each side of the Sparrow 16 has a set of two compression straps with quick release buckles (as well as MOLLE panels). These make it easy to adapt the bag, stabilise the load or even strap on additional equipment or clothing.
Even though it is a small bag, it has a good comfortable strong top strap. Under this strap is the hydration pouch tube port.


The carry straps:
Despite being a small 16l bag, the Sparrow 16 has a lot of details in its design – the carry straps are no exception. Both shoulder straps are fully removable, not just one end of the strap, but both, can be unclipped. You can use remove one strap to make it a neat single shoulder bag (in the way many people carry a rucksack), or both and have a large organiser that you carry with the handle.
Even on this smaller bag there is a chest strap, and the hydration tube clips.


Compartments in the Sparrow 16:
On the very front panel of the bag is a side zip accessed compartment, the same size as the whole front panel. Moving onto the main compartment, which has a full clamshell opening (once you undo the side straps). At the front of the main compartment is a zip up compartment, and below this is an elastic strap with loops for organising items. The back of the main compartment has a pocket with elastic edge, to hold a hydration pouch, or any other flat items.


Moving onto the Sparrow 20.

External features:
The Sparrow 20 steps up the ‘strappage’ to another level. Like the 16, each side has a set of two compression straps with quick release buckles (as well as MOLLE panels). The front panel has a further two compression straps with quick release buckles, and the base of the bag has both MOLLE webbing and a set of four attachment points for webbing of your own configuration. The front panel also has a top opening zip up compartment. It’s all topped off with a sturdy carry strap.


The carry straps:
In the case of the sparrow 20, the shoulder straps are much more substantial, wider, and padded. The tops of the straps are fixed, but the bottom have quick release buckles to give you a quick exit from the straps when needed. Under the straps at the top of the back panel is the hydration tube port. The back panel has large padded contours and space for air to flow. At the bottom end of the shoulder straps there is an angled load spreader where it is fixed to the bag. Next to this, on either side, is a webbing attachment point that could be used for fitting a waist strap.
Hydration tube clips sit in the same place on the shoulder straps as the chest strap.


Compartments in the Sparrow 20:
With the extra 4l in space comes a jump in equipment and more organisation. Starting on the front panel is a pocket for very quick and easy access. For the full clamshell opening of the front panel compartment you need to unclip the four side straps. Inside the front compartment is a clip hanger strap and a D-loop hanger strap (for keys and the like), a small organiser panel with pen pockets and elastic strap, a mesh zip up pocket, and an open pouch pocket.
Moving into the main compartment, again with full clamshell opening, and the back has an elasticated pocket for a hydration pouch. Around this are four webbing attachment points so you can add further restraints. Covering the front of the main compartment are two zip-up mesh pockets.


What it is like to use?
To add more of the impression of these bags, this video takes a tour round both the Sparrow 16 and 20.

As the more ‘equipped’ of the two bags, the Sparrow 20 has stepped into my EDC while I develop the bug-out-bag system, so here is a quick look round the way I’m using it.
On the front panel I’ve added a MOLLE fixing patch panel to give me more room for velcro patches. There is a torch / flashlight slipped into the webbing to be immediately to hand, but with the top put under the strap above to hopefully stop it falling out by itself.
To keep the compression straps that I’m not currently using out of the way (so the compartments can be unzipped easily), I have actually laid these across each other and used the elastic loops on each strap to hold the other one in place. (Each strap was threaded into the elastic strap loop of the opposite strap.)
On one side panel is a MOLLE glasses case, and on the other are a further two MOLLE pouches. One of these takes my phone and the other has various small items I want within easy reach.
For my EDC use, I only use one of the shoulder straps to quickly pick it up and put it down. The other strap is held neatly out of the way by tucking it into the lower side compression strap.
In the front compartment I have medication pouches, two more lights and a pen, plus many ‘useful’ items tucked into the mesh pouch and pocket.
Not being a fan of chest straps I removed this from the bag, however, inside the main compartment are some webbing attachment points, and here I have re-purposed the chest strap inside the main compartment to hold tall items in place. You can see a tablet case, large and small organiser pouches plus an action camera with mini tripod.


My initial temptation was to cut off a few of the Sparrow 20’s numerous straps to tidy it up. Unused straps can become more of a hindrance than a help. However, I stopped myself; currently the work-arounds I found for the various straps I wanted out of the way are working nicely.
The way I am EDCing the Sparrow 20 should show any potential shoulder strap issues quickly enough, especially considering I’ve made it quite heavy already. No signs of strain or overloading as yet.
So far these bags appear well made, strong and packed full of features.

Review Summary

The views expressed in this summary table are from the point of view of the reviewer’s personal use. I am not a member of the armed forces and cannot comment on its use beyond that covered in the review.

Something that might be a ‘pro’ for one user can be a ‘con’ for another, so the comments are categorised based on my requirements. You should consider all points and if they could be beneficial to you.

_______________________________________________
What doesn’t work so well for me
_______________________________________________

Almost too many straps.
Side straps can prevent easy opening of clamshell compartments.
Main zips a little ‘sticky’ (this may improve with use).

_______________________________________________
Things I like
_______________________________________________

Plenty of Webbing and Straps.
Good ‘organiser’ design features.
Break-out shoulder straps.
Strong top carry handle.
Hydration pouch compatible.
Main compartments have full clamshell opening.
Padded back.

 
Discussing the Review:
The ideal place to discuss this review is on the Tactical Reviews Facebook Page
Please visit there and start/join the conversation.