Light Review: Surefire Sidekick (Compact Fob Light)

Though not the first to make a USB rechargeable keychain light, Surefire have applied their philosophy of ‘excellence in illumination’ to this EDC essential.
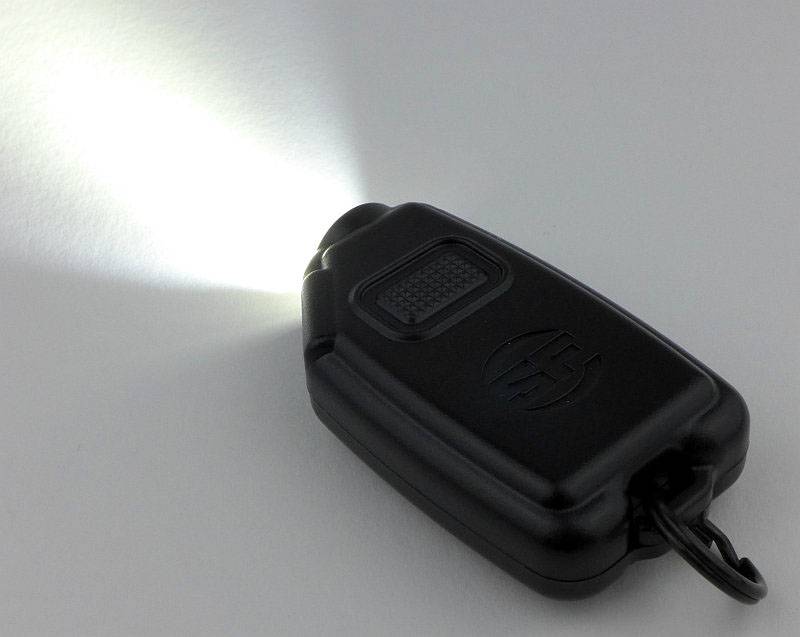
 photo 09 Sidekick on P1170827.jpg

Taking a more detailed look:

The Sidekick comes in a cardboard blister pack.
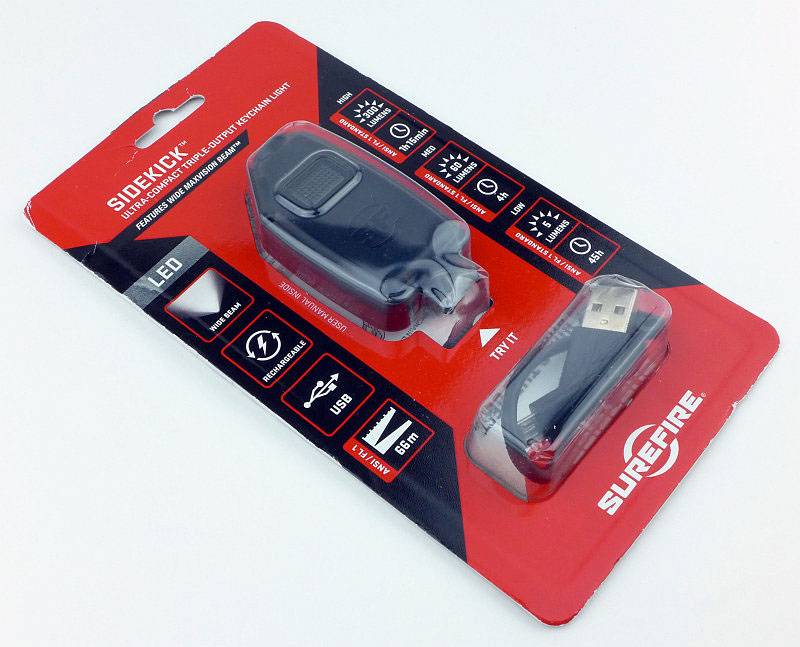
 photo 01 Sidekick Boxed P1170798.jpg

Inside is the Sidekick itself, a short USB charging cable, a metal clip and the instructions.
 photo 02 Sidekick Box contents P1170803.jpg

The underside of the Sidekick has a metal heat sink panel with the model engraved onto it.
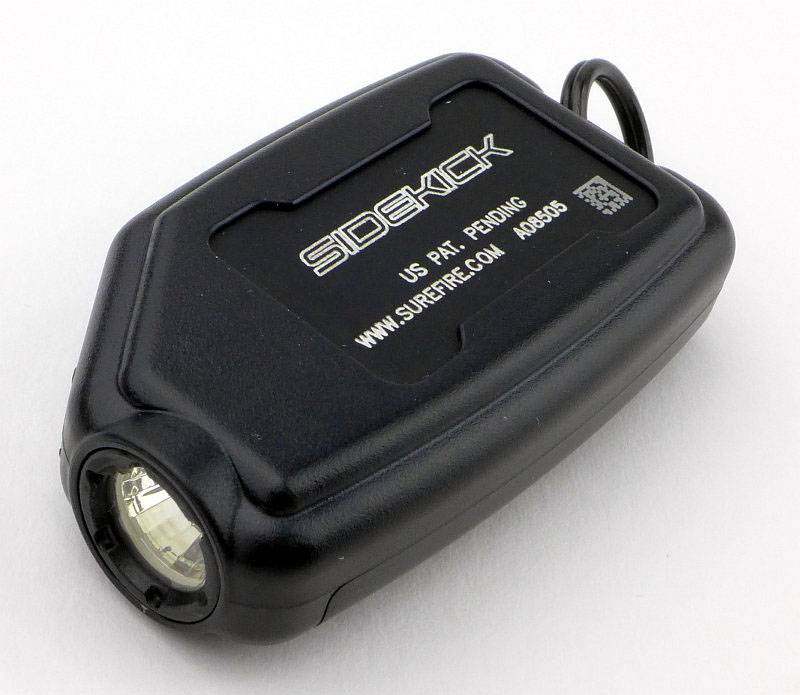
 photo 03 Sidekick angle P1170808.jpg

At the top is the power button and a moulded Surefire logo. The main body is a tough plastic and has a split ring at the rear.
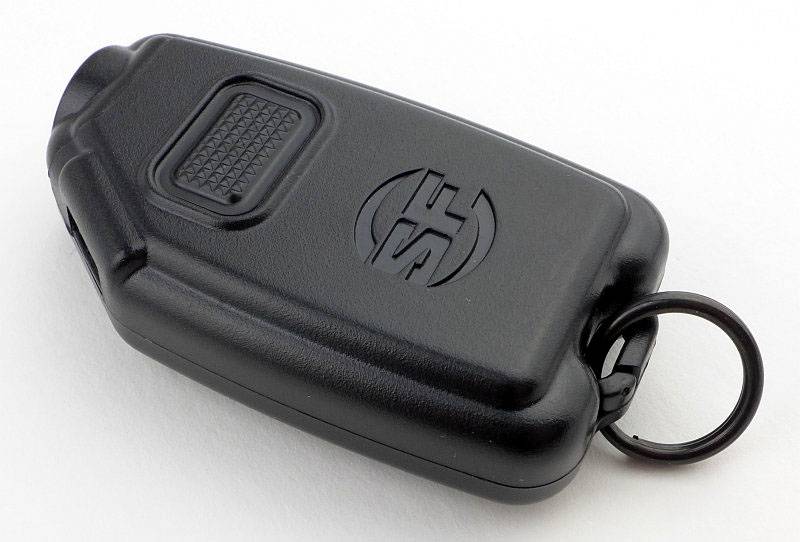
 photo 04 Sidekick rear angle P1170812.jpg

On the angled corner at the front you can see the micro-USB port for charging.
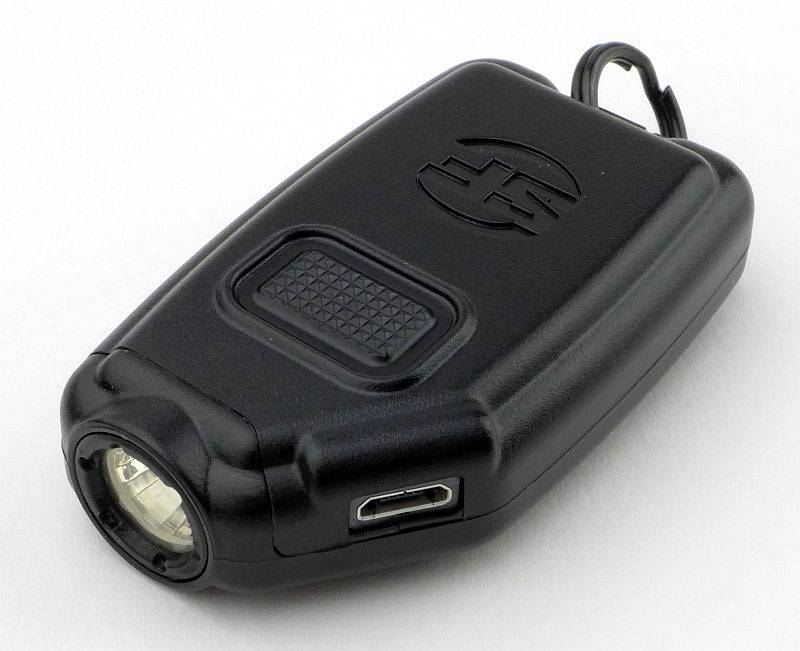
 photo 05 Sidekick port angle P1170815.jpg

I only noticed the small piece of plastic case under the micro-USB port was cracked when I was preparing these photos. This has not affect the function at all.
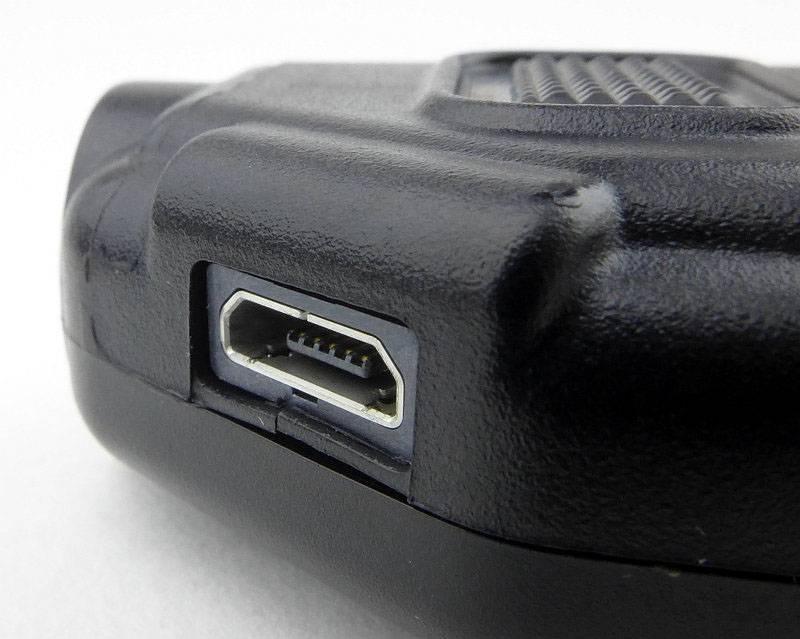
 photo 06 Sidekick port close P1170816.jpg

Set into the front is Surefire’s MaxVision Beam reflector assembly. This has a multi-faceted reflector surface to smooth out the beam without the losses of a textured reflector.
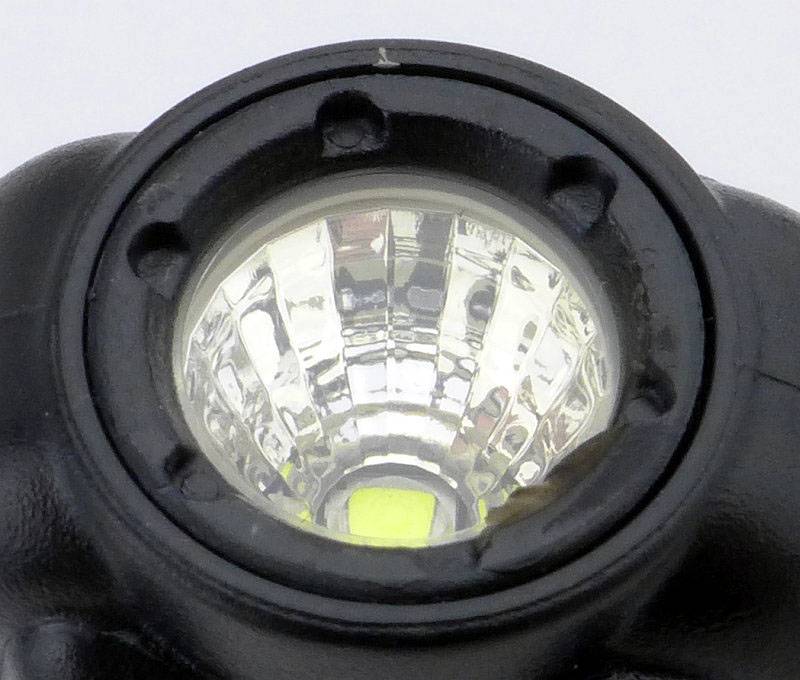
 photo 07 Sidekick reflector angle P1170822.jpg

Looking straight into the faceted reflector at the Cree XP-G2 LED. (For some reason Surefire don’t specify the actual LED anywhere in the documentation.)
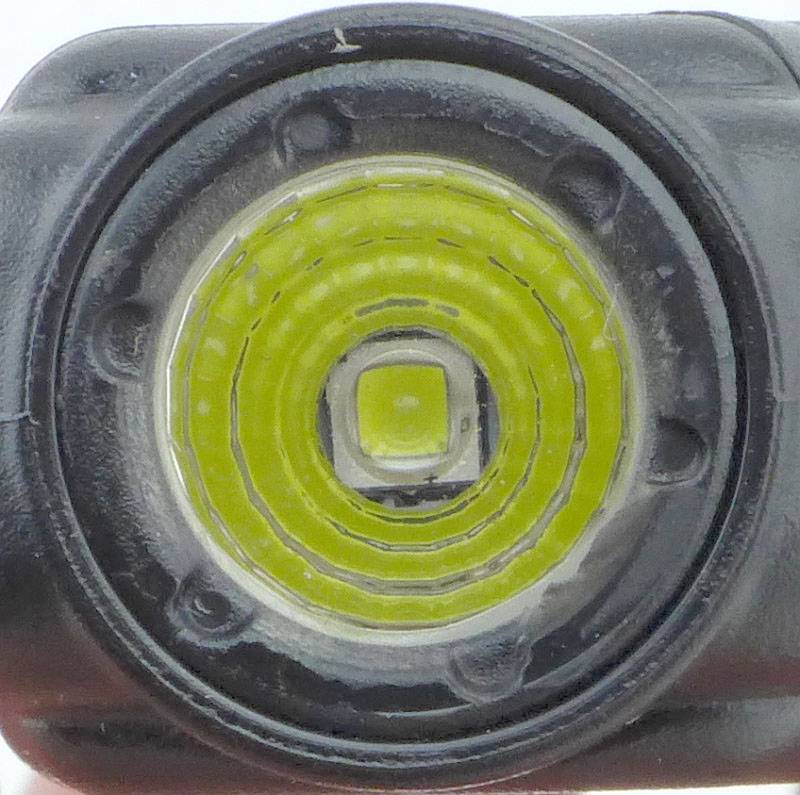
 photo 08 Sidekick LED P1170824.jpg

Plugging in the micro-USB cable to charge the Sidekick.
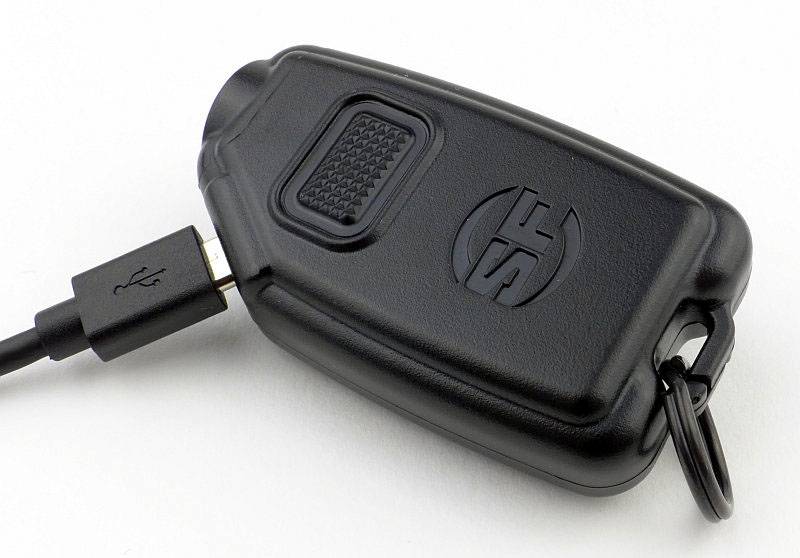
 photo 10 Sidekick charging P1170830.jpg

Even the compact metal clip has ‘SF’ on it.
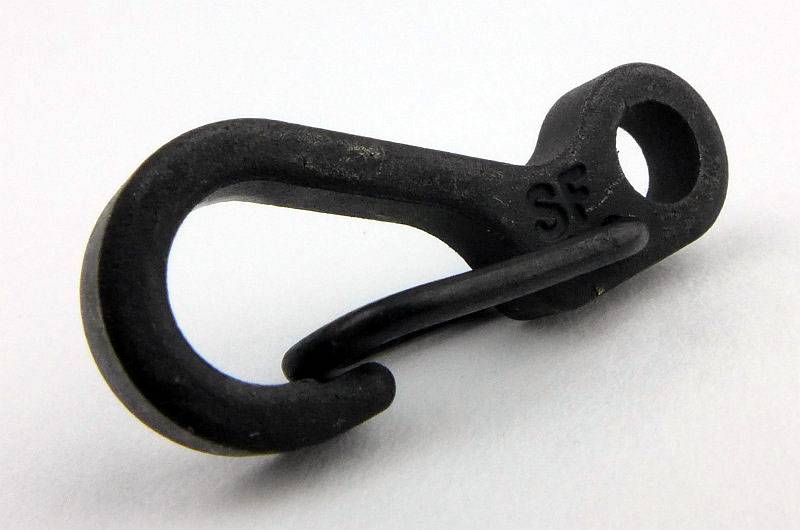
 photo 11 Sidekick clip P1170831.jpg

The split ring is very stiff, so getting the clip on isn’t easy, but its not going to come off by mistake.
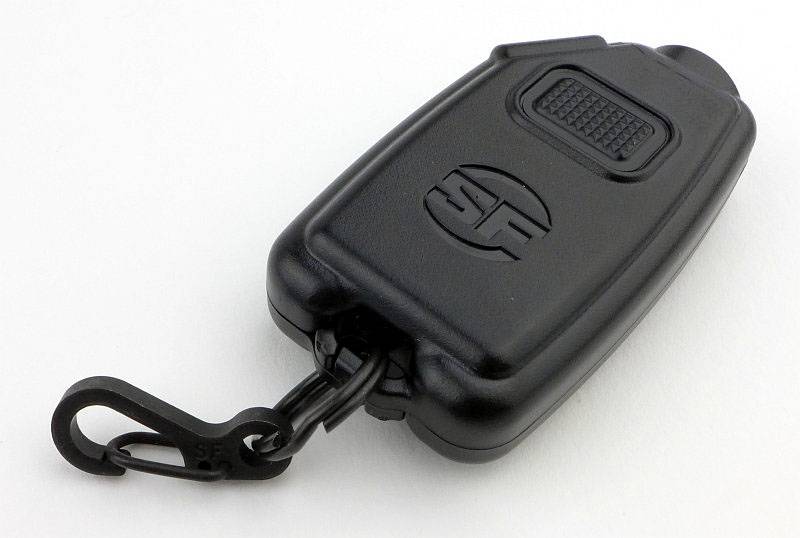
 photo 12 Sidekick with clip P1170834.jpg

The beam

Please be careful not to judge tint based on images you see on a computer screen. Unless properly calibrated, the screen itself will change the perceived tint.

The indoor beamshot is intended to give an idea of the beam shape/quality rather than tint. All beamshots are taken using daylight white balance. The woodwork (stairs and skirting) are painted Farrow & Ball “Off-White”, and the walls are a light sandy colour called ‘String’ again by Farrow & Ball. I don’t actually have a ‘white wall’ in the house to use for this, and the wife won’t have one!

Since the days of the Solitaire keychain light, I’ve always had a compact EDC light on my keys. This shrunk to the photon size button cell type, but those really only served as a last ditch light, so the size I used grew again to include a USB rechargeable or AAA powered light. The beam of the Sidekick is a revelation in keychain lights, with its wide floody beam (with no glare) and plenty of power.

Just look at this beamshot and you probably think we were looking at something you wouldn’t attach to your keys. A really excellent EDC beam.
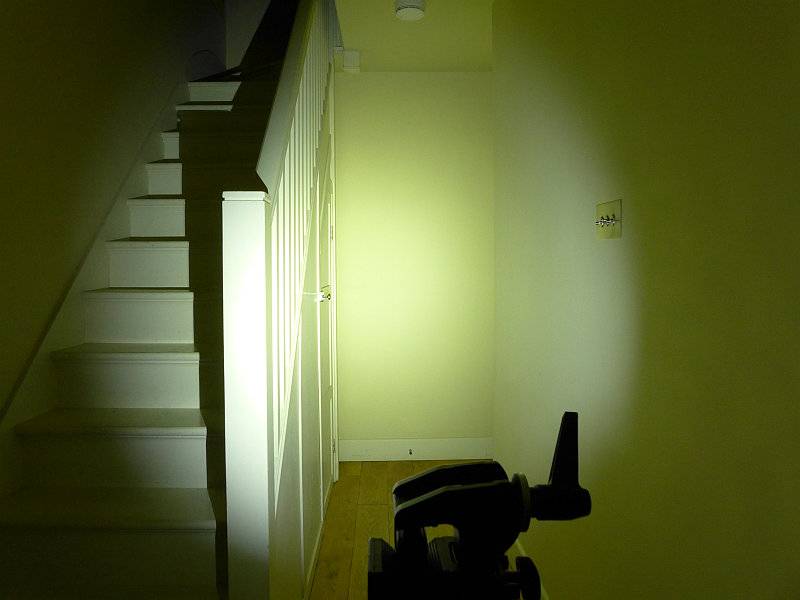
 photo 14 Sidekick indoor beam P1230310.jpg

Modes and User Interface:

The Sidekick has three output levels Low, Medium, and High.
From OFF, press the power switch to select Low, press again within 2s to change to Medium, press again within 2s of the last press to get High, and once more cycles to OFF.
If you are using either Low or Medium, if you wait over 2s before pressing again, the Sidekick will turn OFF (instead of going to the next mode and then OFF).

There are no indicator lights on the Sidekick, so no charge or low battery indicators. Instead the Sidekick uses its main LED. For low battery, the output simply reduces sharply to a lower level and starts to fade out. There is no sudden turn off, so while there is no actual ‘warning’ it is clear you are low on power.

For charging, the main LED is used as the indicator. With the USB power connected, the LED blinks to indicate the Sidekick is charging. During the charging process the LED sometimes comes on steadily for a few seconds then has a series of blinks. I’ve not so far managed to determine if there is an actual pattern to this. Ultimately, once fully charged the main LED comes on steadily at the low level and stays on as long as power is connected.

The default order of the modes is L-M-H, but this can be reversed to H-M-L by carrying out the following steps:

1. Plug in the charger.
2. Press the switch three times until the High level is activated.
3. Leave the Sidekick On for 5 seconds or more, then press the switch once to turn Off.
4. Unplug from the charger and test the sequence.

To return to L-M-H, repeat the previous steps except in step 2 you press three times to activate Low.
(Stopping on Medium at step 2 does not do anything.)

Batteries and output:

The Sidekick runs on a built-in 640mAh Li-ion battery.

Surefire have commented that the charge rate is fixed around 450mA, but it always seems to charge faster than the instruction manual, or this information, would suggest. In my experience (with a good charger) even fully depleted, it takes less than an hour to charge.

To measure actual output, I built an integrating sphere. See here for more detail. The sensor registers visible light only (so Infra-Red and Ultra-Violet will not be measured).

Please note, all quoted lumen figures are from a DIY integrating sphere, and according to ANSI standards. Although every effort is made to give as accurate a result as possible, they should be taken as an estimate only. The results can be used to compare outputs in this review and others I have published.

___________________________________________ ________________________________ ________________________________
Surefire Sidekick using built-in cell I.S. measured ANSI output Lumens PWM frequency or Strobe frequency (Hz)
___________________________________________ ________________________________ ________________________________
High 320 0
Medium 60 0
Low 3 100

* Beacon and Strobe output measurements are only estimates as the brief flashes make it difficult to capture the actual output value.

There is parasitic drain but as the light is sealed this could not be measured. During normal use over a period of over 6 months, the Sidekick has never noticeably self drained.

For such a compact lightweight light, the Sidekick has a fantastic performance on High. Not fully regulated, the output does however remain above 250lm for a full 45 minutes – very impressive for a keychain light.
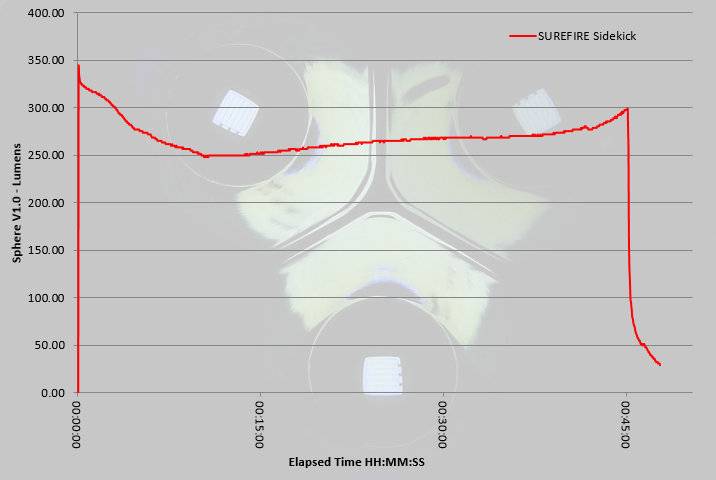
 photo surefire sidekick runtime.jpg

Troubleshooting

This section is included to mention any minor niggles I come across during testing, in case the information helps anyone else.

No issues were encountered during testing.

As per the description of this section, this information is provided in case anyone else finds a similar ‘issue’ that might be fixed in the same way.

The Sidekick in use

Though it is compact, the Sidekick is relatively large for a keychain light. It gets away with this thanks to not being heavy and the plastic housing seems to help reduce its overall presence. Here it is shown next to a AAA keychain light and a photon button cell light.
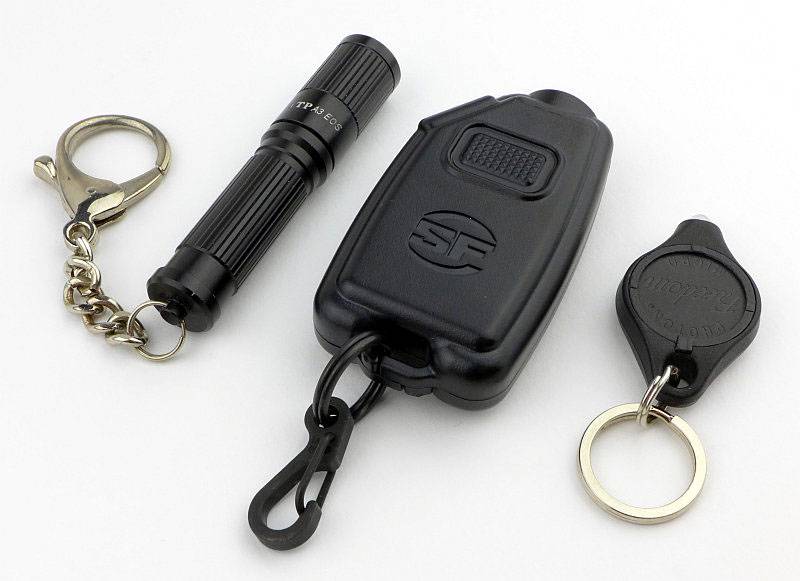
 photo 13 Sidekick size P1170838.jpg

With this extra size and relatively high cost (compared to its rivals, and especially in non-US markets), the Sidekick needs to work well to justify itself. The excellent beam and 300lm output do just that.

Ideally I prefer a smaller keychain light, but the extra size does make it more stable to hold, and you just don’t get that kind of output and runtime from something smaller and lighter.

If the housing were 100% plastic there would be heat issues, but Surefire have used a metal side panel which allows it to conduct heat out of the Sidekick. When using the High output this can get quite hot to the touch.

Perhaps the biggest annoyance for me has been that it is very similar in size to my car key, and when reaching into my pocket I now have to do the ‘pocket juggle’ of my keys to identify if I’ve grabbed my car key or the Sidekick.

The power button is quite stiff and has little feel to the click. The stiffness is an advantage in not having accidental activations (none so far, which I cannot say about other keychain lights), and eventually you do get some feel for the subdued click.

Not being a tactical light, the modes being L-M-H is ideal as for general EDC you most often only need a little light. One disappointment is the use of visible PWM in the Low mode. Medium and High have no PWM, and if only that Low mode was the same it would be much better.

Battery capacity is really great with the 640mAh cell always having plenty of output and runtime for everything I’ve thrown at it. Even with some unexpected night time strolls needing the path to be lit, using the full 300lm and plenty of other On/Off cycles to check things, and I’ve not needed to keep on recharging.

Recharging is one of those ‘love it or hate it’ things due to the main beam being used as a charging indicator. As it has never taken more than 1 hour to charge I haven’t needed to charge it overnight, so it is not that the main beam flashing and then going onto Low disturbs my sleep. However, the flashing can be annoying if you are in a room with lowered lighting. I was surprised by the Sidekick turning on the Low output once charging is complete, but actually it is a very clear indication that charging has finished, and even with a good charging circuit, it is never a good idea to leave any device on charge for a long time for no reason. The Sidekick tells you clearly to take it off charge. You can look at this either way, and to start with I thought it was not good, but having got used to it find it works pretty well.

The beam is very good, with a smooth floody profile and a neutral tint, which makes it so much better to use than lights with a 5mm LED or those with a more focused hotspot. This combined with the 300lm output, which is reasonably well maintained for a full 45 minutes of constant runtime, make this a really strong performer and the slight size penalty you pay is worth it.

Review Summary

_______________________________________________ _______________________________________________
Things I like What doesn’t work so well for me
_______________________________________________ _______________________________________________
Excellent MaxVision Beam. Bigger than most keychain lights.
300lm output. Easily confused for a car key.
USB rechargeable. Built-in non replaceable cell.
Lightweight. Main beam flashes then comes on constantly while charging.
45 minutes runtime on High. Visible PWM used in Low
L-M-H mode order.
Comfortable and stable to hold.
Strong, small, metal clip.


Discussing the Review:

Please feel free to add comments to the review, but the ideal place to freely discuss these reviews is on a forum. If you started reading the shorter forum version of the review, but followed the link this full exclusive review, please return to that forum to discuss the review there.
If you read the review entirely on Tactical Reviews, please consider one of the following to join in any discussion.

CandlePowerForums – Flashlight Reviews Section (Largest and Friendliest Flashlight Community Forum)

EdgeMatters – Sponsored Reviews (UK based Forum for Knife Makers and Collectors)

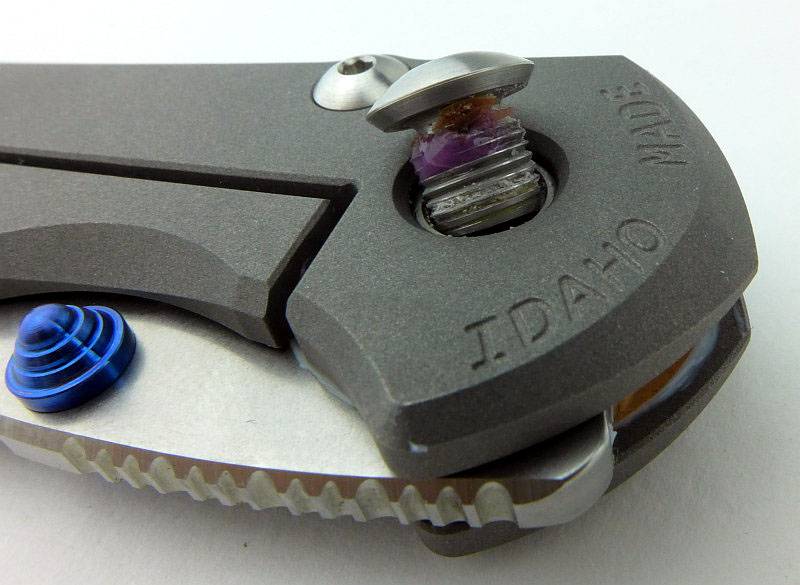
Technical: Chris Reeve Knives Large Inkosi – Strip Down and Washer Replacement

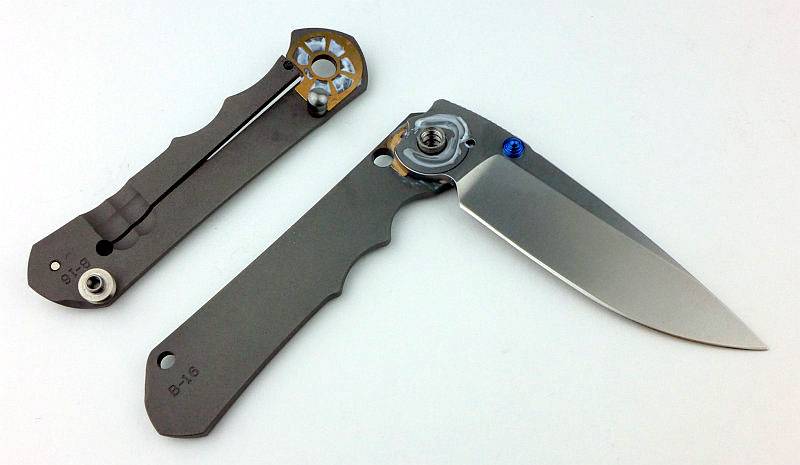
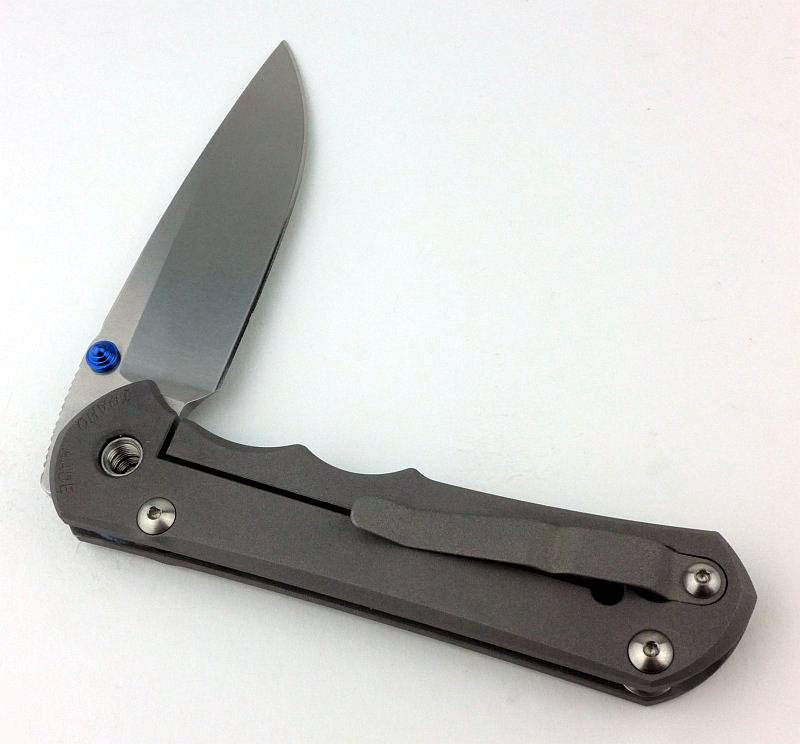
Although the Large Inkosi was only recently launched at Blade Show 2016, in their mission for continual improvement, Chris Reeve Knives have slightly updated the washer design for this knife.

If you want to swap your own washer or give the Large Inkosi a deep clean, this is how to do it.

 photo 15 InkosiWasher Step grease new washer P1230243.jpg

Step-by-step Strip Down and Washer change:

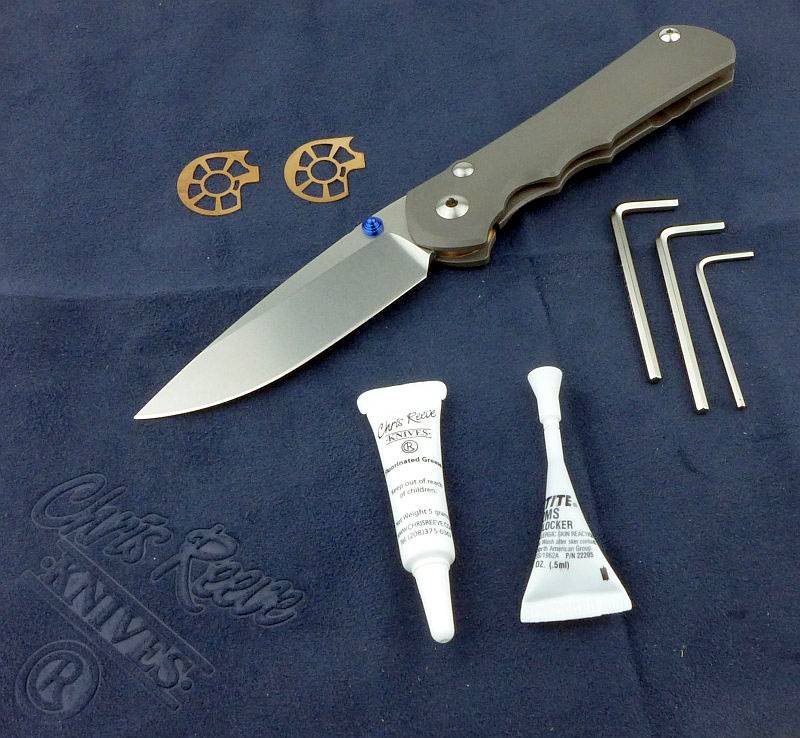
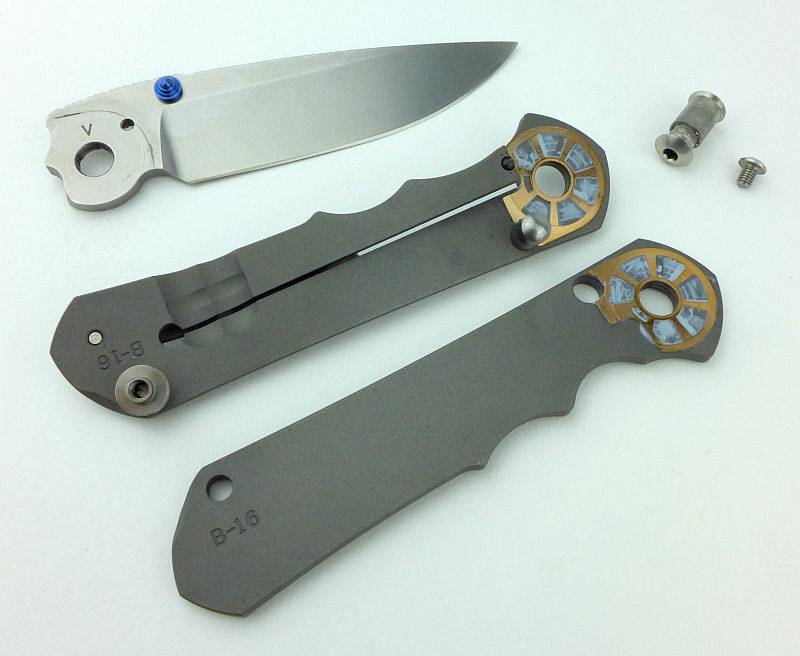
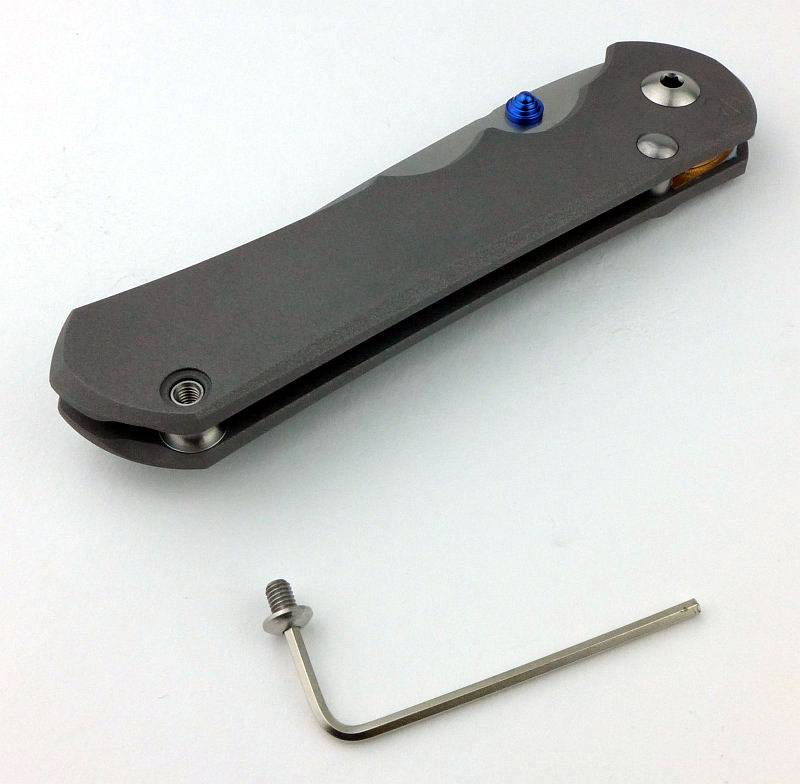
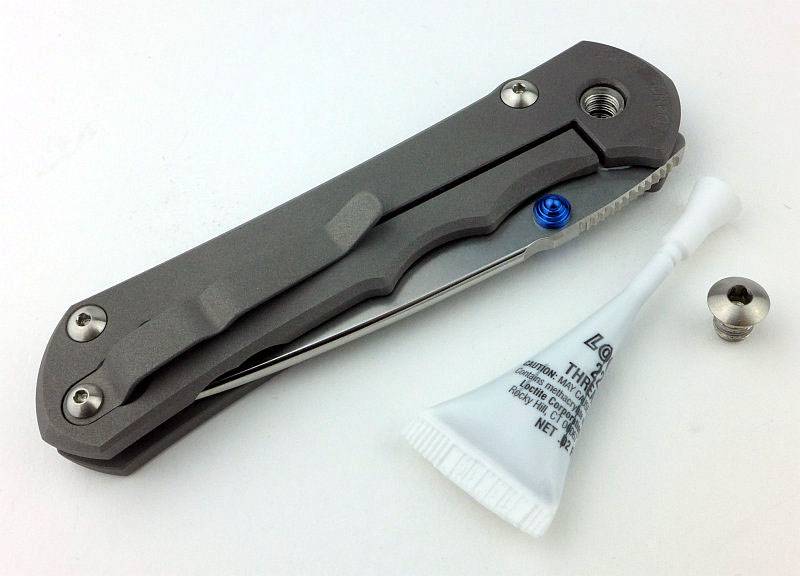
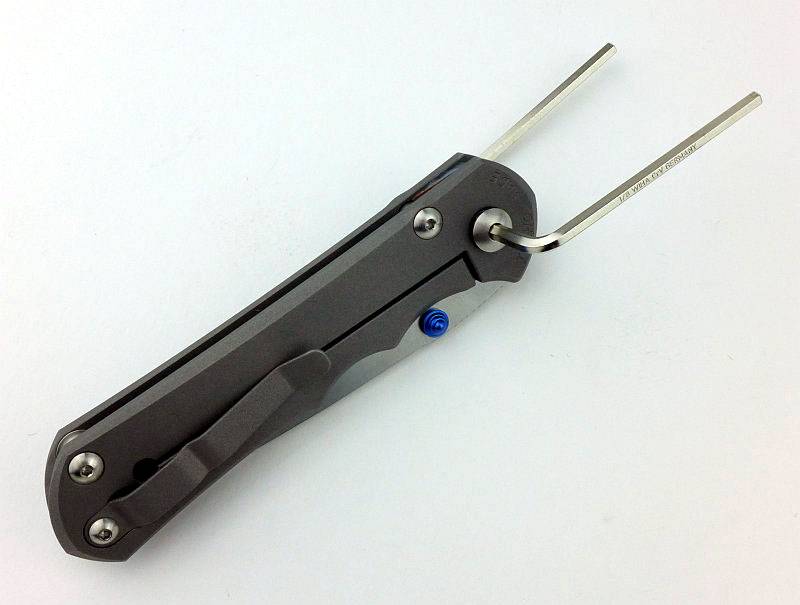
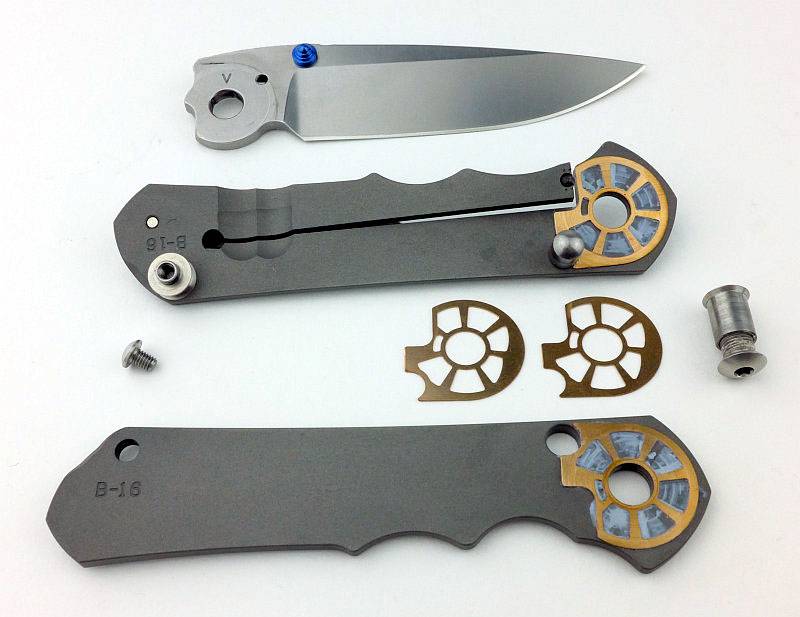
Here we are, ready to go. Working on a suitable surface we have all the things we need laid out – Large Inkosi, new washers, Allen keys for pivot and spacer blots, pivot grease and thread-lock.
 photo 01 InkosiWasher job P1230164.jpg

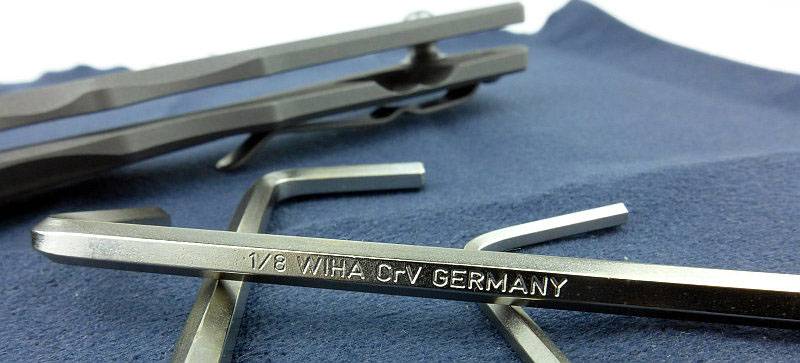
Before going on, something I did spot was that in their approach of using the best quality parts, CRK supply WIHA branded Allen keys – just thought you should know.
 photo 02 InkosiWasher tools P1230169.jpg

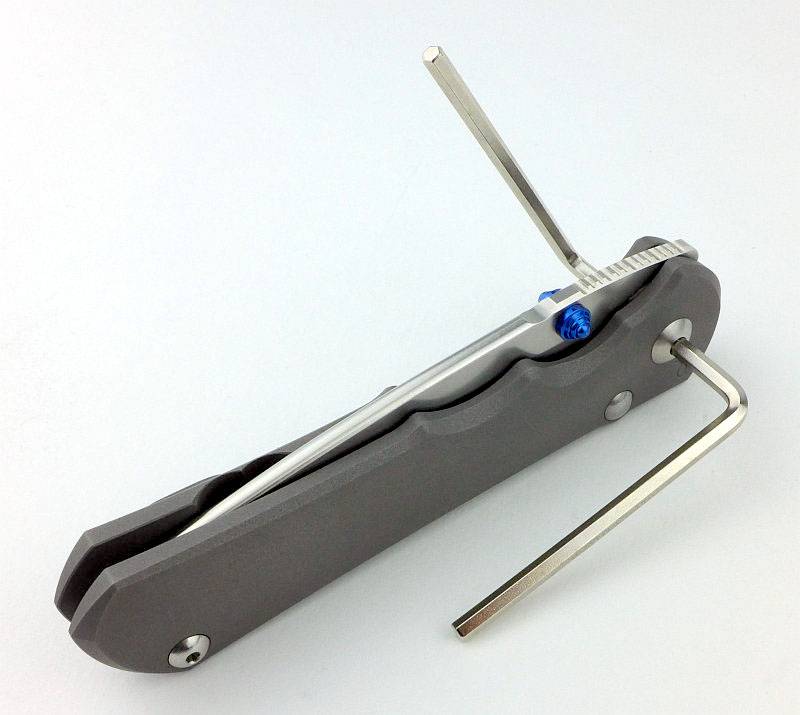
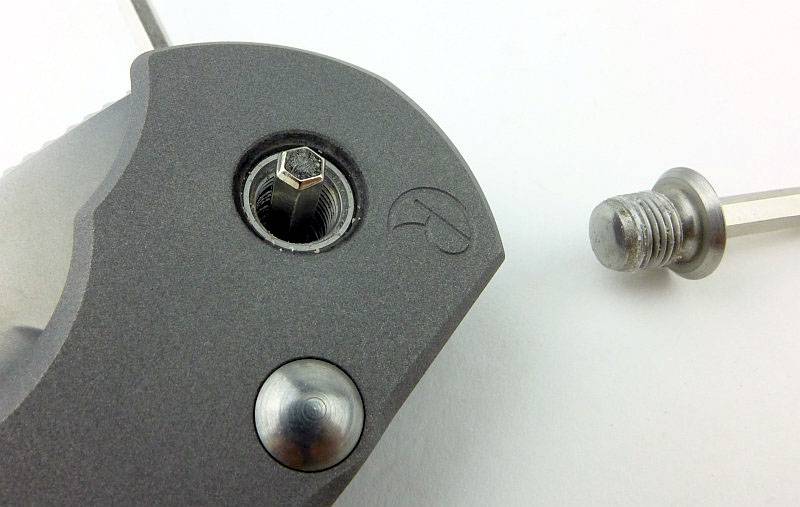
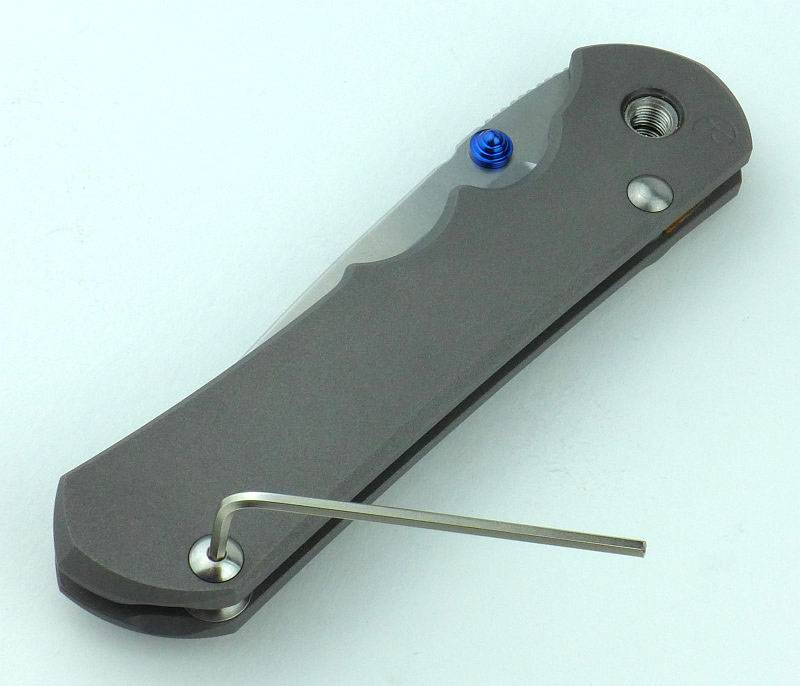
Using the pair of larger Allen keys, fit them into each side of the pivot bolt and start to loosen. Depending on how much thread-lock has been used this might be a bit stiff to start with.
 photo 03 InkosiWasher Step pivot P1230177.jpg

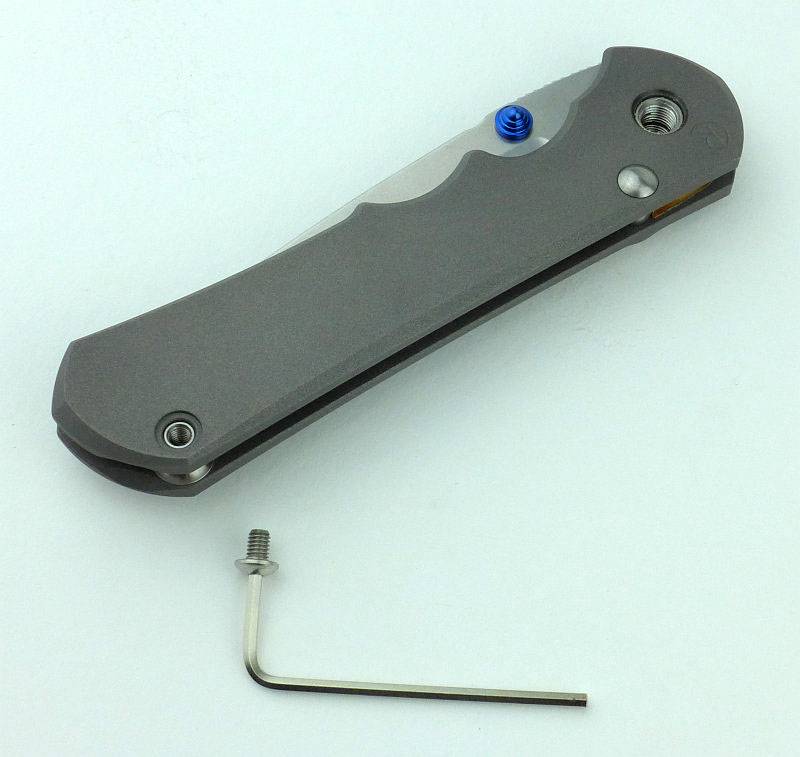
One side of the pivot bolt will start to come out. This side will come out completely, leaving the pivot bolt tube in place. The Allen key from the remaining side of the pivot bolt can come all the way through.
 photo 04 InkosiWasher Step pivot P1230184.jpg

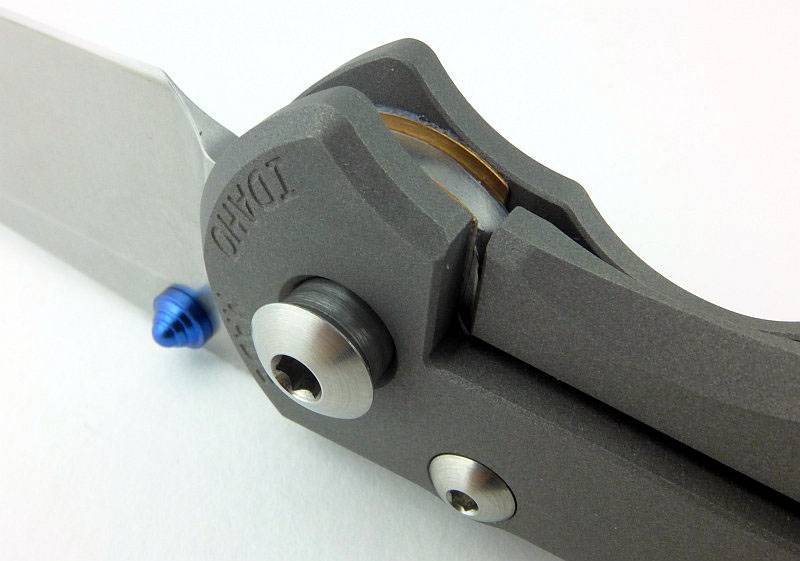
The only other bolt that needs to be removed is from one side of the handle spacer. The blade stop pin is only bolted on one side and will slide out.
 photo 05 InkosiWasher Step spacer bolt P1230192.jpg

With two bolts removed, the Large Inkosi can be taken apart.
 photo 06 InkosiWasher Step spacer bolt out P1230196.jpg

Start to work the pivot bolt tube out. You might open the blade and use the Allen key to help this slide out. Tolerances are so good, the fit is snug without being too stiff. Don’t leave the blade in the locked open position as the lock pressure will make it difficult to remove the pivot tube.
 photo 07 InkosiWasher Step pivot bolt P1230198.jpg

With the pivot bolt mostly out, the blade can be removed and put to one side. (I have skipped over an attempt I made to separate the handles with the blade and blade pivot still in place. With the pressure of the lock-bar and the extra resistance due to the blade pivot, this was not possible. It is much easier to take out the blade pivot and remove the blade.)
 photo 08 InkosiWasher Step blade out P1230202.jpg

Having taken the blade and blade pivot out, the handles can now be gently worked apart. I found that popping the spacer out and gently working back and forth at the pivot end I was able to get the blade stop pin to start sliding out. You can really appreciate the fit of the pieces that make up this knife.
 photo 09 InkosiWasher Step handle separation P1230207.jpg

Looking a little closer at the stop pin sliding out.
 photo 10 InkosiWasher Step handle stop pin P1230210.jpg

And there we are, the knife is apart. Two bolts and a little wiggle!
 photo 11 InkosiWasher Step handle apart P1230213.jpg

All the parts that make up the Large Inkosi laid out.
 photo 12 InkosiWasher Step all parts P1230217.jpg

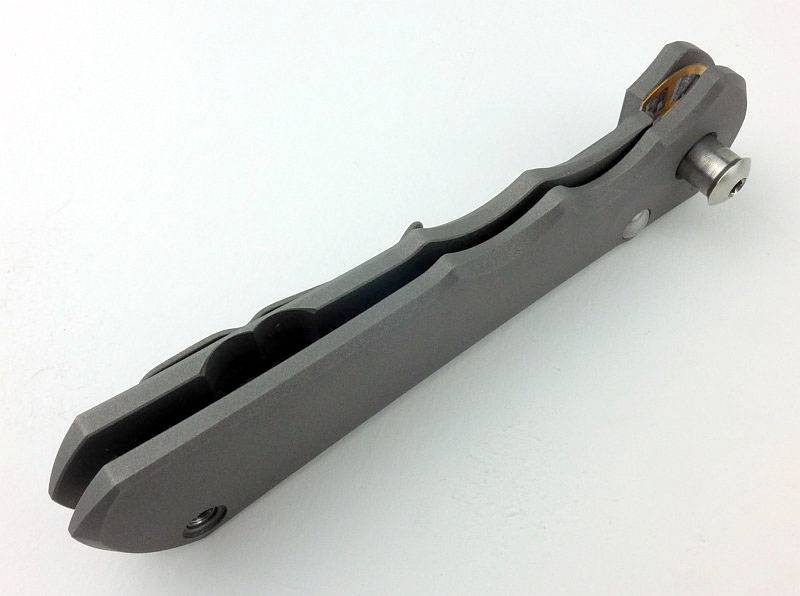
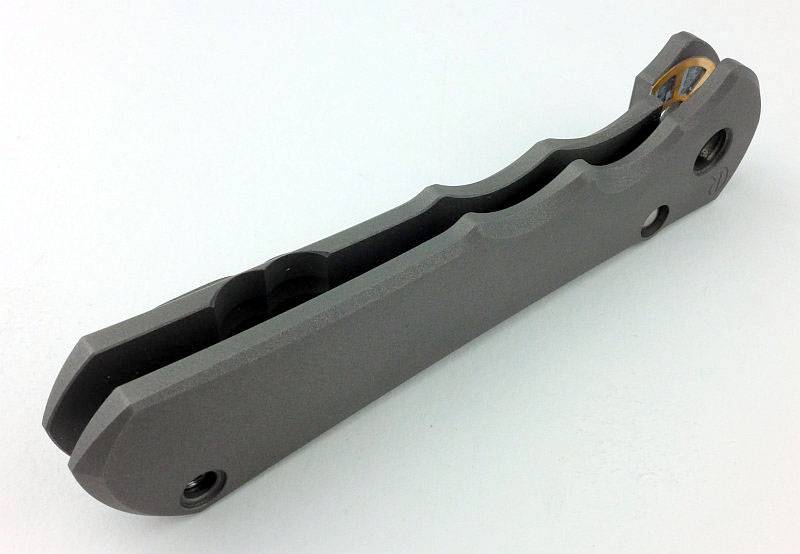
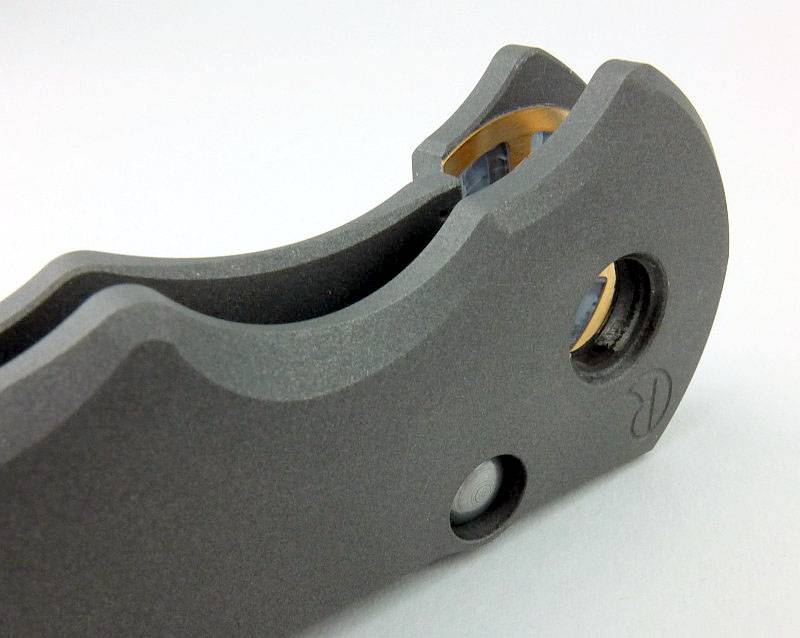
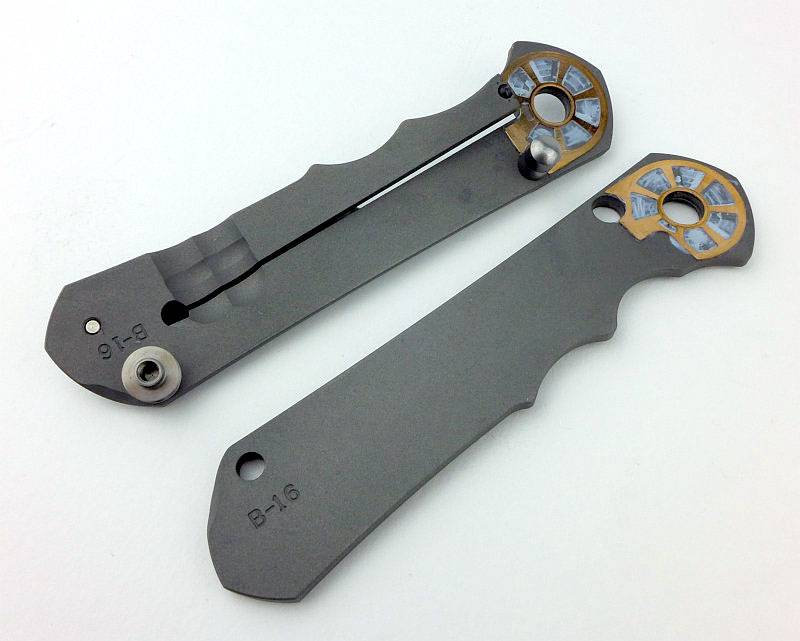
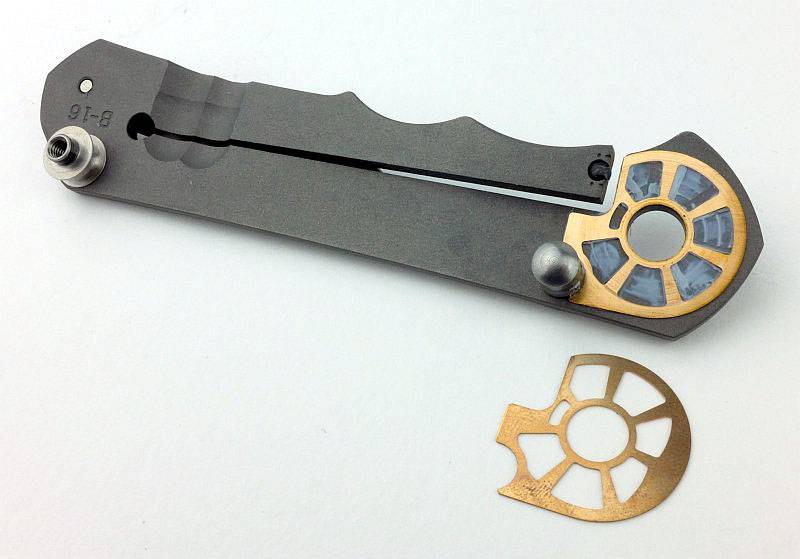
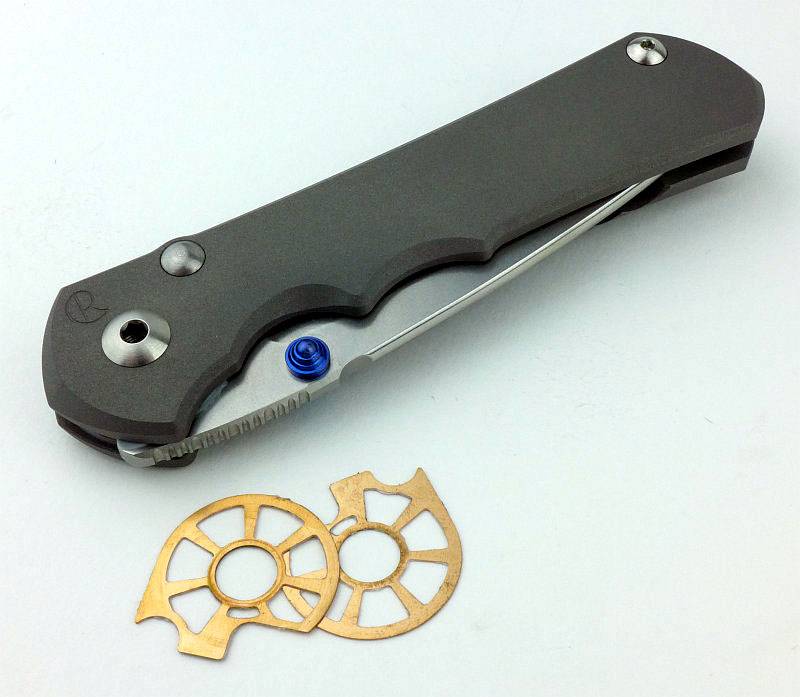
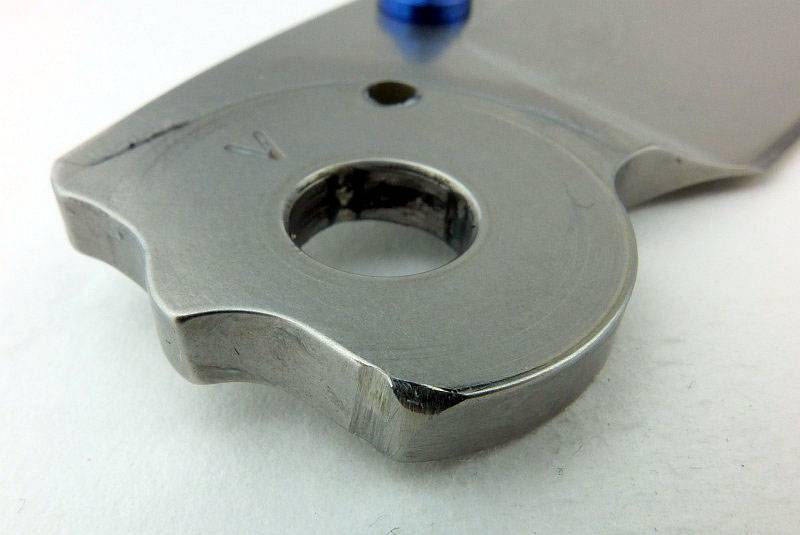
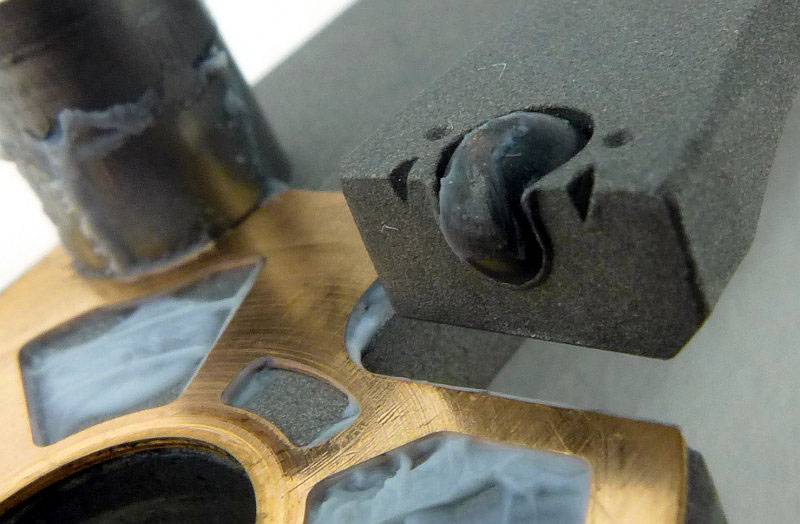
Old and new washers next to each other. Here the old washer is still in place. The difference can be seen with smaller holes towards the front to prevent dirt/grit ingress when the blade is folded.
 photo 13 InkosiWasher Step new washer P1230234.jpg

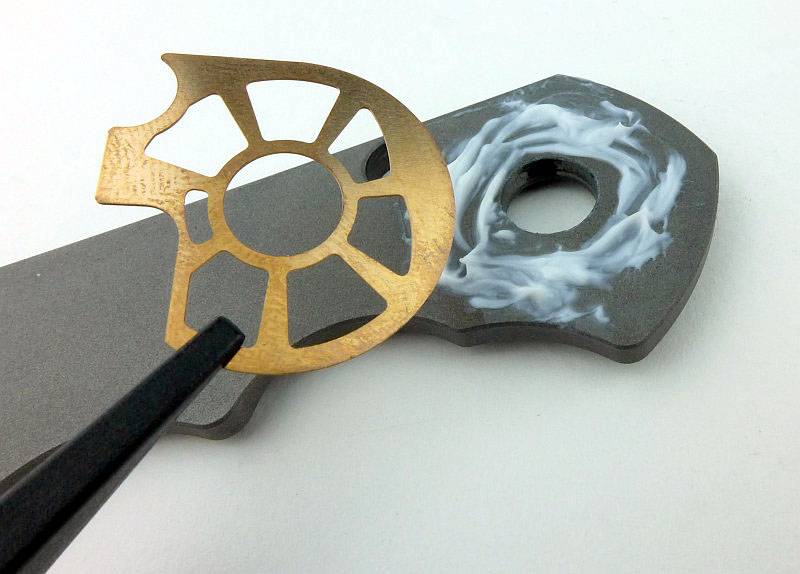
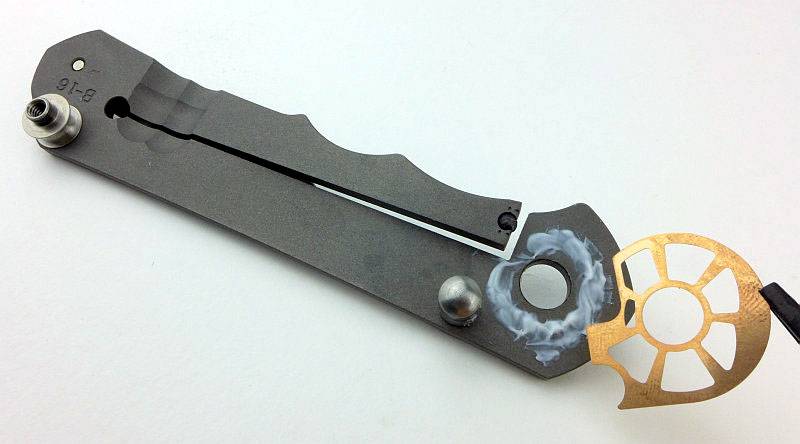
With the old washer removed, apply some grease to the handle (not too much) which will keep the washer in place, and provide the blade lubrication once trapped in the washer holes.
 photo 15 InkosiWasher Step grease new washer P1230243.jpg

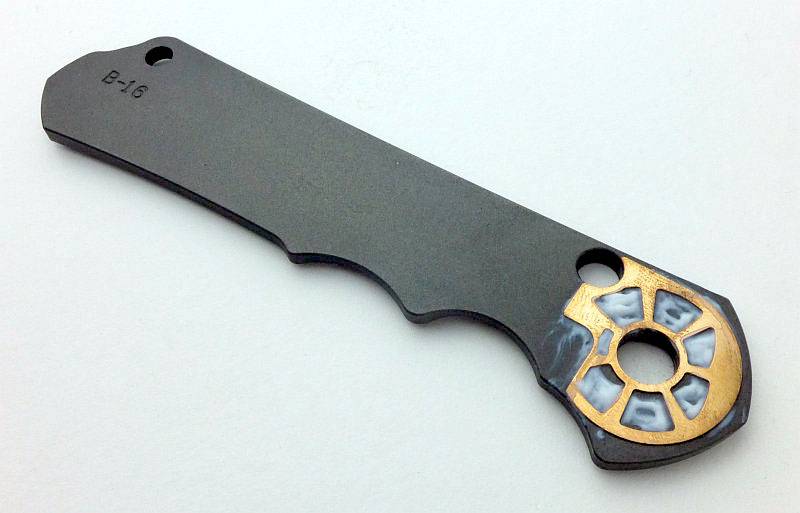
The washer in position and held in place by the grease. Make sure it does not cover the stop-pin hole.
 photo 16 InkosiWasher Step new washer P1230247.jpg

Do the same for the other side.
 photo 17 InkosiWasher Step grease new washer P1230251.jpg

With the stop-pin already in place, the washer sits against this.
 photo 18 InkosiWasher Step new washer P1230254.jpg

In preparation for reassembly, the blade pivot tube has been inserted into the side it was originally fitted to (the solid handle side).
 photo 19 InkosiWasher Step both new plus pivot P1230258.jpg

Just to ensure we have grease on all surfaces, apply a little to the blade tang before sliding it over the pivot tube.
 photo 20 InkosiWasher Step grease blade P1230262.jpg

The blade has been put onto the pivot tube in the open position, but will not be reassembled like this. With some sort of tool (here some plastic nose tweezers) keep the washer from turning round while you rotate the blade to half open.
 photo 21 InkosiWasher Step blade rotate washer P1230264.jpg

Check the washer is still in the correct position and apply a little grease to the blade tang. NOTE: the blade has been positioned at half-open to ensure the lock-bar presses onto the side of the blade and does not try to lock the blade or slip into the detent, either of which would make it harder to reassemble.
 photo 22 InkosiWasher Step blade grease P1230270.jpg

Carefully lining up the blade pivot tube, blade stop pin and spacer, push the handles back together. This does not require much force once you are lined up. Start gently to ensure you don’t catch any edges, and beware of the open blade.
 photo 23 InkosiWasher Step fit together squeeze P1230272.jpg

Start with the spacer bolt which will keep the knife together while you adjust the pivot.
 photo 24 InkosiWasher Step spacer bolt P1230276.jpg

Although not absolutely necessary, CRK recommend using thread-lock, so that is what I’m doing.
 photo 25 InkosiWasher Step pivot thread lock P1230282.jpg

Apply a small amount to one side of the thread. (I should have applied it a bit lower down the thread, but this worked fine for me.)
 photo 26 InkosiWasher Step pivot thread lock on P1230283.jpg

Start to tighten the pivot. This process is important to take a little time over. What you are looking for is the point at which there is no side to side play in the blade at all, but where the blade still rotates smoothly. You should be able to open it with the thumb stud easily – if not, you have gone too tight. Personally I went to the point of being too tight, then loosening it slightly. Doing this ensures settling of the washers, blade tang and grease so your final adjustments will be effective. Final adjustments were made with the Allen key’s end moving only 1/4-1/2″ each time (5-10 degrees) and testing the blade movement. The thread-lock will cure over time and should not affect this adjustment process.
 photo 27 InkosiWasher Step pivot tighten P1230288.jpg

All ready to go, fitted out with its new washers. The old ones can be kept as spares should you ever need them.
 photo 28 InkosiWasher Step finished old washers P1230292.jpg

A few more details:

While I had the knife apart, I took the opportunity to take a closer look at some parts.

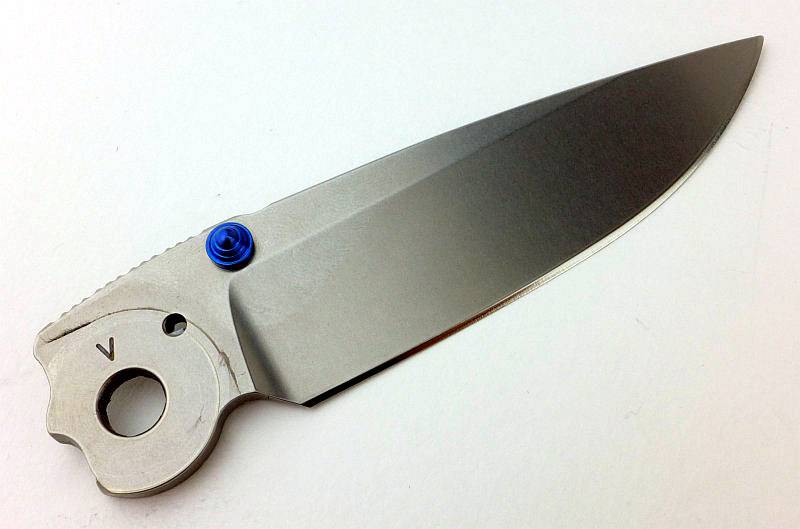
Here we have a clear view of the blade and its tang.
 photo 30 Inkosi details Blade P1230222.jpg

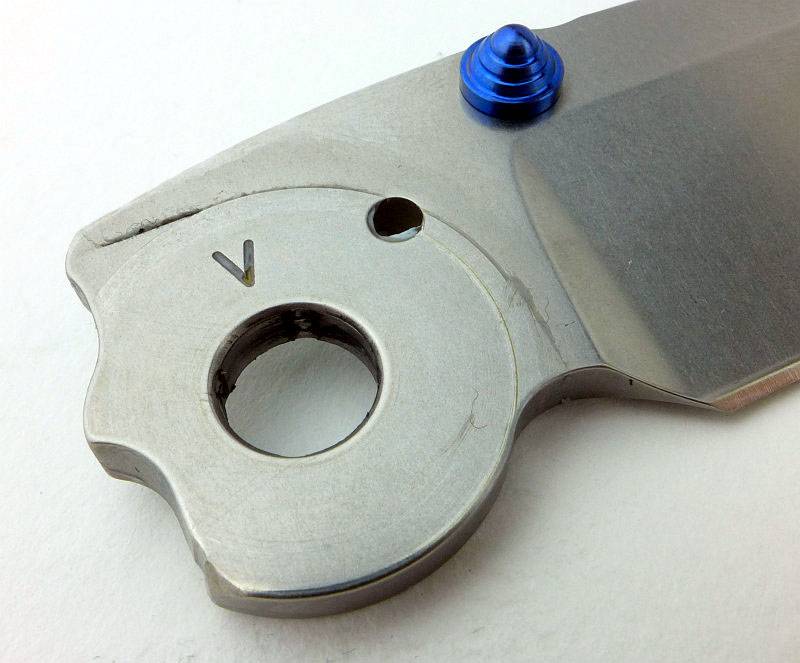
A couple of interesting details on blade tang. There is a groove cut into the lock surface for the ceramic ball to fit into. This means that the contact surface is much larger than a ball touching a flat surface.
Also look closely inside the pivot hole, and you can see that a series of grooves have been included to hold grease and reduce turning friction.
 photo 31 Inkosi details Blade lock groove P1230228.jpg

Between the pivot hole and thumb stud is the blade retention detent hole (to keep it closed).
 photo 31 Inkosi details Blade tang P1230225.jpg

Only with the knife taken apart is it possible to see the detail of the ceramic ball used in the lock.
 photo 32 Inkosi details lock ball P1230233.jpg

Summary

Taking a folding knife apart is a job you might rather leave to a knife maker, especially when it is a high quality knife like the Large Inkosi. As long as you take it slowly, have a little mechanical sympathy, and give yourself room to work, there is no reason you shouldn’t do this job yourself. CRK have made the job of DIY cleaning and maintenance very simple.

Though I’m doing this to swap out the washer, it would be the same process for a deep clean and re-grease operation, so the article can serve as a reference for taking the Large Inkosi apart.

This new washer design will be fitted to all new Large Inkosi knives, but if you have an early one with the old washer and would like the new version of the washer, CRK will happily send you the new washers. If you are of the opinion “It ain’t broke, so don’t fix it”, then you don’t need to.

You can tell which version you have by looking into the front of the handle with the knife blade closed. If you can see the holes in the washer, it will be the older version; if you can’t see any holes then you already have the new one.


Discussing the Article:

Please feel free to add comments to the review, but the ideal place to freely discuss these reviews is on a forum. If you started reading the shorter forum version of the review, but followed the link this full exclusive review, please return to that forum to discuss the review there.
If you read the review entirely on Tactical Reviews, please consider one of the following to join in any discussion.

EdgeMatters – Sponsored Reviews (UK based Forum for Knife Makers and Collectors)
BladeForums – Knife Reviews (US based Forum for Knife Discussion)

CandlePowerForums – Knife Reviews Section (Largest and Friendliest Flashlight Community Forum)

Knife Review: Spartan Blades PALLAS Button Lock

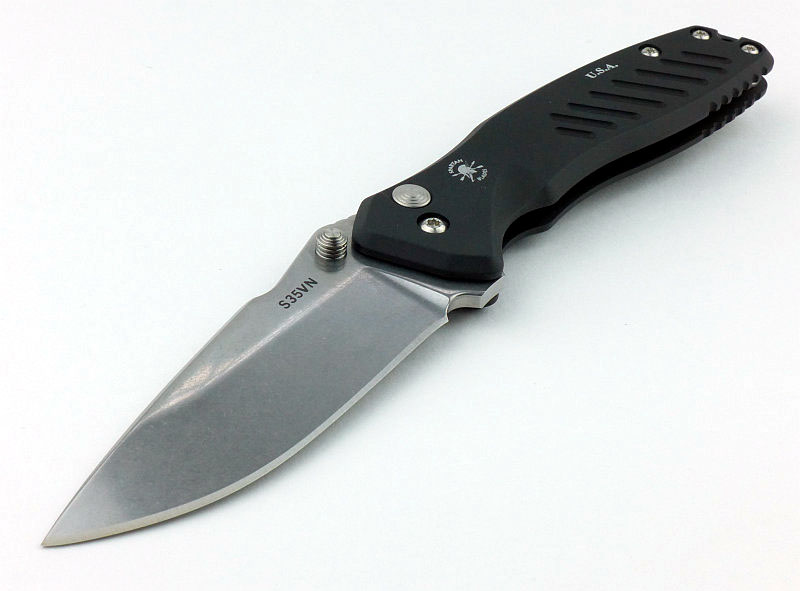
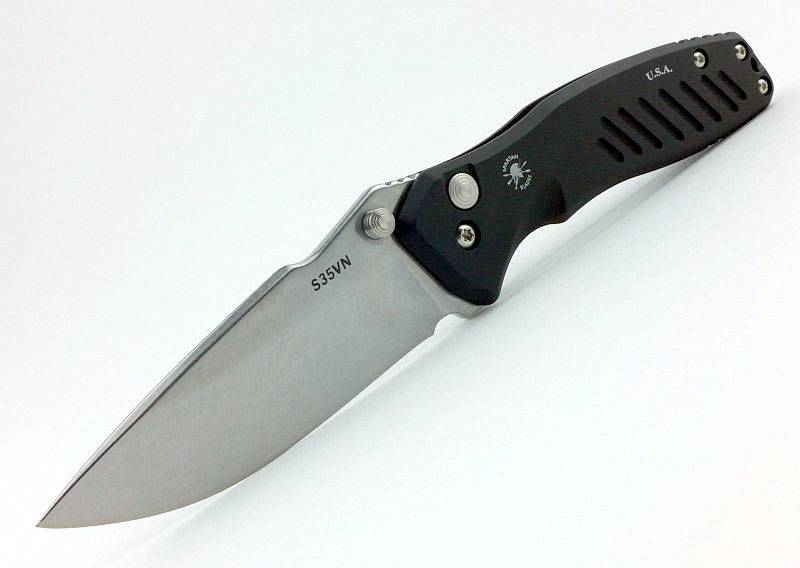
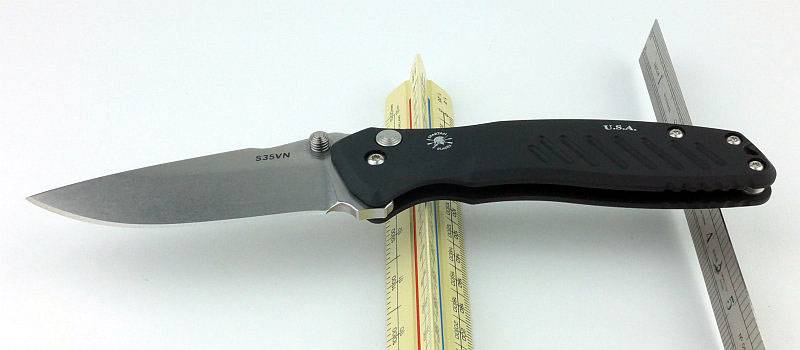
Spartan Blades LLC proudly make “Knives with Intent”, and their Pallas Button Lock folder is no exception, fulfilling its design brief exceptionally well.

 photo 31 Pallas side open P1190318.jpg

The Blade and Handle Geometry:

Most knife specifications have a basic description of the blade geometry, but in this section I will be taking a more detailed look at geometry and balance.
 photo 43 Pallas grind P1200581.jpg

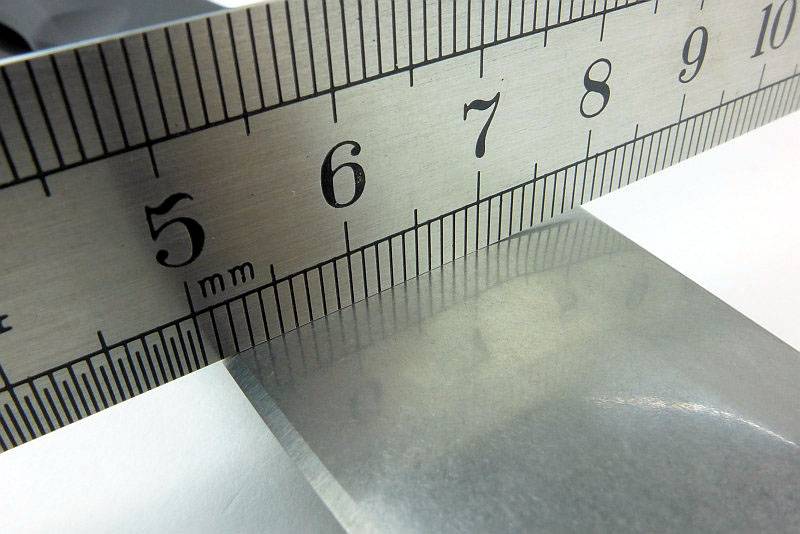
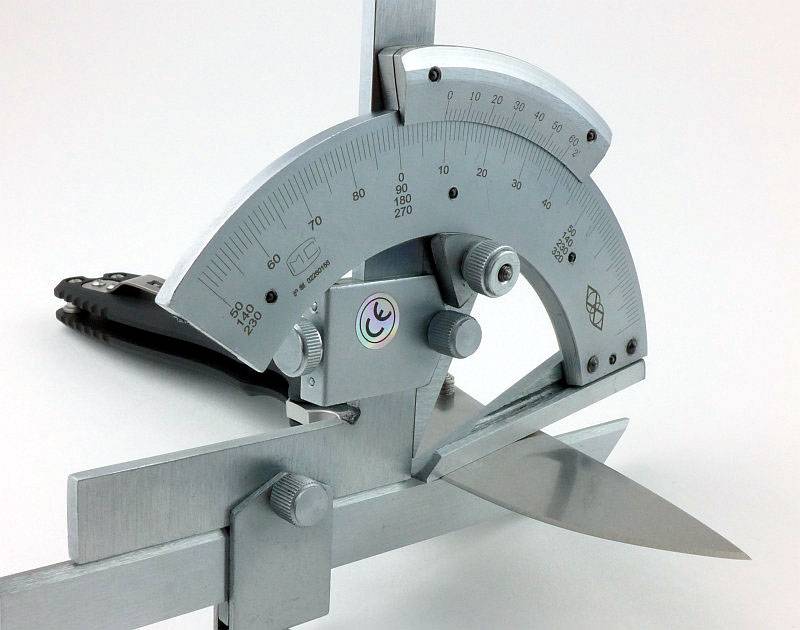
Using a set of gauges and precision measuring equipment including a Vernier protractor, callipers, fixed radius gauges and the unique Arc Master adjustable radius gauge (the one that looks like a crossbow).
 photo Knife measuring P1180483.jpg

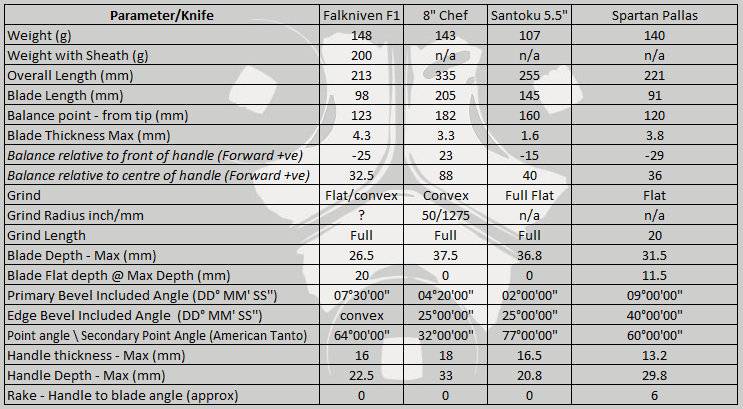
These measurements have been tabulated and are presented along with a few reference blades (8″ Chef’s Knife, 5.5″ Santoku and the popular Fällkniven F1).

Key aspects such as the primary bevel angle, grind type, blade depth, blade thickness, length, weight are detailed, along with balance information.
 photo 44 Pallas angle P1200606.jpg

The ‘Balance relative to the front of the handle’ tells you if the knife will feel front heavy, or if the weight is in your hand (a positive value means the weight is forward of the front of the handle). The ‘Balance relative to the centre of the handle’ indicates how close to a ‘neutral balance’ the knife has in the hand.
 photo 42 Pallas balance P1200573.jpg

In the case of full convex grinds the approximate centre of the grind is used for the primary bevel angle estimate.

 photo Spartan Pallas Parameters.jpg

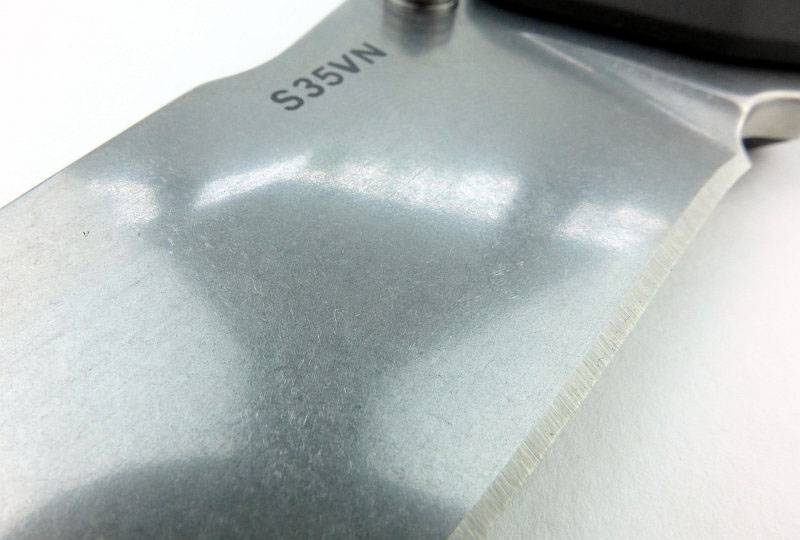
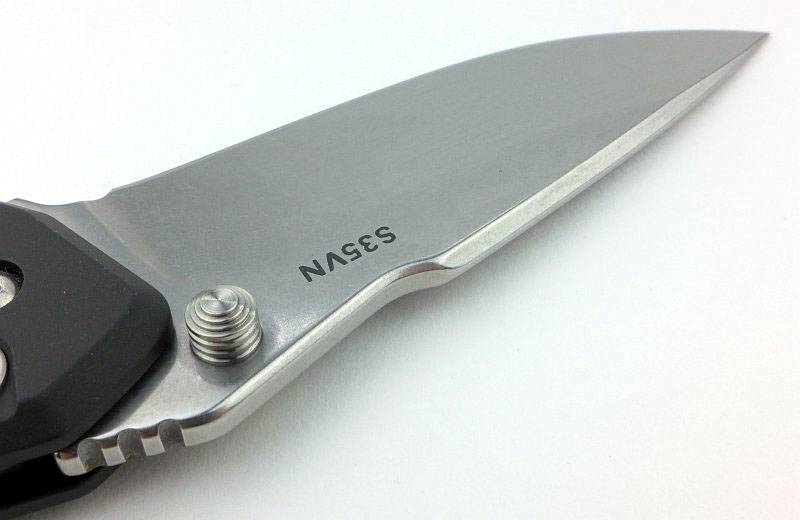
The blade is made from S35VN steel.

Explained by the Maker:

The reasons for certain design choices may not be clear when simply looking at an object, so this section is intended to give an insight into the thinking behind a design by speaking to the designer themselves.

Unfortunately I can’t always get time with the designer so will use this section to include relevant information about the knife and its designer.

Mark Carey (co-founder of Spartan Blades LLC) and I discussed the Pallas at IWA 2016, so I was able to find out a little of the thought processes that brought the Pallas folder into Spartan Blades’ line up.

The knife was actually designed by Spartan Blades’ other founder Curtis Iovito and named after PALLAS (PALE ES), the Titan god of warcraft from Greek mythology.

Mark, as an ex-serviceman himself, is passionate about helping to properly equip those in the armed forces with reliable tools. The Pallas was born out of a relatively simple need for a folding knife that could be easily closed with gloves on, and while being made of premium materials, would stay at an affordable price point.

With most liner or frame lock knives being awkward to close with gloves on, the button lock was an ideal format to make it easy to release the lock with even thick gloves on. For a blade you can rely on, CPMS35VN steel was chosen with a thickness sufficient to make it strong, without being excessively thick or heavy which would impede cutting. The S35VN blade rides on a set of Alpha bearings keeping it slick. To keep weight low and yet not add a high cost, 6061 aluminium was used for the frame along with stainless steel hardware.

In its standard format the Pallas has a flipper tab and thumb stud, either of which can be flicked to easily open the blade. In this review is a special modified version for the UK market. The modification was included following a discussion between Bruce of Heinnie Haynes and Mark, and required the flipper tab to be removed.

This ‘UK’ modified Pallas was created due to the UKBA tightening control over imported knives with quickly deployable blades. Flipper style knives are the primary target.

A few more details:

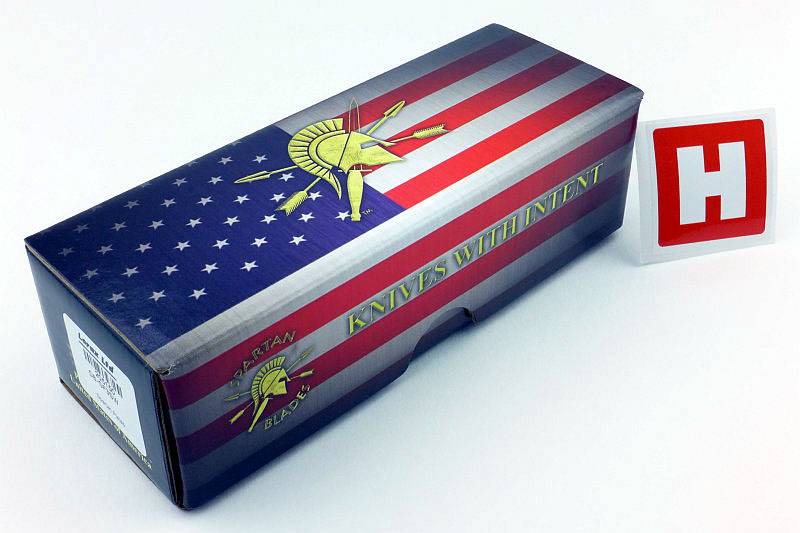
The Pallas box along with a Heinnie Haynes sticker to signify the creation of this ‘UK’ Version of the knife.
 photo 01 Pallas boxed H P1190180.jpg

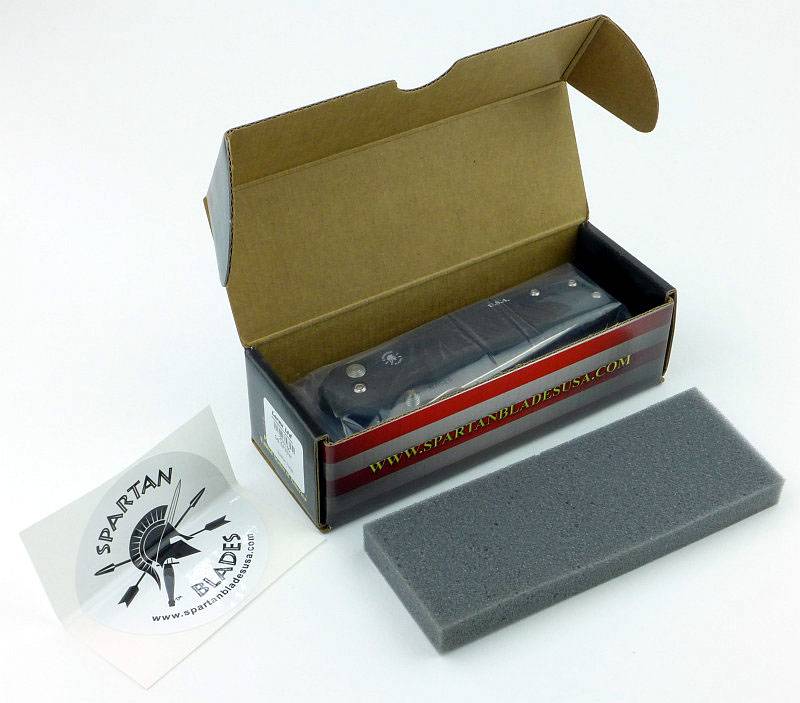
Flipping open the box, and the Pallas is sandwiched between foam liners with a Spartan Blades sticker included.
 photo 02 Pallas box open P1190188.jpg

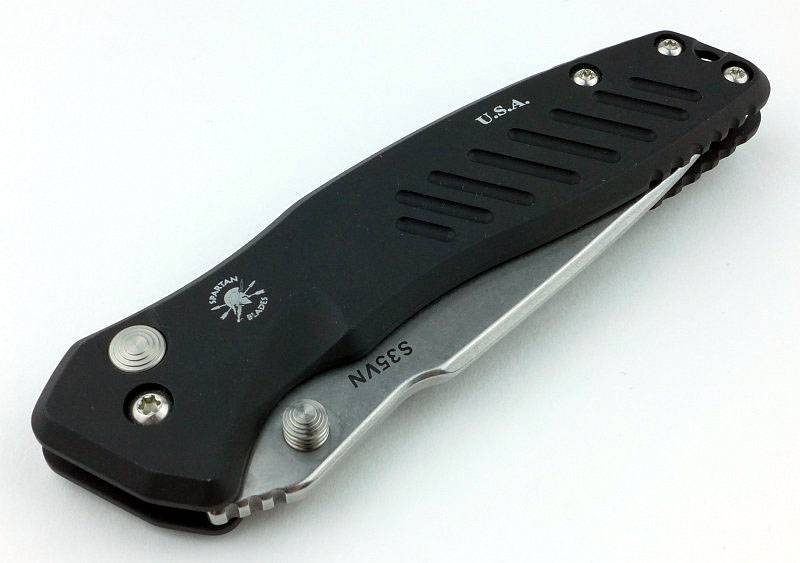
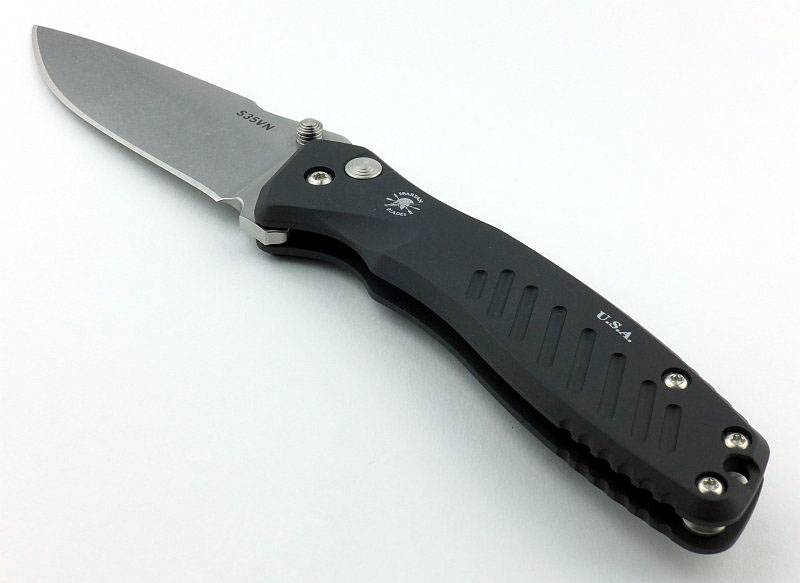
Fresh out of the box, the Pallas.
 photo 03 Pallas closed P1190190.jpg

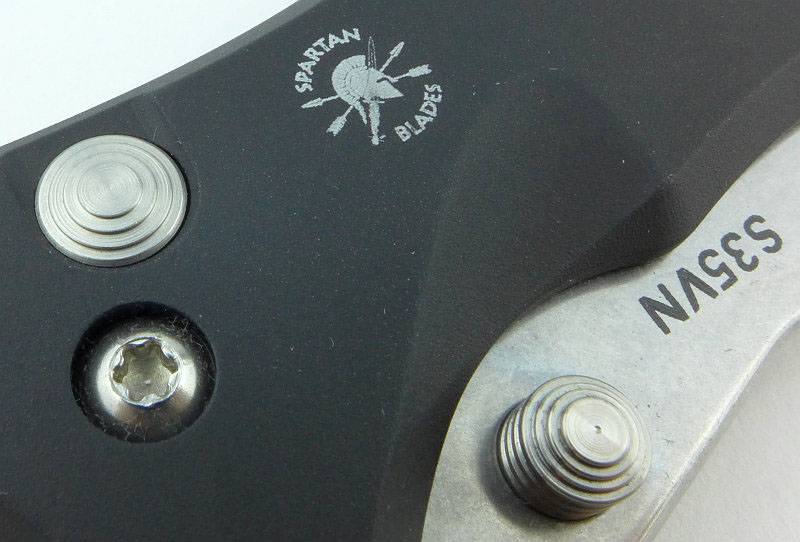
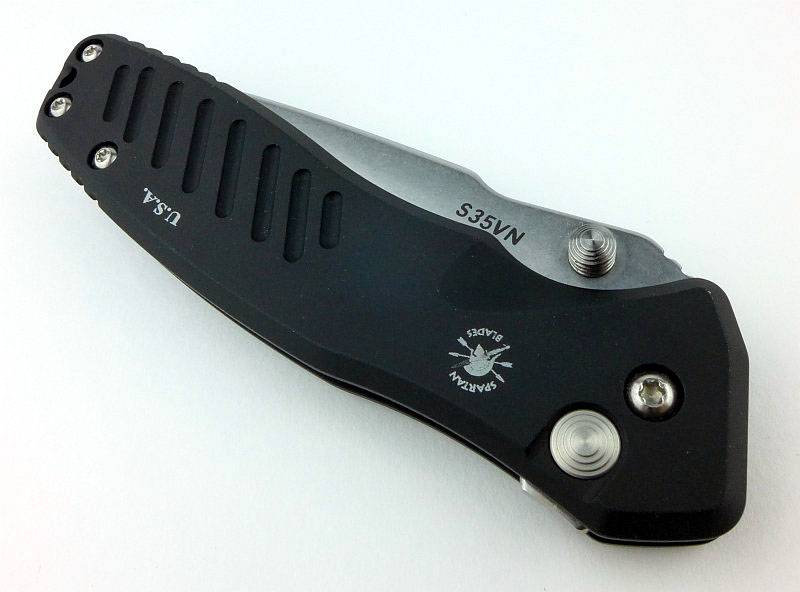
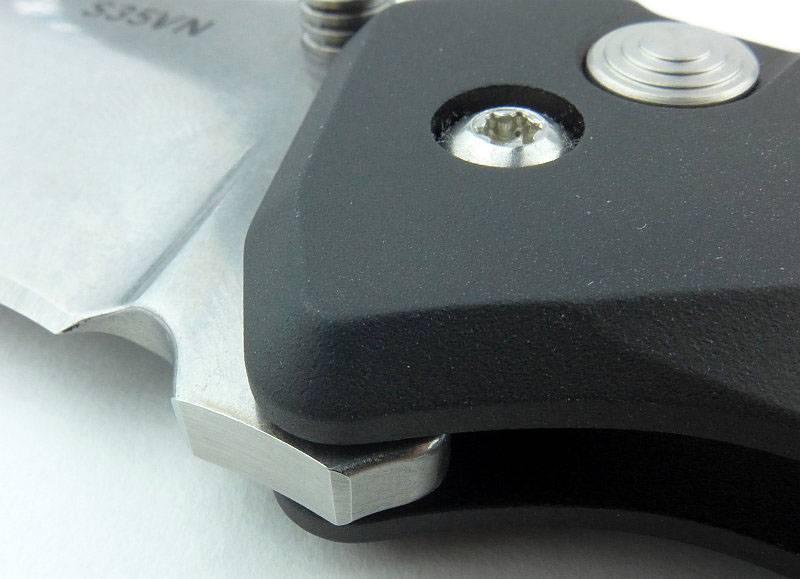
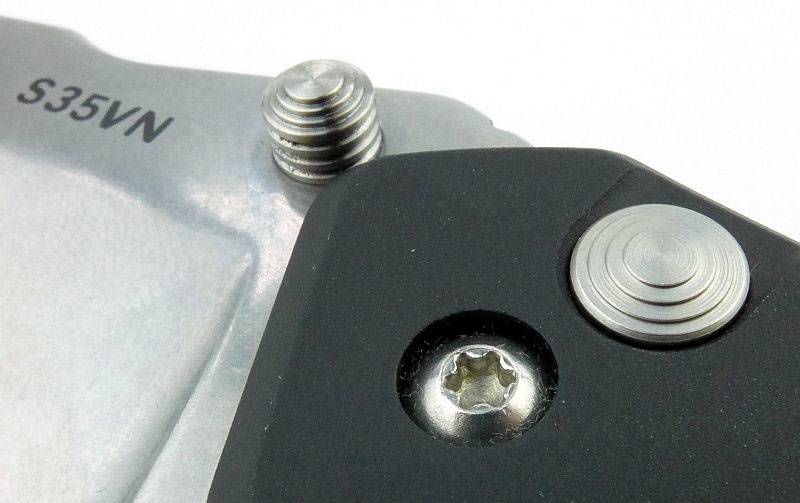
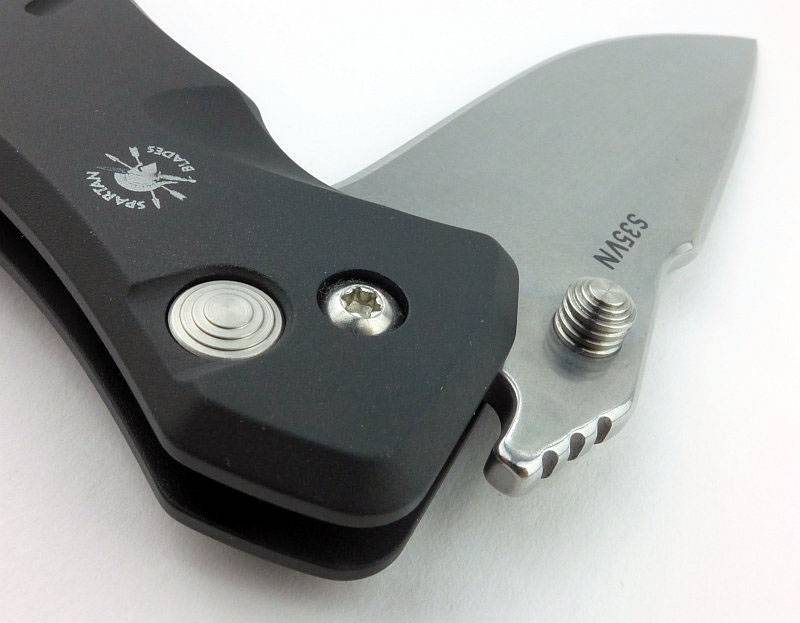
Straight in for a look at three key aspects of this knife, it is made by Spartan Blades (with the logo engraved in the handle), there is a button lock, and the blade is S35VN steel.
 photo 04 Pallas button stud logo P1190191.jpg

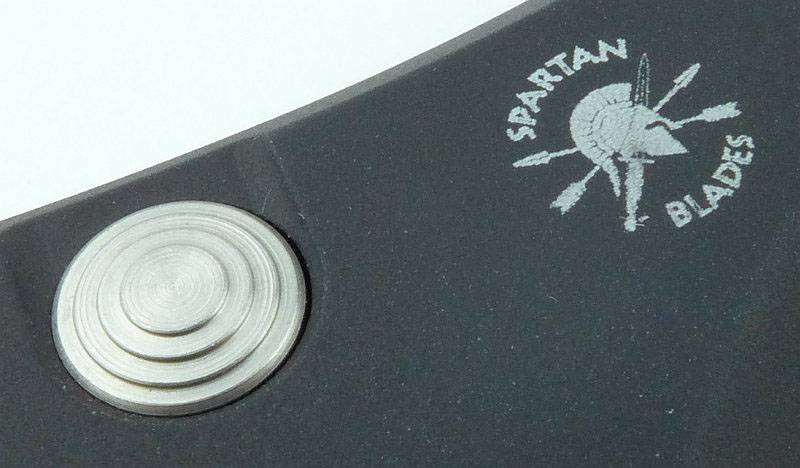
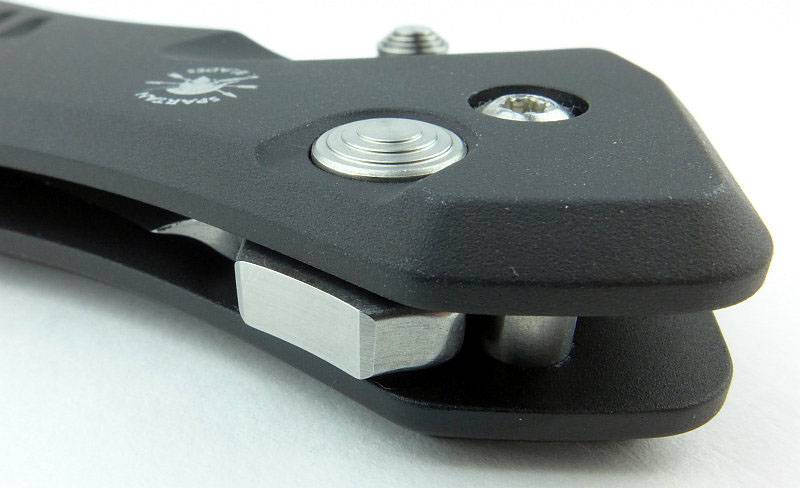
Closer still to the stainless steel button.
 photo 05 Pallas button logo P1190192.jpg

Despite an overall flat cross-section, the Pallas is full of curves that make the design flow and provide its ergonomics.
 photo 06 Pallas standing closed P1190200.jpg

Note the deviation from a standard Pallas in the there is no longer a flipper tab on this special UK version.
 photo 07 Pallas lying closed P1190204.jpg

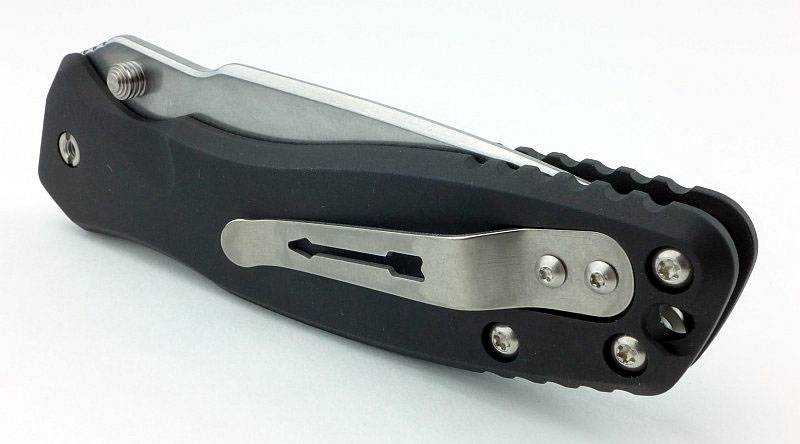
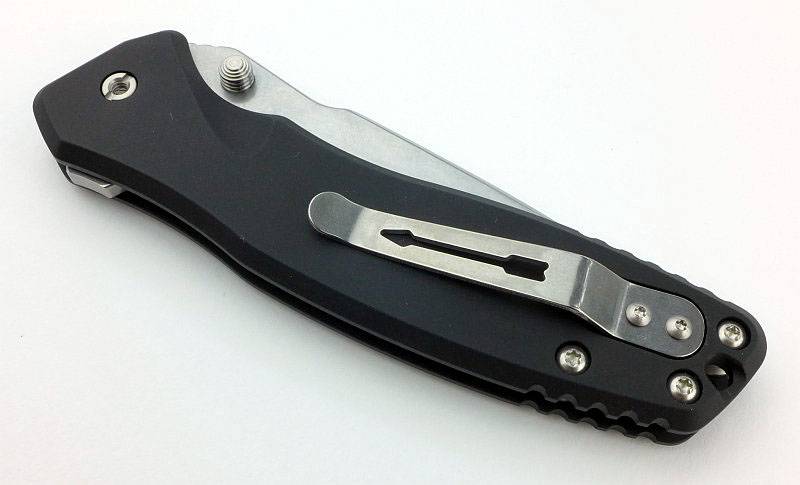
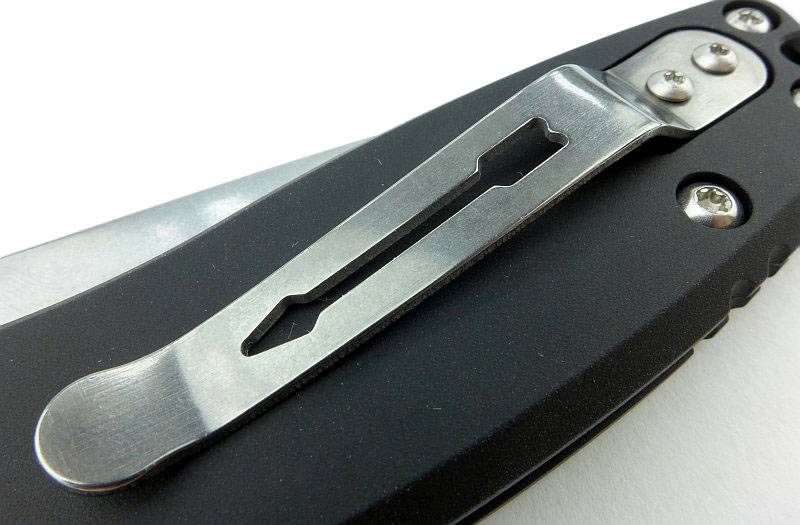
SpartanBlades’ signature titanium arrow pocket clip.
 photo 08 Pallas clip P1190206.jpg

The pocket clip is one sided and cannot be fitted to the side with the lock button.
 photo 09 Pallas lying closed P1190210.jpg

This is where the flipper tab would be on the standard Pallas.
 photo 10 Pallas UK version P1190214.jpg

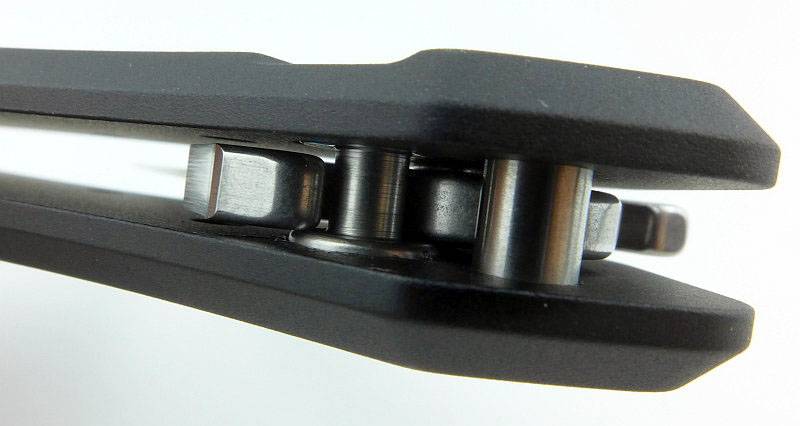
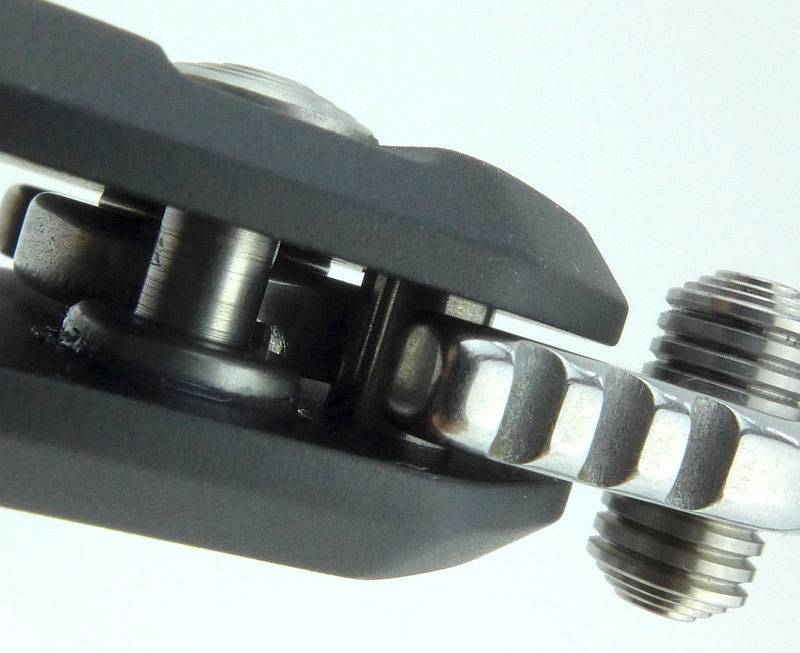
Button locks are far less common in non-autos, than other locking mechanism, so warrants a closer look. Here the blade has been opened slightly to allow the button and its shaft to be seen.
 photo 11 Pallas button inside P1190222.jpg

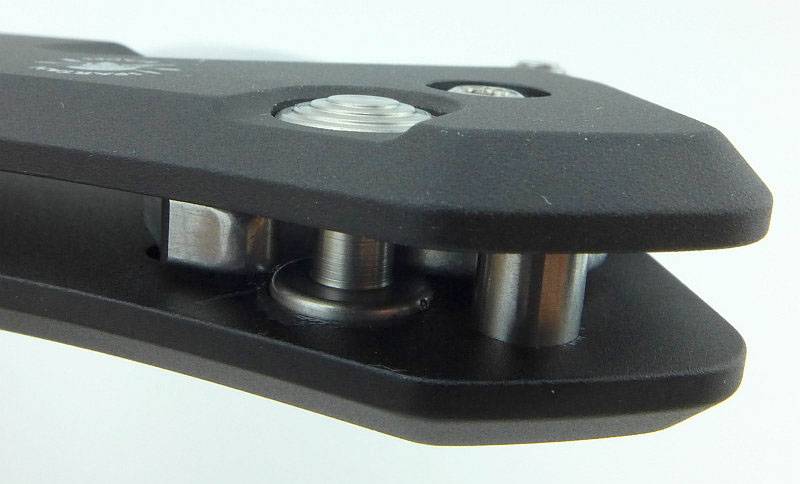
Viewed from a slightly higher angle you can see how the button has been pulled into the handle as the blade starts to open.
 photo 12 Pallas button inside P1190233.jpg

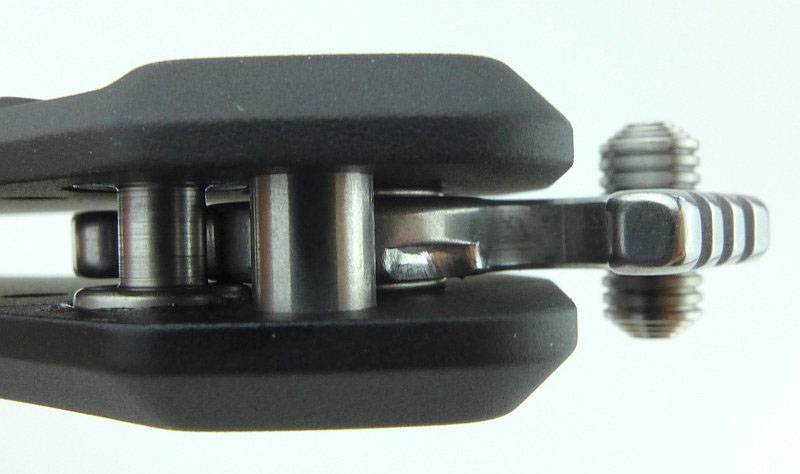
With the blade a little further open you can see the locking notch in the blade into which the button engages. You can see it is just to the right of the blade stop pin.
 photo 13 Pallas lock notch P1190238.jpg

The blade is now nearly fully open and the locking notch has nearly reached the button.
 photo 14 Pallas lock notch nearly open P1190243.jpg

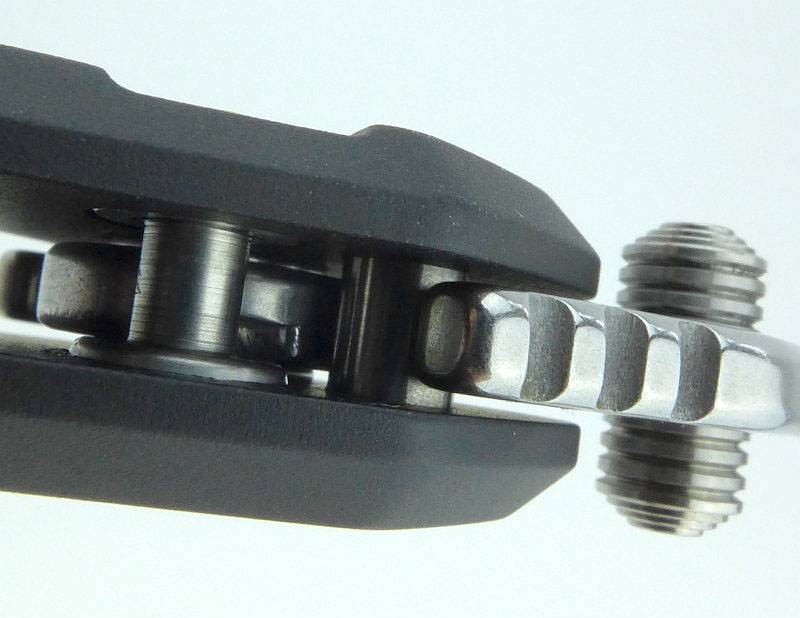
And fully open the button has locked itself into the notch in the blade. The blade has also hit the stop pin and is firmly wedged between the two.
 photo 15 Pallas lock button engaged P1190245.jpg

Now the blade is fully open, the UK version trimmed off flipper tab can be seen more clearly.
 photo 16 Pallas no flipper P1190259.jpg

The overall view.
 photo 18 Pallas angle open reverse P1190264.jpg

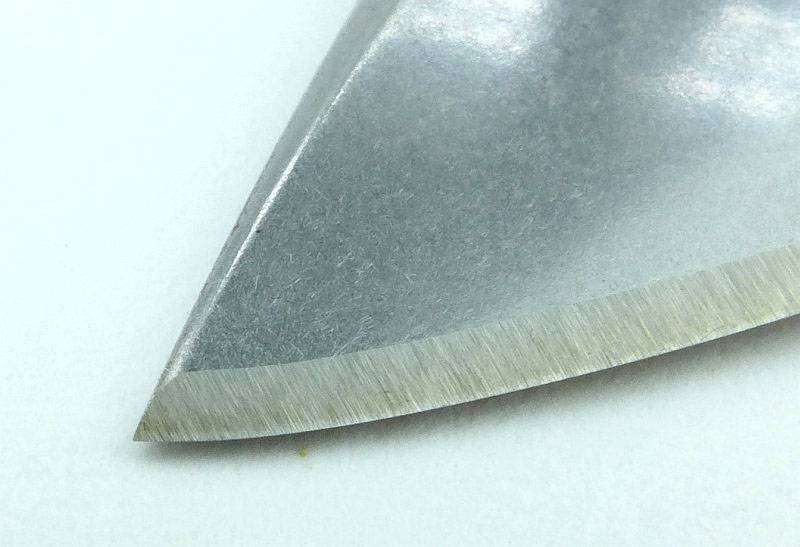
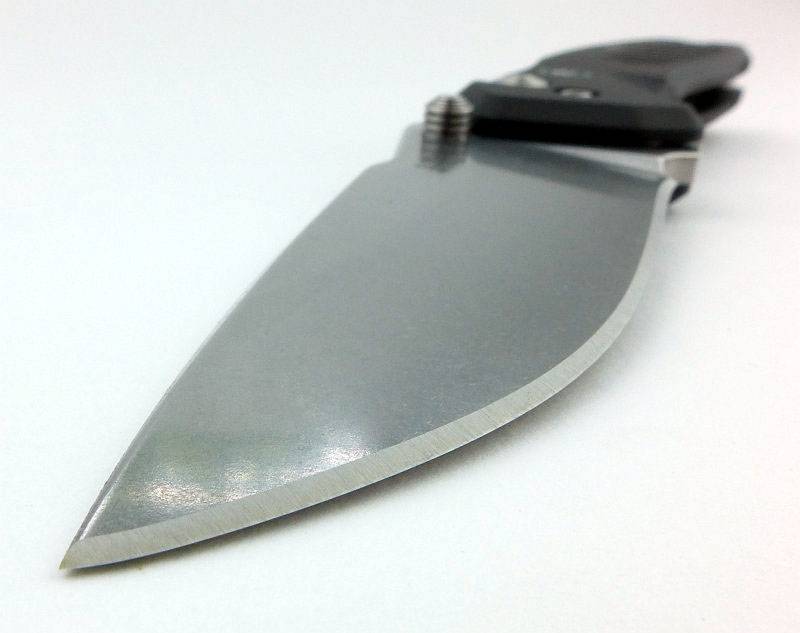
when looking closely at the blade tip you can see the contrast of the crispness of the final edge bevel and the rounded blade spine.
 photo 19 Pallas tip P1190272.jpg

The entire blade surface has a stonewashed finish.
 photo 20 Pallas stonewash P1190275.jpg

Not quite a full flat grind, the Pallas blade is a high flat grind.
 photo 21 Pallas blade grind P1190276.jpg

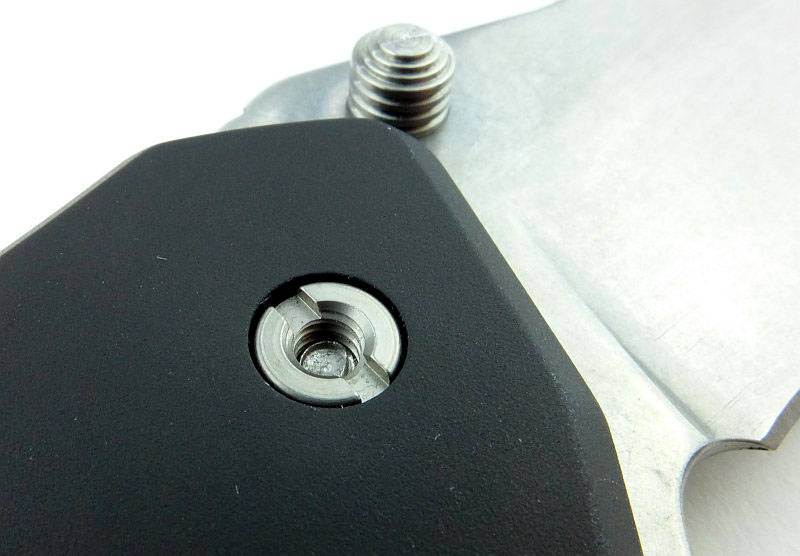
Each side of the pivot bolt is different, with a nut on this side.
 photo 22 Pallas pivot nut P1190285.jpg

And a torx bolt head on the other side.
 photo 23 Pallas pivot bolt P1190280.jpg

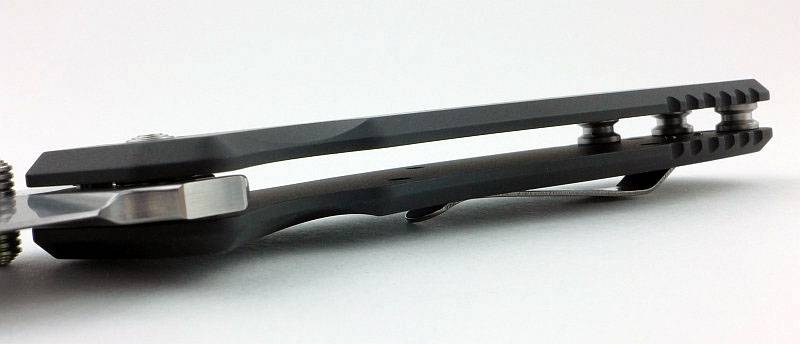
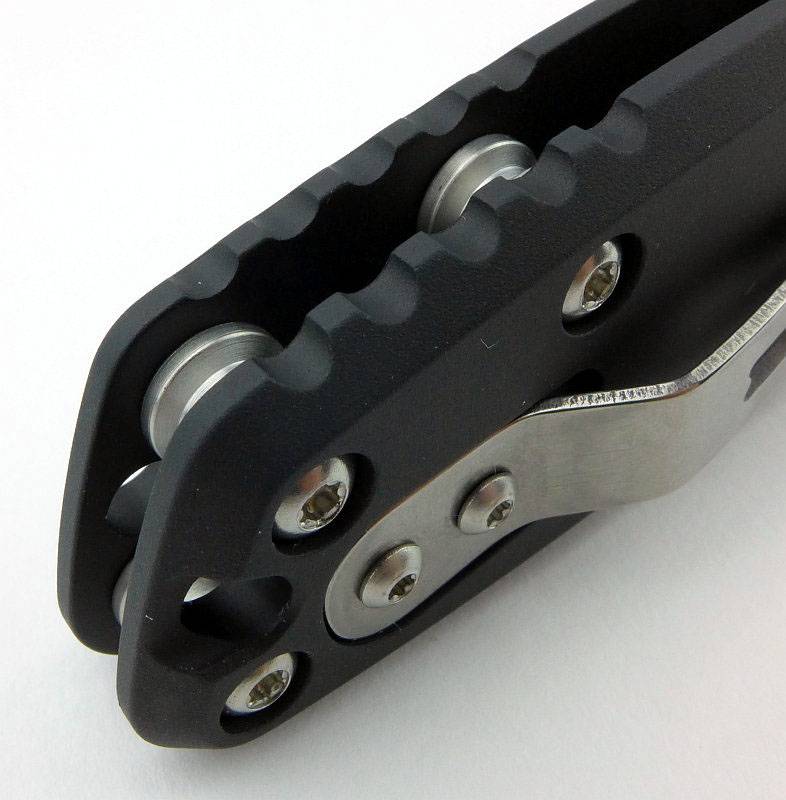
Though they look good, the handle spacers are also a very practical design with wide flats where they contact the handles and a slight waist which will reduce weight without any significant loss of strength.
 photo 24 Pallas spacers P1190289.jpg

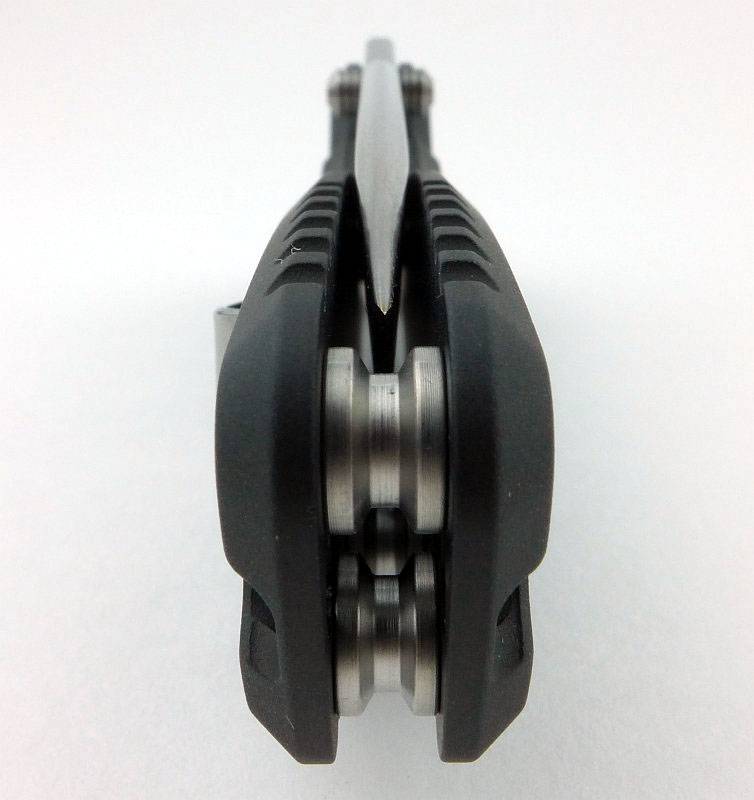
You can see straight through the handle with the three spacers one end,and the blade pivot at the other.
 photo 25 Pallas spacers P1190293.jpg

All the edges of the spine are nicely rounded. So you won’t be striking sparks off fire-rods, but you also won’t be fraying your pockets.
 photo 26 Pallas spine P1190294.jpg

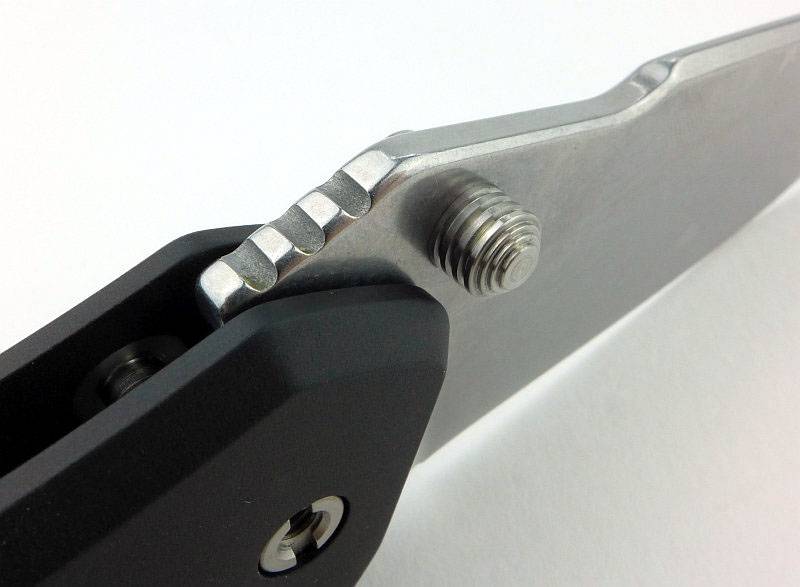
There is a little jimping for your thumb where the blade meets the handle.
 photo 27 Pallas jimping P1190298.jpg

Each side of the spacers are held with torx bolts, as is the pocket clip.
 photo 28 Pallas spacer bolts P1190302.jpg

Blade centring is spot on.
 photo 29 Pallas centring P1190307.jpg

When the blade is between one third and two thirds open you can see the blade-stop hook in the tang of the blade.
 photo 30 Pallas blade stop hook P1190315.jpg

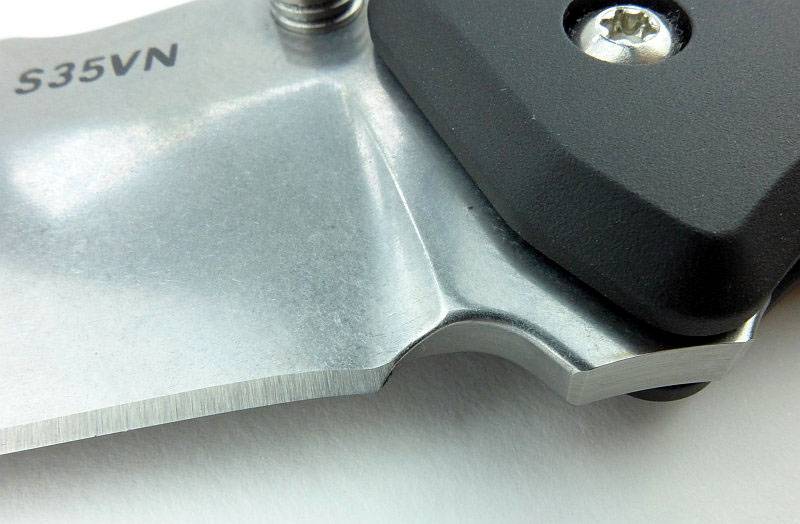
The cutting edge is terminated in a choil, and the plunge line is nicely radiused to reduce stress concentrators.
 photo 32 Pallas plunge choil P1190322.jpg

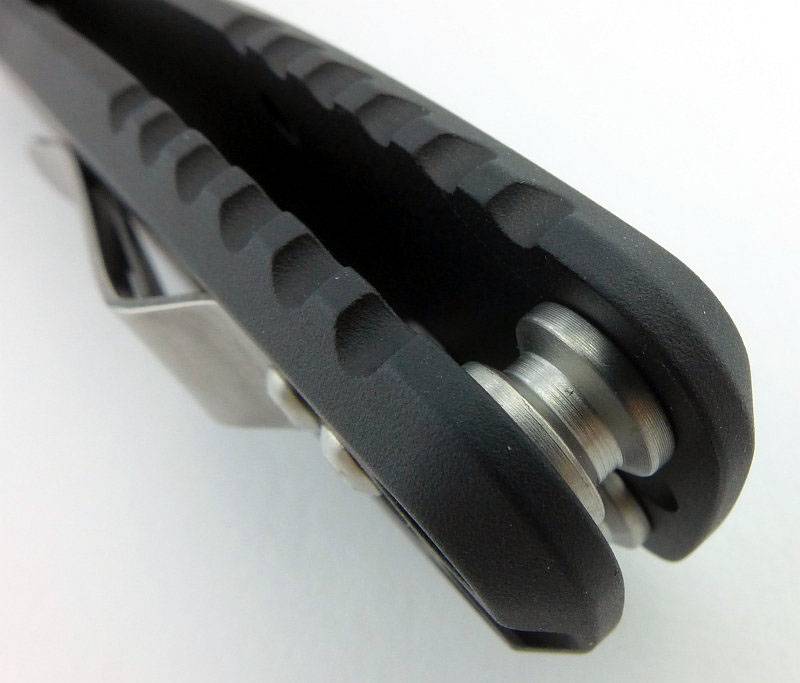
At the butt of the knife handle, there is jimping top and bottom giving a surprisingly useful amount of grip. I’d also take this opportunity to point out the surface texture of the anodised handles. There is a matt finish to the anodising due to what appears to be an underlying bead blasted surface.
 photo 33 Pallas handle jimping P1190325.jpg

Grooves cut into this side of the handle provide grip where your finger tips press onto the handle. Subtle and effective.
 photo 39 Pallas handle grip P1190366.jpg

The lanyard hole goes through both handle slabs.
 photo 40 Pallas lanyard hole P1190368.jpg

Lastly for this section, a close-up of the thumb stud which looks crisp and precise, yet without any sharp edges on the thumb contact surface.
 photo 41 Pallas thumb stud P1190377.jpg

What it is like to use?

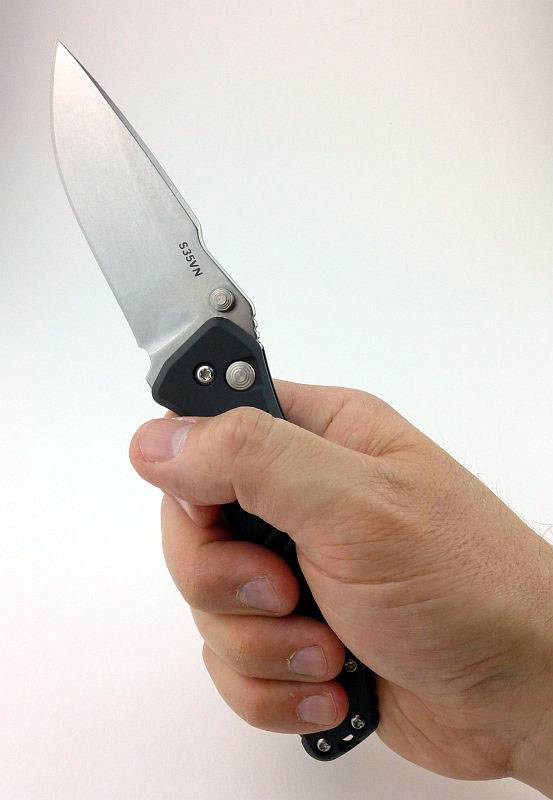
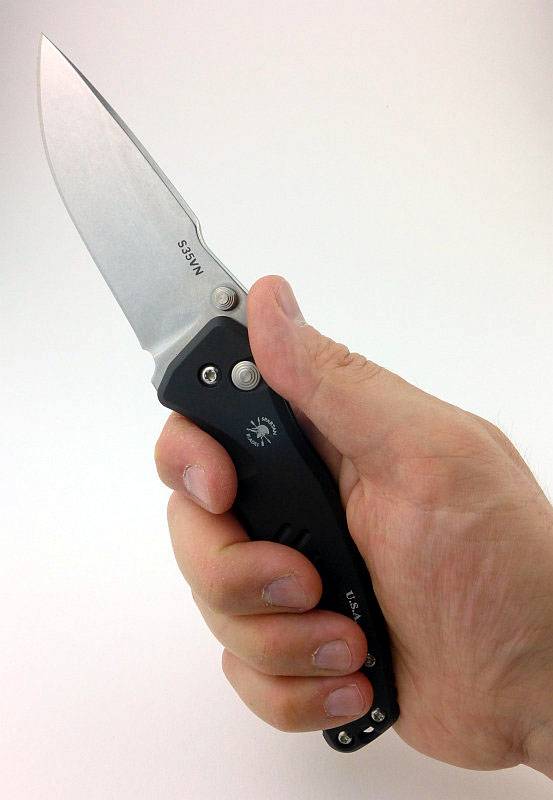
I like a big folder, and though the Pallas is not really big, it certainly is a good size with its 3 3/4″ blade and 8 3/4″ opened length. For a knife of its size with all metal construction, the weight is impressively low making it easy to carry.

Admittedly I was slightly sceptical about the button lock from the point of view of a good tight lockup. Straight out of the box, my fears seemed to be proving true, HOWEVER (and yes a big however) this was only due to two reasons. Firstly without the flipper, I was only opening the blade slowly and the lock was then not engaging tightly, and secondly the button just needed a little use to settle in.

After more use, the lock was engaging tightly even when only opened gently on the thumb stud. So I would recommend all users to start with at least 30-40 good firm flicks open to bed the button lock in. After this the lock has been spot on and rock solid. Even with the UK version you can start to open the blade with the thumb stud, then flick it fully open with your wrist. For those with the knack, so can also flip the blade open using the thumb stud instead of the flipper tab (but be careful as you can easily catch the edge with your thumb doing this).

Another observation that was immediately obvious, is that the blade movement is super slick. Importantly the blade has no side-to-side play, but the movement is so smooth and easy I would go so far as to say it is the smoothest I’ve used to date (and I’ve handles hundreds of folders with and without ball-bearings). This may in part be due to the button lock mechanism allowing the blade tang to move freely, or possibly due to the high level of finish of all the moving parts.

The generous size of the knife means it is a comfortable handful with or without gloves. I would obviously prefer the added protection the flipper tab (finger guard) gives you, but for this UK version it is no less safe than other non-flipper folders.
(I take XL size gloves)
 photo 34 Pallas in hand P1190332.jpg

Taking up a thrust hold, the jimping on the blade gives you more grip.
 photo 35 Pallas in hand P1190334.jpg

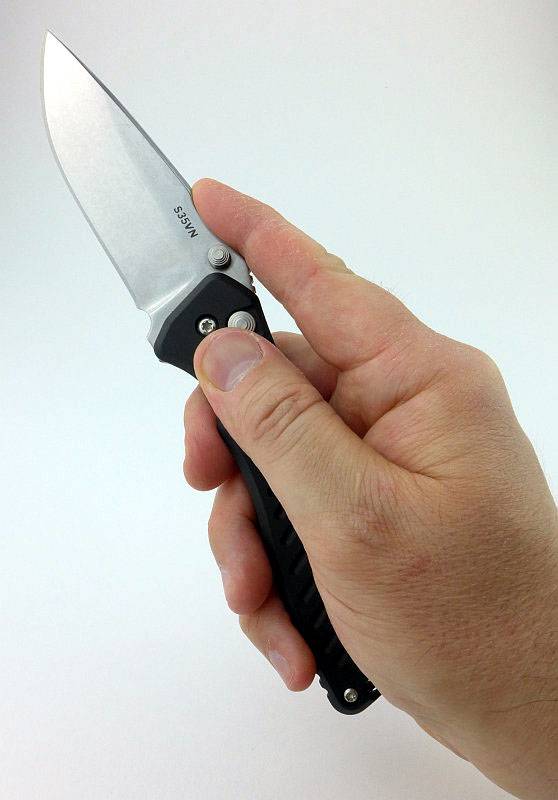
Though this was not the intention of the harpoon style blade, it just happens that for a fine working grip your first finger sits nicely against the harpoon spine. Like this of course you need to watch your thumb doesn’t hit the lock button. (So far I’ve not had any instances of an accidental press of the lock button)
 photo 36 Pallas in hand P1190337.jpg

When swapping between grips, your hand seems to fall into place with no adjustment required to eliminate any hotspots. Handle shaping is subtle but certainly works well for me.

With the button lock design being focused on ease of closing with gloves on, it is primarily a right-handed layout with the button being easy to reach with the thumb of your right hand. The clip is also fixed to one side (opposite to the button). The blade has a double-ended thumb stud and there is a depression on both handle sides giving easier access to the thumb stud, so at least for opening the Pallas is suitable for left-handed users as well. Are there any issues for left-handers? No, even using the Pallas left-handed I found the button easy to press with my first finger to close the blade. It is not as comfortable with the clip falling under your finger tips in a left-handed grip, but that is only a minor annoyance.

Another concern I had was of the button being accidentally pressed during use. So far I’ve not come close to doing this as the button appears to be far enough forward you positively have to try and press it. It is perhaps a small risk, but the completely safe and easy one-handed-closing the Pallas allows, has started to make this a firm favourite. While holding the button in, the blade is able to swing freely, so one-handed-closing is as easy as pressing the button and either flicking the blade closed or holding the blade upright and allowing it to swing closed. Many knives open easily, but few close this easily (when you want it to close).

I’m not a fan of pocket clips, and the Pallas clip looks quite thick, but thanks to being titanium, it has an ideal holding tension that is not too strong or weak.

Blade thickness is an excellent compromise between ultimate strength and cutting ability. It is thick enough that in some harder materials you start to feel it binding as the blade grind wedges into the cut, but the high flat grind helps this stay manageable. There is enough steel in the blade that you are not going to be worried about breaking it (unless you try to use it as a pry bar).

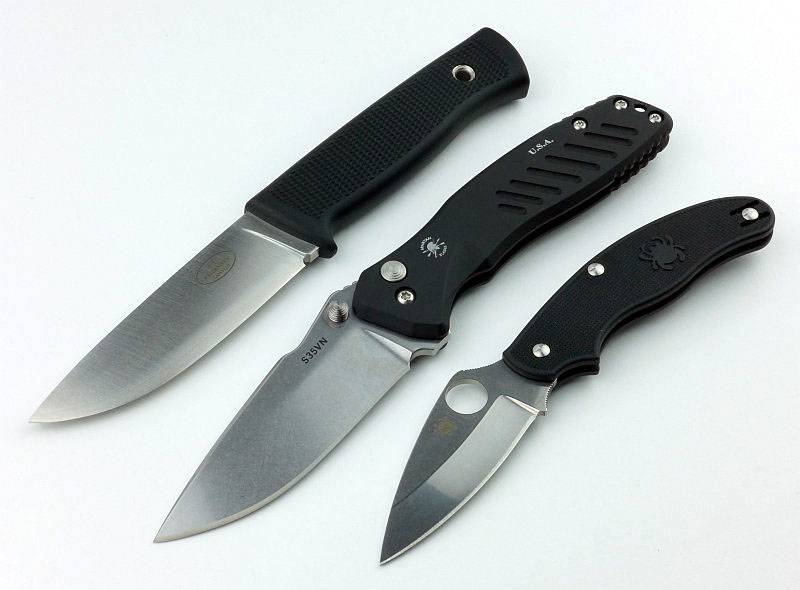
To give another idea of scale, here it is next to the Fällkniven F1 and a Spyderco UK Pen Knife.
 photo 37 Pallas size P1190353.jpg

And also shown next to the Spartan Blades Harsey Model II.
 photo 38 Pallas size P1190360.jpg

Review Summary

The views expressed in this summary table are from the point of view of the reviewer’s personal use. I am not a member of the armed forces and cannot comment on its use beyond a cutting tool or field/hunting knife.

Something that might be a ‘pro’ for one user can be a ‘con’ for another, so the comments are categorised based on my requirements. You should consider all points and if they could be beneficial to you.

_______________________________________________ _______________________________________________
Things I like What doesn’t work so well for me
_______________________________________________ _______________________________________________
Button lock makes blade closing easy, with or without gloves. Lock initially needs some bedding in.
Safe and Easy One-Handed Closing. Small possibility of accidentally pressing the lock button during use (this did NOT happen during testing).
Strong S35VN Blade. Slightly biased for right-handed users.
Lightweight for its size.
Super smooth blade action.
Zero blade play.
Excellent fit and finish.
Titanium pocket clip.

 photo 17 Pallas angle open P1190262.jpg


Discussing the Review:

Please feel free to add comments to the review, but the ideal place to freely discuss these reviews is on a forum. If you started reading the shorter forum version of the review, but followed the link this full exclusive review, please return to that forum to discuss the review there.
If you read the review entirely on Tactical Reviews, please consider one of the following to join in any discussion.

EdgeMatters – Sponsored Reviews (UK based Forum for Knife Makers and Collectors)
BladeForums – Knife Reviews (US based Forum for Knife Discussion)
CandlePowerForums – Knife Reviews Section (Largest and Friendliest Flashlight Community Forum)