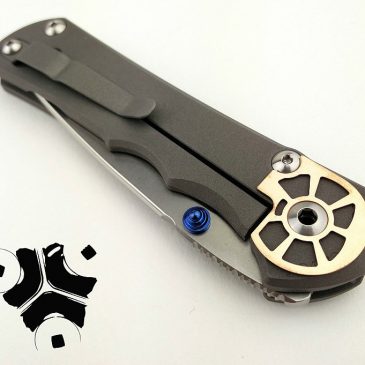
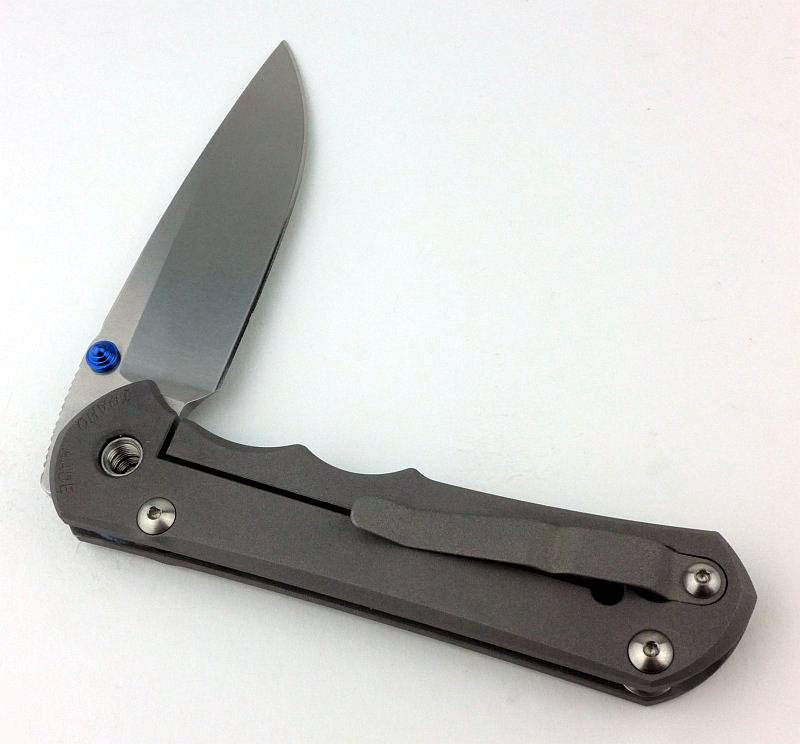
Although the Large Inkosi was only recently launched at Blade Show 2016, in their mission for continual improvement, Chris Reeve Knives have slightly updated the washer design for this knife.
If you want to swap your own washer or give the Large Inkosi a deep clean, this is how to do it.
Step-by-step Strip Down and Washer change:
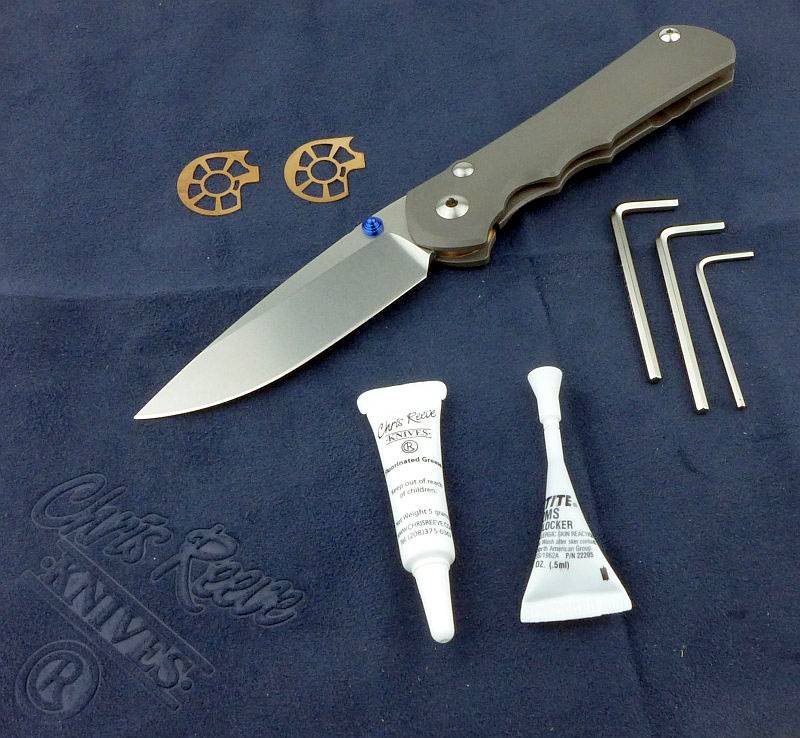
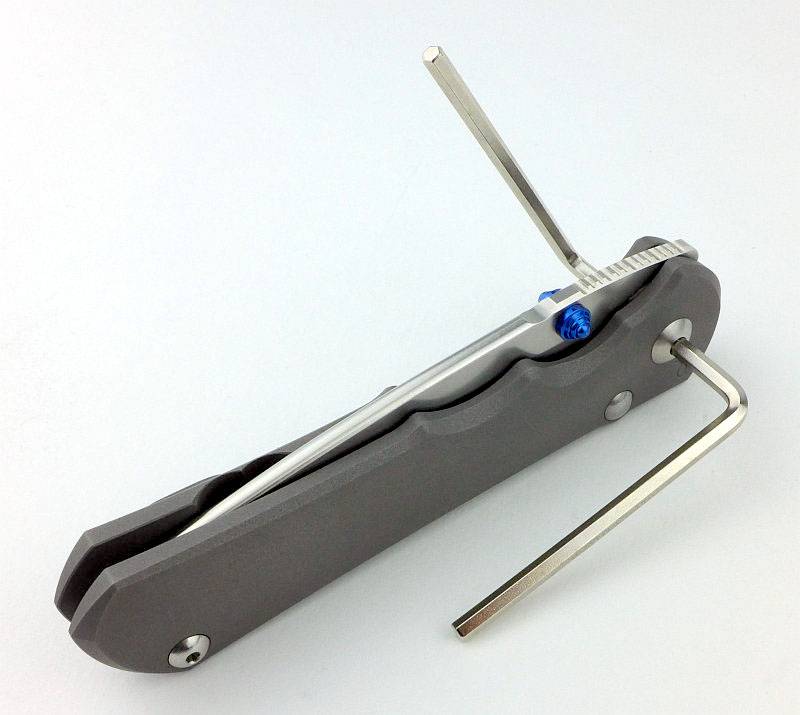
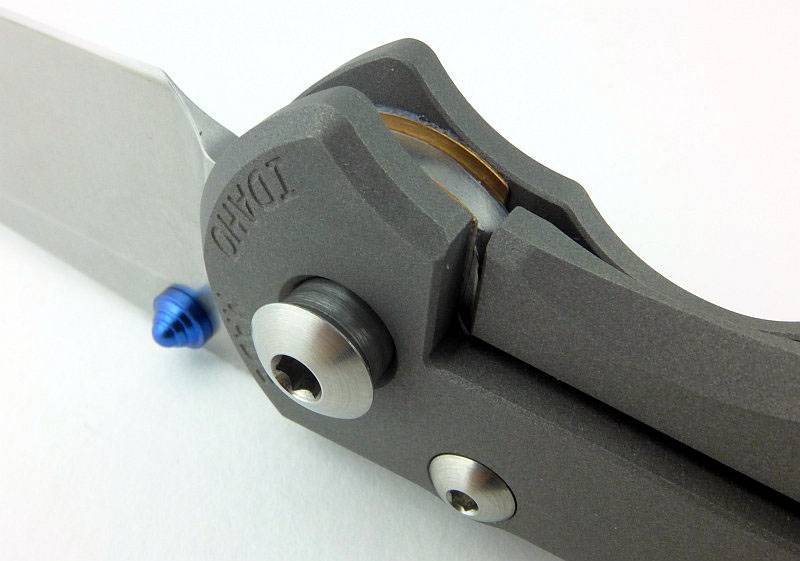
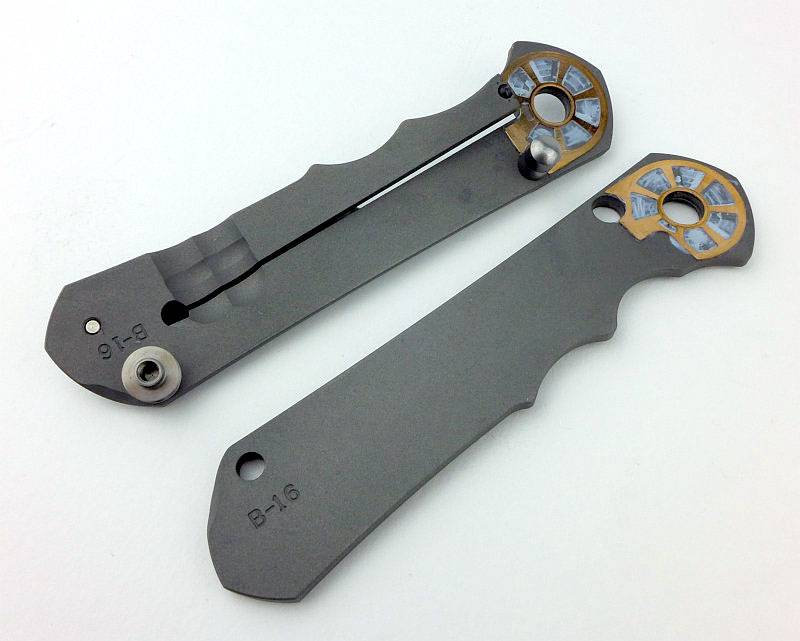
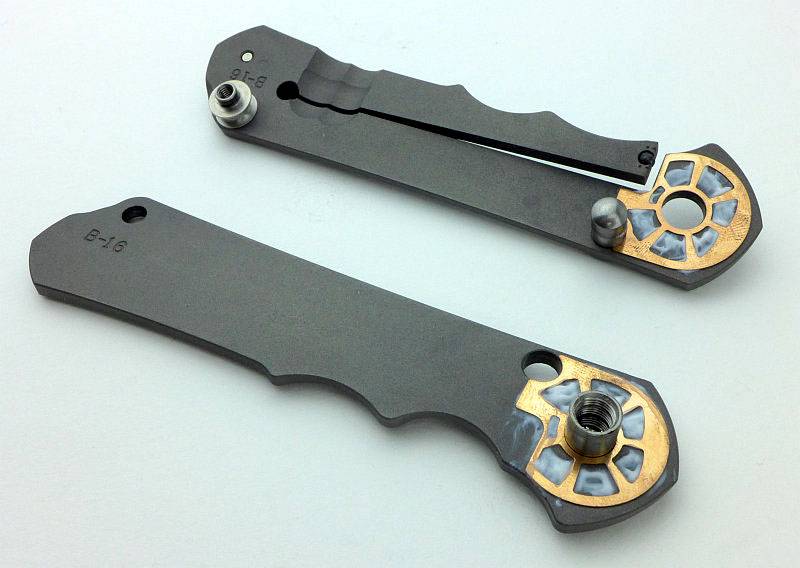
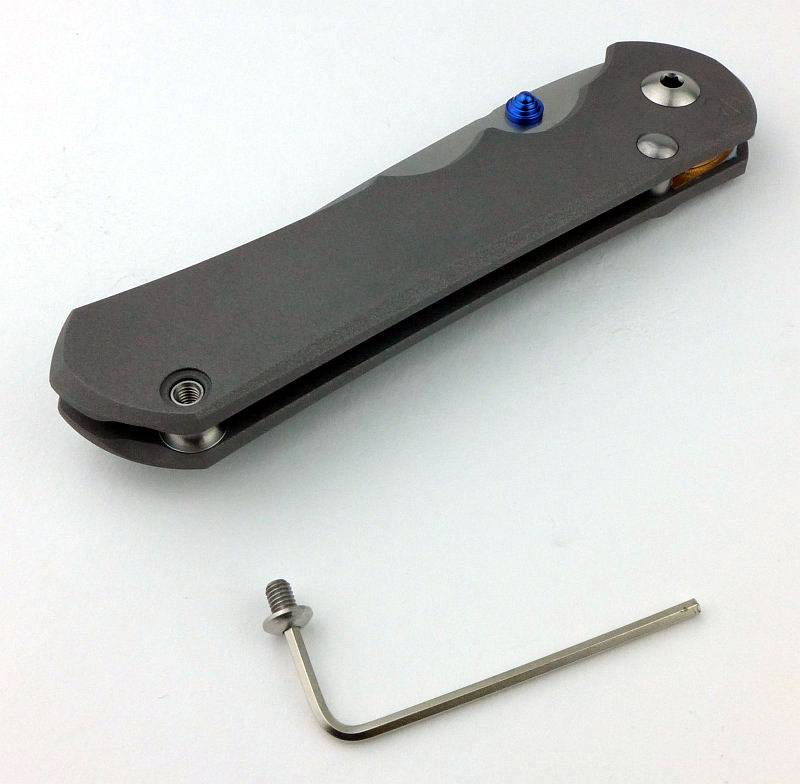
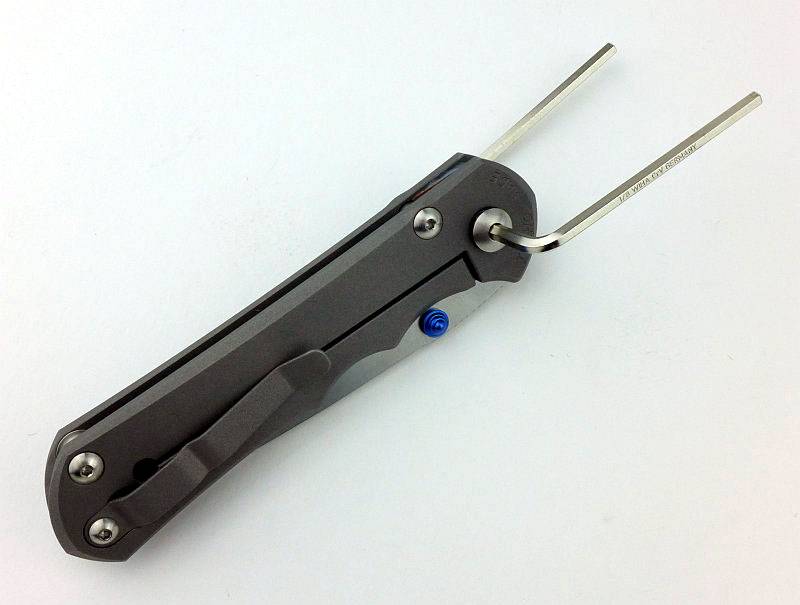
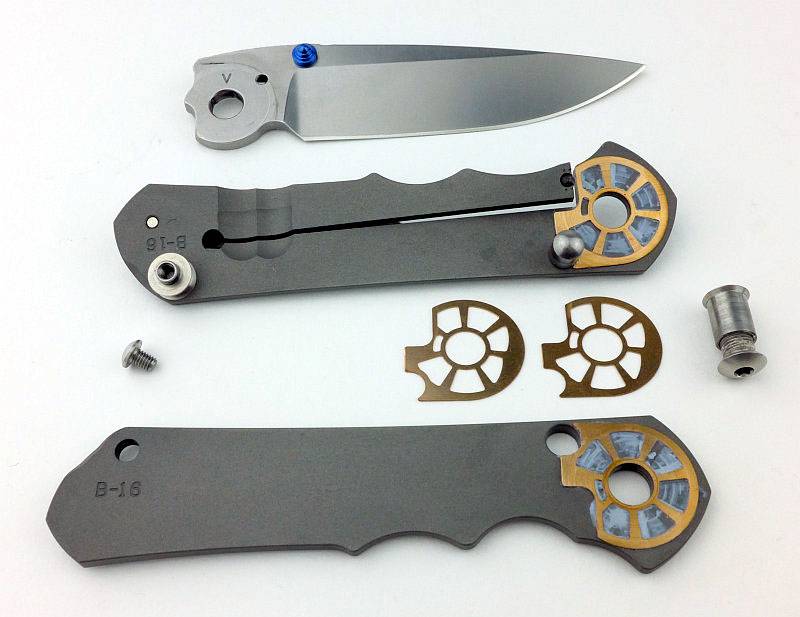
Here we are, ready to go. Working on a suitable surface we have all the things we need laid out – Large Inkosi, new washers, Allen keys for pivot and spacer blots, pivot grease and thread-lock.
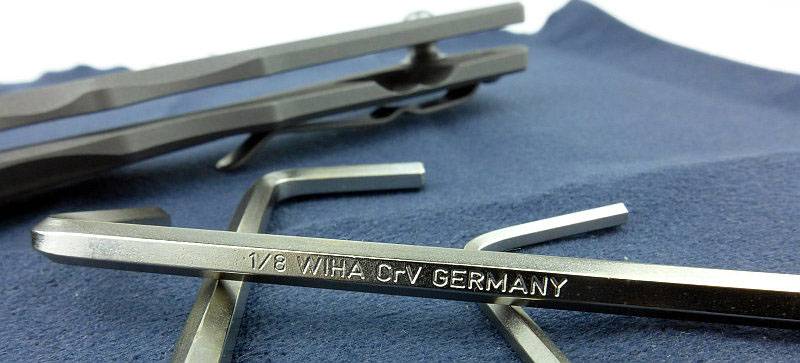
Before going on, something I did spot was that in their approach of using the best quality parts, CRK supply WIHA branded Allen keys – just thought you should know.
Using the pair of larger Allen keys, fit them into each side of the pivot bolt and start to loosen. Depending on how much thread-lock has been used this might be a bit stiff to start with.
One side of the pivot bolt will start to come out. This side will come out completely, leaving the pivot bolt tube in place. The Allen key from the remaining side of the pivot bolt can come all the way through.
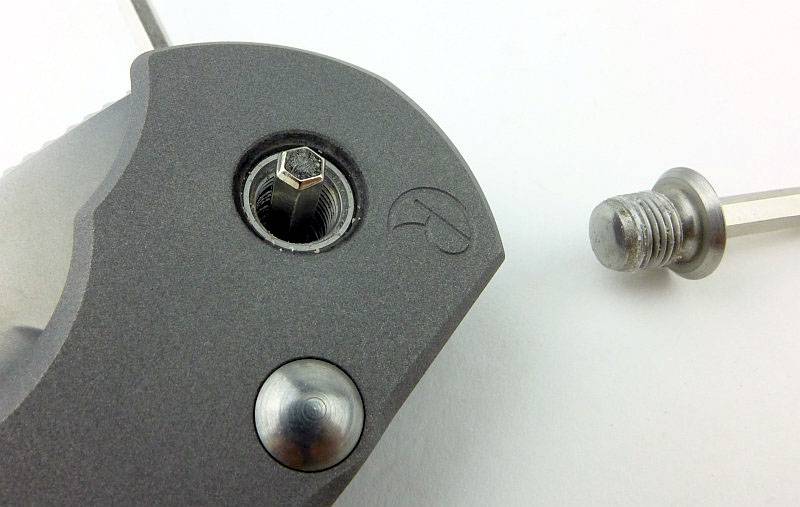
The only other bolt that needs to be removed is from one side of the handle spacer. The blade stop pin is only bolted on one side and will slide out.
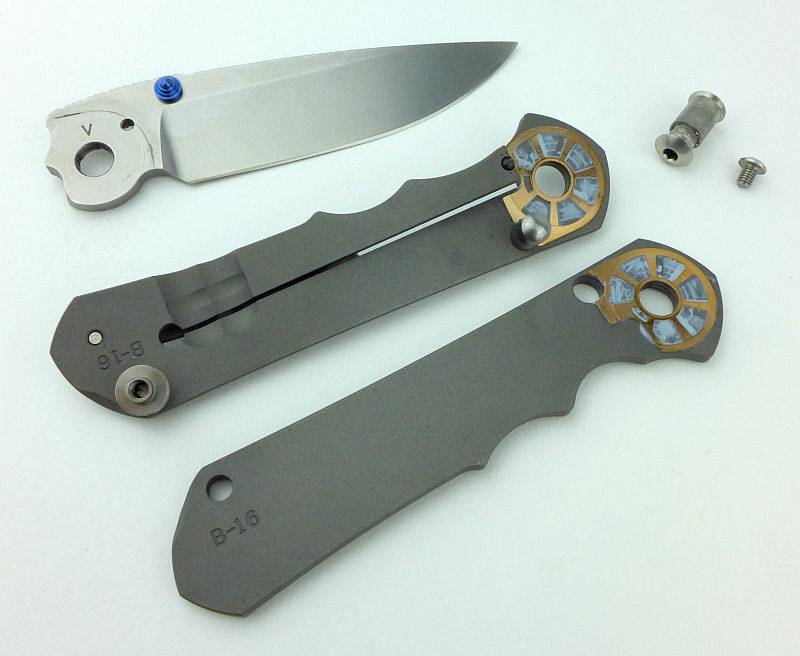
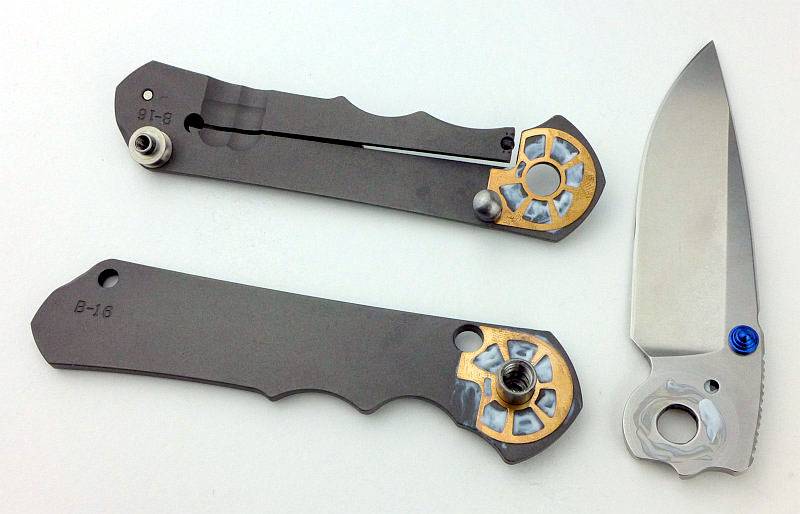
With two bolts removed, the Large Inkosi can be taken apart.
Start to work the pivot bolt tube out. You might open the blade and use the Allen key to help this slide out. Tolerances are so good, the fit is snug without being too stiff. Don’t leave the blade in the locked open position as the lock pressure will make it difficult to remove the pivot tube.
With the pivot bolt mostly out, the blade can be removed and put to one side. (I have skipped over an attempt I made to separate the handles with the blade and blade pivot still in place. With the pressure of the lock-bar and the extra resistance due to the blade pivot, this was not possible. It is much easier to take out the blade pivot and remove the blade.)
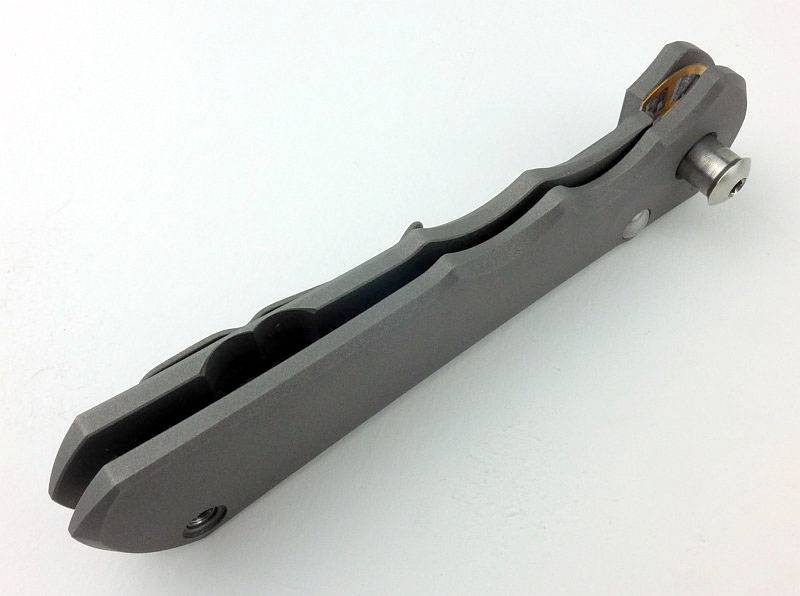
Having taken the blade and blade pivot out, the handles can now be gently worked apart. I found that popping the spacer out and gently working back and forth at the pivot end I was able to get the blade stop pin to start sliding out. You can really appreciate the fit of the pieces that make up this knife.
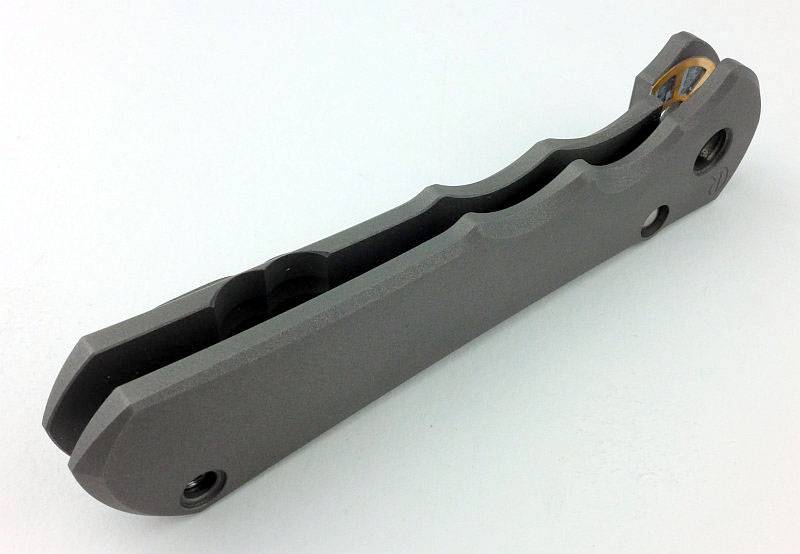
Looking a little closer at the stop pin sliding out.
And there we are, the knife is apart. Two bolts and a little wiggle!
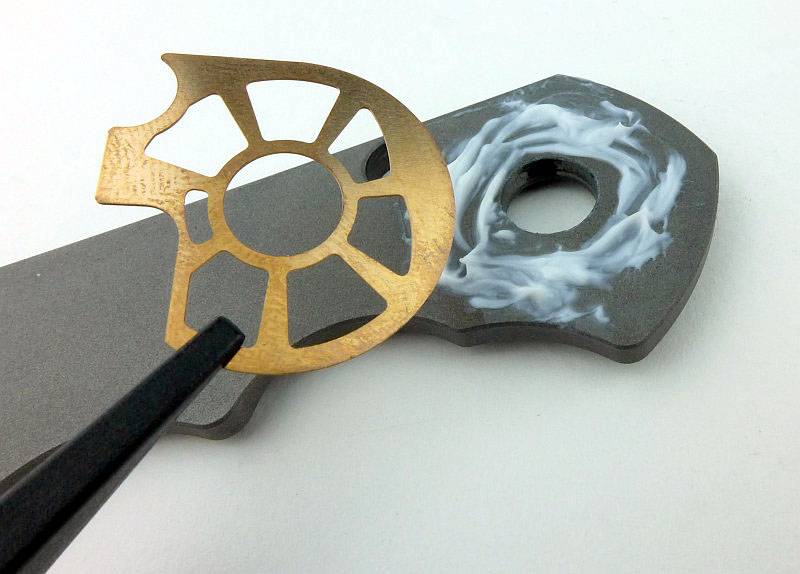
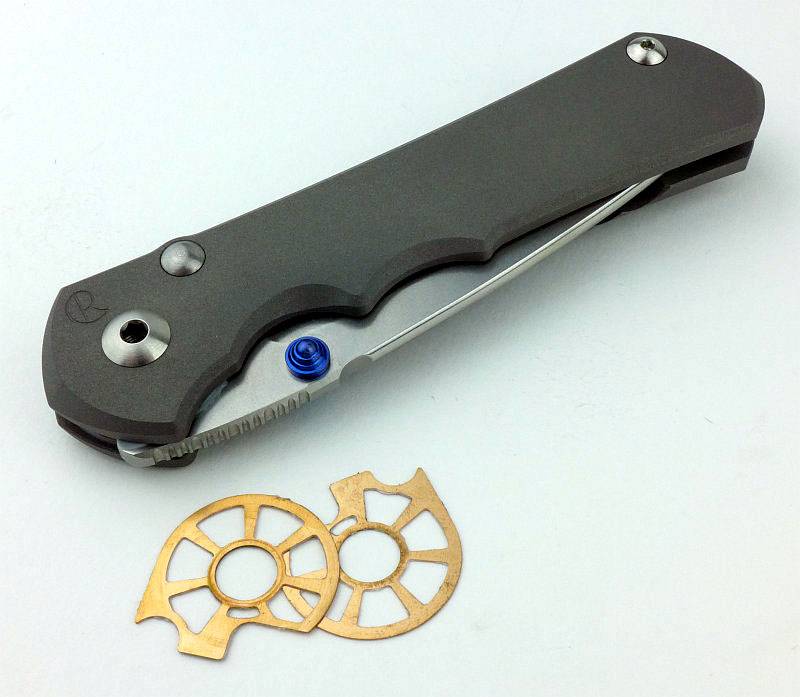
All the parts that make up the Large Inkosi laid out.
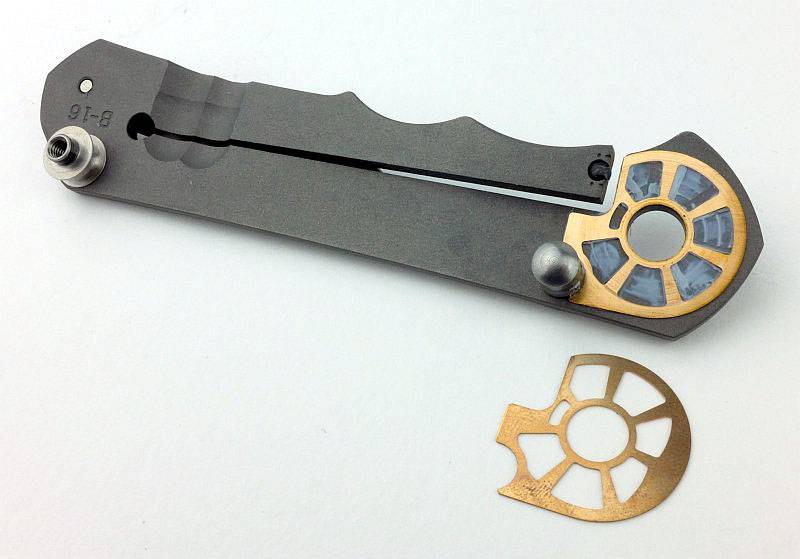
Old and new washers next to each other. Here the old washer is still in place. The difference can be seen with smaller holes towards the front to prevent dirt/grit ingress when the blade is folded.
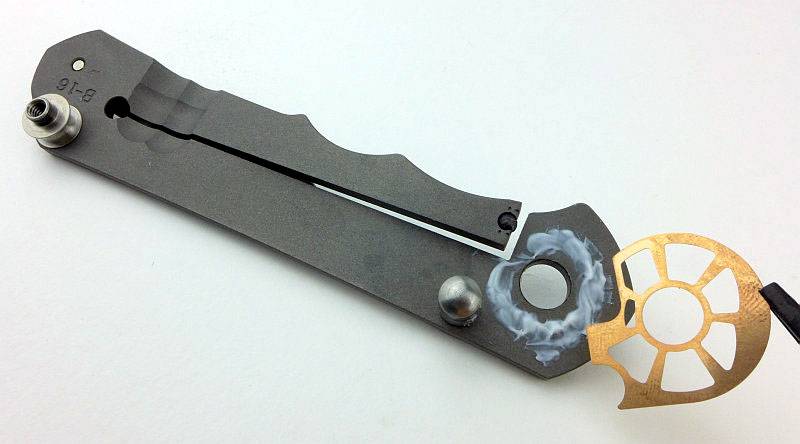
With the old washer removed, apply some grease to the handle (not too much) which will keep the washer in place, and provide the blade lubrication once trapped in the washer holes.
The washer in position and held in place by the grease. Make sure it does not cover the stop-pin hole.

Do the same for the other side.
With the stop-pin already in place, the washer sits against this.

In preparation for reassembly, the blade pivot tube has been inserted into the side it was originally fitted to (the solid handle side).
Just to ensure we have grease on all surfaces, apply a little to the blade tang before sliding it over the pivot tube.
The blade has been put onto the pivot tube in the open position, but will not be reassembled like this. With some sort of tool (here some plastic nose tweezers) keep the washer from turning round while you rotate the blade to half open.
Check the washer is still in the correct position and apply a little grease to the blade tang. NOTE: the blade has been positioned at half-open to ensure the lock-bar presses onto the side of the blade and does not try to lock the blade or slip into the detent, either of which would make it harder to reassemble.
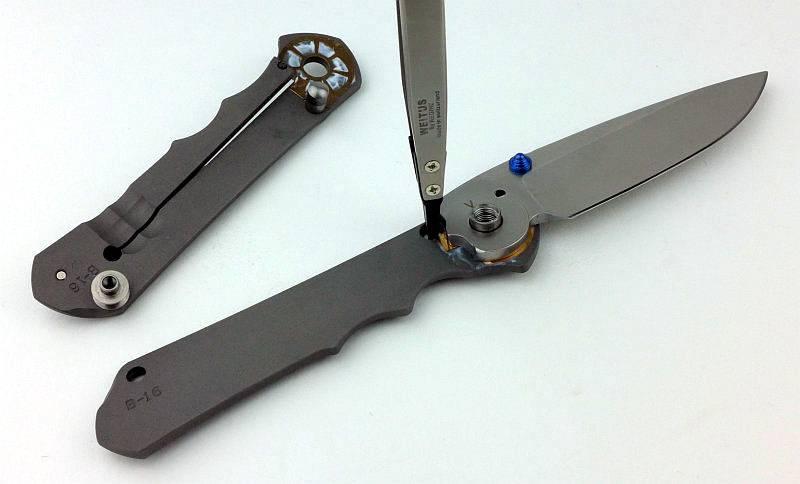
Carefully lining up the blade pivot tube, blade stop pin and spacer, push the handles back together. This does not require much force once you are lined up. Start gently to ensure you don’t catch any edges, and beware of the open blade.
Start with the spacer bolt which will keep the knife together while you adjust the pivot.
Although not absolutely necessary, CRK recommend using thread-lock, so that is what I’m doing.
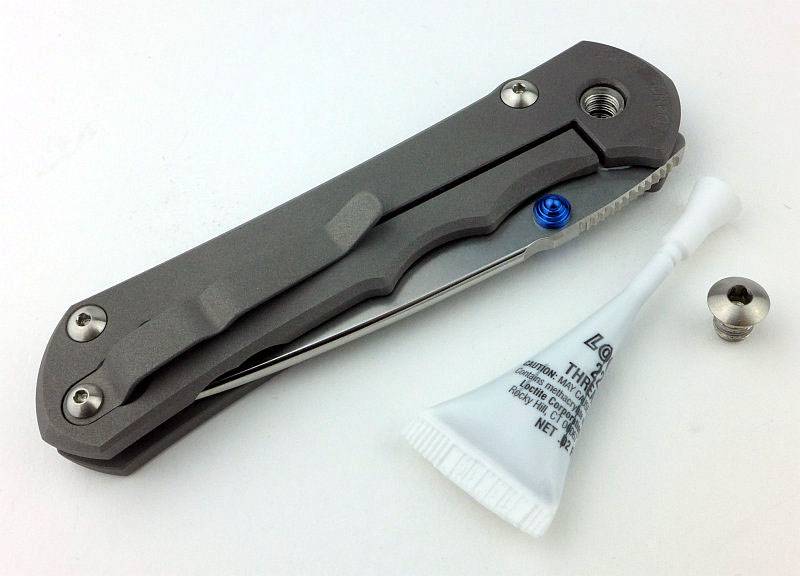
Apply a small amount to one side of the thread. (I should have applied it a bit lower down the thread, but this worked fine for me.)
Start to tighten the pivot. This process is important to take a little time over. What you are looking for is the point at which there is no side to side play in the blade at all, but where the blade still rotates smoothly. You should be able to open it with the thumb stud easily – if not, you have gone too tight. Personally I went to the point of being too tight, then loosening it slightly. Doing this ensures settling of the washers, blade tang and grease so your final adjustments will be effective. Final adjustments were made with the Allen key’s end moving only 1/4-1/2″ each time (5-10 degrees) and testing the blade movement. The thread-lock will cure over time and should not affect this adjustment process.
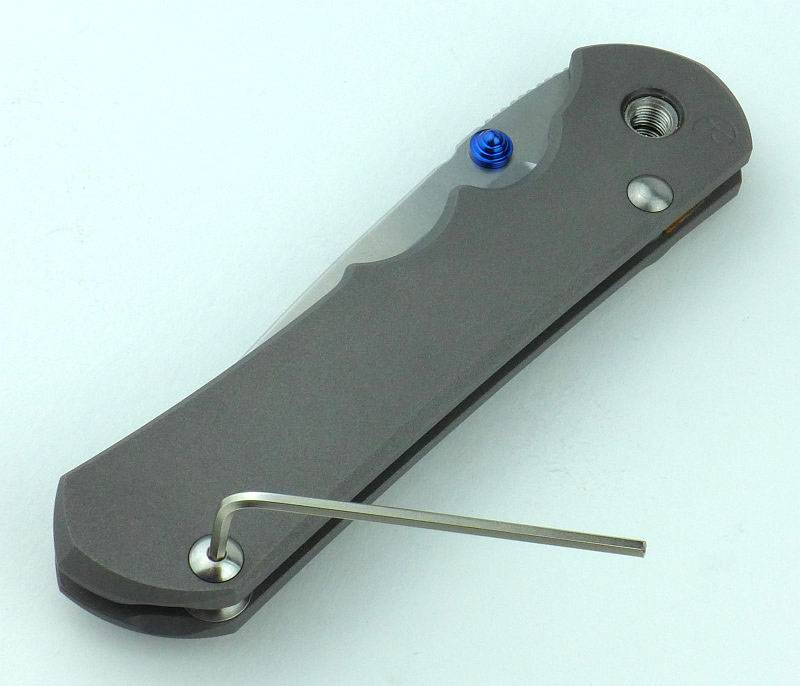
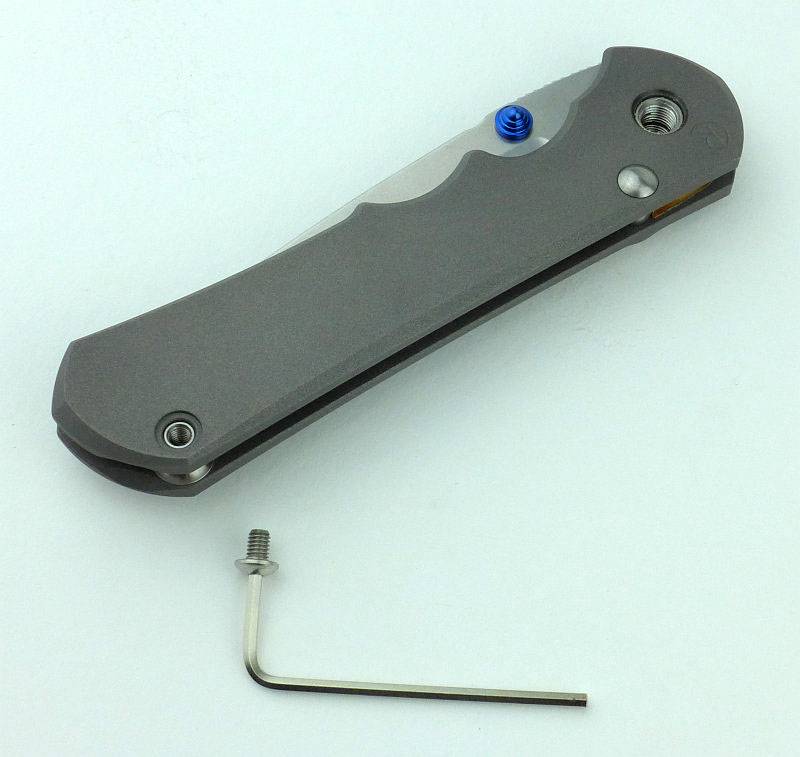
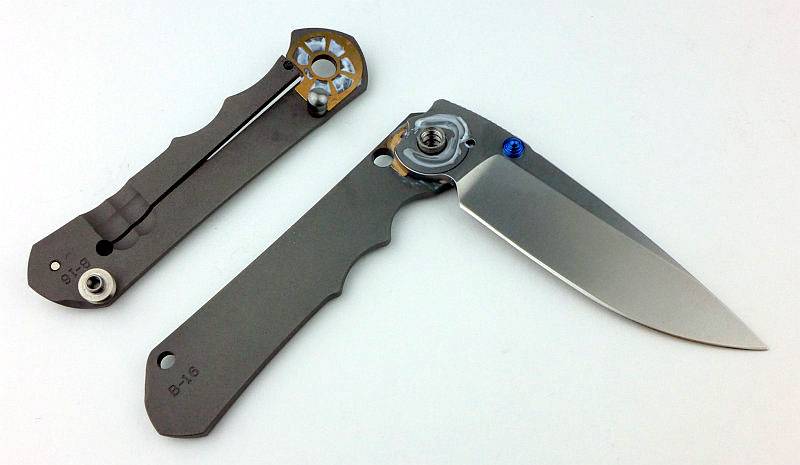
All ready to go, fitted out with its new washers. The old ones can be kept as spares should you ever need them.
A few more details:
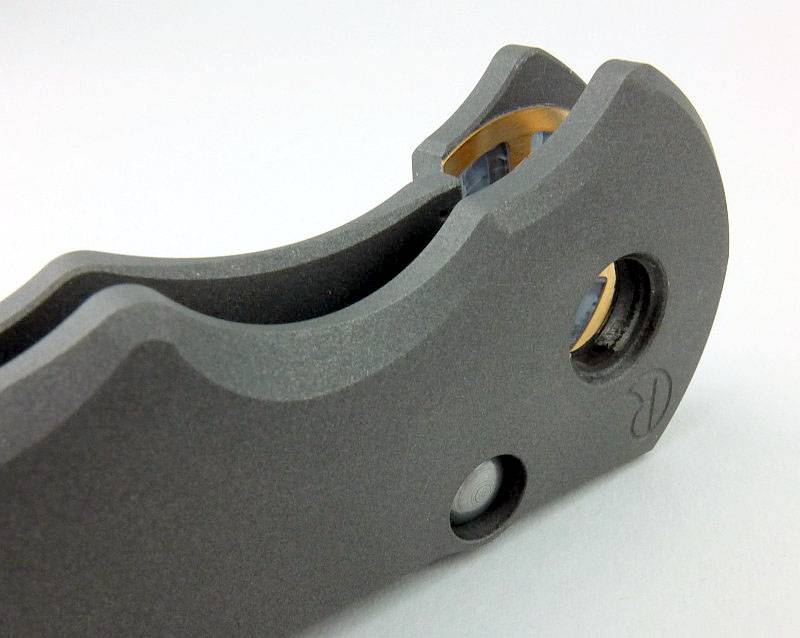
While I had the knife apart, I took the opportunity to take a closer look at some parts.
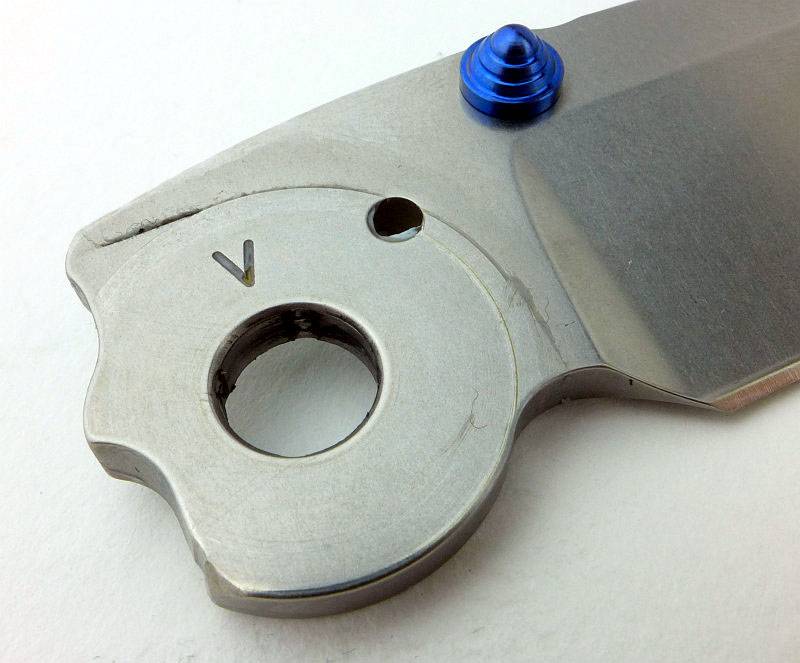
Here we have a clear view of the blade and its tang.
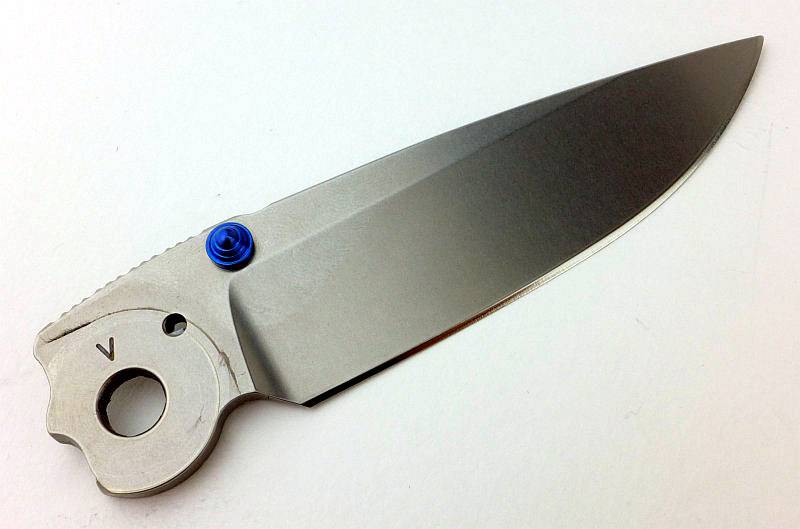
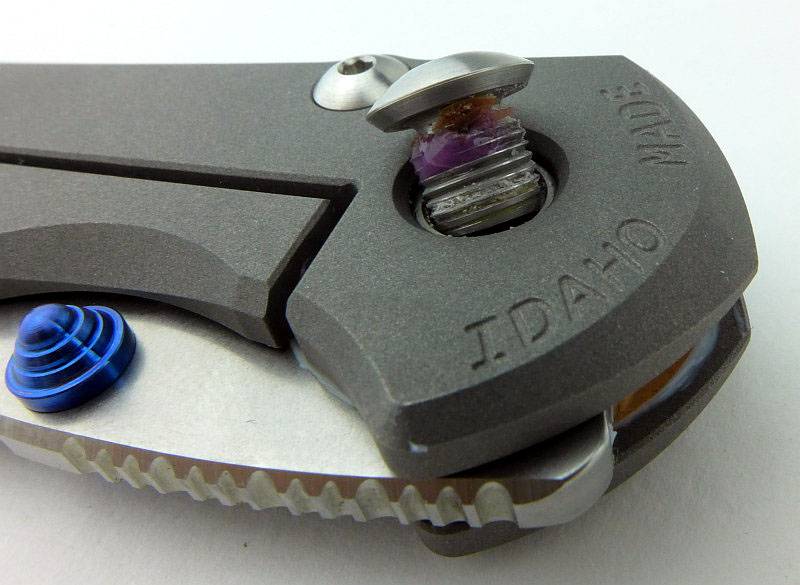
A couple of interesting details on blade tang. There is a groove cut into the lock surface for the ceramic ball to fit into. This means that the contact surface is much larger than a ball touching a flat surface.
Also look closely inside the pivot hole, and you can see that a series of grooves have been included to hold grease and reduce turning friction.
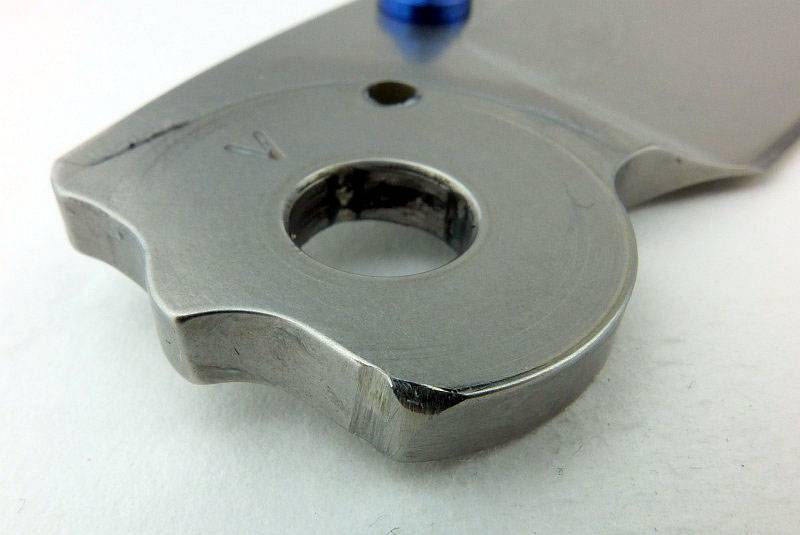
Between the pivot hole and thumb stud is the blade retention detent hole (to keep it closed).
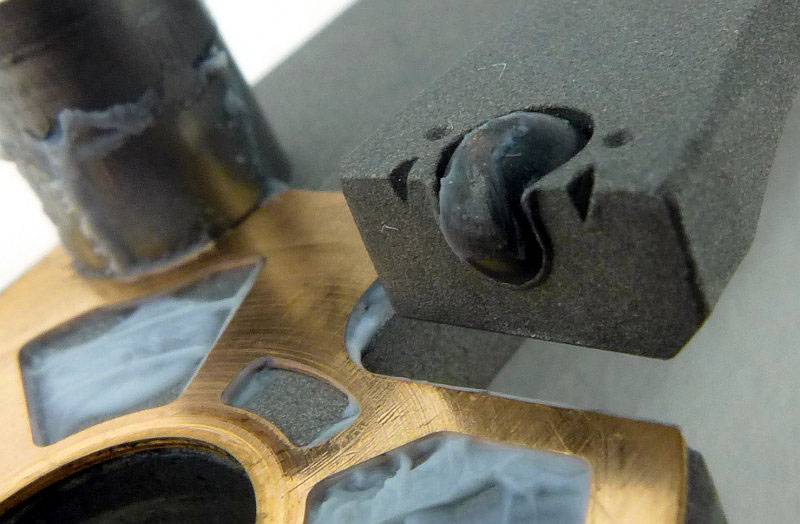
Only with the knife taken apart is it possible to see the detail of the ceramic ball used in the lock.
Summary
Taking a folding knife apart is a job you might rather leave to a knife maker, especially when it is a high quality knife like the Large Inkosi. As long as you take it slowly, have a little mechanical sympathy, and give yourself room to work, there is no reason you shouldn’t do this job yourself. CRK have made the job of DIY cleaning and maintenance very simple.
Though I’m doing this to swap out the washer, it would be the same process for a deep clean and re-grease operation, so the article can serve as a reference for taking the Large Inkosi apart.
This new washer design will be fitted to all new Large Inkosi knives, but if you have an early one with the old washer and would like the new version of the washer, CRK will happily send you the new washers. If you are of the opinion “It ain’t broke, so don’t fix it”, then you don’t need to.
You can tell which version you have by looking into the front of the handle with the knife blade closed. If you can see the holes in the washer, it will be the older version; if you can’t see any holes then you already have the new one.
Discussing the Article:
Please feel free to add comments to the review, but the ideal place to freely discuss these reviews is on a forum. If you started reading the shorter forum version of the review, but followed the link this full exclusive review, please return to that forum to discuss the review there.
If you read the review entirely on Tactical Reviews, please consider one of the following to join in any discussion.
EdgeMatters – Sponsored Reviews (UK based Forum for Knife Makers and Collectors)
BladeForums – Knife Reviews (US based Forum for Knife Discussion)
CandlePowerForums – Knife Reviews Section (Largest and Friendliest Flashlight Community Forum)
