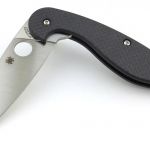
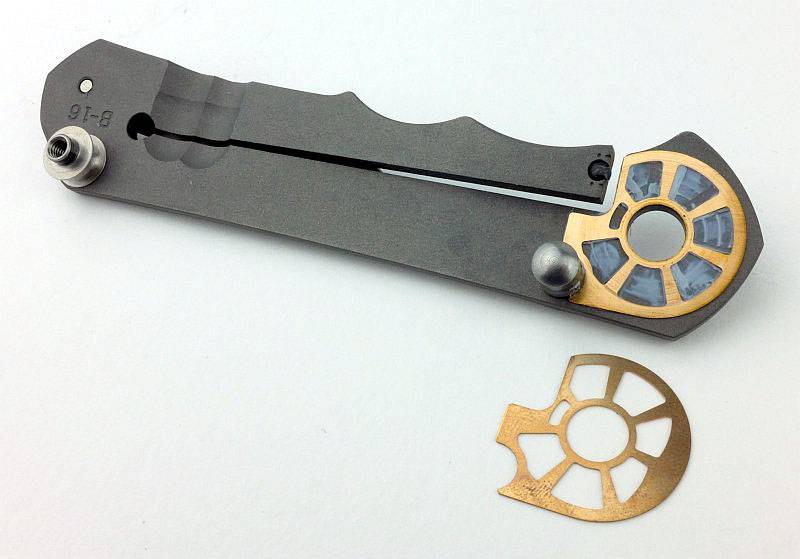
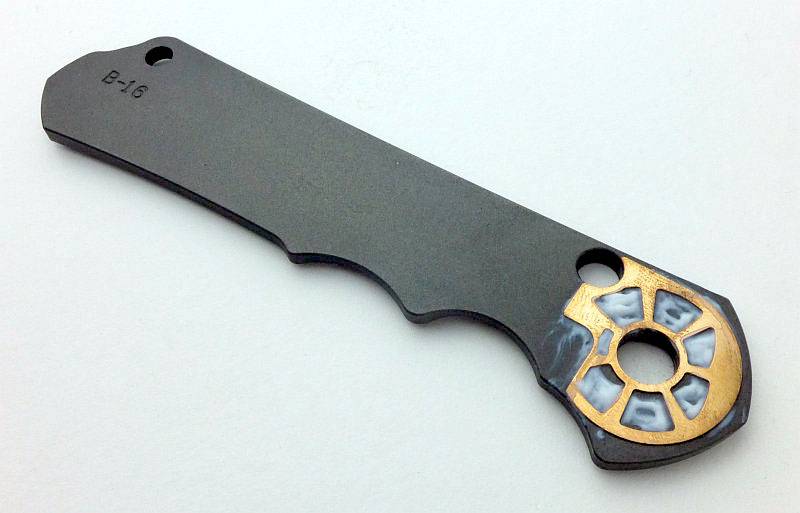
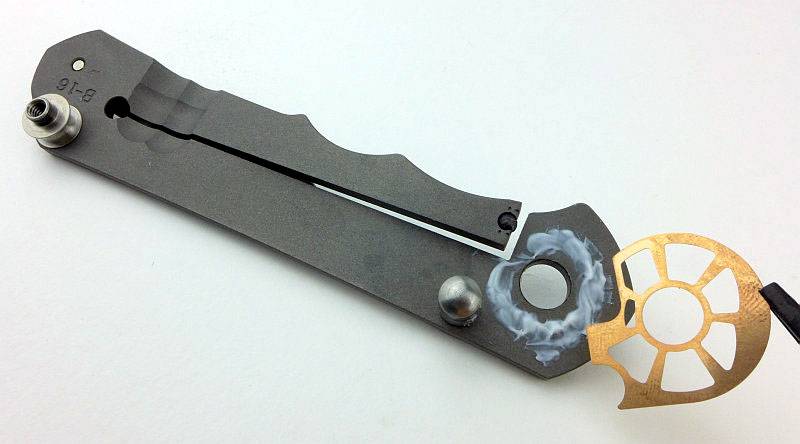
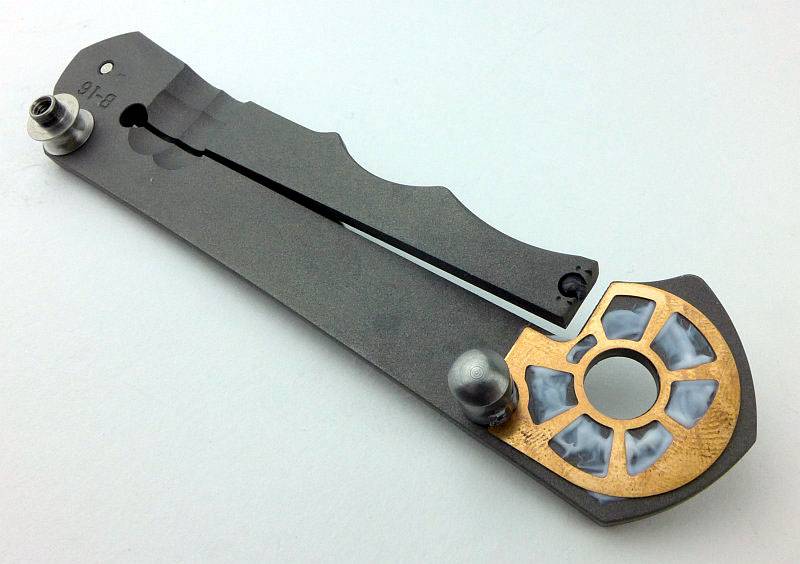
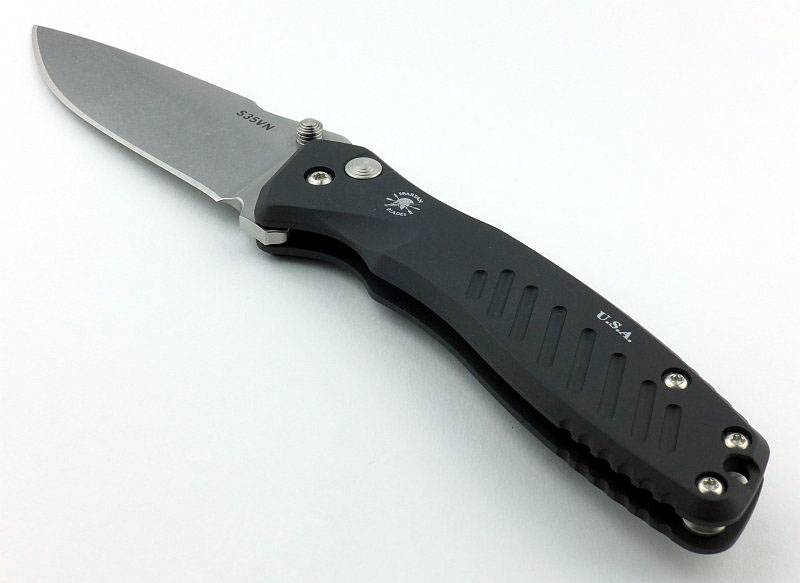
Knife Review: lionSTEEL bestMAN

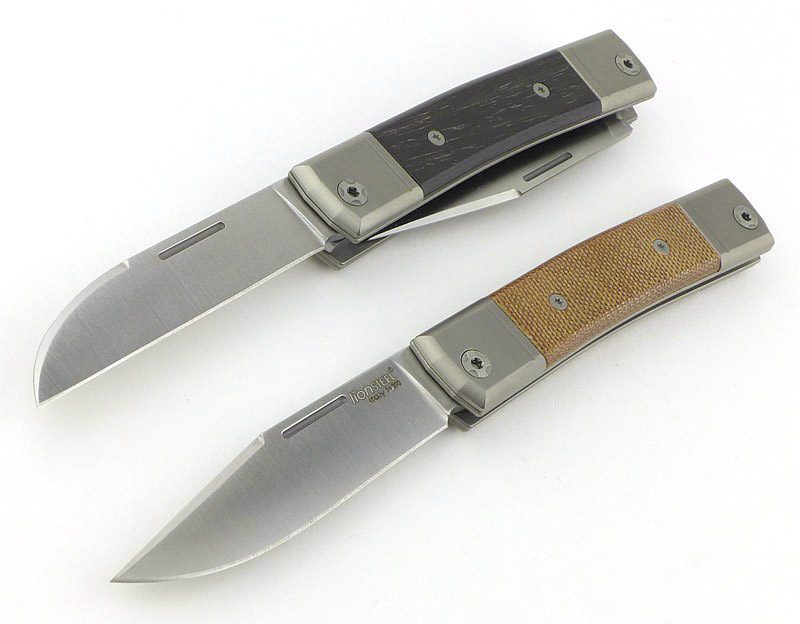
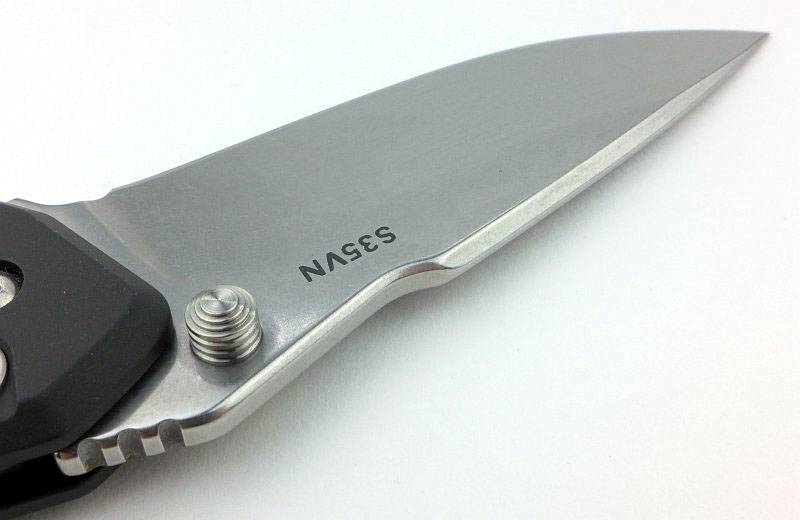
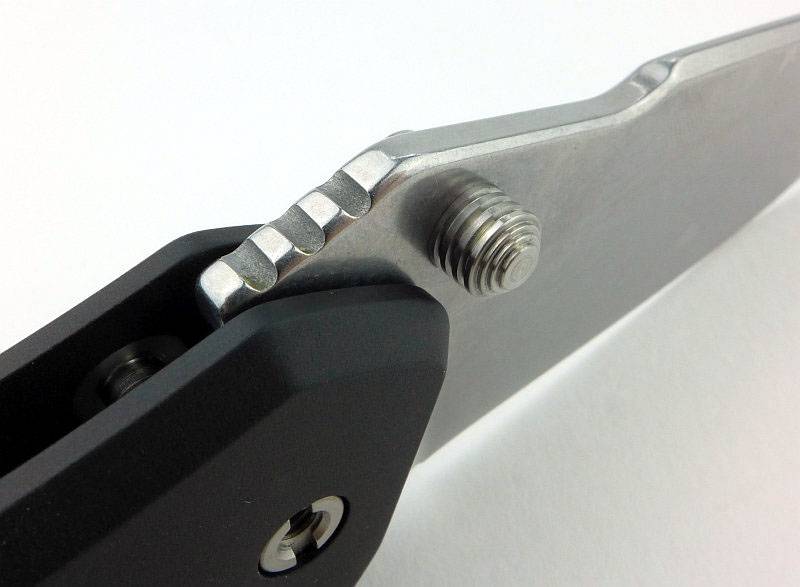
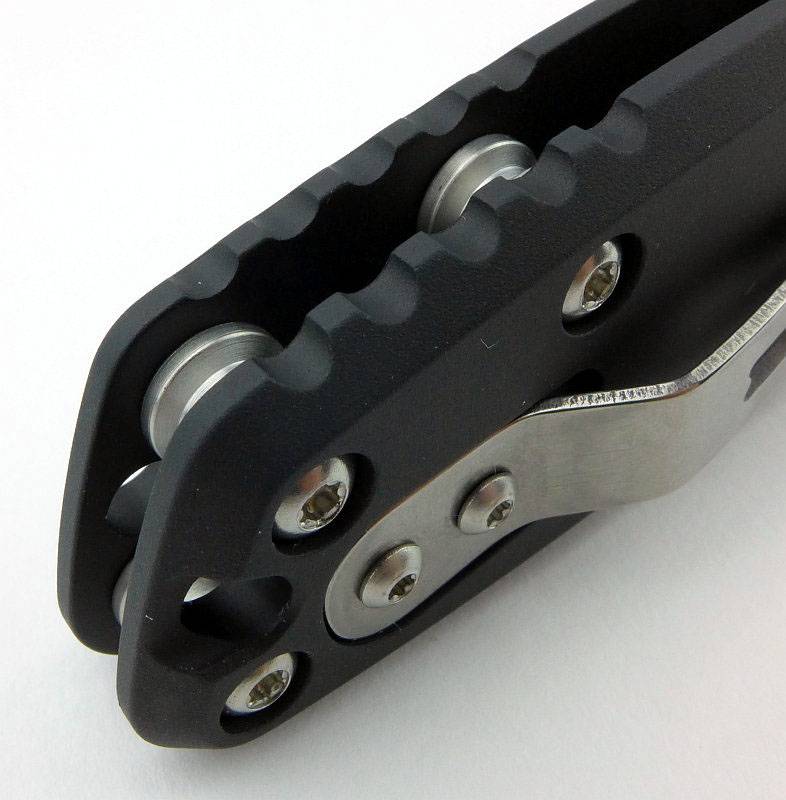
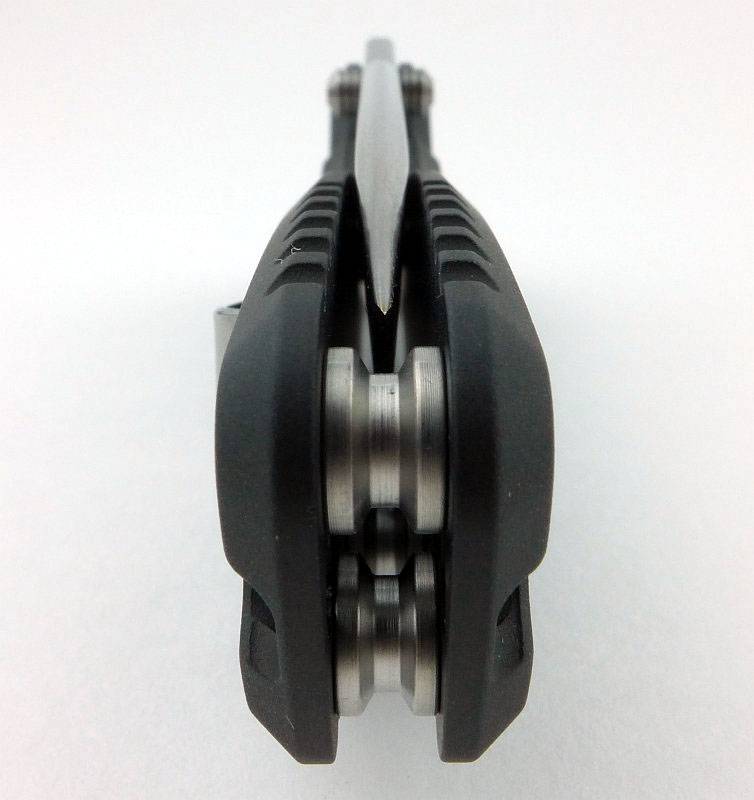
I was first able to handle the lionSTEEL bestMAN folding knife at IWA 2019 – those were prototypes. The finished production knives shown in this review are further refined compared to the prototypes (which you might have seen on the @TacticalReviews Instagram). lionSTEEL have taken the traditional folding pocket knife and modernised it using the best materials and giving you the choice of two blade shapes, single or double bladed versions and five handle materials.

A few more details:

What’s in the box?:


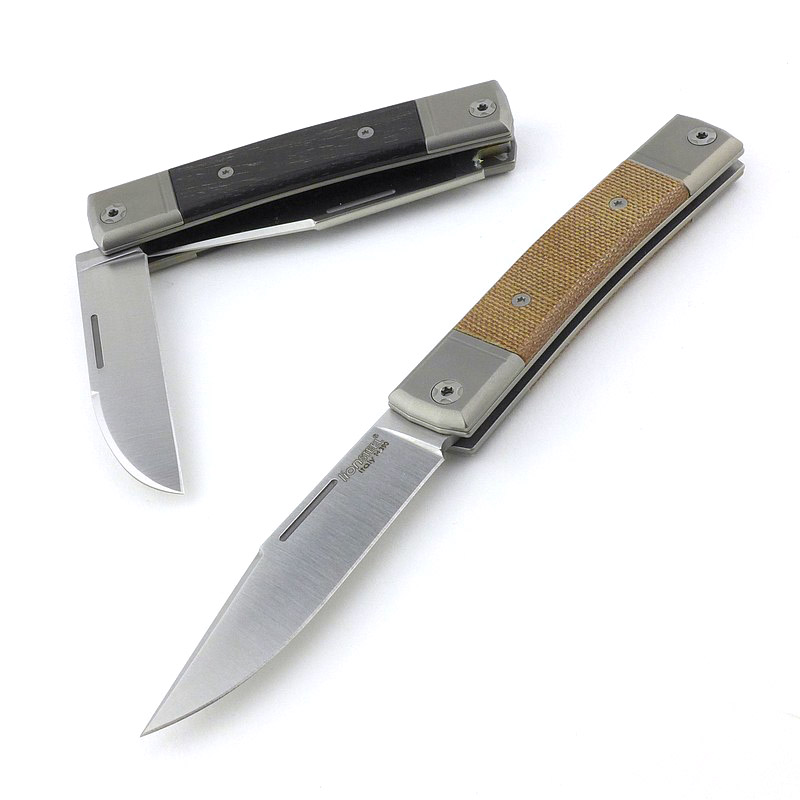
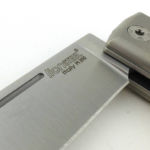
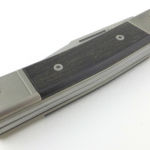
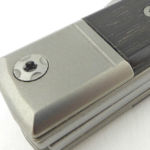
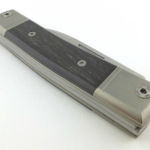
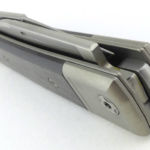
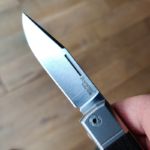
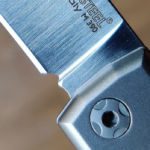
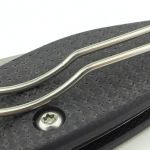
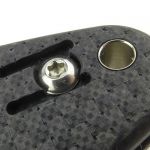
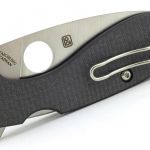
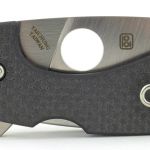
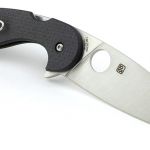
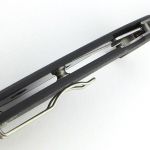
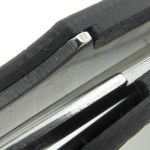
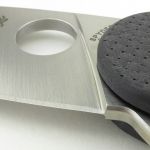
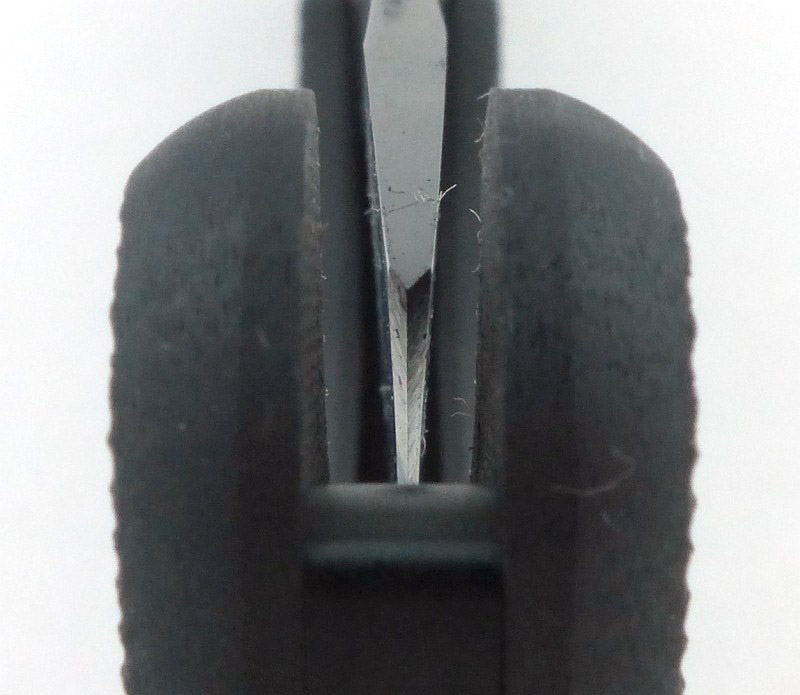
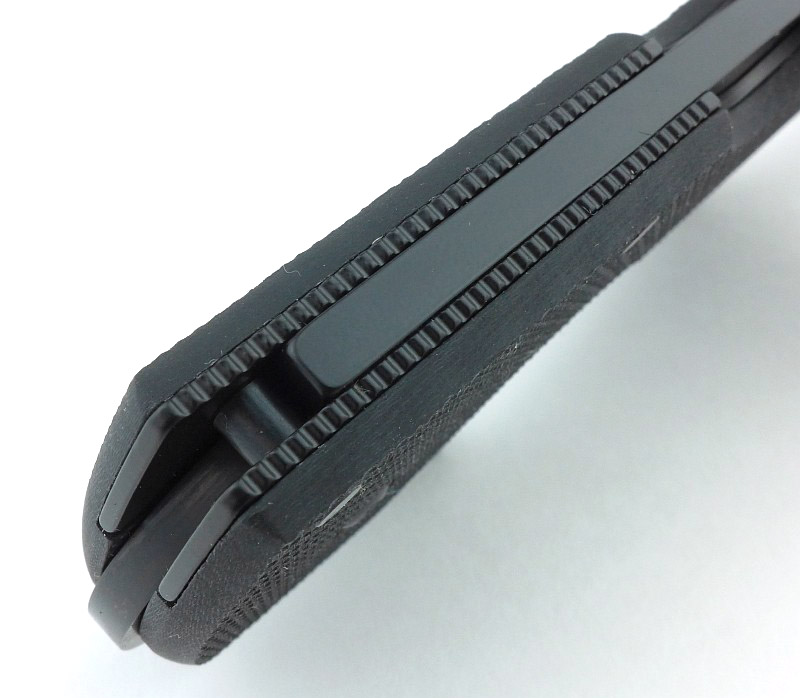
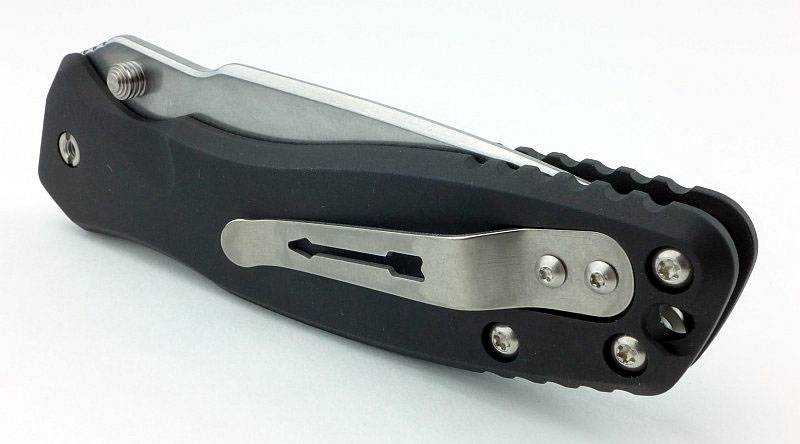
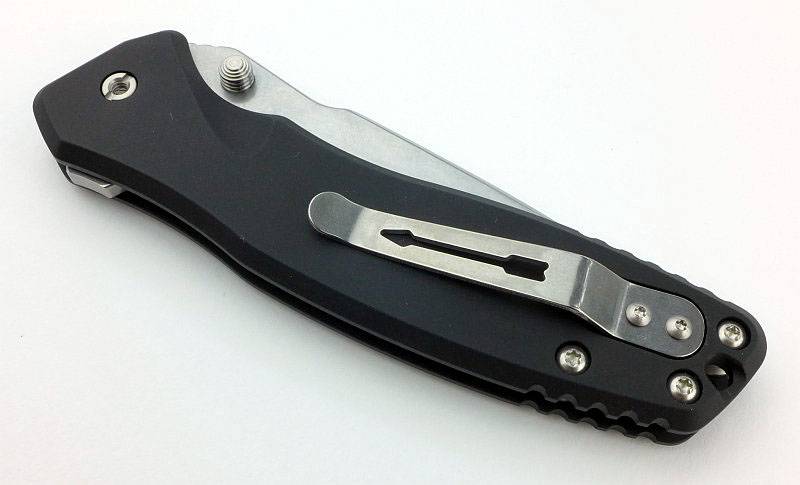
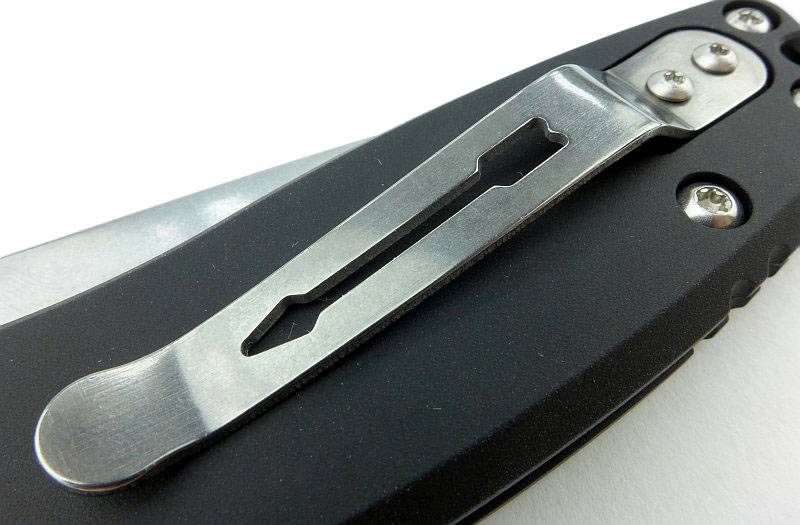
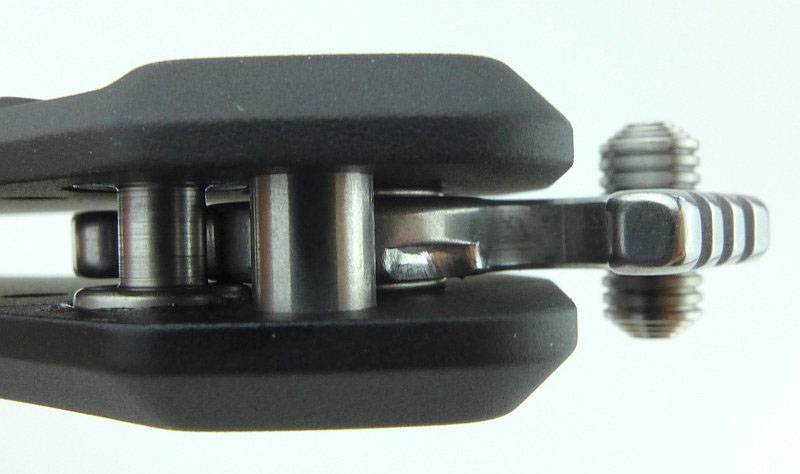
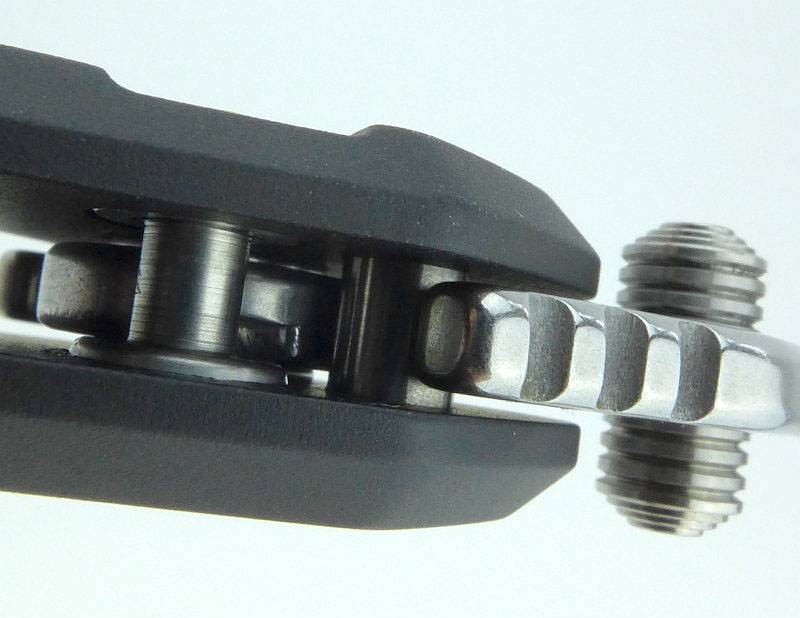
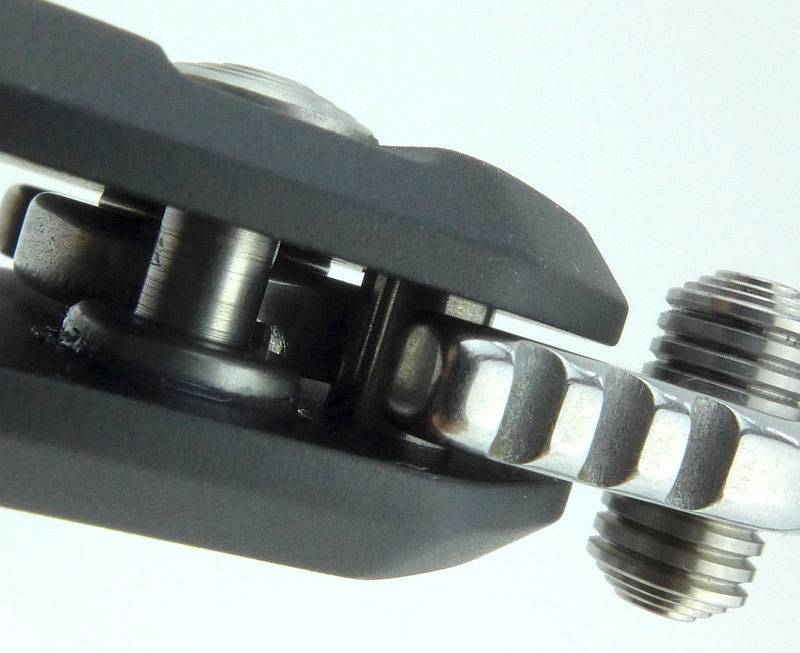
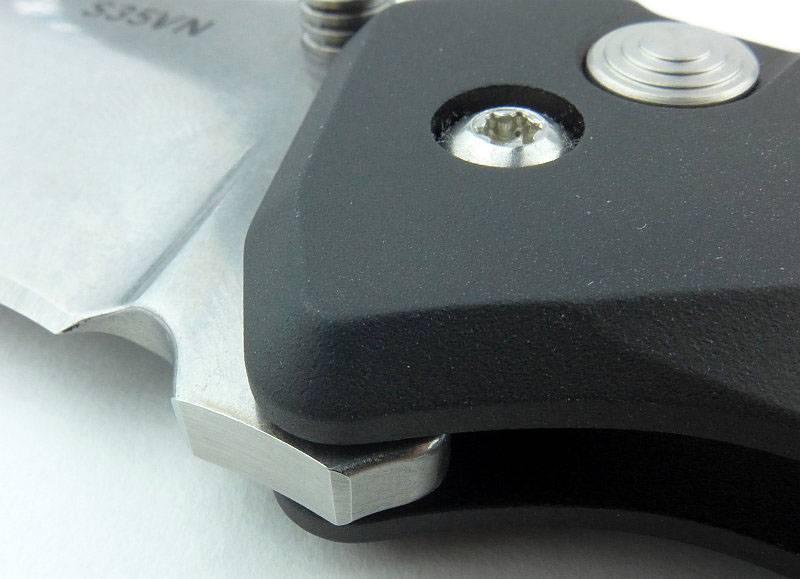
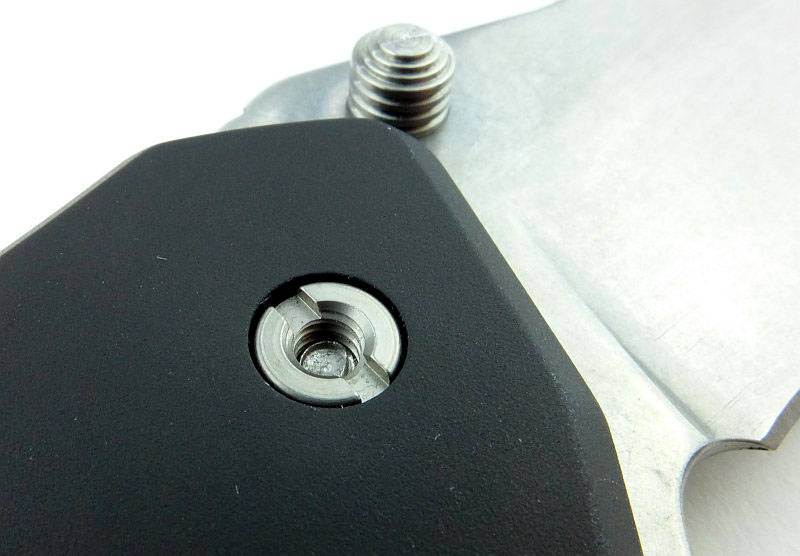
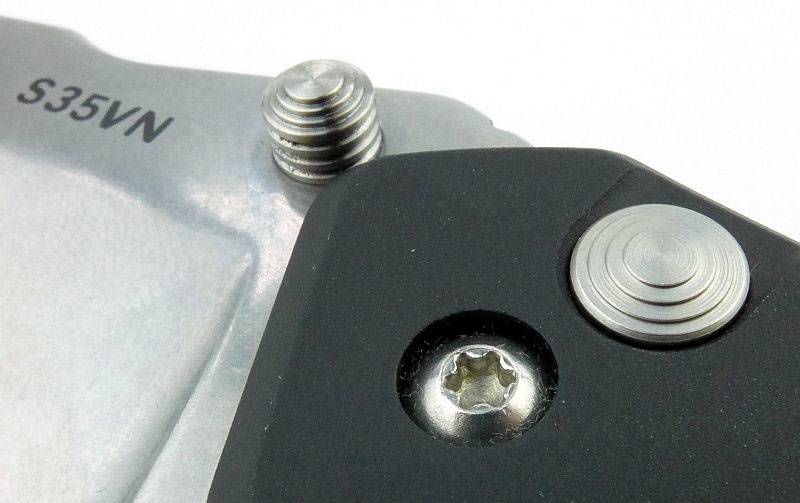
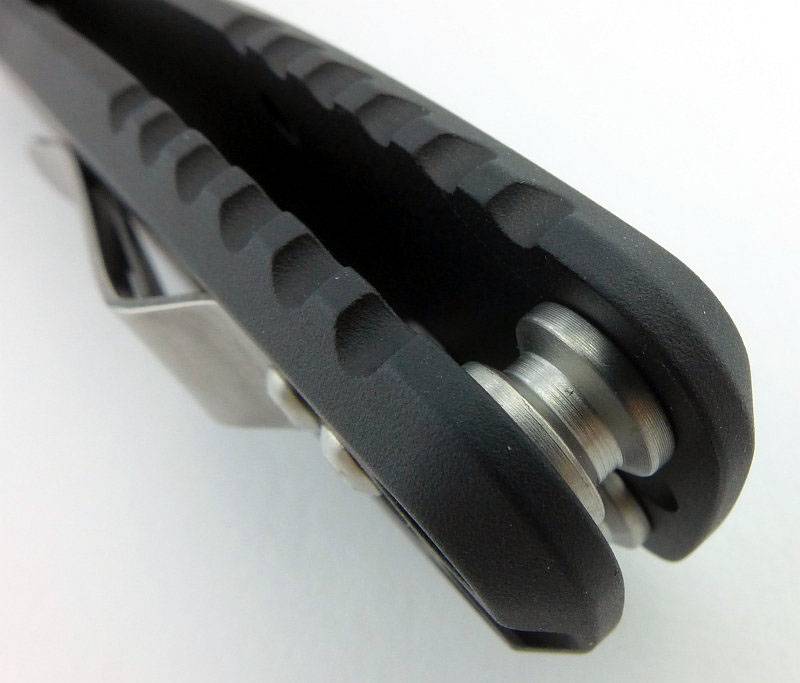
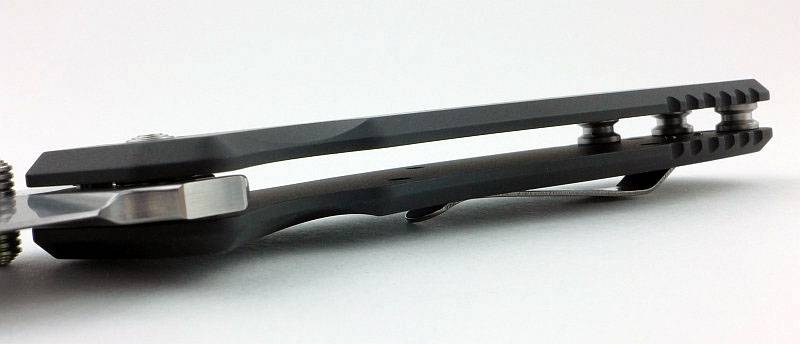
A good look round the single blade bestMAN – Things to look out for here are:

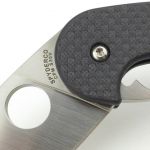
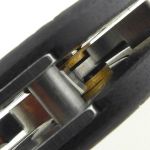
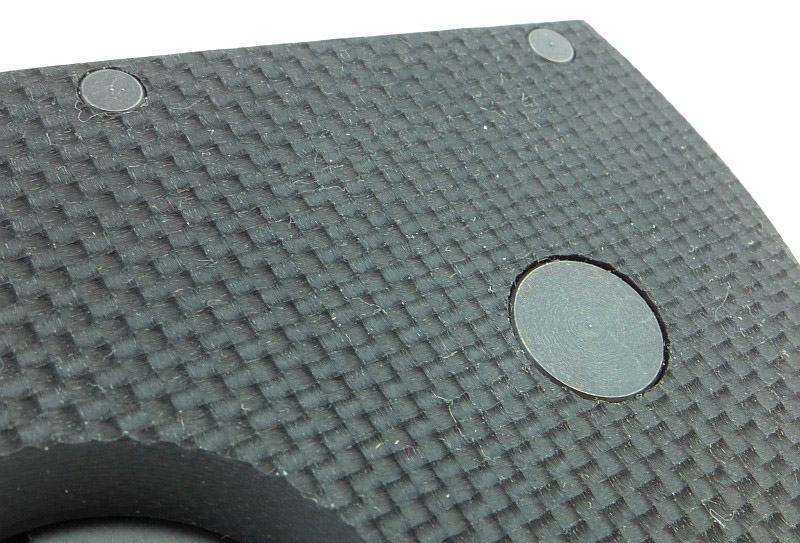
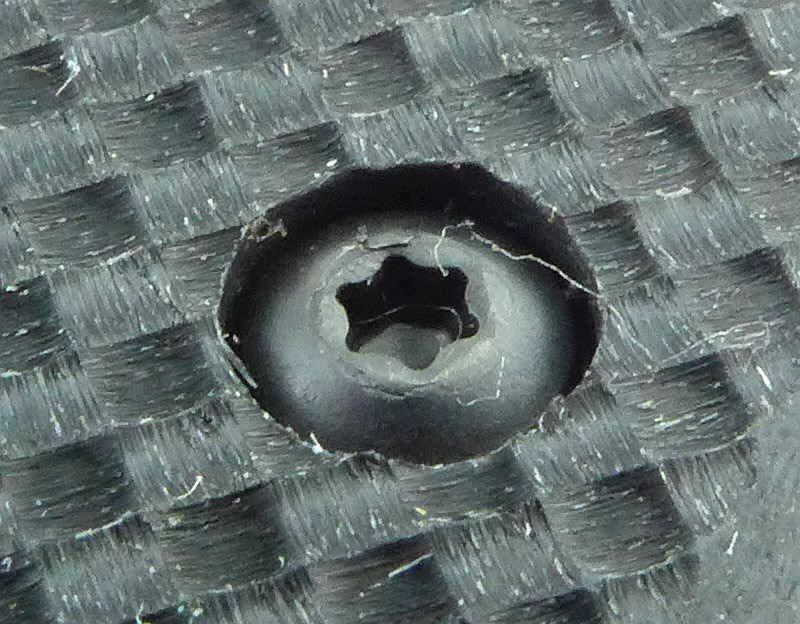
Though looking very traditional, the bestMAN uses modern materials.


A good look round the double blade bestMAN – Things to look out for here are:

Packing in a second blade gives both available blade shapes in one knife. In this case a little more traditional with a wooden handle.


The Blade and Handle – Detailed Measurements:

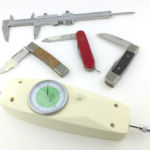
For full details of the tests and measurements carried out and an explanation of the results, see the page – Knife Technical Testing – How It’s Done.

The blades are made from M390 steel.

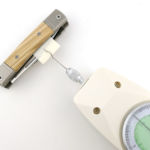
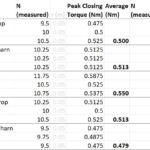
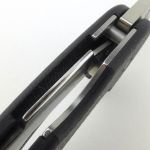
Originally developed following the release of the Chris Reeve Knives Impinda, the bestMAN has been tested for opening and closing torque. The raw data is included but it is the average torque figures in bold that I would direct you to look at. Remember to check the technical testing link above for more on this.


What is it like to use?

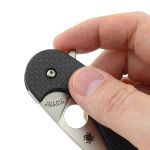
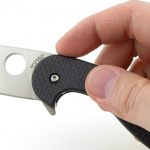
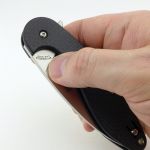
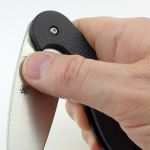
After spending a lot of time carrying the single and double bladed versions, this feels the right place to start. Initially I would have been adamant that the double blade version was without doubt the one you had to have – two blades are better than one – one main blade and one left razor sharp as a backup – the whole ‘one is none’ thing. To a degree maybe, but I’ve gone the other way and found the single blade version to be my favourite. The reason being two-fold, firstly it is noticeably smaller and far less obtrusive in the pocket, and secondly it is much easier to open the blade. Nail-nicks are not ideal if your nails are softened by water or otherwise not very strong. With the single blade version you can pinch-grip the blade as well as using the nail-nick so opening is definitely easier.
The double blade version still has that advantage of giving both blade shapes and a second sharp edge, just with the burden of being a bit bigger.


If you do need to chose between the drop-point and wharncliffe, this might be easy if you have a firm favourite, and either way you won’t go wrong.
The straight cutting edge and lower point of the wharncliffe suits many EDC cutting tasks better for me than the drop-point.

Modifications:

No surprises for anyone reading my reviews, when I bring up the sharpening choil/rear point. Some of the bestMAN blades have a more pronounced cutting edge heel than others, but in general, not sufficient for my liking. I have made a minor modification to the blade heel to add a Victorinox style sharpening choil. Shown here is the double blade version with both blades modified.


Review Summary

The views expressed in this summary table are from the point of view of the reviewer’s personal use. I am not a member of the armed forces and cannot comment on its use beyond a cutting tool or field/hunting knife.

Something that might be a ‘pro’ for one user can be a ‘con’ for another, so the comments are categorised based on my requirements. You should consider all points and if they could be beneficial to you.

I’m trying something slightly different and starting with what doesn’t work so well, so I can finish on a more positive note

_______________________________________________
What doesn’t work so well for me
_______________________________________________

Double bladed version more difficult to open.

_______________________________________________
Things I like
_______________________________________________

Excellent M390 steel.
Nice traditional ‘friendly’ looking slip-joint.
Choice of two blade shapes.
Choice of single or double blade.
Choice of five handle materials.
Reliable design.
Smooth precise action.
Large nail-nick.


Discussing the Review:

The ideal place to discuss this review is on the Tactical Reviews Facebook Page
Please visit there and start/join the conversation.

As well as the Tactical Reviews Facebook Page, please consider visiting one of the following to start/join in any discussion.

BladeForums – Knife Reviews (US based Forum for Knife Discussion)

CandlePowerForums – Knife Reviews Section (Largest and Friendliest Flashlight Community Forum)

The BESS Exchange – A forum discussing technical aspects of sharpness and truly understanding your sharpening process.

Knife Review: Viper Tecnocut Dan 1 and Dan 2

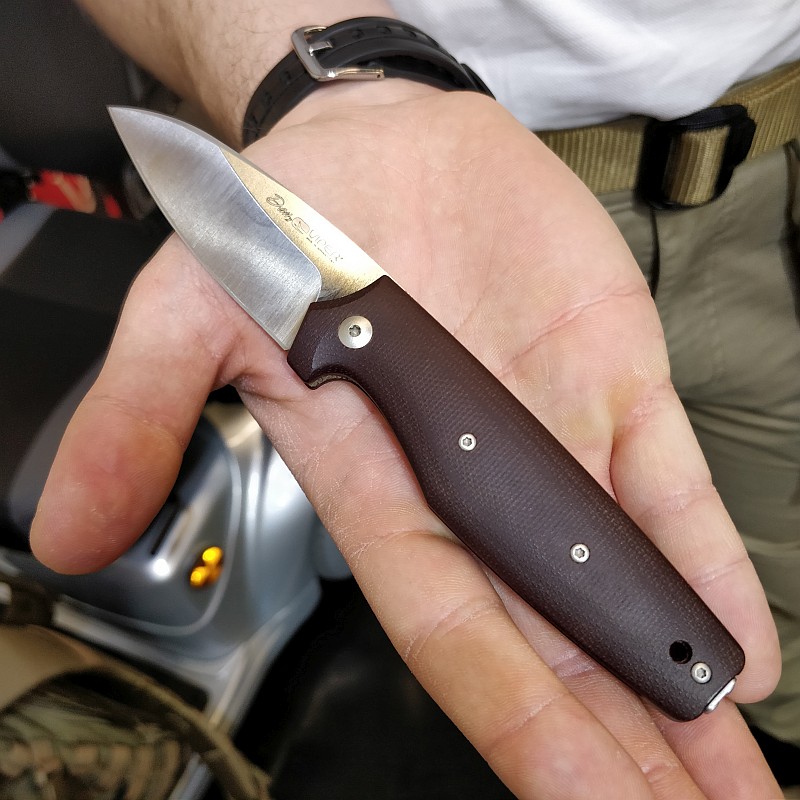
Could the Dan (1 and 2) by Viper Tecnocut be the perfect EDC knife? It was during a meeting with Tommaso Rumici (the designer of the Dan) about a completely different fixed blade design of his, that Tommaso produced a Dan 2 from his pocket and handed it to me. We were still talking knives, but now onto something very different. Intended as an easy to carry, and as widely ‘EDC Legal’ as possible pocket knife (due to size and lack of a lock), the Dan gets so much right, it was an instant hit with me. Since then I’ve not been able to put it down. In this review of the Viper Dan 1 and 2, I take a very close look at this knife and why it works so well.

A few more details:

What’s in the box?:

The two knives in this review were provided without packaging or any accessories as they came directly from the Viper Tecnocut display stand at IWA 2019. This also means they have been handled and ‘played with’ by hundreds of people during the show, so might not be in perfect condition.

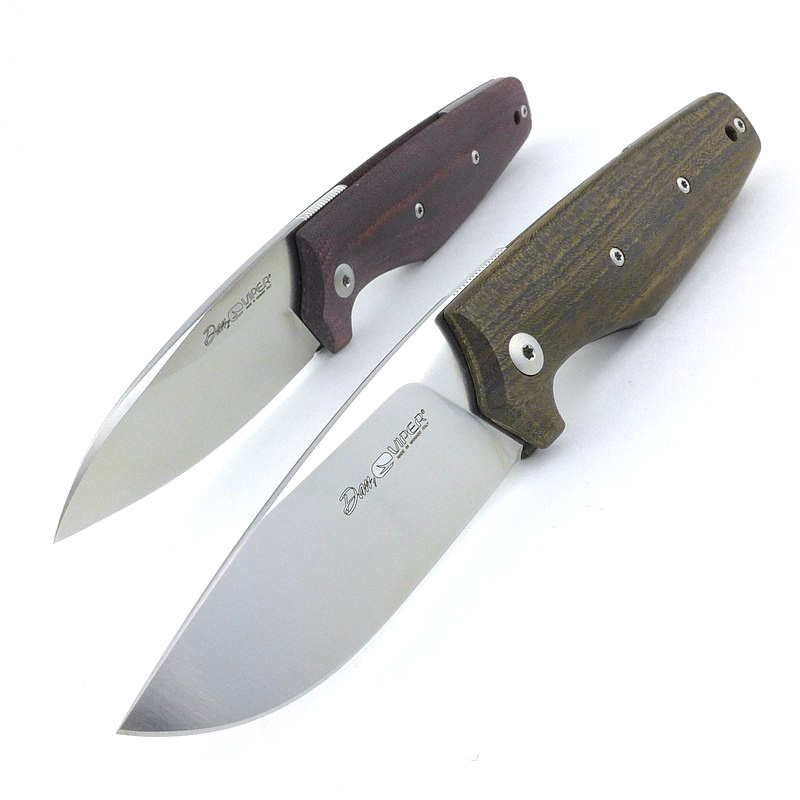
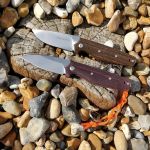
A good look round the Dan 1 in Zircote Wood – Things to look out for here are:

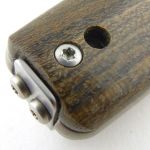
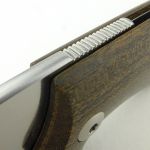
As you take in the details the quality of finish is clear, along with how sleek and efficient each of the design elements are.


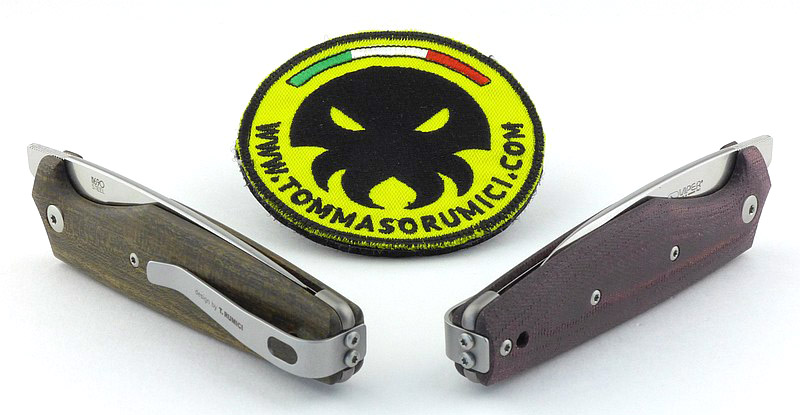
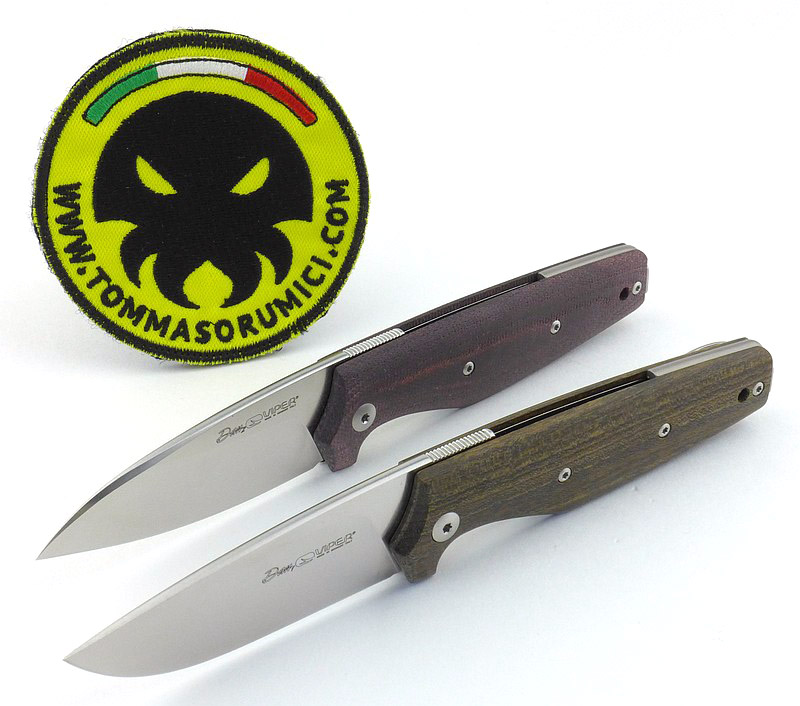
A good look round the Dan 2 in Burgundy Canvas – Things to look out for here are:

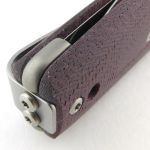
Getting a sense for the different handle material, but the main difference is the wharncliffe blade of the Dan 2.


Explained by the Maker:

As I mentioned in the introduction, while at IWA 2019 I had the good fortune to both be introduced to this knife by, and able to talk about it with, its designer Tommaso Rumici.

Tommaso presenting the knife to me:

Rather than repeating the explanation, I’d recommend you visit Tommaso Rumici’s write up of the Dan here, where Tommaso gives you the background story of this excellent knife, including where the name came from.

With kind permission from Tommaso, here are a couple of his concept design sketches for the Dan.


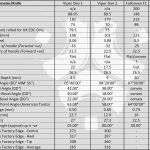
The Blade and Handle – Detailed Measurements:

For full details of the tests and measurements carried out and an explanation of the results, see the page – Knife Technical Testing – How It’s Done.

Take note of some results, like the rolled cutting edge length, and thickness behind the edge, which are particularly relevant when comparing the Dan 1 and 2.

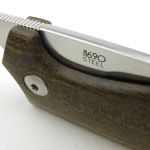
The blade is made from N690 steel.


What is it like to use?

It’s a really unusual design, being a cross between a friction-folder and a slip-joint. The Dan can be opened two-handed, or one-handed and although the opening/closing torque of the slip-joint mechanism is nothing to write home about, the protruding tang sits nicely under the thumb allowing you to hold the blade open.

This knife (either blade style) has actually converted me to pocket clip carry. Before ‘Dan’, I had not found a knife/clip design I felt comfortable with. It HAS to be deep carry, sticking up above the pocket edge is no good (for me). Then there is the clip and handle texture combination. My biggest complaint is how vicious most knife clips, particularly the underlying handle surface, are to the pocket material and edge; way beyond the need to hold it in place, and in some cases almost impossible to fit it onto the pocket or get it off again. If you like ripped pockets, great, but not me.

Instead the Dan (both handle materials on test), has the deep pocket carry clip with a clip spring strength that holds, and has not let it go astray, yet is easy to fit and remove. The handle material finish is smooth without being slippery, so provides some grip but is not overly abrasive to the pocket material.

I’ve been carrying this knife daily for 9 months now – pocket clip carry – totally unheard of for me.

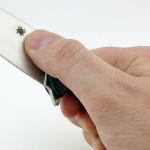
Using the short tang (shorter than most friction folders) to open the knife one handed does require some care and concentration as it is very easy to turn the knife into your thumb pad (as ably demonstrated in the photos) and have it bite you. It does require a determined and positive approach to keep from cutting yourself.


Is it perfect? Clearly, as I’m about to show, for me it is not quite there, as I have made a couple of small modifications.

However the initial inspiration for this modification was entirely due to UK EDC carry law – a cutting edge less than 3″. Proven by many cases, this is typically a measurement of the cutting edge being rolled along a ruler, not the straight line measurement. With its sloping back handles, the Dan also has a longer cutting edge than blade length. Combining these factors, the Dan 1 falls foul, by 3mm, of the UK EDC legal carry requirement. I decided to rectify this with a Dremel and remove 3mm of cutting edge while at the same time creating a sharpening choil (which I prefer anyway).

With the success of the Dan 1 modification I decided I needed to do the same to the Dan 2 though this did not have the same EDC legal issue.

For me these are both now the closest I’ve yet found for a perfect EDC legal folding knife. OK, nothing is perfect, but these knives are superb!


Review Summary

The views expressed in this summary table are from the point of view of the reviewer’s personal use. I am not a member of the armed forces and cannot comment on its use beyond a cutting tool or field/hunting knife.

Something that might be a ‘pro’ for one user can be a ‘con’ for another, so the comments are categorised based on my requirements. You should consider all points and if they could be beneficial to you.

I’m trying something new this time and starting with what doesn’t work so well, so I can finish on a more positive note

_______________________________________________
What doesn’t work so well for me
_______________________________________________

The Dan 1 having a slightly over-long cutting edge for UK EDC Legal.
One-handed opening can be a little hazardous.

_______________________________________________
Things I like
_______________________________________________

Easy to carry streamlined design.
Deep-carry pocket friendly clip.
Ambidextrous pocket clip.
Non-locking friction-folder/slip-joint.
Widely Every-Day-Carry legal friendly (check local laws).
Choice of blade shape and handle material.
Blade tang can be gripped to prevent accidental closure.


Discussing the Review:

The ideal place to discuss this review is on the Tactical Reviews Facebook Page
Please visit there and start/join the conversation.

If you read the review entirely on Tactical Reviews, please consider visiting one of the following to start/join in any discussion.

BladeForums – Knife Reviews (US based Forum for Knife Discussion)

CandlePowerForums – Knife Reviews Section (Largest and Friendliest Flashlight Community Forum)

The BESS Exchange – A forum discussing technical aspects of sharpness and truly understanding your sharpening process.

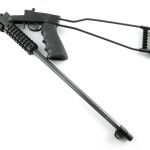
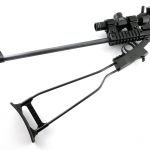
Gear (Gun) Review: Chiappa Little Badger Pt.2 – Fully Loaded!

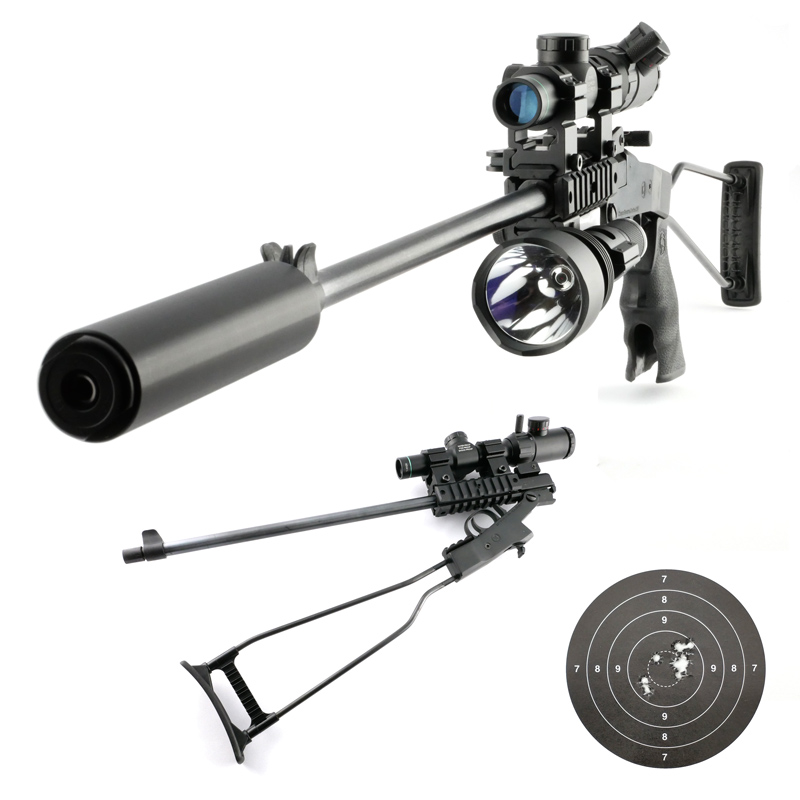
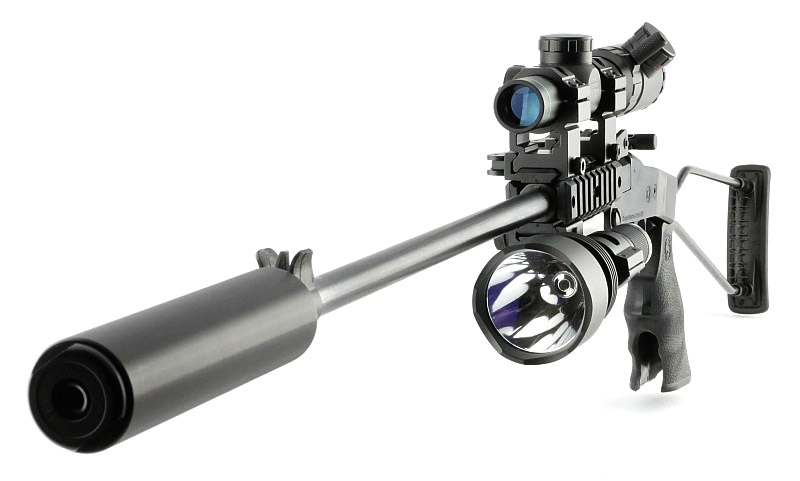
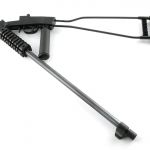
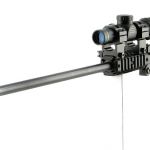
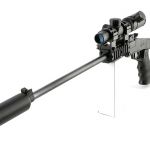
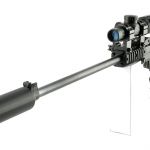
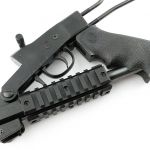
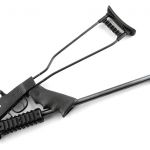
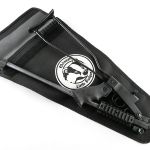
‘Fully Loaded’ – This is the second part of the Chiappa Firearms Little Badger Folding Survival Rifle Review, and follows on from Part 1 which introduced this handy little gun. In Part 2 I’ll be covering more details of the Little Badger accessories, how they fit and perform, and a nice modification that, for me, transformed this rifle.

The accessories in detail:

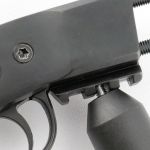
Keep an eye out for the comments on each image. Some of the key points to look out for are:

The effect add-on handles have on folding the rifle, and how easy they are to fit and remove.
A compact scope (from In Your Sights) really does make all the difference in sighting.
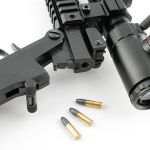
Subsonic .22LR plus a moderator really makes for a great combination.
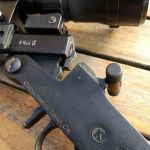
The hammer extension, which seems such a great idea to improve ease of cocking the hammer, might not work as well as hoped.

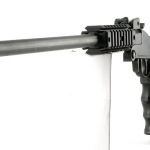
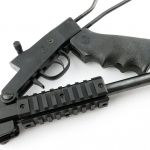
This gallery will show how they all fit together.


Bringing it all together:

So far the photos have been from an initial studio shoot, but now we are moving onto areas which are being re-visited based on using the Little Badger, plus a game changing modification of one of the accessories.

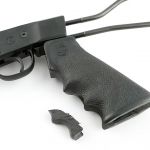
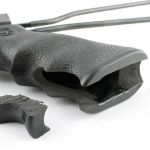
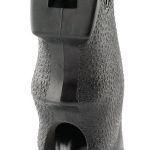
That modification is of the pistol grip – check the gallery for more.


What it is like to use?

Taking the fully loaded (in terms of accessories) Little Badger for a few range sessions resulted in some unexpected troubleshooting (pun intended)!

Knowing how different guns seem to prefer different ammunition, sometimes not the ‘best’ quality ammo, I went with a selection of usually reliable options.

A Slight Issue – easily resolved:

Comfort and stability were all good, but I found myself struggling to get my test groups shot, as there were SO many misfires. Change ammunition, try again, check the firing pin and hammer, try again.

Normally after waiting for a potential hang-fire, I rotate a misfired round so the firing pin can strike a fresh part of the rim. In some cases I did this six times. With the external hammer, I could of course simply re-cock it and go again without opening the action. This turned out to be the way to get a reliable ignition on all misfires.

This second strike also led me to the misfire being due to a light-strike. Why though? After considering all the options it seemed that possibly the extra weight of the hammer extension might be slowing the hammer speed and reducing the inertia of the hammer striking the pin. OFF with that extension and ON with the shooting. Every strike was now a reliable ignition. A pity, but at least the Little Badger was not at fault.

Range:

With the open sights and their limited adjustment, the accuracy was limited too. It felt that the 25yd range would be the most I would take on a live target. With the (max 4x magnification) scope fitted, 50yd would be a comfortable rabbit range, but with the results of the paper target grouping, I would not be happy extending this out to 100yds.


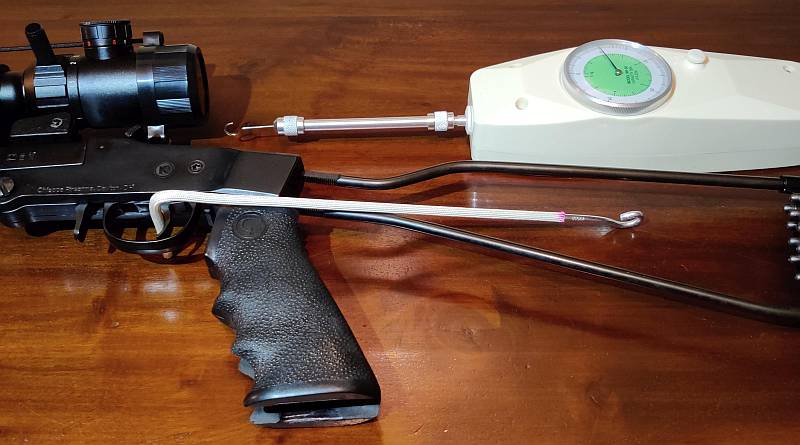
Trigger pull was very good considering the price of this gun. Not quite a glass rod breaking, but smooth, consistent and a good weight. Taking an average and carefully measuring using a force gauge and custom trigger hook, this trigger is breaking at 2.3 lb.

One of the complete joys with this rifle is how easy it is to carry. There are definitely days when I’m not really on serious vermin duty, so might not want to bother taking my usual semi-auto, but the Little Badger comes along without any stress.

Using this excellent little gun also proved to me that if that ‘prepping’ type scenario were to come about, this is the gun I would grab. It is not weighing me down much and the ammo goes a long way. Easy to carry, compact, simple and reliable (without that hammer extension).

The Transformative Modification:

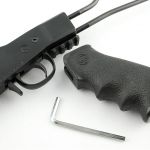
Of the two options, the serious pistol grip is actually a grip made for the Chiappa MFour Semi-Auto rifle. This is the reason it gets in the way of the folding action, it was not actually designed for the Little Badger, but is simply a tried and tested grip that certainly improves the handling.
Making this existing MFour part into a grip specifically designed for use with the Little Badger and allows the full folding action is that transformative modification.
By cutting a slot into the pistol grip I have allowed the rifle to still fold fully. WHAT a DIFFERENCE that pistol grip makes to the handling of the gun. It adds so much stability and control over the bare rifle I would not think twice about having it fitted. If you can make the same modification I highly recommend doing it.

Review Summary

The views expressed in this summary table are from the point of view of the reviewer’s personal use. I am not a member of the armed forces and cannot comment on its use beyond that covered in the review.

Something that might be a ‘pro’ for one user can be a ‘con’ for another, so the comments are categorised based on my requirements. You should consider all points and if they could be beneficial to you.

_______________________________________________
Things I like
_______________________________________________

Super folding action.
Very compact.
Plenty of rails to add extras on.
Light weight.
Simple, reliable mechanism.
Good trigger pull.
Everyone on the range loved this.

_______________________________________________
What doesn’t work so well for me
_______________________________________________

The hammer extension causes light-strikes.
The two pistol grip options interfere with the folding.
Plastic ejector – I’d prefer this to be metal.


Discussing the Review:

The ideal place to discuss this review is on the Tactical Reviews Facebook Page
Please visit there and start/join the conversation.

Knife Review: Spyderco Sliverax

The Spyderco Sliverax is a design by automotive engineer and knife enthusiast Paul Alexander. It is the first production folding knife to combine a flipper opener with Spyderco’s Compression Lock mechanism, and is Paul’s second collaboration with Spyderco. Sleek lines and a pronounced positive rake to the blade give the Sliverax a distinctive and purposeful look.

New Review Format 2018!

Tactical Reviews is known for very detailed reviews using many high quality images. This has meant quite a lot of scrolling to read most reviews. In the new format, the review contains ‘responsive image galleries’ to better display these images as a slide show with captions.
NOTE: On a PC it is best to use the arrow keys to move through the images. Captions can be hidden by clicking the small ‘x’ in the caption box. To enable them again, close the gallery and reopen it.

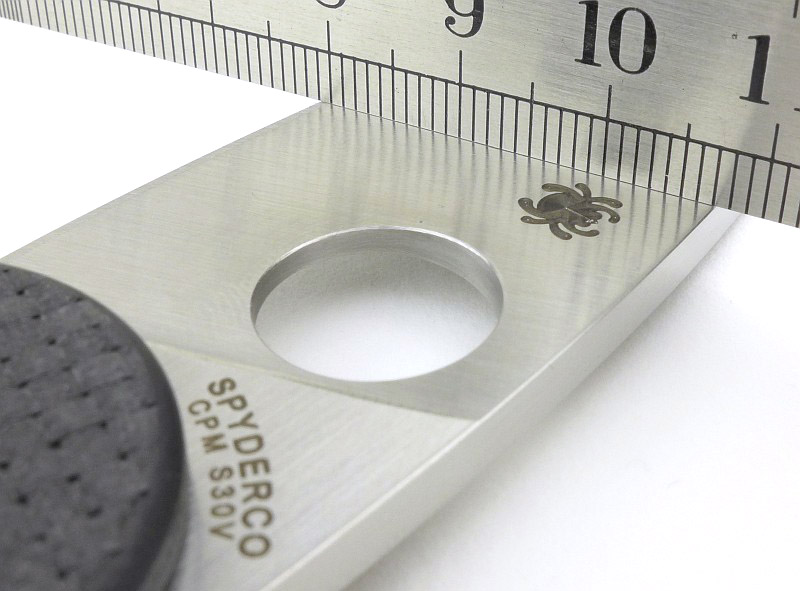
A good look round the Sliverax:

Things to look out for here are included in the image captions.


Explained by the Maker:

The reasons for certain design choices may not be clear when simply looking at an object, so this section is intended to give an insight into the thinking behind a design by speaking to the designer themselves.

From Spyderco’s product description “Designed by automotive engineer and knife enthusiast Paul Alexander, the Sliverax is the first factory-made folding knife to combine Spyderco’s Compression Lock™ mechanism with a flipper-style opener. Its sleek drop-point blade is crafted from CPM® S30V® stainless steel and proudly includes both a fully accessible Trademark Round Hole™ and an index-finger flipper to support a full spectrum of one-handed opening options with either hand. A full-flat grind gives it outstanding edge geometry and its slightly negative blade-to-handle angle enhances its cutting leverage and shortens its opening arc for swift, positive deployment.

The Sliverax’s blade is supported by Spyderco’s patented Compression Lock mechanism—a high-strength lock located in the spine of the handle to greatly reduce the risk of unintentional release during use. Its lightweight, open-backed handle design features stunning carbon fiber/G-10 laminate scales and nested stainless steel liners. This advanced construction style provides impressive structural strength, keeps the knife slim and pocket friendly, and offers a solid foundation for the knife’s lock mechanism. To allow convenient carry and keep the Sliverax instantly accessible, its handle includes a reversible deep-pocket wire clip that can be configured for right or left-side tip-up carry.”

The Blade and Handle Geometry:

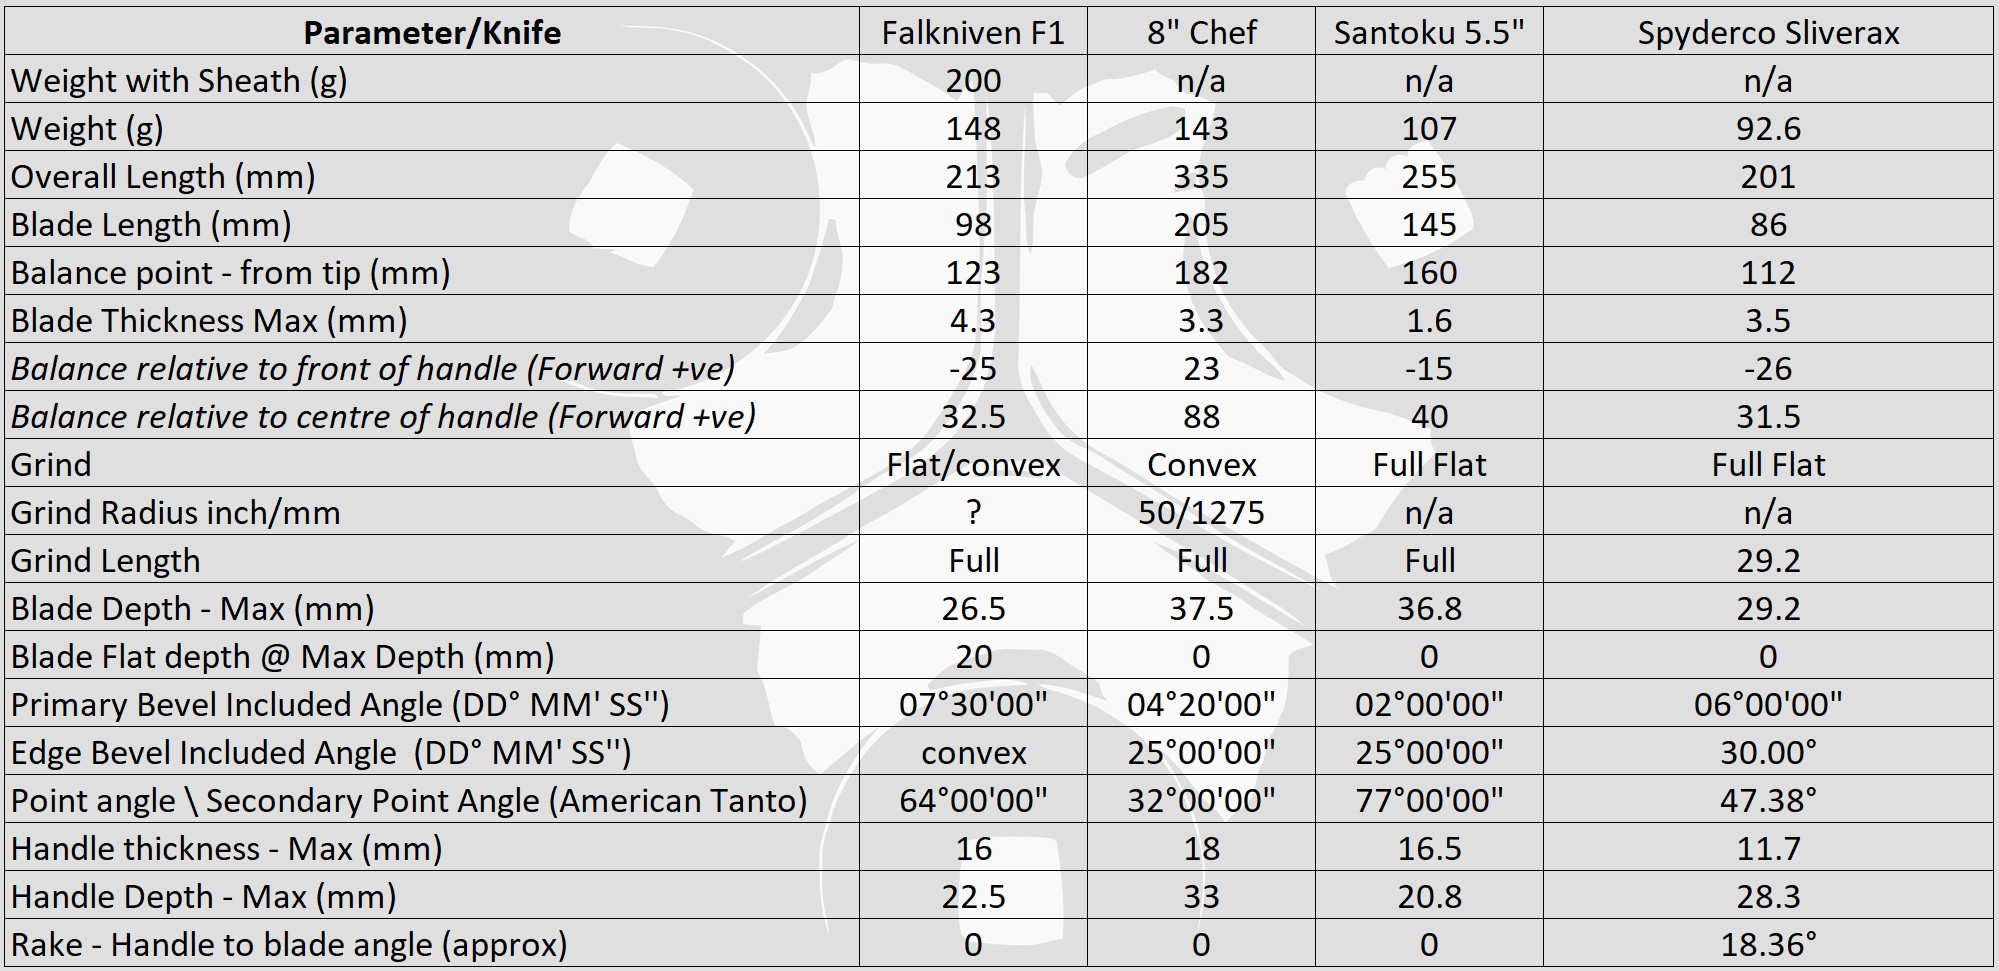
Most knife specifications have a basic description of the blade geometry, but in this section I will be taking a more detailed look at geometry and balance.

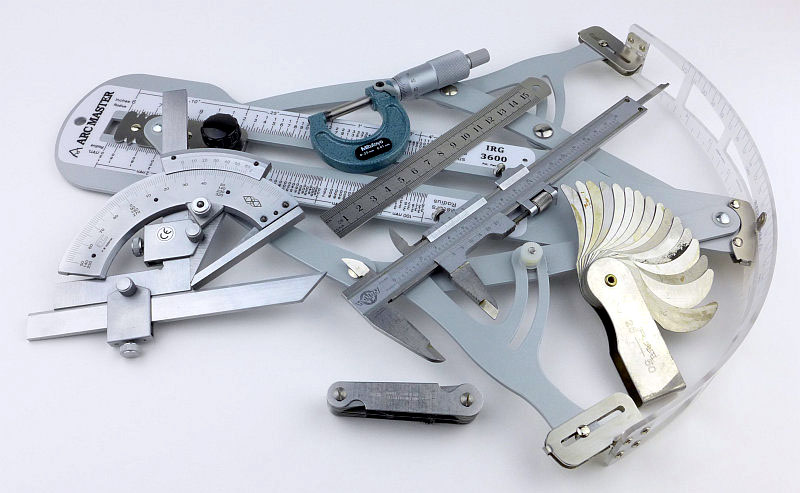
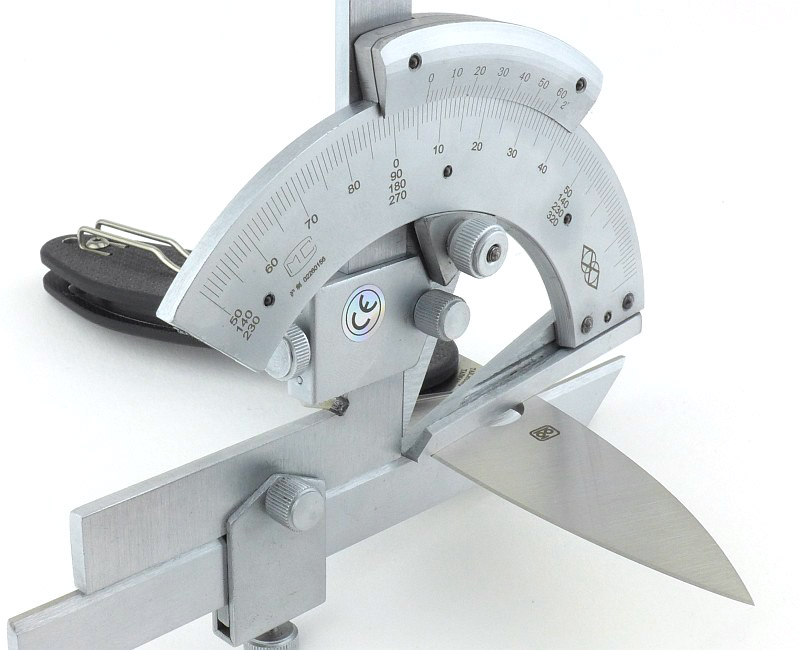
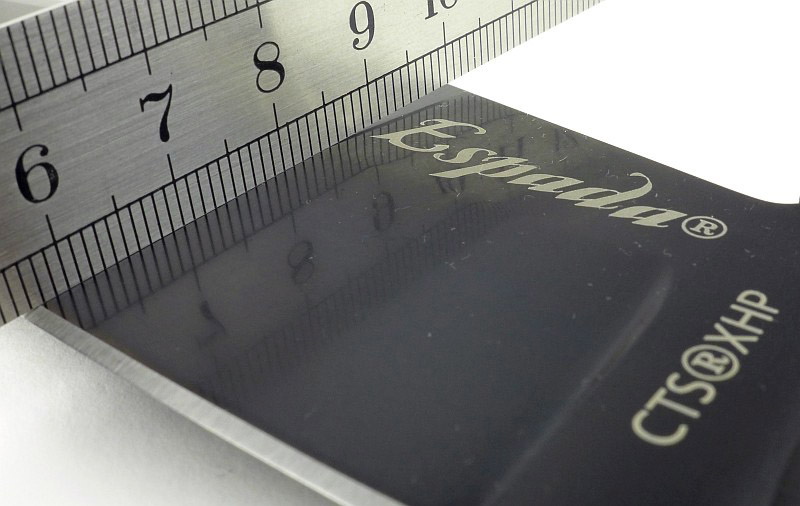
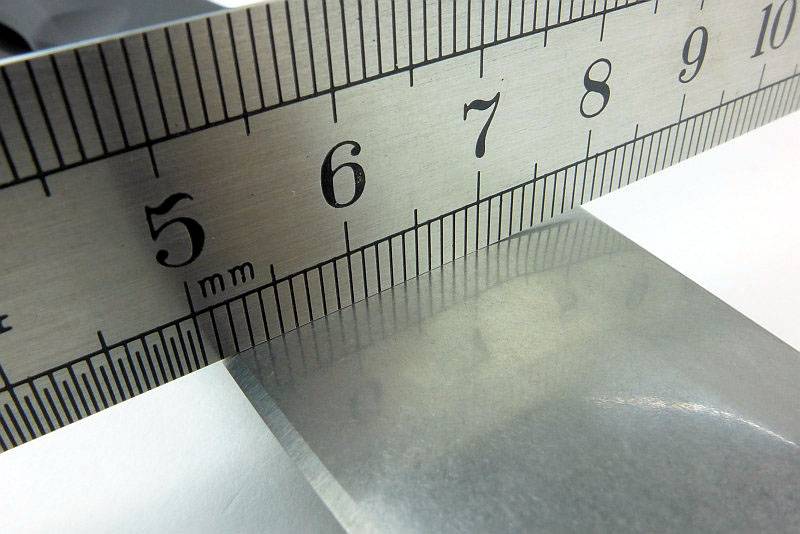
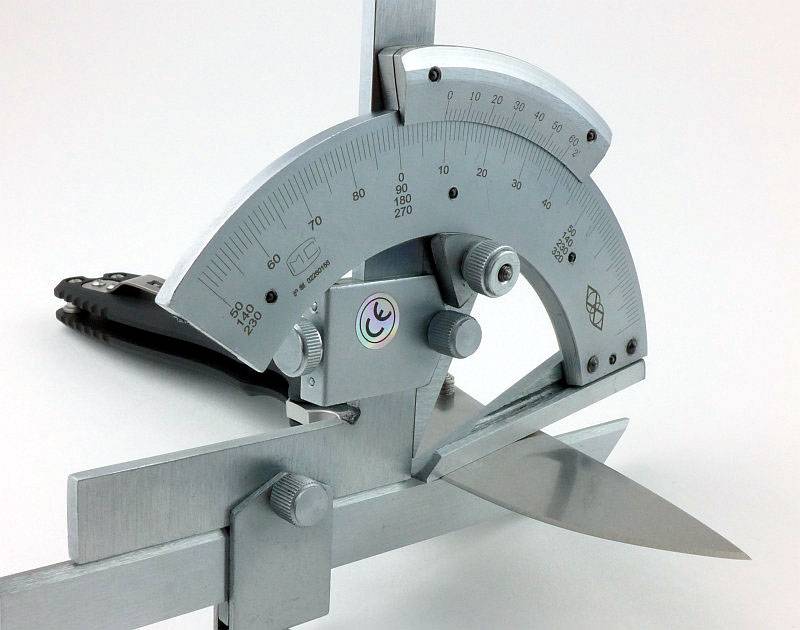
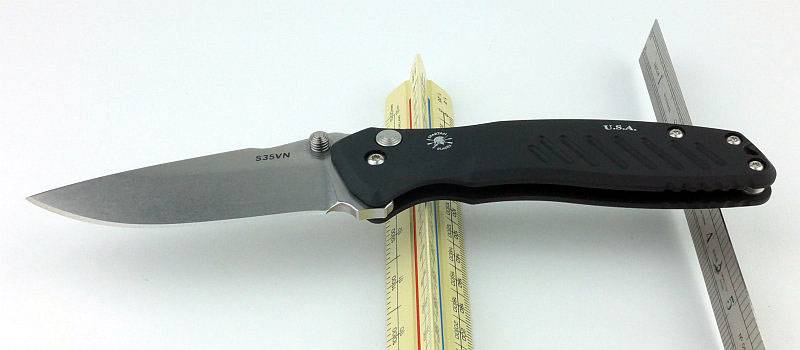
Using a set of gauges and precision measuring equipment including a Vernier protractor, callipers, fixed radius gauges and the unique Arc Master adjustable radius gauge (the one that looks like a crossbow).

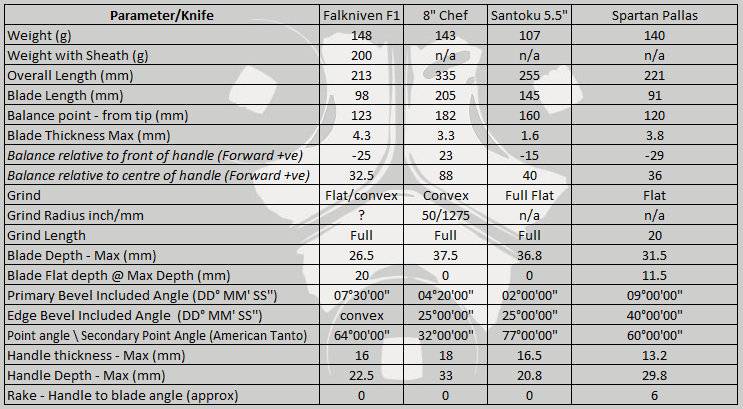
These measurements have been tabulated and are presented along with a few reference blades (8″ Chef’s Knife, 5.5″ Santoku and the popular Fällkniven F1).

Key aspects such as the primary bevel angle, grind type, blade depth, blade thickness, length, weight are detailed, along with balance information.

The ‘Balance relative to the front of the handle’ tells you if the knife will feel front heavy, or if the weight is in your hand (a positive value means the weight is forward of the front of the handle). The ‘Balance relative to the centre of the handle’ indicates how close to a ‘neutral balance’ the knife has in the hand.

In the case of full convex grinds the approximate centre of the grind is used for the primary bevel angle estimate.


The blade is made from CPM S30V steel.

New for 2018! BESS Certified sharpness testing:

The BESS ‘C’ scale of sharpness, developed by Mike Brubacher (Brubacher Edge Sharpness Scale) will now become part of Tactical Reviews’ knife testing process. Initially this will be used to verify the sharpness of the factory edge and allow the knife to be brought to a minimum standard sharpness before testing a blade’s cutting performance.


The Sliverax’s factory edge has an average BESS ‘C’ sharpness of 186. This is yet another super sharp factory edge from Spyderco. A figure less than 200 is really good and easily shaves arm hairs and falls through 80gsm paper.

What it is like to use?

What struck me on initially handling this knife is how the Sliverax differs from conventional folders with its organic lines and purposeful downward angled blade (positive rake).

When folded it is almost like a worry stone in its pleasing feel and curvy shape. Opening is lightning fast with the flipper, and this speed is in part due to the blade’s positive rake, meaning the blade only has to rotate 160 degrees to open, instead of 180 degrees. Of course the pivot’s captive ball bearings also guide the blade with virtually no resistance at all.

Having a fully exposed opening hole from both sides makes it very comfortable and easy to thumb-open with either hand. The clip can be fitted to either side, so the Sliverax is truly ambidextrous. The only aspect that is slightly handed is a one-handed close. I certainly found it easier to unlock the compression lock one handed using my right hand.

For the opening hole to be fully exposed, and to not have a Spyderco ‘hump’, a lot of the handle has been cut away making the handle at the first and second fingers very thin. As well as accentuating the rake of the blade further, it also makes a full hand grip a little awkward as the fingers don’t have much to hold. However it does provide a deep finger guard so the chance your hand might slip forward is very low.

I tend to prefer thumb-opening blades for several reasons. In fact, in the UK where I am based, flippers are too close to switchblades for comfort, so a nicely controlled thumb-open goes down much better. This leads me to make an observation about the compression lock which I also noted on the Sharman. As I open the blade, my first finger tends to lie over the lock itself, and the lock bar often gives me a little nip as it snaps into place. A minor complaint and easily avoided (if you remember) but mentioned here as an observation.

Despite being a smooth finish, the Carbon Fibre/G-10 Laminate handle has enough texture to provide positive grip even when wet.


Even without the ‘issue’ of appearances in the UK, I am personally a bit tired of the flipper. A mechanism where you have to compromise your grip on the knife to be able to press on a flipper tab to literally flick the blade open. Flippers can and do fail to fully open or lock, so much like the fixed blade is your most reliable partner, the two-handed open or the properly thumbed-open blade that is positively taken all the way to the locked position, means you know 100% it is there. If safety and security are your primary aims, then open the blade by manually rotating it all the way.

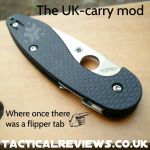
This leads me nicely into a couple of modifications I have made to the Sliverax I’ve been testing. Firstly the removal of the flipper tab. This makes the Sliverax a no-question thumb operated OHO, and has the benefit of removing the protruding flipper tab so it is even more pocket friendly.

The second modification is one of those things that for me is the sign of a finished knife blade, a sharpening choil. Others will have different opinions, and I’m not saying I’m right, but it is my preference. The end of the cutting edge at the sharpening choil also provide another ‘point’ for fine accurate cuts, so is not purely an aesthetic addition, but is functional too.

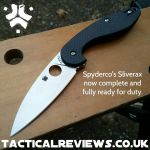
These images are of the modification I made and posted on Instagram, hence the branding on the images.

Modifications:


In the modified state (allowing me to carry it more), this knife has proven itself over and over and has become a firm favourite. The positive rake makes the blade attack each cut eagerly, with the full flat grind slicing smoothly and efficiently. Its, lightness and pocket friendly finish and shape allow you to forget it is there until you need it. This is a knife I’ve gone from being uncertain of, to positively wanting to carry and use.

Review Summary

The views expressed in this summary table are from the point of view of the reviewer’s personal use. I am not a member of the armed forces and cannot comment on its use beyond a cutting tool or field/hunting knife.

Something that might be a ‘pro’ for one user can be a ‘con’ for another, so the comments are categorised based on my requirements. You should consider all points and if they could be beneficial to you.

_______________________________________________
Things I like
_______________________________________________

Organic ergonomic flowing lines.
Full Flat Grind S30V blade.
Easy to access opening hole.
Super slick flipping action.
Lightweight and easy to carry.
Blade rake makes for a positive cutting action.
Ambidextrous.

_______________________________________________
What doesn’t work so well for me
_______________________________________________

Handle very thin where the first two fingers grip.
The Compression lock can ‘nip’ you.


Discussing the Review:

The ideal place to discuss this reviews is on a forum. If you started reading the shorter forum version of the review, but followed the link this full exclusive review, please return to that forum to discuss the review there.
If you read the review entirely on Tactical Reviews, please consider one of the following to join in any discussion.

BladeForums – Knife Reviews (US based Forum for Knife Discussion)

CandlePowerForums – Knife Reviews Section (Largest and Friendliest Flashlight Community Forum)

The BESS Exchange – A forum discussing technical aspects of sharpness and truly understanding your sharpening process.

Knife Review: Extrema Ratio RAO II

Extrema Ratio’s RAO II is an update of the original RAO which was developed back in 2006. Designed as a super tough, compact, survival and field knife, the brutish RAO was an immediate modern classic. In 2014, with improved ergonomics and a new drop-point blade, the RAO II widens the appeal of the RAO to those that found the original tanto blade a bit too specialised. On a personal note, this is one of those knives I knew had to be in my life, and it has not disappointed.

The Blade and Handle Geometry:

Most knife specifications have a basic description of the blade geometry, but in this section I will be taking a more detailed look at geometry and balance.

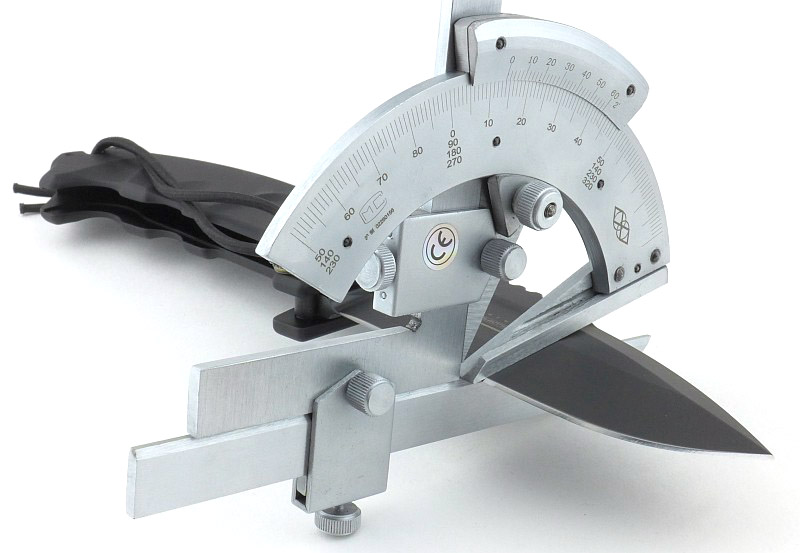
Using a set of gauges and precision measuring equipment including a Vernier protractor, callipers, fixed radius gauges and the unique Arc Master adjustable radius gauge (the one that looks like a crossbow).

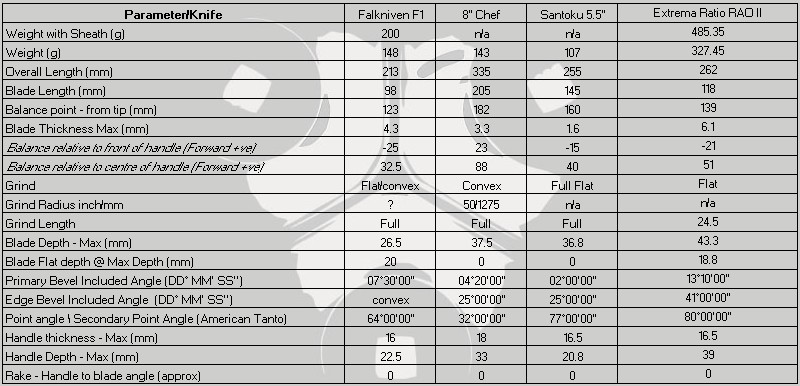
These measurements have been tabulated and are presented along with a few reference blades (8″ Chef’s Knife, 5.5″ Santoku and the popular Fällkniven F1).

Key aspects such as the primary bevel angle, grind type, blade depth, blade thickness, length, weight are detailed, along with balance information.

The ‘Balance relative to the front of the handle’ tells you if the knife will feel front heavy, or if the weight is in your hand (a positive value means the weight is forward of the front of the handle). The ‘Balance relative to the centre of the handle’ indicates how close to a ‘neutral balance’ the knife has in the hand.

In the case of full convex grinds the approximate centre of the grind is used for the primary bevel angle estimate.

The blade is made from Böhler N690Co steel.

New for 2018! BESS Certified sharpness testing:

The BESS ‘C’ scale of sharpness, developed by Mike Brubacher (Brubacher Edge Sharpness Scale) will now become part of Tactical Reviews’ knife testing process. Initially this will be used to verify the sharpness of the factory edge and allow the knife to be brought to a minimum standard sharpness before testing a blade’s cutting performance.

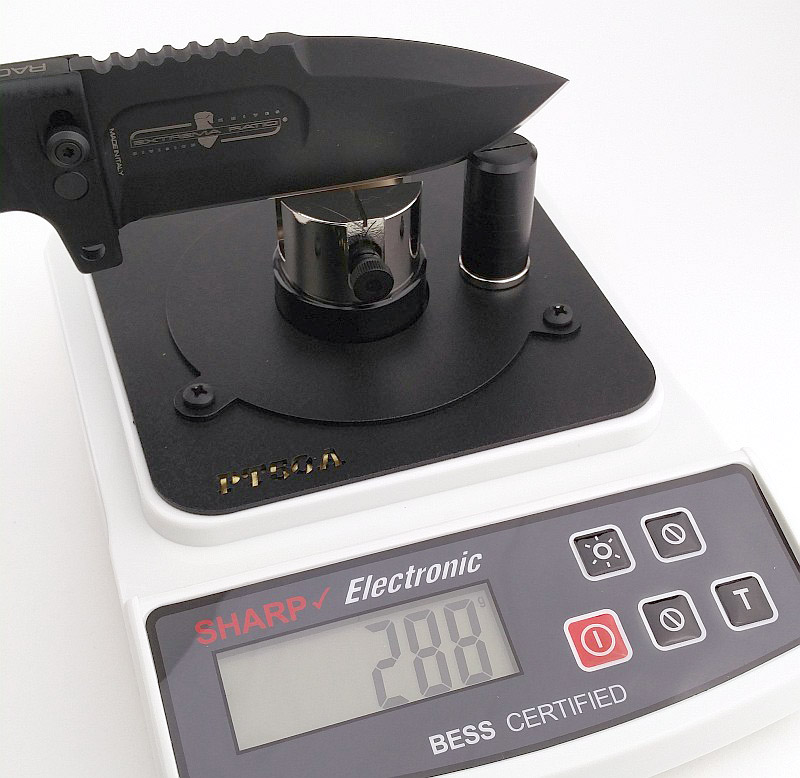
The RAO II’s factory edge has an average BESS ‘C’ sharpness of 279. A score below 300 for a factory edge is good and it will slice 80gsm paper nicely and slices into the rounded edge of a doubled over sheet of the same 80gsm paper. Unfortunately a small nick in the original edge catches in some cuts causing some tearing. It is quite common for factory edges to have some flaws, and these can easily be sharpened out, so this is just an observation.

Explained by the Maker:

The reasons for certain design choices may not be clear when simply looking at an object, so this section is intended to give an insight into the thinking behind a design by speaking to the designer themselves.

Unfortunately I can’t always get time with the designer so will use this section to include relevant information about the knife and its designer.

From Extrema Ratio’s product information:
“In June 2006, the “185° Rgt. Ricognizione e Acquisizione Obiettivi” (Target Acquisition Regiment) airborne “FOLGORE” (185° RAO) entrusted to Extrema Ratio the development of a unique knife fitting the unit’s specific operational duties. This resulted in the RAO: not an oversized folder as much as a compact survival & field knife, with a heavy and dependable blade. Its very reliable locking system, assisted by an extra safety device, effectively turns this folder into a fixed blade knife. The opening and closing is to be performed with both hands in order to minimize the risk of self-inflicted injuries, as the blade, because of its weight, is a veritable guillotine. The extra safe device is a steel pin to be hand-screwed through two holes by the guard section of the massive Anticorodal aluminum handle – its presence between blade and hand also acting as a great psychological boon. The sheath is an essential part of this weapon system: it holds a diamond-plate sharpener and enables user to carry the knife either in open position, held in place by a cord and two clips, or closed, inside the front pocket. The sheath can be attached to tactical vests or common belts, being MOLLE system-compliant.

RAO II is the new version of the celebrated Extrema Ratio RAO knife; it comes with a new drop-point blade and an improved handle, rounded at the upper corners for a more ergonomic grip. The extra safety lock effectively turns it into a fixed blade knife enabling great chopping performance with no risk of injury. The sheath can hold the knife in open position for frequent use, or in closed position inside the front pocket. It comes with a diamond-plate sharpener to always keep a perfect edge. ”

A few more details:

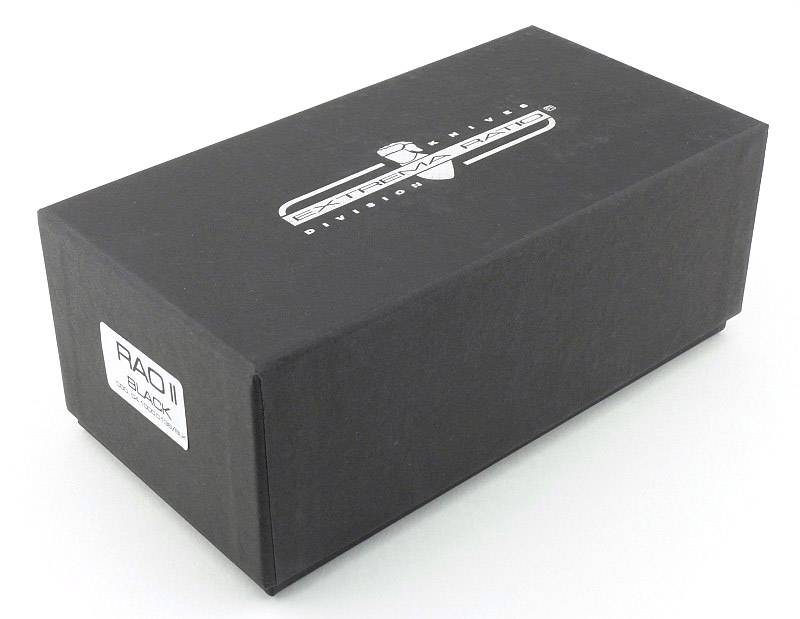
Extrema Ratio’s knives are always well presented; the RAO II comes in a quality cardboard box.

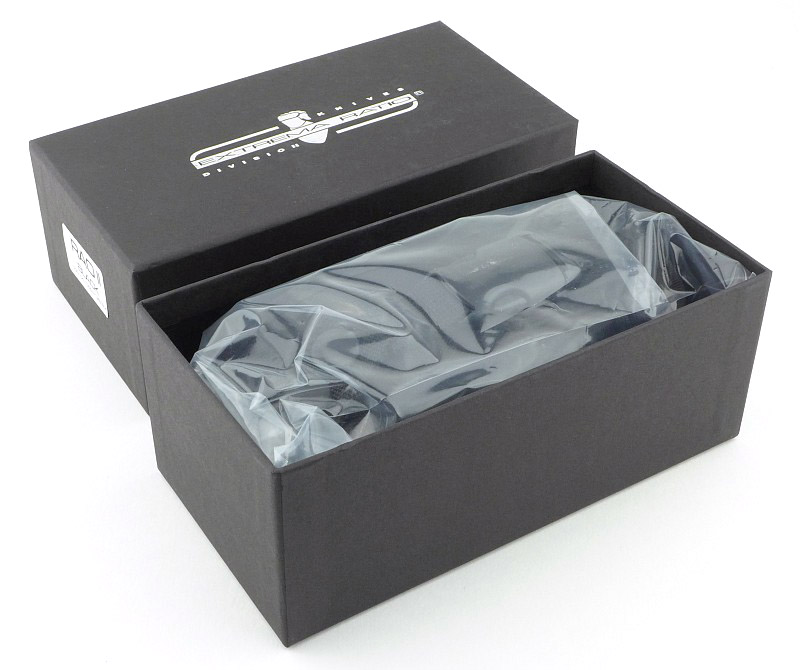
Sliding the lid off, shows the RAO II (in a plastic bag) fills the box.

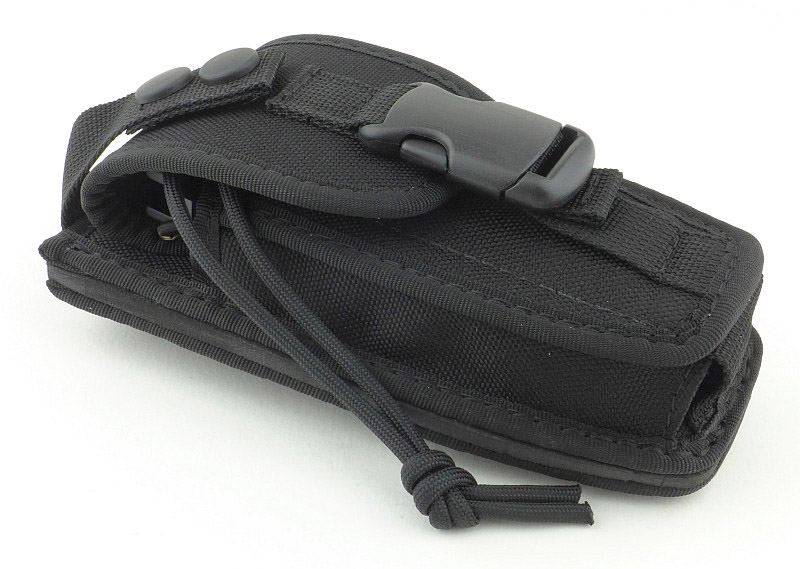
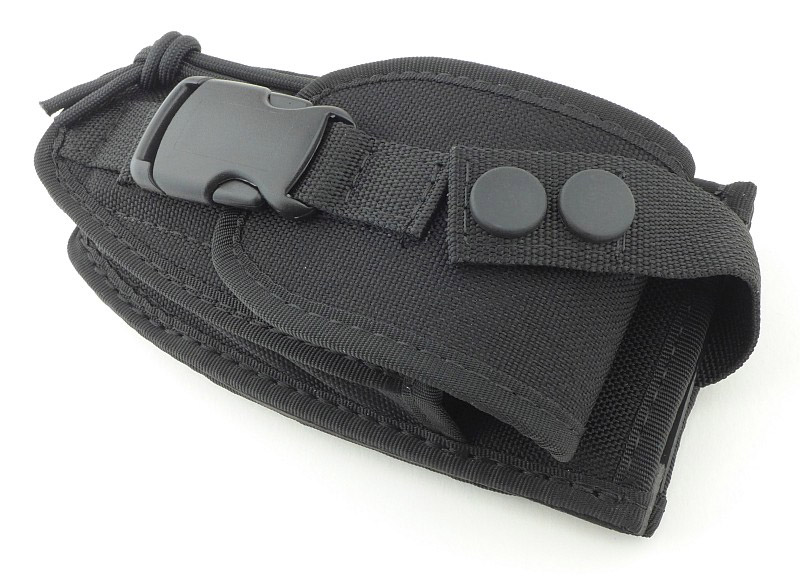
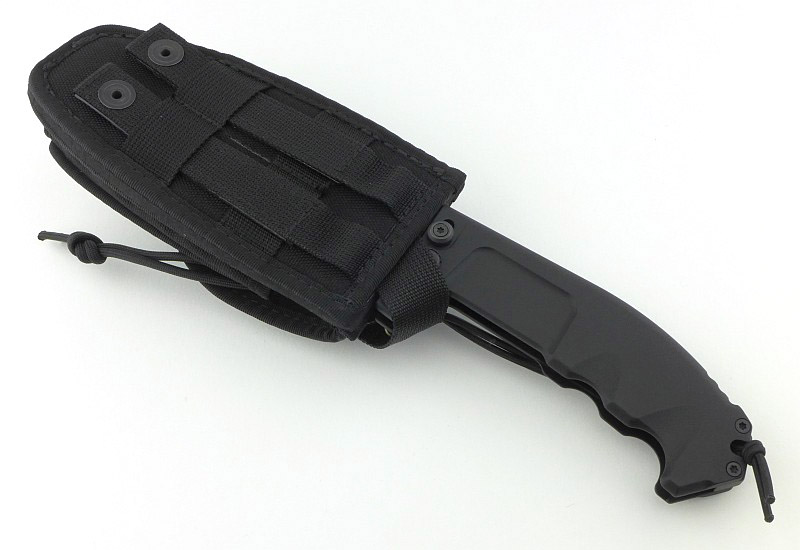
The RAO II arrives in its dual purpose sheath. We need to have a closer look at this sheath before we move onto that amazing knife.

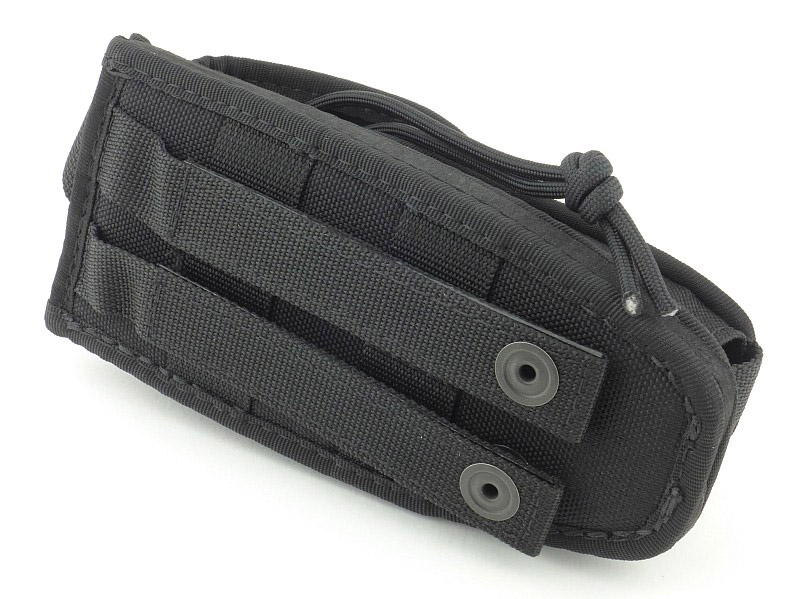
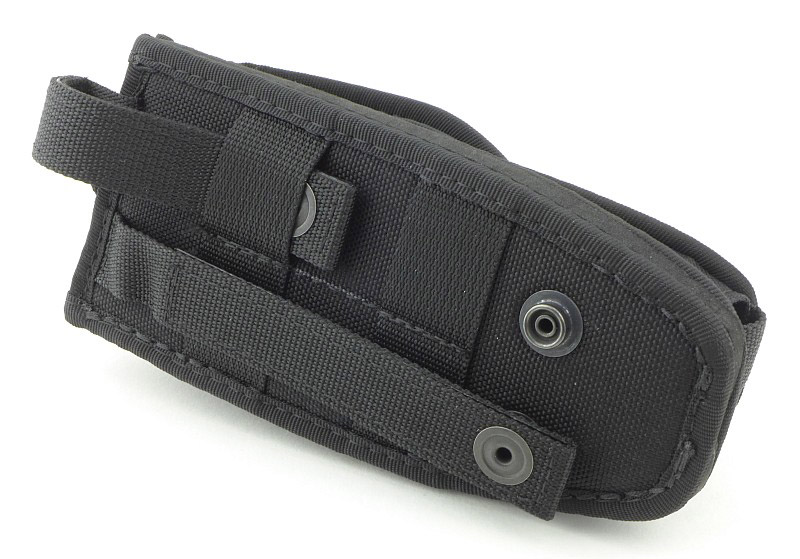
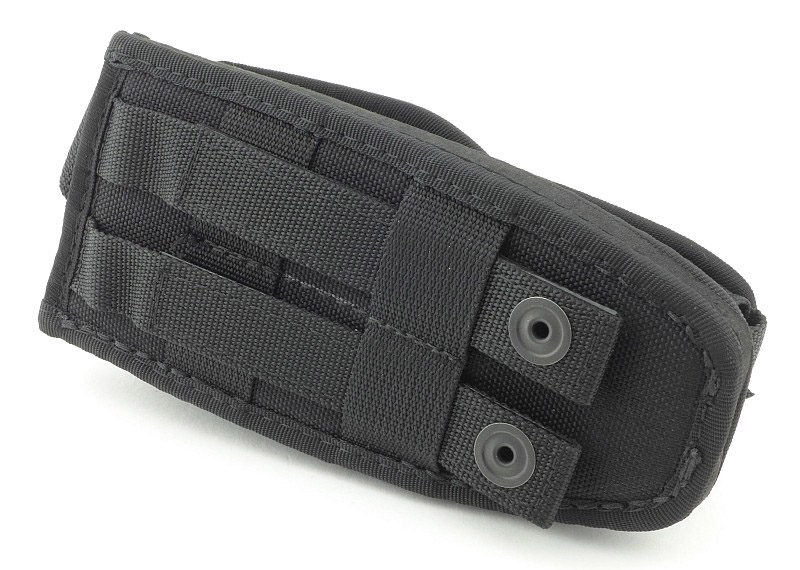
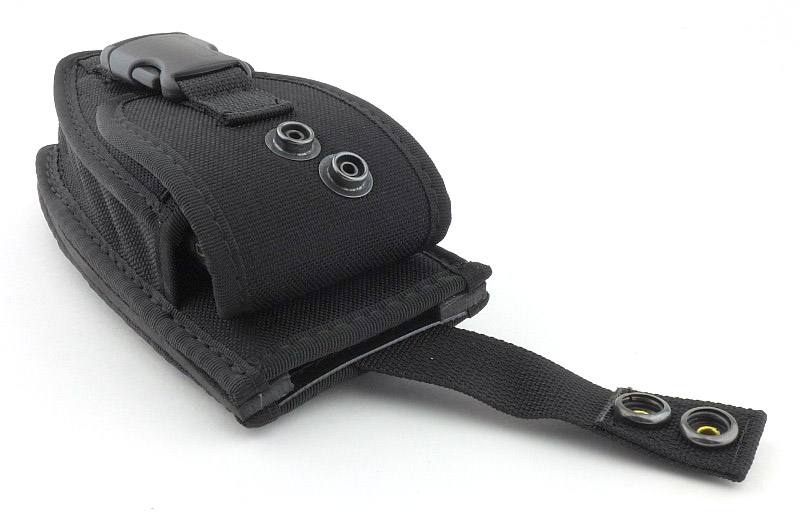
On the back are the MOLLE fitting straps. As supplied they are not woven into the webbing but just held with the press studs.

As with most MOLLE mounts, the fit is pretty tight.

If just using the webbing next to the press studs, the MOLLE straps form a belt loop, which is how I’ll be using this for the most part during testing.

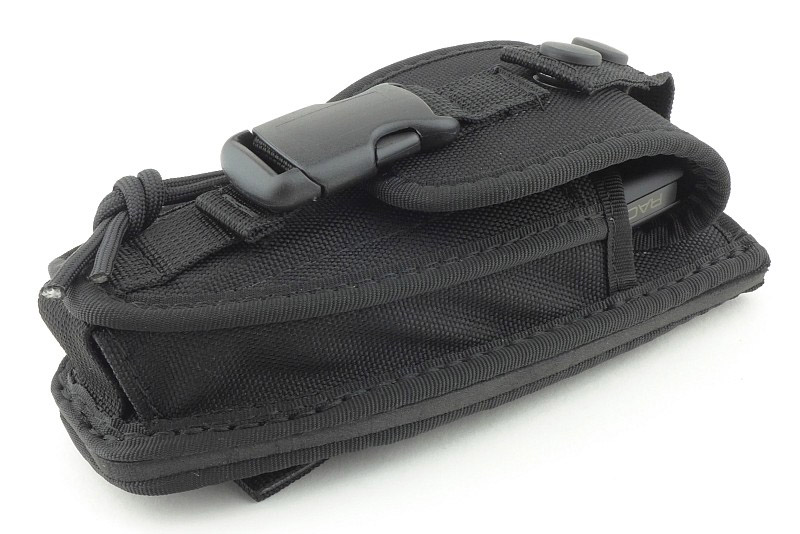
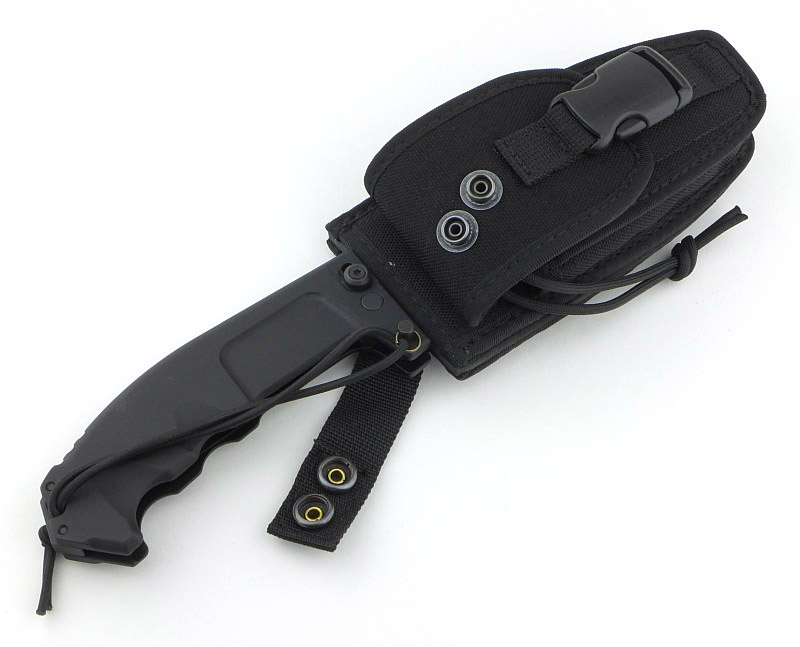
This dual purpose sheath has a large front pocket with plastic buckle fastener holding down the flap.

The flap has another strap attached to it with two press studs. This is the retaining strap for when the sheath is used to carry to opened RAO II.

Releasing the strap from the two press studs and now you can see where the blade of the opened knife is inserted.

Flipping open the flap covering the front pocket and you find the diamond sharpener slipped into a small pocket in front of the main compartment.

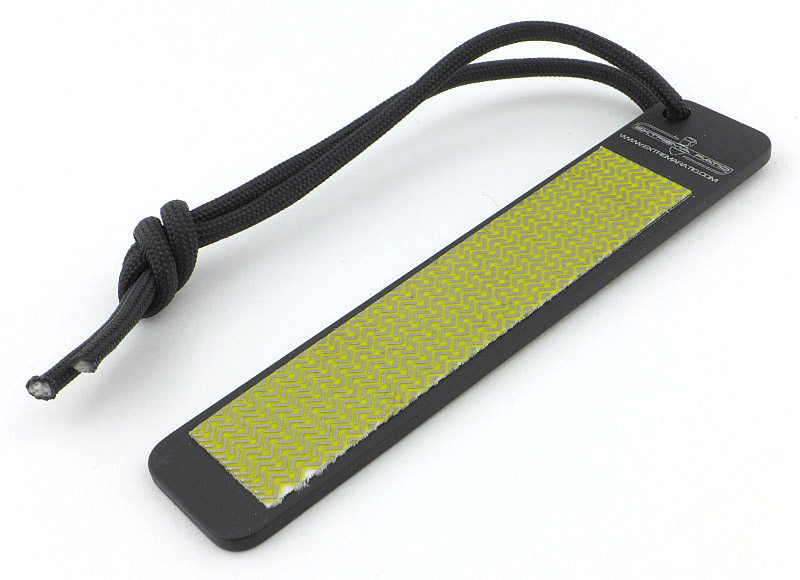
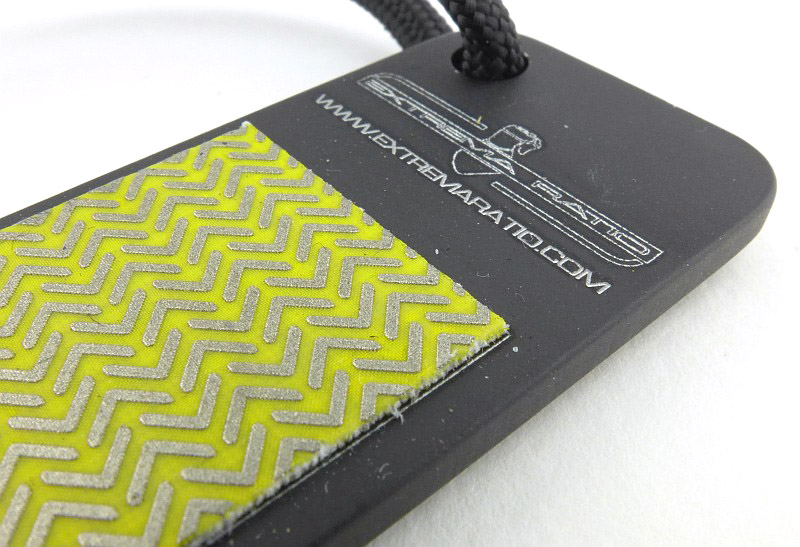
This sharpener is a steel plate with a diamond pad on it.

The diamond pad appears to be a special fabric adhesive tape with a diamond abrasive.

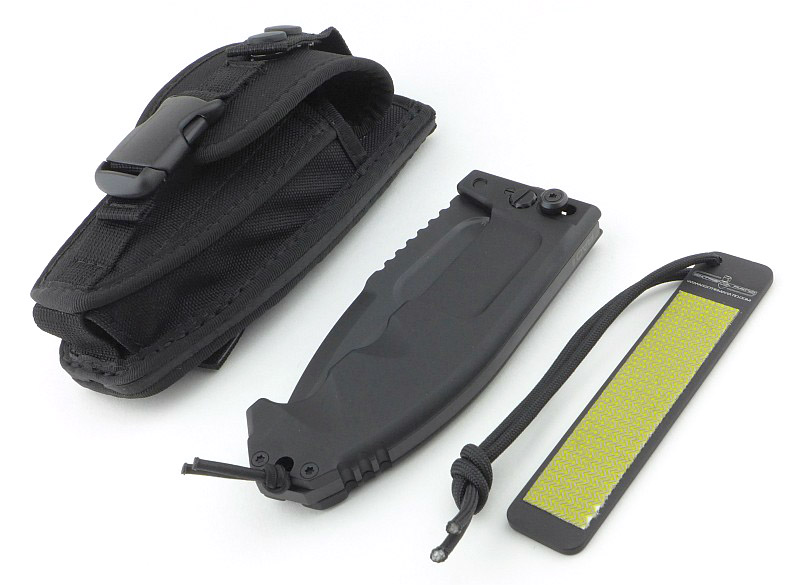
There are the three major components, the sheath, the knife, and the sharpener.

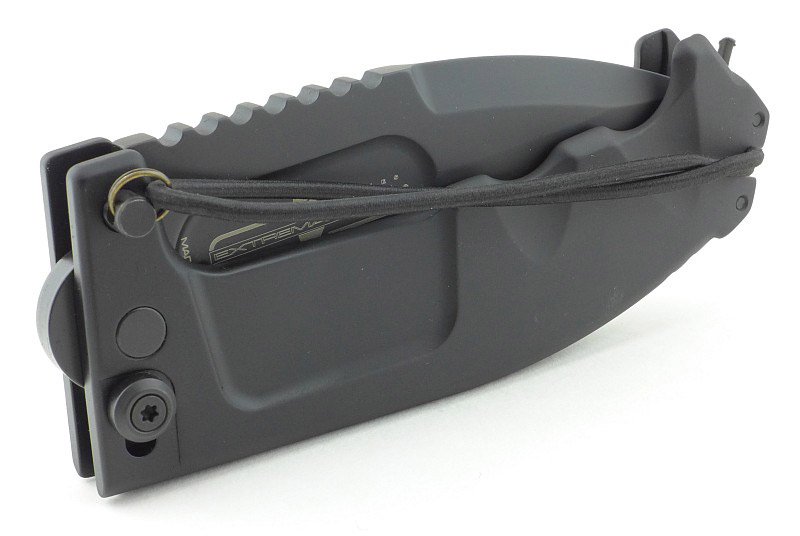
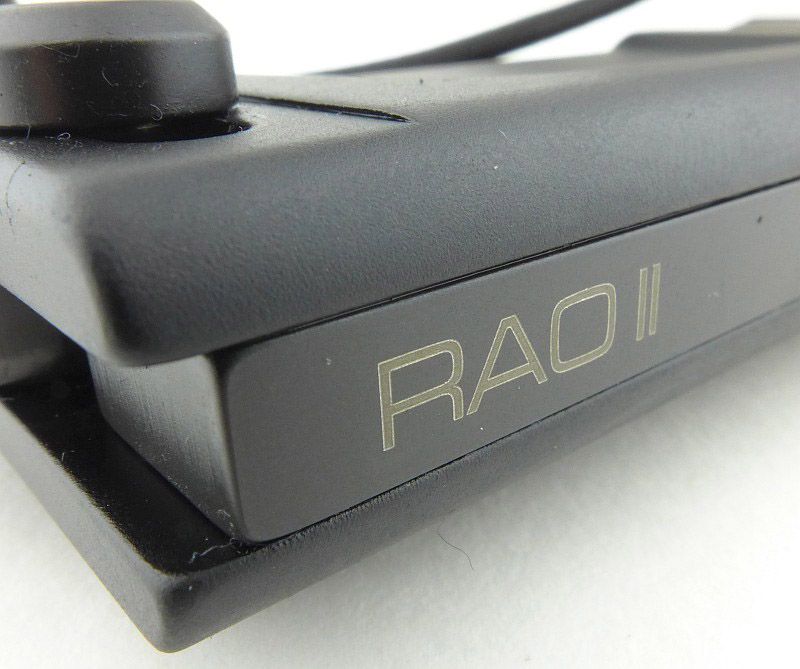
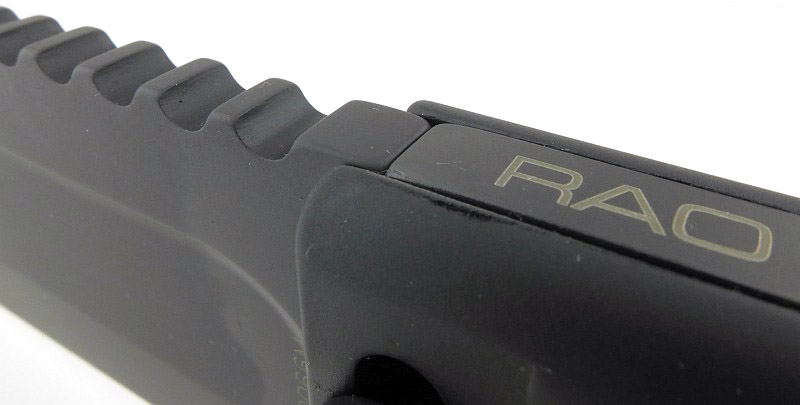
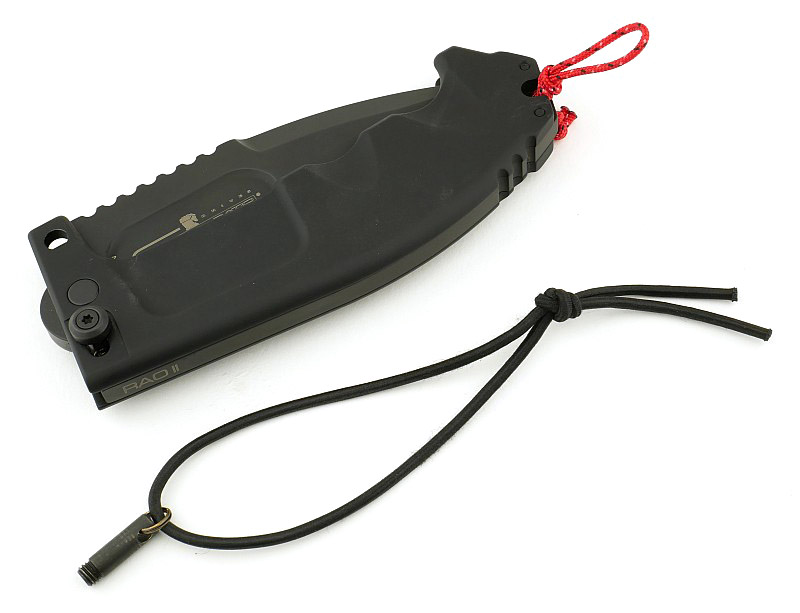
‘RAO II’ is engraved on the back-spacer.

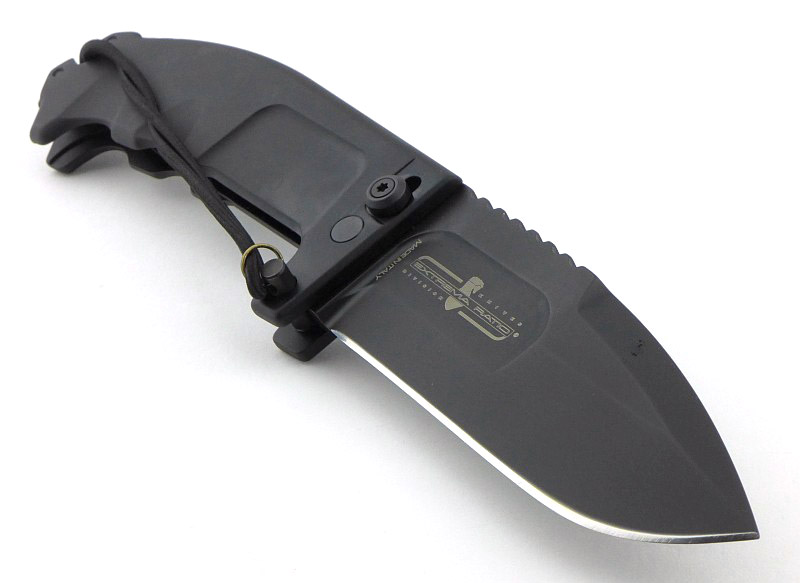
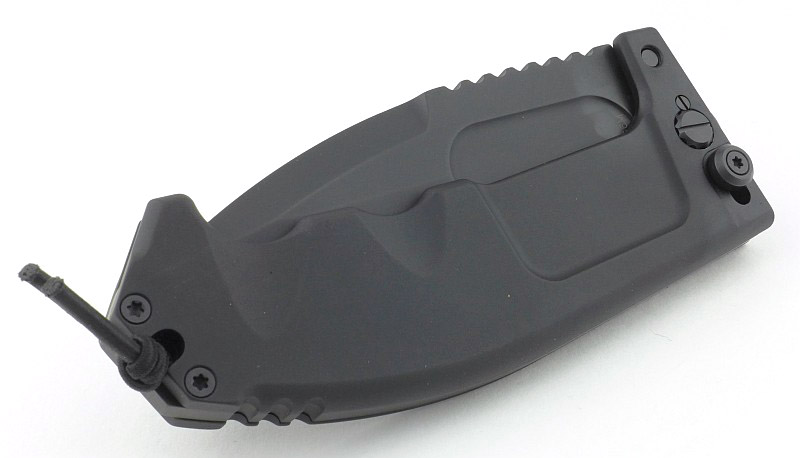
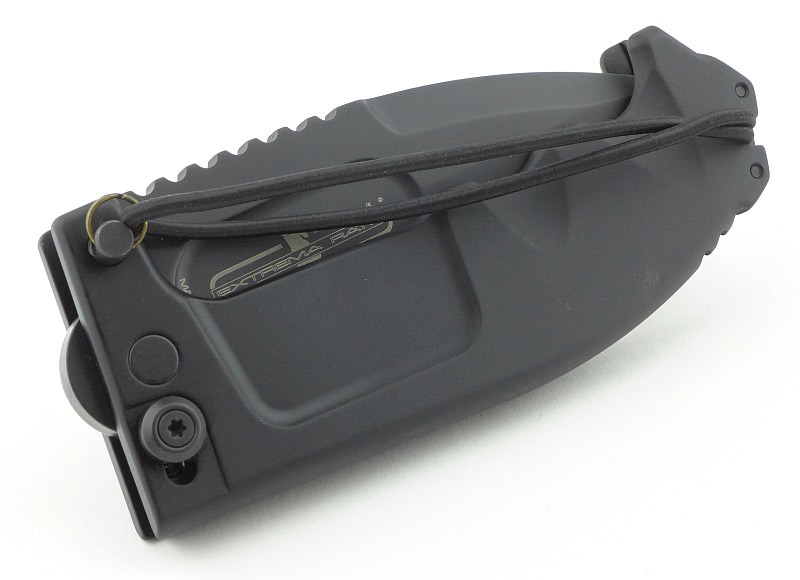
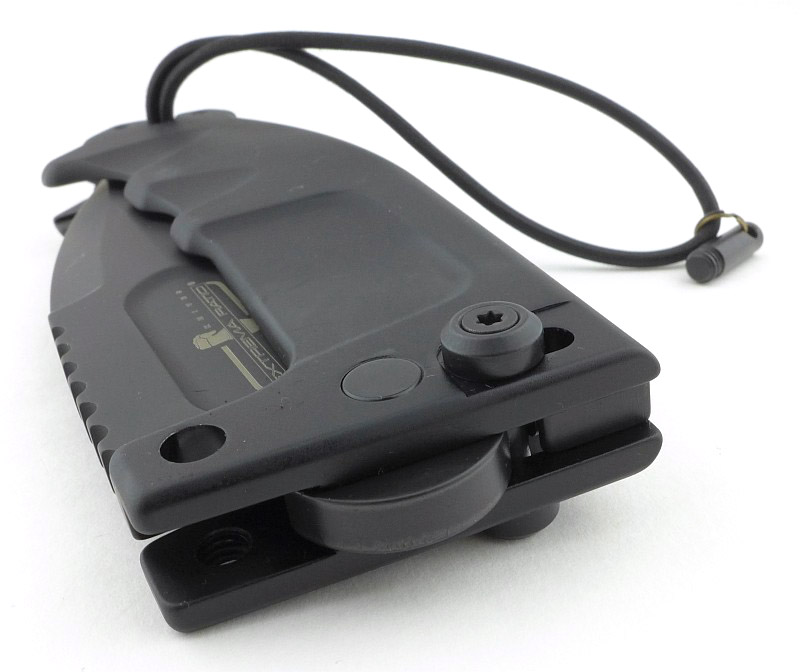
There is no mistaking the presence of this knife. Even when folded it is a beast.

Out of the box, the RAO II is actually locked shut. We’ll look at the special locking/safety pin next.

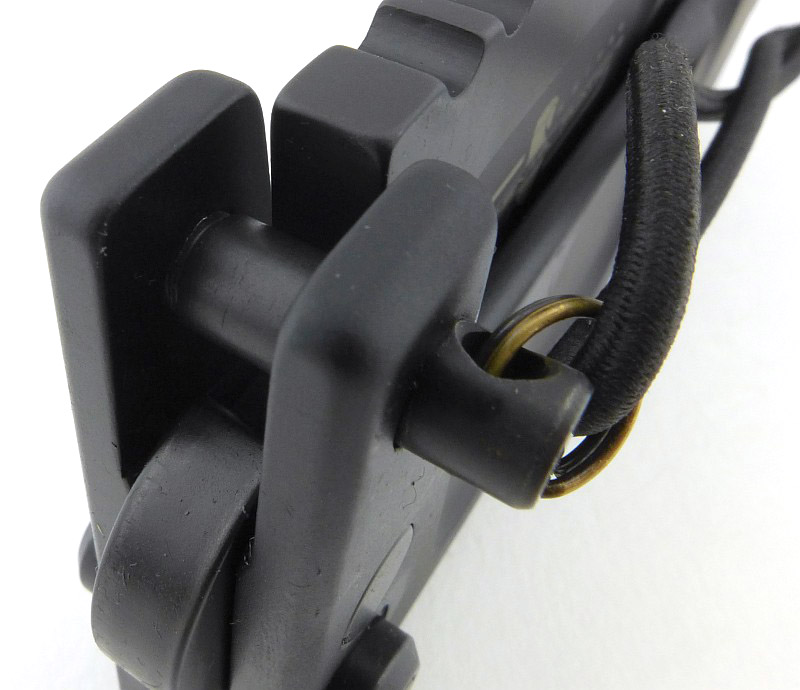
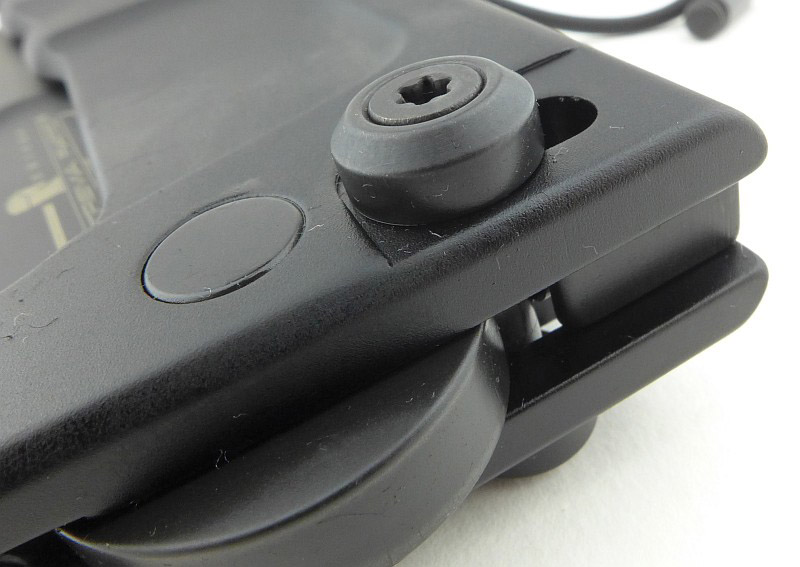
So, one of the RAO II’s special features is its safety locking pin which effectively makes it into a fixed blade knife. This fits through the finger guard and can be fitted with the blade open or folded.

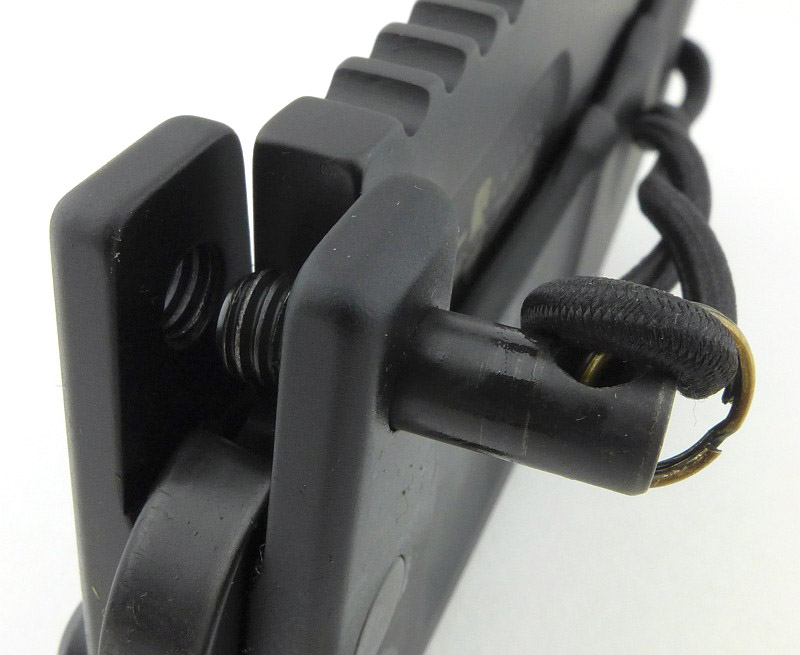
One end of the pin is threaded, so it screws into place.

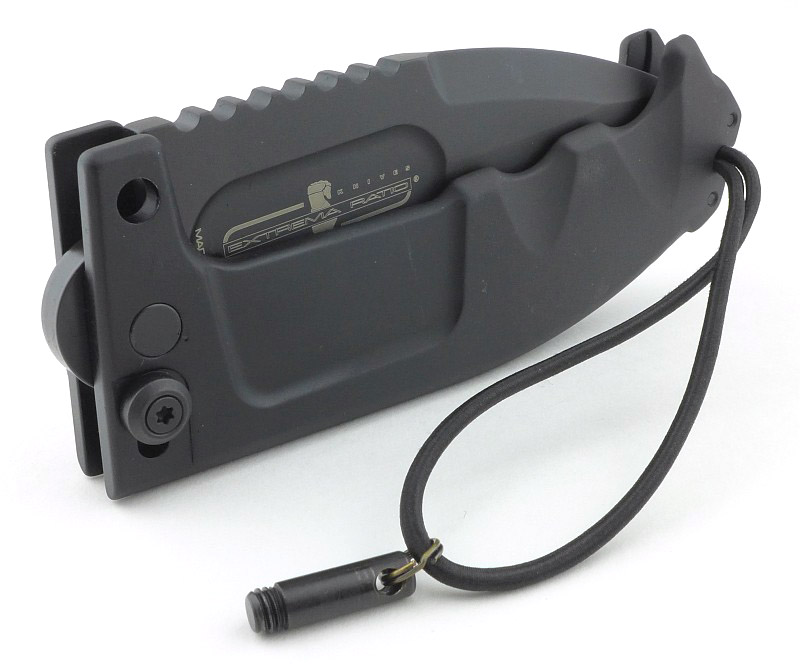
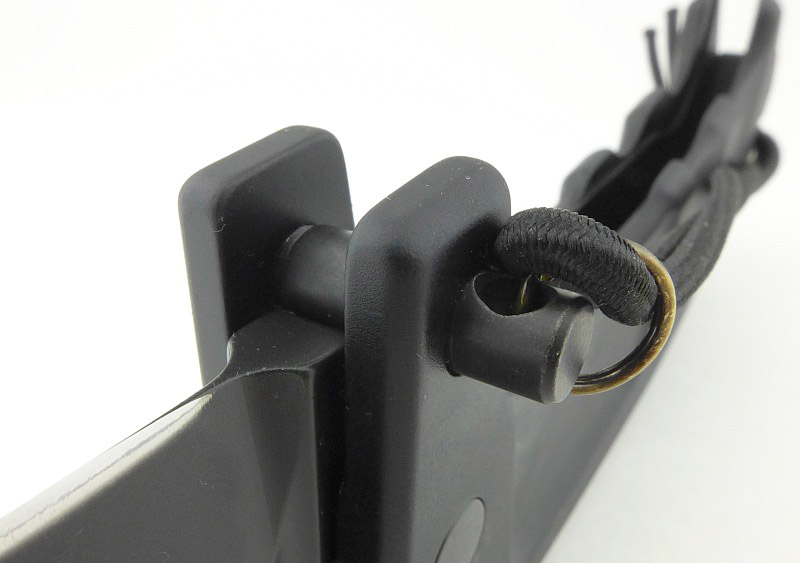
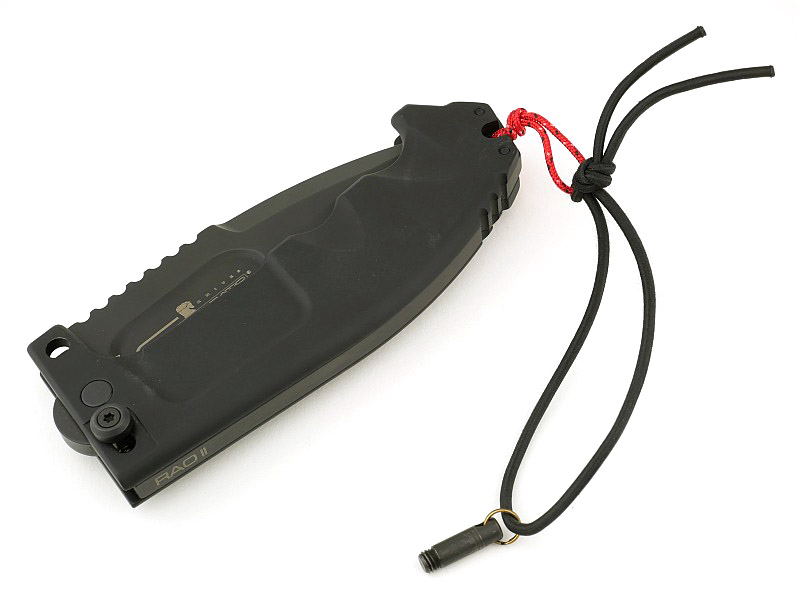
The pin is on a loop of elastic, so once removed it cannot be dropped or lost (unless the elastic cord is cut).

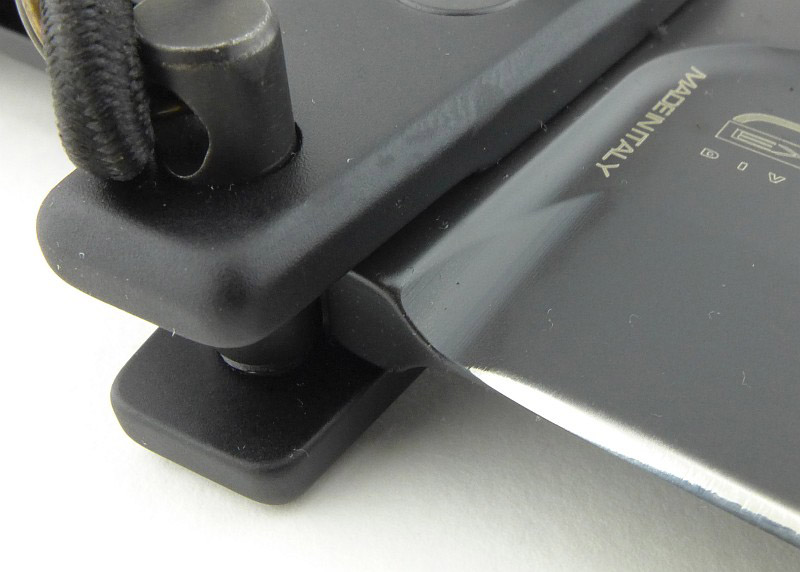
With the safety pin out of the way, the blade can pass between the two parts of the finger guard.

A sliding bolt-lock is used, and this also acts as the back-spring that keeps the blade in the folded position.

Now the blade is opened, we can put the safety pin back in place to secure the blade in the open position. There is no getting past that pin.

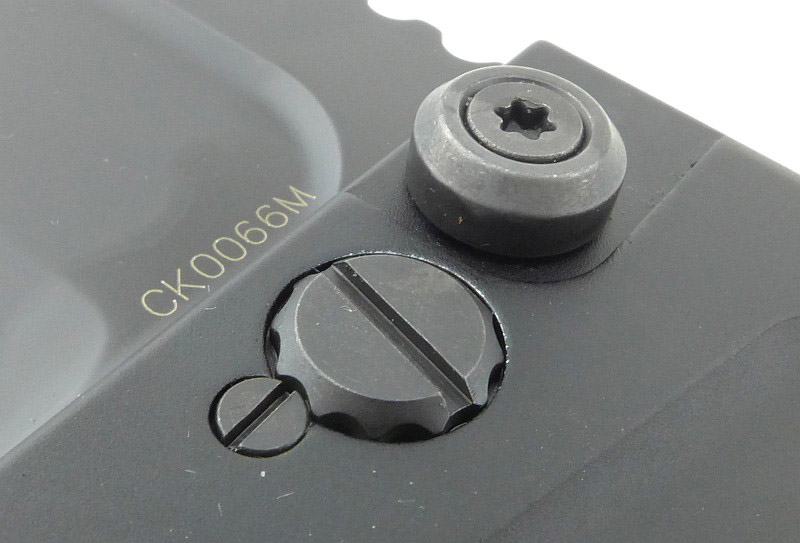
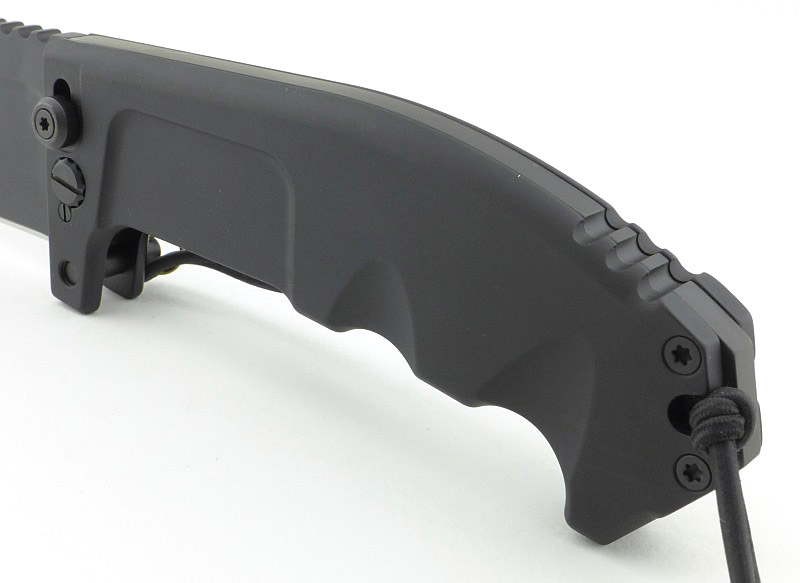
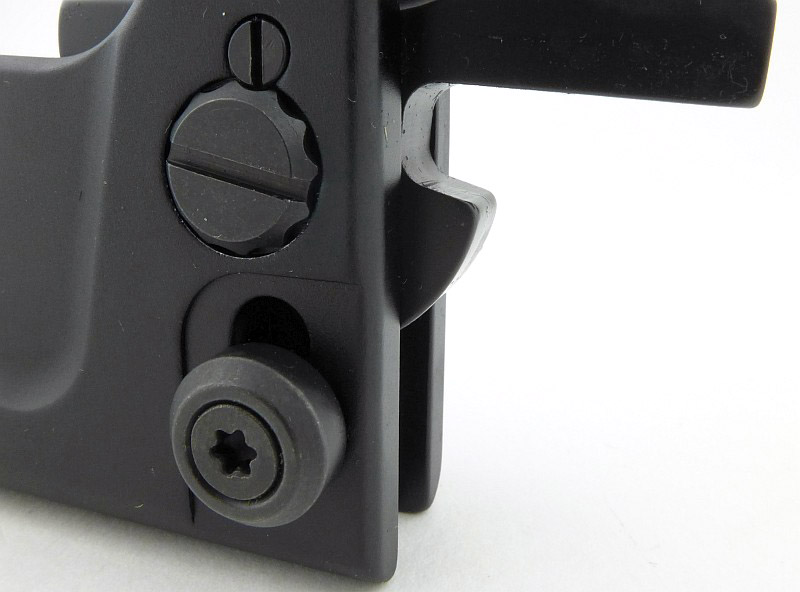
Pivot tension is set using a single sided pivot bolt (the other side is a blank plate). The pivot bolt head has a notched edge which allows it to be securely locked in place using the small screw that fits into one of the twelve notches. With the pivot locking screw in place, the pivot bolt cannot turn at all. You can beat on this knife as hard as you like and that pivot bolt won’t come loose.

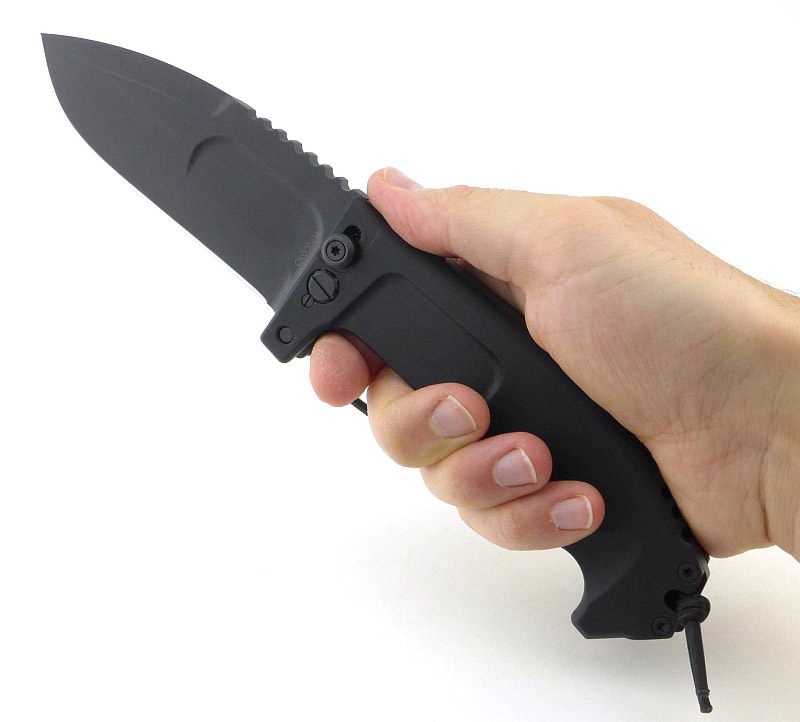
The improved ergonomics are obvious with well rounded edges all round the handle. Extrema Ratio’s handle style is recognisable with the first two fingers grip. The RAO II also includes a third and fourth finger grip.

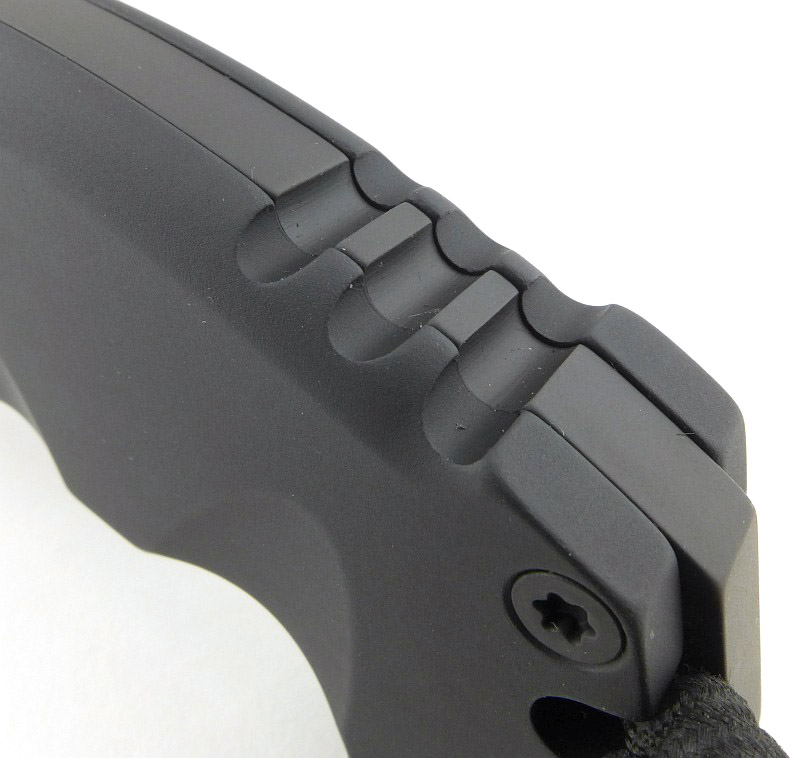
There is jimping at the base of the handle for the thumb, when using a reverse grip.

The H is tight and precise, fit and finish is excellent all over.

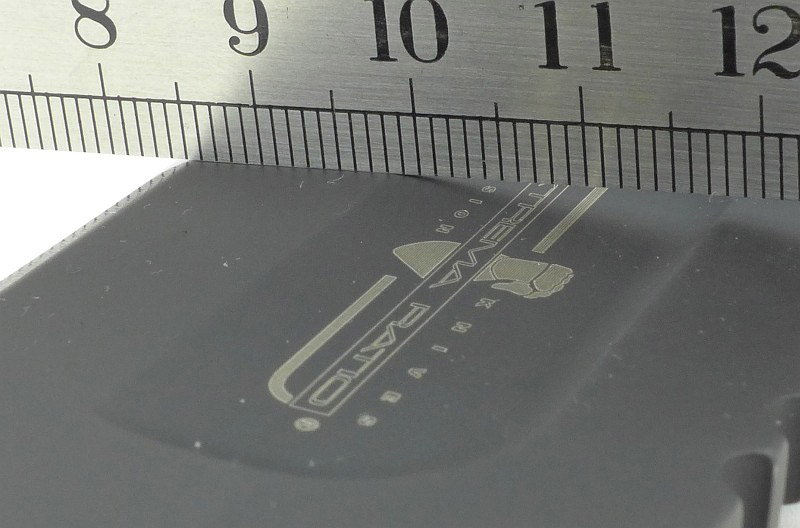
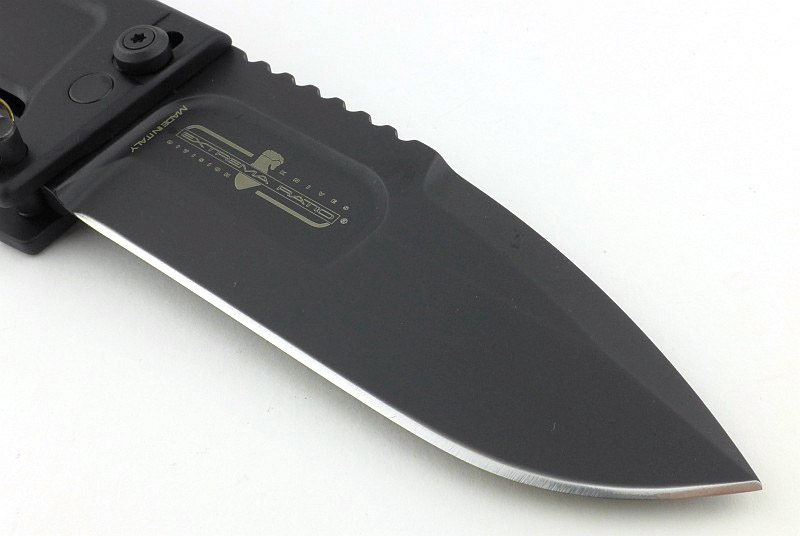
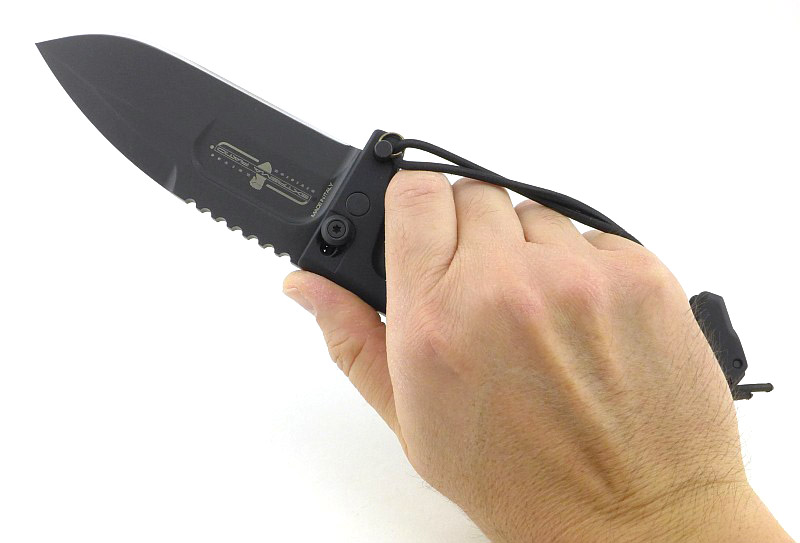
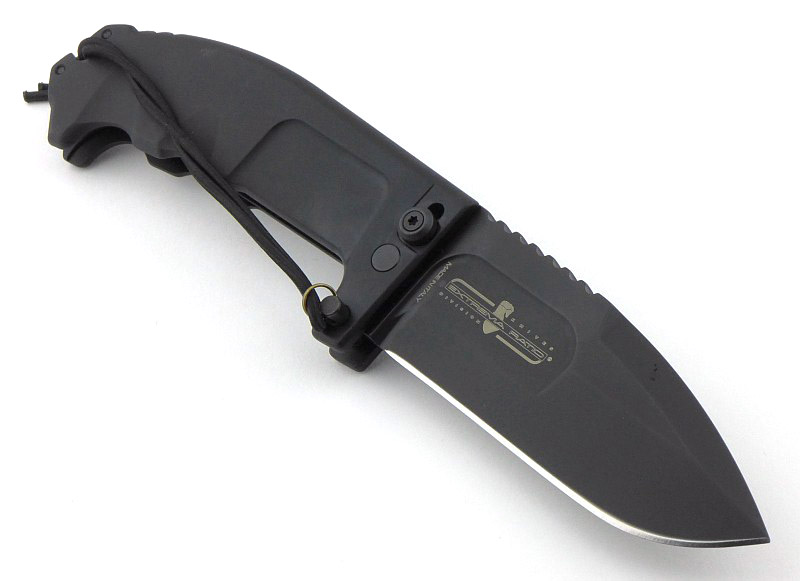
And now onto that purposeful blade. A drop-point with bayonet grind, the RAO II’s blade is very deep. The area where the logo is printed is thinned slightly from the full thickness to provide a grip for opening the blade with.

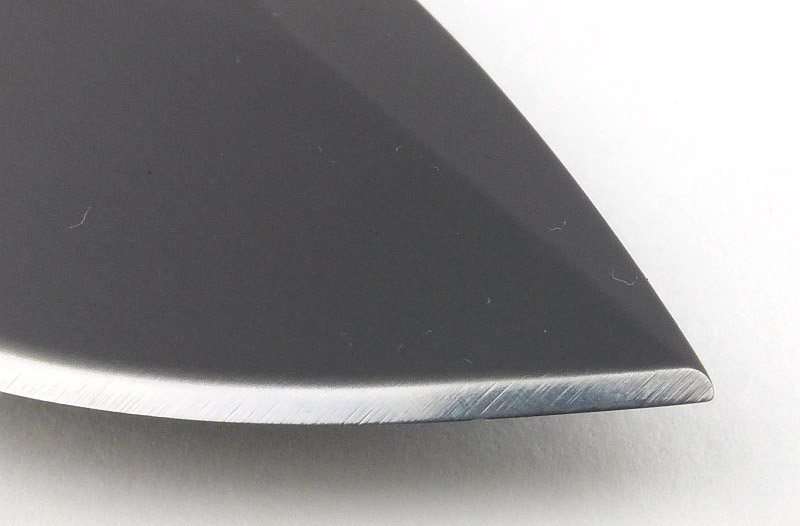
A close look at the blade tip and edge bevel.

The plunge line is well rounded to maximise strength. The slight double-plunge effect here is caused by the primary bevel meeting the blade opening grip and its different radiusing.

With the blade halfway open, you can get a clear view of the locking notch in the tang. The bolt lock drops into this notch when the blade is fully open.

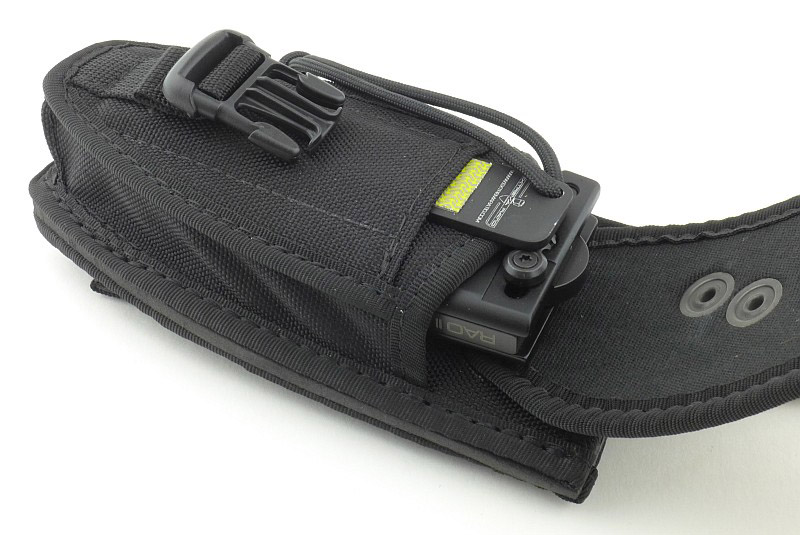
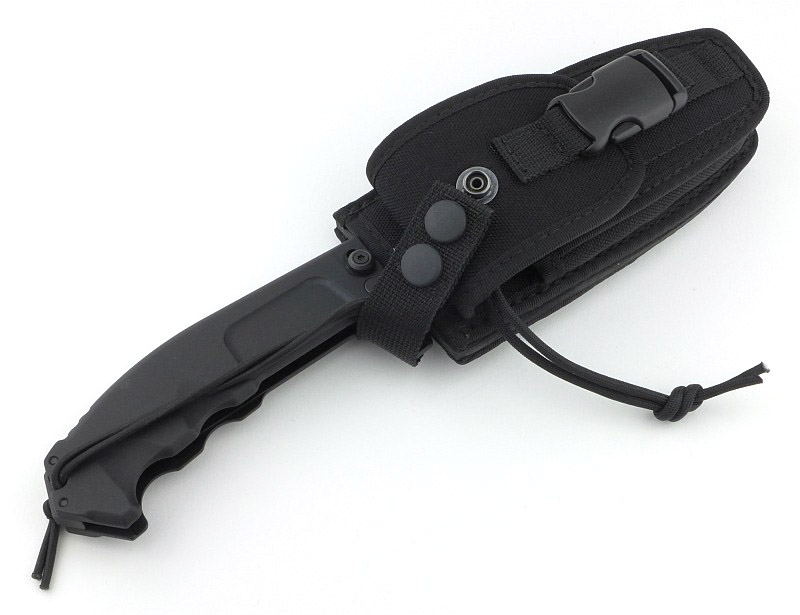
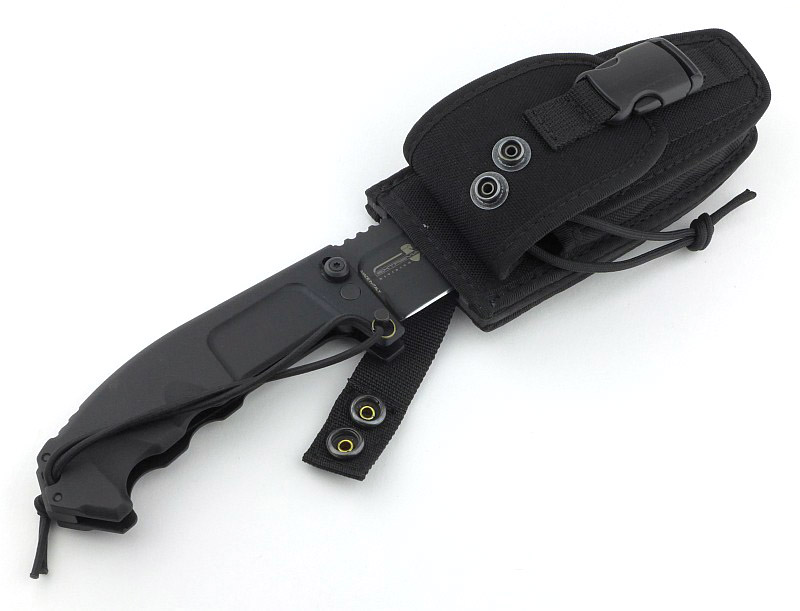
So we’ve taken the folded knife out of the sheath front pocket, opened it and fitted the safety lock pin. Instead of taking the pin out again to fold it, we can simply fit it into the sheath to carry it like a fixed blade. Note one of the press studs is uncovered as the retaining strap now only reaches the top press stud.

A view from the back with the opened knife sheathed.

The retaining strap sits over the deep finger guard, giving it a very secure hold.

What it is like to use?

If you ignore the pivot bolt and bolt lock button, the impression of this knife is not of a folder, but of a chunky fixed utility knife. In a bare hand (I take XL gloves) the finger grips are not quite in the right place. With gloves on they are a better match, but are definitely a better fit for large gloved hands.

It’s big, but somehow seems perfectly reasonable once you pick it up. However, that handle is a significant size and the blade very deep, just look at the next photo.

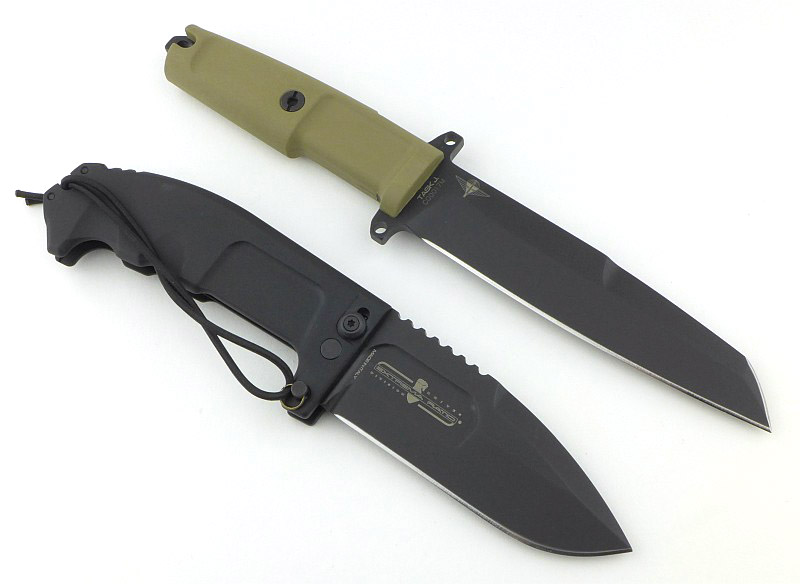
Putting the RAO II next to a full size fixed blade (using the Extrema Ratio TASK J in this case), its blade is not as long, but it is larger in every other way – and this is a folder!

Extrema Ratio have proven time and again that they put real effort into all the details, including the sheaths. Their sheaths are strong, great quality, and highly functional. For the RAO II, this is taken even further, as the dual function sheath is a carry pouch for the folded knife (plus sharpener) as well as a sheath for the RAO II as a fixed blade.
Due to the dual design, the RAO II does carry high on the belt if used as a fixed blade sheath. This is because there is no hanger for the belt loop which would normally drop the carry height (like it does on most fixed blade sheaths).

The included sharpener, I’d class as one of those emergency options which is great because you have it with you, but not for regular use. I’m glad it is included, but won’t be rushing to use it.

This is a short video taking a look over the RAO II and a technique to make the refitting of the safety lock pin easier.

Video Edited with – Cyberlink Director Suite 5 (PowerDirector 16 and AudioDirector 7)
Camera – Panasonic HC-V770    Microphone – Tonor TN120308BL

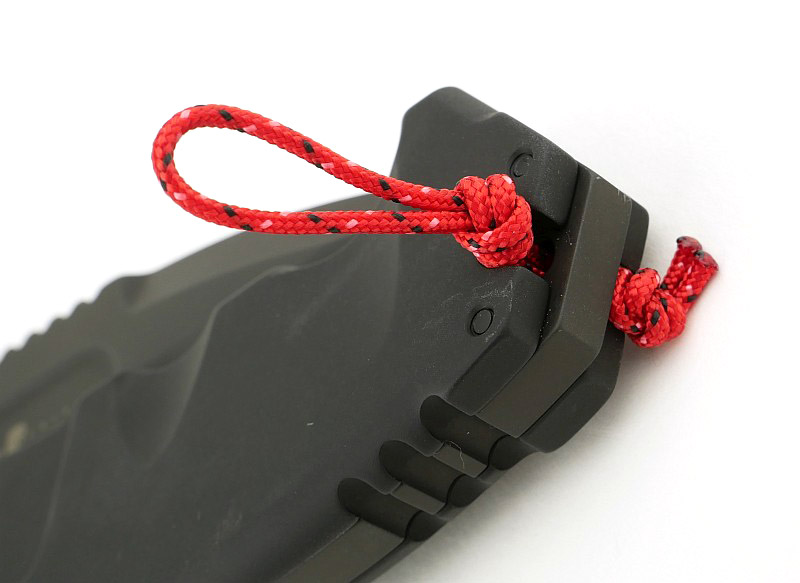
Now you’ve seen the video, and the safety lock pin coming in and out, you might come to the same conclusion I have. This is a great feature, and one I use, but there are many times I want to use the RAO II as a large folder and be able to open and close it quickly. In this case the pin is not being used, and if left attached, as it comes with the knife, it then flaps around and hits your hand, the knife and anything else in range. I got sick of this, so decided to alter things slightly and make it easy to remove the pin entirely.

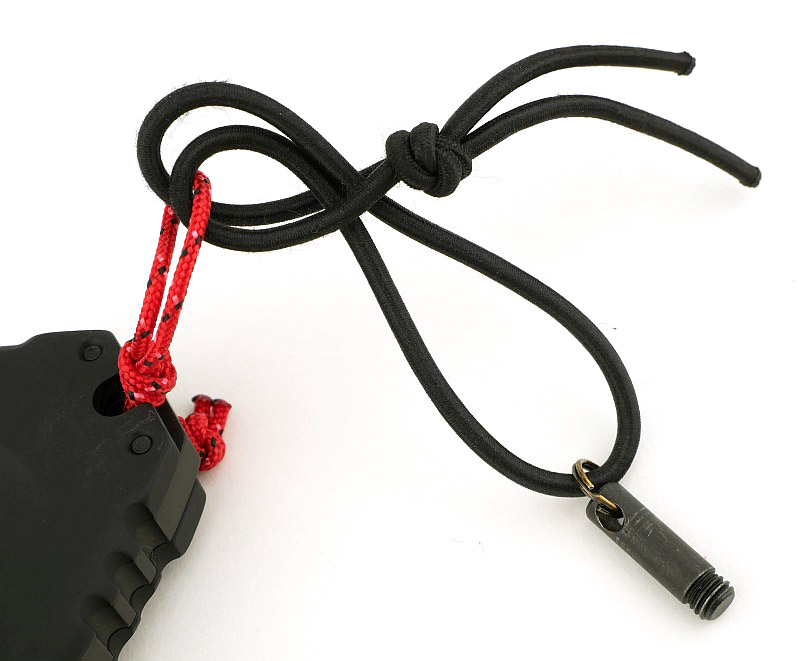
This is my set-up. I’ve taken the original black elastic out of the lanyard hole and added my own loop using 2mm sailing cord.

The original elastic cord with the pin on it is then looped through the sailing cord in a larks head knot.

This larks head knot can easily be loosened and slipped off the sailing cord.

Two overhand knots keep the sailing cord set in the position I wanted.

With this easy modification, that excellent safety lock pin can be set aside for when you want to use the RAO II in more extreme ways, but for general use and really making the most of this knife as a folder, it becomes more of a hindrance. Without that hindrance the RAO II becomes fun to use and revels in its stature and super heavy build.

The bolt lock works so intuitively; as you grasp the knife to fold it, your fingers naturally pull on the bolt as you press the blade into the handle. Unlocking and folding in one motion, as shown in the video.

Talking of super heavy build, this folder is exceptional in the trust you can put in it. That simple idea of the safety lock pin, makes it a folder you can treat just like a fixed blade and not have any concern it might fold on you. Described by Extrema Ratio as a ‘compact’ survival knife, the knife in its sheath is not particularly compact; the dual functions of the carry pouch and fixed blade sheath bulk it up somewhat. The knife on its own however, for the size and strength of knife you get to use, is nicely compact thanks to being a folder.

I’m not going to suggest that this is the most practical knife for general use, but it will make you grin when you bring it out – every time.

Review Summary

The views expressed in this summary table are from the point of view of the reviewer’s personal use. I am not a member of the armed forces and cannot comment on its use beyond a cutting tool or field/hunting knife.

Something that might be a ‘pro’ for one user can be a ‘con’ for another, so the comments are categorised based on my requirements. You should consider all points and if they could be beneficial to you.

_______________________________________________ _______________________________________________
Things I like What doesn’t work so well for me
_______________________________________________ _______________________________________________
Safety lock pin fixes the blade open with complete reliability. If not fitted the safety lock pin flaps around on the elastic cord.
Superb dual function sheath (pouch/fixed blade). Supplied sharpener gets in the way.
MOLLE compatible sheath. Combined pouch / sheath is a little bulky.
Super strong build. Sheath is right-handed only when the blade is open.
Distinctive Extrema Ratio style.
RAO II blade shape more useful to most users.
Basically just awesome.


Discussing the Review:

The ideal place to discuss this reviews is on a forum. If you started reading the shorter forum version of the review, but followed the link this full exclusive review, please return to that forum to discuss the review there.
If you read the review entirely on Tactical Reviews, please consider one of the following to join in any discussion.

BladeForums – Knife Reviews (US based Forum for Knife Discussion)

CandlePowerForums – Knife Reviews Section (Largest and Friendliest Flashlight Community Forum)

The BESS Exchange – A forum discussing technical aspects of sharpness and truly understanding your sharpening process.

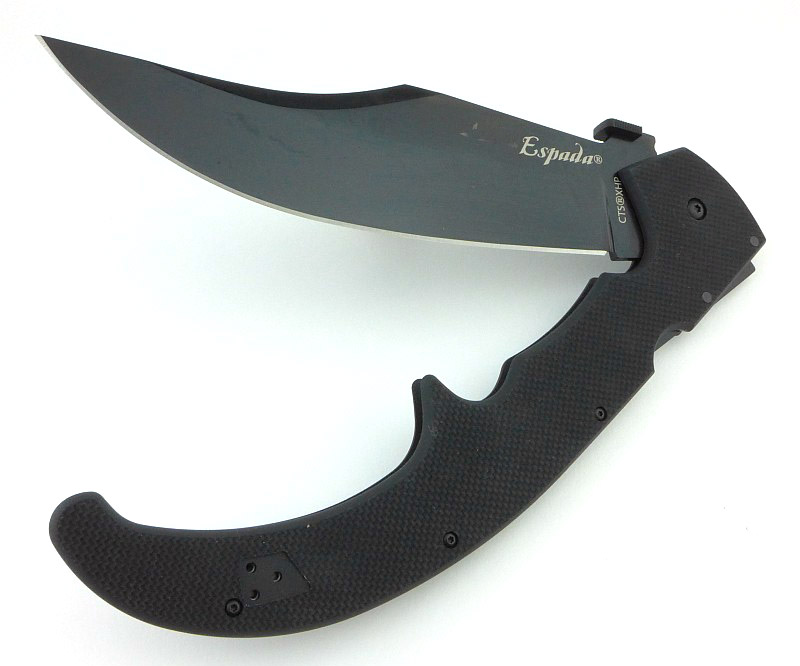
Knife Review: Cold Steel Espada XL G-10

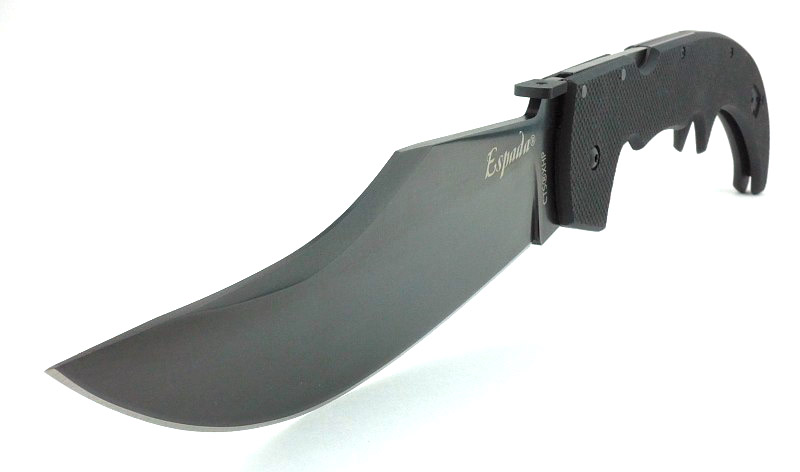
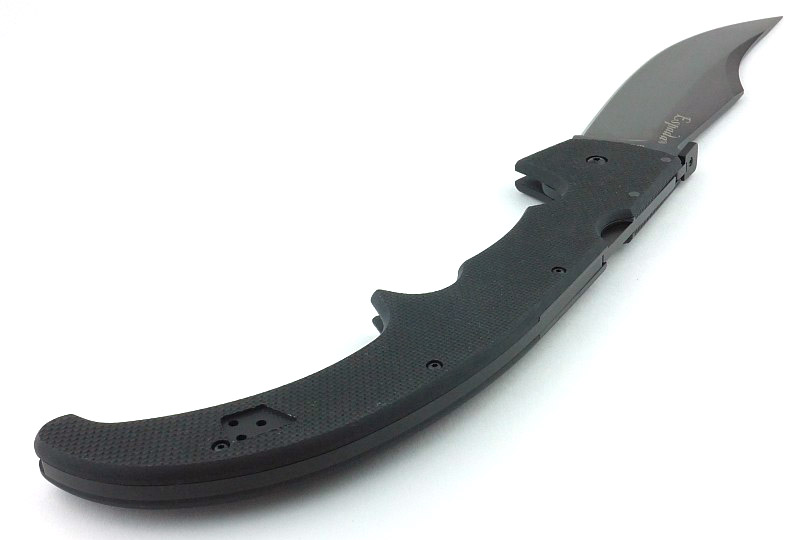
Inspired by the classical Navaja knives of Spain, Cold Steel’s Espada series are the result of a design collaboration between custom knife maker Andrew Demko and Cold Steel President Lynn C. Thompson, using modern design and materials to bring extreme performance to a range of huge folding knives. In this review we are looking at the largest of all, the Espada XL in the newest G-10 edition.

The Blade and Handle Geometry:

Most knife specifications have a basic description of the blade geometry, but in this section I will be taking a more detailed look at geometry and balance.

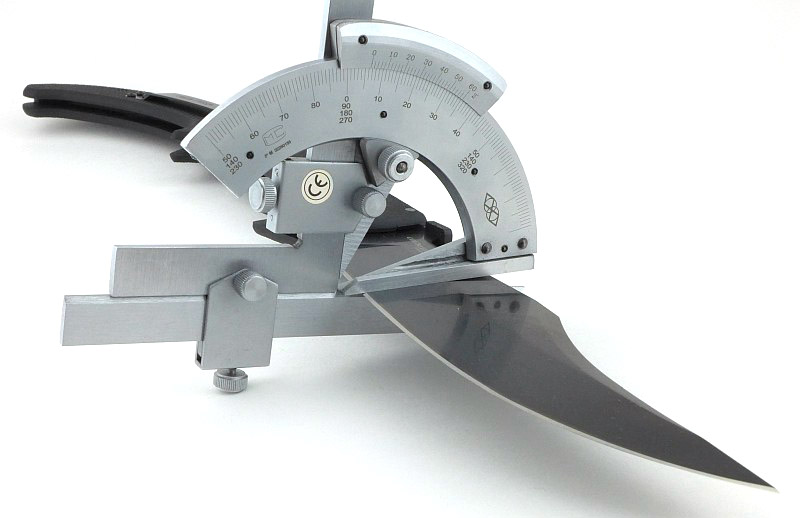
Using a set of gauges and precision measuring equipment including a Vernier protractor, callipers, fixed radius gauges and the unique Arc Master adjustable radius gauge (the one that looks like a crossbow).

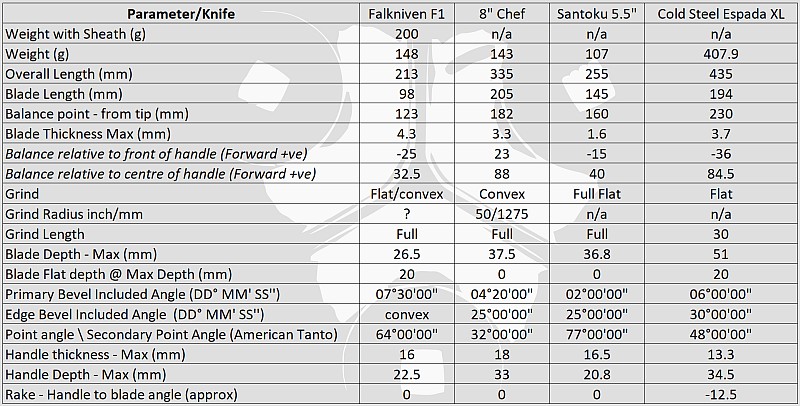
These measurements have been tabulated and are presented along with a few reference blades (8″ Chef’s Knife, 5.5″ Santoku and the popular Fällkniven F1).

Key aspects such as the primary bevel angle, grind type, blade depth, blade thickness, length, weight are detailed, along with balance information.

The ‘Balance relative to the front of the handle’ tells you if the knife will feel front heavy, or if the weight is in your hand (a positive value means the weight is forward of the front of the handle). The ‘Balance relative to the centre of the handle’ indicates how close to a ‘neutral balance’ the knife has in the hand.

In the case of full convex grinds the approximate centre of the grind is used for the primary bevel angle estimate.

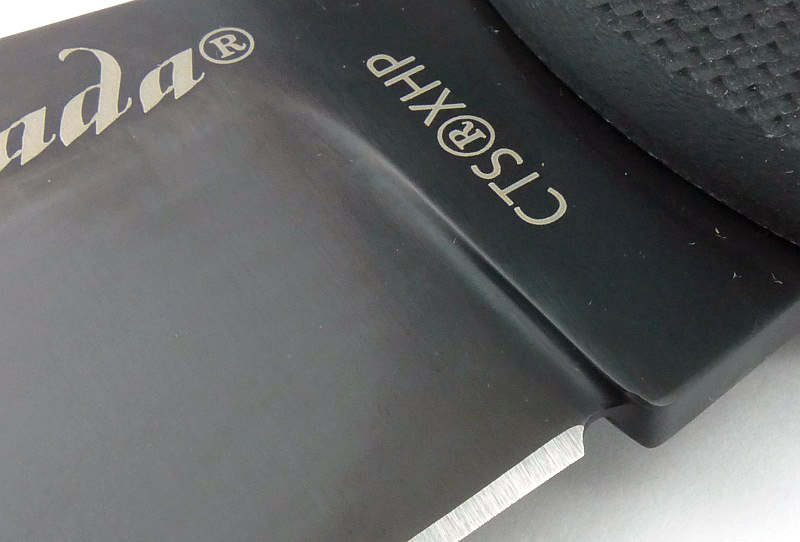
The blade is made from Carpenter CTS XHP Alloy with DLC Coating.

A few more details:

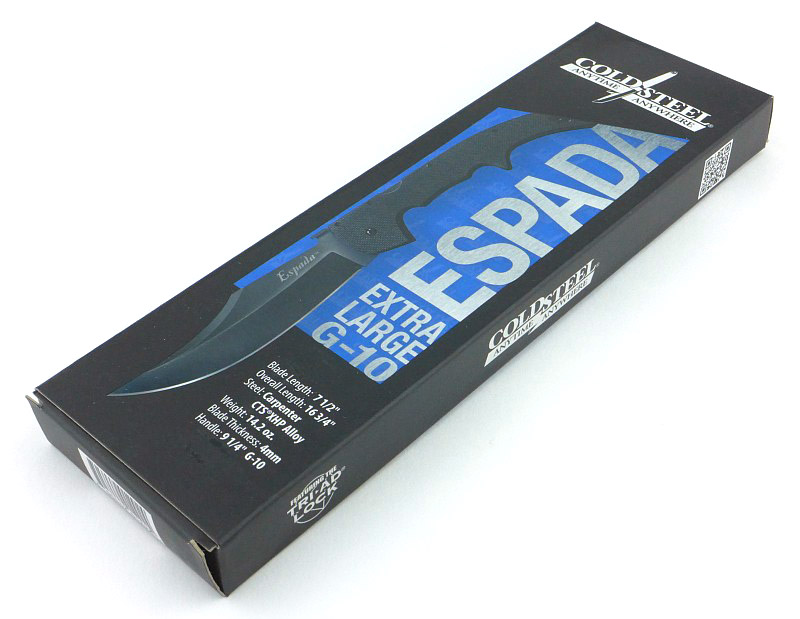
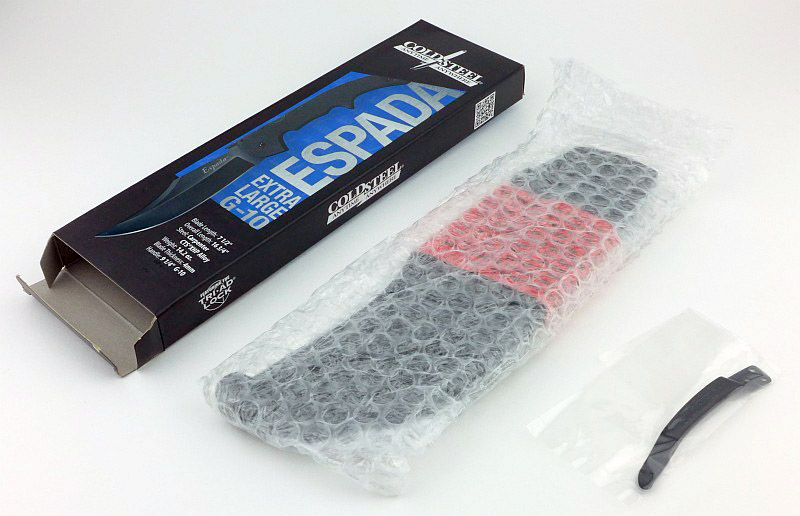
For such a large knife, the Espada XL G-10 arrives in a relatively compact box.

However, this is because the knife completely fills that box.

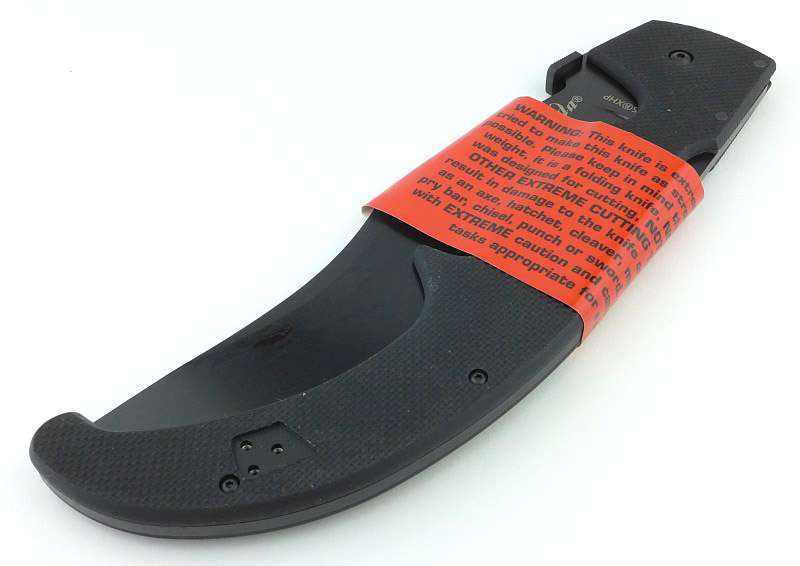
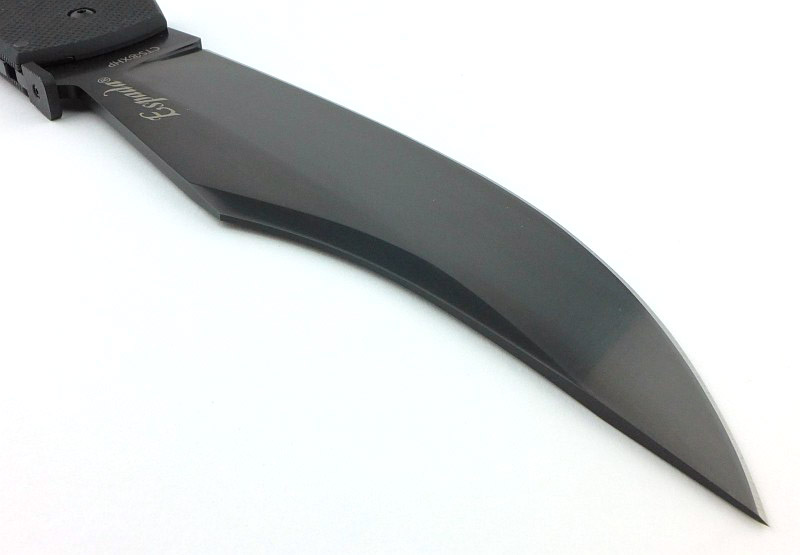
In most cases I think it is over the top to put a warning on a knife that is it sharp, but the Espada XL is worthy of extra caution with that huge sweeping belly of the blade eagerly waiting to bite like a ravening dog.

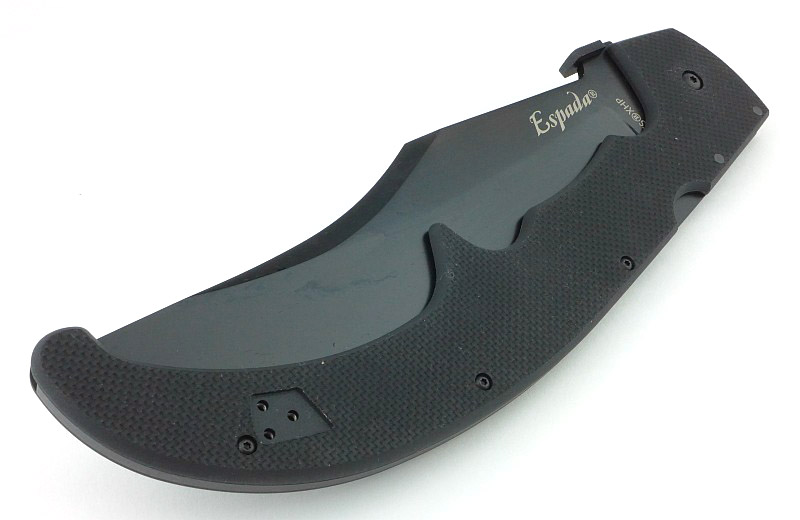
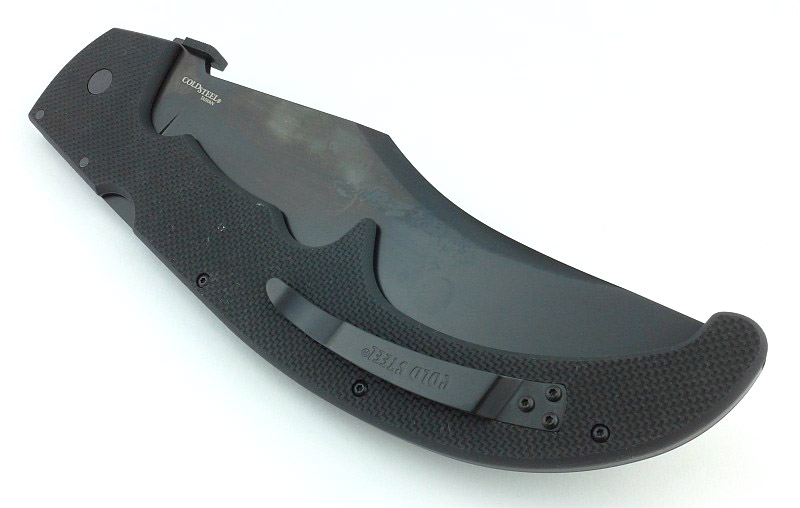
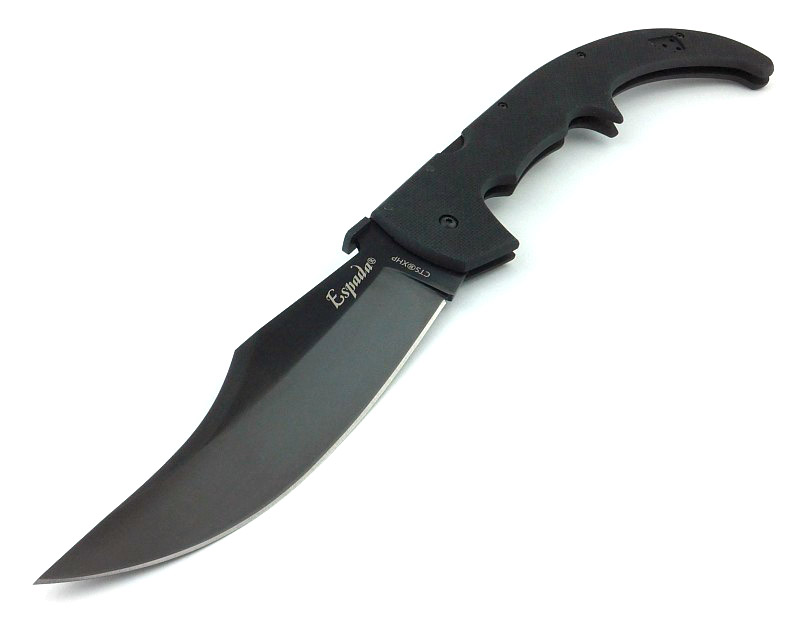
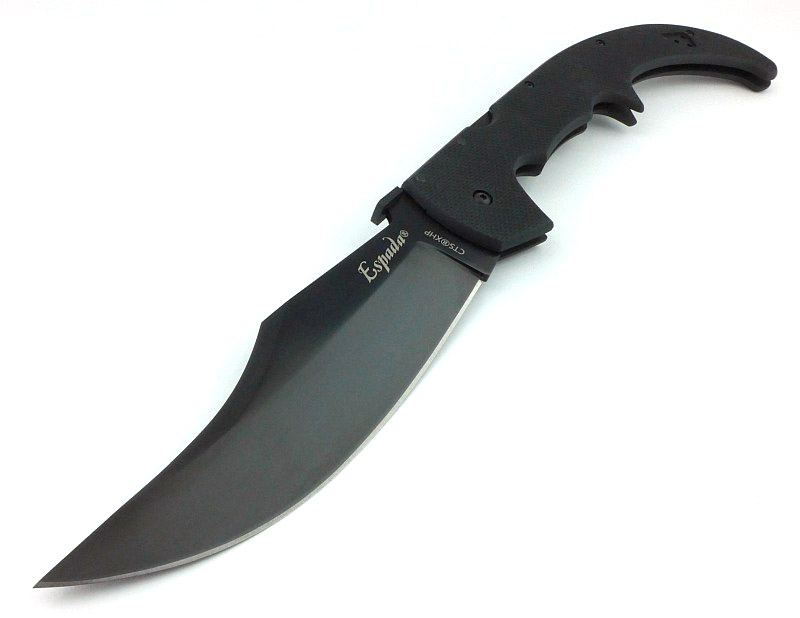
And there we have it, the Espada XL fresh out of the box.

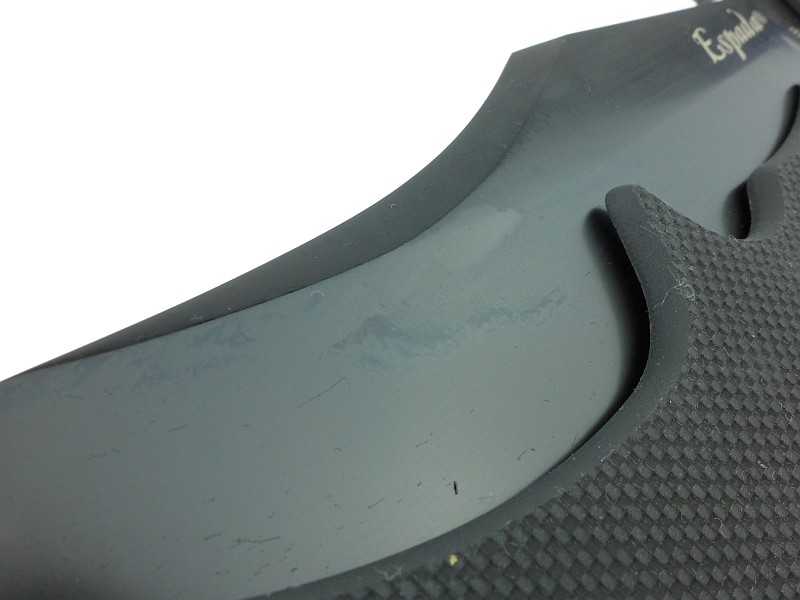
That massive blade has a thin film of oil on it.

It is the oil giving the blade a slightly mottled appearance. As supplied, the clip is fitted for a right-handed person.

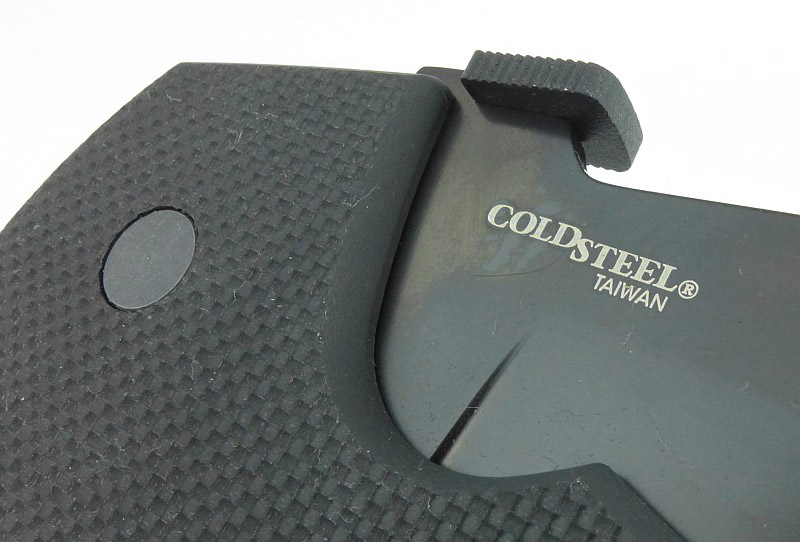
The G-10 version is made in Taiwan.

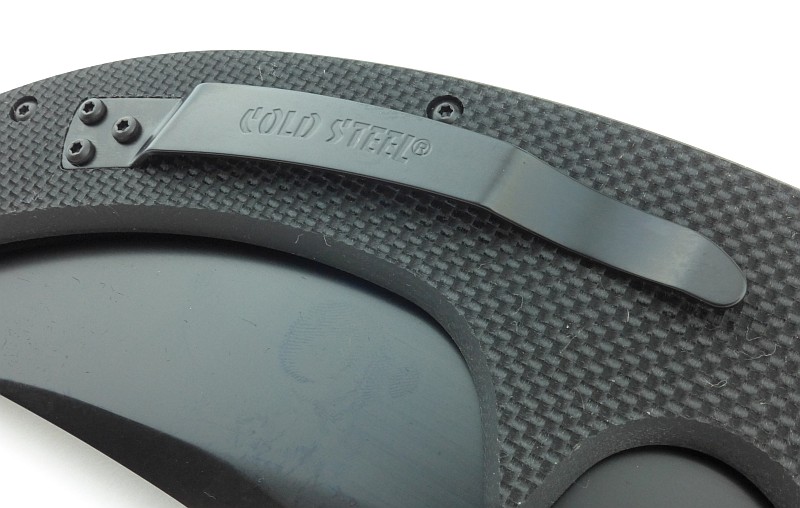
The sweeping clip echoes the lines of the curved handle.

On one side, the pivot bolt is completely plain. You get a hint of the texture on that peeled G-10

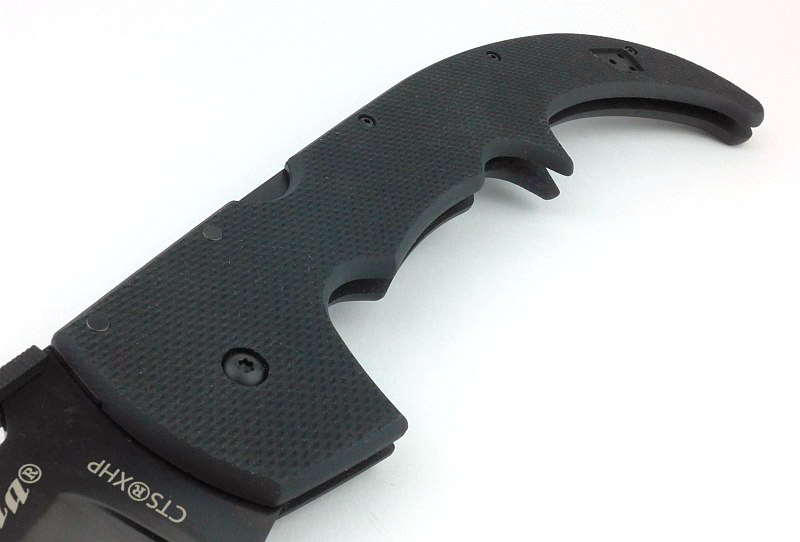
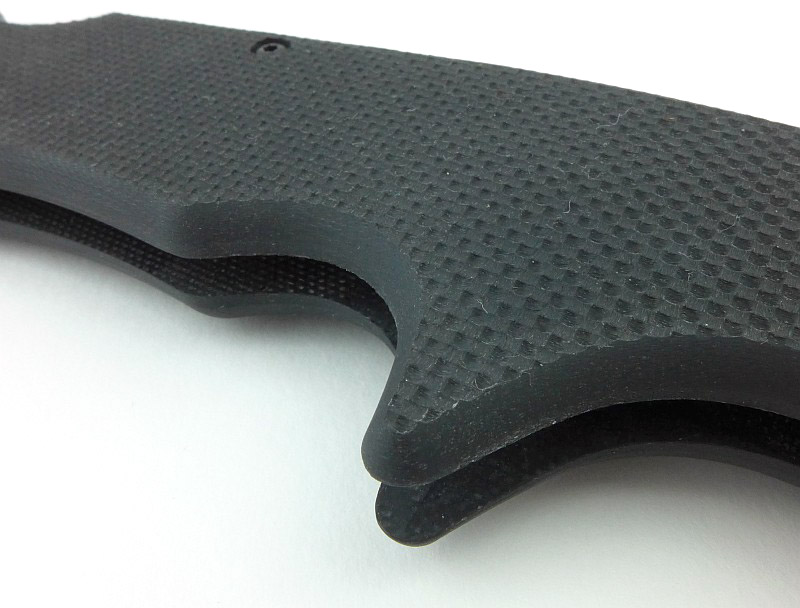
Looking in closely at one of the handle bolts the super grippy texture of the peeled G-10 is clear. This surface is created by peeling off one of the layers of G-10 material leaving the pattern of the weave in the surface of the resin. It makes for a super grippy surface.

Blade centring is excellent, especially considering the huge length of this knife.

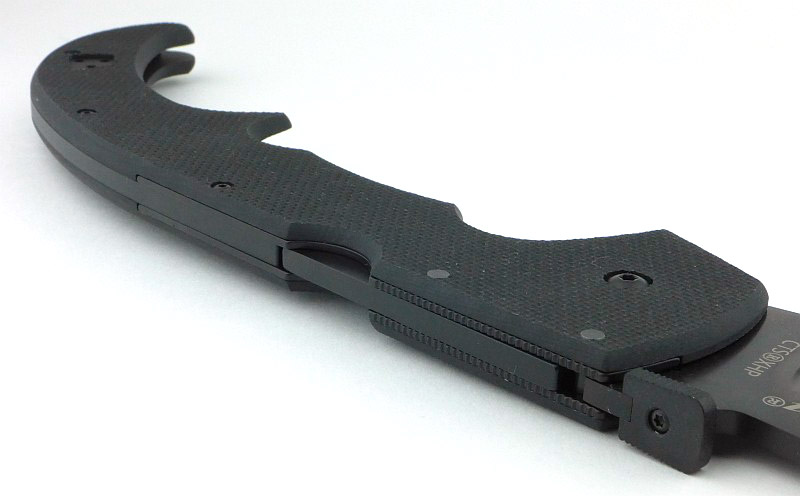
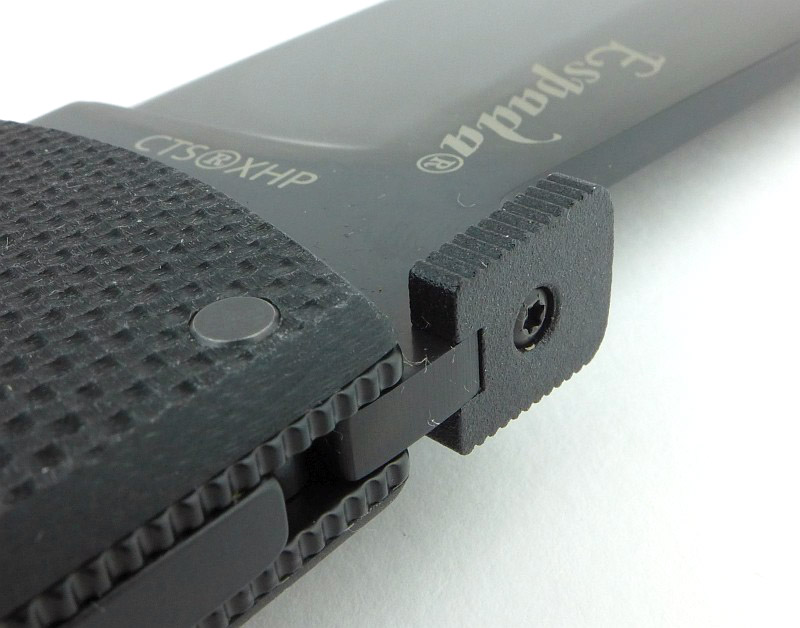
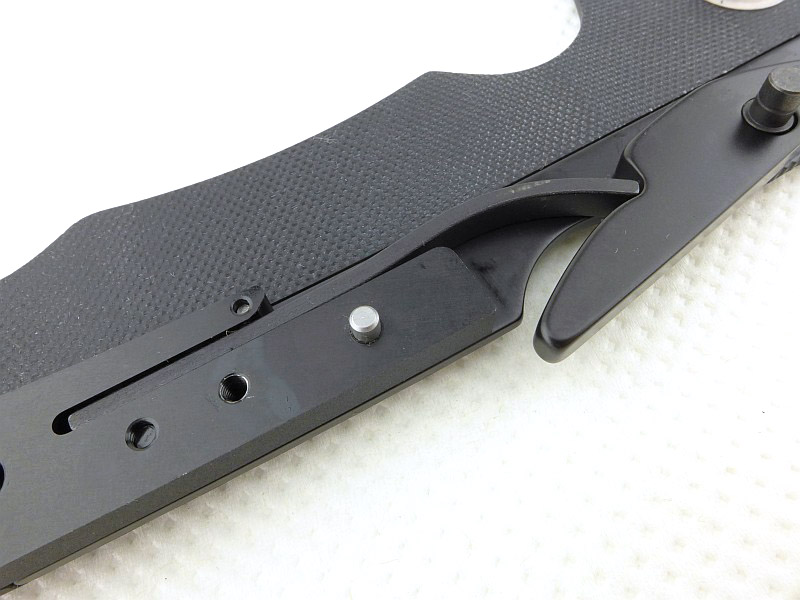
For the highly stressed areas of the lock and pivot, there are steel liner inserts. At the pivot end these are textured on the edges for grip.

Those steel liners extend beyond the end of the lock bar to spread the forces further into the handle.

An overall view of those steel liners.

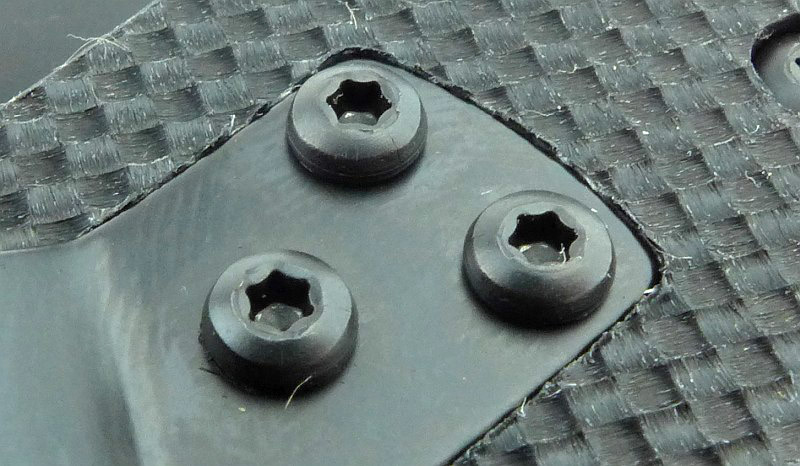
Three torx screws hold the clip in place, and the clip fits into a recessed pocket cut into the handle surface.

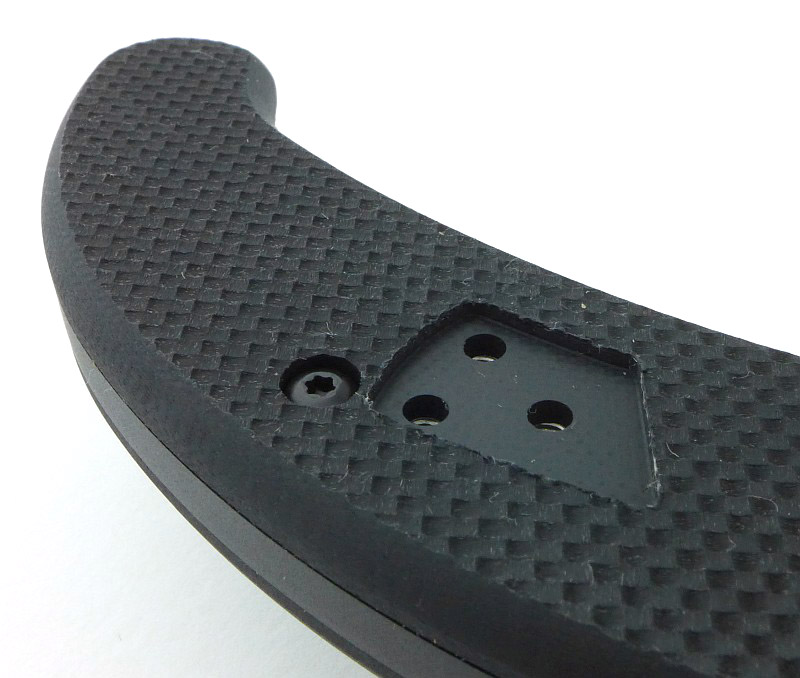
Ready for left-handed configuration the other side of the handle has the pocket for the clip to fit into. The clip is not moved from one side to the other, only the screws are reused to fit the left-handed pocket clip included in the box.

Getting ready to bite!

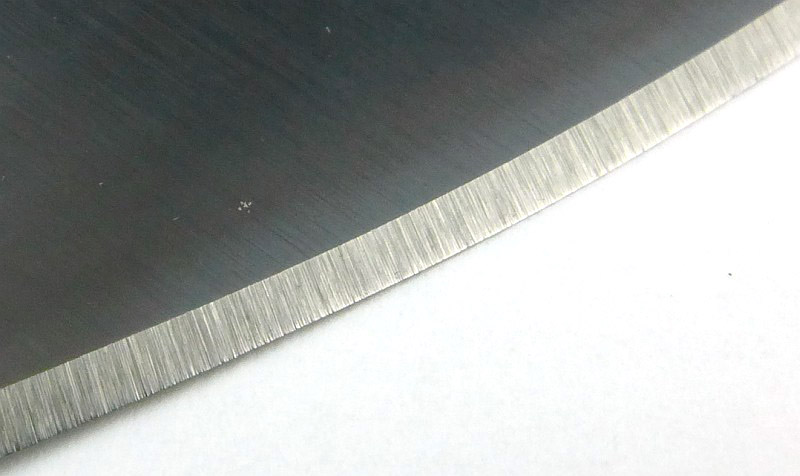
Especially considering the length of the blade, the Espada XL’s factory edge is extremely keen. You can see this is a toothy edge, but it has been finished well.

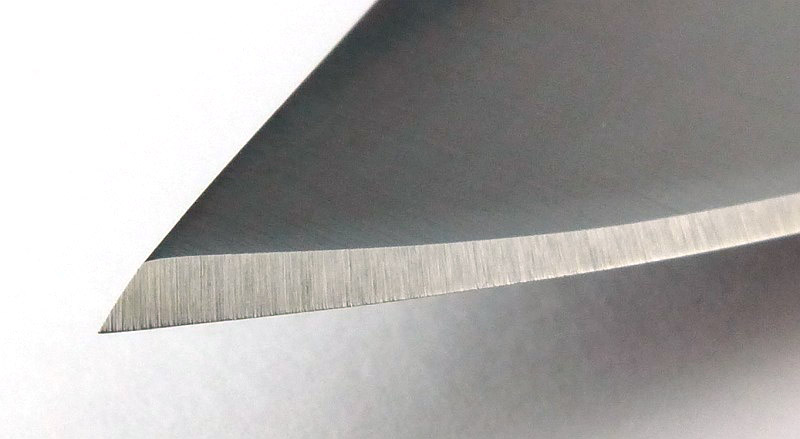
The ‘eager’ edge is topped off with a very acute angled point.

I’m pleased to see a sharpening choil at the base of the plunge line, and that the corners of the plunge line are radiused to reduce stresses.

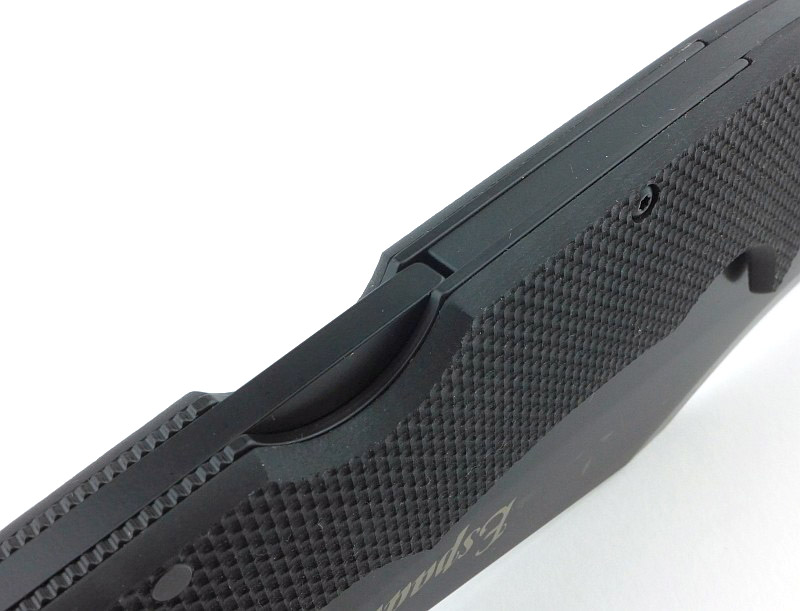
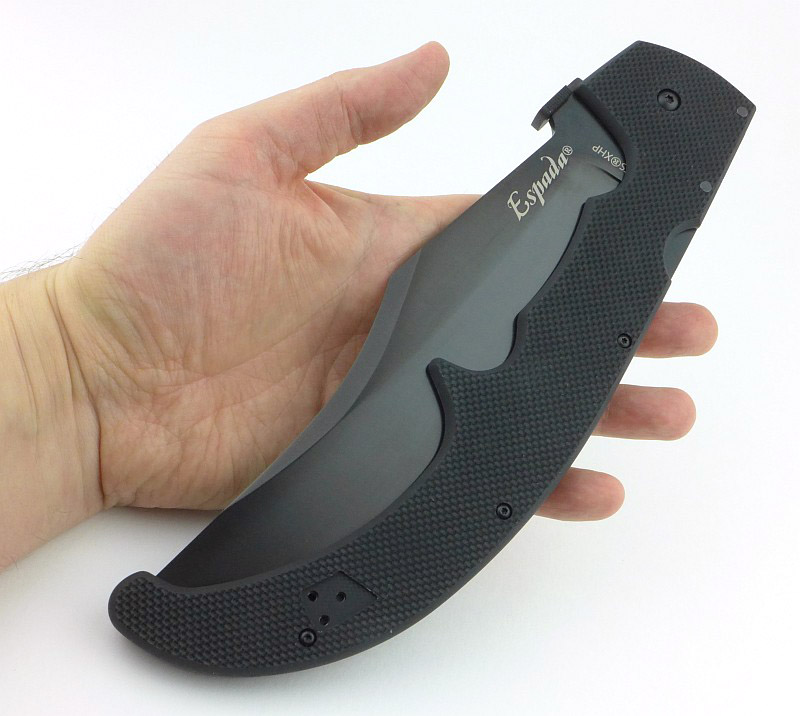
Complex curves create several grip options along the very long handle.

Of course the Espada XL needs to have a Demko Thumb Plate to make it even more awesome with out-of-pocket-opening.

All the edges of the grip are well rounded so as not to cut into your hand. The first finger grip groove is generously sized with deep finger guard.

Moving to the middle of the handle and a spur provides masses of grip for the front or mid-grip hand positions.

Grip options extend right through to the hooked end of the handle.

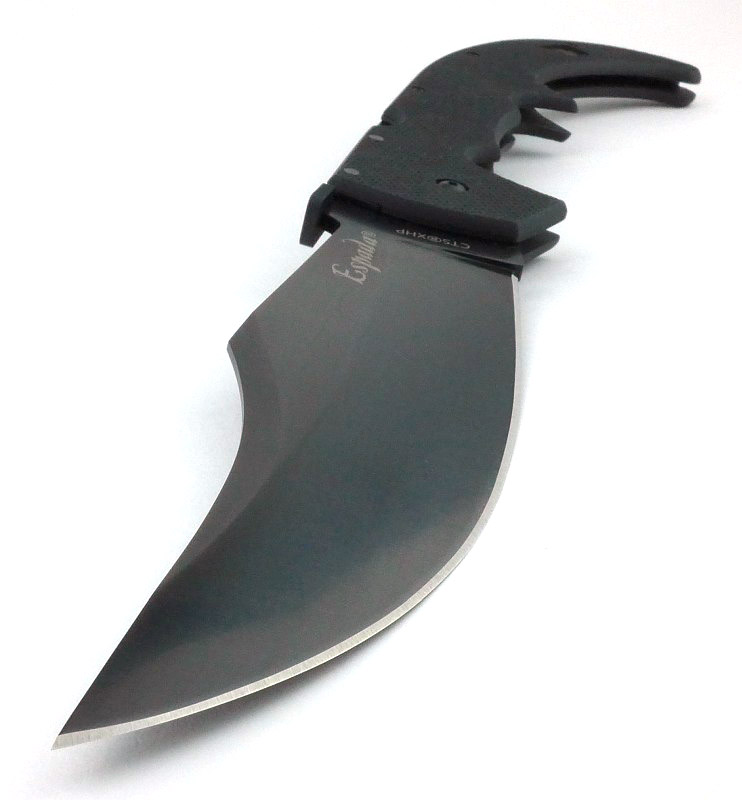
On the Espada XL the trailing point blade has a huge elegant sweeping curve to the tip.

What it is like to use?

Cold Steel describe the Espada series as ‘pocket swords’ and with the Espada XL this is an apt description, but I’d like to move away from the connotations that has and onto the enthusiasts point of view.

Honestly I can’t say the Espada XL is a practical tool, but who cares; it is an awesome giant folding knife!

Actually it is very capable as a slasher for jobs where you would use a machete, so if you want a very expensive folding brush clearing tool that will keep you grinning, look no further. If you happen to have large blocks of material that need deep cuts, it also excels at this (like thick foam rubber for cushions), so you can argue a level of practicality, even if a bit of a reach. But practicality is not what this knife is about; it is an enthusiasts knife.

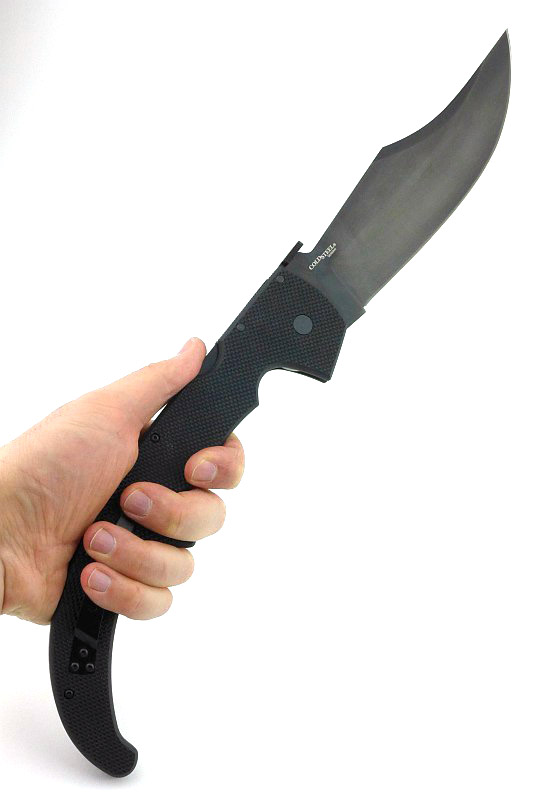
When you are using it, there are many different grip options. Starting with the primary forward grip for working with the blade for cuts requiring the most strength to be applied.

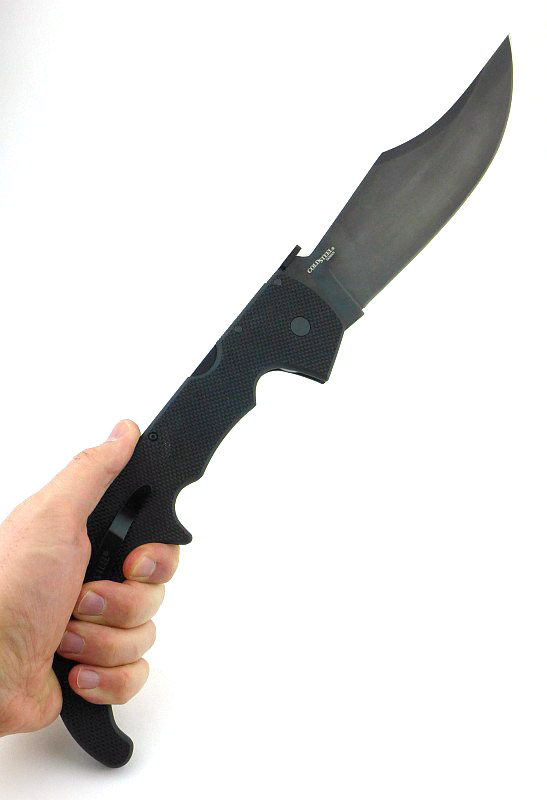
Moving to the mid-grip and with the spur between your middle fingers you have more reach and like this can use the blade to cut precisely or to chop.

Taking up the most extreme hand position on the final hook of the handle and you have very long reach and like this would primarily slash and chop instead of making more controlled cuts.

Let’s jump into a short video with some slow motion opening and cutting.

Video Edited with – Cyberlink Director Suite 5 (PowerDirector 16 and AudioDirector 7)
Camera – Panasonic HC-V770    Microphone – Tonor TN120308BL

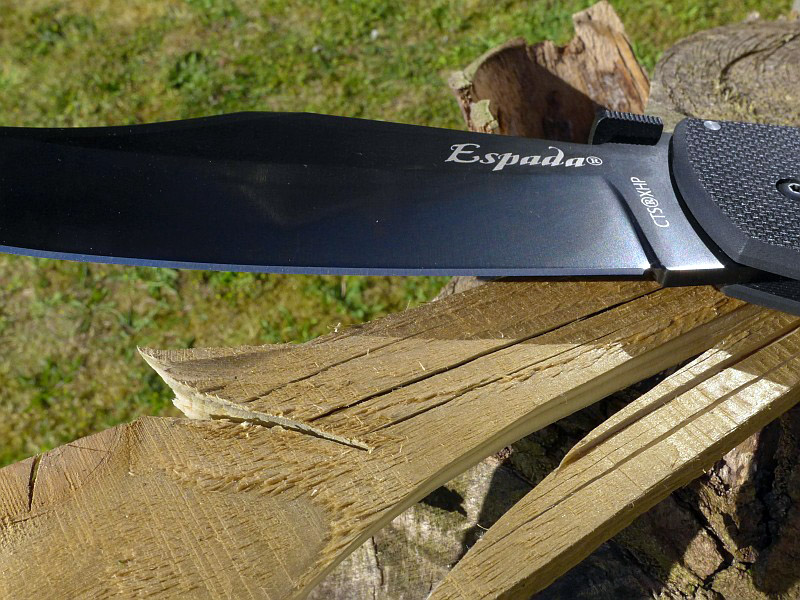
This wood chop was not shown in the video, but I wanted to include it to show a cut made into a well seasoned fencing board, that was placed, unsupported, on the ground. The cut was made at a 45 degree angle towards the ground, so the bottom of the board could not move downwards, but nothing held it sideways except the inertia of the board itself. A very deep cut was the result; not all the way through, but impressively deep.

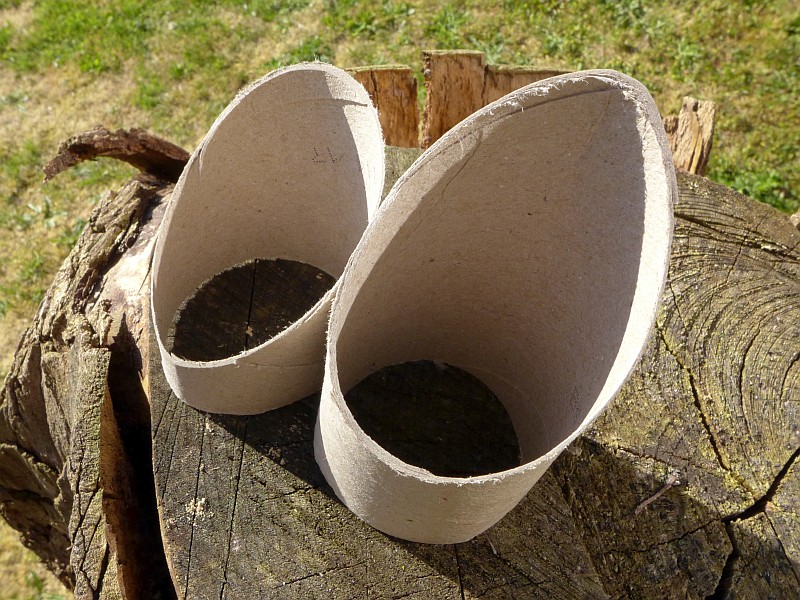
Using the factory edge (with no touch up at all), this lightweight cardboard tube has a very clean-edged slice through it.

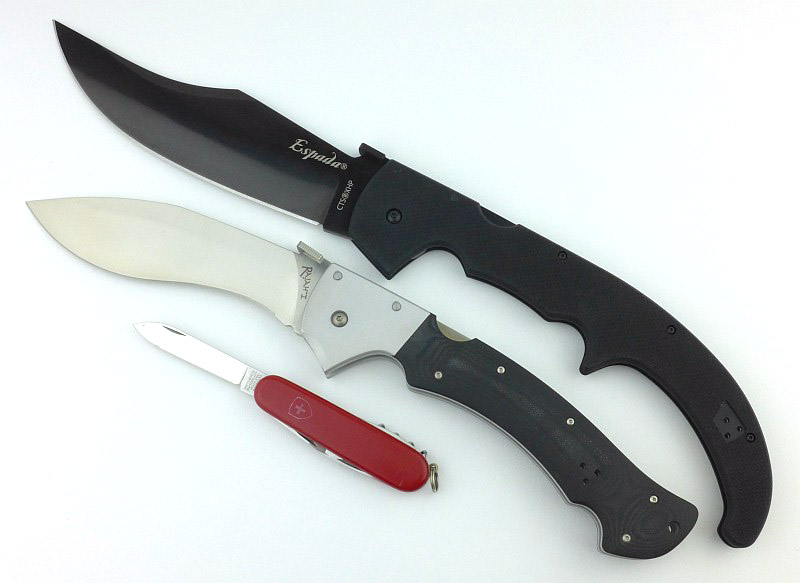
The video also showed some size comparisons, but here they are as photos.
In this image we have the Espada XL along with another well known large folder, the Cold Steel Rajah I (the same size as a Rajah II) and a standard size Victorinox pocket knife.

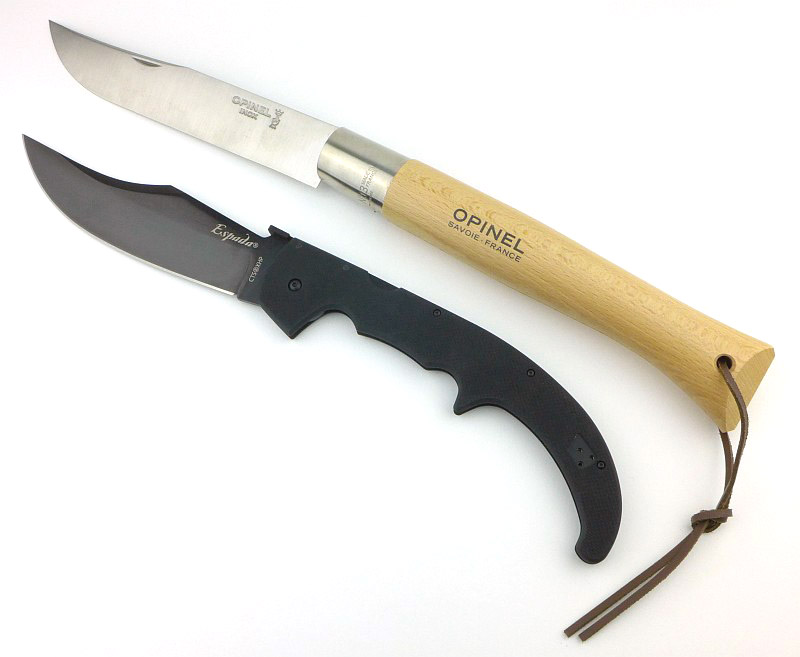
So, the Espada XL is not the largest folding knife I have, the Opinel No. 13 ‘Le Géant’ is, which in terms of pure size does beat the Espada XL, but it is nowhere near as robust.

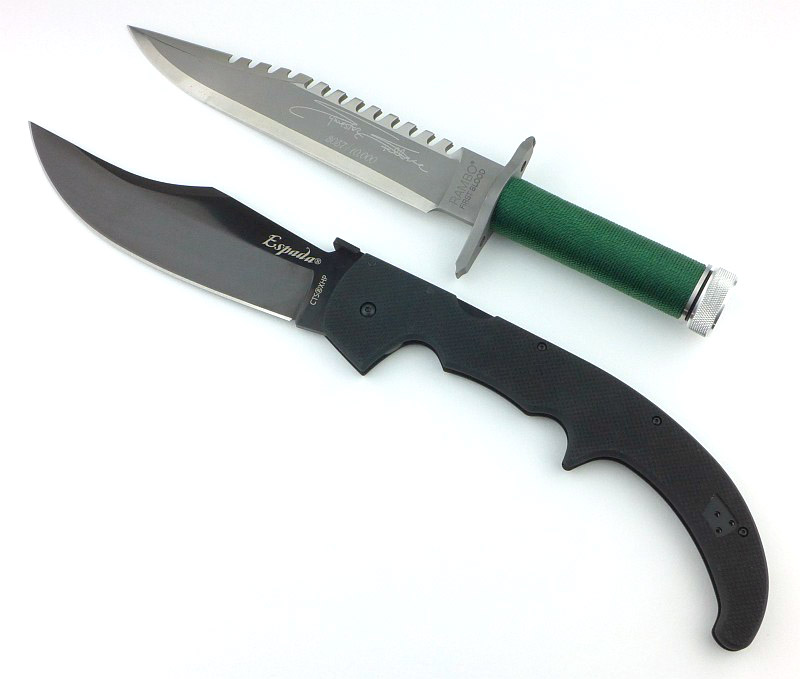
And just because I wanted to, this is a Master Cutlery First Blood replica, showing what a beast the Espada XL really is.

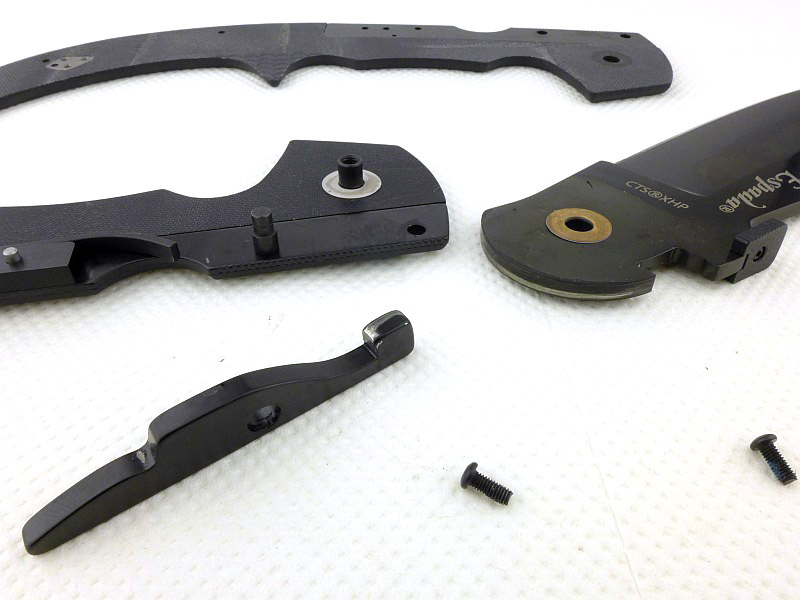
Along the way with this review, I had reason to open the Espada XL up. This proved to be a very easy job, and allows me to show a few internal details. Once you have the pivot bolt and three handle bolts undone, the handle lifts off easily and initially leaves its steel liner in place. This then lifts off easily too.
With the blade then opened up, you press the lock bar to relieve the pressure on the blade tang and lift the blade off the pivot. The lock bar, once you release the pressure, then lifts off its pivot.
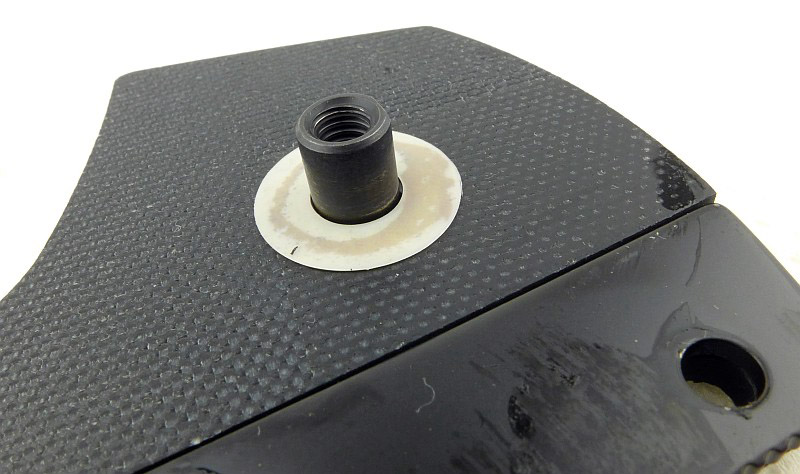
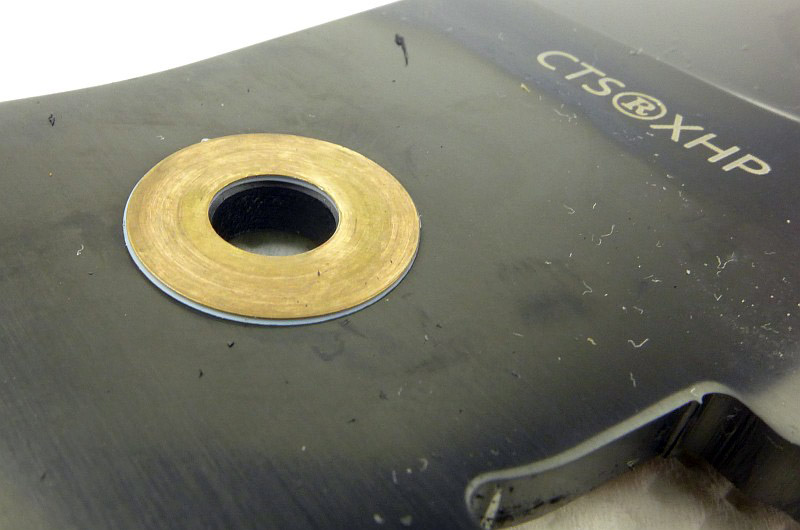
Note that the washers look different here, but that is because each washer is made of two thinner washers, a nylon or teflon (white) washer positioned next to the blade, and a phosphor-bronze washer between the nylon washer and the G-10 handle.

A closer look at the pivot bolt and the nylon washer.

Zooming in on the two-part washer.

Keeping the super strong Tri-Ad lock locked, is a heavy spring, one of the strongest I’ve come across in a back lock.

The Espada XL is a GIANT folding knife, and definitely needs consideration if you want to carry it. You’ll need a deep pocket (like leg pockets on cargo trousers) and the will to have a mostly impractical blade on you. However the genius of the Espada XL’s design is that you CAN carry such a big knife and not be too weighed down by it.

Another point to note is that though the G-10 edition may well be the cheaper version of the Espada XL, actually I’ve found it to be more usable (if not as beautiful). Mainly this is due to the super grippy handle and the fact there is no polished aluminium to get scuffed up through use. According to Cold Steel, the G-10 edition retains 90% of the strength of the original, and it is slightly lighter (50g or 1.8oz). I really must come back to that grippy handle; no matter how sweaty or wet my hands are there is no lack of grip, unlike the polished handle of the original. This is to such a degree I have considered sanding the handles a bit to take off some of the ‘sharpness’ in the surface texture, as it can be pretty abrasive. This is definitely something you might want to do under the clip as you will wear away your pocket very fast if you don’t.

This knife is just so much KNIFE, you want to find a reason to carry and use it.

Review Summary

The views expressed in this summary table are from the point of view of the reviewer’s personal use. I am not a member of the armed forces and cannot comment on its use beyond a cutting tool or field/hunting knife.

Something that might be a ‘pro’ for one user can be a ‘con’ for another, so the comments are categorised based on my requirements. You should consider all points and if they could be beneficial to you.

_______________________________________________ _______________________________________________
Things I like What doesn’t work so well for me
_______________________________________________ _______________________________________________
This is a really BIG knife! This is a really BIG knife! (It is not a mistake putting this in both columns.)
Super strong Tri-Ad lock. Demko opener ‘eats’ your pocket.
Very grippy handle. Handle can be overly abrasive.
Pocket carry is possible despite the size.
Demko Opener allows rapid blade opening..
Extremely ‘eager’ blade wants to cut everything.
This is a really BIG knife! Enthusiasts will LOVE it.


Discussing the Review:

The ideal place to discuss this reviews is on a forum. If you started reading the shorter forum version of the review, but followed the link this full exclusive review, please return to that forum to discuss the review there.
If you read the review entirely on Tactical Reviews, please consider one of the following to join in any discussion.

BladeForums – Knife Reviews (US based Forum for Knife Discussion)

CandlePowerForums – Knife Reviews Section (Largest and Friendliest Flashlight Community Forum)

The BESS Exchange – A forum discussing technical aspects of sharpness and truly understanding your sharpening process.

Gear Review: Walkstool Steady

Following the review of the Walkstool ‘Comfort 65’ Portable Stool, the most asked question was if there was anything to allow it to be used on very soft ground. Well Walkstool had already thought of this and the solution is the Walkstool Steady, an optional extra to give the Walkstool maximum stability on any surface.

A few more details:

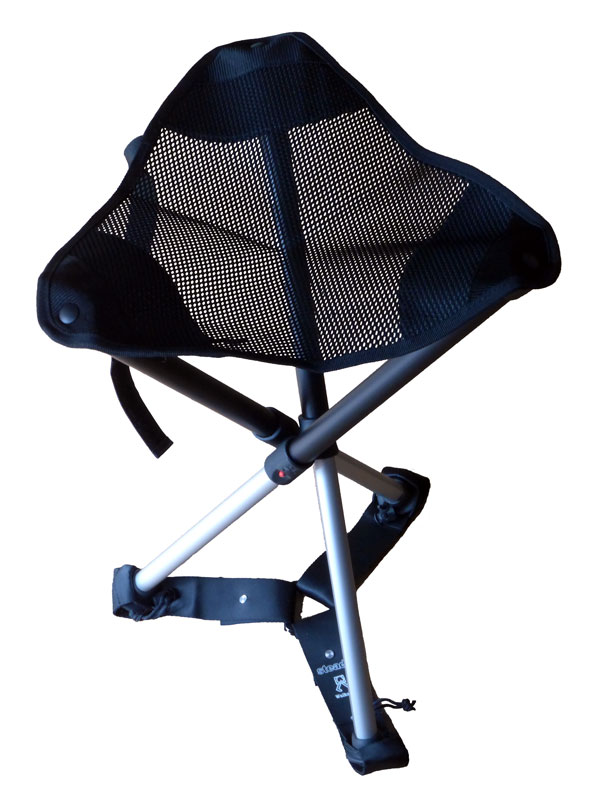
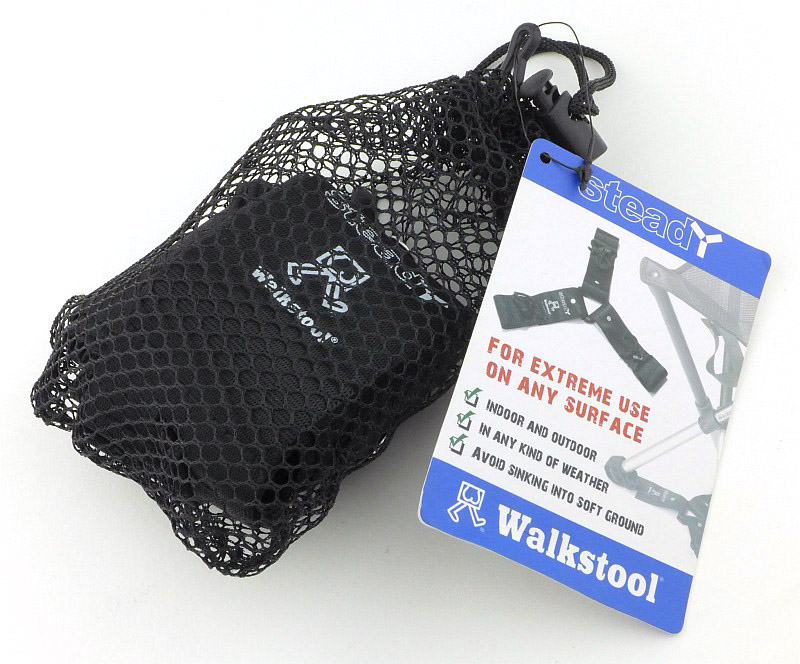
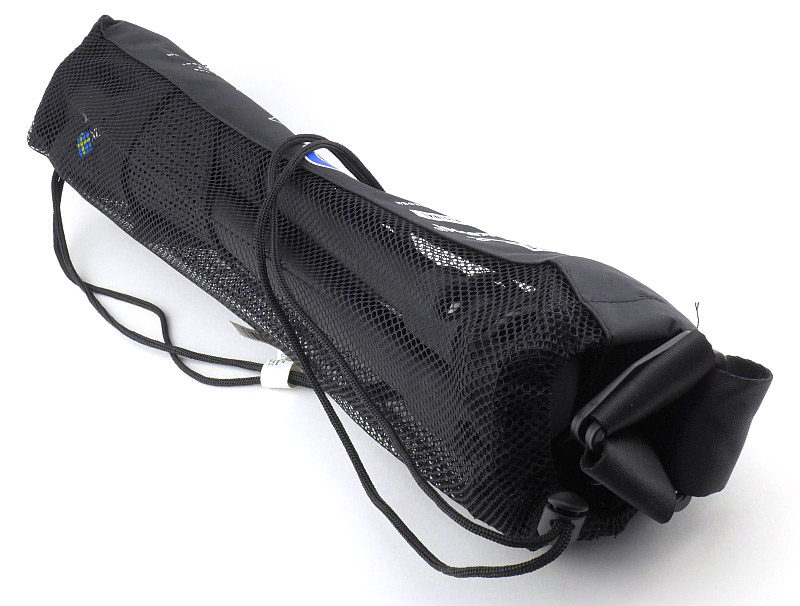
Like the Walkstools themselves, the Steady comes in a mesh carry bag, and is a very neat pocket sized package.

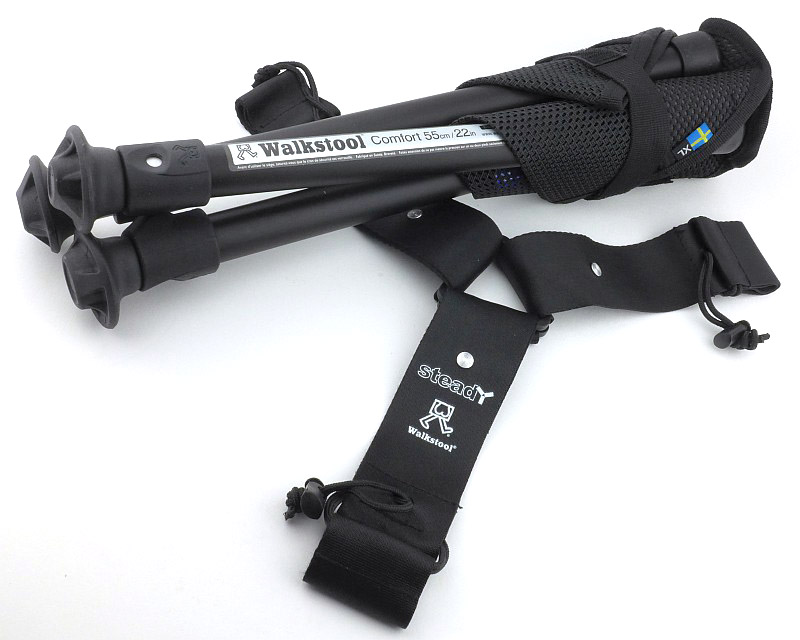
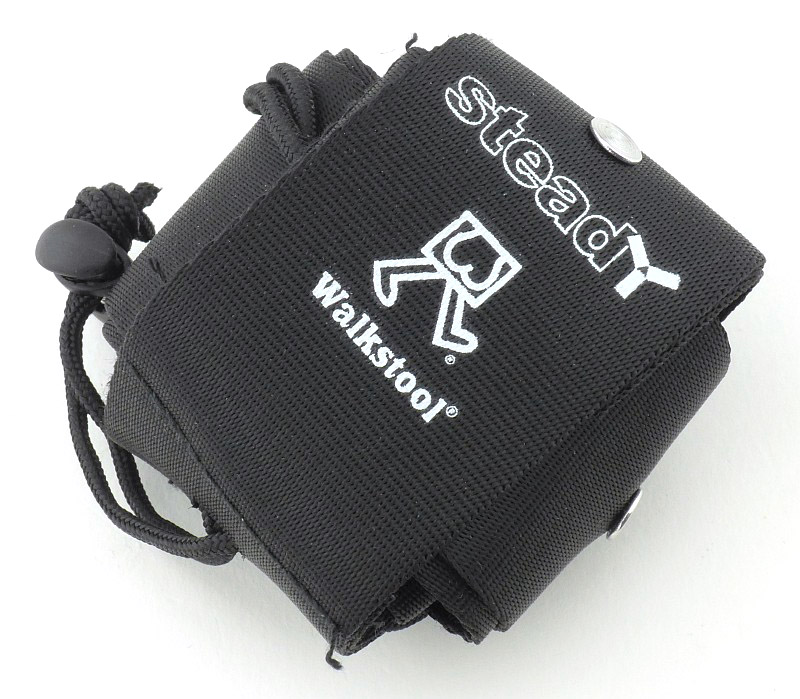
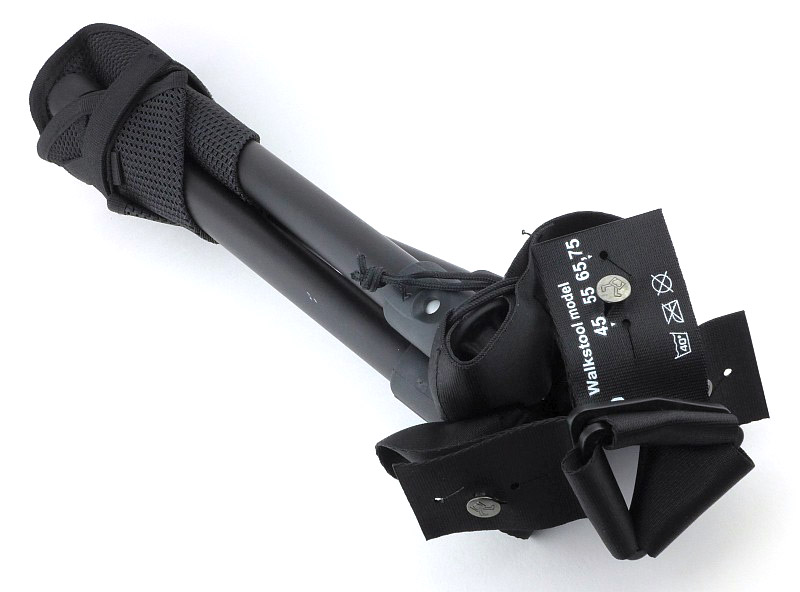
Taken out of the mesh bag, the Steady is wrapped up tidily.

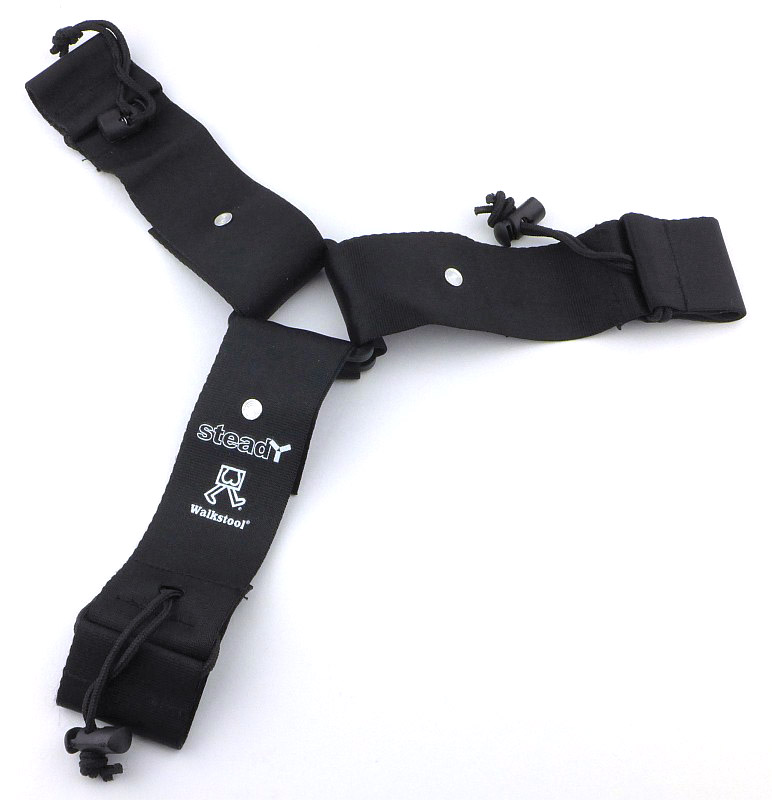
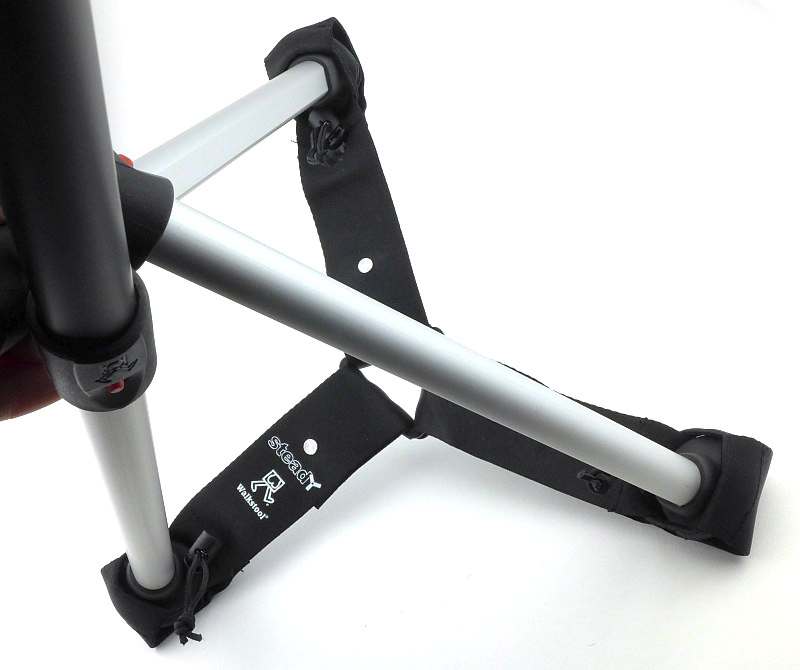
Unravelling it and you now get to see what this is all about. It is both a leg brace, and a load spreader.

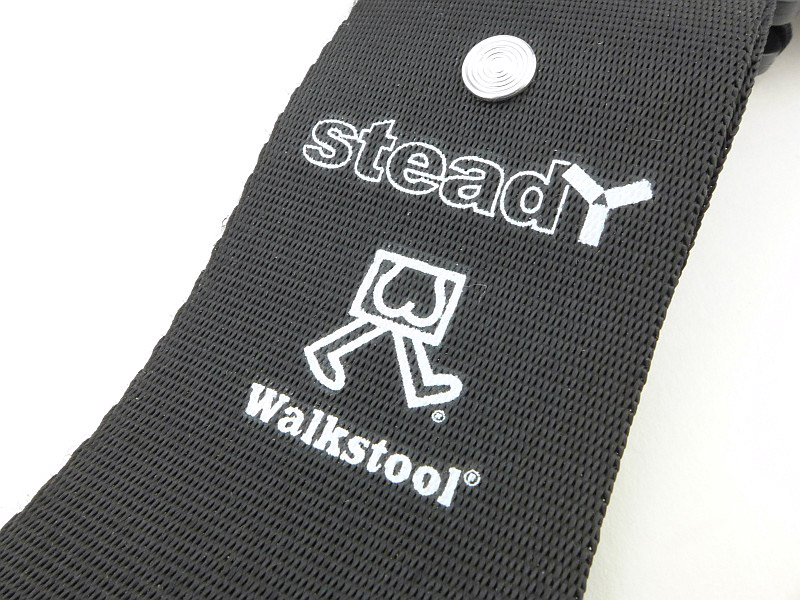
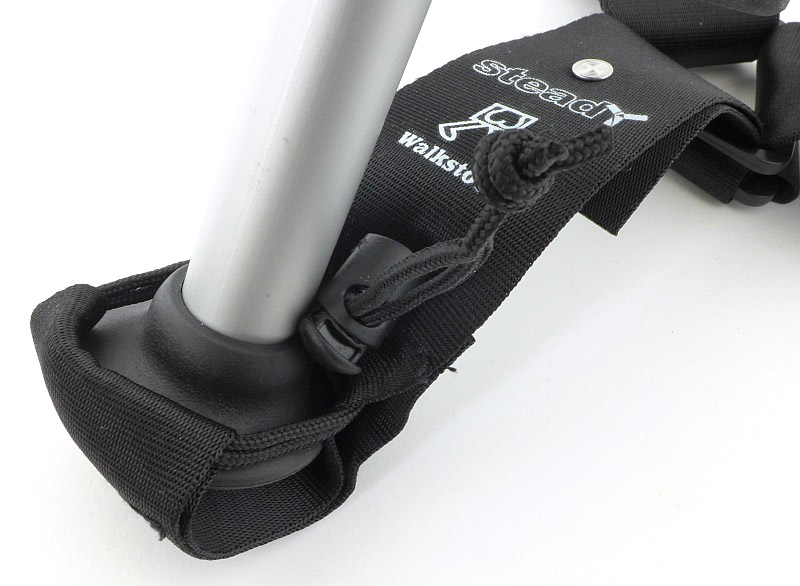
Printed on one of the arms is the Walkstool, and Steady logo.

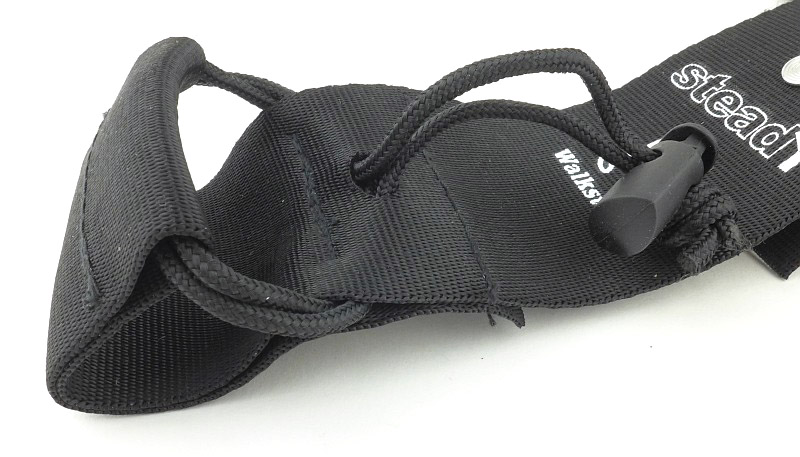
To fit the Steady to the Walkstool, there is a pocket at the end of each ‘arm’, with cords to allow it to be tightened around the foot.

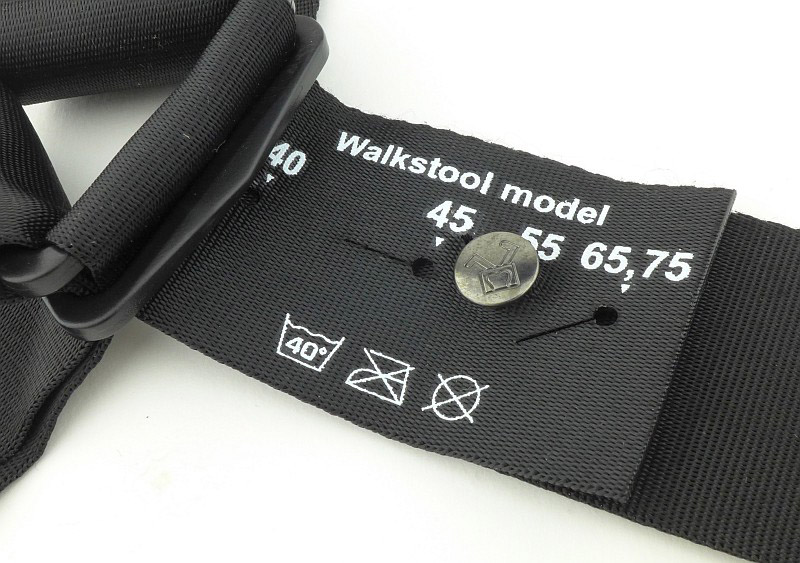
Clearly, as there are several sizes of Walkstool, you might wonder if you then need different Steadys to match, cleverly, there is an adjustment designed into each arm where you simply set it to the matching Walkstool size.

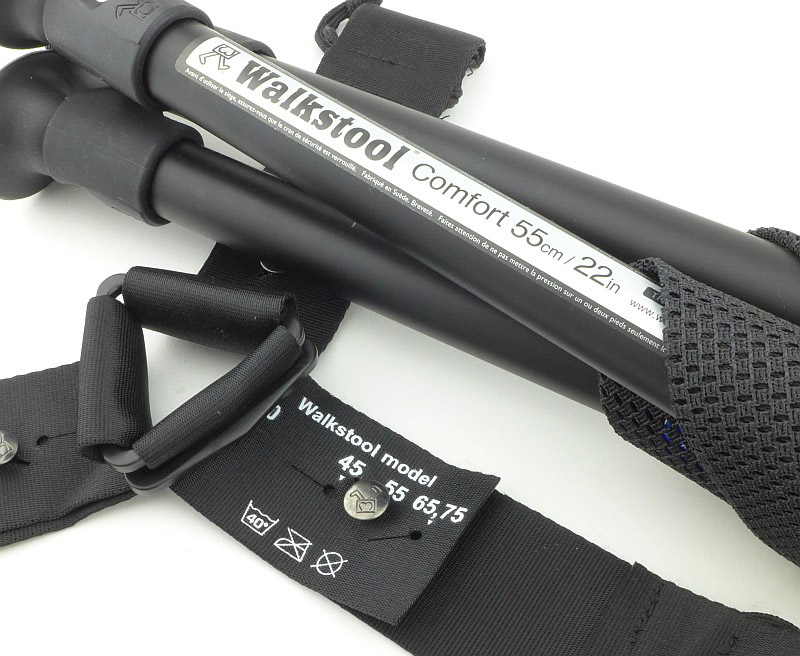
Here it is on the 55cm setting for the Comfort 55 I’m using to test it.

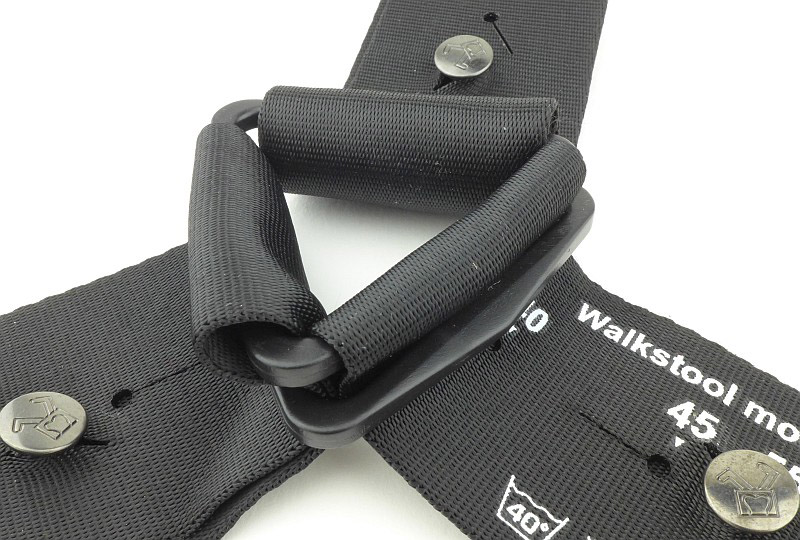
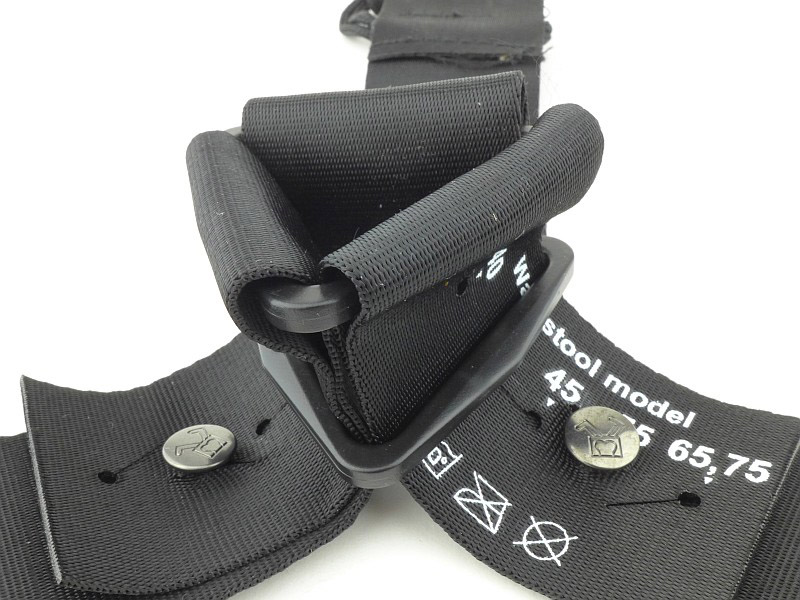
Joining the three arms of the Steady is a triangular plastic ring.

With a second triangular ring positioned in this way, as the arms are pulled tighter, the two triangular rings press together more firmly and grip the webbing securely.

What it is like to use?

Fitting the Steady is simple. Pull the pocket over each foot in turn ensuring you work the cords tight and adjust the toggle to hold the cords in place.

With all three feet fitted into the Steady it is ready to go.

One concern might be that with the Steady fitted, the Walkstool looses some of its ease and convenience, but this is not the case. Opening and folding the stool is almost as easy with the only change being that the Steady can get in the way a bit when working your way round the legs.

And what about putting the Walkstool back in its bag? As you can see here you almost don’t notice the Steady is fitted, with only a little bit of it protruding from the bag.

Of course all these nice clean studio photos don’t show one aspect of the Steady, and what it is designed for. It provides additional stability which is most needed on soft ground, the consequence of which is it will get very dirty, especially if used on a wet soft surface.

Picking the stool up after using it like this will bring plenty of that mud/muck with it, and folding it again will be a messy job. What I tend to do is avoid those really wet and muddy spots, or if next to water, be it river or lake, I dip the end of the legs with the steady into the water and give it a good stir to clean it off.

If you want that extra stability or use a walkstool on soft ground or sandy beaches, then the Steady is a worthy addition to your Walkstool, and can easily be added or removed to suit.

Review Summary

The views expressed in this summary table are from the point of view of the reviewer’s personal use. I am not a member of the armed forces and cannot comment on its use beyond a cutting tool or field/hunting knife.

Something that might be a ‘pro’ for one user can be a ‘con’ for another, so the comments are categorised based on my requirements. You should consider all points and if they could be beneficial to you.

_______________________________________________ _______________________________________________
Things I like What doesn’t work so well for me
_______________________________________________ _______________________________________________
Adds extra strength and stability to a Walkstool Can pick up a lot of dirt if used on very muddy ground.
Stops legs sinking into soft ground.
Adjustable to suit all Walkstool models.
Adds very little bulk to the folded Walkstool.


Discussing the Review:

The ideal place to discuss this reviews is on a forum. If you started reading the shorter forum version of the review, but followed the link this full exclusive review, please return to that forum to discuss the review there.
If you read the review entirely on Tactical Reviews, please consider one of the following to join in any discussion.

CandlePowerForums – Knife Reviews Section (Largest and Friendliest Flashlight Community Forum)

Knife Review: Chris Reeve Knives Large Inkosi

The original Inkosi was launched at Blade Show 2016, and was designed to include improvements to Chris Reeve’s already tried and tested (and industry changing) Sebenza models. Never one to stand still, Chris knew he could improve on his original design with certain key changes to the pivot, bearing, frame and lock. Rather than apply all these changes to the established formula of the Sebenza models, a new line was created to allow these features to be incorporated into the most advanced Chris Reeve folding knife yet. With a trend to smaller more pocketable models, the first Inkosi was created as a compact folding knife, but demand has been strong for a larger version of this knife, and here it is. The Large Inkosi now replaces the Sebenza 25.
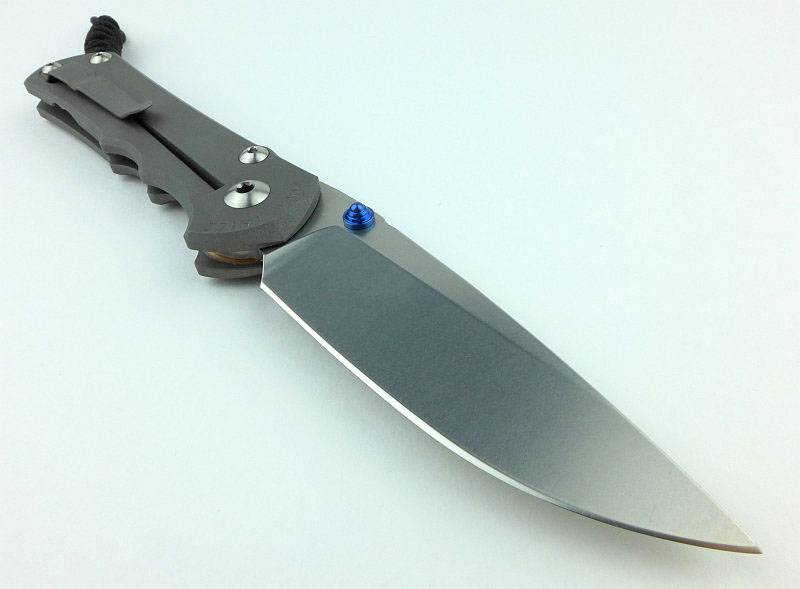
 photo 28 L Inkosi angle open P1200420.jpg

The Blade and Handle Geometry:

Most knife specifications have a basic description of the blade geometry, but in this section I will be taking a more detailed look at geometry and balance.
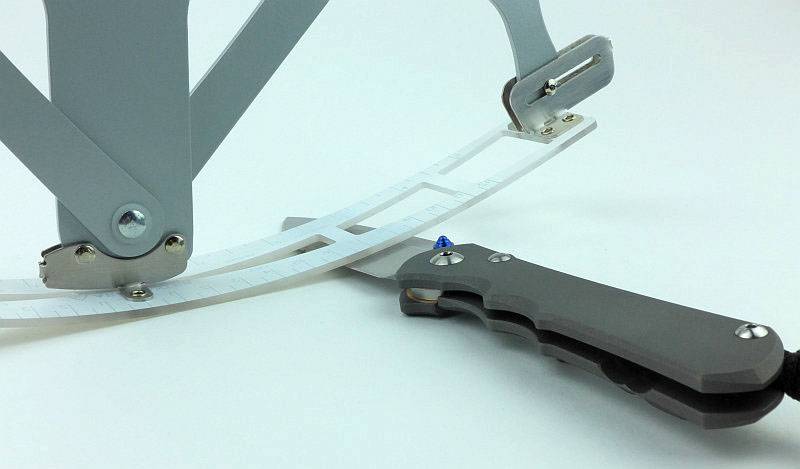
 photo 56 L Inkosi grind measure P1200597.jpg

Using a set of gauges and precision measuring equipment including a Vernier protractor, callipers, fixed radius gauges and the unique Arc Master adjustable radius gauge (the one that looks like a crossbow).
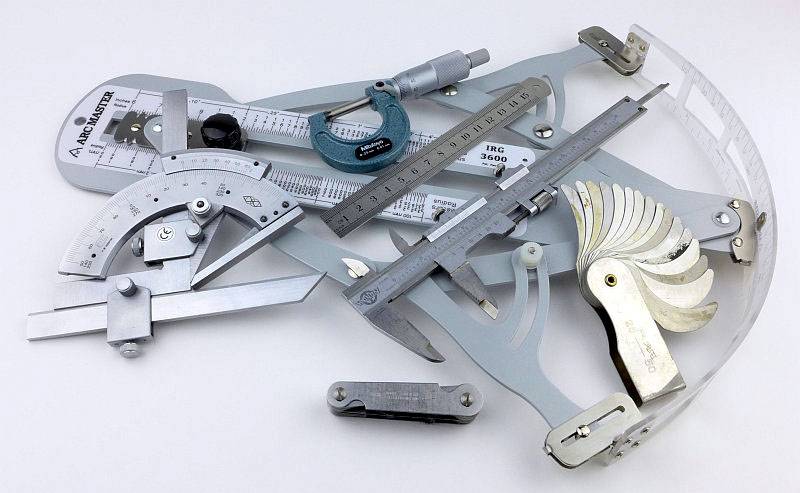
 photo Knife measuring P1180483.jpg

These measurements have been tabulated and are presented along with a few reference blades (8″ Chef’s Knife, 5.5″ Santoku and the popular Fällkniven F1).

Key aspects such as the primary bevel angle, grind type, blade depth, blade thickness, length, weight are detailed, along with balance information.
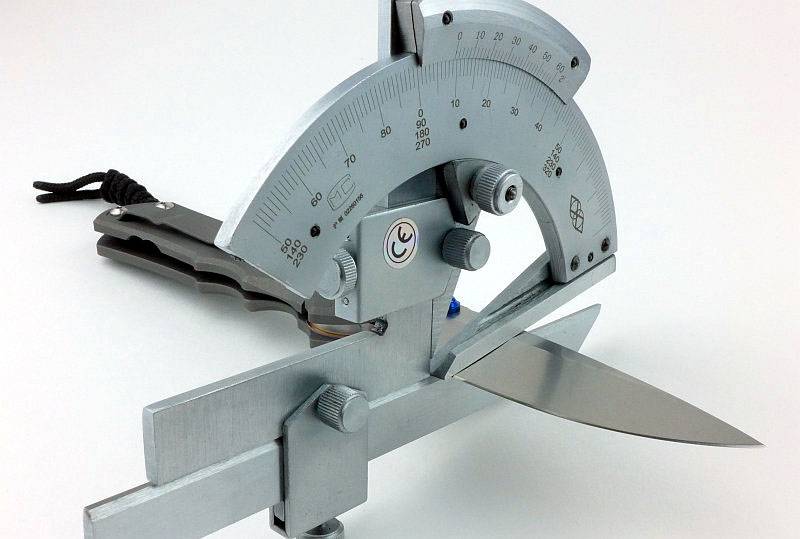
 photo 58 L Inkosi grind angle P1200604.jpg

The ‘Balance relative to the front of the handle’ tells you if the knife will feel front heavy, or if the weight is in your hand (a positive value means the weight is forward of the front of the handle). The ‘Balance relative to the centre of the handle’ indicates how close to a ‘neutral balance’ the knife has in the hand.
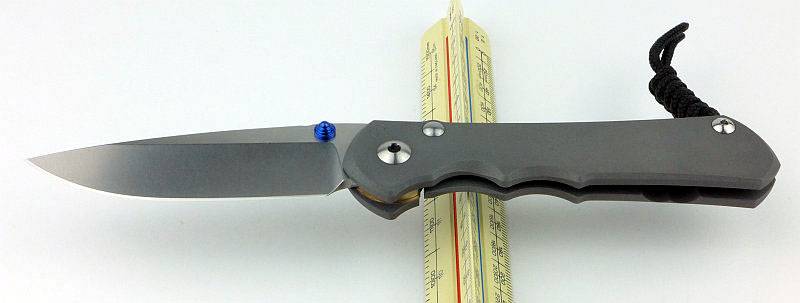
 photo 53 L Inkosi balance P1200569.jpg

In the case of full convex grinds the approximate centre of the grind is used for the primary bevel angle estimate.
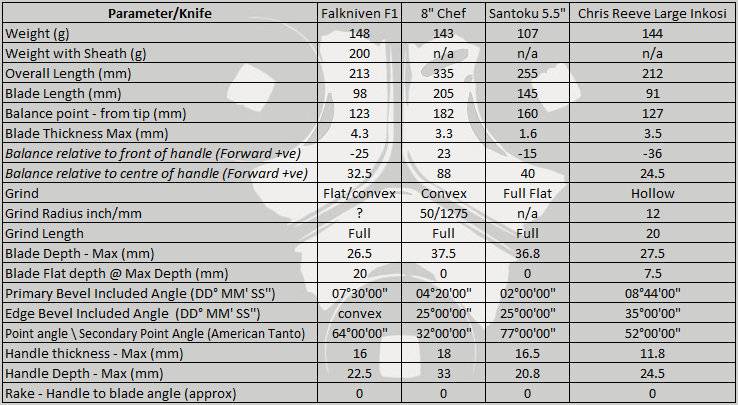
 photo CRK Large Inkosi Parameters.jpg
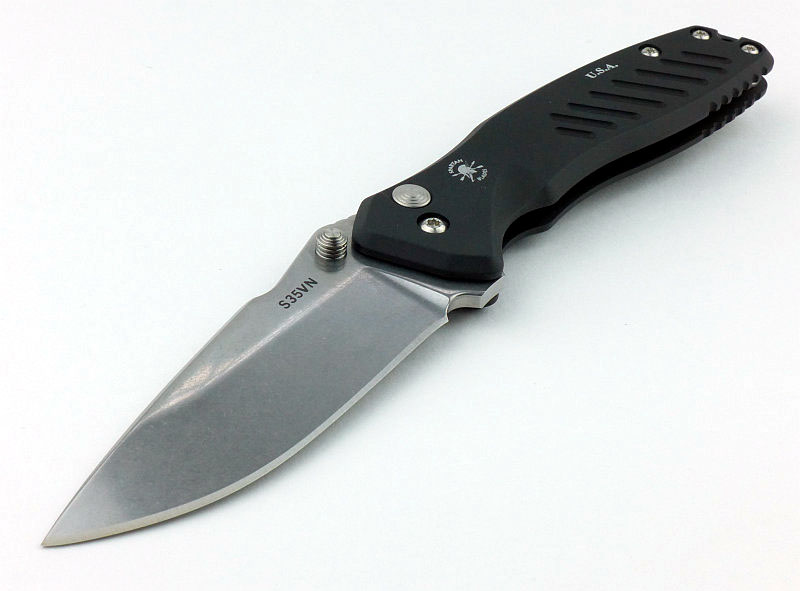
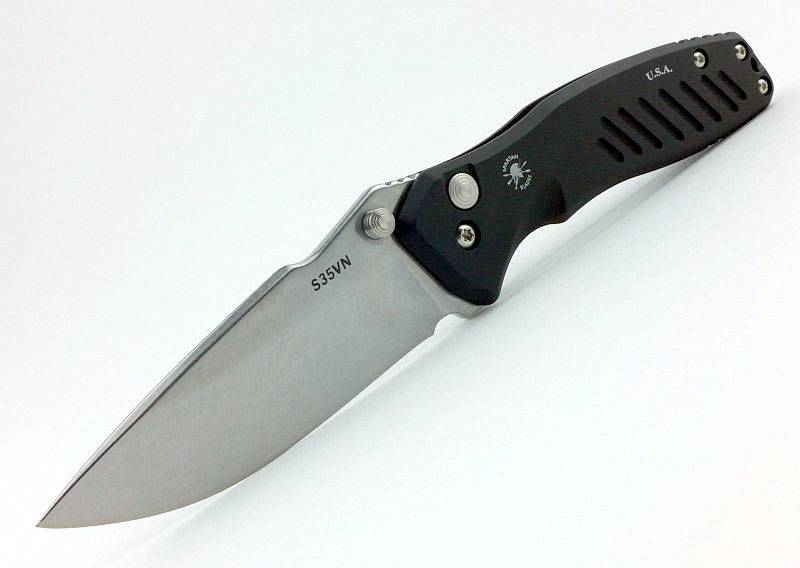
The blade is made from S35VN steel at 59-60RC.

Explained by the Maker:

The reasons for certain design choices may not be clear when simply looking at an object, so this section is intended to give an insight into the thinking behind a design by speaking to the designer themselves.

Unfortunately I can’t always get time with the designer so will use this section to include relevant information about the knife and its designer.

The history of this review goes back to before the release of the Large Inkosi and to IWA 2016 where I was fortunate to be able to speak to Tim Reeve about the Inkosi. It was during this discussion that Tim told me the Large Inkosi was in development. My own preference is for a larger lock knife, so I couldn’t wait for the Large Inkosi to be released.

Tim talked me through the design improvements introduced with the Inkosi which actually include all the major parts, the pivot, bearing, frame and lock.

There is one feature of the Large Inkosi which is not new, but is worthy of mentioning as it is now a CRK design feature that was introduced in the Sebenza 25, the ‘Large Hollow Grind’. The shape of this grind is itself not new, having been common when you go back to older production methods. Before grinding wheels were mass produced in smaller sizes, blades were ground on much larger wheels than are generally used today. Modern grinders tend to have smaller diameter wheels, so hollow grinds have become deeper and more pronounced. This has given the hollow grind its very sharp thin edge, but a blade which hangs up on the shoulders of the hollow grind when cutting deeply. With the growing popularity of the full flat grind, thanks to its smooth cutting action, the modern hollow grind has been losing traction.

That said, both hollow and flat grinds have their place and individual benefits. When looking to make the folding knife as useful as possible, CRK didn’t just follow the trend of going one way or the other, but instead wanted a blade that blends the best of hollow and flat grinds. Using a much larger wheel to grind the blade results in a ‘Large Hollow Grind’ which is almost flat, but slightly hollowed. This stops the blade hanging like a hollow grind would, and allows for more sharpening cycles before the blade edge starts to thicken up. This image (borrowed from CRK) shows how the ‘Large Hollow Grind’ fits between flat and hollow grinds.

 photo largehollowgrindweb.jpg

Here you can see the slight dip of the grind with a flat edge lying across it.
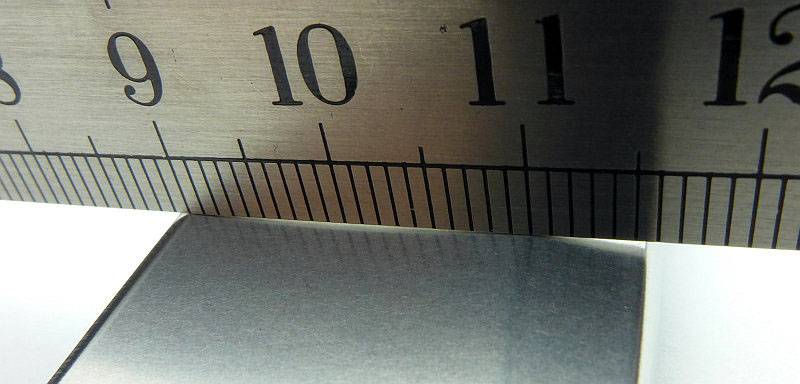
 photo 54 L Inkosi grind P1200578.jpg

In the previous section ‘The Blade and Handle Geometry:’ you could see the size of the hollow grind being measured with the Arc Master radius gauge. This is a closer look at the measuring arc sitting in the hollow grind with the gauge set at 12″ radius, so a 24″ wheel has been used for this grind.
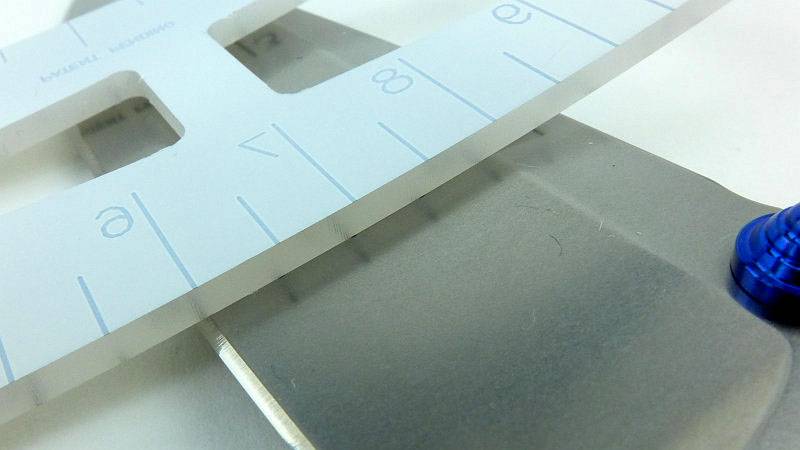
 photo 57 L Inkosi grind measure close P1200593.jpg

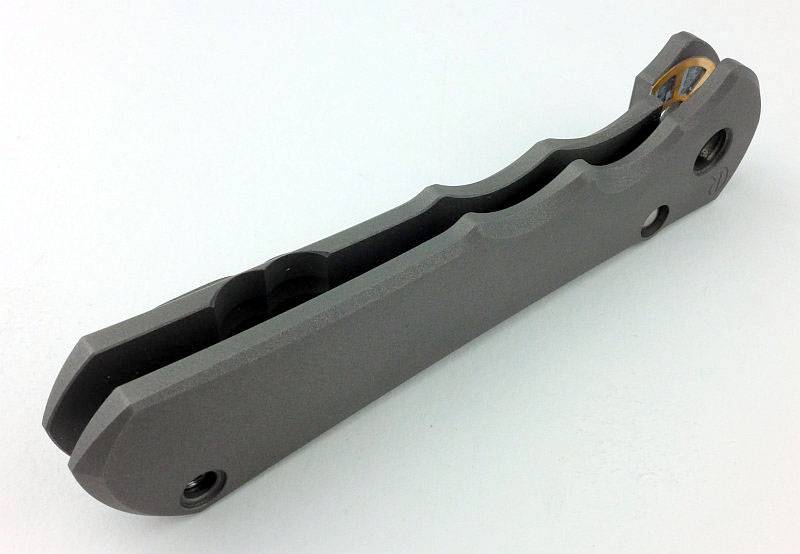
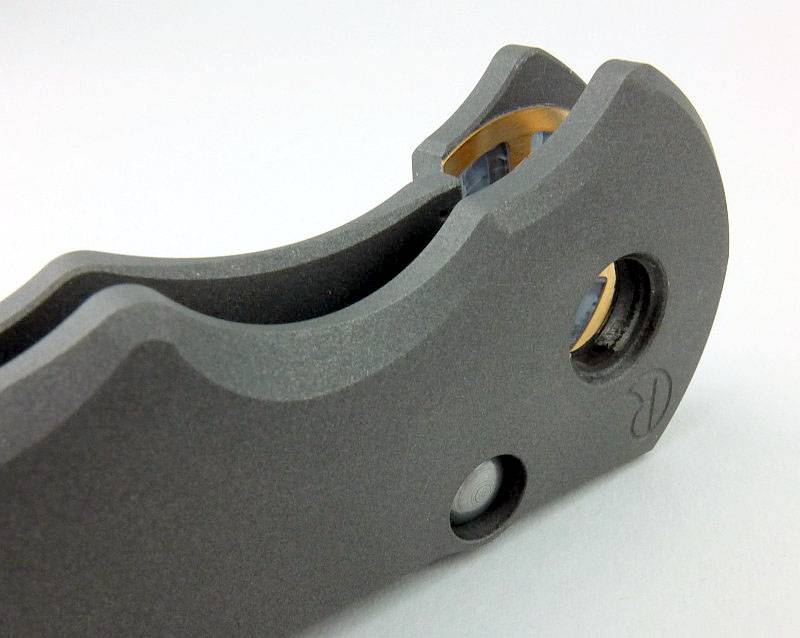
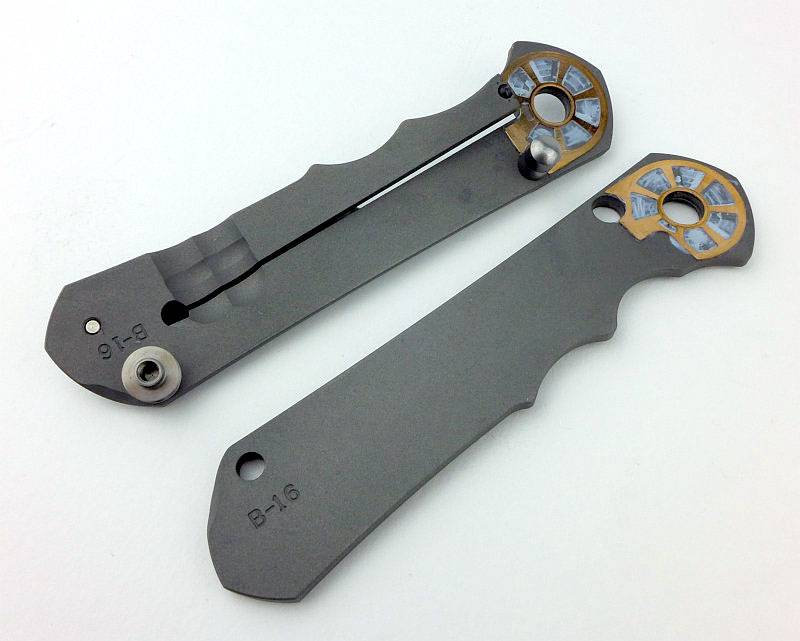
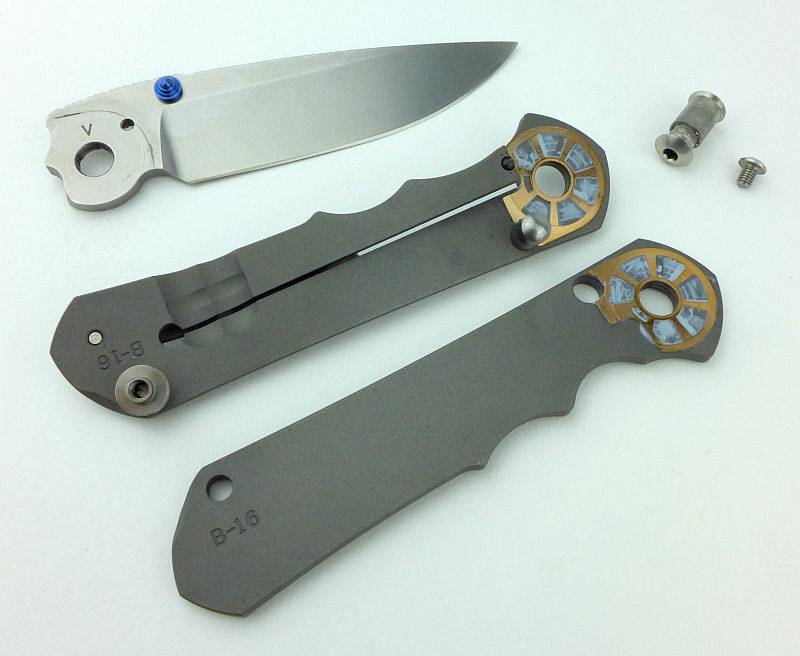
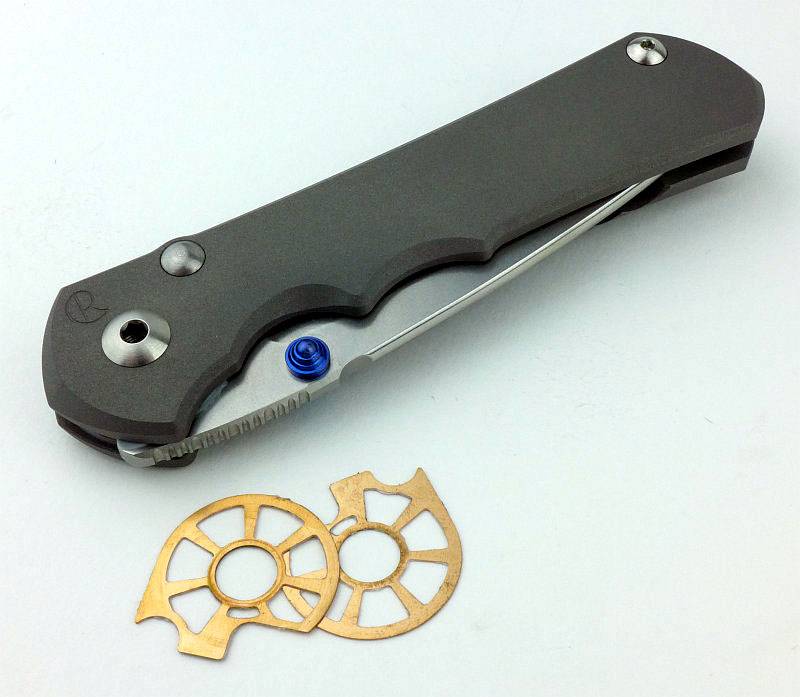
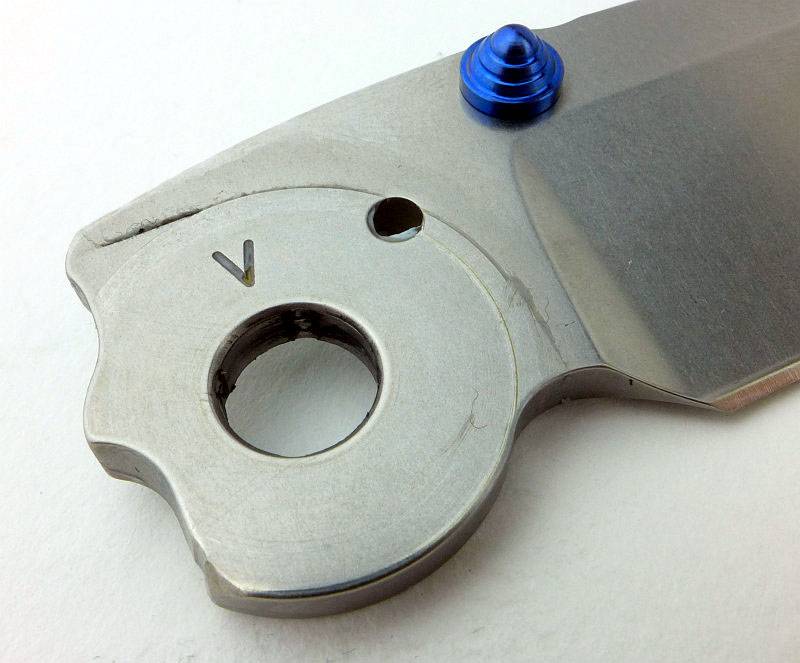
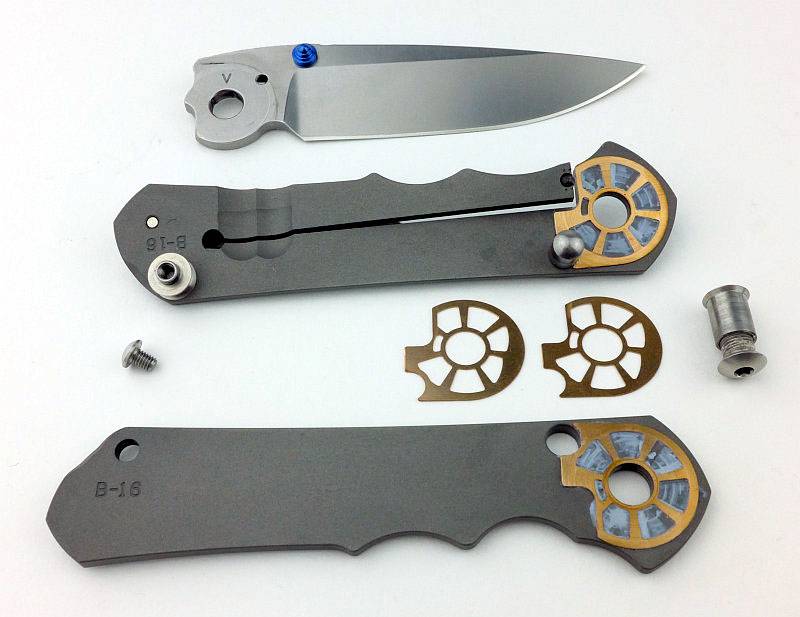
This next image is a big hit of detail as it shows the Large Inkosi almost fully disassembled. For the moment there are two specific details I’d like to focus on and they are the large pivot and shaped phosphor bronze washers.
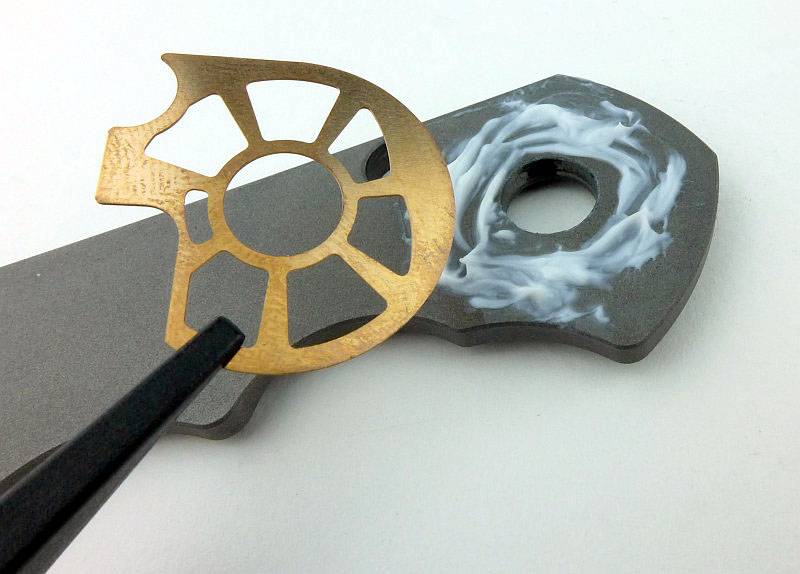
In earlier designs, the size of the washer on the lock side was limited by the end of the lock bar and if the washer were to have a cut out, it might rotate and then interfere with the lock. In turn, the size of the washer limited the size of the blade pivot, as if the pivot were made larger, the washer would become smaller and provide less support to the blade.
Taking the washer to the maximum size allowed by the handles means it can then be shaped to locate on the blade stop pin and not rotate into the way of the lock bar. It also allows the washers to be the same both sides bringing equal stability to each side of the blade.
Now that the washer has broken free of the earlier limits, it is possible to increase the size of the blade pivot and so increase the strength of this joint.
However, all this extra contact area increases friction with the blade tang, making the knife more difficult to open, so large perforations have been added to the washers to reduce friction without weakening the support of the blade. The perforations also store more lubricant and offer space for small particles of dirt to move away from the contact surfaces of the blade and washer, helping to prevent blade from stiffening up over time.
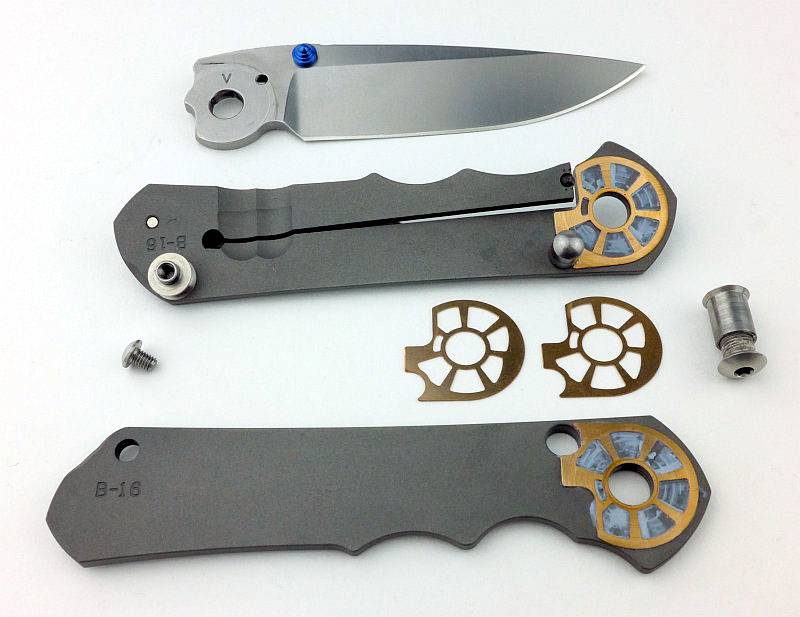
 photo 14 InkosiWasher Step all parts plus new P1230240.jpg

Only with the knife fully disassembled can you get a really good look at another design feature, the ceramic ball used in the lock.
Other integral locks use either the titanium itself or an insert of hardened steel for the locking surface. Looking to improve on both if these and increase the service life, CRK have employed some of the hardest material available, ceramic.

A one-eighth inch ceramic ball with hardness of 97RC acts as the interface between the lock bar and the blade tang. It also doubles up as the detent ball that holds the blade in the closed position. Due to the detent now becoming the locking surface as well, you get a uniquely smooth feel when opening the Inkosi. For just about every other integral/liner lock, when the blade is nearing fully open, the detent ball clicks as it drops off the locking surface of the blade tang. Only after this pre-lock click does the actual lock click into place. It means you get this double click as the blade is opened into the locked position. With the Inkosi, when you start to use it, you’ll notice the absence of this pre-lock click as it is not what you are used to. You open the blade and the only click is the lock bar falling into place. This is only possible with the dual purpose ceramic ball.
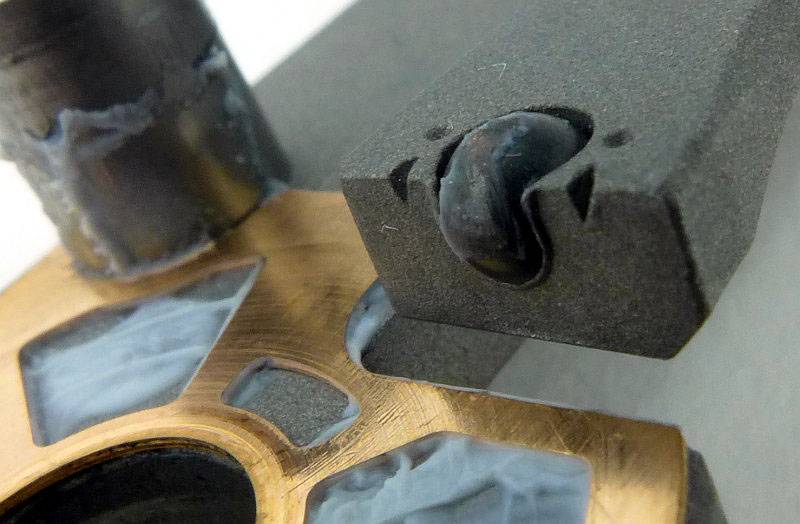
 photo 32 Inkosi details lock ball P1230233.jpg

Unlike a standard lock interface, which uses two flat surfaces, we now have a round ceramic ball which would create a point-contact on the blade tang, so instead of having a flat locking surface on the blade tang, the Inkosi has a rounded groove with the same curvature as the ball.
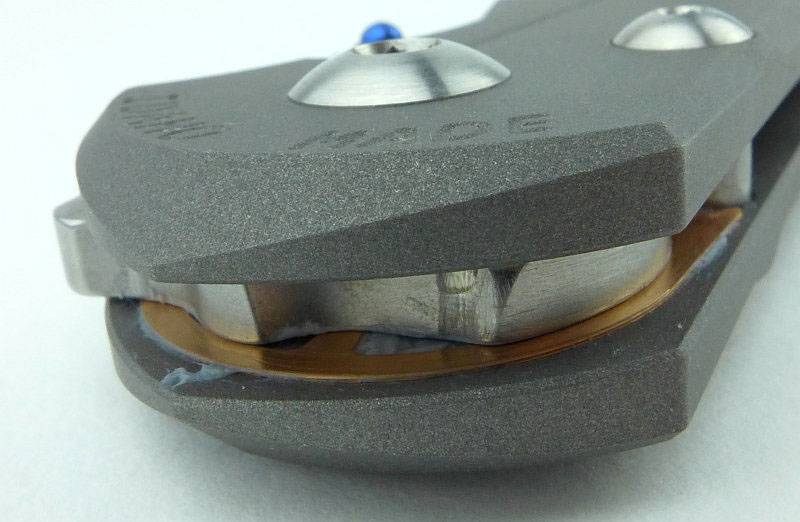
 photo 23 L Inkosi washer lock groove P1200402.jpg

The ball and groove mate securely and this interface also stabilises the lock bar as it can’t flex away from the handle. (NOTE: since the review sample was provided, CRK have found the ball track groove on the tang to be unnecessary, so it is no longer included on current production Inkosi knives.)
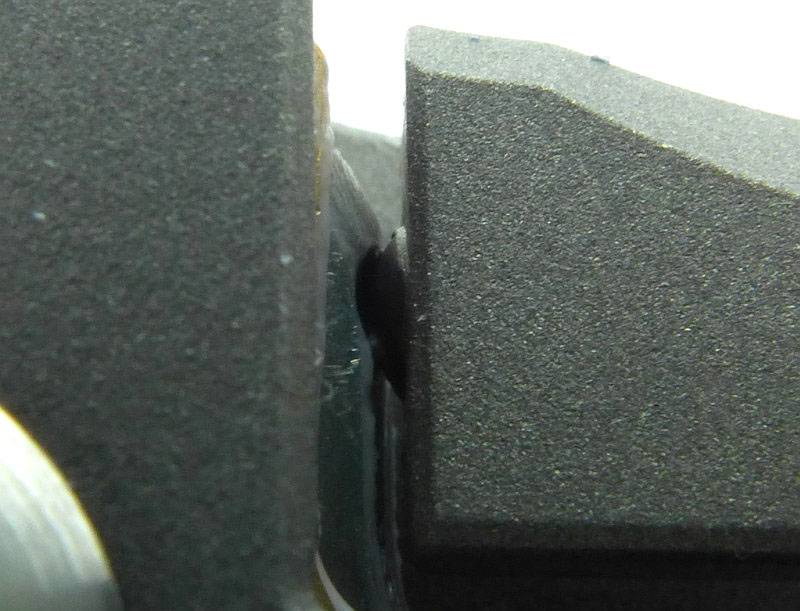
 photo 33 L Inkosi ceramic ball P1200442.jpg

Another innovation in the Inkosi is the slip-through stop-pin in the frame. One end of the stop-pin is secured to one side of the frame with a bolt, but the other end simply fits through a hole in the front of the frame and is not fixed in place.
Of course this only works as well as it does due to the high precision of the fit of the stop-pin on the floating side, and this configuration provides an excellent advantage in the operation of the knife.
Traditionally the stop sleeve, which spaces the frame/handle parts, needed to be very precisely sized to ensure that the fit of the assembled knife was tight, but not too tight. If that stop sleeve is a touch too wide you get blade play.
With the slip-through stop-pin, the advantage is that the front face of the handle can move along it as you set your pivot tension. The Sebenza has a stop sleeve that has to be machined to a width accurate within a few tenths of a thousandth requiring a lot of fitting to ensure the knife operates as it should.
From a manufacturing perspective, this feature removes the need for the fitting of the stop sleeve, however, the main advantage is really for the owner of the knife, as the slip-through stop-pin guarantees that even once the knife wears in, the action can always be set perfectly, with no blade play and perfect washer contact, just by adjusting the pivot; the stop-pin will never need any adjustment because it is self adjusting.
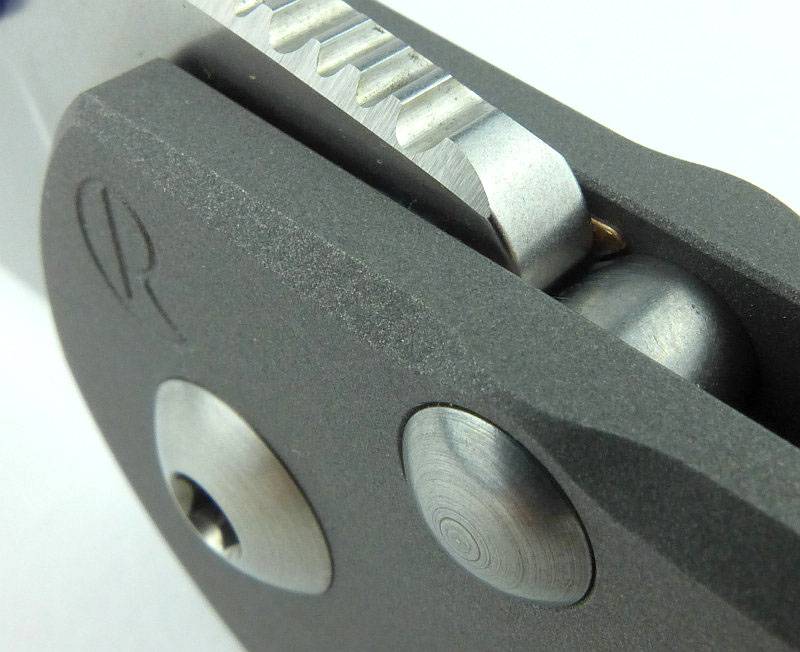
 photo 37 L Inkosi stop pin contact P1200454.jpg

A few more details:

Amazing how this box generates a real sense of anticipation and excitement. (NOTE: CRK have subsequently updated the packaging.)
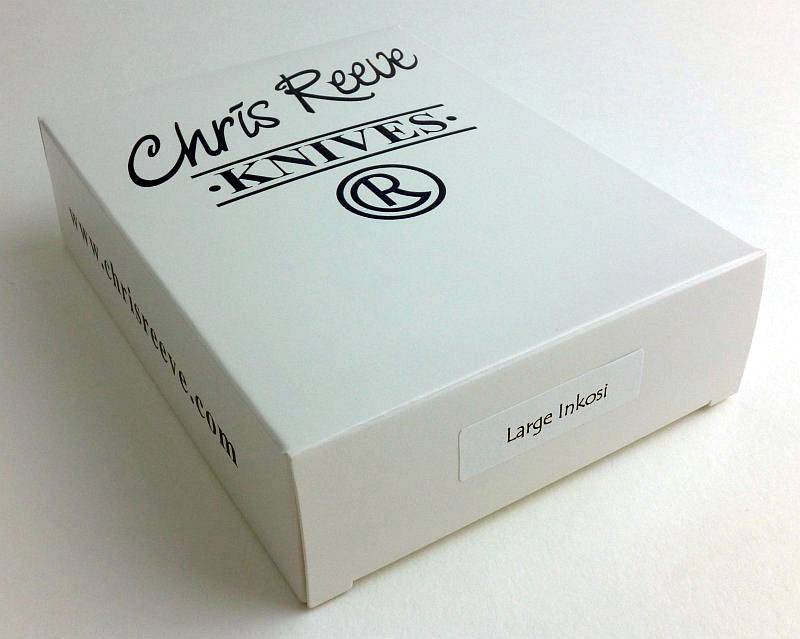
 photo 01 L Inkosi box P1200318.jpg

Personally, I’m not sure a knife should come with a warning it is sharp, but there it is.
 photo 02 L Inkosi warning P1200320.jpg

The birth certificate of one of the first Large Inkosi knives.
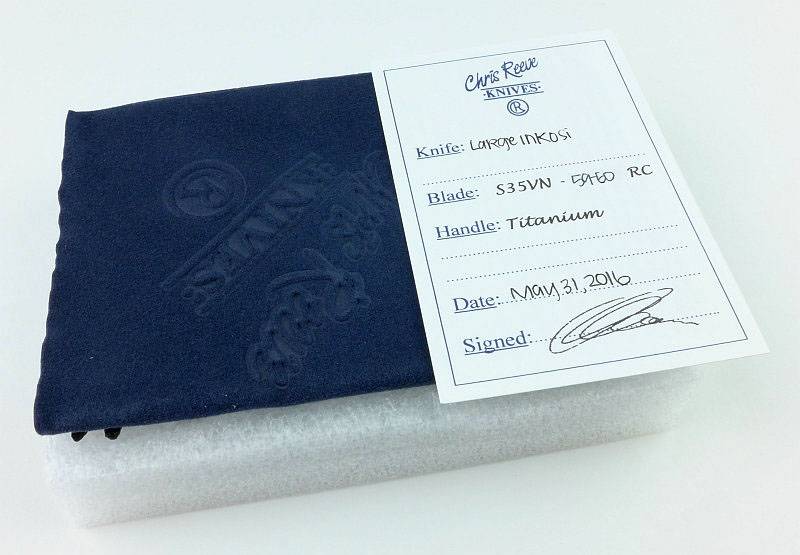
 photo 03 L Inkosi certificate P1200325.jpg

Nestled into a foam liner is the Large Inkosi and some accessories.
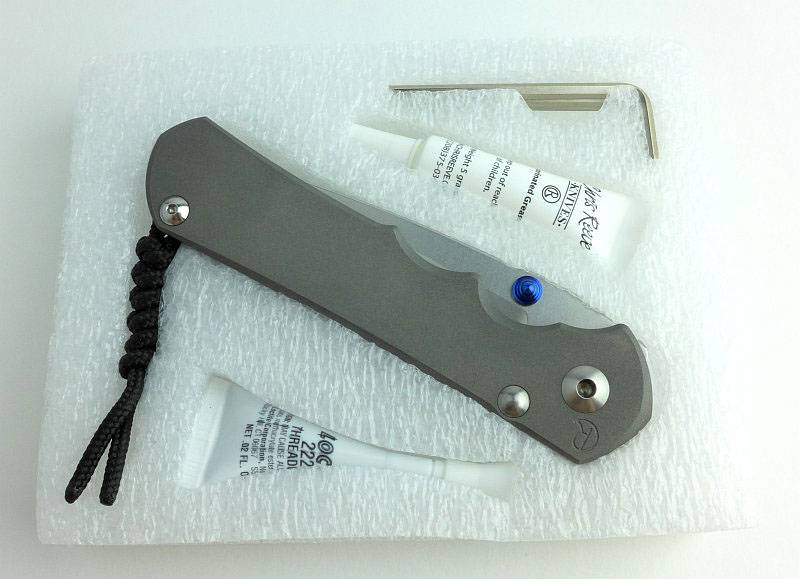
 photo 04 L Inkosi box tray P1200331.jpg

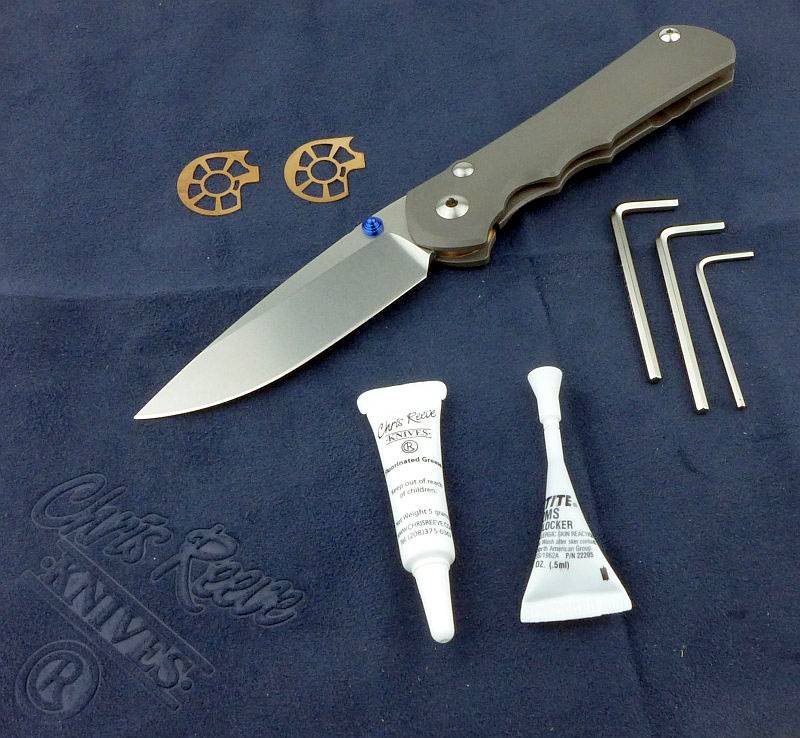
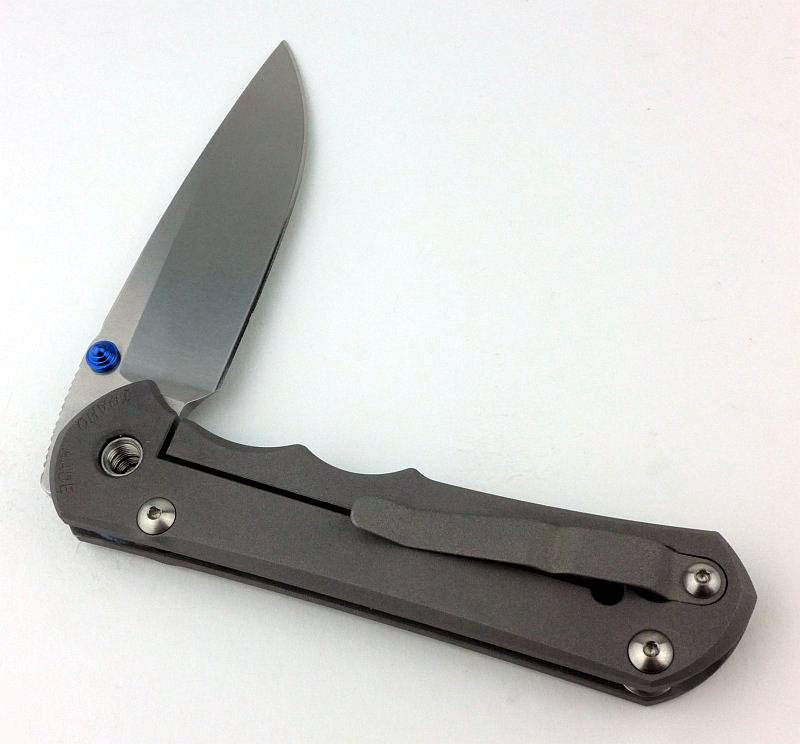
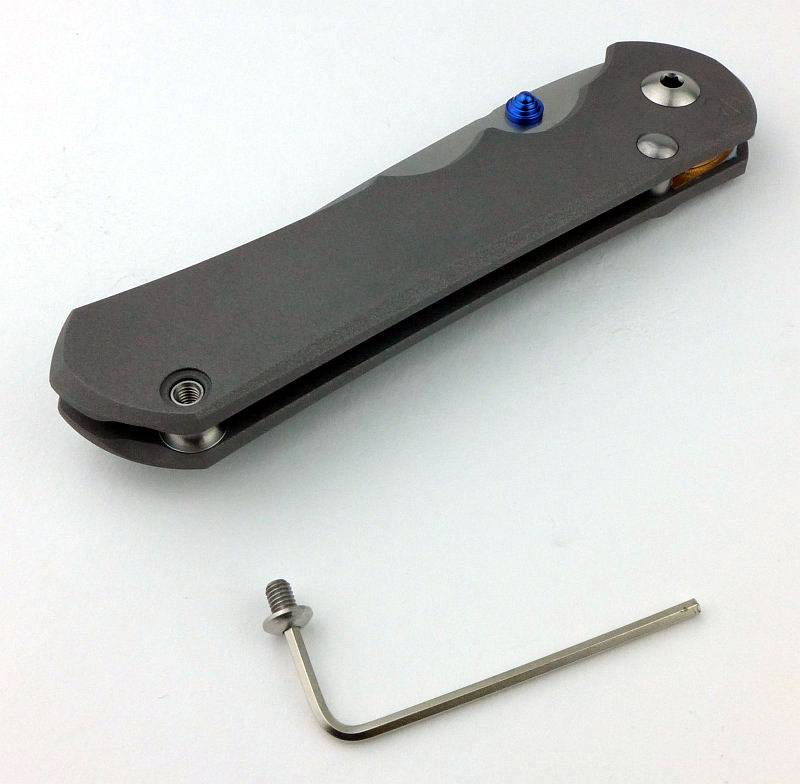
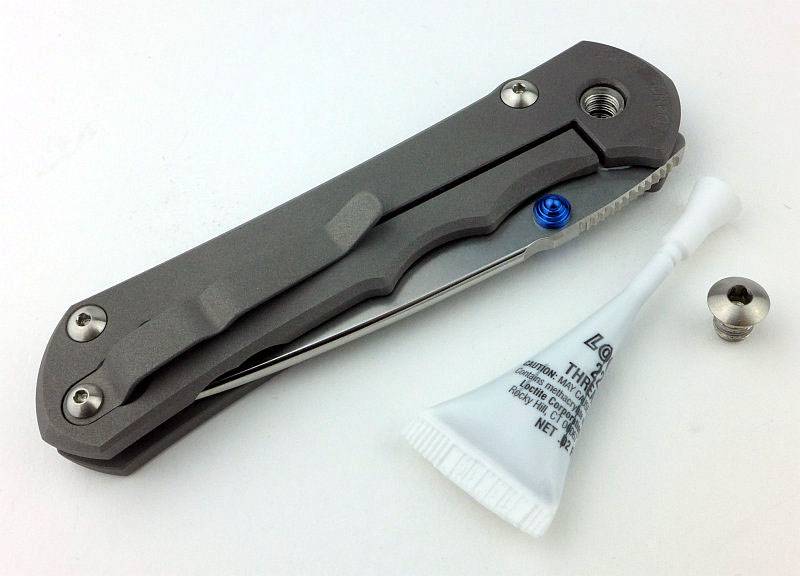
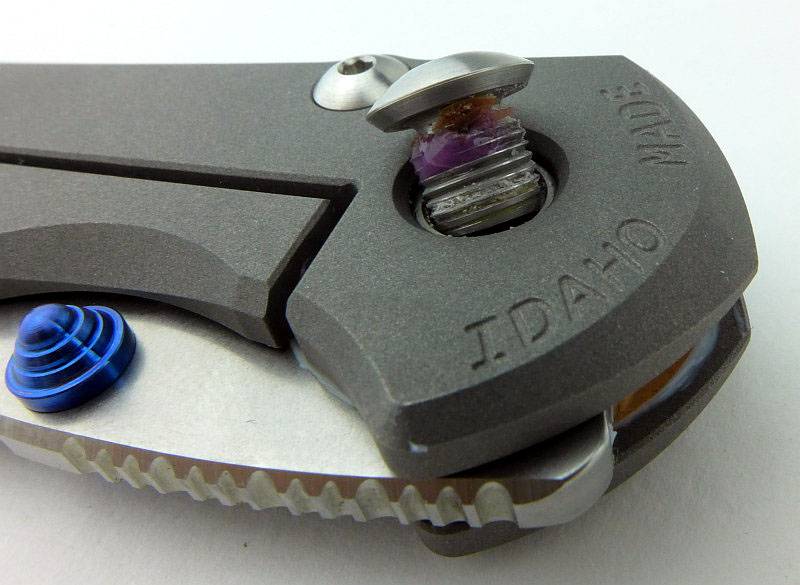
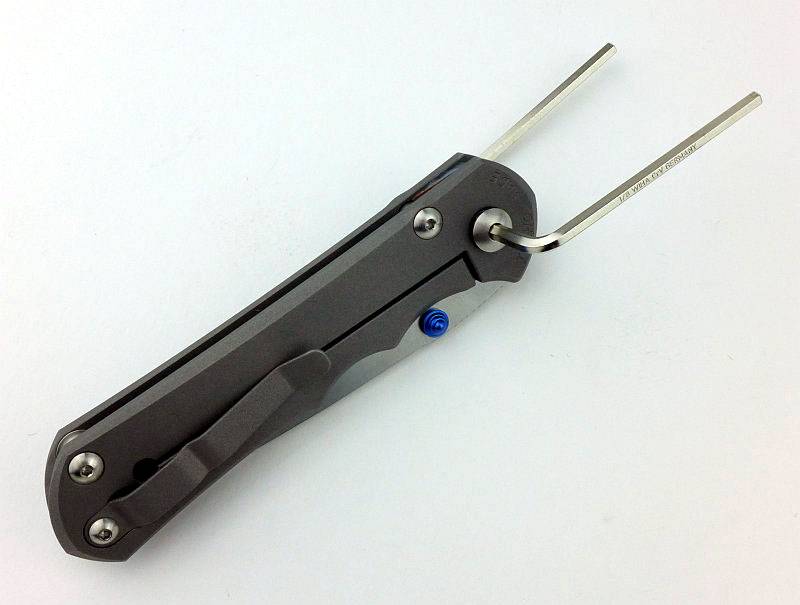
Along with the Large Inkosi you get a CRK cleaning cloth, two Allen keys for the pivot and one for the spacer and stop-pin bolts. there is also a tube of grease and thread-lock, giving you a full service kit.
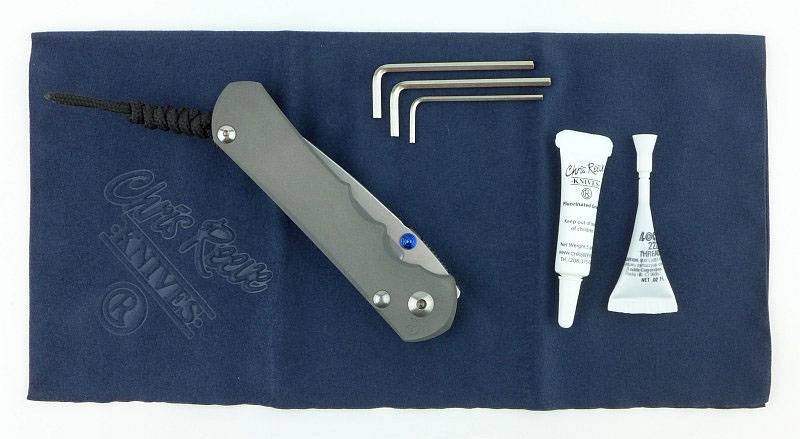
 photo 05 L Inkosi box contents P1200337.jpg

Not to skip over this too soon, please note that these are not unbranded tools, you get WIHA Allen keys.
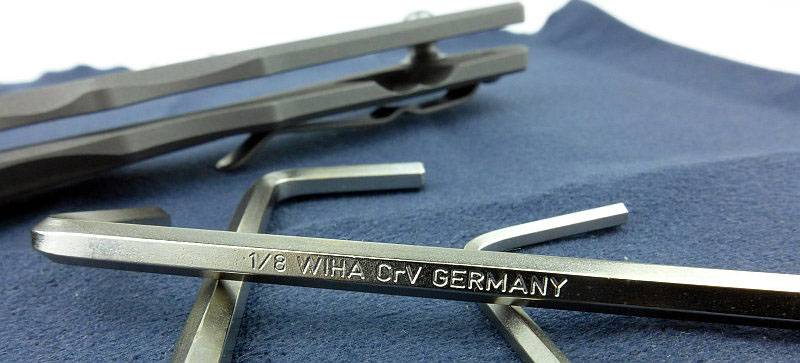
 photo 02 InkosiWasher tools P1230169.jpg

The grease is a fluorinated grease and thread-lock is Loctite 222.
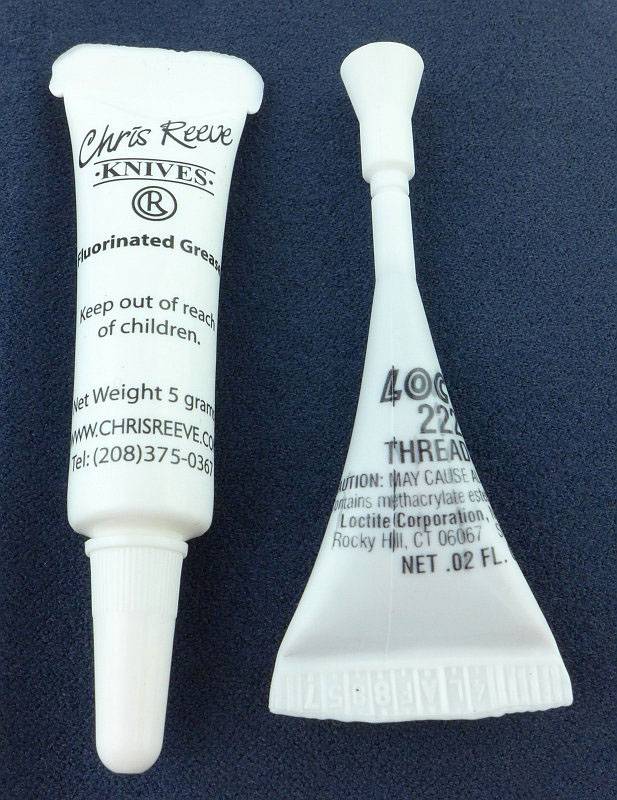
 photo 06 L Inkosi tubes P1200340.jpg

There is something special about that box-fresh CRK knife.
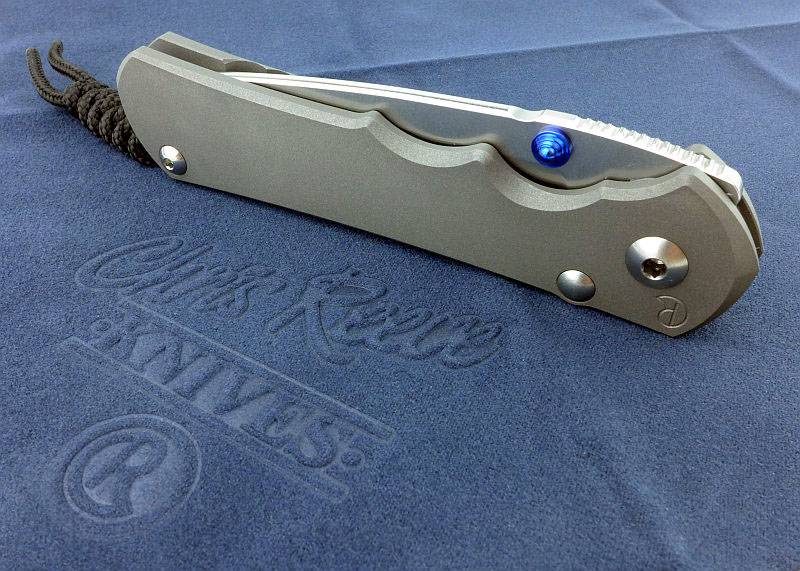
 photo 07 L Inkosi cloth P1200349 copy.jpg

The Large Inkosi arrives with a knotted cord lanyard already fitted to the knife.
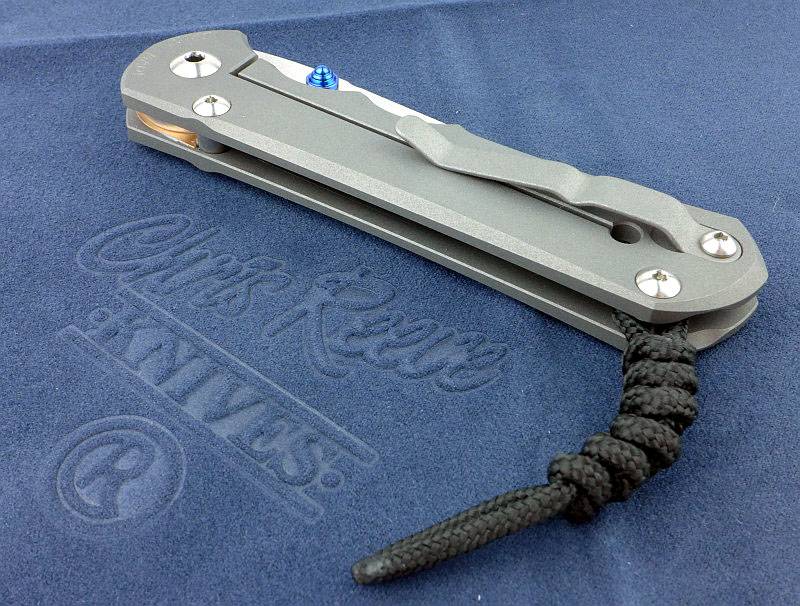
 photo 08 L Inkosi cloth2 P1200353.jpg

As with the Sebenza 25, the Inkosi has finger grooves in the handle.
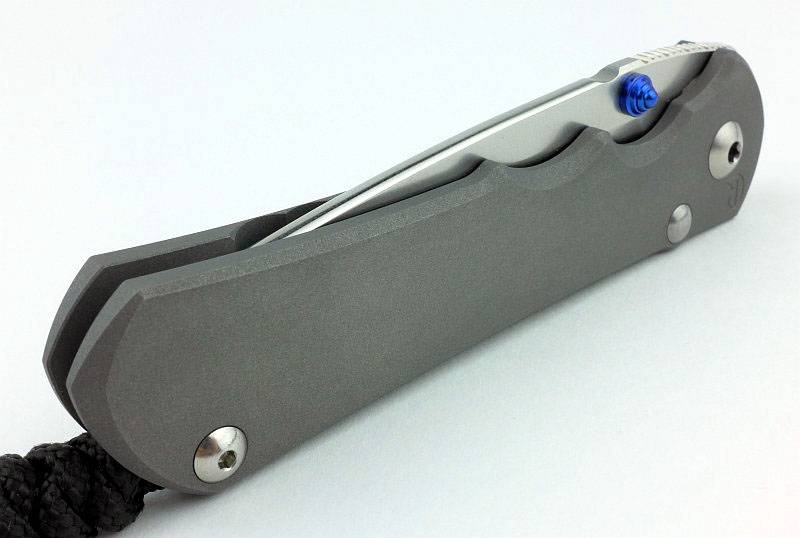
 photo 09 L Inkosi angle P1200355.jpg

Fit, and finish is flawless, just as you would expect with CRK.
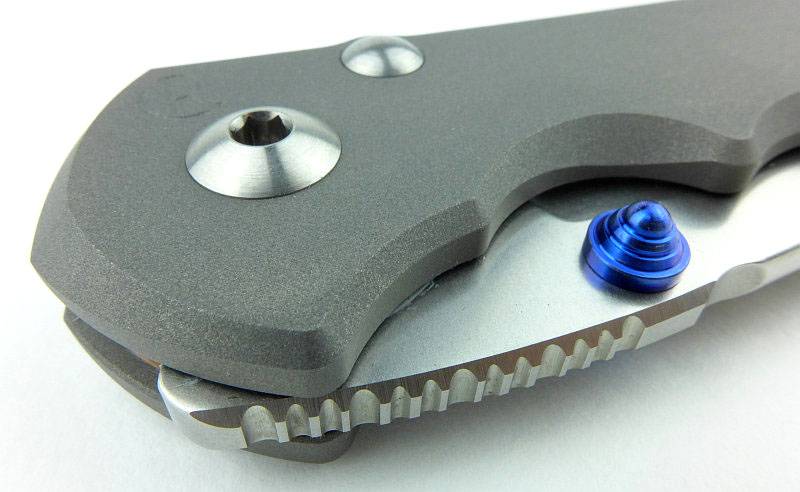
 photo 12 L Inkosi pivot pin stud P1200364.jpg

The understated logo sits next to the large pivot bolt.
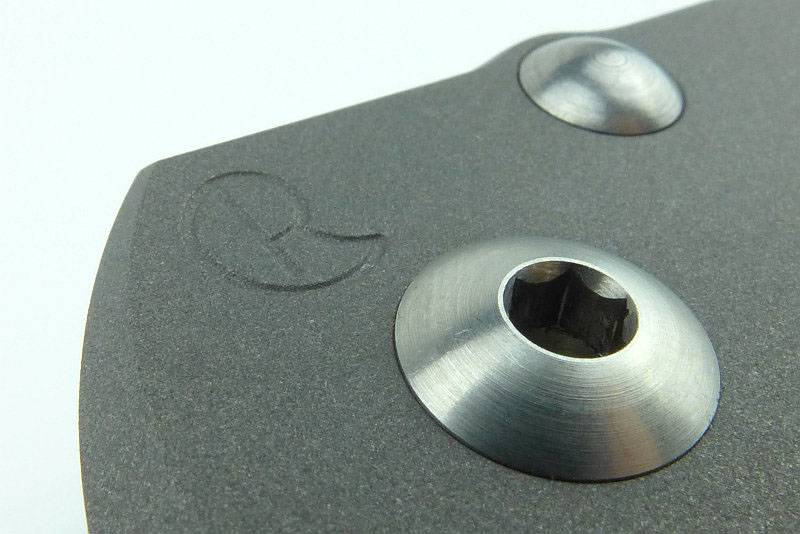
 photo 13 L Inkosi pivot logo P1200368.jpg

Switching to the back of the frame and you can see the left-hander’s thumb stud, but there is less space between it and the lock bar than for the right-handed thumb stud.
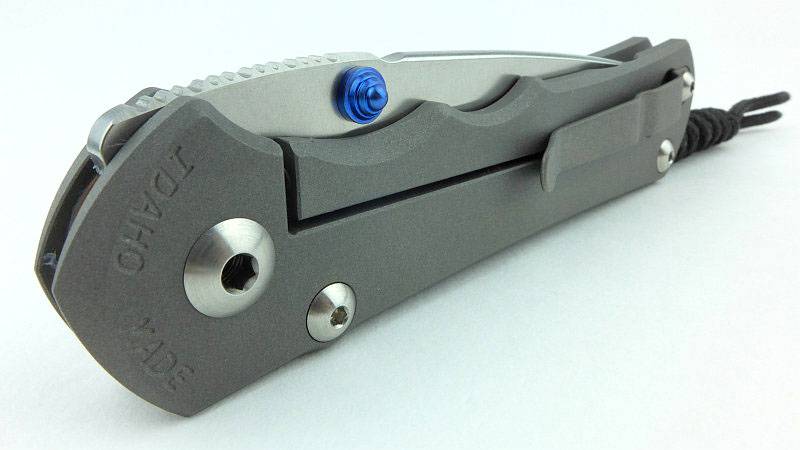
 photo 14 L Inkosi lock side P1200369.jpg

On the back, the pivot bolt looks identical. You can also see the stop-pin bolt as the stop-pin is only fixed to the back of the frame.
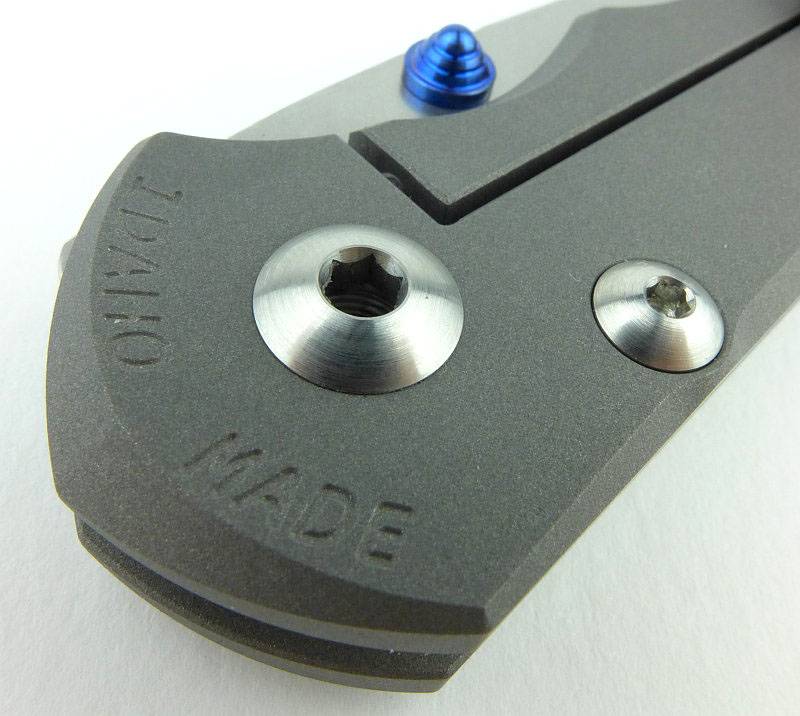
 photo 15 L Inkosi Idaho made P1200373.jpg

Start casting your eyes towards that pocket clip.
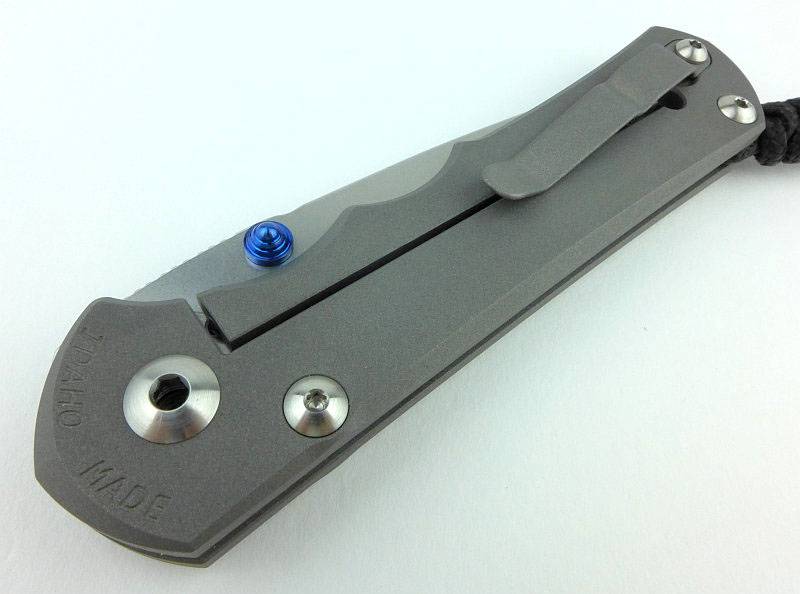
 photo 16 L Inkosi full lock side P1200375.jpg

Another part of the CRK folder design that has changed is the movement of the clip so that it sits directly onto the frame instead of onto the lock bar. This ensures no additional pressure on the lack bar which might make opening the knife more difficult.
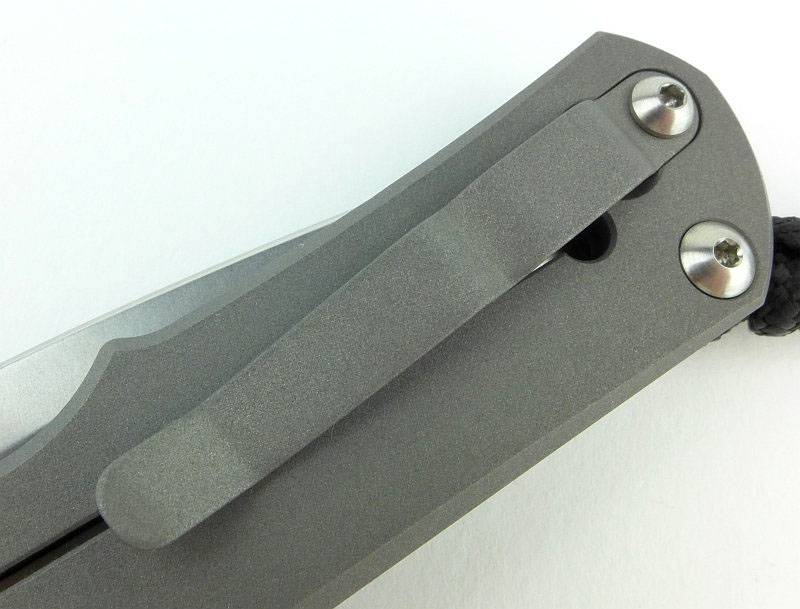
 photo 17 L Inkosi clip angle P1200376.jpg

Giving excellent grip, there is a section of asymmetrical pattern jimping on the thumb ramp.
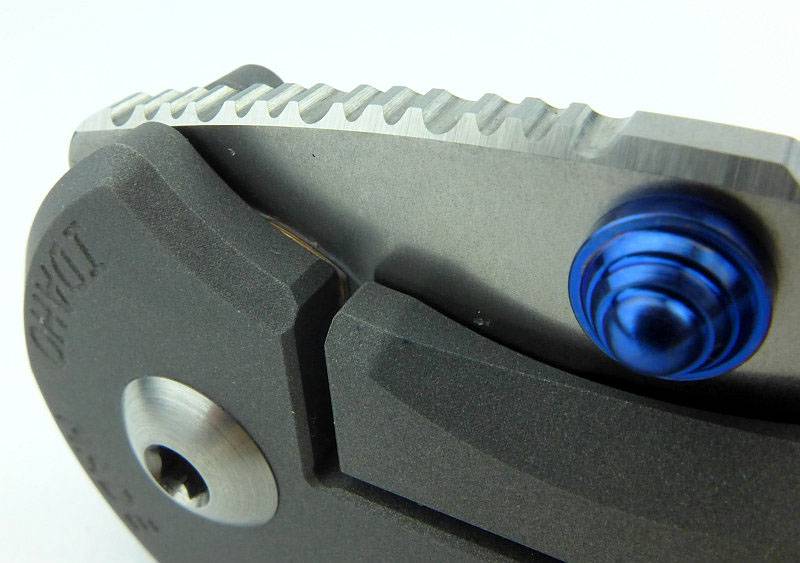
 photo 19 L Inkosi jimping P1200384.jpg

A single bolt holds the clip in place and can easily be removed if you prefer not to have a clip.
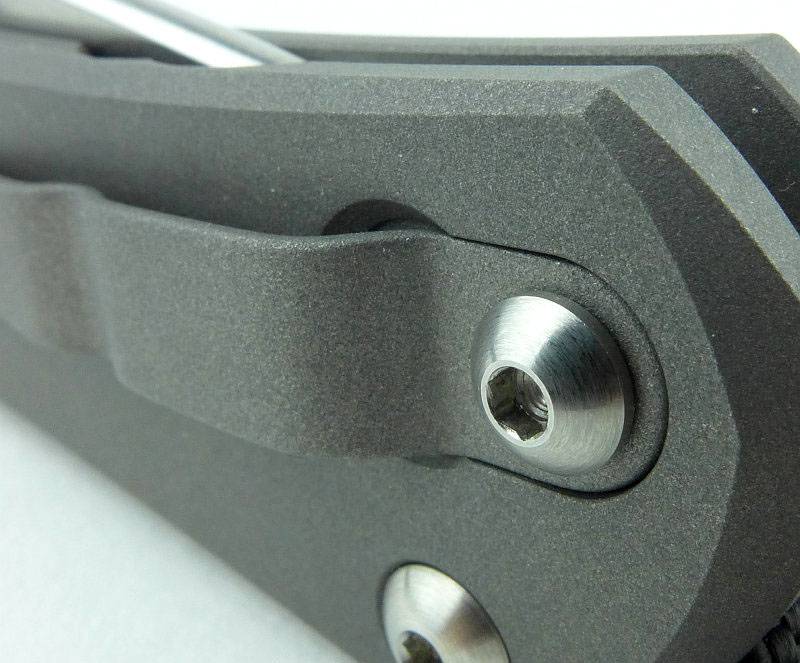
 photo 20 L Inkosi clip fixing P1200387.jpg

To create the lock bar spring, two large radius scallops are cut out of the bar.
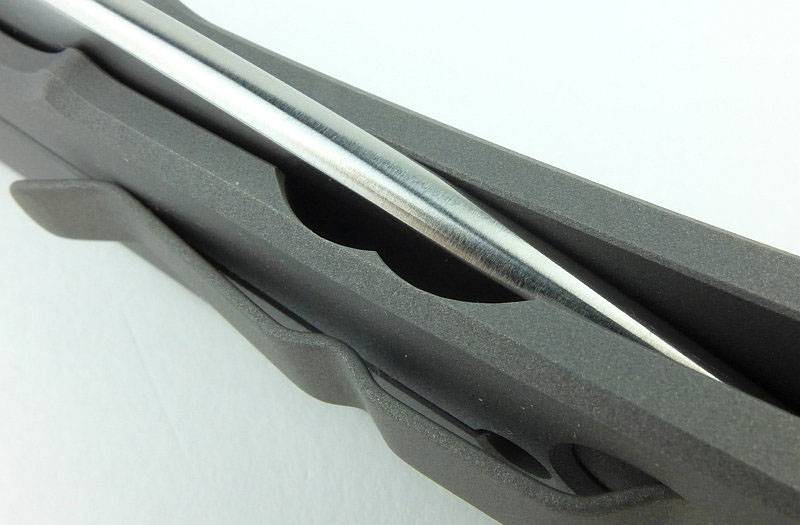
 photo 21 L Inkosi lock spring P1200391.jpg

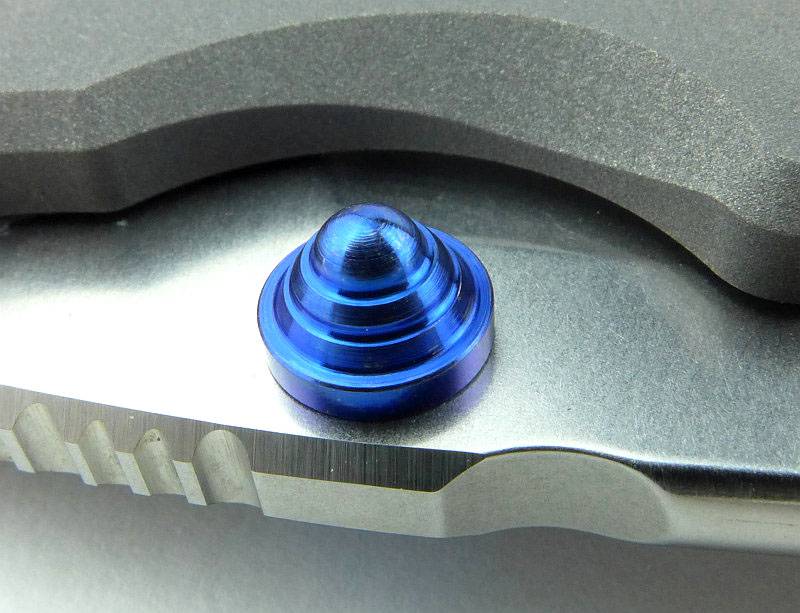
Providing the spot of colour, the ambidextrous thumb stud is blue PVD finish.
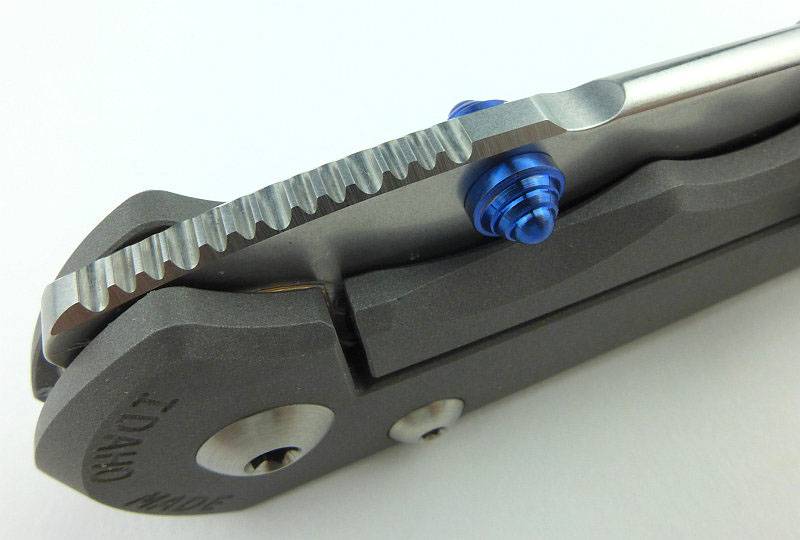
 photo 25 L Inkosi stud spine P1200408.jpg

With the blade partway open, here you can see the ceramic ball is out of the detent hole and sitting on the side of the blade tang. Like this the lock bar now stands slightly proud of the frame.
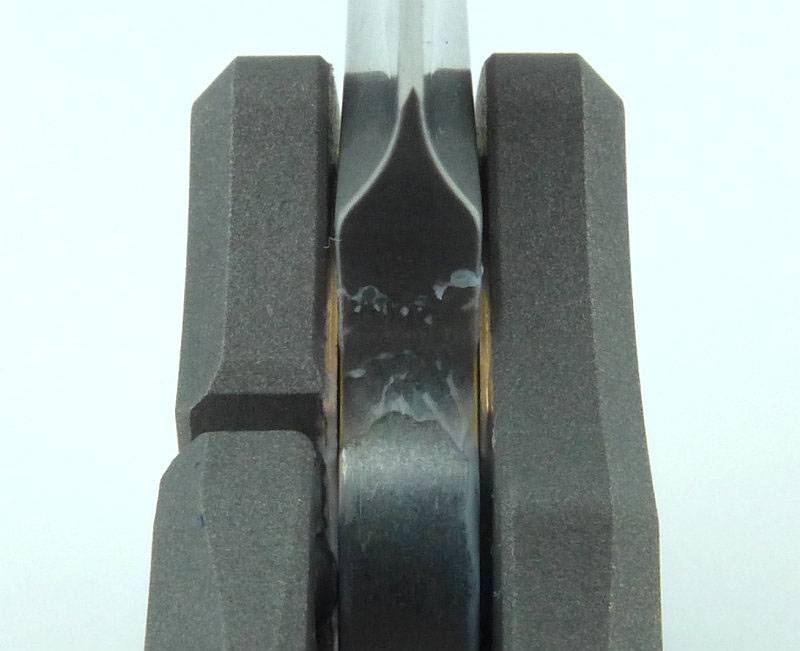
 photo 26 L Inkosi lock bar out P1200415.jpg

When the lock engages, the lock bar has clearly moved into the frame. Also note here how the washer is actually larger than the blade tang.
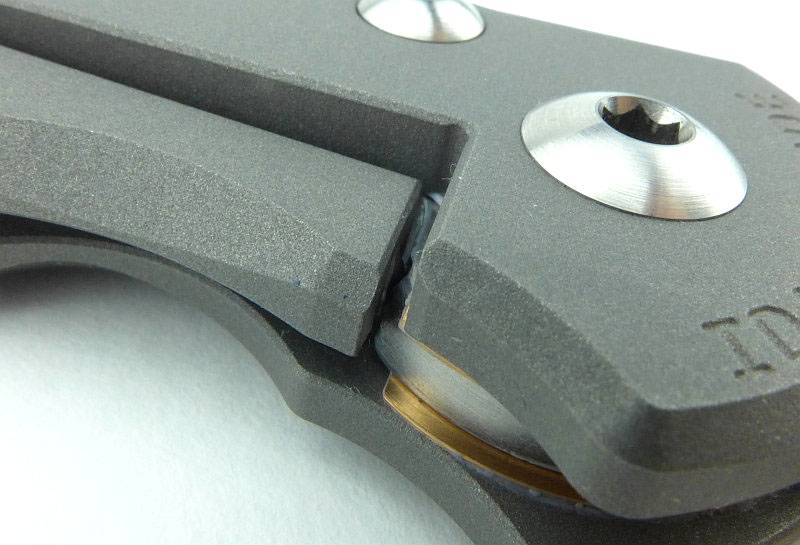
 photo 27 L Inkosi lock bar engaged P1200419.jpg

The blade has a beautifully even stonewash finish.
 photo 28 L Inkosi angle open P1200420.jpg

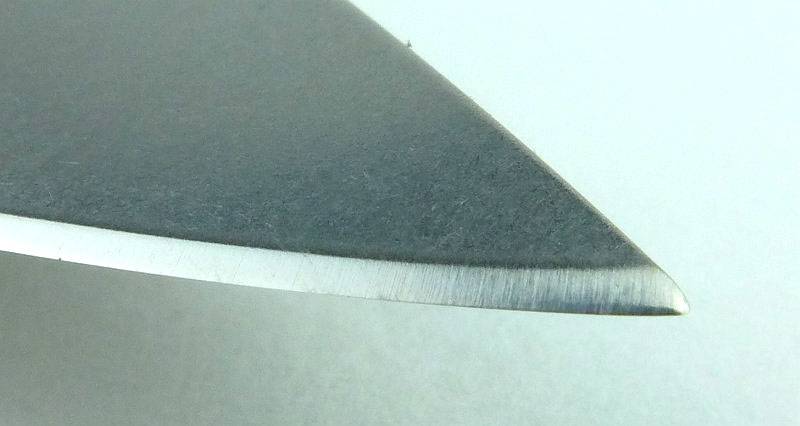
Zooming in to the blade tip.
 photo 29 L Inkosi blade tip P1200422.jpg

With the blade now open, both sides of the finger grooves can be seen. The first finger groove is deeper on the front of the frame giving right-handers easier access to the thumb stud.
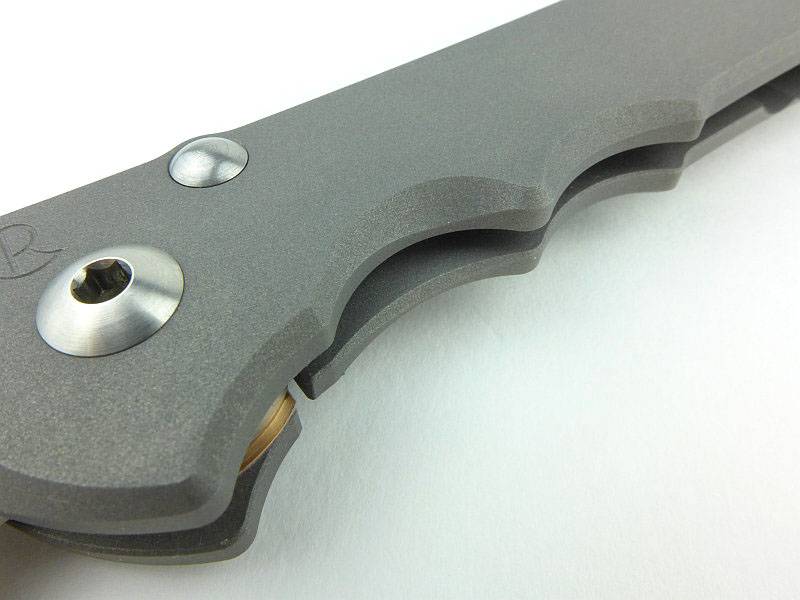
 photo 31 L Inkosi finger grooves P1200434.jpg

In the assembled knife you can see how the over-sized washers are fitted to the lock bar cutout in the frame.
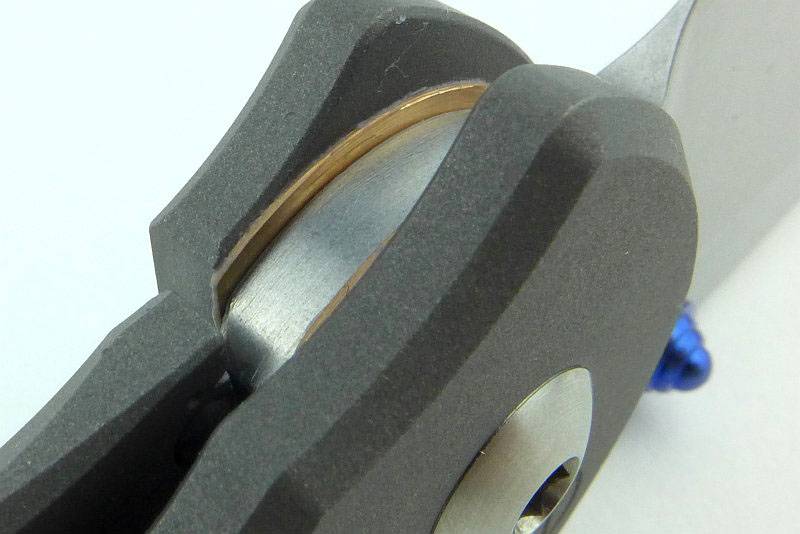
 photo 32 L Inkosi washer cut P1200437.jpg

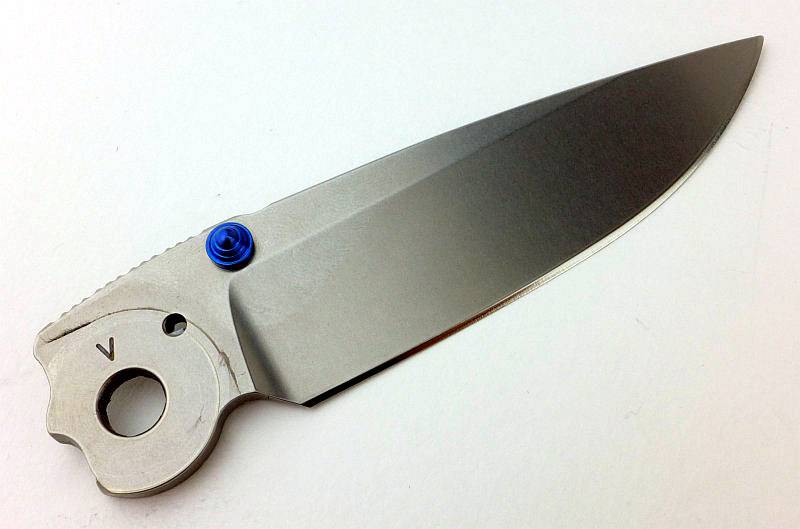
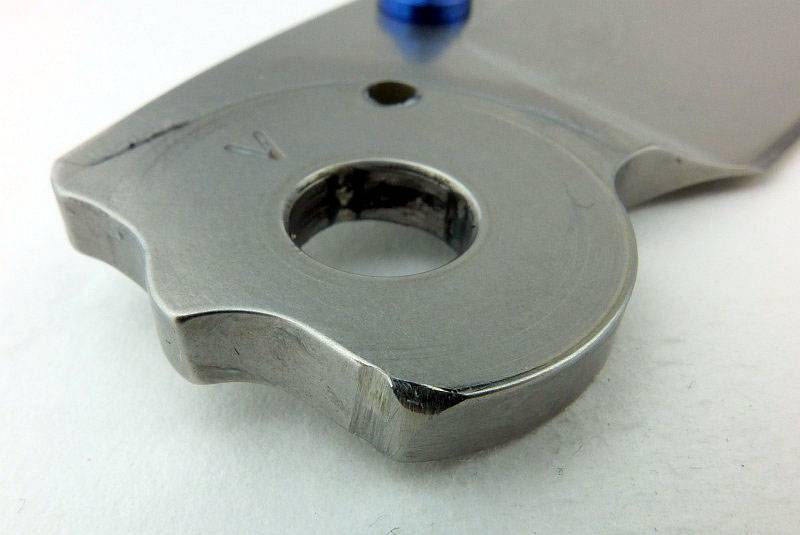
A nicely radiused plunge line takes you from the blade grind to the full thickness of the blade tang.
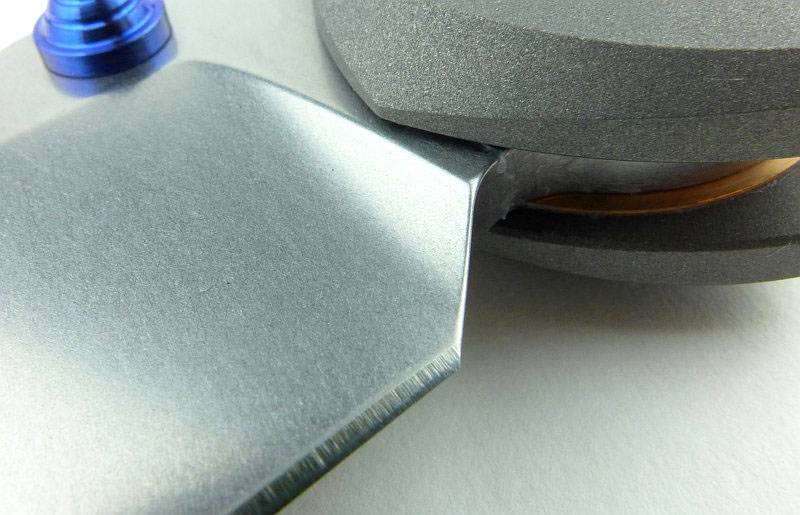
 photo 39 L Inkosi plunge line P1200467.jpg

Though it looks almost like a flat grind, the large hollow grind is noticeable as the light plays on the blade. (Of course it would help if this image was animated, but it is not.)
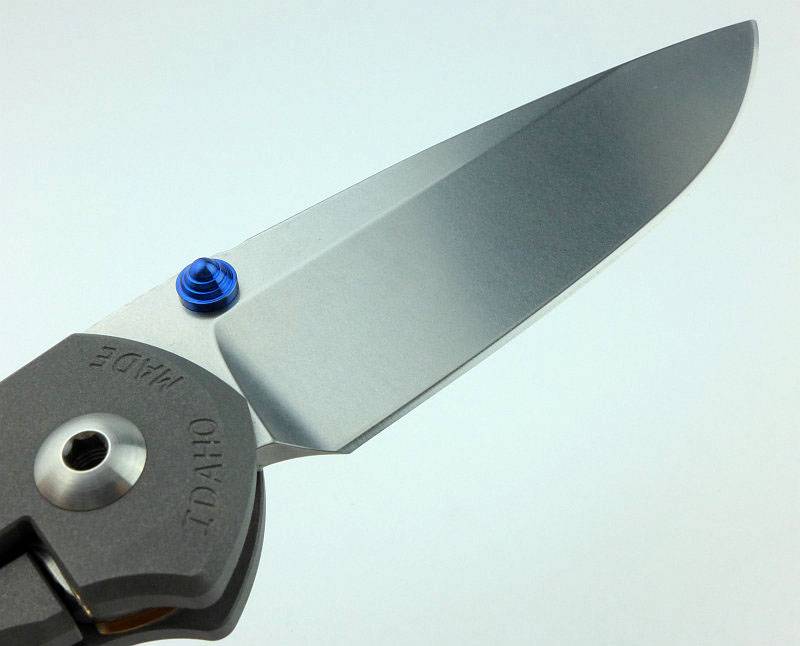
 photo 40 L Inkosi large hollow P1200473.jpg

There is a gentle curve to the blade spine which is very comfortable to press on. It does mean you won’t be striking sparks of a ferro-rod with it.
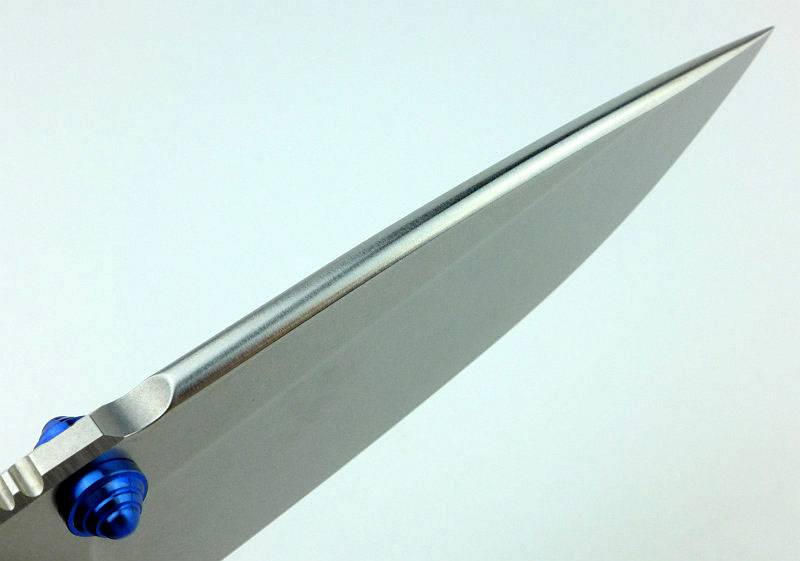
 photo 41 L Inkosi spine P1200476.jpg

A close-up look at the thumb stud.
 photo 44 L Inkosi thumb stud P1200499.jpg

On the first run of Large Inkosi knives the washer perforations were a little too large and could be seen when the blade is closed. Not a functional issue, but a potential point for dirt to collect. This washer design has been updated now.
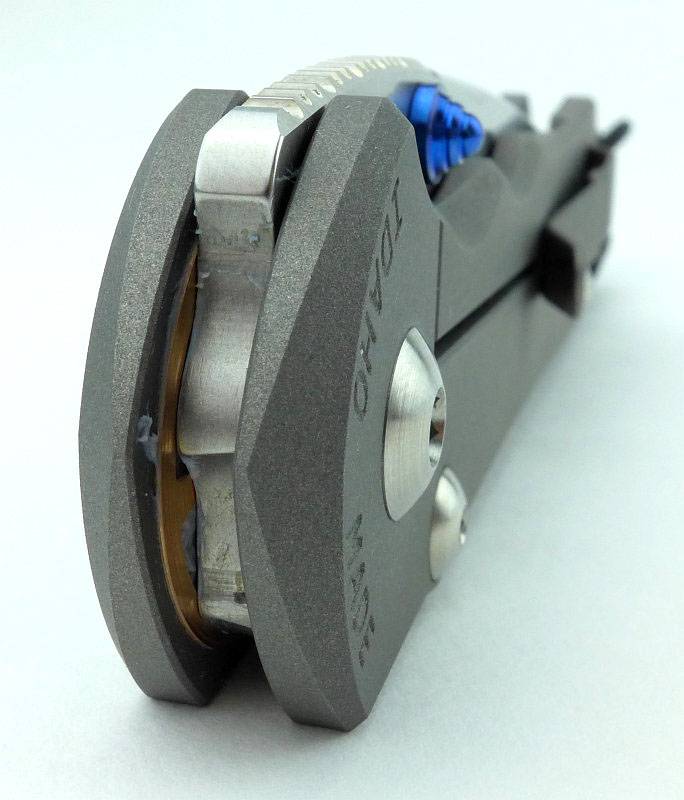
 photo 45 L Inkosi blade tang P1200504.jpg

CRK have really got it spot on with the pocket clip. I generally don’t like them because they are never quite right, mainly too aggressive. In this case the tension is soft enough to be easy to use, but strong enough to hold. The bead blasted surface finish of the frame and clip give plenty of hold without being too abrasive.
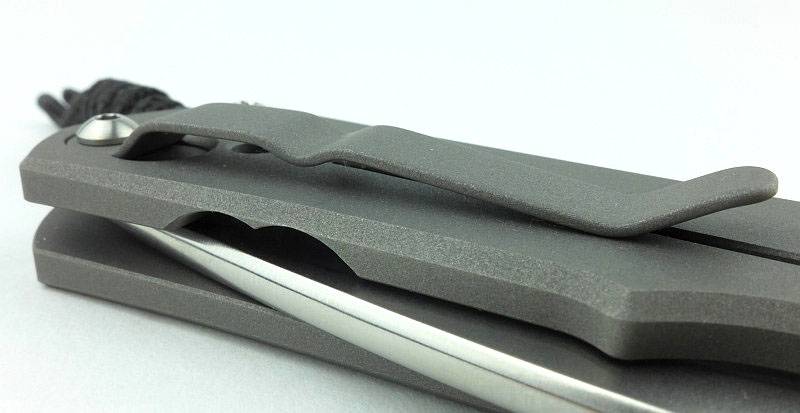
 photo 46 L Inkosi clip P1200516.jpg

What it is like to use?

Ok, so this is the Large Inkosi, but how big is ‘Large’? I’ll start with my standard comparison, so here it is next to the Fällkniven F1 and a Spyderco UK Pen Knife.
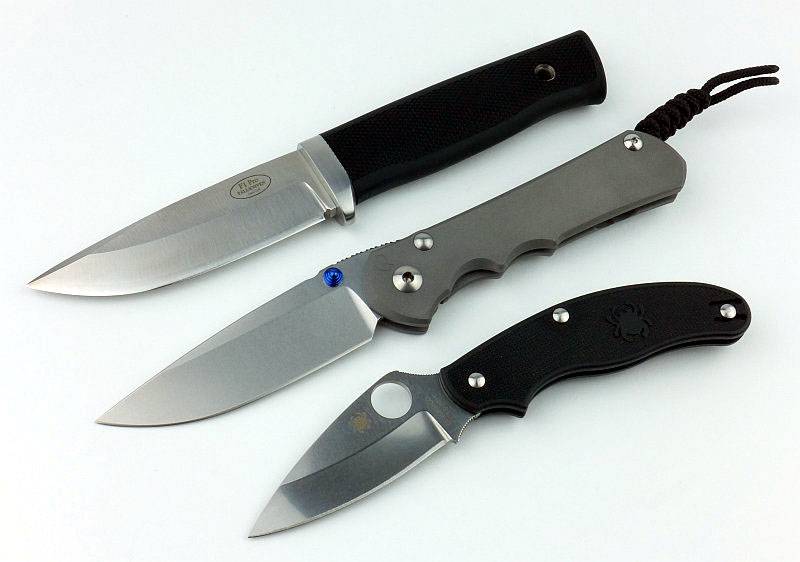
 photo 52 L Inkosi size P1200557.jpg

Then just for gratuitous CRK viewing, here it is with a Pacific.
 photo 50 L Inkosi with Pacific P1200531.jpg

And in the hand. (I take XL size gloves). So it is not really all that large, it is just the larger size of CRK folder. While we are looking at it in the hand, I’m going to mention those finger grooves. It often seems that the Sebenza 21 vs 25 debate has been very polarising with owners being adamant that the they love or hate the 25’s finger grooves. I was concerned they might be problematic, but for my XL size hands, I can happily say that in all the time I’ve been using this knife I have actually not noticed the finger grooves. Clearly this is a good sign as the knife was secure in my hand but without anything digging in.
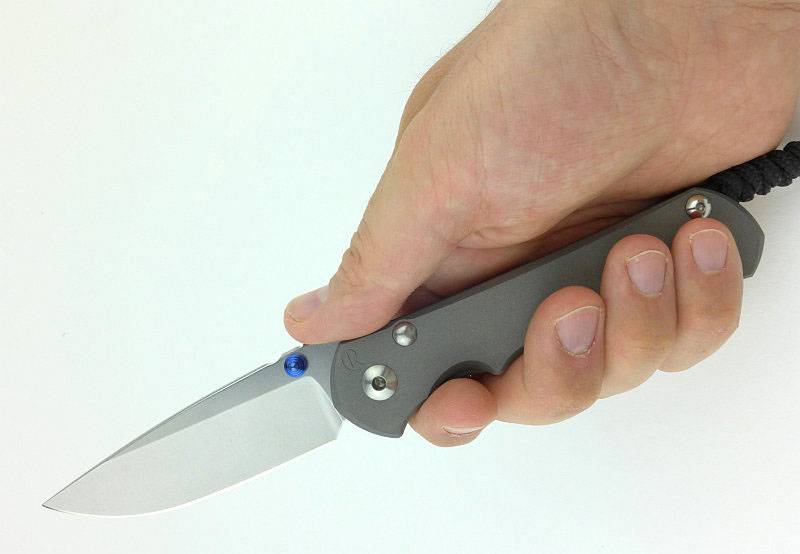
 photo 38 L Inkosi in hand P1200460.jpg

Lanyards, hmmm. Not my thing. So this was to come off, but I thought I would just note down how it was tied so I could put it back.
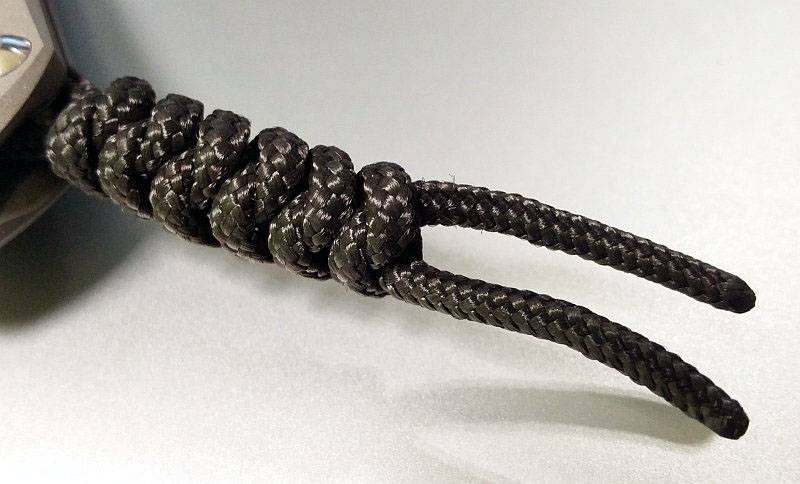
 photo 60 L Inkosi lanyard IMG_20160628_160656.jpg

Loosening the first knot shows it is tied like this.
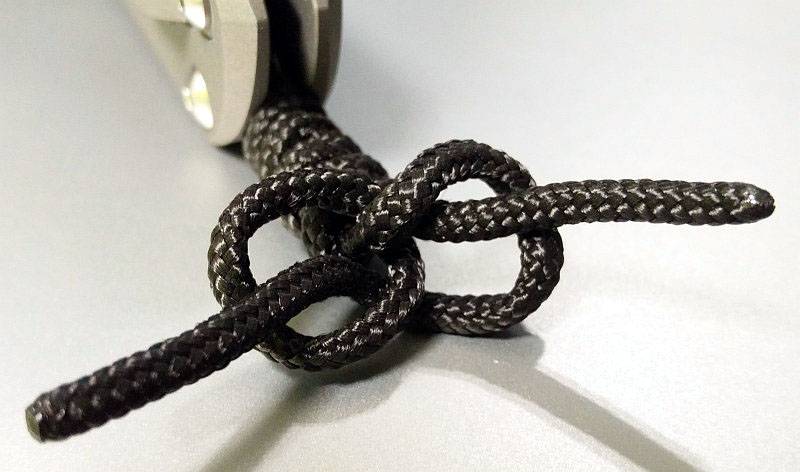
 photo 61 L Inkosi lanyard IMG_20160628_161111.jpg

And repeated all the way back to the first knot round the frame spacer. And with that removed I started putting the knife to work.
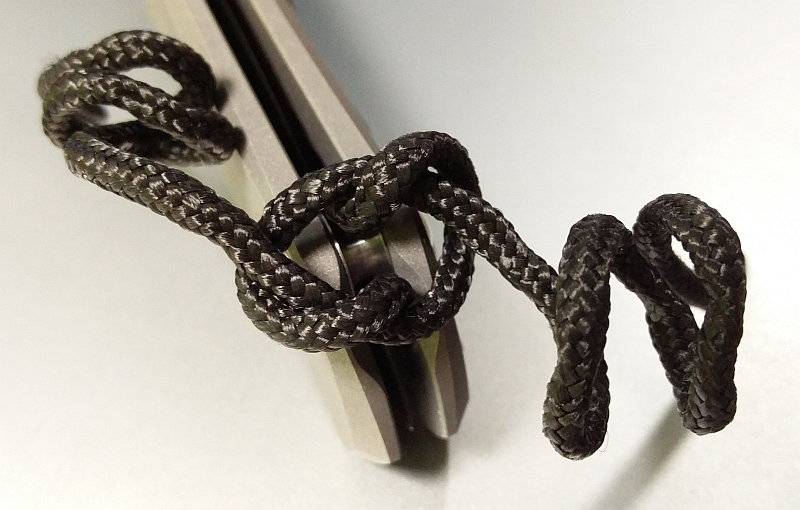
 photo 62 L Inkosi lanyard IMG_20160628_161641.jpg

Although serviceable, I’m afraid the factory edge didn’t have quite enough bite for my liking, so it had a session on the Wicked Edge. Much better!
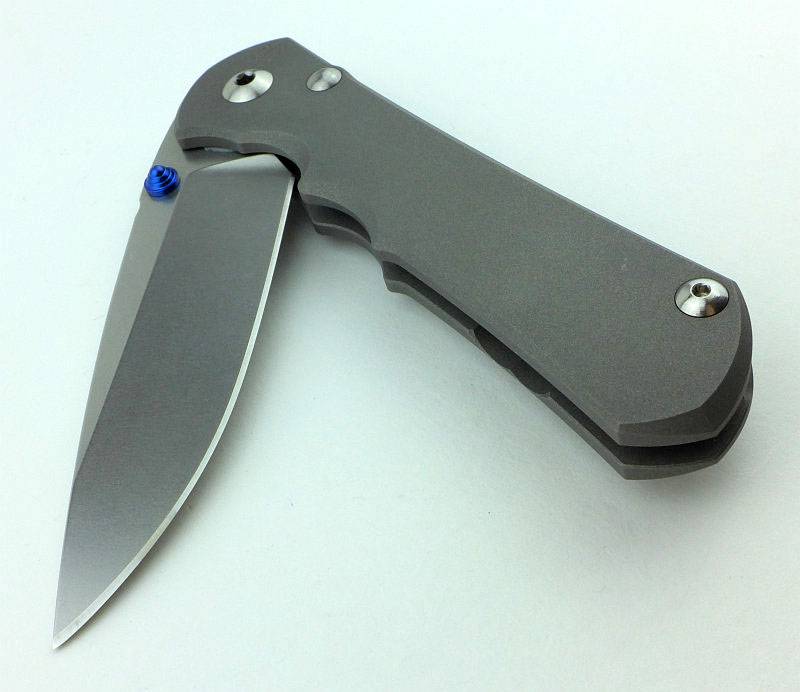
 photo 67 L Inkosi wicked edge P1250279.jpg

Recycling day was much more interesting now. Here was a large heavy duty box needing to be broken down. Made from ‘BC’-Flute double-wall heavy duty shipping cardboard, this was a bigger job than the average box.
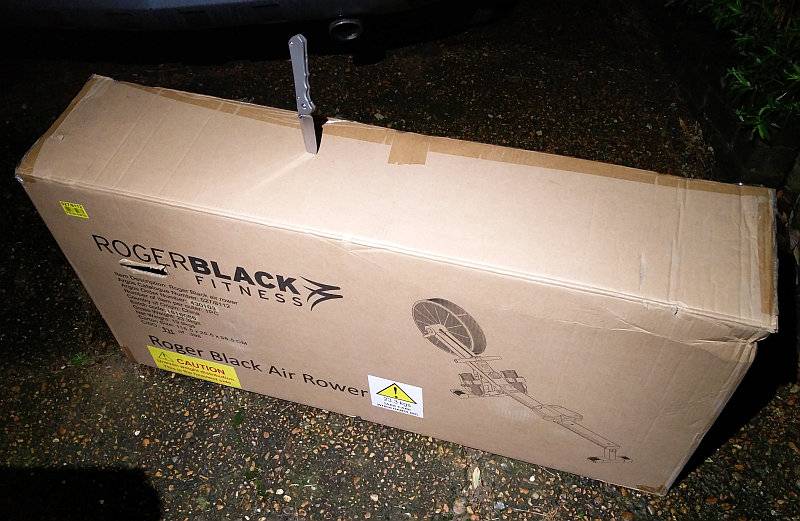
 photo 63 L Inkosi recycling IMG_20170116_183445.jpg

Done. That was easy and enjoyable. Give me another to do.
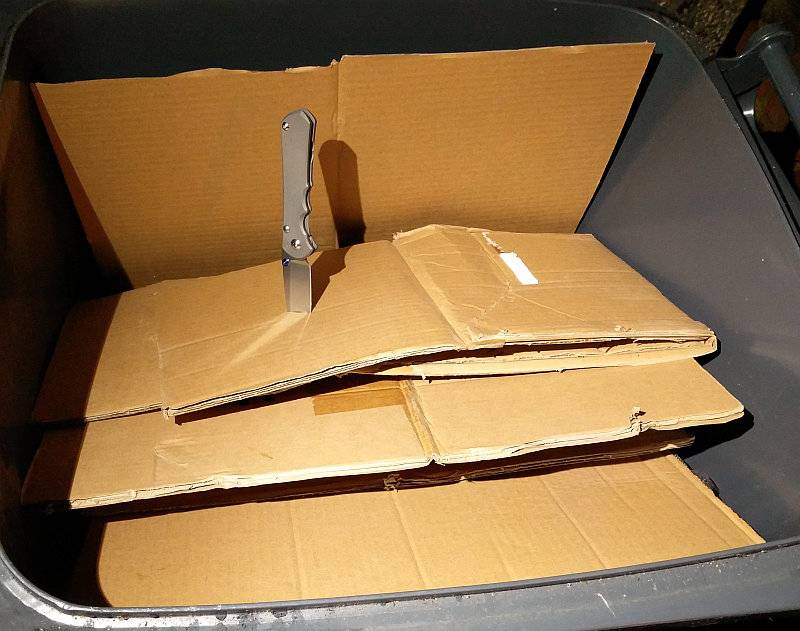
 photo 64 L Inkosi recycling IMG_20170116_184731.jpg

The last cut through this was crisp as the blade slid through with ease. Feeling just as smooth in the cut as a full flat grind, possibly even smoother as there is less blade to material contact than with a FFG.
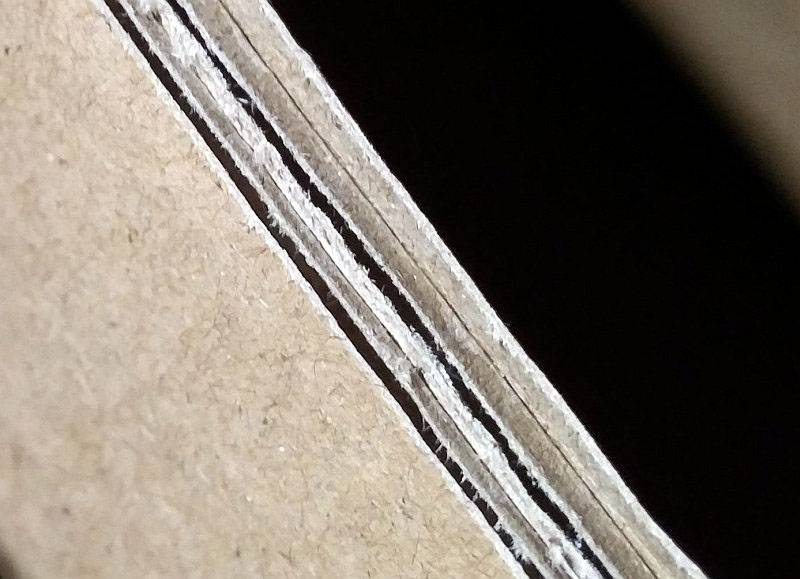
 photo 65 L Inkosi recycling cut IMG_20170116_184810.jpg

Outdoors and the Large Inkosi makes quick work of wood carving. Even when applying a good force to the cut, the finger grooves in the handle were not noticeable.
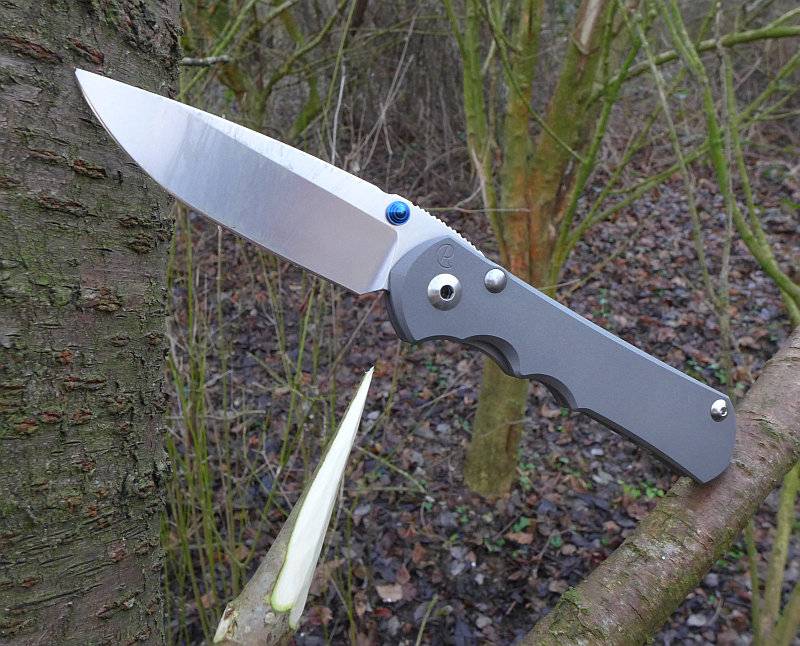
 photo 66 L Inkosi in the woods P1250177.jpg

CRK have taken their already time-tested design and made several improvements to it, improvements you might never actually notice in real world use, unless you push the knife to its absolute limits. I suspect many CRK owners appreciate knowing that the knife is as good as it can be and that if they really did need to push it further than normal, it won’t let them down.

The Large Inkosi is the next generation of a classic folding knife from CRK, and has been designed with such a thorough and thoughtful attention to function and detail that it is more than just a knife; it is a highly desirable object and a pleasure to use.

Review Summary

The views expressed in this summary table are from the point of view of the reviewer’s personal use. I am not a member of the armed forces and cannot comment on its use beyond a cutting tool or field/hunting knife.

Something that might be a ‘pro’ for one user can be a ‘con’ for another, so the comments are categorised based on my requirements. You should consider all points and if they could be beneficial to you.

_______________________________________________ _______________________________________________
Things I like What doesn’t work so well for me
_______________________________________________ _______________________________________________
CRK Build Quality. Slim metal handle not ideal for extended use.
Ceramic ball lock interface. Thumb stud access poor for left-handers.
Large pivot. Exposed washer perforations can accumulate dirt.
Oversized phosphor-bronze washers provide enhanced blade support.
Slip-Through Stop-Pin ensures perfect frame/washer/tang alignment.
Large Hollow Grind gives a blend of flat-grind and hollow-grind benefits.
Only two bolts need to be undone to service the knife.
Finger grooves and thumb-ramp jimping give excellent grip.

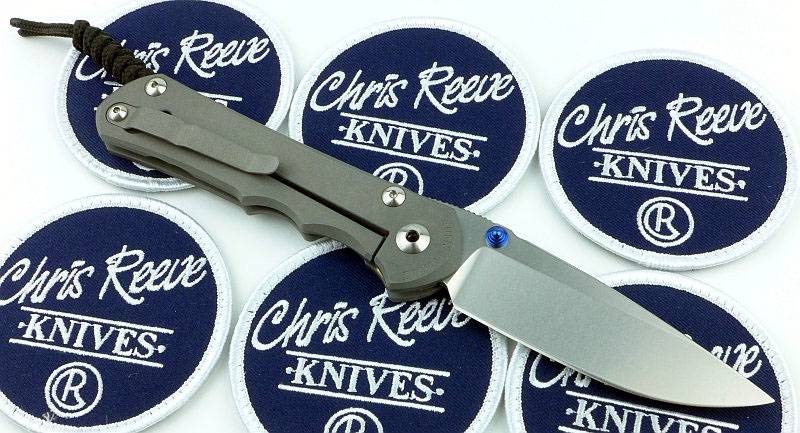
 photo 51 L Inkosi patches P1200543.jpg


Discussing the Review:

Please feel free to add comments to the review, but the ideal place to freely discuss these reviews is on a forum. If you started reading the shorter forum version of the review, but followed the link this full exclusive review, please return to that forum to discuss the review there.
If you read the review entirely on Tactical Reviews, please consider one of the following to join in any discussion.

EdgeMatters – Sponsored Reviews (UK based Forum for Knife Makers and Collectors)

BladeForums – Knife Reviews (US based Forum for Knife Discussion)

CandlePowerForums – Knife Reviews Section (Largest and Friendliest Flashlight Community Forum)
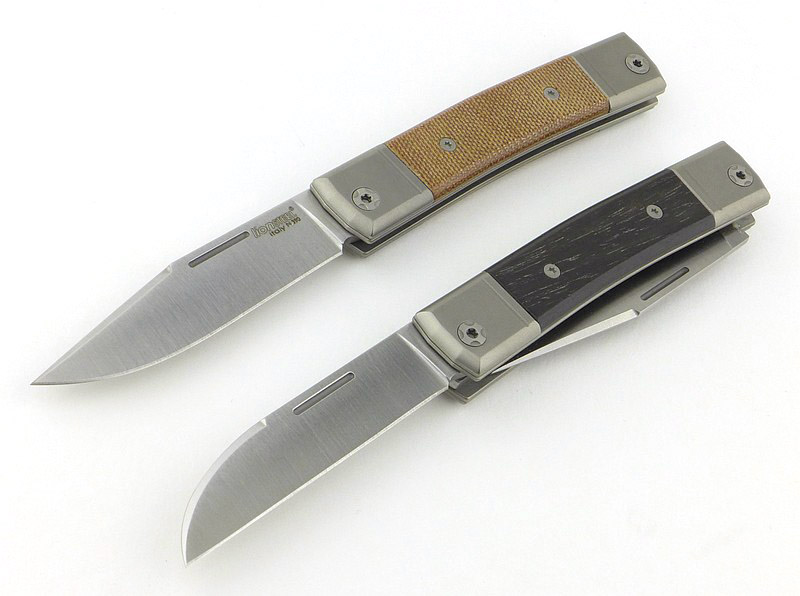
Technical: Chris Reeve Knives Large Inkosi – Strip Down and Washer Replacement

Although the Large Inkosi was only recently launched at Blade Show 2016, in their mission for continual improvement, Chris Reeve Knives have slightly updated the washer design for this knife.

If you want to swap your own washer or give the Large Inkosi a deep clean, this is how to do it.

 photo 15 InkosiWasher Step grease new washer P1230243.jpg

Step-by-step Strip Down and Washer change:

Here we are, ready to go. Working on a suitable surface we have all the things we need laid out – Large Inkosi, new washers, Allen keys for pivot and spacer blots, pivot grease and thread-lock.
 photo 01 InkosiWasher job P1230164.jpg

Before going on, something I did spot was that in their approach of using the best quality parts, CRK supply WIHA branded Allen keys – just thought you should know.
 photo 02 InkosiWasher tools P1230169.jpg

Using the pair of larger Allen keys, fit them into each side of the pivot bolt and start to loosen. Depending on how much thread-lock has been used this might be a bit stiff to start with.
 photo 03 InkosiWasher Step pivot P1230177.jpg

One side of the pivot bolt will start to come out. This side will come out completely, leaving the pivot bolt tube in place. The Allen key from the remaining side of the pivot bolt can come all the way through.
 photo 04 InkosiWasher Step pivot P1230184.jpg

The only other bolt that needs to be removed is from one side of the handle spacer. The blade stop pin is only bolted on one side and will slide out.
 photo 05 InkosiWasher Step spacer bolt P1230192.jpg

With two bolts removed, the Large Inkosi can be taken apart.
 photo 06 InkosiWasher Step spacer bolt out P1230196.jpg

Start to work the pivot bolt tube out. You might open the blade and use the Allen key to help this slide out. Tolerances are so good, the fit is snug without being too stiff. Don’t leave the blade in the locked open position as the lock pressure will make it difficult to remove the pivot tube.
 photo 07 InkosiWasher Step pivot bolt P1230198.jpg

With the pivot bolt mostly out, the blade can be removed and put to one side. (I have skipped over an attempt I made to separate the handles with the blade and blade pivot still in place. With the pressure of the lock-bar and the extra resistance due to the blade pivot, this was not possible. It is much easier to take out the blade pivot and remove the blade.)
 photo 08 InkosiWasher Step blade out P1230202.jpg

Having taken the blade and blade pivot out, the handles can now be gently worked apart. I found that popping the spacer out and gently working back and forth at the pivot end I was able to get the blade stop pin to start sliding out. You can really appreciate the fit of the pieces that make up this knife.
 photo 09 InkosiWasher Step handle separation P1230207.jpg

Looking a little closer at the stop pin sliding out.
 photo 10 InkosiWasher Step handle stop pin P1230210.jpg

And there we are, the knife is apart. Two bolts and a little wiggle!
 photo 11 InkosiWasher Step handle apart P1230213.jpg

All the parts that make up the Large Inkosi laid out.
 photo 12 InkosiWasher Step all parts P1230217.jpg

Old and new washers next to each other. Here the old washer is still in place. The difference can be seen with smaller holes towards the front to prevent dirt/grit ingress when the blade is folded.
 photo 13 InkosiWasher Step new washer P1230234.jpg

With the old washer removed, apply some grease to the handle (not too much) which will keep the washer in place, and provide the blade lubrication once trapped in the washer holes.
 photo 15 InkosiWasher Step grease new washer P1230243.jpg

The washer in position and held in place by the grease. Make sure it does not cover the stop-pin hole.
 photo 16 InkosiWasher Step new washer P1230247.jpg

Do the same for the other side.
 photo 17 InkosiWasher Step grease new washer P1230251.jpg

With the stop-pin already in place, the washer sits against this.
 photo 18 InkosiWasher Step new washer P1230254.jpg

In preparation for reassembly, the blade pivot tube has been inserted into the side it was originally fitted to (the solid handle side).
 photo 19 InkosiWasher Step both new plus pivot P1230258.jpg

Just to ensure we have grease on all surfaces, apply a little to the blade tang before sliding it over the pivot tube.
 photo 20 InkosiWasher Step grease blade P1230262.jpg

The blade has been put onto the pivot tube in the open position, but will not be reassembled like this. With some sort of tool (here some plastic nose tweezers) keep the washer from turning round while you rotate the blade to half open.
 photo 21 InkosiWasher Step blade rotate washer P1230264.jpg

Check the washer is still in the correct position and apply a little grease to the blade tang. NOTE: the blade has been positioned at half-open to ensure the lock-bar presses onto the side of the blade and does not try to lock the blade or slip into the detent, either of which would make it harder to reassemble.
 photo 22 InkosiWasher Step blade grease P1230270.jpg

Carefully lining up the blade pivot tube, blade stop pin and spacer, push the handles back together. This does not require much force once you are lined up. Start gently to ensure you don’t catch any edges, and beware of the open blade.
 photo 23 InkosiWasher Step fit together squeeze P1230272.jpg

Start with the spacer bolt which will keep the knife together while you adjust the pivot.
 photo 24 InkosiWasher Step spacer bolt P1230276.jpg

Although not absolutely necessary, CRK recommend using thread-lock, so that is what I’m doing.
 photo 25 InkosiWasher Step pivot thread lock P1230282.jpg

Apply a small amount to one side of the thread. (I should have applied it a bit lower down the thread, but this worked fine for me.)
 photo 26 InkosiWasher Step pivot thread lock on P1230283.jpg

Start to tighten the pivot. This process is important to take a little time over. What you are looking for is the point at which there is no side to side play in the blade at all, but where the blade still rotates smoothly. You should be able to open it with the thumb stud easily – if not, you have gone too tight. Personally I went to the point of being too tight, then loosening it slightly. Doing this ensures settling of the washers, blade tang and grease so your final adjustments will be effective. Final adjustments were made with the Allen key’s end moving only 1/4-1/2″ each time (5-10 degrees) and testing the blade movement. The thread-lock will cure over time and should not affect this adjustment process.
 photo 27 InkosiWasher Step pivot tighten P1230288.jpg

All ready to go, fitted out with its new washers. The old ones can be kept as spares should you ever need them.
 photo 28 InkosiWasher Step finished old washers P1230292.jpg

A few more details:

While I had the knife apart, I took the opportunity to take a closer look at some parts.

Here we have a clear view of the blade and its tang.
 photo 30 Inkosi details Blade P1230222.jpg

A couple of interesting details on blade tang. There is a groove cut into the lock surface for the ceramic ball to fit into. This means that the contact surface is much larger than a ball touching a flat surface.
Also look closely inside the pivot hole, and you can see that a series of grooves have been included to hold grease and reduce turning friction.
 photo 31 Inkosi details Blade lock groove P1230228.jpg

Between the pivot hole and thumb stud is the blade retention detent hole (to keep it closed).
 photo 31 Inkosi details Blade tang P1230225.jpg

Only with the knife taken apart is it possible to see the detail of the ceramic ball used in the lock.
 photo 32 Inkosi details lock ball P1230233.jpg

Summary

Taking a folding knife apart is a job you might rather leave to a knife maker, especially when it is a high quality knife like the Large Inkosi. As long as you take it slowly, have a little mechanical sympathy, and give yourself room to work, there is no reason you shouldn’t do this job yourself. CRK have made the job of DIY cleaning and maintenance very simple.

Though I’m doing this to swap out the washer, it would be the same process for a deep clean and re-grease operation, so the article can serve as a reference for taking the Large Inkosi apart.

This new washer design will be fitted to all new Large Inkosi knives, but if you have an early one with the old washer and would like the new version of the washer, CRK will happily send you the new washers. If you are of the opinion “It ain’t broke, so don’t fix it”, then you don’t need to.

You can tell which version you have by looking into the front of the handle with the knife blade closed. If you can see the holes in the washer, it will be the older version; if you can’t see any holes then you already have the new one.


Discussing the Article:

Please feel free to add comments to the review, but the ideal place to freely discuss these reviews is on a forum. If you started reading the shorter forum version of the review, but followed the link this full exclusive review, please return to that forum to discuss the review there.
If you read the review entirely on Tactical Reviews, please consider one of the following to join in any discussion.

EdgeMatters – Sponsored Reviews (UK based Forum for Knife Makers and Collectors)

BladeForums – Knife Reviews (US based Forum for Knife Discussion)

CandlePowerForums – Knife Reviews Section (Largest and Friendliest Flashlight Community Forum)
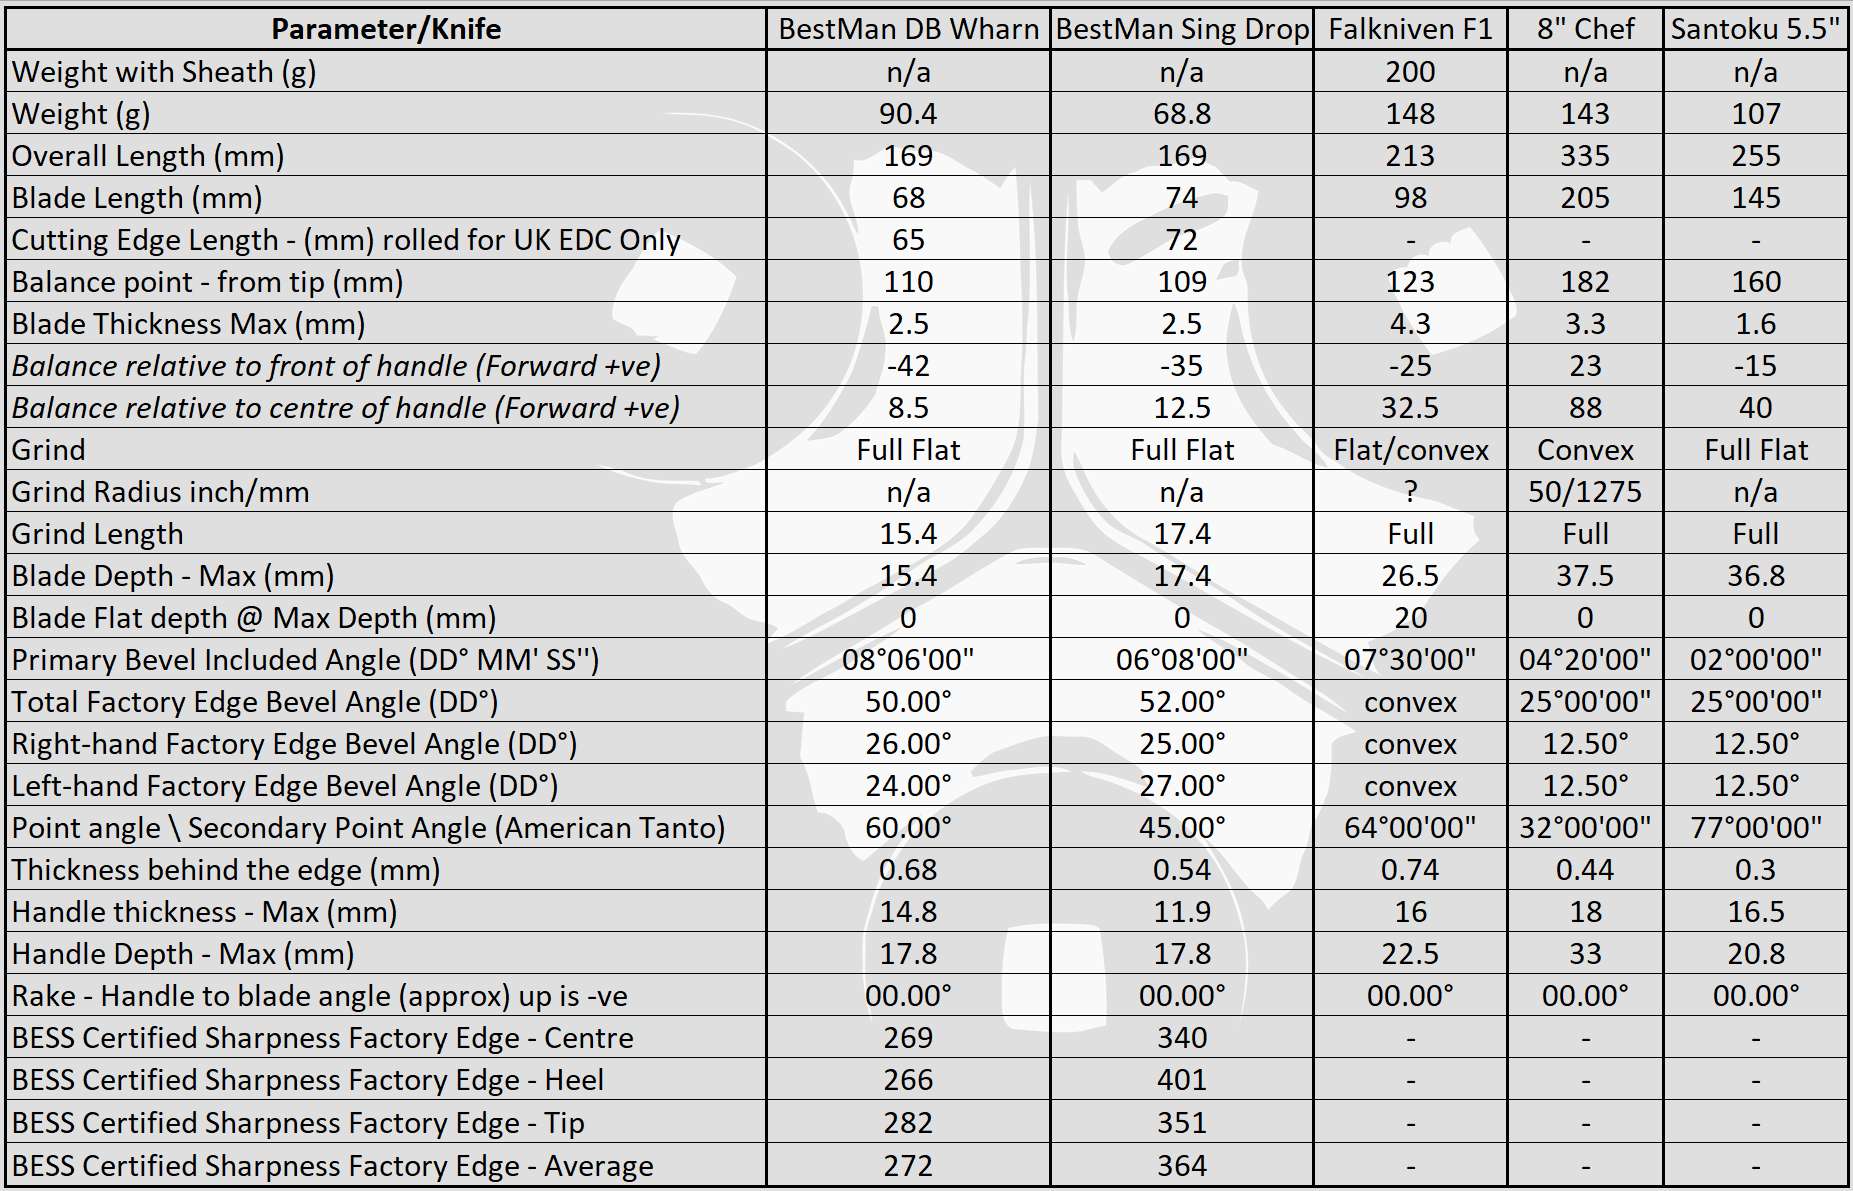
Knife Review: Spartan Blades PALLAS Button Lock

Spartan Blades LLC proudly make “Knives with Intent”, and their Pallas Button Lock folder is no exception, fulfilling its design brief exceptionally well.

 photo 31 Pallas side open P1190318.jpg

The Blade and Handle Geometry:

Most knife specifications have a basic description of the blade geometry, but in this section I will be taking a more detailed look at geometry and balance.
 photo 43 Pallas grind P1200581.jpg

Using a set of gauges and precision measuring equipment including a Vernier protractor, callipers, fixed radius gauges and the unique Arc Master adjustable radius gauge (the one that looks like a crossbow).
 photo Knife measuring P1180483.jpg

These measurements have been tabulated and are presented along with a few reference blades (8″ Chef’s Knife, 5.5″ Santoku and the popular Fällkniven F1).

Key aspects such as the primary bevel angle, grind type, blade depth, blade thickness, length, weight are detailed, along with balance information.
 photo 44 Pallas angle P1200606.jpg

The ‘Balance relative to the front of the handle’ tells you if the knife will feel front heavy, or if the weight is in your hand (a positive value means the weight is forward of the front of the handle). The ‘Balance relative to the centre of the handle’ indicates how close to a ‘neutral balance’ the knife has in the hand.
 photo 42 Pallas balance P1200573.jpg

In the case of full convex grinds the approximate centre of the grind is used for the primary bevel angle estimate.

 photo Spartan Pallas Parameters.jpg

The blade is made from S35VN steel.

Explained by the Maker:

The reasons for certain design choices may not be clear when simply looking at an object, so this section is intended to give an insight into the thinking behind a design by speaking to the designer themselves.

Unfortunately I can’t always get time with the designer so will use this section to include relevant information about the knife and its designer.

Mark Carey (co-founder of Spartan Blades LLC) and I discussed the Pallas at IWA 2016, so I was able to find out a little of the thought processes that brought the Pallas folder into Spartan Blades’ line up.

The knife was actually designed by Spartan Blades’ other founder Curtis Iovito and named after PALLAS (PALE ES), the Titan god of warcraft from Greek mythology.

Mark, as an ex-serviceman himself, is passionate about helping to properly equip those in the armed forces with reliable tools. The Pallas was born out of a relatively simple need for a folding knife that could be easily closed with gloves on, and while being made of premium materials, would stay at an affordable price point.

With most liner or frame lock knives being awkward to close with gloves on, the button lock was an ideal format to make it easy to release the lock with even thick gloves on. For a blade you can rely on, CPMS35VN steel was chosen with a thickness sufficient to make it strong, without being excessively thick or heavy which would impede cutting. The S35VN blade rides on a set of Alpha bearings keeping it slick. To keep weight low and yet not add a high cost, 6061 aluminium was used for the frame along with stainless steel hardware.

In its standard format the Pallas has a flipper tab and thumb stud, either of which can be flicked to easily open the blade. In this review is a special modified version for the UK market. The modification was included following a discussion between Bruce of Heinnie Haynes and Mark, and required the flipper tab to be removed.

This ‘UK’ modified Pallas was created due to the UKBA tightening control over imported knives with quickly deployable blades. Flipper style knives are the primary target.

A few more details:

The Pallas box along with a Heinnie Haynes sticker to signify the creation of this ‘UK’ Version of the knife.
 photo 01 Pallas boxed H P1190180.jpg

Flipping open the box, and the Pallas is sandwiched between foam liners with a Spartan Blades sticker included.
 photo 02 Pallas box open P1190188.jpg

Fresh out of the box, the Pallas.
 photo 03 Pallas closed P1190190.jpg

Straight in for a look at three key aspects of this knife, it is made by Spartan Blades (with the logo engraved in the handle), there is a button lock, and the blade is S35VN steel.
 photo 04 Pallas button stud logo P1190191.jpg

Closer still to the stainless steel button.
 photo 05 Pallas button logo P1190192.jpg

Despite an overall flat cross-section, the Pallas is full of curves that make the design flow and provide its ergonomics.
 photo 06 Pallas standing closed P1190200.jpg

Note the deviation from a standard Pallas in the there is no longer a flipper tab on this special UK version.
 photo 07 Pallas lying closed P1190204.jpg

SpartanBlades’ signature titanium arrow pocket clip.
 photo 08 Pallas clip P1190206.jpg

The pocket clip is one sided and cannot be fitted to the side with the lock button.
 photo 09 Pallas lying closed P1190210.jpg

This is where the flipper tab would be on the standard Pallas.
 photo 10 Pallas UK version P1190214.jpg

Button locks are far less common in non-autos, than other locking mechanism, so warrants a closer look. Here the blade has been opened slightly to allow the button and its shaft to be seen.
 photo 11 Pallas button inside P1190222.jpg

Viewed from a slightly higher angle you can see how the button has been pulled into the handle as the blade starts to open.
 photo 12 Pallas button inside P1190233.jpg

With the blade a little further open you can see the locking notch in the blade into which the button engages. You can see it is just to the right of the blade stop pin.
 photo 13 Pallas lock notch P1190238.jpg

The blade is now nearly fully open and the locking notch has nearly reached the button.
 photo 14 Pallas lock notch nearly open P1190243.jpg

And fully open the button has locked itself into the notch in the blade. The blade has also hit the stop pin and is firmly wedged between the two.
 photo 15 Pallas lock button engaged P1190245.jpg

Now the blade is fully open, the UK version trimmed off flipper tab can be seen more clearly.
 photo 16 Pallas no flipper P1190259.jpg

The overall view.
 photo 18 Pallas angle open reverse P1190264.jpg

when looking closely at the blade tip you can see the contrast of the crispness of the final edge bevel and the rounded blade spine.
 photo 19 Pallas tip P1190272.jpg

The entire blade surface has a stonewashed finish.
 photo 20 Pallas stonewash P1190275.jpg

Not quite a full flat grind, the Pallas blade is a high flat grind.
 photo 21 Pallas blade grind P1190276.jpg

Each side of the pivot bolt is different, with a nut on this side.
 photo 22 Pallas pivot nut P1190285.jpg

And a torx bolt head on the other side.
 photo 23 Pallas pivot bolt P1190280.jpg

Though they look good, the handle spacers are also a very practical design with wide flats where they contact the handles and a slight waist which will reduce weight without any significant loss of strength.
 photo 24 Pallas spacers P1190289.jpg

You can see straight through the handle with the three spacers one end,and the blade pivot at the other.
 photo 25 Pallas spacers P1190293.jpg

All the edges of the spine are nicely rounded. So you won’t be striking sparks off fire-rods, but you also won’t be fraying your pockets.
 photo 26 Pallas spine P1190294.jpg

There is a little jimping for your thumb where the blade meets the handle.
 photo 27 Pallas jimping P1190298.jpg

Each side of the spacers are held with torx bolts, as is the pocket clip.
 photo 28 Pallas spacer bolts P1190302.jpg

Blade centring is spot on.
 photo 29 Pallas centring P1190307.jpg

When the blade is between one third and two thirds open you can see the blade-stop hook in the tang of the blade.
 photo 30 Pallas blade stop hook P1190315.jpg

The cutting edge is terminated in a choil, and the plunge line is nicely radiused to reduce stress concentrators.
 photo 32 Pallas plunge choil P1190322.jpg

At the butt of the knife handle, there is jimping top and bottom giving a surprisingly useful amount of grip. I’d also take this opportunity to point out the surface texture of the anodised handles. There is a matt finish to the anodising due to what appears to be an underlying bead blasted surface.
 photo 33 Pallas handle jimping P1190325.jpg

Grooves cut into this side of the handle provide grip where your finger tips press onto the handle. Subtle and effective.
 photo 39 Pallas handle grip P1190366.jpg

The lanyard hole goes through both handle slabs.
 photo 40 Pallas lanyard hole P1190368.jpg

Lastly for this section, a close-up of the thumb stud which looks crisp and precise, yet without any sharp edges on the thumb contact surface.
 photo 41 Pallas thumb stud P1190377.jpg

What it is like to use?

I like a big folder, and though the Pallas is not really big, it certainly is a good size with its 3 3/4″ blade and 8 3/4″ opened length. For a knife of its size with all metal construction, the weight is impressively low making it easy to carry.

Admittedly I was slightly sceptical about the button lock from the point of view of a good tight lockup. Straight out of the box, my fears seemed to be proving true, HOWEVER (and yes a big however) this was only due to two reasons. Firstly without the flipper, I was only opening the blade slowly and the lock was then not engaging tightly, and secondly the button just needed a little use to settle in.

After more use, the lock was engaging tightly even when only opened gently on the thumb stud. So I would recommend all users to start with at least 30-40 good firm flicks open to bed the button lock in. After this the lock has been spot on and rock solid. Even with the UK version you can start to open the blade with the thumb stud, then flick it fully open with your wrist. For those with the knack, so can also flip the blade open using the thumb stud instead of the flipper tab (but be careful as you can easily catch the edge with your thumb doing this).

Another observation that was immediately obvious, is that the blade movement is super slick. Importantly the blade has no side-to-side play, but the movement is so smooth and easy I would go so far as to say it is the smoothest I’ve used to date (and I’ve handles hundreds of folders with and without ball-bearings). This may in part be due to the button lock mechanism allowing the blade tang to move freely, or possibly due to the high level of finish of all the moving parts.

The generous size of the knife means it is a comfortable handful with or without gloves. I would obviously prefer the added protection the flipper tab (finger guard) gives you, but for this UK version it is no less safe than other non-flipper folders.
(I take XL size gloves)
 photo 34 Pallas in hand P1190332.jpg

Taking up a thrust hold, the jimping on the blade gives you more grip.
 photo 35 Pallas in hand P1190334.jpg

Though this was not the intention of the harpoon style blade, it just happens that for a fine working grip your first finger sits nicely against the harpoon spine. Like this of course you need to watch your thumb doesn’t hit the lock button. (So far I’ve not had any instances of an accidental press of the lock button)
 photo 36 Pallas in hand P1190337.jpg

When swapping between grips, your hand seems to fall into place with no adjustment required to eliminate any hotspots. Handle shaping is subtle but certainly works well for me.

With the button lock design being focused on ease of closing with gloves on, it is primarily a right-handed layout with the button being easy to reach with the thumb of your right hand. The clip is also fixed to one side (opposite to the button). The blade has a double-ended thumb stud and there is a depression on both handle sides giving easier access to the thumb stud, so at least for opening the Pallas is suitable for left-handed users as well. Are there any issues for left-handers? No, even using the Pallas left-handed I found the button easy to press with my first finger to close the blade. It is not as comfortable with the clip falling under your finger tips in a left-handed grip, but that is only a minor annoyance.

Another concern I had was of the button being accidentally pressed during use. So far I’ve not come close to doing this as the button appears to be far enough forward you positively have to try and press it. It is perhaps a small risk, but the completely safe and easy one-handed-closing the Pallas allows, has started to make this a firm favourite. While holding the button in, the blade is able to swing freely, so one-handed-closing is as easy as pressing the button and either flicking the blade closed or holding the blade upright and allowing it to swing closed. Many knives open easily, but few close this easily (when you want it to close).

I’m not a fan of pocket clips, and the Pallas clip looks quite thick, but thanks to being titanium, it has an ideal holding tension that is not too strong or weak.

Blade thickness is an excellent compromise between ultimate strength and cutting ability. It is thick enough that in some harder materials you start to feel it binding as the blade grind wedges into the cut, but the high flat grind helps this stay manageable. There is enough steel in the blade that you are not going to be worried about breaking it (unless you try to use it as a pry bar).

To give another idea of scale, here it is next to the Fällkniven F1 and a Spyderco UK Pen Knife.
 photo 37 Pallas size P1190353.jpg

And also shown next to the Spartan Blades Harsey Model II.
 photo 38 Pallas size P1190360.jpg

Review Summary

The views expressed in this summary table are from the point of view of the reviewer’s personal use. I am not a member of the armed forces and cannot comment on its use beyond a cutting tool or field/hunting knife.

Something that might be a ‘pro’ for one user can be a ‘con’ for another, so the comments are categorised based on my requirements. You should consider all points and if they could be beneficial to you.

_______________________________________________ _______________________________________________
Things I like What doesn’t work so well for me
_______________________________________________ _______________________________________________
Button lock makes blade closing easy, with or without gloves. Lock initially needs some bedding in.
Safe and Easy One-Handed Closing. Small possibility of accidentally pressing the lock button during use (this did NOT happen during testing).
Strong S35VN Blade. Slightly biased for right-handed users.
Lightweight for its size.
Super smooth blade action.
Zero blade play.
Excellent fit and finish.
Titanium pocket clip.

 photo 17 Pallas angle open P1190262.jpg


Discussing the Review:

Please feel free to add comments to the review, but the ideal place to freely discuss these reviews is on a forum. If you started reading the shorter forum version of the review, but followed the link this full exclusive review, please return to that forum to discuss the review there.
If you read the review entirely on Tactical Reviews, please consider one of the following to join in any discussion.

EdgeMatters – Sponsored Reviews (UK based Forum for Knife Makers and Collectors)

BladeForums – Knife Reviews (US based Forum for Knife Discussion)

CandlePowerForums – Knife Reviews Section (Largest and Friendliest Flashlight Community Forum)