The Ontario Knife Company RD Tanto is the first of a three-knife review series featuring the Blackbird SK-5, RD Tanto and RTAK II. (See – OKC Group Review.)

The RD Tanto is one of the ‘Ranger series’ of OKC knives, a heavy duty high performance range of knives designed by Justin Gingrich.
The Blade and Handle Geometry:
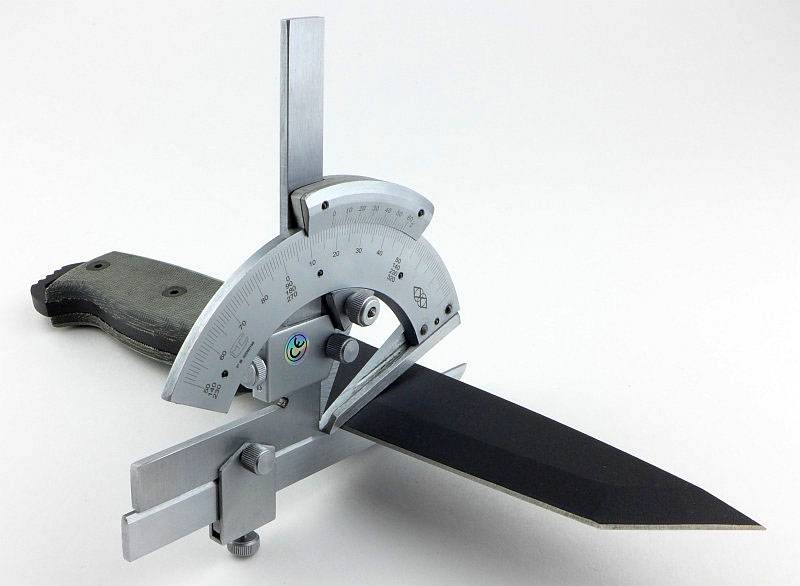
Most knives specifications have a basic description of the blade geometry, but in this section I will be taking a more detailed look at geometry and balance.
Using a set of gauges and precision measuring equipment including a Vernier protractor, callipers, fixed radius gauges and the unique Arc Master adjustable radius gauge (the one that looks like a crossbow).
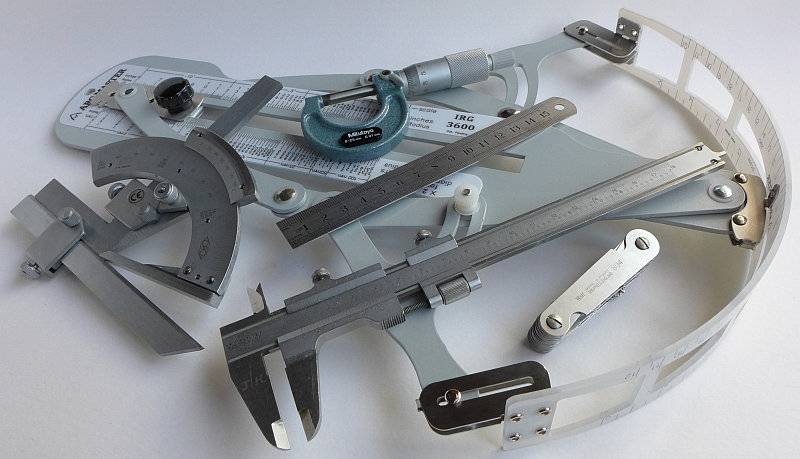
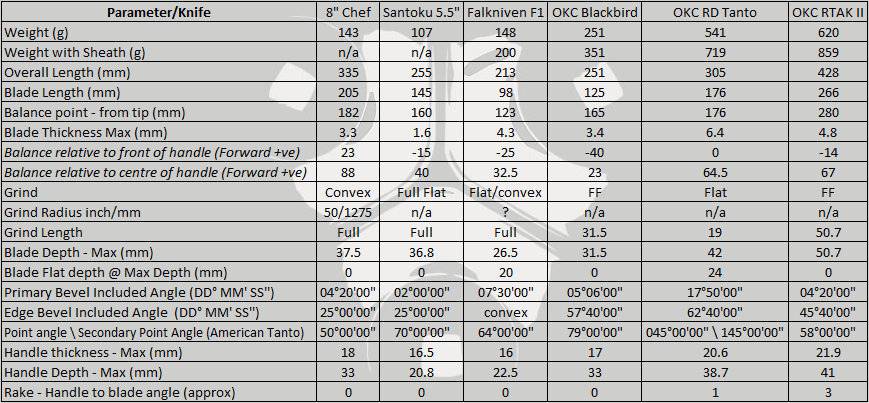
These measurements have been tabulated and are presented along with a few reference blades (8″ Chef’s Knife, 5.5″ Santoku and the popular Fällkniven F1).
Key aspects such as the primary bevel angle, grind type, blade depth, blade thickness, length, weight are detailed, along with balance information.
The ‘Balance relative to the front of the handle’ tells you if the knife will feel front heavy, or if the weight is in your hand (a positive value means the weight is forward of the front of the handle). The ‘Balance relative to the centre of the handle’ indicates how close to a ‘neutral balance’ the knife has in the hand.
In the case of full convex grinds the approximate centre of the grind is used for the primary bevel angle estimate. This table includes the parameters for all the OKC knives in this series of reviews.
The blade is made from 5160 steel.
Explained by the Maker:
The reasons for certain design choices may not be clear when simply looking at an object, so this section is intended to give an insight into the thinking behind a design by speaking to the designer themselves.
Though no longer directly involved with OKC, Justin Gingrich was happy to talk to me about the RD Tanto, how it came into being, and some of the design’s details.
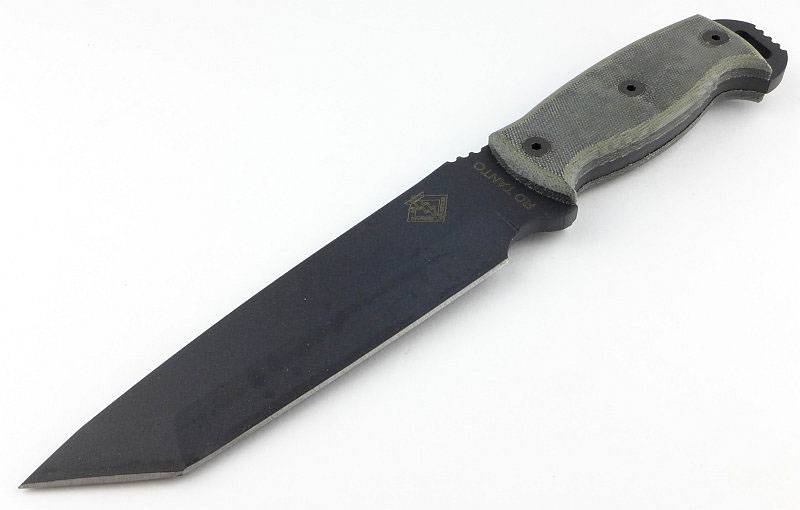
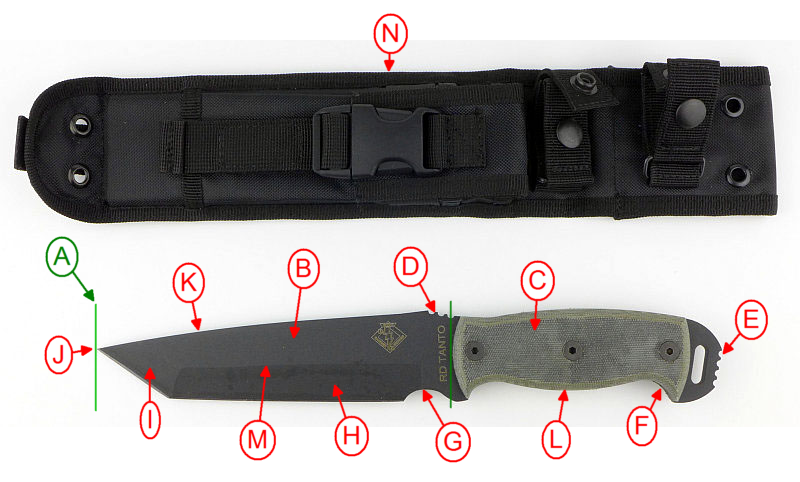
As this was done by phone to help our discussion I sent this marked up image and include it now so I can use the same reference labels in the description.
The entire OKC Ranger series comes from Justin’s original company ‘Ranger Knives’ which he started in 2002 and eventually sold to OKC in 2008. Under OKC, Ranger Knives became the ‘Ranger series’. All Ranger Series knives have been designed by Justin and the original Ranger Series included four knives, the RD-4, 6, 7 and 9 as well as two versions of the RD Hawk. Justin continued to design the Ranger Series for around three years after selling Ranger Knives to OKC, and the RD Tanto was one of the knives designed for the OKC Ranger series.
During the time he worked with OKC, Justin continued to design various different knives and presented them to OKC for consideration. The Tanto was added as he had received a lot of demand for this style of knife.
With the RD Tanto being an additional design to an existing series, many of the design parameters were already set. Specifications such as the blade stock being 1/4 inch thick and using 5160 steel, as well as the handle design and materials, were kept the same to maintain continuity.
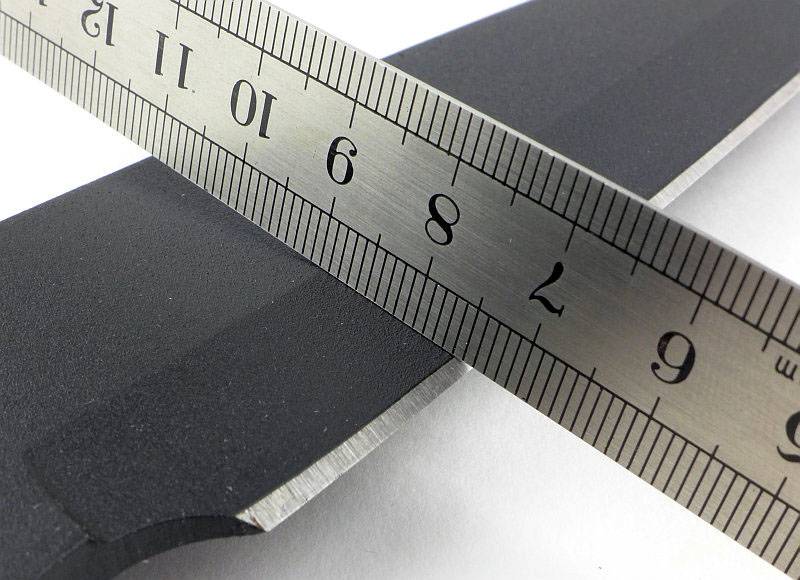
The final blade length (A) was chosen for a couple of reasons, but the main one actually being aesthetics. It had to look in proportion to the RD series handle and 6 1/2 – 7 inches was a sweet spot for this blade. To better understand the purpose of this blade length you need to consider that it doesn’t really fit into the category of a fine-work blade or a heavy-work blade. This blade length is a hybrid of the two and though it won’t do anything really well, it will do everything moderately well. For the person who doesn’t want to carry more than one knife, and doesn’t want to carry a heavy tomahawk or hatchet, the 6-7 inch blade allows them to more-or-less do anything they need to do, without it being too bulky to carry.
Looking at the very heavy blade stock (B), though this was carried over from the other knives in the Ranger series, the intention is to allow it to be a heavy duty tool with powerful stabbing ability. The design needed to be suitable to open a can of beans, dig, carry out extraction work such as prying open car doors or interior doors and to allow the user to really be able to lever on that blade without fear of it breaking.
Handle style (C) is something Justin has gone over with OKC a lot as he would prefer there to be more rounding on the handle slabs to increase comfort. The design originally comes from a time when the slab style of handle was very popular as a straightforward Tactical design. When working on the Ranger knives, Justin had just come out of the military so this tactical style was the one he adopted, however, his original knives had a more rounded handles than the current OKC versions.
Next to the handle, a thumb ramp with jimping (D) is included to provide additional grip strength when thrusting the knife.
Though the exposed pommel (E) allows the knife to be hammered with or hammered on, the jimping on it is not to stabilise the hammer strikes but is intended to keep your thumb in place when using a reverse grip for digging or stabbing.
There are well pronounced hooks front and back of the handle (F) as well as a palm swell (L), asking Justin how these were sized and spaced he explained that the handle shape and size came about because he designs so that it is comfortable for him to use with or without gloves.
Though views vary about the safety of using a choil (G) such as this for choking up on, Justin specifically did design this to be used for a finger to sit in and change the grip for finer work. It was sized for comfort and to enable one finger to sit in it without riding up onto the edge. He was careful not to go too big as it does increase the overall length of the blade. Asking Justin about the choil pushing the cutting edge further from the handle, he responded that with a 6 inch blade you won’t be doing a lot of food prep type cutting and if you are holding the handle you are going to be chopping, digging and slashing. For finer work where you want the edge as close to your first finger as possible you choke up on the blade and use the finger choil to get you back right up on the edge so you can apply more pressure. With a choil, when choking up on it, the change in grip takes a 6 inch blade and brings the blade back to a more manageable 4-5 inch length. Not leaving this subject right now, I pressed Justin as to why not just leave the choil out and bring the edge back to the handle? His reply was that removing the choil increases the blade length making it more daunting to do tip work with. The choil gives you two blade lengths in one knife for greater control in finer tasks.
A flat grind (H) was chosen simply for strength though this can bind or stick when chopping wood.
When asking about the use of a Tanto point (I), as mentioned earlier, there was a high demand for a Tanto design, so this piece was specifically added to fill that gap in the series.
Placing the tip position (J) directly in line with centre of grip was to make the tip as effective as possible. Whether stabbing/thrusting or using the tip as a drill, you get the most power behind the tip when it is in the centre line. If the tip is off centre the point has a tendency to travel in the direction it is already going.
The spine (K) has been kept plain and with no swedges partly for strength, but mainly to give you better purchase if you baton with it. A swedge grind chews up the baton and does not provide any real weight reduction.
Grind line position (M); though the steepness of the primary grind limits slicing sharpness, the more material there is behind the edge the less likely you are to chip that edge. When you are doing tasks like cutting through car doors, prying or processing a lot of wood, with all the material behind it you are less likely to chip the edge. You can still cut paper with it and you can still shave with it if you take the time to hone the edge, but it is not meant for super fine cutting tasks.
In the design specification, the steel is 5160. Though 1095 is a proven blade steel and has been around forever, 5160 is much tougher than 1095, and has the same or better edge retention as 10 series steel. At 56-58 HRC you will be hard pressed to break the knife because it is made from a spring steel. Typically 5160 is used for truck leaf springs as it is meant to take repeated abuse, back and forth motion, and flexing of the blade without forming stress risers or stress cracks in the steel that would lead to catastrophic failure. Failure should never happen with a knife made of 5160 and it should flex/come back, flex and come back for the life of the user.
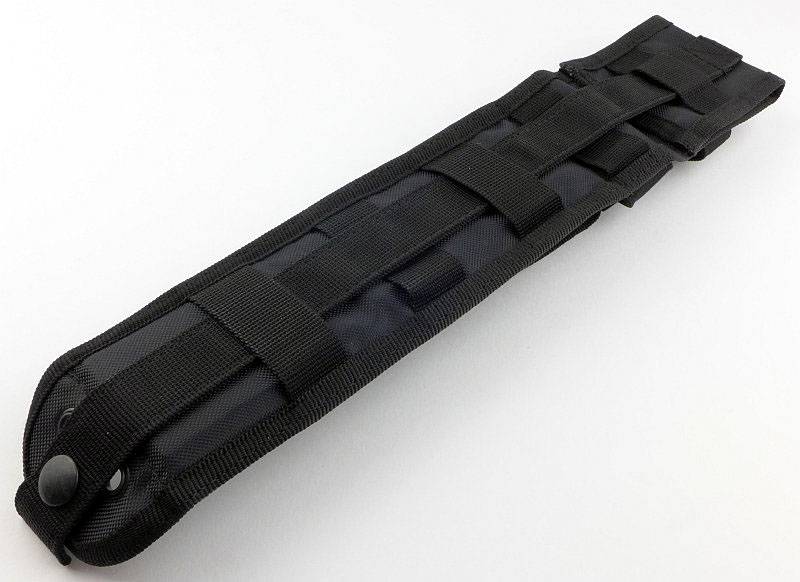
Lastly looking at the Sheath (N), this is a standard item used by OKC and by Justin when working as Ranger Knives. It is a nylon sheath with a pouch and snap closures, plus a plastic liner to stop you cutting through it if you fall or drop the sheath. Working to a price point, the compromise of using a relatively basic but serviceable sheath was made rather than pushing the price up with a spectacular sheath.
A few more details:
Ontario Knife Company’s standard knife box.
Inside the box the knife has a cardboard protector over the blade, and the knife is not fitted into the sheath.
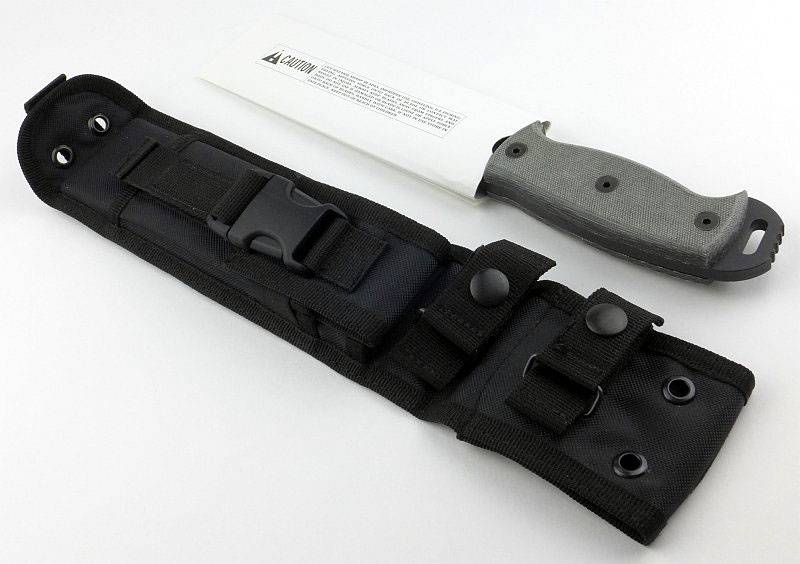
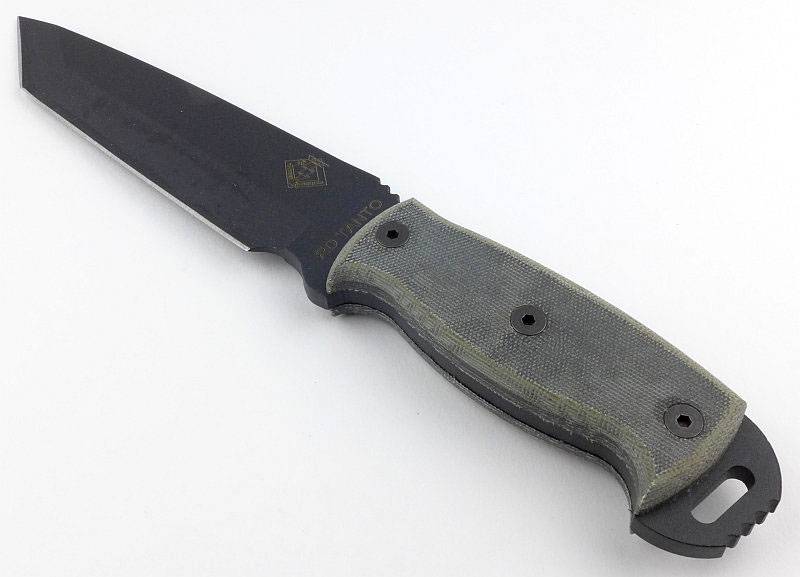
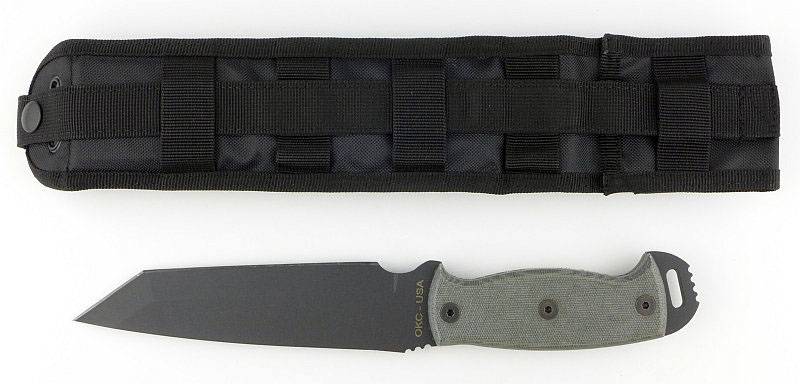
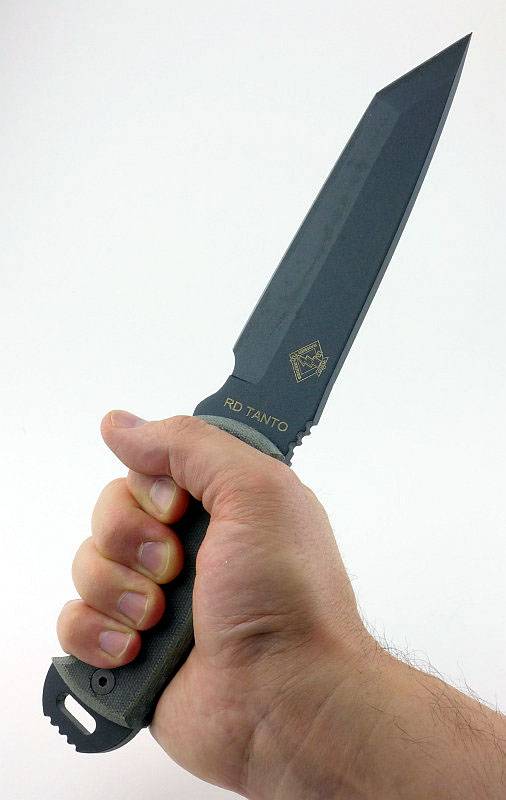
The first view of the RD Tanto – Heavy Duty! (Any marks on the blade are due to there being a waxy protective film on the blade.)

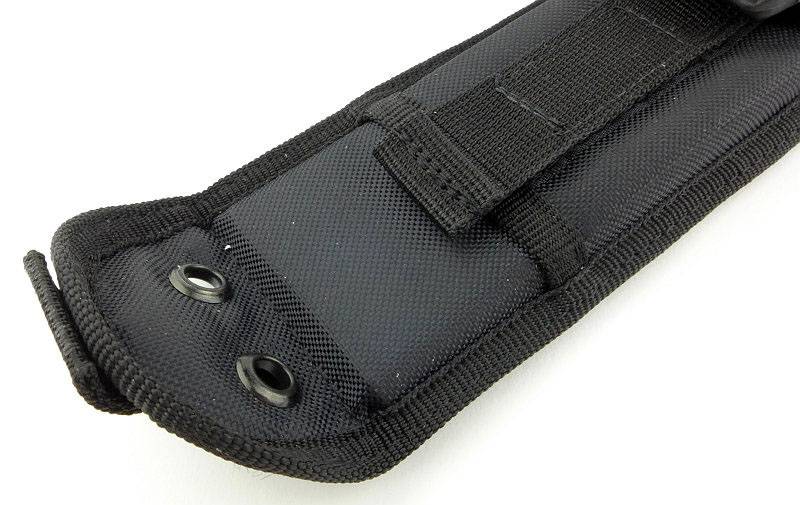
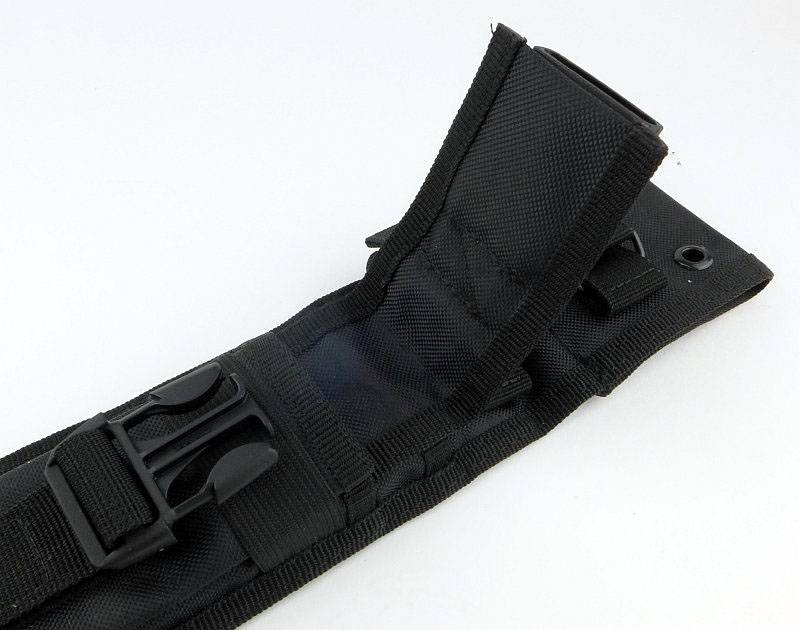
Before going back to the knife, a quick look at a few details for the sheath. Metal eyelet holes are provided for a leg tying point.
An expanding pocket is kept closed with a plastic snap-buckle.
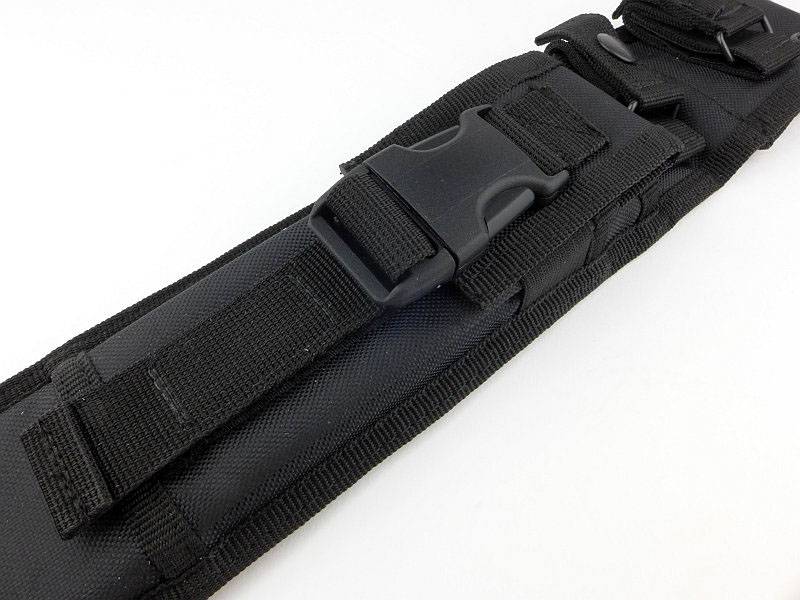
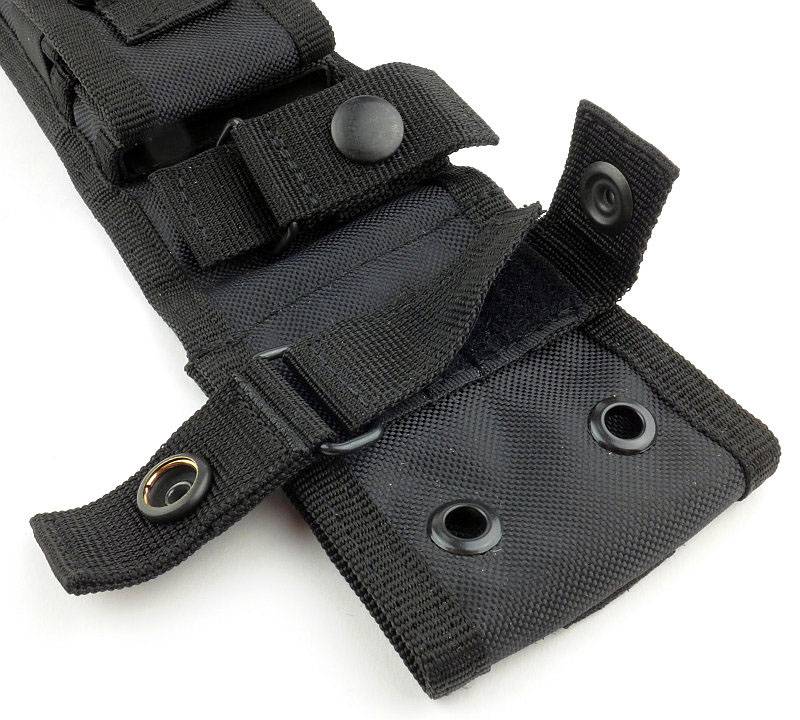
Opening the pocket shows a fixed elastic strap keeps the pocket neat and tight onto whatever is held in the pouch.
Two straps with popper closures are used to secure the handle when in the sheath.
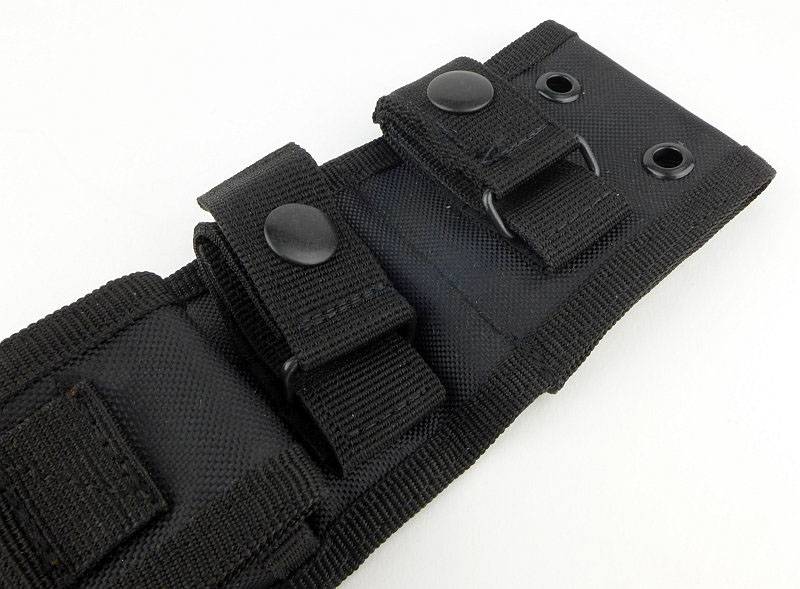
Both the knife retention straps are adjustable to allow the user to tighten or loosen the grip on the knife to suit.
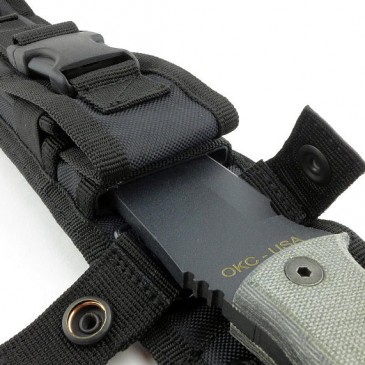
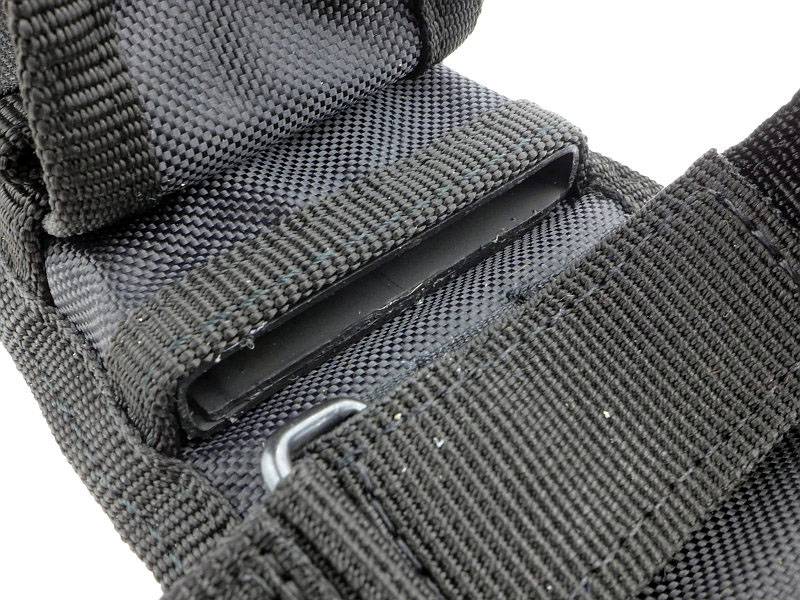
A kydex liner is provided in the sheath. Due to the thickness of the blade, the fit is snug.
The back of the sheath has PALS webbing (MOLLE compatible).
Enough of the sheath, back to the RD Tanto. Each slab handle is held in place with three screws.
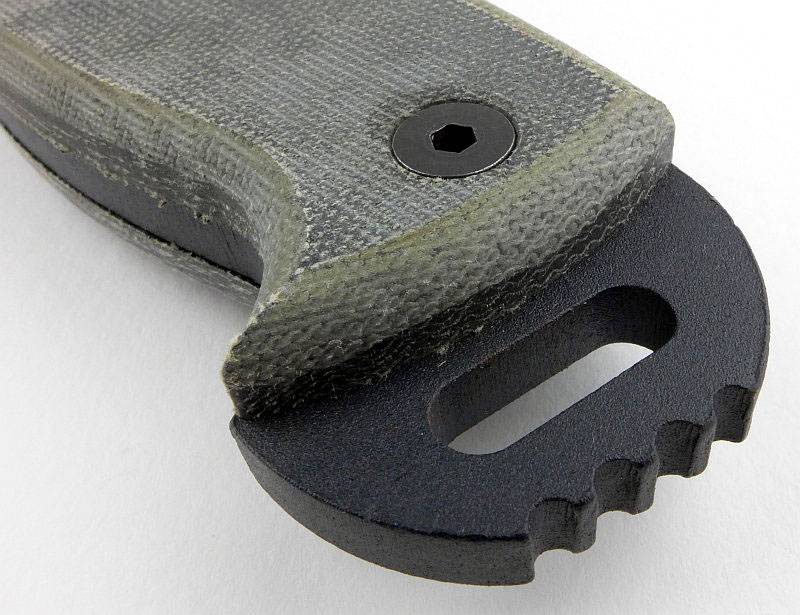
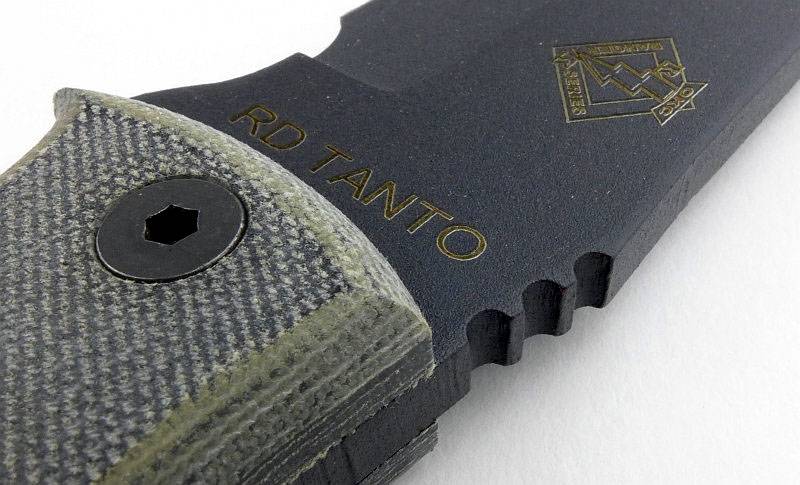
The RD Tanto has an exposed pommel with thumb-grip jimping. You can also see the texture and layers in the micarta handle slabs.
The Ranger Series handle around which this Tanto was designed.

A finger choil allows you to choke up the grip for finer work.
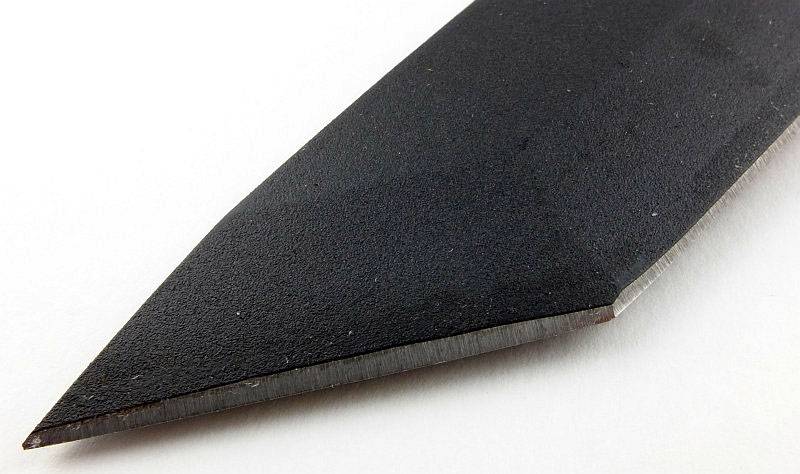
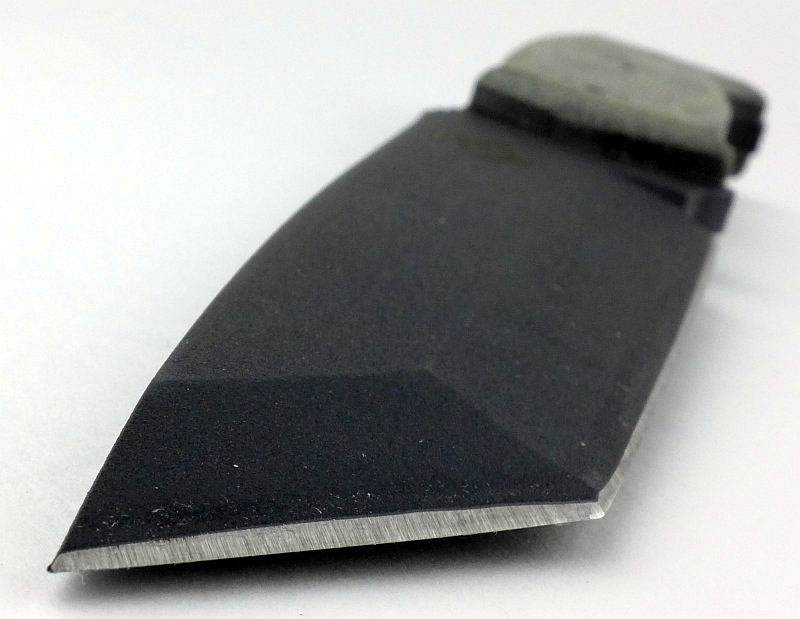
With the 1/4″ blade stock and V-grind, this tanto has a very strong point.
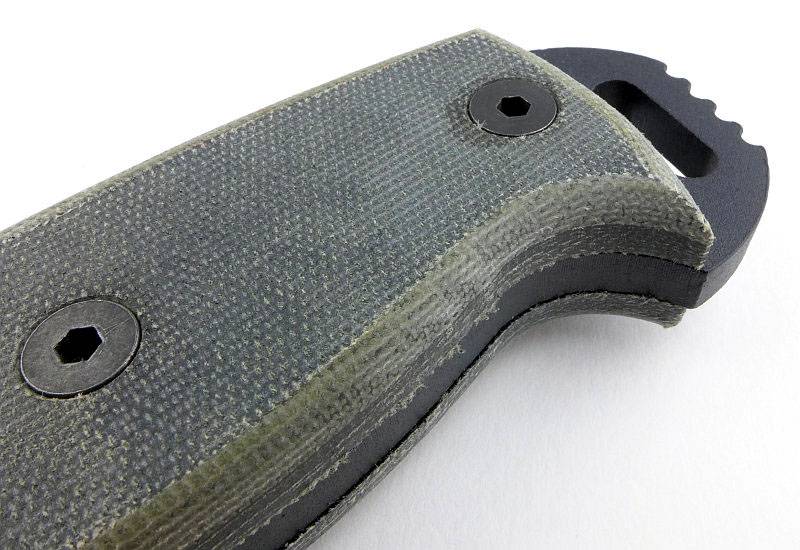
Another look at the grip hook. Here you can also see the micarta handle slabs extend slightly beyond the tang.
At the front of the handle is a similar hook forming the finger guard, and in front of that the finger choil.
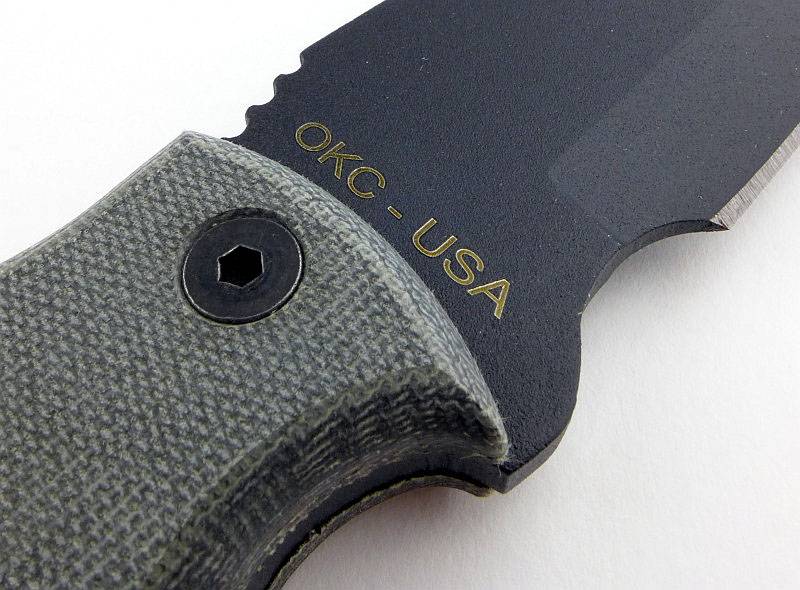
Jimping on the thumb ramp is coarse but effective.
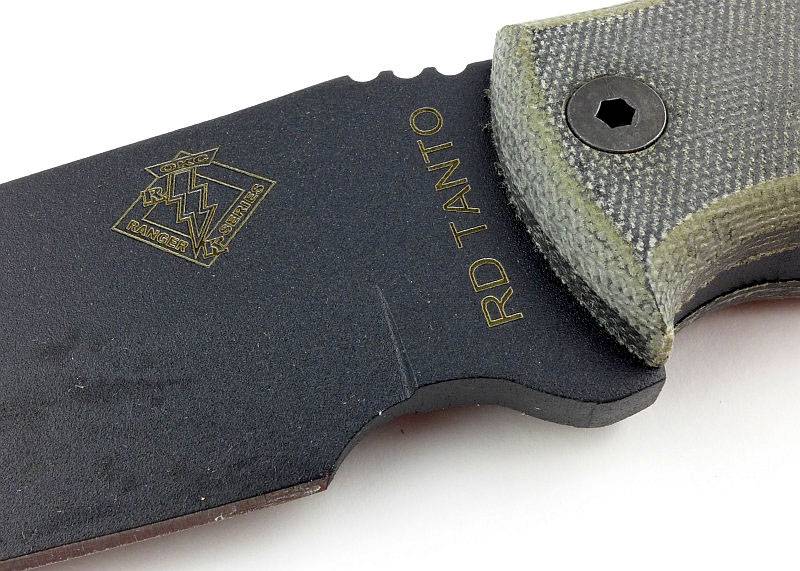
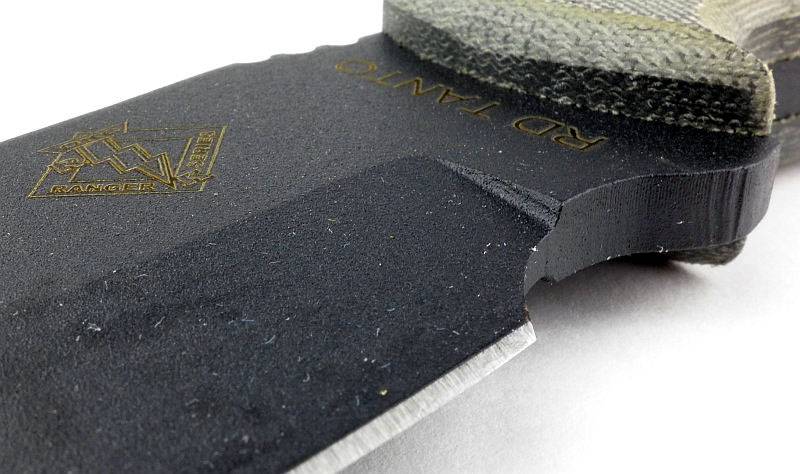
There is slight rounding on the plunge line. You can also see some evidence of the water-jet cutting used to create the basic blade shape.
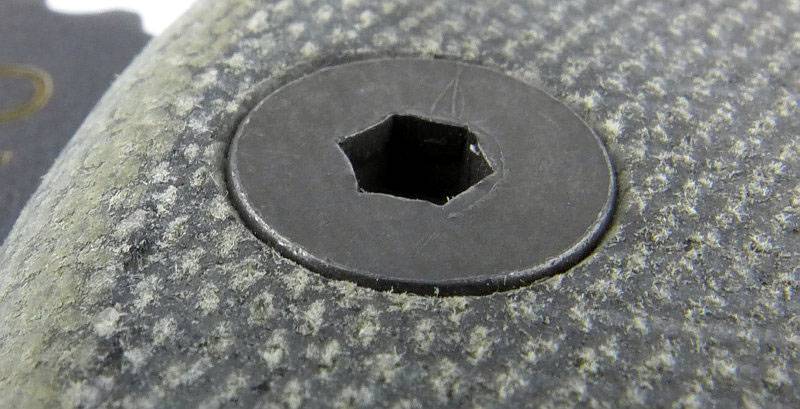
A closer look at one of the handle bolts and the raw sanded surface of the micarta grip.
This is a HEAVY DUTY blade!
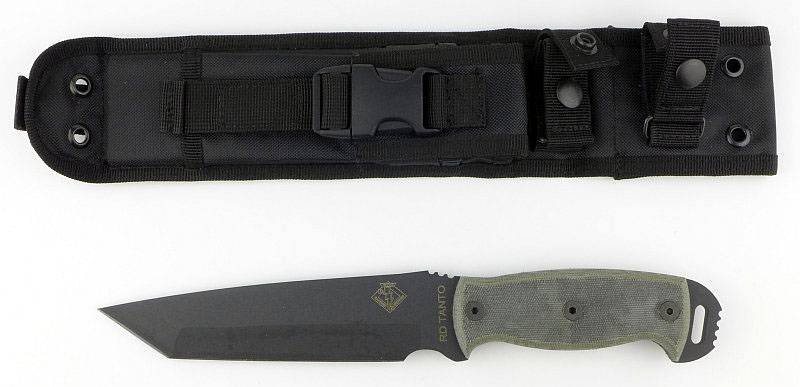
Next to the sheath for an overall view of the RD Tanto and the front of the sheath.
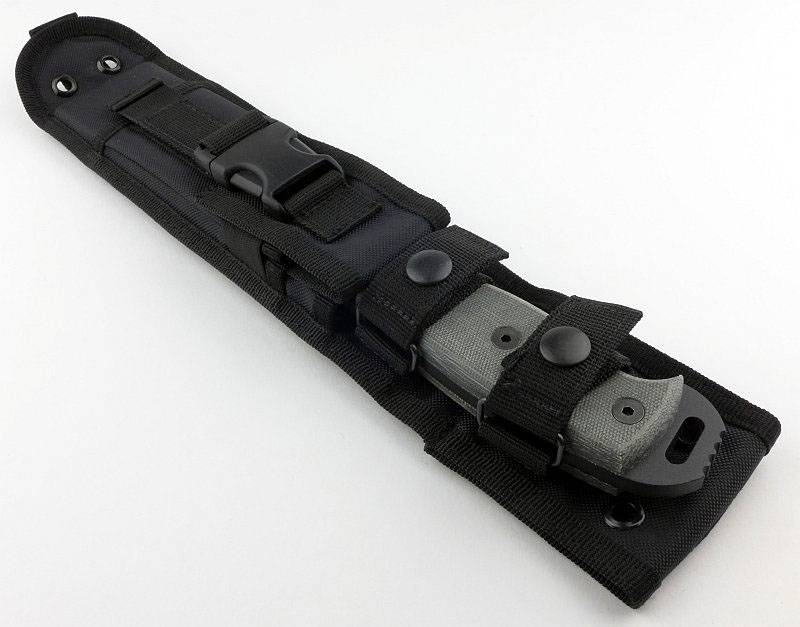
Flipping both over to check the other side.
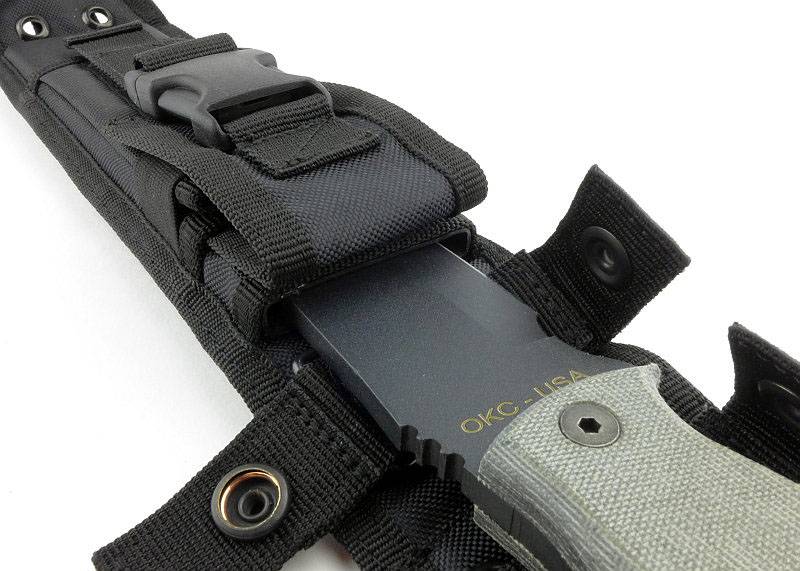
Due to its thick blade stock, the RD Tanto rubs all the way in when inserting into the sheath.
With both straps closed there is no chance of this knife coming loose.
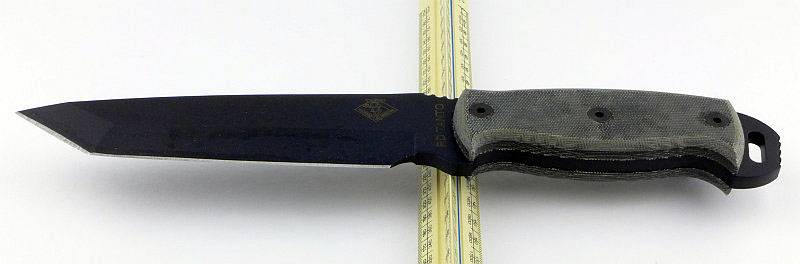
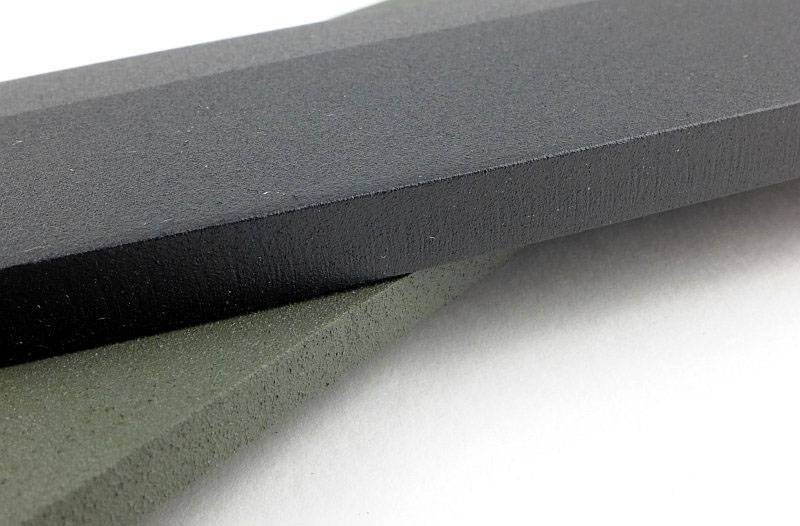
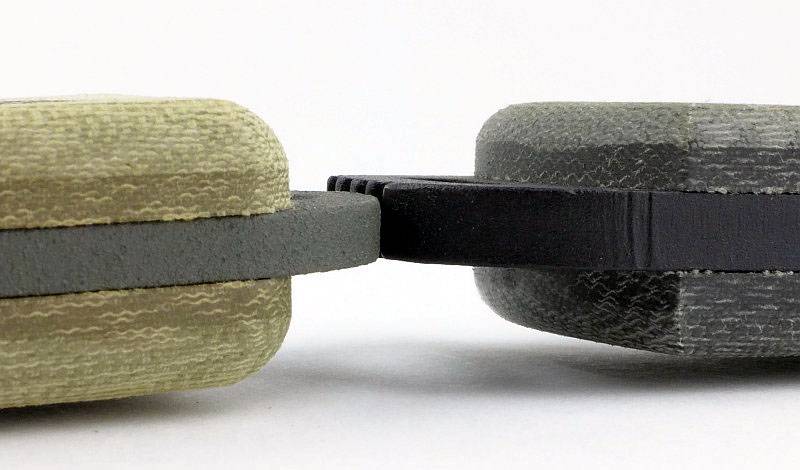
We will see more comparisons of blade thickness in other reviews in this OKC series, but here is a comparison to the RTAK II. The RD Tanto is substantially thicker.
Placed pommel to pommel, the RTAK II and RD Tanto compared again.
What it is like to use?
With a seriously heavy duty knife such as the RD Tanto, before looking at what it is like to use, it is important to consider your expectations for a knife like this and what it will give you.
There is little finesse in a knife of such heavy build – it is a bruiser and unashamed of that. Built for those jobs you would balk at using a knife for, but you want to be prepared for and can only justify carrying one knife/tool.
So if you want to do some delicate whittling and sophisticated food preparations but still want to be able to breeze through a fire door or release someone trapped in a vehicle, you will be disappointed.
For everyday tasks this knife is vastly over engineered and will disappoint most with its cutting characteristics. But, this is NOT why you choose a knife like this.
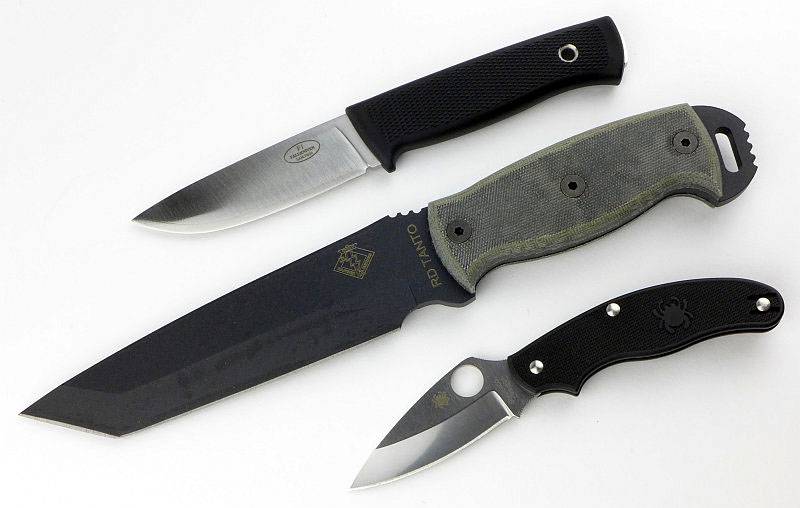
Look at it next to the Fällkniven F1 and a Spyderco UK Pen Knife. This photo doesn’t do justice of the heavy build in relation to those other knives.
Having put aside the notion that this might go on your belt or pack for ‘normal’ knife work, we can move onto its more serious purpose – Heavy Work.
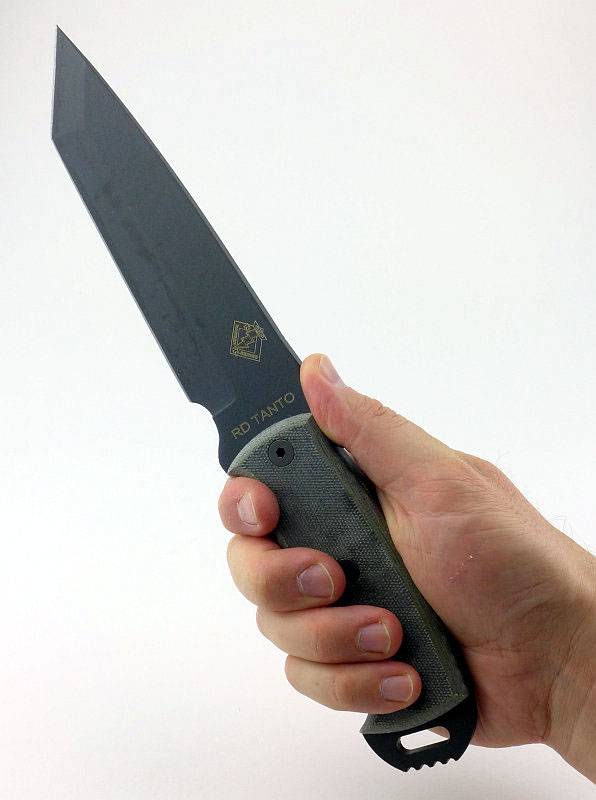
My hands take XL sized gloves and the grip fills my hand well. When you are really going to be beating a knife the last thing you want is a slim grip, so a good handful makes for a solid grip.
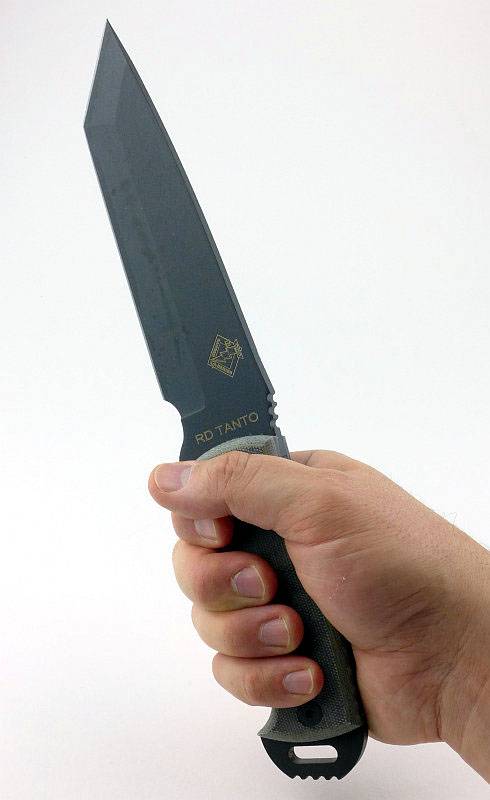
As penetration is a Tanto’s strong point (pun intended) the thumb ramp combined with deep hooks on the grip gives you a great power behind the thrust.
You can either hammer on the exposed pommel or in this case give something a good pounding with it.
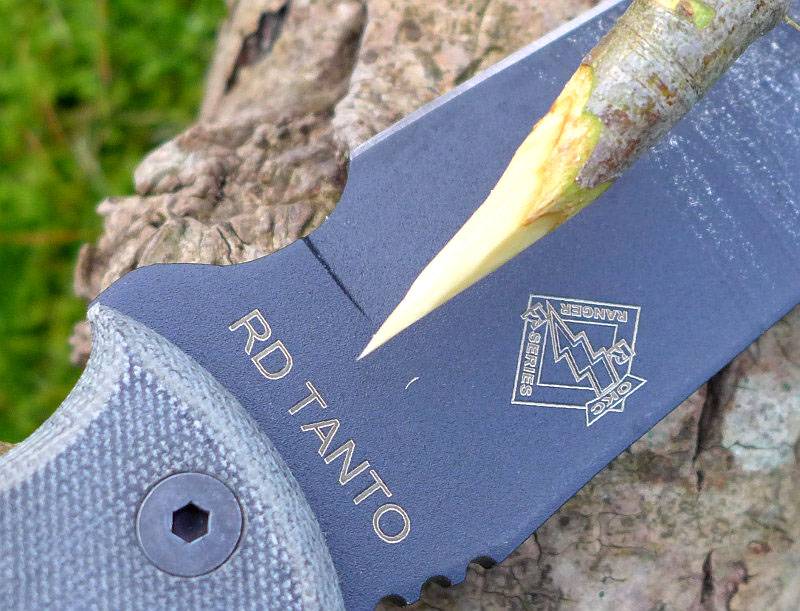
Taking the RD Tanto out for a few woodland tasks it was surprisingly capable, but does feel heavy. One of the comparisons I made to the other OKC knives was in putting a point on a stick. Due to the steep edge bevel, the RD Tanto had a tendency to slide off the stick and this resulted in a long point which was formed like this due to the cutting action tending to push away from the centre of the stick. The edge itself is sharp and cuts cleanly but needs to be angled far more ‘into’ the material than most.
Will you want a knife like this? If you want to be prepared for all eventualities, then yes I would say you do. It would not be my every day choice, but it is a choice I want to have and a knife I continue to grab when preparing for certain situations.
To date I’ve not had any doors to demolish, or vehicles to gain entry to, but can tell you this is a tool I would happily take for the task. During some severe weather, which was threatening structural damage to buildings, the tool I kept within arm’s length at all times during the threat was the RD Tanto, and it gave me confidence to know I had it.
Review Summary
The views expressed in this summary table are from the point of view of the reviewer’s personal use. I am not a member of the armed forces and cannot comment on its use beyond a cutting tool or field/hunting knife.
Something that might be a ‘pro’ for one user can be a ‘con’ for another, so the comments are categorised based on my requirements. You should consider all points and if they could be beneficial to you.
| _______________________________________________ | _______________________________________________ |
| Things I like | What doesn’t work so well for me |
| _______________________________________________ | _______________________________________________ |
| Super Heavy Duty Build in 1/4″ blade stock | ‘Feels’ too heavy for daily tasks |
| 5160 spring steel | Steep edge angle |
| Tanto point penetration | Edge can bind during wood preparation |
| You can confidently work this knife hard! |

Discussing the Review:
Please feel free to add comments to the review, but the ideal place to freely discuss these reviews is on a forum. If you started reading the shorter forum version of the review, but followed the link this full exclusive review, please return to that forum to discuss the review there.
If you read the review entirely on Tactical Reviews, please consider one of the following to join in any discussion.
EdgeMatters – Sponsored Reviews (UK based Forum for Knife Makers and Collectors)
BladeForums – Knife Reviews (US based Forum for Knife Discussion)
CandlePowerForums – Knife Reviews Section (Largest and Friendliest Flashlight Community Forum)
