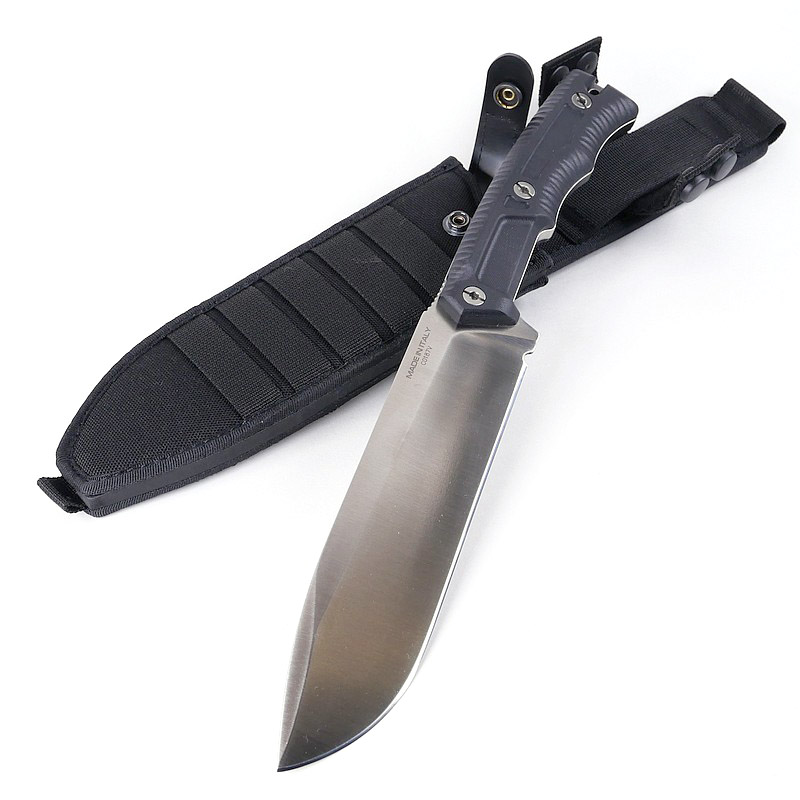
Epic Knife Review: Aitor Jungle King Series 1, 2 and 3 – Part 2

Join me in the continuation of an epic super-detailed two-part review of the AITOR Jungle King knife series. For me, this style of knife focuses on the fun in outdoor knife use that is so often overlooked due to it being fashionable to dismiss any knife if it doesn’t have a full tang and latest super-steel. Let’s allow ourselves the simple enjoyment of using different knives, and with the Jungle King Series, Aitor have packed them with interesting and useful features.

This epic review of the Aitor Jungle King knives has so much detail I’ve had to split it into two parts. In this, the second part, we will explore using the plethora of features Aitor give you, and some valuable insights into these interesting knives.

See Part 1 for the technical details and photo galleries showing all the features. Read on here in Part 2 for practical testing and insights plus a unique insight into the madness of UK knife law.

The madness of UK Knife law (and the global epidemic):

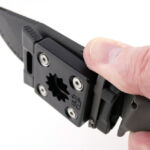
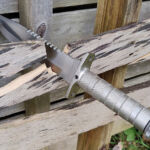
I’ve had to start Part 2 with this section for two main reasons. Firstly, in order not to break a new UK knife law “The Criminal Justice Act 1988 (Offensive Weapons) (Amendment, Surrender and Compensation) Order 2024″ when it came into force, I had to modify the Jungle King 1, as overnight this knife became an illegal offensive weapon in the UK, which was clearly a danger to society and must be destroyed.

Fortunately the relatively minor reshaping of the knife tip brought the Jungle King’s blade under this terrifying 8” threshold and filled it with fwuffy bunny wabbit love meaning the UK was safe again 🙂

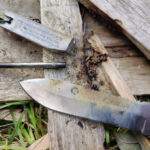
In the gallery, the masking tape was used to mock up the required position for this modification and finalise the angle for this small reverse Tanto. Such a pity to have to make this alteration, but the tip strength will be higher with this modification. The material was removed using a belt grinder, and definitely proved the hardness and wear resistance of the Aitor heat treat as it did resist the change and take longer than expected. It was however worth it to feel I had made the country a safer place to live in (this was said with sarcasm).


Comparison of size and handling:

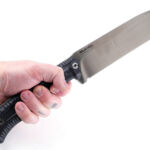
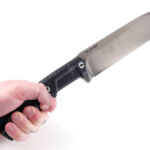
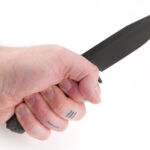
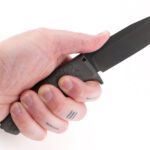
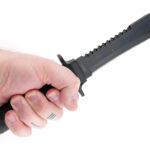
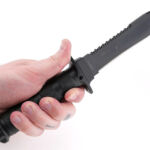
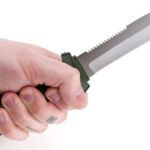
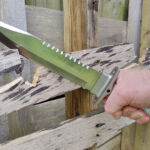
I take an XL size Glove, and this gallery steps through the models from Jungle King 1 to 3 giving a sense of how they handle.


New Edges for All:

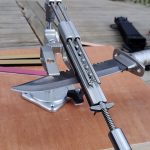
I did give myself quite a job with the major reprofiling of all three blades, and although there was a lot of metal needing to be removed, it was worth the effort as this has transformed all the Jungle King models.

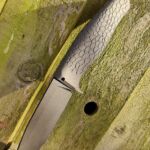
All blades were taken to 17.5 DPS.


The Pallet Chop test:

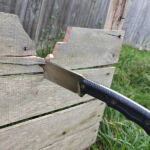
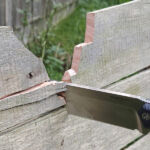
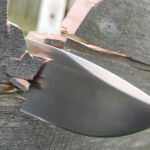
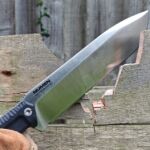
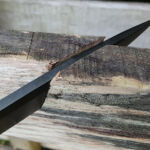
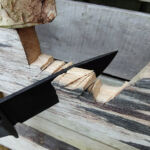
This is a no-holds-barred chopping test. Initially chopping directly with the knife, and then, if required, using a baton to drive the blade into the board.
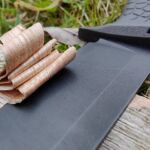
The Jungle King 1 simply blasts through this test under its own weight, a powerful chopper without any jarring or bounce. The difference in chopping with the Jungle King 2 is huge. Its weight, or lack of, in comparison to the Jungle King 1 makes it much less effective; so step in the baton. The blade profile is also a wider wedge, so takes more effort to drive it in deeply, and the angle of cut is critical. As the Jungle King 2 progresses through this cutting task, it becomes more difficult to do as it needs enough space for the baton to be able to strike the blade.
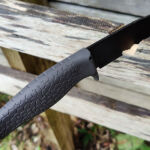
Last up is the Jungle King 3, lightweight and a plastic handle – so “what are you doing?” you might well ask. The point is to see if it could and what I found was a ‘Yes…but’ answer. Right here in this gallery, the Jungle King 3 was used as it is, with the tailcap and survival kit in place. After three strikes on the blade spine, the brass threaded insert broke free of the handle. The lesson is; don’t baton with the Jungle King 3 straight out of the sheath, however, this story is to be continued…


Aitor Saw-Backs:

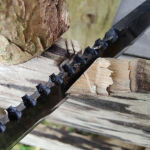
With the Jungle King 1 and 2 featuring the Aitor Saw Back, how do these fare? As with almost all saws on the spine of a knife blade, it is best to consider these a notching tool rather than a full cross-cut saw. Depth of cut is limited to more or less the depth of the saw teeth before the saw starts to bind in the cut and progress stops as there is no clearance. The saw-backs do help give a square cut for making pegs, traps, cooking stands, so are useful, but won’t allow you to saw off branches.


Camp Cutting and Fire Lighting:

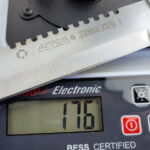
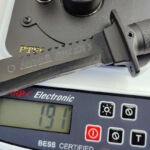
Straight up I must say that initial out-of-the-box cutting tests were disappointing. I normally would try to use the factory edges as much as possible. However the edge reprofile, and sharpen to shaving sharp (less than 200 BESS shaves), has made the Jungle King knives eager cutters and a pleasure to use. The fineness and delicacy of cut the Jungle King 1 manages surprised me. The large blade and handle allowing for controlled power to be applied to the cuts. Moving to the Jungle King 2 and it feels so light in comparison, despite its all metal construction, and although also cutting very well, with good control, the advantages of the larger Jungle King 1 are apparent.
Lightest of all, the Jungle King 3 with the slimmest blade, has a tendency to bite in more deeply that you want, and its smaller size and weight becomes apparent as you feel it is harder work for the same tasks; but it is significantly lighter and easier to carry.
All the Jungle King knives stood up really well with the new edge geometry, holding their edges and not showing any damage.
The fire-lighting tests were a mix and match, with the magnesium block fire steel from the Jungle King 1, and using the easier to handle Jungle King 3 for striking and shaving the magnesium block. I chose to use the magnesium block mounted firesteel as the small fire steels in the survival kits are uncomfortable to hold during striking, so the magnesium block provides a stable platform for this. Unfortunately, during this test, the fire steel came away from the magnesium block, leaving me having to hold the firesteel on its own anyway.
Though not a requirement, the magnesium shavings do help get a flame going if the tinder is not perfectly dry, so try without first, but then you can always give it a boost if needed.


That Iconic Slingshot:

Such an overused word ‘iconic’ but it is true for Aitor’s Jungle King knives. Again one of those highly copied features, for the reason it is simply great fun. Would I expect to use it to hunt in a survival situation? Honestly, no, I’ve never been that good with a slingshot, and naturally available ammunition is not consistent in size, shape or weight. Like the lottery, if you don’t play you can’t win, so in desperate times an attempted shot is better than no shot. Added to that, for survival, when you finally might need to try, the slingshot bands are latex, and latex bands degrade over time, so unless you make sure to replace them every year or two with fresh bands, you may find they are unusable.
Initial testing here was with the Jungle King 1 and 2. When using the Jungle King 3 I found it significantly less comfortable to hold, with the smaller sheath digging into my hand more.
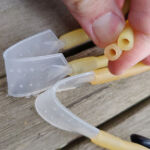
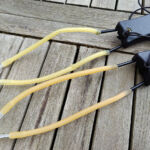
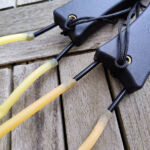
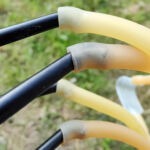
The slingshot bands appear to be the same specification, even if a slightly different colour. Assembly is very easy just pushing the ends of the bands over the slingshot arms. Drawing the slingshot makes the tubes grip onto the metal arms, so they don’t slide off.
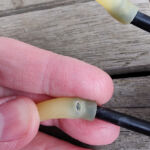
For this plinking test I used ‘mud balls’ (clay slingshot ammo), and two factors presented very quickly. For each and every shot, the slingshot arms are knocked forward (as shown) out of position, so need to be pulled back into place for the next shot. Most seriously, after only five shots, the bands developed holes from the unfinished ends of the slingshot arms. At least one arm for each Jungle King model has a sharp corner which cut through the slingshot band. Testing was cut short as I did not want to continue with the damaged bands.


The Slingshot Fix:

After that initial testing session being cut short, I rounded off the ends of all the slingshot arms with a file, on all the Jungle King models. Not a perfect job by any means, but leaving no sharp corners. Then trimming off those damaged ends from the bands (at least this is an easy fix, by just shortening them a couple of centimetres) and going again.
Now, after I got tired (lost track of how many shots), there was no damage to the bands at all. I did get more accurate, but would not have expected to hit a rabbit, squirrel or bird sized target. Fun, just not if my life depended on it.


General use of the Jungle King knives:

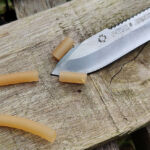
This is a bit of a hotchpotch section to round up a few things in one last gallery. A reminder that you don’t need to be on jungle adventures to use these knives; I needed to cut some foam rubber to size and the large blade of the Jungle King 1 was ideal to give me the a perfectly clean wide flat cut. Slicing easily with the same untouched edge that was previously put to work for the pallet chop and cutting tests.
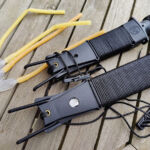
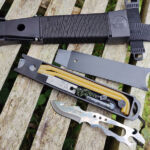
A note about the Jungle King 1’s sheath, and the slide-out tray plus metal sheath divider, which fell out. I suspect the slingshot practice session caused the metal divider to come loose, and the photos in the gallery show the correct way round for the metal divider to be fitted. The slightly upturned end actually provides some pressure on the blade of the knife to stabilise it in the sheath, so it must be fitted back in this way round.
For the final part of the gallery I am revisiting the Jungle King 3 batoning test where previously the brass threaded insert came loose. I took the brass insert out completely, cleaned it up and epoxied it back in place. I know I used more glue to fix it than there was before.
The main lesson learned was that actually you can baton with the Jungle King 3, but if you do, make sure you remove the tailcap and survival kit first. Without the tailcap in place the shock from the baton strikes won’t hit the threaded insert so hard. In fact what you see here was a full-on batoning session and only the smaller size of blade was slowing progress. No damage was sustained at all using the Jungle King 3 like this, and though I know the threaded insert is more firmly epoxied in place than it was originally, I think this approach would probably have been fine.


What is it like to use?

Are the Jungle King Knives the best survival knives you can buy? Would a modern military special forces team choose these knives for critical missions? I think not – But this is not the point.

The Jungle King knives are capable, if somewhat unwieldy, tools, with plenty of features. They are enjoyable to use and find uses for their features.

Working on the basis the Jungle King 3 is intended for a younger user (who can then progress to the Jungle King 1 or 2 in time), we consider it as a leisure knife to use while camping, and practice both general camp and survival skills.

Though a seriously capable knife, the Jungle King 1, as a total package, is big and heavy, so you might not want to carry it far. Which brings us to the ‘Goldilocks’ model of the series, the Jungle King 2 – a practical carry option and still packed with features, including the secondary knife. It is understandable why this was copied so much.

As a Gen-Xer, these knives have been highly influential and are nostalgic; regardless of this, and current trends, let your hair down and have some fun with these strong and feature-packed knives.


Review Summary

The views expressed in this summary table are from the point of view of the reviewer’s personal use. I am not a member of the armed forces and cannot comment on its use beyond a cutting tool or field/hunting knife.

Something that might be a ‘pro’ for one user can be a ‘con’ for another, so the comments are categorised based on my requirements. You should consider all points and if they could be beneficial to you.

_______________________________________________
What doesn’t work so well for me
_______________________________________________

Sharp ends on slingshot arms damaging the rubbers.
Factory edges are disappointing.
UK Only – JK1 is no longer legal as the blade is over 8″.
Saw back cut depth very limited.
JK3 compass cannot be used while fitted to the handle.
A metal handle will be VERY cold to use in winter.

_______________________________________________
Things I like
_______________________________________________

Very robust all metal construction for JK1 and JK2.
Classic, Iconic and historically Influential design.
A choice of size to suit all.
Individually HRC hardness tested/verified blades.
Good edge performance and resilience during testing.
JK1 and JK2 include a secondary full tang knife.
Hollow handles carry survival essentials.
Slingshot incorporated into all models.
JK1 and JK2 include emergency cord.
JK1 and JK2 include a sharpening stone.
JK3 brings inclusivity for the younger user.
Fun to use.

Review Videos

Starting with a short format sixty second review of the Jungle King 1:


Starting with a short format sixty second review of the Jungle King 2:


Starting with a short format sixty second review of the Jungle King 3:


Onto a full video review covering many more details of all three:


Discussing the Review:
Something new – will it work? A Tactical Reviews Subreddit.
TacticalReviewsChat on Reddit
Please visit there and start/join the conversation.

Epic Knife Review: Aitor Jungle King Series 1, 2 and 3 – Part 1

Join me in an epic super-detailed two-part review of the AITOR Jungle King knife series, the Jungle King 1, 2 and 3. For me, this style of knife focuses on the fun in outdoor knife use that is so often overlooked due to the fashion to dismiss any knife if it doesn’t have a full tang and the latest super-steel. Let’s allow ourselves the simple enjoyment of using different knives and with the Jungle King Series, Aitor have packed them with interesting, fun and useful features.

This epic review of the Aitor Jungle King Series knives is has so much detail I’ve had to split it into two parts. In this, the first part, you can see all the design details and features of each model – a technical presentation. Part two will then explore using the plethora of functions Aitor give you.

The Jungle King I is one of the most famous knives on the market, and as we know it now, was released in 1985 following the huge increase in demand for this style of knife, first made popular due to the movie ‘First Blood’ and its sequels.

It was not long before the Jungle King II joined its bigger brother, and then went on to be (probably) the most copied design ever for this type of survival knife. It is these inferior copies that gave the style of knife a bad name. The Aitor Jungle King II is not the same, as the hollow handle is made of metal and is built for heavy use. Each blade is Rockwell hardness tested during production, proudly shown on the blade in the “Hardness Control” circle engraved to highlight this quality control check.

The Jungle King III is the little brother of the Jungle King knife series. Agile and fast, its design is versatile and functional make it a very capable tool. The Jungle King III joins the family and gives you a choice of size and weight.

Jungle King knives have been issued as part of basic military equipment by some armed forces, including the Special Operations Unit of Marine Spanish Armed Forces. Over the years, the Jungle King has been considered by many experts as the best survival knife in the world, pioneering and unique, being one of the best in its category. Its design, versatility and functionality make it very useful for survival.

The entire Jungle King Series (at the time of writing) is represented in this review, so we’ll be looking at the Jungle King 1, 2 and 3 (or I, II and III).

Jungle King 1 – What’s in the box?:

The Jungle King arrives in a cardboard box, simply the sheathed knife and nothing else. I’ve included an initial indication of size as here it is held in my XL glove size hand.


A good look round the Jungle King 1’s Sheath – Things to look out for here are:

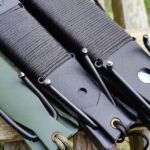
For this gallery we are looking at just the sheath, not any of the extras in it. A simple cord leg strap with snap together fastener is included. Then, sorry, but I do need to use the word ‘iconic’ , we have the iconic folding slingshot arms. The main body of the sheath is wrapped in cord. The cord serves two purposes, first is that it will be a seriously useful survival item, the other is that while stored on the sheath is covers up the sheath mounted sharpening stone which you can see peeking out as I pushed the cord aside slightly.
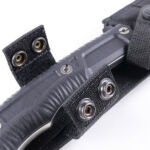
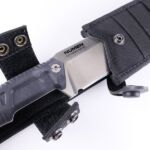
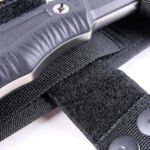
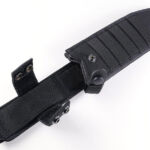
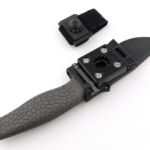
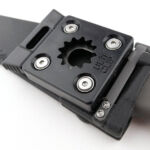
For the retention strap Aitor use a quick-release toggle type of fastener, more commonly used on military MOLLE pouches. Reliable and strong and unlike a press stud it can’t loosen over time. Similarly, the belt loop also has the quick-release toggle to open and allow it to be fitted to a belt without undoing the belt.


A good look round the Jungle King 1’s Kit – Things to look out for here are:

We saw a hint of this in the previous gallery; tucked into the sheath is a slide-out tray, and a full tang secondary knife / multi-tool.
Held within the tray are the slingshot rubbers, a small glass vial, and a magnesium block with firesteel. The back of the tray has a cut-out to house the secondary knife, plus a signaling mirror. Also on the tray are some molded in reminders for signaling protocols.
So, we actually have a whole other knife, the Aitor Skinner JK1, a full tang multi-purpose blade, with gut hook, spanner, bottle / can opener, and flat head screwdriver. Plenty of holes are provided to lash this to a pole as a spear point.
For the details of the Jungle King I hollow handle kit, please see the feature length video.


A good look round the Jungle King 1 Knife – Things to look out for here are:

Onto the Jungle King Knife itself. Big and full-metal construction makes this a beast. The handle is cast from the same steel as the blade, and the tailcap is non-magnetic stainless steel, so this is full stainless steel construction. As well as being epoxied into the handle, the blade tang has a large roll-pin driven through it to make the join very strong, while the front part of the handle is extended to further support the blade to handle join.
A hollow grind is used for the primary bevel, and the Jungle King features a saw-back using Aitor’s unique pattern. Don’t miss the fact that during production each blade is individually HRC tested and this test indentation is identified with an engraving on the blade to highlight it. The sweeping swedge finishes off the classic blade shape.
Unscrewing the tail-cap reveals the survival capsule kit in the handle, and inside the tail-cap is a button compass. There is an o-ring to keep the handle compartment water tight, and inside the handle a spring is used to stop the capsule rattling, and helpfully push it out slightly as you open the handle. For the details of the Jungle King I hollow handle kit, please see the feature length video.


Jungle King 2 – What’s in the box?:

The Jungle King 2 arrives in a cardboard box, simply the sheathed knife and nothing else.


A good look round the Jungle King 2’s Sheath – Things to look out for here are:

For this gallery we are looking at just the sheath, not any of the extras in it. As with the Jungle King I, a simple cord leg strap with snap together fastener is included. Then, again, we have the iconic folding slingshot arms. The main body of the sheath is wrapped in cord. The cord serves two purposes, first is that it will be a seriously useful survival item, the other is that while stored on the sheath it covers up the sheath mounted sharpening stone, which you can see peeking out as I pushed the cord aside slightly.
As with the Jungle King 1, for the Jungle King 2’s retention strap, Aitor use a quick-release toggle type of fastener, more commonly used on military MOLLE pouches. Reliable and strong and unlike a press stud it can’t loosen over time. Similarly, the belt loop also has the quick-release toggle to open and allow it to be fitted to a belt without undoing the belt.


A good look round the Jungle King 2’s Kit – Things to look out for here are:

Tucked into the sheath is a slide out tray, and a just as with the Jungle King 1, includes a full tang secondary knife / multi-tool.
Held within the tray are just the slingshot rubbers as there is less space inside the Jungle King 2’s sheath. The back of the tray has a cut-out to house the secondary knife, plus a signaling mirror. Also on the tray are some molded in reminders for signaling protocols.
So we do have a whole other knife, the Aitor Skinner JKII, a full tang multi-purpose blade, with gut hook, spanner, bottle / can opener, and flat head screwdriver. Plenty of holes are provided to lash this to a pole as a spear point.


A good look round the Jungle King 2 Knife – Things to look out for here are:

Onto the Jungle King 2 Knife itself. As with the Jungle King 1, the handle is cast from the same steel as the blade, and the tailcap is non-magnetic stainless steel, so this is full stainless steel construction. As well as being epoxied the blade tang has a large roll-pin driven through it to make the join very strong while the front part of the handle is extended to further support the blade to handle join.
A hollow grind is used for the primary bevel, and the knife features a saw back using Aitor’s unique pattern. Don’t miss the fact that during production each blade is individually HRC tested and this test indentation is identified with an engraving on the blade to highlight it. The sweeping swedge finished off the classic spear-point blade shape.
Unscrewing the tail-cap reveals the survival capsule kit in the handle and inside the tail-cap is a button compass. There is an o-ring to keep the handle compartment water tight, and inside the handle a spring is used to stop the capsule rattling, and push it out slightly as you open the handle.


A good look round the Aitor Jungle King 2 Survival Capsule – Things to look out for here are:

The survival capsule…usually this is opened straight away and then quickly lost, or just never touched. Of course the idea is to pack in as many useful things as possible, which might help you or make some survival tasks easier. Aitor’s survival capsule contains two standard plasters, a sterile No. 23 scalpel blade, tweezers, fire-steel, two small safety pins, two sewing needles, some thread, plus a fishing kit consisting of three pre-tied hooks, a longer piece of line and three split shot. (Plus, don’t forget that they can sometimes oddly useful, the two staples that closed the bag containing the fishing kit.)
All these things are better to have and not need, than to need and not have.


Jungle King 3 – What’s in the box?:

In keeping with the rest of the series, the Jungle King 3 arrives in a cardboard box, simply the sheathed knife and nothing else.


A good look round the Jungle King 3’s Sheath – Things to look out for here are:

Being a simpler, smaller, lighter design for a younger user, the Jungle King 3 sheath keeps some of the character, but has less detail.

A simple cord leg-tie lace is included and needs to be knotted to use. Despite the simplification, Aitor have still included the iconic folding slingshot arms. The back of the sheath has a strip of webbing running along it (we’ll come back to this).
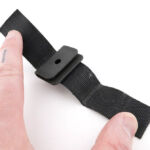
For the Jungle King 3, the retention strap uses a press stud and the belt loop has a quick-release toggle to open and allow it to be fitted to a belt without undoing the belt.


A good look round the Jungle King 3’s Kit – Things to look out for here are:

For the smallest in the Jungle King series, the sheath ‘kit’ is not really a kit, it comprises only the slingshot bands, tucked behind that webbing strip on the back of the sheath.


A good look round the Jungle King 3 Knife – Things to look out for here are:

Onto the Jungle King 3 Knife itself. Stepping away from the all metal construction, instead the handle is made from fibreglass-reinforced polyamide. As well as being epoxied into the handle, the blade tang has a roll-pin driven through it to strengthen the join.
A hollow grind is used for the primary bevel, and the spine has a double-bevel serrated edge. The Jungle King 3 is also individually HRC tested and this test indentation is identified with an engraving on the blade to highlight it.
For the Jungle King 3, the compass is always visible in the end of the tail-cap (although you do need to remove it to use it as the blade affects the compass direction). Unscrewing the tail-cap reveals the brass thread inserts used to ensure the threads last well. Inside the handle is a slim survival capsule kit plus a combination tool designed to fit round the capsule. This tool has a can/bottle opener, pry tool and flat head screwdriver.


The Blade and Handle – Detailed Measurements:
For full details of the tests and measurements carried out and an explanation of the results, see the page – Knife Technical Testing – How It’s Done.

The blade is made from MoVa / DIN 1.4116 which is identical to X50CrMOV15 steel.


The Factory edge up close:

Followers of Tactical Reviews will know my views on factory edges, but to recap:

Anyone using a knife will need to sharpen it. That first factory edge is just like the first tank of fuel that a new car comes with (or first charge of the battery).
A good factory edge is a ‘nice to have’ but not a ‘make or break’ for a good knife, as you will be putting your own edge onto it soon enough.
The factory edge does however indicate the care a knife maker has put into the final finish.
It is for this reason Tactical Reviews measures factory edge sharpness and specifications, and includes this information in the detailed technical testing.

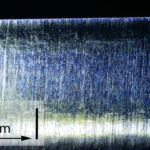
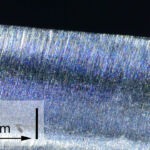
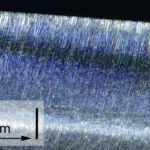
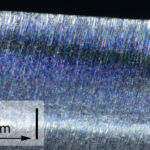
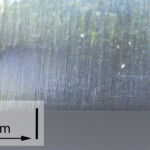
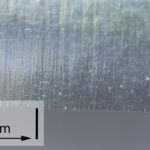
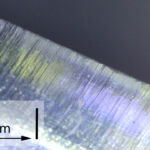
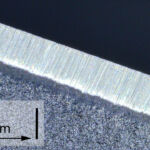
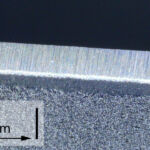
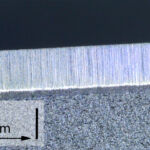
As a further look at the factory edge, this section has been added to include some high magnification photos of the factory edges.

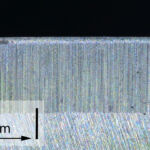
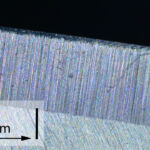
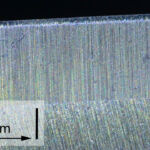
Remembering all these factory edges were around 500 BESS, which is not sufficient for my testing, they look quite good under magnification, but all needed to be reprofiled. The Jungle King 2 was the best of the three from the factory, but all these knives were utterly transformed by a good edge.

Jungle King 1


Jungle King 2


Jungle King 3


Part 1 ends here with the review videos included below. See Part 2 for all the practical testing and insights plus a unique insight into the madness of UK knife law.

Review Videos

Starting with a short format sixty second review of the Jungle King 1:


Starting with a short format sixty second review of the Jungle King 2:


Starting with a short format sixty second review of the Jungle King 3:


Onto a full video review covering many more details of all three:


Knife Review: Extrema Ratio AMF (A.M.F.)

Extrema Ratio AMF (Advanced Multi Function) a Detailed Review. My heart skipped a beat when I first saw Extrema Ratio‘s A.M.F. in an exhibition cabinet. Yes, it is a big knife, but it is because its design is inspired by a legendary classic of survival cutlery from the 1980s; and that classic happens to be one of my all time favourite knives! Join me in this Extrema Ratio AMF A.M.F. Review to see how Extrema Ratio have managed to surpass the classic in every way.

What’s in the box?:
The AMF arrives in a large, robust box, with a QC card. You certainly can’t miss this one!


A good look round the A.M.F.’s Sheath – Things to look out for here are:
Picking up on some of the details from the knife that inspired it, yet also being unmistakably Extrema Ratio. Front and back are well provisioned with webbing, giving you a wide variety of mounting options for both the AMF being mounted, and extras being mounted on the AMF. The leg tie is a nod back to the original sheath design.
On the back of the sheath the AMF comes with three 2M MOLLE systems straps, two of which also act as a belt loop.
Another distinctive feature is the Extrema Ratio removable/reversible/adjustable press-stud retention strap. The main body of the sheath has a tough liner to ensure the long blade stays where it should.


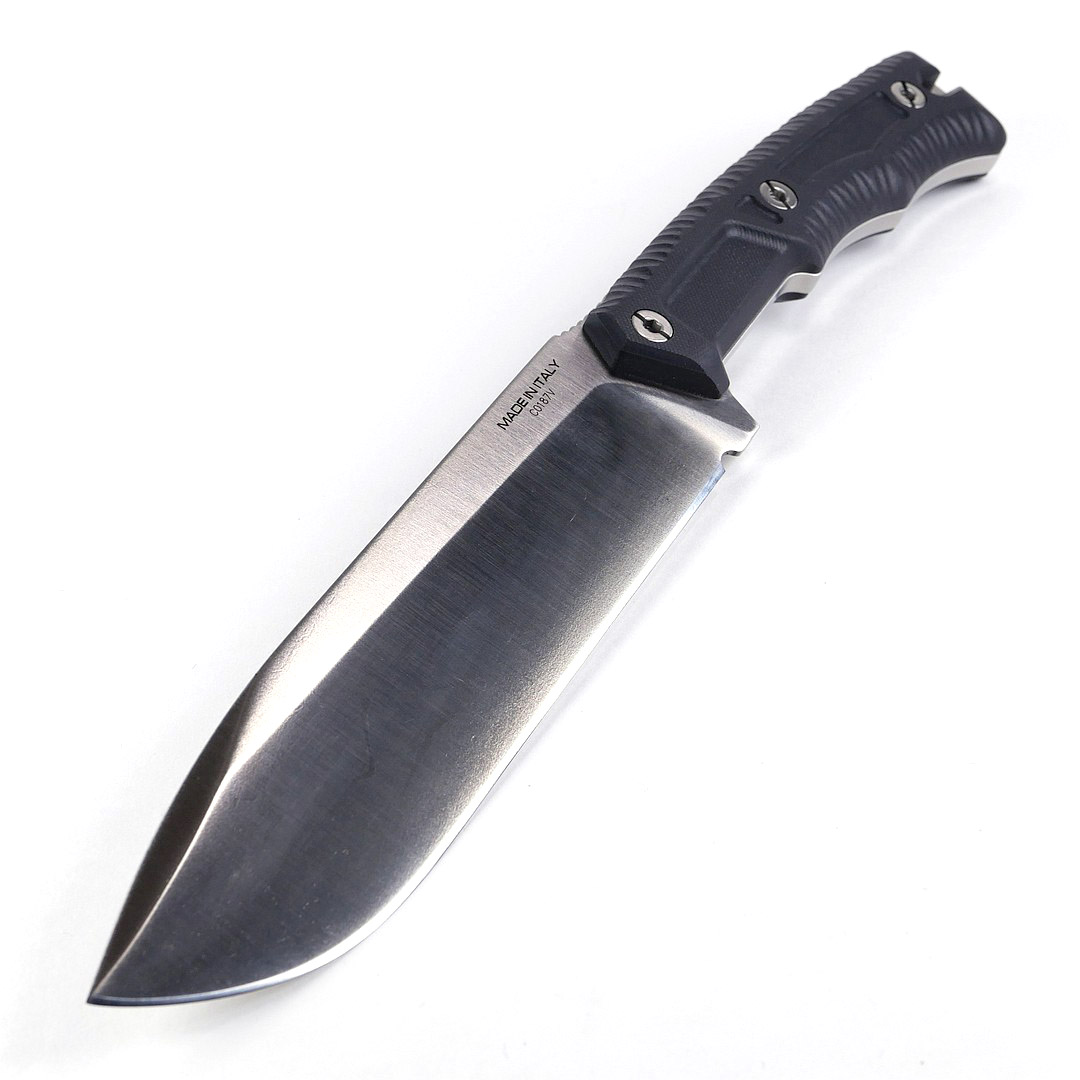
A good look round the A.M.F. – Things to look out for here are:
Just look at the purpose in that design; it is going to get the job done. It may be clearly inspired by the BMF, but Extrema Ratio have taken every aspect of this knife and made it their own. The aluminium guard has lashing points / lanyard holes, and a slight sweep forwards so the thumb can sit on the top guard much more comfortably than a straight guard. With the AMF being easy to strip down completely, this guard is removable as part of the strip down.
The cone shaped butt cap pommel leaves you in no doubt of the direct inspiration of the AMF. Extrema Ratio again making the design their own with the curved butt cap guard that is more usable and more protective than the original.
Completely new is the ability to strip down the knife for a deep clean, and this is achieved via a single hex bolt in the cone shaped butt cap.
For the handle, which on its own, you could recognise as Extrema Ratio thanks to the molded double finger grip, it is again inspired by an innovation of the original in its day (by using the cushioning material DuPont Hypalon for the handle), the AMF has a generous handful of shock absorbing Forprene.
Onto that 206mm long blade with simple clean lines and monster swedge defining its strong look.


The history of the legendary BMF:

This article is an Extrema Ratio AMF review, but I have to include some personal insights as the 1980s classic that is the inspiration for the AMF has been massively influential for me.

From the day I walked to the newsagents to pick up the latest issue of a magazine, it has been waiting 34 years for just this moment!! – A review of the BMF published in January 1991, along with the matching version of the BMF from my collection and Extrema Ratio’s AMF – improved in every aspect.

Some original text from Gerber:

Basic Multi-Function Survival Knife System™
Gerber’s BMF is the latest generation of survival knives. From its conception, the BMF was carefully researched and engineered to be the best survival knife available today.

This tough, heavy duty survival system is designed to withstand heavy use under the most extreme conditions. The 8-inch blade is ground from tough 1/4 inch thick high carbon surgical stainless steel, with Rockwell hardness of c54-55. We have purposely lowered the hardness several points to increase toughness. The chisel tooth saw is the result of countless experiments until we knew it was “just right”. It is designed for aggressive cutting of wood and other materials. The blade and stainless steel guards and but cap are treated with a non-reflective finish. The butt cap is specifically designed to endure heavy pounding, and is firmly attached to the full length blade tang. The most unique feature of the BMF is its revolutionary handle of highly compressed DuPont Hypalon. Hypalon’s semi-soft composition cushions the hand during heavy use, and provides a comfortable positive grip. Each BMF is hand-adjusted so that the point of balance is approximately at the front guard, which makes it comfortable to use, even during extended periods of heavy usage.

As much engineering and designed time went into the BMF sheath as the knife itself. Blackie Collins really “did himself proud” on this one. This sheath is made from black, heavy-duty DuPont Cordura and reinforced to provide protection for both the blade and user. Loaded with features, the sheath is specifically designed as a superior alternative to the hollow handle for carrying life sustaining and support accessories. It is compact and without protrusions to snag on brush or other objects in the field. Engineered to be silent, there are no hard surfaces other than rivets. A pocket at the top the sheath holds a quality, liquid-filled, jeweled compass. Permanently attached to the back of the sheath is a fine grain diamond sharpening hone, which is protected by a nylon cover when not in use. A unique accessory strap on the front of the sheath allows a folding knife sheath, survival, or other equipment to be attached. ALICE clips allow the BMF to be attached to standard issue military battle dress and harnesses. The ALICE clips are removable so that the BMF can be worn on a conventional belt. The BMF can be tied down to the leg or lashed to other equipment with nylon cord supplied with each sheath. (Dated June 1986)

The BMF was first released in January 1986 and discontinued in 1998. During this time it underwent a few changes and had 6 variations manufactured. I have managed to get hold of four of the six types with three pictured alongside the AMF in this gallery. The original 8″ plain, the 8″ saw back, and the 9″ plain version are shown here. The 8″ saw back was the hero-knife in the 1988 film Deadly Pursuit (aka Shoot to Kill).


The Blade and Handle – Detailed Measurements:
For full details of the tests and measurements carried out and an explanation of the results, see the page – Knife Technical Testing – How It’s Done.

The blade is made from N690 steel.
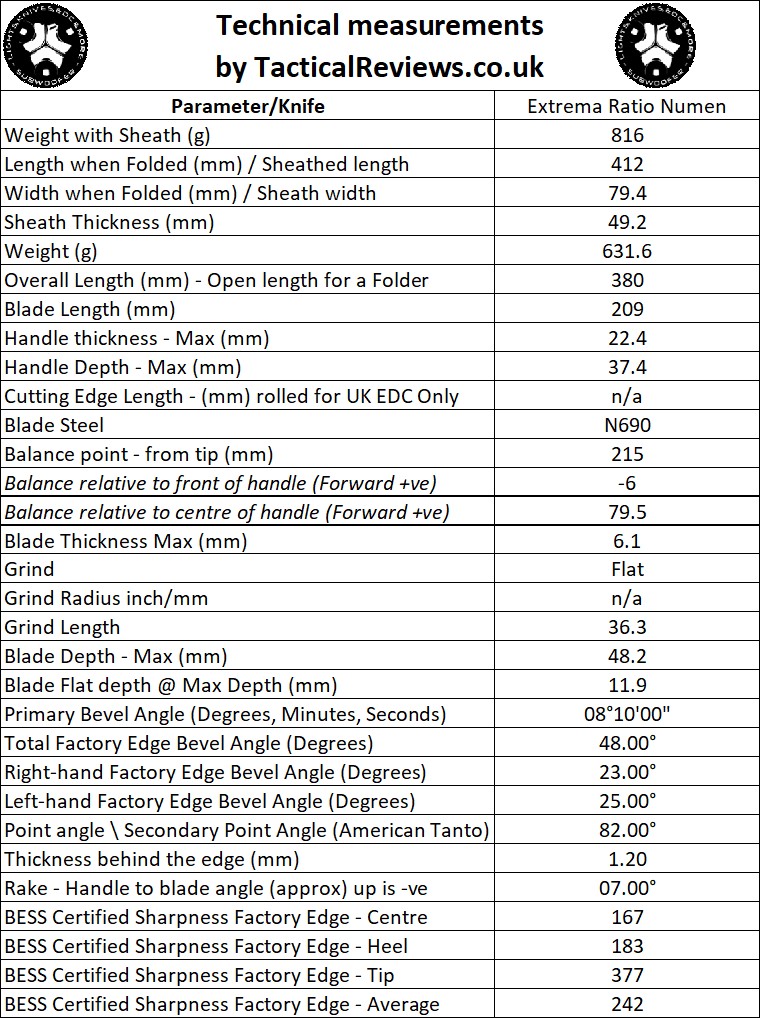

The Factory edge up close:

Followers of Tactical Reviews will know my views on factory edges, but to recap:

Anyone using a knife will need to sharpen it. That first factory edge is just like the first tank of fuel that a new car comes with (or first charge of the battery).
A good factory edge is a ‘nice to have’ but not a ‘make or break’ for a good knife, as you will be putting your own edge onto it soon enough.
The factory edge does however indicate the care a knife maker has put into the final finish.
It is for this reason Tactical Reviews measures factory edge sharpness and specifications, and includes this information in the detailed technical testing.

As a further look at the factory edge, this section has been added to include some high magnification photos of the factory edges.

These are showing a used edge, so the dirt on the edge is NOT from the factory, but from me using it. Also included is a close up of the engraving, just out of interest.


What is it like to use?

The AMF is exactly the handful it is meant to be; Unashamedly big, bold and striking!

For a little perspective, this gallery starts with the AMF blade next to Extrema Ratio’s BF1 CD folder, the overall open length of which is less than just the AMF’s blade. Even with my XL Glove sized hands, the AMF’s handle fills my hand while being super comfortable, and cushioning in hard use.


At 206mm the AMF’s blade is not a full-on chopper, but it is a big knife that is very capable of chopping. The large comfortable, cushioning and secure handle make it so easy to really lay into the chopping task. It found myself easily powering through this pallet chop. Actually you can see how much striking power there is, as the last half of the board was broken before it could be cut.
A dry oak branch happened to be to hand; again thanks to the firm grip, this hard wood shaved easily and smoothly, submitting to the AMF’s blade with minimal effort.


Though it is a large knife with a large sheath, Extrema Ratio have improved every aspect of the knife that inspired the AMF, making it really worth carrying. The action of sheathing and unsheathing is easier and better, and the sheath is simpler and lighter (the original had a metal belt hanger and diamond sharpener on the back, plus permanent pouch). You have webbing so you can carry more on the sheath if you want, but you are not forced to.
AMF’s hand filling handle is so comfortable, and when chopping there is no shock transferred to your hand, making it feel effortless. And still Extrema Ratio managed to give it their distinctive style.
As Extrema Ratio’s main choice of steel, N690 massively upgrades the original 440-A, in hardness, toughness and corrosion resistance. The BMF is notorious for rusting badly, mainly from its blasted surface (re-finished blades appear much less prone to rusting). The N690 used in the AMF is in a different league. Obviously I can’t replicate 40 years of storage for the AMF, but I am highly confident this will never be an issue for the AMF.
Extrema Ratio’s reinterpretation of the guards, make them so much more functional. The rear guard, by curving round the fingers, makes it much more protective, and also keeps it out of the way when using the knife; a small change and a massive improvement. The front guard, being slightly shorter and pushed forward allows the thumb to be able to push on it. The lower part of the front guard protrudes slightly further to enhance the protection it provides.
None of the long spine or swedge is sharpened for fire steel scraping, but I’m fine with that. As it is, it has a more genuine feel of the classic that inspired it, and you are better off having a small scraper with any firesteel you choose to carry.
Maybe it is that wide comfortable handle, but somehow Extrema Ratio have managed to make this large knife not feel that large in the hand. It handles much better than it should and feels easier to use than knives this size tend to feel.


Though I didn’t get it dirty enough to justify a strip down, I wanted to see how Extrema Ratio had approached this. The original does not take down, so this is a new feature. A single hex bolt in the cone shaped butt cap releases everything. First the cone coming off, then the rear guard, that fits closely enough it doesn’t just fall off. When slipping off the handle this then reveals the use of a specially shaped captive nut in the end of the tang which gives several benefits. Firstly it spreads the load of the butt cap bolt, it also allows a different metal to be used for the threads than is used for the blade tang, and lastly it brings in some ‘compliance’ when tightening the butt cap bolt so all the parts can find the best contact points and settle firmly, making it more secure and less likely to loosen. A nice detail you won’t see unless you strip the knife down, so I’ve done it for you.


Even if you don’t have that connection to the classic 80s knife like I do, the AMF stands on its own feet and is just a great knife.

Extrema Ratio AMF Review Summary

The views expressed in this summary table are from the point of view of the reviewer’s personal use. I am not a member of the armed forces and cannot comment on its use beyond a cutting tool or field/hunting knife.

Something that might be a ‘pro’ for one user can be a ‘con’ for another, so the comments are categorised based on my requirements. You should consider all points and if they could be beneficial to you.

_______________________________________________
What doesn’t work so well for me
_______________________________________________

The handle might be too large for some people.
The 2M MOLLE straps don’t feel in keeping with the AMF’s quality.

_______________________________________________
Things I like
_______________________________________________

A Classic Reborn!
Improved in every way over the original.
Unmistakably Extrema Ratio.
Strips down for cleaning.
Ultra-comfortable handle.
Shock absorbing grip (especially when chopping).
N690 steel.
Captive tang nut.
Great protection from forward and rear finger guards.
A BIG knife (always makes you smile).
Highly versatile sheath mounting.
Everything else about it!

Review Videos

Starting with a short format sixty second review:


Onto a full video review covering many more details:

 
Discussing the Review:
Something new – will it work? A Tactical Reviews Subreddit.
TacticalReviewsChat on Reddit
Please visit there and start/join the conversation.

Knife Review: Viper TURN

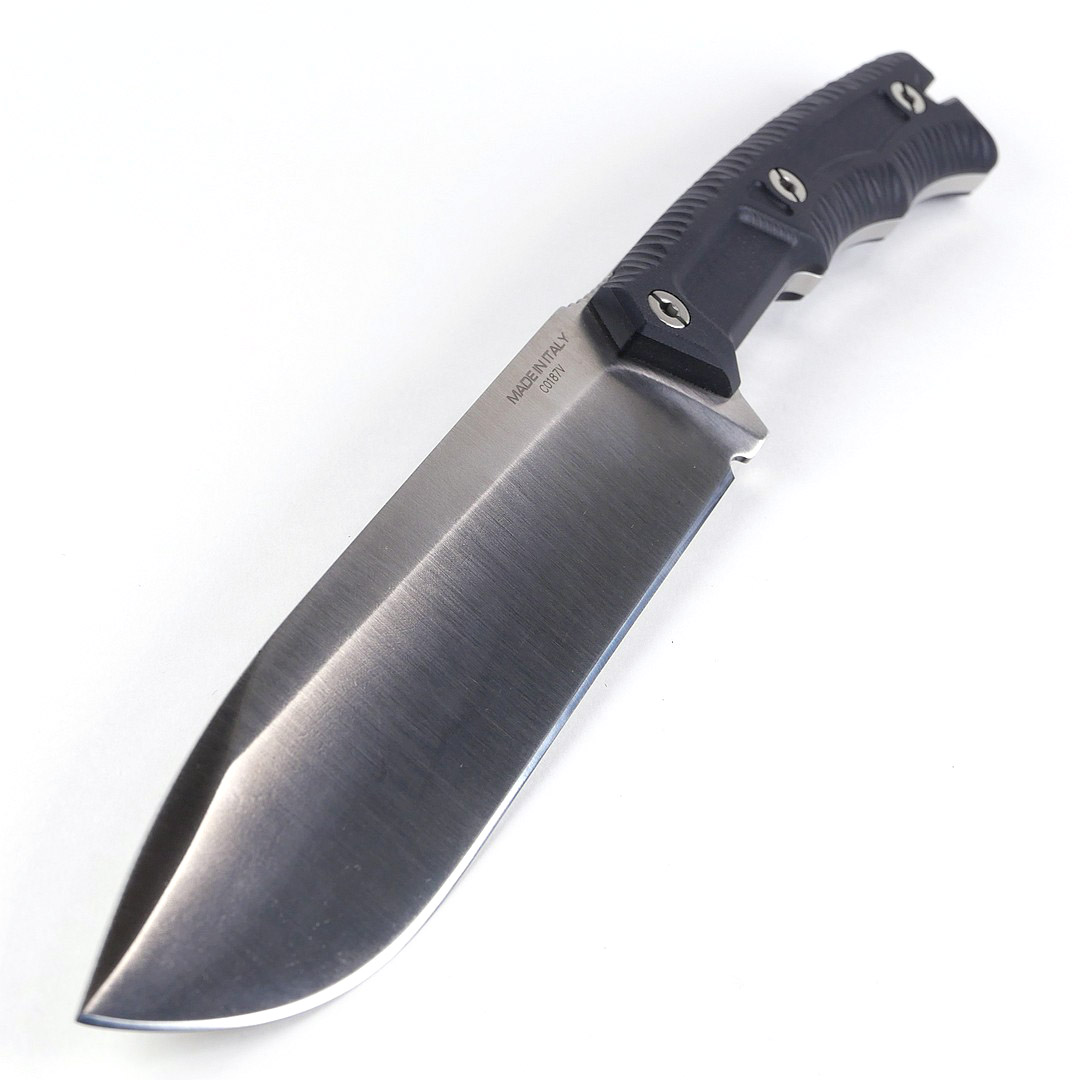
Viper TURN a Detailed Review – The TURN is a folding knife designed by Fabrizio Silvestrelli, blending tradition, practicality and modern construction techniques. We’ll also be seeing how, in this Viper TURN Review how distinctively ‘Viper’ this knife is. The TURN’s blade is Böhler M390 steel and described by Viper as having ‘a bold counter-bevel’ on the satin finish blade. A double stepped-cone thumb-stud allows easy opening with either hand. Unusually for a back-lock, TURN uses ball bearings for the pivot to ensure a smooth and fluid rotation of the blade. This Viper TURN review features the Essential G10 version that includes a deep-carry titanium pocket clip.

What’s in the box?:
Or should that be ‘Where is the box?’. As mentioned in the video, this was a display knife at IWA 2024 so is being reviewed without any of the normal packaging. So here it is in a bag, and not in a bag!


A good look round the closed TURN – Things to look out for here are:

Being the ‘Essential’ model, there are no bolsters, instead the handle material covers the entire side of the knife. Around the pivot bolt is an extra washer detail. A singe position deep-carry titanium pocket clip is fitted in a tip-up right-handed location. The polished lock bar has grip grooves on the release ‘button’ and thumb grip jimping at the other end. Full length stainless steel liners provide the main structure. A pair of stepped-cone thumb-studs make the blade opening ambidextrous.


A good look round the open TURN – Things to look out for here are:

Swinging open that gloriously wide blade, and as we open it you see the lock bar action in operation. Thumb grip jimping spans the lock / blade contact point forming the clean ‘H’. Very stylish contouring of the G10 handles creates a grip shaping your fingers will settle into. That ‘bold counter-bevel’ is something I would describe as an elongated harpoon style swedge, and bold it certainly is.


The Blade and Handle – Detailed Measurements:
For full details of the tests and measurements carried out and an explanation of the results, see the page – Knife Technical Testing – How It’s Done.

The blade is made from M390 steel.


The Factory edge up close:

Followers of Tactical Reviews will know my views on factory edges, but to recap:

Anyone using a knife will need to sharpen it. That first factory edge is just like the first tank of fuel that a new car comes with (or first charge of the battery).
A good factory edge is a ‘nice to have’ but not a ‘make or break’ for a good knife, as you will be putting your own edge onto it soon enough.
The factory edge does however indicate the care a knife maker has put into the final finish.
It is for this reason Tactical Reviews measures factory edge sharpness and specifications, and includes this information in the detailed technical testing.

As a further look at the factory edge, this section has been added to include some high magnification photos of the factory edges.


What is it like to use?

Viper describe the blade as having ‘high bevels’, and indeed it does, in fact verging on the full-flat grind apart from that bold swedge. It is an excellent blade geometry for eager slicing and the TURN is indeed a very efficient cutter.
I’d classify it as a mid-sized folder, large enough for most ever day jobs, and small enough to be easy to carry.
Viper’s stepped-cone thumb-stud has drawn blood on previous occasions on other knives, and could easily do so again. They are a bit on the sharp side and it is when I’ve had hardened skin on my thumb (from too much knife opening) that the cone shape has punctured/cracked this skin and I’ve ended up bleeding over the knife. Grippy these thumb-studs are, but also high pressure.


This might be the ‘Essential’ version of the TURN, but it is still lovely to look at. The blend of a traditional back-lock folder layout with a modern, efficient, cutting blade profile, using high performance materials and features that increase its usability is spot-on.
Viper’s signature polished spacer and lock bar contrast with the bead blast liners and black G10, giving the TURN a distinctive and stand-out look.
If I had to pick one position for the pocket clip, it is exactly where Viper have positioned it. Tip-up, right-handed; it is going to be best for the majority, and for the left-handed it only needs one small adjustment before opening.
The near-full-flat grind makes the TURN a fantastic slicer, and with great control too. The relatively wide blade adds to stability during cutting, so it is a real pleasure to use.


Review Summary – Viper TURN Review

The views expressed in this summary table are from the point of view of the reviewer’s personal use. I am not a member of the armed forces and cannot comment on its use beyond a cutting tool or field/hunting knife.

Something that might be a ‘pro’ for one user can be a ‘con’ for another, so the comments are categorised based on my requirements. You should consider all points and if they could be beneficial to you.

_______________________________________________
What doesn’t work so well for me
_______________________________________________

Thumb-stud a bit ‘sharp’.
Single position clip.
Potential hot-spots on the grip.

_______________________________________________
Things I like
_______________________________________________

Excellent fit and finish.
M390 blade steel.
Classic Back-Lock.
Super-smooth blade action.
Ambidextrous opening.
Powerful slicing geometry.
Deep-carry pocket clip.
Premium satin blade finish.
Refined style.

Review Videos

Starting with a short format sixty second review:


Onto a full video review covering many more details:


Discussing the Review:
Something new – will it work? A Tactical Reviews Subreddit.
TacticalReviewsChat on Reddit
Please visit there and start/join the conversation.
Knife Review: lionSTEEL T6

T6 is the newest addition to the lionSTEEL
fixed blade family, it sits in between the M7 and the T5 in terms of size. Join me in this detailed review of the lionSTEEL T6, the biggest of the T-series. Featuring a strong CPM 3V steel blade and a lionSTEEL SOLID handle; milled out of a single Canvas micarta block, ensuring a firm and safe grip.

A design by Molletta, the T6 has an aggressive profile and is ideal when you need a robust and easy to handle heavy duty knife. From making a fire to food preparation, the LionSteel T6 has got you covered.

Supplied with its Kydex sheath that has a reversible Cordura structure with MOLLE system for secure and easy mounting.

What’s in the box?:
Nice and simple, just the T6 and a leaflet.


A good look round the T6 sheath – Things to look out for here are:
There is a lot to see here, with an excellent combination of a hollow rivet construction Kydex sheath, with a highly functional MOLLE hanger and leg-tie cord. Though the Kydex retention is all you need to secure the knife, there is a removable retention strap which adds extra stability when needed. A good size drainage hole in the base of the Kydex, will help look after the blade, especially with this being a non-stainless steel. The multi-functional mounting platform is attached to the Kydex sheath with four Chicago screw-bolts and means you can remove it completely, swap it round for left handed carry, or tweak the position. Straps for PALS / MOLLE mounting can also be configured as a belt loop. A super flexible sheath and mount.


A good look round the T6 – Things to look out for here are:
It has been love at first sight for me. The T6 has a really powerful, purposeful look, and does not disappoint. Just take in those lines.
With lionSTEEL’s ‘SOLID’ handle, the T6 has a single piece of micarta milled to perfectly sit over the blade’s full tang. Both the blade and handle have an incorporated finger guard, with the blade’s just slightly protruding to better protect the micarta, which protects you. The tang also slightly protrudes at the butt to form a striker, or striking surface. Simple flowing lines in the micarta create an ergonomic and comfortable handle, a perfect for connecting you to that wide strong blade.


The Blade and Handle – Detailed Measurements:
For full details of the tests and measurements carried out and an explanation of the results, see the page – Knife Technical Testing – How It’s Done.

The blade is made from CPM 3V steel.


The Factory edge up close:

Followers of Tactical Reviews will know my views on factory edges, but to recap:

Anyone using a knife will need to sharpen it. That first factory edge is just like the first tank of fuel that a new car comes with (or first charge of the battery).
A good factory edge is a ‘nice to have’ but not a ‘make or break’ for a good knife, as you will be putting your own edge onto it soon enough.
The factory edge does however indicate the care a knife maker has put into the final finish.
It is for this reason Tactical Reviews measures factory edge sharpness and specifications, and includes this information in the detailed technical testing.

As a further look at the factory edge, this section has been added to include some high magnification photos of the factory edges.

The factory edge is a great cutter, even better than the good (but not great) BESS sharpness figures. These magnified images of the edge explain this as you can see the micro-serrations in the 3V steel.


What is it like to use?

It is one thing to see and just hold the T6, and another to really put it to use. In use, the T6 really surprised me as it feels like a much smaller and more nimble knife than it should for its size. It is a large heavy, wide-bladed, knife, it is. I have to remind myself and if you just pick it up to look at it and not use it, it still feels exactly that.


Then you start to work with it, and it just seems to work with you.

A quick check of the edge before getting on with the tasks at hand. Popping the sheath on my belt, and fitting the leg-tie cord (which I leave a little slack as this cord has no give in it). I’ll probably add in some elastic to the leg cord so it has some give and won’t restrict movement. The sheath sits very flat to your body and re-sheathing needs a quick glance when you have clothing partly in the way.
I keep thinking it looks like the muscle car of the knife world, and wants to be admired as much as to cut.
The blade geometry, and weight, get behind each cut. Combine this with an amazingly comfortable handle, and the cuts become so much easier than you expect. Making a type of feather-cut on a board and before I knew it I’d gone through the entire board.
Batoning for splitting, and if anything it had a tendency not to follow the grain and instead to bite in and cut in the direction you strike it. Either way, the wide blade’s depth means the wood usually splits before the spine reaches the top of the wood being split, so you can just strike straight down onto the split and don’t have to fight against each strike trying to twist the knife.


Onto pallet cutting, and the first image showing an initial single strike. The depth of cut is good, and after this, nice sized chunks of timber fly out as the T6 cuts and ejects – you can see the ‘steps’ formed in the wood during this board chop.
Last in this gallery is the T6 being batoned into a pallet board, the depth achieved here with medium effort, is about double a single chop, but the wedge effect then prevents further progress due to the thickness of the blade stock. In this case the overall effort is lower if just chop into the board compared to batoning.


So far, lionSTEEL’s stance on the T6 is to go with ultra-tough super-carbon steels, with the first run being K490 and this next production run in CPM 3V. 3V is not a stainless steel and will form a patina and rust if not maintained, but its virtual indestructibility means you will forgive it this minor weakness. For me, however, with the choice of great stainless steels, I do not like having to maintain a knife against rust, so I have been asking lionSTEEL to make the T6 in a stainless…I will continue to nag. Unlike myself, many will see the 3V as a massive positive, and as a working steel it will do you proud.

The love for the T6 is still as strong as from my first sighting of the prototype, looks and performance, plus that ability to feel lighter and more nimble than it should, mean the T6 makes you want to keep picking it up.

Review Summary

The views expressed in this summary table are from the point of view of the reviewer’s personal use. I am not a member of the armed forces and cannot comment on its use beyond a cutting tool or field/hunting knife.

Something that might be a ‘pro’ for one user can be a ‘con’ for another, so the comments are categorised based on my requirements. You should consider all points and if they could be beneficial to you.

_______________________________________________
What doesn’t work so well for me
_______________________________________________

Not stainless steel. – Yeah, I think that is all I’m less keen on.

_______________________________________________
Things I like
_______________________________________________

Incredibly comfortable and stable in the hand.
SOLID micarta handle has no ‘hotspots’.
Feels light and nimble (for its size).
Super tough CPM 3V.
Purposeful looks.
Wide blade adds control.
Highly functional sheath.
MOLLE / PALS compatible.
Firm (but not too firm) Kydex retention.

Review Videos

Starting with a short format sixty second review:


Onto a full video review covering many more details:


Discussing the Review:
Something new – will it work? A Tactical Reviews Subreddit.
TacticalReviewsChat on Reddit
Please visit there and start/join the conversation.
Knife Review: Spyderco Military 2

Spyderco’s Military 2 – The 2024 Update of a Classic. The original Spyderco Military Model was designed in 1996, and is a tried and tested knife, proven to be a robust and reliable tool. Building on the strengths of the original design, the Military 2 is refined and updated, bringing in improvements where they make a real difference. Larger stainless steel liners give the knife increased structural strength and also allow the addition of four pocket clip fixing positions. A major switch has been made away from a liner lock and to the signature Spyderco Compression Lock improving safety and handling. Join me in this detailed review of the Spyderco Military 2.

Is the ‘New and Improved’ Spyderco Military 2 actually an improvement? Read on to find out.

What’s in the box?:
This Military 2 comes in the familiar Spyderco box. Included with the knife is a sticker and a leaflet about the exact model of knife.


A good look round the closed Military 2 – Things to look out for here are:

Some of the more obvious updates are easy to spot straight away. The extra pocket clip fitting positions, and compression lock on the back of the handle. Notably missing is the liner lock handle cut-out that normally affects the grip, as the Military 2 now uses a different lock. There is no longer a hole in the clip mount to access the pivot bolt; should you continue to use the clip in a tip-down position, you may need to take it off to adjust the pivot. Next to the compression lock lever, the liners include some thumb grip jimping. Having a choice of all four pocket clip positions is a massive improvement, as clip position is quite a personal choice, and depending if you pocket carry or put onto webbing, you might want to swap this around from time to time. Phosphor-bronze washers; my favourite for stability and reliability.


A good look round the open Military 2 – Things to look out for here are:

Opening up the blade to reveal that long, eager edge. This is a Large folder, no mistaking that. Now we have the blade open you can see the compression lock engaged in the locked position. Thanks to the change of lock, the handle shape can be optimised for grip instead of incorporating the liner lock cut out, so we have improved first-finger grip shaping. Large blade – Large opening hole.


Explained by the Maker:
Spyderco describe the Military 2 as follows.

Designed by Spyderco co-founder Sal Glesser as the perfect knife for forward-deployed military personnel, the original Military Model is one of the cutlery industry’s most iconic designs. More than 25 years after its original release, the eagerly anticipated Military 2 builds on that hard-earned reputation while incorporating several significant design improvements. Instead of a LinerLock, the Military 2’s full-flat ground CPM® S30V® blade is supported by Spyderco’s signature Compression Lock® mechanism, which offers greater strength and even safer one-handed operation. The stainless steel liners that form the foundation of the lock are larger, giving the knife increased structural strength and anchoring its four-position pocket clip, which is configurable for left or right-side, tip-up or tip-down carry. The skeletonized liners are nested within peel-ply-textured G-10 scales to maintain a slim profile and complement its open-backed construction to reduce the knife’s overall weight. A proud successor to a legendary design, the Military 2 is ready to serve.

The Blade and Handle – Detailed Measurements:
For full details of the tests and measurements carried out and an explanation of the results, see the page – Knife Technical Testing – How It’s Done.

The blade is made from S30V steel.


The Factory edge up close:

Followers of Tactical Reviews will know my views on factory edges, but to recap:

Anyone using a knife will need to sharpen it. That first factory edge is just like the first tank of fuel that a new car comes with (or first charge of the battery).
A good factory edge is a ‘nice to have’ but not a ‘make or break’ for a good knife, as you will be putting your own edge onto it soon enough.
The factory edge does however indicate the care a knife maker has put into the final finish.
It is for this reason Tactical Reviews measures factory edge sharpness and specifications, and includes this information in the detailed technical testing.

As a further look at the factory edge, this section has been added to include some high magnification photos of the factory edges.

Spyderco’s factory edges are reliably excellent.


What is it like to use?

We all know what ‘New and Improved’ typically means for our favourite products…it normally means ‘cheaper to manufacture and worse’. Typically.

What about the Military 2, what have Spyderco done to our beloved Military? Well, they have, in fact, made it better. This is not to say the original Military, if Spyderco continue to make the classic, no longer has a place; it is still the classic liner lock it always was. If you pick up the Military and swap to the Military 2 and back, fundamentally they are the same with a long pointy blade, long handle, and powerful cutting ability. Instead it is in the more subtle refinements that the Military 2 shows it improvements, those small differences in regular actions and handling that start to shine through.

General handling makes a couple of those updates all the more apparent. The forward choked-up position now has the proper first finger shaping and grip; it just fits and sits better. Open and close, open and close, and the ease the Compression lock brings also shines through. One-handed closing becoming a breeze with the lock released, and the blade falling closed under its own weight, made safer as you do not need to put your hand in the blade’s path to unlock it.


I absolutely love a big folder, and the Military 2 just wanted to get to work, so who am I to stand in the way! The blade reach is excellent, making all the jobs I deployed it for quick and easy. Over and over those two biggest changes, the lock and improved grip shape making the knife itself almost disappear and the jobs complete themselves. For me the Tip-Up clip position and right-handed side means that as I draw the knife out of my pocket, the handle is already in the right orientation and my thumb finds the opening hole immediately, so I have swapped the clip over to this location from the factory position.
Though it is a heavy duty knife, the fineness of the blade has always made me wonder a little. Personally I’ve never had a Spyderco full-flat blade (or any other) fail on me in use, but it is just with the Military 2, the blade is very long. For part of the testing I decided to baton it through pallet wood cross-grain, cutting not splitting. That slicey blade shape just falls through the boards, and comes back out as easily. No gentle tap here, I was full swing pounding on it, and no concerns at all. Obviously it is easy to actually abuse a blade, and I was not trying to do this, but instead just work it hard. It took all this in its stride.


Is the Military 2 true to the original Military model? – Yes.
Is the Military 2 an improvement over the original Military model? – I certainly say Yes.

Review Summary

The views expressed in this summary table are from the point of view of the reviewer’s personal use. I am not a member of the armed forces and cannot comment on its use beyond a cutting tool or field/hunting knife.

Something that might be a ‘pro’ for one user can be a ‘con’ for another, so the comments are categorised based on my requirements. You should consider all points and if they could be beneficial to you.

_______________________________________________
What doesn’t work so well for me
_______________________________________________

No sharpening choil.
The peeled G10 is very abrasive to your pocket.
It makes me want all the different versions of the Military 2.

_______________________________________________
Things I like
_______________________________________________

Compression lock.
It is a Large folder.
Very slicey and pointy blade.
Improved grip shaping over its predecessor.
Phosphor-bronze pivot washers.
Four-position pocket clip.
Full length steel liners.
Excellent factory edge.
‘New and Improved’ – Yes it is.

Review Videos

Starting with a short format sixty second review:


Onto a full video review covering many more details:


Discussing the Review:
Something new – will it work? A Tactical Reviews Subreddit.
TacticalReviewsChat on Reddit
Please visit there and start/join the conversation.
Knife Review: Aitor Commando

The Legendary AITOR Commando – a Detailed Review of the Aitor Commando knife, taking a fresh look for 2025.

The Aitor Commando was originally developed together with the German manufacturer Mauser for the German Army. Designed to be a powerful, durable and reliable fixed blade knife. Ready for any situation, the robust blade is made of MoVa, and features a saw back. The lightweight and textured aluminium handle holds a comprehensive survival kit inside: Fishing set, sewing kit, tweezers, plasters and a scalpel blade.

This style of knife may have fallen out of favour for those demanding the most robust, full-tang blades made with super steels and other exotic materials, but there was a time when a well made hollow handle knife was king (and in fact even the poorly made copy that ended up giving them all a bad name). The reason they were so popular was because they are fun, and I have a feeling knife enthusiasts have forgotten about having fun with interesting designs that don’t need to be strong enough to survive being run over by a tank. I’m letting my hair down (all 3mm of it), shaking loose and letting myself enjoy picking up and using this classic design.

What’s in the box?:
Nice a simple, the knife is in the box. Nothing unnecessary, just a box to deliver the knife to you in.


A good look round the Commando’s Sheath – Things to look out for here are:

I’ve found the next two galleries in this Aitor Commando review have ended up quite a bit larger than usual, as there are many details to see. It is these details that all add to the overall interest and make the Commando a different experience.
At the base of the sheath there is a simple, adjustable, quick release leg strap cord, with the same cord used for the basic wrist lanyard. The knife retention strap uses a military style quick release pull tab closure. Pull the tab out, and the buckle opens freely. The same quick release pull-tab closure is used for the belt loop, allowing you to fit the sheath to your belt without undoing your belt.
Within the sheath is extra storage, (originally for small flares), allowing you to add whatever is most useful to you.
A length of cord wraps the lower section of the sheath, which covers up an integrated sharpening stone.


A good look round the Commando – Things to look out for here are:

Out of the box, the blackness of the blade finish is striking, making the whole package very ‘dark’. The Commando has presence, and overall the package is substantial. Unlike most traditional hollow handle knives, the Commando’s handle is a molded metal casting that allows for complex shaping, and includes three finger grooves, an integrated guard with thumb ramp, grip texturing panels and the fittings for the blade tang and the cap for the storage inside the handle. Recessed into the butt, and low profile, the screw-fit tail-cap can be gripped either side and unscrewed to access the handle storage compartment. With the tail-cap unscrewed, a survival capsule pops out and you find the tail-cap has a small compass in it. To both prevent rattle and to make access easy, a spring is fitted at the bottom of the handle compartment.
With a subtle weight-forward blade shape, spear point and saw back, the Commando has a purposeful appearance.


A good look round the Survival Capsule – Things to look out for here are:

The survival capsule…usually this is opened straight away and then quickly lost, or just never touched. Of course the idea is to pack in as many useful things as possible, which might help you or make some survival tasks easier. Aitor’s survival capsule contains two standard plasters, a sterile No. 23 scalpel blade, tweezers, fire-steel, two small safety pins, two sewing needles, some thread, plus a fishing kit consisting of three pre-tied hooks, a longer piece of line and three split shot. (Plus, don’t forget that they can sometimes oddly useful, the two staples that closed the bag containing the fishing kit.)
All these things are better to have and not need, than to need and not have.


The Blade and Handle – Detailed Measurements:
For full details of the tests and measurements carried out and an explanation of the results, see the page – Knife Technical Testing – How It’s Done.

The blade is made from MoVa steel. MoVa is identical in composition to the German blade steel 4116.


The Factory edge up close:

Followers of Tactical Reviews will know my views on factory edges, but to recap:

Anyone using a knife will need to sharpen it. That first factory edge is just like the first tank of fuel that a new car comes with (or first charge of the battery).
A good factory edge is a ‘nice to have’ but not a ‘make or break’ for a good knife, as you will be putting your own edge onto it soon enough.
The factory edge does however indicate the care a knife maker has put into the final finish.
It is for this reason Tactical Reviews measures factory edge sharpness and specifications, and includes this information in the detailed technical testing.

As a further look at the factory edge, this section has been added to include some high magnification photos of the factory edges.

Though just about serviceable, this factory edge was immediately re-profiled and a 17.5 DPS edge put on for testing. Also included in this gallery are close-ups of two of the saw teeth.


What is it like to use?

Straight away, picking up the Commando, its all metal construction gives it a feeling of solidity. It might indeed have a hollow handle, and it might have a short roll-pinned tang, and so may not be as strong as a similar sized full tang knife, but frankly who cares? Unlike many of the cheap clones (the clones giving the entire concept a bad name), the Aitor Commando is all-metal, so it is strong, certainly strong enough.
In the hand, the metal handle is cold (which is definitely noticeable in cold weather). The cast handle is however, very comfortable and ergonomic, at least in hands the size of mine. Smaller hands might find it less well fitting.
The molded finger grips help with stability, and the integrated thumb ramp in the guard works well. It helps that the handle is a generous length, as you do need to back-up along the handle to be able to place your thumb on the ramp.


The Saw-back – Anyone who has used a saw-back on a knife knows that these are really only a notching tool. You can’t get much downward pressure and the teeth are not set, so once you cut down enough to have the blade stock in the notch it becomes progressively harder to cut.
Here I’m showing a cut which has started to bind up on the blade, followed by showing the cut before and after tapping the saw and notch clean. The notch sides are nice and crisp, and this is useful for easily creating flat-sided notches, just not for full depth saw cuts.


Earlier I spoke of the deep black finish on the Commando’s blade. Following my initial sharpening, I use acetone to remove any stropping compound residue and generally clean up the blade. Of course this stripped off all the oil on the blade and shows the underlying matt black blade finish. Like any surface finish, oil always deepens the colour and once stripped off you see the true blade coating. You might also spot here where the forward part of the blade rubs more on the inside of the sheath where it is a tight finish, and has some rub marks in the blade finish. So don’t expect that deep deep black to last once you start using the Commando, but I actually prefer the ‘old black’ look.

Before testing the Commando, I wasn’t happy with the factory edge, so re-profiled to 17.5 DPS and stropped. The factory edge would not cleanly cut paper and card, but now I have a ‘telephone directory’ (or TV guide) slicer, which requires a saving sharp edge to cut without tearing.
Aitor’s Commando is a short tang hollow handle knife – can it chop? I gave it no quarter, and went for it chopping a tough pallet. Being a hollow-grind the depth of cut on each strike is slightly limited, but it still powered through without any concern. With a metal handle and metal roll pin, and a steel that has been left at the tougher end of hardening, the overall construction means this chopping was a walk in the park for the Commando. The new edge showing clean cuts all the way through.
It may be relatively weighty due to the all metal construction, but still lacks slightly on impact weight. As another test, I’ve switched to batoning the blade into the same type of wood, and am showing how once the blade gets past the shoulder of the hollow grind it stops making much progress. Viewed from above you can see how the blade is forcing apart the board and getting wedged in.
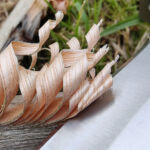
Not strictly feather-sticking, but making a tight series of cuts and the Commando outperformed my expectations. The large handle giving plenty of grip and the blade is long enough to allow it to be rested onto a cutting surface for extra control, and the Commando was slicing though this seasoned wood almost too easily.
At the end of testing the ‘telephone directory’ result was the same without any touch up or stropping, which was also beyond expectations.


Can you spot the deliberate mistake when getting my bearings? (The compass is pointing at the knife blade, not to the north.)

Times change, technology moves forward, and designs become outdated, preferences change, and for many this style of knife is a thing of the past. Hollow handle knives gained a poor reputation due to the vast number of cheap, horrifically-badly made hollow handle knives that quickly broke or bent, wouldn’t hold and edge and had dangerous sheaths. But this is not true of Aitor; The Aitor Commando quickly proves it is worthy of a place in your collection, a collection that are hopefully all ‘users’.
Aitor, established in 1939, have vast experience making hollow handle knives that are strong, hold an edge and make this style of knife worth adding into your lineup to give you something different and interesting to use, and the Commando happens to be a true classic.

Review Summary

The views expressed in this summary table are from the point of view of the reviewer’s personal use. I am not a member of the armed forces and cannot comment on its use beyond a cutting tool or field/hunting knife.

Something that might be a ‘pro’ for one user can be a ‘con’ for another, so the comments are categorised based on my requirements. You should consider all points and if they could be beneficial to you.

_______________________________________________
What doesn’t work so well for me
_______________________________________________

By current standards it is on the heavy side.
No visible drainage holes in the sheath.
Tight fit in the sheath (could have issues with a dirty blade).
Saw back cuts into the sheath (true of any saw back).

_______________________________________________
Things I like
_______________________________________________

Fun to use.
All metal construction.
Large ergonomic handle.
Generous storage in knife handle and sheath.
Survival capsule included in handle.
Integrated (backup) sharpener.
Includes emergency cord neatly wrapped on the sheath.
Pull-tab quick-release closures for retention strap and belt loop.
Saw-back works well for notching.
Takes and holds an edge well enough despite low hardness.
Lower hardness makes field maintenance easier.

Review Videos

Starting with a short format sixty second review:


Onto a full video review covering many more details:


Discussing the Review:
Something new – will it work? A Tactical Reviews Subreddit.
TacticalReviewsChat on Reddit
Please visit there and start/join the conversation.
Knife Review: Casström No.14 SFK and Lars Fält Slip Joint

I decided to pair up a fixed blade and folder for this detailed review; the Casström No. 14 SFK and Casstrom Lars Fält Slip Joint. The No.14 is a new knife designed by Casström to tackle the toughest challenges nature throws your way. Built for rugged outdoor use, bushcrafting, survival skills training, or hunting. With its full-tang construction, the No.14 SFK’s large blade is great for those bigger more demanding jobs, like splitting wood but also just as happy carving too. This example features green Linen Micarta handles and A8Mod steel, and is supplied with a vegetable-tanned leather sheath.
The Casström Lars Falt Slip Joint was created in collaboration with world-renowned Swedish survivalist Lars Fält, and was designed to meet UK EDC legal requirements by virtue of having a non-locking folding blade under 3 inches with a sturdy opening and closing mechanism. The handle is crafted from beautiful Scandinavian curly birch, offering a secure and comfortable grip, and the blade steel is cryo-quenched Alleima (formerly Sandvik) 14C28N, a recycled Swedish stainless steel.

What’s in the box?:
Both knives are presented in cardboard boxes with the minimum of fuss.


The No. 14:

A good look round the No. 14’s sheath – Things to look out for here are:
A beautifully made, traditional friction/gravity leather sheath (vegetable tanned leather). Construction is from one folded piece of leather, plus the double welt insert to protect the stitching and stabilise the blade. Each end of the stitching is riveted for extra strength and the lower rivet is hollow so you can add a leg tie if you want. It also includes a good size drainage hole in the design.


A good look round the No. 14 – Things to look out for here are:

Though the handle shape and size, and the knife’s overall form are typical for this style of scandi-grind bushcraft knife, the extra ruggedness is clear from the longer blade and extra-thick blade stock.
The review sample is fitted with green linen micarta handles, nicely showing off the ergonomic shaping as contour lines in the layered micarta. Both handle rivets and the lanyard tube are brass. Somehow the blade steel looks thicker than the 4mm stock used, and really shows its robustness.
As delivered, the No. 14 has a full zero grind scandi edge.


The Lars Fält Slip Joint:

A good look round the Lars Fält Slip Joint belt pouch – Things to look out for here are:

Really this pouch is too good an option not to get. The beautifully crafted leather belt pouch (also using vegetable tanned leather), is a perfect companion to the Lars Fält Slip Joint. In this case it is a two piece construction, with the belt loop and flap being one piece which is riveted onto the stitched main pouch body. There is a welt allowing for a small drainage hole to complete it.


A good look round the Lars Fält Slip Joint – Things to look out for here are:

Casstrom’s folders (locking and non-locking) are only made with Curly Birch handles (no micarta option) which adds to their character and unique look for each knife. Liners, blade and back-spring are all stainless steel, and the remaining fittings, rivets, and lanyard tube, are brass. The sturdy blade has a large nail nick and a scandi grind; this time with a micro-bevel rather than full zero edge.


The Blade and Handle – Detailed Measurements:
For full details of the tests and measurements carried out and an explanation of the results, see the page – Knife Technical Testing – How It’s Done.

The blades are made from A8 Mod and 14C28N steel.


The Factory edge up close:

Followers of Tactical Reviews will know my views on factory edges, but to recap:

Anyone using a knife will need to sharpen it. That first factory edge is just like the first tank of fuel that a new car comes with (or first charge of the battery).
A good factory edge is a ‘nice to have’ but not a ‘make or break’ for a good knife, as you will be putting your own edge onto it soon enough.
The factory edge does however indicate the care a knife maker has put into the final finish.
It is for this reason Tactical Reviews measures factory edge sharpness and specifications, and includes this information in the detailed technical testing.

As a further look at the factory edge, this section has been added to include some high magnification photos of the factory edges.

The No. 14’s Edge:

Once you move onto the next gallery with the Lars Fält Slip Joint’s Edge, you will see the clear difference between this knife’s zero grind edge, and when there is the extra bevel.
Casstrom advise you to add a micro-bevel if you intend to subject the No 14 to heavy chopping to help stabilise the edge and prevent chipping. Having given this zero grind edge a beating to intentionally see if it would chip, so far it has remained intact.


The Lars Fält Slip Joint’s Edge:

Yes, these are magnified, and are showing a 1mm scale, but even so I feel this is more than a micro-bevel, and more into the realms of a small edge bezel. The mini-bevel shown clearly here, when checked with the laser edge bevel protractor, is found to be convexed to a final edge angle of 60 degrees (30 DPS).


What is it like to use?

For this review the fixed blade and folder have been specifically partnered as an elegant traditional pairing. The only time you will catch me out and about with only one knife is if I’ve lost all but the one I still have, so I am always partnering up knives. This is to have different knives to better suit the various cutting tasks, which is more comfortable and helps you do more work with less effort. So, although specifically partnered as a Casstrom pairing for this review, it is a partnership I would happily make for function and looks, any day.
To best show their relative sizes, this gallery includes each knife in my XL glove sized hands. You can clearly see the extended blade of the No. 14 and versatility of the smaller folder.


In my overall edged tool use, I’ve been finding where the No. 14 best fits. With the blade grind and thickness, I’ve found it struggles with outright cross-grain chopping. That thicker blade and wide wedge grind retards the penetration of each strike, ending up almost bouncing back when using a chopping action, combined with a relatively slim handle and the No. 14 wasn’t working for me as an outright chopper. Where this limitation suddenly becomes a benefit is with splitting tasks. Batoning the knife into end grain to split, and it becomes a doddle. The extra blade length giving you more room to strike it, and the wedge-shaped grind being excellent at splitting along the grain.
If the diameter of the wood being struck with a chopping action is thin enough, the wedge effect of the thicker blade is no longer a problem, so cleaning up bigger branches by whipping off the side shoots works well with the No. 14’s longer and heavier blade; this type of chopping action does work well. It is more a matter of knowing the characteristics and working with them than trying to make the knife do something it is not good at.

Despite the suggestion of adding a micro-bevel to protect the edge, I wanted to test the toughness of Casstrom’s A8 Mod and heat treat, and despite going full whack on the blade, so far I’ve seen no edge chipping; a great outcome. I prefer the zero grind edge so as far as I am concerned I’ll take that risk and stick with it.

On the subject of zero grinds, I fully intend to take the Lars Fält edge to a zero grind, but as this will take a bit of work due to the mini-bevel on the factory edge, haven’t got it done in time for this article. This will be a super fine edge, especially compared to the factory bevel at 30 DPS, so I might end up putting the micro-bevel back on.

For a slip-joint the firmness of action makes a big difference to the experience. If the action is too stiff, it can be difficult to use and worrying to close. This Lars Fält is reassuringly firm in action, almost verging on too stiff. In fact having asked people less familiar with edged tools to try it, they struggled to open and close this knife safely (I had to intervene). Due to the stiffness, the nail nick doesn’t work for me and I have to use a pinch grip on the blade, carefully taking it to the half stop and readjusting my grip to fully open the blade. In use it has certainly instilled confidence that the blade will stay where it should (with correct technique of course). Being able to chose a UK EDC Legal slip-joint with a scandi grind is a really nice addition to my carry options, and one I can carry without having to worry if I should or shouldn’t have it on me.


Casstrom give you beautiful traditional designs made with sustainable materials, that look as good as the perform.

Review Summary

The views expressed in this summary table are from the point of view of the reviewer’s personal use. I am not a member of the armed forces and cannot comment on its use beyond a cutting tool or field/hunting knife.

Something that might be a ‘pro’ for one user can be a ‘con’ for another, so the comments are categorised based on my requirements. You should consider all points and if they could be beneficial to you.

_______________________________________________
What doesn’t work so well for me
_______________________________________________

No. 14 – Geometry not suited to cross-grain chopping.
No. 14 – Semi-stainless steel (needs some maintenance).
No. 14 – Handle too slim for chopping.
Lars Fält – More of a mini-bevel than micro-bevel
Lars Fält – Opening action too stiff for many people.

_______________________________________________
Things I like
_______________________________________________

No. 14 – Excellent for splitting wood.
No. 14 – Super tough steel.
No. 14 – Extra blade length makes batoning easier.
No. 14 – Zero-grind edge.
No. 14 – Quality leather sheath.
No. 14 – Sleek and easy to carry (despite longer blade).
Lars Fält – Very firm slip-joint action.
Lars Fält – Scandi grind in a folder.
Lars Fält – High quality leather belt pouch available.
Lars Fält – All brass fixings.
Lars Fält – Sturdy blade.
Lars Fält – EDC legal (where local laws allow).

Review Videos

Starting with a short format sixty second review of the No. 14:


Starting with a short format sixty second review of the Lars Fält Slip Joint:


Onto a full video review covering many more details:


Discussing the Review:
Something new – will it work? A Tactical Reviews Subreddit.
TacticalReviewsChat on Reddit
Please visit there and start/join the conversation.
Knife Review: Civivi Sentinel Strike and Vision FG

The Vision FG and Sentinel Strike are two of Civivi‘s best sellers. In this detailed review of the Vision FG and Sentinel Strike we are taking a close look at two versions of these knives featuring Civivi’s genuine Damascus steel blades. The Vision FG, designed by Snecx Tan, is equipped with the ‘Superlock Mechanism’. The ‘Superlock Mechanism’ is a lock design Snecx and WE Knife worked on together develop. For this lock, the back of the handle has a titanium bar which hinges just below the pocket clip. The bar is spring loaded and pushed into a cut-out between the blade and the stop pin – the lock gets stronger the more pressure you apply. Push the bar backwards and the blade unlocks easily.
The Sentinel Strike has a reverse-tanto blade shape. Its straight edge makes it an ideal knife for so many cutting tasks. The knife is easy to open with the thumb studs, flipper or large hole in the blade, and it has a very smooth opening action. The blade is locked in place with a button lock.

Join me in this review of the Vision FG and Sentinel Strike to see why these Civivi knives are so popular.

What’s in the box?:

These are in the 2024 10th Anniversary boxes, with WE Knives / Civivi becoming 10 years old in 2024. Both knives use the same packaging and have the same contents apart from the knives themselves. Considering the price point, the fact they include a nice zip up storage case is a bonus. Also included are a few stickers and a cleaning cloth.


A good look round the Vision FG – Things to look out for here are:

Mainly as it was the first of the two I picked up, we are starting with the Vision FG. Featuring a genuine Damascus steel blade, the composition of which is included later in the review, also happens to be different to the Damascus used in the other knife in this review and makes for a very distinctive look.

This version of the Vision FG has the black Micarta handles on top of the steel liners; there is a black G10 as well, so you can choose the feel of the scales you prefer. This gallery focuses closely on details like the handle texture, thumb-stud, and pivot fixings including Civivi’s branded bolt head.
The pocket clip is a tip-up position and can be fitted to either side of the handle.
For the Vision FG, it uses the ‘Superlock Mechanism’, designed by Snecx. Without the literature, I would have continued referring to this as a recoil lock, as in operation it is very similar to this. On closer inspection, the locking process involves inserting a bar between the blade locking surface and the stop bar (much like a compression lock). As your hand pushes this into place while gripping the knife, it becomes even more secure as you use it, yet easy to disengage.


A good look round the Sentinel Strike – Things to look out for here are:

Next we have a recent addition in the Sentinel Strike range where the combination of handle colour and Damascus was added to the original Strike line up (there is also a Strike II with drop point blade).

This time the handle is a combination of aluminium (with a choice of colours) and the integral spacer, made from FRN which helps keep the weight down. It is also fitted with a stainless-steel pocket clip incorporating a glass breaker into the head of its fixing bolt.
The Sentinel Strike has a flipper tab, thumb stud and opening hole in the blade, plus it is a button-lock mechanism, giving you a multitude of ways to open it.
As with all Civivi folders, the pivot bolt head is branded to confirm its identity.


The Blade and Handle – Detailed Measurements:
For full details of the tests and measurements carried out and an explanation of the results, see the page – Knife Technical Testing – How It’s Done.

The blade is made from Civivi’s Damascus steel.
For the Strike, according to the information from Damascus supplier, the base materials of the Damascus is compound by 10Cr15CoMoV and 9Cr18MoV.
For the Vision FG, the Damascus steels used in this knife are 10Cr15CoMov steel in its core with 316 and 5Cr15Mov steel in layers.

For comparison the measure parameters are shown side by side here.


The Factory edge up close:

Followers of Tactical Reviews will know my views on factory edges, but to recap:

Anyone using a knife will need to sharpen it. That first factory edge is just like the first tank of fuel that a new car comes with (or first charge of the battery).
A good factory edge is a ‘nice to have’ but not a ‘make or break’ for a good knife, as you will be putting your own edge onto it soon enough.
The factory edge does however indicate the care a knife maker has put into the final finish.
It is for this reason Tactical Reviews measures factory edge sharpness and specifications, and includes this information in the detailed technical testing.

As a further look at the factory edge, this section has been added to include some high magnification photos of the factory edges.

Vision FG’s factory Edge – Starting with a close up of the engraved text, just for the sake of interest.
NOTE: these are of a used edge, not factory fresh.


Sentinel Strike’s factory Edge – following use, there is some micro-chipping showing in some areas instead of rolling.
NOTE: these are of a used edge, not factory fresh.


What is it like to use?

Both of these Civivi bestsellers are a good size, but I was surprised by just how much of a hefty EDC knife the Sentinel Strike is (in length if not weight); with its blade length of 91 mm, it is up to more demanding cutting tasks.
It is not that the Vision FG is small, but you can see the Sentinel Strike is substantial in my XL Glove sized hands with the handle clearly visible either side of my hand.


Shown with the knives are a couple of my favourite Civivi EDC extras, the tiny pry-bar, and precise folding tweezers (in case you wondered what these were).
Both of the knives were just put to use on a variety of jobs around the home and garden. Entering the constant battle against encroaching ivy and hacking this back wherever it pops up. No mercy (but also no abuse), for the blade tip, which is quite fine and pointy on the Sentinel Strike, and no problems.
Though the Vision FG is also a reverse-tanto / Wharncliffe style blade, it is less pointy, and for many jobs makes it a bit easier to handle and control. The micarta handle is ‘softer’ to grip (without being soft, but this is a way in which micarta feels gentler and easier to hold compared to G10), and though the handles are slab like in shape, it is comfortable enough to hold.


The close-up edge images included in this review are, unusually, ‘used’ rather than factory fresh. Of the two, the Sentinel Strike has starting to show some micro-chipping, but without noticeably blunting. Of the two, this blade was probably given the harder tasks, so this isn’t unexpected, and the characteristic of this edge damage means a strop won’t help (as the edge isn’t rolled) but also the micro-chipping creates a micro-serration which can actually be very effective.
Altogether, the edge performance has been good with these factory edges.

Both knives have a large sharpening choil; so large it might be confused for a finger choil on the Sentinel Strike. I would not use either of these knives’ choils as a finger choil. There may be a design reason for this, perhaps to prevent the heel of the edge hitting part of the locking mechanism, or stop pin, so there may be no other option. The problem for me is that it takes the closest part of the cutting edge further from the handle, and so loses mechanical advantage for heavy cuts. If even a mm or two could be added to the cutting edge, it would improve them for me, but it might not be possible.

What is apparent on real hands-on use of these knives is that for the price point the quality is surprising. Both the knives are using mechanisms that are much more complex than a liner lock, and that give a great user experience (I do especially like a button lock). We all have different preferences and budgets for our ‘users’ and Civivi have hit a great sweet spot in pricing, performance and user experience.

Review Summary

The views expressed in this summary table are from the point of view of the reviewer’s personal use. I am not a member of the armed forces and cannot comment on its use beyond a cutting tool or field/hunting knife.

Something that might be a ‘pro’ for one user can be a ‘con’ for another, so the comments are categorised based on my requirements. You should consider all points and if they could be beneficial to you.

_______________________________________________
What doesn’t work so well for me
_______________________________________________

Sentinel Strike – Long hole in blade accumulates dirt.
Sentinel Strike – Overly large sharpening choil wastes edge space.
Sentinel Strike – Thin pocket clip is a bit sharp.
Vision FG – Overly large sharpening choil wastes edge space.
Vision FG – Thumb stud a little too recessed.

_______________________________________________
Things I like
_______________________________________________

Sentinel Strike – Well executed button lock.
Sentinel Strike – Very easy to open, by flipper, blade hole or thumb stud.
Sentinel Strike – Very easy one-handed close.
Sentinel Strike – Comfortable thumb jimping.
Sentinel Strike – Low weight for a large knife.
Sentinel Strike – Super smooth bearings.
Sentinel Strike – Damascus blade.
Sentinel Strike – Ambidextrous tip-up pocket clip.
Sentinel Strike – Long slim blade has great reach.
Vision FG – Intuitive and easy to use ‘Superlock Mechanism’.
Vision FG – Very easy one-handed close.
Vision FG – Super smooth bearings.
Vision FG – Damascus blade.
Vision FG – Locking force increases as you grip the knife.
Vision FG – Ambidextrous tip-up pocket clip.

Review Videos

Starting with a short format sixty second review of the Vision FG:
NOTE: The Vision FG uses the ‘Superlock Mechanism’, designed by Snecx, and throughout the video I refer to this as a ‘recoil lock’ which isn’t strictly correct. I wasn’t going to re-record the video to correct this, so please take this as the correction.


Starting with a short format sixty second review Sentinel Strike:


Onto a full video review covering many more details:


Discussing the Review:
Something new – will it work? A Tactical Reviews Subreddit.
TacticalReviewsChat on Reddit
Please visit there and start/join the conversation.
Knife Review: Viper Twin

In this Viper Twin review we will be taking a detailed look at this new knife. The Twin is a small and elegant slipjoint gentleman’s pocket knife, especially suitable for every day use. It was designed by Fabrizio Silvestrelli who has been collaborating with Viper for years in the development of new knives.

Each of the Twin’s handles are made from one piece of titanium formed into the body, liner and bolsters, making it very strong, and it is offered with a choice of different colours of scale inserts. You can choose from Dark Matter Gold carbon fiber and the ivory G10 or as shown here, the green Canvas micarta. The Twin also comes with a leather slip case.

The blade is made from M390 stainless steel, an excellent combination of edge retention and corrosion resistance. It is non-locking slipjoint design, and the cutting edge is under three inches long making the knife friendly carry in many places.

What’s in the box?:
This is more of a ‘what would have been in the box’ as I don’t have the box. This knife was a display piece at IWA 2024, so you may see a few marks that would not be there on a new knife, and I have only the slip case and knife.


A good look round the Twin – Things to look out for here are:

This gallery is quite a large one, covering all the main aspects of the Twin. Starting with a detail of the pivot bolt in the integral bolster, moving to the other end of the handle with rear integral bolster and lanyard hole. The spacer/back-spring of the Twin is polished making for a stand out feature next to the matt titanium. The fit of the handle scale, and the one-piece construction of each titanium handle can be seen. My personal preference of phosphor-bronze washers are used for the blade pivot.
Swinging out the blade, initially to the half stop. A drop-point with long swedge gives this a powerful look. Focusing in on a few smaller details on the M390 blade, and into the handle. The final image is of the blade tip with factory edge.


The Blade and Handle – Detailed Measurements:
For full details of the tests and measurements carried out and an explanation of the results, see the page – Knife Technical Testing – How It’s Done.

The blade is made from M390 steel.

Being a slipjoint, the blade’s resistance to opening and closing is a key feature. One of the Tactical Review’s tests is to measure the torque required to open and close the blade, and in here including the half stop. This is done using a force meter and applying it to the blade at a set distance from the pivot.

The final measurements are as follows. A crucial factor you can see in these results is that the closing force is significantly higher than the opening force, making the blade stable during use even though it is non-locking.


The Factory edge up close:

Followers of Tactical Reviews will know my views on factory edges, but to recap:

Anyone using a knife will need to sharpen it. That first factory edge is just like the first tank of fuel that a new car comes with (or first charge of the battery).
A good factory edge is a ‘nice to have’ but not a ‘make or break’ for a good knife, as you will be putting your own edge onto it soon enough.
The factory edge does however indicate the care a knife maker has put into the final finish.
It is for this reason Tactical Reviews measures factory edge sharpness and specifications, and includes this information in the detailed technical testing.

As a further look at the factory edge, this section has been added to include some high magnification photos of the factory edges.

There are a few more images than I normally include as I found this knife, despite being a show knife, still had some burrs from the factory sharpening. A quick strop would remove them quickly and this edge was very good, so this is out of interest more than anything else.


What is it like to use?

As a non-locking knife I’m able to properly EDC it, and have been carried this knife for a considerable time. My nails don’t like nail nicks, and I always pinch-open the blade of the Twin, which is reassuringly firm in its action. The size is both easy to carry but also substantial enough you don’t feel it is lacking, certainly not for typical EDC use. The wide flat ground blade makes light work of various jobs and slices well.
This gallery shows it in my XL glove-size hands.
In the last two images in this gallery (one of which is included full size at the end of the review) you can just make out the modification I have made, which for me completes the Twin, and that is adding a sharpening choil. I find that small point detail incredibly useful when I’m doing certain cuts so I’ll often add this feature if it isn’t there.


You might have noticed the review ‘feature image’ makes the blade appear very dark, and then in the review introduction, another similar image with the blade full of light. And just below here is another version somewhere between. Of course the blade is very reflective and the changing light gives very different character to the blade. Though the feature image is absolutely real, it is not really representative of how you see the Twin most of the time, it was however striking and interesting looking, so I put it as the headline feature image for that reason.

With the minor modification I made (adding the sharpening choil), the Twin is a firm favourite of mine and will be difficult to displace from my daily EDC.


Review Summary

The views expressed in this summary table are from the point of view of the reviewer’s personal use. I am not a member of the armed forces and cannot comment on its use beyond a cutting tool or field/hunting knife.

Something that might be a ‘pro’ for one user can be a ‘con’ for another, so the comments are categorised based on my requirements. You should consider all points and if they could be beneficial to you.

_______________________________________________
What doesn’t work so well for me
_______________________________________________

No sharpening choil (but I added one).

_______________________________________________
Things I like
_______________________________________________

Reassuringly firm blade retention torque.
Stable construction.
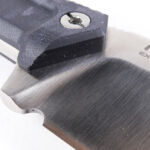
Polished back-spring detail stands out.
M390 steel giving excellent edge retention.
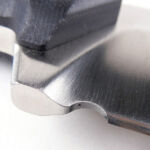
Slim and easy to carry.
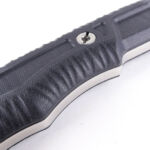
Strong wide blade.
Leather slip case included.

Review Videos

Starting with a short format sixty second review:


Onto a full video review covering many more details:


Discussing the Review:
Something new – will it work? A Tactical Reviews Subreddit.
TacticalReviewsChat on Reddit
Please visit there and start/join the conversation.