Light Review: Olight H1 Nova Headlamp

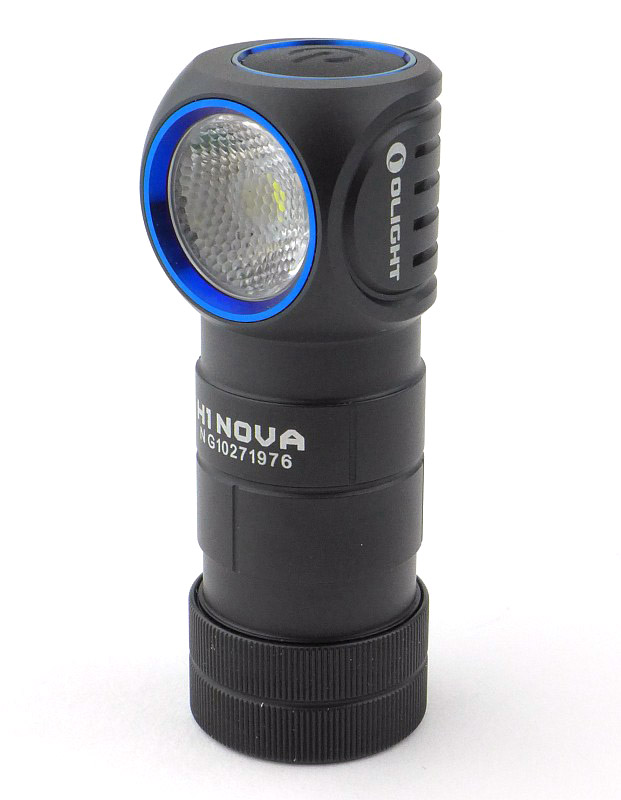
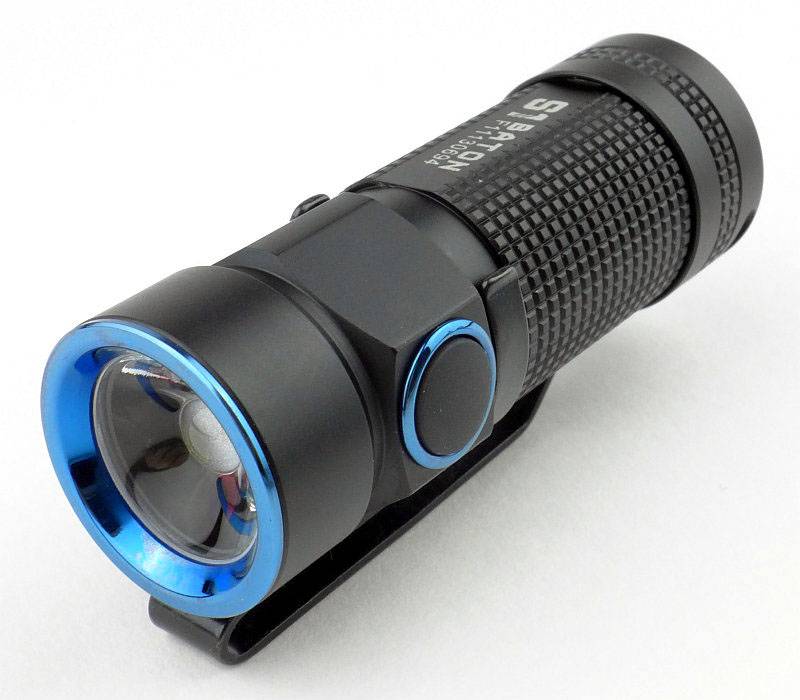
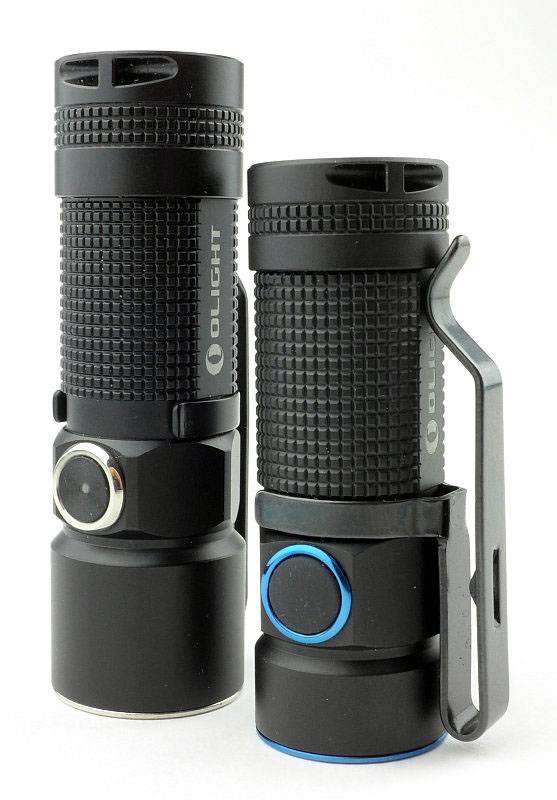
Inspired by their excellent S1 Baton pocket light (previously reviewed), Olight wanted to bring the same concept of an ultra compact body with high performance output to a headlamp. As will become clear throughout this review they have managed to do just that with the H1 Nova which is a headlamp and pocket light all in one.
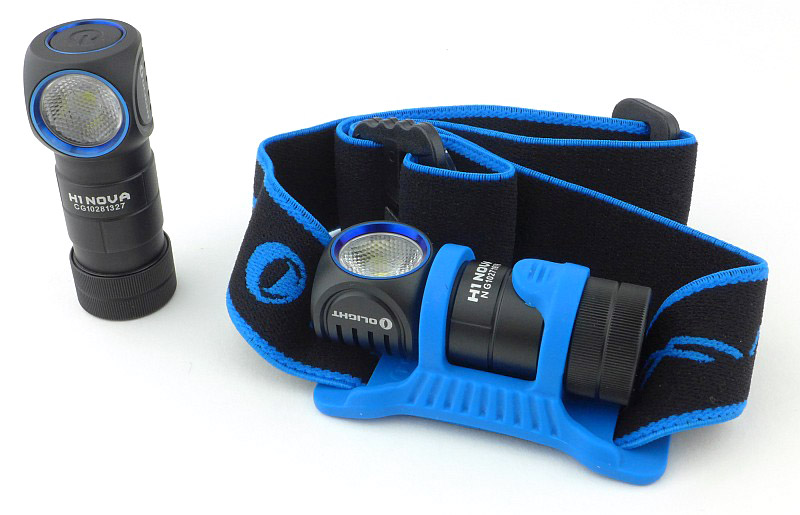
Taking a more detailed look:

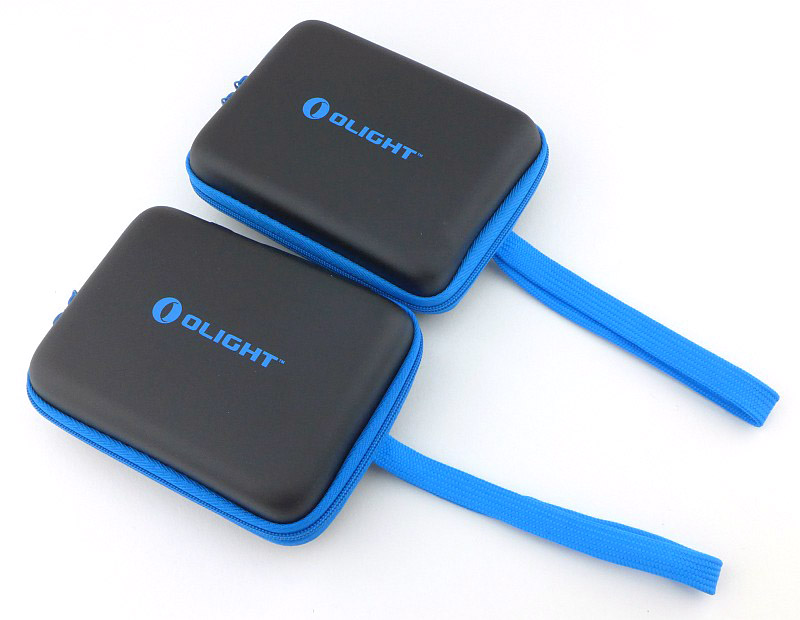
The reason there are two boxes here is that this review is looking at the CW – Cool White, and NW – Neutral White versions of the H1.
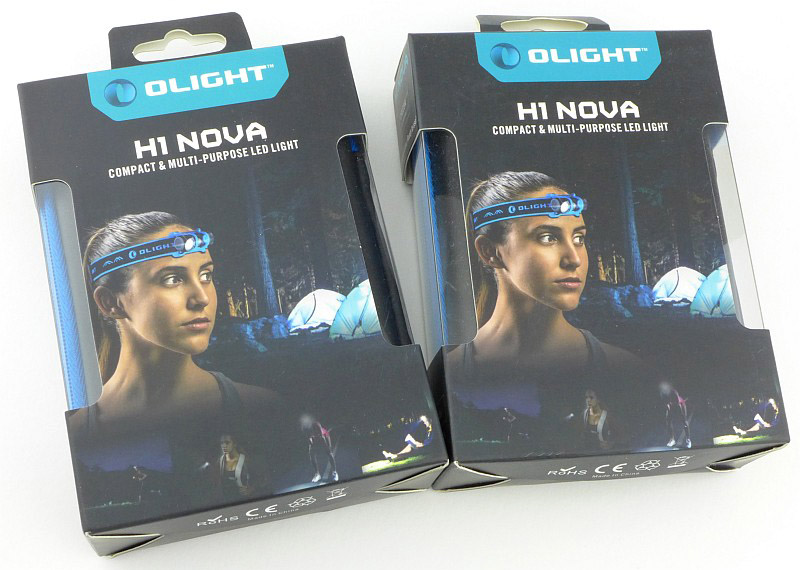
Inside the outer box is a zip-up carry case.
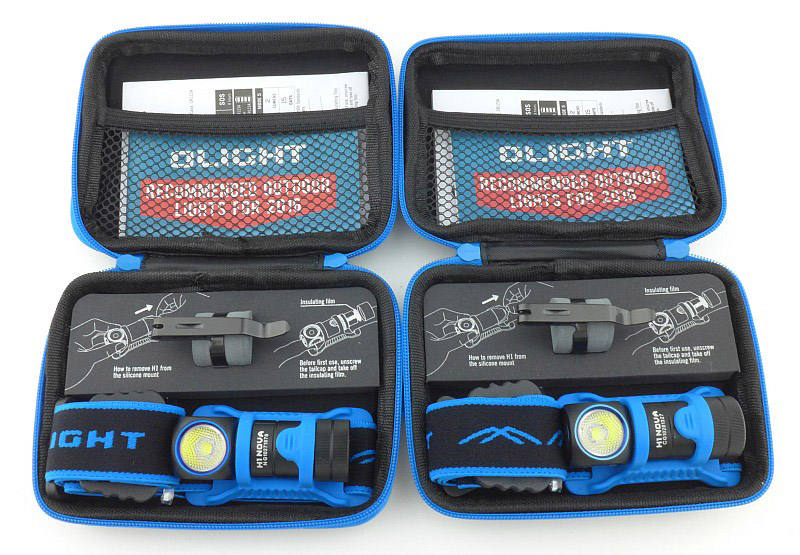
In each of the cases is the H1 in its headband mount, a pocket clip stored on a foam holder, and the instructions held in a mesh pocket.
Laying out the contents of the case.
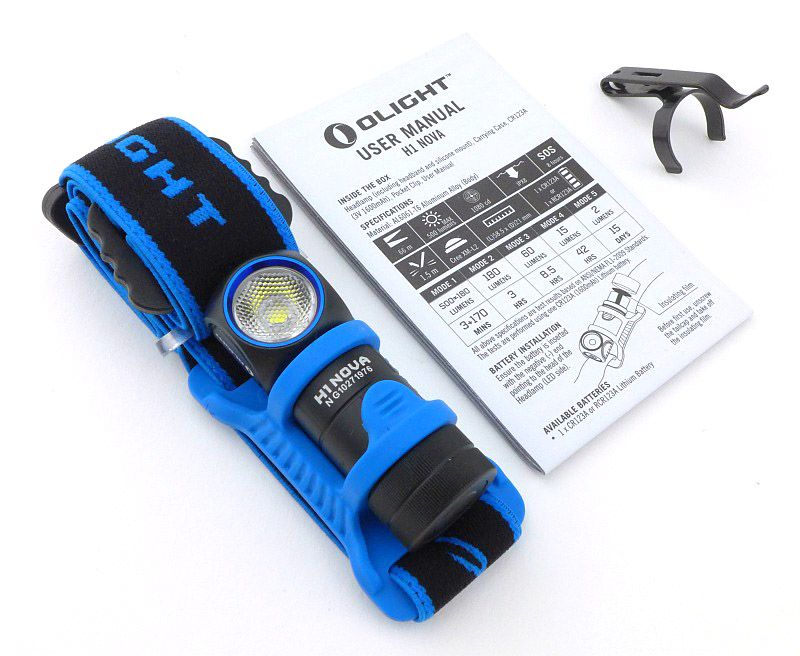
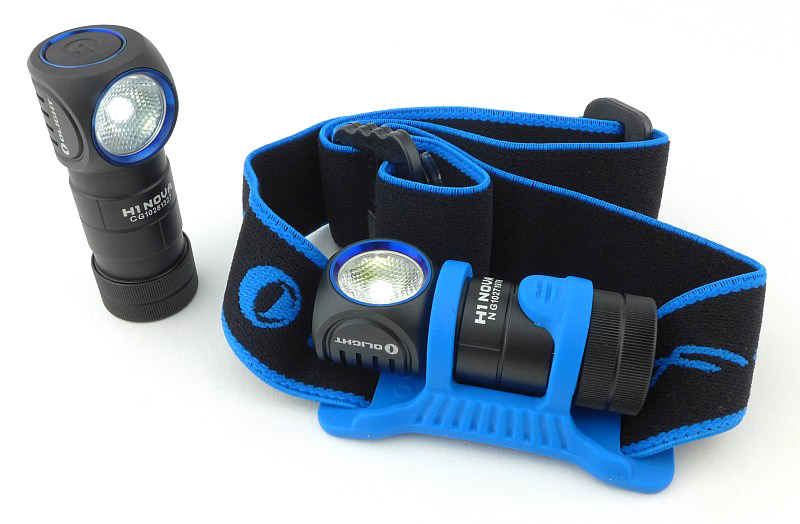
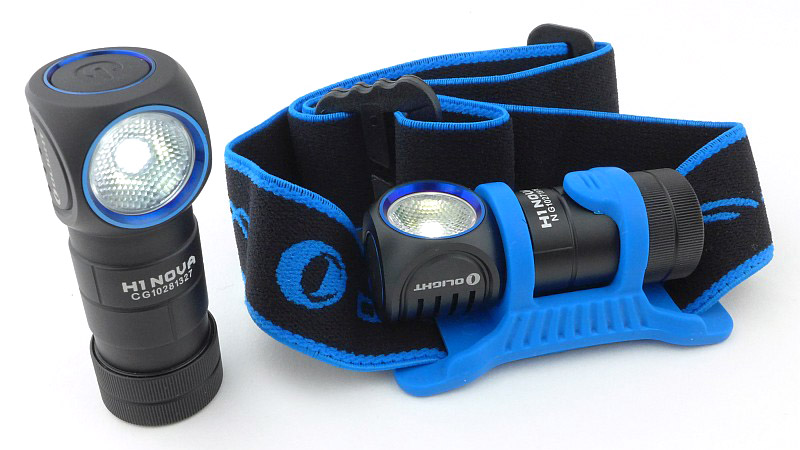
The main parts are the headband with rubber mount, the H1 Nova light, and a steel pocket clip.
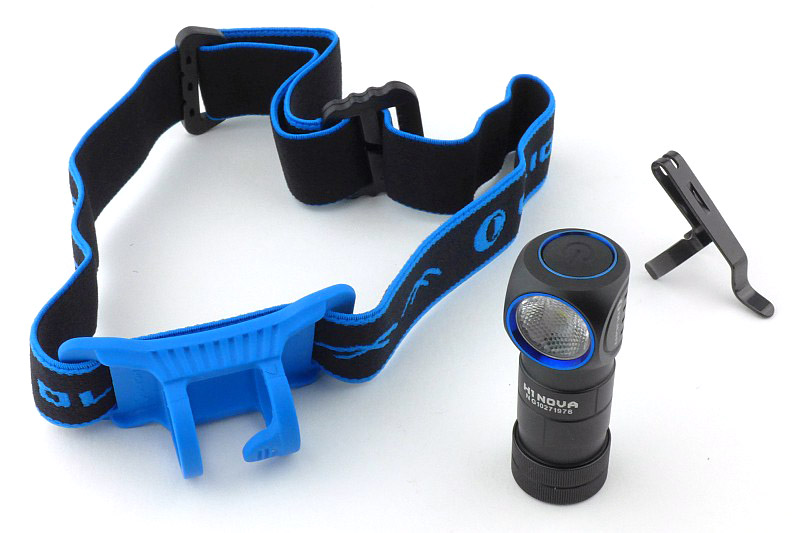
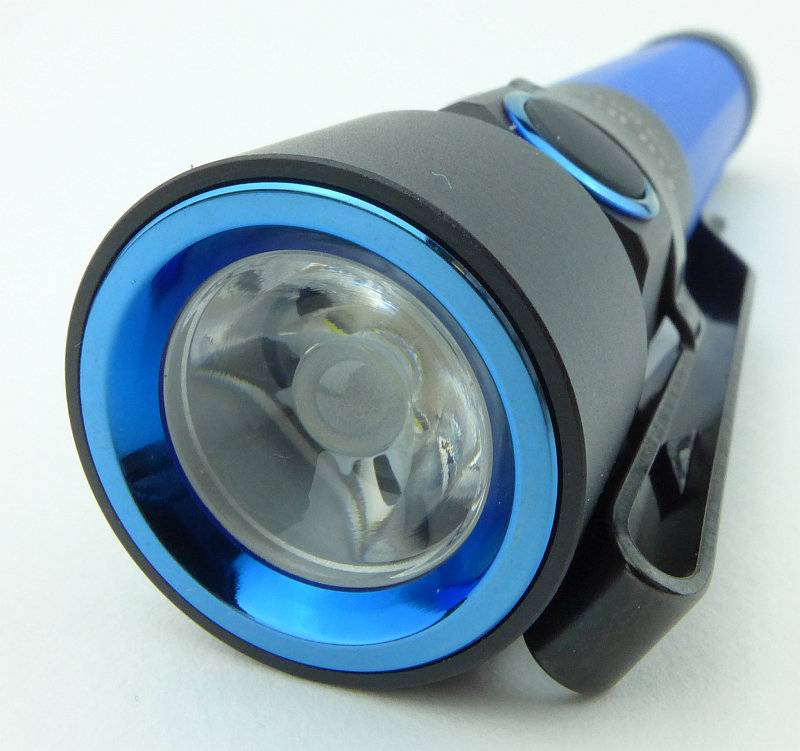
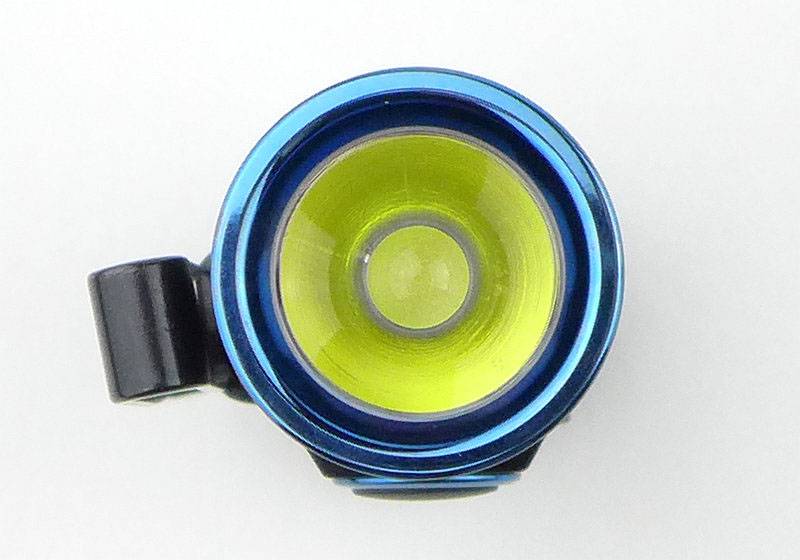
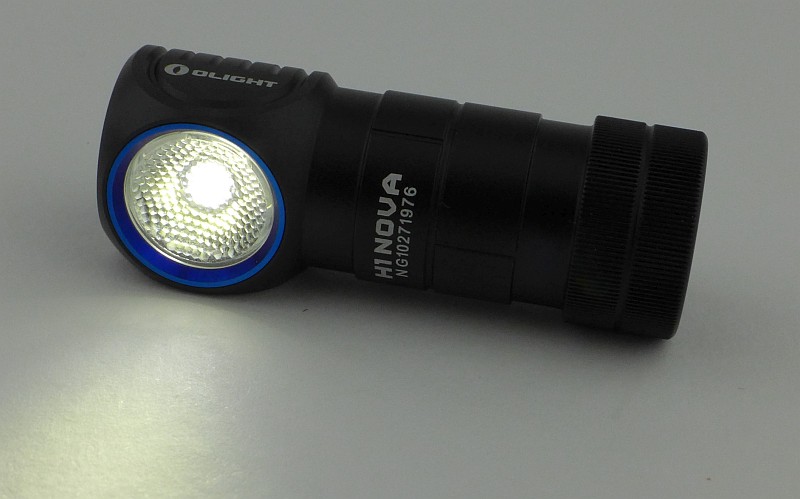
Just like the S1, the H1 has the blue highlights surrounding the lens and switch.
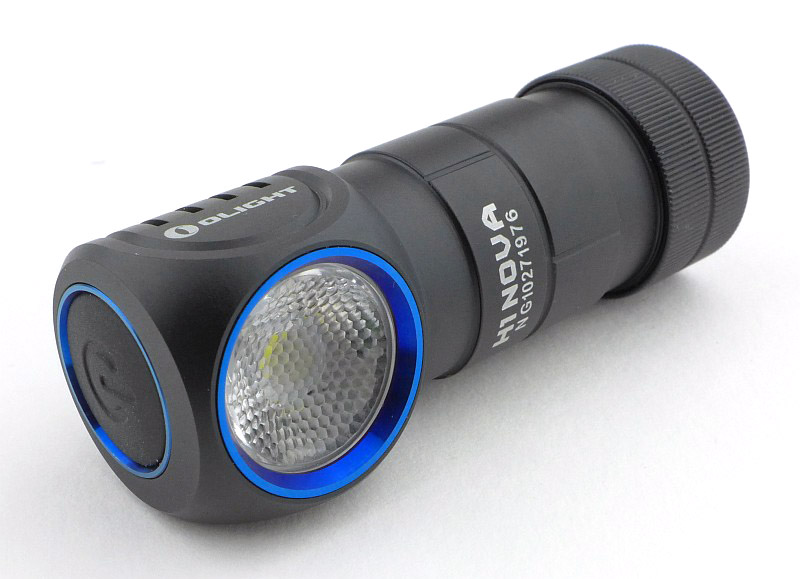
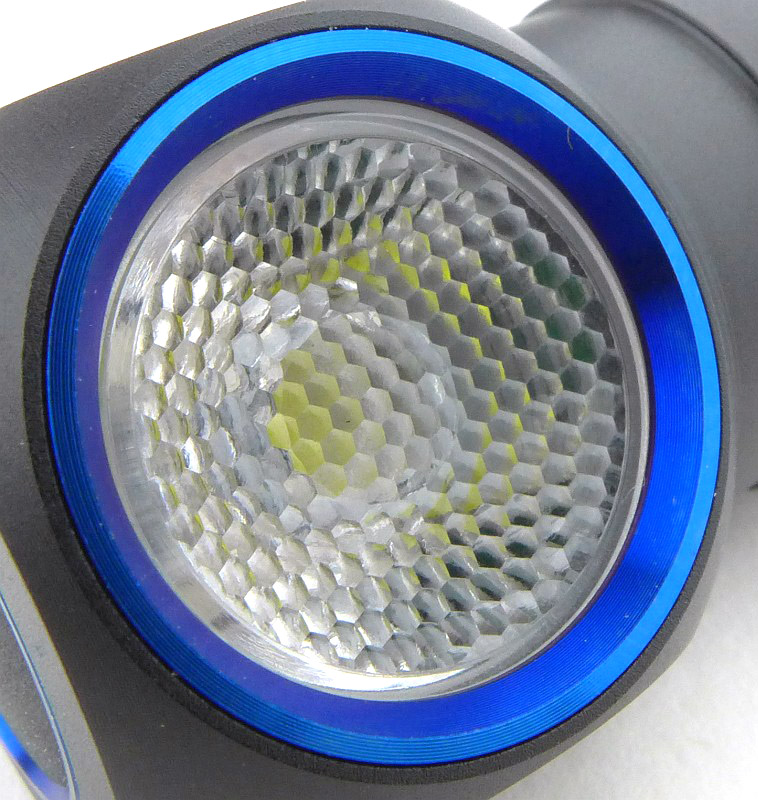
A TIR optic is used, but this also has a hexagonal diffuser pattern to give a flood beam to the XM-L2 LED.
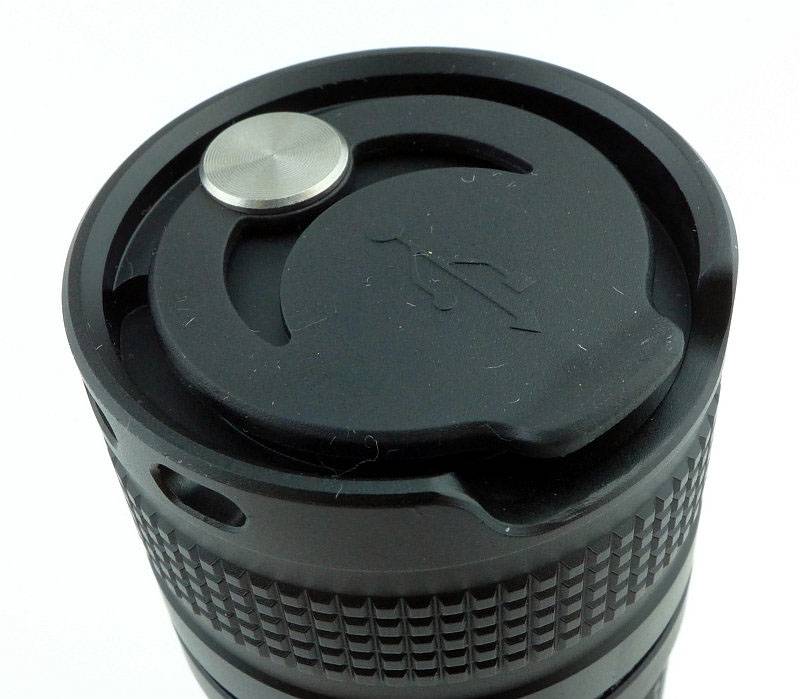
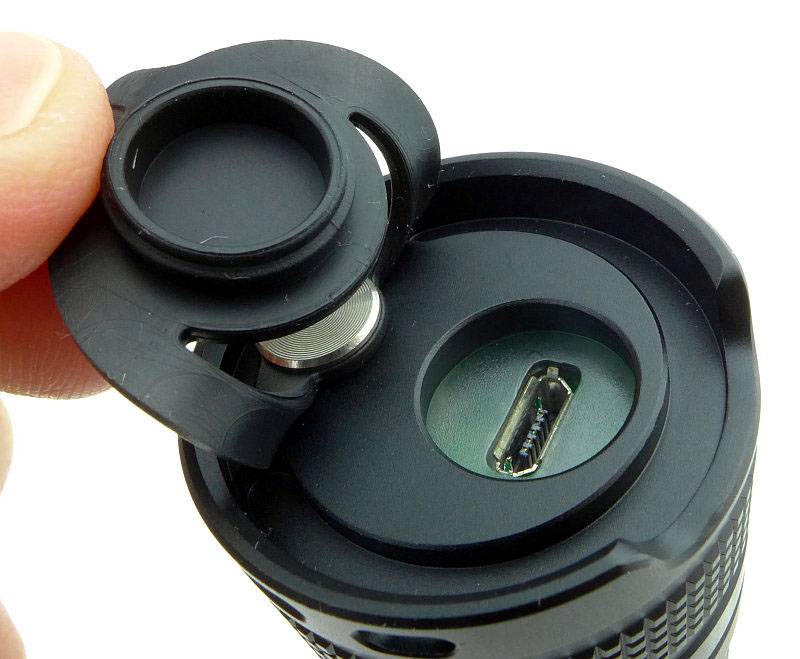
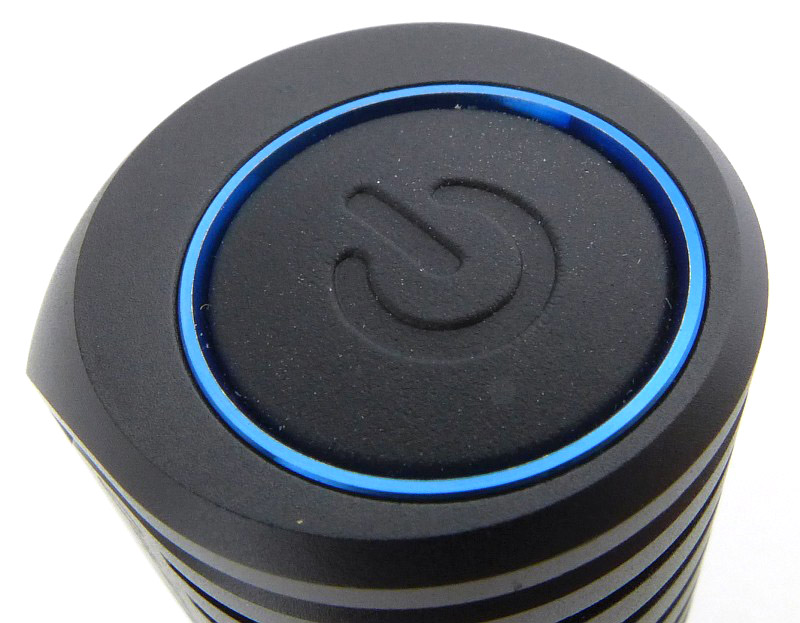
On the top of the H1 is its rubber power switch. This is an electronic click switch.
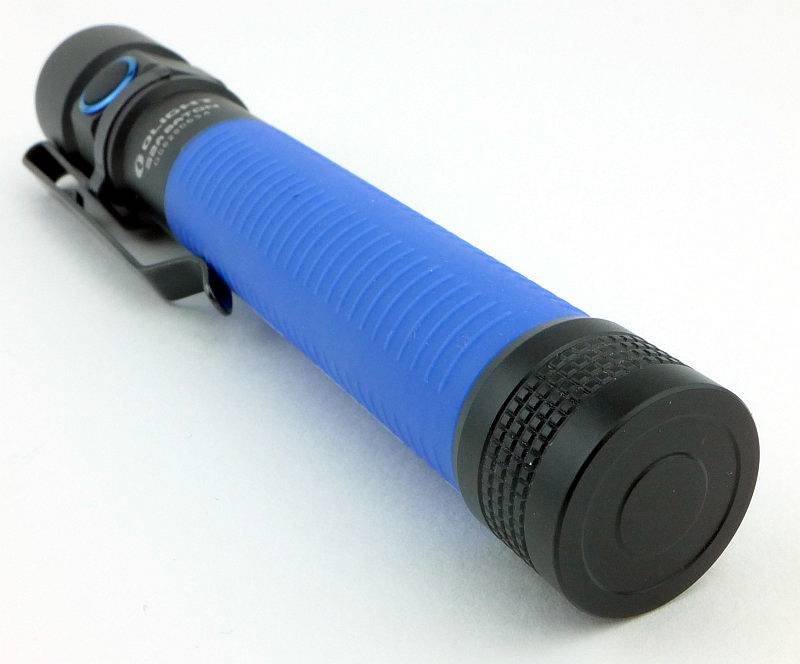
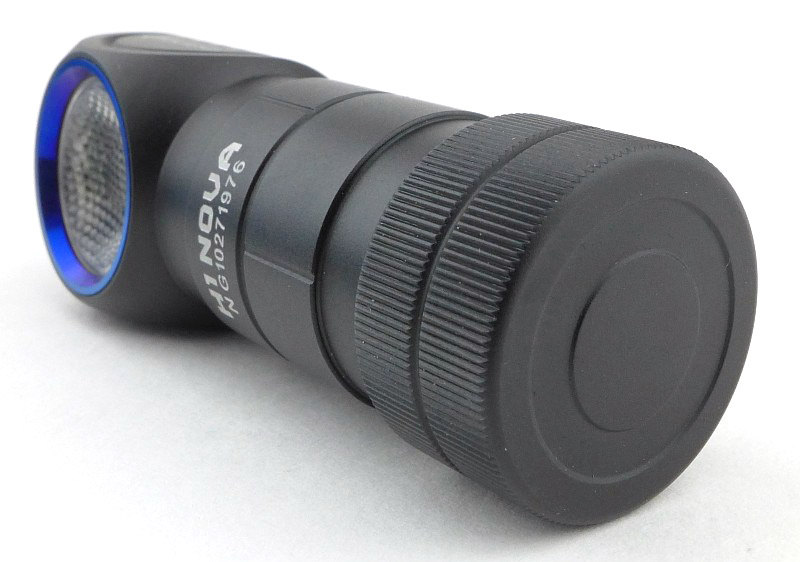
A plain tail-cap has a hidden magnet.
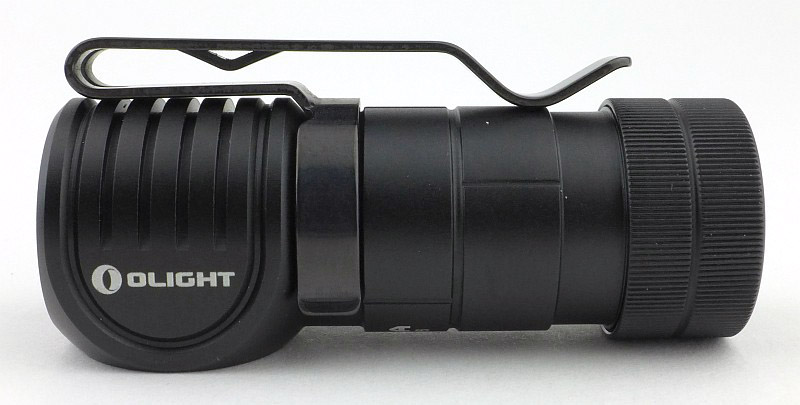
Though designed as a headlamp, the H1 also has a pocket clip that can be fitted either way up into one of the two grooves in the body.
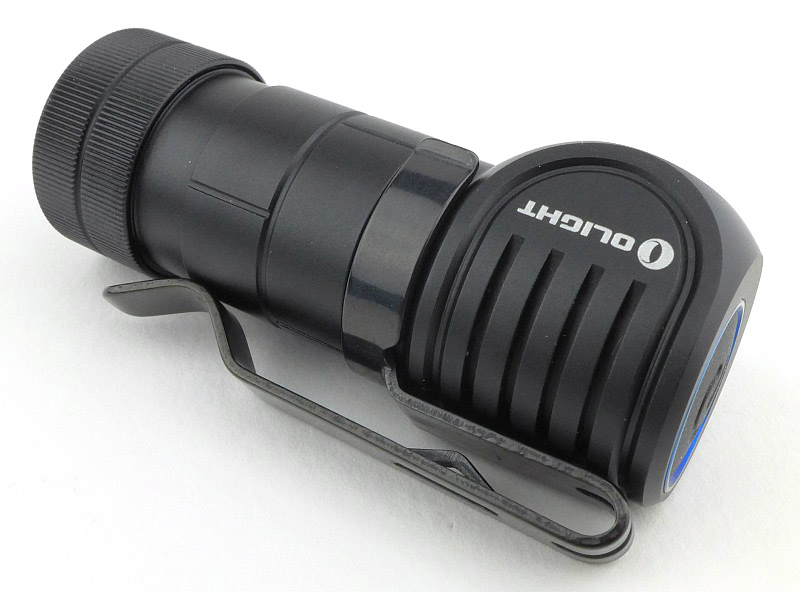
It is a deep carry type of clip with a secondary ‘catch’ to help it hold onto a pocket edge.
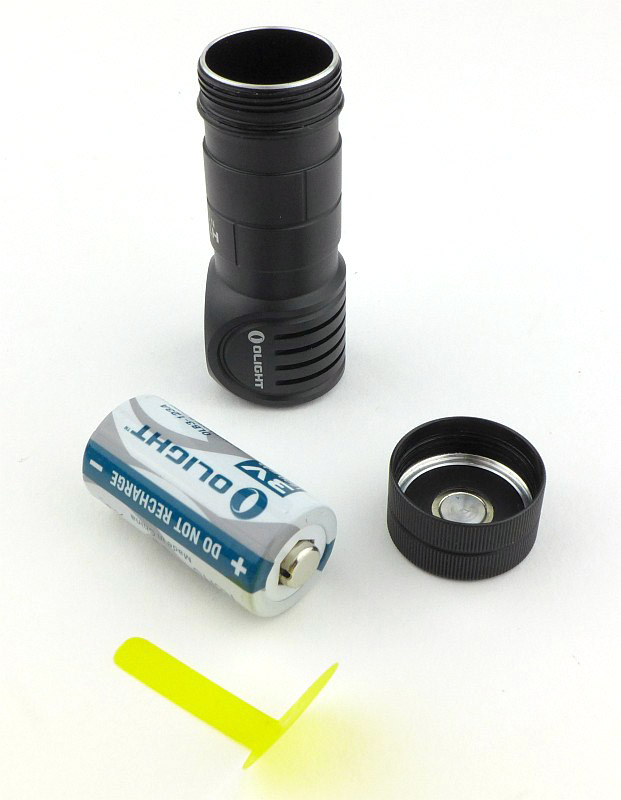
When it arrives, the H1 has a CR123 fitted inside it, but there is also a plastic insulator to stop the H1 from coming on, or having any parasitic drain.
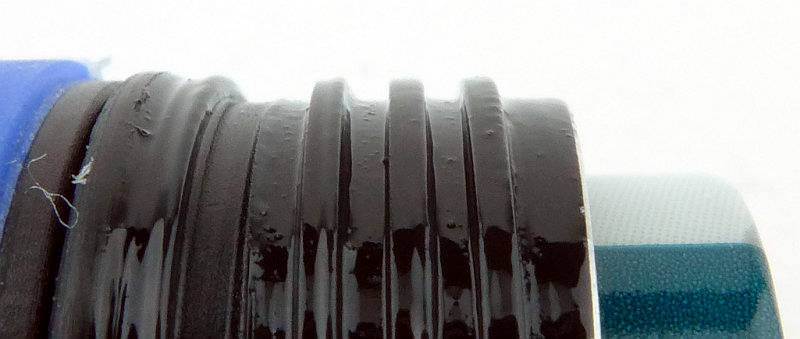
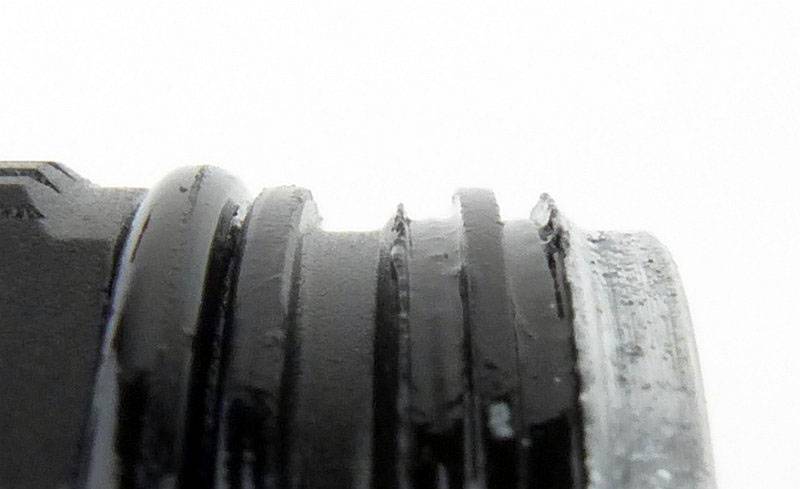
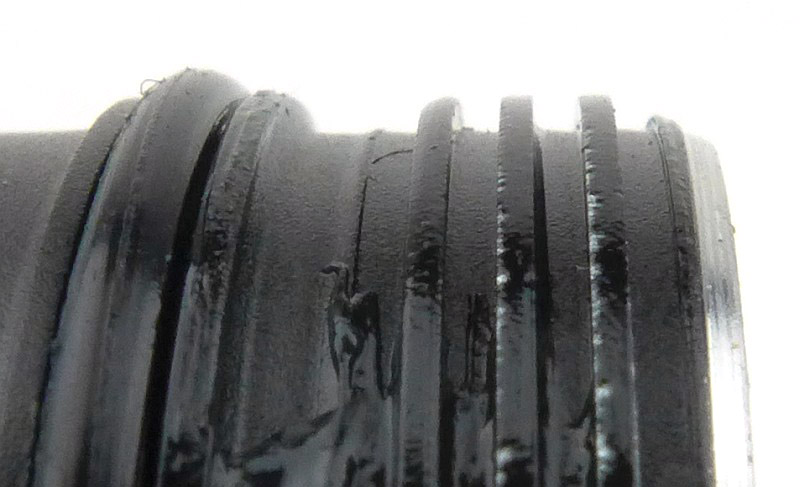
The threads are square cut. In this case there is some chipping to the anodised finish on one side of the thread.
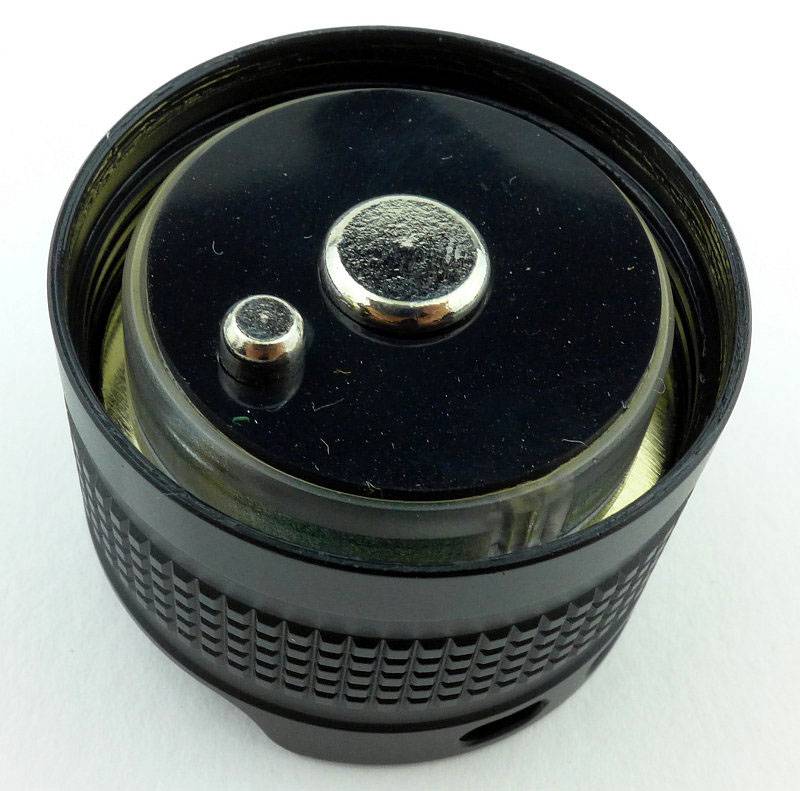
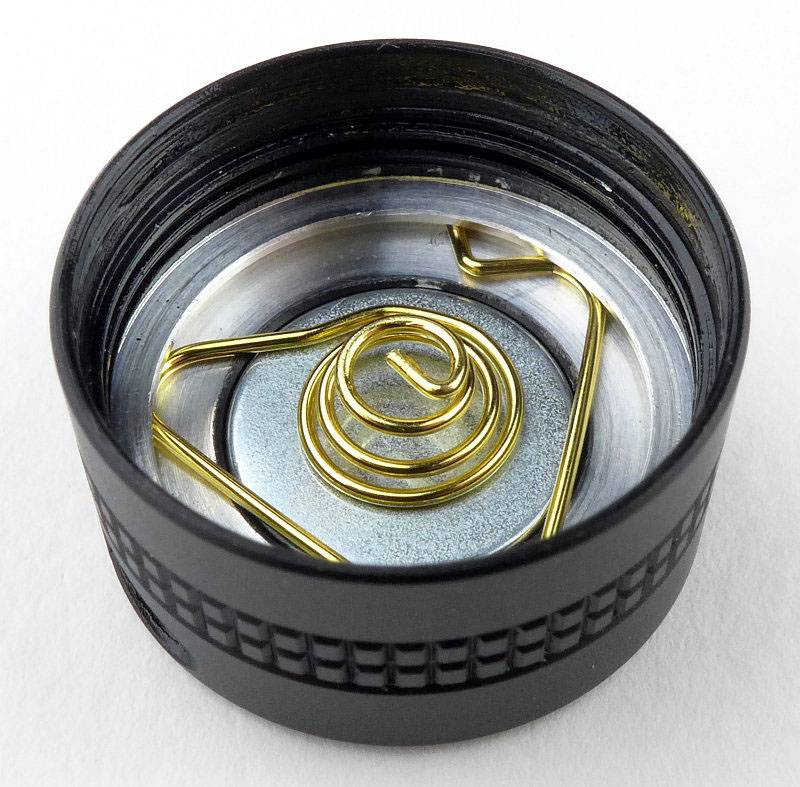
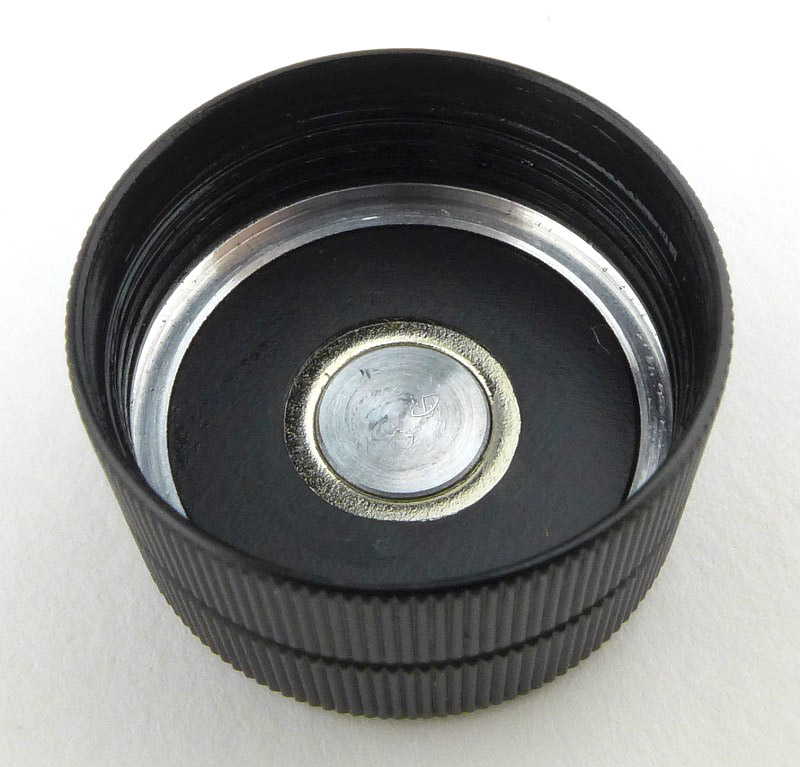
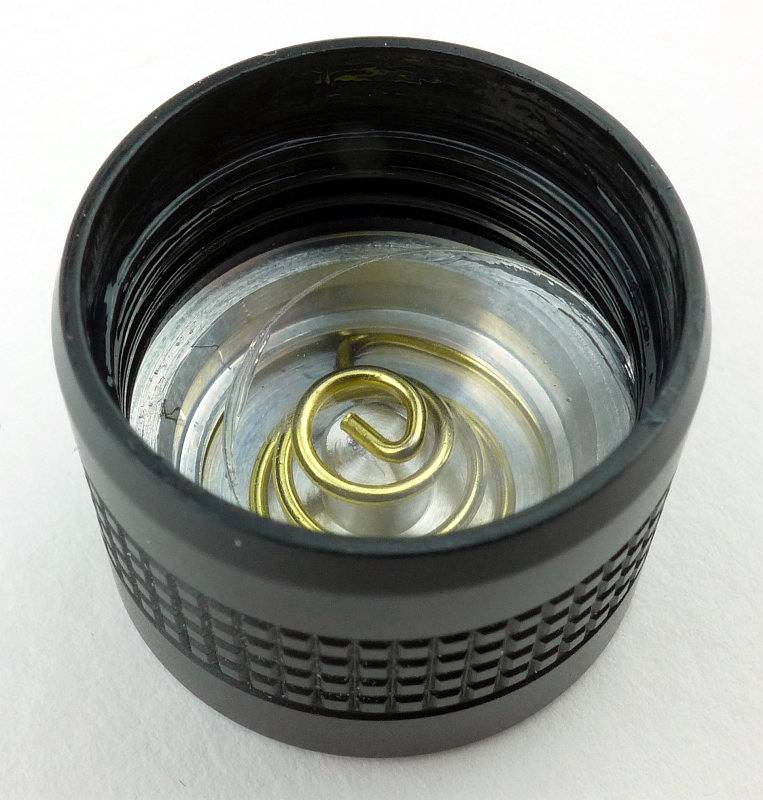
Inside, the tail-cap looks very simple. This is actually the positive contact so doesn’t have a spring. Surrounding the aluminium terminal, there is a ring of the tail-cap magnet visible.
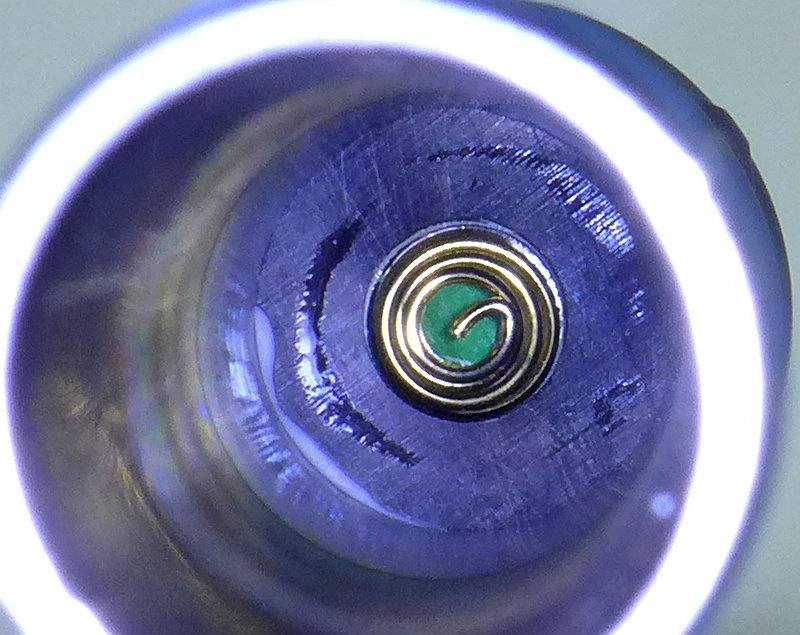
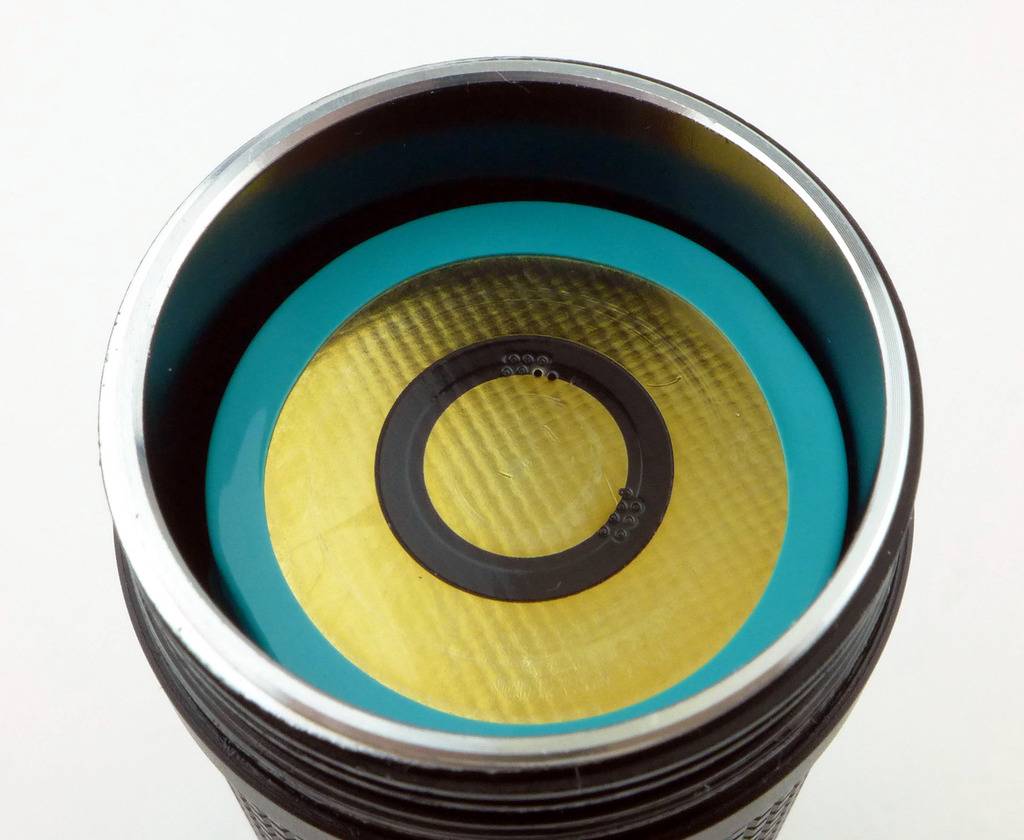
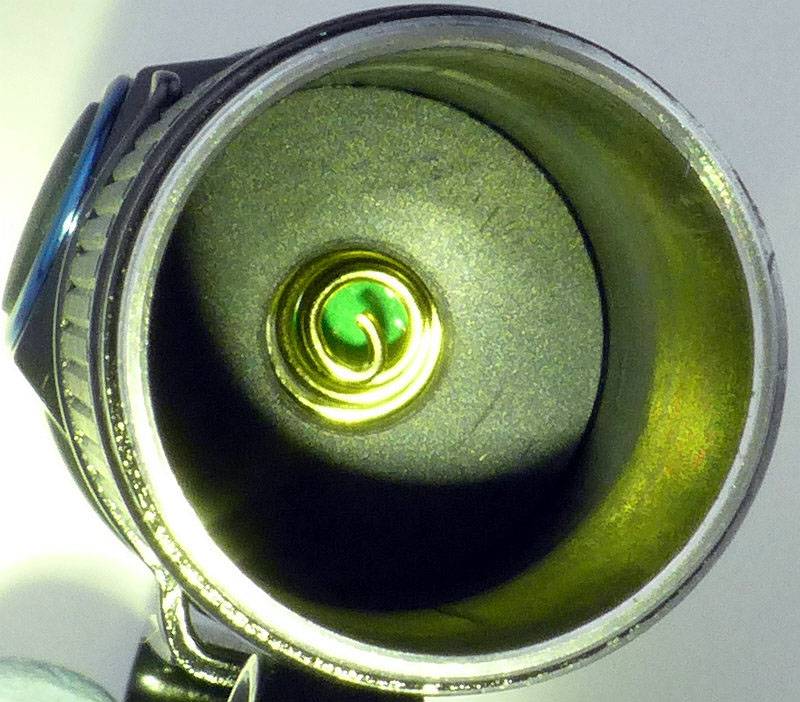
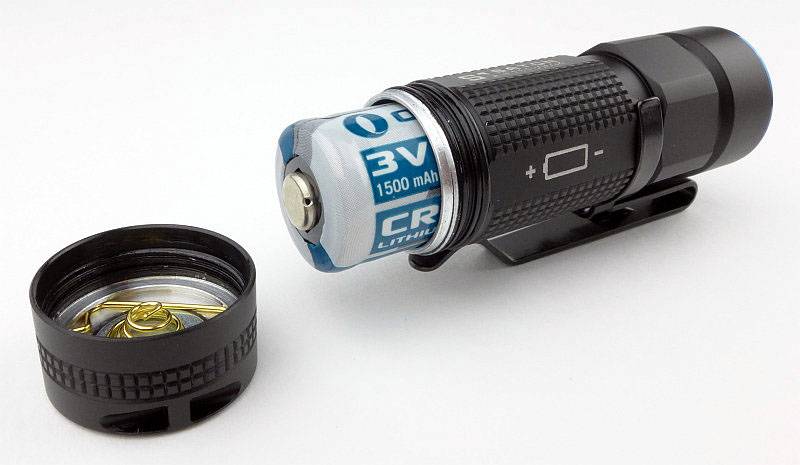
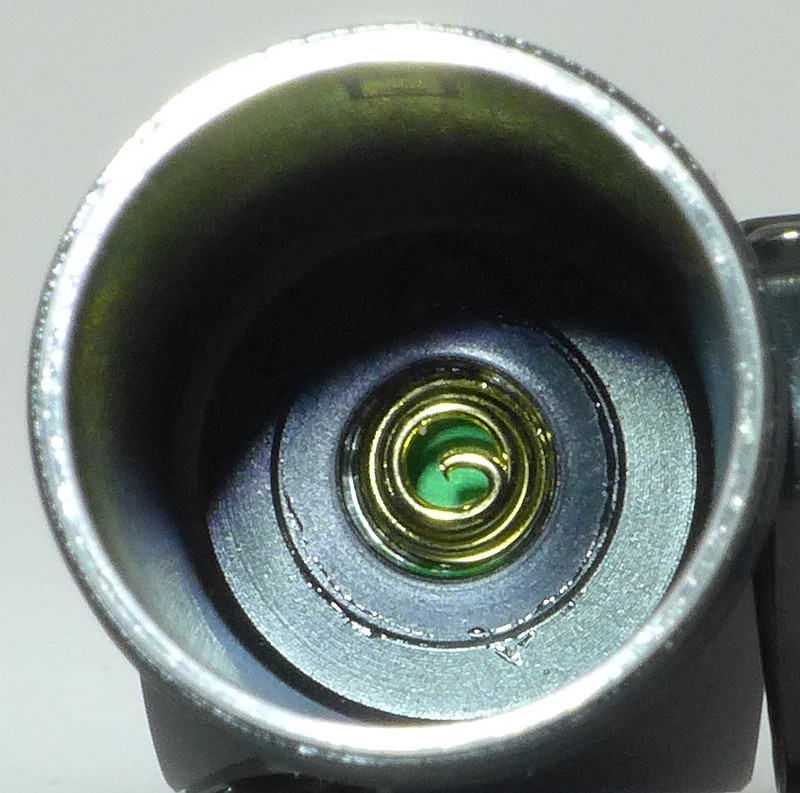
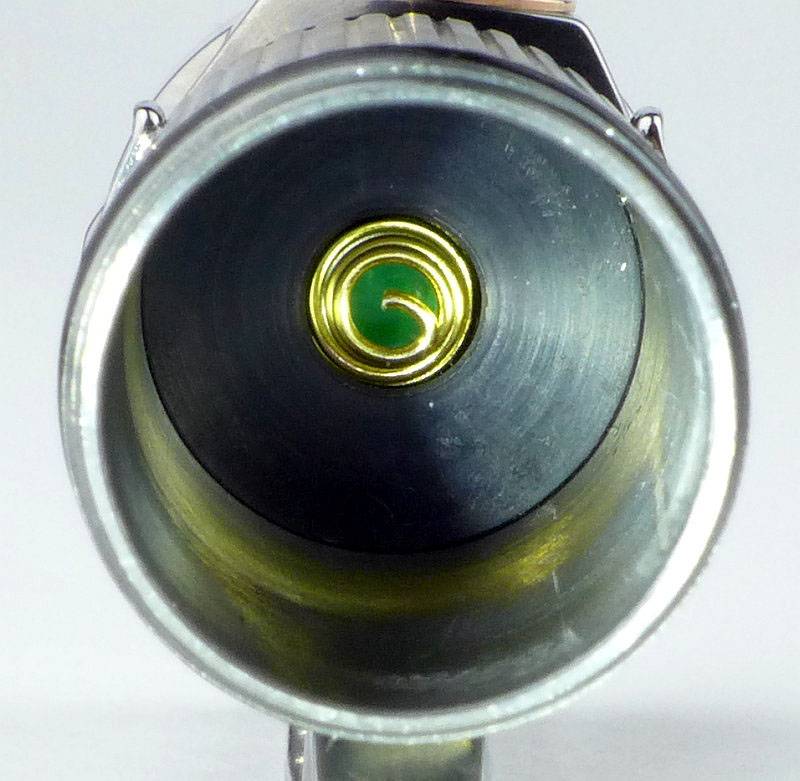
With the less conventional “negative into the tube” contact arrangement, there is a negative terminal spring contact inside the battery tube.
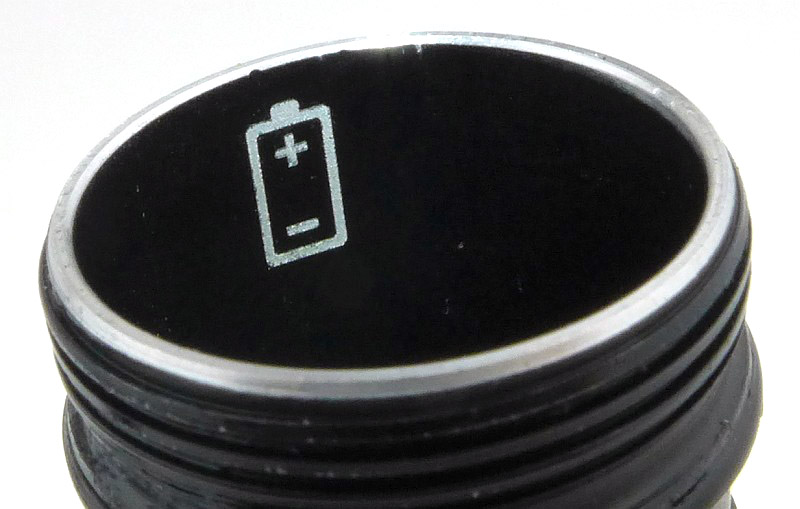
To remind you which way the battery goes in there is a guide marker inside the battery tube.
Refitting the cell after removing the transit insulator, the unconventional cell orientation has the positive terminal of the cell visible.
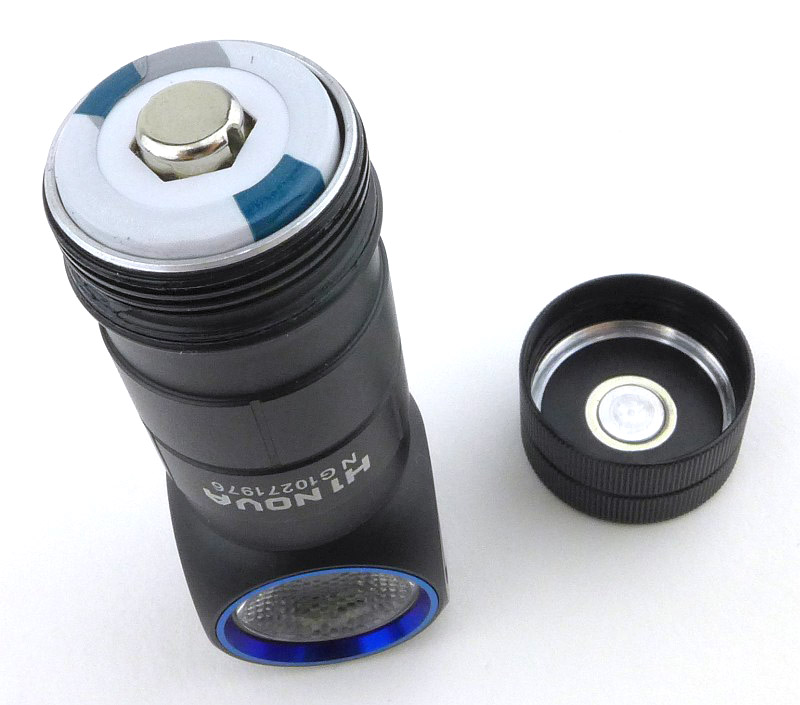
And we are ready to go.
With the NW and CW versions on test we can compare the beam tint in the next section.
The beam

Please be careful not to judge tint based on images you see on a computer screen. Unless properly calibrated, the screen itself will change the perceived tint.

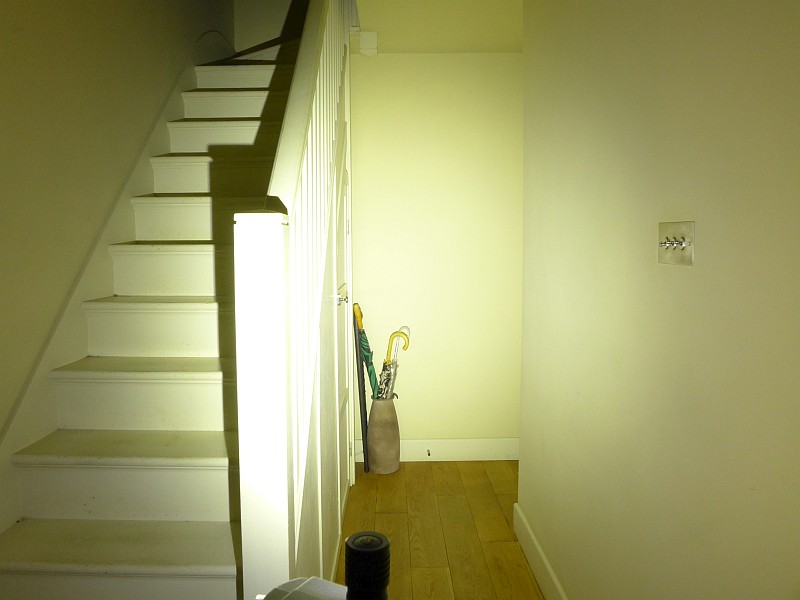
The indoor beamshot is intended to give an idea of the beam shape/quality rather than tint. All beamshots are taken using daylight white balance. The woodwork (stairs and skirting) are painted Farrow & Ball “Off-White”, and the walls are a light sandy colour called ‘String’ again by Farrow & Ball. I don’t actually have a ‘white wall’ in the house to use for this, and the wife won’t have one!

In this first beamshot we have the CW version. All beamshot photos are taken with daylight white balance set. Of particular note is how wide the beam is, an excellent flood beam which, although it has a hotspot, this hotspot is large and surrounded by a super wide spill.
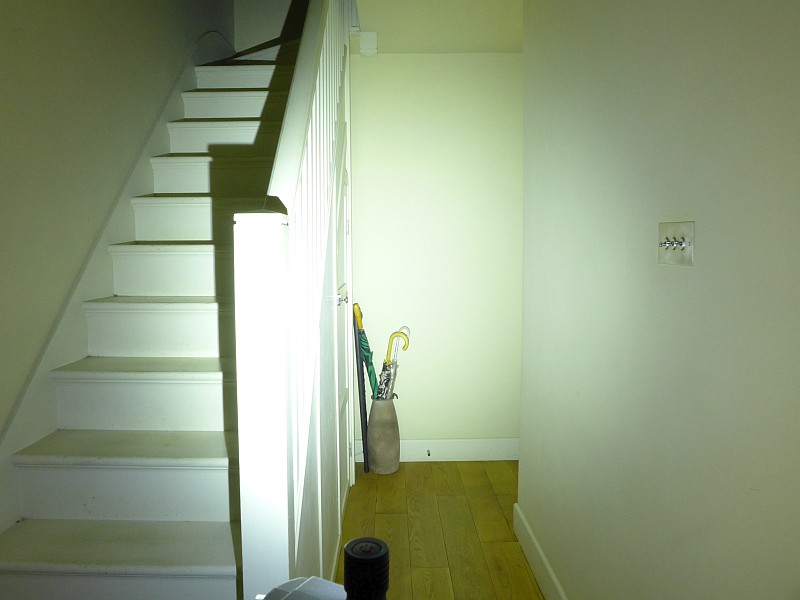
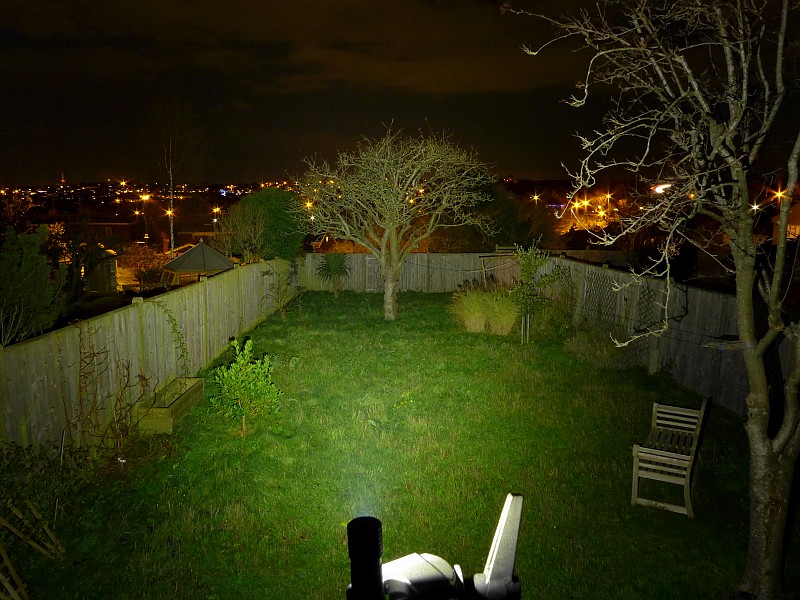
Now the NW version and the tint is significantly warmer than the CW and gentler on the eye.
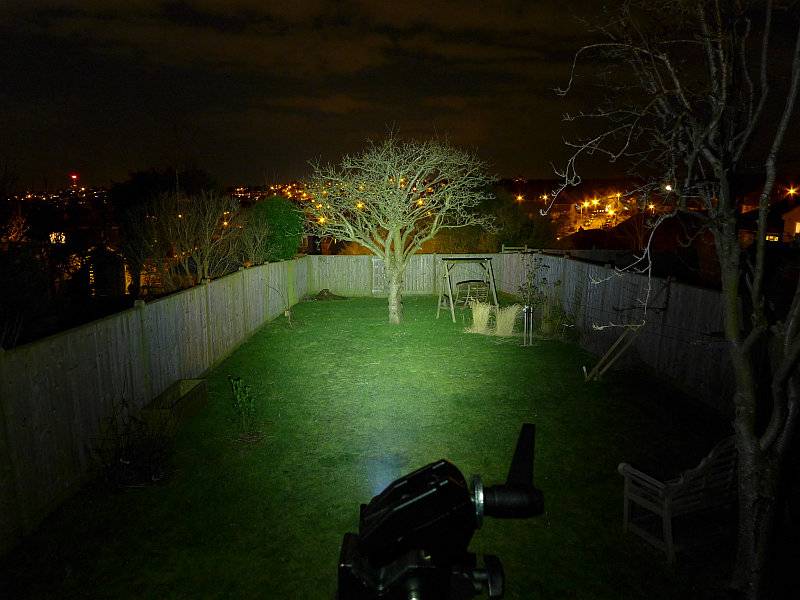
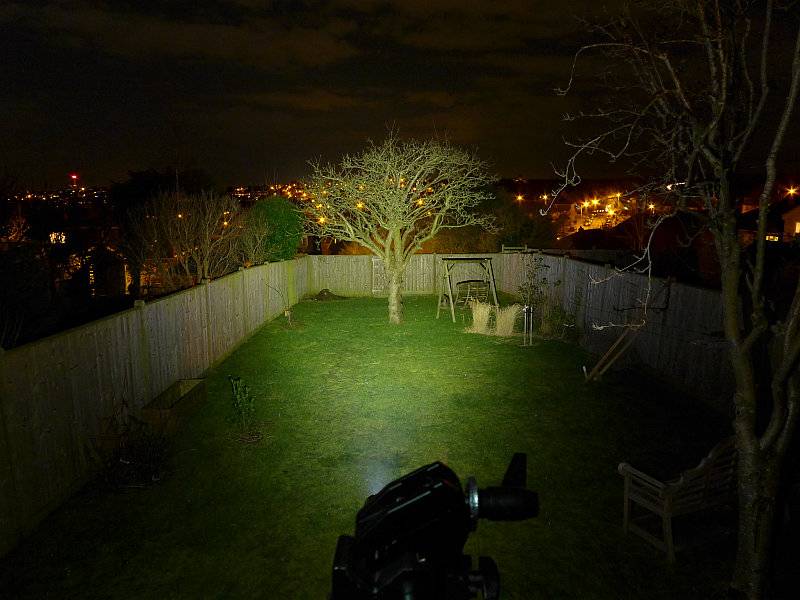
Taking them outdoors, and back to the CW.
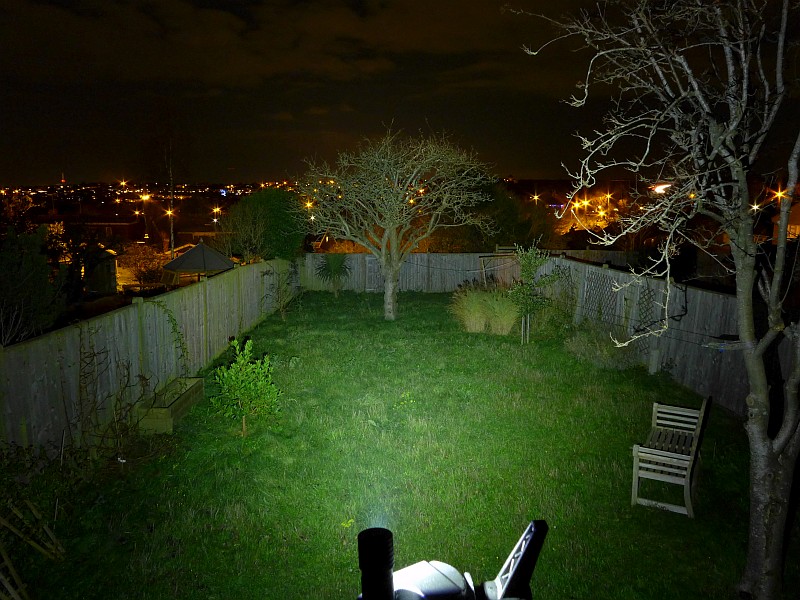
I didn’t quite get the beam alignment the same for these comparison photos, but the NW version appears to have a better reach.
Modes and User Interface:

There are five constant modes, Moon, Low, Medium, High and Turbo, plus an SOS mode. Access to these is controlled via the single electronic click switch.

To turn the H1 ON to the last used output level, click the switch once. Click again to turn OFF.
Note: Turbo is only memorised for 10 minutes after which is changes to Medium, and SOS is not memorised.

To change the output level, when ON, press and hold the switch to cycle through Moon (or Turbo), Low, Medium, High, Low etc.
Note: ‘normal’ brightness levels are Low, Medium and High.

For Moon mode, from OFF, press and hold the switch for 1s and the H1 will turn ON to Moon mode. This level is memorised.

For Turbo, from ON or OFF, rapidly double tap the switch. Double tap the switch again to change to the memorised output level.

For SOS, from ON or OFF, rapidly triple tap the switch. To exit SOS carry out any action with the side switch.

The H1 also has an electronic lockout to protect against accidental activation. To LOCK the H1, from OFF, press and hold the switch for 2s. After 1s the H1 will enter Moon mode, but continuing to hold the switch and the moon mode goes off again. The H1 is now Locked Out.

While locked, pressing and holding the switch for less than 1s will activate Moon mode momentarily, going off as soon as the switch is released. Holding it for 2s or more will unlock the H1.

To UNLOCK the H1, press and hold the switch for 2s or more. The Moon mode output will blink briefly to indicate it is unlocked and the H1 will be on in Moon mode.

With the anodised tail-cap threads there is also the option of a mechanical lockout by unscrewing the tail-cap 1/4 to 1/2 turn.

Batteries and output:

The H1 Nova runs on CR123 or RCR123.

To measure actual output, I built an integrating sphere. See here for more detail. The sensor registers visible light only (so Infra-Red and Ultra-Violet will not be measured).

Please note, all quoted lumen figures are from a DIY integrating sphere, and according to ANSI standards. Although every effort is made to give as accurate a result as possible, they should be taken as an estimate only. The results can be used to compare outputs in this review and others I have published.

___________________________________________ ________________________________ ________________________________
Olight H1 Nova Version using specified cell. I.S. measured ANSI output Lumens PWM frequency or Strobe frequency (Hz)
___________________________________________ ________________________________ ________________________________
Cool White Turbo – AW RCR123 575 0
Cool White Turbo – CR123 308 0
Cool White High – AW RCR123 193 0
Cool White Medium – AW RCR123 70 0
Cool White Low – AW RCR123 14 0
Cool White Moon – AW RCR123 2 0
Neutral White Turbo – AW RCR123 560 0
Neutral White High – AW RCR123 190 0
Neutral White Medium – AW RCR123 70 0
Neutral White Low – AW RCR123 14 0
Neutral White Moon – AW RCR123 2 0

There is parasitic drain but it is low. When using CR123, the drain was 19.6uA (8.15 years to drain the cell) and when using RCR123, the drain was 23.6uA (3.63 years to drain the cell).

Initially looking at just the first part of the three runtime traces shown in the graph, and the first observation is that the H1 does not achieve full output on CR123 instead requiring a RCR123 for the full 500+ lm. Also note that for the maximum Turbo output the H1 is quite sensitive to the cell condition with the CW run only managing about 45s on Turbo before dropping to High, but the NW taking this to the full 3 minutes of Turbo before ramping down to High. There is more to discuss on this in the full length runtime graph.
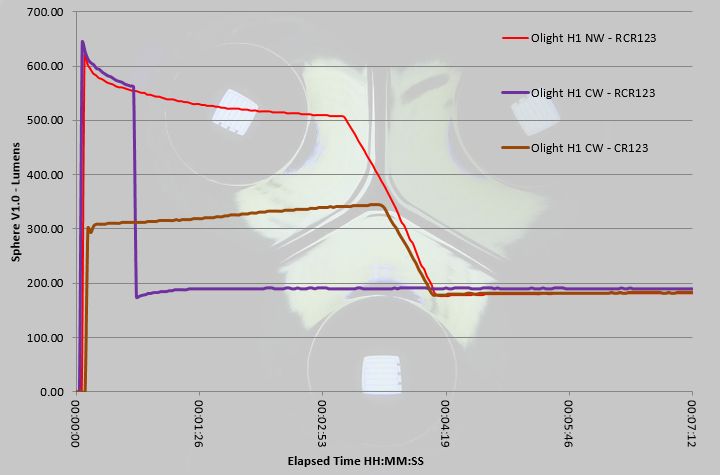
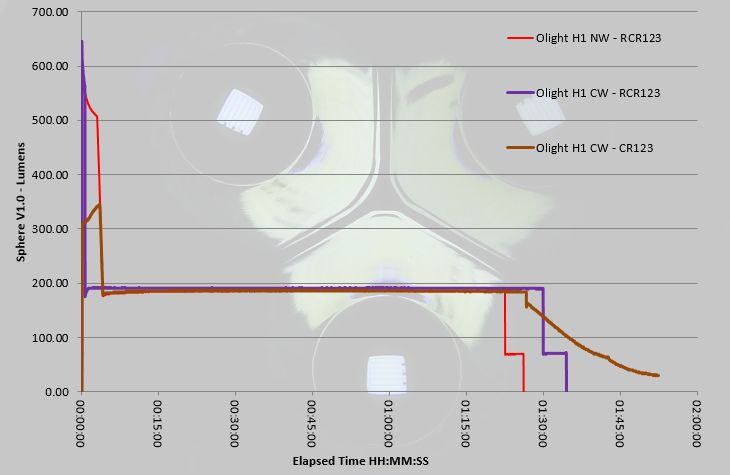
Picking up from the previous comment, where the CW only ran at Turbo for 45s (possibly indicating a cell that was not fully charged) it actually managed a slightly longer runtime than the NW (which had the full 3 minutes of Turbo), so in reality the cell had the same level of charge, but the CW terminated Turbo earlier.
Also note that the supplied CR123 has managed approximately the same overall output (though it does tail off and gives a longer total runtime). What is important to note is that when using the RCR123, it’s protection kicks in and the output of the H1 does cut out completely around 5 minutes after dropping down to Medium. If used on Medium for long periods, you won’t have any warning a RCR123 is running low, it will just cut out.
Troubleshooting

This section is included to mention any minor niggles I come across during testing, in case the information helps anyone else.

No issues were encountered during testing.

As per the description of this section, this information is provided in case anyone else finds a similar ‘issue’ that might be fixed in the same way.

The H1 Nova in use

Honestly, before trying out the H1 Nova, I was never a fan of 1xCR123 headlamps. The reasons for this were that many would only work with primary cells (I definitely want the option of rechargeable), and the interface/beam/runtime never seemed a good fit to my needs.

Personally, the critical aspects in a headlamp are no PWM, a flood beam, direct access to moon mode, plus a comfortable headband. Add to this easy conversion to a pocket lamp, and the ability to use rechargeable cells, and you have a winning formula.

Though I prefer rechargeable cells, you often have the issue that output can shut off completely if the protection circuit kicks in. Unfortunately the H1 does have this slight issue, and it can be very disorienting to suddenly lose all light. As the H1 will drop from High to Medium when a RCR123 is getting low, if you are already on Medium, then you don’t get that warning and it will just go off. Using a primary cell completely removes this problem, so depending on your type of use you can pick the cell to suit.

With the switch being very low profile, which helps avoid accidental activation, I have found it difficult to operate reliably. When you don’t hit the middle of the button, but are more to the side, the click is not clean, or might not click at all. As soon as you find the middle of the button, it has a very precise action and works perfectly. Mounted on your head, finding that sweet spot on the button is not always easy, and if wearing gloves, forget it, so the compact design can work against the H1 in this way.

The beamshots really do speak for themselves, and the H1 has a beam that is so easy to get on with. A headlamp is predominately a task light, and when you are carrying out a task you don’t want to have to ‘point’ the beam with your head. When using the H1 as a headlamp you can just focus on the task in hand, and the fact the H1 pretty much disappears from your awareness is the signal it is working really well.

It is great that the H1 is capable of the Turbo output, however, I find that this is rarely used, it is just too bright for anything within arms reach. Moon mode is an essential, and the Low and Medium levels are just right for the vast majority of my needs. If out walking with it, I will use High sometimes when I want that bit more range, but even then Medium is my go-to level.

There is one feature I hadn’t really noticed that much, the gradual brightness changes: When turned on/off on medium, high, and turbo modes, it will turn on or off gradually. This mimics the characteristics of incan bulbs that have to heat up and cool down, making it much kinder to the eyes; Thank you Olight. The reason I hadn’t noticed this much was due to mainly using Low and Medium where the effect is less noticeable. It is more significant with the High and Turbo modes, and does make a difference.

I wouldn’t normally bother to mention the magnetic tail-cap except in passing, but I would like to make a point with the H1, to say that the strength of the magnet is one of the best I’ve come across. Often a magnetic tail-cap can be too aggressive and end up sticking to everything, yet with the H1 it is sufficient to hold the light where you put it, without ‘grabbing’ everything incessantly.

Considering this is based on the excellent S1 Baton, my one slight disappointment is that the parasitic drain is much higher. OK, it is only 20uA, but the S1 is 1uA. Parasitic drain is pure waste, especially with primary cells, so I’d have hoped to see this at the same level as the S1 instead of 20x more.

This does lead me to prefer using the mechanical lockout as this does kill the drain completely, but also the electronic lockout is not ideal to prevent accidental activation as this is too easy to unlock, and if squashed in a bag or pocket, it is very likely the button will be pressed for 2s or more.

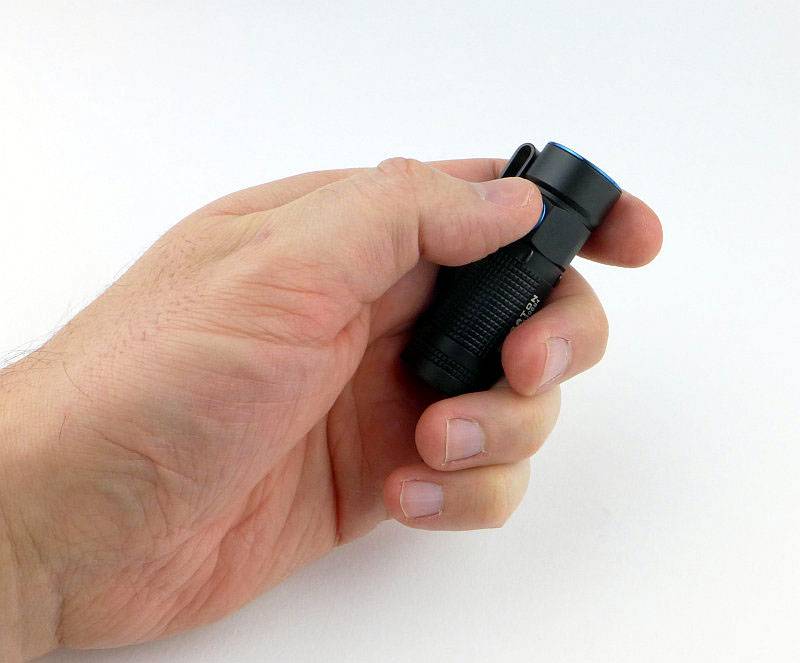
Converting the H1 between headlamp and pocket light is very easy, and getting the light out of the rubber mount is no struggle at all. Regular fitting and removal of the pocket clip will mar the anodised finish, but there is not much that could be done about that, so you decide if you want to convert it to and from. I find it most useful as a headlamp, and a bit on the small and lose-able size when taken out of the mount.

So, overall I’ve been won round by this CR123 headlamp, which has been helped by how easy it is to carry (living in my coat pocket), by its very usable interface, the excellent beam, and comfort. There have been far fewer battery changes than I expected, so its practicality has been proven.

Review Summary

_______________________________________________ _______________________________________________
Things I like What doesn’t work so well for me
_______________________________________________ _______________________________________________
Compact and easy to carry. Though low, the parasitic drain is much higher than the S1 Baton.
Excellent flood beam. Electronic lockout too easy to unlock.
Runs on CR123 and RCR123. When used on RCR123 the cell protection is ultimately triggered, cutting the output completely.
Direct access to Moon mode (and Turbo). Sometimes difficult to press the switch in the right spot.
Very functional UI.
Useful level selection.
Soft ON/OFF is easy on the eyes.


Discussing the Review:

The ideal place to discuss this reviews is on a forum. If you started reading the shorter forum version of the review, but followed the link this full exclusive review, please return to that forum to discuss the review there.
If you read the review entirely on Tactical Reviews, please consider one of the following to join in any discussion.

CandlePowerForums – Flashlight Reviews Section (Largest and Friendliest Flashlight Community Forum)

EdgeMatters – Sponsored Reviews (UK based Forum for Knife Makers and Collectors)

Light Review: Olight Valkyrie PL-1 II Pistol Light

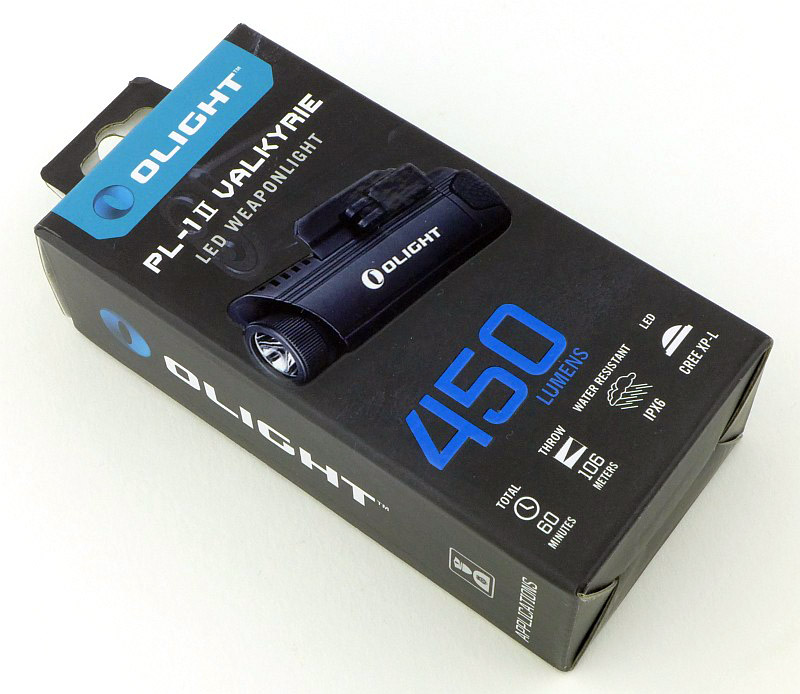
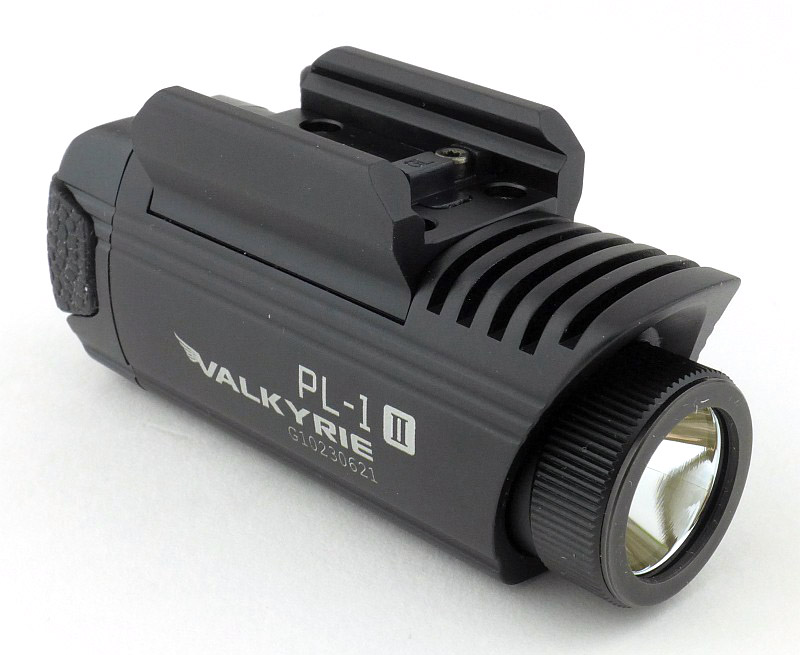
The PL-1 II is Olight’s refined and upgraded version of the original PL-1 weapon light. After a year of development Olight have dramatically increased the strength of the mounting mechanism which they claim will NEVER become loose or fall off of any firearm that has a rail.

Taking a more detailed look:

The PL-1 II Arrives in a cardboard box.

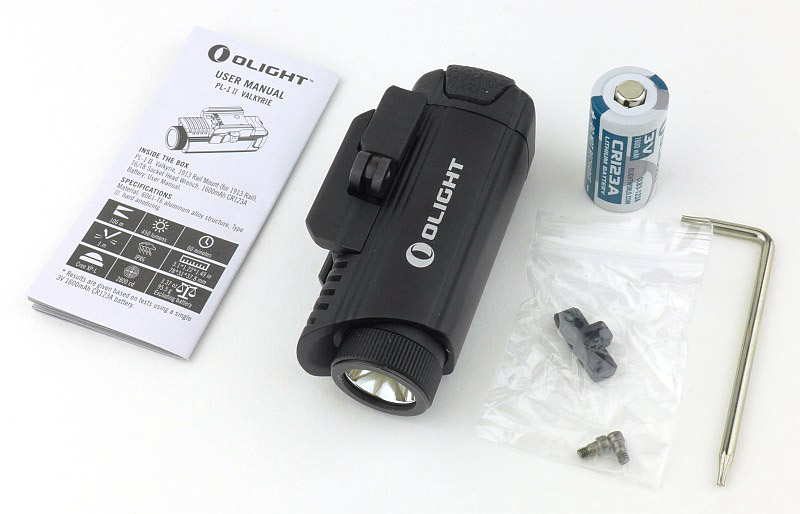
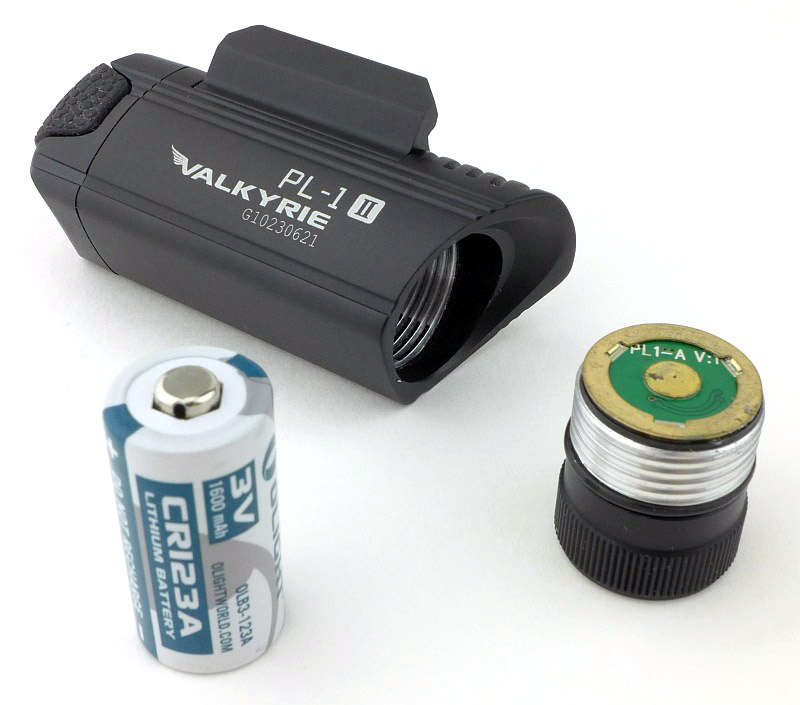
Inside the box is the PL-1 II, the instructions, a CR123 cell, a Torx wrench, and a 1913 rail key. The PL-1 II arrives with a Glock rail key already fitted.

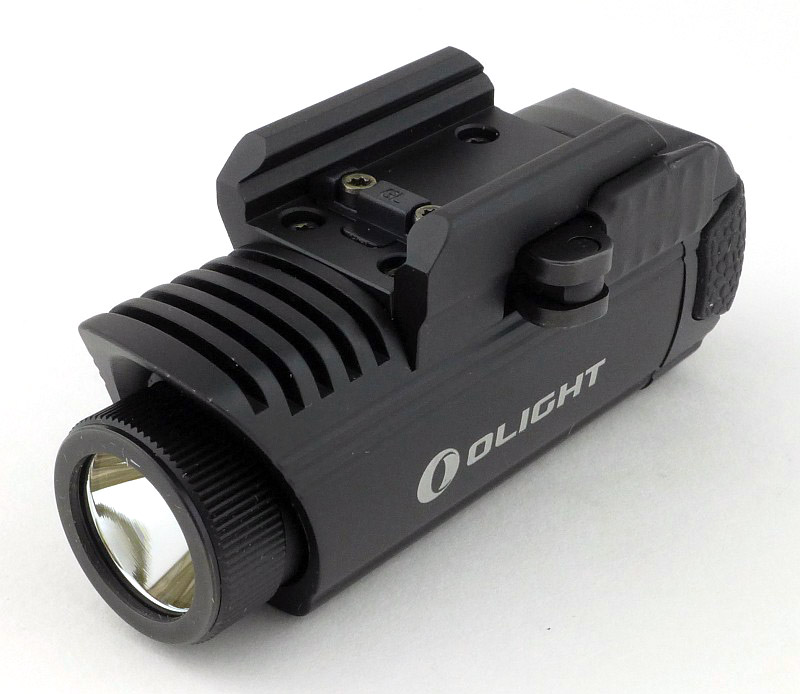
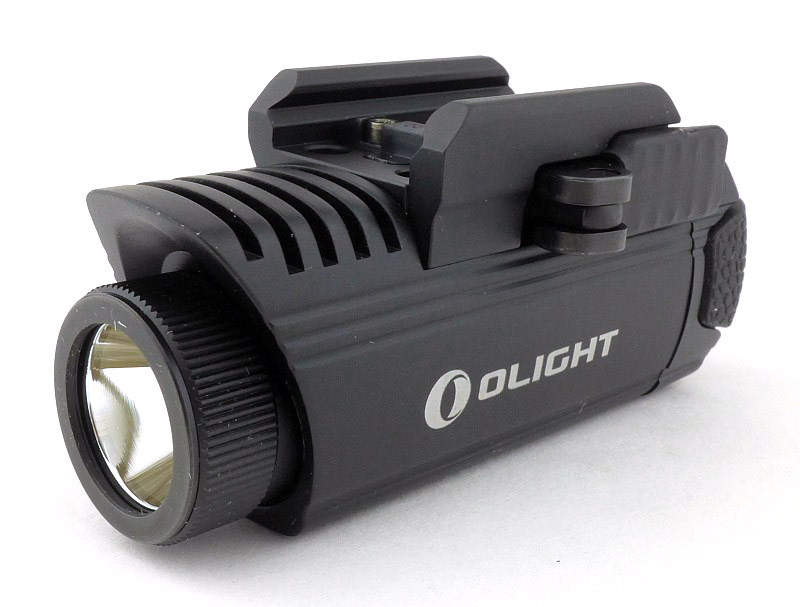
Being a pistol/gun light, the PL-1 II is a (mostly) snag free shape with a rail mount on the top. This side has the rail lock lever.

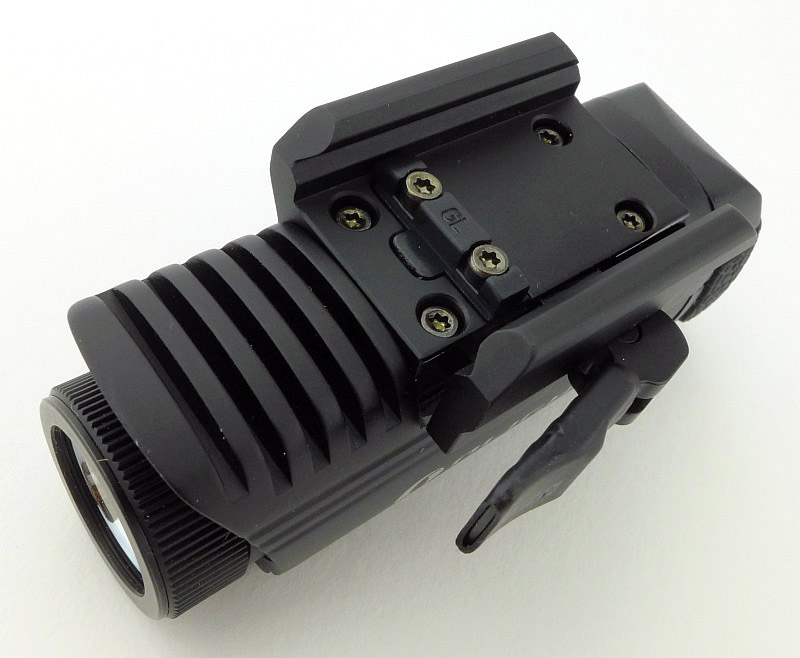
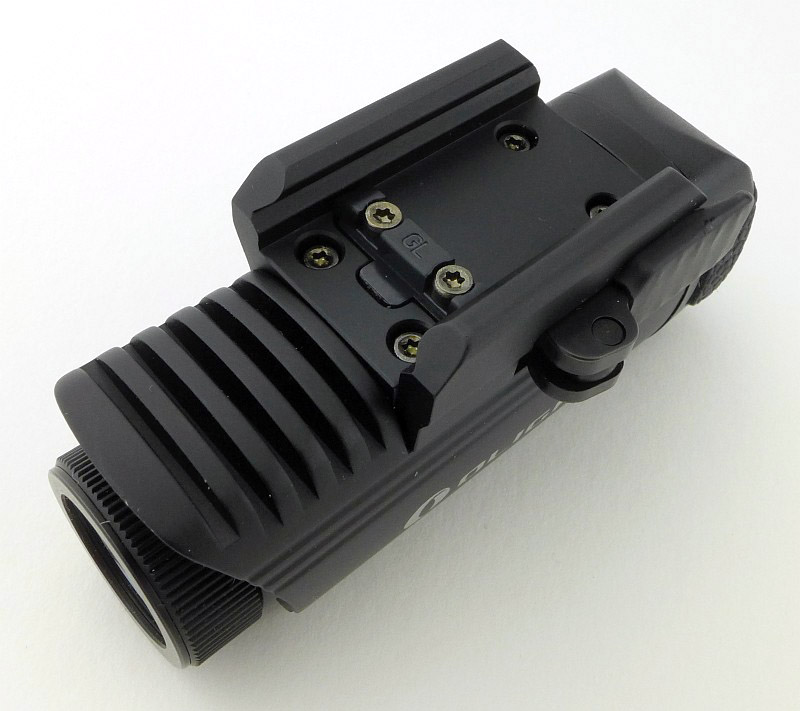
On the other side the rail clamp jaw is fixed.

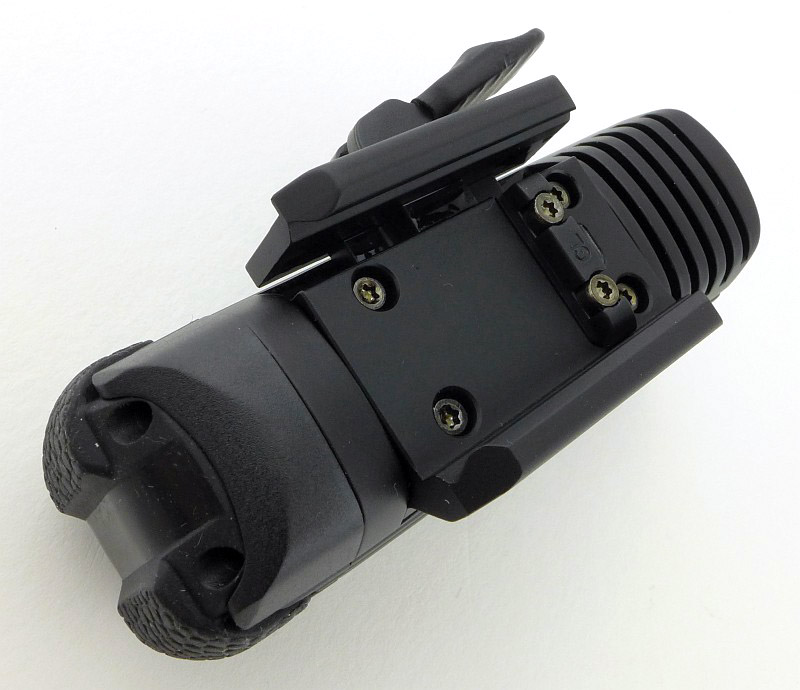
Rotating the lever 180 degrees to the front opens the rail clamp.

Already fitted is the GL (Glock) universal rail key. You can use this on just about any rail, but if you want the 1913 rail key for a more secure fit, this is supplied and is easily swapped out.

Rotate the locking lever 180 degrees to the rear to lock the clamp jaws in place.

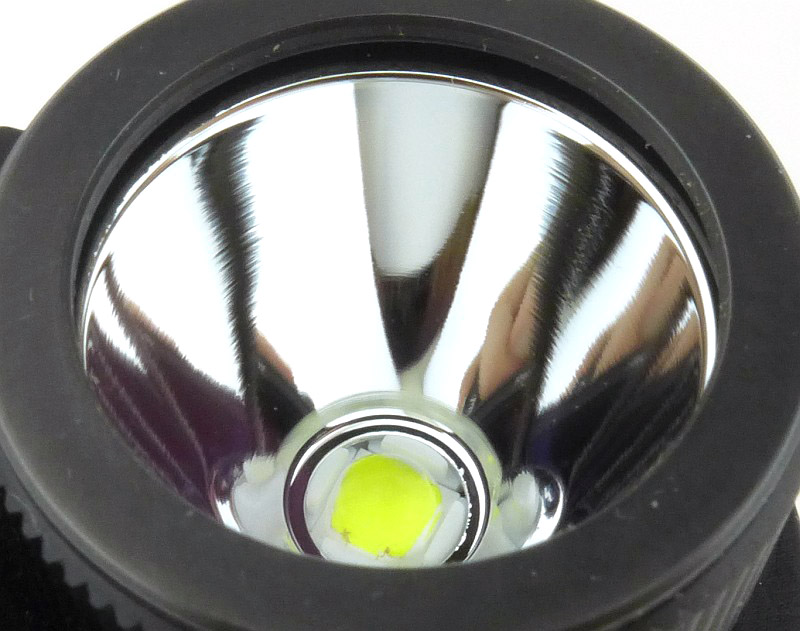
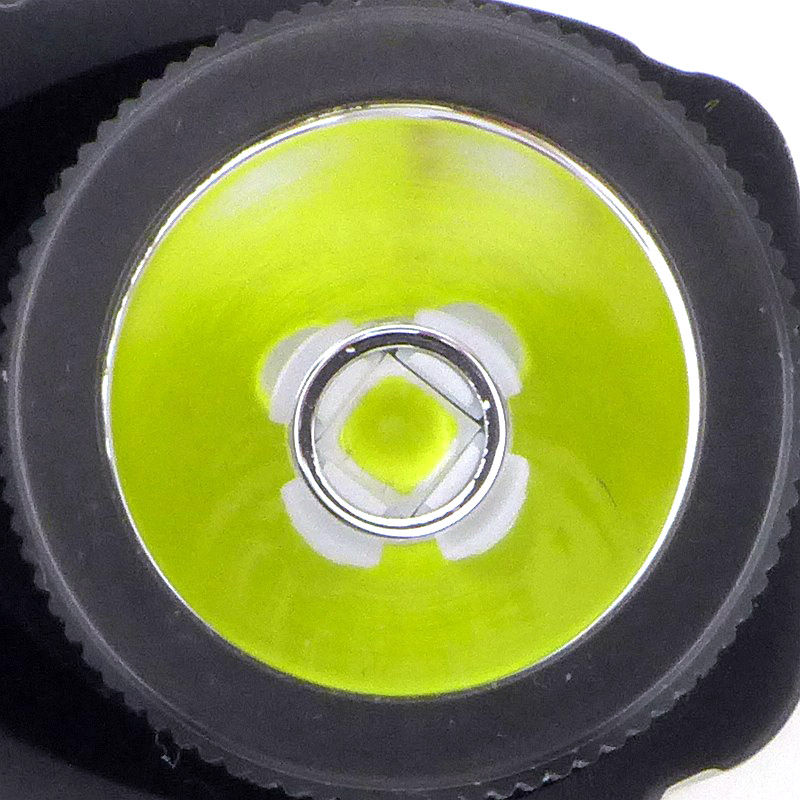
Limited by the size of the light, the reflector needs to focus the beam sufficiently for the ranges you are likely to need.

A Cree XP-L LED is used.

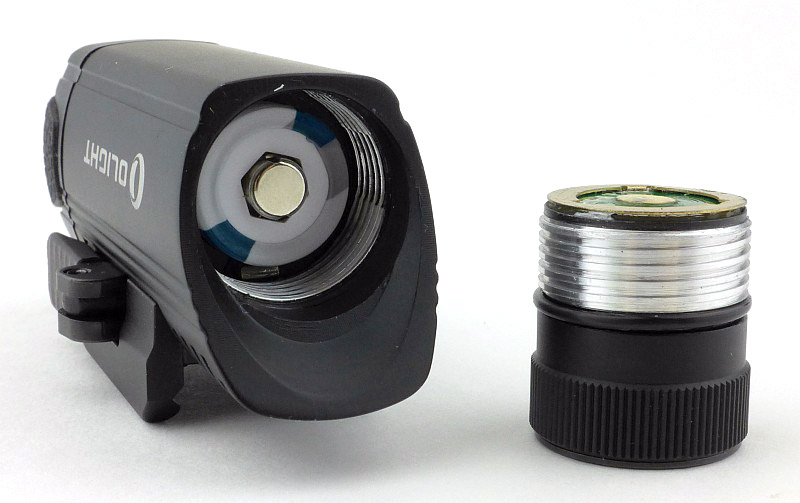
To insert the CR123 cell, unscrew the lens bezel to remove the LED / reflector assembly.

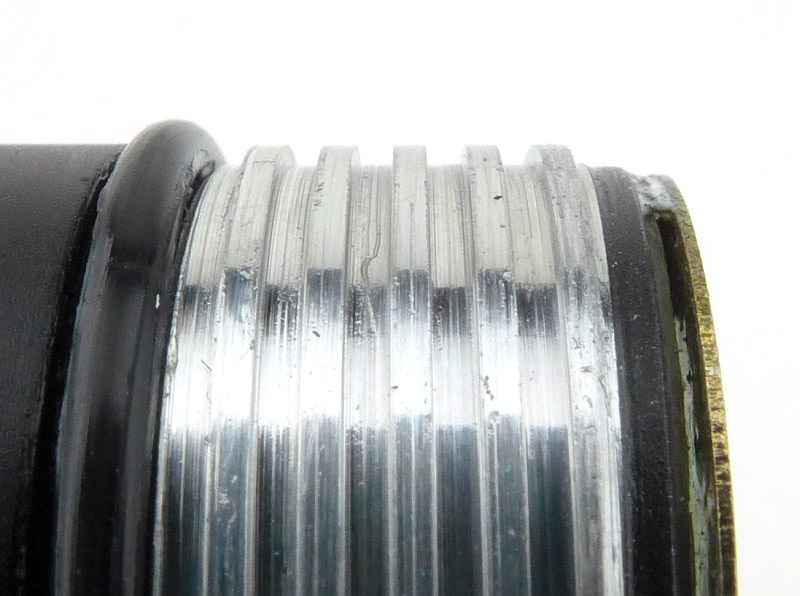
The threads are a nice square cut, bare aluminium, thread.

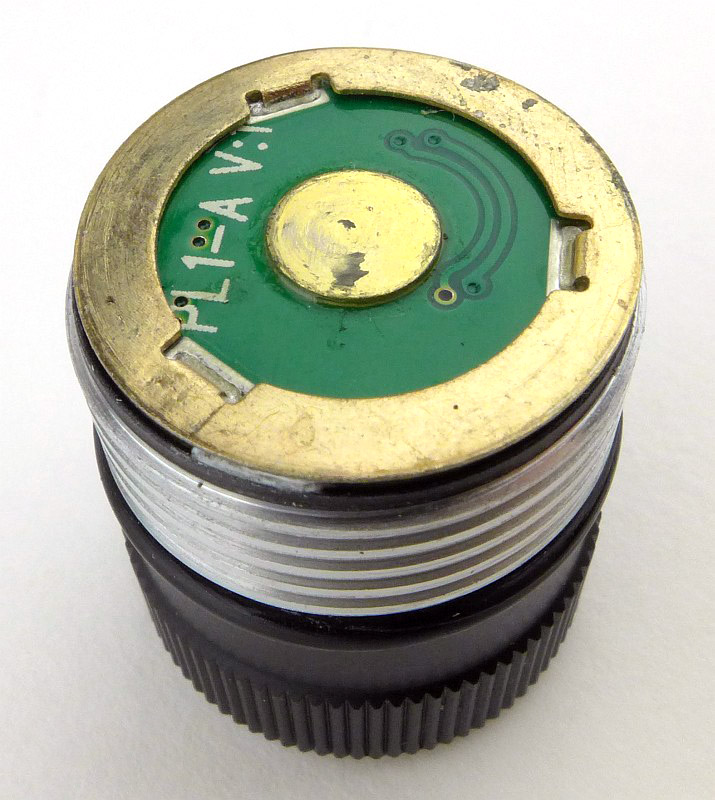
Robust solid metal contacts are used to connect to the cell positive terminal and to the body contact. These will not scratch off or wear out due to recoil forces.

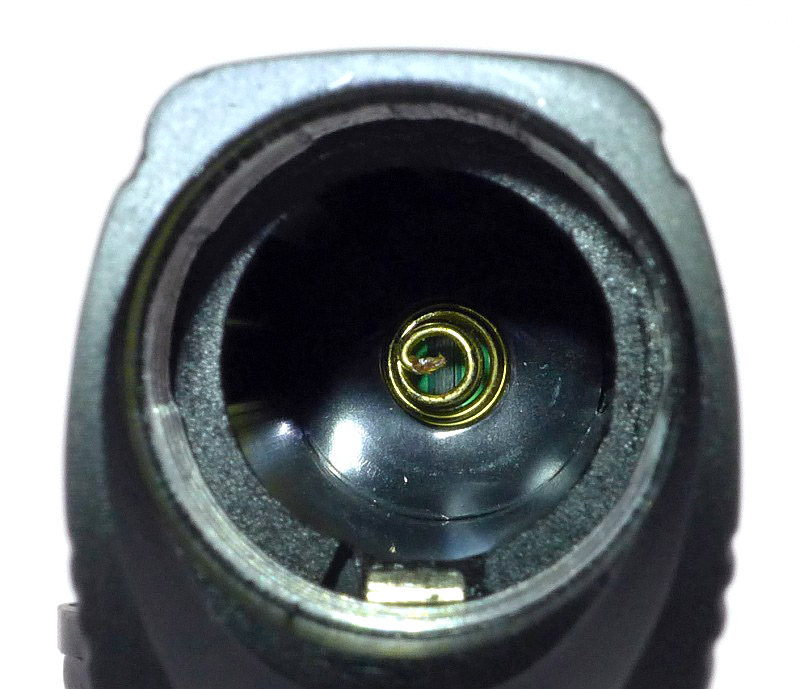
Inside the light the negative contact is a spring. Also note that surrounding the spring is a rubber buffer pad.

A cell is inserted with the head ready to screw back in.

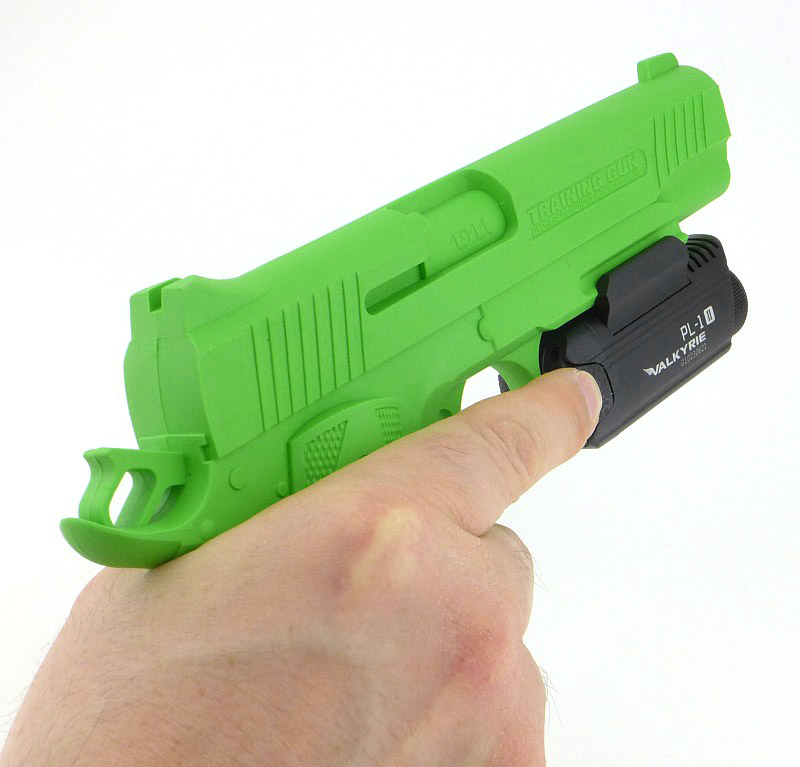
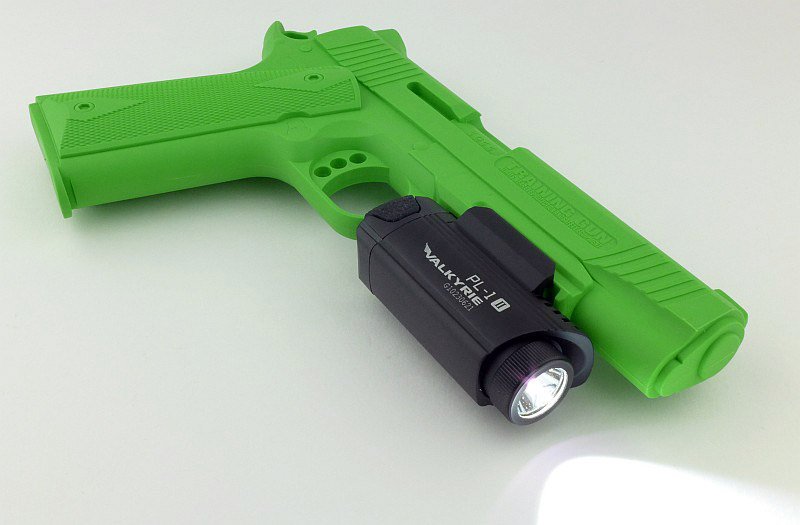
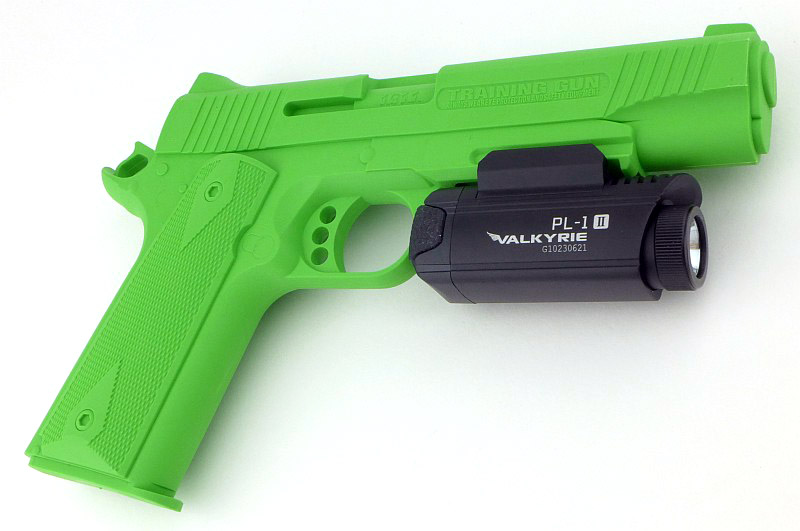
Here the PL-1 II is mounted on a 1911 training gun (to most obviously show the PL-1 II).

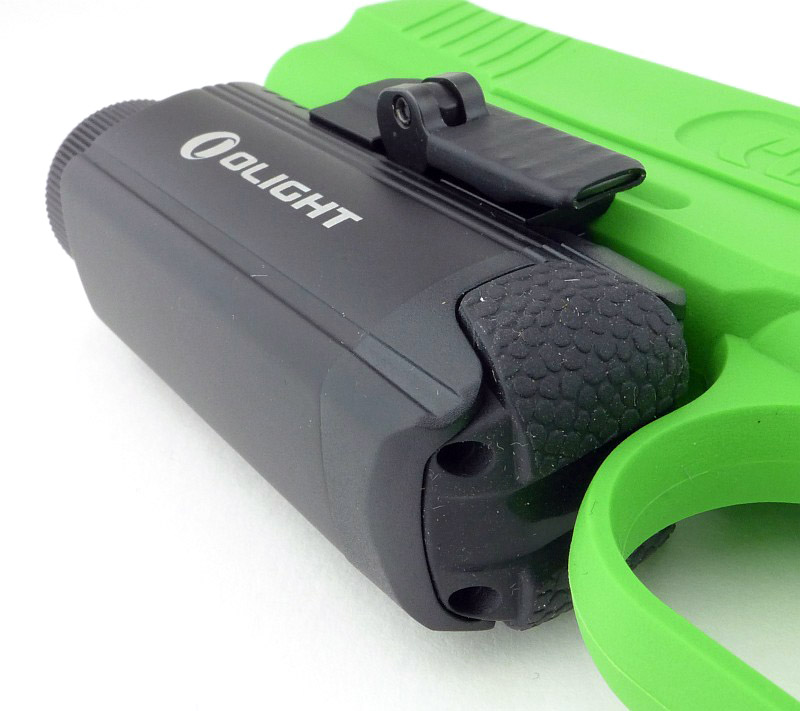
The switches are positioned just in front of the trigger guard, one on each side.

The beam

Please be careful not to judge tint based on images you see on a computer screen. Unless properly calibrated, the screen itself will change the perceived tint.

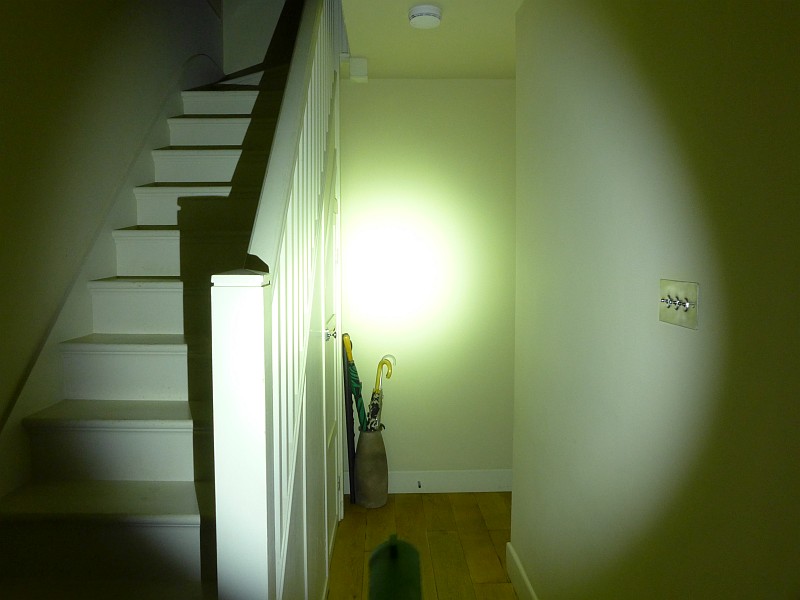
The indoor beamshot is intended to give an idea of the beam shape/quality rather than tint. All beamshots are taken using daylight white balance. The woodwork (stairs and skirting) are painted Farrow & Ball “Off-White”, and the walls are a light sandy colour called ‘String’ again by Farrow & Ball. I don’t actually have a ‘white wall’ in the house to use for this, and the wife won’t have one!

There will be more beamshots in the ‘In Use’ section, but here we can see a nice wide and bright hotspot with good width spill.

Modes and User Interface:

Control of the PL-1 II is intentionally very simple. There are three ‘modes’, Constant ON, Momentary ON and Strobe. There are two switches, one on each side.

To turn the PL-1 II ON, briefly press either side switch. To turn OFF, briefly press either side switch.

To turn the PL-1 II ON Momentarily, press and hold either side switch. While you hold the switch the light will remain ON, and will switch off again when you release the switch (as long as the press is at least approx. 0.2s or longer).

For Strobe, press both side switches at the same time. To switch OFF briefly press either side switch.

Batteries and output:

The PL-1 II runs on one CR123.

To measure actual output, I built an integrating sphere. See here for more detail. The sensor registers visible light only (so Infra-Red and Ultra-Violet will not be measured).

Please note, all quoted lumen figures are from a DIY integrating sphere, and according to ANSI standards. Although every effort is made to give as accurate a result as possible, they should be taken as an estimate only. The results can be used to compare outputs in this review and others I have published.

___________________________________________ ________________________________ ________________________________
PL-1 II using specified cell I.S. measured ANSI output Lumens PWM frequency or Strobe frequency (Hz)
___________________________________________ ________________________________ ________________________________
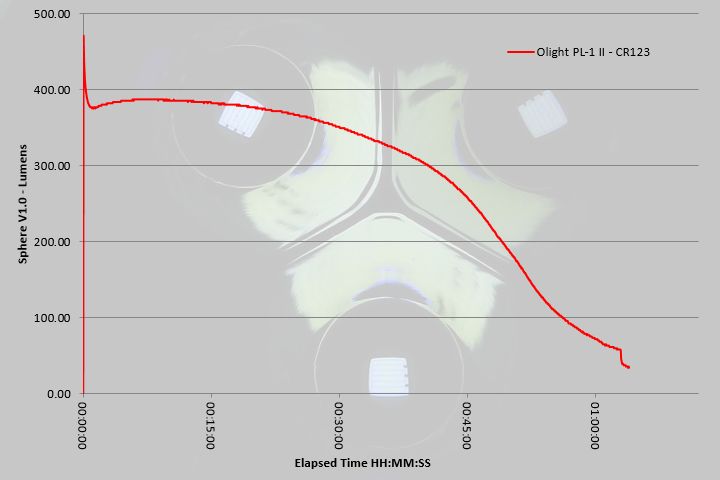
High – CR123 387 0

* Beacon and Strobe output measurements are only estimates as the brief flashes make it difficult to capture the actual output value.

There is parasitic drain but is incredibly low. When using CR123, the drain was 0.2uA (798 years to drain the cells) making it negligible as the cell will degrade long before it is run down.

You get a solid 30 minutes of good runtime, and a further 15 minutes where the output is still strong, before the output starts to really decline. Considering you won’t be using this light as a general light (as you only want to point this at potential targets) and won’t have it on all the time, this balance of output and runtime is a good match for how it will be used.

Troubleshooting

This section is included to mention any minor niggles I come across during testing, in case the information helps anyone else.

No issues were encountered during testing.

As per the description of this section, this information is provided in case anyone else finds a similar ‘issue’ that might be fixed in the same way.

The PL-1 II in use

Crucial for any truly ‘tactical’ light (and a pistol light really is the definition of a tactical light) is that it is easy to use. In stressful situations you won’t be ‘thinking’ about how to use something, it must be instinctive.

Here the PL-1 II excels as the user interface is so simple you will be using it right out of the box. The only thing I found out from the instructions was how to activate the strobe. Regular readers will know I don’t have much time for strobe, so I wasn’t looking for it anyway.

It is important to stress that during testing, no part of the PL-1 II shook loose, but I must point out that compared to other similar products, the toolless mount, and screw-in head used in this light have the potential to work loose or be caught on something (in fact my laptop bears the scar of the PL-1 II coming off the gun due to the locking lever catching). This is a very small likelihood, but as other gun lights require tools to tighten the mounts, and won’t open the battery compartment unless removed from the rail, you need to consider both sides of the argument for quick release. Of course, with a toolless mount, you can easily take the PL-1 II on and off the gun (if your holster won’t accommodate a gun light) and you can change the battery while it is still mounted (though I would not recommend it, considering the easy of dismounting this).

The PL-1 II sits very naturally under the frame in front of the trigger guard.

If your hands are big enough, you can activate the switch with your trigger finger, so not requiring a two handed grip to switch the light on. (Clearly not how you would use it in momentary output).

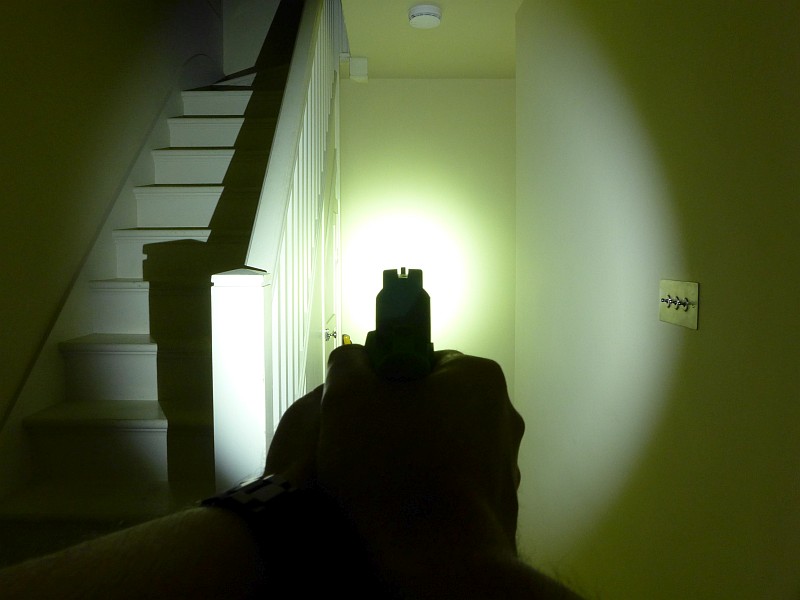
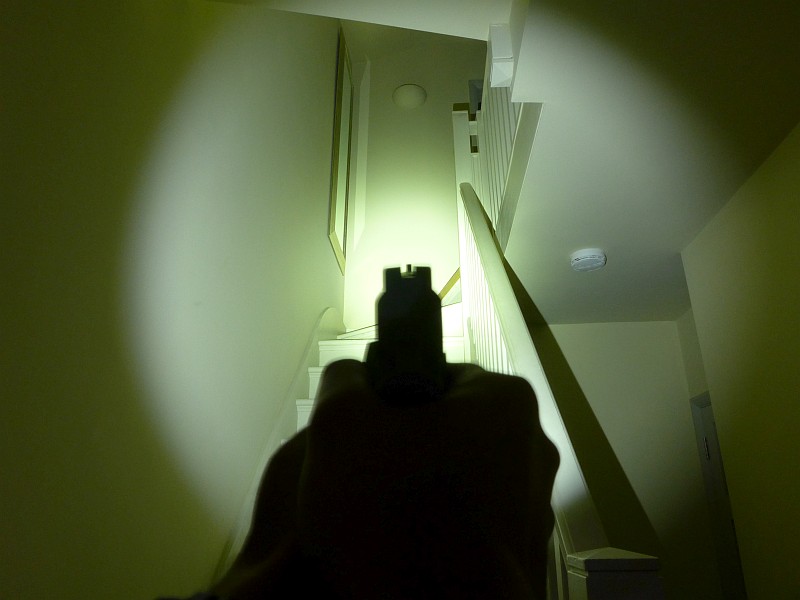
Now, moving onto the sight picture you get with the PL-1 II. Nicely aligned, the sights fall centrally to the hotspot, making pointing extremely natural.

Maintaining your sight alignment and tracking for targets is easy, and at shorter ranges you can use the hotspot as a broad ‘laser sight’ so even if not fully behind your sights the hotspot provides a good guide to the shot placement. These images really speak for themselves.

There is no significant change in balance in the gun as the PL-1 II is light enough at 95g not to weigh down the muzzle.

Overall the PL-1 II gives you and affordable, simple and apparently robust option for a rail mounted pistol/gun light.

Review Summary

_______________________________________________ _______________________________________________
Things I like What doesn’t work so well for me
_______________________________________________ _______________________________________________
Simple to use. The mount’s locking lever could catching on something releasing the rail clamp.
Robust build.
Good beam profile.
Fully ambidextrous.
Inexpensive compared to other options.
Easily mounted and removed.
Runs on a CR123.


Discussing the Review:

The ideal place to discuss this reviews is on a forum. If you started reading the shorter forum version of the review, but followed the link this full exclusive review, please return to that forum to discuss the review there.
If you read the review entirely on Tactical Reviews, please consider one of the following to join in any discussion.

CandlePowerForums – Flashlight Reviews Section (Largest and Friendliest Flashlight Community Forum)

EdgeMatters – Sponsored Reviews (UK based Forum for Knife Makers and Collectors)
Light Review: Olight S2A Baton

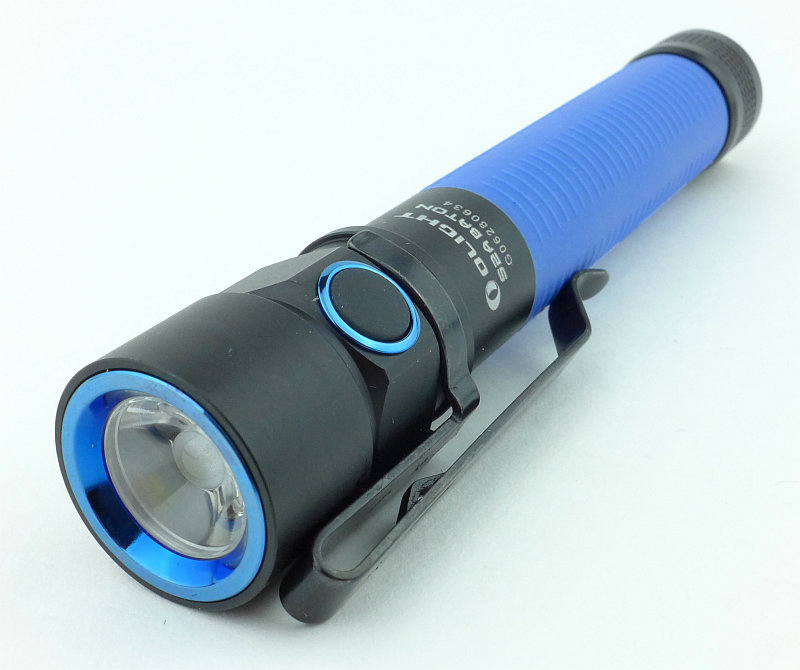
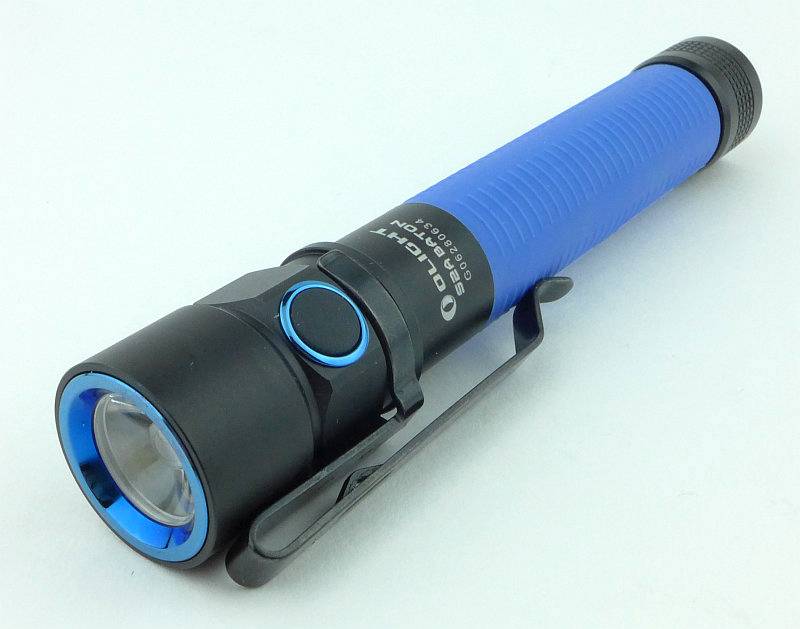
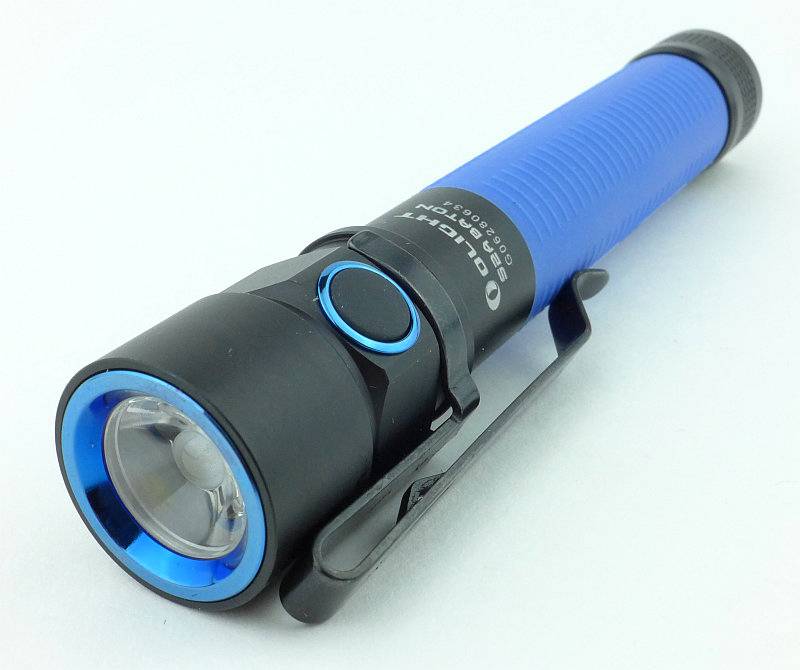
Olight’s Baton line-up gets a 2xAA powered version at last. Though the beautifully compact S1 is a fantastic light (previously reviewed) my personal ideal form factor is the 2xAA for ease of holding yet remaining compact. It also has the added advantage that AA cells are the easiest to come by, so travelling with or gifting this light is trouble free.

 photo 05 Olight S2A angle P1220461.jpg

Taking a more detailed look:

Looking very sharp in a clear plastic box with cardboard insert, you get a good look at the light even before you get your hands on it.
 photo 01 Olight S2A boxed P1220449.jpg

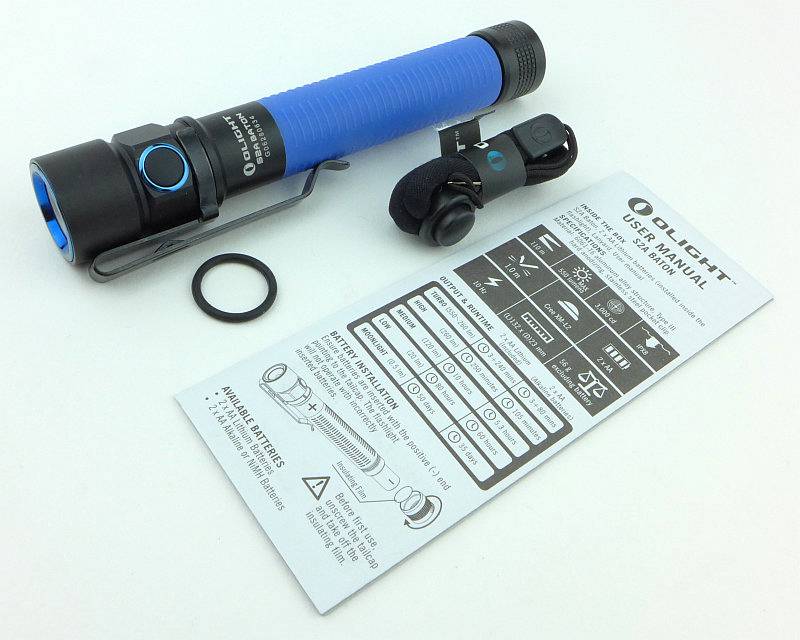
Inside the box is the S2A, a spare o-ring, a lanyard and the instructions.
 photo 02 Olight S2A box contents P1220454.jpg

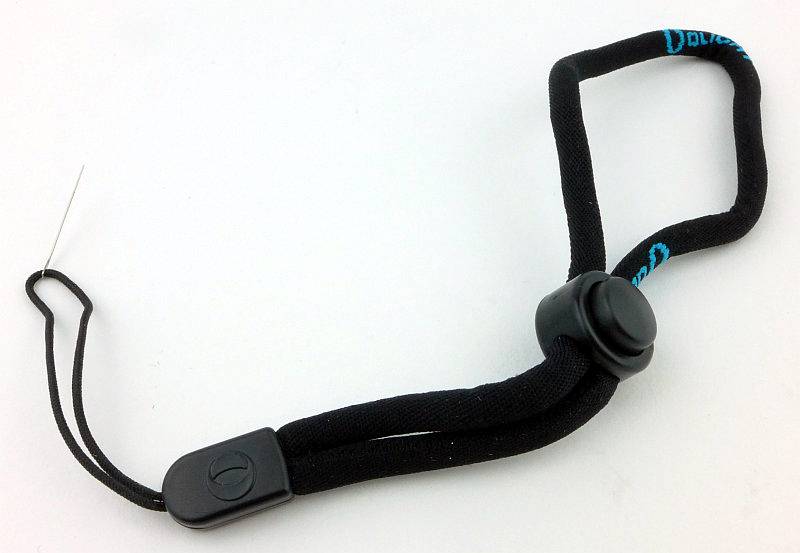
The lanyard has a really nice fabric tube cord and what is that we can see on the attachment loop?
 photo 03 Olight S2A lanyard P1220457.jpg

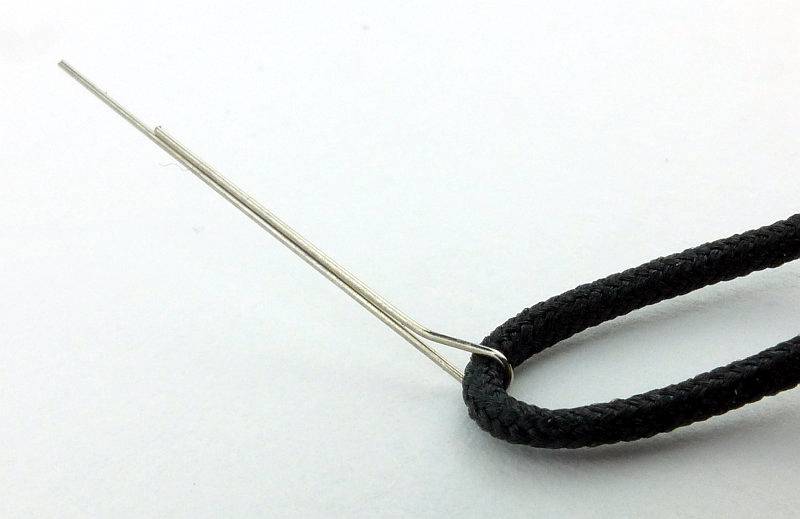
Thank you Olight! It is a wire puller for fitting the lanyard through the small hole in the tailcap. A thoughtful addition and makes life easier. Of course you can do something similar yourself (as I have for some time) but here it is ready to go.
 photo 04 Olight S2A lanyard puller P1220459.jpg

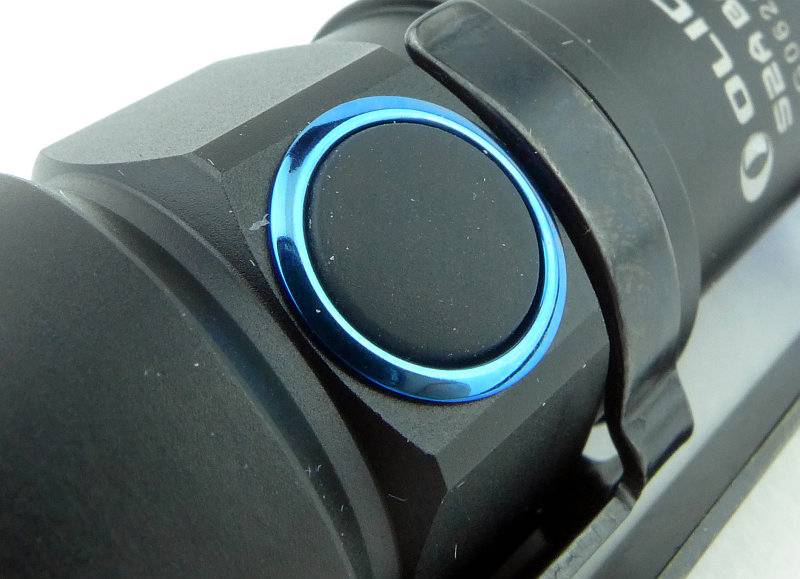
Surrounding the side-switch is a blue PVD ring which matches the bezel.
 photo 06 Olight S2A switch P1220466.jpg

The blue PVD bezel ring surrounds the S2A’s TIR optic.
 photo 08 Olight S2A optic P1220477.jpg

The S2A comes with a deep pocket carry clip which can be removed or swivelled to any position to help you locate the power switch.
 photo 09 Olight S2A clip P1220480.jpg

A very plain and compact tail-cap is used as there is no switch to accommodate.
 photo 10 Olight S2A tailcap P1220483.jpg

Behind that TIR optic is a XM-L2 LED.
 photo 11 Olight S2A led P1220486.jpg

Looking inside the tail-cap. Note, that unlike the S1, the S2A has no magnet, and also shown here is a plastic insulator disc which is present when you get the S2A, as it comes with 2xAA Lithium cells loaded inside.
 photo 12 Olight S2A tail contact P1220496.jpg

Very neatly cut fully anodised square threads are used.
 photo 13 Olight S2A threads P1220501.jpg

Peering inside the battery tube you can make out the positive contact spring.
 photo 15 Olight S2A head contact P1220510.jpg

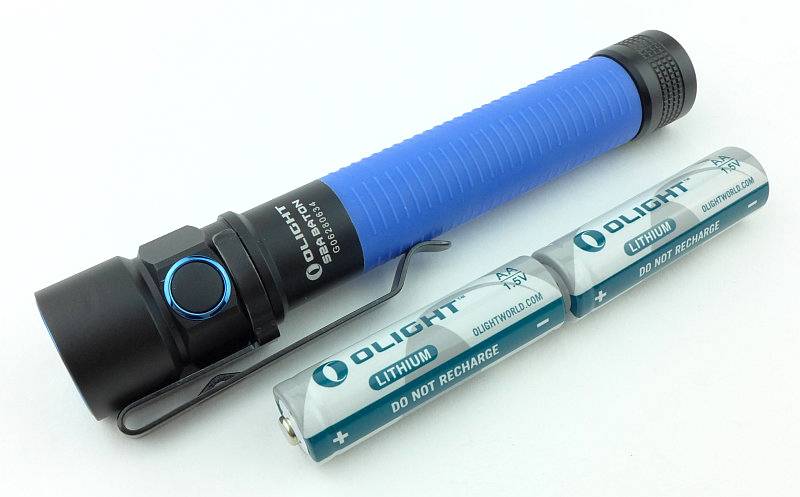
It really isn’t much bigger than the two AA cells that power it.
 photo 14 Olight S2A with cells P1220506.jpg

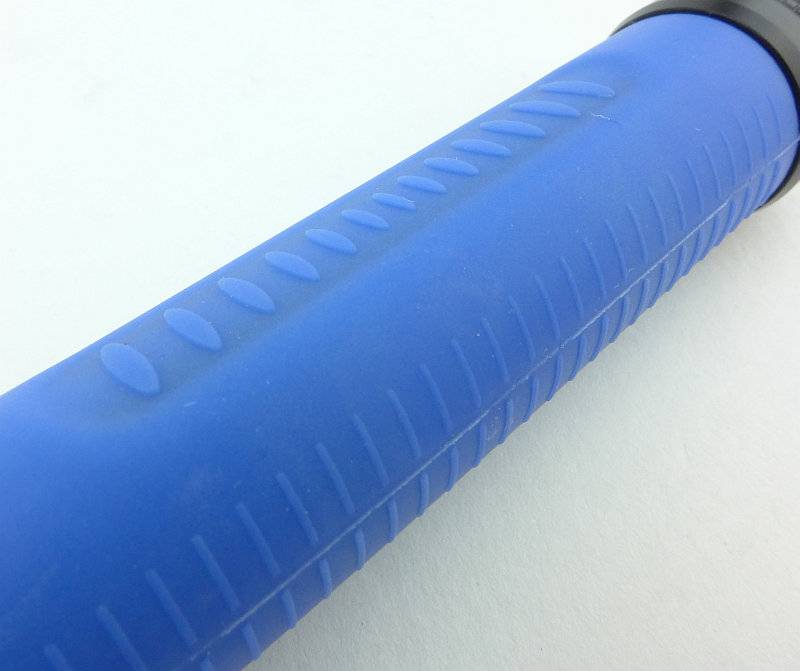
Over the battery tube is a silicon rubber skin-safe grip (more on that later).
 photo 16 Olight S2A grip P1220520.jpg

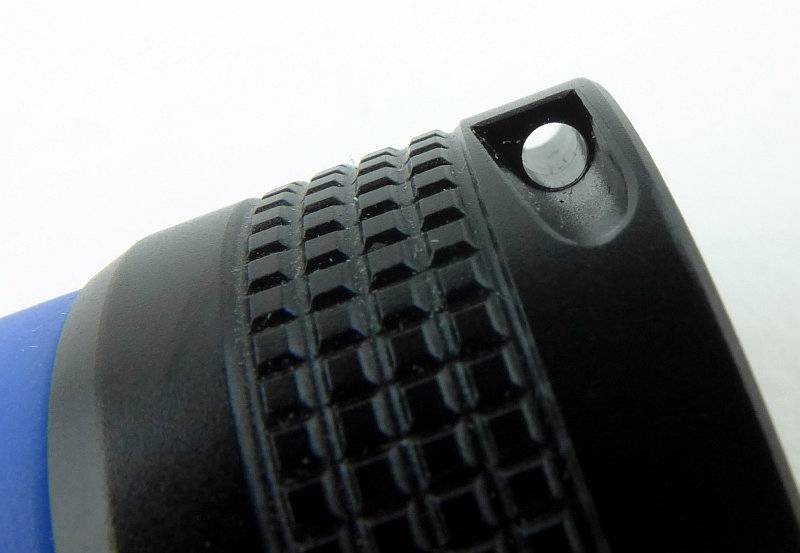
An excellent quality of finish even under closer scrutiny. Here is the lanyard hole in the tail-cap.
 photo 17 Olight S2A lanyard hole P1220523.jpg

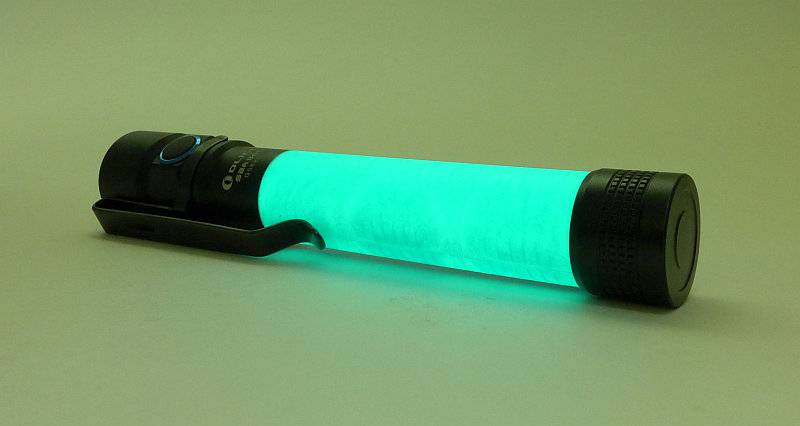
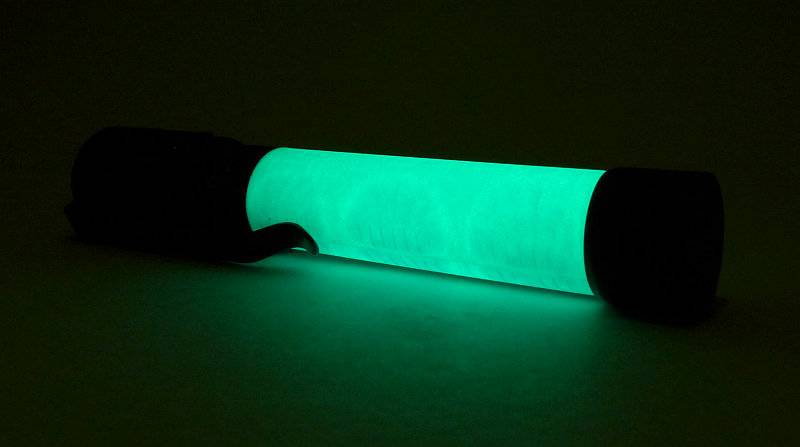
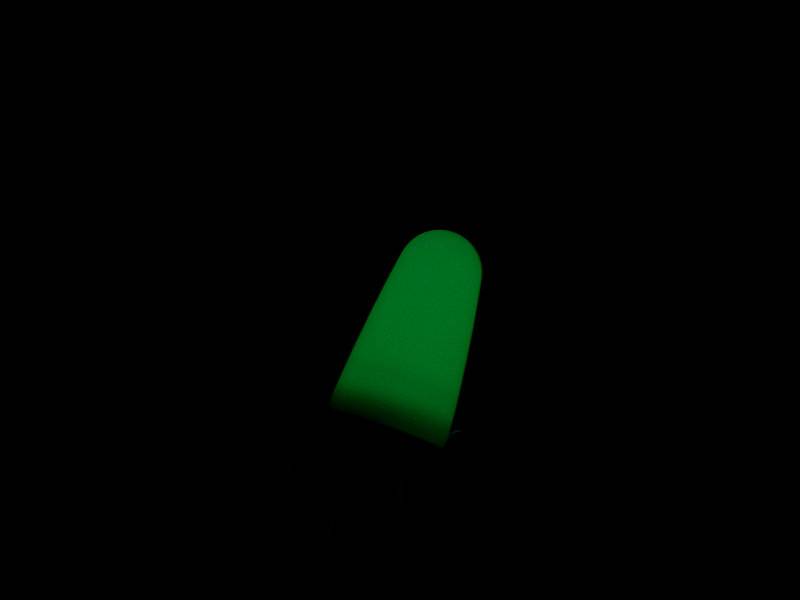
I said we would be coming back to this, the rubber grip. Well, what a nice surprise it was to see that it glows!
 photo 20 Olight S2A glowing grip P1230337.jpg

The GITD grip is a very useful location feature.
 photo 21 Olight S2A glowing grip P1230339.jpg

The beam

Please be careful not to judge tint based on images you see on a computer screen. Unless properly calibrated, the screen itself will change the perceived tint.

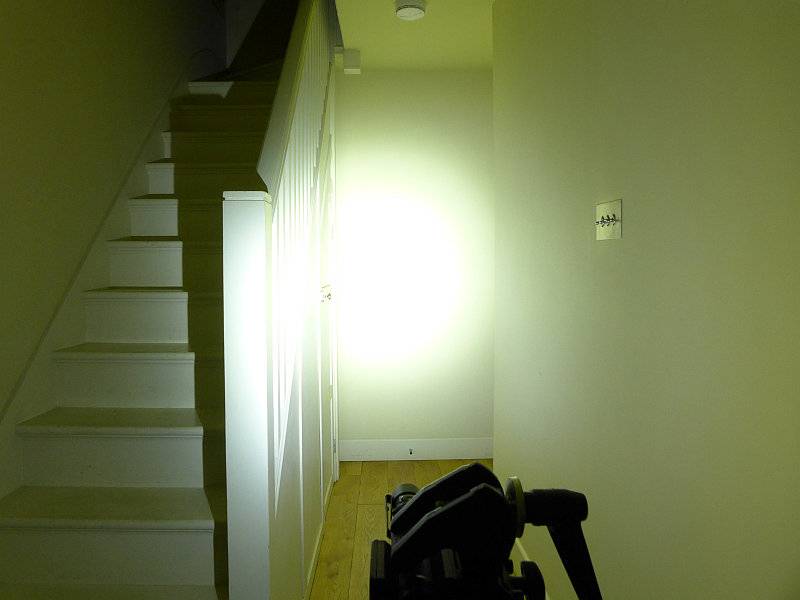
The indoor beamshot is intended to give an idea of the beam shape/quality rather than tint. All beamshots are taken using daylight white balance. The woodwork (stairs and skirting) are painted Farrow & Ball “Off-White”, and the walls are a light sandy colour called ‘String’ again by Farrow & Ball. I don’t actually have a ‘white wall’ in the house to use for this, and the wife won’t have one!

Starting off indoors, the 600lm beam is way more than you need at this range. There is a defined hot-spot with a very wide spill round it.
 photo 18 Olight S2A indoor beam P1230327.jpg

For a 2xAA light the 600lm gives it very good mid-range ability, though the spill becomes much less useful out here, with the hot-spot taking over.
 photo 19b Olight S2A outdoor beam P1240692.jpg

Modes and User Interface:

The S2A has six output modes, Turbo, High, Medium, Low, Moonlight and Strobe and a single click-switch on the side.

Basic ON/OFF operation is carried out with a single click of the side switch. The S2A will turn on to the last used constant mode including moonlight (this does not include Strobe).

To change the brightness, while ON, press and hold the switch to cycle through Low-> Medium -> High -> Low -> Medium etc. Release the switch once you have the required output.

There are a few special functions:
Moonlight mode – from OFF, press and hold the switch for 1s until the Moon mode is activated.
Direct access to Turbo – from OFF, double-click the switch.
Strobe – From ON or OFF, triple-click the switch.
Timer – From ON, double-click the side switch. The S2A will blink one or two times. Once means the 3 minute timer is activated, twice means the 9 minute timer is activated. To swap between 3 and 9 minutes timers, double-click the switch.

Timer mode means that the S2A will turn itself off after the specified time, and this can be started from any mode (including Strobe and Moonlight).

Batteries and output:

The S2A runs on 2xAA cells either Alkaline, NiMh, or AA Lithium.

To measure actual output, I built an integrating sphere. See here for more detail. The sensor registers visible light only (so Infra-Red and Ultra-Violet will not be measured).

Please note, all quoted lumen figures are from a DIY integrating sphere, and according to ANSI standards. Although every effort is made to give as accurate a result as possible, they should be taken as an estimate only. The results can be used to compare outputs in this review and others I have published.

___________________________________________ ________________________________ ________________________________
Olight S2A using specified cell I.S. measured ANSI output Lumens PWM frequency or Strobe frequency (Hz)
___________________________________________ ________________________________ ________________________________
Turbo – AA Eneloop 596 0
High – AA Eneloop 282 0
Medium – AA Eneloop 132 0
Low – AA Eneloop 17 0
Moon – AA Eneloop Below Threshold 0
Turbo – AA Lithium 546 0

* Beacon and Strobe output measurements are only estimates as the brief flashes make it difficult to capture the actual output value.

Peak Beam intensity measured 3500 lx @1m giving a beam range of 118 m.

There is parasitic drain but is incredibly low at 1uA (216 years to drain the cells).

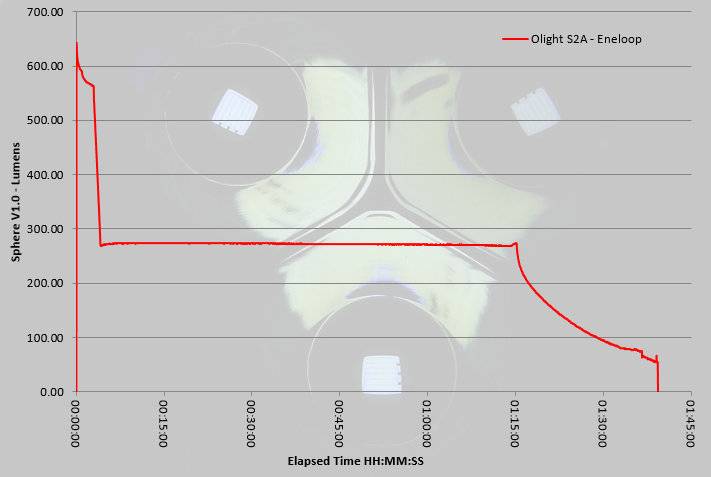
What is very impressive with the S2A is that 600lm Turbo output. This is pushing it for 2xAA, and only with the Eneloops did I get this peak measurement. Like many other lights, the output drops after 3 minutes down to its much more normal 270lm level which the AAs can keep up with. This output is very well regulated for 1h 15m, after which is starts to drop off. There is a sharp cut off around 1h 40m, but you get plenty of warning the output is dropping.
 photo Olight S2A runtime.jpg

Troubleshooting

This section is included to mention any minor niggles I come across during testing, in case the information helps anyone else.

No issues were encountered during testing.

As per the description of this section, this information is provided in case anyone else finds a similar ‘issue’ that might be fixed in the same way.

The S2A in use

For anyone that has read my other reviews of the Olight Batons, you will already know I think they have got the UI spot on. For non-tactical use, the side switch is king, falling nicely under your thumb and being very natural to use. Then there is the simple control options but that give your direct access to moonlight, Turbo, Strobe and last used modes; what more could you want?

I wouldn’t have thought it, but the timer mode has also proven useful letting you get tucked up in a sleeping bag, or even to give you a way of keeping a rough track of time. I’ve certainly used it that way when only wanting to be out for so long and getting easily distracted, the 9 minute timer switches the light off which I pop straight on again and head back. You are sure to find several uses once you try it out.

Having the rubber grip does make it very secure to hold, and stops it from feeling cold when temperatures are low. The best part of this is the GITD feature. The glow does last several hours, but you will need dark adapted eyes to see it after an hour or so, and it might not make it through a long night. Even so this is a great addition.

The brightness of the hot-spot did surprise me a little as I was hoping for a beam with slightly more flood. (This is a personal preference as unless I want a thrower, I always find full flood easier to use for my needs.) Indoors I have felt some hot-spot blinding and have had to use a ceiling bounce instead of direct illumination. Outside that hotspot does become useful, so there is a good balance making this an all-rounder.

Negligible parasitic drain allows for this to be loaded up and on standby without worrying if your cells are running down, so I applaud Olight for that excellent 1uA drain; I won’t be worried in 216 years time that the cells have run down!

Although I also have a preference for single cell lights, as you don’t have to cell match, the 2xAA format does give you quite a bit more power and runtime plus the benefit of being a good size to hold. This really hits a sweet spot for me in format and usability and is now a favourite EDC light.

Review Summary

_______________________________________________ _______________________________________________
Things I like What doesn’t work so well for me
_______________________________________________ _______________________________________________
600lm output (from 2xAA). No holster supplied.
Side switch. Hot-spot can be too bright indoors.
Direct access to Moonlight, Turbo and Strobe.
Timer function.
Glow-in-the-Dark rubber grip.
AA powered.

 photo 00 Olight S2A feature P1220465.jpg


Discussing the Review:

Please feel free to add comments to the review, but the ideal place to freely discuss these reviews is on a forum. If you started reading the shorter forum version of the review, but followed the link this full exclusive review, please return to that forum to discuss the review there.
If you read the review entirely on Tactical Reviews, please consider one of the following to join in any discussion.

CandlePowerForums – Flashlight Reviews Section (Largest and Friendliest Flashlight Community Forum)

EdgeMatters – Sponsored Reviews (UK based Forum for Knife Makers and Collectors)
Light Review: Olight R50 Seeker

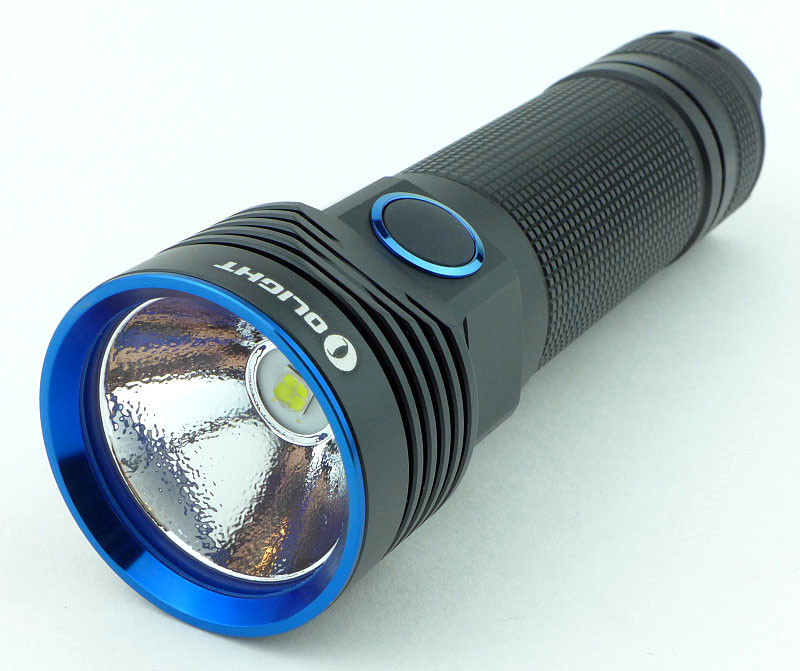
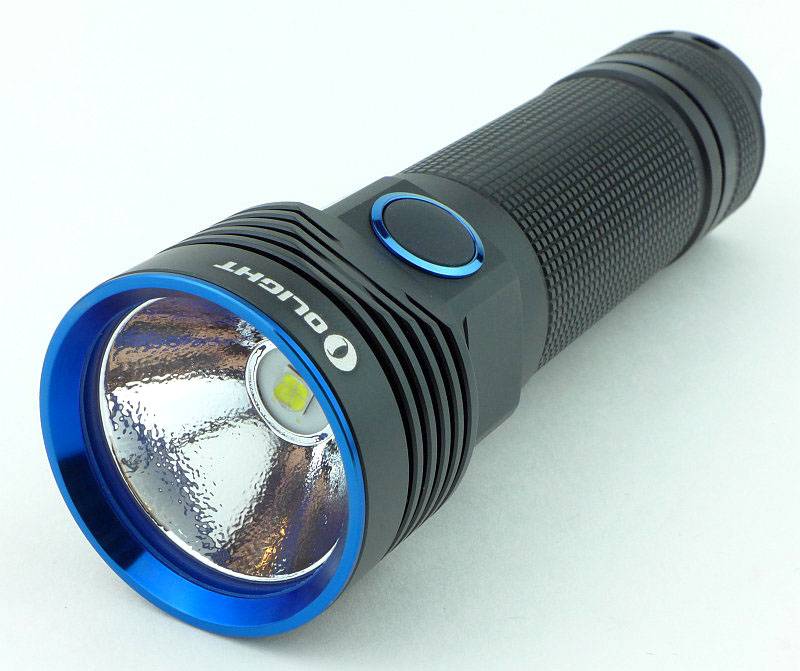
Olight’s R50 Seeker is a handy sized powerhouse using a 26650 cell and the XHP50 LED allowing it to give you 2500lms in an easily carried package; built-in USB charging adds to its flexibility.

 photo 08 Olight R50 angle P1220569.jpg

Taking a more detailed look:

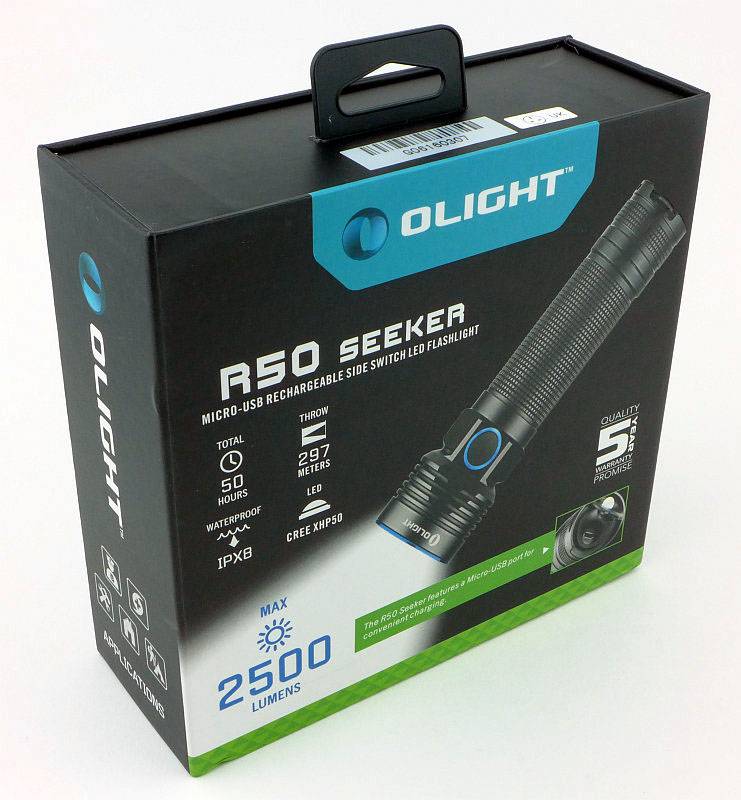
The R50 arrives in something more like a presentation box than just ‘packaging’.
 photo 01 Olight R50 boxed P1220538.jpg

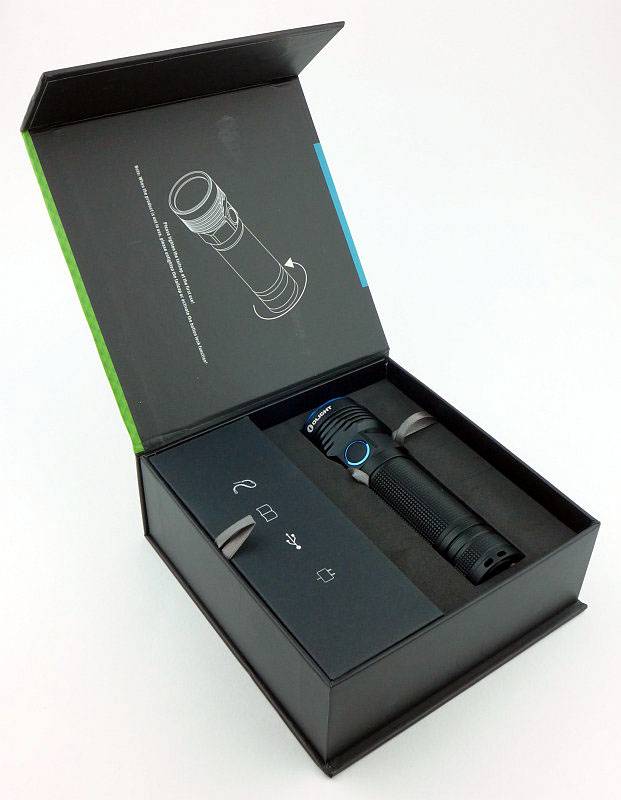
The box has a lid which is held shut with magnets.
 photo 02 Olight R50 box open P1220544.jpg

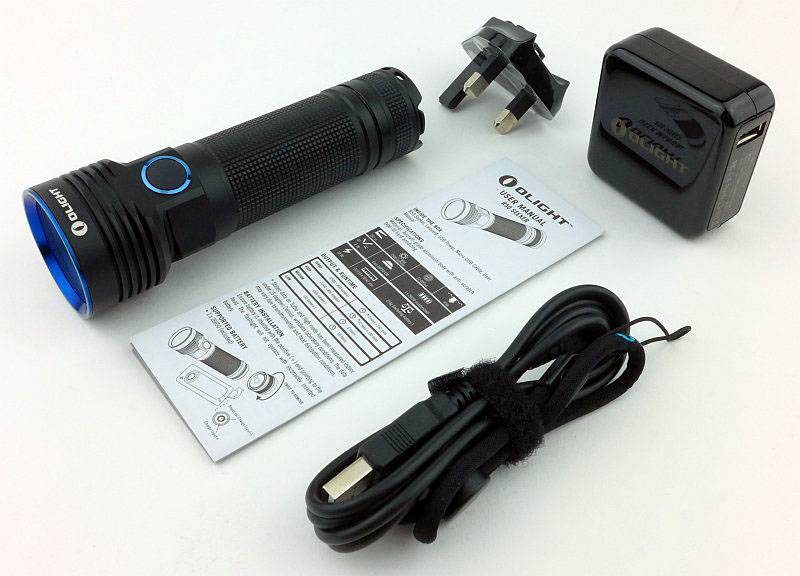
Taking everything out you have the R50, instructions, charger, charger plug adaptor, USB cable and lanyard.
 photo 03 Olight R50 box contents P1220548.jpg

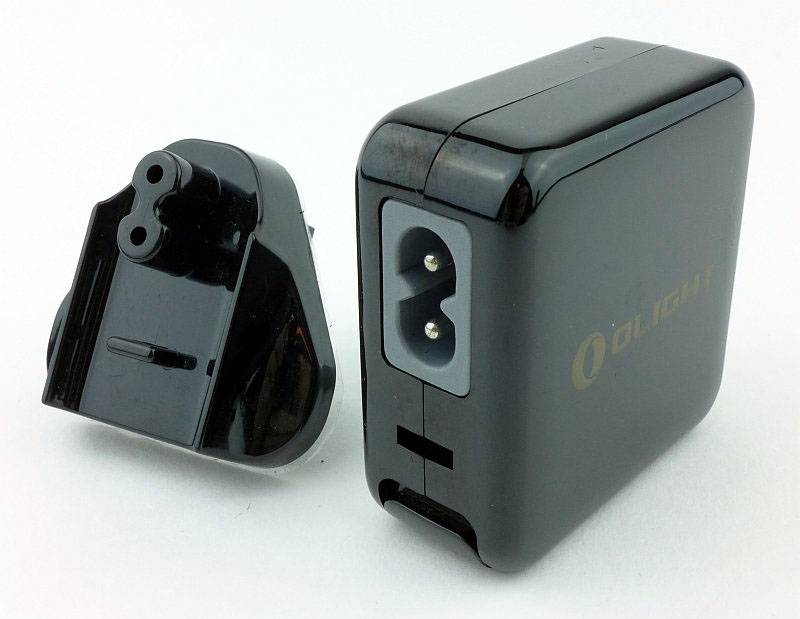
Before you can use the charger you need to fit your local plug adaptor.
 photo 04 Olight R50 charger apart P1220552.jpg

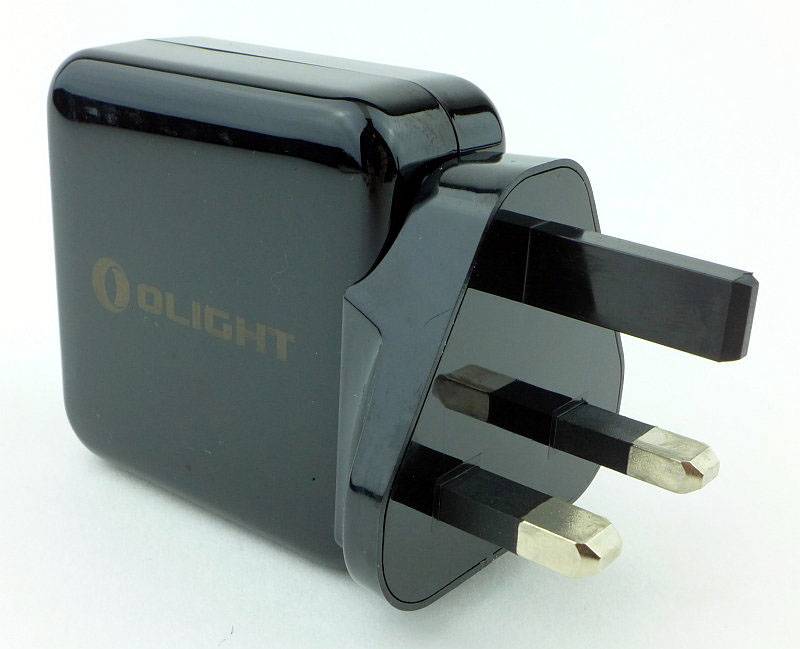
The adaptor clicks into place.
 photo 05 Olight R50 charger together P1220555.jpg

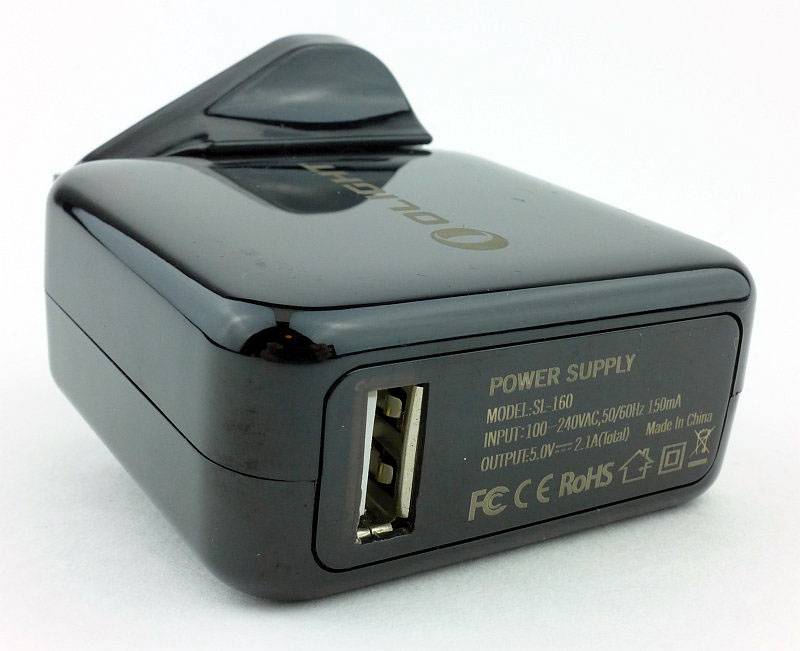
The charger is multi-voltage and with a 2.1A output.
 photo 06 Olight R50 charger info P1220560.jpg

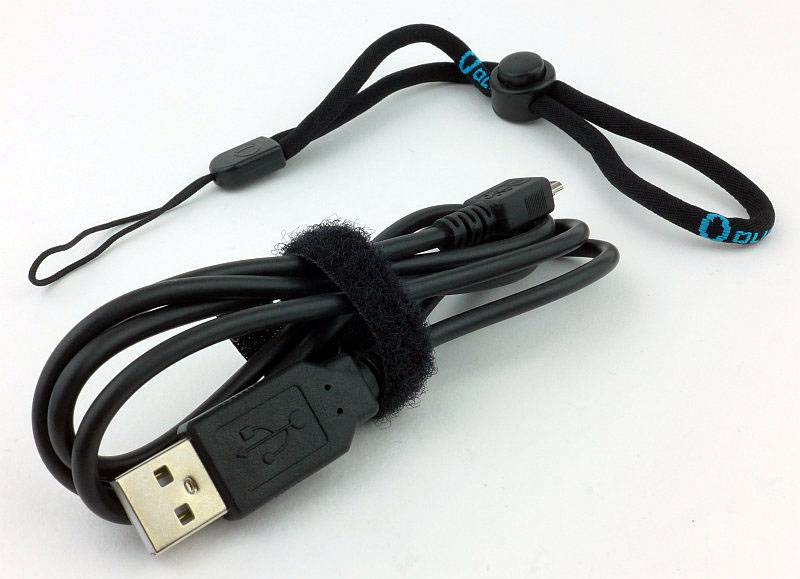
Separating out the USB cable and lanyard. The lanyard has a very nice ‘fabric tube’ wrist loop.
 photo 07 Olight R50 cable lanyard P1220563.jpg

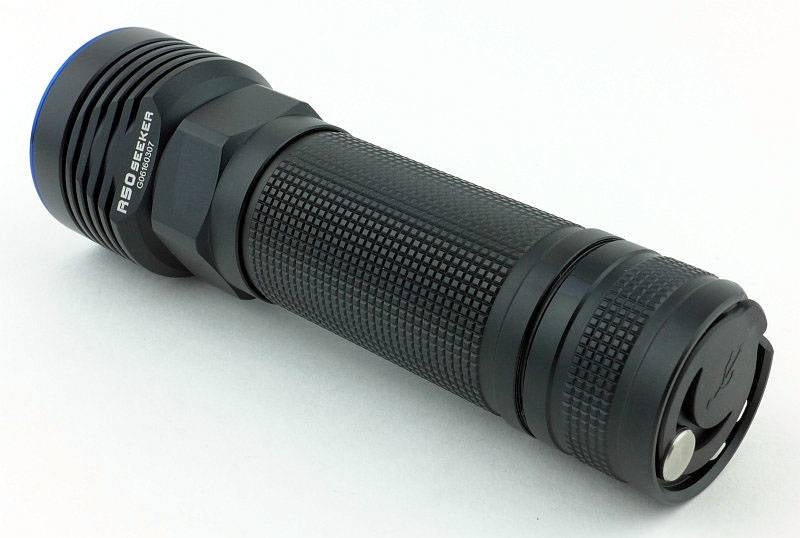
A good looking light with blue bezel an switch rings.
 photo 10 Olight R50 angle P1220576.jpg

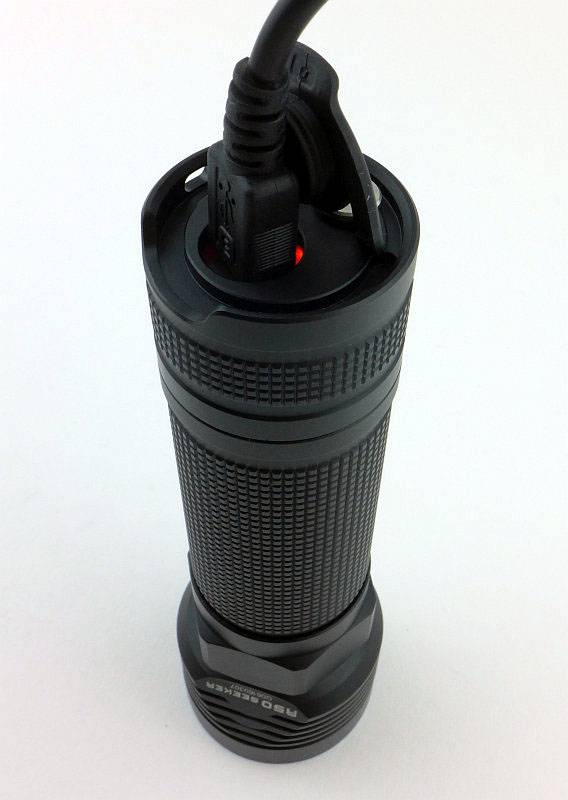
Looking from the rear you can see the USB charging port cover in the tail-cap.
 photo 09 Olight R50 rear angle P1220574.jpg

The main power switch is low profile, but big enough to be easy to use.
 photo 11 Olight R50 switch P1220580.jpg

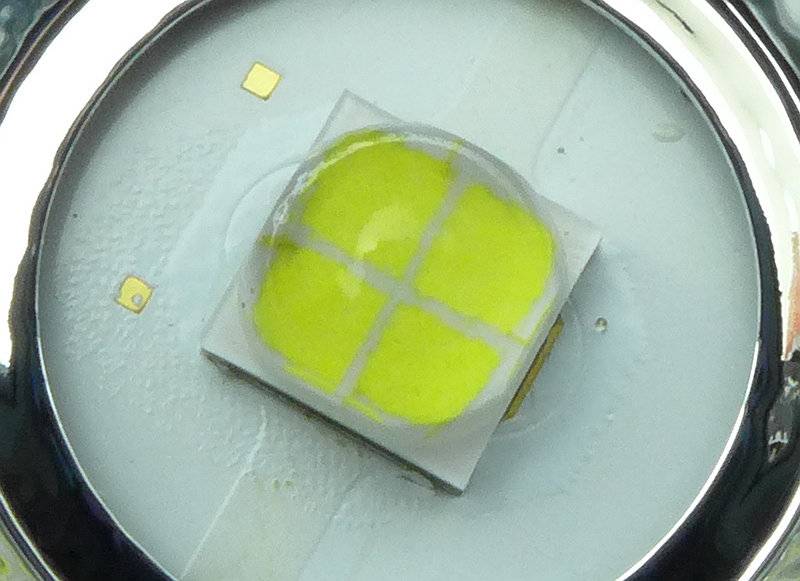
Diving in close to the quad die XHP50 LED.
 photo 13 Olight R50 LED close P1220597.jpg

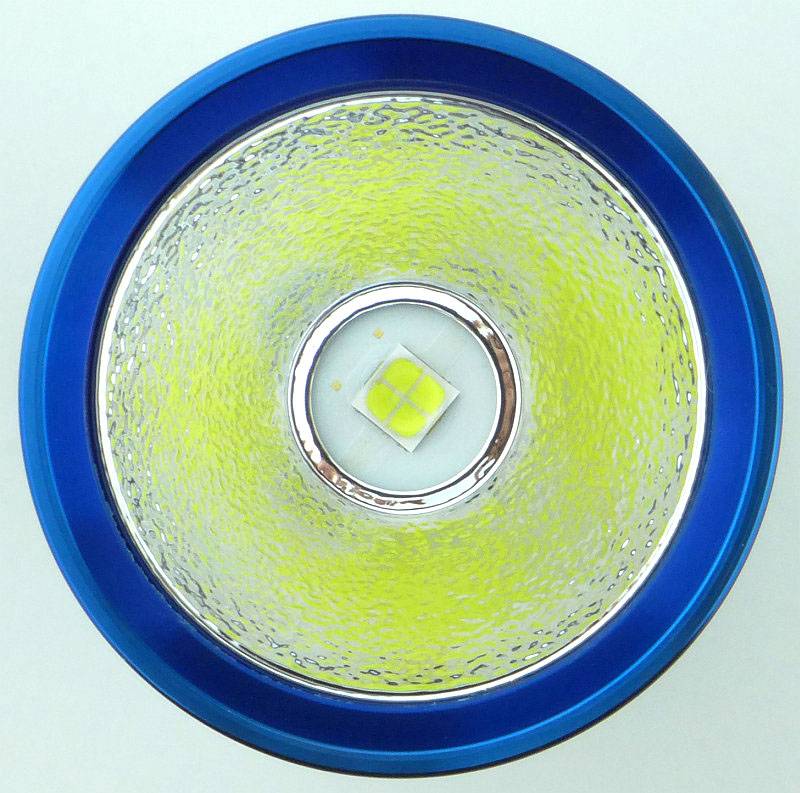
Surrounding the LED is a textured reflector.
 photo 14 Olight R50 reflector P1220606.jpg

Flipping round to the other end, there is a rubber charging port cover in the tail-cap.
 photo 15 Olight R50 port cover P1220610.jpg

Pulling this aside exposes the micro-USB socket.
 photo 16 Olight R50 port open P1220615.jpg

Inside the tailcap, there are three contacts; a ring contact for the end of the battery tube, and two sprung button contacts.
 photo 17 Olight R50 contacts P1220616.jpg

The tail-cap end of the cell has two contacts to match the two in the tail-cap.
 photo 18 Olight R50 cell contacts P1220621.jpg

Threads are square cut.
 photo 19 Olight R50 threads P1220624.jpg

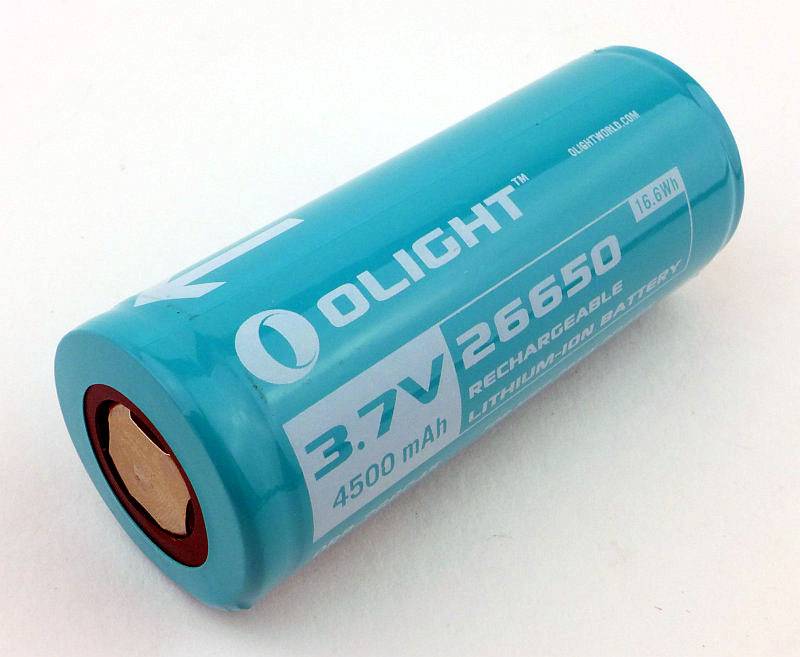
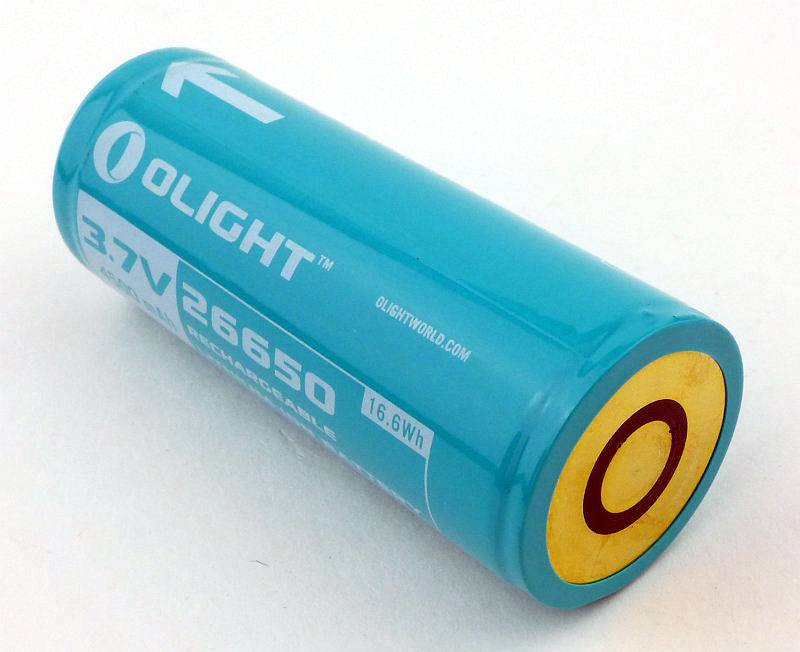
Supplied with the R50 is a proprietary Olight 26650 cell.
 photo 20 Olight R50 cell P1220628.jpg

This cell has the twin contacts on the ‘negative’ end of the cell, and an arrow on the side to indicate which way to insert it.
 photo 21 Olight R50 cell P1220630.jpg

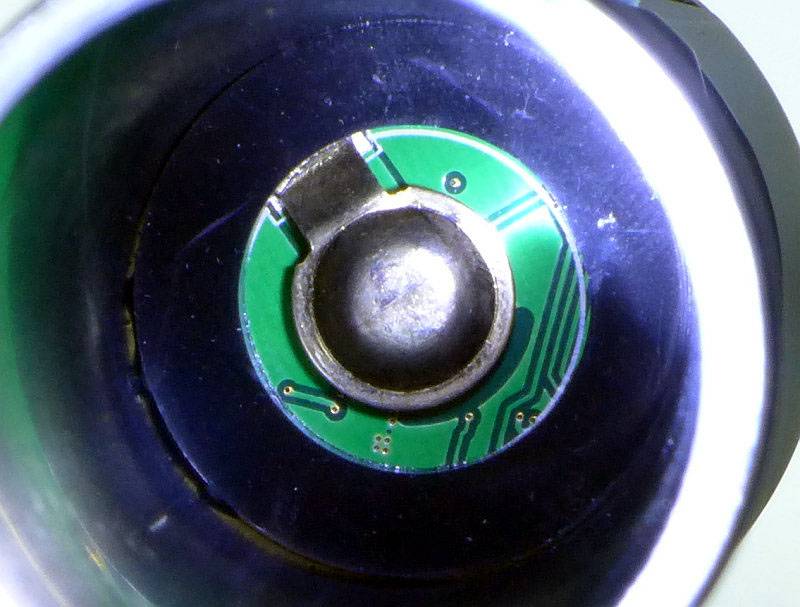
Peering inside the battery tube to look at the positive contact.
 photo 22 Olight R50 internal contact P1220633.jpg

The beam

Please be careful not to judge tint based on images you see on a computer screen. Unless properly calibrated, the screen itself will change the perceived tint.

The indoor beamshot is intended to give an idea of the beam shape/quality rather than tint. All beamshots are taken using daylight white balance. The woodwork (stairs and skirting) are painted Farrow & Ball “Off-White”, and the walls are a light sandy colour called ‘String’ again by Farrow & Ball. I don’t actually have a ‘white wall’ in the house to use for this, and the wife won’t have one!

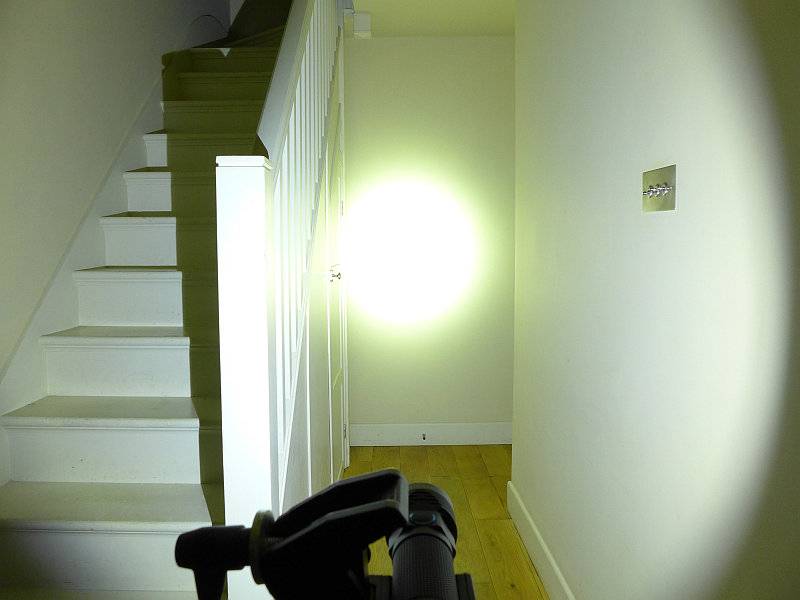
The R50 manages to combine a very wide spill with a bright hotspot.
 photo 29 Olight R50 indoor beam P1240719.jpg

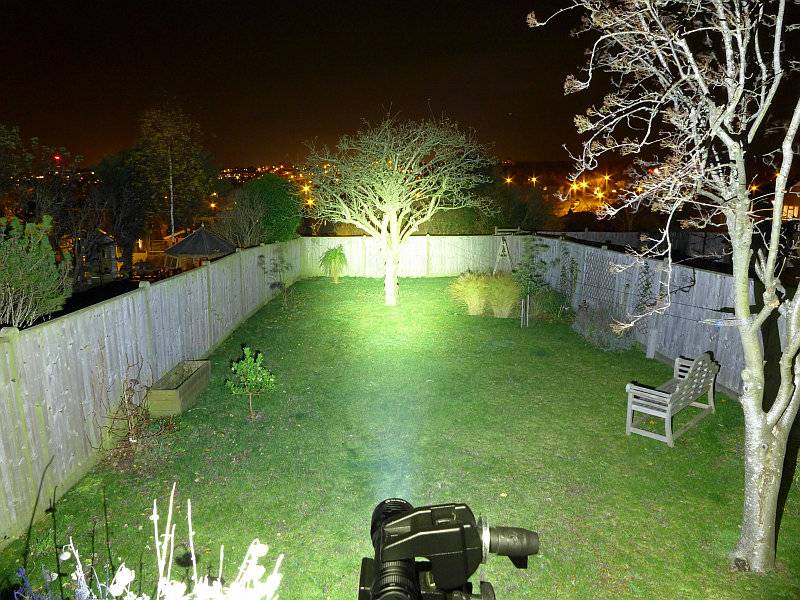
Taking it outside and that wide beam lights up everything near you and the broad hotspot has good range.
 photo 28 Olight R50 outdoor beam P1240671.jpg

Modes and User Interface:

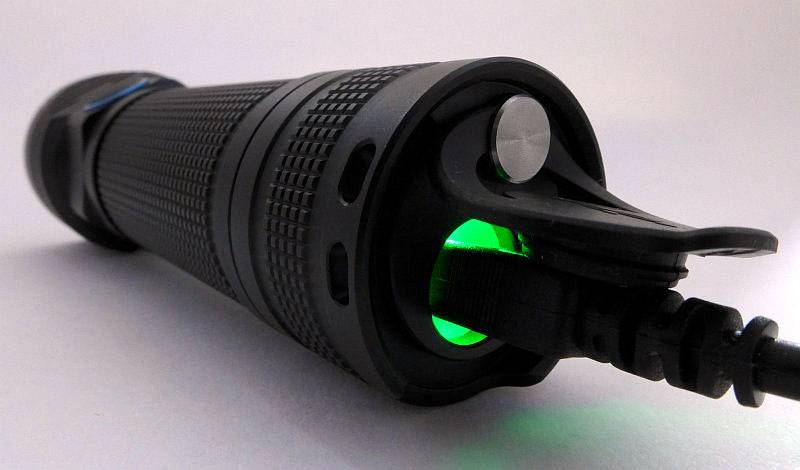
Before we get into the controls, we need to charge the R50. After connecting the USB cable there is a red charging indicator light next to the USB socket.
 photo 25 Olight R50 charging P1220651.jpg

Once fully charged this turns green.
 photo 26 Olight R50 charged P1220668.jpg

To turn ON to the last used constant mode, click the side switch once.
To turn ON to Turbo directly, double-click the side switch.
To turn ON to Strobe, triple-click the side switch.
To turn ON to Low mode directly, press and hold the side switch for 1s.

To change brightness level, with the R50 ON, press and hold the switch to cycle through Low – Medium – High – Low etc.

To turn OFF, click the side switch.

There is a memory for the last used ‘normal’ mode (Low, Medium, or High) but High is only memorised for 10 minutes after which the R50 goes back to Medium.

There are two ways to lockout the R50:
1. Unscrew the tail-cap a half turn.
2. Press and hold the side switch (from OFF) for over 2s. (After 1s the R50 will come onto Low, but after 2s it will go off again as it enters lockout.)

To exit lockout use the corresponding method to the lockouts above:
1. Tighten the tailcap.
2.Press and hold the switch for 3s.

Batteries and output:

The R50 Seeker runs on a proprietary 26650 cell. The instructions do not mention support for standard 26650 cells, however I have tried this and the R50 does function (though does not accommodate very long cells) apart from the charging not working.

To measure actual output, I built an integrating sphere. See here for more detail. The sensor registers visible light only (so Infra-Red and Ultra-Violet will not be measured).

Please note, all quoted lumen figures are from a DIY integrating sphere, and according to ANSI standards. Although every effort is made to give as accurate a result as possible, they should be taken as an estimate only. The results can be used to compare outputs in this review and others I have published.

___________________________________________ ________________________________ ________________________________
Olight R50 using supplied 26650 cell I.S. measured ANSI output Lumens PWM frequency or Strobe frequency (Hz)
___________________________________________ ________________________________ ________________________________
Turbo 2479 0
High 1281 0
Medium 440 0
Low 39 0

* Beacon and Strobe output measurements are only estimates as the brief flashes make it difficult to capture the actual output value.

Peak Beam intensity measured 22000 lx @1m giving a beam range of 297 m.

There is parasitic drain at 52uA. When using the included 4500mAh cell, it will take 9.87 years to drain the cell.

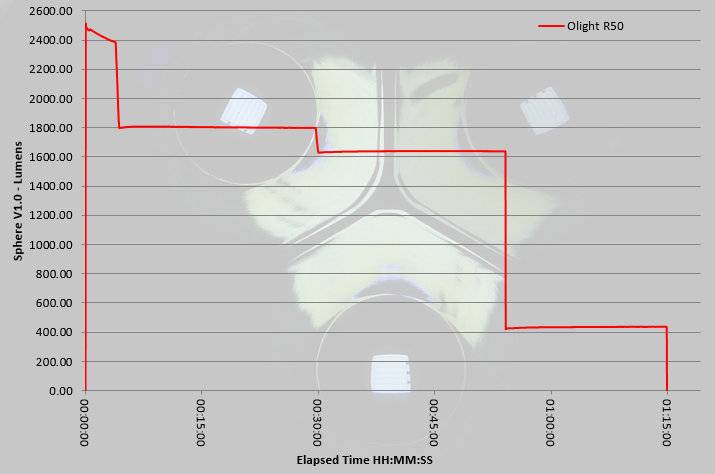
A very impressive output for a compact light. During extended use, the Turbo stepping down from nearly 2500lm to 1800lm is not noticeable and while running at 1800lm starts to generate a good amount of heat. Even with the step down at 30 minutes to around 1650lm you don’t really notice, and it is only once you get to about 50 minutes and the R50 steps down to the medium output of 440lm that you see a drop in output.
 photo Olight R50 runtime.jpg

Troubleshooting

This section is included to mention any minor niggles I come across during testing, in case the information helps anyone else.

No issues were encountered during testing.

As per the description of this section, this information is provided in case anyone else finds a similar ‘issue’ that might be fixed in the same way.

The R50 Seeker in use

For such a usable and useful light I am disappointed Olight did not include a holster. Even though it uses the 26650 cell, so has a thicker tube than the common 18650 size light, Olight have kept the overall size very compact and comfortable to hold. It may not be jeans-pocket sized, it is easily coat-pocket sized.

Output is extremely impressive and does meet the specified 2500lm. This does drop to 1800 after 3 minutes, but that reduction is barely noticeable and the R50 continues to impress. Everyone who has seen me using the R50 has said “that is bright” and asked what it is; a real talking point.

One area where I think Olight has really cracked it, is the interface. It is the same, or very similar, to many of the other Olight lights with a single side switch, so you will recognise the way it works. Giving the user direct access to the maximum and minimum levels, whatever you last used, makes this a real winner. Another nice touch is the way that the ‘normal’ mode (from a single click of the side switch) will not memorise High beyond 10 minutes of being off, it means that whatever you were doing with the R50, worst case you might get Medium if you turn it on without thinking. Not so much you get blinded and yet powerful enough.

These days you won’t really find yourself unable to find a USB charger at work or at home. The R50 comes with a quality 2A charger anyway, but while you are away from home you will be able to top up the R50 easily enough. The instructions specifically don’t mention using any other 26650 cells, but being the rebel I am, I popped one in. Clearly the charging function is not going to work, but the R50 itself did work, so you can carry a spare 26650 if you want. Just beware that the R50’s tube is not that long, so some 26650 cells may be too long. Check it fits before you rely on it.

There is some shaping at the head, but the R50 effectively has no anti-roll feature, you need to put it down head-down or tail-down. It does tail-stand very well.

Running the R50 on Turbo also provides you with a hand-warmer as it does heat up quite a lot. Given a cold evening, this certainly is a welcome feature. If you decide to tail-stand the R50 on Turbo you will hit the over-heat protection, so expect the output to drop if you let it get really hot.

Personally I find the R50 hits a real sweet spot in terms of size, ergonomics and output. Give me a side-switch light any day, add to that a cell which is large enough to sustain a significant output and a great all-rounder beam, keep it small enough to pop into a coat pocket and you have a winner. I’ll forgive it the proprietary cell for the fact that this has convenient built-in USB charging, doesn’t need anything else to be bought to use it, but can use standard 26650 cells, so gets round the normal limitation of proprietary cell lights.

Review Summary

_______________________________________________ _______________________________________________
Things I like What doesn’t work so well for me
_______________________________________________ _______________________________________________
2500lm from a compact light. Requires the proprietary cell for built-in charging.
Excellent UI using an ergonomic side switch. No holster supplied.
Can run on a standard 26650 – Unofficially. No Anti-Roll.
Direct access to Maximum and Minimum modes.
Regulated output.
All-rounder beam.

 photo 24 Olight R50 angle on P1220636.jpg


Discussing the Review:

Please feel free to add comments to the review, but the ideal place to freely discuss these reviews is on a forum. If you started reading the shorter forum version of the review, but followed the link this full exclusive review, please return to that forum to discuss the review there.
If you read the review entirely on Tactical Reviews, please consider one of the following to join in any discussion.

CandlePowerForums – Flashlight Reviews Section (Largest and Friendliest Flashlight Community Forum)

EdgeMatters – Sponsored Reviews (UK based Forum for Knife Makers and Collectors)
Light Review: Olight S1 plus Special Edition S1 Ti

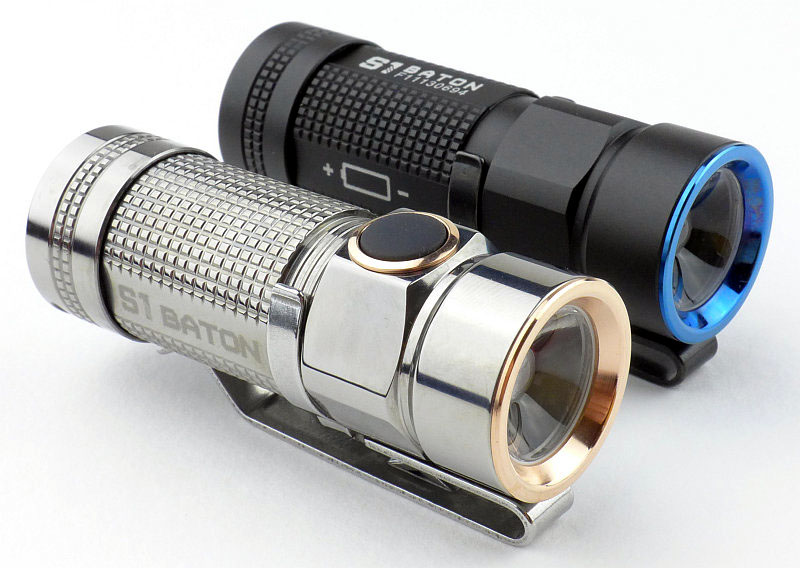
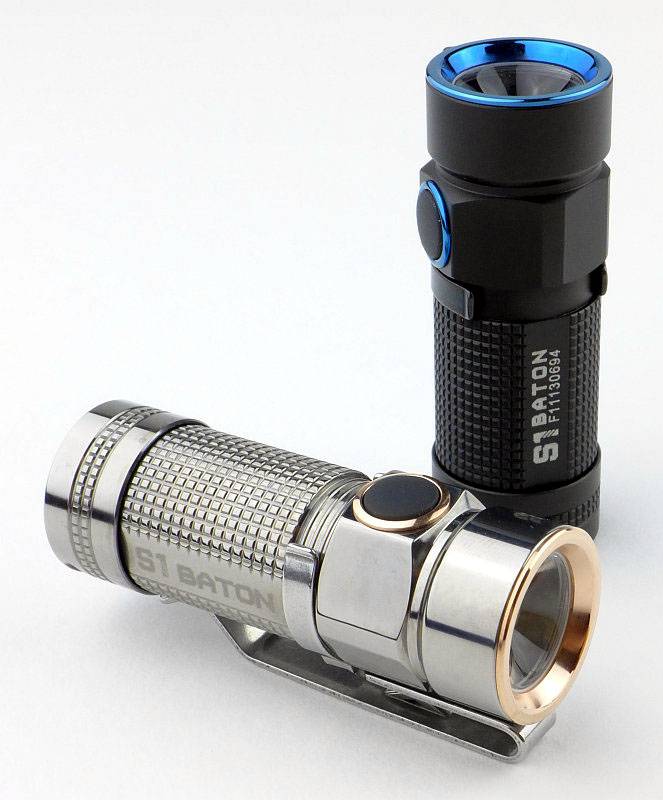
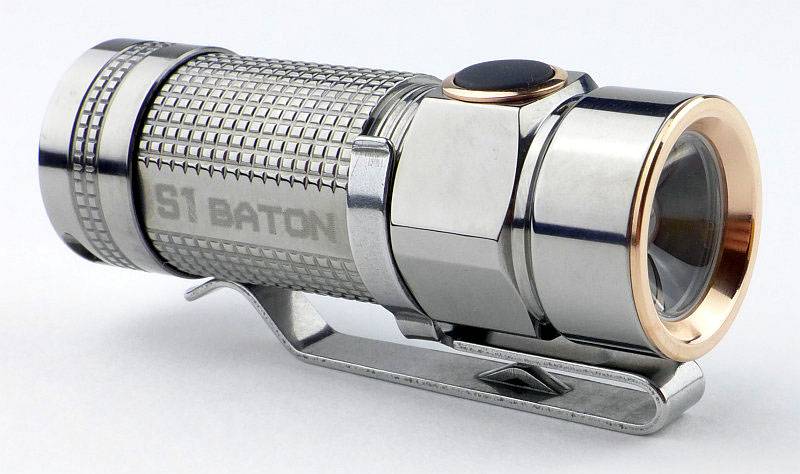
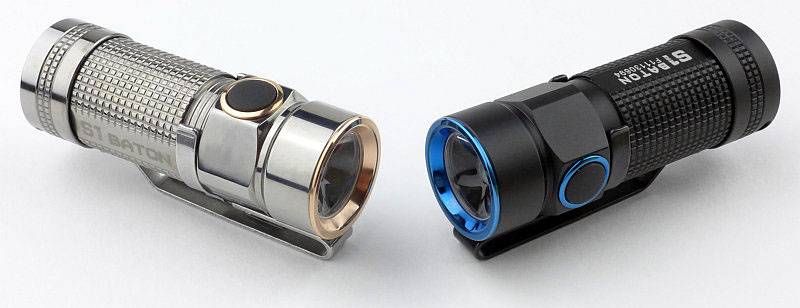
Olight’s S1 is the smallest light they have ever produced with a side switch. Along with the standard aluminium edition, Olight have created quite a storm of interest by also releasing several different Special Editions with different emitters and materials such as Copper, Titanium as well as Gold-plated versions.

 photo 52 S1 twins3 P1150843.jpg

Taking a more detailed look at the S1 (standard Al edition):

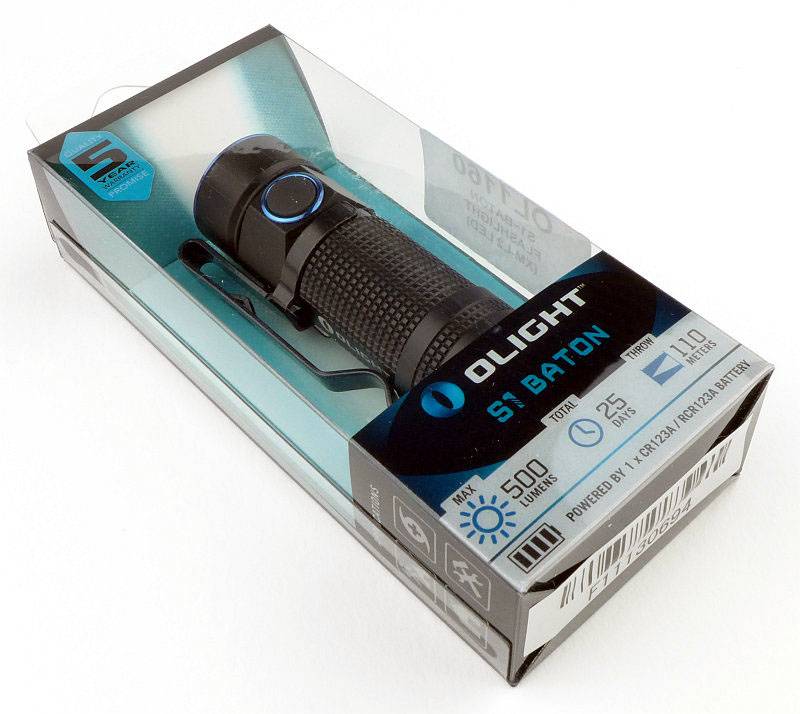
Olight’s standard plastic box packaging displays the S1 nicely.
 photo 01 S1 Al boxed P1150522.jpg

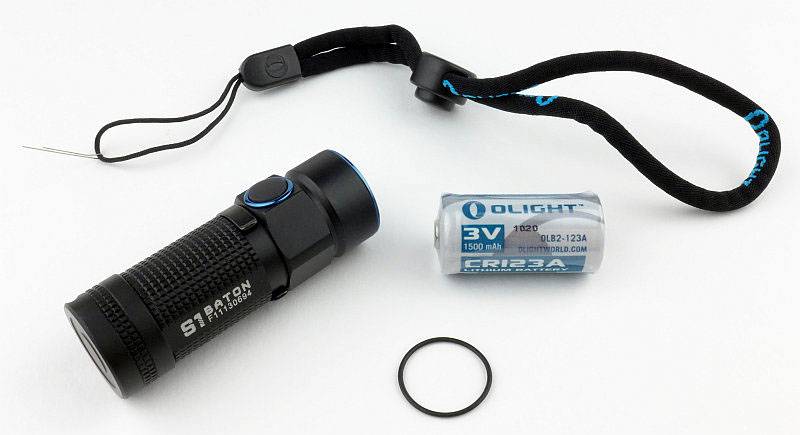
Inside the box is the S1, a CR123 cell, spare O-ring (which is actually used to hold the S1 in place) and a wrist lanyard. A really thoughtful feature is that the lanyard comes with a threading wire fitted to it to make it easy to fit to the S1.
 photo 02 S1 Al box contents P1150526.jpg

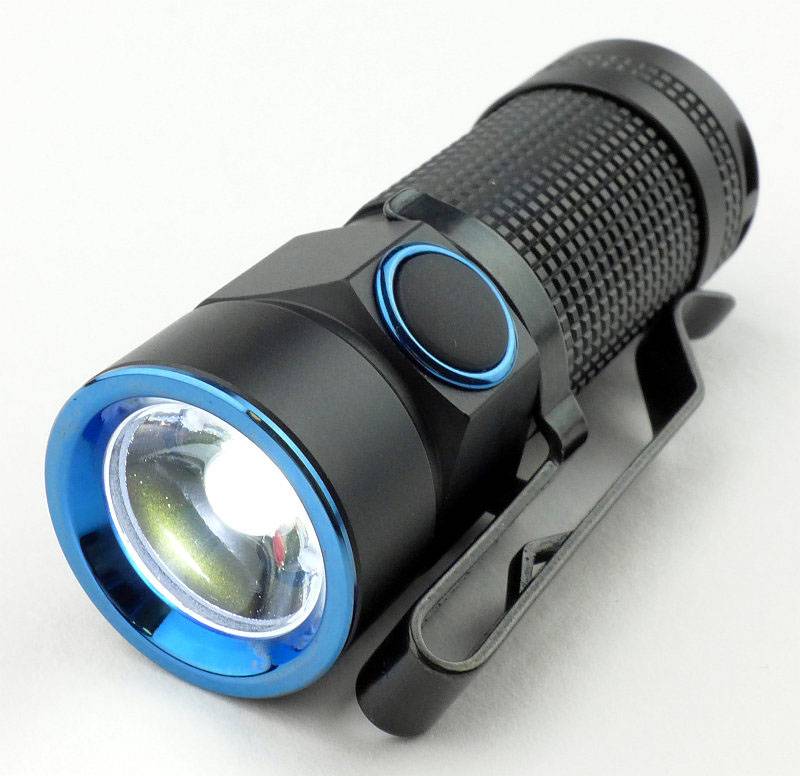
The S1 itself has a stylish two tone appearance with the bezel and switch rings in blue.
 photo 05 S1 Al angle03 P1150532.jpg

Keeping the size down, the tailcap is a very streamlined design. The spring clips into a slot and is used to hold the magnet in place. This makes it easy for the user to remove and replace the magnet.
 photo 06 S1 Al tailcap P1150537.jpg

The threads are square cut and as the body is short, there are not many actual threads.
 photo 07 S1 Al threads P1150539.jpg

Peering inside there is another spring terminal and an anti-rattle closed-cell foam pad.
 photo 08 S1 Al inside P1150549.jpg

Looking dead-on, the S1 has a TIR optic and the actual LED cannot be seen.
 photo 09 S1 Al TIR P1150553.jpg

In a less common format, the cell is inserted negative towards the head and this is clearly marked on the side of the S1.
 photo 11 S1 Al Cell P1150563.jpg

Just to give an idea of how compact this light is, here it is next to the already small Olight S10R (another RCR123 light).
 photo 12 S1 Al S10R compare P1150566.jpg

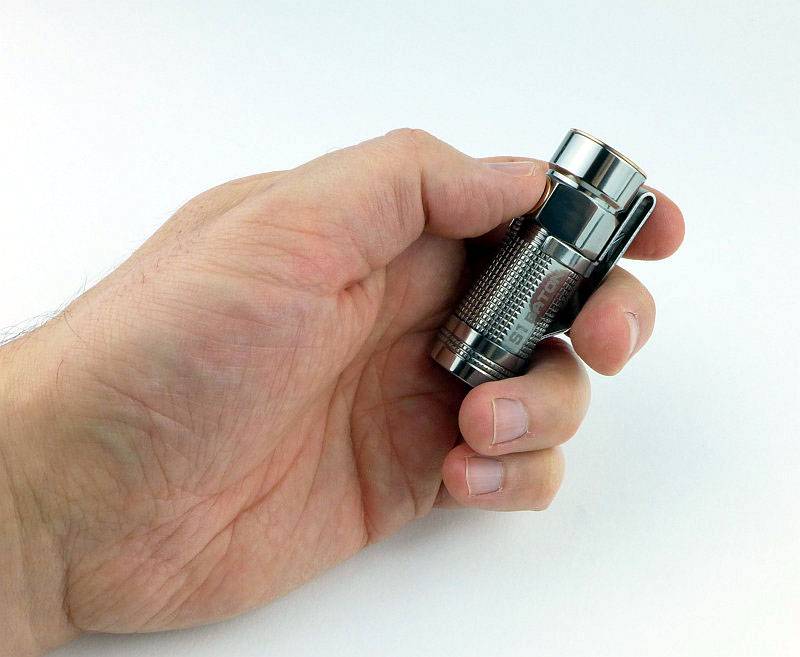
Also for scale here it is in my hand (I take XL gloves)
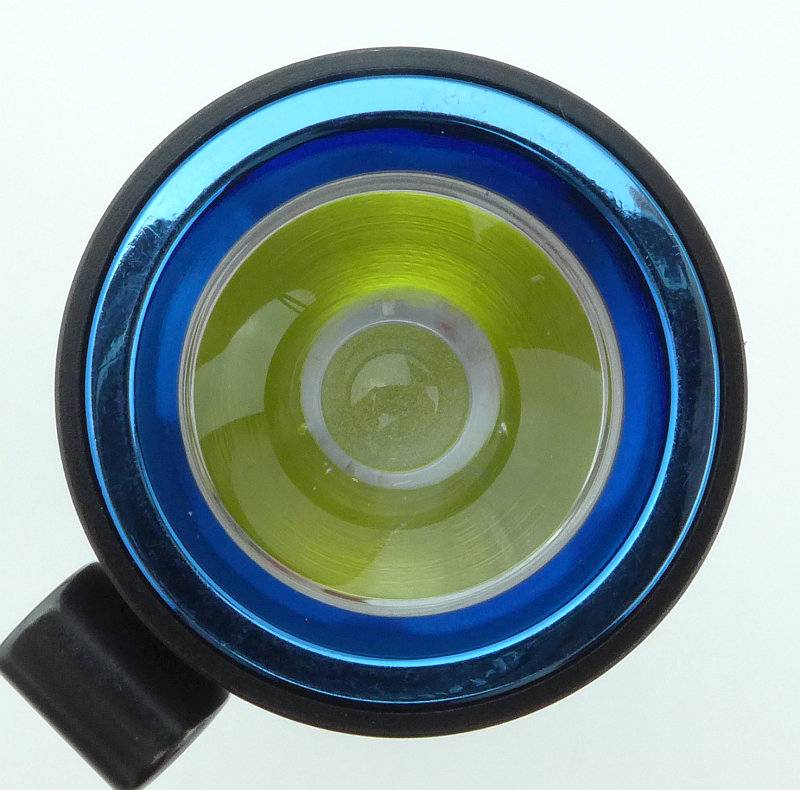
 photo 13 S1 Al in hand P1160056.jpg

Before moving on to the Special Edition another quick look at those lovely blue PVD trims.
 photo 10 S1 Al TIR lit P1150559.jpg

Taking a more detailed look at the S1 Special/Ti edition:

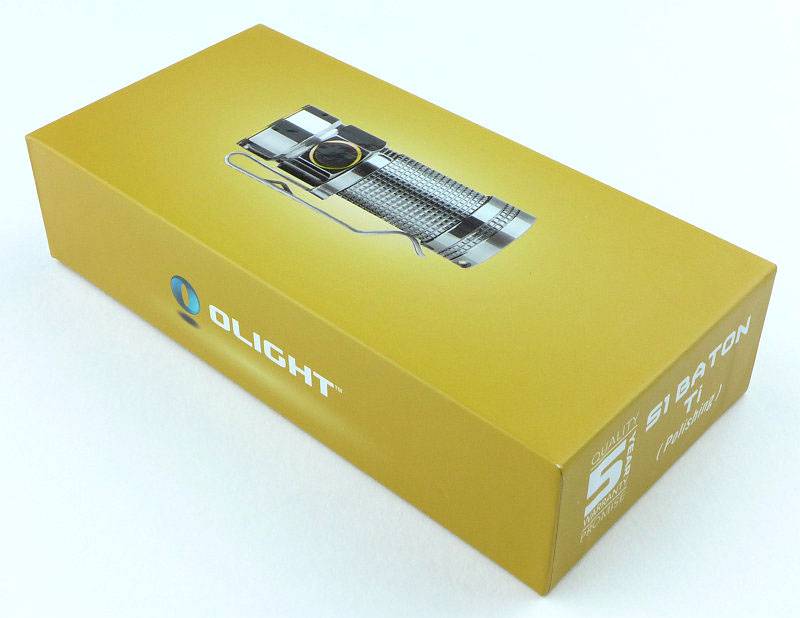
In keeping with its Special Edition status, the Ti S1 gets a different box.
 photo 20 S1 Ti boxed P1150804.jpg

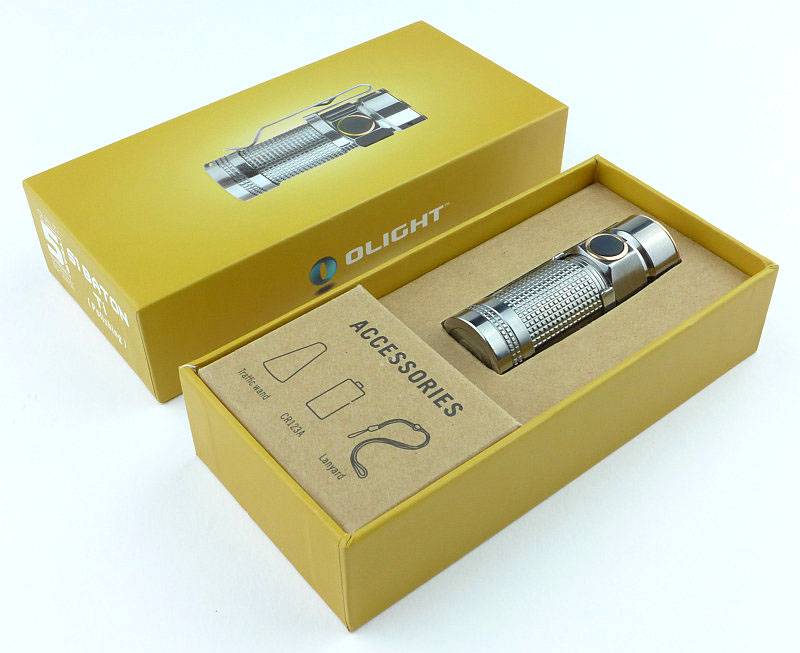
Presentation is excellent.
 photo 21 S1 Ti box open P1150807.jpg

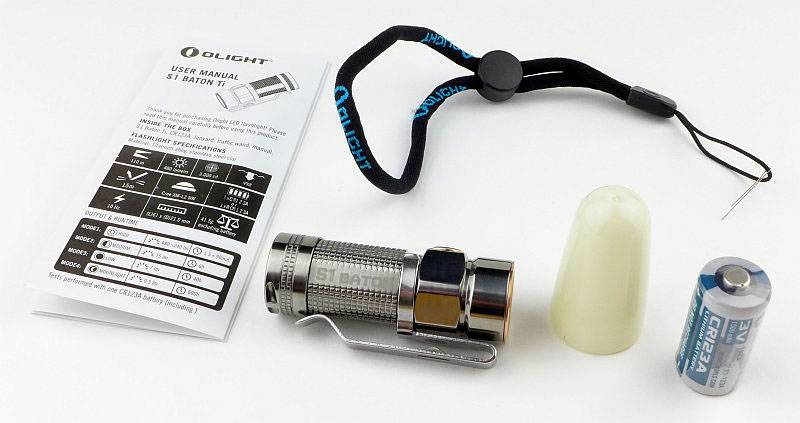
Inside the box is the S1, a CR123 cell, diffuser, instructions and a wrist lanyard. A really thoughtful feature is that the lanyard comes with a threading wire fitted to it to make it easy to fit to the S1.
 photo 25 S1 Ti contents P1150820.jpg

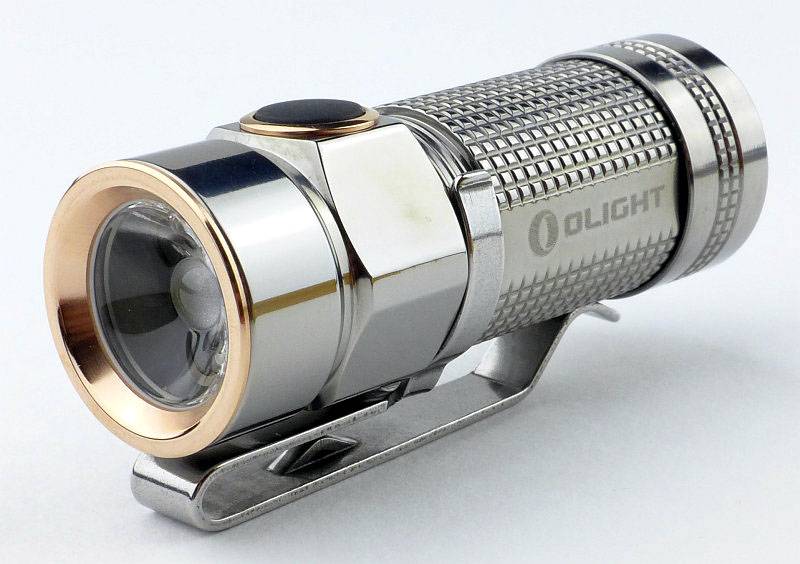
A glorious looking light.
 photo 30 S1 Ti angle3 P1150834.jpg

The clip is removable and reversible.
 photo 24 S1 Ti clip P1150816.jpg

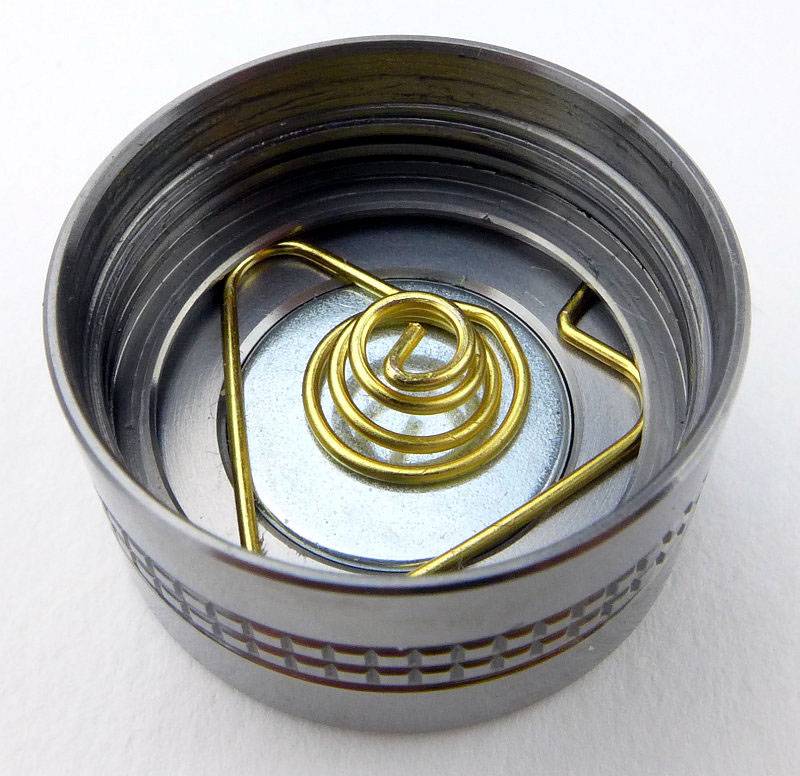
Construction of the tailcap is the same as the standard version with the terminal spring clipped into a groove and used to secure the magnet.
 photo 26 S1 Ti tailcap P1150822.jpg

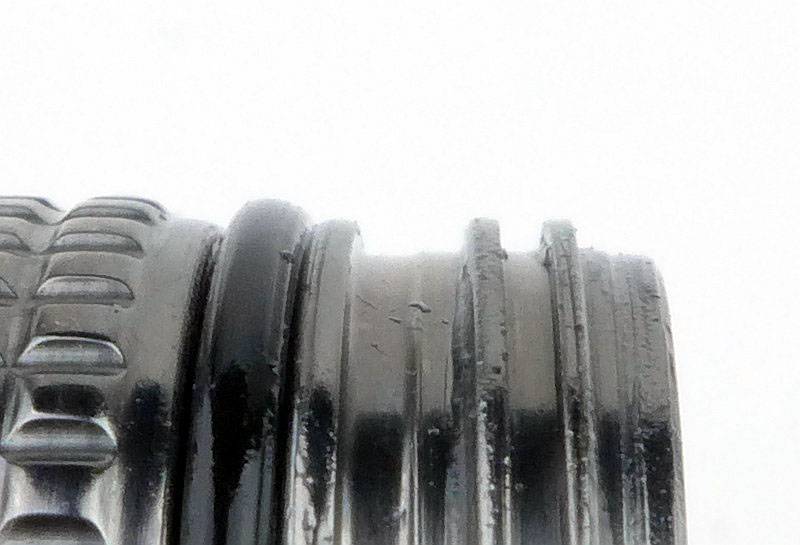
Square threads are used.
 photo 27 S1 Ti threads P1150824.jpg

Looking inside the internals are the same as the standard version.
 photo 28 S1 Ti inside P1150826.jpg

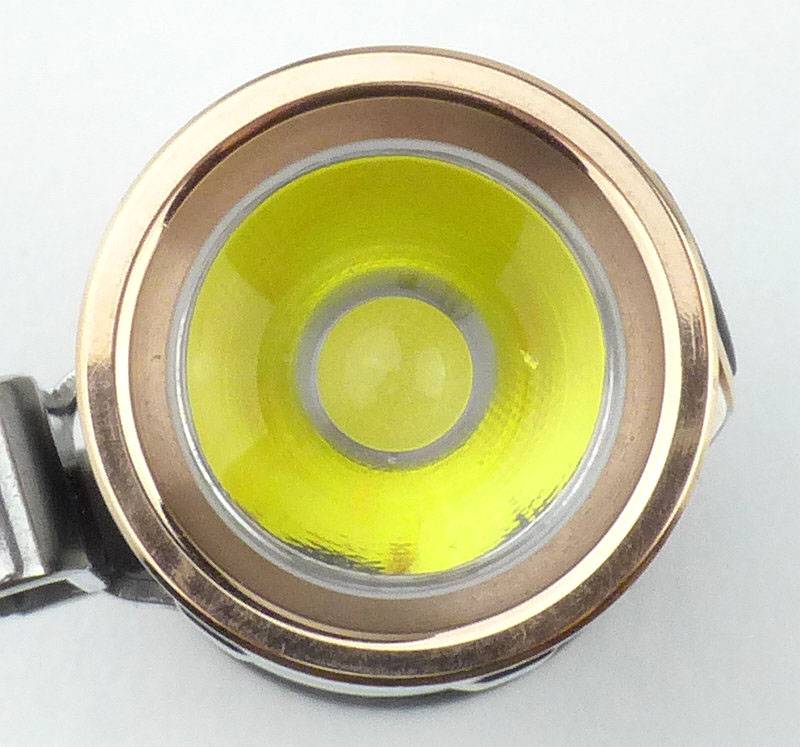
A Rose Gold plated bezel surrounds the TIR optic.
 photo 29 S1 Ti TIR P1150830.jpg

Without the diffuser fitted.
 photo 31 S1 Ti angle4 P1150837.jpg

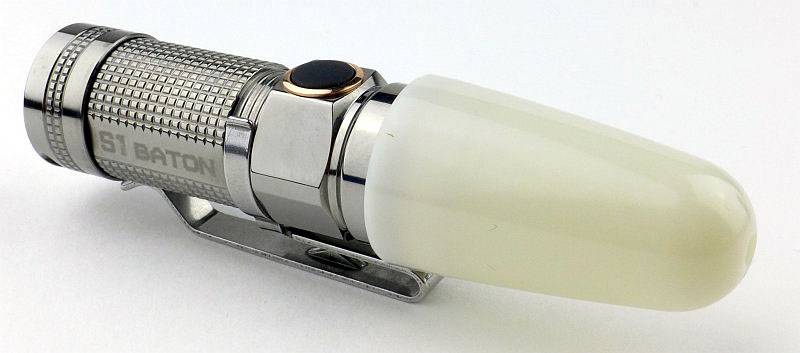
With the diffuser fitted.
 photo 32 S1 Ti diffuser P1150846.jpg

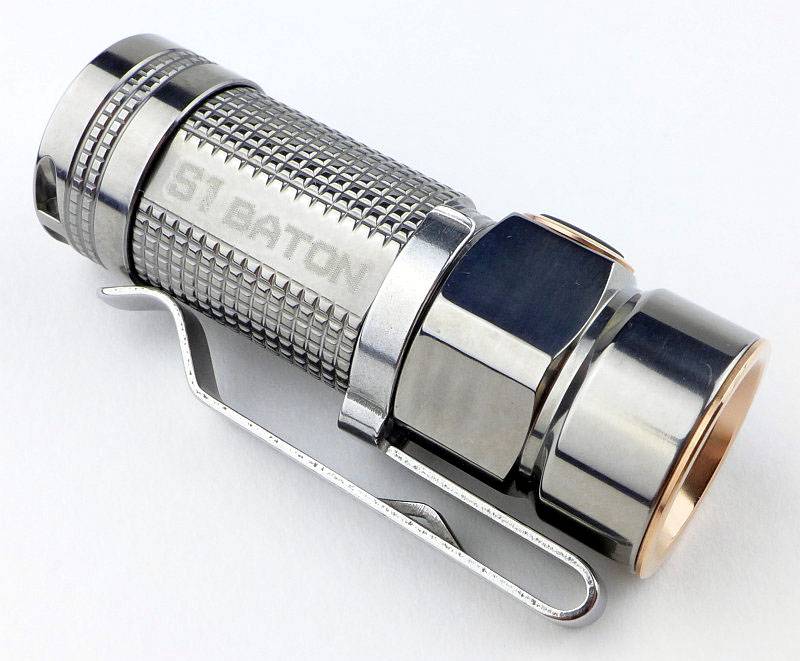
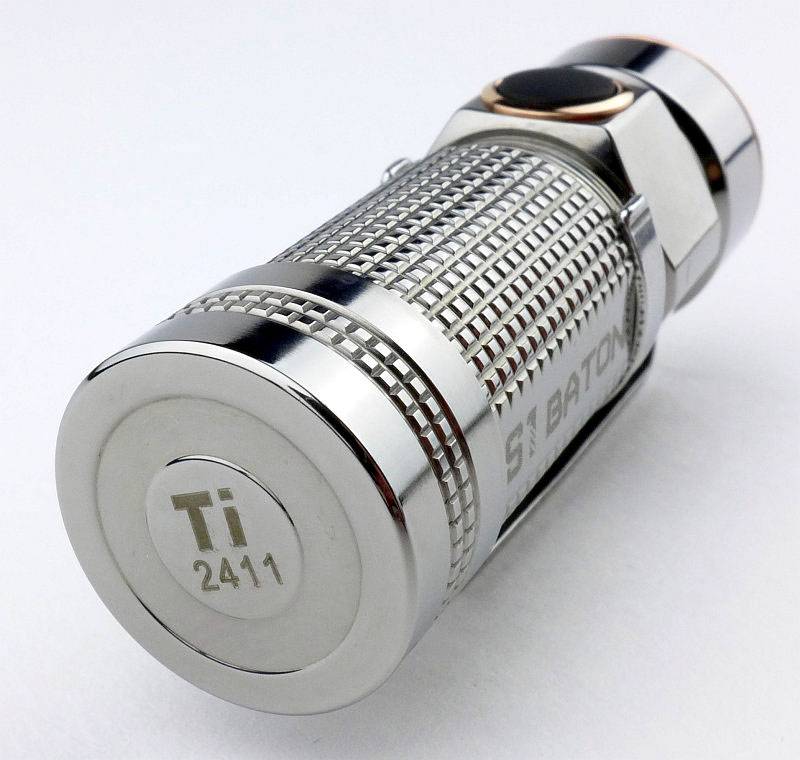
For the special editions they have the identifier ‘Ti’ and a serial number engraved on the tail-cap.
 photo 33 S1 Ti tail view P1150974.jpg

Small, Shiny and Ti, a winning combination.
 photo 34 S1 Ti in hand P1160053.jpg

The beam

Please be careful not to judge tint based on images you see on a computer screen. Unless properly calibrated, the screen itself will change the perceived tint.

The indoor beamshot is intended to give an idea of the beam shape/quality rather than tint. All beamshots are taken using daylight white balance. The woodwork (stairs and skirting) are painted Farrow & Ball “Off-White”, and the walls are a light sandy colour called ‘String’ again by Farrow & Ball. I don’t actually have a ‘white wall’ in the house to use for this, and the wife won’t have one!
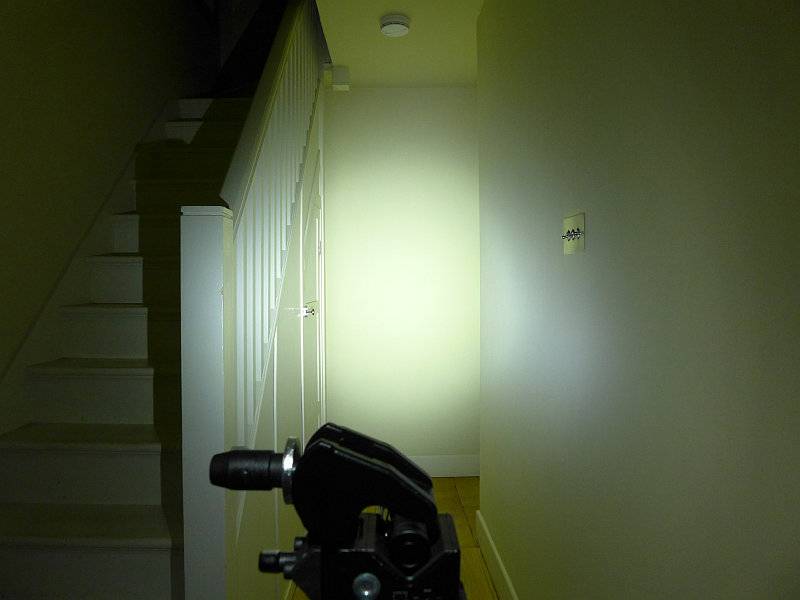
Starting indoors with the Standard S1. The wide hotspot transitions into a wide spill giving a great all round beam, and one that works really well for EDC tasks.
 photo 14 S1 Al indoor beam P1170324.jpg

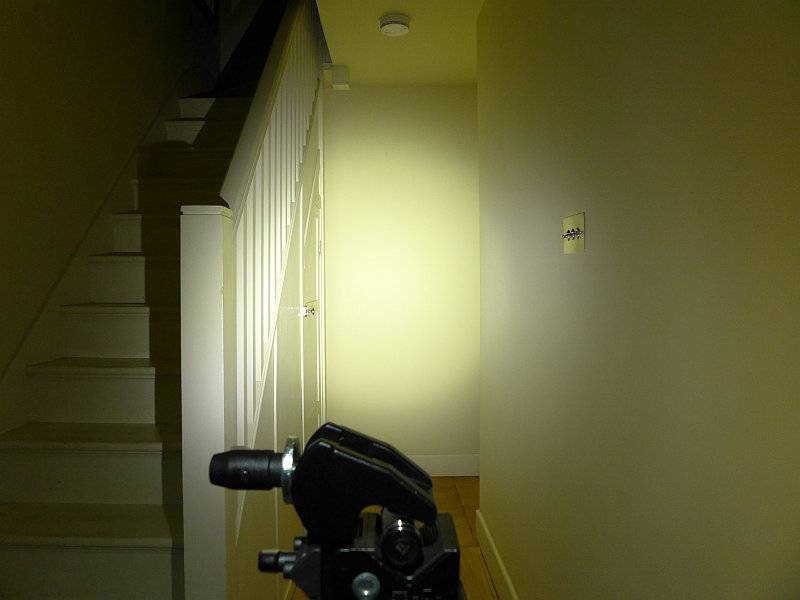
The main difference in the Special Ti Edition is that the LED is neutral white.
 photo 35 S1 Ti indoor beam P1170329.jpg

Fitting the Ti Edition’s diffuser makes a hug difference giving a real lantern like beam.
 photo 36 S1 Ti indoor beam diffused P1170333.jpg

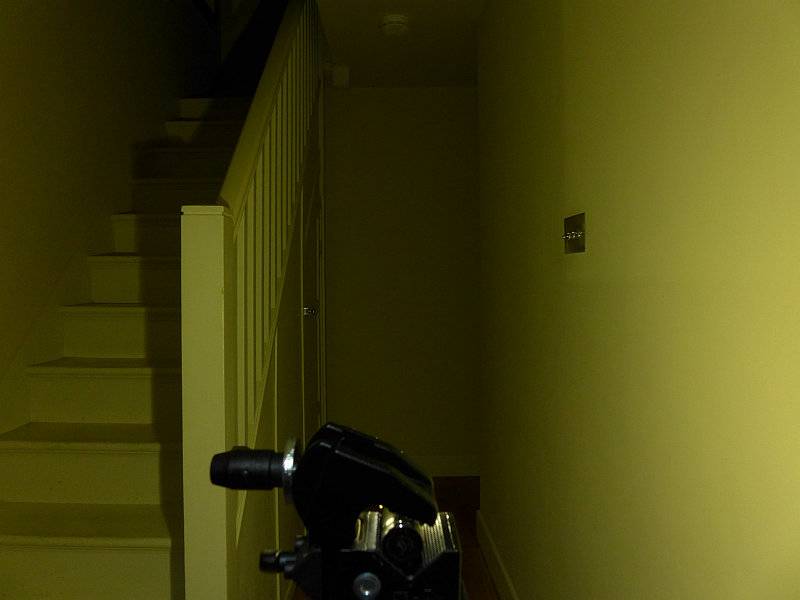
The Diffuser itself is GITD as can be seen here once the test was over.
 photo 37 S1 Ti indoor beam GITD P1170336.jpg

Outdoors, the wide hotspot does well enough up to medium distances.
 photo 15 S1 Al outdoor beam P1170258.jpg

The neutral emitter of the Ti does make the colours appear more natural.
 photo 38 S1 Ti outdoor beam P1170261.jpg

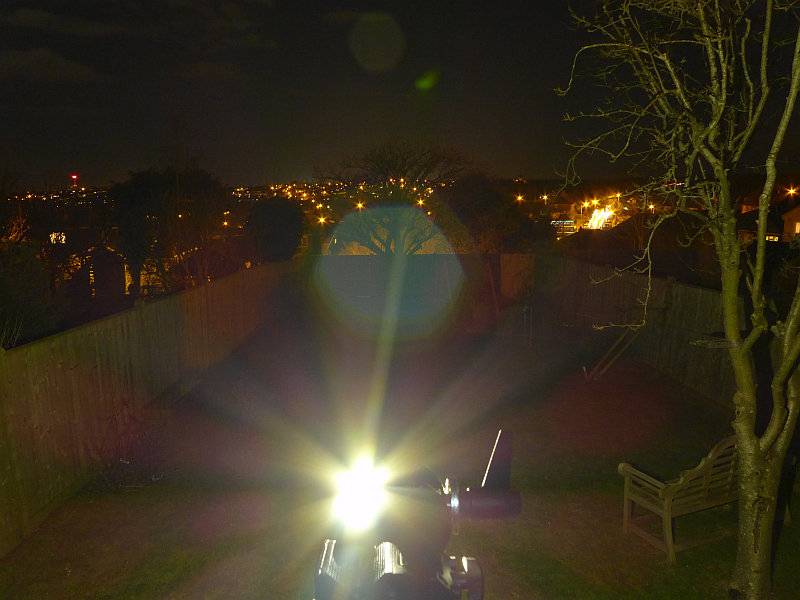
Just to show what happens when the diffuser is fitted – GLARE – lots of glare. On the indoor shot the clamp prevented the glare from hitting the camera, but here it does not. Use the diffuser with caution.
 photo 39 S1 Ti outdoor beam diffused P1170297.jpg

Modes and User Interface:

The S1 has five output modes, High, Medium, Low, Moonlight and Strobe and a single click-switch on the side.

Basic ON/OFF operation is carried out with a single click of the side switch. The S1 will turn on to the last used standard mode (this does not include Moonlight or Strobe).

To change the brightness, while ON, press and hold the switch to cycle through Medium -> High -> Low -> Medium etc. Release the switch once you have the required output.

There are a few special functions:
Moonlight mode – from OFF, press and hold the switch for 1s until the Moon mode is activated.
Direct access to High – from OFF, double-click the switch.
Strobe – From ON, triple-click the switch.
Timer – From ON, double-click the side switch. The S1 will blink one or two times. Once means the 3 minute timer is activated, twice means the 9 minute timer is activated. To swap between 3 and 9 minutes timers, double-click the switch.

Timer mode means that the S1 will turn itself off after the specified time, and this can be started from any mode (including Strobe and Moonlight).

Batteries and output:

The S1 runs on either CR123 or RCR123.

To measure actual output, I built an integrating sphere. See here for more detail. The sensor registers visible light only (so Infra-Red and Ultra-Violet will not be measured).

Please note, all quoted lumen figures are from a DIY integrating sphere, and according to ANSI standards. Although every effort is made to give as accurate a result as possible, they should be taken as an estimate only. The results can be used to compare outputs in this review and others I have published.

___________________________________________ ________________________________ ________________________________
‘Model’ and ‘Mode’ using specified cell I.S. measured ANSI output Lumens PWM frequency or Strobe frequency (Hz)
___________________________________________ ________________________________ ________________________________
S1 Al – High – CR123 428 0
S1 Al – Medium – CR123 92 0
S1 Al – Low – CR123 15 0
S1 Al – Moon – CR123 Below Threshold 0
S1 Al – High – RCR123 555 0
S1 Al – Medium – RCR123 92 0
S1 Al – Low – RCR123 15 0
S1 Al – Moon – RCR123 Below Threshold 0
S1 Ti – High – CR123 461 0
S1 Ti – Medium – CR123 92 0
S1 Ti – Low – CR123 12 0
S1 Ti – Moon – CR123 Below Threshold 0
S1 Ti – High – RCR123 541 0
S1 Ti – Medium – RCR123 91 0
S1 Ti – Low – RCR123 12 0
S1 Ti – Moon – RCR123 Below Threshold 0

* Beacon and Strobe output measurements are only estimates as the brief flashes make it difficult to capture the actual output value.

Peak Beam intensity of the S1 Al measured 3500 lx @1m giving a beam range of 118 m.
Peak Beam intensity of the S1 Ti measured 3000 lx @1m giving a beam range of 110 m.

There is parasitic drain but it is very low. For both the S1 Al and Ti, the drain was 1.1uA (145 years to drain a CR123 cell)

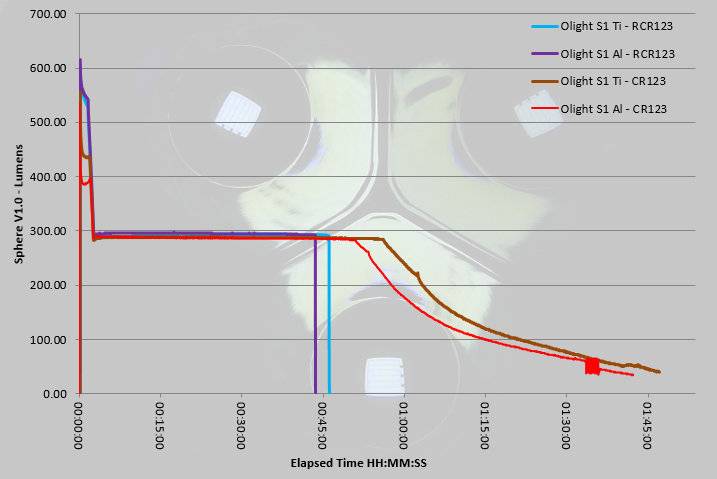
The trace here shows each of the S1 versions running on CR123 and on RCR123. The most distinctive difference is that on RCR123 the initial output is up to 120lm higher than on CR123. Once the light has been running for 3 minutes and the output ramps down to around 300lm, all four traces pretty much overlap. For the RCR123s, there is a sudden shut-off when the cell-protection kicks in. On CR123 the output starts to drop out of regulation at around 50 minutes after turn-on which is approximately halfway through the total ANSI runtime.
 photo Olight S1 runtime.jpg

Troubleshooting

This section is included to mention any minor niggles I come across during testing, in case the information helps anyone else.

No issues were encountered during testing.

As per the description of this section, this information is provided in case anyone else finds a similar ‘issue’ that might be fixed in the same way.

The Olight S1 in use

In reality there is little difference between these two versions in terms of practicality, except perhaps the neutral emitter in the Ti version. Of course the Ti version feels much more special and looks the part, as do any of the S1 special editions.

Regardless of special edition or not, the S1 is an excellent EDC light and won me round straight away. Easy and reliable access to Moon mode, direct access to High and memory of the last standard mode used, all tick the EDC boxes; all this and never forget its super compact size which makes it very easy to carry.

The built in timer is great for giving the light a ‘sleep’ mode so if you are camping or otherwise in need of a period of ‘settling-in’ before going to sleep, but not wanting to then have to turn a light off; it will turn itself off for you. Think of your own uses for this; I really like it even if I don’t use the timer all that much.

Being able to pop out the tailcap spring and remove the magnet is a really clever design. Magnets are useful, but very often I get annoyed with them picking up this and that. Now I can choose to have the magnet or not.

Deciding between CR123 and RCR123 will be personal preference. For heavy users the guilt-free-lumens of RCR123 may be a better match, but check that runtime graph; a sudden cut-off might be a problem for some users. If it is a problem, stick to CR123, as for general light EDC use it will last a long time.

Thanks to the very low parasitic drain, you can be confident that leaving it loaded up with a CR123, the S1 will be ready to go when you need it, and you won’t find it with a run-down cell. If you are super-paranoid, you can lock out the Standard version by unscrewing the tail-cap half a turn. You cannot lockout the Ti Special Edition like this as the threads are not coated.

Although a TIR lens was chosen for better control of the beam shape, it has the added benefit of being pretty much unbreakable. That beam is a general purpose beam which is well suited to closer range typical EDC uses.

Even though I’m use to it, I still have to think twice when putting a new cell in, the ‘negative terminal towards the head’ layout seems a strange choice when convention has the positive terminal towards the head. It does include all the relevant protection in case you get it wrong, but this seems an unnecessary unconventional touch.

The switch is quite low profile and without the clip often needs a bit of ‘hunting’ to find. The clip, which seems relatively large, can act as a guide for finding the button, and also helps stabilise the grip. The S1 is small enough that is can feel insecure to hold, especially when performing multi-clicks of the switch; the clip gives a little something extra to get hold of.

Small, good looking and full of useful modes that are easy to get at. It is no wonder the S1 is proving very popular.

Review Summary

_______________________________________________ _______________________________________________
Things I like What doesn’t work so well for me
_______________________________________________ _______________________________________________
Very compact. Sudden cut-off when using RCR123.
Great UI and selection of modes. Unconventional cell direction.
Takes CR123 or RCR123. Special Edition version cannot be locked out.
Very low parasitic drain.
User removable tail-cap magnet.
‘Proper’ Moon-Mode (with direct access).
Timer mode.

 photo 51 S1 twins2 P1150842.jpg

At the time of posting, the following links are for the Olight S1 on:
Amazon UK
Amazon US


Discussing the Review:

Please feel free to add comments to the review, but the ideal place to freely discuss these reviews is on a forum. If you started reading the shorter forum version of the review, but followed the link this full exclusive review, please return to that forum to discuss the review there.
If you read the review entirely on Tactical Reviews, please consider one of the following to join in any discussion.

CandlePowerForums – Flashlight Reviews Section (Largest and Friendliest Flashlight Community Forum)

EdgeMatters – Sponsored Reviews (UK based Forum for Knife Makers and Collectors)