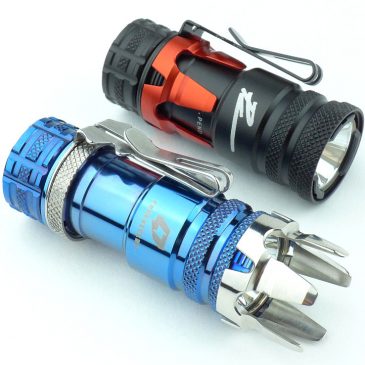
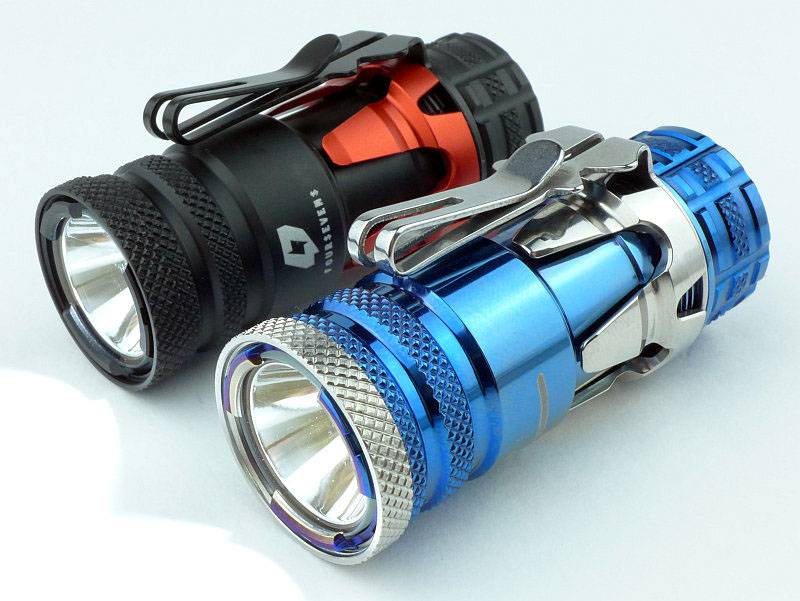
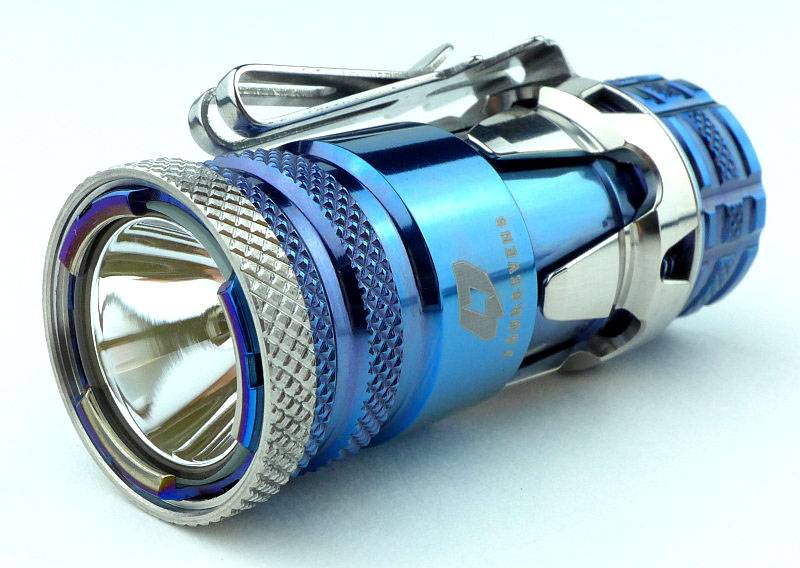
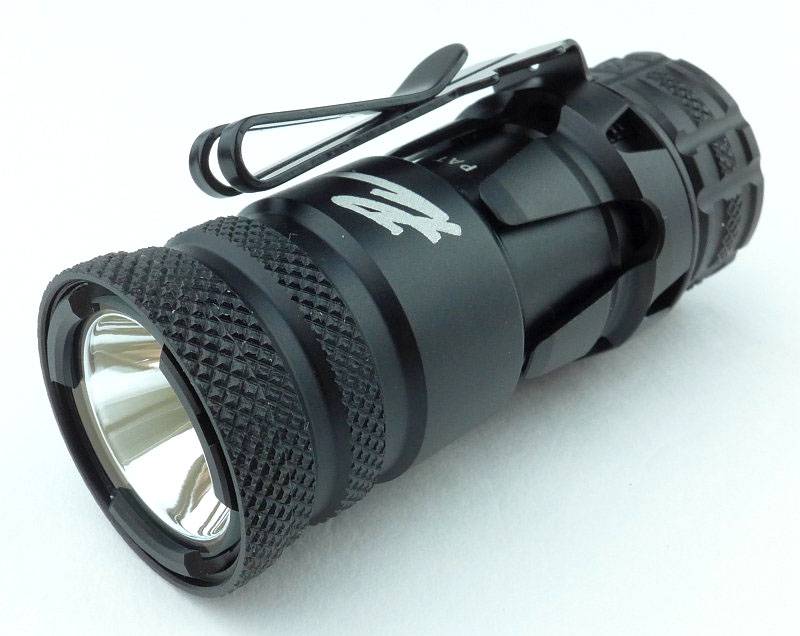
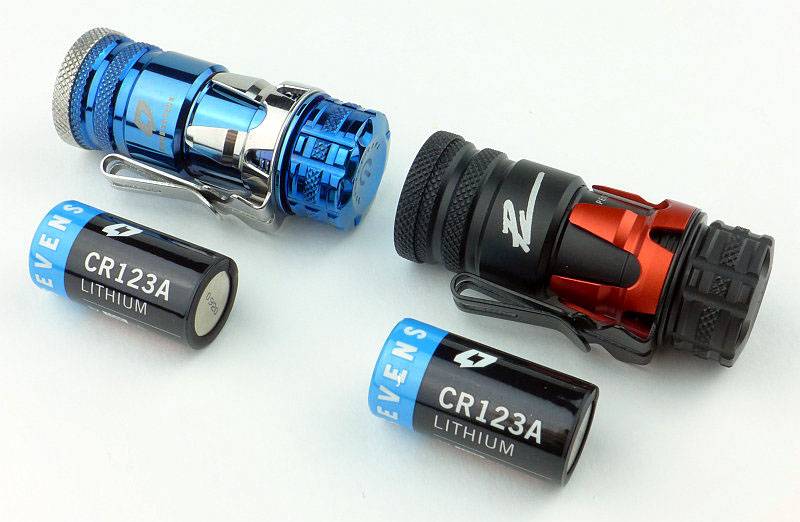
First revealed at SHOT Show 2015, FOURSEVENS have collaborated with PK (Paul Kim aka the Photon King) to produce these two exciting, fun and altogether usable lights – The Knight and Paladin. These are effectively the same light but the Knight is an Aluminium version and the Paladin is Titanium.
Taking a more detailed look:
FOURSEVENS’ packaging is ideal for showing off the design. Available separately are two versions of the strike bezel (a red one is shown here).
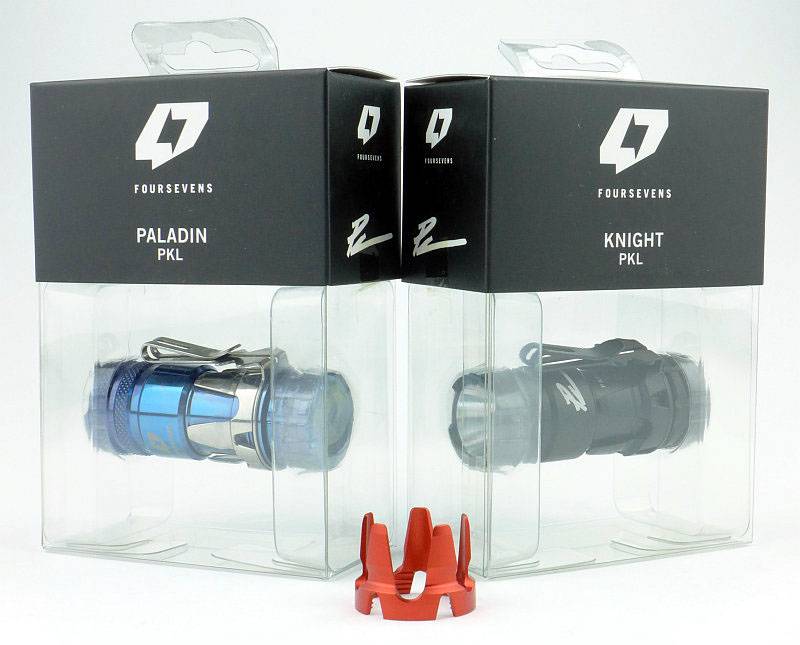
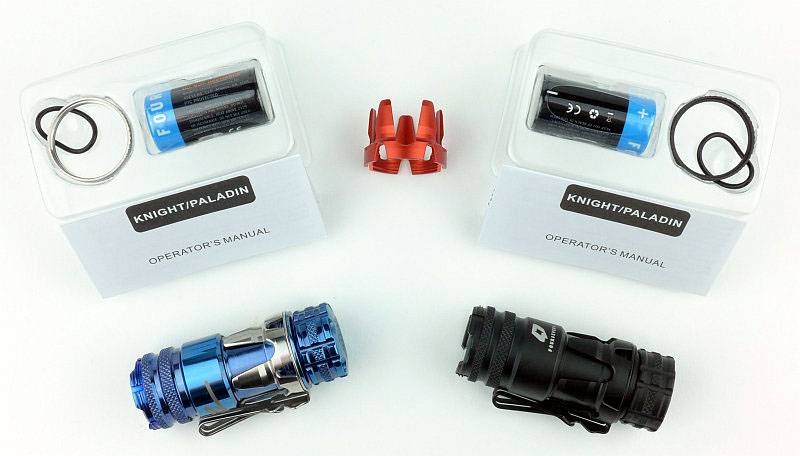
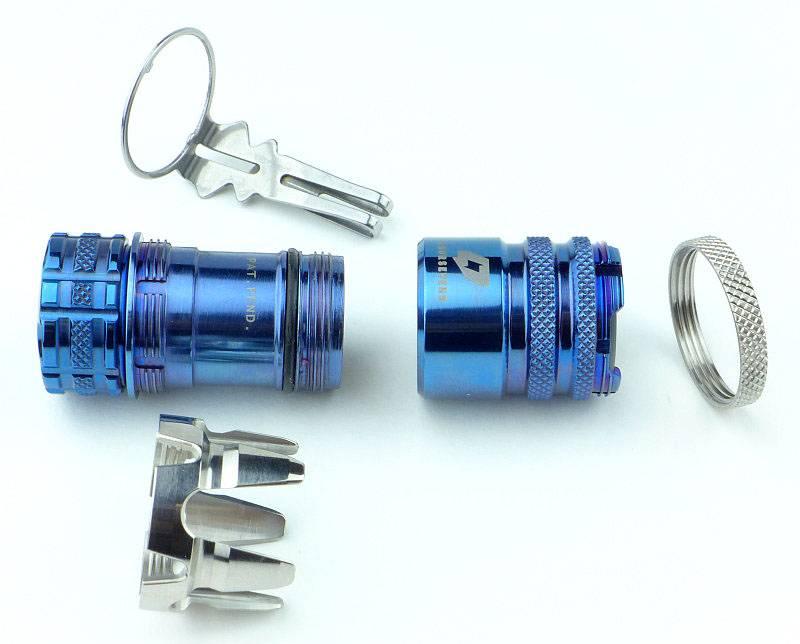
In the box you find the light itself, a spare O-ring, a CR123 cell and the front bezel ring which comes separately and not fitted to the light.
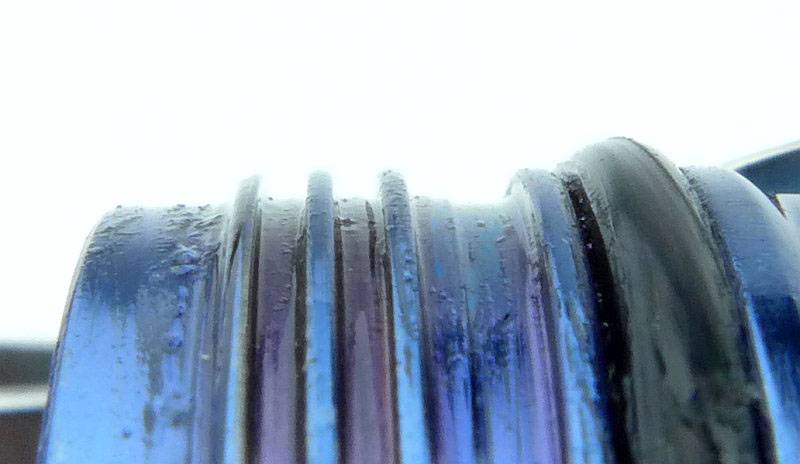
So as it comes out of the package, the front bezel threads are exposed. Here the beautiful blue tones of the Paladin’s PVD finish can be seen clearly.
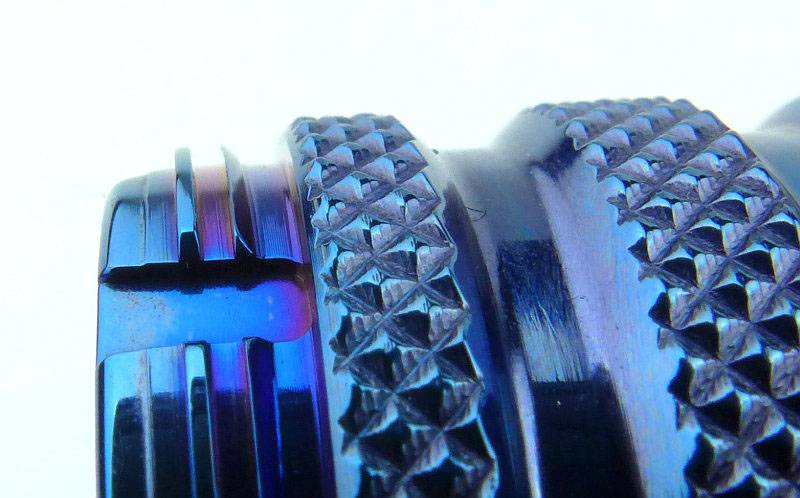
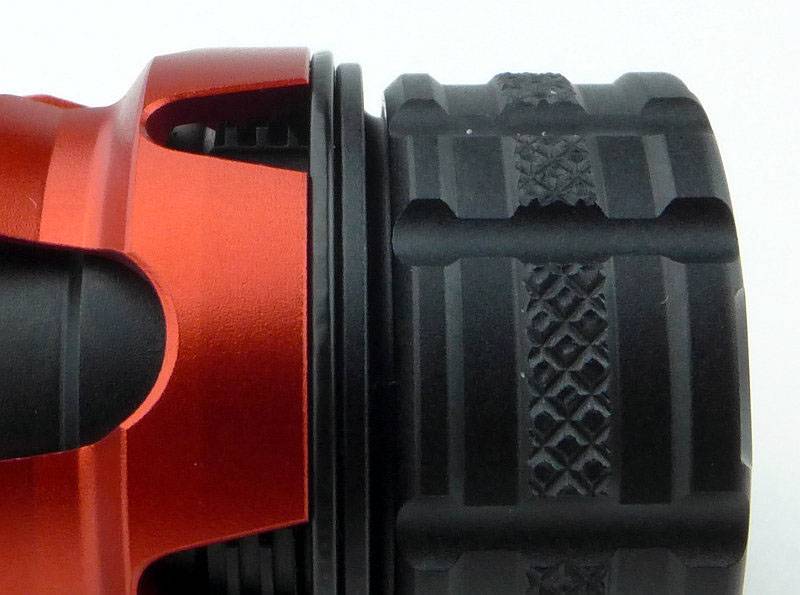
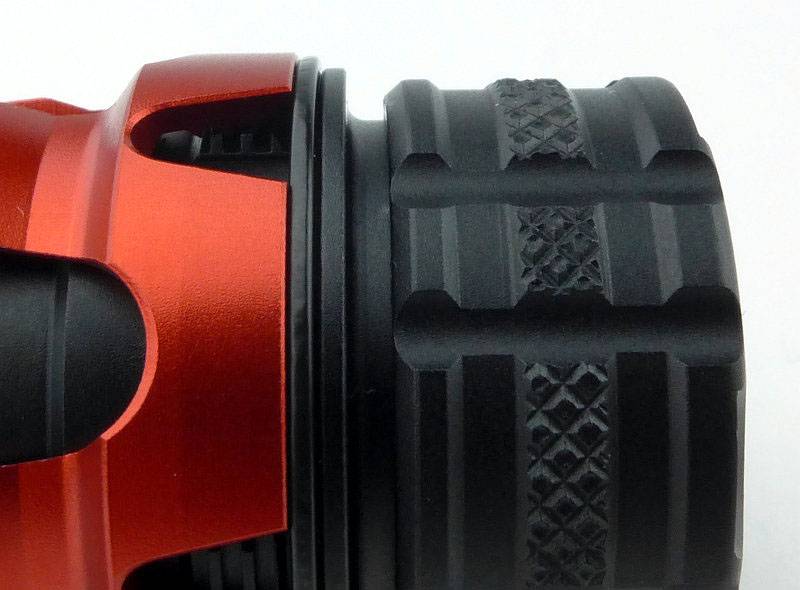
While we are looking at the front, both these lights use a curious lens holder where the edges of the lens are exposed in three places. Once the bezel ring is in place this becomes less noticeable. Also note the small notches through the bezel threads; these allow the pocket clip to be fitted to the front of the light and held in place by the bezel ring.
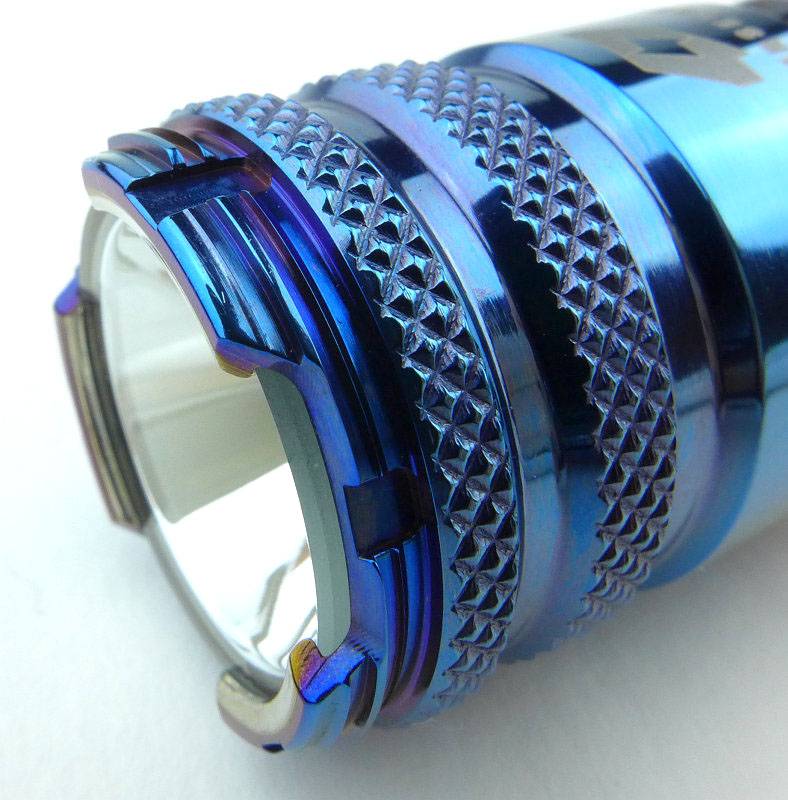
Fitting the bezel ring completes the initial assembly.
The same goes for the Knight.
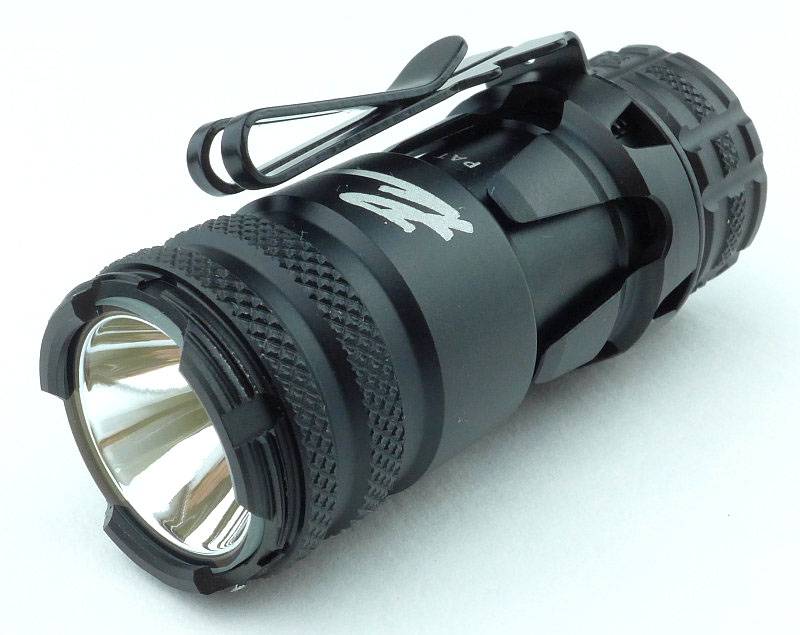
Being all black, the bezel ring blends in more on the Knight.
The positive and negative terminals in the head are gold plated. Despite the bare threads, these are not used as an electrical path. Physical reverse polarity protection is also included.
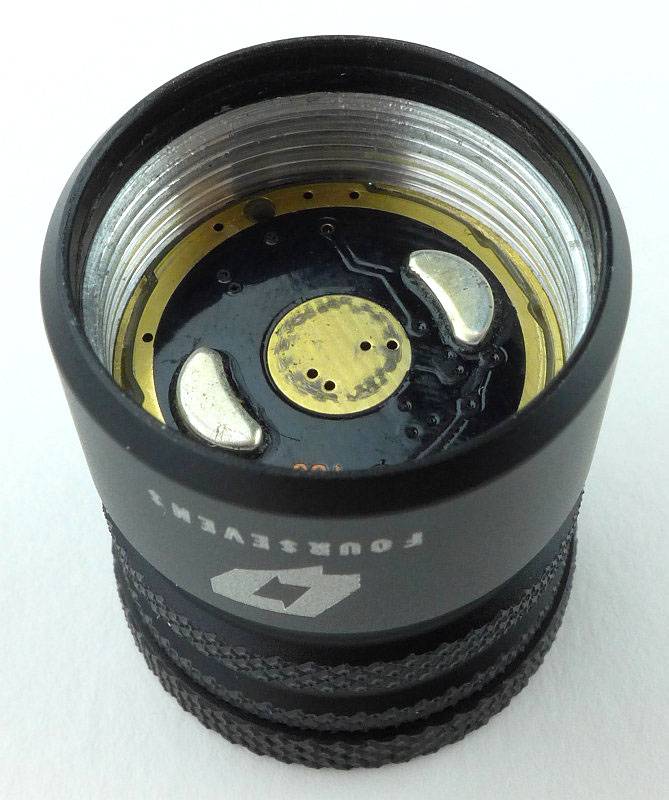
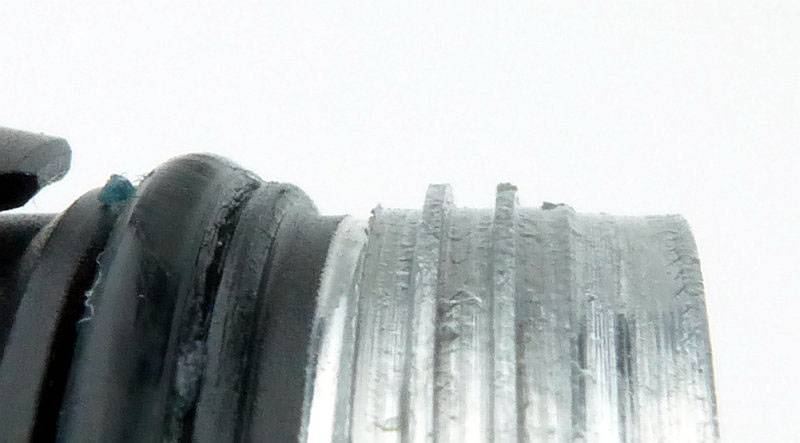
The threads are square cut and of a asymmetrical design with the grooves being much wider. This introduces ‘backlash’ into the threads and I suspect this relates to the special tailcap switch, but more on that later…
A gold plated spring is used for the negative contact.
Part of the design of the Knight and Paladin is that the light breaks down into several parts which can be swapped around in a Lego-like way to achieve different configurations.
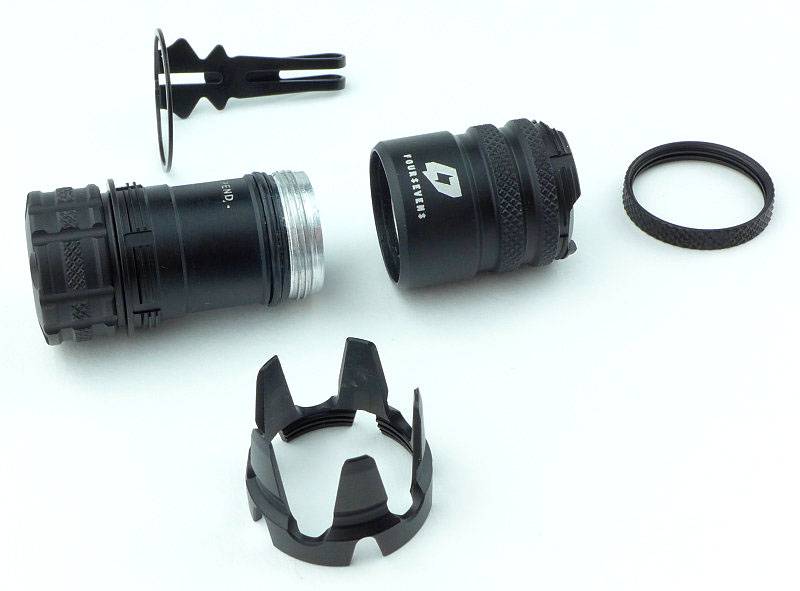
Swapping the bezel ring and the strike bezel components around creates a very different looking light!

For the Paladin, the internals are the same in the head.
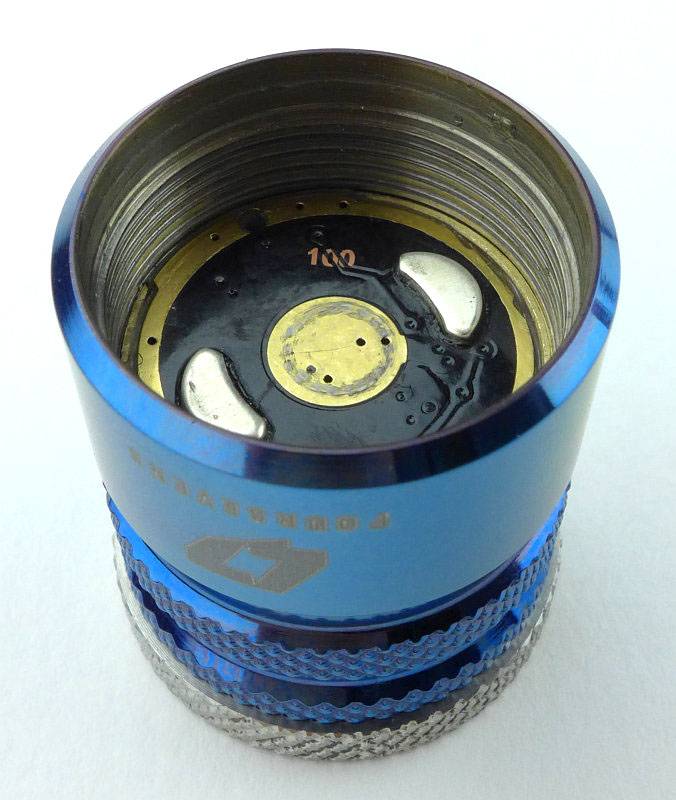
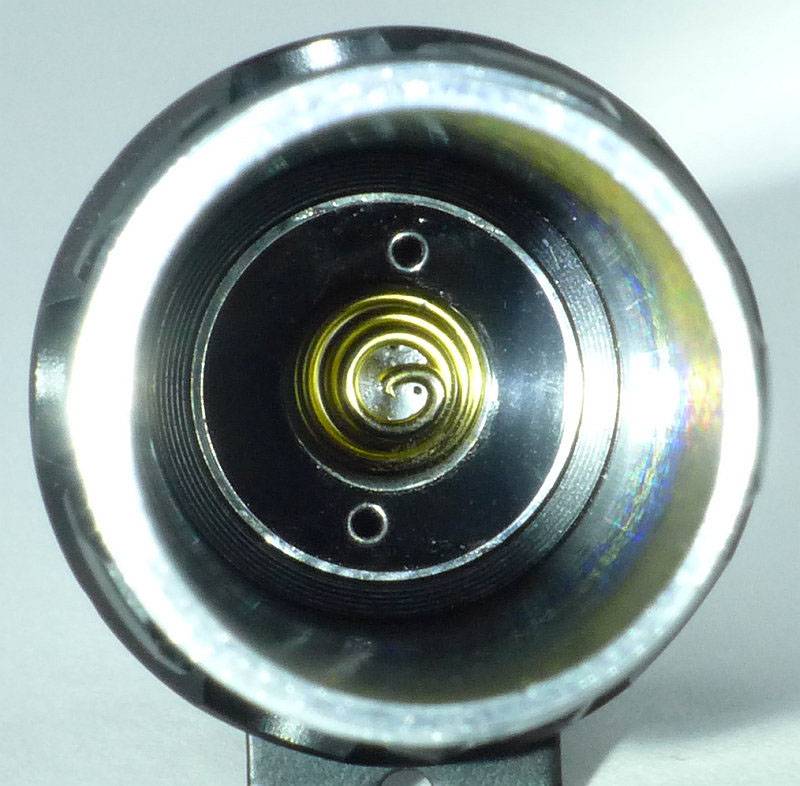
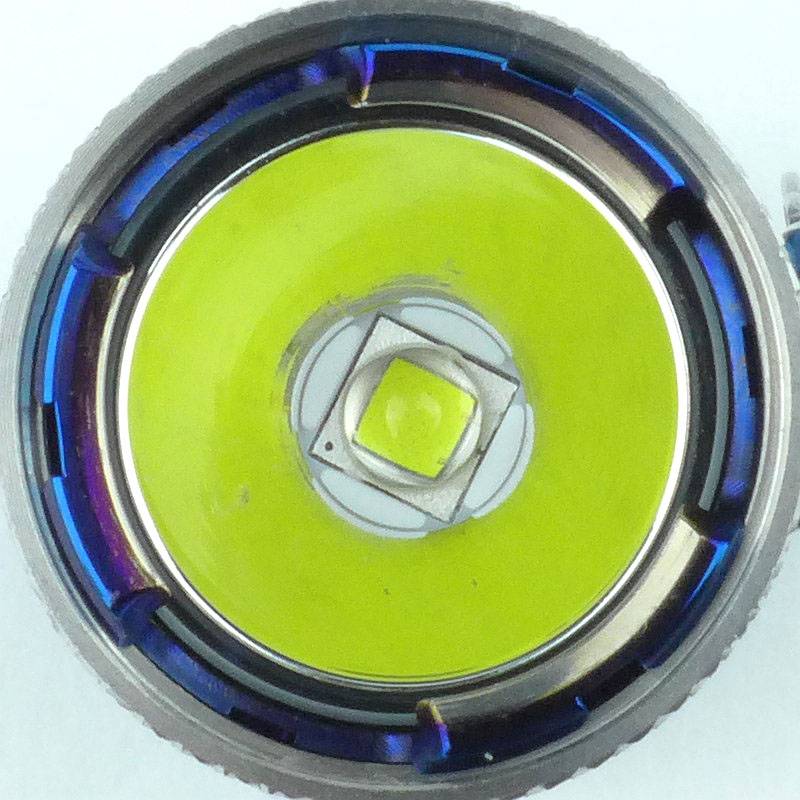
And when looking into the battery tube.
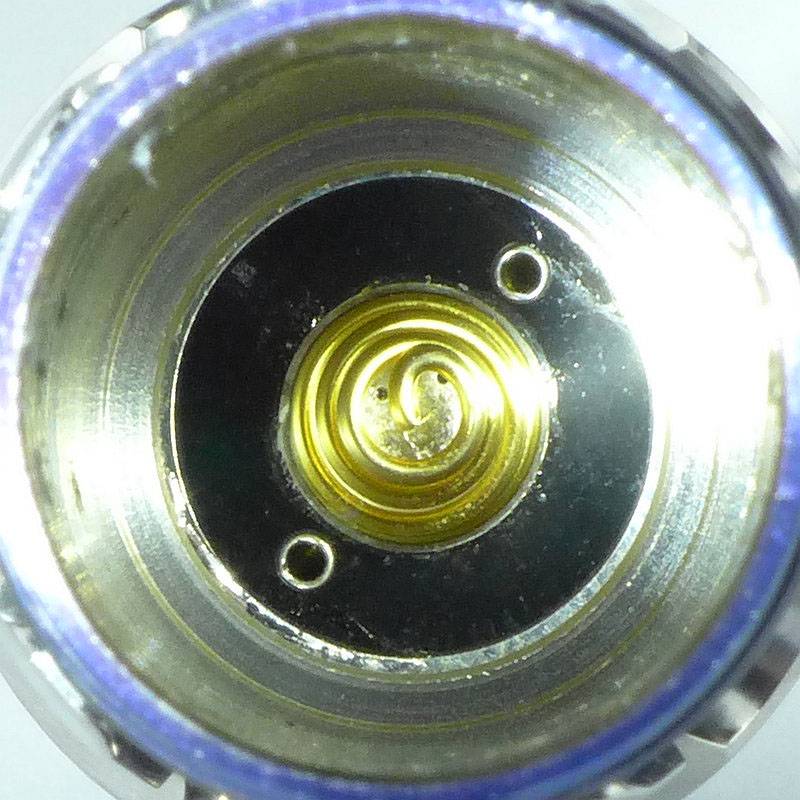
As on the Knight, the threads are square and thin in profile.
Taking the Paladin apart.
Swapping the bezel ring and the strike bezel components and the Paladin too becomes a very different looking light!
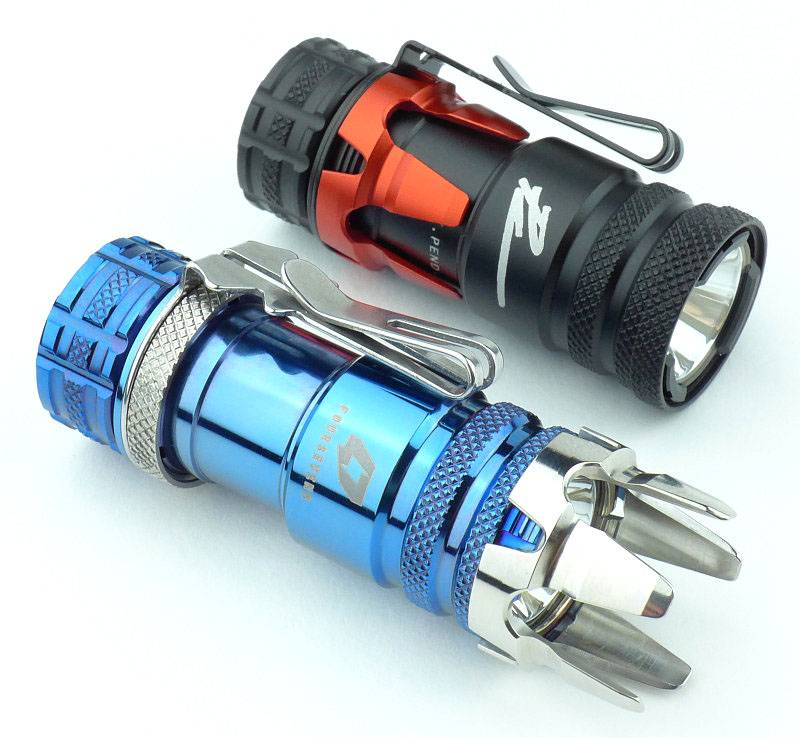
A couple of the options (not showing the clip fitted to the bezel), with the strike bezel on the front and along the battery tube, as well as the optional red strike bezel substituting the original black one on the Knight.
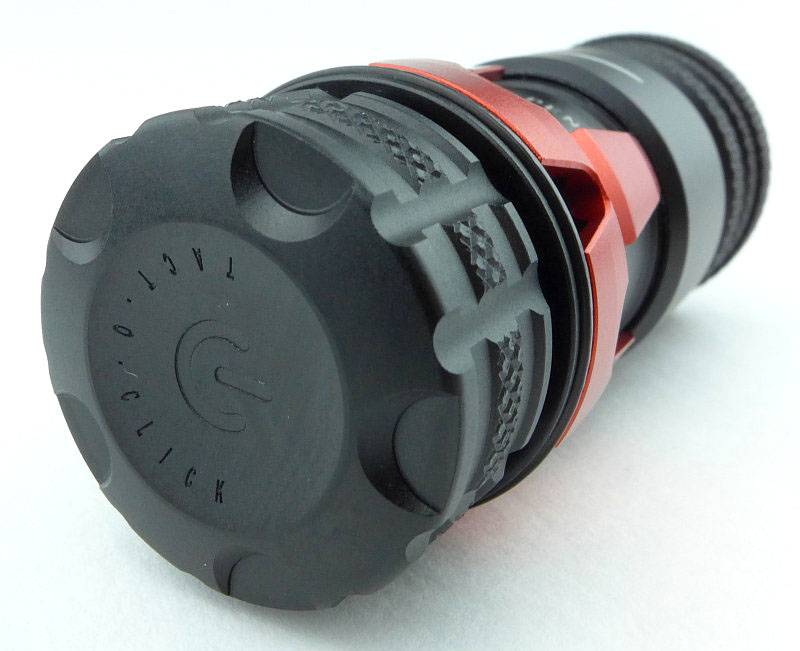
Every part of these lights has had a great deal of attention paid to it. A special Tact-O-Click switch is used (more on that in the UI section).
The Paladin especially, deserves to be viewed from every angle to take in all the details.
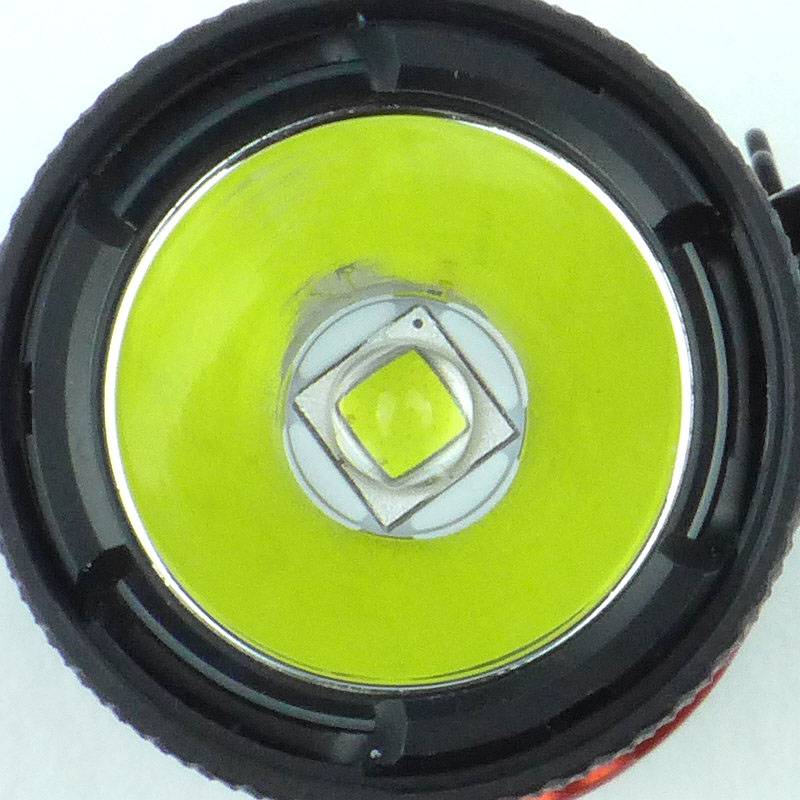
A mid-depth reflector is used.
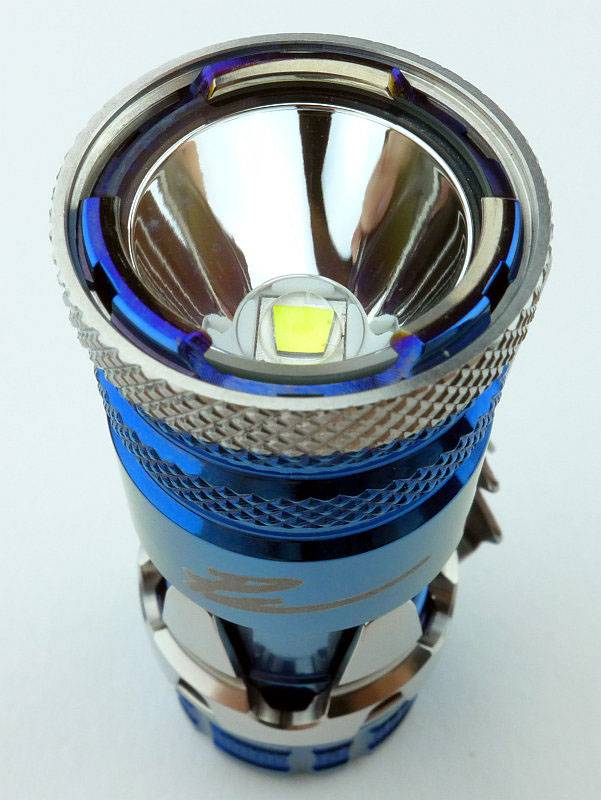
The reflector is the same on both models.
With an XM-L2 LED for the emitter.
And the same again for the Knight.
Though not the smallest of 1 x CR123 lights (with FOURSEVENS own Mini ML and Atom AL lights being smaller), but they are compact enough to be very easy to carry.
The beam
Please be careful not to judge tint based on images you see on a computer screen. Unless properly calibrated, the screen itself will change the perceived tint.
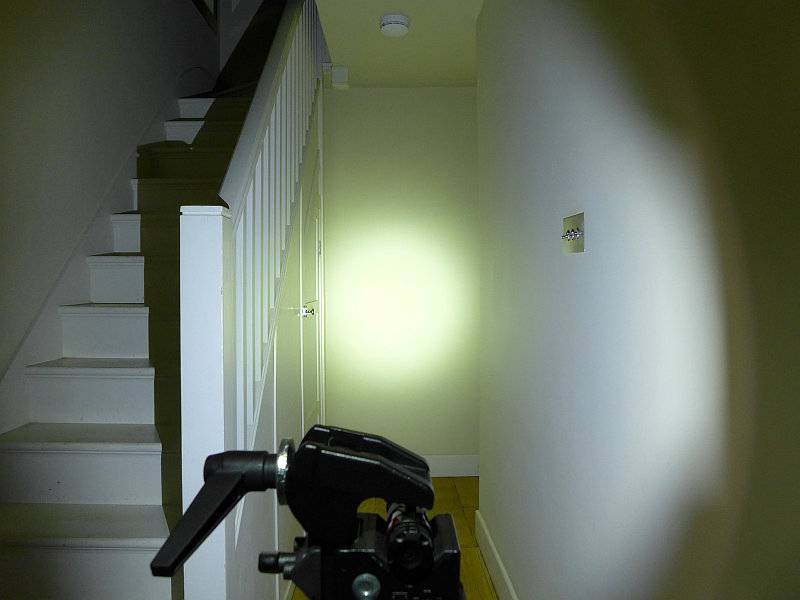
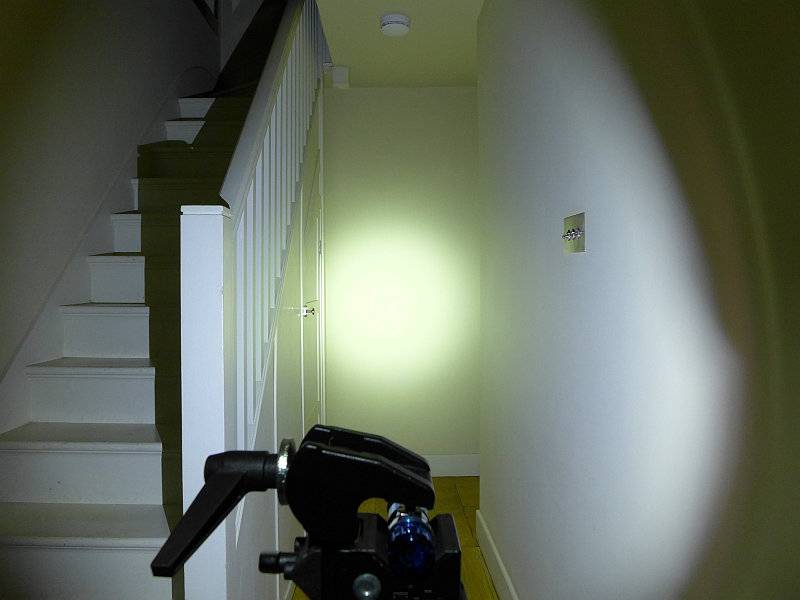
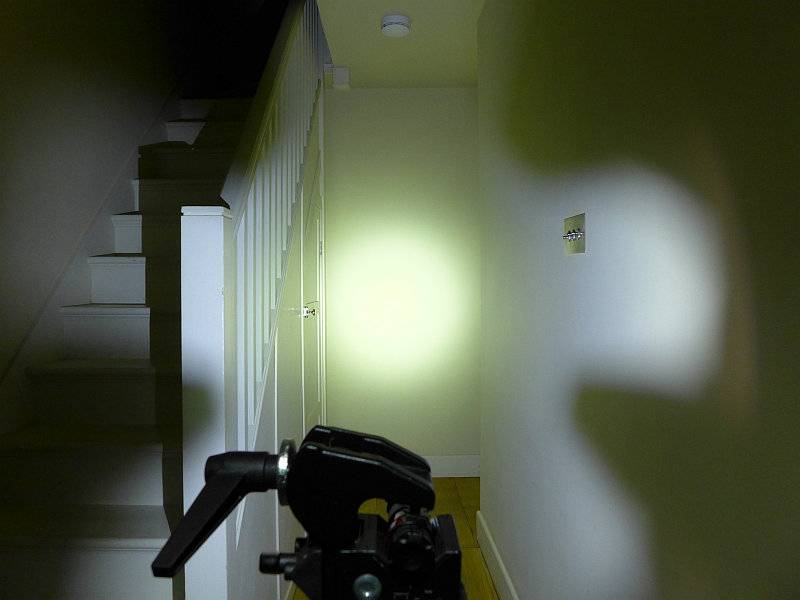
The indoor beamshot is intended to give an idea of the beam shape/quality rather than tint. All beamshots are taken using daylight white balance. The woodwork (stairs and skirting) are painted Farrow & Ball “Off-White”, and the walls are a light sandy colour called ‘String’ again by Farrow & Ball. I don’t actually have a ‘white wall’ in the house to use for this, and the wife won’t have one!
With the Knight’s mid-depth reflector a well defined hotspot is present, but the spill is bright, wide and even until you reach the outer spill, where the lens holder cut-outs become visible.
Unsurprisingly the Paladin’s beam is the same.
If you fit the strike bezel to the front, the effect on the beam is just a little noticeable.
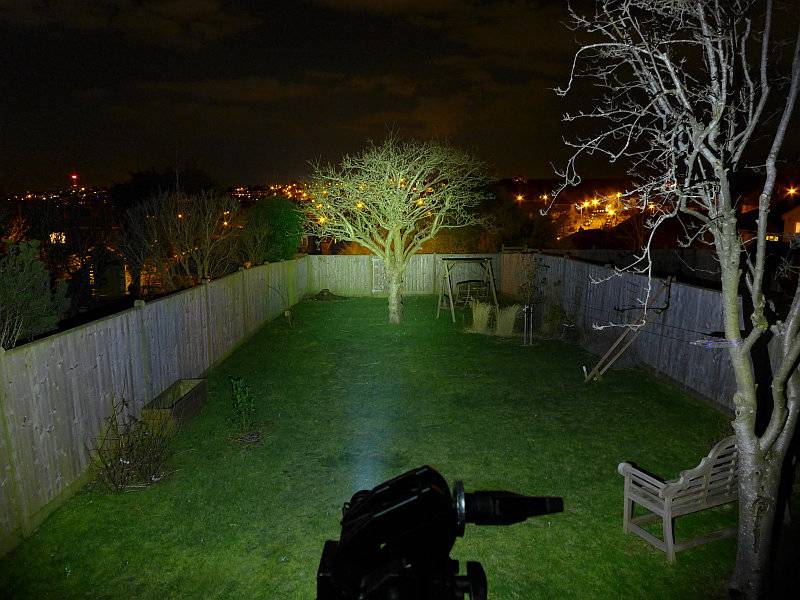
Outdoors (with the Knight) that hotspot gives you some reasonable range, and the bright spill fills in the rest well enough.
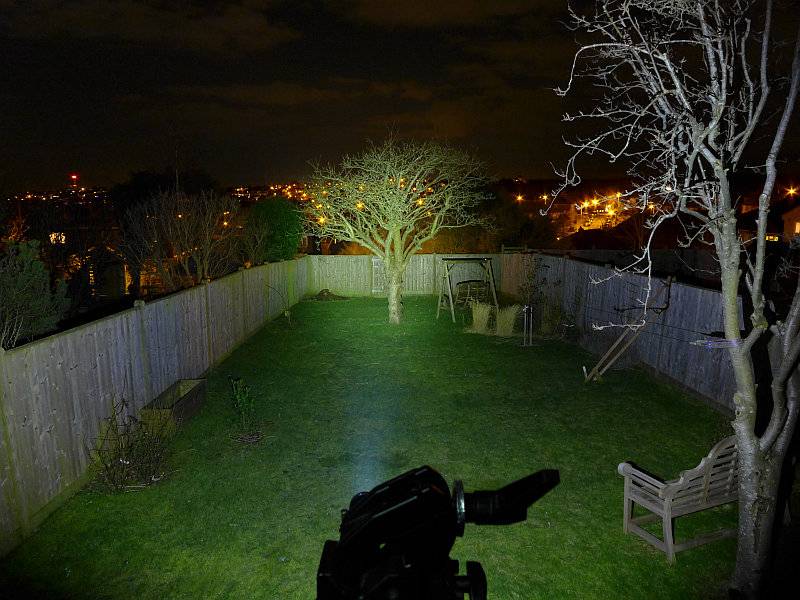
Snap! the Paladin’s beam looks the same outdoors.
Modes and User Interface:
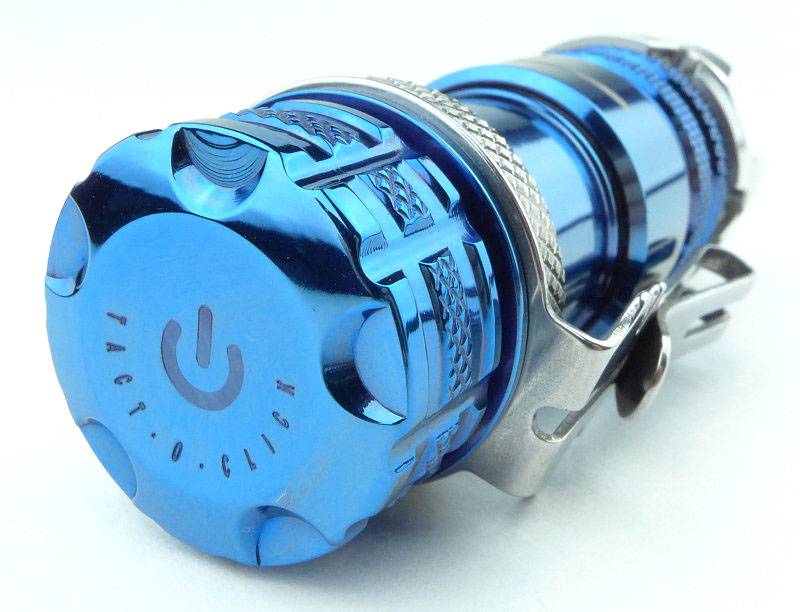
A special TACT-O-CLICK switch is used for these lights. It combines a rotary and momentary click-switch into one design. The threads used for the switch have approximately 0.5-1mm play in them, and under this switch cap there is a momentary click switch.
If you tighten the switch cap it presses on the switch and turns the light on and keeps it on.
If you loosen the switch cap about 1/4 of a turn the light will go off, but there is sufficient movement in the switch cap that you can press on it and click the switch to turn the light on. Like this it operates as a non-latching momentary click switch.
Should you click the light on and wish to keep it on, you can then simply keep pressure on the switch and tighten the switch cap.
When loosening the switch cap, at slightly under one full turn, you reach a ‘stop’ where the switch cap is ‘tight’ against that stop. Like this the light is locked out, and pressure on the switch cap will not operate it.
You have two sets of modes available, Regular and Special. The last used mode is remembered if the light is left off for 1s.
Regular: High – Low
Special: Strobe – Medium – SOS – Beacon (High) – Beacon (Low)
To access the special modes you must first cycle through the Regular modes three times within 1.5 seconds
(Last used Regular or Special) – Low/High – High/Low – Low/High – High/Low – Low/High – Strobe – SOS – Medium – Beacon (High) – Beacon (Low) – (back to Low)
If your last used mode was a Special mode, then it counts as a regular mode when you count the clicks to access the special modes (the same number of clicks is used to access each special mode whatever mode was last used).
From OFF this becomes:
Strobe – 6 clicks
SOS – 7 clicks
Medium – 8 clicks
Beacon (High) – 9 clicks
Beacon (Low) – 10 clicks
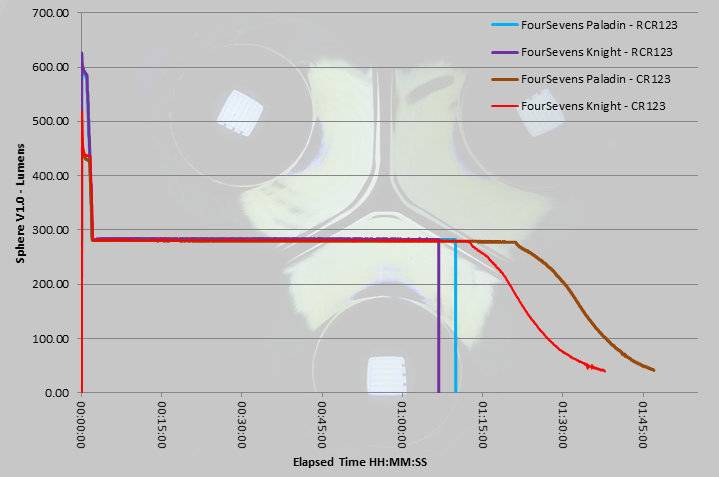
Batteries and output:
Both the Knight and Paladin run on CR123 and RCR123.
To measure actual output, I built an integrating sphere. See here for more detail. The sensor registers visible light only (so Infra-Red and Ultra-Violet will not be measured).
Please note, all quoted lumen figures are from a DIY integrating sphere, and according to ANSI standards. Although every effort is made to give as accurate a result as possible, they should be taken as an estimate only. The results can be used to compare outputs in this review and others I have published.
| ___________________________________________ | ________________________________ | ________________________________ |
| Knight/Paladin using specified cell | I.S. measured ANSI output Lumens | PWM frequency or Strobe frequency (Hz) |
| ___________________________________________ | ________________________________ | ________________________________ |
| Knight – High – CR123 | 449 | 0 |
| Knight – Low – CR123 | 22 | 0 |
| Knight – High – AW RCR123 | 585 | 0 |
| Knight – Low – AW RCR123 | 22 | 0 |
| Paladin – High – CR123 | 443 | 0 |
| Paladin – Low – CR123 | 26 | 0 |
| Paladin – High – AW RCR123 | 582 | 0 |
| Paladin – Low – AW RCR123 | 26 | 0 |
* Beacon and Strobe output measurements are only estimates as the brief flashes make it difficult to capture the actual output value.
Peak Beam intensity of the Knight measured 3800 lx @1m giving a beam range of 123 m.
Peak Beam intensity of the Paladin measured 3600 lx @1m giving a beam range of 120 m.
There is no parasitic drain.
The main part of the runtime is almost identical for both lights and both CR123 and RCR123. RCR123 give a higher ‘burst’ part of the output (the initial 3 minutes of higher output). When using RCR123, these lights do not change their voltage response for the tailing off of the output; the result is that when using RCR123 the output will suddenly cut out when the protection activates.
Troubleshooting
This section is included to mention any minor niggles I come across during testing, in case the information helps anyone else.
No issues were encountered during testing.
As per the description of this section, this information is provided in case anyone else finds a similar ‘issue’ that might be fixed in the same way.
The Knight and Paladin in use
Nothing in the design of these lights has just ‘happened’, everything is designed for function or aesthetics.
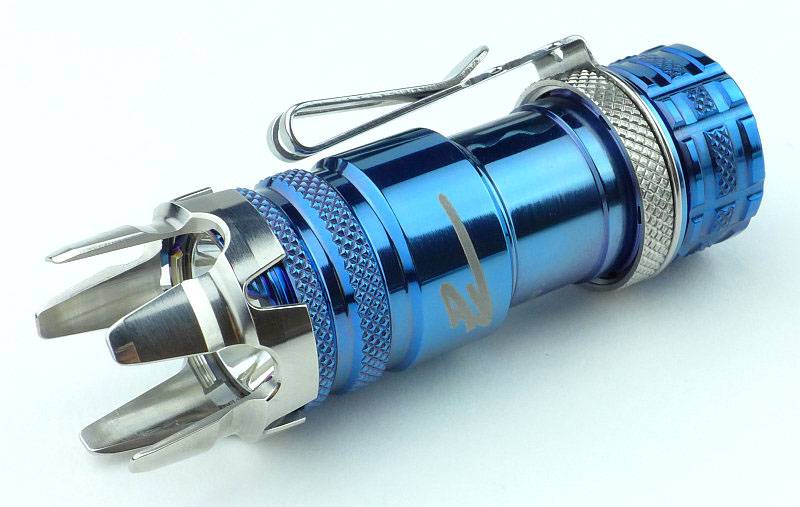
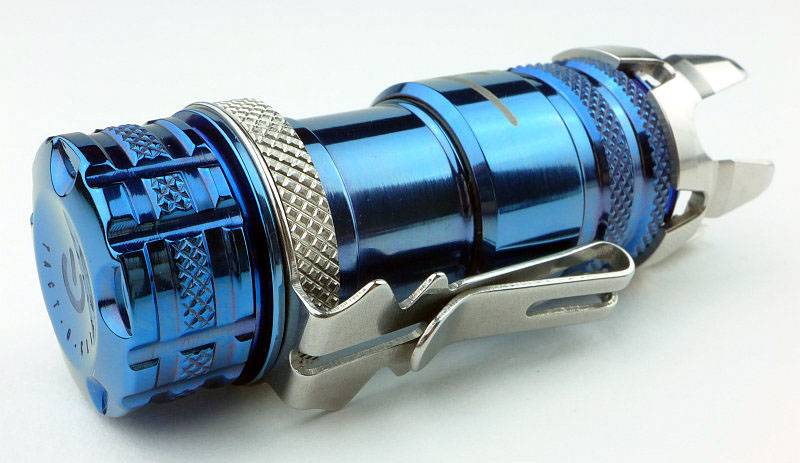
Take the pocket clip for example. It is a double-action clip so will clip on in either direction without being turned around. Each ‘side’ of the clip will accommodate thicker or thinner material (thicker next to the body and thinner on the outer part). The two points sticking out sideways either side of the clip provide grip on the pocket and also grip for the user when unscrewing the battery tube. The groove cut into each end of the clip allows a lanyard to be threaded through. Finally inside the clip ring which fits over the body of the light are two tabs which fit into corresponding notches on the body or bezel to prevent it rotating. Details.
Also highly functional is the TACT-O-CLICK switch. Once you have got used to the ideal positions for the switch cap to click (1/4 turn undone from the fully ON position) or lockout (3/4 turn from fully ON), and swapping between these (so from lock-out to click is a half turn), the UI comes to life and the click or twist of the switch cap just fits the task at hand.
Personally I find the strike bezel to be more of a decorative item than anything practical, due to the length of the crenellations (not to mention the short overall length of the light). They are too long to be strong enough on the aluminium versions, and even the stainless steel strike bezel will bend if used with any real force (as you would if defending yourself). They are also too long to leave fitted all the time as they just stick into things. So are you really going to take the light apart to swap the bezel ring for the strike bezel ‘if’ you feel threatened? Not likely. BUT, who cares?! They Look great! (And you have an executive toy to play with.)
Ignoring the Special modes, the two Regular modes have covered what I need almost entirely. Those two light levels of 25lm and 450lm, though seemingly a long way apart, work perfectly with the beam profile. For my indoor, round-the-house use, the 22lm setting is ideal, especially as it is backed up by the 450lm. Using the Tact-O-Click switch in the momentary press-and-hold approach, with the two modes you can quickly bump it up or down depending on the distance you are looking at. I’ve not personally ever felt the need for the Medium mode (or Strobe or SOS), but have dipped into the Beacon modes for marking a location. What would improve it for me is adding a moonlight mode into the Special modes.
The timing for the mode changes works really well and I’ve not changed mode by mistake so far. Speaking of the Tact-O-Click switch again, the ability to lock the output on while you are using it as a momentary switch, is useful and can be achieved one handed. Also, by simply backing the switch cap off a bit you lock out the light means the lockout is a specific feature of the light and doesn’t require loosening any other parts. Like this, when you come to turn it on, you just twist it on as normal without having to remember to tighten the tailcap first.
A true fusion of function and aesthetics, even if not every feature is entirely practical.
Review Summary
| _______________________________________________ | _______________________________________________ |
| Things I like | What doesn’t work so well for me |
| _______________________________________________ | _______________________________________________ |
| Tact-O-Click switch (twist/click interface combined). | Strike Bezel too long. |
| Can use CR123 or RCR123 | Activates protection circuit when using RCR123. |
| Excellent all-rounder beam profile. | No Moon mode. |
| Mode-change timing works very well. | Strike Bezel strongly affects the beam shape. |
| Well chosen ‘Regular’ Modes. | |
| Lego-like changes in a single light. |
Discussing the Review:
Please feel free to add comments to the review, but the ideal place to freely discuss these reviews is on a forum. If you started reading the shorter forum version of the review, but followed the link this full exclusive review, please return to that forum to discuss the review there.
If you read the review entirely on Tactical Reviews, please consider one of the following to join in any discussion.
CandlePowerForums – Flashlight Reviews Section (Largest and Friendliest Flashlight Community Forum)
EdgeMatters – Sponsored Reviews (UK based Forum for Knife Makers and Collectors)
