Light Review: Nitecore EDC33 and EDC35

This is a detailed review of the Nitecore EDC33 and EDC35, two new Tactical EDC torches / flashlights featuring the NiteLab UHi 20 Max LED and UHi 40 MAX LED respectively. Each are powered by a built-in li-ion battery with USB-C charging port under a rotary cover.

The UHi MAX LEDs combine a small but high-intensity main core with 8 auxiliary cores arrayed together into a single LED, offering long-range coverage, extreme brightness and the ability to seamlessly switch between spot and floodlight.

The “Lumin Shield” mode blasts an stunning 4000/5000 lumen maximum output wall of light.

Review Videos

Starting with a short format sixty second review:


Onto a full video review covering many more details:


What is in the box?:
With the EDC35 also having a belt holster, the unboxing is a bit different as the EDC35 arrives in the holster. The EDC33 doesn’t have a holster and comes in a slide out plastic tray.


A good look round the EDC35 belt holster – Things to look out for here are:
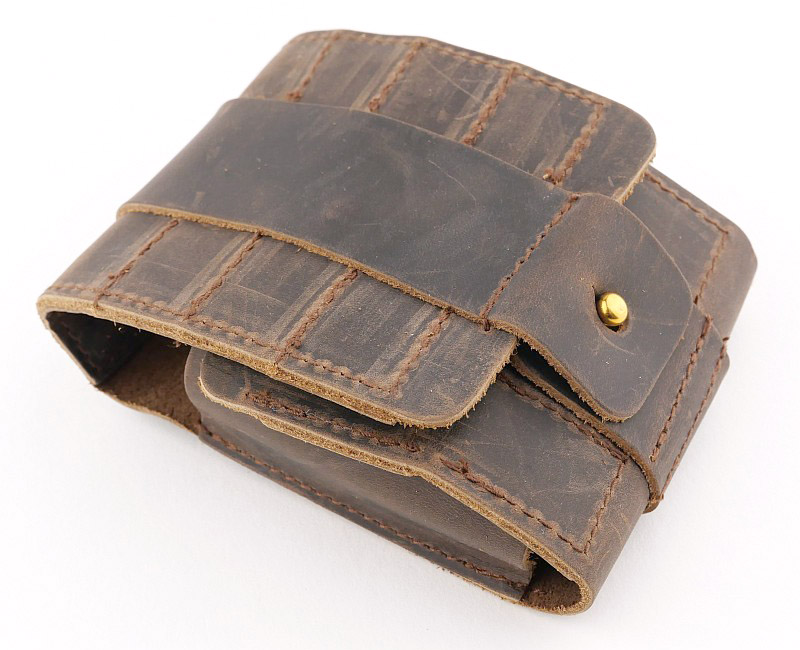
This is a semi-rigid type of holster, so when empty is the same size as when the light is inside it. There is a magnetically secured flip-top opening which hinges towards the belt loop.
A D-loop hanger, fixed belt loop and Velcro closing belt loop provide options for mounting/carry.


A good look round the EDC33 – Things to look out for here are:
The smaller of the two models on test here (based around an 18650), the EDC33 is a straight tube layout with generous size pocket clip. A set of four battery charge level indicator lights sit just beneath the rotating USB-C port cover. The EDC33 has a sliding toggle lockout switch and a two-stage forward-clicky tailcap switch. The EDC33 uses a NiteLab UHi 20 Max LED.


A good look round the EDC35 – Things to look out for here are:
The larger of the two models on test here (based around an 21700), the EDC35 has a head larger than the body to allow for a bigger reflector to accommodate the higher output, and also includes a generous size pocket clip. A set of four battery charge level indicator lights sit just beneath the rotating USB-C port cover. The EDC35 also has a sliding toggle lockout switch and a two-stage forward-clicky tailcap switch. The EDC35 uses a NiteLab UHi 40 Max LED.


The beam

Please be careful not to judge tint based on images you see on a computer screen. Unless properly calibrated, the screen itself will change the perceived tint.

The indoor beamshot is intended to give an idea of the beam shape/quality rather than tint. All beamshots are taken using daylight white balance. The woodwork (stairs and skirting) are painted Farrow & Ball “Off-White”, and the walls are a light sandy colour called ‘String’ again by Farrow & Ball. I don’t actually have a ‘white wall’ in the house to use for this, and my wife won’t have one!

Exposures are not identical throughout the galleries – images are intended to show the beam shape and impression of what you see, rather than a brightness measurement.

EDC33 Beamshots:
Both for indoor and outdoor, the spot beam is shown first, then the ‘Lumin Shield’ beam.


EDC35 Beamshots:
Both for indoor and outdoor, the spot beam is shown first, then the ‘Lumin Shield’ beam.


EDC33 and EDC35 Beamshots:
This gallery uses all the previous images but groups them into comparative pairings for the EDC33 then EDC35 with each type of beam. As before this is the spot beam shown first followed by the ‘Lumin Shield’ beam for the indoor images and then the outdoor.


Batteries and output:

The EDC33 has a built-in 18650 cell and the EDC35 a built-in 21700 cell. Parasitic drain cannot be measured.

Please note, all quoted lumen figures are from a DIY integrating sphere, and according to ANSI standards. Although every effort is made to give as accurate a result as possible, they should be taken as an estimate only. The results can be used to compare outputs in this review and others I have published.

This table compares measured and specified outputs for each mode.

Runtime traces for each model on ‘High’.

Also included in the gallery are the charging capacity measurements after recharging from the end of the runtime testing (show in Wh and Ah).


The EDC33 and EDC35 in use

These lights are BRIGHT! The Lumin Shield does exactly what it promises and blasts a wall of light. The power output is made all the more obvious by the heat generated in the head of each light, especially the smaller EDC33 where the head heats up very fast using Lumin Shield. The EDC35 has more mass and the heating is less immediate which does give you more working time with this mode before it becomes uncomfortable in a bare hand.

This leads me to suggest the main choice between the EDC33 and EDC35, with this being how much you want to use the higher or maximum outputs. The EDC35 has more mass to manage the heat produced, and larger battery capacity.

The next gallery shows the size of each in the hand (I take XL size gloves). In terms of weight, the EDC35 is 150% the weight of the EDC33, plus the holster and general bulk. This weight and size penalty gives you a longer runtime and ability to make use of the higher output for longer.


The choice of more comfortable use of maximum output, or ease of carry will then guide you to the right choice for you.

Though the EDC33 heats up fast on Lumin Shield, it does still give you a wall of light in a compact package, so as a backup this is extremely capable.

For my own use, I use lower outputs about 90% of the time, so this leads me to one of my main observations about using the EDC33 and EDC35, and that is it takes al lot of practice to reliably avoid triggering the Lumin Shield when in fact you really wanted the ultra-low output. Linger just a little too long on the tail switch, and instead of 5 lumen you get 4000 or 5000, or while trying to avoid that you fail to turn it on at all.

Clearly, the ‘Lumin Shield’ wall of light is the headline tactical defence function of these lights, and for that they are excellent. This mode is easily activated (almost too easily) and in the half-lockout is the mode still available. Take this as the primary function and you can then consider the lower outputs as a bonus.

To best manage the accidental activation of the Lumin Shield, I make sure to briefly close my eyes when trying to activate the daily modes, especially when I want the ultra low, and if I do accidentally unleash the 5000 lumens I don’t getting the full effect as I will have let go of the switch before I open my eyes.

Likewise for switching off when using lower modes, I don’t touch the tailcap, instead using the lockout switch to turn it off completely safely, as this will definitely not activate any other output mode.

Making the minor adjustments to how you operate the EDC33 and EDC35 allows the lower mode use to be smoother and not jar, and you still have the potential defensive wall of light ready to go if needed.

Review Summary
The views expressed in this summary table are from the point of view of the reviewer’s personal use. I am not a member of the armed forces and cannot comment on its use beyond that covered in the review.

Something that might be a ‘pro’ for one user can be a ‘con’ for another, so the comments are categorised based on my requirements. You should consider all points and if they could be beneficial to you.

_______________________________________________
What doesn’t work so well for me
_______________________________________________

Easy to accidentally activate the Lumin Shield.
Lowest mode still not that low at 5 Lm.

_______________________________________________
Things I like
_______________________________________________

Stunning ‘Wall of Light’ with Lumin Shield mode.
Secure grip pattern.
USB-C built-in charging port.
EDC35 has an extra large capacity 21700 cell.
EDC33 provides a smaller lighter option but with near 4000lm output.
Ultra-High output from the UHi 20 Max and UHi 40 MAX LEDs.
Safety sensor to detect obstructions.

Knife Review: Extrema Ratio FRAME ROCK XXV Anniversarium

Extrema Ratio have been celebrating their 25th Anniversary in style with a number of limited runs of new and old models.

In this review we are looking at the XXV Anniversarium Limited Edition of the overbuilt folder, the FRAME ROCK. If you do miss out on the limited edition, most of the content here is perfectly valid for the standard FRAME ROCK, so limited or standard, you can get one of these ROCK solid folders.

This review of the Extrema Ratio FRAME ROCK includes an in depth video with overview and detailed measurements, plus image galleries and more.

Review Videos

Starting with a short format sixty second review:


Onto a full video review covering many more details:


What’s in the box?:
Included with the Anniversarium Limited Edition, is a special numbered presentation case and Anniversarium challenge coin. In this section, instead of unboxing we are looking at that special presentation case.


The Anniversary Coin:
Before we move on, here are both sides of the Anniversarium challenge coin.


A REALLY good look round the FRAME ROCK – Things to look out for here are:
Unprecedented in size, this gallery contains more photos of details than ever before, to take in as much of this special edition as possible.
Folded or not, the FRAME ROCK is unmistakably Extrema Ratio with its grip pattern. The FRAME ROCK has presence even though it is relatively compact. On the plain head of the pivot bolt there is an engraving of the anniversary logo with a further XXV Anniversarium engraving just above this. Immediately you can see the 6mm thick blade stock with heavy jimping. An integral lock, the FRAME ROCK has a steel insert on the end of the lock bar to increase lock life and it can be replaced if needed.
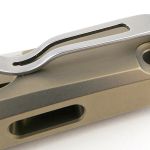
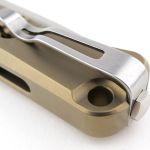
Extrema Ratio folders use a pivot bolt with locking screw that prevents loosening. Unusually, the deep carry clip wraps completely over the end of the handle, fixed onto the opposite side’s handle. As it wraps over it has a slot to allow the glass breaker to protrude through the clip (this can be fitted on the opposite side).
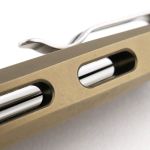
Waisted spacers hold the handles in place, and give the FRAME ROCK its open back layout.
As the glass breaker is fixed in the solid handle (not the lock bar side), to accommodate this, should you swap the clip side, there is an extra slot in the clip.
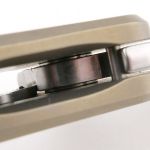
Looking right into the pivot, what is visible are the ball bearing cups for the pivot bearings that give the blade a smooth action.


The Blade and Handle – Detailed Measurements:
For full details of the tests and measurements carried out and an explanation of the results, see the page – Knife Technical Testing – How It’s Done.

The blade is made from N690 steel.


The Factory edge up close:

Followers of Tactical Reviews will know my views on factory edges, but to recap:

Anyone using a knife will need to sharpen it. That first factory edge is just like the first tank of fuel that a new car comes with (or first charge of the battery).
A good factory edge is a ‘nice to have’ but not a ‘make or break’ for a good knife, as you will be putting your own edge onto it soon enough.
The factory edge does however indicate the care a knife maker has put into the final finish.
It is for this reason Tactical Reviews measures factory edge sharpness and specifications, and includes this information in the detailed technical testing.

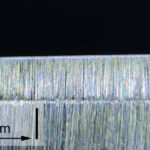
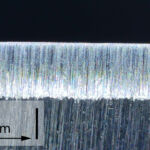
As a further look at the factory edge, this section has been added to include some high magnification photos of the factory edges.


What is it like to use?

A compact, heavyweight, overbuilt knife, it almost seems a contradiction, but the compact size actually allows for a relatively light weight for such a robust knife.
Featuring a beautiful spearpoint blade with fuller, using the same blade shape as the Contact and Contact C fixed blade models. The blade shape adds to the unique look the FRAME ROCK brings.
The more you handle it, the more you understand the allure of the unusual robustness for a knife of this size. Typically, overbuilt folders are much larger, but the FRAME ROCK fits within the hand, while having an incredible solidity – hugely satisfying.
Somehow it also belies belief that such a wide spearpoint could fit into the handle, looking all the more impressive as you swing it open.


For larger hands, the compact handle does mean the clip tends to dig in if you are working the FRAME ROCK hard, and in the left hand, the glass breaker can dig into your hand when taking a tight grip. But trade this off against the overbuilt strength you are carrying, a blade that will take on heavy tasks and not break a sweat.


Review Summary

The views expressed in this summary table are from the point of view of the reviewer’s personal use. I am not a member of the armed forces and cannot comment on its use beyond a cutting tool or field/hunting knife.

Something that might be a ‘pro’ for one user can be a ‘con’ for another, so the comments are categorised based on my requirements. You should consider all points and if they could be beneficial to you.

_______________________________________________
What doesn’t work so well for me
_______________________________________________

Glass breaker digs into hand when used left-handed.
Thick blade reduces slicing ability.

_______________________________________________
Things I like
_______________________________________________

Incredible robustness for its size.
Stunning spearpoint blade with fuller.
Deep-carry ambidextrous clip.
Replaceable steel lock bar insert.
Pivot-bolt locking-screw to prevent loosening.
Smooth ball-bearing blade pivot.
Thick Titanium frame.
Special numbered presentation case.
Anniversarium challenge coin.

 
Discussing the Review:
Something new – will it work? A Tactical Reviews Subreddit.
TacticalReviewsChat on Reddit
Please visit there and start/join the conversation.

Knife Review: ANV M311 COMPACT

The M311 COMPACT is a scaled down version of the excellent M311 Spelter. The reduction is 13%, bringing the overall length down to 235mm and blade to 110mm, while completely retaining the M311’s distinctive characteristics.

With the M311 Spelter being one of my favourite knives, the announcement of the M311 COMPACT had me sitting on the edge of my seat waiting to get hold of one and try it out.

Join me in this detailed review of the ANV – ACTA NON VERBA Knives M311 COMPACT to see what it is really like.

Before we properly embark upon the full review of the M311 COMPACT, lets see what that 13% scaling down looks like compared directly to the original M311 Spelter.

Including the sheaths initially as this is the package you carry.

Then the knives themselves next to each other. 13% doesn’t sound much, but it makes a big difference. The original M311 Spelter is a substantial knife. With a 13% reduction, the M311 COMPACT becomes much more EDC than expedition.

Review Videos

Starting with a short format sixty second review:


Onto a full video review covering many more details:


A few more details:

What’s in the box?:
The ANV packaging has had a slight update where the knife is held in a liner which stretches a clear plastic film over the knife to keep it firmly in place.


A good look round the M311 COMPACT’s Sheath – Things to look out for here are:
With the scaling down, all the parts ANV make are reduced, but the MOLLE straps are not, so become relatively more prominent features. Looking beyond these, we have a Kydex sheath with hollow rivets holding it together. A generous free running drainage hole at the tip of the sheath ensures easy flushing if needed, and the number of hollow rivets and slots give you lots of attachment points.


A good look round the M311 COMPACT – Things to look out for here are:
ANV’s distinctive swedged blade never disappoints on the looks front, giving it immediate appeal. It may be scaled down, but all the proportions and details are still spot on.
3D milled scales, finger guard and first-finger groove, all provide excellent grip, and then there are also three sections of jimping in the full tang. The M311 has a shaped thumb rest on the blade spine to allow for powerful cut control and pressure to be applied directly behind the edge.


The Blade and Handle – Detailed Measurements:
For full details of the tests and measurements carried out and an explanation of the results, see the page – Knife Technical Testing – How It’s Done.

The blade is made from Elmax steel.


The Factory edge up close:

Followers of Tactical Reviews will know my views on factory edges, but to recap:

Anyone using a knife will need to sharpen it. That first factory edge is just like the first tank of fuel that a new car comes with (or first charge of the battery).
A good factory edge is a ‘nice to have’ but not a ‘make or break’ for a good knife, as you will be putting your own edge onto it soon enough.
The factory edge does however indicate the care a knife maker has put into the final finish.
It is for this reason Tactical Reviews measures factory edge sharpness and specifications, and includes this information in the detailed technical testing.

As a further look at the factory edge, this section has been added to include some high magnification photos of the factory edges.


What is it like to use?

Local laws may or may not allow a fixed blade to be carried as an EDC. Unfortunately where I live you need ‘good reason’ to carry a fixed blade in a public place, however on private property and when I do have good reason, my preference is for a compact fixed blade. The M311 COMPACT has muscled its way into my top carry spot, the closest a fixed blade can be to being my EDC.

Take a look at it in the hand. (I take XL size gloves.) It is not small, but it is also not a large knife, instead finding a really efficient and effective sizing that gives you great cutting power without great size.
Multiple grip placements allow you to find the one that gives you the best advantage for any task.


Though the M311 COMPACT is a scaled down M311 Spelter, one observation I have is that oddly it feels ‘crisper’ in terms of its handle finish, and this makes it a little more abrasive to hold and use. Excellent grip, but oddly a touch more fatiguing to use purely from the roughness of the handle. This is a ‘feel’ more than anything really tangible, and for the tasks I tend to use it for, not a problem at all.

Wanting to be carried, the M311 COMPACT has made itself a go-to blade, patching up some air conditioning ducting, trimming down a mouth guard, and splitting up pallet wood are only some of the varied jobs it demanded to be used for.

As I mentioned earlier, with the smaller scale M311, the MOLLE straps became larger, and I decided to drop these in favour of (at the moment) a single Ulti-Clip. The bare sheath allows the M311 COMPACT to slip easily into a pocket or bag, and adding an Ulti-Clip for pocket carry then makes it so easy to pick up the knife and re-sheathe over and over.


If you look at the position of the Ulti-Clip, this was settled on after trying several positions. Deeper carry makes the re-sheathing more difficult, with the finger guard often catching on the pocket edge. If the clip is fitted to the other side, the sheath twists away as you re-sheathe it, so this was the position that worked best for me. If you needed more stability, a second Ulti-Clip would lock it in place; this is just a personal preference.

Local law allowing I would carry this knife much more, I do however carry it as much as a possibly can. EDC or backup blade the M311 COMPACT demands to be picked up and used.

Review Summary

The views expressed in this summary table are from the point of view of the reviewer’s personal use. I am not a member of the armed forces and cannot comment on its use beyond a cutting tool or field/hunting knife.

Something that might be a ‘pro’ for one user can be a ‘con’ for another, so the comments are categorised based on my requirements. You should consider all points and if they could be beneficial to you.

_______________________________________________
What doesn’t work so well for me
_______________________________________________

The handle finish is a little too ‘crisp’ and abrasive.
MOLLE straps seem oversized.

_______________________________________________
Things I like
_______________________________________________

Everything else!
Ideal size for general utility and EDC.
Elmax steel.
Excellent grip.
Slim blade slices well.
Blade thick enough to be very strong.
Easy to fit different mounts to the sheath.
Light enough to forget you are carrying it.
Excellent handling.

 
Discussing the Review:
Something new – will it work? A Tactical Reviews Subreddit.
TacticalReviewsChat on Reddit
Please visit there and start/join the conversation.

Knife Review: Sandrin Knives Torino

A Tungsten Carbide bladed knife! The Torino from Sandrin Knives features a blade made from Polyhedral Tungsten Carbide (PTC), a flexible grade of tungsten carbide that has superb edge retention and measures HRC 71 on the Rockwell scale.
The Torino’s blade also has a unique ‘raw carbide’ finish, giving it its striking appearance. Pivoting on ceramic ball bearings provides a super smooth opening and closing action, with the blade held securely open by a Recoil Lock mechanism.
Join me in this review of the Sandrin knives Torino for a thorough look at the knife.

Review Video

A thorough look at the Sandrin Knives Torino with the Tactical Reviews detailed technical specifications and close up view over the entire knife.


A few more details:

A good look round the Torino – Things to look out for here are:
Using red, high visibility, milled G10 for the handles and a reverse-skeletonised design to reduce weight gives a very distinctive look to the Torino (even before you see the blade).
A black PVD coated pocket clip can be fitted on either side or removed completely.
The Polyhedral Tungsten Carbide blade’s raw TC finish adds further to the distinctiveness of this knife combined with the fact the Torino’s blade is super slim at a maximum of only 1.2mm thick!
Sandrin Knives have used a Recoil Lock for the Torino with a sliding back spacer lock lever on the back of the handle.
PTC, being super-hard at HRC 71, gives the Torino’s blade a very different look on the primary and edge bevel grinds.


The Blade and Handle – Detailed Measurements:
For full details of the tests and measurements carried out and an explanation of the results, see the page – Knife Technical Testing – How It’s Done.

The blade is made from Polyhedral Tungsten Carbide.


Explained by the Maker:

With the unique material used for this knife blade, I’m including the manufacturer’s own description here for ease of reference.

An advancement in the science of blade materials, Sandrin knives are crafted from our patented Polyhedral Tungsten Carbide (PTC), a flexible grade of tungsten carbide that outperforms steel in edge retention. Measuring HRC 71 on the Rockwell scale of hardness, Torino retains its razor-sharp edge far beyond steel knives. We call this StaySharp Technology™. New for Torino is the blade’s raw carbide finish – its striking appearance is achieved by grinding the PTC with fine diamonds. Unlike steel, the Torino blade is completely rustproof making it suitable for both fresh and saltwater conditions. The blade’s thumb ramp features carefully executed jimping, while the rest of the spine and finger choil is chamfered for comfort.

Torino’s ceramic ball bearing action provides for a smooth opening and closing experience. A robust thumb stud provides for one handed blade deployment. But what really makes the Torino a modern marvel is a completely redesigned mechanism we call the Recoil Lock. This ingenious locking system is a gift to the knife community by knife wunderkind Snecx Tan, who refers to it as his PowerLock. Thank you, Snecx, for this remarkable innovation. The beauty of Tan’s recoil lock is the simple yet efficient design. The ambidextrous action delivers positive force (grip) to secure the blade in its rock-solid open position. Closing the knife is accomplished by sliding the backspacer to the rear, eliminating accidental blade unlock.

High-visibility red G-10 handles provide for quick acquisition in emergency situations. Stylized pockets serve to both reduce weight and add tactile feel for positive grip engagement. A reversible titanium pocket clip enables right- or left-hand carry and features our Fibonacci hole sequence design, a distinctive mathematical trademark of Sandrin Knives.

At only 2.29 ounces, Torino is so lightweight it practically disappears in your pocket. And, with a blade length of 2.95 inches, it’s also legal to carry in most jurisdictions.

The Factory edge up close:

Followers of Tactical Reviews will know my views on factory edges, but to recap:

Anyone using a knife will need to sharpen it. That first factory edge is just like the first tank of fuel that a new car comes with (or first charge of the battery).
A good factory edge is a ‘nice to have’ but not a ‘make or break’ for a good knife, as you will be putting your own edge onto it soon enough.
The factory edge does however indicate the care a knife maker has put into the final finish.
It is for this reason Tactical Reviews measures factory edge sharpness and specifications, and includes this information in the detailed technical testing.

As a further look at the factory edge, this section has been added to include some high magnification photos of the factory edges.

The magnified images of the edge show the Torino’s blade’s different look. They also show what appears to be a micro-serration from the grinding process, which aids the cutting ability of this special material.


What is it like to use?
One of the most noticeable features of the Sandrin Knives Torino when you use it is the super-slim, super-slicey blade. The sharpness measurements for the factory edge, are in this case more important than most knives, as I suspect the PTC blade may be difficult to sharpen, and will almost certainly want diamond sharpeners.
Sandrin have supplied the Torino super sharp with the very impressive average BESS measurement of 165. I tend to sharpen a knife to less than 200 BESS, so this is sharper than my normal target sharpness.
Actually with it being so so hard, I’ve not yet worn the edge enough to want to sharpen it, so this aspect of using the PTC blade is to come later.
It certainly is lightweight and easy to carry.
The jimping on the spine of the blade is useful, but with the blade being only 1.2mm thick, I find it quickly becomes uncomfortable to apply a lot of force directly onto the blade spine.
With the forward placed finger groove, choking up on the blade is natural and makes finer work really accurate.
For me, the only aspect that lets the Torino down somewhat is the spring pressure on the recoil lock combined with the finish on the lock lever – together these make unlocking with the pad of your thumb uncomfortable and not entirely reliable. I find I tend to have to curl my finger or thumb over and use my nail to get sufficient purchase to release the lock. If the lock bar protruded a little more and the spring pressure was slightly less, I think this would come together nicely.
However, that said, the recoil lock does allow the Torino to remain slim and gives a reliable lock-up.


Review Summary

The views expressed in this summary table are from the point of view of the reviewer’s personal use. I am not a member of the armed forces and cannot comment on its use beyond a cutting tool or field/hunting knife.

Something that might be a ‘pro’ for one user can be a ‘con’ for another, so the comments are categorised based on my requirements. You should consider all points and if they could be beneficial to you.

_______________________________________________
What doesn’t work so well for me
_______________________________________________

High spring force on the recoil lock.
Lock lever too low profile.

_______________________________________________
Things I like
_______________________________________________

High-tech blade material – Polyhedral Tungsten Carbide
Fantastic factory edge with BESS of 165
Incredibly long lasting sharpness.
Blade is only 1.2mm thick!
Lightweight design.
Reverse-skeletonised G10 handle.
Low profile recoil lock.
Slick blade movement on ceramic bearings.
Double-sided thumb studs.
Ambidextrous deep-carry titanium pocket clip.

Knife Review: Benchmade Bugout 535-3

An even lighter, premium version of the already ultralight Benchmade Bugout, yes, that’s right. Join me in this is detailed review of the Benchmade 535-3, the special super-ultralight Bugout. Now, you say Carbon Fiber, I say Carbon Fibre, but let’s not worry about that (I might use either or both), and this is why the 535-3 is even lighter, as it has Carbon Fibre handles with the minimal steel inserts milled into them. The 535-3 is the Benchmade Bugout – Plus!

Review Videos

Starting with a short format sixty second review:


Onto a full video review covering many more details:


A few more details:

What’s in the box?:
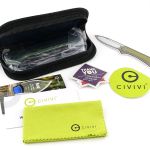
Very well presented in a foam lined box, the Bugout comes in a cloth bag that you can use to help keep the pocket fluff at bay. A clip/handle protector card also gives you information about the Benchmade Axis lock that the Bugout uses.


A good look round the Bugout 535-3 – Things to look out for here are:
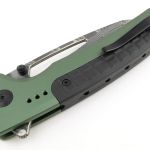
The Bugout uses a mini deep-carry steel pocket clip, that is removable and can be fitted on either side. Blue highlights on the spacer/lanyard hole and thumb stud, play beautifully off the black Carbon Fibre adding to the premium feel of this version of the Bugout.
Ultralight construction means there is only the one spacer and otherwise clear space through the handles.
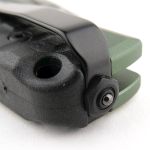
One side of the pivot bolt is capped, and the torx screw head on the other side only. Torx screws are used throughout for the construction.
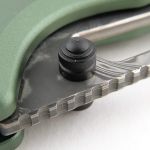
Looking in closely at the axis lock bar and how it moves as the blade is opened. The Bugout, despite being a lightweight knife, is also known for being tough, and the use of phosphor bronze washers adds to the robust and reliable build.
There is something about this particular blue and how it sings on the ambidextrous thumb studs.
And then we have the Bugout’s slim, flat ground blade. No weak points, and very ‘slicey’ (should be a word if it isn’t) with a very useful shape. The smooth plunge line ensures maximum strength and exposed heel-edge provides easy maintenance and a useful rear-point (there isn’t a sharpening choil, but the end of the edge closest to the handle is unobstructed and easy to sharpen). This detail is something I look for in all knives, but especially an EDC knife.


The Blade and Handle – Detailed Measurements:
For full details of the tests and measurements carried out and an explanation of the results, see the page – Knife Technical Testing – How It’s Done.

The blade is made from S90V steel.


The Factory edge up close:

Followers of Tactical Reviews will know my views on factory edges, but to recap:

Anyone using a knife will need to sharpen it. That first factory edge is just like the first tank of fuel that a new car comes with (or first charge of the battery).
A good factory edge is a ‘nice to have’ but not a ‘make or break’ for a good knife, as you will be putting your own edge onto it soon enough.
The factory edge does however indicate the care a knife maker has put into the final finish.
It is for this reason Tactical Reviews measures factory edge sharpness and specifications, and includes this information in the detailed technical testing.

As a further look at the factory edge, this section has been added to include some high magnification photos of the factory edges.

Please be aware that these images were taken with the knife straight out of the box without any stropping and they do have some manufacturing residue visible on the edge.


What is it like to use?

The Bugout is a modern classic and has gained much favour and recognition. This is actually the first Bugout I’ve owned (not the first I’ve handled), so prior to this period of review testing I did not have much experience of using a Bugout. I’ve not been disappointed at all, quite the opposite.
With the 535-3 being the lightest Bugout to date, an already ultralight knife, it sits like a feather in your hand. The Carbon Fibre feels so light, comfortable and warm to the touch, you don’t want to put it down. How can it be so strong and so light?
Benchmade have also got the blade geometry spot on. Using a thinner blade, but not too thin, makes it slice exceptionally well. The exposed heel of the edge (similar to when a sharpening choil is used) makes sharpening of the entire edge easier. I find this secondary ‘point’ a very useful feature for fine work.
Shown here in my XL-glove-size hands, there is enough handle for a firm grip, while the overall knife is compact enough (and very slim) to forget you are even carrying it.


It’s proven its worth with all sorts of random jobs. Here a chandelier replacement candle tube being trimmed to length, and then its been out with me dealing with anything and everything else life has presented.
This edition with the Carbon Fibre handles has been making it so difficult to put down. It want’s you to carry it, it wants you to use it.
I hope this will remain a permanent part of the Benchmade Bugout line-up as it really is superb.


Review Summary

The views expressed in this summary table are from the point of view of the reviewer’s personal use. I am not a member of the armed forces and cannot comment on its use beyond a cutting tool or field/hunting knife.

Something that might be a ‘pro’ for one user can be a ‘con’ for another, so the comments are categorised based on my requirements. You should consider all points and if they could be beneficial to you.

_______________________________________________
What doesn’t work so well for me
_______________________________________________

Nothing to see here.
(There is no such thing as the ‘perfect’ knife, but I have nothing to complain about.)

_______________________________________________
Things I like
_______________________________________________

Super-Ultralight and slim.
Smooth, warm, comfortable Carbon Fibre handle.
Slim, strong blade.
S90V steel.
High-end fit and finish.
Deep carry clip.
Ambidextrous.
Demands to be handled and carried.

Knife Review: Spyderco Enuff 2

In this Spyderco Enuff 2 review, we will take in all the details of this fixed-blade knife. Enuff 2 is an expansion of the Enuff platform, designed by Spyderco’s Sal Glesser and originally created to emphasize the first few inches of the edge nearest the handle where most of the work is done. However, how much blade is “Enuff”, is a matter of opinion. For users who like the Enuff platform, but wanted just a bit more blade length, there’s the new Enuff 2.

Review Videos

Starting with a short format sixty second review:


Onto a full video review covering many more details:


A few more details:

What’s in the box?:
As you would expect from Spyderco.


A good look round the Enuff 2 sheath- Things to look out for here are:
Formed of two molded plastic sections held together with metal eye rivets, the sheath is very slim. The belt clip makes the whole sheath quite a bit thicker, but can be removed easily if you are packing the knife away.
Out of the box, there is a secondary retention option of a leather strap. With the post that holds the end of the leather strap adding further bulk, this strap and its post are also easily removed if not needed.
The belt loop has a nice one-way system to prevent it accidentally coming off your belt. The sprung loop curls back under to catch onto the bottom of the belt and stop it pulling off.
The molded sheath lips grip the handle firmly making the extra strap redundant unless you want a secondary retention on the knife.


A good look round the Enuff 2 – Things to look out for here are:
Starting this gallery off with the tip protector on the knife; it even has the Spyderco logo on it! (which you will discard, but just saying)
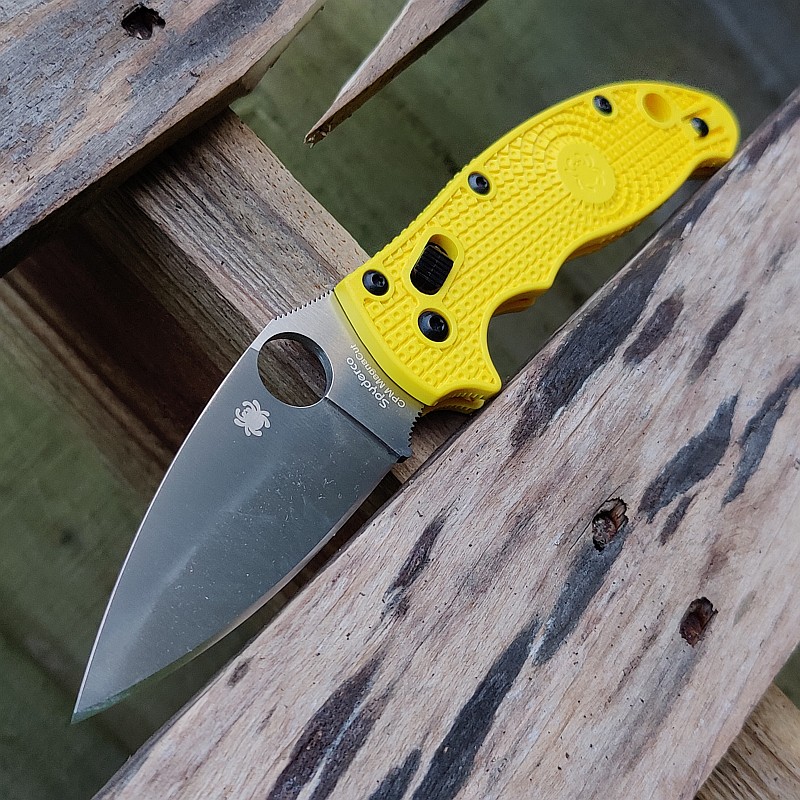
This Enuff 2 has the full Spyderedge serrated edge. Keeping the Enuff 2 slim but with a very secure grip, it has the distinctive Spyderco FRN scales with unique grip pattern.
A generous section of the blade spine has jimping for the thumb to grip.
Flipping the knife over reveals a few differences form one side to the other. The handle screws being one of these, where on the reverse side they are torx screws, compared to the blank heads on the ‘front’. Also clear is the fact the Spyderedge is a chisel grind, so one side of the blade has no edge bevel at all, which is why the Spyderedge is so effective.


The Blade and Handle – Detailed Measurements:
For full details of the tests and measurements carried out and an explanation of the results, see the page – Knife Technical Testing – How It’s Done.

The blade is made from VG-10 steel.


The Factory edge up close:

Followers of Tactical Reviews will know my views on factory edges, but to recap:

Anyone using a knife will need to sharpen it. That first factory edge is just like the first tank of fuel that a new car comes with (or first charge of the battery).
A good factory edge is a ‘nice to have’ but not a ‘make or break’ for a good knife, as you will be putting your own edge onto it soon enough.
The factory edge does however indicate the care a knife maker has put into the final finish.
It is for this reason Tactical Reviews measures factory edge sharpness and specifications, and includes this information in the detailed technical testing.

As a further look at the factory edge, this section has been added to include some high magnification photos of the factory edges.

This gallery shows both sides and sizes of serrations with the chisel grind clearly evident.


What is it like to use?

This is the first Enuff knife I’ve used, so I can’t comment on the original Enuff. Even the longer Enuff 2 is still a compact fixed blade. Having such a flexible sheath means you can change things around, add alternative mounts, or strip it down to basics to keep it as slim and light as possible.

For me the full Spyderedge makes this more of a backup knife. Depending on your typical cutting tasks you might want the serrated edge for a lot of fibrous cuts, but for me this is a less common type of cut. Again, in this instance its advantage of being able to go without maintenance for a long time and still cut well is pushing me towards being an excellent backup knife. The plain edge version would be a great daily use tool.

A slight disappointment is the finish around the exposed tang which is not up to normal Spyderco standards. It might be this example, or a characteristic of the line. There is zero impact on performance, just on aesthetics.

Another observation is that the Spyderco Spyderedge on this knife is effectively a right-handed edge (the plain edge version would not have handedness), although everything else about the Enuff 2 is ambidextrous.

It is slim and light, and the Enuff design principles still hold true of the handle. I take XL size gloves, but the Enuff’s handle is still big enough for a firm and stable grip; it is not just the blade that is ‘Enuff’.


Review Summary

The views expressed in this summary table are from the point of view of the reviewer’s personal use. I am not a member of the armed forces and cannot comment on its use beyond a cutting tool or field/hunting knife.

Something that might be a ‘pro’ for one user can be a ‘con’ for another, so the comments are categorised based on my requirements. You should consider all points and if they could be beneficial to you.

_______________________________________________
What doesn’t work so well for me
_______________________________________________

Some areas of finish are not quite up to Spyderco standards.
Secondary retention strap seems unnecessary.

_______________________________________________
Things I like
_______________________________________________

Spyderedge serrations are super sharp.
Absolutely fantastic backup knife.
Reconfigurable sheath.
Secure and usable sheath retention.
Slim and easy to pack or carry.
Easy to handle and hold.
Large enough for most general tasks.
Excellent grip pattern.

It really is a ‘grate’ knife!!

 
Discussing the Review:
The ideal place to discuss this review is on the Tactical Reviews Facebook Page
Please visit there and start/join the conversation.

Light Review: Fenix E35R and E03R V2.0

Fenix are updating and upgrading two excellent EDC lights. The E03R V2.0 and E35R build on their predecessors and raise them to a higher level. Join me in this review of the Fenix E03R v2.0 and E35R to see how they perform and what improvements have been made.

Review Videos

For the E03R V2.0 first a short format sixty second review:


The short format sixty second review of the E35R:


Onto a full video review covering many more details of both:


What is in the box?:

A brief look over the contents of the box for each of these lights. Starting with the E03R v2.0 in its plastic clamshell inner. To remove the E03R V2.0 from the package needs the plastic tie that comes fitted through the lanyard hole. Without this you can’t get a grip on it ton pull it out of the very tight fitting packaging. It comes with a USB-C charging cable, small split keyring and instructions.
The E35R slides out of the outer cardboard box in a plastic tray. This comes with the battery already fitted, a USB-C charging cable, wrist strap and spare o-ring, plus the instructions.


A good look round the E03R V2.0 – Things to look out for here are:
Before anything else, here is a side-by-side of the original E03R and the new V2.0. You can immediately see the increase in size that allows for the uprated output and runtime.

At the front is the twin TIR optic for the main white beam (with central optic for the Red beam). On the side is a rubber port cover for the USB-C charging port. The power switch has an outer illuminated ring. The switch’s centre also has an indicator light for the state of charge. Details of the split-ring keyring are shown.


Taking a more detailed look at the E35R:

The side by side comparison to the original E35 is included in the video earlier in the review. Most noticeable is the addition of the USB-C charging port. Visually, apart from that, the E35R is almost identical to the E35.

In case you think it is faulty out of the box, Fenix has included a label to remind you to remove the in-transit insulator which protects the E35R from discharging in storage. For the E35R, it is the head rather than tail that unscrews to access the battery compartment. The contacts in the head include physical reverse polarity protection. In the tail is a single strong coil spring to keep the 21700 5000mAh cell in place. The threads are near-square in profile. There is a bronze detail ring round the TIR optic to match the colour of the power switch. To indicate the battery level the centre of the power switch lights up either solid, or a flashing. A steel pocket clip is included. One other addition in the update is the E35R now having a magnetic tail.


The beam

Please be careful not to judge tint based on images you see on a computer screen. Unless properly calibrated, the screen itself will change the perceived tint.

The indoor beamshot is intended to give an idea of the beam shape/quality rather than tint. All beamshots are taken using daylight white balance. The woodwork (stairs and skirting) are painted Farrow & Ball “Off-White”, and the walls are a light sandy colour called ‘String’ again by Farrow & Ball. I don’t actually have a ‘white wall’ in the house to use for this, and my wife won’t have one!

This gallery starts with the E03R V2.0 indoors, white and red beams. The red beam exposure is intentionally longer to show the shape of the beam, not the relative brightness to the white. However, for the outdoor beamshots, the exposure for white and red is similar, and is intended to show the red beam range is, of course, very limited.
Then the last two beamshots are the E35R, showing the very strong performance.


Batteries and output:

The E03R V2.0 has a built in li-po 400mAh cell, and the E35R runs on a removable 21700 5000mAh cell.

These images are the charging traces for the E03R V2.0 and E35R.


Please note, all quoted lumen figures are from a DIY integrating sphere, and according to ANSI standards. Although every effort is made to give as accurate a result as possible, they should be taken as an estimate only. The results can be used to compare outputs in this review and others I have published.

When carrying out runtime tests, I always use a cooling fan to at least represent some of the cooling provided by your hands, and also the lower temperatures outside. Not using any cooling would be unrealistic.
In this run of the E35R, there were actually three power cuts that stopped the cooling fan running (the logging was running on battery), and this corresponds with drops in the output due to the thermal regulation ramping down the output.
The E03R V2.0 output is very predictable and stable and needs no further comment.
In the gallery, the second image has the times of the power cuts marked so you can see the corresponding drops in the E35R’s output.
Showing just the start of the output trace, the final image in the gallery shows the thermal regulation controlling the output.


The E03R V2.0 and E35R in use

Since Fenix first previewed the E03R V2.0, the debate has been based largely around if they have made it too big for a key chain light. Ultimately only you can make that decision, but I’ve found it a very good size. Being slightly larger it is more readily to hand (easier to get a grip on), and the added functions raise its usefulness even more.

I particularly like the ‘breathe’ modes of the E03R V2.0. A soft locator light which give a confidence that when in an unfamiliar place you can activate the breathe mode and then always be able to find where the E03R V2.0 is.

For a light that is going to be knocking around, and in and out of pockets, the timing of the power switch activation seems spot on. I’ve not had any accidental activations, and not really bothered with the lockout. It is good to have the option, but so far no warm pockets.

Between these two lights, the interface is effectively the same, so it is very natural to pair them. Of course the E35R is a single white light LED that goes up to an amazing 3000lm output.

At that maximum output the E35R does get hot quickly, and as shown in the runtime graphs, cannot be maintained – but take a moment and look at those graphs again. The E35R, with good cooling, is running at over 1500lm for an hour. This is a solid performance for a EDC pocket light.

I would prefer one lower mode on the E35R, but for most people, the available modes are going to work well.

With the power button being relatively low profile, it can be a bit hit and miss to find, especially with gloves. To get around this, what I do is to line up the pocket clip so it is opposite the power switch. You then use the pocket clip to index your grip and find the power switch without looking.

The original E35 was a good powerful compact light. It was just slightly smaller and a little lighter, and just enough light wrapped around a 21700 cell. Fenix have now managed to also squeeze in the on-board charging and magnetic base which are worthy updates and make the E35R a complete package.

So far, on testing the magnetic base of the E35R, I’ve found issues with slippage if put onto a smooth vertical surface. The magnet holds the light, but the finish on the tail is so smooth, if the surface is also smooth the E35R usually slips and slides down. If the magnet is holding a horizontal surface it is very secure. It is less about the magnet’s strength and more about there being enough grip between the E35R and the surface to not slide downwards.

‘New and improved’ is often a false claim, but for this pair of EDC lights from Fenix, it really is.


Review Summary
The views expressed in this summary table are from the point of view of the reviewer’s personal use. I am not a member of the armed forces and cannot comment on its use beyond that covered in the review.

Something that might be a ‘pro’ for one user can be a ‘con’ for another, so the comments are categorised based on my requirements. You should consider all points and if they could be beneficial to you.

_______________________________________________
What doesn’t work so well for me
_______________________________________________

E35R – Could do with a lower mode for household use.
E35R – Tends to slide down smooth vertical magnetic surfaces.
Nothing else for either.

_______________________________________________
Things I like
_______________________________________________

E35R – 3000lm maximum output.
E35R – built around the 21700 cell.
E35R – simple and effective user interface.
E35R – magnetic tail.
E35R – built-in USB-C charging.
E03R V2.0 – ‘breath’ locator beacon mode.
E03R V2.0 – white and red output (and green in breath).
E03R V2.0 – built-in USB-C charging.
E03R V2.0 – great combination of size, weight, power and runtime.

Gear Review: EDS II Screwdriver and EDC Wrench from BIGiDESIGN

BIGiDESIGN is producing so many awesome EDC tools, and in this review we are taking a detailed look at the BIGiDESIGN EDS II, the second, updated version of their unique Everyday Screwdriver, along with the BIGiDESIGN EDC Wrench a reimagining of an antique Swedish adjustable wrench.

Their original EDS, Everyday Screwdriver, was probably the first BIGiDESIGN product that I saw, and since then I bought their bolt action pen, a design that ingeniously adjusts to take most ballpoint refills on the market. Now I’ve been able to partner up the Bolt Action pen with the EDS II and EDC wrench making for an incredible EDC setup.

Video Overview

In this video we take a good look at a couple of lovely EDC gear designs from BIGiDESIGN. The EDS II, the second, updated version of their unique Everyday Screwdriver, along with the EDC Wrench, a small unique pocket friendly adjustable wrench.


What’s in the box; Part 1 the EDS II?:
For the three BIGiDESIGN products I have, the packaging follows the same layout. A slide out tray which has a compartment at one end that contains spares.


A good look round the EDS II – Things to look out for here are:
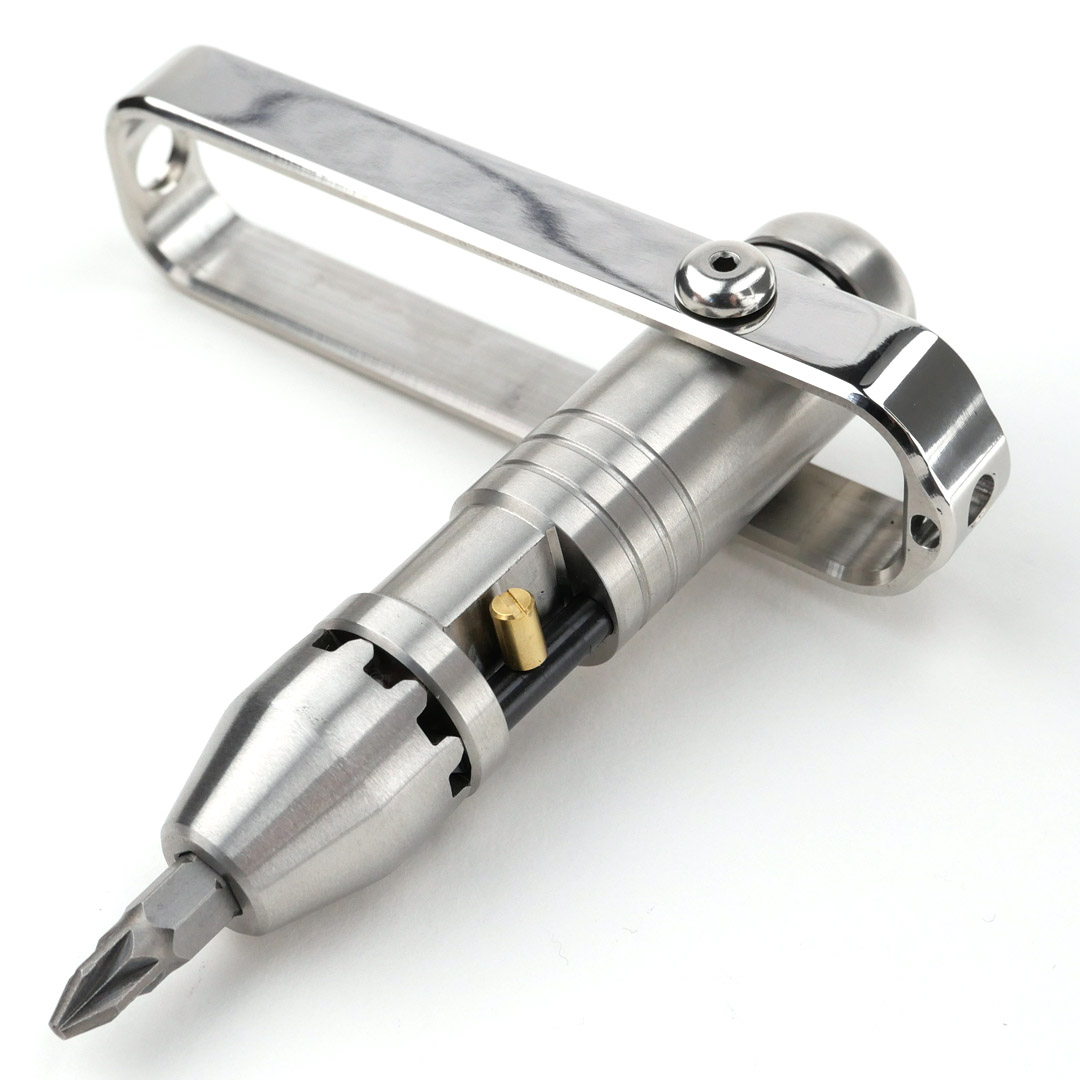
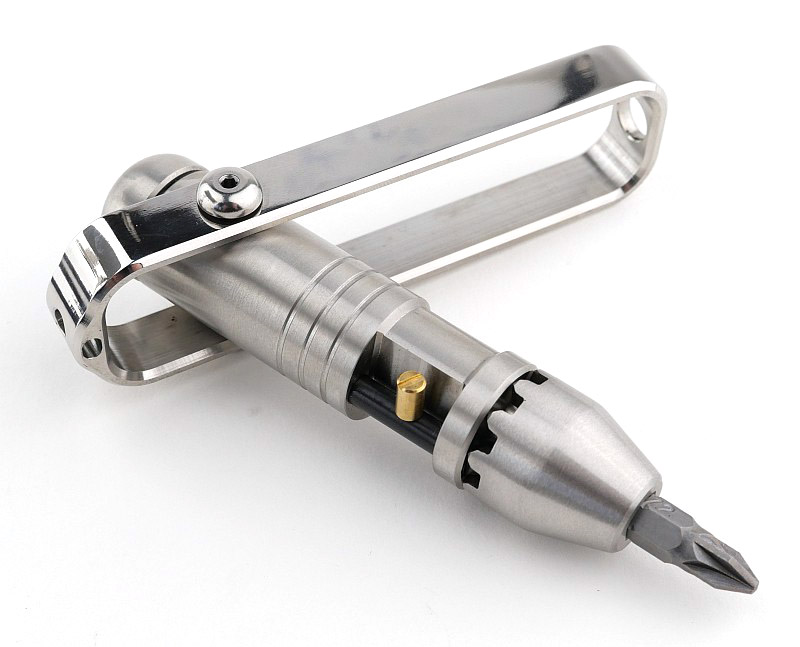
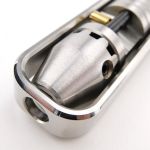
Overall layout of the EDS II is of an integral lock folding knife, but with a bit holder instead of a blade. A single thumb stud means this easier for a right-handed user. Explained in more detail in the video, there is a stop pin that both stops the bit holder arm in the right position when open, and also stops the spare bits sliding out of the front of the storage slot. The other end of the spare bit storage slot has a sprung ball to keep the bits in place. The integral lock action is easy to see as the bit holder is unfolded. Several magnets are used for keeping the spare bits in place and the main bit holder folded. In the EDS II an additional spare bit holder has been integrated into the lower section of bit holder arm. A total of four bits can be carried within the EDS II.


What’s in the box; Part 2 the EDC Wrench?:
Again, following the format of the other BIGiDESIGN products I have, the box has a slide out tray which includes a compartment at one end that contains spares.


A good look round the EDC Wrench – Things to look out for here are:
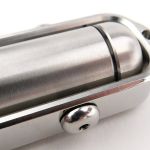
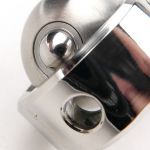
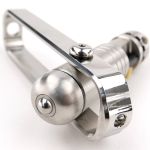
A reimagining of an old Swedish design, there is a sliding adjuster moved by a worm screw. BIGiDESIGN have added both a metric and imperial scale for setting the wrench ready to use. A low profile clip is fitted to the back and the EDC Wrench also includes a Ti bead on the lanyard. You can just see the slider retainer under the clip.


What it is like to use?

BIGiDESIGN have done something really special with the EDS, and now this updated EDS II, and given you not only a new experience of using and carrying a screwdriver, but one that is very practical as well.
It is not the smallest EDC bit holder available, nor does it include a ratchet, but instead it gives you a highly usable screwdriver with integrated bit storage for a total of four bits without needing anything else.
Having a swing-out bit holder extension arm, the EDS unfolds to a very practical conventional structure of handle, shank, and bit, so compared to many other small EDC screwdrivers it gives you a more usable tool.

That genius part of the design is mimicking an integral lock folding knife, having a thumb stud to swing the bit holder arm out of the folded position for one-handed operation. So satisfying to use!

However there is a little observation to note about how easy or difficult it is to open the EDS II. The arm’s retention in the folded position is due to a magnet in the body grabbing the bit that is in the bit holder. As you use the EDS II and swap bits around, you will find that a bigger bit, like the full size flat bit, is held by the magnet more firmly, so firmly it becomes very difficult to open using the thumb stud. Put a smaller bit into the holder and it becomes much easier to open again. So the bit you leave in the main bit holder arm changes the ease of opening the EDS II. I would have preferred that the arm retention was a detent (like a knife would use) or that the thumb stud had a bigger cut-out round it allowing more contact and an easier open.


Onto the partner tool here and the EDC Wrench, an infinitely more pocket friendly design than a standard adjustable wrench, there was one big flip for me, literally, in how I envisaged using it before actually getting my hands on one. That is the fact that with the adjustable slider being very much on one side of the tool, to use it and make contact with the nut, you have to flip it over so the ‘front’ of the tool is away from you (pocket clip towards you). Like this you can’t see the scale, and initially it just felt a bit odd, but is just how it works. Even with larger nuts, all except the very largest, you need to use it this way round.

Being a ring spanner, you do have to be able to pass the ring over the end of the job onto the nut, so can’t be used for certain jobs. If you hit those limits though, it is less likely an EDC type of job, so then you bring out the full size tools. Know the limits of your tools and don’t abuse them and you’ll get along just fine.


Talking of limits, and pushing them, the EDS II and EDC Wrench can nicely partner up for a bit more screw driving torque. There is just enough of the 1/4″ hexagonal bit showing to use the EDC Wrench to grip this and boost the turning force for stubborn screws. Not always possible, but if you have the space, this can save you having to go for bigger tools. In this case the EDC Wrench is used with the slider facing you as it needs to be this way round to grip that small section of the hex bit.

Both of these beautiful EDC tools are made from grade 5 titanium alloy and punch well above their weight, even more so together.


Review Summary

The views expressed in this summary table are from the point of view of the reviewer’s personal use. I am not a member of the armed forces and cannot comment on its use beyond that covered in the review.

Something that might be a ‘pro’ for one user can be a ‘con’ for another, so the comments are categorised based on my requirements. You should consider all points and if they could be beneficial to you.

_______________________________________________
What doesn’t work so well for me
_______________________________________________

EDS II – Difficult to open with larger bits installed.
EDS II – Thumb stud a bit too recessed.
EDC Wrench – Ring spanner design slightly restrictive.
EDC Wrench – Need to use with the slider away from you.

_______________________________________________
Things I like
_______________________________________________

EDS II – One-Handed Operation.
EDS II – Integral Frame-Lock Mechanism.
EDS II – Deep carry Pocket Clip.
EDS II – Uses any 1/4″ hex bit.
EDS II – Integral storage for four bits.
EDS II – 100% metal construction.
EDC Wrench – Infinitely adjustable.
EDC Wrench – SAE 3/16 – 3/4 in.
EDC Wrench – Metric 5 – 19 mm.
EDC Wrench – Solid Titanium Construction.
EDC Wrench – Removable Pocket Clip.

 
Discussing the Review:
The ideal place to discuss this review is on the Tactical Reviews Facebook Page
Please visit there and start/join the conversation.

Knife Review: lionSTEEL H1

Join me in this review of the lionSTEEL H1, to take in all the details of this superb EDC fixed blade knife designed by Tommaso Rumici. This specific knife is a display model from IWA 2022 so might show a few imperfections. The H1 has a M390 blade, black G10 handle with grip ring, standard leather sheath plus also shown in this review with the optional Kydex sheath.

Video Overview

This video includes a close look round the H1, and then onto the measurements and specifications.


What’s in the box?:
As well as the standard H1 package, this review shows the optional Kydex sheath which is pictured next to the closed box. As standard, the H1 comes with the leather sheath and a lionSTEEL made keyring torx wrench.


A good look round the standard Leather Sheath – Things to look out for here are:
The H1’s standard leather sheath is packed full of features. Within the curved and flowing shaping of this sheath, it has a retaining strap secured with a press-stud, a ‘standard’ belt loop, along with two special loops that can be rotated and opened out to allow various belt or MOLLE carry configurations.


A good look round the optional Kydex Sheath – Things to look out for here are:
Giving you a more compact carry, the optional Kydex sheath has two special loops, like the leather sheath, that allow for various belt or MOLLE carry configurations, but without the fixed belt loop and retaining strap. The retaining strap is not needed due to the Kydex ‘clip in’ retention, so allowing for a much more streamlined sheath.


The details of the H1:
Starting off with the H1 sheathed in the leather sheath. A curvy knife in a curved and flowing sheath. Demonstrated in the last of the photos of the sheathed knife, if you are using the fixed belt loop, and if you wanted to tie-in the end of the handle tightly so it can’t catch on anything, you can swing the top loop over the end of the grip ring; not something you would do all the time, but an option.
The remaining photos take in details like the engravings, plunge line, jimping, grip ring finish, handle shaping/milling/texture, plus the overall lines of this knife.


The Blade and Handle – Detailed Measurements:
For full details of the tests and measurements carried out and an explanation of the results, see the page – Knife Technical Testing – How It’s Done.


What is it like to use?
Designed to combine the secure handling of the karambit’s grip ring with a knife blade much better suited to daily EDC tasks, this make the H1 an unusual shape that you might not immediately be drawn to.
Although I started with the two galleries in this section the other way round, I decided to look at the personal carry aspect first. Shown earlier in the review, the H1 can be MOLLE carried, so this is about carry directly on your person using the belt and additional loops on both the leather and Kydex sheathes.
For me the least successful carry is the standard drop belt loop. With the angles set into the sheath, the presentation is very awkward for me, and with the leather wrapping round the handle, re-sheathing the knife tends to result in cutting into the sheath each and every time. It is quick to deploy, but not to re-sheath.
Moving swiftly to horizontal carry and suddenly everything works much better. For the leather sheath you can mount it on your hip facing backwards. The leather sheath doesn’t really work for back carry, due to the retaining strap (this is where the kydex sheath really shines).
(Just to mention these photos are all for right-handed drawing.)
Last up is the kydex sheath on hip and back carry positions. Actually for the back carry I would have set the loops so that one was each side of the trouser belt loop to provide stability for drawing and re-sheathing. The lower profile kydex sheath is excellent, and shines in the back carry position.


So we’ve looked at carry, and now onto handling of the H1. Yes the H1 has a grip ring, but you don’t have to put a finger through it, you can also hold it like a standard grip and use the width of the ring to control the angle the blade presents. Worth remembering and not always putting a finger through the ring.
As you can see, though I take XL size gloves, the H1 is quite a compact knife. With the curve of the blade and the jimping on the spine, the H1 sits so well in the hand making it feel a simple extension of you.
Reverse grips are as natural as forward grip, and the ring is a size and finish that makes it super comfortable however you take hold of it.


I’ve always loved lionSTEEL’s leather sheaths, and the H1’s is a very good sheath. For me though, the optional Kydex sheath takes the H1 into a different league. I would recommend getting it. (If lionSTEEL could offer a sheath choice when buying so you could get the H1 without the leather sheath and just the Kydex one, all the better.) The slim H1 definitely benefits from the much slimmer Kydex sheath. This sheath also allows for ‘in pocket’ carry which the bulkier leather sheath does not.
Handling is where the H1 really excels with the versatile grip ring and curving handle and blade shape that fits into the hand beautifully. Between the H1 and H2 (the H2 which has a drop point blade), the sheep’s foot style blade shape presets the tip of the knife very well for point work, and the curved cutting edge slices easily.

Review Summary

The views expressed in this summary table are from the point of view of the reviewer’s personal use. I am not a member of the armed forces and cannot comment on its use beyond a cutting tool or field/hunting knife.

Something that might be a ‘pro’ for one user can be a ‘con’ for another, so the comments are categorised based on my requirements. You should consider all points and if they could be beneficial to you.

_______________________________________________
What doesn’t work so well for me
_______________________________________________

Relatively bulky leather sheath.
Awkward angle of standard belt loop.

_______________________________________________
Things I like
_______________________________________________

Highly ergonomic.
Grip ring provides security.
Optional Kydex sheath (recommended).
M390 blade steel.
Slim and easy to carry.
Horizontal belt mounting.
MOLLE compatible.
Adaptable sheath mounting loops.

 
Discussing the Review:
The ideal place to discuss this review is on the Tactical Reviews Facebook Page
Please visit there and start/join the conversation.

As well as the Tactical Reviews Facebook Page, please consider visiting one of the following to start/join in any discussion.

BladeForums – Knife Reviews (US based Forum for Knife Discussion)

CandlePowerForums – Knife Reviews Section (Largest and Friendliest Flashlight Community Forum)

Gear Review: Mjolnir III by Ostap Hel Knives

When it comes to EDC pocket jewellery, nothing beats a hand-made custom piece, and I’ve had my eye on the Mjolnir from Ostap Hel Knives for some time. Yes, Mjolnir is Thor’s hammer, and being capable of a knockout blow is very appropriate association, but of course the shape of Ostap’s Mjolnir is also like the old Norse symbols.
Join me in this review of the Mjolnir III from Ostap Hel Knives, the featured version is in carbon fibre.

Video Overview

This video is a detailed look at the Mjolnir III, and hopefully you can get a good feel for the quality of finish.


What it is like to use?
Without saying exactly how you might use the Mjolnir III (due to some more negative connotations), it is both EDC pocket jewellery and a self-defence aid.

The intended configuration for carrying the Mjolnir III is on its own with a lanyard, added for ease of getting it into your hand when needed. Shown here, it has the matching lanyard from Ostap Hel Knives which has a CF bead on the cord. With the CF version being so light, it has minimal pocket presence so can also feel a little difficult to home in on. So…

…picking up on the fact it has felt a little ‘detached’ from easily finding the CF Mjolnir III in my pocket, I wanted to try something a bit different and out there, and fit it as a lanyard stopper on another EDC item. In this case a slip-joint knife which already had a longish lanyard on it.
In this way, the knife provides the weight for easily finding it, and the Mjolnir III makes a fantastic ‘puller’ for getting the knife to hand, but also for then ease of getting the Mjolnir III into your hand.
Reversing the sense that the Mjolnir III is the lanyard stopper round to the knife being the lanyard stopper, and you can either allow the knife to hang out to the side, or take it into you palm while gripping the Mjolnir III between your fingers.
You can experiment with the lanyard length to see how it might work for you if you try this approach. Here the loose ends of the paracord are not yet woven into the lanyard to more easily allow adjustments before making the final configuration.
It has worked for me, it might work for you; try it before completely dismissing the idea.

Regardless of how you choose to carry it, the Mjolnir III is a pleasure to handle and carry. Despite there being no moving parts, it can be a worry-stone or fidget toy, as well as having an actual serious purpose – definitely worth the investment in a quality piece.


Review Summary

The views expressed in this summary table are from the point of view of the reviewer’s personal use. I am not a member of the armed forces and cannot comment on its use beyond that covered in the review.

Something that might be a ‘pro’ for one user can be a ‘con’ for another, so the comments are categorised based on my requirements. You should consider all points and if they could be beneficial to you.

I’m trying something slightly different and starting with what doesn’t work so well, so I can finish on a more positive note.

_______________________________________________
What doesn’t work so well for me
_______________________________________________

What is not to like?

_______________________________________________
Things I like
_______________________________________________

Beautifully crafted.
Choice of materials.
Easy to carry.
Might make all the difference in a tight situation.
Low profile.
Thor’s hammer in your pocket.
 
Discussing the Review:
The ideal place to discuss this review is on the Tactical Reviews Facebook Page
Please visit there and start/join the conversation.