(CLOSED) Instagram Giveaway Now ON! (Ends 1 Oct 2016)

CLOSED – Winners are @olivern246 and @ladynra1.
As a thanks to all my followers, and to celebrate passing the 5k mark, here is a Giveaway which will have two winners.

The two prizes are, a Surefire T-Shirt and Cap, and a Fällkniven T-Shirt and Cap. Both T-Shirts are ‘XL’ and the first winner can choose which prize they get.

To enter, complete all three steps below:

1. Follow @tacticalreviews (you do not need to re-follow if you are already a follower).
2. Like this post.
3. Comment on this post and ‘@ Mention’ a Friend. (Mentioning a company or spoof account will invalidate your entry.)
(One standard entry per Instagram account.)

Full rules (and bonus entry information) can be found here: Full Rules.

The closing date for entries is 1st October 2016 or if I reach 10k followers. (There will be a 10k Giveaway as well)

By entering you agree that Instagram has no responsibility for this Giveaway.
This Giveway is in no way sponsored, endorsed or administered by, or associated with, Instagram.

Don’t miss out on your chance to enter this giveaway – Good Luck!

img_20160909_132239

Knife Review: Fällkniven F1 Pro

Although Fällkniven have a winning formula with their F1 Survival knife, (the official survival knife of Swedish Air Force pilots since 1995), Fällkniven’s desire for continual improvement led them to start work on the Pro Series, including the F1 Pro, in 2010.
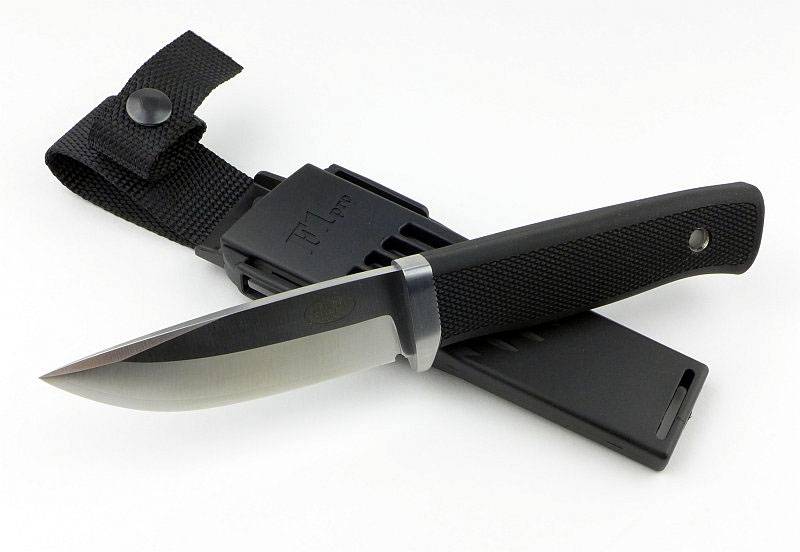
 photo 34 F1 PRO with sheath P1170966.jpg
The Pro Series consists of the F1 Pro (featured here) as well as the S1 and A1 Pro models.

The Blade and Handle Geometry:

Most knife specifications have a basic description of the blade geometry, but in this section I will be taking a more detailed look at geometry and balance.
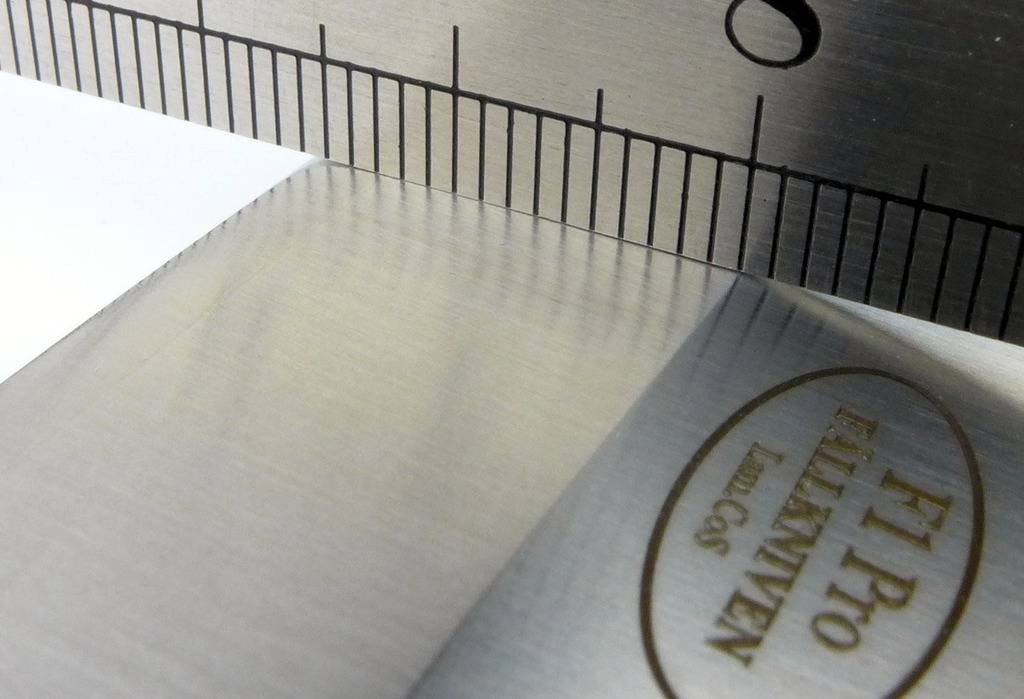
 photo 40 F1 PRO grind P1180553.jpg

Using a set of gauges and precision measuring equipment including a Vernier protractor, callipers, fixed radius gauges and the unique Arc Master adjustable radius gauge (the one that looks like a crossbow).
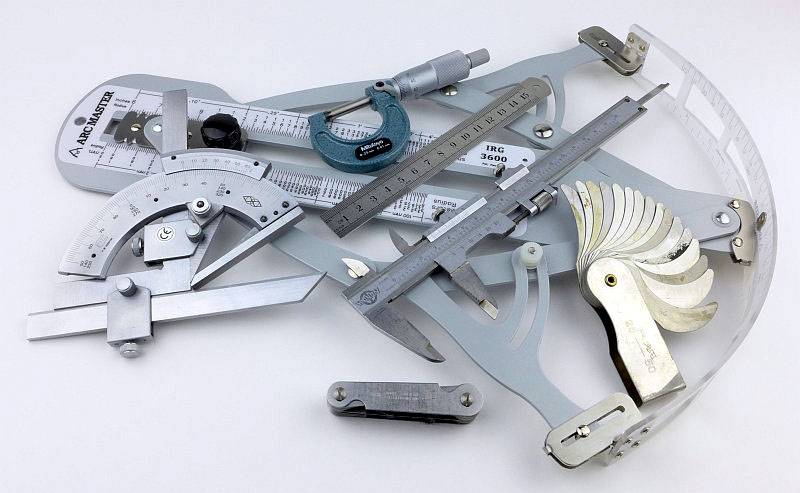
 photo Knife measuring P1180483.jpg

These measurements have been tabulated and are presented along with a few reference blades (8″ Chef’s Knife, 5.5″ Santoku and the popular Fällkniven F1).

Key aspects such as the primary bevel angle, grind type, blade depth, blade thickness, length, weight are detailed, along with balance information.
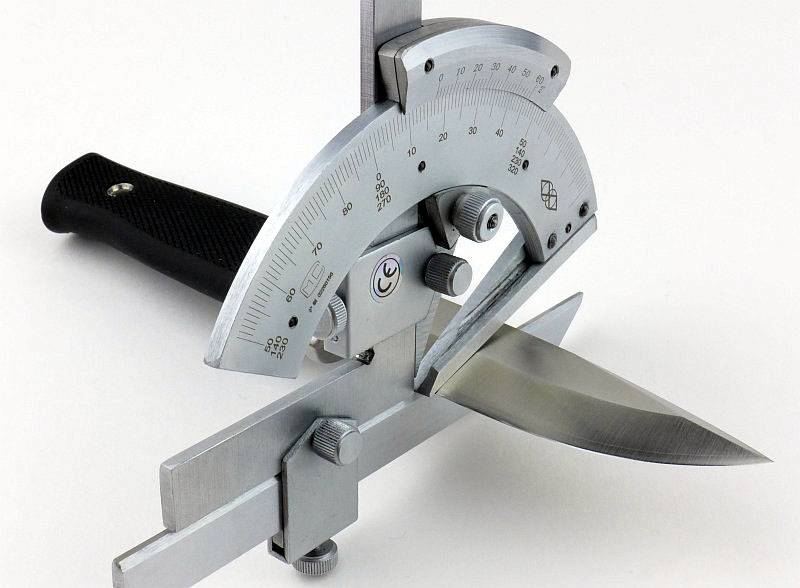
 photo 39 F1 PRO geometry P1180548.jpg

The ‘Balance relative to the front of the handle’ tells you if the knife will feel front heavy, or if the weight is in your hand (a positive value means the weight is forward of the front of the handle). The ‘Balance relative to the centre of the handle’ indicates how close to a ‘neutral balance’ the knife has in the hand.
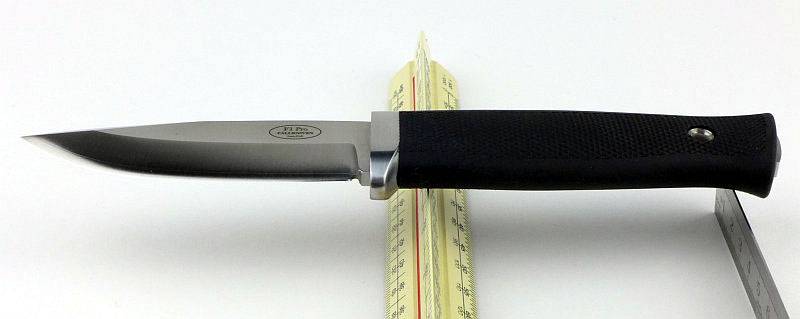
 photo 38 F1 PRO balance P1180542.jpg

In the case of full convex grinds the approximate centre of the grind is used for the primary bevel angle estimate.
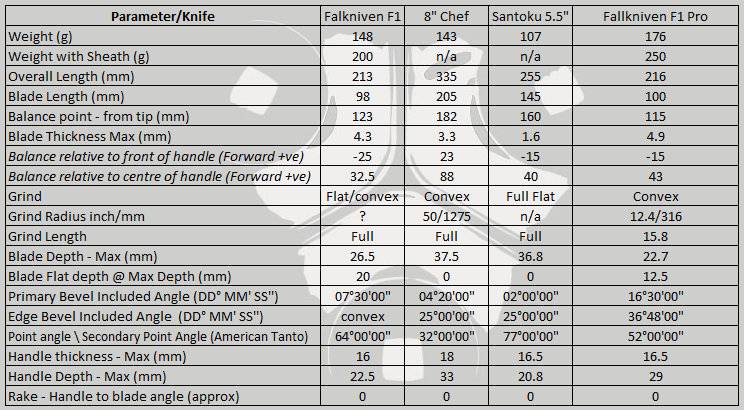
 photo F1 PRO parametersV2.jpg

The blade is made from laminated (Outer)420J2/(Centre)CoS (Cobalt-Special) steel.

Explained by the Maker:

The reasons for certain design choices may not be clear when simply looking at an object, so this section is intended to give an insight into the thinking behind a design by speaking to the designer themselves.

Unfortunately I can’t always get time with the designer so will use this section to include relevant information about the knife and its designer.

Peter Hjortberger (Founder of FÄLLKNIVEN AB) told me a little of the origin of the F1 – The F1 story started with an inquiry from two pilots in the Swedish Air Force (Swedish ”Flygvapnet”). They had a very, very simple sheath knife in their survival dress (leg pocket), a knife that cost less than one GBP. Considering that they were flying an air-fighter costing a huge amount of money, the pilots thought that they should carry a knife which was the same quality level as their aircraft.

Though there is quite a long story behind the F1 Pilot Survival knife, the ”F” comes from ”Flygvapnet”, but you can also consider it to be like the ‘F1’ of Formula One racing, or why not ‘F’ like in Fällkniven.

The F1 knife became such a worldwide success that Peter decided to stop selling products from other brands and concentrate the company on developing their own knives. From 1995 this has been the focus of the company and the reason behind Fällkniven’s good reputation all around the world.

Before getting into the detailed look at the F1 Pro, there is a list of upgraded features that Fällkniven have published so you can keep an eye out for them in the photos (especially the F1/F1 Pro comparison section). I’m going to quote the statement from Fällkniven and add some more detail as we go.

“1. The laminated VG10 steel is replaced with a laminate cobalt steel (lam. CoS) which, amongst other things, ensures a durable edge and improved edge retention.” – Uprating the steel has allowed the hardness to be increased from 59HRC to 60HRC without compromising durability. Cobalt is very beneficial in steel alloys and is used in drill bits suitable for drilling hardened steels. The composition of the CoS used by Fällkniven is shown below compared to the VG10.

Steel analysis
VG10
Composition
(59 HRC)
CoS
Composition
(60 HRC)
Cr – 15.00 Cr – 16
Co – 1.40 Co – 2.5
Mo – 1.05 Mo – 1.5
C – 1.00 C – 1.1
Si – 0.60 V – 0.3
Mn – 0.50 W – 0.3
V – 0.20 Si – trace
P – 0.030 P – trace

“2. The blades are consistently thicker causing an increased torsional rigidity – they will withstand even greater external forces than before.” – Currently unpublished, but Fällkniven have assured me that the breaking test result of the F1 Pro has provided a very positive result compared to the standard VG10 F1.

“3. The tapered tang is wider and thicker and thus significantly stronger.” – Though I’m not going to cut off the Thermorun handles to expose the tangs, when looking at the comparison photos of the pommel you can clearly see the thicker tang.

“4. The crossguard is made of stainless steel and permanently mounted to the tang.” – Though in real use, the F1’s finger guard has not let me down, the fact it is rubber has always concerned me slightly. The F1 Pro however now has a steel finger guard allowing you to much more confidently apply pressure to it.

“5. The convex edge has been refined to improve the cutting properties.” – The F1 I have actually appears to have a mostly flat grind with only the last 4-5mm convexed to the cutting edge. With the F1 Pro I can clearly see the edge is convexed through the entire primary grind to the edge.

“6. The zytel sheaths are redesigned meaning they are more durable and are better suited to the Molle attachment system.” – Without becoming too large, the F1 Pro sheath is far more robust and includes slots that can accommodate MOLLE straps.

“7. The knives are supplied with our most valued combination whetstone, the DC4. It offers both a diamond whetstone and a ceramic stone for field sharpening.” – Really this just makes the F1 Pro package complete, as you might already have a sharpening system. The DC4 however provides a combination diamond/ceramic stone in a pocket size package making it easy to carry into the field. Well worth having.

“8. The knives are packed in shock-resistant, waterproof boxes that can be used for storage of smart phones, GPS, documents, survival gear and much more.” – Packaging and presentation of the F1 Pro is excellent, and the case can be used for other purposes once you have stripped out the foam liner (easier said than donewith the one I had) giving you a tough case that is small enough to be packable and large enough to be useful.

Keep an eye out for these features in the following sections.

A few more details:

In keeping with Fällkniven’s normal product packaging the F1 Pro arrives in a white cardboard box.
I like the Swedish sense of humour as this is the first knife I have received which came with a supply of Fällkniven branded sticking plasters.
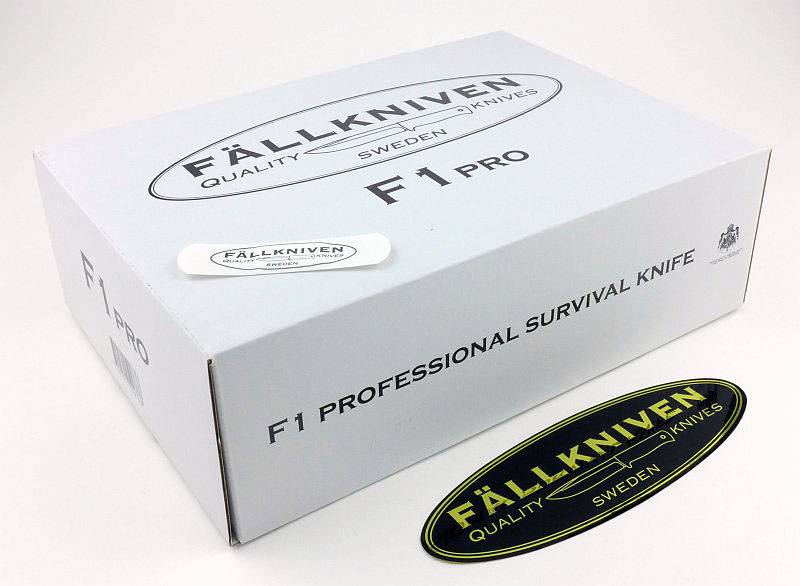
 photo 01 F1 PRO boxed P1170850.jpg

Inside the cardboard box is the tough, waterproof, plastic case.
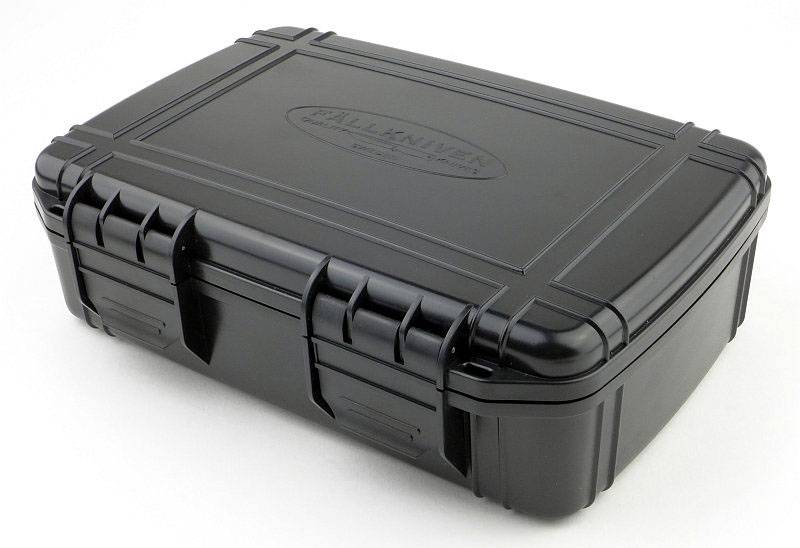
 photo 02 F1 PRO case P1170858.jpg

Opening the case you find the contents nicely organised.
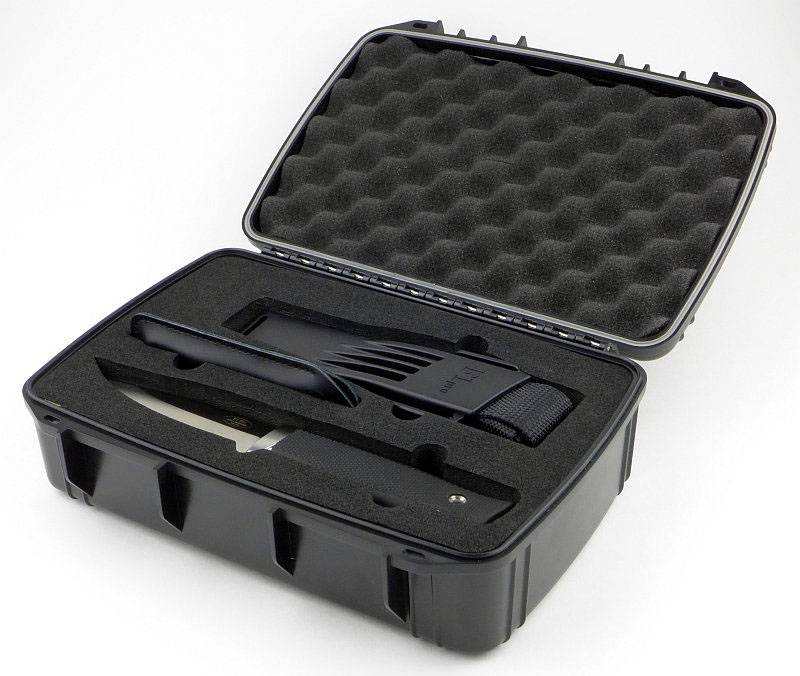
 photo 03 F1 PRO case open P1170861.jpg

The liner is a substantial closed-cell foam with finger cut-outs to make it easy to remove the items.
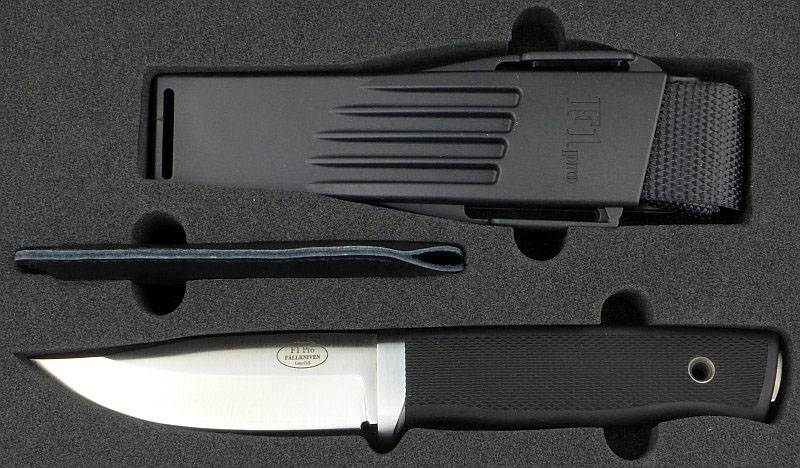
 photo 04 F1 PRO case insert P1170864.jpg

You have the F1 Pro knife, its sheath, the DC4 stone and a case for the DC4.
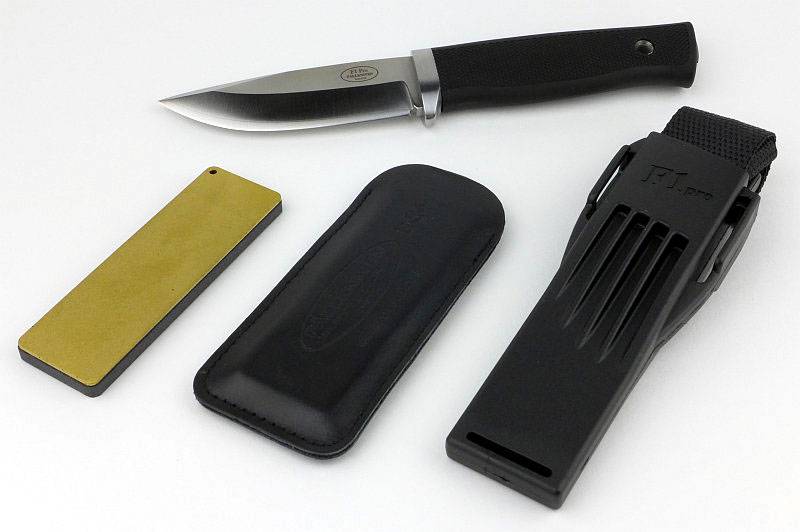
 photo 05 F1 PRO case contents P1170870.jpg

You can buy the DC4 separately, but in keeping with the uprated features of the F1 Pro you get this great stone with the F1 Pro. The gold side is the one with a diamond coating. With harder blade steels, the diamond makes it much easier to achieve a good result while not taking too long.
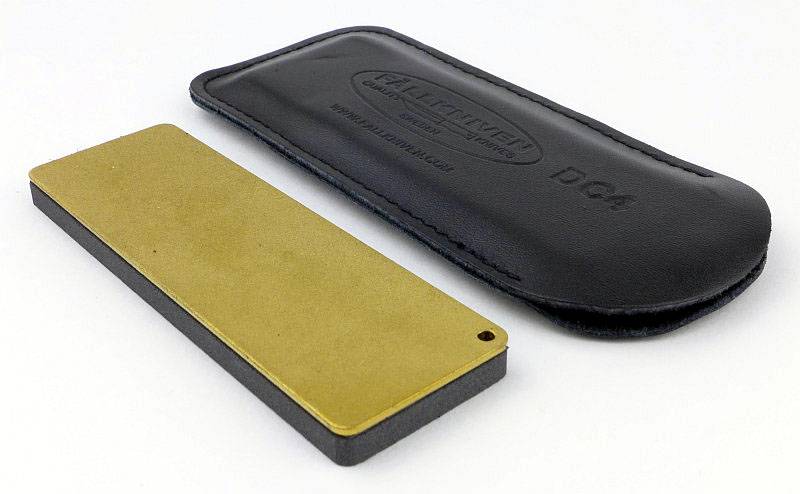
 photo 06 DC4 diamond P1170880.jpg

Flipping the DC4 over, it has a ceramic side which allows for a finer finish once the diamond side has done most of the work.
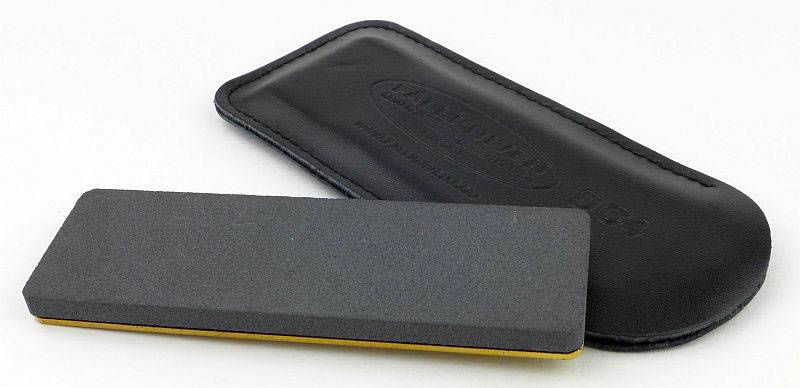
 photo 07 DC4 ceramic P1170881.jpg

As it comes out of the box, the sheath has the belt loop tucked into the top.
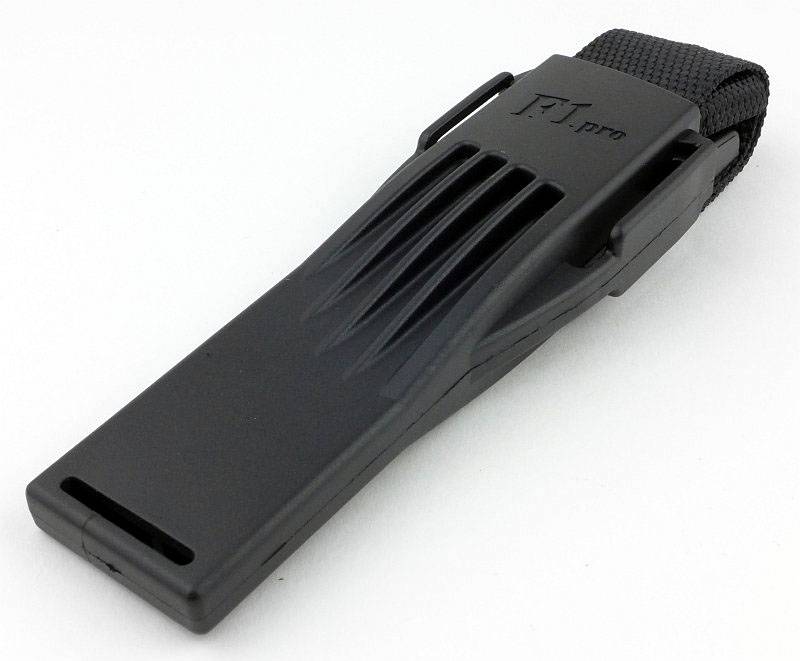
 photo 08 F1 PRO sheath tucked P1170884.jpg

Pulling out the belt loop and you can see the retaining strap as well.
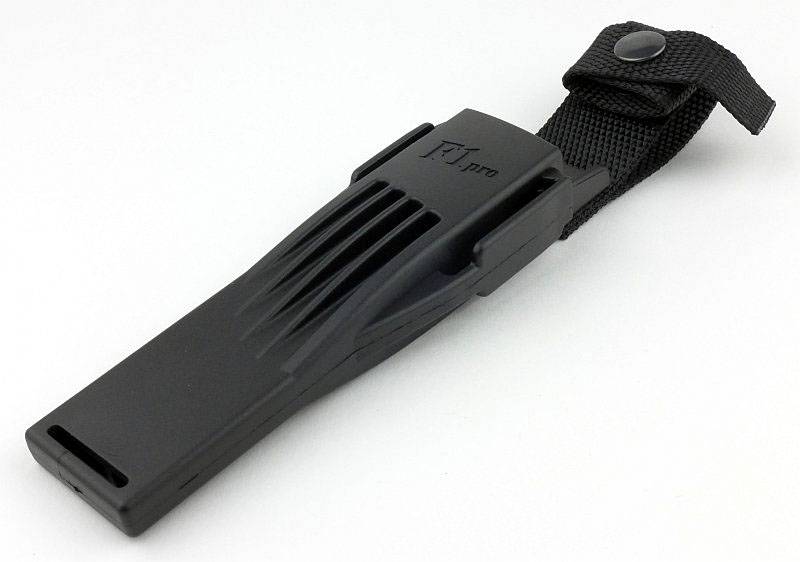
 photo 09 F1 PRO sheath untucked P1170887.jpg

While looking at the sheath, let’s have a closer look as the new strapping points on side. This is the first one.
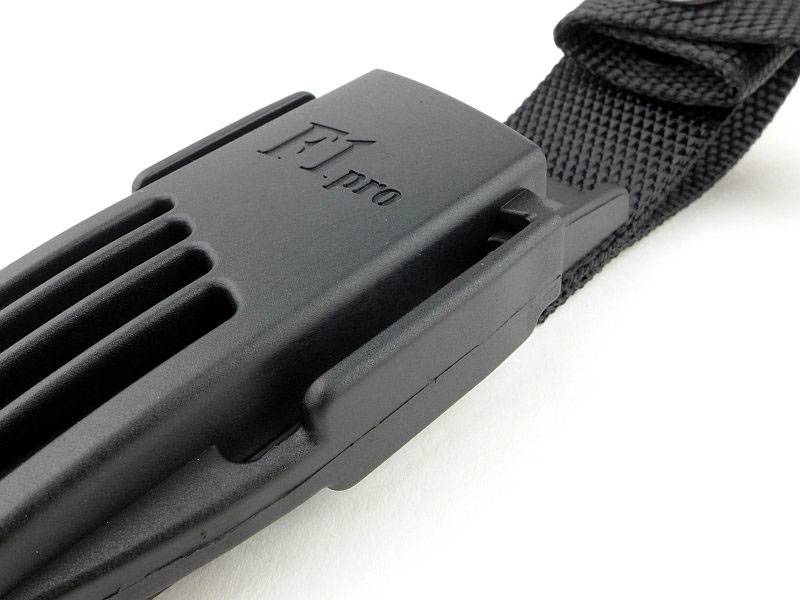
 photo 10 F1 PRO sheath MOLLE P1170889.jpg

On the other side, there is a cut-out in the middle of the strap loop which allows for the movement of the plastic sprung tab which holds onto the F1’s guard. When removing or inserting the F1 Pro, this tab moves far enough out that it would touch the strap loop if it did not have this cut-out.
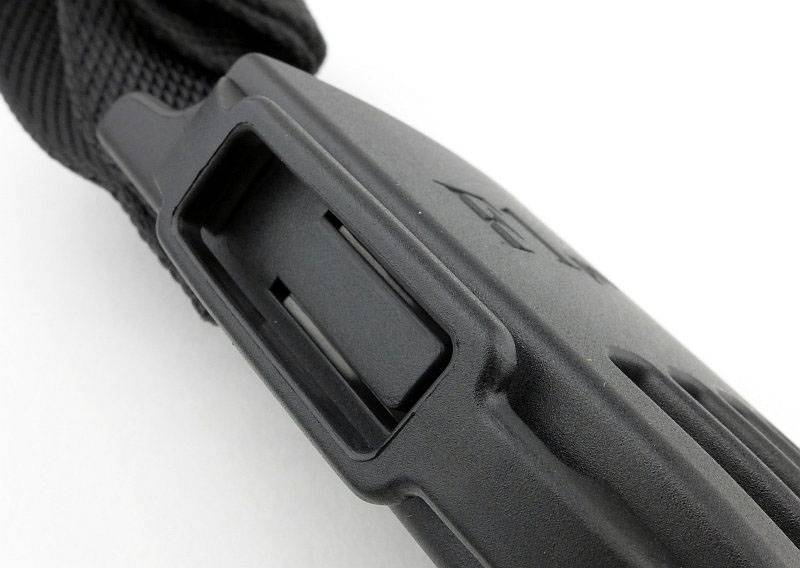
 photo 11 F1 PRO sheath MOLLE P1170893.jpg

The webbing belt loop is riveted onto the back of the sheath.
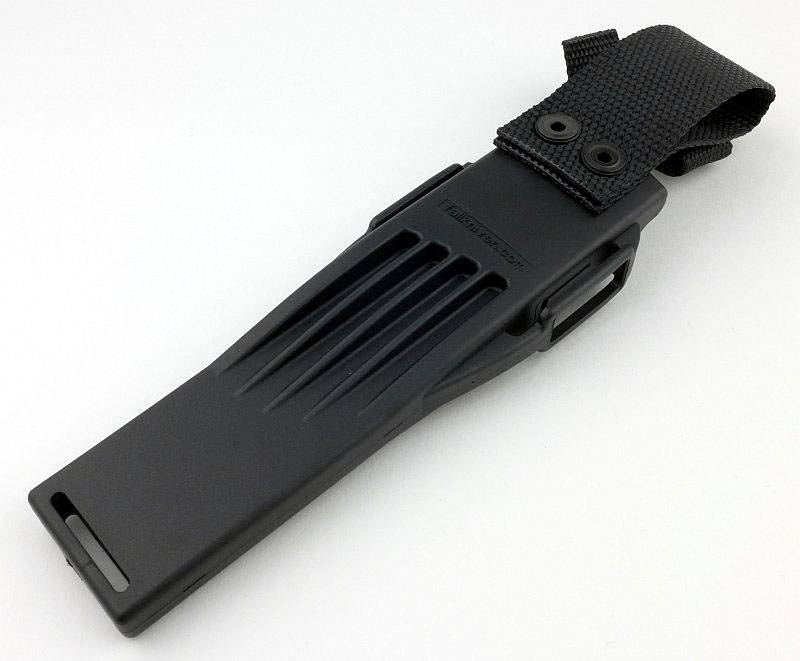
 photo 12 F1 PRO sheath back P1170897.jpg

When sheathed, you can hold the sheath upside-down and even without the retaining strap done up, the knife doesn’t fall out, but for complete security the retaining strap is closed round the end of the handle.
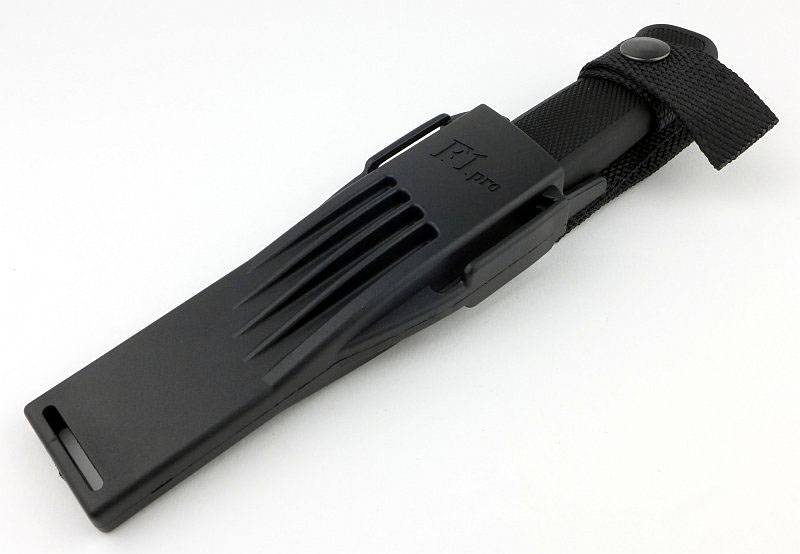
 photo 13 F1 PRO sheathed P1170900.jpg

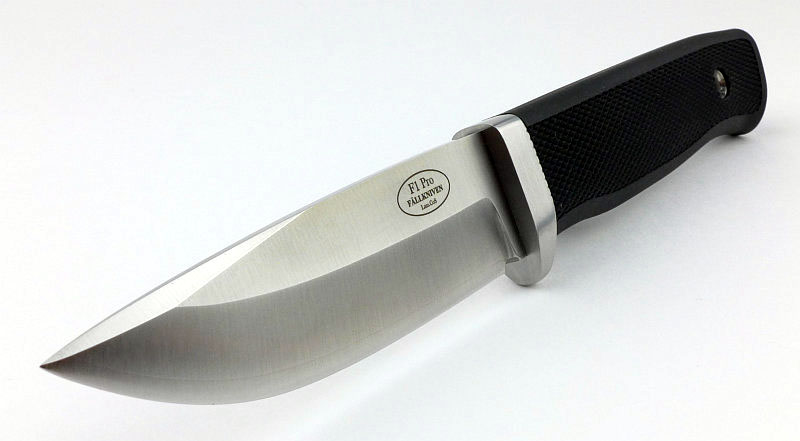
And now for the star of this review, the F1 Pro itself.
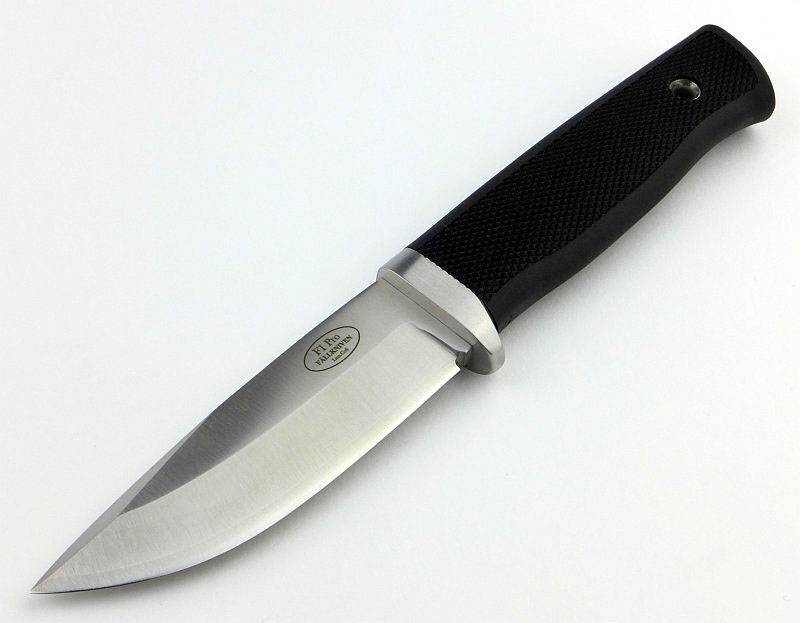
 photo 15 F1 PRO angle P1170909.jpg

Taking a close look at the tip of the blade. You can see the line where the outer and centre steels join.
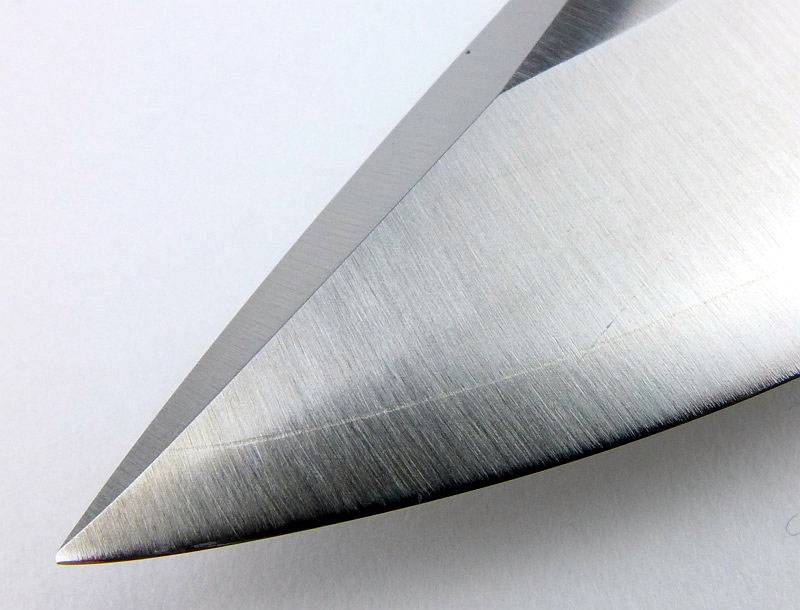
 photo 16 F1 PRO blade tip P1170912.jpg

Looking closer still at the lamination join and cutting edge. Where the steels join it appears as if it is slightly softer as during the finishing processes the line has become slightly recessed. This is not a problem, just an observation.
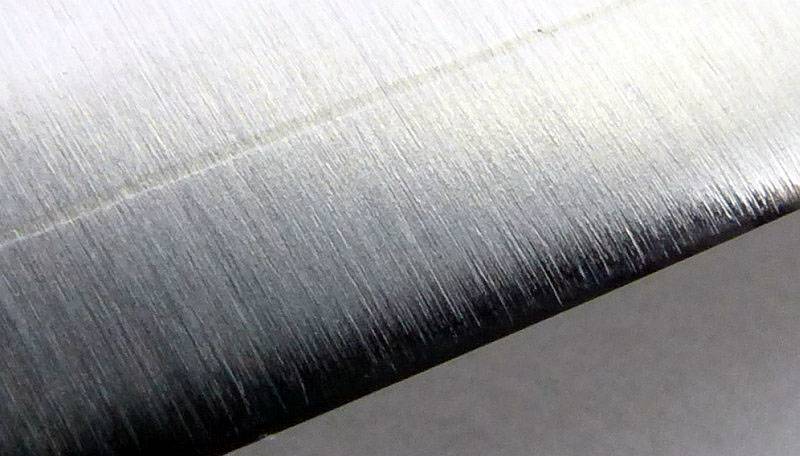
 photo 35 F1 PRO lamination detail P1170975.jpg

Giving the edge a proper termination the F1 Pro has a choil centred on the plunge line.
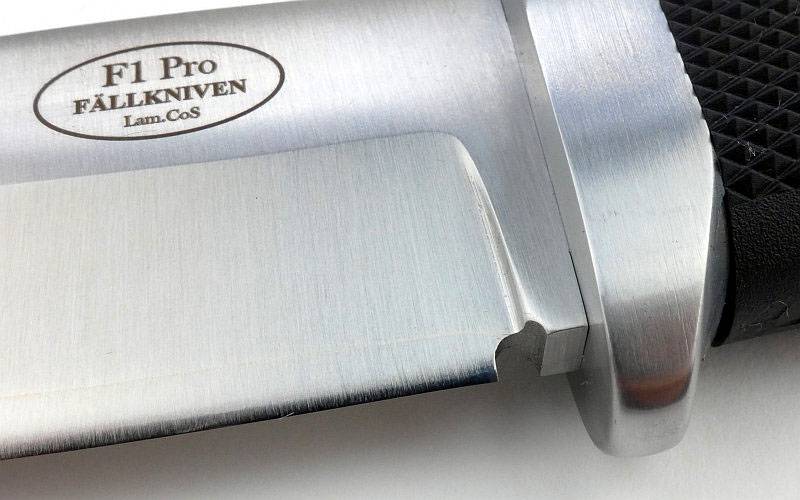
 photo 18 F1 PRO choil P1170919.jpg

Often a point of weakness due to stress concentrators, the F1 Pro’s plunge line has a nicely radiused transition from primary grind to the ricasso.
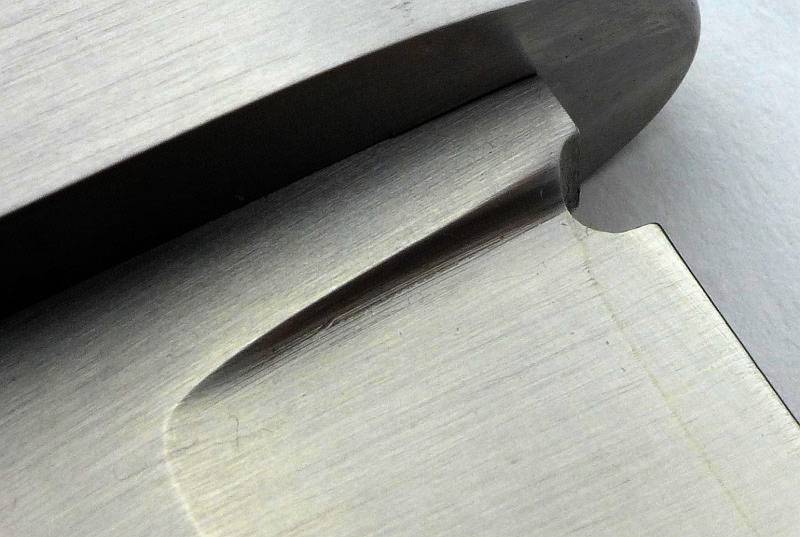
 photo 19 F1 PRO plunge P1170922.jpg

The fit of the guard to the blade is excellent, but if looking closely at the grip to guard fit, the Thermorun handle material extends slightly beyond the guard.
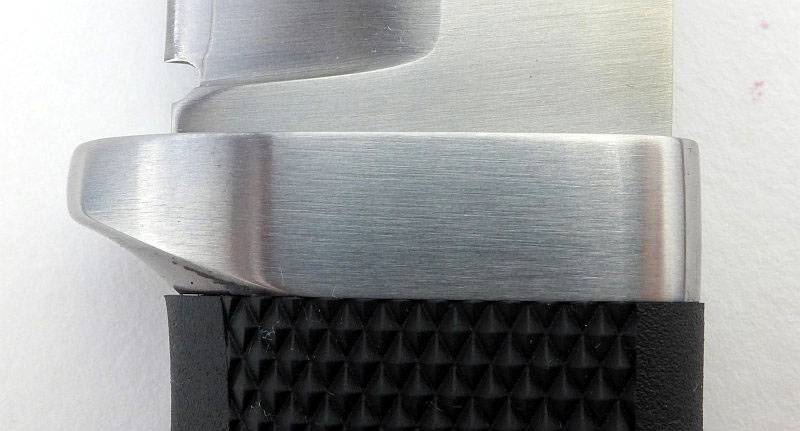
 photo 20 F1 PRO guard P1170924.jpg

As with the F1, the tang of the F1 Pro is exposed at the pommel.
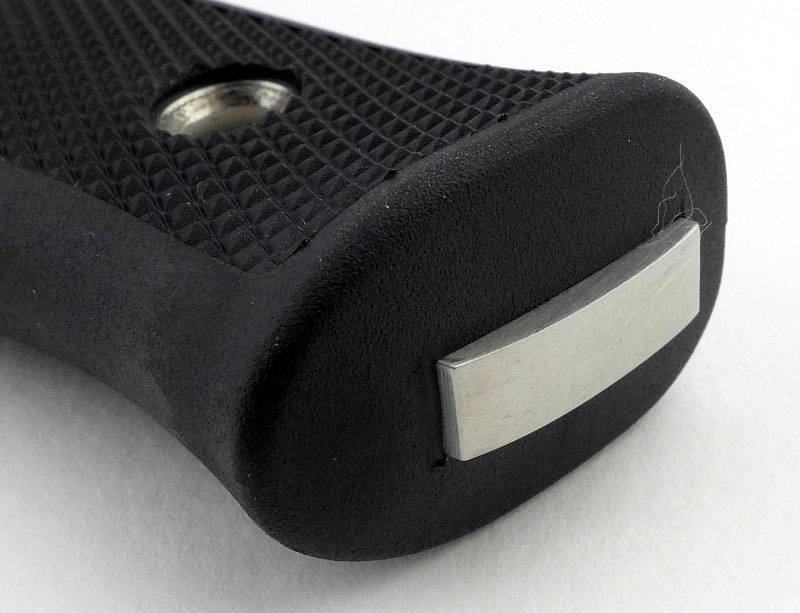
 photo 21 F1 PRO pommel P1170926.jpg

A flared tube is used for the lanyard hole and also secures the grip. The flaring of the tube not only keeps it in place, but also means the lanyard hole has no sharp edges that might have frayed the cord.
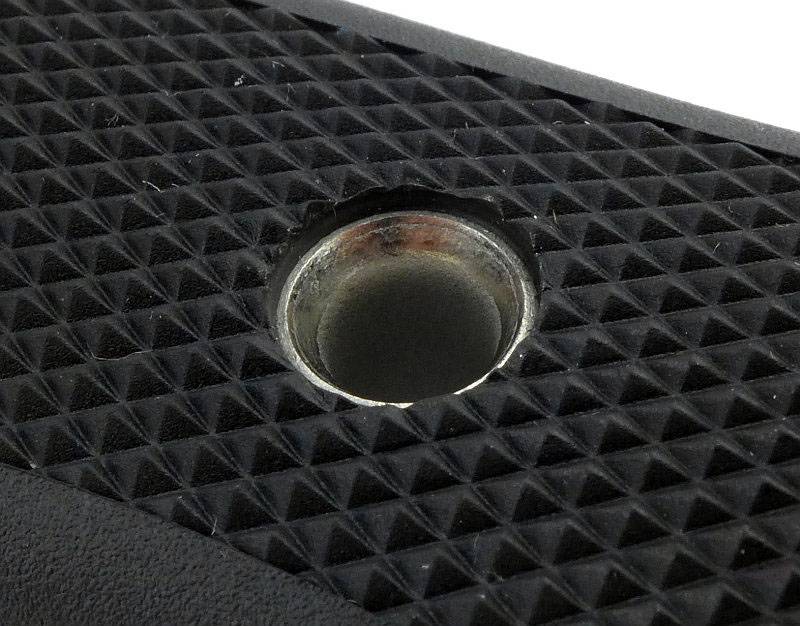
 photo 22 F1 PRO lanyard hole P1170929.jpg

The sides of the handle have a moulded diamond knurling pattern.
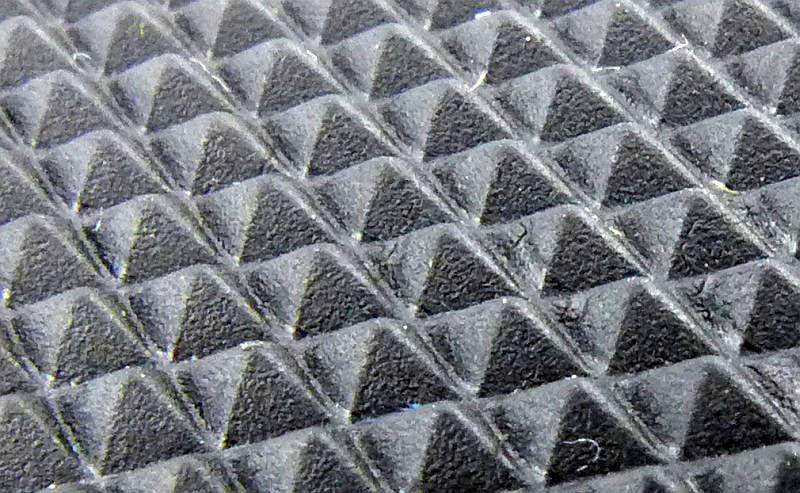
 photo 23 F1 PRO grip P1170932.jpg

Not actually sharp, the corners of the blade’s spine do strike sparks from ferrocerium rods.
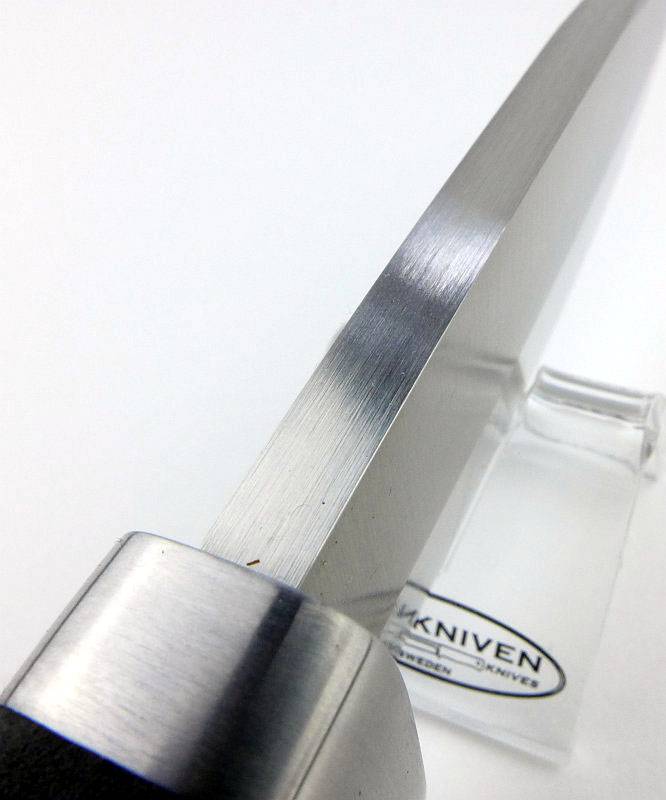
 photo 25 F1 PRO spine P1170937.jpg

Comparing the F1 and F1 Pro:

This review is not simply a comparison of the F1 and this new F1 Pro, but it would not be complete without looking at the two side-by-side.

Starting with an overall view, the F1 Pro’s heavier build is immediately obvious. The new guard and modified blade grind really stand out.
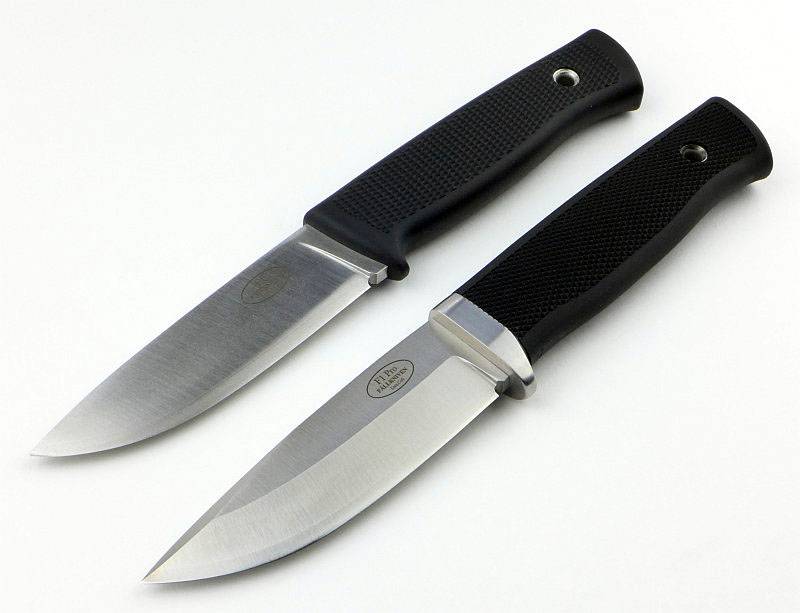
 photo 26 F1 PRO compare angle P1170942.jpg

Staying with an overall view but this time directly side on. Overall dimensions are very similar.
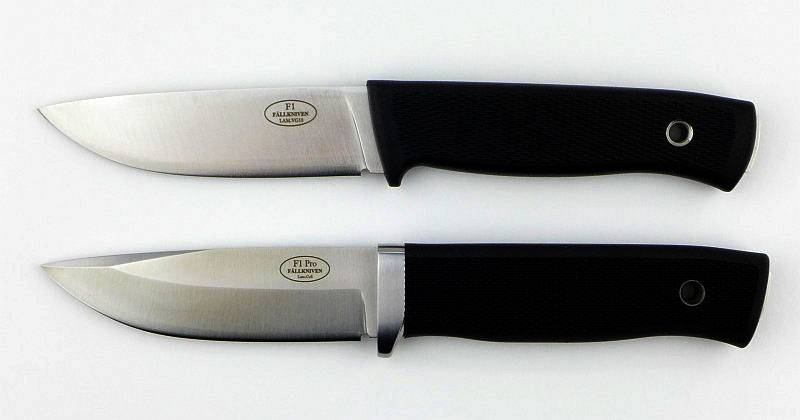
 photo 27 F1 PRO compare straight P1170943.jpg

Focusing in on the handles, the F1 Pro has a slightly deeper grip with less pronounced palm swell.
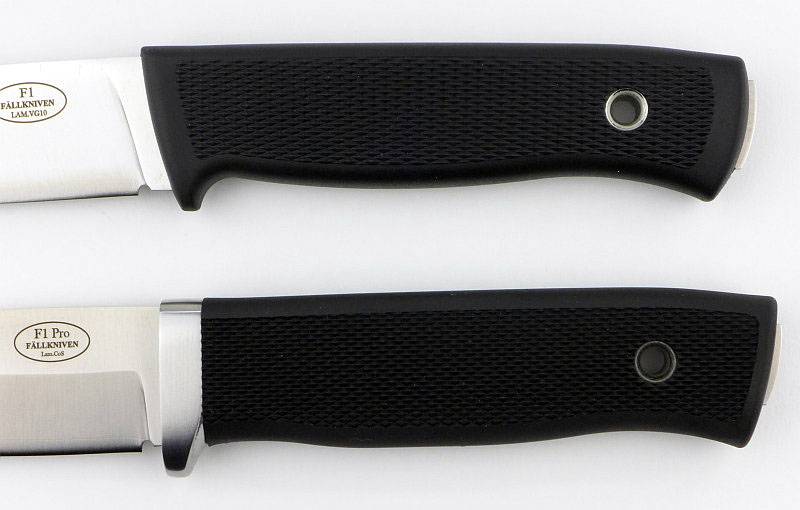
 photo 28 F1 PRO compare handles P1170946.jpg

The new guard sits perpendicular to the edge. On the Original F1 the guard sweeps backwards.
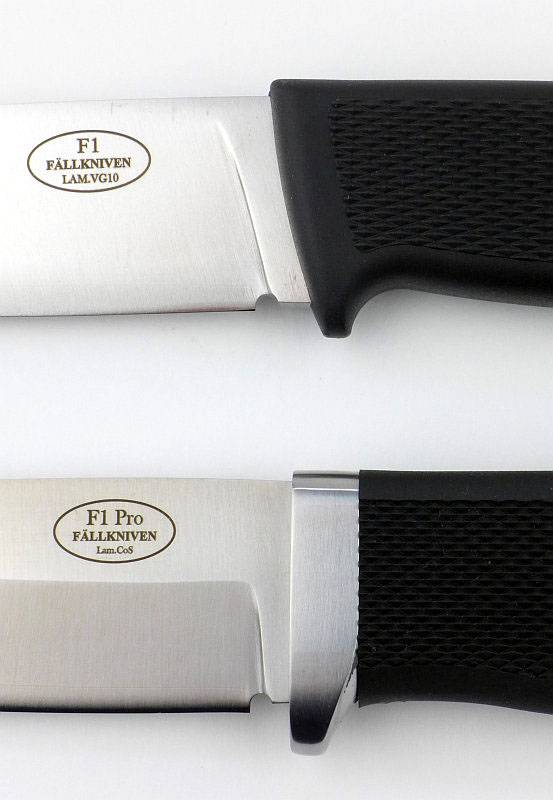
 photo 29 F1 PRO compare guard P1170948.jpg

With a thicker blade stock and sabre grind, the blade of the F1 Pro is significantly stronger than the already strong F1.
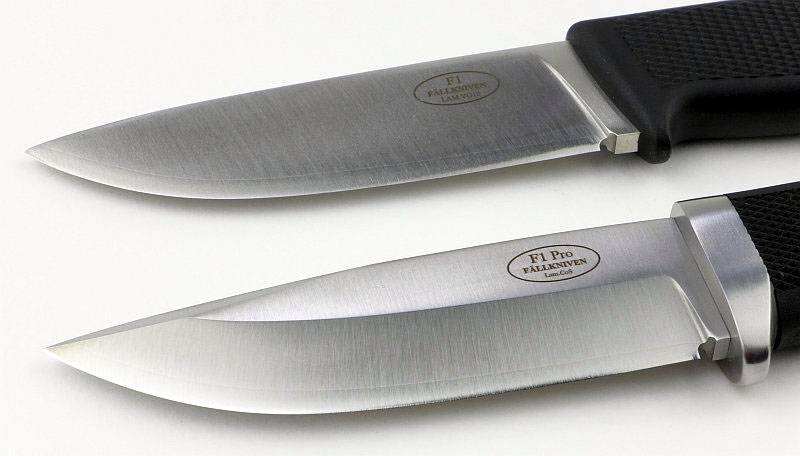
 photo 30 F1 PRO compare blades P1170950.jpg

The exposed tangs also show the thicker blade stock used for the F1 Pro.
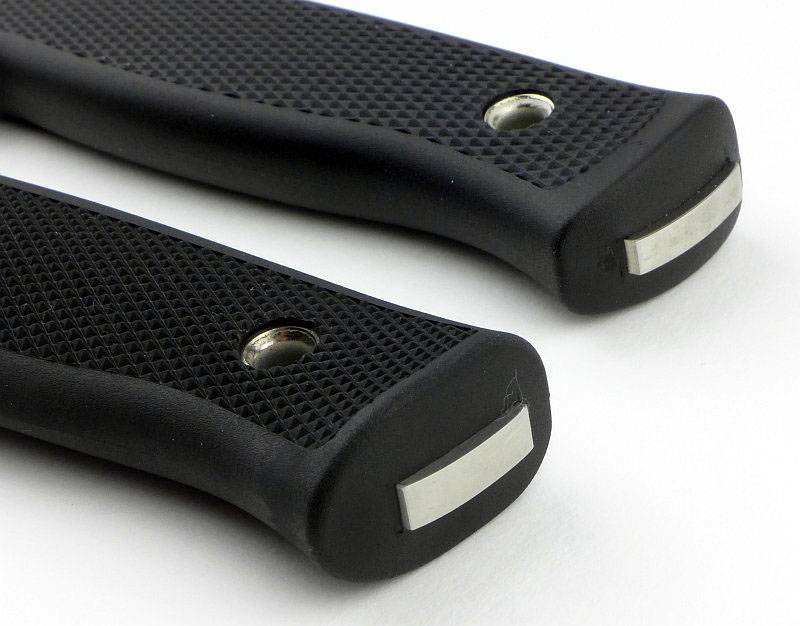
 photo 31 F1 PRO compare pommels P1170952.jpg

A view looking down onto the cutting edge of each knife to show the blade and handle thickness.
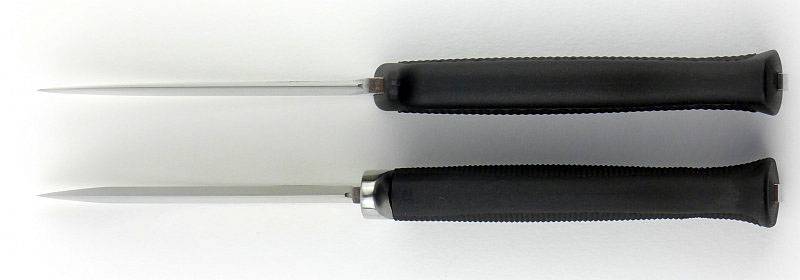
 photo 32 F1 PRO compare tickness P1170957.jpg

Lastly the F1 and F1 Pro sheaths side-by-side. The F1 Pro’s sheath is a bit chunkier than the F1’s.
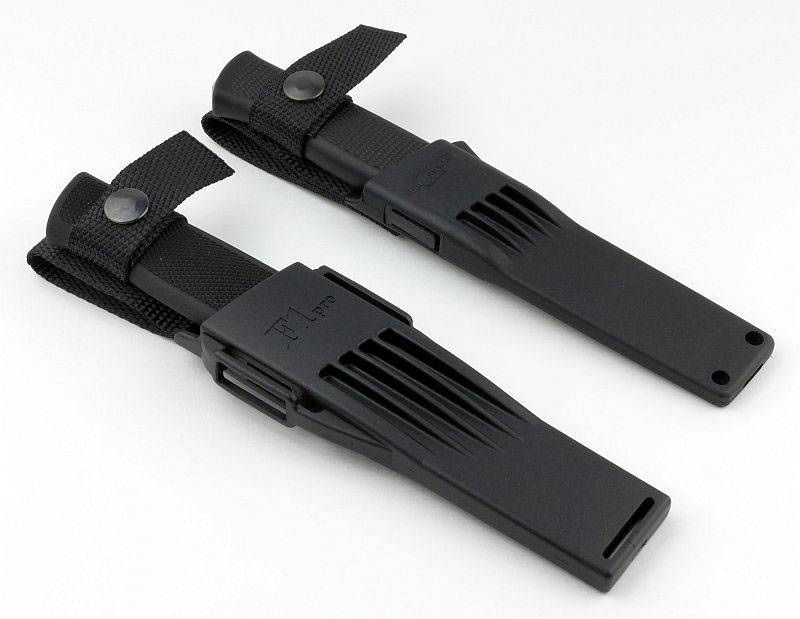
 photo 33 F1 PRO compare sheathed P1170958.jpg

What it is like to use?

With the huge success of the F1, the ‘improved’ F1 Pro certainly has a lot to live up to. Initially I expected the F1 Pro to overshadow the F1 and make it virtually obsolete, but the reality is not so. Both knives have a place, and their differences are what would make you choose one over the other.

Picking up the F1 Pro, you can feel that it is nearly 20% heavier than the F1 though this is not a bad thing, just in keeping with its stronger build.

My hands take an XL size glove, so usually I prefer generously sized handles, especially if I’m going to work hard with it. That said, I’ve always appreciated the F1 being a relatively compact knife, and the F1 Pro still maintains this. A slightly larger grip fits in with this knife as an overall package very well. Even though the sheath has grown slightly as well, it still remains a lot of knife crammed into a small package.
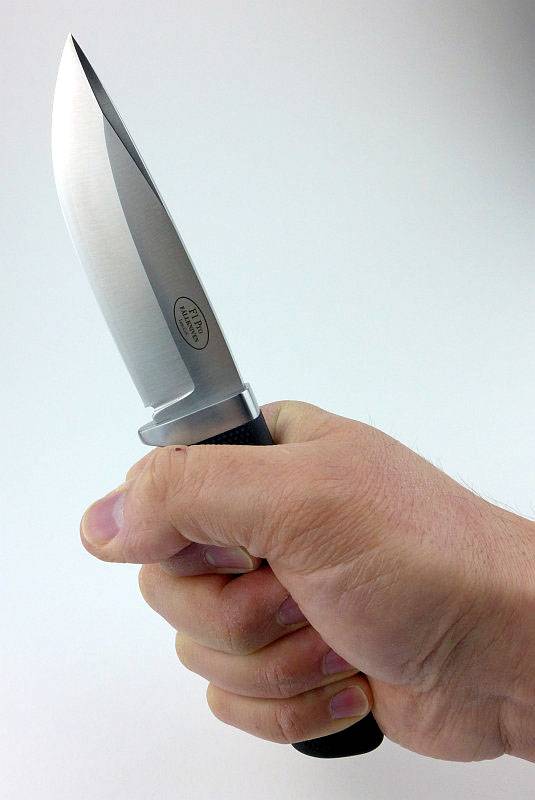
 photo 37 F1 PRO in hand P1170992.jpg

Switching quickly to the hard case supplied with the F1 Pro. You can always leave the case as it came and put the F1 back into it, but once you have the F1 Pro out, you are not going to want to put it back into storage. I keep this one to hand, and it is very easy to pop into a backpack if getting into the great outdoors. So that case….what to do with it? Leaving the foam insert in it is no help as it will only accommodate the F1 Pro, so this needs to come out. With the case being listed as a reusable item, I was surprised that this foam did not want to come out. It seemed very firmly glued into place and I was about to give up when I found that the double-sided tape holding the foam layers together was partially out and sticking the foam to the side of the case as well. After much prying (this is a stiff closed-cell foam), I managed to get it free in one piece. The less patient might have used the F1 Pro to shred this foam liner. Of course, once out, the case can now be used for whatever you like.
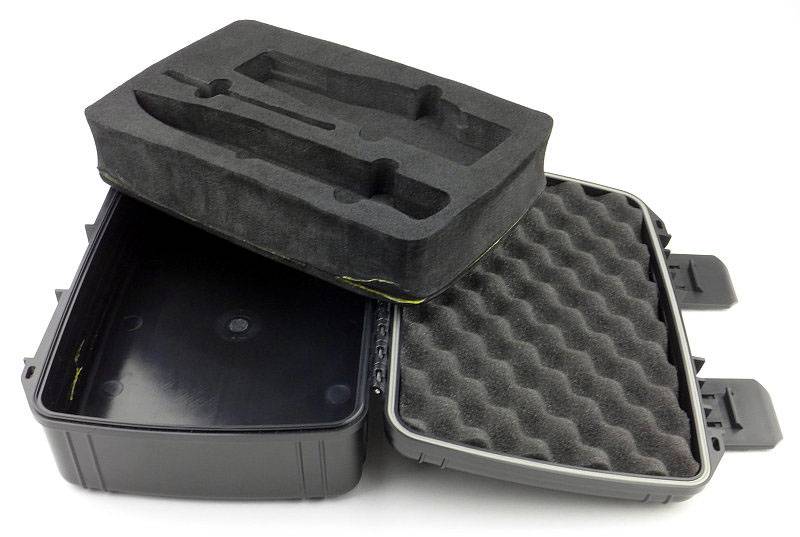
 photo 41 F1 PRO case reuse P1180563.jpg

Time to get out into the field and try it out for various tasks. The first was a bit of wood carving. Not the only knife used for this, but one of the most comfortable thanks to the thick blade stock and the way the edges of the spine were finished. Placing your thumb onto the spine allows for power and control over the cut. After working with it in this way for quite some time, my thumb was not suffering at all and I could have carried on all day (but had other things to do).
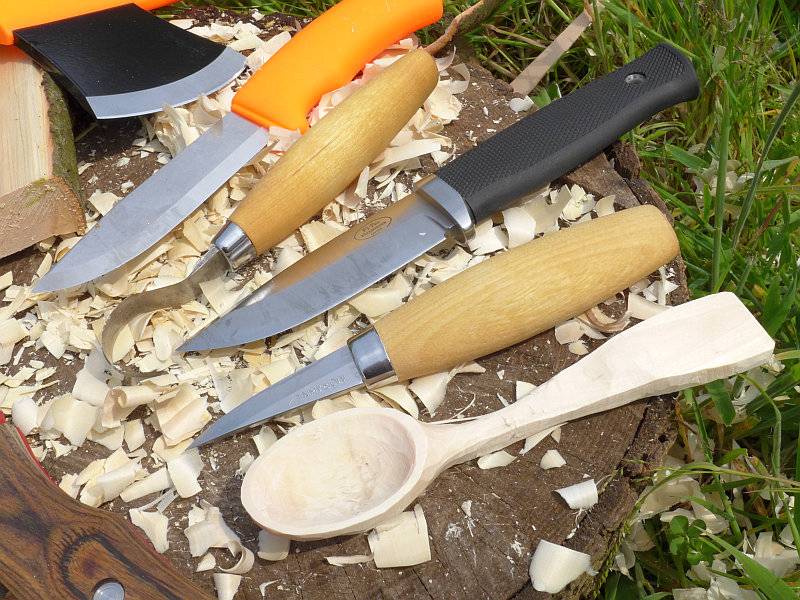
 photo 34 spoon P1190553.jpg

As mentioned above, the spine was very comfortable to press onto, so I wondered how well it would strike a ferrocerium rod (really an essential for a survival knife). It turned out to be really rather good, giving a concentrated and directed shower of sparks.
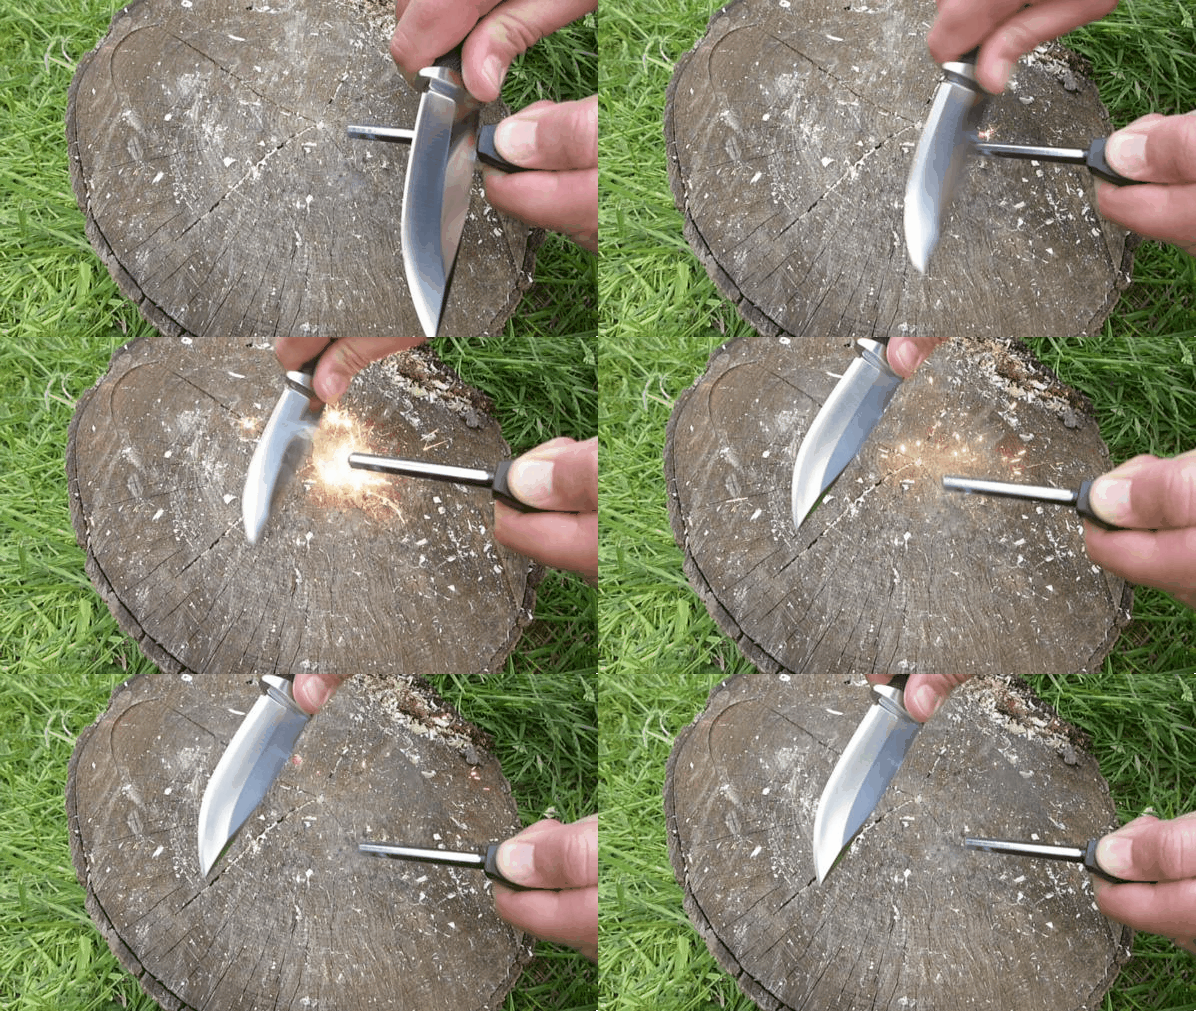
 photo Fallkniven F1 Pro Ferro 600px 200ms Balanced.gif

I thought I would give it a try in the kitchen as well to see what its food preparation capabilities were. A blade this thick is always going to struggle a bit with deeper cuts and this test really showed this. Starting with mushrooms, the cuts were easy and controllable, but the slices were bent over and split by the thick blade.
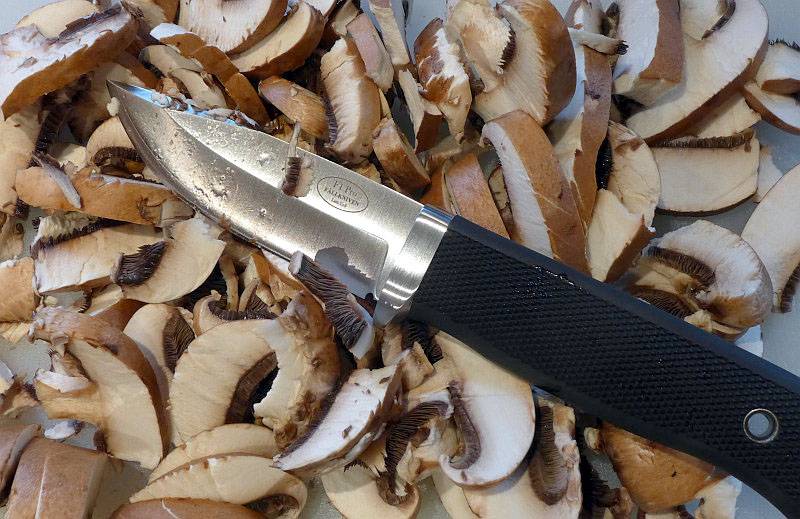
 photo 50 F1 PRO kitchen P1220672.jpg

Moving to a thinner vegetable, it handled the mange-tout with ease and the baby sweetcorn were half cut, half split apart.
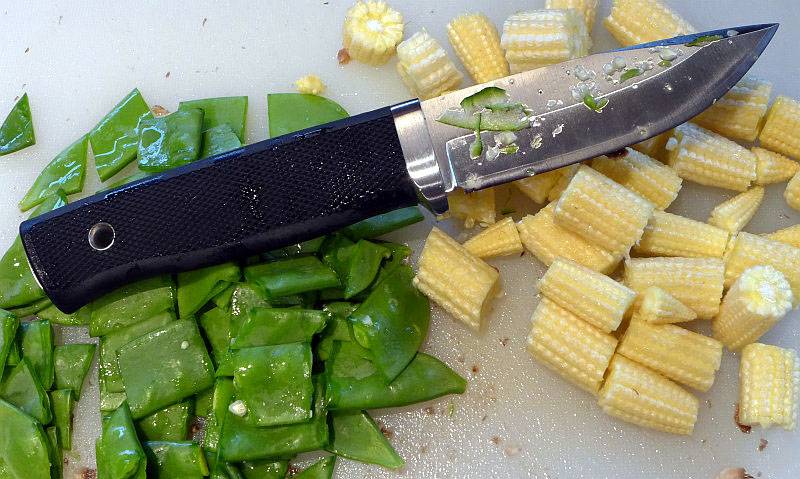
 photo 51 F1 PRO kitchen P1220679.jpg

The biggest challenge to the blade thickness was a crisp courgette. Cutting was easy but there was a great deal of splitting once the blade got a little deeper. Altogether though, the cutting was easy, and even if not my first choice for food preparation, the F1 Pro worked well enough.
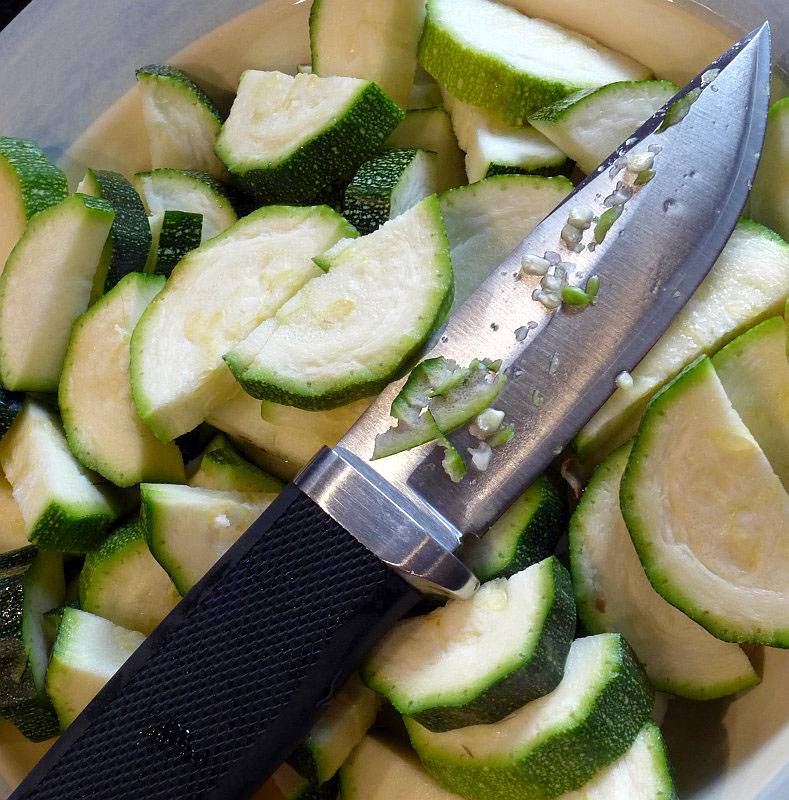
 photo 53 F1 PRO kitchen P1220683.jpg

A little mention of that convex edge and maintaining it. For many, the maintenance of a convex edge is challenging. It is easy to set a knife at an angle and sharpen it, but the convex edge is a curve. This can be made even more difficult with an extended convexed edge, and in the case of the F1 Pro, the entire primary grind is convexed. To sharpen a convex edge you need to remove material over the entire convexed section, so for the F1 it means you really need to work on the entire primary grind. It will never look like new once you have done this. You can of course start to put a standard bevel onto the F1 Pro and it will still work well. I sometimes do this and once the bevel has got a little larger I just knock off the shoulder of the bezel (adding a second bevel) giving a pseudo convex effect. It is generally much easier to do this in the field than attempt a full convex sharpen.

Reader’s Note: There is a commonly known ‘simple’ convexing method using wet and dry paper and a mousemat, so you may want to look into this for maintenance at home. It is not really an ‘in the field’ method. Convexing by hand with a flat stone requires practice and a methodical approach, but can be done in the field with a small stone.

Is the F1 Pro going to be right for you? If you want a high strength, compact and efficient cutting tool, then the answer will be ‘yes’. You could also choose the tried and tested, proven design of the original F1, which gives you a slightly lighter and more compact overall package (at the cost of some blade strength), and this would be fine for most users and most conditions. ‘Most conditions’ being the crucial part of that description, as should you find yourself in an emergency situation where the knife might be tested to its limits, you might prefer to have all the strength you possibly could. The F1 Pro has that extra strength ‘in case’ you need it.

Taking the F1 Pro on its own merits, and you have an extremely sturdy, easily manageable cutting tool with excellent edge retention (thanks to the Cobalt Steel). The F1 Pro is a complete package with the knife/sheath, DC4 sharpener and reusable plastic case.

Review Summary

The views expressed in this summary table are from the point of view of the reviewer’s personal use. I am not a member of the armed forces and cannot comment on its use beyond a cutting tool or field/hunting knife.

Something that might be a ‘pro’ for one user can be a ‘con’ for another, so the comments are categorised based on my requirements. You should consider all points and if they could be beneficial to you.

_______________________________________________ _______________________________________________
Things I like What doesn’t work so well for me
_______________________________________________ _______________________________________________
Builds on an already proven formula and reputation. Quality and strength comes at a higher price.
Cobalt steel edge. Relatively heavy for its size.
Very strong blade. Convex edge can be more difficult to maintain with standard whetstones.
Strikes a ferrocerium rod well. Thicker blade less suited to deeper cuts.
Thick spine is very comfortable to push with the thumb for heavy cuts.
Price also includes the DC4 sharpener and reusable waterproof case.


Discussing the Review:

Please feel free to add comments to the review, but the ideal place to freely discuss these reviews is on a forum. If you started reading the shorter forum version of the review, but followed the link this full exclusive review, please return to that forum to discuss the review there.
If you read the review entirely on Tactical Reviews, please consider one of the following to join in any discussion.

EdgeMatters – Sponsored Reviews (UK based Forum for Knife Makers and Collectors)

BladeForums – Knife Reviews (US based Forum for Knife Discussion)

CandlePowerForums – Knife Reviews Section (Largest and Friendliest Flashlight Community Forum)

Light Review: FOURSEVENS Preon P1 and P2

FOURSEVENS’ Preons have been very popular and well regarded AAA powered EDC lights. Being time for a reboot, here are the current updated versions of the Preon P1 and P2.

(And yes, they do have a high efficiency XP-L LED.)
 photo 09 Preon P2 angle LED P1160829.jpg

Taking a more detailed look:

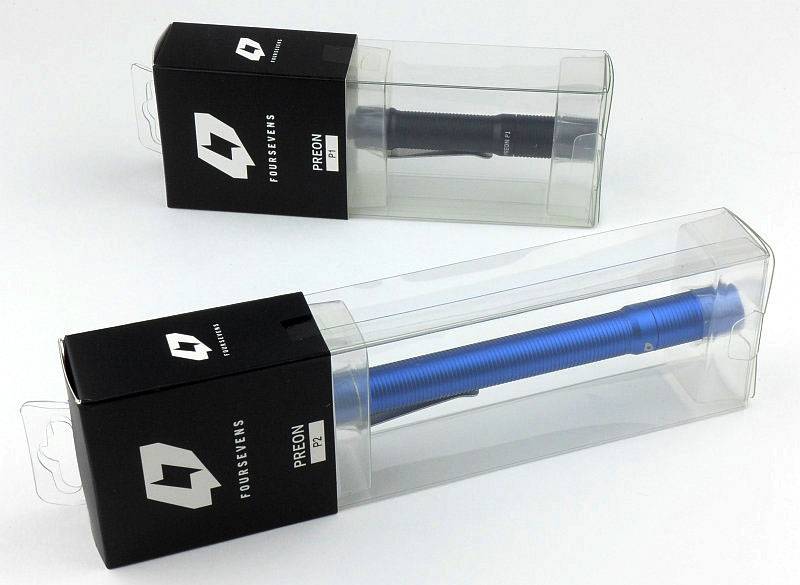
Presentation is great with FOURSEVENS’ standard clear plastic box packaging.
 photo 01 Preon P1P2 boxed P1160796.jpg

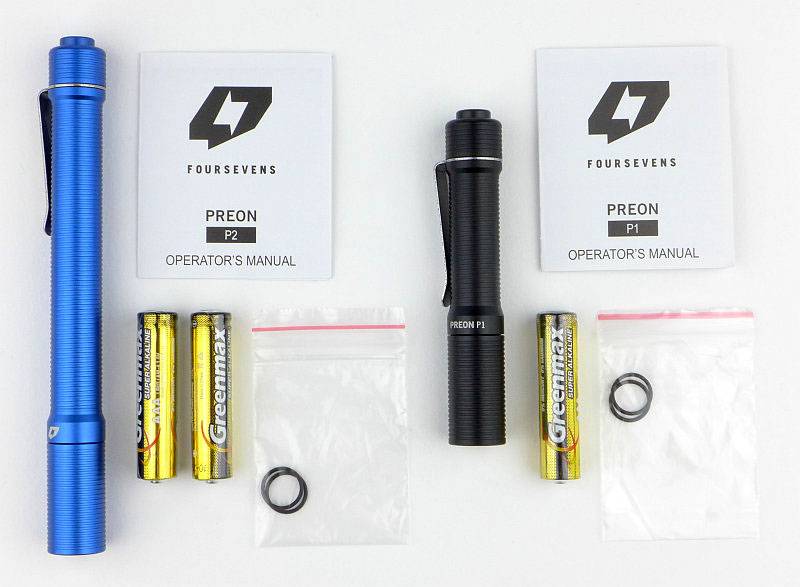
Each Preon comes with one set of AAA Alkaline cells, two spare O-rings and the instructions.
 photo 02 Preon P1P2 unboxed P1160798.jpg

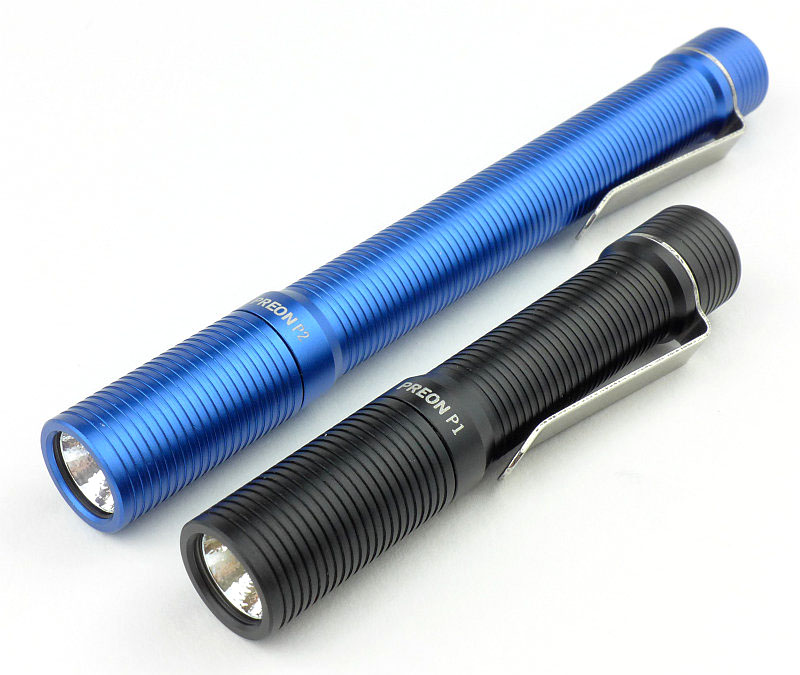
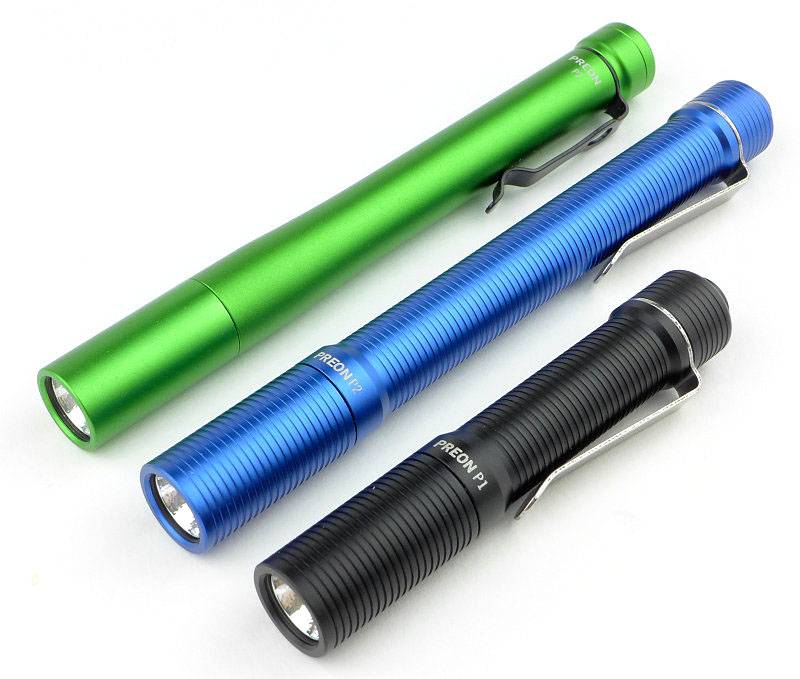
A quick look at the previous generation Preon P2 (in toxic green) with the latest generation Preon P1 and P2.
 photo 04 Preon P1P2 trio angle P1160808.jpg

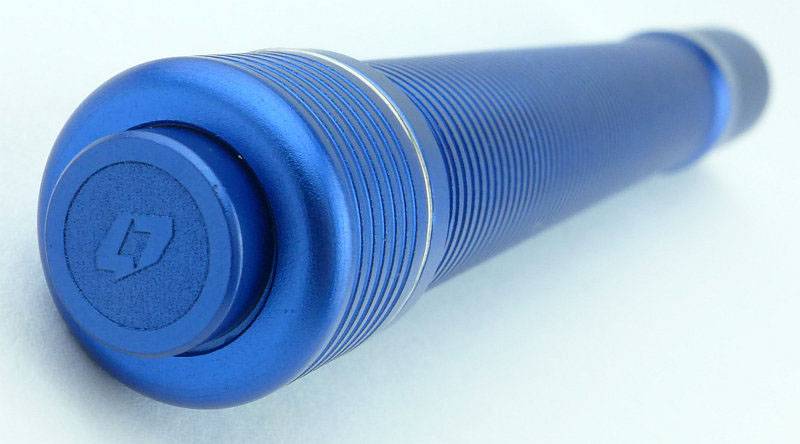
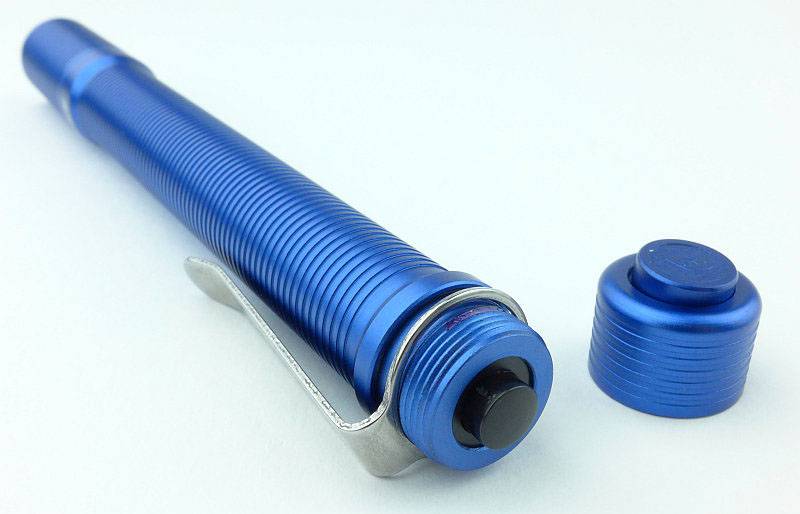
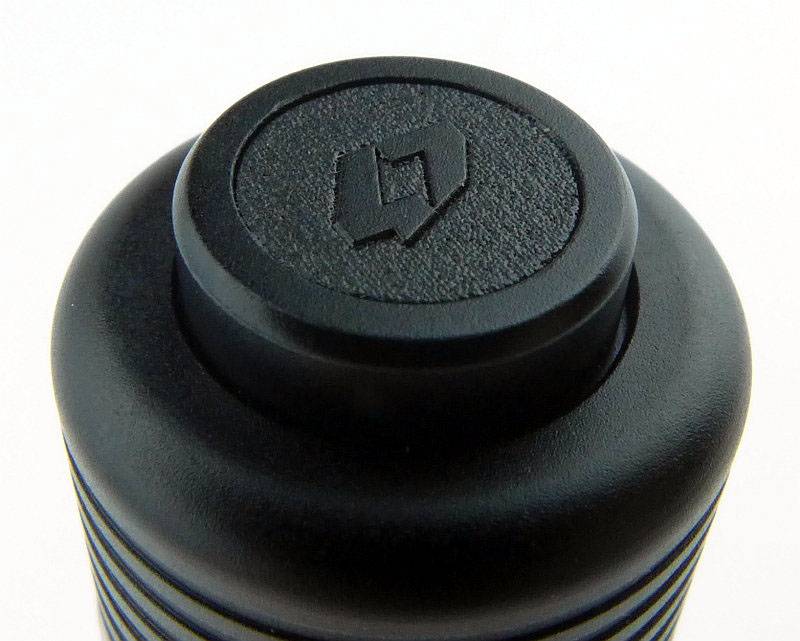
A feature of the Preons is the metal switch button. Prior to anodising, this has been engraved with the FOURSEVENS logo.
 photo 05 Preon P2 switch engraving P1160815.jpg

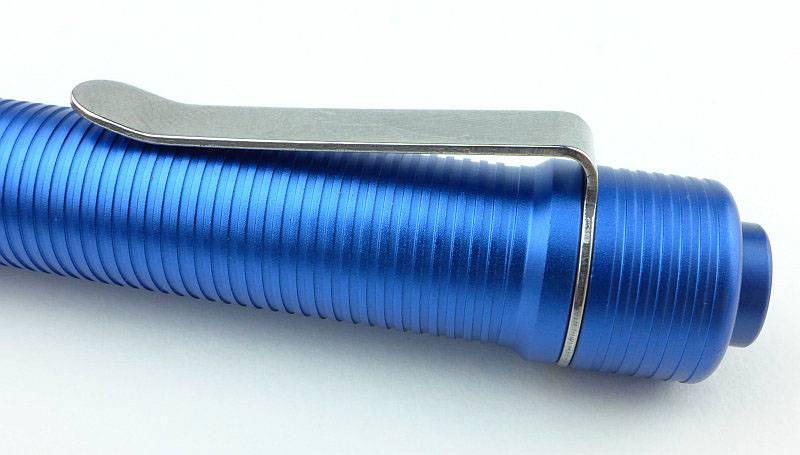
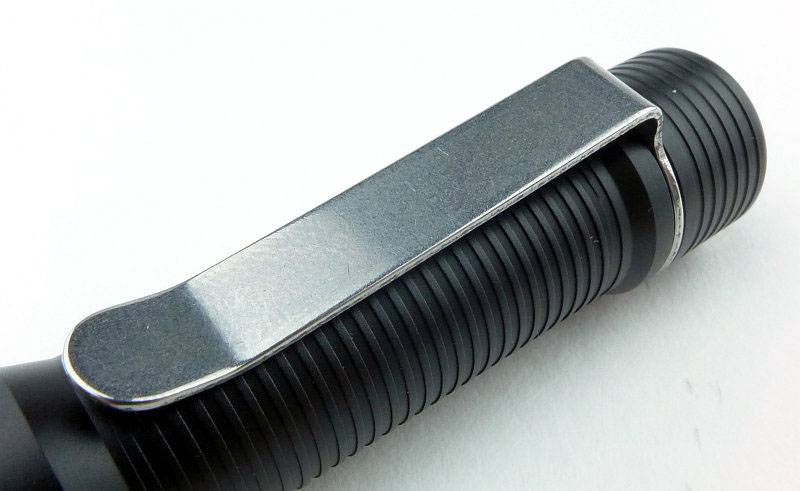
The stainless steel pocket clip is a well finished and has a well-suited tension (not too stiff) to the size and weight.
 photo 06 Preon P2 clip P1160819.jpg

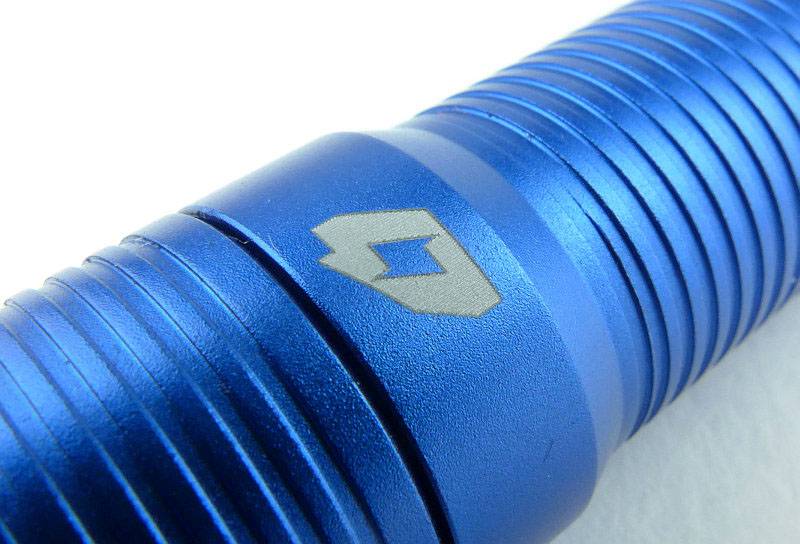
Just above the head of the light the FOURSEVENS logo is laser engraved through the anodising.
 photo 07 Preon P2 engraving P1160821.jpg

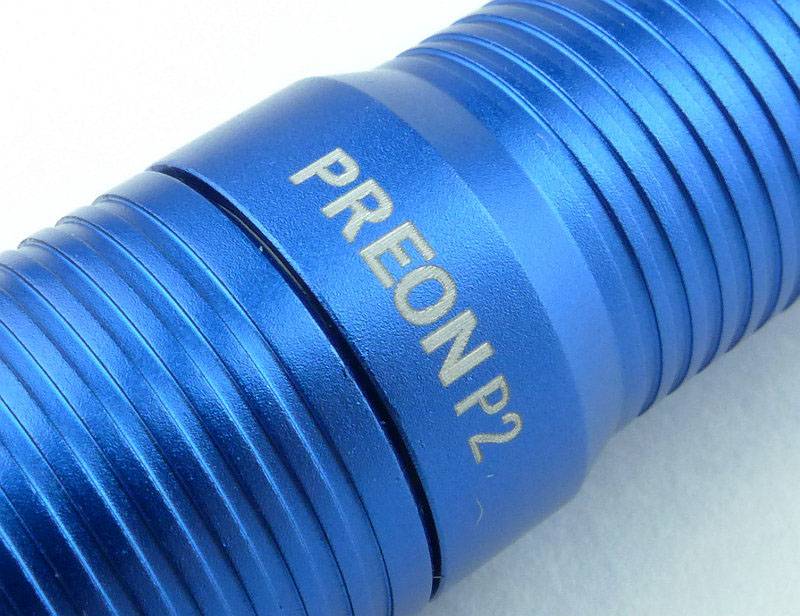
On the opposite side the model is engraved.
 photo 08 Preon P2 engraving2 P1160825.jpg

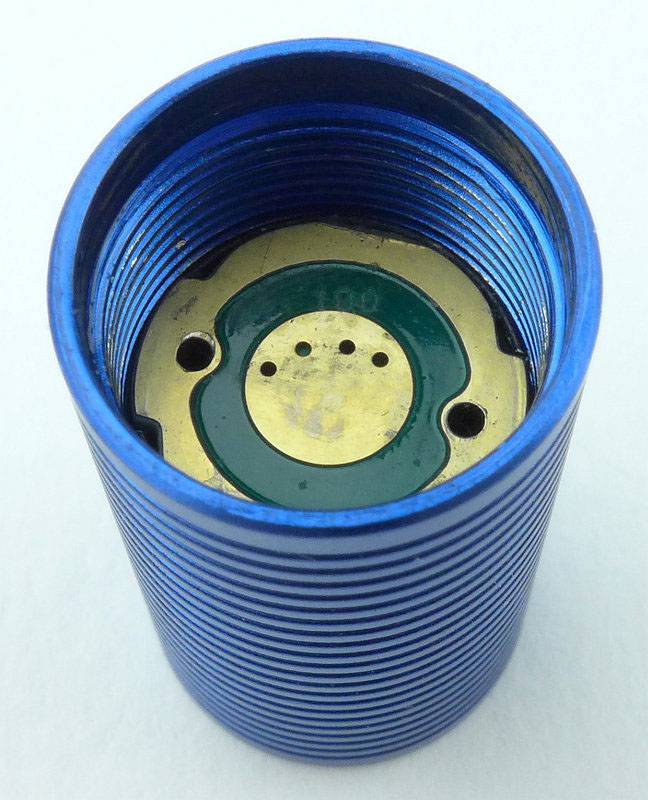
A view of the contacts inside the head. (This is the same for the P1 so the P1 is not being shown.)
 photo 10 Preon P2 head contact P1160831.jpg

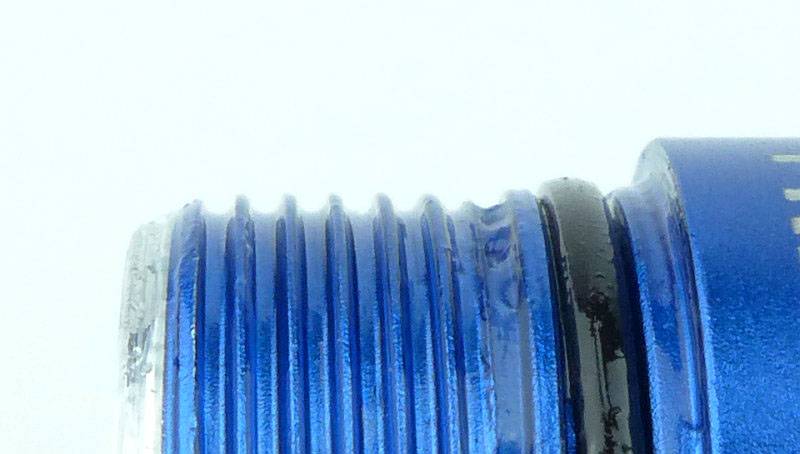
The threads are a standard form, and are well lubricated. (This is the same for the P1 so the P1 is not being shown.)
 photo 11 Preon P2 threads P1160834.jpg

You can unscrew the switch cap and take the clip off, but this does not give access to the battery chamber.
 photo 12 Preon P2 switch cap off P1160837.jpg

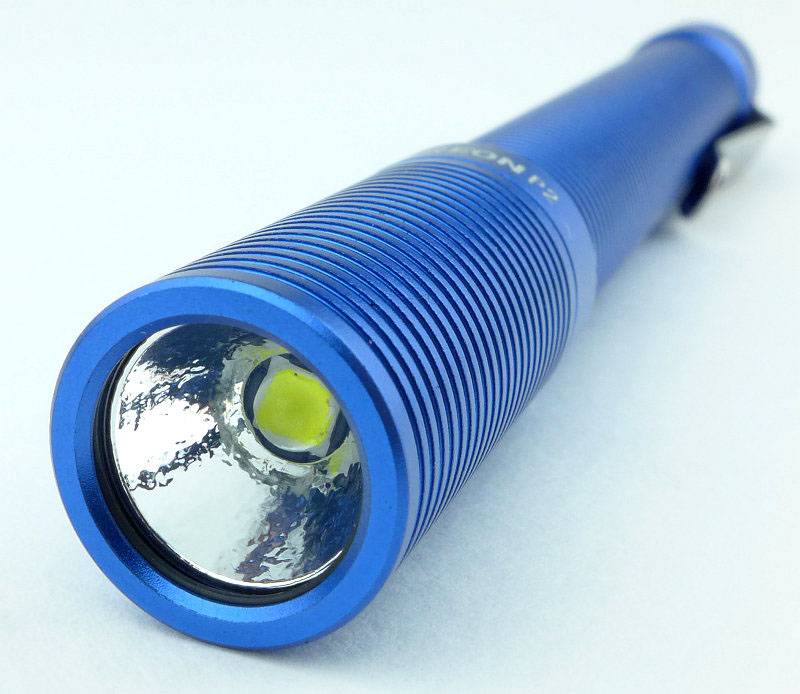
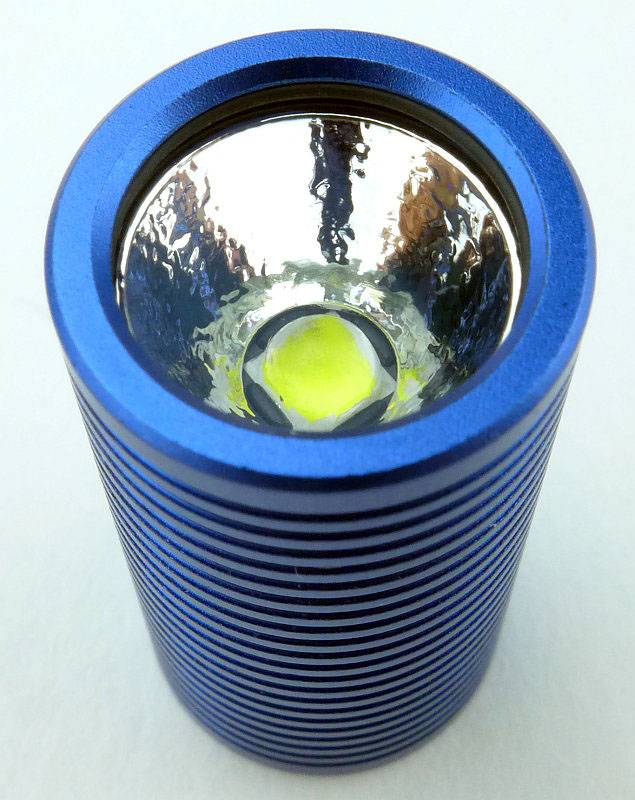
An XP-L LED sits in a small textured reflector.
 photo 13 Preon P2 reflector P1160839.jpg

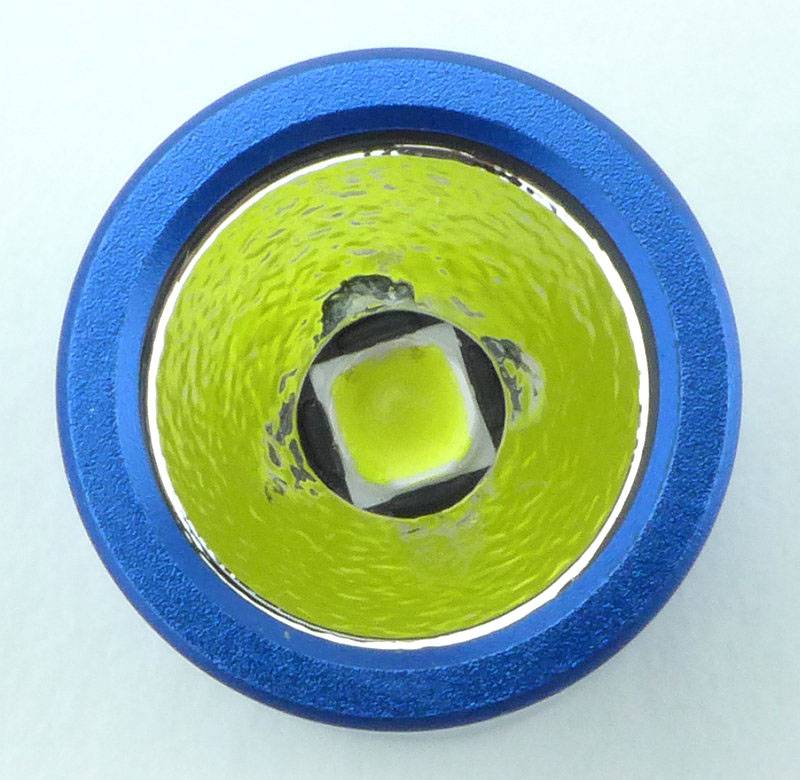
Looking straight into the small reflector.
 photo 14 Preon P2 LED P1160845.jpg

The clip on the P1 is the same, but here is a view from a different angle.
 photo 15 Preon P1 clip P1160848.jpg

The P1 also has a metal switch cap over a forward-clicky switch.
 photo 16 Preon P1 switch P1160854.jpg

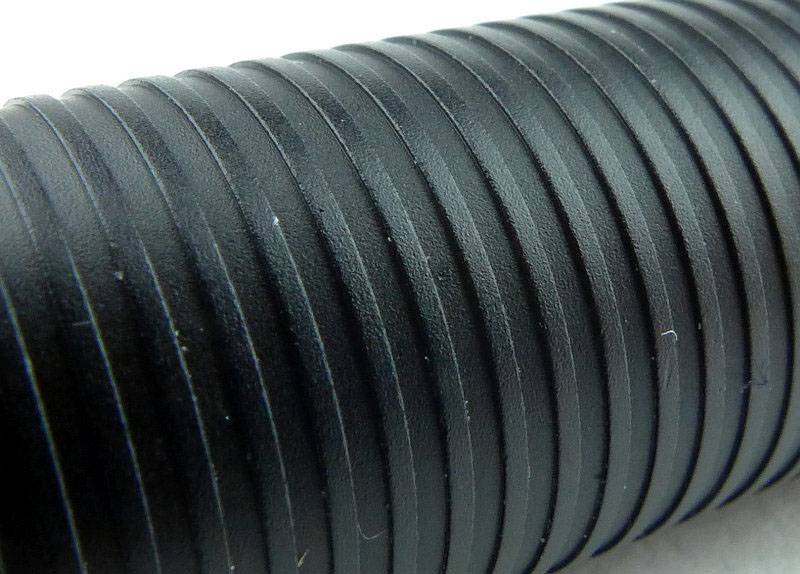
The new Preons feature a fully textured body with grooves for grip along the entire length.
 photo 17 Preon P1 body P1160855.jpg

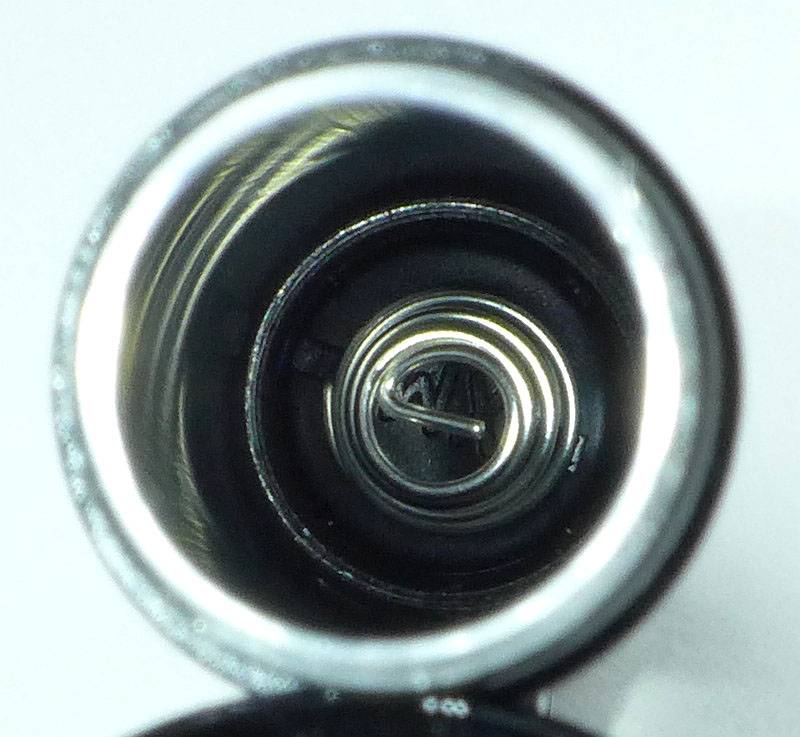
With it shorter battery tube it is just possible to show the positive contact spring terminal.
 photo 18 Preon P1 negative terminal P1160864.jpg

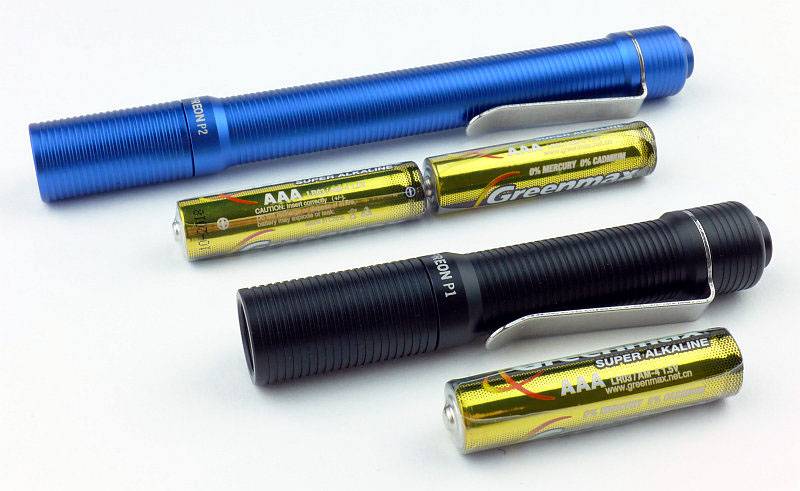
For scale, each Preon is shown with its AAA cells next to it.
 photo 19 Preon P1P2 size P1160870.jpg

The beam

Please be careful not to judge tint based on images you see on a computer screen. Unless properly calibrated, the screen itself will change the perceived tint.

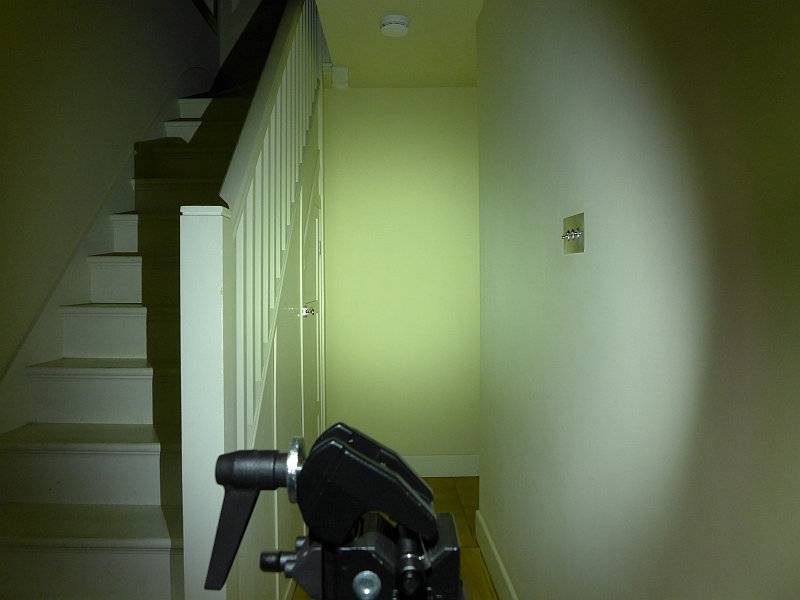
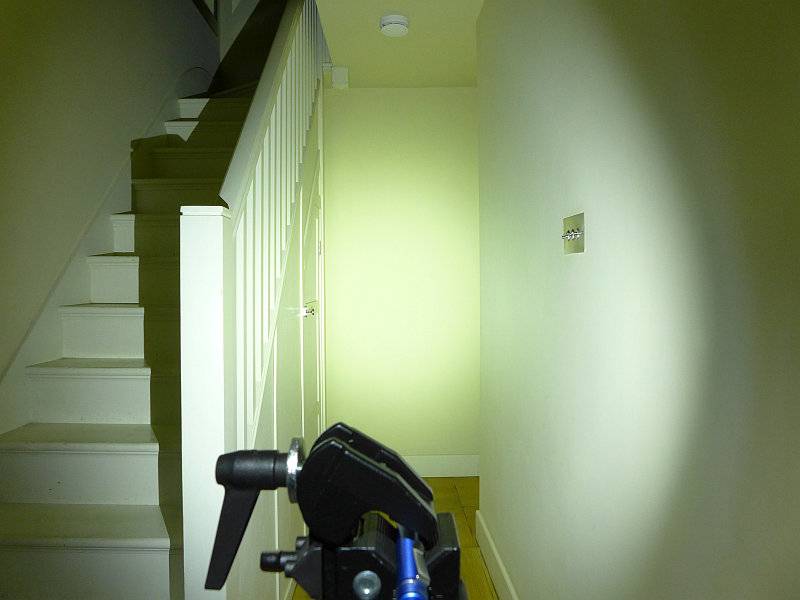
The indoor beamshot is intended to give an idea of the beam shape/quality rather than tint. All beamshots are taken using daylight white balance. The woodwork (stairs and skirting) are painted Farrow & Ball “Off-White”, and the walls are a light sandy colour called ‘String’ again by Farrow & Ball. I don’t actually have a ‘white wall’ in the house to use for this, and the wife won’t have one!

For this set of beamshots, the exposure has been kept the same for the P1 and P2 to show their relative brightness.

Starting indoors with the P1, it has plenty of power for your close range EDC needs, with a nice wide, soft, hotspot and wide spill.
 photo 20 Preon P1 indoor beam P1170374.jpg

With the P2 it looks the same just brighter, as the P2 has double the output of the P1.
 photo 21 Preon P2 indoor beam P1170370.jpg

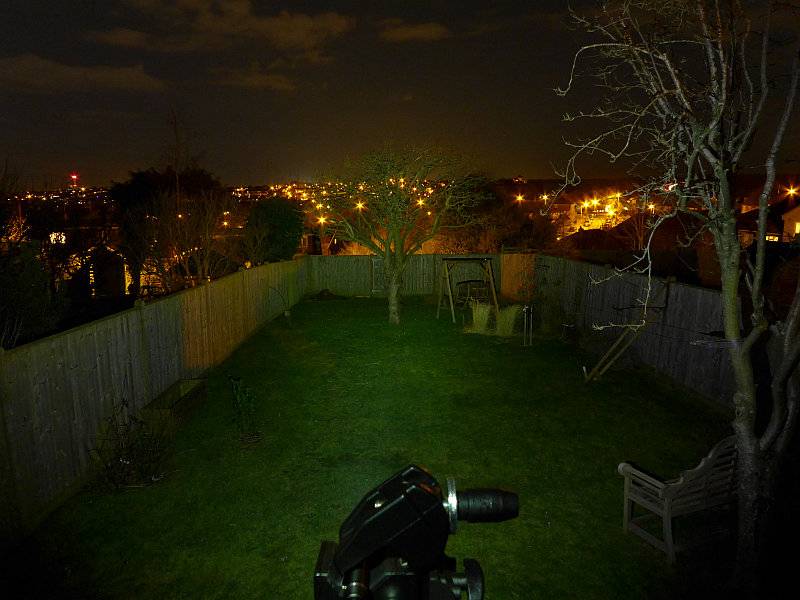
At outdoor ranges the Preons struggle as they are only AAA powered and have a flood orientated beam. These exposures are long to show anything. The P1 doesn’t have much impact.
 photo 22 Preon P1 outdoor beam P1170293.jpg

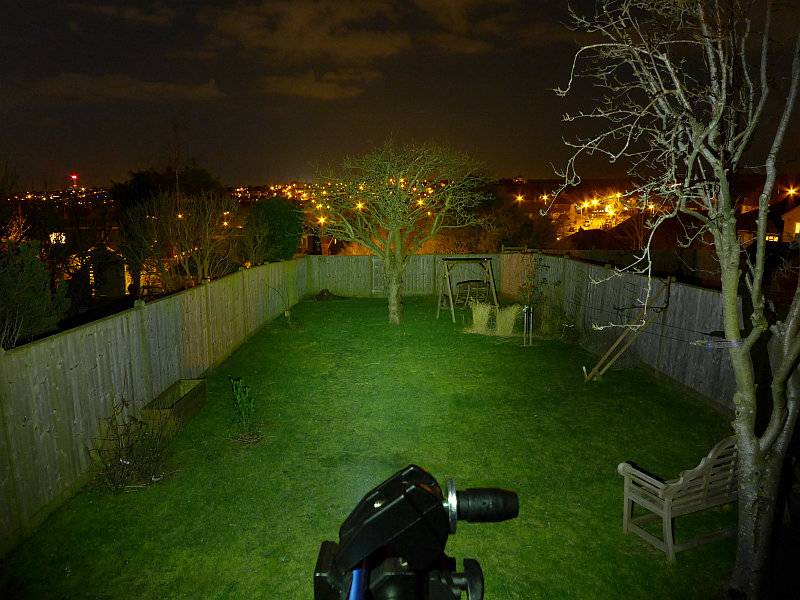
With the same exposure to allow direct comparison, the P2 looks a bit better, but this is a long exposure, so don’t expect too much at this range.
 photo 23 Preon P2 outdoor beam P1170285.jpg

Modes and User Interface:

Both the Preon P1 and P2 operate in the same way with a forward-clicky switch.
In total, there are 7 output modes which can be used – Low, Medium, High, Strobe, SOS, Beacon (high), Beacon (low).

To fine tune the Preon to your needs, you can set one of 5 possible ‘Configurations’ which have only certain modes available:
Configuration 1: High
Configuration 2: Previous, High, Low
Configuration 3: Previous, High, Strobe
Configuration 4: Previous, Low, Medium, High, Strobe
Configuration 5: Previous, Low, Medium, High, Strobe, SOS, Beacon (high), Beacon (low)

By default, configuration 2 is set. To change configuration, rapidly press the switch 10 times within 2s, holding or clicking the tenth press.
At this point the Preon will flash 1 to 5 times to indicate the selected configuration.
Quickly turn the Preon OFF and ON again to move to the next configuration, and repeat until you have the desired configuration. To memorise the setting, turn the Preon OFF for 5 seconds.

The Preon has a memory of the last mode used. This is relevant only on Configurations 2, 3, 4 and 5.
To change to the next mode in the chosen configuration, turn the Preon OFF and ON again within one second.
As shown in the Configuration list above, when you first turn the Preon ON, you get the ‘previously used’ output mode. When you then change mode, you jump to the start of the set of modes for that Configuration.
For example, if you are set to Configuration 5 and previously used Strobe, when you first turn the Preon ON you get Strobe, and when changing modes the next mode becomes Low, Medium… (In this example you do not go to SOS as the next mode).

Batteries and output:

The Preon P1 runs on 1x AAA and the P2 on 2x AAA; either Alkaline of NiMh cells can be used (maximum input voltage 3.0V).

To measure actual output, I built an integrating sphere. See here for more detail. The sensor registers visible light only (so Infra-Red and Ultra-Violet will not be measured).

Please note, all quoted lumen figures are from a DIY integrating sphere, and according to ANSI standards. Although every effort is made to give as accurate a result as possible, they should be taken as an estimate only. The results can be used to compare outputs in this review and others I have published.

___________________________________________ ________________________________ ________________________________
P1/P2 using AAA Eneloop I.S. measured ANSI output Lumens PWM frequency or Strobe frequency (Hz)
___________________________________________ ________________________________ ________________________________
P1 – High 127 1000
P1 – Medium 63 1000
P1 – Low 7 1000
P2 – High 259 950
P2 – Medium 137 950
P2 – Low 33 950

* Beacon and Strobe output measurements are only estimates as the brief flashes make it difficult to capture the actual output value.

Peak Beam intensity for the P1 measured 200 lx @1m giving a beam range of 28 m.
Peak Beam intensity for the P2 measured 600 lx @1m giving a beam range of 49 m.

There is no parasitic drain.

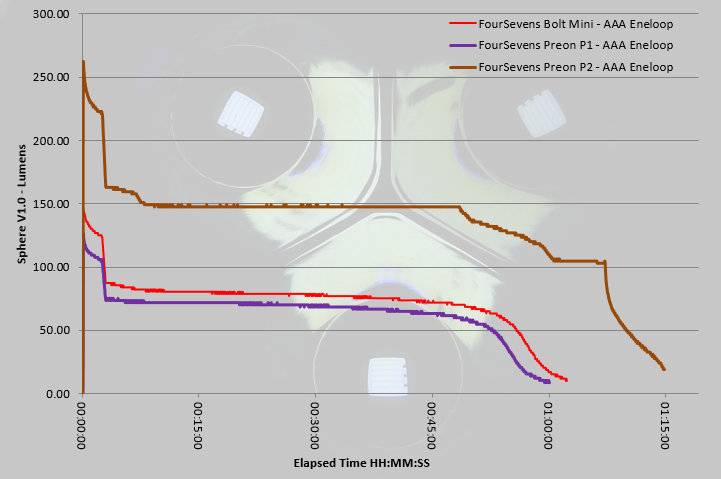
The two Preon models are also shown next to the Bolt-Mini, as this was another FOURSEVENS AAA light I have tested (check index page for this review). Thanks to its two AAA cells, the P2 is the only light to display full regulation in the output. With only one AAA, the P1 is always pushing this limited power source, but runs with a pretty consistent output after the initial drop from the 3 minute ‘burst’ at turn-on.
 photo Foursevens Bolt mini Preon P1 P2 runtime.jpg

Troubleshooting

This section is included to mention any minor niggles I come across during testing, in case the information helps anyone else.

No issues were encountered during testing.

As per the description of this section, this information is provided in case anyone else finds a similar ‘issue’ that might be fixed in the same way.

The Preon P1 and P2 in use

When compared to the previous generation Preons, these new versions are slightly chunkier, and initially I was not entirely convinced, as the point of an AAA light is to be very small. But then I remembered that as much as I love the older P2 shown in the photos, it was always a bit slippery. The smooth body wanting to slide around and not giving much of a grip.

With the new Preons having a grip pattern over the entire length of the light, no longer do you get this slippery feeling. One further observation though, is that these grooves tend to pick up pocket fluff nicely, which does somewhat spoil the look.

Personally I preferred the previous UI where it had no memory, but for some a memory is a requirement as you can pre-select the output you generally use. However, as the memory only affects the mode at switch-on, after which the mode selection goes to the first of the modes in the current Configuration, it only takes one mode change to return to Low (if Low was not the previously used mode). On the P2, the Low is much brighter than it used to be (3lm in the previous version) as it is now 33lm. The P1’s low is still pretty low at 7lm so if you need a lower output the P1 is the way to go.

Unfortunately another aspect has changed in the new version, PWM is rearing its head. The previous P2 had PWM but at 2500Hz and was not noticeable to the naked eye; the new version has PWM at 1000Hz. On High and Medium this has not really been visible, but on Low, I do catch the strobing effect out of the corner of my eye. A minor irritation and not what I would expect of FOURSEVENS. It slightly takes the edge off what could be a great update to this well loved series.

It used to be more common for smaller EDC lights to go with a reverse-clicky switch, but as in earlier versions, the Preon does use a forward-clicky and gives you that immediate response to pressure on the switch.

A great feature that has been added to the Preons is the user-changeable configuration that allows you to limit which output modes can be selected. You don’t get to choose which modes are included in a ‘configuration’ but you can choose one of the five available ‘configurations’ to best suit your needs. This user configuration has great potential and I hope FOURSEVENS expand the number of configurations that can be chosen from including a lower level in the P2, and perhaps configurations with no memory. Remember when choosing your configuration that the new Preon has a memory so starts on the last used mode.

With the small power source of AAA, the added efficiency of the XP-L (though only around 9%) makes a difference. Thanks to the XP-L having an XM-L2 size die in a smaller package, it is compact enough to be fitted into the Preon’s head and provide a great EDC beam.

The new Preon doesn’t just have a new body design, it has user-configuration and an XP-L LED.

Review Summary

_______________________________________________ _______________________________________________
Things I like What doesn’t work so well for me
_______________________________________________ _______________________________________________
XP-L LED in a truly pocket-sized light. PWM at 1000Hz giving some strobe effects on low.
New ‘grippy’ body design. P2’s lowest level is a bit high at 33lm.
User configurable.
Great EDC beam.


Discussing the Review:

Please feel free to add comments to the review, but the ideal place to freely discuss these reviews is on a forum. If you started reading the shorter forum version of the review, but followed the link this full exclusive review, please return to that forum to discuss the review there.
If you read the review entirely on Tactical Reviews, please consider one of the following to join in any discussion.

CandlePowerForums – Flashlight Reviews Section (Largest and Friendliest Flashlight Community Forum)

EdgeMatters – Sponsored Reviews (UK based Forum for Knife Makers and Collectors)

Light Review: Olight M23 JAVELOT

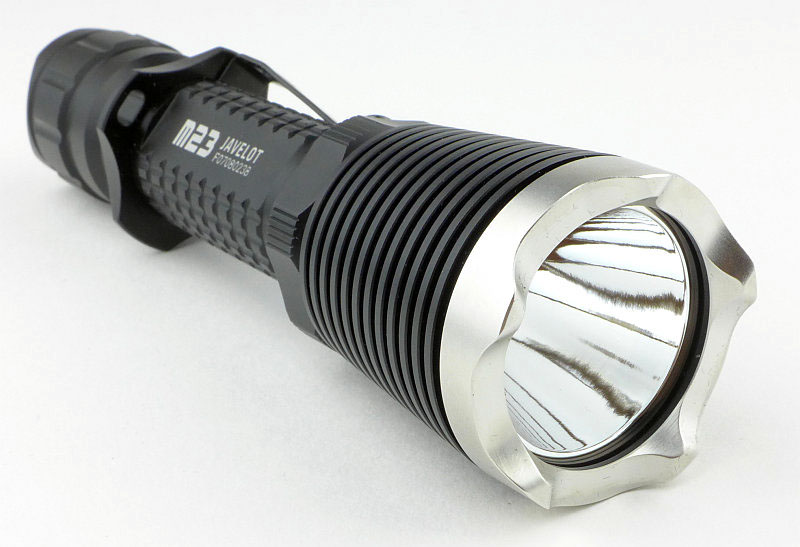
Olight have taken the popular M22 Warrior and updated it by giving it the ‘JAVELOT’ treatment. The result is the M23 JAVELOT. After the success of the first few Javelot models, Olight have been updating a few existing models, like the S30RII and M22 into Javelot versions with uprated emitters and throw.

 photo 09 M23Javelot angle reverse P1160532.jpg

Taking a more detailed look:

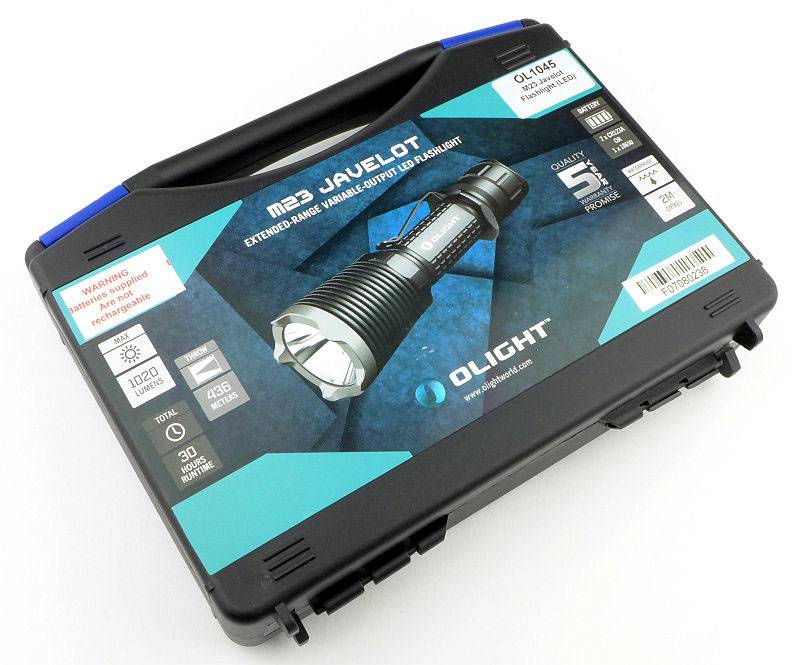
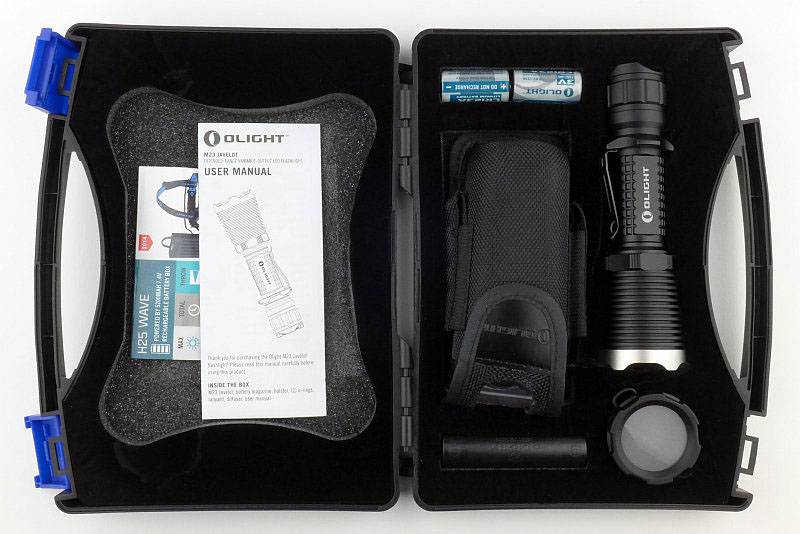
The M23 JAVELOT is supplied in a sturdy plastic case.
 photo 01 M23Javelot boxed P1160500.jpg

Everything is held in cut-outs in the foam liner.
 photo 02 M23Javelot box open P1160506.jpg

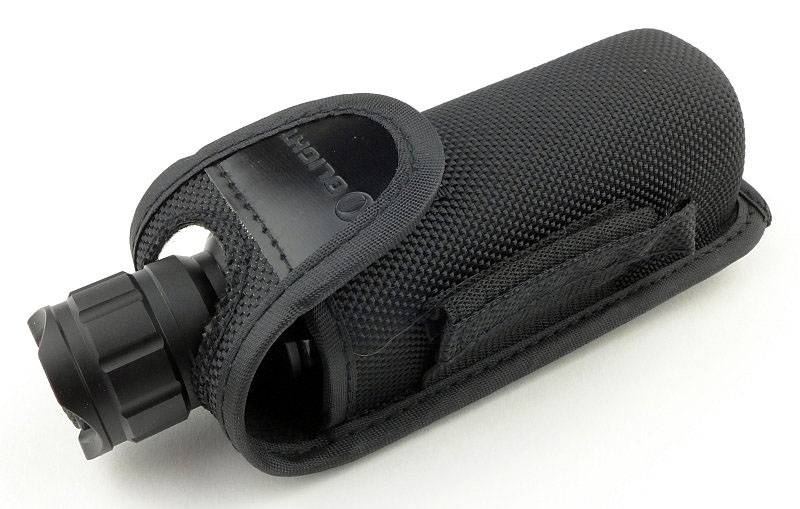
Starting off with a look at the unconventional holster design. The retention flap has a hole cut into it through which the tail-cap protrudes. This gives access to the tail-cap switch.
 photo 03 M23Javelot holstered P1160512.jpg

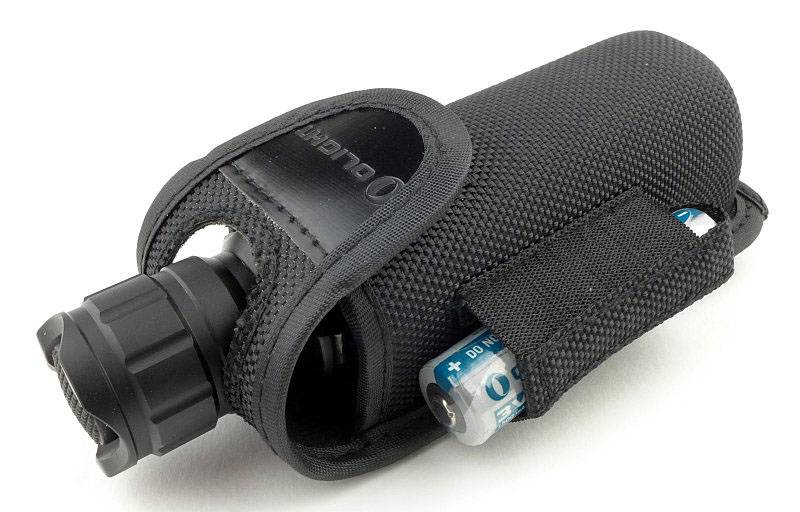
Both sides of the holster feature cell holders. For CR123 these are not that secure, but for 18650 they work well enough (though the cell is partly exposed and could be damaged.
 photo 04 M23Javelot holster cells P1160513.jpg

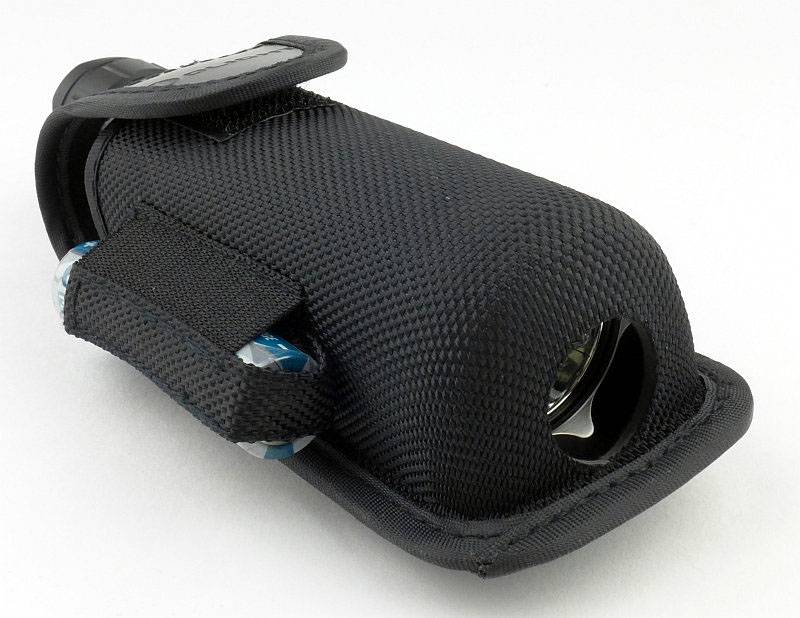
Now we see why you might want access to the tail-cap switch while the light is in the holster. The bottom of the holster has a hole cut in it allowing the M23 to be used while fully inside the holster.
 photo 05 M23Javelot holster base P1160517.jpg

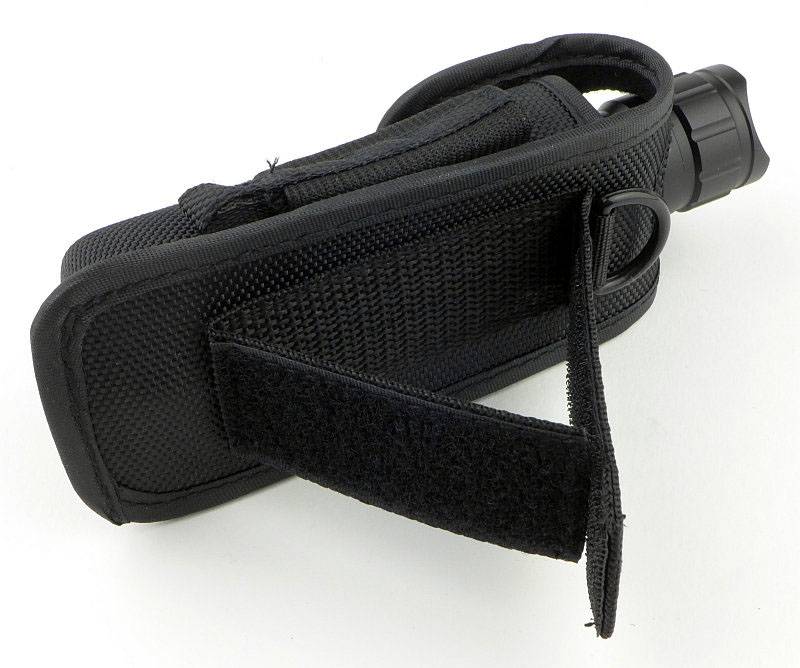
On the back is a Velcro belt-loop and small D-ring.
 photo 06 M23Javelot holster loop P1160519.jpg

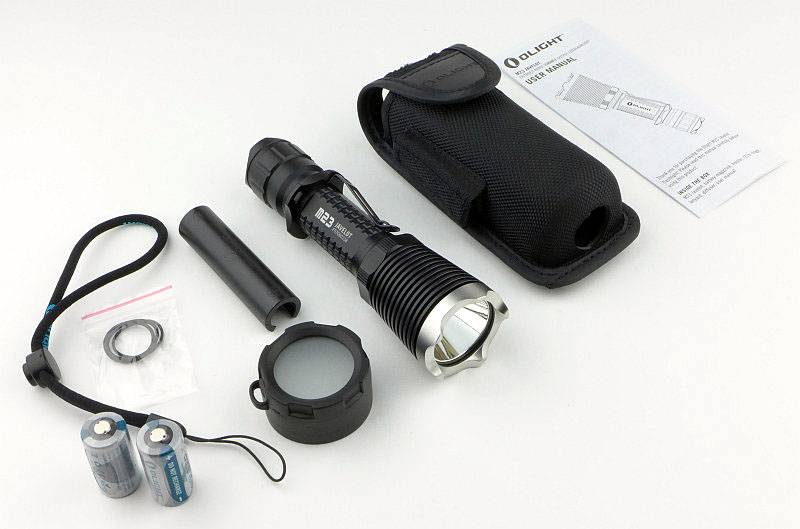
Supplied with the M23 is the holster, CR123 cell holder, diffuser, spare O-rings, a lanyard, the instructions and two CR123 cells.
 photo 07 M23Javelot contents P1160526.jpg

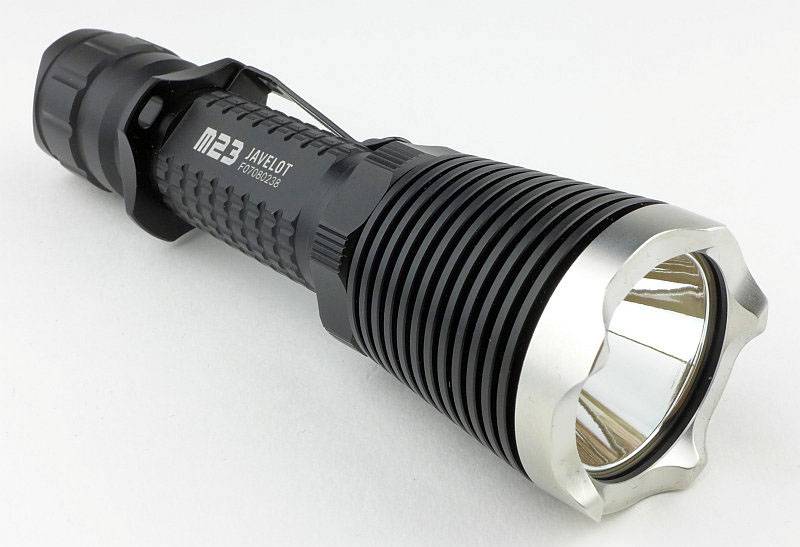
Externally the main difference between the M22 Warrior and the M23 JAVELOT is the stainless steel bezel.
 photo 08 M23Javelot angle P1160528.jpg

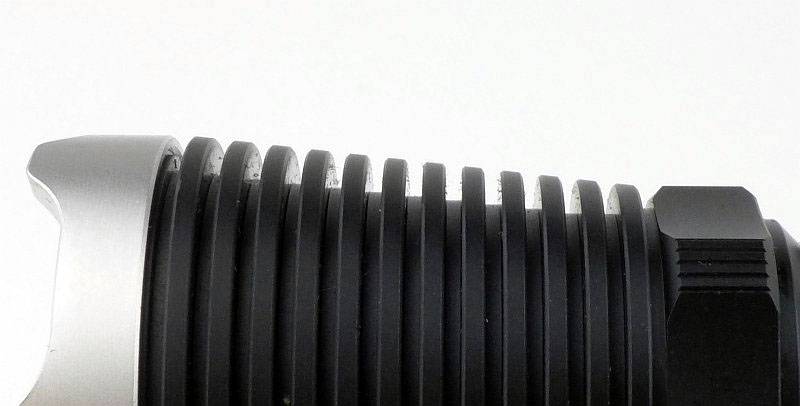
The entire head has heat-sink fins along it.
 photo 10 M23Javelot heat sink fins P1160534.jpg

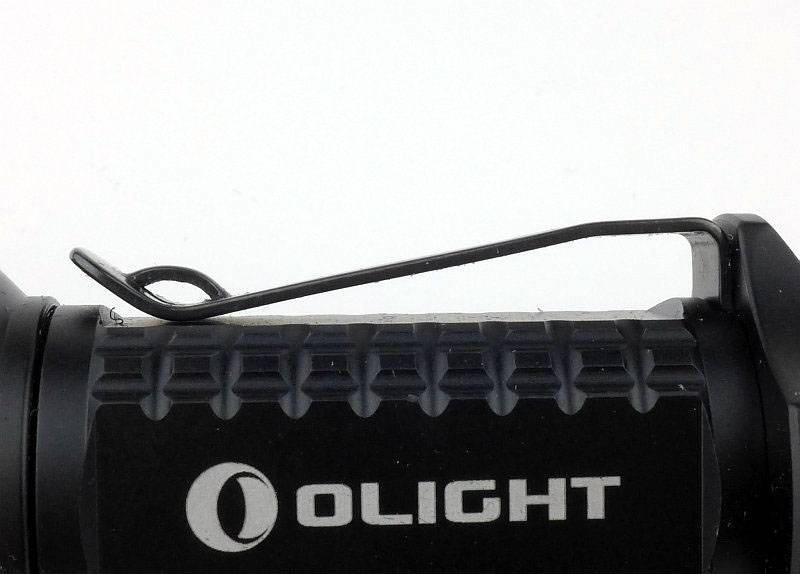
A side view of the steel pocket clip.
 photo 11 M23Javelot clip1 P1160537.jpg

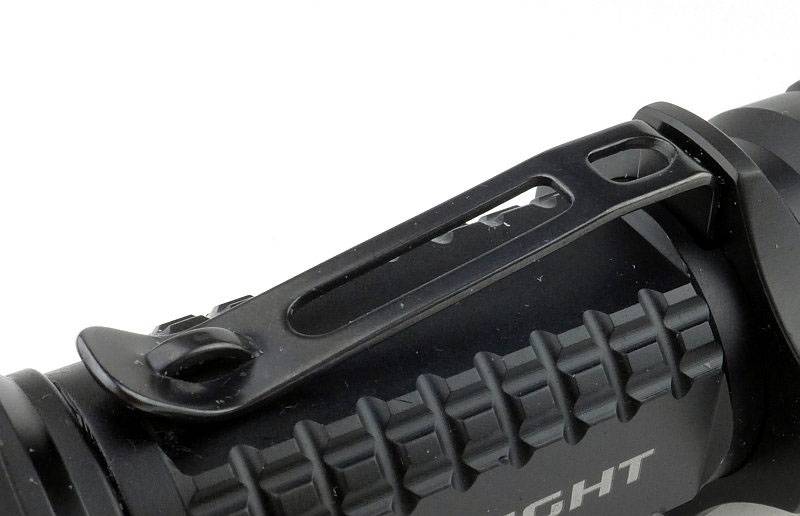
Another view of the strong pocket clip.
 photo 12 M23Javelot clip2 P1160539.jpg

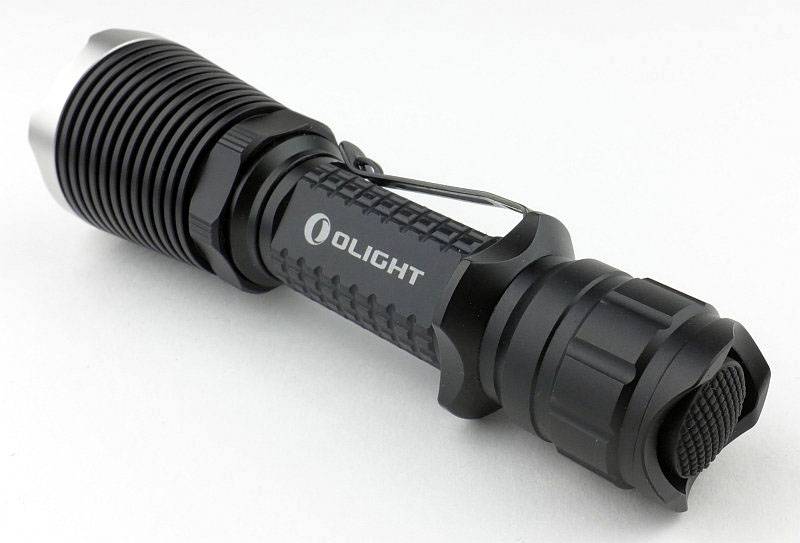
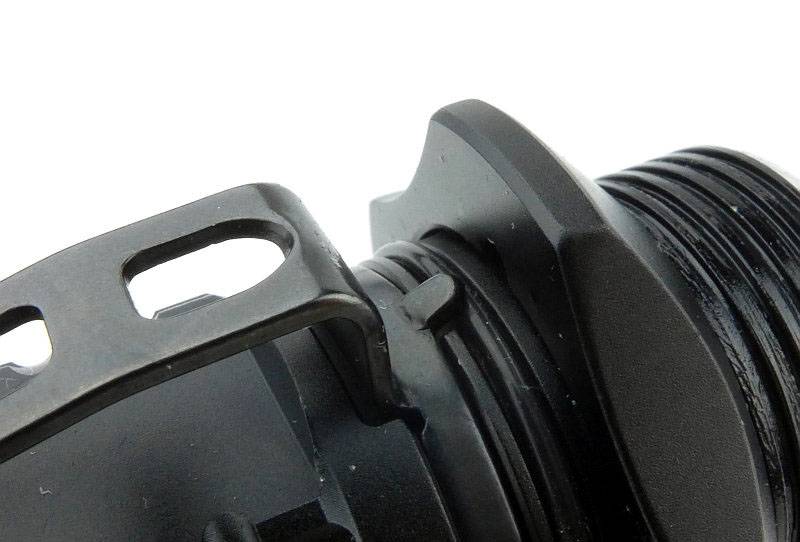
The pocket clip fits into a cut-out on the battery tube, and the grip-ring has a notch in it which fits over a lug on the steel pocket clip. This prevents the pocket clip or grip-ring rotating.
 photo 20 M23Javelot clip fitting P1160564.jpg

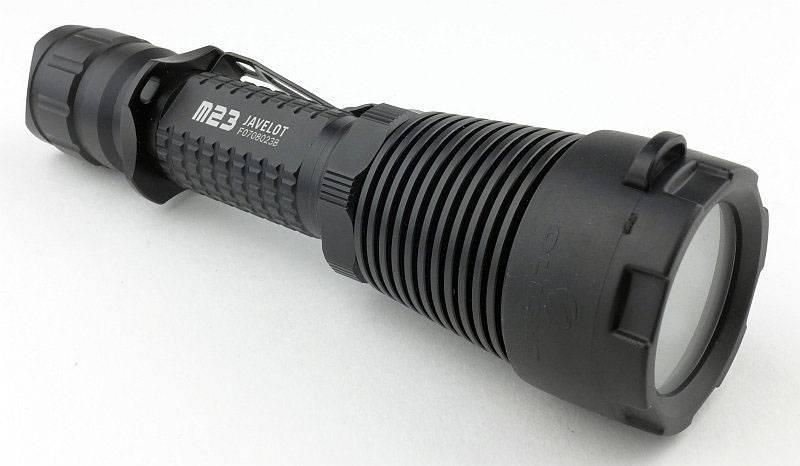
With the supplied diffuser fitted, the stainless bezel is hidden. You can’t fit the M23 into its holster like this.
 photo 14 M23Javelot angle diffuser P1160544.jpg

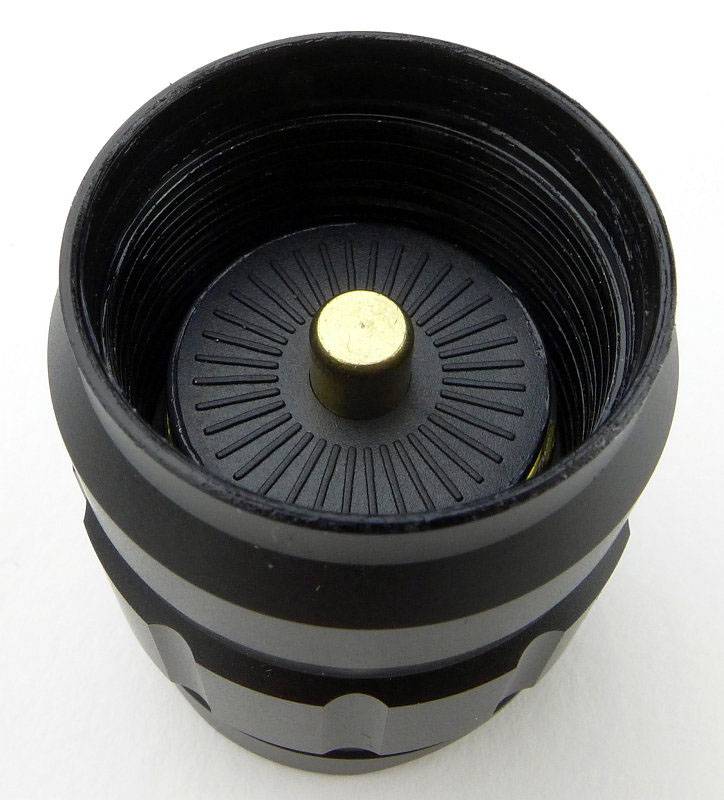
Inside the tail-cap, the negative terminal is a sprung plunger. The tail-cap/battery tube connection is hidden and uses a special design to fit into the conical opening at the end of the battery tube.
 photo 15 M23Javelot tailcap P1160548.jpg

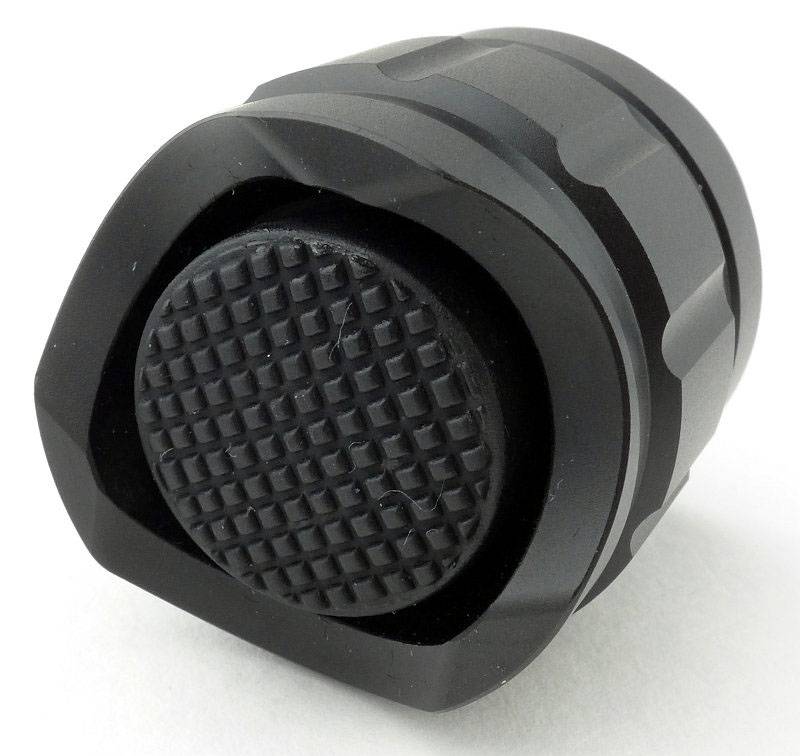
The switch is large and textured.
 photo 16 M23Javelot tailcap switch P1160550.jpg

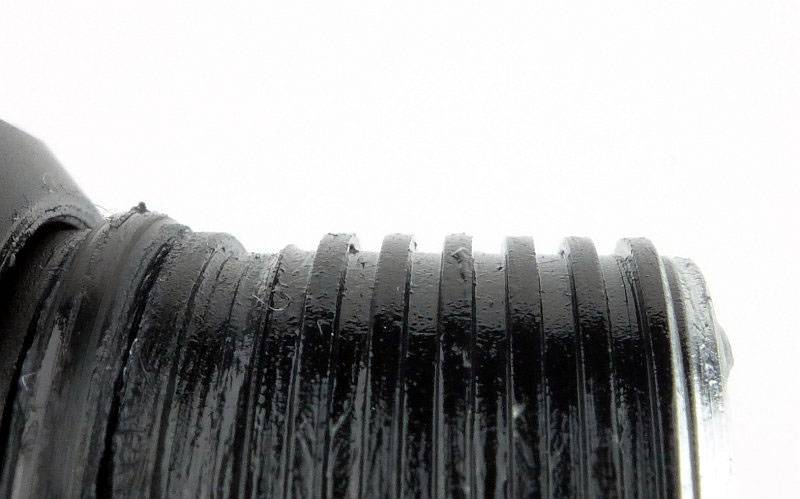
Threads on the tail-cap end of the battery tube are square cut and fully anodised.
 photo 17 M23Javelot threads P1160555.jpg

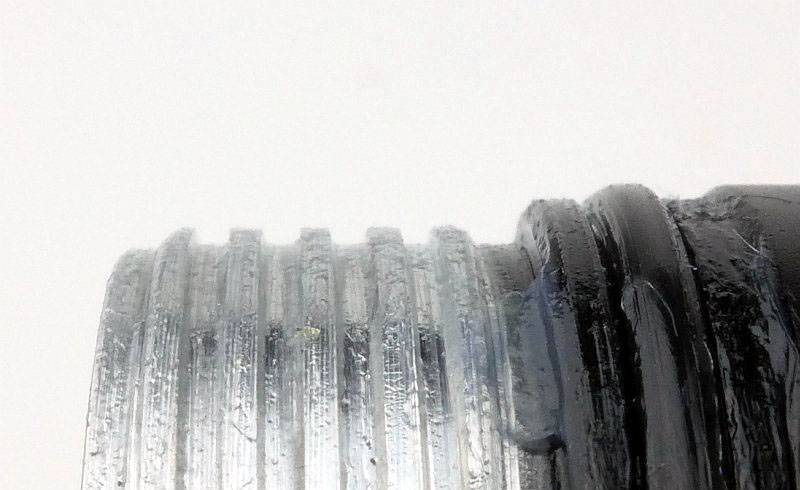
Threads on the head end of the battery tube are square cut and bare aluminium.
 photo 18 M23Javelot head threads P1160556.jpg

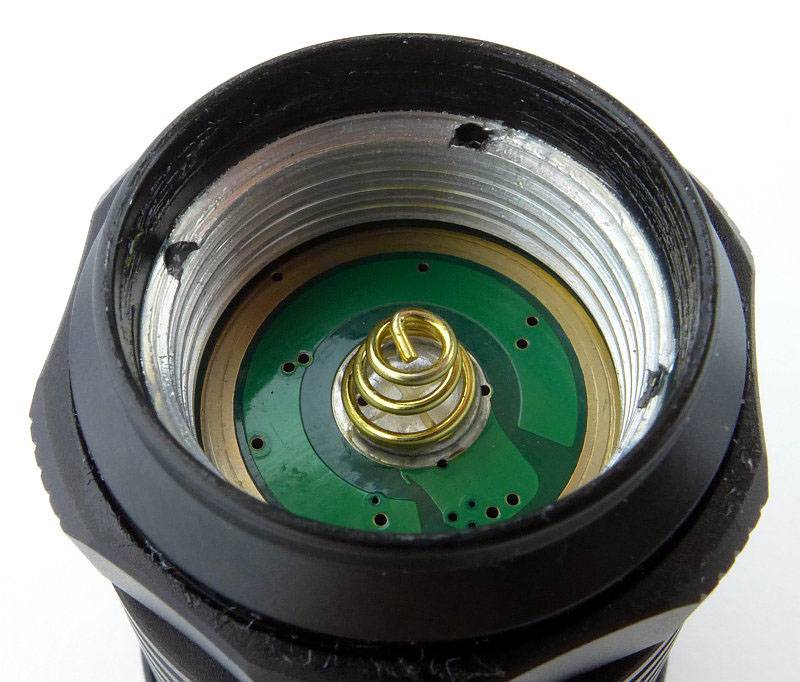
Unscrewing the battery tube fully shows the contacts in the head, with the positive spring-terminal, bare threads plus ring-terminal for the twisty interface.
 photo 19 M23Javelot head contacts P1160561.jpg

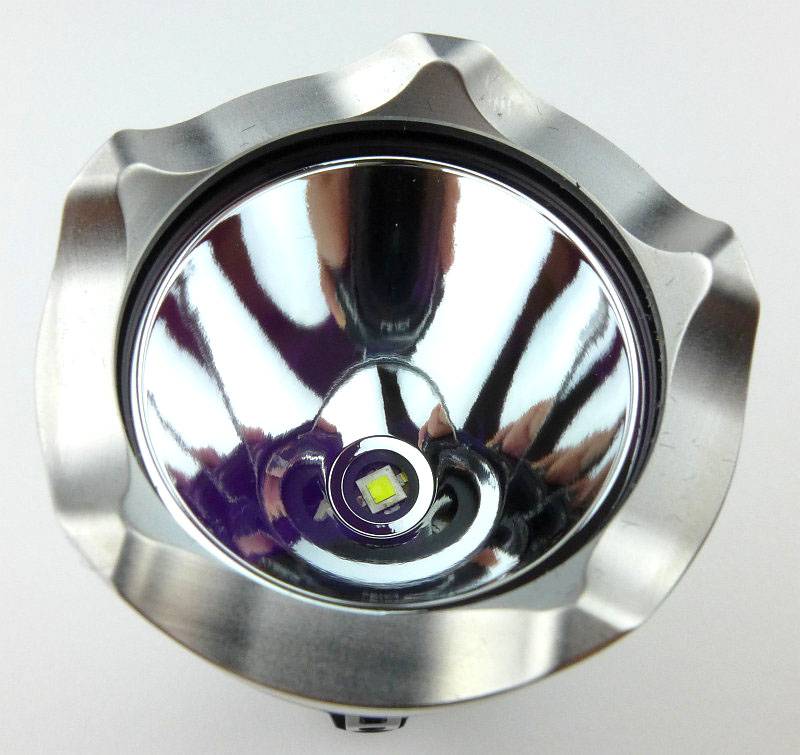
For its excellent throw the M23 uses a deep, smooth reflector.
 photo 21 M23Javelot reflector P1160574.jpg

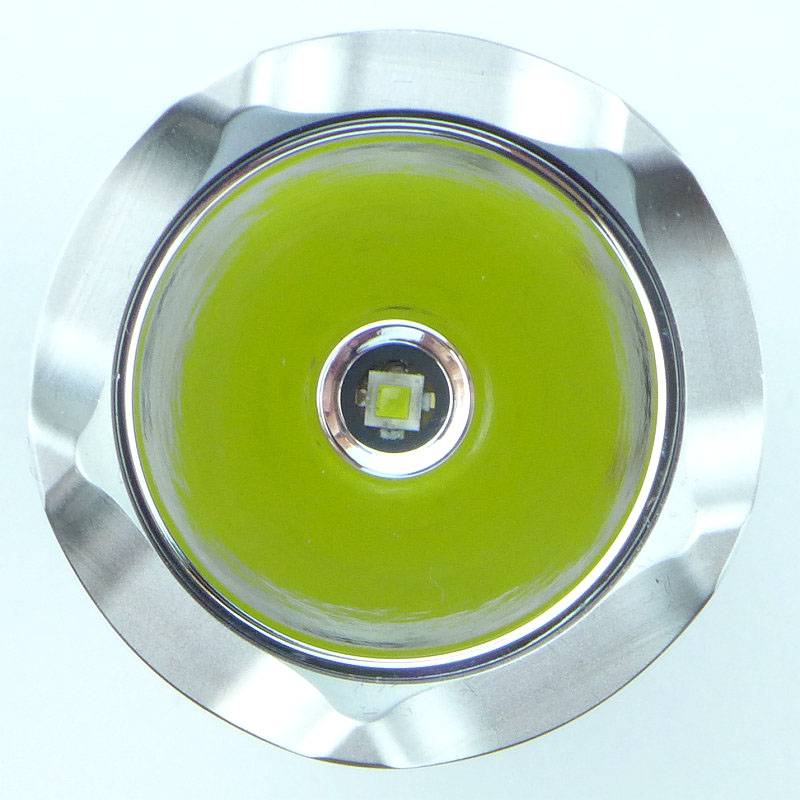
Looking straight into the reflector.
 photo 22 M23Javelot LED P1160580.jpg

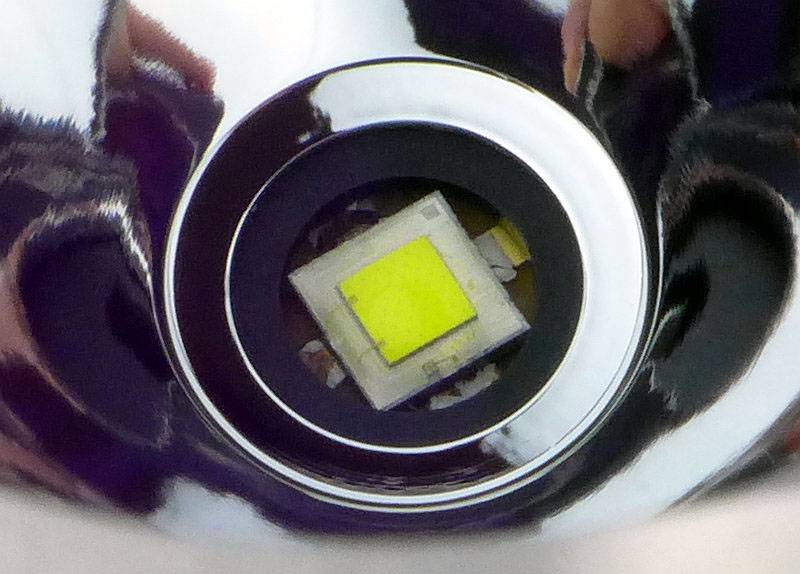
And a closer look at that LED. Olight describe this as a ‘customised high intensity CREE XP-L LED’.
 photo 23 M23Javelot LED close P1160586.jpg

The beam

Please be careful not to judge tint based on images you see on a computer screen. Unless properly calibrated, the screen itself will change the perceived tint.

The indoor beamshot is intended to give an idea of the beam shape/quality rather than tint. All beamshots are taken using daylight white balance. The woodwork (stairs and skirting) are painted Farrow & Ball “Off-White”, and the walls are a light sandy colour called ‘String’ again by Farrow & Ball. I don’t actually have a ‘white wall’ in the house to use for this, and the wife won’t have one!

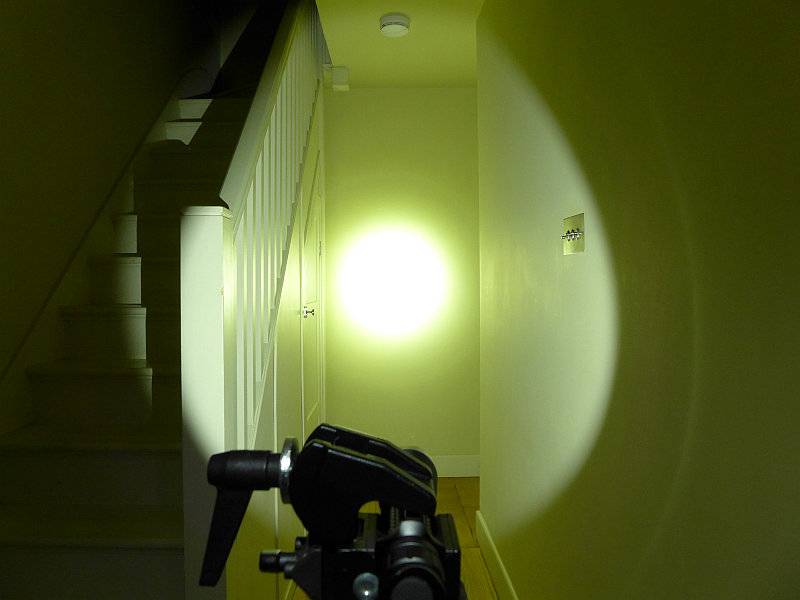
The beam does have a reasonably warm tint and as expected for a JAVELOT light, there is a very strong hotspot. This might be a bit fatiguing to use indoors which is why there is a diffuser supplied.
 photo 24 M23Javelot indoor beam P1170305.jpg

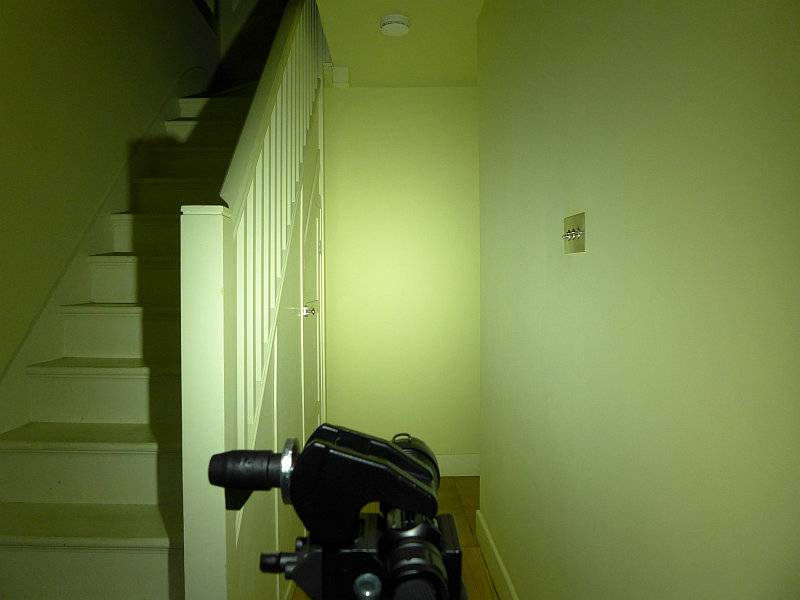
Popping on the diffuser and we have an entirely different experience (the exposure here is the same as without the diffuser).
 photo 25 M23Javelot indoor beam diffused P1170308.jpg

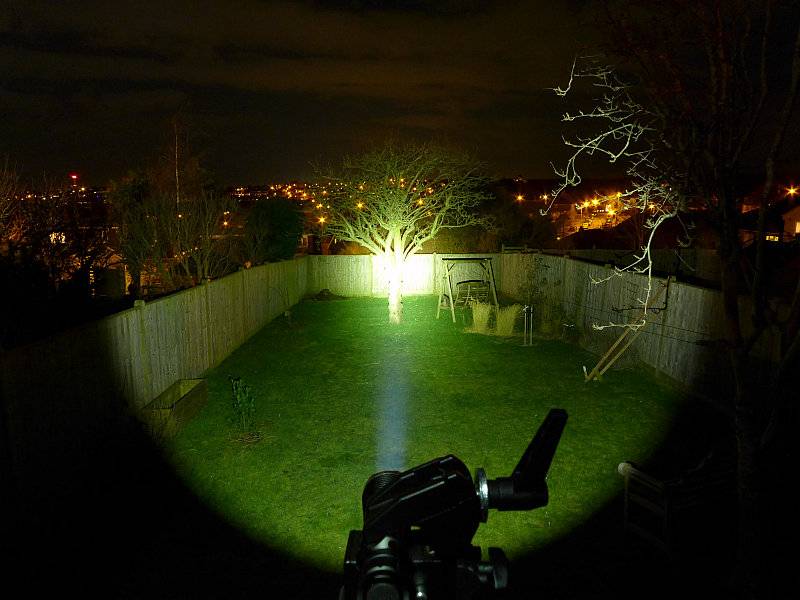
Outdoors it is clear this is a thrower!
 photo 26 M23Javelot outdoor beam P1170240.jpg

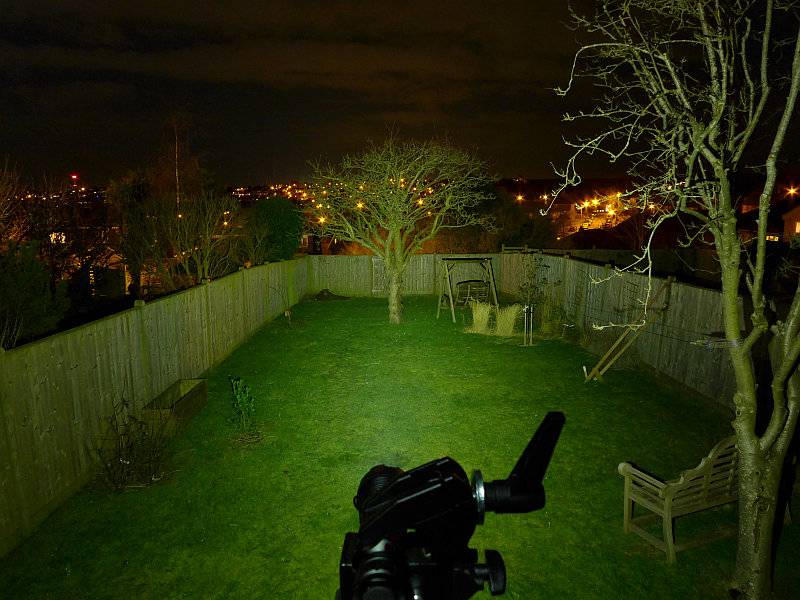
And just to see, the result with the diffuser is good (the exposure here is the same as without the diffuser).
 photo 27 M23Javelot outdoor beam diffused P1170243.jpg

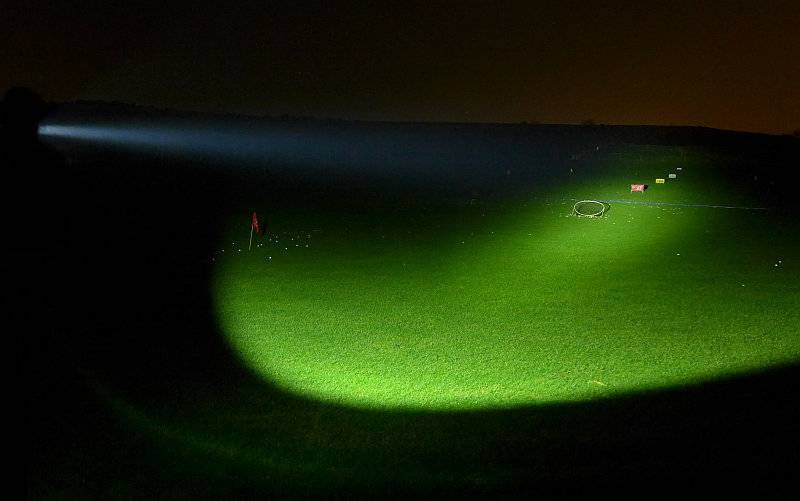
But we need more range, so here we are at a golf driving range with the 250yard marker easily visible, and beyond.
 photo 28 M23Javelot outdoor beam golf P1170221.jpg

Modes and User Interface:

The M23’s output is controlled by the forward-clicky tail-cap switch and twisty interface at the head.

Available modes include High, Medium, Low and Strobe.

From OFF, either click or half-press and hold to turn onto the last-used constant output mode.
From ON, either click the switch or release the half-press to turn OFF.

From OFF, double-tap and click (or hold) the switch to activate High.
From OFF, triple-tap and click (or hold) the switch to activate Strobe. While strobe is activated, the twisty interface does nothing.

From ON, loosen-tighten the head to cycle through High -> Medium -> Low -> High etc. (it is as the head becomes tight again that the mode changes). Tightening the head while the M23 is OFF does nothing.

This operation allows you to set the output to Low, but still have direct access to High (double-tap) and Strobe (triple-tap) via the tail-cap switch alone.

Batteries and output:

The M23 runs on either 1x 18650 or 2x CR123.

To measure actual output, I built an integrating sphere. See here for more detail. The sensor registers visible light only (so Infra-Red and Ultra-Violet will not be measured).

Please note, all quoted lumen figures are from a DIY integrating sphere, and according to ANSI standards. Although every effort is made to give as accurate a result as possible, they should be taken as an estimate only. The results can be used to compare outputs in this review and others I have published.

___________________________________________ ________________________________ ________________________________
Olight M23 JAVELOT using specified cell I.S. measured ANSI output Lumens PWM frequency or Strobe frequency (Hz)
___________________________________________ ________________________________ ________________________________
High – CR123 950 0
Medium – CR123 361 0
Low – CR123 38 0
High – 18650 918 0
Medium – 18650 365 0
Low – 18650 38 0
Diffuser Test High – No Diffuser 861 0
Diffuser Test High – Diffuser 584 0

* Beacon and Strobe output measurements are only estimates as the brief flashes make it difficult to capture the actual output value.

Peak Beam intensity measured 39700 lx @1m giving a beam range of 398 m.

There is no parasitic drain.

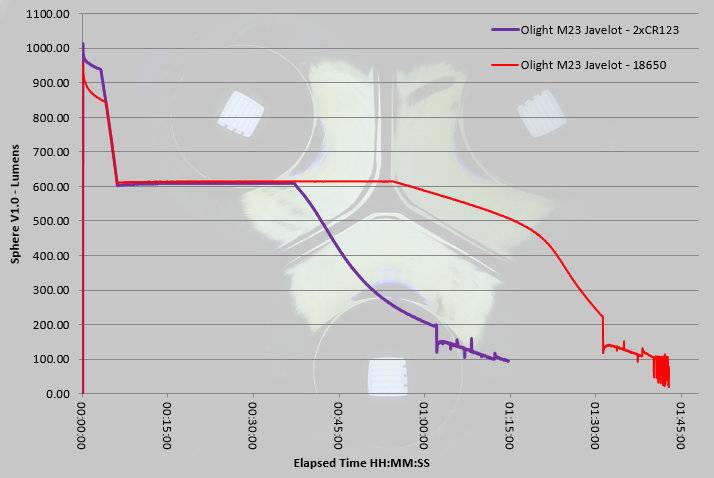
Overlaying the two runtime traces from 2xCR123 and 1×18650 shows that CR123 initially gives a slight boost in output for the first few minutes before the output for both power sources converge. This happens during the controlled output reduction to just over 600lm for the regulated level. CR123 runs out of steam earlier (as expected) falling out of regulation at around 35 minutes. 18650 holds regulation until about 55 minutes with a less sharp fall-off.
Both traces end with a period of inconsistent flickering output instead of cutting out.
 photo Olight M23 Javelot runtime.jpg

Troubleshooting

This section is included to mention any minor niggles I come across during testing, in case the information helps anyone else.

No issues were encountered during testing.

As per the description of this section, this information is provided in case anyone else finds a similar ‘issue’ that might be fixed in the same way.

The M23 in use

I’m going to get the main issue out of the way first – the holster. I can see what was intended with the holster, but for me it presents three main problems in use. Firstly getting the flap over the tail-cap, so you can secure it is far too difficult as it is a tight fit and doesn’t easily go over the M23’s tail-cap. It is possible that as it wears it will become easier, but this will only be due to the material softening and becoming frayed. Secondly the tail-cap switch is exposed, and with the design used for the tail-cap connection, it cannot be locked out; no lock-out and an exposed tailcap is going to lead to accidental activation. Lastly on the holster, though the ability to carry spare cells is welcome, by leaving them partially exposed, they can be lost or damaged; I don’t trust the cells holders myself.

The holster is full of good ideas, but I don’t find them to work terribly well.

Onto the M23 itself, and things swing back to positive – it is a typical single 18650 size light, with solid build quality; you definitely would feel confident that you could use the strike bezel if needed.

Rather than having the typical tail-cap to battery-tube connection that uses a battery tube with a flat end (most common), in the M23, Olight uses a design where the inside of the end of the battery tube is conical and the tail-cap contacts are pushed into the cone as you tighten the tail-cap. This means it is far less likely to break the connection, as the tail-cap needs to move significantly to lose contact. It makes the connection very robust, but does prevent the user from locking-out the M23 by unscrewing the tail-cap.

The pocket clip is very strong, a bit too strong for normal use. If this is going on your load carrier PALS webbing, OK, but for many users it will probably be too stiff.

Of course we must appreciate that JAVELOT beam. The custom XP-L Hi LED certainly does its job with plenty of power and an excellent hotspot. Unlike completely throw-orientated lights, the M23 manages a high beam strength without making the hotspot too small; it seems completely ideal for a light this size.

Normally I’m not keen on using lights with throw at close ranges, but the M23 seems to manage this in a way that is perfectly usable. However as a frosted glass diffuser is supplied, you can easily go full flood (at the expense of 33% loss of output) and have a perfect indoor flood-light beam. With the diffuser fitted it will not fit into the holster.

It is possible to tailstand the M23 even though the large switch boot (18mm) protrudes slightly. The combination of three large cut-outs around the button (giving easy access), and the large button itself make the M23 responsive and reliable to control.

The user interface seems extremely well suited to a ‘tactical’ design. Putting strobe to one side (all serious users of tactical lights I’ve spoken to don’t want strobe as it can be just as disorienting to the person using it), at least it needs a deliberate triple-click to activate it. Unfortunately, if you are ‘signalling’ with the M23 you can accidentally get strobe. Taking just those constant modes, you can easily set the M23 to be effectively a ‘high only’ light or a ‘low-high’ light. Setting high with the twisty interface means that your first press is always high, and if you double-tap the button you still have high. Setting low with the twisty interface means that your first press is always low, and if you double-tap the button you get high. Swapping between these configurations is easy and of course you could also make it ‘medium-high’ as well.

Overall a well thought-out light with solid build and a great beam; another JAVELOT success.

Review Summary

_______________________________________________ _______________________________________________
Things I like What doesn’t work so well for me
_______________________________________________ _______________________________________________
Strong beam with great throw for its size. Holster has issues.
Solid build. No lock-out.
Frosted Glass diffuser included. Strobe can be activated when signaling.
Well though-out UI. Pocket clip too stiff for most users.
Large, easily accessible button.
Can Tail-stand.
Durable tail-cap connection design.


Discussing the Review:

Please feel free to add comments to the review, but the ideal place to freely discuss these reviews is on a forum. If you started reading the shorter forum version of the review, but followed the link this full exclusive review, please return to that forum to discuss the review there.
If you read the review entirely on Tactical Reviews, please consider one of the following to join in any discussion.

CandlePowerForums – Flashlight Reviews Section (Largest and Friendliest Flashlight Community Forum)

EdgeMatters – Sponsored Reviews (UK based Forum for Knife Makers and Collectors)