Light Review: Streamlight ProTac HL USB and Portable USB Charger

Streamlight have been adding USB power into their range and in this review we take a look at the ProTac HL USB along with the Portable USB Charger
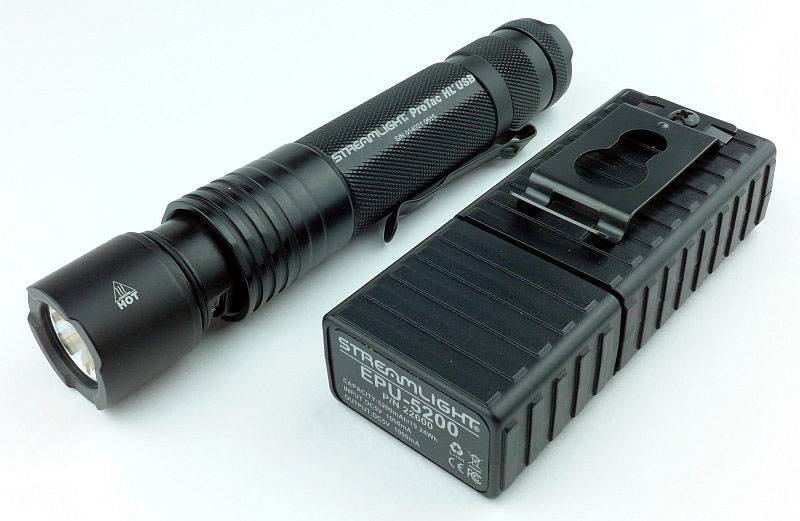
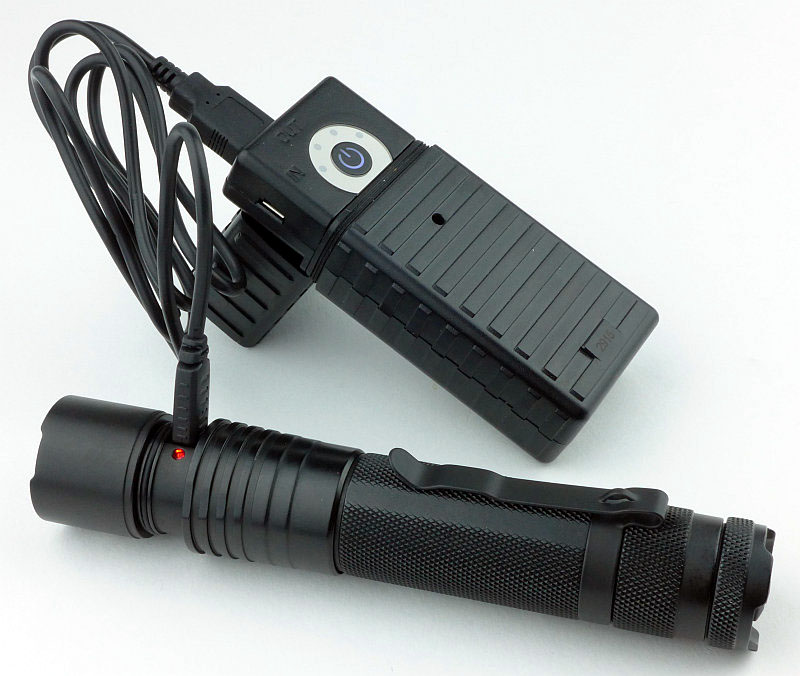
 photo 23 Protac HL USB plus charger P1170014.jpg

Taking a more detailed look:

Everything shown here actually came in a completely plain white outer cardboard box (which didn’t really show up in these white background photos).
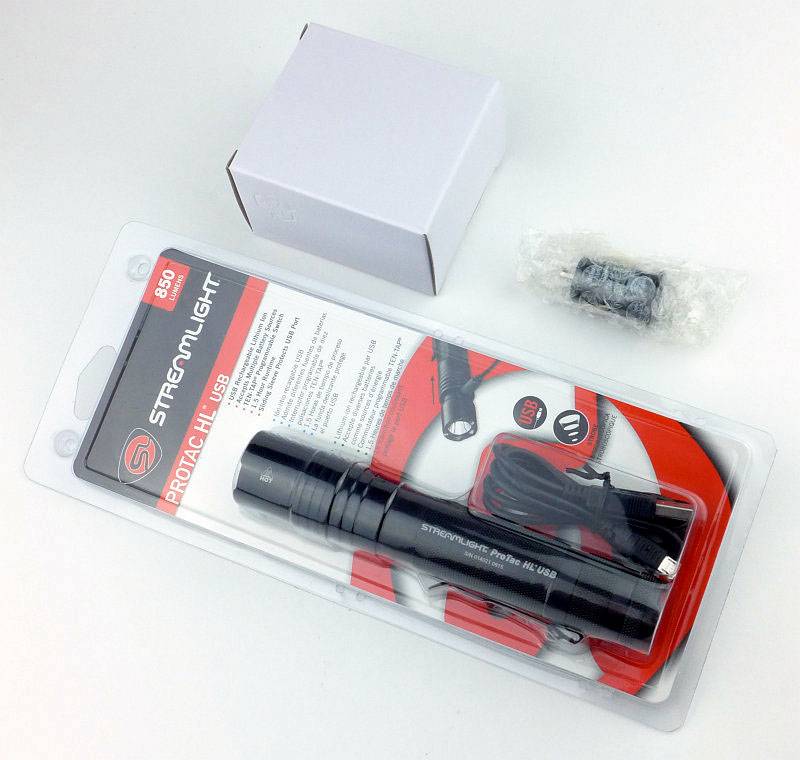
 photo 01 Protac HL USB boxed P1160952.jpg

The package is comprehensive as it includes the ProTac HL USB, a holster, USB cable, mains USB charger and 12v Car USB charger.
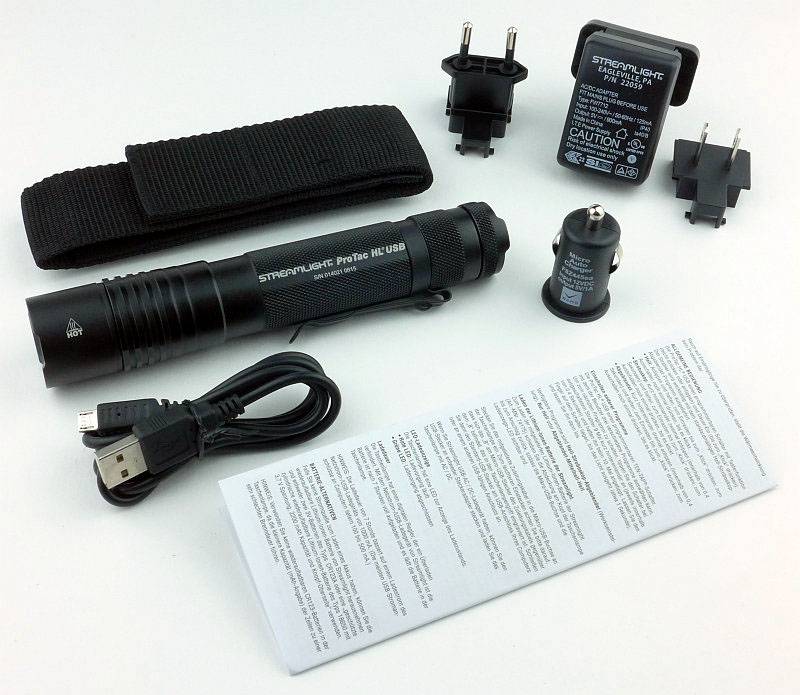
 photo 02 Protac HL USB unboxed P1160958.jpg

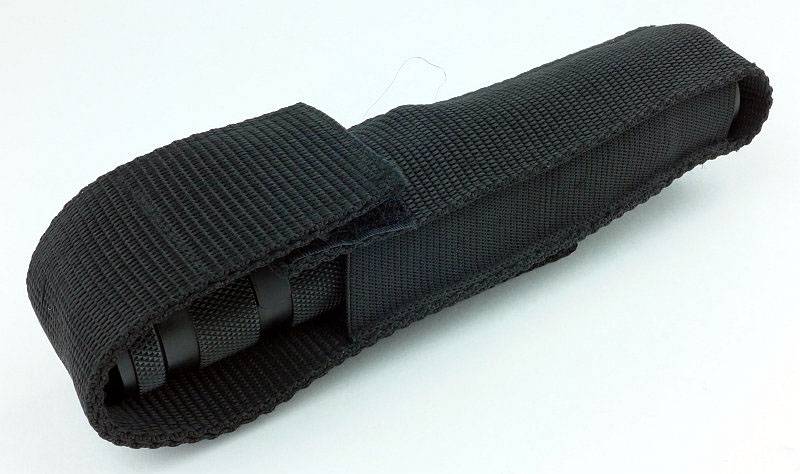
A simple holster is provided.
 photo 03 Protac HL USB holster1 P1160961.jpg

The belt loop has a Velcro closure so it can be fitted without taking your belt off.
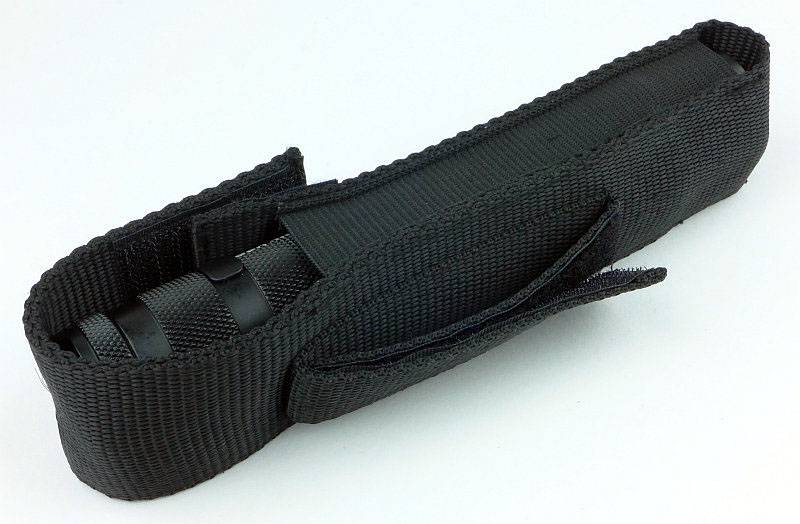
 photo 04 Protac HL USB holster2 P1160963.jpg

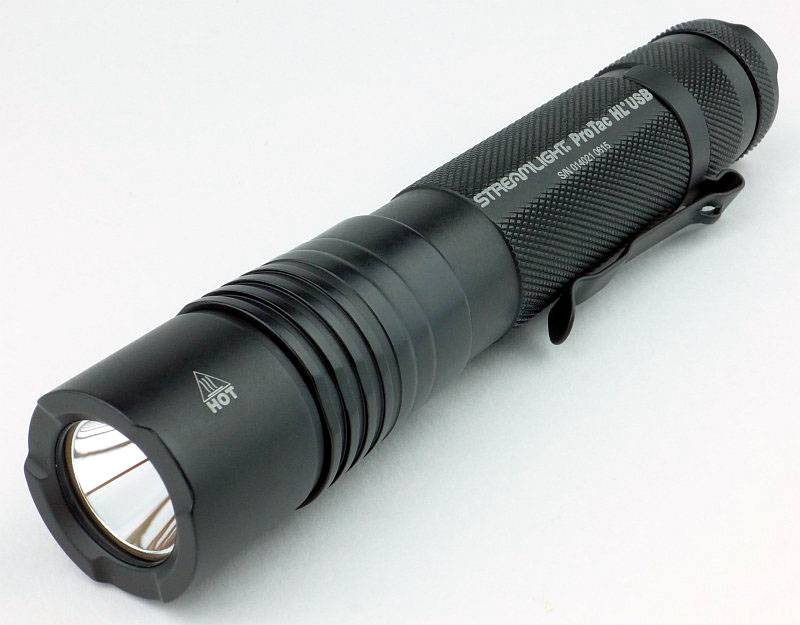
Laser-engraved on the side is the model and serial number. There is not enough flat space for the writing so it spills over onto the knurling.
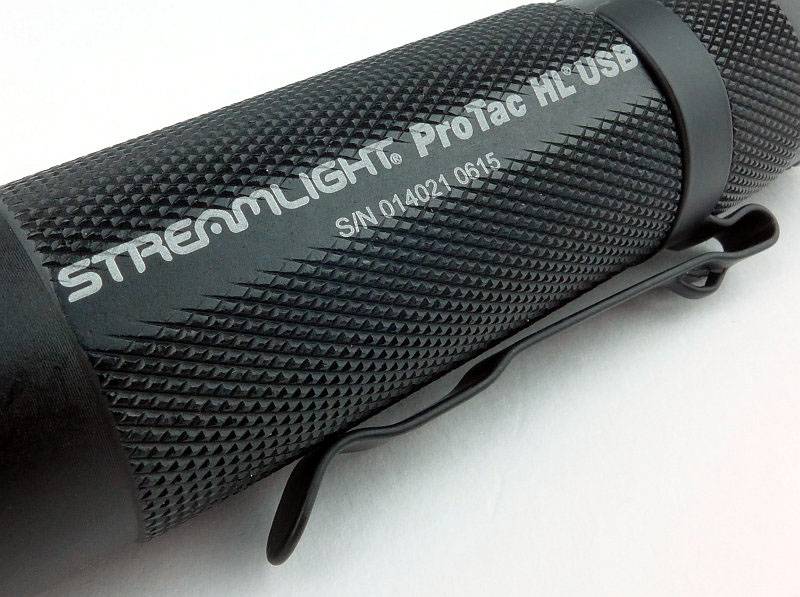
 photo 06 Protac HL USB engraving P1160971.jpg

Already fitted is a removable, powder-coated, pocket clip.
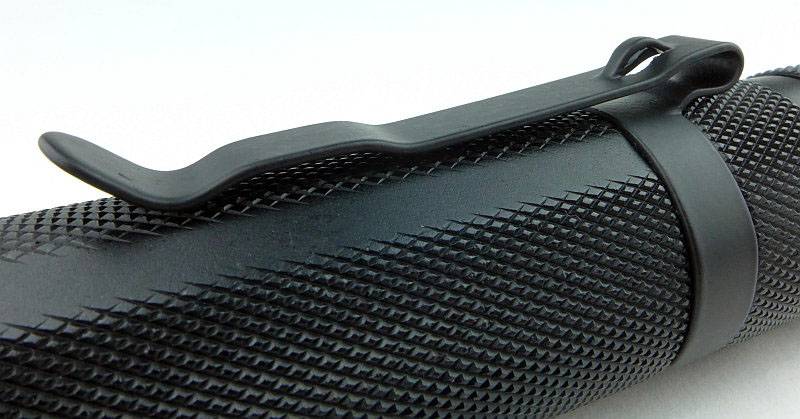
 photo 07 Protac HL USB clip P1160974.jpg

As with most Streamlight lights, the main switch has the Streamlight logo.
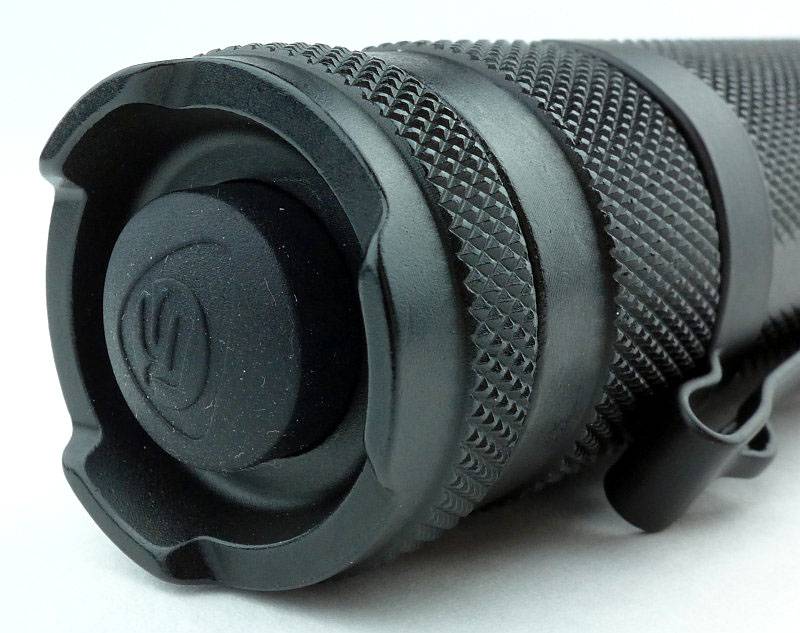
 photo 08 Protac HL USB switch P1160977.jpg

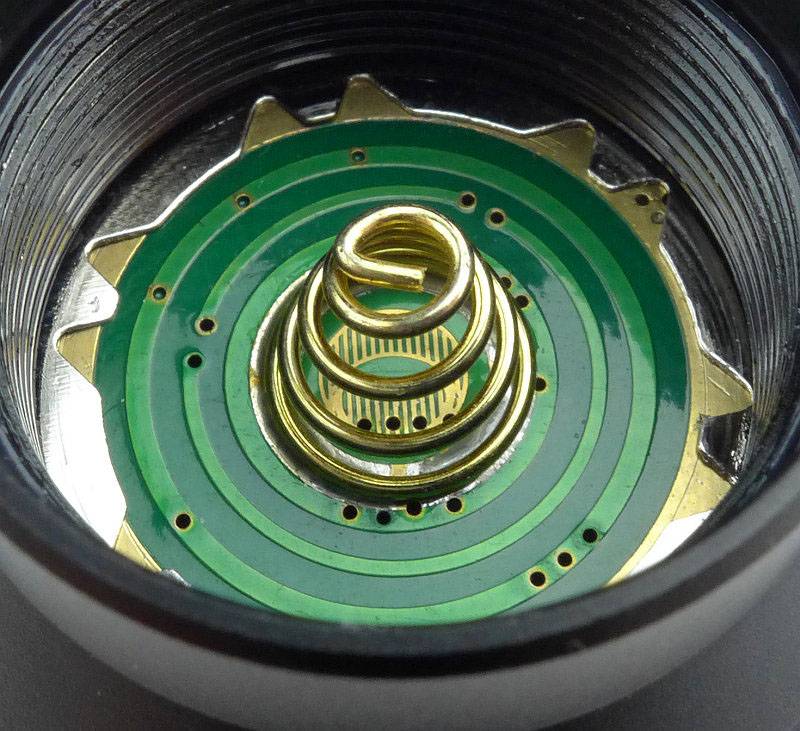
Taking the tailcap out reveals its long twin-springs. This is part of a special design catering for the use of the Streamlight proprietary 18650, standard 18650s and CR123 cells.
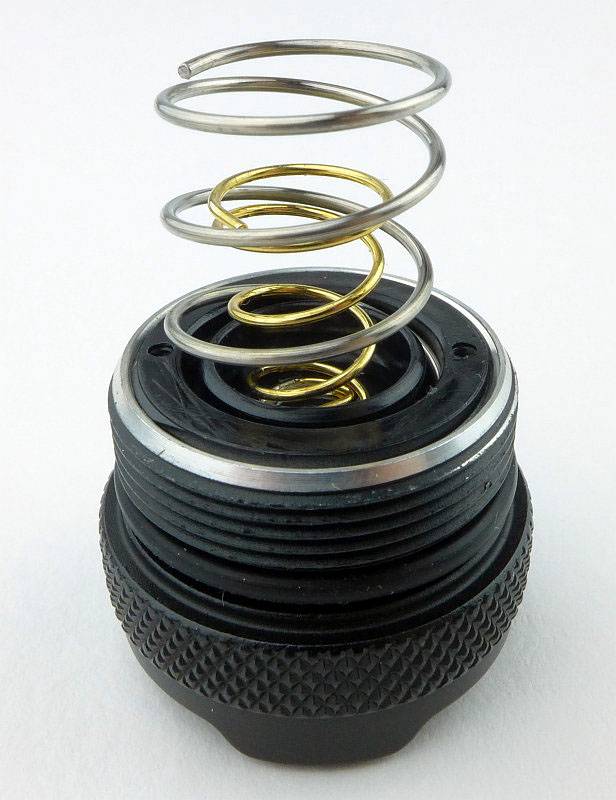
 photo 09 Protac HL USB tailcap P1160982.jpg

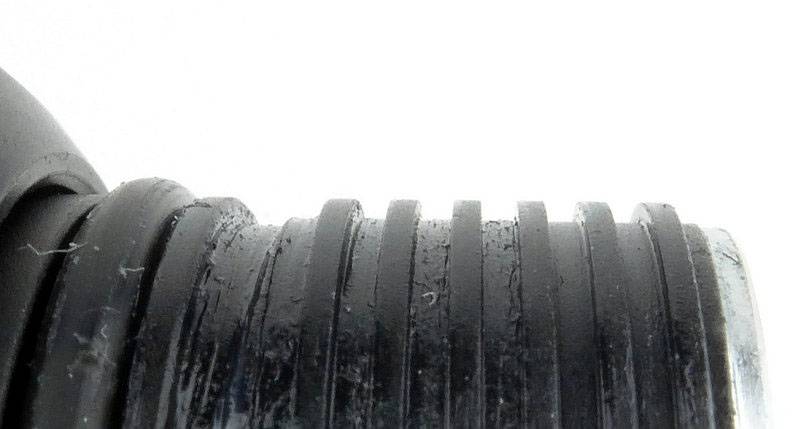
Standard fully-anodised threads are used.
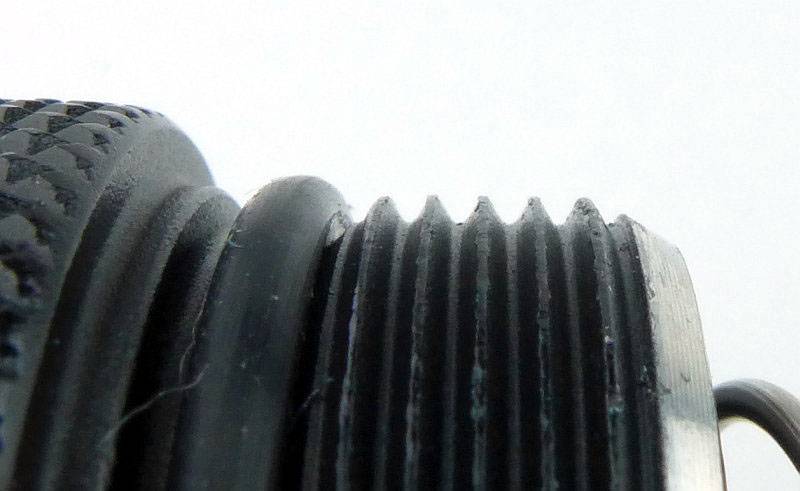
 photo 10 Protac HL USB threads P1160984.jpg

Streamlight’s proprietary 18650 cell has a full plastic casing with one standard negative terminal.
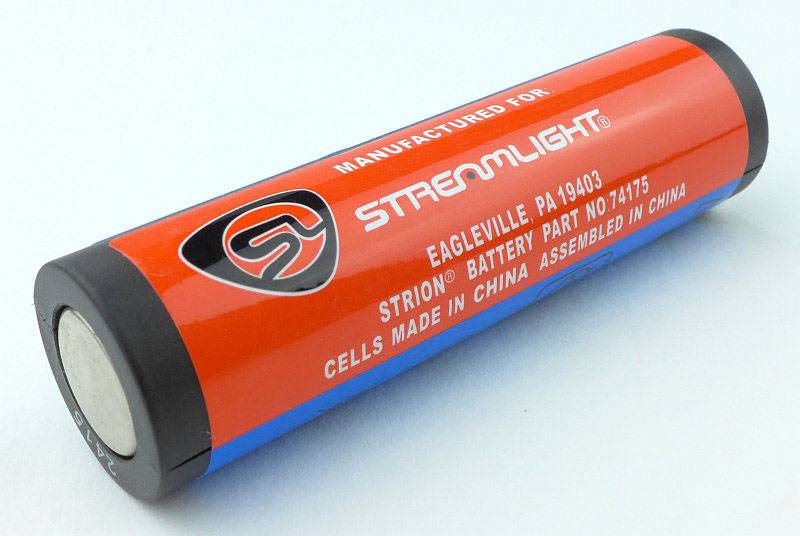
 photo 11 Protac HL USB battery1 P1160988.jpg

Swapping round to the front end of the cell, there is a dual pole contact system which relates to the built-in USB charging of the Protac HL USB.
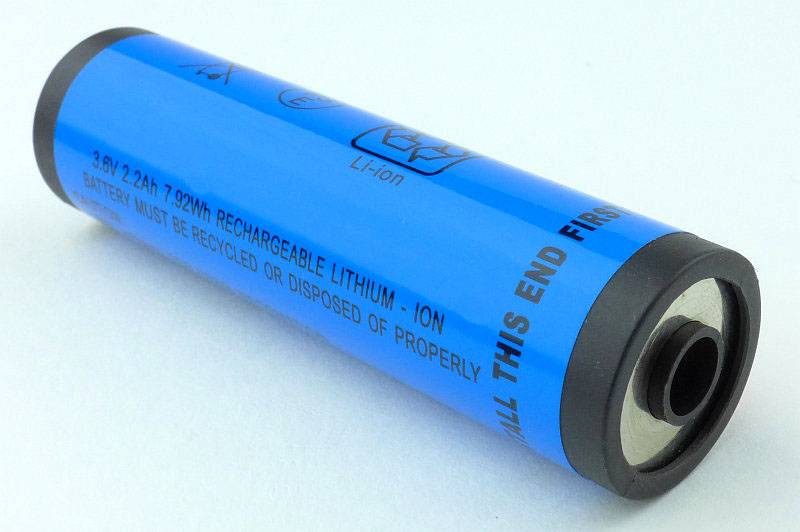
 photo 12 Protac HL USB battery2 P1160990.jpg

For an 18650 light, the Protac HL uses a slightly larger tube than most, but this is due to the clever system to accommodate 18650 and CR123 cells without any rattle. Inside the battery tube are three sprung strips which keep whatever cells are being used securely in place.
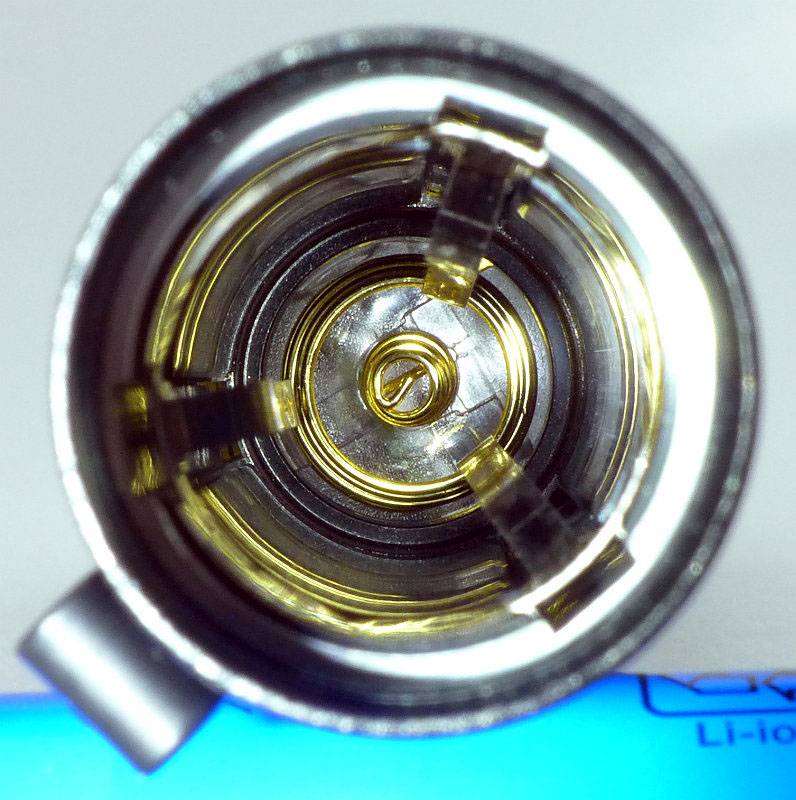
 photo 13 Protac HL USB battery tube P1160994.jpg

While we are looking very closely, the surface texture has a subtle sheen.
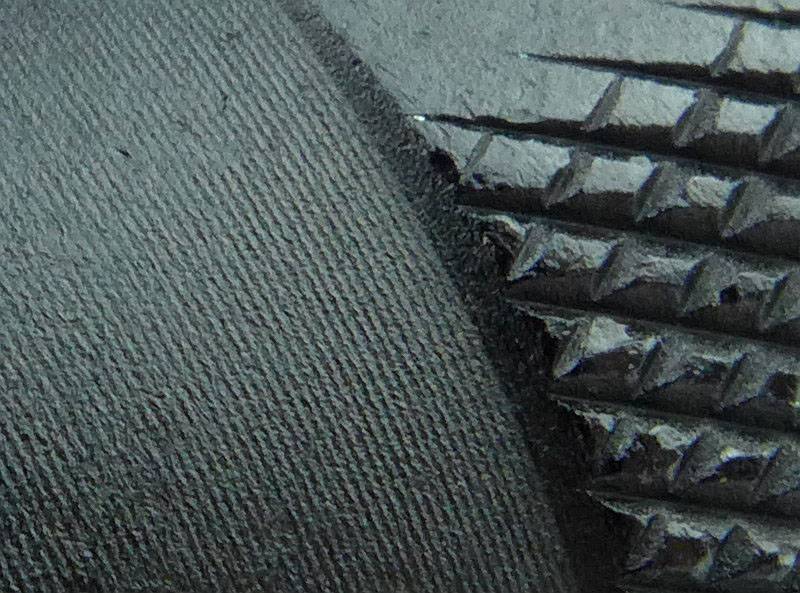
 photo 14 Protac HL USB surface P1170003.jpg

So where is the USB part? Starting here with a reverse angle view with the USB port cover closed.
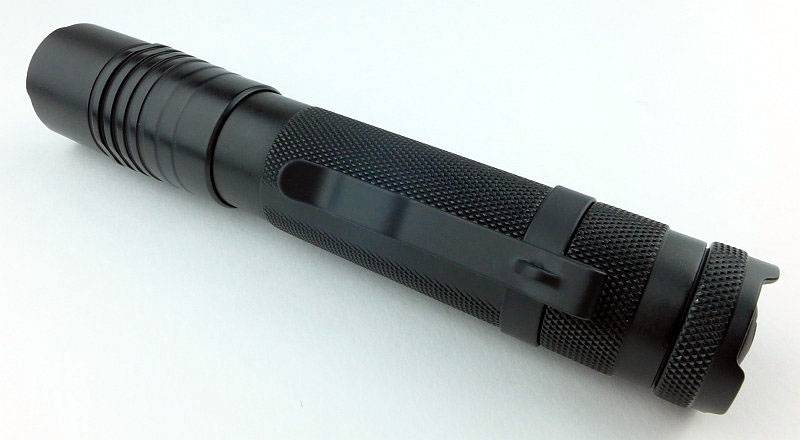
 photo 15 Protac HL USB reverse angle P1170006.jpg

Then with the port cover pulled back.
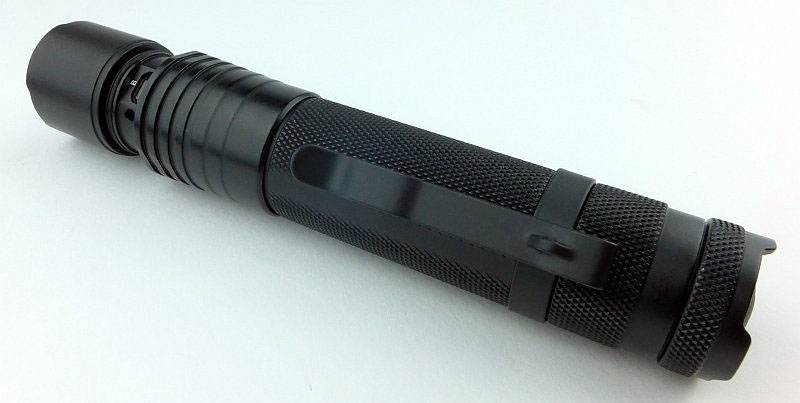
 photo 16 Protac HL USB reverse angle port P1170007.jpg

Under the port cover is a micro USB port and a charging indicator light.
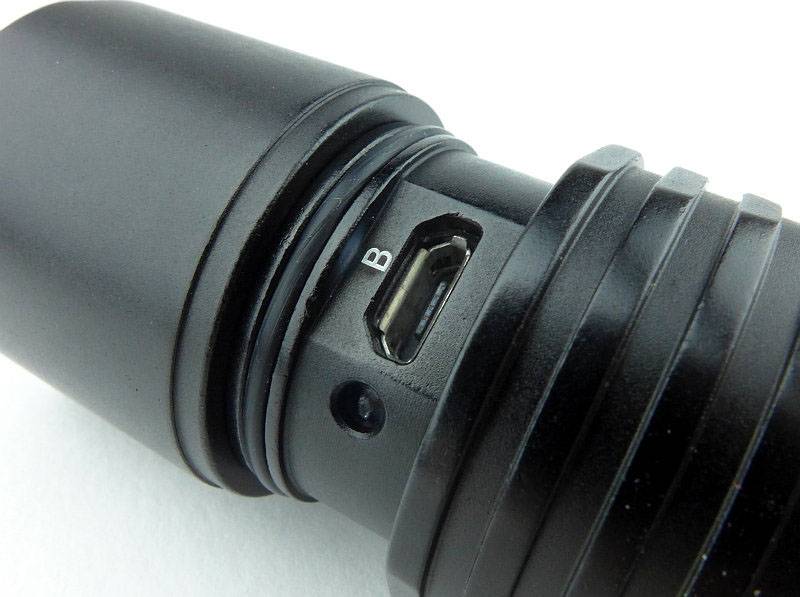
 photo 17 Protac HL USB chaging port P1170011.jpg

Oddly the Protac HL doesn’t make full use of the size of the head, instead having a thick bezel and smaller reflector. For its diameter the reflector is relatively deep.
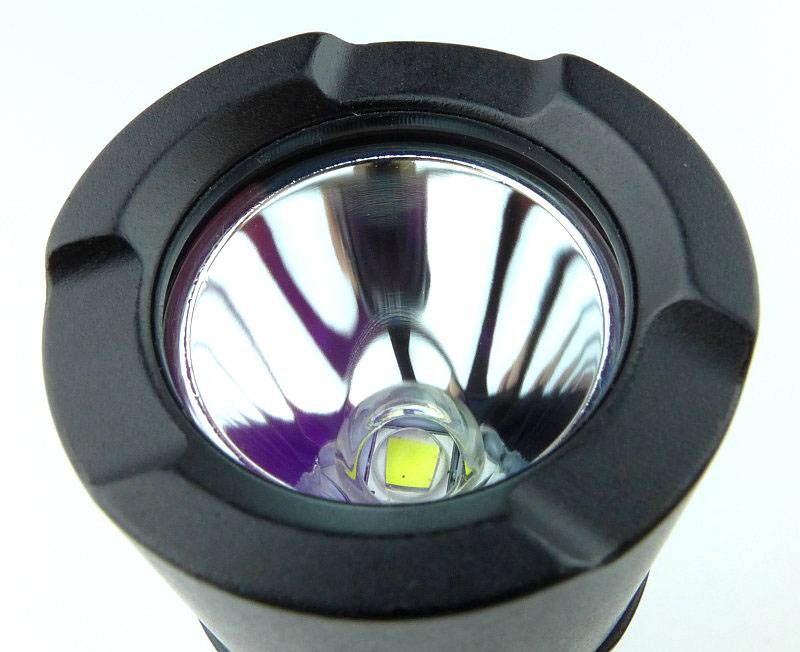
 photo 18 Protac HL USB reflector P1170015.jpg

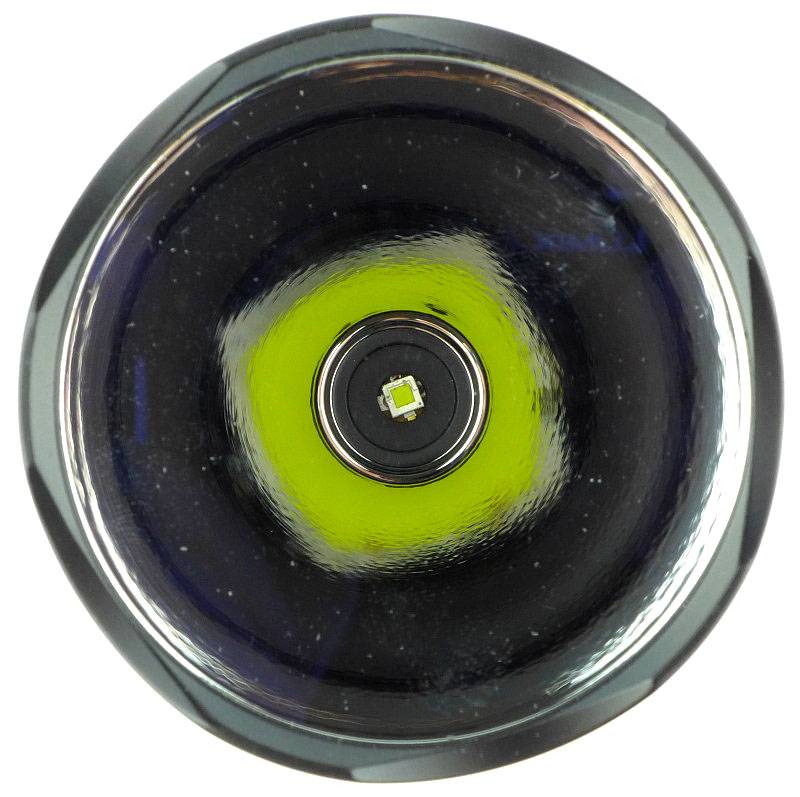
Though Streamlight never specify the actual LED used, this sample has an XM-L2 LED.
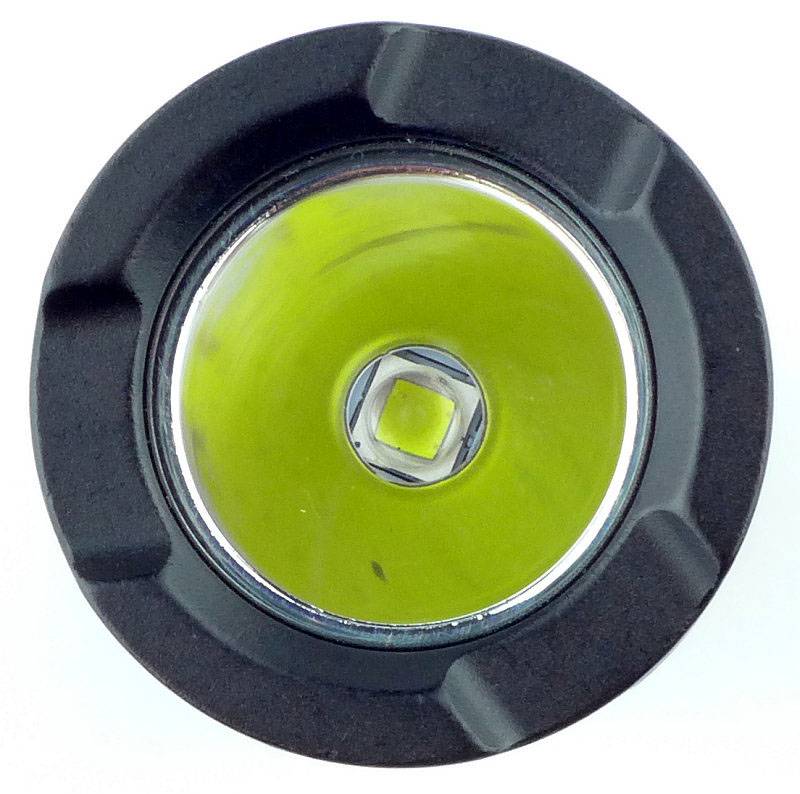
 photo 19 Protac HL USB LED P1170024.jpg

Of course, if you are out and about with no mains or car charger available, a Portable USB Charger is ideal for topping up the battery.
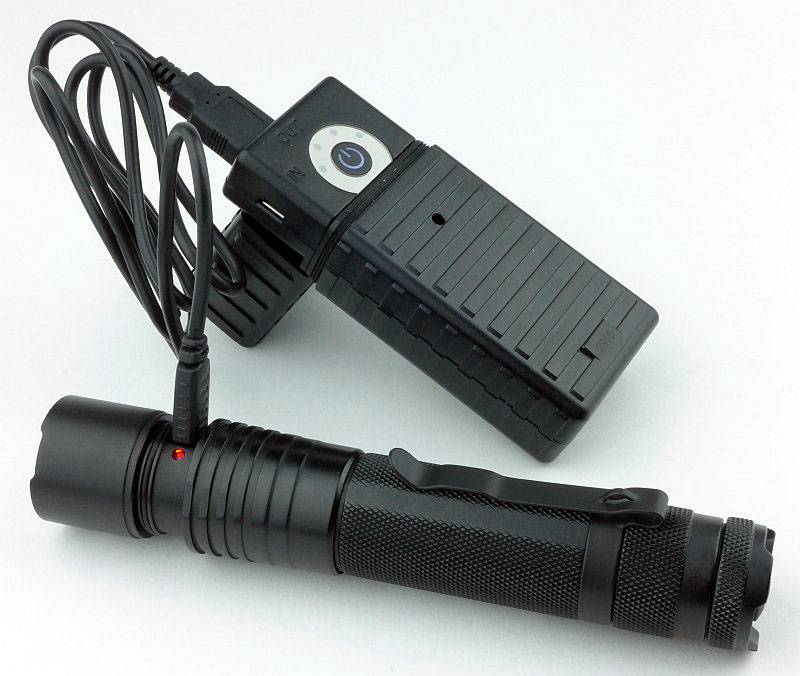
 photo 20 Protac HL USB charging P1170030.jpg

Taking a more detailed look at the Portable USB Charger:

Taking a slight digression from the Protac HL USB light and onto the Streamlight Portable USB Charger. This is how it arrives.
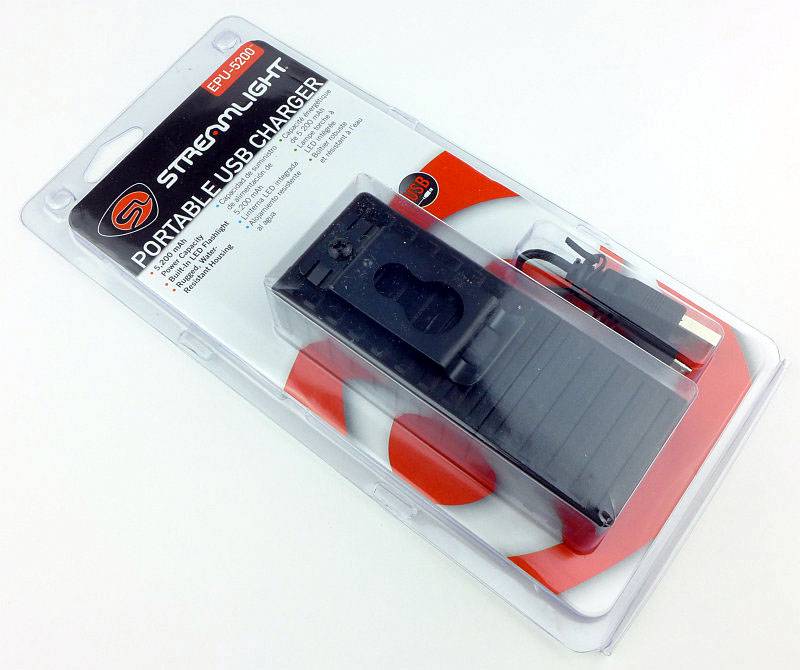
 photo 01 Stream USB boxed P1120294.jpg

There is a short USB cable which you can use to charge it, or charge other devices, and the instructions.
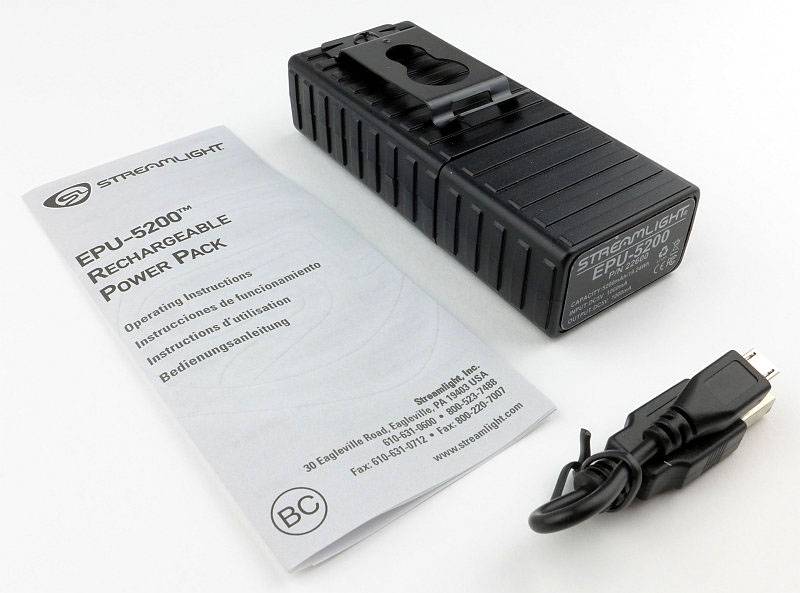
 photo 02 Stream USB unboxed P1120297.jpg

A nice feature of the Streamlight powerbank is that is has a weatherproof cover over the ports. The cover is held on with an elasticated cord, so you need to positively pull it off.
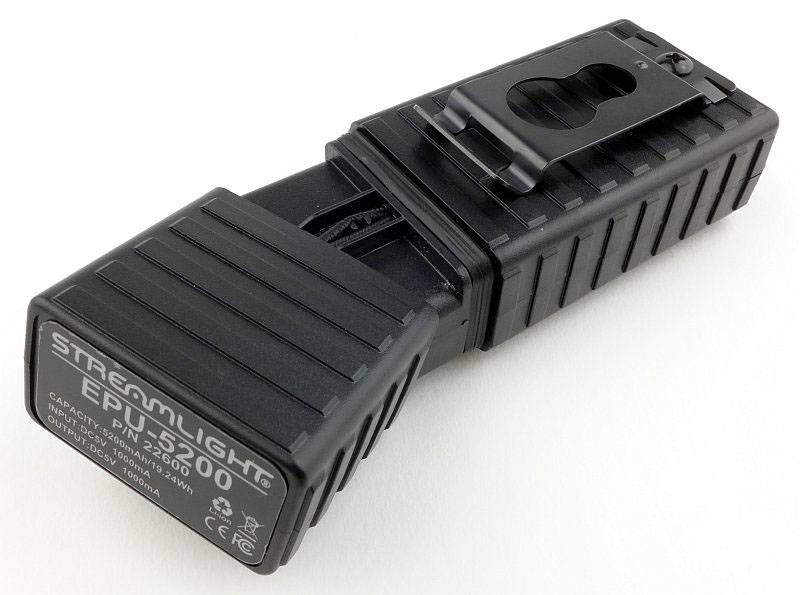
 photo 03 Stream USB opening P1120305.jpg

Once opened the cover stays at an angle and cannot be lost. There is a 5mm LD built in which allows this to be used as a basic light and this has been switched on in this photo.
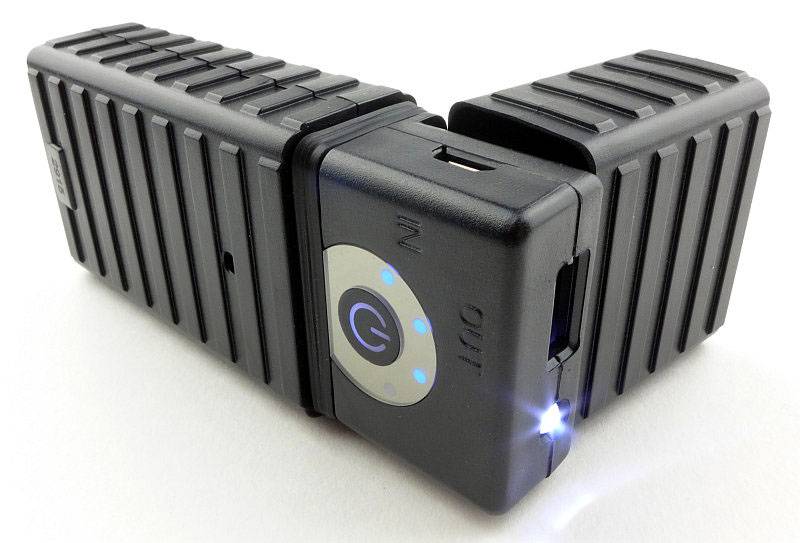
 photo 04 Stream USB open P1120320.jpg

When you turn it on with a click of the power switch, there are four lights to indicate the state of charge. This is showing approximately 75% remaining.
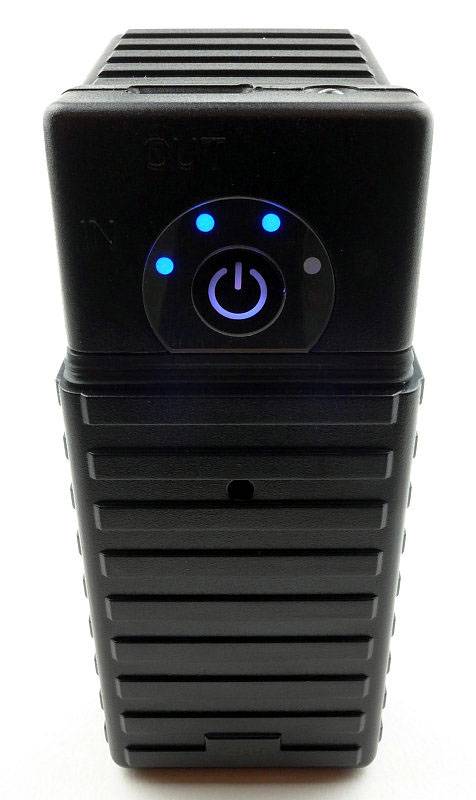
 photo 05 Stream USB lights P1120316.jpg

Though not specified as fully waterproof, the seal has a triple flange.
 photo 06 Stream USB seal P1120328.jpg

Thought it looked familiar? Well yes, it is rather reminiscent of the Streamlight Sidewinder.
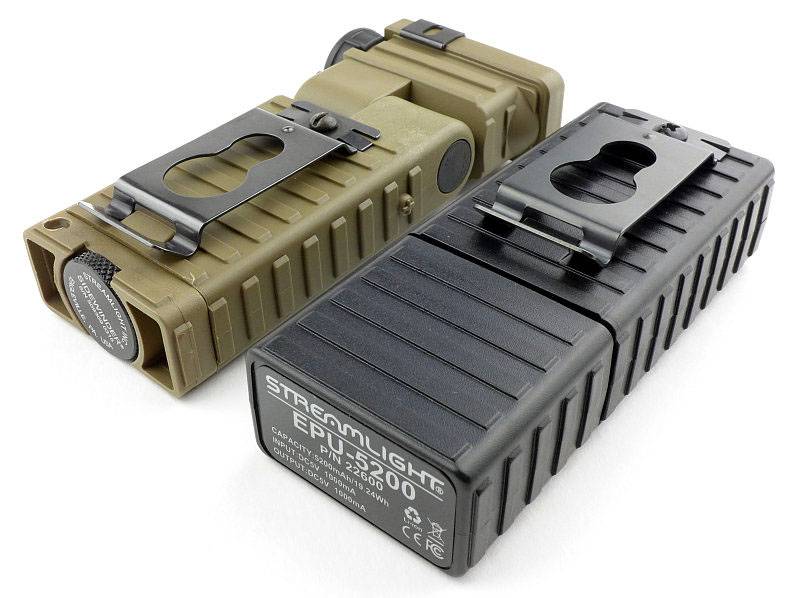
 photo 07 Stream USB sidewinder P1120339.jpg

Any standard USB device can be charged.
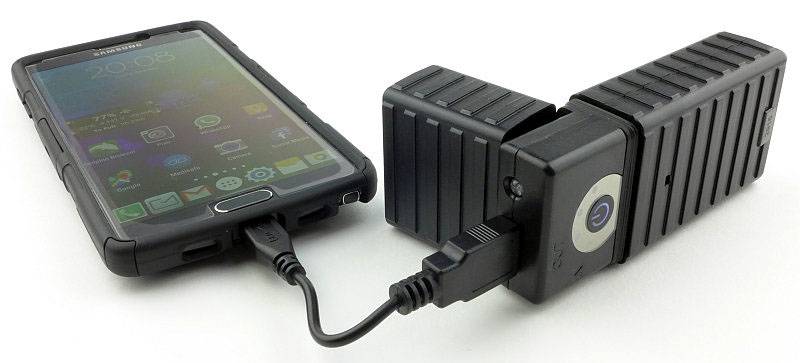
 photo 08 Stream USB output P1120347.jpg

When charging the USB Portable Charger, the indicator lights tick up to show it is charging, with each 25% LED staying lit once that level of charge has been reached, and then all stay on once fully charged.
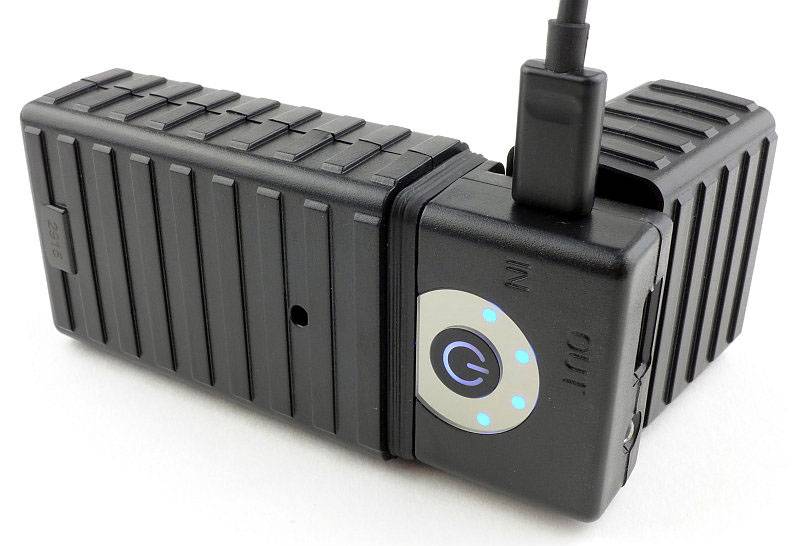
 photo 09 Stream USB input P1120857.jpg

Back to the ProTac HL USB …

The beam

Please be careful not to judge tint based on images you see on a computer screen. Unless properly calibrated, the screen itself will change the perceived tint.

The indoor beamshot is intended to give an idea of the beam shape/quality rather than tint. All beamshots are taken using daylight white balance. The woodwork (stairs and skirting) are painted Farrow & Ball “Off-White”, and the walls are a light sandy colour called ‘String’ again by Farrow & Ball. I don’t actually have a ‘white wall’ in the house to use for this, and the wife won’t have one!

The beam is a pretty good all-rounder. There is a wide hotspot and usable spill.
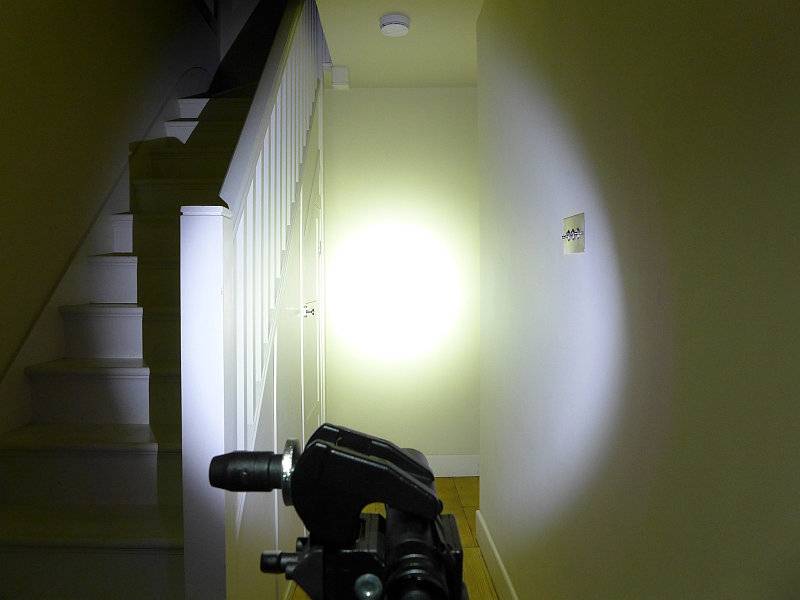
 photo 22 Protac HL USB indoor beam P1170302.jpg

Giving it a bit of range and the beam smoothes out further and give a nice field of view.
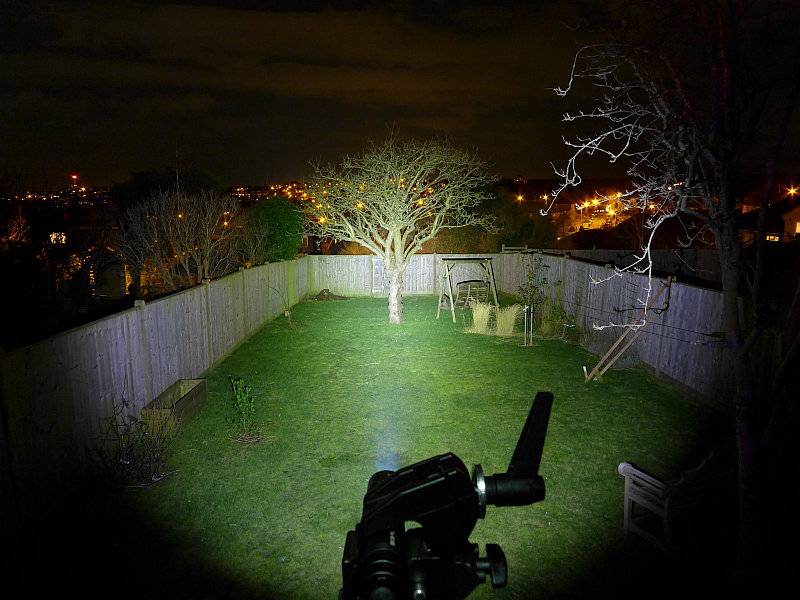
 photo 21 Protac HL USB outdoor beam P1170237.jpg

Modes and User Interface:

Thanks to Streamlight’s TEN TAP programming, you have the choice of three different mode sets. These are:
High – Strobe – Low (Factory default)
High Only
Low – Medium – High

There is no mode memory so every time you use it, it will start from the first mode in the set. To access sub-modes, you use rapid half-presses of the switch.
For example, on the factory default mode set, one press gives you High, a rapid double tap gives you Strobe, and a rapid triple tap for Low.

The switch is a momentary ‘forward-clicky’ so once you have the mode you want, you can fully press the switch to click the mode on.

TEN TAP programming is simple. To cycle through the available mode sets, rapidly press the switch 9 times and then on the tenth hold it on. Continue to hold until the light goes off then release the switch. Doing this moves you to the next mode set, so simply repeat until you have the one you want.

Batteries and output:

The ProTac HL USB runs on its own rechargeable 18650 cell, any standard button top 1860 or 2x CR123. The manual also mentions not using RCR123, but only due to the lower capacity, not because it will damage the light.

To measure actual output, I built an integrating sphere. See here for more detail. The sensor registers visible light only (so Infra-Red and Ultra-Violet will not be measured).

Please note, all quoted lumen figures are from a DIY integrating sphere, and according to ANSI standards. Although every effort is made to give as accurate a result as possible, they should be taken as an estimate only. The results can be used to compare outputs in this review and others I have published.

___________________________________________ ________________________________ ________________________________
ProTac HL USB using supplied cell I.S. measured ANSI output Lumens PWM frequency or Strobe frequency (Hz)
___________________________________________ ________________________________ ________________________________
High 856 0
Medium 360 0
Low 92 0

* Beacon and Strobe output measurements are only estimates as the brief flashes make it difficult to capture the actual output value.

Peak Beam intensity measured 8700 lx @1m giving a beam range of 187m.

There is no parasitic drain.

Maximum output is delivered in a burst format, lasting around 3 minutes before making a controlled reduction. Turning the light off and on again restarts the 3 minute burst. If left on permanently (as in this runtime test) the output initially reduces and then remains well regulated until it steps down slightly after 30 minutes. The remaining runtime is also well regulated right up to the point the cell runs low and output quickly drops.
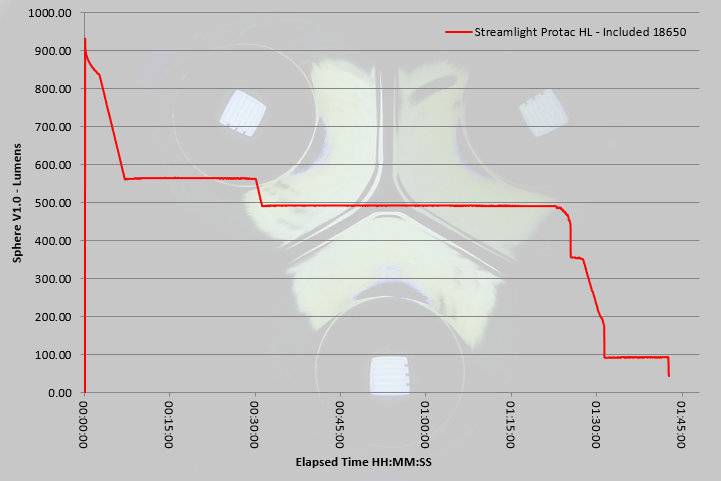
 photo Streamlight Protac HL runtime.jpg

Troubleshooting

This section is included to mention any minor niggles I come across during testing, in case the information helps anyone else.

No issues were encountered during testing.

As per the description of this section, this information is provided in case anyone else finds a similar ‘issue’ that might be fixed in the same way.

The ProTac HL USB in use

Though the ProTac HL USB uses a wider battery tube than most 18650 lights, by keeping the head roughly the same size as the battery tube, overall the light is not overly bulky. With my XL glove sized hands, I find the ProTac HL USB a very comfortable size.

Tailstanding can be a useful feature, and the tailcap design allows for this, but what it means is that the switch is relatively recessed and can become a little difficult to press and click-on, especially when wearing gloves. It requires more of a stab with the tip of your thumb than a press with the pad.

I’ve always like the Streamlight TEN TAP programming, and wish there were more mode-sets available. My preference is for the Low-Medium-High mode set. What I really do like is that when then choosing your output level, this system keeps it very simple; you have a single tap, double tap, or 3 or more taps. If you rapidly press the switch 5 or 6 times you still get the third output level in the mode set. Timing on the mode changes seems to work very well and I always managed to get the mode I want.

Access to the USB charging port is easy as the cover is a simple slider. What does worry me is that the cover is retained only by the o-rings at each end. Once these o-rings wear the cover may not stay in place securely, so it might be better if there was a screw thread to hold it in place. This is a trade off between ease of use and reliability.

Great news is that in the ProTac HL USB Streamlight have not used PWM. All output levels are current controlled and a pleasure to use.

The included 18650 is only 2200 mAh; comparing this to current ‘normal’ capacities of 3400mAh it is somewhat behind the rest. There may be some reliability in a lower capacity cell, but this is slightly disappointing. Of course you can pop a 3400mAh 18650 in and use it, but you can’t charge it in the ProTac HL USB.

Being able to also use standard 18650 (button top) and CR123 cells is a great feature as you are not tied into the proprietary Streamlight cell and can carry backup cells. If you want to use the built-in charger then you have to use the Streamlight cell, but you get one with it so that is not a big issue. Streamlight’s anti-rattle battery tube works very well (but can be a bit tight on some 18650s) and stops CR123s making the light feel cheap as they don’t rattle about.

It may not be outstanding in terms of overall output, or for being compact, but the ProTac HL USB is a workhorse of a light and the package gives you a full kit of parts which can be used for other purposes. I use the mains and 12V USB chargers for my phone and the Portable USB Charger as well as the ProTac HL USB. Simple, programmable and rechargeable.

Review Summary

_______________________________________________ _______________________________________________
Things I like What doesn’t work so well for me
_______________________________________________ _______________________________________________
USB Rechargeable. Switch can be a little difficult to press.
Can use standard 18650 and CR123 cells. Charging port cover only held closed by o-rings.
No PWM. Supplied 18650 only 2200mAh
TEN TAP Programming.
Anti-Rattle battery tube.

 photo 05 Protac HL USB angle P1160965.jpg


Discussing the Review:

Please feel free to add comments to the review, but the ideal place to freely discuss these reviews is on a forum. If you started reading the shorter forum version of the review, but followed the link this full exclusive review, please return to that forum to discuss the review there.
If you read the review entirely on Tactical Reviews, please consider one of the following to join in any discussion.

CandlePowerForums – Flashlight Reviews Section (Largest and Friendliest Flashlight Community Forum)

EdgeMatters – Sponsored Reviews (UK based Forum for Knife Makers and Collectors)
Light Review: Olight M3XS-UT Javelot – Super Thrower (3/4xCR123, 2×18650)

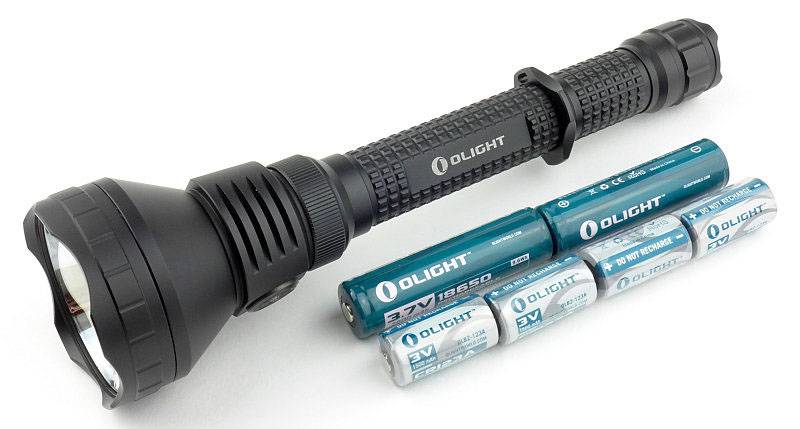
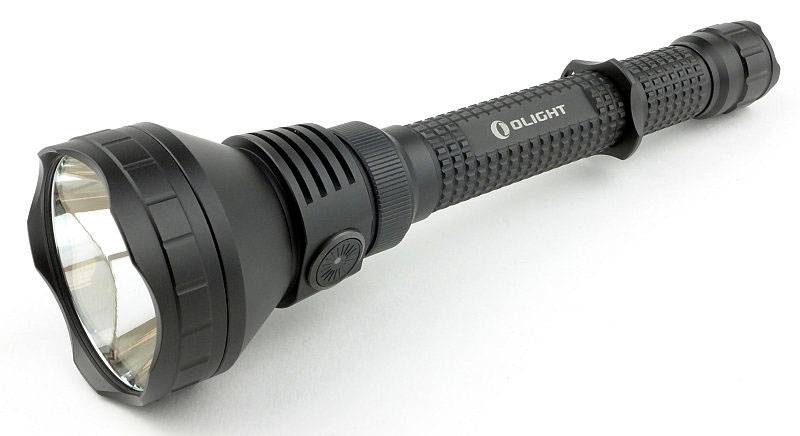
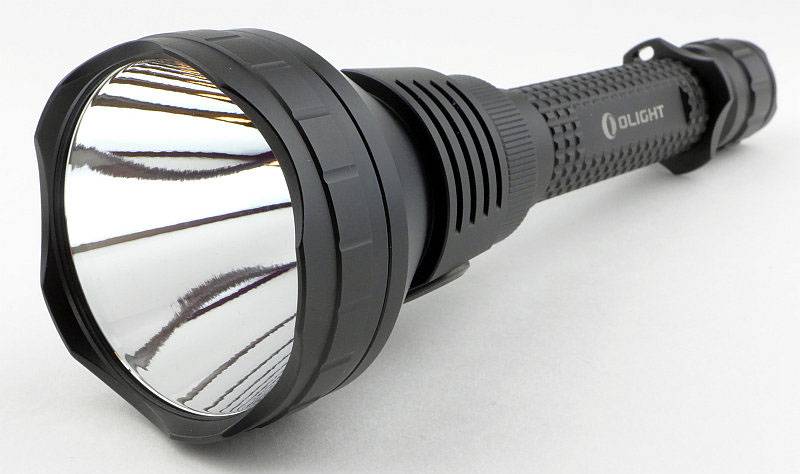
Olight have been building up performance levels with the other Javelot models. These Javelots have been getting noticed for their enhanced throw, and then Olight released the M3XS-UT taking performance up another notch. The M3XS-UT is currently the top of performer amongst the Javelots.

Taking a more detailed look:

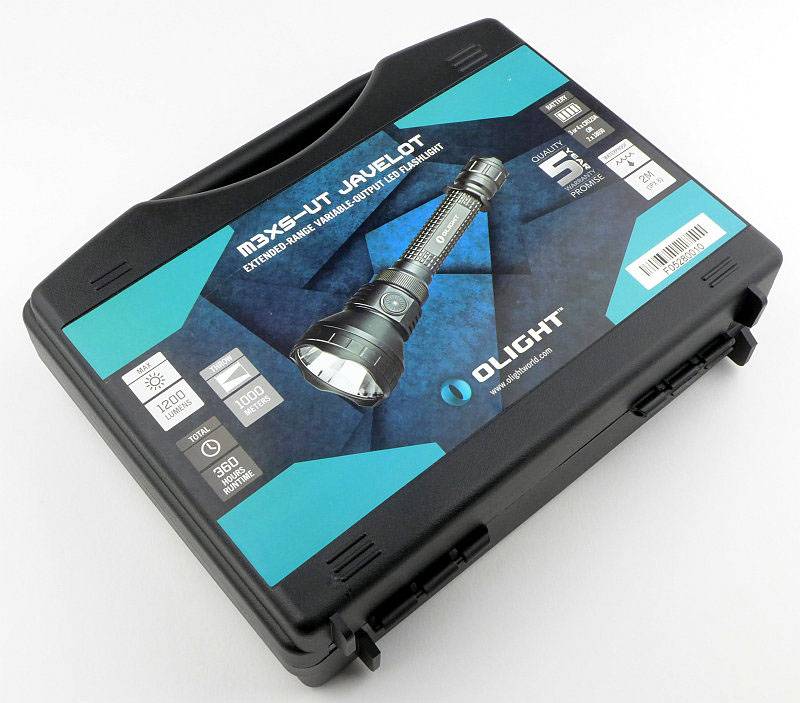
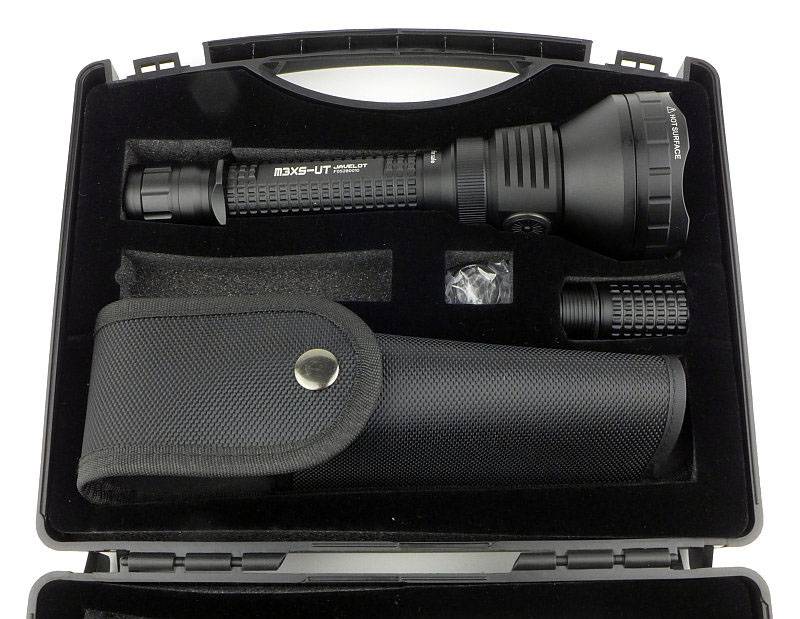
Like all the Javelots I’ve tested, the M3XS-UT comes with a plastic carry case rather than a disposable cardboard box.

Inside, the contents are held in place with a foam liner. The empty slot would contain the CR123 holder, but in this case this demonstration light had a set of cells fitted into the light when it arrived.

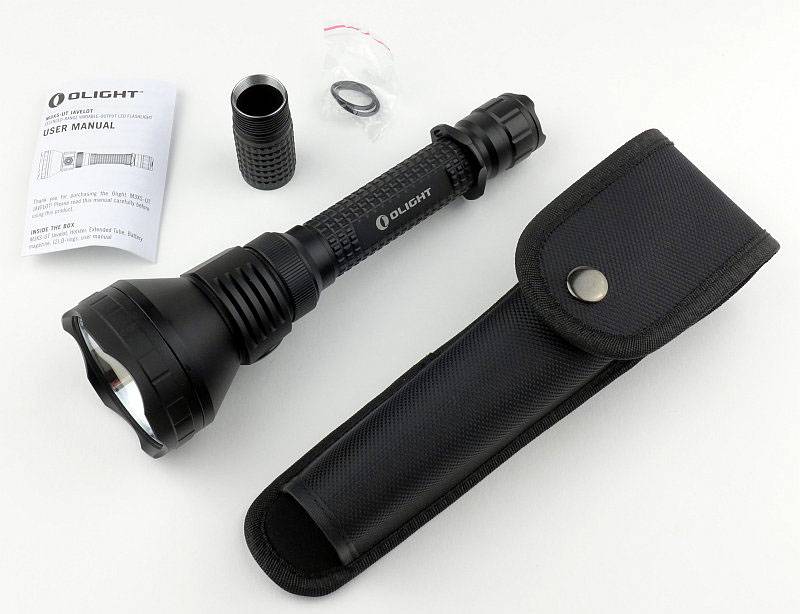
Included are the M3XS-UT, an extender tube, holster, two O-rings and the instructions. (the CR123 cell holder is already in the light here).

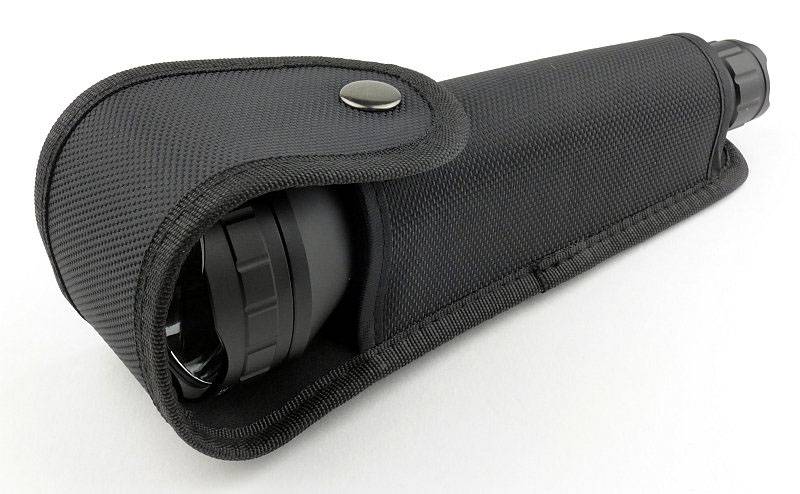
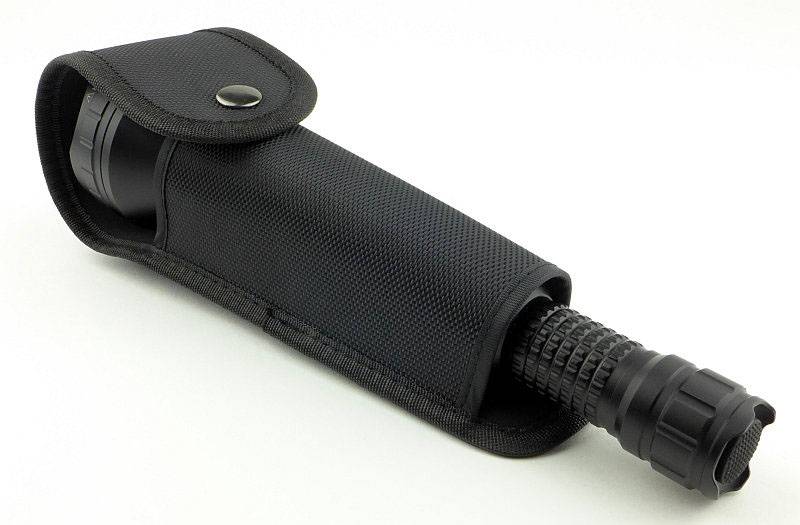
Out of necessity, the M3XS-UT has an open bottom holster.

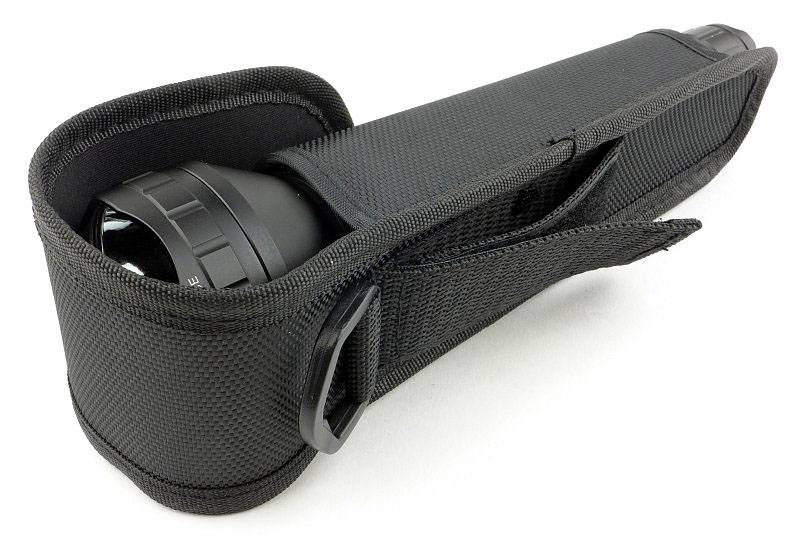
You have the choice of D-ring or Velcro-closed belt loop.

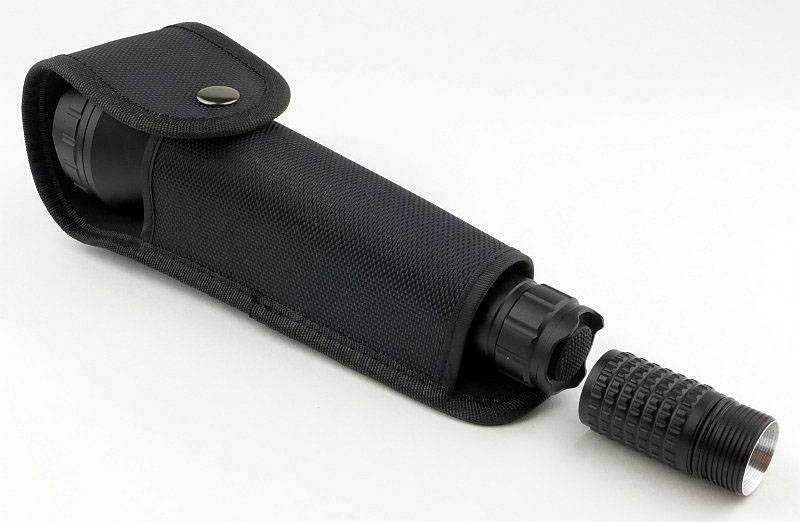
This is why there is an open bottom in the holster.

This holster can be used with or without the extension tube.

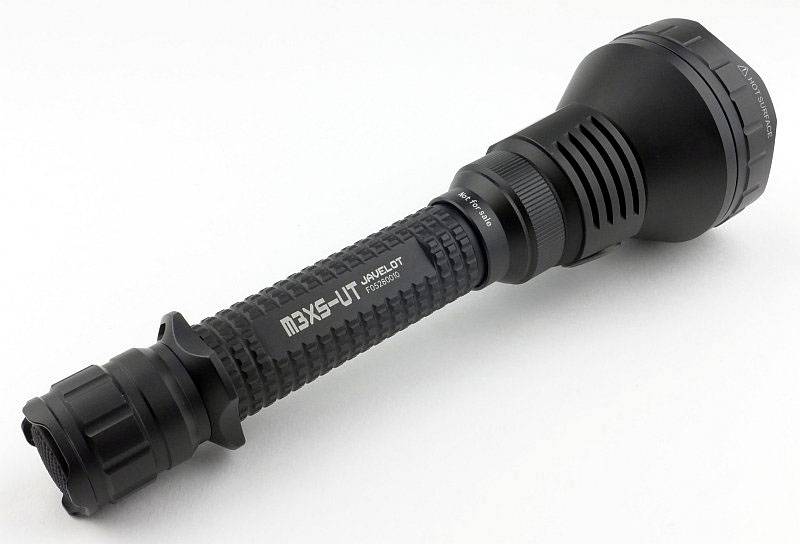
The M3SX-UT has a removable grip ring.

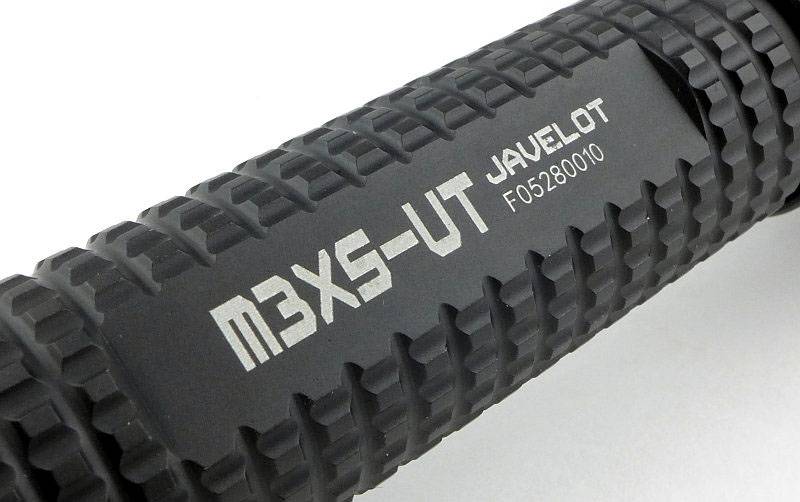
Instead of standard knurling a very effective pattern is machined into the body.

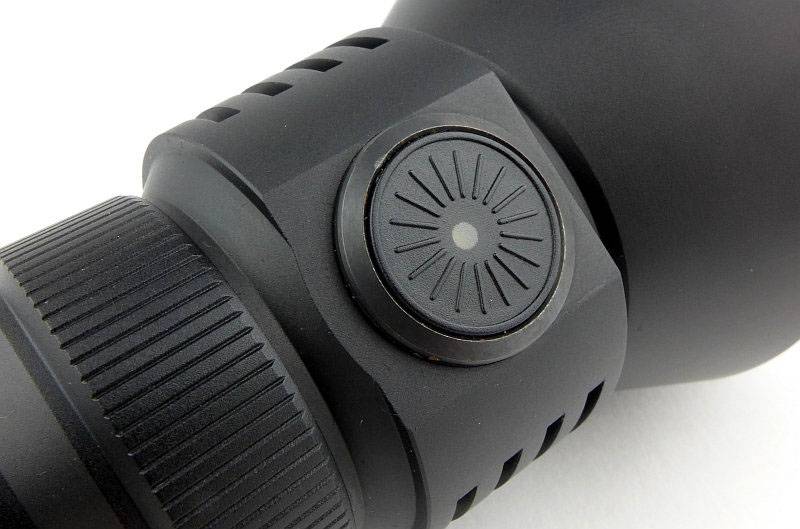
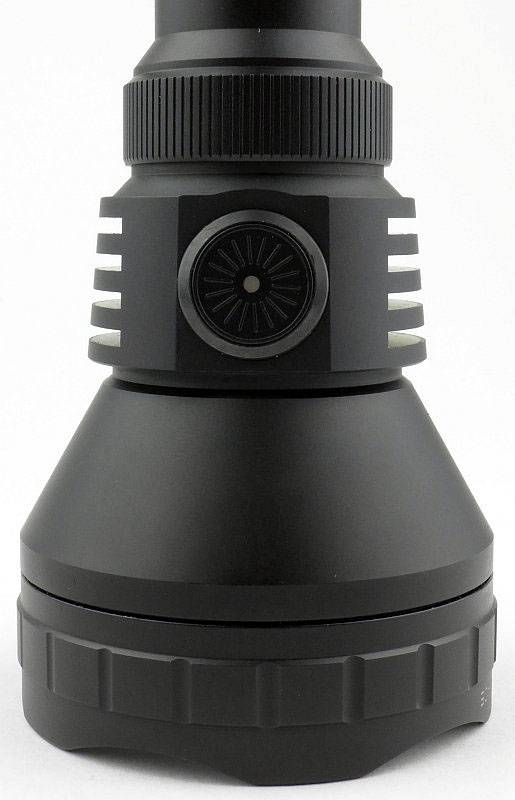
In addition to the tail-cap switch, there is a side-switch for mode selection.

Either side of the side-switch are heat sink fins.

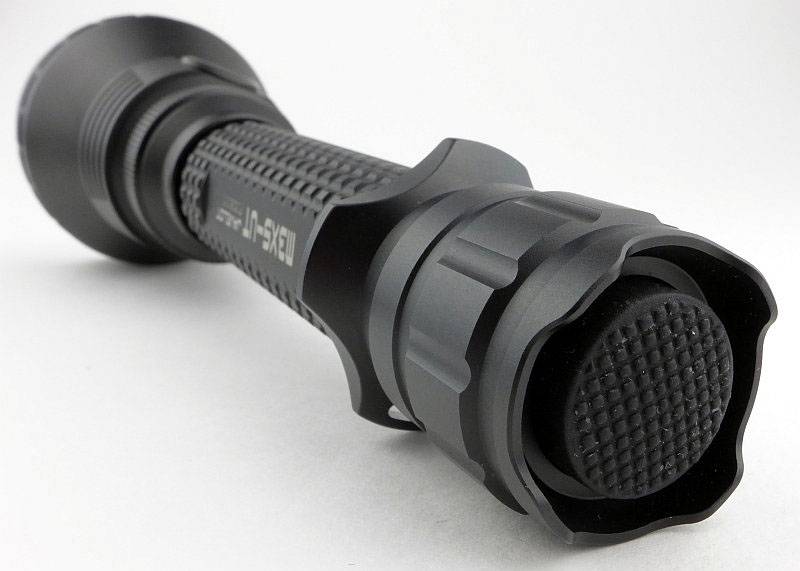
The switch boot is wider than most and the tail-cap has four small raised lugs which allow it to tail-stand (though not very stable).

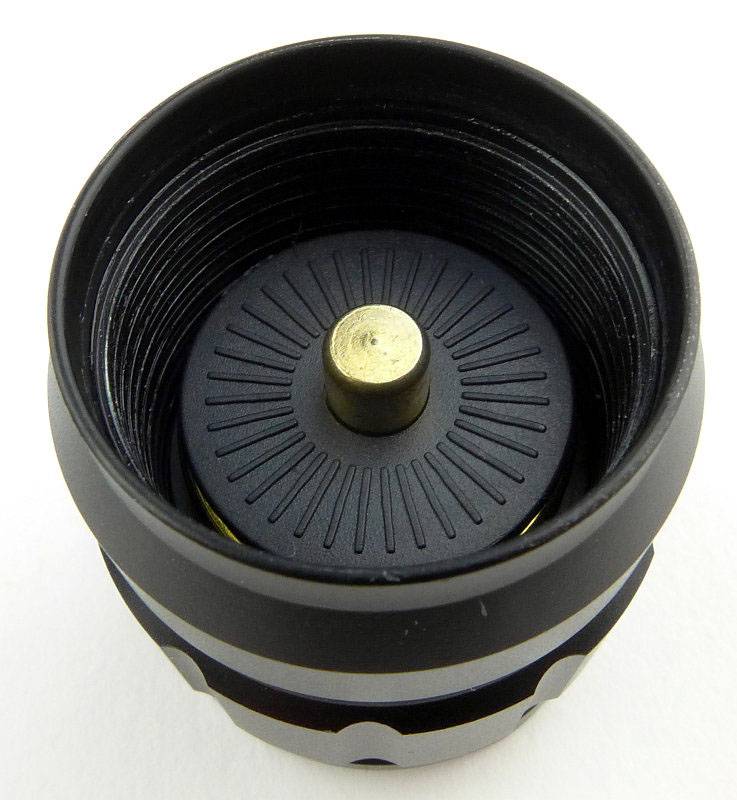
Looking into the tail-cap, the negative terminal is clearly visible, but the contact for the battery tube is only seen as small glimpses. This is due to the design not using a contact point on the end of the tube, but instead fitting into the cone shaped inner edge.

Removing the battery tube completely shows the positive contact in the head as well as the circular battery tube contact.

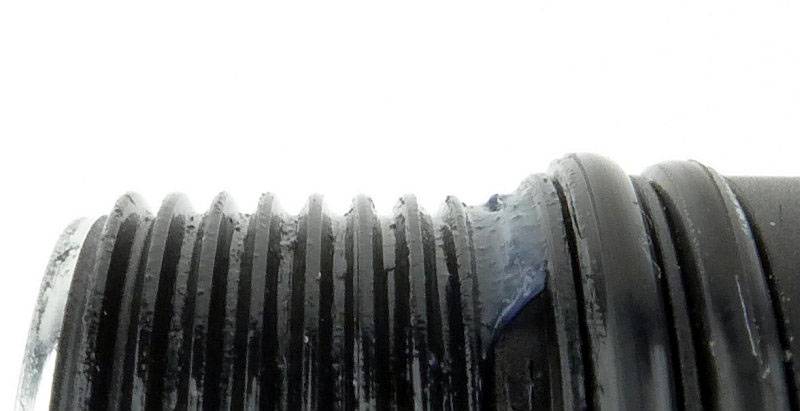
For the tail-cap end of the battery tube, the threads are a square-cut.

At the head end of the batter tube, the threads are standard and two O-rings are used.

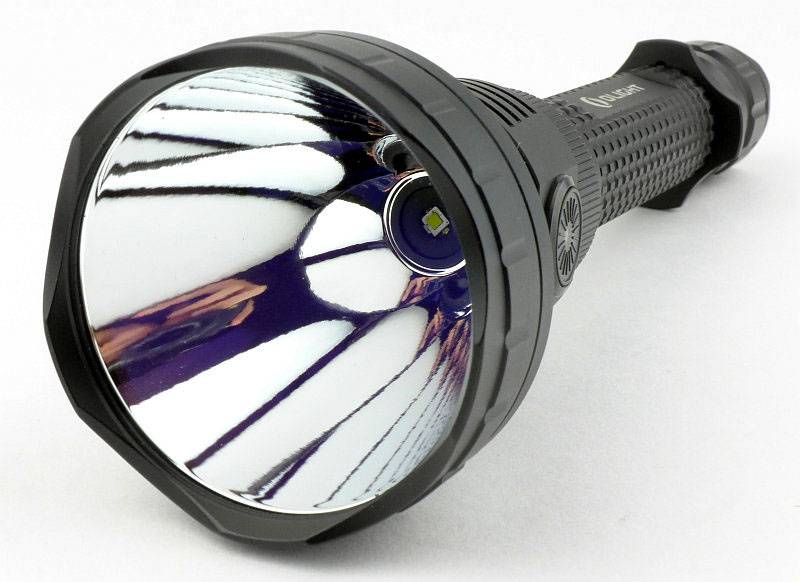
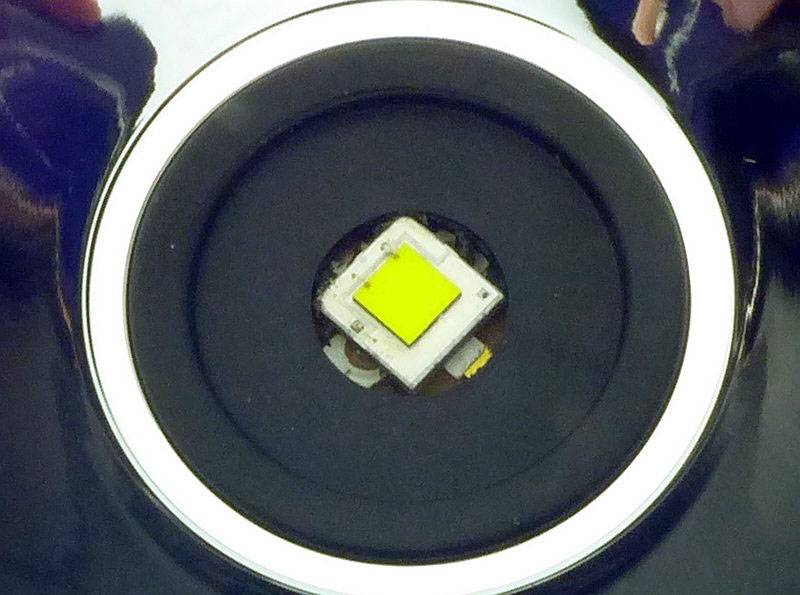
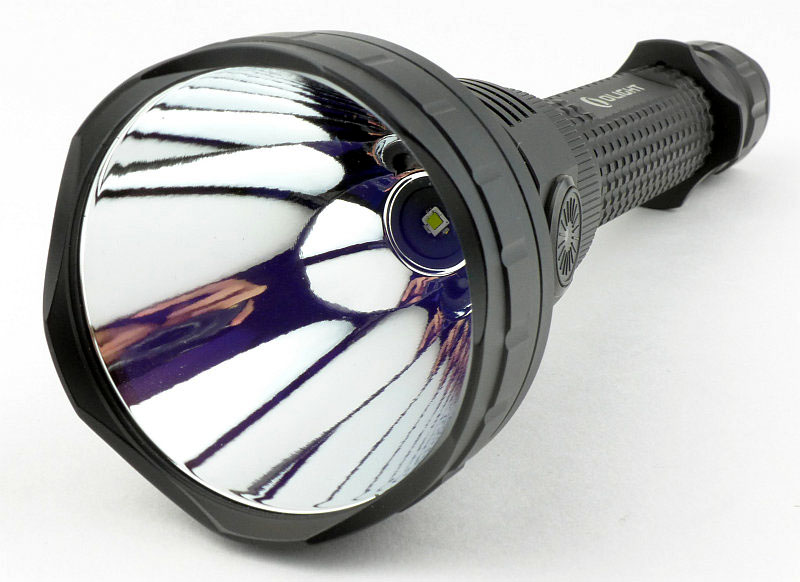
There is just a tiny hint of texturing in the large reflector, and at its heart, a fully exposed XP-L HI LED.

A closer view of the bare phosphor of the XP-L HI.

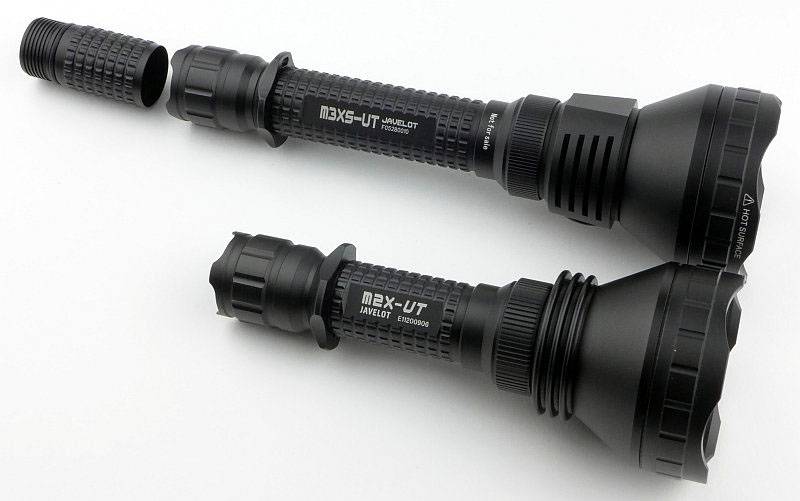
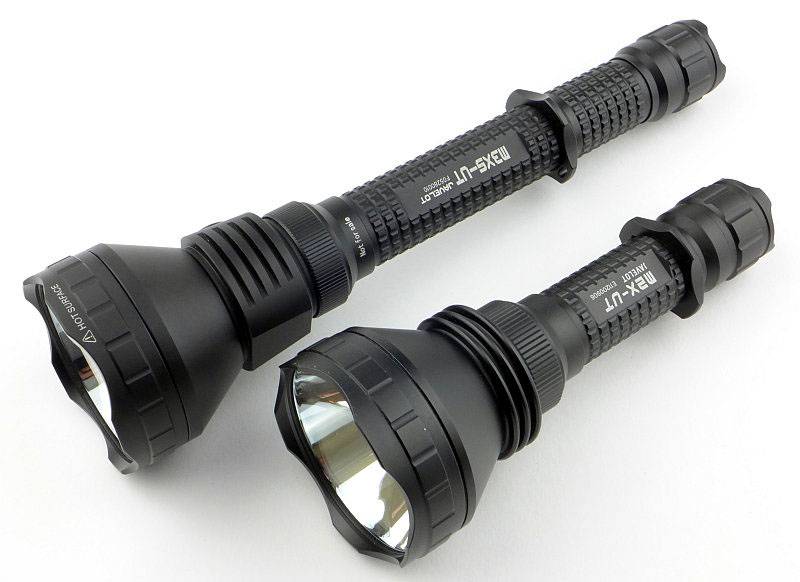
Making comparison to the M2X-UT (using 1×18650), this larger version is clearly longer from the lens to the battery tube due to the inclusion of the side switch and larger heat sink. The non-extended battery tube is also 3xCR123 in length.

Comparing again with the extension tube fitted.

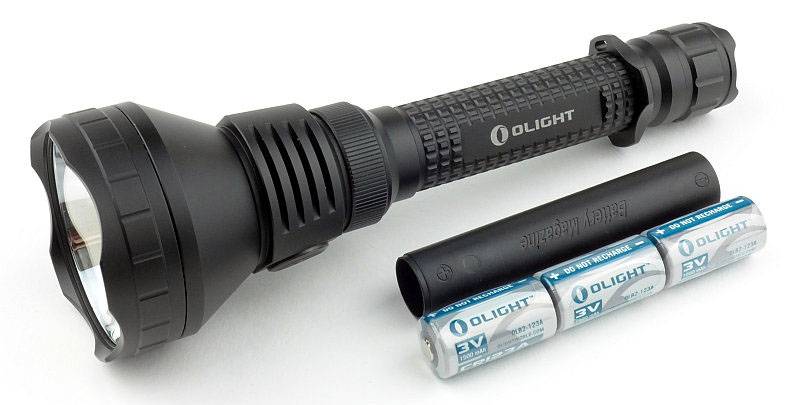
Taking the M3X-UT at its smallest size, it runs on 3xCR123 and has a cell holder to stop any rattle.

Stepping up to the full length M3XS-UT it runs on 2×18650 or 4xCR123.

To get the most runtime out of the M3XS-UT use it with the extension tube fitted.

The beam

Please be careful not to judge tint based on images you see on a computer screen. Unless properly calibrated, the screen itself will change the perceived tint.
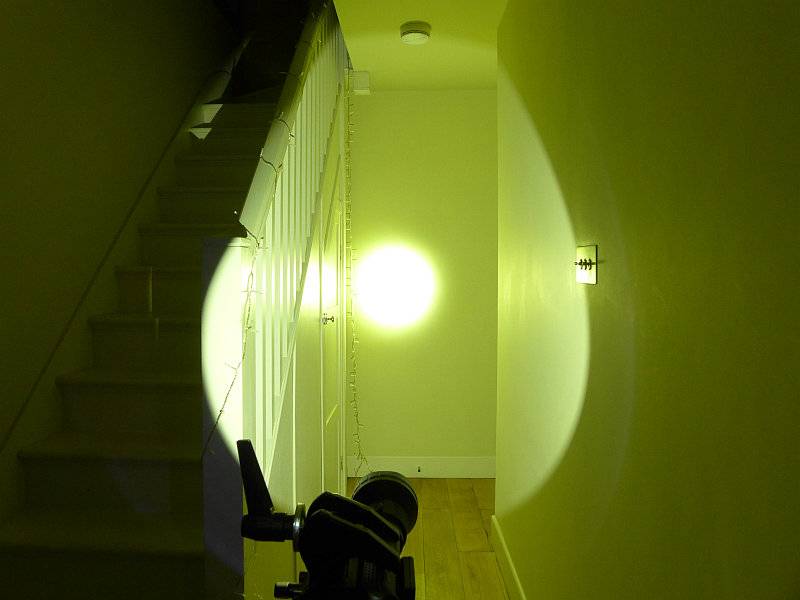
The indoor beamshot is intended to give an idea of the beam shape/quality rather than tint. All beamshots are taken using daylight white balance. The woodwork (stairs and skirting) are painted Farrow & Ball “Off-White”, and the walls are a light sandy colour called ‘String’ again by Farrow & Ball. I don’t actually have a ‘white wall’ in the house to use for this, and the wife won’t have one!

Starting indoors, it is immediately obvious we have a super-high intensity hotspot. In fact what you can see in this photograph is the effect of the hotspot being of such high brightness it is acting as a significant source of light. The edge of the spill is easy to see, but the whole scene is lit behind the spill edge due to the hotspot’s light bouncing back.

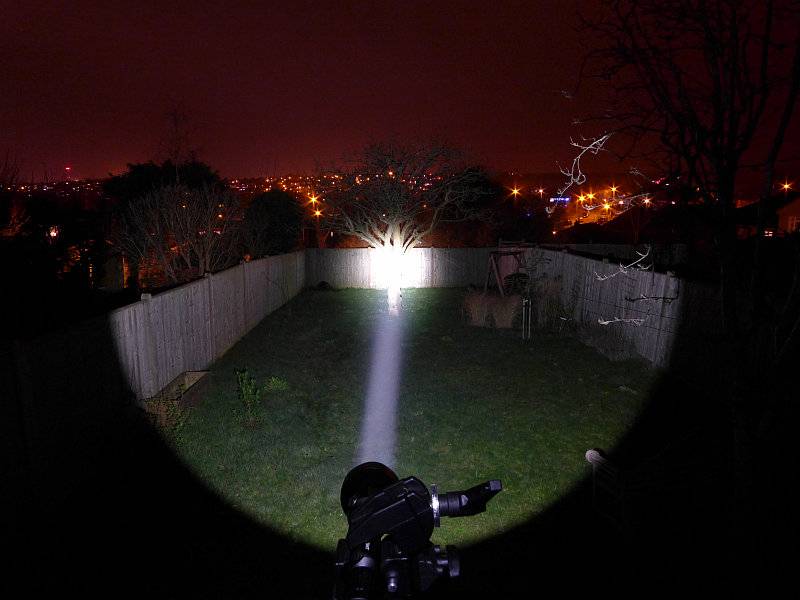
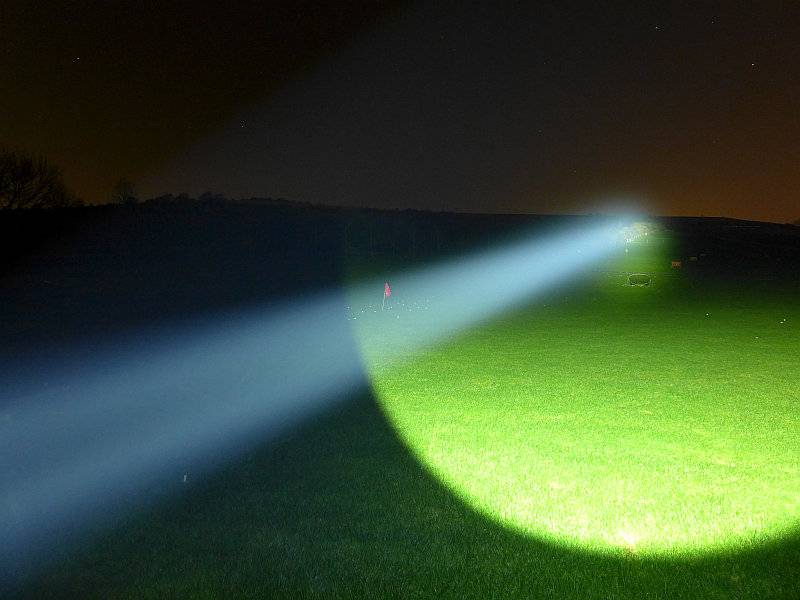
Outdoors the hotspot burns out the centre of the image.

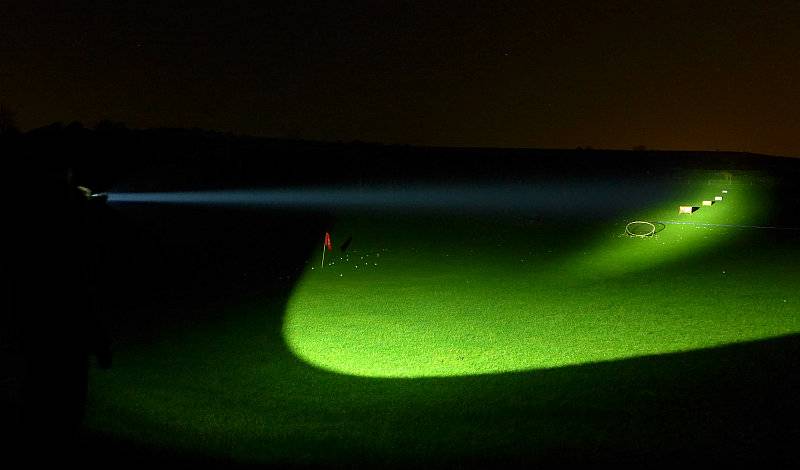
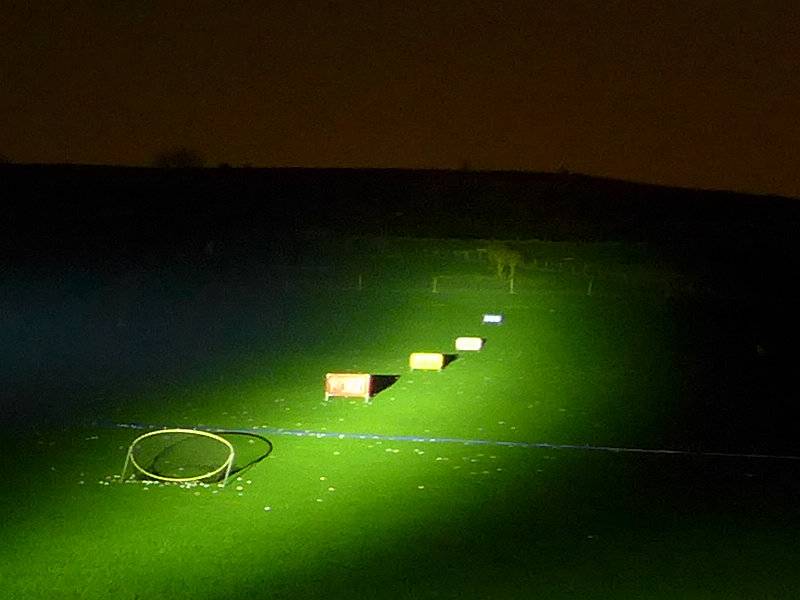
To really appreciate the full power of the M3XS-UT we need a little more range. How about a driving range?

The beam is aimed at a set of four distance markers behind a circular net. The closest marker is 100 yards, with the others set 50 yards apart going up to the furthest at 250 yards.

The beam lights well beyond the markers.

Modes and User Interface:

There are four constant output modes, High, Medium, Low and Moonlight as well as a Strobe mode.

Access to these is via a series of clicks of the forward-click tail-cap switch combined with the side switch.

Turning the M3XS-UT ON with the tail-cap switch, the steady modes are cycled through using the side switch Low -> Medium -> High -> Low etc. The selected mode is memorised for the next time the tail-cap switch is used.

While ON, pressing and holding the side switch turns the output to Strobe.

From OFF, half-pressing or fully pressing the tail-cap switch activates the memorised output level.
From OFF, a rapid double tap of the tail-cap switch activates High. This is not memorised.
From OFF, a rapid triple tap of the tail-cap switch activates Strobe. This is not memorised.
From OFF, holding the side switch while activating the tail-cap switch turns the output to Moonlight. This is not memorised.

Batteries and output:

The Olight M3XS-UT runs on 3/4x CR123 or 2×18650.

To measure actual output, I built an integrating sphere. See here for more detail. The sensor registers visible light only (so Infra-Red and Ultra-Violet will not be measured).

Please note, all quoted lumen figures are from a DIY integrating sphere, and according to ANSI standards. Although every effort is made to give as accurate a result as possible, they should be taken as an estimate only. The results can be used to compare outputs in this review and others I have published.

___________________________________________ ________________________________ ________________________________
Olight M3XS-UT Javelot using specified cell I.S. measured ANSI output Lumens PWM frequency or Strobe frequency (Hz)
___________________________________________ ________________________________ ________________________________
High using 3x Olight CR123 cells 1243 0
Medium using 3x Olight CR123 cells 678 0
Low using 3x Olight CR123 cells 118 0
High using 2x Olight 18650 cells 1234 0
Medium using 2x Olight 18650 cells 666 0
Low using 2x Olight 18650 cells 116 0

* Beacon and Strobe output measurements are only estimates as the brief flashes make it difficult to capture the actual output value.

Peak Beam intensity measured 249000lx @1m giving a beam range of 998m.

There is no parasitic drain.

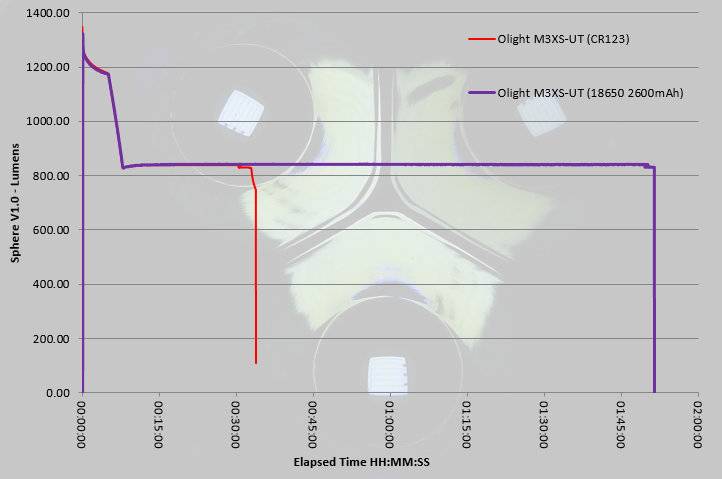
After 8 minutes on High (using either CR123 or 18650) the output makes a controlled reduction to 832lm which is then maintained as a regulated output for as long as the cells can manage.

Running on 2×18650 you have a huge difference in total runtime with the CR123s running into the ANSI cutoff at 35 minutes from turn on, but the 2×18650 (and only 2600mAh cells) gives you up to 1h51m at which point the protection cuts in and the output goes off.
The regulation used in the M3XS-UT means that you get little or no warning of the output cutting out. On 18650 the protection activates, and with CR123 the output plummets once the cells are depleted.

Troubleshooting

This section is included to mention any minor niggles I come across during testing, in case the information helps anyone else.

No issues were encountered during testing.

As per the description of this section, this information is provided in case anyone else finds a similar ‘issue’ that might be fixed in the same way.

The M3XS-UT Javelot in use

This light is an out-and-out throw monster. Unless the extra 3.5cm is a deal breaker, you will want to use the extension tube for the massive increase in run time and guilt-free rechargeable lumens.

At short ranges the M3XS-UT is too tight a beam for comfortable use. It is great for ceiling bounce, but not when directed towards whatever you are looking at. Of course if you are peering into a deep space, the tight beam works wonders, but for general use this extreme-thrower is not the right choice. What you want this light for is its throw and lightsaber like beam.

Due to the intensity of the beam, if you hold it too near to your line of vision the beam itself can obscure your view of what you are shining it at. It is best to hold the light away from your head to allow you to see further. This varies with atmospheric conditions being far more noticeable when the air is moisture laden.

Compared to the smaller M2X-UT (which has very impressive performance – see my review of the M2X-UT for more details), the M3XS-UT steps things up. At 182800 lux@1m the M2X-UT has a beam range of 855m, but with the M3SX-UT this is raised to 249000 lux@1m and a beam range of 998m. A significant jump in beam intensity from the same diameter reflector.

If you are using the momentary output to flash a signal, it is quite easy to activate strobe, and I’d much prefer there to be no strobe at all. In an extreme-range searchlight I see no point in strobe.

Much better is the partly hidden Moonlight mode. In practical terms, due to the highly focussed beam, Moonlight mode is not terribly useful. All you end up seeing is a small bright circle with very dim spill round it. Better than nothing, but this is not a close-range light even with moonlight mode. If only strobe were hidden in this way, then you could easily avoid it.

Handling with the extension fitted is really good. Though the grip ring is now further from the switch, it simply sits between your middle and ring finger, or ring finger and little finger, and gives you plenty of security. I particularly like the machined grip pattern on the battery tube. It is not as abrasive as knurling, but the knobbles give great hold without acting like sandpaper.

The lux figures speak for themselves, and yet the M3XS-UT is not overly large, so you get fantastic throw in a still relatively compact and easy to handle light.

It may not be an all-rounder, but that is not what this light is all about – give it some range and the M3XS-UT truly sings.

Review Summary

_______________________________________________ _______________________________________________
Things I like What doesn’t work so well for me
_______________________________________________ _______________________________________________
Super throw with 249000 lux @1m – 998m beam range Strobe too easily activated
1200lm output Not suited to short range use
Included extension tube allows for longer runtimes Regulated output results in shutdown with little warning
Holster accommodates extension tube
Bare XP-L HI LED used for highest lux
Relatively compact for its performance

Light Review: First Light T-Max LE and TTL (2xR/CR123)
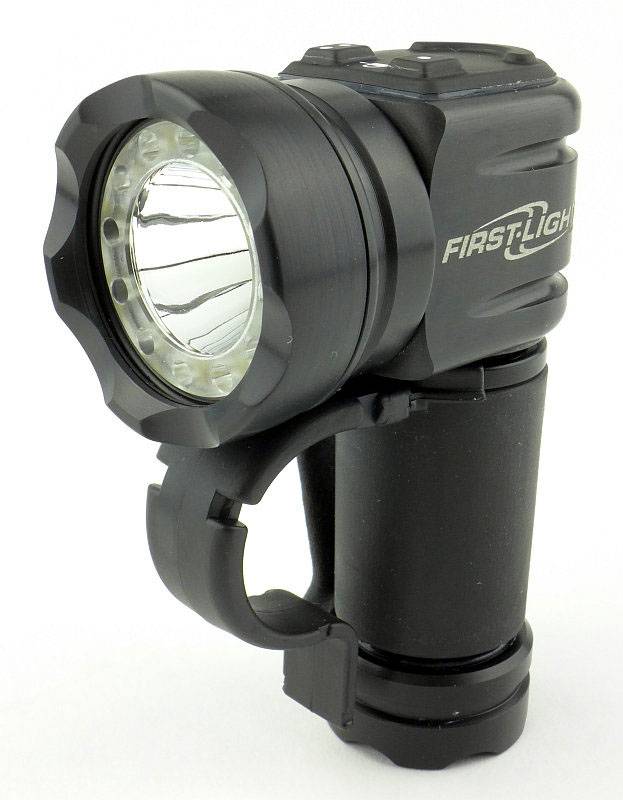
Last time I looked at a First-Light model it was the 2xAA powered TORQ. This time I’m taking a detailed look at the latest T-Max high output model (LE version) and the TTL accessory, as well as another visit to the First-Light mounting system. The TTL actually stands for the Tomahawk Task Light, with the Tomahawk being the T-Max’s predecessor, however, the TTL fits the T-Max so also happens to be the ‘T-Max Task Light’.

This is the LE (Law Enforcement) version of the T-Max and as such has the Red/Green/Blue LEDs and the strobe is red/blue/white. In all there are five versions of the T-Max with either a larger reflector and just the main LED, or having the ring of additional LEDs in combinations of coloured, UV and IR LEDs.

During the time I was talking to First-Light about the T-Max LE, it has been updated to an XP-L and then to the XP-L HI in the featured version here. First-Light certainly work hard to keep right up to date.

If you have not come across First-Light before, then be prepared for something different.

Taking a more detailed look at the T-Max LE:

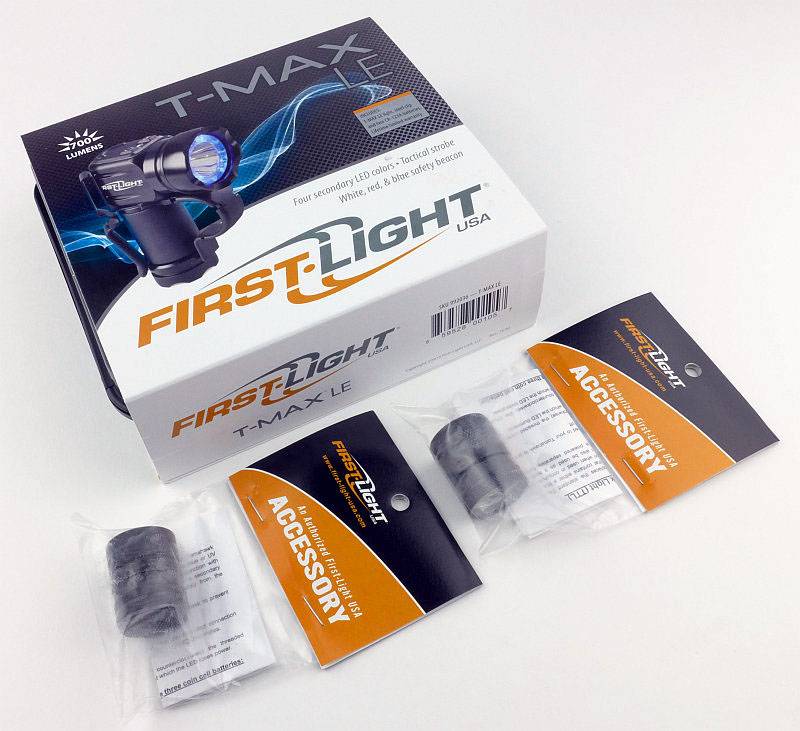
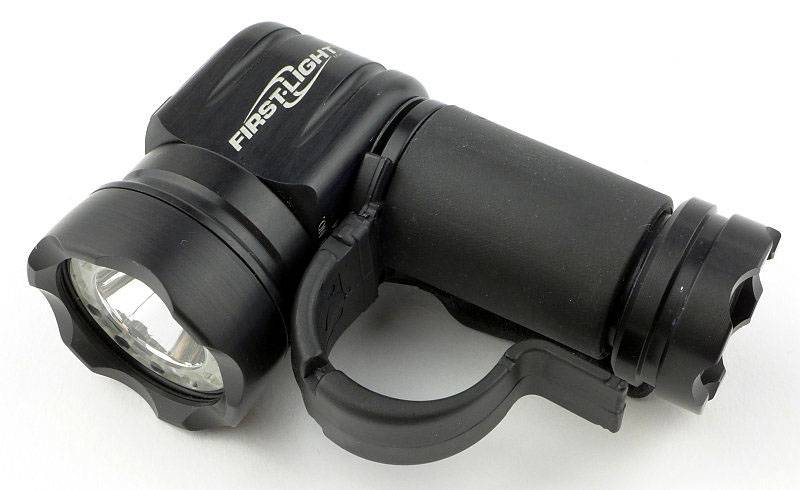
The latest arrival from First-Light including the T-Max LE and the two versions of TTL.

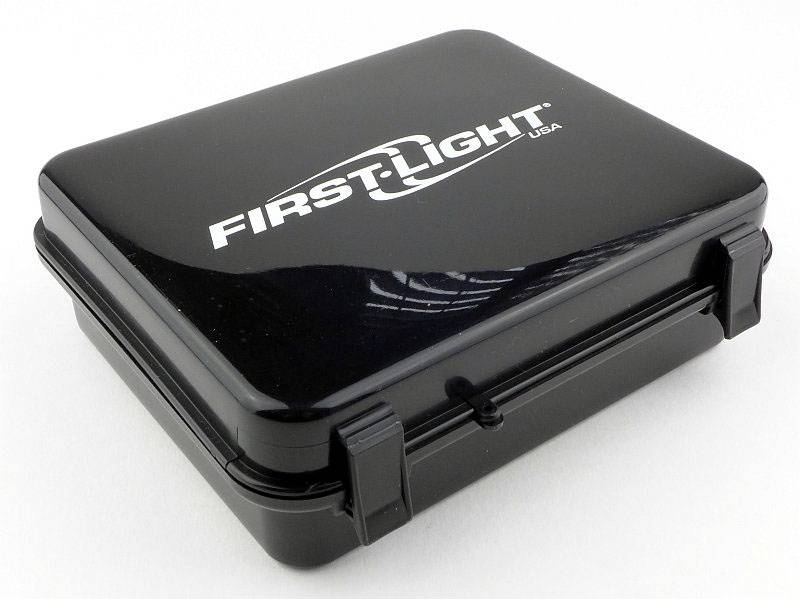
Inside the T-Max’s cardboard sleeve is a smart plastic box.

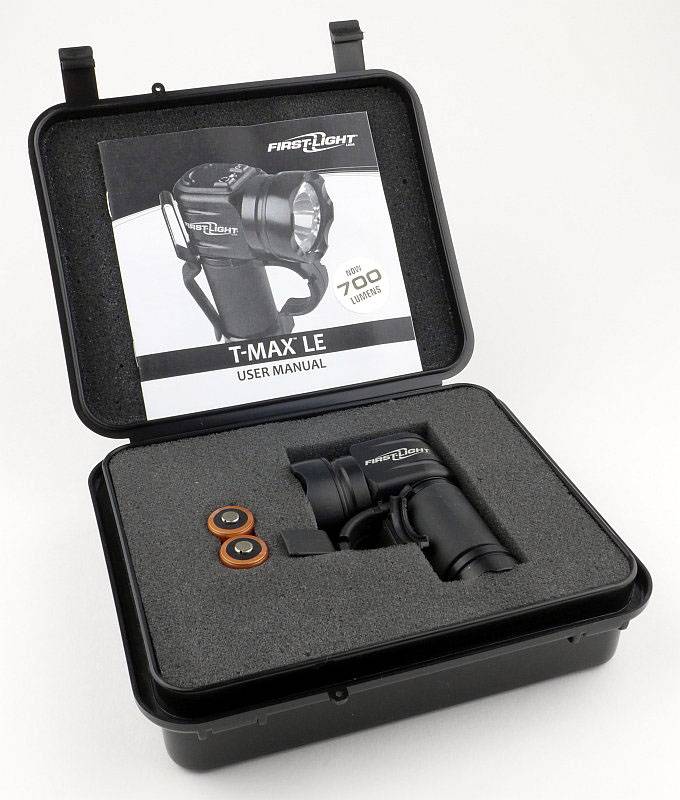
The T-Max is comfortably nestled in a foam liner.

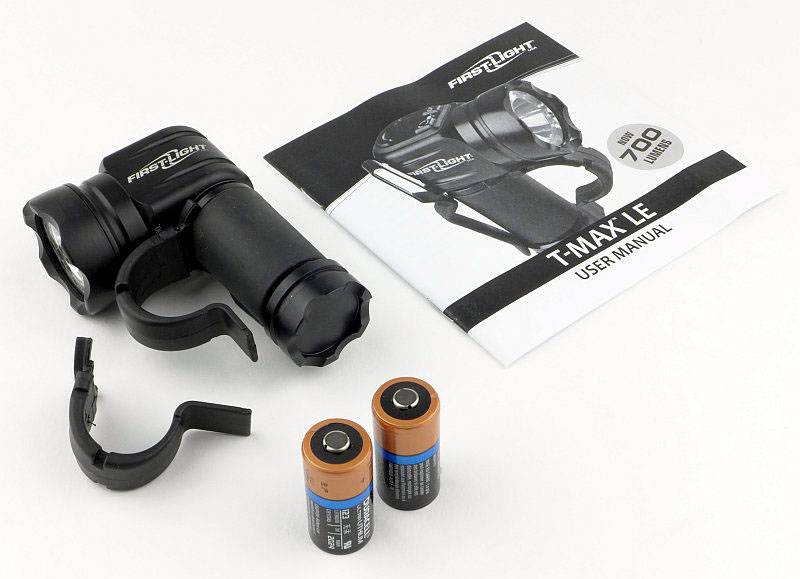
There is a second smaller finger loop, two quality CR123s and the instructions.

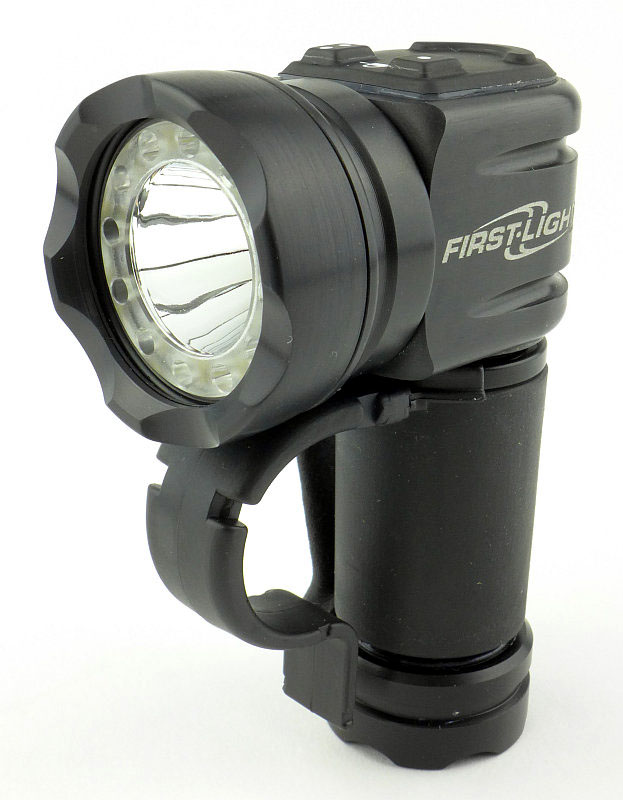
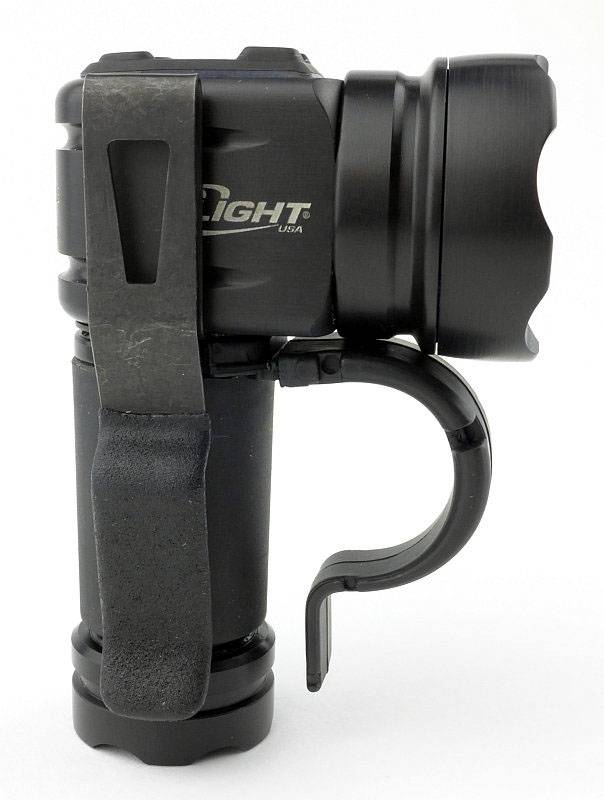
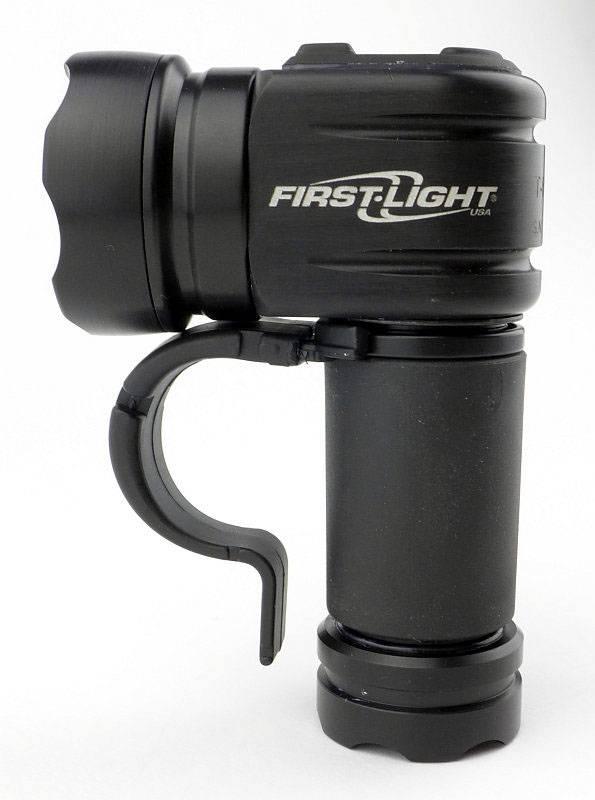
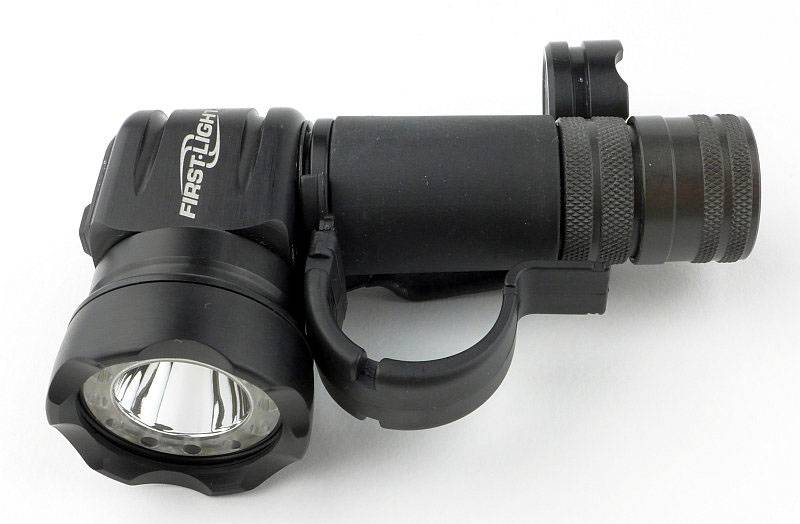
First-Light’s products have a distinctive look.

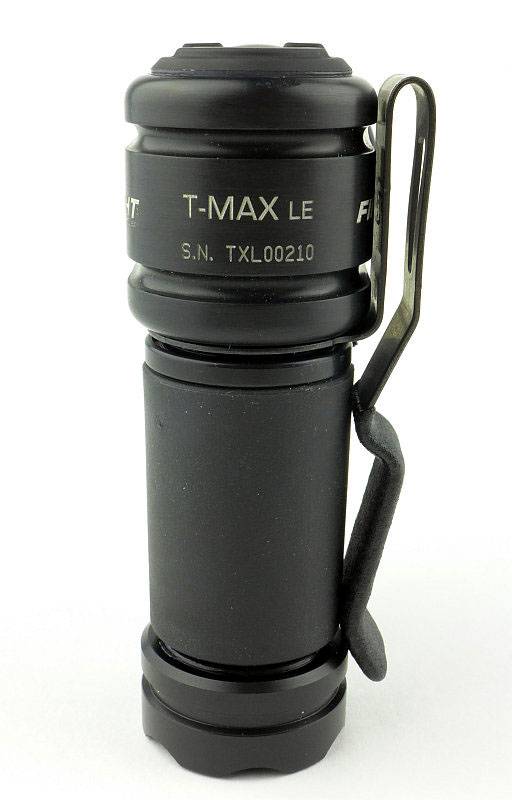
Each light has a serial number, and looking from behind, here you can see the shape of the steel pocket/belt/PALS/MOLLE clip.

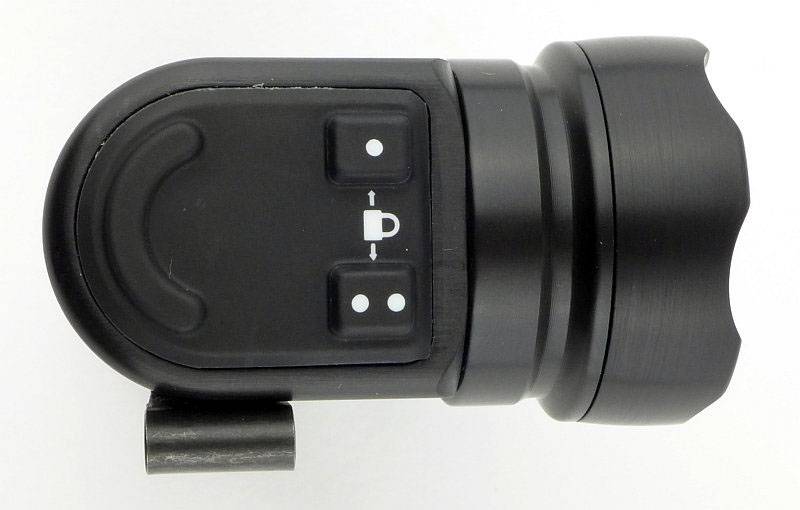
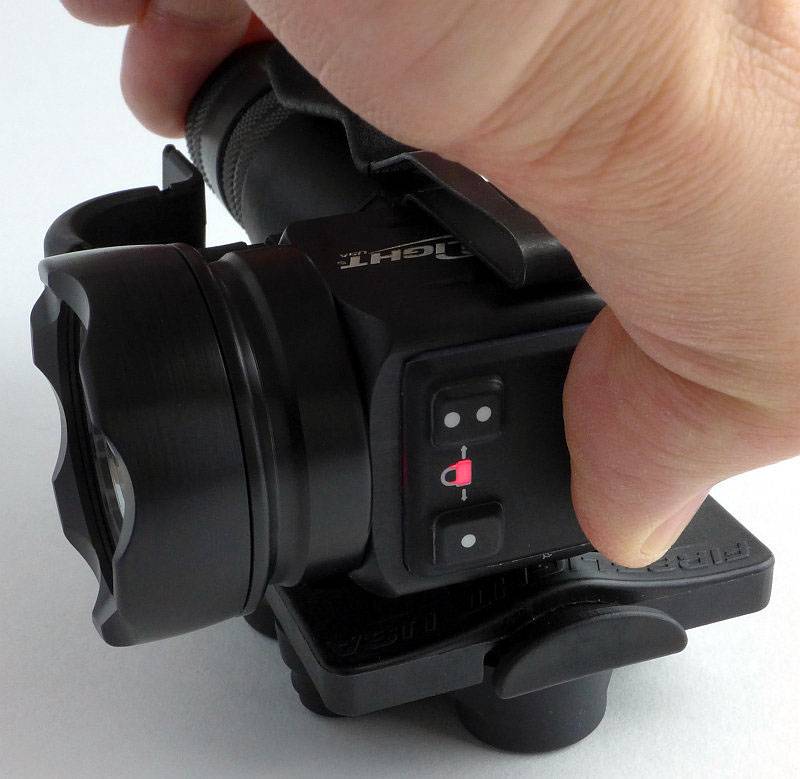
First-Light’s control panel is also one of its distinctive features with a large curved momentary main-beam button, and the two smaller Primary and Secondary control buttons.

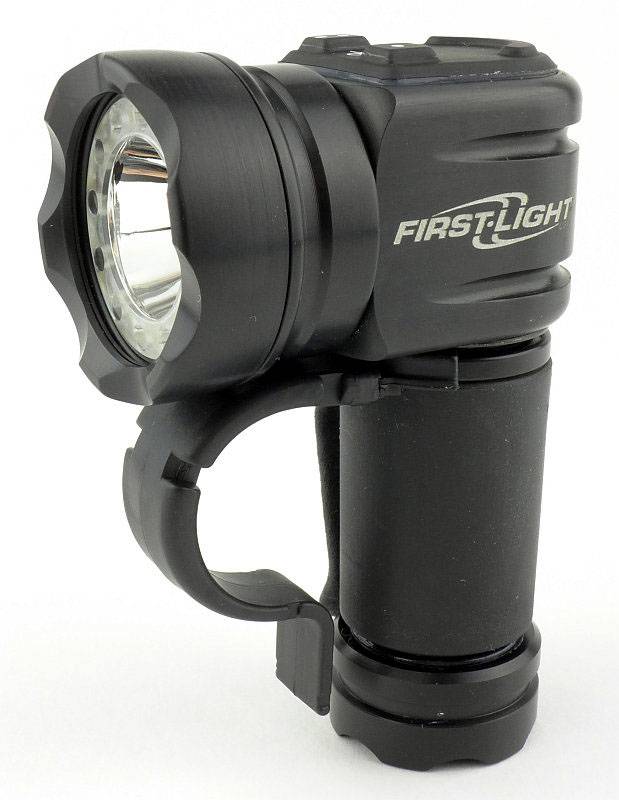
Right side view.

Left side view.

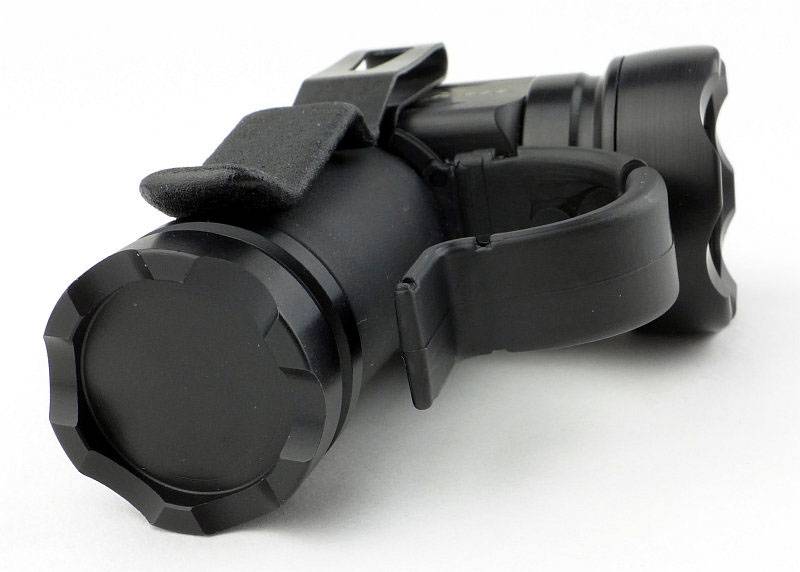
Both the bezel and tail-cap have crenulations.

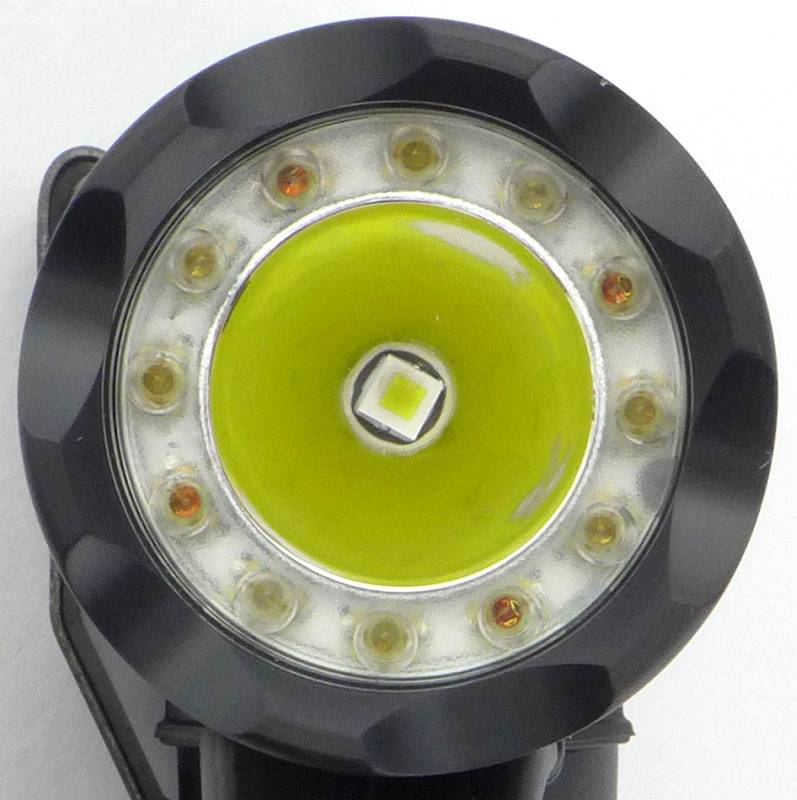
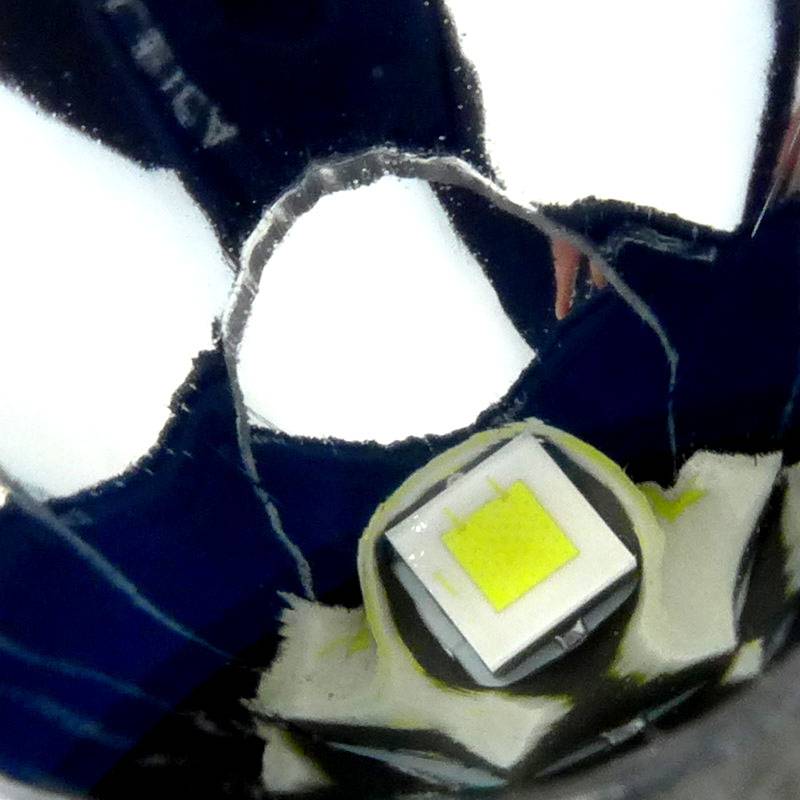
In total the T-Max-LE has 13 LEDs; 12 coloured LEDs (four Red, four Green and four Blue) and the main beam white LED. In this latest version the main beam LED is now an XP-L HI. The main beam uses a smooth reflector.

Awkward to get a close up photograph, the XP-L HI LED is in a 20mm reflector.

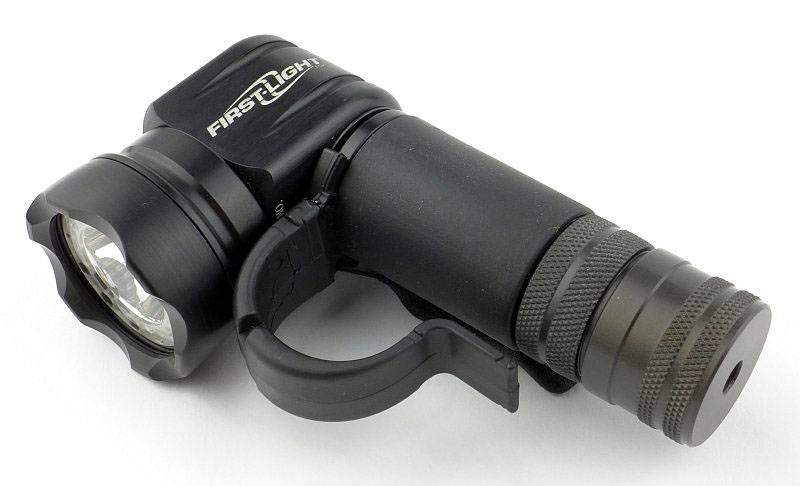
Another First-Light feature is the finger loop; you can see it is attached to the top of the battery tube. The bottom of it is held in place by the finger below the one that goes into the loop. This simple design feature makes the grip on the T-Max very secure and allows you to let the light ‘hang’ on your finger while handling other items.

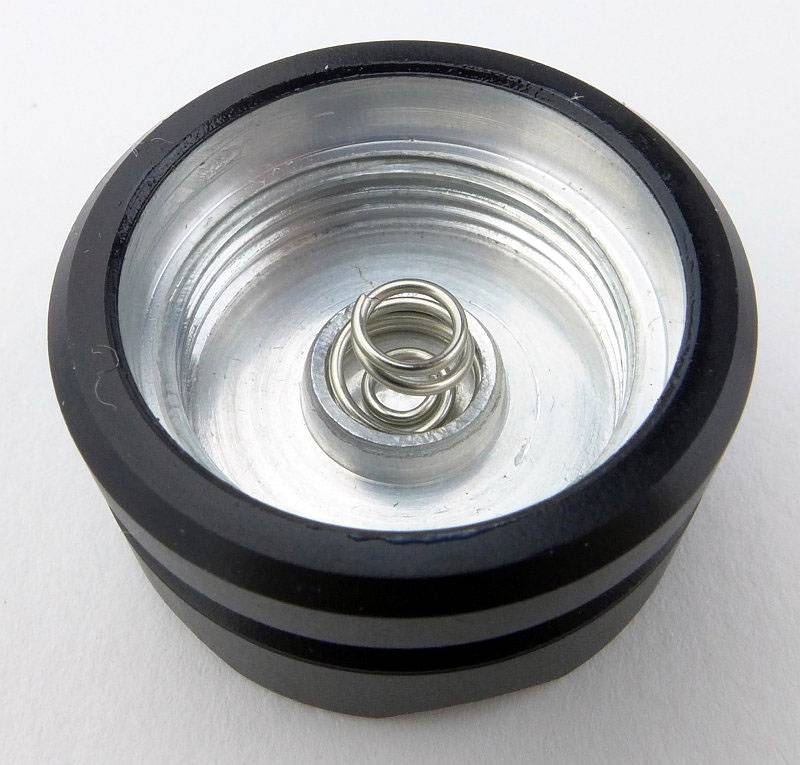
Looking inside the tail-cap reveals it is a very simple design (less to go wrong).

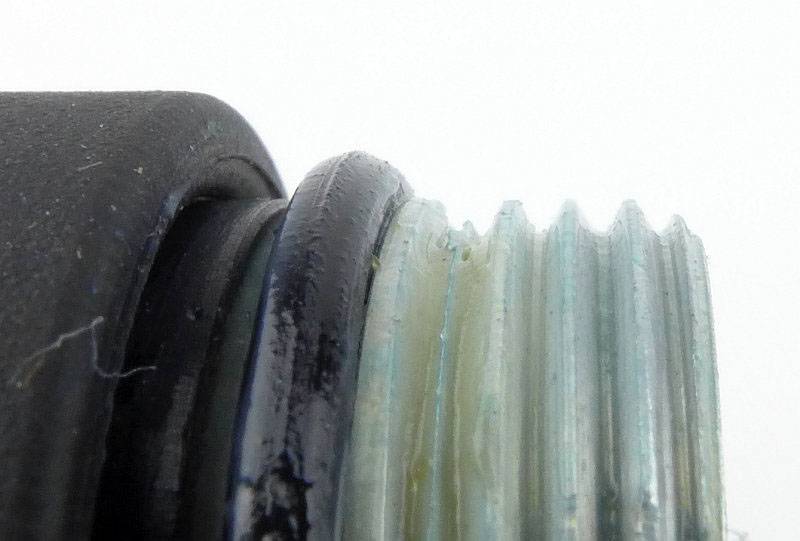
Standard threads are used for the tail-cap and top of the battery tube.

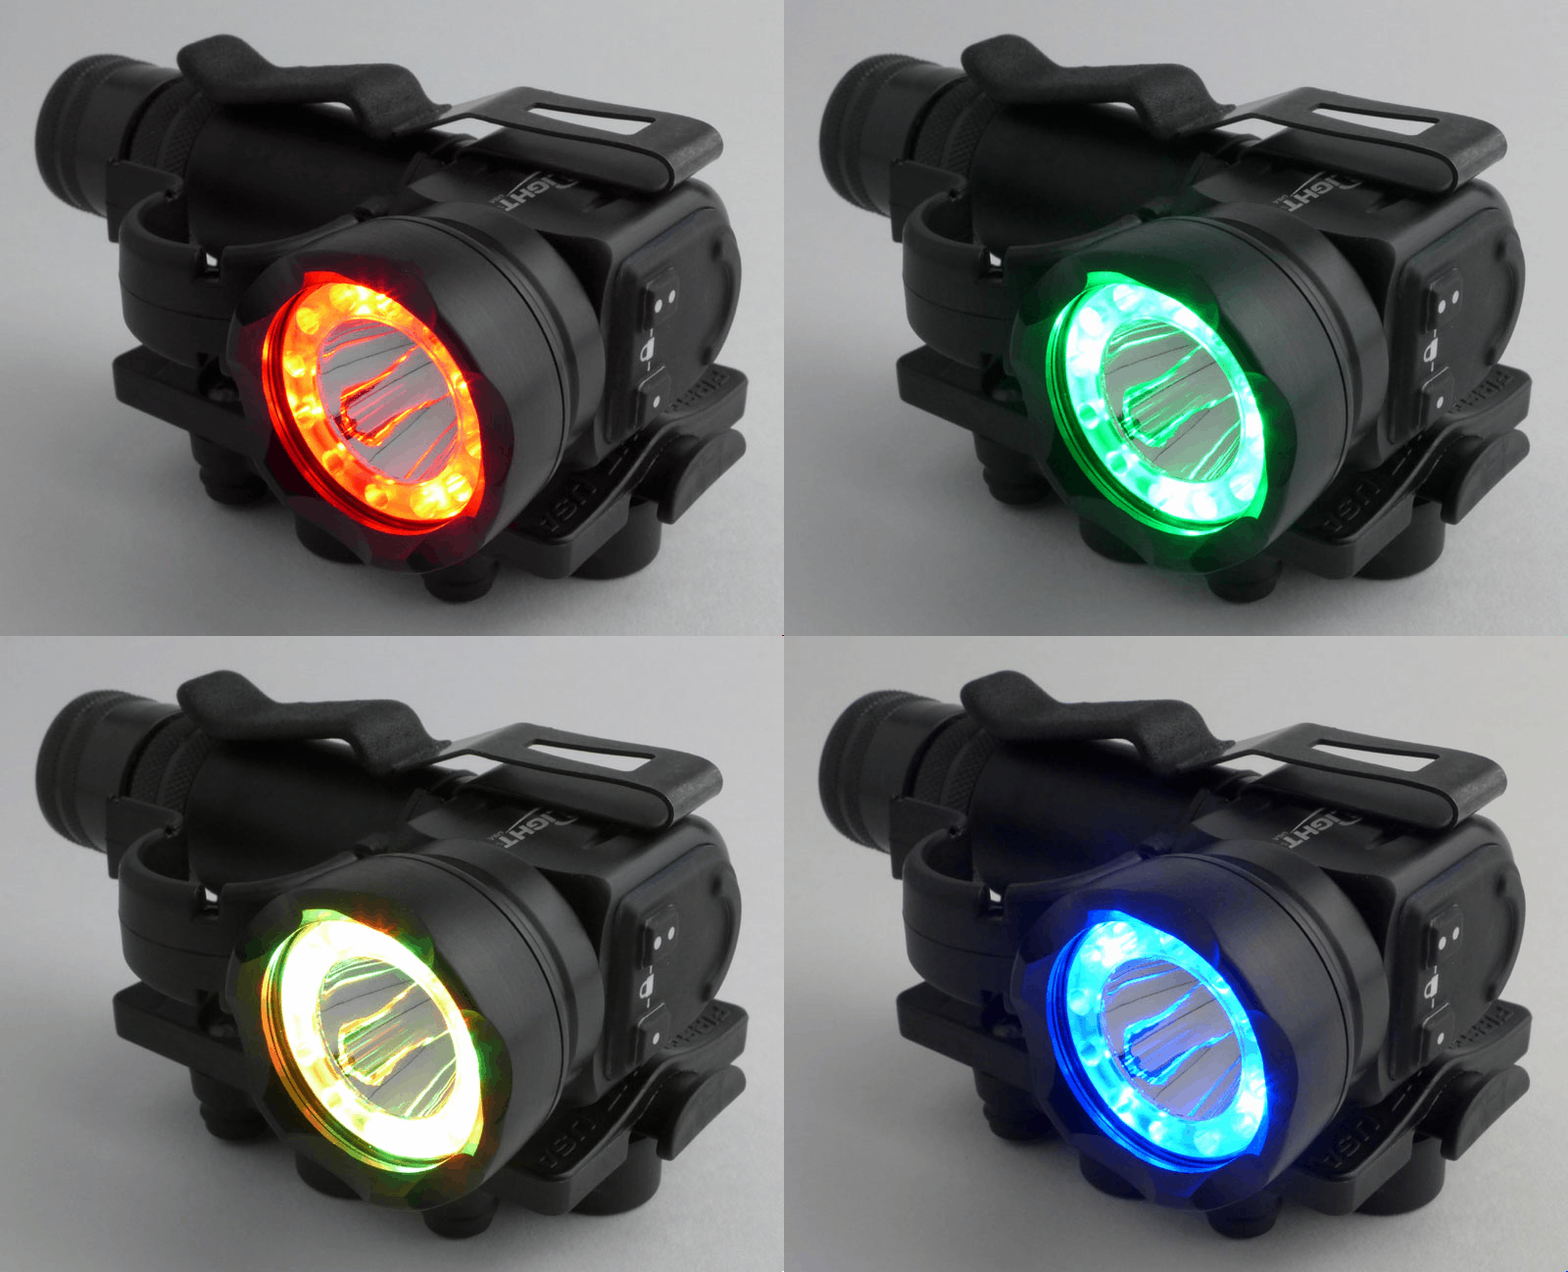
Making it super versatile and useful, the T-Max’s coloured beam options.

Taking a more detailed look at the TTLs:

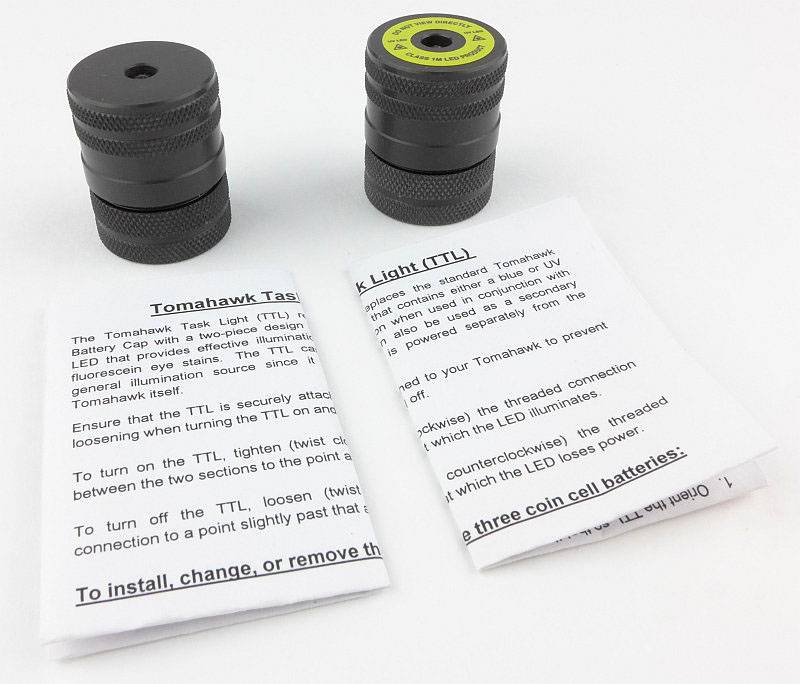
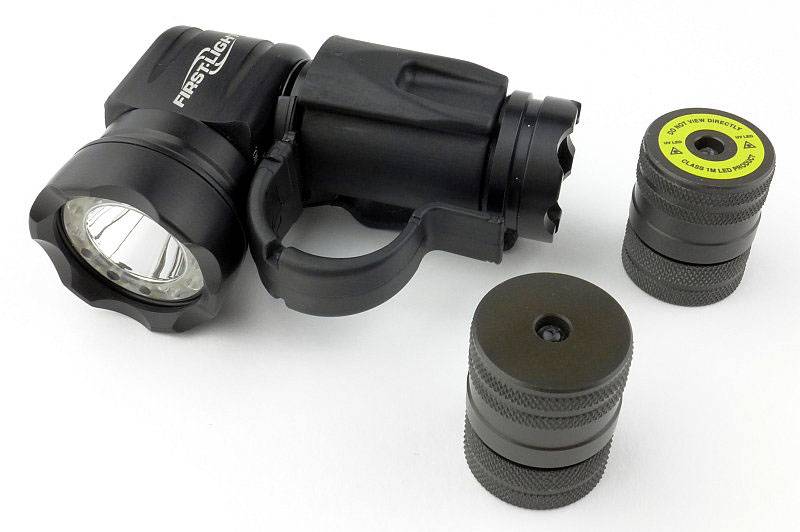
Skipping over to the TTLs for a moment. The Tomahawk Task Light (or what I might start calling the T-Max Task Light), is an add-on for the older Tomahawk or the new T-Max. It is a replacement tail-cap with an additional LED output.

Each one arrives fully assembled and with an instruction manual.

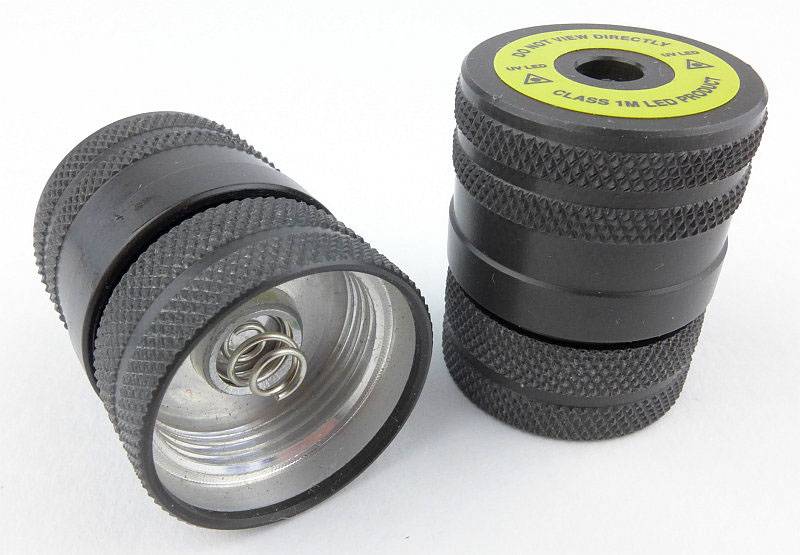
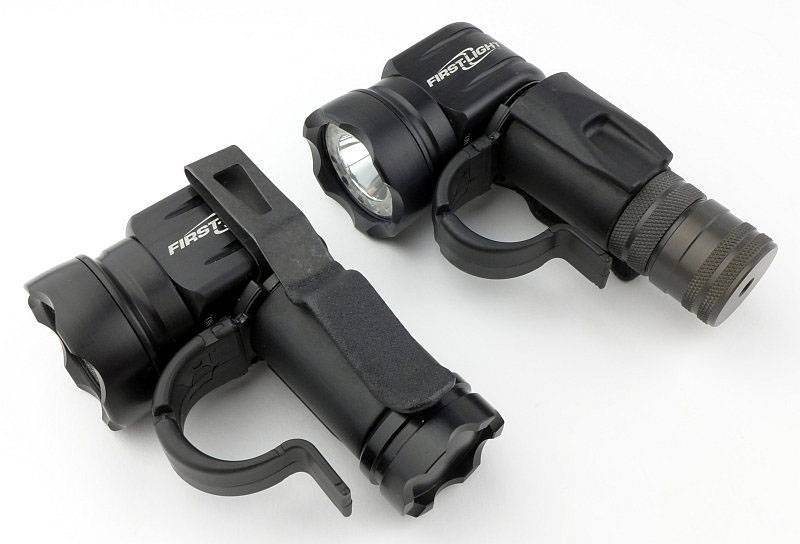
On the left is the standard Blue TTL showing the same internal threads as the T-Max’s tail-cap, and on the right is the UV TTL.
The TTLs have a twisty interface, and the two rings of knurling allow you to fit it to the T-Max and then once fitted to turn it on and off.

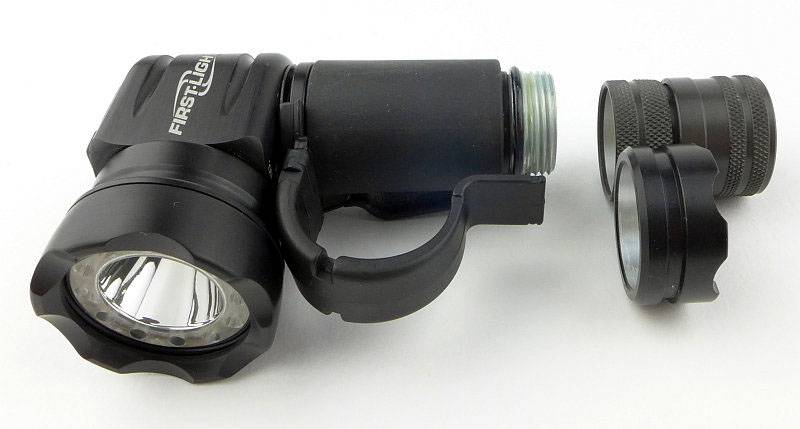
Simply remove the original tail-cap and replace with the TTL.

The old tail-cap is shown where it would have ended so you can see the additional length added by the TTL.

Ignoring the original tail-cap, the TTL does not look out of place on the T-Max. In fact it gives you a little more to hold onto.

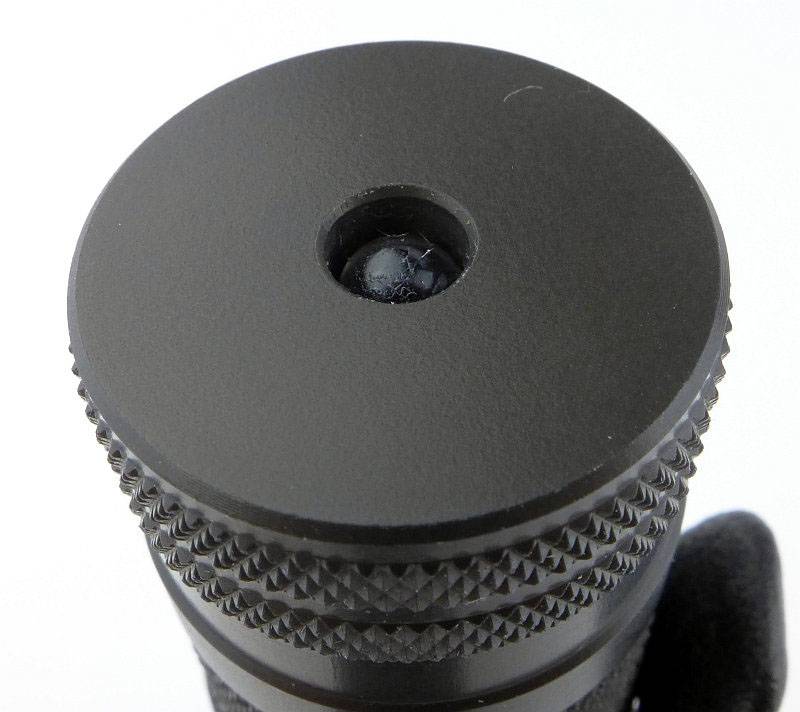
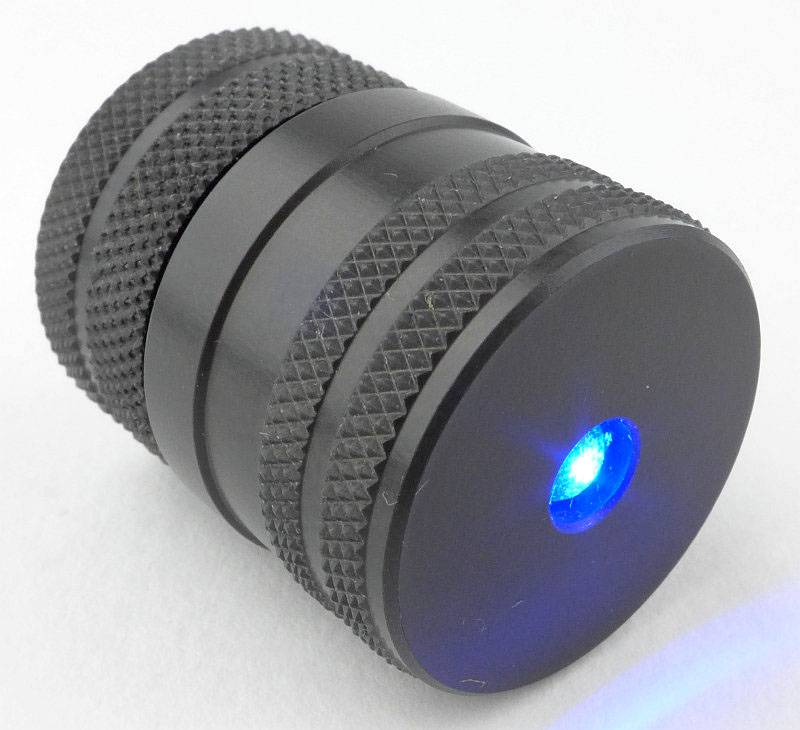
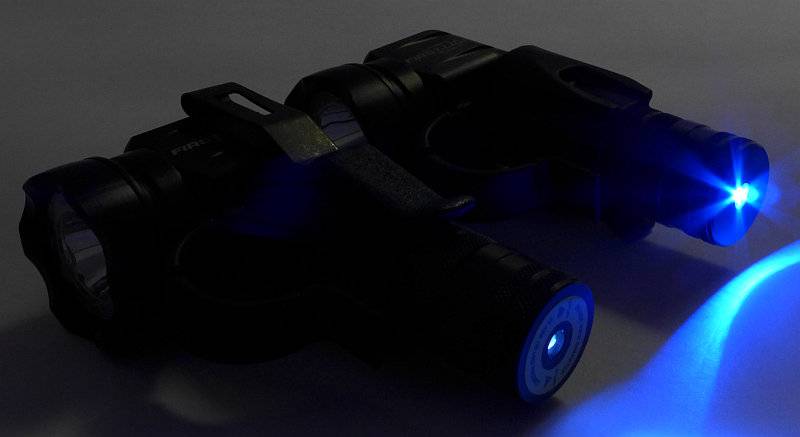
In the centre of each TTL is a recessed 5mm LED.

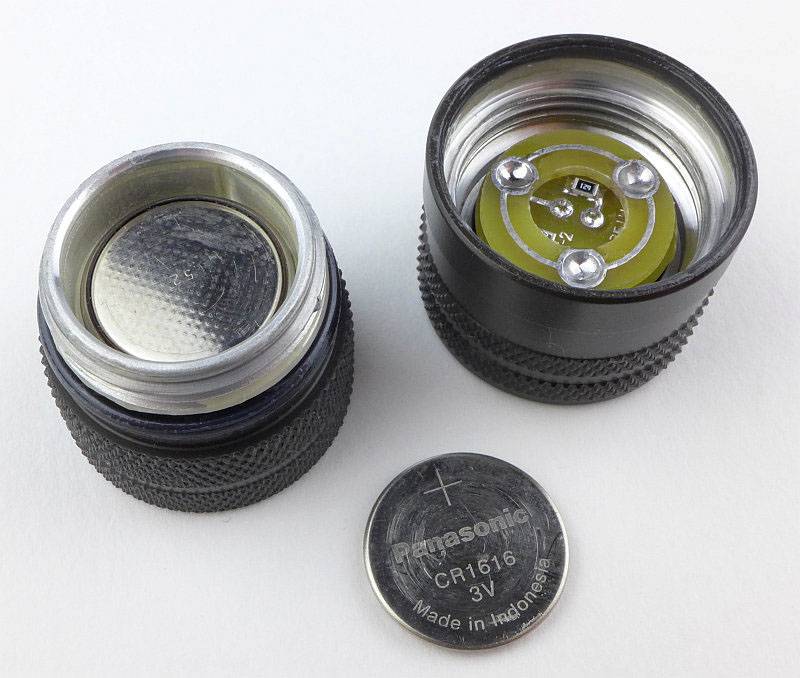
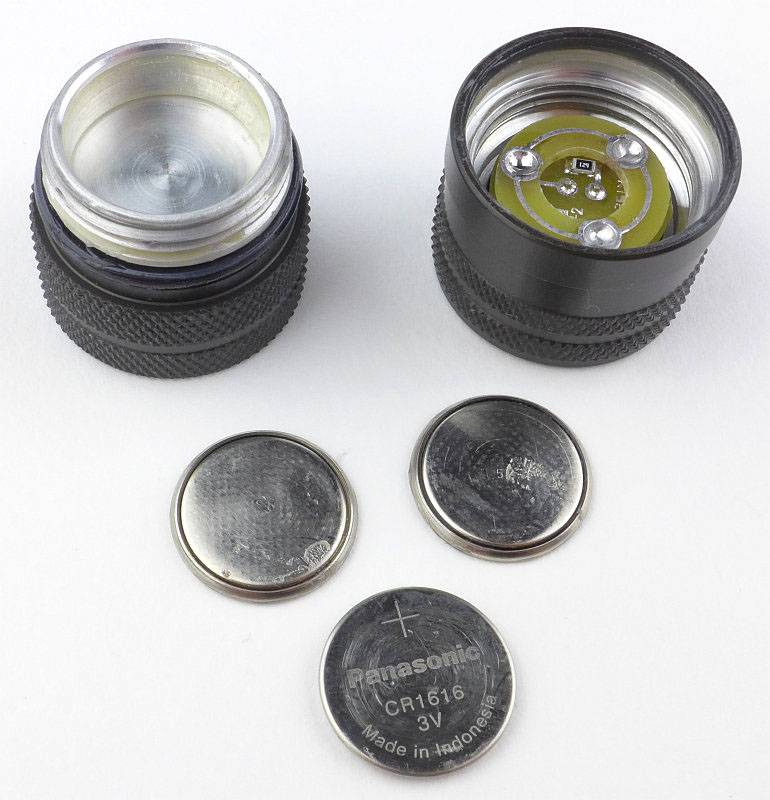
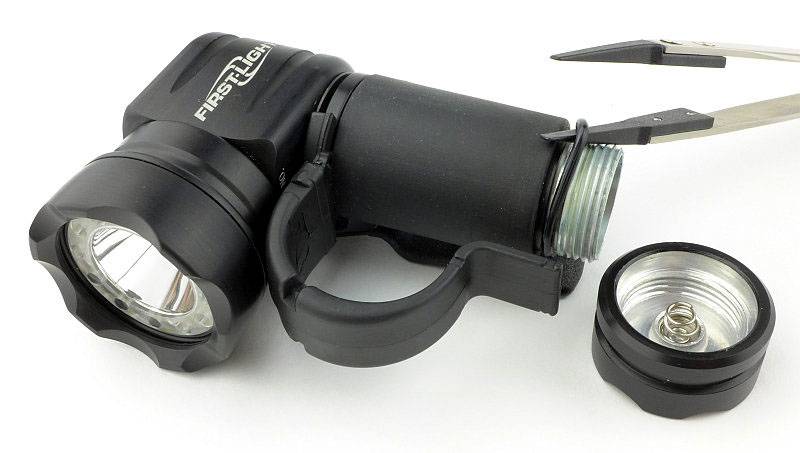
Unscrewing the head of the TTL allows the cells to be replaced.

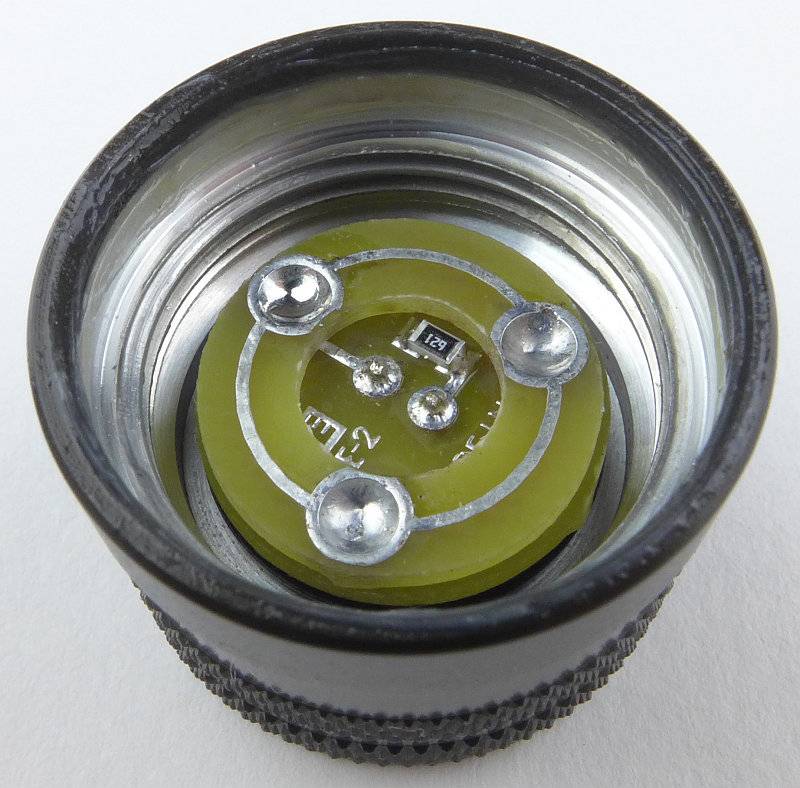
A closer look at the TTL contacts.

Both TTLs are powered by three CR1616 cells (supplied with the TTL).

Of course the TTL operates independently of the T-Max.
Blue was chosen for corneal abrasion testing where one might be reluctant to use UV due to retinal exposure concerns. The blue that First-Light has chosen (and tested with the Army) highlights fluorescein and is eye safe. When used correctly, the UV should be safe as well (short exam duration, indirect angle of illumination), but if someone has any concerns they can choose blue.

Now you just have to decide if you go Blue or UV.

With and without the TTL – Without the T-Max is more compact, but with, the T-Max has a longer grip and the secondary light.

Both versions of the TTL fitted and turned on.

Taking a more detailed look at the TRS mounting system:

I’ve already taken a detailed look at First-Light’s excellent TRS mounting system in the First-Light TORQ and Mounting System (2xAA) review, but here I’ll show how it works with the T-Max.

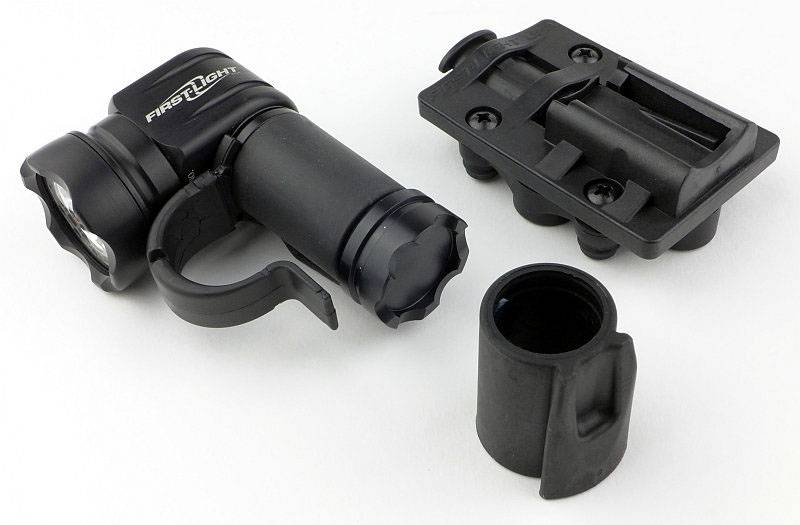
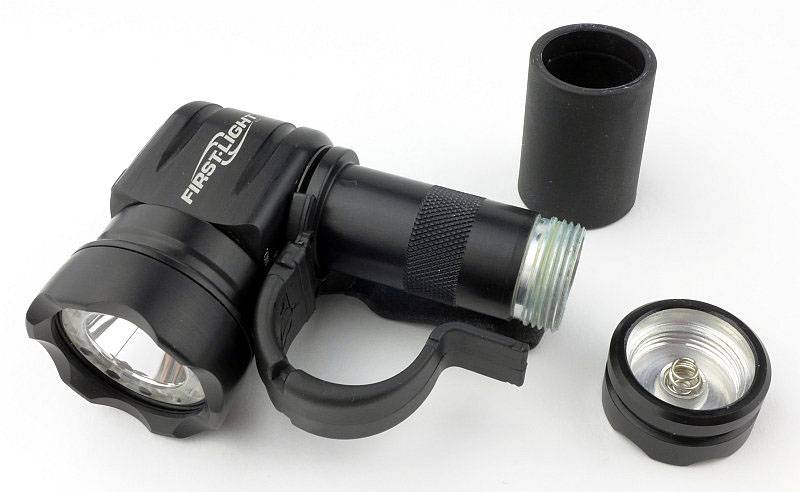
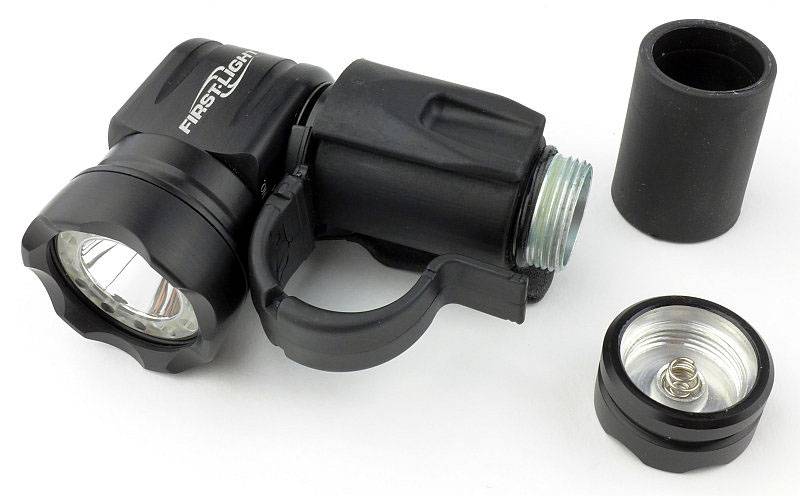
This example uses the Magnetic mount and shows the replacement dovetail sleeve for the T-Max.

To fit the dovetail sleeve first take off the tail-cap and carefully remove the O-ring.

Now the plain battery tube sleeve will slide off the tube. Note the knurling in the middle of the tube which gives adds friction so the sleeve doesn’t just spin round the tube.

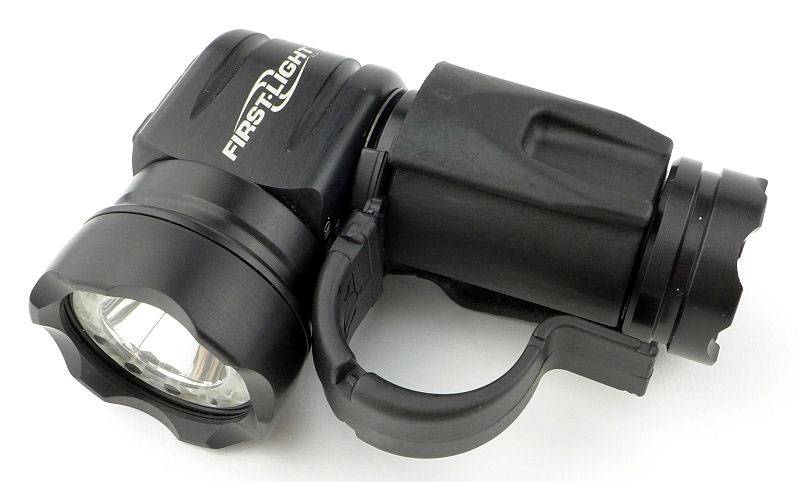
Checking you have it the right way round, slide the dovetail sleeve into place and replace the O-ring.

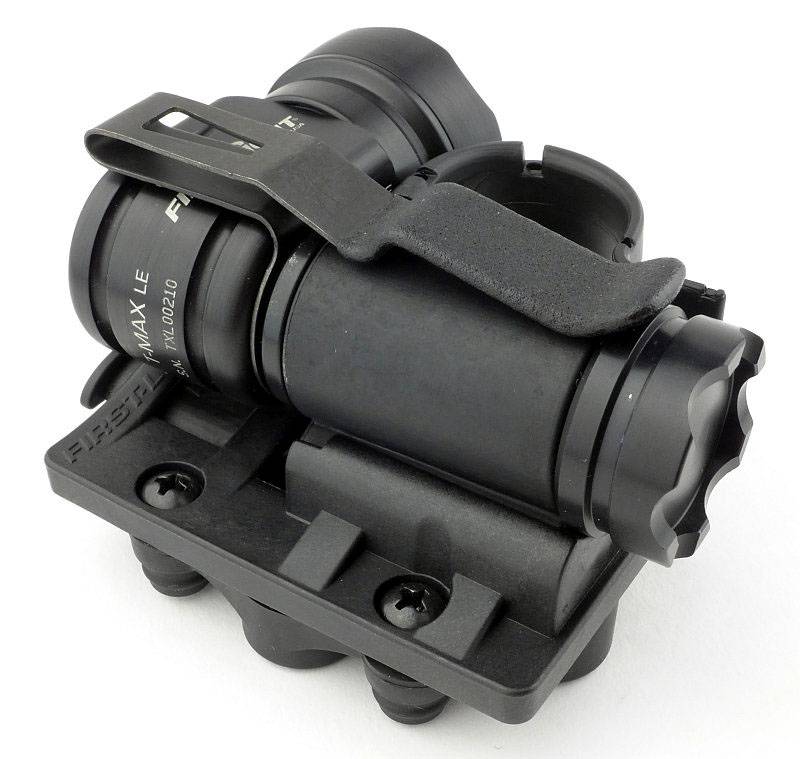
We are in business.

The T-Max LE now locked into the TRS Magnetic Mount.

The beam

Please be careful not to judge tint based on images you see on a computer screen. Unless properly calibrated, the screen itself will change the perceived tint.

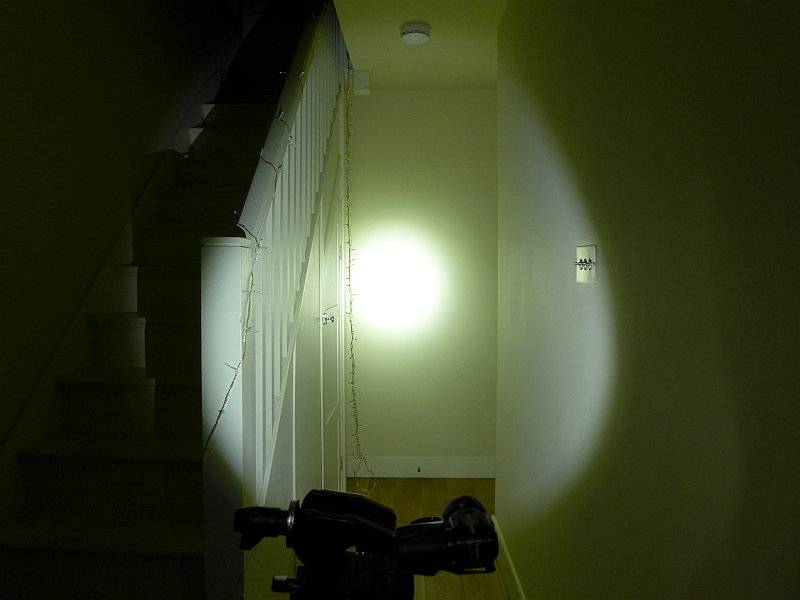
The indoor beamshot is intended to give an idea of the beam shape/quality rather than tint. All beamshots are taken using daylight white balance. The woodwork (stairs and skirting) are painted Farrow & Ball “Off-White”, and the walls are a light sandy colour called ‘String’ again by Farrow & Ball. I don’t actually have a ‘white wall’ in the house to use for this, and the wife won’t have one!
Starting indoors, and the T-Max LE has a strong hotspot thanks to that XP-L HI. The spill is even and medium width.

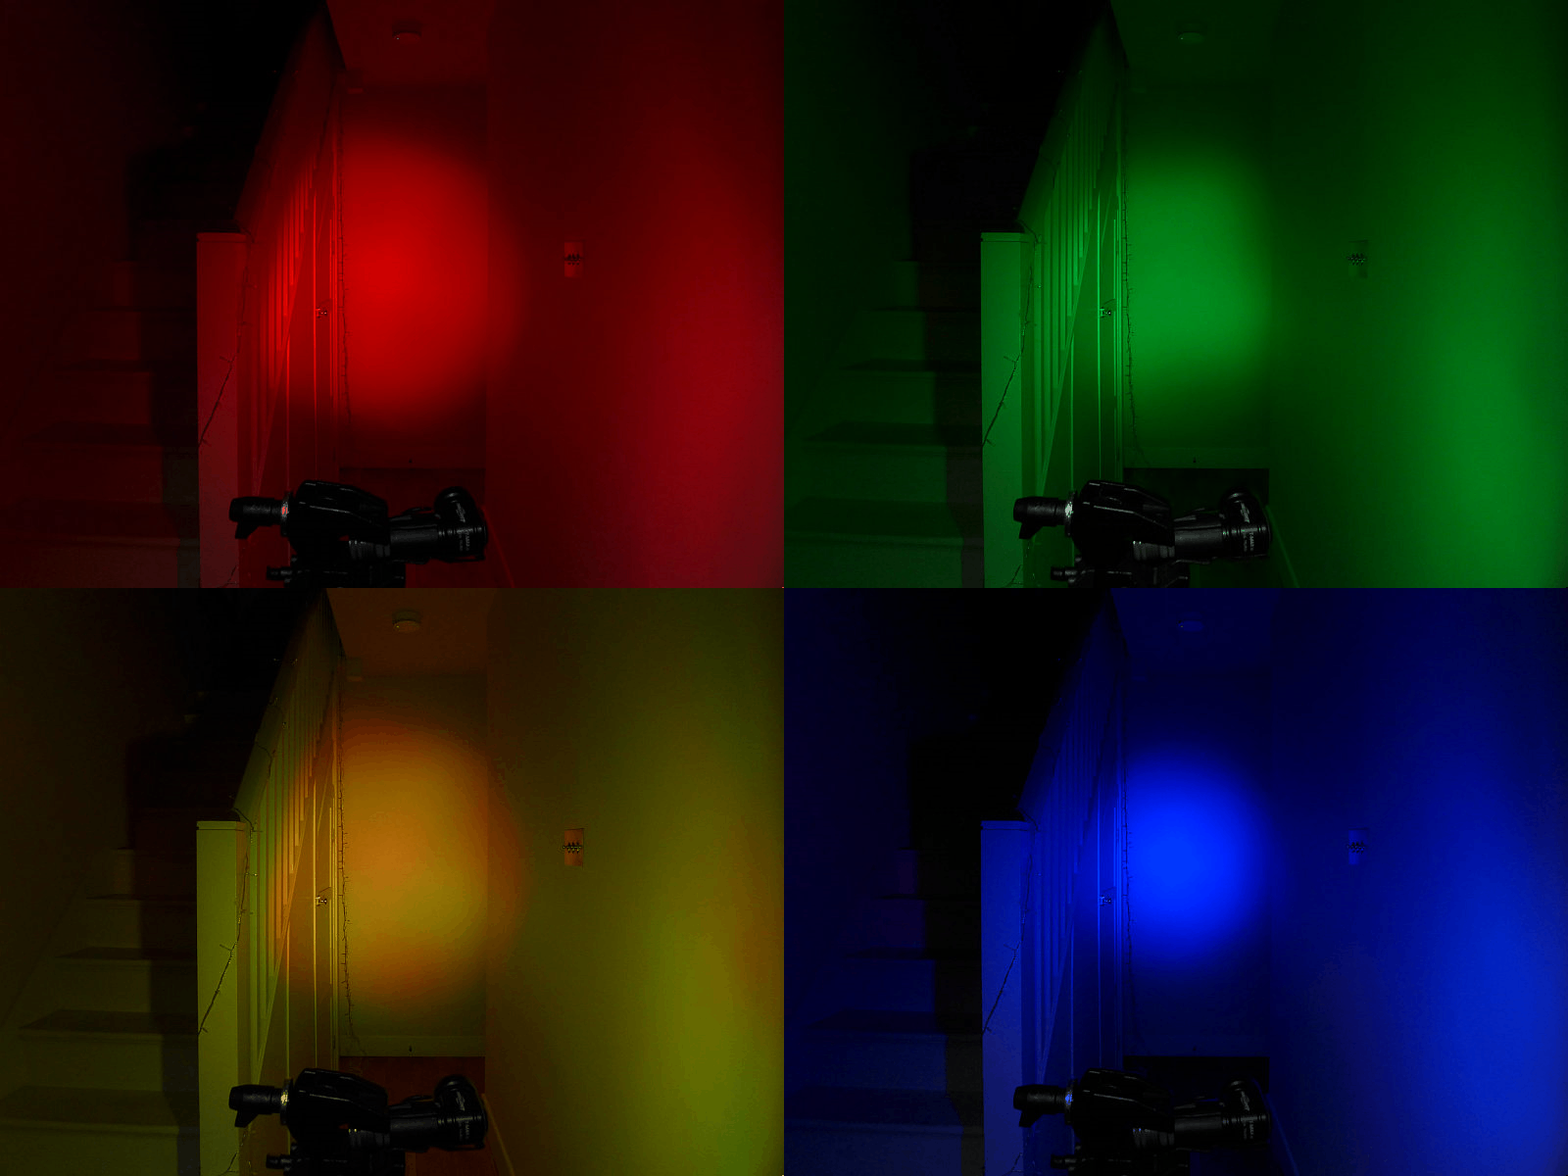
Now onto the coloured outputs. The exposure here is two stops more than the previous white beamshot due to the difference in brightness between white and coloured outputs.

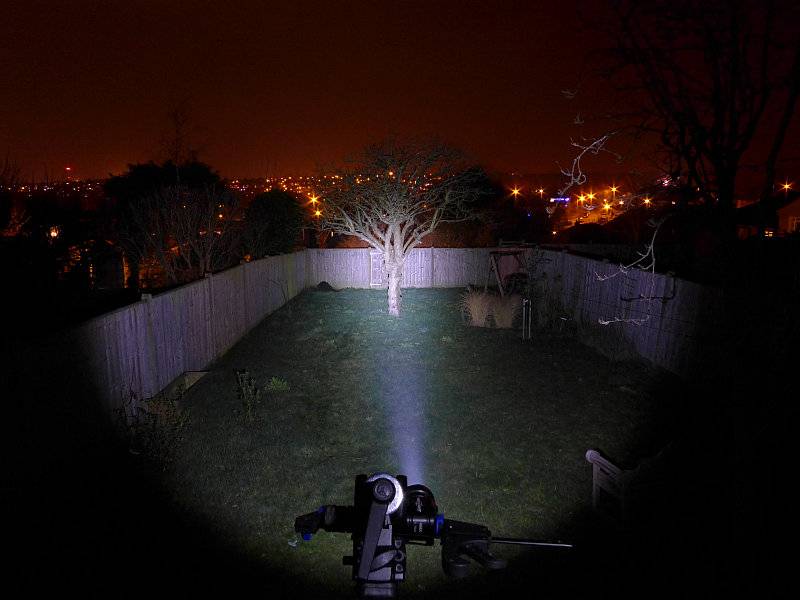
Outdoors you can see the beam’s bright hotspot.

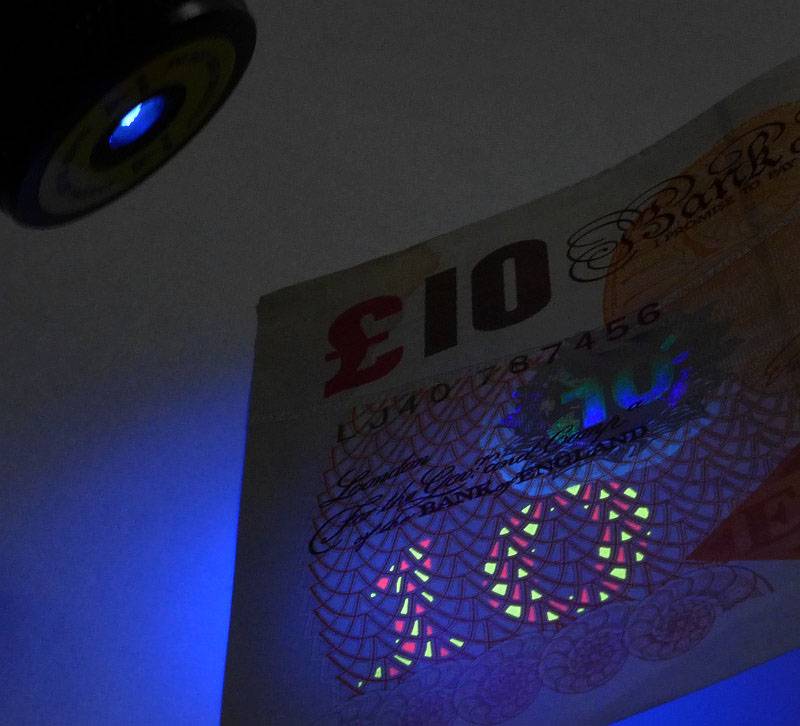
Testing the TTL’s UV output, it readily fluoresces security features in bank notes.

Modes and User Interface:

The available modes are:

Momentary maximum white

White – High, Medium, Low

Red – High, Medium, Low

Green – High, Medium, Low

Red/Green (for highlighting blood) – High, Medium, Low

Blue – High, Medium, Low

Red/White/Blue strobe

These are all access via the three button control panel on the top.

The large curved button is only for Momentary maximum white

Of the two smaller buttons, they are designated Primary (has one dot on it) and Secondary (has two dots on it)

Pressing the Primary button once, turns the White output ON to the last used output level. When ON, pressing and holding the button cycles through Low > Medium > High > Medium > Low etc. Release the button when you have your desired brightness.

From OFF, pressing and holding the Primary button for 1s turns the white output onto Low.

From OFF, pressing and holding the Primary button for 2s turns the output onto Strobe.
Pressing the Secondary button once, turns the Coloured output ON to the last used colour and its output level. When ON, pressing and holding the button cycles through Low > Medium > High > Medium > Low etc for that colour. Release the button when you have your desired brightness.

From OFF pressing and holding the primary button for 1s starts to cycle through the colour options of Red > Green > Red and Green > Blue > Red > etc
A lock mode can be activated either manually, or automatically when the cells are getting low. There is a padlock symbol between the Primary and Secondary buttons which indicates how to lock and unlock and if the lock is active. When the lock is active pressing any button makes it light up red.

To lock the T-Max press and hold both Primary and Secondary buttons until the padlock lights red.

When locked the only mode you can directly access is the lowest output level of the previously used Coloured output. To activate this double click the Secondary button. Once ON low, you can press and hold the Secondary button to choose the Medium or High Coloured output level. A single press of the Secondary button switches the coloured output off.

To unlock briefly press both Primary and Secondary buttons together and the padlock lights green.

Batteries and output:

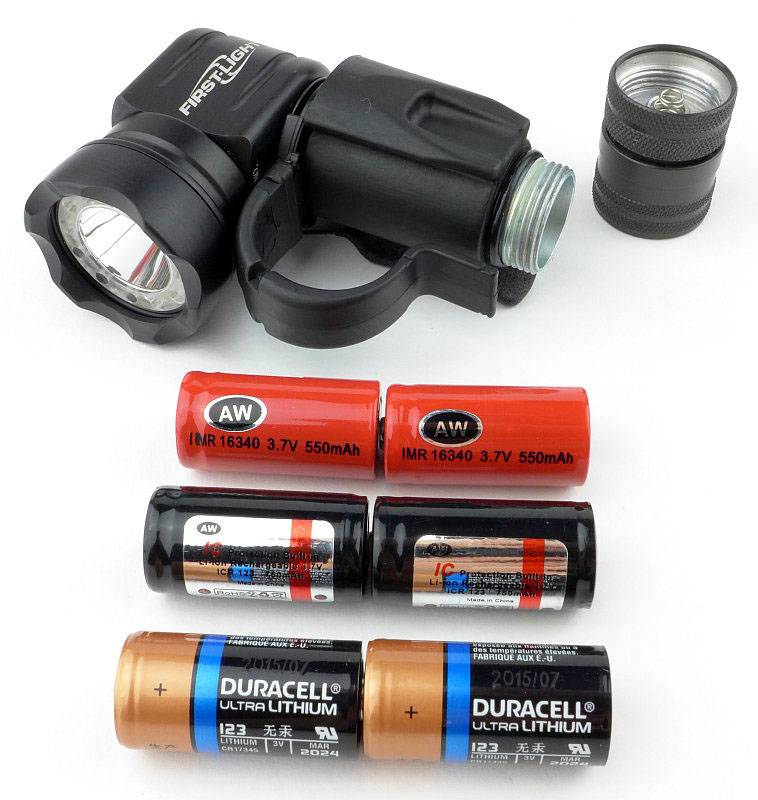
The T-Max LE runs on 2x CR123. However, after asking First-Light about rechargeable options I was told that using 8.4V would be no problem for the T-Max, but unprotected cells might be damaged as the power circuit is designed for CR123s only.

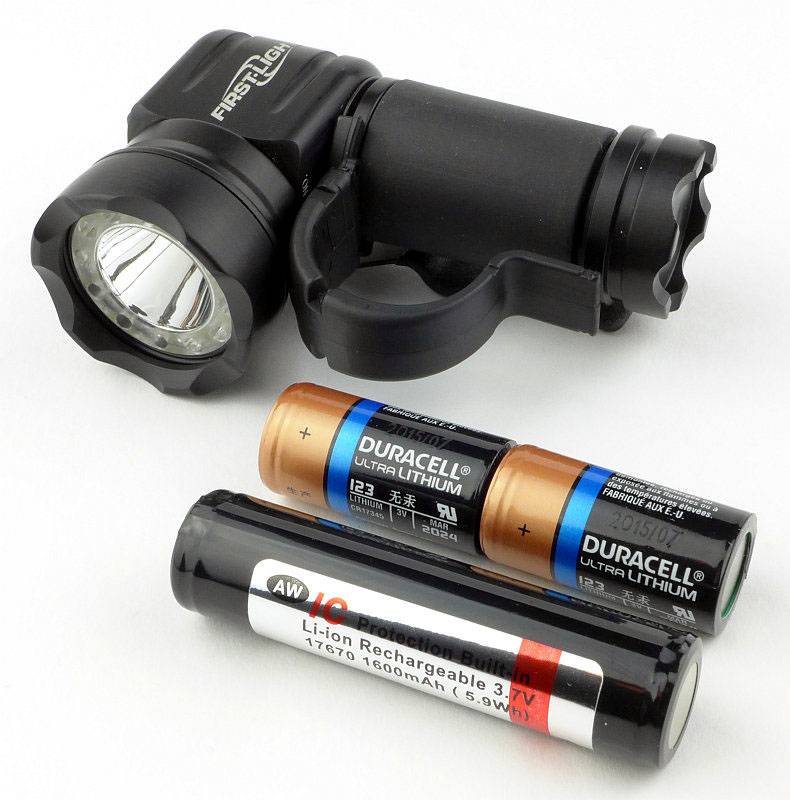
I decided to try a few options. Firstly the 17670. I chose a quality AW cell for this test. Unfortunately at 4.2V the T-Max keeps thinking the power is low and switches off and goes into lock mode. Despite using a good cell the T-Max won’t work with 17670.

However we have a couple of other options and can go for protected RCR123s or in this case I’ve also tried unprotected IMR RCR123s. (use unprotected cells with extreme caution). Again I chose AW cells for quality and reliability. AW protected RCR123s are also the closest in size to CR123s I have come across.

To measure actual output, I built an integrating sphere. See here for more detail. The sensor registers visible light only (so Infra-Red and Ultra-Violet will not be measured).

Please note, all quoted lumen figures are from a DIY integrating sphere, and according to ANSI standards. Although every effort is made to give as accurate a result as possible, they should be taken as an estimate only. The results can be used to compare outputs in this review and others I have published.

___________________________________________ ________________________________ ________________________________
T-Max LE using specified cell I.S. measured ANSI output Lumens PWM frequency or Strobe frequency (Hz)
___________________________________________ ________________________________ ________________________________
Max – CR123 666 0
High – CR123 219 0
Medium – CR123 128 0
Low – CR123 15 0
Max – AW RCR123 704 0
High – AW RCR123 217 0
Medium – AW RCR123 128 0
Low – AW RCR123 33 0
Red High – AW RCR123 9 Not measured
Red Medium – AW RCR123 2 Not measured
Red Low – AW RCR123 Below threshold Not measured
Green High – AW RCR123 9 Not measured
Green Medium – AW RCR123 2 Not measured
Green Low – AW RCR123 Below threshold Not measured
Red and Green High – AW RCR123 15 Not measured
Red and Green Medium – AW RCR123 3 Not measured
Red and Green Low – AW RCR123 Below threshold Not measured
Blue High – AW RCR123 7 Not measured
Blue Medium – AW RCR123 2 Not measured
Blue Low – AW RCR123 Below threshold Not measured

Coloured outputs appear to use PWM but levels were too low to read on the oscilloscope so could not be measured.

* Beacon and Strobe output measurements are only estimates as the brief flashes make it difficult to capture the actual output value.

Peak Beam intensity measured 15000lx @1m giving a beam range of 245m.

There is parasitic drain but is incredibly low. As shown above I’ve had two samples of the T-Max in my possession. The older XP-L version and the newer XP-L HI. I first measured the XP-L version and found that when using CR123, the drain was 1.5uA (106 years to drain the cells) and on RCR123 was 2.3uA (32 years to drain the cells). When checking the XP-L HI version I thought my test meters had all failed as I was reading 0.0uA. On connecting the meter, it would show 2uA then drop to 0.0uA on either CR123 or RCR123. If, and I mean IF the drain was 0.1uA, or just under, then worst case the T-Max would take 741 years to drain the cells. A highly impressive result.
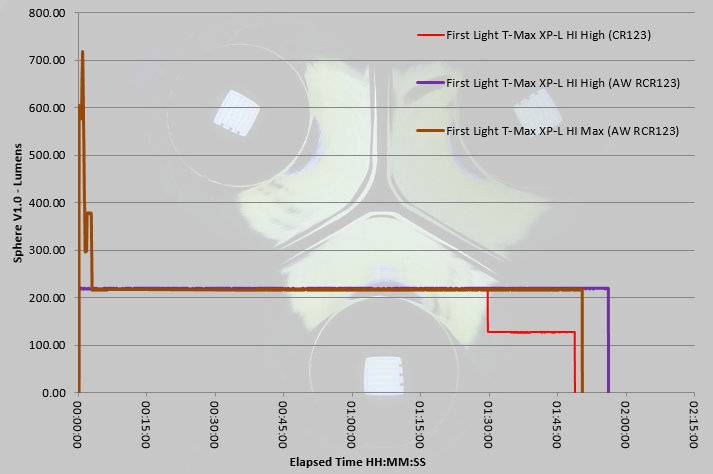
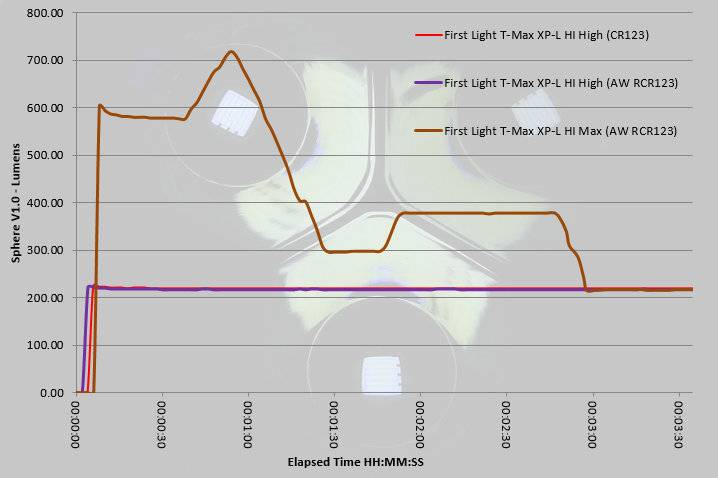
The following runtime graph shows output traces for CR123 on High, and RCR123 on Max (Momentary) and High.

The Max output settles back down to the same as High after 3 minutes. And then has a slightly reduced overall runtime. Both RCR123 traces end with the protection activating in the cells.

CR123 gives a flat regulated output until the cells run low where it drops to Medium and runts until the low voltage lock activates. After this the T-Max can be turned onto the Coloured output.

Magnifying the first part of the trace shows you how the burst output of the Max mode works giving its peak output at 60s.

Troubleshooting

This section is included to mention any minor niggles I come across during testing, in case the information helps anyone else.

No issues were encountered during testing.

As per the description of this section, this information is provided in case anyone else finds a similar ‘issue’ that might be fixed in the same way.

The T-Max LE in use

A major aspect of all First-Light products is their use with firearms. Having already covered this aspect in the First-Light TORQ and Mounting System (2xAA) review I won’t go over it again here (check out the link to read this review).
By not fixing the lower part of the finger loop, First-Light have allowed it to be more accommodating, but more importantly easy to break away from if needed. The loop makes an enormous difference to the handling of the light and you can just leave it hanging on that finger (flipped over onto your knuckles) and have more-or-less full use of your hand.

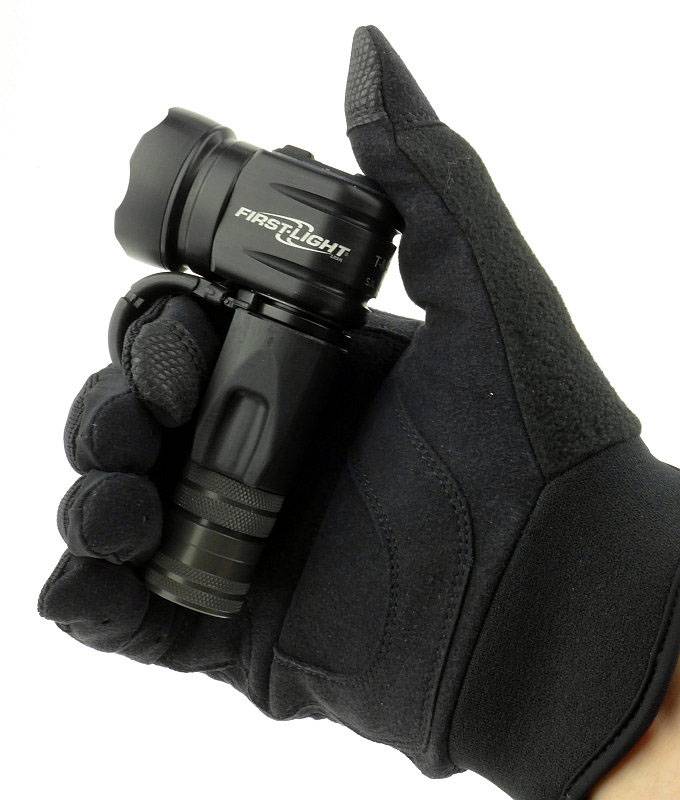
Compared to the TORQ, the thumb has to stretch a little further to reach the momentary switch, so small hands might struggle. (I’m wearing XL size gloves in the photo).

With such an excellent ‘TRS’ (Tactical Retention System) mounting system, First-Light’s T-Max is designed to get as much use mounted as it does in the hand. Remember to check back at my TORQ review for more details of the TRS mounts.

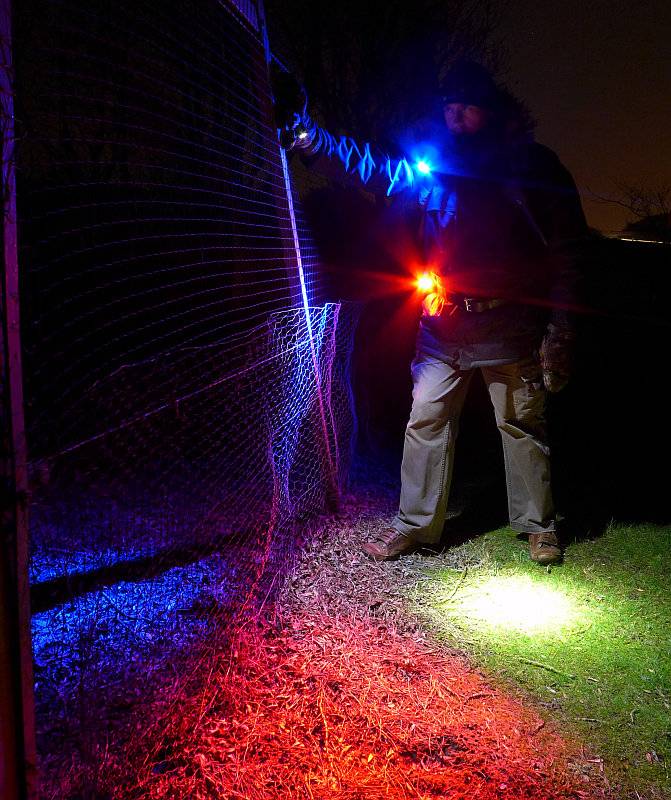
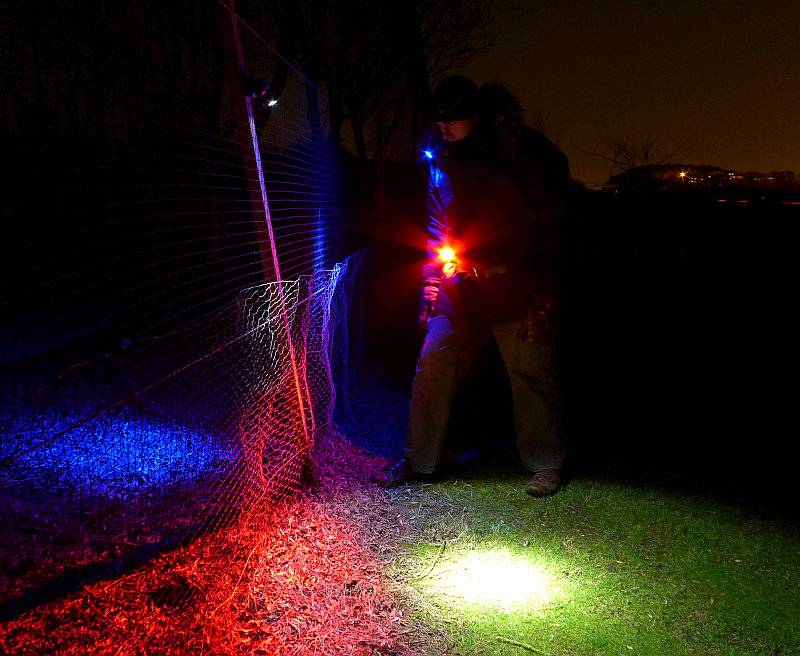
In this photo, I’m using the Magnetic mount to hold the TORQ on a fence post and them aim the head to light up where I want to. Purely for the purpose of showing which light is which, I have the T-Max LE with XPL-HI on the belt mount (Red) and the T-Max XP-L version on the MOLLE Blade mount fitted to a backpack shoulder strap with PALS webbing (Blue)

The Magnetic mount gives you fixed hand-free lighting, and the Belt Mount and MOLLE Blade can be adjusted to suit.

I’ve worn the T-Max on my backpack shoulder strap for many months now, and while travelling and taking off/putting on the backpack it has been knocked about a lot, against metal poles and other solid objects. You would be pushed to tell it from a new one as it barely has a mark on it. I know how hard it has been treated (by accident) so am very impressed with the resilience of the finish.

The combination of the momentary maximum output, constant output levels and coloured outputs (which go down to very low levels) just makes this fantastically versatile. The finger loop and ergonomics give it a very natural feeling, and when you get the confidence to flip it round your finger when you need your hand, it almost takes over from a headlamp. Add in the mounts and the system just works for you.

I keep the TTLs fitted as I do prefer the longer grip, I also like the additional function of the extra light (especially the UV). If you use it mainly in a mount you might prefer to keep the size down and not use a TTL but it will be personal preference and where you mount it that dictates that.

As the cells get low, the T-Max protects you from being without any light at all by locking itself; you can then use the coloured output. Even when the main beam won’t stay on for more than a few seconds, you will have hours of low power coloured light available.

First-Light have taken their innovative Tomahawk, tweaked the interface and given it a significant performance boost in output power and beam intensity resulting in the T-Max.

Review Summary

_______________________________________________ _______________________________________________
Things I like What doesn’t work so well for me
_______________________________________________ _______________________________________________
Excellent distinctive ergonomics and handling Might be a stretch for smaller hands
Functional three button interface Unusual shape can take some getting used to
Finger loop Not optimised for any rechargeable cells
Uses First-Light’s TRS mounting system
Will run on RCR123 cells as well as CR123
Optional TTL adds UV or Eye exam safe Blue beam
Multi-coloured outputs


If you enjoyed my reviews, please remember to ‘Like’ me on Facebook and follow me on Twitter to get all the latest updates and news. You can also find exclusive insights on Instagram and Pinterest