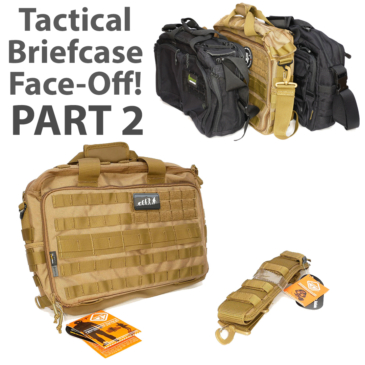
Part 2 of the Tactical Briefcase Face-Off features the Hazard 4 Ditch Bail Out Bag (see it here) and takes a detailed look round this contender. All three Tactical Briefcases in the Tactical Briefcase Face-Off series came from Military 1st who I’ve been buying from for many years.
This series of reviews was originally planned to be a single group review, but has evolved into something much larger as I used each of them for EDC, lived with them, got to know them well, and more and more detail needed to be shown. Each of the three Tactical Briefcases (First Tactical Executive Briefcase, Hazard 4 Ditch Bail Out Bag and Condor Metropolis Briefcase) will have a dedicated article before the final article Part 4 brings it all together to explain how I got on with each one and their strengths and weaknesses.
Tactical Briefcase Face-Off Part 1, featuring the First Tactical Executive Briefcase can be seen here.
Part 2 – The Hazard 4 Ditch Bail Out Bag:
All round the outside:
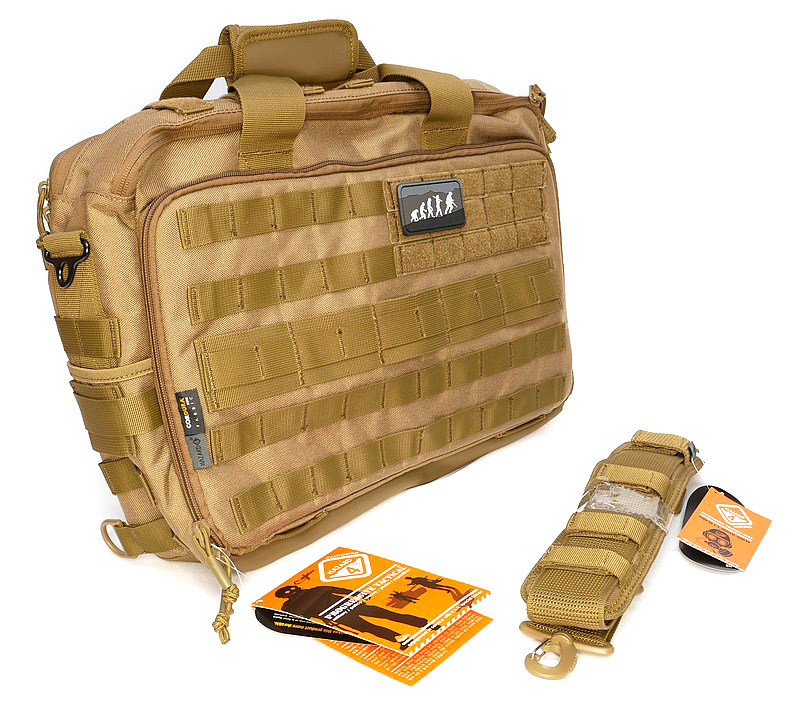
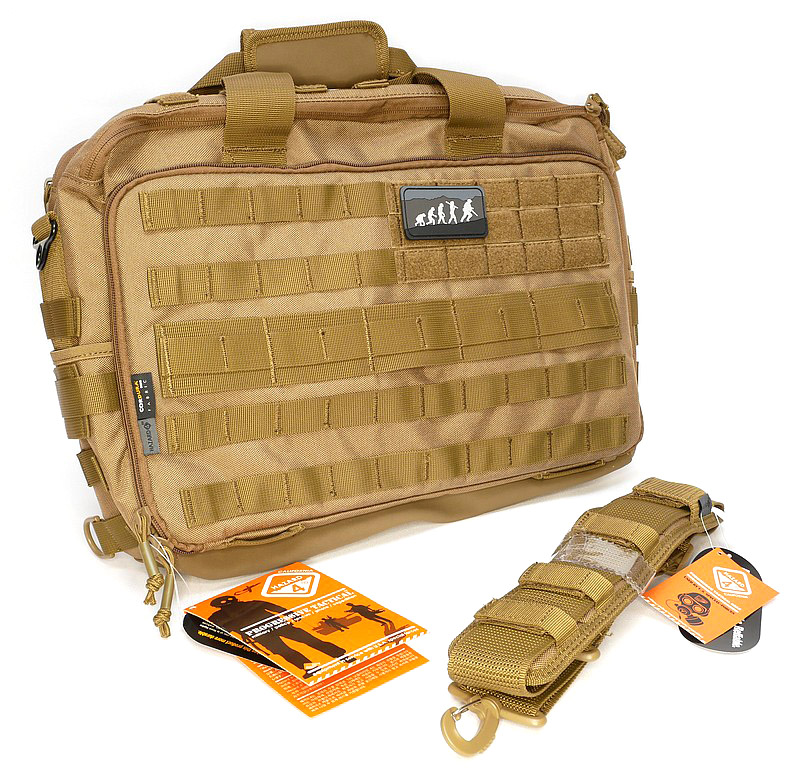
The Hazard 4 bag differs from the others on test in that it doesn’t come with a shoulder strap. The introduction image shows the bag and strap separately as they must be purchased separately. However, the consideration for this is that Hazard 4 do have a few strap options, so this does allow you to either not bother at all, or choose one to best suit your needs.
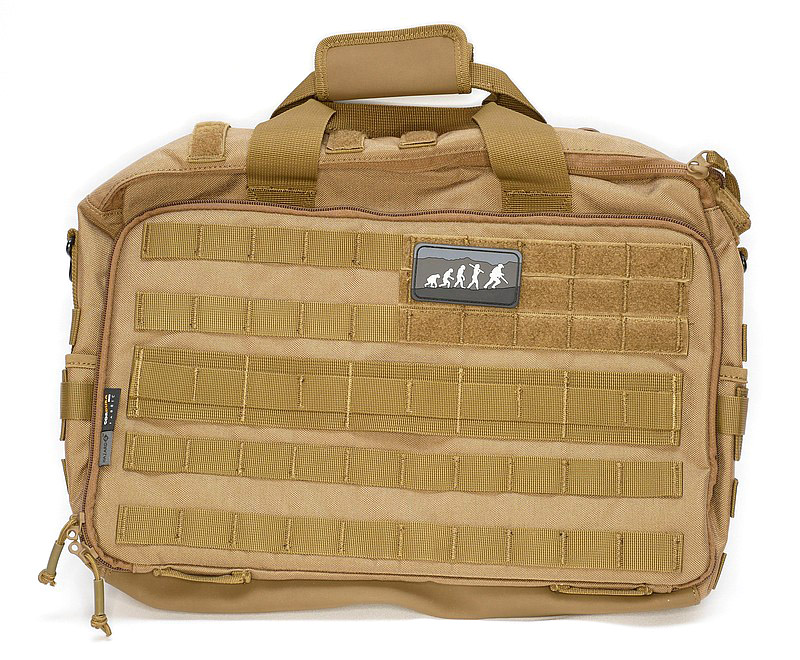
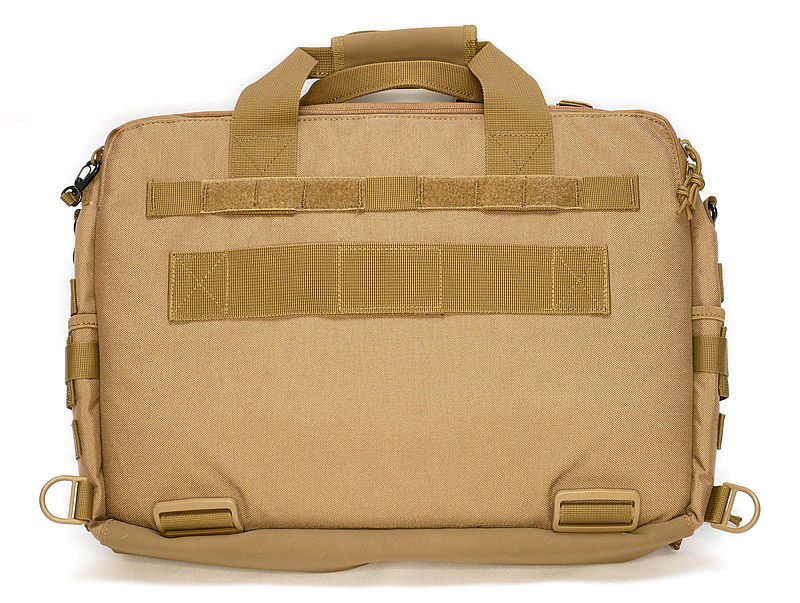
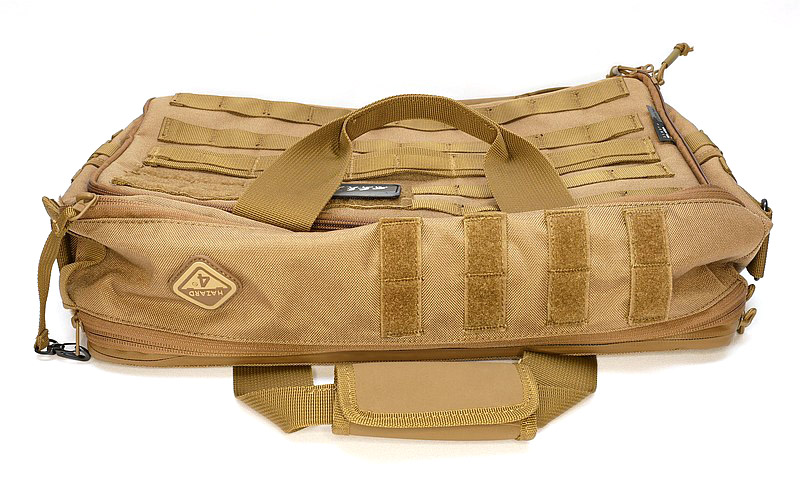
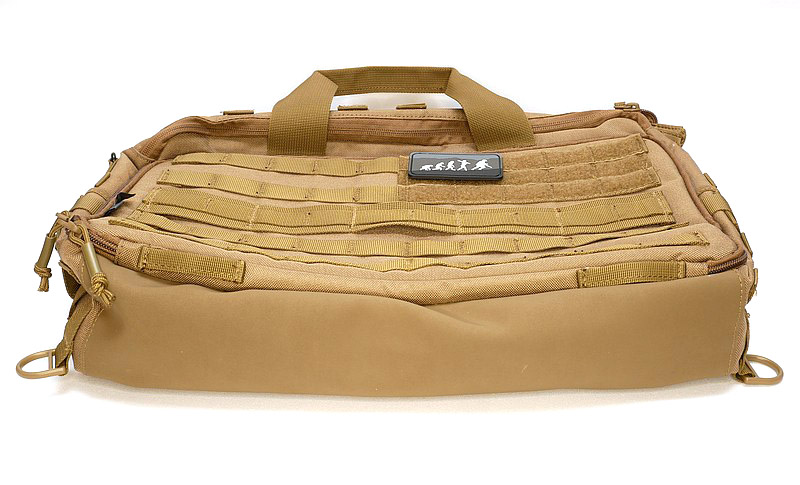
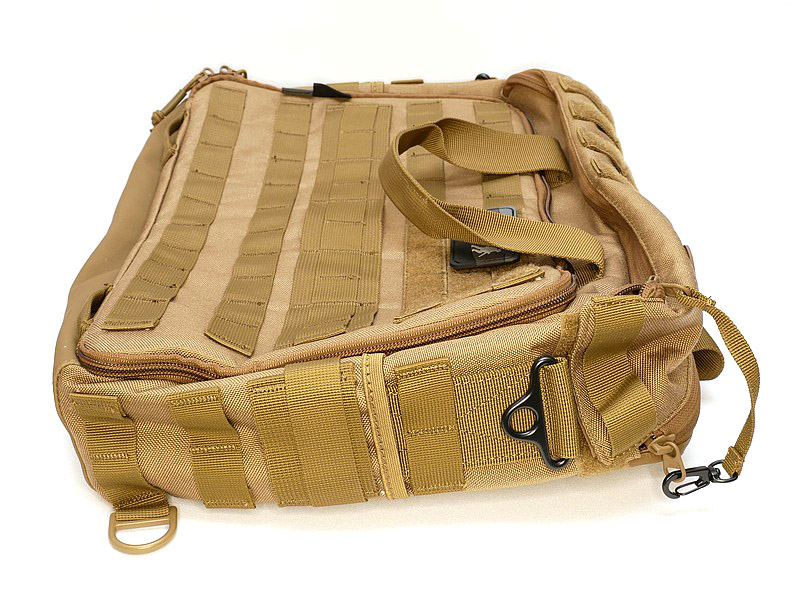
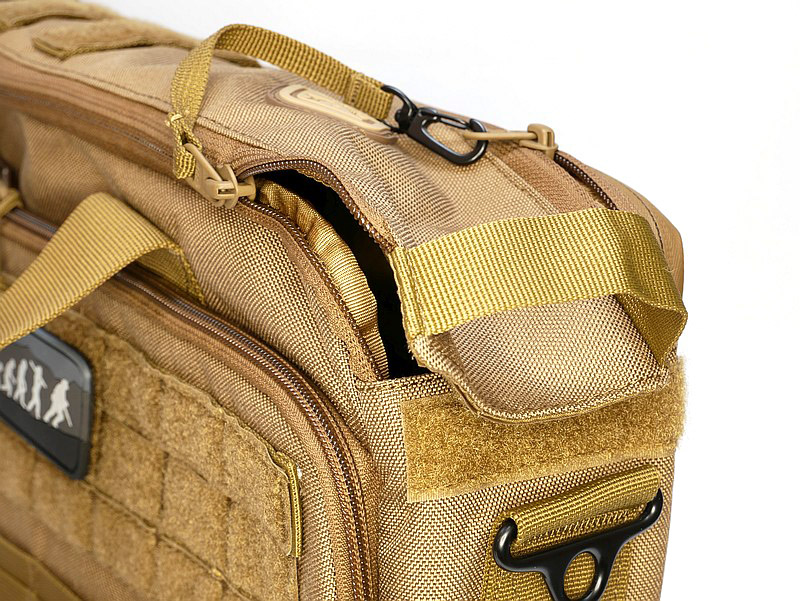
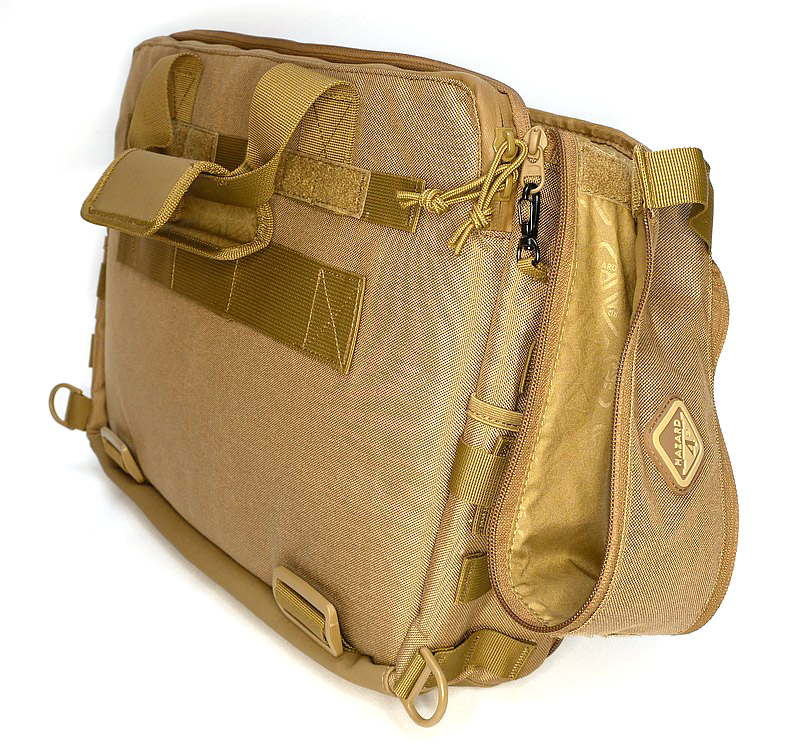
We’ll start with a run round the outside. – The front panel is a large MOLLE platform limited only by your imagination. The back panel has a trolley bag handle loop strap for sitting the Ditch Bail Out Bag onto a larger wheeled bag with telescopic handle. There are also wide webbing buckles allowing you to add extra straps to hold larger items onto the bag. Even the top flap is equipped with webbing attachment loops.
The base of the bag is a different nonabsorbent material which should be better at shrugging off wear and dirt from being on the floor. Each end of the bag has a small elasticated pocket and more webbing.

Pockets, Pouches, and Padding – Things to look out for here are:
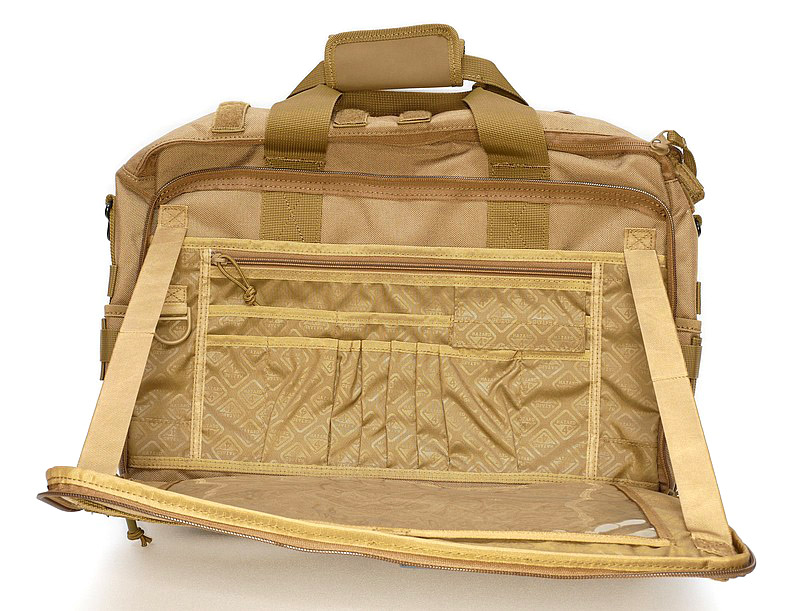
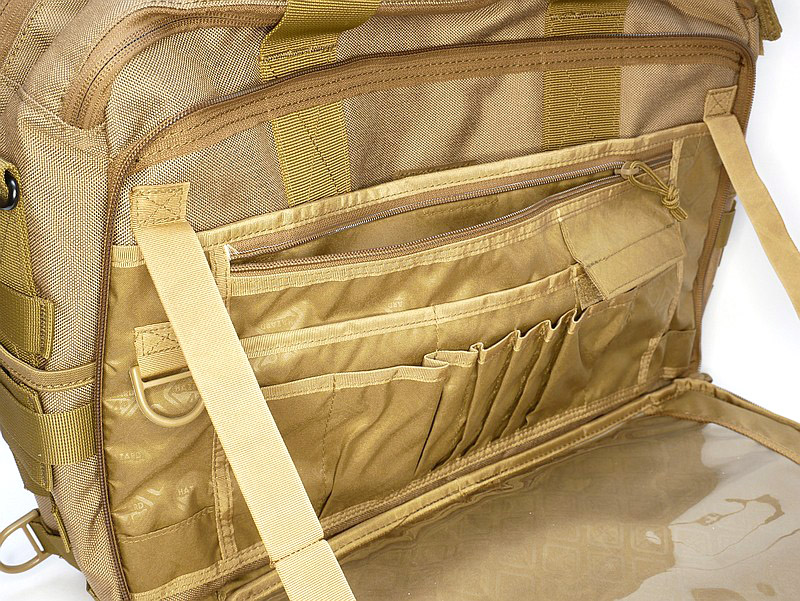
Opening up the full size front section reveals a big admin panel crammed with organisation features; a clear document wallet, zip-up pocket, full width pocket, then various size organiser pockets, with two straps to stop the front section opening further than shown in the gallery.
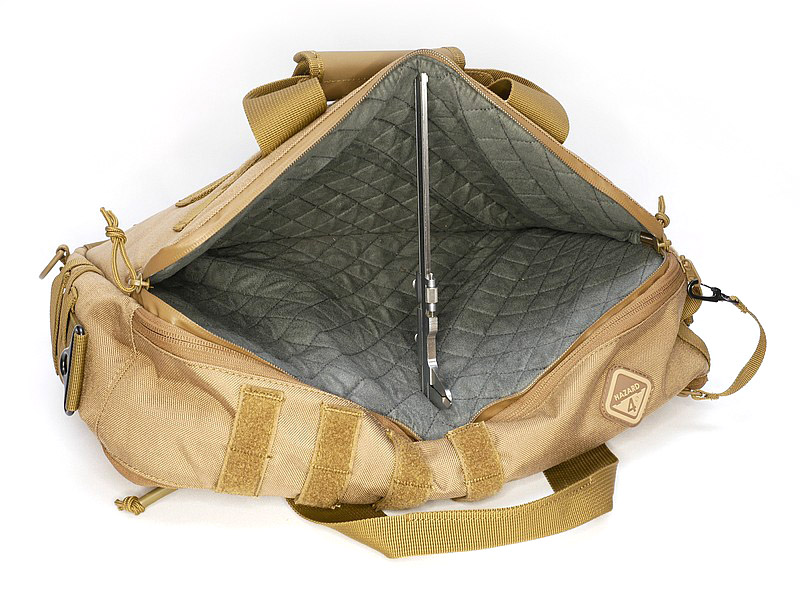
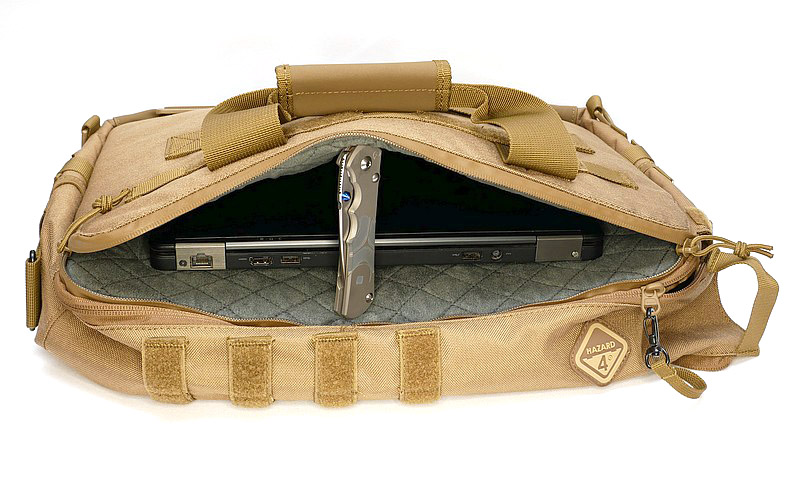
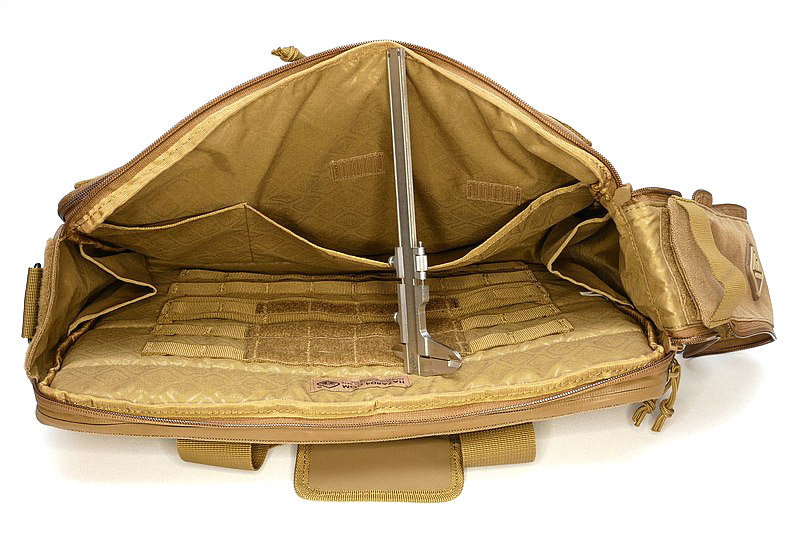
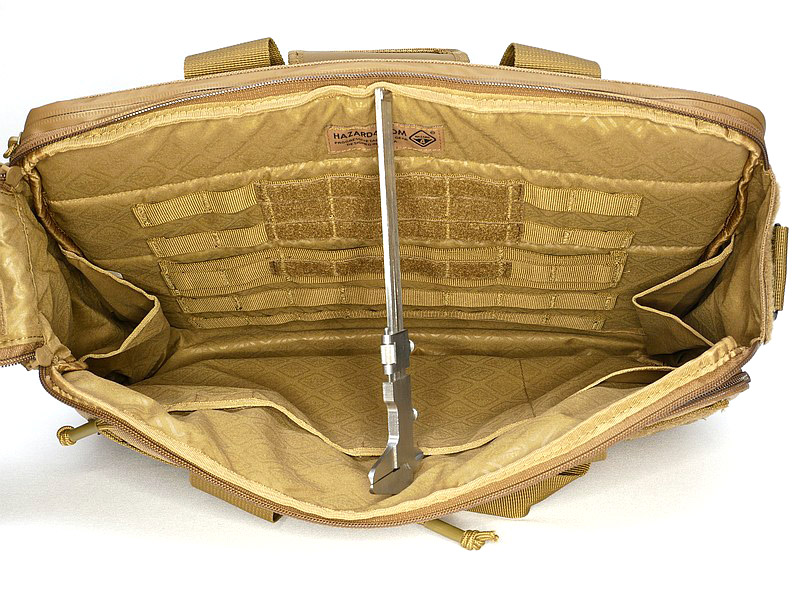
To the rear of the bag is the single section, well padded, laptop pouch with double zips so you can open it either end or either way. This laptop pocket is lined with a soft quilted fabric.
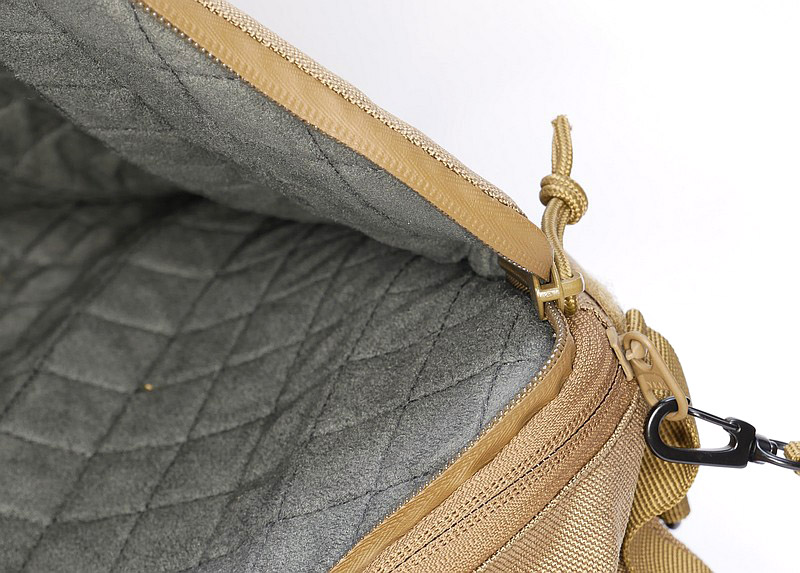
The top flap has lots of details that make it very usable. At the end there is a small grab handle so you can pull it open in one motion. There is a zip either side of the flap and these can be joined with a small loop strap, or one end unhooked to allow them to move independently. So that the flap doesn’t end up on the floor, there are Velcro panels so the front of the flap can be folded in half and attached to the other end of the flap when fully open. This keeps it neat prevents it from getting under foot.
Comparatively, the main compartment has less going on; four pockets and a MOLLE platform on one side.

Strap and Handles:
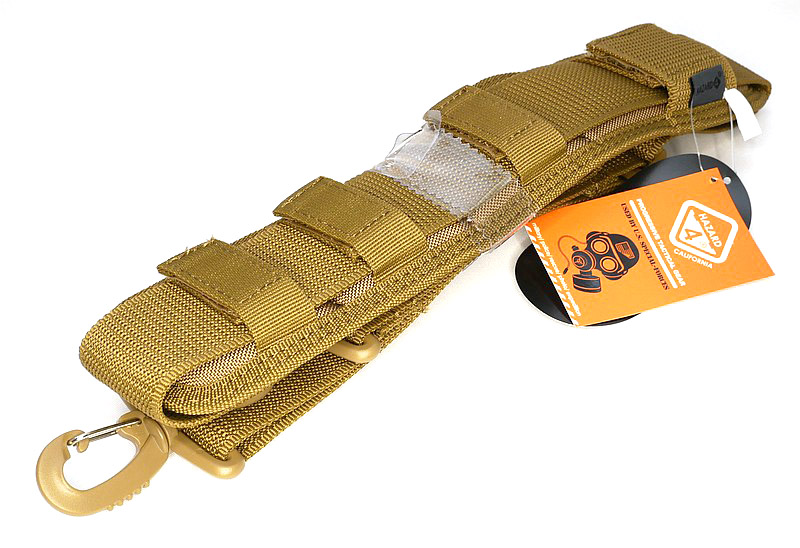
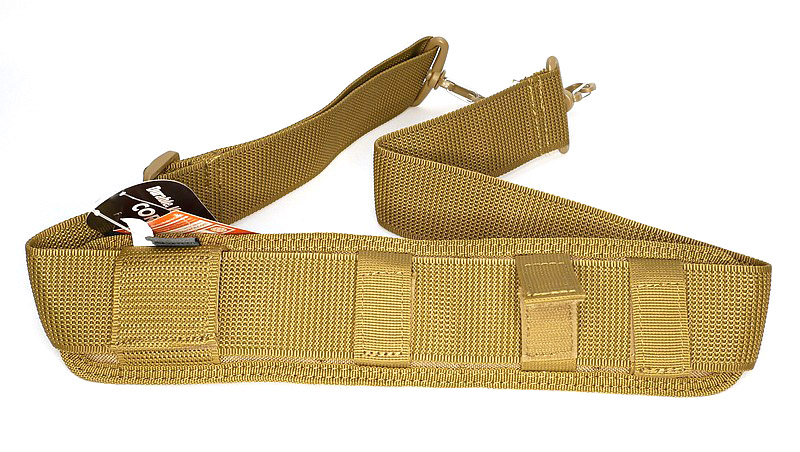
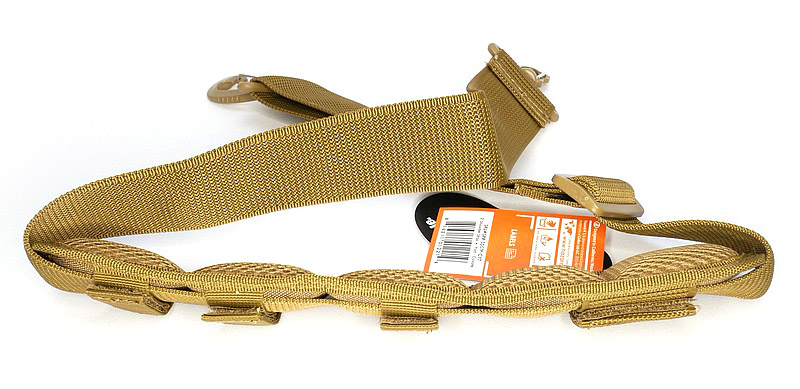
As a completely separate item, the shoulder strap here is the one Hazard 4 recommended for the bag. It is a general purpose 2″ shoulder strap which has swivel clips and a removable pad.
The two carry handles on the bag are simple and comfortable, and have a Velcro grip-wrap to hold them together.


The video tour of all three Tactical Briefcases:
In case you haven’t seen the video overview on Tactical Review’s youtube channel, here it is. This video covers all three of the bags.
Review Summary
As in Part 1 there is a lot to absorb, so this is where we will leave the Hazard 4 Ditch Bail Out Bag for now.
Please follow the series of articles to see all the insights, and it will be in part four that the real-use feedback will be included.
