This review of the 5.11 Tactical RUSH 12 and 24 backpacks is a classic from 2013, and is the first in the Classic Series of reviews to be published on Tactical Reviews. The original versions of the Classic Series Reviews used a well known image host who will be cutting off the visiblity of 3rd party hosted images at the end of 2018.
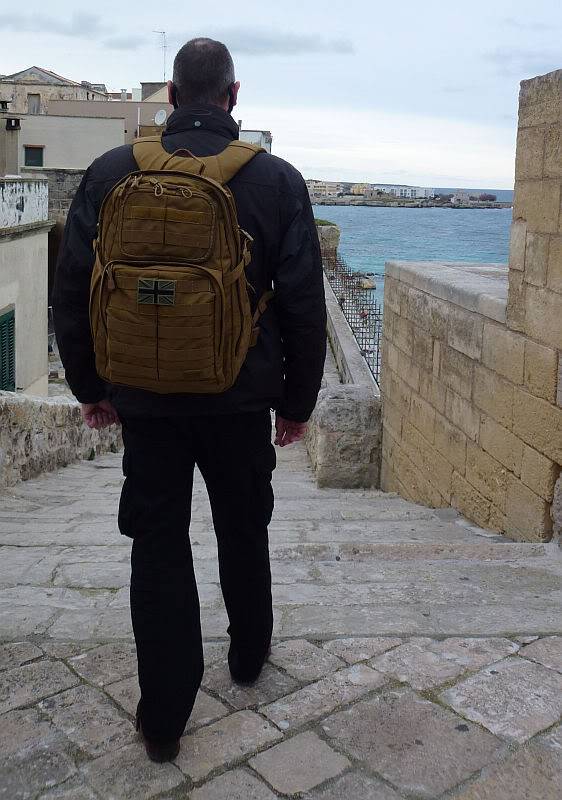
For this review I am testing and comparing two of 5.11’s tactical MOLLE backpacks (well PALS really – but we’ll come back to that), the RUSH 12 and RUSH 24.
These two sizes cover the requirements of the average every-day-user for day trips, commuting, camping, hunting etc. Of course the expandability afforded by the integrated PALS system makes these backpacks all the more versatile.
The model suffix, 12 or 24, of these RUSH backpacks indicates the number of hours you are carrying provisions for, so the RUSH 12 should carry the items you need for a 12 hour outing, and the RUSH 24 covering your needs for a 24 hours out and about. These are reasonable guidelines, especially considering the expandability of the packs and options to add MOLLE/PALS system pouches and tie on other gear.
I have previously looked at a couple of lights from 5.11 Tactical, the ATAC A1 and A2 (1 AA and 2 AA versions) and
ATAC L2 (2xCR123/RCR123), which proved to be great quality and very reliable, and backpacks look like they will live up to the same standards.
Initial Impressions:
‘Quality’, ‘solid build’ and ‘feature packed’ are the over-riding impressions that come to mind when you first get hold of the RUSH 12 and 24. This is certainly reinforced by the weight of the empty bags, roughly double the weight of an average rucksack. However the reasons for this extra weight are the heavy duty materials and construction used to make these along with the designs being packed with useful functional features.
Side by side:
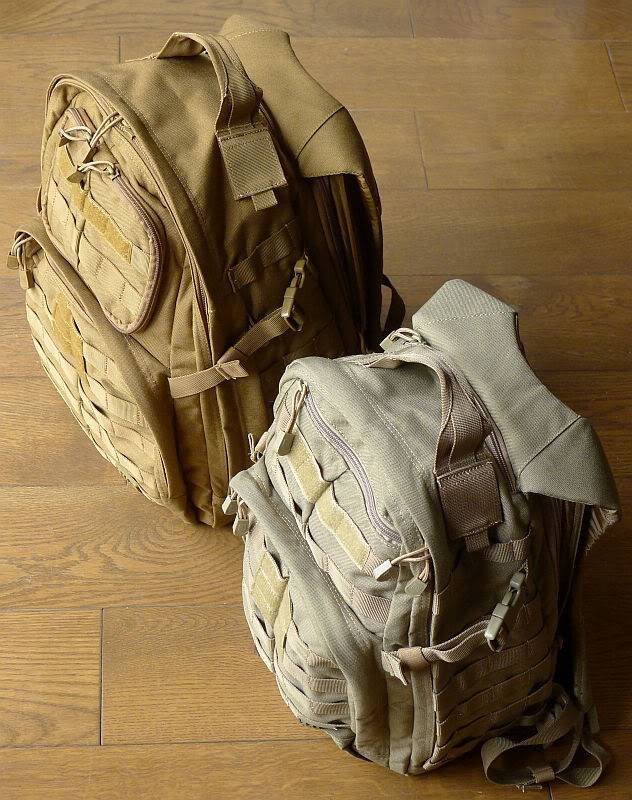
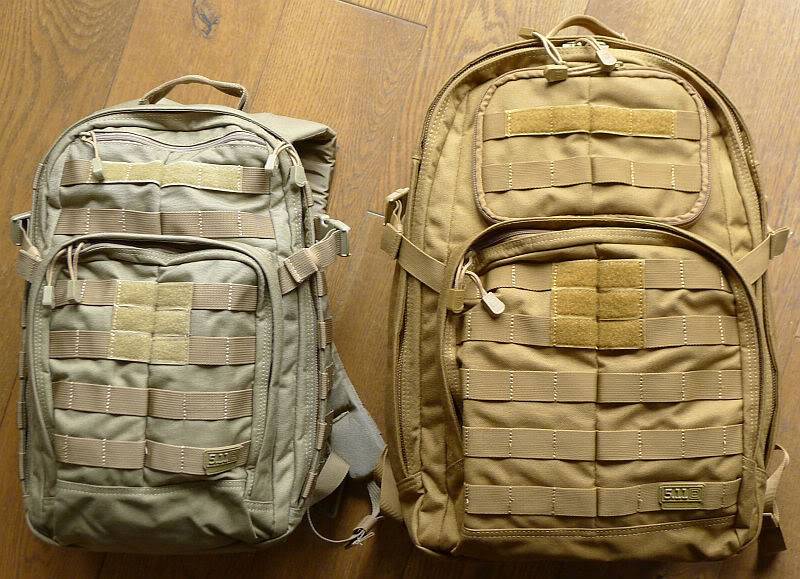
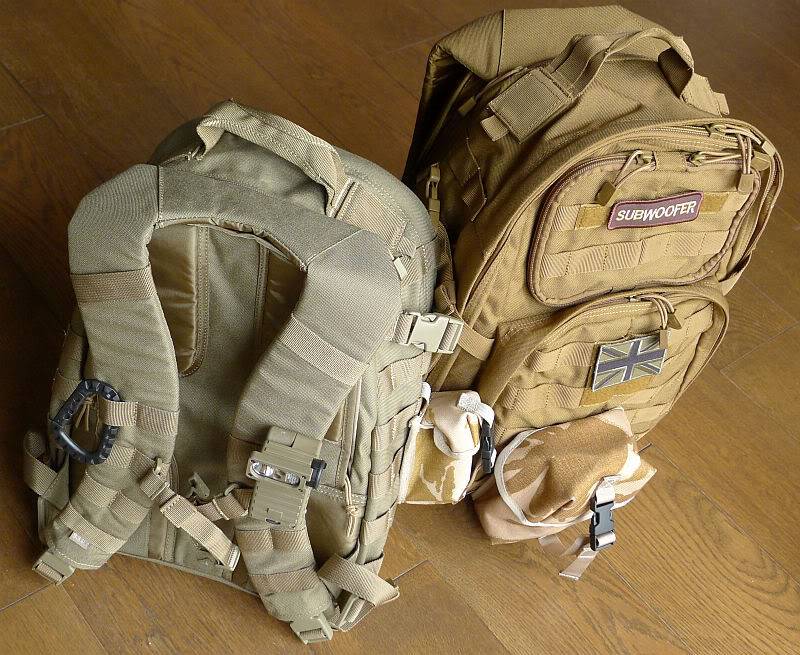
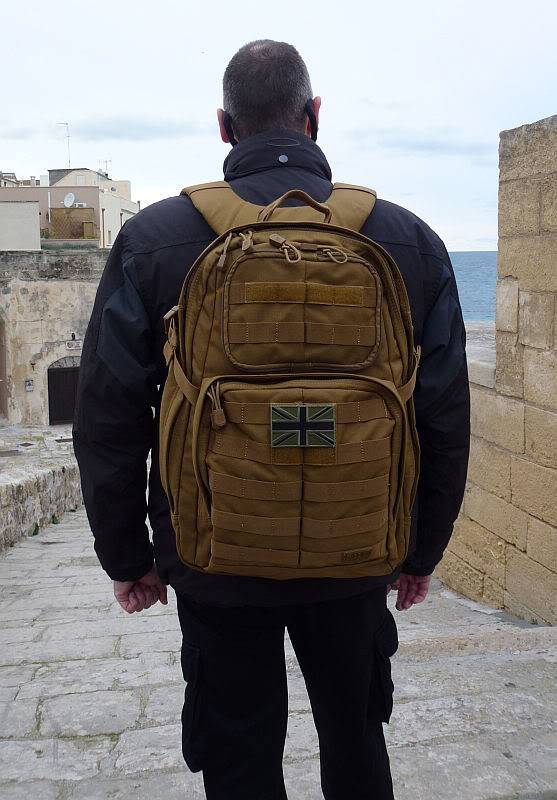
The more I’ve used these two backpacks, the more I appreciate how much thought has gone into their design. Before I delve deeper into the design features of each of them, I wanted to start with a quick look round the RUSH 12 and 24 side-by-side to give an idea of how they compare.
On the left is the RUSH 12 in Sandstone (328) and on the right is the RUSH 24 in Flat Dark Earth (131). For colour comparison, the photo was taken in daylight with the camera set to daylight white balance.
The size difference is clear with the RUSH 12 having a capacity of 21.2 litres and the RUSH24 32.7 litres, so the RUSH 12 is has about 2/3 the capacity of the RUSH 24. The main compartment of the RUSH 12 is 45.7cm tall with the RUSH 24 being 50.8cm tall, and the RUSH 12 is 27.9cm wide compared to the RUSH 24 at 31.8cm wide.
The side view shows extra depth of the RUSH24 which has about 5cm deeper.
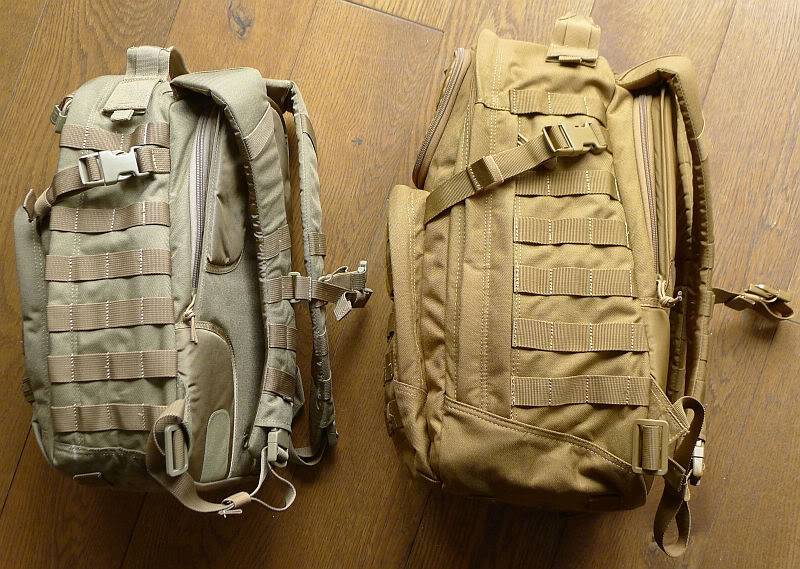
The straps are in proportion to the overall backpack dimensions, so the RUSH 12 will suit the smaller framed individual.

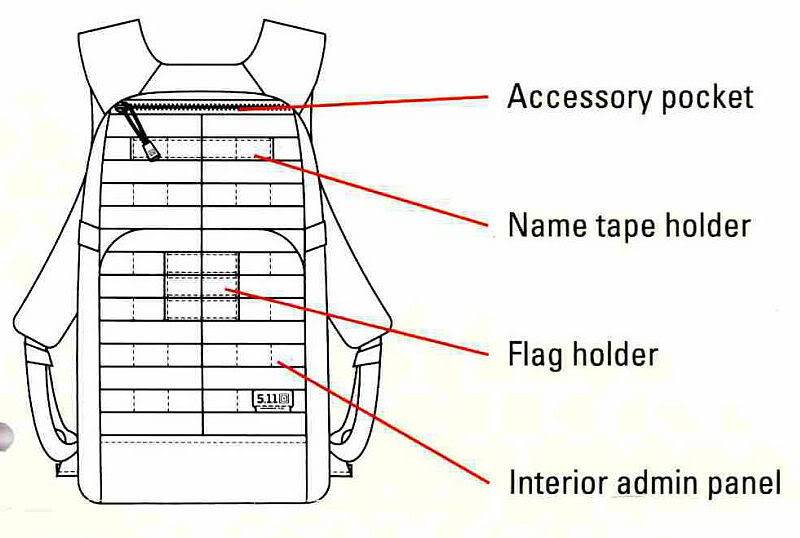
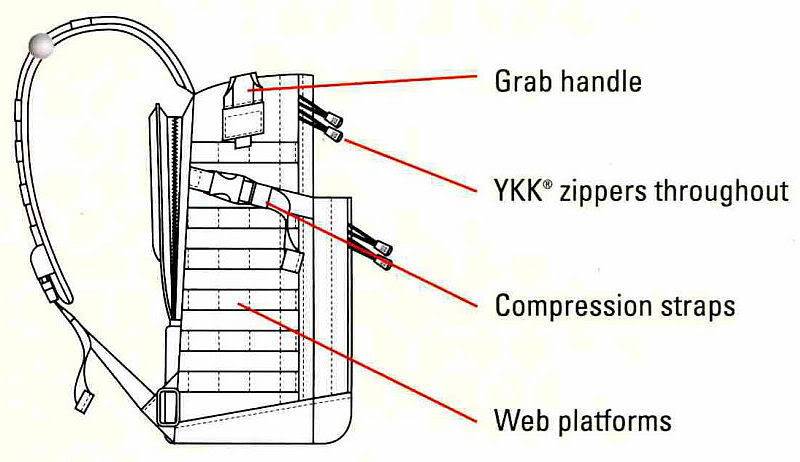
Comparing the schematics:
Each of the RUSH backpacks comes with a tag which has a helpful set of schematics which do not appear to be published on 5.11’s website. The schematics also provide an excellent comparison between the two sizes and their main features.
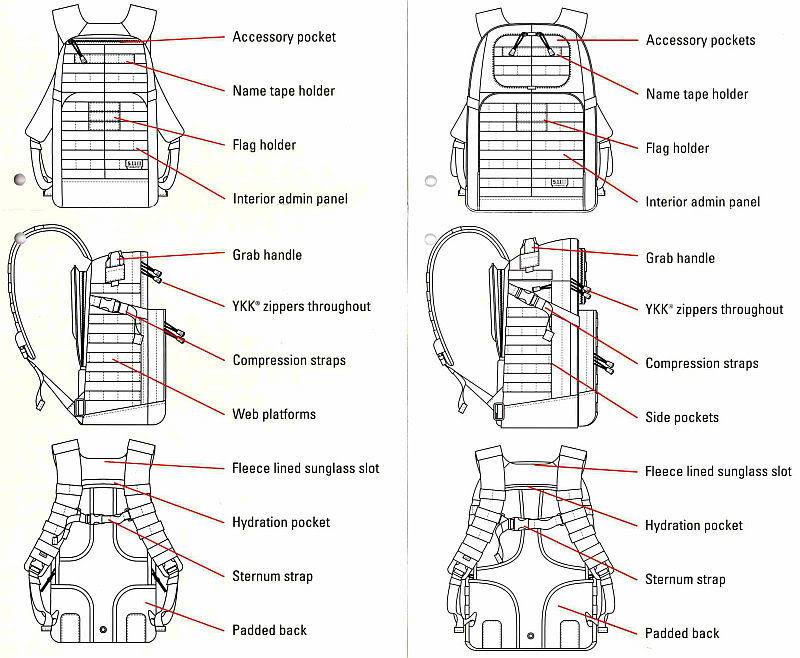
Weighing the empty bags, the RUSH 12 comes in at 1200g and the RUSH 24 at 1670g. This compares to a typical 30 litre rucksack at around 750g.
Looking closer at the RUSH 12’s schematics. The representation of the PALS/MOLLE webbing on these schematics give a good idea of the relative sizes of the RUSH 12 and 24.
With side view
And back view
Then the RUSH 24 and the schematic making it easy to compare layout and size.
Side view.
And back view.
The RUSH 12 in detail:
As each of these RUSH backpacks is packed with so many features, I need to take a closer look at each one separately. The RUSH 24 will be covered in the next section.
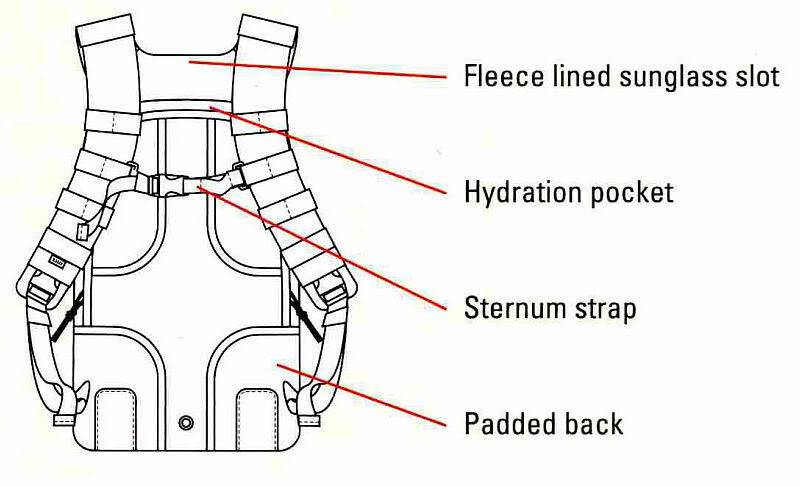
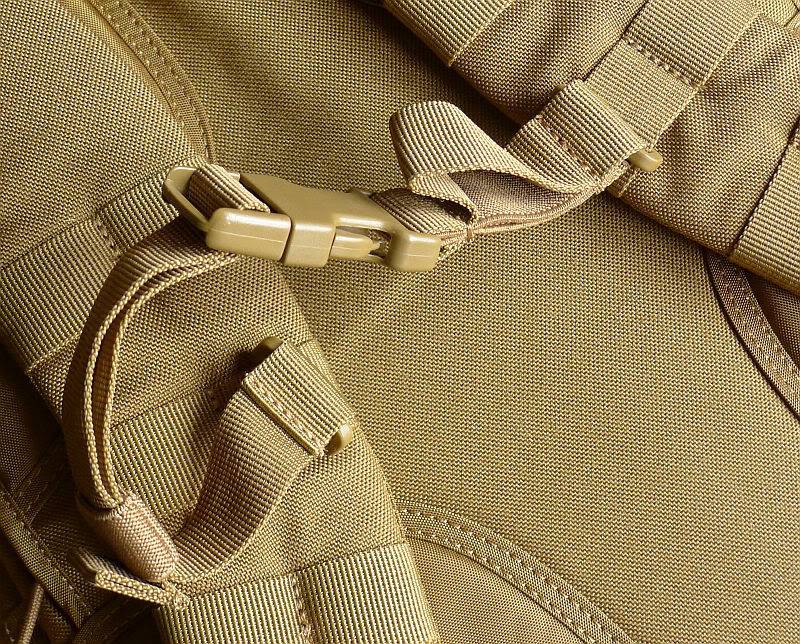
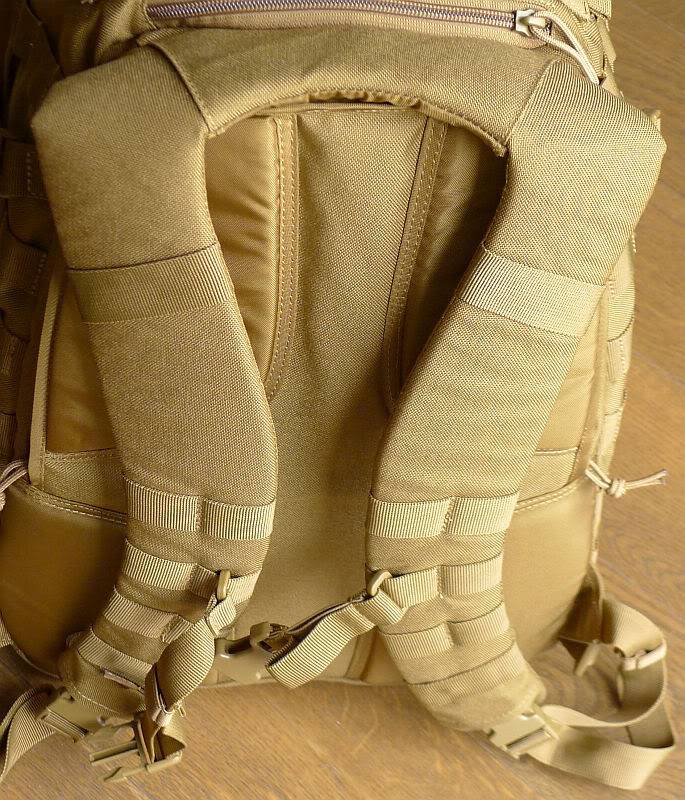
Even something as simple as the sternum strap has several special features.
The strap is attached using C-loops which allow it to be easily removed and repositioned higher or lower on the shoulder straps to suit your requirements.
The free end of the length adjustment strap is held neatly by an elasticated keeper, and the strap itself has an elasticated section to provide some give for extra comfort.
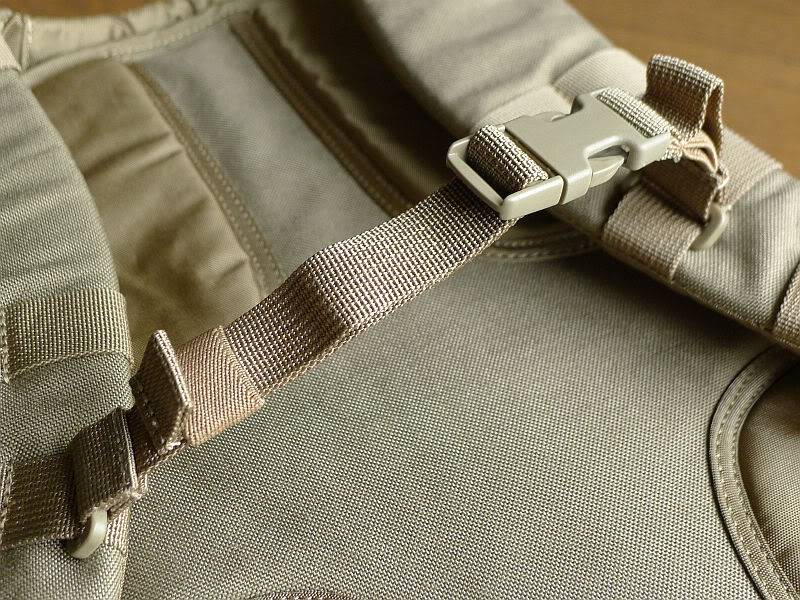
Both RUSH backpacks have Dura-flex side release buckles incorporated into the shoulder straps. This simple design feature provides two major benefits most other packs are missing. Firstly, in general use, this makes removing a heavy pack much easier. Simply unclip one strap (or both), and then swing the pack off the other shoulder without having to struggle to get your arm out of the strap. Secondly, as the pack is covered in lashing points and PALS webbing, it has lots of possible points to get hung-up on obstacles. The side-release clips in the straps allow for an instant release from the pack if you ever get caught up on anything.
5.11 mention the Dura-flex hardware in the straps, but don’t seem to highlight this fantastic feature.
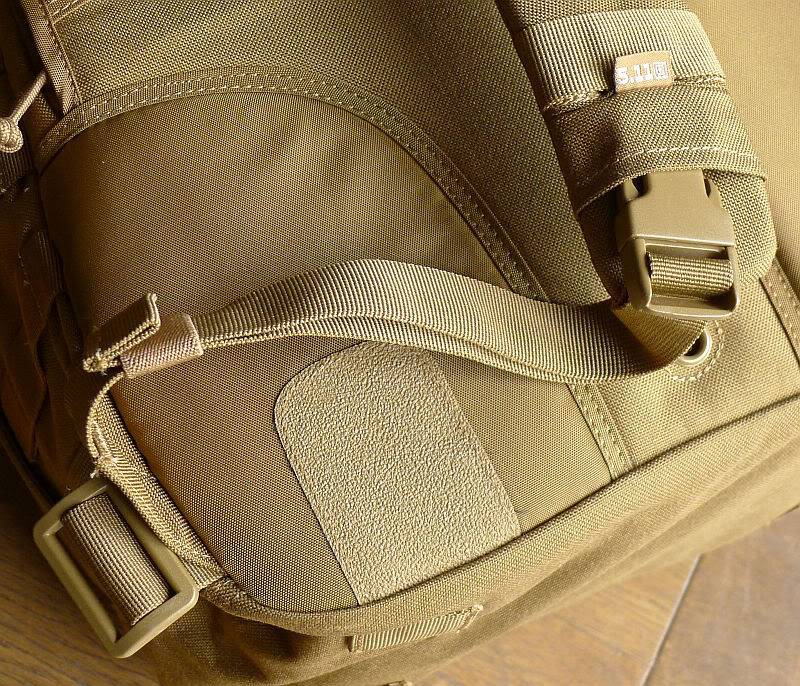
Also visible is a plain buckle that allows a hip belt to be attached.
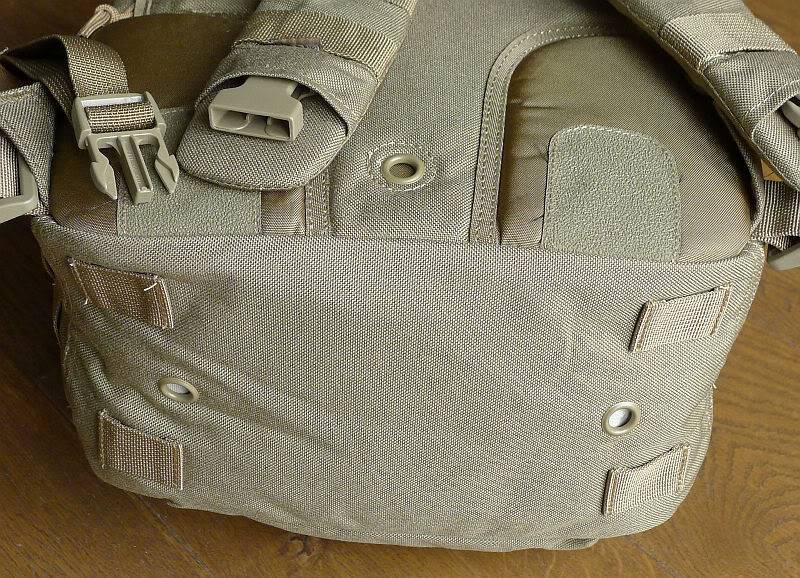
In the base of the pack there are two drainage holes, and this most recent version of the RUSH 12 includes four lashing points on the bottom.
Folding the shoulder straps over the main pack reveals the hydration pocket zip.
A hydration bladder can be fitted and secured using the two toggles or suspension strap. The drinking tube is then fed through the top of this pocket and into the main compartment.
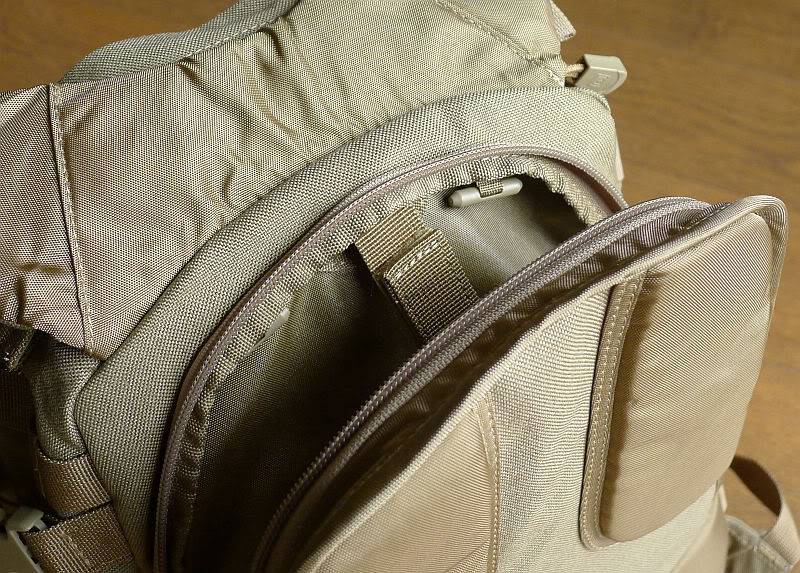
From the main compartment the drinking tube can be fed out of either port (one each side of the grab handle), before being routed under the webbing on the shoulder straps.
Inside the hydration bladder pocket, the back support padding and reinforcement can be accessed and removed if desired.
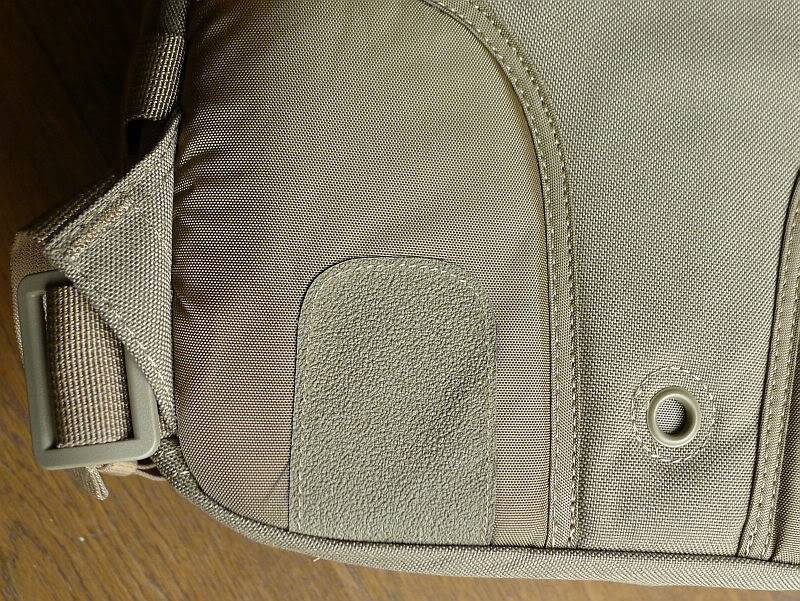
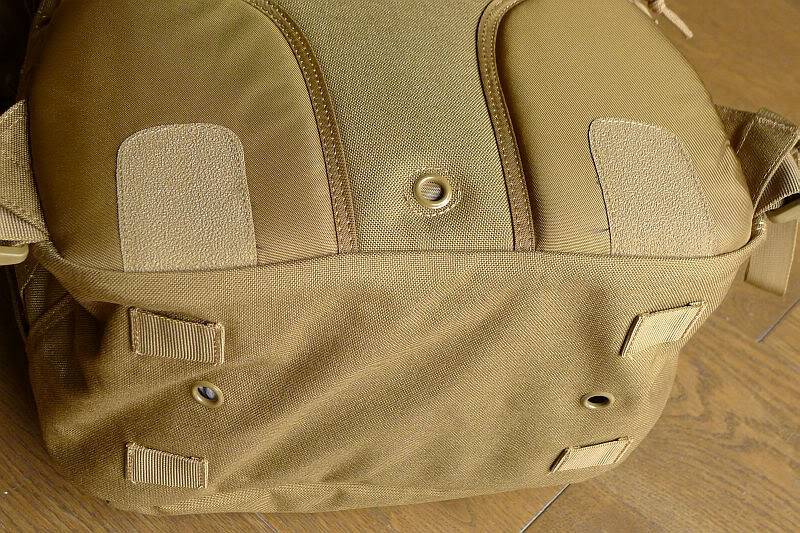
The padded back of the pack has two textured grip pads to help prevent the pack moving in use and between these is the drainage hole for the hydration pocket.
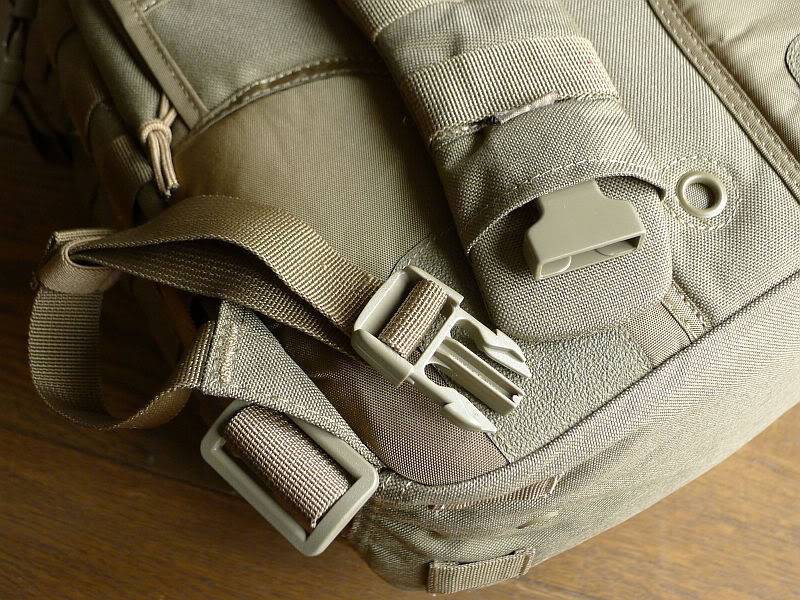
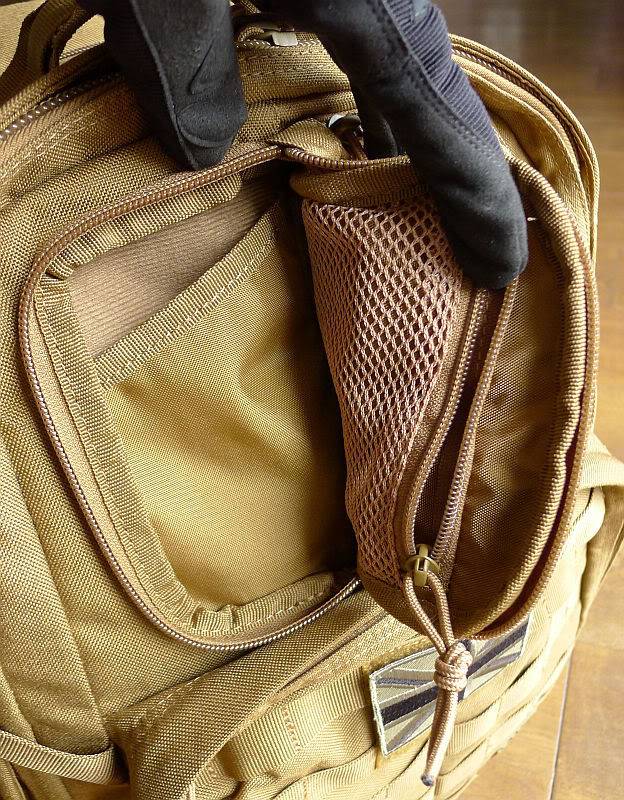
Just next to the grab handle is a small fleece lined zip pocket perfect for sunglasses or small electronic devices that you want to find quickly.
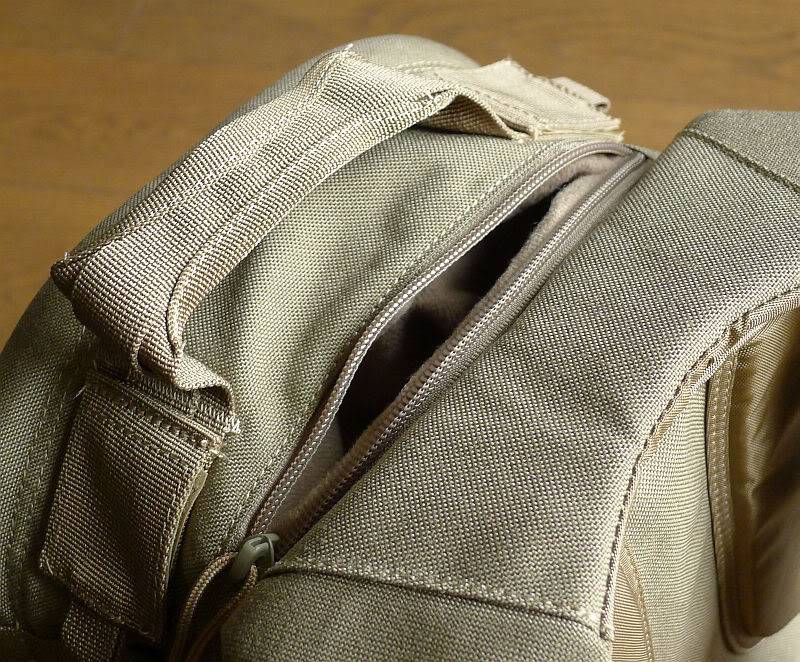
The pocket is pulled inside out here to show the lining and depth.
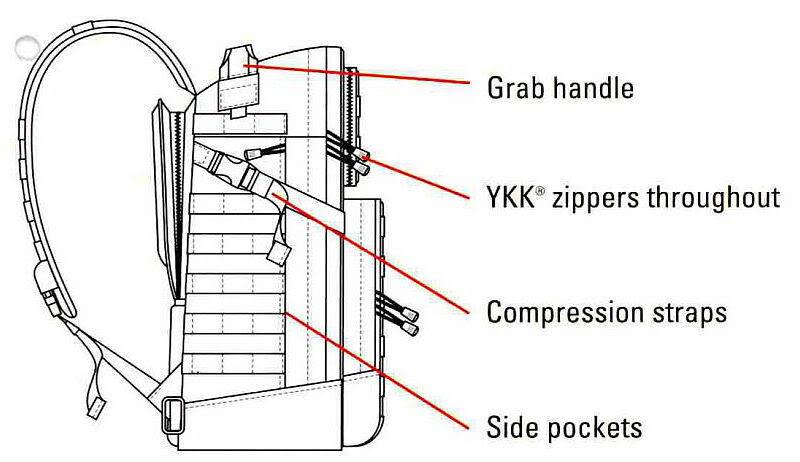
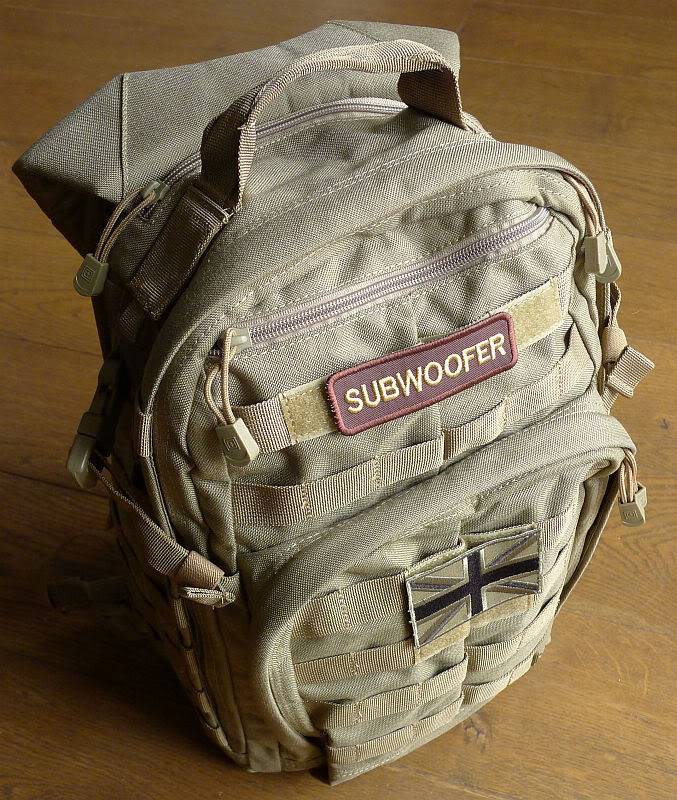
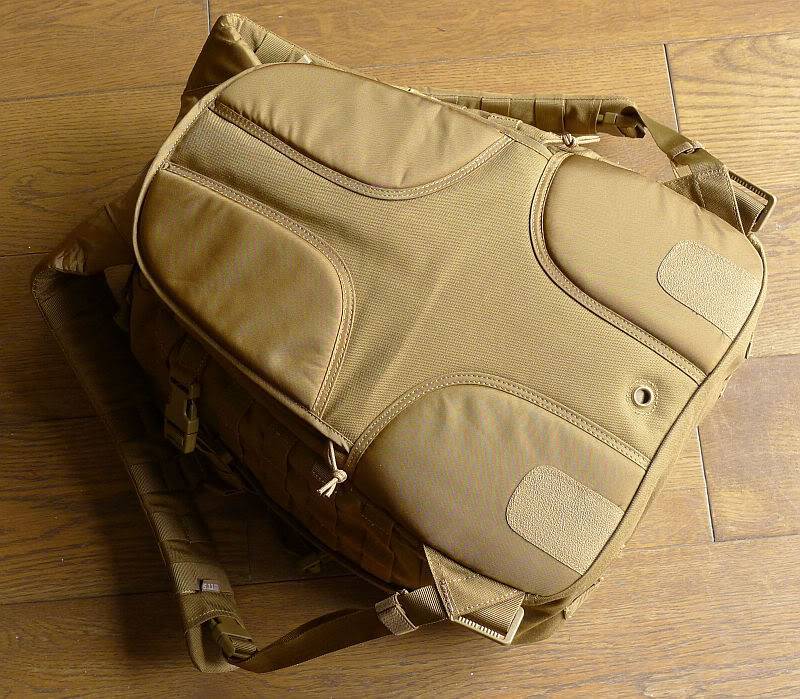
Each side of the pack has a compression strap with elastic keeper to tidy the loose end, and a series of PALS webbing provides mounting options. The RUSH 12 is constructed of durable water-resistant 1050-denier nylon.
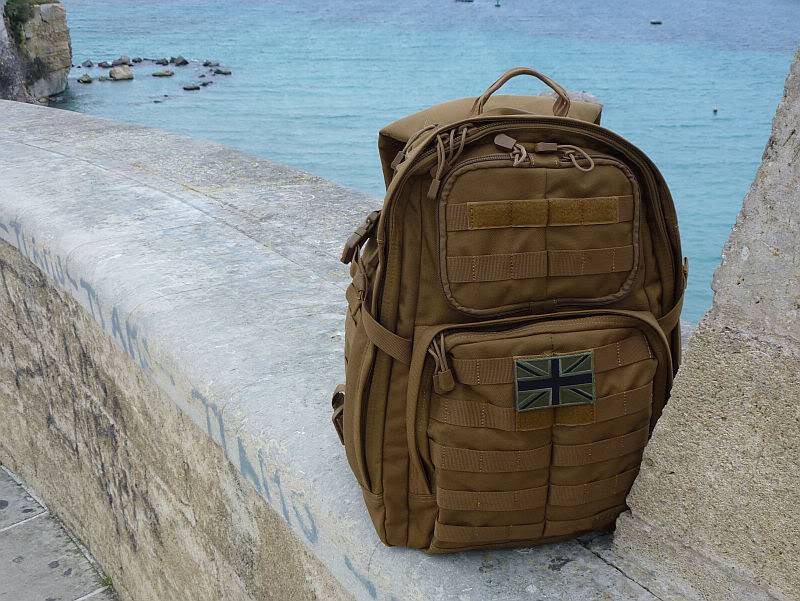
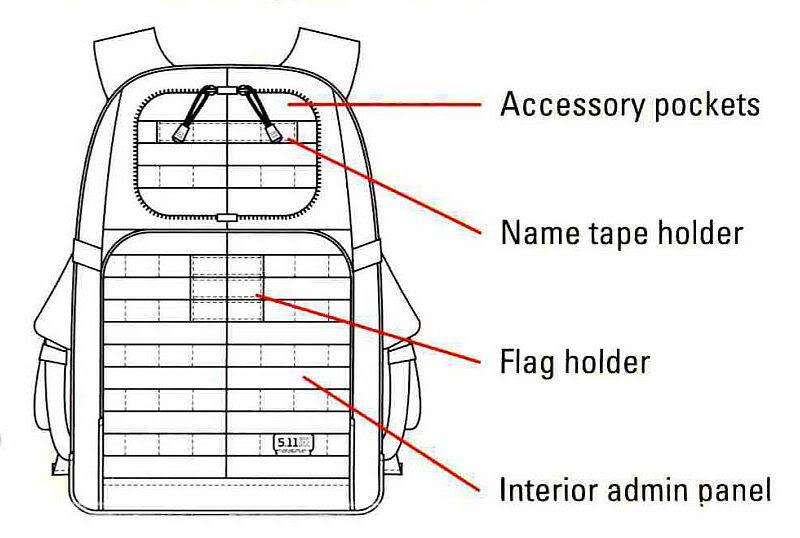
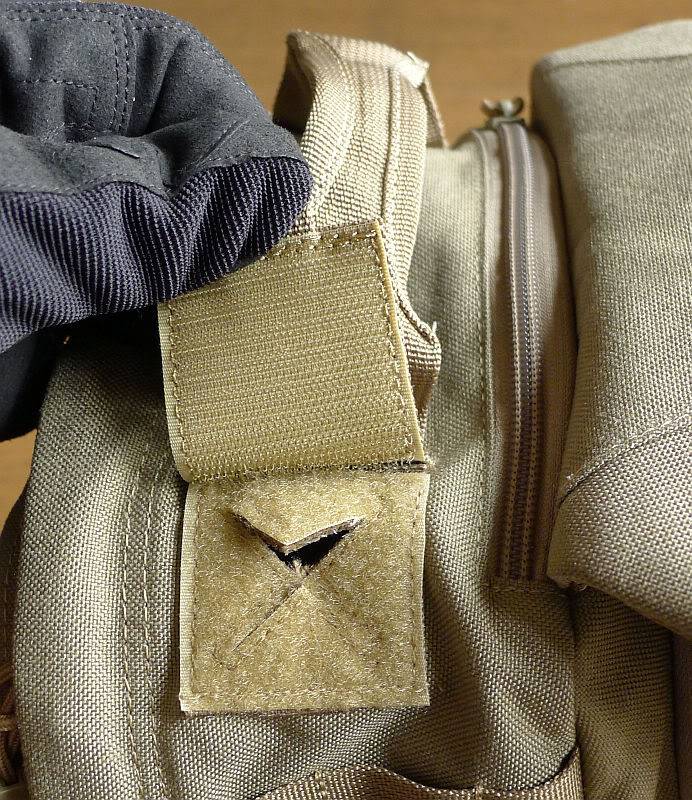
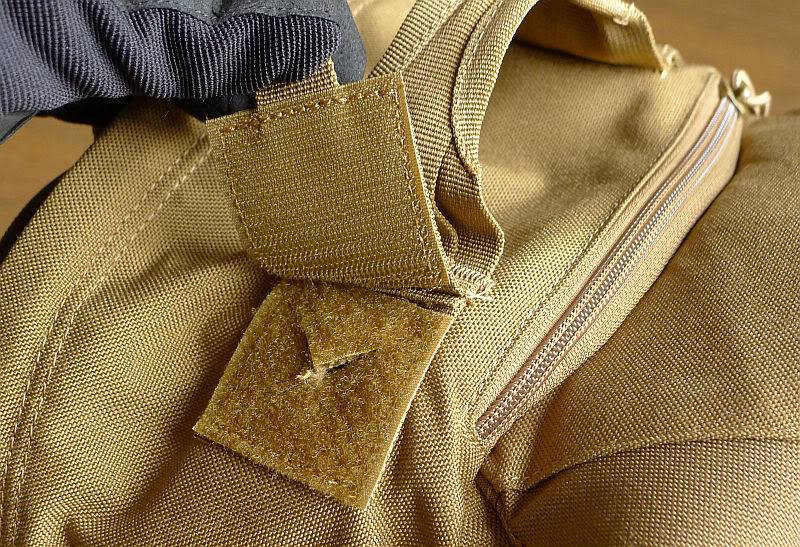
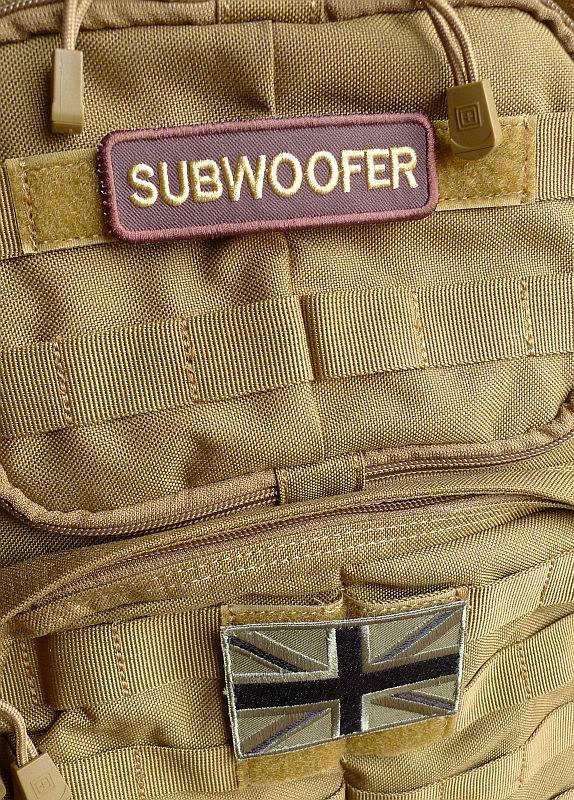
As well as more PALS webbing the front of the pack has a Velcro panels for a name patch and flag.
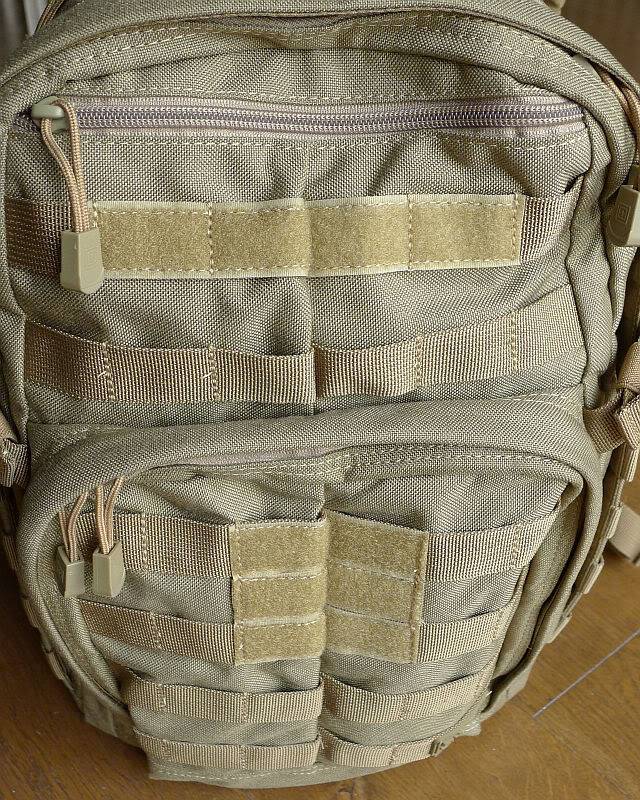
These Velcro panels allow you to personalise your pack.
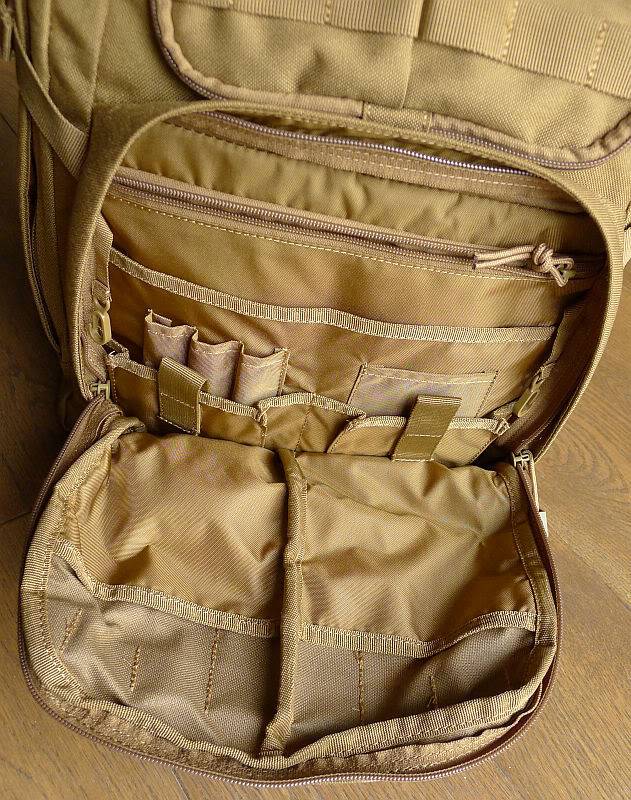
At the top of the front panel there is a simple single compartment.

Below this is the main admin panel which has a further zip compartment and several organiser pockets.

Also incorporated are a couple of key keepers
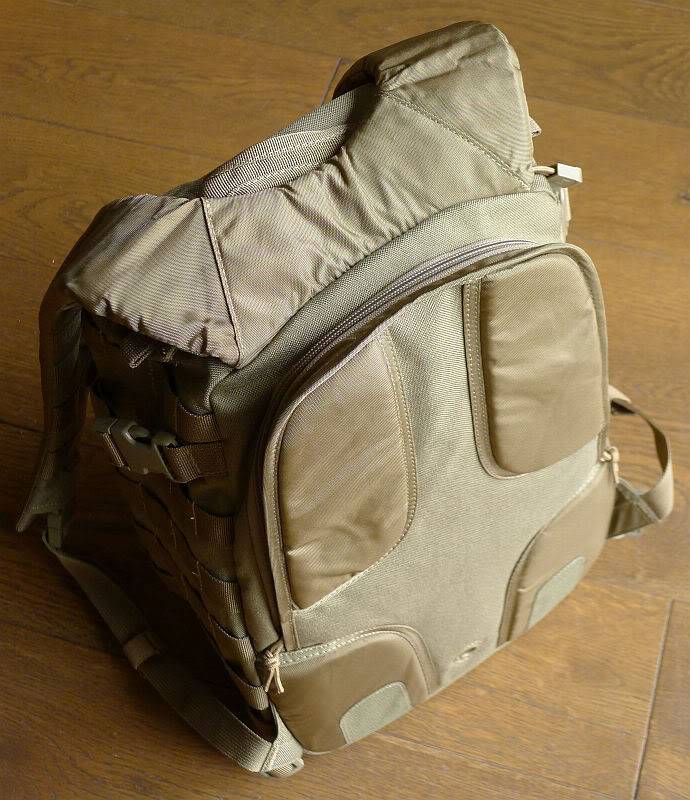
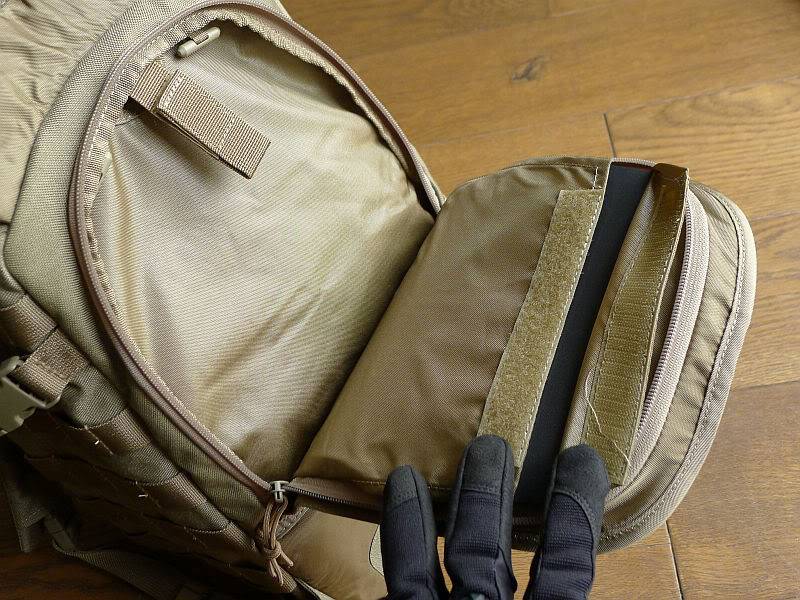
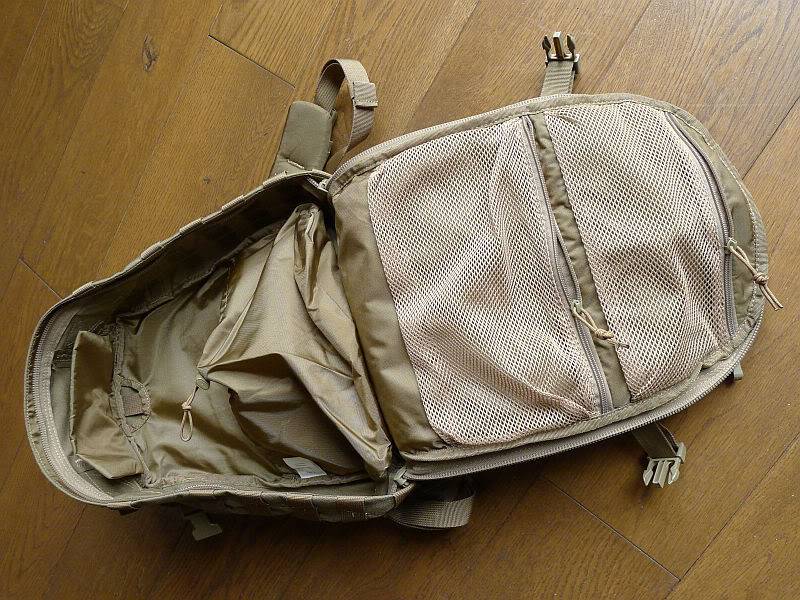
Unlike most backpacks, the RUSH backpacks feature full clamshell opening of the main compartment. The back of the front panel has two mesh compartments and the main compartment includes a large pocket with bungee clinch top.
Keeping things secure:
Before moving onto the detailed look at the RUSH 24, there is a feature common to both RUSH 12 and 24 worth noting.
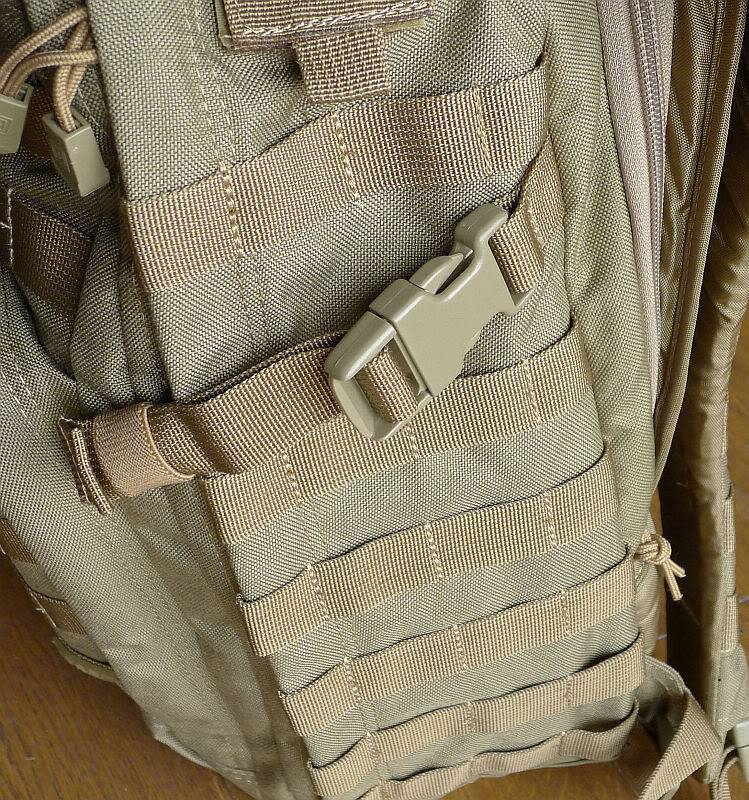
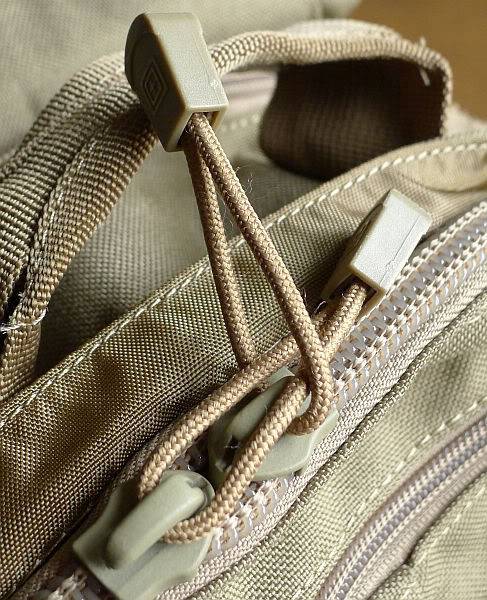
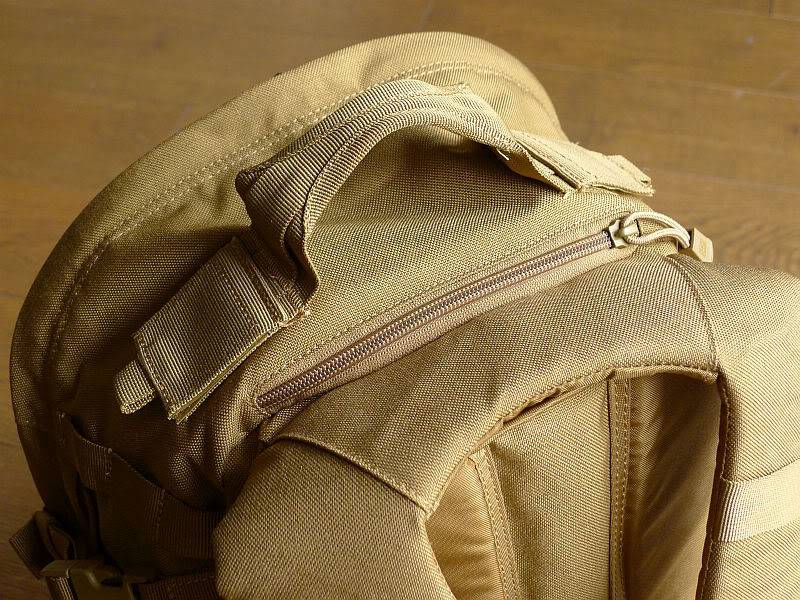
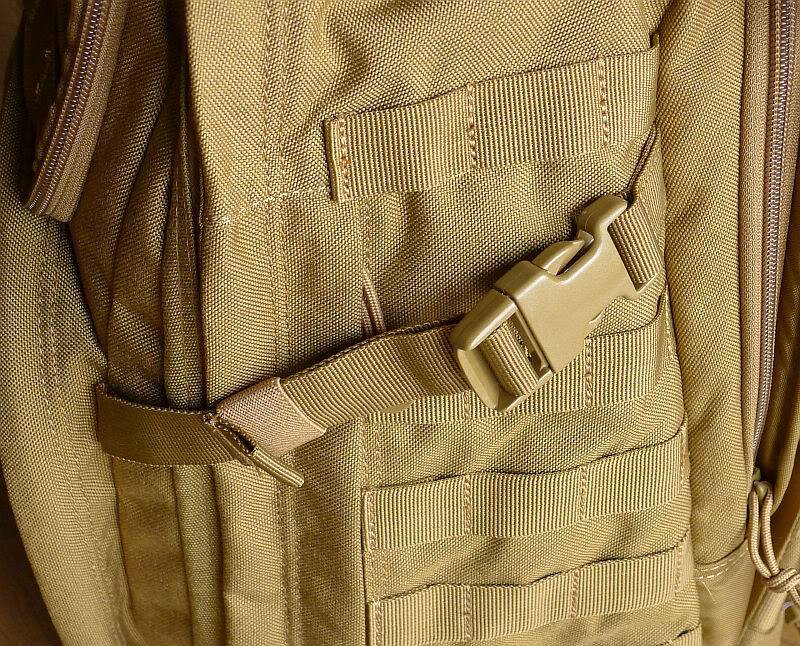
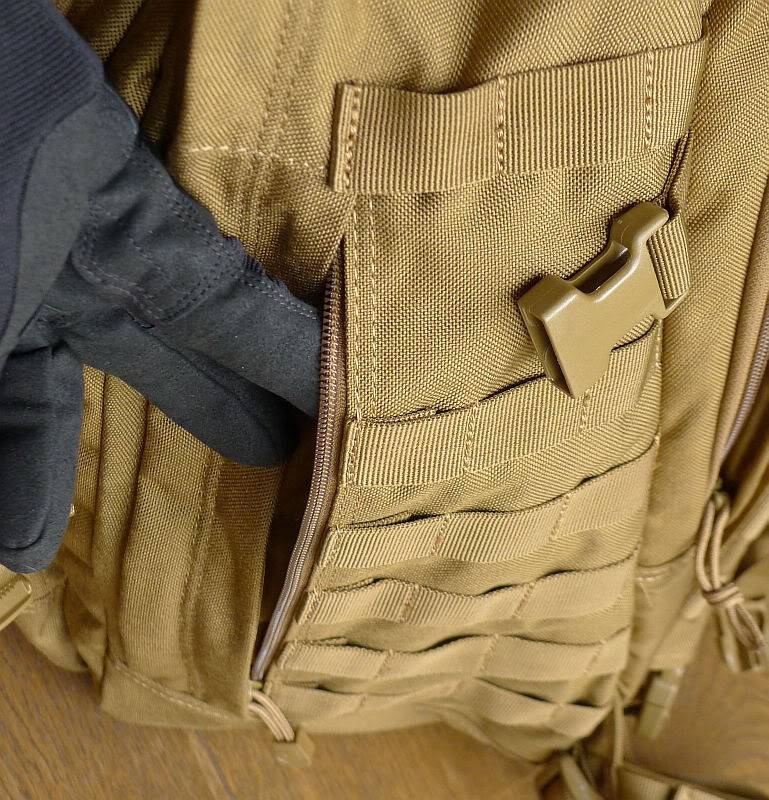
All zips are self-repairing YKK zips which have large glove friendly tags. These type of tags allow you to secure the zips together to prevent the pack opening unexpectedly.
Doing this is simple once you are used to it and well worth doing. Hopefully this series of photos will explain.
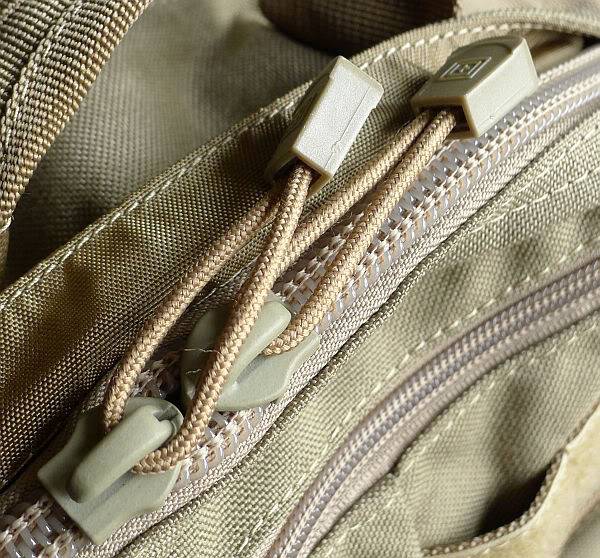
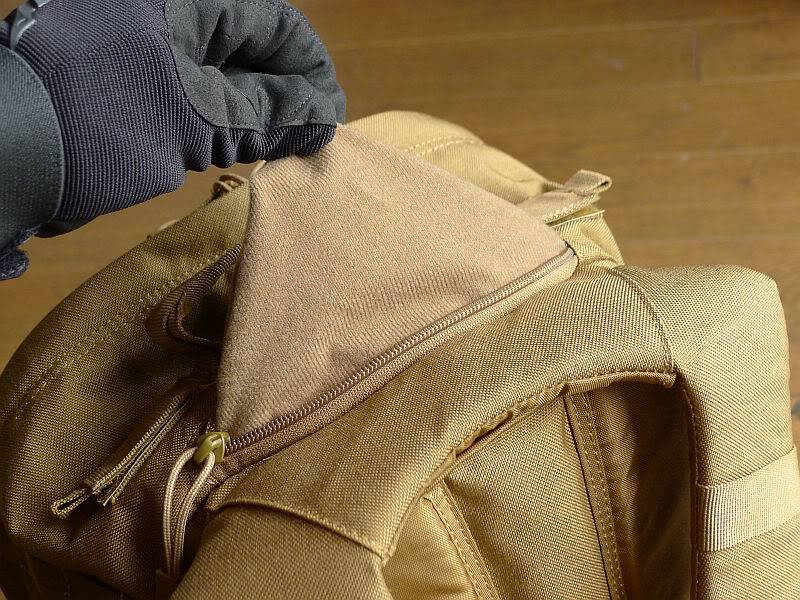
First feed one tag (A) through the other (B).
Then feed B though A
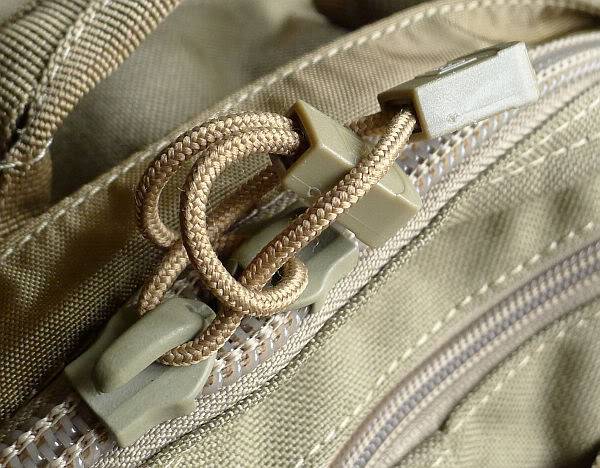
Pulling B far enough through that you can…

…then pass A back through it
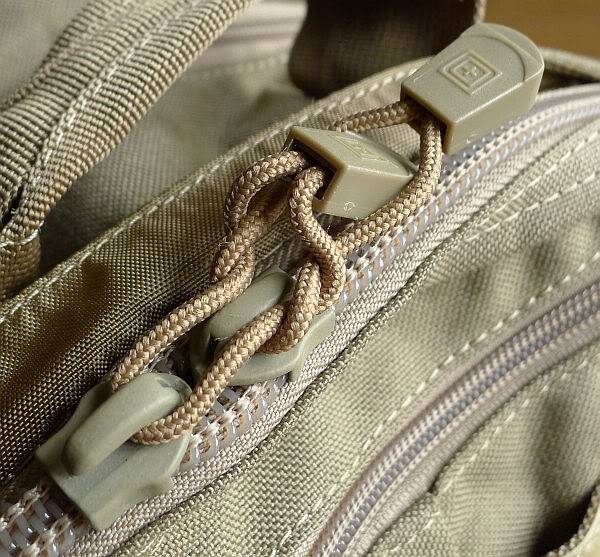
Finally pulling tight.
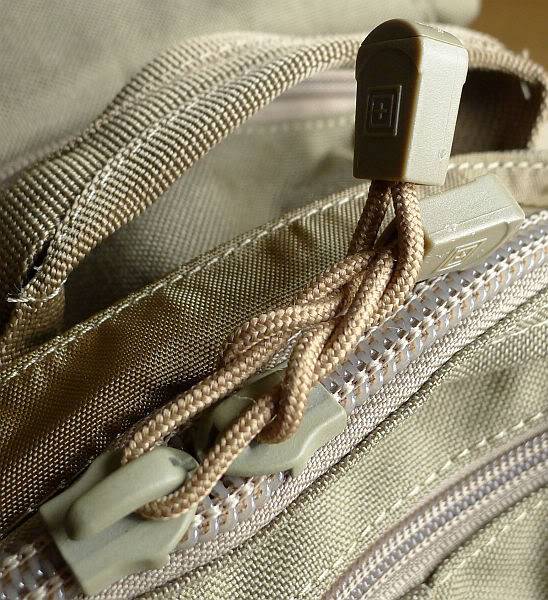
Using this method of passing one tag through the other again and again allows you to secure the compartments from accidental opening without any other hardware.
The RUSH 24 in detail:
Having already covered the RUSH 12 in detail, may of the same features can be seen on the RUSH 24, plus a few more.
The sternum strap is attached with C-loops and has an elasticated keeper, and the strap itself having an elasticated section to provide extra comfort.
Dura-flex side release buckles are incorporated into the shoulder straps allowing the shoulder straps to be opened for easy removal of the pack, or an instant release from the pack if you ever get caught up on anything.
Also visible is a plain buckle that allows a hip belt to be attached.
In the base of the pack there are two drainage holes, and this most recent version of the RUSH 24 includes four lashing points on the bottom.
Folding the shoulder straps over the main pack provides easy access to the hydration pocket. The padded back of the pack has two textured grip pads to help prevent the pack moving in use and between these is the drainage hole for the hydration pocket.
A hydration bladder can be fitted and secured using the two toggles or suspension strap. The drinking tube is then fed through the top of this pocket and into the main compartment.

From the main compartment the drinking tube can be fed out of either port (one each side of the grab handle), before being routed under the webbing on the shoulder straps.
The grab handle is very strong and stitched firmly to the top of the bag.
Inside the hydration bladder pocket, the back support padding and reinforcement can be accessed and removed if desired.
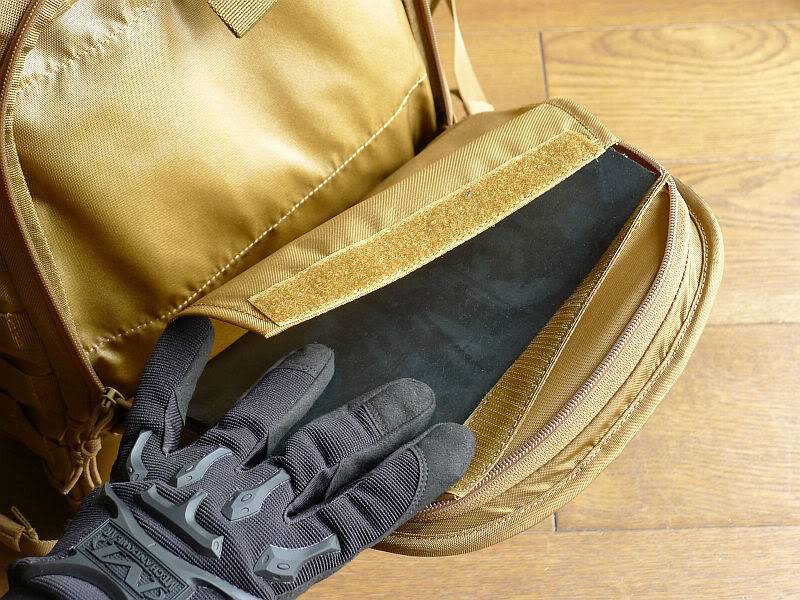
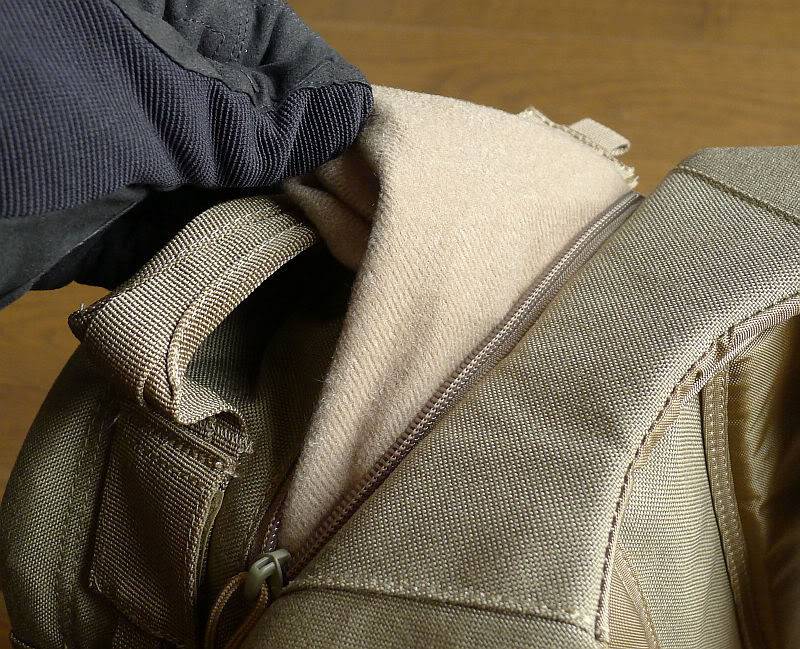
Just like the RUSH 12, next to the grab handle is a small fleece lined zip pocket perfect for sunglasses or small electronic devices that you want to find quickly. Here the pocket is pulled inside out here to show the lining and depth.
The shoulder straps have a yolk system to spread the load, and densely padded straps to make carrying even heavy loads comfortable.
Each side of the pack has a compression strap with elastic keeper to tidy the loose end, and a series of PALS webbing provides mounting options. The RUSH 24 is constructed of durable water-resistant 1050-denier nylon.
The RUSH 24 also has a side pocket (which the RUSH 12 does not).
As well as more PALS webbing the front of the pack has a Velcro panels for a name patch and flag allowing you to personalise your pack.
Instead of the simple single compartment of the RUSH 12, the RUSH 24 has a double sided compartment (here one side is shown open) where each side has a fleece lined pocket and a zip up mesh pocket. This gives three separated storage areas on each side of this top section.
The large admin panel includes a further zip closed pocket and multiple sections and two key keepers for organising the contents.
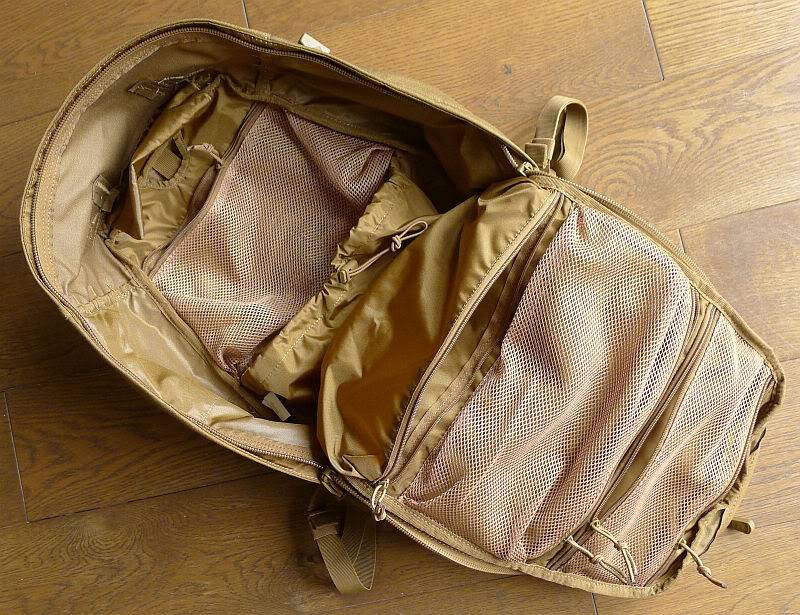
Inside the main compartment (with full clamshell opening), the RUSH 24 has two more compartments than the RUSH12. On the back of the front flap there are two mesh compartments and a further zip pouch below these. The main compartment includes a large stuff-pocket with bungee clinch top and above this another mesh zip closed compartment.
MOLLE/PALS and what this means for the user
Already highly featured backpacks, the RUSH 12 and 24 are expandable thanks to the incorporated PALS webbing.
Most people are familiar with the more commonly known MOLLE (pronounced Molly) system used by armed forces around the world.
MOLLE stands for MOdular Lightweight Load-carrying Equipment, and refers to the entire system made up of many components.
Part of the MOLLE system is PALS which stands for Pouch Attachment Ladder System, and takes the form of the 1” webbing you see on ‘MOLLE compatible’ gear. The webbing straps are fitted with 1” spaces between them and stitched on at 1.5” intervals to provide a flexible attachment framework.
Most of the time I’ve been using the RUSH 12 and 24 in their basic form, tending to use the PALS webbing to attach items using karabiners or lashing them on, but have also tried them out with a variety of pouches attached.
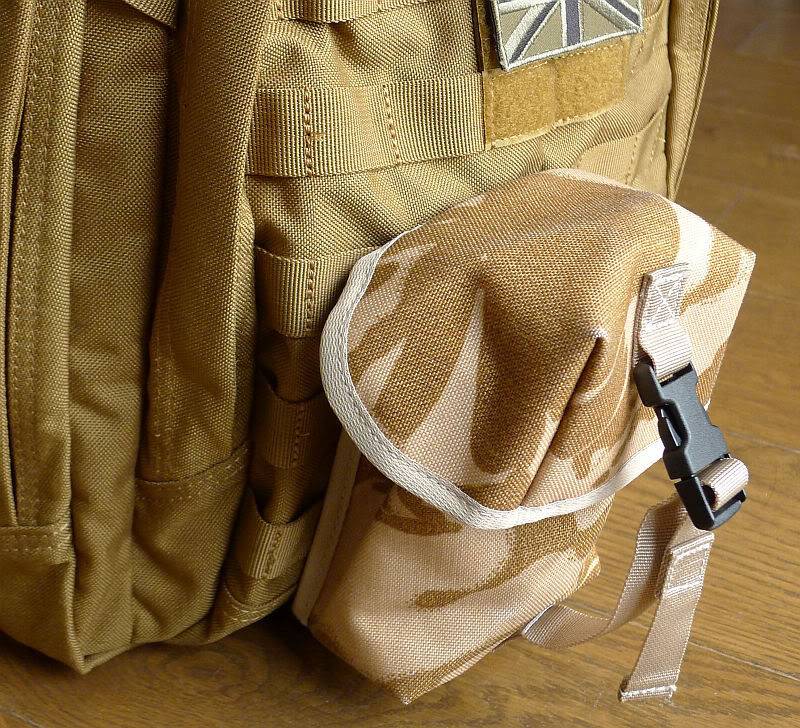
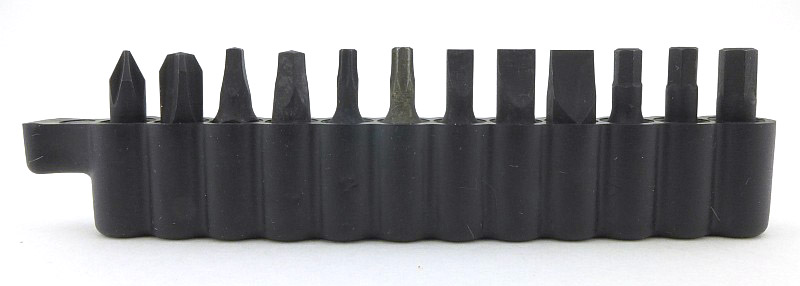
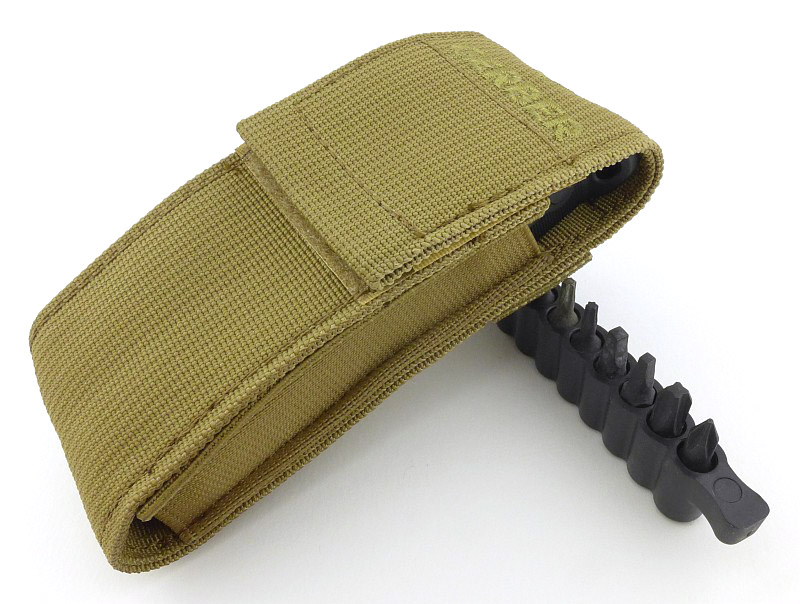
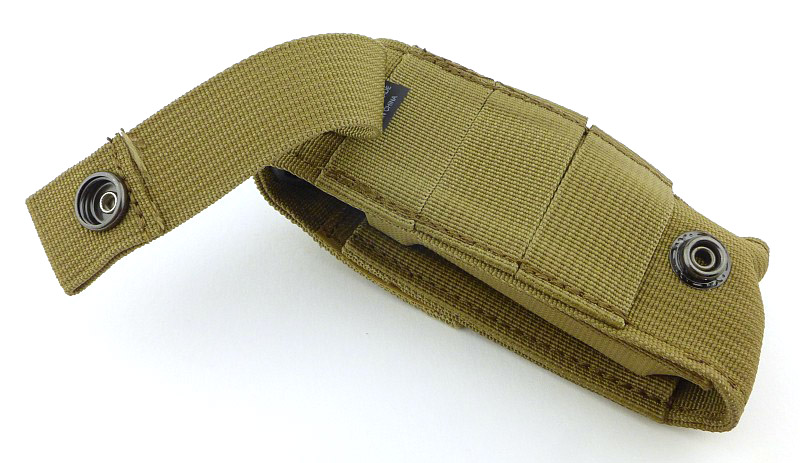
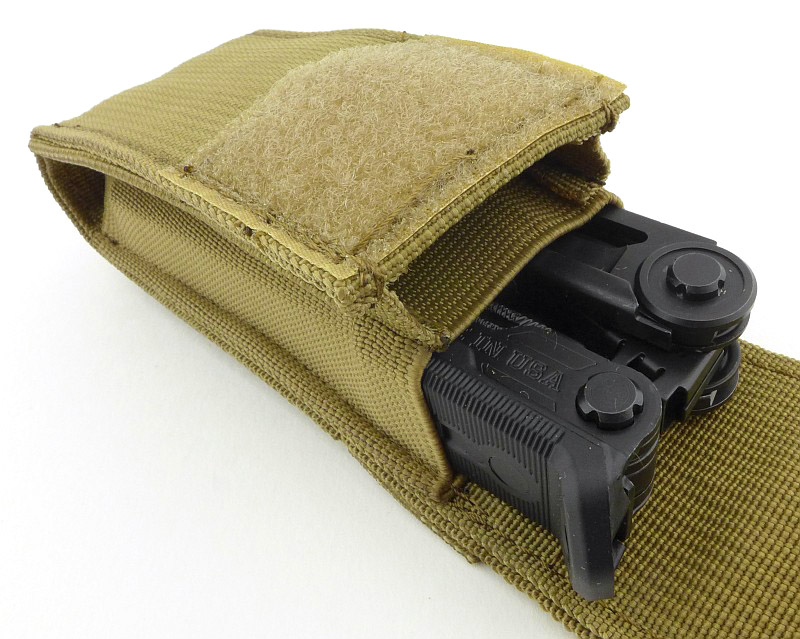
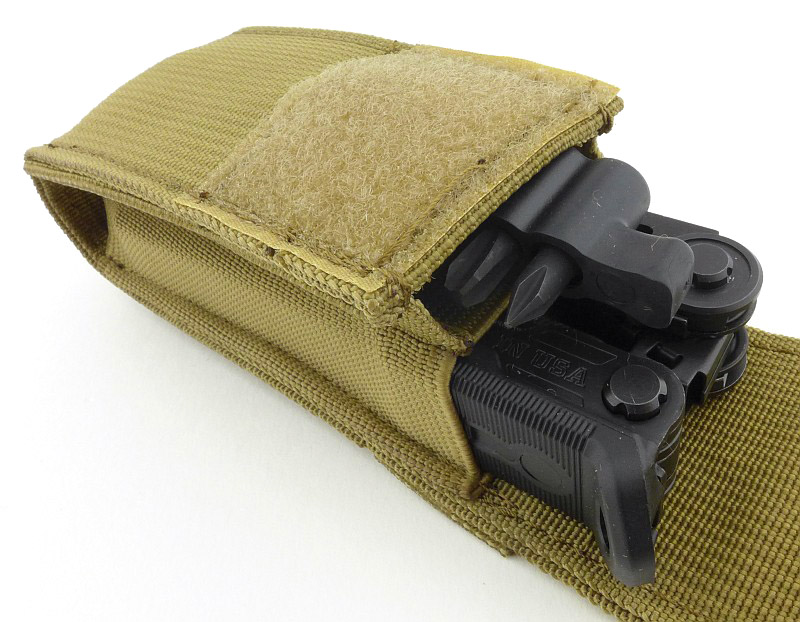
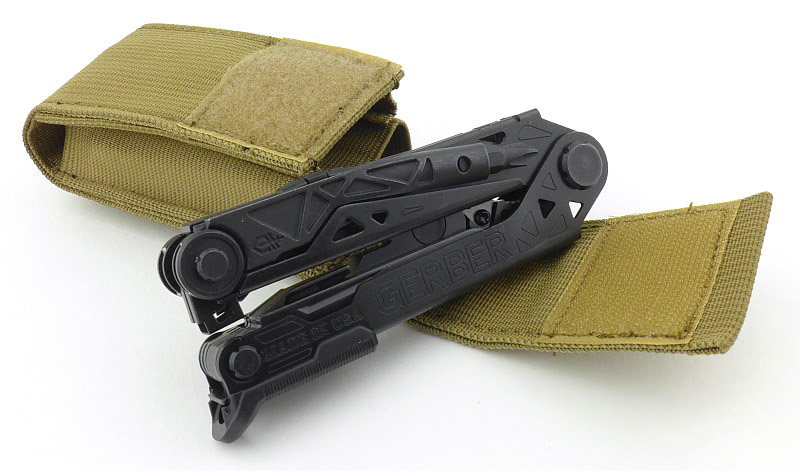
Here the RUSH 12 has a small pouch (British Army issue) fitted to the side panel. This has now been replaced by a larger utility pouch.
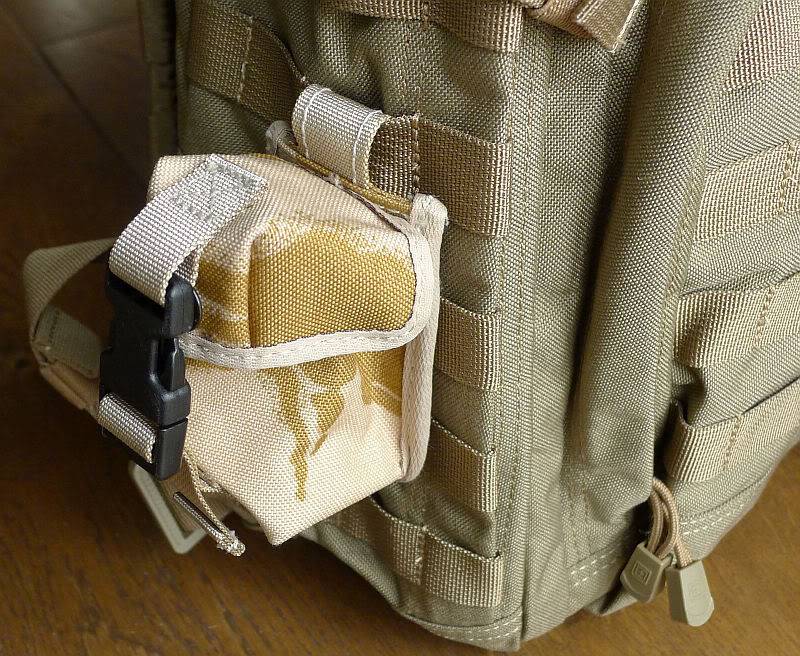
On the RUSH 24 a small utility pouch has been fitted to the front panel.
The best aspect of this feature is its flexibility. If one pouch configuration isn’t working for you, take them off and rearrange them until you find one that works.
What are they really like to use…
Since prehistoric times, the backpack has been the fundamental load carrier for most activities, and a good one can make all the difference.
Both the RUSH 12 and 24 have been improved on from their first versions, based on real user feedback, so are now a mature design, and this is obvious when you use them.
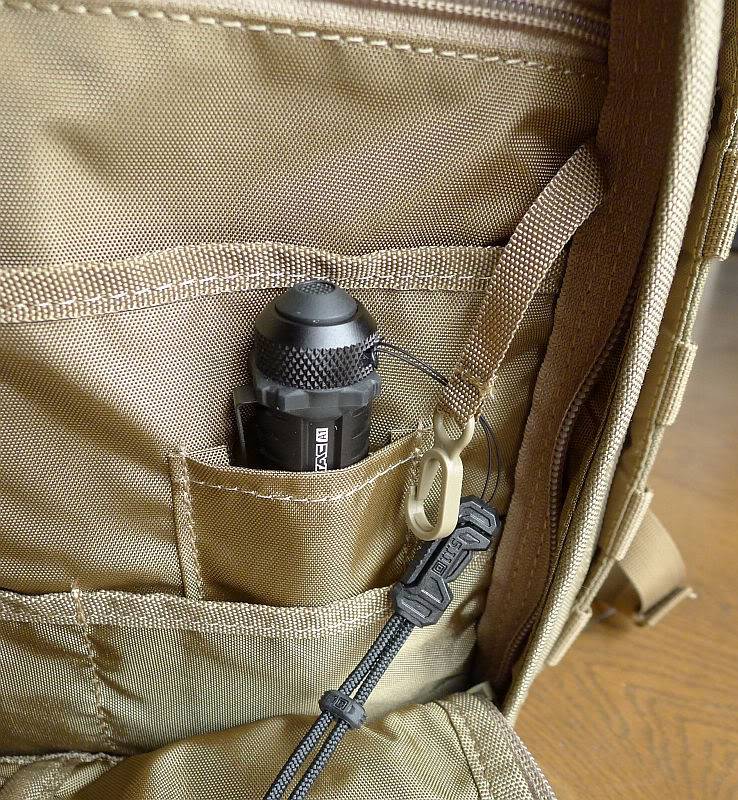
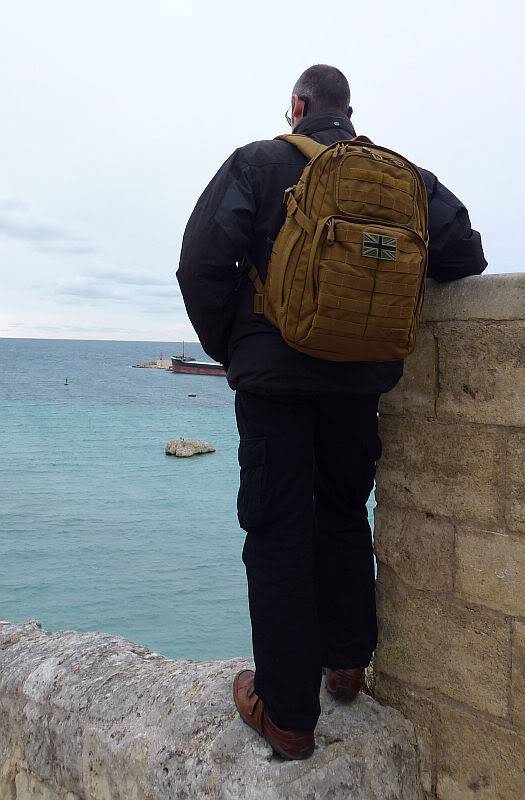
Of the two, the RUSH 12 is the one I grab for most frequently for general day trips. I’ve moved the small pouch from the side onto the left hand shoulder strap and a larger utility pouch onto the left side. The right hand strap has a polymer karabiner for hooking on a compact camera, and if it’s dark, a torch like the Sidewinder shown here is often added.
All the small touches, like the elastic keepers for tidying up all the strap ends, the well laid out pockets, and compartments, and the fully organised admin panel make it easy to locate all the bits and bobs that always seemed elude me and take ages to find when using standard backpacks. Everything is to hand and organised.
The side-release buckles in the shoulder straps now seem to me an essential feature. Why don’t all backpacks have them? With these, there is no more struggling to take a pack off, and instant release to get unloaded or escape the pack in an emergency is straight forward.
On a recent trip, the RUSH 24 was carefully packed to keep within the airline’s specified dimensions (56x45x25cm). If filled to capacity the 25cm limit could be exceeded, so the contents needed to be arranged neatly. This was made very easy thanks to its clamshell opening, and it then came with me as cabin baggage. In this instance the RUSH 24 was loaded with 10Kg of equipment which almost disappeared once on my back. All the pockets and compartments kept various documents and passes close at hand and perfectly organised.
Even going through security became a breeze as my pockets simply transferred to the various compartments around the RUSH 24. Onto the conveyor for scanning and the clamshell lets me take out the laptop and liquids in a flash, and back in again after the scan.
The only time I noticed the weight of the pack was when I had to use the grab handle or when putting it into the overhead lockers.
Once you’ve tried a RUSH backpack, you won’t want to go back to anything else. If you are in the market for a backpack, the RUSH might seem quite expensive, but just look back over the features crammed into each version. All those pockets, compartments, straps, buckles and PALS webbing don’t come for nothing and in the RUSH 12 and 24 (and presumably the 72 as well) have been put together in a robust package with quality materials. You certainly get what you pay for.
These RUSH backpacks will be trusted companions on many adventures to come, and many more mundane trips as well.
Test samples provided by 5.11 Tactical for review.


.")


.")


")


 initially comes off enough to make things dirty.")