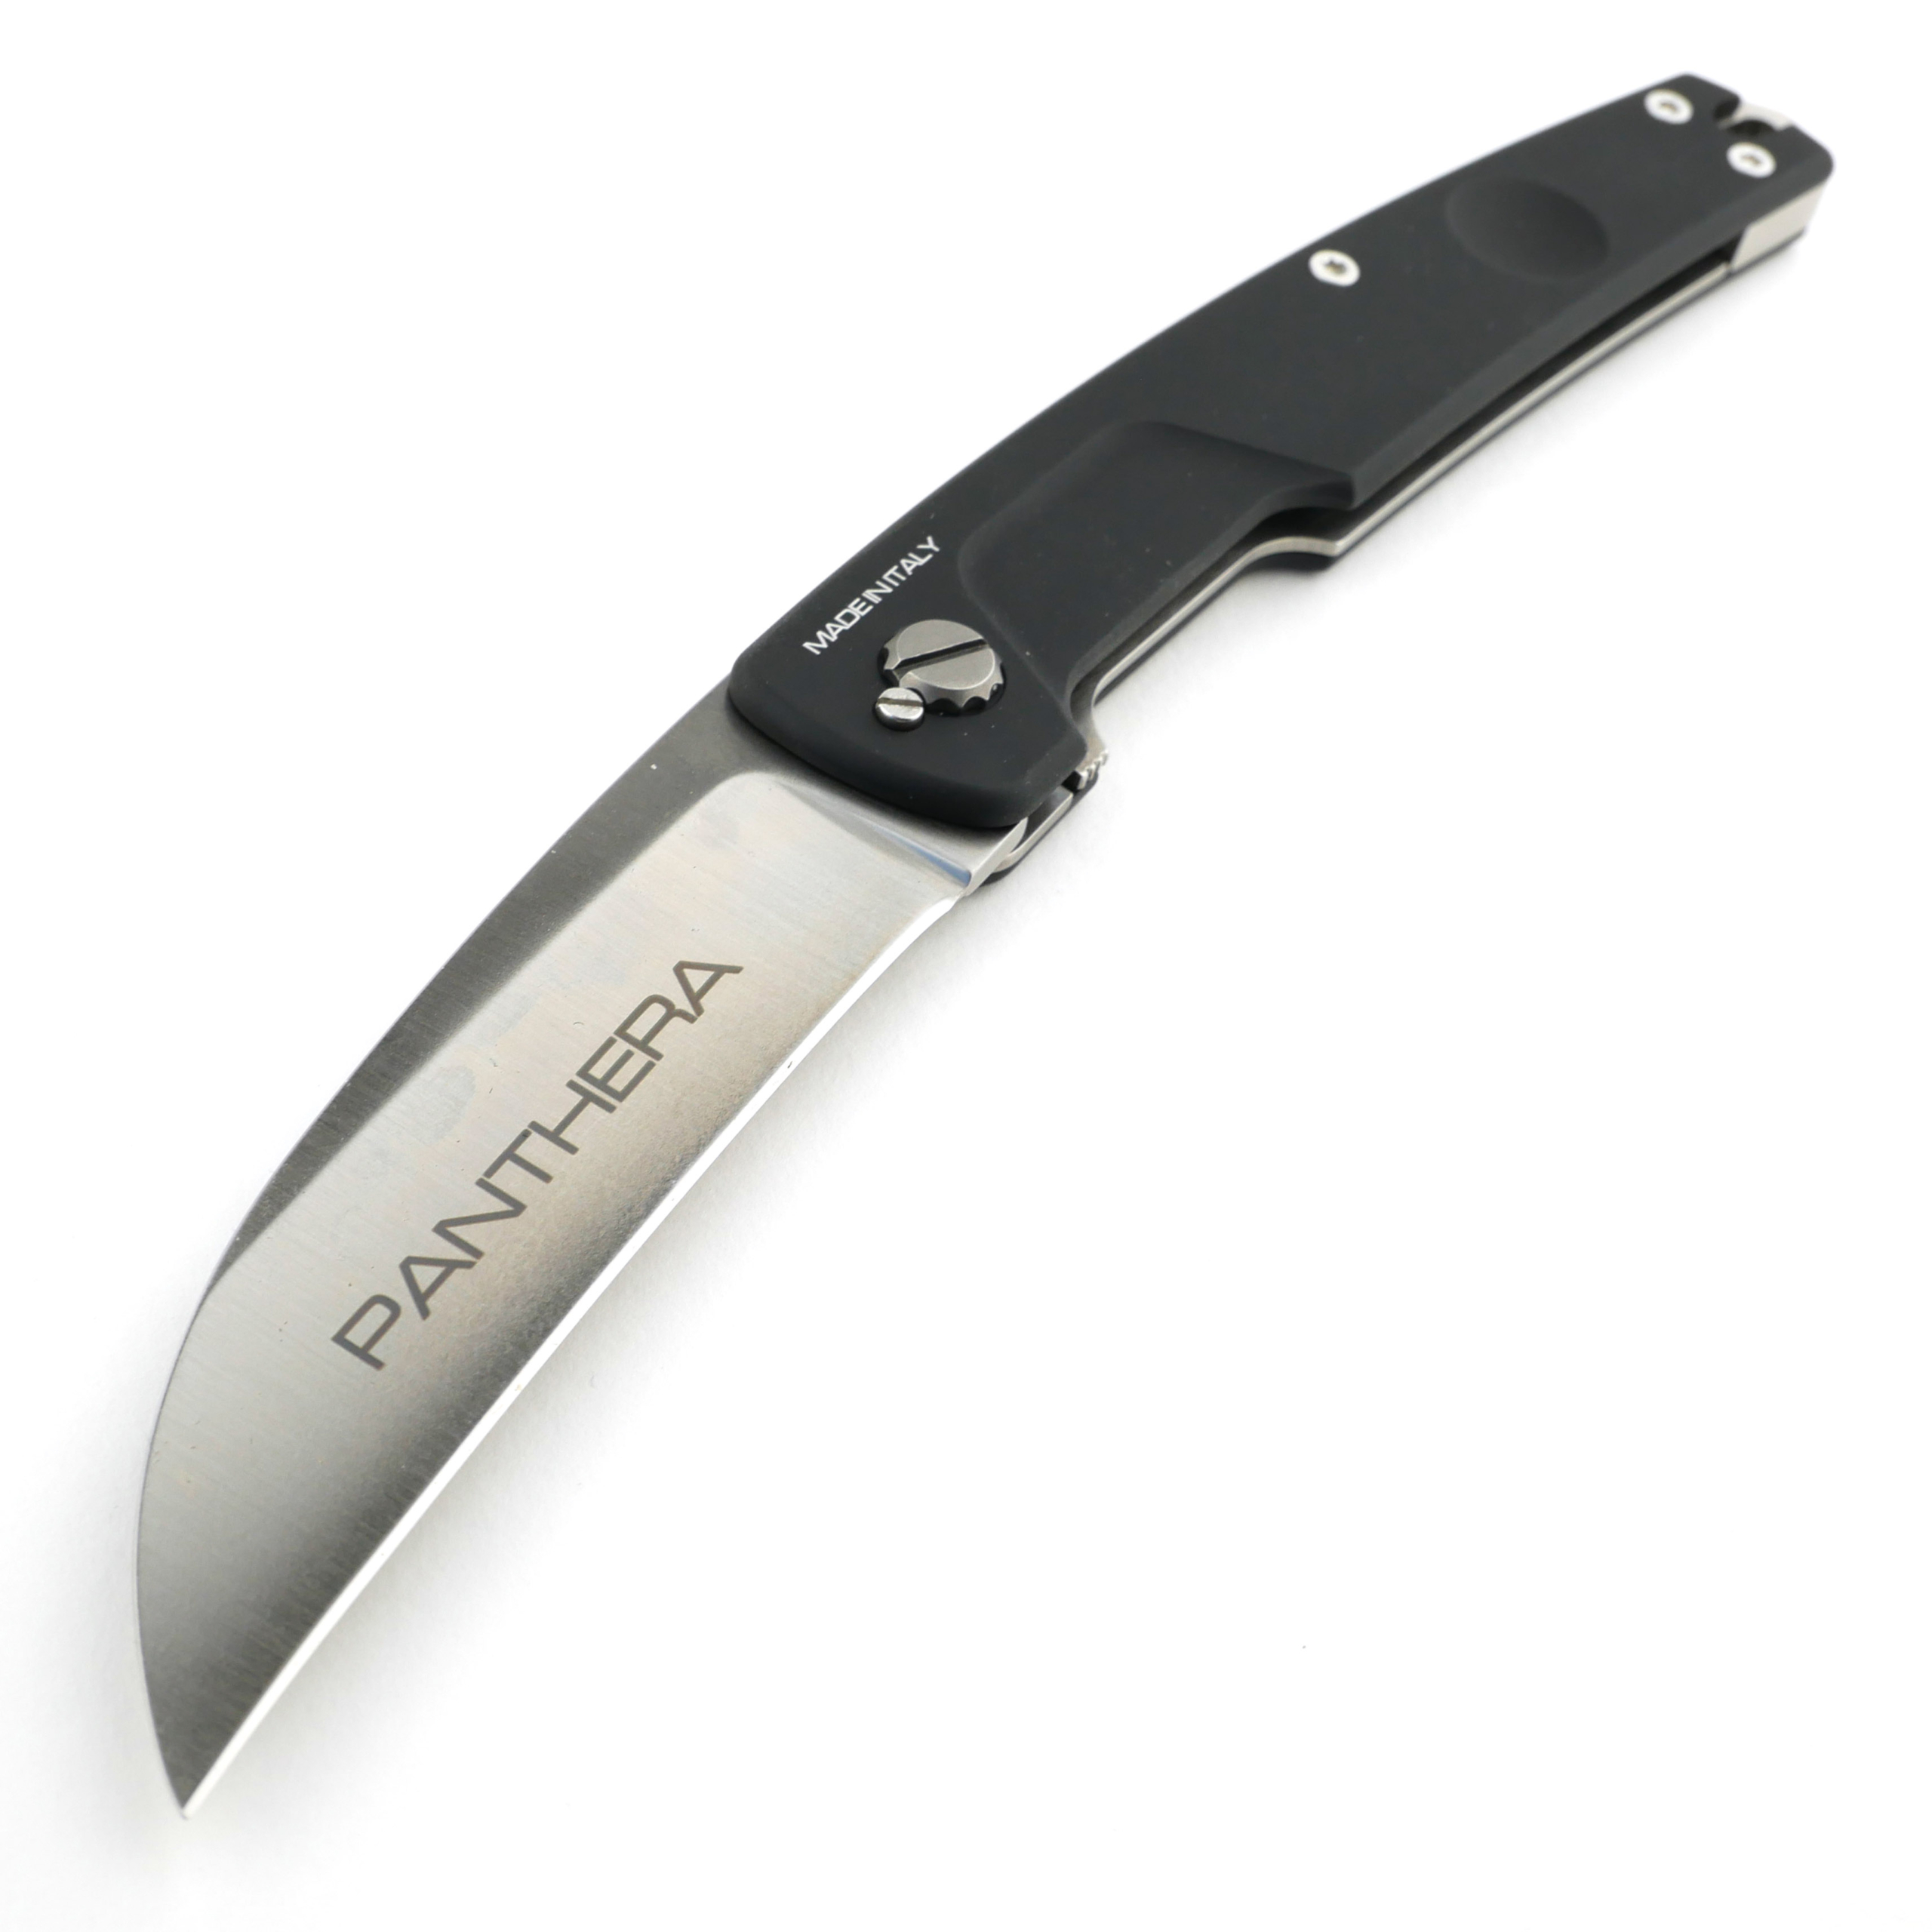
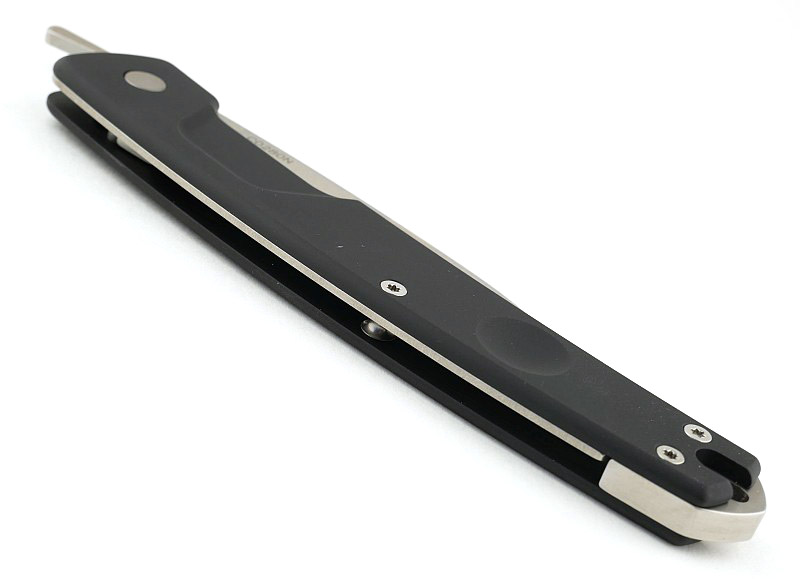
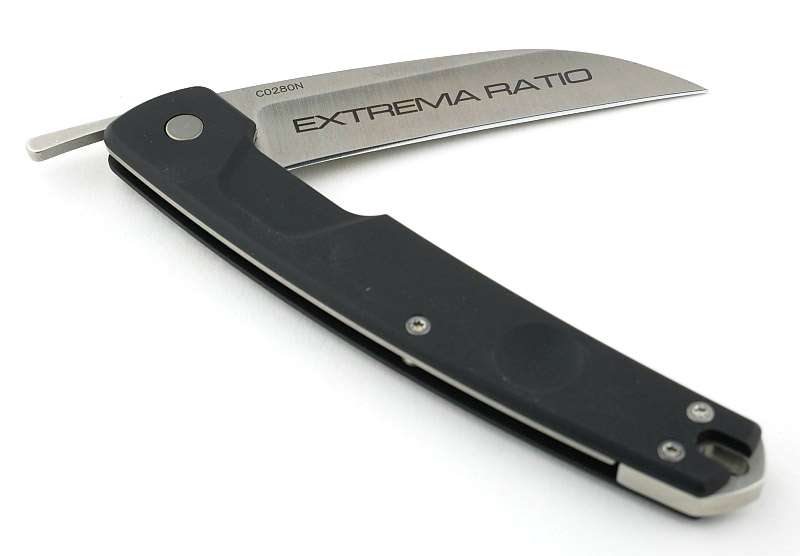
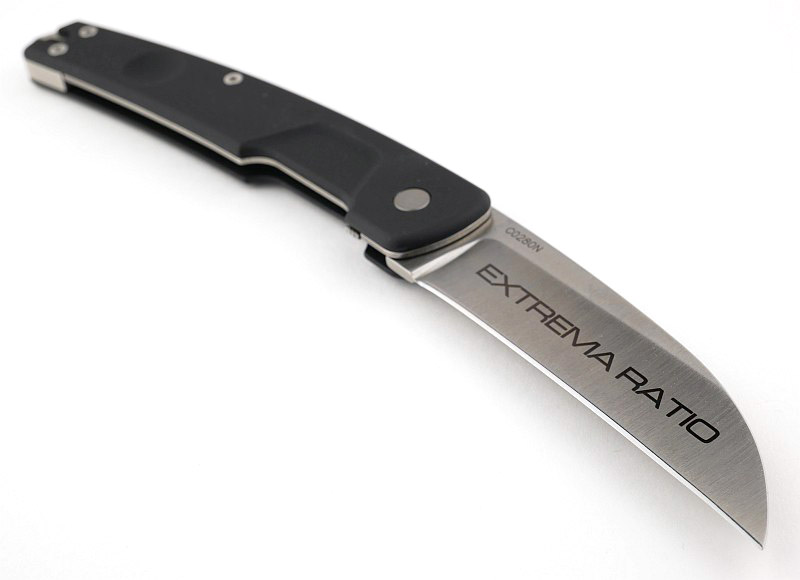
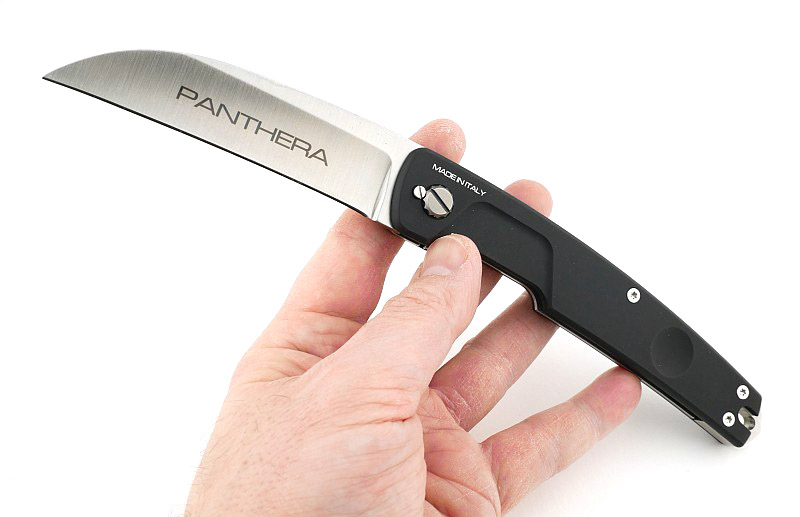
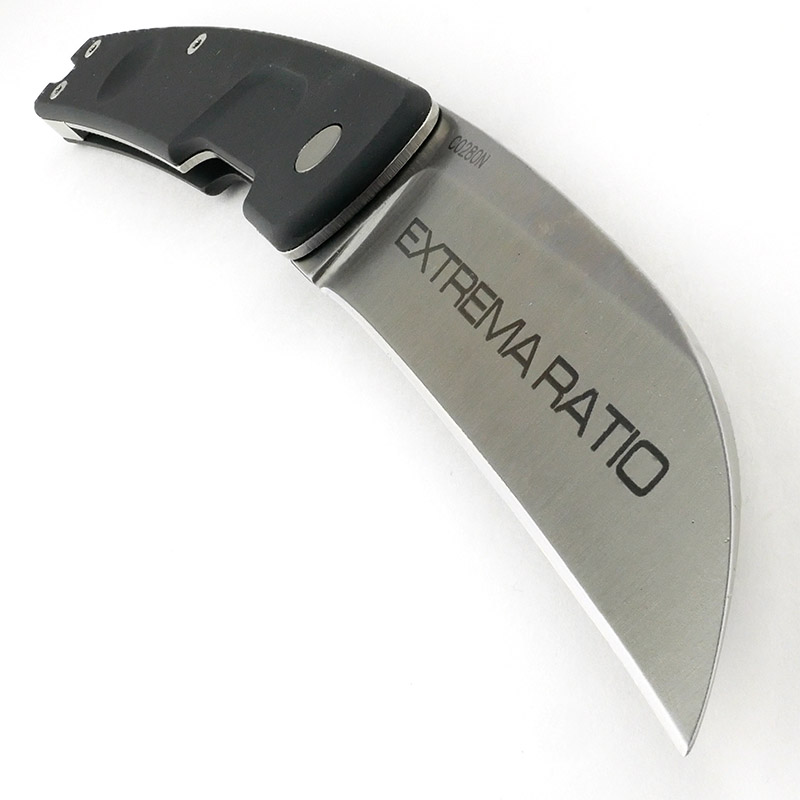
The Extrema Ratio Panthera is a further development of their T-Razor (that was based on the traditional straight razor) and maintains all the characteristics of the T-Razor, but with a new wharncliffe blade shape and curving claw-like appearance. In this Extrema Ratio Panthera review, I cover all the technical specifications, detailed galleries to show you all the details, a video overview and demonstration of the opening method.
Video Overview
This video is a detailed look at the Extrema Ratio Panthera, from handling to technical measurements. Hopefully something for everyone and you should have a better idea if you should also pick one up.
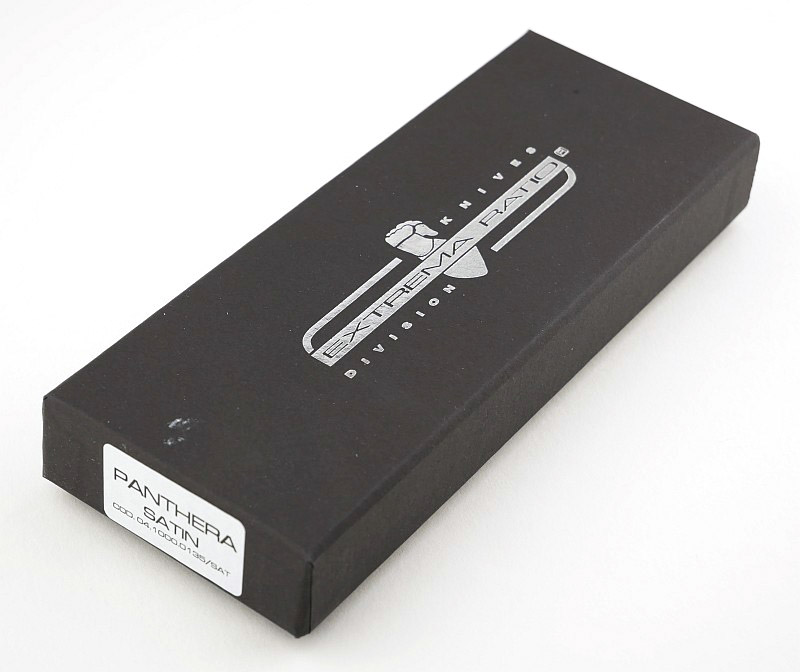
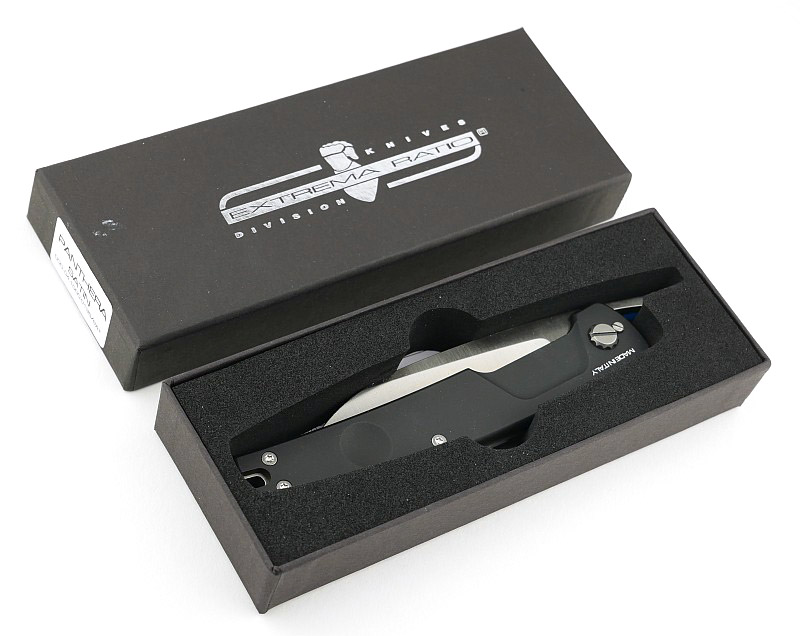
The packaging:
A good look round the Panthera – Enjoy all the details:
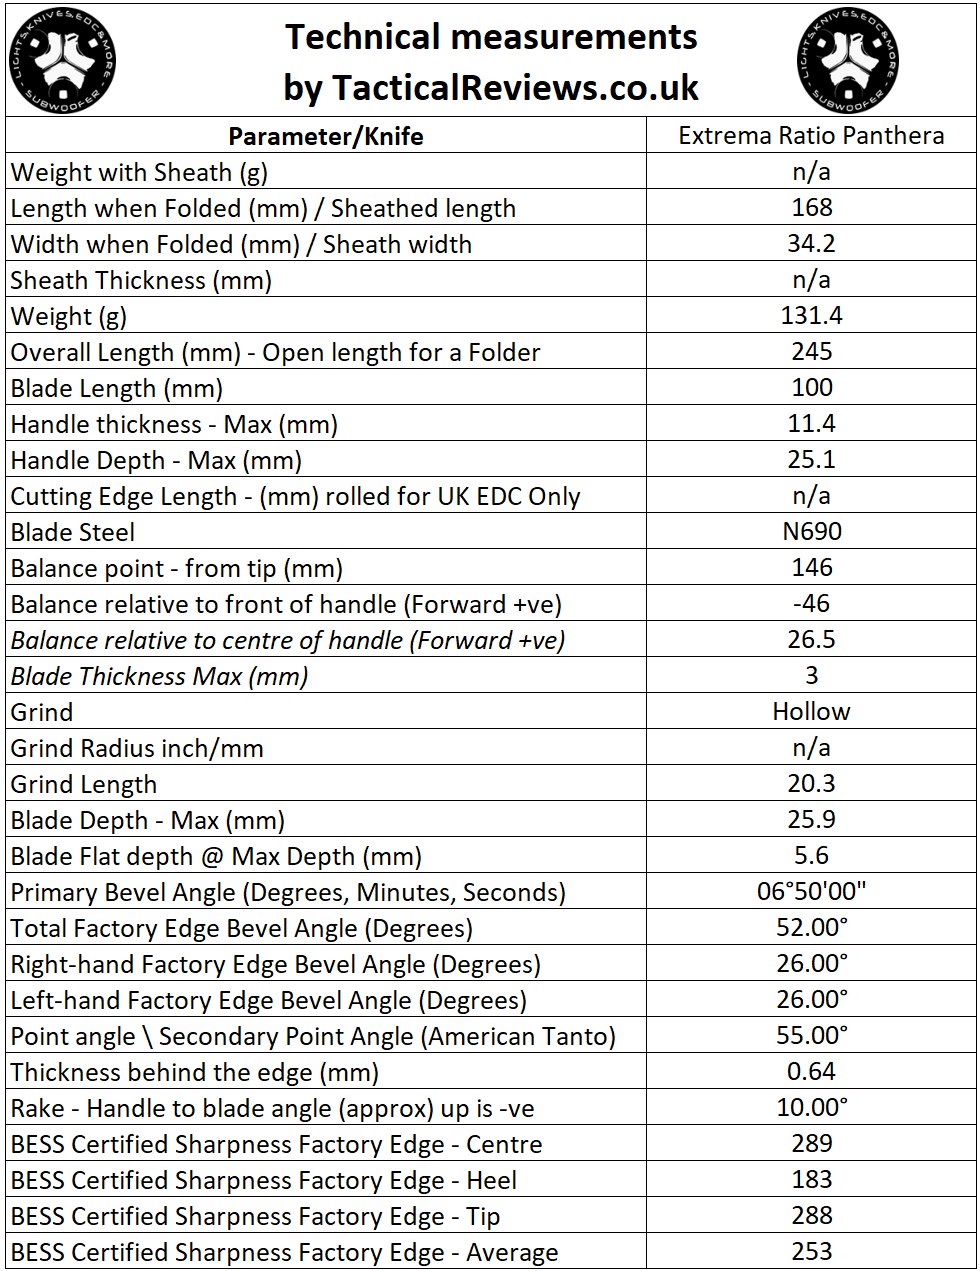
The Blade and Handle – Detailed Measurements:
For full details of the tests and measurements carried out and an explanation of the results, see the page – Knife Technical Testing – How It’s Done.
The blade is made from N690 steel.
The Factory edge up close – NEW FOR 2022!:
Followers of Tactical Reviews will know my views on factory edges, but to recap:
Anyone using a knife will need to sharpen it. That first factory edge is just like the first tank of fuel that a new car comes with (or first charge of the battery).
A good factory edge is a ‘nice to have’ but not a ‘make or break’ for a good knife, as you will be putting your own edge onto it soon enough.
The factory edge does however indicate the care a knife maker has put into the final finish.
It is for this reason Tactical Reviews measures factory edge sharpness and specifications, and includes this information in the detailed technical testing.
As a further look at the factory edge, this section has been added to include some high magnification photos of the factory edges.
What is it like to use?
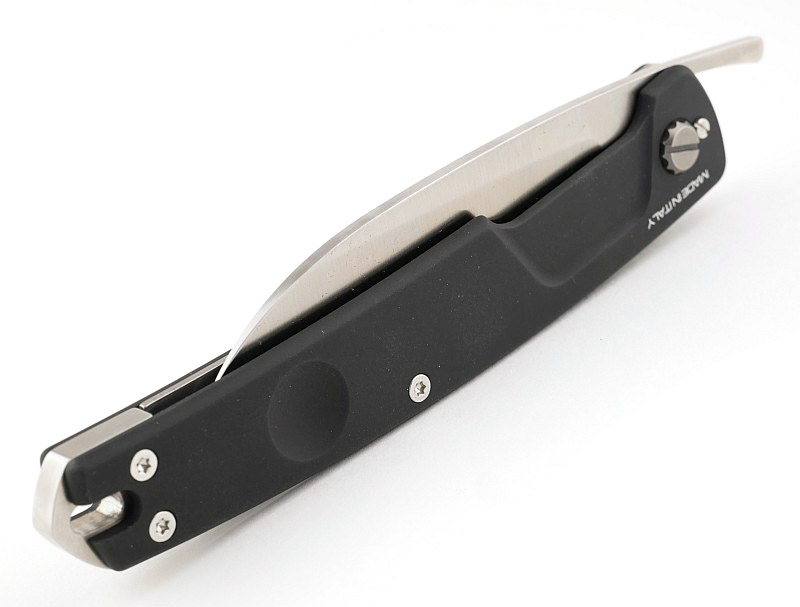
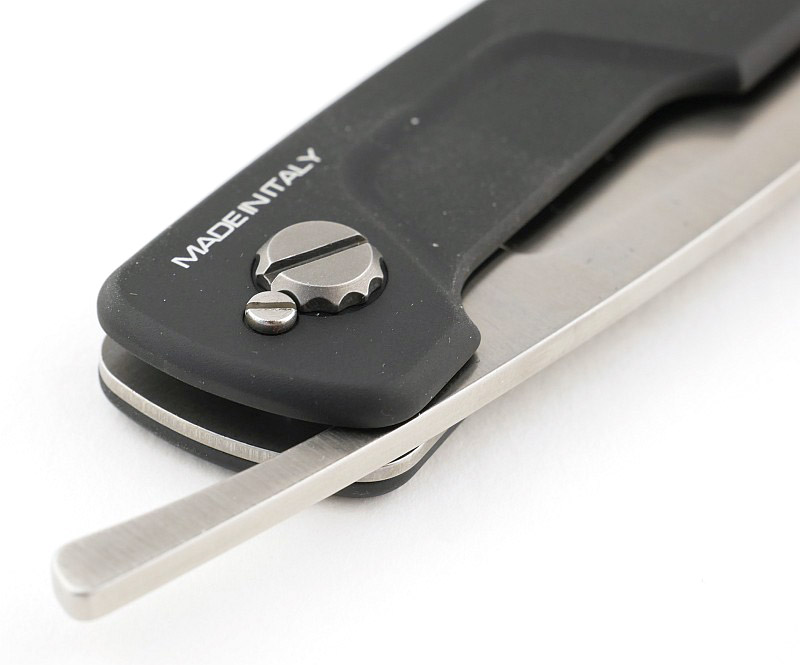
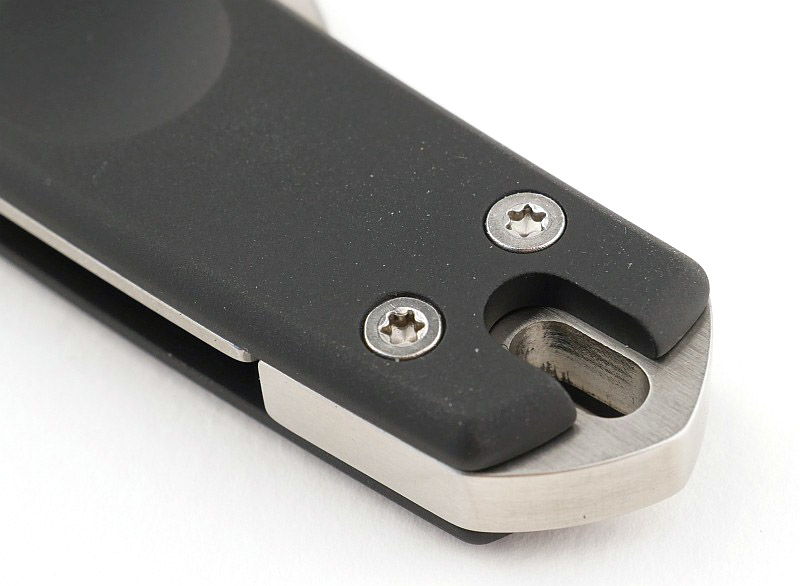
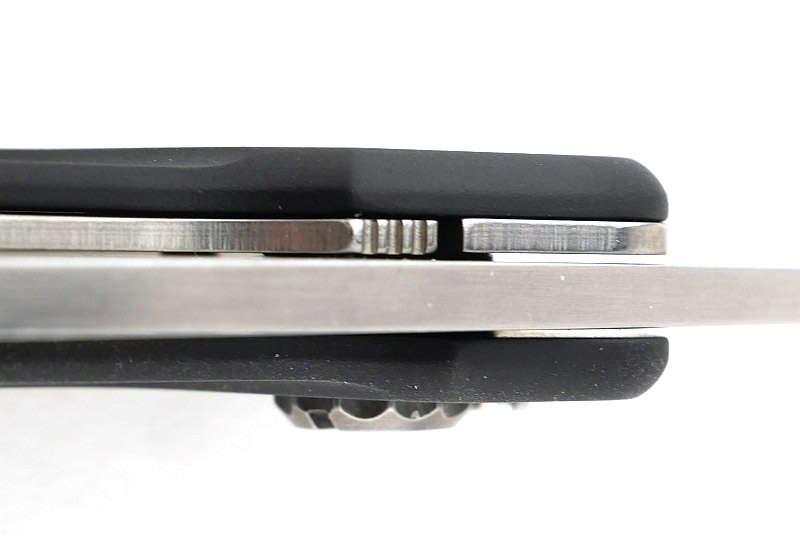
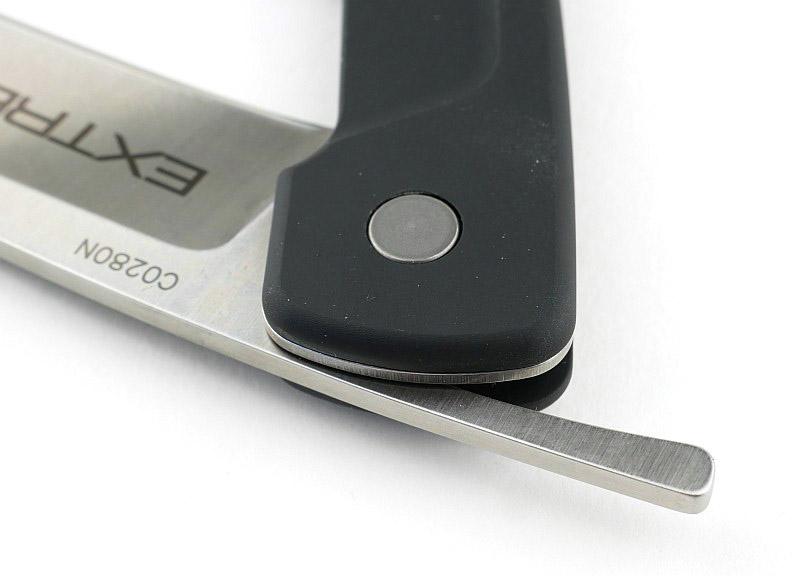
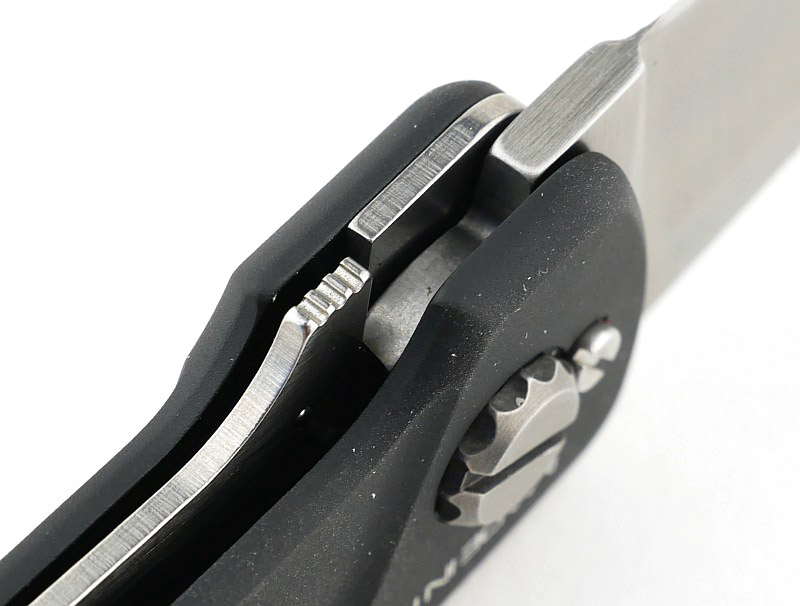
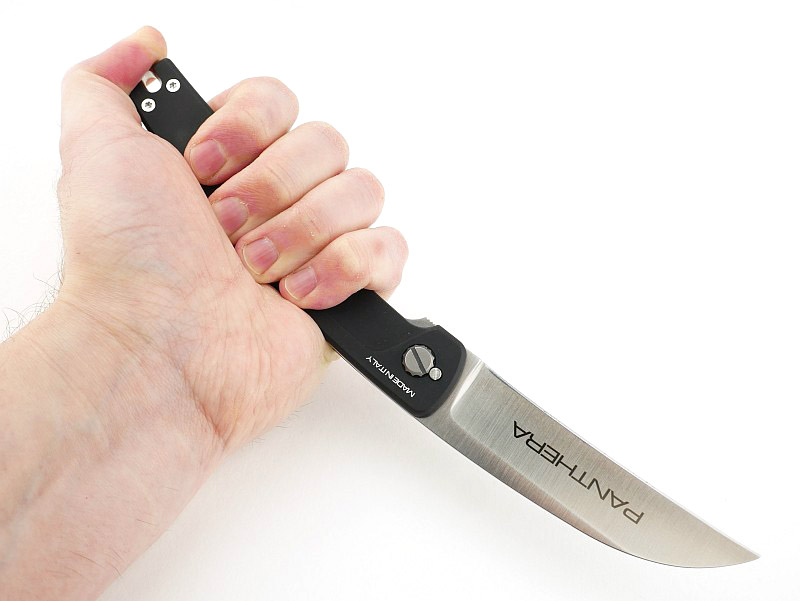
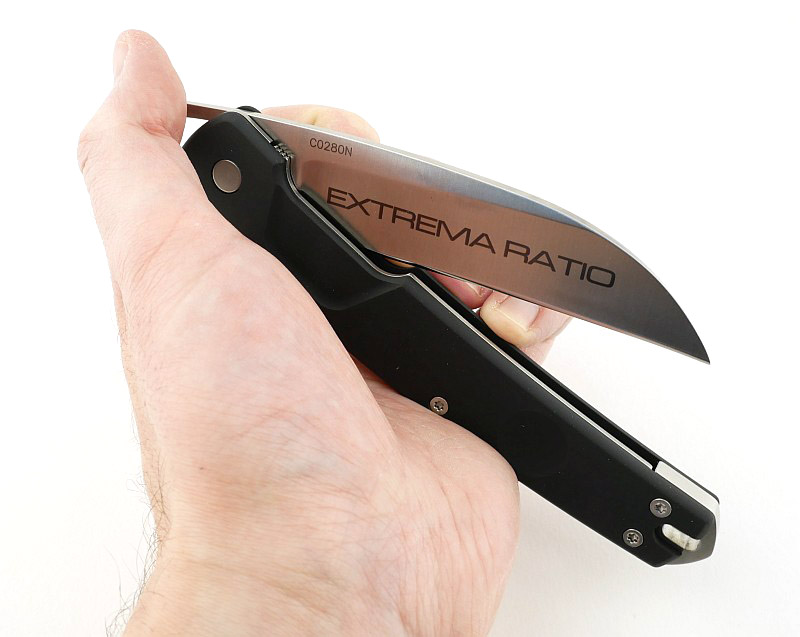
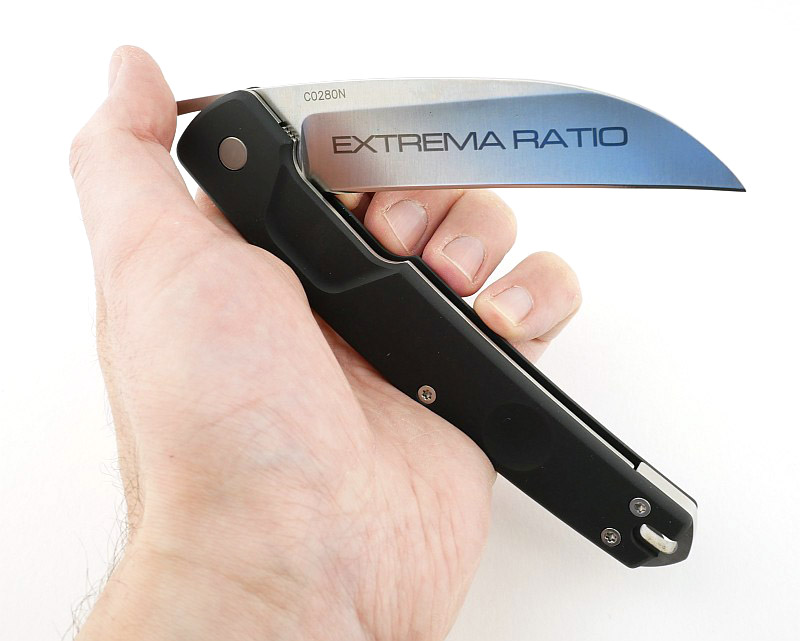
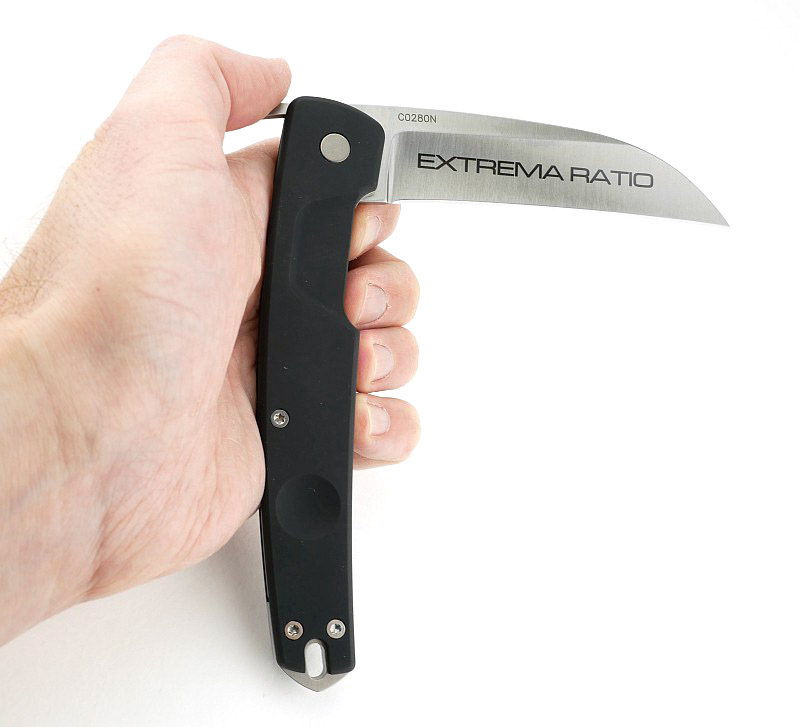
One of the distinctive features of the Panthera (and its sibling the T-Razor) is the extended tang used as the blade opening lever. This is the same style as with a friction folder (which being of Roman design actually predates the straight razor by around 1600 years), and allows both opening of the blade, and holding it in the open position. The Panthera also has a liner lock, so the tang is not used to keep the blade open, only to open it in the first place.
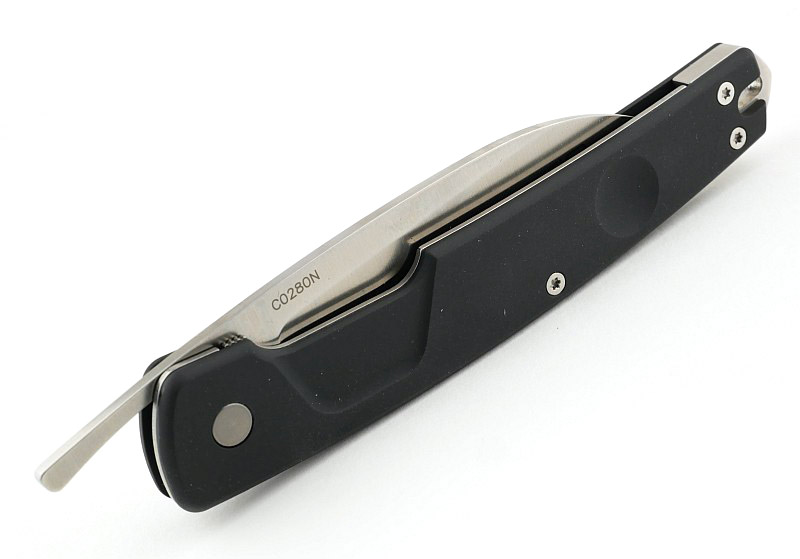
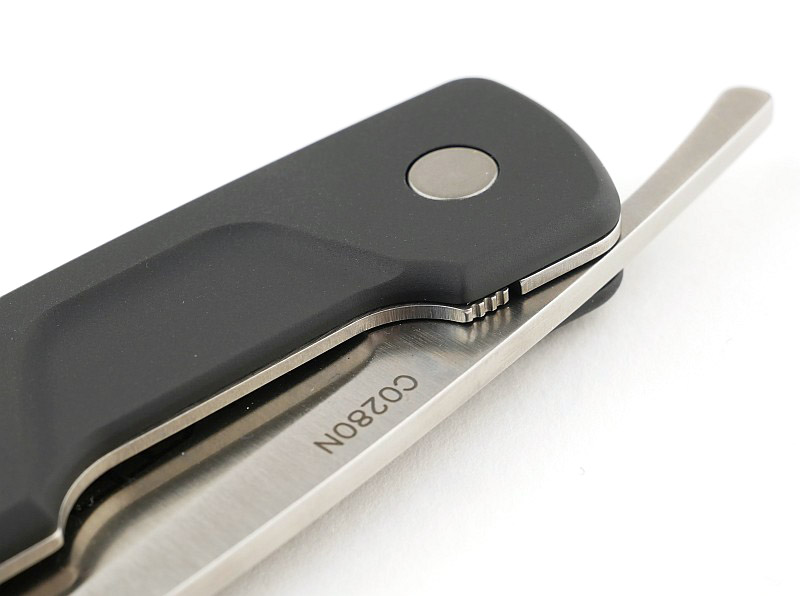
Of course the other striking design feature is the curved claw-like blade used in the Panthera, which makes it stand out.
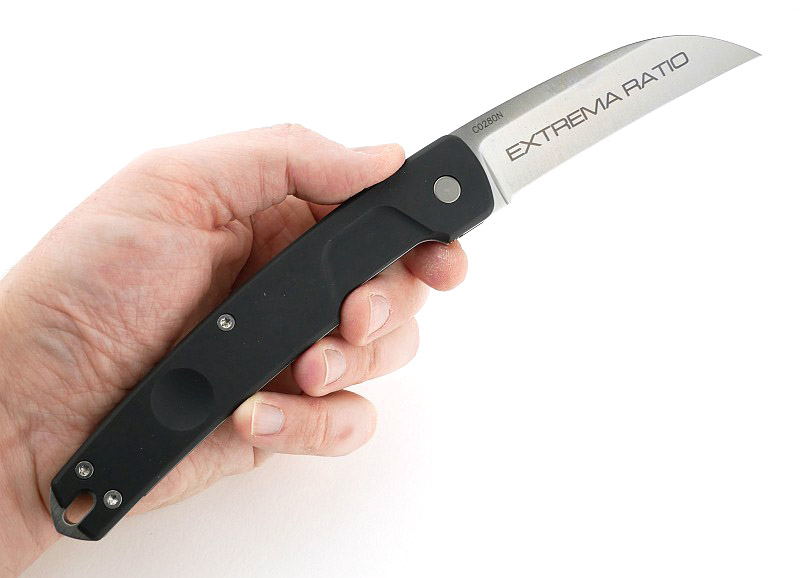
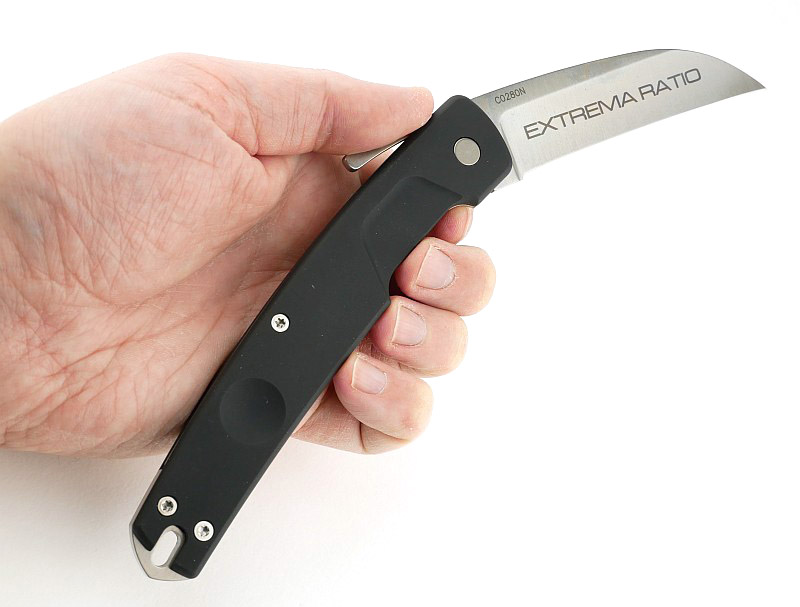
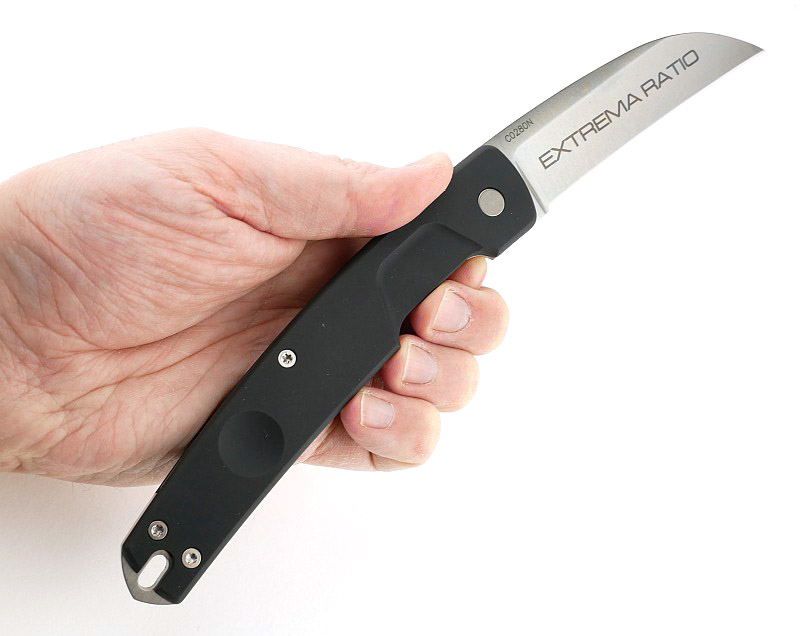
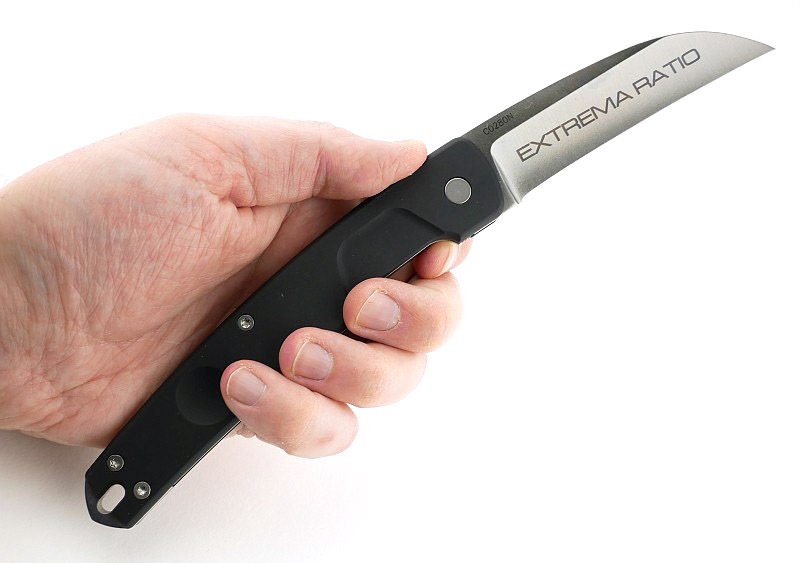
It’s a big knife. I take XL size gloves and the Panthera is a real handful, just take a look at this set of photos.
The opening method is shown a few times in the video at the start of this review, but here are a set of photos to step through opening the Panthera using the T-Razor speed style of opening.
Review Summary
The views expressed in this summary table are from the point of view of the reviewer’s personal use. I am not a member of the armed forces and cannot comment on its use beyond a cutting tool or field/hunting knife.
Something that might be a ‘pro’ for one user can be a ‘con’ for another, so the comments are categorised based on my requirements. You should consider all points and if they could be beneficial to you.
_______________________________________________
What doesn’t work so well for me
_______________________________________________
No pocket clip.
No case or holster (in lieu of a clip).
Tang opening doesn’t suit everyone.
Lock release is a bit sharp to push on.
_______________________________________________
Things I like
_______________________________________________
Striking and impressive knife.
Curved blade can increase cutting power for many tasks.
Very comfortable grip.
Blade opens quickly (once you are practiced).
Long handle allows for multiple grip positions.
Matte anodised handle finish feels great.
Discussing the Review:
The ideal place to discuss this review is on the Tactical Reviews Facebook Page
Please visit there and start/join the conversation.
As well as the Tactical Reviews Facebook Page, please consider visiting one of the following to start/join in any discussion.
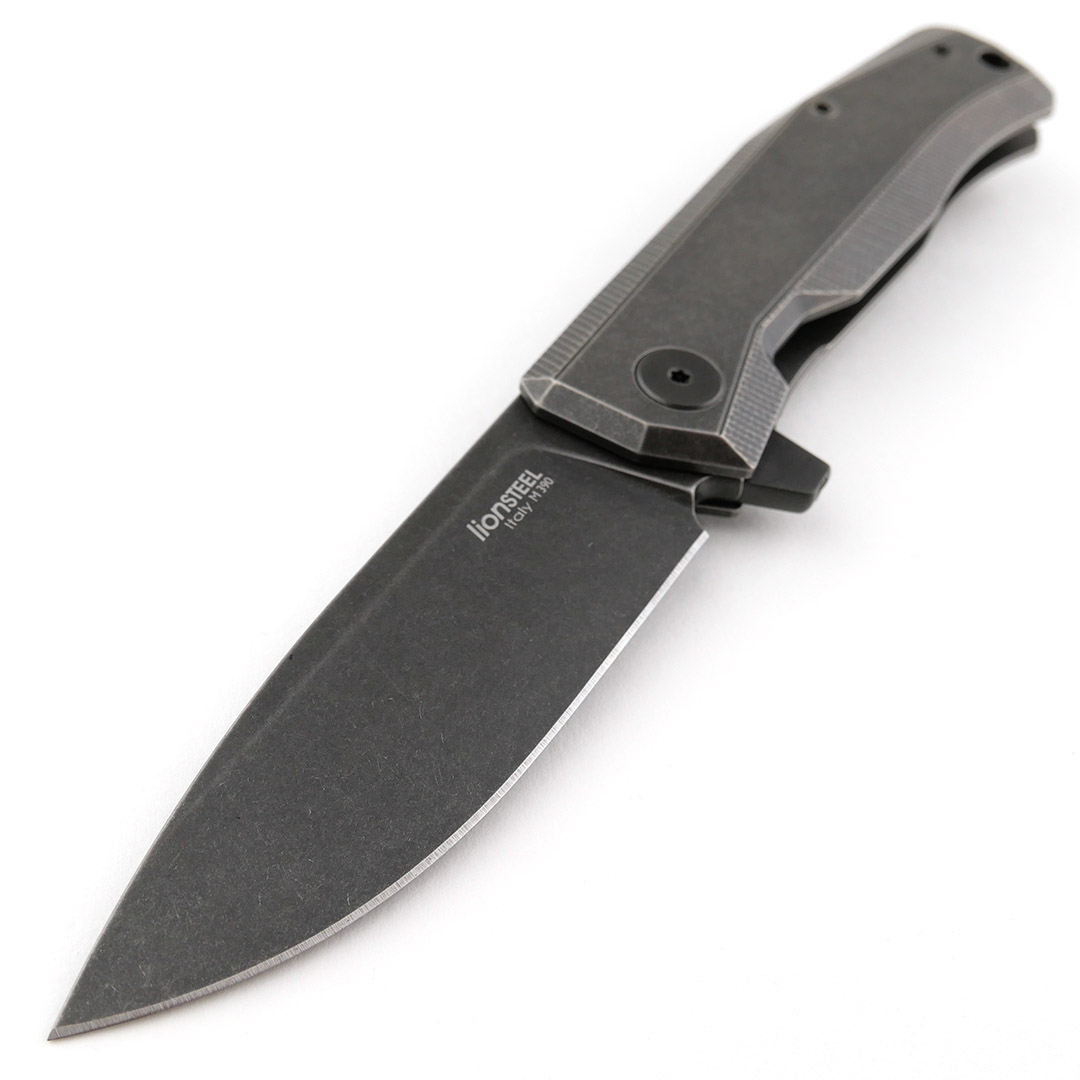
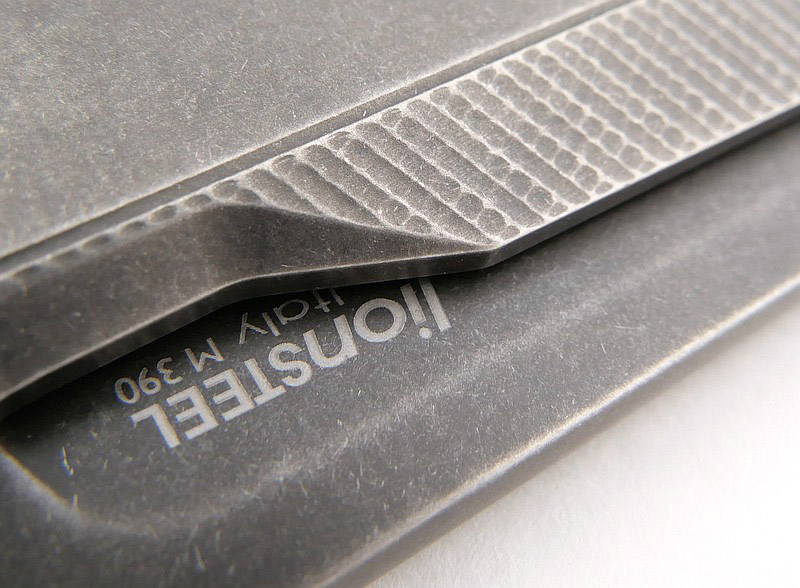
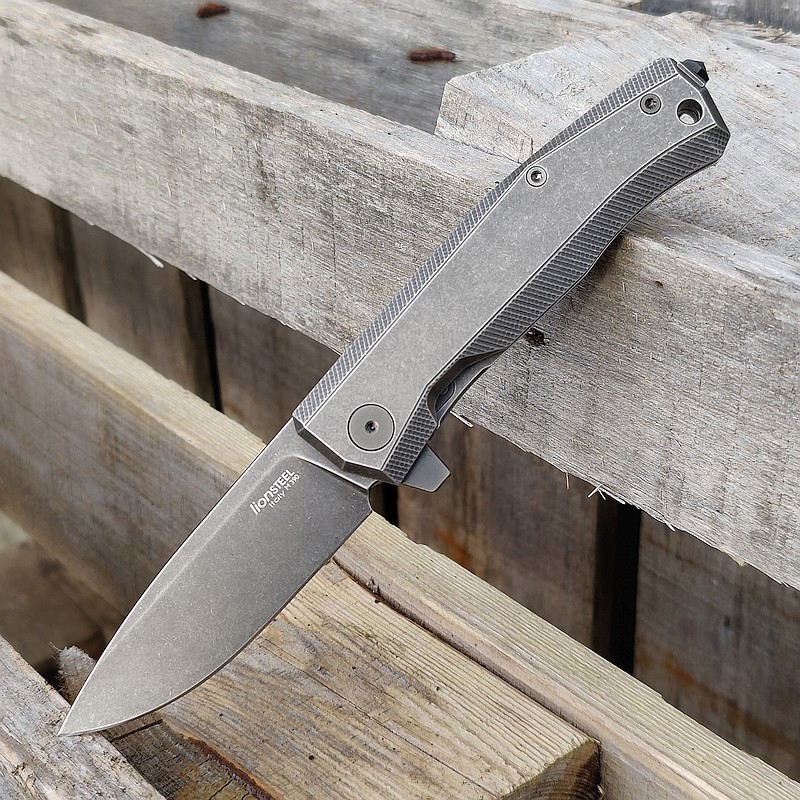
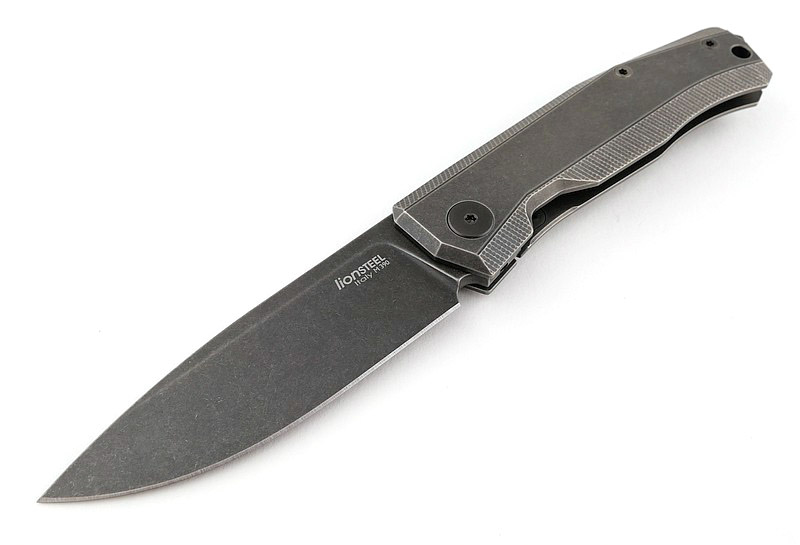
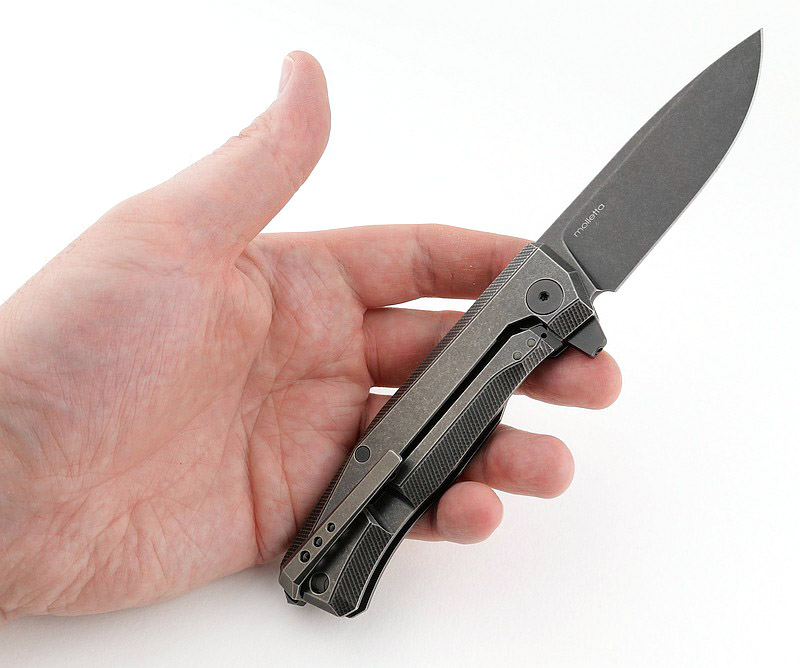
The lionSTEEL Myto is a superb EDC knife designed by Mik Molletta, with Titanium handles, M390 blade and a removable flipper tab. The version on test has a black stonewashed finish on the handles and blade. Join me in this review of the lionSTEEL Myto for a really detailed look over the design and technical specifications of this excellent EDC knife.
Video Overview
This video is a detailed look at the Myto, from handling to technical measurements. Hopefully something for everyone and you should have a better idea how the knife handles.
A few more details:
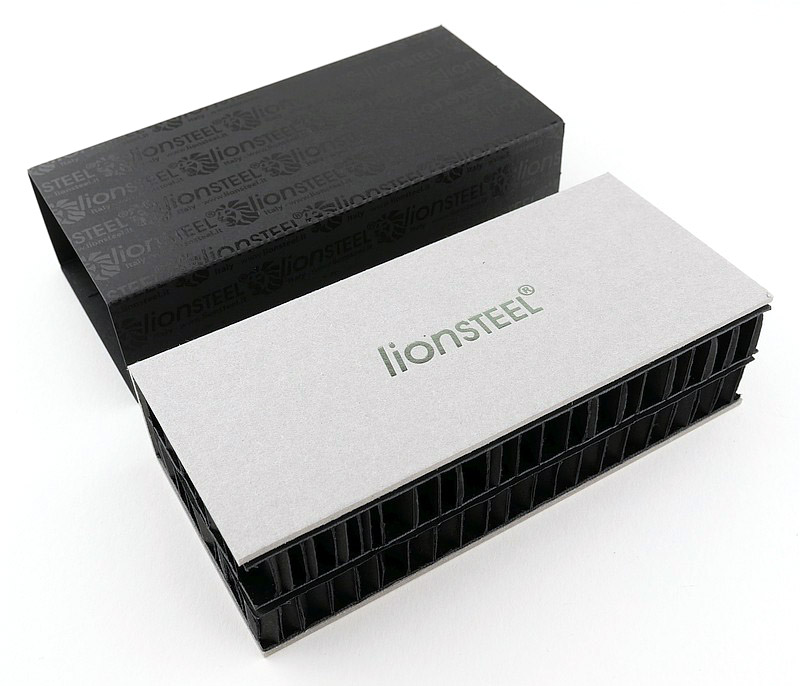
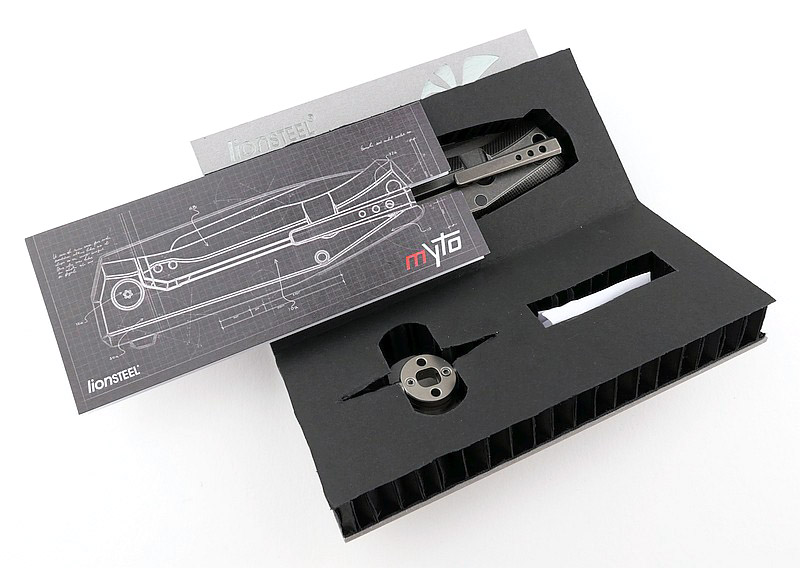
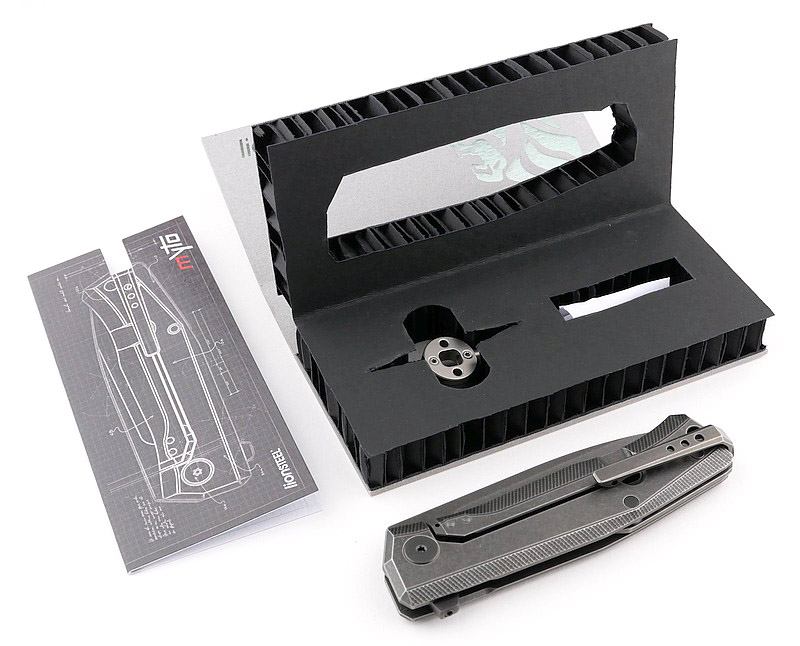
What’s in the box?:
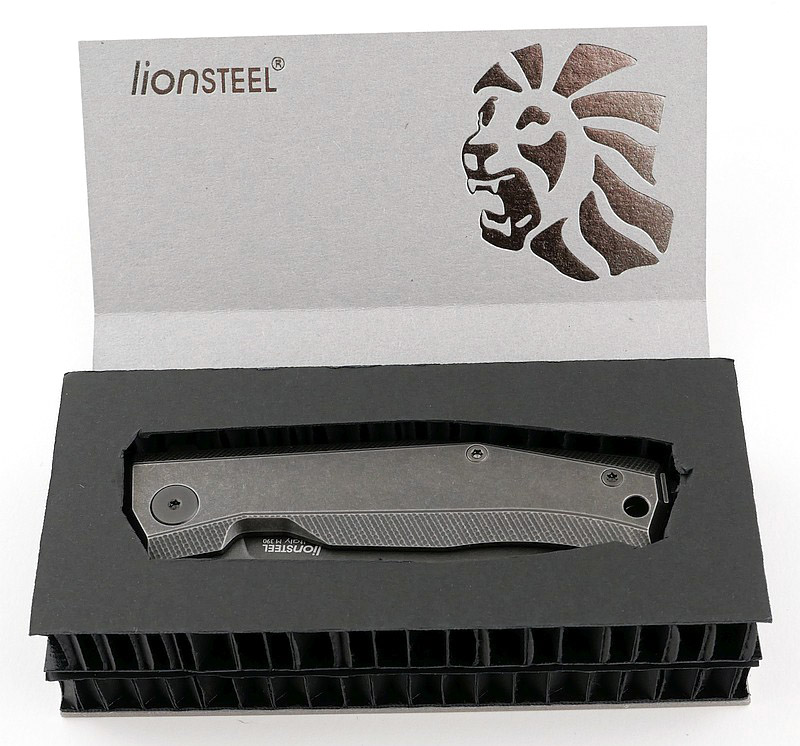
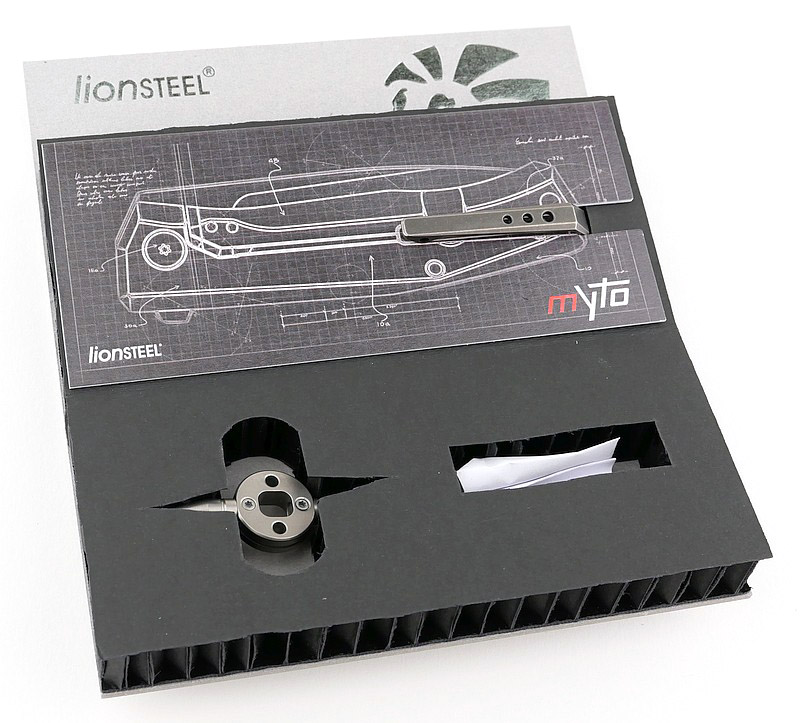
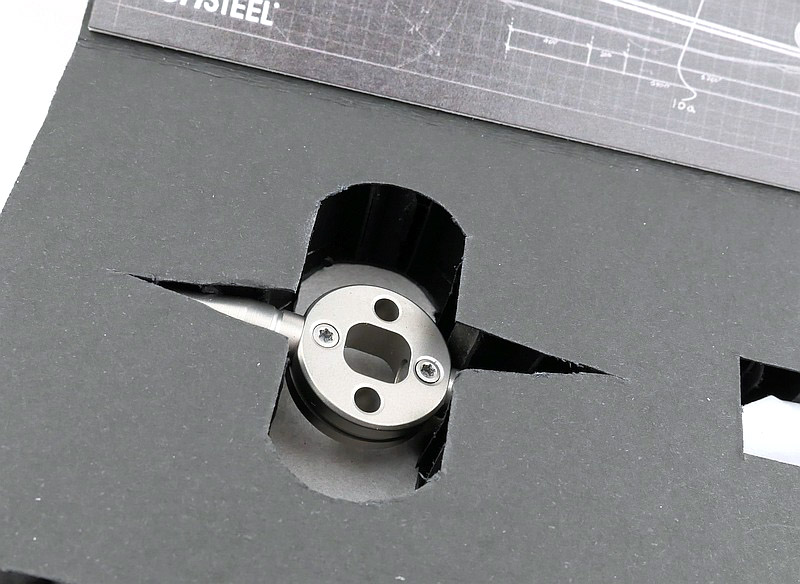
Arriving on lionSTEEL’s ‘recyclable’ packaging, this is how it arrives.
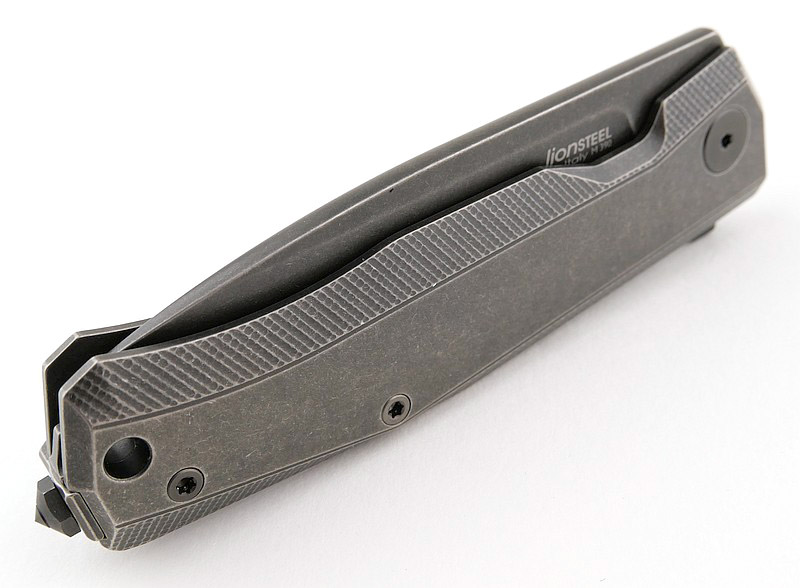
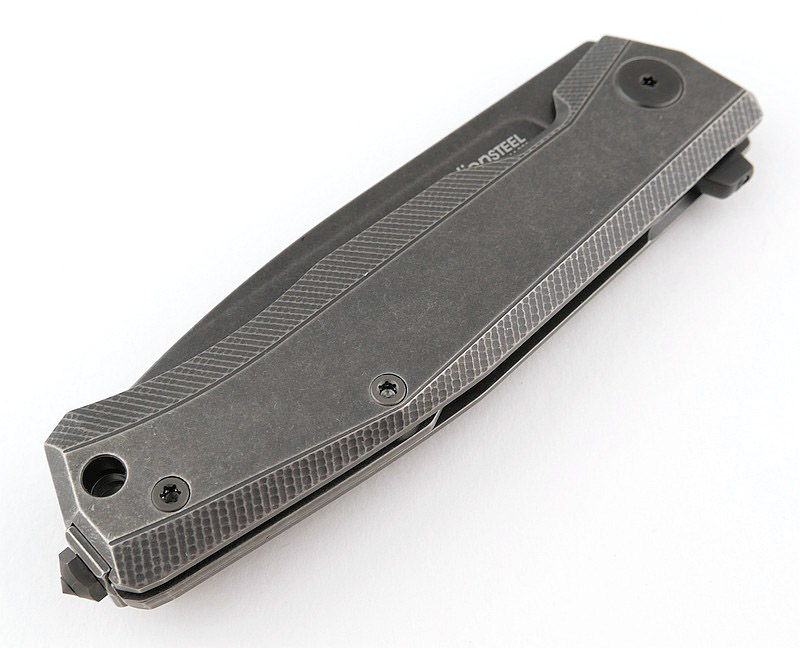
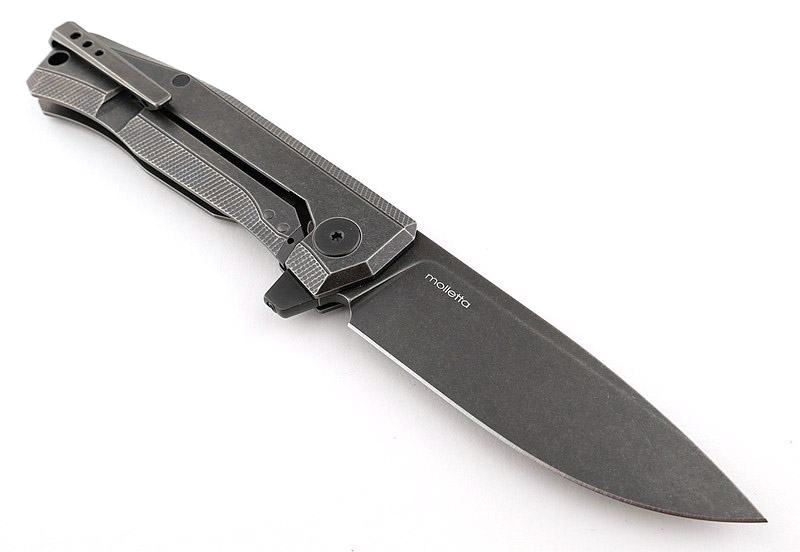
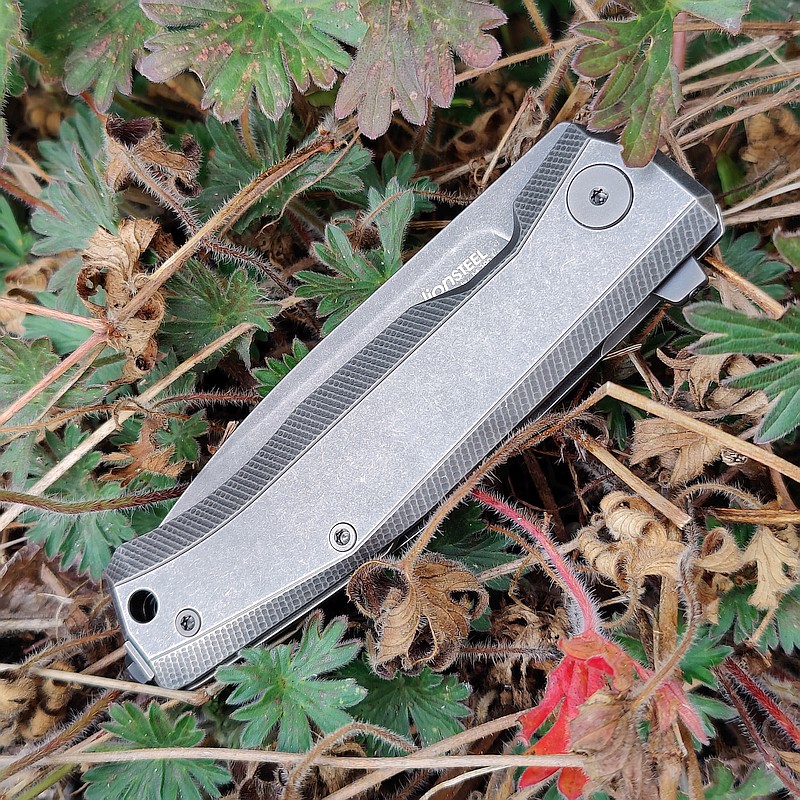
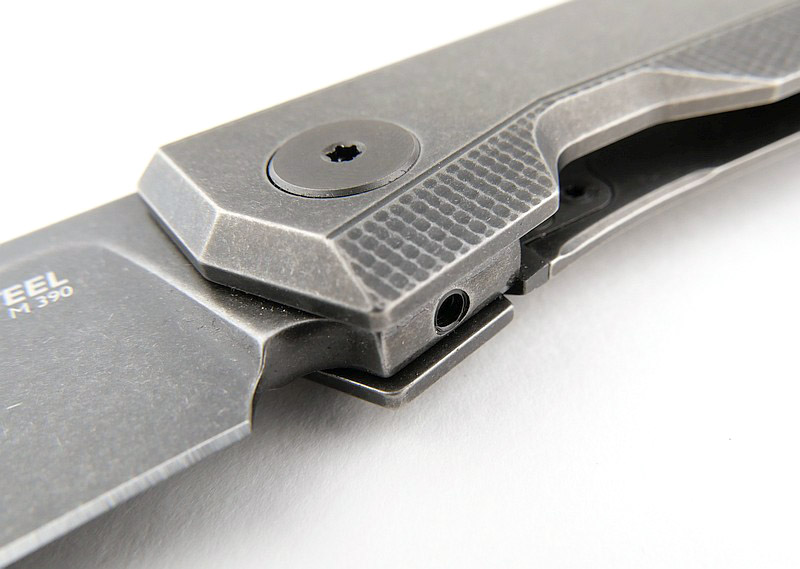
A good look round the Myto – Things to look out for here are:
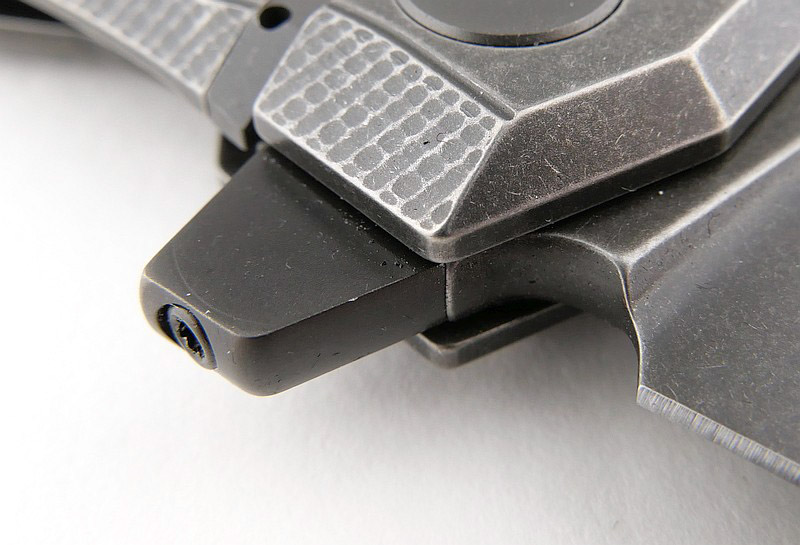
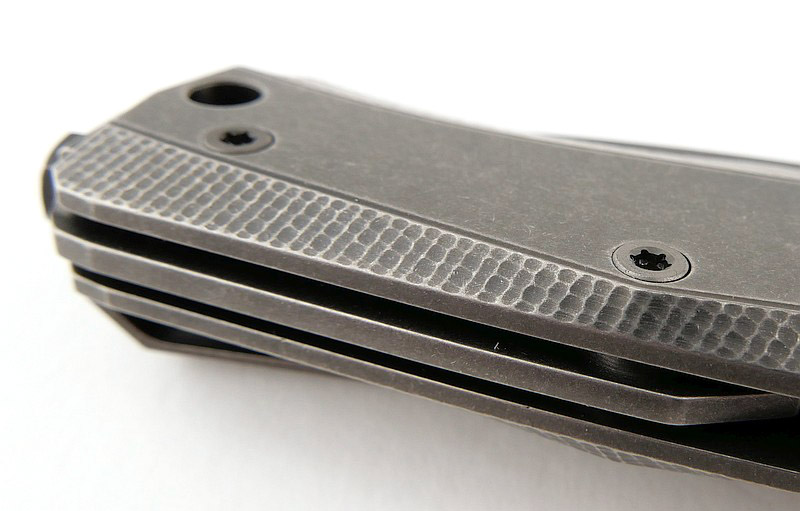
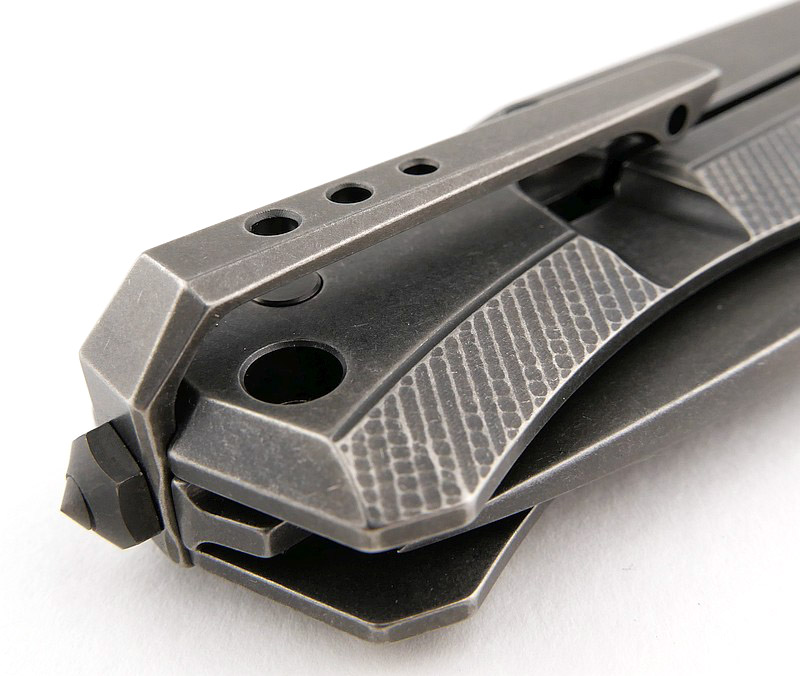
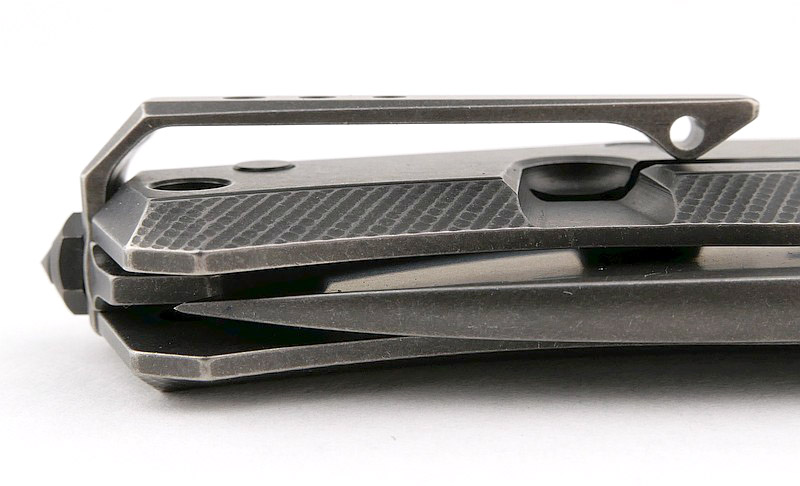
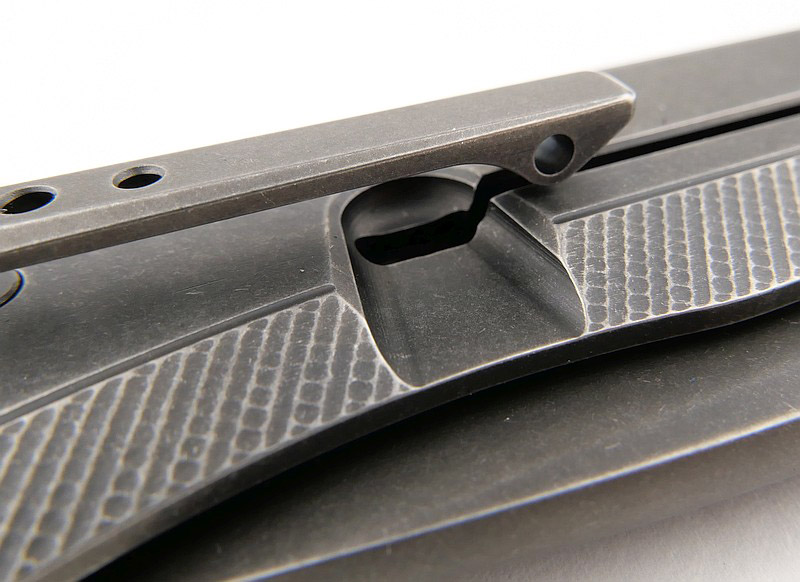
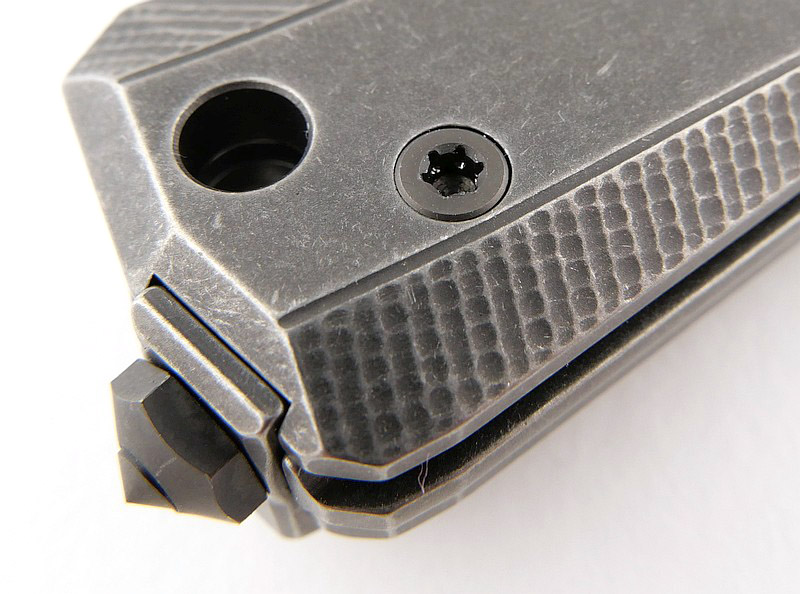
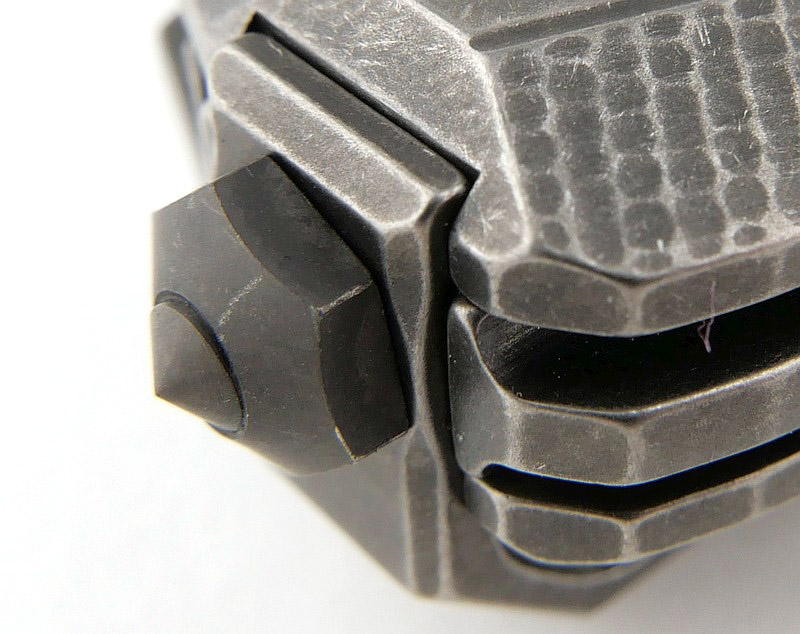
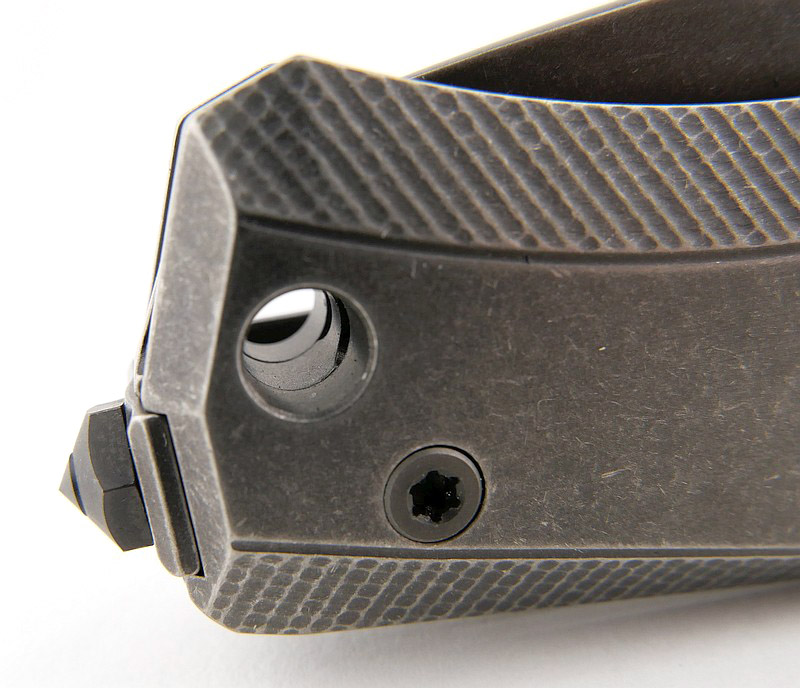
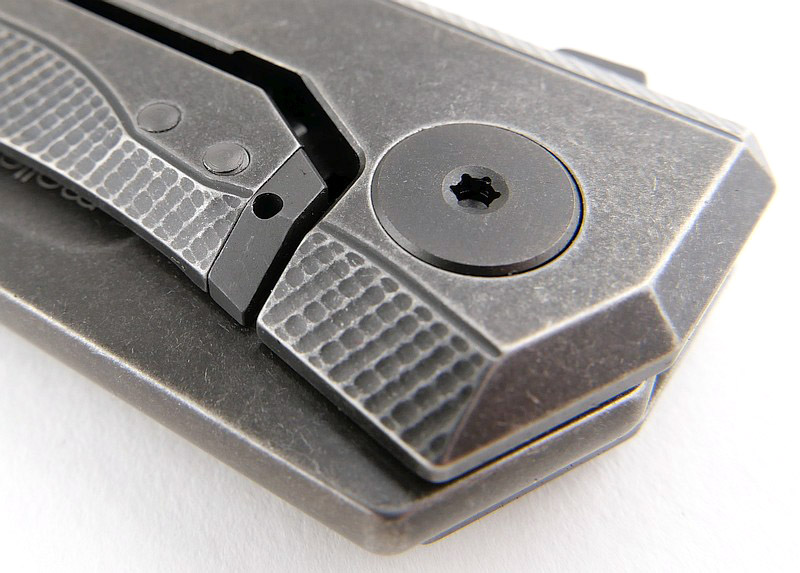
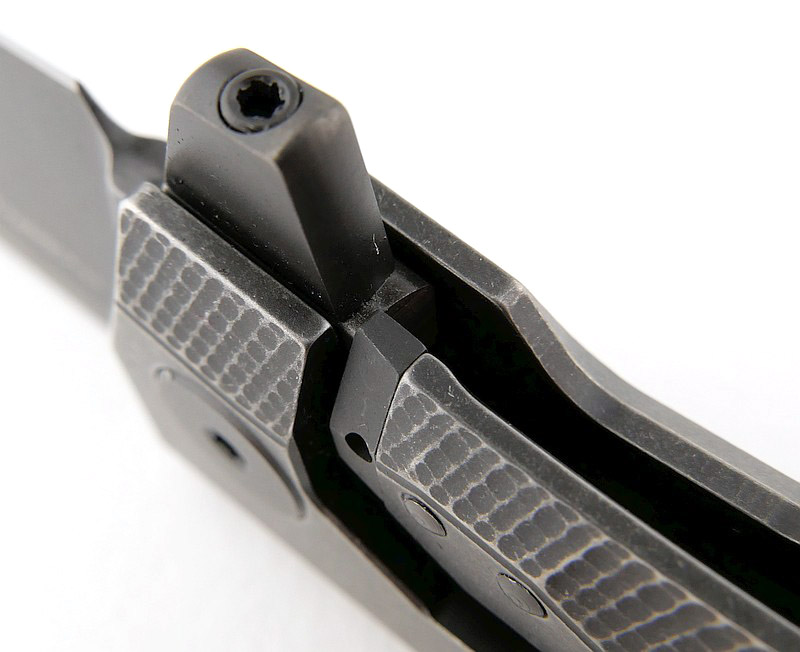
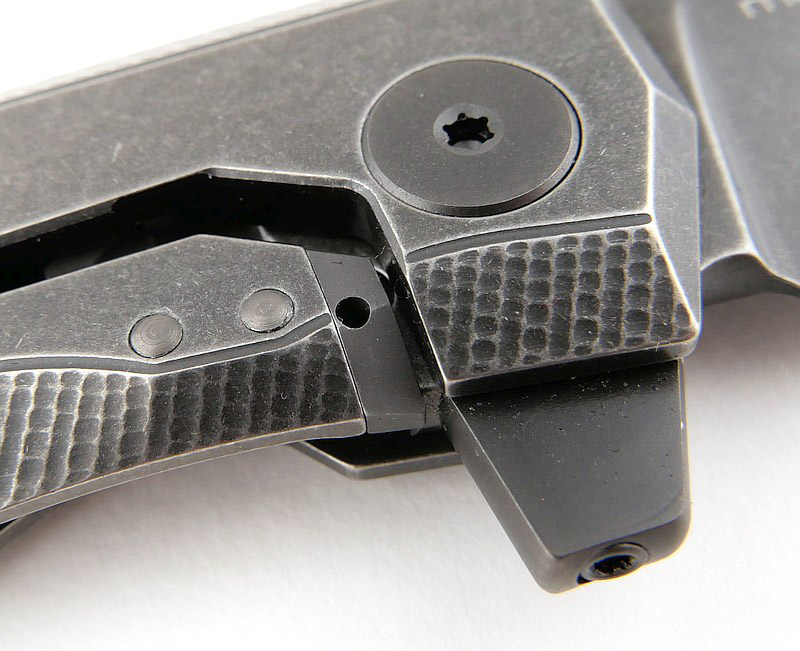
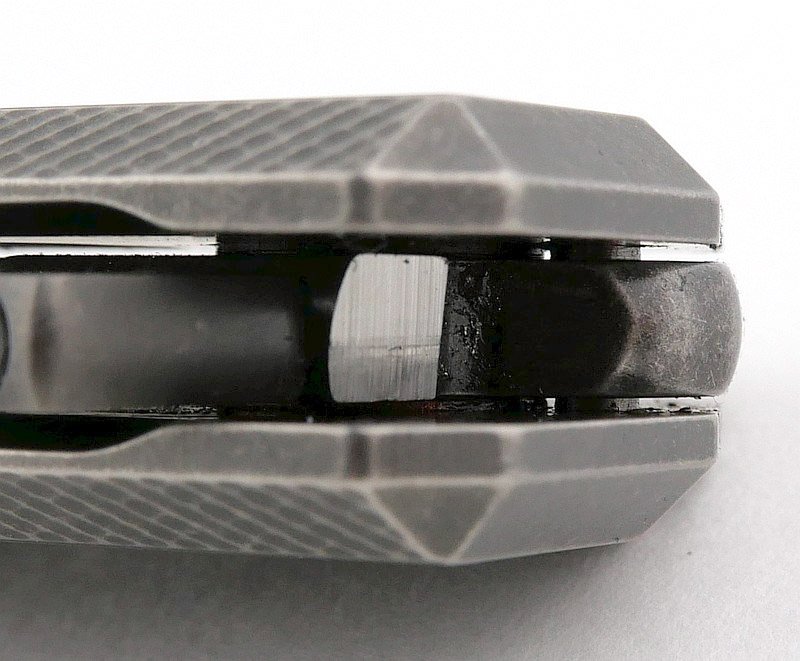
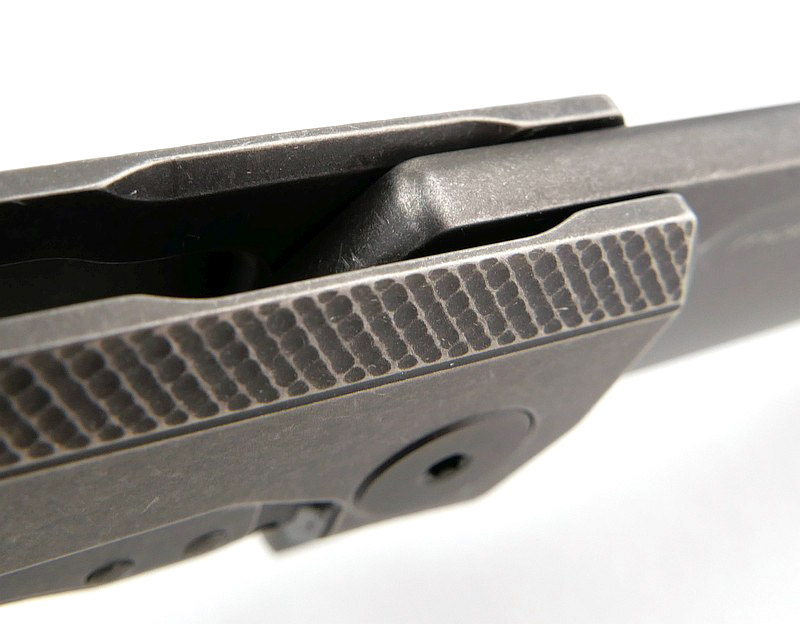
Overall fit and finish is flawless, even with the unforgiving close up photos. As you go through the gallery you will see the details of form (such as round the lock bar spring, or pocket clip, or lanyard hole, or flipper tab etc.) One detail you have to look closely for is the hidden stop pin which is just visible in one of the images. This version in the stonewash finish gives it a nice soft look, ready to be put to use.
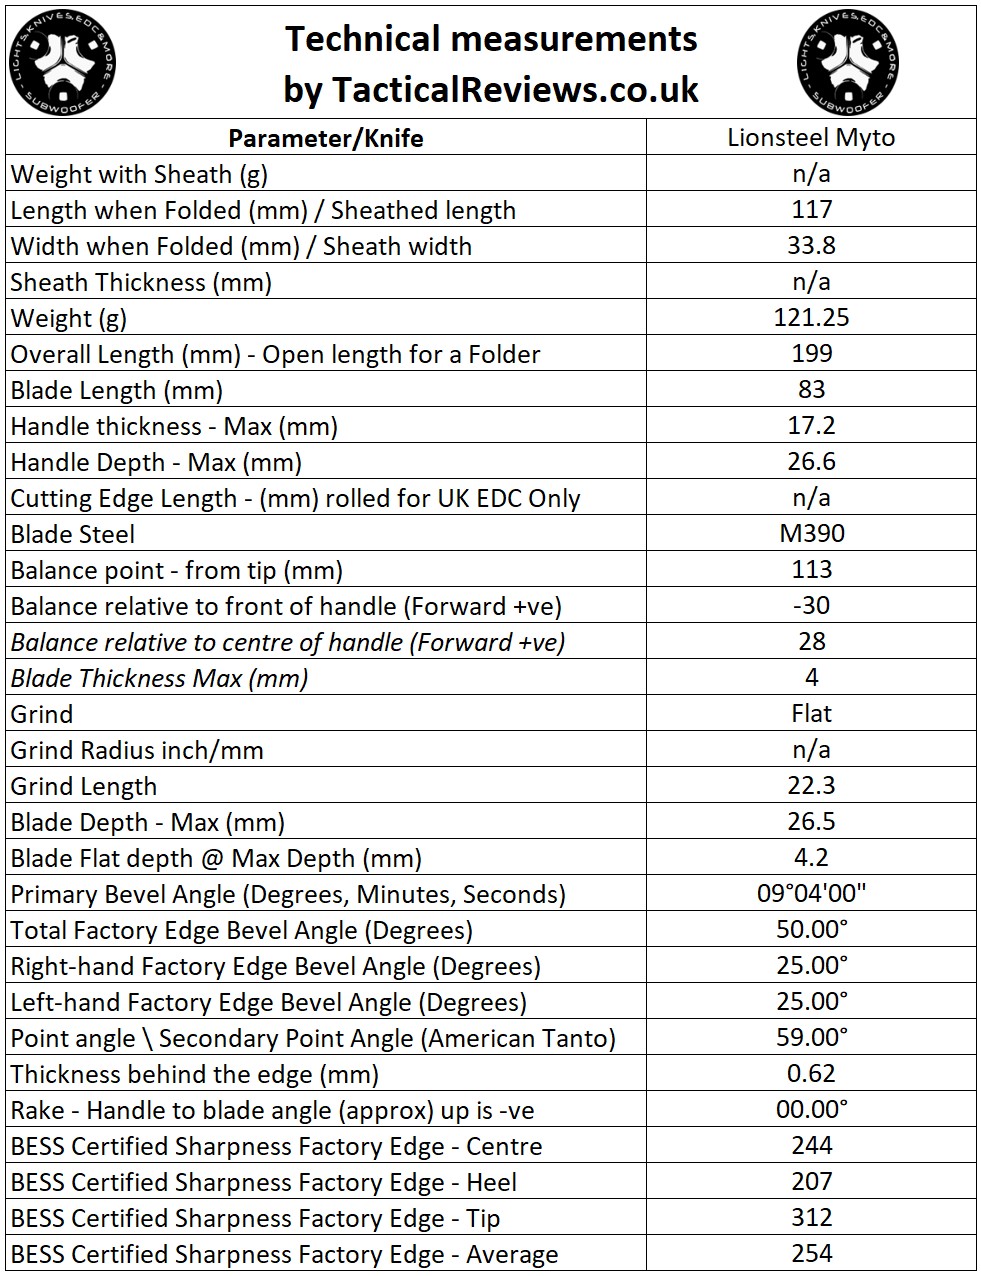
The Blade and Handle – Detailed Measurements:
For full details of the tests and measurements carried out and an explanation of the results, see the page – Knife Technical Testing – How It’s Done.
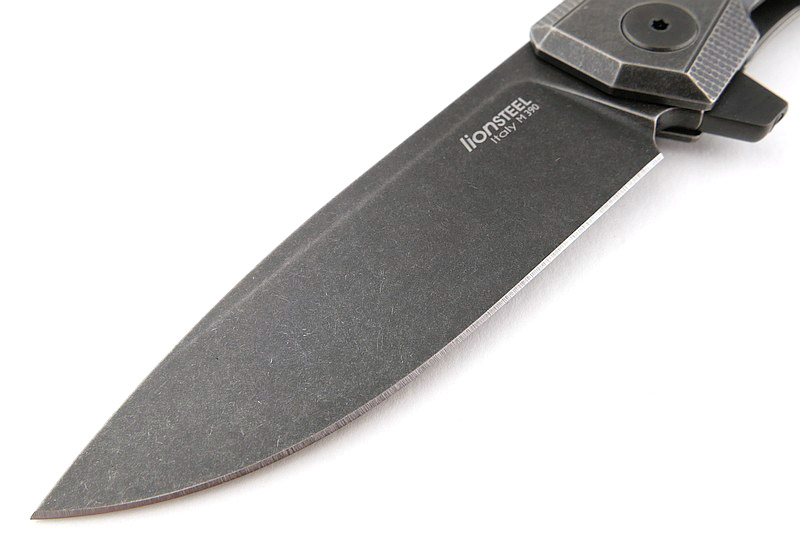
The blade is made from M390 steel.
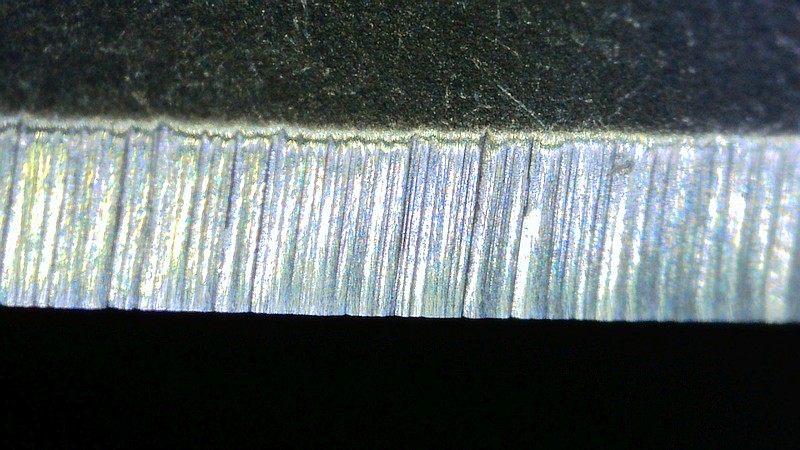
The Factory edge up close – NEW FOR 2022!:
Followers of Tactical Reviews will know my views on factory edges, but to recap:
Anyone using a knife will need to sharpen it. That first factory edge is just like the first tank of fuel that a new car comes with (or first charge of the battery).
A good factory edge is a ‘nice to have’ but not a ‘make or break’ for a good knife, as you will be putting your own edge onto it soon enough.
The factory edge does however indicate the care a knife maker has put into the final finish.
It is for this reason Tactical Reviews measures factory edge sharpness and specifications, and includes this information in the detailed technical testing.
As a further look at the factory edge, this section has been added to include some high magnification photos of the factory edges.
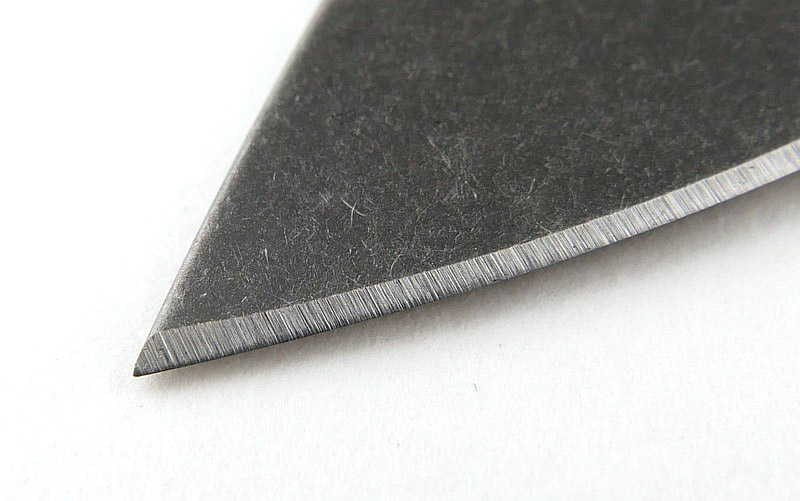
Though not the best BESS sharpness measurements, this close up of the edge shows the texturing in the edge that makes it really cut well.
What is it like to use?
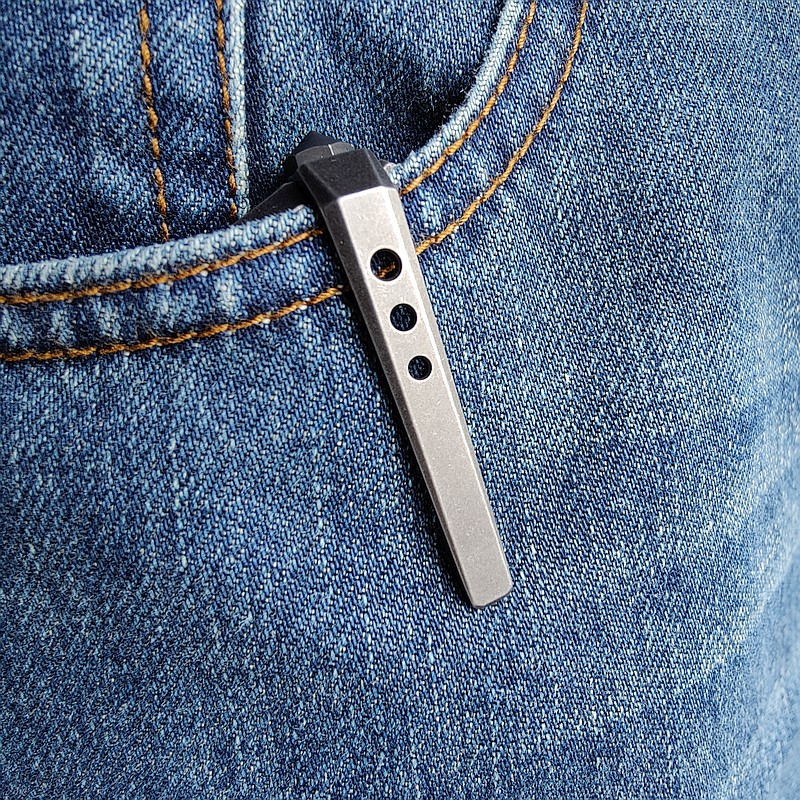
Inobtrusive and easy to carry are a couple of first impressions which make a great EDC knife. One thing I wasn’t so sure about when I first picked up the Myto was the solid pocket clip; it seemed too stiff and like it would be difficult to use. I’ve been proven completely wrong on that as actually the clip eases over the edge of a pocket without a struggle, but then is a bit harder to take off, so making it secure.
With the blade on bearings, the flip open is super slick, as you can see in the video. It really doesn’t take any effort at all to flip to the locked position and you can develop a nice slow lazy flip with the blade reliably locking, or really snap it out. The detent if firm without being harsh so you never have to fight with it.
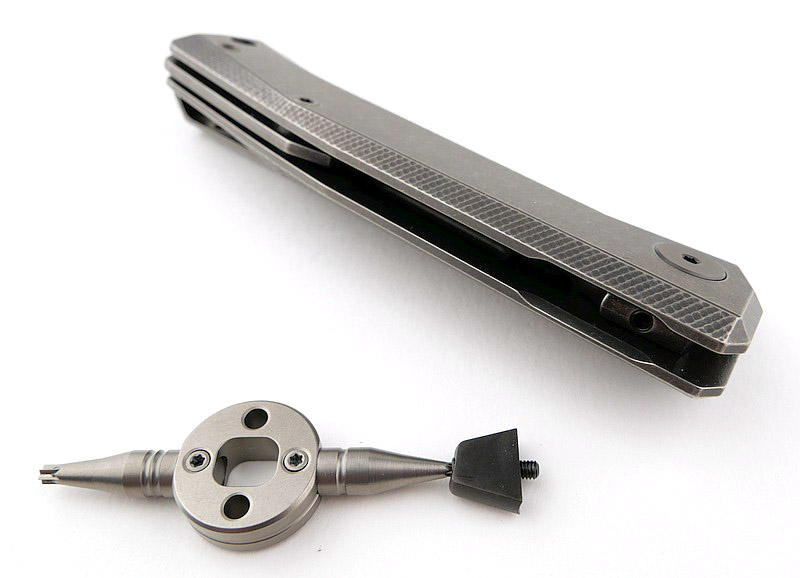
It’s not the first lionSTEEL with removable flipper tab, and you might question the benefits of such a feature. Consider the pros and cons for a flipper. As pros, you might have fast deployment, and built-in finger guard. As cons, one of the most frequent complaints it the messy tab sticking out and the action appearing like a flick knife and in many places or situations causing distress to non-knife people.
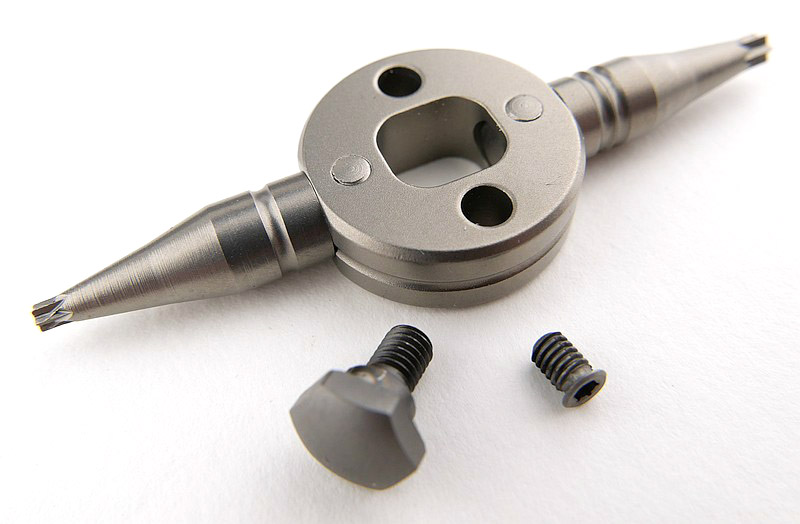
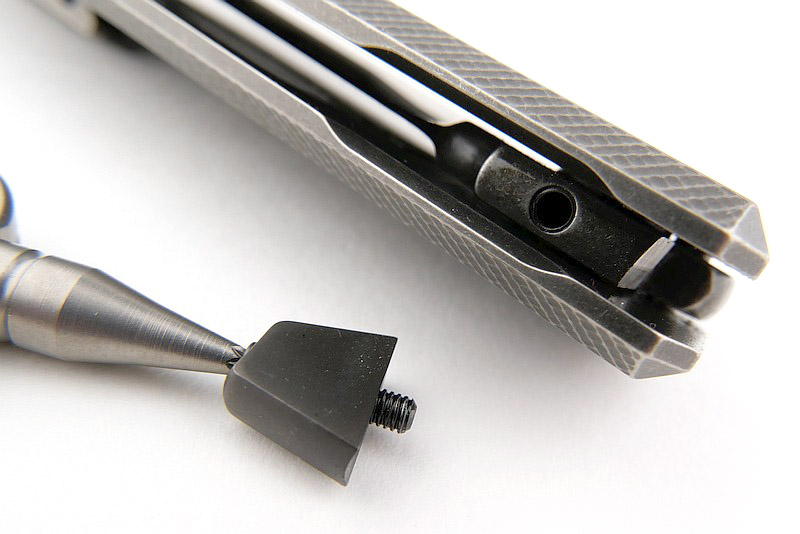
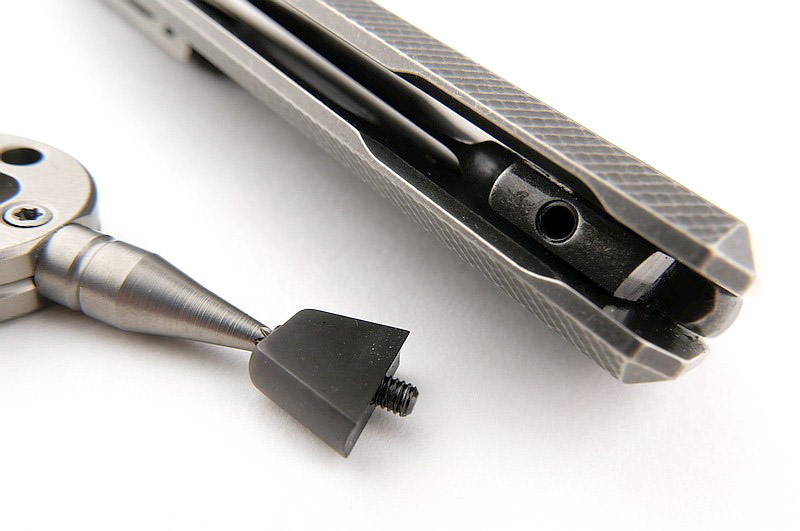
So if you want a sleeker looking knife, and one which requires a steady and inoffensive two-handed opening, you undo one screw and off comes the flipper tab. You can then change your mind, just want to mix it up again, or go fidget flipping and on goes the tab.
I did find the tab itself was not perfectly in line due to the removable system, and in trying to get it lined up better I over torqued the supplied tool and started to twist off the end of the torque driver, so beware of this when refitting the tab.
If you have the facility you will likely use it, giving you two slightly different knives in one. I have several folders I wish had the same feature.
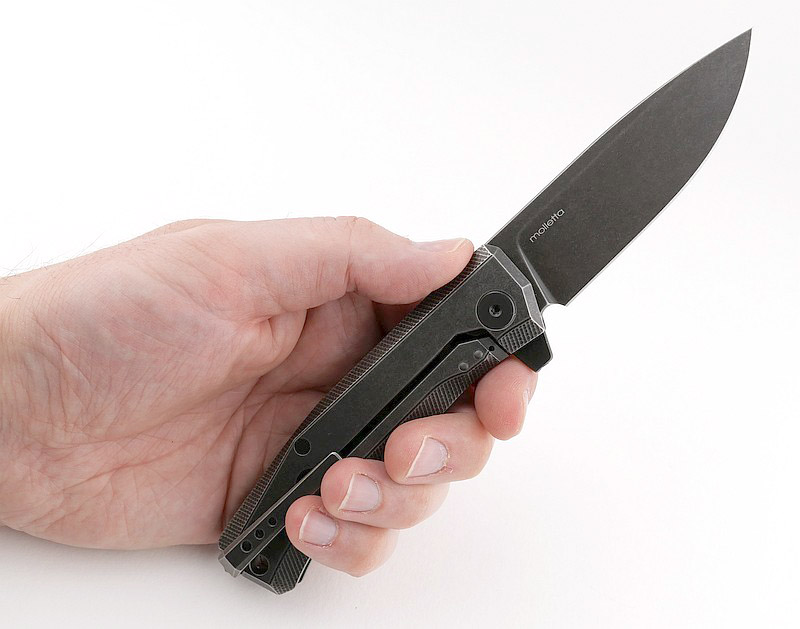
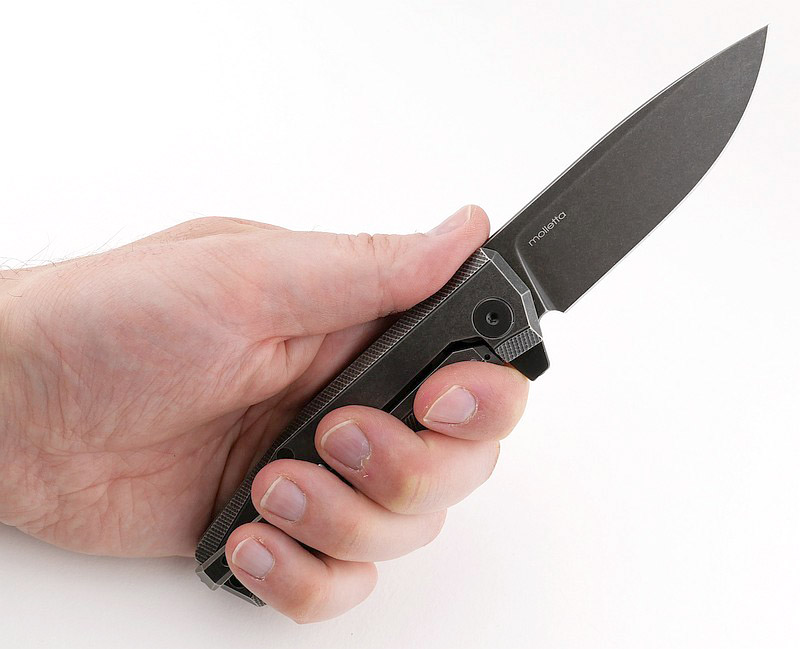
In terms of size, the Myto fits in very well in the 3/3.5″ blade length category ideal for general purpose every day tasks. The strong lock and flipper tab/finger guard allow you to work hard with this knife.
I take an XL size glove, and in my hand I can take a full grip and the handle is large enough so that my hand doesn’t have the corners of the butt digging in, instead just extending slightly out of my hand. At the front, the flipper tab acting as a finger guard, keeps the position of the knife safely under control. Just right.
lionSTEEL’s superb engineering stands out the moment you pick up the Myto with absolutely nothing seeming out of place or ‘could be better’, instead everything just being right. Refined, easy to carry and strong blade with great slicing power.
Review Summary
The views expressed in this summary table are from the point of view of the reviewer’s personal use. I am not a member of the armed forces and cannot comment on its use beyond a cutting tool or field/hunting knife.
Something that might be a ‘pro’ for one user can be a ‘con’ for another, so the comments are categorised based on my requirements. You should consider all points and if they could be beneficial to you.
_______________________________________________
What doesn’t work so well for me
_______________________________________________
Flipper tab is slightly wonky due to removable system.
Easy to over-torque the supplied tool.
Solid clip feels very stiff.
Glass breaker is scratchy.
_______________________________________________
Things I like
_______________________________________________
Quality engineering.
M390 blade steel performance.
Excellent EDC size of knife.
‘ReF’ Removable Flipper tab system.
Elegant and refined design.
Blade geometry makes for a great slicer.
Solid and slick blade action.
Clip can be fitted for left or right handed use.
Discussing the Review:
The ideal place to discuss this review is on the Tactical Reviews Facebook Page
Please visit there and start/join the conversation.
As well as the Tactical Reviews Facebook Page, please consider visiting one of the following to start/join in any discussion.
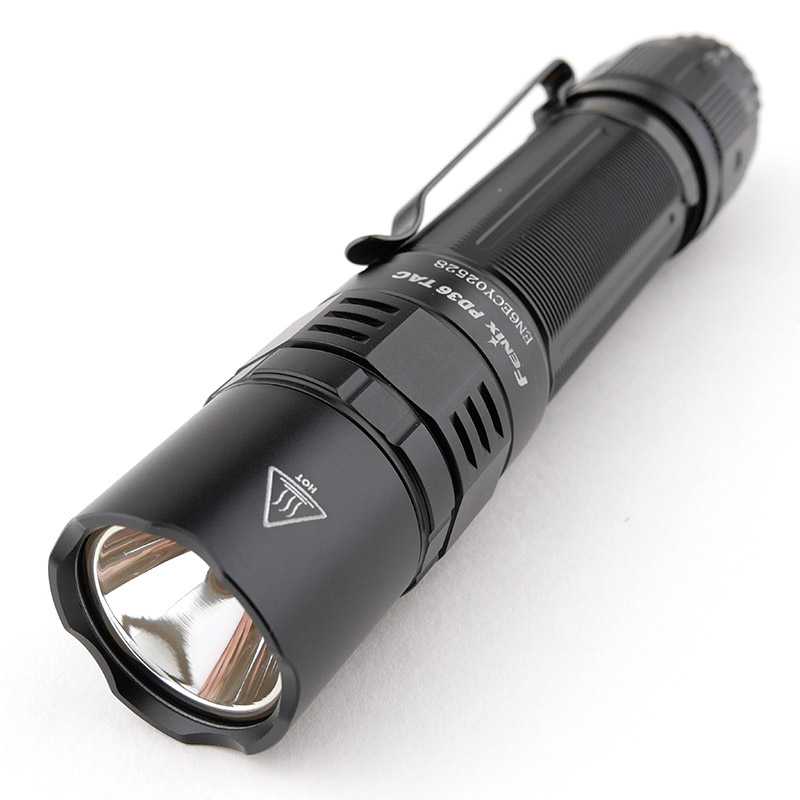
In this review of the Fenix PD36 TAC, I’m going to be taking a detailed look at the details, comparing its performance to the specifications, checking out the beam and how usable it is. The review includes video content as well as photo galleries and technical testing results.
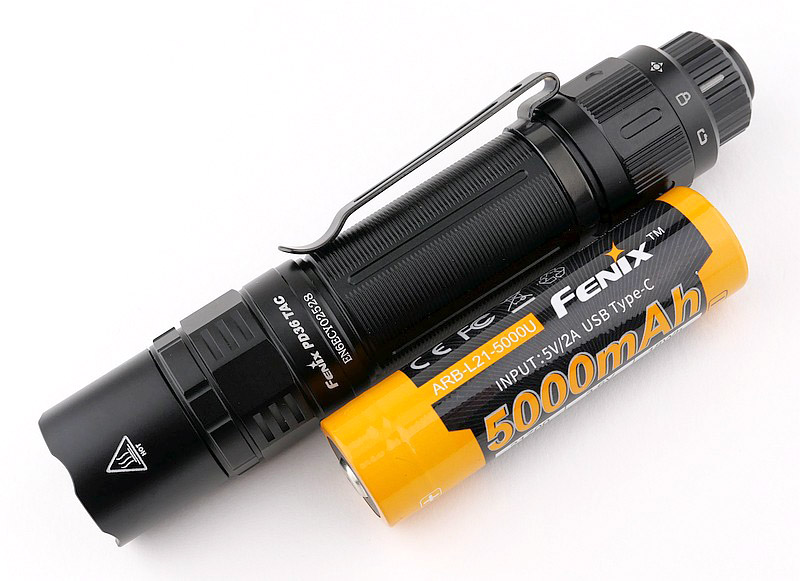
Join me in this look over the Fenix PD36 TAC Flashlight / Torch, a light built around the increasingly common larger 21700 cell (compared to the typical 18650 previously used). This has a specialised tail-cap with physical lockout, dedicated ‘Tactical’ setting, and a normal ‘duty’ multi-mode setting.
Let’s get to really know the Fenix PD36 TAC!
Video Overview
Starting out with the video overview of the PD36 TAC.
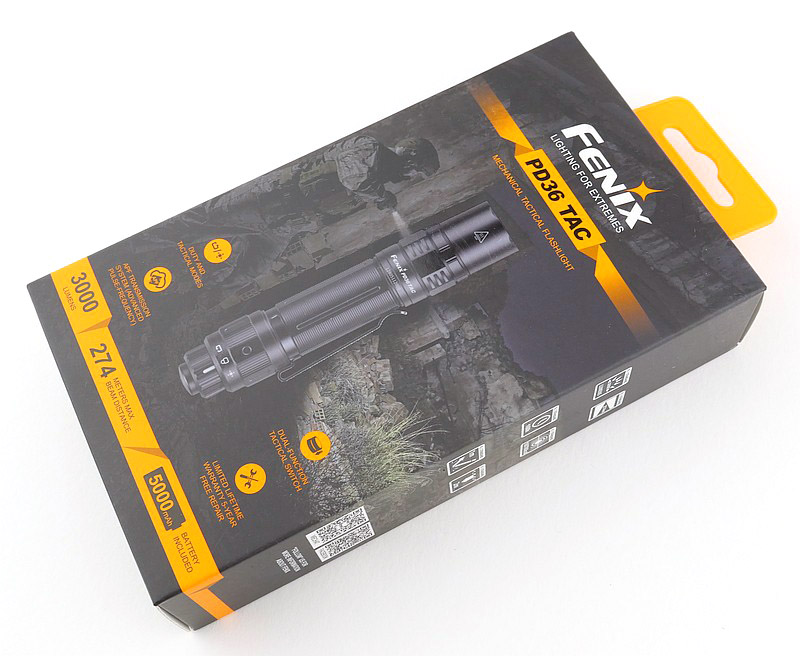
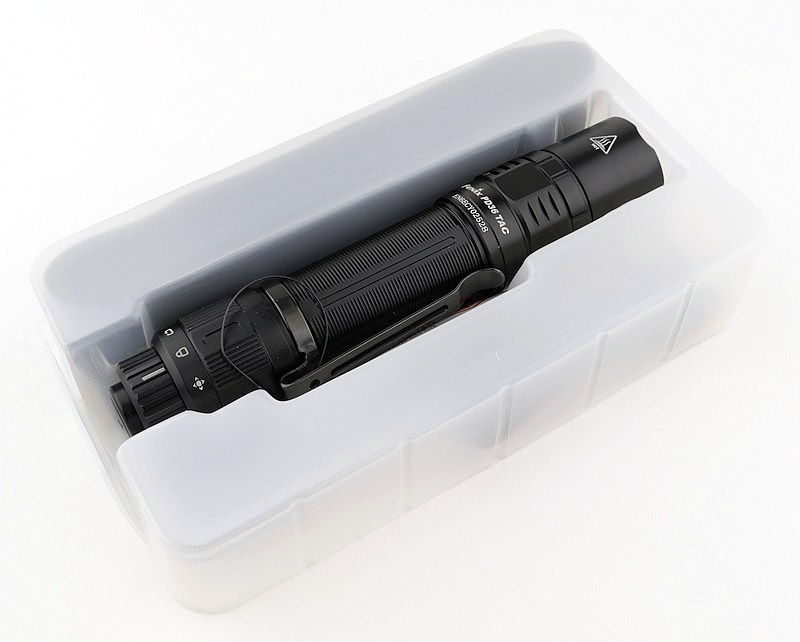
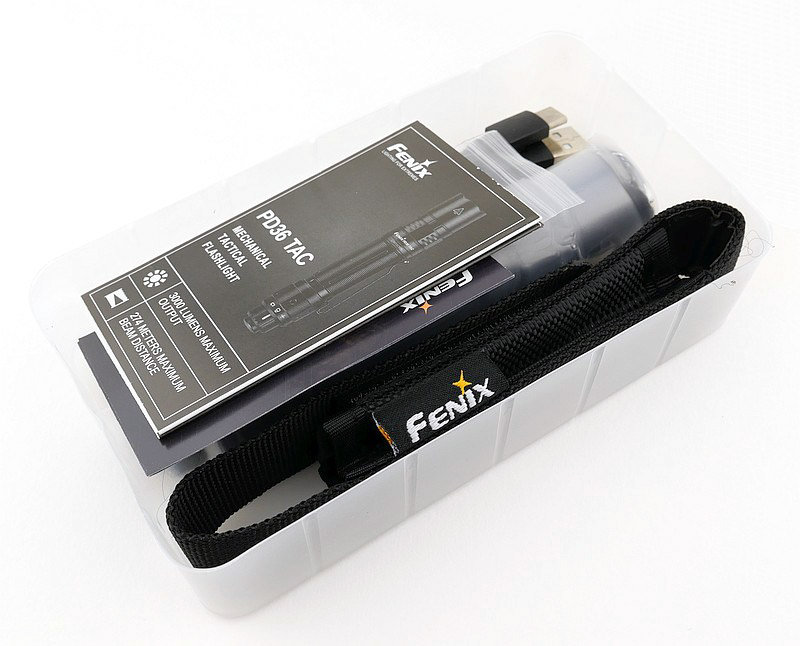
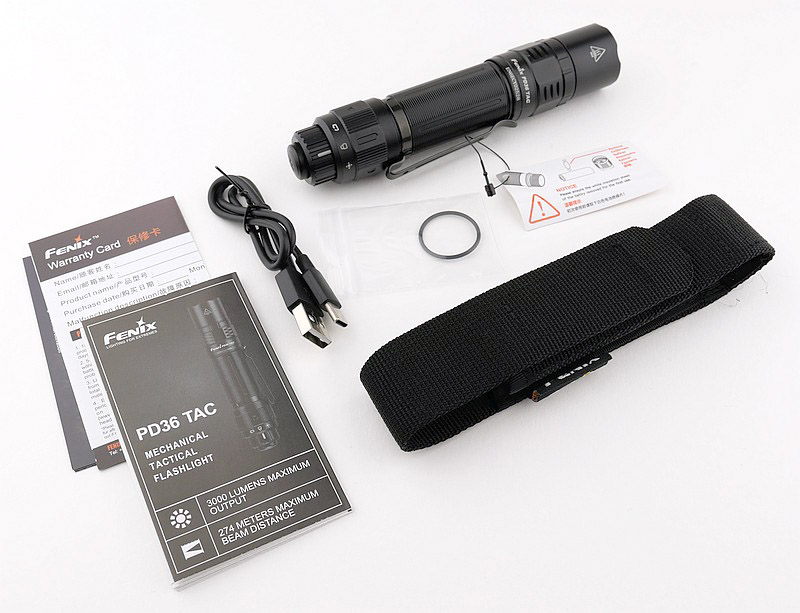
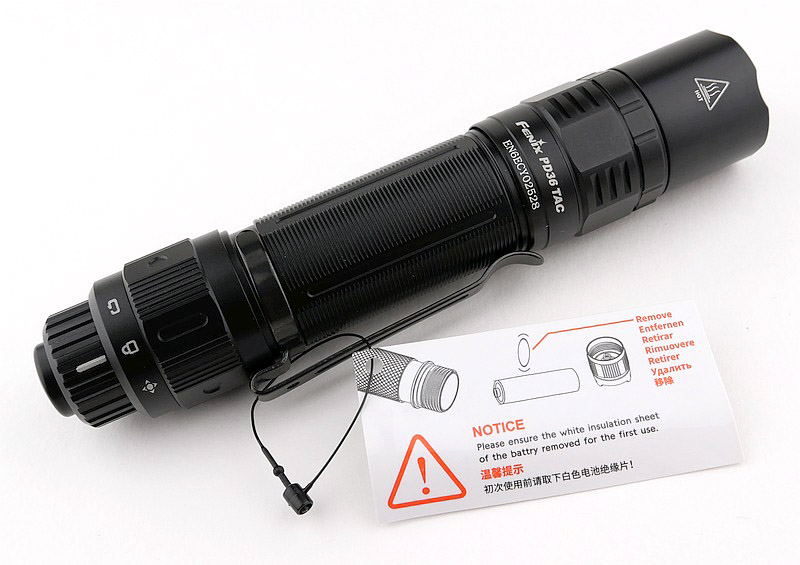
What is in the box?:
Unpacking the PD36 TAC and its accessories.
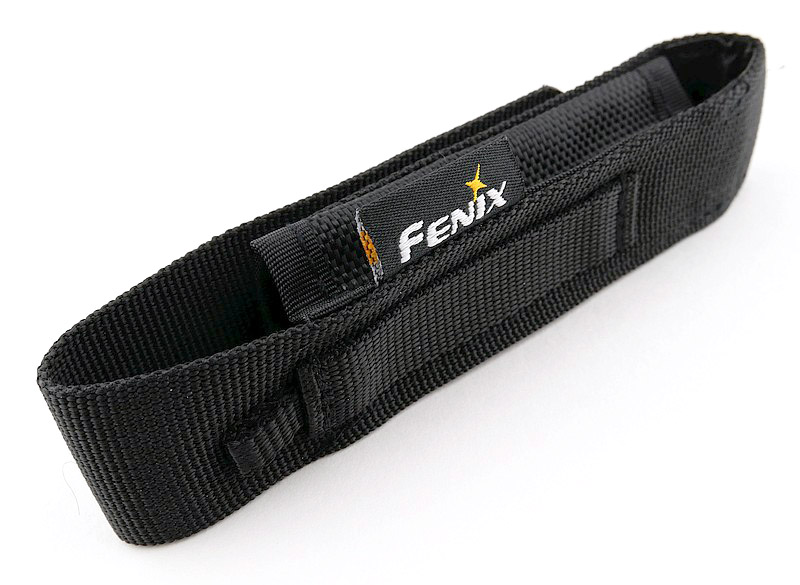
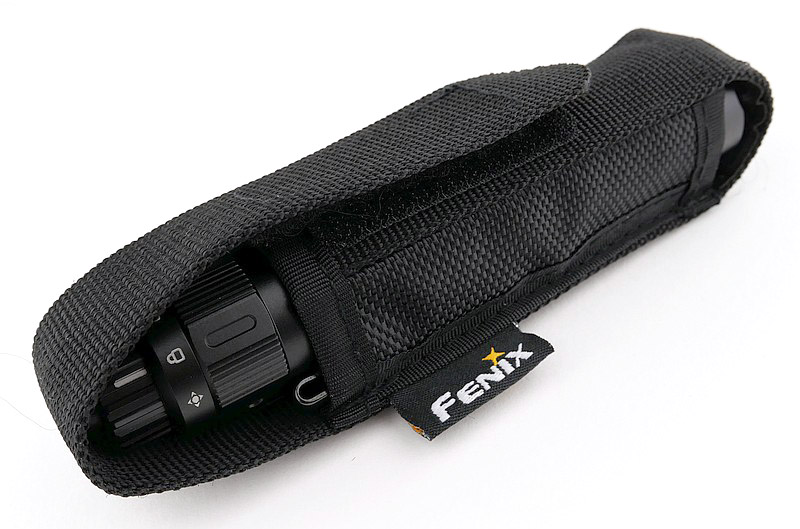
Taking a more detailed look at the holster:
Before moving onto the PD36 TAC itself, this is a run round the supplied belt holster.
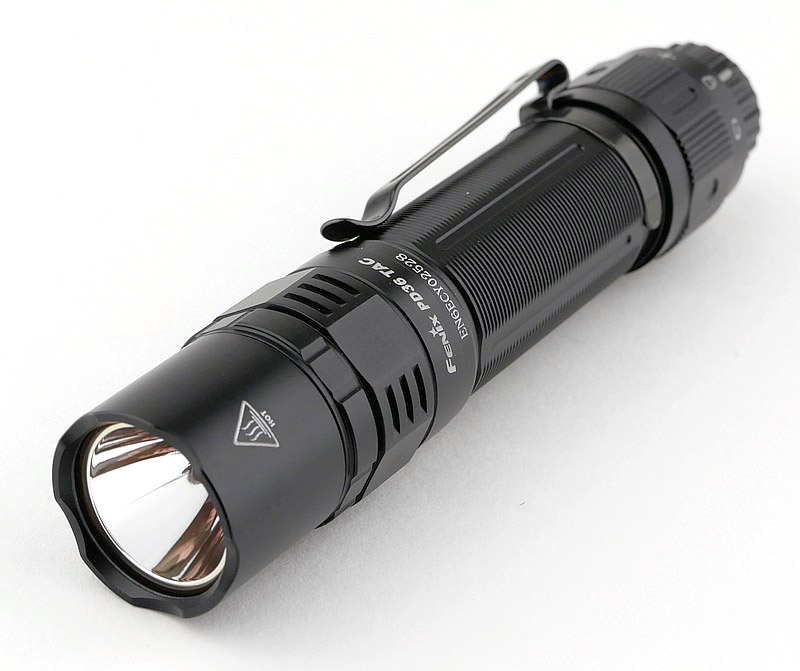
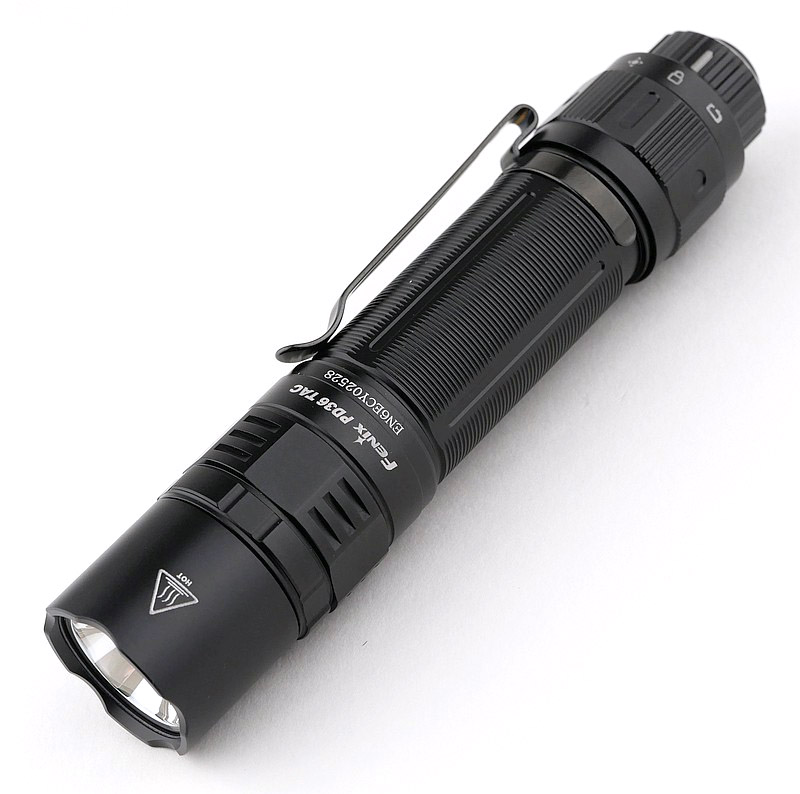
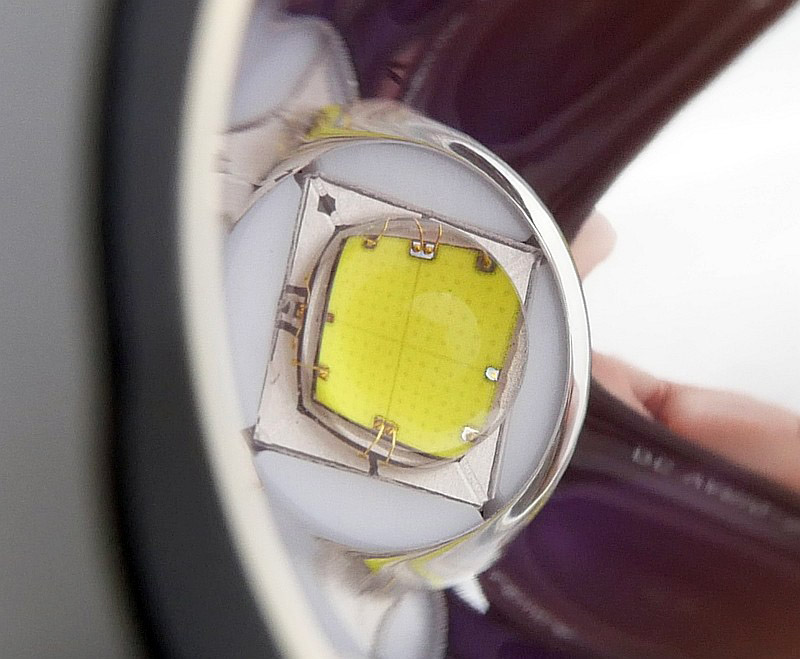
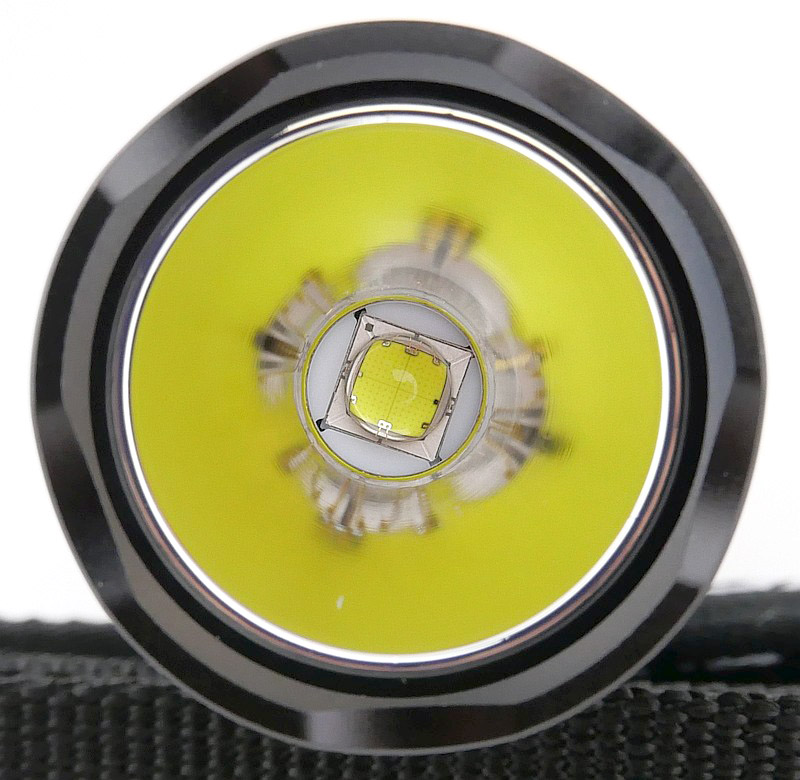
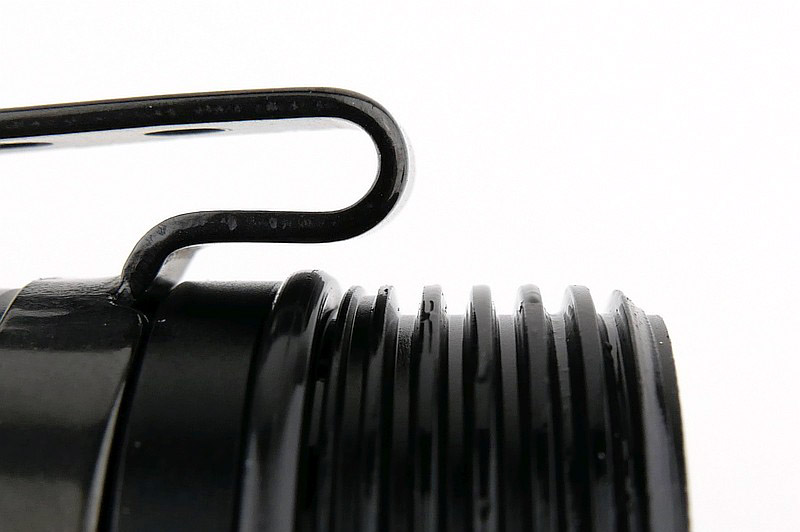
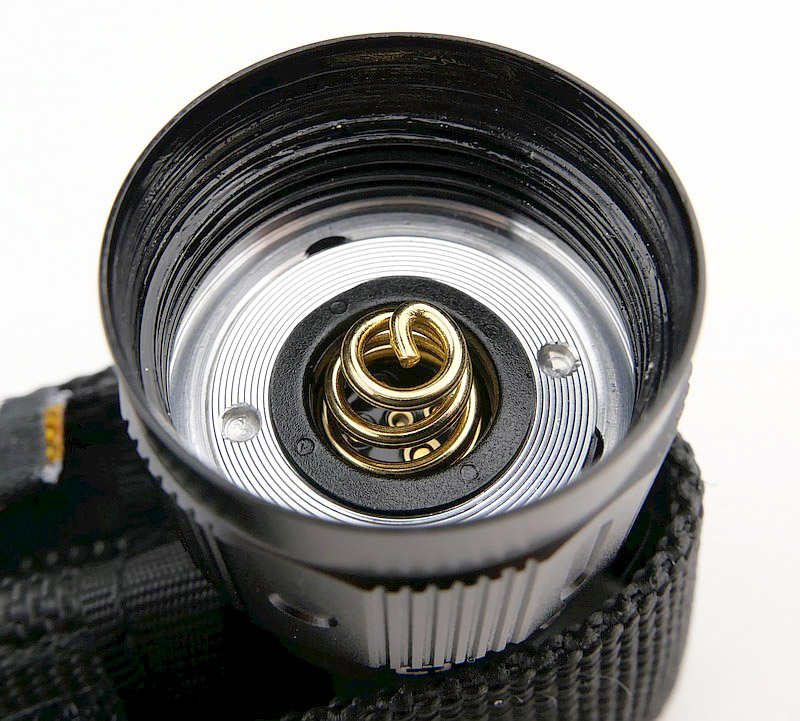
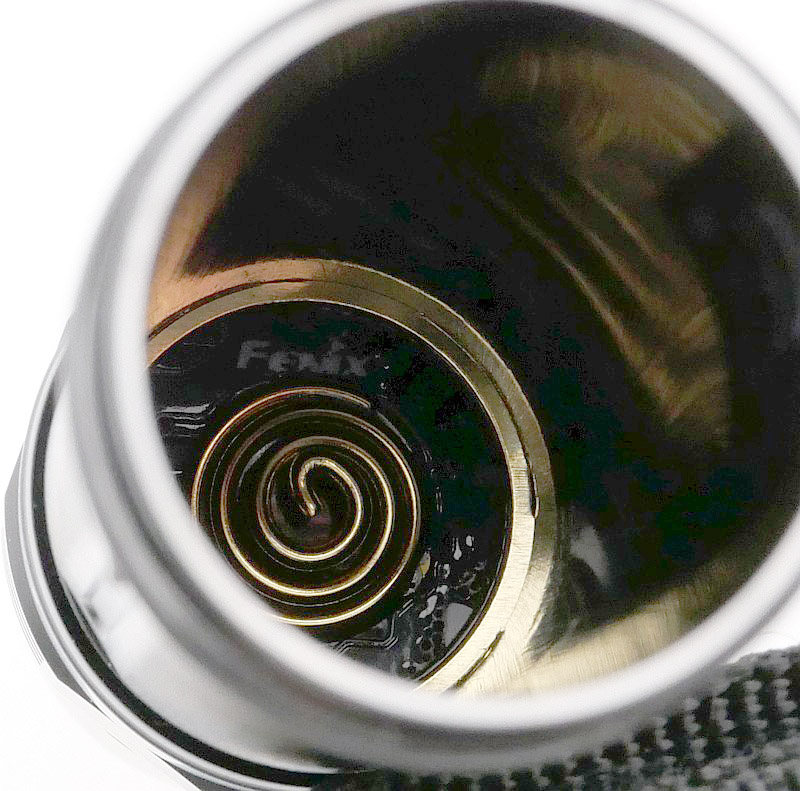
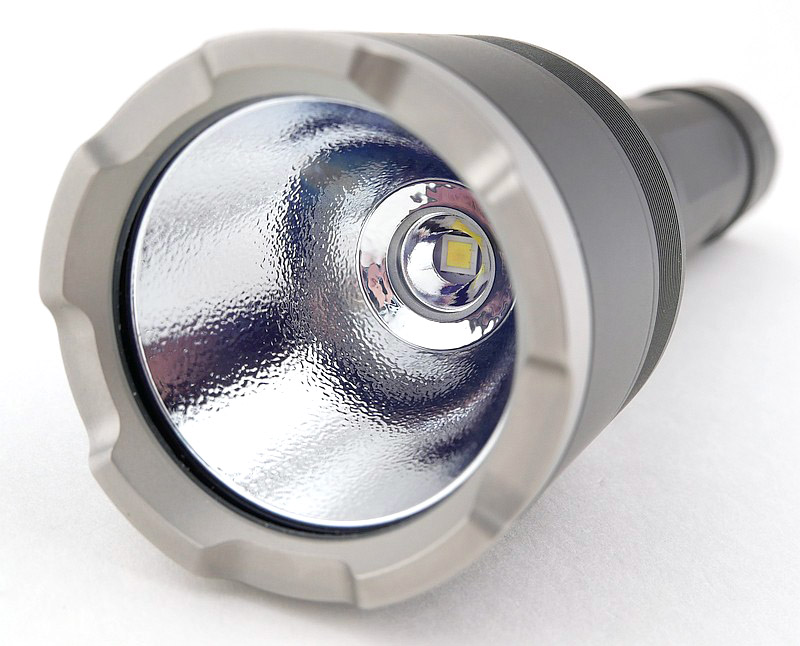
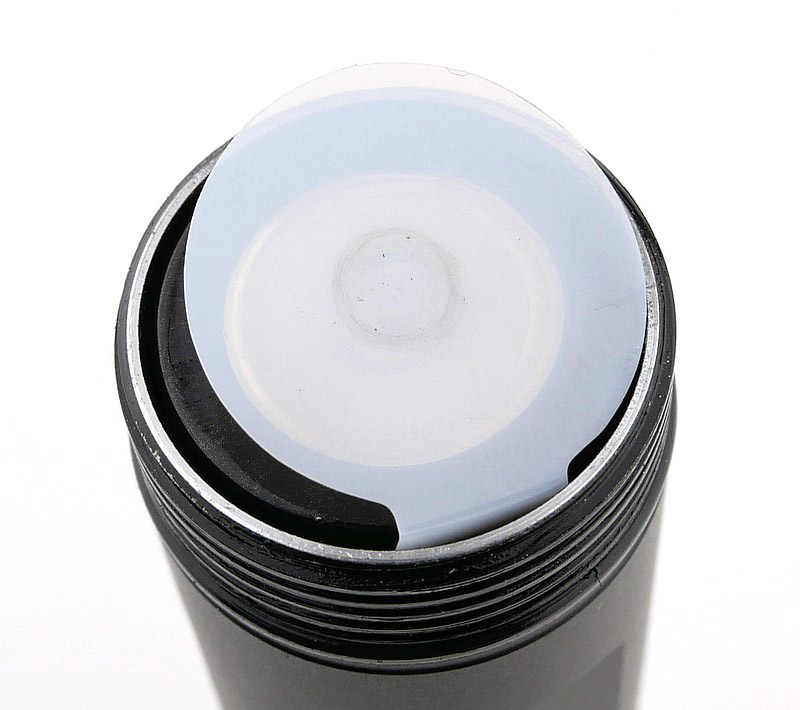
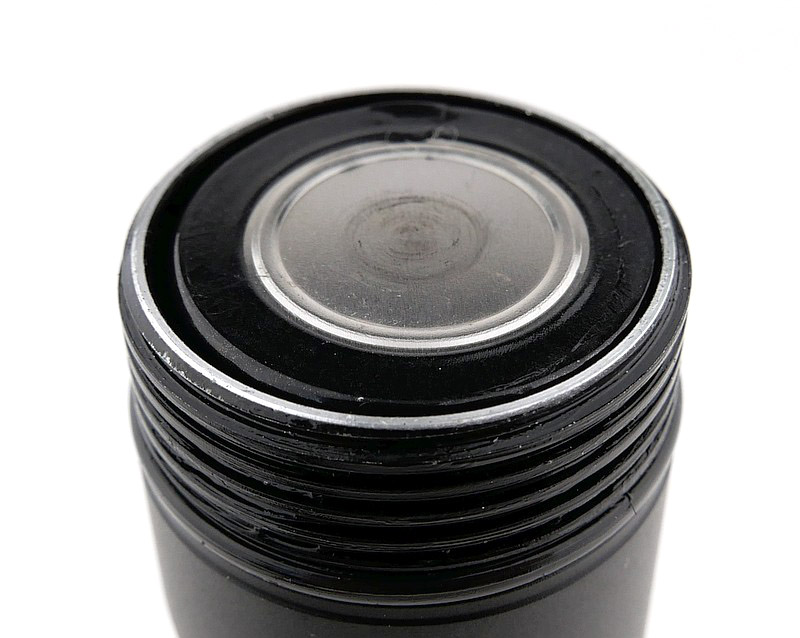
A good look round the PD36 TAC – Things to look out for here are:
In the gallery are details of the design, the clip, bezel, contacts, threads, battery, and more…
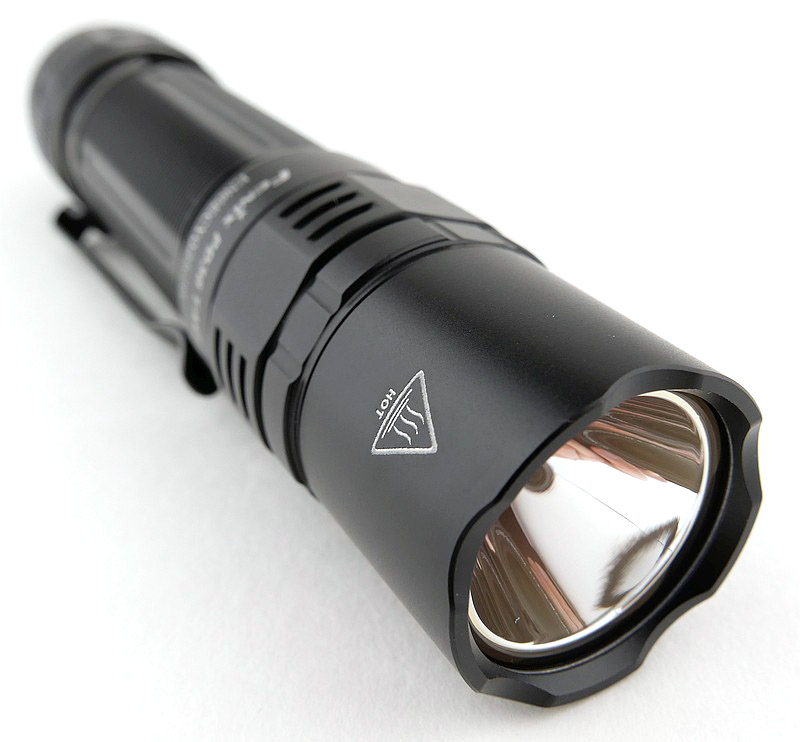
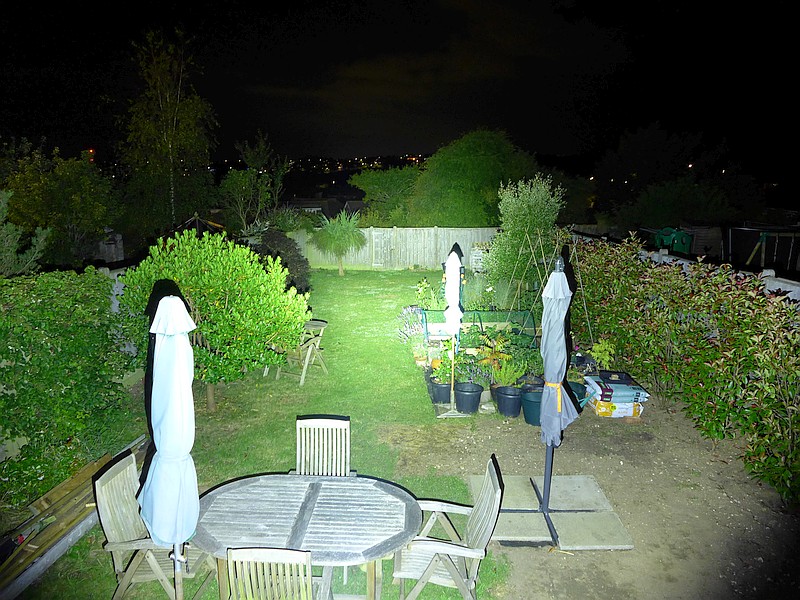
The beam
Please be careful not to judge tint based on images you see on a computer screen. Unless properly calibrated, the screen itself will change the perceived tint.
The indoor beamshot is intended to give an idea of the beam shape/quality rather than tint. All beamshots are taken using daylight white balance. The woodwork (stairs and skirting) are painted Farrow & Ball “Off-White”, and the walls are a light sandy colour called ‘String’ again by Farrow & Ball. I don’t actually have a ‘white wall’ in the house to use for this, and my wife won’t have one!
Below are the indoor and outdoor beamshots giving you an idea of throw and spill. The PD36 TAC has a great balanced beam with great area lighting.
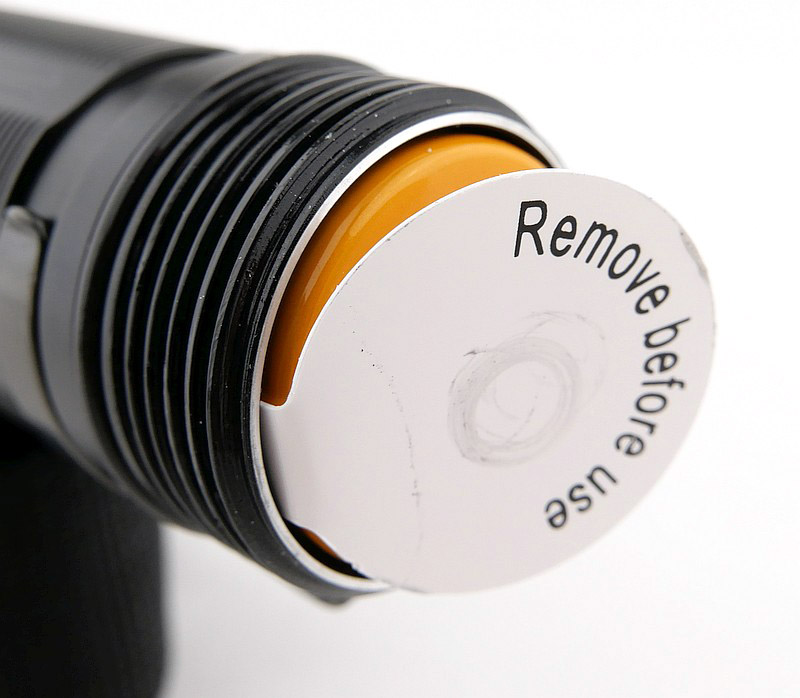
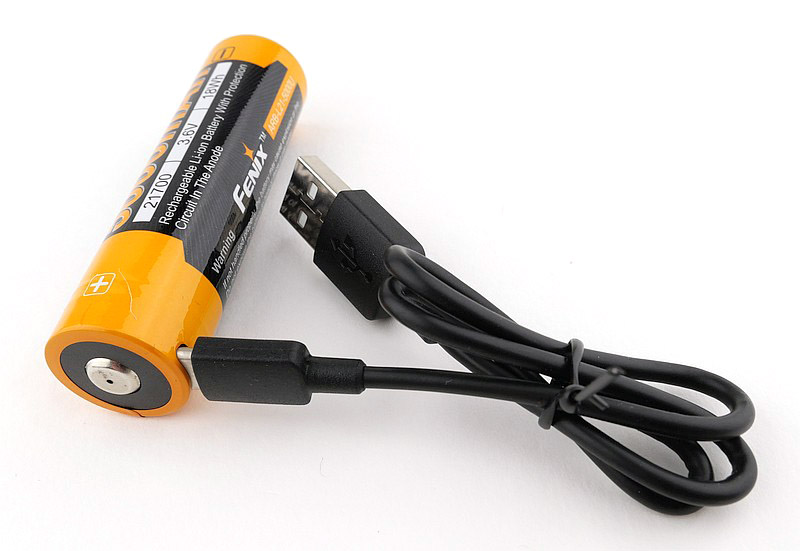
Batteries and output:
The PD36 TAC runs on the supplied 21700 USB-C rechargeable cell.
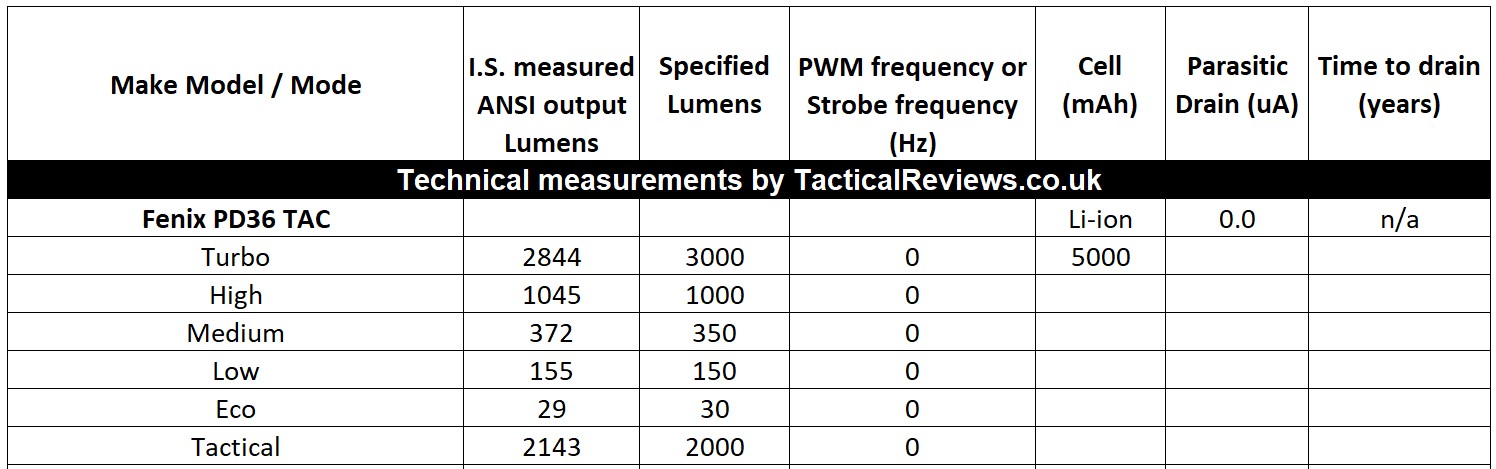
Please note, all quoted lumen figures are from a DIY integrating sphere, and according to ANSI standards. Although every effort is made to give as accurate a result as possible, they should be taken as an estimate only. The results can be used to compare outputs in this review and others I have published.
Measured output is a great match for the specifications.
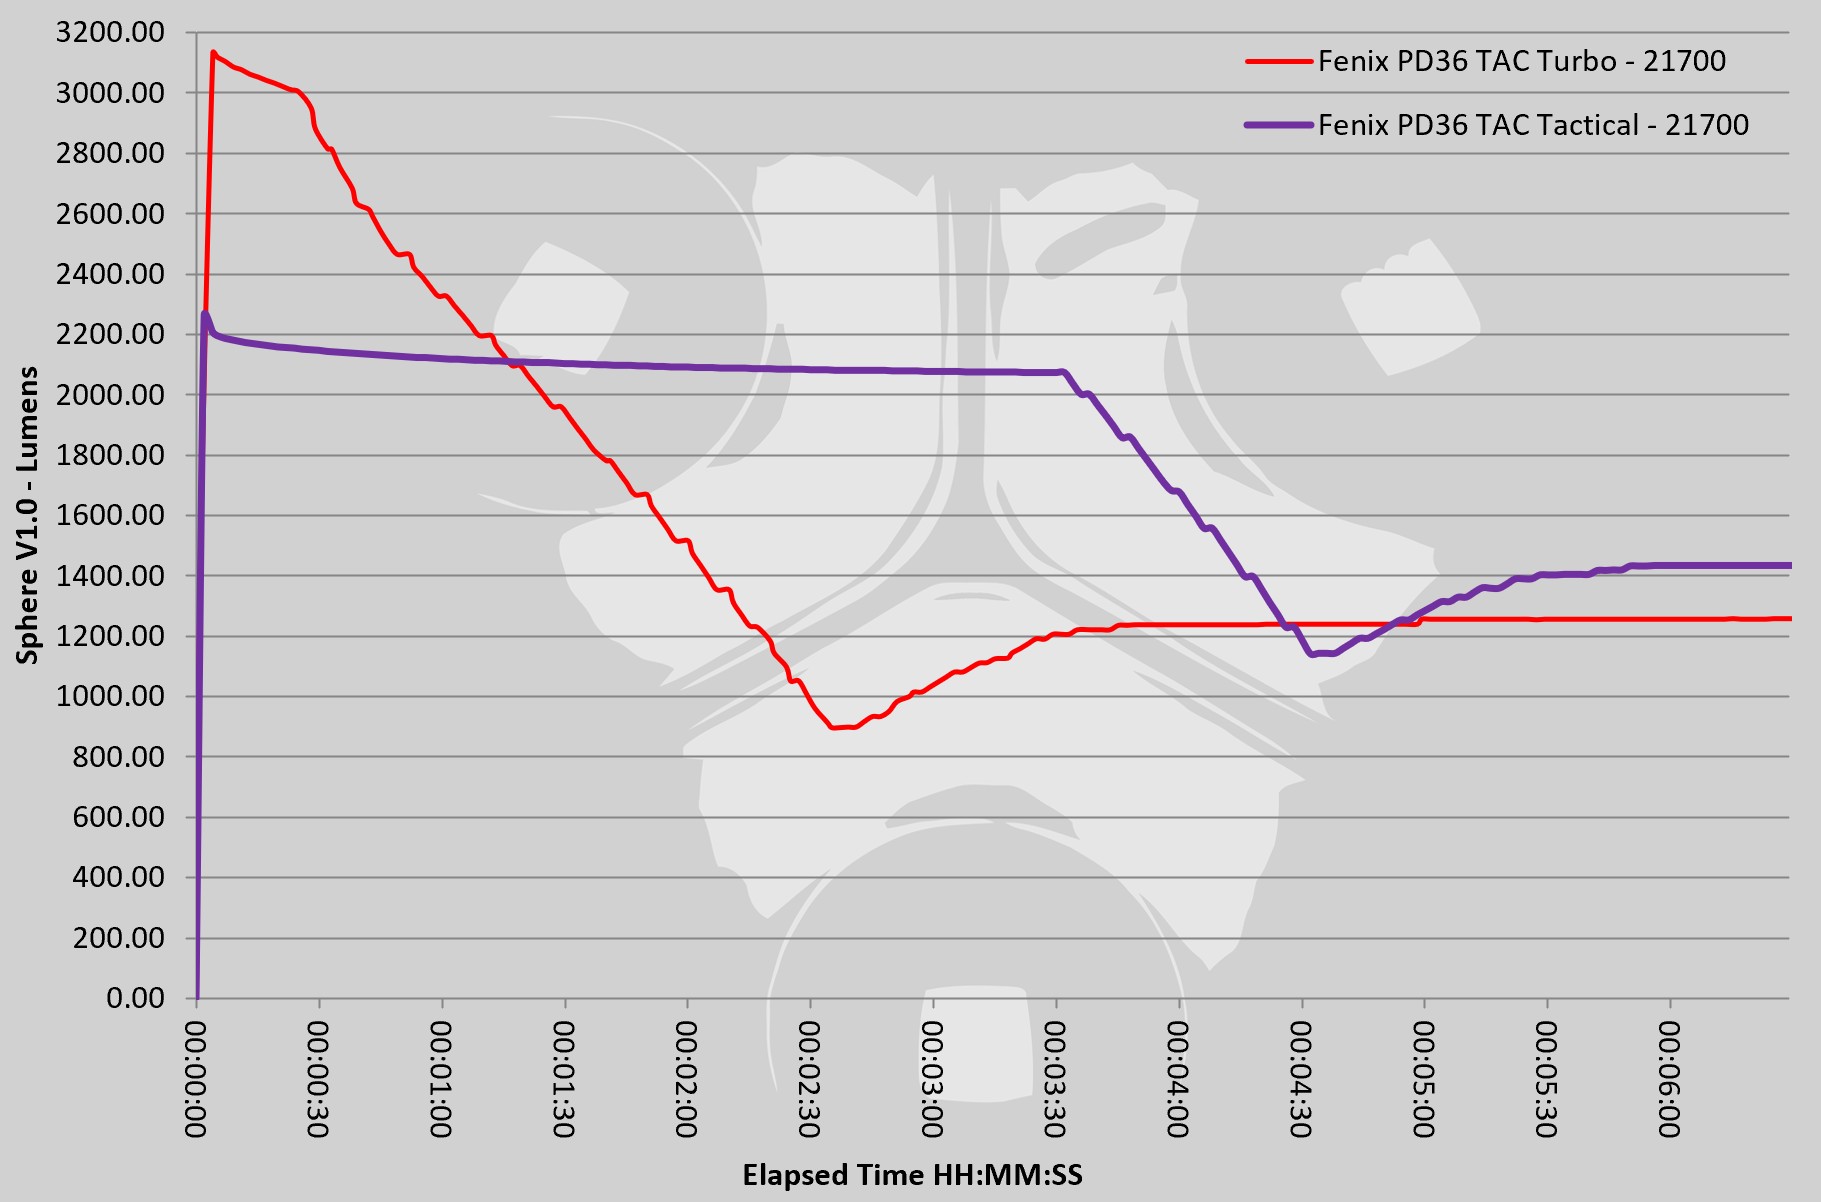
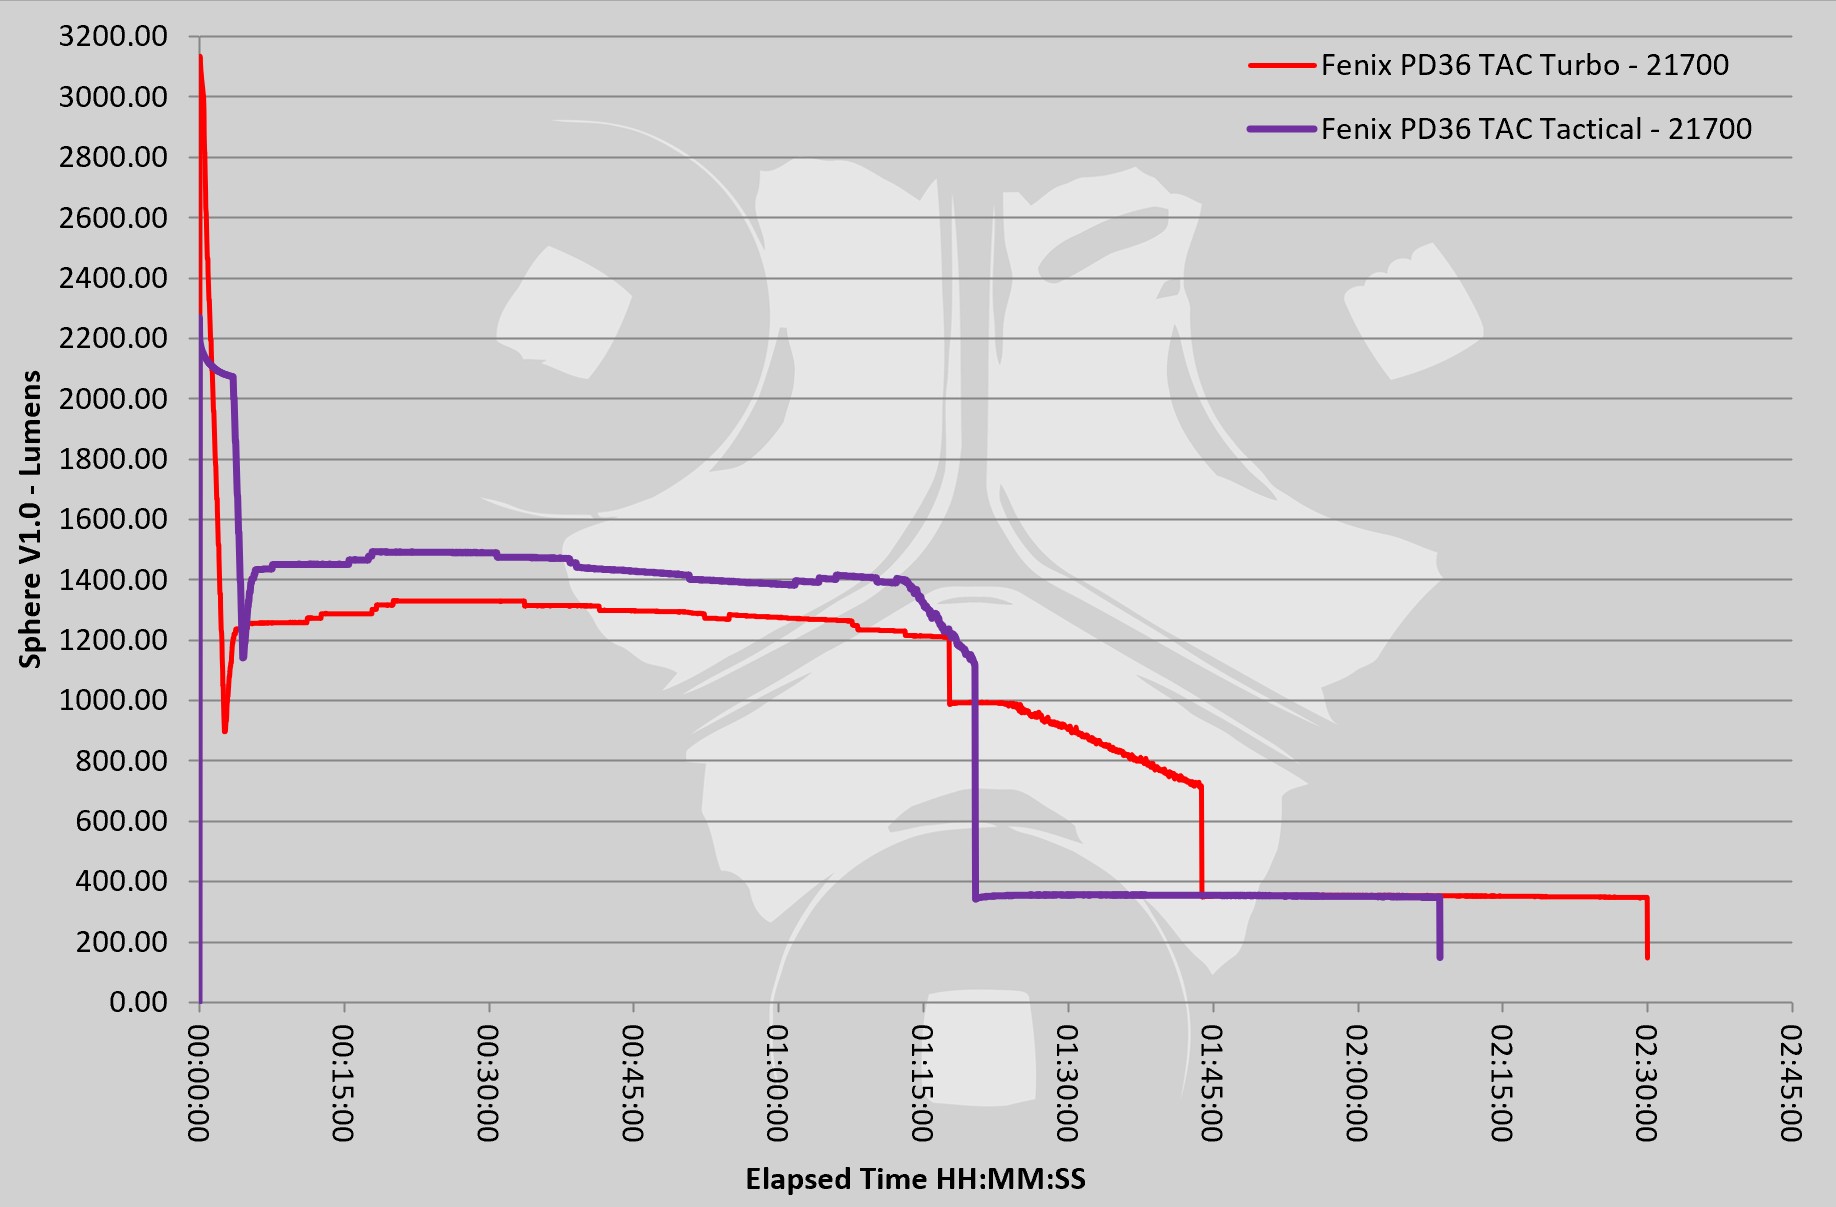
For the runtime graphs, I have included runs for Turbo and Tactical, which have different starting outputs. Also included is a graph of the first six minutes to better show the difference between Turbo and Tactical modes.
The PD36 TAC in use
The general change towards using 21700 cells is great for two reasons; better runtime/output and a comfortable size to hold. If you were completely unaware of the reason the battery tube was larger than previous generations that run on 18650, you would just be thinking the PD36 TAC is nice and comfortable to hold. The fact that it now houses a 21700 cell with that 5000mAh capacity is a further bonus to the comfort in the hand. Win win at this point.
With that greater capacity of the 21700 cell, this compact tactical light can pump out a huge 3000lm. Go back and look at the runtime graphs to see how impressively the PD36 TAC keeps its output going. The output limitation is more down to thermal capacity for longer runs.
This is the first of this style of Fenix tactical tail-cap I have been able to try. It has three functional modes. One is a simple and solid physical lockout. Line the selector ring up with the padlock, and the button does not move.
The selector ring certainly feels secure enough in its positioning that you won’t be accidentally going between locked and unlocked by accident. You pre-select the type of use you want and leave it there. Bear in mind, you can also use this to lock the PD36 TAC on. If you first turn it on to a mode you want and then rotate the selector ring to the padlock, you can’t turn it off again.
Being designed as a ‘Tactical’ light, most users will likely keep it in ‘Tactical’ mode – instant 2000lm output with momentary or latched action. Half press the tail-switch for momentary output, complete the press to latch it on (or just go for the full press to start with). Holding the switch fully in for about 1s and you enter strobe mode.
Move the selector round to the ‘Duty’ mode and you have access to five different output levels. Starting on ‘eco’ the first time you use it, but after that the last used level is remembered. Changing modes requires a half press – this can either be a half press from off and then cycle through modes before latching on, or a half press after turning the PD36 TAC on with a full press, the half presses then cycling through modes. Personally I would have preferred an automatic reset to eco after a few seconds being off as after not using it for a period of time, you won’t know if you had eco or turbo set, and this could be quite a shock.
The Fenix PD36 TAC is a purposeful lighting tool, and can instantly be reconfigured as either a dedicated ‘Tactical’ light or into a multi-mode ‘Duty’ light to fit with your needs.
Review Summary The views expressed in this summary table are from the point of view of the reviewer’s personal use. I am not a member of the armed forces and cannot comment on its use beyond that covered in the review.
Something that might be a ‘pro’ for one user can be a ‘con’ for another, so the comments are categorised based on my requirements. You should consider all points and if they could be beneficial to you.
_______________________________________________
What doesn’t work so well for me
_______________________________________________
‘Duty’ mode last used level remembered (so could be on eco or turbo).
Tail-switch has a relatively stiff action.
No grip ring provided.
_______________________________________________
Things I like
_______________________________________________
Great area lighting beam profile.
Nearly 3000lm from a compact light.
Three function tail-cap selector ring.
Dedicated ‘Tactical’ mode.
Proper physical lockout.
Uses a large capacity 21700 cell.
Supplied cell has built-in USB-C charging.
Very usable holster supplied.
With the Spyderco Respect, Sal Glesser is paying tribute to the traditional American Bowie knife. The design of the Respect dates back decades, but Sal didn’t have the opportunity to make it a reality until a couple of years ago. In this review I’m very excited to have the opportunity to take a very detailed look over this mighty bowie, and see how it really is to use.
Video Overview
In this video of the Respect, I’ll show you how it arrives, how it compares to some other well known bowie knives, and run through the Tactical Reviews technical specification measurements.
This is some of the pre-use processes I go through for a new test sample before I can put a knife through its paces, so doesn’t include the in-use aspects beyond first impressions.
A few more details:
What’s in the box?:
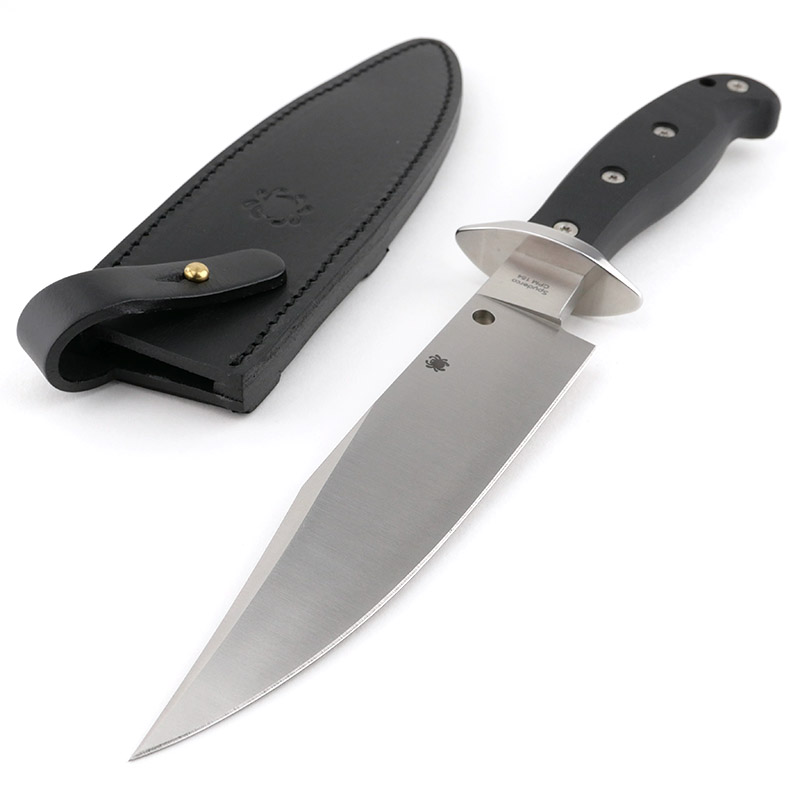
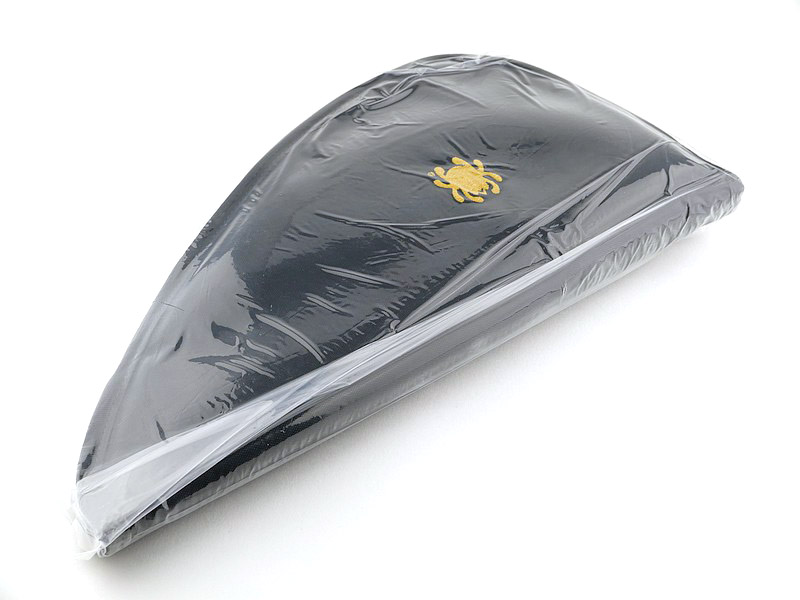
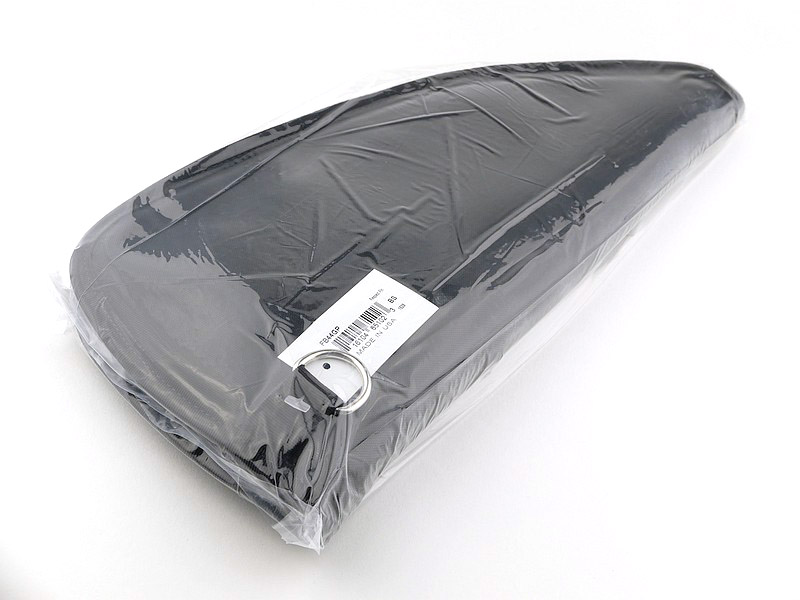
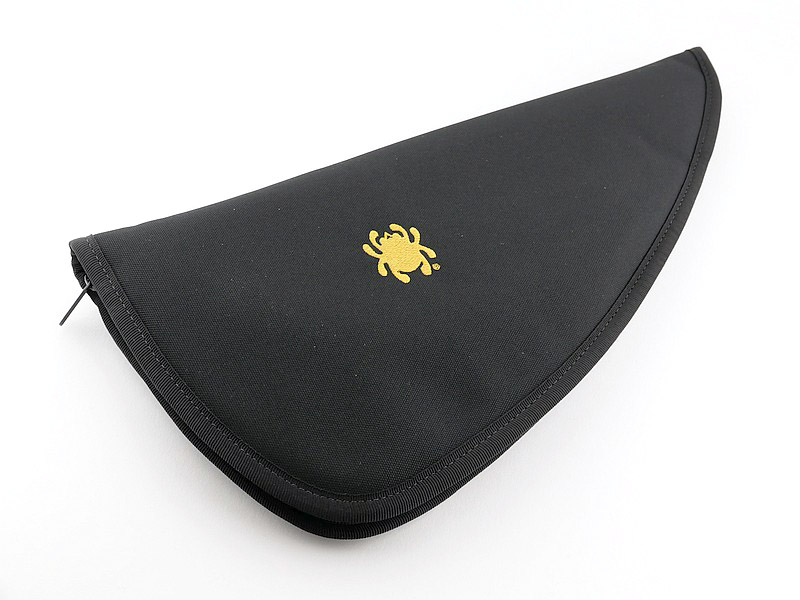
Or should I say bag? – This is the unpacking of the Respect, and differs from the typical Spyderco as it does not come in a box.
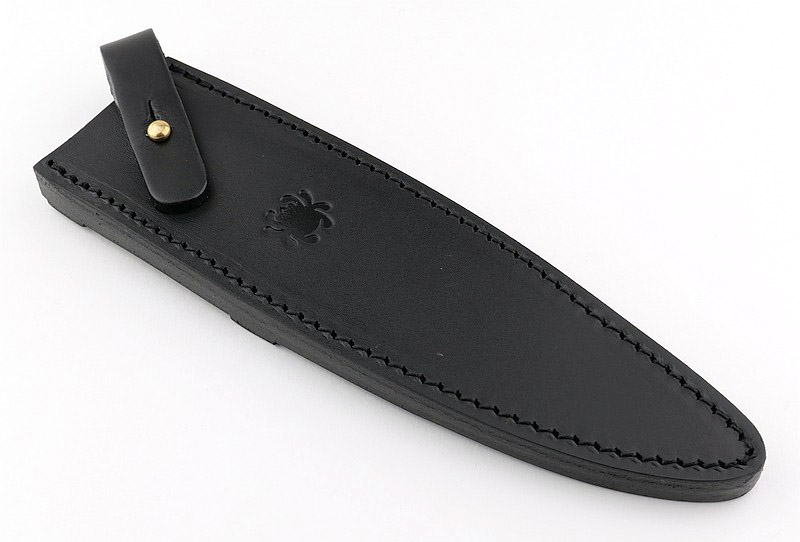
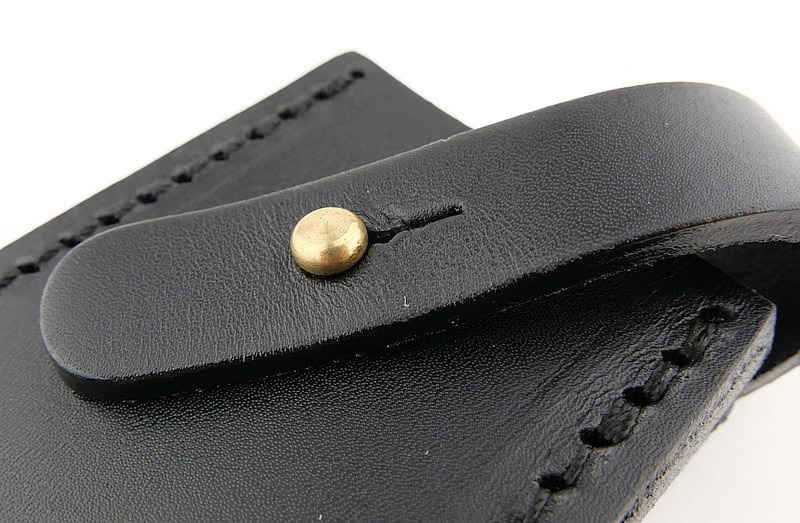
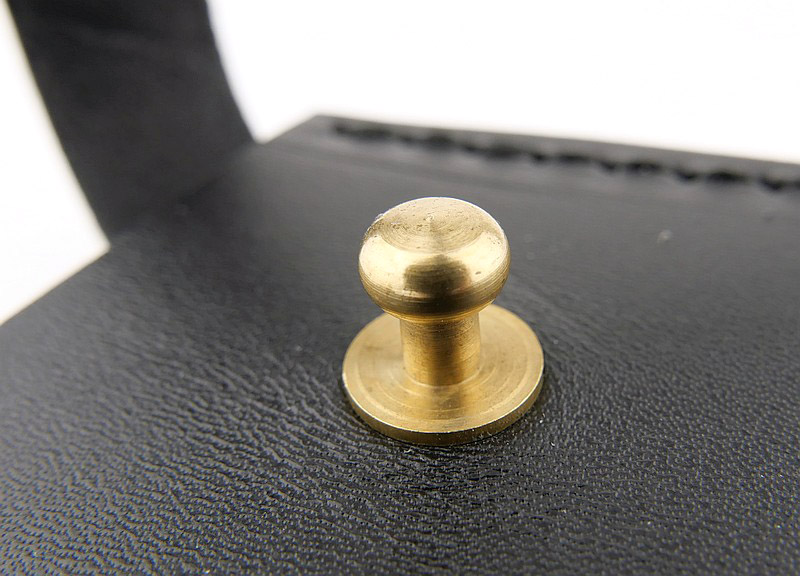
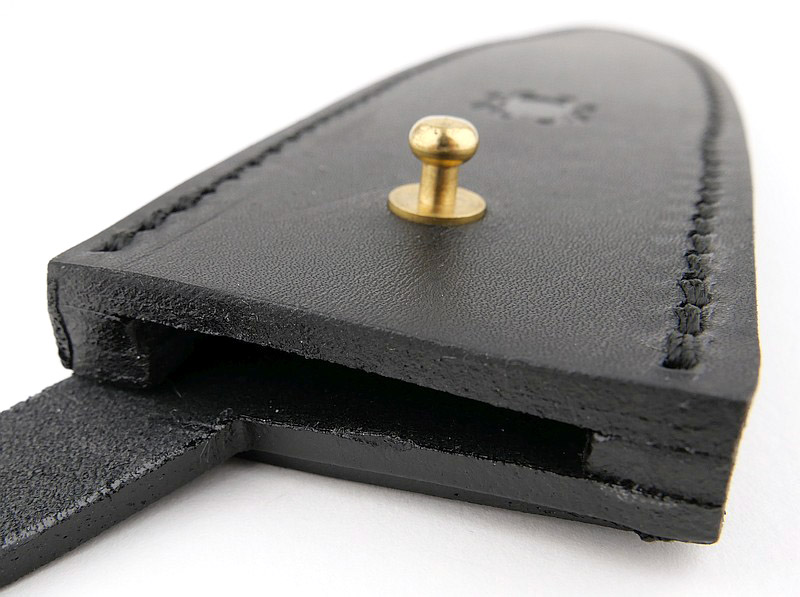
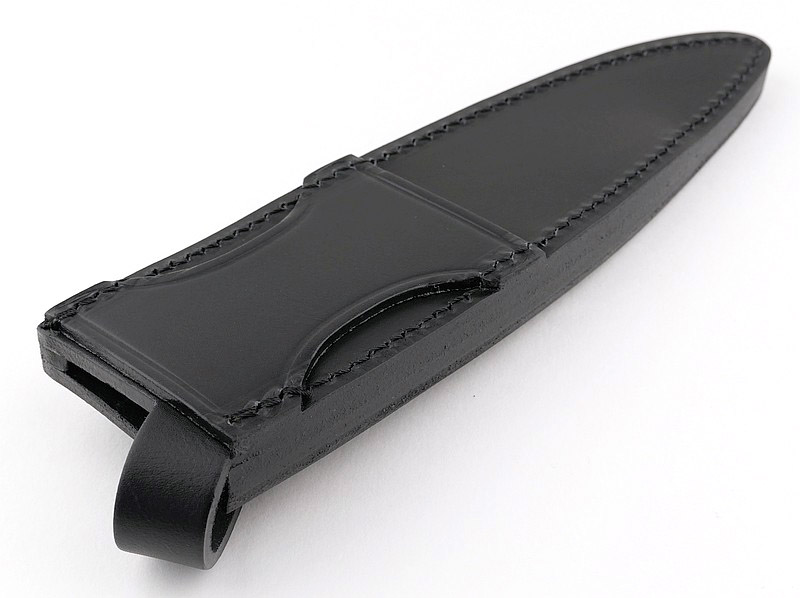
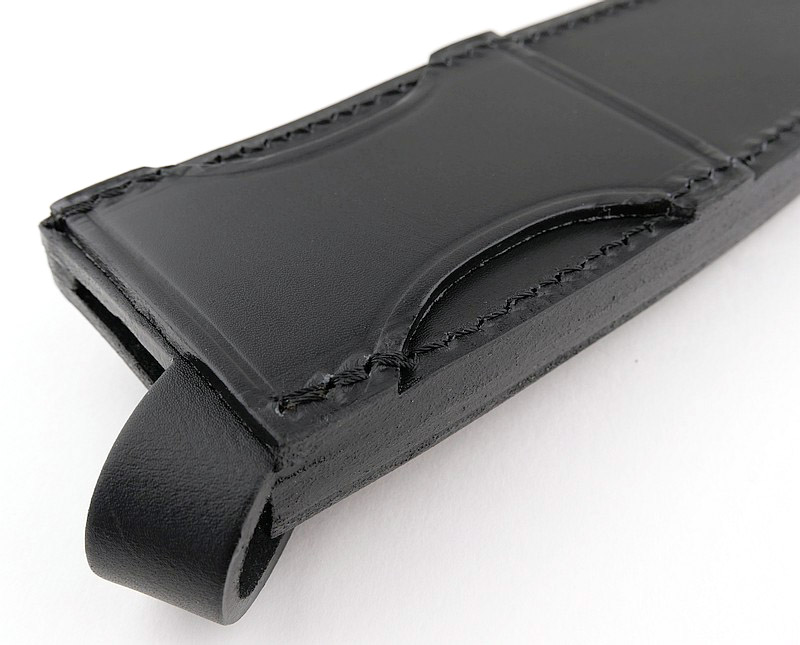
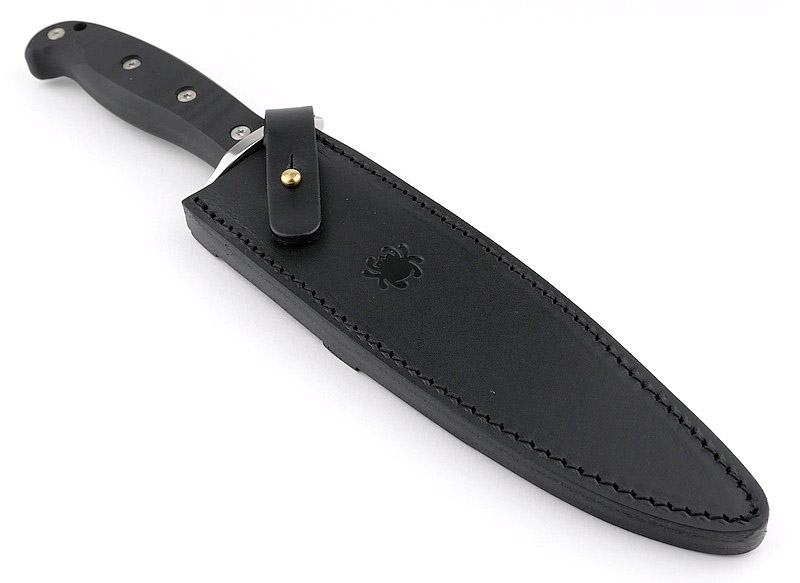
A good look round the Respect’s sheath – Things to look out for here are:
Starting with the leather sheath that comes with the Respect. Simple and functional with a classic strap and stud fastening.
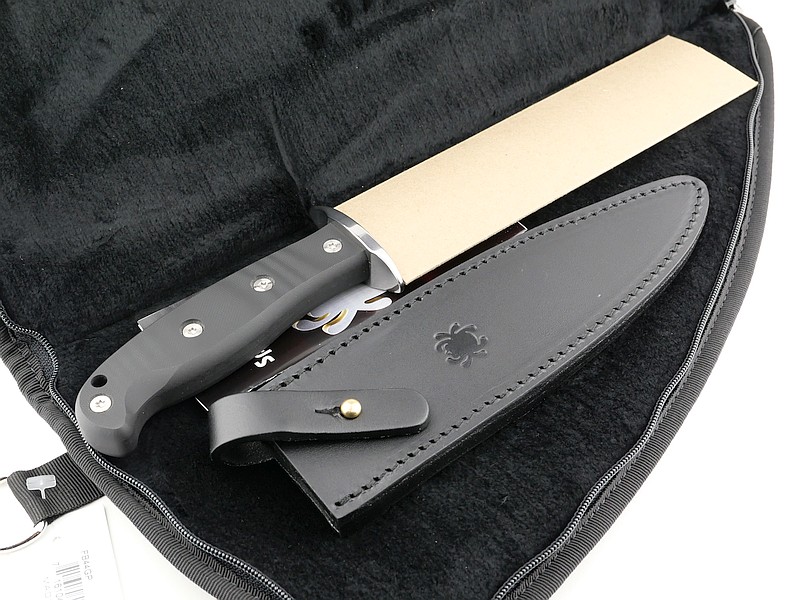
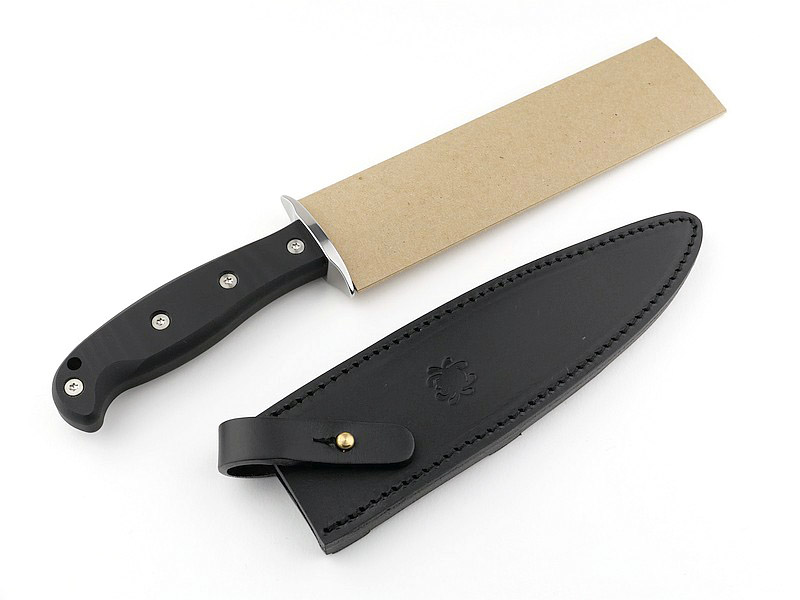
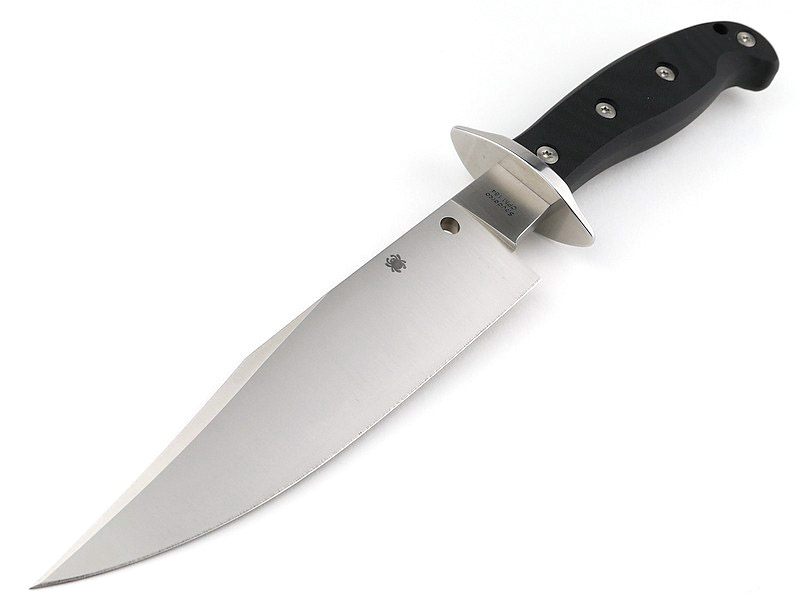
A good look round the Respect – Things to look out for here are:
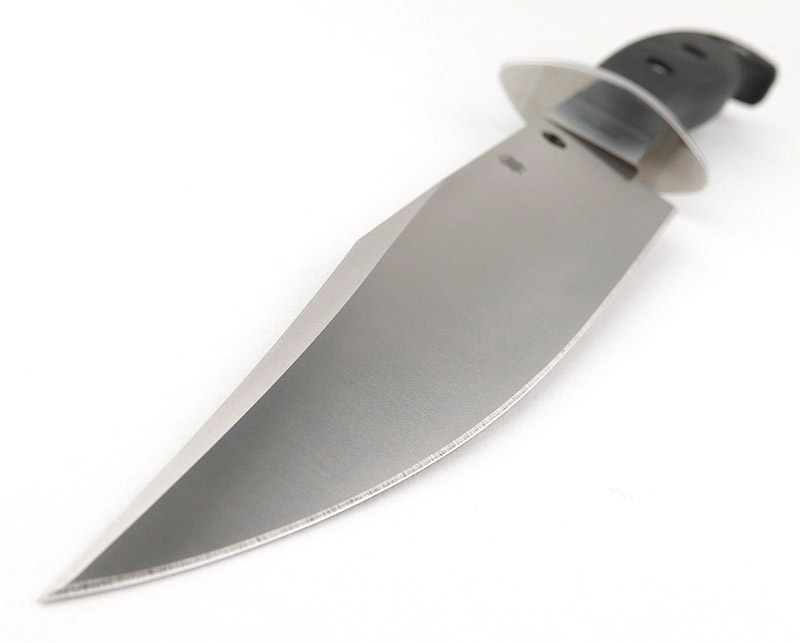
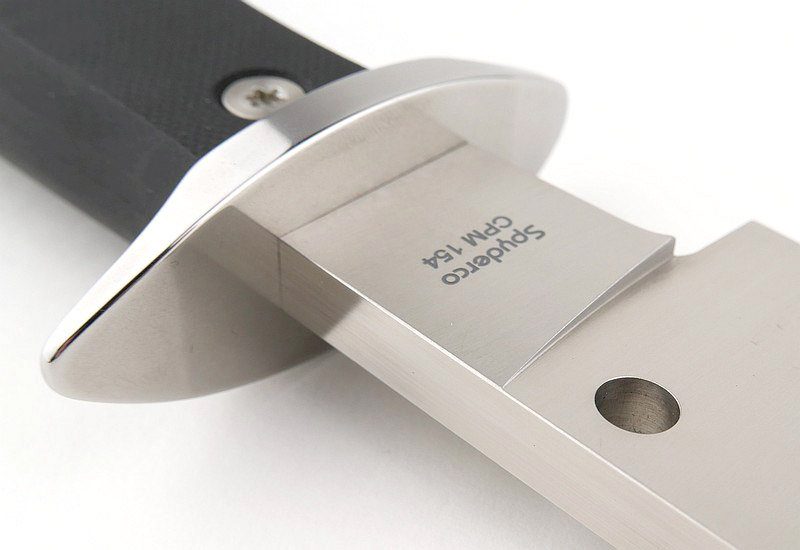
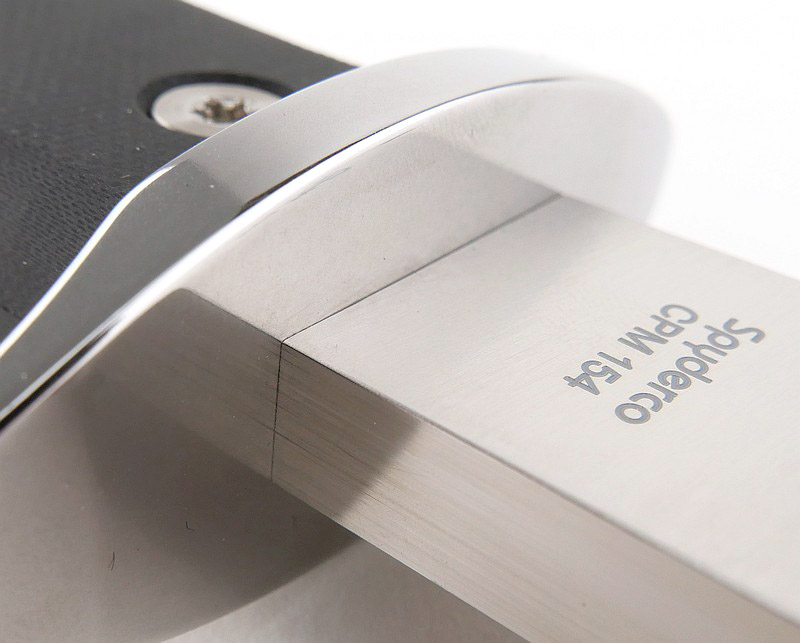
A mighty blade, and a superb level of fit and finish. Take in the detailed close-ups and enjoy.
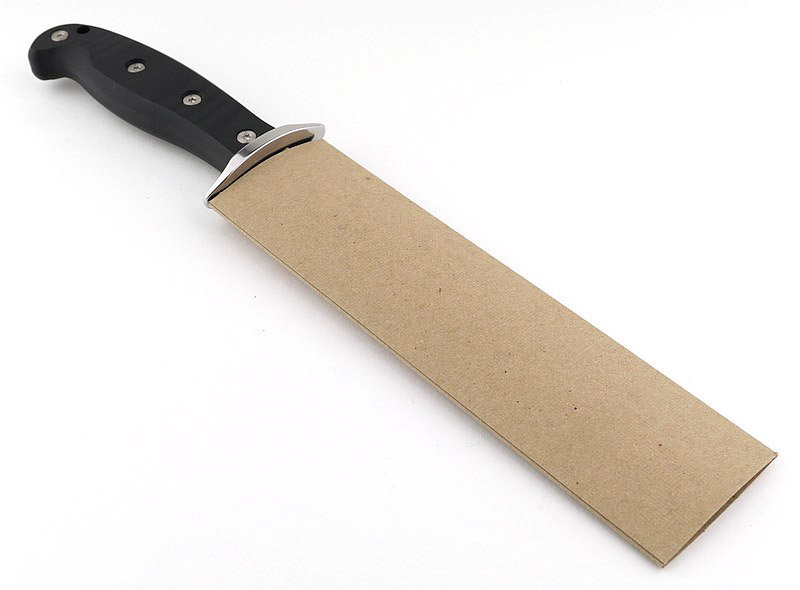
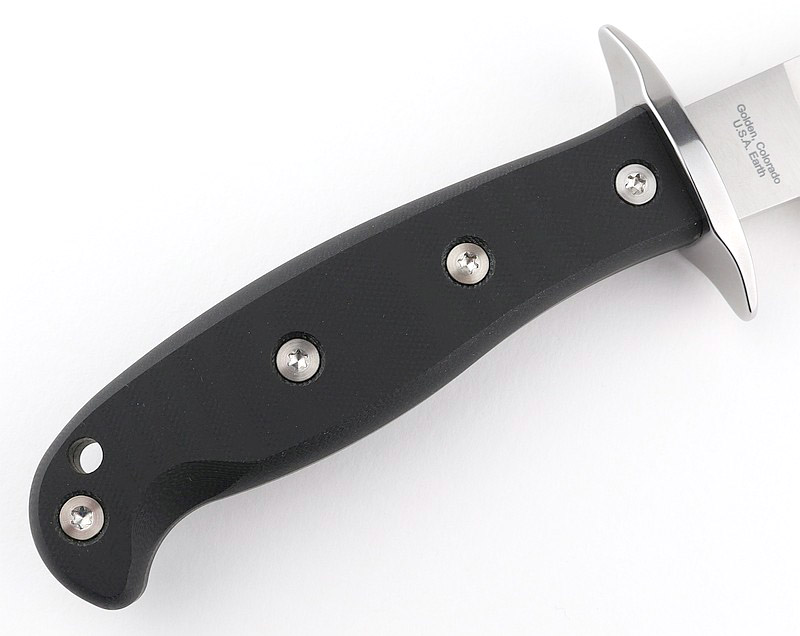
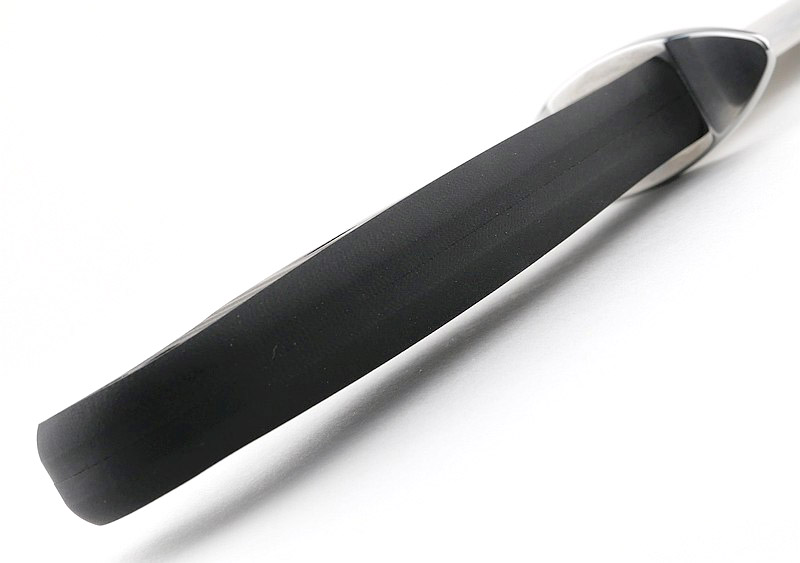
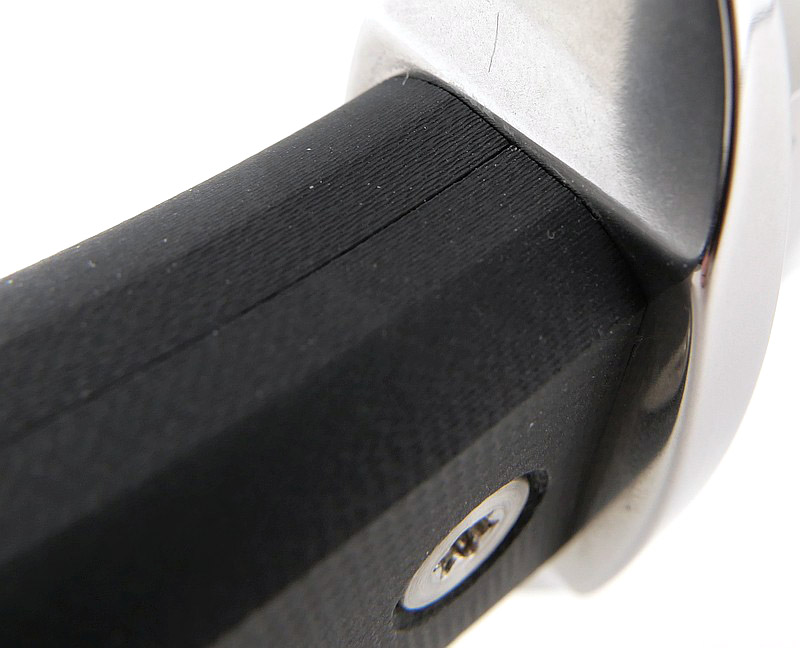
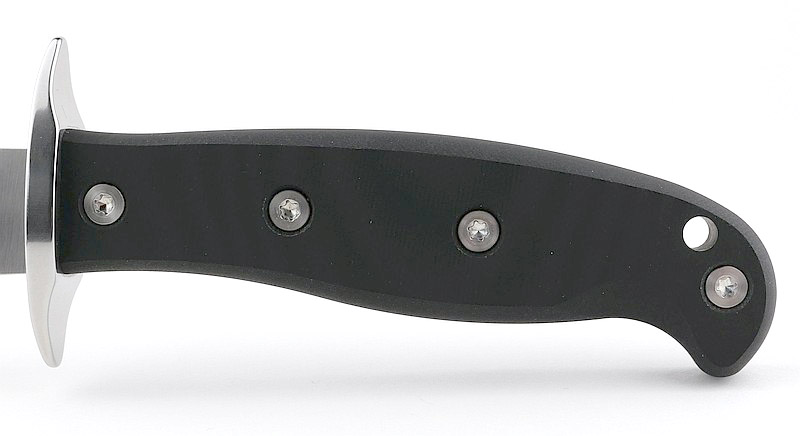
A good look round the Respect’s handle – Things to look out for here are:
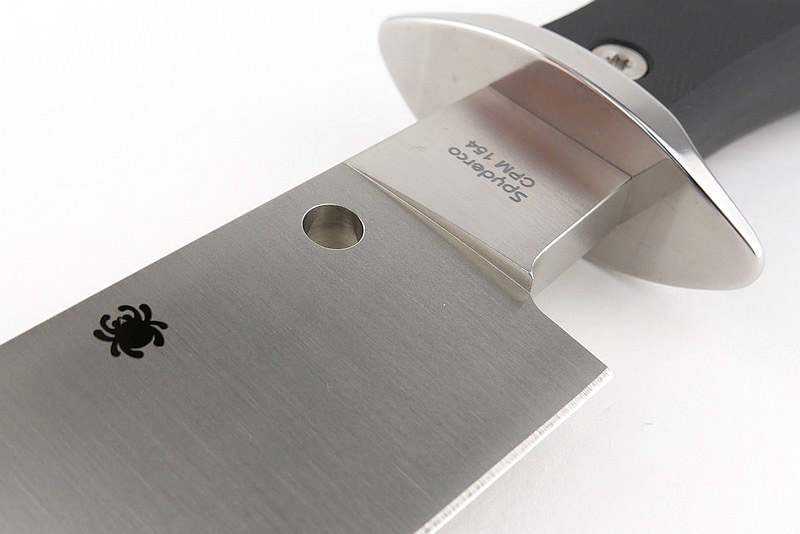
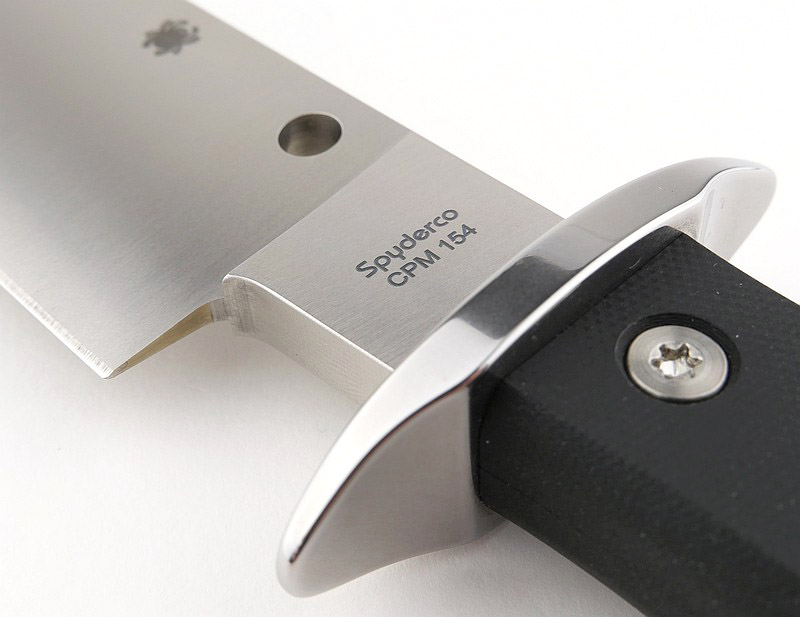
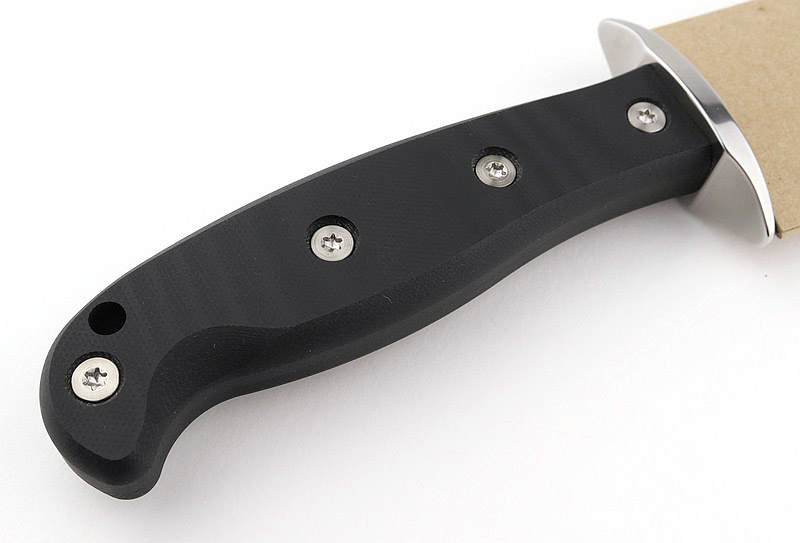
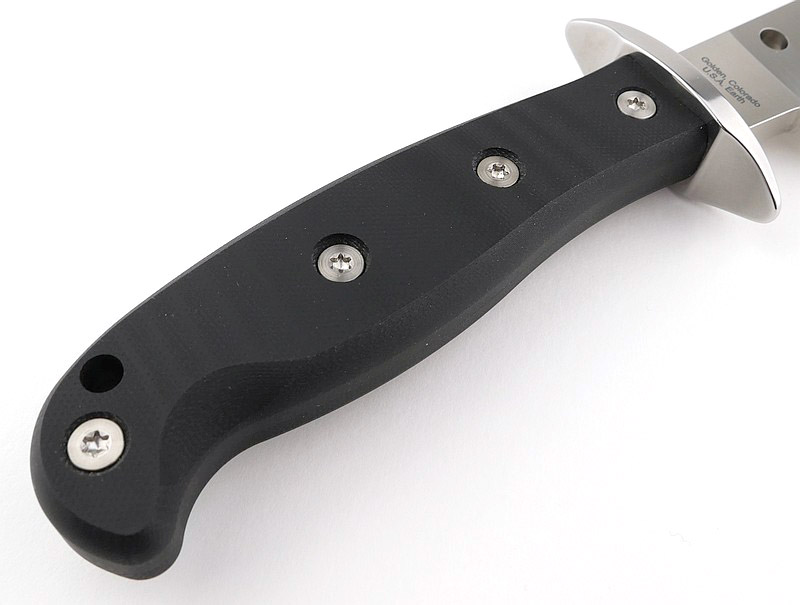
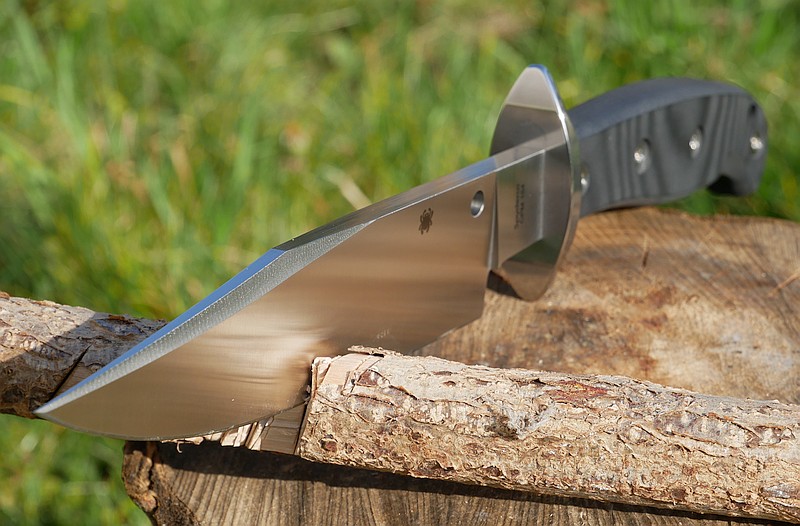
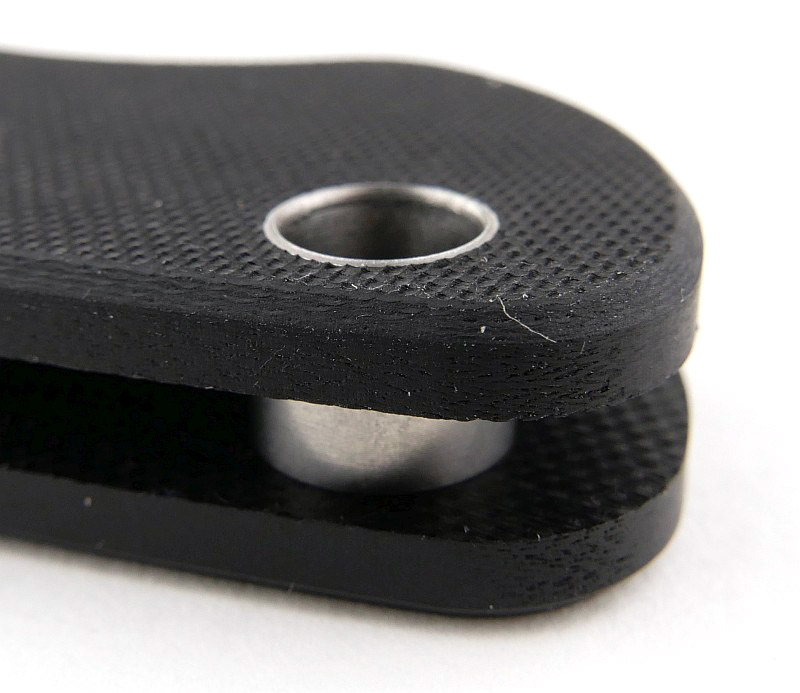
A fully concealed, full tang, with the two G10 slabs secured with four bolts.
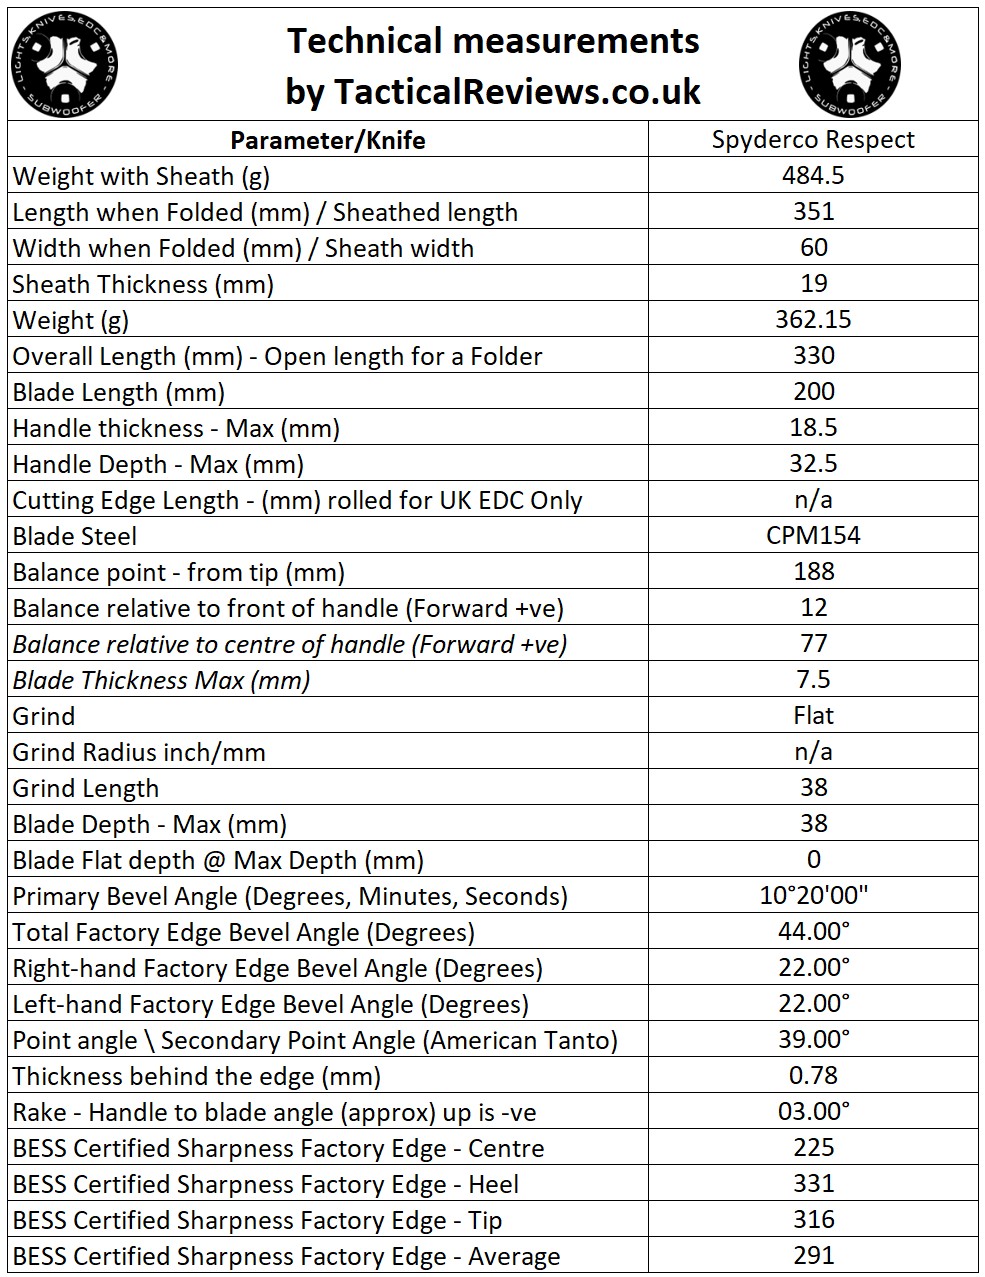
The Blade and Handle – Detailed Measurements:
For full details of the tests and measurements carried out and an explanation of the results, see the page – Knife Technical Testing – How It’s Done.
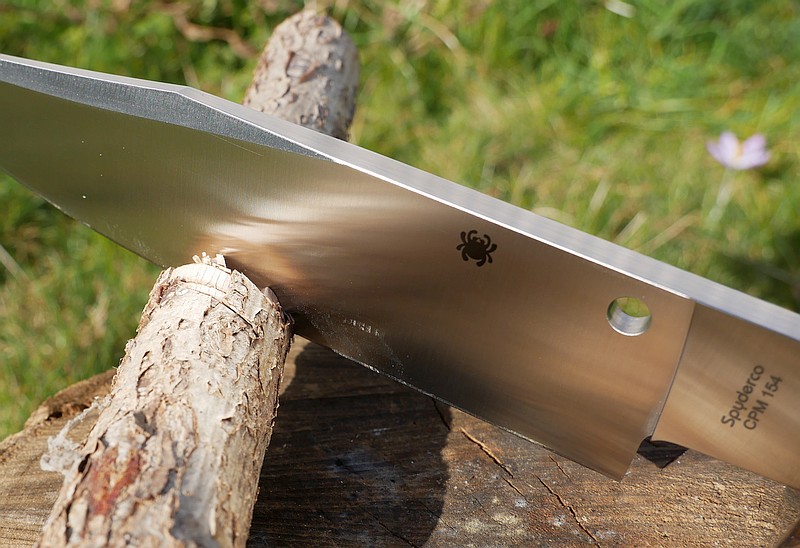
The blade is made from CPM 154 steel.
The Factory edge up close – NEW FOR 2022!:
Followers of Tactical Reviews will know my views on factory edges, but to recap:
Anyone using a knife will need to sharpen it. That first factory edge is just like the first tank of fuel that a new car comes with (or first charge of the battery).
A good factory edge is a ‘nice to have’ but not a ‘make or break’ for a good knife, as you will be putting your own edge onto it soon enough.
The factory edge does however indicate the care a knife maker has put into the final finish.
It is for this reason Tactical Reviews measures factory edge sharpness and specifications, and includes this information in the detailed technical testing.
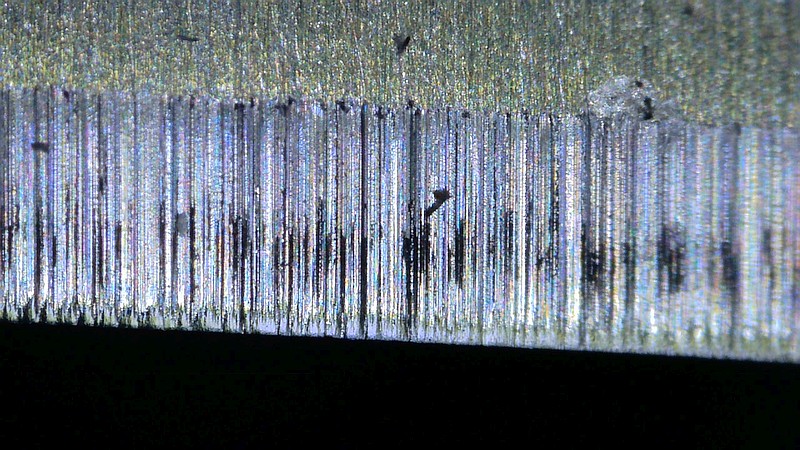
As a further look at the factory edge, this section has been added to include some high magnification photos of the factory edges.
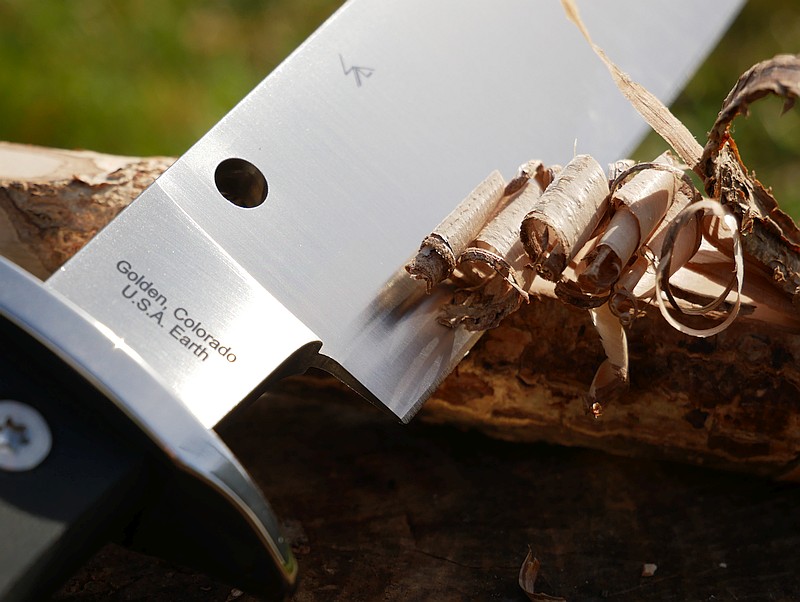
The Respect’s factory edge shows an aggressive micro-serration, and slices well beyond the sharpness measurements might indicate in the technical testing table.
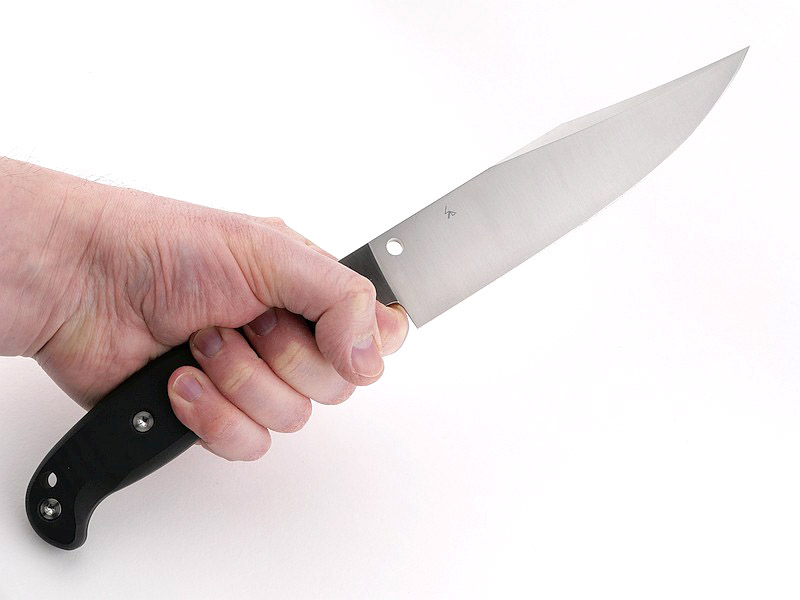
What is it like to use?
It’s a mighty blade! So the first impression is that this is a big knife, big blade and big handle. I take XL size gloves, so you can see here the handle is generously sized, perfectly big enough to use with heavy gloves on and stay comfortable.
The large choil easily allowing a finger to be placed for a choked up hold when carrying out finer cutting tasks.
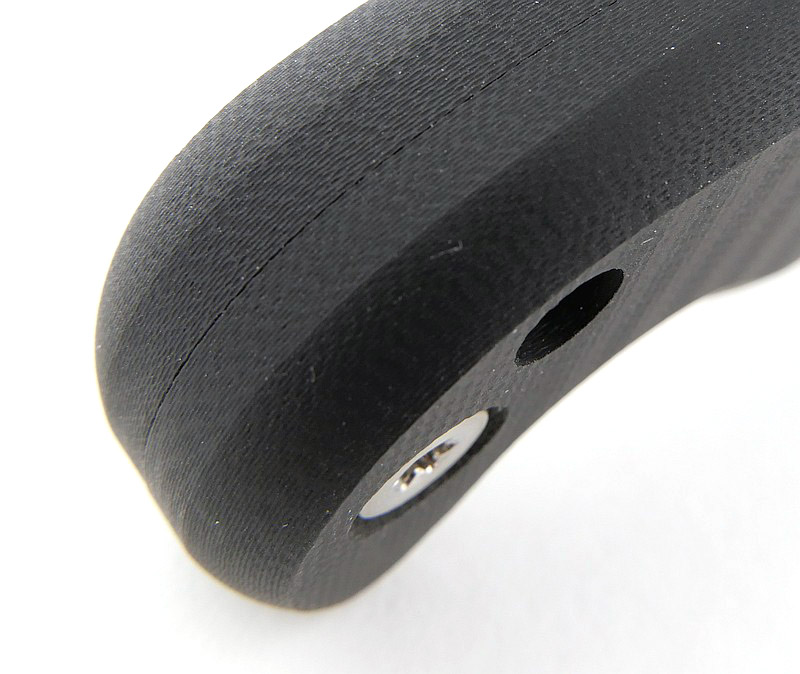
A deep hook at the butt means even if you have a bit of grip slippage, the hook will stop you losing grip. That hook also allows for a low grip for greater leverage in heavy chopping.
Staying on the subject of grip, though the handle scales are relatively smooth, the four bolt holes actually (intentionally or not) give a lot of extra purchase. The holes have a sharp edge to them so when gripping your hands press into them and grab.
CPM 154 – oh yes, one of my all time favourites and this knife is one big piece of CPM 154. I have to drop in another name here, Leatherman, and the reason being that in Leatherman pliers with replaceable wire cutters, the cutter is made of CPM 154, chosen as the idea tool steel to cut hardened steel wire! And here it is as the blade steel used for the Respect – Yes! (Ok a bit of steel bias there, but I like it.)
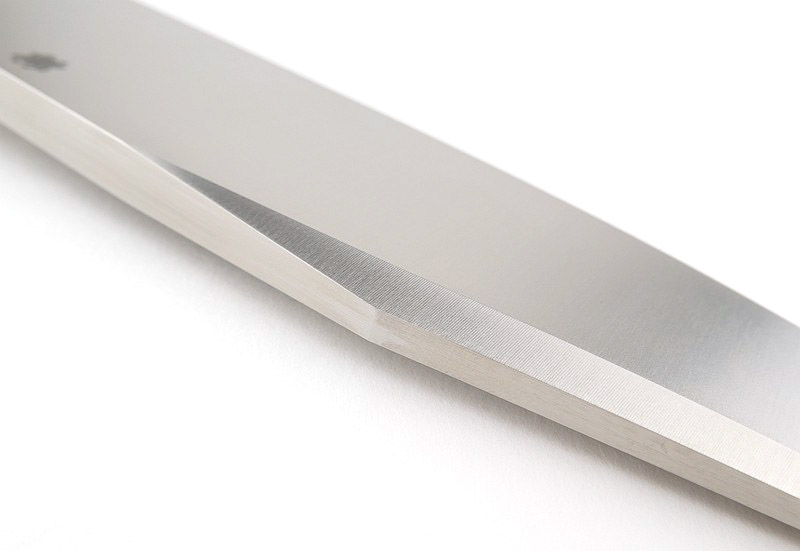
This knife has a spine measuring 7.5mm, which is massive! Yet with a full flat grind 38mm long, the blade geometry is still a strong slicer – it does ultimately still need to part the material past that 7.5mm spine, but for such a strong blade it is still impressively good at slicing.
As a chopper it is very capable. In the photos below all the wood is well seasoned, even the small branch shown. In dry timber the blade can bind a bit when cutting in deep, but once you get a few relief cuts in the wood chips fly! Grip is perfectly secure when chopping and the grip hook definitely helps.
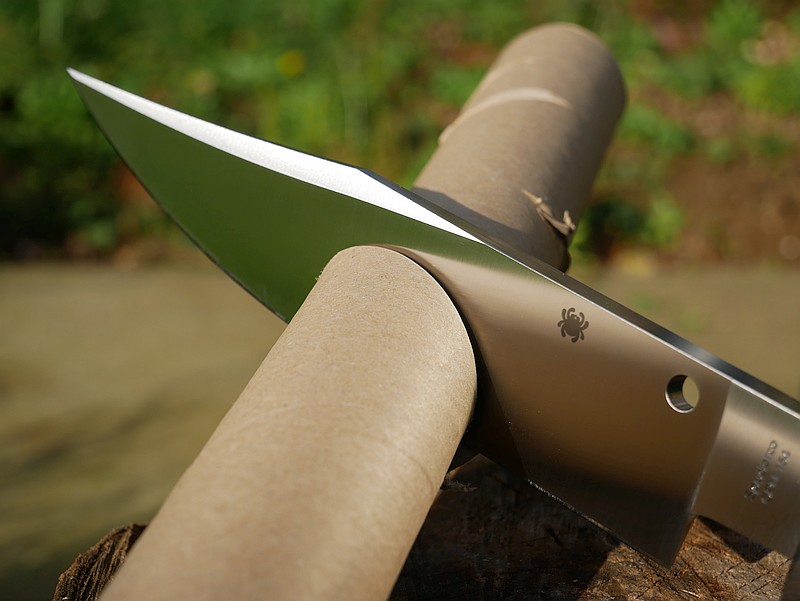
There is a also a photo of a single chop into an industrial cardboard tube (5mm dense card walls) which it went through with ease.
The Respect is not for the faint hearted; when you carry this knife, you mean to carry a knife. It is imposing, impressive and a powerful cutter.
Review Summary
The views expressed in this summary table are from the point of view of the reviewer’s personal use. I am not a member of the armed forces and cannot comment on its use beyond a cutting tool or field/hunting knife.
Something that might be a ‘pro’ for one user can be a ‘con’ for another, so the comments are categorised based on my requirements. You should consider all points and if they could be beneficial to you.
_______________________________________________
What doesn’t work so well for me
_______________________________________________
Needing to choke-up on the blade for fine work.
Belt loop position makes the knife ride high.
The blade spine is almost too thick.
_______________________________________________
Things I like
_______________________________________________
Large choil makes sharpening to the very heel easy.
Comfortable handle, large enough to wear heavy gloves.
Traditional look in modern high performance materials.
Quality leather sheath.
CPM 154 steel.
Full Flat grind.
A really ‘purposeful’ design with presence.
Discussing the Review:
The ideal place to discuss this review is on the Tactical Reviews Facebook Page
Please visit there and start/join the conversation.
As well as the Tactical Reviews Facebook Page, please consider visiting one of the following to start/join in any discussion.
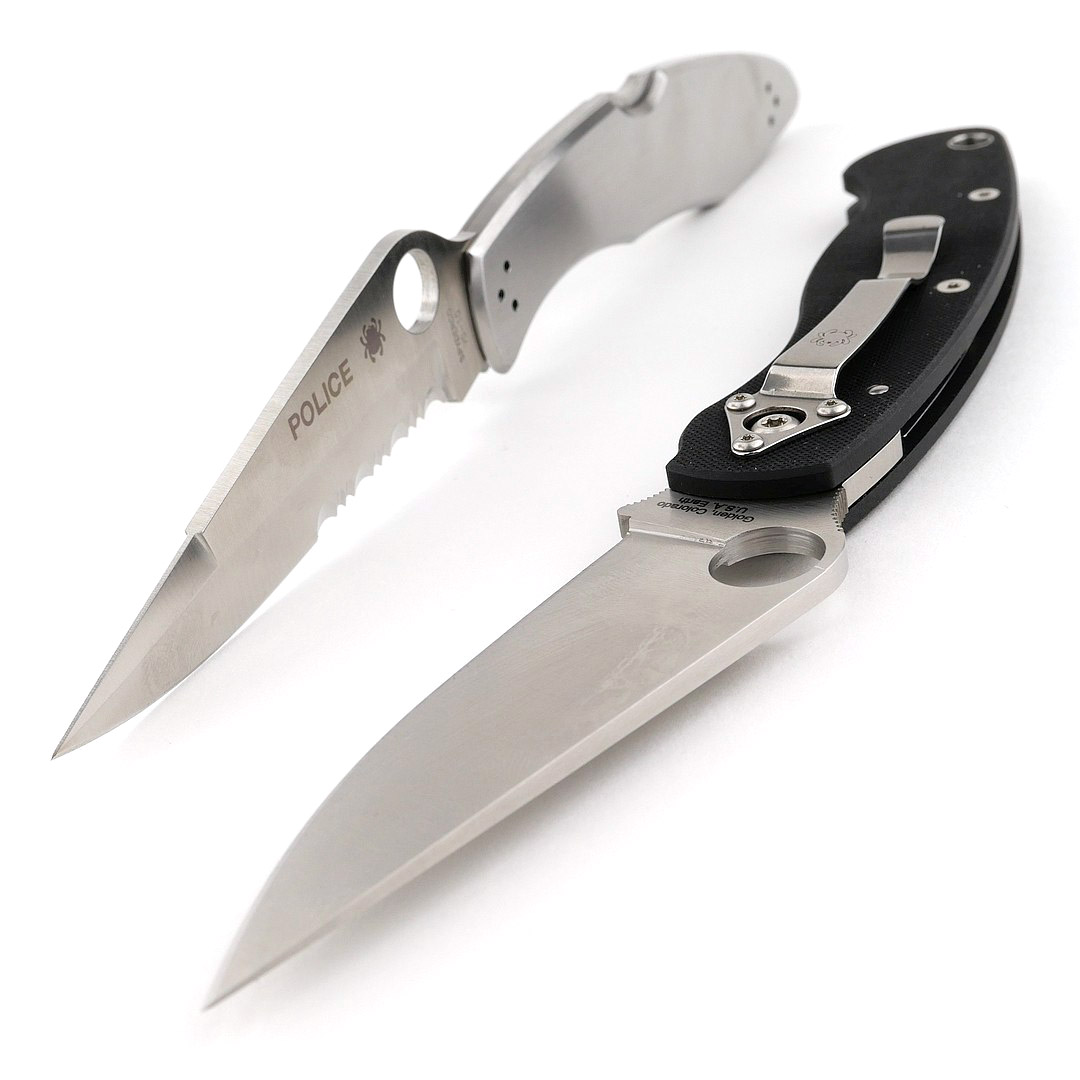
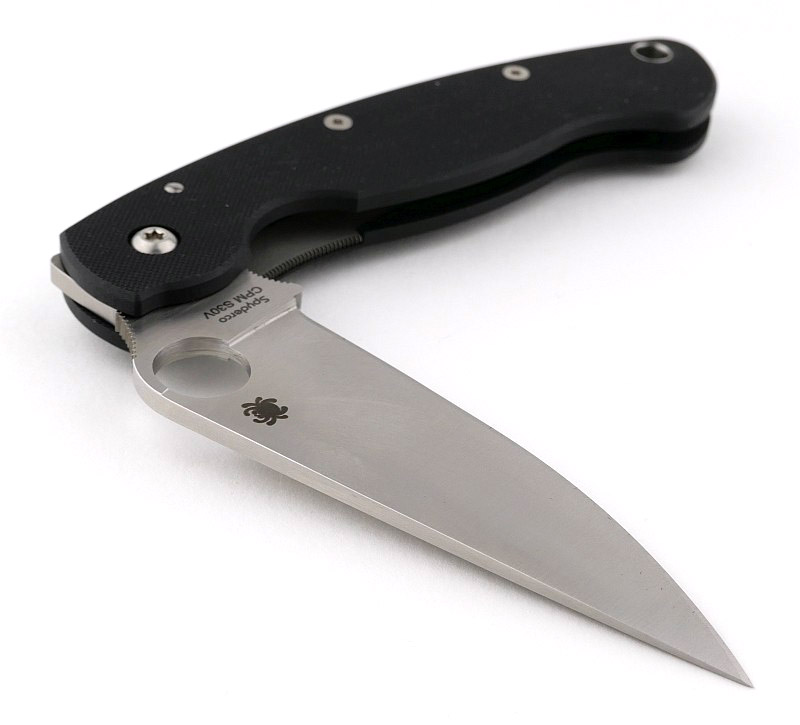
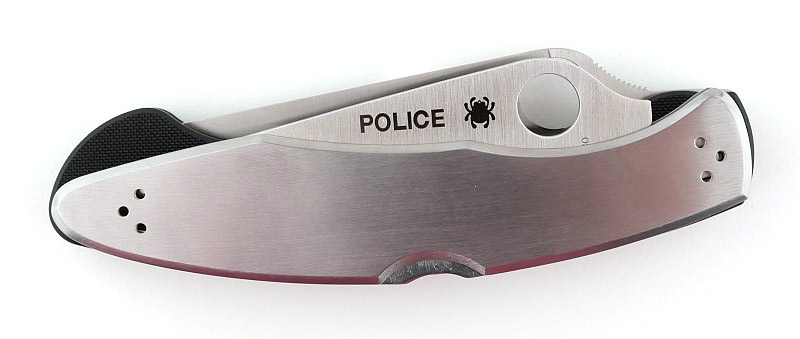
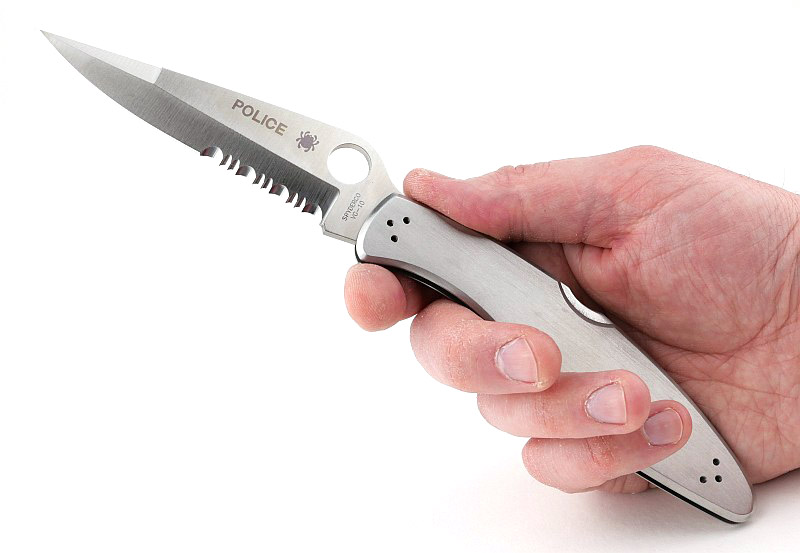
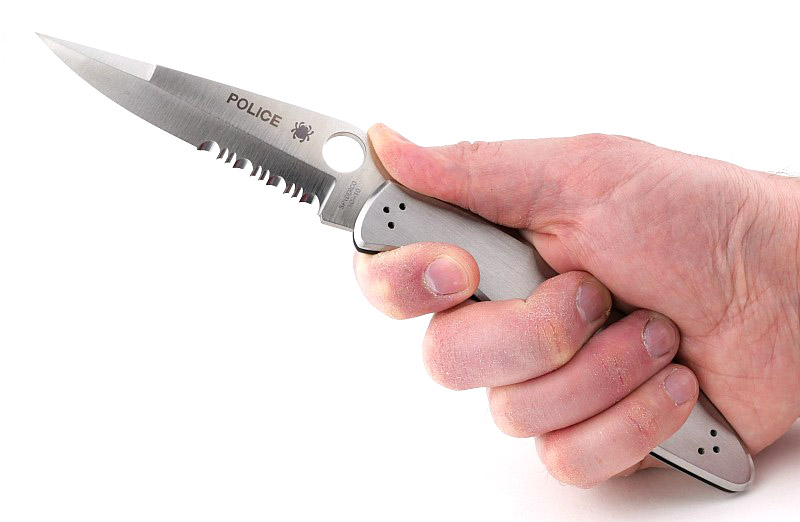
We all know them, we might not all have them. These two Spyderco classics (Police and Military) have stood the test of time and use, and are still current models – for good reason.
I refer to them as ‘Classics’ and Spyderco calls the Police model a ‘Signature’ model and the Military a ‘USA Made’ and/or ‘Save and Serve’ model. Both really qualify as a classic in my opinion and are worthy of being in your pocket.
Video Overview
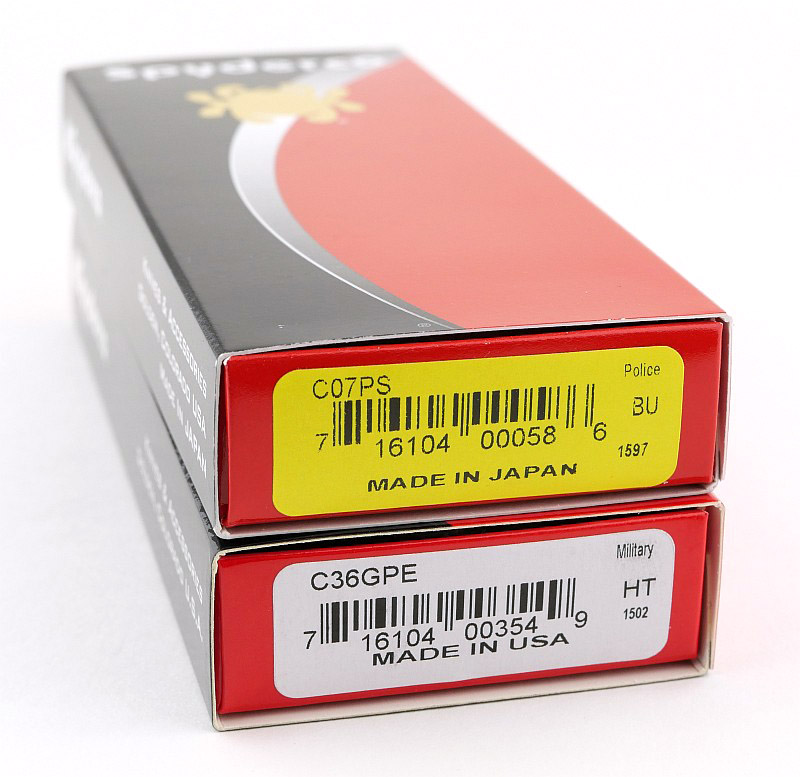
This video is a detailed look at the Police and Military Models, from handling to technical measurements. Hopefully something for everyone and you should have a better idea if you should also pick up one or both.
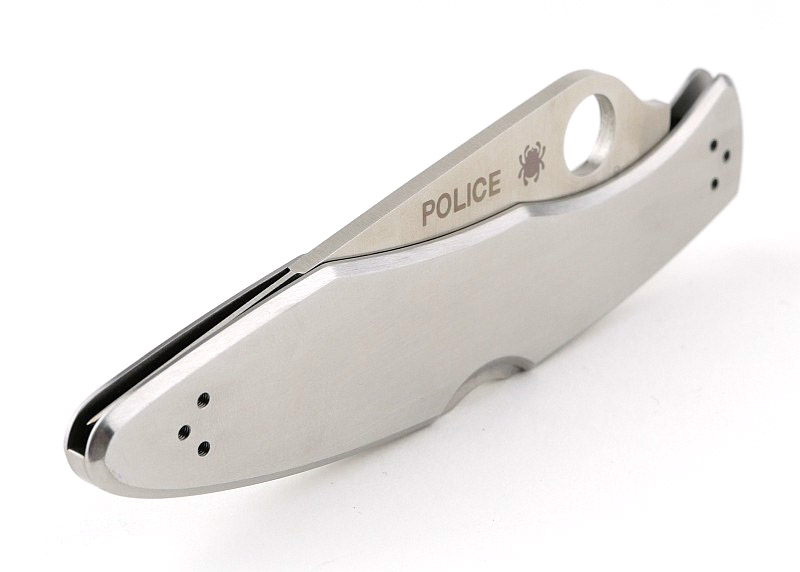
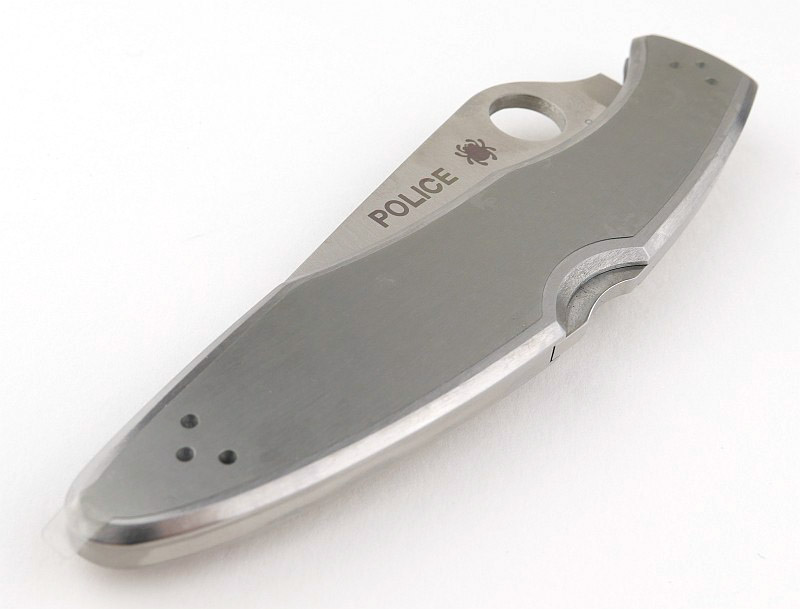
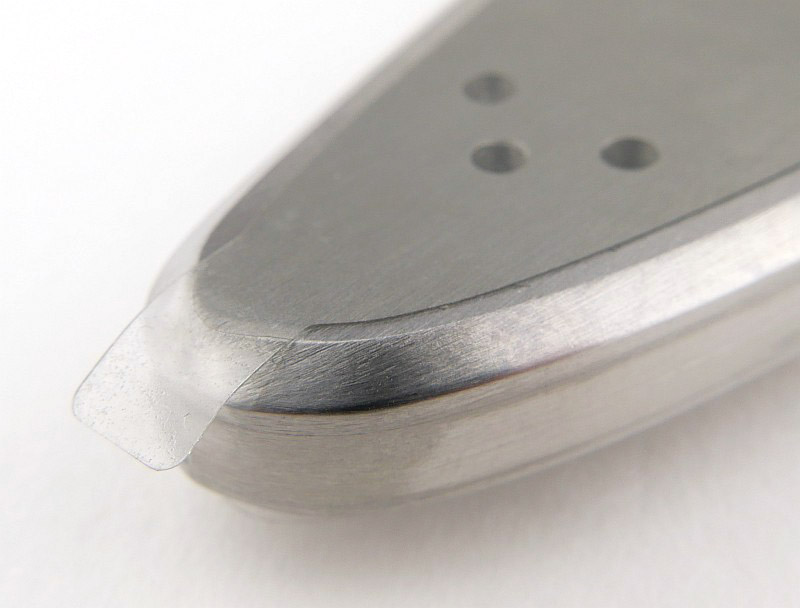
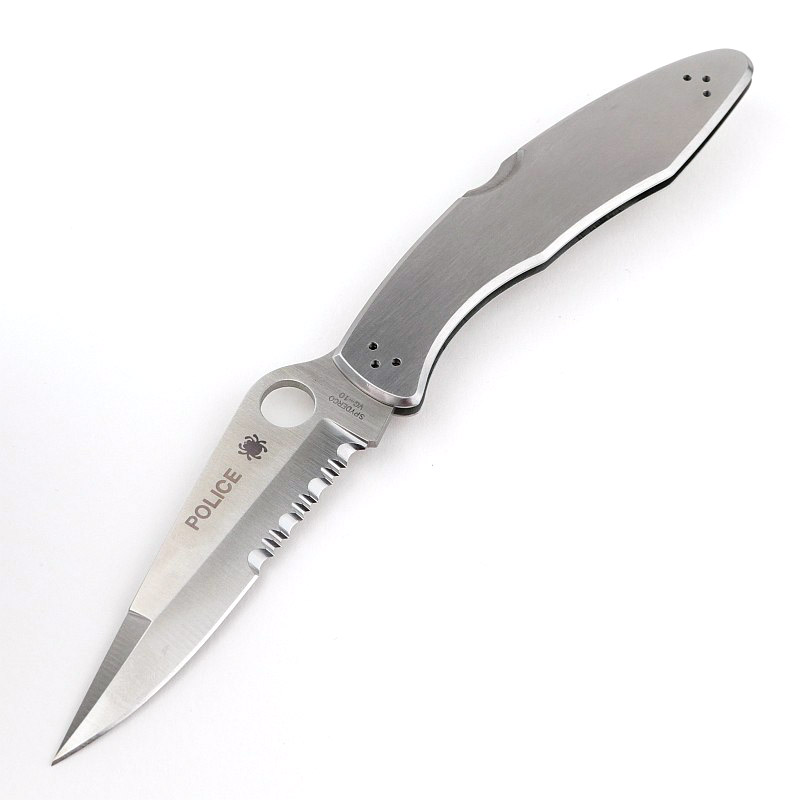
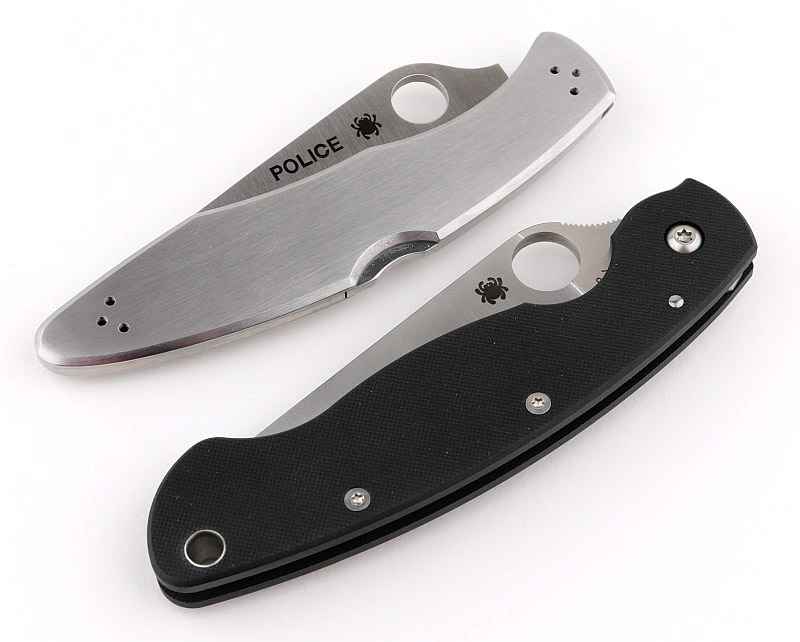
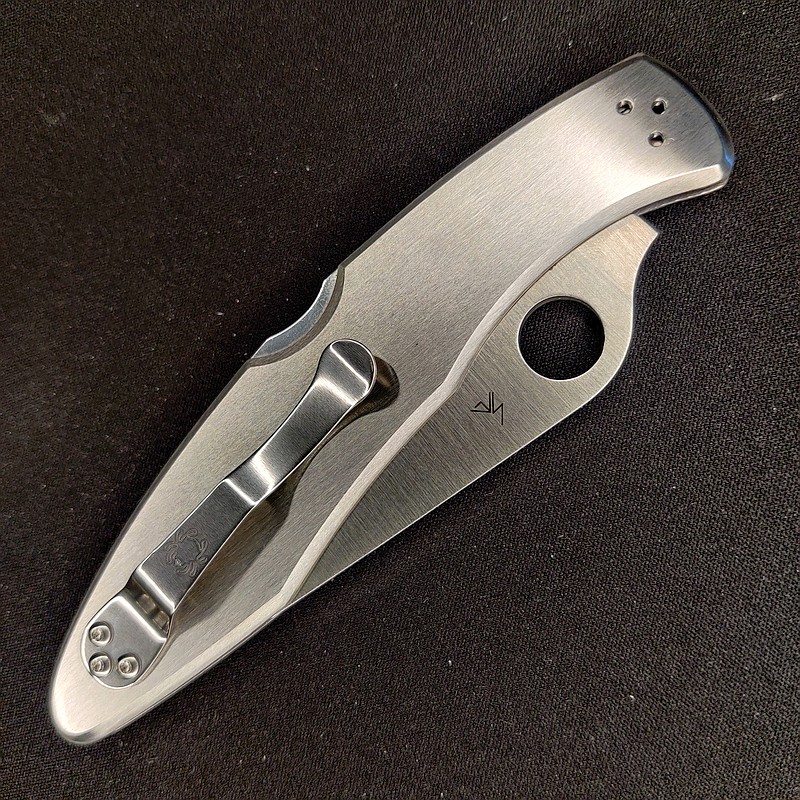
A good look round the Police Model – Things to look out for here are:
Being of full stainless steel construction, and having brushed steel handles, to ensure you get it in new condition, the handle scales come with protectors fitted that you need to peel off.
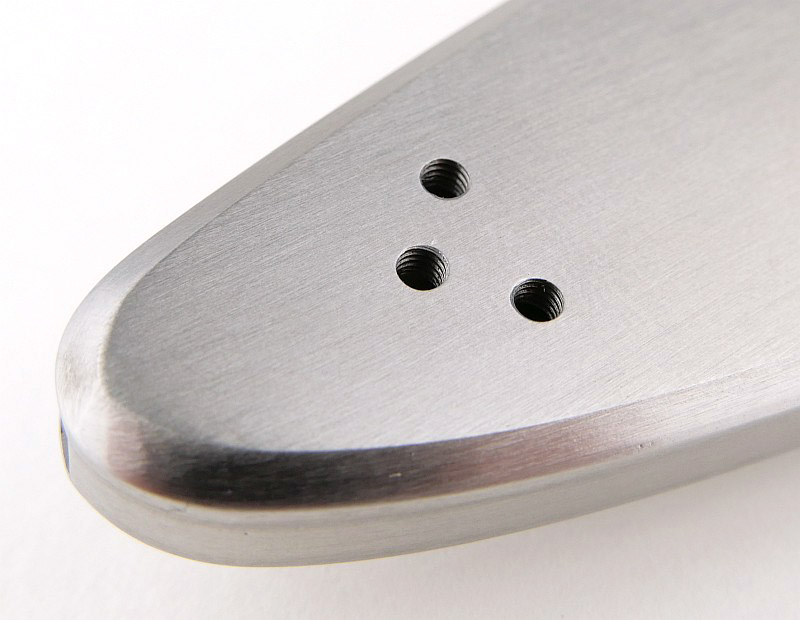
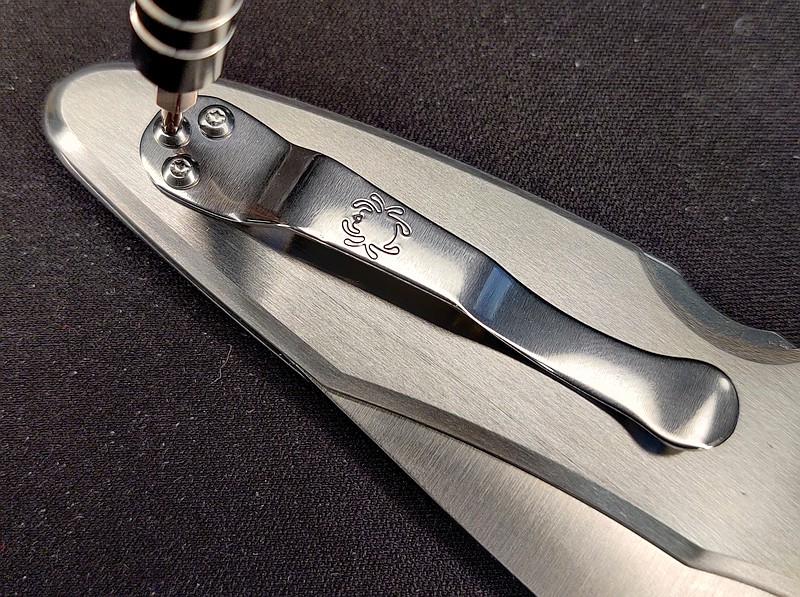
The Police model has drilled and tapped holes in all four possible clip positions, so you can decide the very best clip position for your needs (personally I changed this to tip-up and right handed).
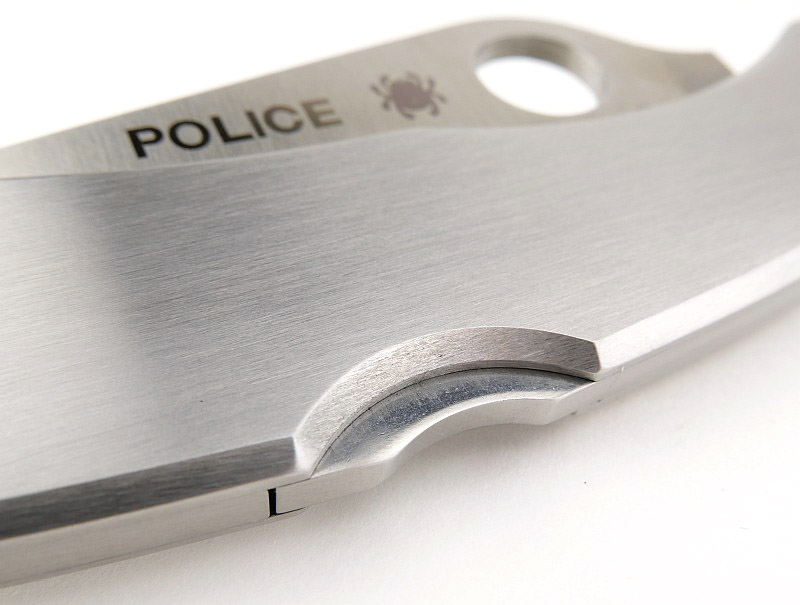
Being a long standing model it unsurprisingly uses a back lock.
With a rivet type of blade pivot, there is no adjustment or user servicing possible. The pivot rivet finishing is excellent and completely invisible.
This example is the part serrated version, but it also comes in a fully serrated or full plain edge blade.
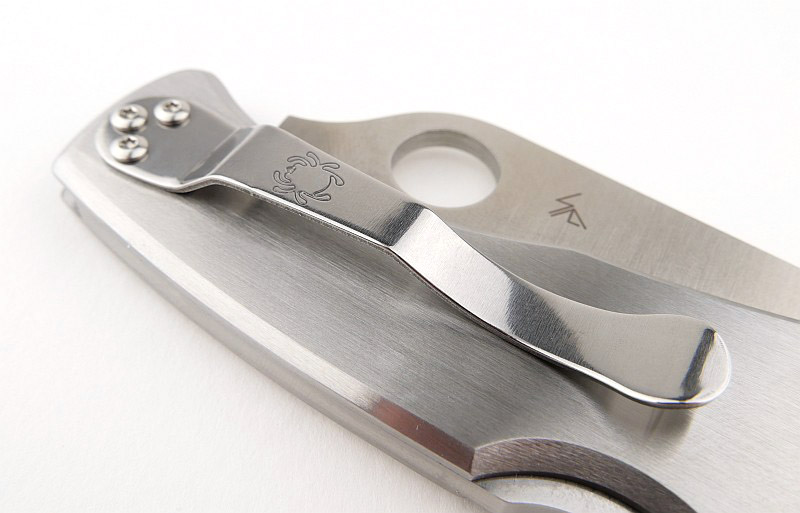
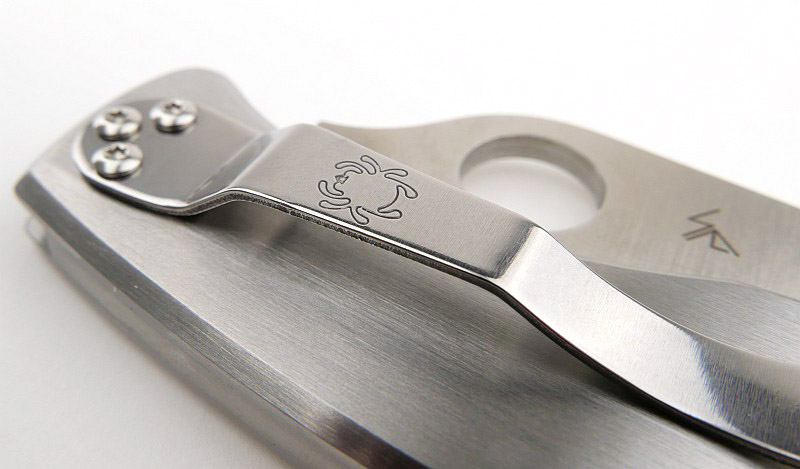
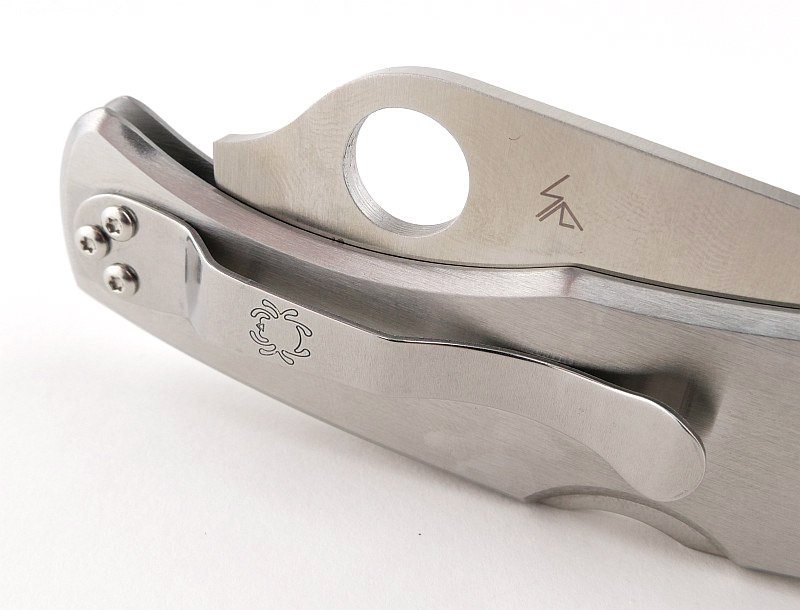
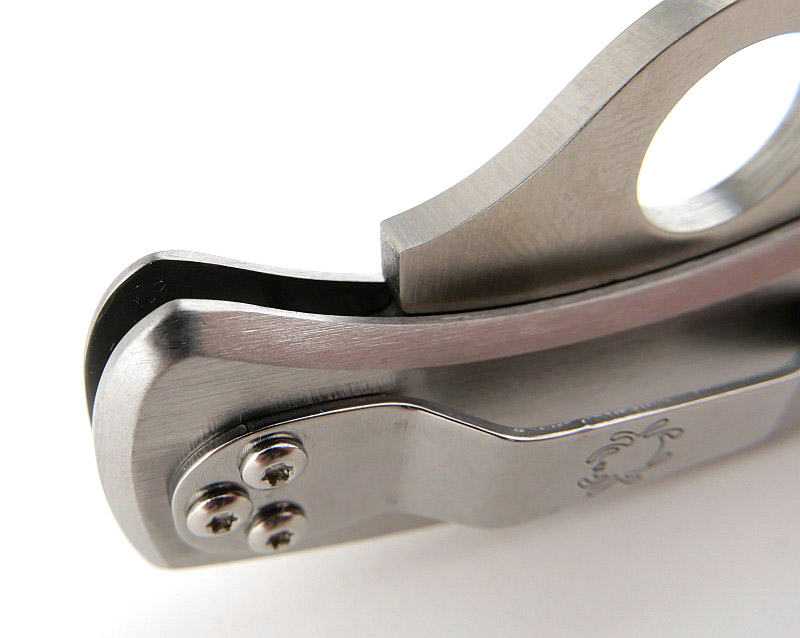
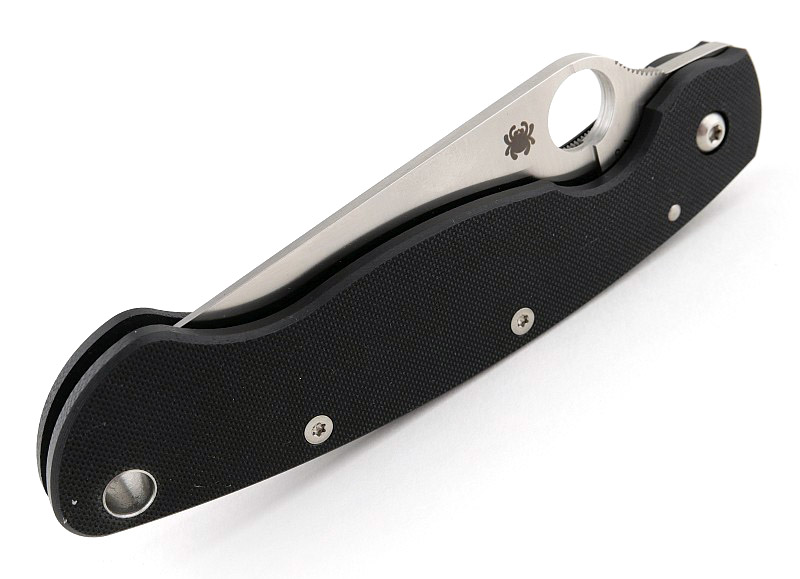
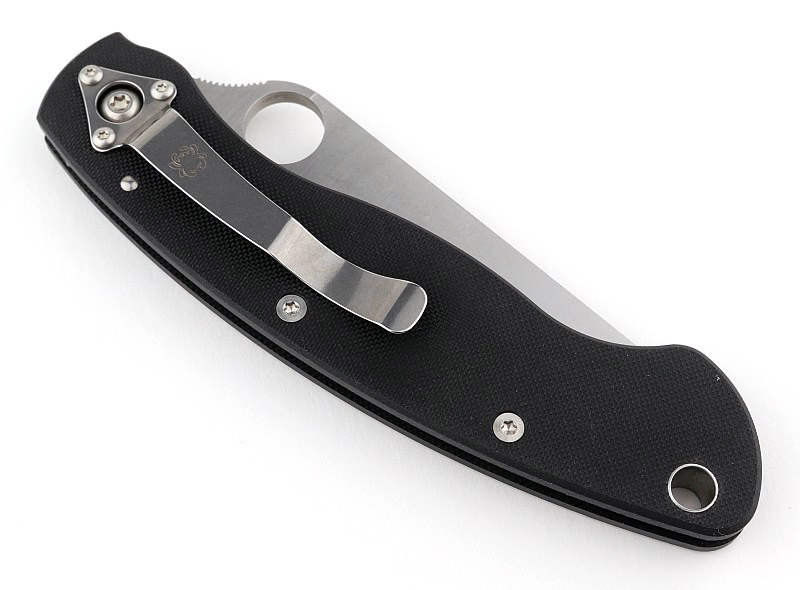
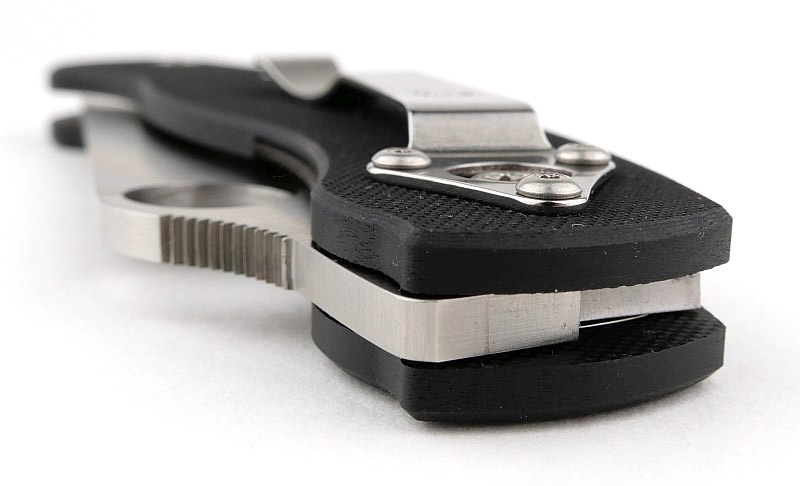
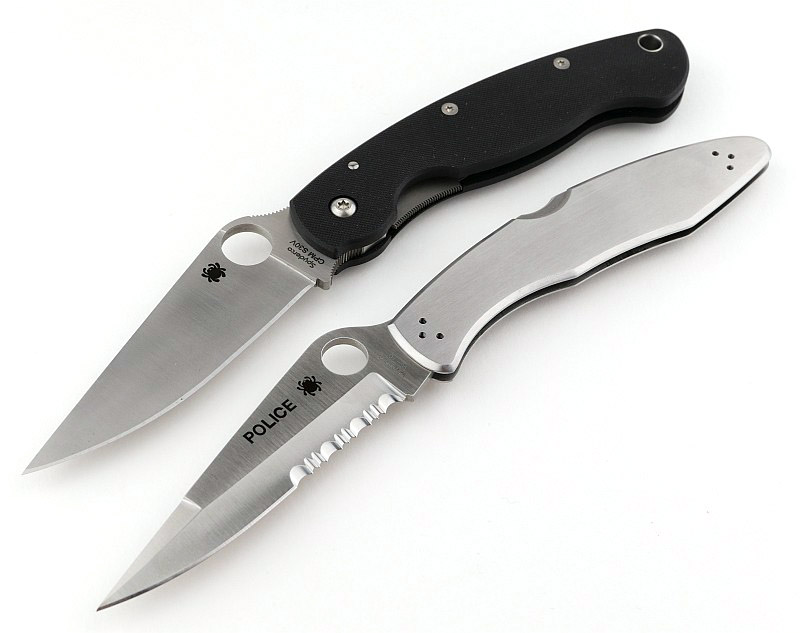
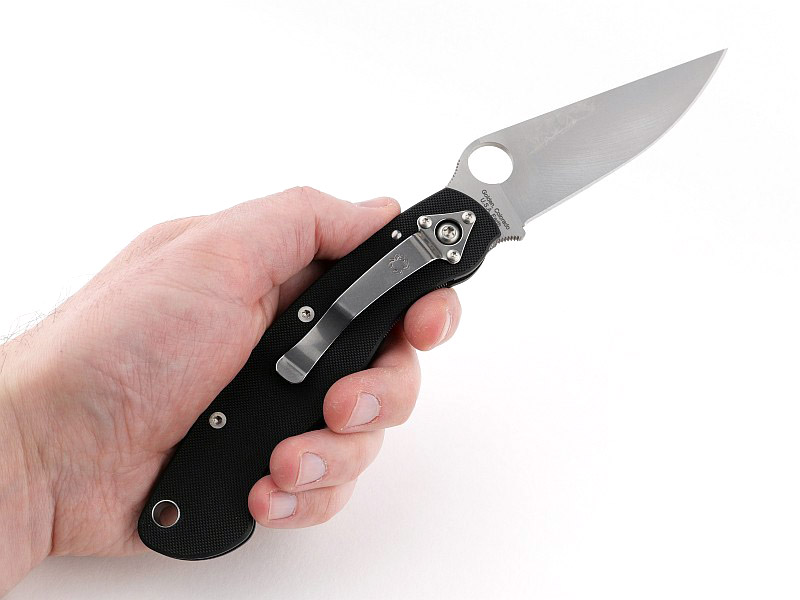
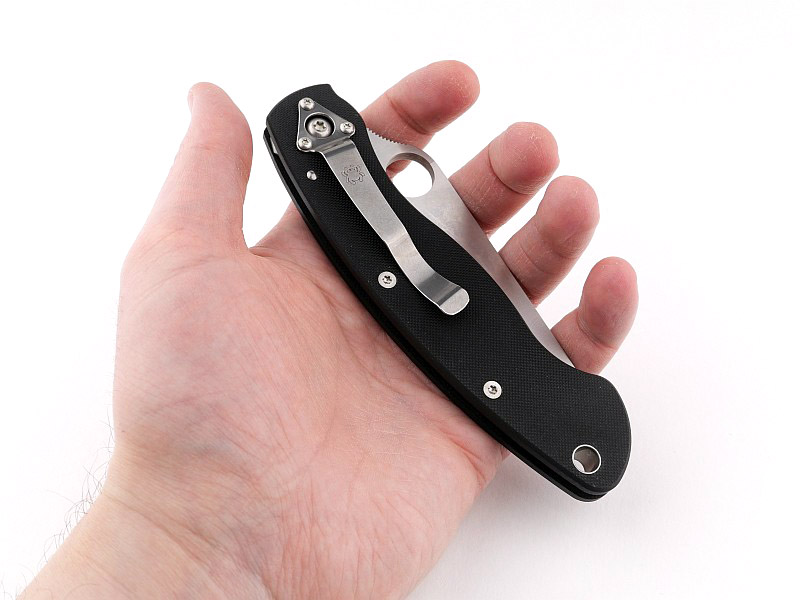
A good look round the Military Model – Things to look out for here are:
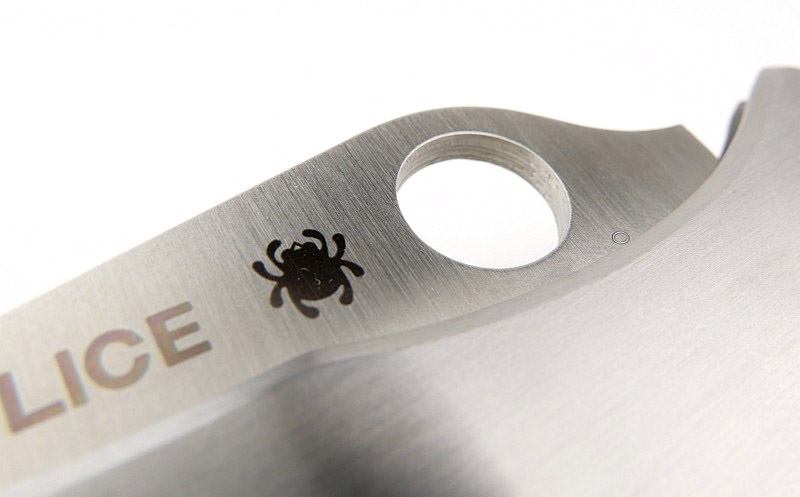
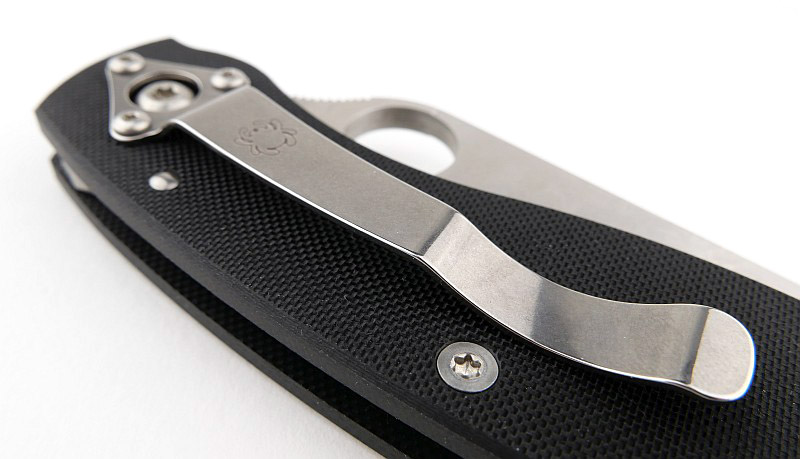
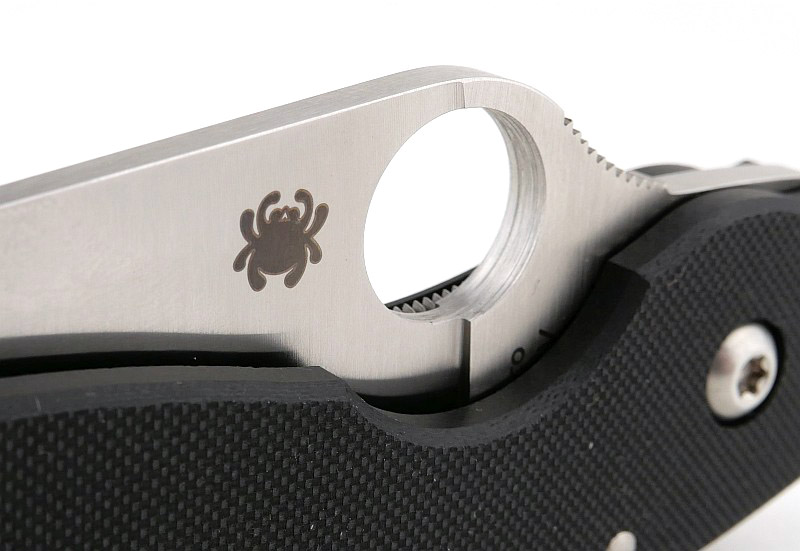
Immediately unmistakably Spyderco, with the G10 handle scales, pocket clip and opening hole, the Military is a good sized folder.
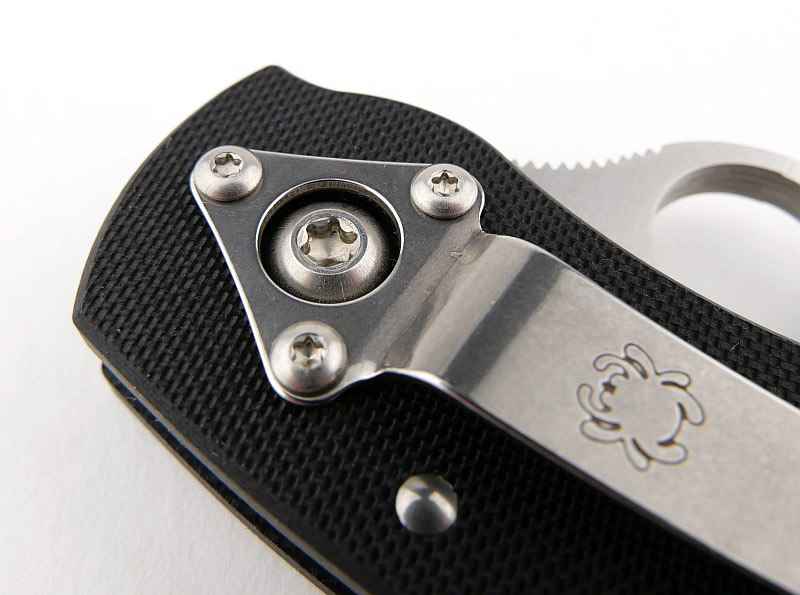
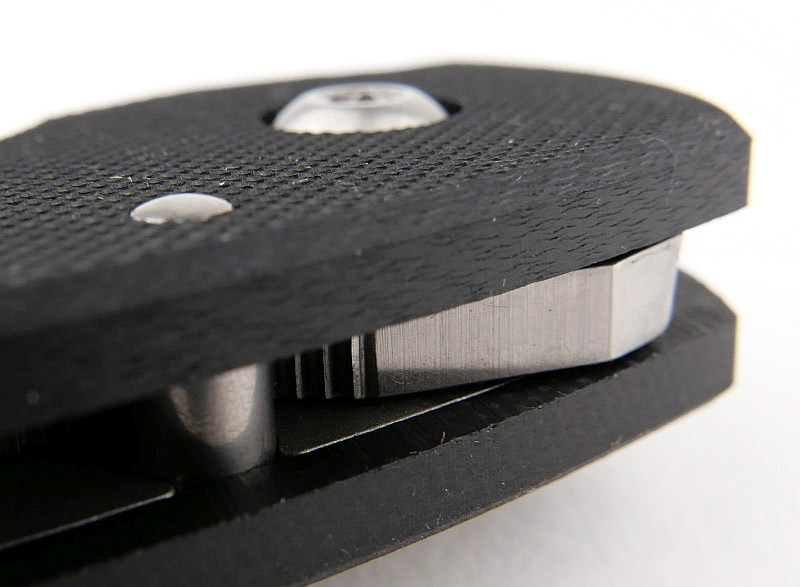
Unlike the Police model, the Military can be taken apart, with the G10 handle scales bolted together and a pivot bolt. Also unlike the Police model, the Military has only the one clip position (tip-down right handed).
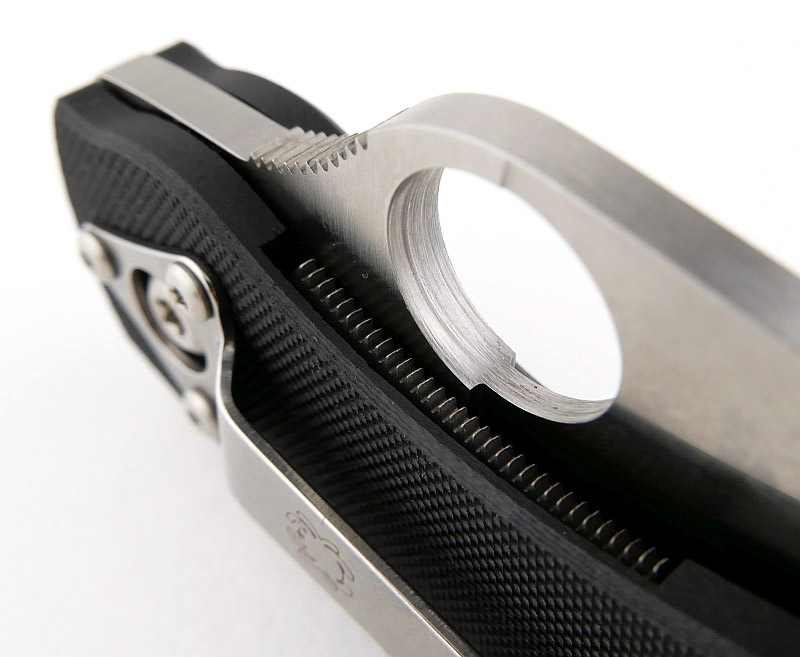
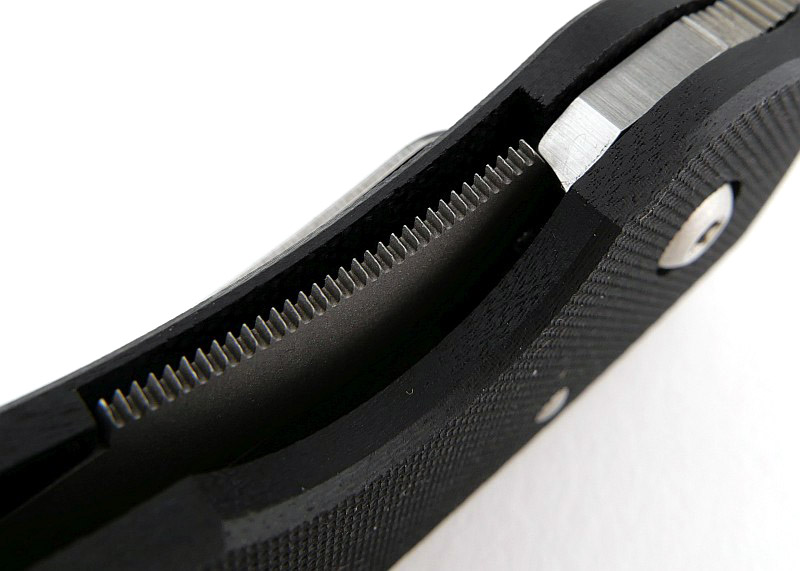
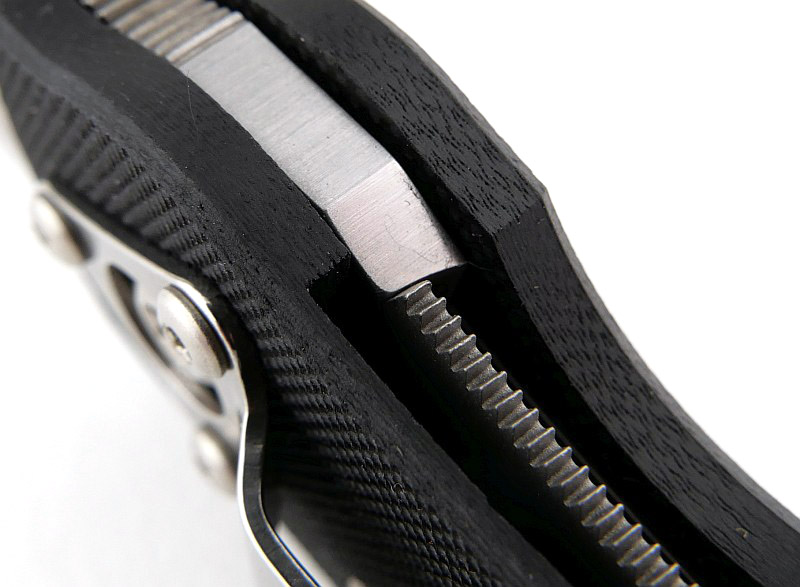
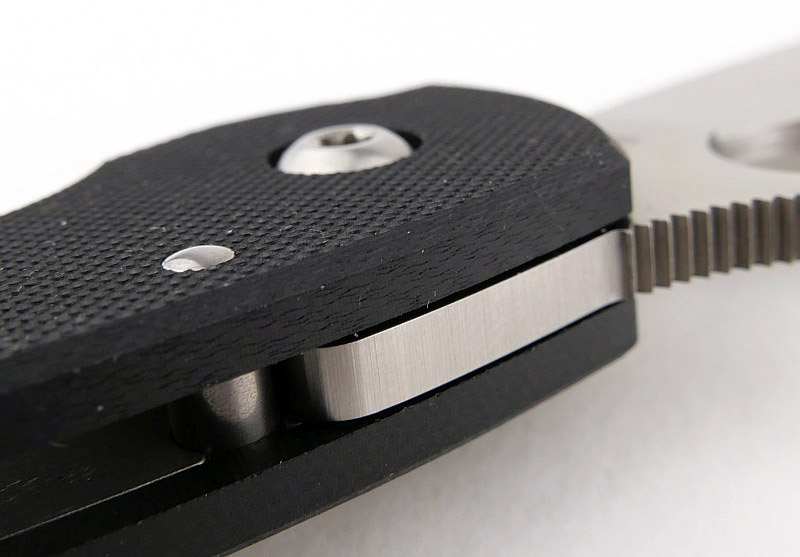
Recessed into the G10 handles are minimal steel liners and the Military uses a liner lock. Just to drive home that point about ‘minimal’ steel liners, this is what allows for the light weight yet still strong construction. The liner on the non-lock side just goes from handle bolt to handle bolt to the pivot (supporting the stop pin as well). The other partial liner is larger as it includes the lock bar.
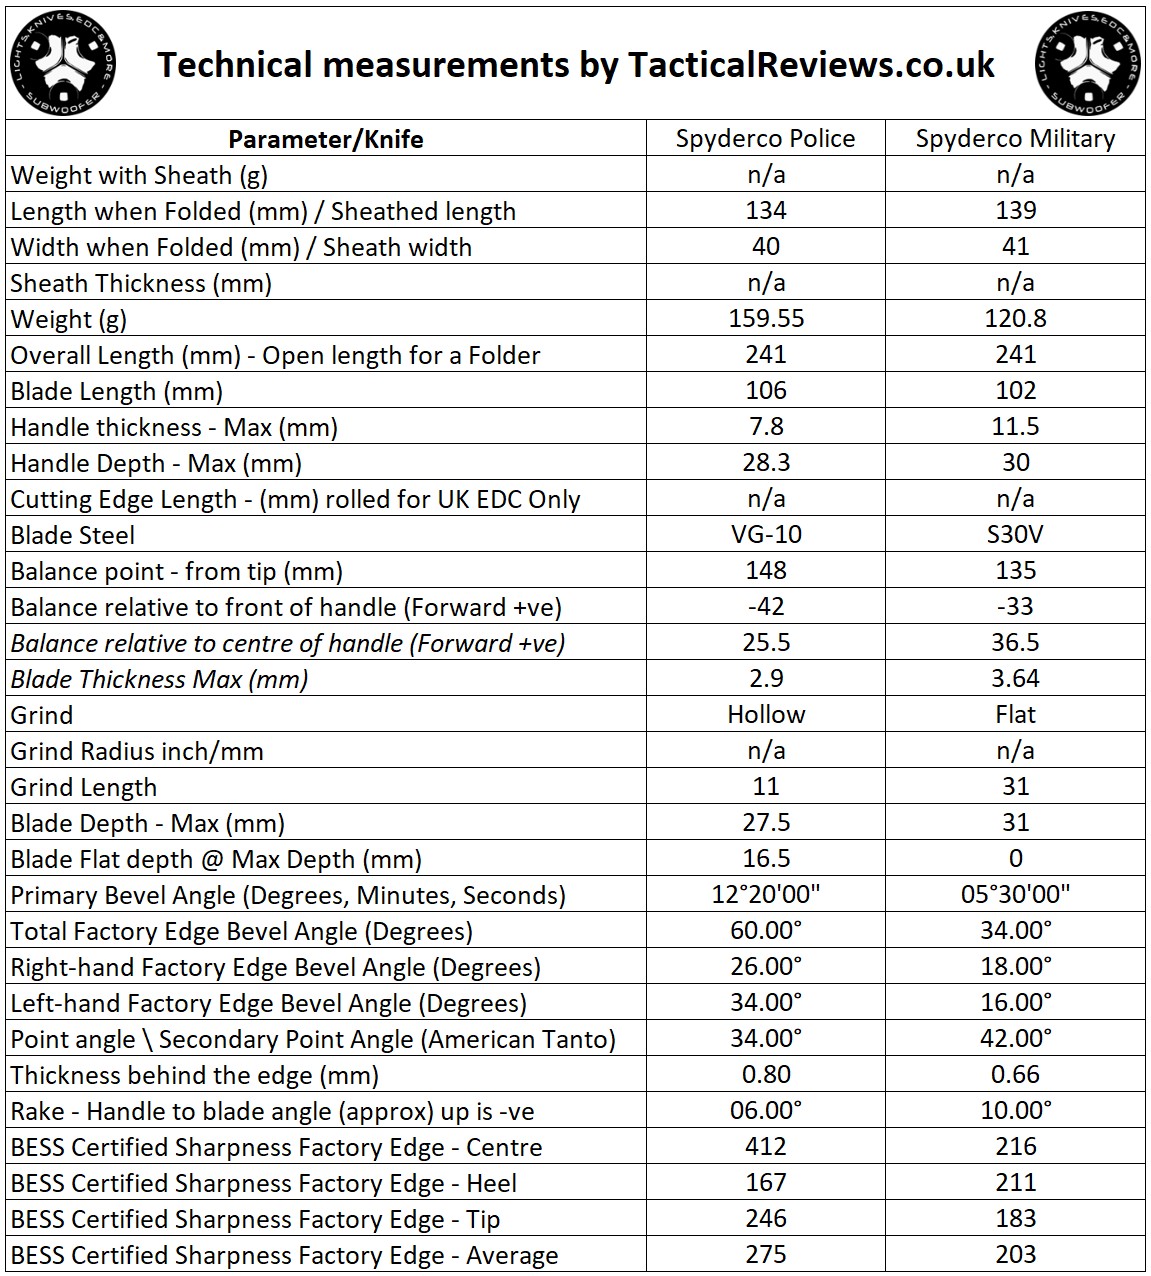
The Blade and Handle – Detailed Measurements:
For full details of the tests and measurements carried out and an explanation of the results, see the page – Knife Technical Testing – How It’s Done.
An extra detail not in this table is the edge angle of the serration on the Police Model. One of the reasons the Spyderco serrations cut so well is that they are chisel grind (so only one side is sharpened) making the edge angle very fine – in this case just 17 degrees total inclusive edge angle (0 degrees one side and 17 the other).
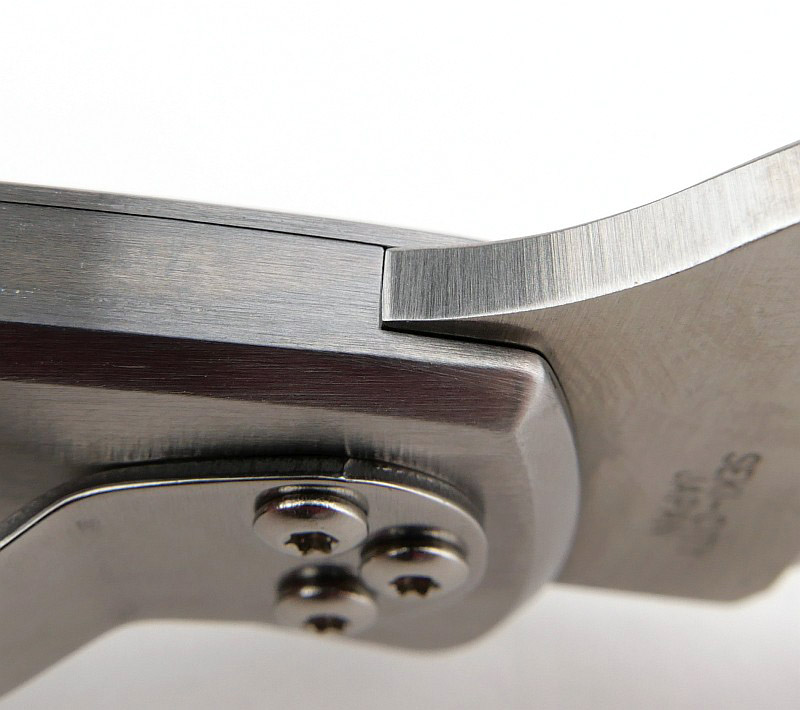
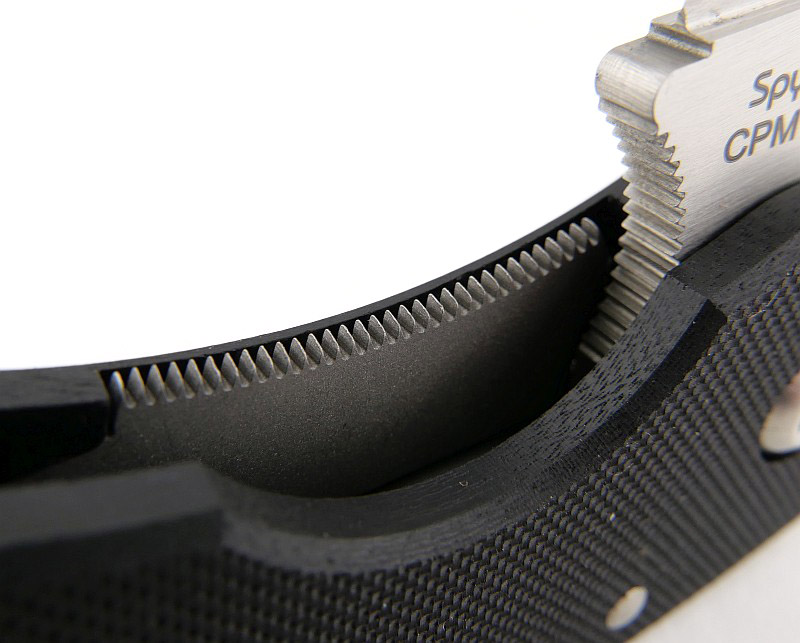
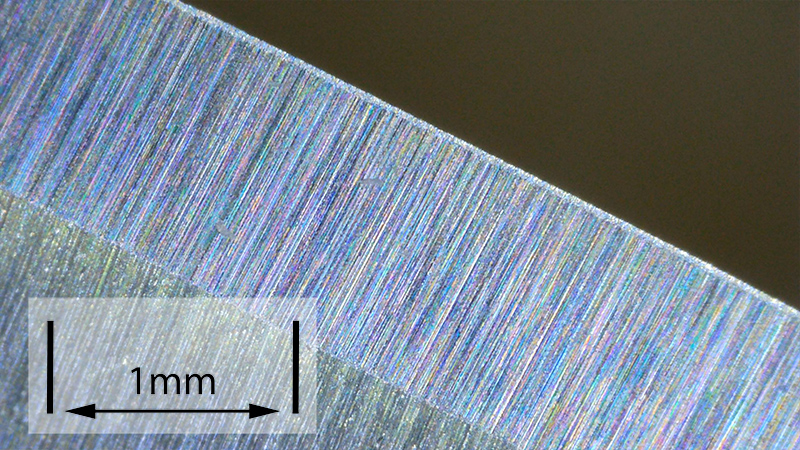
The Factory edge up close – NEW FOR 2022!:
Followers of Tactical Reviews will know my views on factory edges, but to recap:
Anyone using a knife will need to sharpen it. That first factory edge is just like the first tank of fuel that a new car comes with (or first charge of the battery).
A good factory edge is a ‘nice to have’ but not a ‘make or break’ for a good knife, as you will be putting your own edge onto it soon enough.
The factory edge does however indicate the care a knife maker has put into the final finish.
It is for this reason Tactical Reviews measures factory edge sharpness and specifications, and includes this information in the detailed technical testing.
As a further look at the factory edge, this section has been added to include some high magnification photos of the factory edges.
In this case the serrated part of the Police model (the plain edge part was sharpened before the imaging device was ready) and the edge of the Military model.
These two edges are outstanding and will the standard by which others are judged!
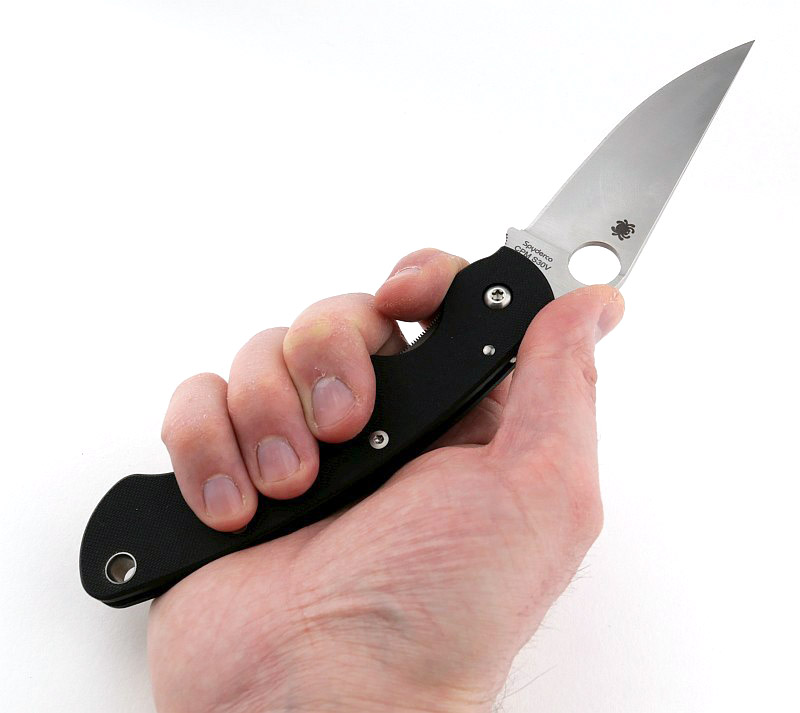
What is it like to use?
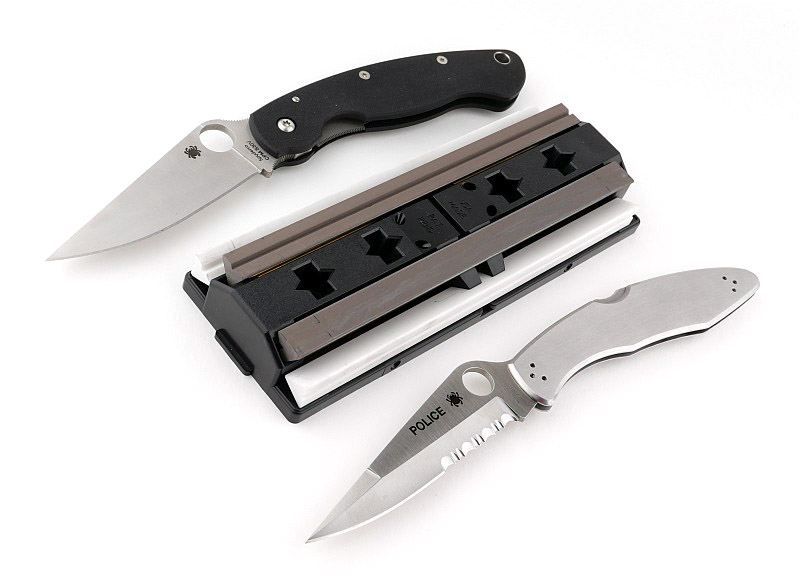
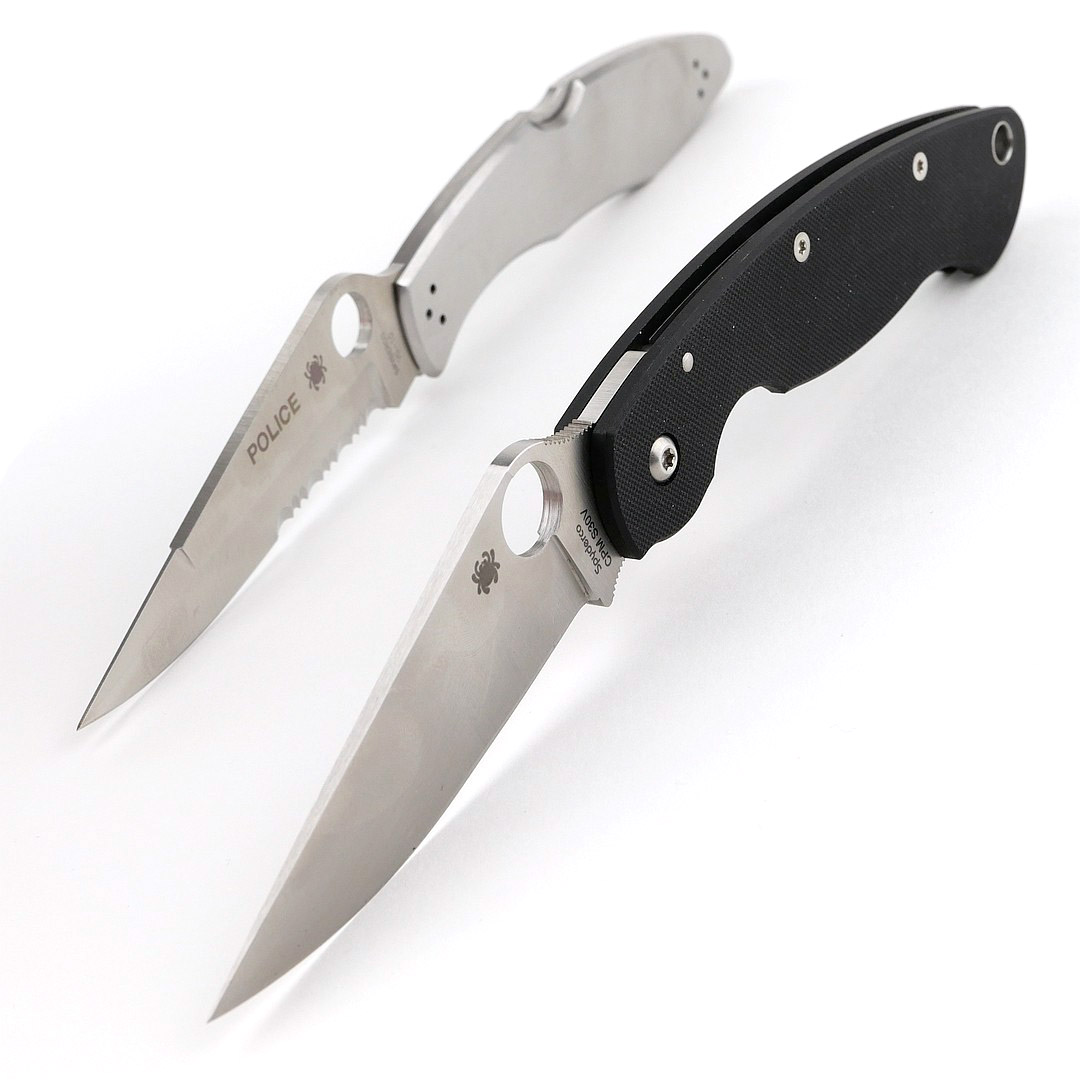
Before going further with using them, a quick side by side (and one on top of the other) size and form-factor comparison.
Moving onto the two knives in the hand, and despite being very similar in size, they do feel very different when you hold them. The G10 handles of the Military make for a different weight distribution plus fill the hand more. Of the two, the Military is definitely the more comfortable and easy to have a very secure grip of. Conversely though this makes it harder to carry, taking up more pocket space. The Police model is very slim and even at the size it is, slips into your pocket so easily.
In terms of carry, the Police model also gives you all four possible clip positions (or five if you count – ‘no clip’) so there isn’t any limitation of the clip position. Although that said, this current version is missing a lanyard hole if you wanted one of these.
For my own purposes, I have moved the clip from the factory position to tip-up and right handed.
Of course for edge maintenance, especially considering the serrated edge on the Police model, the Spyderco Tri-Angle Sharp Maker (also pictured above) is ideal and easy to use.
Both the Police and Military models do have a very pointy blade tip, the Police being the slightly pointier of the two. It makes them very aggressive at penetrating, and for anyone more used to a drop point or other less eager blade tip might find them unwieldy or difficult to control. You certainly need to use great care where depth of cut matters, and the long blade can make this control all the more difficult. You will get used to it, but it does need care and consideration when wielding these super capable blades.
Review Summary
The views expressed in this summary table are from the point of view of the reviewer’s personal use. I am not a member of the armed forces and cannot comment on its use beyond a cutting tool or field/hunting knife.
Something that might be a ‘pro’ for one user can be a ‘con’ for another, so the comments are categorised based on my requirements. You should consider all points and if they could be beneficial to you.
_______________________________________________
What doesn’t work so well for me
_______________________________________________
Military –
single clip position.
clip/G10 abrasive on pocket edge.
Police –
no lanyard hole.
slippery when wet.
_______________________________________________
Things I like
_______________________________________________
Military –
Very light for its size.
Very ‘eager’ blade (full flat grind and sharp point).
Liner lock makes for very smooth opening.
G10 handles have excellent grip.
Spyderco high quality fit and finish
One of the best factory edges I have ever seen!
Police –
Slim design makes it easy to carry.
Pocket clip has four possible positions.
Spyderco serrations incredibly sharp.
Three options for blade (plain, serrated, part-serrated).
Hope to see you at IWA 2022 soon!
Discussing the Review:
The ideal place to discuss this review is on the Tactical Reviews Facebook Page
Please visit there and start/join the conversation.
As well as the Tactical Reviews Facebook Page, please consider visiting one of the following to start/join in any discussion.
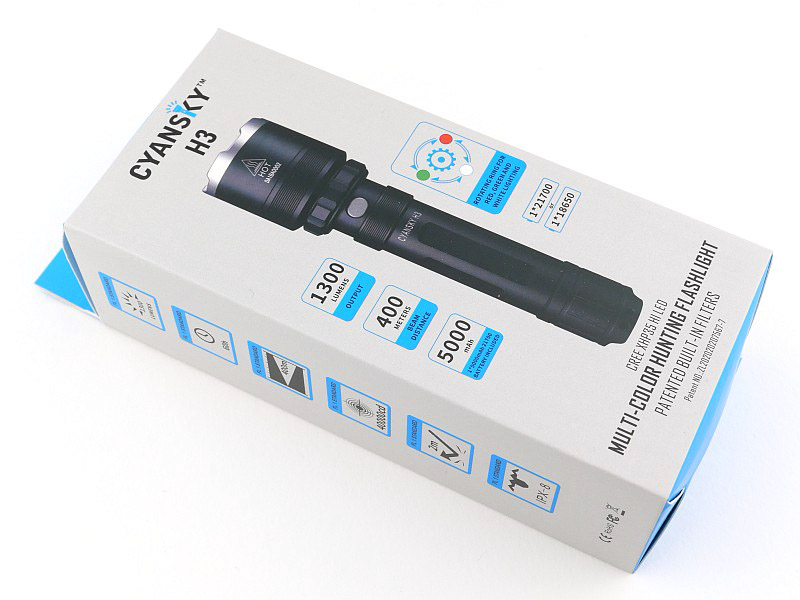
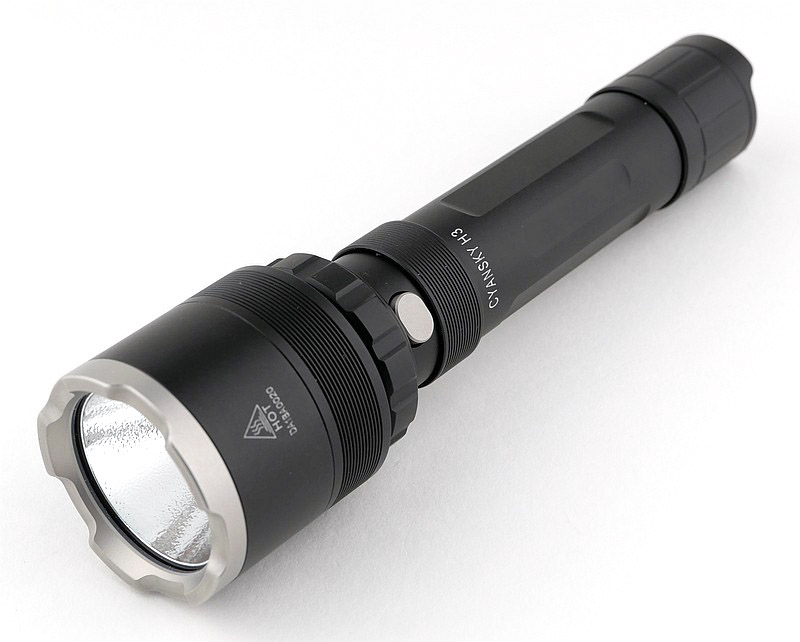
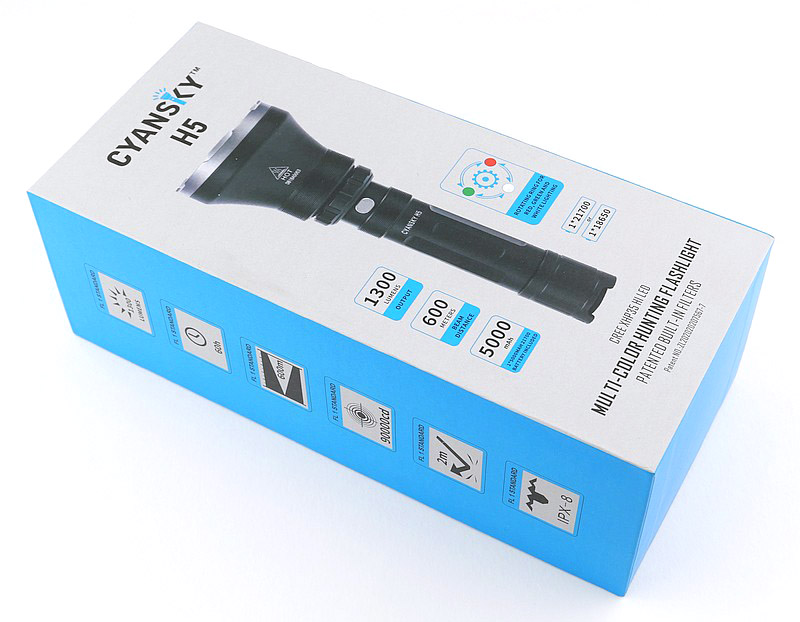
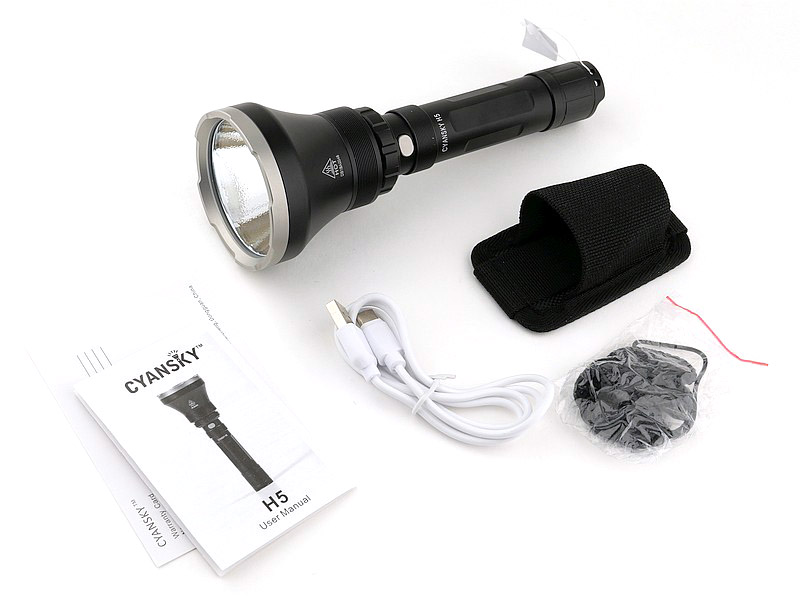
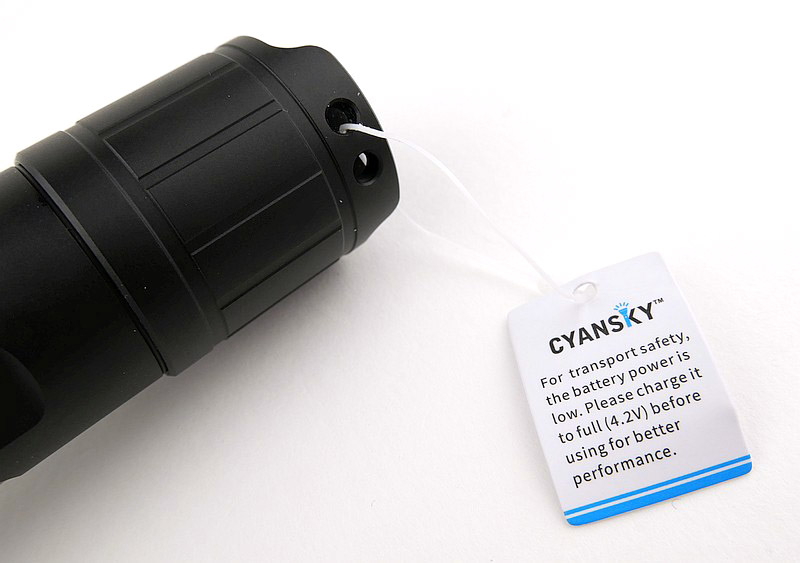
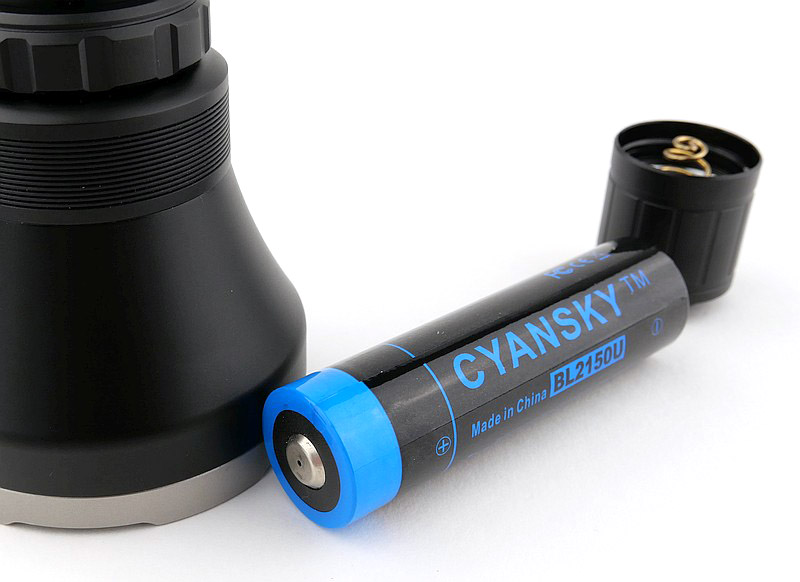
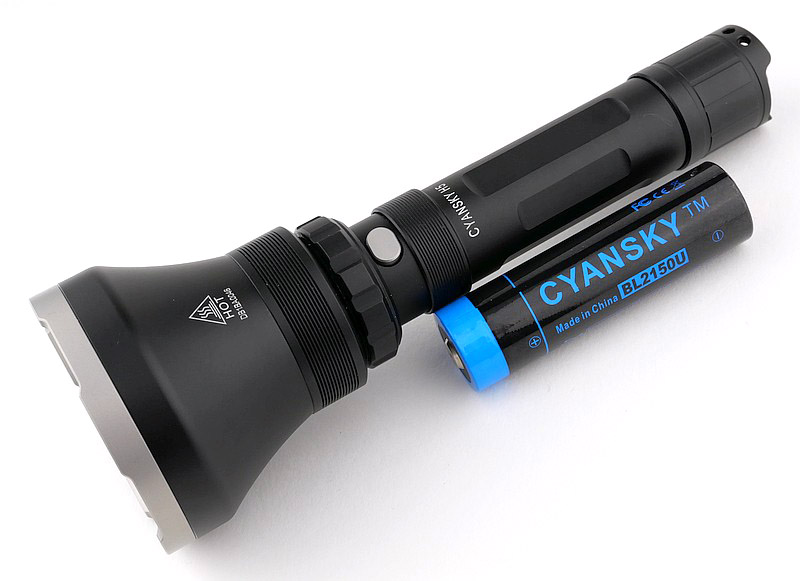
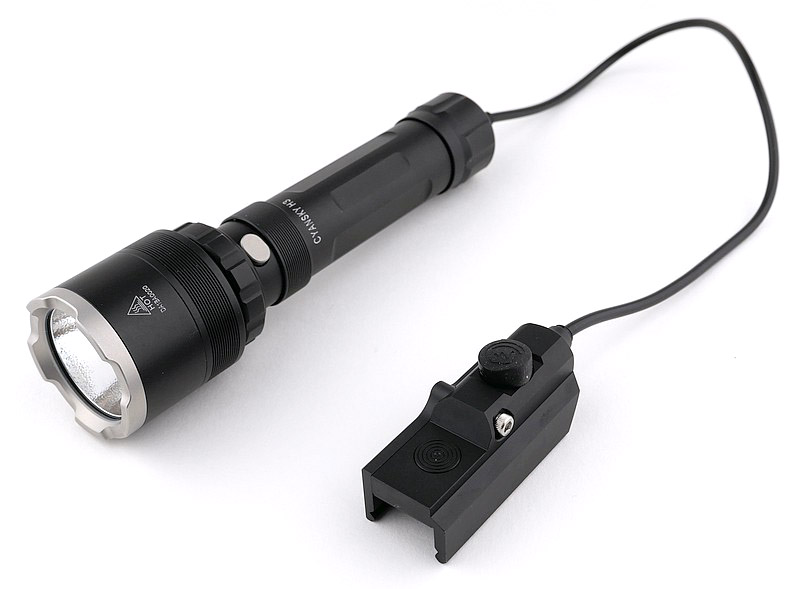
Cyansky have come up with a novel way to solve the problem of having multiple colours of light in a single device without many of the compromises multi-LED or LED swapping lights might have. Most people will have come across, or used, colour filters to change the output of a white beam, but these are easily forgotten or lost. In the CyanskyH3 and H5 hunting models, glass filters are completely contained within the head of the light and the patented mechanism lets you drop a red or green filter in front of the XHP35 HI LED with a simple twist of the control ring – nothing else needed. The H3 and H5 use the increasingly popular 21700 cell to provide more power and runtime, but can run on an 18650 or 2 CR123s for added versatility.
Join me in the detailed examination of these two hunting lights and see how they perform.
Video Overview
Starting with a look over these light in a short video.
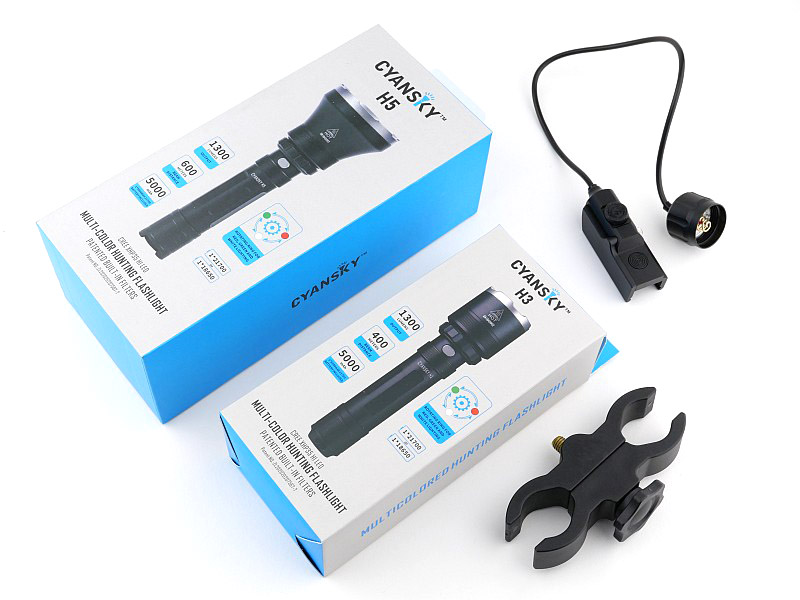
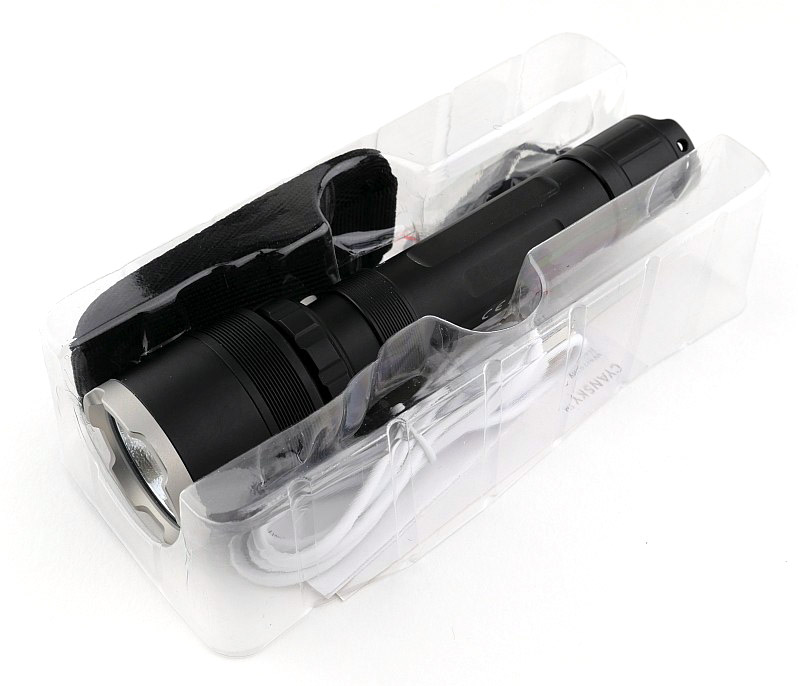
This is what arrived from Cyansky –
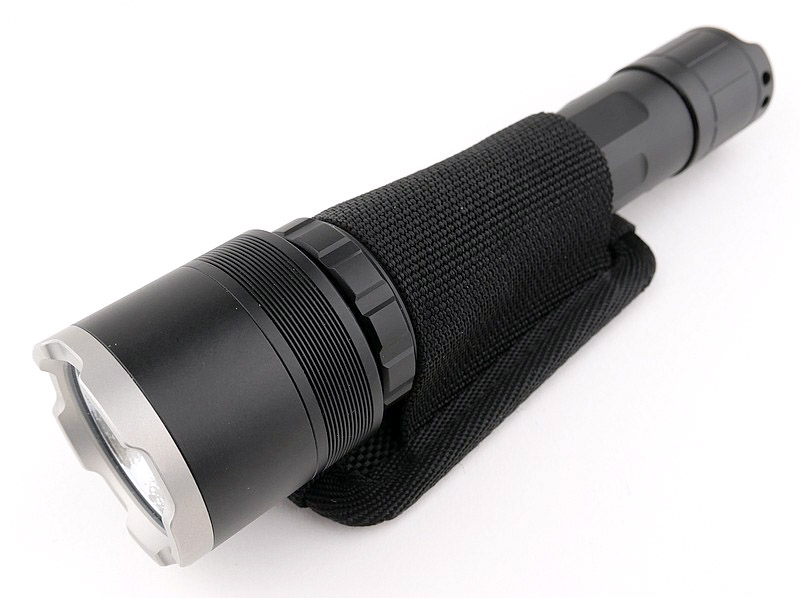
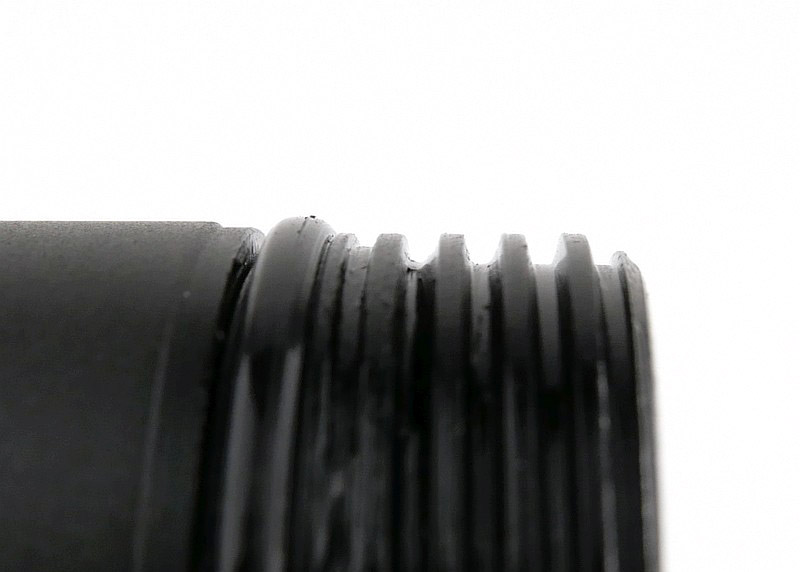
A good look round the H3 – Things to look out for here are:
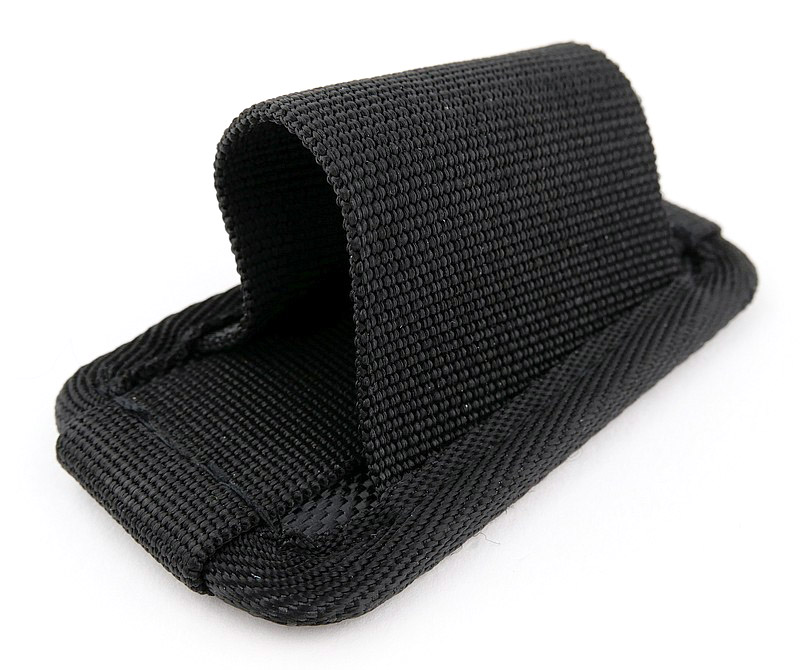
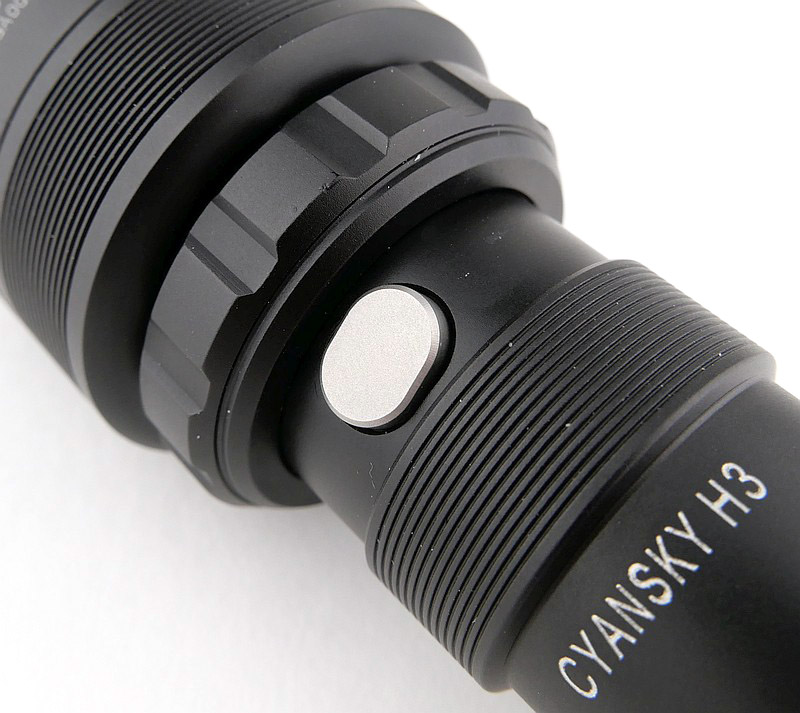
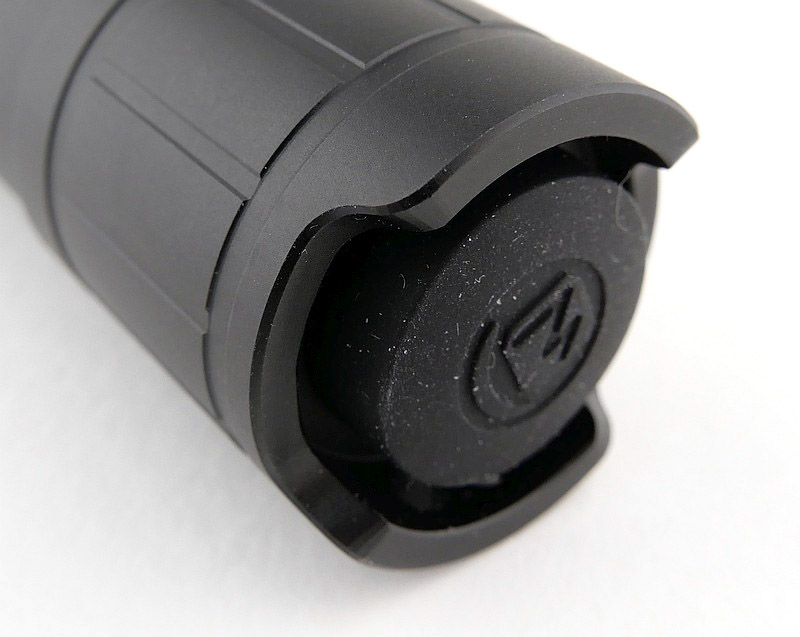
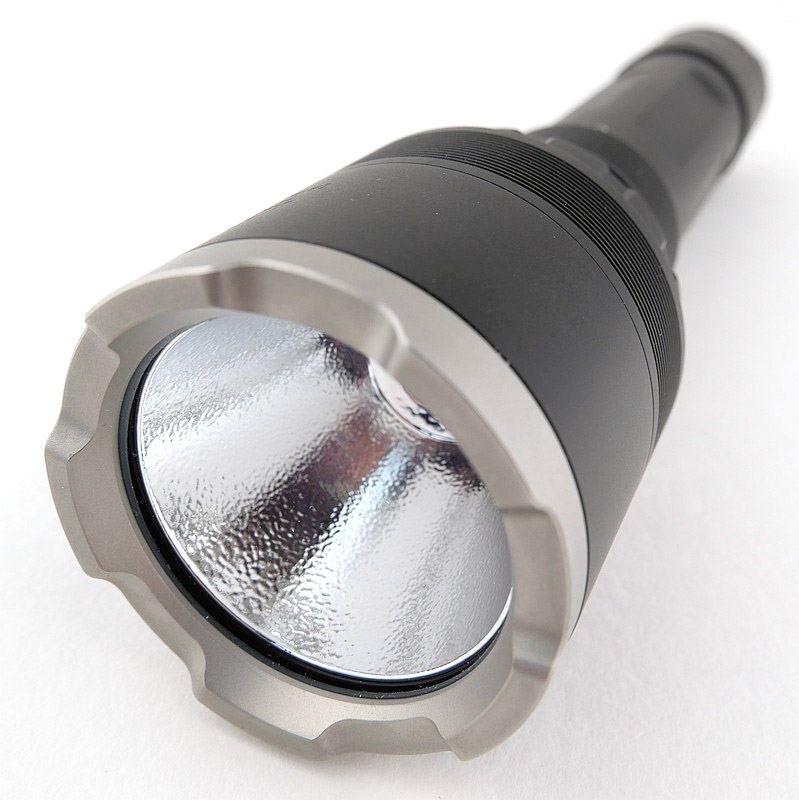
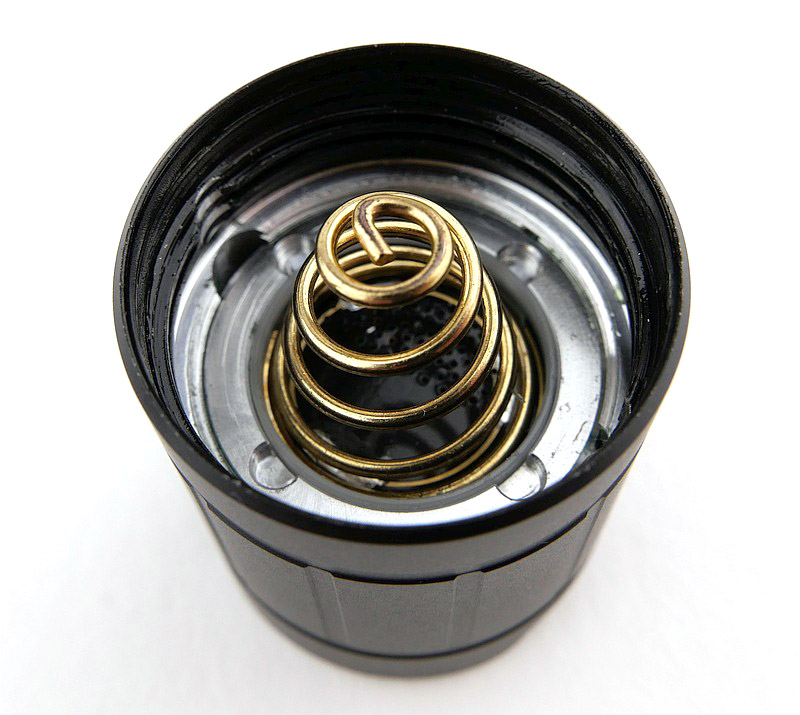
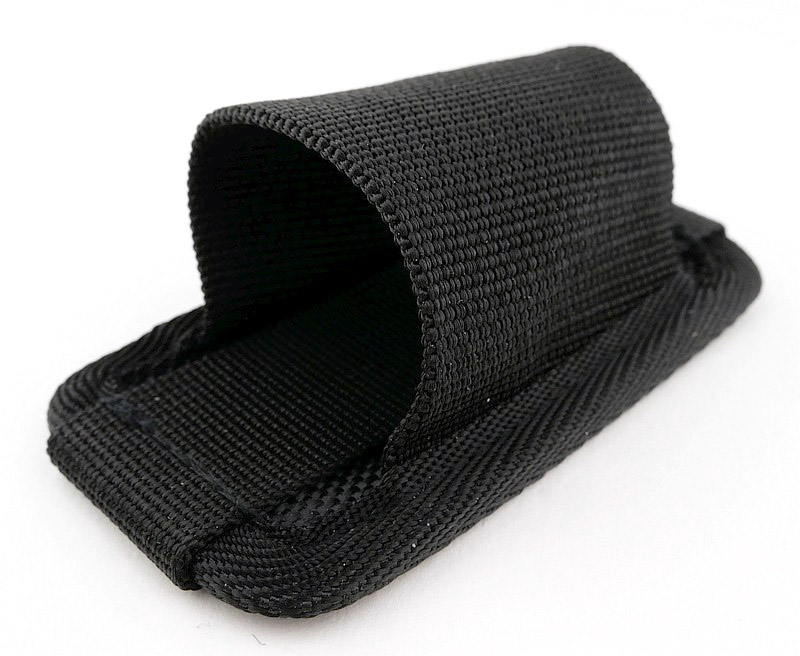
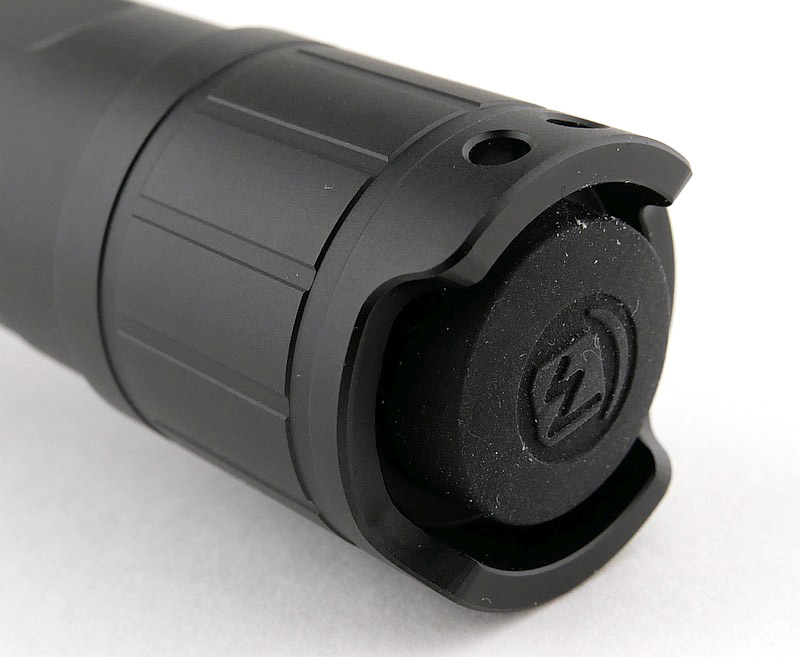
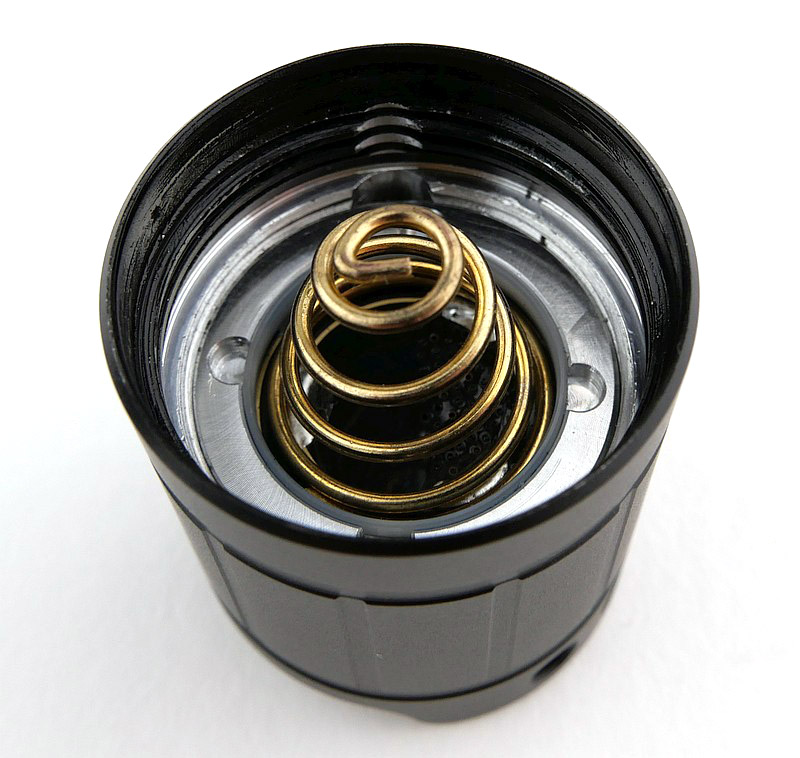
As you may have already seen in the video, first up are the contents of the box. The H3 has a belt hanger (rather than full holster) providing a head-up belt carry option. Moving round the H3 and we get onto the mode switch and filter control ring at the base of the head. The tail-switch is semi-recessed, so allowing for tail standing, but with cutouts to ease access to the switch. The stainless bezel ring is wide and well finished. And then a first look at one of the filters.
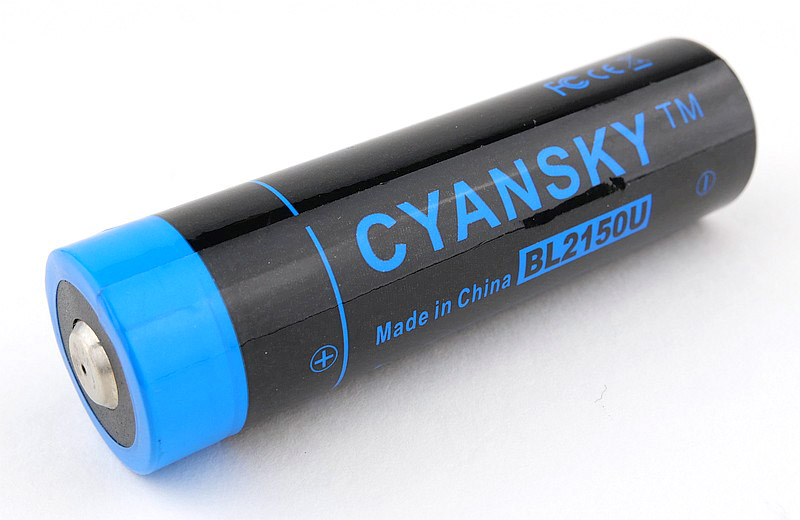
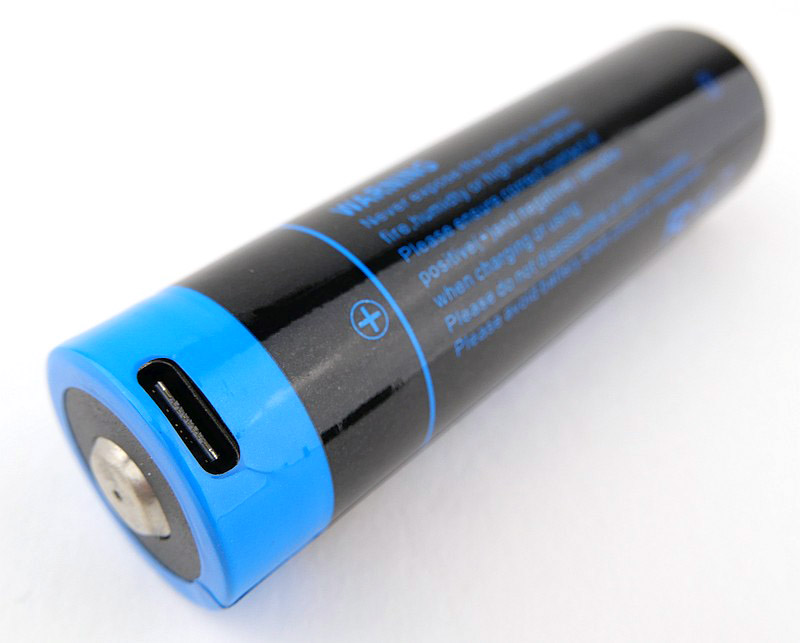
The H3 comes with a 21700 with built-in USB-C charging. As it arrives there is a plastic insulator to prevent accidental discharge in the light.
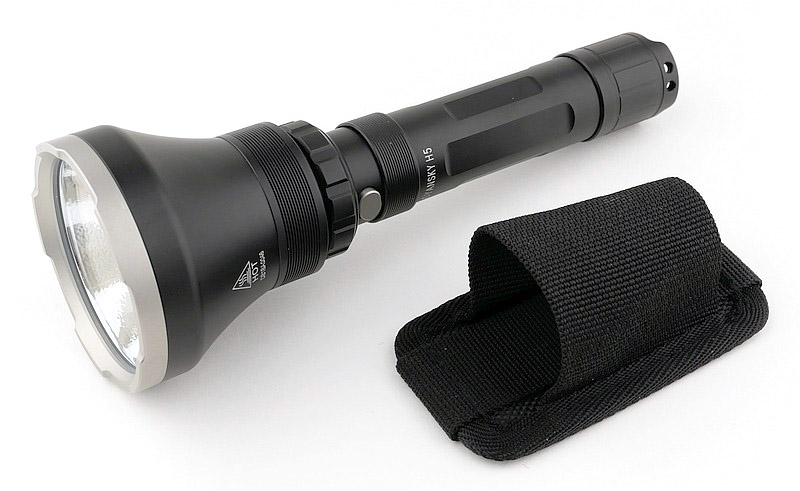
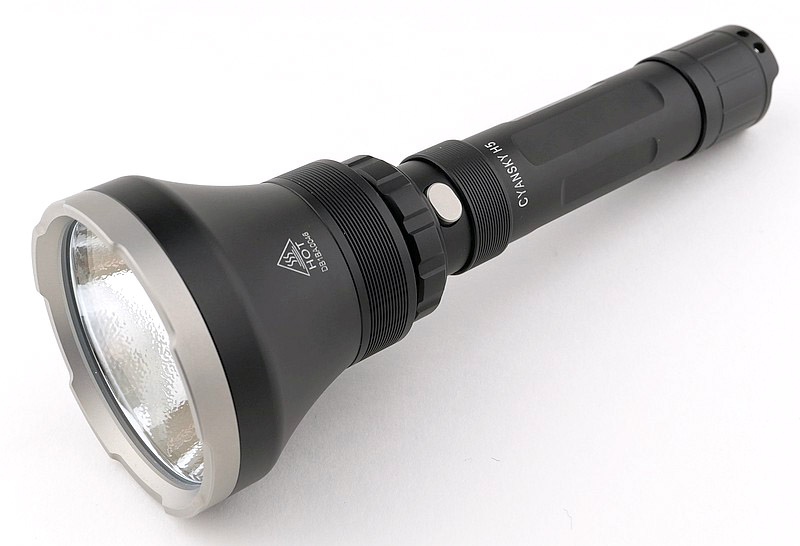
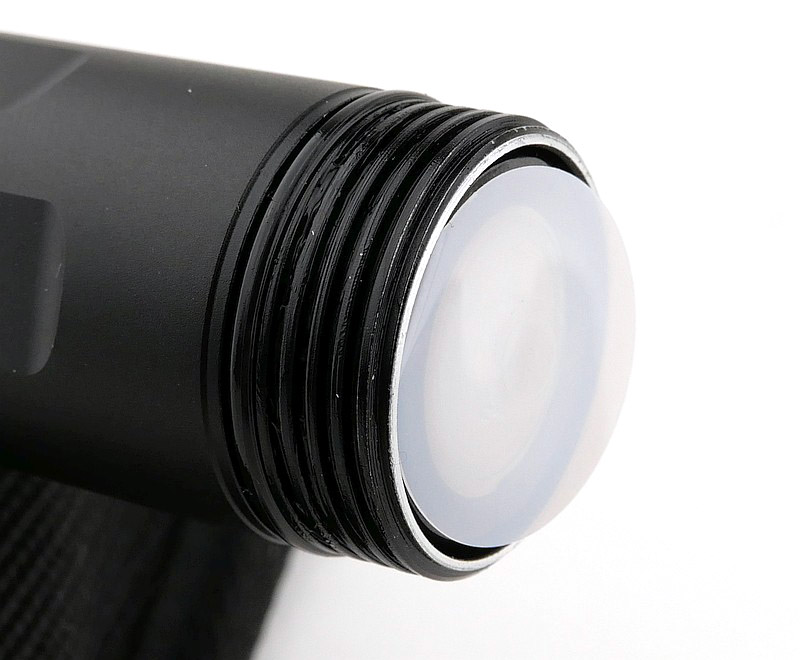
A good look round the H5 – Things to look out for here are:
With the H5, the details are the same as for the H3, so I won’t repeat them, the difference is in the much larger head and reflector to give extra beam range.
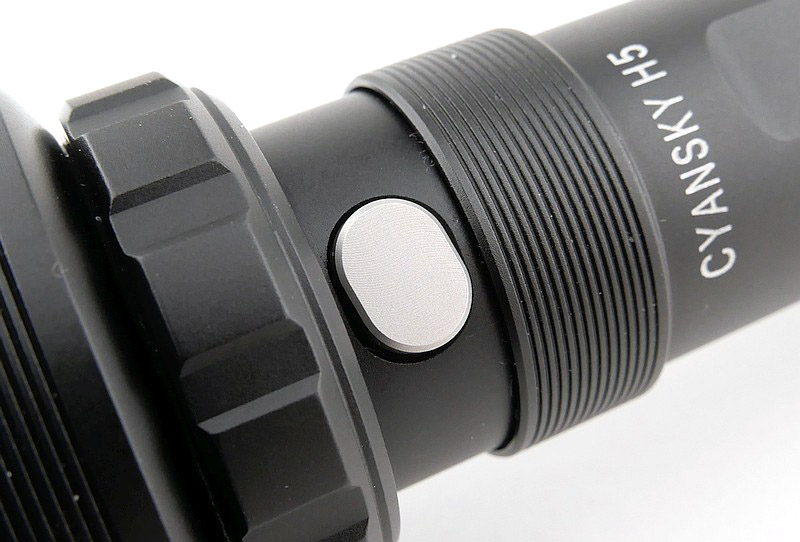
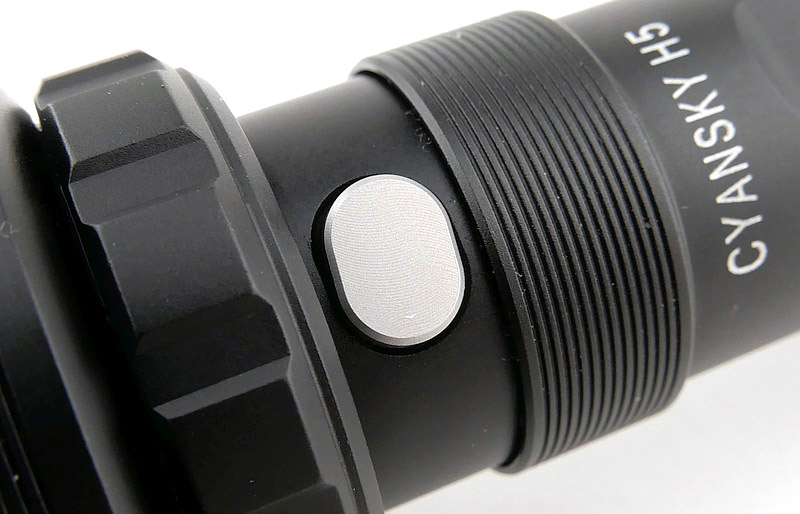
One small observation which doesn’t affect function at all is that the mode switch has room to move about and twist, so might look a little ‘off’. This doesn’t affect function at all, and is only mentioned in case you see the button looking slightly twisted (this is the same for both models).
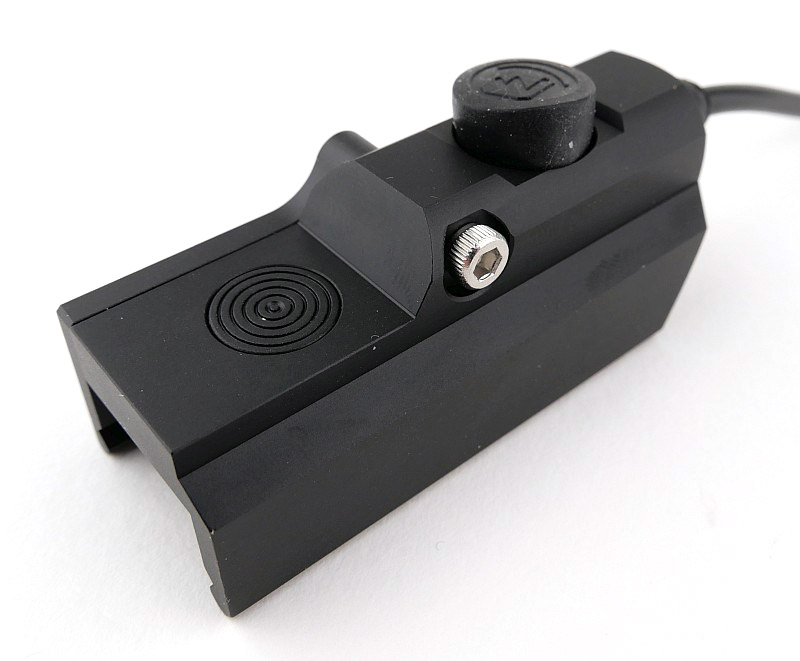
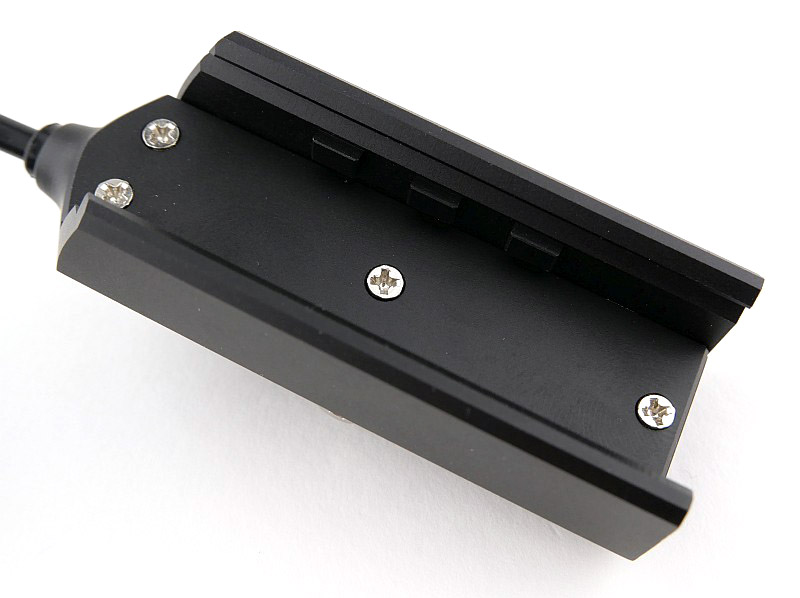
The Remote Switch and scope mount:
The supplied remote switch replaces the tail-cap of either the H3 or H5. The remote switches are in a rail-mount unit, and you have a momentary only switch, plus a forward clicky latching switch much like the original tail switch.
The scope mount is basic and easy to use, but I would not use it for heavy duty setups. For smaller calibers and for quick tool-less mounting it works well, and has enough stand off for the H3 or H5.
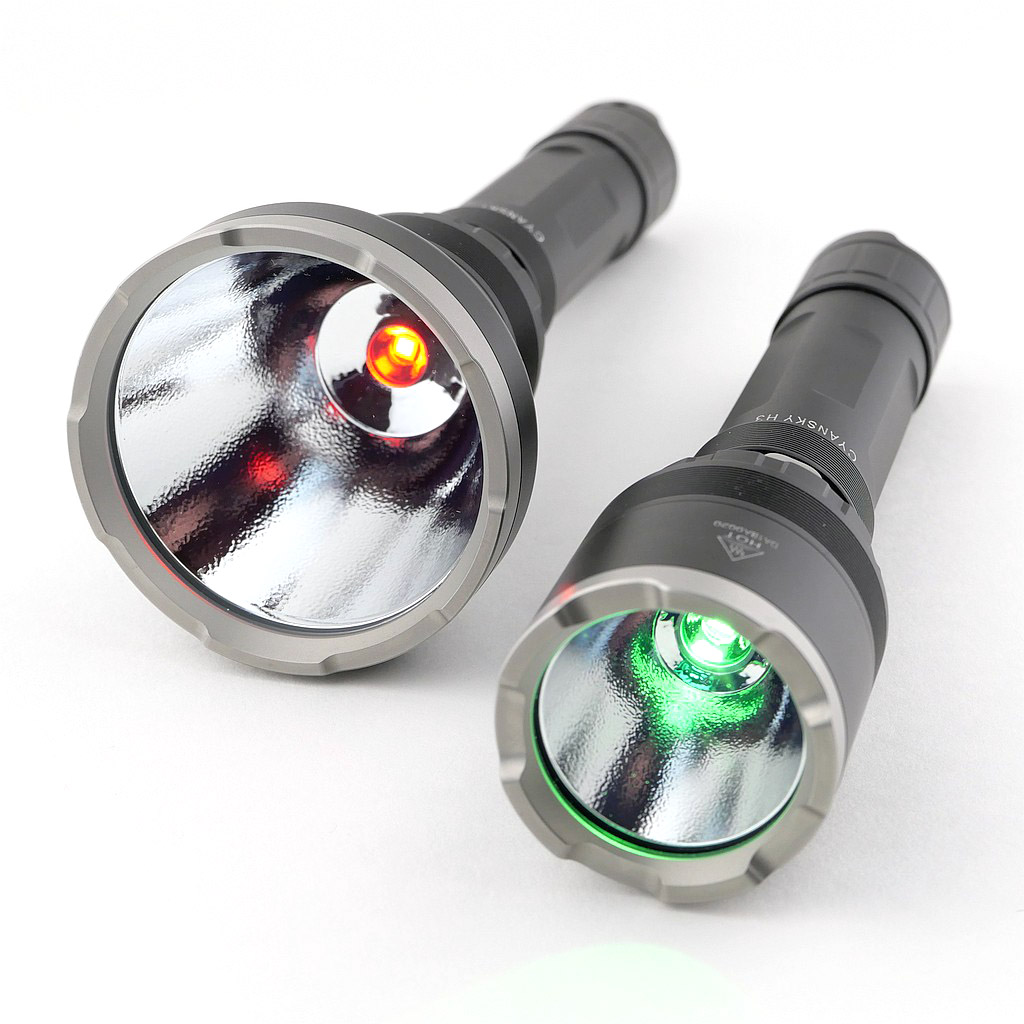
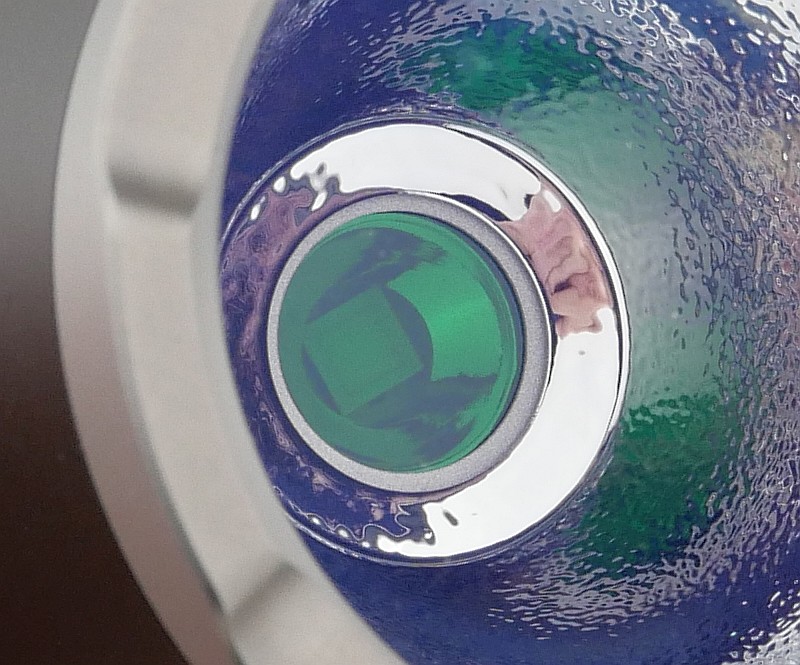
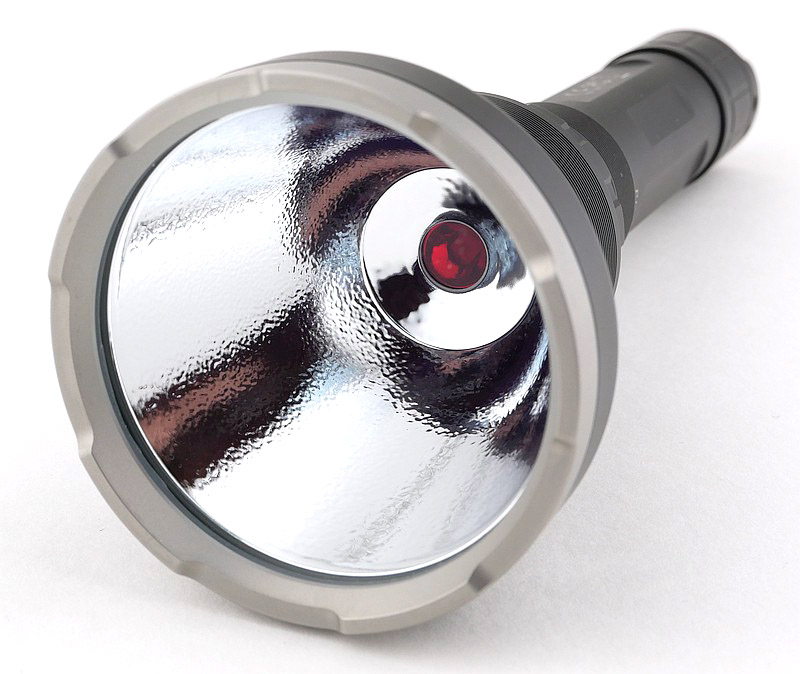
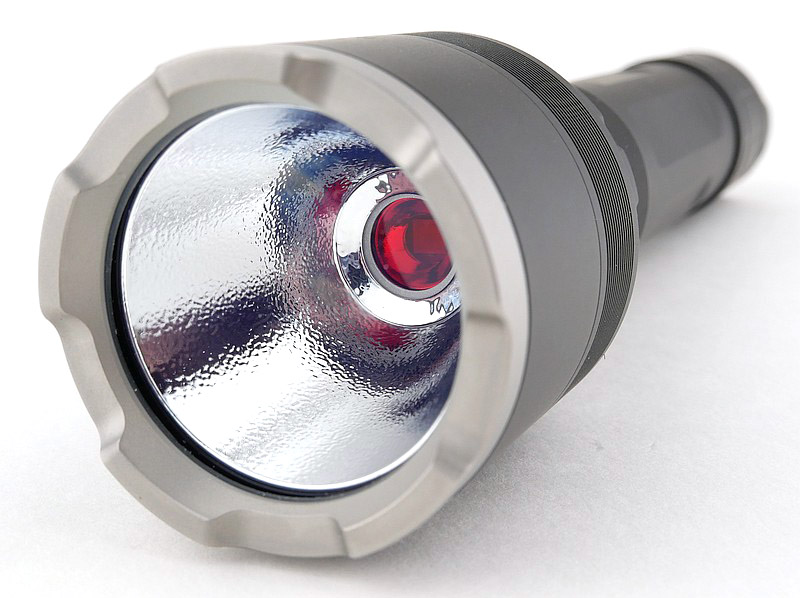
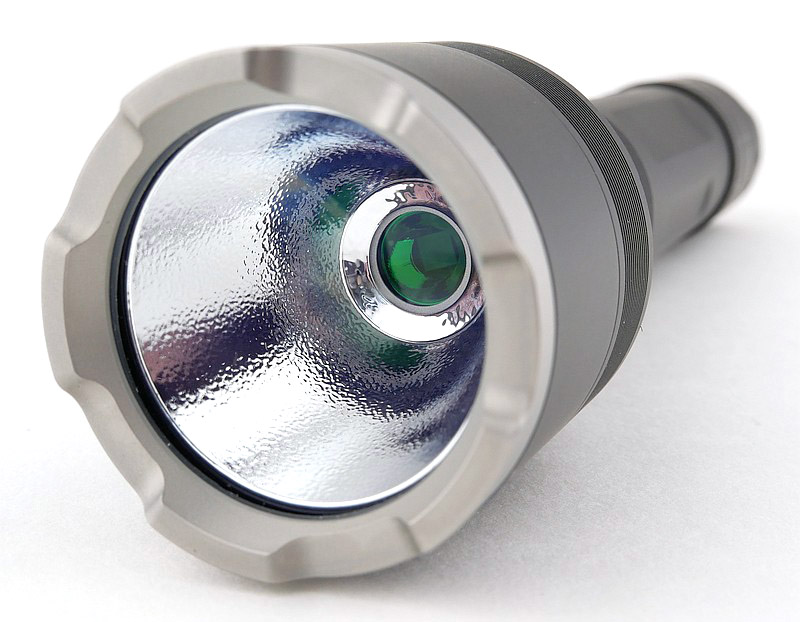
The Cyansky special feature – built-in colour filters:
Now for a set of images to just show the built-in filter change. I’ve used the H3 here as with the smaller head it is easier to see the filter better than with the H5. First no filter – with the filter holder just having a little bit of extra reflector round the base of the LED. Then part of the way to dropping a filter in place (this is NOT how you use it, just showing the filter holder disk rotating). Finally with the red and green glass filters shown in place over the LED.
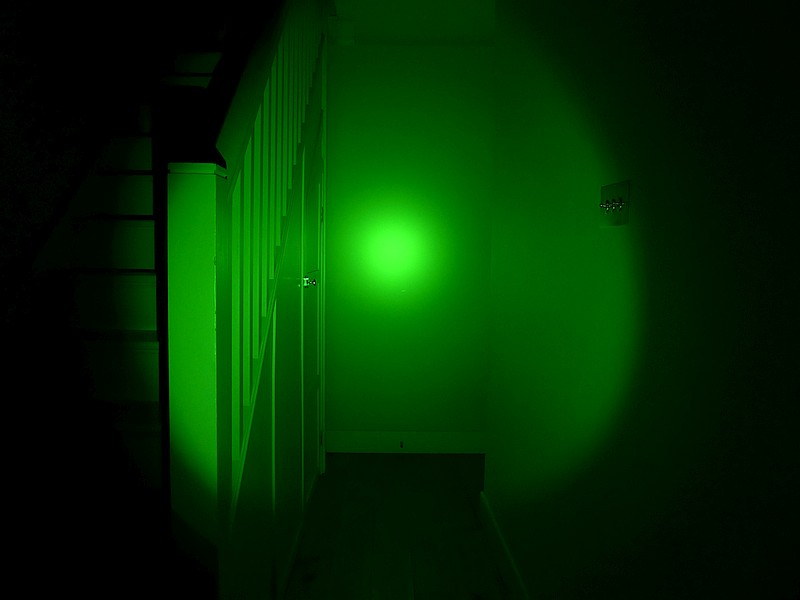
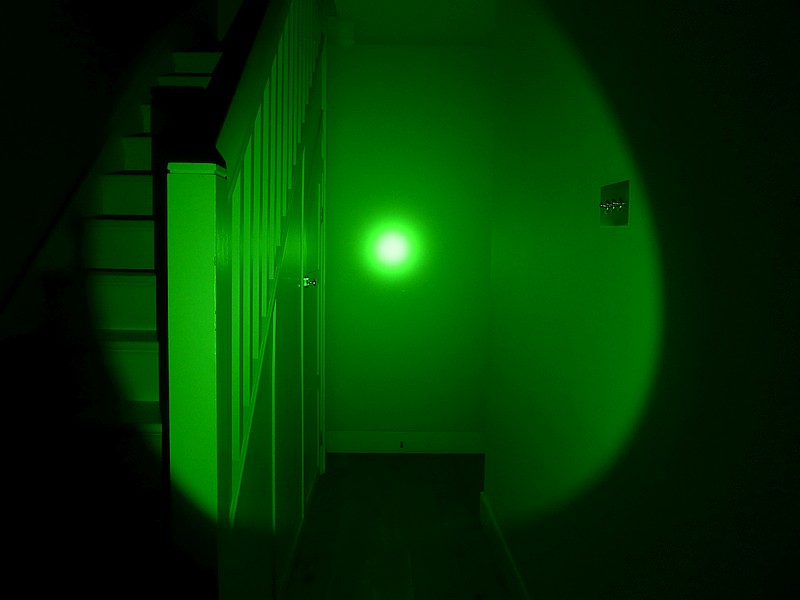
The beam
Please be careful not to judge tint based on images you see on a computer screen. Unless properly calibrated, the screen itself will change the perceived tint.
The indoor beamshot is intended to give an idea of the beam shape/quality rather than tint. All beamshots are taken using daylight white balance. The woodwork (stairs and skirting) are painted Farrow & Ball “Off-White”, and the walls are a light sandy colour called ‘String’ again by Farrow & Ball. I don’t actually have a ‘white wall’ in the house to use for this, and my wife won’t have one!
Stepping through these beamshots we have the H3 white beam, then H5 white beam, and as you go through the gallery it is H3 then H5 to show a direct comparison on each colour indoors and out.
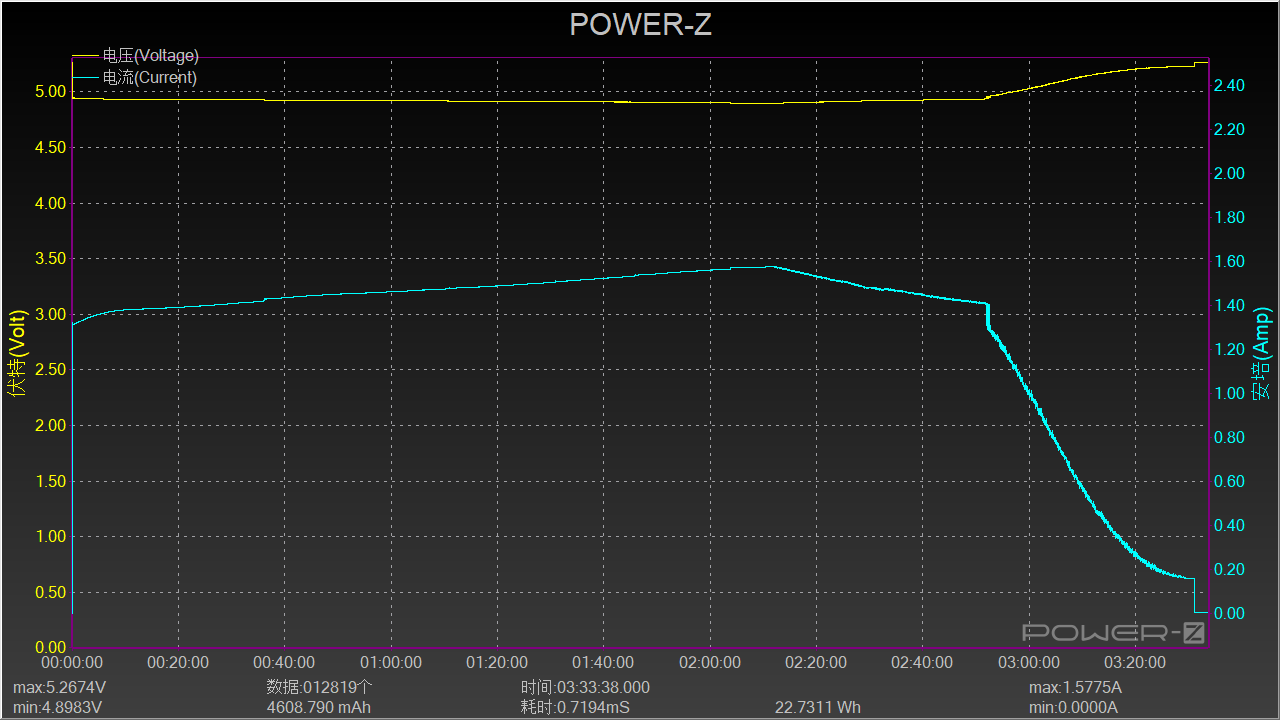
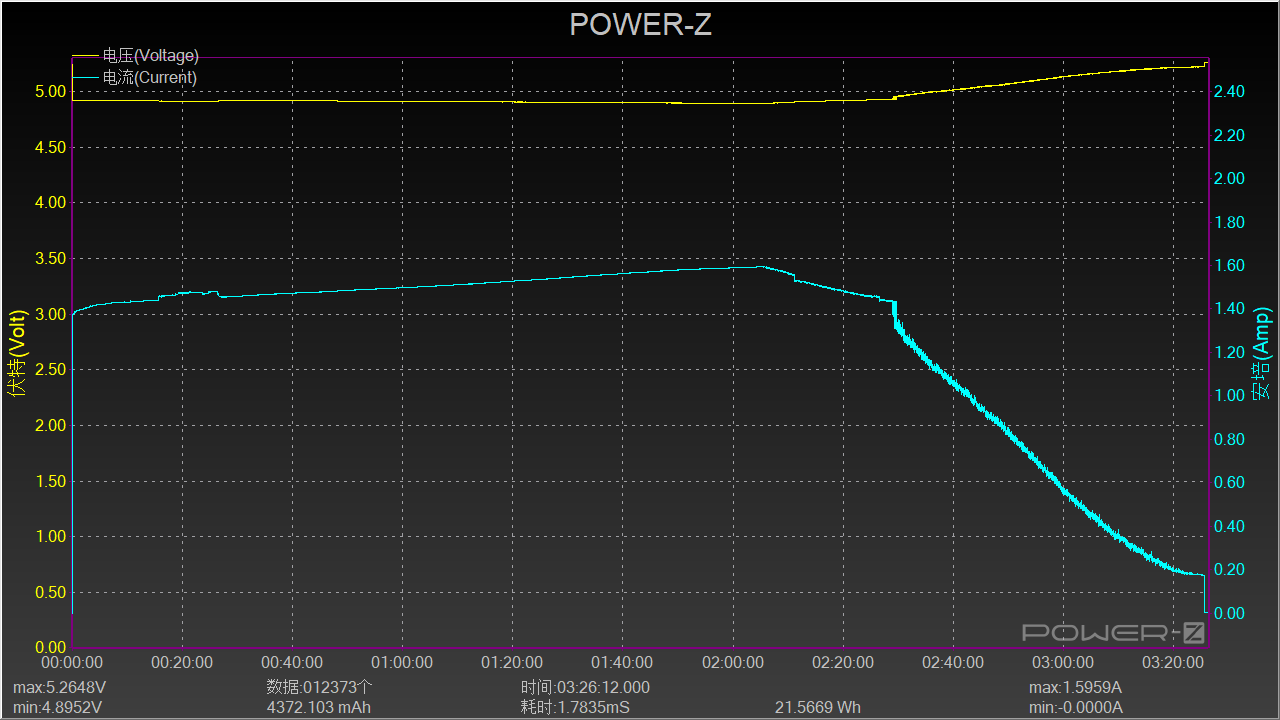
Batteries and output:
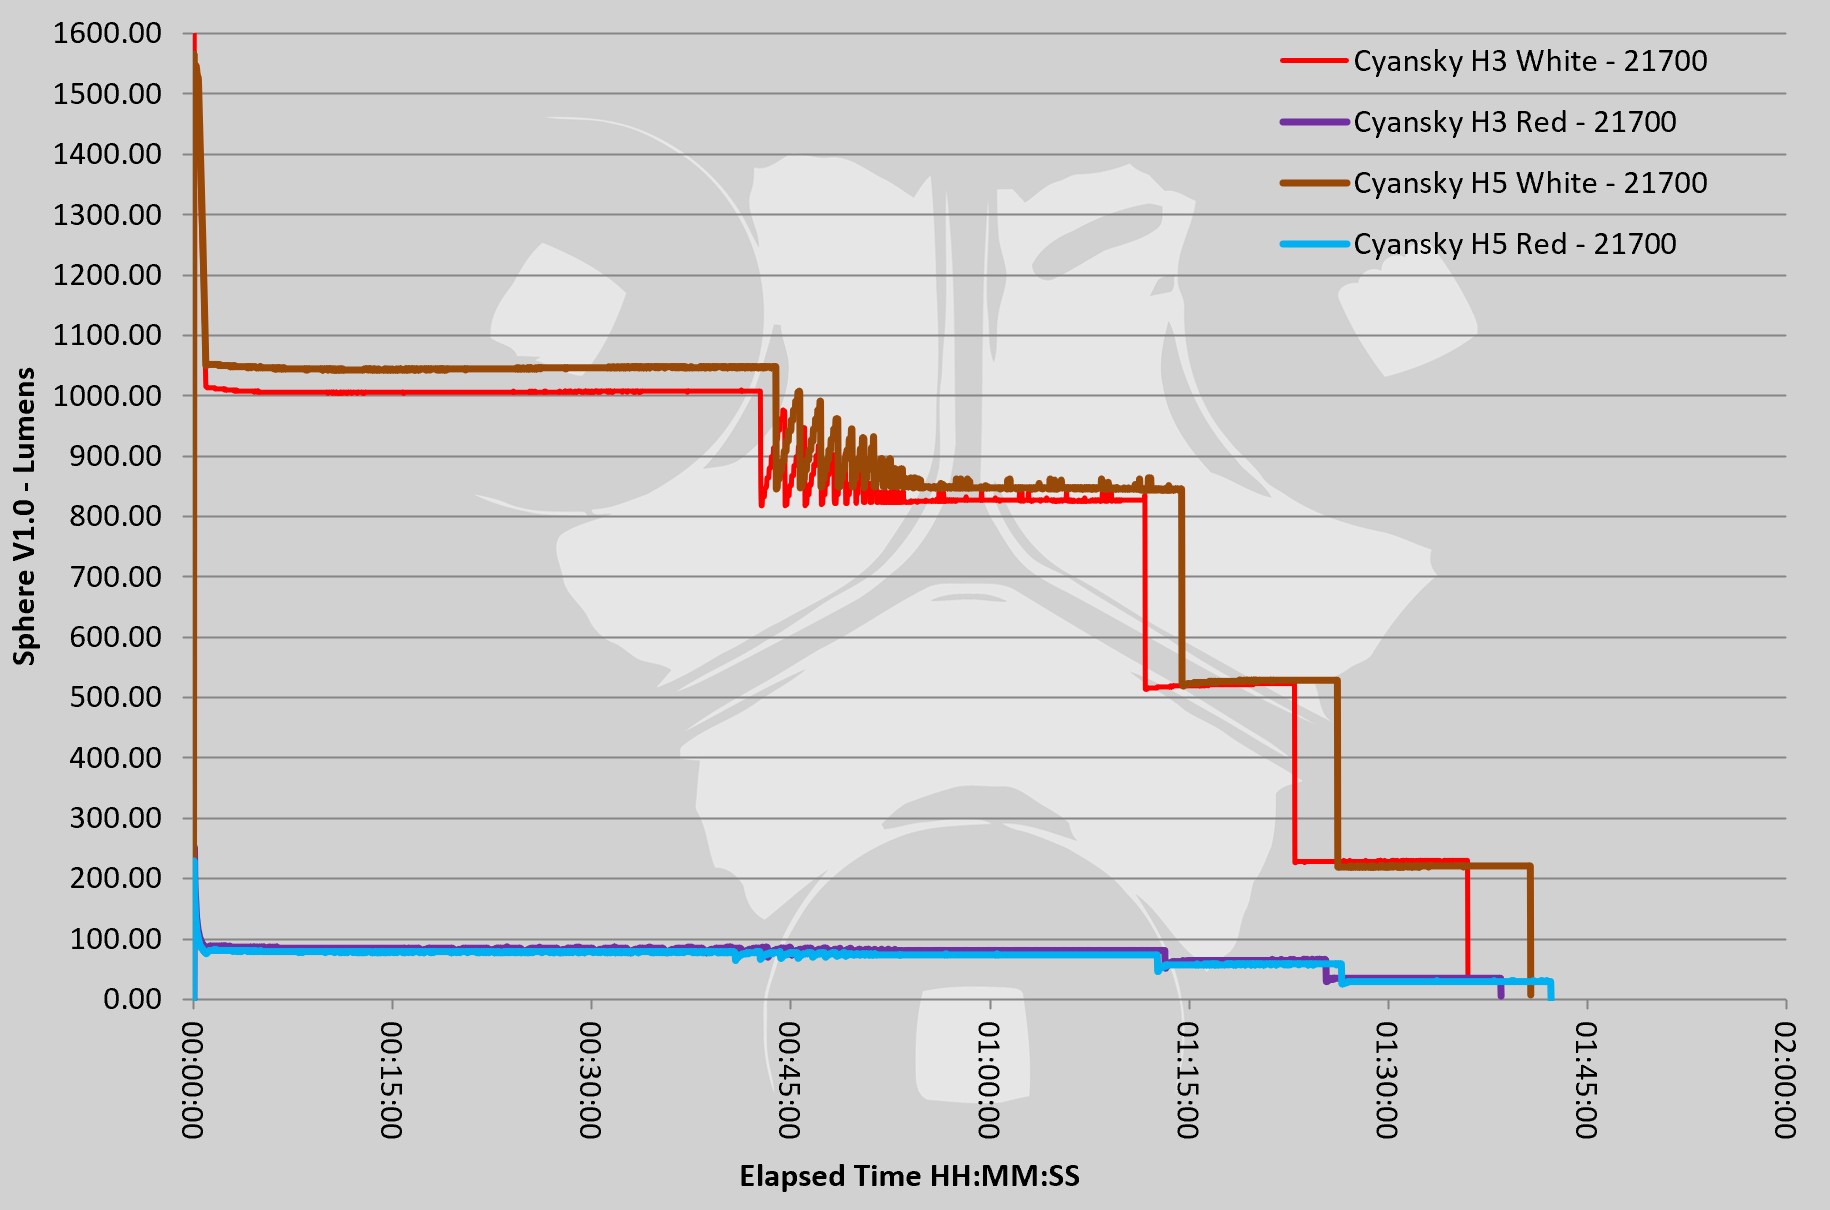
The two models runs on 21700 cells. Logging the built-in USB-C charging gives these traces for the cell provided with each light.
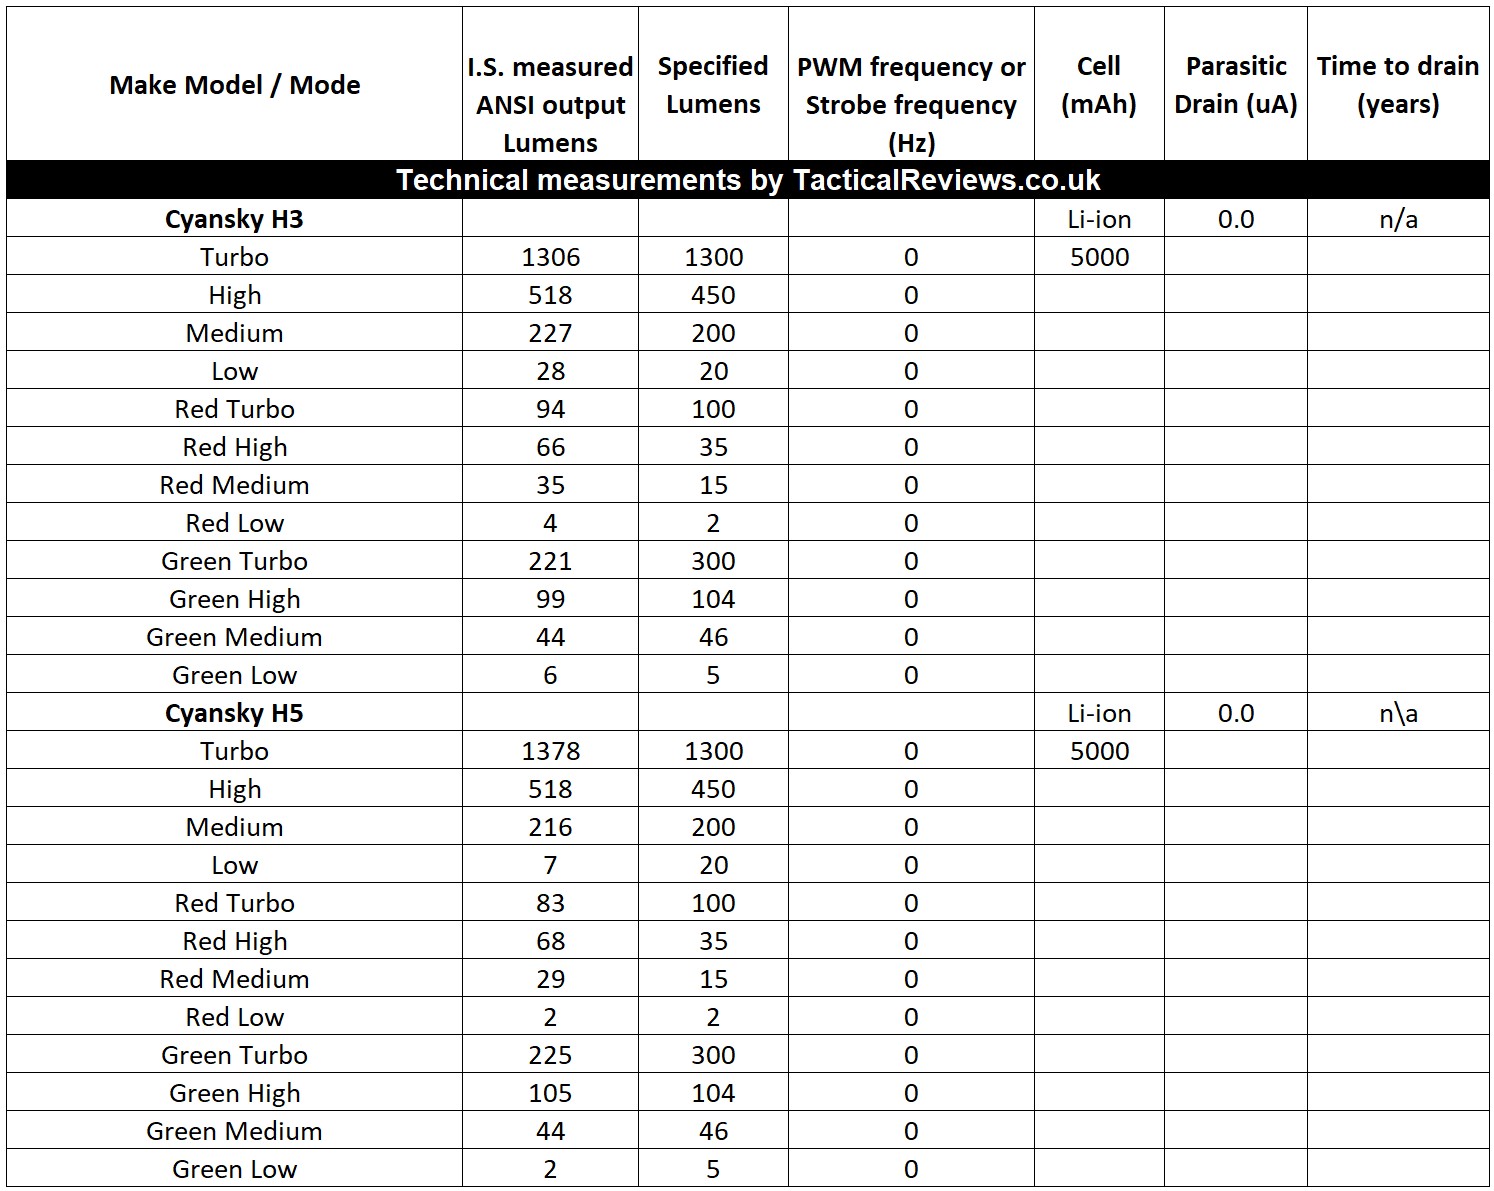
Please note, all quoted lumen figures are from a DIY integrating sphere, and according to ANSI standards. Although every effort is made to give as accurate a result as possible, they should be taken as an estimate only. The results can be used to compare outputs in this review and others I have published.
The Output table also includes the manufacturer specified lumens for comparison.
For the runtime trace, only the highest and lowest output colours were used (white and red) and all traces were run on maximum power.
The H3 and H5 in use
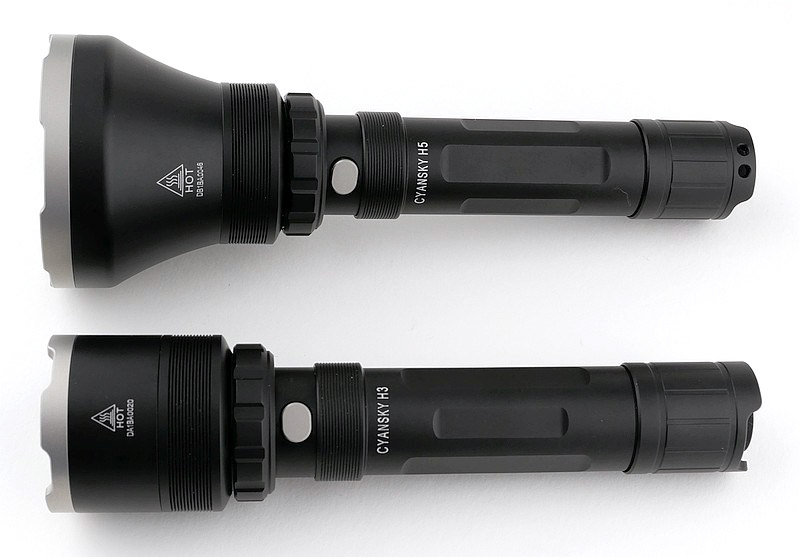
The first aspect to mention is how the H3 and H5 themselves compare. Actually this photo doesn’t show it accurately, but from the control ring to tail-cap, the H3 and H5 are identical. Not a surprise as they run on the same cell, have the some output specifications (apart from beam range), and have the same controls. So when holding them, they are the same for grip and controls.
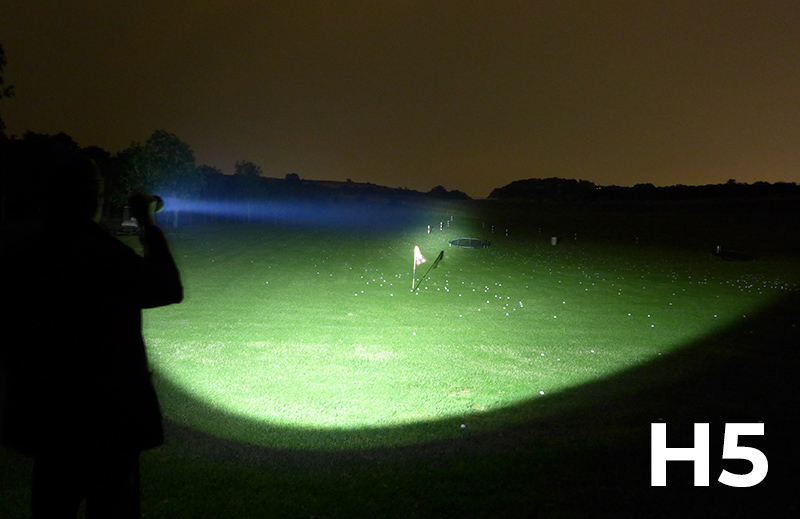
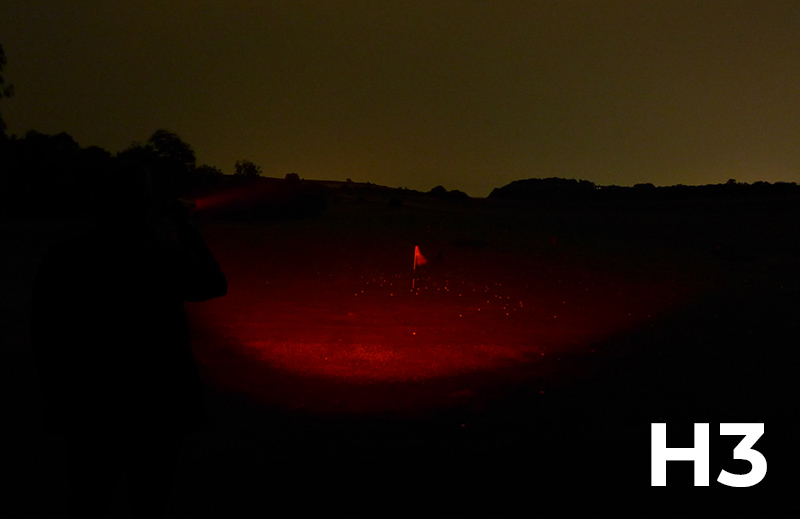
With the larger head, and larger reflector, the H5 does have the edge in overall output, and it focuses the beam more for a longer reach. This gallery shows some longer distant photos on a golf course driving range. The H3 and H5 beams compared directly. The focus of the H5 is clearly visible at these longer ranges.
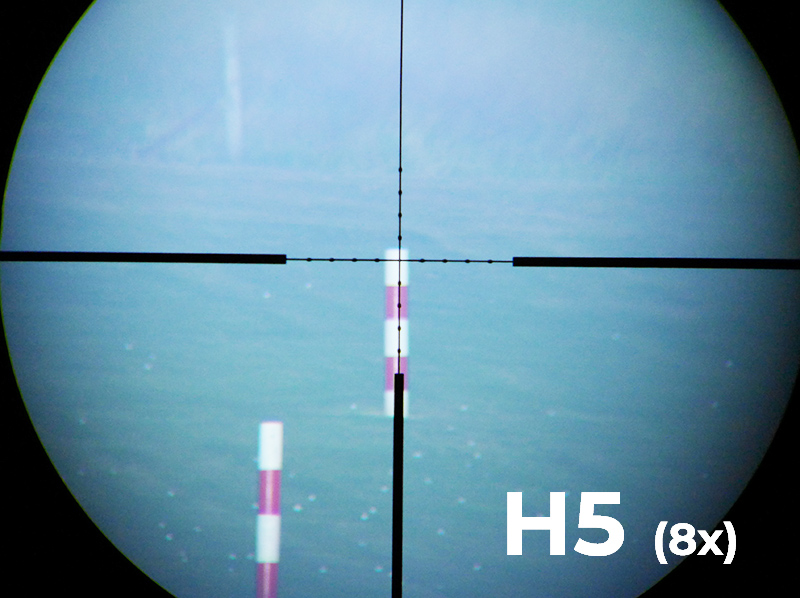
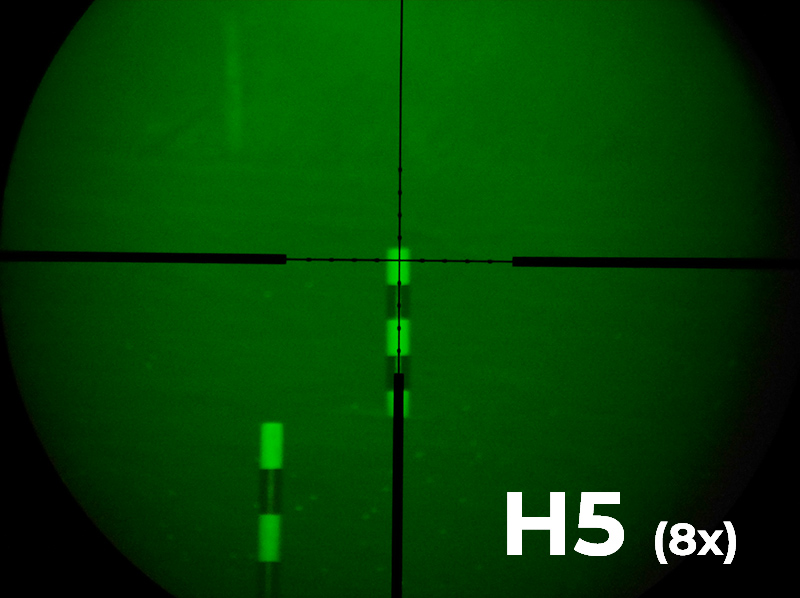
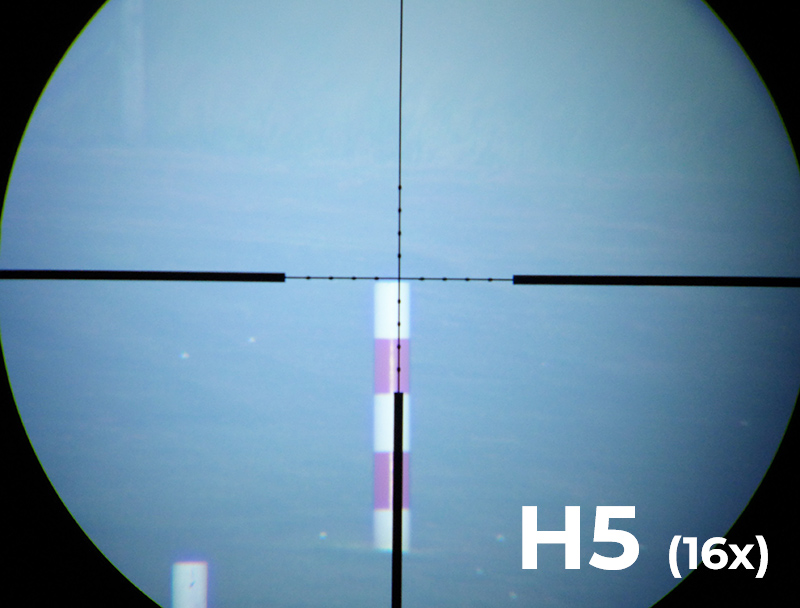
Using a zoom rifle scope this gallery has a set of images at the same exposure to show the gain in distance the H5 has over the H3. The magnification is set to 8x in this first gallery.
Important to note is that the distance markers the scope is aimed at are 250 yards, and that the H3 is still usable on white output, but struggles a bit at this range on the coloured output.
Also bear in mind that I am using a .22lr on this course, so 250 yards it beyond the limit I would take a shot.
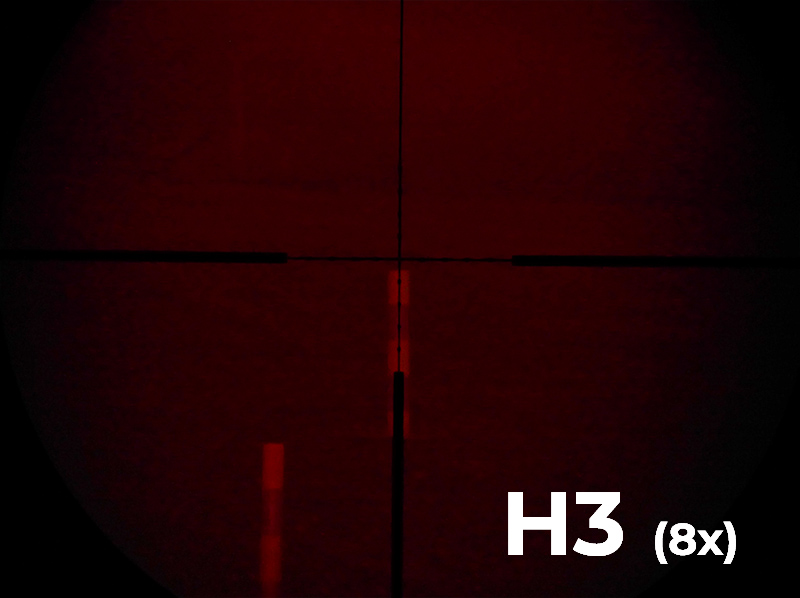
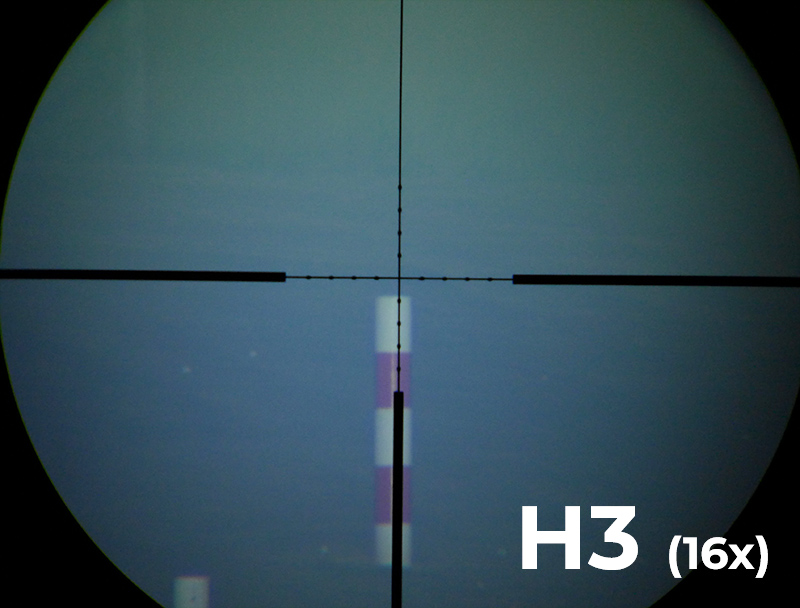
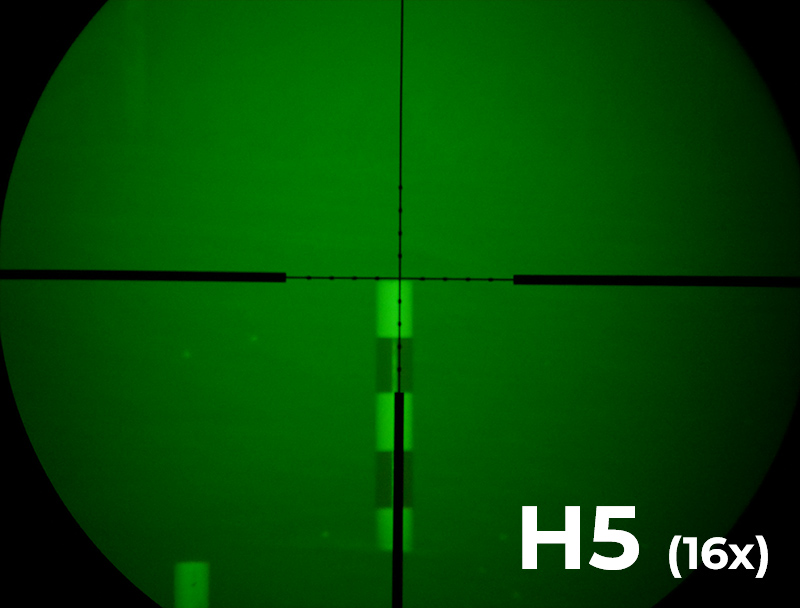
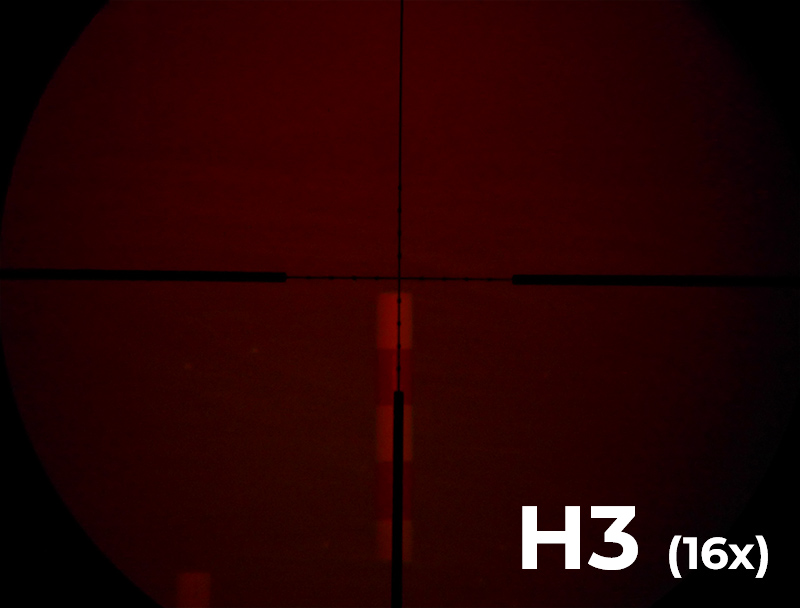
Now taking the scope to 16x magnification. Although all the images here are the same exposure, I have had to use a longer exposure than for the 8x magnification. At this range and magnification the H3 was pushed too far. the H5 was still working well.
This was to test the limits for range and scope magnification. (At 32x magnification I could not get any photos to come out.)
All of the above proves the H3 and H5 work well on or off a rifle, and the coloured output filters, being built-in, are so convenient, allowing for changes of output colour with nothing but a turn of the control ring.
Although I normally use dedicated coloured lights (so the LED is red or green) due to being most efficient and having the best quality of beam, it means I need to carry entire replacement lights to change colour. There are also LED swapping lights on the market but these compromise the thermal path as the heat sink has to move. With the H3 and H5, the single LED has an optimal thermal path for heat sinking.
Using filters on any light does reduce efficiency as you are ‘wasting’ up to 93% of the actual output (in the case of the red 1306lm down to 94lm). This is the cost of the convenience of instant access to red green or white light.
As long as you have a suitable rail to mount the remote switch on, this switch works really well. By including both a dedicated momentary switch, and a latching forward-clicky switch that gives you momentary and permanent on options, you have all you might want. If you don’t have a rail in the right place, this switch won’t really work for you, so consider this before choosing.
If you normally use a dedicated coloured light, then do you switch to the H3 and H5? – if you ever have a need to change between red, white, and green, then the all-in-one solution these Cyansky lights give you allows you to stop carrying additional separate lights.
If you use, or would consider using colour filters, then the H3 and H5 are no-brainers. Why would you want external filters you can lose, that are often a plastic filter material, when you can have self-contained selectable glass filters?
Review Summary The views expressed in this summary table are from the point of view of the reviewer’s personal use. I am not a member of the armed forces and cannot comment on its use beyond that covered in the review.
Something that might be a ‘pro’ for one user can be a ‘con’ for another, so the comments are categorised based on my requirements. You should consider all points and if they could be beneficial to you.
_______________________________________________
What doesn’t work so well for me
_______________________________________________
Using filters is not efficient compared to dedicated coloured lights.
The mode button can look a little twisted as it has a little too much room to move.
Basic belt hanger provided.
_______________________________________________
Things I like
_______________________________________________
Glass filters are used.
Simple turn of the control ring to change filter colour.
21700 power (plus can use 18650 or CR123 if needed).
Supplied 21700 is USB-C chargeable.
Good choice of beam pattern between the H3 and longer reaching H5.
You can find the Official Cyansky Store Here, if you would like to get hold of these lights. (I have no affiliation and get no reward for you buying from this link).
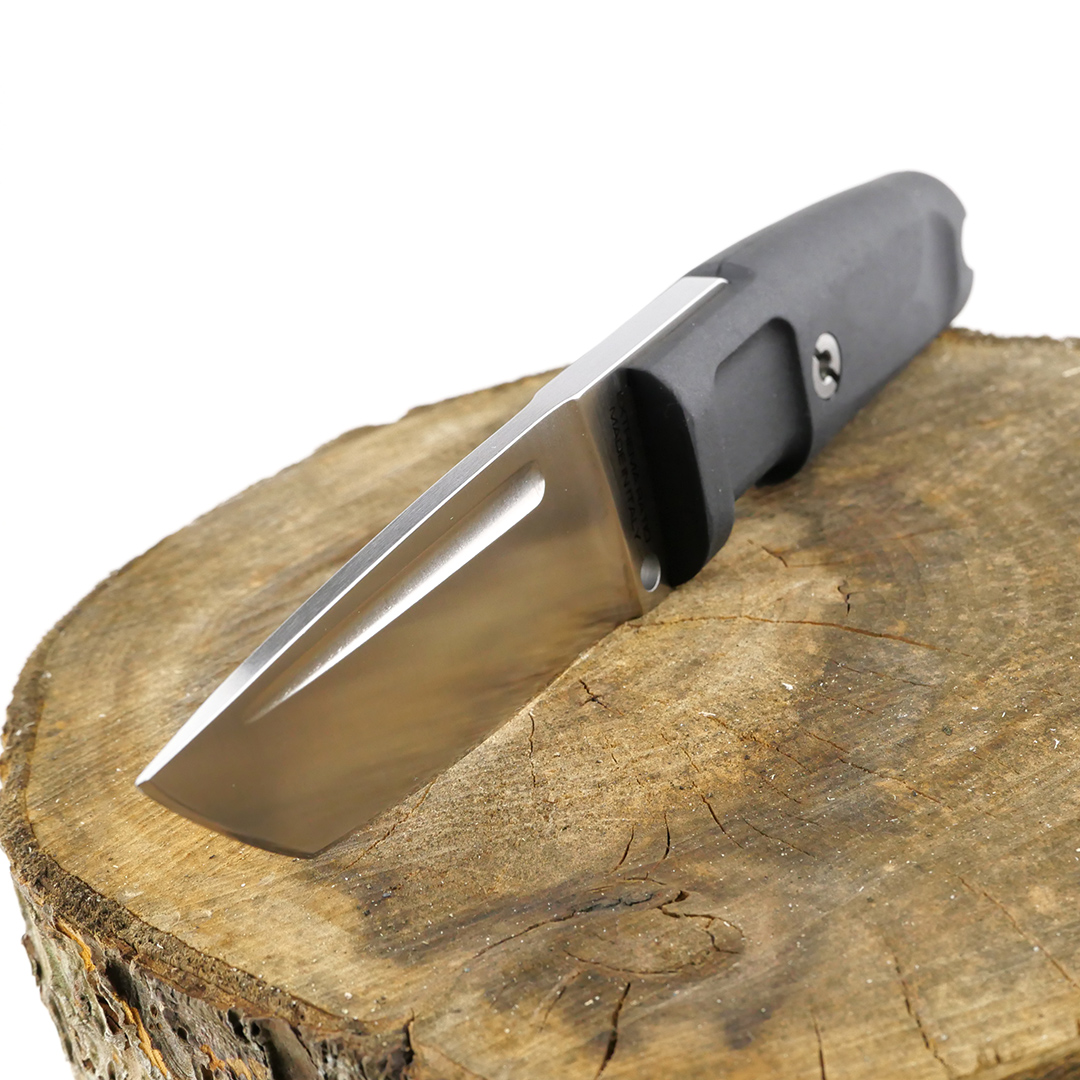
Included in this review of the Extrema Ratio T4000 C, a compact classic Tanto with Extrema Ratio’s tactical sheath and handle, are a video with an overview and detailed measurements, galleries of the packaging, sheath, and knife, plus insights into how it is to use.
Let’s take a closer look.
The video tour of the T4000 C:
In case you haven’t seen the video overview and vital statistics of the T4000 C on Tactical Review’s youtube channel, here it is. This video covers a quick tour of the knife and sheath and a detailed technical measurements section.
A few more details:
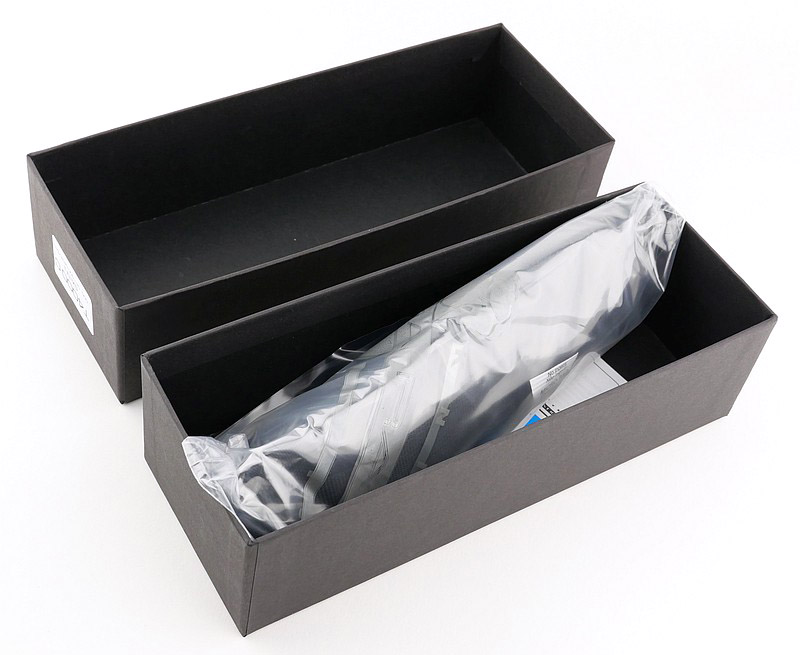
What’s in the box?:
For the T4000 C, it ‘just fits’ into the box. The usual Extrema Ratio high quality two-part box is used.
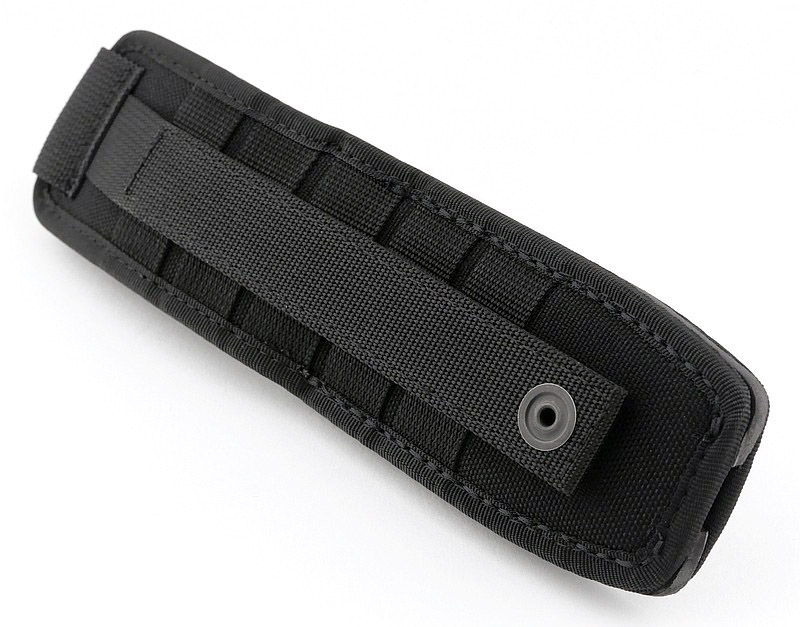
A good look round the T4000 C’s Sheath – Things to look out for here are:
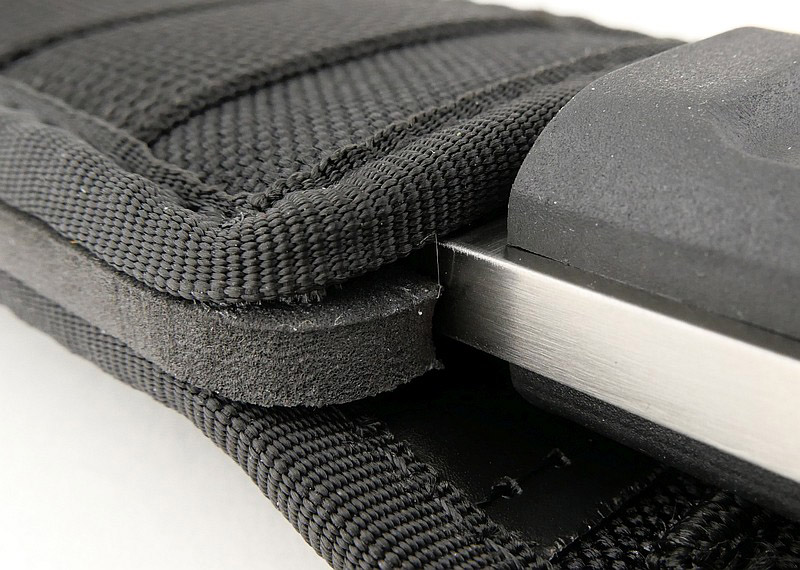
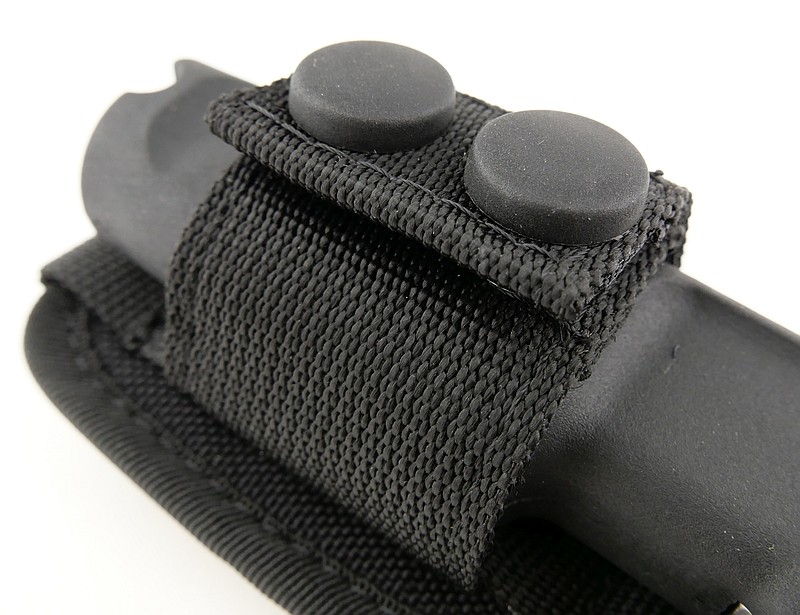
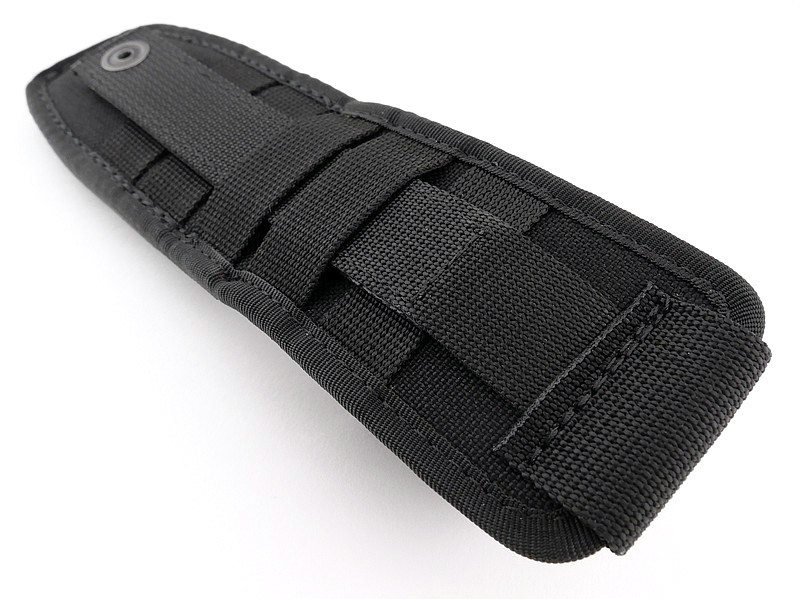
Even though ‘Compact’ the sheath manages to fit in a lot of features and details. Solidly constructed and made to fit the compact knife perfectly. On the back is a set of PALS/MOLLE webbing and strap, with the front also having webbing for mounting a small pouch or other item. A gap in the welt at the base of the sheath allows for free flowing drainage. To comfortably accommodate the thick blade stock the welt is similarly sized.
A strong double press-stud retaining strap wraps the handle and keeps the knife securely in place. you can adjust the position of the retaining strap as it is held in place with a Velcro adjusting system. There is an anti-catch smooth plastic insert backing the sheath to prevent wear and damage to the back of the sheath when sheathing the knife.
With there not being a specific belt loop, using the MOLLE strap, you can make your own belt loop to fit the size of the belt.
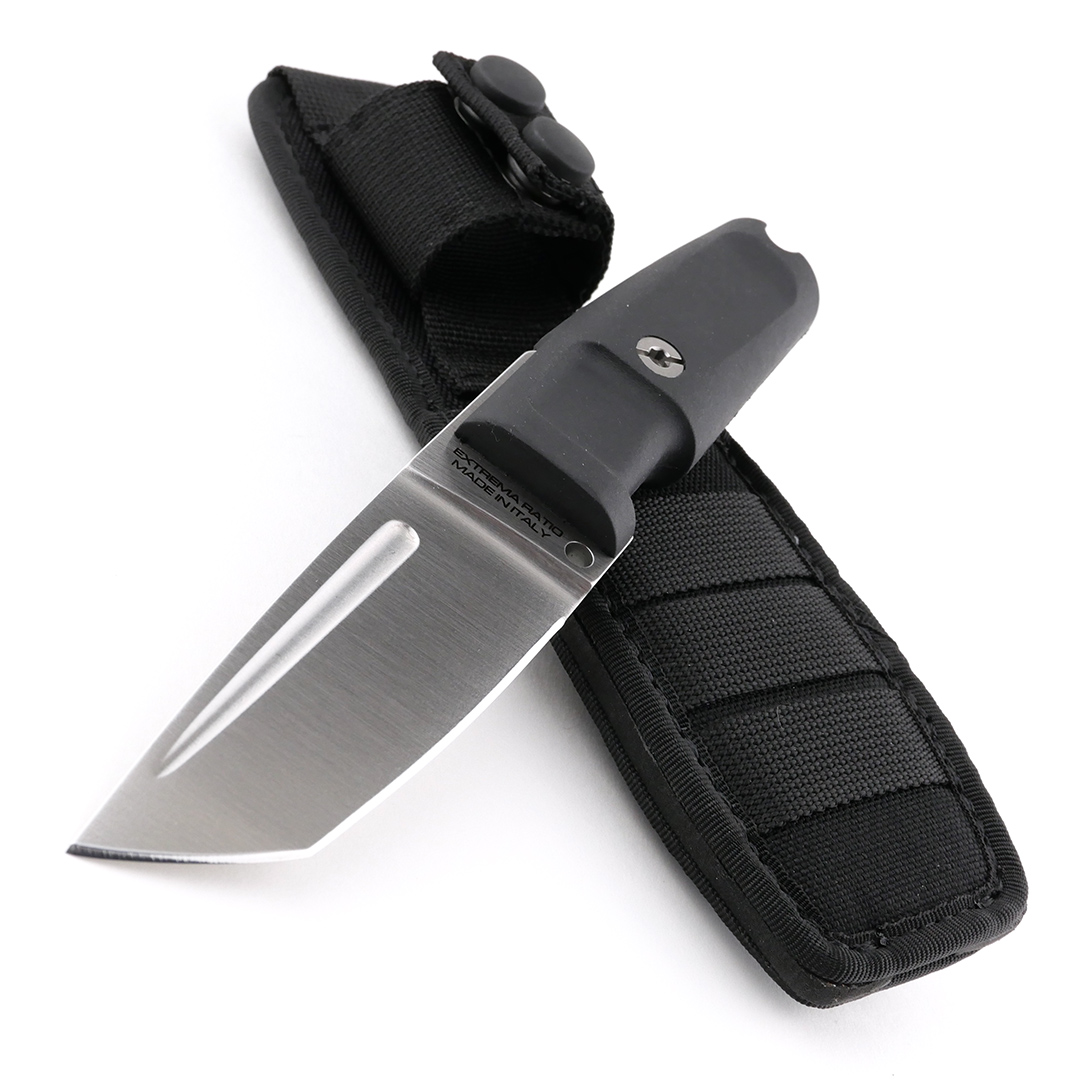
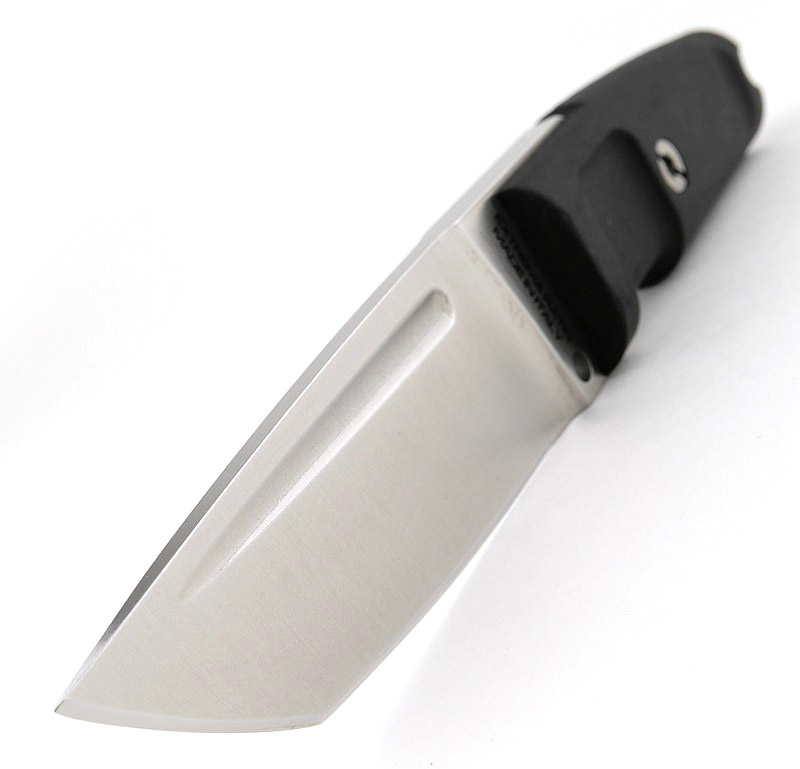
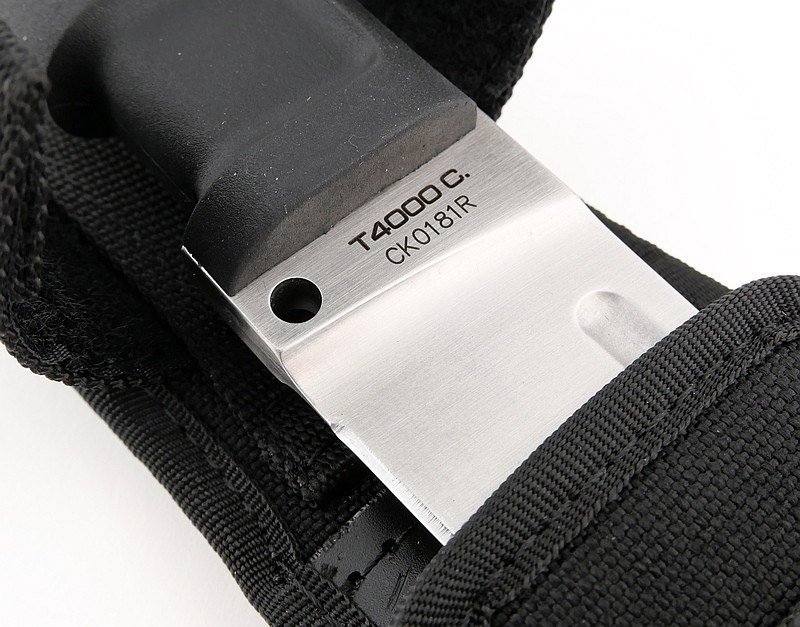
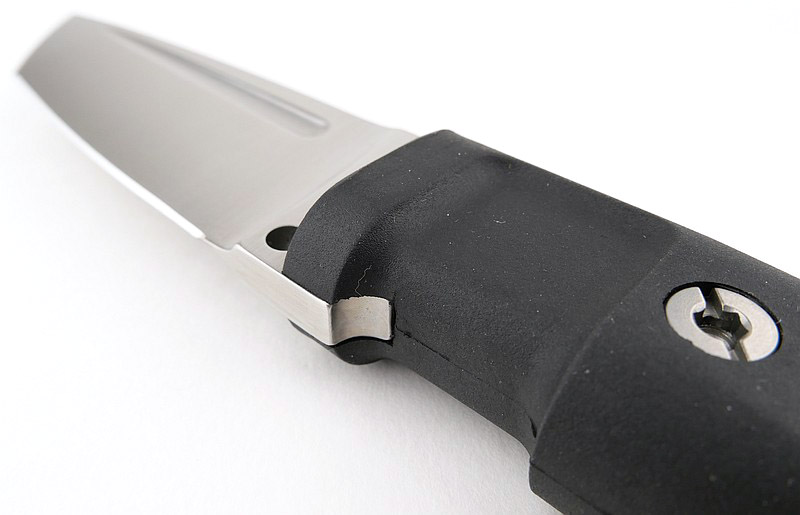
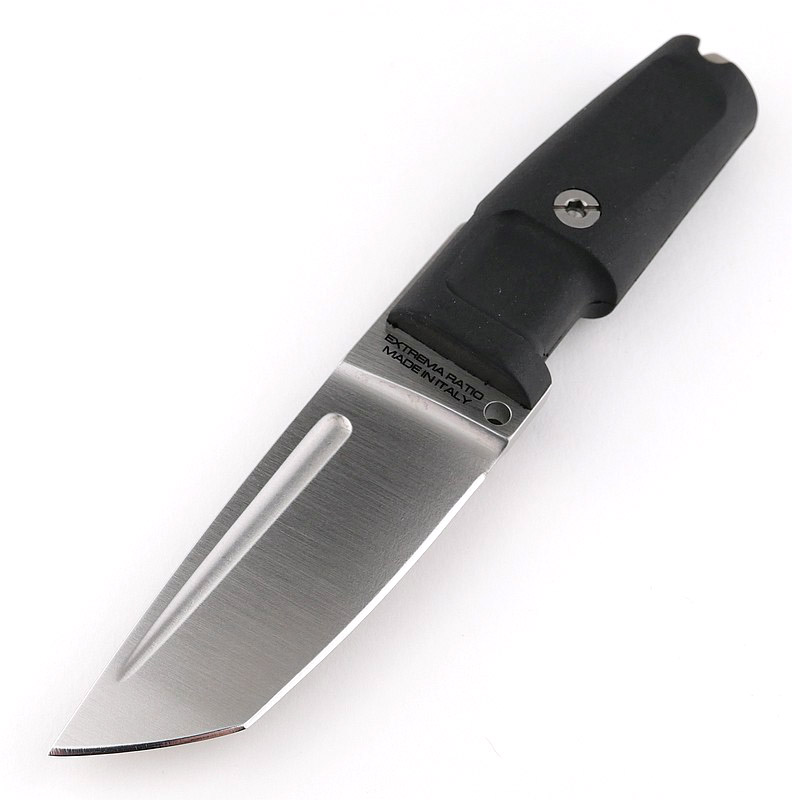
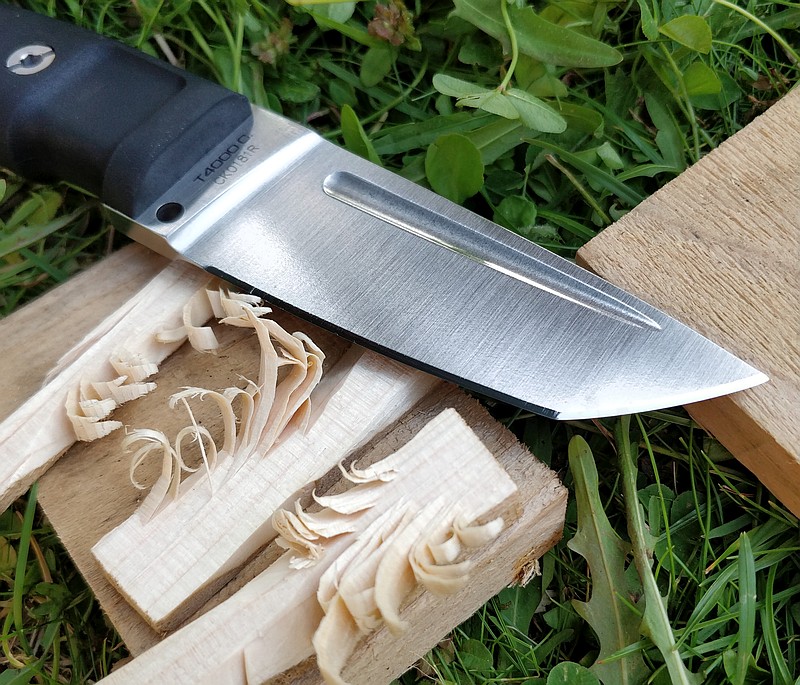
The T4000 C knife itself:
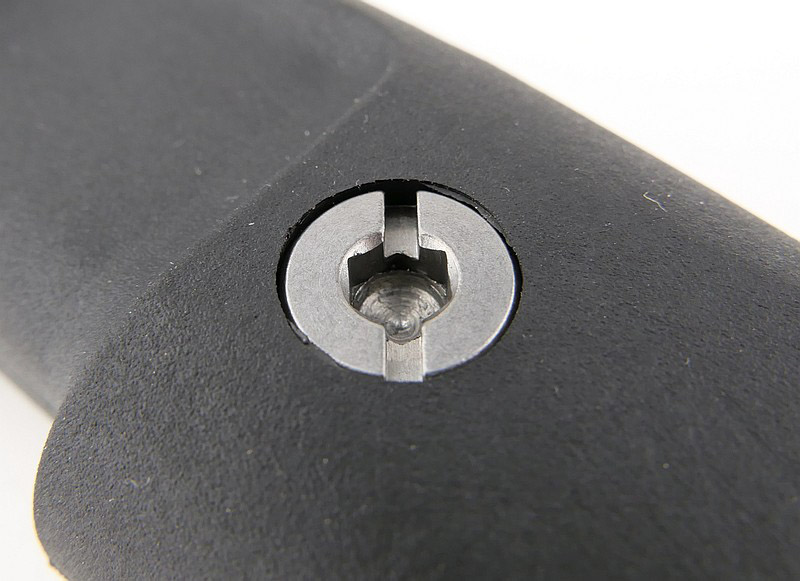
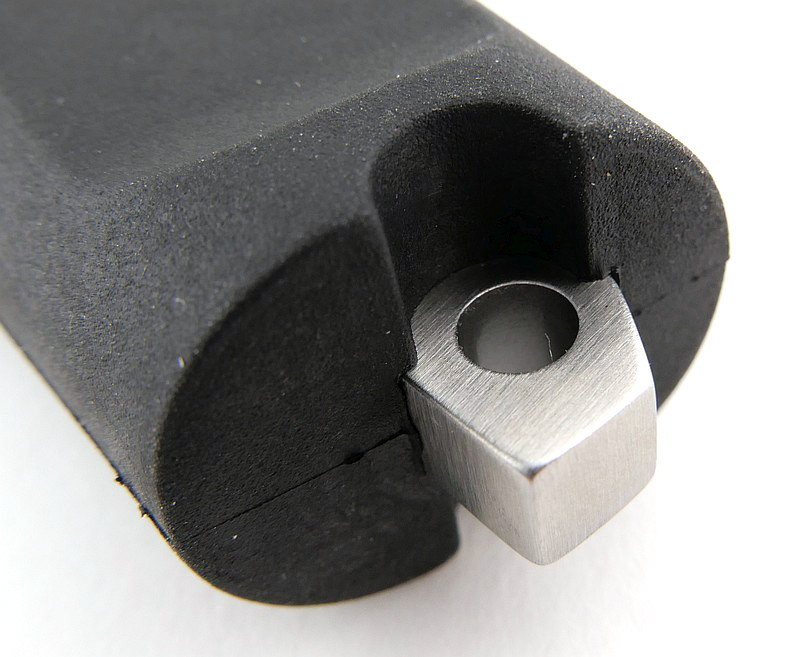
From the first view of the satin blade emerging you get drawn into admiring the knife. The beautifully executed fuller on each side of the blade enhances the lines. Extrema Ratio’s distinctive grip design provides an index finger groove to give a strong grip. A single bolt holds the rubber grip in place on the full tang, that extends through to a striker and lanyard hole. Sharpening choils – what is your take? – well the T4000 C does not have one, so the sharp edge stops just short of the plunge line. Also note a front lanyard hole, allowing you to fit a cord to both the front or rear of the handle.
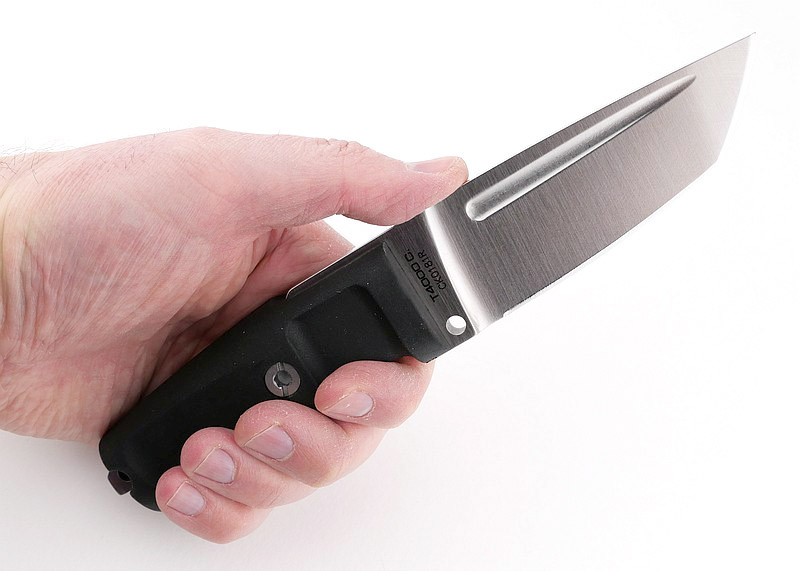
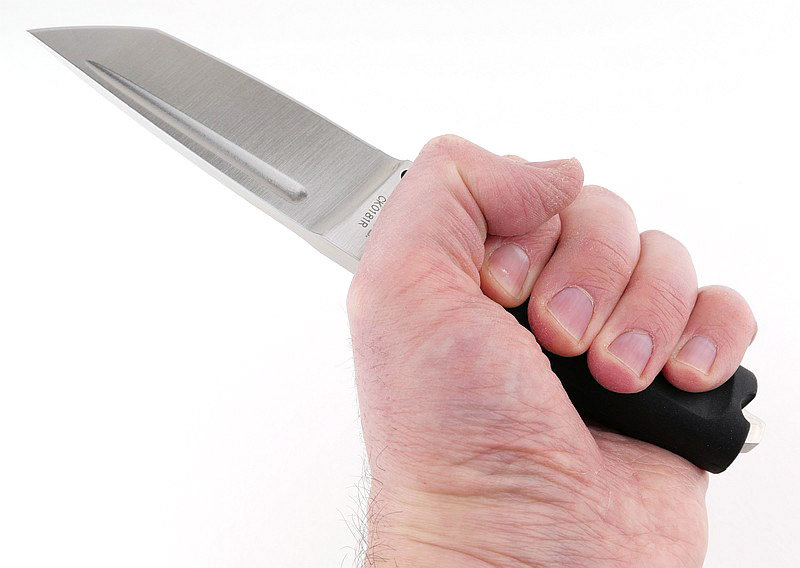
Being the compact model, the handle length sits just within the hand (I take XL size gloves).
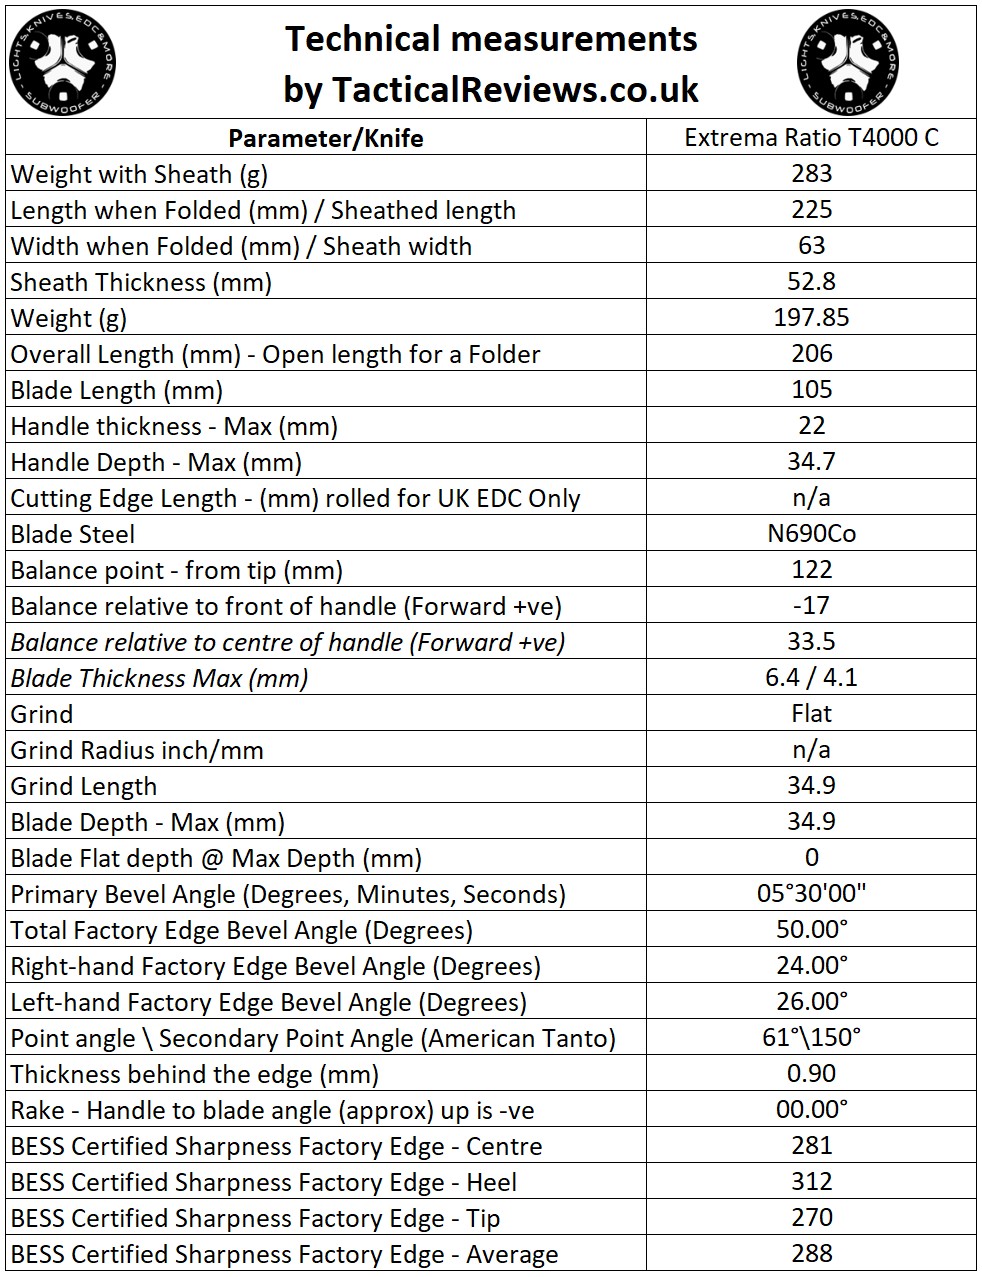
The Blade and Handle – Detailed Measurements:
For full details of the tests and measurements carried out and an explanation of the results, see the page – Knife Technical Testing – How It’s Done.
There is a lot to take in here. These measurements are shown in the video.
What is it like to use?
It’s a tanto – nice – I always like a tanto. There is a practicality of having an almost chisel-like tip and what I refer to as the secondary point (where the tip and main edge meet) for various cuts instead of using the actual tip of the knife.
The elegant lines are simply a pleasure to look at as well as to use, and being the compact knife class from Extrema Ratio this is a really useful day to day blade. Something you are more likely to pick up and use, as it is very practical.
I knew after measuring the factor edge I would want to re-profile the edge bevel, 25DPS is too wide/heavy for a small knife, even 20DPS would be more than I want. But before doing this, with the sharpness measuring a respectable 281 BESS average I wanted to see how it fared. It would not shave arm hair with this edge, however…
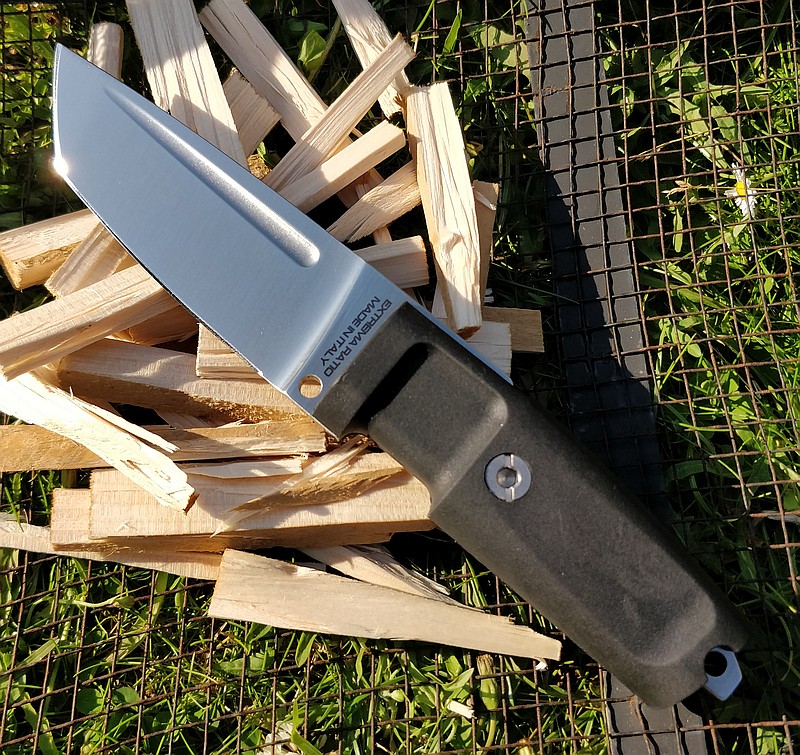
Factory edge put to some minor fire prep tasks. The wood here is fully seasoned so much harder than any green wood. Kindling and feather sticks, perfectly good with these little pieces of wood, using the edge out of the box.
After a bit of use, it was time to change the edge bevel to 17DPS and bring that cutting edge a bit closer to the plunge line. As always, putting your own edge on a knife makes all the difference, and now it sings along shaving and slicing ferociously.
Extrema Ratio are good at Tantos, and this is one of their best. The thinned down blade thickness with full flat grind give it great slicing power, yet the blade still starts at 4.1mm at the spine, so is plenty strong for heavy use. Go back and look at the blade in the video as the light plays off it and you really appreciate the qualities of the T4000 C.
Review Summary
The views expressed in this summary table are from the point of view of the reviewer’s personal use. I am not a member of the armed forces and cannot comment on its use beyond a cutting tool or field/hunting knife.
Something that might be a ‘pro’ for one user can be a ‘con’ for another, so the comments are categorised based on my requirements. You should consider all points and if they could be beneficial to you.
I’m trying something slightly different and starting with what doesn’t work so well, so I can finish on a more positive note
_______________________________________________
What doesn’t work so well for me
_______________________________________________
No sharpening choil – personal preference.
Retaining strap is a bit bulky for a compact knife.
Factory edge usable but a bit ‘heavy’.
_______________________________________________
Things I like
_______________________________________________
Build quality and finish.
Practical well designed sheath.
‘Handy’ size being a ‘C’ Compact model.
Very comfortable grip.
Front and rear lanyard points.
Elegant blade profile with fullers.
Reliable steel choice.
Discussing the Review:
The ideal place to discuss this review is on the Tactical Reviews Facebook Page
Please visit there and start/join the conversation.
As well as the Tactical Reviews Facebook Page, please consider visiting one of the following to start/join in any discussion.
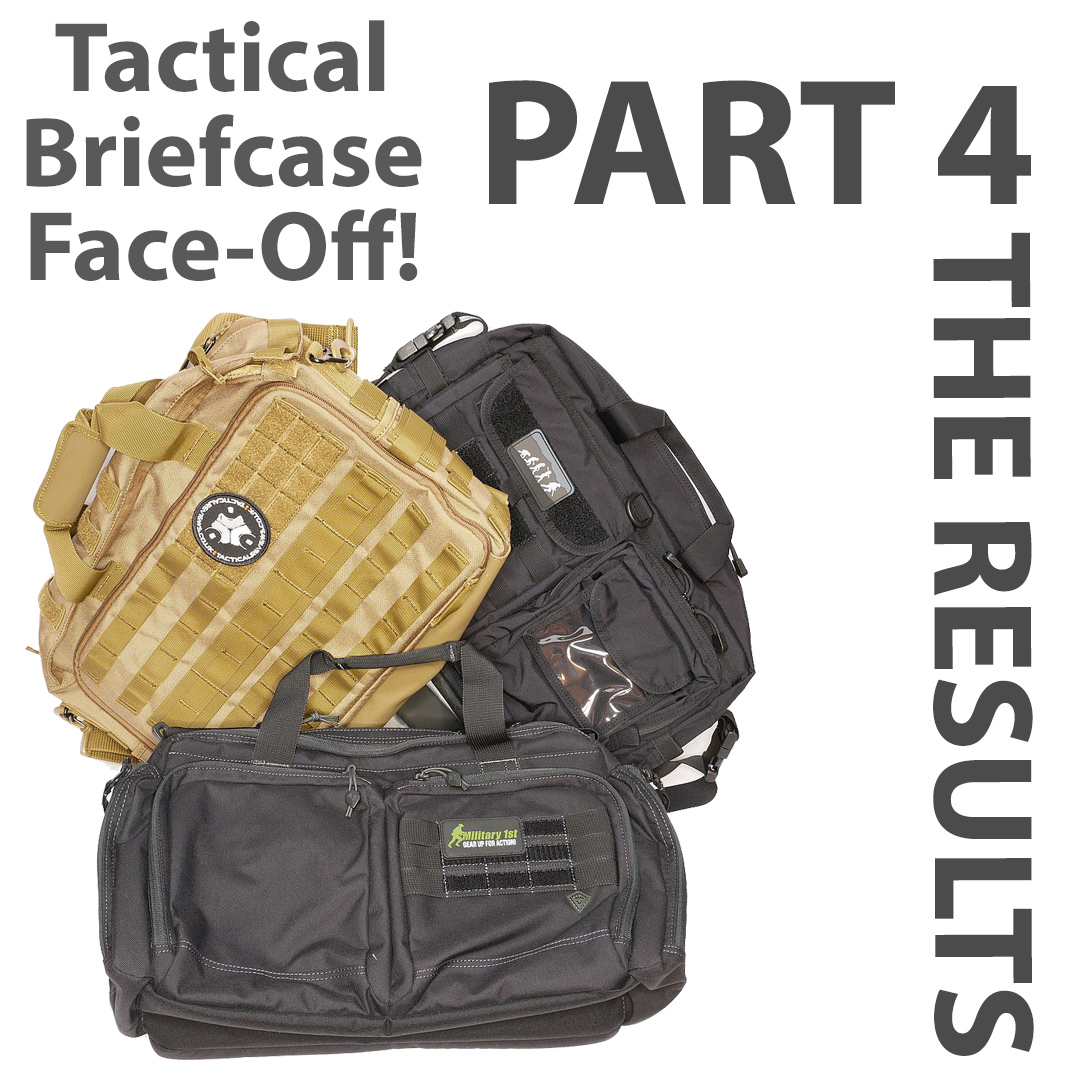
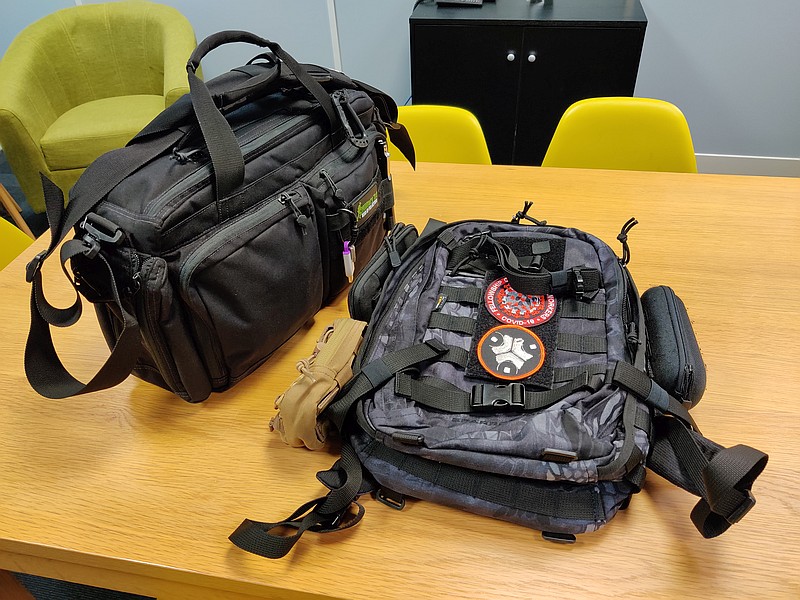
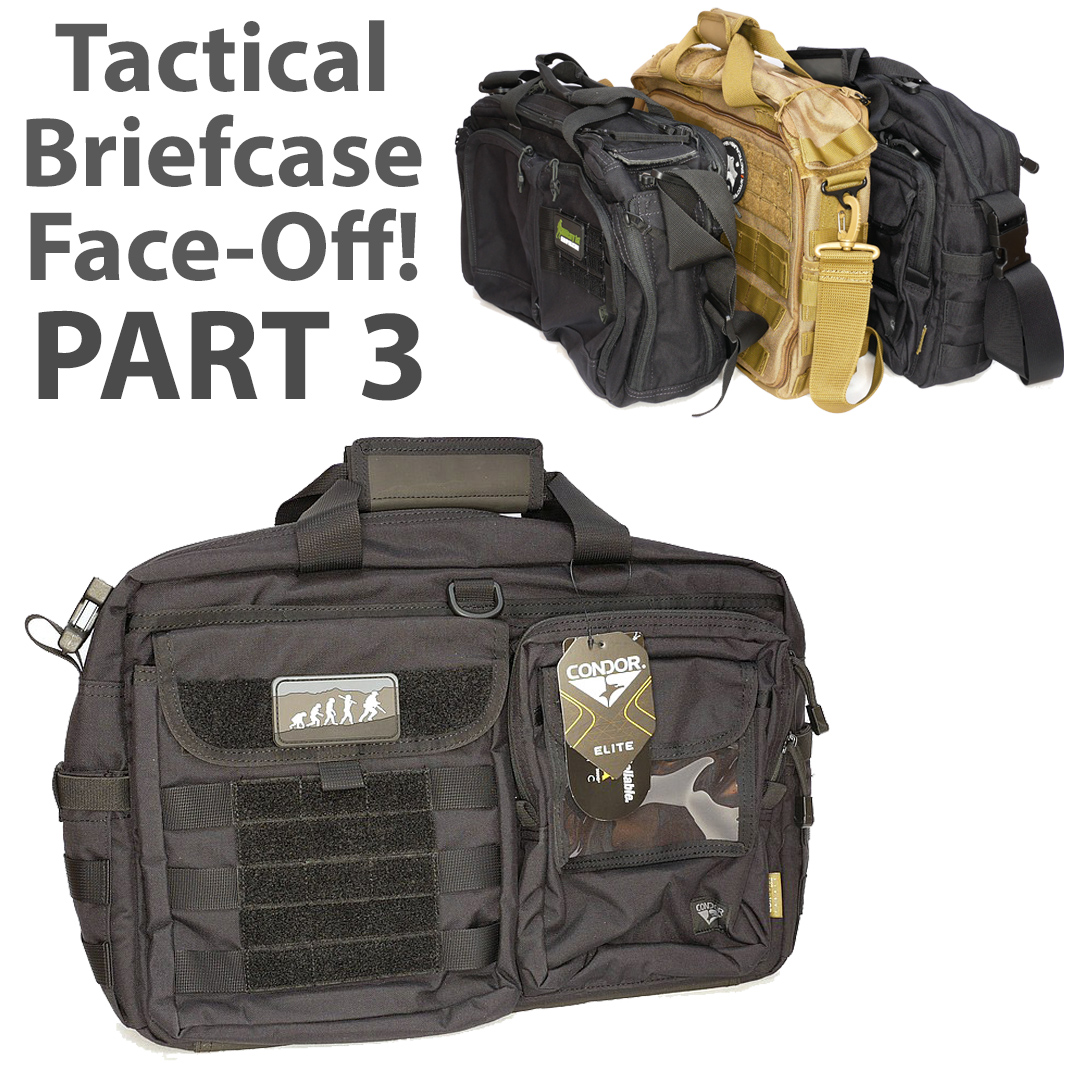
Part 4 of the Tactical Briefcase Face-Off is all about the results! All three Tactical Briefcases in the Tactical Briefcase Face-Off series came from Military 1st who I’ve been buying from for many years.
This series of reviews was originally planned to be a single group review, but has evolved into something much larger as I used each of them for EDC, lived with them, got to know them well, and more and more needed to be shown. In parts 1-3, each of the three Tactical Briefcases (First Tactical Executive Briefcase, Hazard 4 Ditch Bail Out Bag and Condor Metropolis Briefcase) has been shown in detail, and now in Part 4, it all comes together to explain how I got on with each one and their strengths and weaknesses.
The video tour of all three Tactical Briefcases:
In case you haven’t seen the video overview on Tactical Review’s youtube channel, here it is. This video covers all three of the bags.
Part 1 – The First Tactical Executive Briefcase:
The story of this Tactical Briefcase Face-Off series of tests starts with the bag in Part 1, the First Tactical Executive Briefcase.
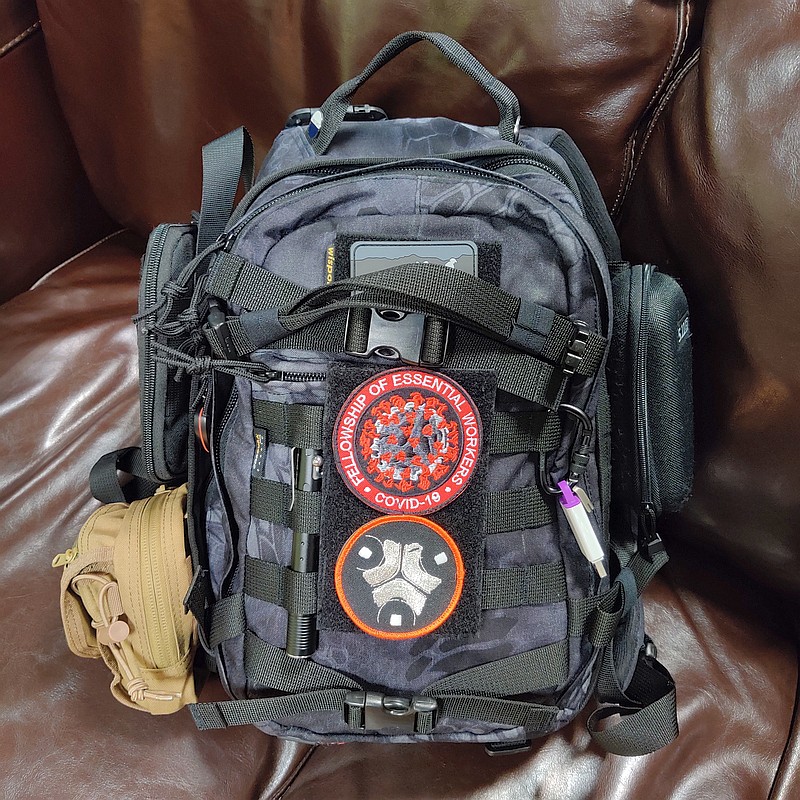
These briefcases all have to follow in the footsteps of my established 20l EDC backpack. Over the years, this 20l class of backpack has fitted in nicely with my EDC needs, and the most recent of these being the Wisport Sparrow 20 (also reviewed here).
Taking this as my optimum starting point, all the Tactical Briefcases would need to measure up in terms of capacity, storage and function.
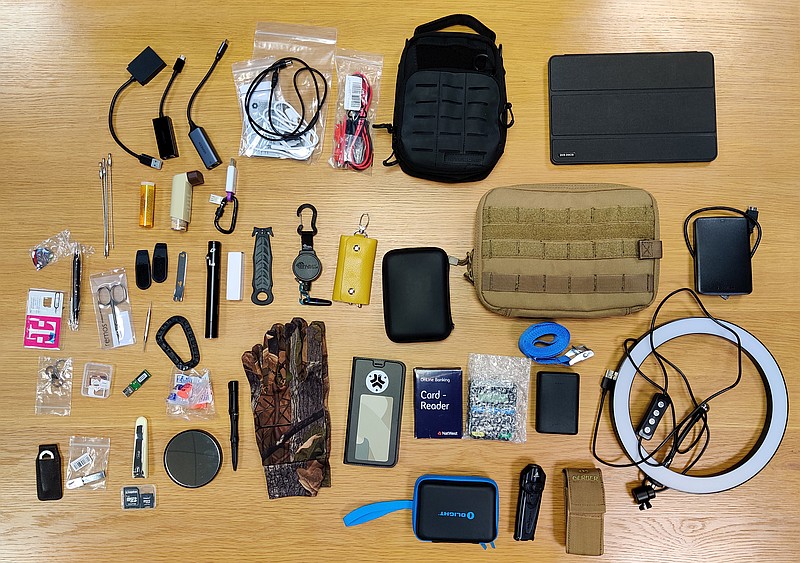
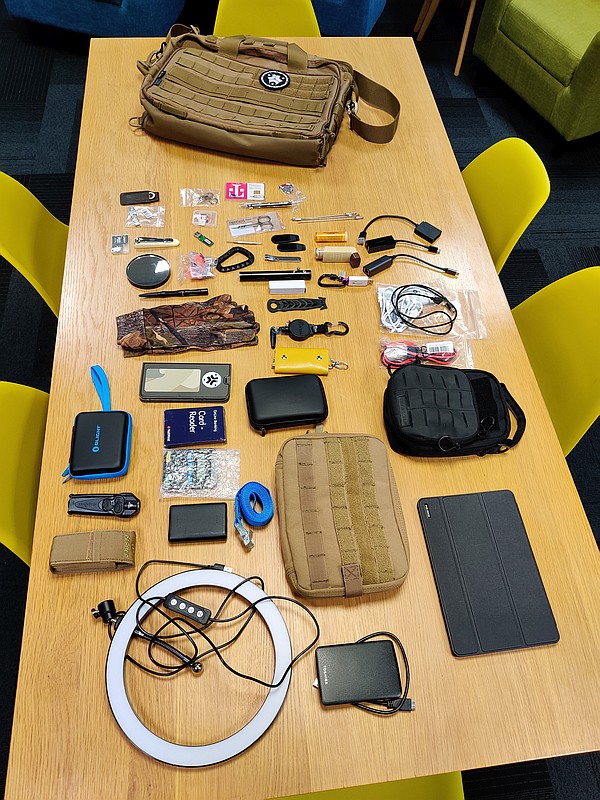
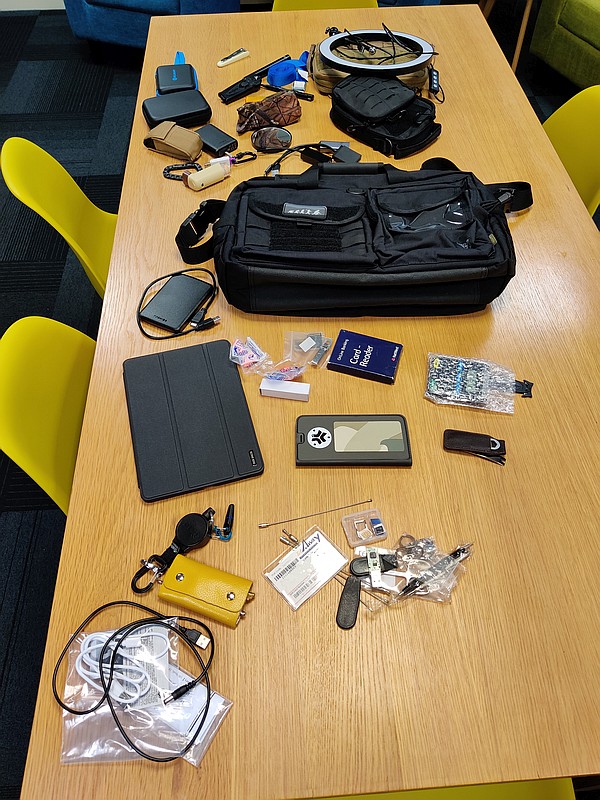
We all carry a variety of gear, and I just went with what I actually do EDC rather then contriving a test. Laying it all out ready to move over to the First Tactical bag, this is what I currently carry, and I’m not even going into the contents of the two organiser pouches in there.
So it’s all moved over, and there is room to spare, an easy and straightforward bag move; immediately feeling comfortable and reassured the bag will stand up to use.
Then I EDCed this bag for two weeks before considering a swap to the next.
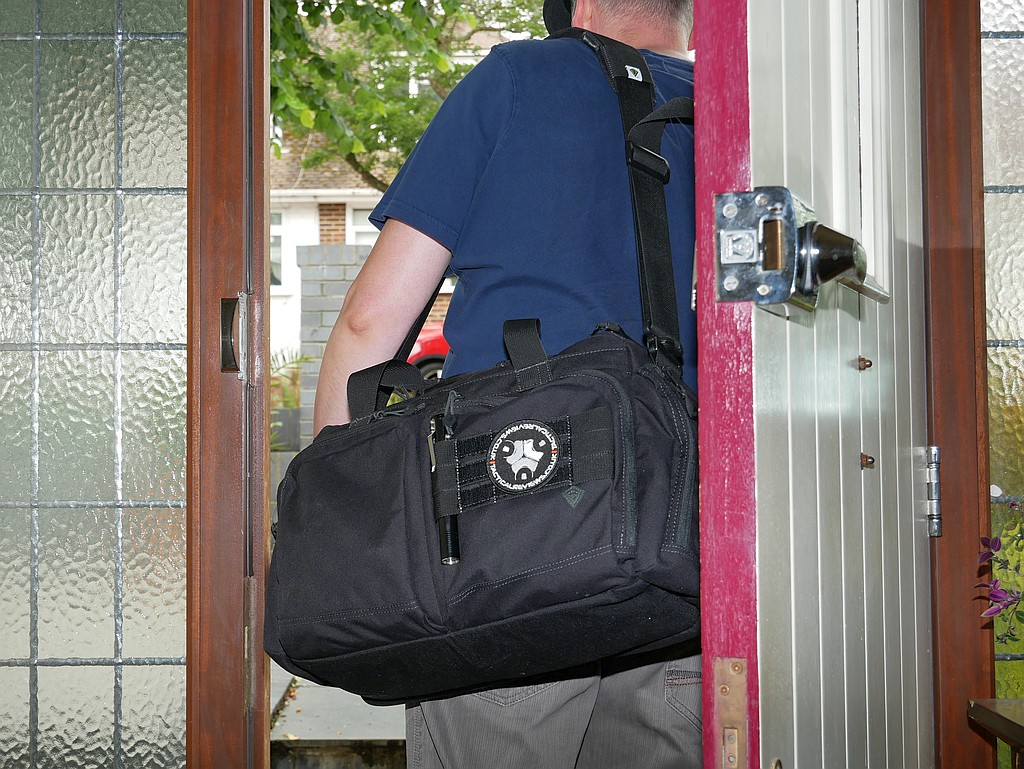
At this stage where I didn’t have any comparison of using the other bags, I could only consider the first impressions of this one on its own. Sturdy and comfortable would be the words that come to mind. The well padded strap made carrying it very easy despite now having only a single strap compared to a backpack with two. The strap is also super stable, and doesn’t slip off the shoulder thanks to the rubberised grip-strips on the strap pad. On the floor it is nice and stable in the upright position, and the double-zipped top flap makes for very easy access to the main compartment, just make sure you put the most needed items near the front of the compartment.
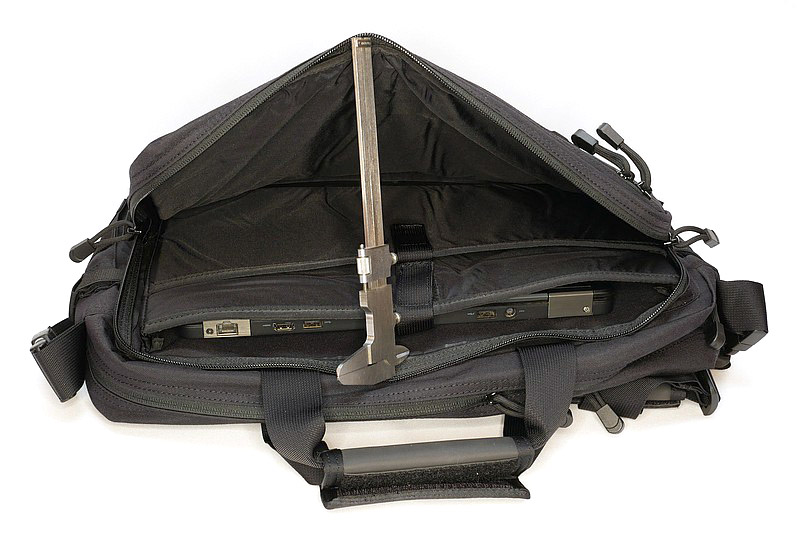
The well made handles also add to the sturdy feel of the bag and when carrying with the handles they feel very strong. I keep a 10″ tablet in the laptop section rather than a laptop, and this only needs one side of the padded section, easily accessible with the twin zip.
With all the compartments using zip closures, noise levels are low when getting bits and pieces out, although when carrying it is prone to a bit of strap buckle squeaking from the swivels.
A strong start to the face-off series.
Part 2 – The Hazard 4 Ditch Bail Out Bag:
Hazard 4, oh Hazard 4, I do like Hazard 4 quality, so wanted this to be my favourite. I always try not to allow any bias into my assessment of gear, so had to have strong words with myself on how I was going to view this one.
Of the three, the Hazard 4 was the only one not to come with a shoulder strap. I understand why, but actually don’t think it is right that it doesn’t, considering the price point. There isn’t much choice in matching shoulder straps, really only two, the one on test, and a version with additional stabilisation strap that clips onto another loop on the bag. As a separate item, the strap is however of a quality that justifies it being an item itself, and not something made to fit within the overall pricing.
The use of a different fabric on the bottom that is waterproof and wipeable is a great touch and gives the impression this bag will definitely go on and on.
On swap-over day; laying out everything ready to move it over.
Slightly surprisingly, it was a bit more of a challenge to fit everything in, with the bag developing a bulge on the admin panel side. This, combined with the padded laptop compartment on the opposite side being quite rigid and stiff, gave the bag an imbalance and it seems to want to topple over rather than sit upright. This tendency continued throughout the fortnight it was in the EDC rotation, and was somewhat annoying. It was as if the laptop section was a bit too big for the side of the bag, which also impacts on the carrying capacity.
Reliability was never in question, and the strap made it comfortable to carry. Both because the contents seemed to fill it more, and the lack of capacity to take any top-up EDC items, made it appear smaller than the First Tactical bag. This was also noticeable while carrying it; I did not knock into door frames or walls with it (as much), so carry was easier, and more streamlined.
With the admin panel being the whole side, instead of a couple of smaller pockets, it was not as easy or convenient taking out a few bits a pieces. It would be more suited to a kit of items where you need to see them all at once to pick the one you want.
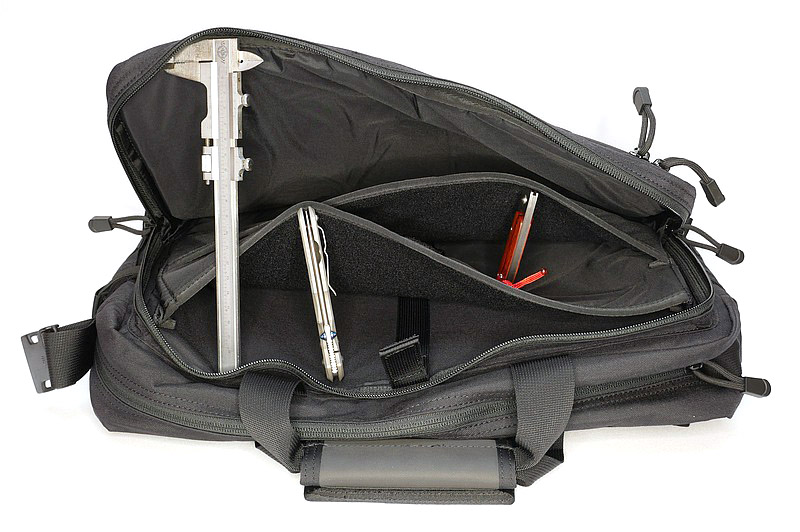
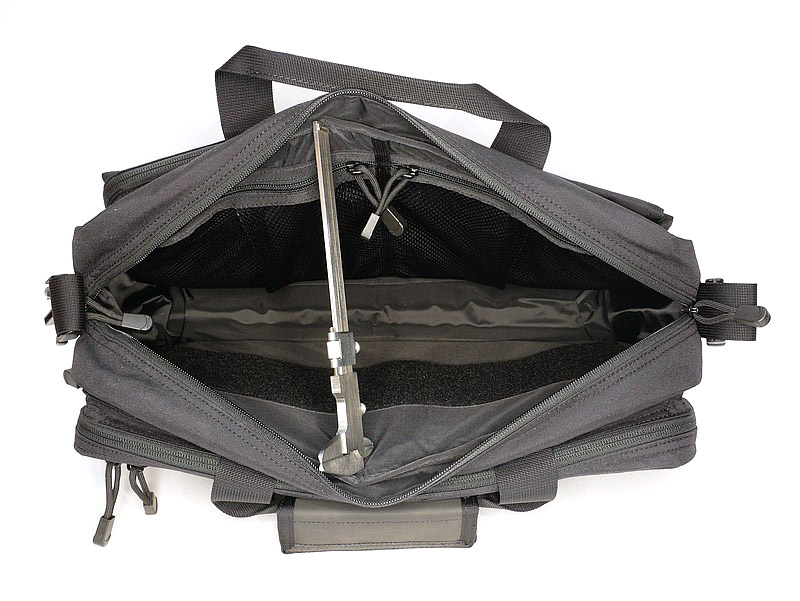
The main compartment however was very usable, with the internal end pockets, pockets on one side and a versatile webbing panel on the other. Access is quick and easy with the lightweight double-zip flap top.
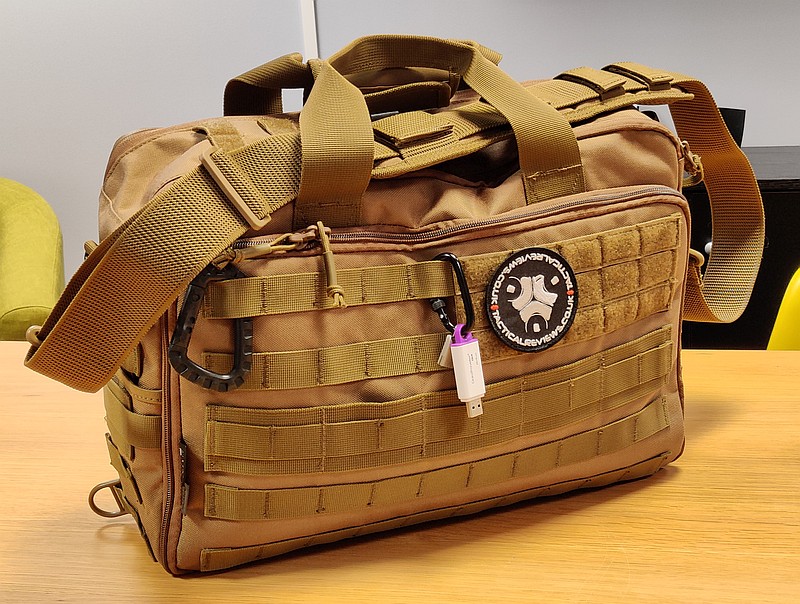
Part 3 – The Condor Metropolis Briefcase:
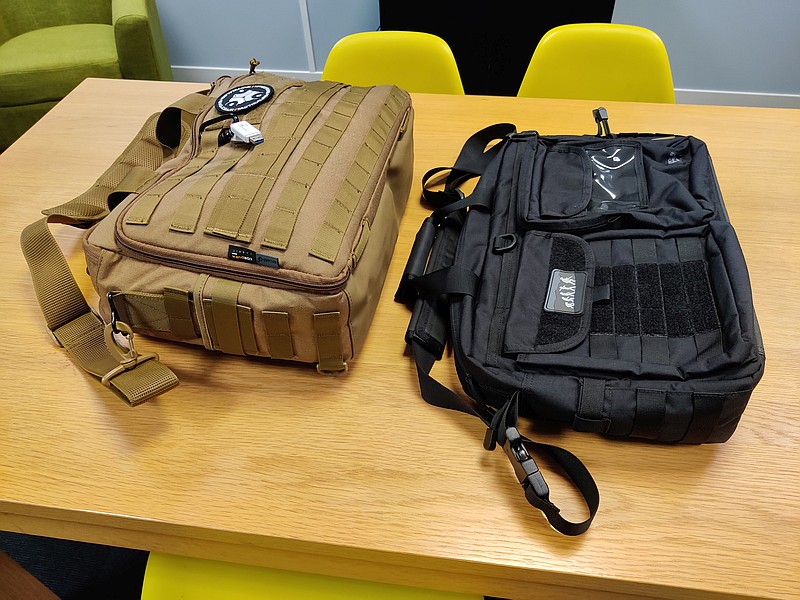
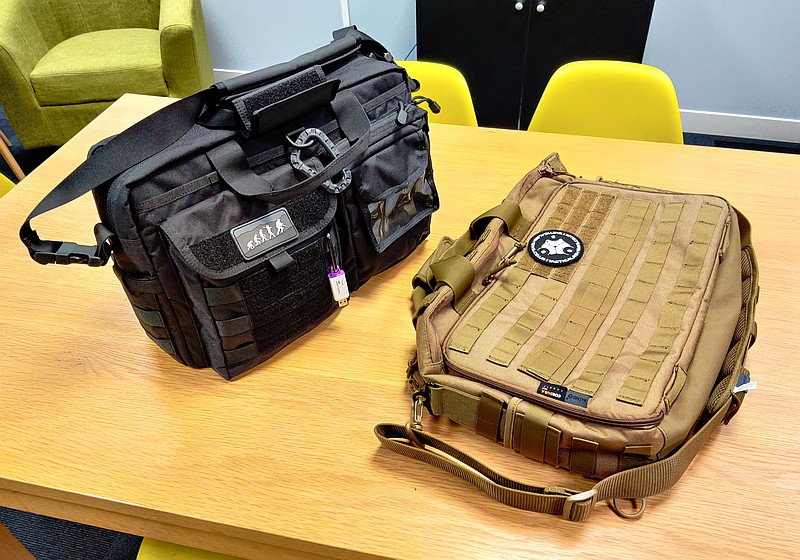
And the transfer day for the last bag in this series after two weeks with the Hazard 4 – the Condor Metropolis Briefcase. A quick pre-transfer comparison, with the Condor looking like it might be quite similar in capacity to the Hazard 4.
Ready to start packing everything away to get it to all fit in the right way for my regular needs. By this stage I was finding that it is quite a challenge to keep reorganising gear you use all the time after having just got more or less used to where it was in the previous bag. The different pouches, pockets, sections make you rethink where things need to go.
The Condor had no issues accommodating everything without bulges or struggling at all and it is sits upright happily on the floor. The sharp eyed might have spotted in the bag contents there is a large admin pouch in coyote, and this is a Condor too.
In this bag, more Velcro closures are used than the previous two. When in the workplace, ripping these open does make quite a bit of noise and attracts attention. Velcro also has the tendency that once you take one thing out, if the flap falls closed by itself, you then have to rip it open yet again to get item two out. One of the front pockets does have a zip for part of its compartment, but then Velcro for the other part, and the second front pocket is fully Velcro.
Access to the main compartment in this bag is via a single zip requiring you to ‘dig’ a bit more to find things as the compartment is not as openly presented as those with a double-zip flap opening.
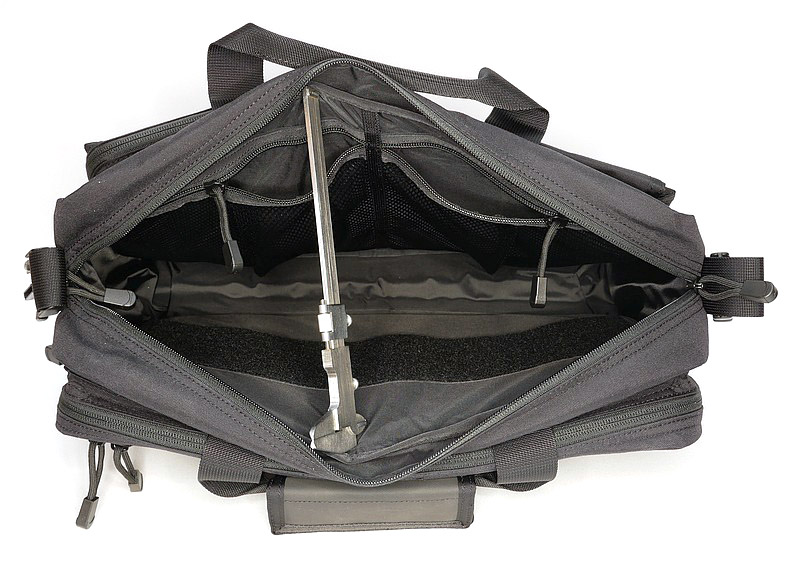
The main compartment having only two mesh pockets is simple in structure. Mesh pockets don’t provide much protection for what is in them, or what is on the main compartment, but the mesh does mean it is really easy to see what is in which pocket without a rummage. It really depends on what you carry for how well they suit your needs. In my case I have several items that partially poke through the mesh if I’m not careful.
For the first time in this series, I noticed some discomfort with the shoulder strap, but remember I do have this loaded up and the pouches I carry contain many tools, so can be pushing 10kg. With a slightly lighter load this would not be an issue.
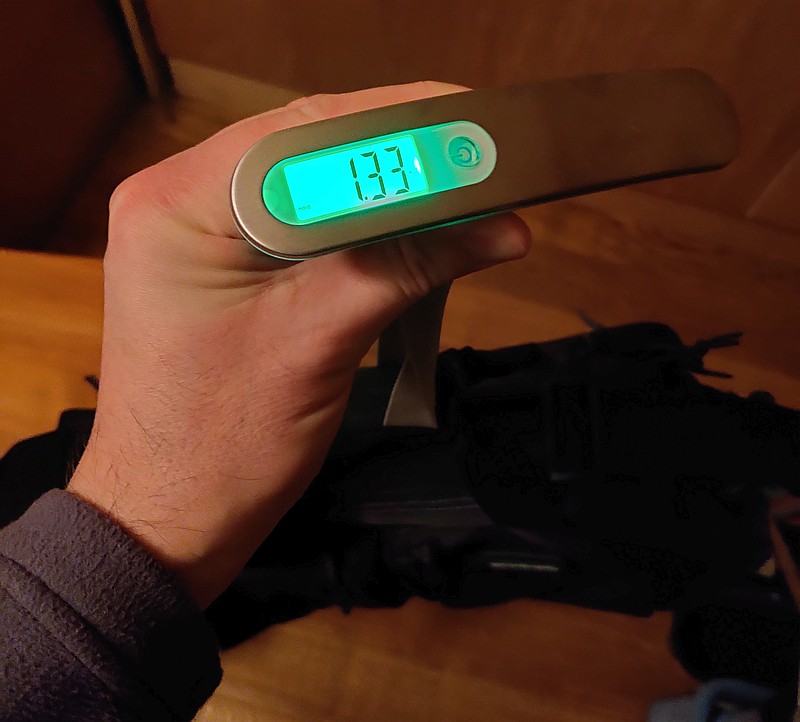
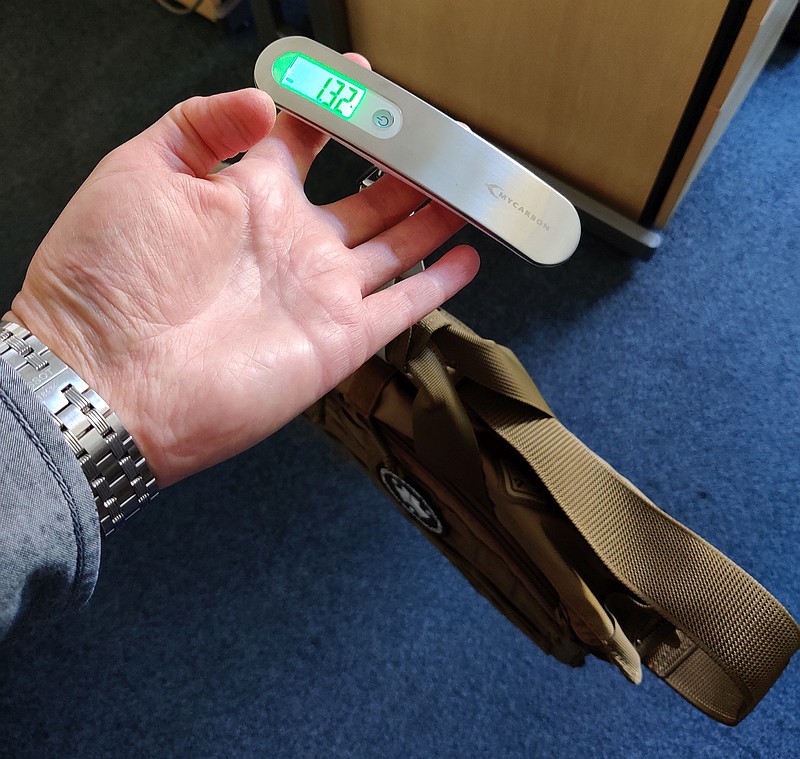
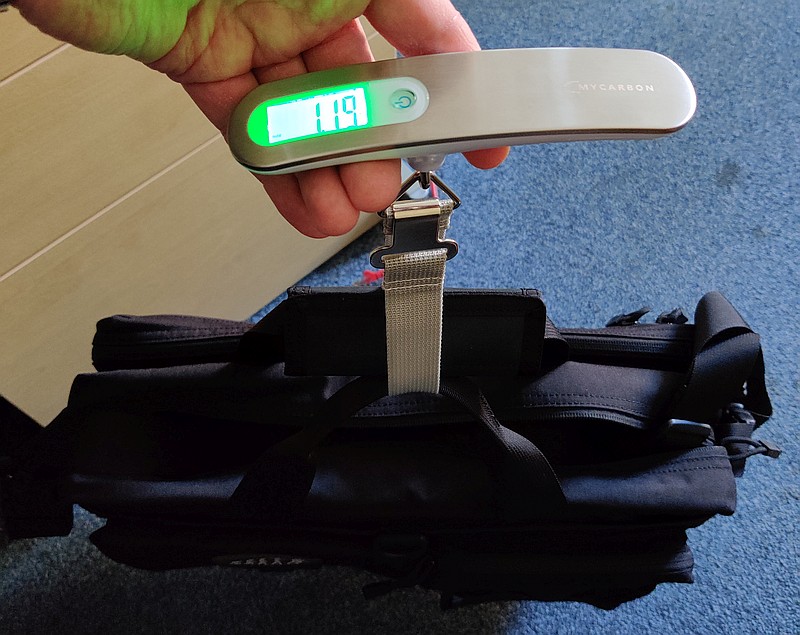
And I was wrong:
After using all three bags, I was convinced that there was a big difference in their empty weight. I was clearly wrong, with this quick gallery of using luggage scales to weigh all of them. So it was purely an impression based on structure, build and materials. (These are in the same order as the previous parts, so it is the Condor that is a touch lighter.)
Review Summary
And here we are now, where having used each of these three bags for a minimum of two weeks EDC, and looked at them in detail, I can come to a conclusion. The conclusion I can come to is only for my own EDC, as our choice of EDC is entirely personal.
On the way to reaching this point I hope to have given you enough information to find one that would suit your needs, with the video tour, individual detailed feature reviews, and the comments and impressions I’ve described earlier in this part of the face-off.
The views expressed in this summary table are from the point of view of the reviewer’s personal use. I am not a member of the armed forces and cannot comment on its use beyond that covered in the review.
Something that might be a ‘pro’ for one user can be a ‘con’ for another, so the comments are categorised based on my requirements. You should consider all points and if they could be beneficial to you.
_______________________________________________
What doesn’t work so well for me
_______________________________________________
First Tactical – Can seem a bit big.
First Tactical – Strap squeaks a little when walking if heavily loaded.
Hazard 4 – A bit unbalanced and tending to topple over on the floor.
Hazard 4 – Strap needs to be purchased separately.
Condor – Main compartment access restricted by single zip opening.
Condor – Strap has less padding so is not as comfortable with heavy load.
_______________________________________________
Things I like
_______________________________________________
First Tactical – Easily has room for additional top-up items.
First Tactical – The most comfortable and stable strap.
First Tactical – Comprehensive pockets, pouches, all with easy access.
Hazard 4 – Super build quality (the others are great, but I’d put this ahead on build).
Hazard 4 – Lots of versatile webbing.
Hazard 4 – Large admin panel packed with features.
Condor – Great all-rounder with simplified main compartment.
Condor – Concealed compartment (easily accessed by pulling the front D-loop).
Condor – Drainage holes in elasticated end pockets in case of leaks.
In short, all of these Tactical Briefcases stand on their own merits. If I had purchased any one of them on its own, it would have done the job, and I would have been happy. You won’t go wrong with any of them, but if you have any specific requirements, take a look back over the details to see which would be the better fit.
For my uses, and the gear I EDC, one of them was a better fit, and is currently serving as my EDC bag…
This milestone sneaked up on me, and it is now 10 years ago that I published my first review – from then on it just kept evolving.
It started when I found online discussion forums and I became an avid reader of online reviews and active participant in forum threads – but there was something slightly lacking…
As a photographer, engineer, outdoorsman and perhaps most importantly an enthusiast, I felt I might have something extra to offer and decided to give it a go and see how I got on. The more work I did, the more I was drawn into trying to better understand the tools and gear I love, and share all of that with others in the most factual and well illustrated way possible. I’ve always worked to introduce new ideas and new tests, many of which have been adopted by other reviewers as part of a standard ‘review formula’.
In 10 years I’ve built up a considerable body of work and experience, and many valued friendships and relationships. Hopefully there is still a lot more to come, with improvements and innovations along the way.
What you might not realise (as a reader) is that all of this (photos and photo editing, technical tests, graphic design, web design, website hosting and management, video and video editing, social media, writing and many more things needed to keep it all running) is done by one person. One person with a full time job in I.T.
I often call reviewing my ‘Hobby Job’, taken as seriously as a paid job, but something that costs quite a bit to keep going, and is a lot to fit around the demands of normal life. ‘Enthusiast’, or is that ‘Crazy Person’?
Thanks to everyone that has supported me so far, in both believing in me, and in taking the time to look at the reviews – Subwoofer (aka Richard)
Part 3 of the Tactical Briefcase Face-Off features the Condor Metropolis Briefcase (see it here) and takes a detailed look round this contender. All three Tactical Briefcases in the Tactical Briefcase Face-Off series came from Military 1st who I’ve been buying from for many years.
This series of reviews was originally planned to be a single group review, but has evolved into something much larger as I used each of them for EDC, lived with them, got to know them well, and more and more detail needed to be shown. Each of the three Tactical Briefcases (First Tactical Executive Briefcase, Hazard 4 Ditch Bail Out Bag and Condor Metropolis Briefcase) will have a dedicated article before the final article, Part 4, brings it all together to explain how I got on with each one and their strengths and weaknesses.
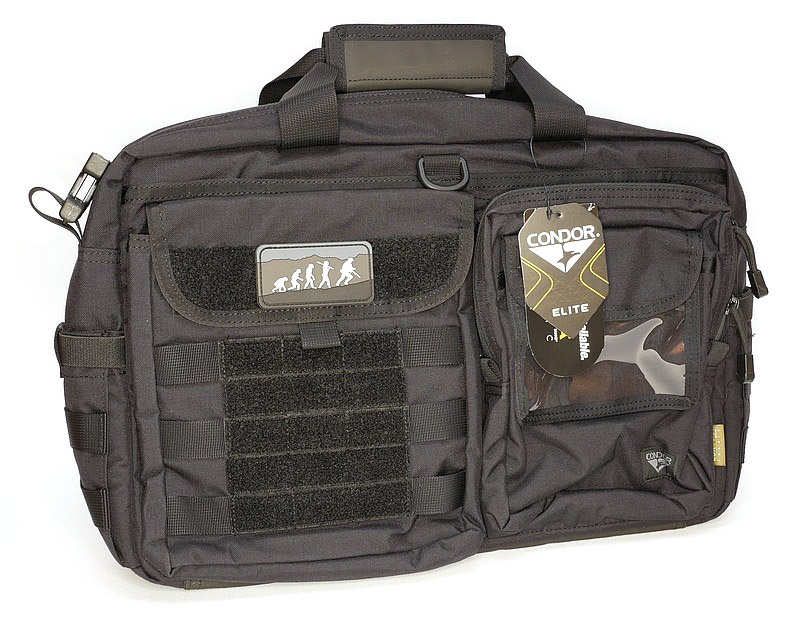
All round the outside:
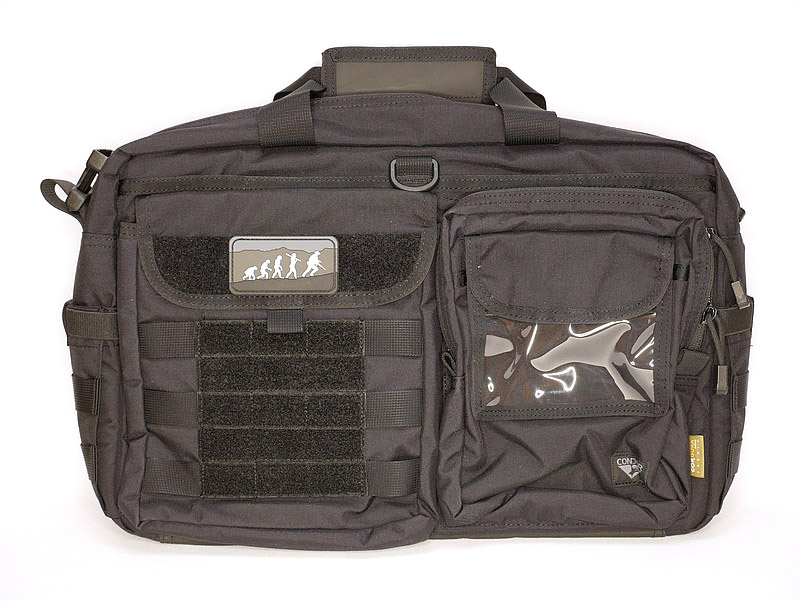
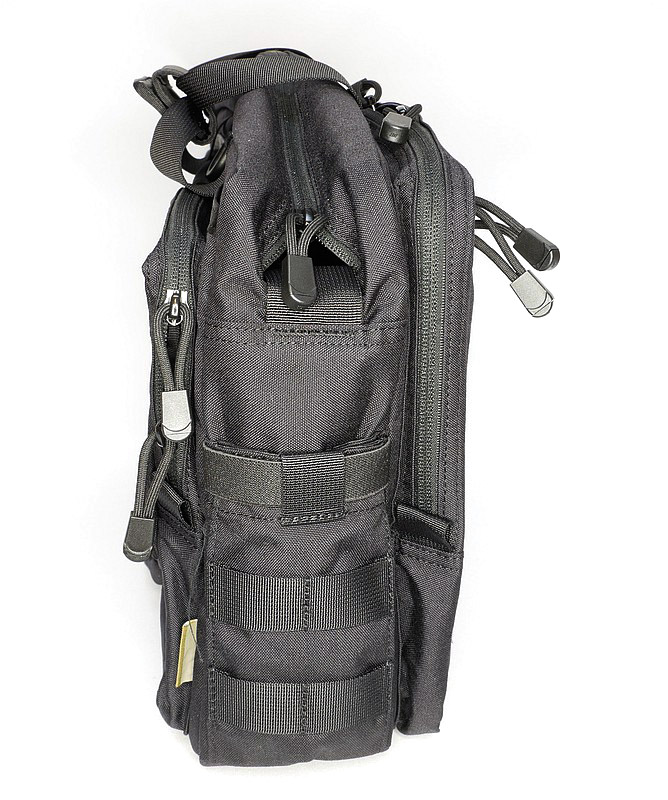
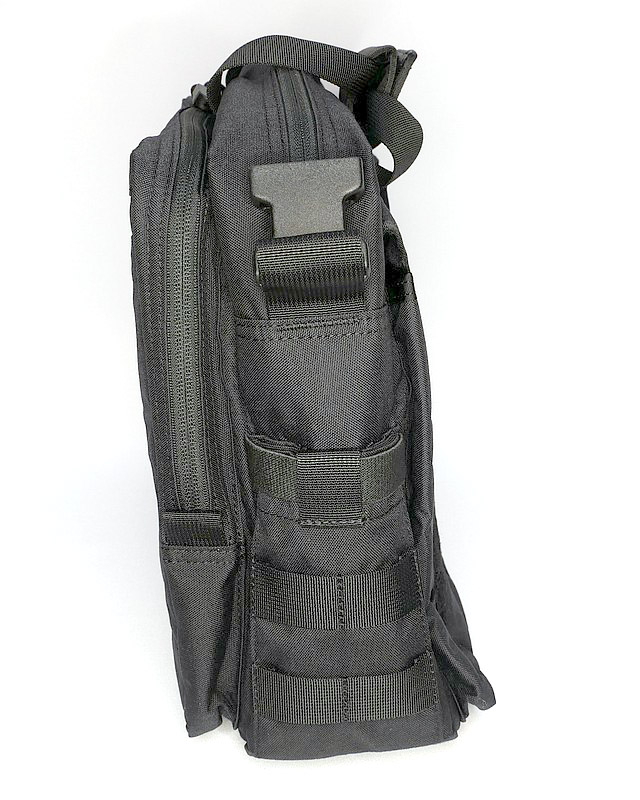
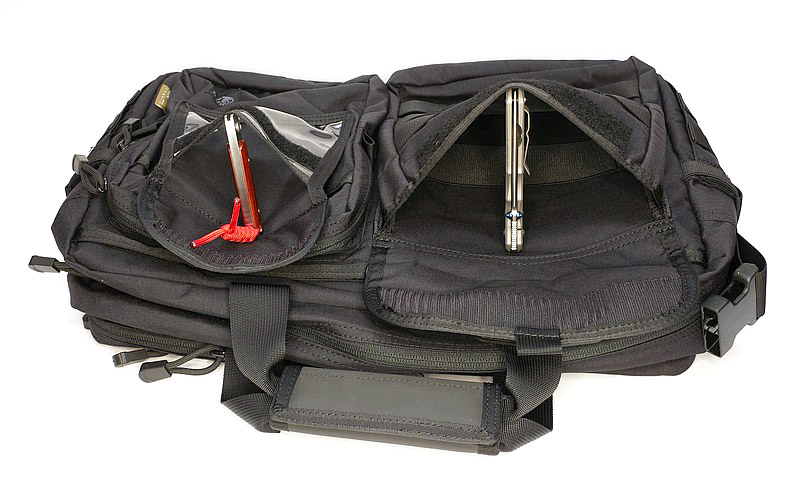
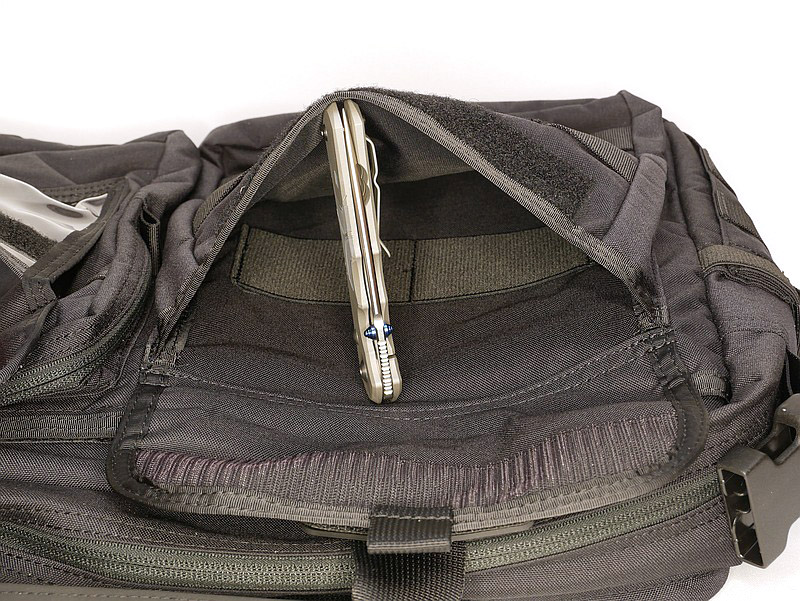
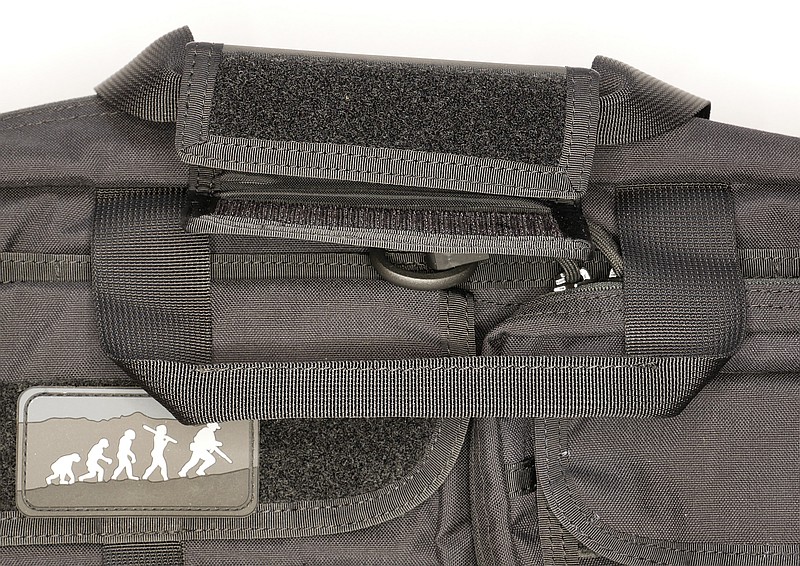
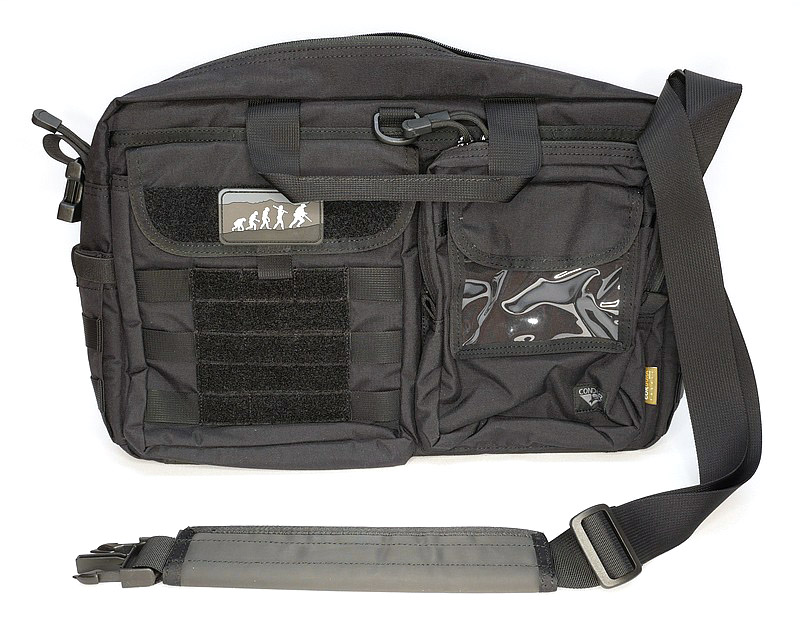
We’ll start with a run round the outside. – The Condor Metropolis Briefcase includes a shoulder strap which is tucked into the main compartment when it arrives. The front panel has two main pockets with a patch panel / MOLLE panel on one and an extra clear ID holder pocket on the other, and there is a handy D-loop in the middle for clipping keys etc to. The back panel has a large zip up pocket and a trolley bag handle loop strap for sitting the Metropolis Briefcase onto a larger wheeled bag with telescopic handle. Each end panel has an elasticated pocket with webbing for MOLLE pouches.
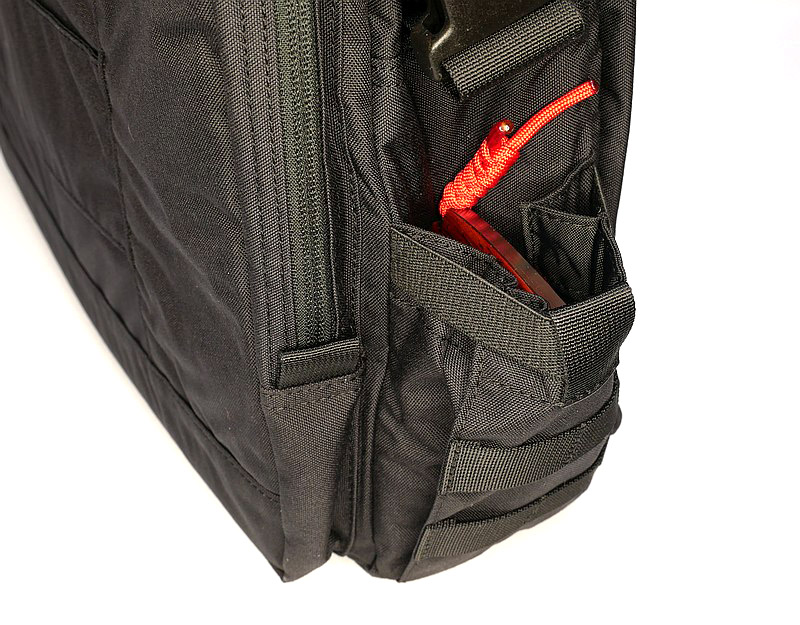
Pockets, Pouches, and Padding – Things to look out for here are:
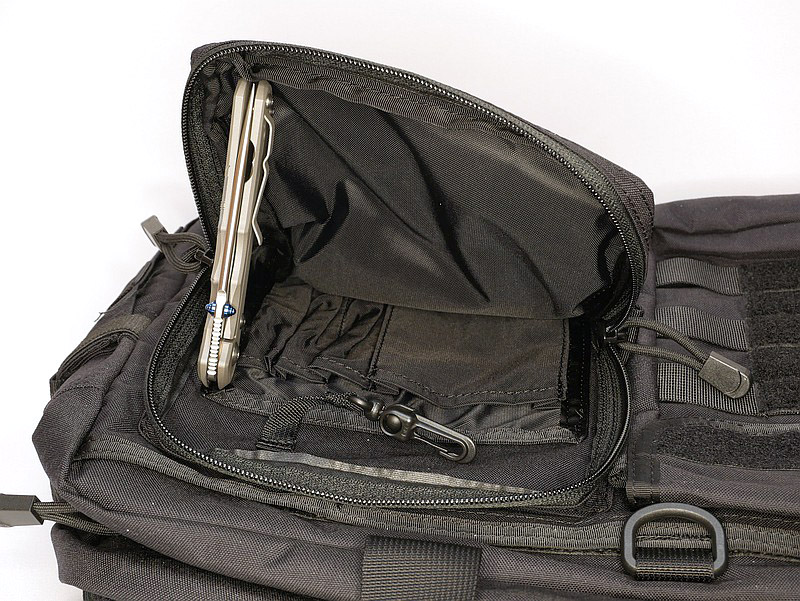
Starting off with one of the end panel stretch pockets, here I’m using a pocket knife to prop it open so you can see the construction. Of the two front pockets, one has a Velcro flap, and the clear ID pocket on the other also has a Velcro flap closure. Inside that first pocket there are a couple of elastic organiser loops. The other pocket with ID holder, uses a zip to close it. Inside it has a set of organiser pockets of different sizes and a key hanger. Behind those front panel pockets is a full width pocket with internal Velcro mounting panel.
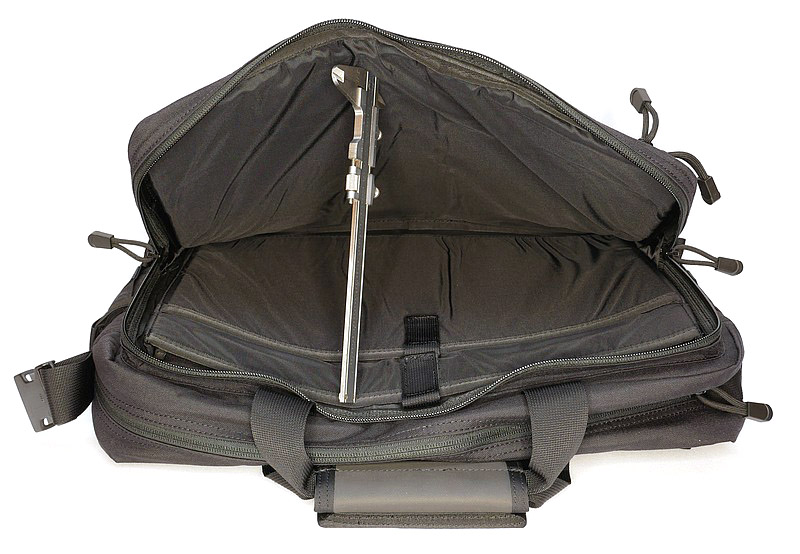
On the rear of the bag is a thin zip-up plain pocket. Behind this is the padded laptop storage compartment with a full double zip opening. Inside the laptop compartment are two pockets, the larger of which has a retaining strap to keep the laptop in place.
Accessed via a double-zip opening (but not using a flap like the other two bags), the main compartment has a Velcro-loop panel on one side, and two zip-up mesh pockets on the other side.
Strap and Handles:
There are two simply constructed carry handles, and one has a Velcro grip-wrap to hold them together. The shoulder strap has a removable sliding pad, and each end attaches to the bag with a side-release buckle. On one end of the strap there is the female buckle, and the other end has the male buckle – this means that you will always put it onto the bag the same way, and that strap can be made into a loop by clicking the ends together and used in other ways.
The video tour of all three Tactical Briefcases:
In case you haven’t seen the video overview on Tactical Review’s youtube channel, here it is. This video covers all three of the bags.
Review Summary
As in Parts 1 & 2 there is a lot to absorb, so this is where we will leave the Condor Metropolis Briefcase for now.
Please follow the series of articles to see all the insights, and it will be in part four that the real-use feedback will be included.