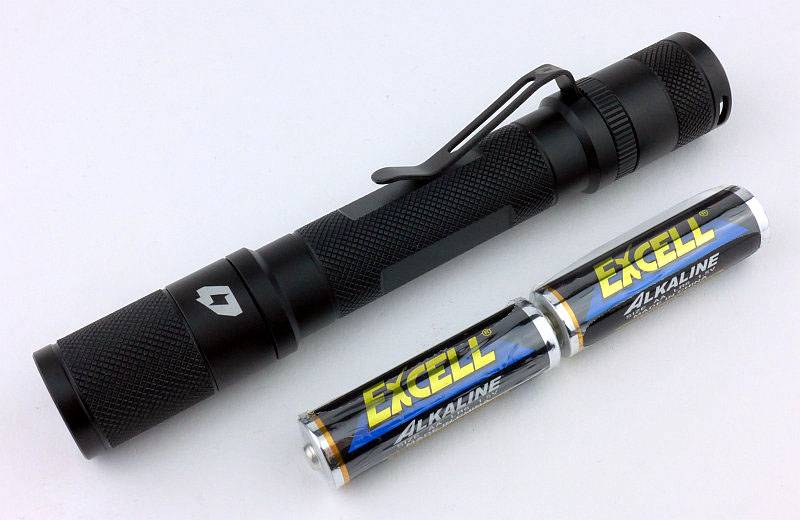
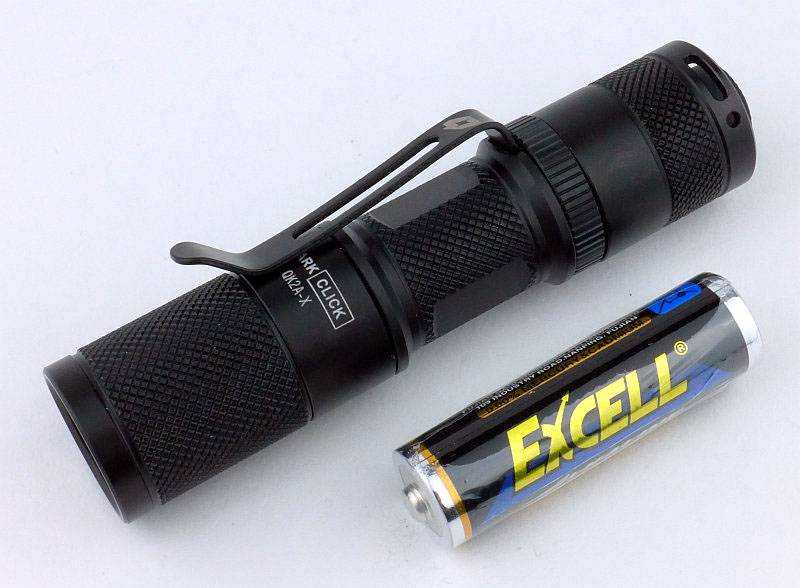
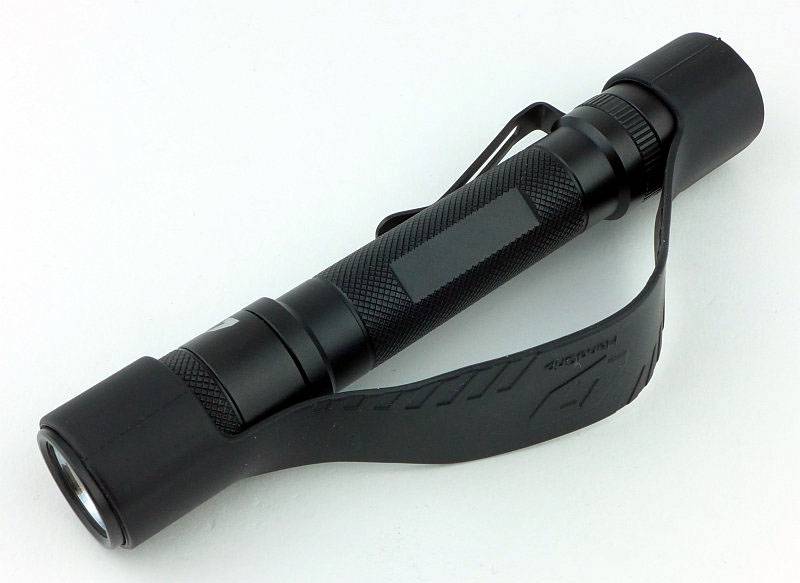
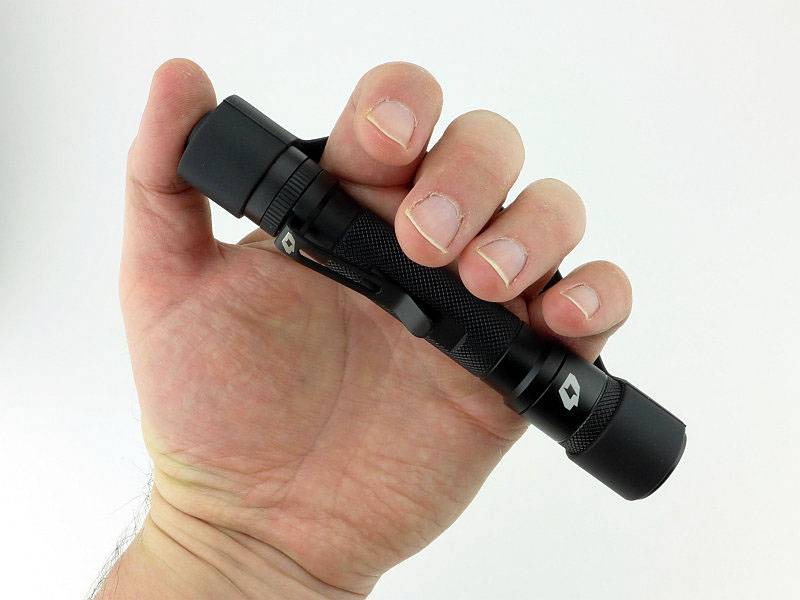
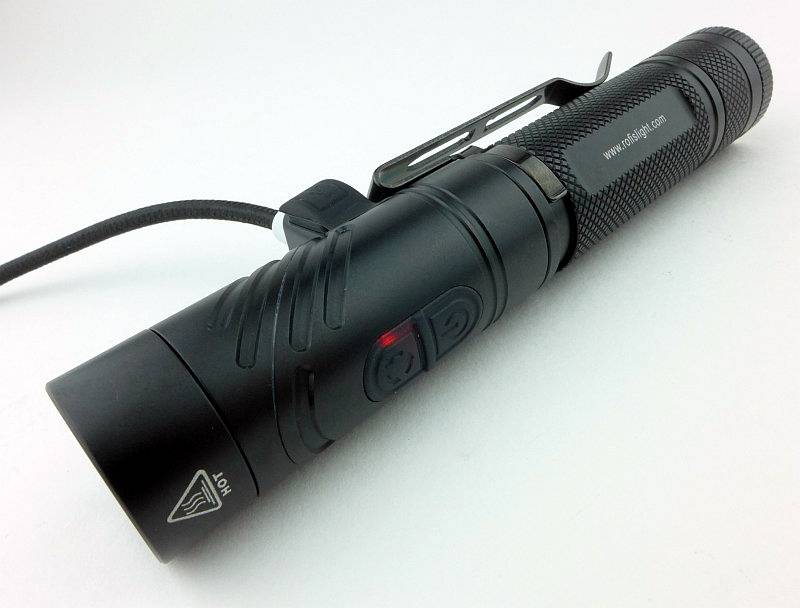
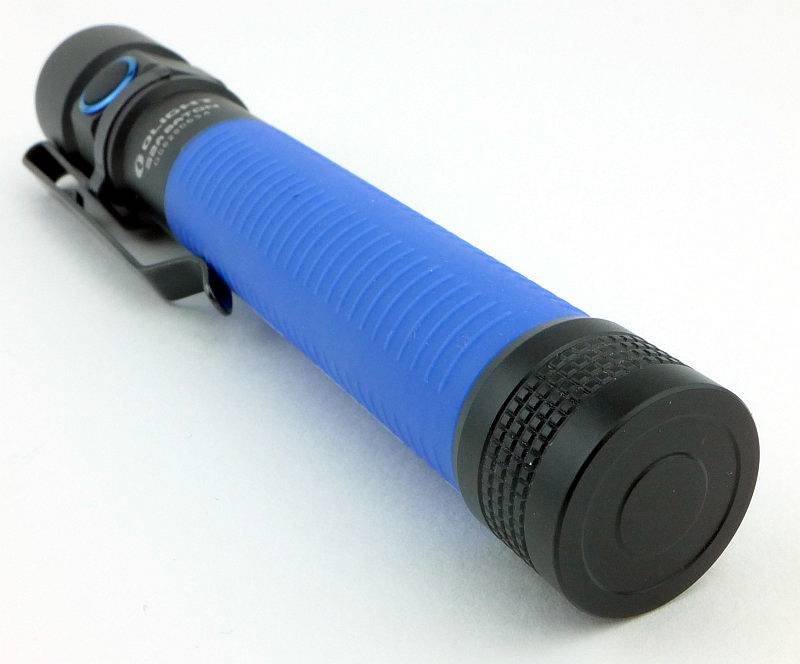
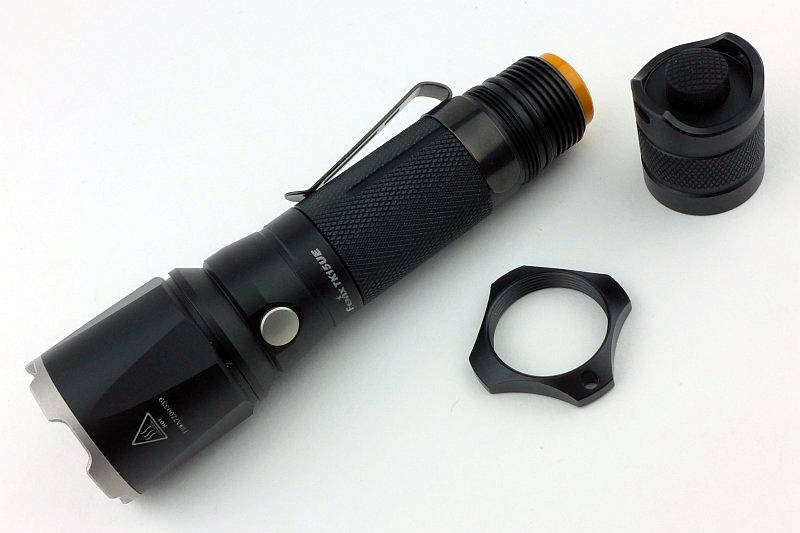
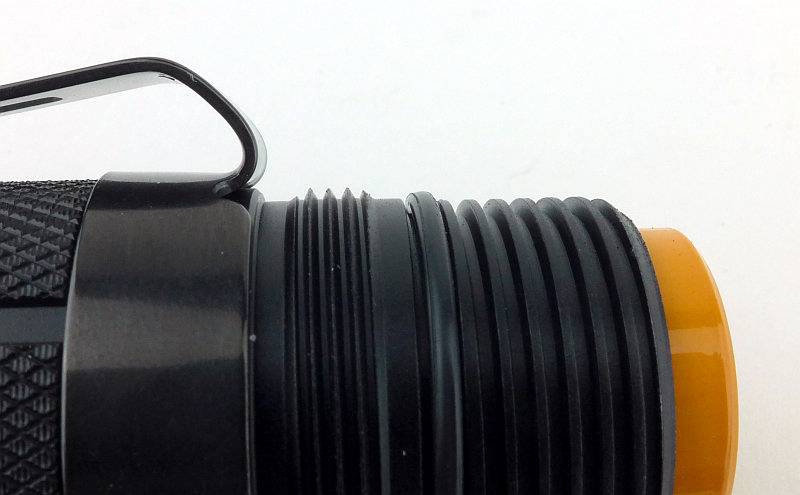
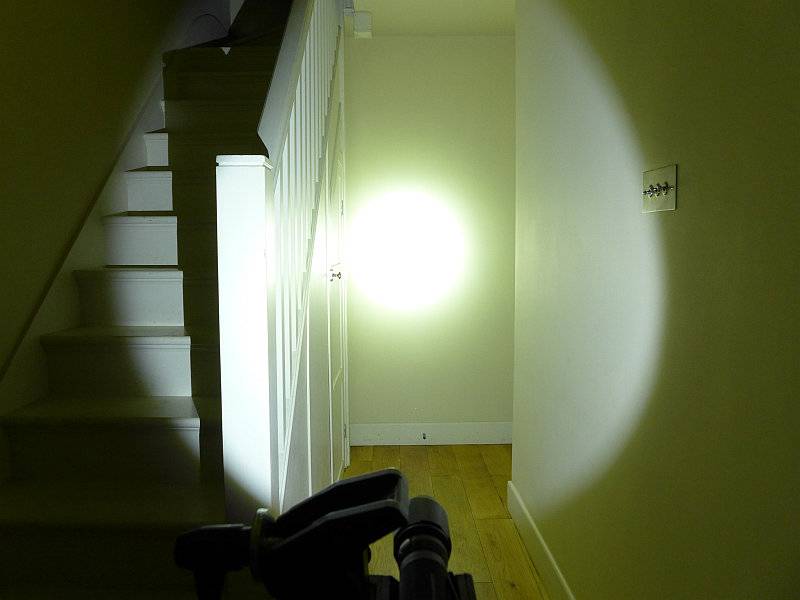
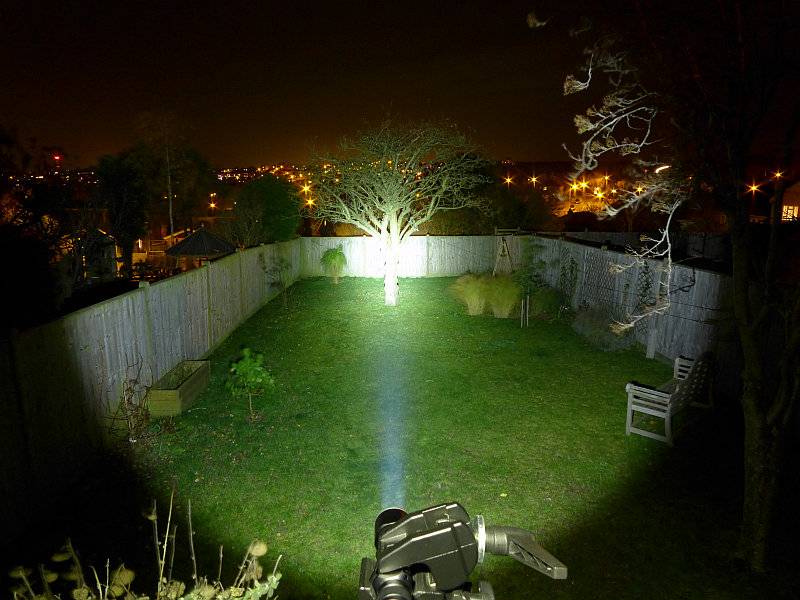
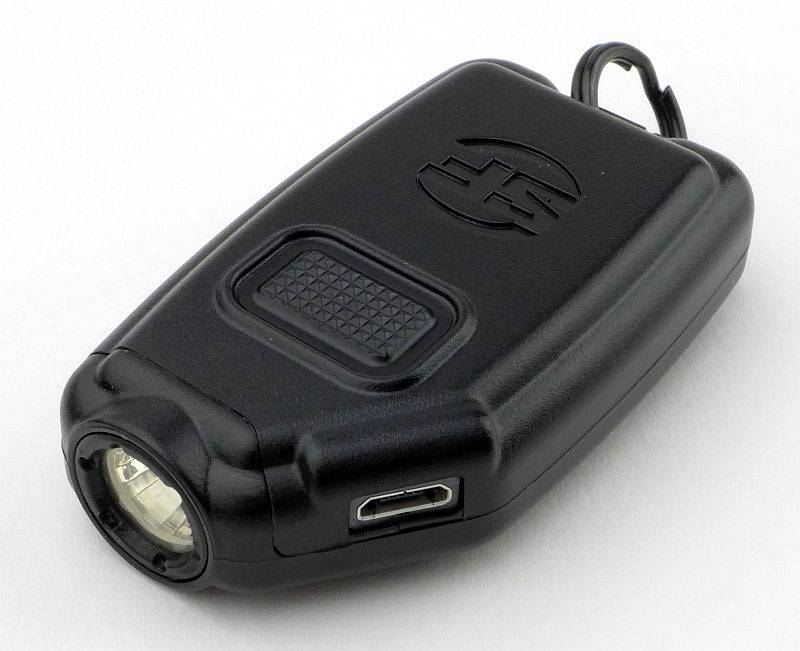
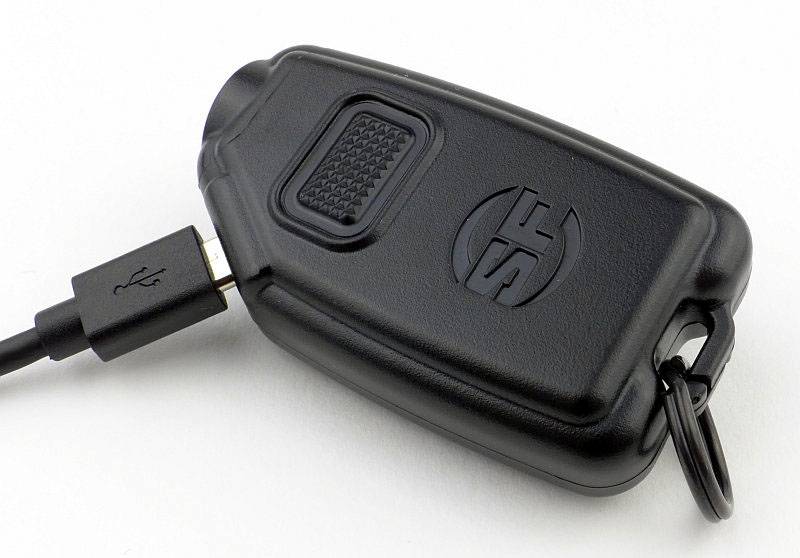
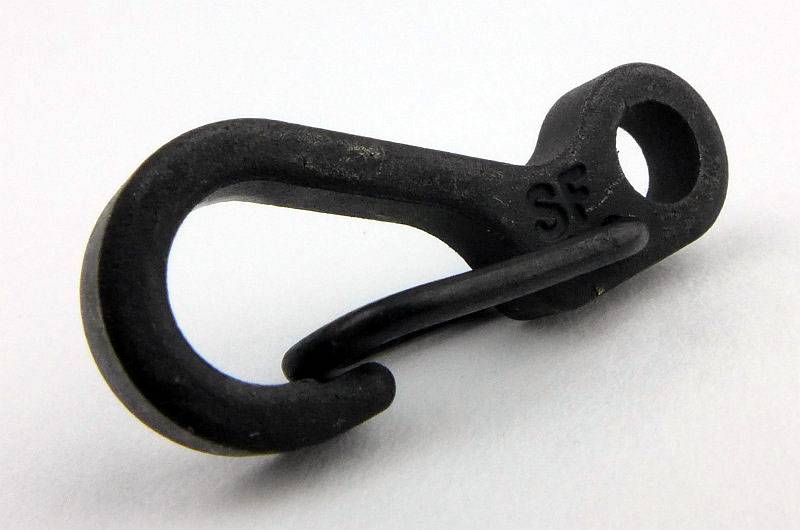
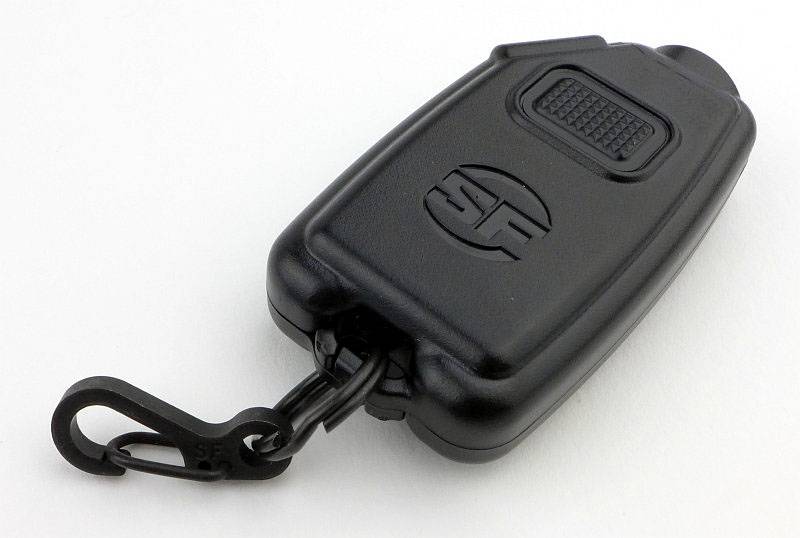
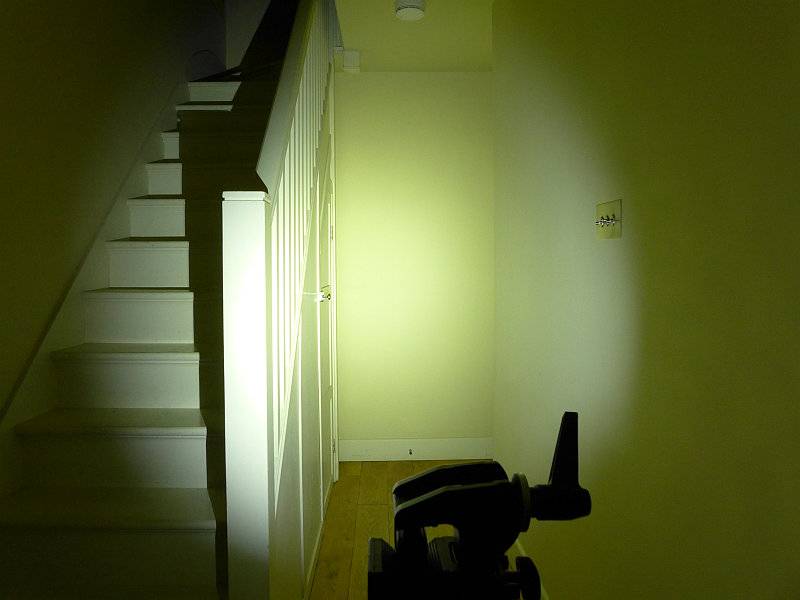
Light Review: FOURSEVENS Preon P1 Copper Limited Edition

FOURSEVENS’ Preons have been very popular and well regarded AAA powered EDC lights. After their latest reboot (previously reviewed), this is the special edition solid copper version. Grab one while you can here and don’t miss out on the copper goodness.
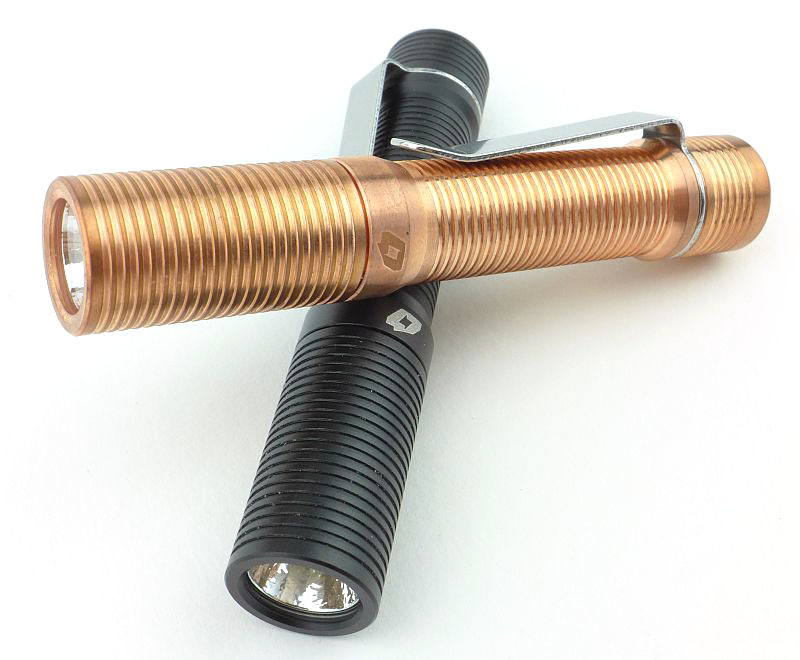
Taking a more detailed look:

Unlike the standard edition Preons, the Copper version does not come in a clear plastic box, instead it comes in a presentation cardboard box.
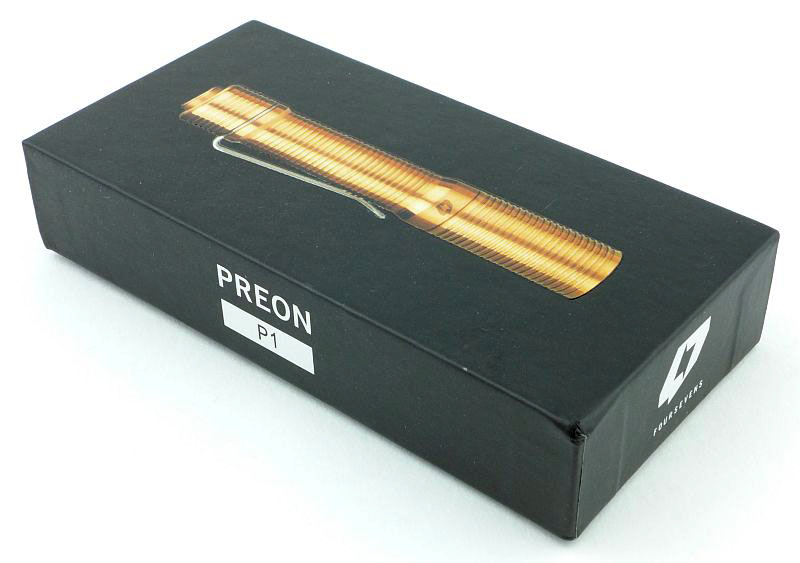
The contents are nicely laid out.
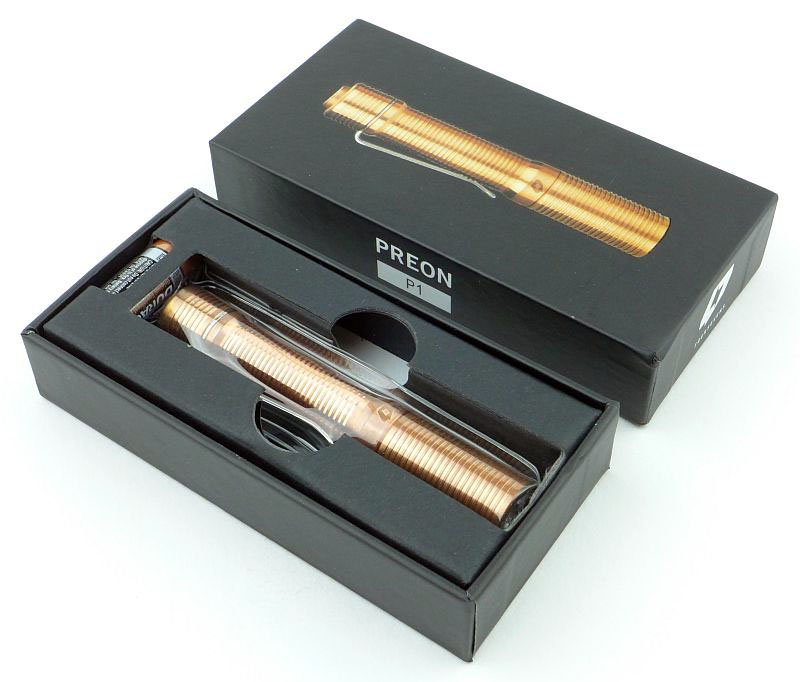
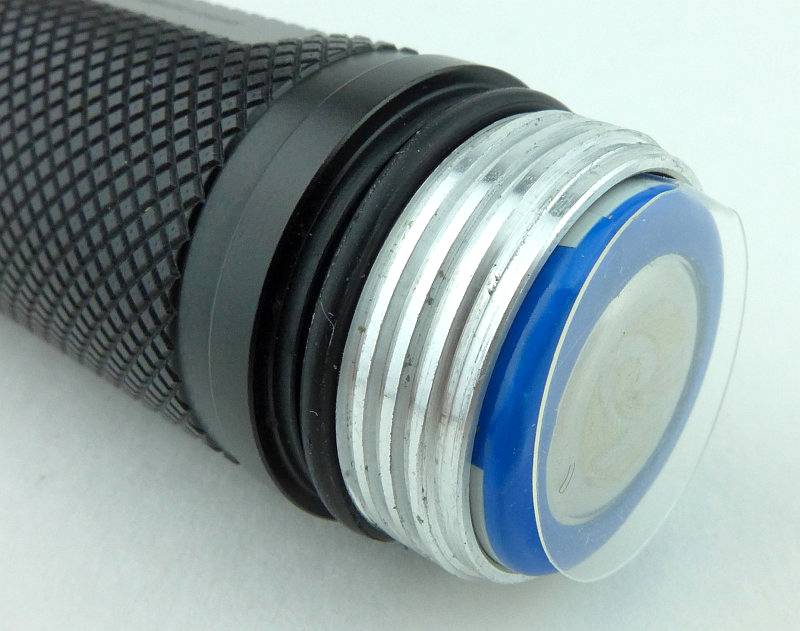
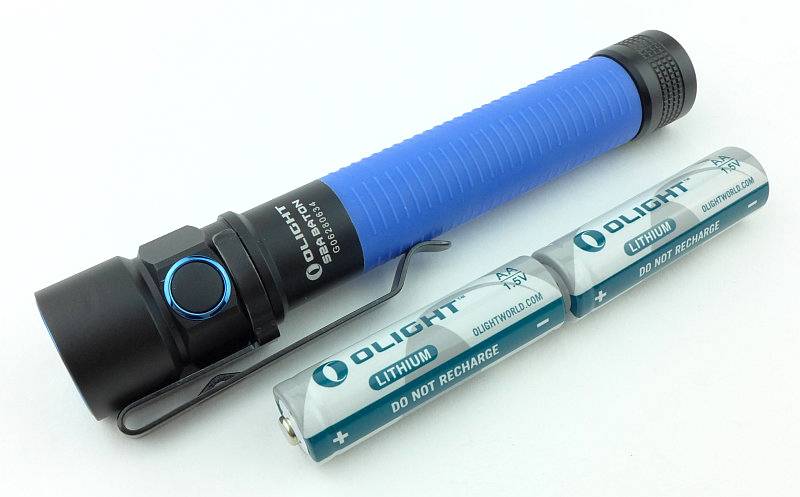
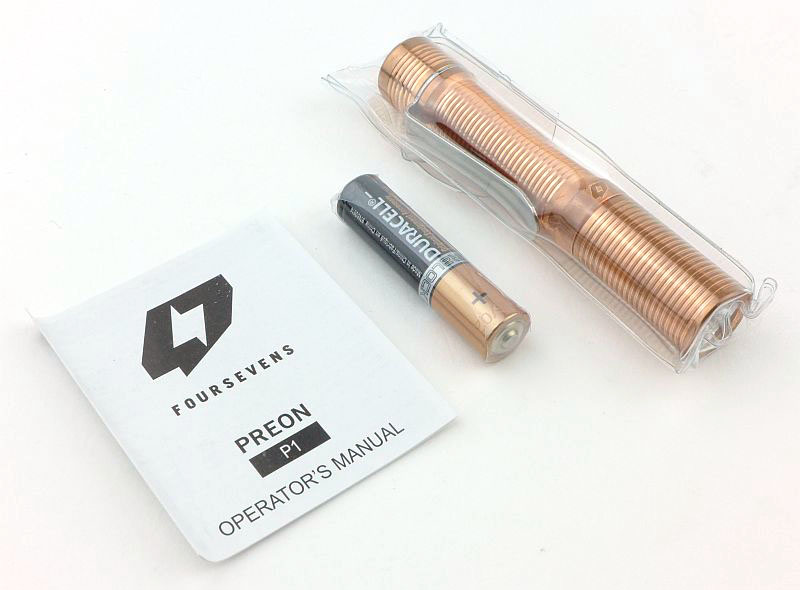
Included are the Copper Preon P1 (in a protective plastic case), a Duracell AAA cell, and the instructions. That plastic protector is to ensure that the Copper P1 arrives while still a Copper colour. The patina and darkening can then develop over time as you use it.
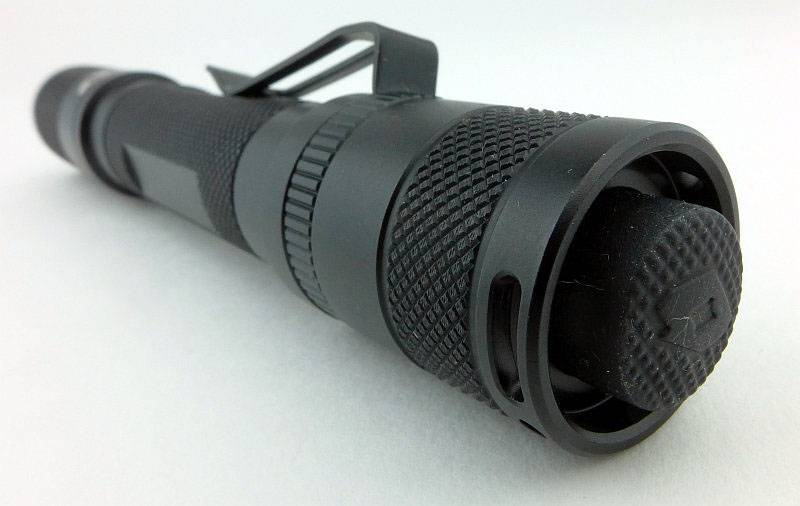
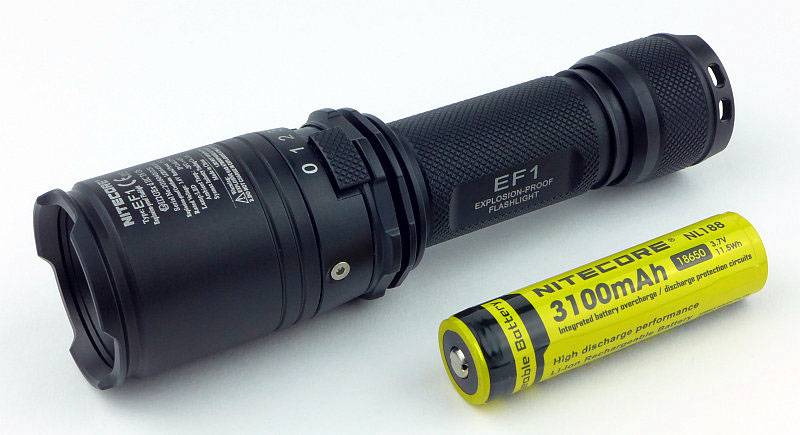
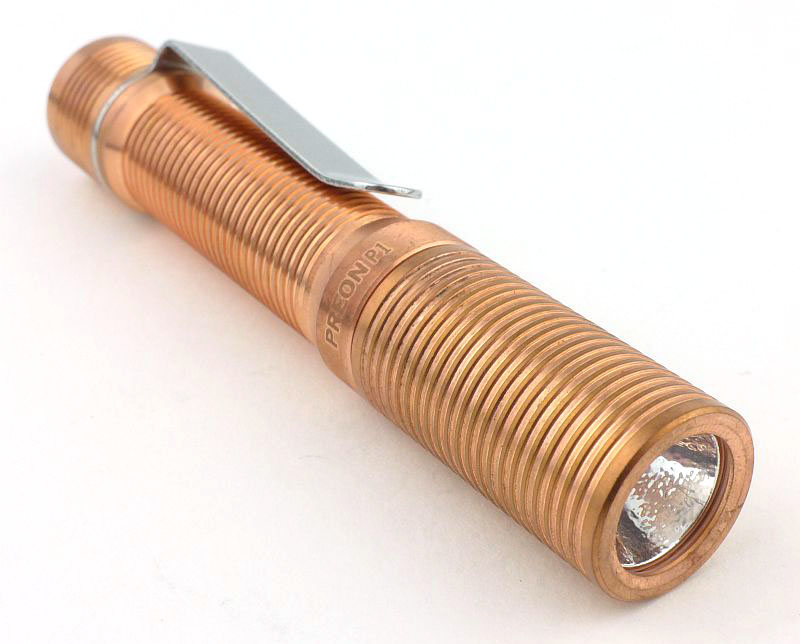
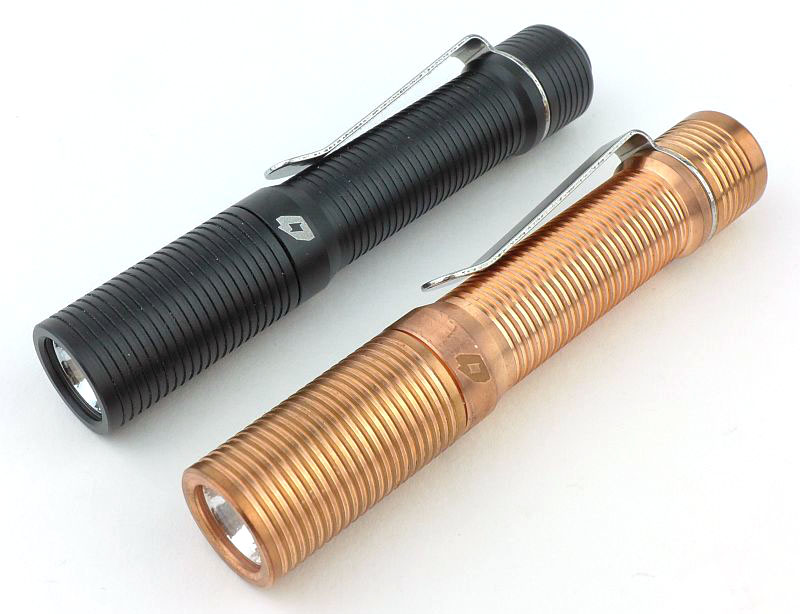
The Copper Preon is exactly the same in design, dimensions and machining as the standard P1, just made of solid Copper instead of aluminium.
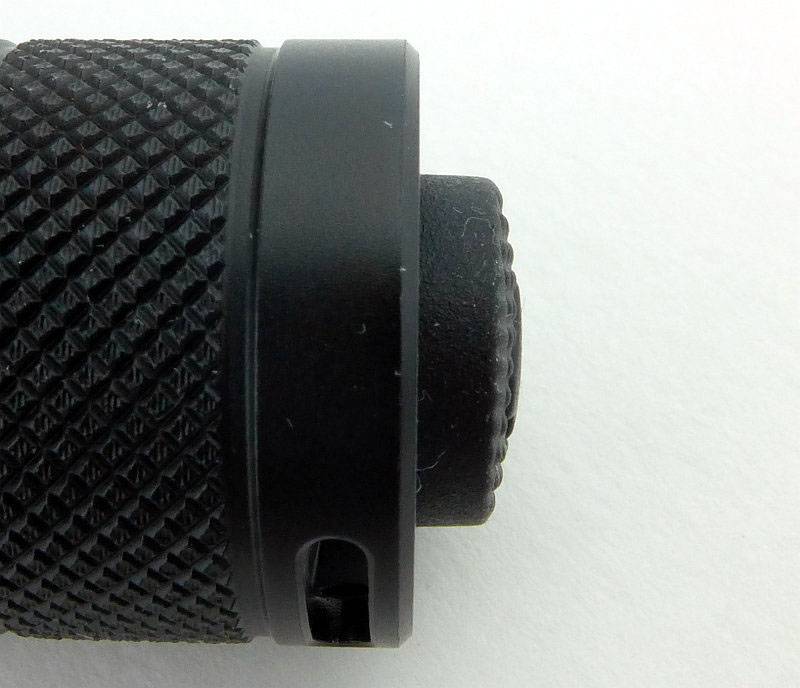
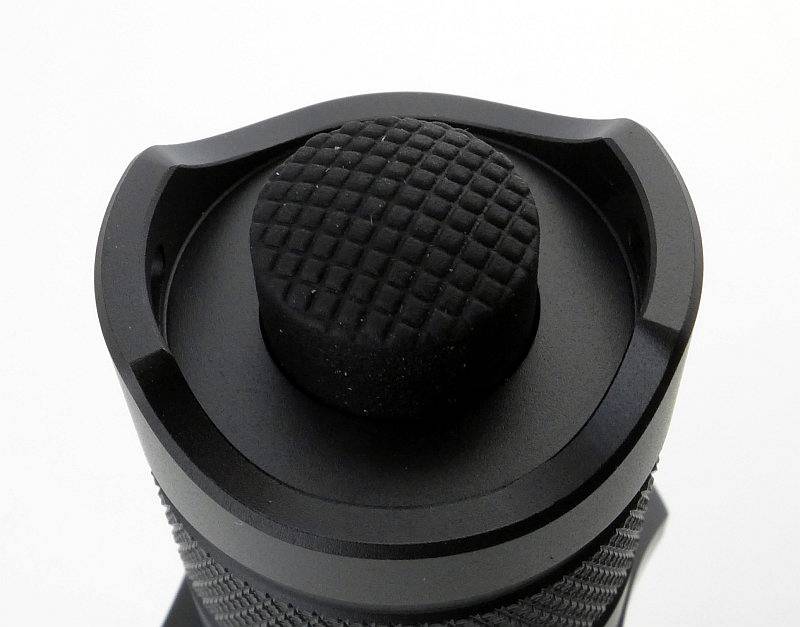
Every part that was aluminium in the standard version is Copper, including the switch button cap.
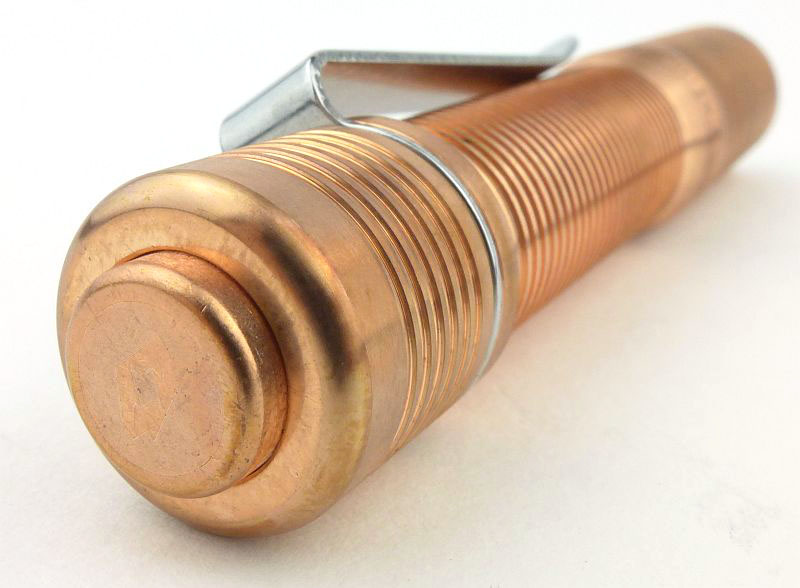
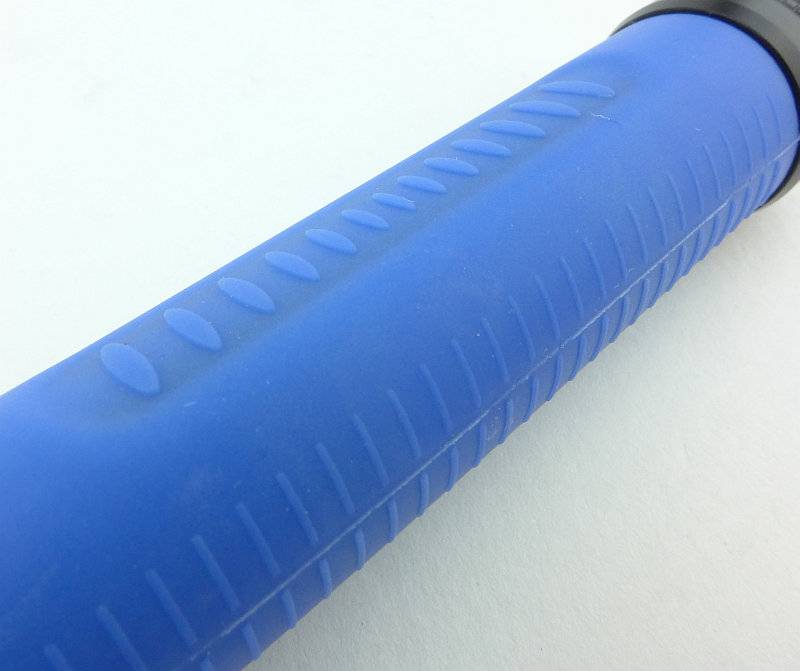
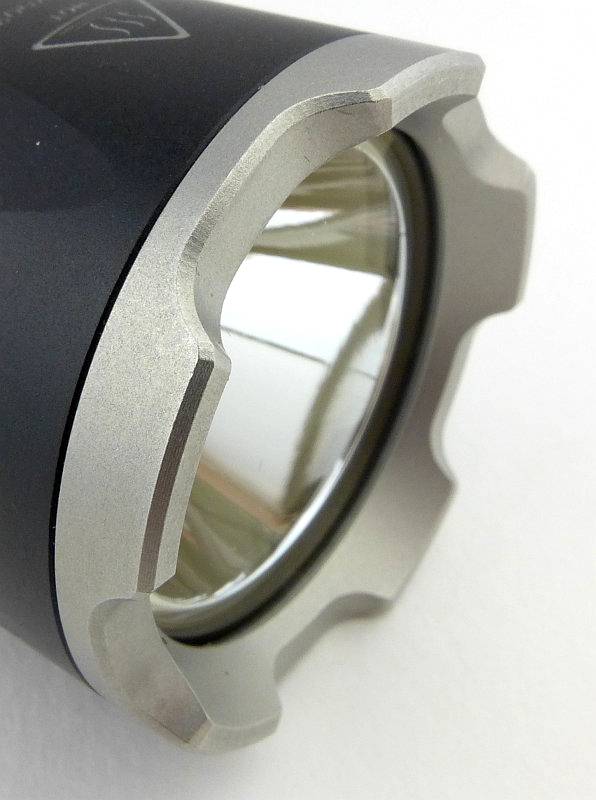
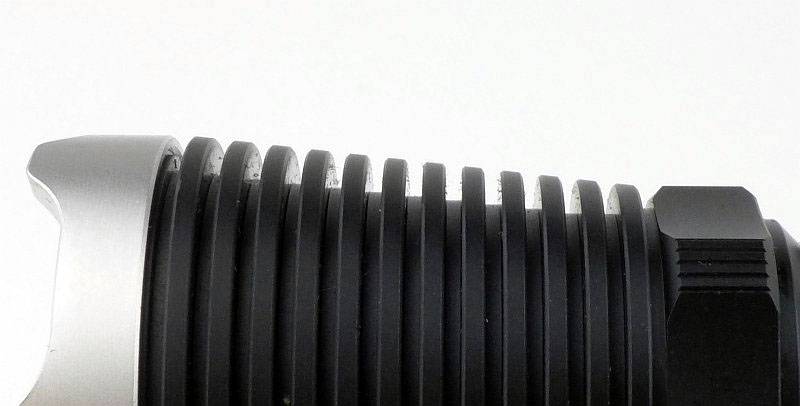
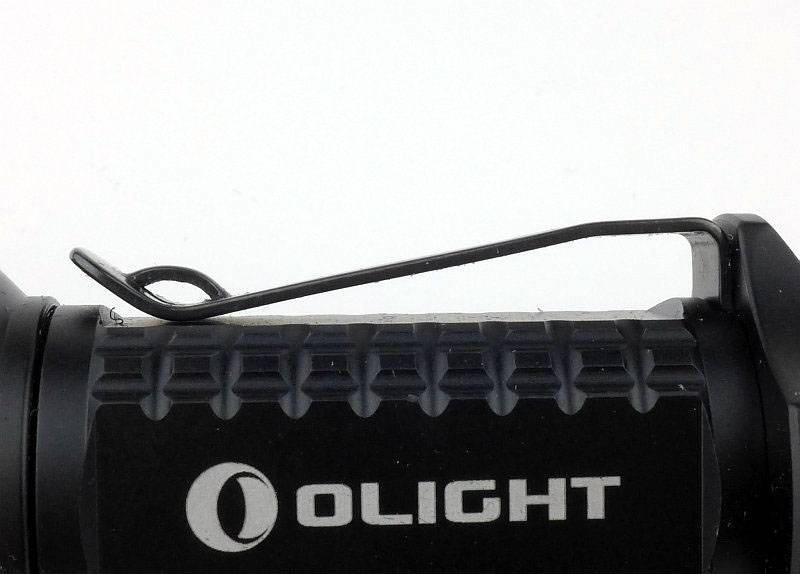
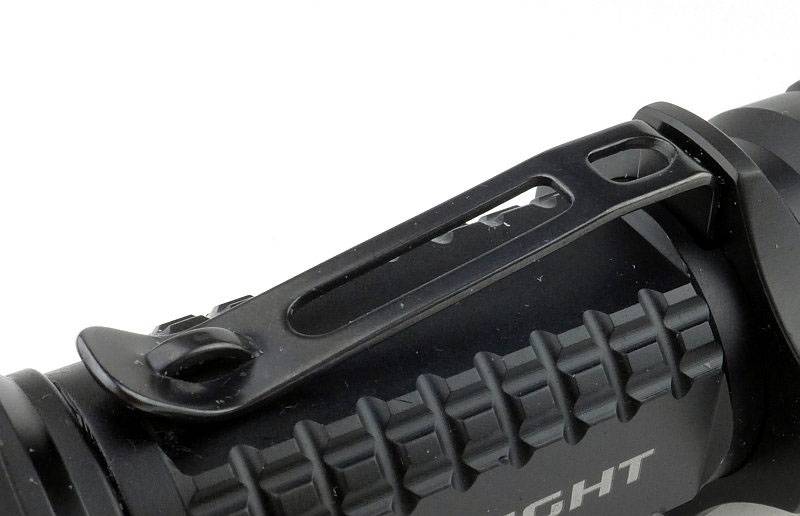
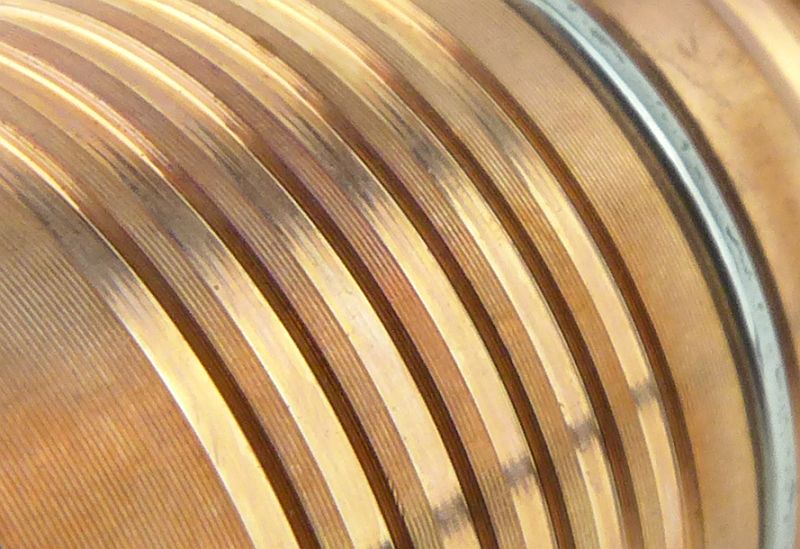
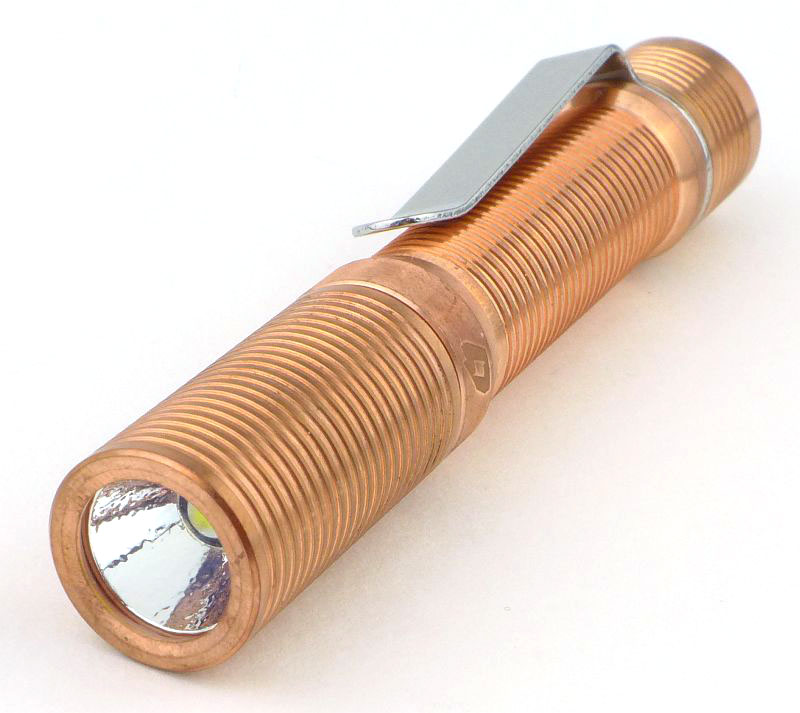
Taking a closer look at the bare Copper machined surface.
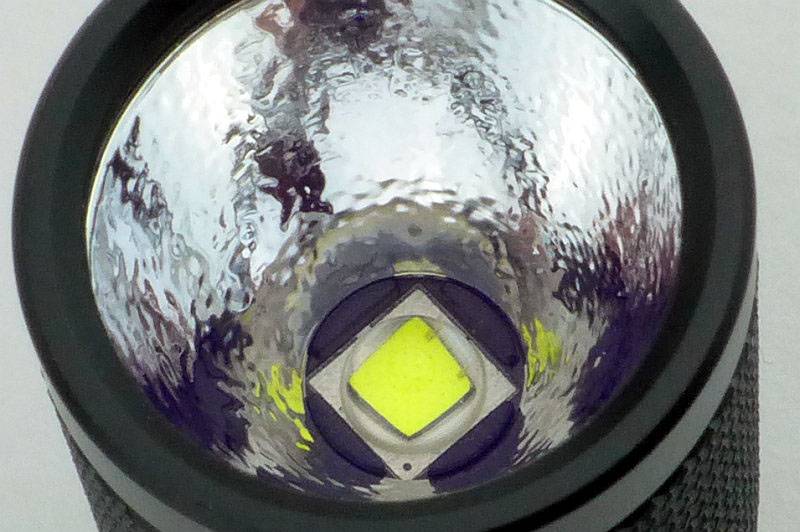
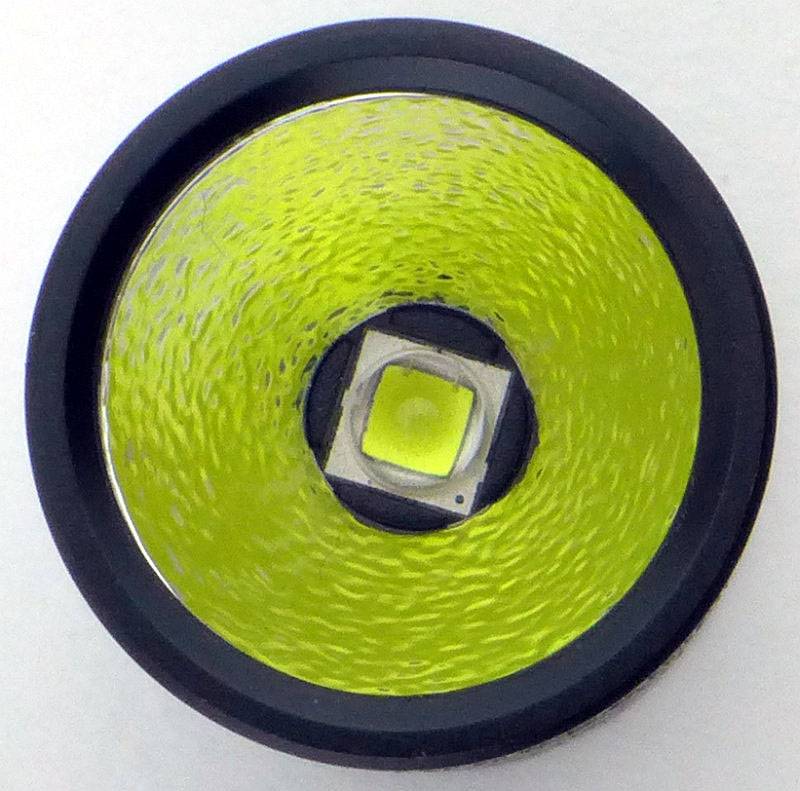
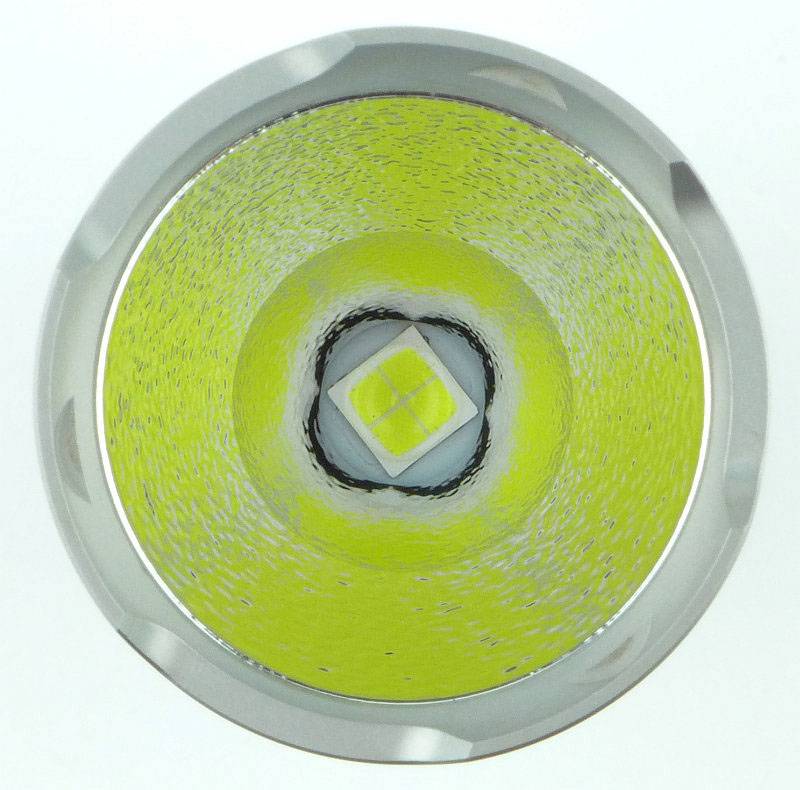
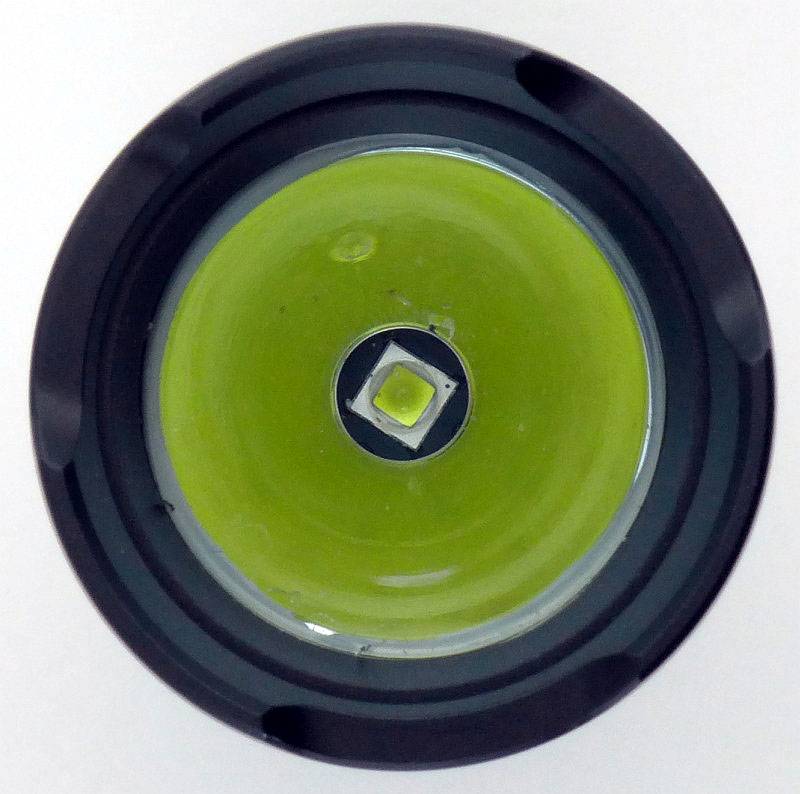
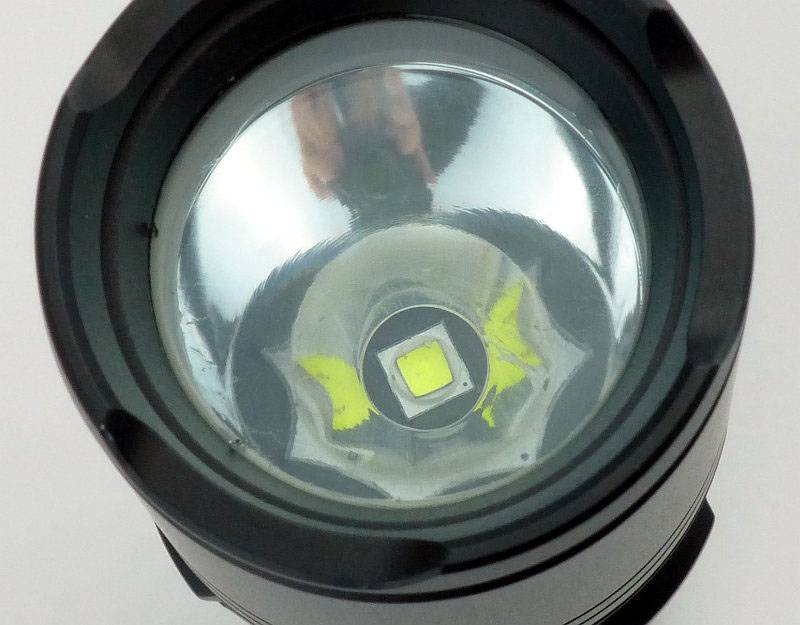
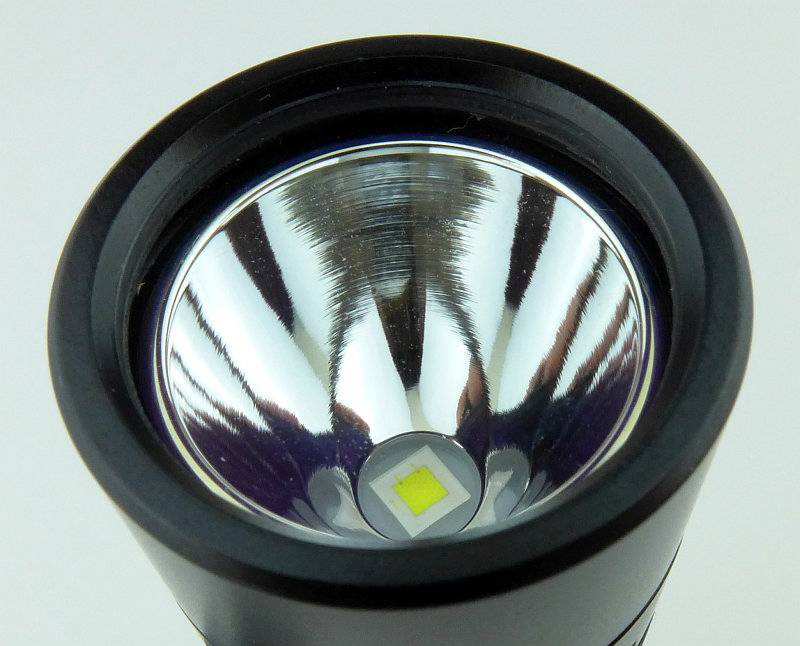
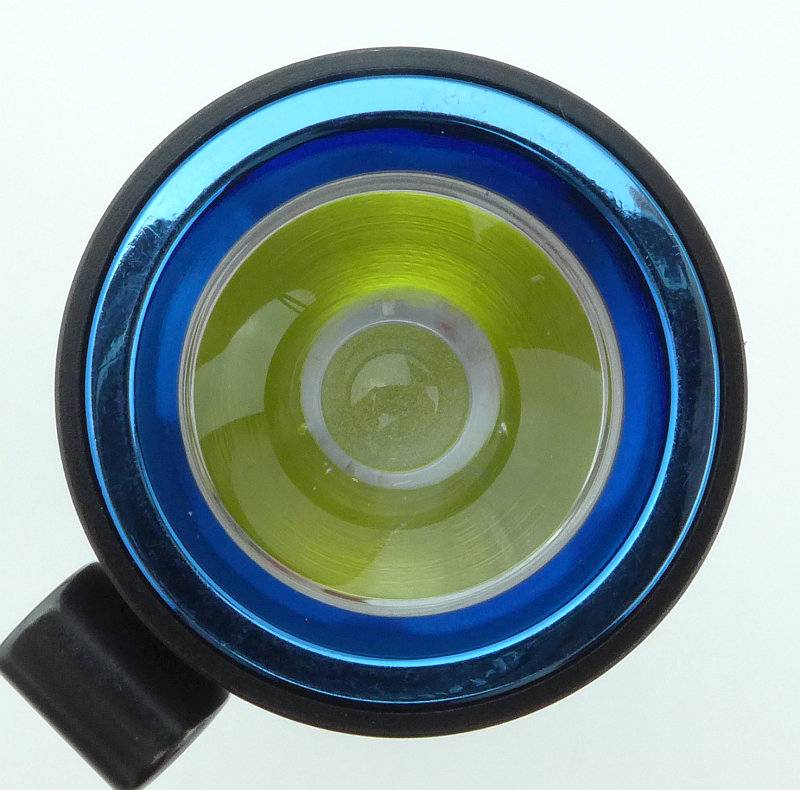
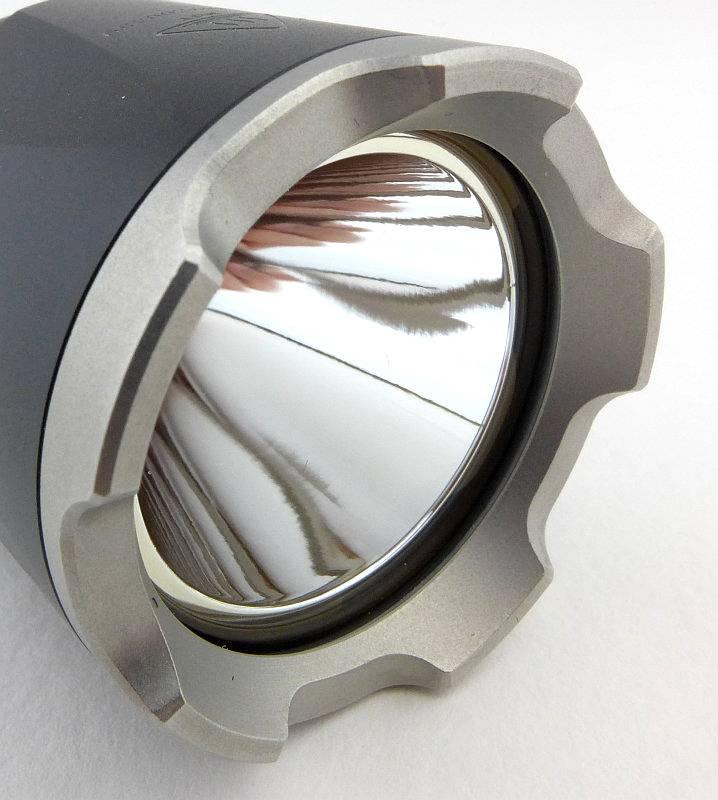
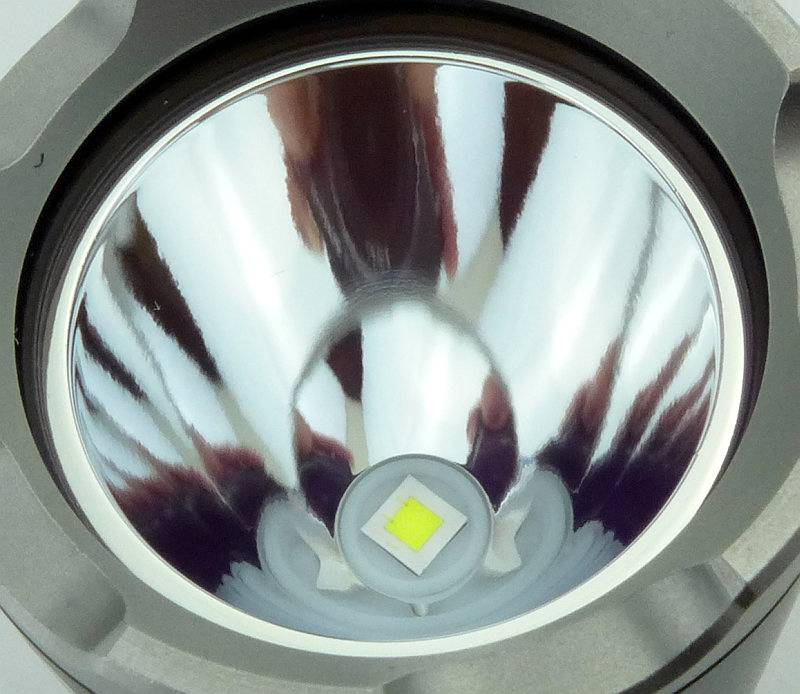
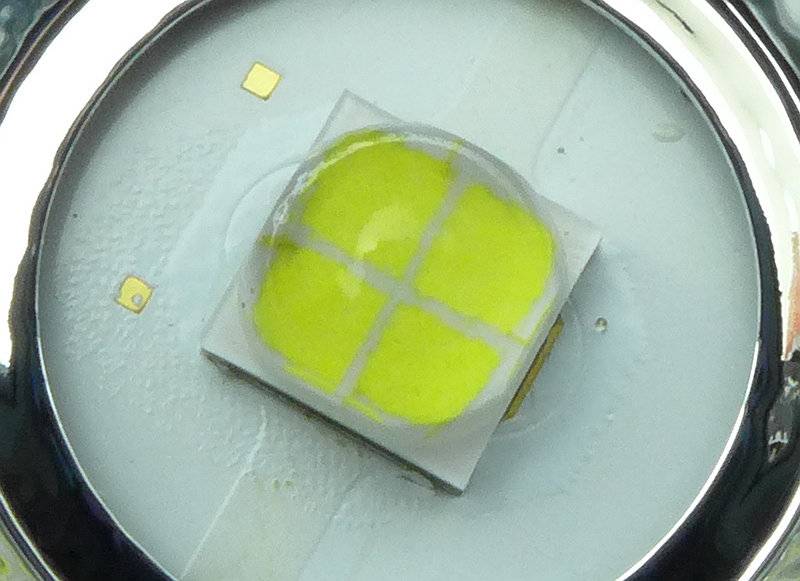
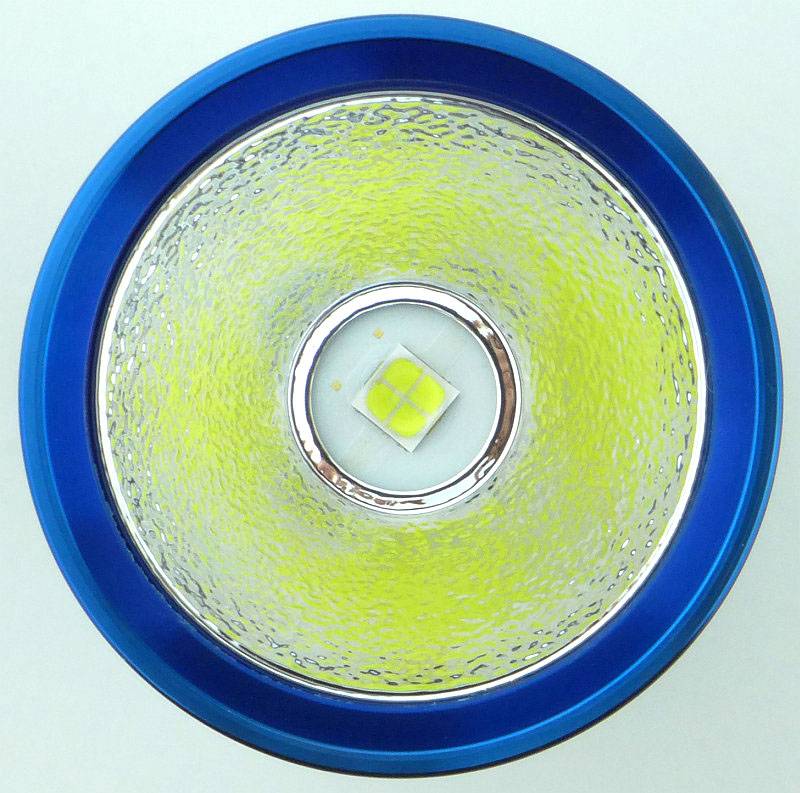
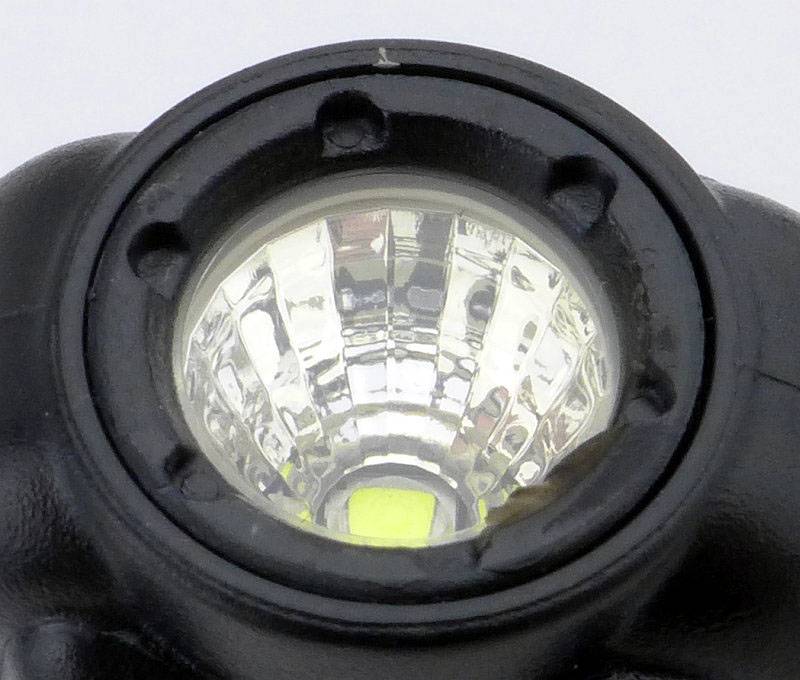
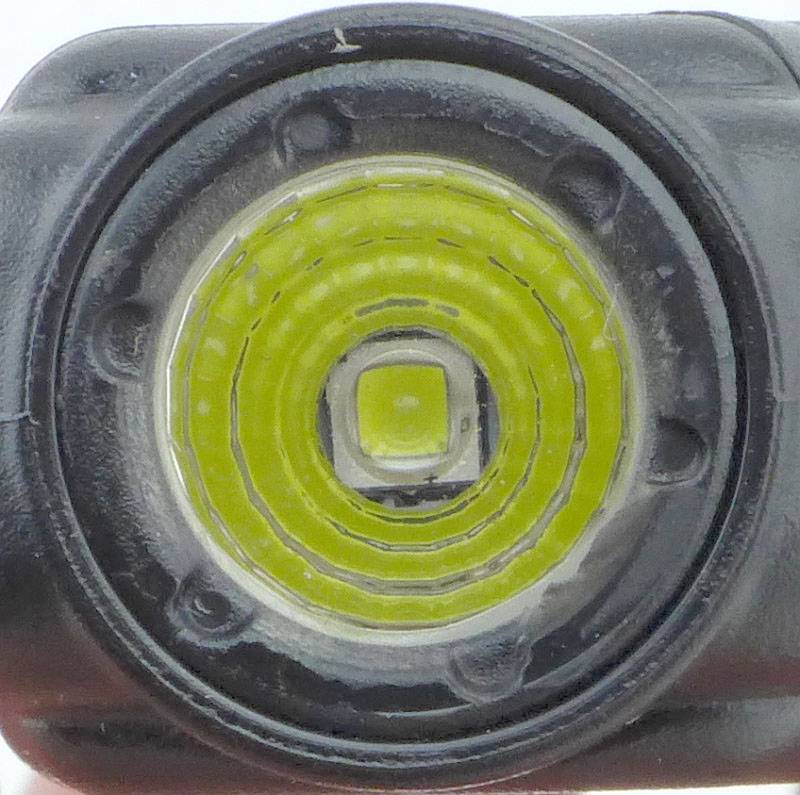
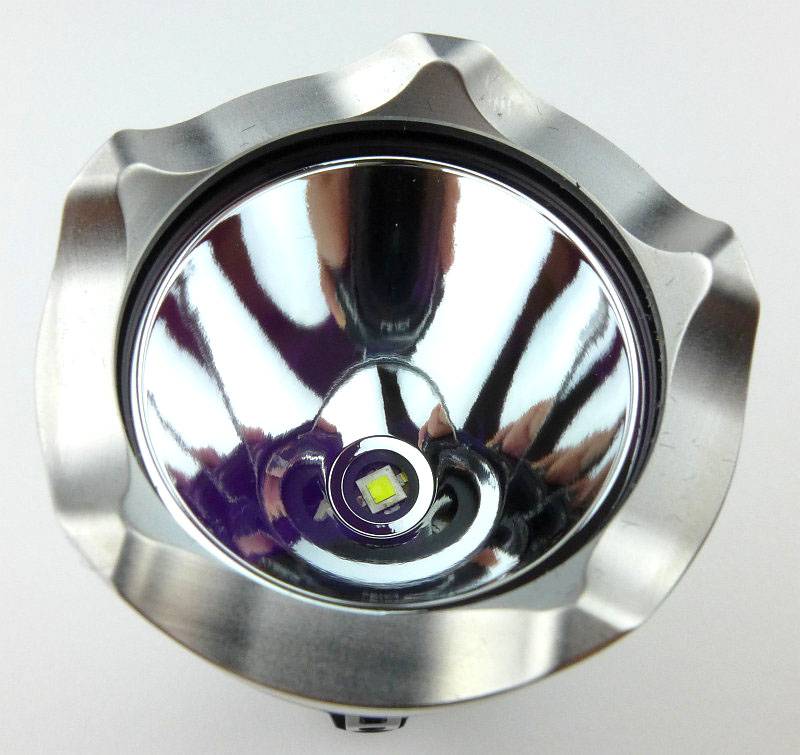
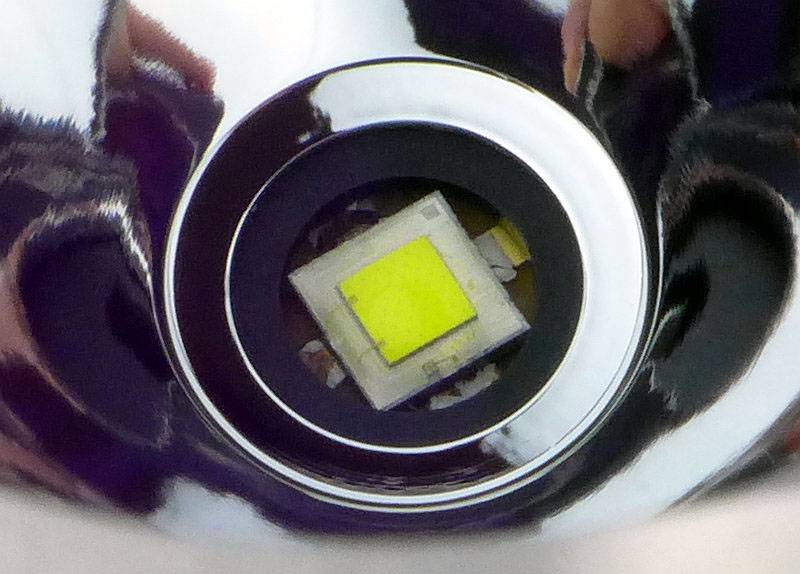
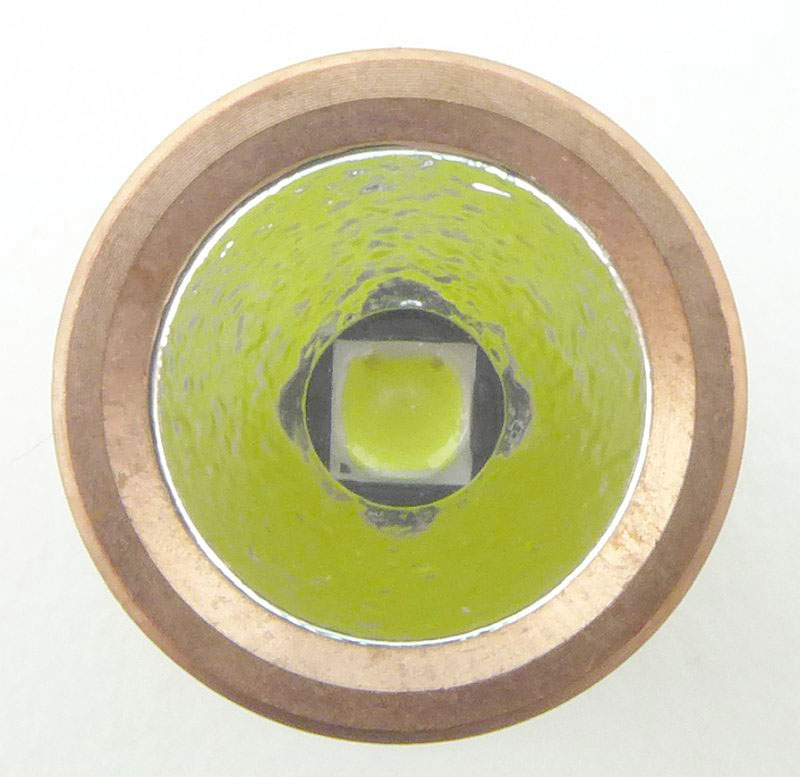
With the small reflector and XP-L LED, the Preon P1 is set for an excellent EDC beam.
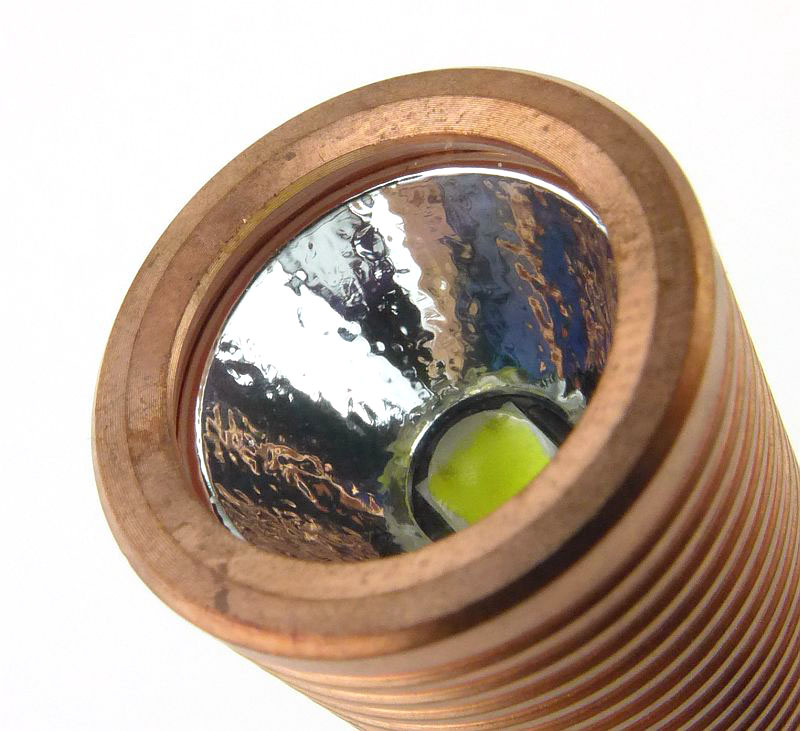
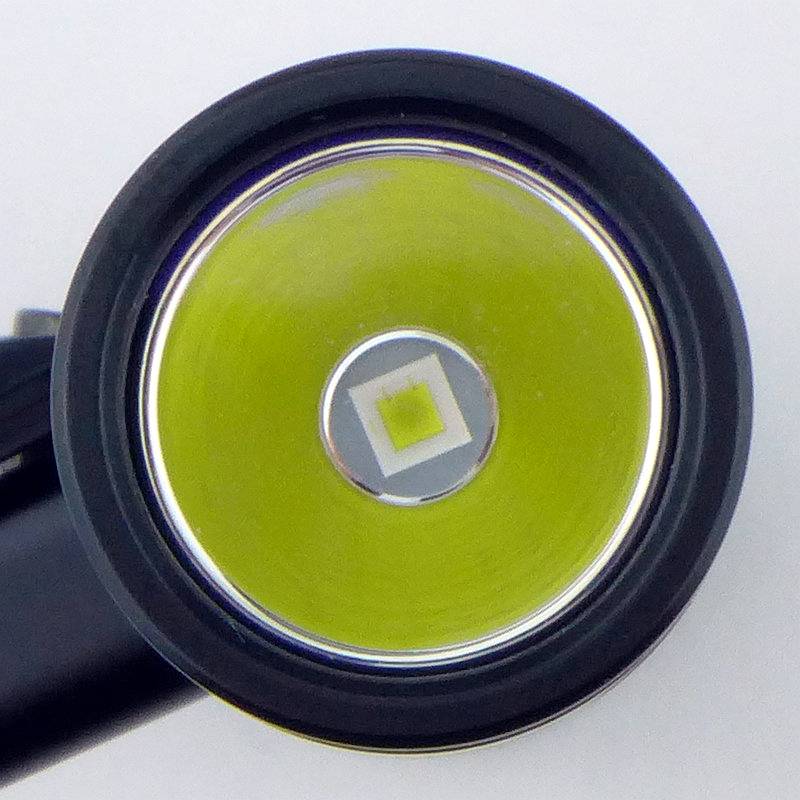
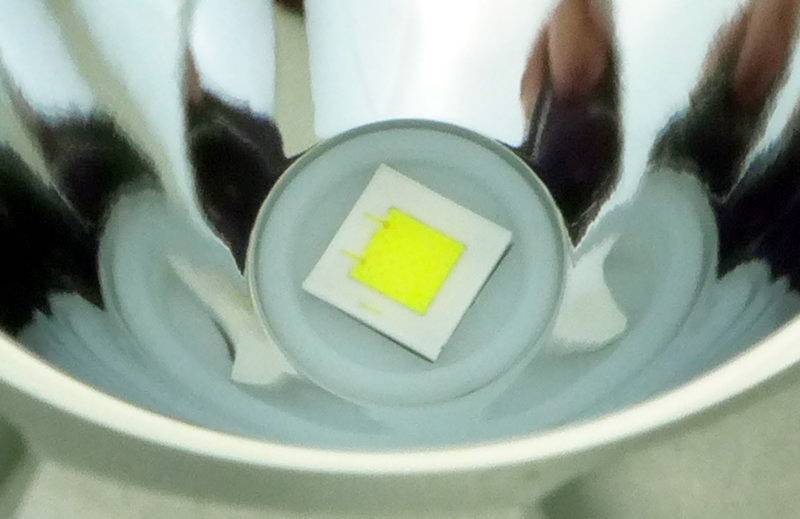
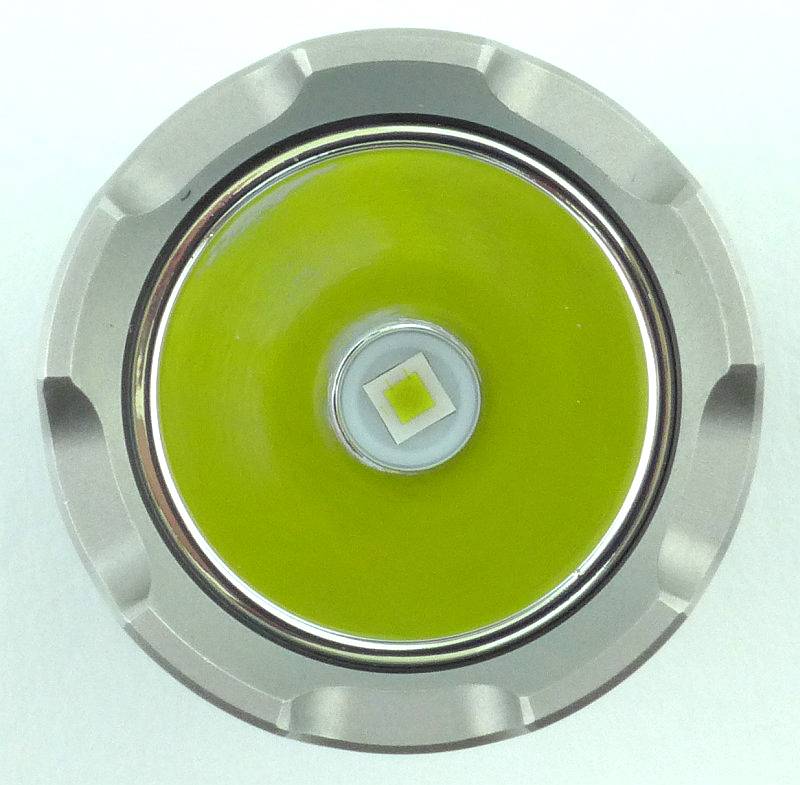
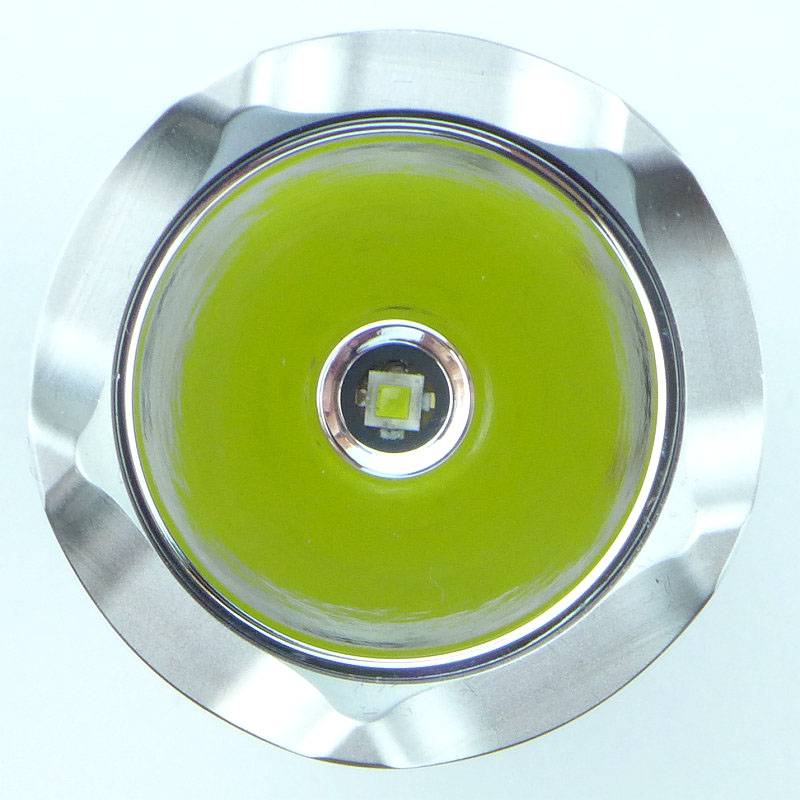
The XP-L LED and textured reflector.
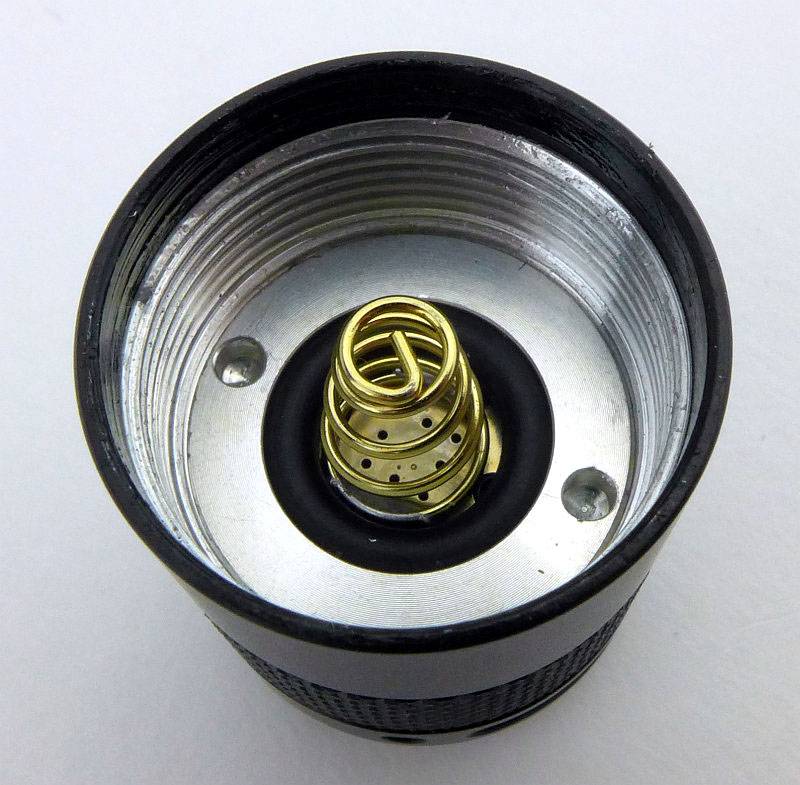
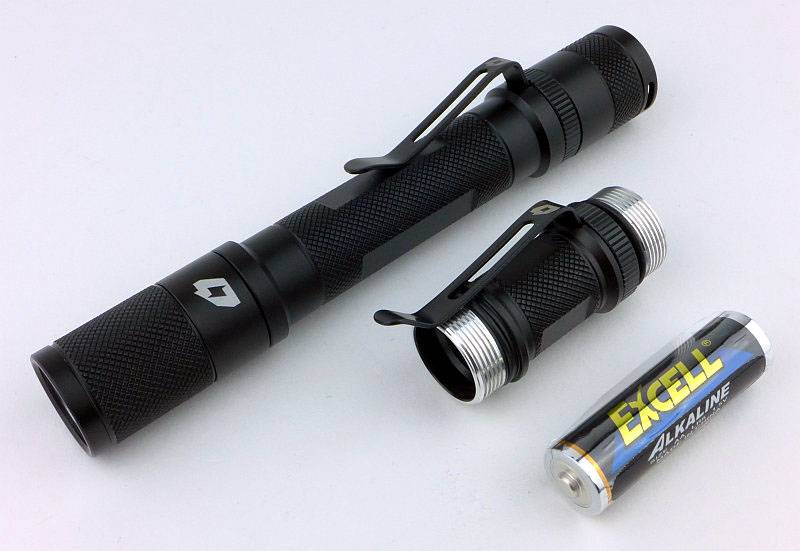
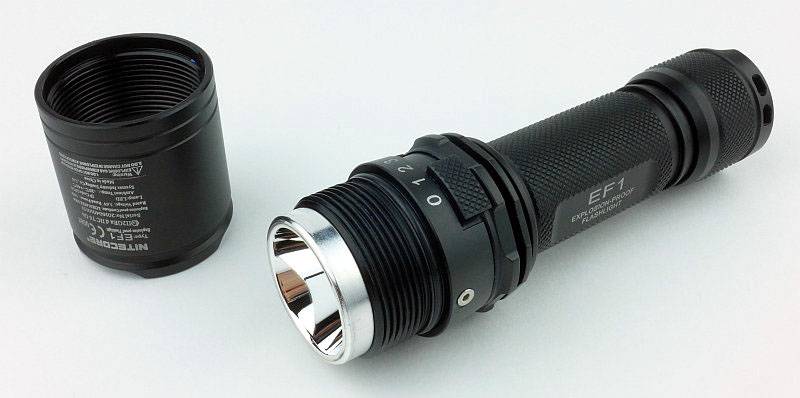
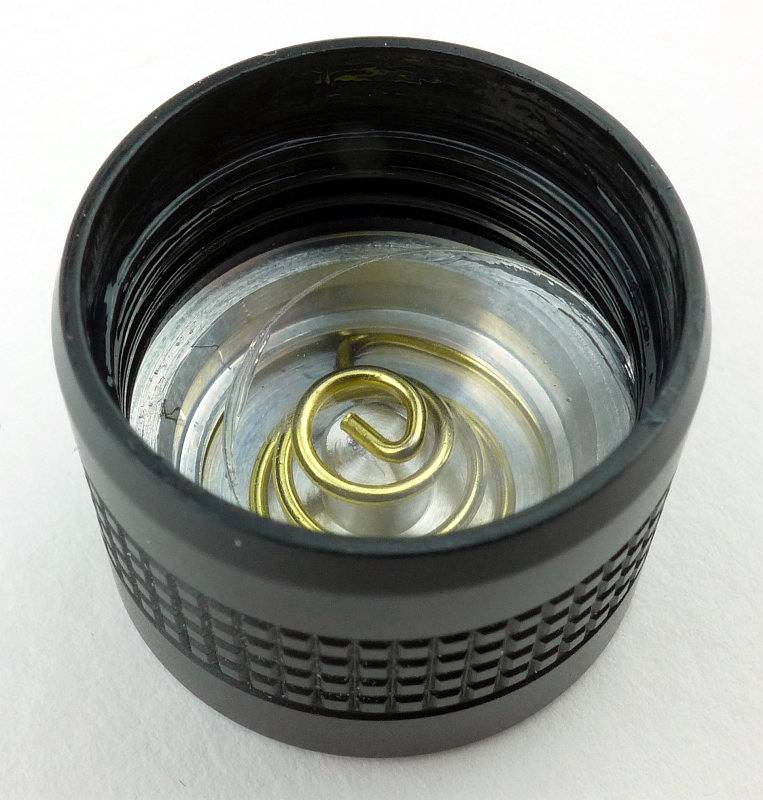
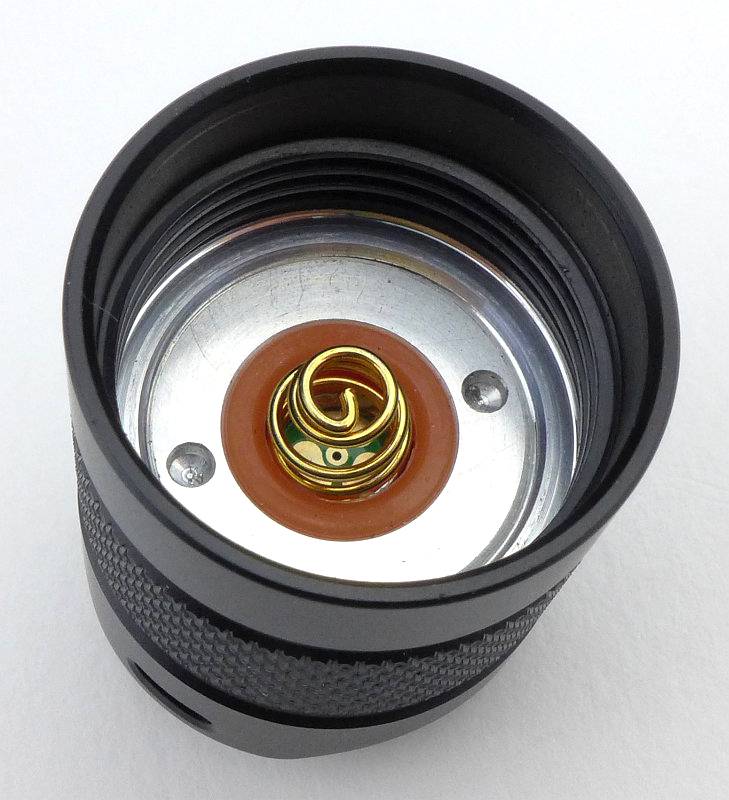
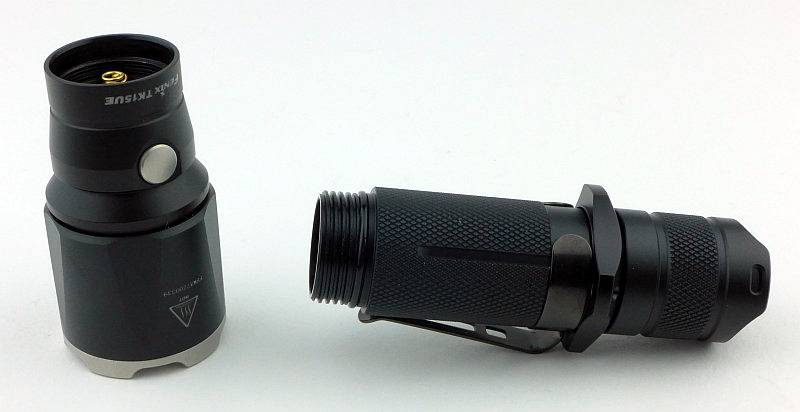
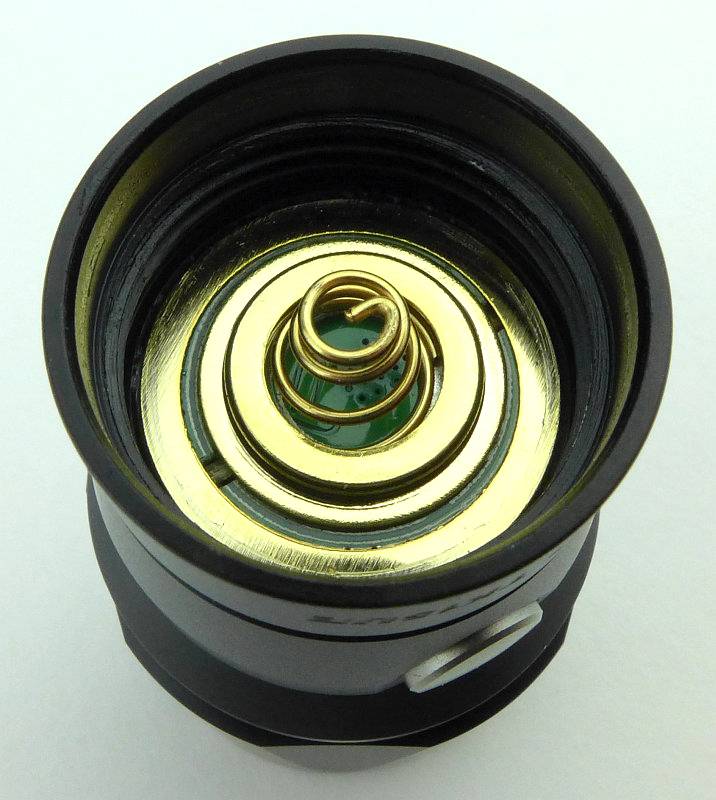
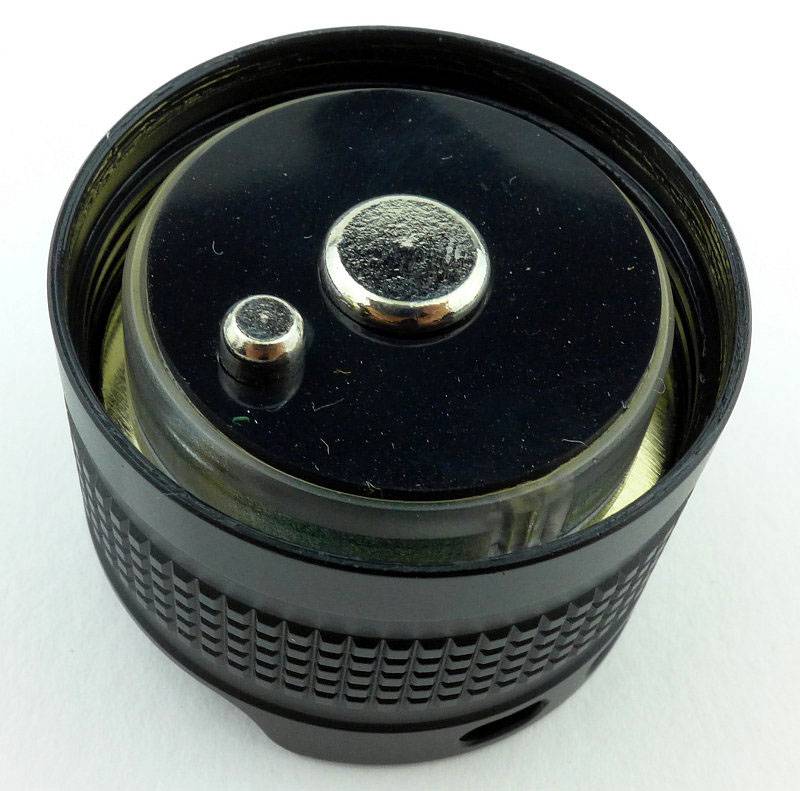
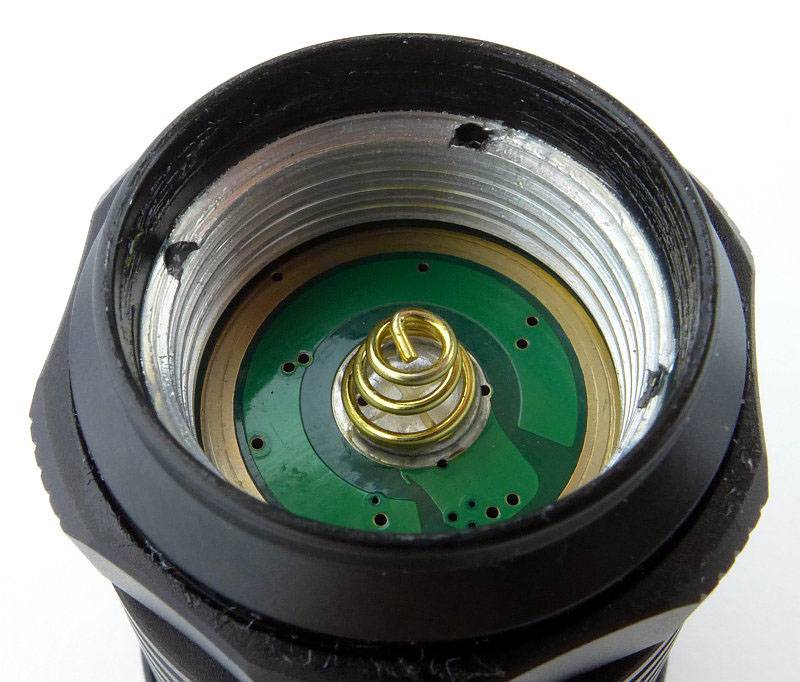
With the head removed (for inserting the battery) the contacts can be seen.
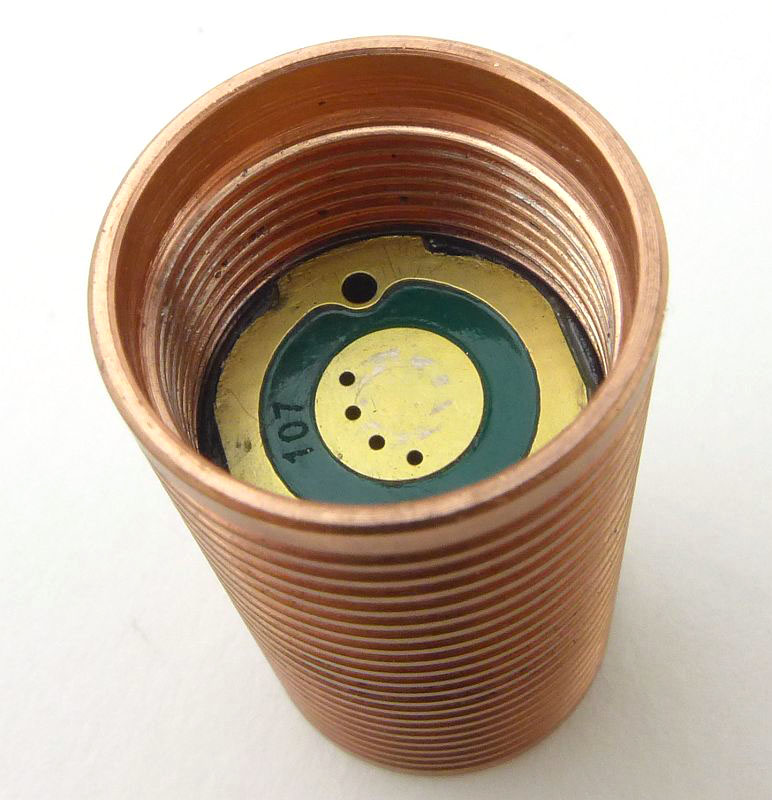
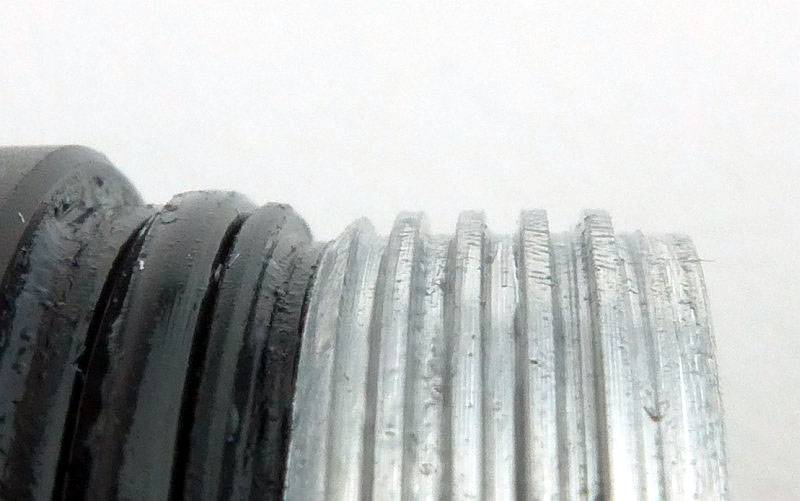
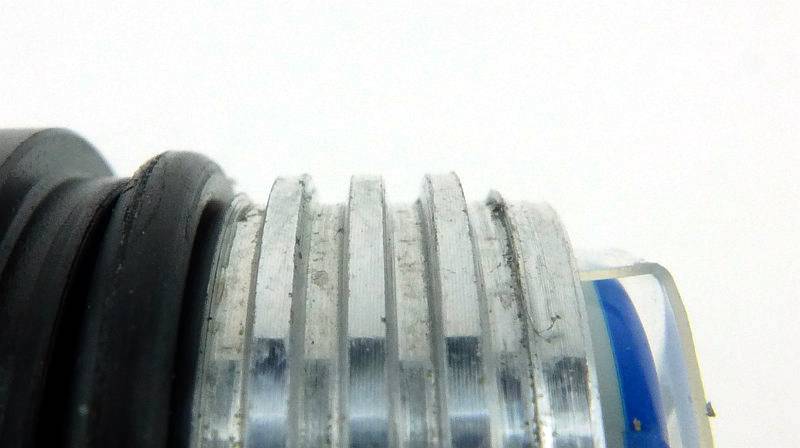
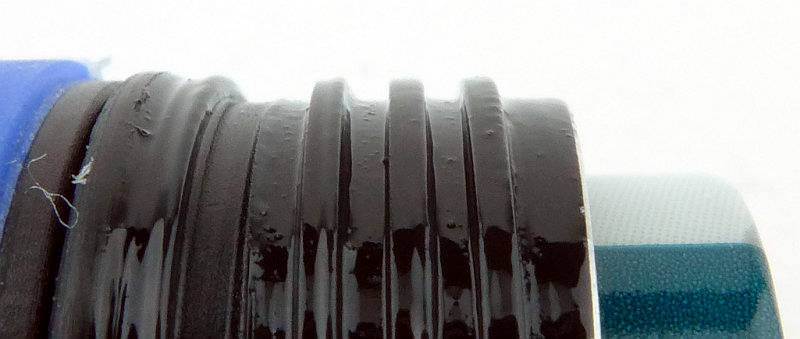
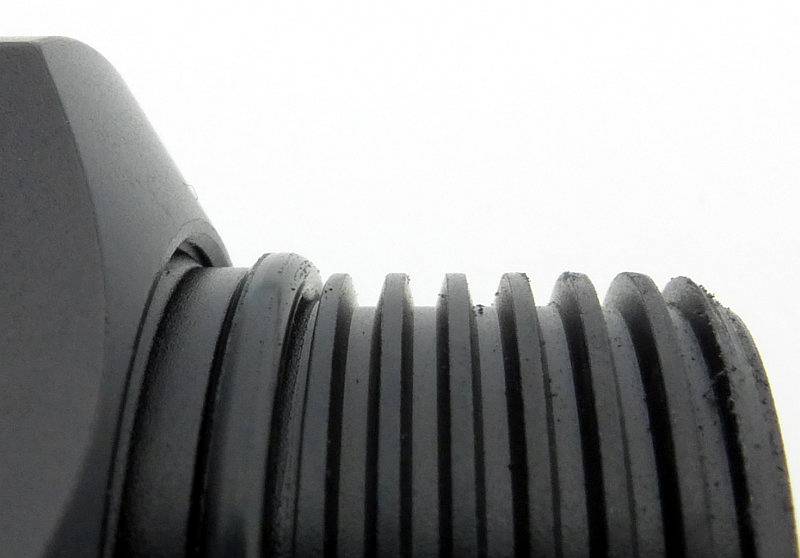
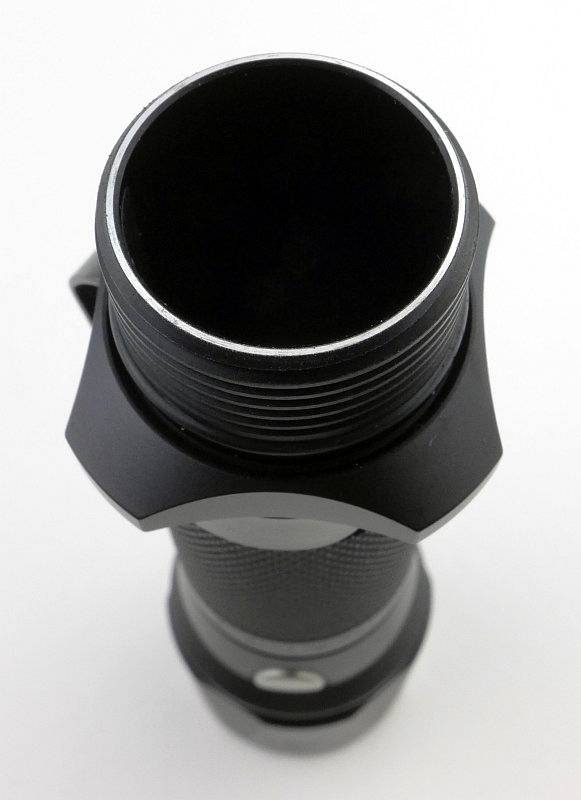
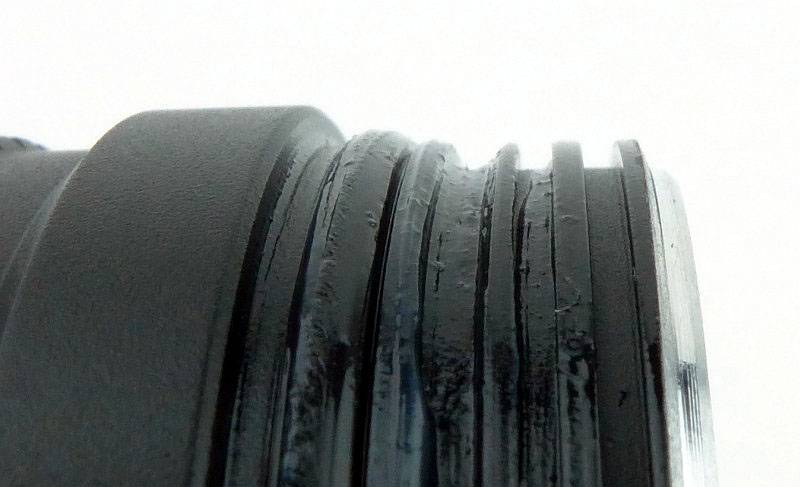
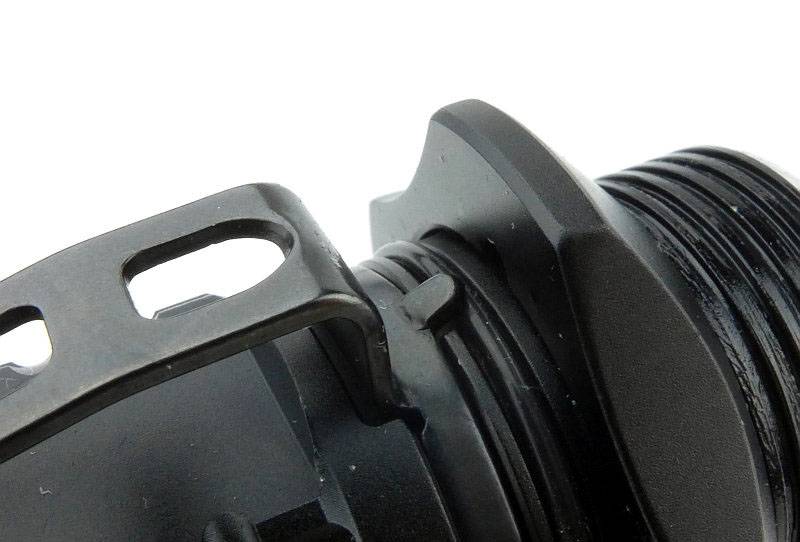
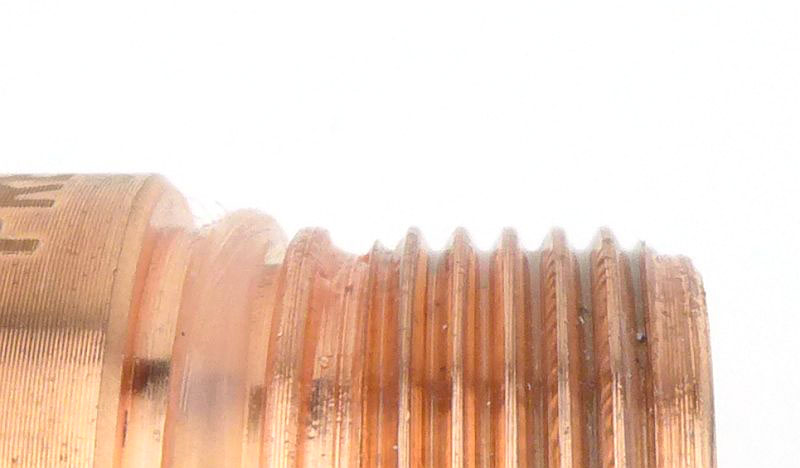
The threads are standard and cleanly cut.
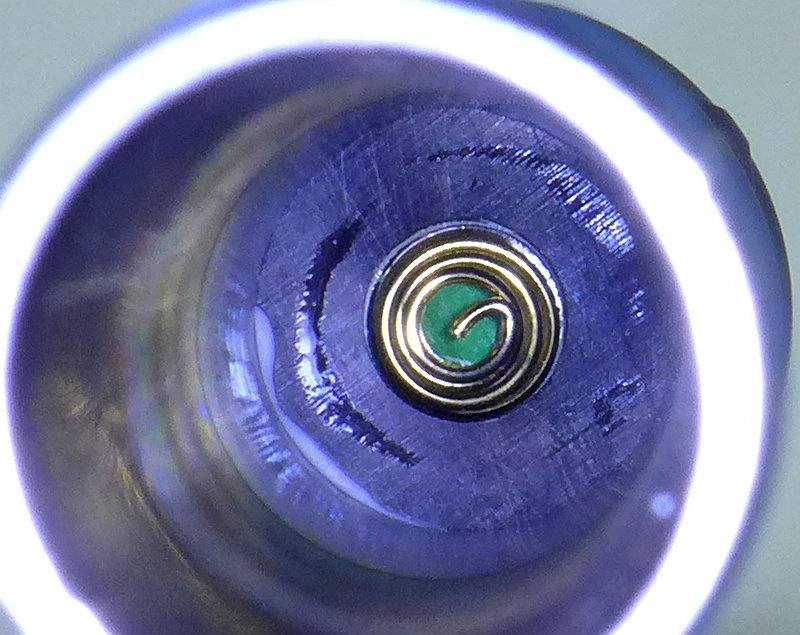
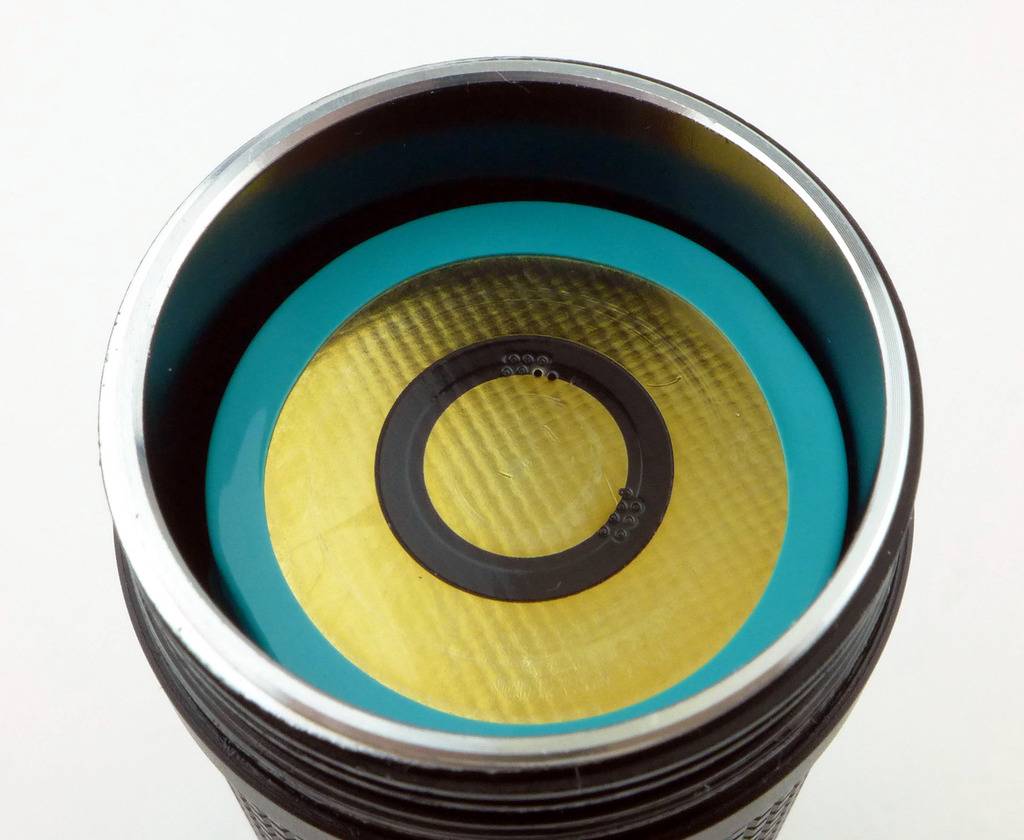
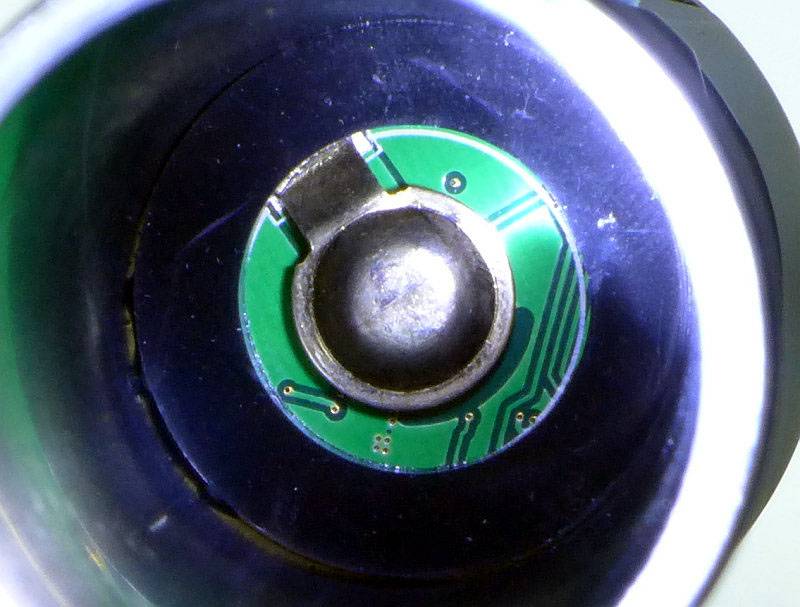
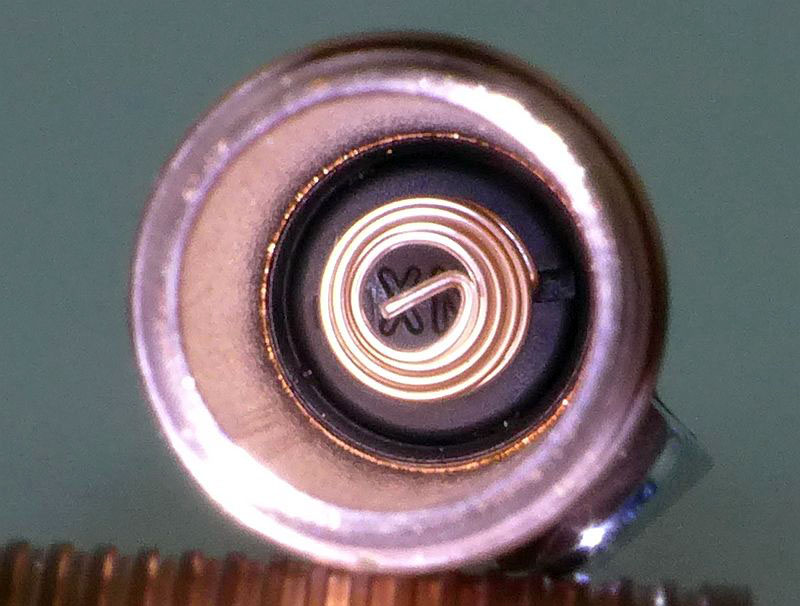
Shining another Preon down the battery tube allows us to see the negative spring contact.
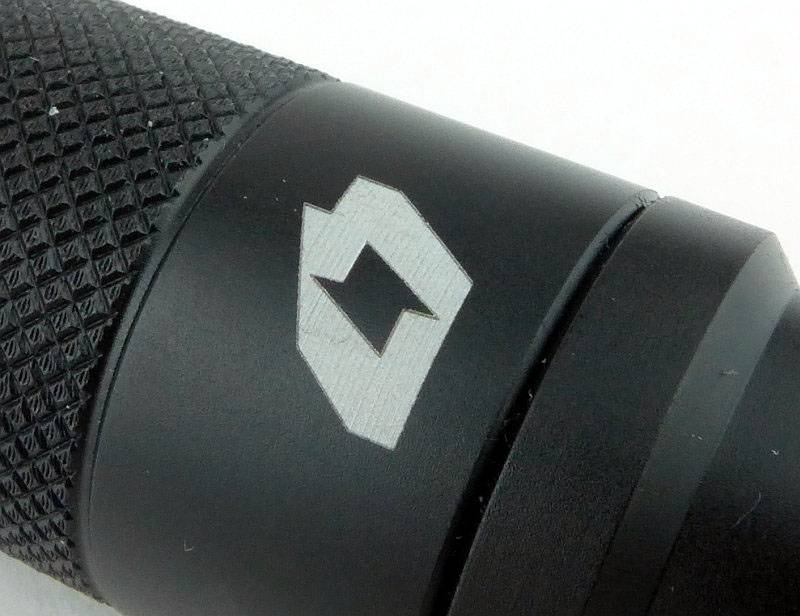
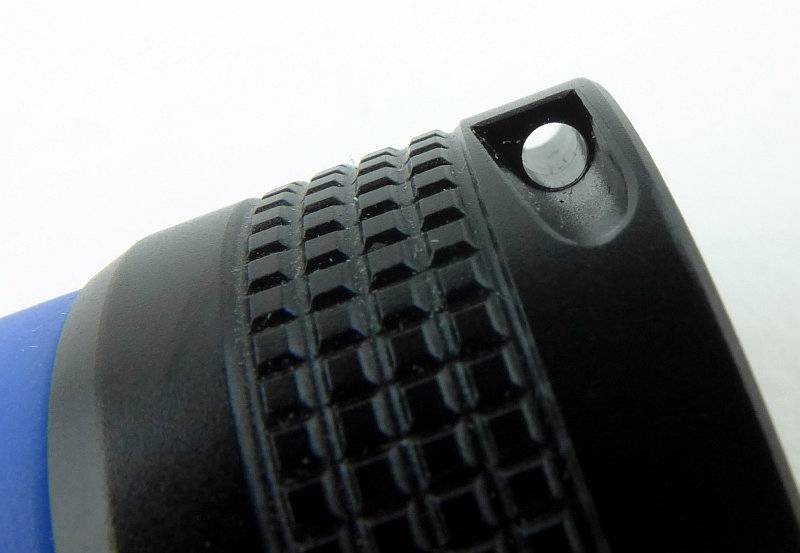
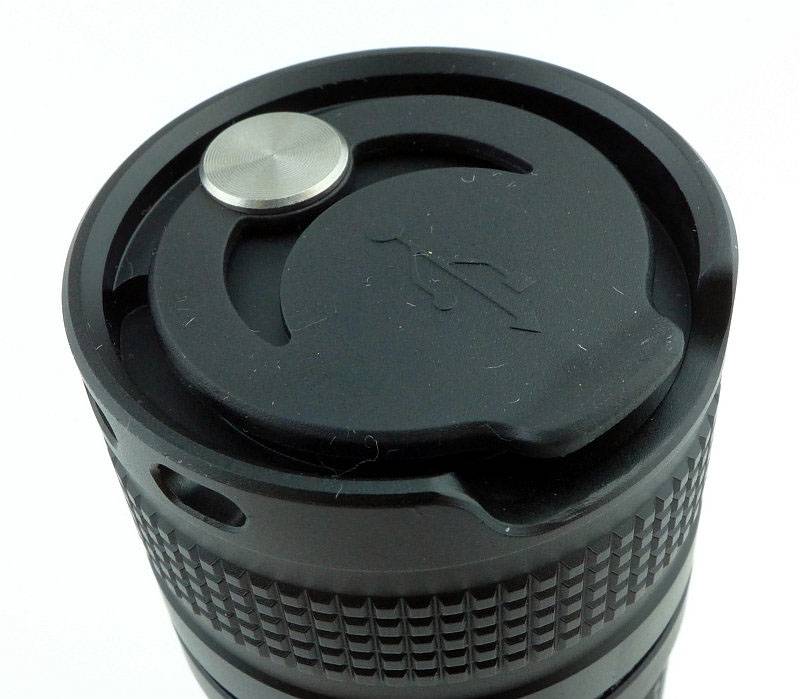
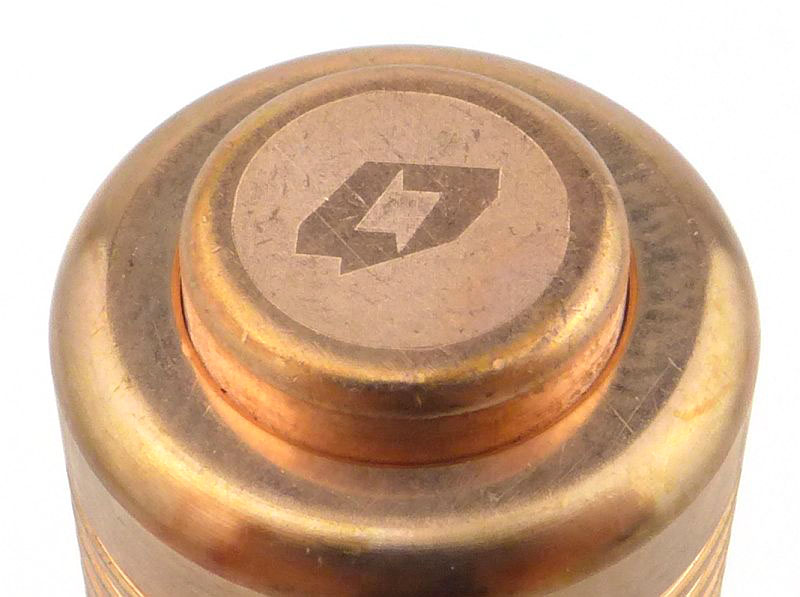
FOURSEVEN’s logo is engraved on the switch button cap.
The beam

Please be careful not to judge tint based on images you see on a computer screen. Unless properly calibrated, the screen itself will change the perceived tint.

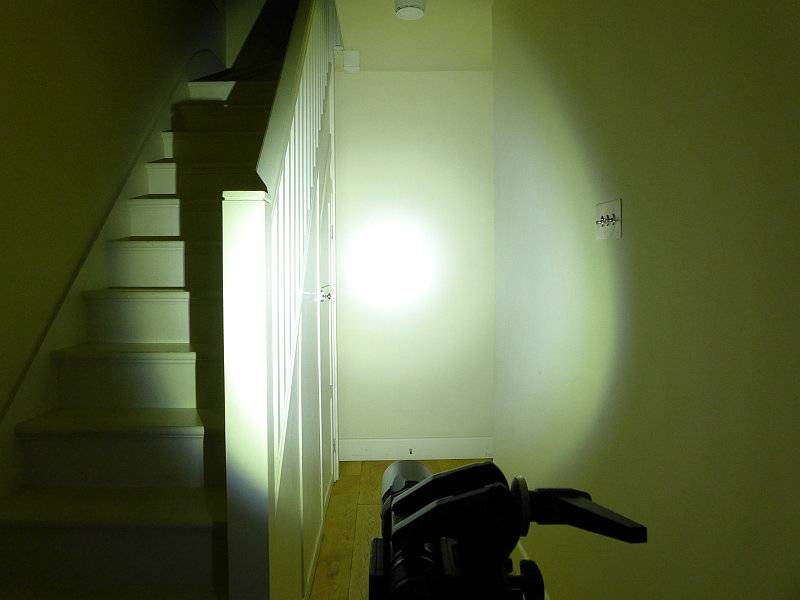
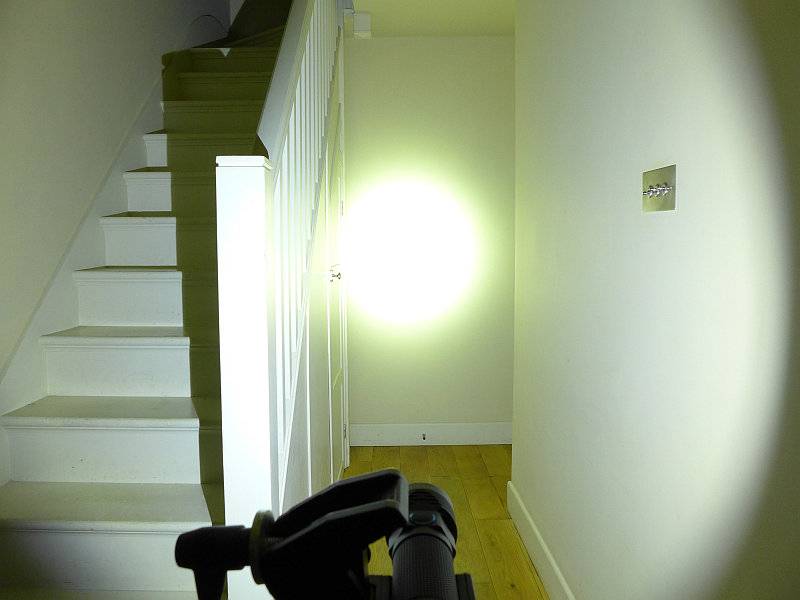
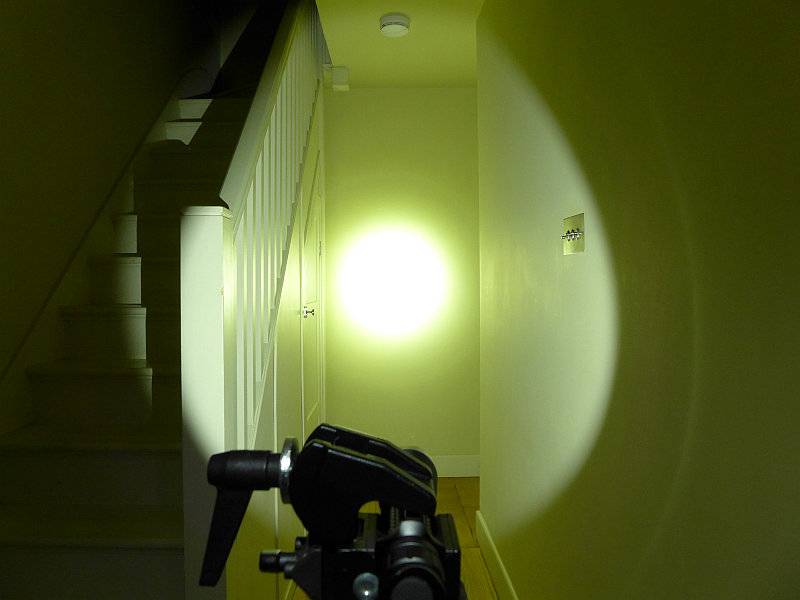
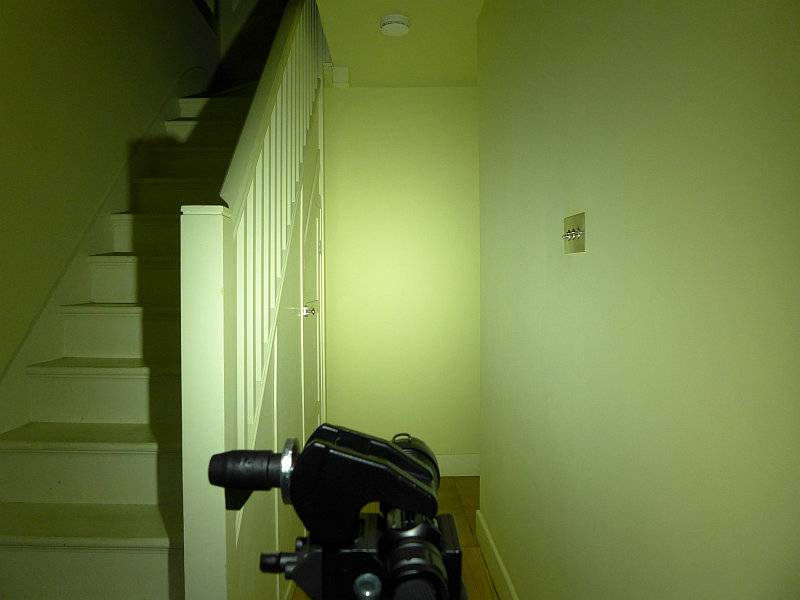
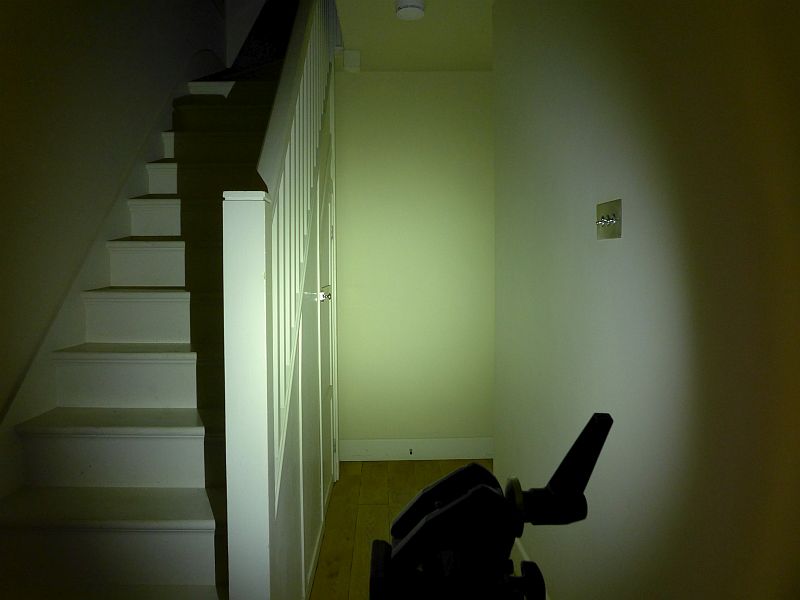
The indoor beamshot is intended to give an idea of the beam shape/quality rather than tint. All beamshots are taken using daylight white balance. The woodwork (stairs and skirting) are painted Farrow & Ball “Off-White”, and the walls are a light sandy colour called ‘String’ again by Farrow & Ball. I don’t actually have a ‘white wall’ in the house to use for this, and the wife won’t have one!

Starting indoors with the P1, it has plenty of power for your close range EDC needs, with a nice wide, soft, hotspot and wide spill.
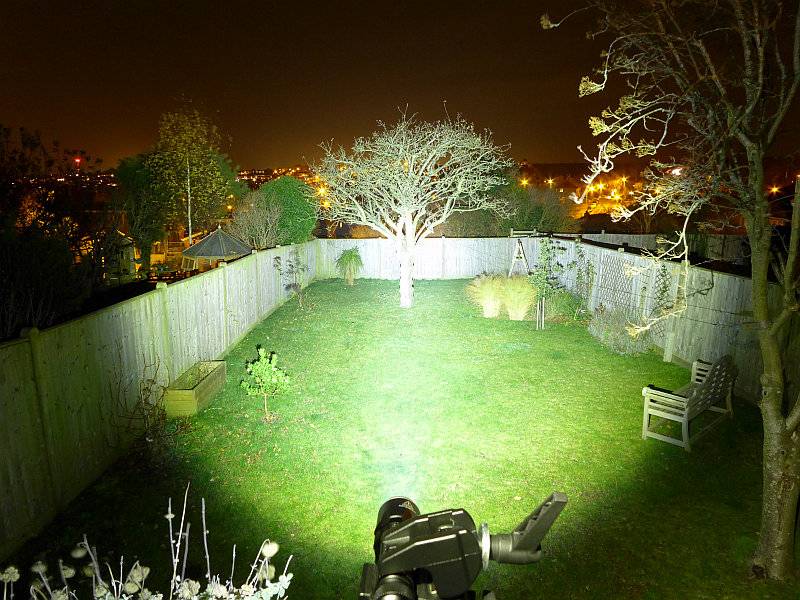
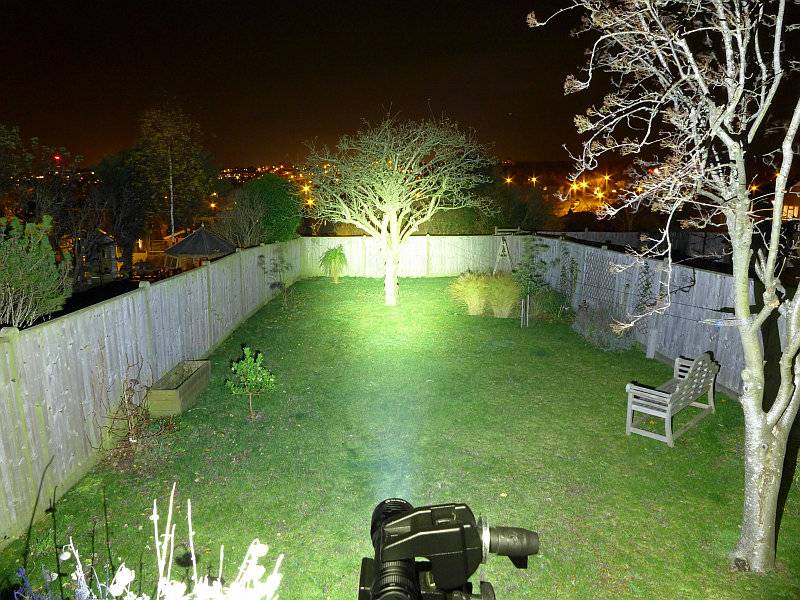
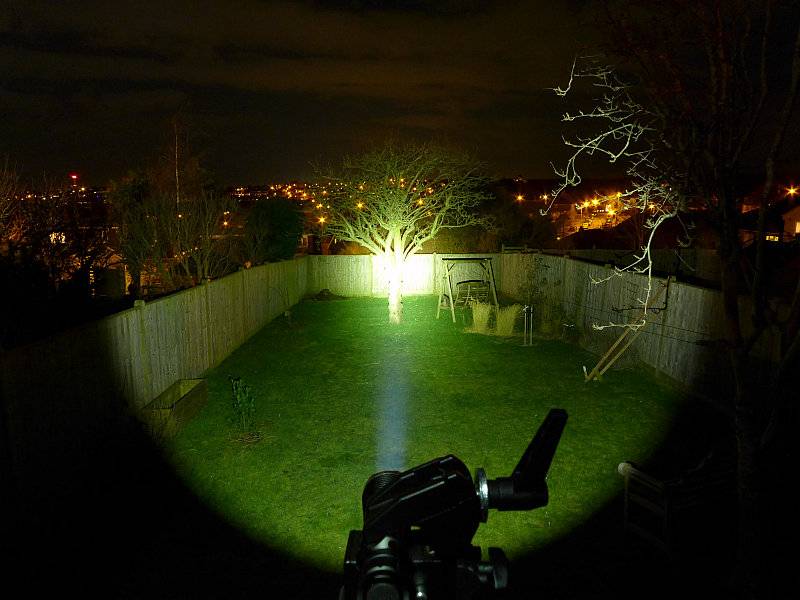
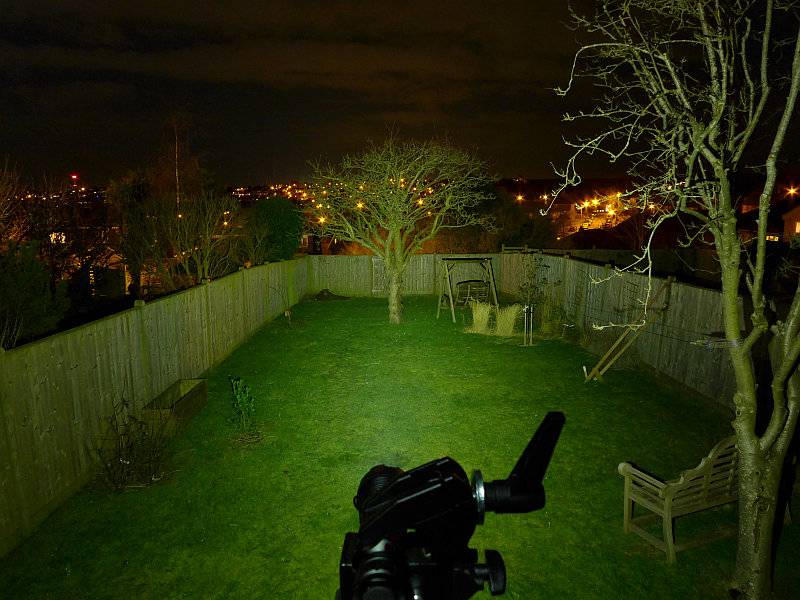
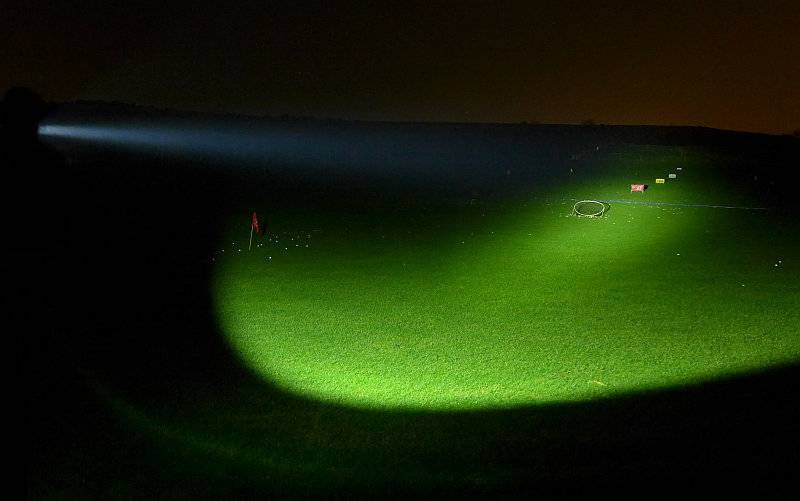
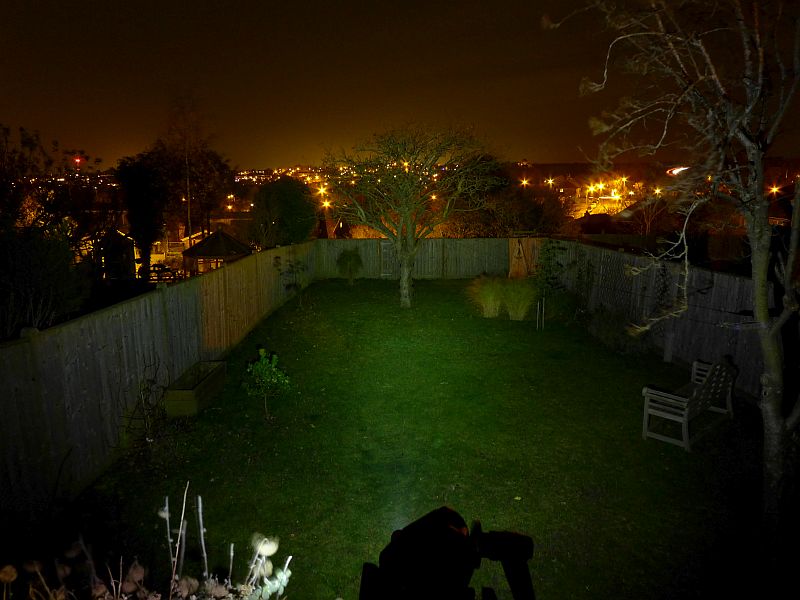
At outdoor ranges the Preon struggles as it is only a single AAA powered light and has a flood orientated beam. These exposures are long to show anything. The P1 doesn’t have much impact.
Modes and User Interface:

Just as with both the standard Preon P1 and P2, the special edition Copper P1 operates in the same way with a forward-clicky switch.
In total, there are 7 output modes which can be used – Low, Medium, High, Strobe, SOS, Beacon (high), Beacon (low).

To fine tune the Preon to your needs, you can set one of 5 possible ‘Configurations’ which have only certain modes available:
Configuration 1: High
Configuration 2: Previous, High, Low
Configuration 3: Previous, High, Strobe
Configuration 4: Previous, Low, Medium, High, Strobe
Configuration 5: Previous, Low, Medium, High, Strobe, SOS, Beacon (high), Beacon (low)

By default, configuration 2 is set. To change configuration, rapidly press the switch 10 times within 2s, holding or clicking the tenth press.
At this point the Preon will flash 1 to 5 times to indicate the selected configuration.
Quickly turn the Preon OFF and ON again to move to the next configuration, and repeat until you have the desired configuration. To memorise the setting, turn the Preon OFF for 5 seconds.

The Preon has a memory of the last mode used. This is relevant only on Configurations 2, 3, 4 and 5.
To change to the next mode in the chosen configuration, turn the Preon OFF and ON again within one second.
As shown in the Configuration list above, when you first turn the Preon ON, you get the ‘previously used’ output mode. When you then change mode, you jump to the start of the set of modes for that Configuration.
For example, if you are set to Configuration 5 and previously used Strobe, when you first turn the Preon ON you get Strobe, and when changing modes the next mode becomes Low, Medium… (In this example you do not go to SOS as the next mode).

Batteries and output:

The Preon P1 runs on AAA Alkaline or NiMh.

To measure actual output, I built an integrating sphere. See here for more detail. The sensor registers visible light only (so Infra-Red and Ultra-Violet will not be measured).

Please note, all quoted lumen figures are from a DIY integrating sphere, and according to ANSI standards. Although every effort is made to give as accurate a result as possible, they should be taken as an estimate only. The results can be used to compare outputs in this review and others I have published.

___________________________________________ ________________________________ ________________________________
Preon P1 Cu using specified cell I.S. measured ANSI output Lumens PWM frequency or Strobe frequency (Hz)
___________________________________________ ________________________________ ________________________________
High 97 1000
Medium 50 1000
Low 7 1000

* Beacon and Strobe output measurements are only estimates as the brief flashes make it difficult to capture the actual output value.

Peak Beam intensity measured 200 lx @1m giving a beam range of 28 m.

There is no parasitic drain.

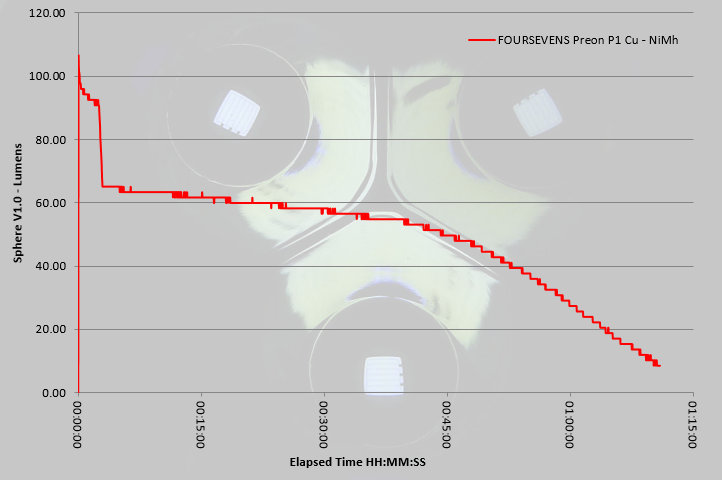
The Preon P1 Cu exhibits the FOURSEVENS ‘Burst Mode’ behaviour. When on maximum output the first three minutes are at a higher output before dropping to a slightly lower level for the remainder of the runtime.
Troubleshooting

This section is included to mention any minor niggles I come across during testing, in case the information helps anyone else.

No issues were encountered during testing.

As per the description of this section, this information is provided in case anyone else finds a similar ‘issue’ that might be fixed in the same way.

The FOURSEVENS Preon P1 Copper in use
If you have read my other Preon review, then this will be mostly the same as the light is the FOURSEVENS Preon, just in a lovely raw Copper. I’m including the impressions of the current Preon as they are just as relevant to this special edition as the standard ones.

When compared to the previous generation Preons, these new versions are slightly chunkier, and initially I was not entirely convinced, as the point of an AAA light is to be very small. But then I remembered that as much as I love the older Preons they were always a bit slippery. The smooth body wanting to slide around and not giving much of a grip.

With the new Preons having a grip pattern over the entire length of the light, no longer do you get this slippery feeling. One further observation though, is that these grooves tend to pick up pocket fluff nicely, which does somewhat spoil the look.

Personally I preferred the previous UI where it had no memory, but for some a memory is a requirement as you can pre-select the output you generally use. However, as the memory only affects the mode at switch-on, after which the mode selection goes to the first of the modes in the current Configuration, it only takes one mode change to return to Low.

Unfortunately another aspect has changed in the new version, PWM is rearing its head. The previous Preons had PWM but at 2500Hz and was not noticeable to the naked eye; the new version has PWM at 1000Hz. On High and Medium this has not really been visible, but on Low, I do catch the strobing effect out of the corner of my eye. A minor irritation and not what I would expect of FOURSEVENS. It slightly takes the edge off what could be a great update to this well loved series.

It used to be more common for smaller EDC lights to go with a reverse-clicky switch, but as in earlier versions, the Preon does use a forward-clicky and gives you that immediate response to pressure on the switch.

A great feature that has been added to the Preons is the user-changeable configuration that allows you to limit which output modes can be selected. You don’t get to choose which modes are included in a ‘configuration’ but you can choose one of the five available ‘configurations’ to best suit your needs. This user configuration has great potential and I hope FOURSEVENS expand the number of configurations that can be chosen from.

With the small power source of AAA, the added efficiency of the XP-L (though only around 9%) makes a difference. Thanks to the XP-L having an XM-L2 size die in a smaller package, it is compact enough to be fitted into the Preon’s head and provide a great EDC beam.

The new Preon doesn’t just have a new body design, it has user-configuration and an XP-L LED, and in this special edition version you have a solid Copper body that with age and develop it own unique and attractive patina.

Review Summary

_______________________________________________ _______________________________________________
Things I like What doesn’t work so well for me
_______________________________________________ _______________________________________________
It’s Solid Copper. PWM at 1000Hz giving some strobe effects on low.
XP-L LED in a truly pocket-sized light. Copper marks easily and tarnishes.
User configurable. Copper is heavier.
Great EDC beam.


Discussing the Review:

The ideal place to discuss this reviews is on a forum. If you started reading the shorter forum version of the review, but followed the link this full exclusive review, please return to that forum to discuss the review there.
If you read the review entirely on Tactical Reviews, please consider one of the following to join in any discussion.

CandlePowerForums – Flashlight Reviews Section (Largest and Friendliest Flashlight Community Forum)

EdgeMatters – Sponsored Reviews (UK based Forum for Knife Makers and Collectors)

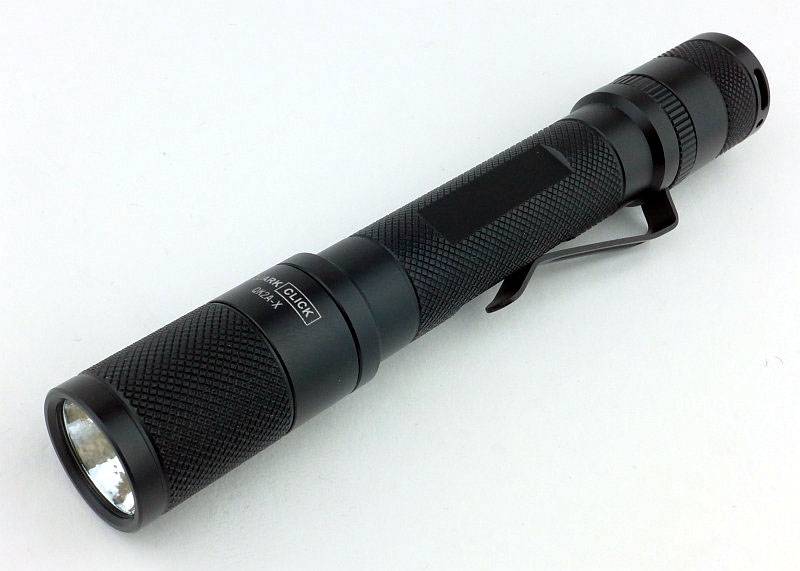
Light Review: FOURSEVENS Quark Click QK2A-X (2xAA)

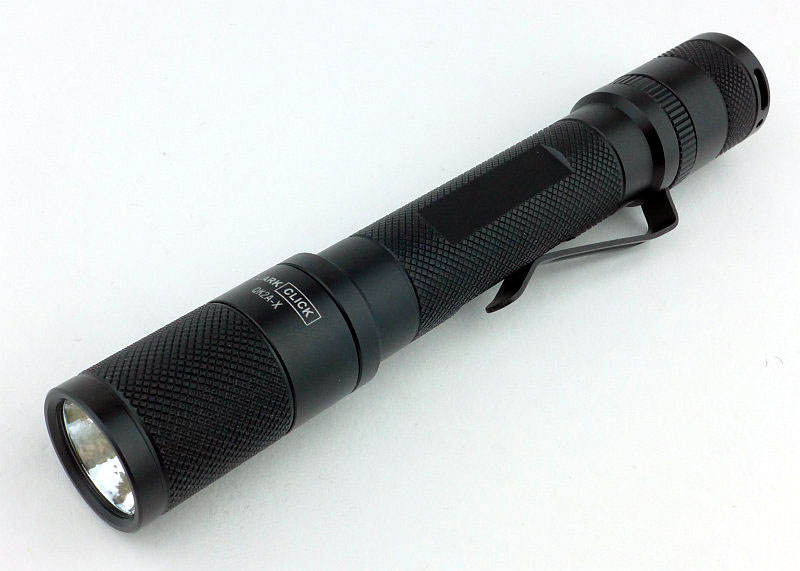
The original Quark models from FOURSEVENS redefined what a light could be, but with redesign forced upon them, FOURSEVENS had to re-imagine the Quark, and the Quark Click was born. This review is of the QK2A-X model (2AA)

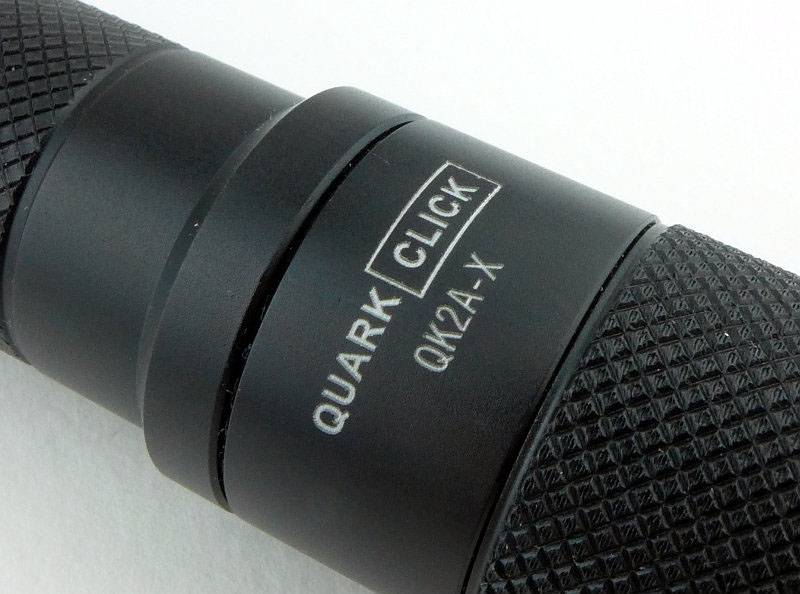
 photo 05 Quark Click engraving P1240116.jpg

Taking a more detailed look:

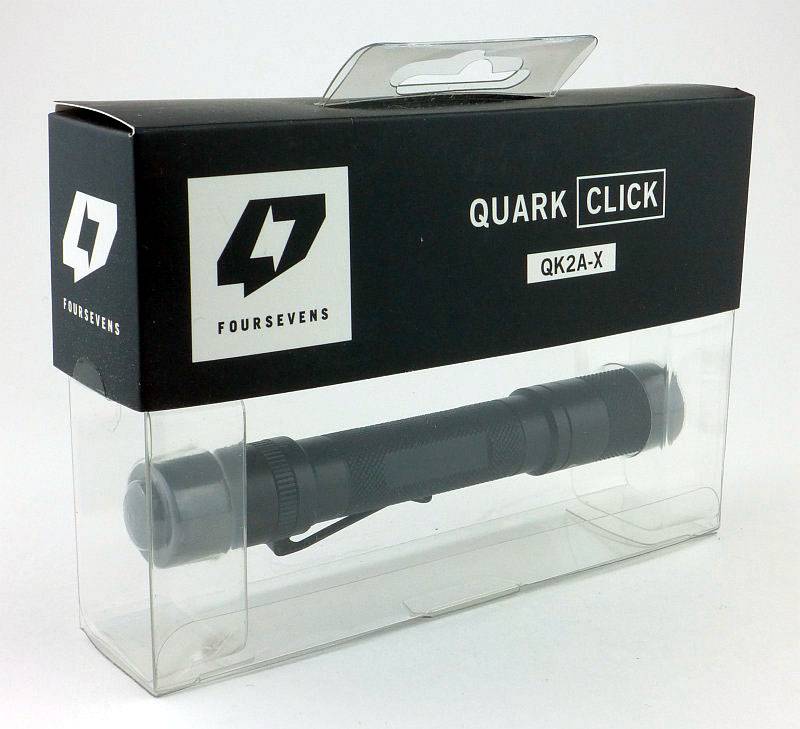
FOURSEVENS packaging presents the Quark Click so you can get an all round view.
 photo 01 Quark Click boxed P1240094.jpg

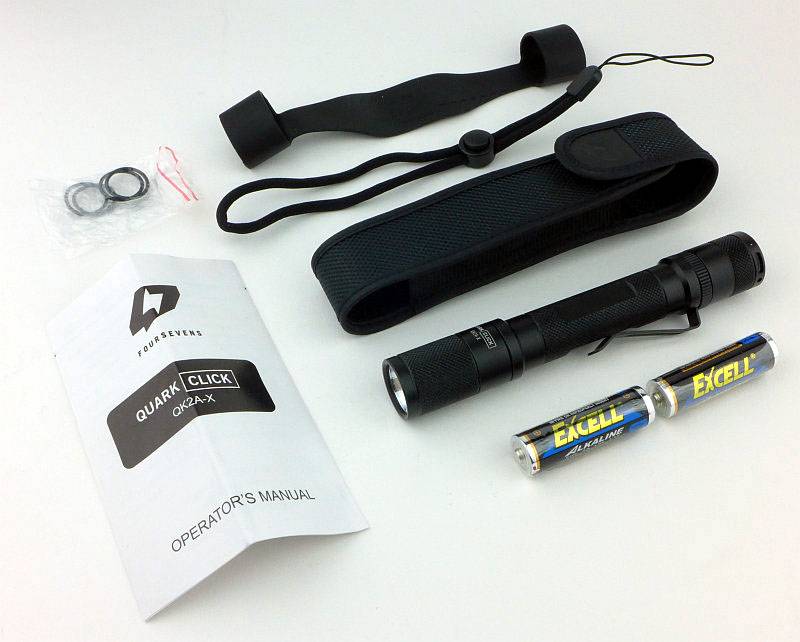
Supplied with the QK2A-X is a holster, hand-grip, lanyard, spare O-rings and 2x AA Alkaline cells.
 photo 02 Quark Click unboxed P1240099.jpg

If you already know the Quark holsters, this is the same as all the others I have. The front/back are semi rigid with elasticated sides.
 photo 03 Quark Click holstered P1240107.jpg

On the back is a D-loop and fixed webbing loop.
 photo 04 Quark Click holstered P1240110.jpg

The Quark range have removable steel pocket clips.
 photo 06 Quark Click clip P1240122.jpg

As standard, the Quark Click comes with the ‘Tactical’ forward-clicky switch.
 photo 07 Quark Click rear P1240125.jpg

Being a ‘Tactical’ switch the button protrudes for easy access, so no tail-standing for this one.
 photo 08 Quark Click button P1240128.jpg

The FOURSEVENS logo is laser engraved on the head.
 photo 09 Quark Click engraving logo P1240129.jpg

At the base of the compact textured reflector is a XM-L2 LED.
 photo 10 Quark Click reflector P1240138.jpg

Thanks to the design including a location guide surrounding the LED, the LED is very well aligned with the reflector.
 photo 12 Quark Click LED P1240135.jpg

Taking the head off, and you can see the contacts inside it. These include physical reverse polarity protection.
 photo 11 Quark Click contacts P1240141.jpg

The threads are square and bare metal. They arrive well lubricated.
 photo 13 Quark Click threads P1240146.jpg

Inside the tailcap is a strong spring contact for the negative connection. Due to the use of bare metal threads, the Quark Click cannot be locked-out by unscrewing the tail-cap slightly – instead you must unscrew the head of the Quark Click half a turn.
 photo 14 Quark Click tail contacts P1240150.jpg

And here we have one of the Quarks’ historical features, its lego-ability (change the head, or battery tube, or switch). In this case, simply use a 1xAA long battery tube and this Quark can now use 1xAA or 1×14500 as well as the original 2xAA.
 photo 15 Quark Click 1AA P1240154.jpg

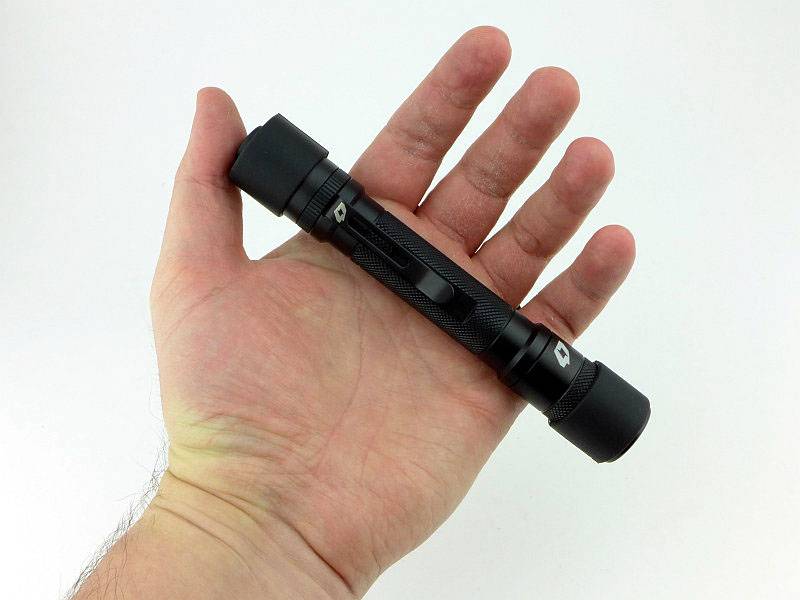
So this is the Quark Click QK2A-X next to 2xAA cells for size reference.
 photo 16 Quark Click size 2AA P1240161.jpg

The same head and switch now on a 1xAA battery tube next to1xAA for size reference.
 photo 17 Quark Click size 1AA P1240162.jpg

Another feature of FOURSEVENS lights is the inclusion of the hand-grip. Not frequently talked about, this is a very useful accessory. Here it is fitted to the QK2A-X.
 photo 18 Quark Click strap P1240168.jpg

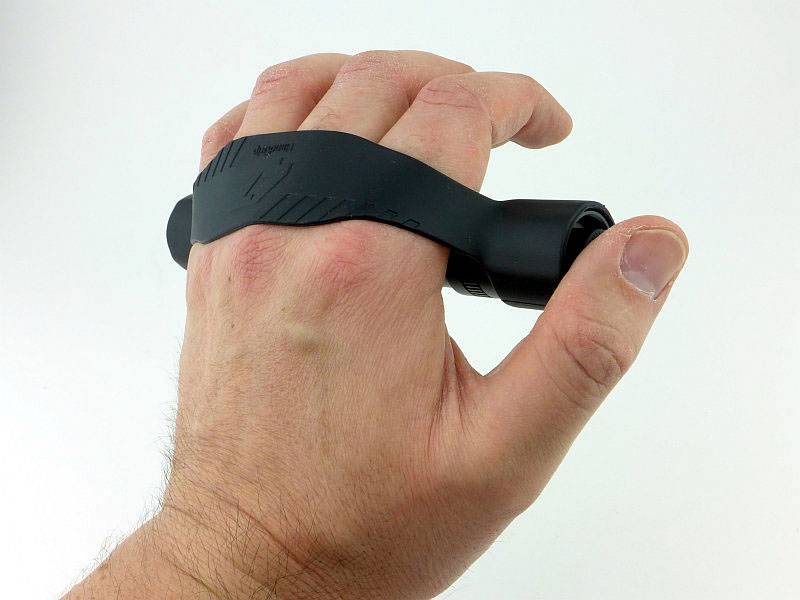
Slipping the hand-grip over your fingers positions the Quark like this.
 photo 19 Quark Click strap in hand P1240176.jpg

You position the hand-grip to wherever it is most comfortable for you. This is where I like it, not quite onto my knuckles.
 photo 20 Quark Click strap in hand P1240174.jpg

No need to hold onto the light as the hand-grip does this for you. You hand is free for other tasks (as long as they fit in with keeping the light where you need it).
 photo 21 Quark Click strap in hand P1240171.jpg

The beam

Please be careful not to judge tint based on images you see on a computer screen. Unless properly calibrated, the screen itself will change the perceived tint.

The indoor beamshot is intended to give an idea of the beam shape/quality rather than tint. All beamshots are taken using daylight white balance. The woodwork (stairs and skirting) are painted Farrow & Ball “Off-White”, and the walls are a light sandy colour called ‘String’ again by Farrow & Ball. I don’t actually have a ‘white wall’ in the house to use for this, and the wife won’t have one!

I’ve always like the Quark beam profile, and the latest Quark Click doesn’t disappoint. Good wide spill, and a hotspot giving good reach make this a great all rounder. If you study the beam close-up on a white wall, it can seem a bit unrefined, but step back and the beam is well diffused and very nice to use.
 photo 22 Quark Click indoor P1240746.jpg

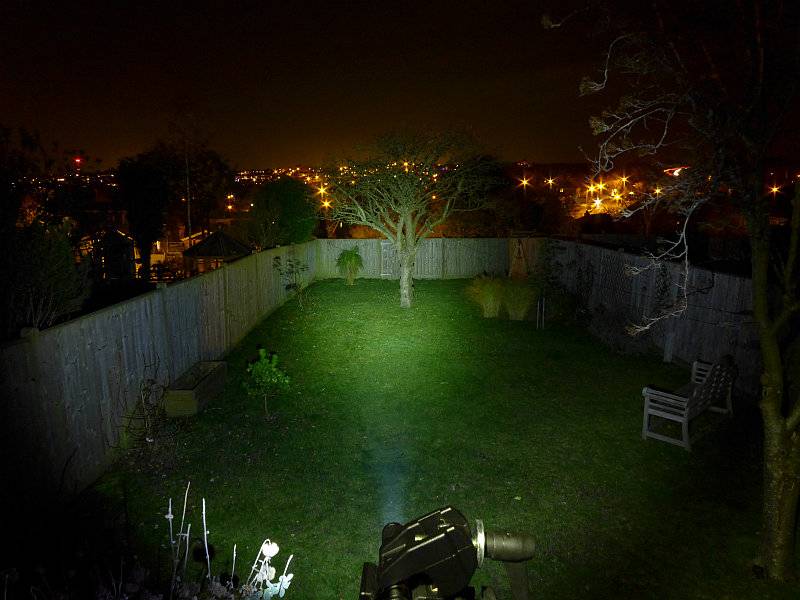
Outdoors and the ultimate brightness of the Quark starts to show its limitations, but that hotspot does give you a reasonable range and the broad spill gives you a wide field of view, even if not the brightest. This is a 2xAA after all.
 photo 23 Quark Click outdoor P1240699.jpg

Modes and User Interface:

In its default configuration the Quark Click has two output modes Low and Max, but the model on test has been reprogrammed to include Moon, Low, Mid and Max/Burst (this customisation was requested as it is offered by FOURSEVENS as standard customisation).

For the default configuration (according to the manual):
To turn ON, either half-press the switch, or fully press it so it clicks.
To toggle between output modes turn the light ON, OFF, then ON again.
The last used mode is memorised if the Quark remains OFF for at least 5 seconds and is used next time you turn it ON.
To turn OFF, release the switch (if half-pressing it), or press it so it clicks and release.

For the customised Quark Click with Moon, Low, Mid, and Max:
To turn on, either half-press the switch, or fully press it so it clicks.
To toggle between output modes turn the light ON, OFF, then ON again – However, you have to cycle through Max, Low three to four times to access the additional modes, so Max, Low, Max, Low, Max, Low, Max, Moon, Low, Mid, Max, Moon……
Now we have another deviation from the standard interface when it comes to memory.
When using the Quark Click in the Max, Low mode selection (before reaching the additional modes) it does not memorise Low, it always starts on Max.
Only if you have selected a mode from the additional mode selection (Moon, Low, Mid, Max) is it memorised. Also it is only memorised if the Quark has been ON that mode for 5s and remains OFF for at least 5 seconds. Then once memorised, as long as there is not a full ON/OFF/ON cycle within 5s, it will remain on that mode.
If you memorise Max mode, the Quark Click returns to the Low/Max mode, and always gives you Max until you carry out the memorisation steps described above.
To turn OFF, release the switch (if half-pressing it), or press it so it clicks and release.

Batteries and output:

The Quark Click QK2A-X in its default configuration runs on 2x AA (Lithium, Alkaline or NiMh). With the additional 1xAA battery tube it will run on 1xAA (Lithium, Alkaline or NiMh) or 1x 14500.

To measure actual output, I built an integrating sphere. See here for more detail. The sensor registers visible light only (so Infra-Red and Ultra-Violet will not be measured).

Please note, all quoted lumen figures are from a DIY integrating sphere, and according to ANSI standards. Although every effort is made to give as accurate a result as possible, they should be taken as an estimate only. The results can be used to compare outputs in this review and others I have published.

___________________________________________ ________________________________ ________________________________
Quark Click QK2A-X using specified cell I.S. measured ANSI output Lumens PWM frequency or Strobe frequency (Hz)
___________________________________________ ________________________________ ________________________________
Max/Burst – 2x AA Eneloop 296 0
Medium – 2x AA Eneloop 26 0
Low – 2x AA Eneloop 3 0
Moon – 2x AA Eneloop Below Threshold 0

* Beacon and Strobe output measurements are only estimates as the brief flashes make it difficult to capture the actual output value.

Peak Beam intensity measured 2500 lx @1m giving a beam range of 100 m.

There is no parasitic drain.

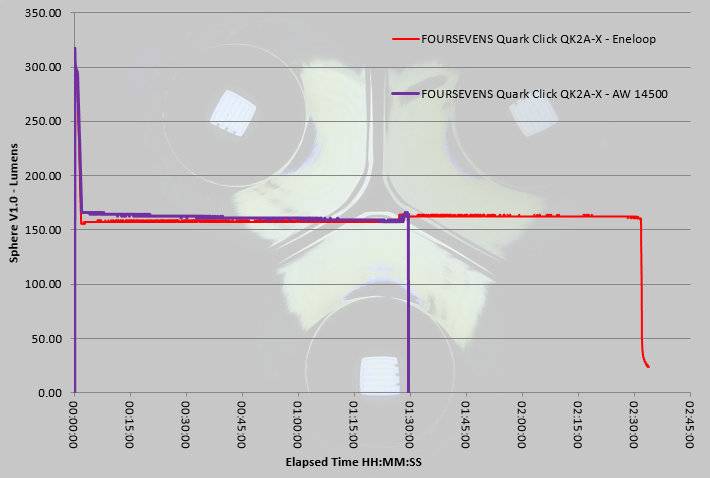
In this runtime graph are the output traces from using 2xAA Eneloop, and an AW protected 14500. Running the QK2A-X head on 3V or 4.2V doesn’t increase the maximum output. Both traces show the Burst mode where the first 30s of output are maximum, before dropping to approximately 50% of this. The output is then very well regulated right up to the point the cells become fully depleted.
With the 14500, there is an absolute cut-off when the protection kicks in (it goes OFF), but the 2xAA trace drops sharply, but doesn’t fully cut out.
 photo FOURSEVENS QK2A-X runtime.jpg

Troubleshooting

This section is included to mention any minor niggles I come across during testing, in case the information helps anyone else.

No issues were encountered during testing.

As per the description of this section, this information is provided in case anyone else finds a similar ‘issue’ that might be fixed in the same way.

The Quark Click QK2A-X in use

Anyone following my reviews will know that I consider the 2xAA form-factor one of the best. The QK2A-X has a slim battery tube with slightly larger head and tail-cap. making it very secure in the hand.

Even if you don’t really use pocket clips, it provides a very useful anti-roll function, so I’d rather leave it in place. As pocket clips go, it also has a generous capacity so is easy to use on thicker pocket edges like on some heavy cargo-pants.

With this one being a customised version, I was scratching my head a little when it wouldn’t memorise the low mode, but as explained in the UI section, you need to get to the additional modes before the memory function kicks in. It can seem a little fiddly as to memorise Moon mode you need to turn the Quark Click on and off 5 or 6 times watching the output to catch the Moon mode (miss it and you have to turn it on and off a further 4 times to get back to Moon). It works, but is not the slickest interface.

In most lights, lock-out is provided by undoing the tail-cap half a turn. It is slightly counter intuitive that the Quark uses the head to lock-out the Quark Click, but then again, this also means you can leave the tail-cap clicked on and then use the head to give you a twisty interface. Great for silent use, and twisting the head is very intuitive. Suddenly I’m liking that design feature much more.

With the interface being an ON/OFF/ON to switch modes, you can’t really use the momentary action for signaling. I’ve always preferred the immediacy of the forward-clicky tail-cap switch, so definitely prefer this to a reverse-clicky.

A little comment about the available levels and the Burst mode – Effectively, you have a combined Burst/High output as a single mode. After the initial 30s of Burst, the output drops to a very useful 150lm which is then maintained. Unfortunately it is not possible to directly enter the 150lm mode as it is always proceeded by the 300lm burst mode. When you look at the ANSI output levels this leaves a ‘hole’ in the available output levels as you have 296lm, then down to 26lm, then 3lm then Moon. Really that 150lm level is needed to fill the hole, and it is there, but you have to get through burst mode first.

Having Moon mode memorised, you will notice the FOURSEVENS pre-flash is present for this mode. This is a very quick flash of a level slightly brighter than Moon mode before it settles into the constant output. It has never caused me a problem and is more a characteristic than anything wrong. With the Moon mode being a true Current Controlled output it is far preferable to some PWM control of this level.

PWM – well I might have just mentioned it, but I’m happy to say there is none present in the Quark Click. None of the modes available in this sample exhibited PWM at any frequency.

A classic, game-changing, lego-able design, rebooted with a simple interface and one that can be operated as a clicky or a twisty.

Review Summary

_______________________________________________ _______________________________________________
Things I like What doesn’t work so well for me
_______________________________________________ _______________________________________________
Excellent All-Rounder beam. Mode memorisation a little laborious in this customised Quark.
Current Controlled output (no PWM). Tail-standing not possible with standard tail-cap.
Lego-able design compatible with all previous Quark models. 150lm output only available after 30s by first using the Burst Mode.
Optional AA and CR123 battery tubes.
Spacious/removable pocket clip provides anti-roll.
Wide input voltage range 0.9-4.2v.
Can be used as a Twisty or Clicky.

 photo 00 Quark Click feature P1240113.jpg


Discussing the Review:

Please feel free to add comments to the review, but the ideal place to freely discuss these reviews is on a forum. If you started reading the shorter forum version of the review, but followed the link this full exclusive review, please return to that forum to discuss the review there.
If you read the review entirely on Tactical Reviews, please consider one of the following to join in any discussion.

CandlePowerForums – Flashlight Reviews Section (Largest and Friendliest Flashlight Community Forum)

EdgeMatters – Sponsored Reviews (UK based Forum for Knife Makers and Collectors)
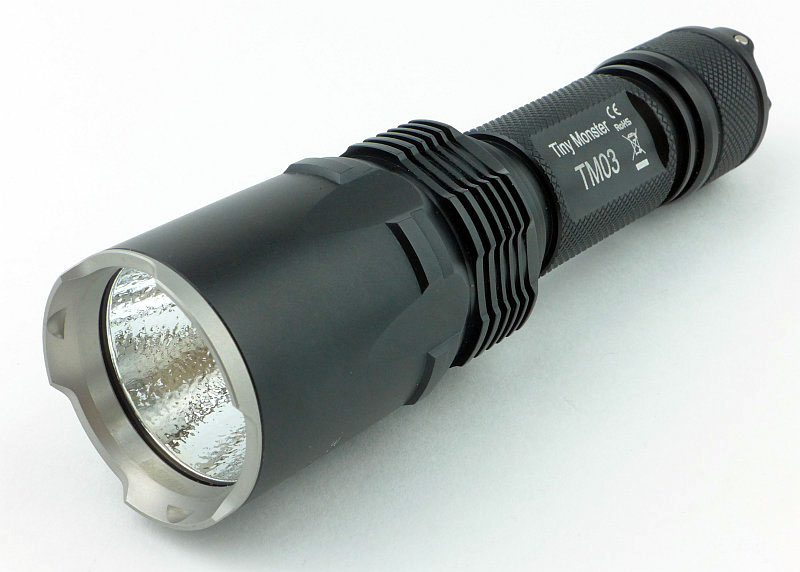
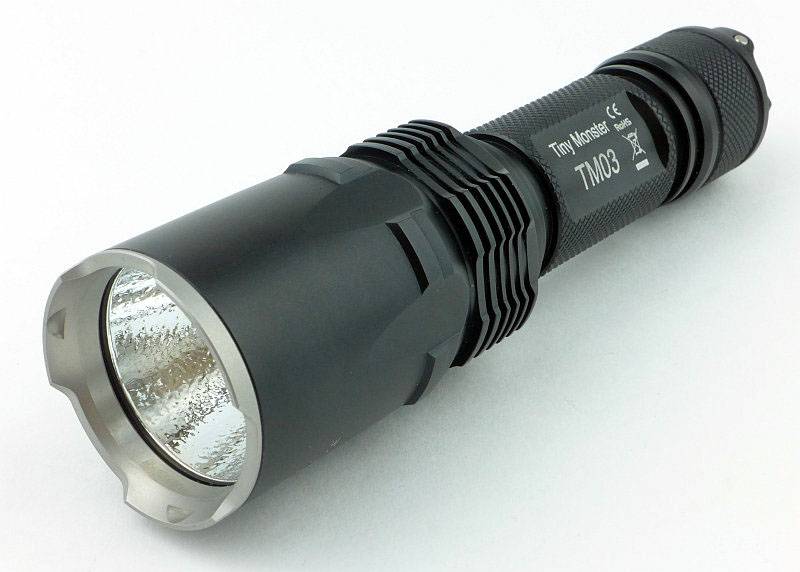
Light Review: NITECORE TM03 (Tiny Monster)

NITECORE have been expanding the Tiny Monster line and with the TM03 have shrunk the monster performance into a single 18650 size light. Now it is even easier to carry Tiny Monster performance with you in the form of the world’s most powerful 1x 18650 light.

 photo 00 TM03 feature P1210997.jpg

Taking a more detailed look:

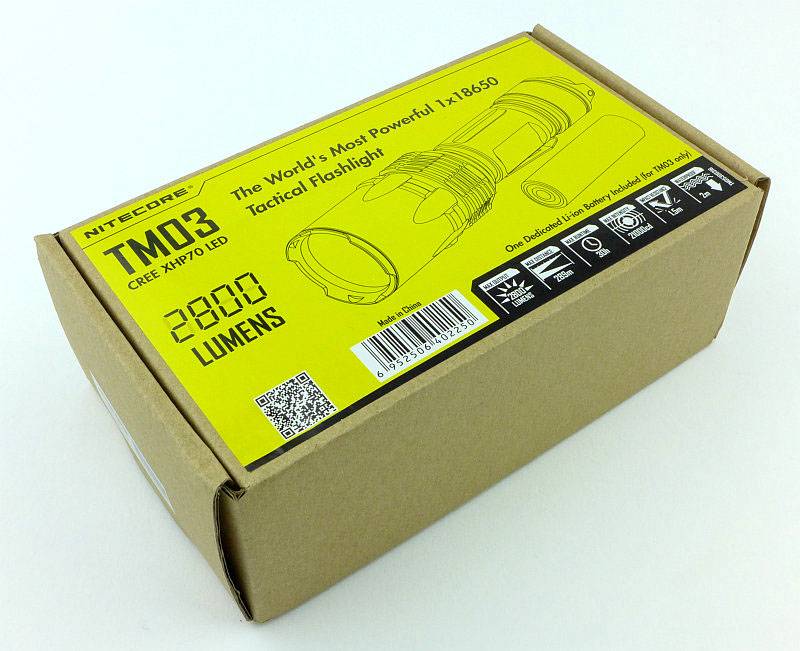
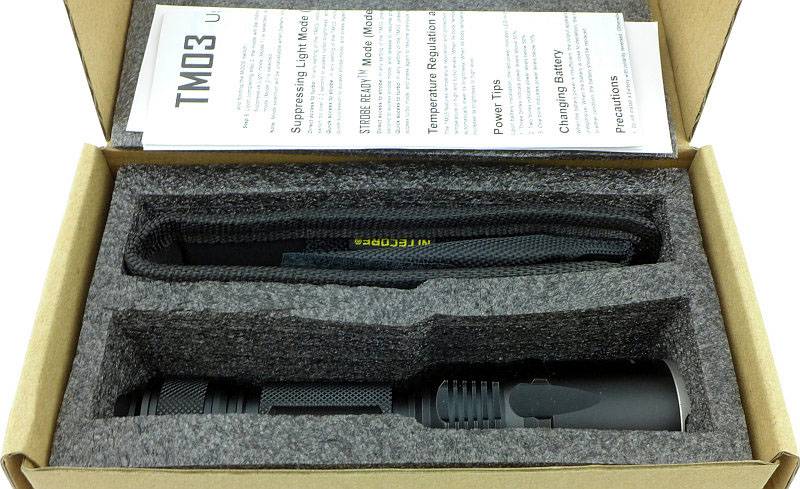
Following the other TM series lights, the TM03 comes in a tough cardboard box.
 photo 01 TM03 boxed P1210968.jpg

The light is held in place with a strong closed cell foam.
 photo 02 TM03 box open P1210973.jpg

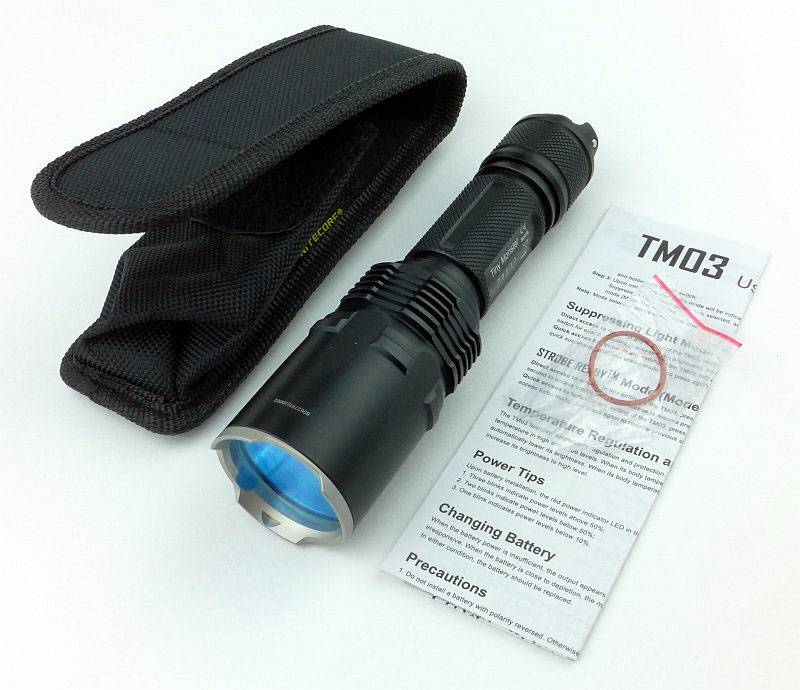
Along with the TM03, a holster, the instructions and a spare o-ring are provided.
 photo 03 TM03 box contents P1210979.jpg

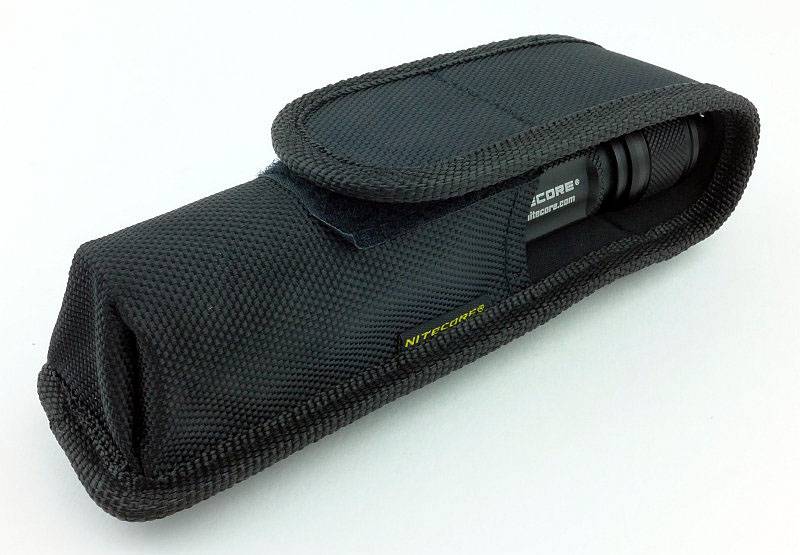
Before we look at the TM03 in more detail, let’s look at the holster. Here it is with the TM03 inside.
 photo 04 TM03 holstered P1210983.jpg

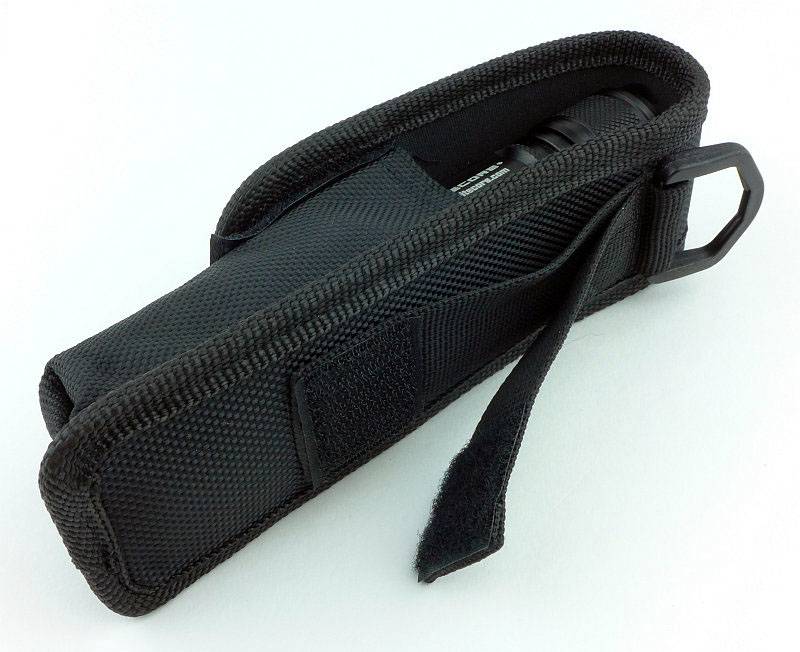
You have the choice of D-loop, fixed loop, or Velcro loop.
 photo 05 TM03 holster loops P1210986.jpg

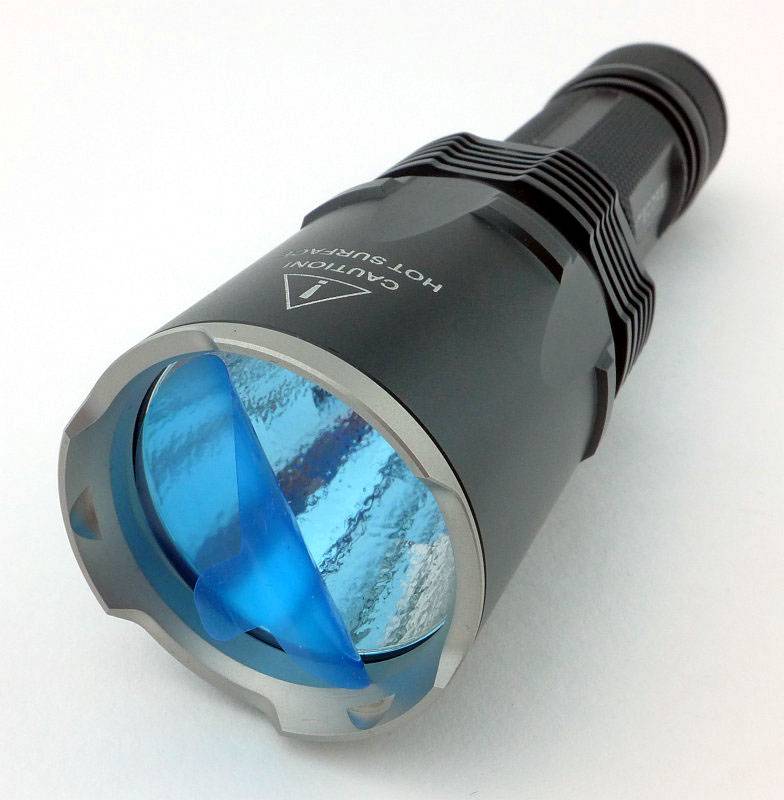
There is a blue plastic lens protector on the front when it arrives. You MUST remove this before trying the TM03 at all as it will melt and make a mess of the lens if you don’t.
 photo 06 TM03 protector P1210991.jpg

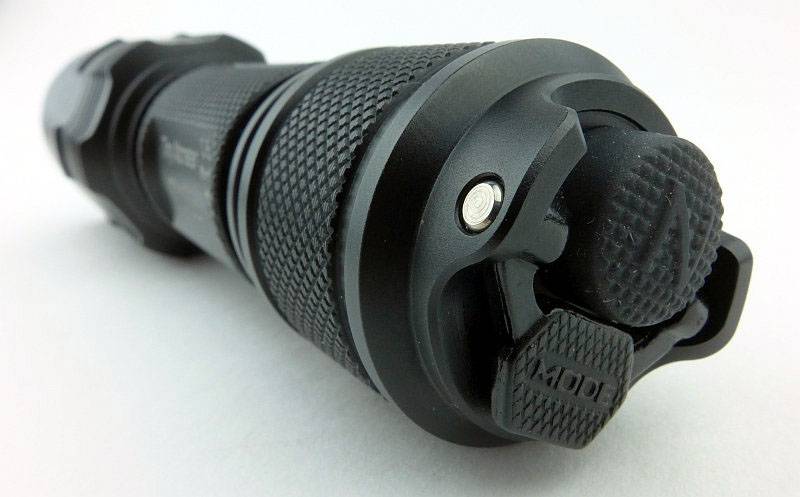
As with the NITECORE Precise series, the TM03 has a dual switch tail-cap. One is a forward clicky standard switch and the other is a metal paddle MODE switch.
 photo 07 TM03 switches P1220001.jpg

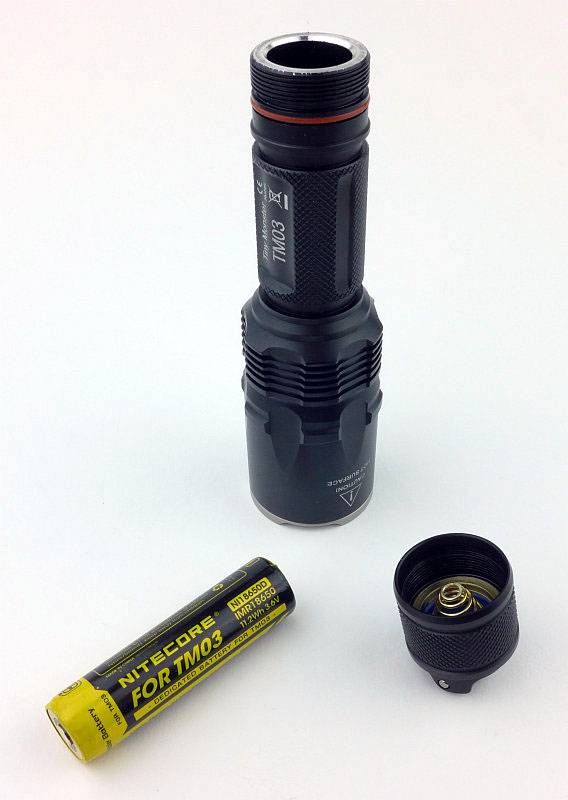
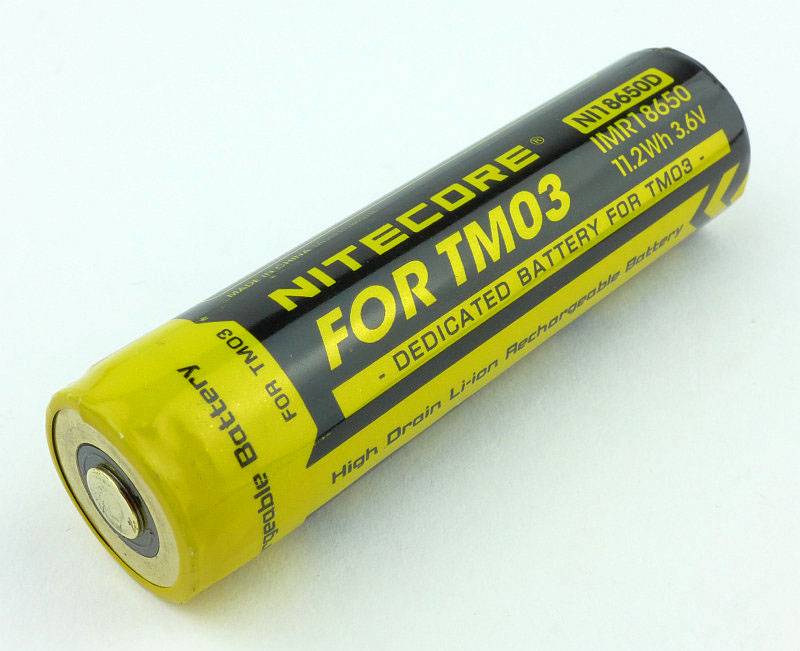
Supplied in the TM03 is a special IMR cell, clearly labelled ‘FOR TM03’. It is normal 18650 size, so this gives you and idea of the overall size of the TM03.
 photo 08 TM03 cell out P1220005.jpg

In the tailcap are the two normal contacts.
 photo 09 TM03 tailcap contacts P1220008.jpg

Mainly for heat-sinking, the TM03 has a heavy duty thick walled battery tube.
 photo 10 TM03 tube wall P1220011.jpg

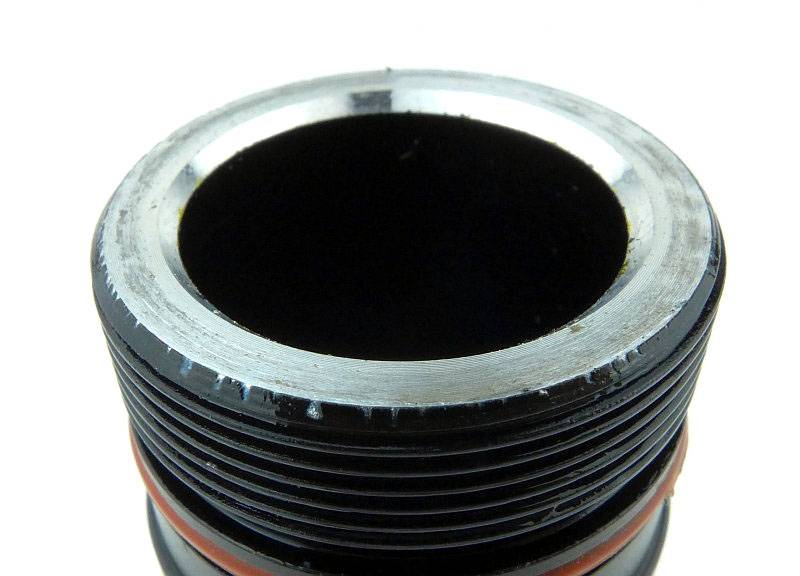
Standard threads are used for the tail-cap.
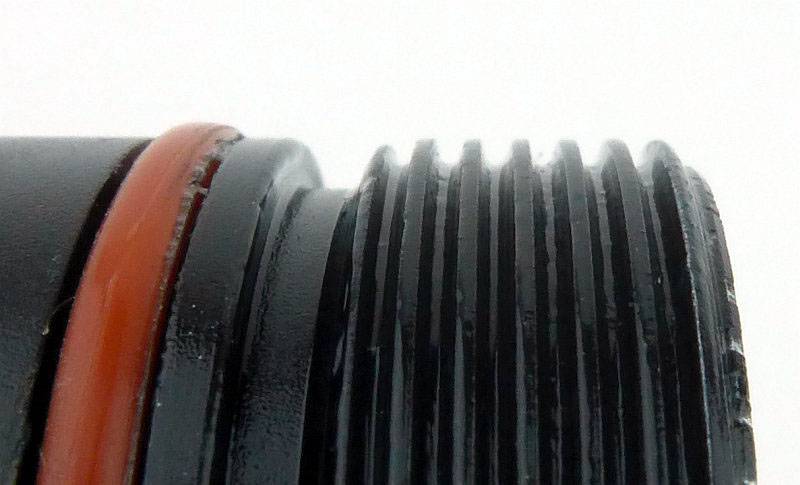
 photo 11 TM03 threads P1220012.jpg

Back to the dedicated 18650 IMR cell. Notice the dual contacts at the front.
 photo 12 TM03 cell P1220018.jpg

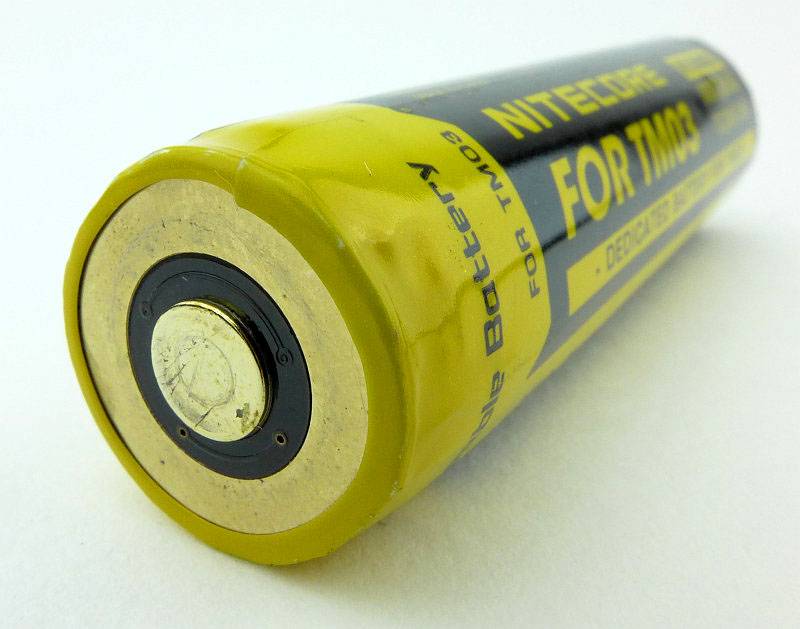
Taking a closer look at the dual contacts on what would normally be the positive end of the cell.
 photo 13 TM03 positive P1220021.jpg

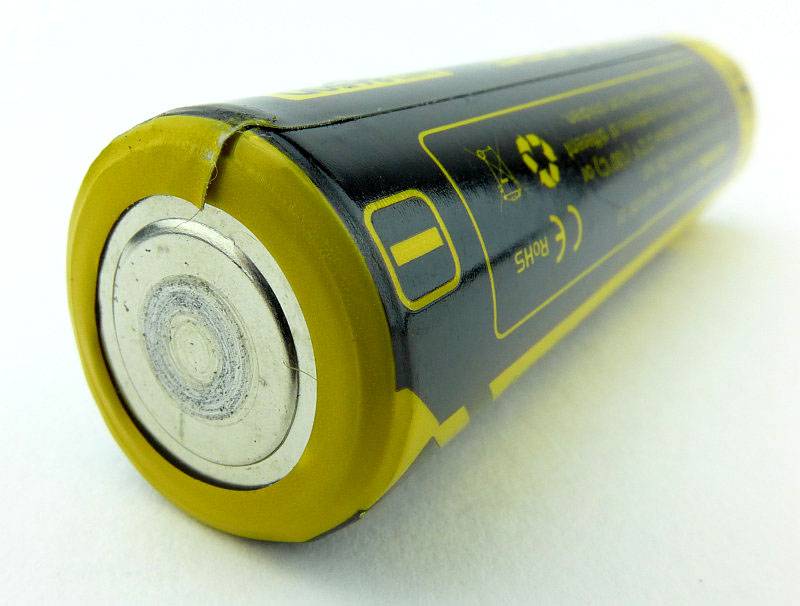
The negative terminal of the cell is standard.
 photo 14 TM03 negative P1220024.jpg

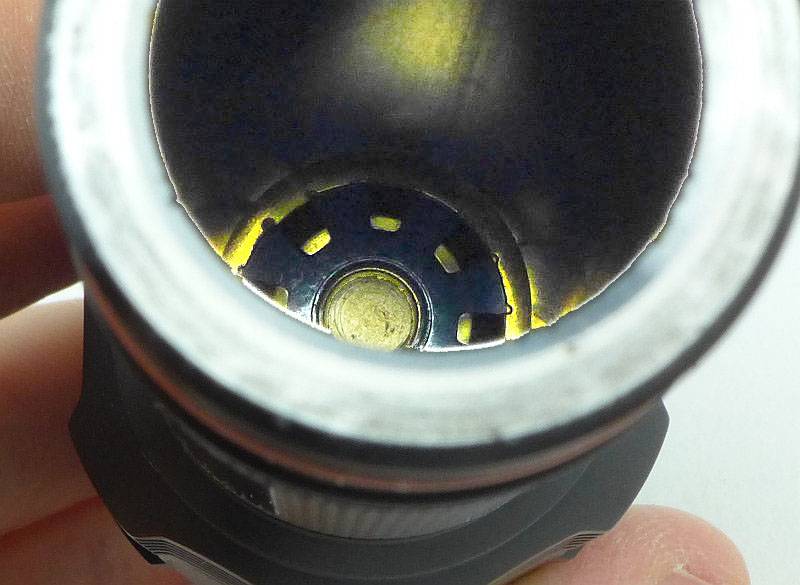
Peering inside the battery tube you can make out the positive contact as well as the secondary contacts surrounding it.
 photo 15 TM03 head contacts P1220028.jpg

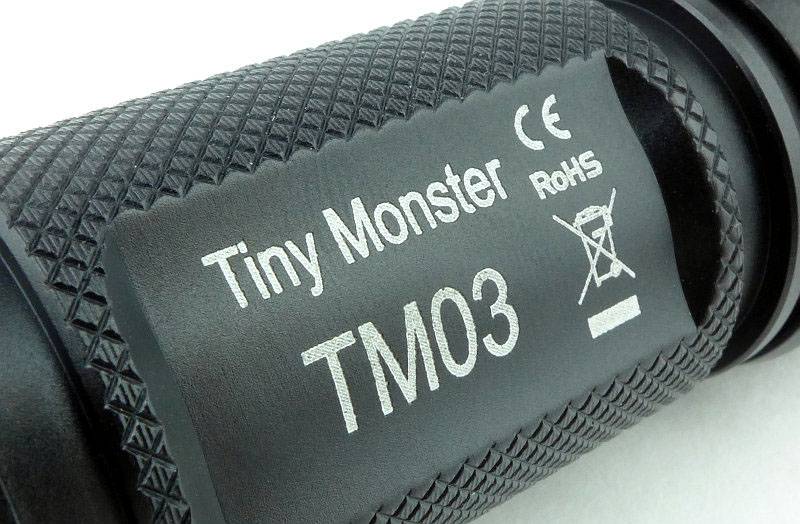
Finish is to a high standard as is the engraving.
 photo 16 TM03 engraving P1220030.jpg

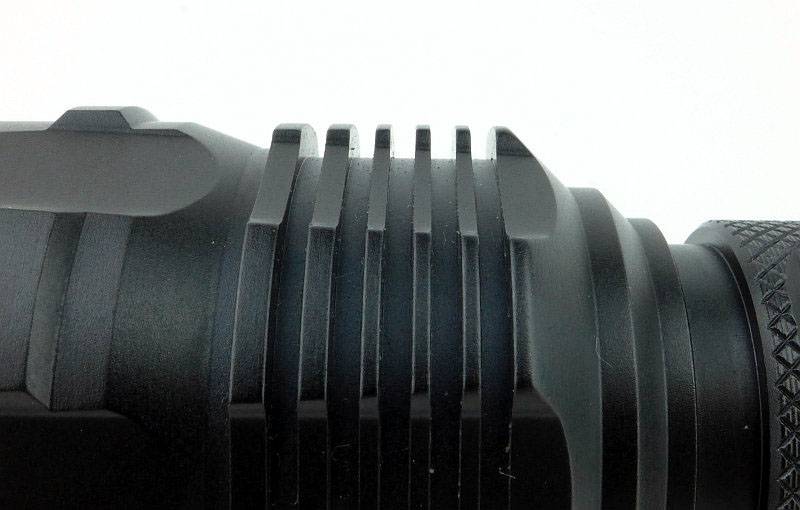
Despite the high output, the cooling fins are shallow.
 photo 17 TM03 fins P1220033.jpg

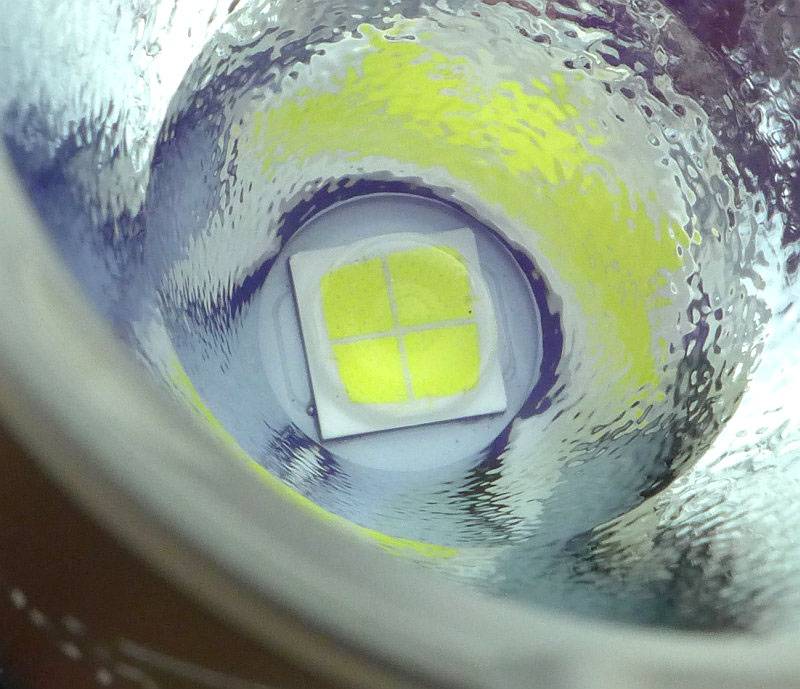
Here is the heart of this Tiny Monster, its monster XHP70 Quad die LED.
 photo 18 TM03 XHP70 LED close P1220045.jpg

The reflector is textured to give a smoother beam, but the reflector also has two profiles specifically controlling how much spill and hotspot the TM03 has.
 photo 19 TM03 XHP70 LED P1220053.jpg

Putting the TM03 next to a normal 18650 light, it is slightly bigger and heavier in build, but has performance that outshines the standard light by a long way.
 photo 20 TM03 size P1220127.jpg

The beam

Please be careful not to judge tint based on images you see on a computer screen. Unless properly calibrated, the screen itself will change the perceived tint.

The indoor beamshot is intended to give an idea of the beam shape/quality rather than tint. All beamshots are taken using daylight white balance. The woodwork (stairs and skirting) are painted Farrow & Ball “Off-White”, and the walls are a light sandy colour called ‘String’ again by Farrow & Ball. I don’t actually have a ‘white wall’ in the house to use for this, and the wife won’t have one!

With such high output, and indoor shot can easily be overblown, so this is not a representation of how bright the beam is, but the characteristics of the beam. Exposure has been adjusted to show the hotspot, spill, and outer spill. For such a large LED, there is quite a defined hotspot, and the spill is a medium width.
 photo 21 TM03 indoor beam P1230313.jpg

Then we go outdoors, and blast the full 2800lm , and this is the effect you get. The TM03 is bright, and it is very compact. Nice!
 photo 23 TM03 outdoor beam P1240710.jpg

Modes and User Interface:

The TM03 has four constant modes (Turbo, High, Mid and Low) and one flashing (Strobe) mode, controlled by a dual-switch tail-cap.

Basic operation is with the forward-clicky switch; half press for momentary access to the last used constant mode, and fully press and click to turn the TM03 ON to the last used constant mode. (Release or click again to switch off).

When ON, pressing the MODE switch cycles through the output modes – Low, Mid, High, Turbo, Low etc.

The TM03 allows you to set up the direct access operation of the MODE switch in two different modes – Suppressing Light, or STROBE READY.

To swap between these two modes:
Switch the TM03 OFF
Remove and replace the battery.
Within 60s of replacing the battery tighten the tail-cap while pressing and holding the MODE switch.
The TM03 will then flash once to indicate Suppressing Light, and two for STROBE READY.

In Suppressing Light mode:
Direct access to Turbo – in any mode including OFF, press and hold the MODE switch. Release to return to previous output.
Quick access to Strobe – in any mode including OFF, press the MODE switch twice in quick succession. Press again to return to previous output.

In STROBE READY mode:
Direct access to Strobe – in any mode including OFF, press and hold the MODE switch. Release to return to previous output.
Quick access to Turbo – in any mode including OFF, press the MODE switch twice in quick succession. Press again to return to previous output.

When inserting the battery, a red light in the tail-cap flashes to indicate battery power. Three blinks for above 50%, two blinks for below 50% and one blink for less than 10%.

Batteries and output:

The TM03 runs on a supplied proprietary IMR call with dual contacts on one end, but will also run at a severely reduced output on a normal 18650.

To measure actual output, I built an integrating sphere. See here for more detail. The sensor registers visible light only (so Infra-Red and Ultra-Violet will not be measured).

Please note, all quoted lumen figures are from a DIY integrating sphere, and according to ANSI standards. Although every effort is made to give as accurate a result as possible, they should be taken as an estimate only. The results can be used to compare outputs in this review and others I have published.

___________________________________________ ________________________________ ________________________________
NITECORE TM03 using specified cell I.S. measured ANSI output Lumens PWM frequency or Strobe frequency (Hz)
___________________________________________ ________________________________ ________________________________
Turbo – TM03 IMR 2804 0
High – TM03 IMR 1501 0
Medium – TM03 IMR 632 0
Low – TM03 IMR 34 0
Max – ‘Normal’ AW IMR 259 0

* Beacon and Strobe output measurements are only estimates as the brief flashes make it difficult to capture the actual output value.

Peak Beam intensity measured 21300 lx @1m giving a beam range of 292 m.

There is parasitic drain and due to the dual contact at the head of the light there is drain at the head, and drain at the tailcap. When using the TM03’s IMR cell, the drain was 1.7mA at the head and 15uA at the tailcap. Taking the worst of these as the only significant value, it is the head drain that is relevant as it will take only 76 days to drain the cell.

NOTE: The use of the AW IMR cell for the ‘normal’ 18650 test was to prove that the throttling of output was not due to a bad cell. The TM03 is drastically throttled when not using the supplied cell and this is no reflection on the AW cell.

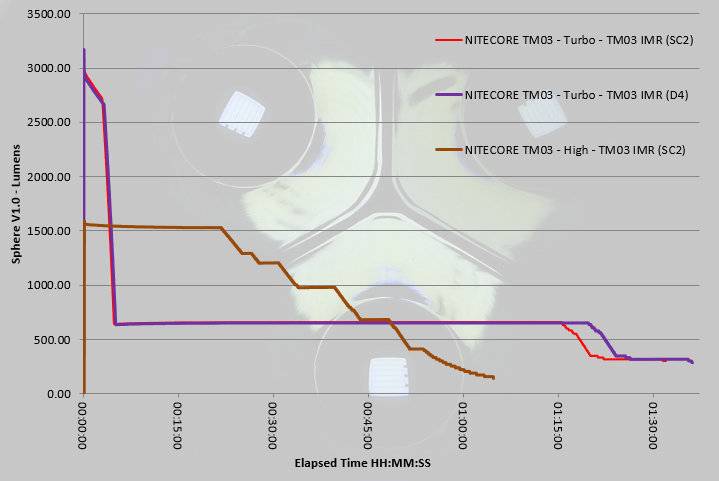
This graph has three traces on it to show a couple of specific aspects, including comparing a couple of NITECORE chargers, the SC2 and D4 (both used to charge the TM03s’s cell), and also showing the characteristics depending on if you start in Turbo or High.
The SC2 is a rapid charger, well suited to IMR cells. Due to charging at a higher current, it also tends to terminate earlier. This can be seen with the earlier drop to low mode at around 1h 20m. Considering the vast reduction in charging time, this minor loss in overall output is well worth it.
Then look at the overall characteristics when starting on Turbo where after the initial 2800lm burst, the output drops right down to the 630lm Mid level output, and then continues on this until the cell is depleted.
When starting on High, the output remains on High until the cell can no longer maintain the output and starts to drop in stages, gradually reducing at 20m all the way through to 1h from turn on.
Effectively if you want more light for longer, either stay on High, or you’ll have to switch it OFF and ON again to get Turbo (as long as it is not too hot), and expect not to have much runtime.
 photo TM03 runtime.jpg

Troubleshooting

This section is included to mention any minor niggles I come across during testing, in case the information helps anyone else.

No issues were encountered during testing.

As per the description of this section, this information is provided in case anyone else finds a similar ‘issue’ that might be fixed in the same way.

The TM03 in use

Normally I don’t like to start with a negative, but the TM03 does have one issue, and that is particularly with the Suppression Mode. I have found that when closing the holster flap over the TM03’s tail-cap, it is easy to press (or more dangerously – nearly press) the MODE switch enough to activate direct access Turbo. This means that inside the holster the TM03 bursts into life with all 2800lm. It gets hot VERY fast. Now I also said ‘more dangerously – nearly press’, and the reason it is more dangerous, is that the TM03 is now on a hair trigger needing only a tiny pressure on the holster to bring on the Turbo output. I was putting the TM03 into a drawer and as it nestled against some other items Turbo came on. Luckily I noticed, but I could easily have closed that drawer – for the last time.
So my first comment is that if using the holster you need to undo the tail-cap a half turn (a quarter is not enough) to lock-out the TM03.

Now onto the good stuff. This is a very bright light. Even these days when people are used to high output lights, the TM03 still surprises with its compact size. It is not much bigger than standard 1x 18650 lights, but is a lot more powerful. The heavy build is reassuring and is certainly needed for heat-sinking. I never had the sense the TM03 was getting too hot.

My own views on tactical lighting requirements gathered from various members of the armed services and law enforcement are that Strobe is not the preferred output, but very bright is. The TM03 does VERY bright, very well.

Of course with the fundamental law of portable lighting that you can only have two of the three factors – Bright, Small, Long Runtime, the TM03 looses out in runtime. Mainly this is because if you have the TM03 on you, why would you bother with the Low mode? You will be enjoying all those lumens, using bursts of Turbo, and all too soon it does start to struggle. Not the fault of the TM03, but just a factor to be aware of – this is a Tiny Monster after all.

It was worth the extra effort required to check the parasitic drain at the head, as this explains why after only short periods of storage, the runtime is even more reduced. This level of drain is bad. It is easy to pop a light in a drawer for three months at a time, and in that time the TM03 will be dead. Even if you undo the tail-cap slightly, this doesn’t stop the double pole in the head making contact and draining the cell, you need to remove the cell completely.

With regard to using other 18650 cells, NITECORE have severely hobbled the output on the TM03 when not using its dedicated double pole IMR. The maximum output I managed to get was around 250lm. It does mean that you know you can still have enough light to see by if you carry a normal 18650 as a spare, but once that dedicated IMR is depleted, you need to recharge before you get the TM performance again. At least you know it will work as a backup, and with such extreme performance it is sensible to protect the light and the user from ‘unknown’ cells.

If you want a pocket rocket, the TM03 will not disappoint, and brings custom level performance to a production light.

Review Summary

_______________________________________________ _______________________________________________
Things I like What doesn’t work so well for me
_______________________________________________ _______________________________________________
2800lm on a single 18650!! Direct access via the MODE switch too easily activated by the holster flap.
Solid build. High Parasitic Drain.
Direct access to TURBO. Uses a proprietary cell for full performance.
Sturdy holster provided.
Supplied with cell so you only need a charger.


Discussing the Review:

Please feel free to add comments to the review, but the ideal place to freely discuss these reviews is on a forum. If you started reading the shorter forum version of the review, but followed the link this full exclusive review, please return to that forum to discuss the review there.
If you read the review entirely on Tactical Reviews, please consider one of the following to join in any discussion.

CandlePowerForums – Flashlight Reviews Section (Largest and Friendliest Flashlight Community Forum)

EdgeMatters – Sponsored Reviews (UK based Forum for Knife Makers and Collectors)
Light Review: Nitecore’s Explosion Proof EF1

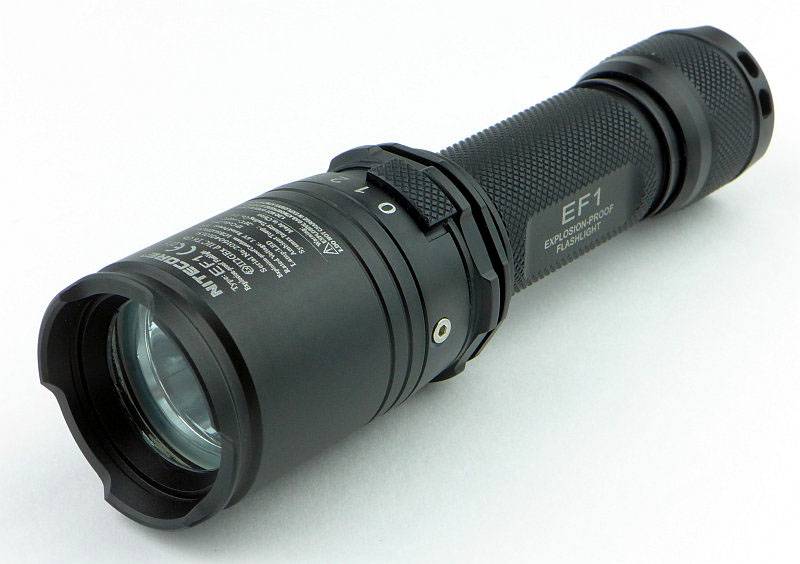
With the EF1, NITECORE have confidently entered the market for hazardous environment equipment, with a light which can be used in the petroleum exploration, petrochemical and chemical industries, as it is rated as a Type II non-mine explosion-proof electrical appliance.

 photo 00 EF1 Feature P1200195.jpg

Taking a more detailed look:

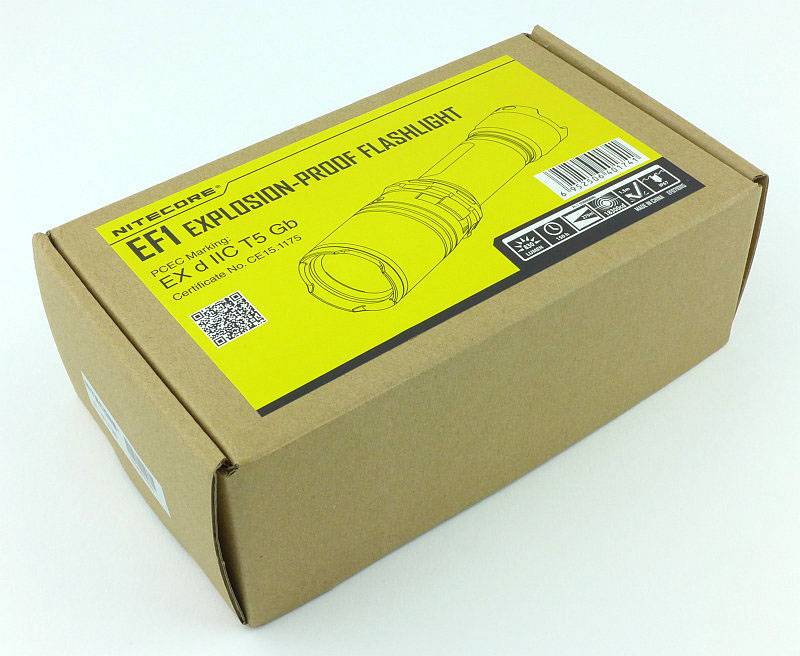
The EF1 arrives in a box like the ones used for the TM series.
 photo 01 EF1 boxed P1200173.jpg

Closed cell foam is used as the liner.
 photo 02 EF1 box open P1200177.jpg

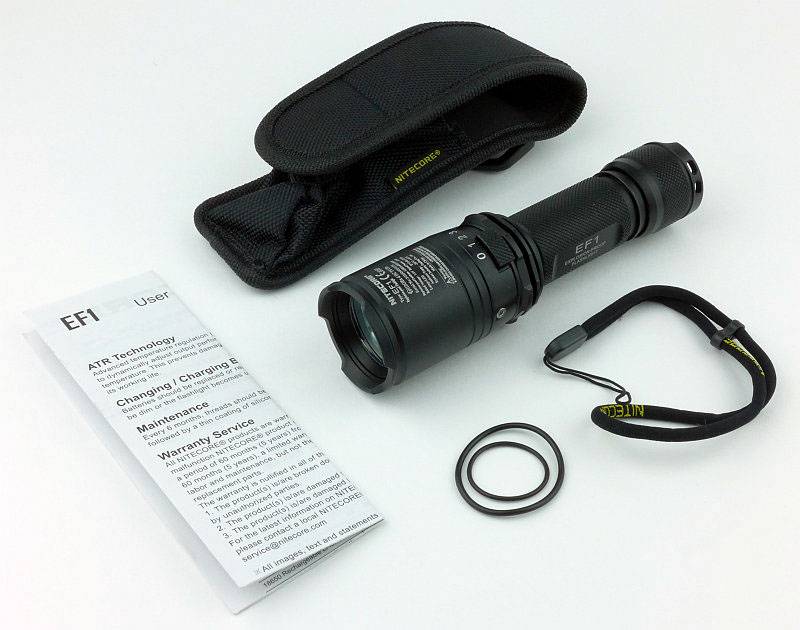
With the EF1 you get a holster, lanyard, spare o-rings and the instructions.
 photo 03 EF1 box contents P1200185.jpg

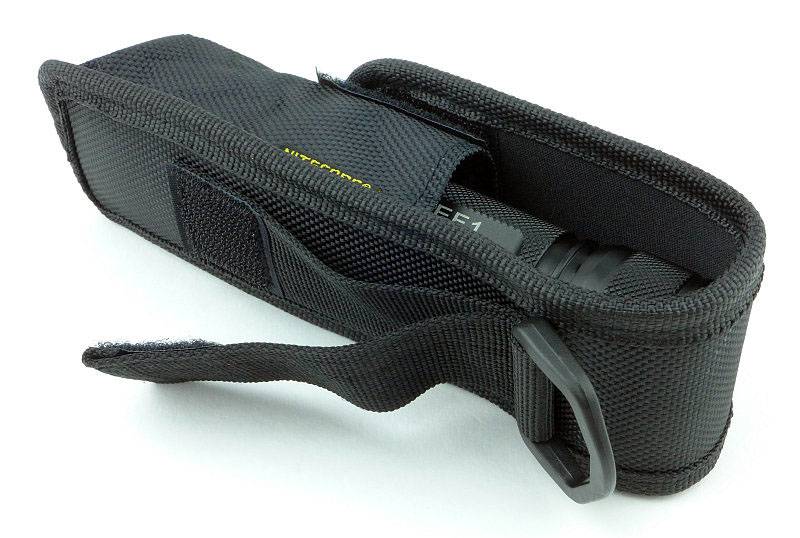
The EF1 in its holster.
 photo 04 EF1 holster P1200188.jpg

On the back it has a fixed loop, a D-loop and a Velcro closed loop.
 photo 05 EF1 holster loops P1200191.jpg

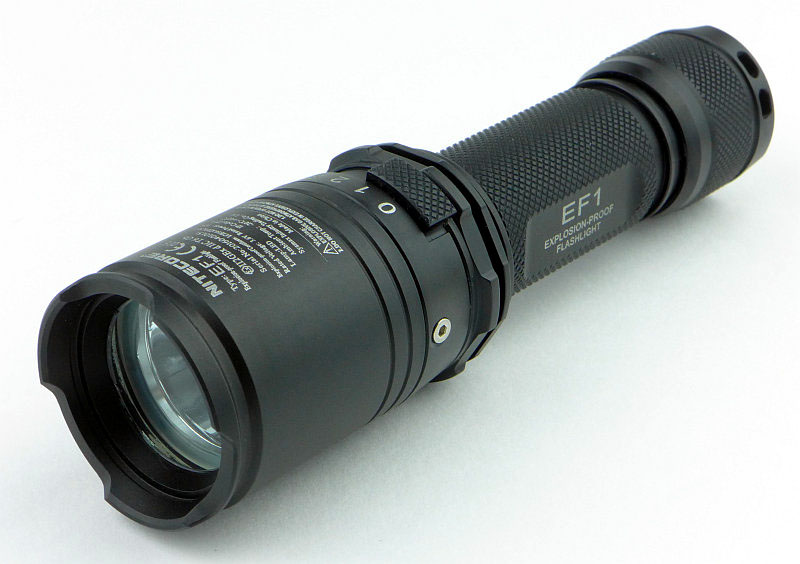
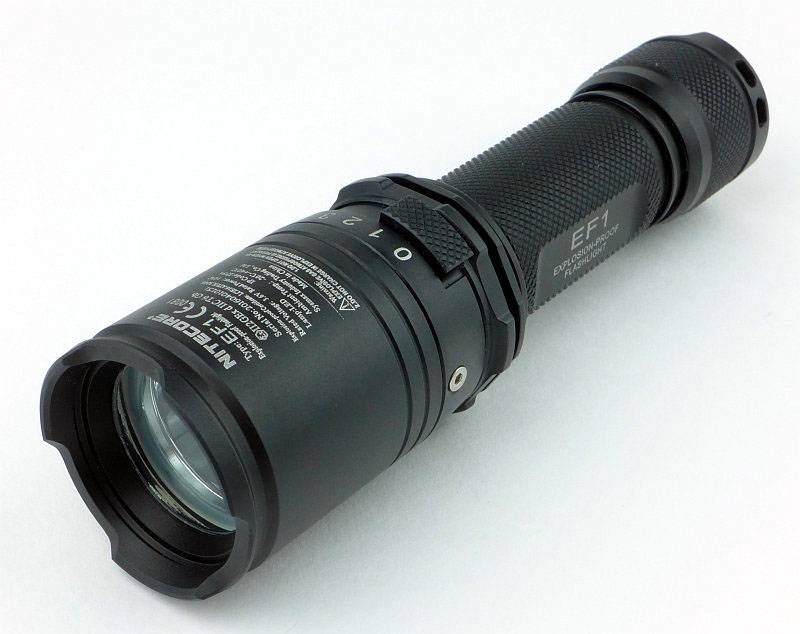
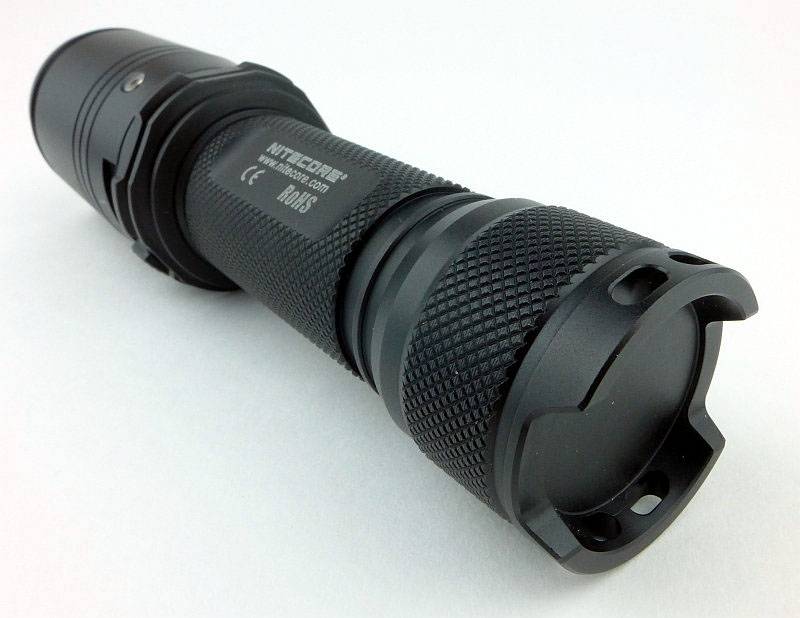
It is a chunky light, but that is due to its heavy build for the Explosion Proof rating.
 photo 06 EF1 angle P1200197.jpg

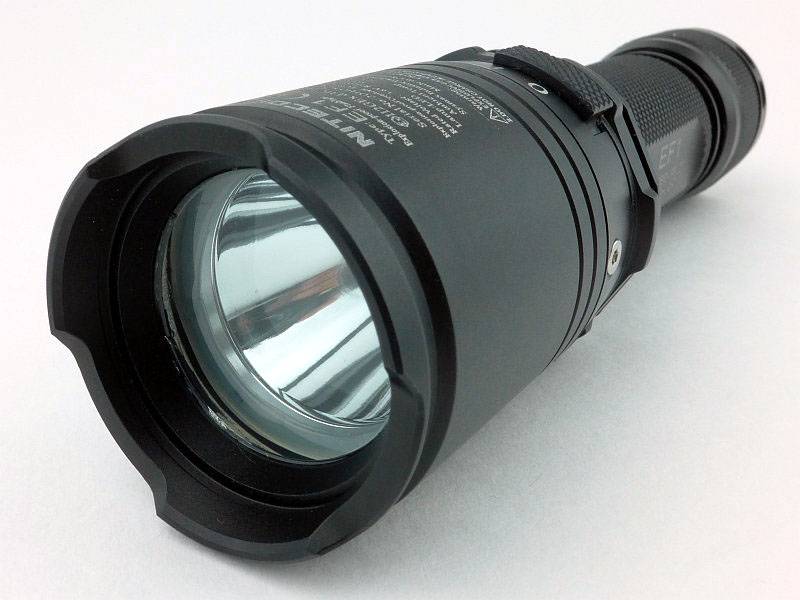
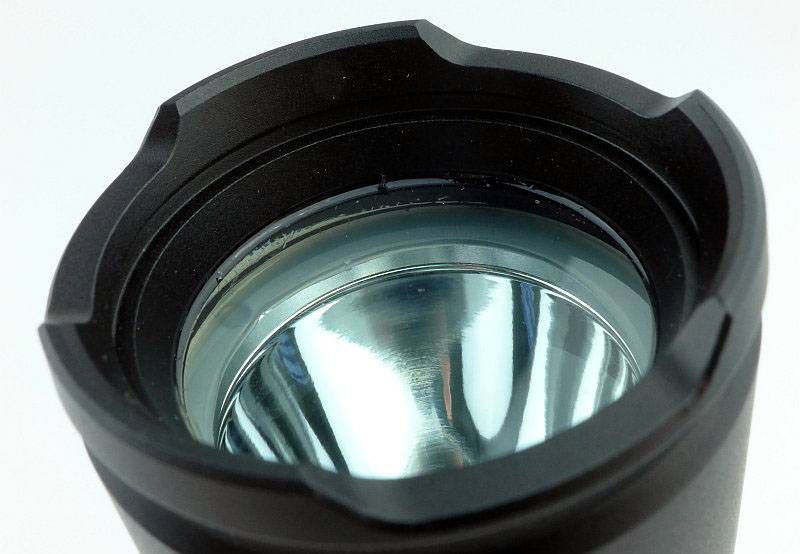
The lens is very thick making it look like a dive light.
 photo 07 EF1 lens P1200203.jpg

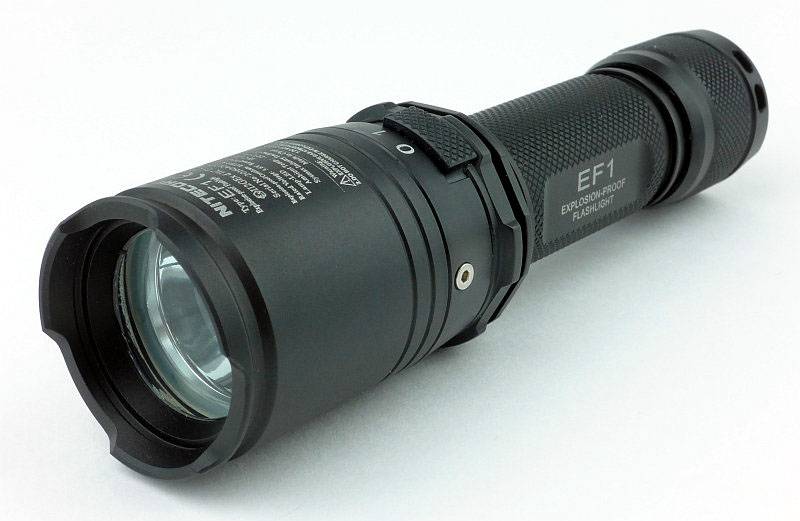
On the side it proudly states its explosion proof status.
 photo 08 EF1 engraving P1200205.jpg

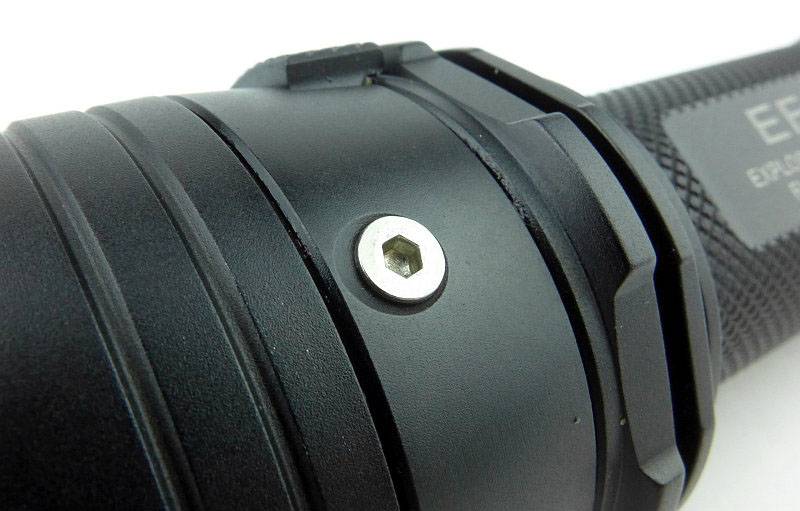
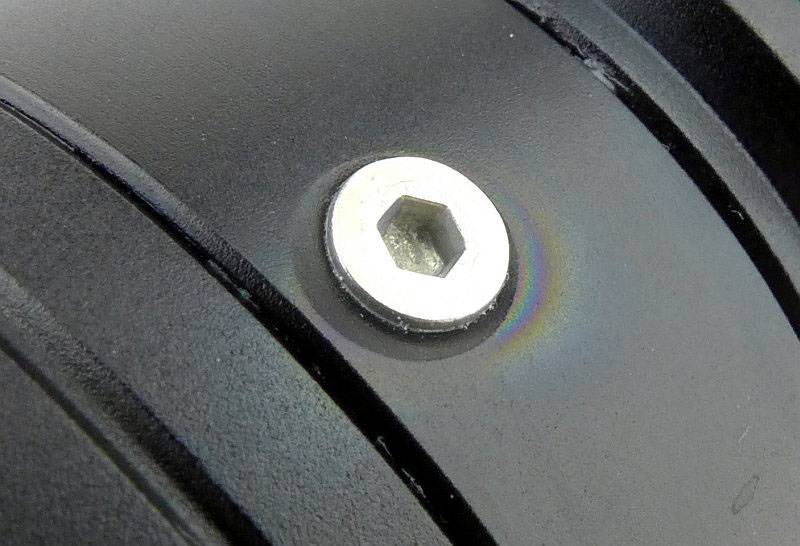
There are a couple of exposed screws on the head that seem to hold parts of the magnetic switch together.
 photo 09 EF1 screw P1200207.jpg

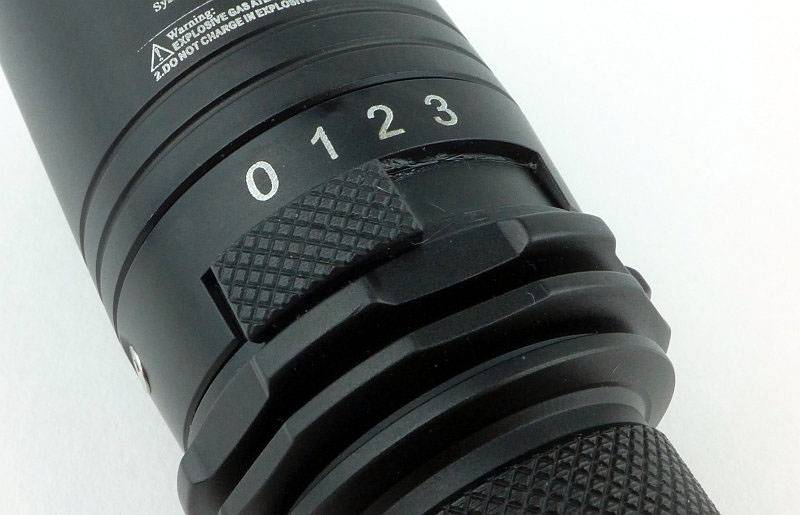
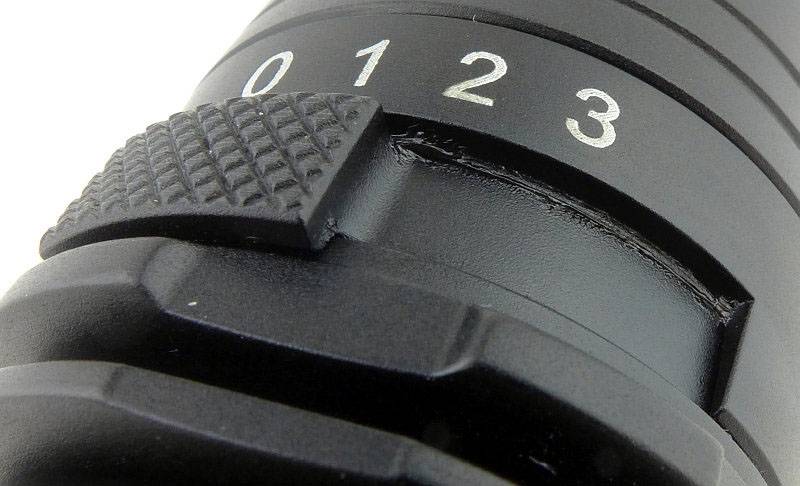
The switch is a rotating/sliding switch with four positions.
 photo 10 EF1 switch P1200210.jpg

It is difficult to really show how thick this lens is, but it is thick – 10mm thick.
 photo 11 EF1 lens P1200220.jpg

A view from the tail-cap end.
 photo 12 EF1 tail view P1200227.jpg

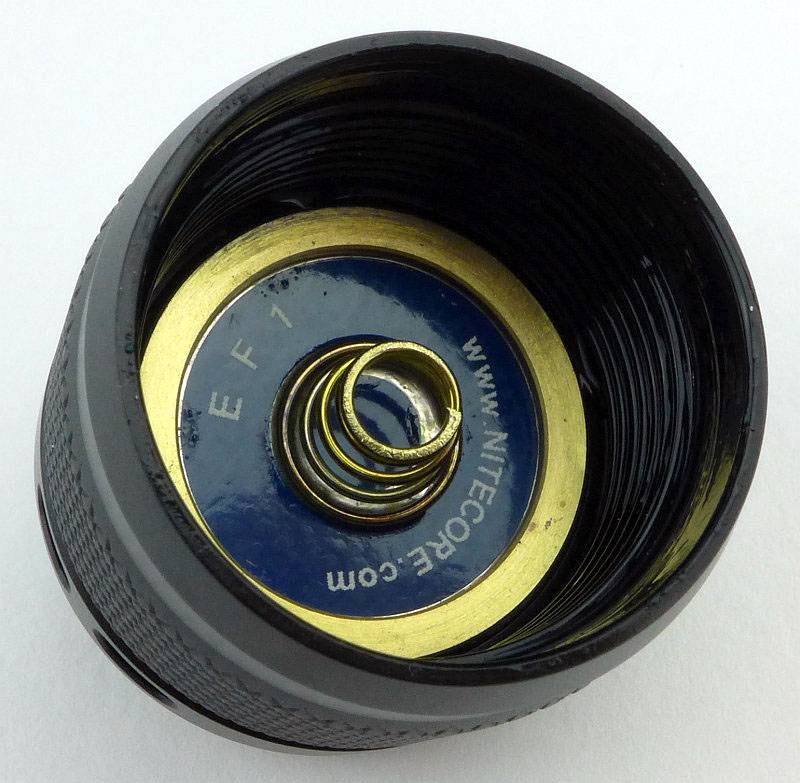
Inside the tail-cap is a spring and ring terminal.
 photo 13 EF1 tail contacts P1200235.jpg

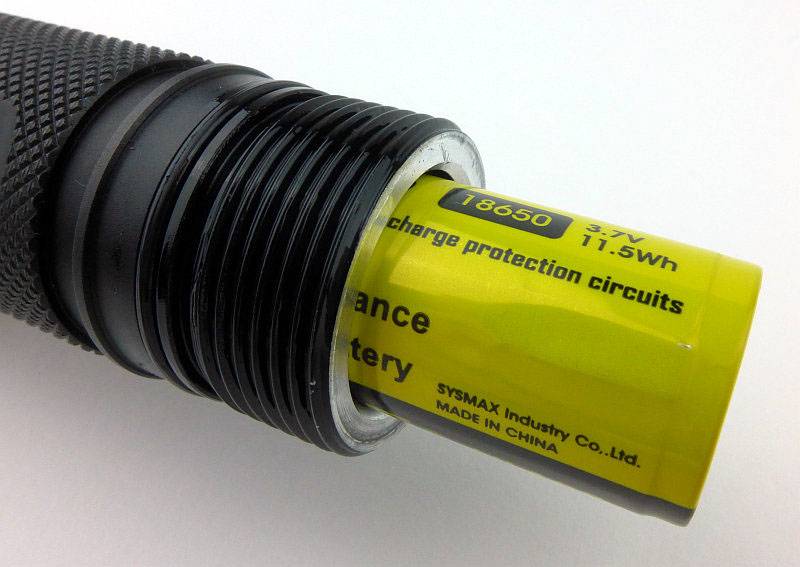
That is one thick battery tube with a minimum thickness of 3mm.
 photo 14 EF1 battery tube P1200237.jpg

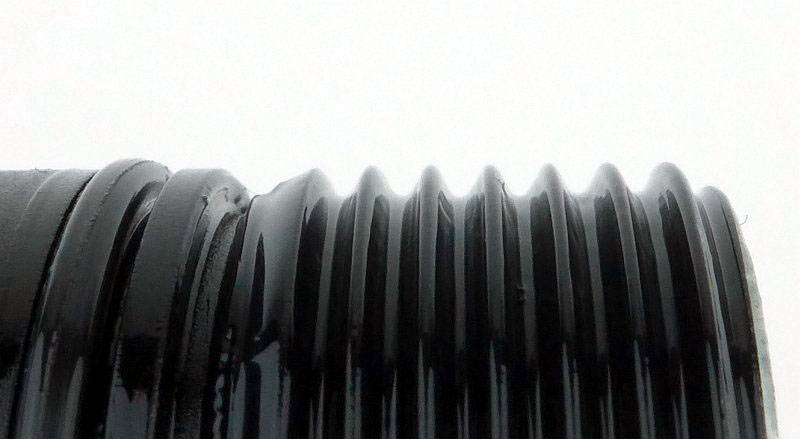
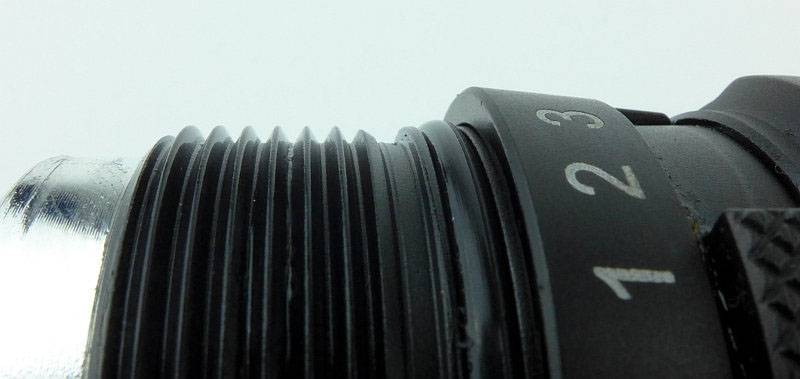
A long section of well lubricated standard threads are used for the tail-cap. They are fully anodised, so you can physically lock out the EF1 by unscrewing the tail-cap slightly.
 photo 15 EF1 battery threads P1200245.jpg

With a battery being inserted you see how thick that battery tube is.
 photo 16 EF1 battery insert P1200248.jpg

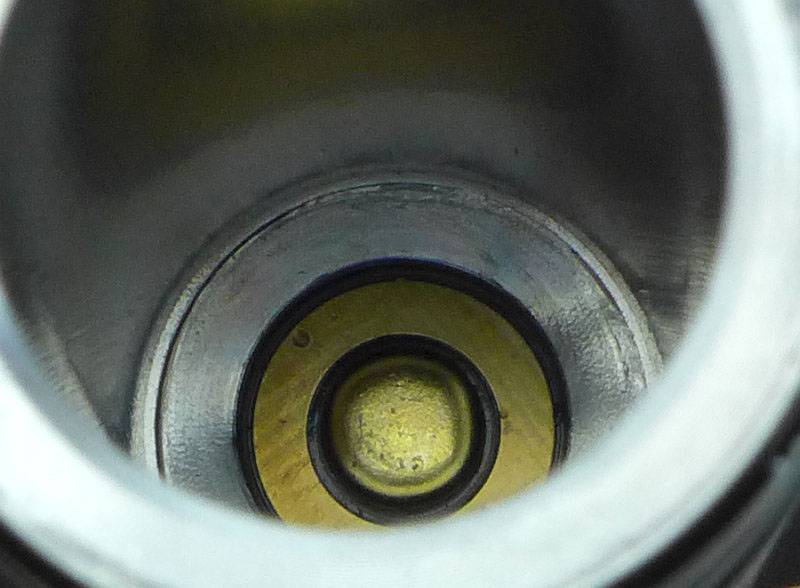
Peering deep into the battery tube for a view of the positive contact.
 photo 17 EF1 head contacts P1200256.jpg

The XM-L2 U3 LED sits in a smooth reflector.
 photo 18 EF1 LED P1200261.jpg

It is a relatively deep reflector to focus the beam.
 photo 18 EF1 reflector P1200264.jpg

Next to an 18650 cell you can see the heavy build of this light.
 photo 19 EF1 size P1200286.jpg

Slightly surprisingly, the head does unscrew giving access to the reflector and LED. This may be to provide access to the o-ring to allow it to be inspected.
 photo 20 EF1 head off P1200290.jpg

The detail of those threads for the front part of the light.
 photo 21 EF1 head threads P1200291.jpg

The beam

Please be careful not to judge tint based on images you see on a computer screen. Unless properly calibrated, the screen itself will change the perceived tint.

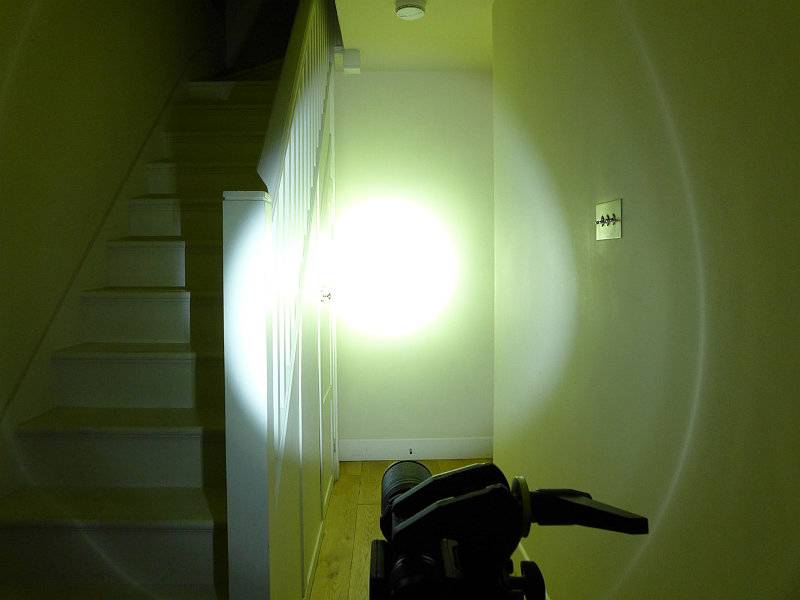
The indoor beamshot is intended to give an idea of the beam shape/quality rather than tint. All beamshots are taken using daylight white balance. The woodwork (stairs and skirting) are painted Farrow & Ball “Off-White”, and the walls are a light sandy colour called ‘String’ again by Farrow & Ball. I don’t actually have a ‘white wall’ in the house to use for this, and the wife won’t have one!

Starting off indoors, the EF1’s beam is narrow overall. There is a relatively average sized hotspot, but only a very narrow spill around this. This appears much more suited to inspection duties than general lighting for getting around.
 photo 23 EF1 indoor beam P1230323.jpg

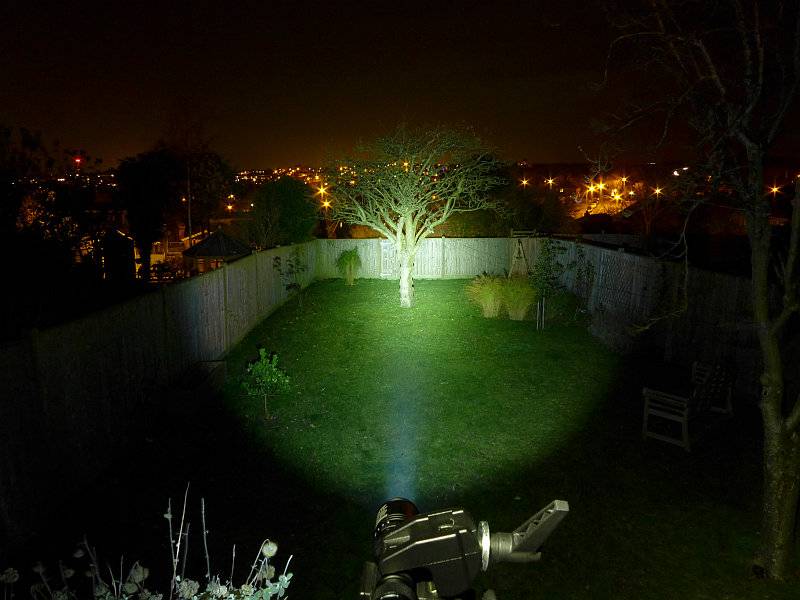
Giving it some more range outdoors and that narrow spill is still an obvious characteristic.
 photo 28 EF1 outdoor beam P1240708.jpg

Modes and User Interface:

Nitecore have kept the interface of the EF1 very simply. There is a four position sliding switch, OFF (0), Low (1), Medium (2) and High (3).

Simply slide the switch to the position you want. There is nothing more to it.

Batteries and output:

The EF1 runs on either 1x 18650 or 2x CR123.

To measure actual output, I built an integrating sphere. See here for more detail. The sensor registers visible light only (so Infra-Red and Ultra-Violet will not be measured).

Please note, all quoted lumen figures are from a DIY integrating sphere, and according to ANSI standards. Although every effort is made to give as accurate a result as possible, they should be taken as an estimate only. The results can be used to compare outputs in this review and others I have published.

___________________________________________ ________________________________ ________________________________
EF1 using specified cell I.S. measured ANSI output Lumens PWM frequency or Strobe frequency (Hz)
___________________________________________ ________________________________ ________________________________
High – NL189 729 0
Medium – NL189 341 100
Low – NL189 5 217

* Beacon and Strobe output measurements are only estimates as the brief flashes make it difficult to capture the actual output value.

Peak Beam intensity measured 13900 lx @1m giving a beam range of 236m.

There is parasitic drain which varies between 2.68 and 1.2 mA. When using a 3100mAh 18650 it will take 48-108 days to drain the cell. This is very bad for a standby light.

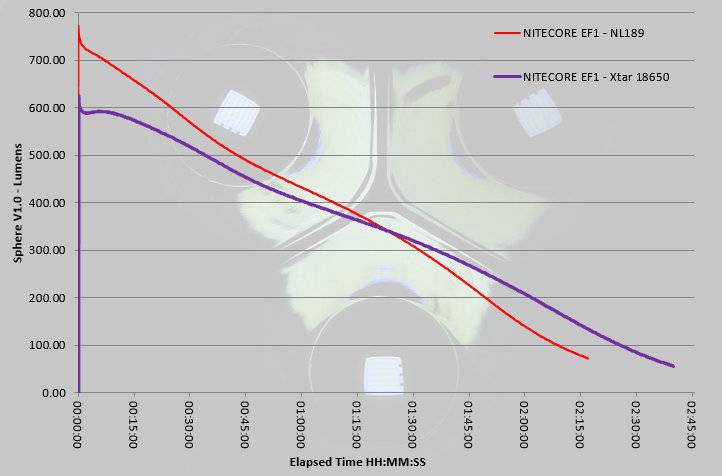
Initially I was testing the EF1 with an Xtar 3100mAh 18650, but the output figures were not up to specification. Subsequently I re-ran these tests with a Nitecore NL189. With the NL189 the ANSI output was higher, but as you can see the runtime was overall lower. Output is not regulated and drops off during the entire run. In the environments in which you would use this light, you definitely don’t want a sudden drop in output at the wrong time, so this is a better runtime profile to have.
 photo EF1 runtime plus Xtar.jpg

Troubleshooting

This section is included to mention any minor niggles I come across during testing, in case the information helps anyone else.

No issues were encountered during testing.

As per the description of this section, this information is provided in case anyone else finds a similar ‘issue’ that might be fixed in the same way.

The EF1 in use

Before we get any further we must clarify what ‘Explosion proof’ actually means. Firstly, it does not mean you can drop a bomb on it! Instead it relates to the world of hazardous environment equipment, for which there are many different and very specific standards for the various classifications of hazard. The safest equipment are ‘Intrinsically Safe’ devices which are intrinsically incapable of igniting hazardous atmospheres even if destroyed, as no component within them can achieve ignition, including the cells. Then there are the ‘Explosion-Proof’ ratings where the device does indeed contain enough energy to ignite explosive gasses, but critically, should the device have been opened in that hazardous atmosphere and contain an explosive mixture which can be ignited, if there is a small explosion within the device, that explosion is completely contained and cannot propagate into the surrounding atmosphere. The ‘Explosion Proof’ rating is protection from internal explosions.

Now we have got that clear, a direct consequence of the explosion proof rating is that the build is very heavy. Putting the EF1 next to a two cell light, the P36 shows how even though it is a single 18650 light, it really has presence. We are looking at one very tough light.
 photo 22 EF1 size p36 P1200296.jpg

With it being a very solid build, and having a sliding switch, actually the EF1 could also be very suited to diving use. While carrying out my Dive Knives 2016 – Mega Test Review I also took the EF1 with me, but wasn’t able to get any in-use shots. It was ceratinly taken to depths greater than the 1.5m specified, but not more than 10m where I was diving.
One thing I did put the EF1 through was the dive knife corrosion testing (details in the Dive Knives 2016 – Mega Test Review) and this is what happened to the EF1.
Taking in the overall view, the most obvious sign is a small white patch on the handle.
 photo 24 EF1 corrosion P1230810.jpg

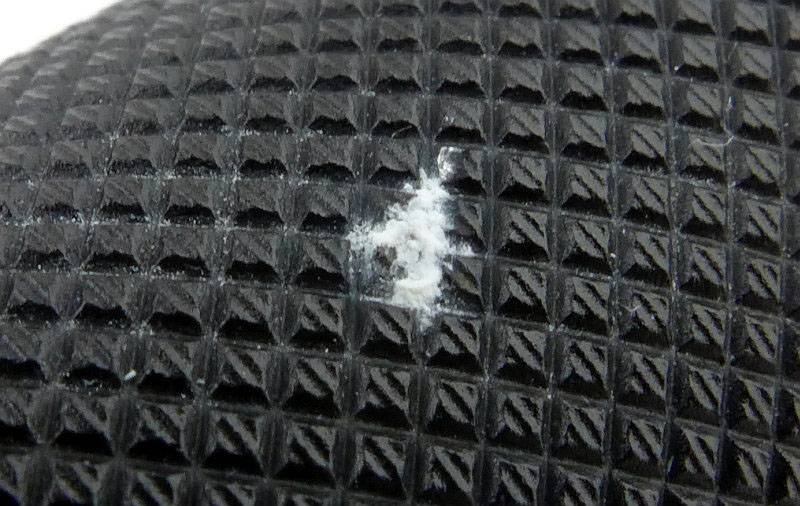
Going in closer we can see this is a patch of aluminium corrosion from the salt water exposure. There must have been a small flaw in the anodising for this to have happened.
 photo 25 EF1 corrosion P1230823.jpg

Just next to one screw on the head was a rainbow like colouring on the anodising looking like an oil film. It was perfectly dry and free of oil, and this was only visible after the corrosion test.
 photo 26 EF1 corrosion P1230817.jpg

The last visible effect was that the grease around the sliding switch turned a dark brown/black colour, so was not an inert grease.
 photo 27 EF1 corrosion P1230820.jpg

There were no issues with the EF1 following this intensive corrosion test, and it is still functioning perfectly.

Though we tend to prefer smaller and easier to carry lights, there is a certain satisfaction to carrying the tank-like EF1. Its weight is comforting and there is nothing fragile about it. The slider switch is positive and simple to use and needs no explanation. There is a noticeable delay in the switch response, most notable when switching the EF1 on from OFF. It is probably only 0.3s or thereabouts, but you move the switch, then the EF1 turns on after that brief pause. The same when changing levels.

For my own use, the biggest issue is the mode spacing. It has a useful 5lm Low mode, but then jumps to 341lm. It definitely could have done with something around 80lm-100lm mark instead of jumping right up to 340lm. When the 5lm is not enough, that jump can be blinding.

Not working in a hazardous environment myself, I can’t say if the beam profile is a good fit for this type of use. It certainly seems to be an inspection type of beam rather than one for general use and getting about. I found it too narrow for navigating on rough ground as the hotspot was giving peripheral blindness when shining it at the ground. It is fine for longer distances, just not good closer up.

For the domestic user, there is the attraction of the Explosion Proof rating particularly in case of gas leaks. Personally I have several gas-safe lights including intrinsically safe lights. Those intrinsically safe lights however are all AA Alkaline powered, so the EF1 with its Li-ion power means the output is much higher, and I would consider it totally safe to use in a domestic gas leak situation. Some users would argue that any waterproof light will be safe to use, but this is wrong. If you change the battery and the explosive atmosphere gets inside the light, turning it on could create an explosion that would break out of a normal waterproof light. It would have been fine if you hadn’t opened it, but you did. With the EF1 this would not matter, as if this internal explosion did occur, the EF1 can withstand it – I know what I’d rather be holding.

Review Summary

_______________________________________________ _______________________________________________
Things I like What doesn’t work so well for me
_______________________________________________ _______________________________________________
Explosion Proof rating. Big jump in output from Low (5lm) to Medium (341lm).
Simple sliding switch. High parasitic drain – remember to lock out the tail-cap.
Predictable gradual drop in output (no sudden cut-out). Narrow spill limits versatility.
Extremely solid build. PWM used on Medium and Low modes.
Excellent corrosion resistance.
Holster supplied.

 photo 00 EF1 Feature P1200217.jpg


Discussing the Review:

Please feel free to add comments to the review, but the ideal place to freely discuss these reviews is on a forum. If you started reading the shorter forum version of the review, but followed the link this full exclusive review, please return to that forum to discuss the review there.
If you read the review entirely on Tactical Reviews, please consider one of the following to join in any discussion.

CandlePowerForums – Flashlight Reviews Section (Largest and Friendliest Flashlight Community Forum)

EdgeMatters – Sponsored Reviews (UK based Forum for Knife Makers and Collectors)
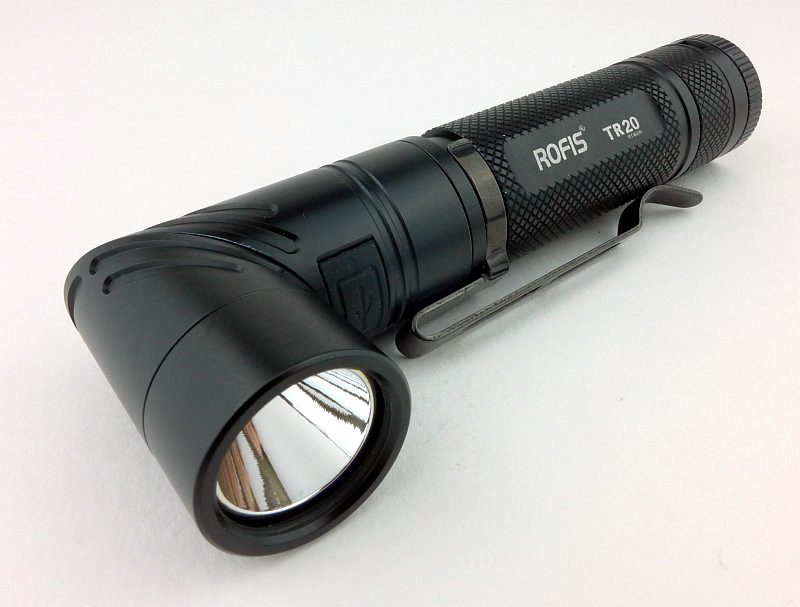
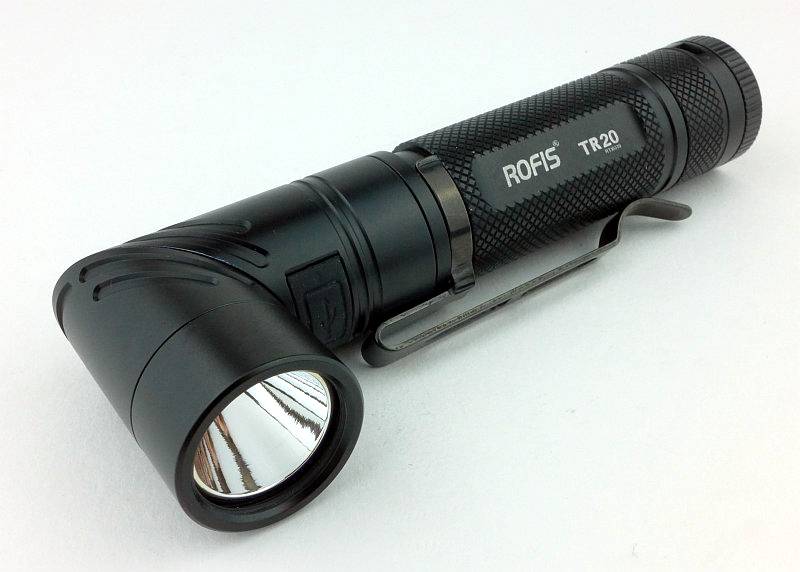
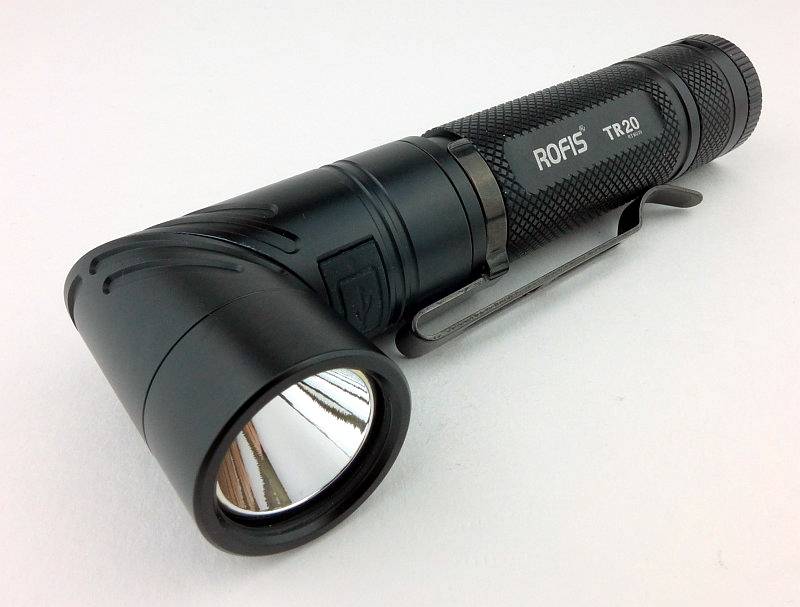
Light Review: Rofis TR20

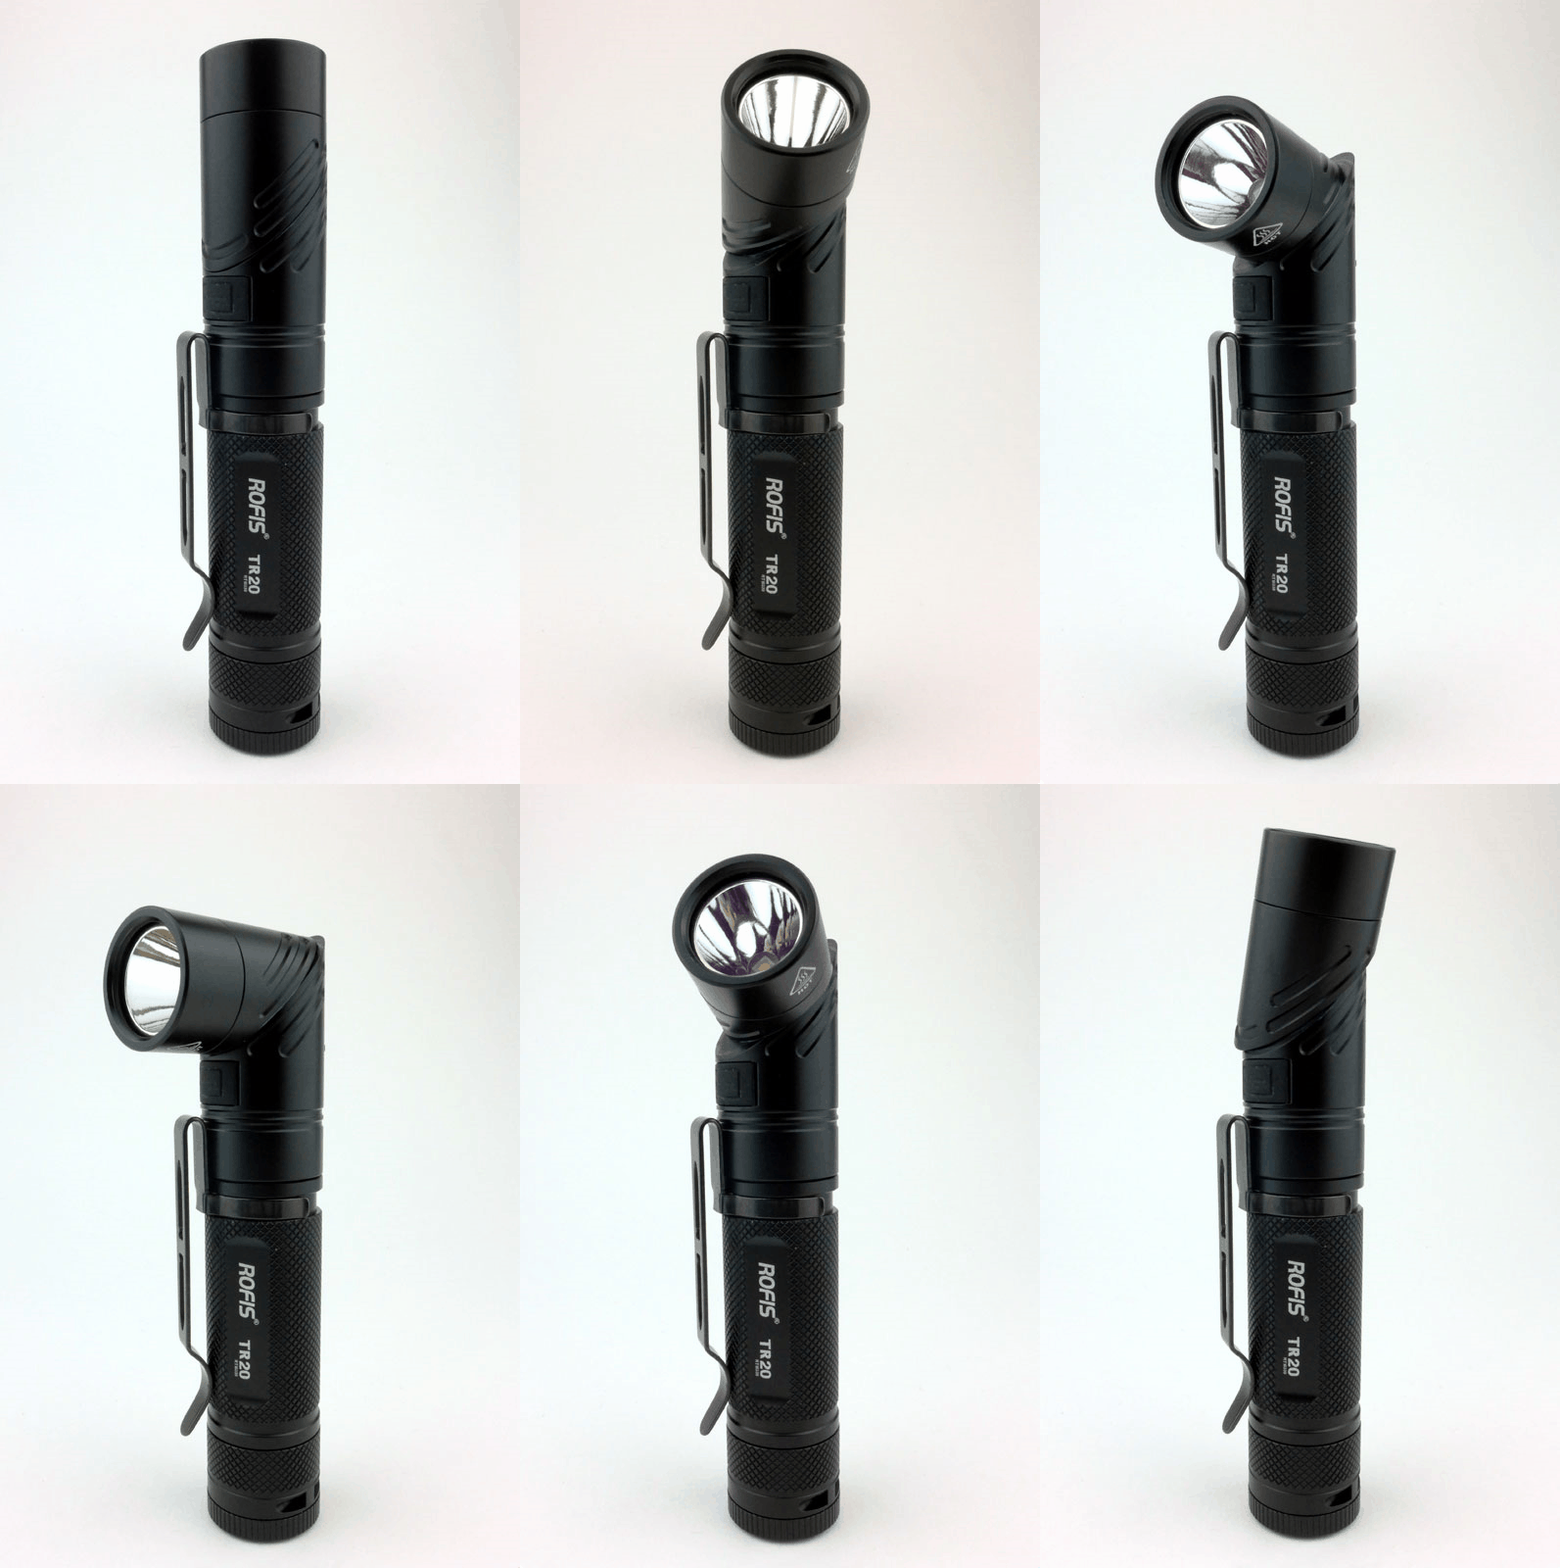
Rofis were the first manufacturer I came across which have made a standard tubular light that transforms into a right-angle light. They have applied the same principle to a couple of different models, and in this review we are looking at the TR20, which is an 18650 powered model with built in USB charging, making it an all-in-one lighting solution.

 photo 00 Rofis TR20 feature P1240405.jpg

Taking a more detailed look:

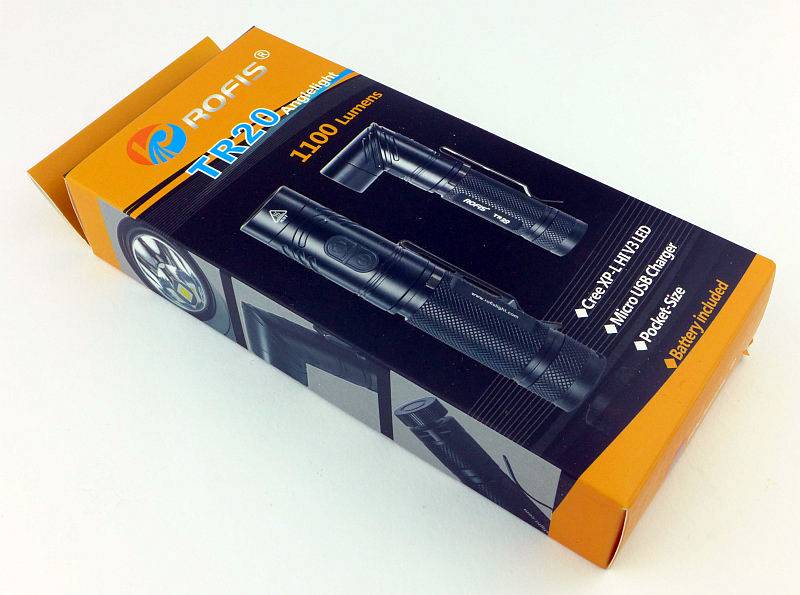
The TR20’s box.
 photo 01 Rofis TR20 box P1240376.jpg

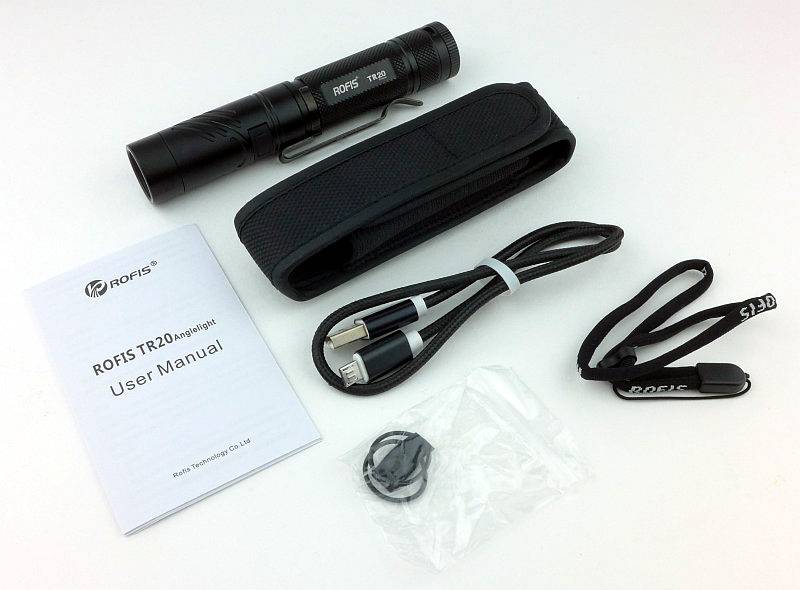
Included in the box is the TR20 (with 3400mAh cell inside), holster, USB cable, wrist lanyard, two o-rings, a spare USB port cover and the instructions.
 photo 02 Rofis TR20 box contents P1240379.jpg

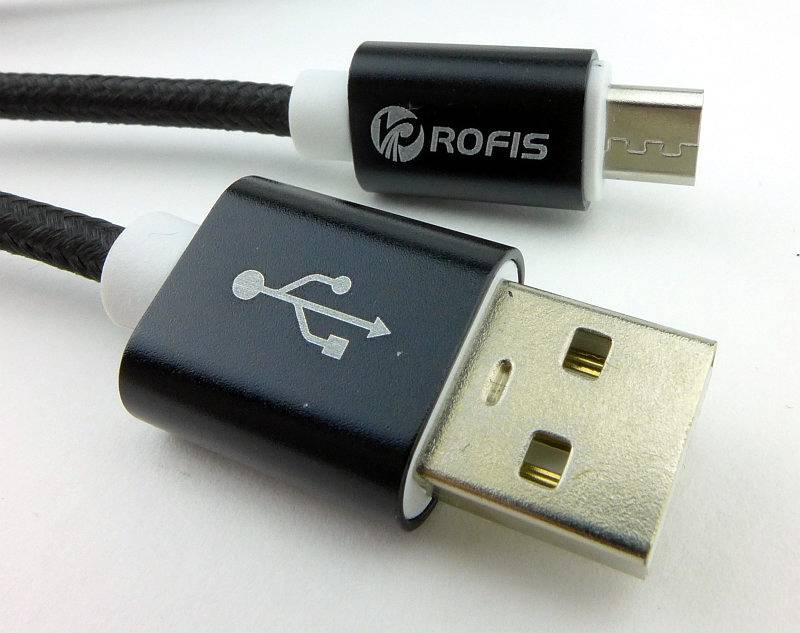
The UBS cable is of a nice quality with metal plugs and a braided cable.
 photo 03 Rofis TR20 USB Cable P1240385.jpg

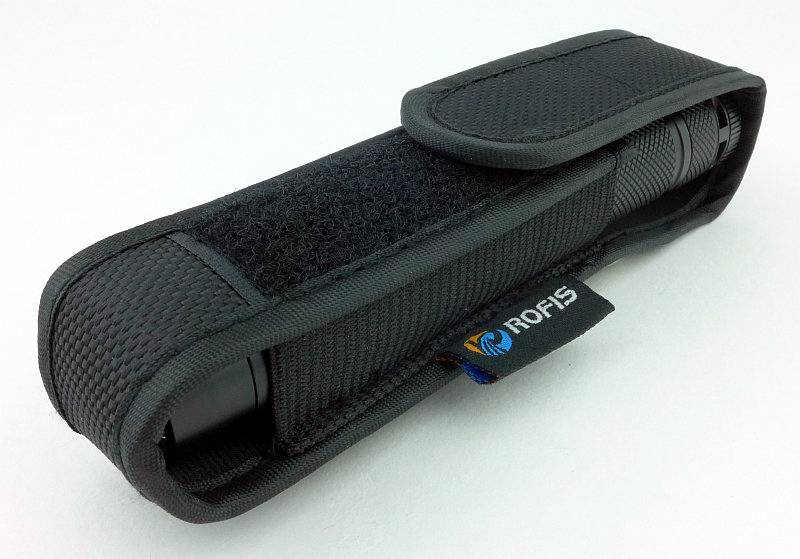
On the holster there is an apparently overly long patch of Velcro, but we shall see about that later.
 photo 04 Rofis TR20 holster P1240389.jpg

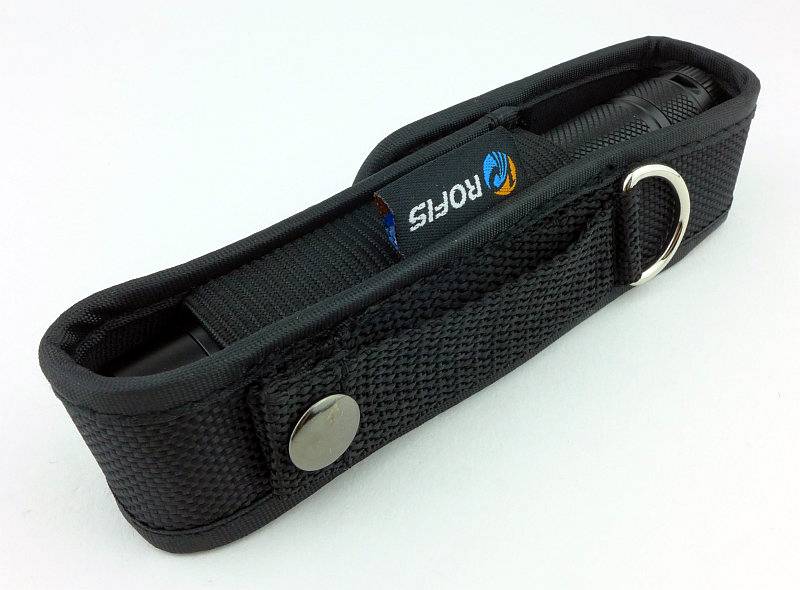
There are three loops on the holster, a D-ring, a fixed belt loop and a loop secured with a press-stud.
 photo 05 Rofis TR20 holster loops P1240393.jpg

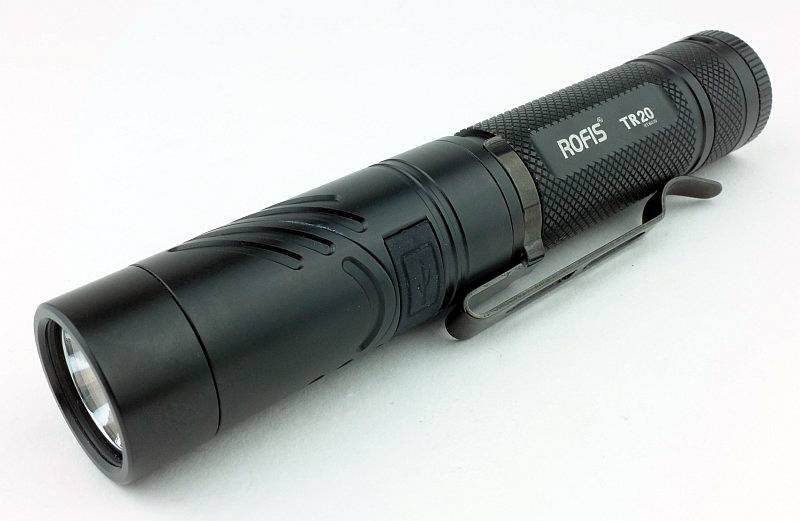
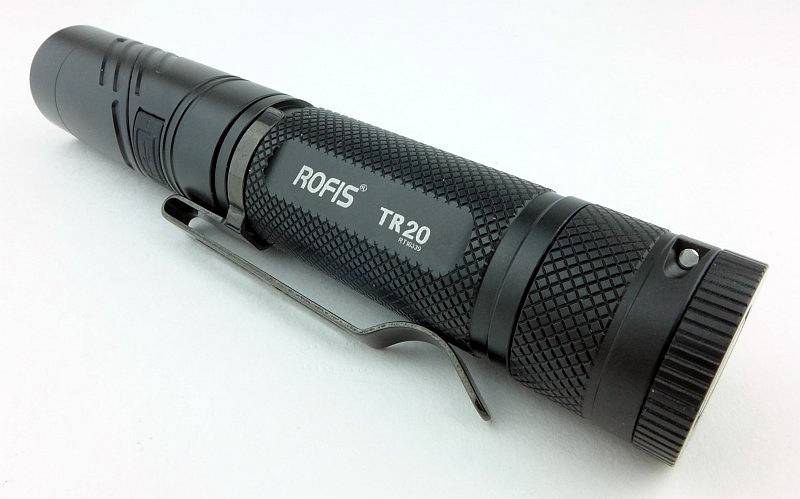
And here we have the TR20 in its ‘normal’ tubular configuration.
 photo 06 Rofis TR20 angle P1240396.jpg

Switching round for a different view.
 photo 08 Rofis TR20 rear angle P1240415.jpg

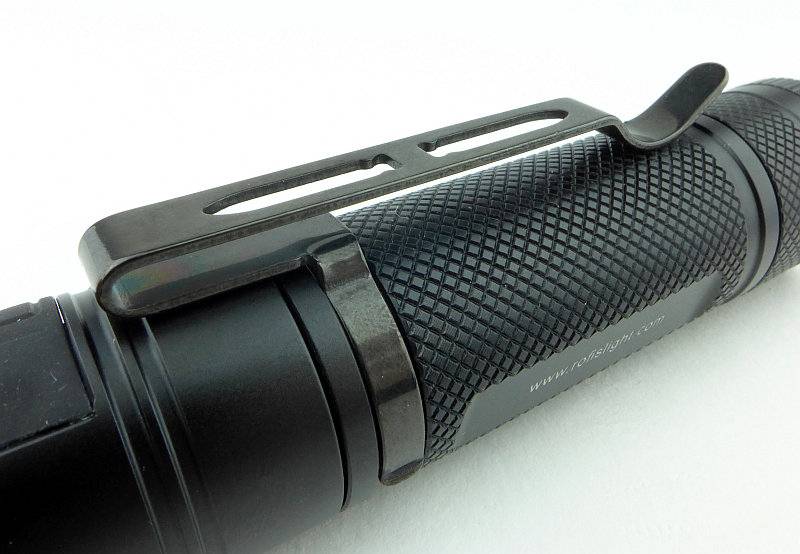
Fitted to the TR20 is a long steel pocket clip.
 photo 09 Rofis TR20 clip P1240418.jpg

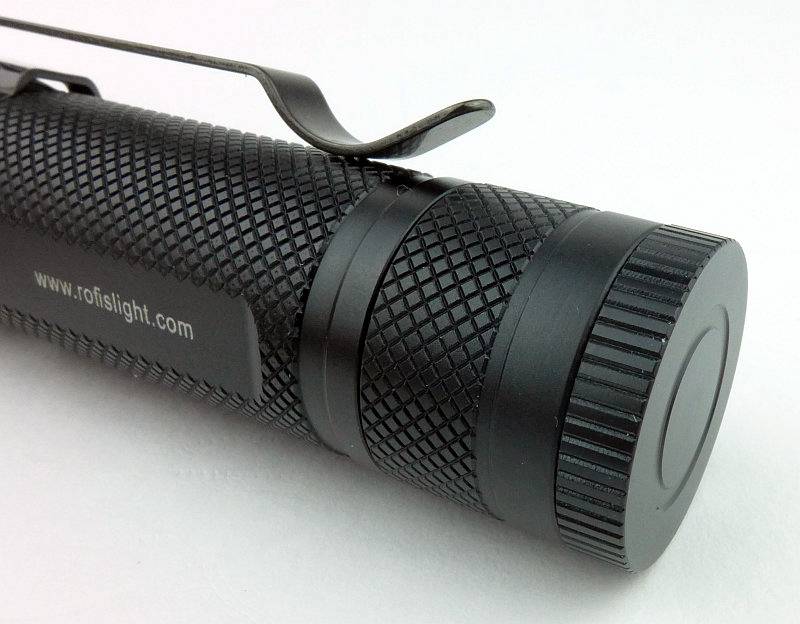
The tail-cap has a plain appearance, but the very end looks slightly different.
 photo 10 Rofis TR20 tail P1240421.jpg

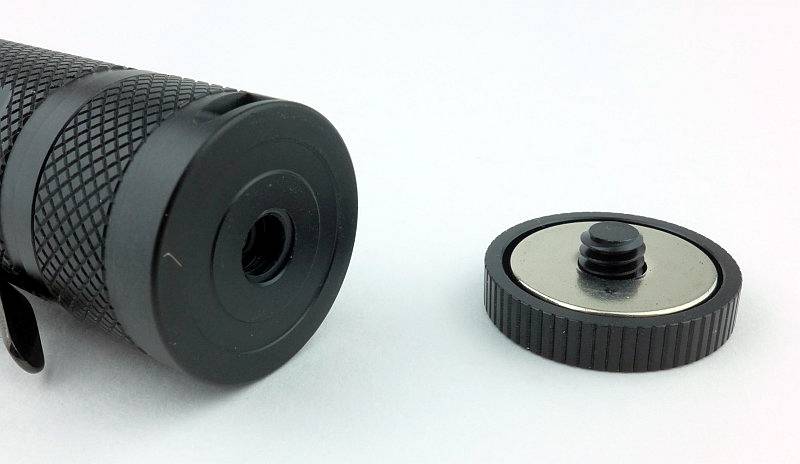
The explanation for the way the tail-cap looks is that screwed onto the end is a removable magnet.
 photo 11 Rofis TR20 magnet off P1240425.jpg

Inside the tail-cap there is a gold plated spring contact. Bare threads mean there is no physical lock-out.
 photo 12 Rofis TR20 tail contacts P1240430.jpg

As the TR20 ships with the 18650 inside, it comes with an insulator which you need to remove.
 photo 13 Rofis TR20 insulator P1240434.jpg

Square cut threads are used for the tail-cap.
 photo 14 Rofis TR20 threads P1240437.jpg

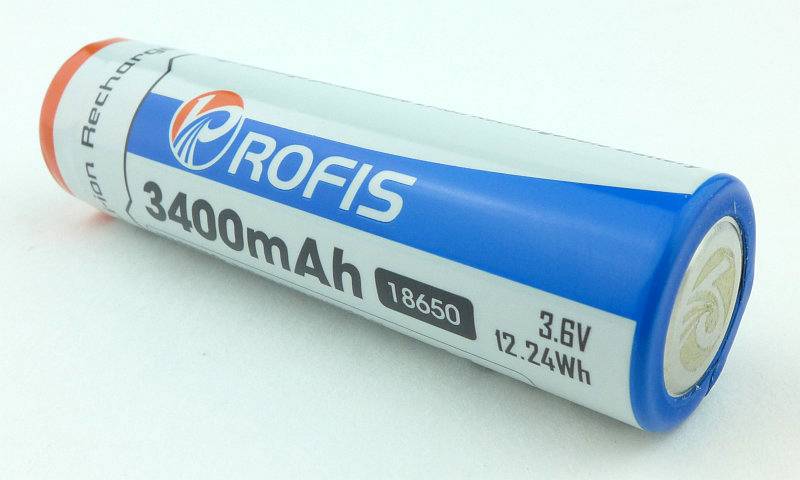
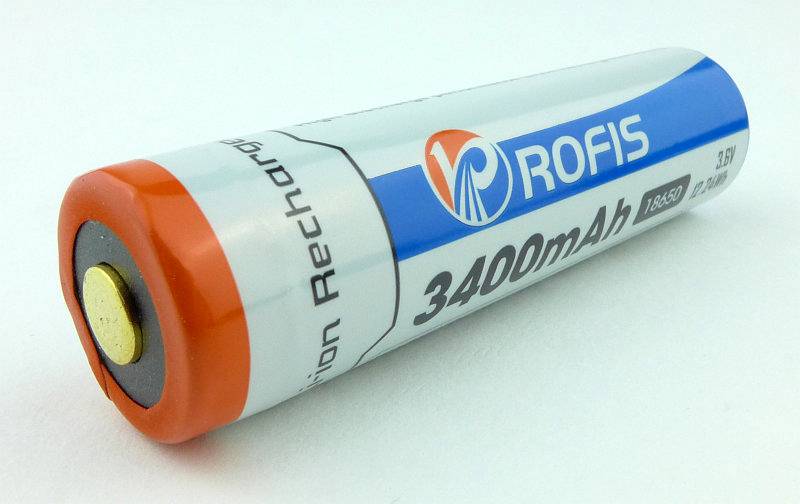
It is a Rofis branded cell that is included.
 photo 15 Rofis TR20 cell P1240440.jpg

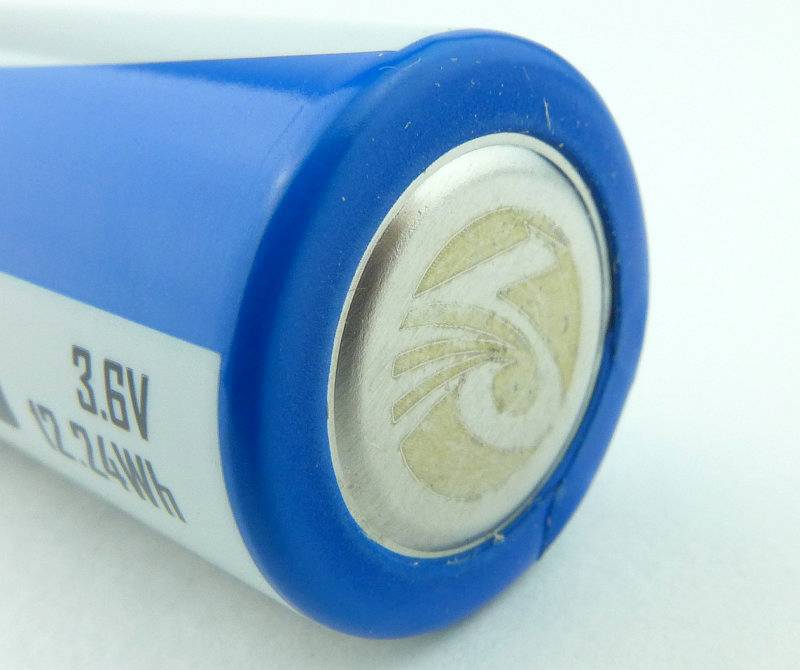
An unnecessary detail, but a nice touch is that the negative terminal has the Rofis logo etched into it.
 photo 16 Rofis TR20 cell logo P1240442.jpg

The positive terminal is gold plated.
 photo 17 Rofis TR20 cell positive P1240446.jpg

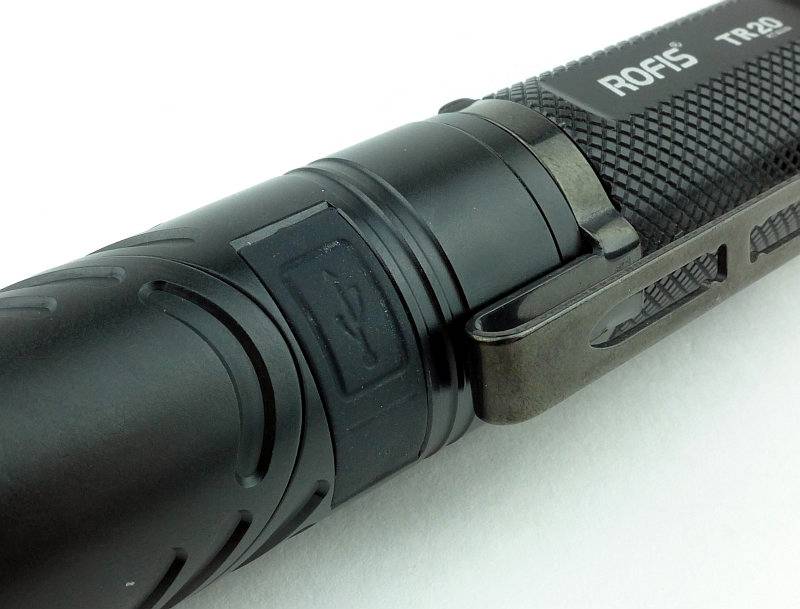
Opposite the control switches is the rubber USB port cover.
 photo 18 Rofis TR20 USB cover P1240449.jpg

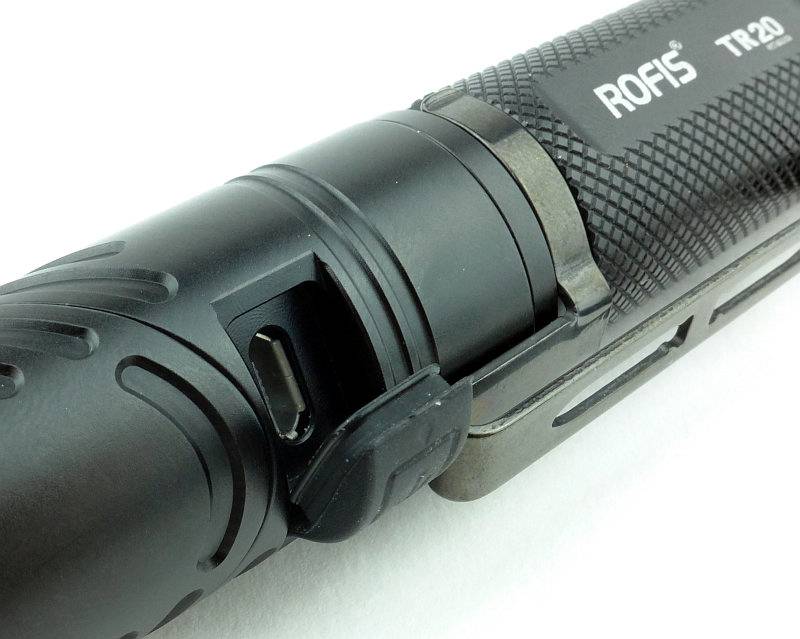
Using your nail, you prise the hinged cover out.
 photo 19 Rofis TR20 USB cover open P1240452.jpg

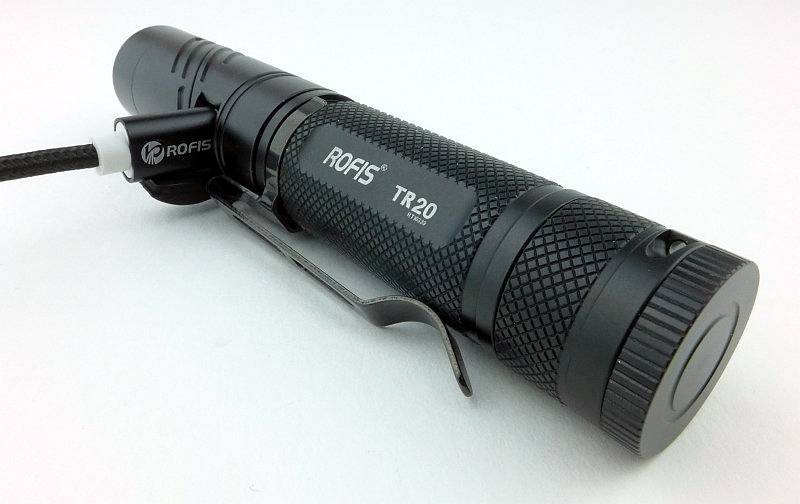
Here the supplied USB cable has been plugged in for charging.
 photo 20 Rofis TR20 USB connect P1240462.jpg

While charging, the red indicator light in the dual switch is on. Once charged this will go green. Also note the dual switch where the front part is the mode change switch and the rear part is the power switch.
 photo 21 Rofis TR20 USB charging P1240458.jpg

The smooth reflector does have a few visible machining marks in it, but these don’t aversely affect the beam.
 photo 22 Rofis TR20 reflector P1240463.jpg

A XP-L Hi V3 LED is used.
 photo 23 Rofis TR20 LED P1240473.jpg

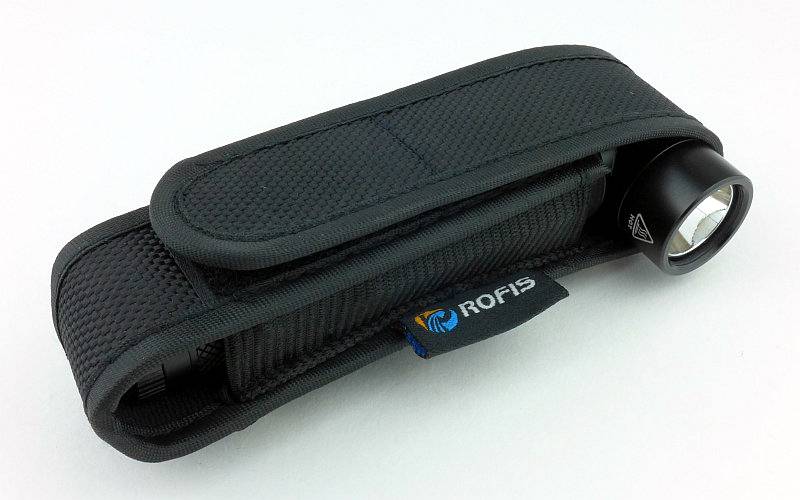
So, the reason for the extended Velcro area on the holster is so that when the TR20 is transformed into a right-angle light the flap folds over further and still fits the TR20 perfectly with the lens sticking out sideways.
 photo 24 Rofis TR20 holster 90 P1240475.jpg

The beam

Please be careful not to judge tint based on images you see on a computer screen. Unless properly calibrated, the screen itself will change the perceived tint.

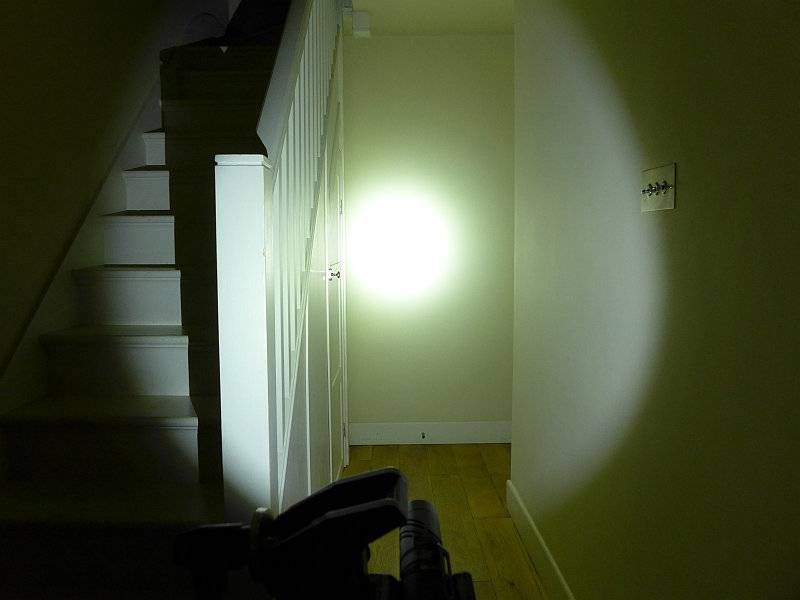
The indoor beamshot is intended to give an idea of the beam shape/quality rather than tint. All beamshots are taken using daylight white balance. The woodwork (stairs and skirting) are painted Farrow & Ball “Off-White”, and the walls are a light sandy colour called ‘String’ again by Farrow & Ball. I don’t actually have a ‘white wall’ in the house to use for this, and the wife won’t have one!

Starting indoors, the TR20 does have a bright hot spot, but the transition to the spill is smooth and the spill is sufficiently bright that the beam does not appear unbalanced.
 photo 25 Rofis TR20 indoor beam P1240743.jpg

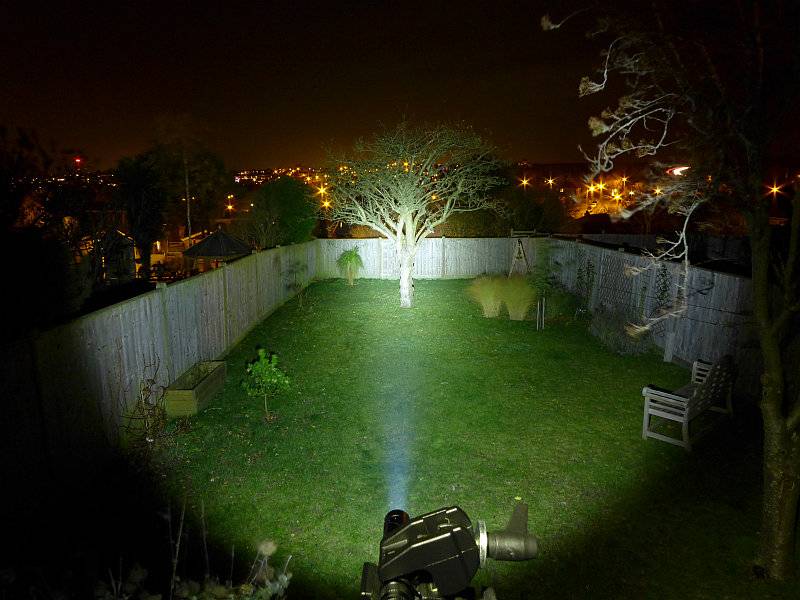
Moving outdoors you can see how the spill is nice a bright and gives a good view. Though not a flood beam, the beam has a good useful width.
 photo 26 Rofis TR20 outdoor beam P1240696.jpg

Modes and User Interface:

The TR20 has 6 constant output modes (Turbo, High, Mid, Low, Lower and Ultra-Low) and three flashing modes (Strobe/Beacon/SOS) controlled by a dual button.

From OFF, to switch ON to the last used constant output (not including directly accessed modes), briefly press the Power switch. When ON, press the Mode switch to cycle through Turbo -> Ultra-Low -> Low -> Mid -> High back to Turbo etc. To switch OFF briefly press the Power switch.

From OFF, for direct access to Turbo, press and hold the Power switch for more than 1s.

From OFF, for direct access to Ultra-Low, press and hold the Mode switch for more than 1s.

To access flashing modes, from ON, press and hold the Mode switch for more than 1s. This will activate strobe. Press and hold the Mode switch for more than 1s again to switch to Beacon mode. Press and hold the Mode switch for more than 1s once more to activate SOS.
Once activated, pressing the mode switch briefly returns the TR20 to the previous steady mode, or a brief press of the Power switch will turn the TR20 OFF.

The TR20 is Strobe-Ready and to activate Strobe directly from OFF, double-click the mode switch.

There is a lockout mode included. With the TR20 OFF, press and hold both buttons simultaneously for 3s to enter lockout. When entering Lockout, the TR20’s red indicator light in the dual switch will come on to indicate Lockout has been activated. Like this the buttons will not turn the TR20 on. To exit Lockout press and hold both buttons simultaneously for 3s and the TR20 will turn ON in Low mode.

Lastly when turning the TR20 ON, or changing mode, after 3s the dual power switch will light up to indicate the remaining battery power. This will light green if there is more than 50% battery left, red if there is less than 50% and will flash red if the battery is low.

Batteries and output:

The TR20 runs on a standard 18650 which is supplied.

To measure actual output, I built an integrating sphere. See here for more detail. The sensor registers visible light only (so Infra-Red and Ultra-Violet will not be measured).

Please note, all quoted lumen figures are from a DIY integrating sphere, and according to ANSI standards. Although every effort is made to give as accurate a result as possible, they should be taken as an estimate only. The results can be used to compare outputs in this review and others I have published.

___________________________________________ ________________________________ ________________________________
Rofis TR20 using specified cell I.S. measured ANSI output Lumens PWM frequency or Strobe frequency (Hz)
___________________________________________ ________________________________ ________________________________
Turbo – Rofis 3400mAh 18650 883 0
High – Rofis 3400mAh 18650 503 0
Medium – Rofis 3400mAh 18650 199 0
Low – Rofis 3400mAh 18650 72 0
Lower – Rofis 3400mAh 18650 19 0
Ultra Low – Rofis 3400mAh 18650 9 0

* Beacon and Strobe output measurements are only estimates as the brief flashes make it difficult to capture the actual output value.

Peak Beam intensity measured 15600 lx @1m giving a beam range of 250 m.

There is parasitic drain at 83.8uA. When using a 3400mAh cell it will take 4.63 years to drain the cell.

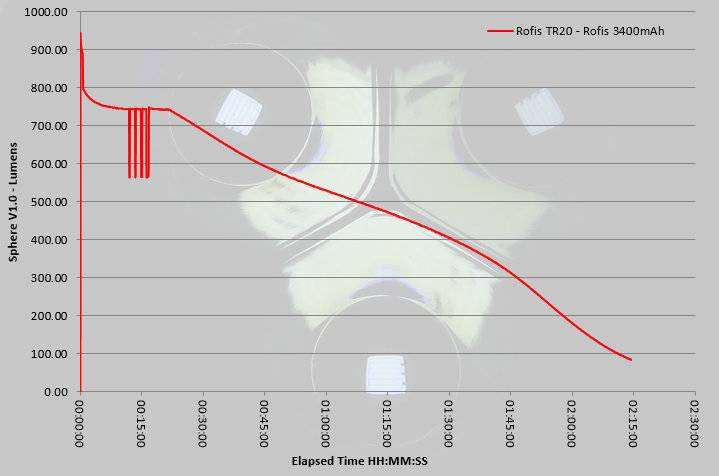
At switch-on the near 900lm output is short lived and after only around 30s starts to decline to the 750 running output. There are some unexplained dips around the 15 minute mark where the output briefly drops to 560lm but then goes back up to 750lm again. After 20 minutes from switch-on the TR20 no longer maintains regulation and the output starts a steady decline until the end of the ANSI runtime at 2h 15m.
 photo Rofis TR20 runtime.jpg

Troubleshooting

This section is included to mention any minor niggles I come across during testing, in case the information helps anyone else.

No issues were encountered during testing.

As per the description of this section, this information is provided in case anyone else finds a similar ‘issue’ that might be fixed in the same way.

The TR20 in use

Right-angle lights are incredibly useful and bring an added dimension to the function of a light. Personally I find the variety of grip options they bring make them amongst the most comfortable to use, with a natural pointing of the beam as well as allowing various arm and hand positions that still direct the beam forward where you want it. If I had to choose between a straight or right-angle light it would be a right-angle that I would choose, but there is a definitely a place for the straight tube light. Why have to choose one or the other when you can have both?
 photo TR20 500ms.gif

Having a dual-switch does make the UI very functional, but these types of switches don’t work so well when using gloves as you can’t feel the two parts of the switch. For gloved hands the two switch parts are a bit small so you can miss the part you meant to press. Gloved use may not be the highest priority because this light is not a tactical light, it is a utility light.

Another example of how functional this light is, is the holster that adjusts to the straight or right-angle configurations. But there is more. When in the right-angle configuration, the control buttons now line up with the gap on the side of the holster opposite the lens. In this way you can operate the TR20 when it is still in the holster giving you easy access and hands free use; this is the real benefit.
 photo 24 Rofis TR20 holster 90 P1240475.jpg

USB charging and the use of a standard 18650 cell adds convenience and ease of carrying a spare cell. The power indicator which tells you ‘Over 50%’, ‘Under 50%’ and ‘Empty’ is better than nothing, but might tend to lead you to keep topping up once you hit ‘Under 50%’. At least you only need to flip the USB port cover aide and hook it up to your USB charger.

One aspect that very much surprised me, and it is one I’ve heard others have found, is that the rotation of the head to transform to and from the right-angle configuration is very stiff. I’m known for a pretty strong grip and am the person at the archery club who is asked to pull out the arrows others can’t. I say this as I feel that if I find this too stiff, I think there are plenty of people who would struggle with it. Clearly you don’t want the head swing back round to straight, and this certainly won’t, but you do want to be able to transform it easily. Another way to look at it though, is that any concerns that the articulation of the head might introduce a weakness certainly doesn’t seem to be the case.

The instructions say that the last used output mode is memorised, but doesn’t mention that this does not include a mode activated by the direct access option. Only the mode set when the TR20 is on and the mode switch pressed to choose the level is memorised. As I typically use the Ultra-Low level, this is the reason I’ve become aware of this. To be sure you get the lowest level you will need to use the direct access method for Ultra-Low rather than relying on the ‘last used’ mode. This behaviour is good as you end up with direct access to one additional mode; if you have memorised medium, but have used the direct access to get ultra-low, simply switching it off and on again gets you back to medium.

Magnetised lights leave me in two minds; I find them more annoying than useful as they stick to everything I didn’t want them to, the TR20 completely removes this annoyance by making it very easy to remove the magnet, and not only that, but the threaded hole left where the magnet was will fit onto a tripod.

A quick observation about the lockout mode; As the only indication you have entered lockout is a flash of the red indicator in the dual switch, when you are pressing both parts of the dual switch, your fingers mostly hide the red light. It would be easier to see if the main LED was given a brief flash to let you know it was going into lockout.

Pocket clips are normally something I strip off straight away, largely because they are often too stiff and damage the pocket. Rofis have got this clip spot on. It is long and stable, yet the spring force is low enough not to be harsh and damaging. Add to this the right-angle configuration and the pocket clip is much more practical than on many lights.

Overall, the ability to transform the light into two different configurations overrides any minor quibbles with this light and makes it very attractive and very useful.

Review Summary

_______________________________________________ _______________________________________________
Things I like What doesn’t work so well for me
_______________________________________________ _______________________________________________
Transforms from a straight to right-angled configuration. Head is very stiff.
Direct access to Turbo, Ultra-low and Strobe. Dual button is difficult to use with gloves.
Removable Magnet. Lockout indication not clear.
Tripod mount.
Excellent clip.
Holster adjusts to straight or right-angle configuration.
Built in USB charging.


Discussing the Review:

Please feel free to add comments to the review, but the ideal place to freely discuss these reviews is on a forum. If you started reading the shorter forum version of the review, but followed the link this full exclusive review, please return to that forum to discuss the review there.
If you read the review entirely on Tactical Reviews, please consider one of the following to join in any discussion.

CandlePowerForums – Flashlight Reviews Section (Largest and Friendliest Flashlight Community Forum)

EdgeMatters – Sponsored Reviews (UK based Forum for Knife Makers and Collectors)
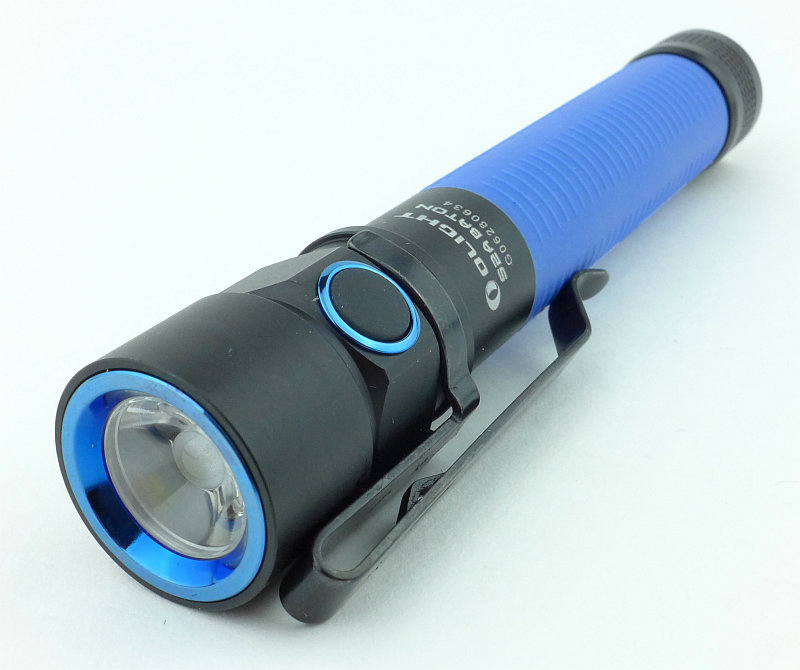
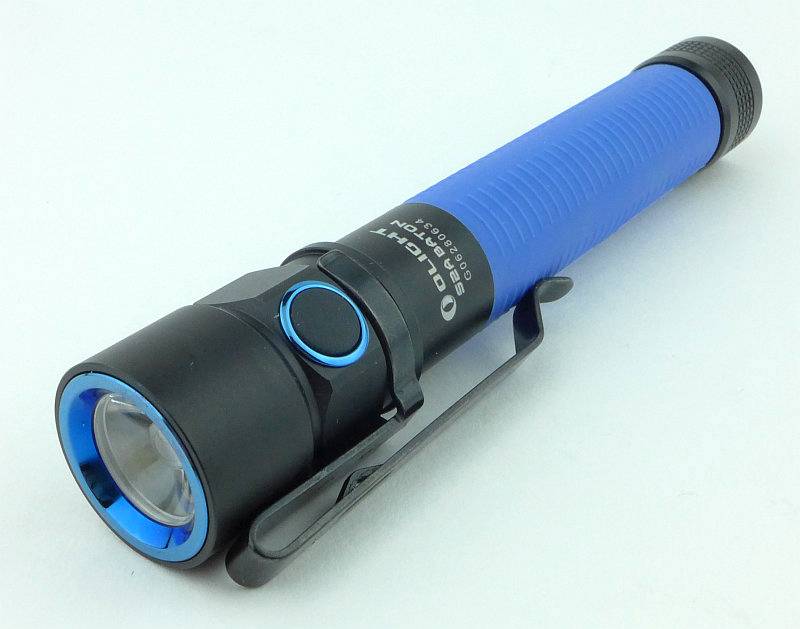
Light Review: Olight S2A Baton

Olight’s Baton line-up gets a 2xAA powered version at last. Though the beautifully compact S1 is a fantastic light (previously reviewed) my personal ideal form factor is the 2xAA for ease of holding yet remaining compact. It also has the added advantage that AA cells are the easiest to come by, so travelling with or gifting this light is trouble free.

 photo 05 Olight S2A angle P1220461.jpg

Taking a more detailed look:

Looking very sharp in a clear plastic box with cardboard insert, you get a good look at the light even before you get your hands on it.
 photo 01 Olight S2A boxed P1220449.jpg

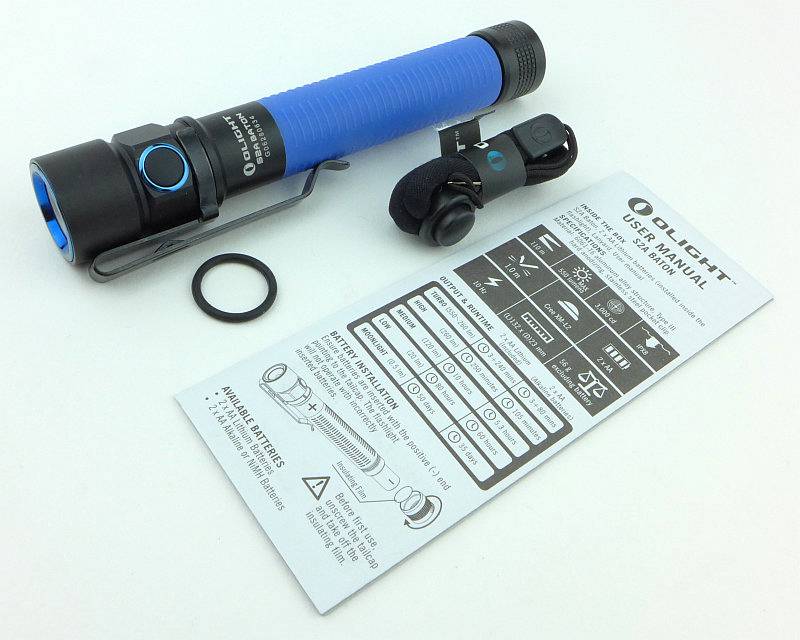
Inside the box is the S2A, a spare o-ring, a lanyard and the instructions.
 photo 02 Olight S2A box contents P1220454.jpg

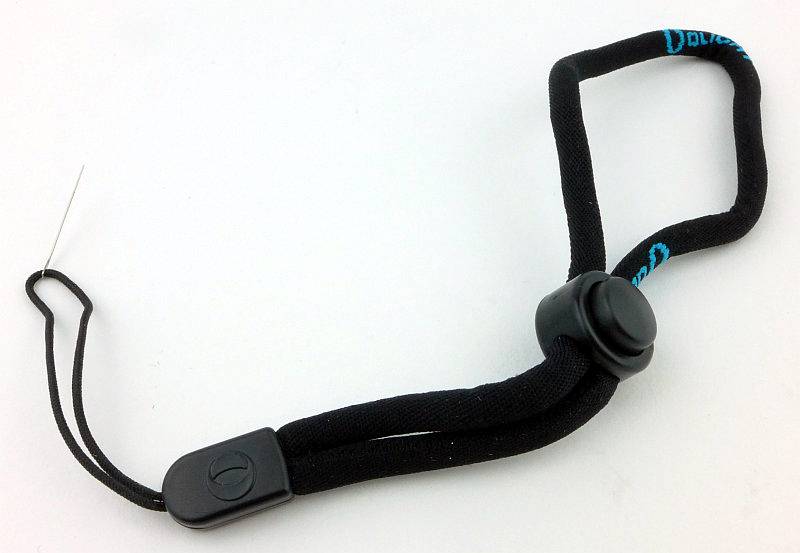
The lanyard has a really nice fabric tube cord and what is that we can see on the attachment loop?
 photo 03 Olight S2A lanyard P1220457.jpg

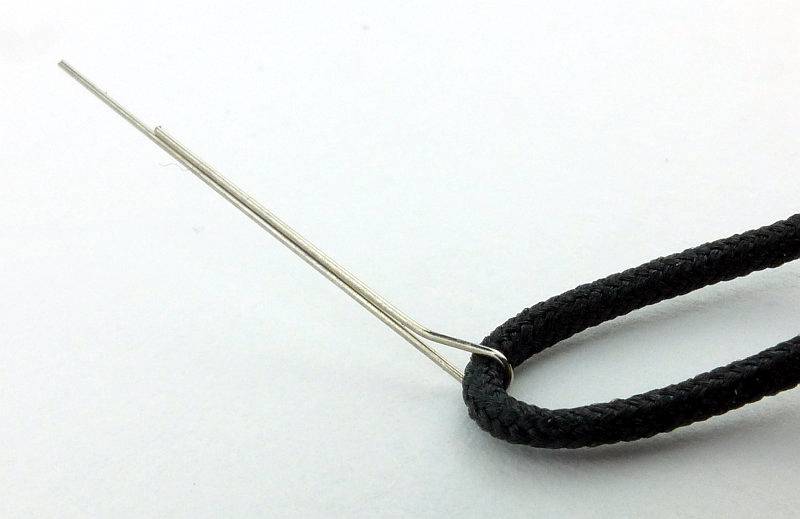
Thank you Olight! It is a wire puller for fitting the lanyard through the small hole in the tailcap. A thoughtful addition and makes life easier. Of course you can do something similar yourself (as I have for some time) but here it is ready to go.
 photo 04 Olight S2A lanyard puller P1220459.jpg

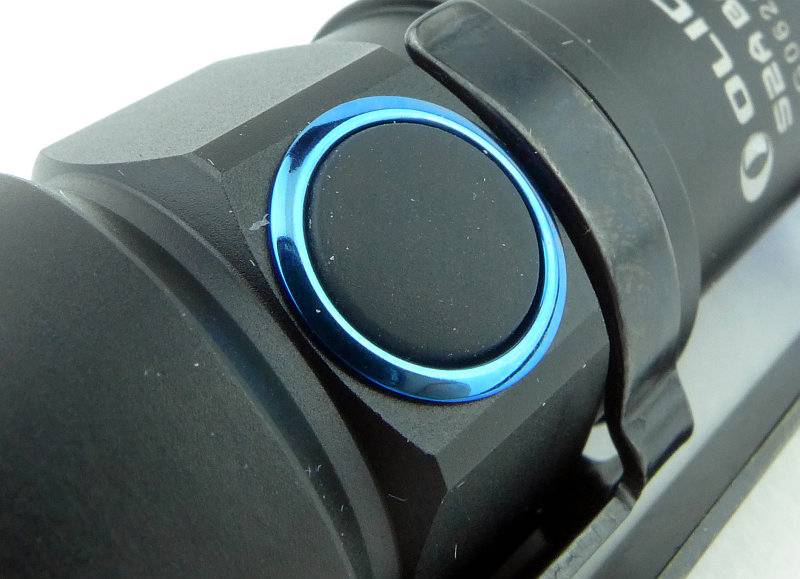
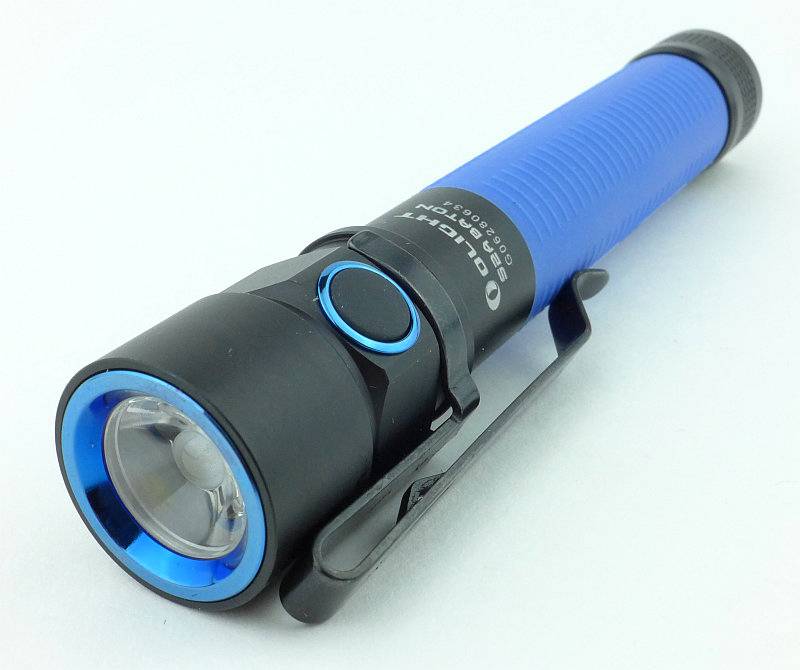
Surrounding the side-switch is a blue PVD ring which matches the bezel.
 photo 06 Olight S2A switch P1220466.jpg

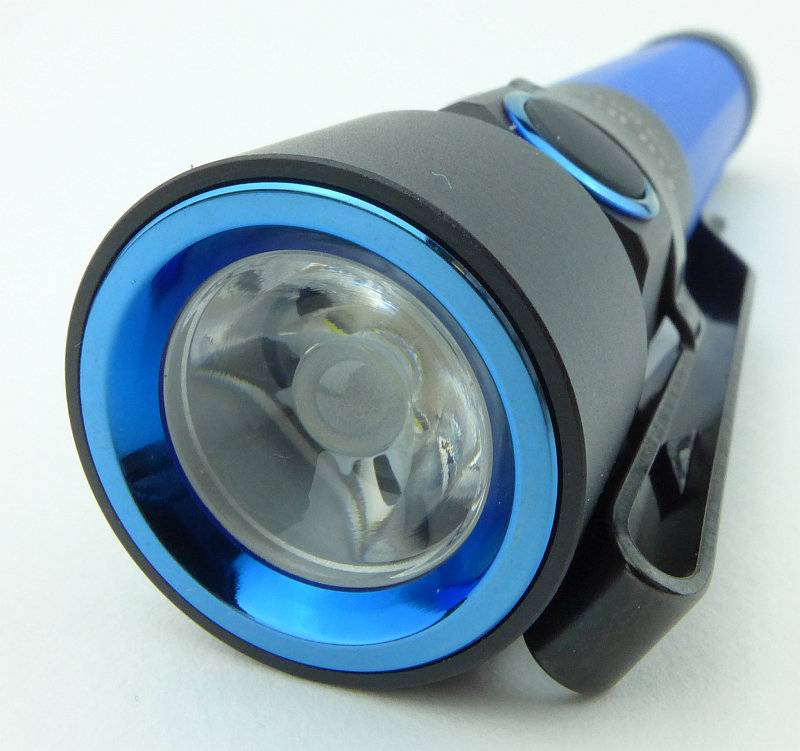
The blue PVD bezel ring surrounds the S2A’s TIR optic.
 photo 08 Olight S2A optic P1220477.jpg

The S2A comes with a deep pocket carry clip which can be removed or swivelled to any position to help you locate the power switch.
 photo 09 Olight S2A clip P1220480.jpg

A very plain and compact tail-cap is used as there is no switch to accommodate.
 photo 10 Olight S2A tailcap P1220483.jpg

Behind that TIR optic is a XM-L2 LED.
 photo 11 Olight S2A led P1220486.jpg

Looking inside the tail-cap. Note, that unlike the S1, the S2A has no magnet, and also shown here is a plastic insulator disc which is present when you get the S2A, as it comes with 2xAA Lithium cells loaded inside.
 photo 12 Olight S2A tail contact P1220496.jpg

Very neatly cut fully anodised square threads are used.
 photo 13 Olight S2A threads P1220501.jpg

Peering inside the battery tube you can make out the positive contact spring.
 photo 15 Olight S2A head contact P1220510.jpg

It really isn’t much bigger than the two AA cells that power it.
 photo 14 Olight S2A with cells P1220506.jpg

Over the battery tube is a silicon rubber skin-safe grip (more on that later).
 photo 16 Olight S2A grip P1220520.jpg

An excellent quality of finish even under closer scrutiny. Here is the lanyard hole in the tail-cap.
 photo 17 Olight S2A lanyard hole P1220523.jpg

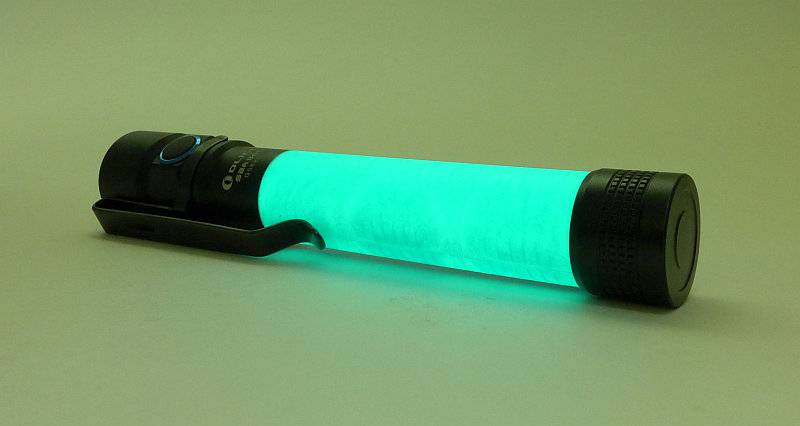
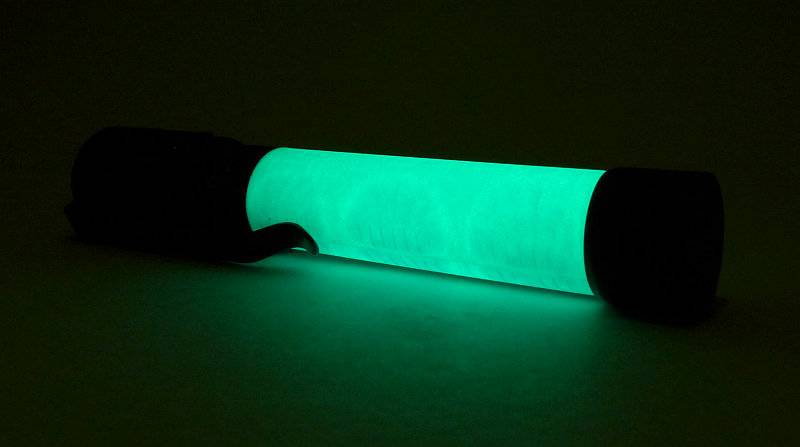
I said we would be coming back to this, the rubber grip. Well, what a nice surprise it was to see that it glows!
 photo 20 Olight S2A glowing grip P1230337.jpg

The GITD grip is a very useful location feature.
 photo 21 Olight S2A glowing grip P1230339.jpg

The beam

Please be careful not to judge tint based on images you see on a computer screen. Unless properly calibrated, the screen itself will change the perceived tint.

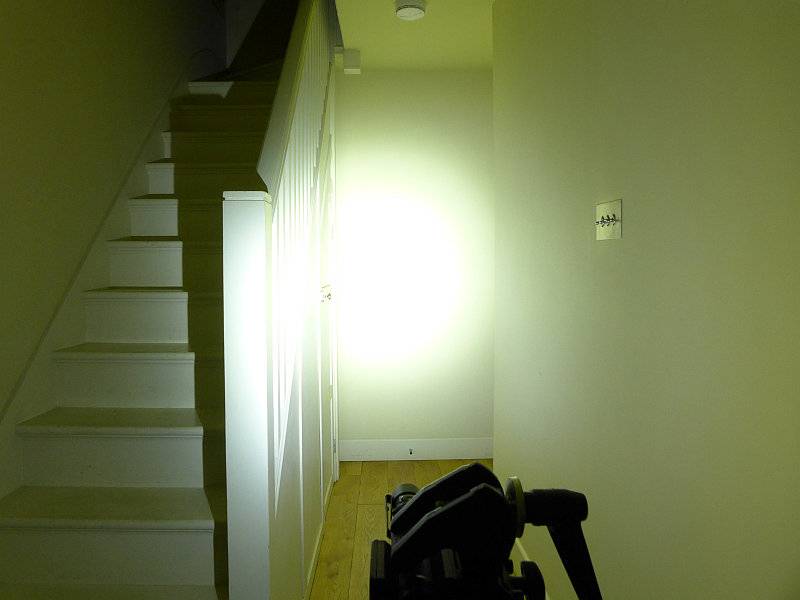
The indoor beamshot is intended to give an idea of the beam shape/quality rather than tint. All beamshots are taken using daylight white balance. The woodwork (stairs and skirting) are painted Farrow & Ball “Off-White”, and the walls are a light sandy colour called ‘String’ again by Farrow & Ball. I don’t actually have a ‘white wall’ in the house to use for this, and the wife won’t have one!

Starting off indoors, the 600lm beam is way more than you need at this range. There is a defined hot-spot with a very wide spill round it.
 photo 18 Olight S2A indoor beam P1230327.jpg

For a 2xAA light the 600lm gives it very good mid-range ability, though the spill becomes much less useful out here, with the hot-spot taking over.
 photo 19b Olight S2A outdoor beam P1240692.jpg

Modes and User Interface:

The S2A has six output modes, Turbo, High, Medium, Low, Moonlight and Strobe and a single click-switch on the side.

Basic ON/OFF operation is carried out with a single click of the side switch. The S2A will turn on to the last used constant mode including moonlight (this does not include Strobe).

To change the brightness, while ON, press and hold the switch to cycle through Low-> Medium -> High -> Low -> Medium etc. Release the switch once you have the required output.

There are a few special functions:
Moonlight mode – from OFF, press and hold the switch for 1s until the Moon mode is activated.
Direct access to Turbo – from OFF, double-click the switch.
Strobe – From ON or OFF, triple-click the switch.
Timer – From ON, double-click the side switch. The S2A will blink one or two times. Once means the 3 minute timer is activated, twice means the 9 minute timer is activated. To swap between 3 and 9 minutes timers, double-click the switch.

Timer mode means that the S2A will turn itself off after the specified time, and this can be started from any mode (including Strobe and Moonlight).

Batteries and output:

The S2A runs on 2xAA cells either Alkaline, NiMh, or AA Lithium.

To measure actual output, I built an integrating sphere. See here for more detail. The sensor registers visible light only (so Infra-Red and Ultra-Violet will not be measured).

Please note, all quoted lumen figures are from a DIY integrating sphere, and according to ANSI standards. Although every effort is made to give as accurate a result as possible, they should be taken as an estimate only. The results can be used to compare outputs in this review and others I have published.

___________________________________________ ________________________________ ________________________________
Olight S2A using specified cell I.S. measured ANSI output Lumens PWM frequency or Strobe frequency (Hz)
___________________________________________ ________________________________ ________________________________
Turbo – AA Eneloop 596 0
High – AA Eneloop 282 0
Medium – AA Eneloop 132 0
Low – AA Eneloop 17 0
Moon – AA Eneloop Below Threshold 0
Turbo – AA Lithium 546 0

* Beacon and Strobe output measurements are only estimates as the brief flashes make it difficult to capture the actual output value.

Peak Beam intensity measured 3500 lx @1m giving a beam range of 118 m.

There is parasitic drain but is incredibly low at 1uA (216 years to drain the cells).

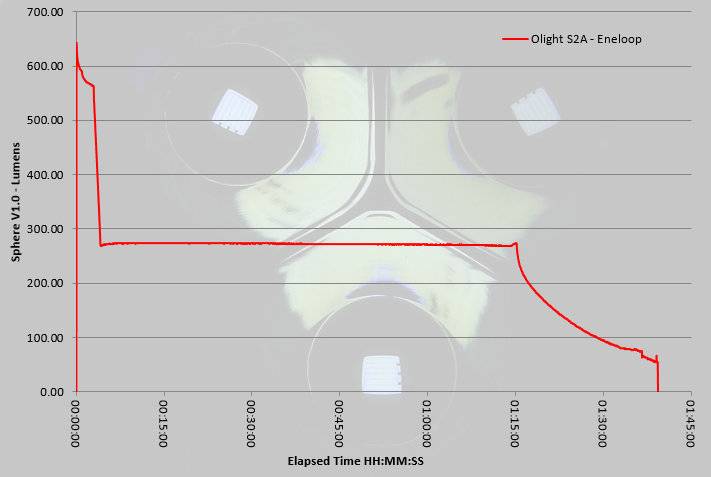
What is very impressive with the S2A is that 600lm Turbo output. This is pushing it for 2xAA, and only with the Eneloops did I get this peak measurement. Like many other lights, the output drops after 3 minutes down to its much more normal 270lm level which the AAs can keep up with. This output is very well regulated for 1h 15m, after which is starts to drop off. There is a sharp cut off around 1h 40m, but you get plenty of warning the output is dropping.
 photo Olight S2A runtime.jpg

Troubleshooting

This section is included to mention any minor niggles I come across during testing, in case the information helps anyone else.

No issues were encountered during testing.

As per the description of this section, this information is provided in case anyone else finds a similar ‘issue’ that might be fixed in the same way.

The S2A in use

For anyone that has read my other reviews of the Olight Batons, you will already know I think they have got the UI spot on. For non-tactical use, the side switch is king, falling nicely under your thumb and being very natural to use. Then there is the simple control options but that give your direct access to moonlight, Turbo, Strobe and last used modes; what more could you want?

I wouldn’t have thought it, but the timer mode has also proven useful letting you get tucked up in a sleeping bag, or even to give you a way of keeping a rough track of time. I’ve certainly used it that way when only wanting to be out for so long and getting easily distracted, the 9 minute timer switches the light off which I pop straight on again and head back. You are sure to find several uses once you try it out.

Having the rubber grip does make it very secure to hold, and stops it from feeling cold when temperatures are low. The best part of this is the GITD feature. The glow does last several hours, but you will need dark adapted eyes to see it after an hour or so, and it might not make it through a long night. Even so this is a great addition.

The brightness of the hot-spot did surprise me a little as I was hoping for a beam with slightly more flood. (This is a personal preference as unless I want a thrower, I always find full flood easier to use for my needs.) Indoors I have felt some hot-spot blinding and have had to use a ceiling bounce instead of direct illumination. Outside that hotspot does become useful, so there is a good balance making this an all-rounder.

Negligible parasitic drain allows for this to be loaded up and on standby without worrying if your cells are running down, so I applaud Olight for that excellent 1uA drain; I won’t be worried in 216 years time that the cells have run down!

Although I also have a preference for single cell lights, as you don’t have to cell match, the 2xAA format does give you quite a bit more power and runtime plus the benefit of being a good size to hold. This really hits a sweet spot for me in format and usability and is now a favourite EDC light.

Review Summary

_______________________________________________ _______________________________________________
Things I like What doesn’t work so well for me
_______________________________________________ _______________________________________________
600lm output (from 2xAA). No holster supplied.
Side switch. Hot-spot can be too bright indoors.
Direct access to Moonlight, Turbo and Strobe.
Timer function.
Glow-in-the-Dark rubber grip.
AA powered.

 photo 00 Olight S2A feature P1220465.jpg


Discussing the Review:

Please feel free to add comments to the review, but the ideal place to freely discuss these reviews is on a forum. If you started reading the shorter forum version of the review, but followed the link this full exclusive review, please return to that forum to discuss the review there.
If you read the review entirely on Tactical Reviews, please consider one of the following to join in any discussion.

CandlePowerForums – Flashlight Reviews Section (Largest and Friendliest Flashlight Community Forum)

EdgeMatters – Sponsored Reviews (UK based Forum for Knife Makers and Collectors)
Light Review: Fenix TK15UE (Ultimate Edition)

Fenix have been taking classic lights from their range and creating ‘Ultimate Edition’ versions, pushing their performance to the maximum. The TK15 has now been ‘UE’ed to make the TK15UE with uprated output, throw and a new stainless steel bezel.

 photo 16 TK15UE trailer P1230848.jpg

Taking a more detailed look:

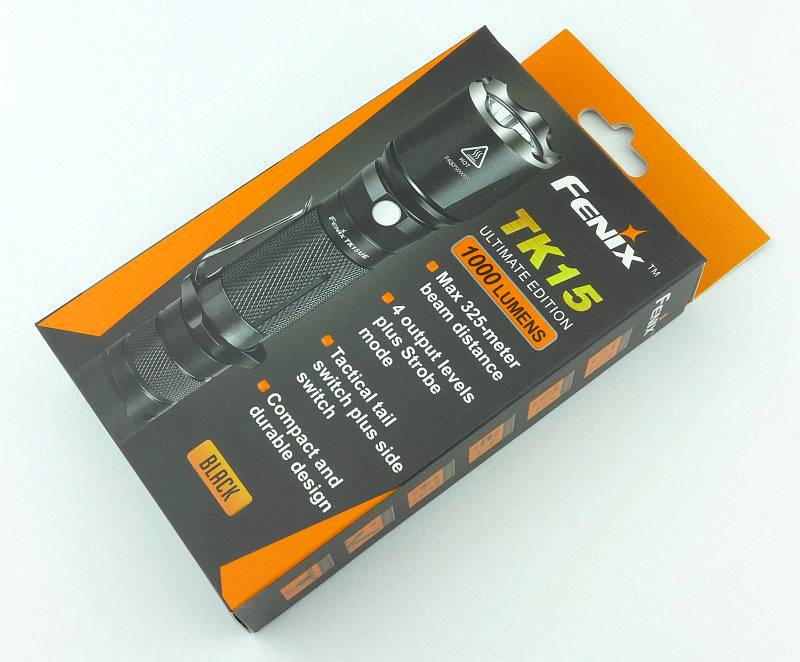
The TK15UE comes in Fenix’s standard packaging.
 photo 01 TK15UE Boxed P1230641.jpg

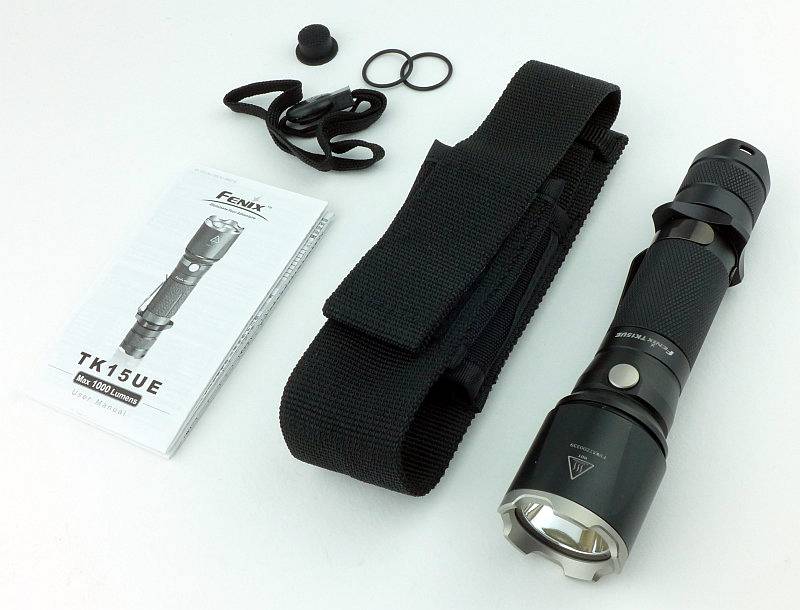
Included with the TK15UE are the instructions, a holster, a lanyard, a couple of O-rings and a spare switch boot.
 photo 02 TK15UE Box contents P1230650.jpg

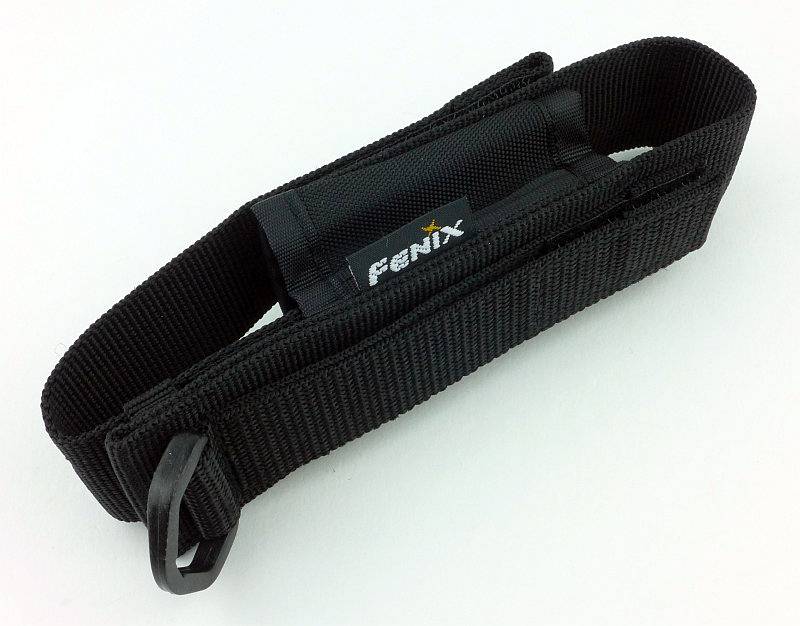
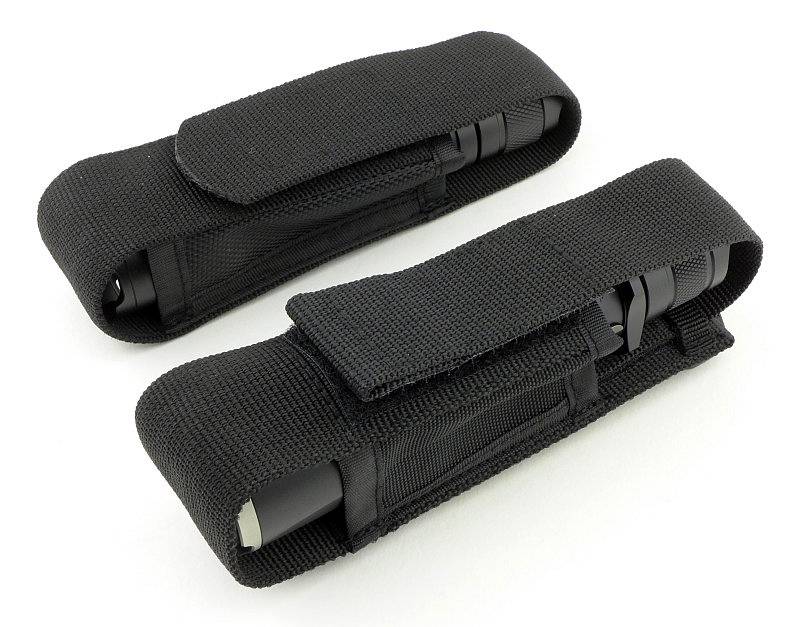
Before we move on, the holster is worth lingering on a little longer.
 photo 03 TK15UE holster P1230657.jpg

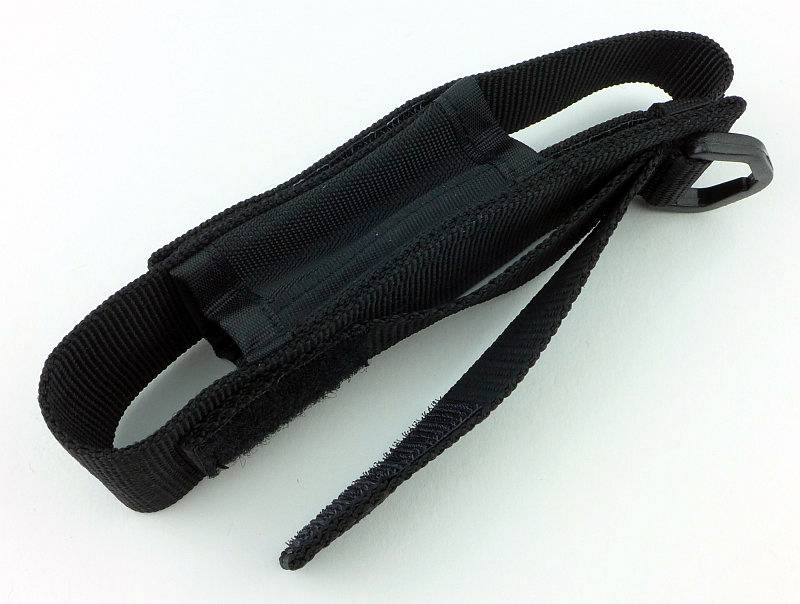
On the back there is a choice of a D-ring, fixed loop, and Velcro closing loop.
 photo 04 TK15UE holster loops P1230656.jpg

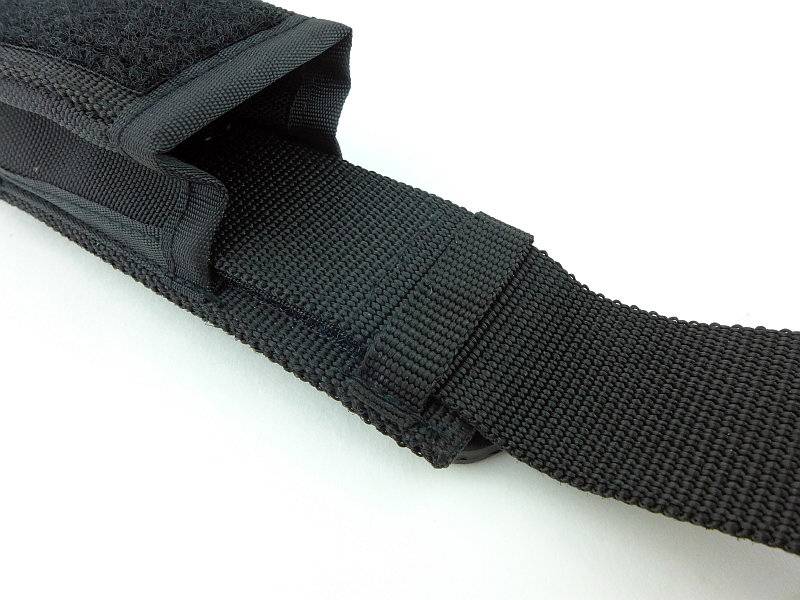
There is something a little different here. The holster flap has a retaining strap over it and inside the holster it is fixed with Velcro.
 photo 05 TK15UE holster flap P1230667.jpg

You can just see inside that the flap extends most of the way down the inside of the holster.
 photo 07 TK15UE holster flap adjust inside P1230678.jpg

The entire flap can be undone and either removed or adjusted to loosen or tighten the fit, or even accommodate a different length light.
 photo 06 TK15UE holster flap adjust P1230675.jpg

As supplied, the holster is correctly configured for the TK15UE.
 photo 08 TK15UE in holster P1230680.jpg

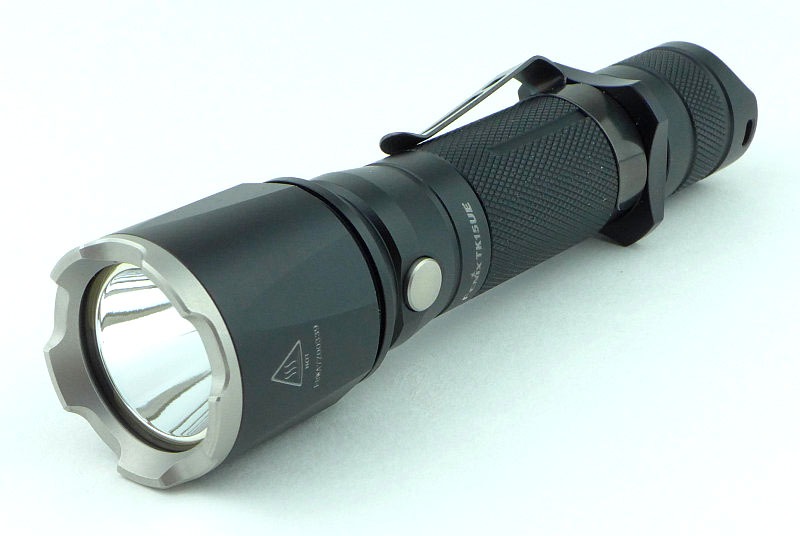
The most obvious sign that this is something a bit different to the previous TK15s is the Stainless Steel bezel.
 photo 09 TK15UE angle P1230689.jpg

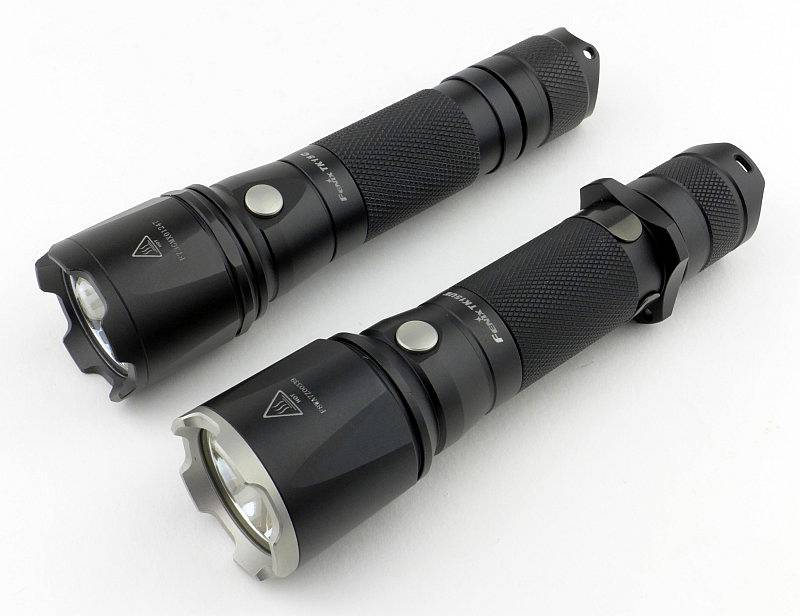
Let’s have a look at how the TK15UE and an older TK15 compare. This is the TK15C. So the holster is more than the basic one the TK15C comes with.
 photo 10 TK15UE compare P1230827.jpg

Dimensions are all very similar. The TK15C I’m comparing with here has had the clip removed as well as the tactical grip ring because it has been used gun-mounted.
 photo 12 TK15UE compare P1230832.jpg

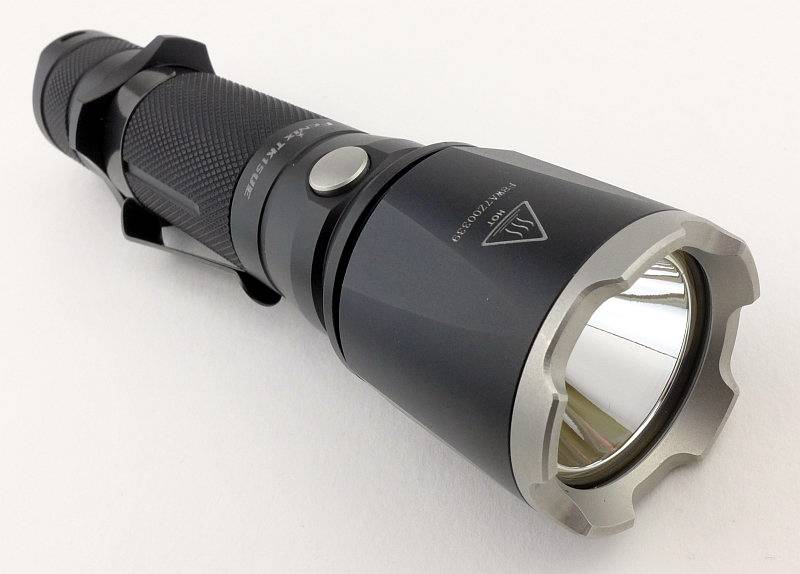
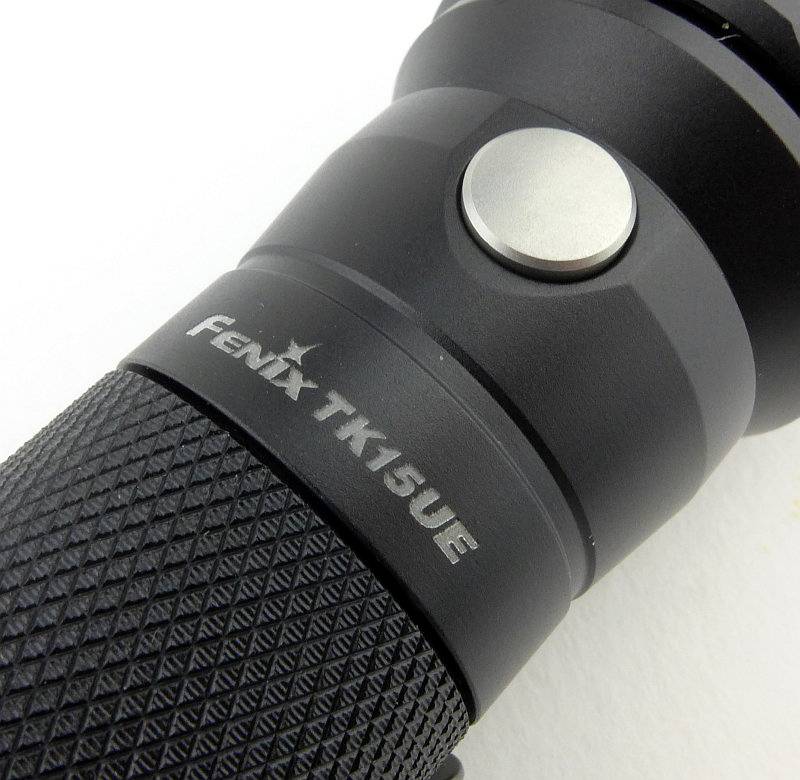
Going in close to the engraving of the model, the knurling and mode switch.
 photo 13 TK15UE switch detail P1230837.jpg

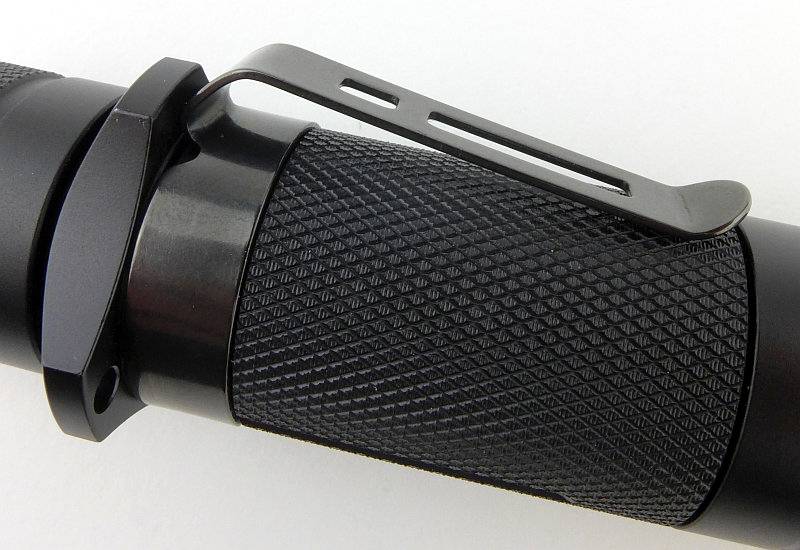
All the edges of the clip are nicely rounded, and there are no sharp corners to eat away at your pockets (just the knurling under the clip).
 photo 14 TK15UE clip detail P1230839.jpg

The switch button does protrude, so no tail-standing, and it has two raised areas to provide the switch with some protection from accidental activation.
 photo 15 TK15UE tail detail P1230844.jpg

As with the stainless bezels on other Fenix lights, the edges have been bevelled to make them kind to the holster and your pockets.
 photo 17 TK15UE bezel P1230849.jpg

The inner edges of the bezel are crisp without being sharp.
 photo 18 TK15UE bezel P1230852.jpg

Fenix’s preferred trapezoid threads are used.
 photo 19 TK15UE threads P1230857.jpg

The end of the battery tube is the electrical contact that connects to the tail-cap contact.
 photo 20 TK15UE tube P1230863.jpg

Inside the tail-cap are the battery tube contact and the negative terminal sprung contact.
 photo 21 TK15UE tailcap contacts P1230866.jpg

With the TK15UE, the head will unscrew.
 photo 22 TK15UE head off P1230884.jpg

As the battery tube can be removed we can get a good look at those contacts in the head.
 photo 23 TK15UE head contacts P1230885.jpg

Just like previous TK15 models, the TK15UE has a smooth reflector.
 photo 24 TK15UE reflector P1230888.jpg

In the centre of that reflector is the CREE XP-L HI V3 LED.
 photo 25 TK15UE LED P1230897.jpg

Looking straight into the TK15UE’s reflector.
 photo 26 TK15UE LED P1230901.jpg

The TK15UE is one of the more compact single 18650 lights. Not as compact as the small-head types such as the PD32, but it does have a big enough reflector to give it some punch.
 photo 27 TK15UE with cell P1230904.jpg

You can take off the tactical grip ring by unscrewing it.
 photo 28 TK15UE ring off P1230910.jpg

Unless you buy the optional thread protector you will see the grip ring threads.
 photo 29 TK15UE ring threads P1230914.jpg

The beam

Please be careful not to judge tint based on images you see on a computer screen. Unless properly calibrated, the screen itself will change the perceived tint.

The indoor beamshot is intended to give an idea of the beam shape/quality rather than tint. All beamshots are taken using daylight white balance. The woodwork (stairs and skirting) are painted Farrow & Ball “Off-White”, and the walls are a light sandy colour called ‘String’ again by Farrow & Ball. I don’t actually have a ‘white wall’ in the house to use for this, and the wife won’t have one!

Indoors the TK15UE is not at its best, as it is quite a throw orientated beam. The hotspot is bright and well formed. Spill is relatively dim and narrow but usable. There is enough balance in the beam to make it OK indoors.
 photo 32 TK15UE indoor P1240716.jpg

But it is when you get a bit more range that the TK15UE really starts to shows what it is made of. The throw belies its compact size, and with the ‘UE’ upgrade it is a really punchy little light.
 photo 31 TK15UE outdoor P1240668.jpg

Modes and User Interface:

To control the TK15 UE there is the forward-clicky tail switch, and the mode selection switch just behind the head.

Click ON (or half press for momentary action) the tail switch to access the last used constant mode. With the tail switch on, press the mode button to cycle though the modes.

The standard modes are Low, Medium, High and Turbo.

There is a hidden Strobe mode accessed by holding the modes selection switch in for 1s. Strobe is not memorised as a last used mode.

Batteries and output:

The TK15UE runs on 18650 or 2xCR123.

To measure actual output, I built an integrating sphere. See here for more detail. The sensor registers visible light only (so Infra-Red and Ultra-Violet will not be measured).

Please note, all quoted lumen figures are from a DIY integrating sphere, and according to ANSI standards. Although every effort is made to give as accurate a result as possible, they should be taken as an estimate only. The results can be used to compare outputs in this review and others I have published.

___________________________________________ ________________________________ ________________________________
Fenix TK15UE using specified cell I.S. measured ANSI output Lumens PWM frequency or Strobe frequency (Hz)
___________________________________________ ________________________________ ________________________________
Turbo – Fenix ARB-L18-3500 776 0
High – Fenix ARB-L18-3500 377 0
Medium – Fenix ARB-L18-3500 164 0
Low – Fenix ARB-L18-3500 14 0

* Beacon and Strobe output measurements are only estimates as the brief flashes make it difficult to capture the actual output value.

Peak Beam intensity measured 31100 lx @1m giving a beam range of 353m.

There is no parasitic drain.

I was slightly surprised by the Turbo output runtime trace as unlike most Fenix lights the TK15UE does not appear to run with a regulated output. The trace was recorded using cooling, so it is unlikely that this is due to overheat protection, instead the TK15UE seems to run at maximum output with that output sagging as the cell becomes depleted. However saying that, you do get a full hour of runtime at more than 600lm, so overall the performance is still good. (This was run using Fenix’s latest ARB-L18 3500mAh cell.)
 photo Fenix TK15 UE runtime.jpg

Troubleshooting

This section is included to mention any minor niggles I come across during testing, in case the information helps anyone else.

No issues were encountered during testing.

As per the description of this section, this information is provided in case anyone else finds a similar ‘issue’ that might be fixed in the same way.

The TK15UE in use

By separating the mode selection to a side-switch Fenix have allowed proper momentary use of that forward-clicky tail switch. This makes for a really easy and intuitive interface and keeps things simple for any user.
Fortunately the strobe mode is reasonably well hidden and is not memorised; I’m surprised anyone still includes strobe. As those that follow me will know, I’m certainly no fan of strobe and most true tactical users I know are aware that if you strobe another person, you strobe yourself as well, so your are better off not using it at all. Thankfully with the TK15UE you need never come across strobe and can use the four constant output modes without tripping over strobe.
The TK15UE manages a balance between hotspot and spill that, although it is more oriented towards throw, is still usable at indoor distances.
When using the holster with the TK15UE inserted bezel-down, the bezel does catch in the holster before getting all the way in. Used bezel-up, this does not happen. It seems to be due to the adjustable flap taking up more space inside so the bezel catches on the inside of the holster. To get it all the way into the holster bezel-down you need to twist the TK15UE as you insert it.
There are smaller single 18650 lights, but the TK15UE is still compact enough to make it easy to carry, yet that slightly larger head is enough to give it a nice strong beam. Even with the upgrades to the head and LED, Fenix have kept the character of the TK15 but made it significantly brighter.
I’ve always felt the TK15 was an unsung hero in the Fenix line-up, quietly getting on with the job while others took the glory. In the Ultimate Edition, the TK15UE can now take some of the limelight and hopefully get a bit more recognition.

Review Summary

_______________________________________________ _______________________________________________
Things I like What doesn’t work so well for me
_______________________________________________ _______________________________________________
Significantly boosted output compared to previous TK15 models. Turbo output not regulated.
Excellent throw from a compact head. Bezel catches in holster when used bezel down.
Simple user interface. Can accidentally hit the mode switch especially if wearing gloves.
Stainless Steel Bezel.

 photo 30 TK15UE angle on P1230918.jpg


Discussing the Review:

Please feel free to add comments to the review, but the ideal place to freely discuss these reviews is on a forum. If you started reading the shorter forum version of the review, but followed the link this full exclusive review, please return to that forum to discuss the review there.
If you read the review entirely on Tactical Reviews, please consider one of the following to join in any discussion.

CandlePowerForums – Flashlight Reviews Section (Largest and Friendliest Flashlight Community Forum)

EdgeMatters – Sponsored Reviews (UK based Forum for Knife Makers and Collectors)

Light Review: Olight R50 Seeker

Olight’s R50 Seeker is a handy sized powerhouse using a 26650 cell and the XHP50 LED allowing it to give you 2500lms in an easily carried package; built-in USB charging adds to its flexibility.

 photo 08 Olight R50 angle P1220569.jpg

Taking a more detailed look:

The R50 arrives in something more like a presentation box than just ‘packaging’.
 photo 01 Olight R50 boxed P1220538.jpg

The box has a lid which is held shut with magnets.
 photo 02 Olight R50 box open P1220544.jpg

Taking everything out you have the R50, instructions, charger, charger plug adaptor, USB cable and lanyard.
 photo 03 Olight R50 box contents P1220548.jpg

Before you can use the charger you need to fit your local plug adaptor.
 photo 04 Olight R50 charger apart P1220552.jpg

The adaptor clicks into place.
 photo 05 Olight R50 charger together P1220555.jpg

The charger is multi-voltage and with a 2.1A output.
 photo 06 Olight R50 charger info P1220560.jpg

Separating out the USB cable and lanyard. The lanyard has a very nice ‘fabric tube’ wrist loop.
 photo 07 Olight R50 cable lanyard P1220563.jpg

A good looking light with blue bezel an switch rings.
 photo 10 Olight R50 angle P1220576.jpg

Looking from the rear you can see the USB charging port cover in the tail-cap.
 photo 09 Olight R50 rear angle P1220574.jpg

The main power switch is low profile, but big enough to be easy to use.
 photo 11 Olight R50 switch P1220580.jpg

Diving in close to the quad die XHP50 LED.
 photo 13 Olight R50 LED close P1220597.jpg

Surrounding the LED is a textured reflector.
 photo 14 Olight R50 reflector P1220606.jpg

Flipping round to the other end, there is a rubber charging port cover in the tail-cap.
 photo 15 Olight R50 port cover P1220610.jpg

Pulling this aside exposes the micro-USB socket.
 photo 16 Olight R50 port open P1220615.jpg

Inside the tailcap, there are three contacts; a ring contact for the end of the battery tube, and two sprung button contacts.
 photo 17 Olight R50 contacts P1220616.jpg

The tail-cap end of the cell has two contacts to match the two in the tail-cap.
 photo 18 Olight R50 cell contacts P1220621.jpg

Threads are square cut.
 photo 19 Olight R50 threads P1220624.jpg

Supplied with the R50 is a proprietary Olight 26650 cell.
 photo 20 Olight R50 cell P1220628.jpg

This cell has the twin contacts on the ‘negative’ end of the cell, and an arrow on the side to indicate which way to insert it.
 photo 21 Olight R50 cell P1220630.jpg

Peering inside the battery tube to look at the positive contact.
 photo 22 Olight R50 internal contact P1220633.jpg

The beam

Please be careful not to judge tint based on images you see on a computer screen. Unless properly calibrated, the screen itself will change the perceived tint.

The indoor beamshot is intended to give an idea of the beam shape/quality rather than tint. All beamshots are taken using daylight white balance. The woodwork (stairs and skirting) are painted Farrow & Ball “Off-White”, and the walls are a light sandy colour called ‘String’ again by Farrow & Ball. I don’t actually have a ‘white wall’ in the house to use for this, and the wife won’t have one!

The R50 manages to combine a very wide spill with a bright hotspot.
 photo 29 Olight R50 indoor beam P1240719.jpg

Taking it outside and that wide beam lights up everything near you and the broad hotspot has good range.
 photo 28 Olight R50 outdoor beam P1240671.jpg

Modes and User Interface:

Before we get into the controls, we need to charge the R50. After connecting the USB cable there is a red charging indicator light next to the USB socket.
 photo 25 Olight R50 charging P1220651.jpg

Once fully charged this turns green.
 photo 26 Olight R50 charged P1220668.jpg

To turn ON to the last used constant mode, click the side switch once.
To turn ON to Turbo directly, double-click the side switch.
To turn ON to Strobe, triple-click the side switch.
To turn ON to Low mode directly, press and hold the side switch for 1s.

To change brightness level, with the R50 ON, press and hold the switch to cycle through Low – Medium – High – Low etc.

To turn OFF, click the side switch.

There is a memory for the last used ‘normal’ mode (Low, Medium, or High) but High is only memorised for 10 minutes after which the R50 goes back to Medium.

There are two ways to lockout the R50:
1. Unscrew the tail-cap a half turn.
2. Press and hold the side switch (from OFF) for over 2s. (After 1s the R50 will come onto Low, but after 2s it will go off again as it enters lockout.)

To exit lockout use the corresponding method to the lockouts above:
1. Tighten the tailcap.
2.Press and hold the switch for 3s.

Batteries and output:

The R50 Seeker runs on a proprietary 26650 cell. The instructions do not mention support for standard 26650 cells, however I have tried this and the R50 does function (though does not accommodate very long cells) apart from the charging not working.

To measure actual output, I built an integrating sphere. See here for more detail. The sensor registers visible light only (so Infra-Red and Ultra-Violet will not be measured).

Please note, all quoted lumen figures are from a DIY integrating sphere, and according to ANSI standards. Although every effort is made to give as accurate a result as possible, they should be taken as an estimate only. The results can be used to compare outputs in this review and others I have published.

___________________________________________ ________________________________ ________________________________
Olight R50 using supplied 26650 cell I.S. measured ANSI output Lumens PWM frequency or Strobe frequency (Hz)
___________________________________________ ________________________________ ________________________________
Turbo 2479 0
High 1281 0
Medium 440 0
Low 39 0

* Beacon and Strobe output measurements are only estimates as the brief flashes make it difficult to capture the actual output value.

Peak Beam intensity measured 22000 lx @1m giving a beam range of 297 m.

There is parasitic drain at 52uA. When using the included 4500mAh cell, it will take 9.87 years to drain the cell.

A very impressive output for a compact light. During extended use, the Turbo stepping down from nearly 2500lm to 1800lm is not noticeable and while running at 1800lm starts to generate a good amount of heat. Even with the step down at 30 minutes to around 1650lm you don’t really notice, and it is only once you get to about 50 minutes and the R50 steps down to the medium output of 440lm that you see a drop in output.
 photo Olight R50 runtime.jpg

Troubleshooting

This section is included to mention any minor niggles I come across during testing, in case the information helps anyone else.

No issues were encountered during testing.

As per the description of this section, this information is provided in case anyone else finds a similar ‘issue’ that might be fixed in the same way.

The R50 Seeker in use

For such a usable and useful light I am disappointed Olight did not include a holster. Even though it uses the 26650 cell, so has a thicker tube than the common 18650 size light, Olight have kept the overall size very compact and comfortable to hold. It may not be jeans-pocket sized, it is easily coat-pocket sized.

Output is extremely impressive and does meet the specified 2500lm. This does drop to 1800 after 3 minutes, but that reduction is barely noticeable and the R50 continues to impress. Everyone who has seen me using the R50 has said “that is bright” and asked what it is; a real talking point.

One area where I think Olight has really cracked it, is the interface. It is the same, or very similar, to many of the other Olight lights with a single side switch, so you will recognise the way it works. Giving the user direct access to the maximum and minimum levels, whatever you last used, makes this a real winner. Another nice touch is the way that the ‘normal’ mode (from a single click of the side switch) will not memorise High beyond 10 minutes of being off, it means that whatever you were doing with the R50, worst case you might get Medium if you turn it on without thinking. Not so much you get blinded and yet powerful enough.

These days you won’t really find yourself unable to find a USB charger at work or at home. The R50 comes with a quality 2A charger anyway, but while you are away from home you will be able to top up the R50 easily enough. The instructions specifically don’t mention using any other 26650 cells, but being the rebel I am, I popped one in. Clearly the charging function is not going to work, but the R50 itself did work, so you can carry a spare 26650 if you want. Just beware that the R50’s tube is not that long, so some 26650 cells may be too long. Check it fits before you rely on it.

There is some shaping at the head, but the R50 effectively has no anti-roll feature, you need to put it down head-down or tail-down. It does tail-stand very well.

Running the R50 on Turbo also provides you with a hand-warmer as it does heat up quite a lot. Given a cold evening, this certainly is a welcome feature. If you decide to tail-stand the R50 on Turbo you will hit the over-heat protection, so expect the output to drop if you let it get really hot.

Personally I find the R50 hits a real sweet spot in terms of size, ergonomics and output. Give me a side-switch light any day, add to that a cell which is large enough to sustain a significant output and a great all-rounder beam, keep it small enough to pop into a coat pocket and you have a winner. I’ll forgive it the proprietary cell for the fact that this has convenient built-in USB charging, doesn’t need anything else to be bought to use it, but can use standard 26650 cells, so gets round the normal limitation of proprietary cell lights.

Review Summary

_______________________________________________ _______________________________________________
Things I like What doesn’t work so well for me
_______________________________________________ _______________________________________________
2500lm from a compact light. Requires the proprietary cell for built-in charging.
Excellent UI using an ergonomic side switch. No holster supplied.
Can run on a standard 26650 – Unofficially. No Anti-Roll.
Direct access to Maximum and Minimum modes.
Regulated output.
All-rounder beam.

 photo 24 Olight R50 angle on P1220636.jpg


Discussing the Review:

Please feel free to add comments to the review, but the ideal place to freely discuss these reviews is on a forum. If you started reading the shorter forum version of the review, but followed the link this full exclusive review, please return to that forum to discuss the review there.
If you read the review entirely on Tactical Reviews, please consider one of the following to join in any discussion.

CandlePowerForums – Flashlight Reviews Section (Largest and Friendliest Flashlight Community Forum)

EdgeMatters – Sponsored Reviews (UK based Forum for Knife Makers and Collectors)
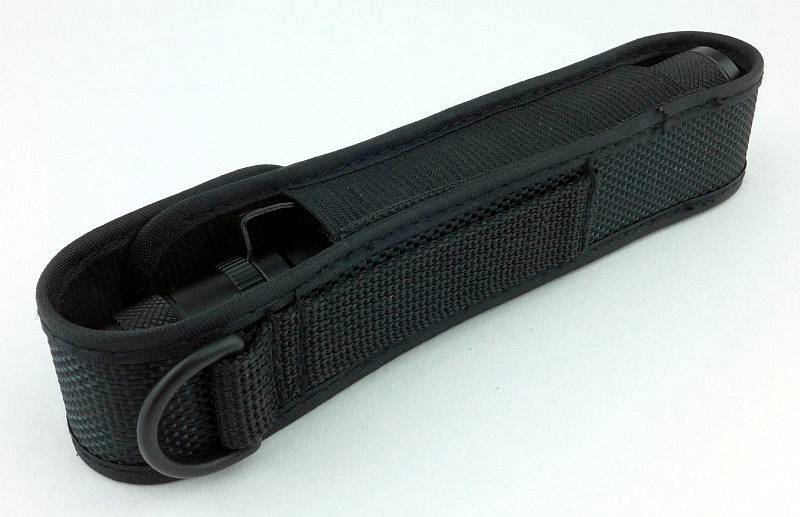
Light Review: Surefire Sidekick (Compact Fob Light)

Though not the first to make a USB rechargeable keychain light, Surefire have applied their philosophy of ‘excellence in illumination’ to this EDC essential.

 photo 09 Sidekick on P1170827.jpg

Taking a more detailed look:

The Sidekick comes in a cardboard blister pack.
 photo 01 Sidekick Boxed P1170798.jpg

Inside is the Sidekick itself, a short USB charging cable, a metal clip and the instructions.
 photo 02 Sidekick Box contents P1170803.jpg

The underside of the Sidekick has a metal heat sink panel with the model engraved onto it.
 photo 03 Sidekick angle P1170808.jpg

At the top is the power button and a moulded Surefire logo. The main body is a tough plastic and has a split ring at the rear.
 photo 04 Sidekick rear angle P1170812.jpg

On the angled corner at the front you can see the micro-USB port for charging.
 photo 05 Sidekick port angle P1170815.jpg

I only noticed the small piece of plastic case under the micro-USB port was cracked when I was preparing these photos. This has not affect the function at all.
 photo 06 Sidekick port close P1170816.jpg

Set into the front is Surefire’s MaxVision Beam reflector assembly. This has a multi-faceted reflector surface to smooth out the beam without the losses of a textured reflector.
 photo 07 Sidekick reflector angle P1170822.jpg

Looking straight into the faceted reflector at the Cree XP-G2 LED. (For some reason Surefire don’t specify the actual LED anywhere in the documentation.)
 photo 08 Sidekick LED P1170824.jpg

Plugging in the micro-USB cable to charge the Sidekick.
 photo 10 Sidekick charging P1170830.jpg

Even the compact metal clip has ‘SF’ on it.
 photo 11 Sidekick clip P1170831.jpg

The split ring is very stiff, so getting the clip on isn’t easy, but its not going to come off by mistake.
 photo 12 Sidekick with clip P1170834.jpg

The beam

Please be careful not to judge tint based on images you see on a computer screen. Unless properly calibrated, the screen itself will change the perceived tint.

The indoor beamshot is intended to give an idea of the beam shape/quality rather than tint. All beamshots are taken using daylight white balance. The woodwork (stairs and skirting) are painted Farrow & Ball “Off-White”, and the walls are a light sandy colour called ‘String’ again by Farrow & Ball. I don’t actually have a ‘white wall’ in the house to use for this, and the wife won’t have one!

Since the days of the Solitaire keychain light, I’ve always had a compact EDC light on my keys. This shrunk to the photon size button cell type, but those really only served as a last ditch light, so the size I used grew again to include a USB rechargeable or AAA powered light. The beam of the Sidekick is a revelation in keychain lights, with its wide floody beam (with no glare) and plenty of power.

Just look at this beamshot and you probably think we were looking at something you wouldn’t attach to your keys. A really excellent EDC beam.

 photo 14 Sidekick indoor beam P1230310.jpg

Modes and User Interface:

The Sidekick has three output levels Low, Medium, and High.
From OFF, press the power switch to select Low, press again within 2s to change to Medium, press again within 2s of the last press to get High, and once more cycles to OFF.
If you are using either Low or Medium, if you wait over 2s before pressing again, the Sidekick will turn OFF (instead of going to the next mode and then OFF).

There are no indicator lights on the Sidekick, so no charge or low battery indicators. Instead the Sidekick uses its main LED. For low battery, the output simply reduces sharply to a lower level and starts to fade out. There is no sudden turn off, so while there is no actual ‘warning’ it is clear you are low on power.

For charging, the main LED is used as the indicator. With the USB power connected, the LED blinks to indicate the Sidekick is charging. During the charging process the LED sometimes comes on steadily for a few seconds then has a series of blinks. I’ve not so far managed to determine if there is an actual pattern to this. Ultimately, once fully charged the main LED comes on steadily at the low level and stays on as long as power is connected.

The default order of the modes is L-M-H, but this can be reversed to H-M-L by carrying out the following steps:

1. Plug in the charger.
2. Press the switch three times until the High level is activated.
3. Leave the Sidekick On for 5 seconds or more, then press the switch once to turn Off.
4. Unplug from the charger and test the sequence.

To return to L-M-H, repeat the previous steps except in step 2 you press three times to activate Low.
(Stopping on Medium at step 2 does not do anything.)

Batteries and output:

The Sidekick runs on a built-in 640mAh Li-ion battery.

Surefire have commented that the charge rate is fixed around 450mA, but it always seems to charge faster than the instruction manual, or this information, would suggest. In my experience (with a good charger) even fully depleted, it takes less than an hour to charge.

To measure actual output, I built an integrating sphere. See here for more detail. The sensor registers visible light only (so Infra-Red and Ultra-Violet will not be measured).

Please note, all quoted lumen figures are from a DIY integrating sphere, and according to ANSI standards. Although every effort is made to give as accurate a result as possible, they should be taken as an estimate only. The results can be used to compare outputs in this review and others I have published.

___________________________________________ ________________________________ ________________________________
Surefire Sidekick using built-in cell I.S. measured ANSI output Lumens PWM frequency or Strobe frequency (Hz)
___________________________________________ ________________________________ ________________________________
High 320 0
Medium 60 0
Low 3 100

* Beacon and Strobe output measurements are only estimates as the brief flashes make it difficult to capture the actual output value.

There is parasitic drain but as the light is sealed this could not be measured. During normal use over a period of over 6 months, the Sidekick has never noticeably self drained.

For such a compact lightweight light, the Sidekick has a fantastic performance on High. Not fully regulated, the output does however remain above 250lm for a full 45 minutes – very impressive for a keychain light.
 photo surefire sidekick runtime.jpg

Troubleshooting

This section is included to mention any minor niggles I come across during testing, in case the information helps anyone else.

No issues were encountered during testing.

As per the description of this section, this information is provided in case anyone else finds a similar ‘issue’ that might be fixed in the same way.

The Sidekick in use

Though it is compact, the Sidekick is relatively large for a keychain light. It gets away with this thanks to not being heavy and the plastic housing seems to help reduce its overall presence. Here it is shown next to a AAA keychain light and a photon button cell light.

 photo 13 Sidekick size P1170838.jpg

With this extra size and relatively high cost (compared to its rivals, and especially in non-US markets), the Sidekick needs to work well to justify itself. The excellent beam and 300lm output do just that.

Ideally I prefer a smaller keychain light, but the extra size does make it more stable to hold, and you just don’t get that kind of output and runtime from something smaller and lighter.

If the housing were 100% plastic there would be heat issues, but Surefire have used a metal side panel which allows it to conduct heat out of the Sidekick. When using the High output this can get quite hot to the touch.

Perhaps the biggest annoyance for me has been that it is very similar in size to my car key, and when reaching into my pocket I now have to do the ‘pocket juggle’ of my keys to identify if I’ve grabbed my car key or the Sidekick.

The power button is quite stiff and has little feel to the click. The stiffness is an advantage in not having accidental activations (none so far, which I cannot say about other keychain lights), and eventually you do get some feel for the subdued click.

Not being a tactical light, the modes being L-M-H is ideal as for general EDC you most often only need a little light. One disappointment is the use of visible PWM in the Low mode. Medium and High have no PWM, and if only that Low mode was the same it would be much better.

Battery capacity is really great with the 640mAh cell always having plenty of output and runtime for everything I’ve thrown at it. Even with some unexpected night time strolls needing the path to be lit, using the full 300lm and plenty of other On/Off cycles to check things, and I’ve not needed to keep on recharging.

Recharging is one of those ‘love it or hate it’ things due to the main beam being used as a charging indicator. As it has never taken more than 1 hour to charge I haven’t needed to charge it overnight, so it is not that the main beam flashing and then going onto Low disturbs my sleep. However, the flashing can be annoying if you are in a room with lowered lighting. I was surprised by the Sidekick turning on the Low output once charging is complete, but actually it is a very clear indication that charging has finished, and even with a good charging circuit, it is never a good idea to leave any device on charge for a long time for no reason. The Sidekick tells you clearly to take it off charge. You can look at this either way, and to start with I thought it was not good, but having got used to it find it works pretty well.

The beam is very good, with a smooth floody profile and a neutral tint, which makes it so much better to use than lights with a 5mm LED or those with a more focused hotspot. This combined with the 300lm output, which is reasonably well maintained for a full 45 minutes of constant runtime, make this a really strong performer and the slight size penalty you pay is worth it.

Review Summary

_______________________________________________ _______________________________________________
Things I like What doesn’t work so well for me
_______________________________________________ _______________________________________________
Excellent MaxVision Beam. Bigger than most keychain lights.
300lm output. Easily confused for a car key.
USB rechargeable. Built-in non replaceable cell.
Lightweight. Main beam flashes then comes on constantly while charging.
45 minutes runtime on High. Visible PWM used in Low
L-M-H mode order.
Comfortable and stable to hold.
Strong, small, metal clip.


Discussing the Review:

Please feel free to add comments to the review, but the ideal place to freely discuss these reviews is on a forum. If you started reading the shorter forum version of the review, but followed the link this full exclusive review, please return to that forum to discuss the review there.
If you read the review entirely on Tactical Reviews, please consider one of the following to join in any discussion.

CandlePowerForums – Flashlight Reviews Section (Largest and Friendliest Flashlight Community Forum)

EdgeMatters – Sponsored Reviews (UK based Forum for Knife Makers and Collectors)
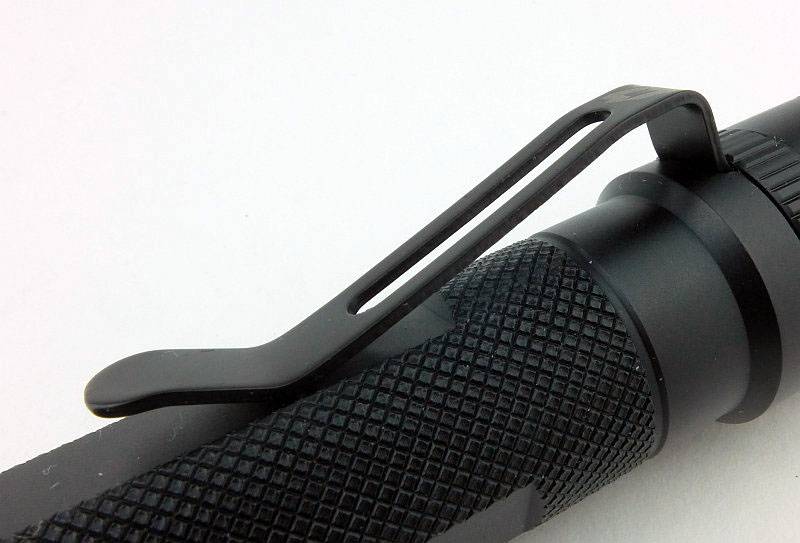
Light Review: Olight M23 JAVELOT

Olight have taken the popular M22 Warrior and updated it by giving it the ‘JAVELOT’ treatment. The result is the M23 JAVELOT. After the success of the first few Javelot models, Olight have been updating a few existing models, like the S30RII and M22 into Javelot versions with uprated emitters and throw.

 photo 09 M23Javelot angle reverse P1160532.jpg

Taking a more detailed look:

The M23 JAVELOT is supplied in a sturdy plastic case.
 photo 01 M23Javelot boxed P1160500.jpg

Everything is held in cut-outs in the foam liner.
 photo 02 M23Javelot box open P1160506.jpg

Starting off with a look at the unconventional holster design. The retention flap has a hole cut into it through which the tail-cap protrudes. This gives access to the tail-cap switch.
 photo 03 M23Javelot holstered P1160512.jpg

Both sides of the holster feature cell holders. For CR123 these are not that secure, but for 18650 they work well enough (though the cell is partly exposed and could be damaged.
 photo 04 M23Javelot holster cells P1160513.jpg

Now we see why you might want access to the tail-cap switch while the light is in the holster. The bottom of the holster has a hole cut in it allowing the M23 to be used while fully inside the holster.
 photo 05 M23Javelot holster base P1160517.jpg

On the back is a Velcro belt-loop and small D-ring.
 photo 06 M23Javelot holster loop P1160519.jpg

Supplied with the M23 is the holster, CR123 cell holder, diffuser, spare O-rings, a lanyard, the instructions and two CR123 cells.
 photo 07 M23Javelot contents P1160526.jpg

Externally the main difference between the M22 Warrior and the M23 JAVELOT is the stainless steel bezel.
 photo 08 M23Javelot angle P1160528.jpg

The entire head has heat-sink fins along it.
 photo 10 M23Javelot heat sink fins P1160534.jpg

A side view of the steel pocket clip.
 photo 11 M23Javelot clip1 P1160537.jpg

Another view of the strong pocket clip.
 photo 12 M23Javelot clip2 P1160539.jpg

The pocket clip fits into a cut-out on the battery tube, and the grip-ring has a notch in it which fits over a lug on the steel pocket clip. This prevents the pocket clip or grip-ring rotating.
 photo 20 M23Javelot clip fitting P1160564.jpg

With the supplied diffuser fitted, the stainless bezel is hidden. You can’t fit the M23 into its holster like this.
 photo 14 M23Javelot angle diffuser P1160544.jpg

Inside the tail-cap, the negative terminal is a sprung plunger. The tail-cap/battery tube connection is hidden and uses a special design to fit into the conical opening at the end of the battery tube.
 photo 15 M23Javelot tailcap P1160548.jpg

The switch is large and textured.
 photo 16 M23Javelot tailcap switch P1160550.jpg

Threads on the tail-cap end of the battery tube are square cut and fully anodised.
 photo 17 M23Javelot threads P1160555.jpg

Threads on the head end of the battery tube are square cut and bare aluminium.
 photo 18 M23Javelot head threads P1160556.jpg

Unscrewing the battery tube fully shows the contacts in the head, with the positive spring-terminal, bare threads plus ring-terminal for the twisty interface.
 photo 19 M23Javelot head contacts P1160561.jpg

For its excellent throw the M23 uses a deep, smooth reflector.
 photo 21 M23Javelot reflector P1160574.jpg

Looking straight into the reflector.
 photo 22 M23Javelot LED P1160580.jpg

And a closer look at that LED. Olight describe this as a ‘customised high intensity CREE XP-L LED’.
 photo 23 M23Javelot LED close P1160586.jpg

The beam

Please be careful not to judge tint based on images you see on a computer screen. Unless properly calibrated, the screen itself will change the perceived tint.

The indoor beamshot is intended to give an idea of the beam shape/quality rather than tint. All beamshots are taken using daylight white balance. The woodwork (stairs and skirting) are painted Farrow & Ball “Off-White”, and the walls are a light sandy colour called ‘String’ again by Farrow & Ball. I don’t actually have a ‘white wall’ in the house to use for this, and the wife won’t have one!
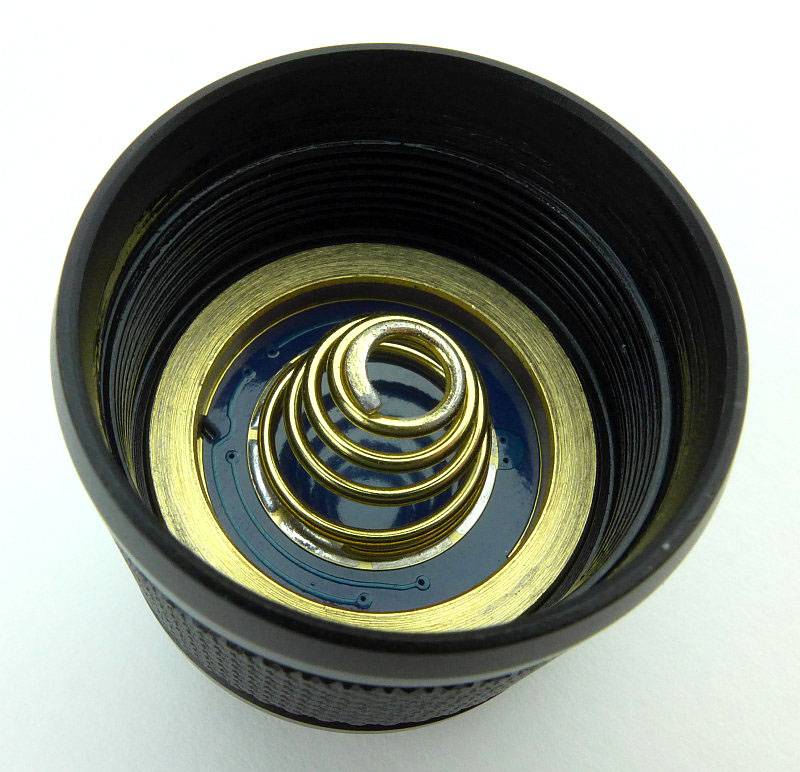
The beam does have a reasonably warm tint and as expected for a JAVELOT light, there is a very strong hotspot. This might be a bit fatiguing to use indoors which is why there is a diffuser supplied.
 photo 24 M23Javelot indoor beam P1170305.jpg

Popping on the diffuser and we have an entirely different experience (the exposure here is the same as without the diffuser).
 photo 25 M23Javelot indoor beam diffused P1170308.jpg

Outdoors it is clear this is a thrower!
 photo 26 M23Javelot outdoor beam P1170240.jpg

And just to see, the result with the diffuser is good (the exposure here is the same as without the diffuser).
 photo 27 M23Javelot outdoor beam diffused P1170243.jpg

But we need more range, so here we are at a golf driving range with the 250yard marker easily visible, and beyond.
 photo 28 M23Javelot outdoor beam golf P1170221.jpg

Modes and User Interface:

The M23’s output is controlled by the forward-clicky tail-cap switch and twisty interface at the head.

Available modes include High, Medium, Low and Strobe.

From OFF, either click or half-press and hold to turn onto the last-used constant output mode.
From ON, either click the switch or release the half-press to turn OFF.

From OFF, double-tap and click (or hold) the switch to activate High.
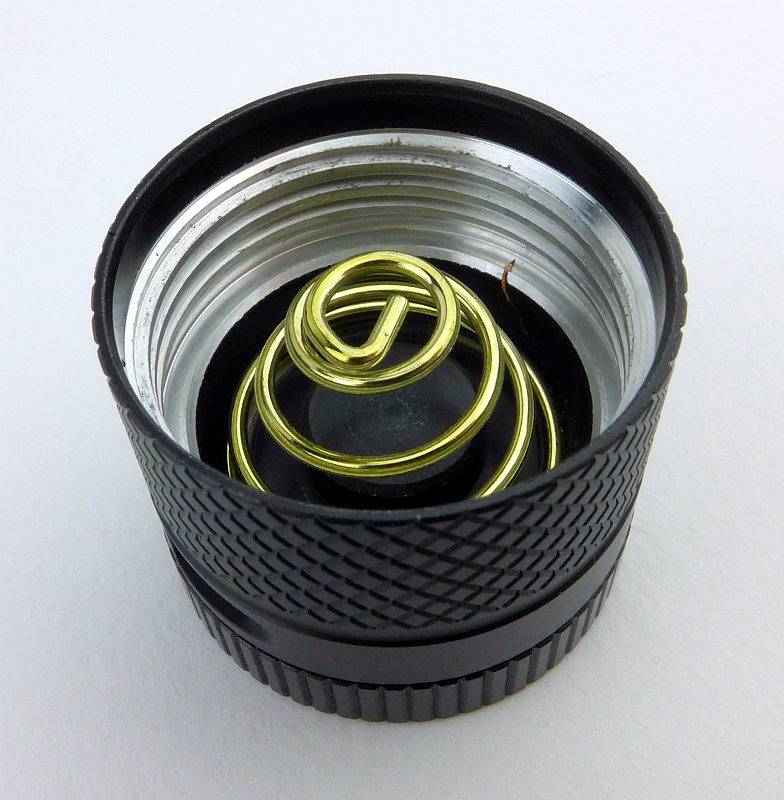
From OFF, triple-tap and click (or hold) the switch to activate Strobe. While strobe is activated, the twisty interface does nothing.

From ON, loosen-tighten the head to cycle through High -> Medium -> Low -> High etc. (it is as the head becomes tight again that the mode changes). Tightening the head while the M23 is OFF does nothing.

This operation allows you to set the output to Low, but still have direct access to High (double-tap) and Strobe (triple-tap) via the tail-cap switch alone.

Batteries and output:

The M23 runs on either 1x 18650 or 2x CR123.

To measure actual output, I built an integrating sphere. See here for more detail. The sensor registers visible light only (so Infra-Red and Ultra-Violet will not be measured).

Please note, all quoted lumen figures are from a DIY integrating sphere, and according to ANSI standards. Although every effort is made to give as accurate a result as possible, they should be taken as an estimate only. The results can be used to compare outputs in this review and others I have published.

___________________________________________ ________________________________ ________________________________
Olight M23 JAVELOT using specified cell I.S. measured ANSI output Lumens PWM frequency or Strobe frequency (Hz)
___________________________________________ ________________________________ ________________________________
High – CR123 950 0
Medium – CR123 361 0
Low – CR123 38 0
High – 18650 918 0
Medium – 18650 365 0
Low – 18650 38 0
Diffuser Test High – No Diffuser 861 0
Diffuser Test High – Diffuser 584 0

* Beacon and Strobe output measurements are only estimates as the brief flashes make it difficult to capture the actual output value.

Peak Beam intensity measured 39700 lx @1m giving a beam range of 398 m.

There is no parasitic drain.

Overlaying the two runtime traces from 2xCR123 and 1×18650 shows that CR123 initially gives a slight boost in output for the first few minutes before the output for both power sources converge. This happens during the controlled output reduction to just over 600lm for the regulated level. CR123 runs out of steam earlier (as expected) falling out of regulation at around 35 minutes. 18650 holds regulation until about 55 minutes with a less sharp fall-off.
Both traces end with a period of inconsistent flickering output instead of cutting out.
 photo Olight M23 Javelot runtime.jpg

Troubleshooting

This section is included to mention any minor niggles I come across during testing, in case the information helps anyone else.

No issues were encountered during testing.

As per the description of this section, this information is provided in case anyone else finds a similar ‘issue’ that might be fixed in the same way.

The M23 in use

I’m going to get the main issue out of the way first – the holster. I can see what was intended with the holster, but for me it presents three main problems in use. Firstly getting the flap over the tail-cap, so you can secure it is far too difficult as it is a tight fit and doesn’t easily go over the M23’s tail-cap. It is possible that as it wears it will become easier, but this will only be due to the material softening and becoming frayed. Secondly the tail-cap switch is exposed, and with the design used for the tail-cap connection, it cannot be locked out; no lock-out and an exposed tailcap is going to lead to accidental activation. Lastly on the holster, though the ability to carry spare cells is welcome, by leaving them partially exposed, they can be lost or damaged; I don’t trust the cells holders myself.

The holster is full of good ideas, but I don’t find them to work terribly well.

Onto the M23 itself, and things swing back to positive – it is a typical single 18650 size light, with solid build quality; you definitely would feel confident that you could use the strike bezel if needed.

Rather than having the typical tail-cap to battery-tube connection that uses a battery tube with a flat end (most common), in the M23, Olight uses a design where the inside of the end of the battery tube is conical and the tail-cap contacts are pushed into the cone as you tighten the tail-cap. This means it is far less likely to break the connection, as the tail-cap needs to move significantly to lose contact. It makes the connection very robust, but does prevent the user from locking-out the M23 by unscrewing the tail-cap.

The pocket clip is very strong, a bit too strong for normal use. If this is going on your load carrier PALS webbing, OK, but for many users it will probably be too stiff.

Of course we must appreciate that JAVELOT beam. The custom XP-L Hi LED certainly does its job with plenty of power and an excellent hotspot. Unlike completely throw-orientated lights, the M23 manages a high beam strength without making the hotspot too small; it seems completely ideal for a light this size.

Normally I’m not keen on using lights with throw at close ranges, but the M23 seems to manage this in a way that is perfectly usable. However as a frosted glass diffuser is supplied, you can easily go full flood (at the expense of 33% loss of output) and have a perfect indoor flood-light beam. With the diffuser fitted it will not fit into the holster.

It is possible to tailstand the M23 even though the large switch boot (18mm) protrudes slightly. The combination of three large cut-outs around the button (giving easy access), and the large button itself make the M23 responsive and reliable to control.

The user interface seems extremely well suited to a ‘tactical’ design. Putting strobe to one side (all serious users of tactical lights I’ve spoken to don’t want strobe as it can be just as disorienting to the person using it), at least it needs a deliberate triple-click to activate it. Unfortunately, if you are ‘signalling’ with the M23 you can accidentally get strobe. Taking just those constant modes, you can easily set the M23 to be effectively a ‘high only’ light or a ‘low-high’ light. Setting high with the twisty interface means that your first press is always high, and if you double-tap the button you still have high. Setting low with the twisty interface means that your first press is always low, and if you double-tap the button you get high. Swapping between these configurations is easy and of course you could also make it ‘medium-high’ as well.

Overall a well thought-out light with solid build and a great beam; another JAVELOT success.

Review Summary

_______________________________________________ _______________________________________________
Things I like What doesn’t work so well for me
_______________________________________________ _______________________________________________
Strong beam with great throw for its size. Holster has issues.
Solid build. No lock-out.
Frosted Glass diffuser included. Strobe can be activated when signaling.
Well though-out UI. Pocket clip too stiff for most users.
Large, easily accessible button.
Can Tail-stand.
Durable tail-cap connection design.


Discussing the Review:

Please feel free to add comments to the review, but the ideal place to freely discuss these reviews is on a forum. If you started reading the shorter forum version of the review, but followed the link this full exclusive review, please return to that forum to discuss the review there.
If you read the review entirely on Tactical Reviews, please consider one of the following to join in any discussion.

CandlePowerForums – Flashlight Reviews Section (Largest and Friendliest Flashlight Community Forum)

EdgeMatters – Sponsored Reviews (UK based Forum for Knife Makers and Collectors)