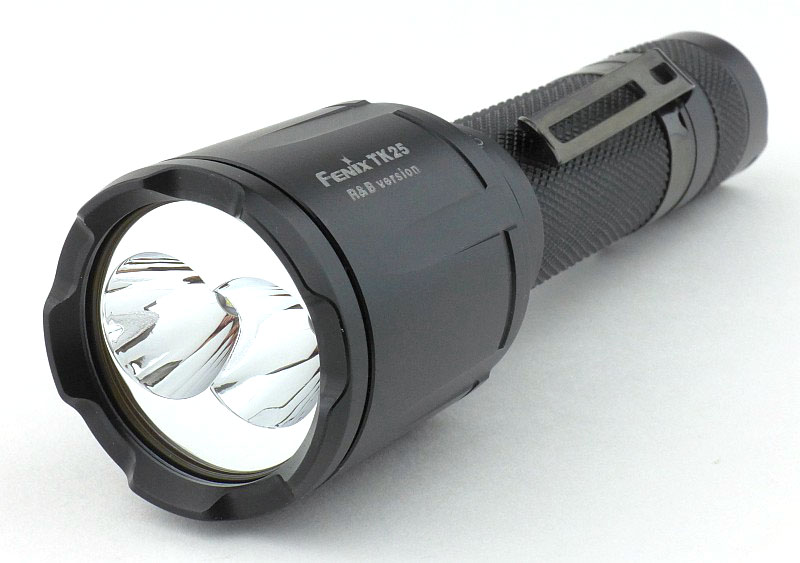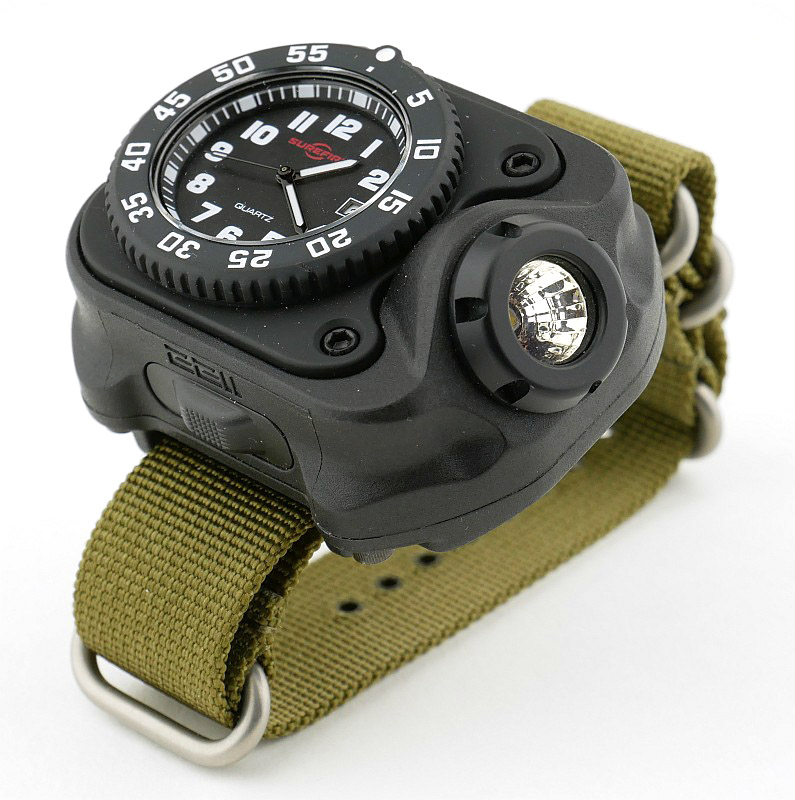
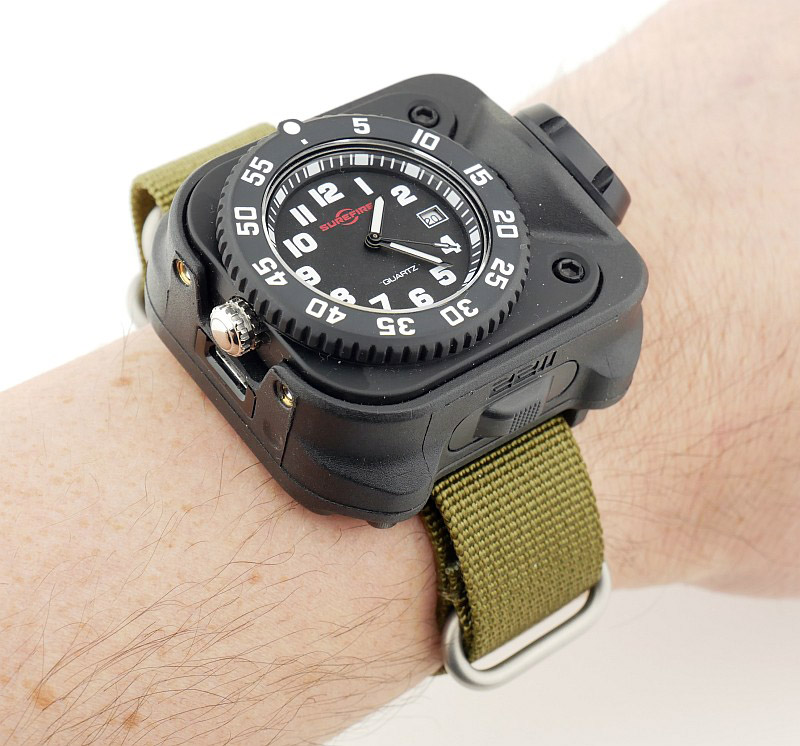
Surefire have expanded the choice in their 2211 Wrist Light range with the addition of the 2211 Signature Wrist Light. This features an integrated watch face (like the Luminox version) which is a special new Surefire branded version.
Taking a more detailed look:
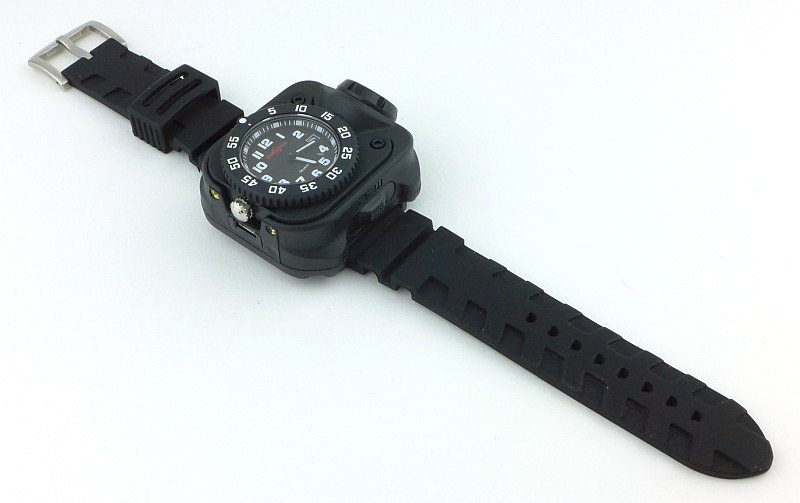
This review sample was a final pre-production example, so had no packaging and has a rubber strap instead of a NATO strap. All other details are the same as a production version.
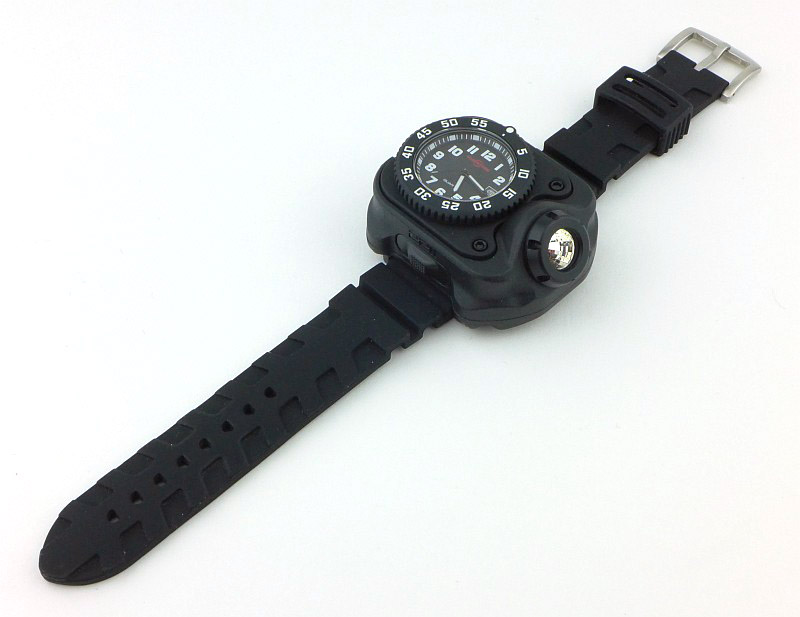
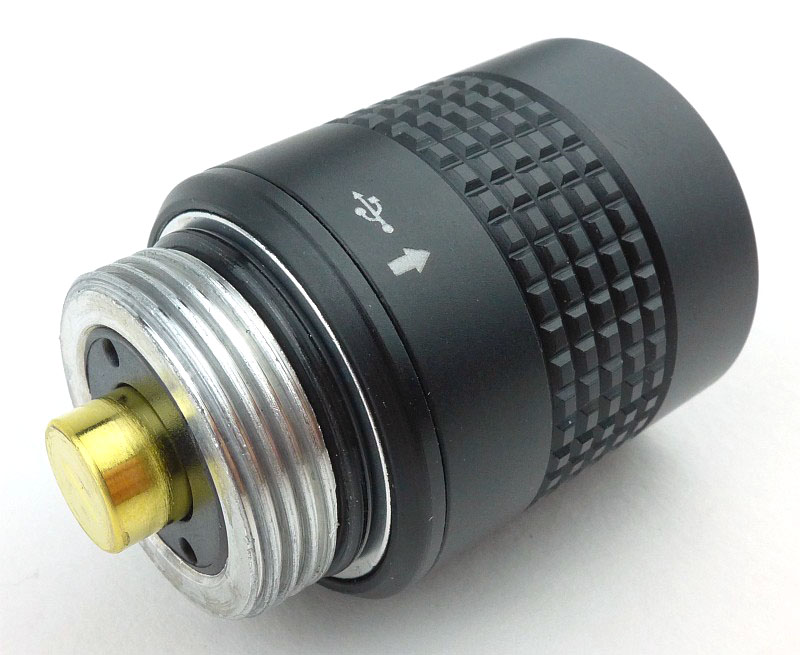
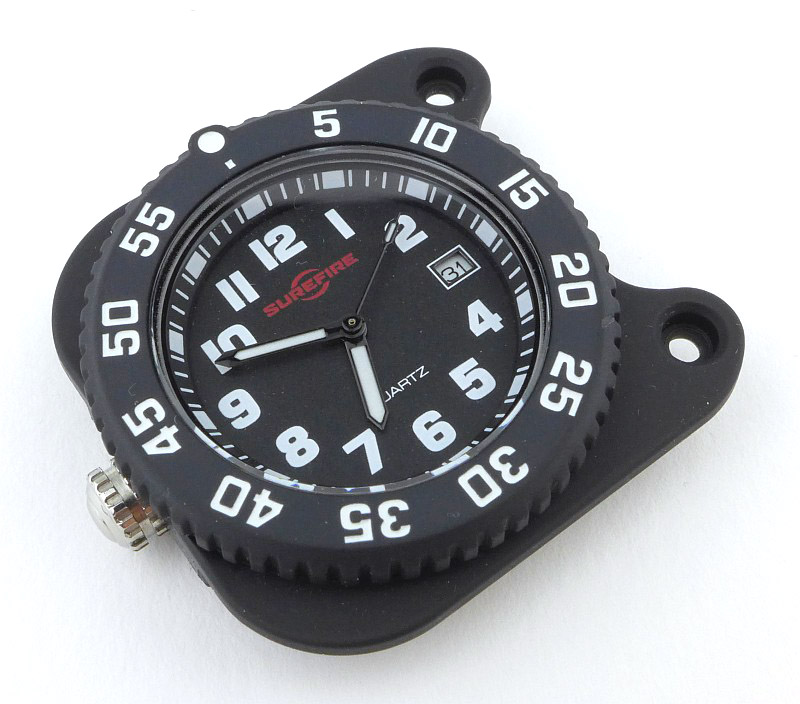
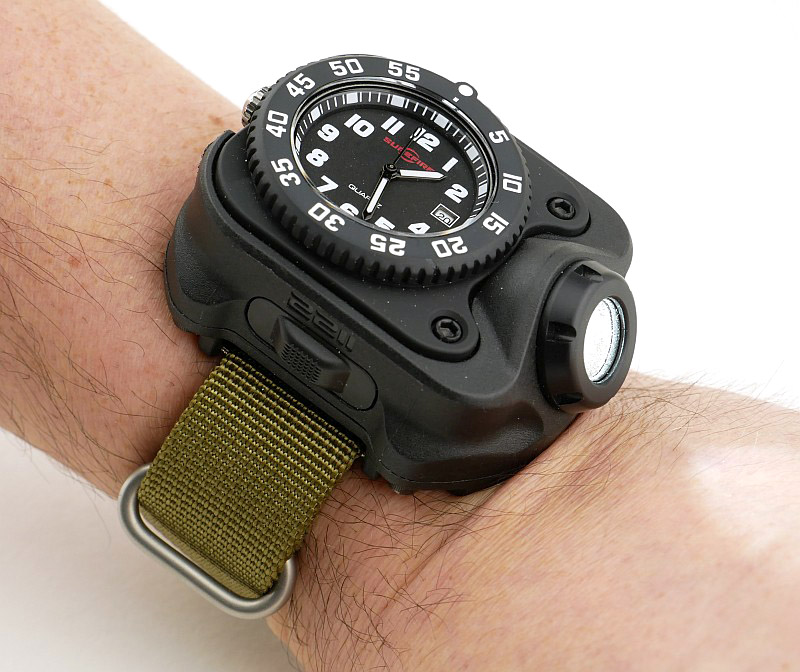
You might have seen the earlier ‘Luminox’ version of the 2211 Wrist Light, so this large watch may look familiar, but is the new ‘Signature’ model.
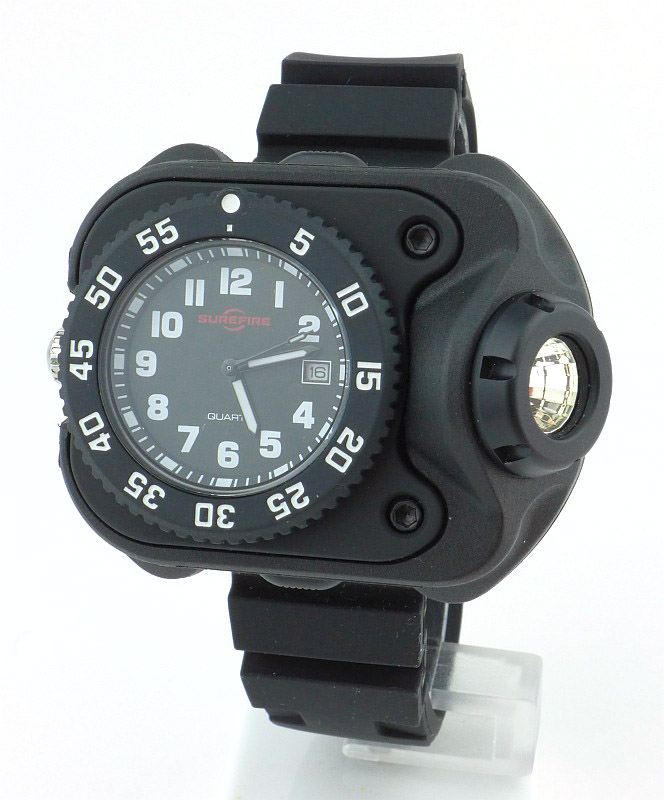
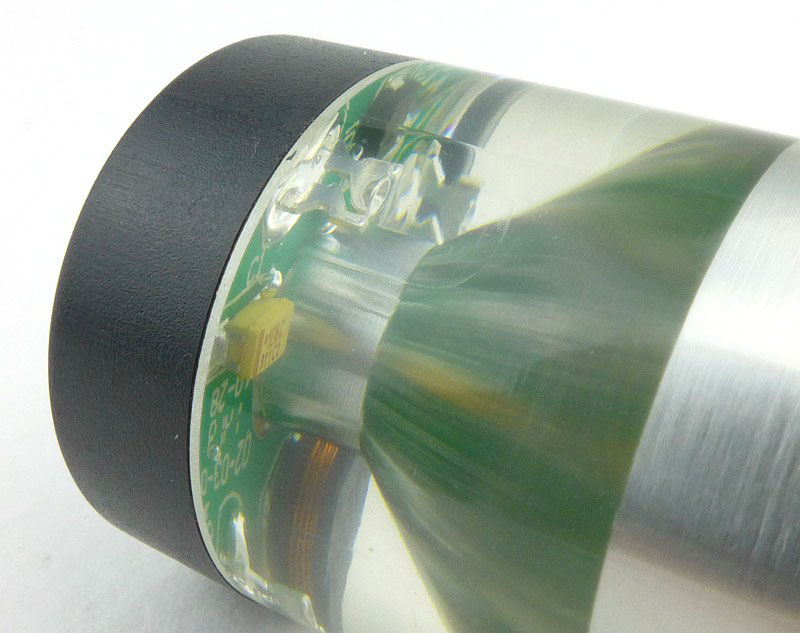
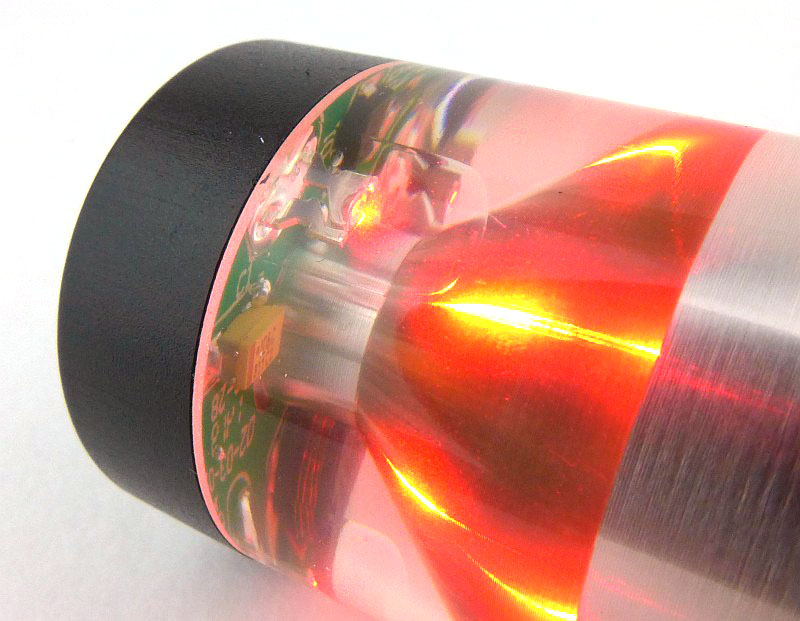
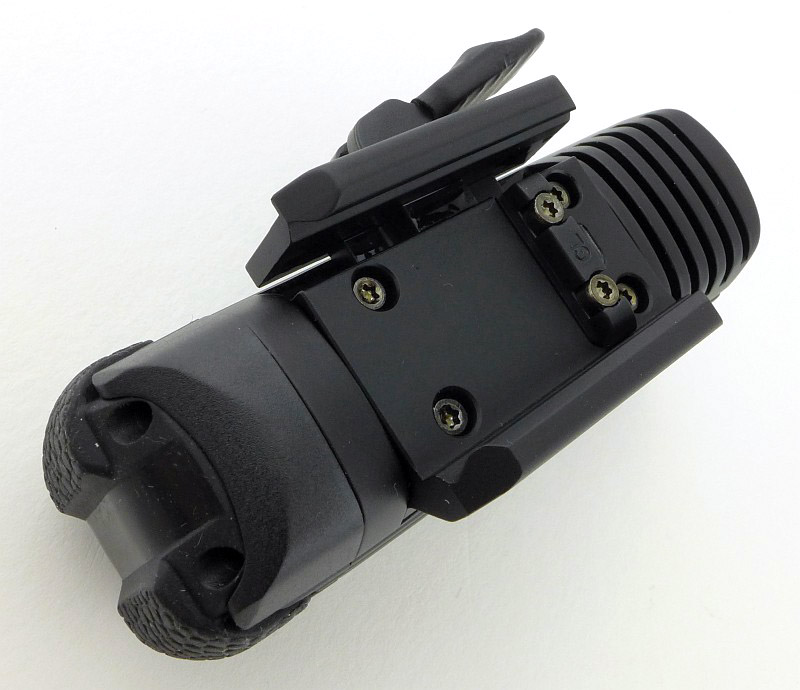
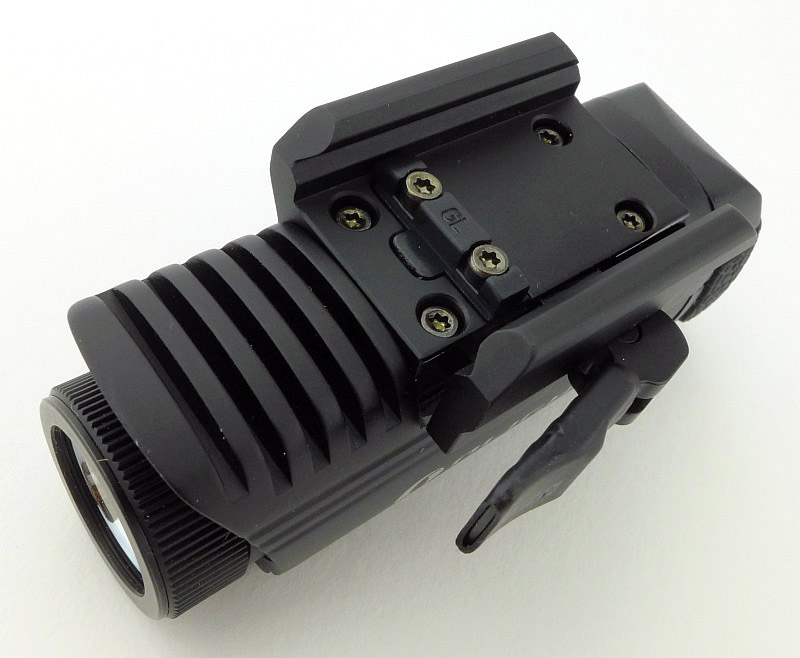
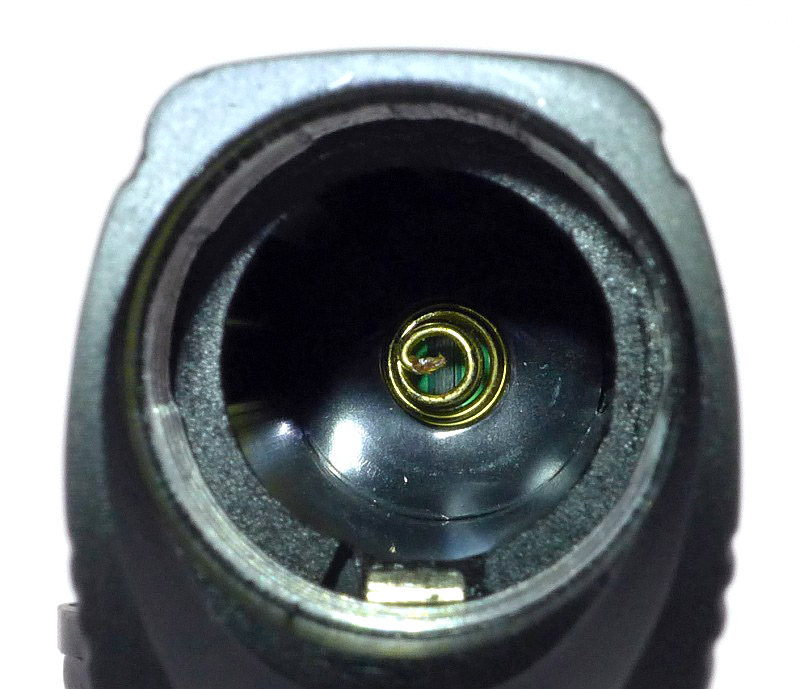
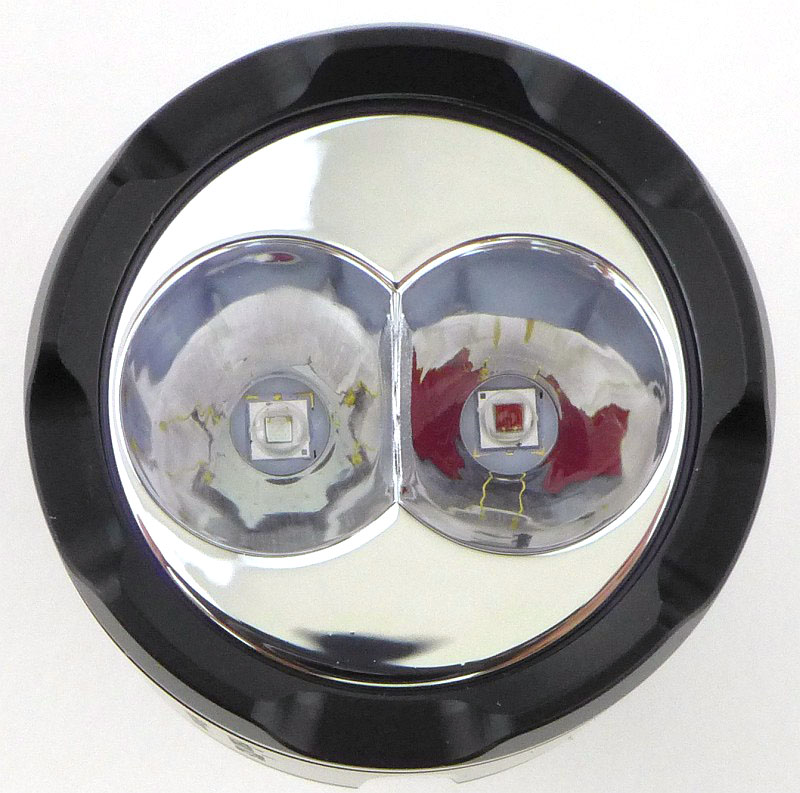
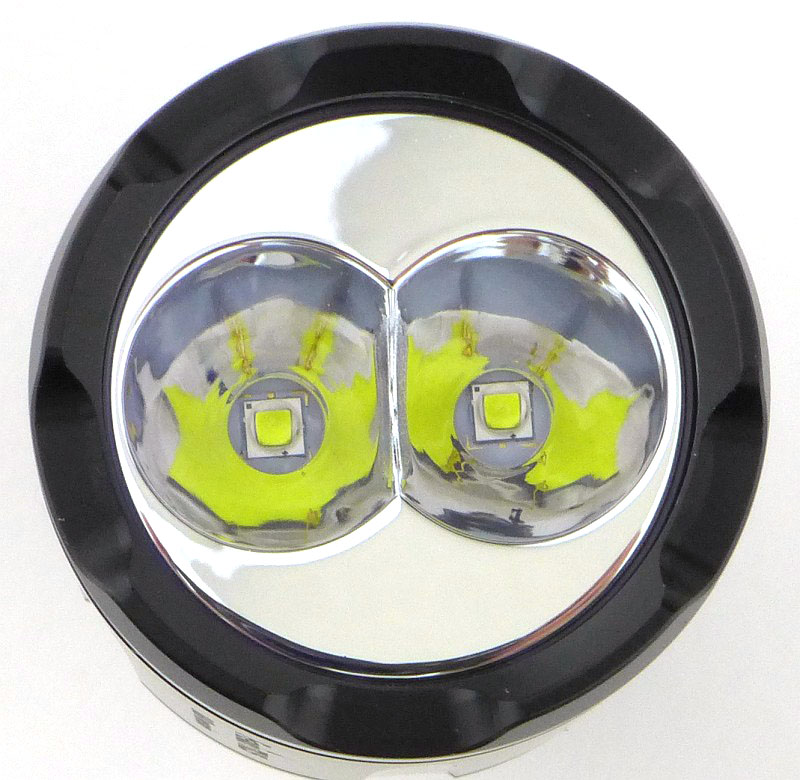
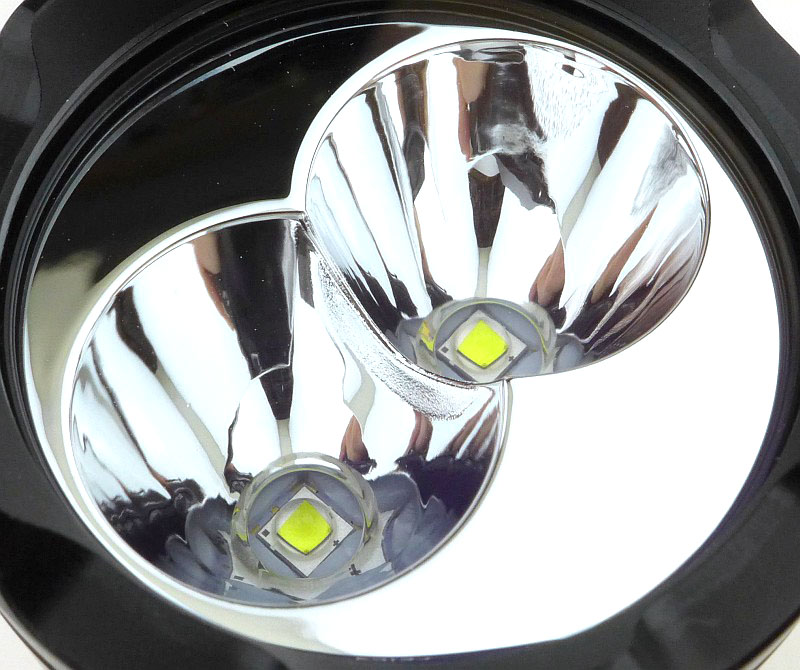
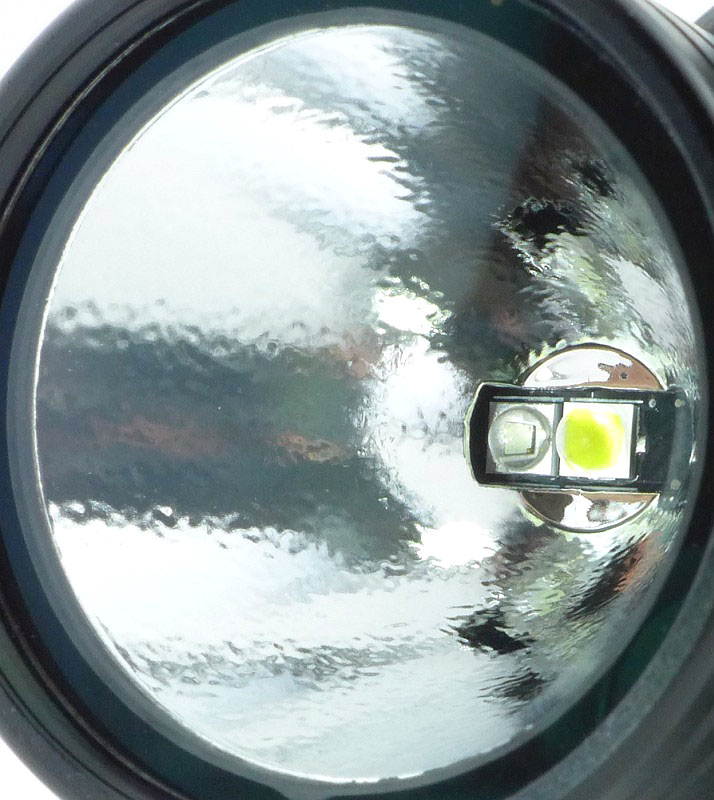
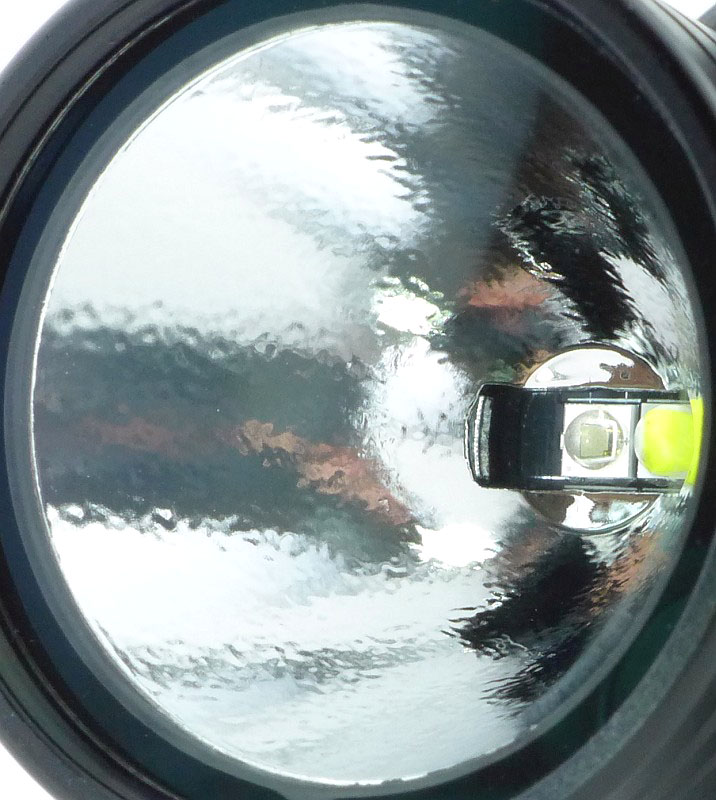
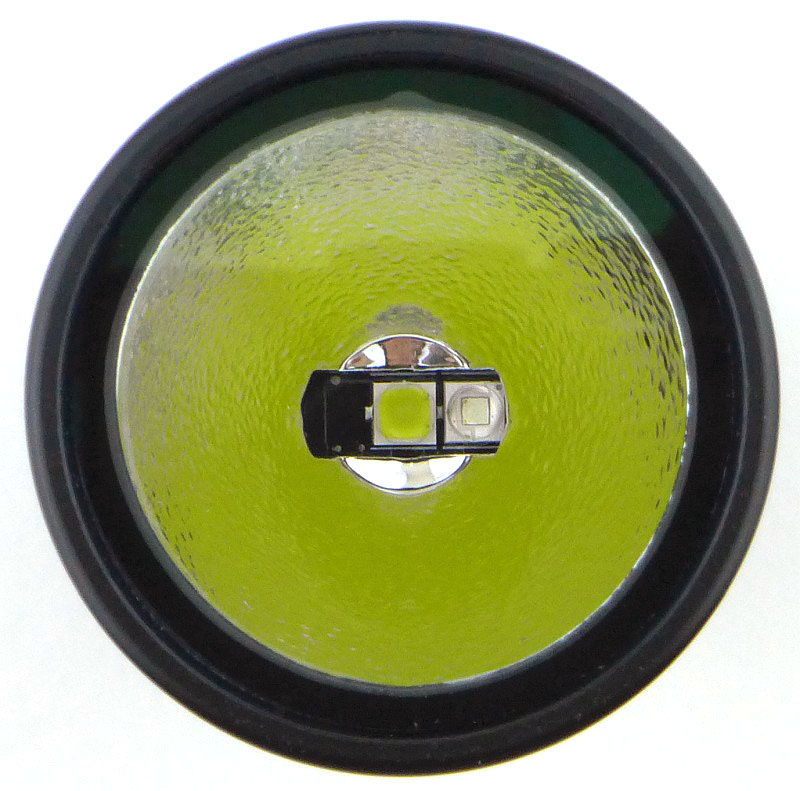
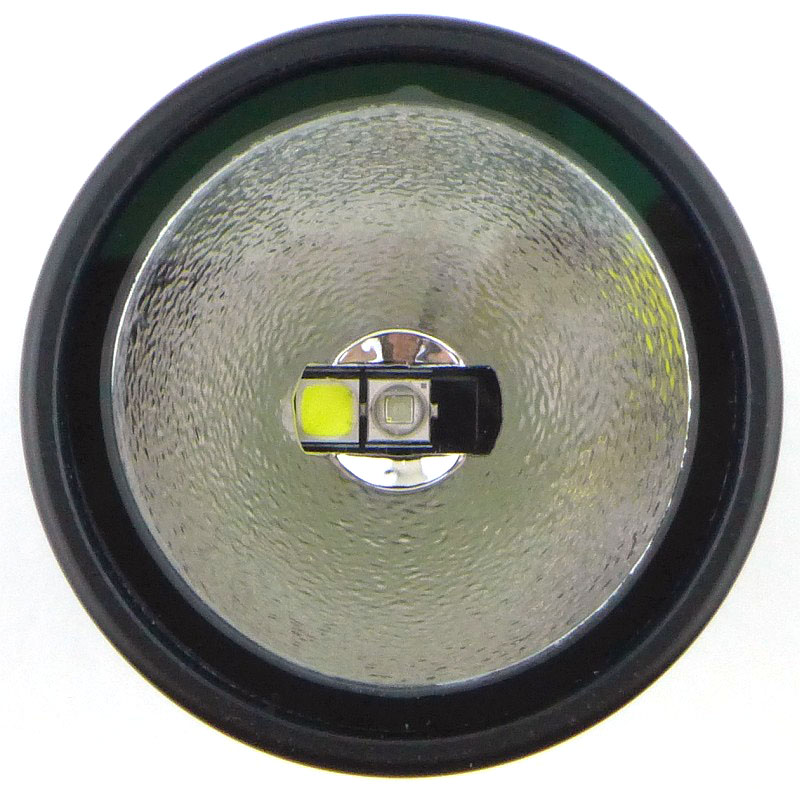
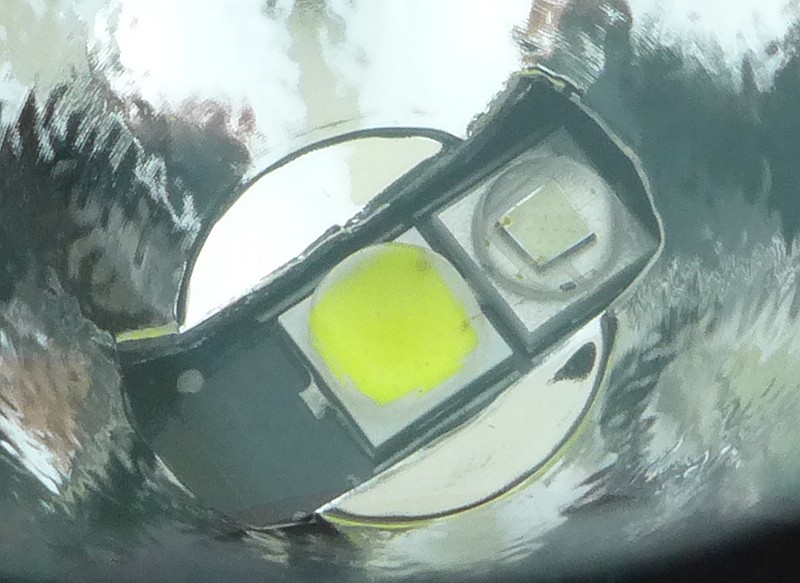
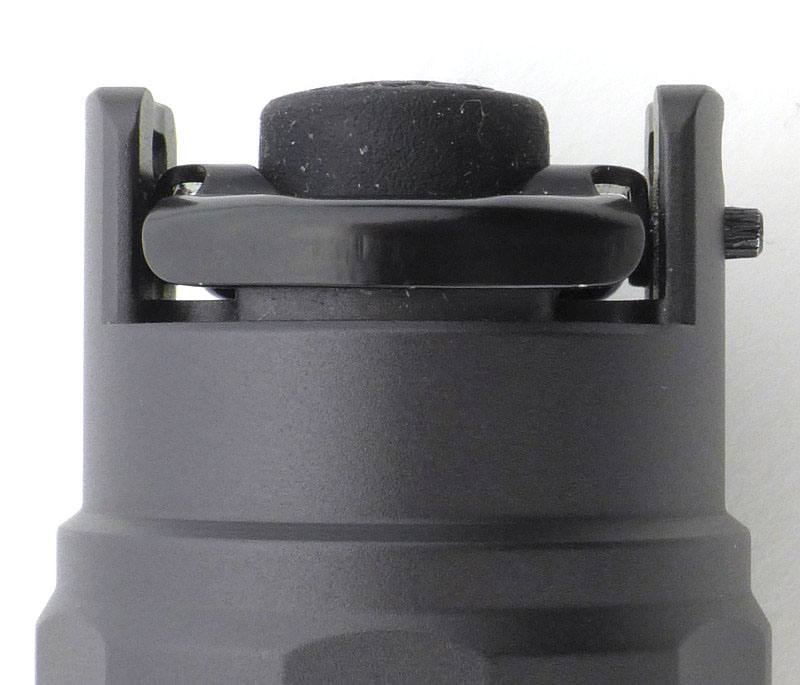
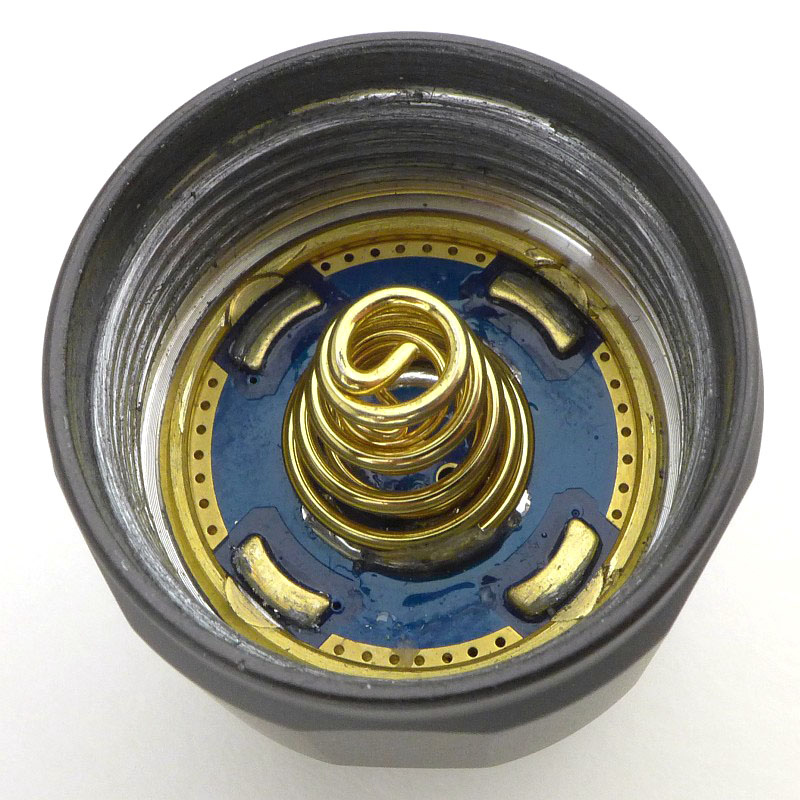
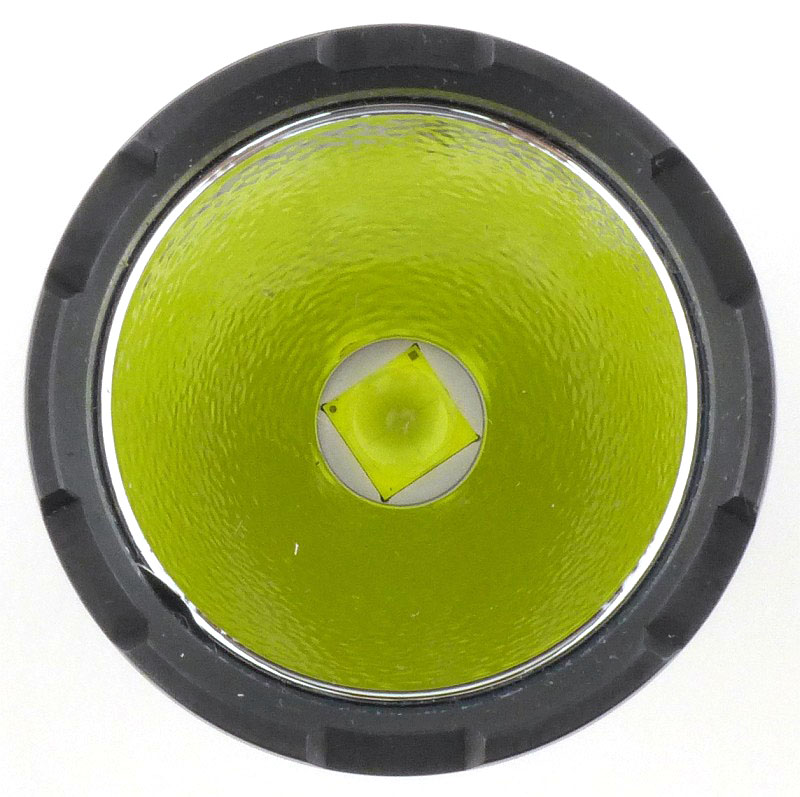
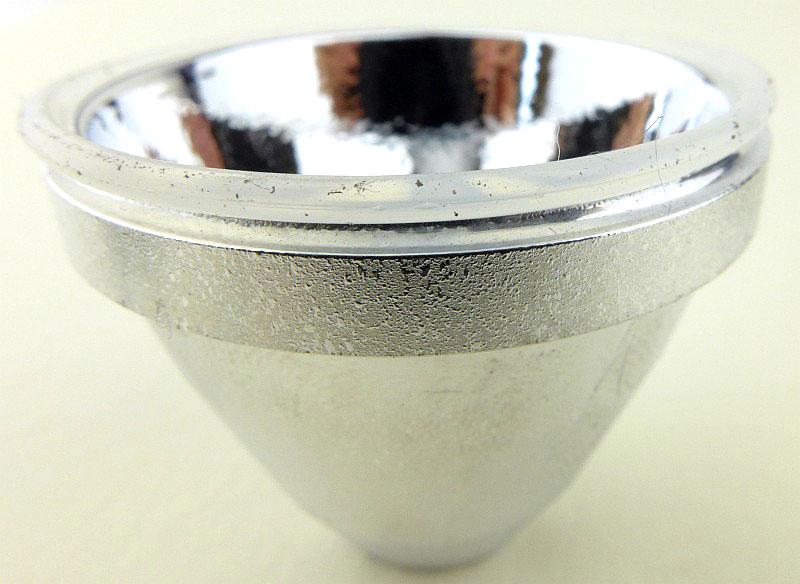
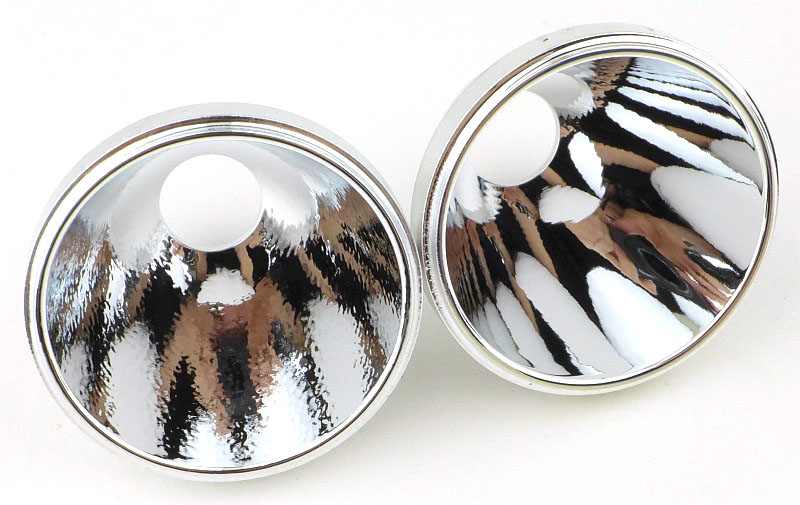
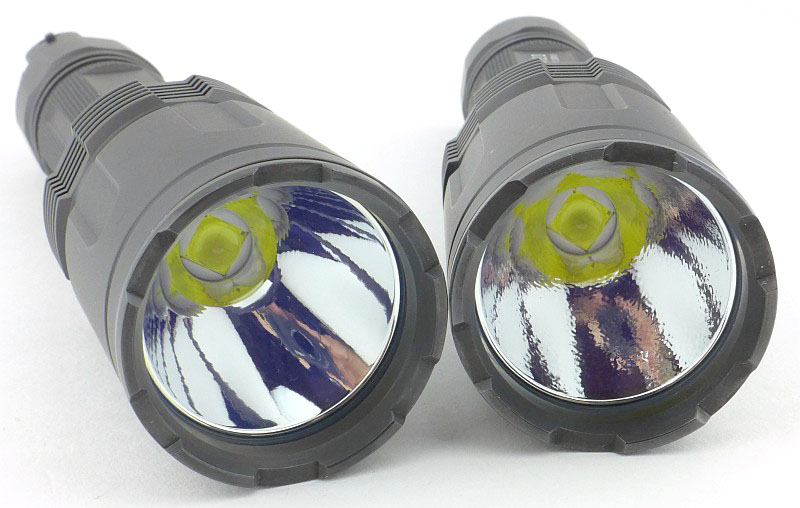
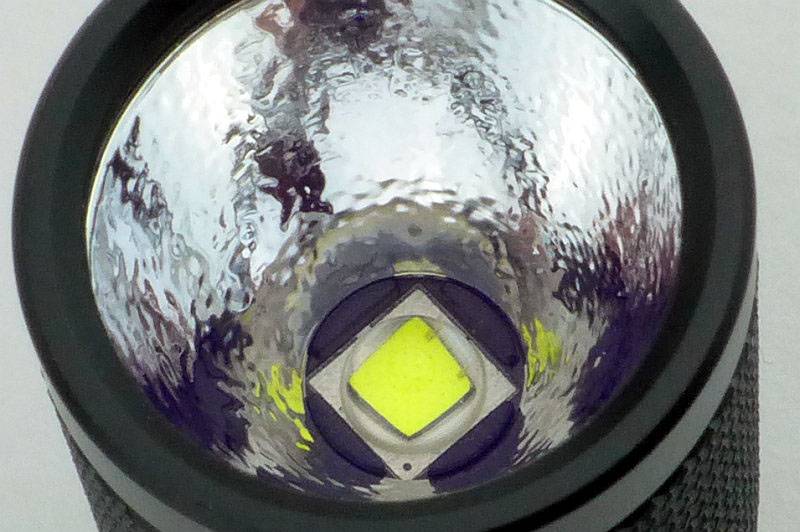
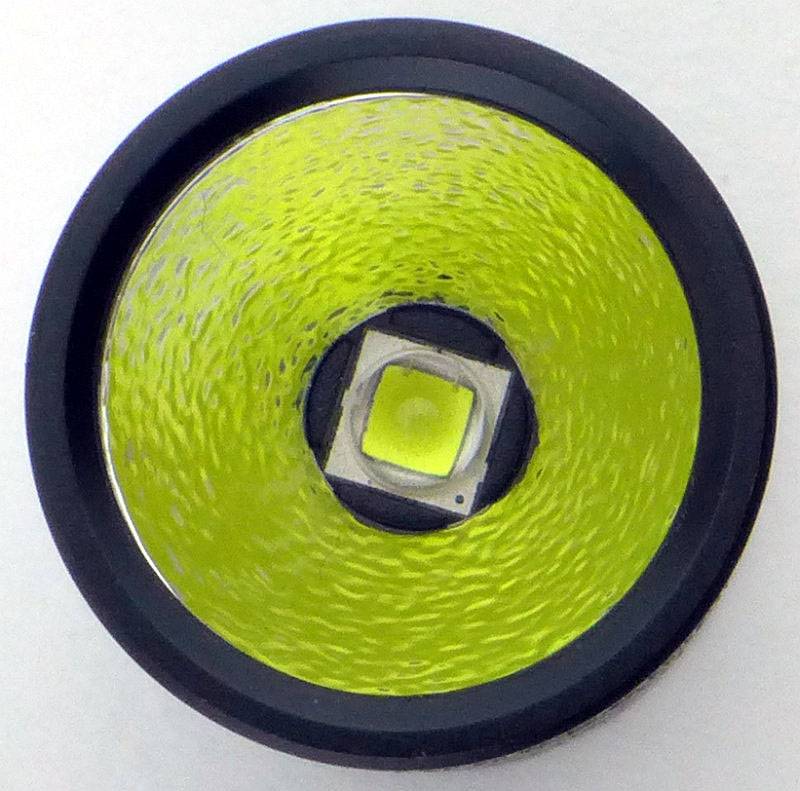
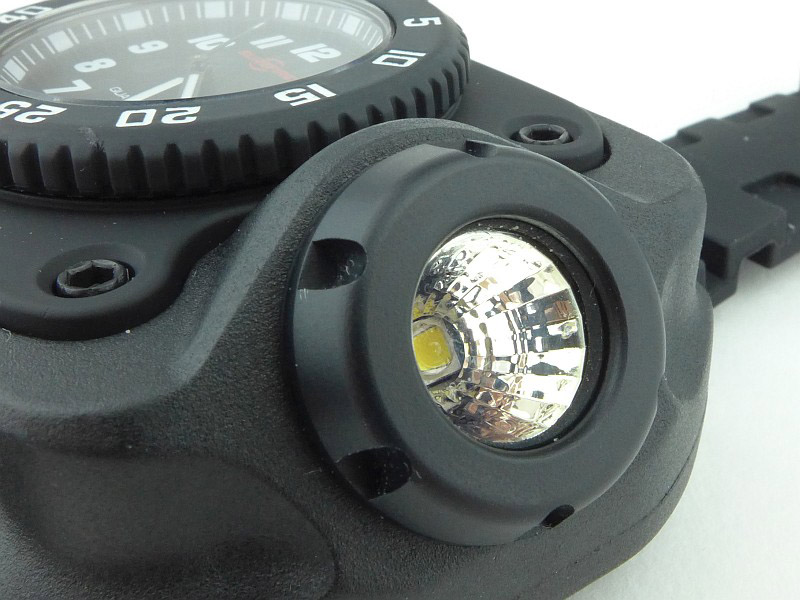
At the 3 o’clock position there is an angled, faceted reflector creating Surefire’s “MaxVision Beam”.
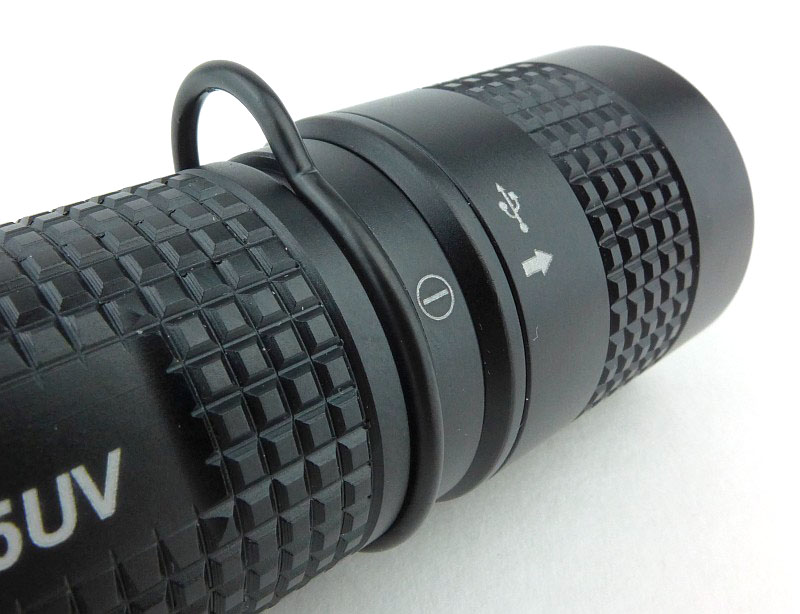
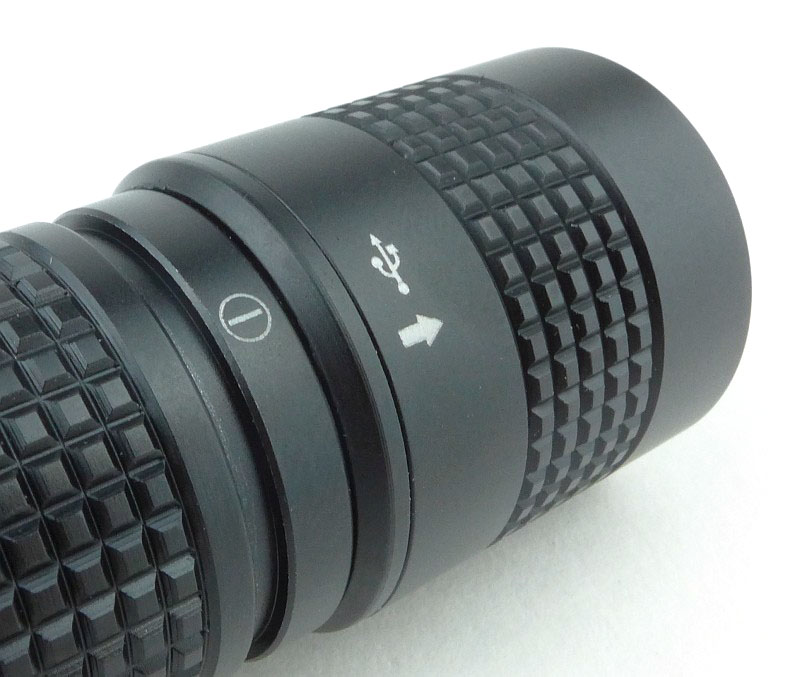
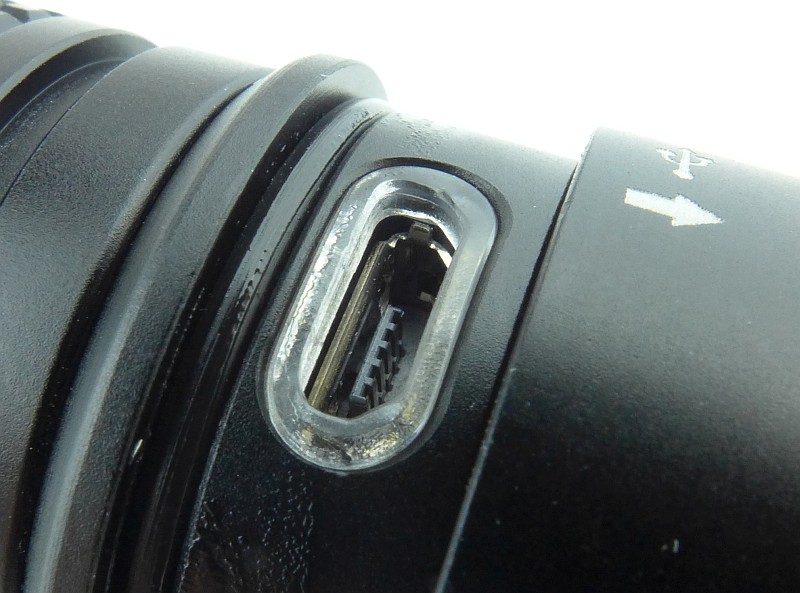
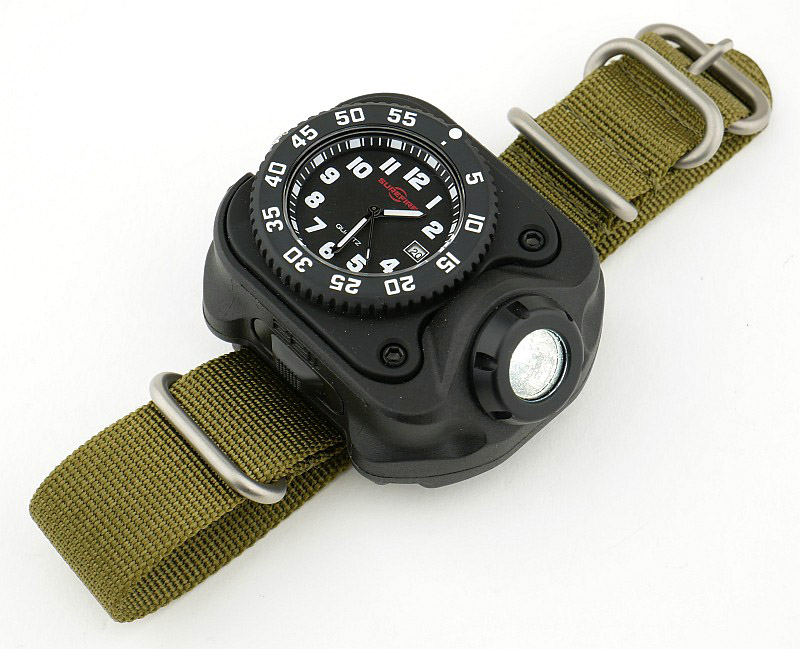
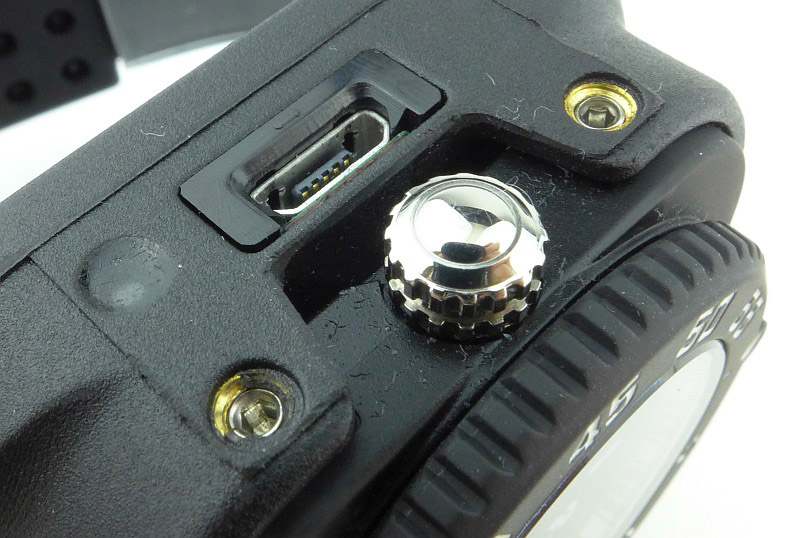
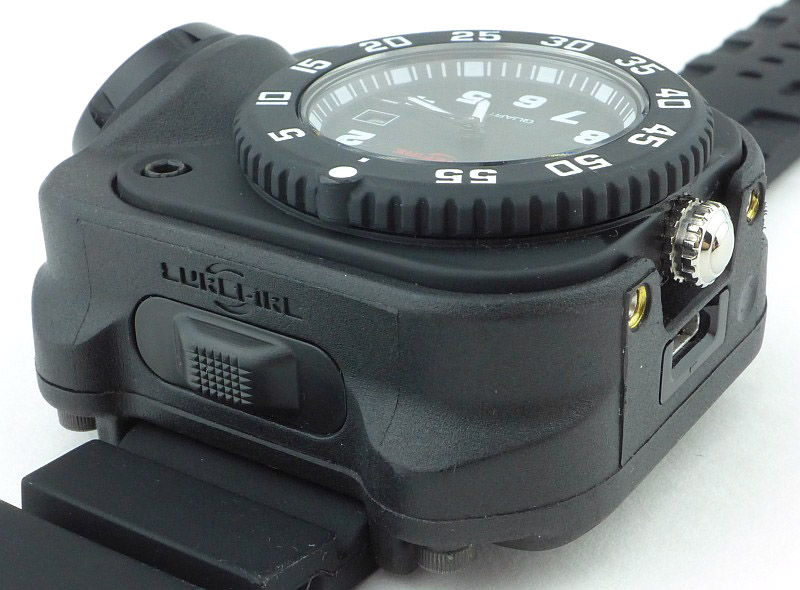
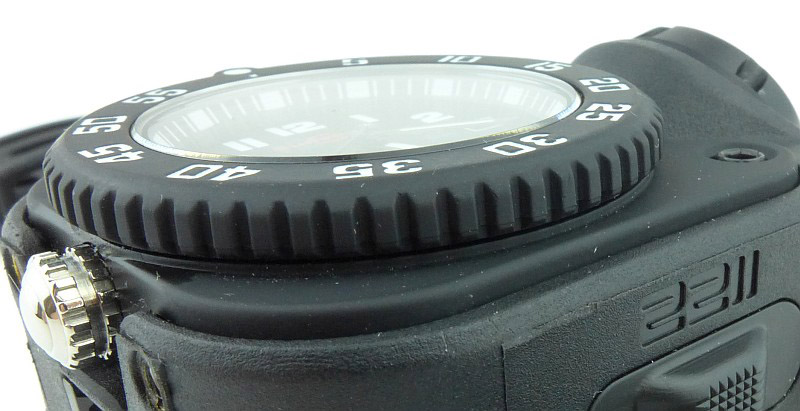
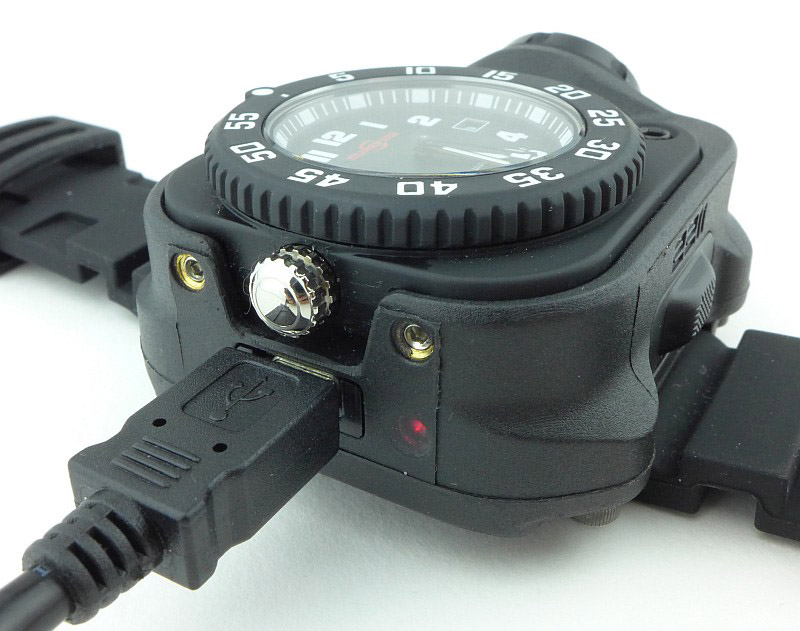
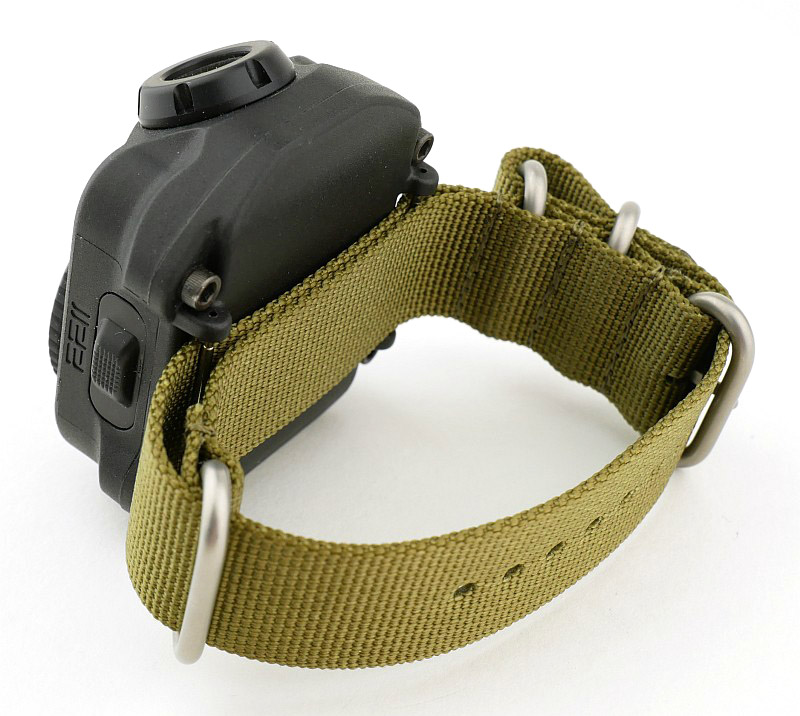
And at the 9 o’clock position there is the watch crown and USB charging port.
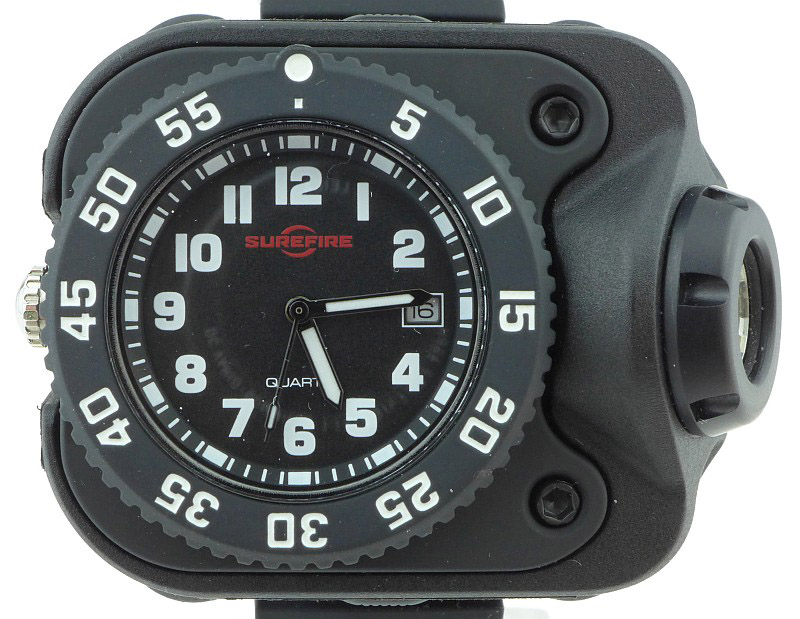
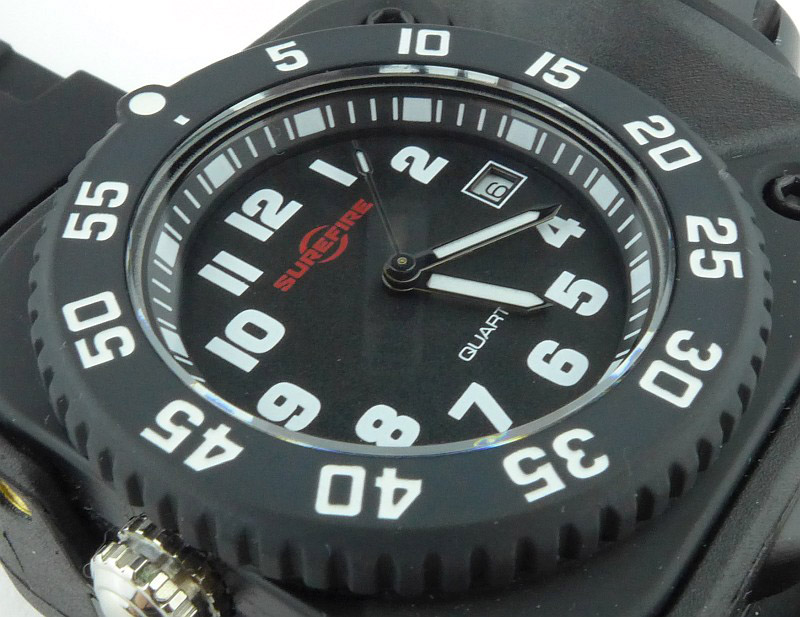
A bold tactical style watch face is incorporated into the 2211 Signature. Note there is some reflection in the glass of the camera lens so this is not any type of smudging on the watch face.
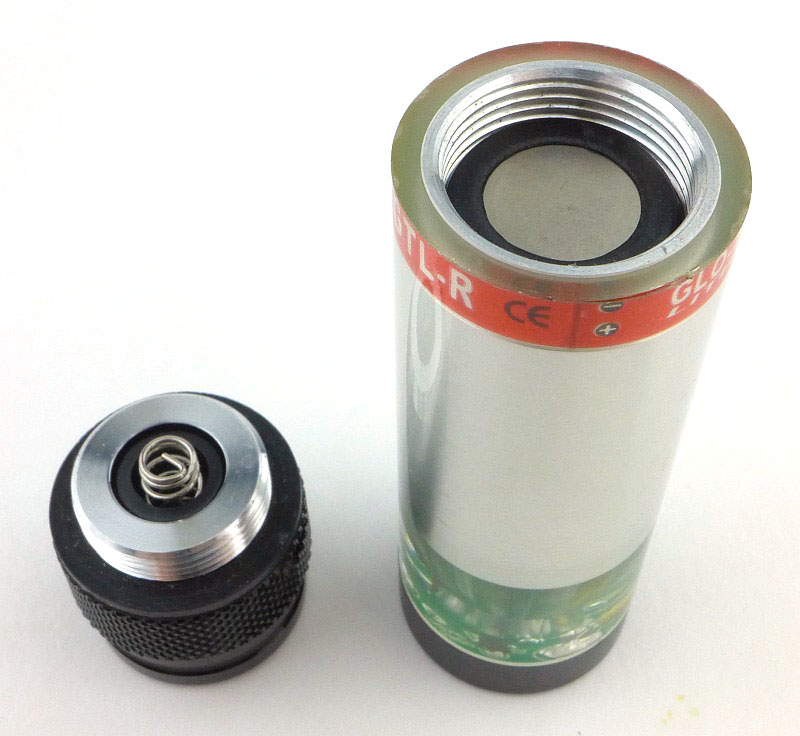
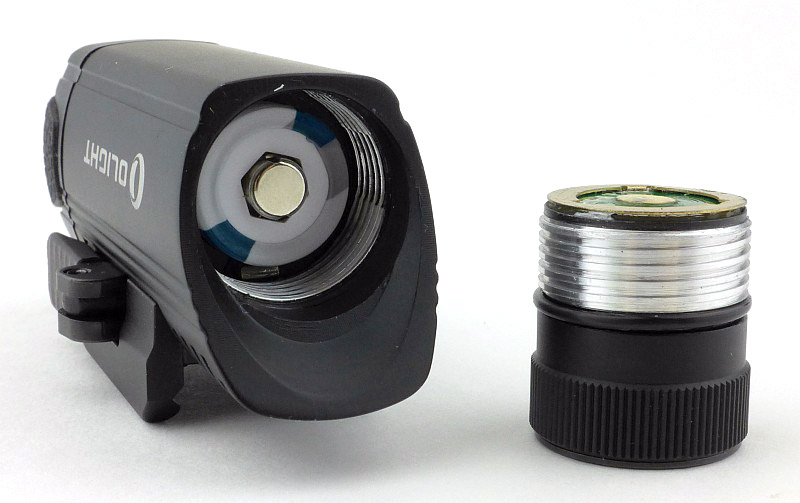
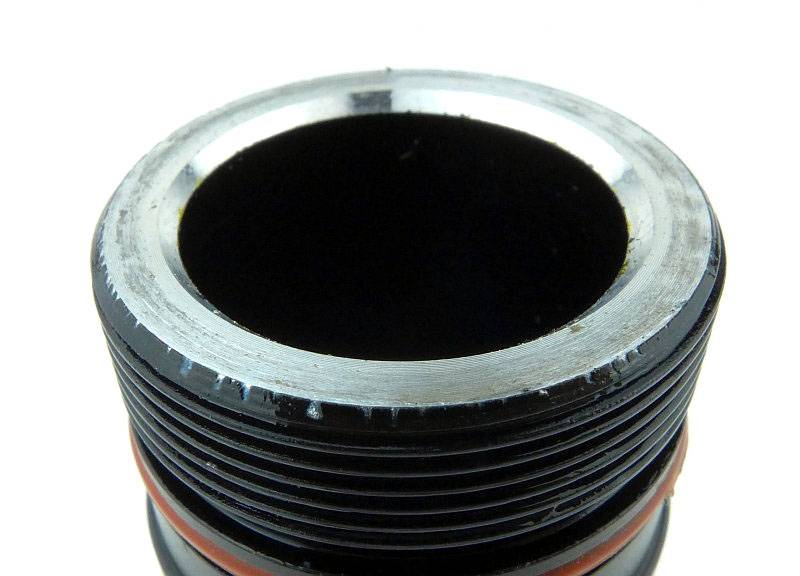
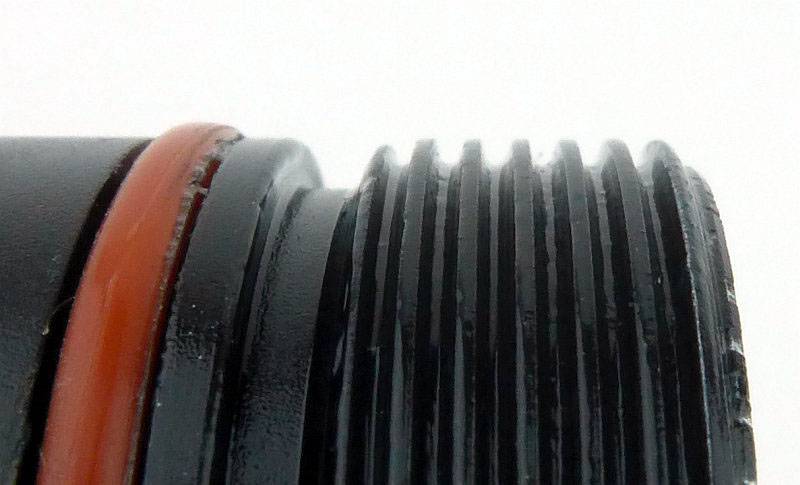
Being a rechargeable model, the 2211 Signature has a micro-USB B port for maximum compatibility.
For a watch, the body is exceptionally thick, but that is of course because this is a Wrist Light. Remember the strap on the production model is a NATO strap.
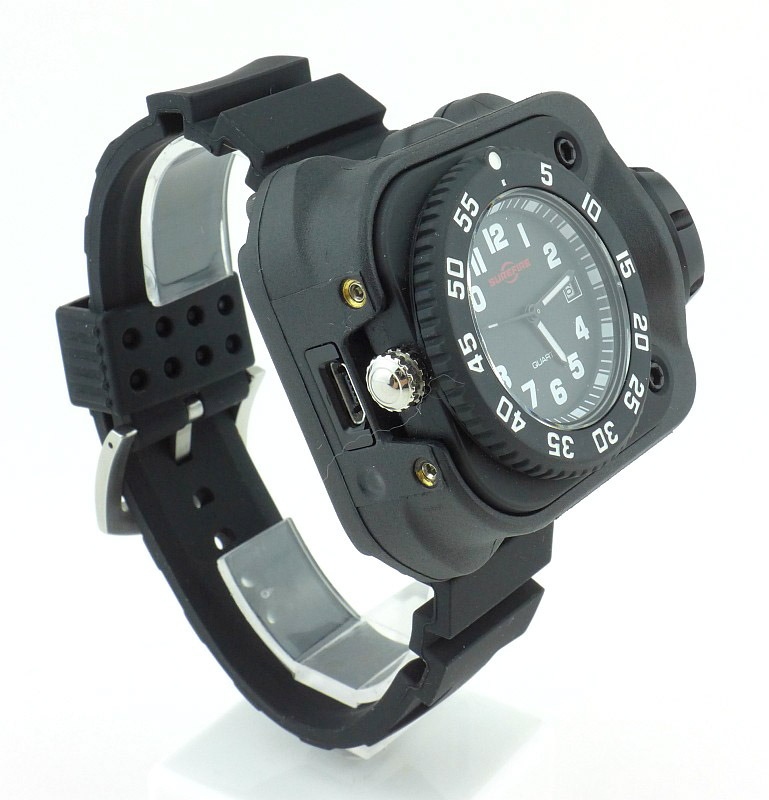
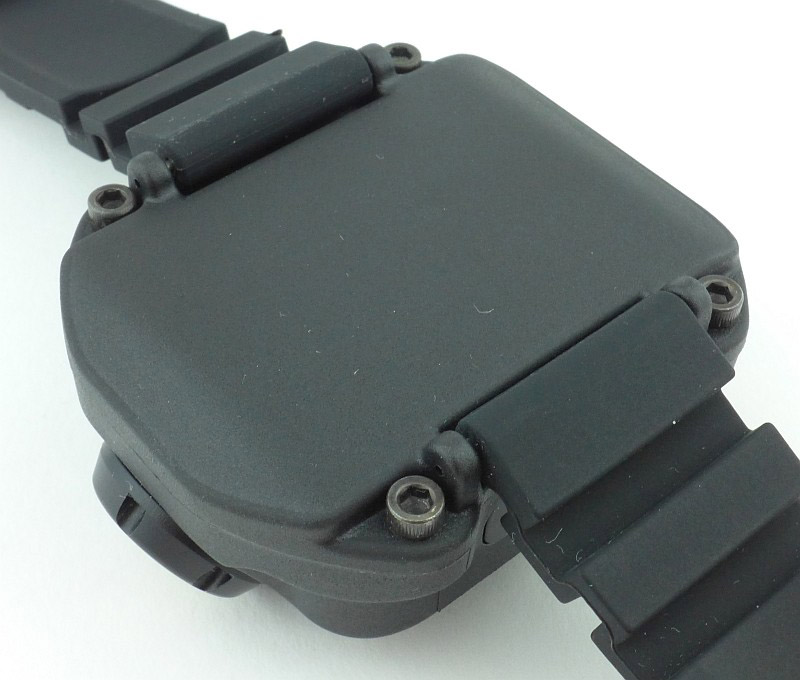
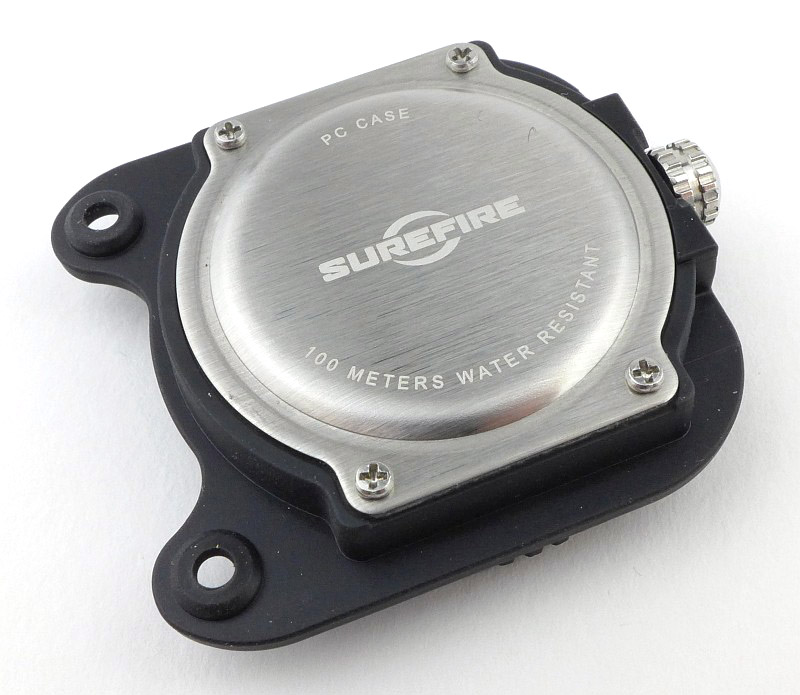
The back of the 2211 Signature is a smooth flat plate.
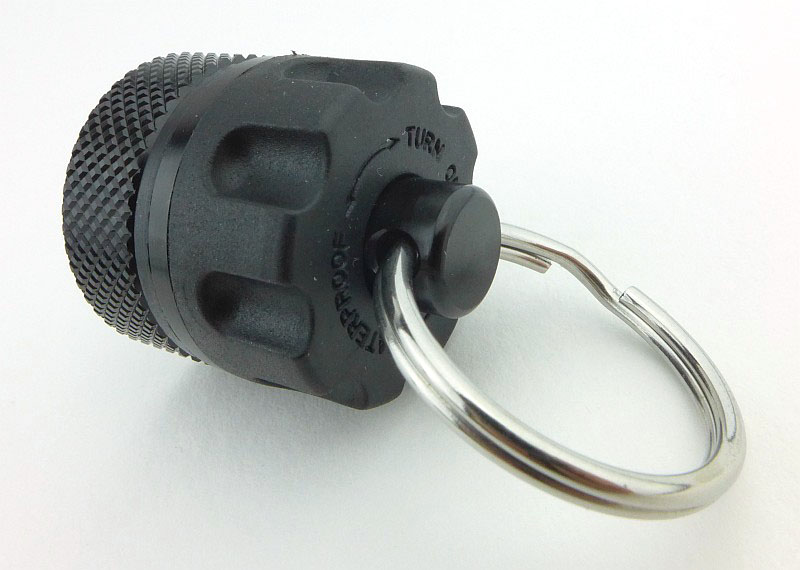
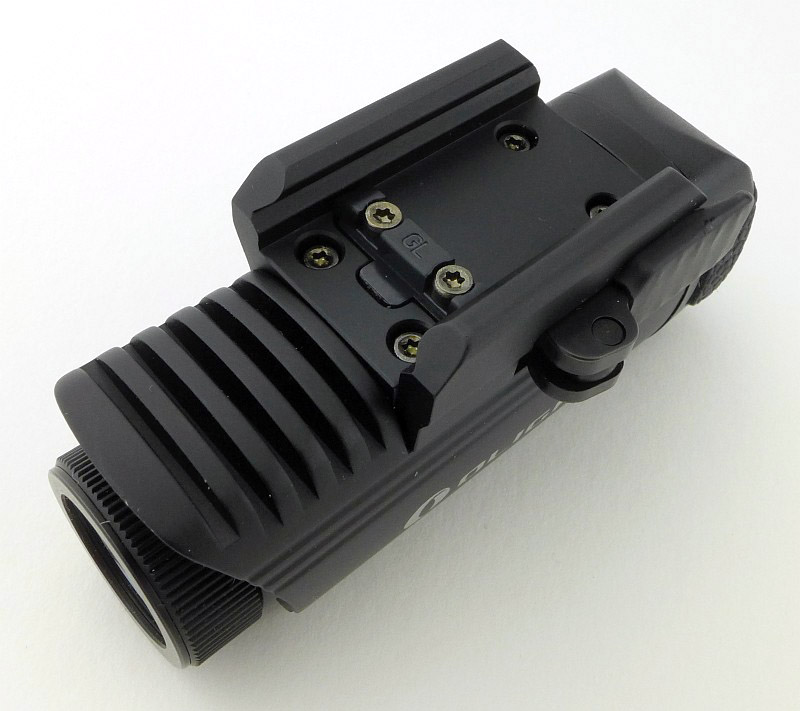
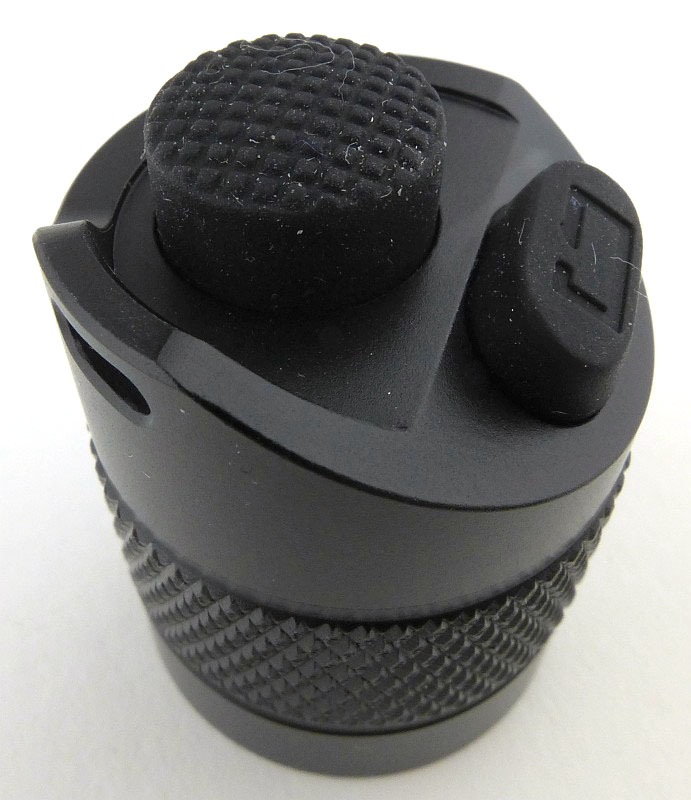
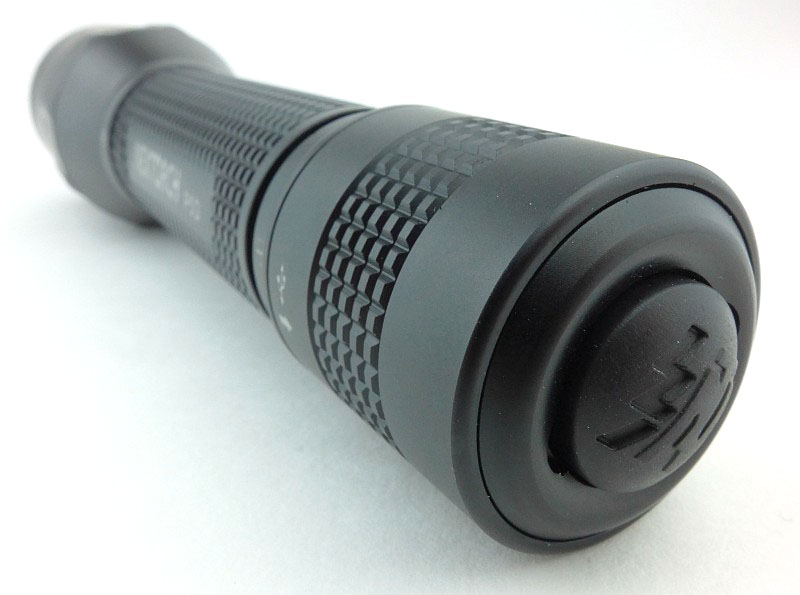
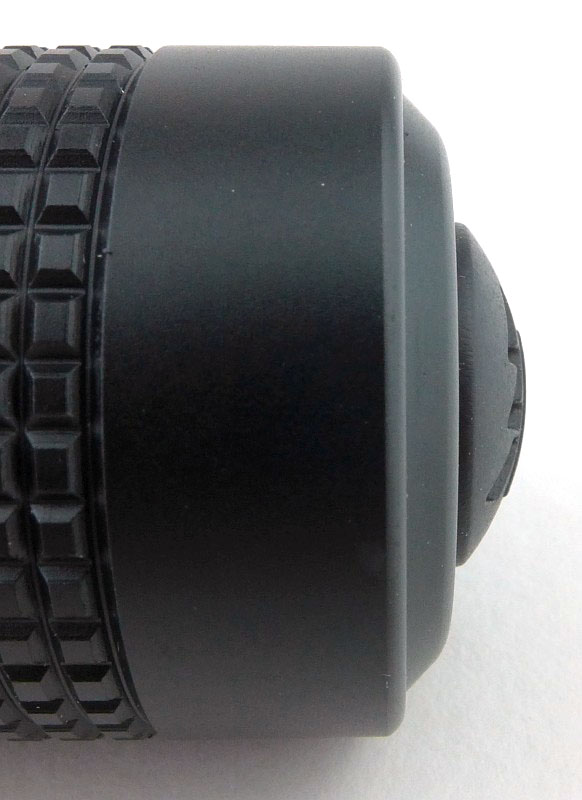
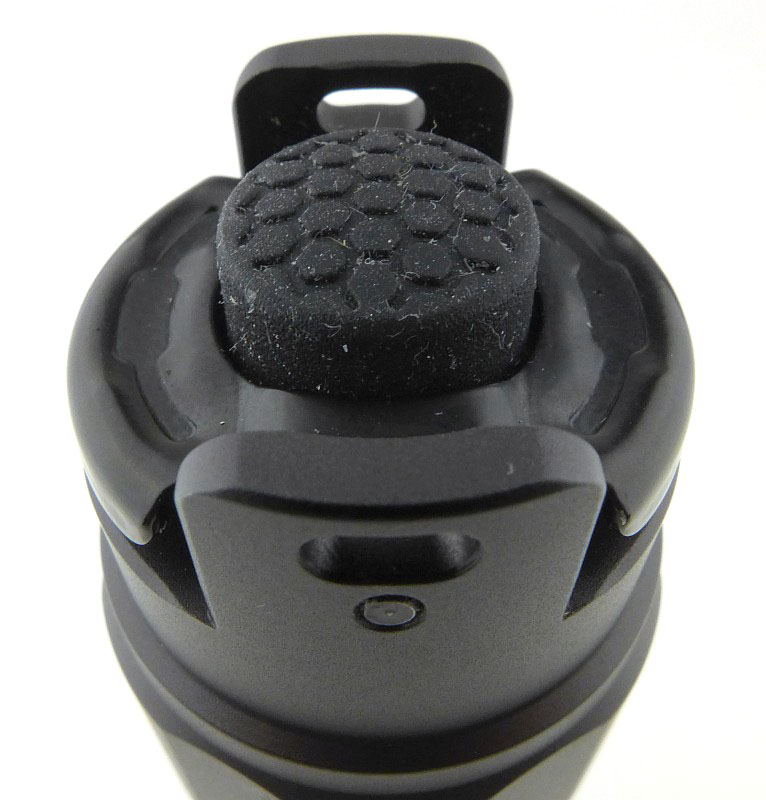
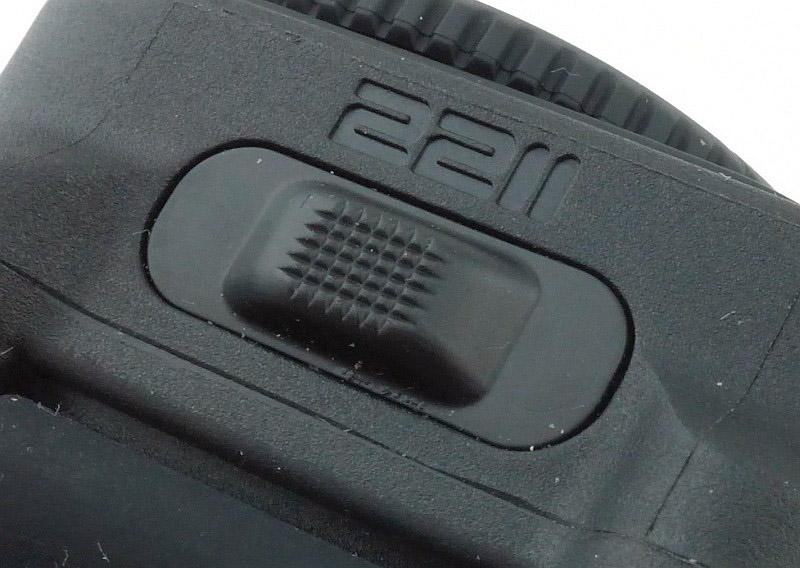
On opposite sides of the 2211 Signature’s body is a rubber covered switch.
A closer look at one of the two switches.
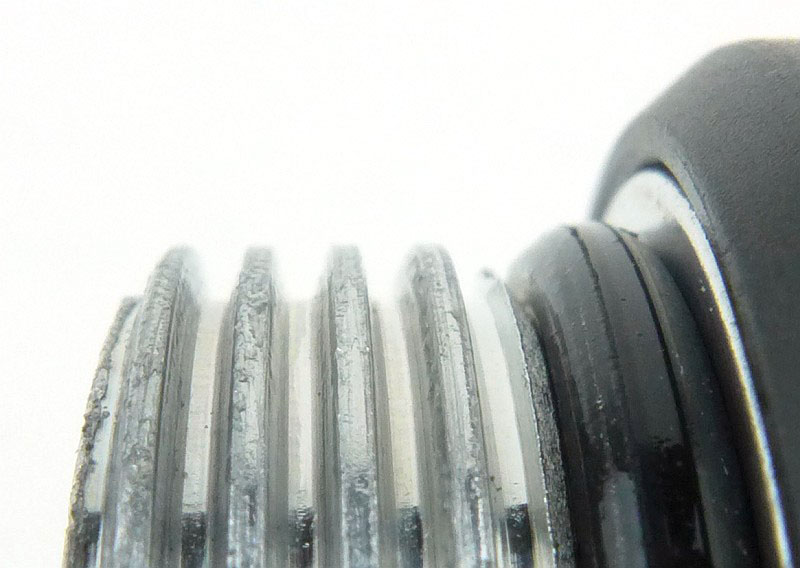
There is a 60-click unidirectional bezel. The watch glass is not specified, so is most likely mineral glass.
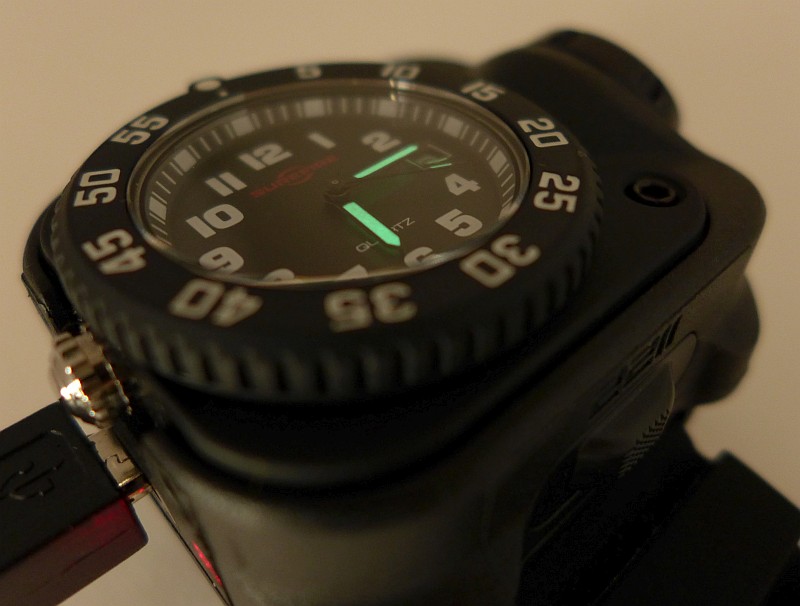
On the face there are bold numbers and this is surrounded by clear markings on the dial ring. The hands stand out well with large areas of lume providing the contrast.
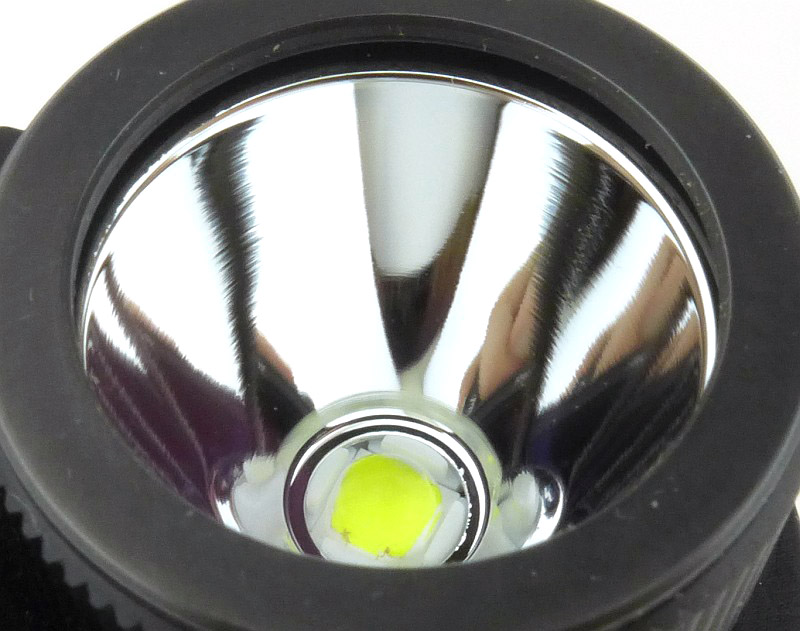
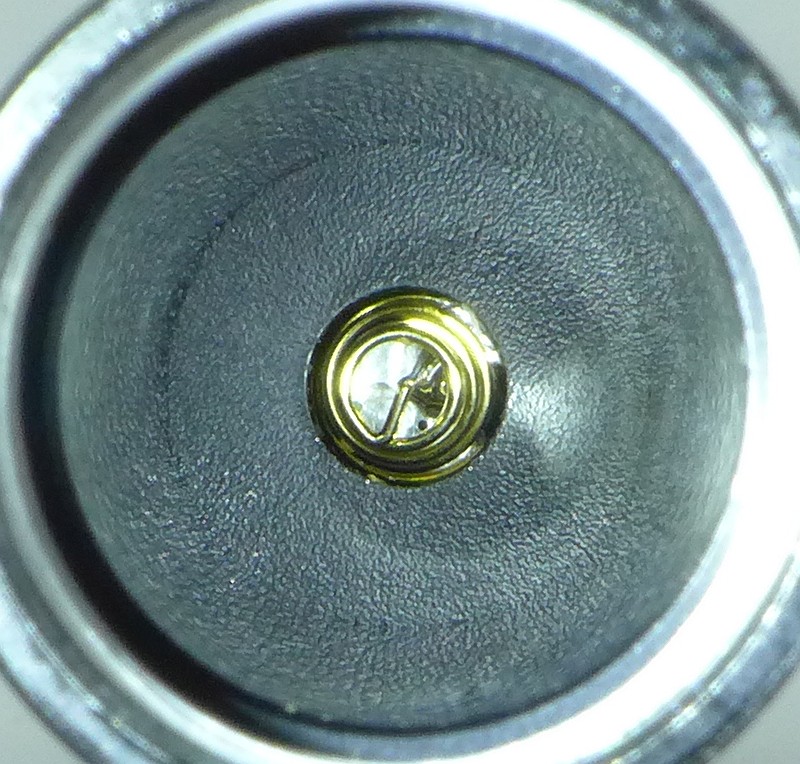
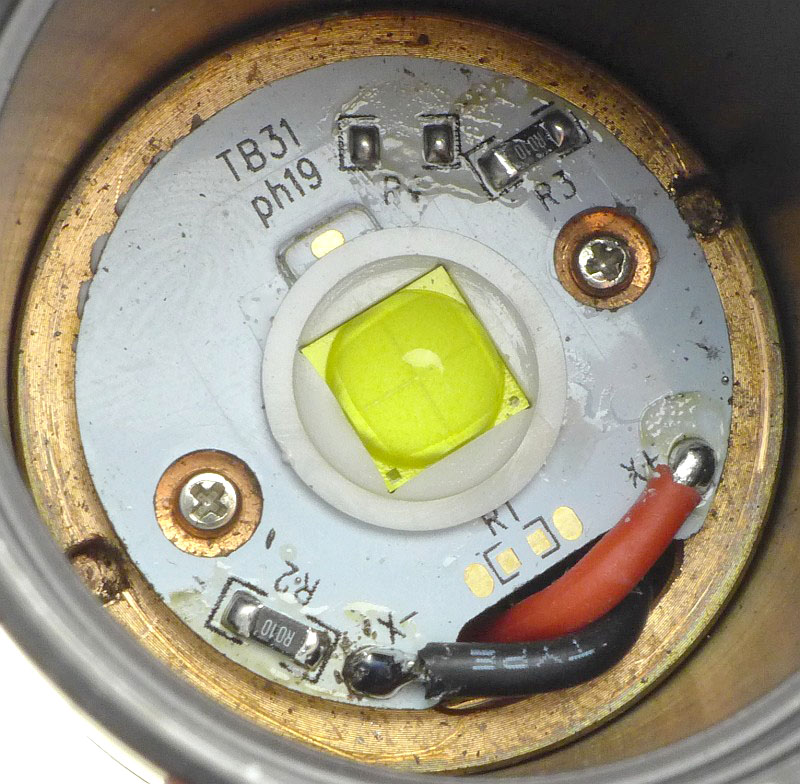
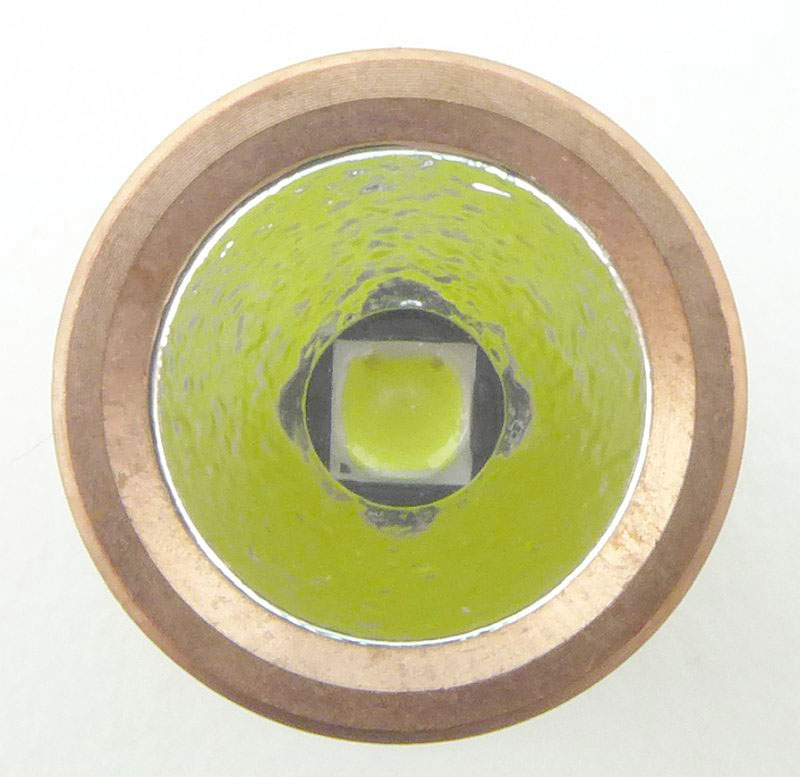
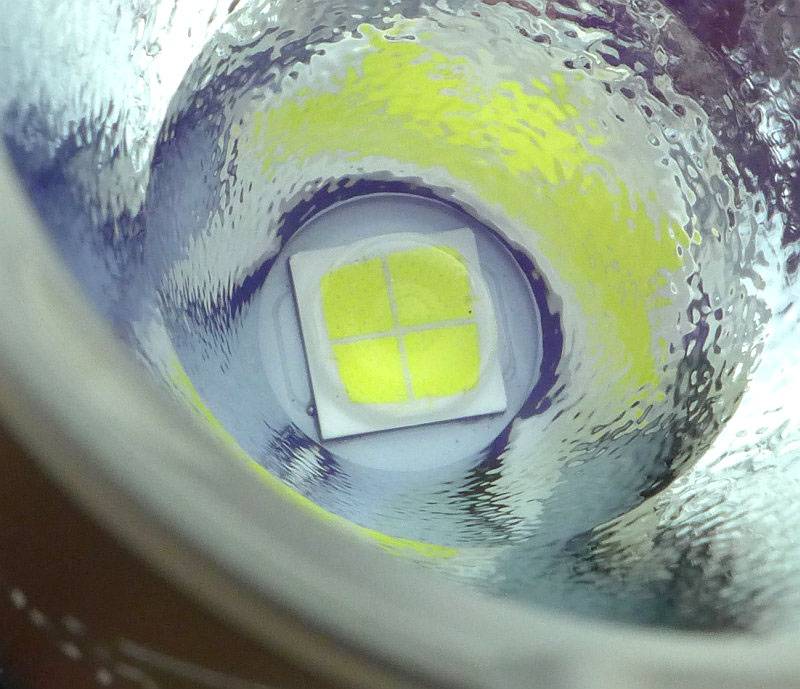
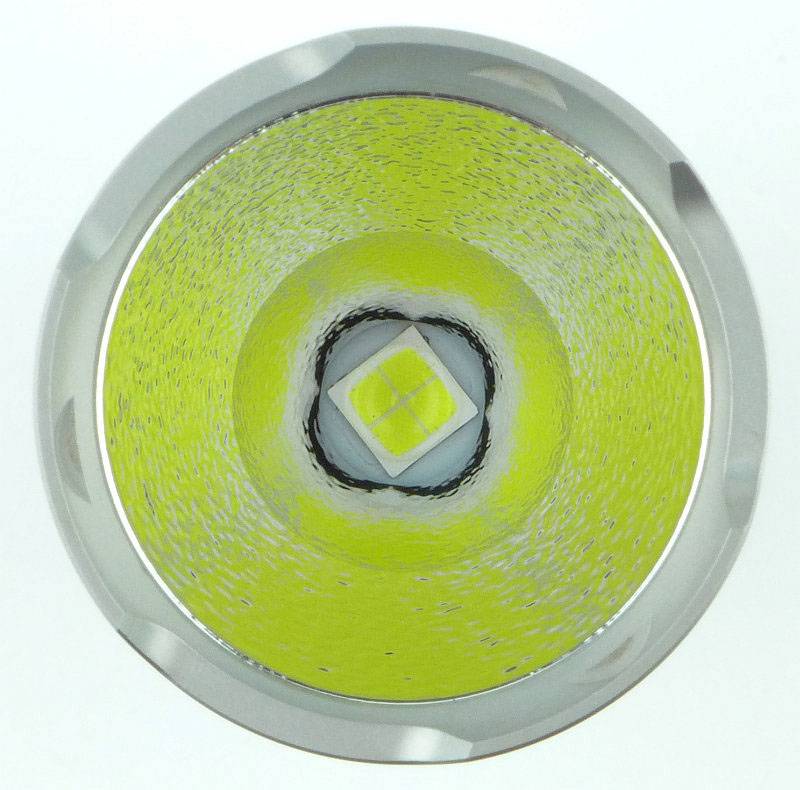
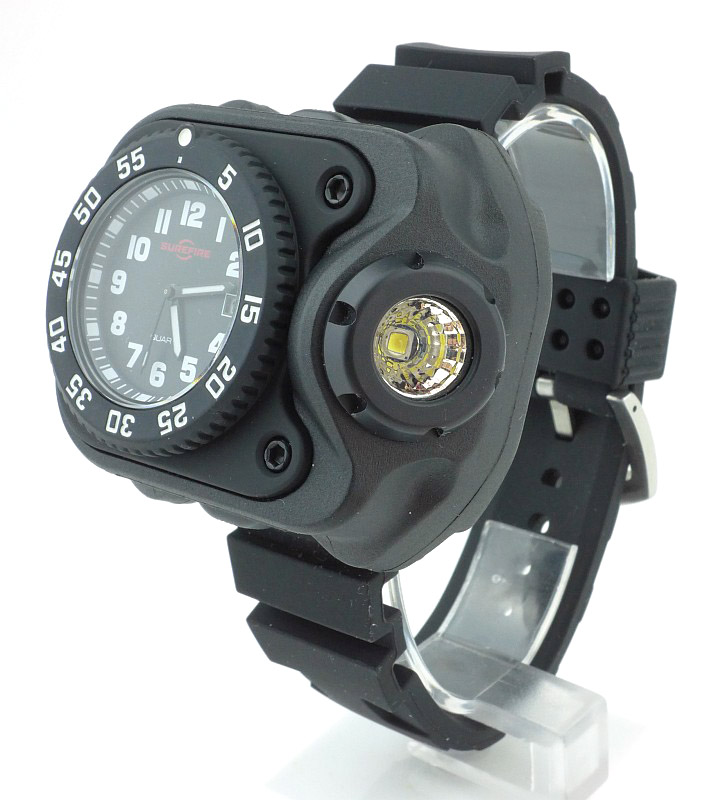
An XP-G2 LED sits in the bottom of the angled, faceted reflector of Surefire’s “MaxVision Beam” first seen on the Titan.
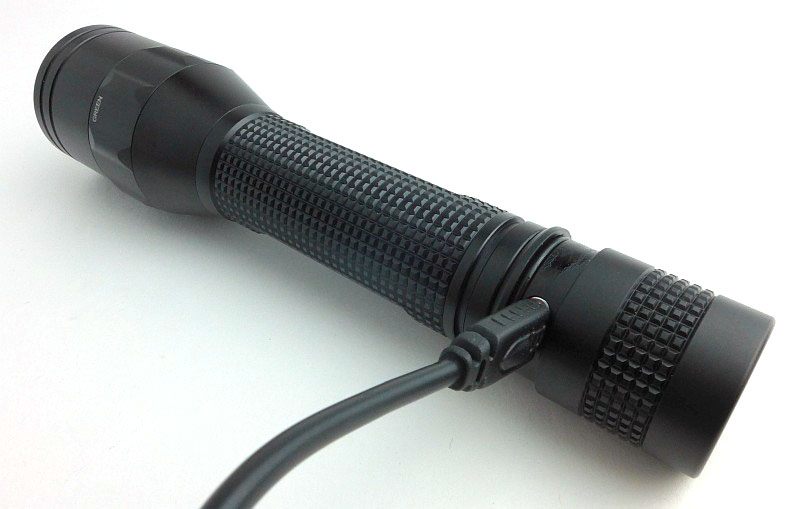
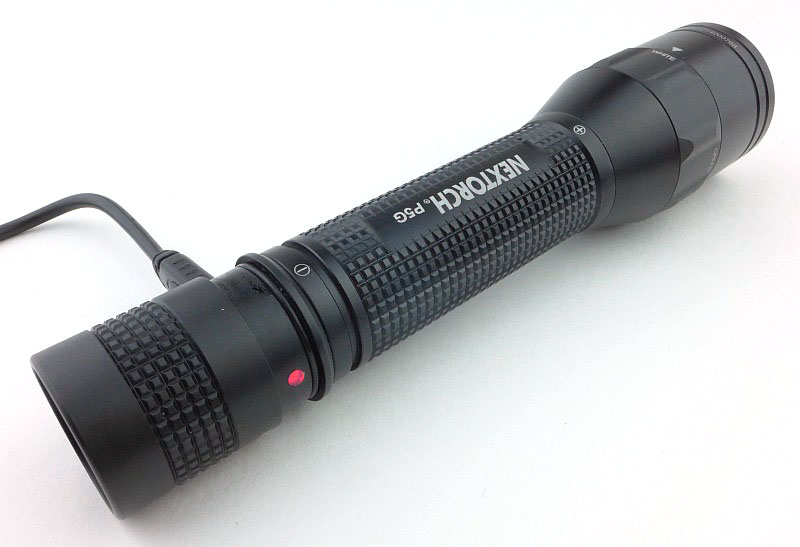
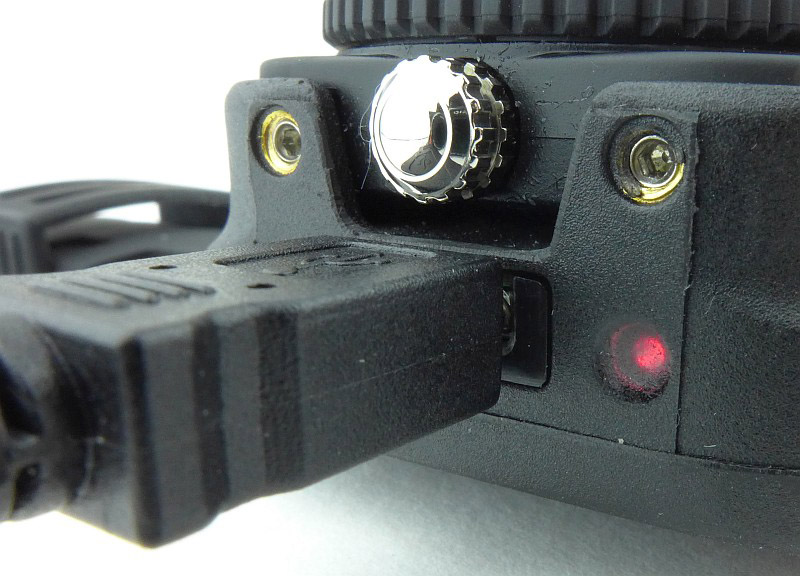
Charging is simple, and you just need a Micro-USB charger.
During charging the ‘fuel gauge’ window lights up red. This starts to turn a slightly amber colour and once fully charged it turns green.
The hands have lume on them, but there is no lume on the rest of the watch face.
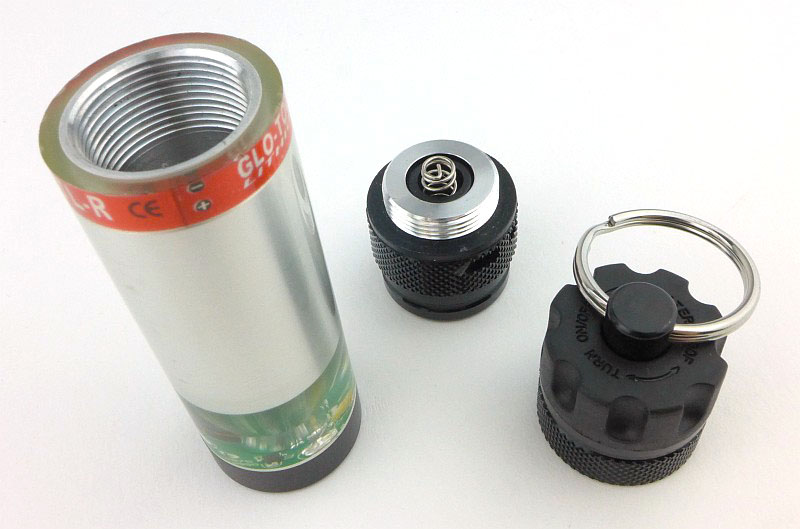
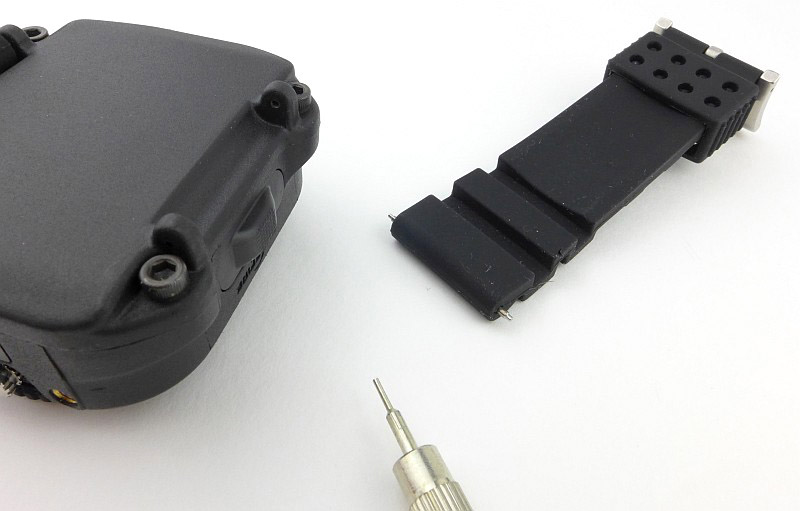
Strap fitting / changing is easy as the lugs are positioned so that you can release the spring pins using a pusher.
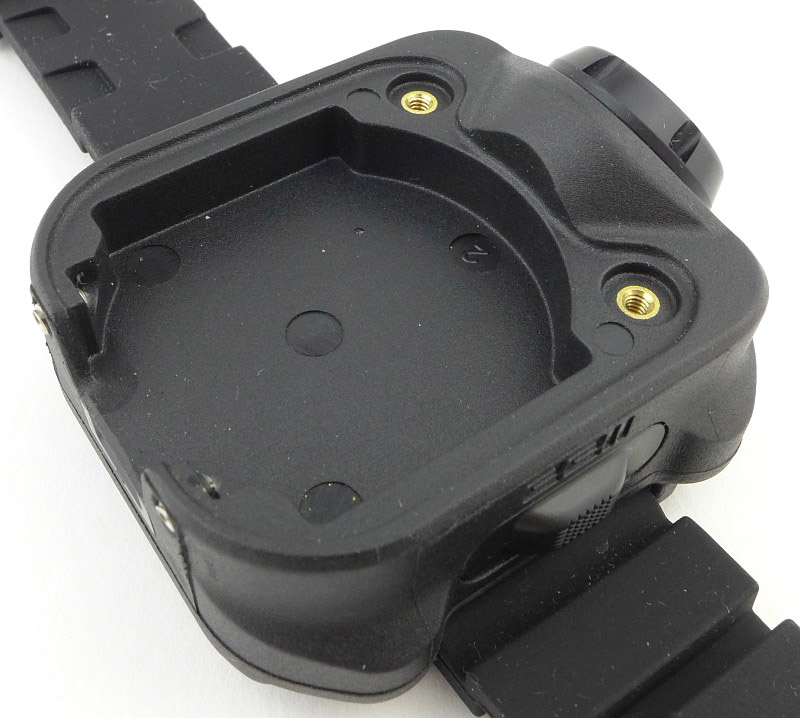
To access the watch, first loosen the two black Allen bolts near the lens of the light.
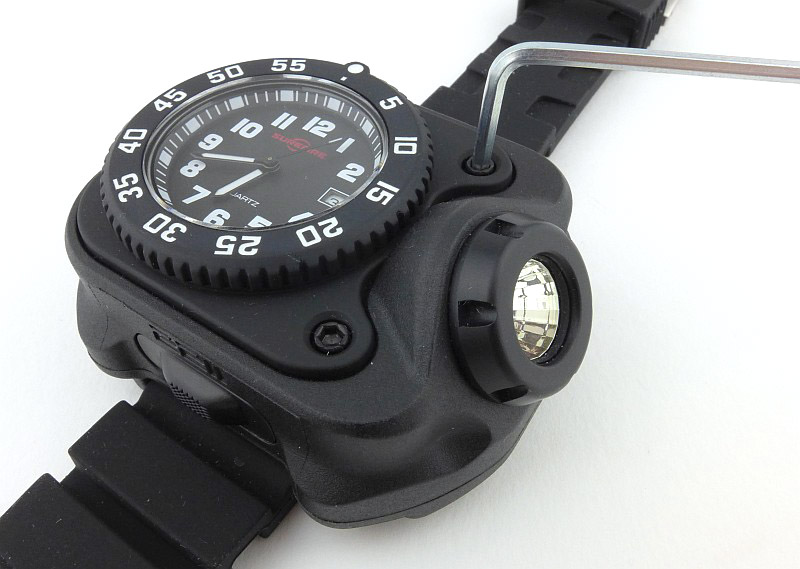
Then loosen the two Torx grub screws either side of the crown.
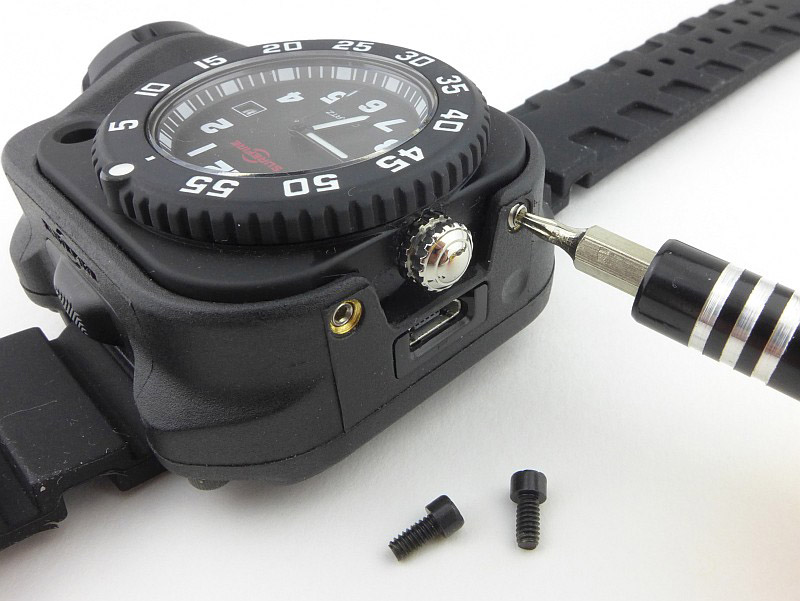
You can now lift out the watch.
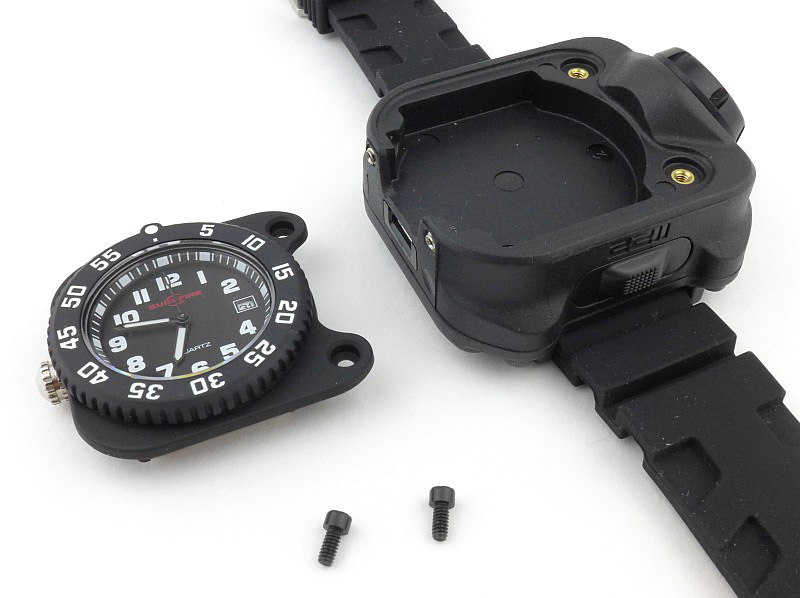
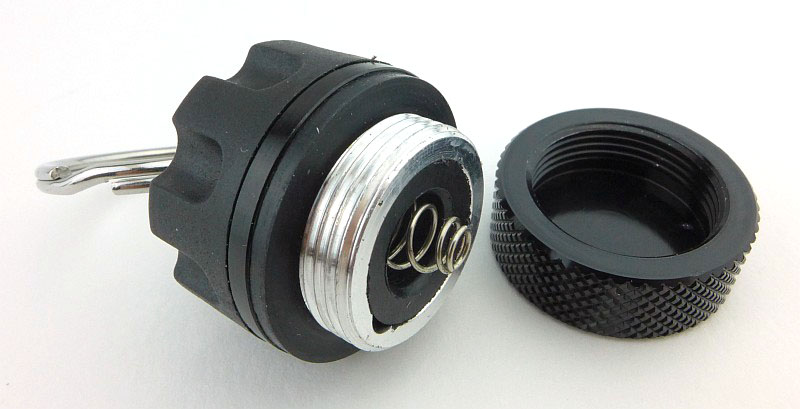
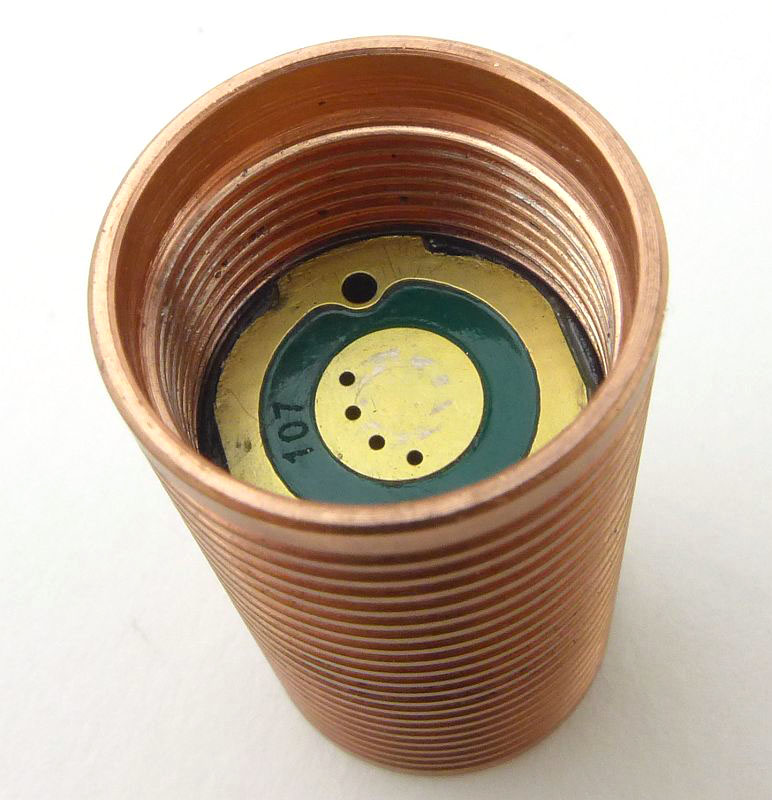
The recess in the 2211 Signature’s body for the watch to fit in, plus the four fixing points, two bolt holes and two grub screws.
The watch itself is a completely self contained module.
On the back of the case we see the only indication of waterproofing with a 100m water resistant rating (which is not shown on the watch face).
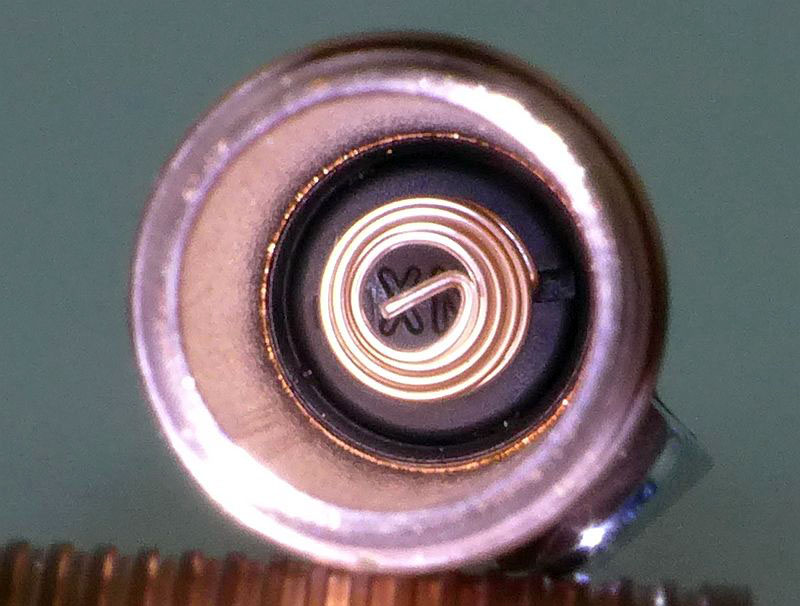
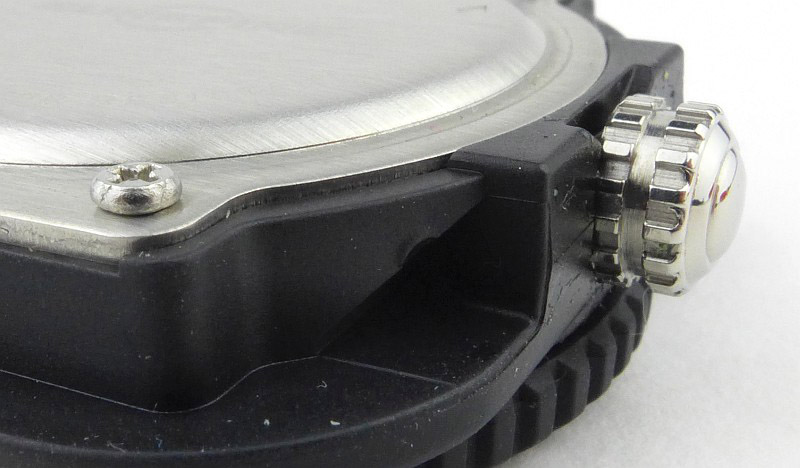
Here you can see one of the four watch back screws. In the centre of the image the slight ding in the plastic case created by the grub screw is visible. The groove in the crown is essential for ease of use, as will be explained in more detail later.
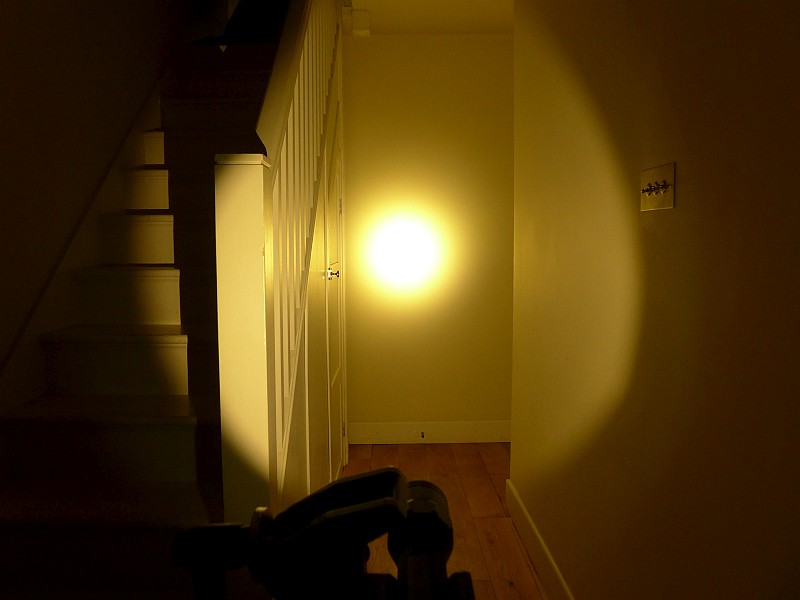
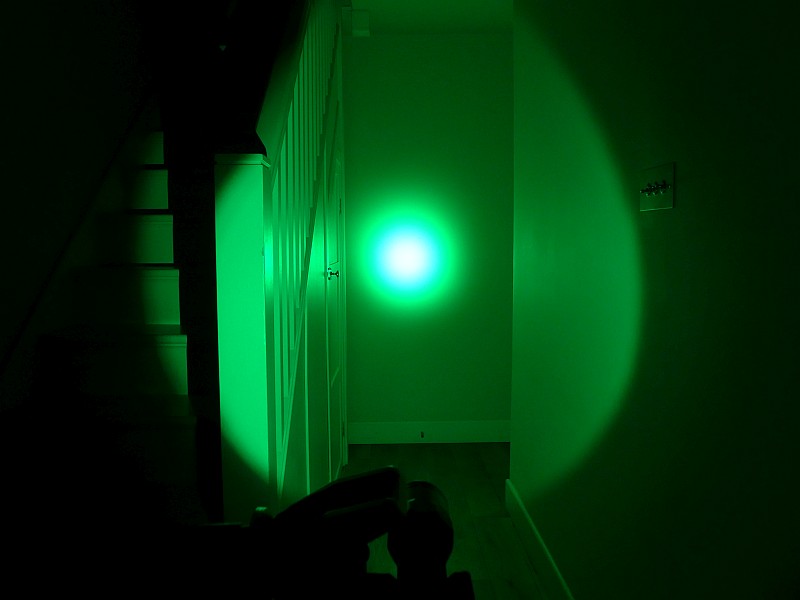
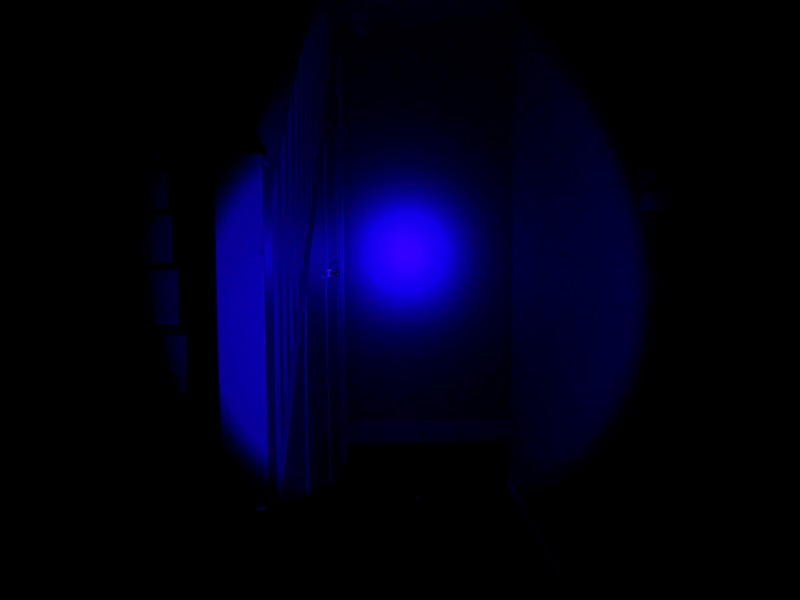
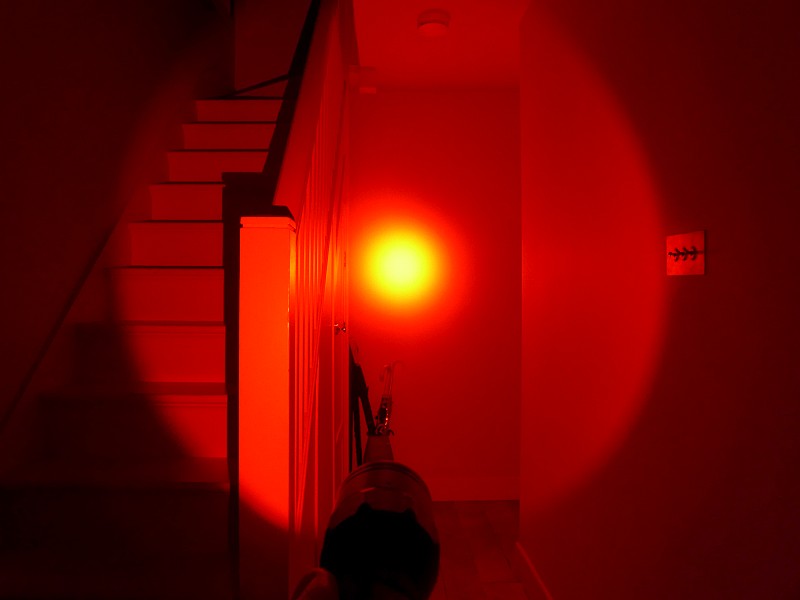
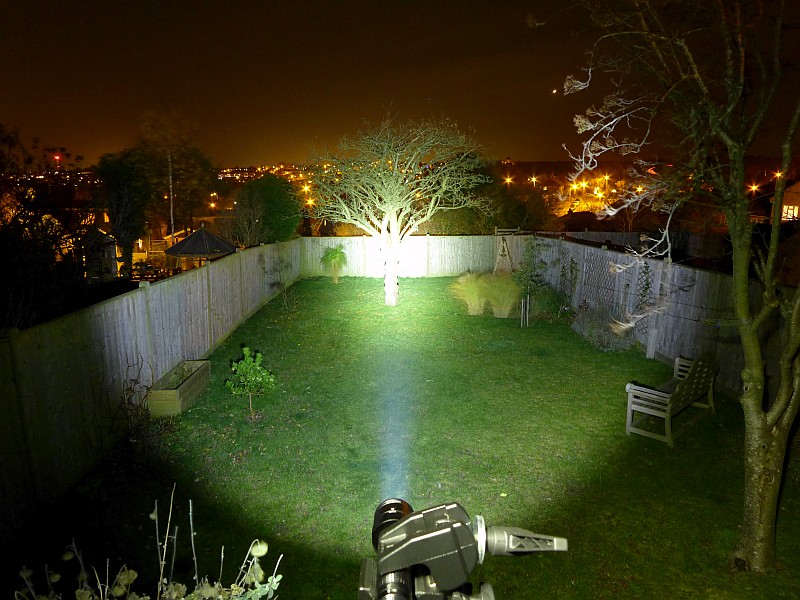
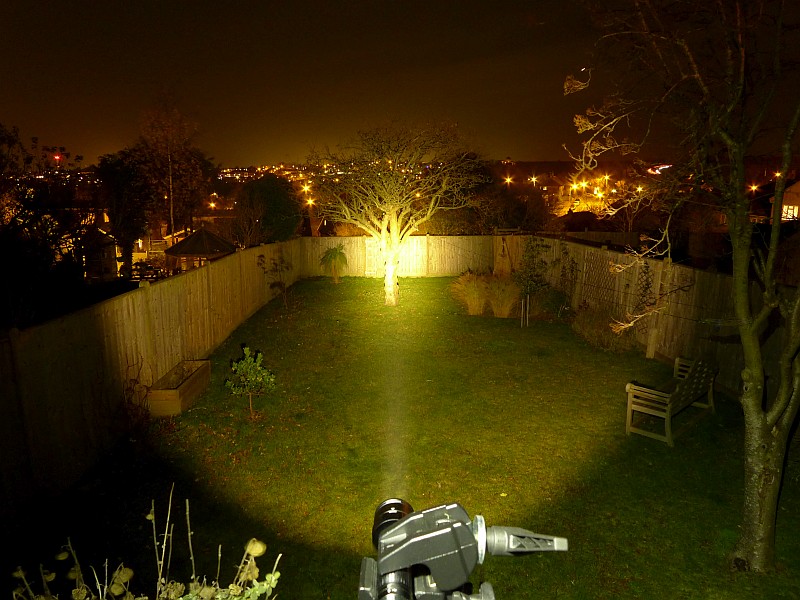
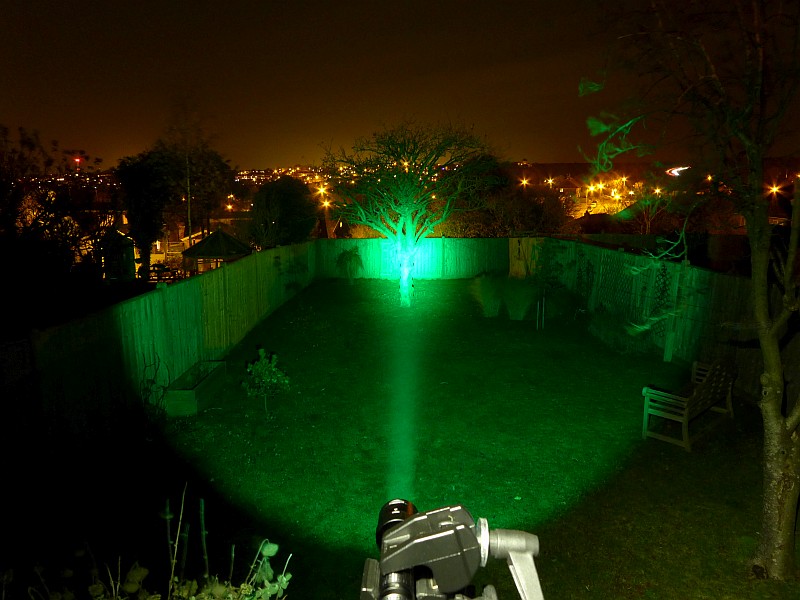
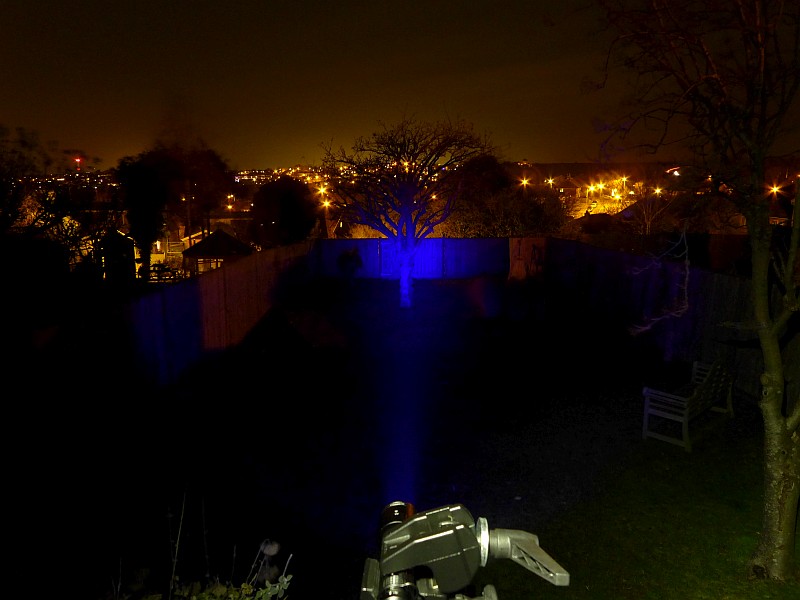
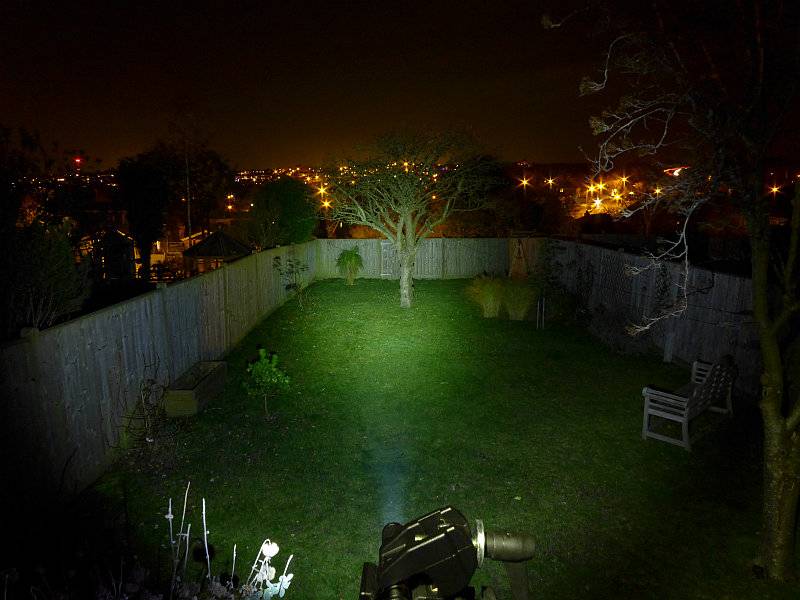
The beam
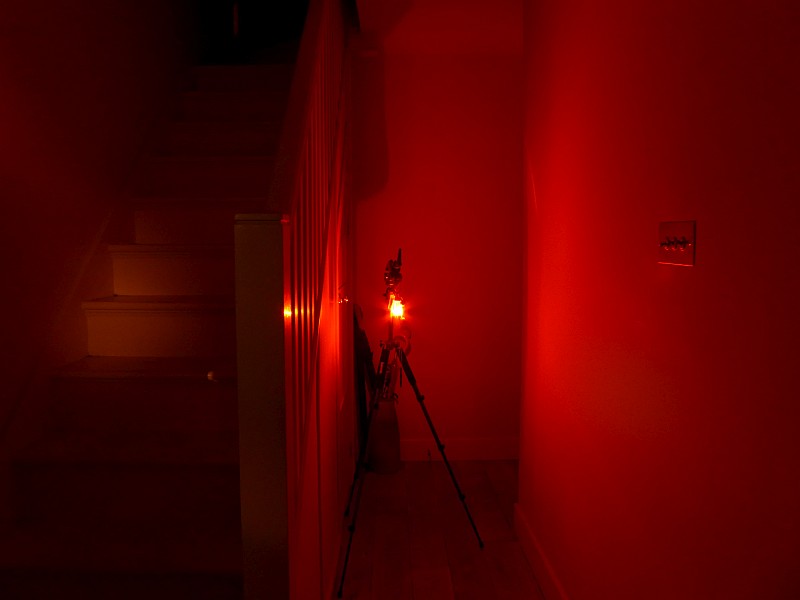
Please be careful not to judge tint based on images you see on a computer screen. Unless properly calibrated, the screen itself will change the perceived tint.
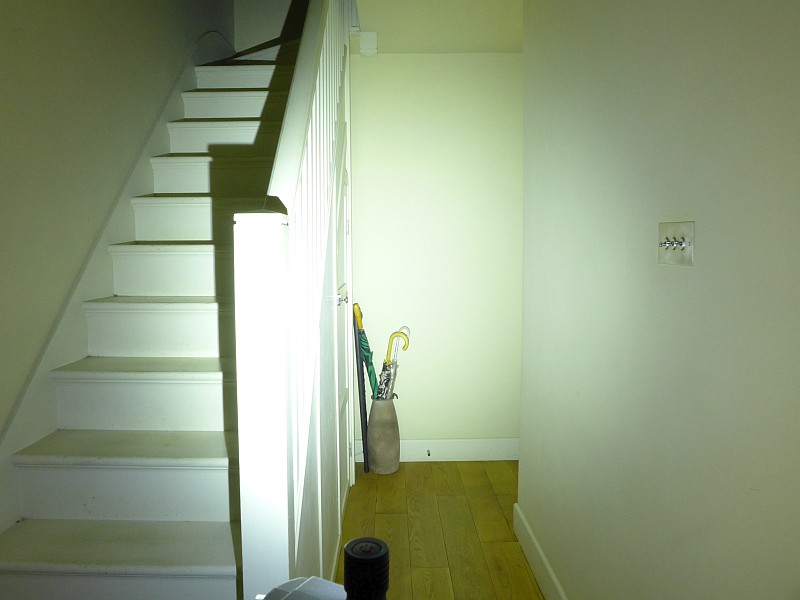
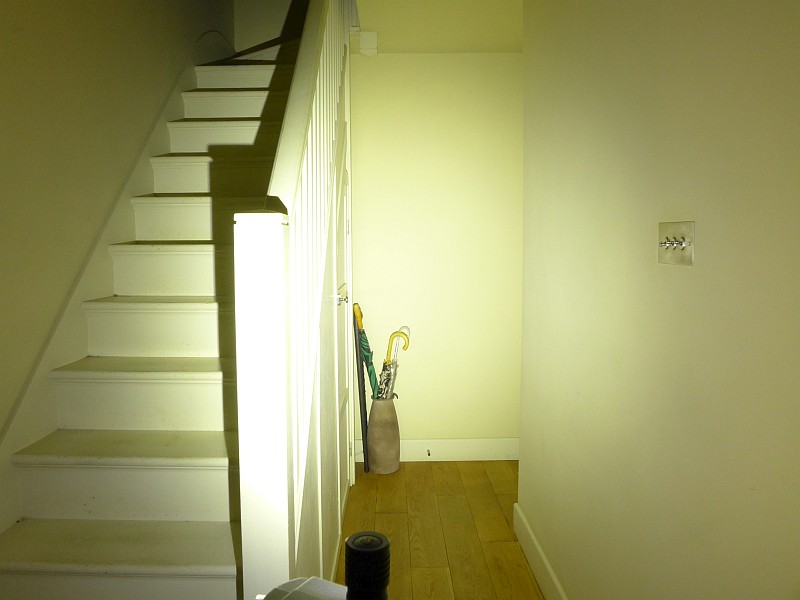
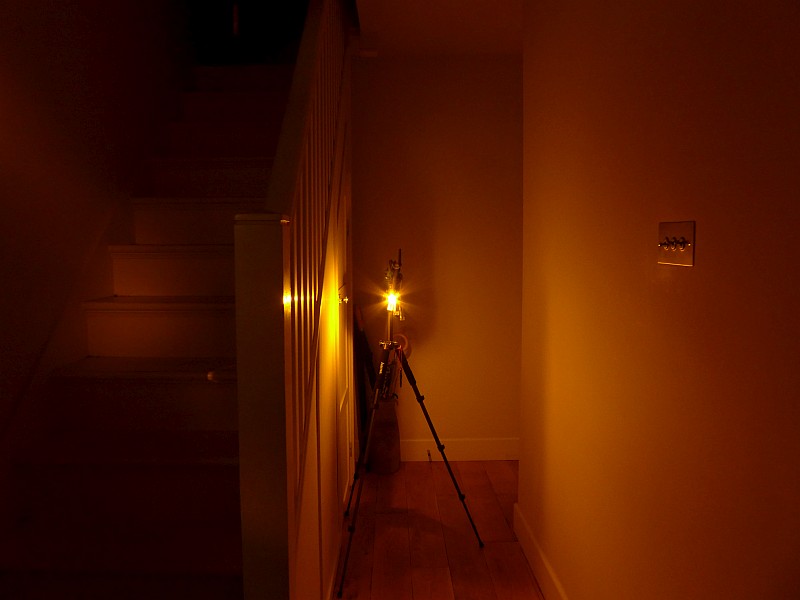
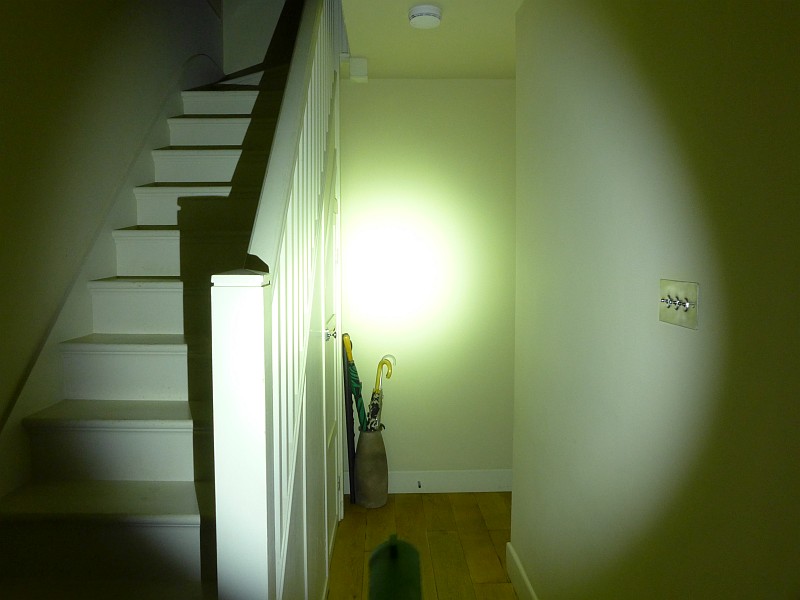
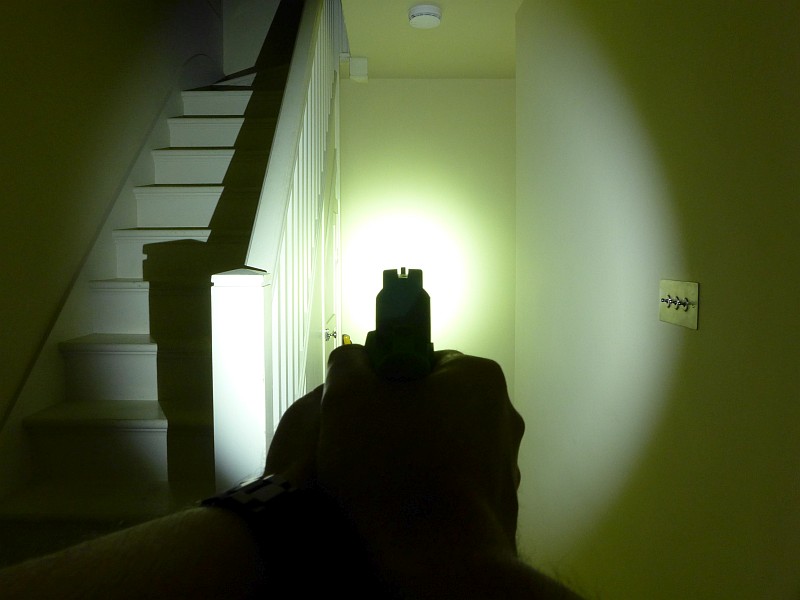
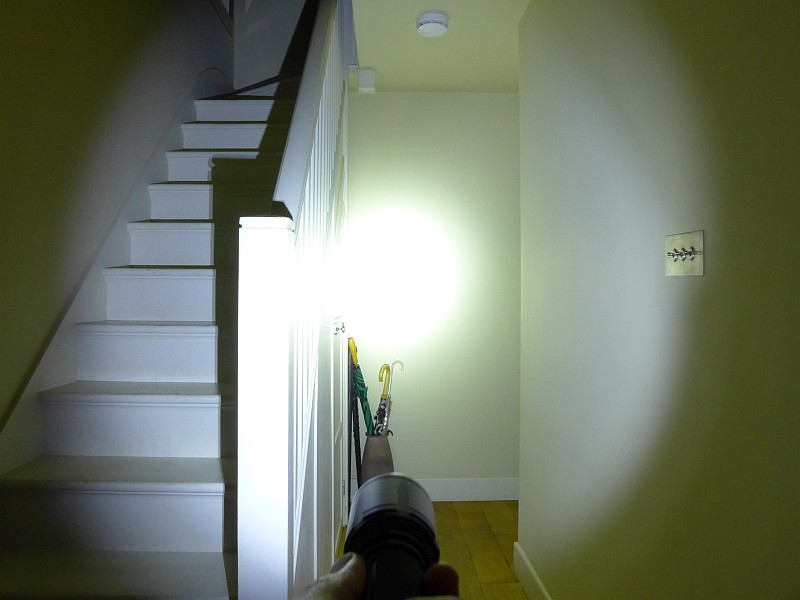
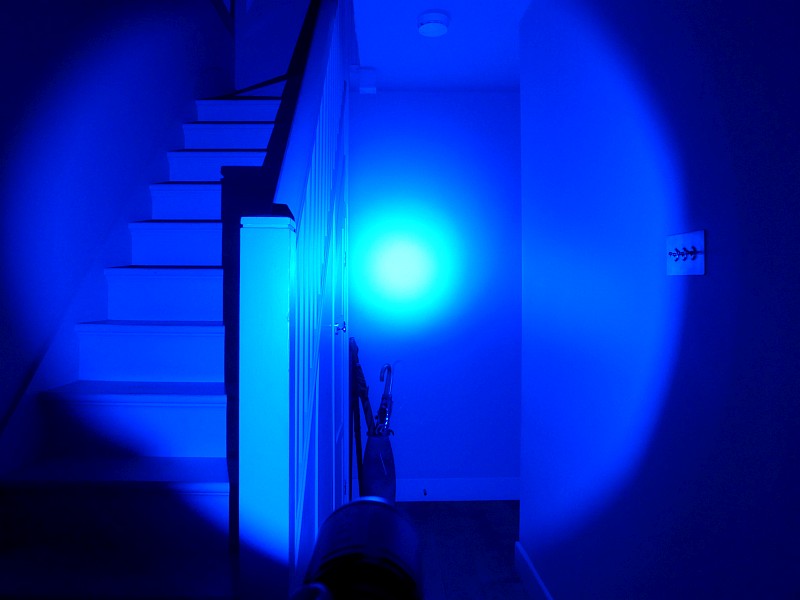
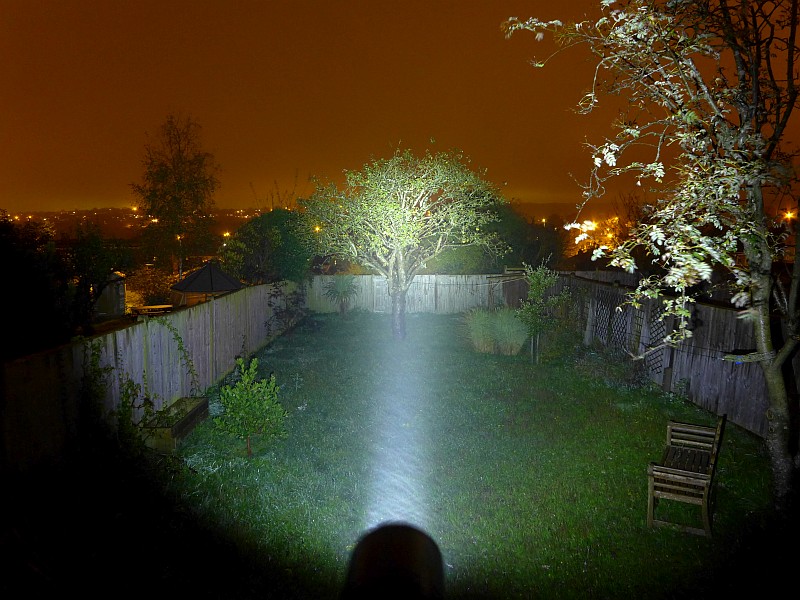
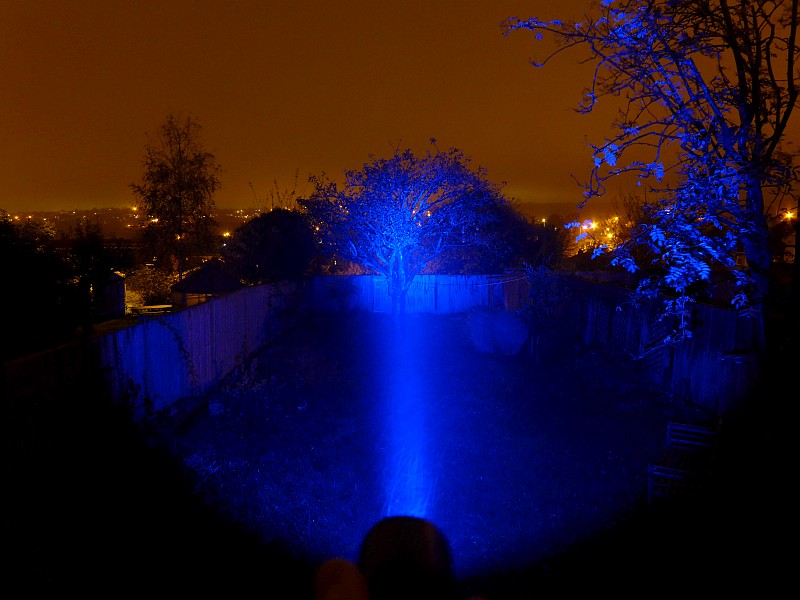
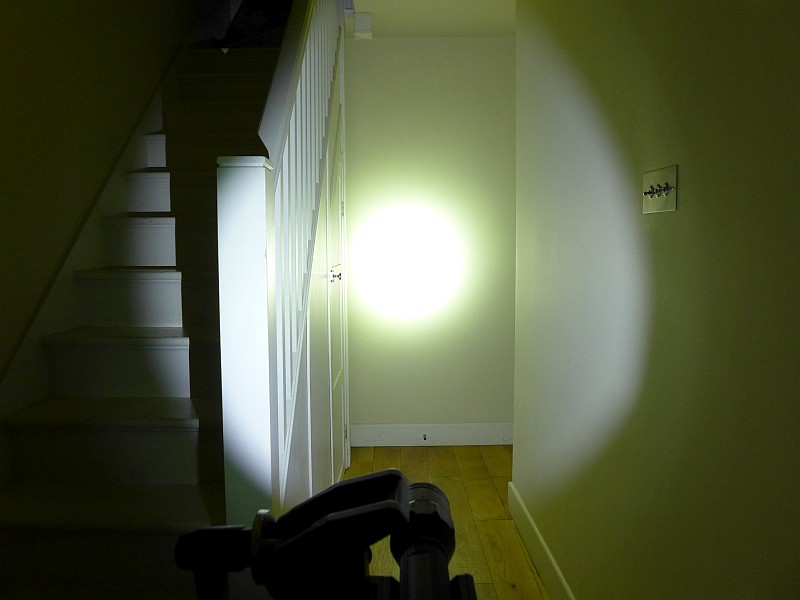
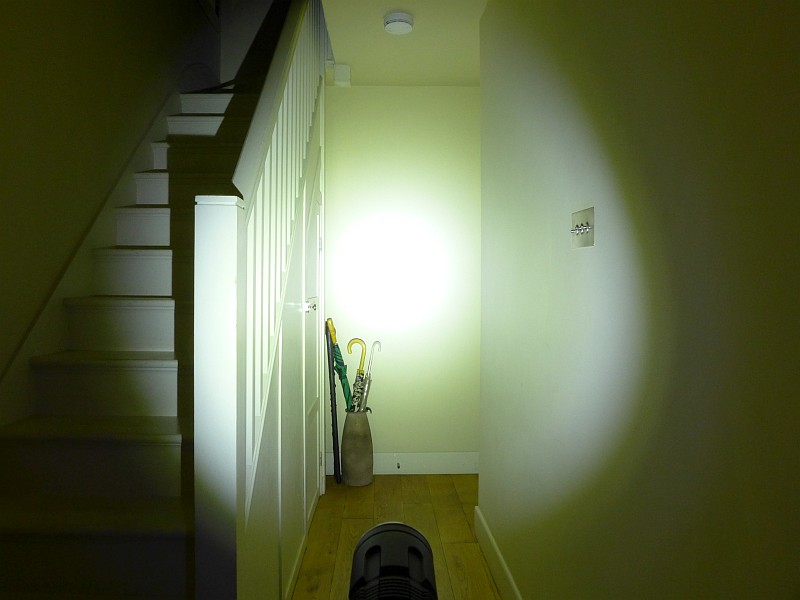
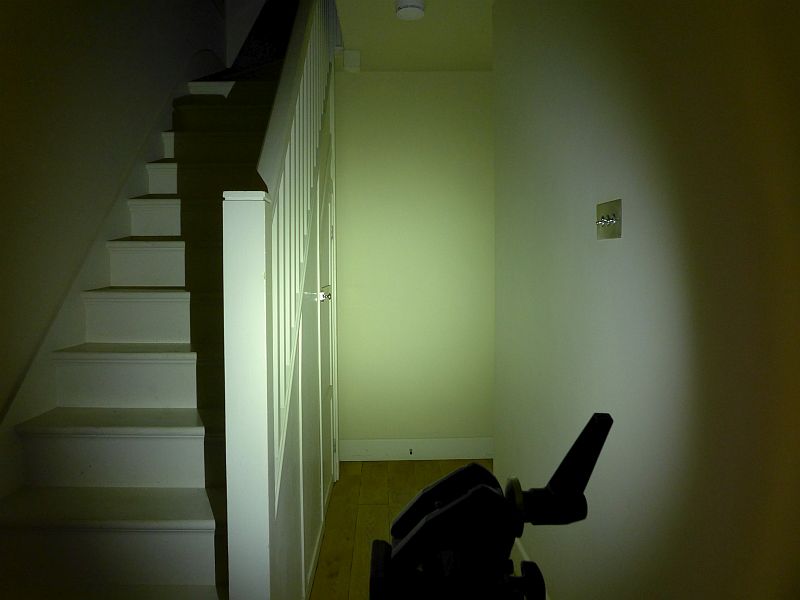
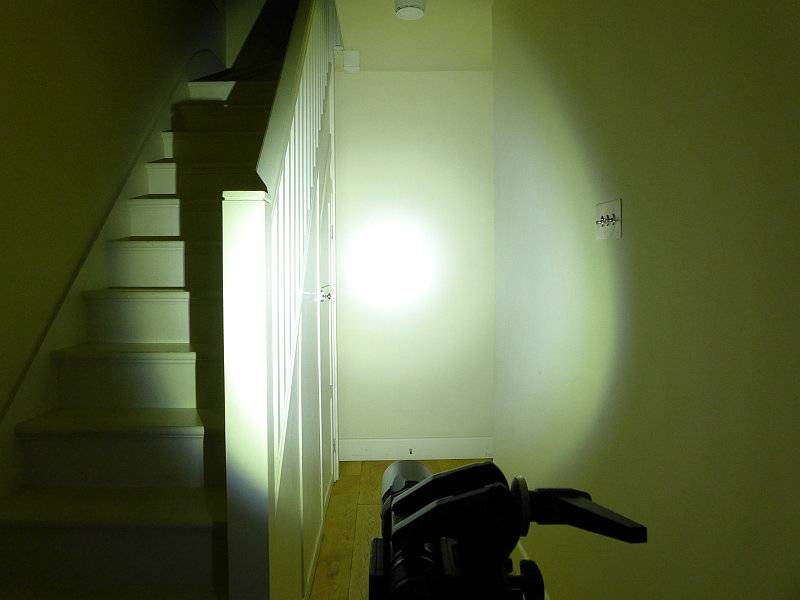
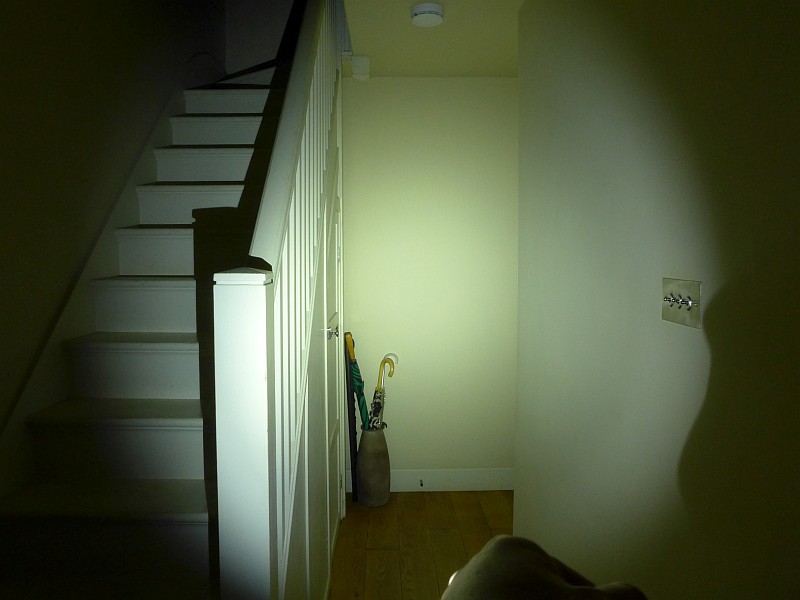
The indoor beamshot is intended to give an idea of the beam shape/quality rather than tint. All beamshots are taken using daylight white balance. The woodwork (stairs and skirting) are painted Farrow & Ball “Off-White”, and the walls are a light sandy colour called ‘String’ again by Farrow & Ball. I don’t actually have a ‘white wall’ in the house to use for this, and the wife won’t have one!
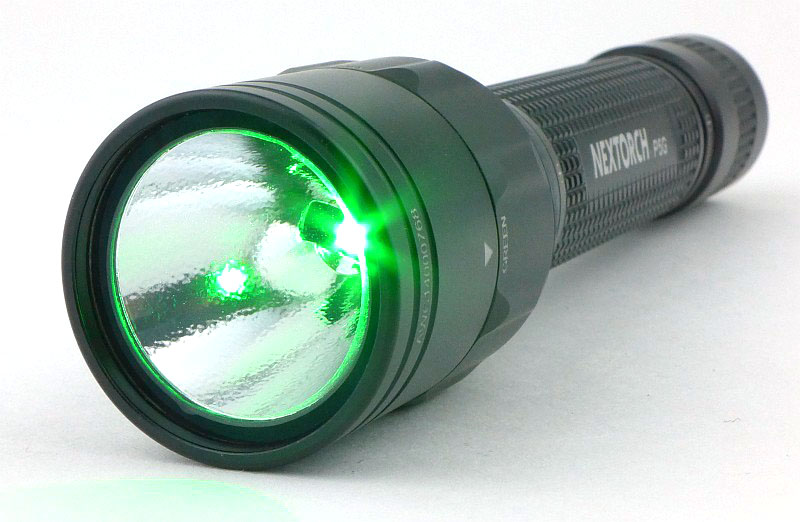
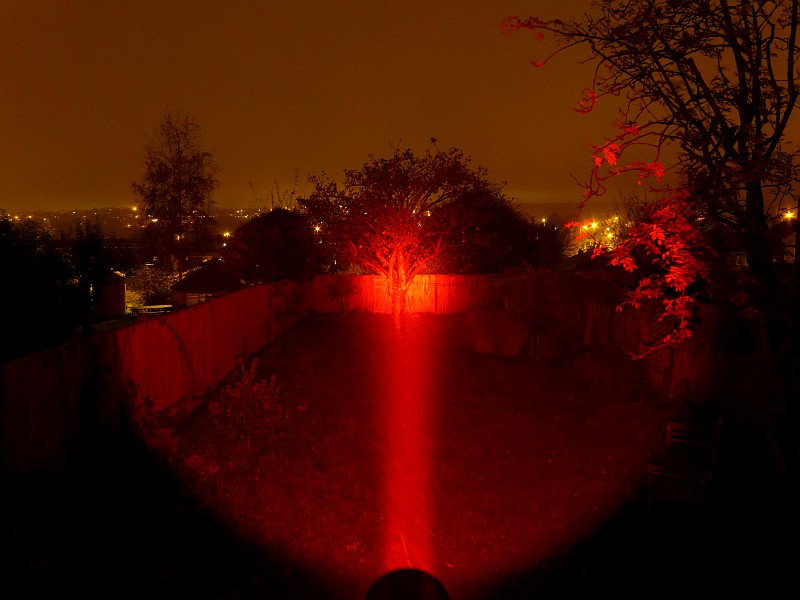
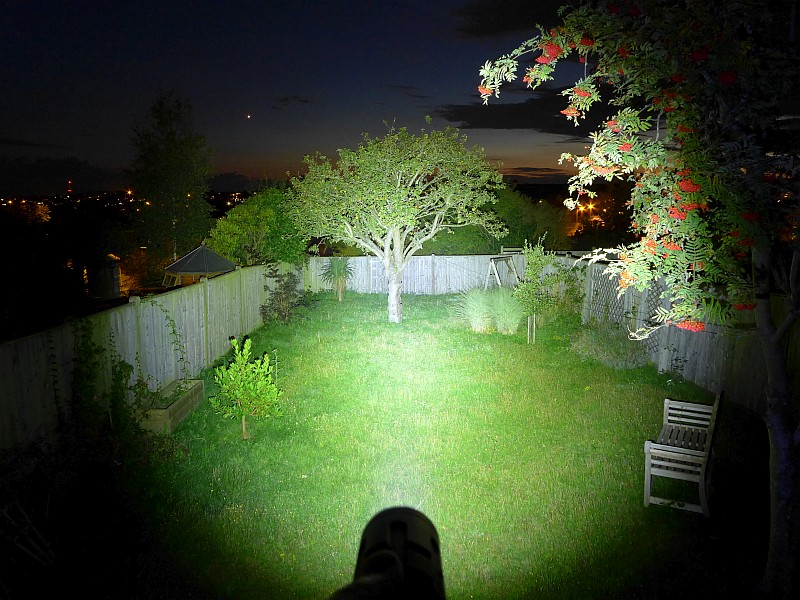
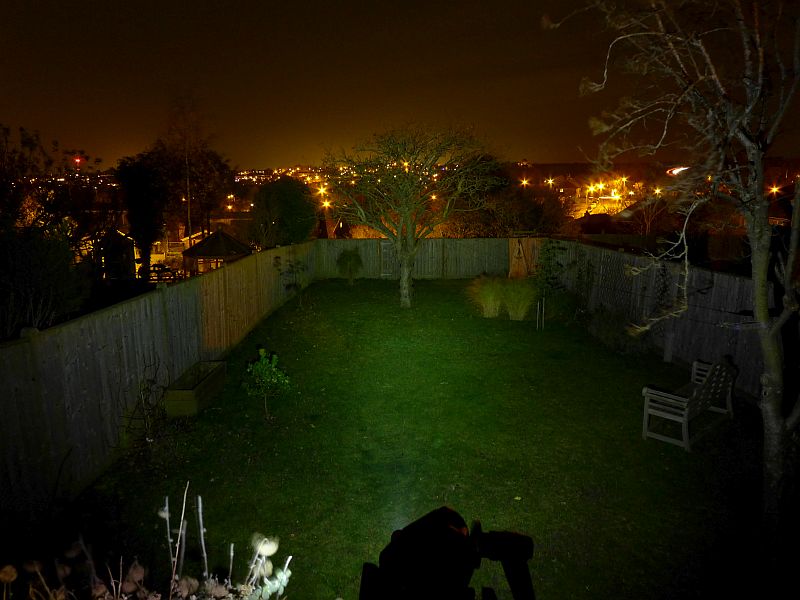
Surefire’s “MaxVision Beam” is a lovely smooth part-focused, part-diffused beam that gives you a soft edged hotspot and reasonably wide spill. Here you can see the tendency of a Wrist Light to catch the user’s knuckles in the outer edge of the spill (on the right hand side). We’ll see what this beam looks like with a sight picture later on.
Modes and User Interface:
In this section I’ll be referring to the operation of the Wrist Light rather than the watch. The watch movement is a Citizen 2115 and operates exactly as you would expect a simple date display movement to work.
There are two electronic switches on the body, positioned on the sides at the 12 and 6 o’clock positions. These control the three constant output levels.
To turn the 2211 Signature onto High – pressing either switch once. To turn OFF press either switch after it has been ON for at least 0.5 seconds.
To turn the 2211 Signature ON to Low – pressing either switch twice within 0.5 seconds. This will turn onto High and then to Low. To turn the light OFF, press either switch again once.
To access Low directly on the 2211 Signature – press and hold both switches simultaneously. This will turn ON to Low. If you continue to hold both switches, the output will cycle through Medium, and then High 0.75 seconds apart. Release both switches when the desired output has been reached. To turn the light OFF, press either switch once.
NOTE: Surefire state “Do not activate, deactivate, or adjust your 2211 Signature while holding a firearm.” – heed this warning.
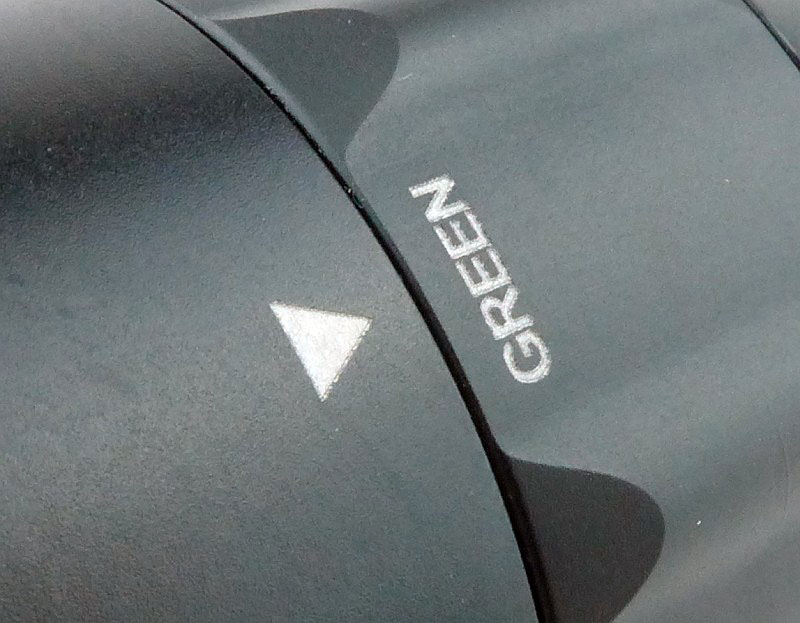
The 2211 Signature has a ‘Fuel Gauge’ LED to indicate the battery charge status during use and while charging. GREEN means the battery is full (or has reached at least 90% when charging). AMBER indicates the battery is low and the output level should be reduced or the 2211 recharged. RED indicates an empty battery and the 2211 should be recharged immediately.
Batteries and output:
The 2211 Signature runs on a built-in battery. For the watch, the Citizen 2115 movement is powered by a SR626SW / 377 / AG4 button cell which is expected to last 2-3 years.
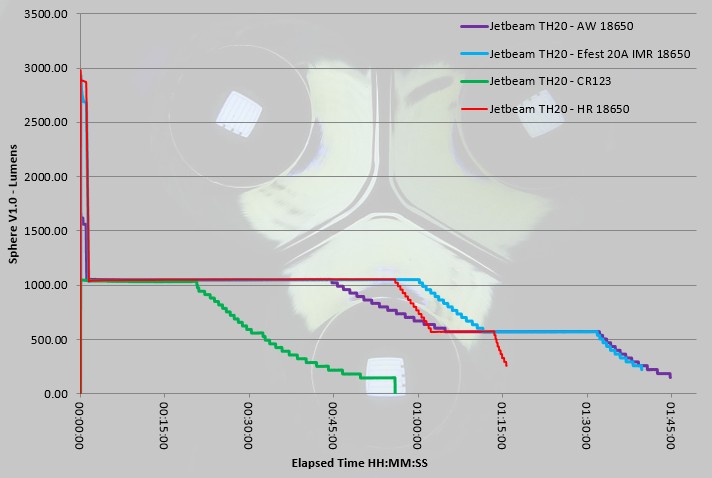
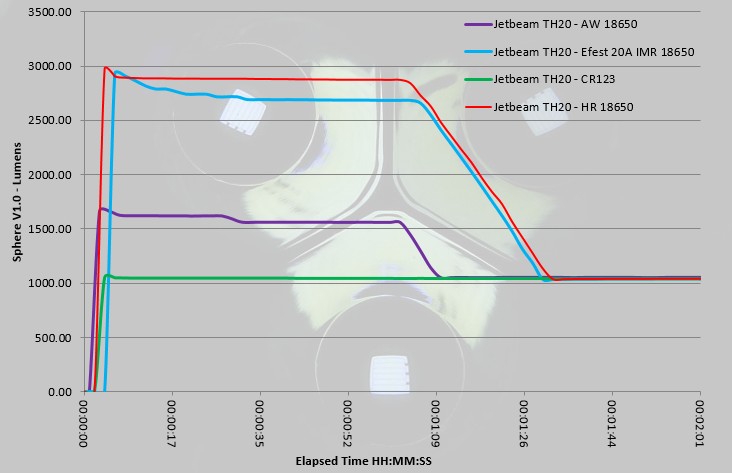
To measure actual output, I built an integrating sphere. See here for more detail. The sensor registers visible light only (so Infra-Red and Ultra-Violet will not be measured).
Please note, all quoted lumen figures are from a DIY integrating sphere, and according to ANSI standards. Although every effort is made to give as accurate a result as possible, they should be taken as an estimate only. The results can be used to compare outputs in this review and others I have published.
| ___________________________________________ | ________________________________ | ________________________________ |
| Surefire 2211 Signature using built-in cell | I.S. measured ANSI output Lumens | PWM frequency or Strobe frequency (Hz) |
| ___________________________________________ | ________________________________ | ________________________________ |
| High | 387 | 0 |
| Medium | 77 | 0 |
| Low | 27 | 0 |
* Beacon and Strobe output measurements are only estimates as the brief flashes make it difficult to capture the actual output value.
There will be parasitic drain but it cannot be measured due to the design. Long term testing of the Surefire Sidekick would indicate that this drain will be very low.
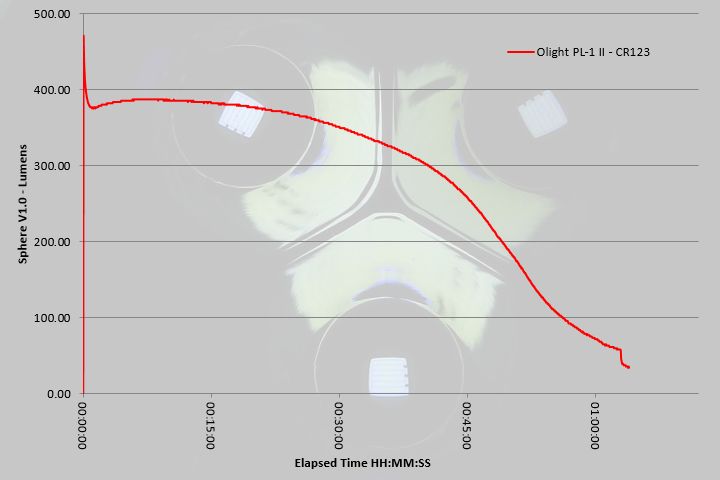
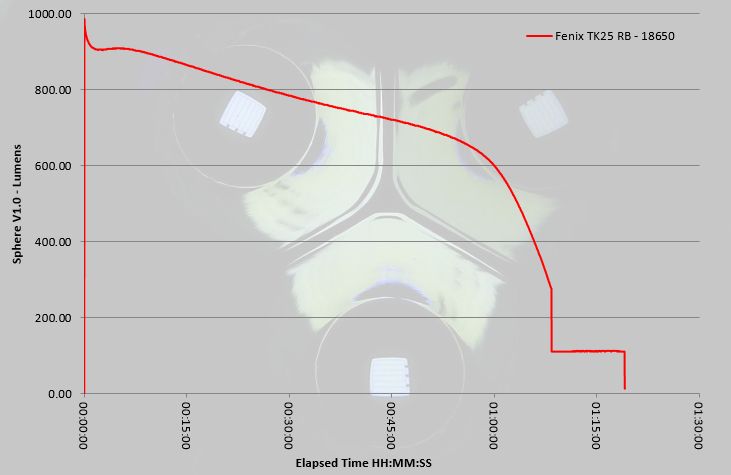
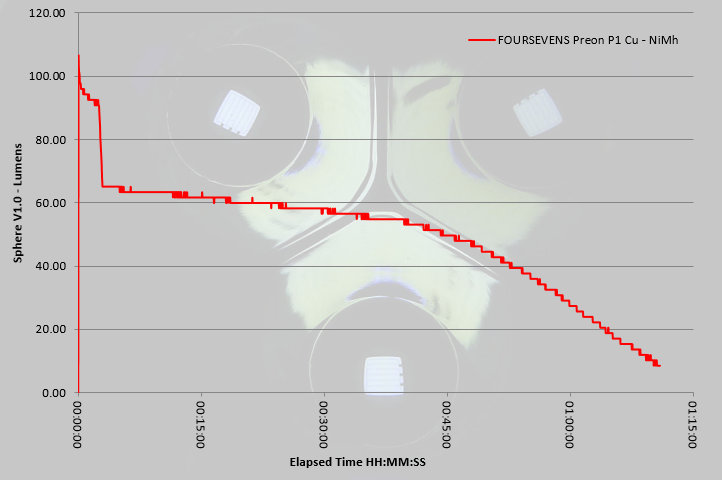
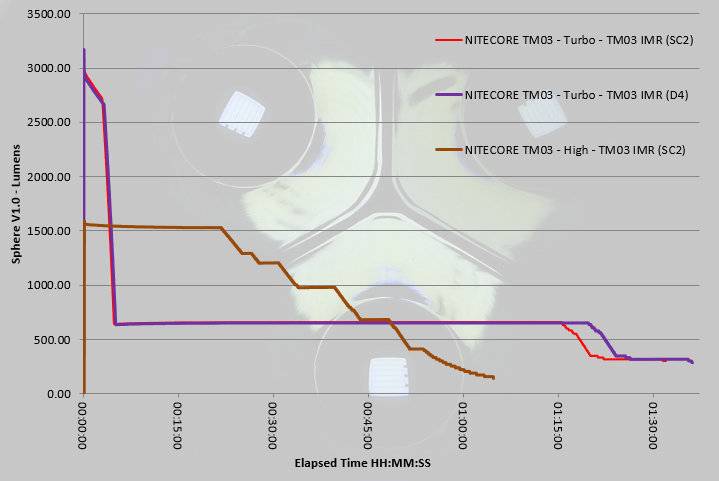
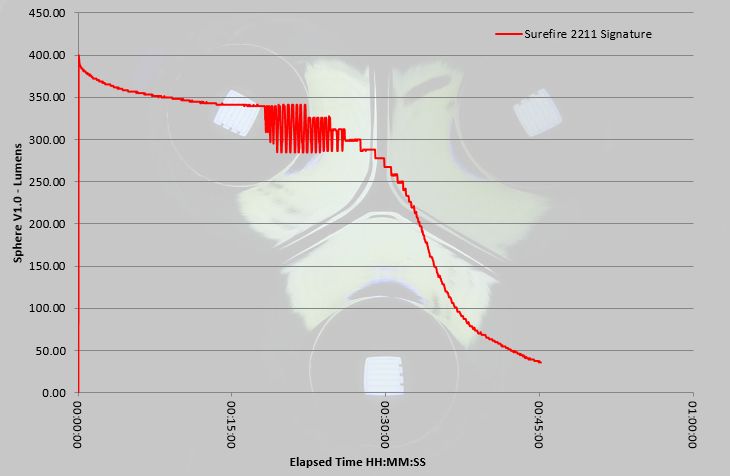
This particular 2211 Signature sample both over and under performs. Maximum output is more than the specified 300lm output for the first 30 minutes of use, but runtime is lower than the one hour specified. Between 20 and 27 minutes, the output fluctuates by around 55lm where the battery is starting to struggle to maintain the over 340 lm output. This then settles into a gradually stepping down output through the 30 minute mark, dropping more rapidly and reaching the ANSI cut off at 45 minutes of total runtime.
Troubleshooting
This section is included to mention any minor niggles I come across during testing, in case the information helps anyone else.
No issues were encountered during testing.
As per the description of this section, this information is provided in case anyone else finds a similar ‘issue’ that might be fixed in the same way.
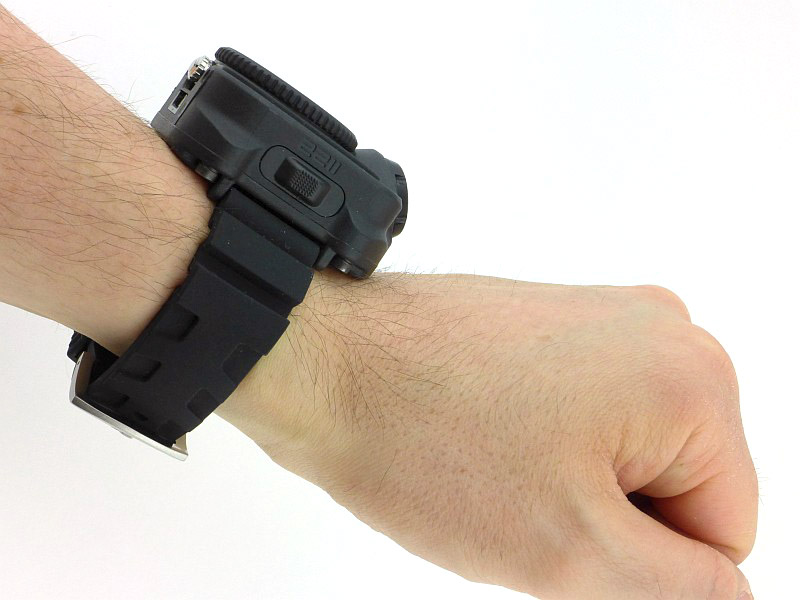
The 2211 Signature in use
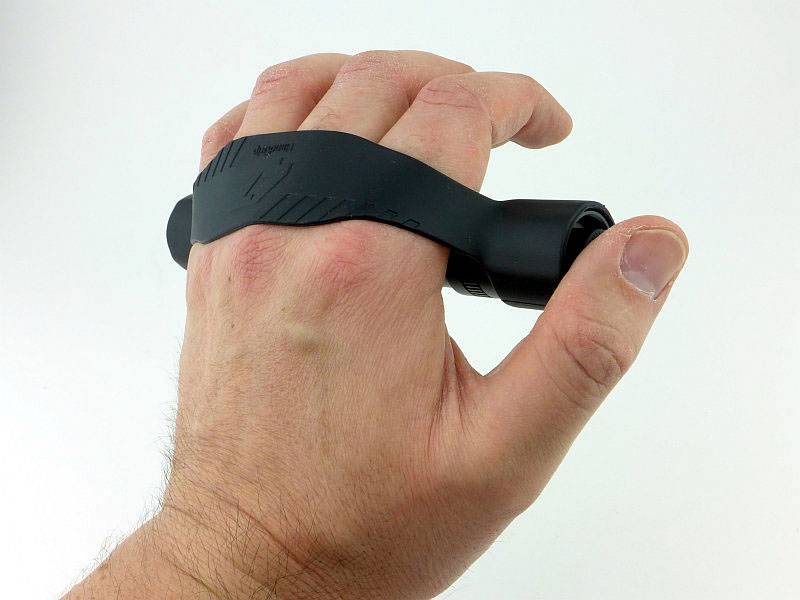
Although pictured with the rubber strap provided with this sample, in line with the Surefire final specification, I’ve changed this and used it with a NATO / ZULU strap. I have also tried it with a metal bracelet strap just to see how this worked.
It is a really good call by Surefire to go with the NATO strap for the final version as this means that the failure of a single strap pin will not cause the 2211 to fall off (which is the reason for the NATO strap design itself).
For those not familiar with this type of strap, here you can see how the nylon webbing passes behind both strap pins, so if one breaks, it will still be attached to the strap.
In use, I’ve also found (thanks to trying all strap types) how critical it is to have the most stable fitting on your wrist. You need to fit the strap to be snug, as any looseness results in the beam being less controllable and responsive.
You certainly know when you are wearing the 2211 Signature as it has real presence on the wrist. There is definitely a sleeve incompatibility consideration as the depth of the 2211 Signature means it doesn’t easily fit into most sleeves. Taking off a jacket or shirt is not really an option with the 2211 Signature on your wrist. It is better fitted to the outside of a sleeve or glove cuff, but you’ll need to try out a few things to find what works best for you. The ideal arrangement is summer clothing with no sleeves at all.
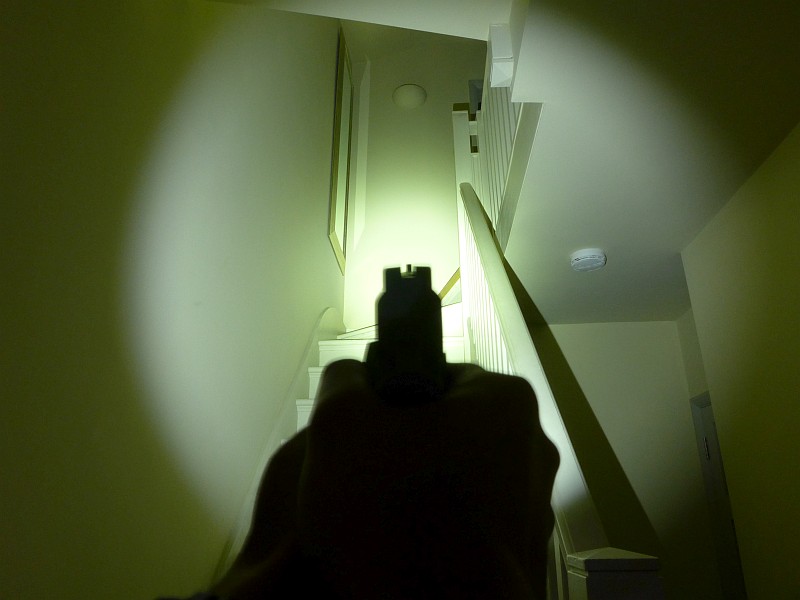
So, does it work? Based on the 2211 Signature being fitted securely to your support hand wrist, and being turned on before handling a firearm, without even thinking about it, you come up on aim and there is light on the target. You can see that the right hand edge of the spill is showing knuckle shadow, but there is still plenty of light to work within.
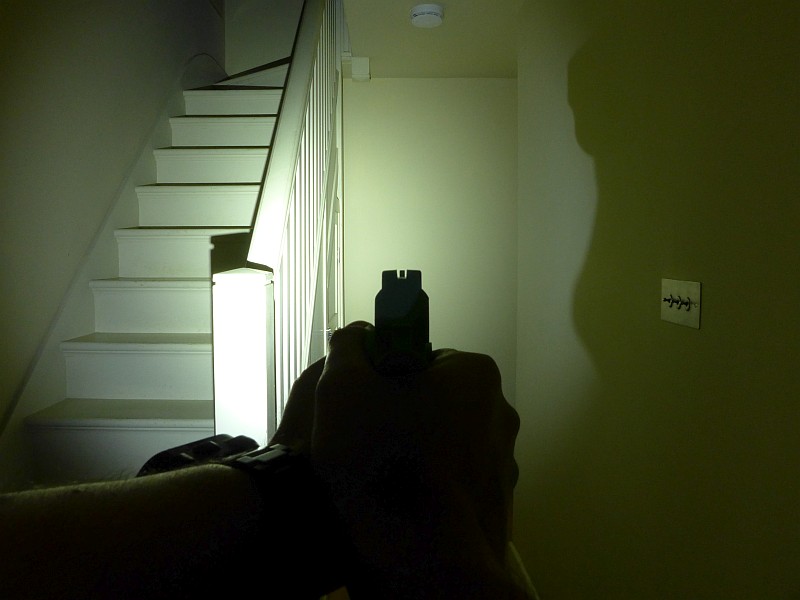
Searching, moving and tracking brings the light with your sight picture, and points as naturally as the sights (as long as it is fitted securely and is not loose on the wrist). But you don’t have access to turning it on or off.

A crucial point to note here is that this system does not work if worn on your primary hand, the one holding the gun. Due to the wrist position being too close to the centre line of the gun, the gun hand blocks half of the beam leaving you with only half the target area lit. In my testing this was more or less a vertical line at the point of impact.
Taking this to the next conclusion, the 2211 Signature is only suitable for right handed people (or at least those who hold their gun in their right hand). It must be worn on the support hand, so for left handed people, this means that with the light pointing forwards the watch face will be upside-down if worn on the right wrist. Left handed people may as well go for the non-watch versions of the 2211 range.
Another point to note with the 2211 Signature is due to the crown being positioned at 9 o’clock, you can’t adjust it while wearing it (unless you are a contortionist). The groove in the crown is essential to allow the, effectively recessed, crown to be pulled out using your finger nails; not the easiest crown to use.
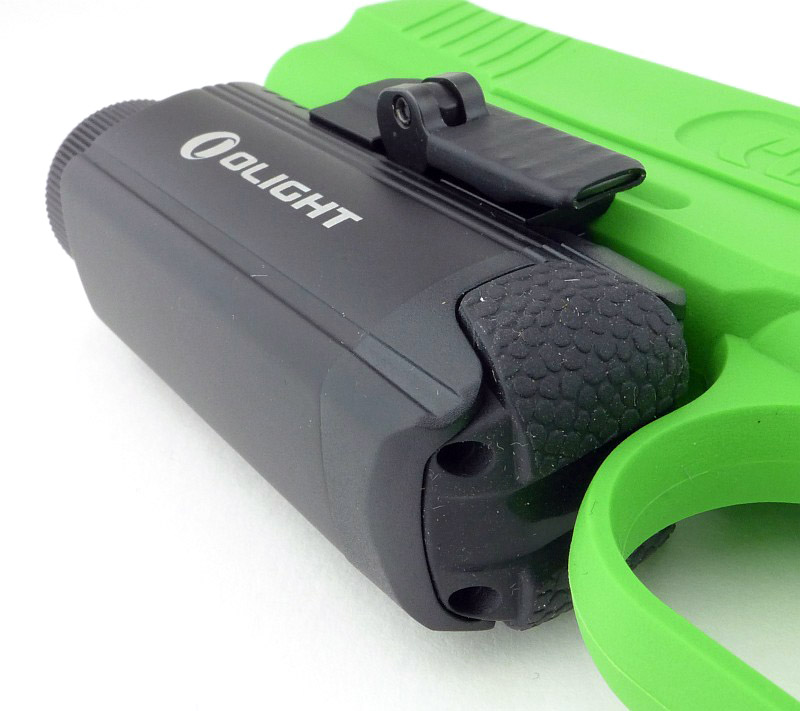
Of course, one major advantage is that you are not going to drop this light, so gives you the benefits of hands-free use. Unlike any other hands-free options (excluding gun lights), the location of the light makes it ideal as it naturally points with the gun and doesn’t shine onto the back of the gun (which would create glare).
Like all tactical equipment, one is none (two is one), so I would not see the 2211 Signature as the only lighting option one would carry, but it does give you a really functional option for those instances where it fits in with your clothing. The major advantage of the 2211 Signature over the plain wrist lights Surefire make is that you won’t need to sacrifice wearing a watch, as the 2211 Signature includes a timepiece.
Review Summary
| _______________________________________________ | _______________________________________________ |
| Things I like | What doesn’t work so well for me |
| _______________________________________________ | _______________________________________________ |
| Hands-free Tactical handgun lighting. | Must be worn on the Support hand. |
| Incorporated Tactical Watch. | The Watch is only usable for right handed people. |
| USB rechargeable. | Cannot adjust time/date while wearing it. |
| ‘Fuel Gauge’ battery level indicator. | |
| Smooth and wide beam. |
Discussing the Review:
The ideal place to discuss this reviews is on a forum. If you started reading the shorter forum version of the review, but followed the link this full exclusive review, please return to that forum to discuss the review there.
If you read the review entirely on Tactical Reviews, please consider one of the following to join in any discussion.
CandlePowerForums – Flashlight Reviews Section (Largest and Friendliest Flashlight Community Forum)
Watchuseek – The Most Visited Watch Forum Site … In The World.
WatchFreeks – The #1 Watch Forum for wrists of all sizes.