Gear Review: DMT Aligner ProKit and DuoSharp 10″ Bench Stone

 photo 00-DMT-featureV2-P1180049.jpg

It is possible to put a great edge onto a knife with very basic equipment and a lot of time. However, with the ever harder and more abrasion resistant steels, diamond stones make it much easier and faster to achieve that edge. DMT are one of the best, if not the best, makers of diamond sharpening stones. If you have checked my ‘Recommended’ page you will have seen that DMT was actually already my favourite diamond sharpener brand, with a pair of DiaFolds (Coarse/Extra Coarse and Fine/Extra Fine) always with me for field maintenance.

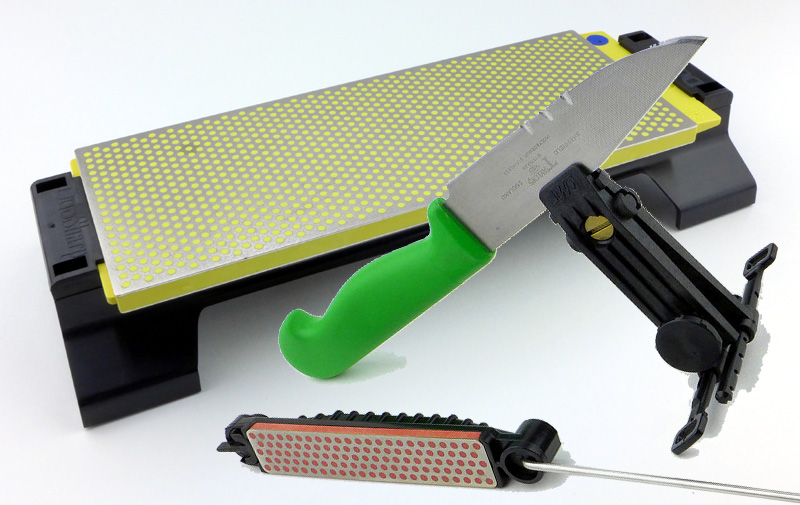
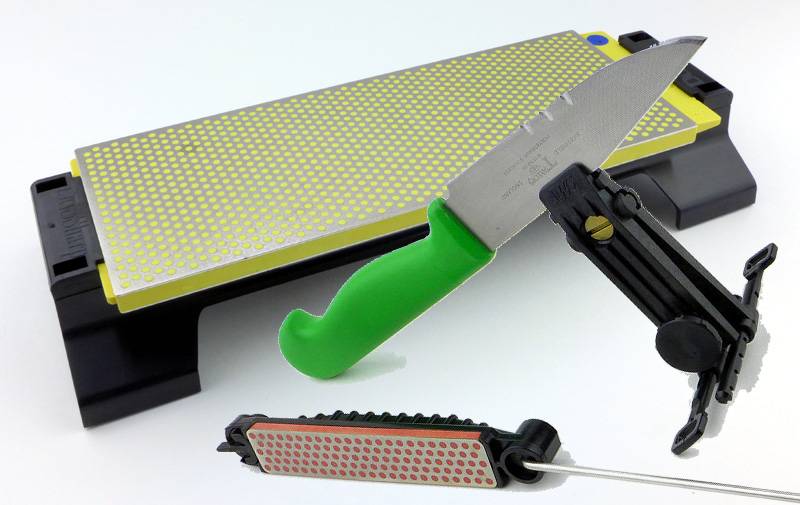
In this review I’m looking at two very different sharpeners, a large bench stone (Duo Sharp 10″ Bench Stone) and a guided precision sharpening system (Aligner ProKit).

 photo 00 DMT both P1170999.jpg

“Getting your EDGE back”:

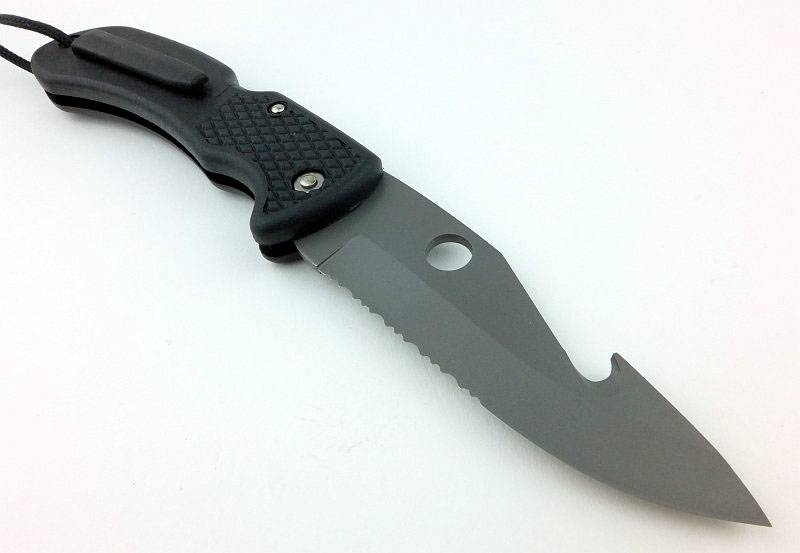
There are so many variations in knife design, size and purpose, and I shall continue to try and review as many as I can, but the one thing that they all have in common is a cutting edge, and it is that edge which makes a knife into a tool. When you buy a knife, the factory put an edge on the blade, but this can vary considerably in quality even from good manufacturers. Relying on the factory edge is like buying a car and only driving it as far as the original tank of fuel will take you. You can transform the performance of a knife, so it is worth investing in quality sharpening equipment.

Actually this section title uses the name of a sharpening service I offer to neighbours (100% going to charity), and is absolutely appropriate for anyone who wants to have the best performance from their cutting tools.

I’ve used just about every method of sharpening, both manual methods and powered. These range from the humble carborundum bench-stone to high-end guided sharpening systems, as well as various wet/dry grinders and belt sanders. Manual sharpening does take longer, but gives you greater control and removes less metal. Where Diamond sharpeners really stand out is the speed they cut, and a quality diamond stone can cut 6-10 times faster than other stones. That is a lot fewer strokes you need to make.

There are many diamond stones to choose from with very different prices. DMT claim the flattest sharpening surfaces with the highest quality of diamond particle and density of coating. I can’t examine this to confirm or deny their claim, but what I can say is that where other diamond stones have let me down and worn out quickly, the DMT stones I have, have worked very very hard and are still going strong.

A few more details of the Aligner ProKit:

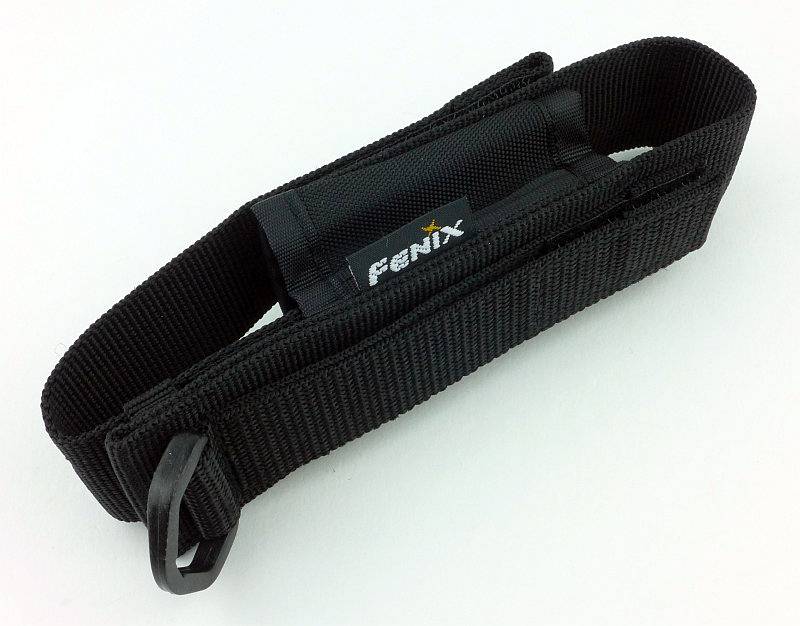
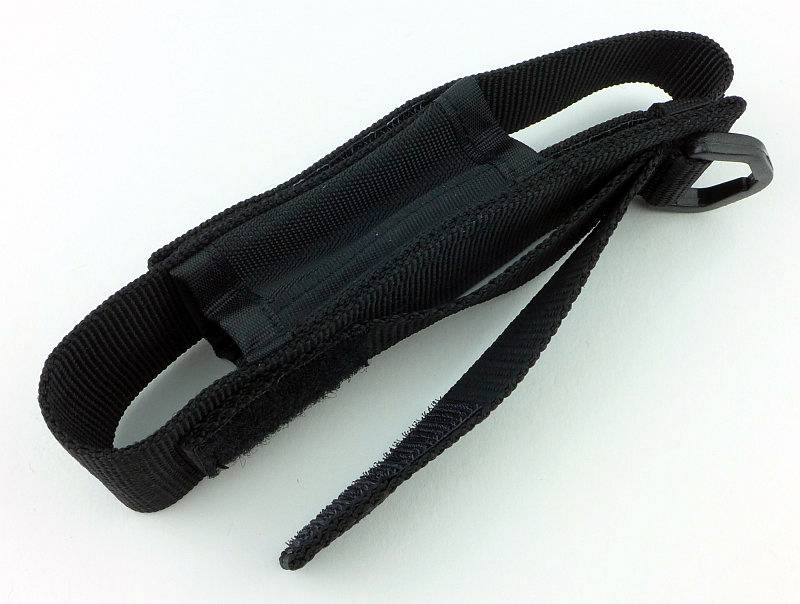
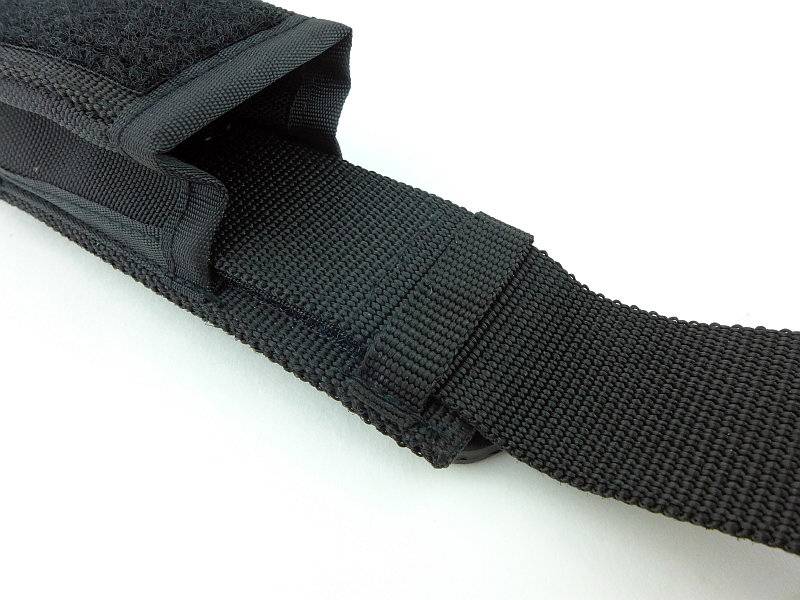
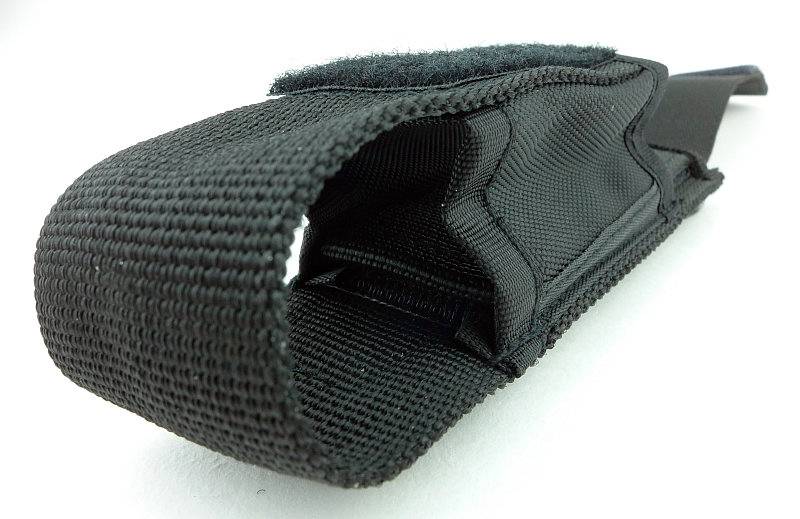
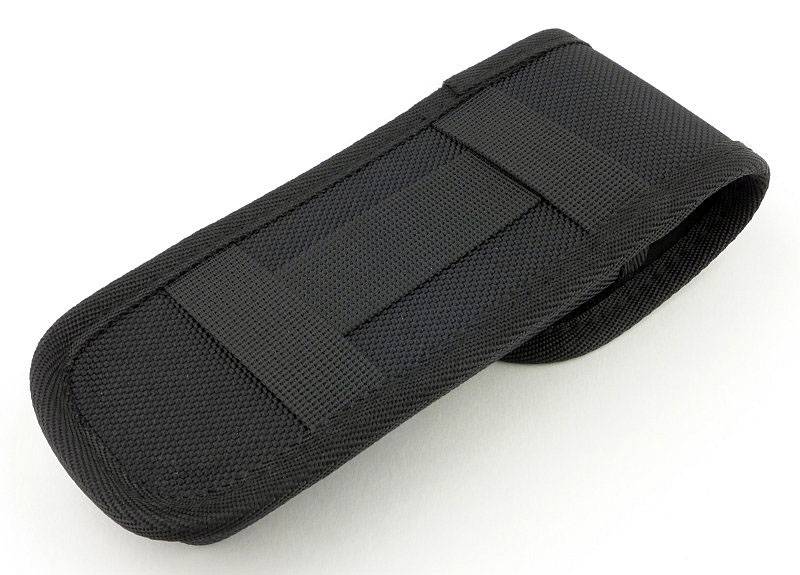
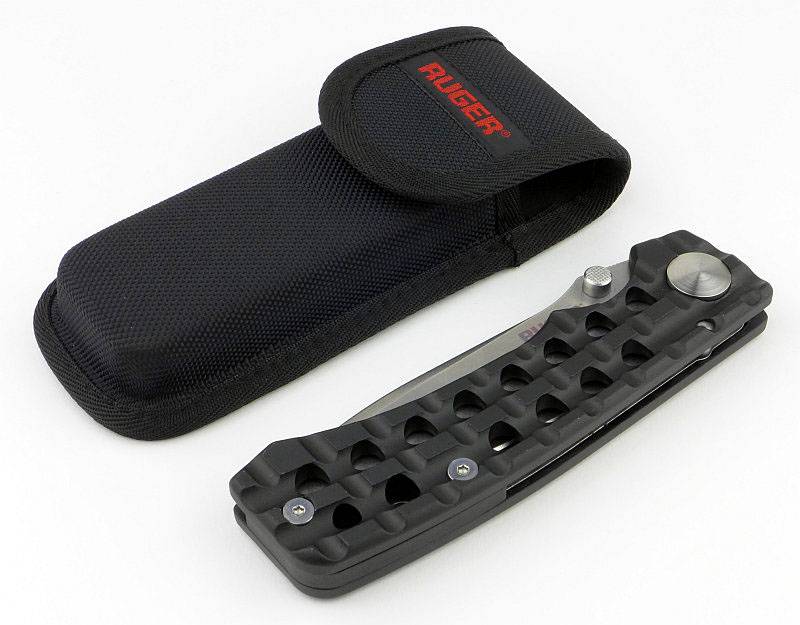
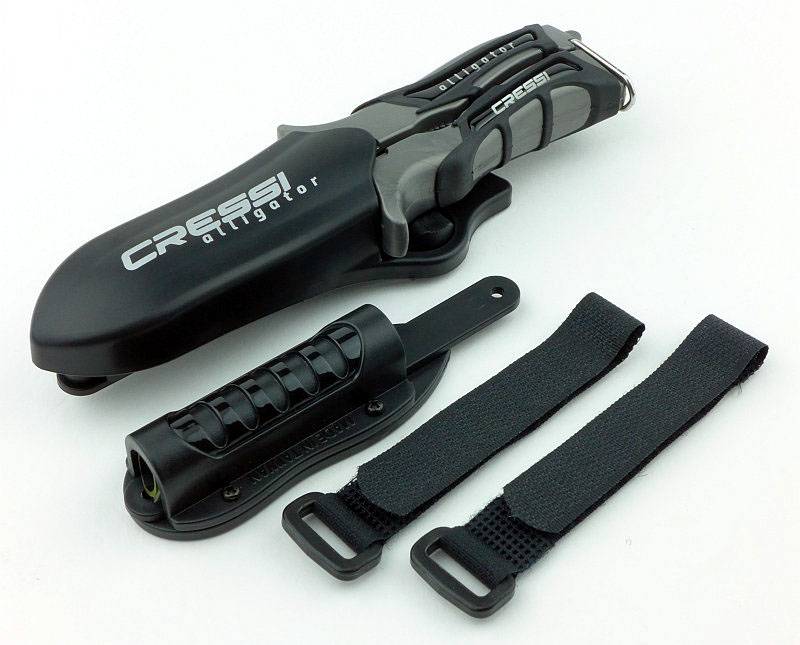
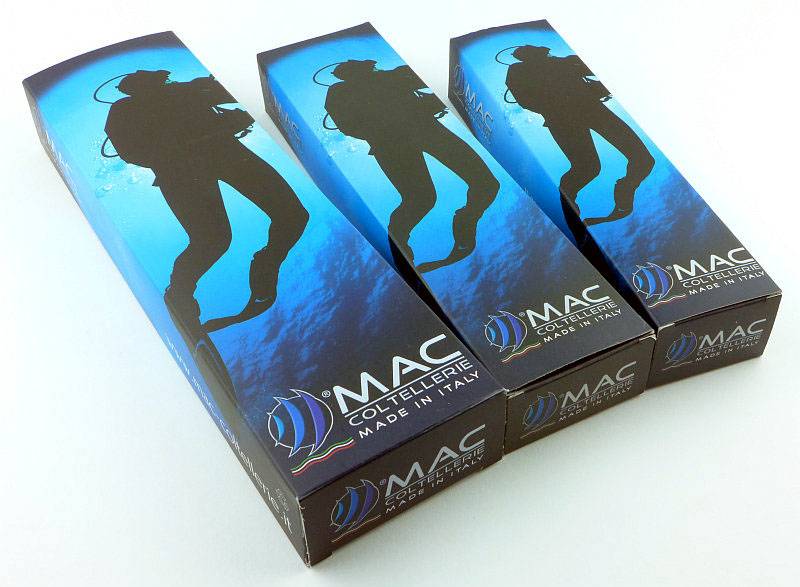
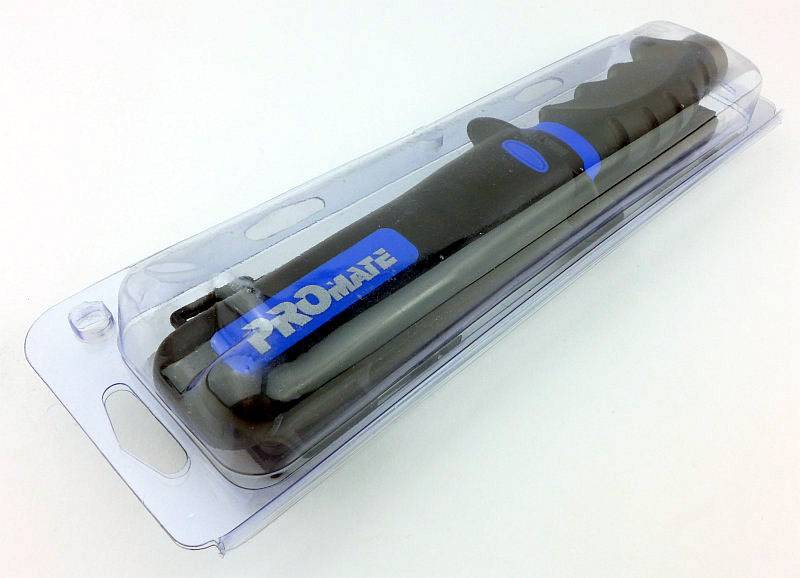
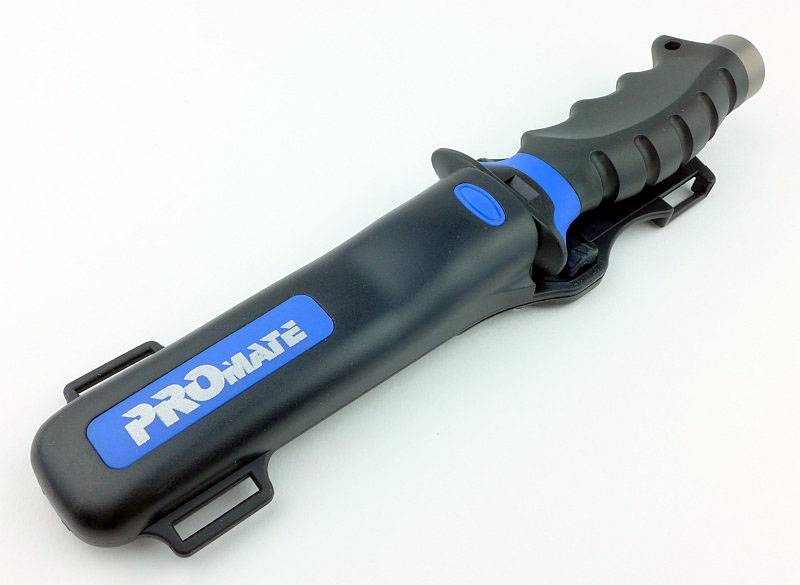
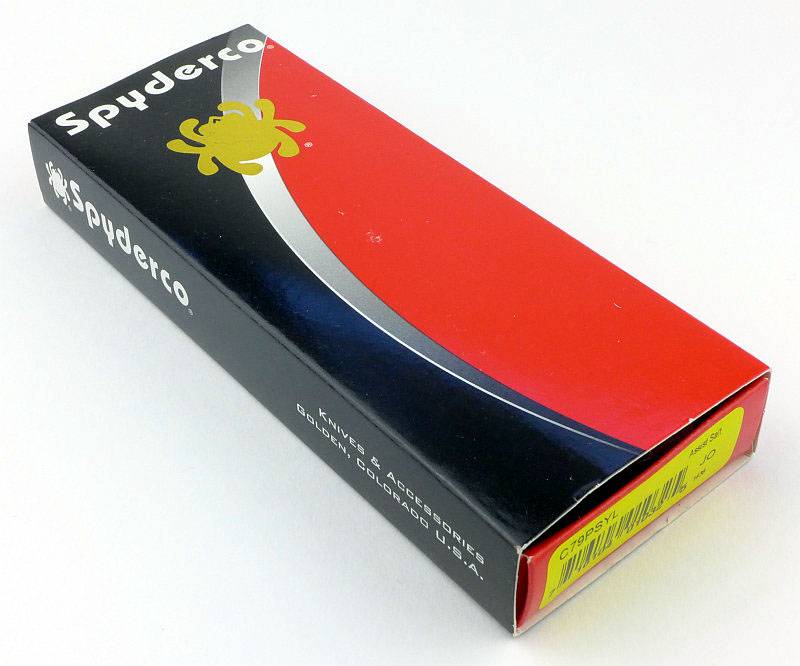
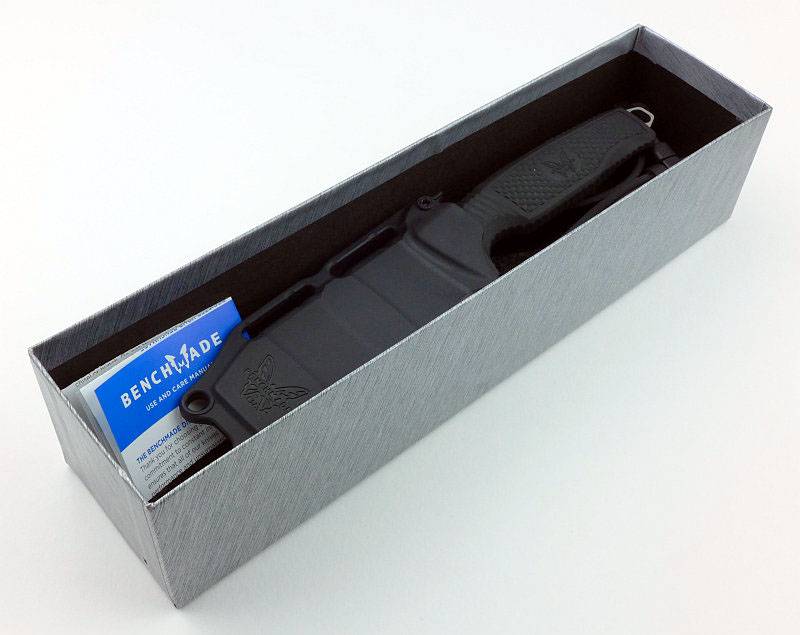
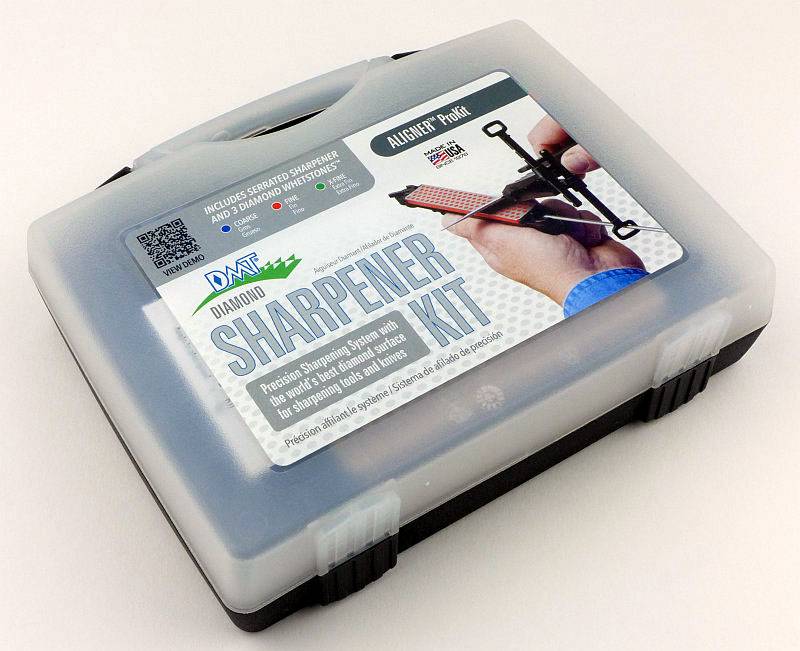
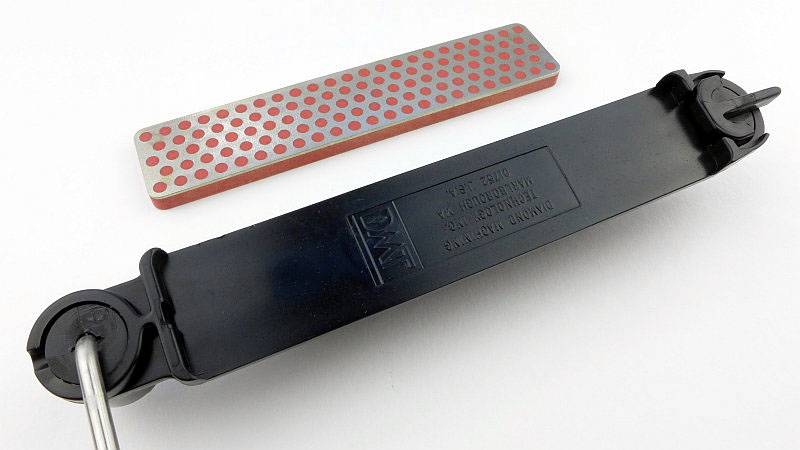
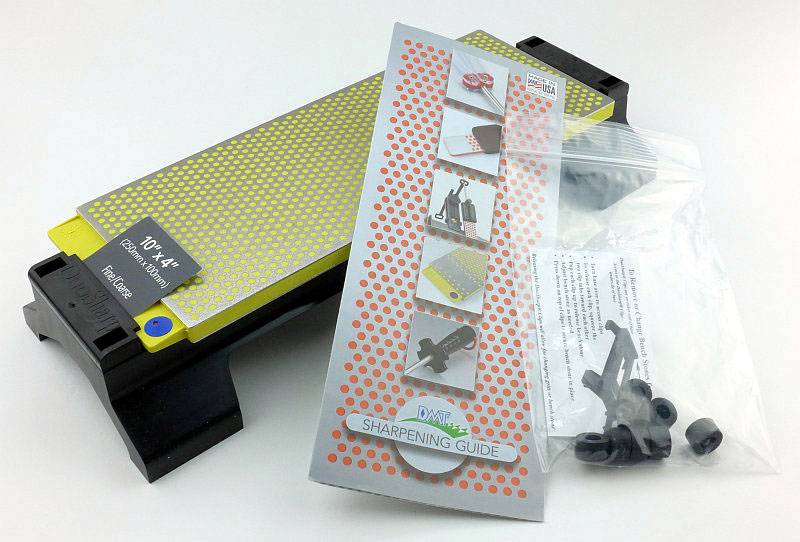
The Aligner ProKit comes in a storage/carry case.
 photo 01 DMT Aligner Box P1180054.jpg

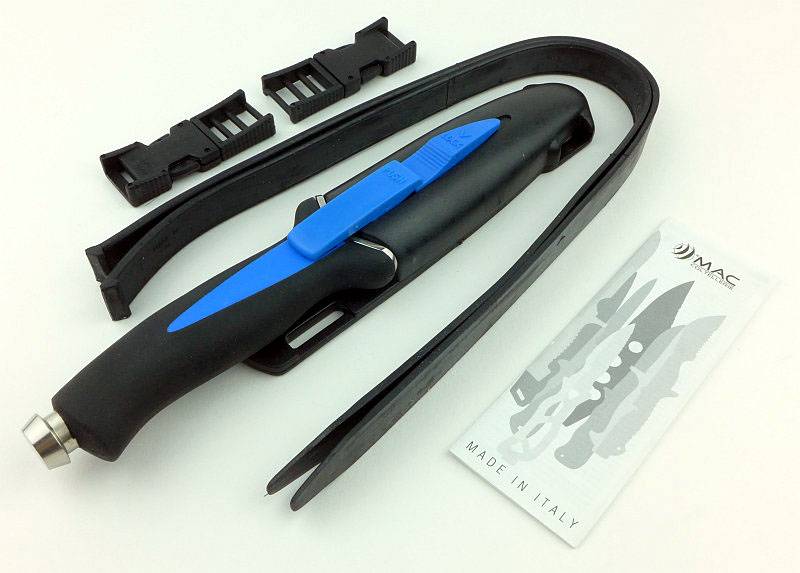
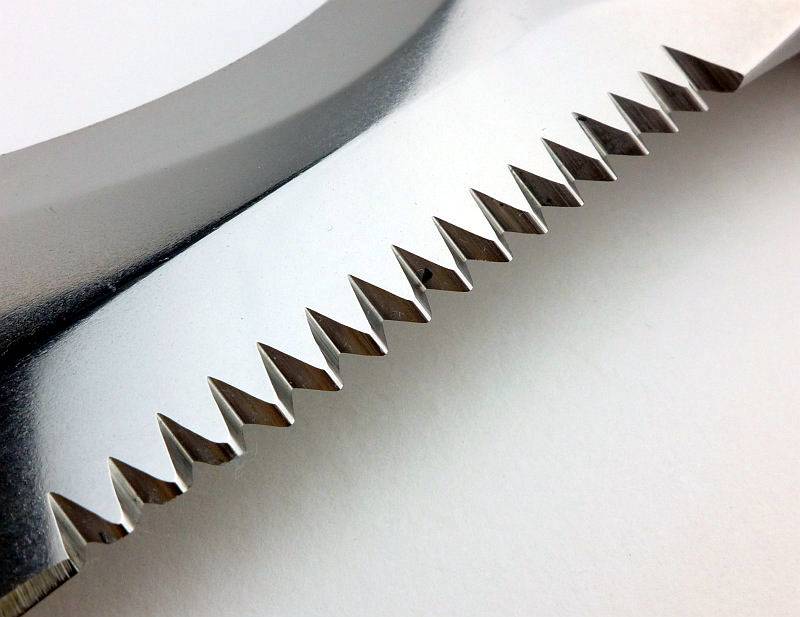
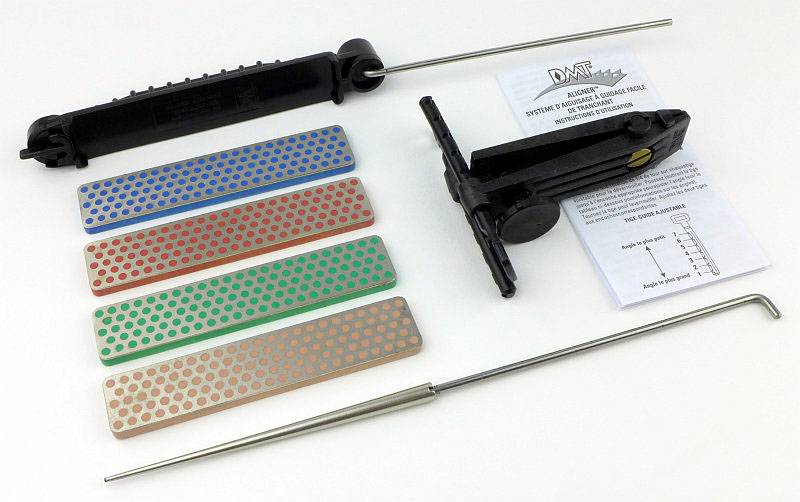
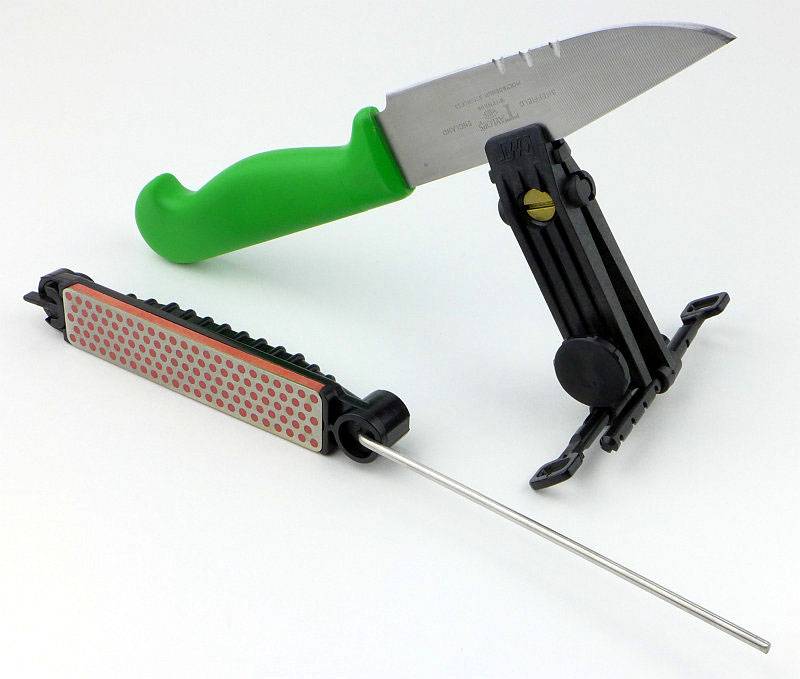
For this review DMT have also included the Extra-Extra-Fine stone (pink colour) so this is not normally in the ProKit pack. What is included are the three grits Coarse, Fine and Extra Fine, the stone holder/guide-rod, the Aligner adjustable clamp and guide, a tapered serration sharpening diamond coated rod plus the instructions.
 photo 02 DMT Aligner Box open P1180056.jpg

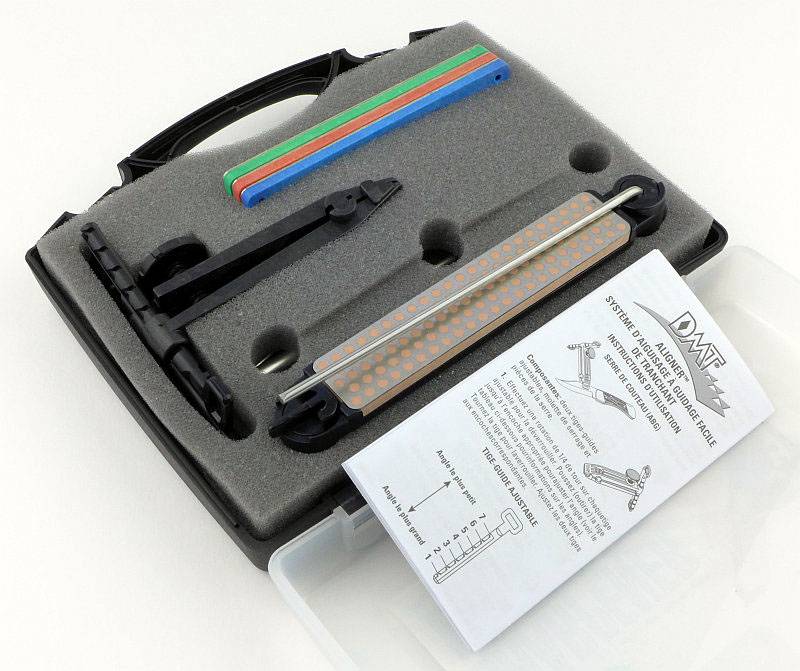
Laying everything out, this is what is in the box (remember the pink stone is not part of the ProKit).
 photo 03 DMT Aligner Box contents P1180061.jpg

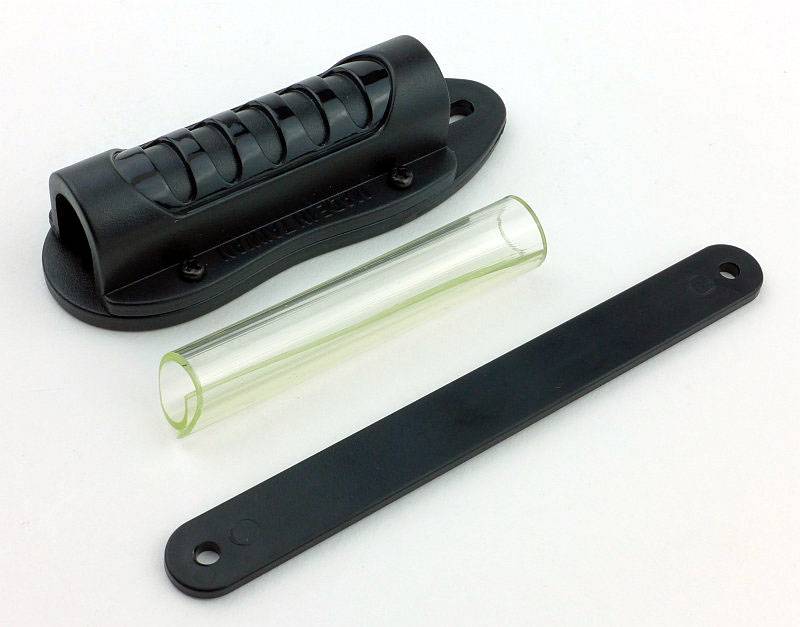
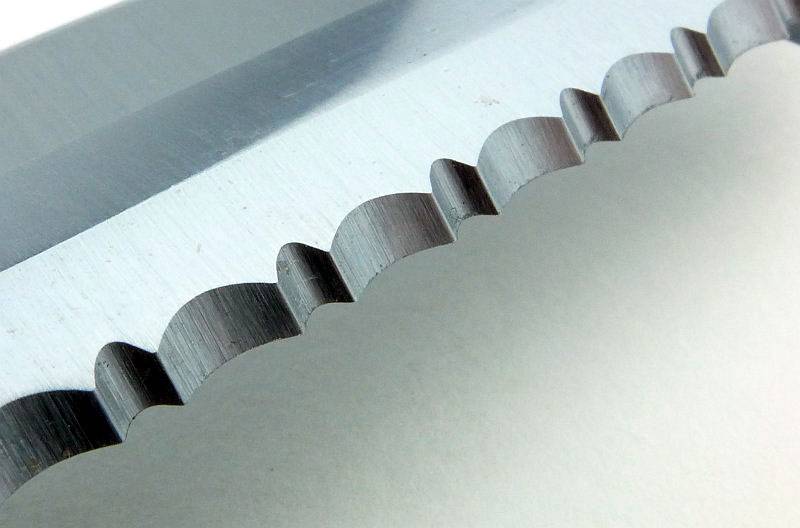
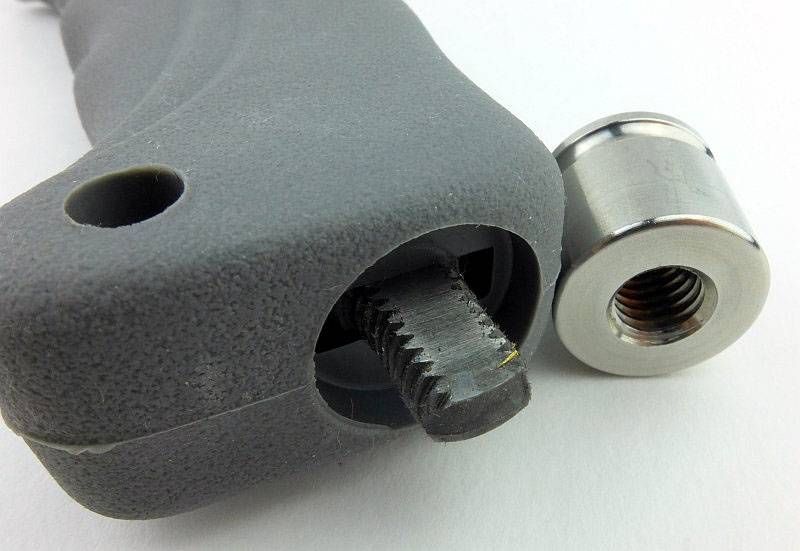
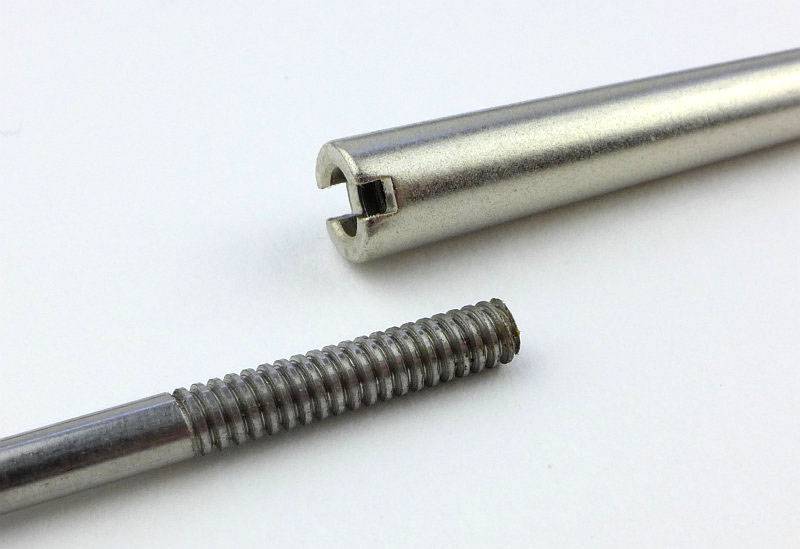
As it can’t be fitted into the stone holder, the tapered rod has its own guide rod which screws into the widest end.
 photo 04 DMT Aligner serration rod thread P1180063.jpg

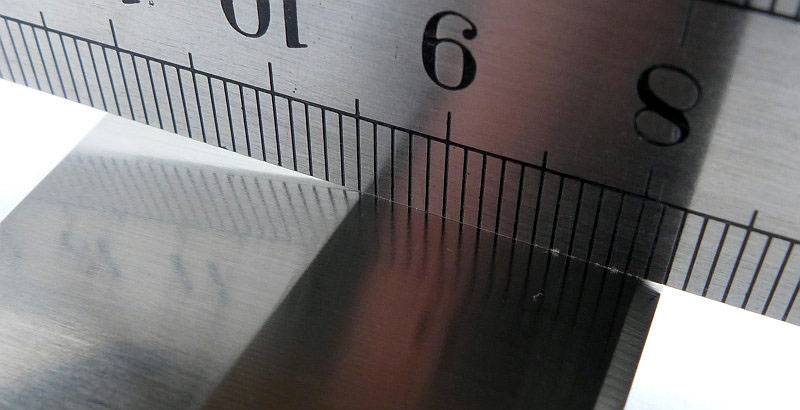
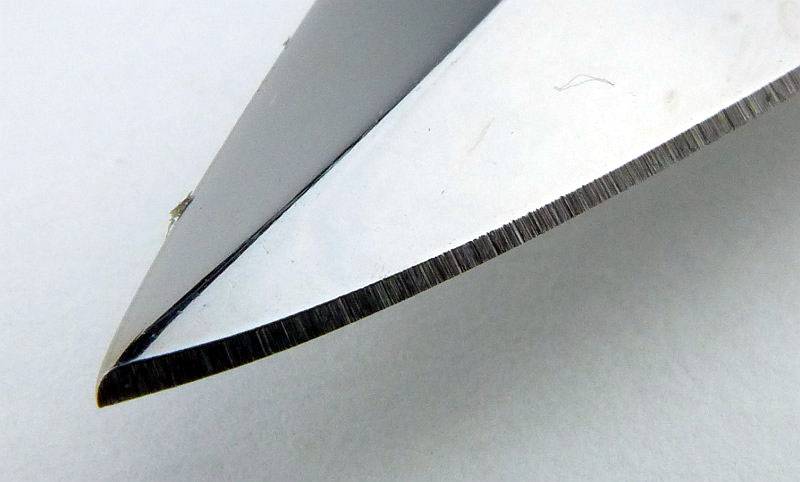
I don’t have a microscope to really go in ultra-close to the different grit stones, but this series of images at the same scale give an indication of the different grits.
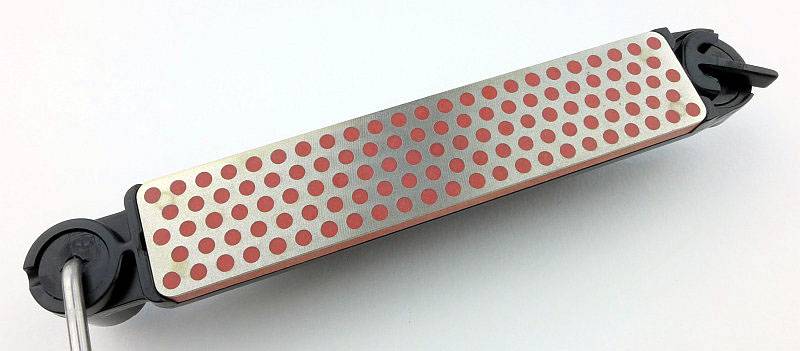
First up is the Extra-Extra-Fine where the surface appears almost as if there were no particles in it.
 photo 05 DMT Aligner extra fine P1180066.jpg

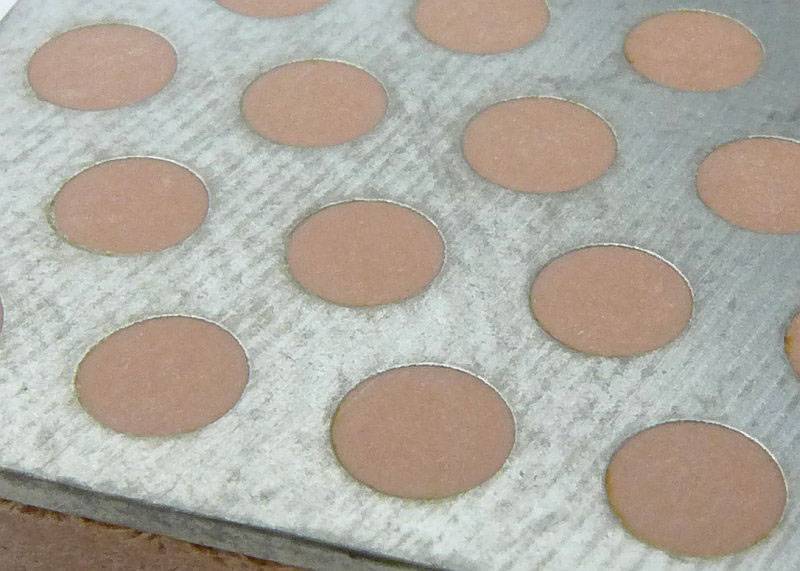
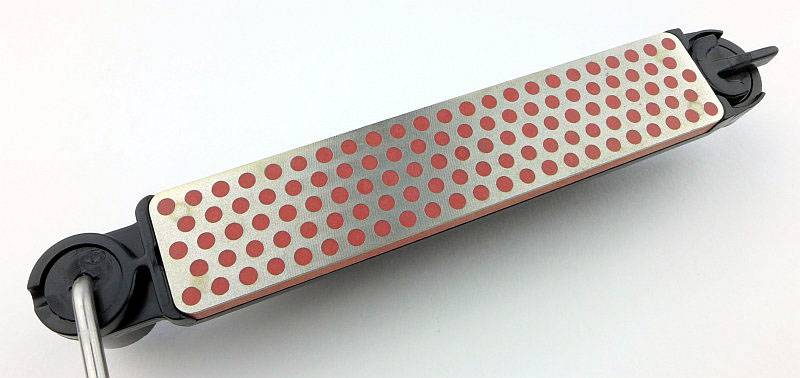
Moving up to Extra-Fine and the surface is starting to take on a textured appearance.
 photo 06 DMT Aligner fine P1180067.jpg

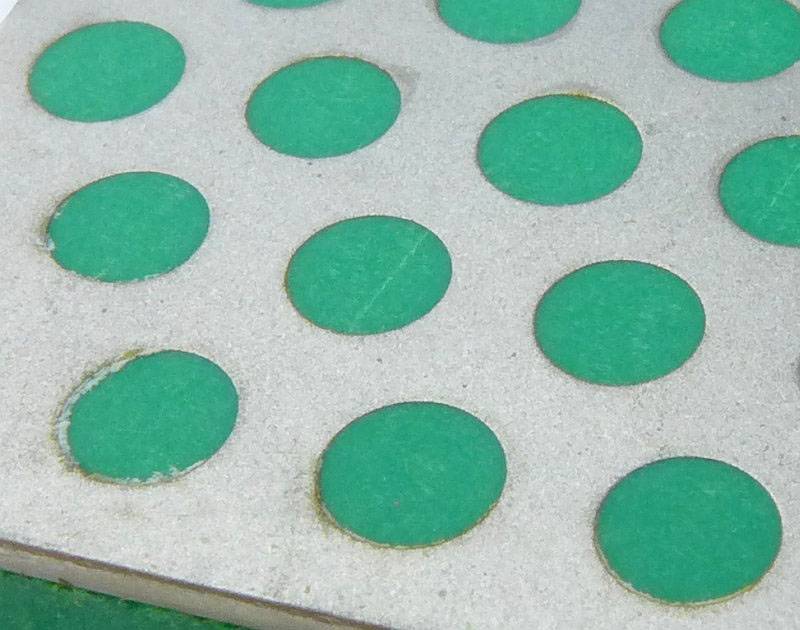
With Fine you can see the grainy surface.
 photo 07 DMT Aligner medium P1180068.jpg

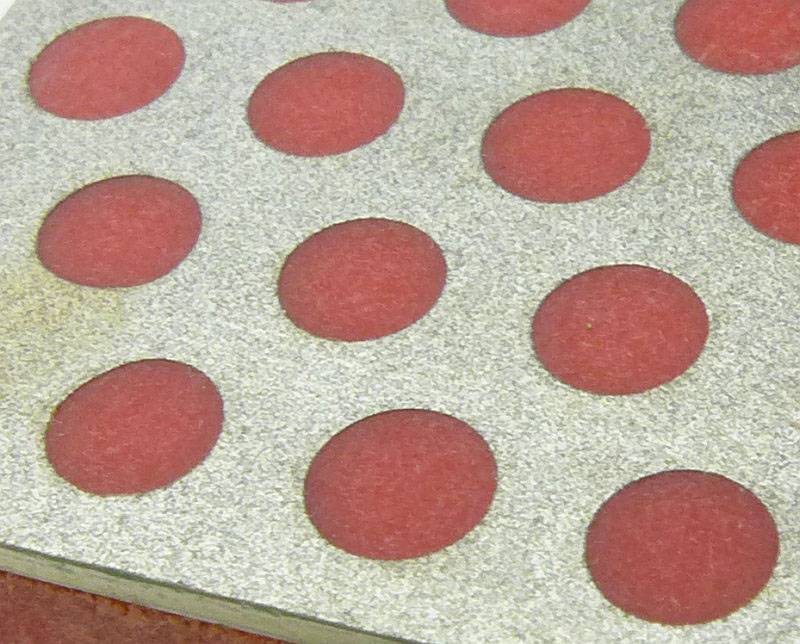
Finally with Coarse there is a distinct texture to the surface of the stone.
 photo 08 DMT Aligner coarse P1180069.jpg

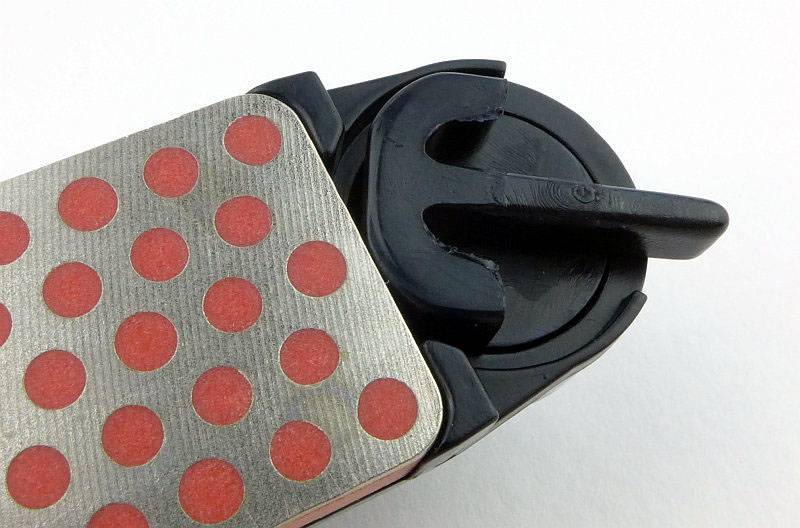
Each of the different grit stones are fitted into the holder for use.
 photo 09 DMT Aligner holder P1180071.jpg

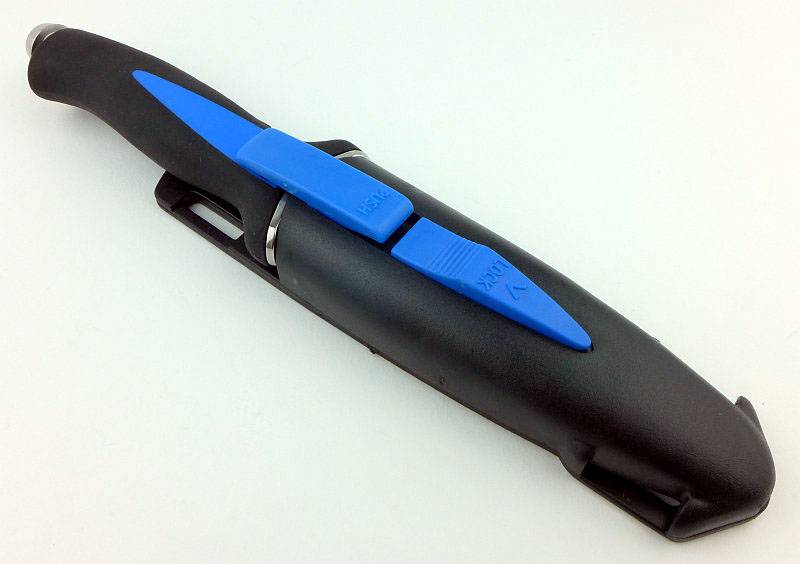
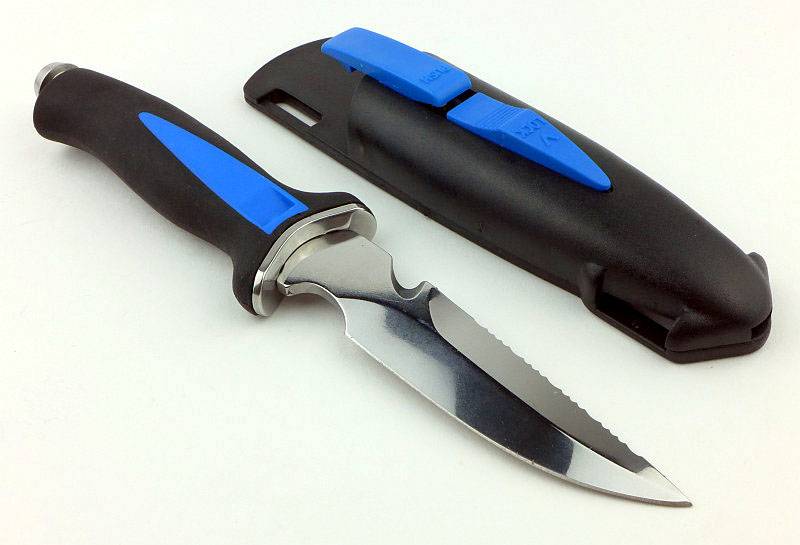
The stone is pressed into the pocket in the holder.
 photo 10 DMT Aligner holder P1180073.jpg

Then the lock at the end of the holder is turned to hold the stone securely in place.
 photo 11 DMT Aligner holder P1180074.jpg

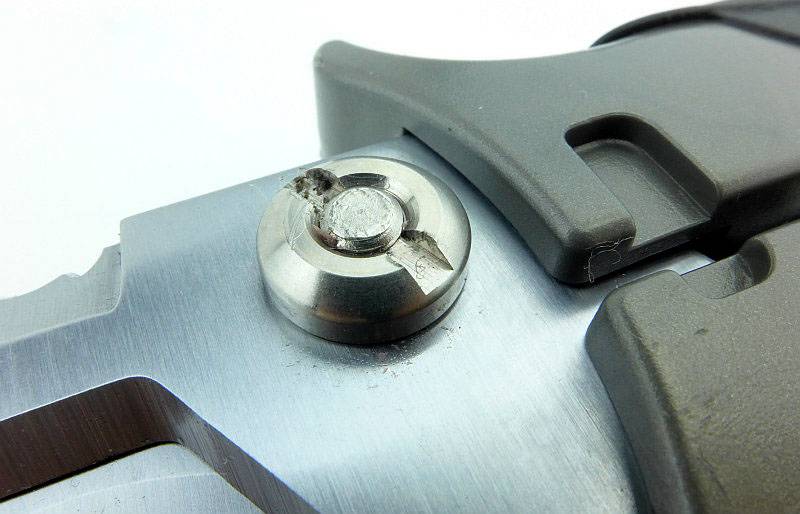
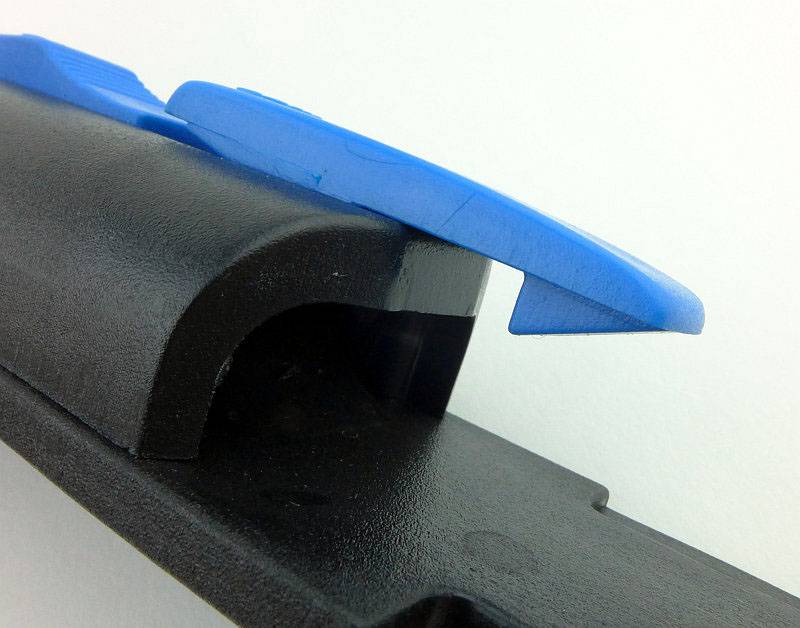
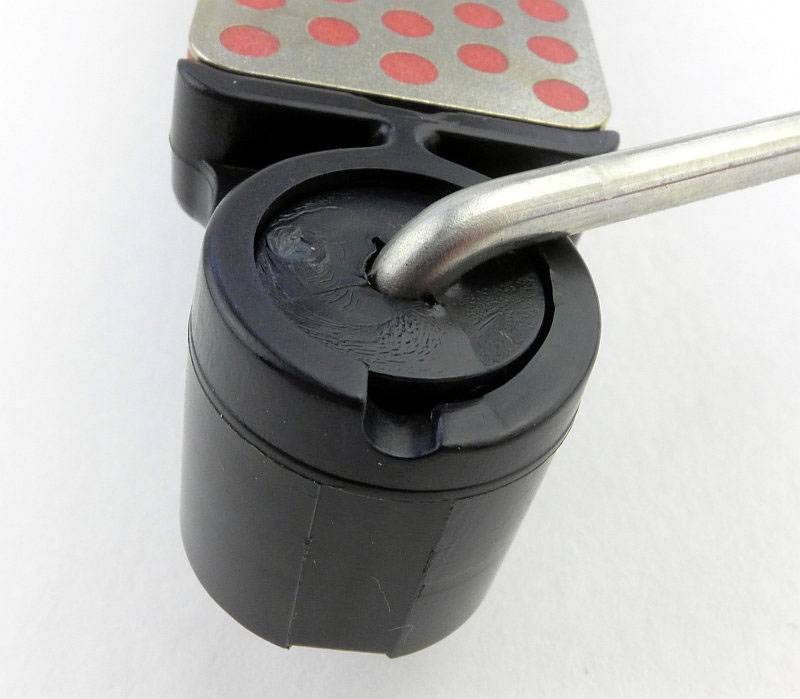
A closer look at the rotating lock. Initially the fit of the stones into the holder is snug enough to not need the lock, but as you use it more they loosen up slightly and you do need to use the lock.
 photo 12 DMT Aligner holder lock P1180075.jpg

Being a portable kit, the stone holder has a folding guide rod. Here it is folded over the stone.
 photo 13 DMT Aligner holder folded rod P1180078.jpg

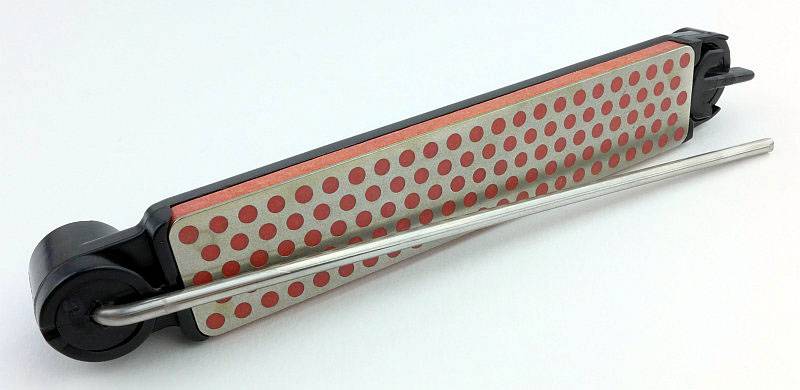
The rod hinges round and locks into place in the open position.
 photo 14 DMT Aligner holder rod hinge P1180079.jpg

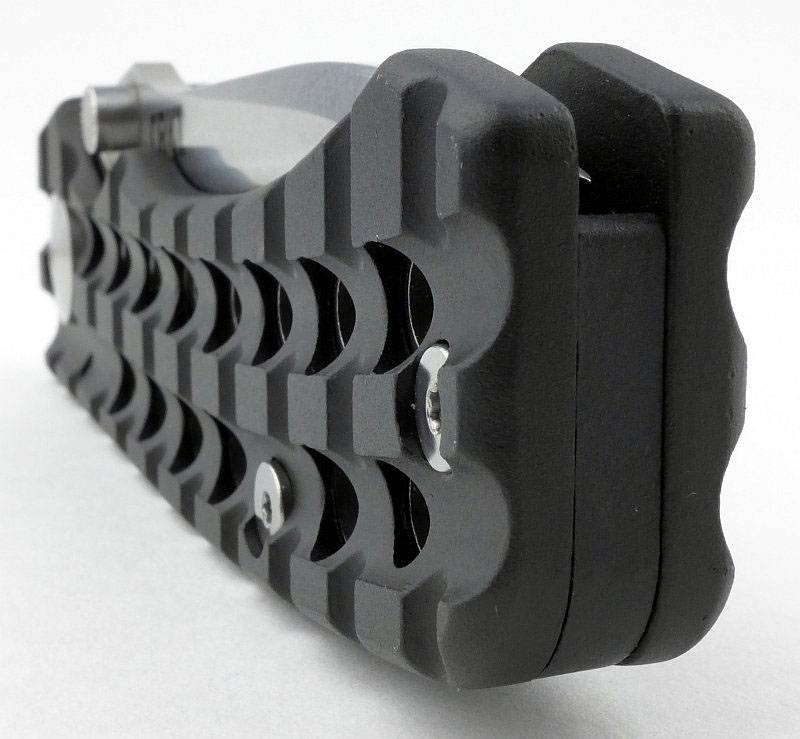
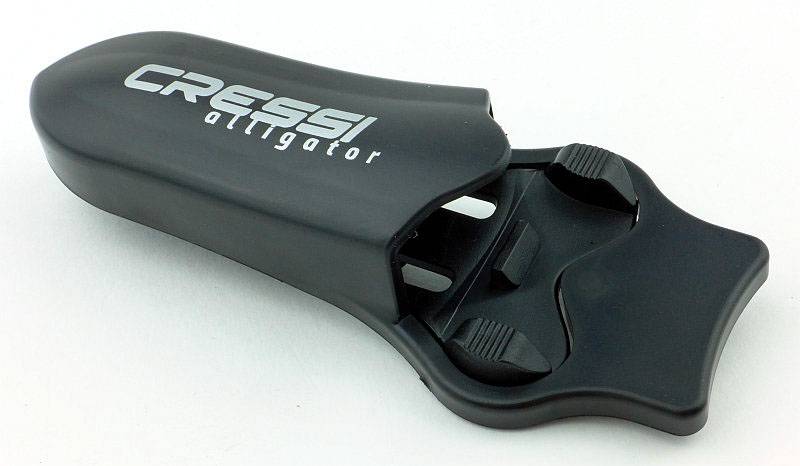
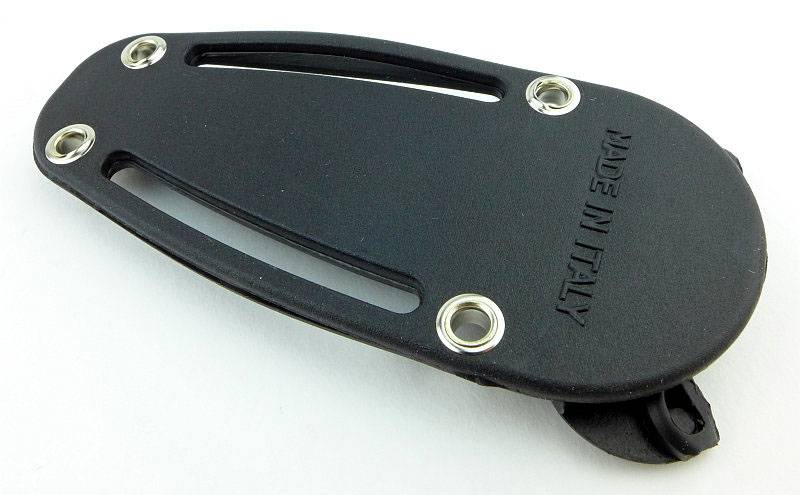
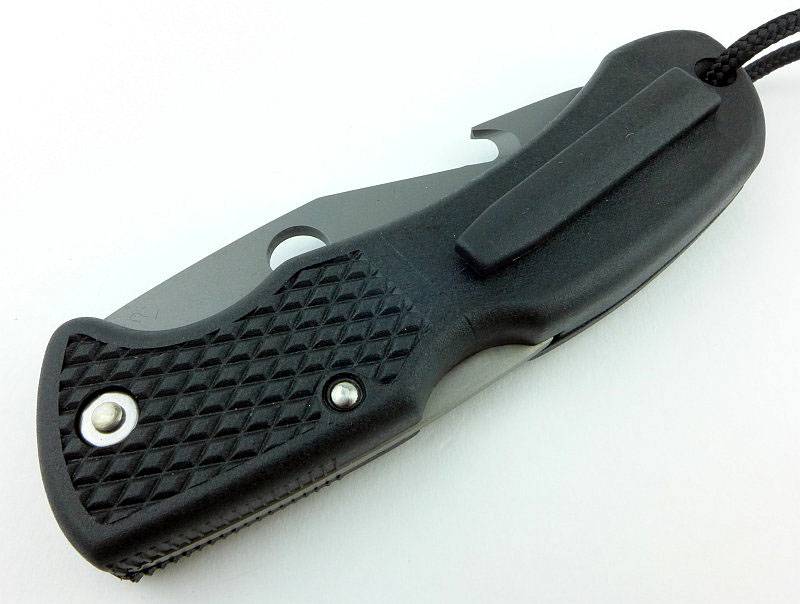
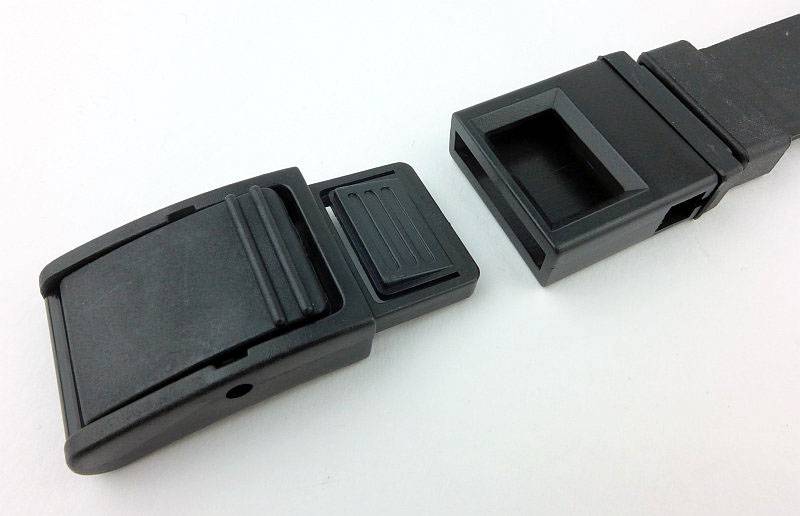
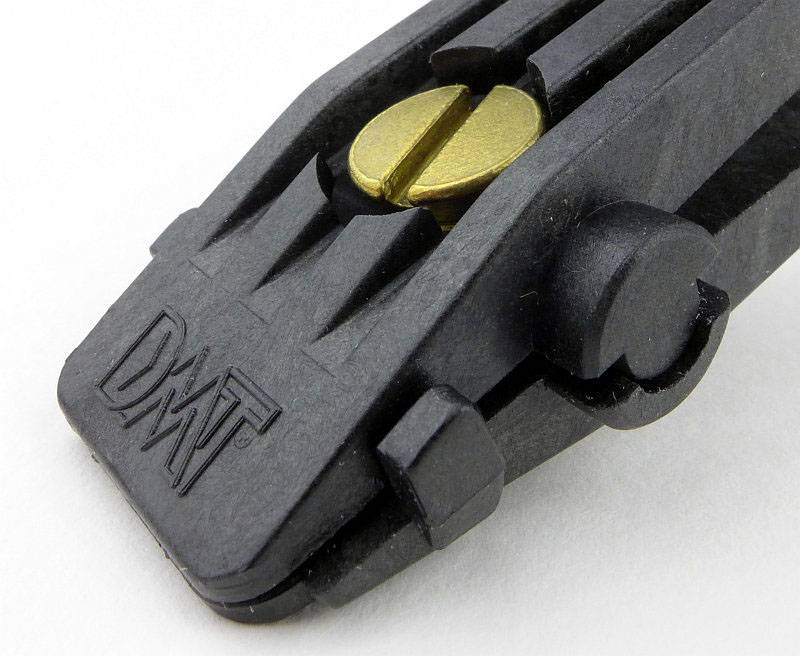
Then we have the crucial part of a guided system, the guide itself. This is a clamp which fits onto the blade spine and has adjustable guide rings for the guide rods to run in.
 photo 15 DMT Aligner clamp P1180082.jpg

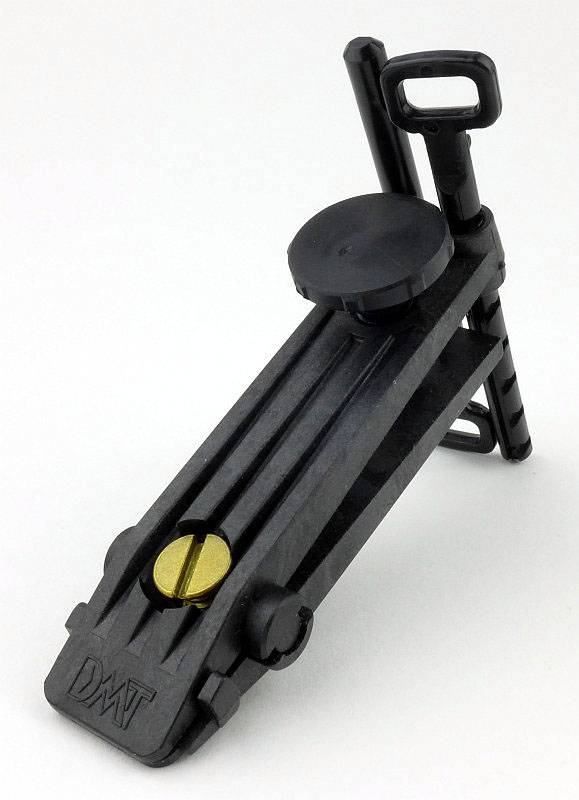
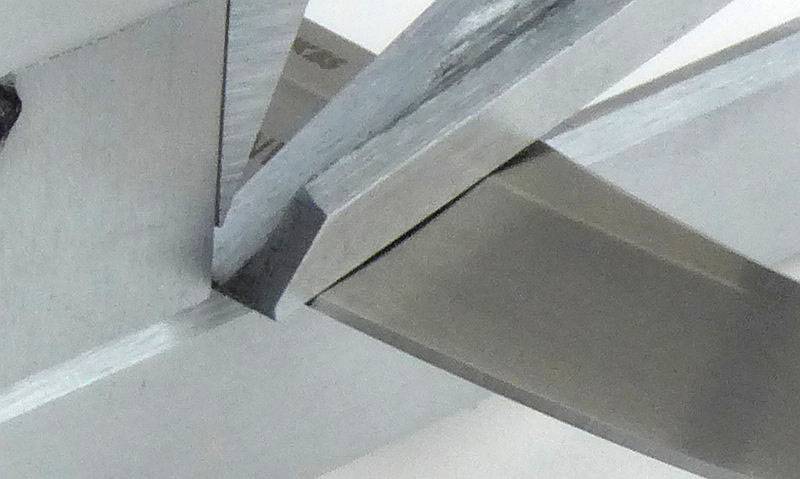
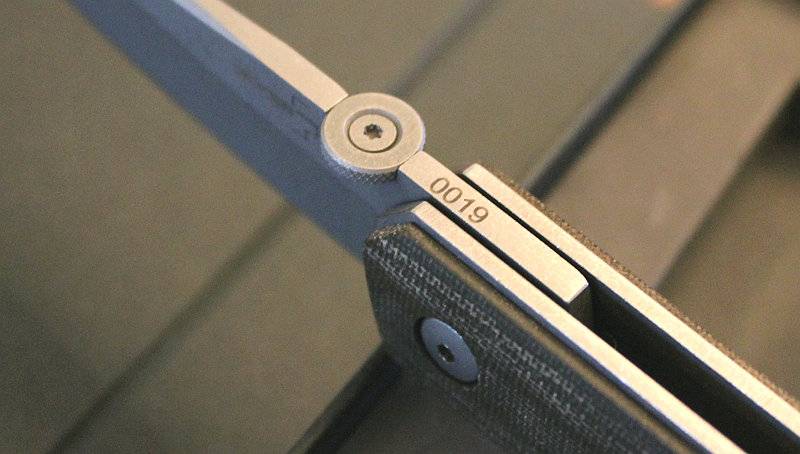
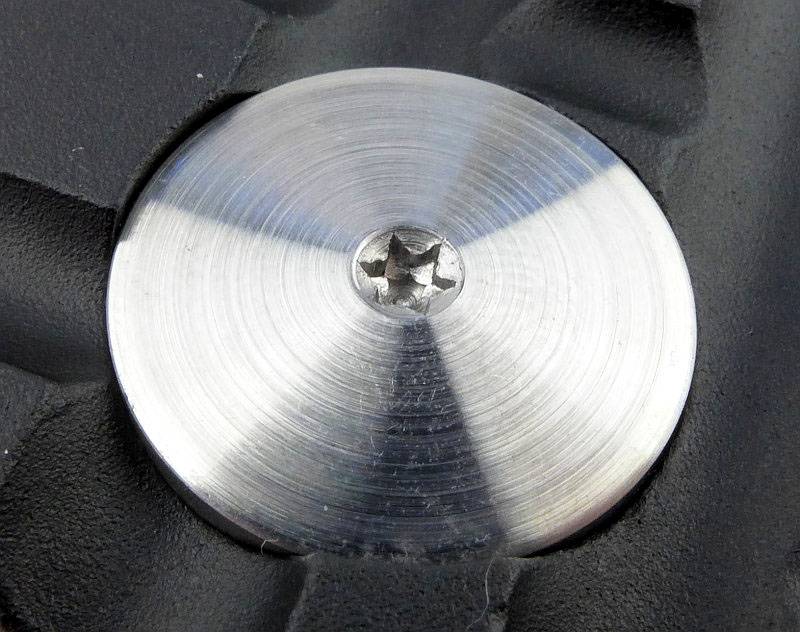
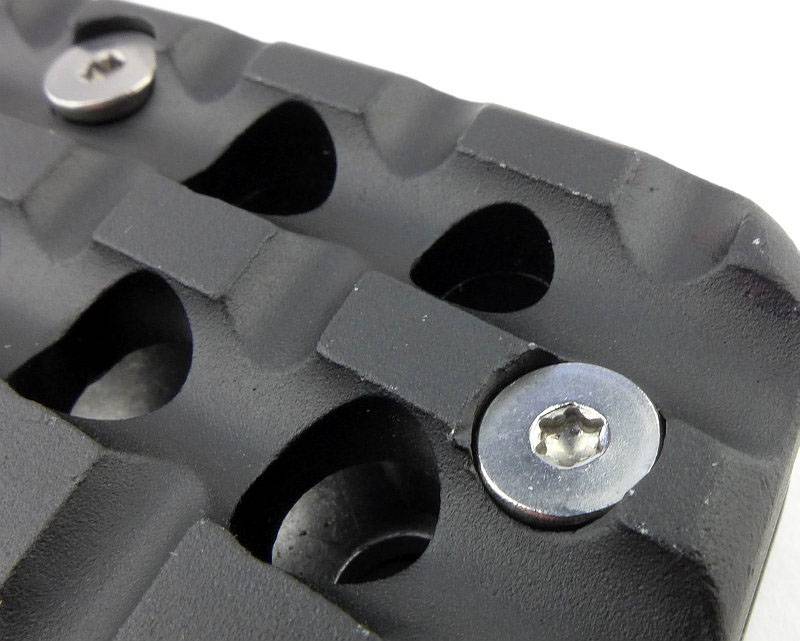
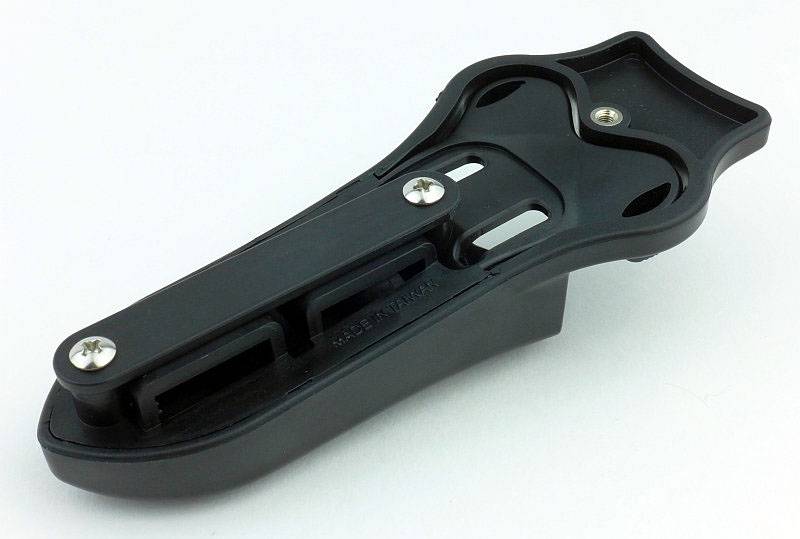
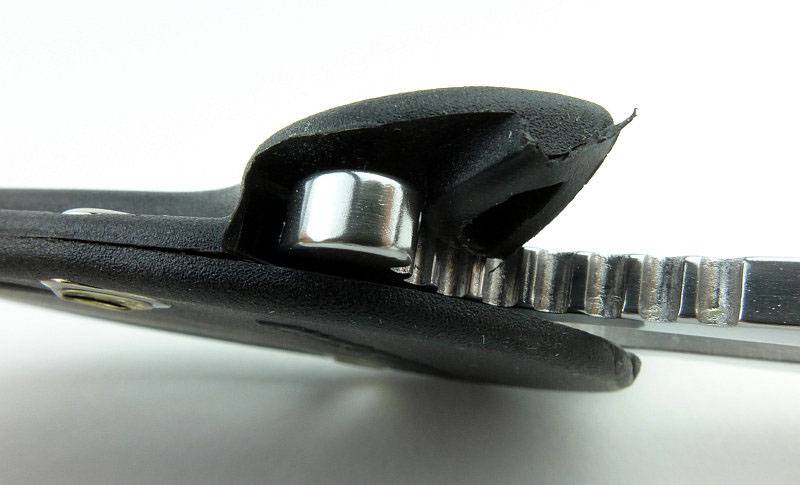
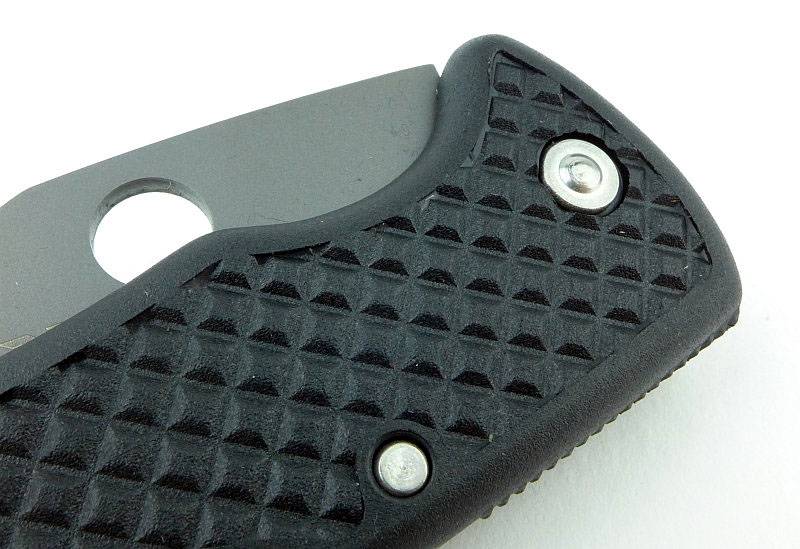
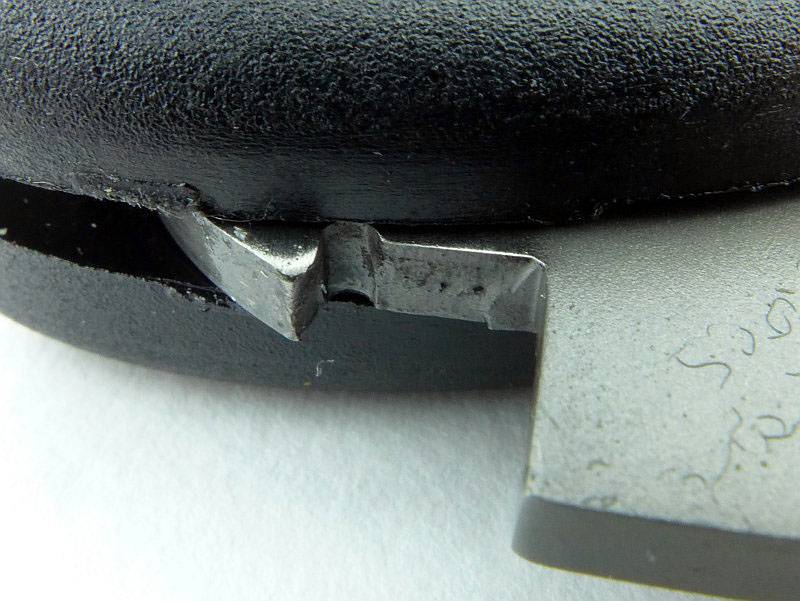
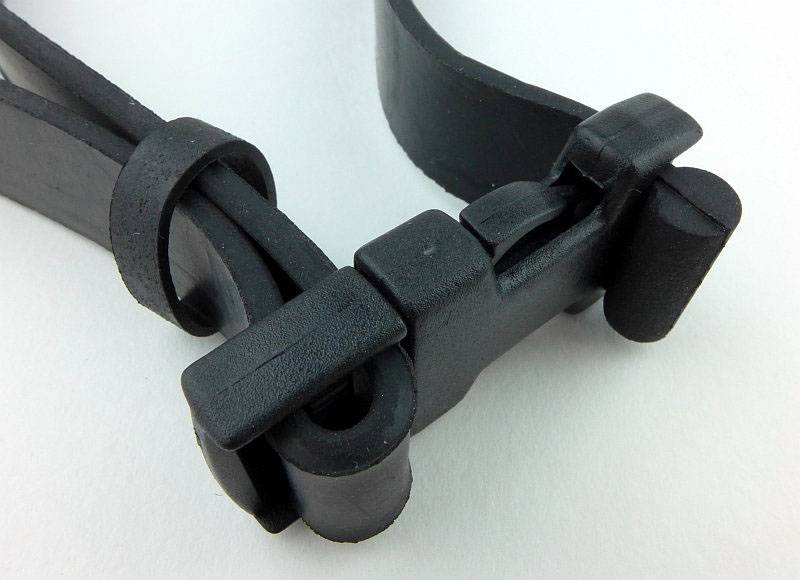
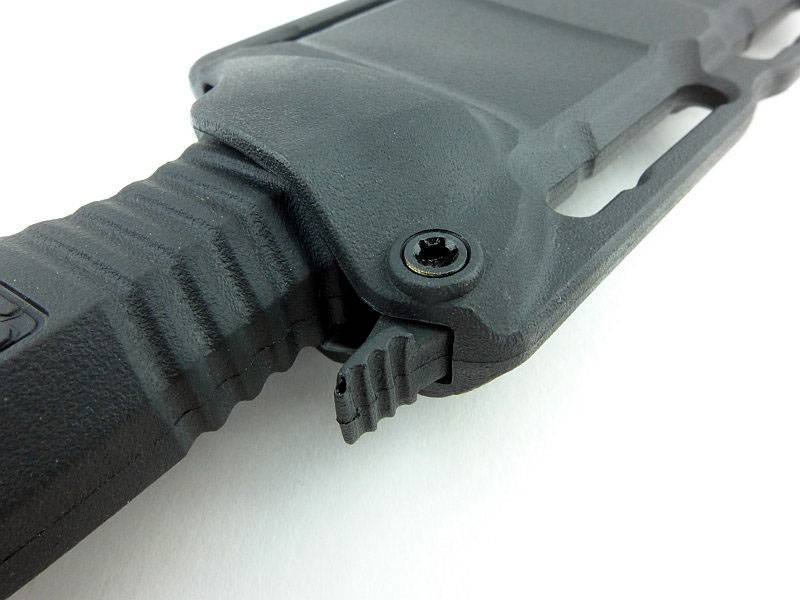
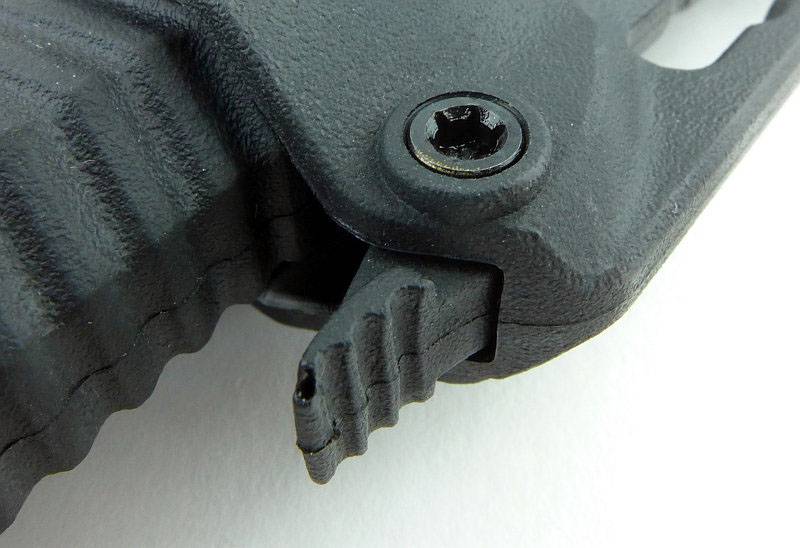
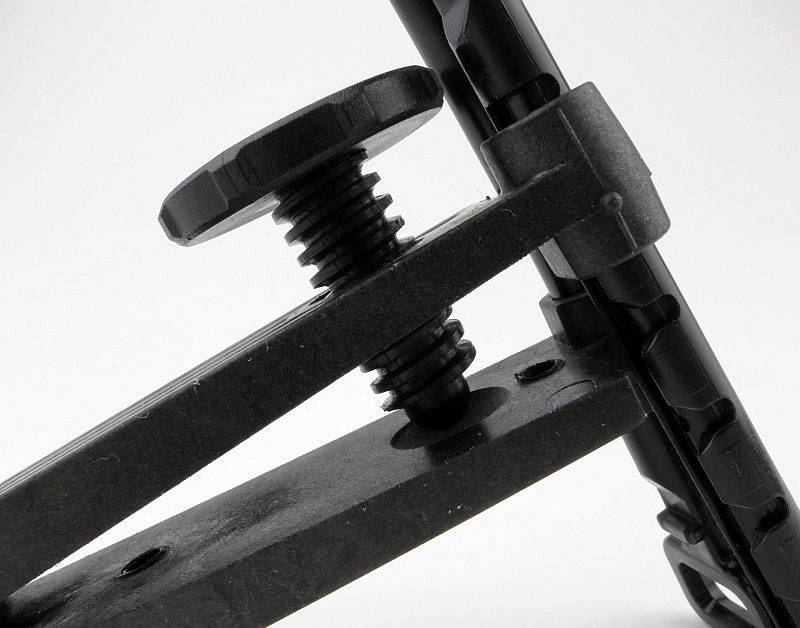
Looking in close at the clamp jaws. There is a brass screw for adjusting the width of the jaws.
 photo 16 DMT Aligner clamp jaws P1180084.jpg

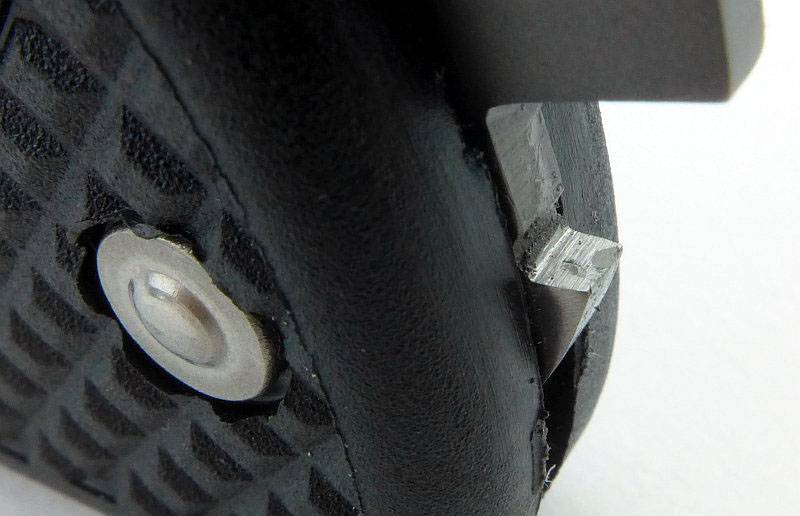
With the jaws adjusted to the right size, a locking screw is used to tighten the jaws onto the blade.
 photo 17 DMT Aligner clamp lock screw P1180085.jpg

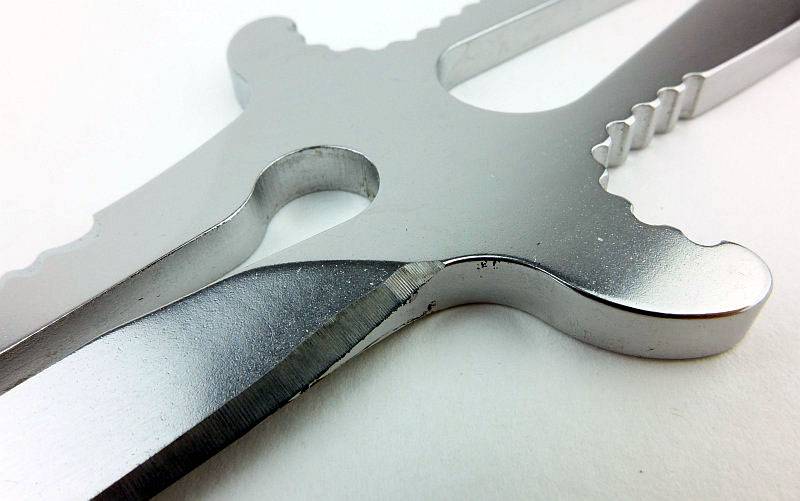
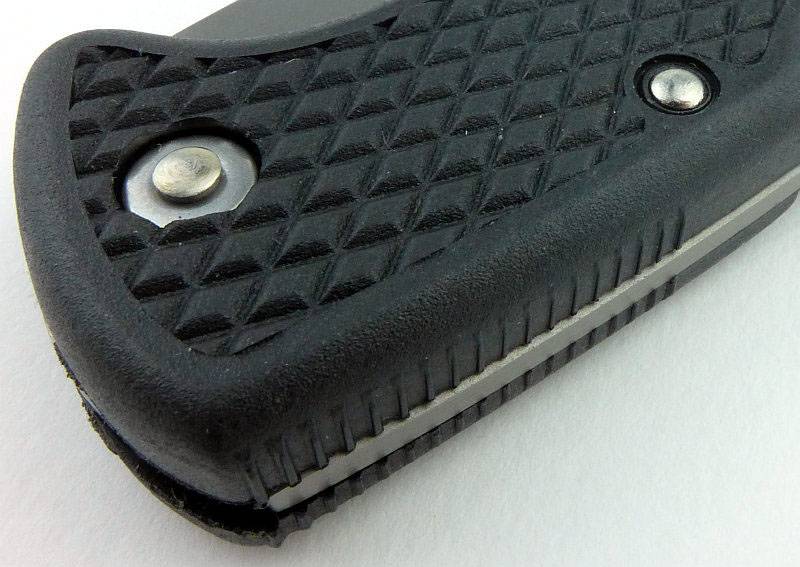
Each of the two guides have a number of positions they can be set to. Each of these positions has a groove moulded into the guide arm.
 photo 18 DMT Aligner clamp guide adjuster P1180087.jpg

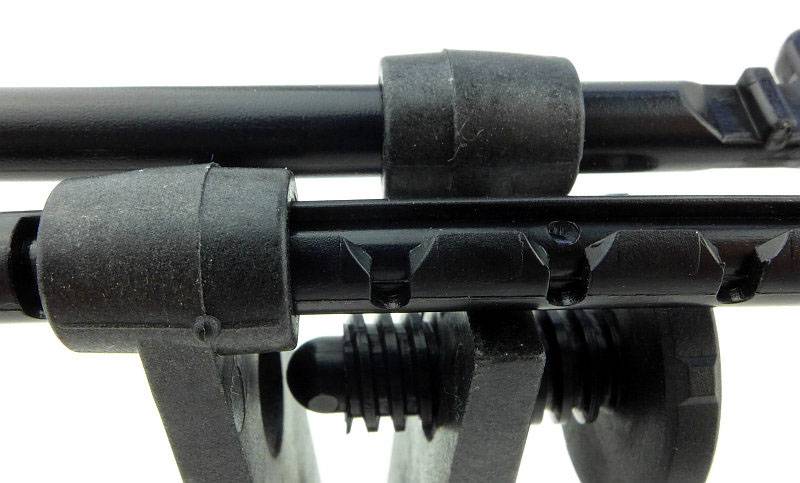
Here we have the clamp fitted onto a blade and the guides set to position 3.
 photo 19 DMT Aligner clamp fitted P1180095.jpg

A few more details of the DuoSharp Bench Stone:

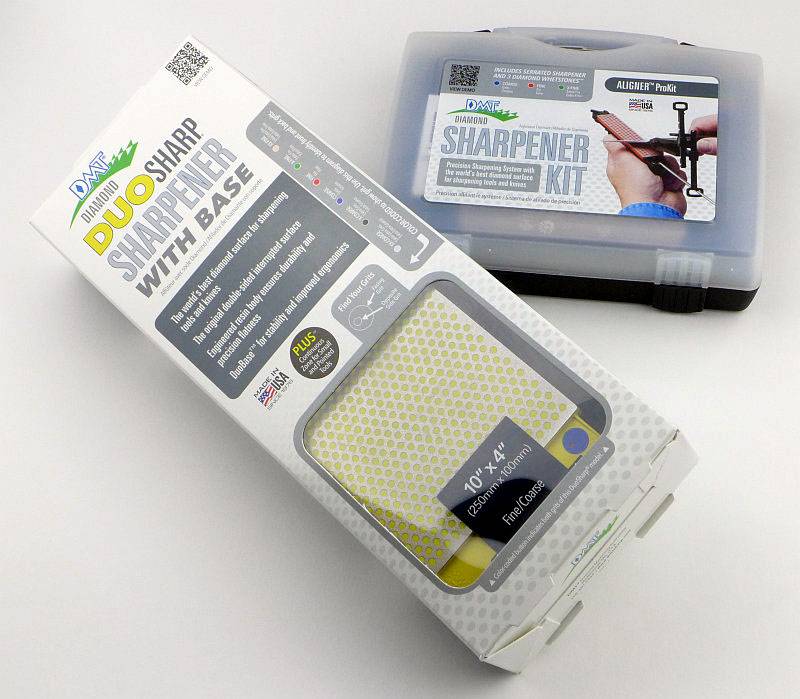
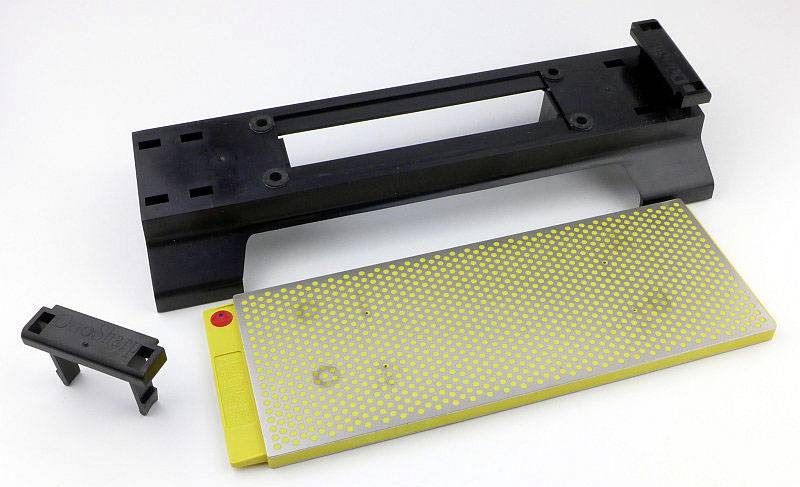
The box was shown earlier along with the Aligner ProKit. Inside the box you get the DuoSharp, a sharpening guide (showing other DMT products) and a set of rubber feet.
 photo 01 DMT Benchstone contents P1180008.jpg

There are eight feet which need to be fitted to the eight pegs (two in each corner).
 photo 02 DMT Benchstone feet P1180012.jpg

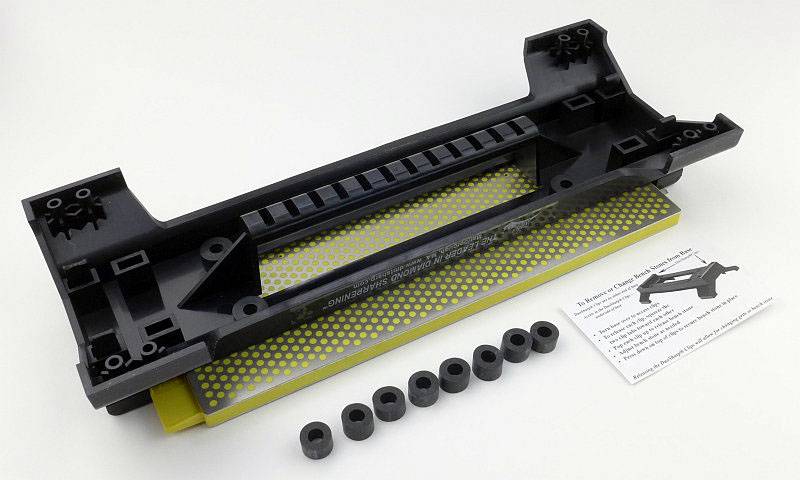
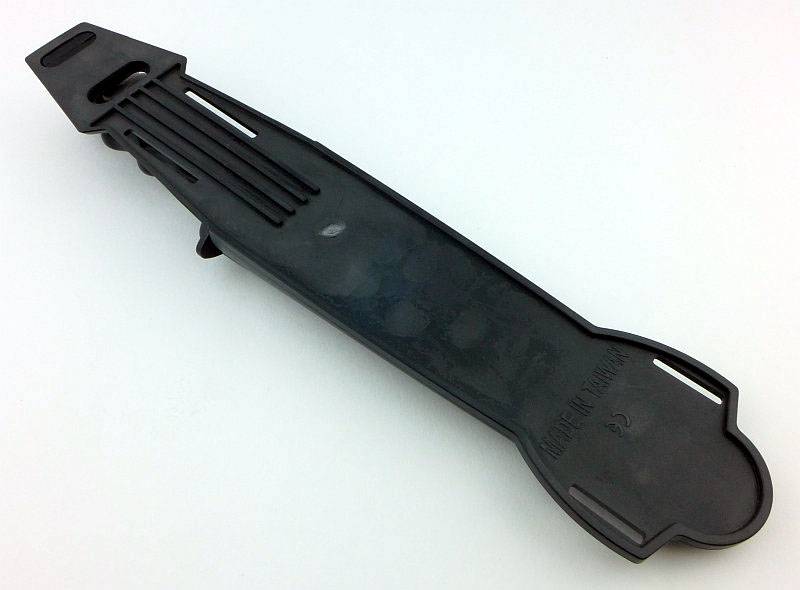
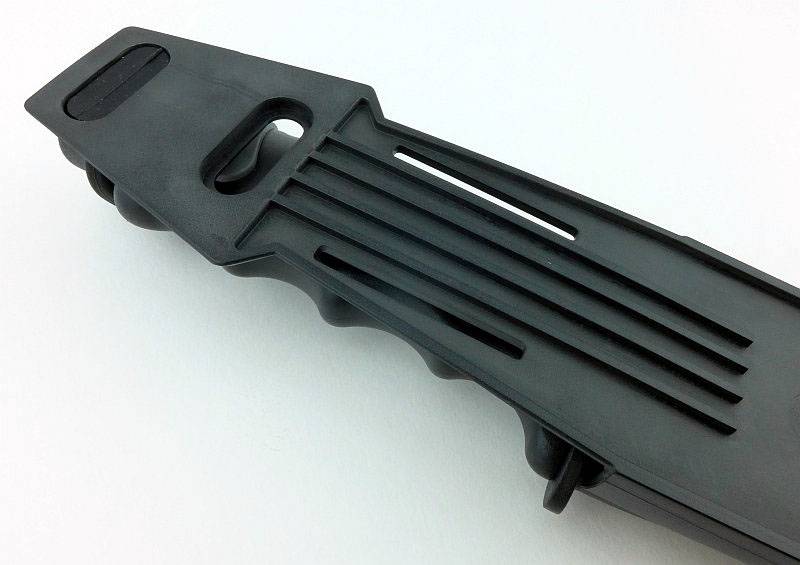
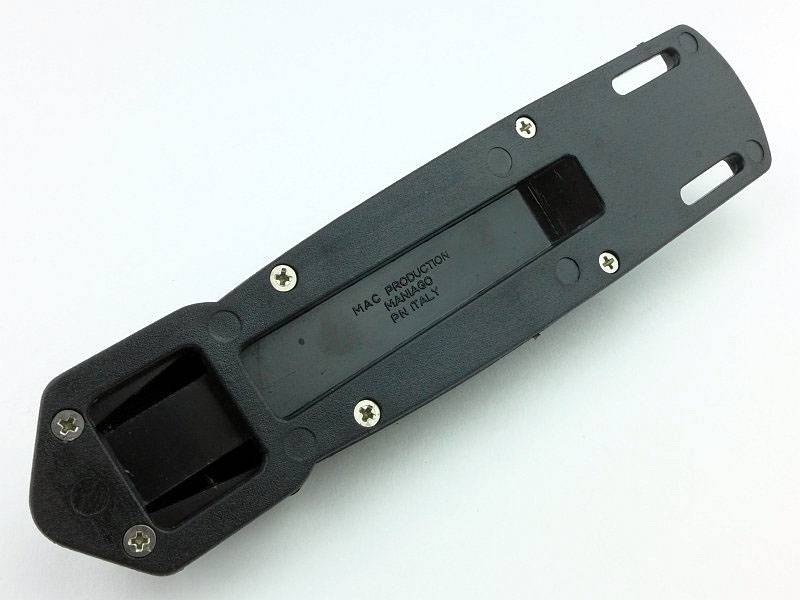
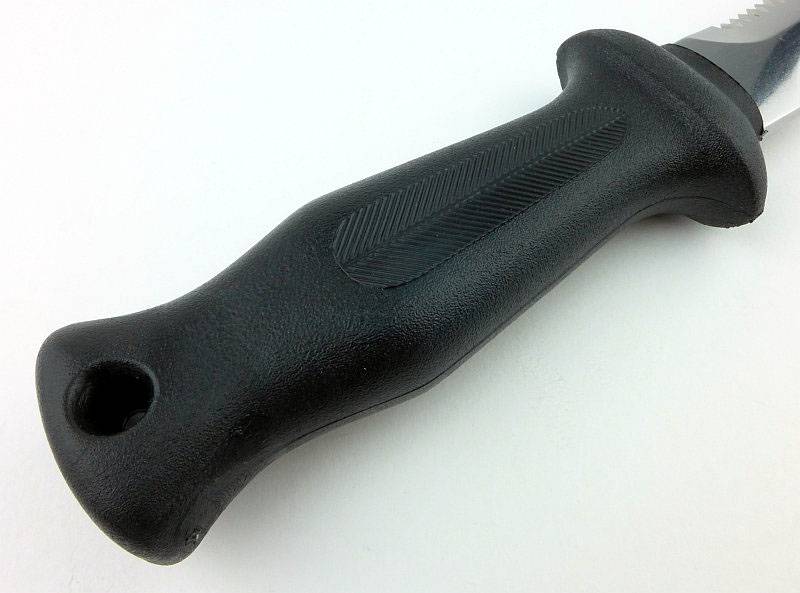
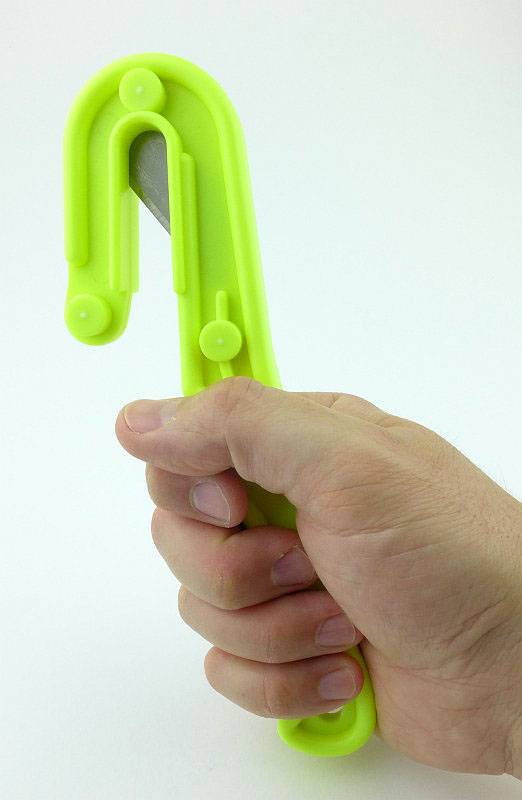
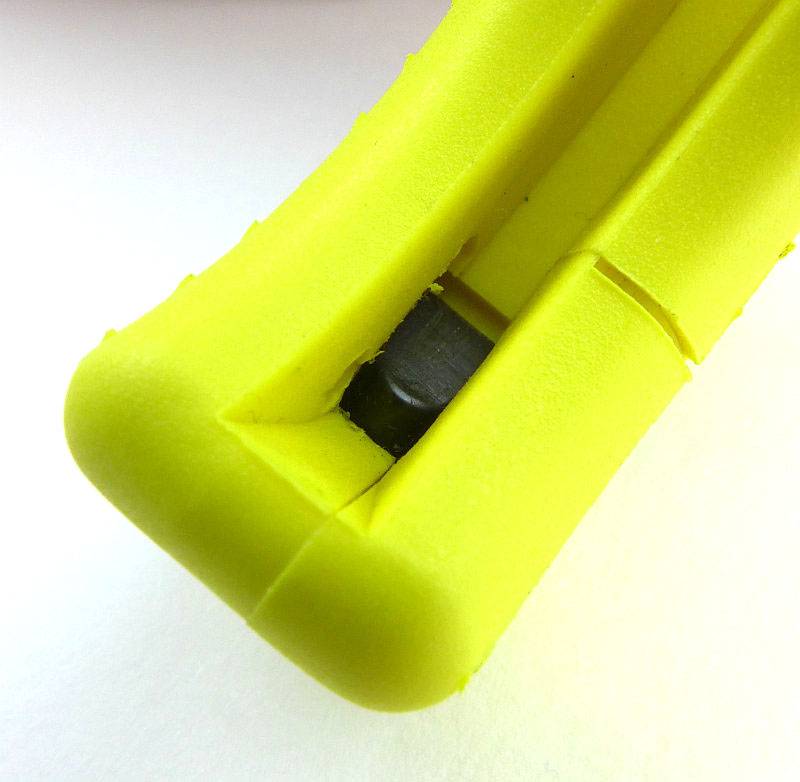
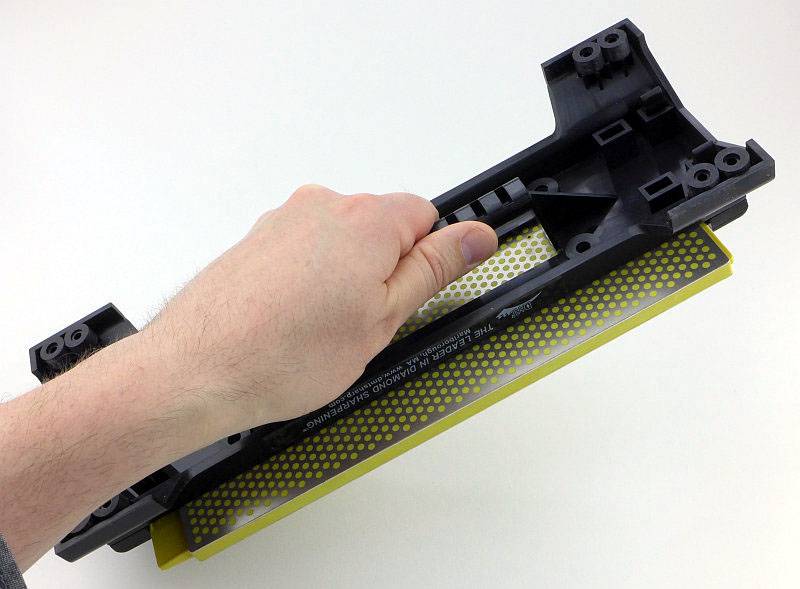
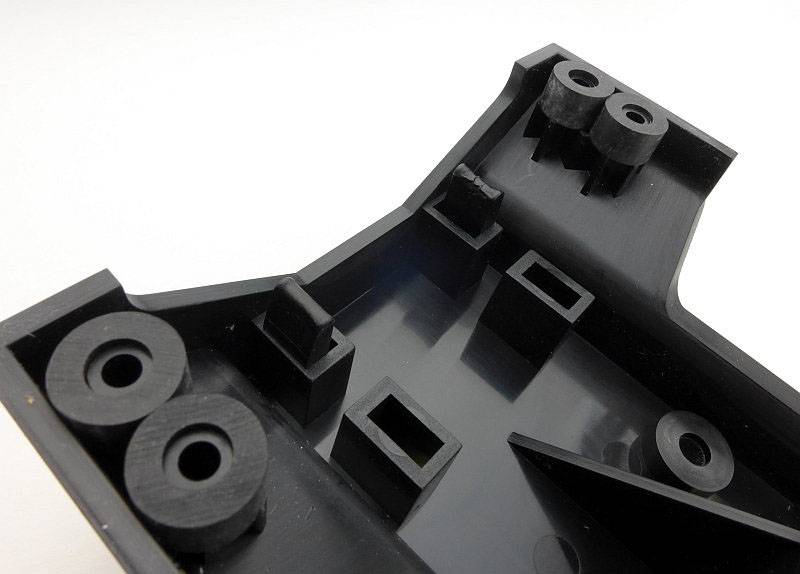
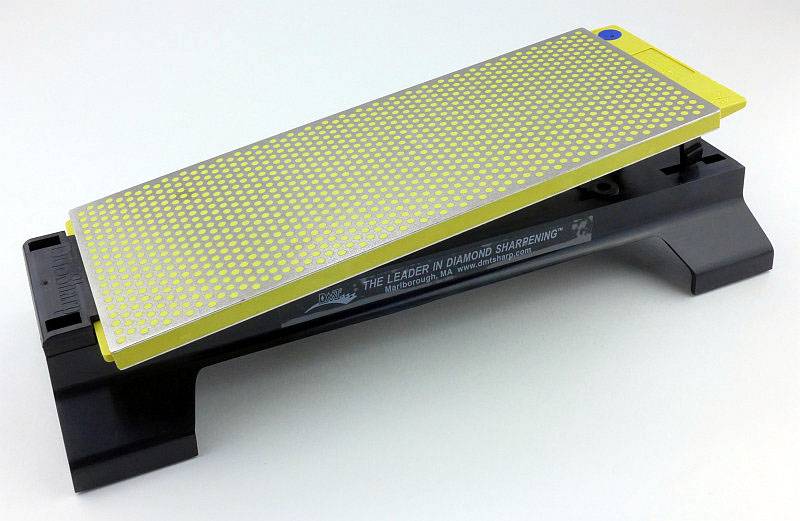
While the bench stone is upside-down one of its stand-out features can be seen – a handle. This is part of the DuoBase design.
 photo 03 DMT Benchstone handle P1180014.jpg

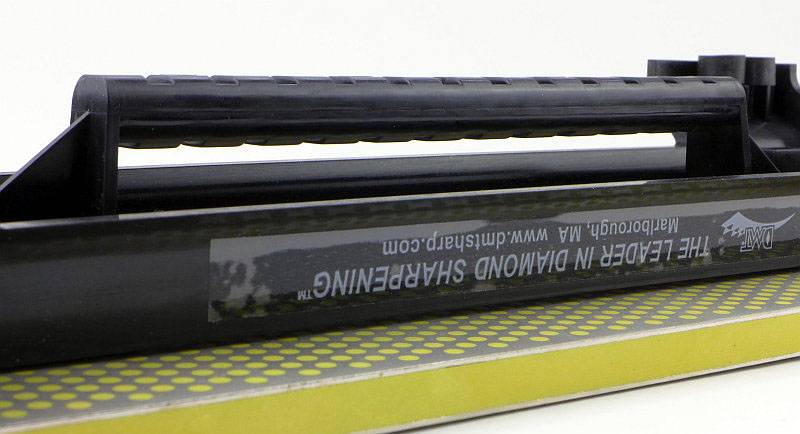
The handle means that you can take the stone to the blade instead of the blade to the stone. For larger blades this is ideal and makes the DMT benchstone pretty unique. Later on I show an example of exactly this with a ham knife.
 photo 04 DMT Benchstone handle P1180017.jpg

The Diamond stone slab is double-sided, so for the other grit you need to flip it over. It is held onto the base with two plastic clamps. Turning the base over you can see the two tabs that click into place. (you can also see the positions these can be put for the smaller 8″ stone.)
 photo 05 DMT Benchstone clamp P1180021.jpg

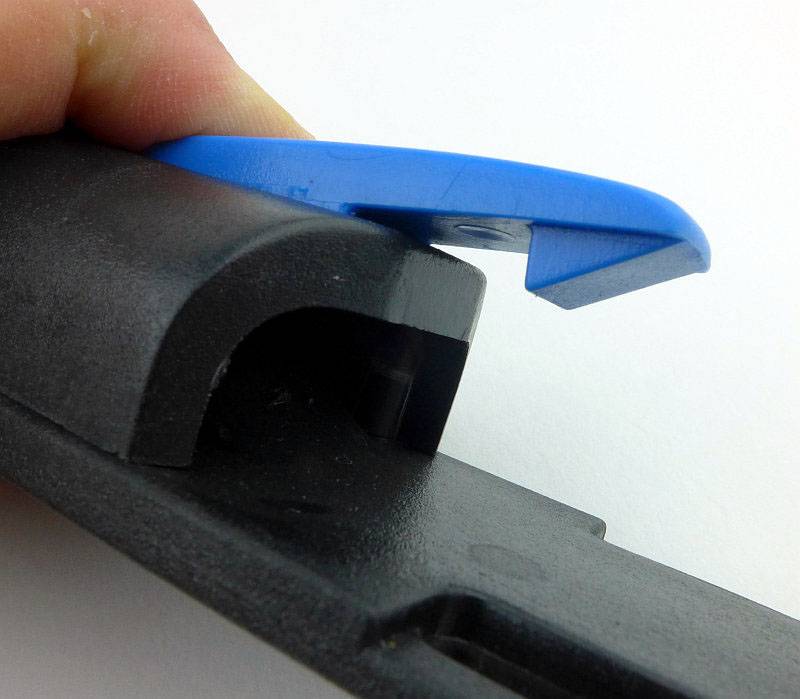
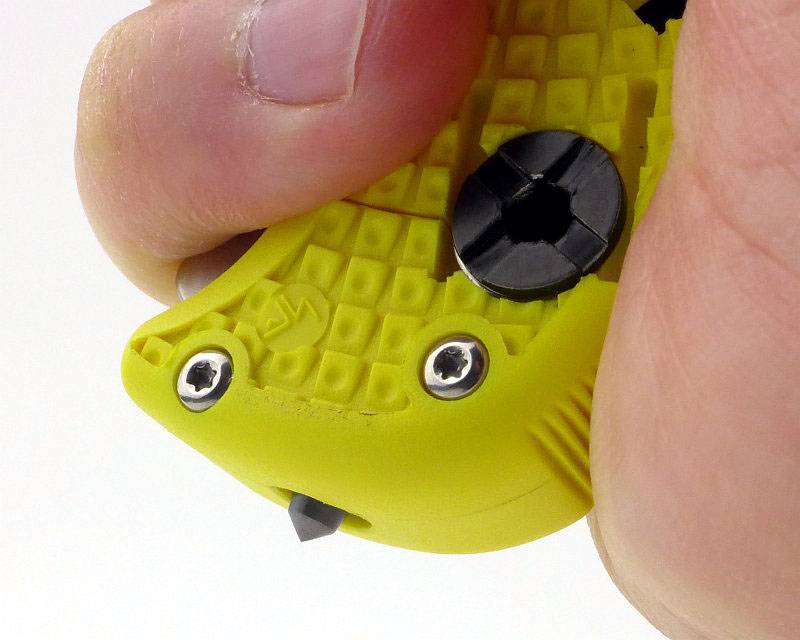
Simply pinch these together to release the stone clamp.
 photo 06 DMT Benchstone clamp release P1180023.jpg

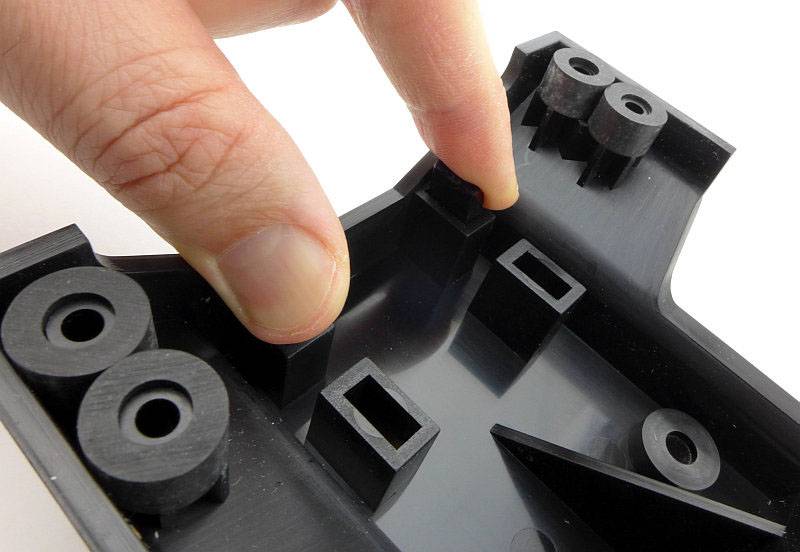
You only need to remove one of the clamps to allow the stone to come free.
 photo 07 DMT Benchstone off P1180024.jpg

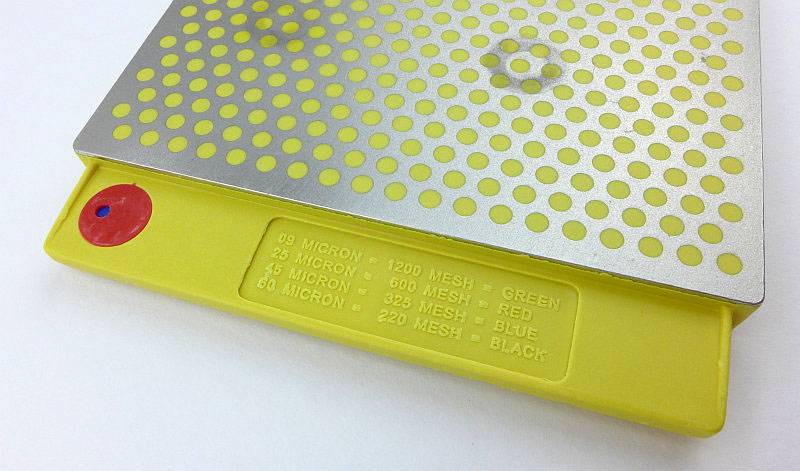
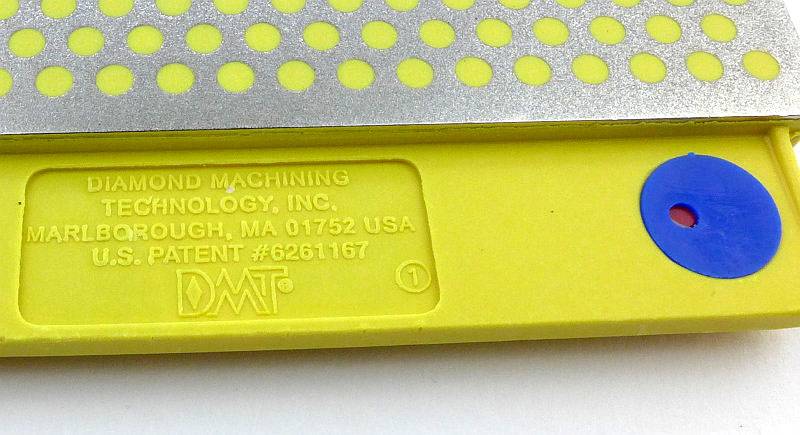
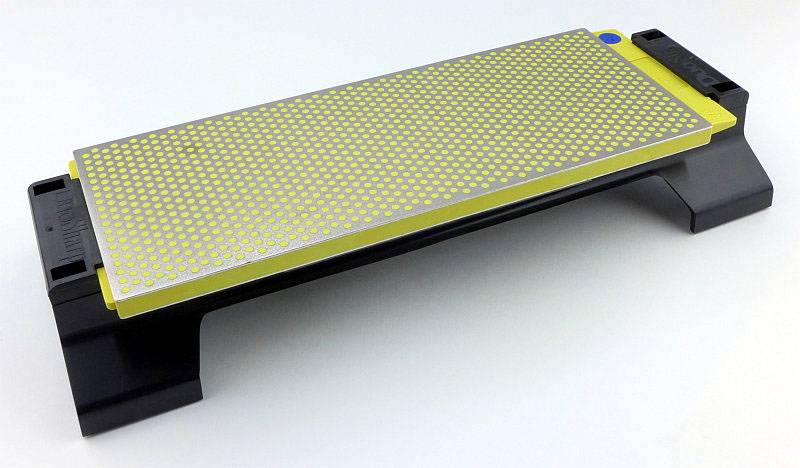
Fitting in with the colour coding across the DMT range the Red dot represents the Fine grit. The smaller blue dot shows what grit the other side of the stone has – in this case Blue/Coarse.
 photo 08 DMT Benchstone grit indicator P1180028.jpg

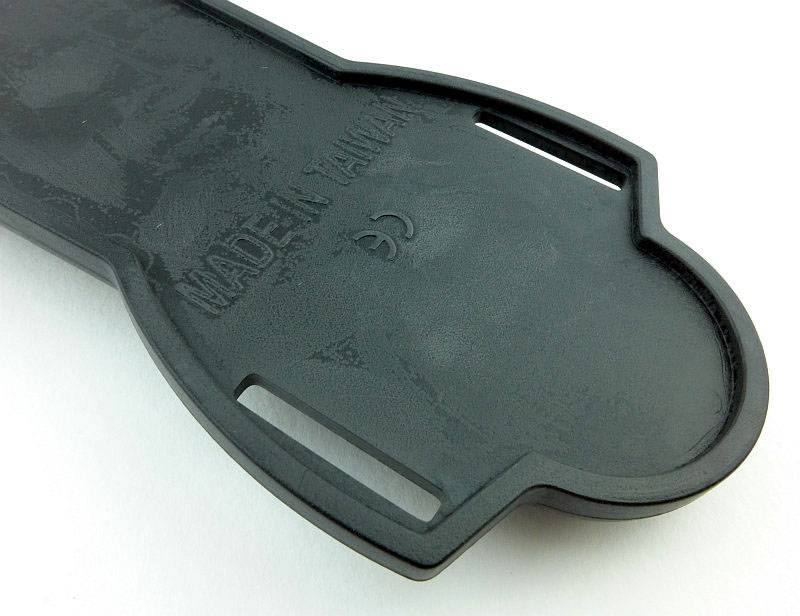
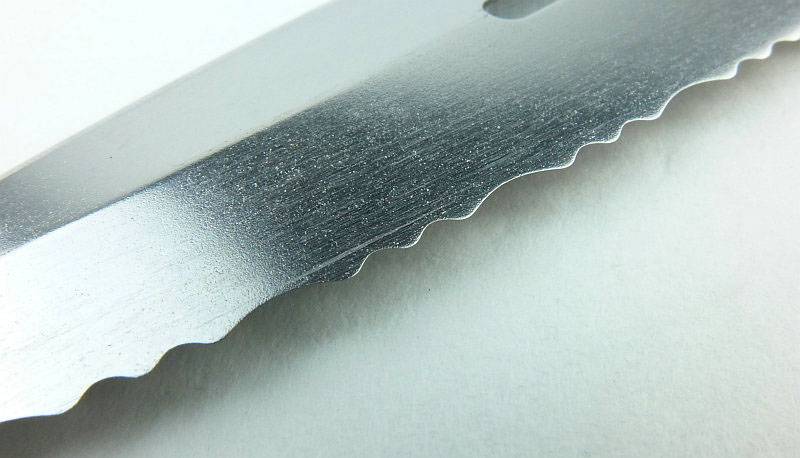
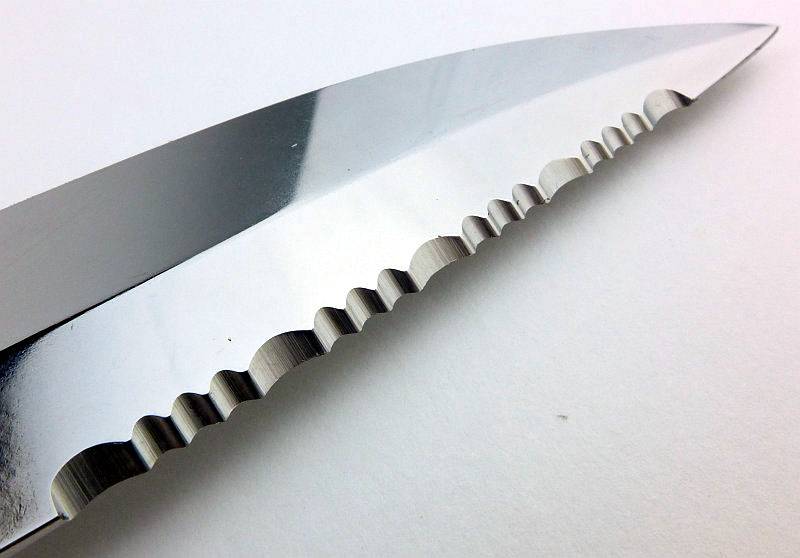
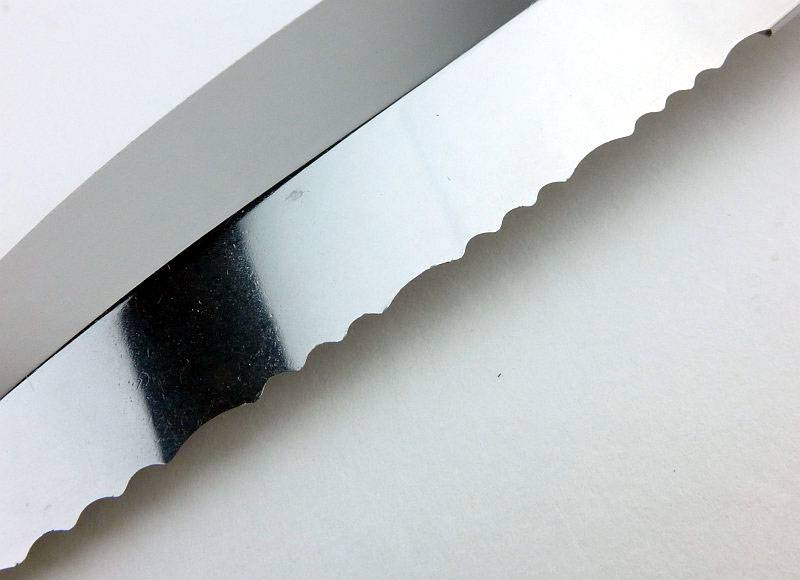
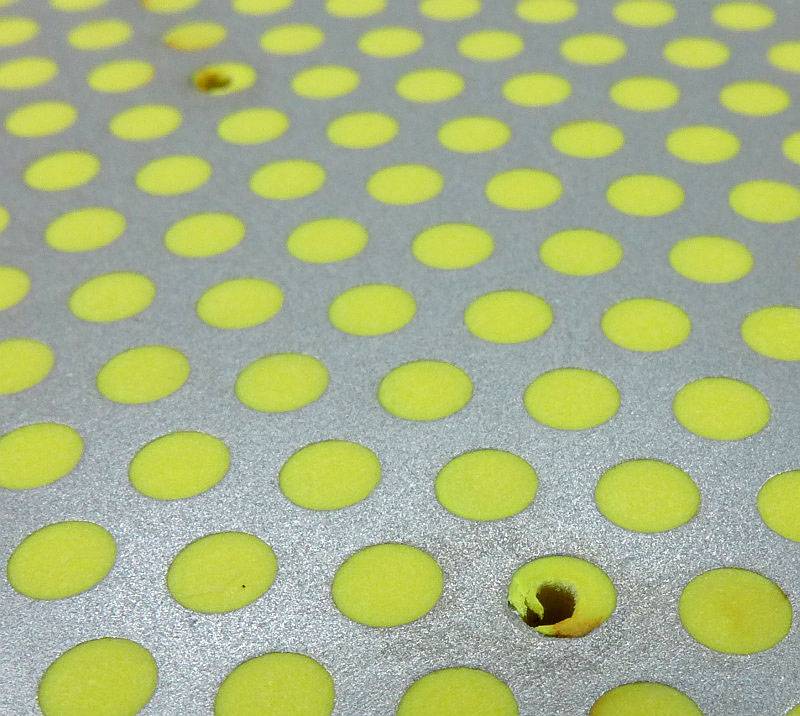
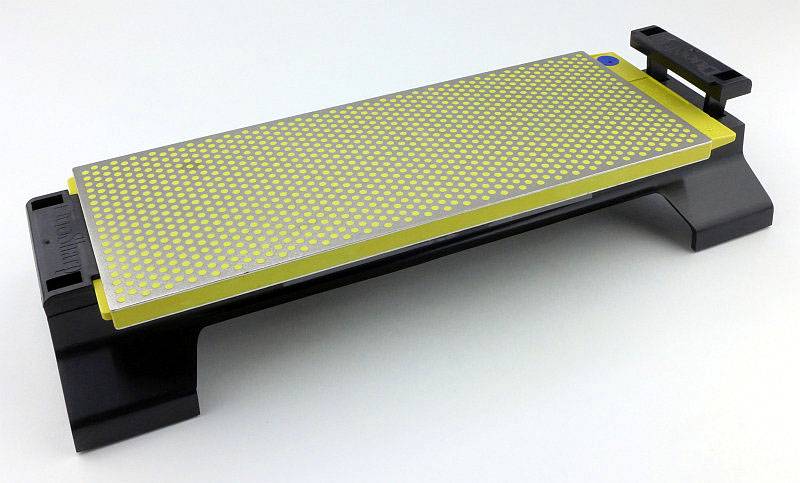
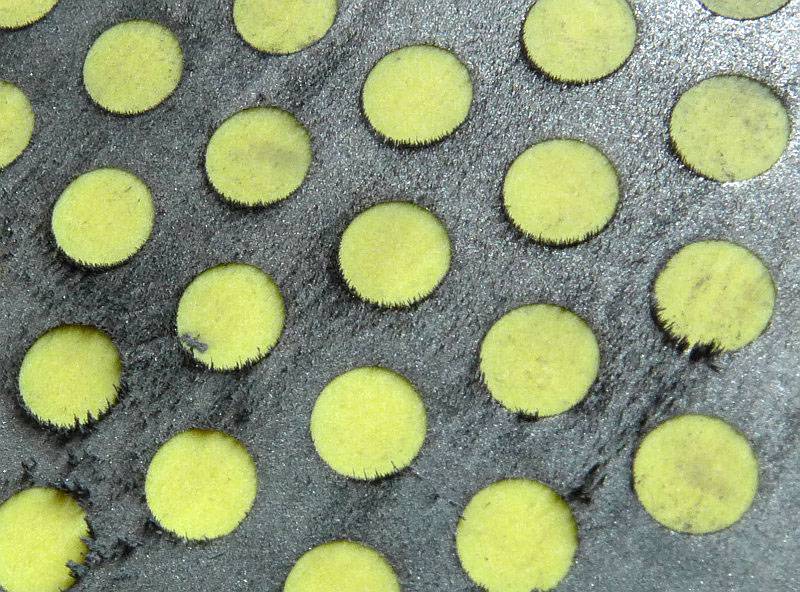
The DuoSharp 10″ benchstone has an ‘interrupted’ surface which helps clear the filings produced during use. There are a couple of pin marks into the plastic which probably relate to location pins used during the moulding of the plastic part.
 photo 10 DMT Benchstone holes P1180033.jpg

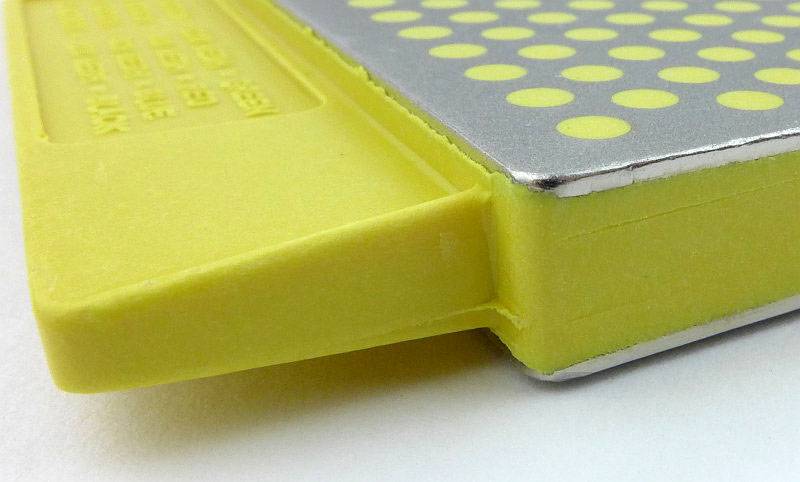
You can see how the diamond surface has been moulded into a plastic base-plate. One end has the elongated tab, only part of which fits under the stone clamp.
 photo 11 DMT Benchstone corner P1180036.jpg

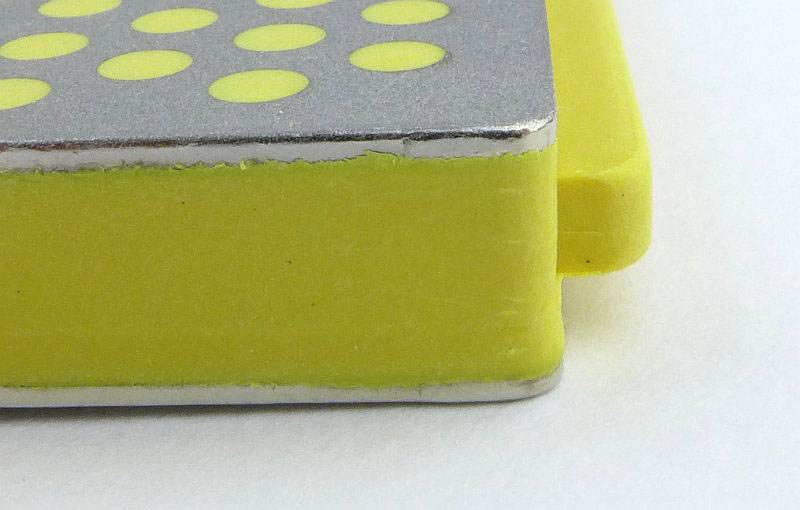
The other end has a smaller tab for the stone clamp to hold.
 photo 12 DMT Benchstone other end P1180037.jpg

Flipping the stone over you can see the Blue grit indicator spot, this time with the smaller Red dot for the other side’s grit.
 photo 13 DMT Benchstone other grit P1180041.jpg

Fixing the stone back onto the base, first slide the tab under one stone clamp.
 photo 14 DMT Benchstone fitting P1180044.jpg

Then fit the second stone clamp.
 photo 15 DMT Benchstone fitting P1180047.jpg

Press the clamp down until it clicks into place.
 photo 16 DMT Benchstone fitting P1180049.jpg

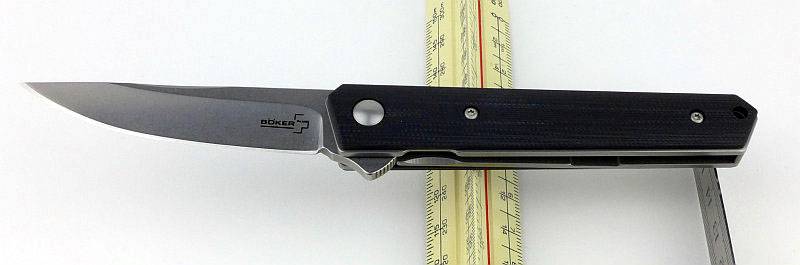
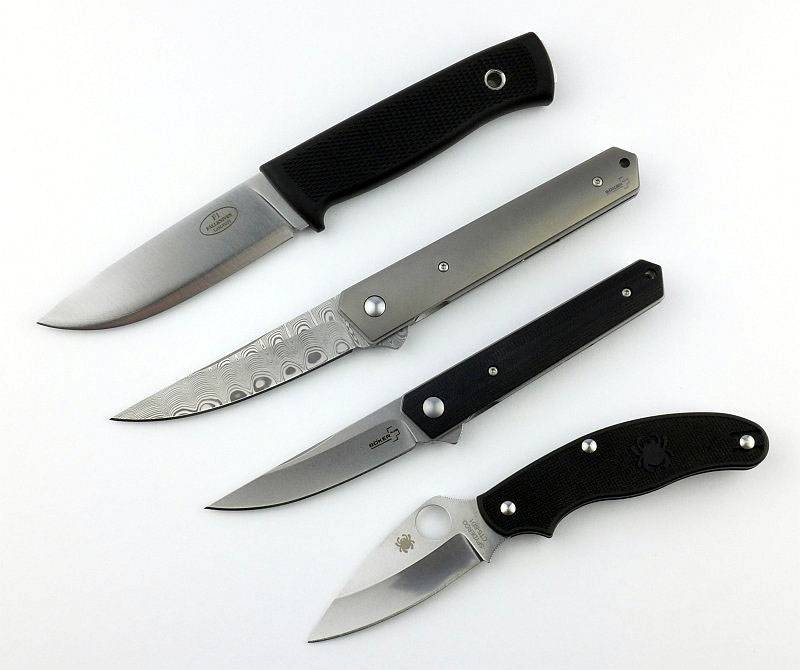
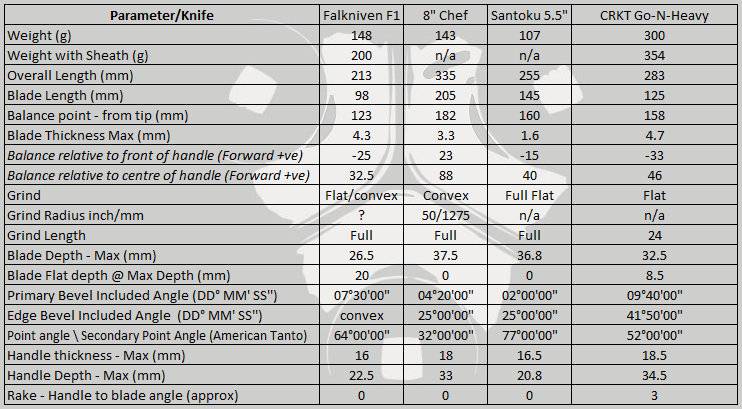
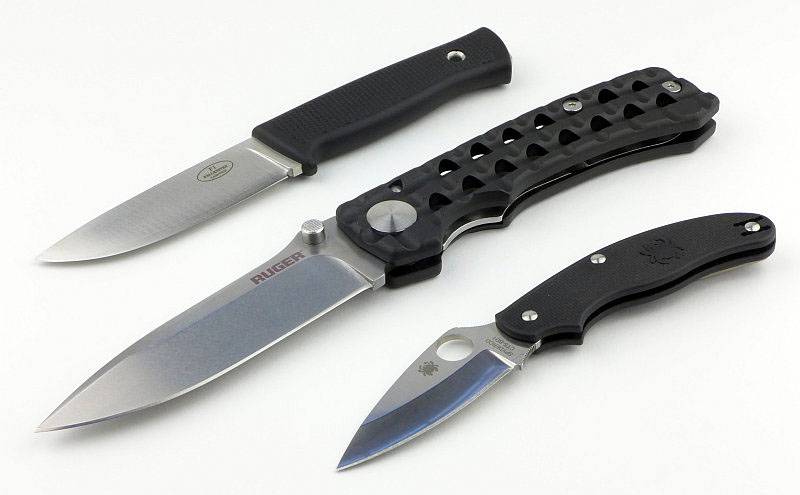
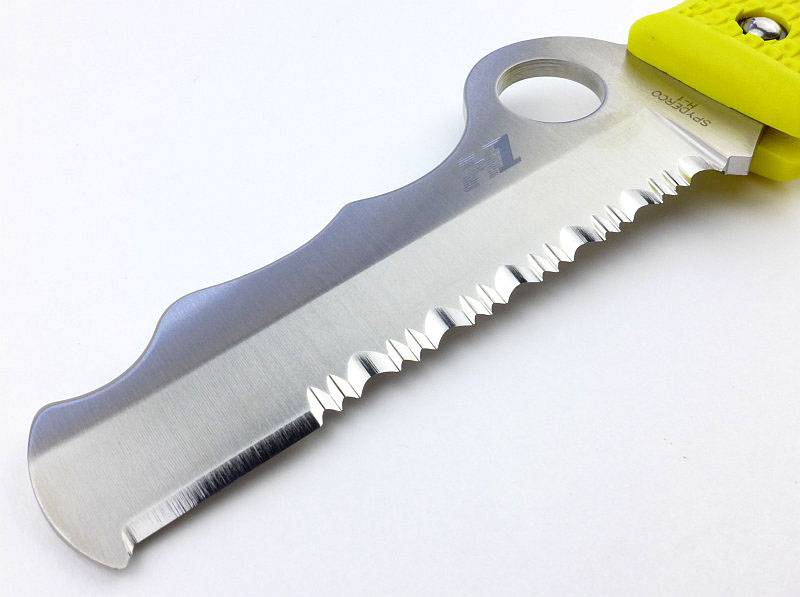
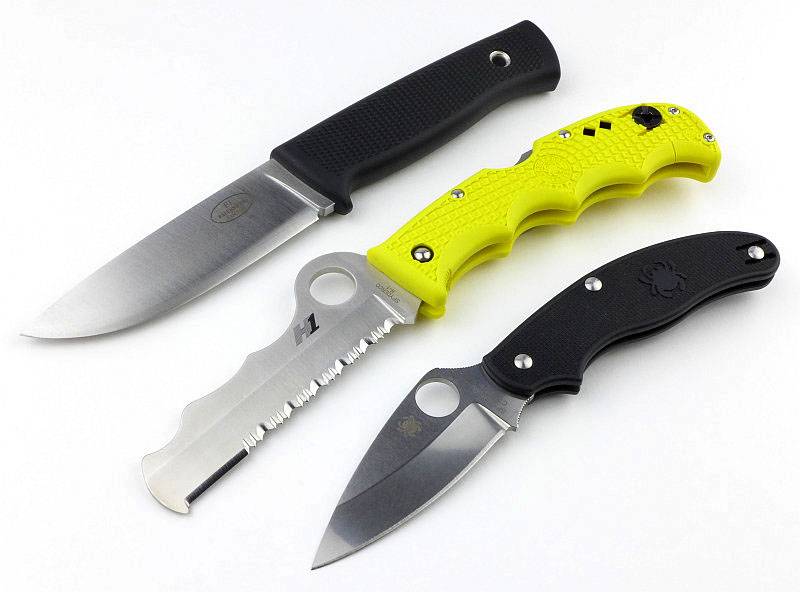
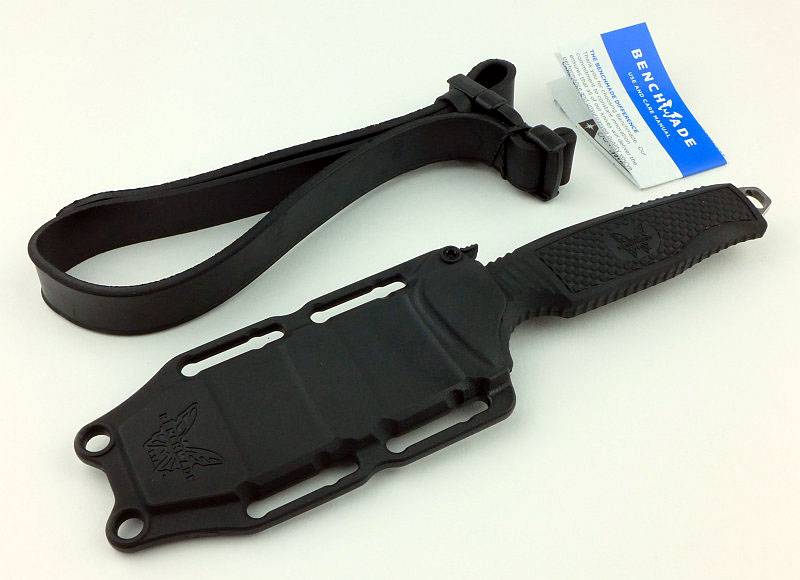
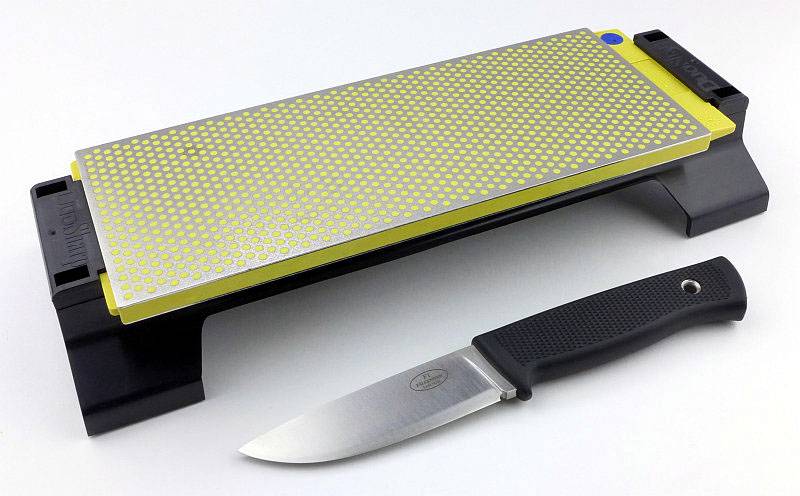
For an idea of scale, here is the stone next to a Fällkniven F1. At 10″, this is a good sized stone.
 photo 17 DMT Benchstone size P1180050.jpg

What are they like to use?

Firstly, the Aligner fully packed in its box is not only compact, but is also light weight. This makes it a great kit to take with you on trips, to keep in the car, or to use to sharpen friends/relatives knives. With DMT diamond stones being used dry you also don’t need to carry any oils or lubricants, so overall it is very convenient.

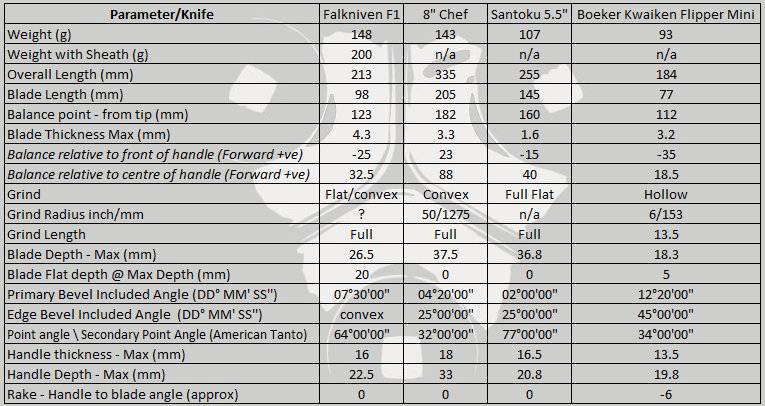
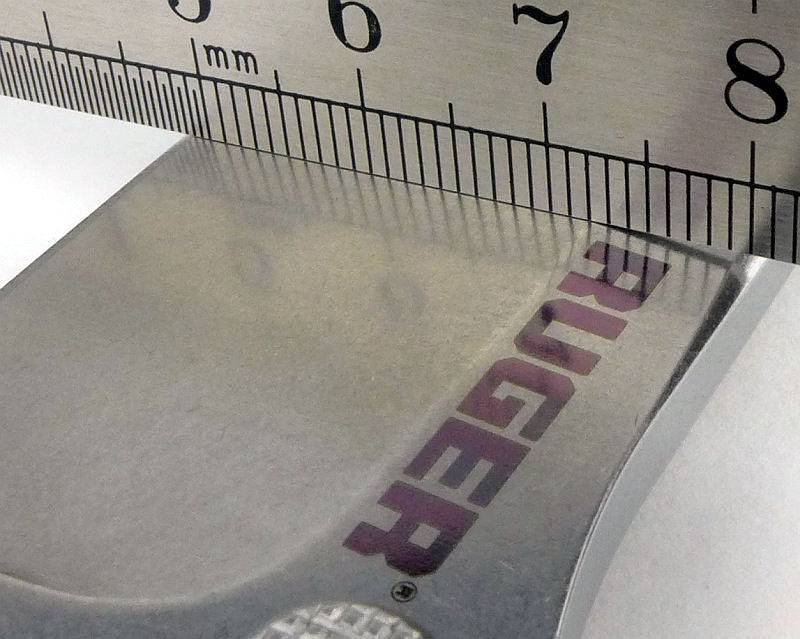
Clamp based sharpening systems are limited by the capacity of the clamp. The Aligner’s clamp has a 6.5mm capacity if the adjustment screw is fully removed and reinserted one half turn. I’d prefer more than half a turn, so I think a 6mm blade thickness is a more realistic maximum.

It is best to have an ‘approach’ to keep your results consistent. In this case what I’m referring to is the clamp position. Moving this along the blade will change the angle the stone runs on the edge. So far my approach has been to fit the clamp in the centre of the cutting edge of the blade on every blade I sharpen. Working in this way, in future you will put the clamp into the same position for subsequent sharpening sessions.

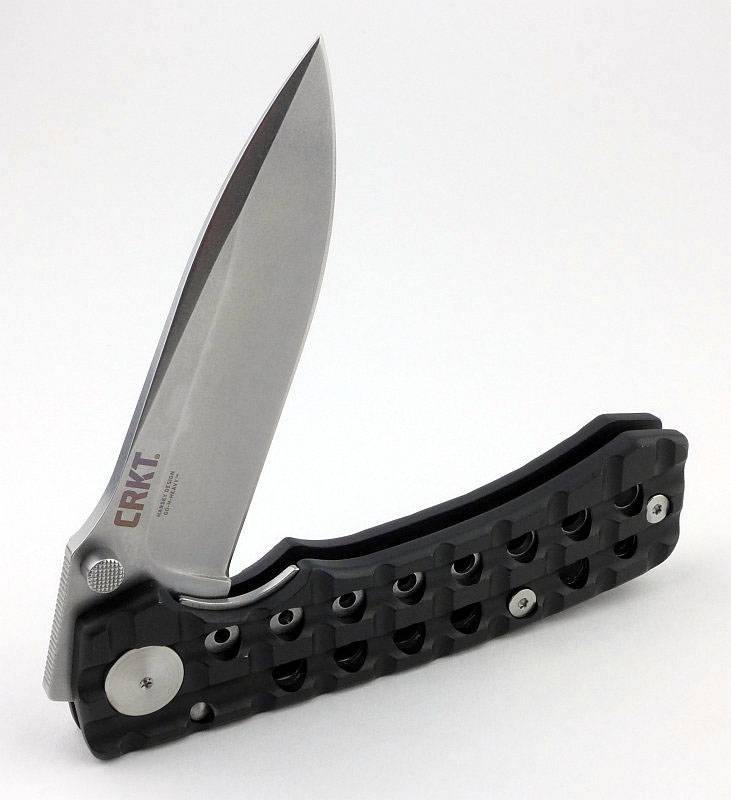
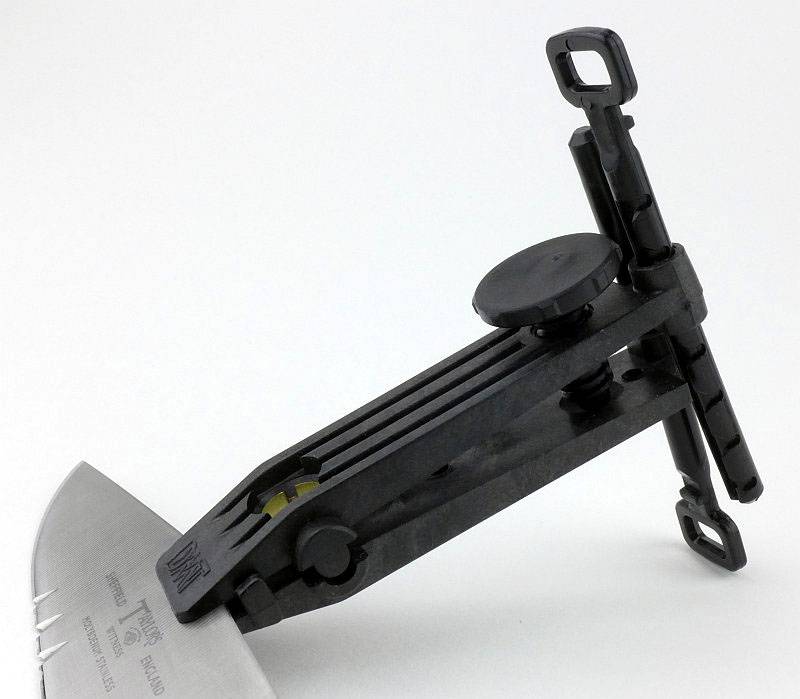
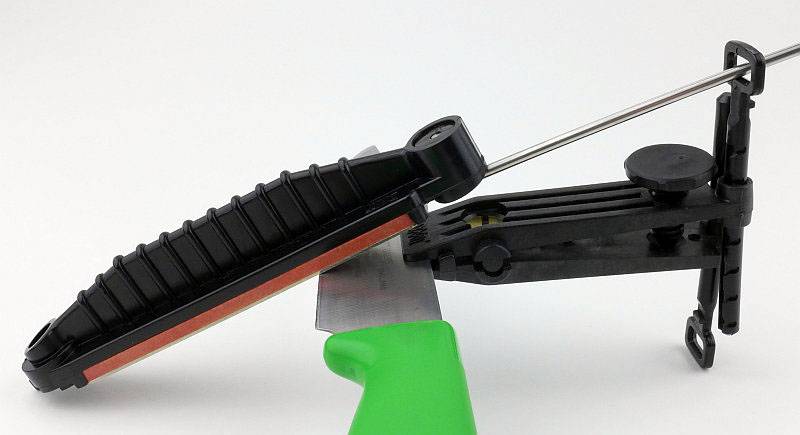
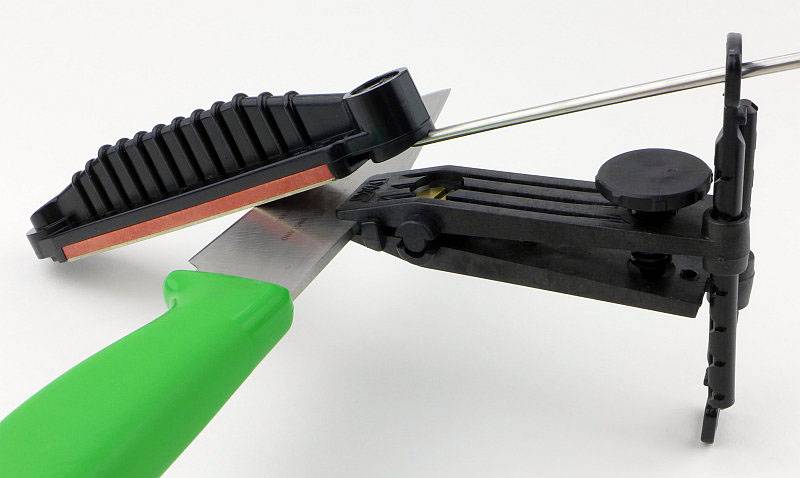
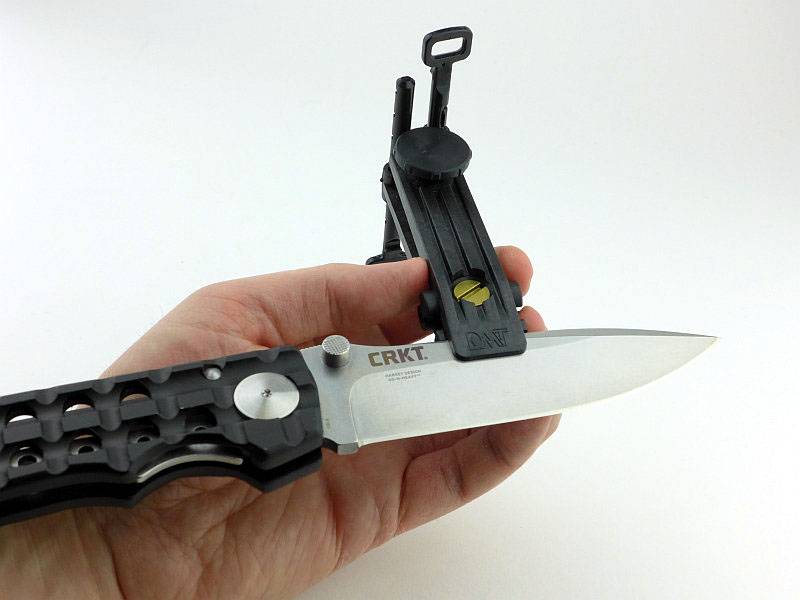
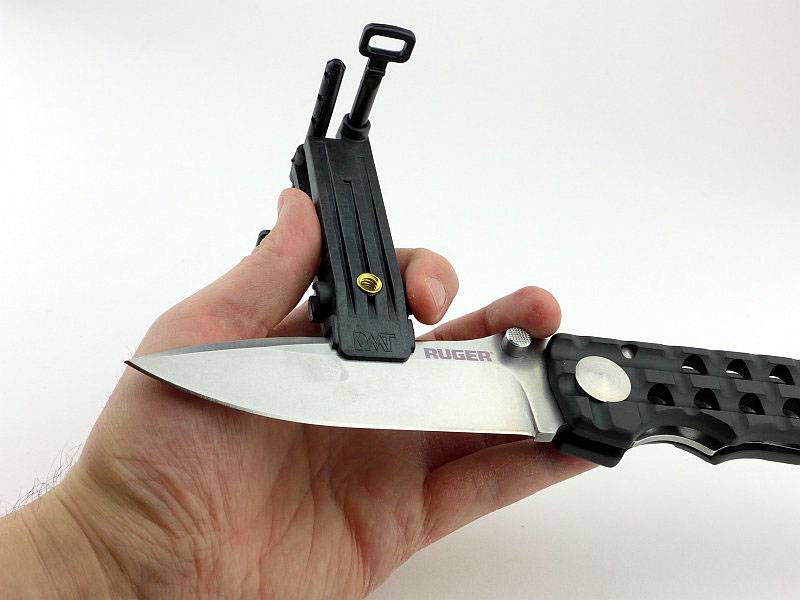
As with this type of guided sharpening, once the clamp is fitted to the blade spine and locked on, sliding the guide rod into the guide ring you can now move the stone across the knife edge at a consistent angle.

If you are not used to working with this can be a little awkward. The instructions say to hold the knife handle in one hand and the stone holder in the other; personally I find it easier to hold the clamp in my left hand (I’m right handed) with the blade sitting on my hand. The feel is the same for both sides of the blade. If you have to hold the knife handle it means swapping round an moving the stone with your non-handed hand as well.
 photo 20 DMT Aligner sharpening P1180096.jpg

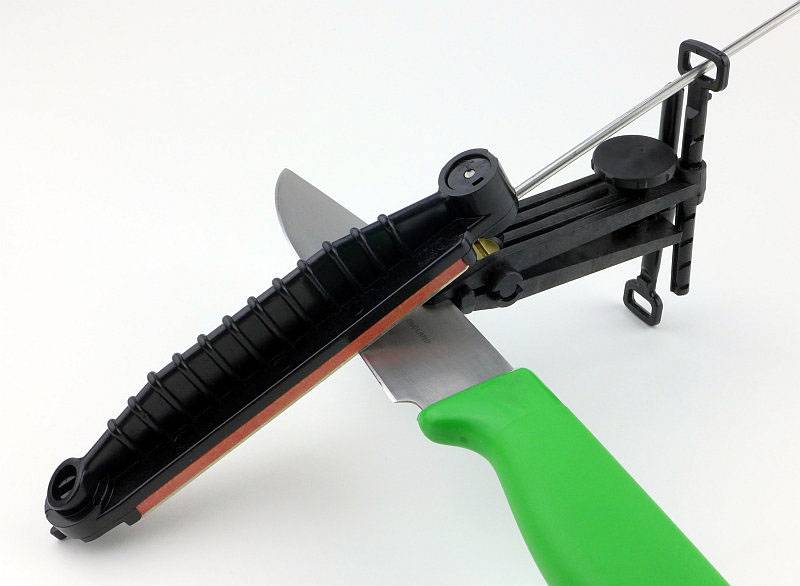
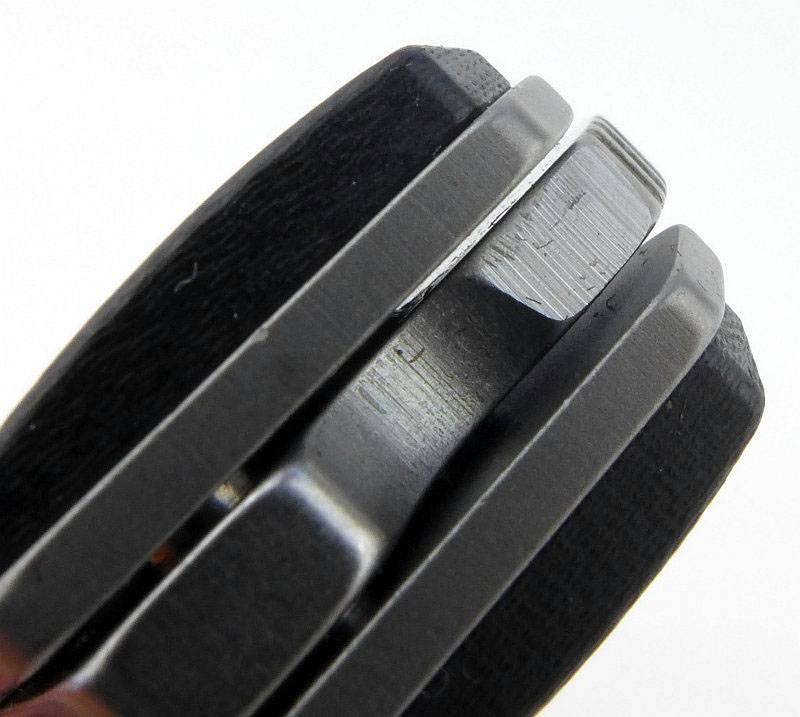
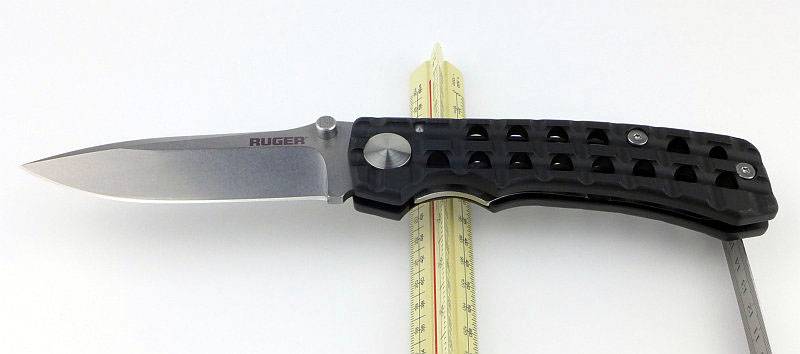
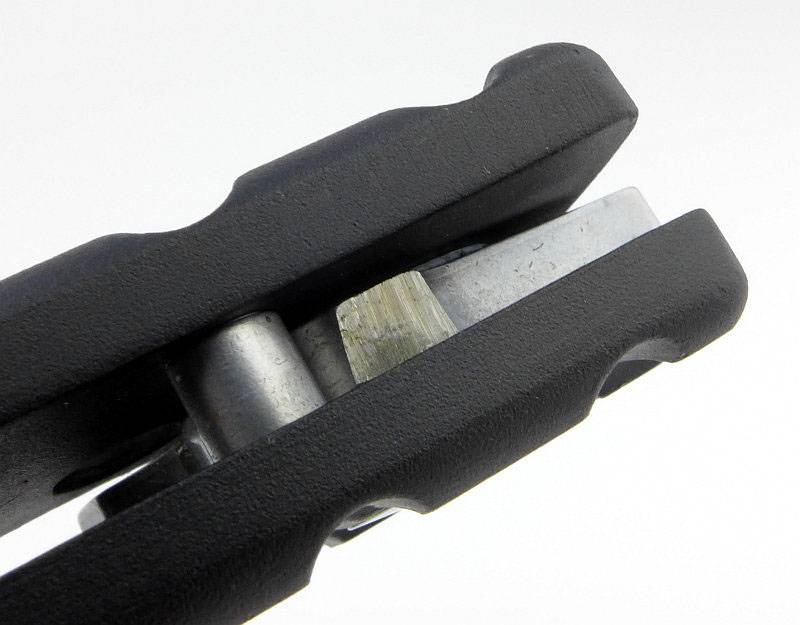
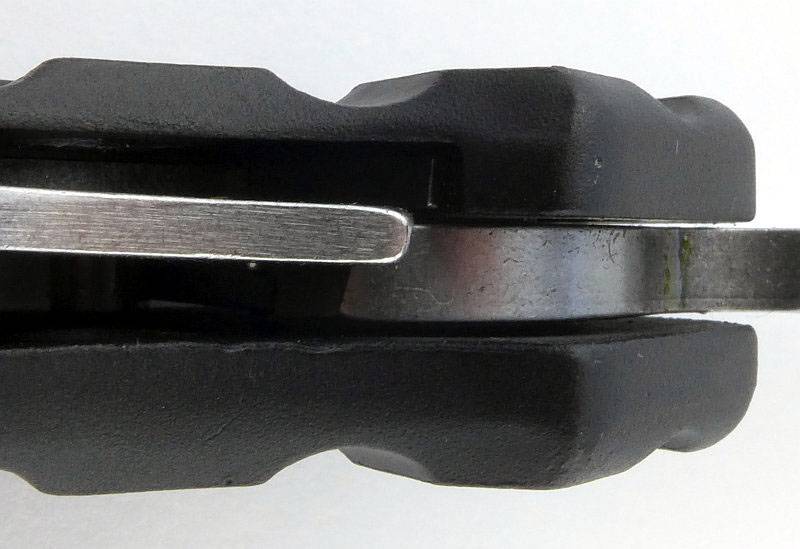
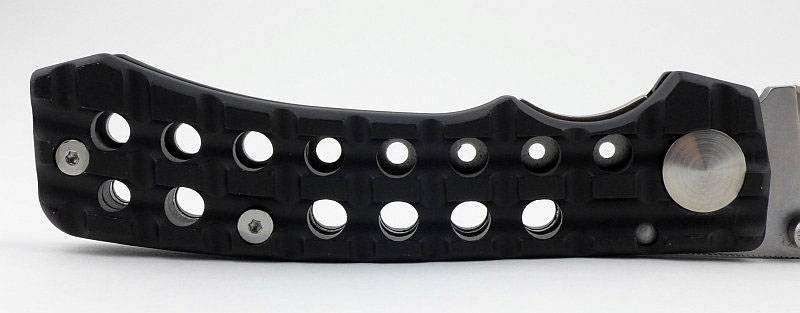
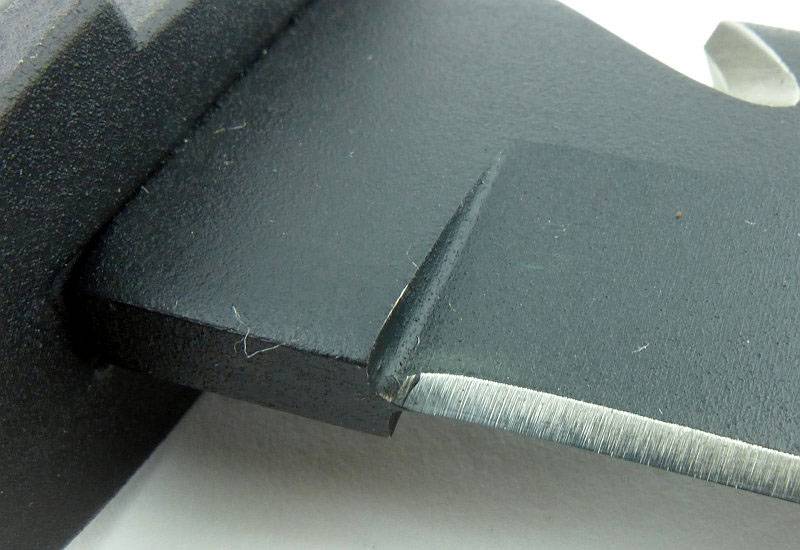
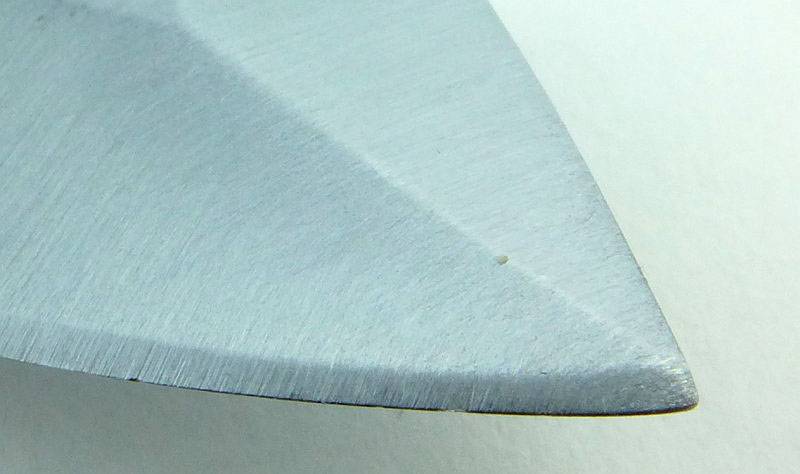
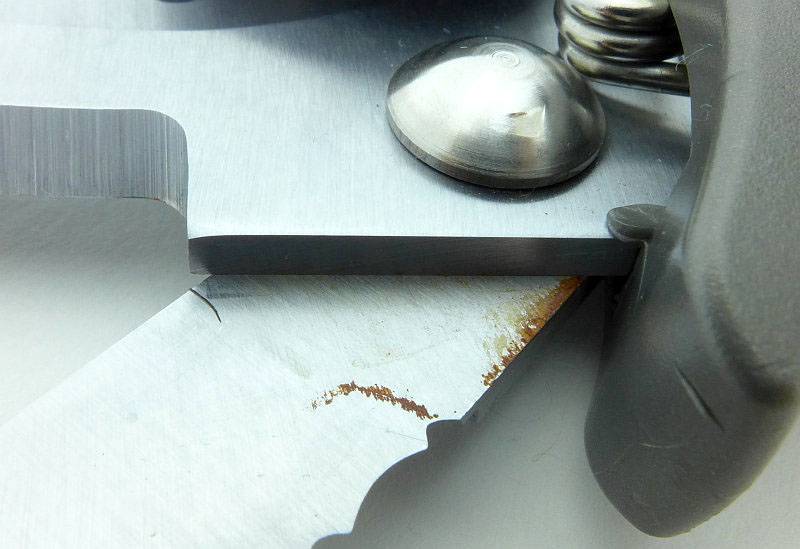
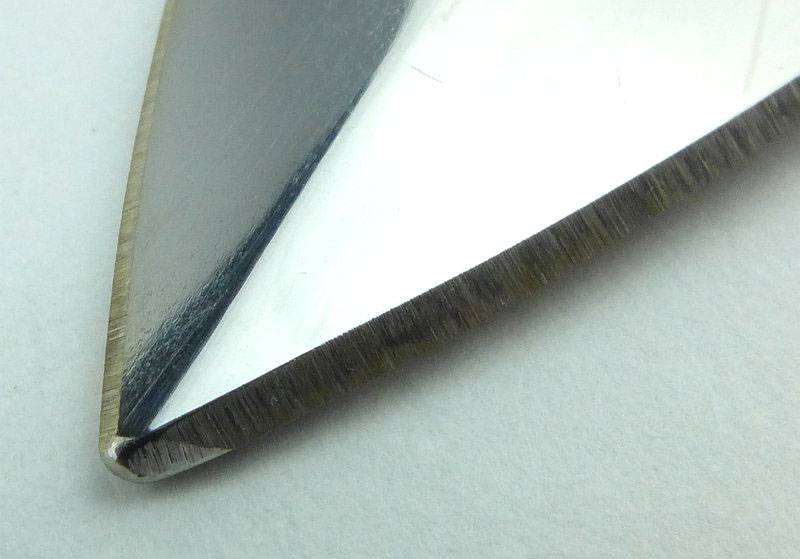
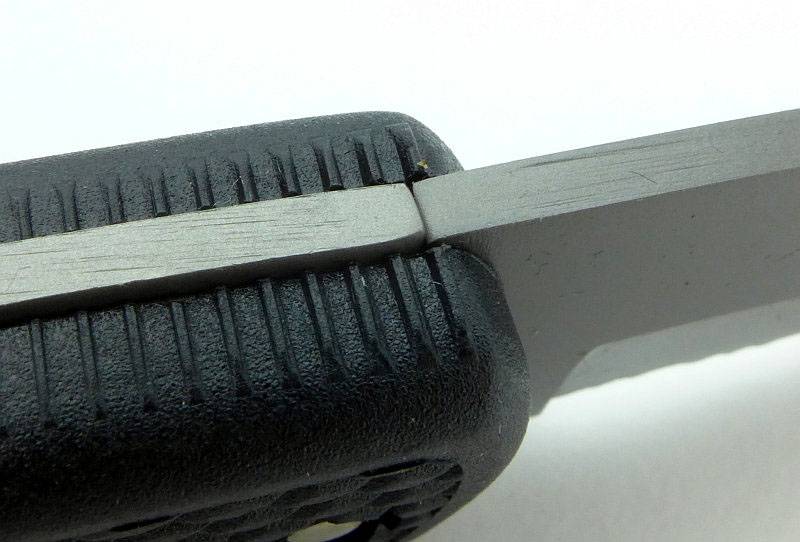
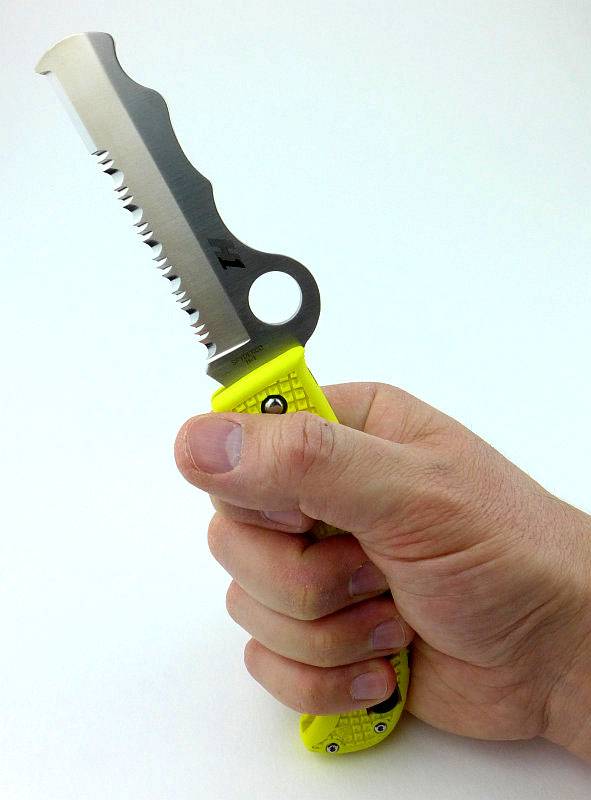
For narrow blades you should check for clearance (keeping the stone from wearing into the clamp). In this case there is plenty of room, but the blade is not narrow.
 photo 21 DMT Aligner sharpening P1180097.jpg

To select the right angle you can use the ‘Sharpie’ method (using a marker pen to blacken the edge bevel and check where the stone is cutting) and if necessary adjust the position of the guide rings. If you are using different settings for different blades, you will want to keep a note of the positions used for each blade to allow you to sharpen it properly next time without changing the bevel angle.
 photo 22 DMT Aligner sharpening P1180103.jpg

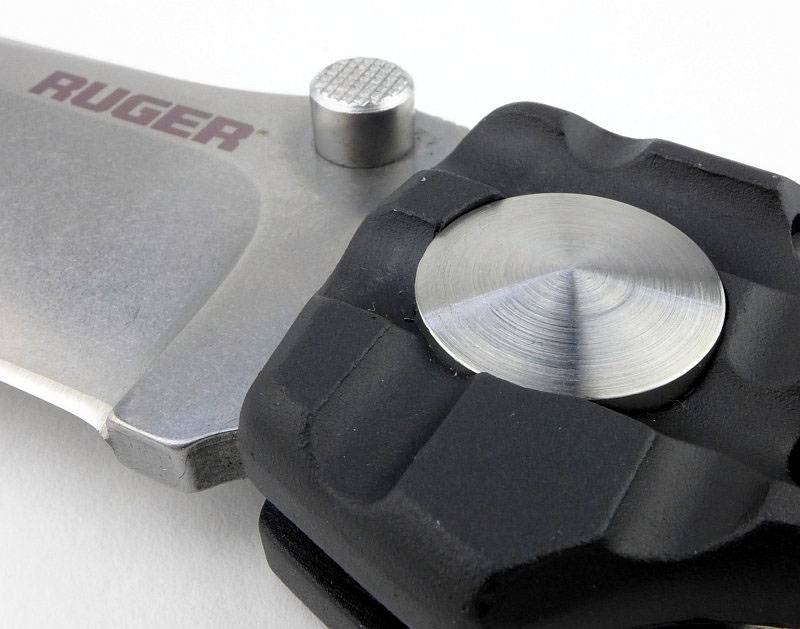
Once you are done, I find it best to leave the clamp on the blade when you test the edge in case you need to work on the edge a little more.
 photo 23 DMT Aligner done P1180105.jpg

Overall the Aligner is light and efficient, and the DMT diamond stones cut very well.

Update 20 Jan 2017
Following some discussions on the clamp being liable to flex as it is plastic, I wanted to show more clearly how I use the Aligner and similar guided sharpeners. In the instructions for the Aligner it show the stone being held under the knife and the knife being moved over the stone in a similar way to using a bench stone. This means you are holding the knife by its handle and pressing down onto the stone. Like this there is maximum room for flexing. However I have always used this type of guide differently.

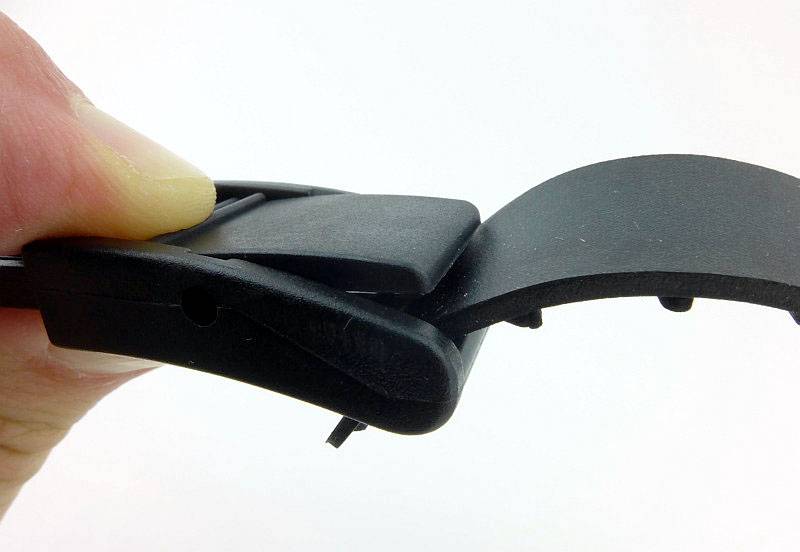
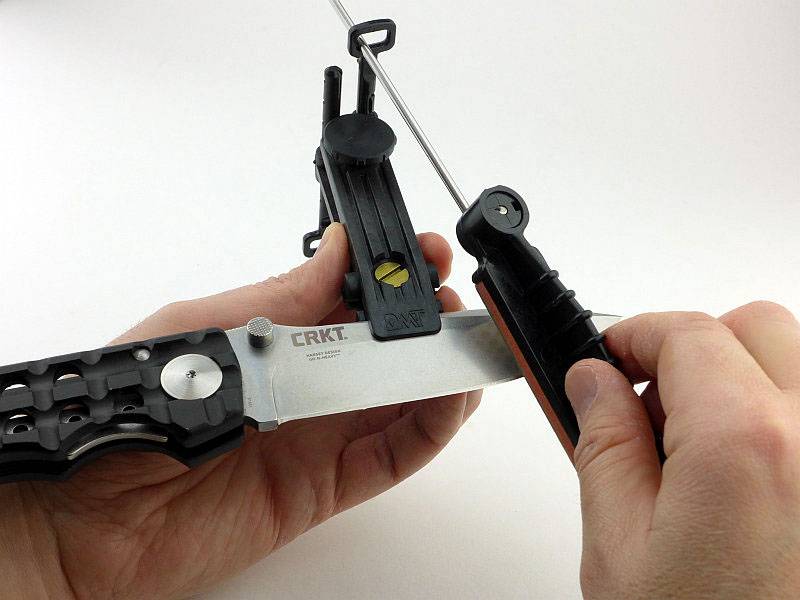
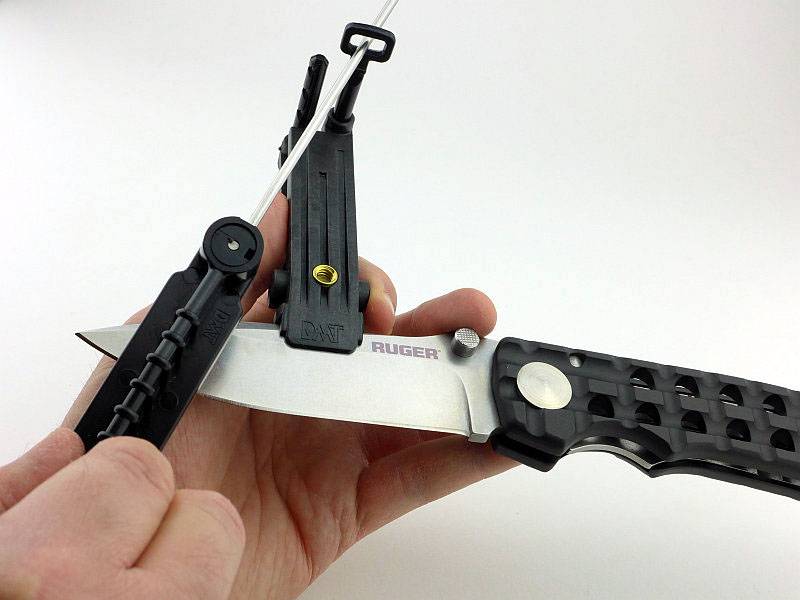
I hold the clamp and allow the handle to rest onto my wrist for this side of the blade.
 photo 32 Aligner holding P1250263.jpg

And for the other side I again hold the clamp and support the handle (or blade depending on the blade length) with my third and fourth finger. This way round the blade also sits onto the pad of my thumb.
 photo 33 Aligner holding P1250265.jpg

In this way it is possible to support where the clamp holds onto the blade while you bring the stone to the blade.
 photo 30 Aligner holding and using P1250260.jpg

And the other way. Hopefully this show clearly why I haven’t had any actual issue with flexing from the plastic clamp.
 photo 31 Aligner holding and using P1250258.jpg

End of Update 20 Jan 2017

Now we move onto the DuoSharp Bench stone and the technique requiring most user skill. However due to its wide flat surface and diamond cutting efficiency it certainly seems to make sharpening this way much easier than on the carborundum stones I learnt on.
 photo 18 DMT Benchstone kitchen P1220149.jpg

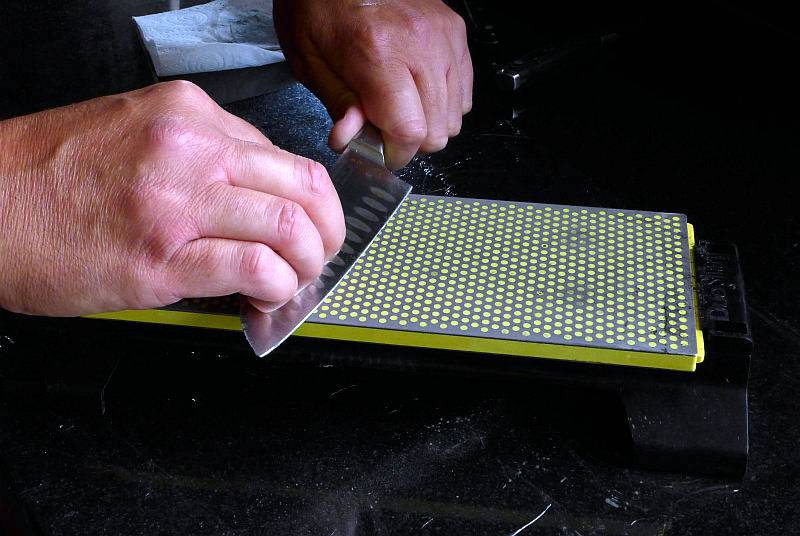
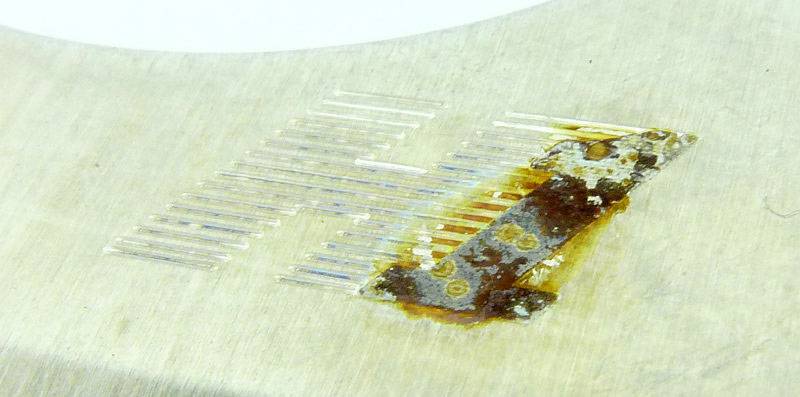
The kitchen knives being sharpened are slightly magnetised due to being stored on a magnetic rack. The filings stand themselves up like this due to being magnetic themselves. A wipe over with a damp rag clears these off nicely.
 photo 19 DMT Benchstone kitchen filings P1220161.jpg

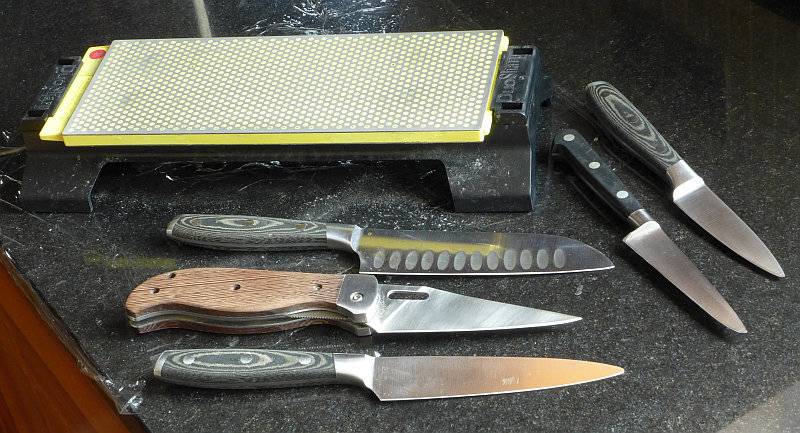
A few of the knives this stone breezed through.
 photo 20 DMT Benchstone kitchen knives P1220169.jpg

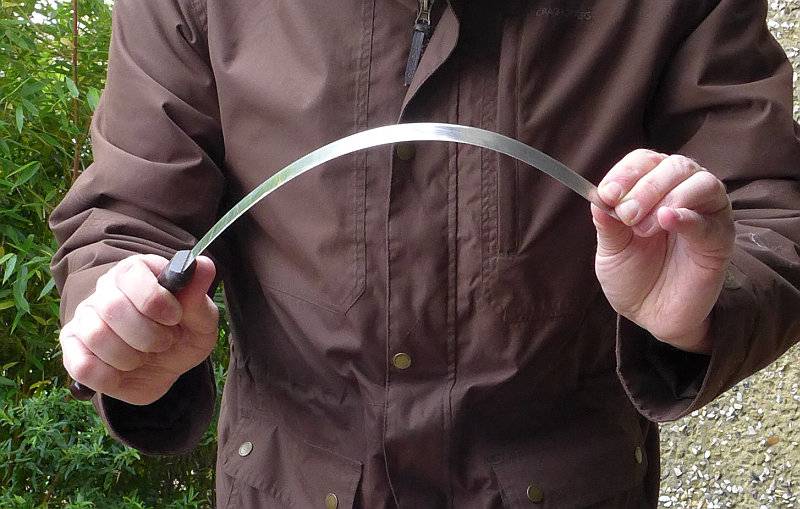
Now onto something a little more challenging, a 16″ ham knife. Ham knives are super flexible and thin, so are not easy to work onto a stone with.
 photo 21 DMT Benchstone ham knife P1230617.jpg

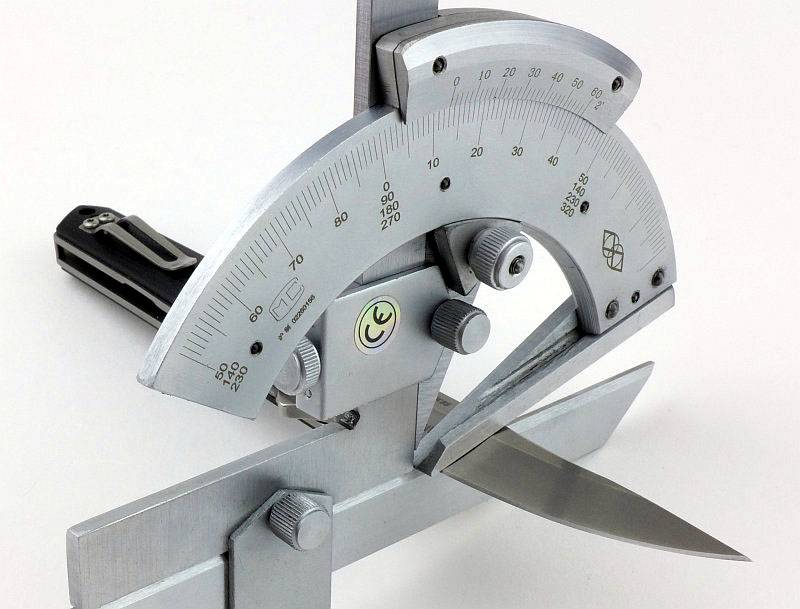
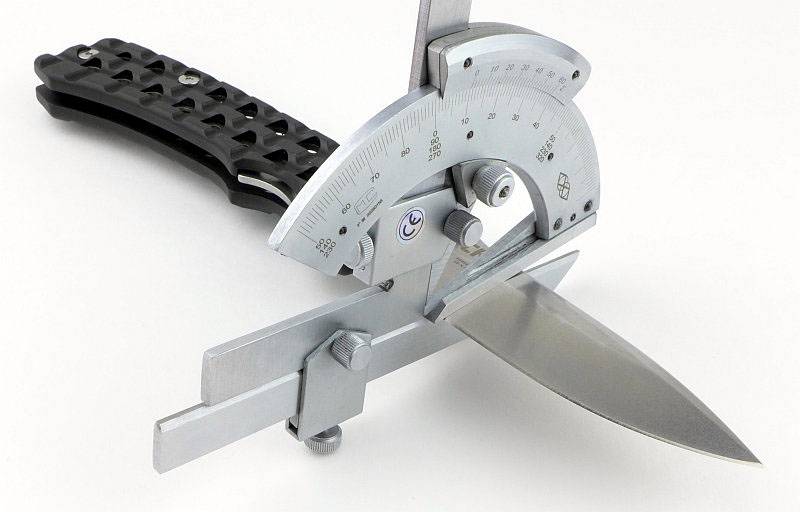
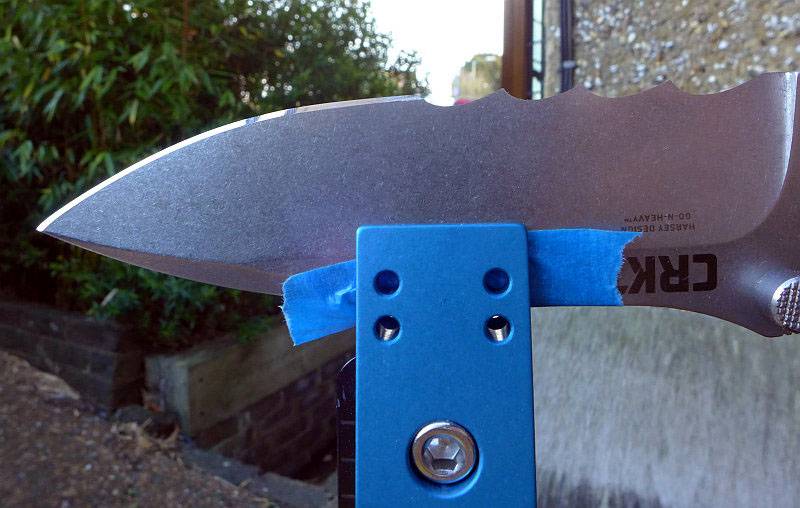
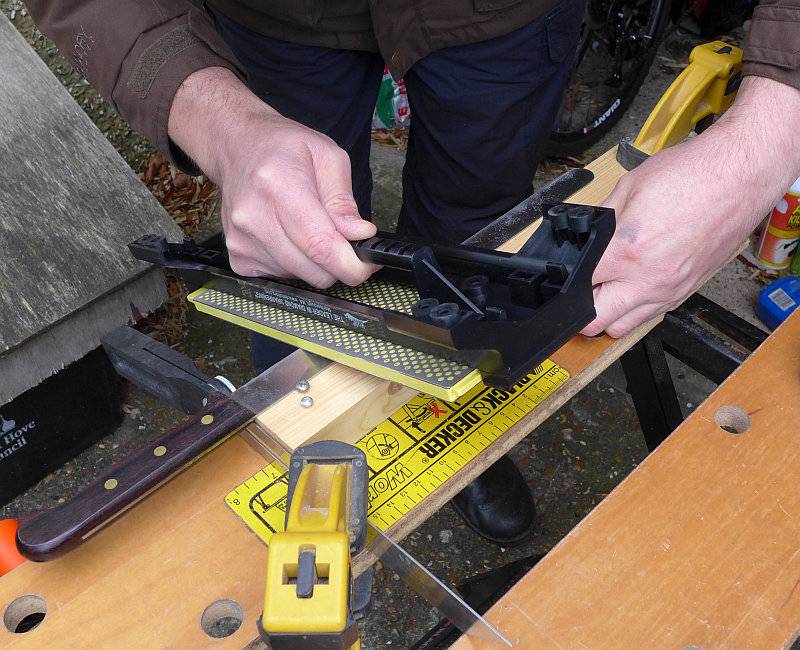
This blade had seen some abuse in the past and the edge was a bit wavy. I wanted to tidy it up and put together a very simple jig to keep the blade straight. A couple of stop-screws on a wooden base and some masking tape to keep it in place. To the right you can see an angle guide I setup for reference to help me stay on track.
 photo 22 DMT Benchstone ham knife jig P1230623.jpg

Using the handle on the back of the base I then used the bench stone hand-held. Working on the long and flexible blade in this way was so much easier and resulted in a corrected and hair-splitting edge (after a final strop).

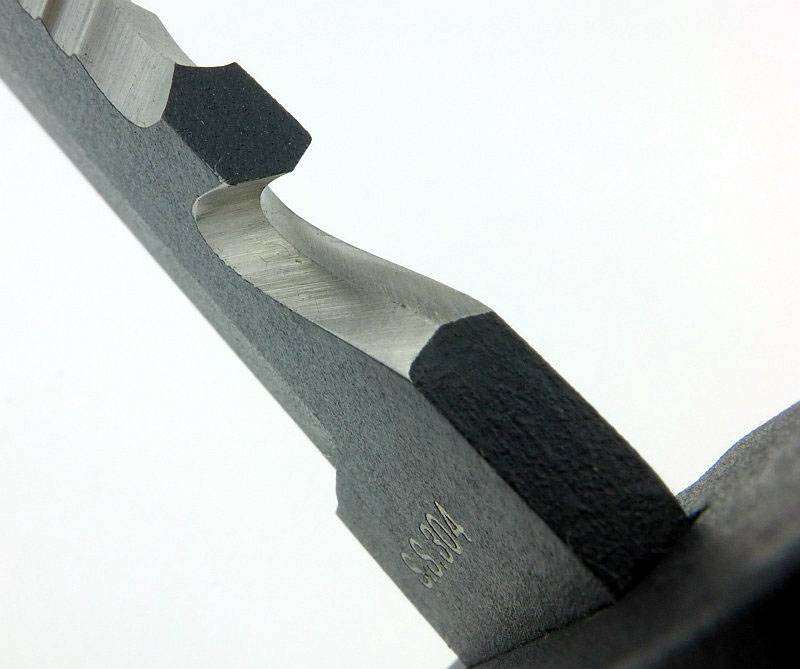
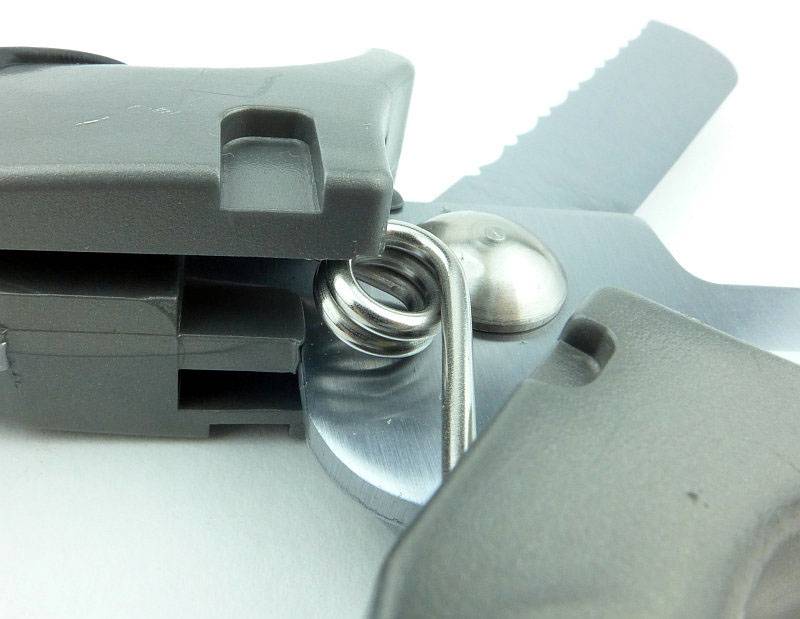
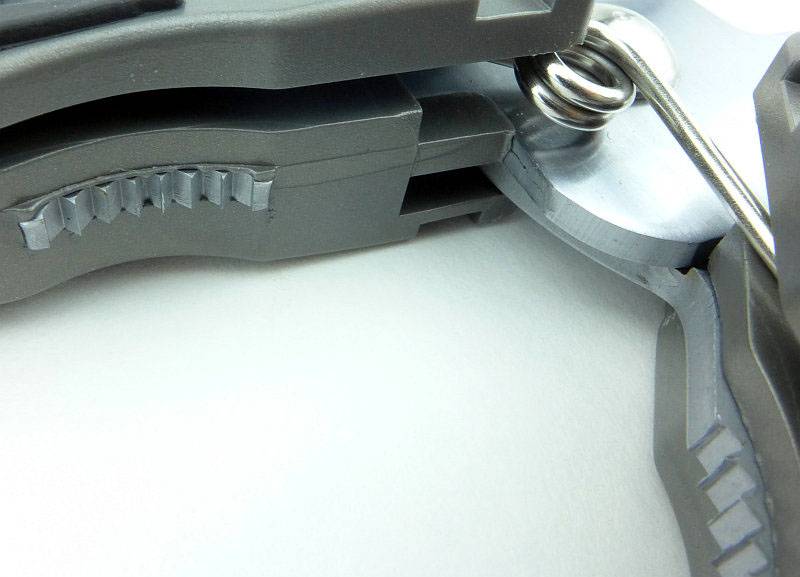
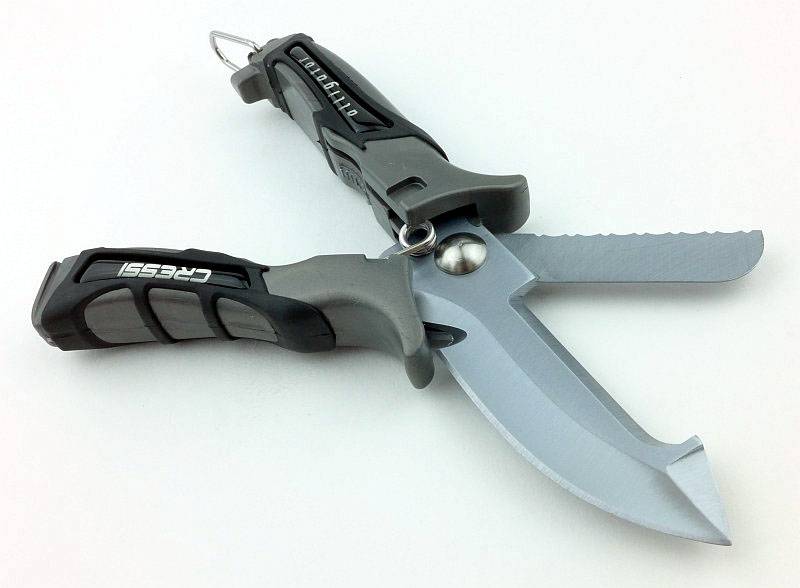
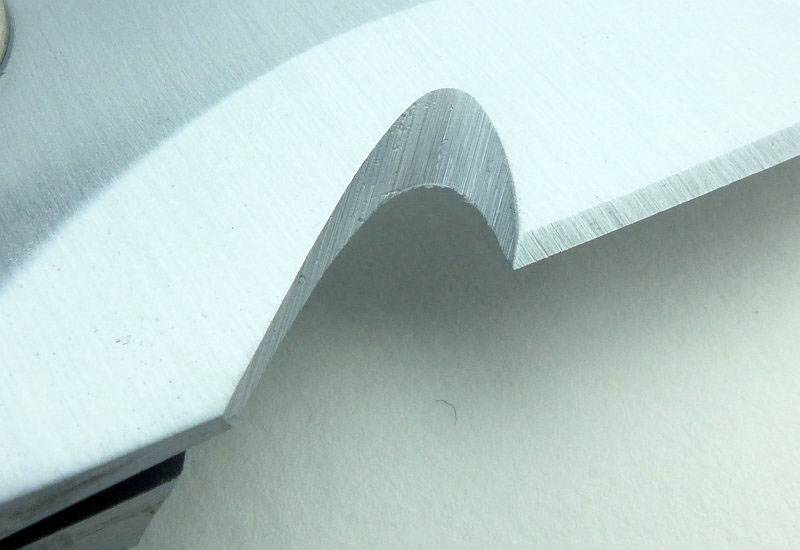
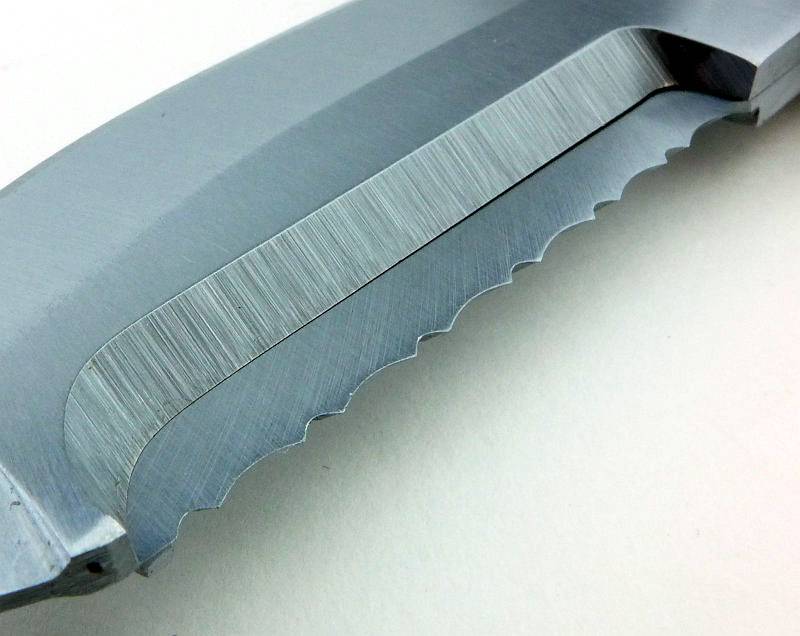
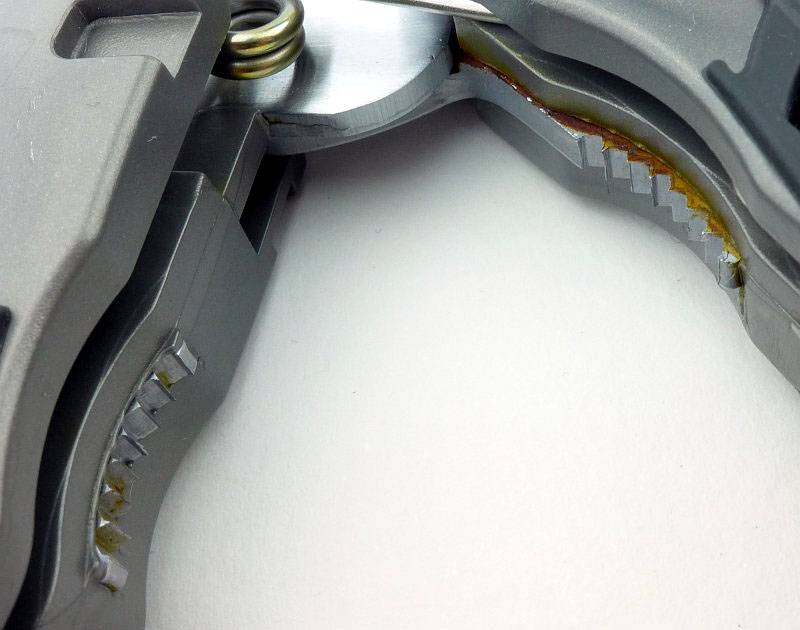
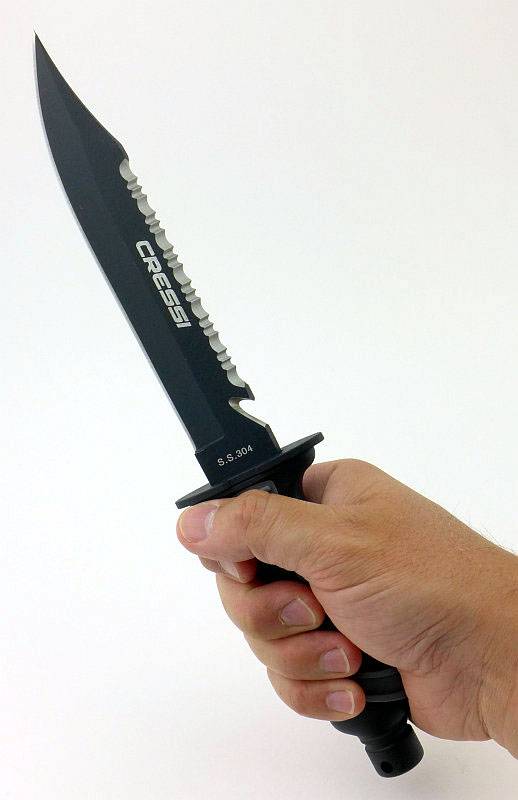
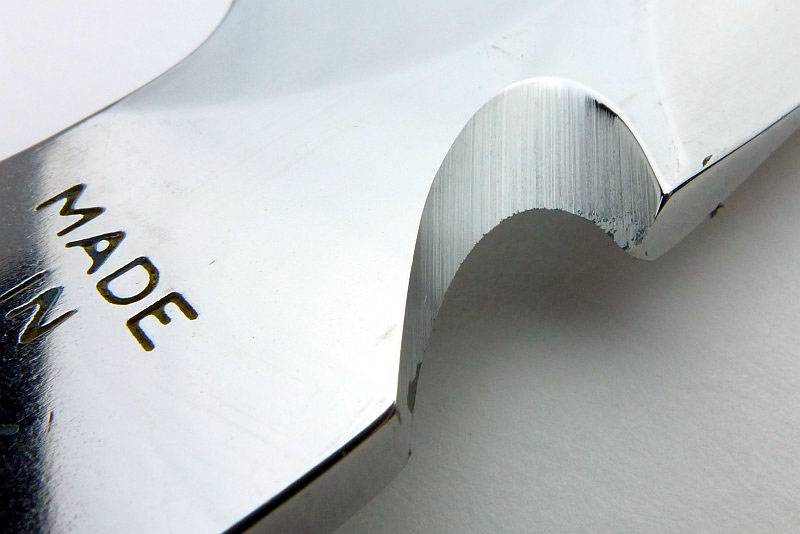
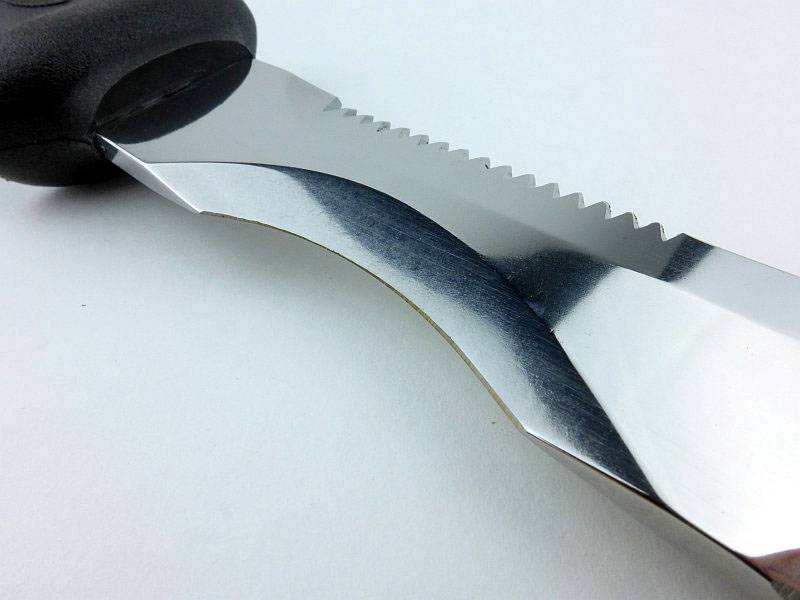
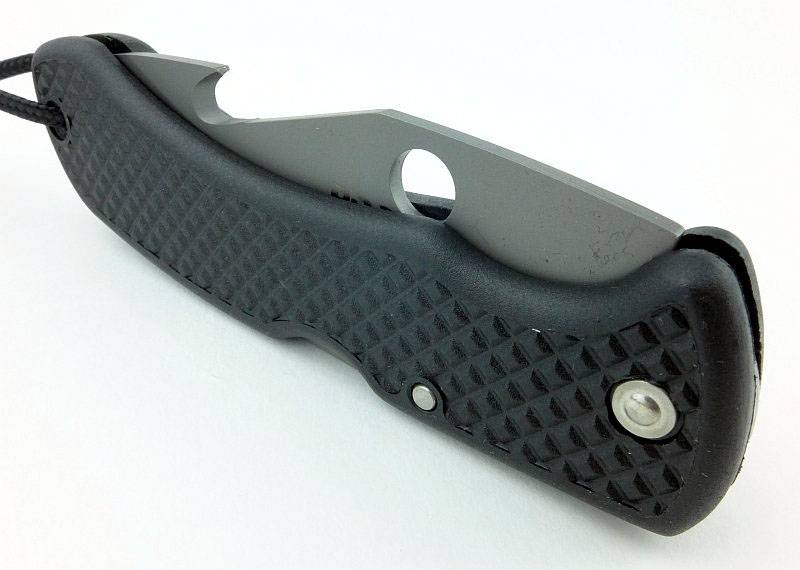
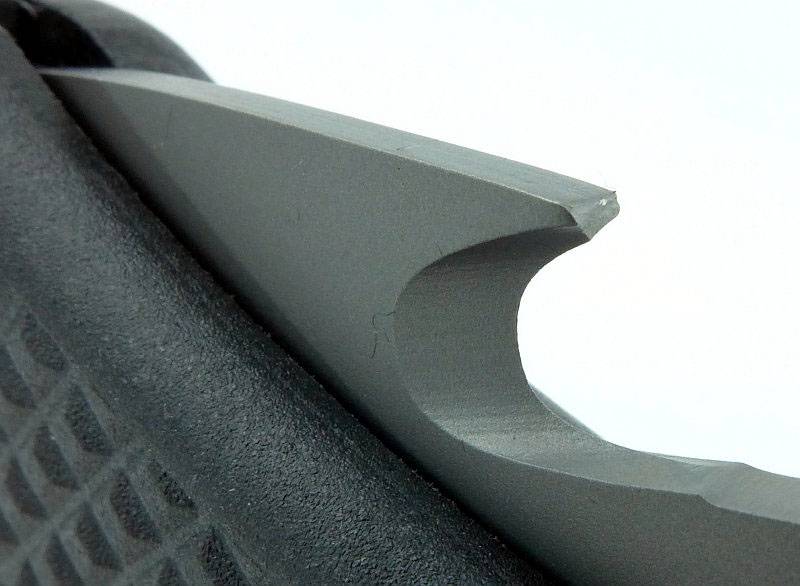
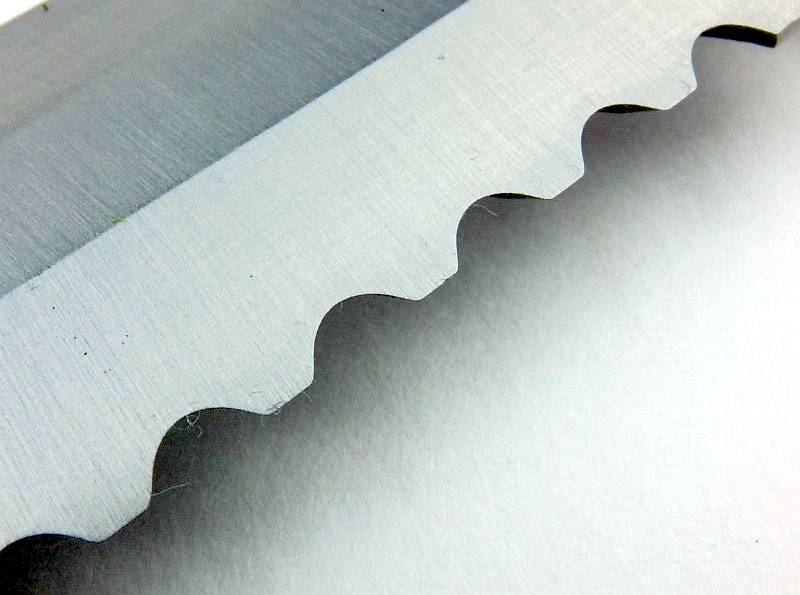
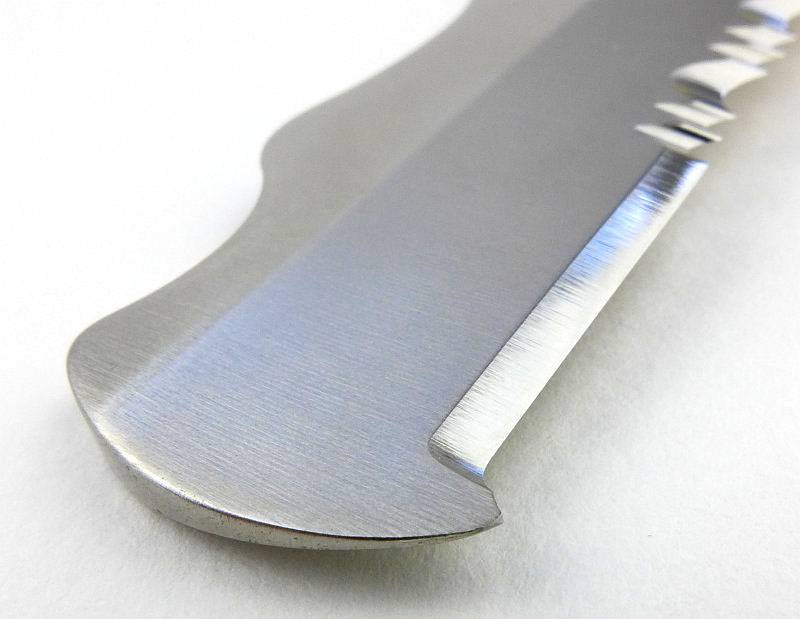
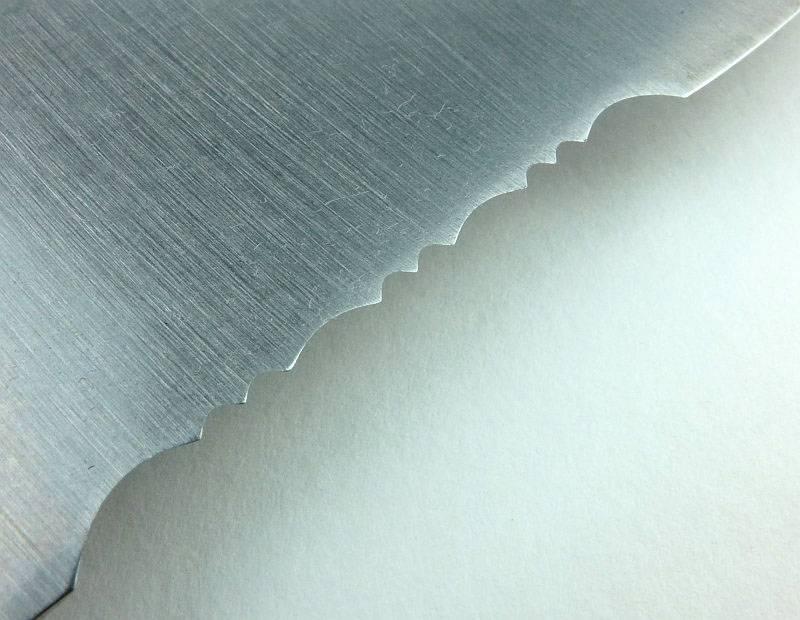
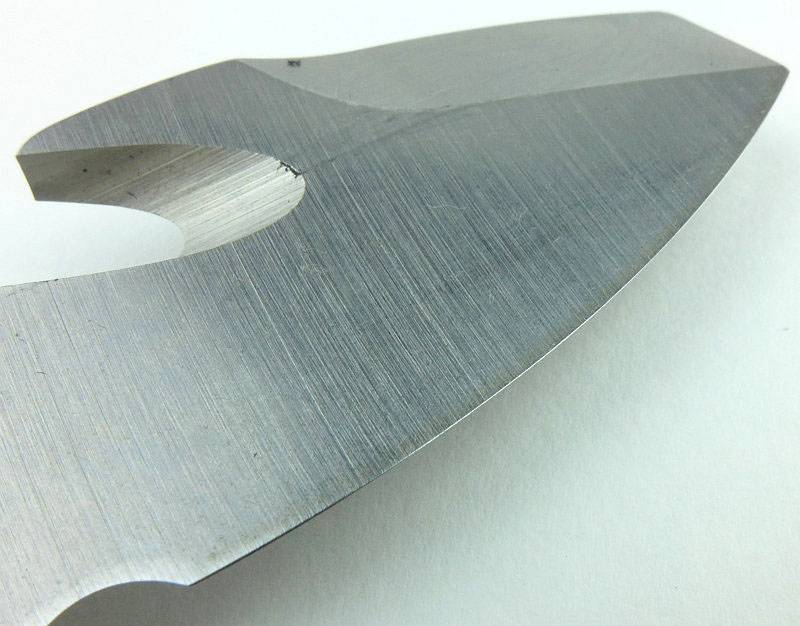
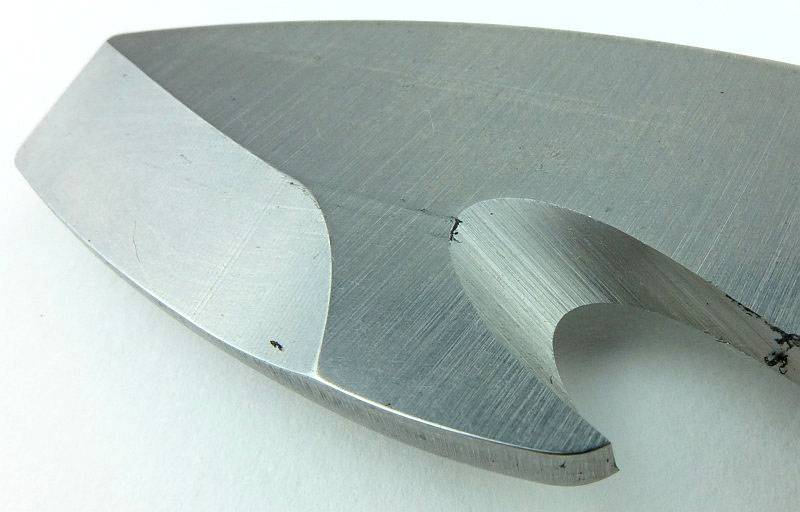
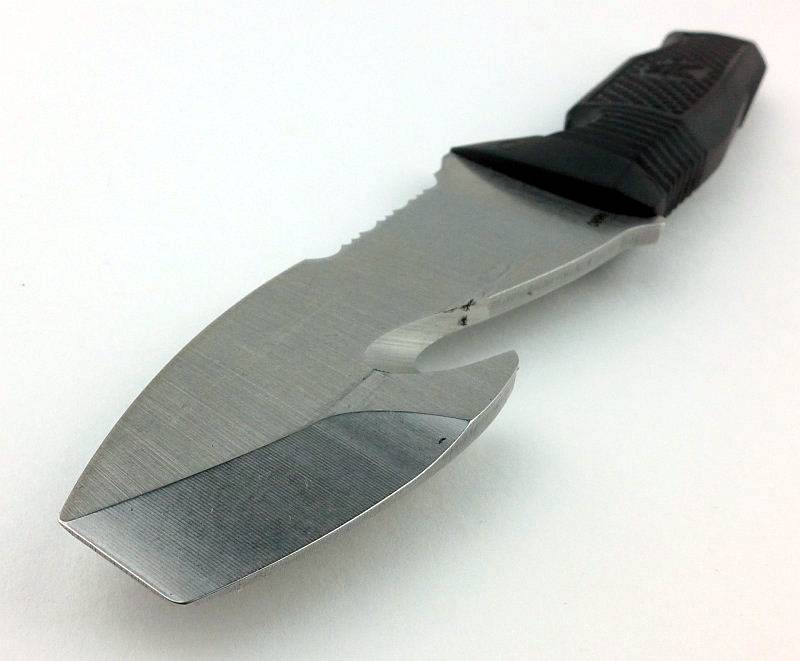
The only real limitation with a large flat bench stone like this is with the recurve section of some blades. Those concave recurve sections just won’t get to touch the diamonds, but that is always the difficulty of a recurve blade.

Being able to hand hold the DuoSharp bench stone was an unexpected benefit of the DMT design and makes it much more versatile.

Review Summary

The views expressed in this summary table are from the point of view of the reviewer’s personal use. I am not a member of the armed forces and cannot comment on its use beyond a cutting tool or field/hunting knife.

Something that might be a ‘pro’ for one user can be a ‘con’ for another, so the comments are categorised based on my requirements. You should consider all points and if they could be beneficial to you.

_______________________________________________ _______________________________________________
Things I like What doesn’t work so well for me
_______________________________________________ _______________________________________________
Aligner package is lightweight for easy transport. Aligner guide clamp will only fit blades up to 6-6.5mm thick.
Aligner ensures you maintain a consistent angle. Aligner – One side of the blade is more awkward to work on than the other.
Aligner – Easy swapping of grits. Aligner – Clamp needs to be fitted tightly and can flex if pressing too hard.
Bench Stone – Large flat surface. Bench Stone – Large surface prevents recurve blades being sharpened.
Bench Stone – Handle included to allow hand-held use. Bench Stone – Rubber feet can fall off.
Bench Stone – Easily identifiable grits.
DMT stones can be used dry.
DMT diamond surface cuts very well.

 photo 00-DMT-featureV2-P1180049.jpg


Discussing the Review:

Please feel free to add comments to the review, but the ideal place to freely discuss these reviews is on a forum. If you started reading the shorter forum version of the review, but followed the link this full exclusive review, please return to that forum to discuss the review there.
If you read the review entirely on Tactical Reviews, please consider one of the following to join in any discussion.

EdgeMatters – Sponsored Reviews (UK based Forum for Knife Makers and Collectors)

BladeForums – Knife Reviews (US based Forum for Knife Discussion)

CandlePowerForums – Knife Reviews Section (Largest and Friendliest Flashlight Community Forum)

Light Review: Fenix TK15UE (Ultimate Edition)

Fenix have been taking classic lights from their range and creating ‘Ultimate Edition’ versions, pushing their performance to the maximum. The TK15 has now been ‘UE’ed to make the TK15UE with uprated output, throw and a new stainless steel bezel.

 photo 16 TK15UE trailer P1230848.jpg

Taking a more detailed look:

The TK15UE comes in Fenix’s standard packaging.
 photo 01 TK15UE Boxed P1230641.jpg

Included with the TK15UE are the instructions, a holster, a lanyard, a couple of O-rings and a spare switch boot.
 photo 02 TK15UE Box contents P1230650.jpg

Before we move on, the holster is worth lingering on a little longer.
 photo 03 TK15UE holster P1230657.jpg

On the back there is a choice of a D-ring, fixed loop, and Velcro closing loop.
 photo 04 TK15UE holster loops P1230656.jpg

There is something a little different here. The holster flap has a retaining strap over it and inside the holster it is fixed with Velcro.
 photo 05 TK15UE holster flap P1230667.jpg

You can just see inside that the flap extends most of the way down the inside of the holster.
 photo 07 TK15UE holster flap adjust inside P1230678.jpg

The entire flap can be undone and either removed or adjusted to loosen or tighten the fit, or even accommodate a different length light.
 photo 06 TK15UE holster flap adjust P1230675.jpg

As supplied, the holster is correctly configured for the TK15UE.
 photo 08 TK15UE in holster P1230680.jpg

The most obvious sign that this is something a bit different to the previous TK15s is the Stainless Steel bezel.
 photo 09 TK15UE angle P1230689.jpg

Let’s have a look at how the TK15UE and an older TK15 compare. This is the TK15C. So the holster is more than the basic one the TK15C comes with.
 photo 10 TK15UE compare P1230827.jpg

Dimensions are all very similar. The TK15C I’m comparing with here has had the clip removed as well as the tactical grip ring because it has been used gun-mounted.
 photo 12 TK15UE compare P1230832.jpg

Going in close to the engraving of the model, the knurling and mode switch.
 photo 13 TK15UE switch detail P1230837.jpg

All the edges of the clip are nicely rounded, and there are no sharp corners to eat away at your pockets (just the knurling under the clip).
 photo 14 TK15UE clip detail P1230839.jpg

The switch button does protrude, so no tail-standing, and it has two raised areas to provide the switch with some protection from accidental activation.
 photo 15 TK15UE tail detail P1230844.jpg

As with the stainless bezels on other Fenix lights, the edges have been bevelled to make them kind to the holster and your pockets.
 photo 17 TK15UE bezel P1230849.jpg

The inner edges of the bezel are crisp without being sharp.
 photo 18 TK15UE bezel P1230852.jpg

Fenix’s preferred trapezoid threads are used.
 photo 19 TK15UE threads P1230857.jpg

The end of the battery tube is the electrical contact that connects to the tail-cap contact.
 photo 20 TK15UE tube P1230863.jpg

Inside the tail-cap are the battery tube contact and the negative terminal sprung contact.
 photo 21 TK15UE tailcap contacts P1230866.jpg

With the TK15UE, the head will unscrew.
 photo 22 TK15UE head off P1230884.jpg

As the battery tube can be removed we can get a good look at those contacts in the head.
 photo 23 TK15UE head contacts P1230885.jpg

Just like previous TK15 models, the TK15UE has a smooth reflector.
 photo 24 TK15UE reflector P1230888.jpg

In the centre of that reflector is the CREE XP-L HI V3 LED.
 photo 25 TK15UE LED P1230897.jpg

Looking straight into the TK15UE’s reflector.
 photo 26 TK15UE LED P1230901.jpg

The TK15UE is one of the more compact single 18650 lights. Not as compact as the small-head types such as the PD32, but it does have a big enough reflector to give it some punch.
 photo 27 TK15UE with cell P1230904.jpg

You can take off the tactical grip ring by unscrewing it.
 photo 28 TK15UE ring off P1230910.jpg

Unless you buy the optional thread protector you will see the grip ring threads.
 photo 29 TK15UE ring threads P1230914.jpg

The beam

Please be careful not to judge tint based on images you see on a computer screen. Unless properly calibrated, the screen itself will change the perceived tint.

The indoor beamshot is intended to give an idea of the beam shape/quality rather than tint. All beamshots are taken using daylight white balance. The woodwork (stairs and skirting) are painted Farrow & Ball “Off-White”, and the walls are a light sandy colour called ‘String’ again by Farrow & Ball. I don’t actually have a ‘white wall’ in the house to use for this, and the wife won’t have one!

Indoors the TK15UE is not at its best, as it is quite a throw orientated beam. The hotspot is bright and well formed. Spill is relatively dim and narrow but usable. There is enough balance in the beam to make it OK indoors.
 photo 32 TK15UE indoor P1240716.jpg

But it is when you get a bit more range that the TK15UE really starts to shows what it is made of. The throw belies its compact size, and with the ‘UE’ upgrade it is a really punchy little light.
 photo 31 TK15UE outdoor P1240668.jpg

Modes and User Interface:

To control the TK15 UE there is the forward-clicky tail switch, and the mode selection switch just behind the head.

Click ON (or half press for momentary action) the tail switch to access the last used constant mode. With the tail switch on, press the mode button to cycle though the modes.

The standard modes are Low, Medium, High and Turbo.

There is a hidden Strobe mode accessed by holding the modes selection switch in for 1s. Strobe is not memorised as a last used mode.

Batteries and output:

The TK15UE runs on 18650 or 2xCR123.

To measure actual output, I built an integrating sphere. See here for more detail. The sensor registers visible light only (so Infra-Red and Ultra-Violet will not be measured).

Please note, all quoted lumen figures are from a DIY integrating sphere, and according to ANSI standards. Although every effort is made to give as accurate a result as possible, they should be taken as an estimate only. The results can be used to compare outputs in this review and others I have published.

___________________________________________ ________________________________ ________________________________
Fenix TK15UE using specified cell I.S. measured ANSI output Lumens PWM frequency or Strobe frequency (Hz)
___________________________________________ ________________________________ ________________________________
Turbo – Fenix ARB-L18-3500 776 0
High – Fenix ARB-L18-3500 377 0
Medium – Fenix ARB-L18-3500 164 0
Low – Fenix ARB-L18-3500 14 0

* Beacon and Strobe output measurements are only estimates as the brief flashes make it difficult to capture the actual output value.

Peak Beam intensity measured 31100 lx @1m giving a beam range of 353m.

There is no parasitic drain.

I was slightly surprised by the Turbo output runtime trace as unlike most Fenix lights the TK15UE does not appear to run with a regulated output. The trace was recorded using cooling, so it is unlikely that this is due to overheat protection, instead the TK15UE seems to run at maximum output with that output sagging as the cell becomes depleted. However saying that, you do get a full hour of runtime at more than 600lm, so overall the performance is still good. (This was run using Fenix’s latest ARB-L18 3500mAh cell.)
 photo Fenix TK15 UE runtime.jpg

Troubleshooting

This section is included to mention any minor niggles I come across during testing, in case the information helps anyone else.

No issues were encountered during testing.

As per the description of this section, this information is provided in case anyone else finds a similar ‘issue’ that might be fixed in the same way.

The TK15UE in use

By separating the mode selection to a side-switch Fenix have allowed proper momentary use of that forward-clicky tail switch. This makes for a really easy and intuitive interface and keeps things simple for any user.
Fortunately the strobe mode is reasonably well hidden and is not memorised; I’m surprised anyone still includes strobe. As those that follow me will know, I’m certainly no fan of strobe and most true tactical users I know are aware that if you strobe another person, you strobe yourself as well, so your are better off not using it at all. Thankfully with the TK15UE you need never come across strobe and can use the four constant output modes without tripping over strobe.
The TK15UE manages a balance between hotspot and spill that, although it is more oriented towards throw, is still usable at indoor distances.
When using the holster with the TK15UE inserted bezel-down, the bezel does catch in the holster before getting all the way in. Used bezel-up, this does not happen. It seems to be due to the adjustable flap taking up more space inside so the bezel catches on the inside of the holster. To get it all the way into the holster bezel-down you need to twist the TK15UE as you insert it.
There are smaller single 18650 lights, but the TK15UE is still compact enough to make it easy to carry, yet that slightly larger head is enough to give it a nice strong beam. Even with the upgrades to the head and LED, Fenix have kept the character of the TK15 but made it significantly brighter.
I’ve always felt the TK15 was an unsung hero in the Fenix line-up, quietly getting on with the job while others took the glory. In the Ultimate Edition, the TK15UE can now take some of the limelight and hopefully get a bit more recognition.

Review Summary

_______________________________________________ _______________________________________________
Things I like What doesn’t work so well for me
_______________________________________________ _______________________________________________
Significantly boosted output compared to previous TK15 models. Turbo output not regulated.
Excellent throw from a compact head. Bezel catches in holster when used bezel down.
Simple user interface. Can accidentally hit the mode switch especially if wearing gloves.
Stainless Steel Bezel.

 photo 30 TK15UE angle on P1230918.jpg


Discussing the Review:

Please feel free to add comments to the review, but the ideal place to freely discuss these reviews is on a forum. If you started reading the shorter forum version of the review, but followed the link this full exclusive review, please return to that forum to discuss the review there.
If you read the review entirely on Tactical Reviews, please consider one of the following to join in any discussion.

CandlePowerForums – Flashlight Reviews Section (Largest and Friendliest Flashlight Community Forum)

EdgeMatters – Sponsored Reviews (UK based Forum for Knife Makers and Collectors)

Knife Review: Böker Plus Kwaiken Mini Flipper

After reviewing the Böker Plus Kwaiken Flipper, while at IWA 2016 I was able to speak to Lucas Burnley about the original Kwaiken folder and this new ‘Mini’ version of the Kwaiken Flipper. This review is of the new Kwaiken Mini Flipper, a scaled down version of the Kwaiken Flipper.

 photo 19 KwaikenMini maker angle P1180169.jpg

The Blade and Handle Geometry:

Most knife specifications have a basic description of the blade geometry, but in this section I will be taking a more detailed look at geometry and balance.
 photo 30 KwaikenMini grind P1180560.jpg

Using a set of gauges and precision measuring equipment including a Vernier protractor, callipers, fixed radius gauges and the unique Arc Master adjustable radius gauge (the one that looks like a crossbow).
 photo Knife measuring P1180483.jpg

These measurements have been tabulated and are presented along with a few reference blades (8″ Chef’s Knife, 5.5″ Santoku and the popular Fällkniven F1).

Key aspects such as the primary bevel angle, grind type, blade depth, blade thickness, length, weight are detailed, along with balance information.
 photo 29 KwaikenMini grind angle P1180560.jpg

The ‘Balance relative to the front of the handle’ tells you if the knife will feel front heavy, or if the weight is in your hand (a positive value means the weight is forward of the front of the handle). The ‘Balance relative to the centre of the handle’ indicates how close to a ‘neutral balance’ the knife has in the hand.
 photo 28 KwaikenMini balance P1180557.jpg

In the case of full convex grinds the approximate centre of the grind is used for the primary bevel angle estimate.

 photo 53 Kwaiken Mini parameters.jpg

The blade is made from VG-10 steel.

Explained by the Maker:

The reasons for certain design choices may not be clear when simply looking at an object, so this section is intended to give an insight into the thinking behind a design by speaking to the designer themselves.

Unfortunately I can’t always get time with the designer so will use this section to include relevant information about the knife and its designer.
While at IWA 2016 I was fortunate enough to meet Lucas Burnley and have the opportunity to talk to him about the Kwaiken Flipper and its development and design including the latest ‘Mini’ in this review.
 photo 53 Lucas.jpg
(Photo Credit – Oliver Lang-Geffroy)

The original Kwaiken was in fact a fixed blade, and the folder came from that fixed blade around eleven years ago (approx. 2005). The fixed blade Kwaiken is such a simple design it was a hard translation into the folder, and to date is the hardest thing Lucas has designed.

Aspects such as the fully enclosed blade, the detailing on the spine and the sleek lines were the main reasons it was difficult to work out the mechanics, and how to make it, making it a stretch for Lucas at the time.

The design is completely linear and slender which is what the Kwaiken is known for. At the time, Lucas’s design style (apart from the Kwaiken) was very curvy with big wide blades and the folders he was making were really ‘swoopy’, so to strip the design down to the point the entire blade fits within the handle, yet still has the same proportions of the fixed blade was a real challenge.

Not being able to use cord wrapping for the handle meant there was a need for additional grip, and the shadow-boxing (the step between the scales and liners) is actually a gripping surface in a similar way to jimping. So the shadow-boxing detail is a completely intentional feature and not included for easing manufacturing tolerances for the production knives. In fact including this feature added extra work as for the custom Kwaiken folders as Lucas would first make the scales to size, and then mark them and hand cut them to the final inset shape.

Asking Lucas about his own workshop and how much automated machinery he has, he mentioned how completely different the approach to CNC machining is to making by hand. Although making by hand is not the most efficient way, if he makes a mistake he can correct it, if he wants to change something he can change it, with CNC machining you have to plan from the start all the way to a finished product. Currently he does use the CNC machine to make a parts-set for a knife which he then assembles and hand fits everything to achieve the really high quality he demands. Whatever method might be used, Lucas feels it is unimportant for there to be a distinction between a custom knife maker and a handmade knife maker; he can forge a knife, machine a knife – he makes knives, and is completely open as to how his knives are made. However, saying that, the processes need to be satisfying to Lucas; he might want to learn how to use CNC machinery simply because it’s fun, after that, if people like that fact, great, but he will make what he wants, how he wants, explain to people how it is made, and then they buy it or they don’t.

Back to the Kwaiken Folder; initially this design didn’t start with a flipper, and the original custom knife had a thumb disc. The flipper was the next generation of the design.

When the first Böker Kwaiken folder production knife was released (thumb disc version), there were complaints because some people had a hard time opening it. This was because Lucas wanted a really small thumb disc and this became a good lesson in the differences between a factory design versus custom knife making. When Lucas makes a custom knife he can absolutely tune that knife so it opens exactly the way he wants it to every time. He can then explain to the user that this is a small thumb disc and instead of treating it like a lever, you need to treat it like a button, pushing down on it. As the design was now making its way into the hands of people not so familiar with thumb opening knives, without the benefit of a custom tune and one-to-one customer contact, the decision was made to move to a larger disc. Production design has to be very understandable to everyone.

The original Thumb disc size.
 photo 50 Kwaiken history 01.jpg
(Photo Credit – BladeBarrelBezel.com)

The new larger Thumb disc has been fitted and is shown next to the original.
 photo 51 Kwaiken history 02.jpg
(Photo Credit – BladeBarrelBezel.com)

Lucas asked himself how he could make the Kwaiken folder more understandable and more accessible for everyone – that was why the flipper was introduced. It turns out however, that the flipper had other advantages; it allows the handle to go back to being straight, completely linear and clean, which is how Lucas wanted it in the first place. The ‘flip’ side of this (excuse the pun) is that now you have the flipper tab sticking out. When Lucas designed the Kwaiken flipper, a lot of the knives out there had very large flipper tabs, so he concentrated on working out what it is that really makes a flipper work. In the case of the Kwaiken this results in the tab being shaped like a wheel to allow prolonged contact with it as the blade deploys; this concept allows the tab to be as small as it is (in fact Lucas feels he could probably go even smaller). The goal was to keep it as clean and as small as possible, yet remain intuitive so anyone could pick it up and use it.

Concerning overall design, though Lucas considers the knife a tool, he also recognises the fact that it might be used for self defence, so includes attributes to support that. There is the simple fact that any knife is better than no knife, but here we have a folder so the first disadvantage is that you have to open it. With the Kwaiken, straight out of your pocket, even the folded knife was intended to also be better than nothing, with the taper and slight point of the handle giving you a kubotan style pressure point weapon. This is not something you will see listed as a feature or selling point but is part of the thought process behind the design.

When designing a knife, unlike other products that need to ‘perform’ within measured parameters, the process is more about visual correctness. Things have to ‘look’ right and be intuitive. For Lucas there is a critical interaction in the design between curves, angles and straight lines, and he tries to create tension in his designs. A knife with only curves can be boring, a knife with only angles, though modern looking, can also be boring; for Lucas there needs to be a balance and interest created from combining these.

In the Kwaiken folder, the mainly linear design has a few curves, the sweep from belly to blade tip, and the hollow grind. In fixed blades the choice of grind can be highly driven by the purpose of that knife, be it a small carving knife, or a large chopper. With folding knives you have much more flexibility in choosing the grind. Using a hollow grind takes out more metal and reduces the weight as well as adjusting the balance point. Many of the design features incorporated into Lucas’s designs (such as the scallops in the spine) are not for a particular purpose, but simply to add interest and look good. He doesn’t want his designs to be instantly understood, but instead needing you to look at it again and again to take in the details.

Due to the size constraints inside the Kwaiken, to be able keep blade fully inside the handle, an internal stop pin was needed. This further constrained the space for any bushings and with a small narrow and light blade which needs the action to be slick enough for a flipper, the IKBS bearing system is ideal. Currently Lucas is working on increasing the size to allow the use of caged rather than loose bearings in the next generation of the Kwaiken folder, making user maintenance much easier.

And now the subject of this review, the Kwaiken Mini Flipper, a scaled down version. Miniature is truly scaled down, whereas ‘compact’ is generally scaled down in certain elements but not in others. With the Mini, starting with the blade length, the blade has not been reduced all that much, reduced by only half to three quarters of an inch, but being a folder, with this small decrease in blade length, overall you lose twice that. The knife doesn’t lose much blade, but it gets much smaller altogether.

The reduction in size makes it such a convenient length, Lucas said he would not be surprised if the Mini becomes more popular than the full size version. Many people are not that comfortable carrying a large folding knife, and the Kwaiken is quite a large knife, so the Mini gives you all of the style in a much easier to carry package.

One the most fun aspects of the Kwaiken for Lucas is all the modifications people are making to the basic knife, and he is really looking forward to seeing that with the Mini as well.

The ‘Burnley Böker’ has become a very influential design, affecting what people think of as a Kwaiken more towards Lucas’s design than the original Japanese knife, this has only really been possible due to the collaboration with Böker and getting the knife into so many people’s hands. Though Lucas appreciates exclusivity, he likes to be inclusive. Lucas wants to make his product, and he wants them to be very high-end, so they are going to be exclusive purely because his own output is limited; he just can’t make enough. The factory collaboration provides a starting point and at a usable price, and allows people to be part of the Kwaiken wave without having to find a Burnley original custom.

Many owners of original Burnley custom Kwaiken folders have bought the Böker version as their ‘user’ keeping the original as a display piece. When asked how he feels about the fate of his crafted knives, where every aspect has been optimised to make it the best tool it possibly can be, yet many never get used at all, Lucas responded by saying that the most important thing for him is that the owner gets value from it in their own way, whether that is to be able to pull it out and show its perfection to friends, or to use it. All of Lucas’s knives have been made to be used and used well.

Whenever moving to production, it means suddenly dealing with a lot of different personalities and opinions and there are going to be problems. For Lucas, it is the relationships with the companies he chooses to work with that are most important. You have to be able to have a problem, look at it, and communicate to be able to get it fixed. Working with Böker has been mutually beneficial for both Lucas and Böker and they have both learned from each other. The goal for Lucas is to create icons and to do this working with a factory as a long term relationship, not to produce a single model that fades away, just to get a pay cheque, but to continue to build (as can be seen with the progression of the Kwaiken folder). Icons come about because they are made, and then made available, and then made continuously.

Showing the continual development of the Kwaiken Folder, here are the versions made so far (see photo below)-
1. Böker Plus Kwaiken Folder
2. Böker Plus Kwaiken Folder Orange
3. Böker Plus Kwaiken Flipper Titan
4. Böker Plus Kwaiken Flipper Carbon
5. Böker Plus Kwaiken Flipper Damast
6. Böker Plus Kwaiken Flipper Tactical
7. Böker Plus Kwaiken Mini Flipper G-10
8. Böker Plus Kwaiken Mini Flipper Titan
9. Böker Plus Kwaiken Flipper G-10
 photo 52 Kwaiken history 03.jpg
(Photo Credit – Böker)

The work is still ongoing and there are a few more versions of the Kwaiken folder in the pipeline, a slim framelock version and a compact version. Though previously only Lucas’s knives have had a duplex grind on the blade, this is also something that is being worked on for the production models, but it is difficult. At the time of speaking the duplex blade grind is on about its fifth version and is getting really close to being ready.

A few more details:

The Kwaiken Mini Flipper arrives in a presentation box.
 photo 01 KwaikenMini Boxed P1180106.jpg

Before opening the box, here is the full size Kwaiken Flipper next to it.
 photo 02 KwaikenMini Boxed plus normal P1180110.jpg

The box has a magnetic closure, and the knife arrives in a small plastic bag.
 photo 03 KwaikenMini Box open P1180113.jpg

This is the G10 version of the Kwaiken Mini – there is a Ti version as well.
 photo 04 KwaikenMini P1180114.jpg

Though only a little shorter the scaled down Mini appears a lot smaller than the full size version.
 photo 05 KwaikenMini plus normal P1180117.jpg

Thanks to the fully concealed blade, the Kwaiken Mini Flipper will sit with the flipper tab upwards.
 photo 06 KwaikenMini flipper P1180118.jpg

Turned the other way up you can see how the blade is fully enclosed in the handle.
 photo 07 KwaikenMini folded P1180121.jpg

The Kwaiken Mini Flipper also has a mini clip.
 photo 08 KwaikenMini clip P1180126.jpg

With careful design, the flipper tab has been kept small, and includes jimping for grip.
 photo 09 KwaikenMini flipper along P1180129.jpg

Top right in this photo you can see the locking surface on the blade tang and just visible in the bottom left quadrant is the concealed blade stop pin.
 photo 10 KwaikenMini lock face P1180130.jpg

Blade centring is excellent and only looks slightly off here due to the uneven edge from the final sharpening.
 photo 11 KwaikenMini centring P1180132.jpg

Out of the box, lock engagement is not that deep, but is still rock solid. Also note the cutout of the liner opposite the lock to allow the lock to be released.
 photo 12 KwaikenMini lock engagement P1180140.jpg

The lock bar is part of the liner, and here is the section that has been thinned to create the lock bar spring.
 photo 13 KwaikenMini lock spring P1180142.jpg

Looking deep within the knife you can see the detent ball which holds the blade in the closed position.
 photo 14 KwaikenMini detent P1180149.jpg

Classic Burnley Kwaiken lines have the straight spine and curve from plunge line to tip.
 photo 16 KwaikenMini blade P1180155.jpg

The knife’s credentials are marked on one side of the blade, a Burnley design, VG-10 blade steel and using an IKBS bearing.
 photo 18 KwaikenMini maker P1180164.jpg

On the opposite side of the blade is the Böker Plus logo. The blade is stonewashed, and this photo also clearly shows the plunge line and sharpening choil.
 photo 27 KwaikenMini plunge P1180219.jpg

A different view of the fully concealed blade.
 photo 21 KwaikenMini concealed blade P1180173.jpg

Torx bolts hold the clip and scales on.
 photo 22 KwaikenMini lanyard P1180177.jpg

The blade has a small sharpening choil, but if you look closely, the factory edge has not quite made it all the way back to this.
 photo 23 KwaikenMini choil P1180187.jpg

With space being so limited, the actual cutting edge is quite near the surface of the liners with the blade closed.
 photo 24 KwaikenMini spacer P1180189.jpg

What it is like to use?

If you start with the full size Kwaiken Flipper, the Mini can feel exactly that, Mini. Perhaps too small, but we must not stop there, as in the course of this testing, after the initial photo shoot, I made myself put away the full size version to allow myself to become accustomed to the Mini in its own right.

Taking the two versions on their own and putting them back to back, the scaling down is clear.
 photo 20 KwaikenMini back to back P1180171.jpg

But put this in context with some other knives, and here it is next to the Fällkniven F1 and a Spyderco UK Pen Knife along with the full size Kwaiken Flipper. The full size Kwaiken is a large folder and only seems less so due to being slim, so the Mini is still a good sized knife.
 photo 25 KwaikenMini size P1180207.jpg

There is plenty of handle to get a good grip. (I take XL Sized gloves)
 photo 26 KwaikenMini in hand P1180212.jpg

With the Kwaiken Mini Flipper used as a regular carry, it is much more discreet being smaller and lighter. It still retains all the character of the original, and I found myself forgetting what the full size version feels like and not missing it.

We all have different knife carry laws to contend with, so size can be an important factor. It the UK, there is no difference in law between me carrying the full size or Mini, but if I have good reason to carry a locking knife or I’m simply using it on private property, the Mini is much more pocket friendly.

Having a smaller and lighter blade, the flip is not quite as reliable as the full size Kwaiken Flipper and I’ve had a few misfires. Any misfire can easily be fully opened with a flick of the wrist, and if you maintain good contact with the flipper tab throughout the launch it rarely happens.

For the size of blade, the spine is relatively thick so this does start to drag when cutting deeply into tougher materials. For point-work though the Kwaiken blade shape is highly effective so much so you have to be careful not to puncture too deeply.

Initially I was sceptical about the Kwaiken Mini and it seemed too small; Why would I want to bother with a scaled down version of a great knife? Well, now I’ve lived with it I can see exactly why. Clearly you need to like the Kwaiken design, and if you do (why wouldn’t you?) then the Mini gives you all of the sleek lines and style, in perfect scaled down proportion that is far more pocket friendly.

Review Summary

The views expressed in this summary table are from the point of view of the reviewer’s personal use. I am not a member of the armed forces and cannot comment on its use beyond a cutting tool or field/hunting knife.

Something that might be a ‘pro’ for one user can be a ‘con’ for another, so the comments are categorised based on my requirements. You should consider all points and if they could be beneficial to you.

_______________________________________________ _______________________________________________
Things I like What doesn’t work so well for me
_______________________________________________ _______________________________________________
Truly scaled down so faithfully keeps the character of the original. Relatively thick blade for its size.
Pocket friendly size. Flip is less reliable than the full size.
IKBS bearing. Pocket clip can be tricky to get started.
Fully enclosed blade when folded.
Sleek and distinctive style.

 photo 17 KwaikenMini plus normal P1180157.jpg


Discussing the Review:

Please feel free to add comments to the review, but the ideal place to freely discuss these reviews is on a forum. If you started reading the shorter forum version of the review, but followed the link this full exclusive review, please return to that forum to discuss the review there.
If you read the review entirely on Tactical Reviews, please consider one of the following to join in any discussion.

EdgeMatters – Sponsored Reviews (UK based Forum for Knife Makers and Collectors)

BladeForums – Knife Reviews (US based Forum for Knife Discussion)

CandlePowerForums – Knife Reviews Section (Largest and Friendliest Flashlight Community Forum)

Light Review: Olight R50 Seeker

Olight’s R50 Seeker is a handy sized powerhouse using a 26650 cell and the XHP50 LED allowing it to give you 2500lms in an easily carried package; built-in USB charging adds to its flexibility.

 photo 08 Olight R50 angle P1220569.jpg

Taking a more detailed look:

The R50 arrives in something more like a presentation box than just ‘packaging’.
 photo 01 Olight R50 boxed P1220538.jpg

The box has a lid which is held shut with magnets.
 photo 02 Olight R50 box open P1220544.jpg

Taking everything out you have the R50, instructions, charger, charger plug adaptor, USB cable and lanyard.
 photo 03 Olight R50 box contents P1220548.jpg

Before you can use the charger you need to fit your local plug adaptor.
 photo 04 Olight R50 charger apart P1220552.jpg

The adaptor clicks into place.
 photo 05 Olight R50 charger together P1220555.jpg

The charger is multi-voltage and with a 2.1A output.
 photo 06 Olight R50 charger info P1220560.jpg

Separating out the USB cable and lanyard. The lanyard has a very nice ‘fabric tube’ wrist loop.
 photo 07 Olight R50 cable lanyard P1220563.jpg

A good looking light with blue bezel an switch rings.
 photo 10 Olight R50 angle P1220576.jpg

Looking from the rear you can see the USB charging port cover in the tail-cap.
 photo 09 Olight R50 rear angle P1220574.jpg

The main power switch is low profile, but big enough to be easy to use.
 photo 11 Olight R50 switch P1220580.jpg

Diving in close to the quad die XHP50 LED.
 photo 13 Olight R50 LED close P1220597.jpg

Surrounding the LED is a textured reflector.
 photo 14 Olight R50 reflector P1220606.jpg

Flipping round to the other end, there is a rubber charging port cover in the tail-cap.
 photo 15 Olight R50 port cover P1220610.jpg

Pulling this aside exposes the micro-USB socket.
 photo 16 Olight R50 port open P1220615.jpg

Inside the tailcap, there are three contacts; a ring contact for the end of the battery tube, and two sprung button contacts.
 photo 17 Olight R50 contacts P1220616.jpg

The tail-cap end of the cell has two contacts to match the two in the tail-cap.
 photo 18 Olight R50 cell contacts P1220621.jpg

Threads are square cut.
 photo 19 Olight R50 threads P1220624.jpg

Supplied with the R50 is a proprietary Olight 26650 cell.
 photo 20 Olight R50 cell P1220628.jpg

This cell has the twin contacts on the ‘negative’ end of the cell, and an arrow on the side to indicate which way to insert it.
 photo 21 Olight R50 cell P1220630.jpg

Peering inside the battery tube to look at the positive contact.
 photo 22 Olight R50 internal contact P1220633.jpg

The beam

Please be careful not to judge tint based on images you see on a computer screen. Unless properly calibrated, the screen itself will change the perceived tint.

The indoor beamshot is intended to give an idea of the beam shape/quality rather than tint. All beamshots are taken using daylight white balance. The woodwork (stairs and skirting) are painted Farrow & Ball “Off-White”, and the walls are a light sandy colour called ‘String’ again by Farrow & Ball. I don’t actually have a ‘white wall’ in the house to use for this, and the wife won’t have one!

The R50 manages to combine a very wide spill with a bright hotspot.
 photo 29 Olight R50 indoor beam P1240719.jpg

Taking it outside and that wide beam lights up everything near you and the broad hotspot has good range.
 photo 28 Olight R50 outdoor beam P1240671.jpg

Modes and User Interface:

Before we get into the controls, we need to charge the R50. After connecting the USB cable there is a red charging indicator light next to the USB socket.
 photo 25 Olight R50 charging P1220651.jpg

Once fully charged this turns green.
 photo 26 Olight R50 charged P1220668.jpg

To turn ON to the last used constant mode, click the side switch once.
To turn ON to Turbo directly, double-click the side switch.
To turn ON to Strobe, triple-click the side switch.
To turn ON to Low mode directly, press and hold the side switch for 1s.

To change brightness level, with the R50 ON, press and hold the switch to cycle through Low – Medium – High – Low etc.

To turn OFF, click the side switch.

There is a memory for the last used ‘normal’ mode (Low, Medium, or High) but High is only memorised for 10 minutes after which the R50 goes back to Medium.

There are two ways to lockout the R50:
1. Unscrew the tail-cap a half turn.
2. Press and hold the side switch (from OFF) for over 2s. (After 1s the R50 will come onto Low, but after 2s it will go off again as it enters lockout.)

To exit lockout use the corresponding method to the lockouts above:
1. Tighten the tailcap.
2.Press and hold the switch for 3s.

Batteries and output:

The R50 Seeker runs on a proprietary 26650 cell. The instructions do not mention support for standard 26650 cells, however I have tried this and the R50 does function (though does not accommodate very long cells) apart from the charging not working.

To measure actual output, I built an integrating sphere. See here for more detail. The sensor registers visible light only (so Infra-Red and Ultra-Violet will not be measured).

Please note, all quoted lumen figures are from a DIY integrating sphere, and according to ANSI standards. Although every effort is made to give as accurate a result as possible, they should be taken as an estimate only. The results can be used to compare outputs in this review and others I have published.

___________________________________________ ________________________________ ________________________________
Olight R50 using supplied 26650 cell I.S. measured ANSI output Lumens PWM frequency or Strobe frequency (Hz)
___________________________________________ ________________________________ ________________________________
Turbo 2479 0
High 1281 0
Medium 440 0
Low 39 0

* Beacon and Strobe output measurements are only estimates as the brief flashes make it difficult to capture the actual output value.

Peak Beam intensity measured 22000 lx @1m giving a beam range of 297 m.

There is parasitic drain at 52uA. When using the included 4500mAh cell, it will take 9.87 years to drain the cell.

A very impressive output for a compact light. During extended use, the Turbo stepping down from nearly 2500lm to 1800lm is not noticeable and while running at 1800lm starts to generate a good amount of heat. Even with the step down at 30 minutes to around 1650lm you don’t really notice, and it is only once you get to about 50 minutes and the R50 steps down to the medium output of 440lm that you see a drop in output.
 photo Olight R50 runtime.jpg

Troubleshooting

This section is included to mention any minor niggles I come across during testing, in case the information helps anyone else.

No issues were encountered during testing.

As per the description of this section, this information is provided in case anyone else finds a similar ‘issue’ that might be fixed in the same way.

The R50 Seeker in use

For such a usable and useful light I am disappointed Olight did not include a holster. Even though it uses the 26650 cell, so has a thicker tube than the common 18650 size light, Olight have kept the overall size very compact and comfortable to hold. It may not be jeans-pocket sized, it is easily coat-pocket sized.

Output is extremely impressive and does meet the specified 2500lm. This does drop to 1800 after 3 minutes, but that reduction is barely noticeable and the R50 continues to impress. Everyone who has seen me using the R50 has said “that is bright” and asked what it is; a real talking point.

One area where I think Olight has really cracked it, is the interface. It is the same, or very similar, to many of the other Olight lights with a single side switch, so you will recognise the way it works. Giving the user direct access to the maximum and minimum levels, whatever you last used, makes this a real winner. Another nice touch is the way that the ‘normal’ mode (from a single click of the side switch) will not memorise High beyond 10 minutes of being off, it means that whatever you were doing with the R50, worst case you might get Medium if you turn it on without thinking. Not so much you get blinded and yet powerful enough.

These days you won’t really find yourself unable to find a USB charger at work or at home. The R50 comes with a quality 2A charger anyway, but while you are away from home you will be able to top up the R50 easily enough. The instructions specifically don’t mention using any other 26650 cells, but being the rebel I am, I popped one in. Clearly the charging function is not going to work, but the R50 itself did work, so you can carry a spare 26650 if you want. Just beware that the R50’s tube is not that long, so some 26650 cells may be too long. Check it fits before you rely on it.

There is some shaping at the head, but the R50 effectively has no anti-roll feature, you need to put it down head-down or tail-down. It does tail-stand very well.

Running the R50 on Turbo also provides you with a hand-warmer as it does heat up quite a lot. Given a cold evening, this certainly is a welcome feature. If you decide to tail-stand the R50 on Turbo you will hit the over-heat protection, so expect the output to drop if you let it get really hot.

Personally I find the R50 hits a real sweet spot in terms of size, ergonomics and output. Give me a side-switch light any day, add to that a cell which is large enough to sustain a significant output and a great all-rounder beam, keep it small enough to pop into a coat pocket and you have a winner. I’ll forgive it the proprietary cell for the fact that this has convenient built-in USB charging, doesn’t need anything else to be bought to use it, but can use standard 26650 cells, so gets round the normal limitation of proprietary cell lights.

Review Summary

_______________________________________________ _______________________________________________
Things I like What doesn’t work so well for me
_______________________________________________ _______________________________________________
2500lm from a compact light. Requires the proprietary cell for built-in charging.
Excellent UI using an ergonomic side switch. No holster supplied.
Can run on a standard 26650 – Unofficially. No Anti-Roll.
Direct access to Maximum and Minimum modes.
Regulated output.
All-rounder beam.

 photo 24 Olight R50 angle on P1220636.jpg


Discussing the Review:

Please feel free to add comments to the review, but the ideal place to freely discuss these reviews is on a forum. If you started reading the shorter forum version of the review, but followed the link this full exclusive review, please return to that forum to discuss the review there.
If you read the review entirely on Tactical Reviews, please consider one of the following to join in any discussion.

CandlePowerForums – Flashlight Reviews Section (Largest and Friendliest Flashlight Community Forum)

EdgeMatters – Sponsored Reviews (UK based Forum for Knife Makers and Collectors)

Knife Review: Ruger / CRKT GO-N-HEAVY (Plain and Veff Serrated Versions)

One of my highlights of IWA 2016 was a visit to the CRKT stand, and on that stand was a knife I could not leave IWA without. Amongst the new Ruger line of knives (produced by CRKT) was the super-sized Go-N-Heavy which stood out not only due to its size, but for the distinctive look which comes from a combination of the design brief for the Ruger line of knives and its pedigree of being a William Harsey design.

 photo 17 GoNHeavy open P1170642.jpg

The Blade and Handle Geometry:

Most knife specifications have a basic description of the blade geometry, but in this section I will be taking a more detailed look at geometry and balance.
 photo 33 GoNHeavy flat grind P1180539.jpg

Using a set of gauges and precision measuring equipment including a Vernier protractor, callipers, fixed radius gauges and the unique Arc Master adjustable radius gauge (the one that looks like a crossbow).
 photo Knife measuring P1180483.jpg

These measurements have been tabulated and are presented along with a few reference blades (8″ Chef’s Knife, 5.5″ Santoku and the popular Fällkniven F1).

Key aspects such as the primary bevel angle, grind type, blade depth, blade thickness, length, weight are detailed, along with balance information.
 photo 32 GoNHeavy grind P1180537.jpg

The ‘Balance relative to the front of the handle’ tells you if the knife will feel front heavy, or if the weight is in your hand (a positive value means the weight is forward of the front of the handle). The ‘Balance relative to the centre of the handle’ indicates how close to a ‘neutral balance’ the knife has in the hand.
 photo 31 GoNHeavy balance P1180534.jpg

In the case of full convex grinds the approximate centre of the grind is used for the primary bevel angle estimate.
 photo GoNHeavy parameters.jpg

The blade is made from 8Cr13Mov steel, the washers from Teflon and the handles are hard anodised 6061-T6 Aluminium.

Explained by the Maker:

The reasons for certain design choices may not be clear when simply looking at an object, so this section is intended to give an insight into the thinking behind a design by speaking to the designer themselves.

Unfortunately I can’t always get time with the designer so will use this section to include relevant information about the knife and its designer.

While discussing the Ruger knives with CRKT, there were a couple of insights into the processes that led to the final designs of the knives.

The project started with Ruger approaching CRKT and asking them to design a special line of knives for them. The knives had to represent Ruger, so would not simply be any old design, but had to fit in with the feel of Ruger’s products.

As one of the designers CRKT have worked with before, it turns out that Bill Harsey had already been working on a design that was reminiscent of the Picatinny rails on the SR line of rifles. Never quite making it off his workbench, it seemed a perfect fit, so was adopted for the Go-N-Heavy and Go-N-Heavy Compact knives in the Ruger lineup. The Ruger range also includes a total of 23 different models, fixed and folding, plain edges and part-serrated.

A feature used in CRKT knives are the unique Veff Serrations (which we will see in more detail). A different take on the design of serrations where the scallops are angled to give a positive feed into the cut. The effect is similar to a normal wood saw where the teeth cut into the material in one direction, but ride over the surface (clearing the cut) in the other. Veff serrations give real bite to the cut. We will cover these in more detail later.

A few more details:

This review is going to look at both versions of the Go-N-Heavy, the plain edge and part-serrated (Veff serrations). The knife arrives in a Ruger branded box.
 photo 01 GoNHeavy box P1190016.jpg

Inside the knife is in its belt pouch and wrapped in a plastic bag.
 photo 03 GoNHeavy box open P1190022.jpg

Along with the knife and belt pouch is a CRKT leaflet.
 photo 04 GoNHeavy box contents P1190030.jpg

Especially important as this is a large folder, there is a well finished nylon belt pouch.
 photo 06 GoNHeavy holster front P1170601.jpg

The belt pouch loops allow for horizontal or vertical carry positions.
 photo 07 GoNHeavy holster back P1170604.jpg

That large belt pouch is filled by the Go-N-Heavy.
 photo 08 GoNHeavy knife and holster P1170607.jpg

Let’s take a look round this, starting with the Ruger side of the blade.
 photo 09 GoNHeavy knife closed P1170609.jpg

Then the CRKT side of the blade. (On this side you can see the stainless steel lock insert/liner.)
 photo 10 GoNHeavy knife closed P1170613.jpg

Centring is pretty much spot on. Oddly, I’m looking at the actual knife right now and it looks better than this photo.
 photo 11 GoNHeavy centring P1170617.jpg

Loving the details in the handle. Though not a Picatinny rail, it is certainly reminiscent of one.
 photo 12 GoNHeavy handle P1170620.jpg

Enough blade is exposed to allow two handed opening, but there is also an ambidextrous thumb stud fitted to the blade.
 photo 13 GoNHeavy thumb P1170624.jpg

One side of the pivot has a torx fitting for adjustment. The pivot bolt appears big and oversized, but this is for stylistic reasons and sits very well with the black anodised handles.
 photo 14 GoNHeavy pivot P1170628.jpg

Here we can see the blade stop pin and locking surface (which is fresh and unused straight out of the box).
 photo 15 GoNHeavy stop pin P1170633.jpg

And out comes that nice big blade with recognisable Harsey style.
 photo 16 GoNHeavy part open P1170636.jpg

Both versions together to show how it looks open and closed.
 photo 05 GoNHeavy open and closed P1190031.jpg

One side of the blade has the CRKT logo, plus model, engraved into the surface.
 photo 18 GoNHeavy logo P1170646.jpg

Lock engagement straight out of the box looks a little light, but was strong and soon settled in slightly with use.
 photo 19 GoNHeavy lock P1170649.jpg

Stepping back a little this view shows how the stainless liner fits into a recess in one of the aluminium handles.
 photo 20 GoNHeavy lock bar P1170653.jpg

The holes in the handles do go all the way through. You might also spot that the holes in the stainless steel liner are slightly smaller.
 photo 21 GoNHeavy holes P1170655.jpg

Only one side of the pivot bolt has a torx fitting. The other side is completely plain.
 photo 22 GoNHeavy pivot 2 P1170659.jpg

The plunge line is neatly executed.
 photo 23 GoNHeavy plunge P1170663.jpg

Torx bolts are used to hold the handles together.
 photo 24 GoNHeavy handle screw P1170666.jpg

On the thumb ramp there is some fine jimping to give you extra grip.
 photo 28 GoNHeavy jimping P1170696.jpg

Taking a very close look into the Go-N-Heavy with the blade open you can see the detent ball on the side of the lock bar which holds the blade in the closed position.
 photo 29 GoNHeavy detent P1170703.jpg

There is a nice flowing semi-swedge on the blade spine.
 photo 25 GoNHeavy angle P1170677.jpg

Now a switch over to the part-serrated version featuring Veff serrations.
 photo 34 GoNHeavy veff P1190041.jpg

Really heavy-duty serrations with only four scallops in the serrated area.
 photo 35 GoNHeavy veff serrations P1190047.jpg

From the other side of the blade you can see the serrations are cut with a single bevel.
 photo 36 GoNHeavy veff single bevel P1190054.jpg

The two versions.
 photo 38 GoNHeavy both P1190085.jpg

What is the Go-N-Heavy like to use?

Before we go onto using it, to start with we have to get the proper ideal of scale, so here the Go-N-Heavy is next to the Fällkniven F1 and a Spyderco UK Pen Knife. Yes, it really dwarfs the Fällkniven in blade and handle.
 photo 27 GoNHeavy size P1170691.jpg

I take XL size gloves, and this knife makes my hand look small. What the large handle does allow for however are a range for different grip positions all of which remain comfortable.
 photo 30 GoNHeavy in hand P1170714.jpg

Ok, I’m not going to argue that it is the most practical knife, but saying that there are plenty of occasions I want to have a large knife with me but can’t really justify a fixed blade. The Go-N-Heavy gives you a knife with presence but which is small enough when folded to pop into a bag or onto your belt and not be too noticeable; until you need it.

There is also just something so satisfying about a big folder, watching that large blade appear and the knife double in size. When at IWA I found it very difficult to put down, and knew exactly which CRKT knife I wanted to test.

Perhaps a little over sized for a box cutter (especially as you might end up going through the entire box and cutting the contents), but it did the job. Clearly this is not what the knife was intended for.
 photo Box cutter IMG_20161006_133916.jpg

Though the factory plain edge was serviceable enough, I decided to give it a bit of an upgrade and pop a Wicked Edge onto it.
 photo Wicked edge GoNHeavy P1230401.jpg

Looks rather nice with its new edge.
 photo Wicked edge GoNHeavy P1230411.jpg

Unfortunately no large rope cutting tasks have yet presented themselves, so I’ve had to make do with smaller ropes. On the smaller sizes, the rope tends to stick in one of the serrations rather than the serration sawing through. It makes it more like a series of line cutting hooks. You need to scale up the cutting job to really get the Veff serrations showing their power. They look great, and are very aggressive, but on smaller jobs they can be hard work.
What you really can feel is the effect of the angled serrations; they actively bite deeper into the material as you cut instead of riding over the surface. In the right cutting job it makes for a very aggressive and efficient cut. For smaller jobs you often have to push the cut away from you to stop the teeth biting so deeply.
 photo 40 GoNHeavy veff cut P1230442.jpg

Serrated or plain edge, its your call and depends on your requirements (I’d love to see a mid-serrated version – see The Mid-Serrated Blade – A new concept from Subwoofer). Either one will give you a really satisfying super-sized folder.
 photo 39 GoNHeavy both P1190091.jpg

Review Summary

The views expressed in this summary table are from the point of view of the reviewer’s personal use. I am not a member of the armed forces and cannot comment on its use beyond a cutting tool or field/hunting knife.

Something that might be a ‘pro’ for one user can be a ‘con’ for another, so the comments are categorised based on my requirements. You should consider all points and if they could be beneficial to you.

_______________________________________________ _______________________________________________
Things I like What doesn’t work so well for me
_______________________________________________ _______________________________________________
Super-Sized Folder. Serrations are too large for some jobs.
Harsey Design. Smaller hands may struggle to open one handed.
Multiple grip options.
Distinctive Styling.
Veff Serrations have excellent bite.
Belt pouch included.

 photo 40 GoNHeavy ruger IMG_20160326_121119.jpg


Discussing the Review:

Please feel free to add comments to the review, but the ideal place to freely discuss these reviews is on a forum. If you started reading the shorter forum version of the review, but followed the link this full exclusive review, please return to that forum to discuss the review there.
If you read the review entirely on Tactical Reviews, please consider one of the following to join in any discussion.

EdgeMatters – Sponsored Reviews (UK based Forum for Knife Makers and Collectors)

BladeForums – Knife Reviews (US based Forum for Knife Discussion)

CandlePowerForums – Knife Reviews Section (Largest and Friendliest Flashlight Community Forum)

Knife Review: Cressi Giant Knife and Alligator (Dive Knives 2016 – Detail Review)

This review provides further details for the Cressi Giant Knife and Alligator which could not be included in the Dive Knives 2016 – Mega Test Review

The candidates sent by Cressi were a last minute addition to the Mega Test Review, so unfortunately did not go on the Ionian Sea trip and missed out on some of the real use testing, however they did go through all of the experimental corrosion and cutting testing.
 photo 01 Cressi boxed P1220175.jpg

A pretty unique pair from Cressi with a knife at at each end of the size spectrum.
 photo 02 Cressi unboxed P1220357.jpg

The Blade and Handle Geometry:

Most knife specifications have a basic description of the blade geometry, but in this section I will be taking a more detailed look at geometry and balance.

Using a set of gauges and precision measuring equipment including a Vernier protractor, callipers, fixed radius gauges and the unique Arc Master adjustable radius gauge (the one that looks like a crossbow).
 photo Knife measuring P1180483.jpg

These measurements have been tabulated and are presented along with other blades.

Key aspects such as the primary bevel angle, grind type, blade depth, blade thickness, length, weight are detailed, along with balance information.

The ‘Balance relative to the front of the handle’ tells you if the knife will feel front heavy, or if the weight is in your hand (a positive value means the weight is forward of the front of the handle). The ‘Balance relative to the centre of the handle’ indicates how close to a ‘neutral balance’ the knife has in the hand.

In the case of full convex grinds the approximate centre of the grind is used for the primary bevel angle estimate.

The measurements are presented alongside some of the other knives from the Dive Knives 2016 – Mega Test Review
 photo Dive Knives Parameters 3 of 3.jpg

A few more details of the Giant Knife:

Very nicely presented in its transparent box, the Giant Knife is clearly exactly what it says it is.
 photo 03 Cressi Giant Boxed P1220278.jpg

The knife and sheath come with a pair of rubber straps.
 photo 04 Cressi Giant unBoxed P1220285.jpg

Standard belt buckle type straps are used.
 photo 05 Cressi Giant strap P1220294.jpg

The back of the sheath is basically flat.
 photo 06 Cressi Giant sheath back P1220297.jpg

One set of strap mounting points and what looks like an upside-down “CE” mark.
 photo 07 Cressi Giant sheath back detail P1220299.jpg

Near the top of the sheath are the other set of strap mounting holes. Something that has me curious is that the rubber retaining ring fits into a hole right at the top of the sheath, but there is an identical hole slightly further down. This could not be used for the retaining ring as you would never get it to fit over the handle, so is there another knife that uses this same sheath?
 photo 08 Cressi Giant sheath back detail P1220301.jpg

Staying with the old-school concept, the Giant Knife has a rubber retaining ring which is pulled over the hammer pommel.
 photo 09 Cressi Giant sheath retention P1220303.jpg

Very neatly put together, the rubber ring has a tab which is easy to grip.
 photo 10 Cressi Giant sheath retention P1220306.jpg

In the released position the rubber ring is pushed out of the way. Like this the knife is just loose in the sheath and can fall out.
 photo 11 Cressi Giant sheath retention P1220308.jpg

The sheath is a one piece moulded plastic design.
 photo 12 Cressi Giant sheath empty P1220310.jpg

And there is that substantial blade. Perhaps not actually ‘giant’, but this is certainly a BFK.
 photo 13 Cressi Giant angle P1220318.jpg

As we all know, ‘stainless’ really means ‘stain-resistant’ and Cressi have given the blade a black coating which helps with corrosion resistance, though the cutting edge itself cannot be coated.
 photo 14 Cressi Giant coating P1220320.jpg

Clearly marked as being made from 304 Stainless Steel.
 photo 15 Cressi Giant SS P1220324.jpg

Incorporated into the blade spine is a line cutting hook. This angle clearly shows how wide the double bevel angle is (also see the parameter table) which unfortunately makes it very ineffective.
 photo 16 Cressi Giant hook P1220327.jpg

The back of the blade also has a long line of serrations which unfortunately are also a double bevel with a very wide angle which limits their effectiveness.
 photo 17 Cressi Giant serrations P1220333.jpg

A view of the ricasso and plunge line.
 photo 18 Cressi Giant plunge P1220337.jpg

Being a true dive knife, the Giant Knife can be taken apart to clean and maintain the knife. The steel hammer pommel unscrews.
 photo 19 Cressi Giant hammer removed P1220348.jpg

After taking off the pommel, the handle slides off the tang. The full tang has been given the same black coating as the blade, so reduces the need to disassemble and clean it.
 photo 20 Cressi Giant apart P1220352.jpg

Even the thread is coated, but given a few disassemblies this will wear off.
 photo 21 Cressi Giant tang thread P1220354.jpg

A few more details of the Alligator:

Switching to a completely different concept to the Giant Knife, we have the Alligator.
 photo 23 Cressi Alligator boxed P1220180.jpg

Being a much smaller knife, this is designed to be fitted to your BCD or belt and not to your arm or leg, so instead of rubber straps you get a mounting kit.
 photo 24 Cressi Alligator unboxed P1220187.jpg

The mounting kit includes a hose mount with hose shim (for smaller hoses) plus a straight bar for fitting around webbing.
 photo 25 Cressi Alligator mounting P1220191.jpg

In the moulded plastic sheath is a sprung knife-retaining plate which clicks into place on the knife handle to hold it in place.
 photo 26 Cressi Alligator sheath P1220194.jpg

On the back of the sheath are the screw points for attaching the various mount options.
 photo 27 Cressi Alligator sheath back P1220195.jpg

Is it a knife? Is it a pair of shears? Actually it is both.
 photo 28 Cressi Alligator angle P1220205.jpg

Viewed from the other side it looks a bit more knife like.
 photo 29 Cressi Alligator angle P1220207.jpg

At the base of the handle is a metal loop which holds the two parts of the handle together.
 photo 30 Cressi Alligator clip P1220212.jpg

Flipping the clip outwards frees the handle to open up.
 photo 31 Cressi Alligator clip open P1220215.jpg

As you might expect with smaller shears the pivot is sprung loaded to make them easy to use.
 photo 32 Cressi Alligator spring P1220219.jpg

Inside the handles is a set of gripping teeth that can be used to grip and twist nuts/bolts and other objects you need more grip for.
 photo 33 Cressi Alligator grip teeth P1220220.jpg

And there we have them, the Alligator’s jaws. Anyone having to cut loose lines underwater will know just how effective shears are for this task.
 photo 34 Cressi Alligator jaws P1220223.jpg

Also included is a line cutting hook.
 photo 35 Cressi Alligator hook P1220226.jpg

A close view of the knife point. Though not a needle sharp point, I prefer the tip not to be too sharp for a diving knife.
 photo 36 Cressi Alligator tip P1220231.jpg

The spine of the ‘knife’ (the top jaw of the shears) has serrations cut into it.
 photo 38 Cressi Alligator serration P1220237.jpg

The serrations are formed from a single bevel.
 photo 37 Cressi Alligator serration back P1220233.jpg

Looking at the top jaw of the shears, the grind is very clean and precise.
 photo 39 Cressi Alligator shears P1220240.jpg

One side of the pivot bolt has a security type nut. To tighten this you need a flat head screwdriver with the middle ground out. On trying to adjust this it appears that either thread-lock or some other method has been used to hold this nut in place, so I’ll be leaving it until it needs adjustment.
 photo 40 Cressi Alligator pivot P1220241.jpg

You can sheath the Alligator either way round, however one way is easier than the other.
 photo 41 Cressi Alligator sheathed P1220254.jpg

The reason it is easier to sheath the knife one way round is due to the blade being offset.
 photo 42 Cressi Alligator offset P1220260.jpg

Looking closer you can see that the offset allows the spring for the shears to be incorporated. You can also see the plastic scrapings on the pivot nut where it has rubbed on the sheath.
 photo 43 Cressi Alligator offset P1220262.jpg

Feature packed and very versatile.
 photo 44 Cressi Alligator angle open P1220275.jpg

What are they like to use?

There are those that say there is no need for a big diving knife any more. For many this may be true, and they are better served by something smaller, or even just a line cutter, but there is still a place for the BFK when you need a tool that can take on bigger tasks. Cressi recognise this and that is why they have recently introduced the Giant Knife.

This review includes a cutting tool from both ends of the size spectrum with the much more compact Alligator which is a pair of shears as well as a knife. The Alligator is supremely effective for cutting and in the cutting tests has been scored separately as both a knife and as shears. The cutting score for the shears was joint first place, and the knife was not a bad performer at all. If you combined both scores, it is head and shoulders above any other knife in the Mega Test. The Giant Knife was a respectable performer, but the cutting hook and serrations were poor. See the Dive Knives 2016 – Mega Test Review for more information on the cutting test results.

For stainless steel tools, both Cressi knives came out of the corrosion test very well. There is a small amount of rust showing near the pivot between the two halves of the shears.
 photo 47 Cressi Alligator rust P1220997.jpg

There is also some rust on the gripping jaws inside the handles.
 photo 48 Cressi Alligator rust P1230004.jpg

For the Giant Knife, there is nothing to show for the corrosion testing as there was no visible rust to be found on the knife.

Going back to the Giant Knife… Oh yes, this is a BFK! If you want a decent sized diving knife then the Giant Knife is a very good fit. It is big, the blade is thick, it is heavier than most, but you have a heavy duty tool you can really put to work. The shaped rubber handle gives you a very positive grip and lets you go for it. With some weight behind it, the hammer pommel is effective (just watch where that point is going).
(For size reference, I wear XL size gloves).
 photo 22 Cressi Giant in hand P1220366.jpg

Going the other way now, and as the Alligator is much more compact than the Giant Knife, the grip is nearly (but not quite) too short. Despite the smaller size, the Alligator’s knife is effective in all its aspects, with the cutting hook working well and serrations working reasonably.
 photo 45 Cressi Alligator in hand P1220361.jpg

But the jewel in the Alligator’s crown are the shears. Wet lines and rope can be very difficult to grip and cut with a knife. Free-floating lines even worse, but shears grip the line for you, making it so much easier to cut. Notice how the tip of the shears in the knife blade is hook shaped, which prevents lines slipping out of the front of the jaws. Being spring loaded makes the shears stay firmly in the hand as you use them. Even without the knife blade elements of the Alligator, it would be worth having just for these shears.
 photo 46 Cressi Alligator in hand open P1220364.jpg

Review Summary

The views expressed in this summary table are from the point of view of the reviewer’s personal use. I am not a member of the armed forces and cannot comment on its use beyond a cutting tool or field/hunting knife.

Something that might be a ‘pro’ for one user can be a ‘con’ for another, so the comments are categorised based on my requirements. You should consider all points and if they could be beneficial to you.

_______________________________________________ _______________________________________________
Things I like What doesn’t work so well for me
_______________________________________________ _______________________________________________
The Alligator gives you the cutting power of shears as well as a knife blade. Neither design is safe for ‘release’ cutting next to the body.
The Giant gives you a true heavy duty ‘BFK’ for diving. The Giant Knife’s serrations and hook are ground at far too wide an angle to be effective.
Extremely good corrosion resistance. The Alligator handle catch can be tricky to open, especially with gloves on.
Both ends of the size spectrum are represented.
Sheaths work right or left handed.

 photo 02 Cressi unboxed P1220289.jpg


Discussing the Review:

Please feel free to add comments to the review, but the ideal place to freely discuss these reviews is on a forum. If you started reading the shorter forum version of the review, but followed the link this full exclusive review, please return to that forum to discuss the review there.
If you read the review entirely on Tactical Reviews, please consider one of the following to join in any discussion.

EdgeMatters – Sponsored Reviews (UK based Forum for Knife Makers and Collectors)

BladeForums – Knife Reviews (US based Forum for Knife Discussion)

CandlePowerForums – Knife Reviews Section (Largest and Friendliest Flashlight Community Forum)

Knife Review: Whitby & Co Dive Knives – DK9, DK11 and DK511/14 (Dive Knives 2016 – Detail Review)

This review provides further details for the three Whitby & Co Dive Knife models DK9, DK11 and DK511/14 which could not be included in the Dive Knives 2016 – Mega Test Review

 photo 49 whitby Group sheathed P1210772.jpg

The Blade and Handle Geometry:

Most knife specifications have a basic description of the blade geometry, but in this section I will be taking a more detailed look at geometry and balance.

Using a set of gauges and precision measuring equipment including a Vernier protractor, callipers, fixed radius gauges and the unique Arc Master adjustable radius gauge (the one that looks like a crossbow).
 photo Knife measuring P1180483.jpg

These measurements have been tabulated and are presented along with other blades.

Key aspects such as the primary bevel angle, grind type, blade depth, blade thickness, length, weight are detailed, along with balance information.

The ‘Balance relative to the front of the handle’ tells you if the knife will feel front heavy, or if the weight is in your hand (a positive value means the weight is forward of the front of the handle). The ‘Balance relative to the centre of the handle’ indicates how close to a ‘neutral balance’ the knife has in the hand.

In the case of full convex grinds the approximate centre of the grind is used for the primary bevel angle estimate.

The measurements are presented alongside some of the other knives from the Dive Knives 2016 – Mega Test Review

There are three Whitby knives, and these have been logged across two comparison tables.
 photo Dive Knives Parameters 2 of 3.jpg

 photo Dive Knives Parameters 3 of 3.jpg

A few more details of the DK9:

Before we really get going looking at the details, you might be curious as to these being Whitby & Co knives yet coming in alternately branded packaging. Whitby & Co source some of the foremost international brands and supply Trade customers with these products.
 photo 01 whitby boxed P1210566.jpg

The knives on test here are referred to under their Whitby & Co model numbers.
 photo 02 whitby label P1210568.jpg

Starting with the smallest of the Whitby dive knives, the DK9, it is supplied with two rubber straps with quick release buckles and a leaflet.
 photo 03 whitby DK9 contents P1210576.jpg

On the back of the box are the instructions for assembling the straps. This is the same for all the models on test here.
 photo 04 whitby DK9 instructions P1210579.jpg

One end of the rubber strap is moulded so that it won’t pull through the buckle.
 photo 05 whitby DK9 strap detail P1210581.jpg

Onto the DK9 itself, this is exactly as it comes out of the box, in its sheath.
 photo 06 whitby DK9 sheathed P1210584.jpg

The knife construction is a single piece of flat stock steel. Being a typical dagger design with shapr point and double edge, it has no diving safety features that would make it safe for cutting away entanglements from the body.
 photo 07 whitby DK9 unsheathed P1210589.jpg

The sheath consists of two moulded plastic halves riveted together. Each side has a slot to fit the rubber straps into.
 photo 08 whitby DK9 sheath P1210591.jpg

At the top of the front piece of the sheath are a couple of plastic hooks which hold the DK9 in the sheath.
 photo 09 whitby DK9 sheath retention P1210595.jpg

With the knife inserted you can see how the plastic hooks fit over the guard.
 photo 18 whitby DK9 retention P1210637.jpg

The back of the sheath is a simple flat plastic surface.
 photo 10 whitby DK9 sheath back P1210597.jpg

Let’s start looking round the knife. From this overall view, notice that in the handle and blade are two types of shackle wrench cut-out and the knife is a one piece all metal construction.
 photo 11 whitby DK9 angle P1210602.jpg

Having a typical dagger grind, there are no sharp corners/edges to the plunge lines.
 photo 12 whitby DK9 plunge P1210604.jpg

One side of the double edged blade has some very effective serrations.
 photo 13 whitby DK9 serrations P1210607.jpg

The serrations are formed with a single bevel, so when looking at the back, there is no visible edge bevel.
 photo 16 whitby DK9 serration back P1210622.jpg

Quick close-up of the blade tip.
 photo 14 whitby DK9 tip P1210612.jpg

A generous sized lanyard hole is included in the handle.
 photo 15 whitby DK9 lanyard P1210618.jpg

It is a relatively compact blade, and despite the thin handle is comfortable enough in the hand (I take XL gloves).
 photo 17 whitby DK9 in hand P1210632.jpg

There is room to fit both straps, but being so compact I found I only needed one and it stayed where I needed it.
 photo 19 whitby DK9 with straps P1210642.jpg

As quick-release buckles are used, you set the strap length to fit at which point they operate as fixed length straps. This is how the rubber is threaded through the adjustment side of the buckle.
 photo 20 whitby DK9 strap adjustment P1210647.jpg

A few more details of the DK11:

Taking a step up in size to the DK11, and we also take a step up in design and function. As with the DK9, the DK11 comes with two straps with quick-release buckles.
 photo 21 whitby DK11 contents P1210653.jpg

A more substantial package than the DK9. Note that there is a sliding lock for the knife release lever.
 photo 22 whitby DK11 sheathed P1210660.jpg

Box fresh and not yet subjected to the corrosion testing, the DK11 has a double edged blade with a line cutting hook.
 photo 23 whitby DK11 unsheathed P1210662.jpg

On the front of the sheath is a sprung knife retaining catch with a hook that engages with the knife handle.
 photo 24 whitby DK11 retention P1210665.jpg

Requiring a reasonable pressure, the retaining catch lifts away to release the knife.
 photo 25 whitby DK11 retention P1210669.jpg

The two halves of the plastic sheath are screwed together.
 photo 26 whitby DK11 sheath back P1210672.jpg

The spine of the blade has the serrations and cutting hook, and the DK11 also has a hammer pommel.
 photo 27 whitby DK11 angle P1210675.jpg

At the front of the handle a stainless steel curved guard is incorporated. There is what might be considered a finger choil in the ricasso, but this is not something I would use when diving.
 photo 28 whitby DK11 guard P1210678.jpg

A close-up of the blade tip and factory edge.
 photo 29 whitby DK11 tip P1210681.jpg

The serrations are a similar pattern to the DK9, but have three repeats of the smaller groove rather than two.
 photo 30 whitby DK11 serrations P1210684.jpg

Just as with the DK9, the serrations are formed with a single bevel, so from the other side have no visible bevel.
 photo 31 whitby DK11 serrations P1210687.jpg

A line cutter hook is included near the guard.
 photo 32 whitby DK11 line cutter P1210694.jpg

Despite its smooth lines, the handle is nice and grippy thanks to being rubber.
 photo 33 whitby DK11 handle P1210696.jpg

The blue plastic insert includes the knife retention catch point.
 photo 34 whitby DK11 retention catch P1210699.jpg

With the DK11 you have a good mid-sized all rounder blade.
 photo 35 whitby DK11 in hand P1210704.jpg

After threading the straps through the sheath, you still need to thread the loose end through the buckle.
 photo 36 whitby DK11 straps P1210705.jpg

A few more details of the DK511/14:

Lastly we have a bit of an old-school BFK (Big F’n Knife), the DK511/14. As before, there are two adjustable quick-release buckle straps included.
 photo 37 whitby DK511-14 contents P1210713.jpg

This is what the classic dive knife used to look like, and it still has a place today.
 photo 38 whitby DK511-14 sheathed P1210715.jpg

Again with the classic design we have a rubber ring fitting over the end of the handle to keep the knife in the sheath.
 photo 39 whitby DK511-14 retention P1210722.jpg

To release the knife just pull the ring off the handle using the tab provided.
 photo 40 whitby DK511-14 retention P1210726.jpg

Definitely not a compact blade, this is a full size traditional dive knife design.
 photo 41 whitby DK511-14 unsheathed P1210735.jpg

A real working blade, there are several useful features.
 photo 42 whitby DK511-14 angle P1210736.jpg

Very ‘saw-like’ serrations which shred rope, even if not cutting it cleanly.
 photo 43 whitby DK511-14 serrations P1210742.jpg

A close-up of the tip shows it could do with a little work, but actually not having a needle like point is safer for diving.
 photo 44 whitby DK511-14 tip P1210744.jpg

Unlike the hook type of line cutter, the DK511/14 has a much bigger line cutting feature with an elongated scallop which helps contain what you are cutting by preventing the line/rope from slipping off the cutting edge.
 photo 45 whitby DK511-14 line cutter P1210749.jpg

The handle is coffin shaped with a flared butt and guard.
 photo 46 whitby DK511-14 handle P1210757.jpg

Yeah, this is a BFK!
 photo 47 whitby DK511-14 in hand P1210761.jpg

You have a couple of options for strap positions, and the back of the one-piece sheath is shaped to fit your leg.
 photo 48 whitby DK511-14 with straps P1210768.jpg

What are they like to use?

By featuring these three models, this review covers a wide range of the styles of knife offered by Whitby. Not to be too generalistic I would class these three as a backup, general purpose and heavy duty type of knife.
 photo 54 whitby Group underwater P1000917.jpg

I’ll not cover the cutting again as this is detailed in the Dive Knives 2016 – Mega Test Review which you can check for more information on the cutting test results.

None of these dive knives has a blunt tip, which means you do need to take great care using them as a release knife. All of them also have double edged designs which again makes them very hazardous for release use especially if you have line or rope wrapped round you.

Price-wise the DK9 and DK511/14 come in at the low end of the scale, and the DK11 entering the low-mid price range. This is an important consideration as though not perfect, these have proven to be very good value.

Remember that the corrosion testing was tantamount to abuse for these knives. No cleanup, and no protection for the blades, just a highly corrosive environment.

Starting with the DK9, unsurprisingly, the rust has taken hold inside the sheath, and where the edge has been ground (leaving a rougher finish than the rest of the knife). With only two spots suffering significantly, very little of the cutting edge was damaged by this corrosion.
 photo 52 whitby DK9 rust P1230022.jpg

Next up the DK11. Though this does not look too bad, there is rust going into the handle, and around 30% of the edge has corroded. After re-sharpening this knife is was clear the edge had pitted and become damaged. The serrations however show no signs of rust and were unaffected.
 photo 51 whitby DK11 rust P1230016.jpg

Lastly the DK511/14 which was looking one of the worst. It was also the first to show signs of rust after only two hours immersion. The mirror finish on the blade has helped protect it, but the edge has suffered quite a lot of corrosion and pitting.
 photo 53 whitby DK511-14 rust P1230029.jpg

These knives definitely need a little care and attention and should be cleaned and have grease applied to protect the blades.

Of the three, the DK9 felt very appropriate as a forearm mounted backup blade. Small, easy to forget you are wearing it, and importantly, being on the arm it is easier to watch as you re-sheath it – that point is wicked and will bite you if you are not careful.

The retention system was the least easy to use as you pretty much had to drag the knife out and push it home like a friction fit. Getting gloved fingers under the plastic clips was unreliable.
 photo 55 whitby DK9 arm P1000944.jpg

Going to a leg mount with the DK11, on dry land, the knife release catch was the stiffest of all the sprung clip designs and I thought it would make things a struggle in the water. It was much easier to work with once strapped to your leg, but still not as easy as I would really like. One winning, and unique, feature is the sliding lock. It really did give peace of mind to know that the blade was positively locked into the sheath, and unlocking to then allow the blade to be released was easy.
 photo 56 whitby DK11 leg P1000953.jpg

Lastly the DK511/14 which takes up much more room on your leg. With the rubber retaining ring pulled off the knife handle, the knife actually rattles around in the sheath and will fall out if the sheath is tipped up. This is unlike the other two where simply fully inserting the knife will lock it into the sheath – you have to watch this and make sure you re-fit the rubber retaining strap. There is a time and a place for a big knife, and the DK511/14 gives you a lot of blade for the money.
 photo 57 whitby DK511-14 leg P1000952.jpg

Review Summary

The views expressed in this summary table are from the point of view of the reviewer’s personal use. I am not a member of the armed forces and cannot comment on its use beyond a cutting tool or field/hunting knife.

Something that might be a ‘pro’ for one user can be a ‘con’ for another, so the comments are categorised based on my requirements. You should consider all points and if they could be beneficial to you.

_______________________________________________ _______________________________________________
Things I like What doesn’t work so well for me
_______________________________________________ _______________________________________________
Excellent cutting results from the DK9 None of the models are safe for ‘release’ tasks due to sharp points a double edged blades.
The DK11 has a locking system to ensure the blade is secure. All models suffered edge damage from corrosion.
Good value. DK511/14 knife retention is fiddly to use.
Effective rubber straps.
Sizes from Compact to BFK to choose from.

 photo 50 whitby Group unsheathed P1210778.jpg


Discussing the Review:

Please feel free to add comments to the review, but the ideal place to freely discuss these reviews is on a forum. If you started reading the shorter forum version of the review, but followed the link this full exclusive review, please return to that forum to discuss the review there.
If you read the review entirely on Tactical Reviews, please consider one of the following to join in any discussion.

EdgeMatters – Sponsored Reviews (UK based Forum for Knife Makers and Collectors)

BladeForums – Knife Reviews (US based Forum for Knife Discussion)

CandlePowerForums – Knife Reviews Section (Largest and Friendliest Flashlight Community Forum)

Knife Review: Promate Dive Knives – Barracuda, Scuba, Seal Folder, KF505 Blunt and Line Cutter (Dive Knives 2016 – Detail Review)

This review provides further details for the five Promate dive knives (Barracuda Blunt Ti, KF593 Ti, KF090 Seal Folder Ti, KF505 Blunt and KF001 Line Cutter) which could not be included in the Dive Knives 2016 – Mega Test Review. Promate is a Full line manufacturer of scuba diving equipment and snorkeling gear including regulators, instruments, buoyancy compensators, masks, snorkels, fins, knives, boots, gloves and bags.

 photo 87 Promate intro P1210559.jpg

The Blade and Handle Geometry:

Most knife specifications have a basic description of the blade geometry, but in this section I will be taking a more detailed look at geometry and balance.

Using a set of gauges and precision measuring equipment including a Vernier protractor, callipers, fixed radius gauges and the unique Arc Master adjustable radius gauge (the one that looks like a crossbow).
 photo Knife measuring P1180483.jpg

These measurements have been tabulated and are presented along with other blades.

Key aspects such as the primary bevel angle, grind type, blade depth, blade thickness, length, weight are detailed, along with balance information.

The ‘Balance relative to the front of the handle’ tells you if the knife will feel front heavy, or if the weight is in your hand (a positive value means the weight is forward of the front of the handle). The ‘Balance relative to the centre of the handle’ indicates how close to a ‘neutral balance’ the knife has in the hand.

In the case of full convex grinds the approximate centre of the grind is used for the primary bevel angle estimate.

The measurements are presented alongside some of the other knives from the Dive Knives 2016 – Mega Test Review

As there are five Promate cutting tools, these are logged across two tables.
 photo Dive Knives Parameters 1 of 3.jpg

 photo Dive Knives Parameters 2 of 3.jpg

A few more details of the KF001 Line Cutter:

There are five models from Promate and a huge amount of detail to cover, so each one will have its own “A few more details…” section.
 photo 01 Promate boxed P1210106.jpg

The first two we will look at are the ones that are not fixed blade sheath knives, the Seal Folder and Line Cutter.
 photo 02 Promate first two P1210122.jpg

Fresh out of the box.
 photo 03 Promate first two unboxed P1210127.jpg

A small container is supplied with the line cutter.
 photo 04 Promate line cutter P1210131.jpg

This contains two spare blades wrapped in oil paper.
 photo 06 Promate line cutter spare blade P1210138.jpg

A close up of the blade in the line cutter.
 photo 05 Promate line cutter blade P1210137.jpg

Taking out the three screws holding the line cutter together allows you to see how the standard utility blade fits inside.
 photo 07 Promate line cutter blade swap P1210158.jpg

It is a generous size so is easy to handle.
 photo 08 Promate line cutter in hand P1210161.jpg

A few more details of the KF090 Seal Folder Ti:

An adjustable wrist strap is supplied fitted to the Seal folder.
 photo 09 Promate Ti Folder P1210165.jpg

The pivot is riveted and cannot be adjusted.
 photo 10 Promate Ti Folder pivot P1210167.jpg

On one side there is a plastic pocket clip.
 photo 11 Promate Ti Folder clip P1210168.jpg

From this side you can see the blade pivot and lock bar pivot rivet heads.
 photo 12 Promate Ti Folder pivot rivet P1210173.jpg

As a specialist knife, the Seal folder has an unusual cutting hook which is accessible even with the blade folded.
 photo 13 Promate Ti Folder folded P1210178.jpg

A closer look at the cutting hook.
 photo 14 Promate Ti Folder hook P1210181.jpg

The blade is part serrated and there is a small thumb opening hole.
 photo 15 Promate Ti Folder open P1210184.jpg

In case you had forgotten, it is made of titanium. The serrations are well formed.
 photo 17 Promate Ti Folder serration P1210192.jpg

When you look at the reverse of the blade, you can see that this knife uses only a single bevel edge.
 photo 18 Promate Ti Folder blade back P1210200.jpg

Going in closer to the back of the serrations.
 photo 19 Promate Ti Folder serration back P1210201.jpg

And also the plain edge.
 photo 20 Promate Ti Folder plain back P1210206.jpg

Not a large knife, the Seal folder is still a comfortable size.
 photo 21 Promate Ti Folder in hand P1210212.jpg

A few more details of the Barracuda Blunt Ti:

Promate’s Barracuda comes in Steel and Titanium versions, as well as blunt and pointed tips. The fully diving orientated blade design with Titanium and a blunt tip was chosen for the review.
 photo 23 Promate Barracuda boxed P1210224.jpg

Supplied with the knife are two rubber straps and an instruction leaflet.
 photo 24 Promate Barracuda box contents P1210227.jpg

The strap has quick release buckles.
 photo 25 Promate Barracuda strap clip P1210235.jpg

Each buckle has a sprung loaded adjustment clip to grip the rubber strap.
 photo 26 Promate Barracuda strap adjust P1210239.jpg

A strap in its fully assembled state. However this now cannot be fitted to the sheath. You need to take it apart, thread it through the slots and then reassemble it.
 photo 27 Promate Barracuda strap P1210242.jpg

Before unsheathing the knife for the first time.
 photo 28 Promate Barracuda sheathed P1210247.jpg

Inside the sheath the blade is wrapped in plastic.
 photo 29 Promate Barracuda unsheathed P1210251.jpg

With the knife out, you can see the ambidextrous retention clip.
 photo 30 Promate Barracuda sheath P1210254.jpg

The retention clip is a sprung plate with a catch in the centre and a release button each side.
 photo 31 Promate Barracuda clip P1210257.jpg

A quick look at the back of the sheath.
 photo 32 Promate Barracuda sheath back P1210262.jpg

A fully featured blade made of titanium which has a cutting hook, plain edge, prying blunt tip, smaller plain edge leading into a section of large serrations.
 photo 33 Promate Barracuda angle P1210272.jpg

Clearly marked as being made of titanium.
 photo 34 Promate Barracuda titanium P1210274.jpg

A cutting hook is included near the handle.
 photo 35 Promate Barracuda hook P1210280.jpg

The blunt tip is shaped nicely for prying, tapered but not too thin at the end.
 photo 36 Promate Barracuda blunt P1210284.jpg

Contoured more heavily than any of the other handles, the Barracuda provides excellent grip in all conditions.
 photo 37 Promate Barracuda handle P1210287.jpg

Just at the guard area is the indentation that the retention clip holds on to.
 photo 38 Promate Barracuda catch P1210289.jpg

The back of the blade reveals that the serrations are cut with a single bevel, but the plain edges are double bevelled.
 photo 39 Promate Barracuda blade back P1210293.jpg

Nicely cut, the serrations are larger than any others I’ve used.
 photo 41 Promate Barracuda serration P1210306.jpg

For scale, I take XL size gloves.
 photo 42 Promate Barracuda in hand P1210311.jpg

The butt has a large hammer striking surface. This is made of Titanium, so is not up to very heavy work.
 photo 43 Promate Barracuda hammer P1210314.jpg

Though it doesn’t need any cleaning for corrosion prevention, the Barracuda does fully disassemble.
 photo 44 Promate Barracuda apart P1210335.jpg

As mentioned earlier, the straps need to be threaded through the loops before fitting the quick release buckles.
 photo 45 Promate Barracuda straps P1210340.jpg

Fully assembled and ready for work.
 photo 46 Promate Barracuda straps P1210361.jpg

A few more details of the KF593 Ti:

This is a knife which has had a little more exposure than most and you might recognise it as it was featured in a few episodes of Bear Grylls ‘Man vs Wild’. It is also known unofficially as the Promate ‘Scuba’ Knife, but officially only as the KF593. There is a blunt tip version as well.

The KF593’s box.
 photo 47 Promate scuba box P1210371.jpg

Inside the box the knife comes wrapped in plastic. Also include are two rubber straps.
 photo 48 Promate scuba contents P1210373.jpg

With the wrapping off. There is a warning card included regarding care for the knife, however, this advice proved unnecessary.
 photo 49 Promate scuba contents P1210380.jpg

The KF593 fresh out of the box.
 photo 50 Promate scuba unsheathed P1210384.jpg

One of the great features of the KF593 is the retention system of the sheath. There is a sprung plate with two release buttons and a catch.
 photo 51 Promate scuba sheath lock P1210396.jpg

Looking at the back of the sheath, you can see the lower strap loop serves as a drainage hole. there is also a plastic spring which pushes against the blade when it is in the sheath the prevent rattling.
 photo 52 Promate scuba sheath back P1210403.jpg

This knife has alternative colour options for the handle. The orange part of the handle can be grey or blue.
 photo 53 Promate scuba angle P1210404.jpg

In case you forget, this is a titanium blade. Being a dive knife there is a line cutter hook.
 photo 54 Promate scuba hook P1210409.jpg

An unusual ‘reverse’ set of serrations are on the blade spine.
 photo 55 Promate scuba serrations P1210416.jpg

The full tang protrudes through the handle and provides a narrow hammer.
 photo 56 Promate scuba hammer P1210422.jpg

As supplied, the factor edge looks quite coarse, but cuts well enough.
 photo 57 Promate scuba edge P1210426.jpg

A nice mid-sized knife. (I take XL size gloves.)
 photo 58 Promate scuba in hand P1210431.jpg

The coloured rubber insert gives a good amount of grip.
 photo 59 Promate scuba handle P1210434.jpg

Rather than quick release buckles, this knife uses belt buckle type fastenings. Note that the holes in the strap are actually filled in. The first time you use any of them you need to push the buckle prong through the rubber in the hole.
 photo 60 Promate scuba strap P1210442.jpg

These straps are very quick and easy to set up and use.
 photo 61 Promate scuba with straps P1210444.jpg

A few more details of the KF505 Blunt:

And onto the last one of the Promate knives, the steel bladed KF505.
 photo 62 Promate steel box P1210448.jpg

In the box is the sheathed knife, rubber straps, care instructions and disassembly instructions.
 photo 63 Promate steel box contents P1210458.jpg

The clear sheath is an option for this knife.
 photo 64 Promate steel sheath back P1210461.jpg

A box-fresh KF505.
 photo 65 Promate steel unsheathed P1210464.jpg

Compared to the titanium knives a different sheath retention system used. A single release button on the front of the sheath is connected to a catch at the rear.
 photo 66 Promate steel sheath lock P1210467.jpg

Before moving onto some details let’s look at both sides of the blade.
 photo 67 Promate steel angle P1210478.jpg

The other side of the blade.
 photo 68 Promate steel angle P1210485.jpg

An unspecified stainless steel is used for the guard. Check the corrosion results later.
 photo 69 Promate steel guard P1210487.jpg

The serrations are cut with a single bevel.
 photo 72 Promate steel serrations P1210492.jpg

The use of a single bevel is clear when looking at the other side.
 photo 73 Promate steel serration back P1210496.jpg

A line cutting hook is ground into the blade near the handle. Note the steel designation on the blade – Stainless Steel 420 J2.
 photo 74 Promate steel hook P1210498.jpg

This knife uses a one-piece rubber handle.
 photo 75 Promate steel handle P1210509.jpg

The tang nut acts as a hammer.
 photo 76 Promate steel hammer P1210513.jpg

Starting to disassemble the knife by taking the tang nut off.
 photo 77 Promate steel hammer off P1210517.jpg

And fully disassembled.
 photo 78 Promate steel apart P1210528.jpg

The rubber straps have standard belt buckle type fixings.
 photo 79 Promate steel strap P1210531.jpg

This design of strap make it very quick and easy to get everything put together ready for use.
 photo 80 Promate steel with straps P1210534.jpg

Like the previous model this is a medium sized knife.
 photo 82 Promate steel in hand P1210541.jpg

What are they like to use?

With several very different offerings from Promate, the cutting results were varied and also not as I expected. The best performer in the cutting tests was actually the Seal folder with Ti blade. This maintenance-free small titanium bladed folder makes a fantastic backup knife. The other knives were mainly let down in the cutting tests by the factory edges, and are more capable given a bit of work getting a good edge.
The biggest surprise was the performance of the dedicated line cutter; using only a standard steel utility blade as the cutting edge, the corrosion testing really took its toll on this (details to follow). With a new blade, initial tests were that this was a very good cutter, so if you can find stainless utility blades they would be a better option.
See the Dive Knives 2016 – Mega Test Review for more information on the cutting test results.

Though a really excellent cutter, the Seal knife had a small issue that was easily fixed, but one worth being aware of.
The sharp eyed might have spotted that when looking at the ‘H’ (where the blade spine and lock bar touch), the lock bar is slightly raised. This gave me concern over how well the lock would function. Proven correct, I found the lock failed under mild pressure to close the blade.
 photo 22 Promate Ti Folder H P1210213.jpg

Taking a closer look at the locking surfaces, these appeared to be raw pressings so the fit was not good, and the blade tang hook was not catching the lock bar well. There is a simple fix for that….
 photo 22 Promate Ti Folder lock P1210364.jpg

Without having to take the knife apart, the blade tang hook can be cleaned up with a file (and the Ti files easily) to give a much better flat locking surface. Be careful not to go at this too much as taking more material than necessary will result in a blade that has play in the locked position. File a bit then test, and repeat. Once corrected, the locked blade was solid and the result was worth having to do this.
 photo 22 Promate Ti Folder lock P1210377.jpg

Earlier I mentioned the line cutter having disappointing cutting results, well this is why – Oh dear! The corrosion testing certainly hit the weak spot of this design – standard carbon steel blades. Cheap and easy to replace, but the rust starts as soon as it gets wet.
 photo 84 Promate line cutter corrosion P1230148.jpg

The corrosion tests threw up a surprise with the stainless steel knife. Typically, non-cutting stainless parts have a higher grade of stain resistance (with lower cutting ability), but in this case the worse corrosion was to the guard (though the hammer pommel was completely free of corrosion). The blade had a light frosting, but the guard was heavily corroded. After a cleanup, the guard was found to have deep pitting, and the clean-up (using a soak in cider vinegar) actually etched the guard heavily while making the blade nice and shiny.
 photo 85 Promate steel corrosion P1230009.jpg

The blade itself was relatively untouched and the frosting cleaned off with vinegar.
 photo 86 Promate steel corrosion P1230013.jpg

Ergonomics of the Promate knives is excellent, with easy to use, and secure, sheath retention along with great straps.

Folders are a contentious subject for diving, as the action of opening can be a make or break moment for the diver. The opening hole in the Seal folder is a little small, and being experienced in one-handed-opening (OHO) I did find this to be perfectly usable even with gloves, but with tired, cold hands and very thick gloves I suspect it will become increasingly difficult. There is also the exposed cutting hook to consider. This hook was actually a very poor cutter as it was not very sharp as supplied; with it being exposed, this lack of sharpness is actually a benefit. The Seal’s blade is worth carrying this knife for, with very good cutting ability and excellent serrations.

Overall it is clear these Promate knives are designed very well for divers, and the added bonus of zero corrosion on the titanium blades make them well worth considering.

Review Summary

The views expressed in this summary table are from the point of view of the reviewer’s personal use. I am not a member of the armed forces and cannot comment on its use beyond a cutting tool or field/hunting knife.

Something that might be a ‘pro’ for one user can be a ‘con’ for another, so the comments are categorised based on my requirements. You should consider all points and if they could be beneficial to you.

_______________________________________________ _______________________________________________
Things I like What doesn’t work so well for me
_______________________________________________ _______________________________________________
Titanium blades require no post-dive cleanup. The steel knife and cutter suffered corrosion.
Excellent blade retention. Factory edges not very good.
Comfortable leg straps. Serrations are too coarse for smaller ropes.
Handle design provides a very secure grip.
Sheaths are ambidextrous.

 photo 83 Promate line up P1210543v2.jpg


Discussing the Review:

Please feel free to add comments to the review, but the ideal place to freely discuss these reviews is on a forum. If you started reading the shorter forum version of the review, but followed the link this full exclusive review, please return to that forum to discuss the review there.
If you read the review entirely on Tactical Reviews, please consider one of the following to join in any discussion.

EdgeMatters – Sponsored Reviews (UK based Forum for Knife Makers and Collectors)

BladeForums – Knife Reviews (US based Forum for Knife Discussion)

CandlePowerForums – Knife Reviews Section (Largest and Friendliest Flashlight Community Forum)

Knife Review: Spyderco Assist Salt (Dive Knives 2016 – Detail Review)

This review provides further details for the Spyderco Assist Salt which could not be included in the Dive Knives 2016 – Mega Test Review

Not strictly a diving knife, thanks to the Assist model’s reputation as a rescue knife and the use of specialist rustless H1 steel in the ‘Salt’ edition, it has been adopted by many divers as an underwater rescue knife.

 photo Dive Knives underwater P1000872.jpg

The Blade and Handle Geometry:

Most knife specifications have a basic description of the blade geometry, but in this section I will be taking a more detailed look at geometry and balance.

Using a set of gauges and precision measuring equipment including a Vernier protractor, callipers, fixed radius gauges and the unique Arc Master adjustable radius gauge (the one that looks like a crossbow).
 photo Knife measuring P1180483.jpg

These measurements have been tabulated and are presented along with other blades.

Key aspects such as the primary bevel angle, grind type, blade depth, blade thickness, length, weight are detailed, along with balance information.

The ‘Balance relative to the front of the handle’ tells you if the knife will feel front heavy, or if the weight is in your hand (a positive value means the weight is forward of the front of the handle). The ‘Balance relative to the centre of the handle’ indicates how close to a ‘neutral balance’ the knife has in the hand.

In the case of full convex grinds the approximate centre of the grind is used for the primary bevel angle estimate.

The measurements are presented alongside some of the other knives from the Dive Knives 2016 – Mega Test Review

 photo Dive Knives Parameters 1 of 3.jpg

A few more details:

The Assist Salt arrives in Spyderco’s standard box.
 photo 01 Salt Assist boxed P1180225.jpg

An instantly recognisable design, but now in a bright yellow FRN and with H1 proudly shown on the blade. You will notice the Assist model’s ‘cobra hood’ over the thumb hole is not present on the Salt version.
 photo 02 Salt Assist unboxed P1180232.jpg

Spyderco’s very grippy FRM scale pattern surrounds the model and logo.
 photo 03 Salt Assist detail P1180239.jpg

And why not? There is a whistle moulded into the handle.
 photo 04 Salt Assist whistle P1180240.jpg

A Spyderco wire clip is used. This can be fitted to either side of the handle.
 photo 05 Salt Assist clip side P1180249.jpg

The ends of the wire clip are held in place under a special hollow bolt that also provides the lanyard hole.
 photo 06 Salt Assist clip fastning P1180251.jpg

At first it looks like the cutout in the lock bar is misaligned, but….
 photo 07 Salt Assist lock bar P1180256.jpg

…no, this is one of the Spyderco details where due to the pivoting action of the lock bar, the cutout does line up once pressed in to release the lock (or due to opening the blade).
 photo 08 Salt Assist lock bar 2 P1180259.jpg

The Assist uses a mostly serrated edge (80%), but with a small section of plain edge for detailed tasks. The main cutting power of the blade is in those SpyderEdge serrations.
 photo 09 Salt Assist part open P1180260.jpg

With well formed finger grooves and the textured FRN handle, the Assist Salt is not short on grip.
 photo 10 Salt Assist open P1180265.jpg

Yes, that is H1 steel.
 photo 11 Salt Assist H1 P1180270.jpg

For those not familiar with the Assist model, we’ll come back to the grooves in the blade spine.
 photo 12 Salt Assist blade P1180274.jpg

Recessed into the butt of the handle, there is a point that looks like a glass breaker.
 photo 13 Salt Assist breaker P1180289.jpg

With the blade closed, if you give it a squeeze, the glass breaker point comes out of the handle ready to use.
 photo 14 Salt Assist breaker out P1180291.jpg

Inside the handle where the blade tip sits, there is a small sprung block which has the glass breaker in it.
 photo 17 Salt Assist breaker push P1180322.jpg

The rounded end of the blade presses into this block and pushes the glass breaker out for use. Very neat design.
 photo 18 Salt Assist breaker pusher P1180325.jpg

What it is like to use?

Being a folder, for use as a dive knife, it is important that the Assist is a good size as this makes it easy to handle with, and without, gloves.

Actually in terms of easy handling, this is where I was slightly disappointed with the Salt version, as for some reason Spyderco decided to do away with the ‘cobra hood’ over the thumb hole. The thumb hole is still big enough to make opening easy enough, but that cobra hood would have made all the difference when using wet gloves with cold hands, just giving you more to get hold of.

 photo Dive Knives underwater P1000872.jpg

With the claims about H1 steel, I was particularly interested to see the corrosion test results. What did surprise me was what looked like a failure in this regard. However looking much closer, the apparent corrosion is actually the black writing on the blade which has mostly disintegrated, but where the black ‘1’ was, it has made it look like the blade has rusted. However this can be cleaned off leaving just the H1 steel. It might be better for Spyderco to use a different ‘ink’ for the writing, or none at all, to avoid this blemish on the otherwise unmarked H1 steel.
 photo Spyderco corrosion P1220990.jpg

The distinctive blade is a good size (I take XL size gloves) as can be seen here. This is ideal as you have plenty of edge to work with combined with the safety of the blunt tip to prevent stabbing yourself (or others).
 photo 19 Salt Assist in hand P1180341.jpg

To give an idea of scale, here it is next to the Fällkniven F1 and a Spyderco UK Pen Knife.
 photo 16 Salt Assist size P1180310.jpg

We have already seen the hidden glass breaker and how the finger grooves in the blade spine are used to access this, but there is another design feature that these finger grooves provide. The Assist can be used as a type of shears where the material to be cut is placed under the folding blade and the blade then squeezed shut to complete the cut. In this arrangement, you are carrying out a push cut with a serrated blade, when the serrations work best in a sawing motion. Personally, despite the very sharp blade, I found this to not work well on wet rope, in fact a normal cut worked far better, so for me the jury is out on that feature.

Unsurprisingly the SpyderEdge was an excellent cutter, and the H1 steel held up well. See the Dive Knives 2016 – Mega Test Review for more information on the cutting test results where the Assist achieved the second highest score.

Personally for a ‘working’ diving knife I prefer a fixed blade, but as a backup/release knife, the Assist gives me real confidence when carrying it. Requiring little to no care or maintenance, the Assist Salt is just ready and waiting for when you need it.

Review Summary

The views expressed in this summary table are from the point of view of the reviewer’s personal use. I am not a member of the armed forces and cannot comment on its use beyond a cutting tool or field/hunting knife.

Something that might be a ‘pro’ for one user can be a ‘con’ for another, so the comments are categorised based on my requirements. You should consider all points and if they could be beneficial to you.

_______________________________________________ _______________________________________________
Things I like What doesn’t work so well for me
_______________________________________________ _______________________________________________
Proven Escape Knife Design. The Assist ‘Cobra Hood’ is not on the Salt version.
H1 ‘Rustless’ Steel. Blade marking corrode (even though the steel doesn’t).
Built-In Signal Whistle
Built-In Glass Breaker.
Excellent grip.


Discussing the Review:

Please feel free to add comments to the review, but the ideal place to freely discuss these reviews is on a forum. If you started reading the shorter forum version of the review, but followed the link this full exclusive review, please return to that forum to discuss the review there.
If you read the review entirely on Tactical Reviews, please consider one of the following to join in any discussion.

EdgeMatters – Sponsored Reviews (UK based Forum for Knife Makers and Collectors)

BladeForums – Knife Reviews (US based Forum for Knife Discussion)

CandlePowerForums – Knife Reviews Section (Largest and Friendliest Flashlight Community Forum)

Knife Review: Benchmade 112S H2O (Dive Knives 2016 – Detail Review)

This review provides further details for the Benchmade 112S H2O which could not be included in the Dive Knives 2016 – Mega Test Review

 photo 10 H2O angle P1200651.jpg

The Blade and Handle Geometry:

Most knife specifications have a basic description of the blade geometry, but in this section I will be taking a more detailed look at geometry and balance.

Using a set of gauges and precision measuring equipment including a Vernier protractor, callipers, fixed radius gauges and the unique Arc Master adjustable radius gauge (the one that looks like a crossbow).
 photo Knife measuring P1180483.jpg

These measurements have been tabulated and are presented along with other blades.

Key aspects such as the primary bevel angle, grind type, blade depth, blade thickness, length, weight are detailed, along with balance information.

The ‘Balance relative to the front of the handle’ tells you if the knife will feel front heavy, or if the weight is in your hand (a positive value means the weight is forward of the front of the handle). The ‘Balance relative to the centre of the handle’ indicates how close to a ‘neutral balance’ the knife has in the hand.

In the case of full convex grinds the approximate centre of the grind is used for the primary bevel angle estimate.

The measurements are presented alongside some of the other knives from the Dive Knives 2016 – Mega Test Review

Please note the Benchmade 112S is incorrectly named the 112B in the table.
 photo Dive Knives Parameters 1 of 3.jpg

A few more details:

Benchmade’s nicely presented box.
 photo 01 H2O boxed P1200611.jpg

Taking the lid off the box gives your first view of the sheathed model 112S H20 diving knife.
 photo 02 H2O box open P1200616.jpg

Included are the sheathed knife, a single rubber strap and a leaflet.
 photo 03 H2O box contents P1200618.jpg

The strap, which can be used for a calf strap or arm strap has a quick release buckle.
 photo 04 H2O strap P1200622.jpg

A closer look at the plastic buckle and the rubber strap’s adjustable and fixed ends.
 photo 05 H2O strap buckle P1200628.jpg

The sheathed 112S H2O is a very neat package.
 photo 06 H2O sheathed P1200632.jpg

There is an essential drainage hole at the bottom of the sheath.
 photo 07 H2O drainage P1200636.jpg

On one side of the sheath is a very neat and functional release lever which holds and release the knife.
 photo 08 H2O retention P1200641.jpg

Looking in a bit closer you can see the metal pivot made of 316 Stainless Steel and hidden inside is a zinc-plated music wire spring.
 photo 09 H2O retention close P1200643.jpg

And here it is, the 112S H2O knife.
 photo 22 H2O angle P1200687.jpg

Featuring a blunt tip designed for safety and prying, there is a plain edge near the tip and a serrated edge closer to the handle.
 photo 11 H2O blade tip P1200653.jpg

Two sizes of scallop are used for the serrations.
 photo 12 H2O serrations P1200655.jpg

The plunge line is nicely radiused to avoid stress concentrators, especially important as the blade is designed to pry.
 photo 13 H2O plunge P1200659.jpg

A first finger indentation combined with a grippy rubber handle, makes the 112S very sure in the hand.
 photo 14 H2O handle P1200661.jpg

Surprisingly missing from some dive knives, the 112S has a lanyard hole.
 photo 15 H2O lanyard P1200663.jpg

On the spine is a small protrusion; it is this that the retaining clip locks onto to keep it secure in the sheath.
 photo 16 H2O retention hook P1200667.jpg

Part of what makes the 112S look strange, but yet which gives it its excellent cutting power is the chisel grind used for the main edges. This is the back of the blade and it is essentially just flat steel.
 photo 17 H2O blade back P1200673.jpg

The rear of the serrations.
 photo 18 H2O serration back P1200676.jpg

And of the plain edge.
 photo 19 H2O edge back P1200677.jpg

Also included in the blade design is a line cutter hook. This too is a chisel grind and is cut the opposite way to the main edges (back to front instead of front to back).
 photo 20 H2O cutting hook P1200680.jpg

Looking along the blade from the flat side.
 photo 21 H2O reverse anlge P1200684.jpg

What it is like to use?

Coming from a well respected knife manufacturer, the 112S had a lot to live up to. One of the stranger looking knives, it might not be one which you drool over and ‘must have’. However there is purpose behind every design detail, and its cutting test results speak for themselves. Only shears equalled the cutting score of the 112S, that is quite some achievement. See the Dive Knives 2016 – Mega Test Review for more information.

Another key feature of the 112S is the sheath and the retention system. As long as you mount the sheath so that your hand falls onto the handle and your thumb onto the release lever, the drawing of the knife becomes completely natural. Your thumb presses the lever as you grip the knife and the knife can be easily withdrawn. I have found that if pulling on the knife too early, the release lever can’t ‘let go’ of the knife and you have to push the knife back into the sheath to allow it to release the lock. I particularly like that there is a slight friction fit of the knife into the sheath, so even with the lock released, it doesn’t just fall out.

For a good knife steel (N680), the 112S performed very well in the corrosion testing. Here is the raw result of this testing, but actually a lot of this rubbed off with a cloth, leaving only really the outer ring of the corrosion. Less easy to see, there is some corrsion near the handle rubber, but overall for what really constitutes complete neglect, the 112S did not suffer any significant corrosion.
 photo Benchmade corrosion P1220994.jpg

One concern I had was about only a single strap being provided, and this was for two reasons. Firstly was comfort of fit – with two straps you don’t need either to be too tight, but secondly and perhaps more importantly, in case a strap snapped, was cut, or became snagged on something, once that single strap has failed you could lose the knife.

 photo 23 H2O with strap P1220134.jpg

However, my concerns over comfort proved not to be realised at all, and the strap is a good quality so felt secure enough. As long as you check its condition regularly it should be reliable.

In the Dive Knives 2016 – Mega Test Review I did express a preference for one of the knives on test, but that was in relation to a general purpose backup knife. If I were expecting a lot of cutting work, then the Benchmade 112S would jump right up there and would be my pick of the bunch as a quality cutting and prying tool.

Review Summary

The views expressed in this summary table are from the point of view of the reviewer’s personal use. I am not a member of the armed forces and cannot comment on its use beyond a cutting tool or field/hunting knife.

Something that might be a ‘pro’ for one user can be a ‘con’ for another, so the comments are categorised based on my requirements. You should consider all points and if they could be beneficial to you.

_______________________________________________ _______________________________________________
Things I like What doesn’t work so well for me
_______________________________________________ _______________________________________________
Excellent cutting performance. Only a single leg strap.
Great ergonomics for knife and sheath. Slight concern over the corrosion resistance of the ‘music wire’ spring used for the sheath lock.
Sheath is easy to use and secure.
Strong prying tip.
Very good corrosion resistance.

 photo H2O feature P1200700.jpg


Discussing the Review:

Please feel free to add comments to the review, but the ideal place to freely discuss these reviews is on a forum. If you started reading the shorter forum version of the review, but followed the link this full exclusive review, please return to that forum to discuss the review there.
If you read the review entirely on Tactical Reviews, please consider one of the following to join in any discussion.

EdgeMatters – Sponsored Reviews (UK based Forum for Knife Makers and Collectors)

BladeForums – Knife Reviews (US based Forum for Knife Discussion)

CandlePowerForums – Knife Reviews Section (Largest and Friendliest Flashlight Community Forum)