Knife Review: UG Tools TiNy SecuriTi

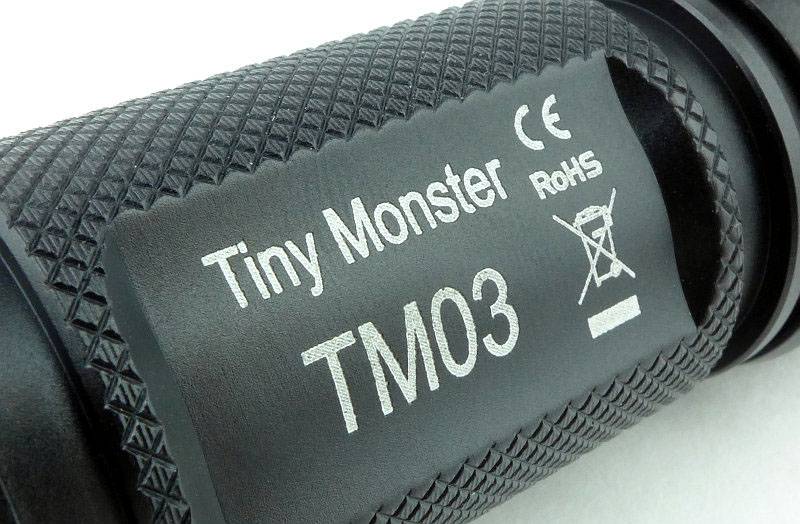
TiNy by name, but definitely not in strength and performance; this is a detailed review of the UG Tools TiNy superlight knife. Not just the TiNy, but the special ‘SecuriTi’ edition, specifically designed to prevent unauthorised snatching of the knife from the owner by means of an added security lock. More on that later in this UG Tools TiNy SecuriTi review.

Before saying more about the knife, just a quick explanation of the maker’s name. UG Tools in full is Utsch & Gierse Tools, and for the review video titles I’ve written this as U.G. Tools with full stops to separate the U & G. I did this to specifically demonstrate how their name should be said. They are not pronounced like a well know brand of footwear, nooooooo, Utsch & Gierse are U.G. Tools, but write this simply as UG tools. Don’t sound like a caveman, say the name as it should be 🙂

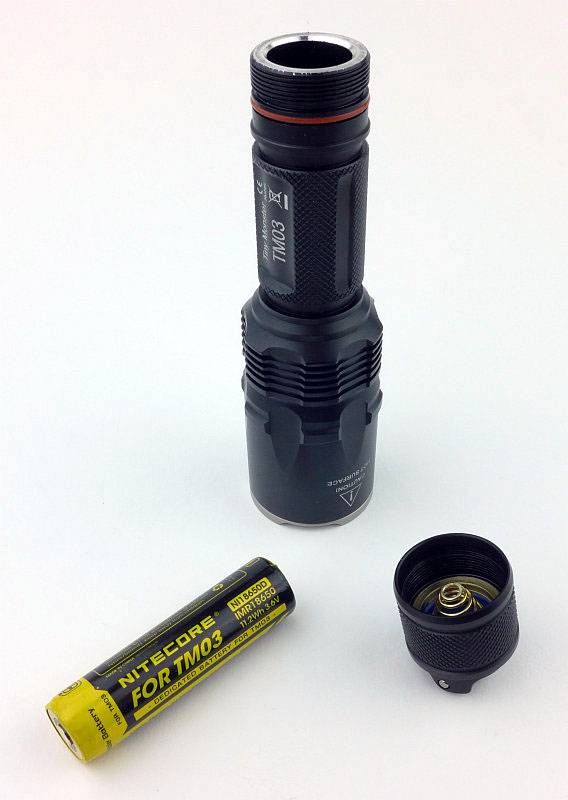
UG Tools TiNy has already made its mark, giving you a superlight fixed blade without sacrificing strength through ingenuous use of 3D printed Titanium handles (referred to as 3DTi) that allow a short tang blade to have the stability and strength of a full tang knife at a much lower weight.
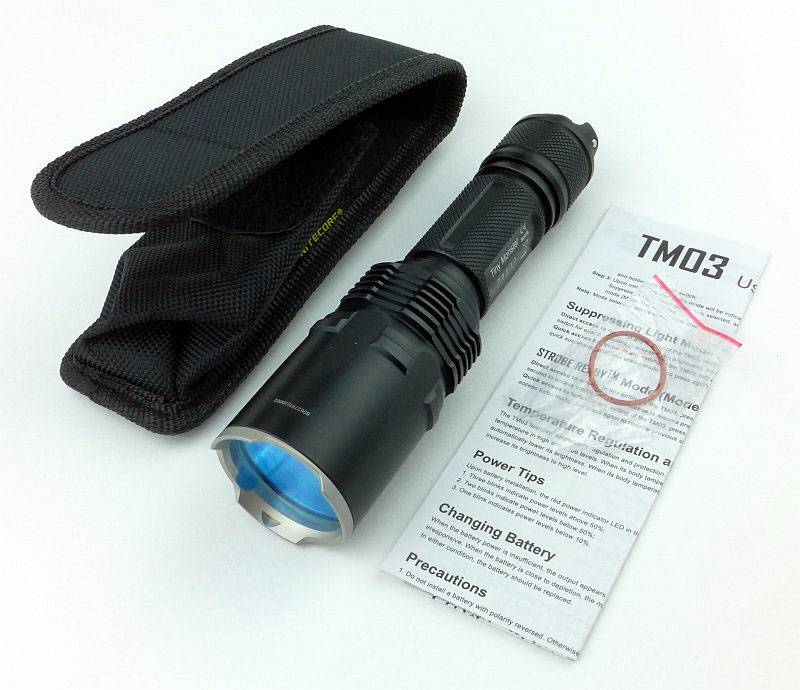
What’s in the box?:
In fact there is no box as this was an exhibition knife from EnforceTac 2025 (held immediately prior to IWA 2025), and shows a little wear on the Ulti-clip mount and this edition’s special security latch.

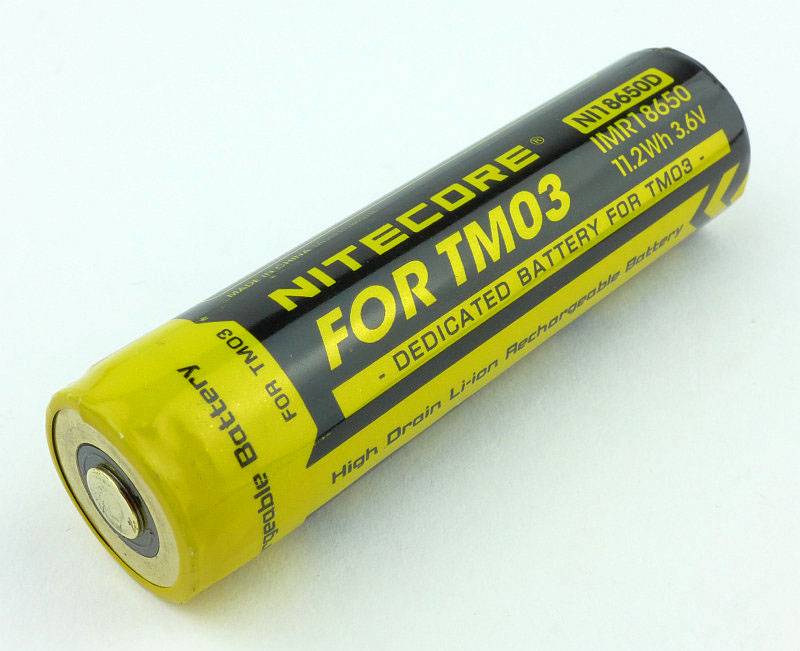
This review knife has the Floe pattern handle texturing, 3D printed sheath made of PA11 (polyamide) which incorporates the SecuriTi’s added security lock, and has been designed to perfectly integrate with Ulti-Clip UltiLink mounting system.


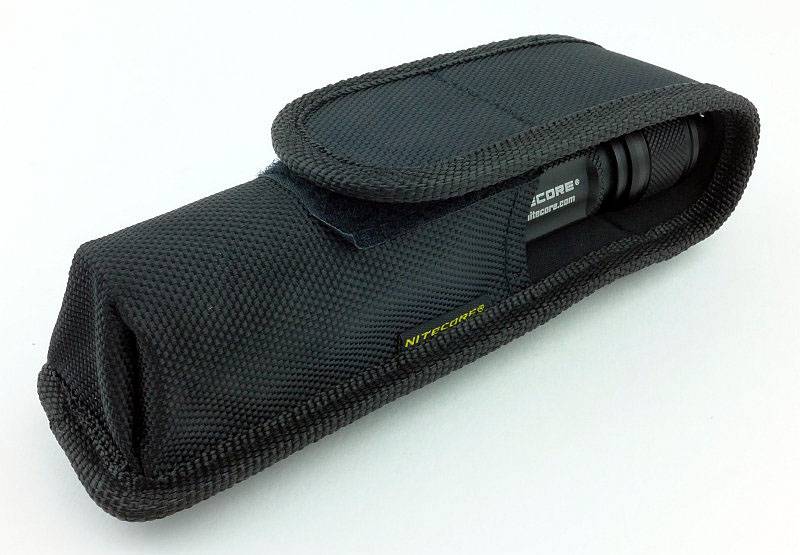
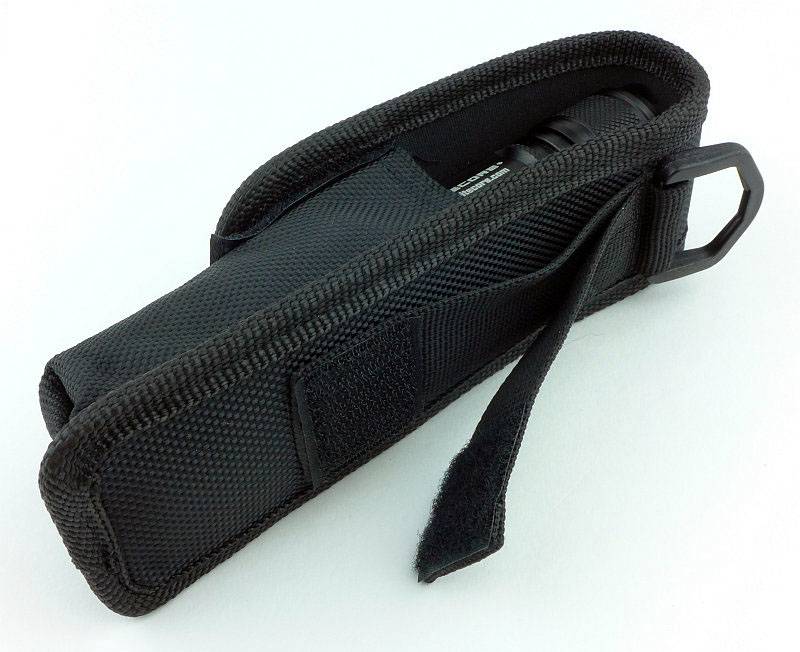
A good look round the SecuriTi’s Sheath – Things to look out for here are:
First in the gallery are photos showing the integration of the Ulti-Clip UltiLink mounting system into the TiNy’s sheath. UG Tools have made the sheath to use this mounting system so the integration could not be better.
The titanium lever that sits above the UltiLink is the SecuriTi’s security latch. Other sheath details are a retention tension adjusting screw, drainage hole and integrated thumb ramp for removing the knife from the sheath.


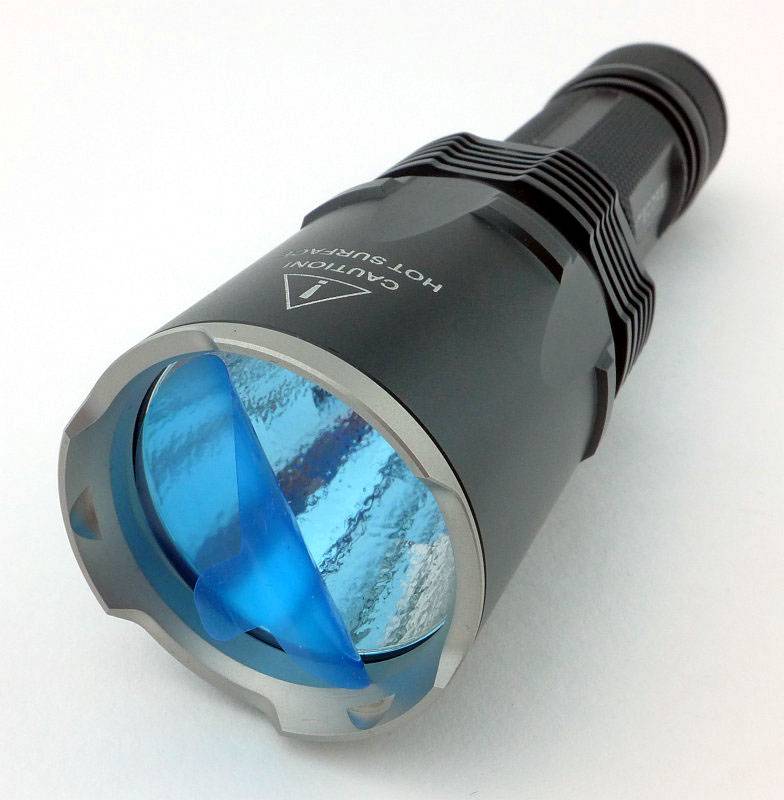
A good look round the TiNy’s handle and blade – Things to look out for here are:
After an overall look at the proportions, it’s time for a closer look at the 3DTi printed handle with Type II anodised finish. All TiNy models have the integral guard, and the SecuriTi has the additional security latch integral keeper hole for the latch hook to grip.
This review knife features the Floe pattern handle texturing (or giraffe pattern as renamed by a friend).
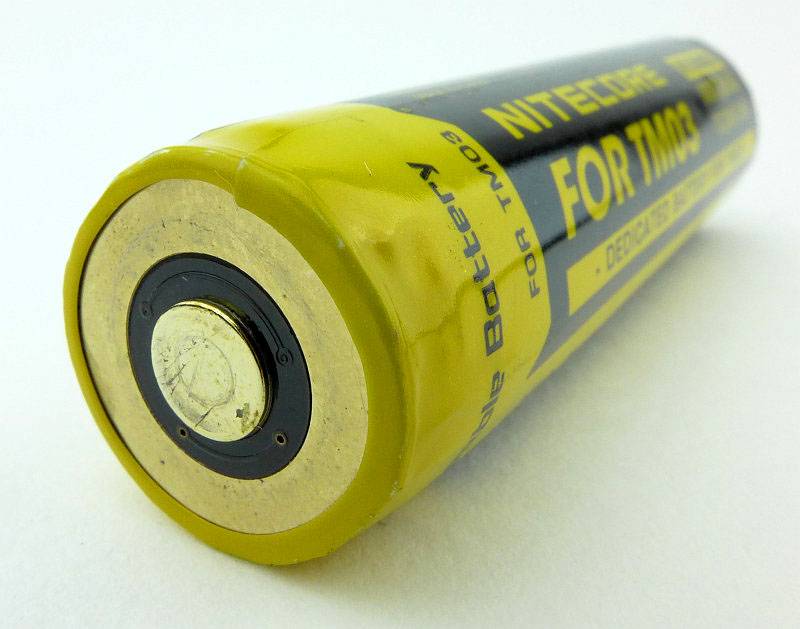
Another SecuriTi specific feature is the Ceramic ball glass breaker in the butt of the handle. Next to this is a blind loop lanyard hole.
And now onto the blade, the only conventionally manufactured part (not 3D printed), a 100 mm drop point blade made of 2.8 mm thick MagnaCut with stonewashed and DLC coated finish. A sharpening choil ensures you can re-sharpen the entire cutting edge.


Explained by the Maker:
In this section I’m including words directly from the maker themselves.

“Our 3DTi-knives combine extremely low weight with the stability of a full-tang.

Our 3DTi Handles

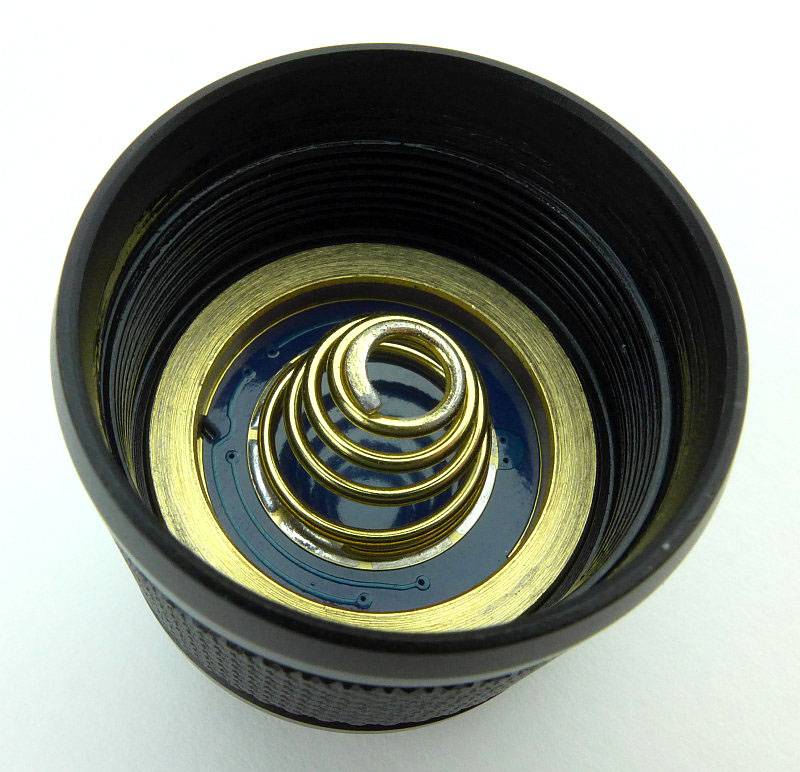
Our 3D-printed titanium handles were developed by us with clear goals: To achieve the best balance of weight and stability with the highest functionality and perfect ergonomics. In many iterations, the moulds were repeatedly adjusted over a year and subjected to strict stress tests of the knives (and our nerves) until we were satisfied with the result. With a average wall thickness of 1 mm, the high-strength titanium of the handle is still incredibly stable and allows for a blade with an unusually short tang that has no disadvantages: the titanium supports the tang and force is dissipated into the handle evenly. In addition to the extreme weight saving, another advantage is a large hollow space inside (expect with TiNy-models) which, in combination with our titanium screw cap, provides a storage space for various applications. In addition to our ruby sharpening rod, each individually important item can be stored absolutely dry in the handle.

Our Blades

We source our blades from a renowned Solingen contract grinder, with whom we also work together on the optimal ergonomics of our blades and select suitable steels. We have our blades hardened at the special German hardening shop Werz. Here we have full control over the final result. We fit the blades into the handle without play and glue them into the titanium handle over the entire surface with high-strength adhesive. For even more safety, with most models the blade is additionally screwed from the inside. So it remains fully functional in the unlikely event of the adhesive coming off. The adhesive reliably seals the gap to the handle and prevents dirt and moisture from penetrating. It is possible to have worn or damaged blades replaced by us at a reasonable price.

Our Sheaths

Knife sheaths have always been one of our biggest bottlenecks. Knife sheaths typically are made of leather or Kydex and are produced by hand. Due to our large number of blade-handle combinations, we were unable to have sufficient quantities produced economically. The problem: injection moulded sheaths were far from meeting our requirements. That’s why we developed 3D printable sheaths especially for our knives. They are made of PA11 (polyamide) and have, varying by model, for example a removable belt loop, drain holes, an adjusting screw for the perfect fit of the knife and other features. They are available for right- & left-handers. In the future we will offer 3D-printed sheaths and leather sheaths.

Our TiNy series in Floe design was developed with the goal of offering our no-compromise 3DTi design in even more compact and lightweight form. The TiNy with droppoint blade in MagnaCut is, despite the extremely low weight of only 80 grams, as stable as a full-tang of the same length. This makes the TiNy the perfect unobtrusive companion for everyday use(EDC) or a no-compromise backup knife with impressive stability.”


The Blade and Handle – Detailed Measurements:
For full details of the tests and measurements carried out and an explanation of the results, see the page – Knife Technical Testing – How It’s Done.

The blade is made from Magnacut steel.


The Factory edge up close:

Followers of Tactical Reviews will know my views on factory edges, but to recap:

Anyone using a knife will need to sharpen it. That first factory edge is just like the first tank of fuel that a new car comes with (or first charge of the battery).
A good factory edge is a ‘nice to have’ but not a ‘make or break’ for a good knife, as you will be putting your own edge onto it soon enough.
The factory edge does however indicate the care a knife maker has put into the final finish.
It is for this reason Tactical Reviews measures factory edge sharpness and specifications, and includes this information in the detailed technical testing.

As a further look at the factory edge, this section has been added to include some high magnification photos of the factory edges.


What is it like to use?

For this special edition TiNy, as the SecuriTi, I envision it typically being on a load carrier platform or pack shoulder strap to provide maximum accessibility.

Exactly the reason the security latch was added, as being so accessible, there is a chance of unauthorised snatching, which the latch counters brilliantly. For the owner of the knife, releasing the security latch is completely natural, you need only place your thumb, as you would normally, to pop the knife from the sheath, but then apply a little sideways force to the latch lever to release the security latch.
Any attempt to just grab the knife handle will not gain access to the knife as it just won’t come free from the sheath.


Once in your hand this is now no longer about the SecuriTi edition, but instead the UG Tools model, the TiNy. Shown here in my XL-glove size hands, it is a compact knife, not a tiny one. Tiny in terms of weight, yes, 85 grams for an all metal construction fixed blade without compromise on comfort or strength. You can see that the ergonomics of the handle and blade make this excellent as a general purpose utility knife.
Considering the ergonomics of the sheath as well, the integral jimped thumb ramp for releasing the knife (which has the security latch lever next to it) makes one handed opening a breeze when the sheath is not mounted to a belt or load carrier; you just pop and flick the sheath off.


Before getting on to some cutting tests, the TiNy has a full metal handle, which meant I needed to test UG Tools’ claim about cold weather use:
“In winter, the low mass with the poor thermal conductivity of titanium ensures that the handle is at body temperature in just a few seconds, even in wet and cold conditions, making it suitable for use in all climates.”

While it is true that Titanium has a conductivity around 22 W/m·K, compared to steel at around 45 W/m·K, another factor is also the low mass of the UG Tools handle construction with a wall thickness of around 1mm, meaning there is also less metal to need to warm up than other metal handle knives.

So for this test I left the TiNy in the freezer overnight to soak it down to a crispy -20°C then, thermal camera ready, straight out of the freezer and in my hand.

The gallery shows how the purely Titanium part of the handle is warming rapidly. Where the steel knife tang is inserted into the handle it stays cold longer. Considering the knife was at -20°C, it wasn’t ‘warm’ but it also didn’t freeze to my skin or otherwise feel particularly uncomfortable.


One other factor in this cold weather test that does make a difference is the surface finish. UG Tools use a Type II anodising carried out after an initial coarse sand blasting. The Type II anodising used creates plasma sparks that “melt” the surface on a microscopic level which leads to a smooth almost organic feeling. This surface finish further insulates your skin from hot/cold when holding the knife.

This is what the surface looks like under the same magnification as the factory edge images.

First I made the TiNy prepare its own baton, ready for a good pounding through pallet wood. Being so lightweight you can’t chop with the TiNy, so it needs a baton to strike it and drive it through what you are cutting. The compact size also means it is more of a nibbling away, having to reposition and widen the cut so the baton can still hit the blade. In this specific cutting test, the knife tip is not available to strike, instead it is either the spine or very close to (or on occasion on) the handle. In the end, the last part of this cut split under the batoning force with only a few millimetres left to cut.
Combining the slim blade stock with a flat grind, makes the TiNy an eager cutter, and easy to control. Slicing the wood like a woodworker’s plane, feather stick work turning into something like a wafer stick.


IT is actually amazingly tactile, and another observation when handling the TiNy is that its unique construction, with the thin walled printed Titanium handle, is that is almost ‘rings’ as you hold it, reminiscent of handling fine ceramics. Different to any other knife I have used, and I like it. Comfortable to use, lightweight, super strong and easy to carry.

As we have seen, UG Tool’s TiNy is the exception to at least two of rules of knife design; that anything other than a full tang compromises overall strength, and an all metal handle is heavy and cold. They say ‘it is the exception that proves the rule’, but is the UG Tools TiNy the exception, or simply the rule breaker?

Review Summary

The views expressed in this summary table are from the point of view of the reviewer’s personal use. I am not a member of the armed forces and cannot comment on its use beyond a cutting tool or field/hunting knife.

Something that might be a ‘pro’ for one user can be a ‘con’ for another, so the comments are categorised based on my requirements. You should consider all points and if they could be beneficial to you.

_______________________________________________
What doesn’t work so well for me
_______________________________________________

The UltiLink Mount seems a bit out of proportion on the TiNy.
It makes me want more UG Tools knives!!!

_______________________________________________
Things I like
_______________________________________________

Fantastic ergonomics and comfort.
Magnacut blade.
Low temperature DLC coating.
Security latch system on the SecuriTi edition.
Organic feeling handle texture/Type II anodising.
Uniquely tactile 3D printed Titanium handle.
Uncompromised fixed blade strength weighing only 85g.
Slim 2.8mm blade stock.
Flat grind slicing ability.

Review Videos

Starting with a short format sixty second review:


Onto a full video review covering many more details:


Discussing the Review:
Something new – will it work? A Tactical Reviews Subreddit.
TacticalReviewsChat on Reddit
Please visit there and start/join the conversation.

Light Review: NITECORE TM03 (Tiny Monster)

NITECORE have been expanding the Tiny Monster line and with the TM03 have shrunk the monster performance into a single 18650 size light. Now it is even easier to carry Tiny Monster performance with you in the form of the world’s most powerful 1x 18650 light.

 photo 00 TM03 feature P1210997.jpg

Taking a more detailed look:

Following the other TM series lights, the TM03 comes in a tough cardboard box.
 photo 01 TM03 boxed P1210968.jpg

The light is held in place with a strong closed cell foam.
 photo 02 TM03 box open P1210973.jpg

Along with the TM03, a holster, the instructions and a spare o-ring are provided.
 photo 03 TM03 box contents P1210979.jpg

Before we look at the TM03 in more detail, let’s look at the holster. Here it is with the TM03 inside.
 photo 04 TM03 holstered P1210983.jpg

You have the choice of D-loop, fixed loop, or Velcro loop.
 photo 05 TM03 holster loops P1210986.jpg

There is a blue plastic lens protector on the front when it arrives. You MUST remove this before trying the TM03 at all as it will melt and make a mess of the lens if you don’t.
 photo 06 TM03 protector P1210991.jpg

As with the NITECORE Precise series, the TM03 has a dual switch tail-cap. One is a forward clicky standard switch and the other is a metal paddle MODE switch.
 photo 07 TM03 switches P1220001.jpg

Supplied in the TM03 is a special IMR cell, clearly labelled ‘FOR TM03’. It is normal 18650 size, so this gives you and idea of the overall size of the TM03.
 photo 08 TM03 cell out P1220005.jpg

In the tailcap are the two normal contacts.
 photo 09 TM03 tailcap contacts P1220008.jpg

Mainly for heat-sinking, the TM03 has a heavy duty thick walled battery tube.
 photo 10 TM03 tube wall P1220011.jpg

Standard threads are used for the tail-cap.
 photo 11 TM03 threads P1220012.jpg

Back to the dedicated 18650 IMR cell. Notice the dual contacts at the front.
 photo 12 TM03 cell P1220018.jpg

Taking a closer look at the dual contacts on what would normally be the positive end of the cell.
 photo 13 TM03 positive P1220021.jpg

The negative terminal of the cell is standard.
 photo 14 TM03 negative P1220024.jpg

Peering inside the battery tube you can make out the positive contact as well as the secondary contacts surrounding it.
 photo 15 TM03 head contacts P1220028.jpg

Finish is to a high standard as is the engraving.
 photo 16 TM03 engraving P1220030.jpg

Despite the high output, the cooling fins are shallow.
 photo 17 TM03 fins P1220033.jpg

Here is the heart of this Tiny Monster, its monster XHP70 Quad die LED.
 photo 18 TM03 XHP70 LED close P1220045.jpg

The reflector is textured to give a smoother beam, but the reflector also has two profiles specifically controlling how much spill and hotspot the TM03 has.
 photo 19 TM03 XHP70 LED P1220053.jpg

Putting the TM03 next to a normal 18650 light, it is slightly bigger and heavier in build, but has performance that outshines the standard light by a long way.
 photo 20 TM03 size P1220127.jpg

The beam

Please be careful not to judge tint based on images you see on a computer screen. Unless properly calibrated, the screen itself will change the perceived tint.

The indoor beamshot is intended to give an idea of the beam shape/quality rather than tint. All beamshots are taken using daylight white balance. The woodwork (stairs and skirting) are painted Farrow & Ball “Off-White”, and the walls are a light sandy colour called ‘String’ again by Farrow & Ball. I don’t actually have a ‘white wall’ in the house to use for this, and the wife won’t have one!

With such high output, and indoor shot can easily be overblown, so this is not a representation of how bright the beam is, but the characteristics of the beam. Exposure has been adjusted to show the hotspot, spill, and outer spill. For such a large LED, there is quite a defined hotspot, and the spill is a medium width.
 photo 21 TM03 indoor beam P1230313.jpg

Then we go outdoors, and blast the full 2800lm , and this is the effect you get. The TM03 is bright, and it is very compact. Nice!
 photo 23 TM03 outdoor beam P1240710.jpg

Modes and User Interface:

The TM03 has four constant modes (Turbo, High, Mid and Low) and one flashing (Strobe) mode, controlled by a dual-switch tail-cap.

Basic operation is with the forward-clicky switch; half press for momentary access to the last used constant mode, and fully press and click to turn the TM03 ON to the last used constant mode. (Release or click again to switch off).

When ON, pressing the MODE switch cycles through the output modes – Low, Mid, High, Turbo, Low etc.

The TM03 allows you to set up the direct access operation of the MODE switch in two different modes – Suppressing Light, or STROBE READY.

To swap between these two modes:
Switch the TM03 OFF
Remove and replace the battery.
Within 60s of replacing the battery tighten the tail-cap while pressing and holding the MODE switch.
The TM03 will then flash once to indicate Suppressing Light, and two for STROBE READY.

In Suppressing Light mode:
Direct access to Turbo – in any mode including OFF, press and hold the MODE switch. Release to return to previous output.
Quick access to Strobe – in any mode including OFF, press the MODE switch twice in quick succession. Press again to return to previous output.

In STROBE READY mode:
Direct access to Strobe – in any mode including OFF, press and hold the MODE switch. Release to return to previous output.
Quick access to Turbo – in any mode including OFF, press the MODE switch twice in quick succession. Press again to return to previous output.

When inserting the battery, a red light in the tail-cap flashes to indicate battery power. Three blinks for above 50%, two blinks for below 50% and one blink for less than 10%.

Batteries and output:

The TM03 runs on a supplied proprietary IMR call with dual contacts on one end, but will also run at a severely reduced output on a normal 18650.

To measure actual output, I built an integrating sphere. See here for more detail. The sensor registers visible light only (so Infra-Red and Ultra-Violet will not be measured).

Please note, all quoted lumen figures are from a DIY integrating sphere, and according to ANSI standards. Although every effort is made to give as accurate a result as possible, they should be taken as an estimate only. The results can be used to compare outputs in this review and others I have published.

___________________________________________ ________________________________ ________________________________
NITECORE TM03 using specified cell I.S. measured ANSI output Lumens PWM frequency or Strobe frequency (Hz)
___________________________________________ ________________________________ ________________________________
Turbo – TM03 IMR 2804 0
High – TM03 IMR 1501 0
Medium – TM03 IMR 632 0
Low – TM03 IMR 34 0
Max – ‘Normal’ AW IMR 259 0

* Beacon and Strobe output measurements are only estimates as the brief flashes make it difficult to capture the actual output value.

Peak Beam intensity measured 21300 lx @1m giving a beam range of 292 m.

There is parasitic drain and due to the dual contact at the head of the light there is drain at the head, and drain at the tailcap. When using the TM03’s IMR cell, the drain was 1.7mA at the head and 15uA at the tailcap. Taking the worst of these as the only significant value, it is the head drain that is relevant as it will take only 76 days to drain the cell.

NOTE: The use of the AW IMR cell for the ‘normal’ 18650 test was to prove that the throttling of output was not due to a bad cell. The TM03 is drastically throttled when not using the supplied cell and this is no reflection on the AW cell.

This graph has three traces on it to show a couple of specific aspects, including comparing a couple of NITECORE chargers, the SC2 and D4 (both used to charge the TM03s’s cell), and also showing the characteristics depending on if you start in Turbo or High.
The SC2 is a rapid charger, well suited to IMR cells. Due to charging at a higher current, it also tends to terminate earlier. This can be seen with the earlier drop to low mode at around 1h 20m. Considering the vast reduction in charging time, this minor loss in overall output is well worth it.
Then look at the overall characteristics when starting on Turbo where after the initial 2800lm burst, the output drops right down to the 630lm Mid level output, and then continues on this until the cell is depleted.
When starting on High, the output remains on High until the cell can no longer maintain the output and starts to drop in stages, gradually reducing at 20m all the way through to 1h from turn on.
Effectively if you want more light for longer, either stay on High, or you’ll have to switch it OFF and ON again to get Turbo (as long as it is not too hot), and expect not to have much runtime.
 photo TM03 runtime.jpg

Troubleshooting

This section is included to mention any minor niggles I come across during testing, in case the information helps anyone else.

No issues were encountered during testing.

As per the description of this section, this information is provided in case anyone else finds a similar ‘issue’ that might be fixed in the same way.

The TM03 in use

Normally I don’t like to start with a negative, but the TM03 does have one issue, and that is particularly with the Suppression Mode. I have found that when closing the holster flap over the TM03’s tail-cap, it is easy to press (or more dangerously – nearly press) the MODE switch enough to activate direct access Turbo. This means that inside the holster the TM03 bursts into life with all 2800lm. It gets hot VERY fast. Now I also said ‘more dangerously – nearly press’, and the reason it is more dangerous, is that the TM03 is now on a hair trigger needing only a tiny pressure on the holster to bring on the Turbo output. I was putting the TM03 into a drawer and as it nestled against some other items Turbo came on. Luckily I noticed, but I could easily have closed that drawer – for the last time.
So my first comment is that if using the holster you need to undo the tail-cap a half turn (a quarter is not enough) to lock-out the TM03.

Now onto the good stuff. This is a very bright light. Even these days when people are used to high output lights, the TM03 still surprises with its compact size. It is not much bigger than standard 1x 18650 lights, but is a lot more powerful. The heavy build is reassuring and is certainly needed for heat-sinking. I never had the sense the TM03 was getting too hot.

My own views on tactical lighting requirements gathered from various members of the armed services and law enforcement are that Strobe is not the preferred output, but very bright is. The TM03 does VERY bright, very well.

Of course with the fundamental law of portable lighting that you can only have two of the three factors – Bright, Small, Long Runtime, the TM03 looses out in runtime. Mainly this is because if you have the TM03 on you, why would you bother with the Low mode? You will be enjoying all those lumens, using bursts of Turbo, and all too soon it does start to struggle. Not the fault of the TM03, but just a factor to be aware of – this is a Tiny Monster after all.

It was worth the extra effort required to check the parasitic drain at the head, as this explains why after only short periods of storage, the runtime is even more reduced. This level of drain is bad. It is easy to pop a light in a drawer for three months at a time, and in that time the TM03 will be dead. Even if you undo the tail-cap slightly, this doesn’t stop the double pole in the head making contact and draining the cell, you need to remove the cell completely.

With regard to using other 18650 cells, NITECORE have severely hobbled the output on the TM03 when not using its dedicated double pole IMR. The maximum output I managed to get was around 250lm. It does mean that you know you can still have enough light to see by if you carry a normal 18650 as a spare, but once that dedicated IMR is depleted, you need to recharge before you get the TM performance again. At least you know it will work as a backup, and with such extreme performance it is sensible to protect the light and the user from ‘unknown’ cells.

If you want a pocket rocket, the TM03 will not disappoint, and brings custom level performance to a production light.

Review Summary

_______________________________________________ _______________________________________________
Things I like What doesn’t work so well for me
_______________________________________________ _______________________________________________
2800lm on a single 18650!! Direct access via the MODE switch too easily activated by the holster flap.
Solid build. High Parasitic Drain.
Direct access to TURBO. Uses a proprietary cell for full performance.
Sturdy holster provided.
Supplied with cell so you only need a charger.


Discussing the Review:

Please feel free to add comments to the review, but the ideal place to freely discuss these reviews is on a forum. If you started reading the shorter forum version of the review, but followed the link this full exclusive review, please return to that forum to discuss the review there.
If you read the review entirely on Tactical Reviews, please consider one of the following to join in any discussion.

CandlePowerForums – Flashlight Reviews Section (Largest and Friendliest Flashlight Community Forum)

EdgeMatters – Sponsored Reviews (UK based Forum for Knife Makers and Collectors)