In this review of the Fenix PD36 TAC, I’m going to be taking a detailed look at the details, comparing its performance to the specifications, checking out the beam and how usable it is. The review includes video content as well as photo galleries and technical testing results.
Join me in this look over the Fenix PD36 TAC Flashlight / Torch, a light built around the increasingly common larger 21700 cell (compared to the typical 18650 previously used). This has a specialised tail-cap with physical lockout, dedicated ‘Tactical’ setting, and a normal ‘duty’ multi-mode setting.
Let’s get to really know the Fenix PD36 TAC!
Video Overview
Starting out with the video overview of the PD36 TAC.
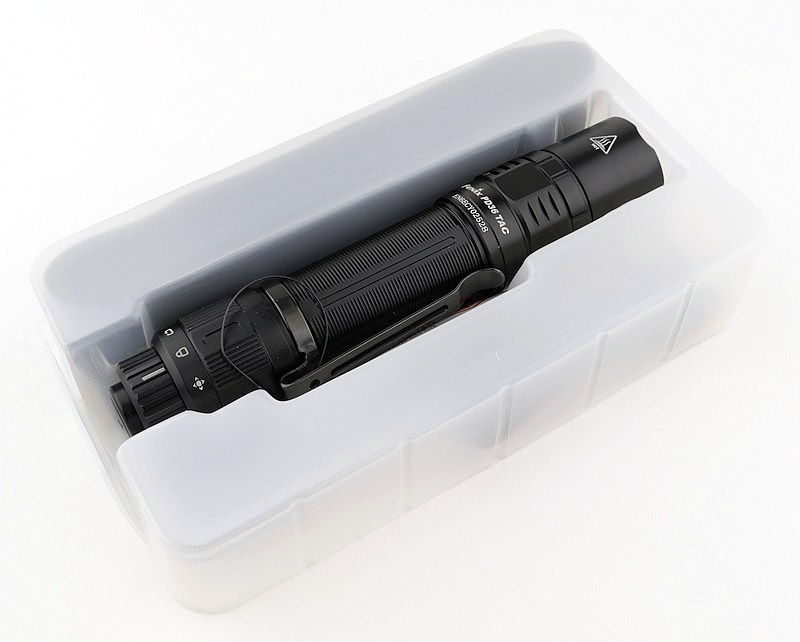
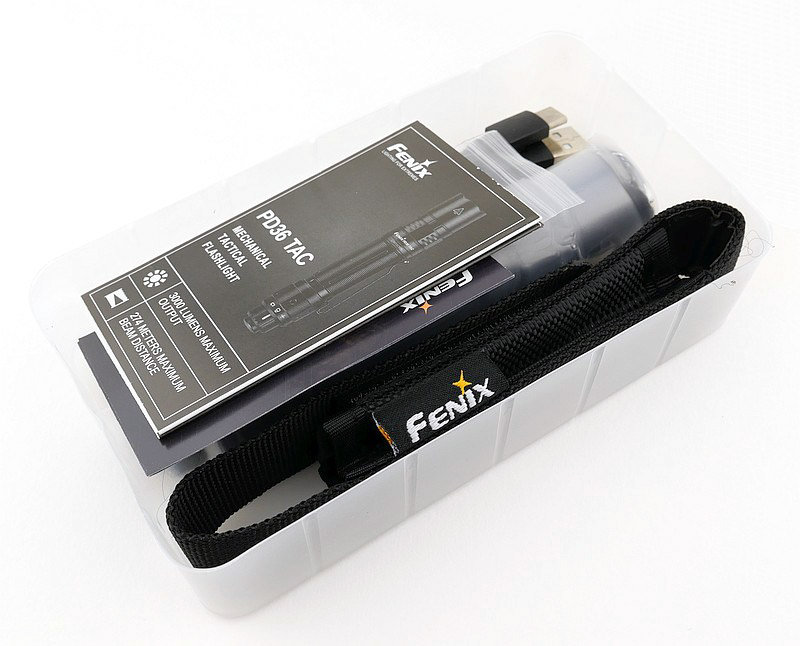
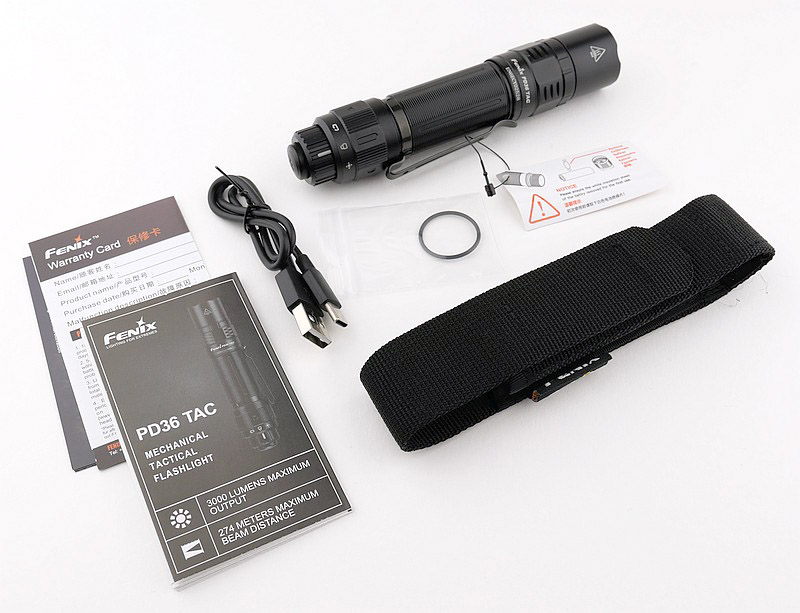
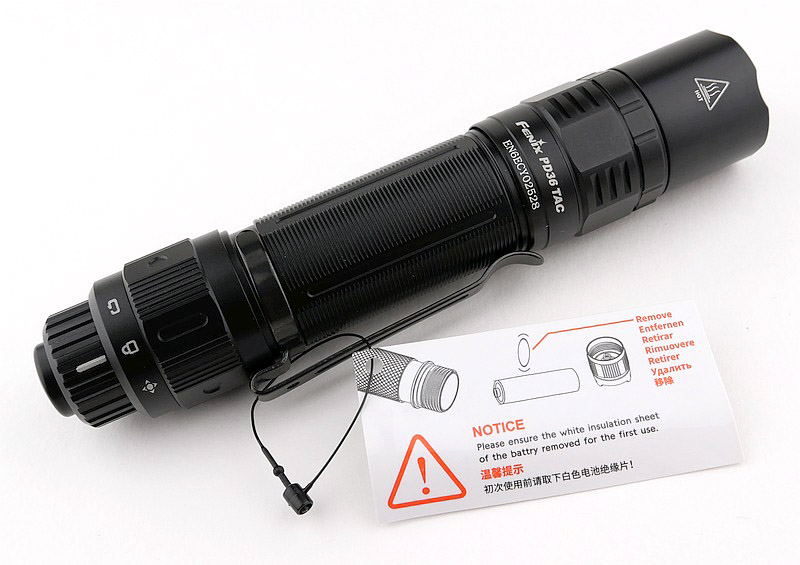
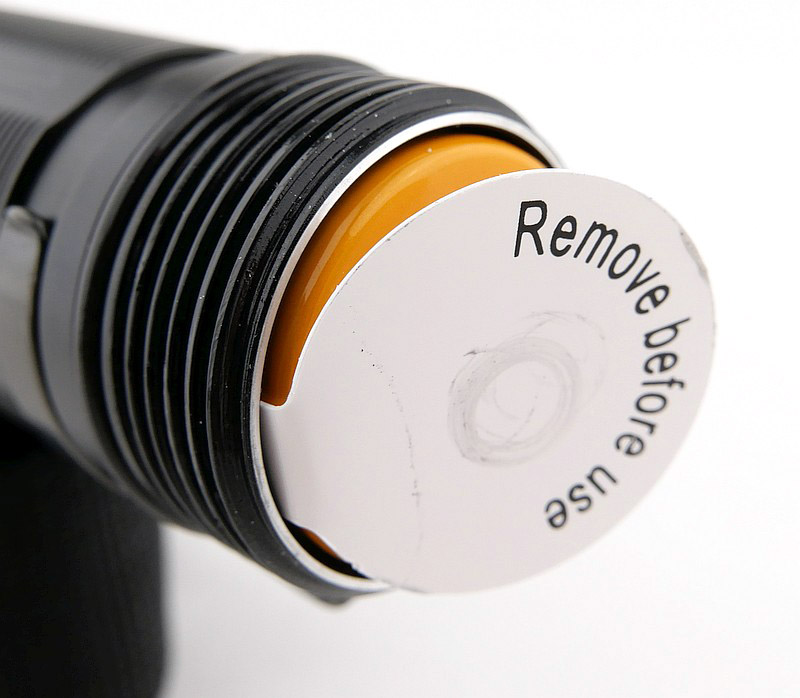
What is in the box?:
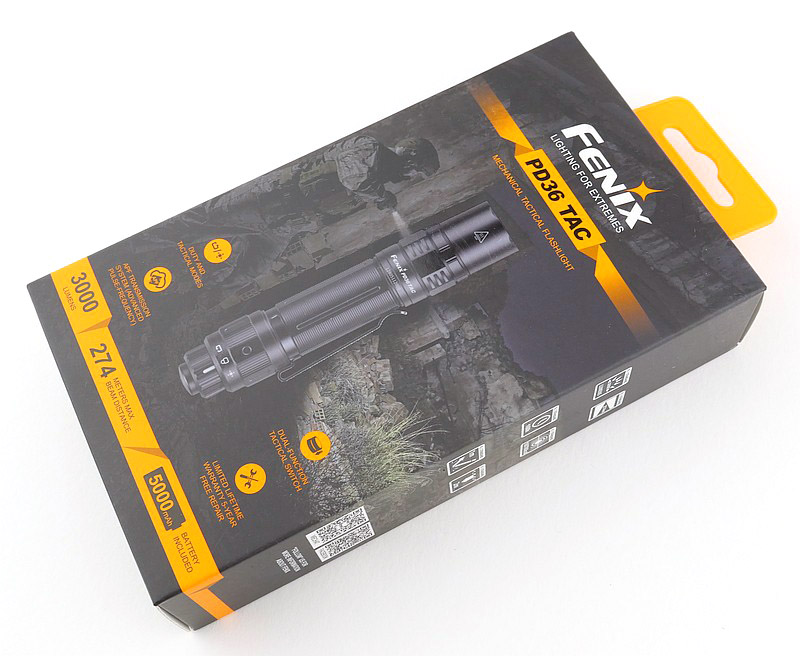
Unpacking the PD36 TAC and its accessories.

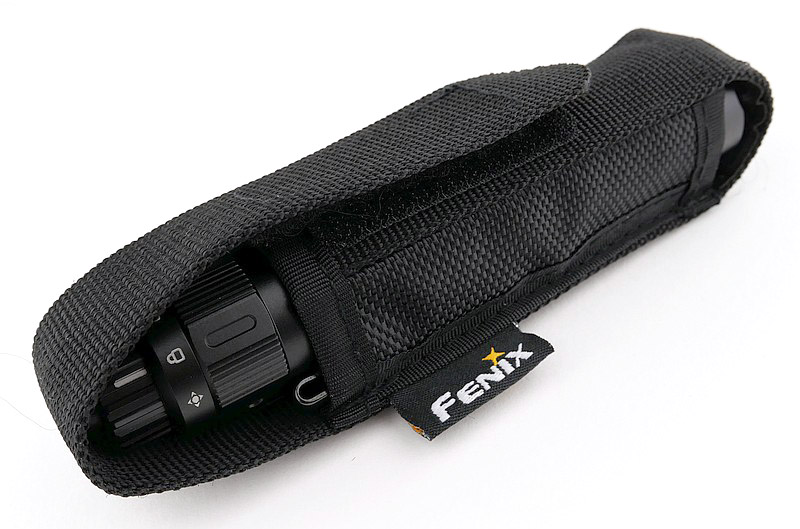
Taking a more detailed look at the holster:
Before moving onto the PD36 TAC itself, this is a run round the supplied belt holster.


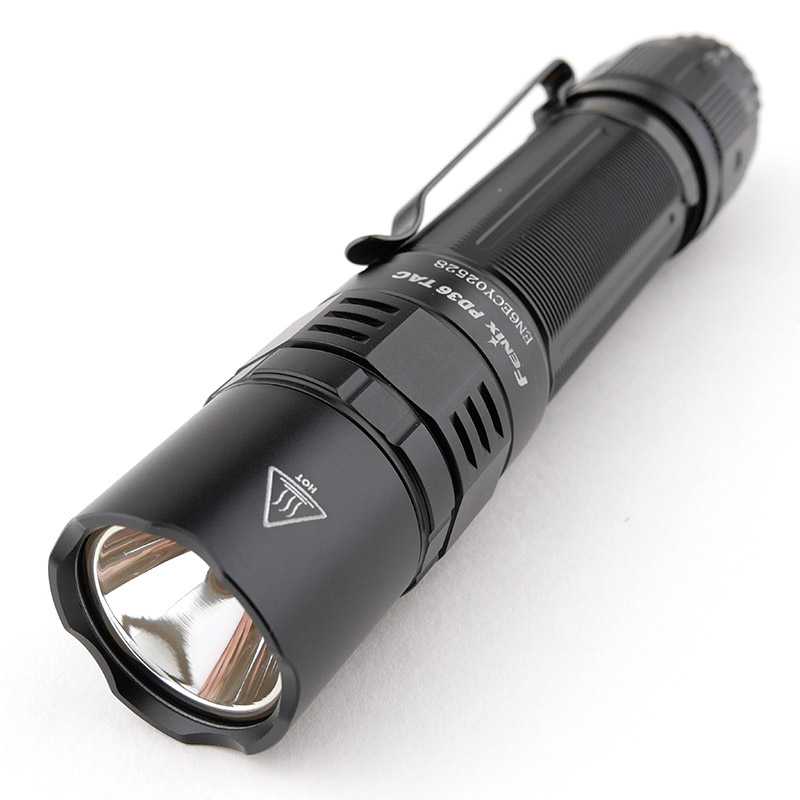
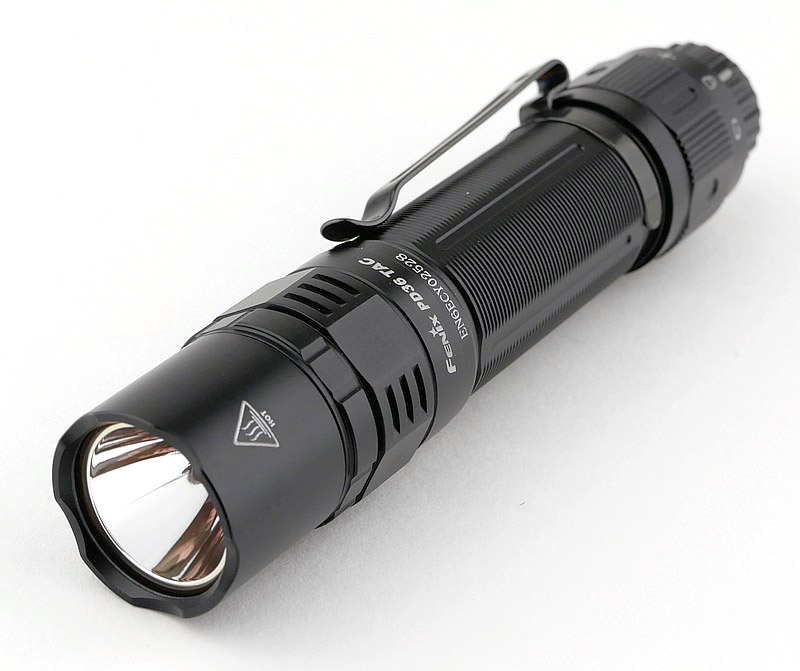
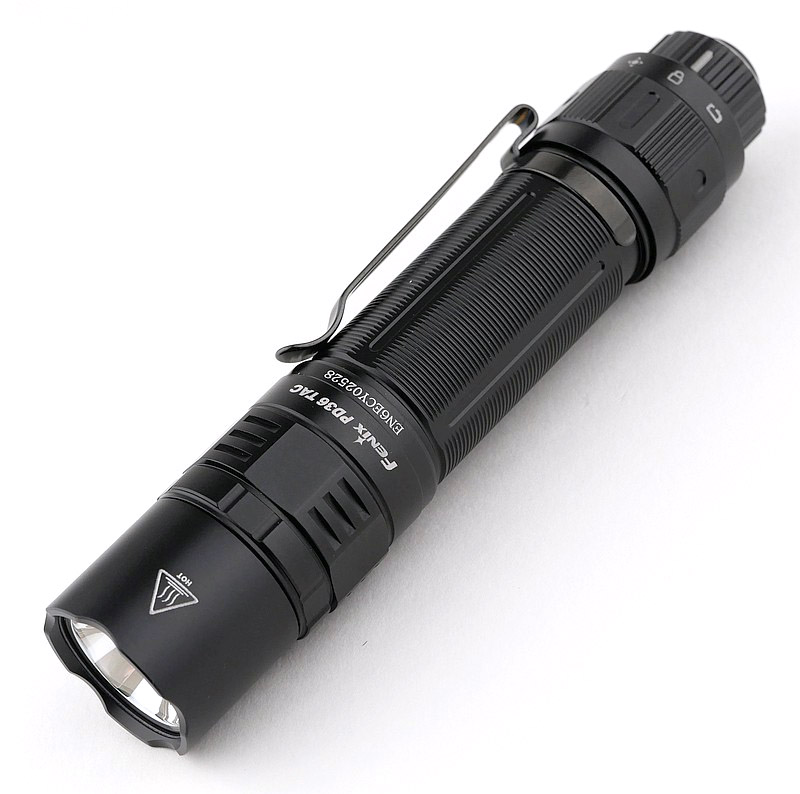
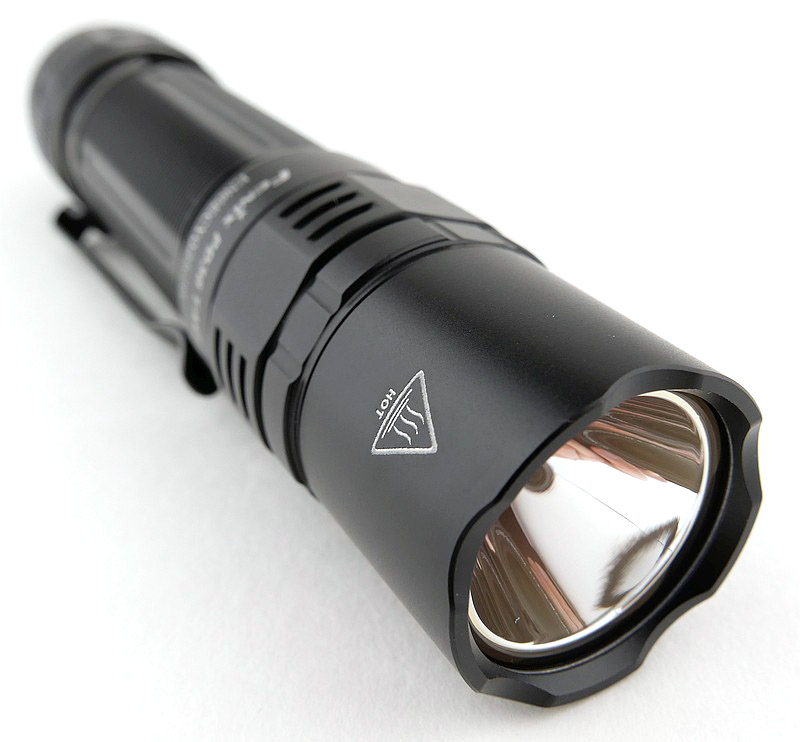
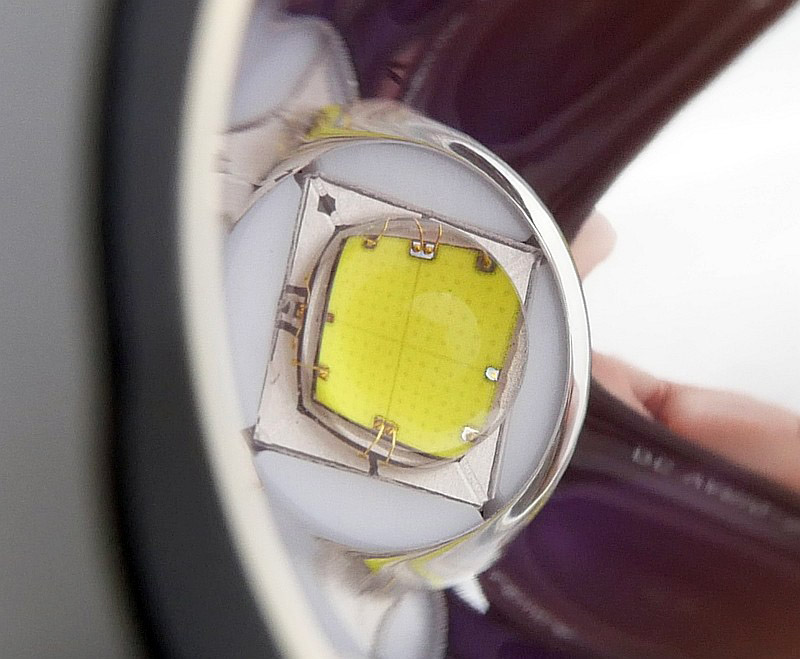
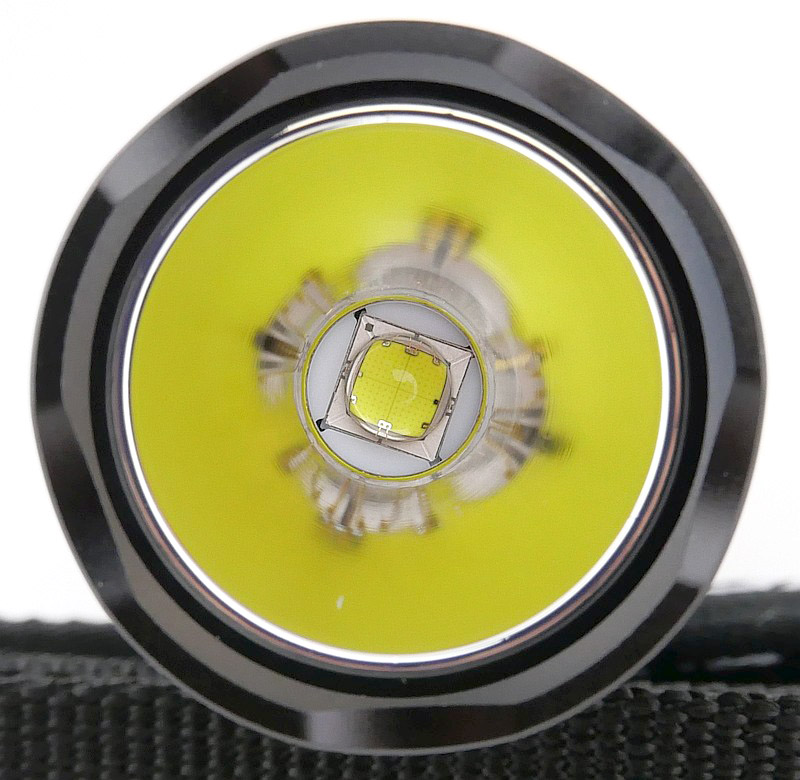
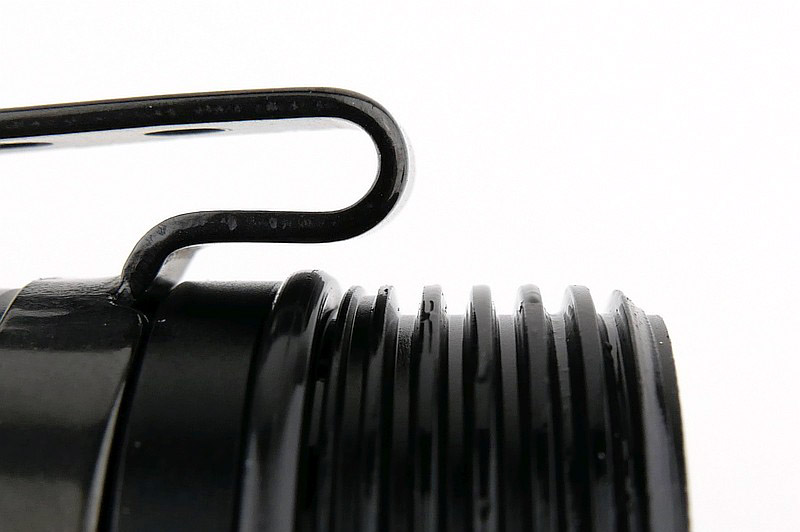
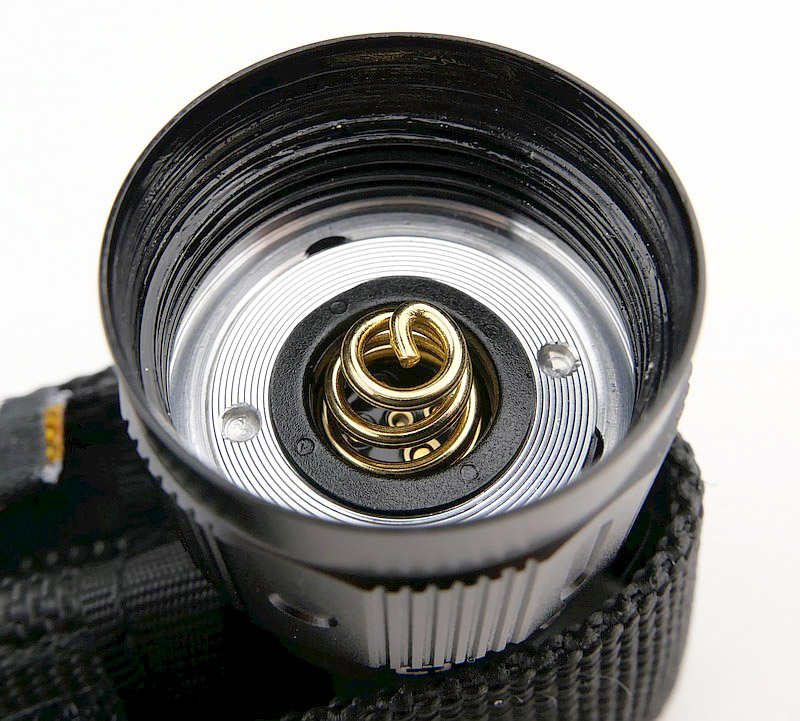
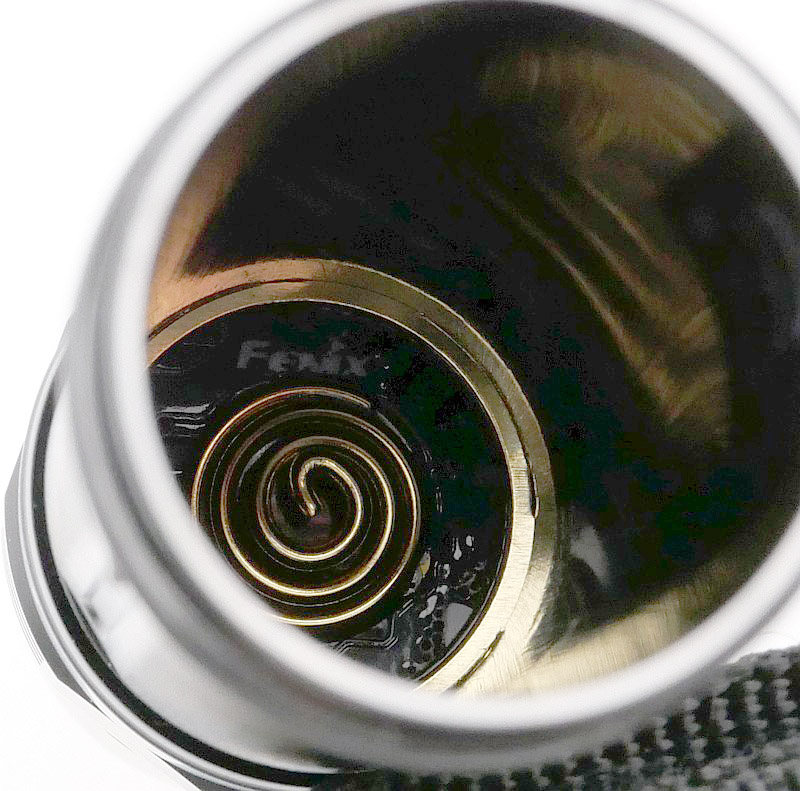
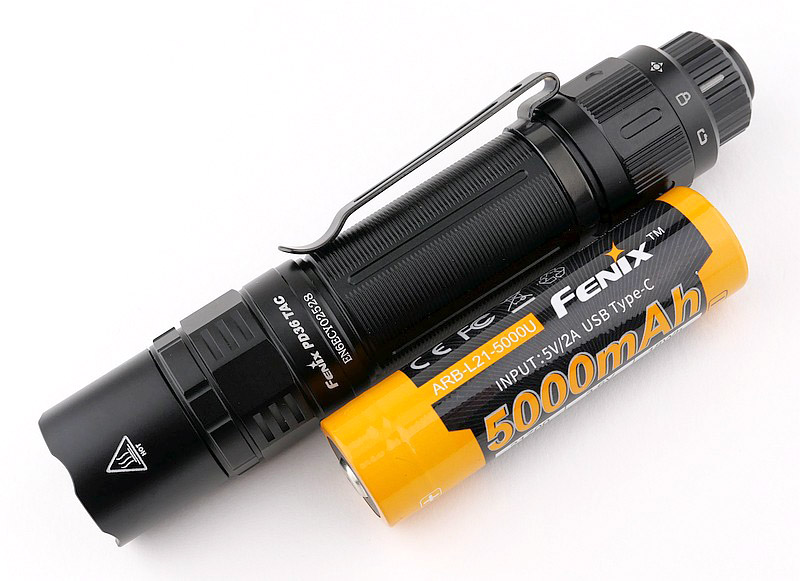
A good look round the PD36 TAC – Things to look out for here are:
In the gallery are details of the design, the clip, bezel, contacts, threads, battery, and more…


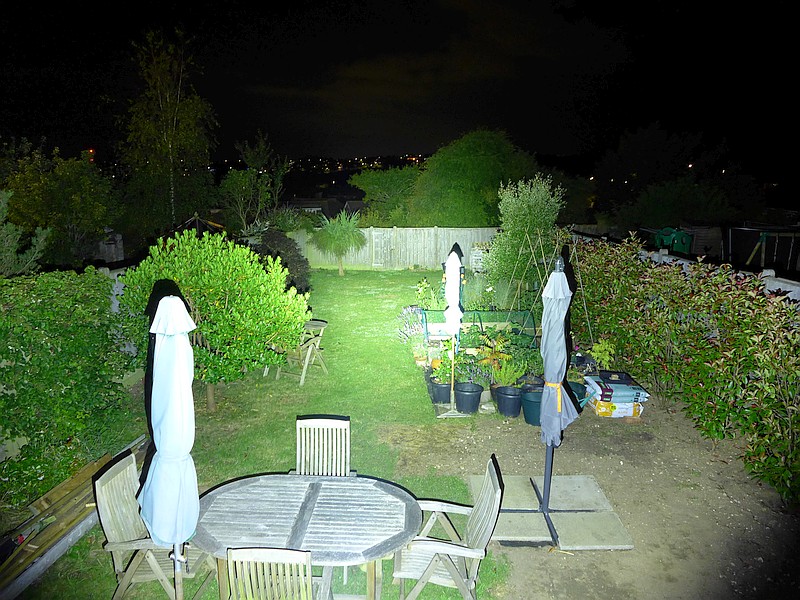
The beam
Please be careful not to judge tint based on images you see on a computer screen. Unless properly calibrated, the screen itself will change the perceived tint.
The indoor beamshot is intended to give an idea of the beam shape/quality rather than tint. All beamshots are taken using daylight white balance. The woodwork (stairs and skirting) are painted Farrow & Ball “Off-White”, and the walls are a light sandy colour called ‘String’ again by Farrow & Ball. I don’t actually have a ‘white wall’ in the house to use for this, and my wife won’t have one!
Below are the indoor and outdoor beamshots giving you an idea of throw and spill. The PD36 TAC has a great balanced beam with great area lighting.

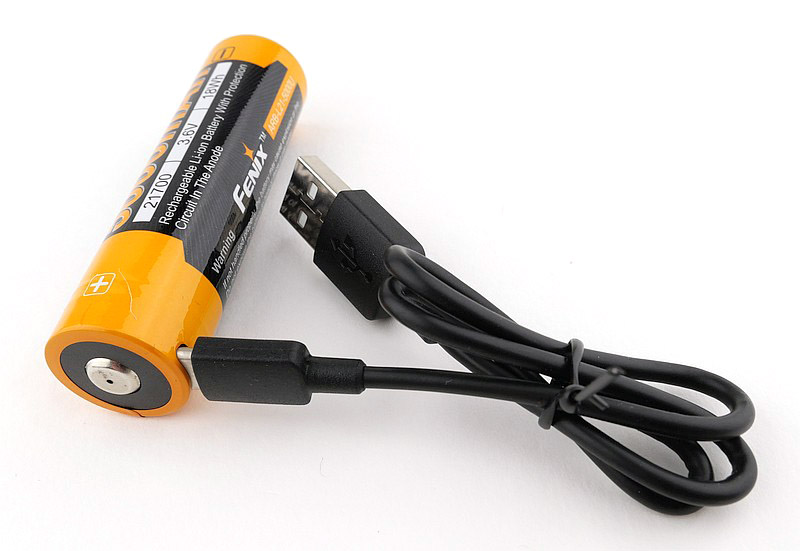
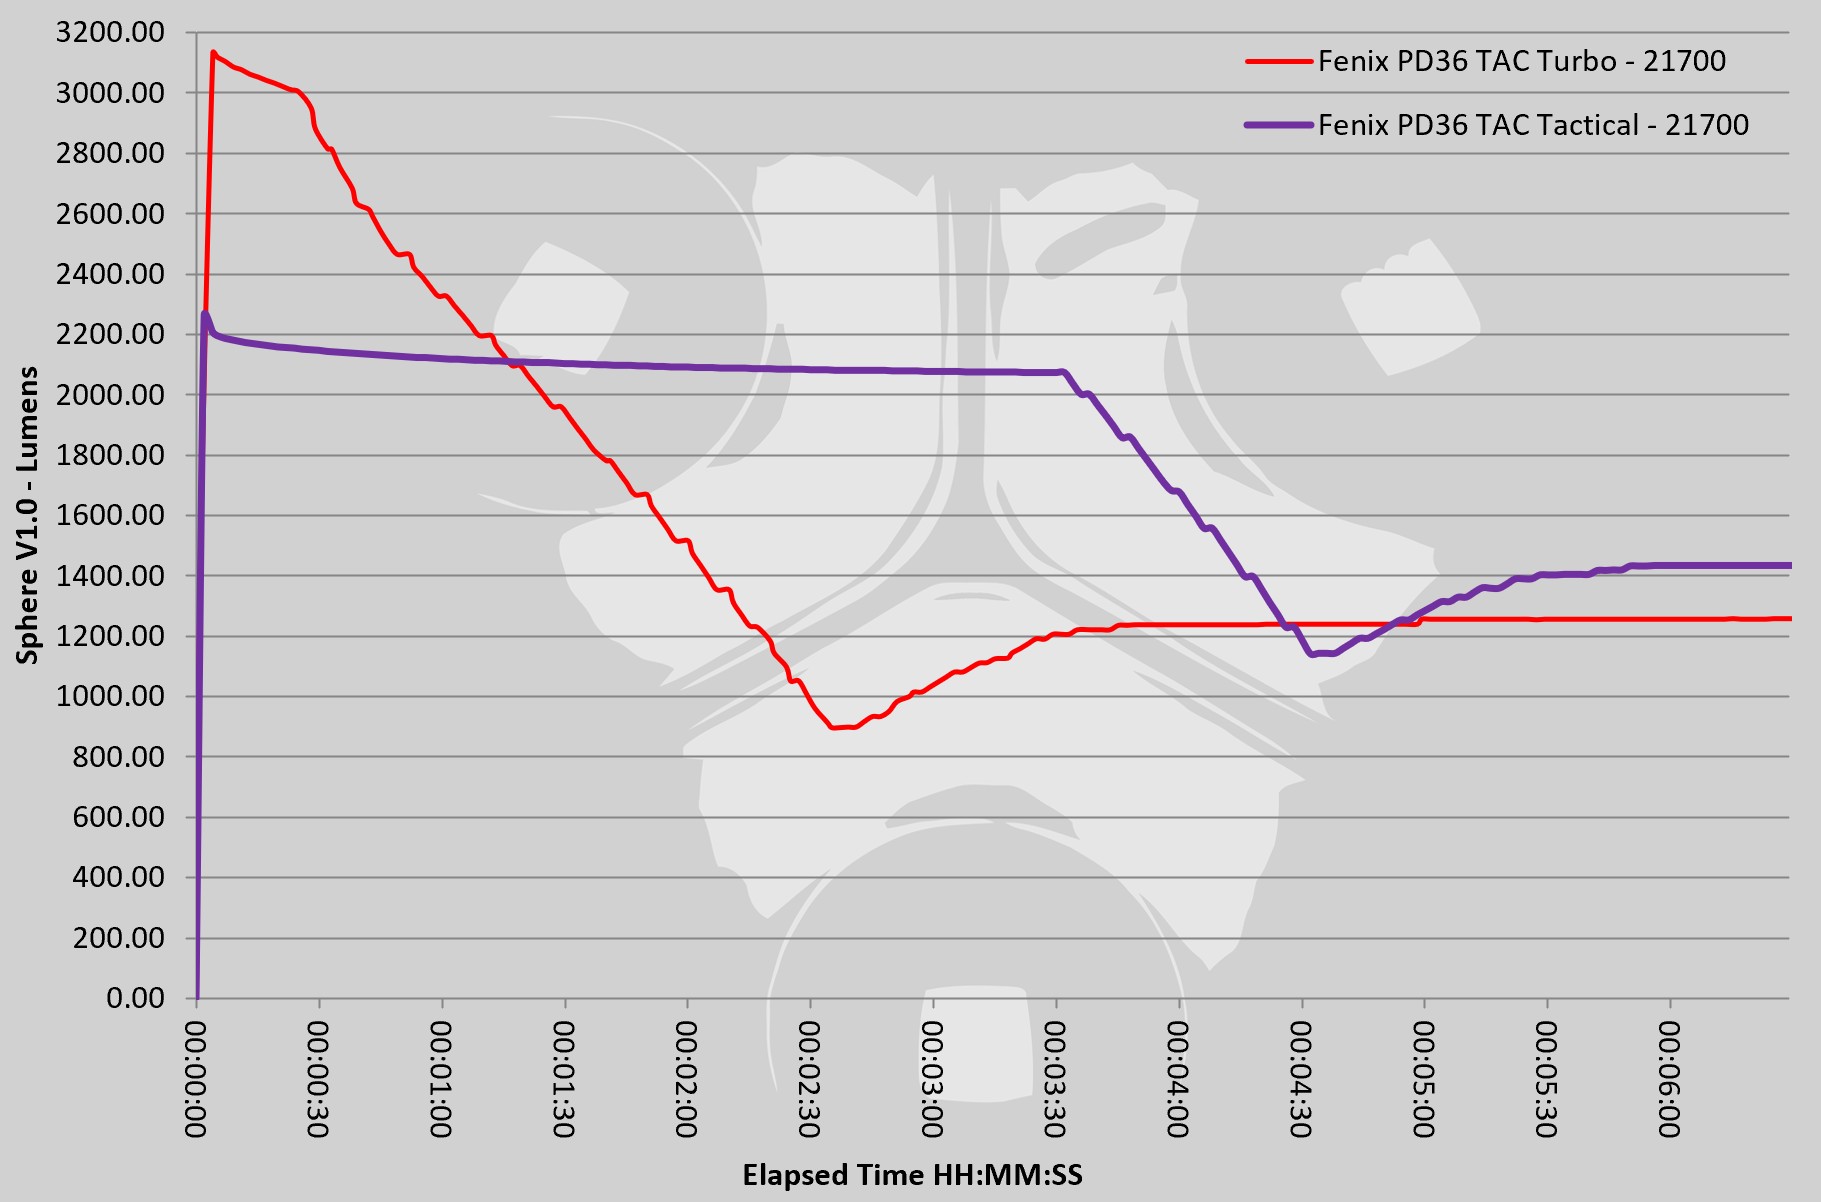
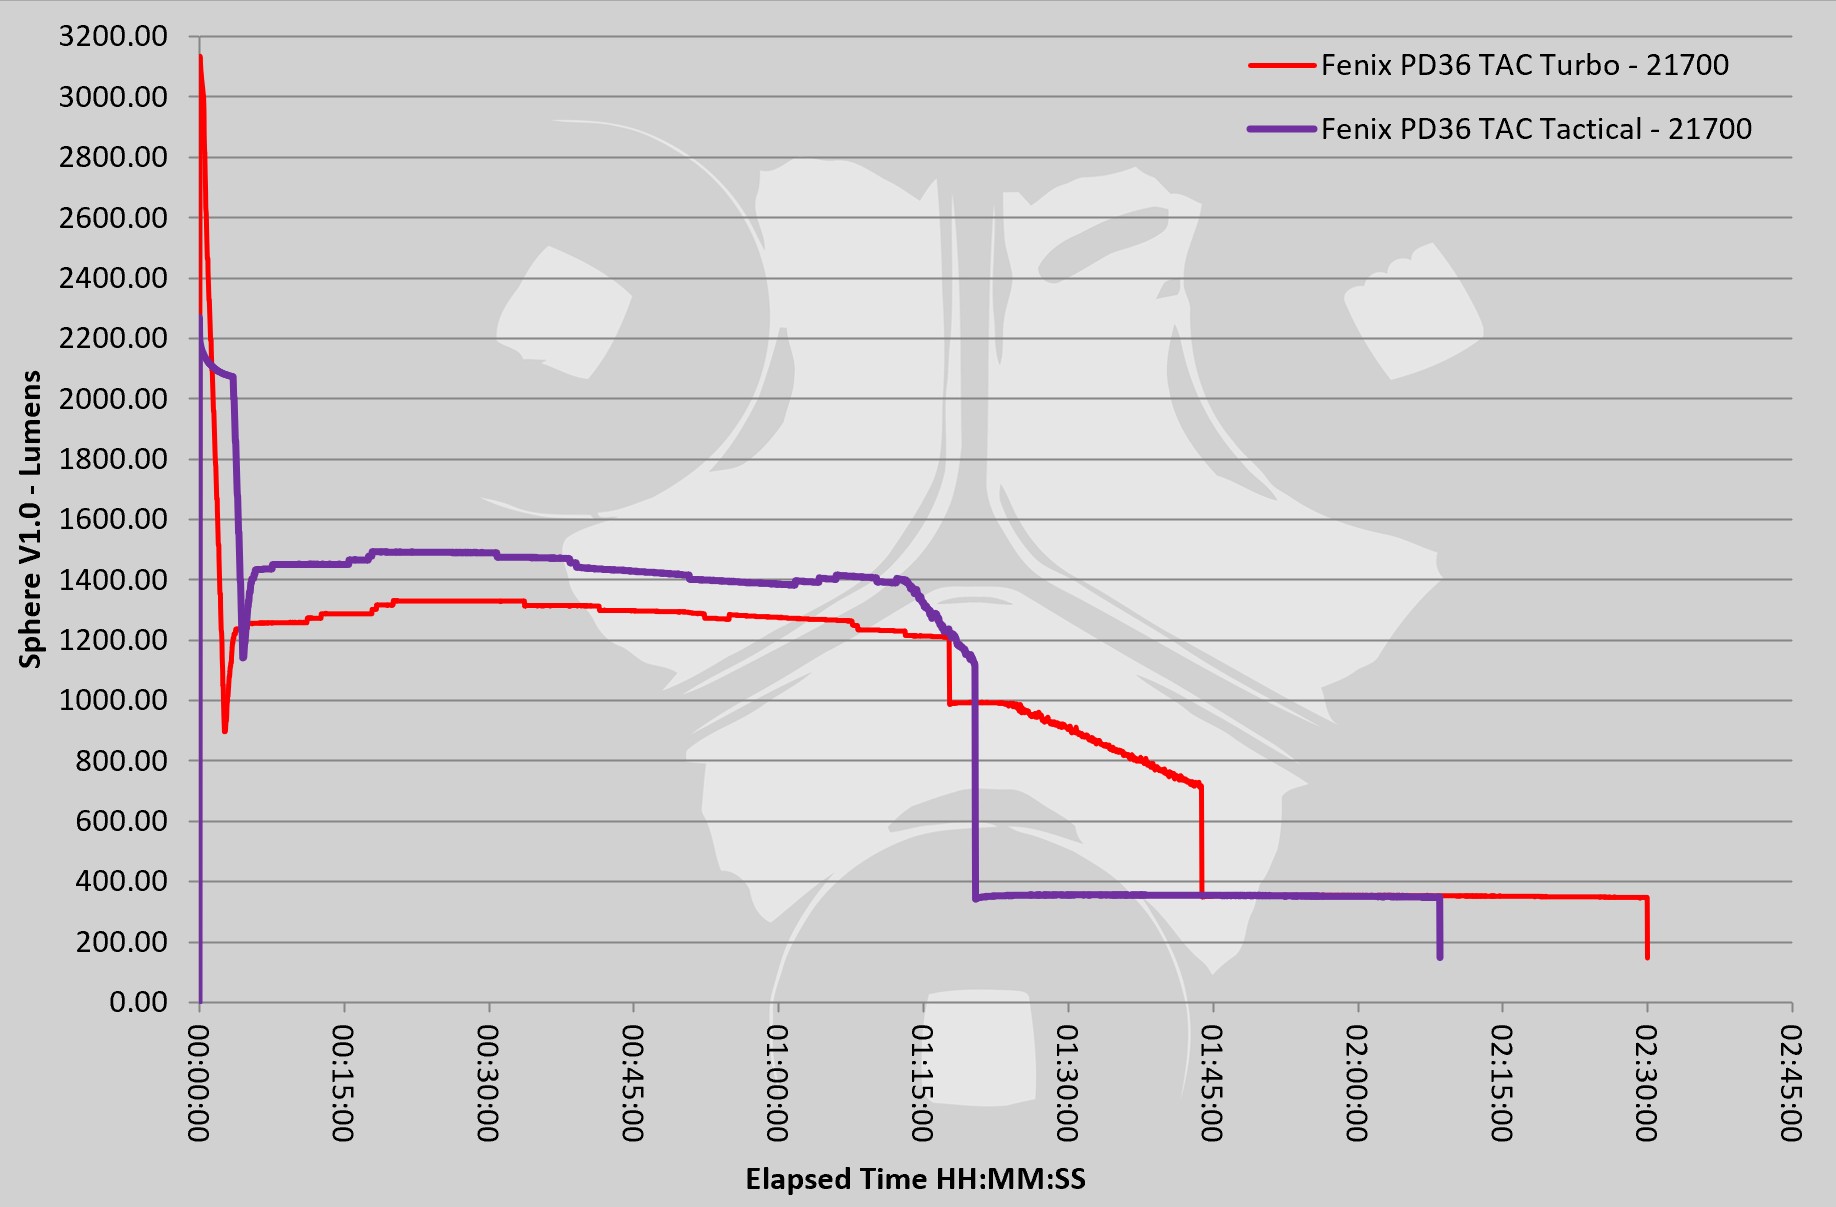
Batteries and output:
The PD36 TAC runs on the supplied 21700 USB-C rechargeable cell.
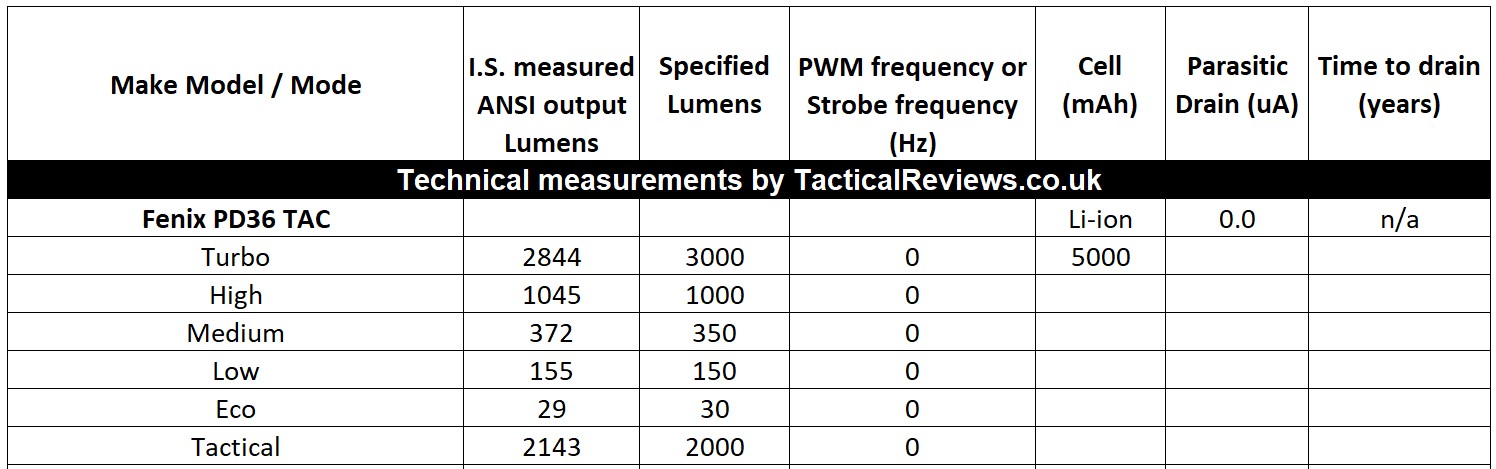
Please note, all quoted lumen figures are from a DIY integrating sphere, and according to ANSI standards. Although every effort is made to give as accurate a result as possible, they should be taken as an estimate only. The results can be used to compare outputs in this review and others I have published.
Measured output is a great match for the specifications.
For the runtime graphs, I have included runs for Turbo and Tactical, which have different starting outputs. Also included is a graph of the first six minutes to better show the difference between Turbo and Tactical modes.
The PD36 TAC in use
The general change towards using 21700 cells is great for two reasons; better runtime/output and a comfortable size to hold. If you were completely unaware of the reason the battery tube was larger than previous generations that run on 18650, you would just be thinking the PD36 TAC is nice and comfortable to hold. The fact that it now houses a 21700 cell with that 5000mAh capacity is a further bonus to the comfort in the hand. Win win at this point.
With that greater capacity of the 21700 cell, this compact tactical light can pump out a huge 3000lm. Go back and look at the runtime graphs to see how impressively the PD36 TAC keeps its output going. The output limitation is more down to thermal capacity for longer runs.
This is the first of this style of Fenix tactical tail-cap I have been able to try. It has three functional modes. One is a simple and solid physical lockout. Line the selector ring up with the padlock, and the button does not move.
The selector ring certainly feels secure enough in its positioning that you won’t be accidentally going between locked and unlocked by accident. You pre-select the type of use you want and leave it there. Bear in mind, you can also use this to lock the PD36 TAC on. If you first turn it on to a mode you want and then rotate the selector ring to the padlock, you can’t turn it off again.
Being designed as a ‘Tactical’ light, most users will likely keep it in ‘Tactical’ mode – instant 2000lm output with momentary or latched action. Half press the tail-switch for momentary output, complete the press to latch it on (or just go for the full press to start with). Holding the switch fully in for about 1s and you enter strobe mode.
Move the selector round to the ‘Duty’ mode and you have access to five different output levels. Starting on ‘eco’ the first time you use it, but after that the last used level is remembered. Changing modes requires a half press – this can either be a half press from off and then cycle through modes before latching on, or a half press after turning the PD36 TAC on with a full press, the half presses then cycling through modes. Personally I would have preferred an automatic reset to eco after a few seconds being off as after not using it for a period of time, you won’t know if you had eco or turbo set, and this could be quite a shock.
The Fenix PD36 TAC is a purposeful lighting tool, and can instantly be reconfigured as either a dedicated ‘Tactical’ light or into a multi-mode ‘Duty’ light to fit with your needs.
Review Summary
The views expressed in this summary table are from the point of view of the reviewer’s personal use. I am not a member of the armed forces and cannot comment on its use beyond that covered in the review.
Something that might be a ‘pro’ for one user can be a ‘con’ for another, so the comments are categorised based on my requirements. You should consider all points and if they could be beneficial to you.
_______________________________________________
What doesn’t work so well for me
_______________________________________________
‘Duty’ mode last used level remembered (so could be on eco or turbo).
Tail-switch has a relatively stiff action.
No grip ring provided.
_______________________________________________
Things I like
_______________________________________________
Great area lighting beam profile.
Nearly 3000lm from a compact light.
Three function tail-cap selector ring.
Dedicated ‘Tactical’ mode.
Proper physical lockout.
Uses a large capacity 21700 cell.
Supplied cell has built-in USB-C charging.
Very usable holster supplied.