Knife Review: Böker Plus Kwaiken Damascus/Damast (3.5″ blade – Odins Eye Damasteel)

The Böker Plus Kwaiken Flipper is one of Böker Plus’s most popular knives, and is the result of a collaboration with renowned knife maker Lucas Burnley. The Kwaiken Flipper is available in many variations of blade and handle materials. This review is looking at the Damascus / Titanium version.

The Blade and Handle Geometry:

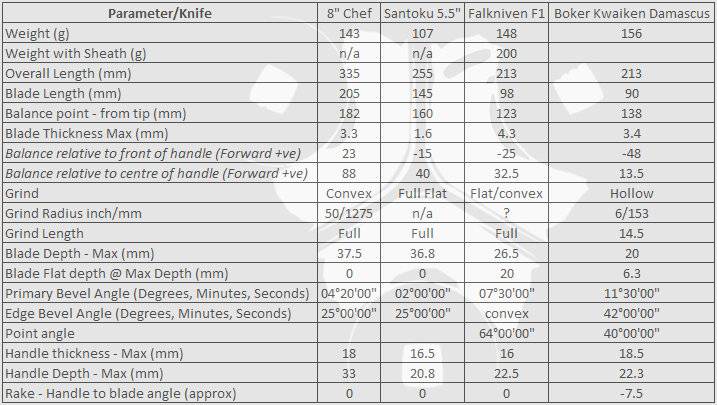
Most knives specifications have a basic description of the blade geometry, but in this section I will be taking a more detailed look at geometry and balance.

Using a set of gauges and precision measuring equipment including a Vernier protractor, callipers, fixed radius gauges and the unique Arc Master adjustable radius gauge (the one that looks like a crossbow).

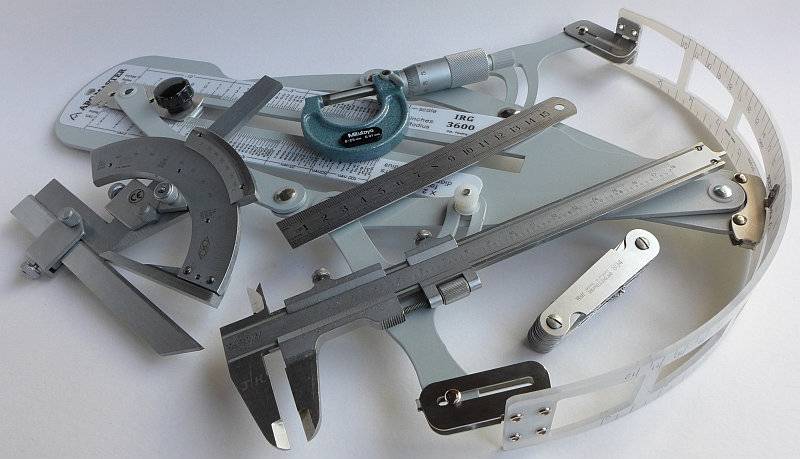
These measurements have been tabulated and are presented along with a few reference blades (8″ Chef’s Knife, 5.5″ Santoku and the popular Fallkniven F1).

Key aspects such as the primary bevel angle, grind type, blade depth, blade thickness, length, weight are detailed, along with balance information.

The ‘Balance relative to the front of the handle’ tells you if the knife will feel front heavy, or if the weight is in your hand (a positive value means the weight is forward of the front of the handle). The ‘Balance relative to the centre of the handle’ indicates how close to a ‘neutral balance’ the knife has in the hand.

In the case of full convex grinds the approximate centre of the grind is used for the primary bevel angle estimate.

The blade is made from Odins Eye pattern DAMASTEEL martensitic stainless Damascus steel.

Explained by the Maker:

The reasons for certain design choices may not be clear when simply looking at an object, so this section is intended to give an insight into the thinking behind a design by speaking to the designer themselves.

Unfortunately I can’t always get time with the designer so will use this section to include relevant information about the knife and its designer.
This knife started as the distinctive Kwaiken fixed blade design created by Lucas Burnley from New Mexico. Lucas Burnley wanted to transfer the thin and narrow concept into a folding knife, without changing the proportions too much. Working with Böker, Lucas developed the Kwaiken folder in thumb stud and flipper varieties maintaining the unique character of the clean lines and sleek design

In keeping with the sleek design, the knife uses a hidden stop pin, IKBS ball bearing system and liner locking mechanism.

The Böker Plus Kwaiken flipper has been available in several other versions with a recent upgrade to VG-10, but this special edition is presented with the blade made from the Swedish powdered-metal Damascus steel (ie DAMASTEEL).
Before talking a little more about the exact steel used in this knife, here is a quick note about Damascus steel:

Damascus steel was considered the ultimate blade material in the Middle Ages, and is named after the Syrian city of Damascus, a once important commercial centre for knives and swords with blades made from this special composite steel.

Ignoring its decorative appeal, Damascus is a composite steel, (made of at least two steels with different properties). These steels are folded over each other again and again creating a layered structure which is clearly visible when etched. Combining the steels in this way allowed their respective strengths (edge holding and toughness) to overcome their weaknesses (easily blunting and brittleness) resulting in a far superior steel. The more layers in the final steel, the better they work together.

The properties of Damascus steel can now be recreated in a single modern steel so it is no longer necessary to use Damascus steel. Damascus steel is still highly desirable for its historical and decorative appearance.

DAMASTEEL is a Swedish brand of specialist manufacturer of stainless Damascus steel.

DAMASTEEL’s products are all made from a martensitic stainless Damascus steel which is a powder based steel with the two alloys RWL 34 and PMC 27. They are both variations of the martensitic stainless steel 420 type with a minimum of 13 percent chromium content.

For the Kwaiken flipper, Böker Plus have chosen the ‘Odins Eye’ pattern. When etched to bring out the detail of the layers, the RWL34 shows as Bright and the PMC27 as Dark.

A few more details:

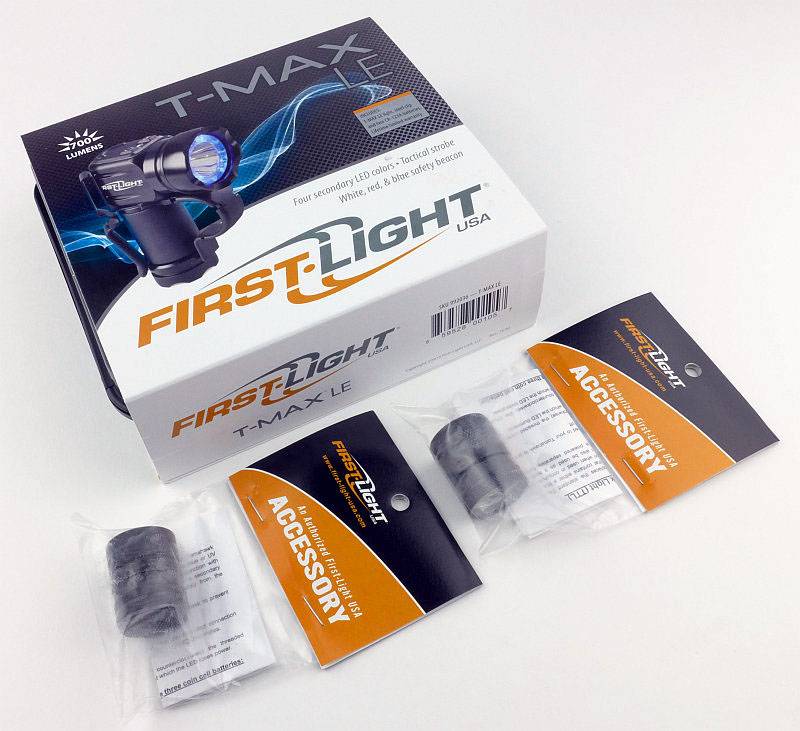
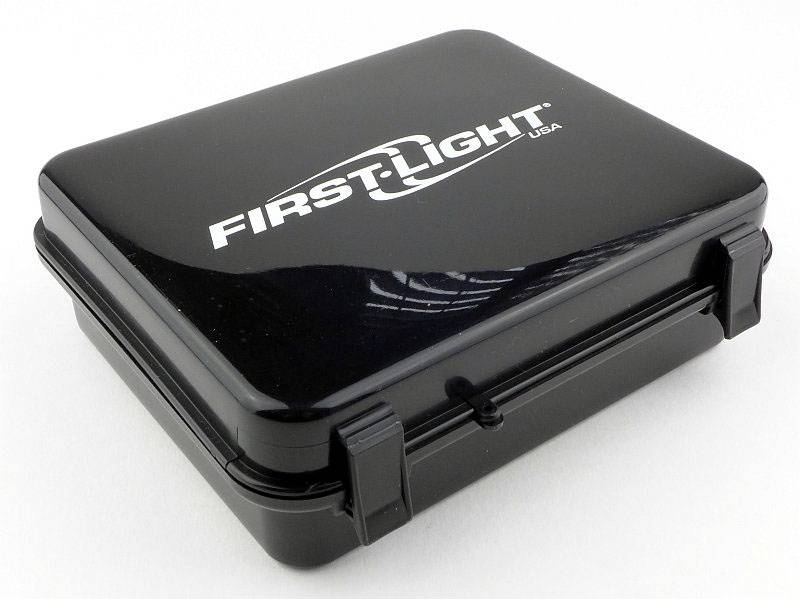
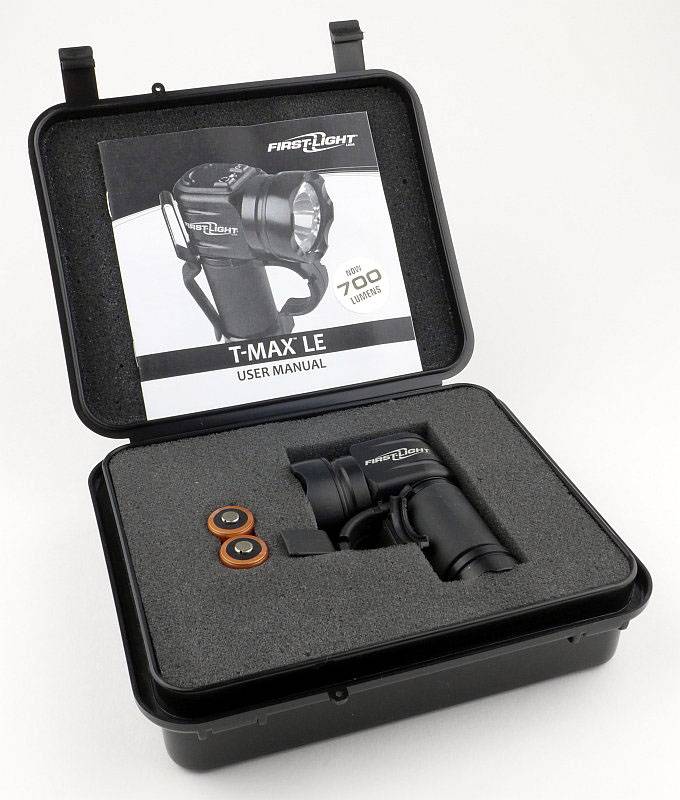
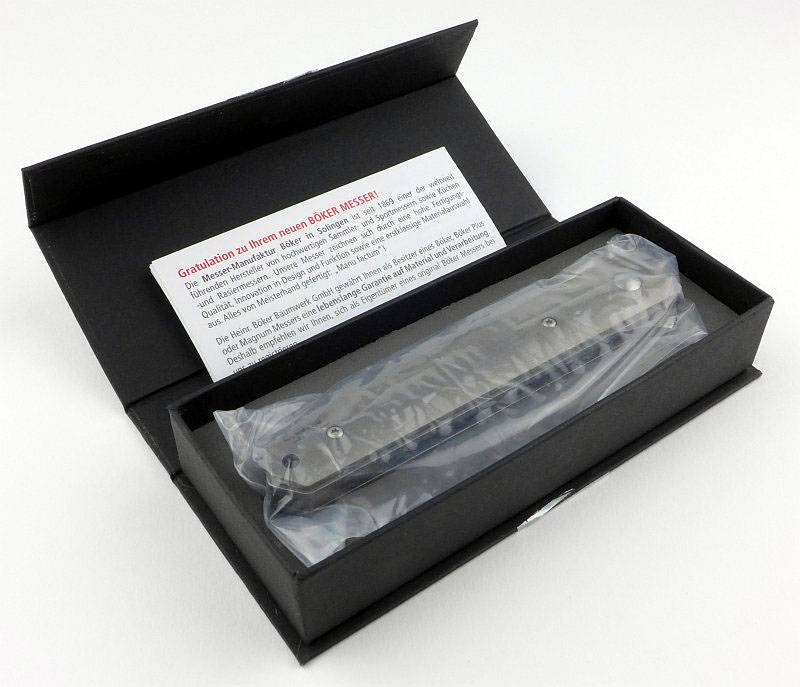
The Kwaiken folder arrives in a sealed presentation box.

The box lid is held closed by a magnetic catch, and the knife is plastic wrapped and held in a foam liner.

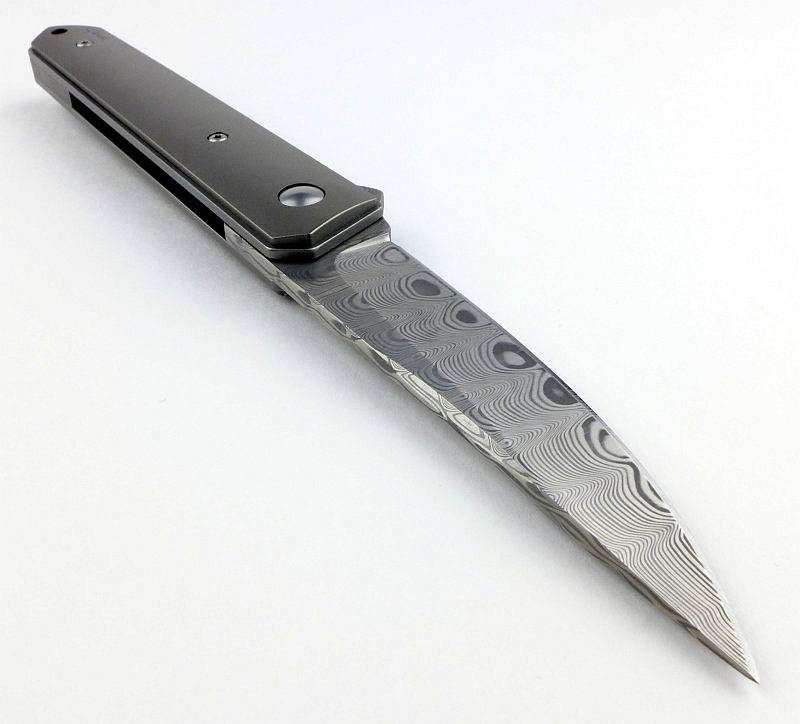
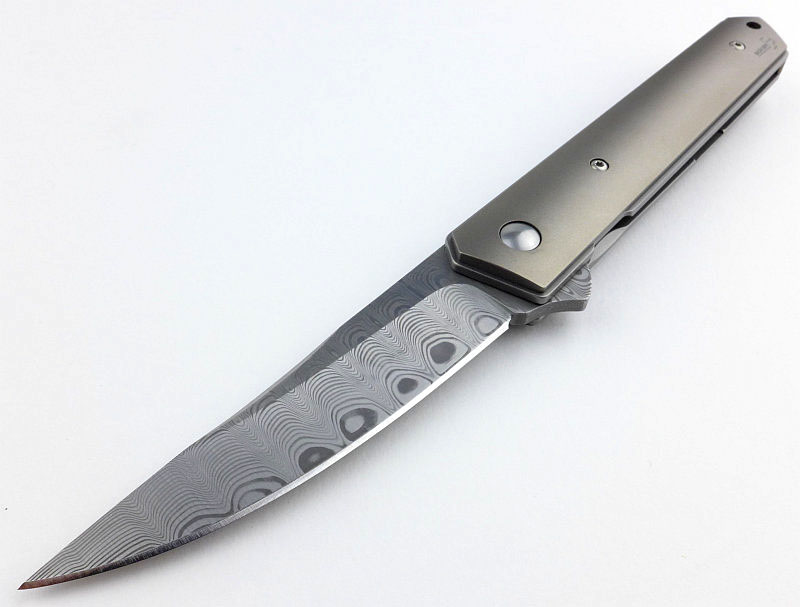
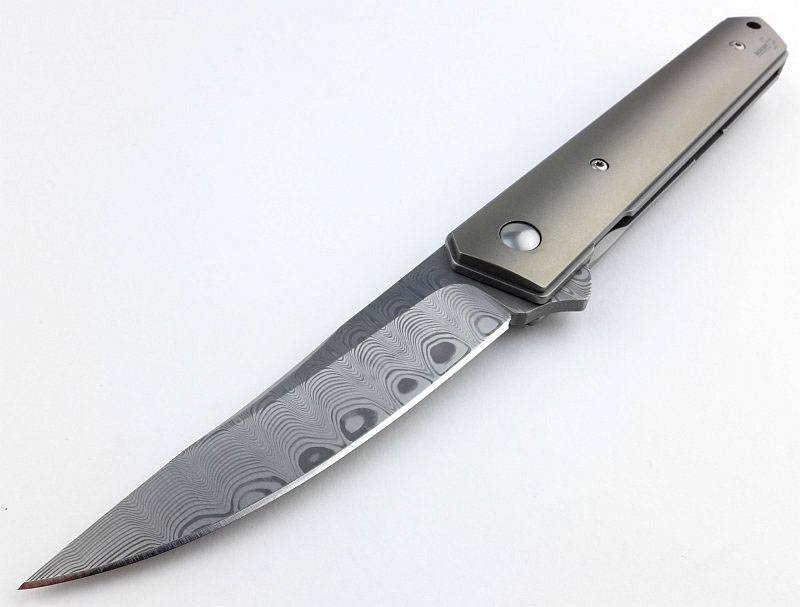
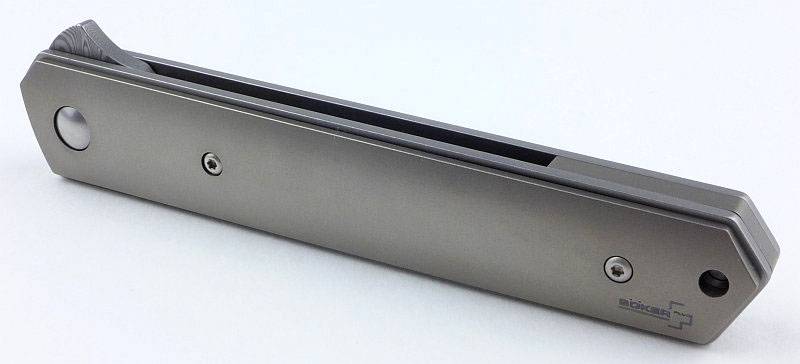
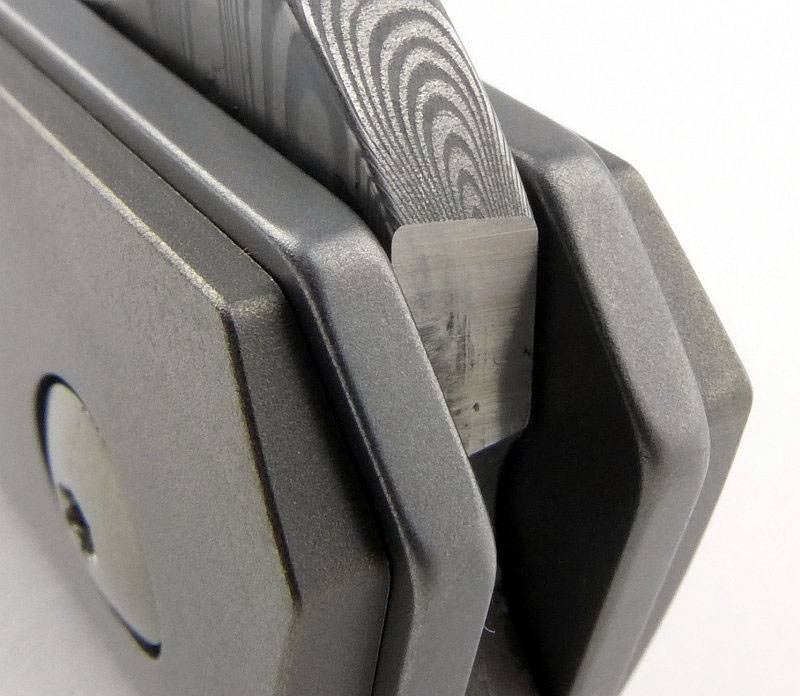
The first full view of the super sleek Kwaiken flipper fresh out of the box.

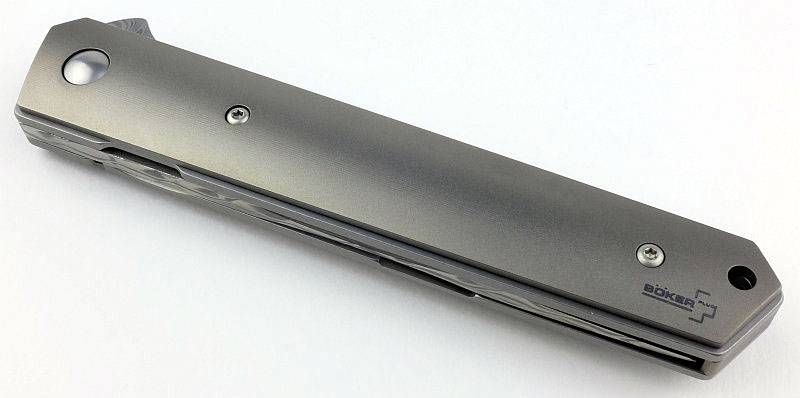
A couple of hints of something special. First the flipper is clearly Damascus steel, and secondly, the folded knife is sitting upright with the blade opening downward – not something you can do with most folding knives. Oh and let’s not forget the Titanium scales.

Yes that definitely is Damascus.

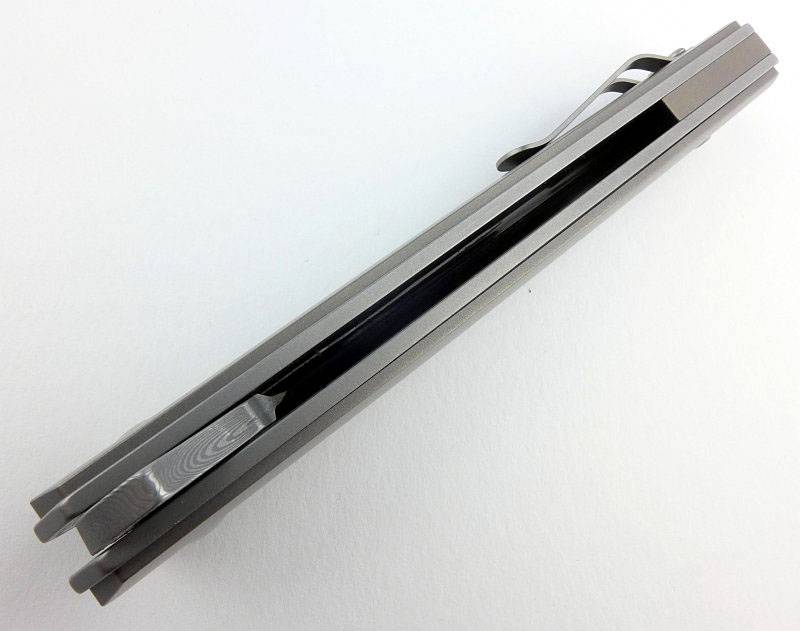
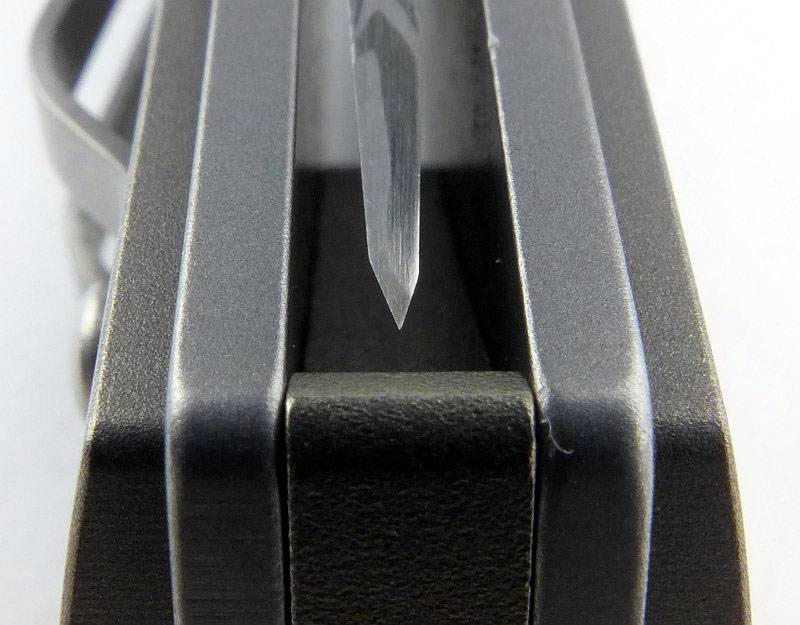
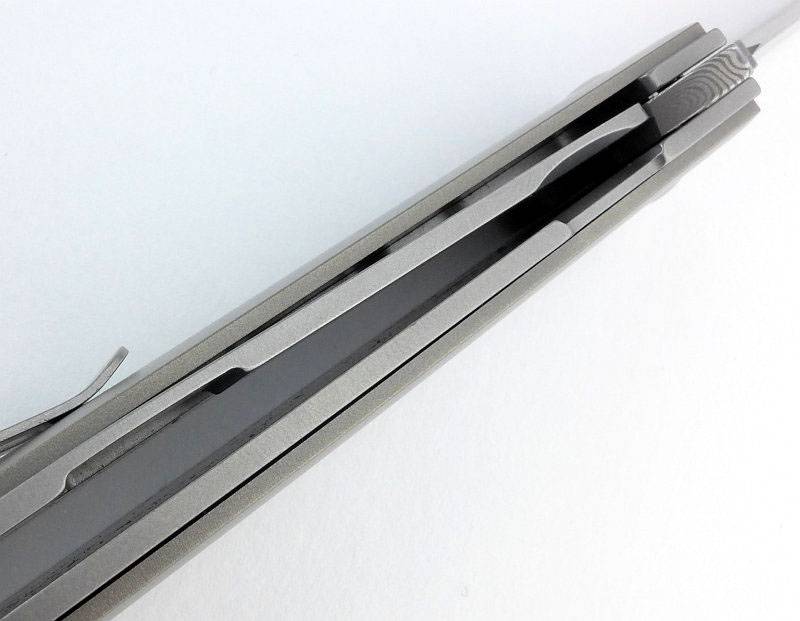
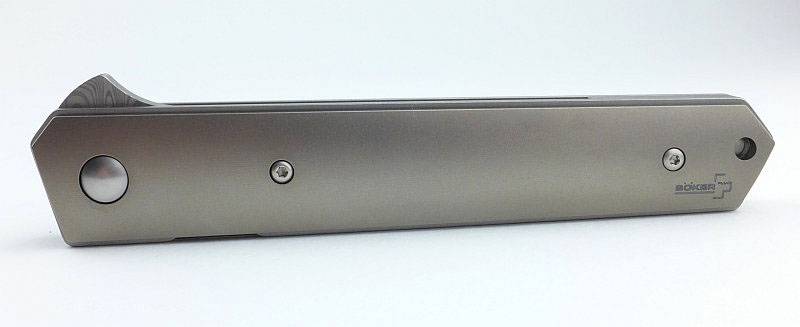
Turning it over to look at the spine of the blade and you can see it sits flush with the liners giving a completely flat profile. The only part of the blade protruding from the handle is the flipper.

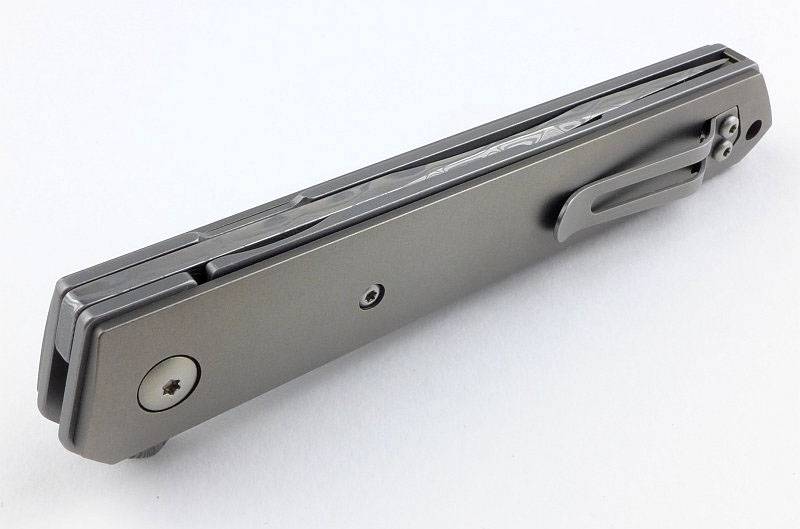
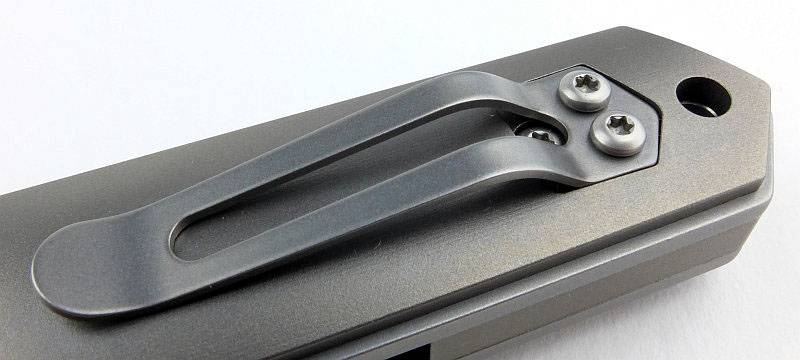
The small pocket clip is steel.

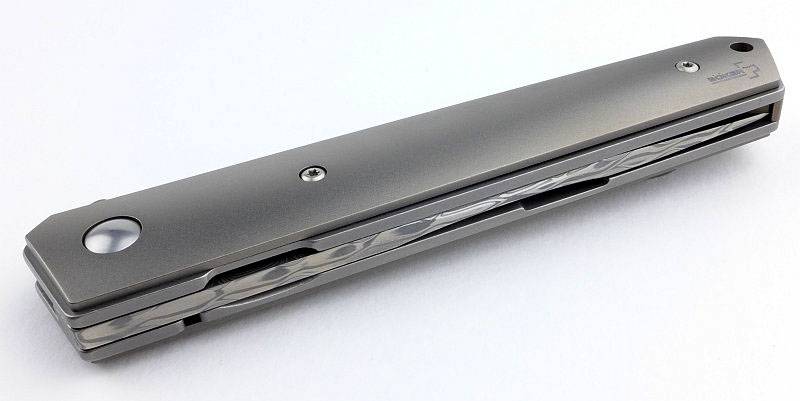
Looking down into the handles, there is still something we haven’t seen, a stop pin. This is because the Kwaiken folder uses a hidden stop pin which runs in a slot cut into the blade tang near the pivot, allowing it to be totally out of sight.

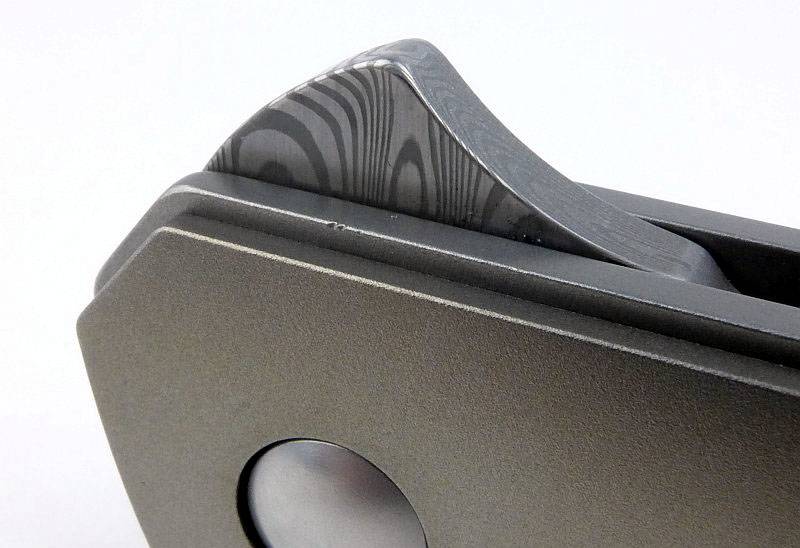
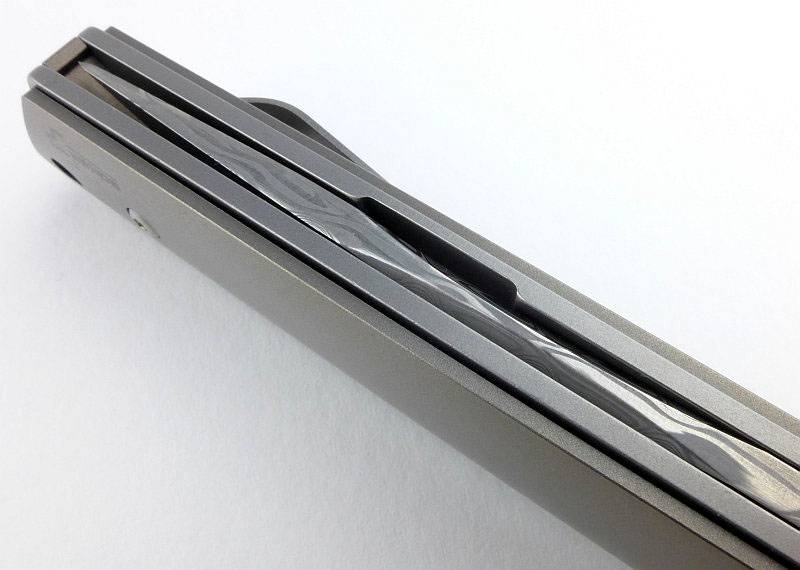
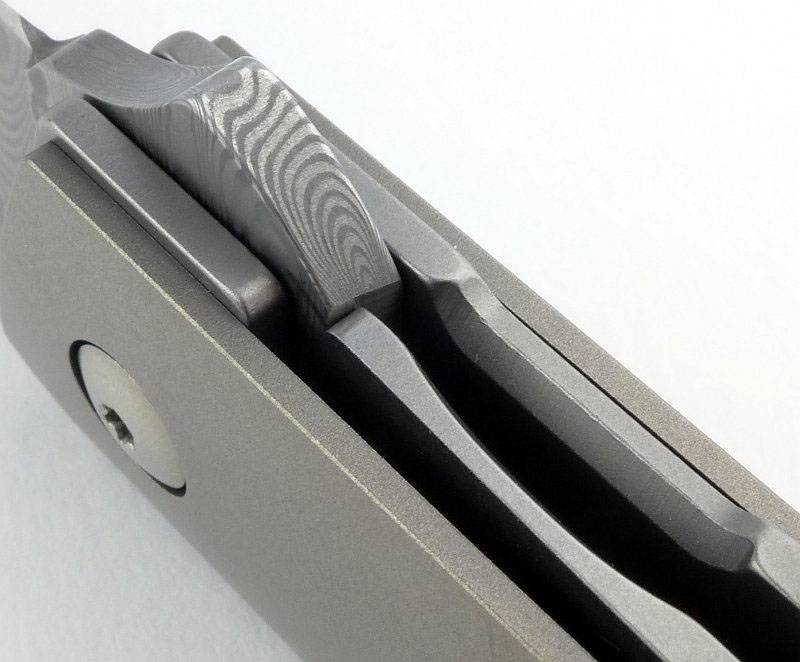
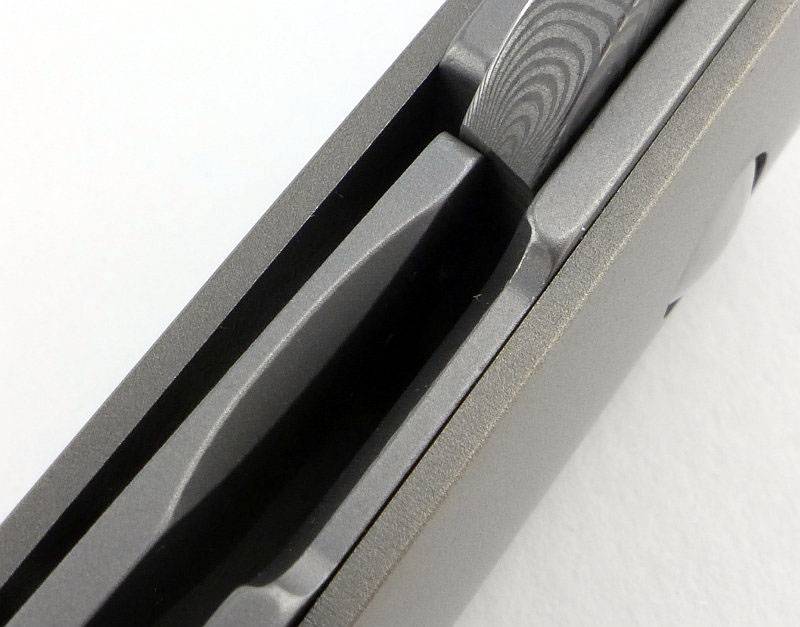
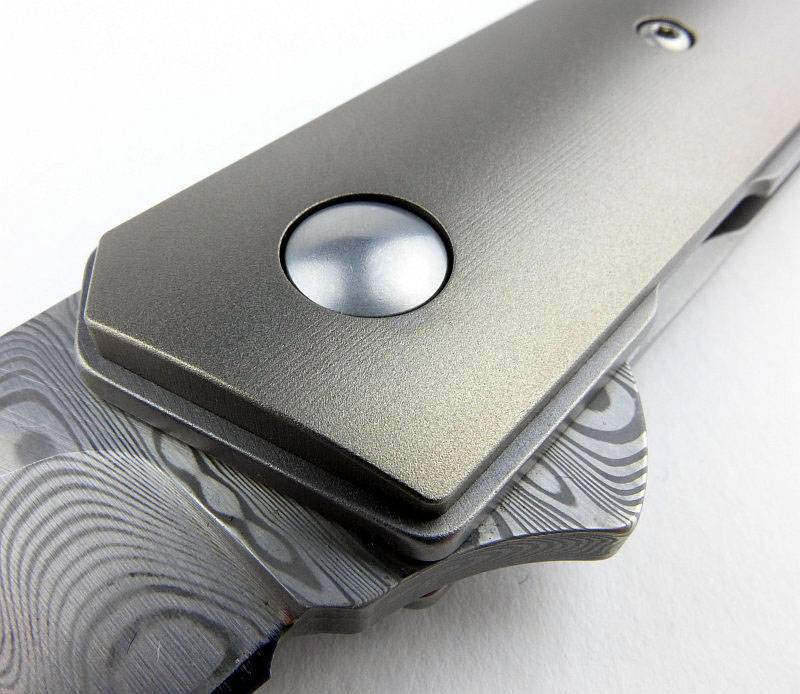
We can start to take in the details on the blade-side of the handle. The spine of the blade shows the Damascus pattern etched into it along with some sculpting. There is also the liner lock detail from its spring section to the lock release cut-out.

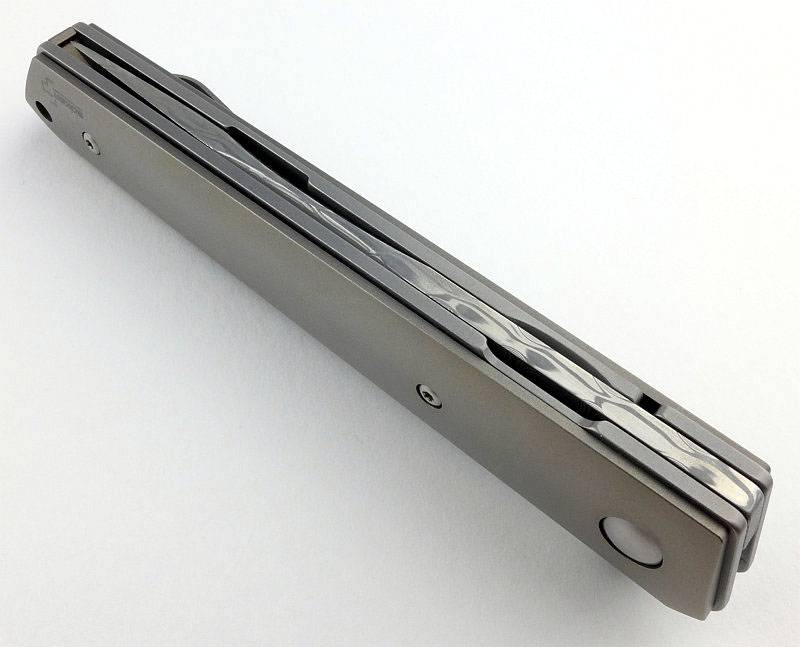
Moving closer there is just a small cut-out to give just enough access to the lock bar to release it, and the lock bar has a shallow bevel to ‘ease’ the corner of the lock bar where you press on it.

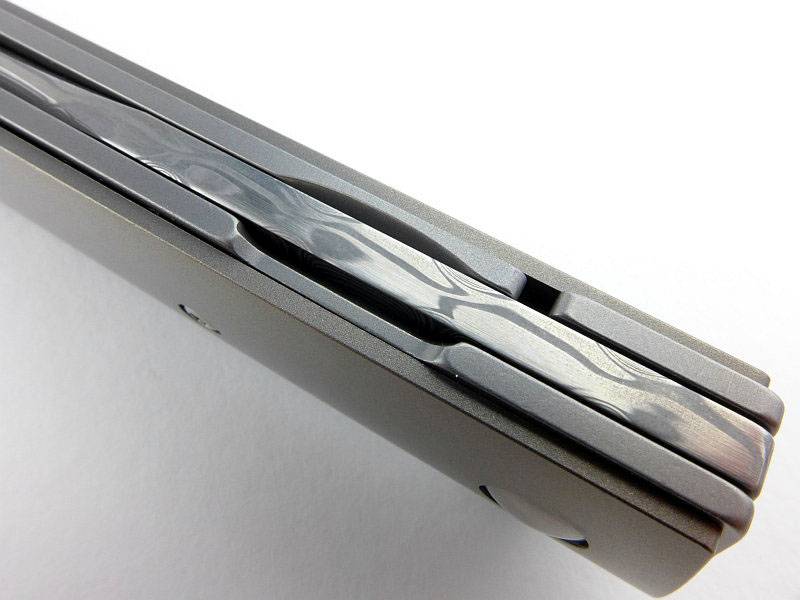
Two long scallops on the blade spine sit near the thinned liner which acts as the lock bar spring.

And the blade emerges…

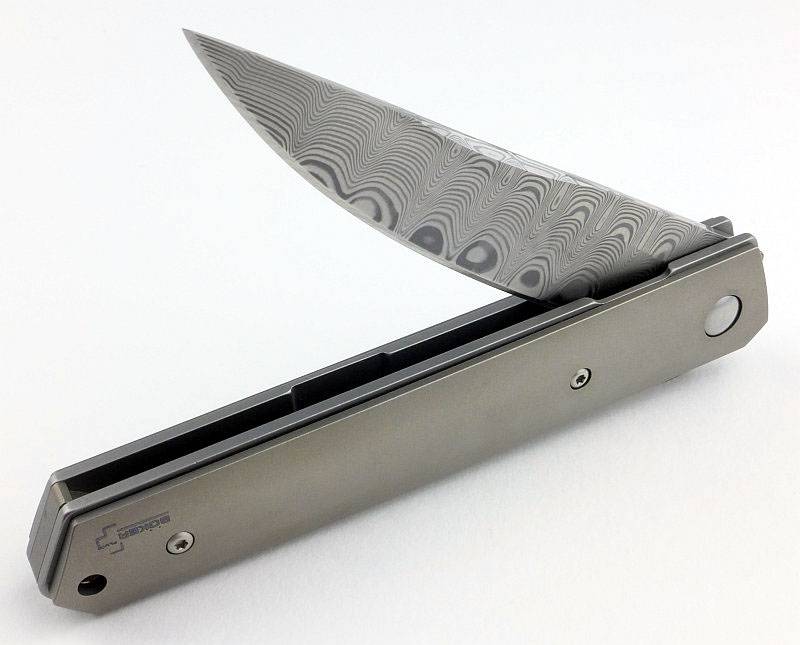
…allowing us to take in the beauty of that Damascus blade. The etching of the blade brings out the layers, but you can see how the polished edge conceals those layers. (To those not familiar with Damascus steel, it is only the etching that shows the layers, otherwise it would look no different.)

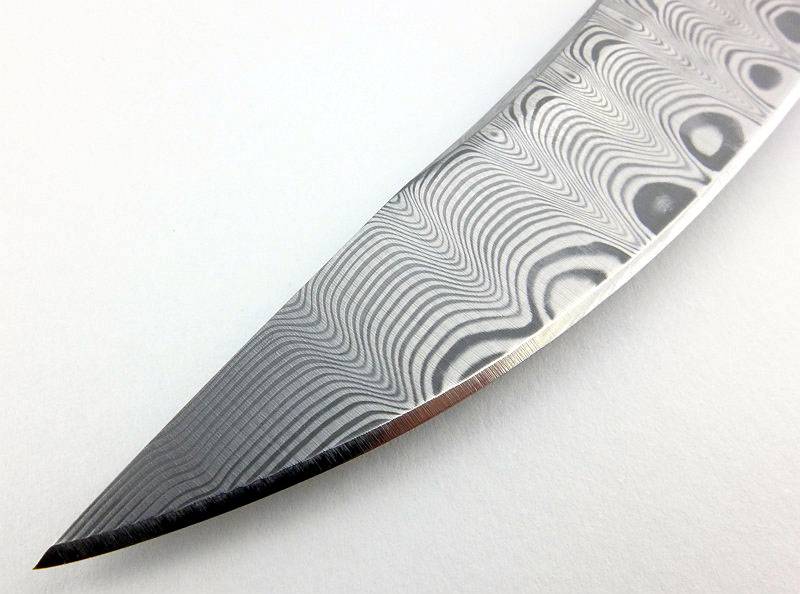
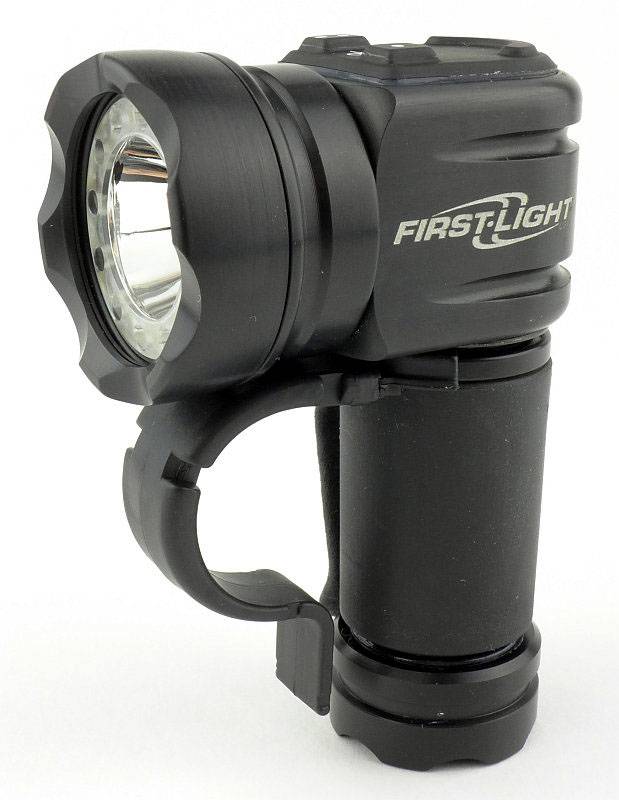
This image has several details of note. The blade has a sharpening choil – this is a favourite feature of mine. The entire blade side is etched including the flipper (the effect this has will be discussed later). You can see some diagonal grinding line remnants on the blade flat as well as some machining lines running along the Titanium handle scales.

Looking very very closely at where the point sits when the knife is closed, you can see it is the tiniest bit off centre. However, for some reason this photo makes it look much worse than to the eye. You can also see a slight unevenness of the final edge bevel, but these are tiny details magnified significantly.

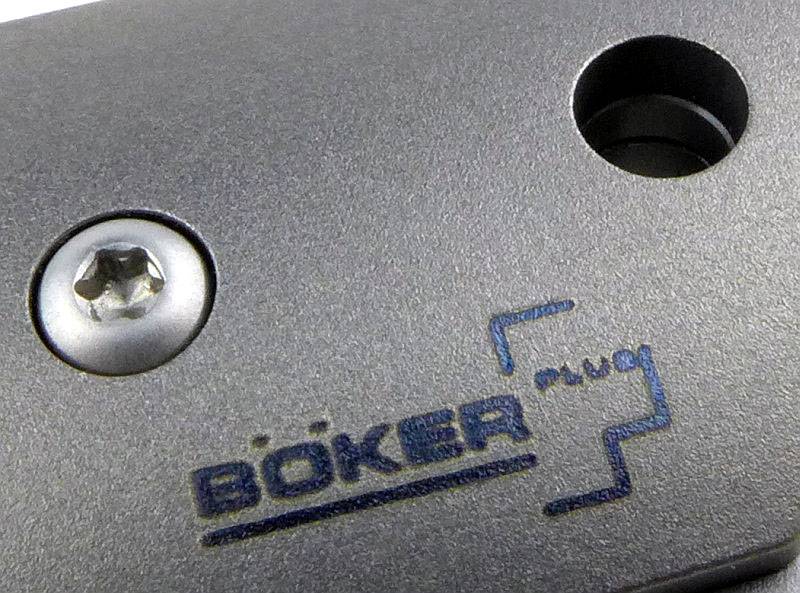
The Böker Plus logo is etched into the Titanium. It appears to be a laser etching but is not ‘cut’ into the surface, instead appearing mainly as a colour change. I can’t find the logo just by feeling for it.

Now to concentrate on the lock and its engagement. Here the full lock-bar is shown from where it bends inward at the thinned section of liner, to the lock surface.

The lock bar does not quite get to the centre of the blade.

A view from the other side.

Having operated the lock quite a few times a set of marks show on the blade’s lock surface giving a better indication of the contact point.

What it is like to use?

To try to describe what this knife is like to use, I need to go back to its ultra-sleek lines with a fully concealed folded blade.

Being so streamlined and being all metal, the Kwaiken feels relatively heavy, yet fine at the same time. In a similar way to the fusion of beneficial characteristics in the Damascus steel used for the blade, the Kwaiken flipper manages to give you the best of each of its characteristics with a reassuring weight and a handle that is slim, elegant and easy to hold.

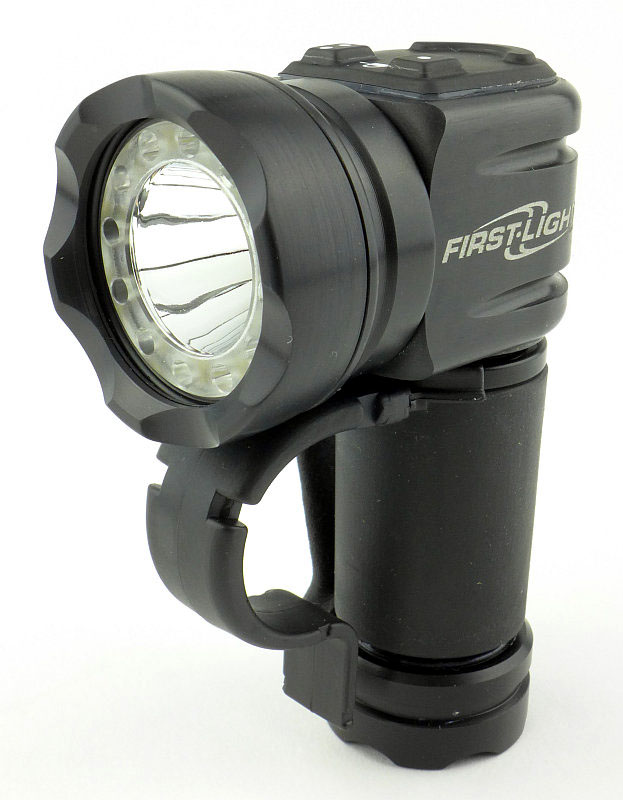
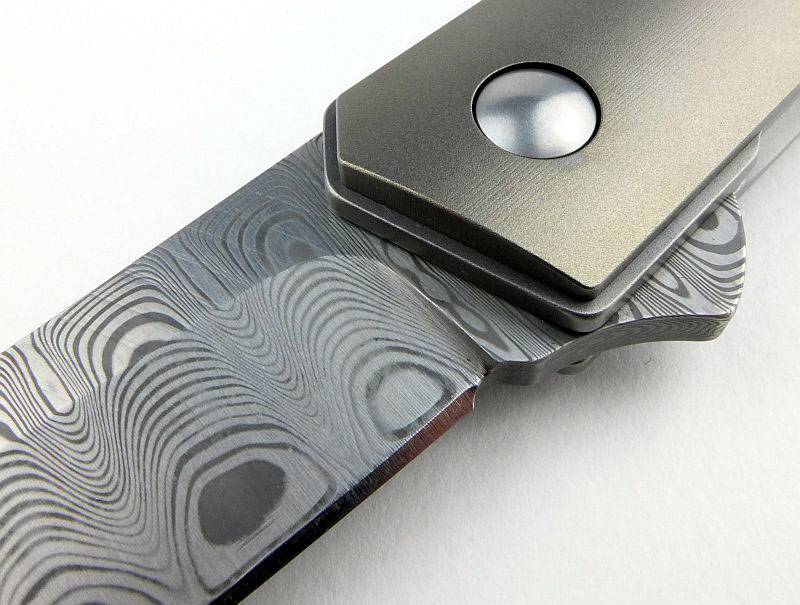
Flippers vary enormously in the smoothness of their opening. Böker Plus’s Kwaiken flipper is known for is silky flip, but in this photo I’ve gone in very close to look at the etched blade and flipper surface. Though the blade itself runs on an IKBS ball bearing, the lock-bar sits against the side of the blade tang inside the handle.

The lock-bar has a blade retaining detent and once the blade starts to open, the ‘ball’ part of this detent sits against the side of the blade and rubs over the surface. Due to this, the opening of the blade has a slightly gritty feeling as the blade rotates round into the locked position.

Holding the lock bar away from the side of the blade removes this gritty feeling straight away, and the more I flip the knife open, the smoother it is becoming. It is an unfortunate consequence of the Damascus etching and that the entire blade surface is etched. If you go for this version you will forgive this because you wanted this steel.

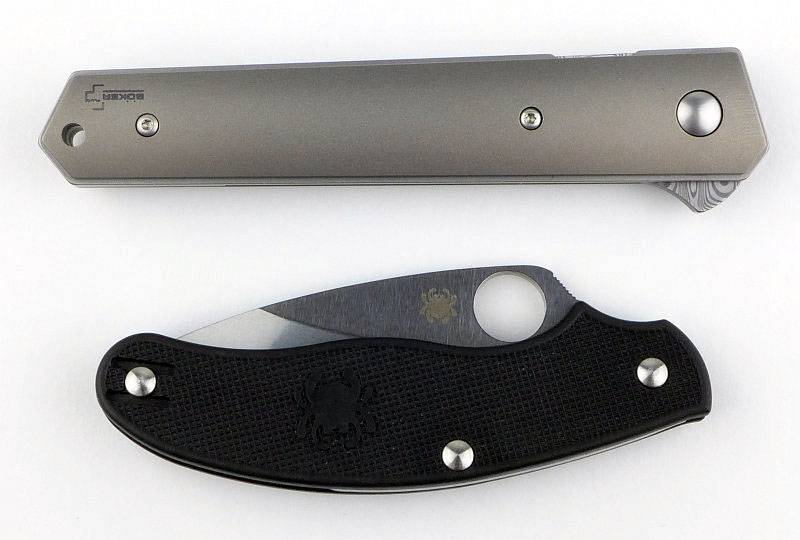
To give an idea of scale, the Kwaiken flipper is being shown next to a UKPK FRN. Also notice again the fully enclosed blade unlike the UKPK.

And with the blades open. Compared to the UKPK with its contoured grip, finger choil and negative rake, the Kwaiken looks straight, stiff and not very ergonomic, but don’t be misled by this. Actually it sits very well in the hand, not for extended periods of heavy cutting, but for general EDC work it is fine.

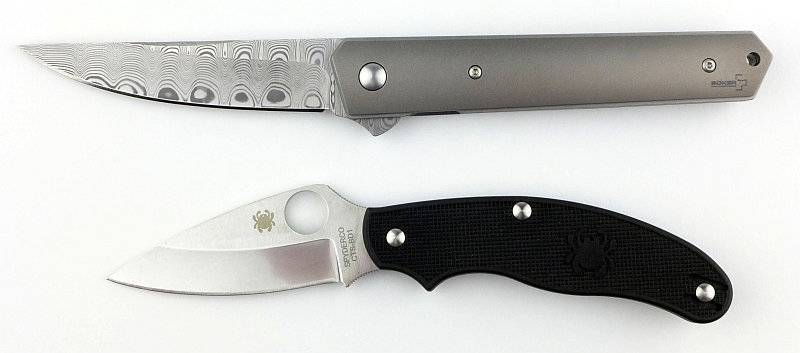
For a narrow blade, the blade stock is quite thick and this does affect the ease with which you can make deep slicing cuts. As with any hollow ground blade, the first part of the cut is easy, but as the cut depth increases the blade starts to bind. Having said this I think the spine thickness suits the style and length of blade perfectly and I wouldn’t change it.

The point is great for piercing cuts, in fact with its slim blade the Kwaiken is excellent at deep piercing cuts

The Kwaiken flipper is an outstanding piece of design and I take my hat off to Lucas Burnley for creating a timeless masterpiece which, thanks to Böker Plus, is within reach of just about everyone.

Review Summary

The views expressed in this summary table are from the point of view of the reviewer’s personal use. I am not a member of the armed forces and cannot comment on its use beyond a cutting tool or field/hunting knife.

Something that might be a ‘pro’ for one user can be a ‘con’ for another, so the comments are categorised based on my requirements. You should consider all points and if they could be beneficial to you.

_______________________________________________ _______________________________________________
Things I like What doesn’t work so well for me
_______________________________________________ _______________________________________________
Sleek lines Slight roughness in the opening due to Damascus etch
Fully enclosed blade Relatively heavy
DAMASTEEL blade Small pocket clip
Easy flip
Ball-bearing pivot


If you enjoyed my reviews, please remember to ‘Like’ me on Facebook and follow me on Twitter to get all the latest updates and news. You can also find exclusive insights on Instagram and Pinterest

Light Review: First Light T-Max LE and TTL (2xR/CR123)

Last time I looked at a First-Light model it was the 2xAA powered TORQ. This time I’m taking a detailed look at the latest T-Max high output model (LE version) and the TTL accessory, as well as another visit to the First-Light mounting system. The TTL actually stands for the Tomahawk Task Light, with the Tomahawk being the T-Max’s predecessor, however, the TTL fits the T-Max so also happens to be the ‘T-Max Task Light’.

This is the LE (Law Enforcement) version of the T-Max and as such has the Red/Green/Blue LEDs and the strobe is red/blue/white. In all there are five versions of the T-Max with either a larger reflector and just the main LED, or having the ring of additional LEDs in combinations of coloured, UV and IR LEDs.

During the time I was talking to First-Light about the T-Max LE, it has been updated to an XP-L and then to the XP-L HI in the featured version here. First-Light certainly work hard to keep right up to date.

If you have not come across First-Light before, then be prepared for something different.

Taking a more detailed look at the T-Max LE:

The latest arrival from First-Light including the T-Max LE and the two versions of TTL.

Inside the T-Max’s cardboard sleeve is a smart plastic box.

The T-Max is comfortably nestled in a foam liner.

There is a second smaller finger loop, two quality CR123s and the instructions.

First-Light’s products have a distinctive look.

Each light has a serial number, and looking from behind, here you can see the shape of the steel pocket/belt/PALS/MOLLE clip.

First-Light’s control panel is also one of its distinctive features with a large curved momentary main-beam button, and the two smaller Primary and Secondary control buttons.

Right side view.

Left side view.

Both the bezel and tail-cap have crenulations.

In total the T-Max-LE has 13 LEDs; 12 coloured LEDs (four Red, four Green and four Blue) and the main beam white LED. In this latest version the main beam LED is now an XP-L HI. The main beam uses a smooth reflector.

Awkward to get a close up photograph, the XP-L HI LED is in a 20mm reflector.

Another First-Light feature is the finger loop; you can see it is attached to the top of the battery tube. The bottom of it is held in place by the finger below the one that goes into the loop. This simple design feature makes the grip on the T-Max very secure and allows you to let the light ‘hang’ on your finger while handling other items.

Looking inside the tail-cap reveals it is a very simple design (less to go wrong).

Standard threads are used for the tail-cap and top of the battery tube.

Making it super versatile and useful, the T-Max’s coloured beam options.

Taking a more detailed look at the TTLs:

Skipping over to the TTLs for a moment. The Tomahawk Task Light (or what I might start calling the T-Max Task Light), is an add-on for the older Tomahawk or the new T-Max. It is a replacement tail-cap with an additional LED output.

Each one arrives fully assembled and with an instruction manual.

On the left is the standard Blue TTL showing the same internal threads as the T-Max’s tail-cap, and on the right is the UV TTL.
The TTLs have a twisty interface, and the two rings of knurling allow you to fit it to the T-Max and then once fitted to turn it on and off.

Simply remove the original tail-cap and replace with the TTL.

The old tail-cap is shown where it would have ended so you can see the additional length added by the TTL.

Ignoring the original tail-cap, the TTL does not look out of place on the T-Max. In fact it gives you a little more to hold onto.

In the centre of each TTL is a recessed 5mm LED.

Unscrewing the head of the TTL allows the cells to be replaced.

A closer look at the TTL contacts.

Both TTLs are powered by three CR1616 cells (supplied with the TTL).

Of course the TTL operates independently of the T-Max.
Blue was chosen for corneal abrasion testing where one might be reluctant to use UV due to retinal exposure concerns. The blue that First-Light has chosen (and tested with the Army) highlights fluorescein and is eye safe. When used correctly, the UV should be safe as well (short exam duration, indirect angle of illumination), but if someone has any concerns they can choose blue.

Now you just have to decide if you go Blue or UV.

With and without the TTL – Without the T-Max is more compact, but with, the T-Max has a longer grip and the secondary light.

Both versions of the TTL fitted and turned on.

Taking a more detailed look at the TRS mounting system:

I’ve already taken a detailed look at First-Light’s excellent TRS mounting system in the First-Light TORQ and Mounting System (2xAA) review, but here I’ll show how it works with the T-Max.

This example uses the Magnetic mount and shows the replacement dovetail sleeve for the T-Max.

To fit the dovetail sleeve first take off the tail-cap and carefully remove the O-ring.

Now the plain battery tube sleeve will slide off the tube. Note the knurling in the middle of the tube which gives adds friction so the sleeve doesn’t just spin round the tube.

Checking you have it the right way round, slide the dovetail sleeve into place and replace the O-ring.

We are in business.

The T-Max LE now locked into the TRS Magnetic Mount.

The beam

Please be careful not to judge tint based on images you see on a computer screen. Unless properly calibrated, the screen itself will change the perceived tint.

The indoor beamshot is intended to give an idea of the beam shape/quality rather than tint. All beamshots are taken using daylight white balance. The woodwork (stairs and skirting) are painted Farrow & Ball “Off-White”, and the walls are a light sandy colour called ‘String’ again by Farrow & Ball. I don’t actually have a ‘white wall’ in the house to use for this, and the wife won’t have one!
Starting indoors, and the T-Max LE has a strong hotspot thanks to that XP-L HI. The spill is even and medium width.

Now onto the coloured outputs. The exposure here is two stops more than the previous white beamshot due to the difference in brightness between white and coloured outputs.

Outdoors you can see the beam’s bright hotspot.

Testing the TTL’s UV output, it readily fluoresces security features in bank notes.

Modes and User Interface:

The available modes are:

Momentary maximum white

White – High, Medium, Low

Red – High, Medium, Low

Green – High, Medium, Low

Red/Green (for highlighting blood) – High, Medium, Low

Blue – High, Medium, Low

Red/White/Blue strobe

These are all access via the three button control panel on the top.

The large curved button is only for Momentary maximum white

Of the two smaller buttons, they are designated Primary (has one dot on it) and Secondary (has two dots on it)

Pressing the Primary button once, turns the White output ON to the last used output level. When ON, pressing and holding the button cycles through Low > Medium > High > Medium > Low etc. Release the button when you have your desired brightness.

From OFF, pressing and holding the Primary button for 1s turns the white output onto Low.

From OFF, pressing and holding the Primary button for 2s turns the output onto Strobe.
Pressing the Secondary button once, turns the Coloured output ON to the last used colour and its output level. When ON, pressing and holding the button cycles through Low > Medium > High > Medium > Low etc for that colour. Release the button when you have your desired brightness.

From OFF pressing and holding the primary button for 1s starts to cycle through the colour options of Red > Green > Red and Green > Blue > Red > etc
A lock mode can be activated either manually, or automatically when the cells are getting low. There is a padlock symbol between the Primary and Secondary buttons which indicates how to lock and unlock and if the lock is active. When the lock is active pressing any button makes it light up red.

To lock the T-Max press and hold both Primary and Secondary buttons until the padlock lights red.

When locked the only mode you can directly access is the lowest output level of the previously used Coloured output. To activate this double click the Secondary button. Once ON low, you can press and hold the Secondary button to choose the Medium or High Coloured output level. A single press of the Secondary button switches the coloured output off.

To unlock briefly press both Primary and Secondary buttons together and the padlock lights green.

Batteries and output:

The T-Max LE runs on 2x CR123. However, after asking First-Light about rechargeable options I was told that using 8.4V would be no problem for the T-Max, but unprotected cells might be damaged as the power circuit is designed for CR123s only.

I decided to try a few options. Firstly the 17670. I chose a quality AW cell for this test. Unfortunately at 4.2V the T-Max keeps thinking the power is low and switches off and goes into lock mode. Despite using a good cell the T-Max won’t work with 17670.

However we have a couple of other options and can go for protected RCR123s or in this case I’ve also tried unprotected IMR RCR123s. (use unprotected cells with extreme caution). Again I chose AW cells for quality and reliability. AW protected RCR123s are also the closest in size to CR123s I have come across.

To measure actual output, I built an integrating sphere. See here for more detail. The sensor registers visible light only (so Infra-Red and Ultra-Violet will not be measured).

Please note, all quoted lumen figures are from a DIY integrating sphere, and according to ANSI standards. Although every effort is made to give as accurate a result as possible, they should be taken as an estimate only. The results can be used to compare outputs in this review and others I have published.

___________________________________________ ________________________________ ________________________________
T-Max LE using specified cell I.S. measured ANSI output Lumens PWM frequency or Strobe frequency (Hz)
___________________________________________ ________________________________ ________________________________
Max – CR123 666 0
High – CR123 219 0
Medium – CR123 128 0
Low – CR123 15 0
Max – AW RCR123 704 0
High – AW RCR123 217 0
Medium – AW RCR123 128 0
Low – AW RCR123 33 0
Red High – AW RCR123 9 Not measured
Red Medium – AW RCR123 2 Not measured
Red Low – AW RCR123 Below threshold Not measured
Green High – AW RCR123 9 Not measured
Green Medium – AW RCR123 2 Not measured
Green Low – AW RCR123 Below threshold Not measured
Red and Green High – AW RCR123 15 Not measured
Red and Green Medium – AW RCR123 3 Not measured
Red and Green Low – AW RCR123 Below threshold Not measured
Blue High – AW RCR123 7 Not measured
Blue Medium – AW RCR123 2 Not measured
Blue Low – AW RCR123 Below threshold Not measured

Coloured outputs appear to use PWM but levels were too low to read on the oscilloscope so could not be measured.

* Beacon and Strobe output measurements are only estimates as the brief flashes make it difficult to capture the actual output value.

Peak Beam intensity measured 15000lx @1m giving a beam range of 245m.

There is parasitic drain but is incredibly low. As shown above I’ve had two samples of the T-Max in my possession. The older XP-L version and the newer XP-L HI. I first measured the XP-L version and found that when using CR123, the drain was 1.5uA (106 years to drain the cells) and on RCR123 was 2.3uA (32 years to drain the cells). When checking the XP-L HI version I thought my test meters had all failed as I was reading 0.0uA. On connecting the meter, it would show 2uA then drop to 0.0uA on either CR123 or RCR123. If, and I mean IF the drain was 0.1uA, or just under, then worst case the T-Max would take 741 years to drain the cells. A highly impressive result.
The following runtime graph shows output traces for CR123 on High, and RCR123 on Max (Momentary) and High.

The Max output settles back down to the same as High after 3 minutes. And then has a slightly reduced overall runtime. Both RCR123 traces end with the protection activating in the cells.

CR123 gives a flat regulated output until the cells run low where it drops to Medium and runts until the low voltage lock activates. After this the T-Max can be turned onto the Coloured output.

Magnifying the first part of the trace shows you how the burst output of the Max mode works giving its peak output at 60s.

Troubleshooting

This section is included to mention any minor niggles I come across during testing, in case the information helps anyone else.

No issues were encountered during testing.

As per the description of this section, this information is provided in case anyone else finds a similar ‘issue’ that might be fixed in the same way.

The T-Max LE in use

A major aspect of all First-Light products is their use with firearms. Having already covered this aspect in the First-Light TORQ and Mounting System (2xAA) review I won’t go over it again here (check out the link to read this review).
By not fixing the lower part of the finger loop, First-Light have allowed it to be more accommodating, but more importantly easy to break away from if needed. The loop makes an enormous difference to the handling of the light and you can just leave it hanging on that finger (flipped over onto your knuckles) and have more-or-less full use of your hand.

Compared to the TORQ, the thumb has to stretch a little further to reach the momentary switch, so small hands might struggle. (I’m wearing XL size gloves in the photo).

With such an excellent ‘TRS’ (Tactical Retention System) mounting system, First-Light’s T-Max is designed to get as much use mounted as it does in the hand. Remember to check back at my TORQ review for more details of the TRS mounts.

In this photo, I’m using the Magnetic mount to hold the TORQ on a fence post and them aim the head to light up where I want to. Purely for the purpose of showing which light is which, I have the T-Max LE with XPL-HI on the belt mount (Red) and the T-Max XP-L version on the MOLLE Blade mount fitted to a backpack shoulder strap with PALS webbing (Blue)

The Magnetic mount gives you fixed hand-free lighting, and the Belt Mount and MOLLE Blade can be adjusted to suit.

I’ve worn the T-Max on my backpack shoulder strap for many months now, and while travelling and taking off/putting on the backpack it has been knocked about a lot, against metal poles and other solid objects. You would be pushed to tell it from a new one as it barely has a mark on it. I know how hard it has been treated (by accident) so am very impressed with the resilience of the finish.

The combination of the momentary maximum output, constant output levels and coloured outputs (which go down to very low levels) just makes this fantastically versatile. The finger loop and ergonomics give it a very natural feeling, and when you get the confidence to flip it round your finger when you need your hand, it almost takes over from a headlamp. Add in the mounts and the system just works for you.

I keep the TTLs fitted as I do prefer the longer grip, I also like the additional function of the extra light (especially the UV). If you use it mainly in a mount you might prefer to keep the size down and not use a TTL but it will be personal preference and where you mount it that dictates that.

As the cells get low, the T-Max protects you from being without any light at all by locking itself; you can then use the coloured output. Even when the main beam won’t stay on for more than a few seconds, you will have hours of low power coloured light available.

First-Light have taken their innovative Tomahawk, tweaked the interface and given it a significant performance boost in output power and beam intensity resulting in the T-Max.

Review Summary

_______________________________________________ _______________________________________________
Things I like What doesn’t work so well for me
_______________________________________________ _______________________________________________
Excellent distinctive ergonomics and handling Might be a stretch for smaller hands
Functional three button interface Unusual shape can take some getting used to
Finger loop Not optimised for any rechargeable cells
Uses First-Light’s TRS mounting system
Will run on RCR123 cells as well as CR123
Optional TTL adds UV or Eye exam safe Blue beam
Multi-coloured outputs


If you enjoyed my reviews, please remember to ‘Like’ me on Facebook and follow me on Twitter to get all the latest updates and news. You can also find exclusive insights on Instagram and Pinterest