Knife Review: Spyderco Bradley Bowie

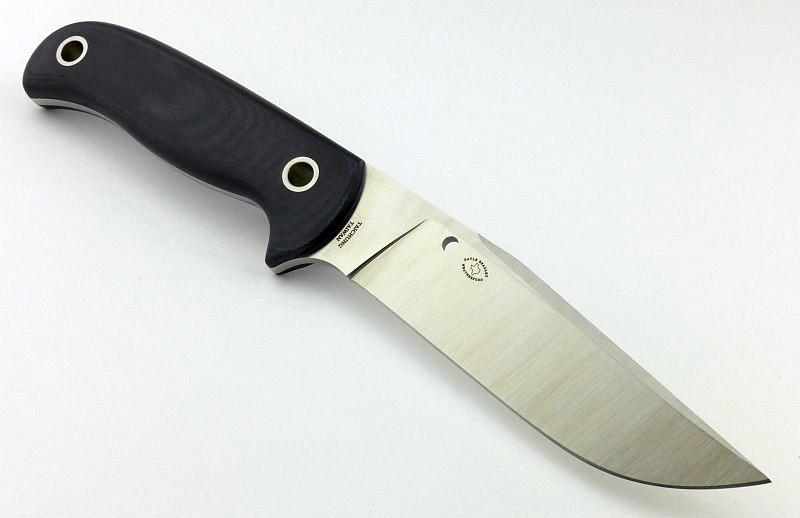
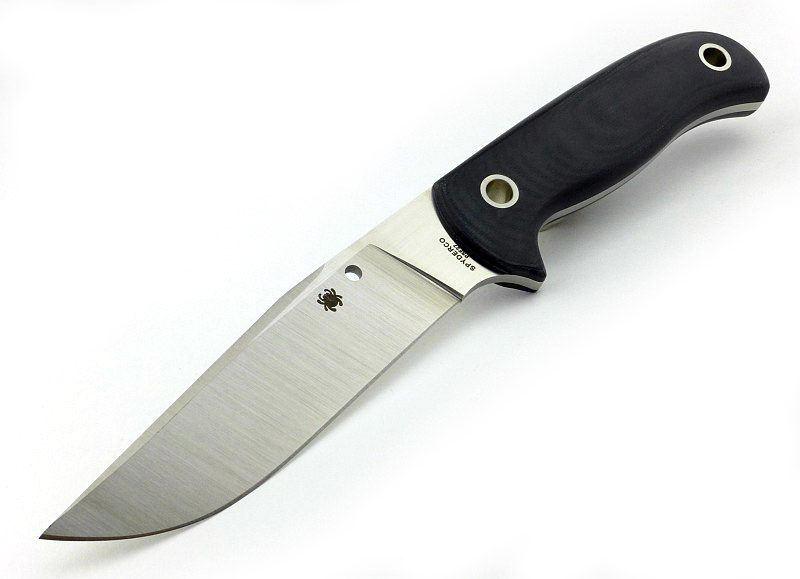
It’s not something I’ve been able to properly define, but there are some knives that just look ‘right’ from the moment you first see them, and the Spyderco Bradley Bowie (designed by Gayle Bradley of course) is one of those. Many knives have specific purposes and their design reflects the requirements of those; the Bradley Bowie manages to make itself a truly general purpose knife, just as happy preparing camp food, dressing game, battoning wood, or on manoeuvres carried by service personnel.
The Blade and Handle Geometry:

Most knife specifications have a basic description of the blade geometry, but in this section I will be taking a more detailed look at geometry and balance.
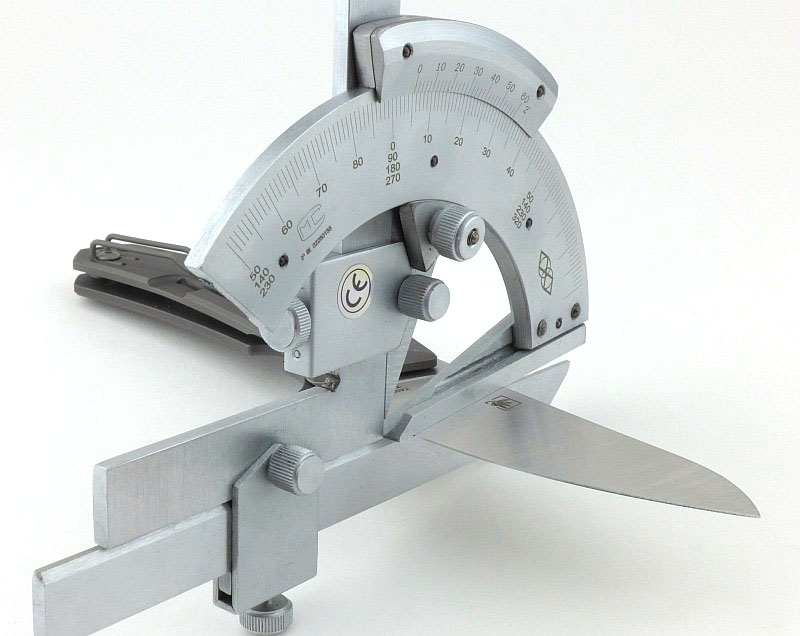
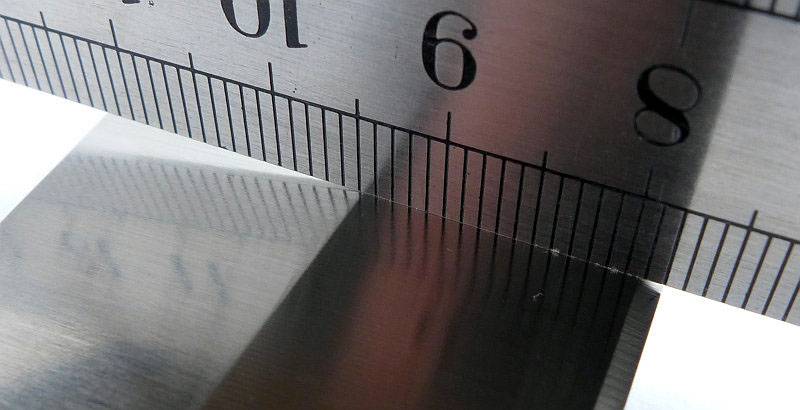
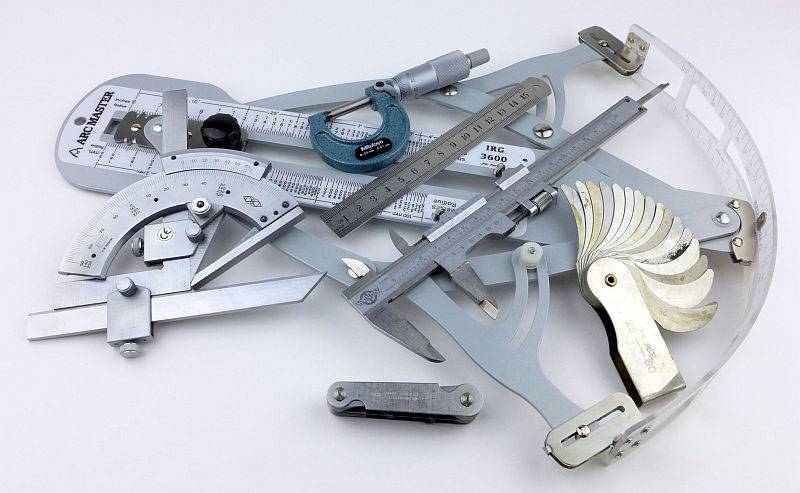
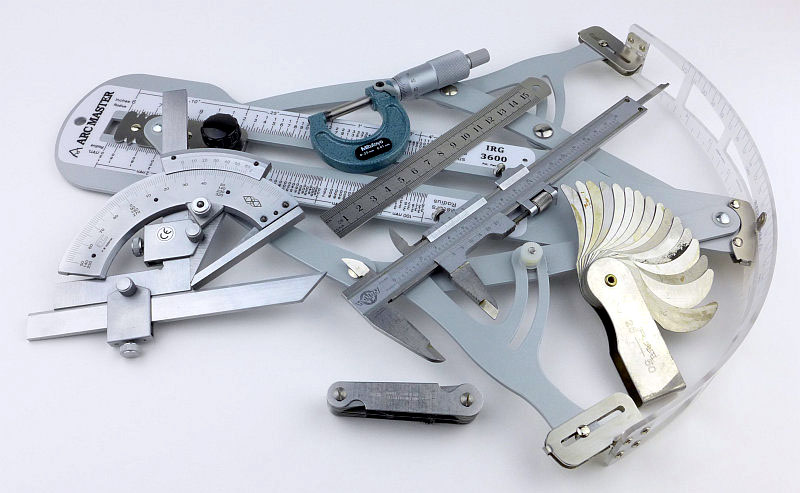
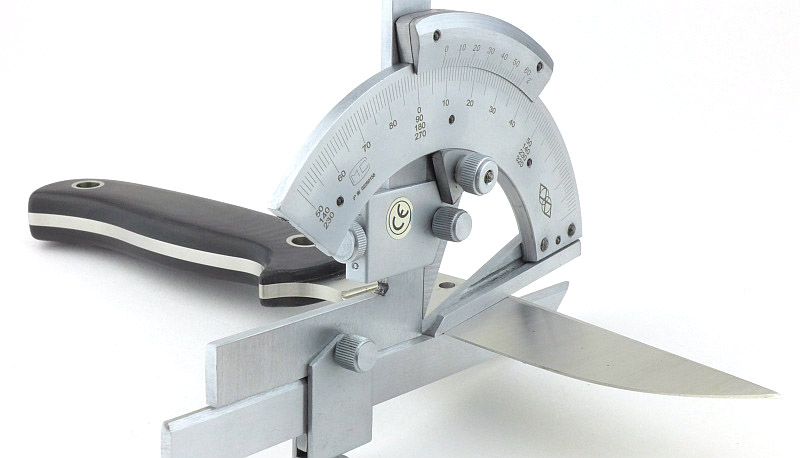
Using a set of gauges and precision measuring equipment including a Vernier protractor, callipers, fixed radius gauges and the unique Arc Master adjustable radius gauge (the one that looks like a crossbow).
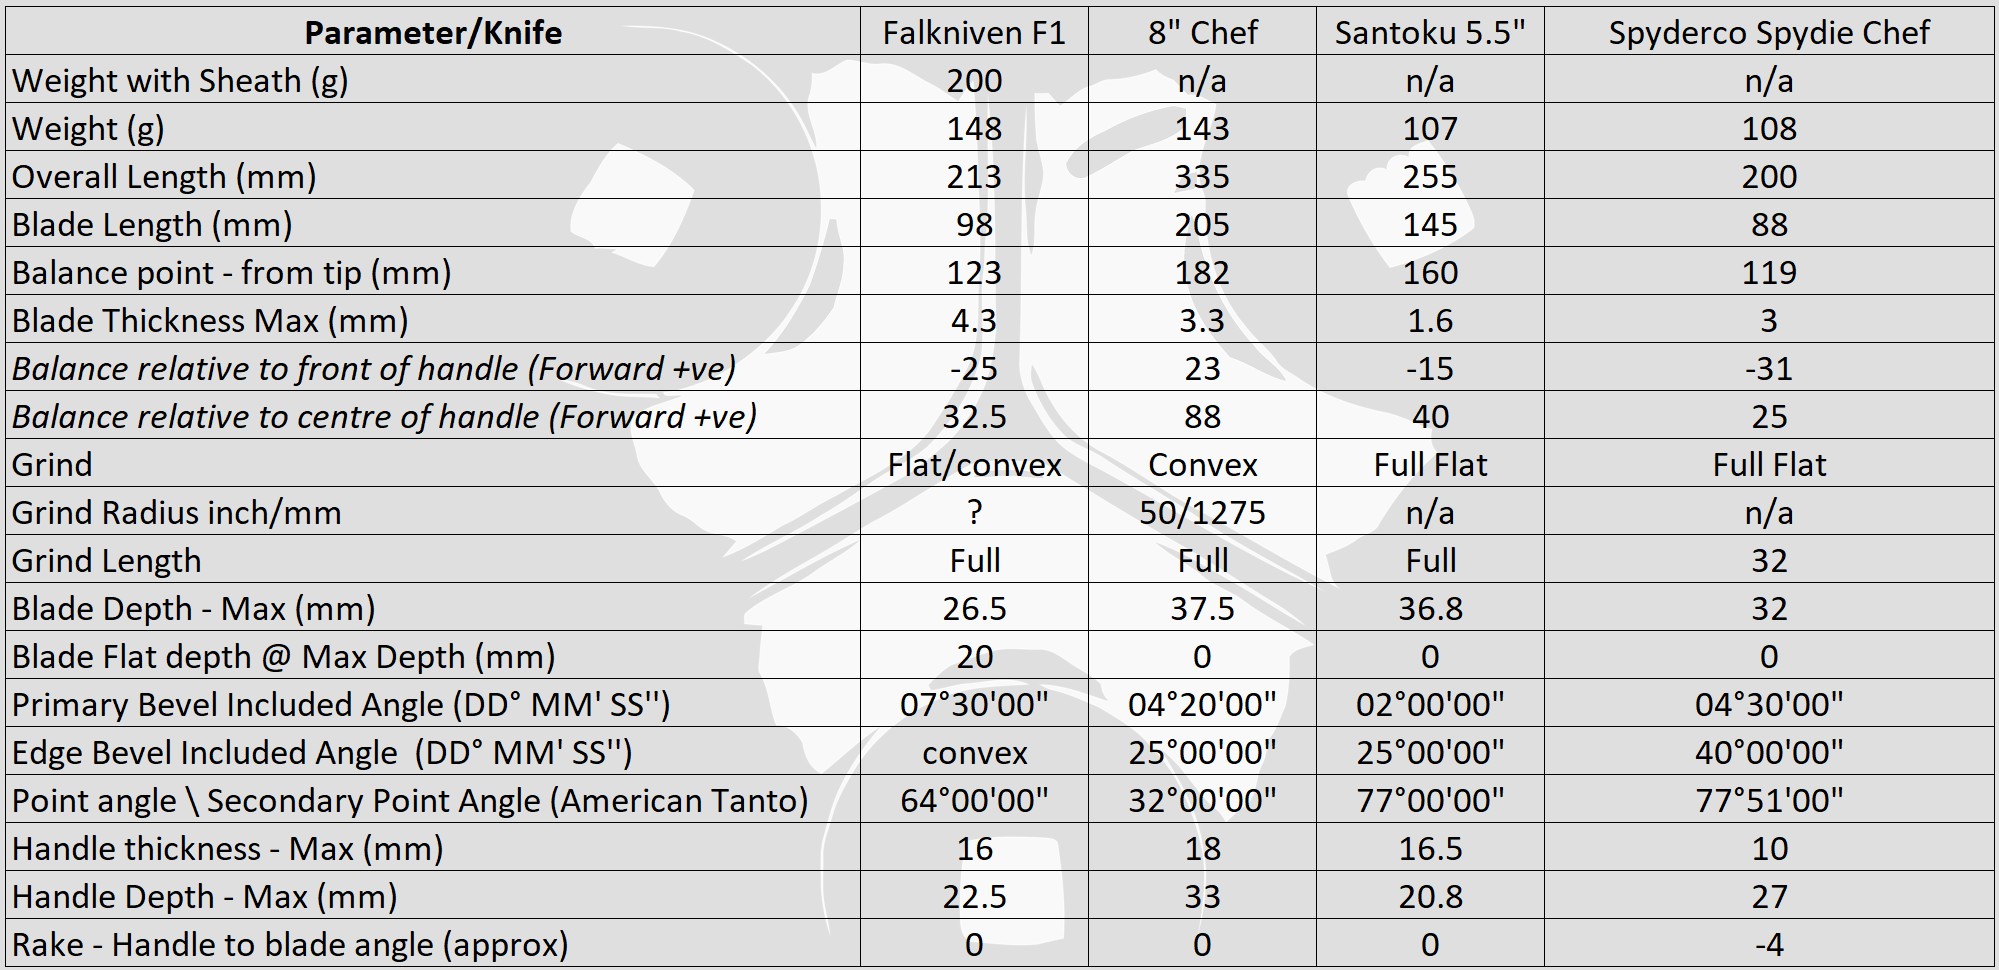
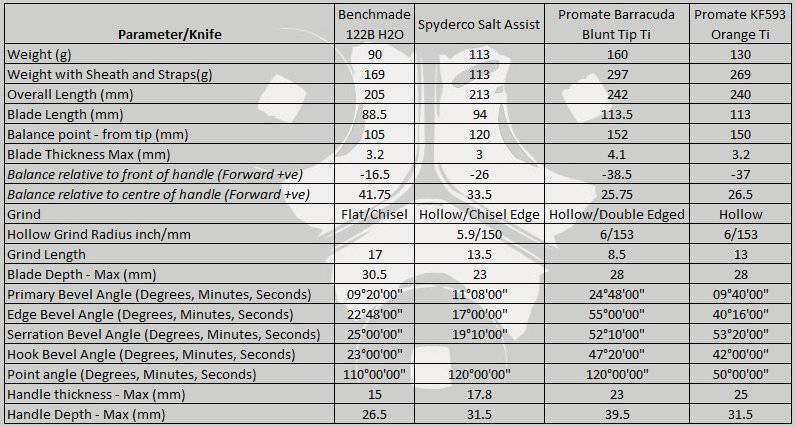
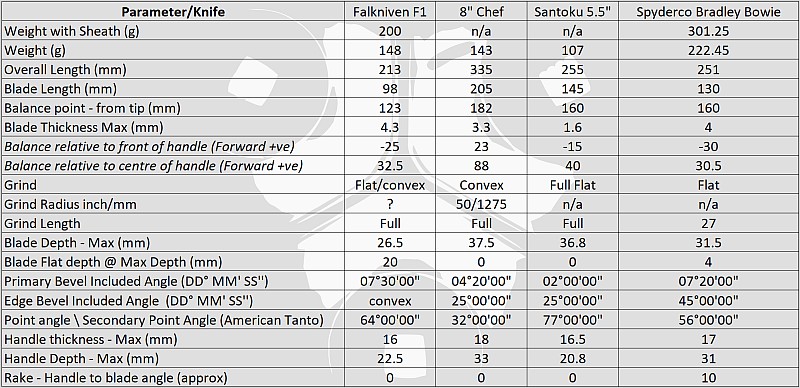
These measurements have been tabulated and are presented along with a few reference blades (8″ Chef’s Knife, 5.5″ Santoku and the popular Fällkniven F1).

Key aspects such as the primary bevel angle, grind type, blade depth, blade thickness, length, weight are detailed, along with balance information.
The ‘Balance relative to the front of the handle’ tells you if the knife will feel front heavy, or if the weight is in your hand (a positive value means the weight is forward of the front of the handle). The ‘Balance relative to the centre of the handle’ indicates how close to a ‘neutral balance’ the knife has in the hand.

In the case of full convex grinds the approximate centre of the grind is used for the primary bevel angle estimate.
The blade is made from PSF27 steel.

New for 2018! BESS Certified sharpness testing:

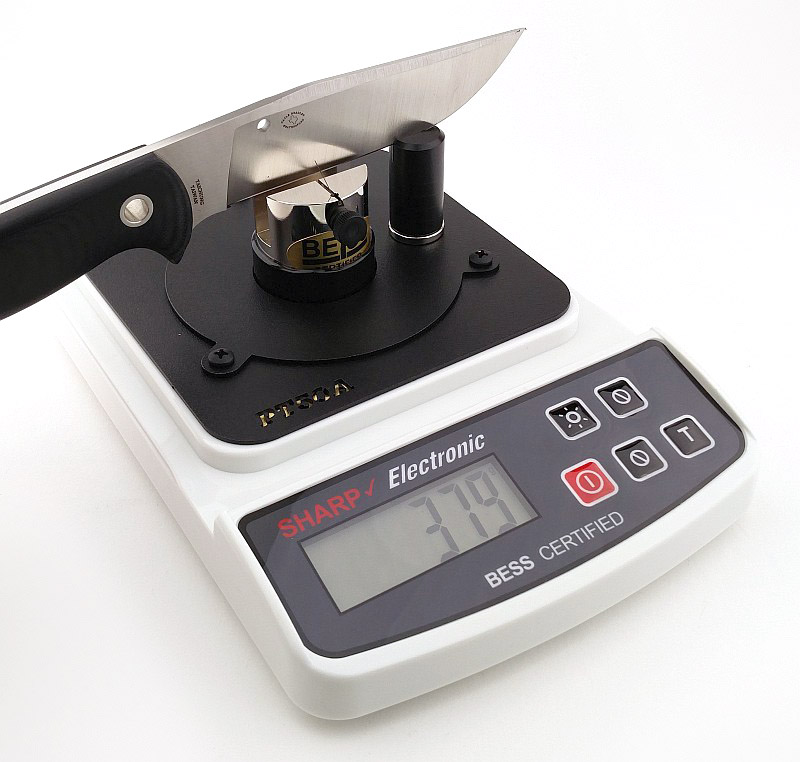
The BESS ‘C’ scale of sharpness, developed by Mike Brubacher (Brubacher Edge Sharpness Scale) will now become part of Tactical Reviews’ knife testing process. Initially this will be used to verify the sharpness of the factory edge and allow the knife to be brought to a minimum standard sharpness before testing a blade’s cutting performance.

The Bradley Bowie’s factory edge has an average BESS ‘C’ sharpness of 374. This original edge will slice thicker paper/card, but although it bites into the edge, it starts to tear thinner paper rather than cut.
Explained by the Maker:

The reasons for certain design choices may not be clear when simply looking at an object, so this section is intended to give an insight into the thinking behind a design by speaking to the designer themselves.

Unfortunately I can’t always get time with the designer so will use this section to include relevant information about the knife and its designer.

Quote From Spyderco’s literature:
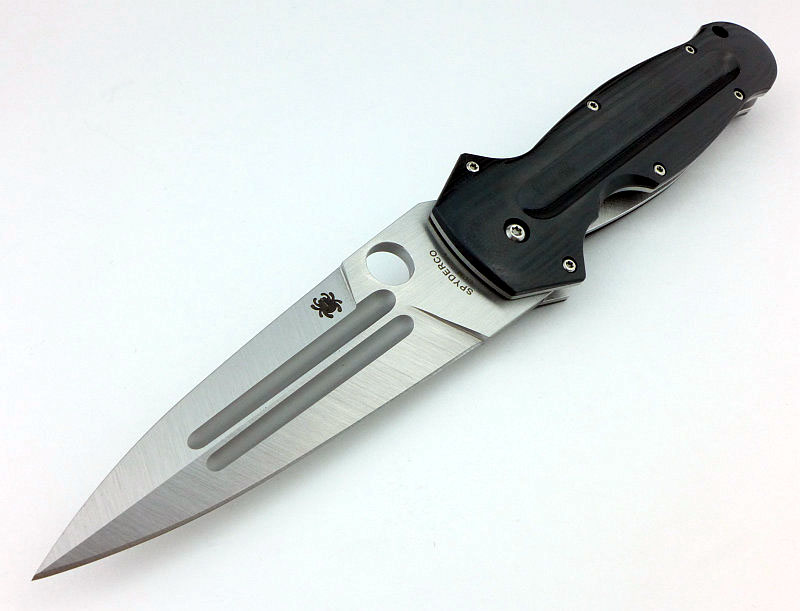
“Gayle Bradley’s experiences a custom knifemaker and competitive cutting champion give him an exceptional insight into high-performance knife design—an insight that is directly reflected in his first fixed-blade collaboration with Spyderco, the Bradley Bowie.

The Bradley Bowie’s blade is precision ground from PSF27—an incredibly tough spray-formed tool steel. Like the particle metallurgy process, spray forming rapidly solidifies molten steel into small particles so its component alloys cannot “segregate” or settle. This creates an ultra-fine, extremely homogenous grain structure that is ideal for knife blades. PSF27’s alloy composition includes molybdenum, vanadium and a generous 1.55% carbon, but because its chromium content is 12%—just below the official threshold for stainless steel—care should be taken to maintain it properly.

The full-flat-ground blade has a pronounced “belly” for precise cutting control and a long straight swedge (unsharpened bevel) that helps defines its “Bowie” character. It is complemented by full-tang handle construction and a prominent integral lower guard to protect the user’s hand. The handle’s gracefully contoured G-10 scales are 3-D machined and polished to an attractive finish that still ensures a secure grip during use. They are secured to the tang with stout tubular rivets that help reduce weight, allow easy attachment of a lanyard, and in a survival situation, allow the knife to be lashed to a pole to create an improvised spear.

A unique blend of expert design and state-of-the-art metallurgy, the Bradley Bowie comes complete with a custom-molded Boltaron® sheath with a versatile G-Clip™ attachment.”

A few more details:

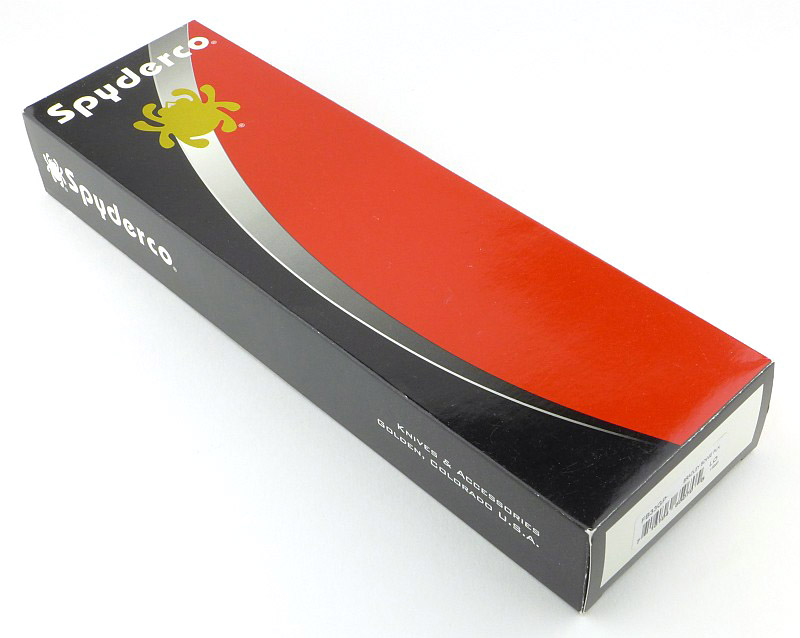
Standard Spyderco packaging is used for the Bradley Bowie.
Both Knife and sheath arrive in plastic bags. The sheath has come out of the bag slightly, but the knife is still fully covered.
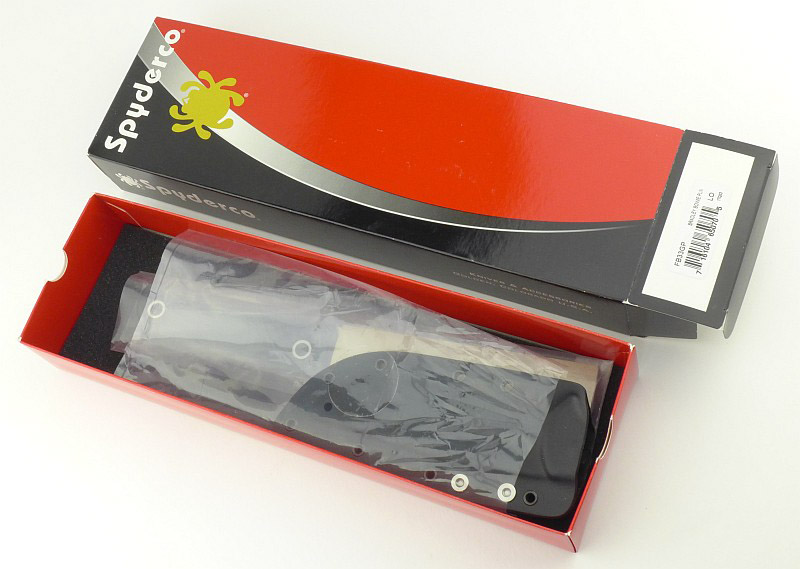
In the box are the knife, sheath and information leaflet.
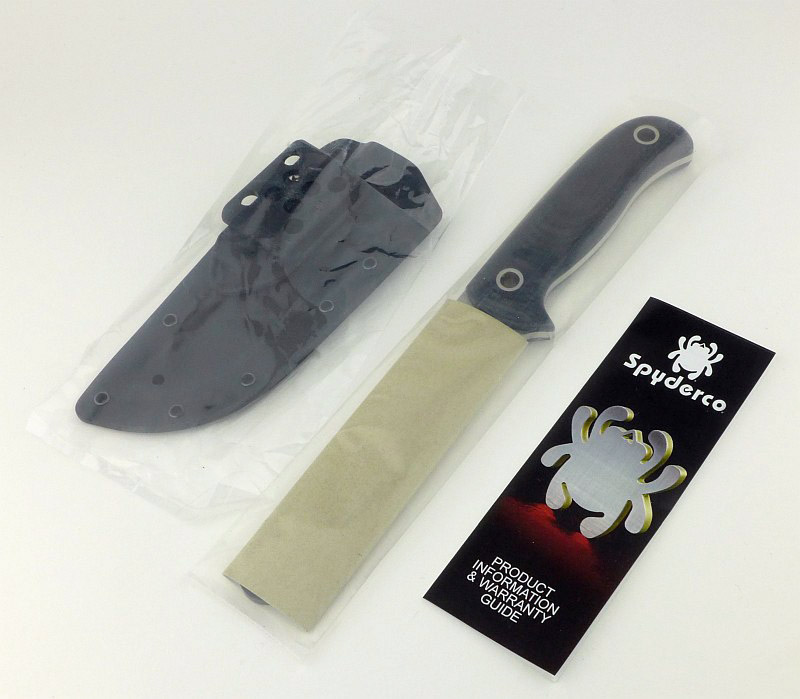
Mainly due to the choice of steel, there are a few layers of protection for the blade. With the plastic bag removed, the first layer is a cardboard sleeve.
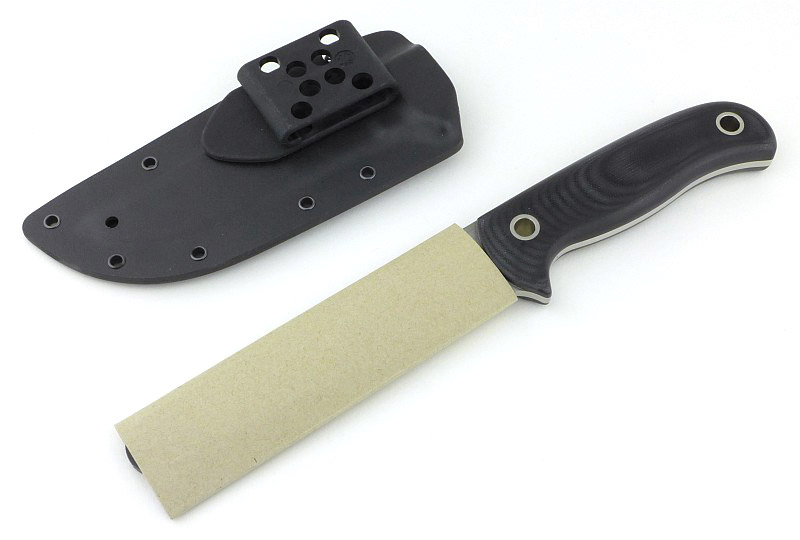
With the cardboard sleeve removed we find a wrapping of Vapour Corrosion Inhibitor paper, plus a plastic tip guard.
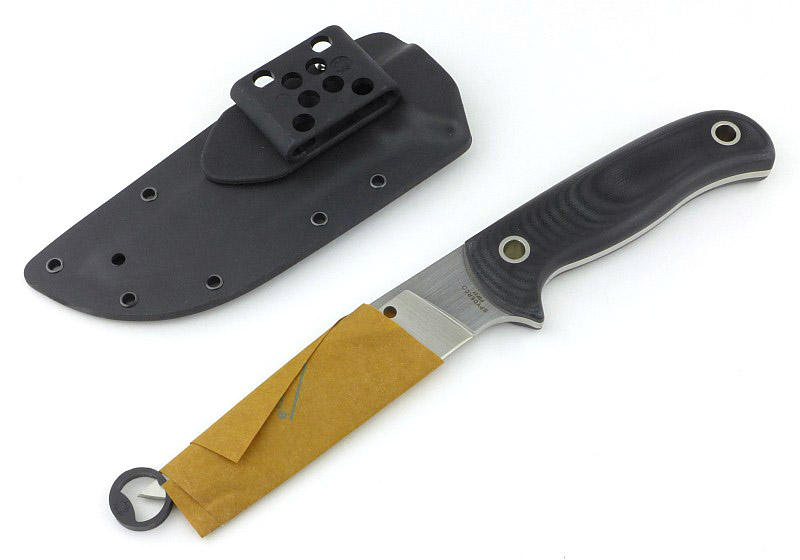
And there it is, kept pristine by the wrappings.
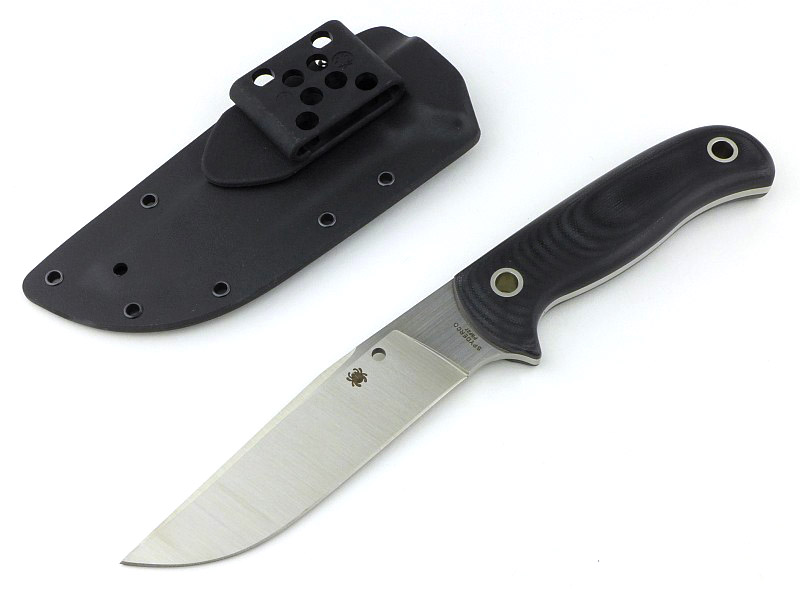
We are going to have a look round the sheath first. Not just any old Kydex sheath, in fact not Kydex at all, but its higher performance alternative – Boltaron.
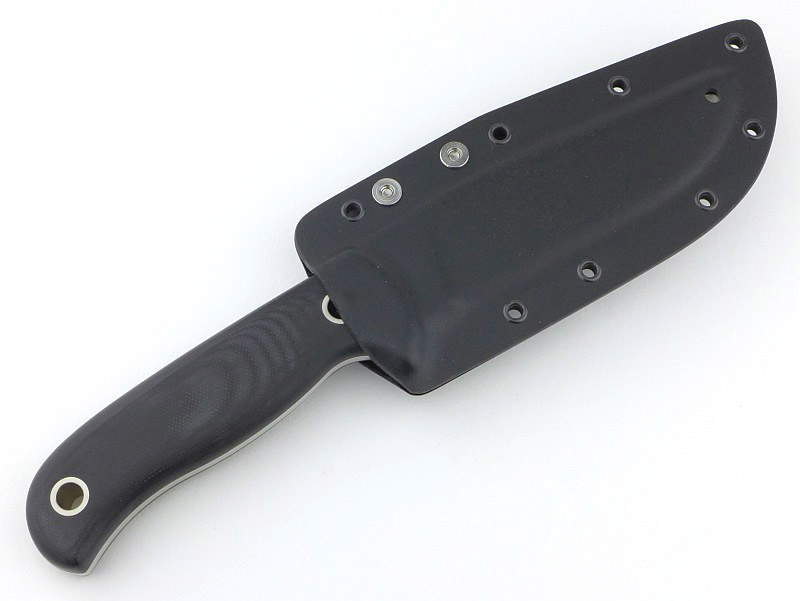
The back of the sheath…next onto some details.
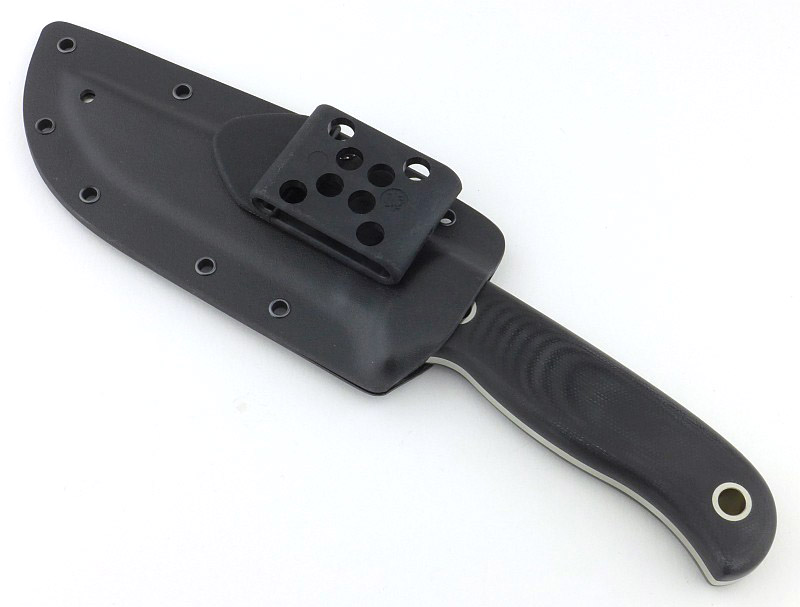
In contrast to the black Boltaron and rivets, the belt clip fixings are silver coloured.

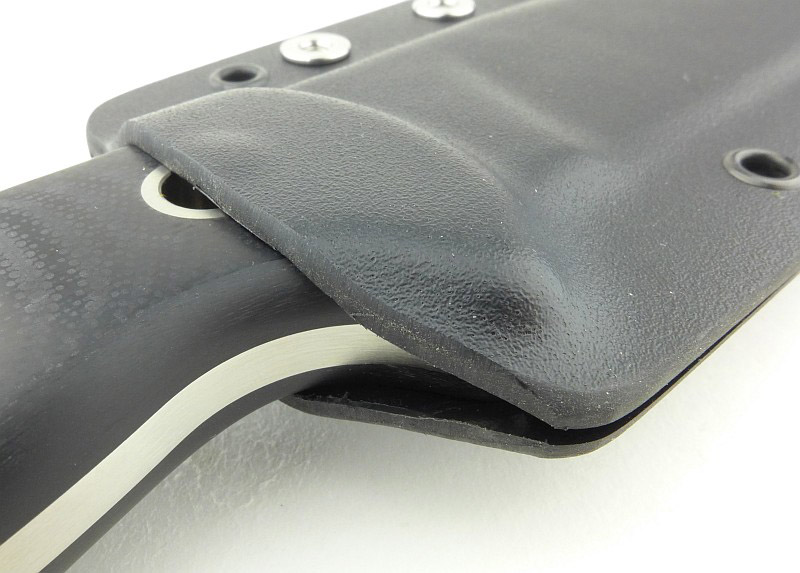
As expected with this type of sheath, the Boltaron is moulded around the end of the handle and has been cut and sanded to its final size and shape.
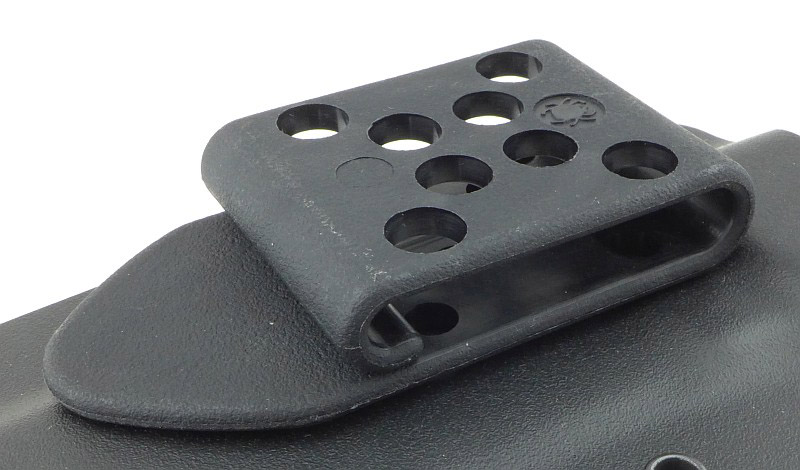
Eight holes in the outside of the belt clip correspond to all the possible fixing holes that can be used to fit this belt clip to a sheath.

You can unscrew the Torx screws to remove and reposition the belt clip.
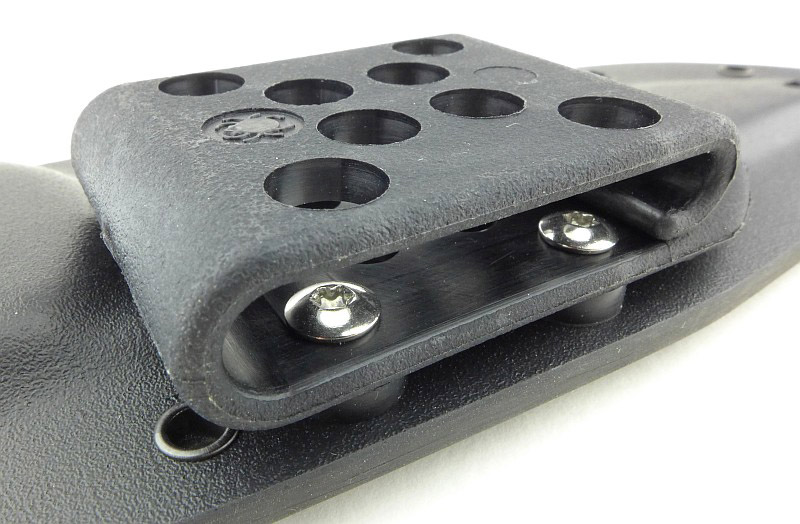
The belt clip itself is open at the bottom, but tightly sprung with a hook shaped end. Once positioned on a belt it will not easily come off again.
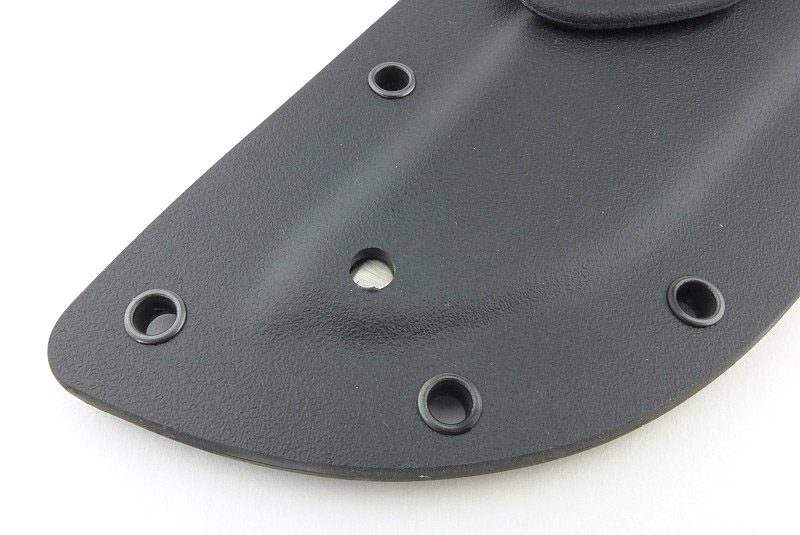
Near the tip of the knife is a drainage hole. Ideally this could have been further down at the actual blade tip, as a small amount of water can still stay in the sheath if it becomes soaked.
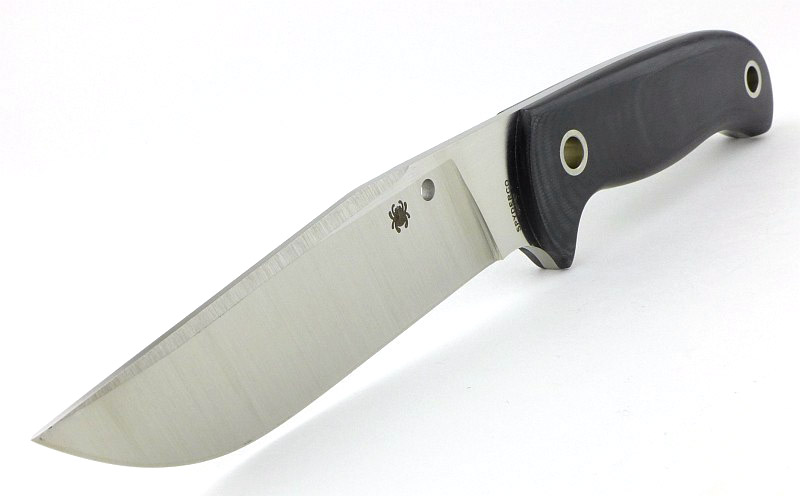
Now onto the knife. Just take in that full flat grind and long sloping swedge.
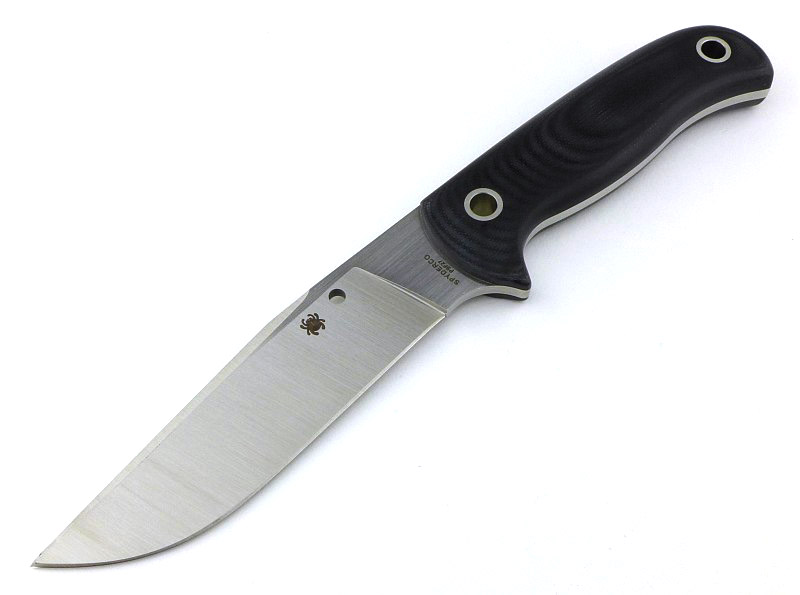
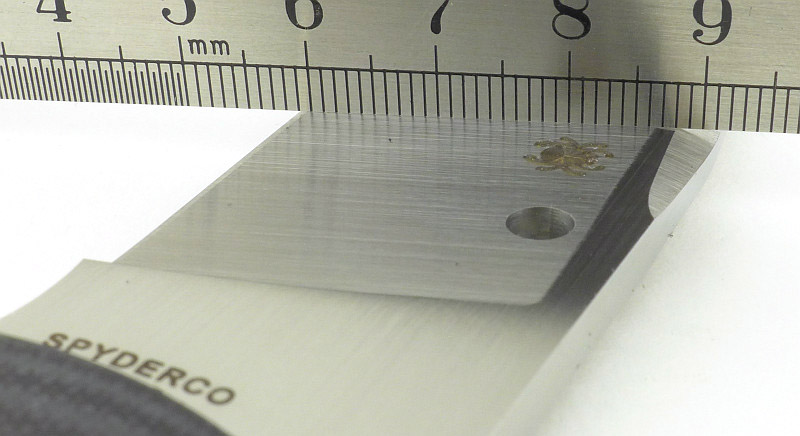
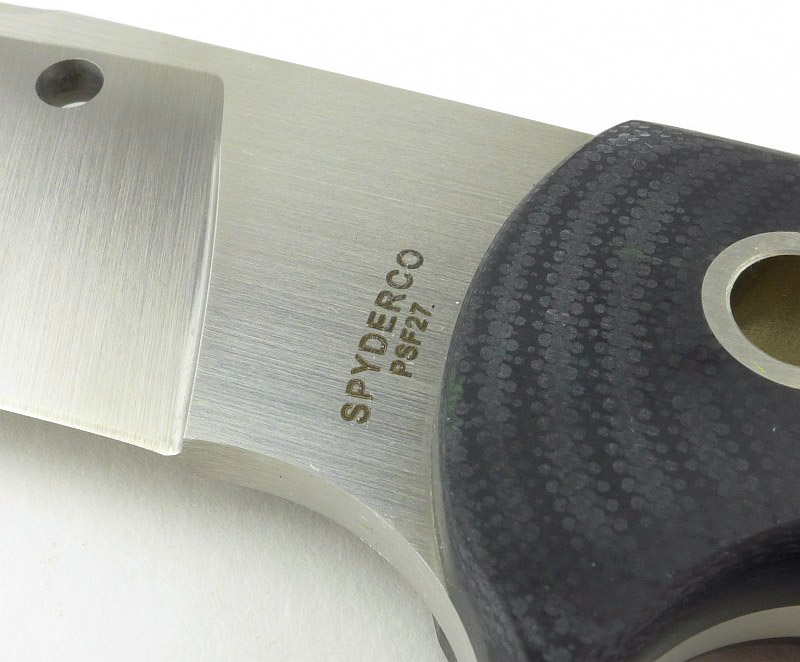
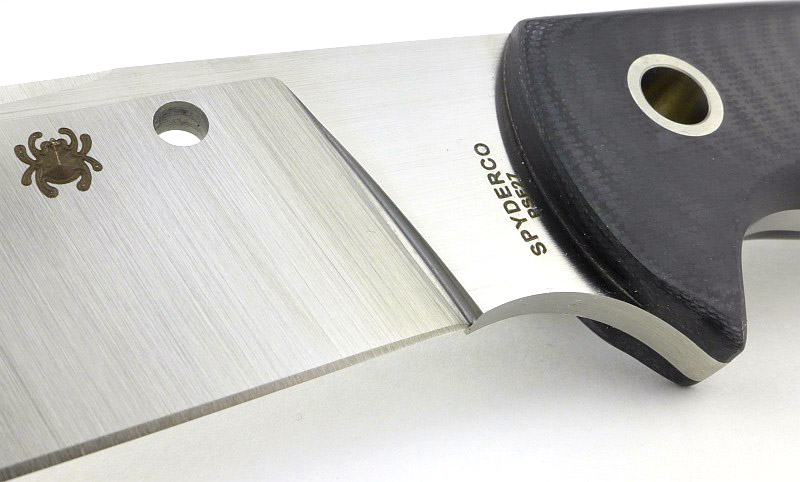
The PSF27 steel specification is engraved under Spyderco’s name.
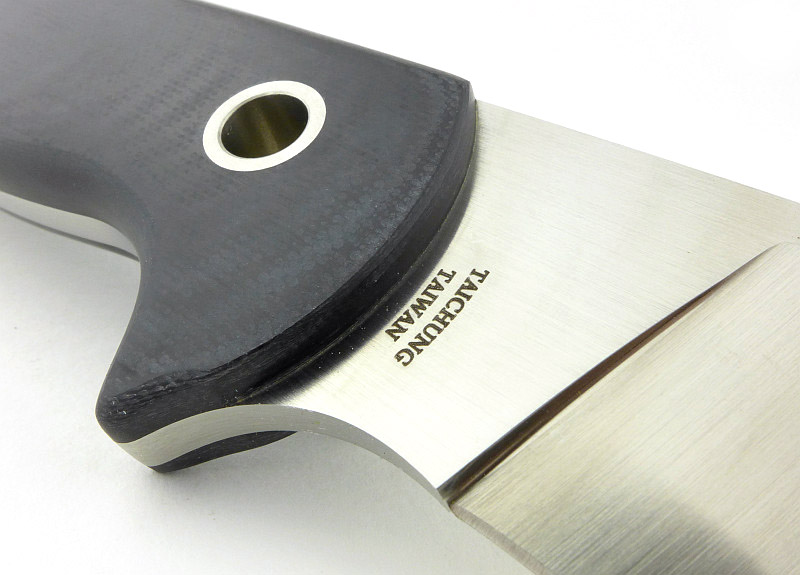
A finger guard is formed out of the full thickness tang and handle slabs.
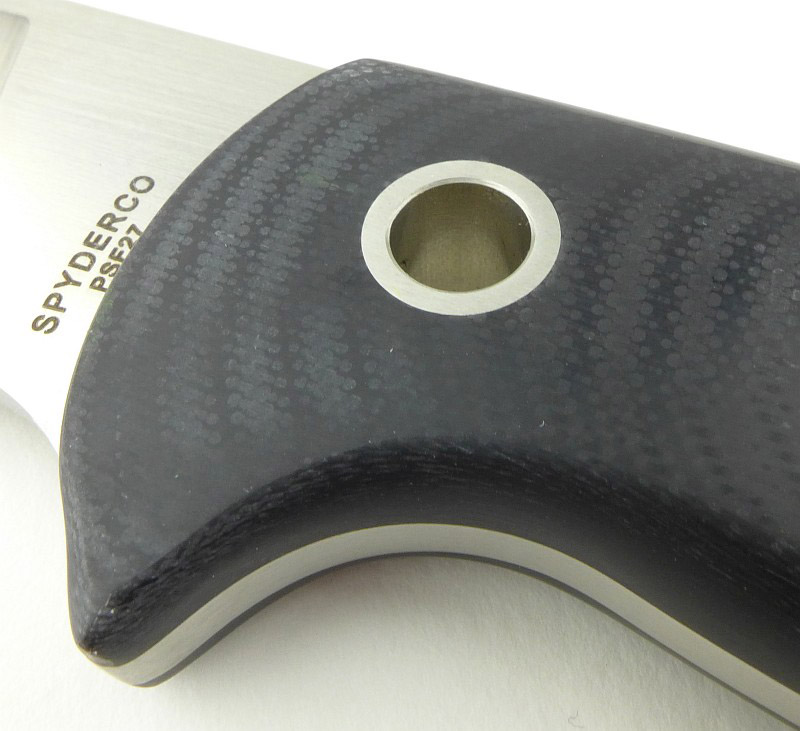
Large diameter hollow pins are used to secure the handle and provide easy fixings for a lanyard, or to lash the knife to a pole.
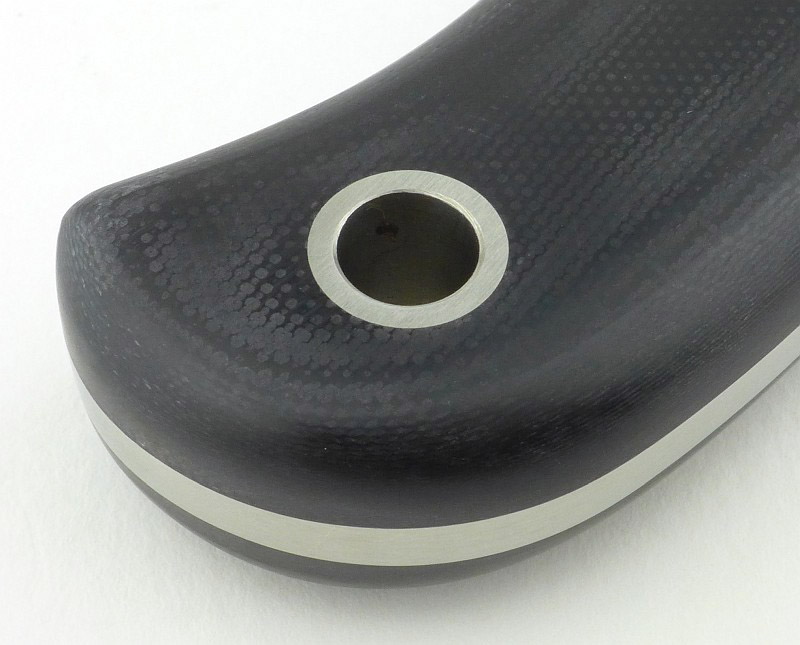
Both hollow pins are the same size.
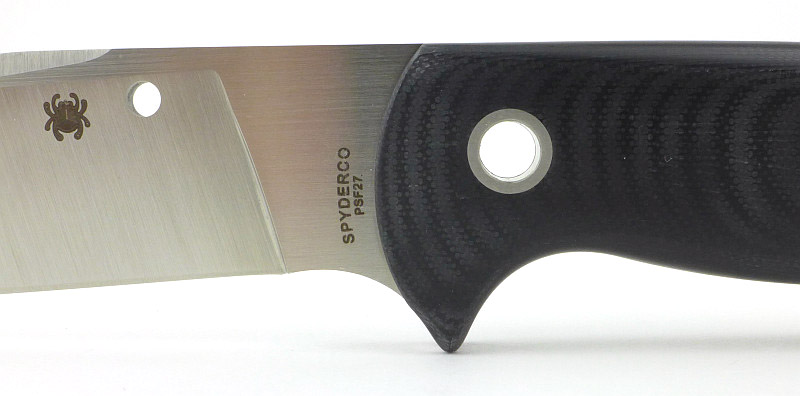
Layers in the semi-polished G-10 handle reveal the contours of the handle shape.
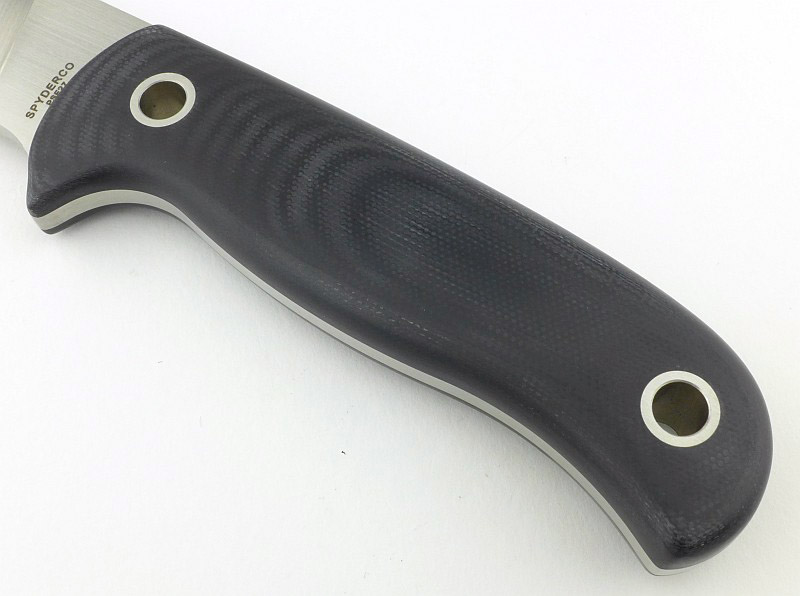
The full thickness tang is prominent in the slim handle.
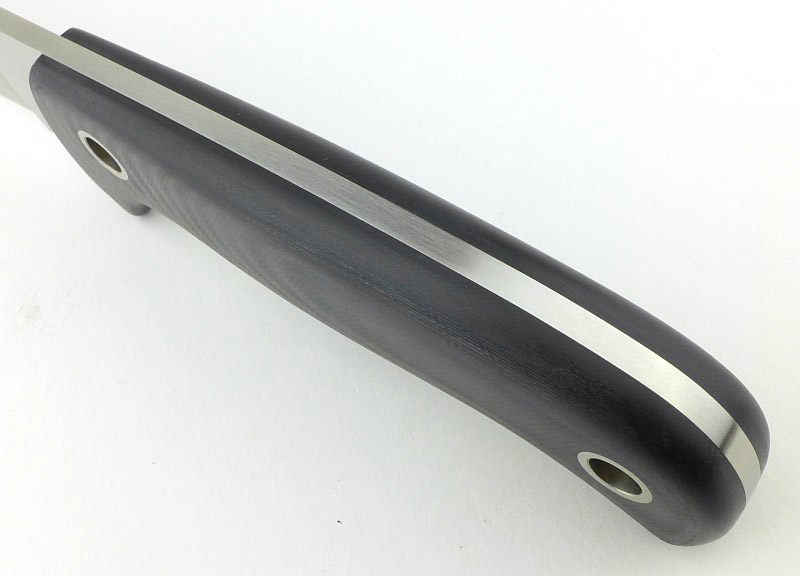
There are relatively sharp corners to the plunge line – potential stress concentrators.
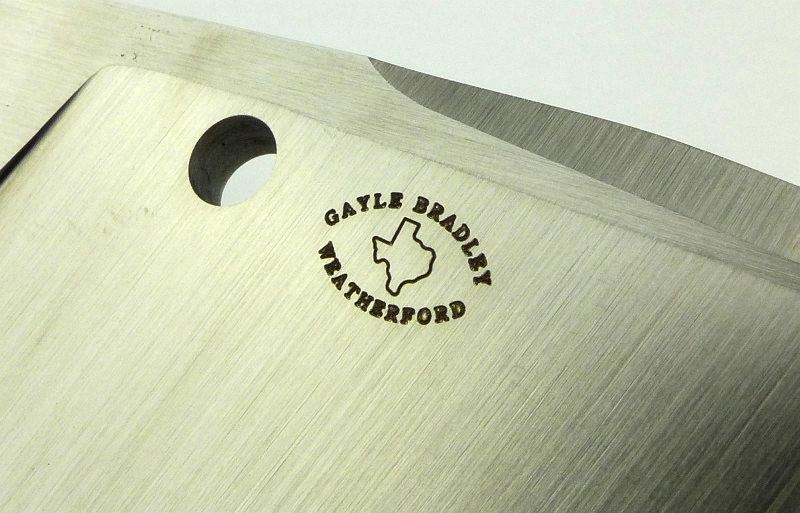
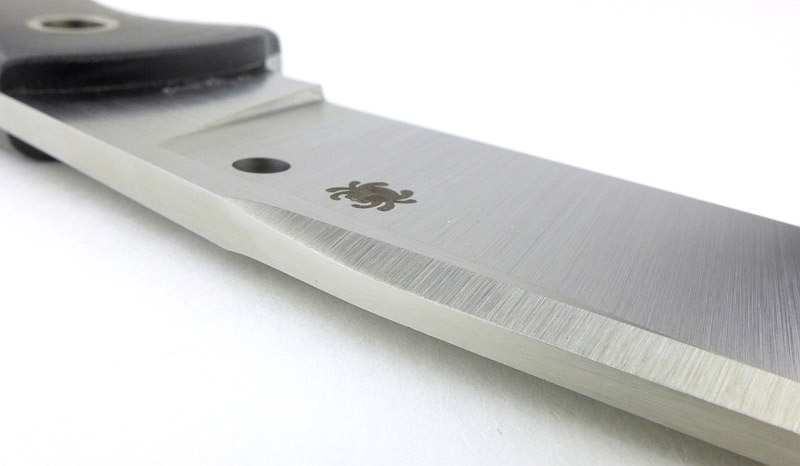
Gayle Bradley’s logo appears on one side of the blade.
All the corners of the G-10 Handle are well rounded preventing any hot-spots. Only a small section of the handle edge next to the ricasso is not fully rounded.
The swedge extends over two thirds of the blade length.
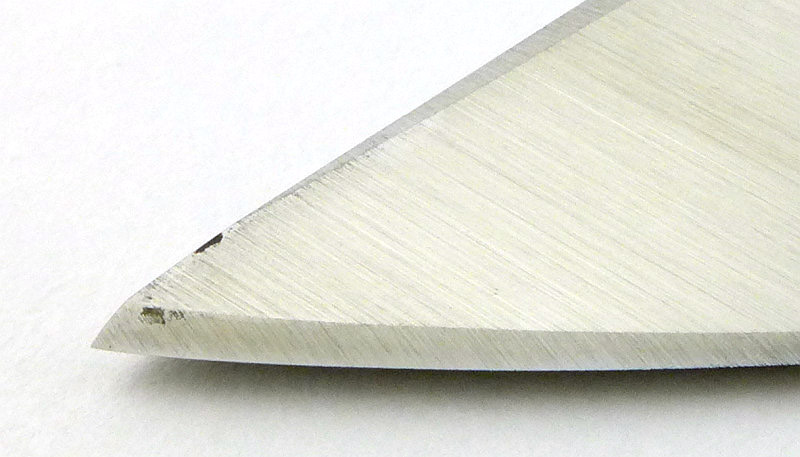
Tapering towards the tip is only slight, retaining a good amount of strength.
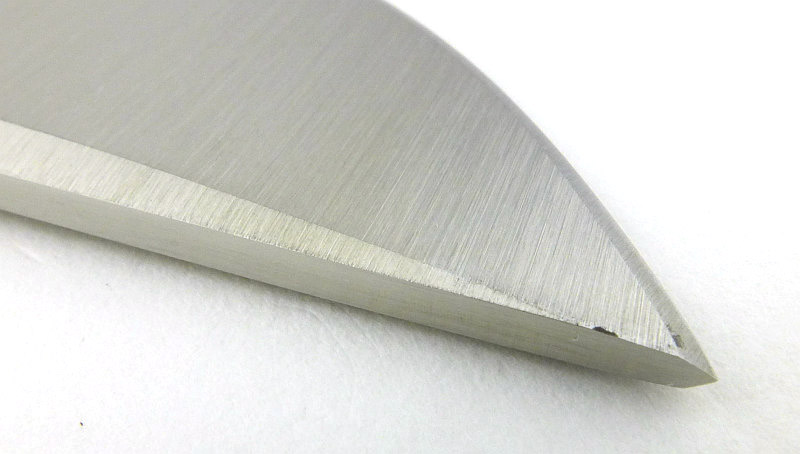
Of course the trade off is a widening and steepening edge bevel.
What it is like to use?

I’ve already mentioned that the design of this knife really speaks to me, and just looks right. This is absolutely confirmed by the feel in the hand; it really does work as well as it looks like it will.
Excuse the potential connotations here, but that semi-polished G-10 handle is asking to be touched, stroked and held, much like a worry stone. Every part of it is smooth, the type of smooth that doesn’t drag, catch or stick like a full gloss polish can. It has got to be one of the best feeling handles I’ve come across, and you don’t want to put it down.
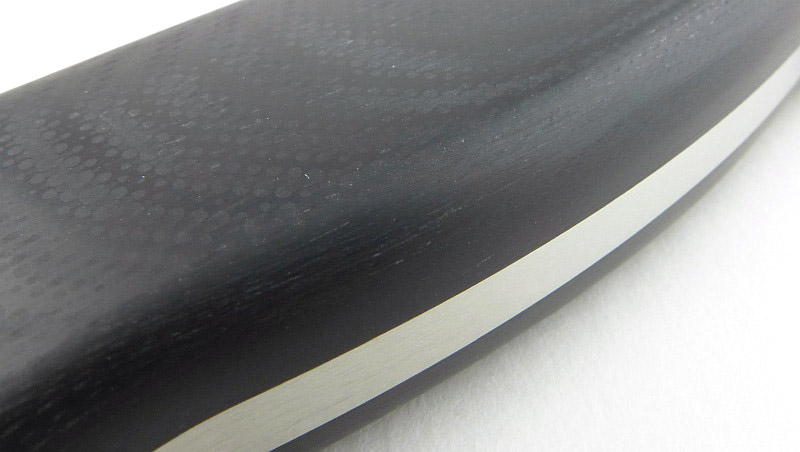
Even wet or sweaty, there is plenty of grip despite its smoothness, in fact the least amount of grip I found is with a completely clean and dry hand. The rounded edges remove any hotspots; you are much more likely to get a blister due to wearing gloves (and their seams creating a hotspot) than anything to do with the handle.
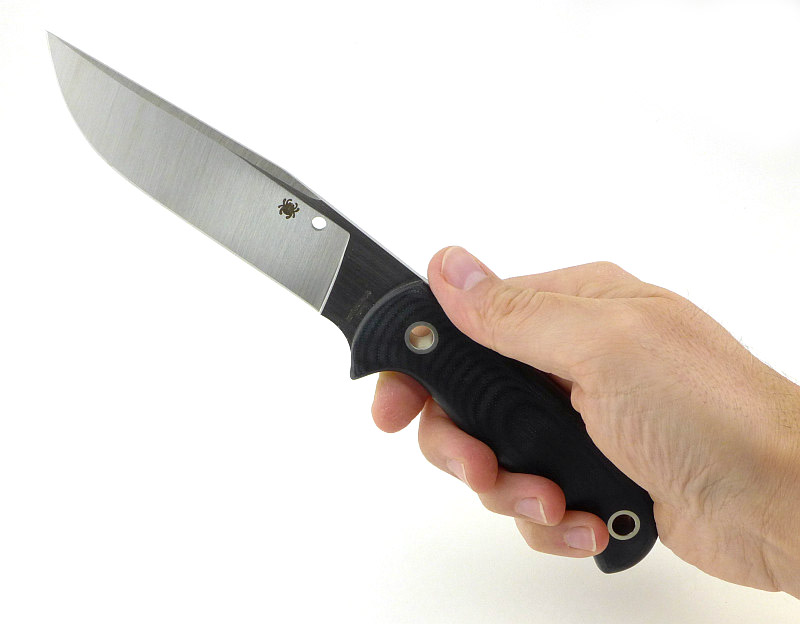
Personally I prefer a thicker handle for a bit more of a handful, but in this case I like the lower profile handle with less ‘presence’ on the belt (or as I often do, slipped in a large pocket). There is enough handle to allow you to really work the blade hard without adding bulk.
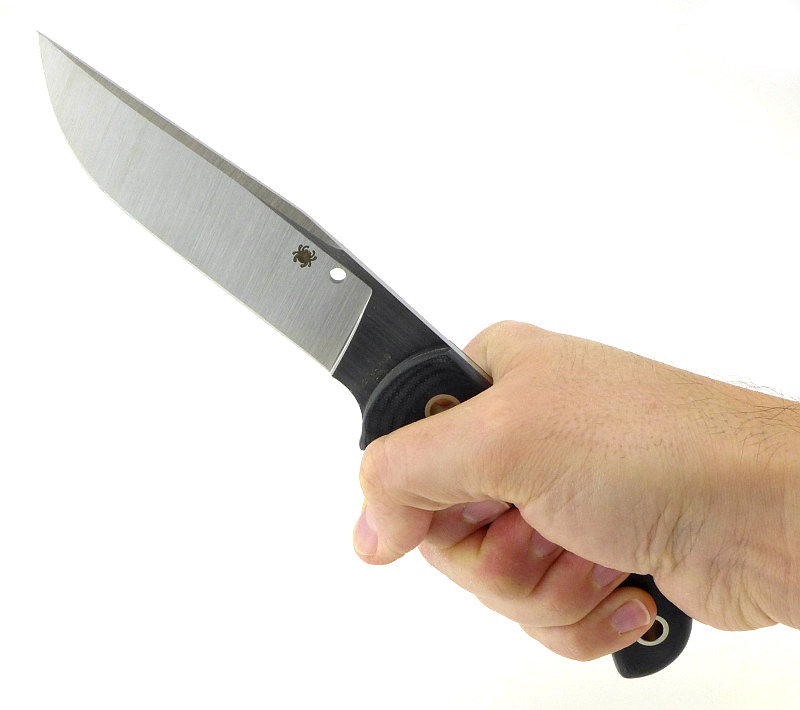
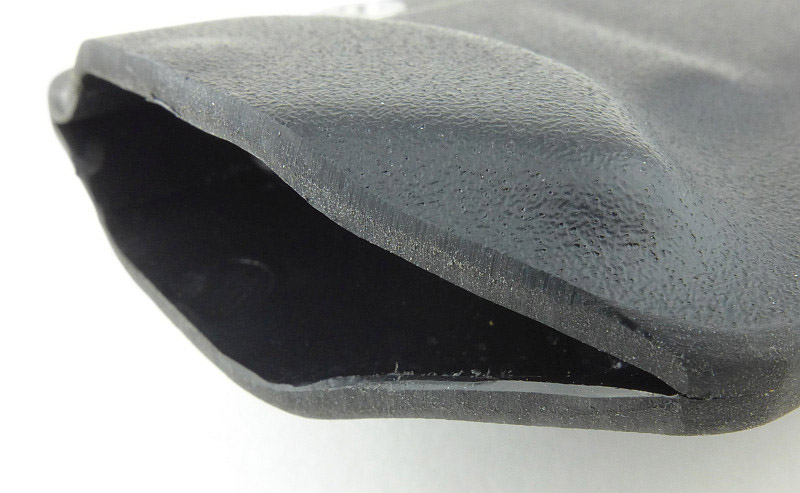
As is often the case with the type of sheath used here, the retention is pretty stiff, and the knife doesn’t easily come out. You need to lever the sheath away with your thumb, or end up with severe ‘sheath recoil’ and an uncontrolled slash of the blade as it flies out. In the sample received here, the edges of the Boltaron had sharp corners from the final shaping and these were catching on the knife, especially on re-sheathing the knife.
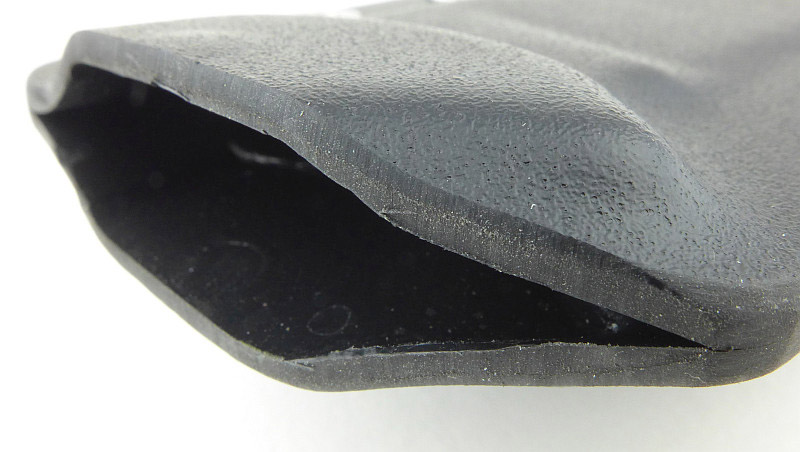
A careful trim of those edges smoothed out the sheathing and unsheathing, so though not strictly necessary, it did improve the feel. I’ve noticed that consistently the sheath is depositing black plastic on the knife every time it is sheathed and unsheathed. What I can’t confirm if is this is due to a quantity of dust left inside the sheath, or if the blade is rubbing off the inside of the sheath. This is only of any real consequence if you are preparing food and don’t want to eat Boltaron dust.
Unfortunately, I’ve not had as much time using this knife as I would normally fit in before completing a review, so haven’t gone through enough sharpening cycles, or seen how sensitive to corrosion the PSF27 really is. It has definitely been wet, cut damp materials and covered in corrosive finger prints and so far hasn’t become marked. I’m hoping this steel proves more stain resistant that its composition might suggest.

With the choice of ever better stainless steels, I don’t want to worry about corrosion, and personally might have preferred a steel that is not on the wrong side of stainless levels of corrosion resistance. I’m also not subjecting a blade like this to demolition work, so the ultimate performance of PSF27 is not entirely relevant to me in this knife. That said, it is nice to know there is a great deal of strength in reserve, especially if you choose this as a survival knife or for military applications.

Review Summary

The views expressed in this summary table are from the point of view of the reviewer’s personal use. I am not a member of the armed forces and cannot comment on its use beyond a cutting tool or field/hunting knife.

Something that might be a ‘pro’ for one user can be a ‘con’ for another, so the comments are categorised based on my requirements. You should consider all points and if they could be beneficial to you.

_______________________________________________ _______________________________________________
Things I like What doesn’t work so well for me
_______________________________________________ _______________________________________________
Excellent general purpose blade. Slightly over-stiff sheath retention.
Superb handle with semi-polished G-10. PSF27 steel is not quite ‘stainless’.
High performance PSF27 steel.
Conveniently slim overall package.
Sheath can be configured for right or left handed use.


Discussing the Review:

The ideal place to discuss this reviews is on a forum. If you started reading the shorter forum version of the review, but followed the link this full exclusive review, please return to that forum to discuss the review there.
If you read the review entirely on Tactical Reviews, please consider one of the following to join in any discussion.

BladeForums – Knife Reviews (US based Forum for Knife Discussion)

CandlePowerForums – Knife Reviews Section (Largest and Friendliest Flashlight Community Forum)

The BESS Exchange – A forum discussing technical aspects of sharpness and truly understanding your sharpening process.
Knife Review: Spyderco SpydieChef

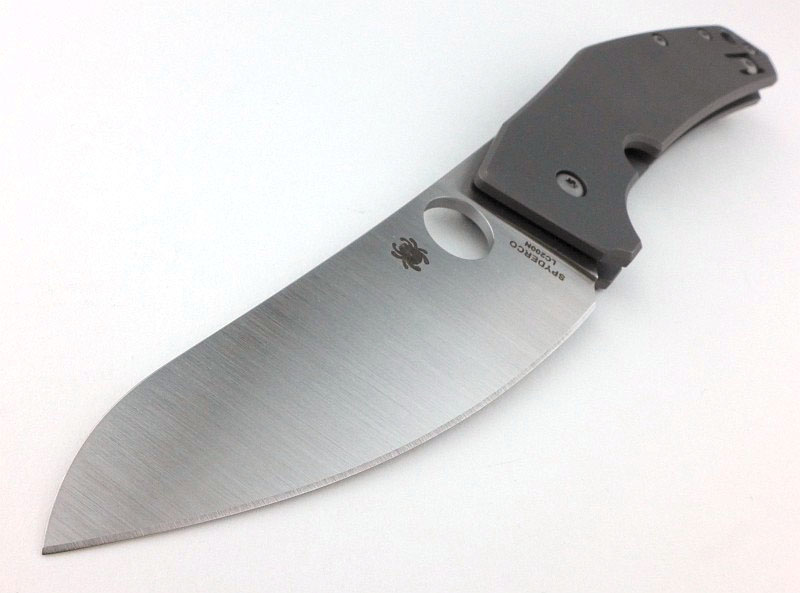
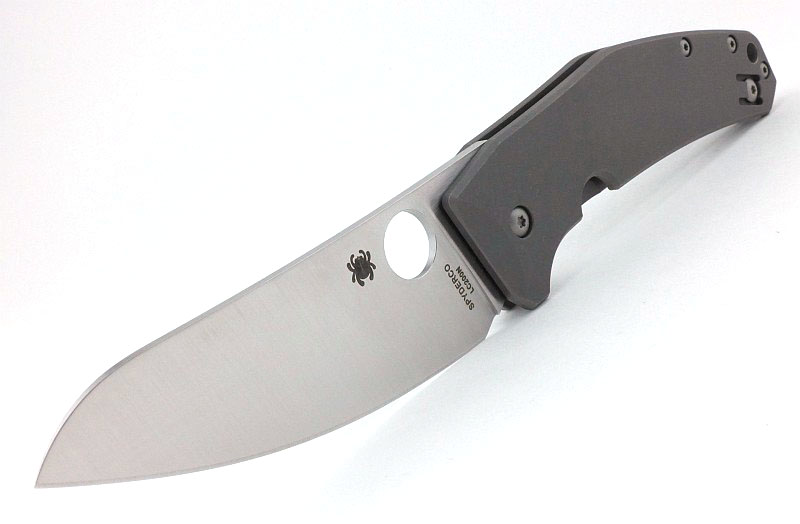
Sometimes it’s all in a name… and ‘SpydieChef’ immediately lets you know this is a small (folding and EDC-able) Spyderco Chef’s knife. Of course it is a blend of exotic ingredients, made to that special Spyderco recipe, and is capable of so much more than just chopping a few vegetables. The SpydieChef is designed to deal with all-round EDC tasks as well as kitchen duties, is built using ultra-corrosion-resistant materials (it is a member of Spyderco’s Salt Series), and is finished to the high level of quality that we have come to expect in Spyderco products.

The Blade and Handle Geometry:

Most knife specifications have a basic description of the blade geometry, but in this section I will be taking a more detailed look at geometry and balance.

Using a set of gauges and precision measuring equipment including a Vernier protractor, callipers, fixed radius gauges and the unique Arc Master adjustable radius gauge (the one that looks like a crossbow).

These measurements have been tabulated and are presented along with a few reference blades (8″ Chef’s Knife, 5.5″ Santoku and the popular Fällkniven F1).

Key aspects such as the primary bevel angle, grind type, blade depth, blade thickness, length, weight are detailed, along with balance information.

The ‘Balance relative to the front of the handle’ tells you if the knife will feel front heavy, or if the weight is in your hand (a positive value means the weight is forward of the front of the handle). The ‘Balance relative to the centre of the handle’ indicates how close to a ‘neutral balance’ the knife has in the hand.

In the case of full convex grinds the approximate centre of the grind is used for the primary bevel angle estimate.

The blade is made from LC200N steel, a state-of-the-art nitrogen-based alloy, which is extremely corrosion resistant and is actually used by NASA for the ball bearings used in aerospace applications.

A few more details:

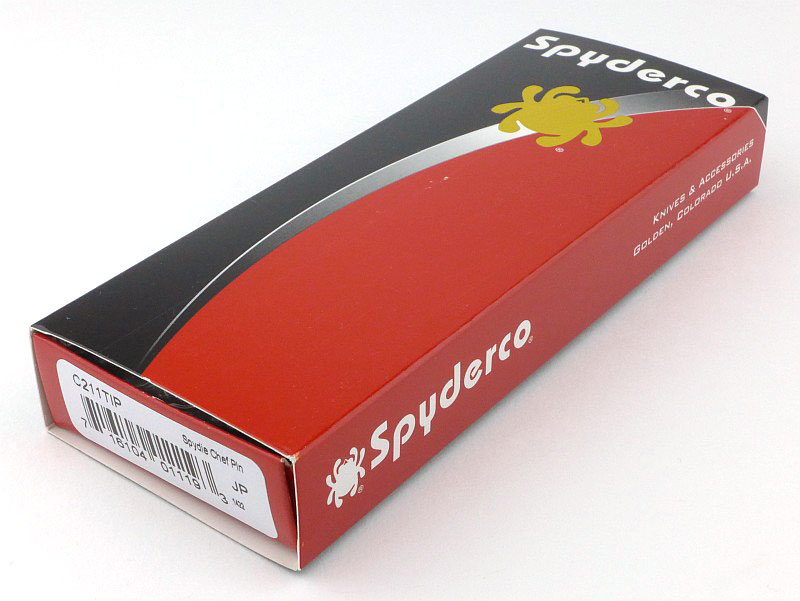
Spyderco’s standard sleeve box is used for the SpydieChef.

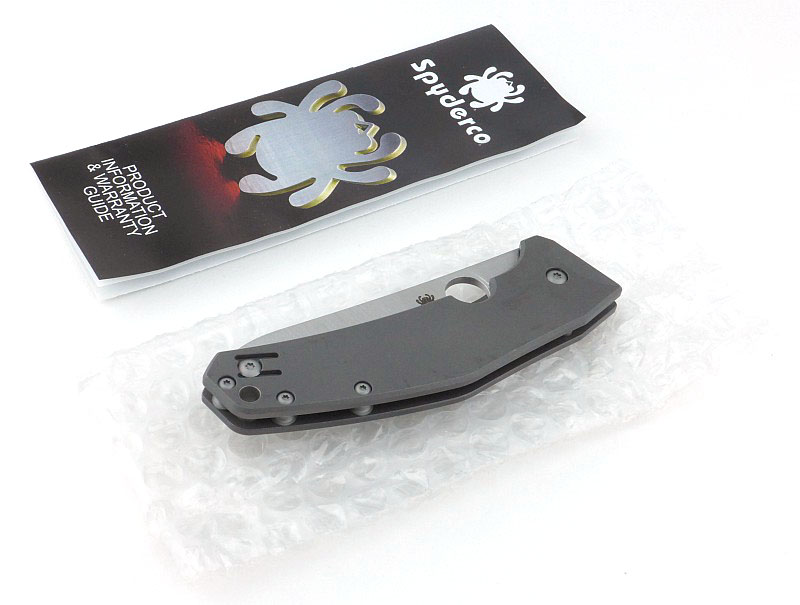
Inside the box the knife comes in a bubble wrap bag along with a product information leaflet.

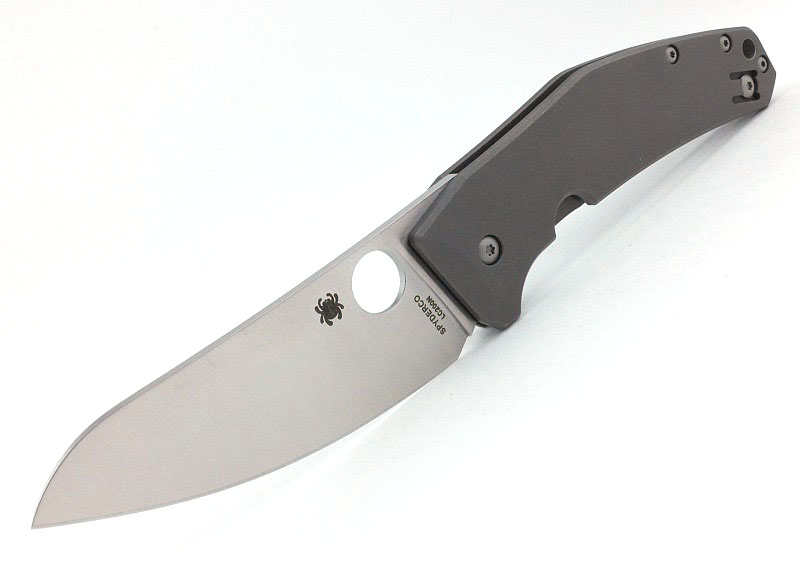
Let’s just take a moment to appreciate those lines…

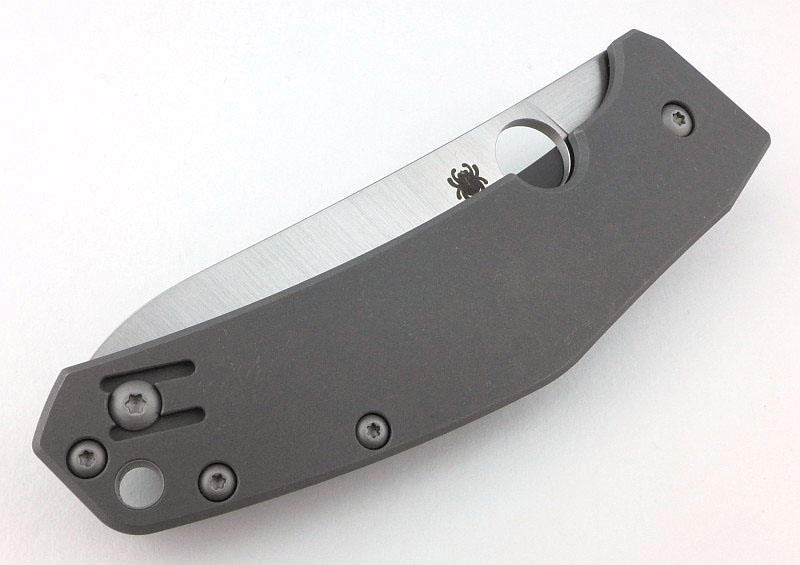
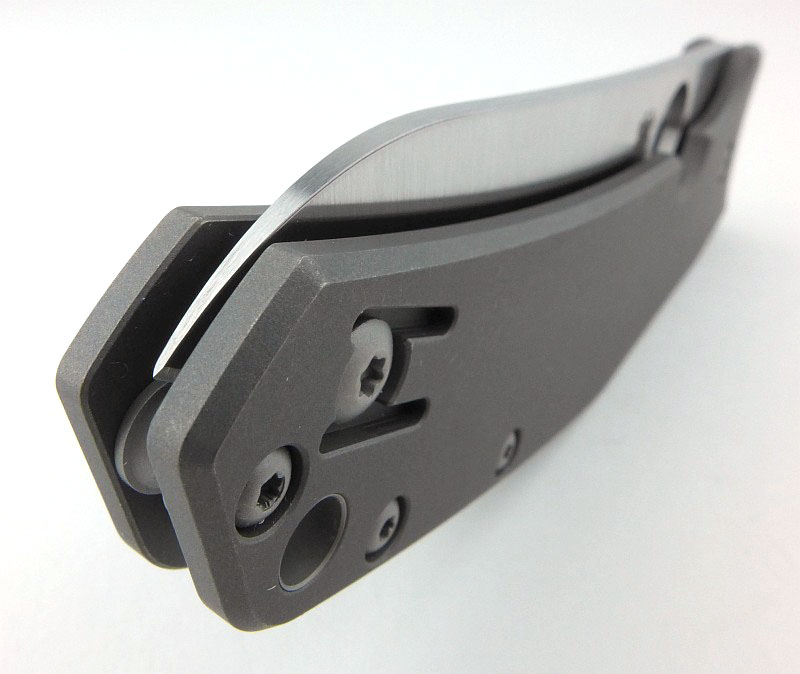
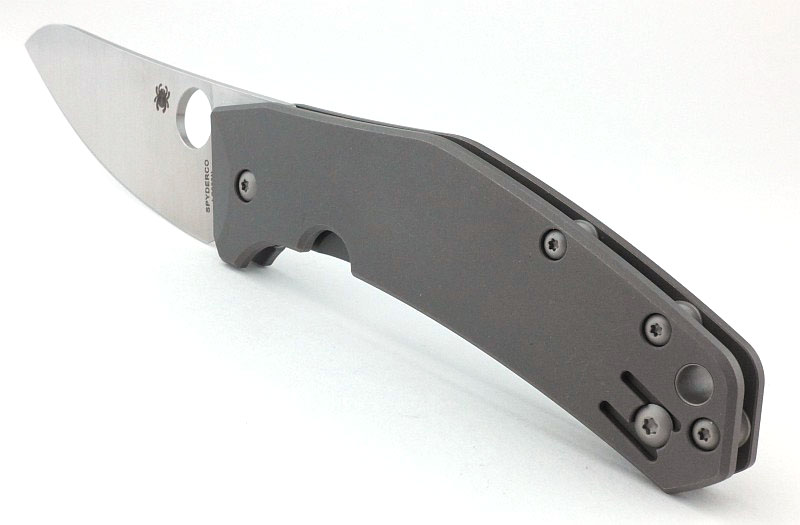
Using flat Titanium handles and a Reeve Integral Lock keeps the design streamlined and simple.

The gently curving and elegant design is by the Polish custom knifemaker Marcin Slysz.

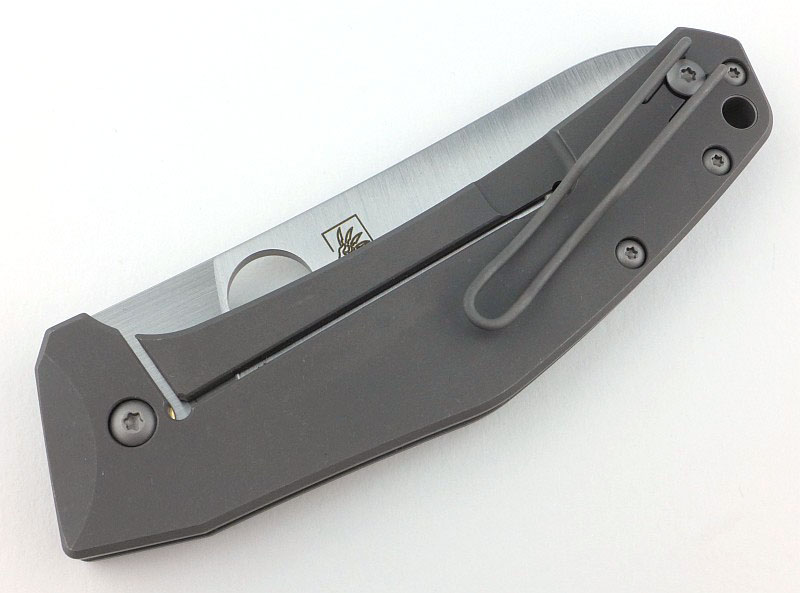
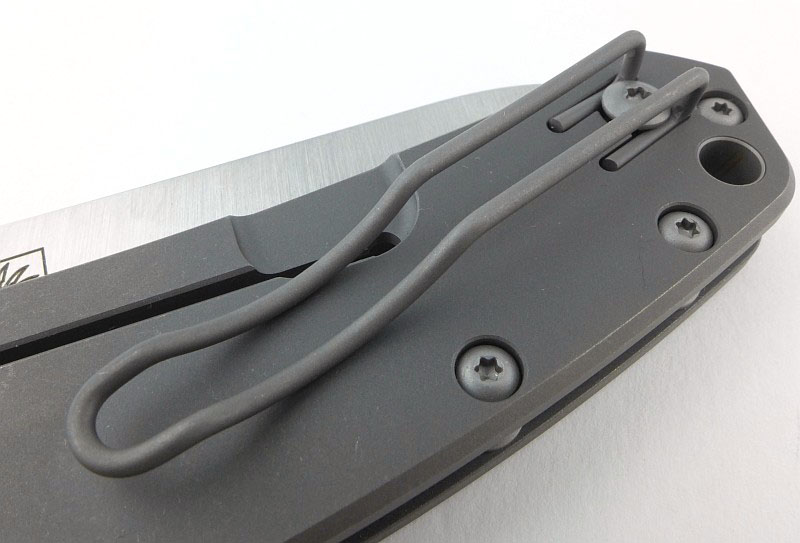
Being a Spyderco, we have a Spyderco wire pocket clip. This can be fitted to either side of the knife for a tip-up carry.

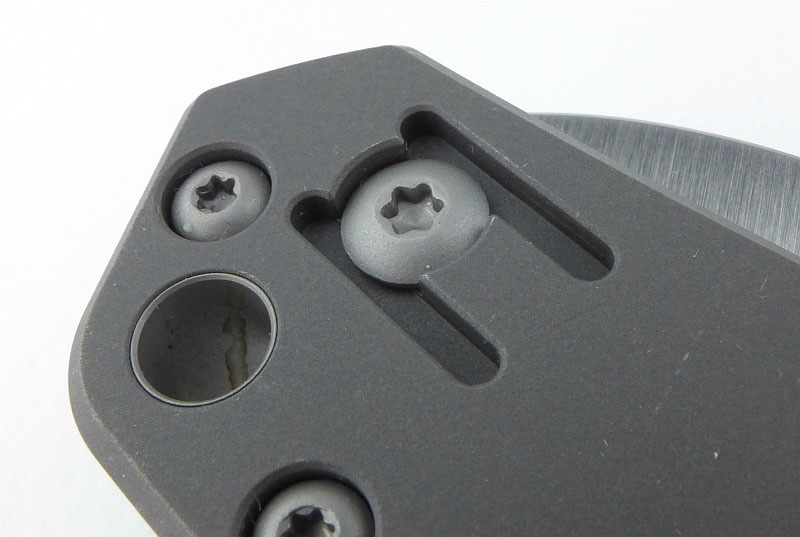
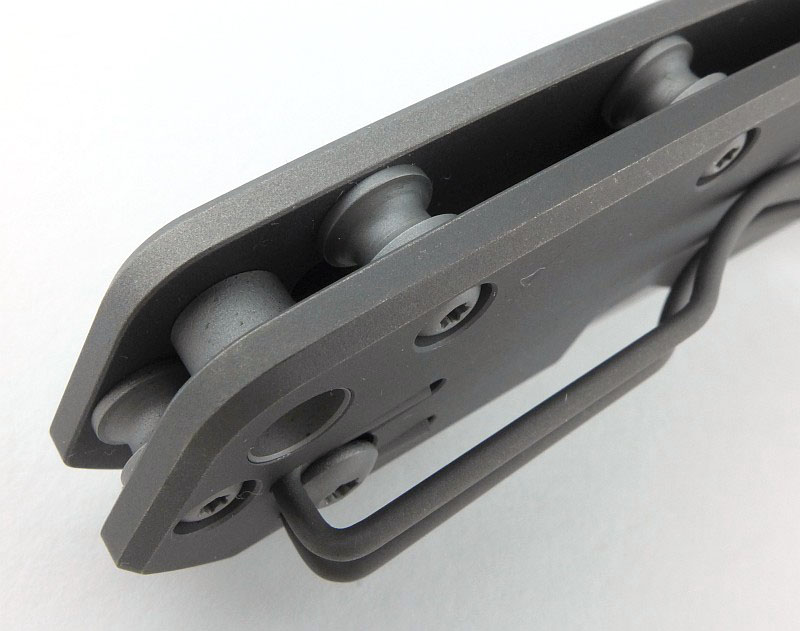
The alternate clip position with blanking screw. If you swap the clip side, you need to swap the screws round as they are different lengths. The Lanyard hole is lined to make it easy to fit cord through both sides of the handle.

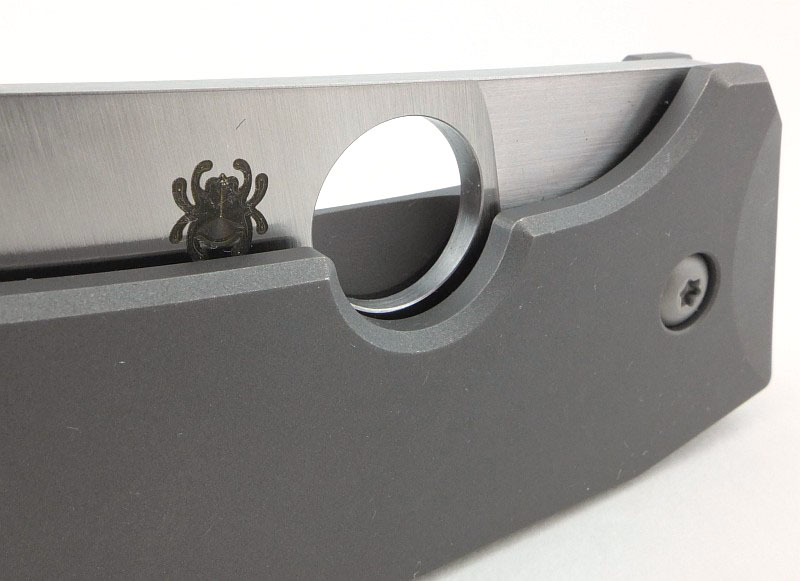
A 12mm opening hole is comfortable to use for right-handers and has a nice cut-out in the handle to give easy access, but as you can see, the reverse of the hole is partially blocked by the lock bar, so this is not ideal for left-handers.

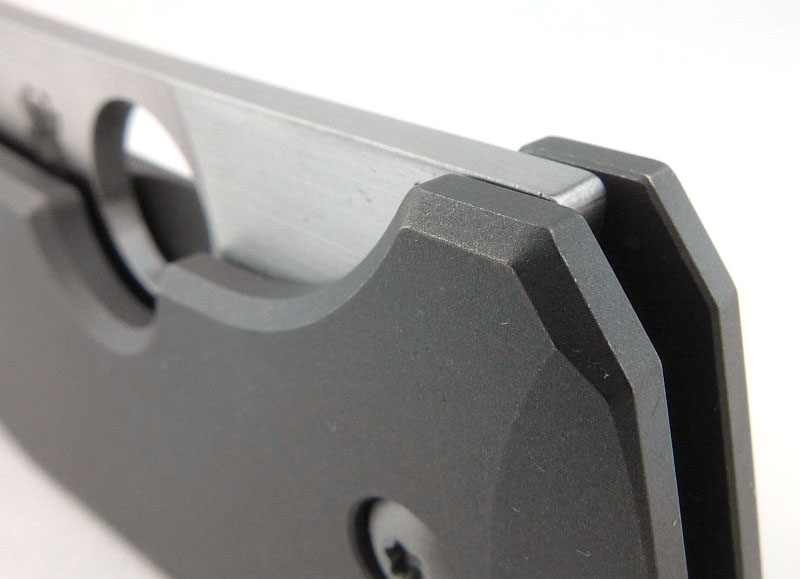
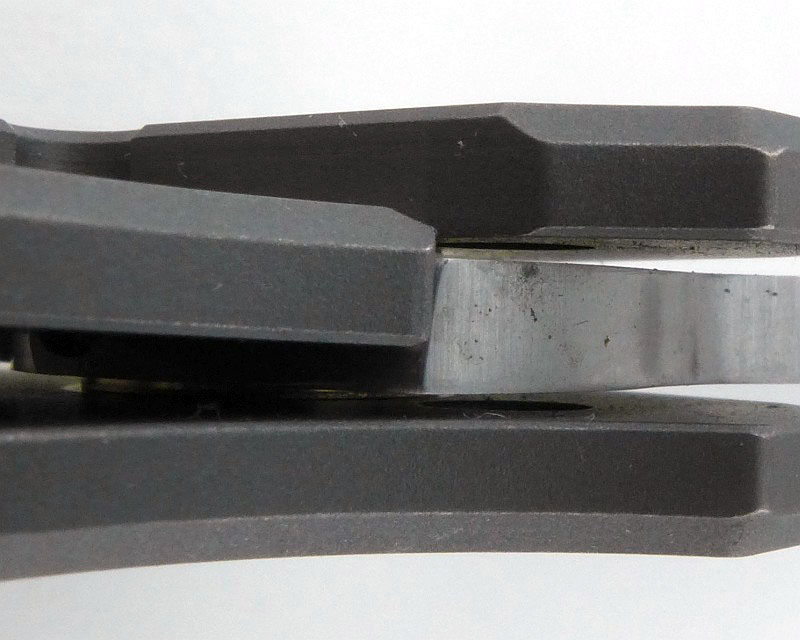
Details ‘make’ designs, and in this example, the finger guard formed by the handle titanium, and the spine of the blade have been positioned such that they line up when the blade is closed, keeping the outline of the closed knife smooth and tidy.

To make the SpydieChef easy to clean, small spacers have been used to give as much access as possible into the handle.

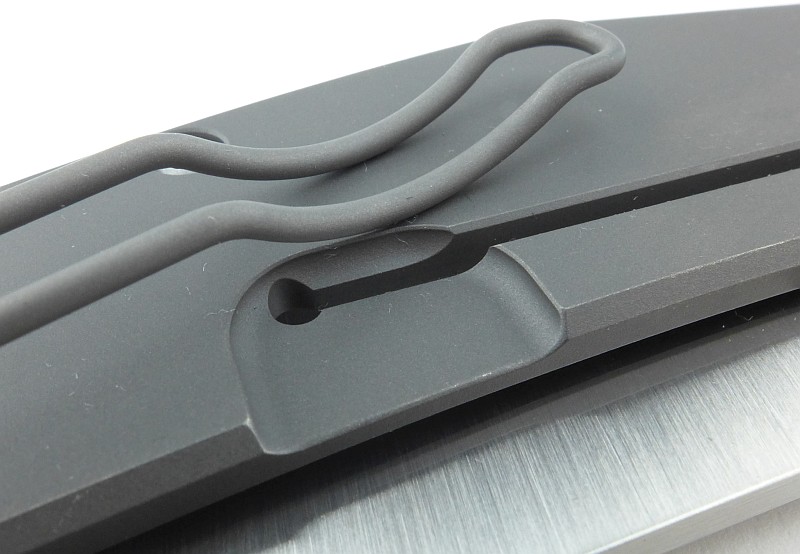
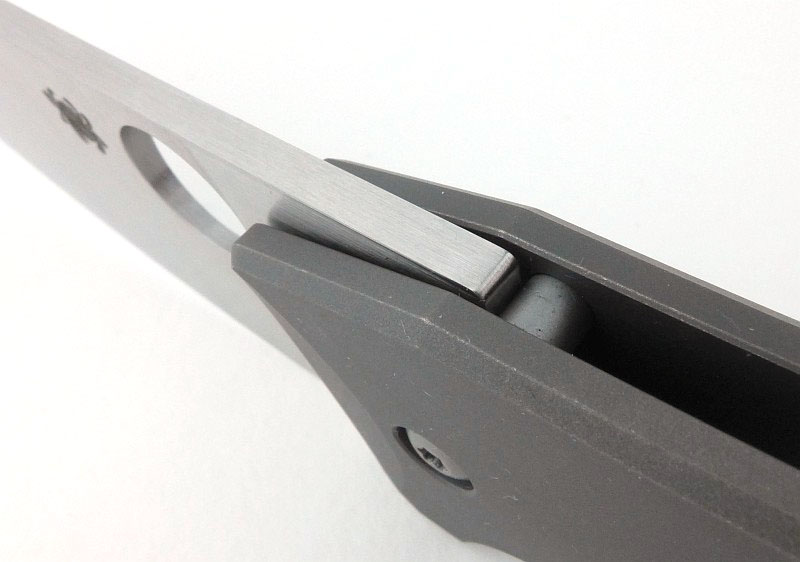
Here I’m showing two specific details of the lock-bar spring, the first is the thinning of the handle scale to reduce the spring tension, and the second is the stress-reducer hole drilled at the end of the lock-bar slot.

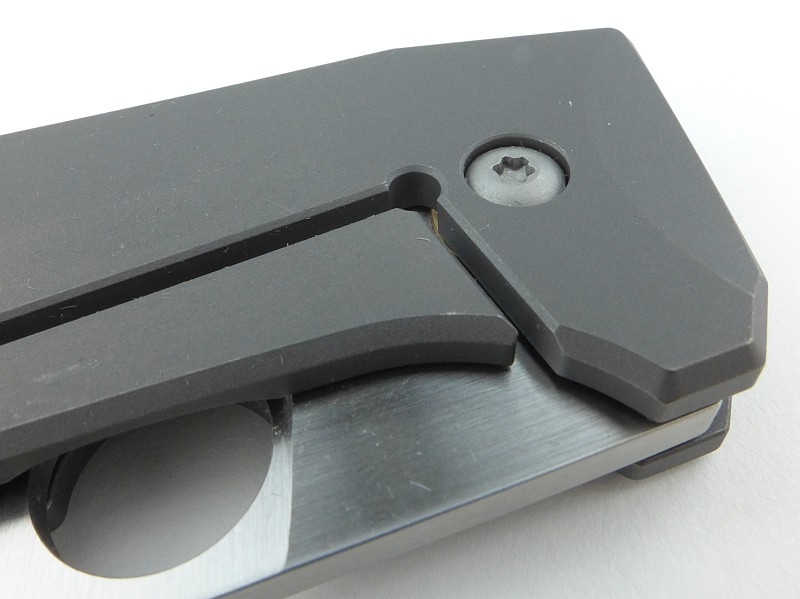
Similarly there is a stress-reducer hole drilled at the corner of the lock-bar cut out in the titanium scale.

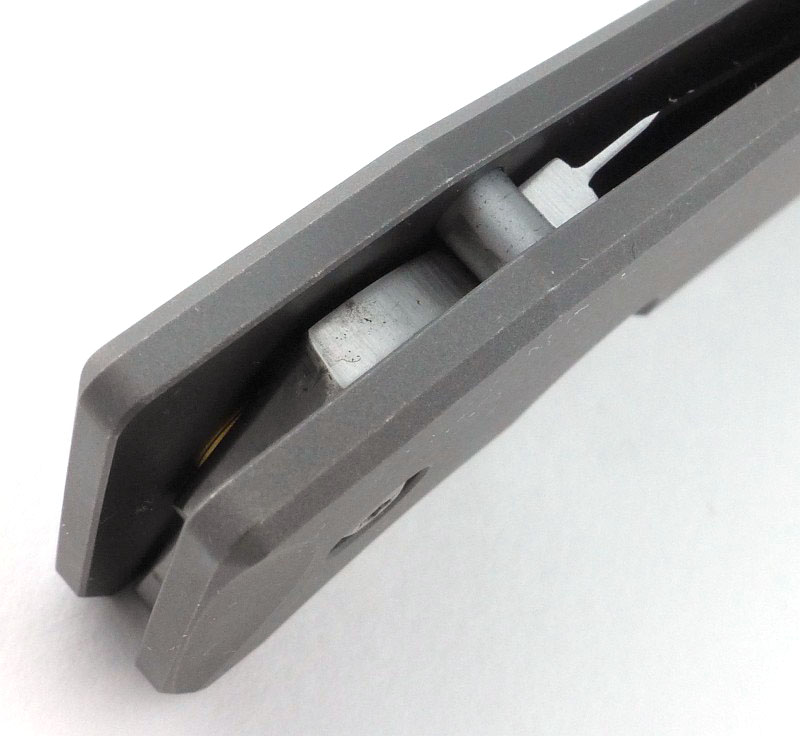
Here the blade is in the closed position sitting against the stop pin. There is also a hint of that phosphor-bronze washer.

Lock engagement is excellent, with room to move as the lock wears, but with a positive overlap which won’t slip out under pressure or if knocked.

The open blade sitting onto the stop pin.

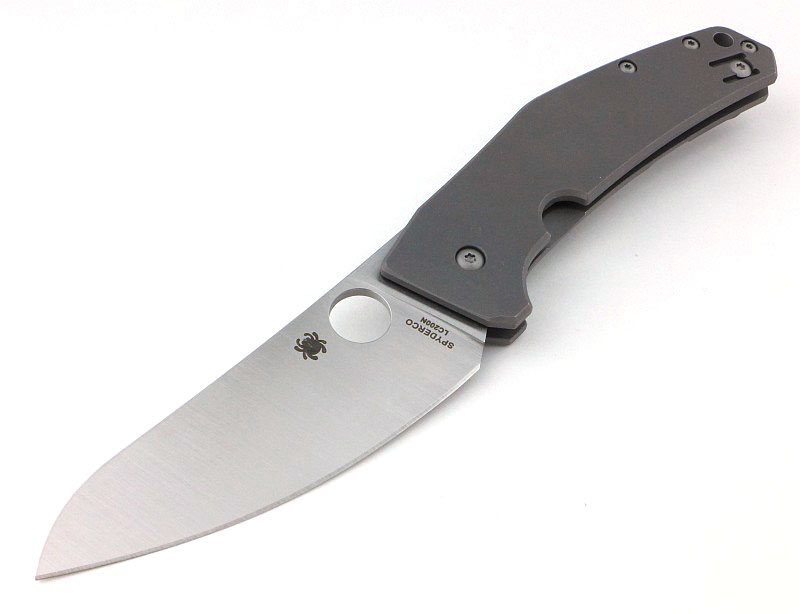
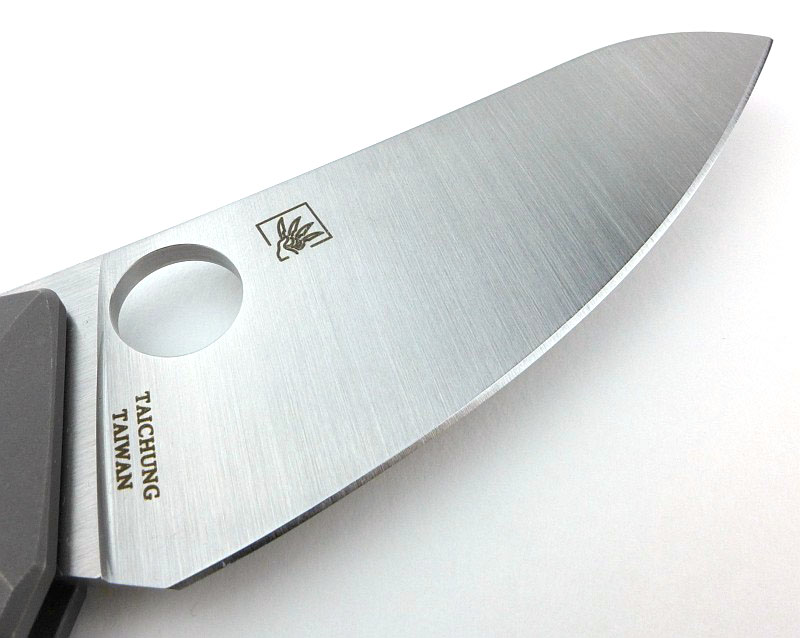
Though compact enough to fit into a folding pocket knife the Marcin Slysz blade design is immediately reminiscent of a kitchen knife. Marcin Slysz’s logo is included on this side of the blade.

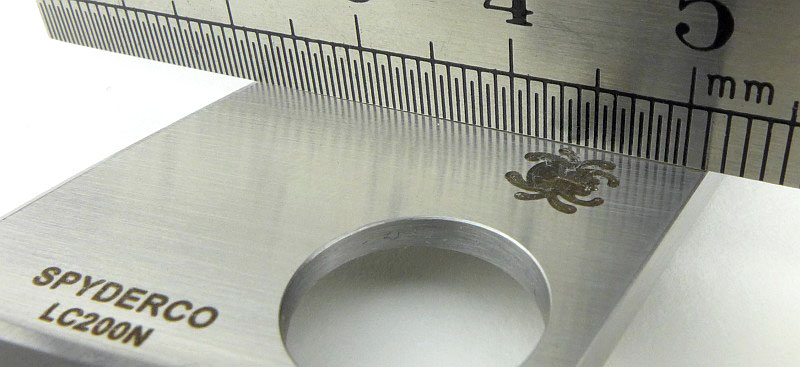
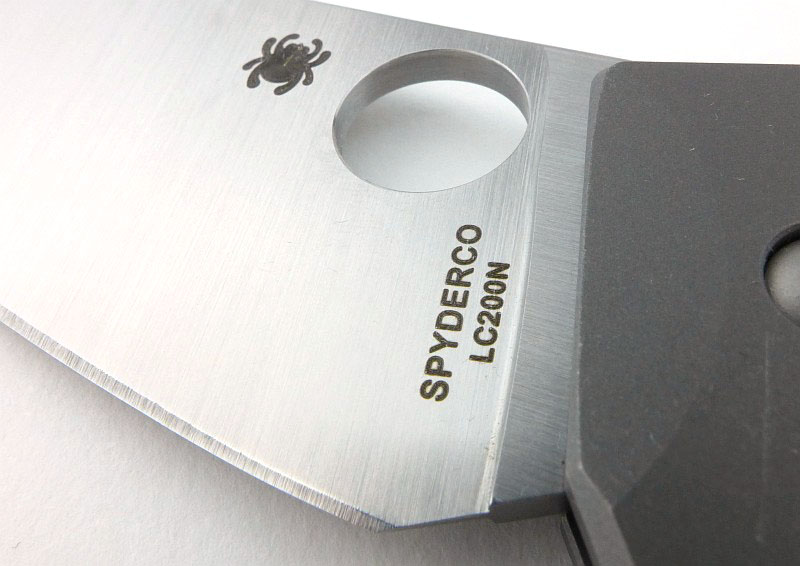
The other side of the blade has the Spyderco branding as well as the steel specification.

Flowing lines sweep the blade tip nicely into the handles in the folded position.

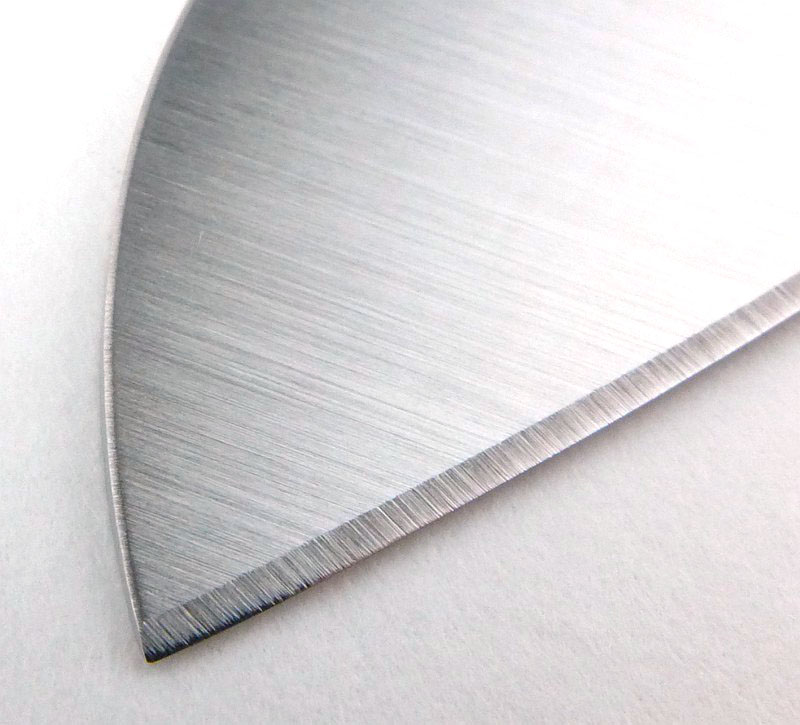
A closer look at the blade tip. Note that the entire blade spine has had the edges eased so they are very slightly radiused and smooth.

What it is like to use?

We’ve had a good look round this knife, but what really counts is how it is to use and cut with. Take a special purpose knife and make it into a folder and you immediately introduce compromises, so this was always going to be a challenging design to get right. Also considering that the chef’s knife, by the very nature of being taken out of the kitchen and put into your pocket as an EDC blade, will now be used for so much more than just kitchen duties, so some compromises have to be made.

I’ve used other folding kitchen knives, and after considerable use and comparison, I’ve found the only advantage they had over the SpydieChef was a thinner blade. A thinner blade which only gave a slight advantage on a chopping board in a kitchen, and in no other situation when carrying the knife as an EDC blade. The thinner blade always flexed far too much for EDC tasks and become more of a liability than an benefit.

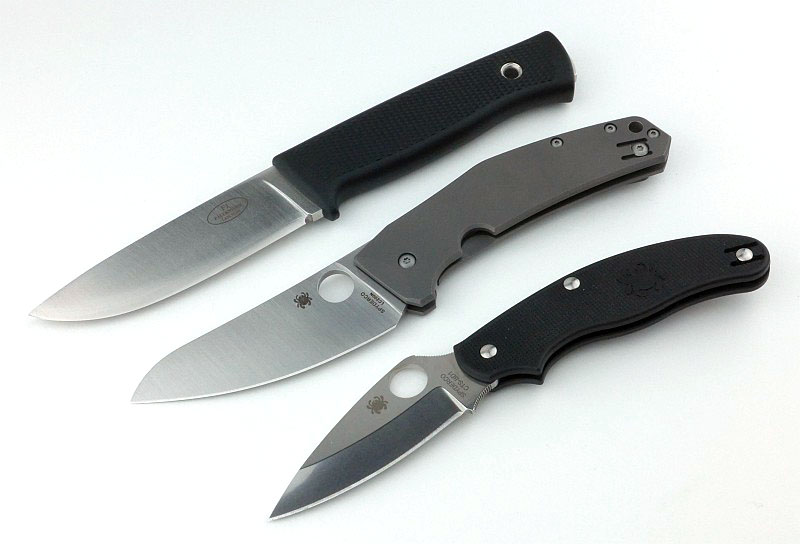
Before we look further at the SpydieChef in use, to give an idea of scale, here it is next to the Fällkniven F1 and a Spyderco UK Pen Knife. It is a very pocketable size knife which is helped by the slim profile, but has enough blade to be useful. Clearly you will struggle to chop large vegetables with this knife, but it is an EDC folder and not a substitute for a full sized Chef’s knife.

Something I do want to mention is that Spyderco definitely get the blade retention detent resistance right. The reason for mentioning this is that I’ve come across certain knives with integral locks where the detent is far too stiff and should you touch the lock bar when trying to open the blade you have had it, the blade is virtually locked in place – not so with the SpydieChef. The blade is perfectly secure in the closed position, so let’s get that clear, but then regardless of how you hold it, fingers on the lock bar or not, the blade opens with a slight resistance that is easily overcome with the 12mm opening hole. I don’t want to be thinking about how I have to hold a folded knife to open it (beyond the basics of which way the blade swings open), so this is a major factor and over stiff detents on integral locks have ruined otherwise good knives. Spyderco have consistently got this right and in this case I nearly forgot to mention it as I hadn’t noticed any issues or hang-ups opening this knife, so it went out of my mind.

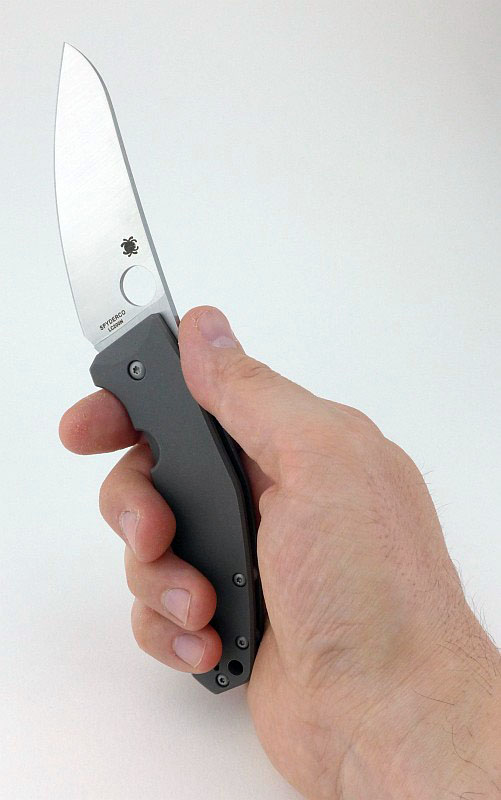
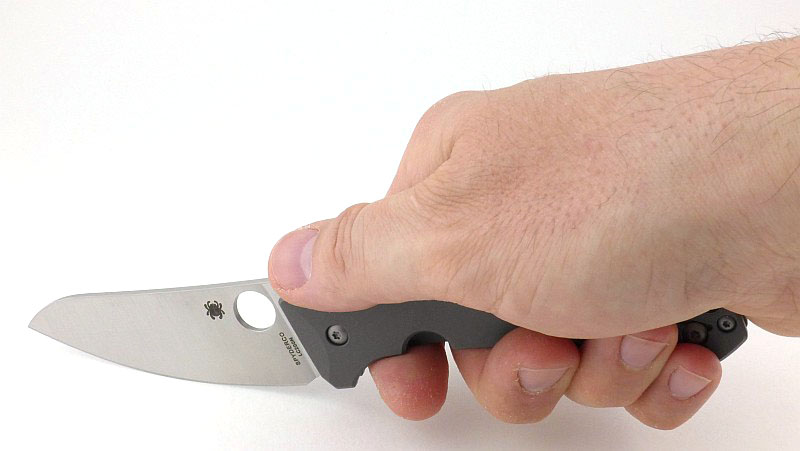
Slim, flat slab handles can often become uncomfortable in use quite quickly, but their low profile makes them easy to carry. However, the curving handle of the SpydieChef does a very good job of resting over your fingers and sitting into your hand in a perfectly comfortable way despite its slim flat profile.

The SpydieChef sitting comfortably in my hand (XL glove size) with my forefinger nestled up to the integral finger guard.

Absolutely crucial for a kitchen knife is it ability to be used cutting down onto a chopping board. This requires clearance for the fingers when the edge is in contact with the board. As well as the clearance, it helps cutting control enormously to have a curved edge that allows you to rock the blade for fine chopping or to apply controlled cutting force to harder foods like nuts while keeping the edge in contact with the board. The geometry of the SpydieChef has this absolutely nailed, and I’ve been chopping away without rapping my knuckles and no food pinging off the board.

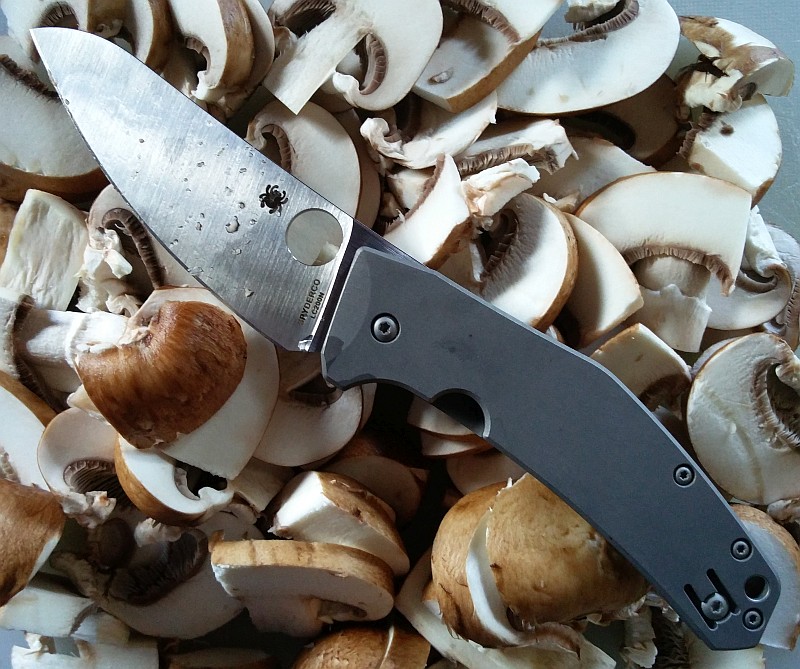
I mentioned it earlier, compared to an actual kitchen knife, the blade is thicker (an EDC compromise) and this does mean that the knife does not fall through firmer and larger vegetables like a thinner blade does. Instead you can get that slight snapping action at the end of the cut, but the full flat grind does a good job of parting the cut, and these crisp chestnut mushrooms which can be quite fragile and break up with wider blades have stayed in nice slices without cracking or other signs of stress.
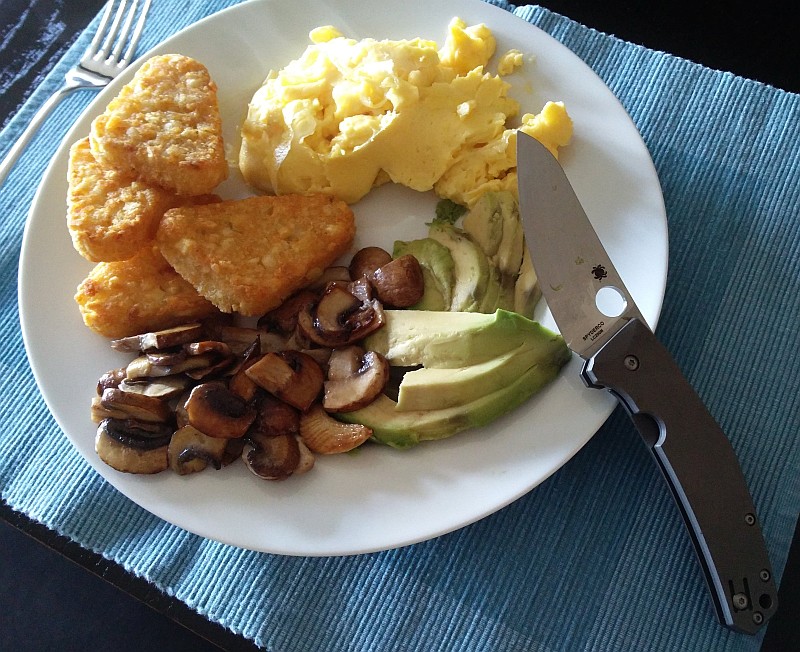
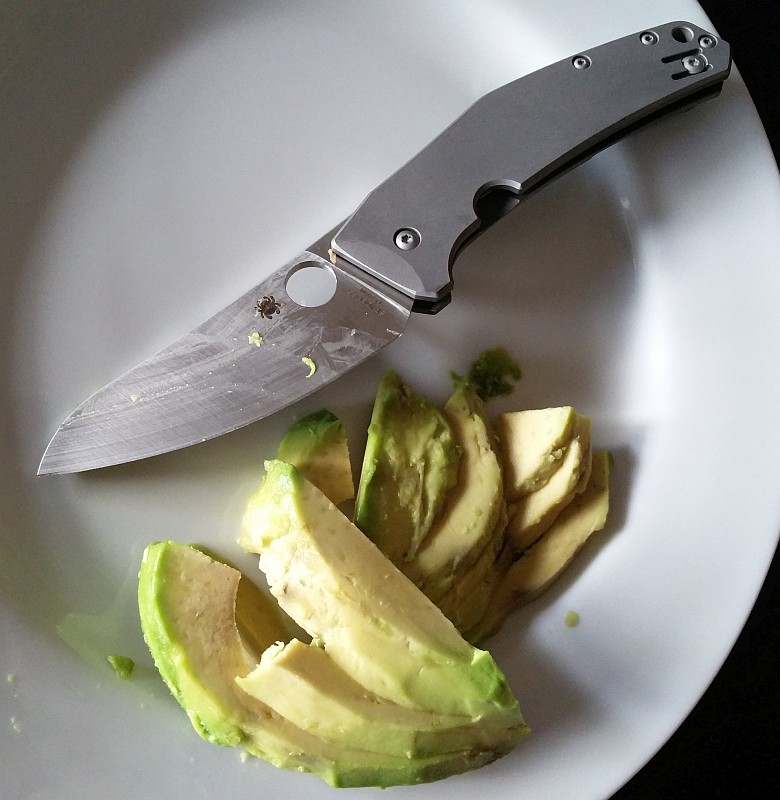
It might not really be much of a challenge for a knife, but the combination of a tough skin and the soft flesh means a less than capable knife can make a real mess of an avocado, but not in this case where the only limit was user skill.

Breakfast is served…

In terms of kitchen capabilities, the fact I can pull this from my pocket and work with it happily, and at the same time not worry about any residues making their way into the handle or pivot, makes this a huge winner for those days when food prep is a big priority; holidays, camping, picnics, workplaces and more.

With the ultra-corrosion-resistant nitrogen-based LC200N blade, phosphor bronze washers and titanium handle, the SpydieChef doesn’t mind getting dirty, being exposed to corrosive juices and otherwise being left to marinade with the rest of the cooking. You can even pop it in the dishwasher for cleanup afterwards.

Where the SpydieChef gives you extra, is that it is capable of so much more than the light cutting duties of just food prep. The blade is thick enough for you to really grab a handful of that handle and put it to some hard work on tougher materials (and the LC200N will keep its edge longer than an H1 blade will). Mixing it up between food and non-food use might mean a few washes or wipes in between, but this single knife can do it all.

I’ve always been a fan of the kitchen knife as a general purpose blade and have carried both modified and unmodified chef’s knives into the field, so personally I find the SpydieChef’s style and shape ideal as an EDC blade.

Review Summary

The views expressed in this summary table are from the point of view of the reviewer’s personal use. I am not a member of the armed forces and cannot comment on its use beyond a cutting tool or field/hunting knife.

Something that might be a ‘pro’ for one user can be a ‘con’ for another, so the comments are categorised based on my requirements. You should consider all points and if they could be beneficial to you.

_______________________________________________ _______________________________________________
Things I like What doesn’t work so well for me
_______________________________________________ _______________________________________________
Chef’s knife style blade. Blade is a little too thick for easy slicing of hard vegetables.
Ultra-corrosion-resistant materials. Cleanup can be a bit fiddly.
Good cutting clearance for chopping onto a board. Not so good for left-handers.
Slimline, lightweight and easy to carry.
Ergonomic curved handle.
Ideal detent resistance.


Discussing the Review:

The ideal place to discuss this reviews is on a forum. If you started reading the shorter forum version of the review, but followed the link this full exclusive review, please return to that forum to discuss the review there.
If you read the review entirely on Tactical Reviews, please consider one of the following to join in any discussion.

EdgeMatters – Sponsored Reviews (UK based Forum for Knife Makers and Collectors)

BladeForums – Knife Reviews (US based Forum for Knife Discussion)

CandlePowerForums – Knife Reviews Section (Largest and Friendliest Flashlight Community Forum)

Gear Review: Spyderco Tri-Angle Sharpmaker (Sharpener)

Spyderco’s Tri-Angle Sharpmaker is a surprisingly versatile sharpening system (based on the V-sharpener concept), designed to be simple to use, and make it easy to maintain a consistent sharpening angle.

The details:

Let’s dive into the details and talk about it more in the next section.

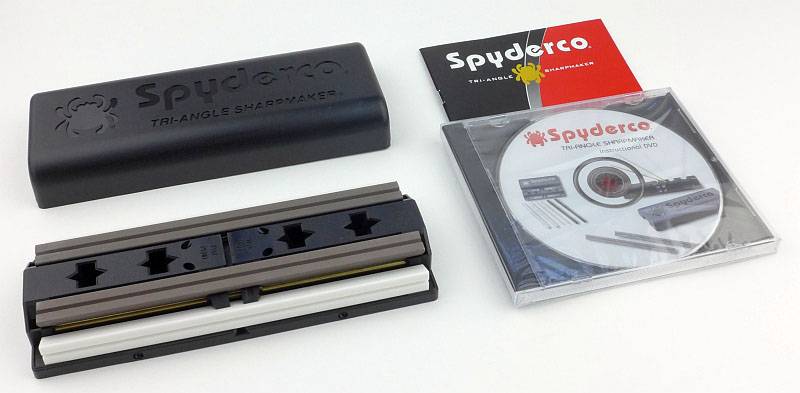
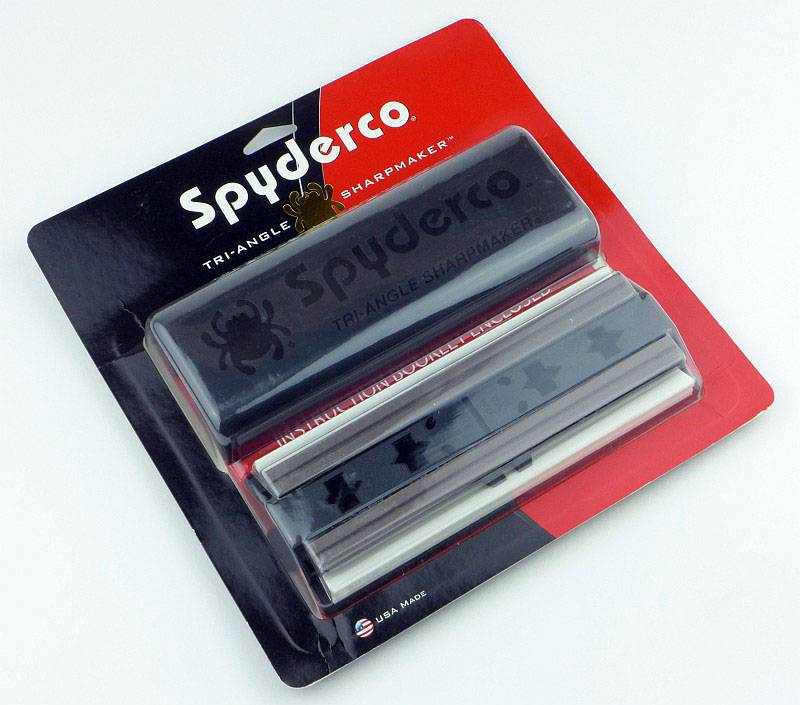
The Tri-Angle Sharpmaker arrives in a combined cardboard/blister pack.
 photo 01 Sharpmaker boxed v2 P1170441.jpg

Included with the Sharpmaker is a set of instructions and an instructional DVD.
 photo 02 Sharpmaker box contents v2 P1170448.jpg

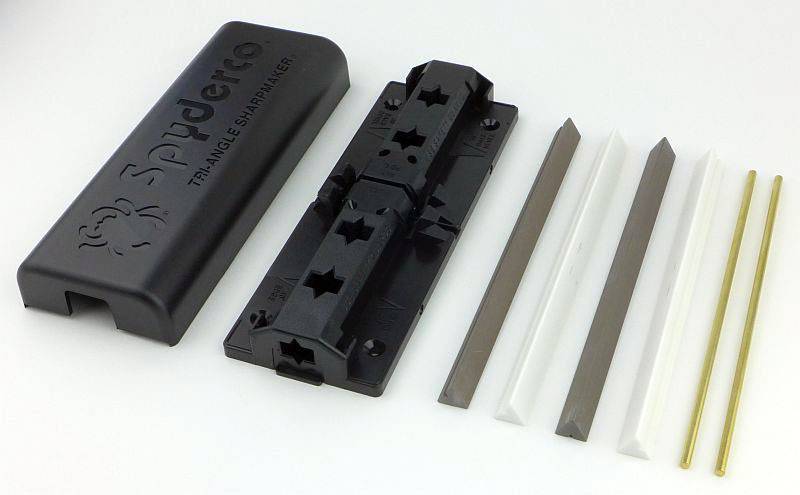
Breaking out all the parts, we have a lid to keep all the components in place, a base plate with various shaped holes, four high alumina ceramic stones/rods (a pair of brown/grey medium grit, and a pair of white fine grit) and very importantly two brass safety guard rods.
 photo 03 Sharpmaker parts P1170452.jpg

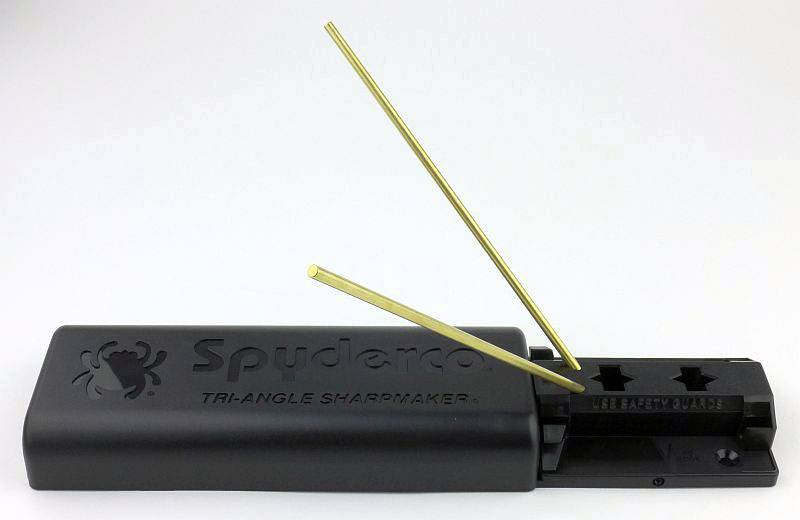
The FIRST thing you should do is to fit the guard rods (for whichever angle you are working to). Notice how the lid fits over the base at a halfway point to act as a handle.
 photo 04 Sharpmaker guards P1170458.jpg

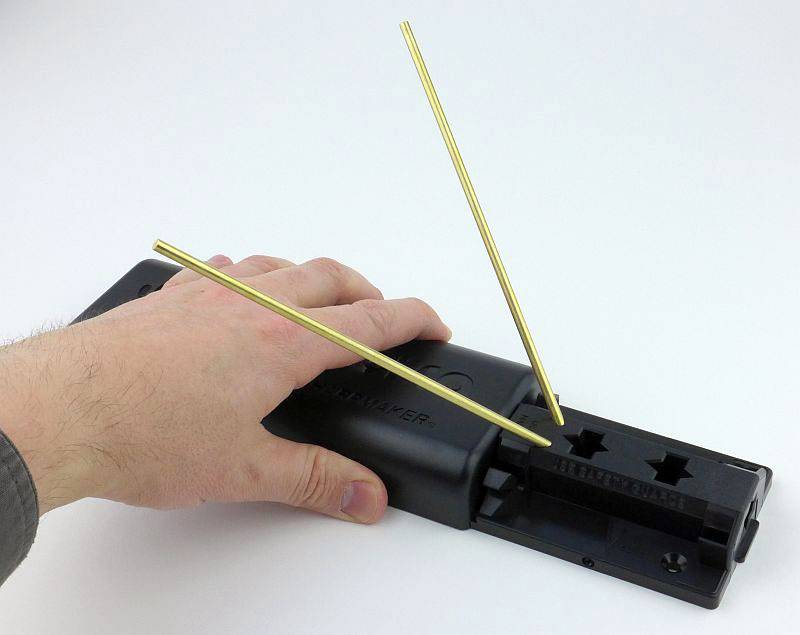
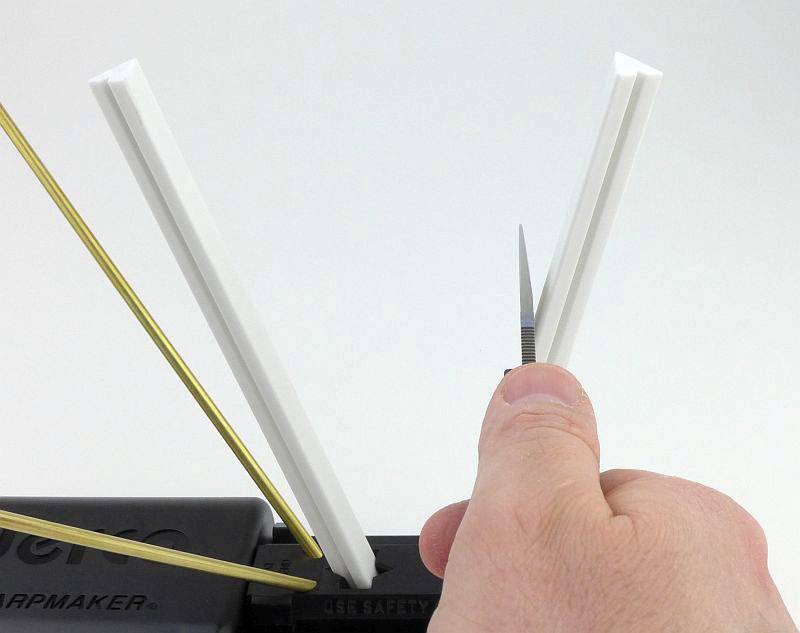
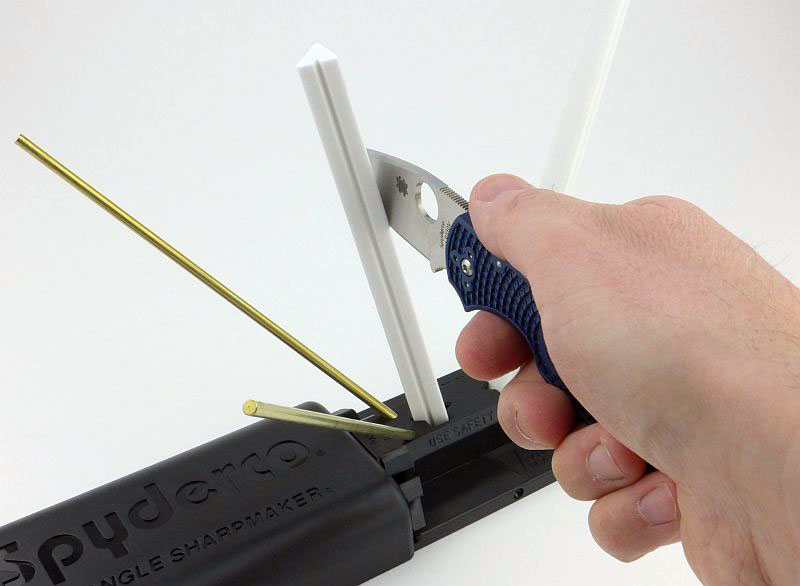
These guard rods angle back over the user’s hand to prevent stray sharpening strokes testing the edge on your hand. This is all the more important for experienced users as they tend to work faster and with less care.
 photo 05 Sharpmaker holding P1170461.jpg

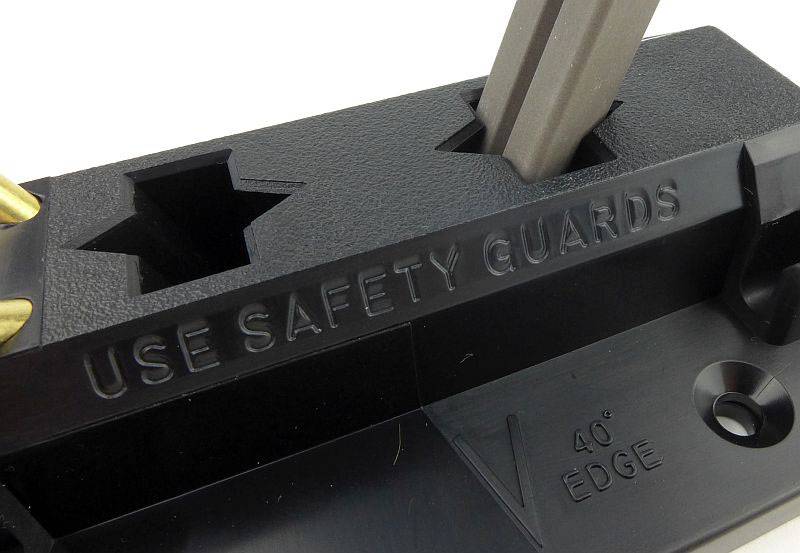
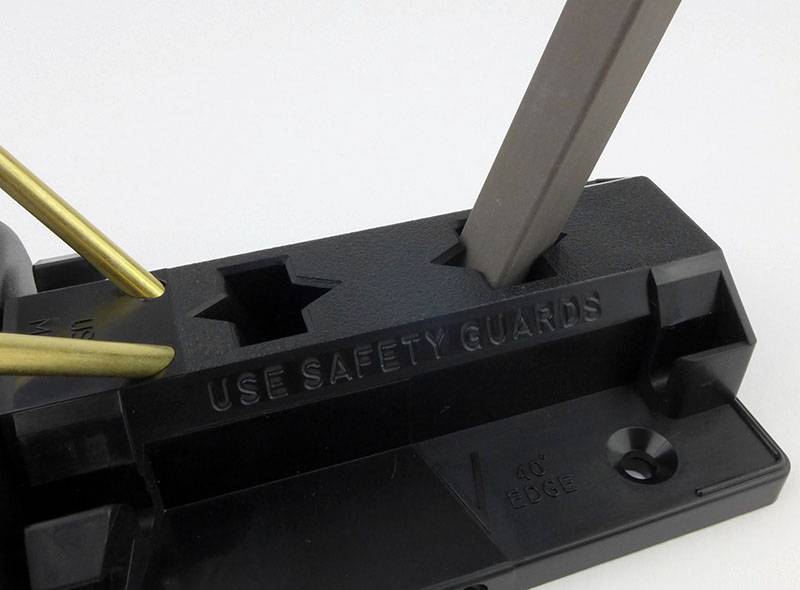
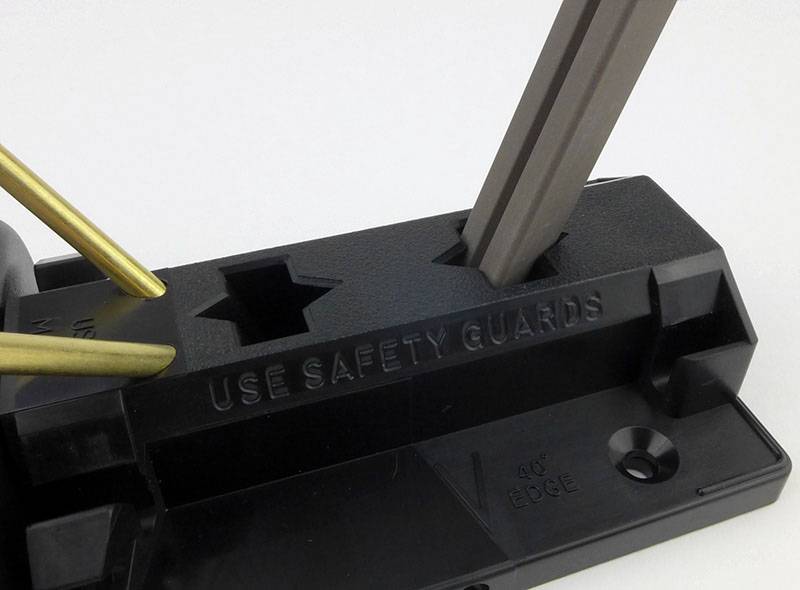
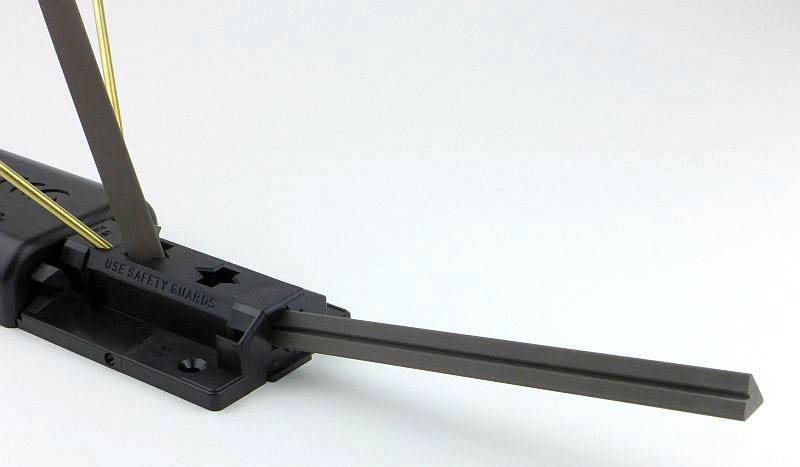
Just in case you forget – ‘USE SAFETY GUARDS’.
 photo 06 Sharpmaker reminder P1170463.jpg

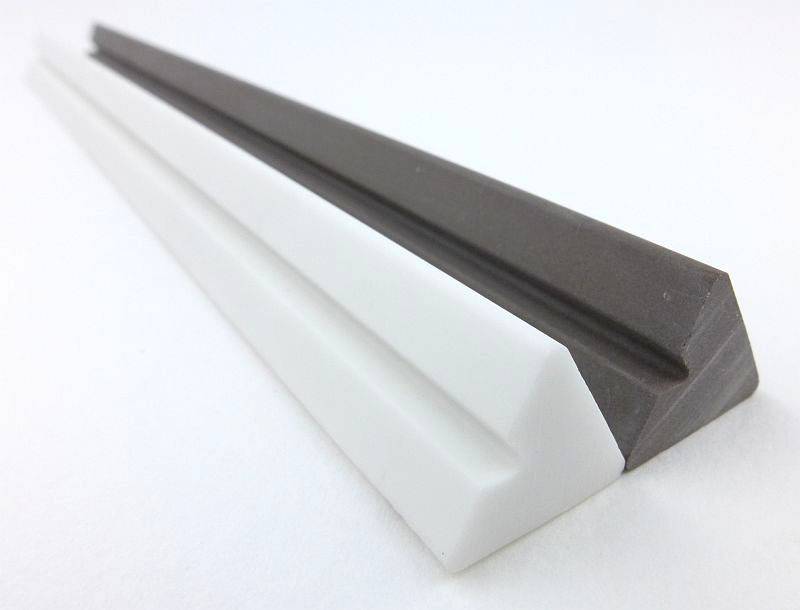
The two types of stone included with the Sharpmaker (shown here in perfectly clean and unused condition).
 photo 18 Sharpmaker stones P1170503.jpg

So why are those holes the shape they are? It’s all very clever actually. The Tri-Angle Sharpmaker, comes with …. yes, tri-angular stones. The stones also have a groove in them for hooks and other pointed objects.
This means we have three different working surfaces on the stones, the flat side, a pointed corner, and the groove. Here we have the stone fitted into the base so that we use the flat surface.
 photo 08-Sharpmaker-stone-rotation-1-P1170470.jpg

Now, taking the stone out and rotating it, it can be fitted back into the base with the corner as the working surface.
 photo 09-Sharpmaker-stone-rotation-2-P1170471.jpg

Lastly the grooved flat surface is presented for working with. All with one hole that holds the stone at the correct angle.
 photo 10-Sharpmaker-stone-rotation-3-P1170472.jpg

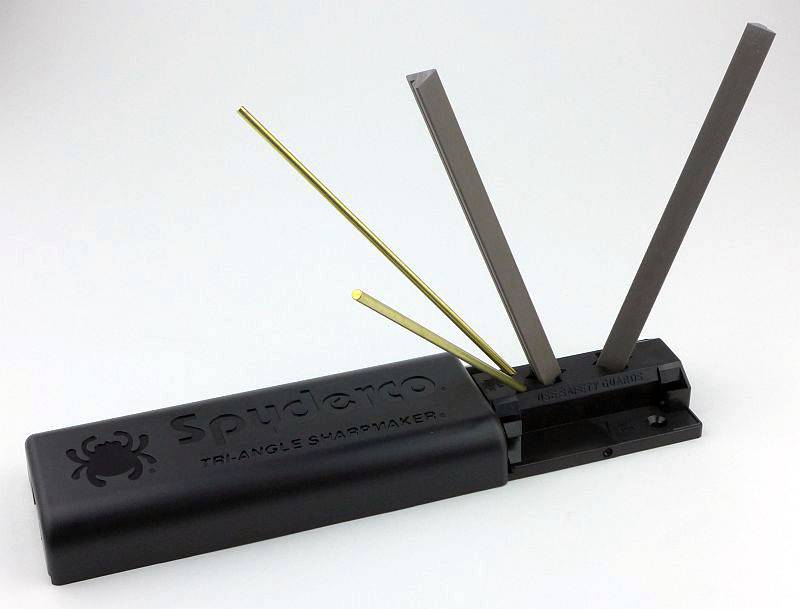
Here we are, fully assembled with ‘stage one’ sharpening (the coarsest arrangement) and on the 40 degree inclusive angle.
 photo 11 Sharpmaker assembled P1170475.jpg

What it is like to use?

Some of my most used sharpening stones are a set of Spyderco pocket stones, so I know how well the Spyderco ceramic stones perform. However, once you start using diamond stones they can seem a little slow, especially on some of the super-steels.

Though not strictly a guided system, I’m going to consider it one to mention the very specific benefit of these systems, which even people with considerable sharpening experience should not dismiss. Quite simply, guided systems help reduce the amount of steel you need to remove to restore an edge. This means that as well as making the sharpening process easier for everyone, it also makes it more efficient. You only remove as much steel as is needed which prolongs the life of the blade and makes sharpening quicker.
With the triangular stones, this is one of the few systems that can sharpen serrations, and is also happy working on hawksbill and recurve blades. To understand fully why, we need only look at the four ‘grades’ of sharpening that are achieved from the two stones.
In order, from most coarse to finest, we have these configurations of the stones:

1. Brown/Grey stone Corners – Coarse edge reshaping
2. Brown/Grey stone Flats – Producing a utility edge (how Spyderco say that most new knives come)
3. White stone Corners – To achieve ‘butcher’ sharp.
4. White stone Flats – for the finest razor edge.

The Sharpmaker base also has two sets of holes which give an inclusive angle of 30 degrees or 40 degrees. In the design of the Sharpmaker, the 30 degree angle is primarily intended to be used for creating a ‘back bevel’ (to thin out the edge). Though some knives might be sharpened to this 30 degree angle, the 40 degree angle is considered by Spyderco to be the best compromise for most blades.
Serrations can be sharpened thanks to the corners of the stones, meaning steps 1 and 3 can be used. Spyderco recommend that only the step three (white stone corners) is used, as step one is a bit too aggressive. Serrations need a slightly different technique, as generally they are formed with a single bevel (chisel) grind. In this case you work only on one side for three or four strokes, then use a single stroke on the other side to remove the burr that forms.

For flexible blades, you only use the corners (steps 1 and 3) as it is difficult to keep the edge sitting on the flat surfaces.

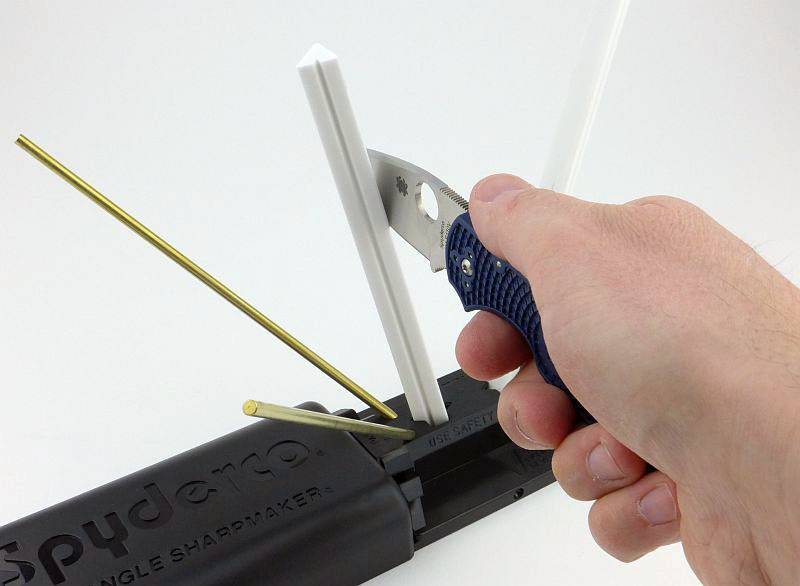
Having covered some of the theory, let’s get back to looking at the way you use the Sharpmaker. Here is a knife in mid-stroke having started at the plunge/ricasso and being draw down and backwards towards the tip, to run the entire edge over the stone on one side.
 photo 13 Sharpmaker knife P1170484.jpg

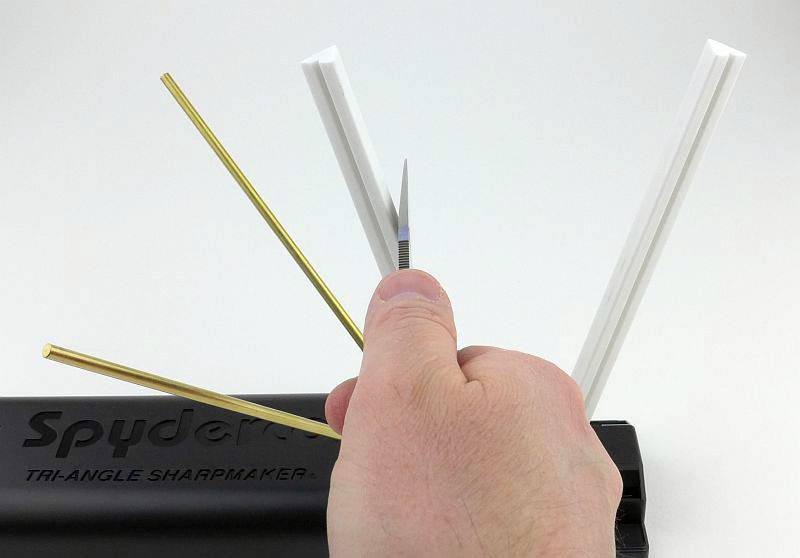
Looking directly from behind the knife, this is the critical aspect for the Sharpmaker – you keep the blade held vertically at all times, the stone angle is then determined by the Sharpmaker. Visually, keeping the blade vertical is the easiest position to judge, much easier than any other angle.
 photo 14 Sharpmaker knife P1170485.jpg

Having given one side of the blade a stroke, swap to the other side. Then just keep alternating sides for each stroke. Once you have given each side 20 strokes, you can move to the next stone configuration, refining the edge each time.
 photo 15 Sharpmaker knife side 2 P1170488.jpg

MAKE SURE YOU USE THE SAFETY GUARDS – Can’t stress this enough. I’ve hit them several times during the testing for this review, and would have cut my hand if I had not fitted them.

In one end of the Sharpmaker is another hole for a stone, this time using only one stone at a much lower angle. With a single stone mounted in this position you can sharpen scissors in the same way as you sharpen a knife. Keeping the scissors vertical and stroking the blade across the stone. To take off the burr on scissors you need to use the other stone like a file and lay it onto the blade flat. Doing this will give you a better burr removal than just closing the scissors.
 photo 12 Sharpmaker scissors P1170479.jpg

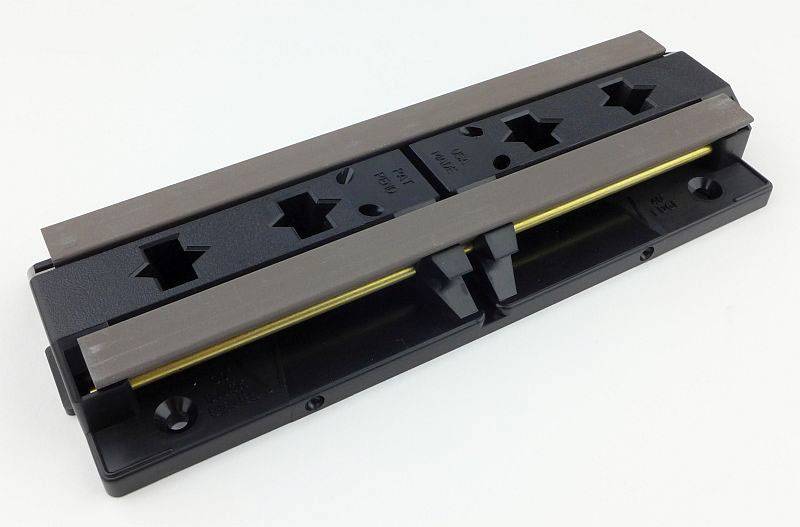
Also included in the design are two bench-stone options. Using the top channels in the base gives you a wide stone surface for large blades.
 photo 16 Sharpmaker bench stone P1170489.jpg

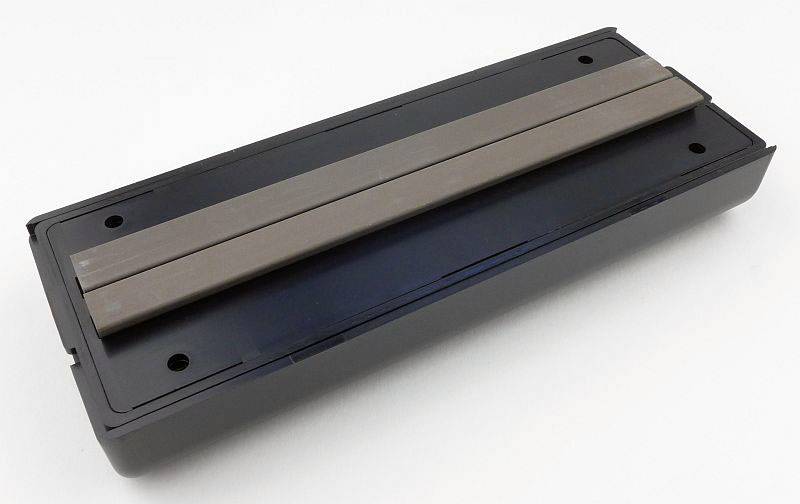
Flipping the base over and it has two grooves that are close together for sharpening smaller tools like chisels.
 photo 17 Sharpmaker bench stone narrow P1170494.jpg

I’ve already mentioned a couple of characteristics of the Sharpmaker that become quite relevant to start with. Especially compared to diamond, the ceramic stones are not the fastest cutters, and add to this a design that helps keep the overall removal of metal to a minimum by maintaining the angle, and you get a sharpener that can be hard work if you need to reprofile a steep edge angle.

(NOTE: When new, the brown/grey stones have a slight glaze that initially slows the cutting down. This glaze will wear through after a few sharpening sessions, but you can rub the two new stones together to speed this up and improve the cutting performance sooner.)

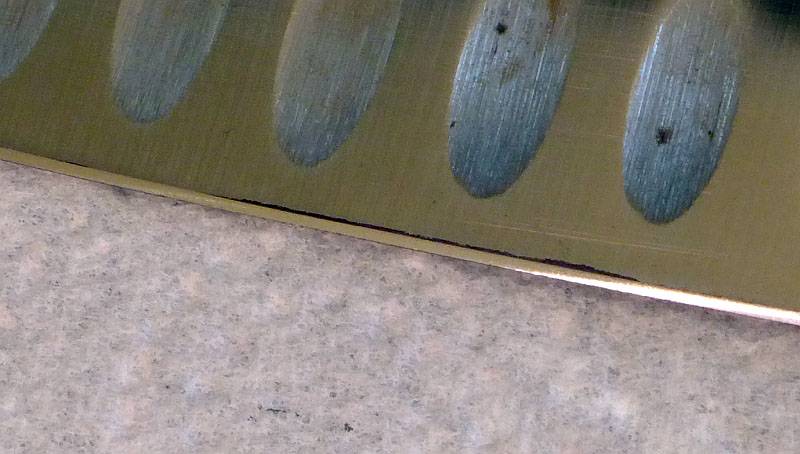
When starting to use the Sharpmaker, your bevel might not be at 40 degrees, so you can use the marker pen test to see if your bevel angle matches the Sharpmaker. If your initial bevel angle is less than 40 degrees, then you can just touch up the very edge and you don’t need to fully reprofile. Here the remnants of the marker pen are visible where the stones have taken off the ink from the full edge bevel itself. If you find the 40 degree stone angle is only working on the back bevel you are going to need to reprofile.
 photo 19 Sharpmaker check P1250574.jpg

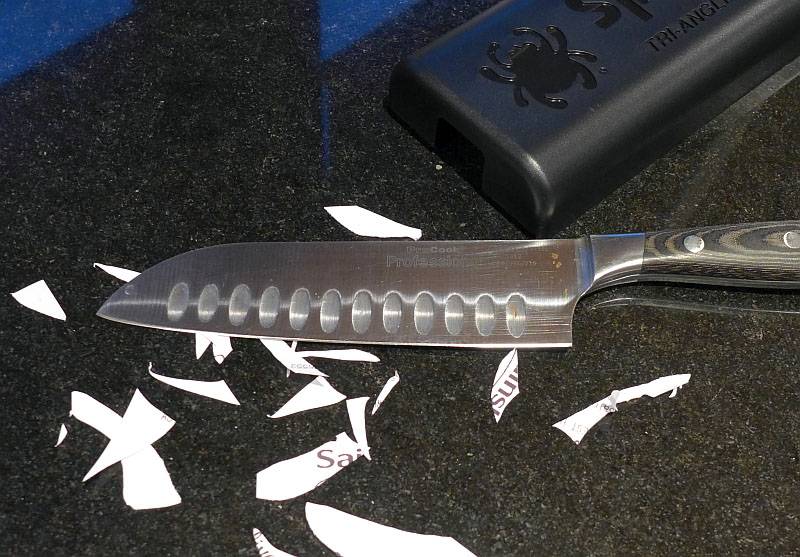
This knife which had a badly damaged edge (from being thrown in with the rest of the washing up) has been restored by running through all four stages and then tested with some thermal receipt paper which simply fell apart on the edge.
 photo 20 Sharpmaker test40 P1250590.jpg

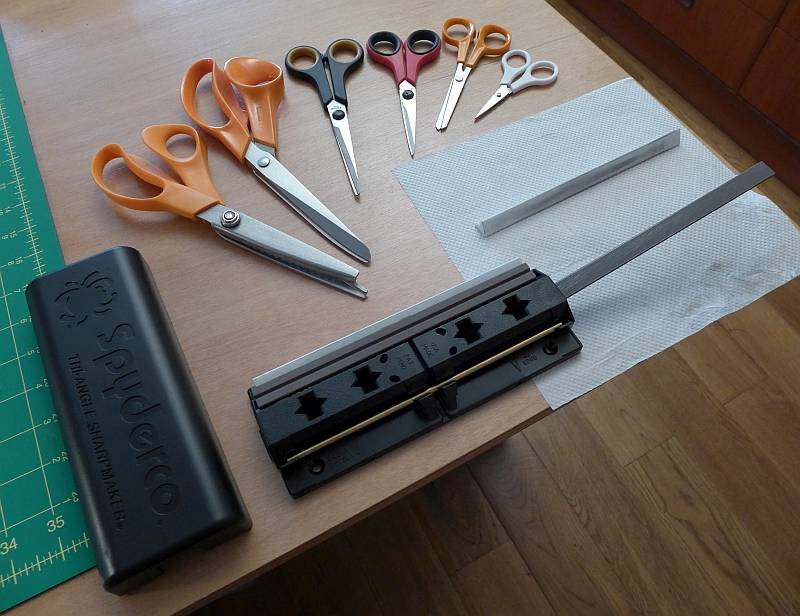
As mentioned above, most sharpening systems actually improve with use, and it was during this session of sharpening a set of sewing scissors that the stones of the Sharpmaker really developed some bite. The difference is significant and you can feel the stones cutting much more aggressively than when new. Perhaps more so than with knives, the process of keeping the blade vertical and drawing it across the stone makes it so easy to sharpen scissors. It only took around 20 minutes in total to get all of these scissors cutting beautifully.
 photo 21 Sharpmaker Scissors P1260926.jpg

Not only is the Sharpmaker simple to use, it is simple to transport and set up. The ceramic stones are used dry so there is no oil/water mess while working, and you use normal kitchen/bathroom cleaning products to clean the stones when clogged. I take it with me to friends and family and into the office kitchen to touch up the edged casualties and give them new life.

The Tri-Angle Sharpmaker is NOT just a knife sharpener and I recommend you watch the Spyderco videos that show just how versatile this sharpener is.

Spyderco Sharpmaker – Introduction (1 of 4)

Spyderco Sharpmaker – Part 2 of 4

Spyderco Sharpmaker – Part 3 of 4

Spyderco Sharpmaker – Part 4 of 4

Review Summary

The views expressed in this summary table are from the point of view of the reviewer’s personal use. I am not a member of the armed forces and cannot comment on its use beyond a cutting tool or field/hunting knife.

Something that might be a ‘pro’ for one user can be a ‘con’ for another, so the comments are categorised based on my requirements. You should consider all points and if they could be beneficial to you.

_______________________________________________ _______________________________________________
Things I like What doesn’t work so well for me
_______________________________________________ _______________________________________________
Very easy to use – just keep the knife blade vertical. Can be a bit slow, especially on harder steels.
Extremely Portable. Initially requires reprofiling the edge to 40 degrees.
Hugely versatile sharpener for almost any cutting tool. Only two bevel angles available.
Ceramic stones need no oil or water in use and are easy to clean.
Minimum metal removal lengthens blade life.

 photo 11 Sharpmaker assembled P1170475.jpg


Discussing the Review:

The ideal place to discuss this reviews is on a forum. If you started reading the shorter forum version of the review, but followed the link this full exclusive review, please return to that forum to discuss the review there.
If you read the review entirely on Tactical Reviews, please consider one of the following to join in any discussion.

EdgeMatters – Sponsored Reviews (UK based Forum for Knife Makers and Collectors)

BladeForums – Knife Reviews (US based Forum for Knife Discussion)

CandlePowerForums – Knife Reviews Section (Largest and Friendliest Flashlight Community Forum)

Knife Showcase: Spyderco Euro Edge (Ed Schempp design)

The Spyderco Euro Edge is one of Ed Schempp’s more recent designs and considered by many to be the best looking knife in Spyderco’s 2017 line up. Fortunately I was able to speak to Joyce Laituri about this knife when I visited Spyderco at IWA 2017.

‘Showcase’ on Tactical Reviews:

The ‘Showcase’ is an opportunity for me to share some photographs, videos and thoughts about interesting or exceptional knives, lights or other gear.

The following video is from a longer informal interview with Joyce of Spyderco recorded at IWA 2017 – it was not originally intended for publication.

Video Edited with – Cyberlink Director Suite 5 (PowerDirector 15 and AudioDirector 7)
Camera – Panasonic HC-V770    Microphone – Tonor TN120308BL and/or Takstar SGC-598

Gallery:

This is a series of images that speak for themselves; enjoy!


Discussing a Showcase:

Please feel free to start a thread on any of the following forums as these are the ideal place to freely discuss it. If you started reading a forum thread that has brought you to this page, please return to that forum to discuss the Showcase there.

EdgeMatters – Sponsored Reviews (UK based Forum for Knife Makers and Collectors)

BladeForums – Knife Reviews (US based Forum for Knife Discussion)

CandlePowerForums – Knife Reviews Section (Largest and Friendliest Flashlight Community Forum)

Knife Review: Spyderco Assist Salt (Dive Knives 2016 – Detail Review)

This review provides further details for the Spyderco Assist Salt which could not be included in the Dive Knives 2016 – Mega Test Review

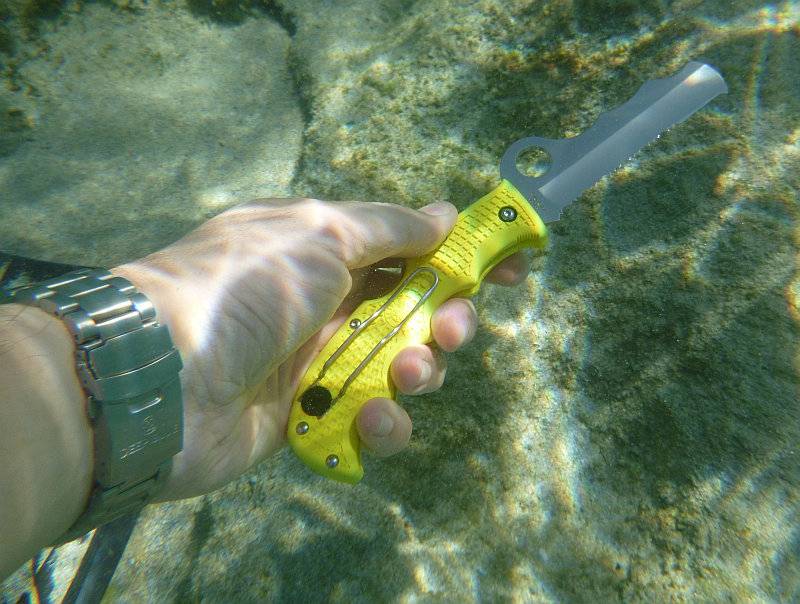
Not strictly a diving knife, thanks to the Assist model’s reputation as a rescue knife and the use of specialist rustless H1 steel in the ‘Salt’ edition, it has been adopted by many divers as an underwater rescue knife.

 photo Dive Knives underwater P1000872.jpg

The Blade and Handle Geometry:

Most knife specifications have a basic description of the blade geometry, but in this section I will be taking a more detailed look at geometry and balance.

Using a set of gauges and precision measuring equipment including a Vernier protractor, callipers, fixed radius gauges and the unique Arc Master adjustable radius gauge (the one that looks like a crossbow).
 photo Knife measuring P1180483.jpg

These measurements have been tabulated and are presented along with other blades.

Key aspects such as the primary bevel angle, grind type, blade depth, blade thickness, length, weight are detailed, along with balance information.

The ‘Balance relative to the front of the handle’ tells you if the knife will feel front heavy, or if the weight is in your hand (a positive value means the weight is forward of the front of the handle). The ‘Balance relative to the centre of the handle’ indicates how close to a ‘neutral balance’ the knife has in the hand.

In the case of full convex grinds the approximate centre of the grind is used for the primary bevel angle estimate.

The measurements are presented alongside some of the other knives from the Dive Knives 2016 – Mega Test Review

 photo Dive Knives Parameters 1 of 3.jpg

A few more details:

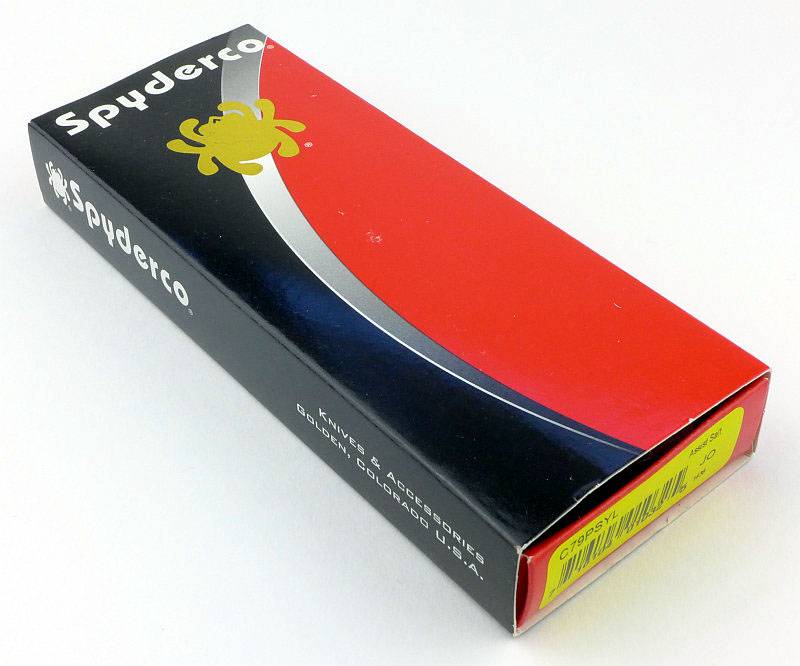
The Assist Salt arrives in Spyderco’s standard box.
 photo 01 Salt Assist boxed P1180225.jpg

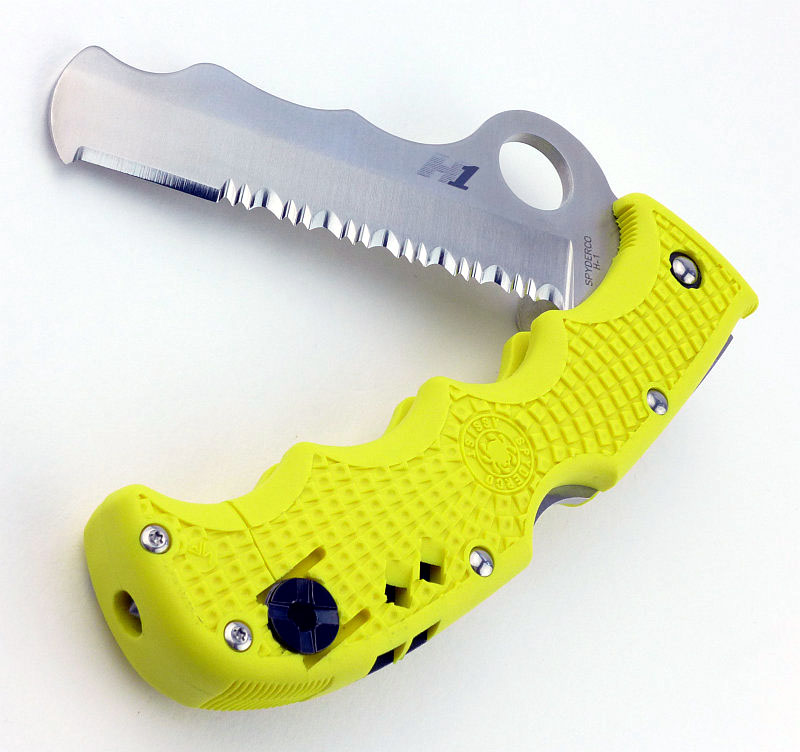
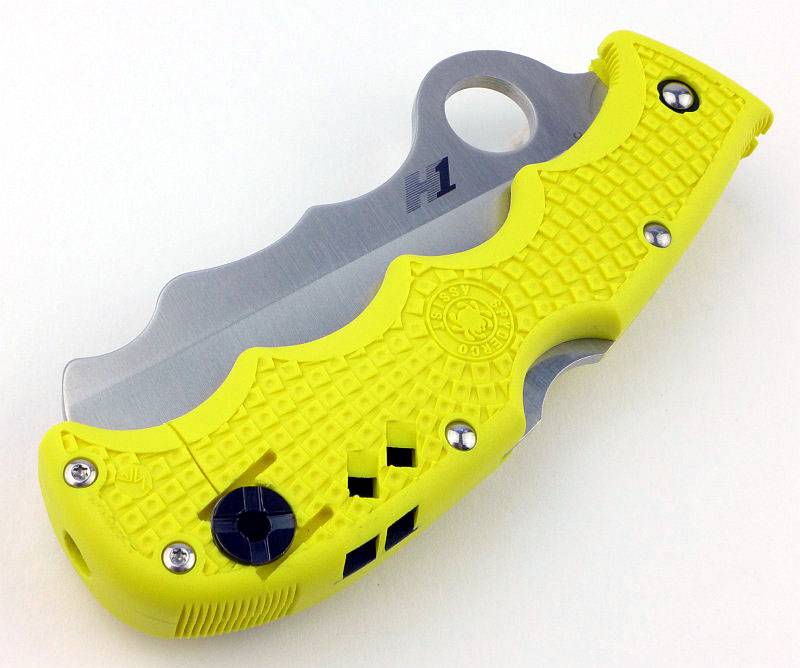
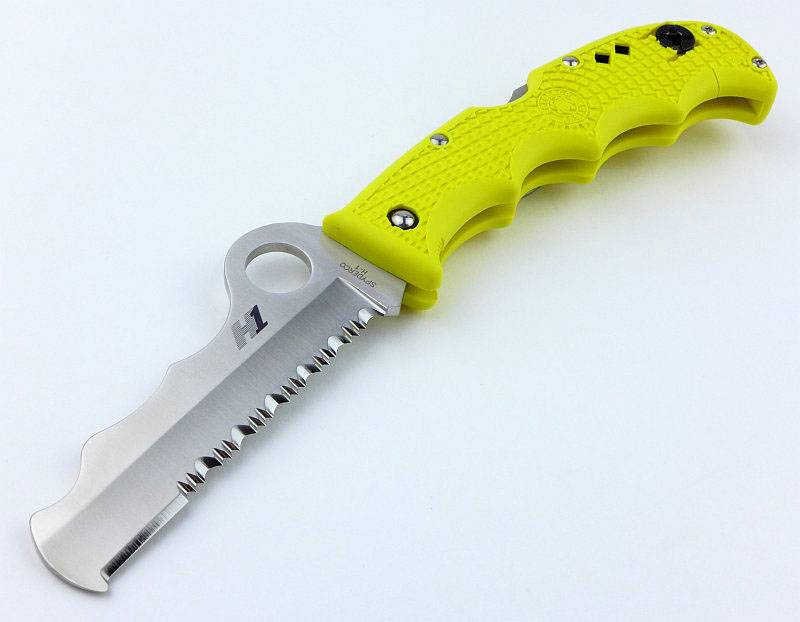
An instantly recognisable design, but now in a bright yellow FRN and with H1 proudly shown on the blade. You will notice the Assist model’s ‘cobra hood’ over the thumb hole is not present on the Salt version.
 photo 02 Salt Assist unboxed P1180232.jpg

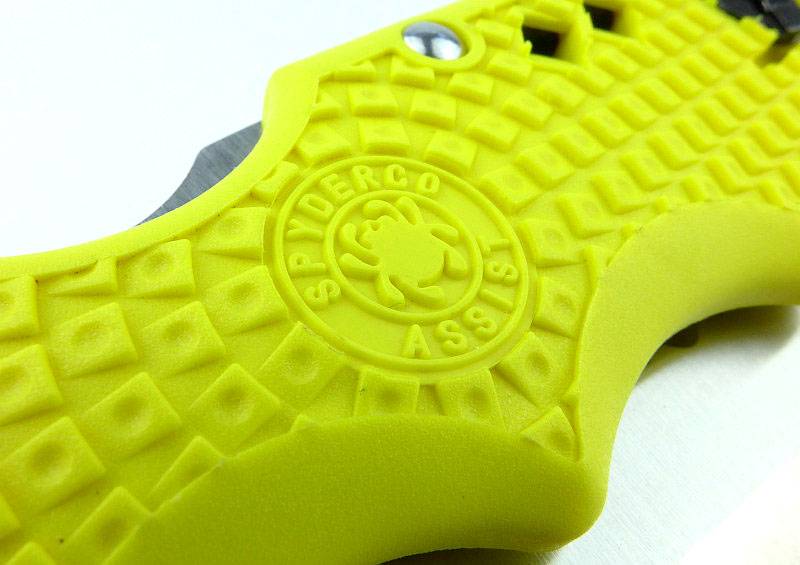
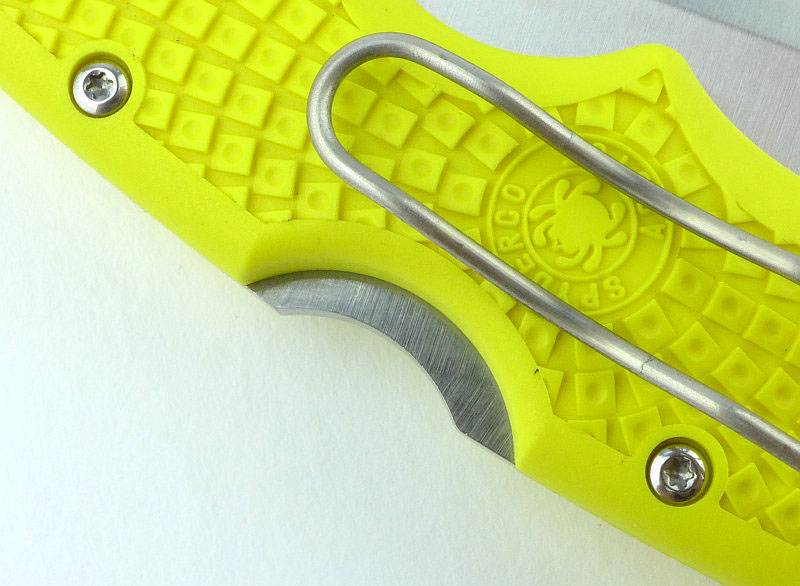
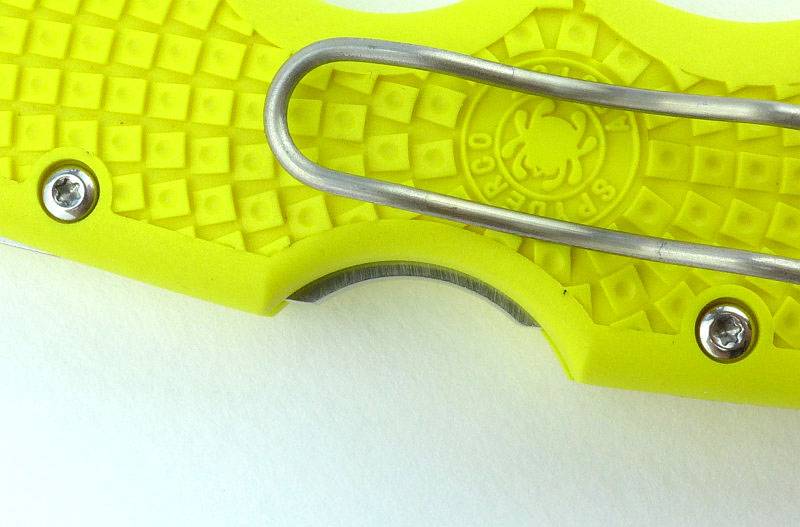
Spyderco’s very grippy FRM scale pattern surrounds the model and logo.
 photo 03 Salt Assist detail P1180239.jpg

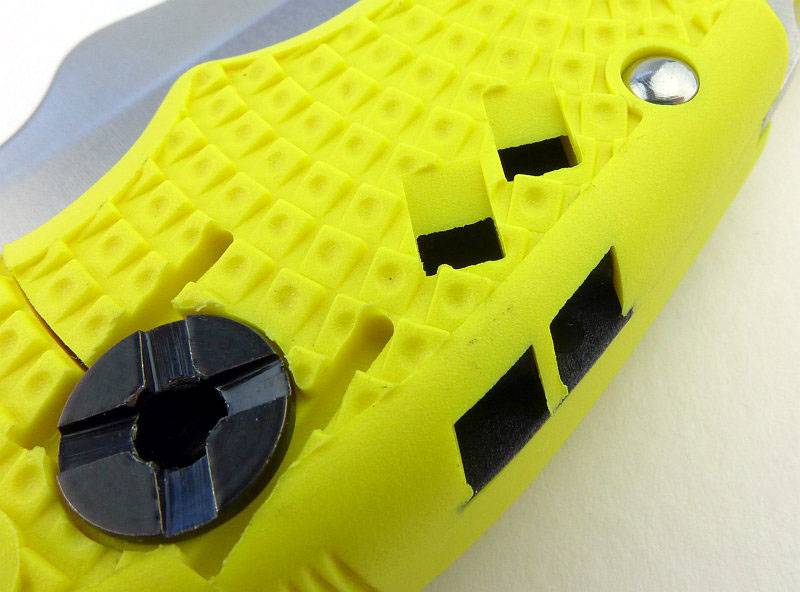
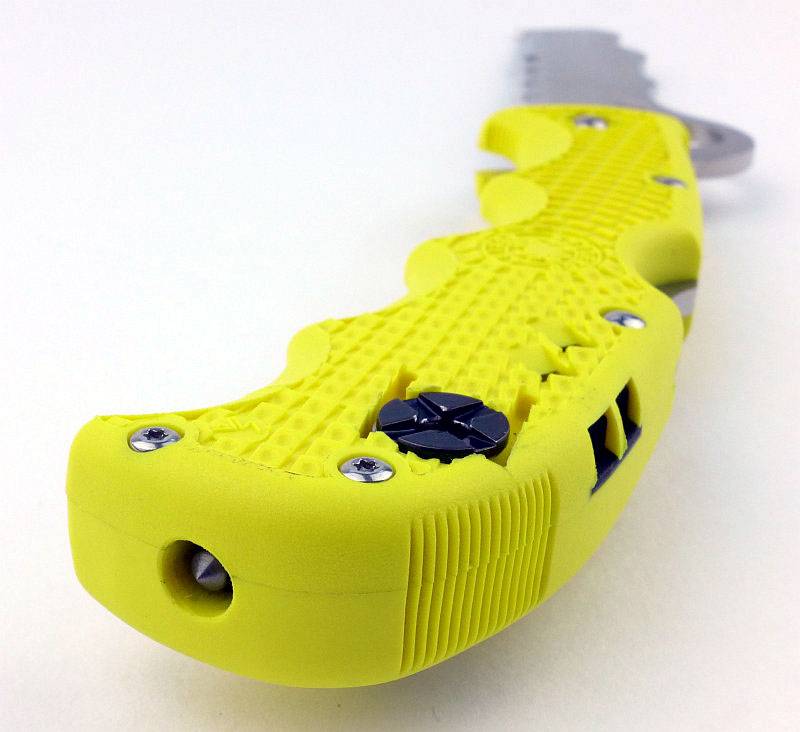
And why not? There is a whistle moulded into the handle.
 photo 04 Salt Assist whistle P1180240.jpg

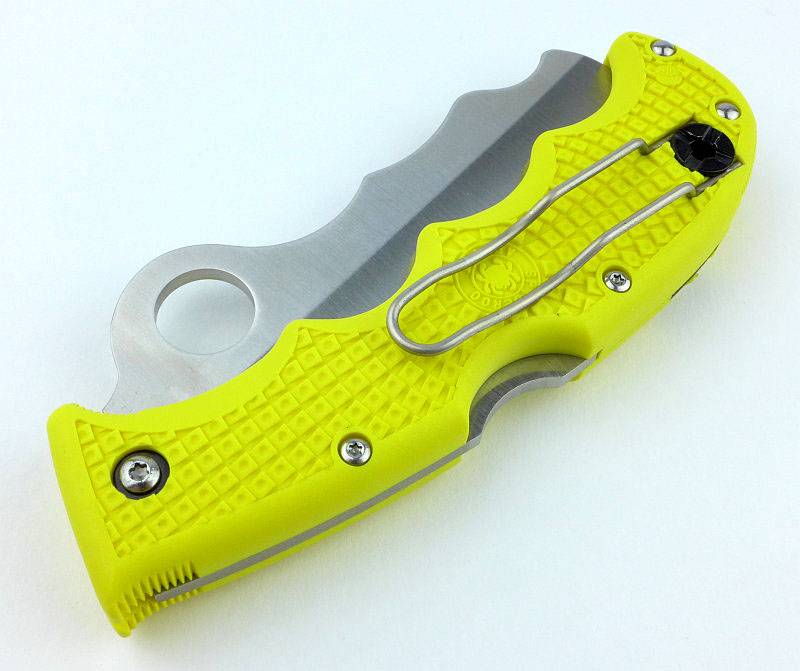
A Spyderco wire clip is used. This can be fitted to either side of the handle.
 photo 05 Salt Assist clip side P1180249.jpg

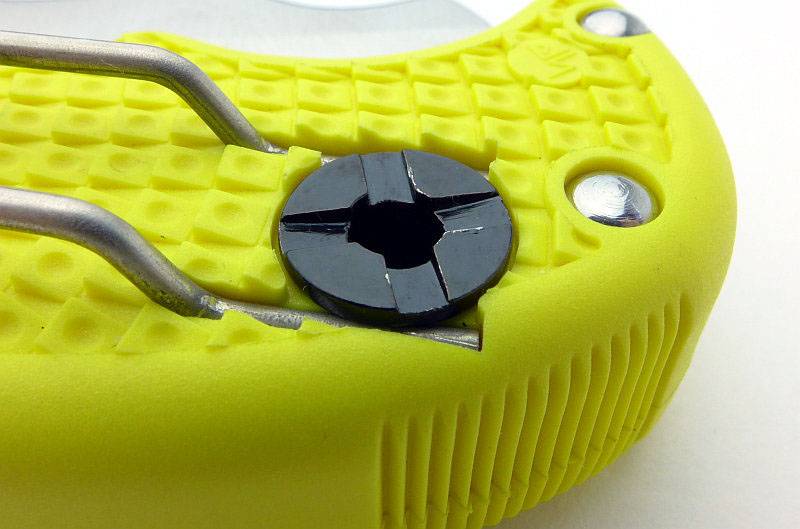
The ends of the wire clip are held in place under a special hollow bolt that also provides the lanyard hole.
 photo 06 Salt Assist clip fastning P1180251.jpg

At first it looks like the cutout in the lock bar is misaligned, but….
 photo 07 Salt Assist lock bar P1180256.jpg

…no, this is one of the Spyderco details where due to the pivoting action of the lock bar, the cutout does line up once pressed in to release the lock (or due to opening the blade).
 photo 08 Salt Assist lock bar 2 P1180259.jpg

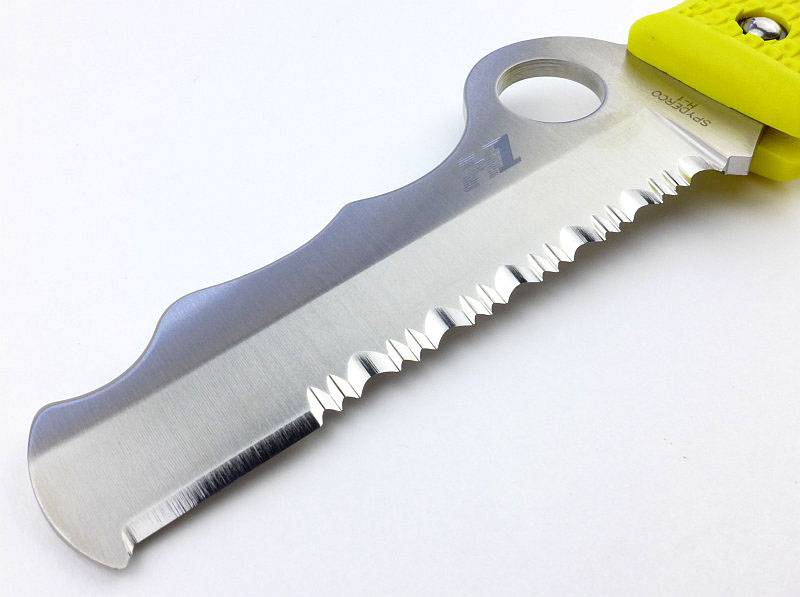
The Assist uses a mostly serrated edge (80%), but with a small section of plain edge for detailed tasks. The main cutting power of the blade is in those SpyderEdge serrations.
 photo 09 Salt Assist part open P1180260.jpg

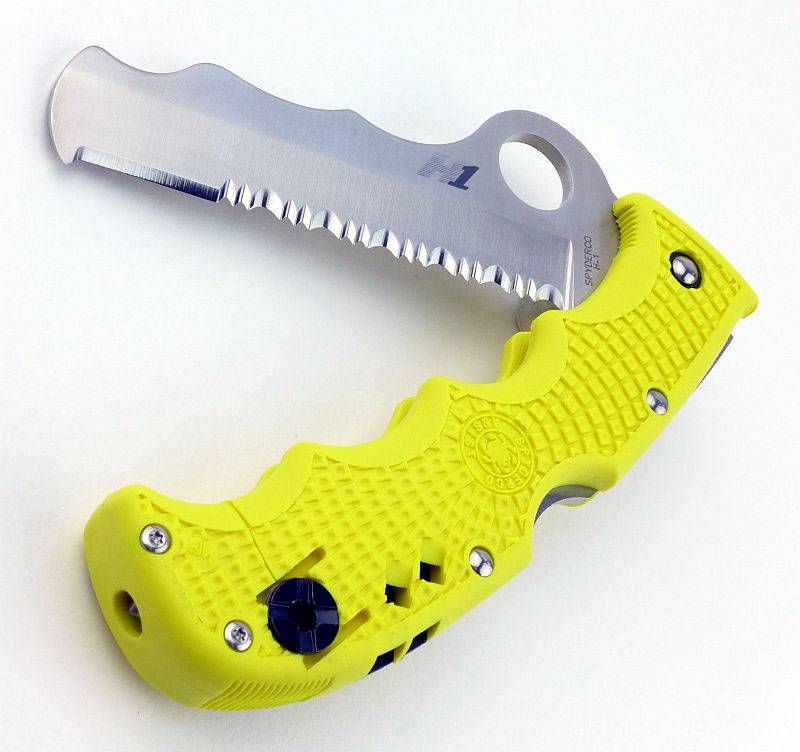
With well formed finger grooves and the textured FRN handle, the Assist Salt is not short on grip.
 photo 10 Salt Assist open P1180265.jpg

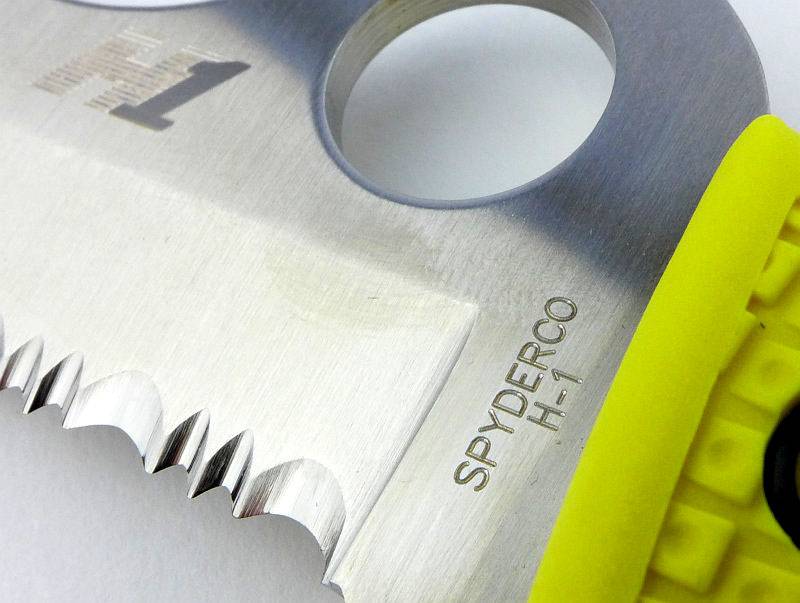
Yes, that is H1 steel.
 photo 11 Salt Assist H1 P1180270.jpg

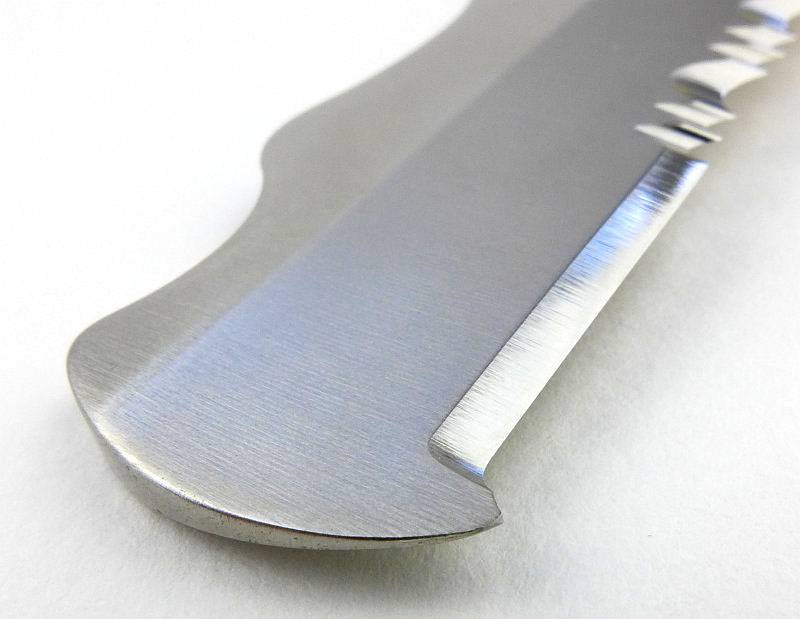
For those not familiar with the Assist model, we’ll come back to the grooves in the blade spine.
 photo 12 Salt Assist blade P1180274.jpg

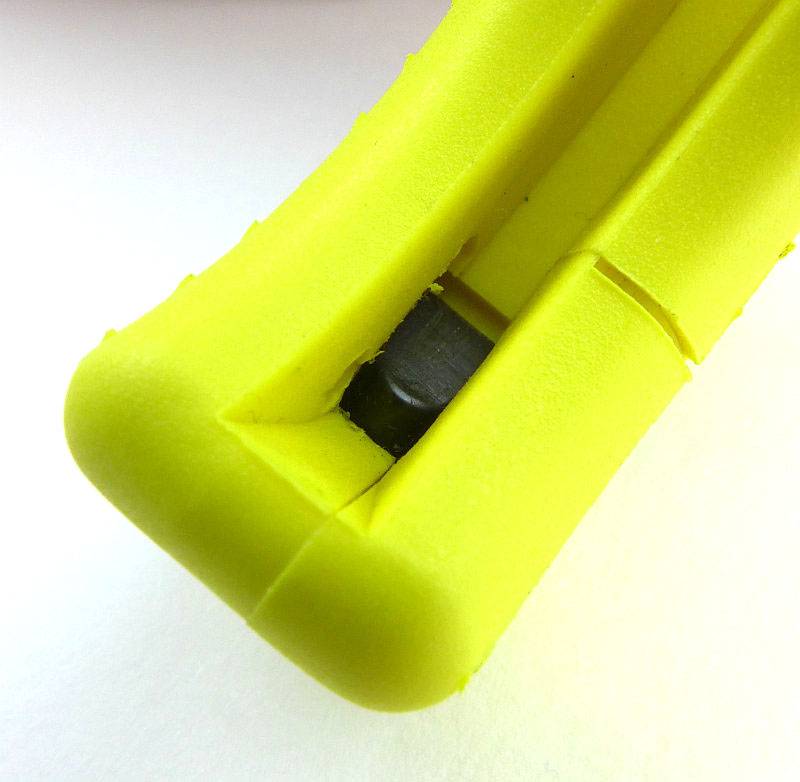
Recessed into the butt of the handle, there is a point that looks like a glass breaker.
 photo 13 Salt Assist breaker P1180289.jpg

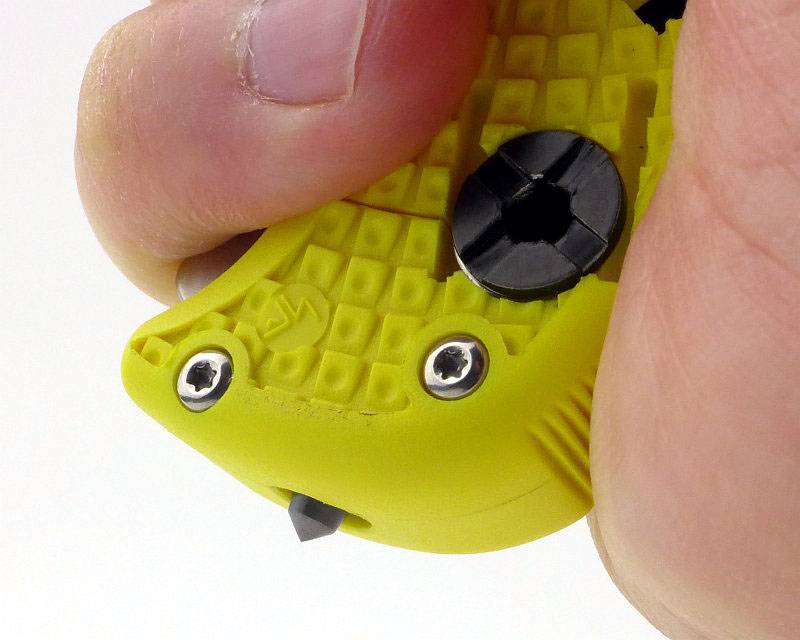
With the blade closed, if you give it a squeeze, the glass breaker point comes out of the handle ready to use.
 photo 14 Salt Assist breaker out P1180291.jpg

Inside the handle where the blade tip sits, there is a small sprung block which has the glass breaker in it.
 photo 17 Salt Assist breaker push P1180322.jpg

The rounded end of the blade presses into this block and pushes the glass breaker out for use. Very neat design.
 photo 18 Salt Assist breaker pusher P1180325.jpg

What it is like to use?

Being a folder, for use as a dive knife, it is important that the Assist is a good size as this makes it easy to handle with, and without, gloves.

Actually in terms of easy handling, this is where I was slightly disappointed with the Salt version, as for some reason Spyderco decided to do away with the ‘cobra hood’ over the thumb hole. The thumb hole is still big enough to make opening easy enough, but that cobra hood would have made all the difference when using wet gloves with cold hands, just giving you more to get hold of.

 photo Dive Knives underwater P1000872.jpg

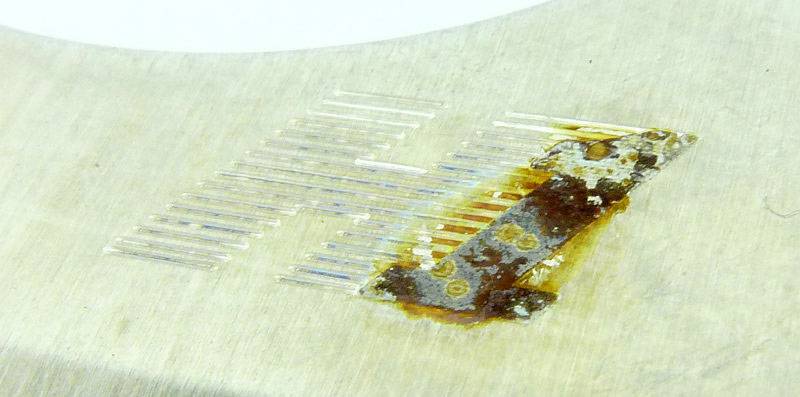
With the claims about H1 steel, I was particularly interested to see the corrosion test results. What did surprise me was what looked like a failure in this regard. However looking much closer, the apparent corrosion is actually the black writing on the blade which has mostly disintegrated, but where the black ‘1’ was, it has made it look like the blade has rusted. However this can be cleaned off leaving just the H1 steel. It might be better for Spyderco to use a different ‘ink’ for the writing, or none at all, to avoid this blemish on the otherwise unmarked H1 steel.
 photo Spyderco corrosion P1220990.jpg

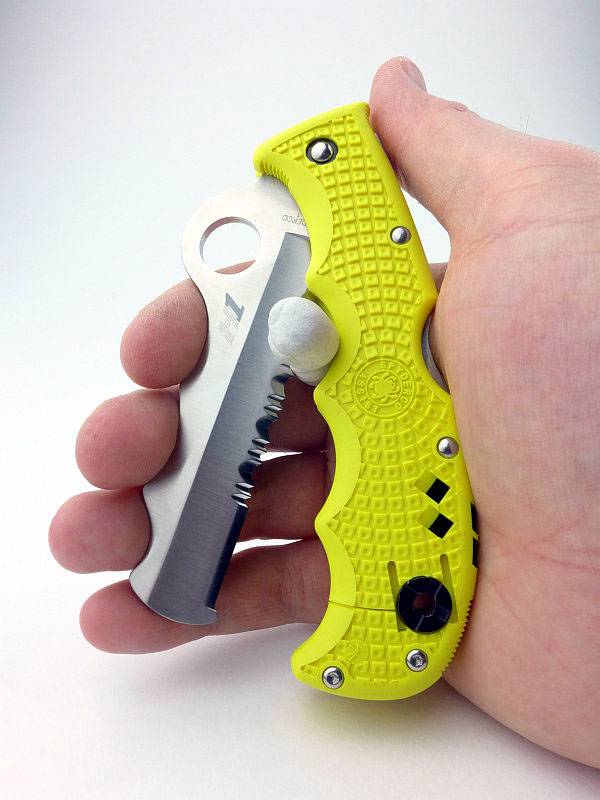
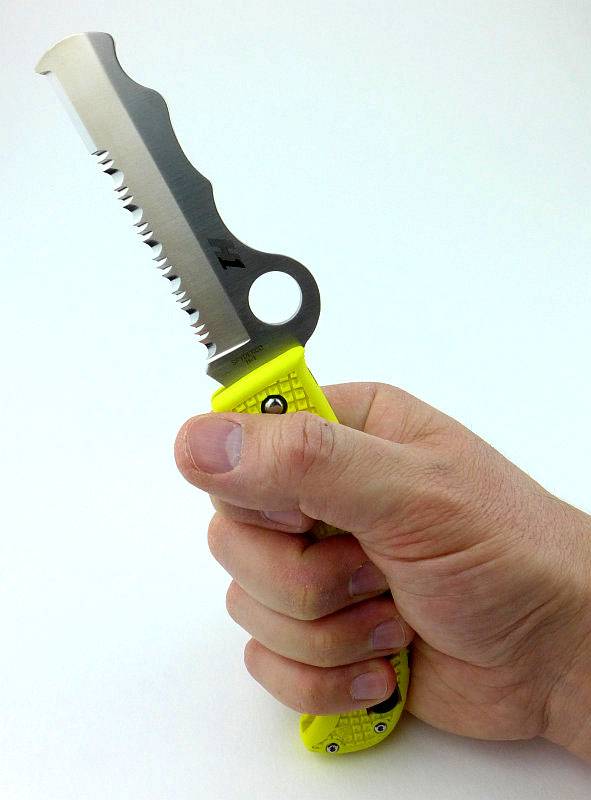
The distinctive blade is a good size (I take XL size gloves) as can be seen here. This is ideal as you have plenty of edge to work with combined with the safety of the blunt tip to prevent stabbing yourself (or others).
 photo 19 Salt Assist in hand P1180341.jpg

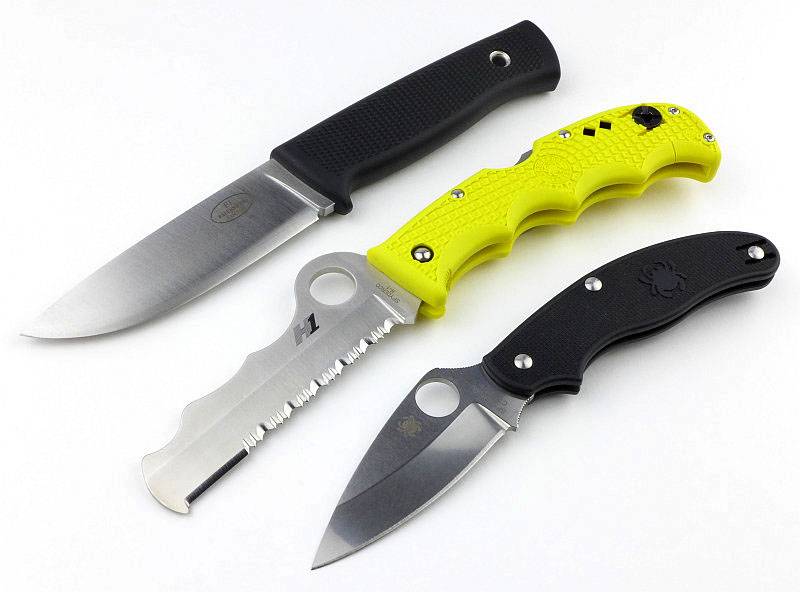
To give an idea of scale, here it is next to the Fällkniven F1 and a Spyderco UK Pen Knife.
 photo 16 Salt Assist size P1180310.jpg

We have already seen the hidden glass breaker and how the finger grooves in the blade spine are used to access this, but there is another design feature that these finger grooves provide. The Assist can be used as a type of shears where the material to be cut is placed under the folding blade and the blade then squeezed shut to complete the cut. In this arrangement, you are carrying out a push cut with a serrated blade, when the serrations work best in a sawing motion. Personally, despite the very sharp blade, I found this to not work well on wet rope, in fact a normal cut worked far better, so for me the jury is out on that feature.

Unsurprisingly the SpyderEdge was an excellent cutter, and the H1 steel held up well. See the Dive Knives 2016 – Mega Test Review for more information on the cutting test results where the Assist achieved the second highest score.

Personally for a ‘working’ diving knife I prefer a fixed blade, but as a backup/release knife, the Assist gives me real confidence when carrying it. Requiring little to no care or maintenance, the Assist Salt is just ready and waiting for when you need it.

Review Summary

The views expressed in this summary table are from the point of view of the reviewer’s personal use. I am not a member of the armed forces and cannot comment on its use beyond a cutting tool or field/hunting knife.

Something that might be a ‘pro’ for one user can be a ‘con’ for another, so the comments are categorised based on my requirements. You should consider all points and if they could be beneficial to you.

_______________________________________________ _______________________________________________
Things I like What doesn’t work so well for me
_______________________________________________ _______________________________________________
Proven Escape Knife Design. The Assist ‘Cobra Hood’ is not on the Salt version.
H1 ‘Rustless’ Steel. Blade marking corrode (even though the steel doesn’t).
Built-In Signal Whistle
Built-In Glass Breaker.
Excellent grip.


Discussing the Review:

Please feel free to add comments to the review, but the ideal place to freely discuss these reviews is on a forum. If you started reading the shorter forum version of the review, but followed the link this full exclusive review, please return to that forum to discuss the review there.
If you read the review entirely on Tactical Reviews, please consider one of the following to join in any discussion.

EdgeMatters – Sponsored Reviews (UK based Forum for Knife Makers and Collectors)

BladeForums – Knife Reviews (US based Forum for Knife Discussion)

CandlePowerForums – Knife Reviews Section (Largest and Friendliest Flashlight Community Forum)