Light Review: Fenix HM65R Headlamp

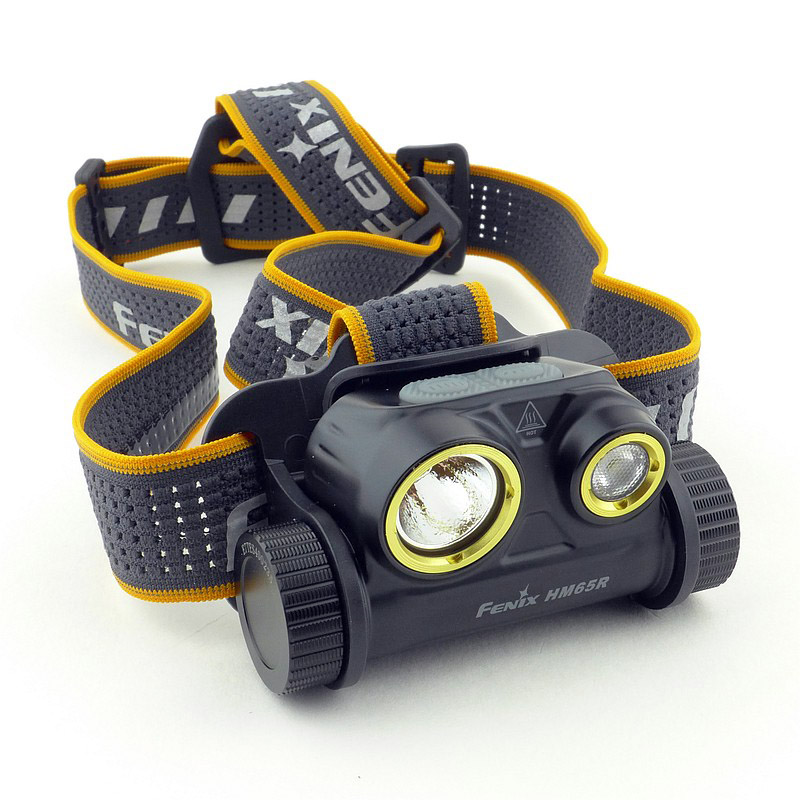
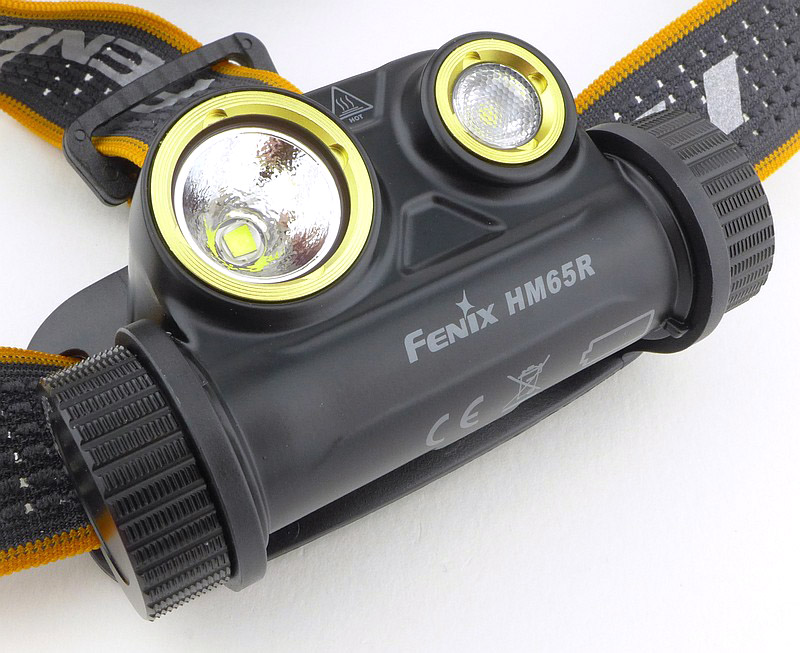
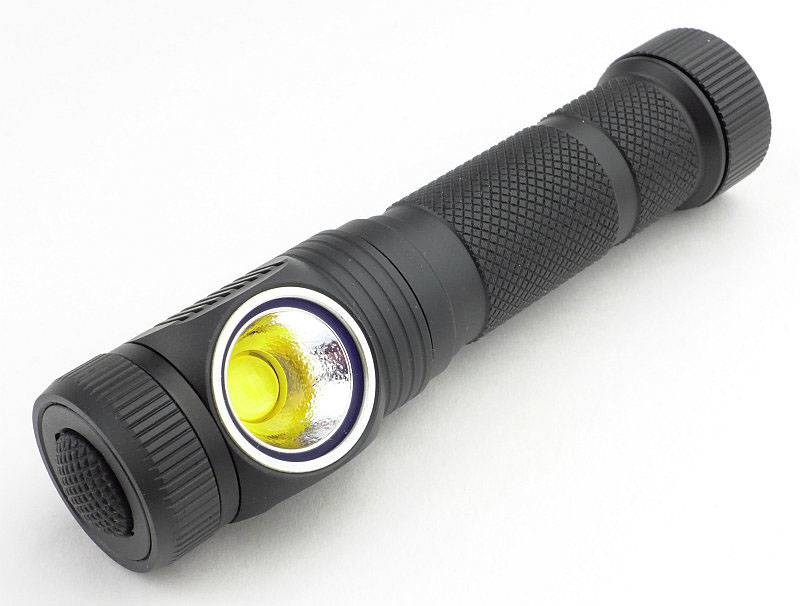
With the HM65R, Fenix have fitted in so much, but have kept this headlamp small and light enough that you don’t have to think twice about taking it with you on any adventure (or even just taking out the rubbish).
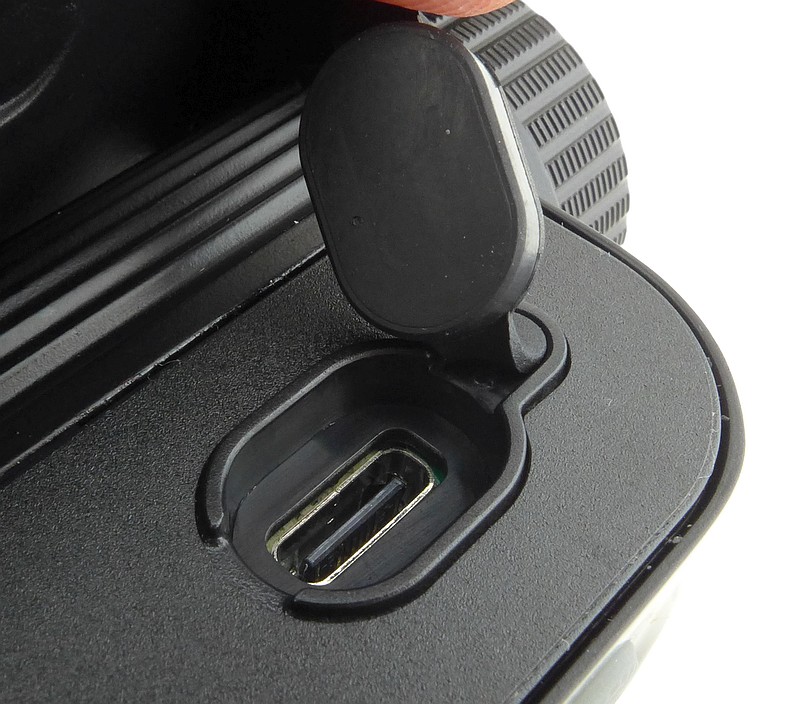
The 18650 li-ion cell used to be the ‘enthusiast’s choice’, being unfamiliar to many users, even more so when strapped to your forehead – not any longer. The Fenix HM65R comes with a high capacity 3500mAh 18650 cell, and there is a built in USB-C charging port. The ONLY thing you need is a USB charger of some kind to open the door to this powerful and capable light.
Join me in this review of the Fenix HM65R to take a look at all the details and how it performs.

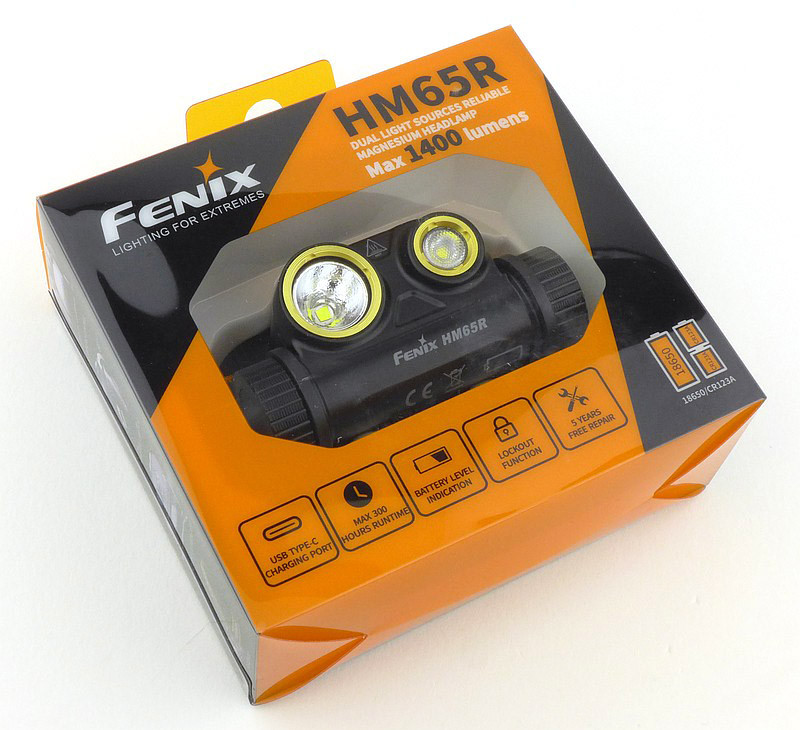
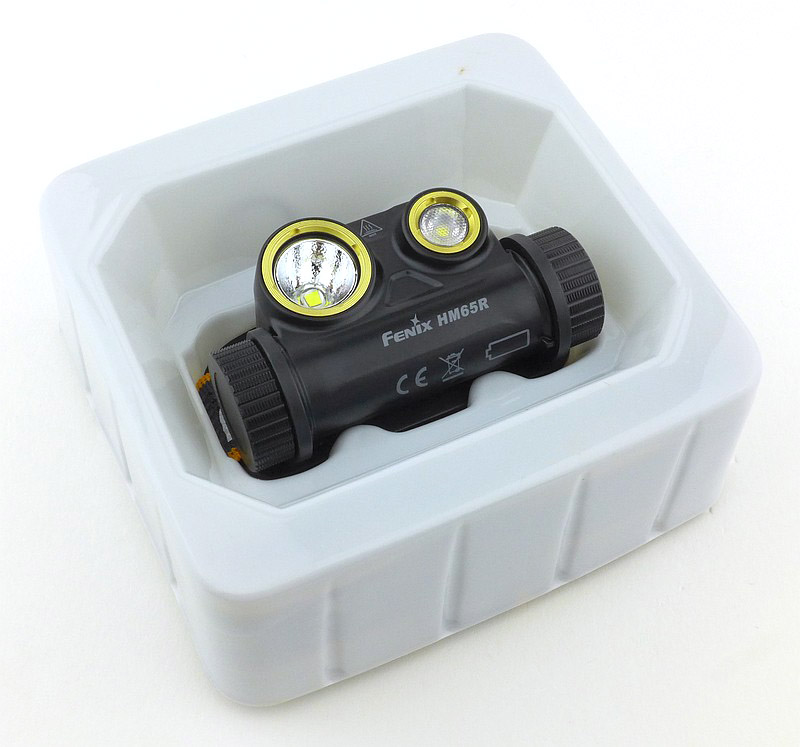
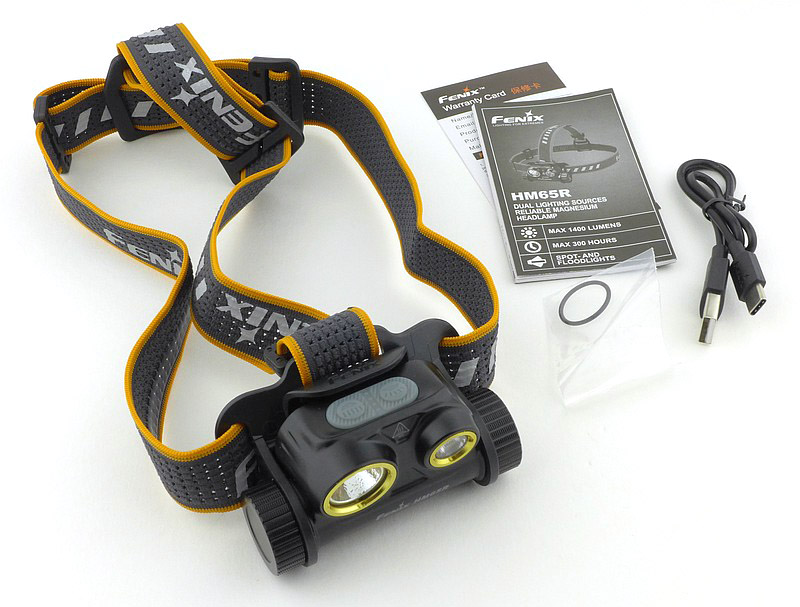
What is in the box?:
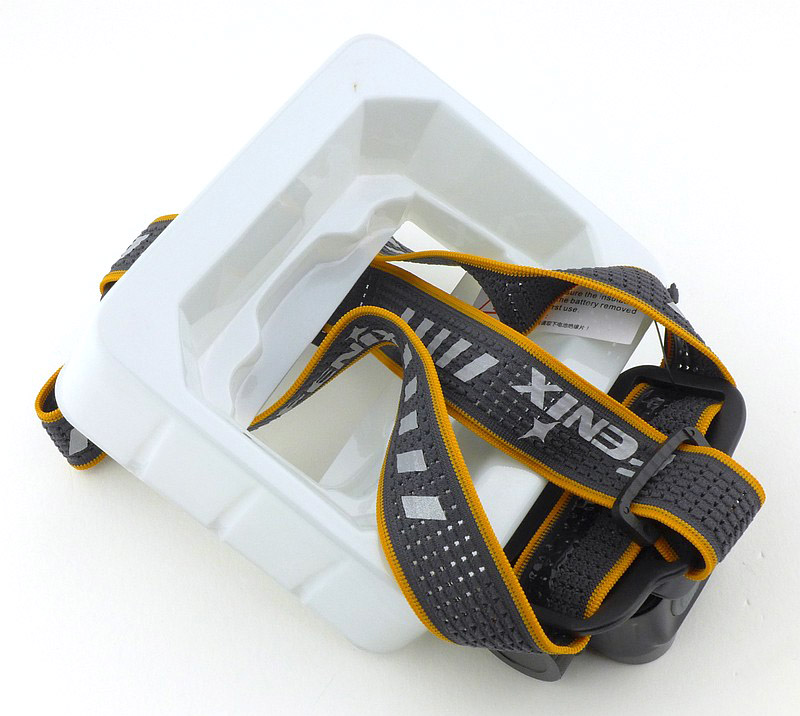
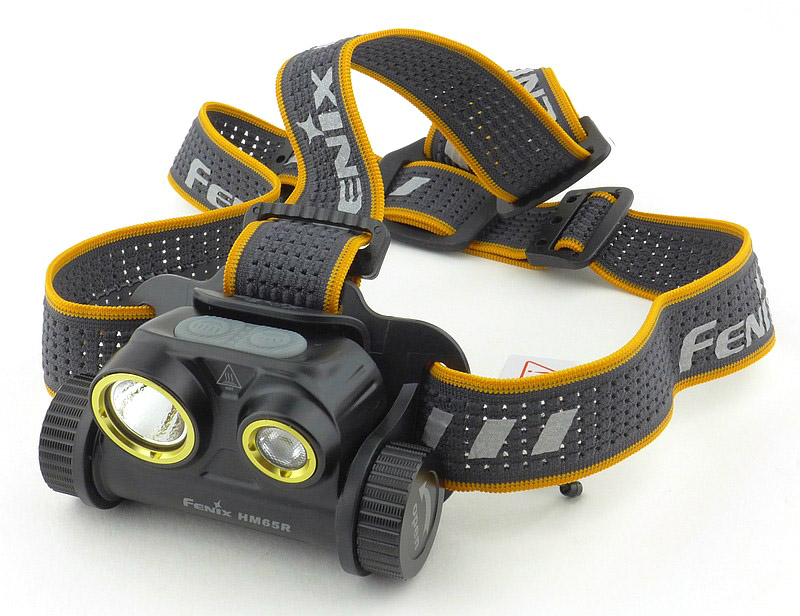
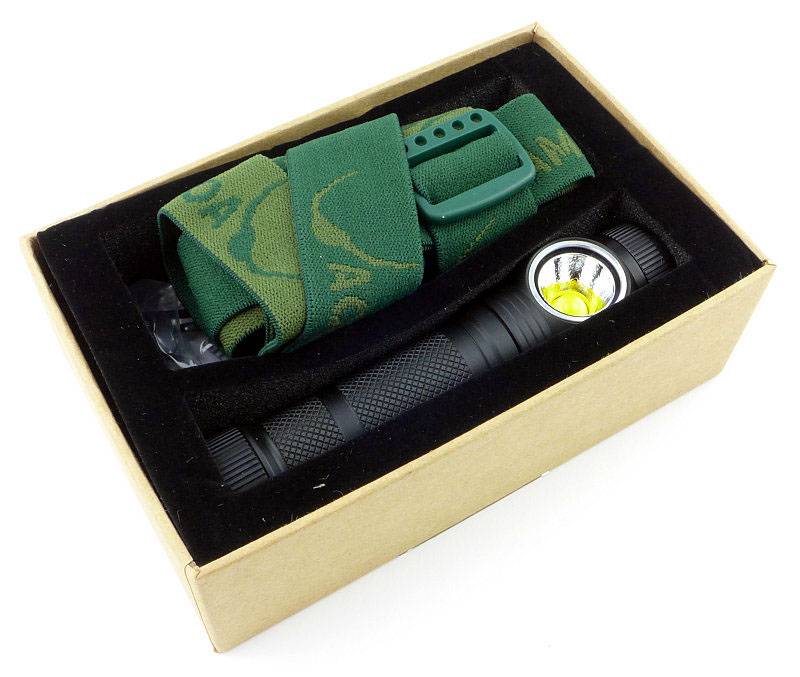
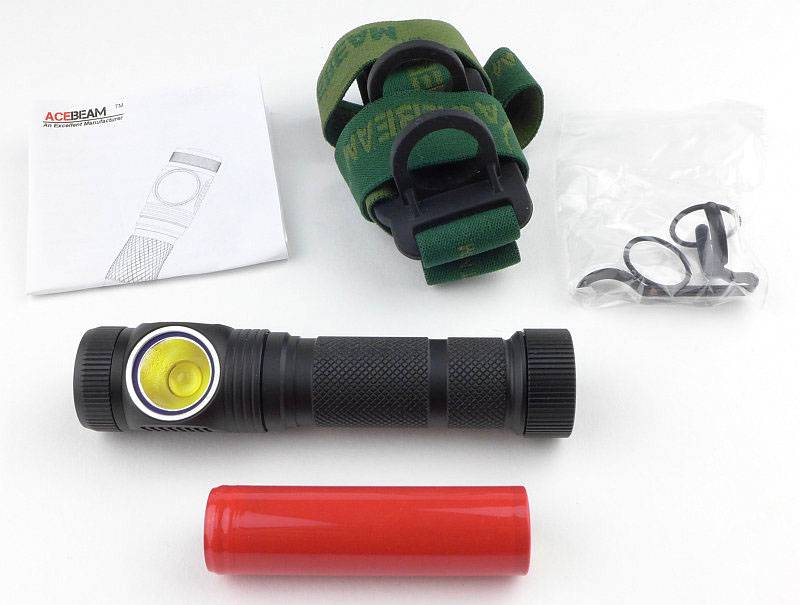
For maximum stability the HM65R has a top strap, and the full head strap comes assembled and neatly tucked away in the packaging.


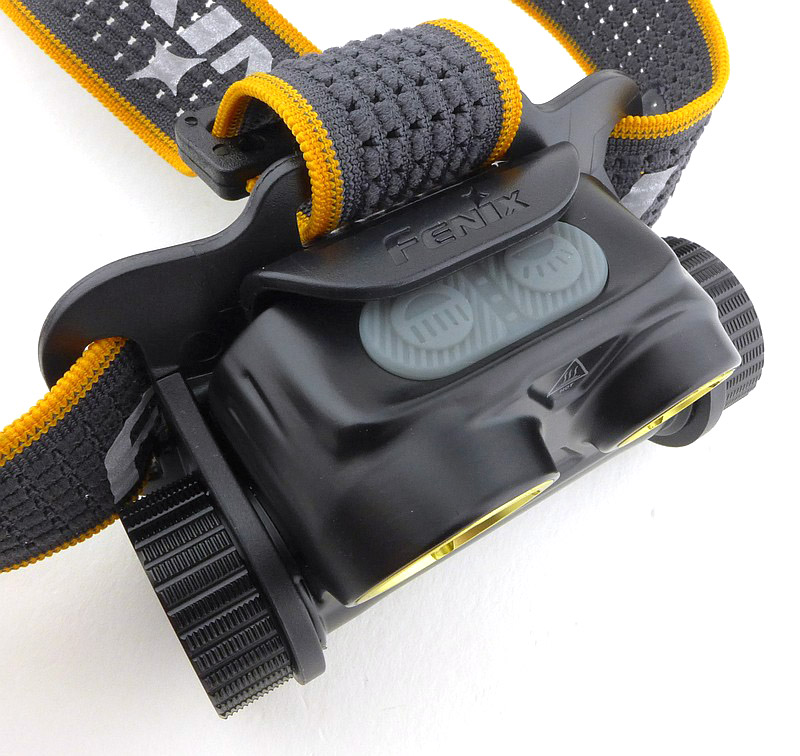
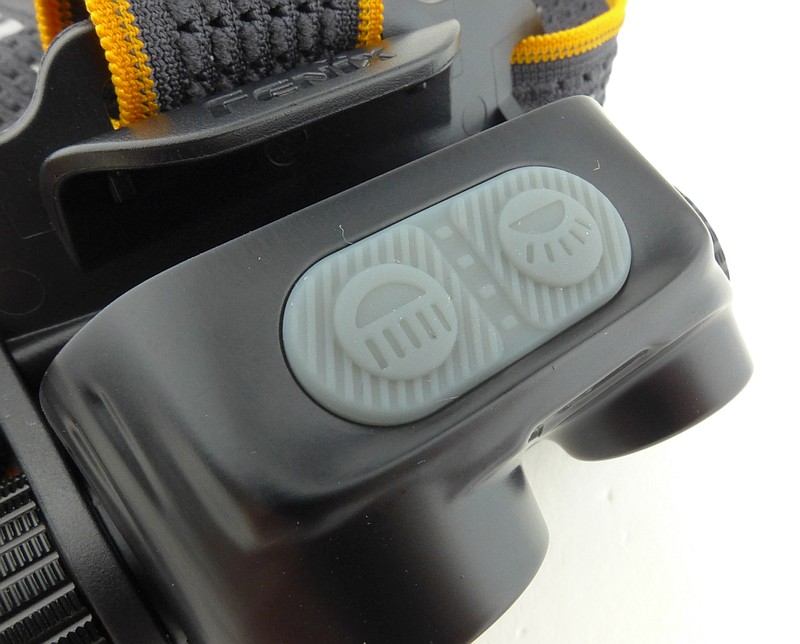
A good look round the HM65R – Things to look out for here are:
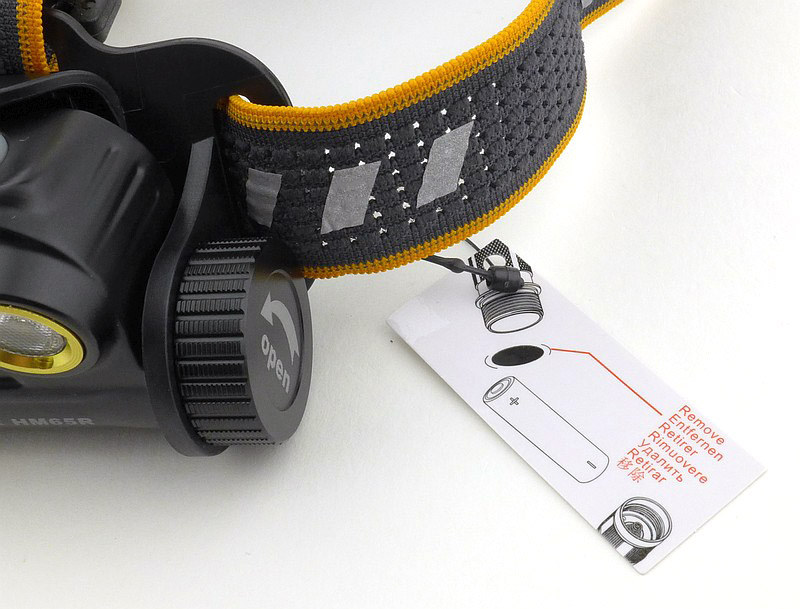
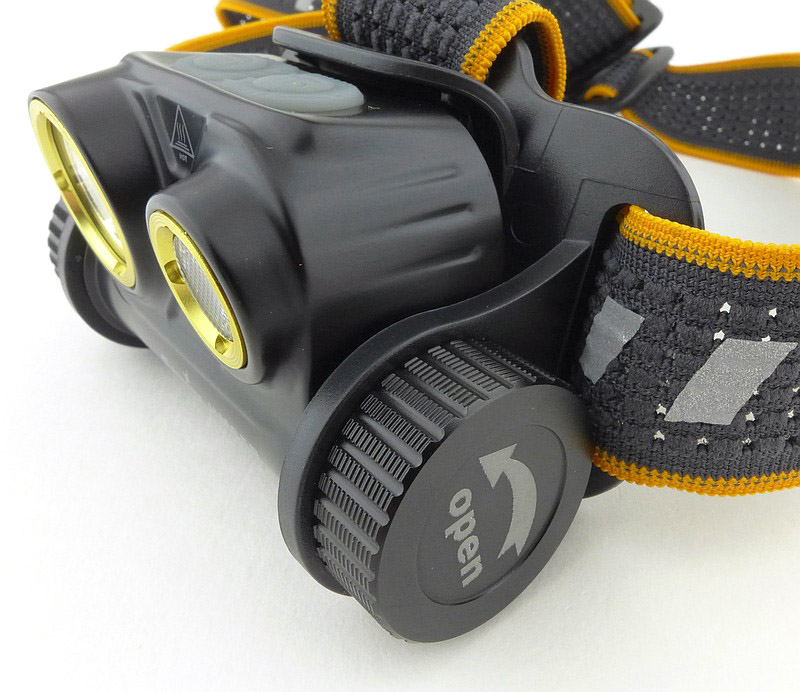
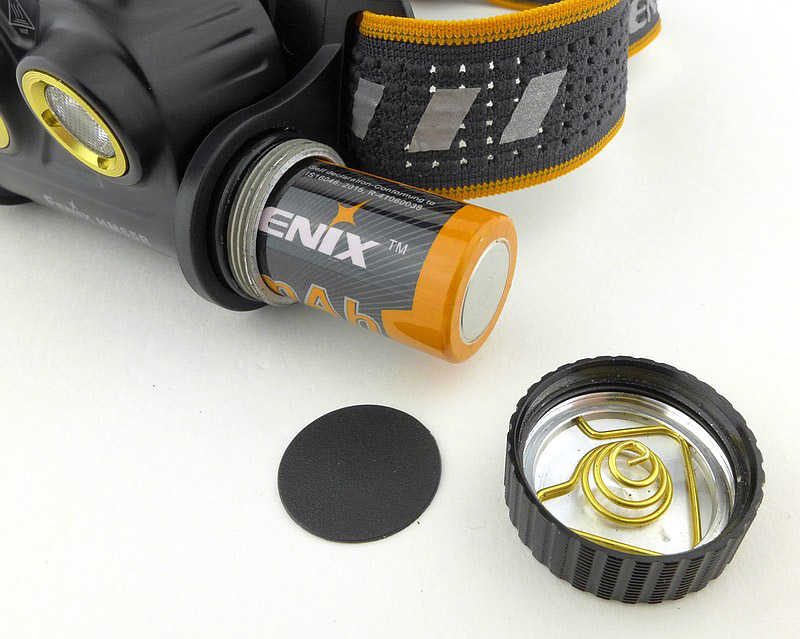
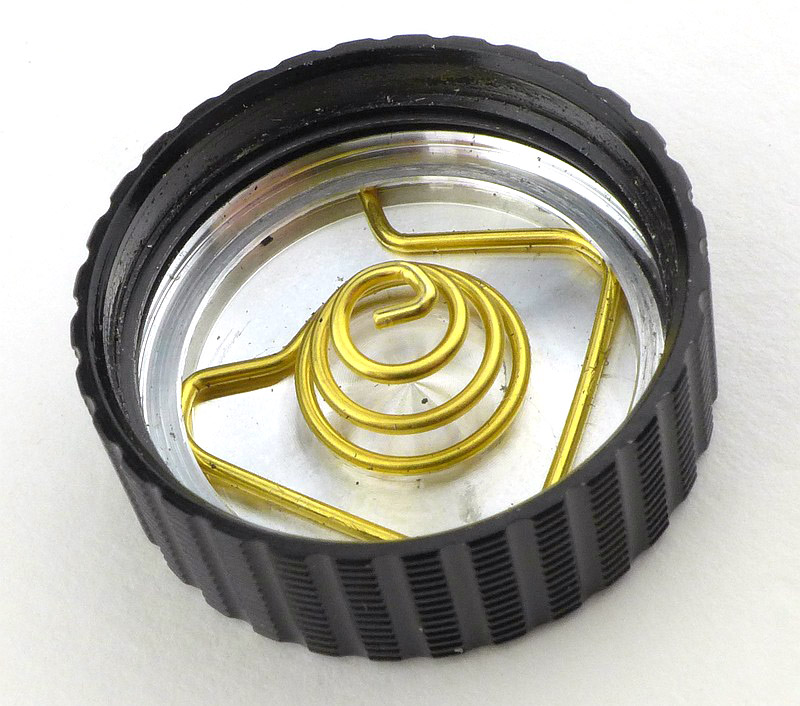
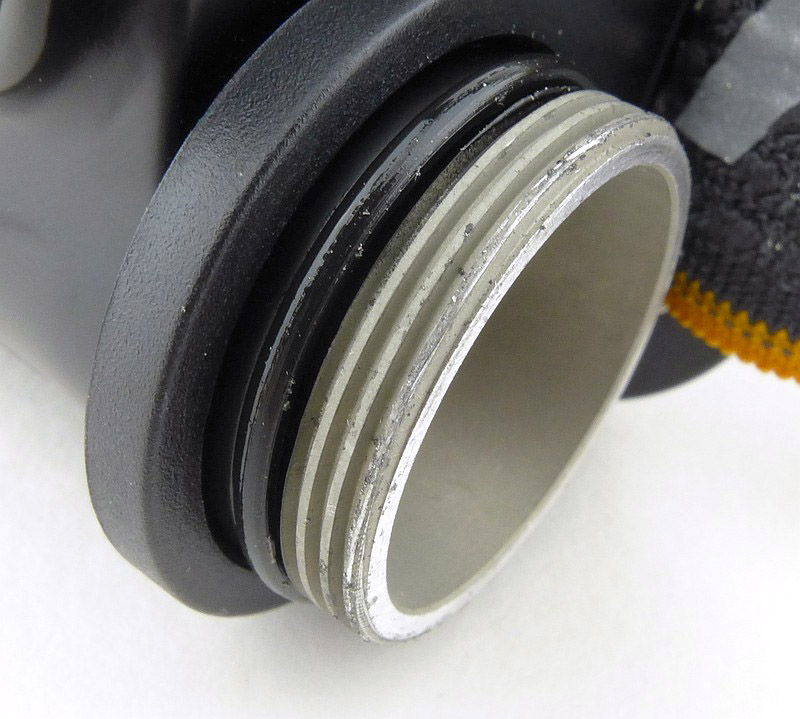
I’m splitting this detailed set of photos into two galleries for a more manageable tour of the HM65R. The HM65R is almost ready to go out of the packaging, but first you need to remove a small insulator that keeps the battery from running down or the HM65R from being turned on accidentally. From the appearance of the threads of the battery tube, you can see that this is made of magnesium, a material chosen by Fenix to shave off a few more grams of weight.


Taking in more details:
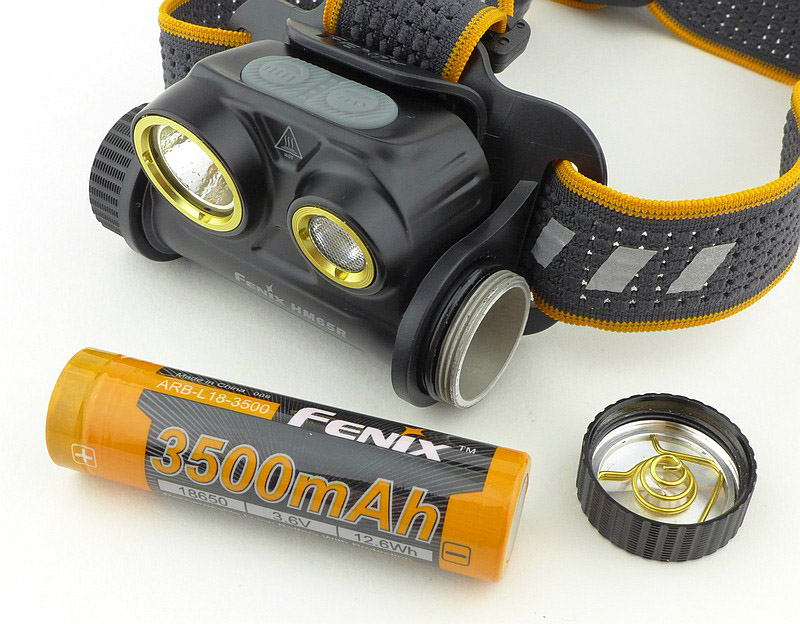
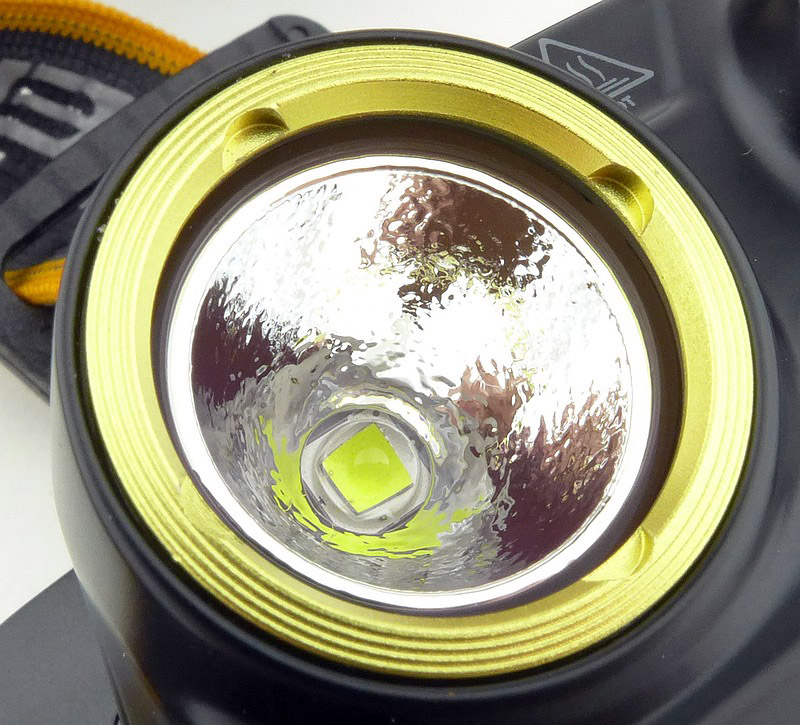
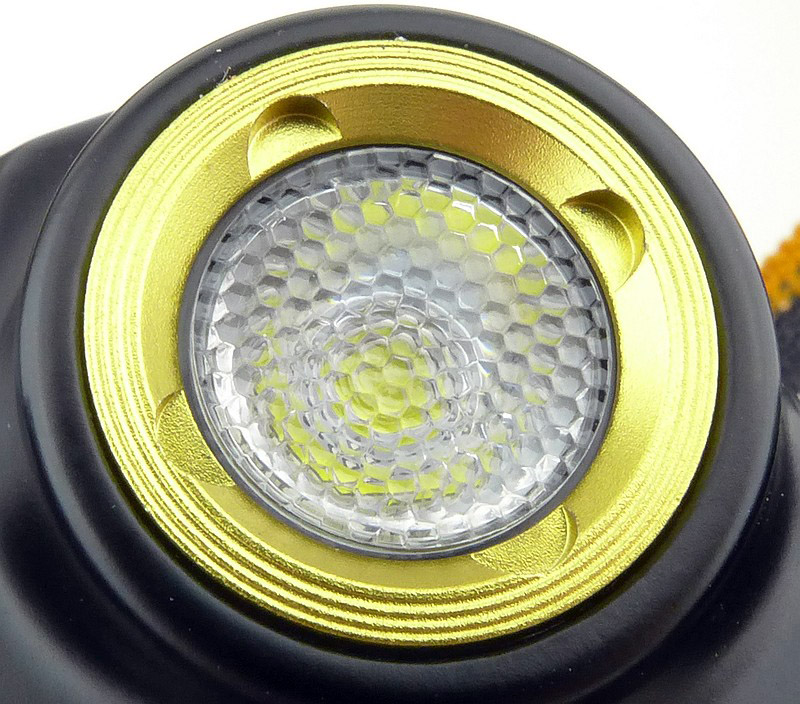
First up in this gallery are the twin lenses – the larger spot emitter with clear lens, and the smaller flood emitter with honeycomb type diffuser lens.
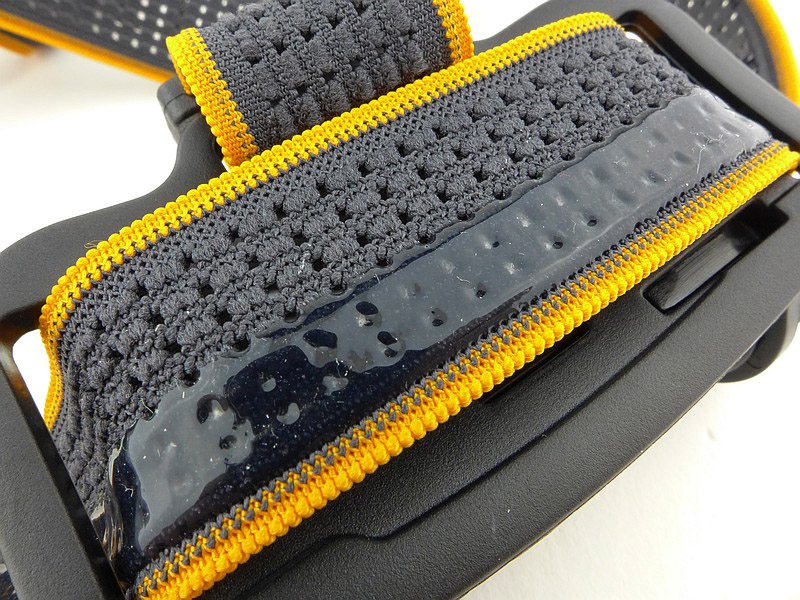
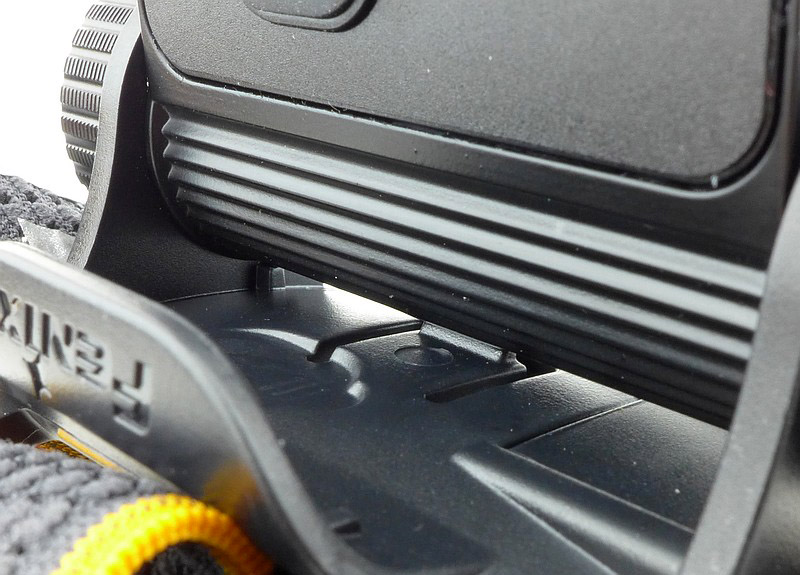
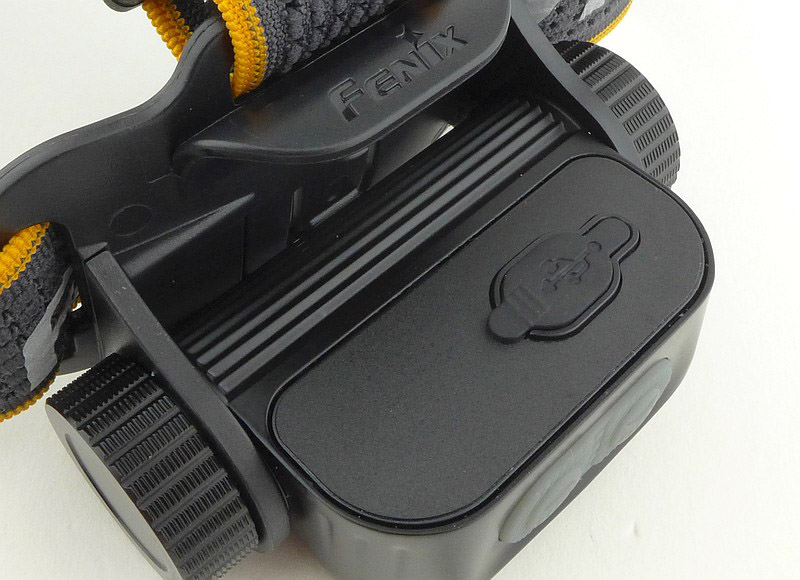
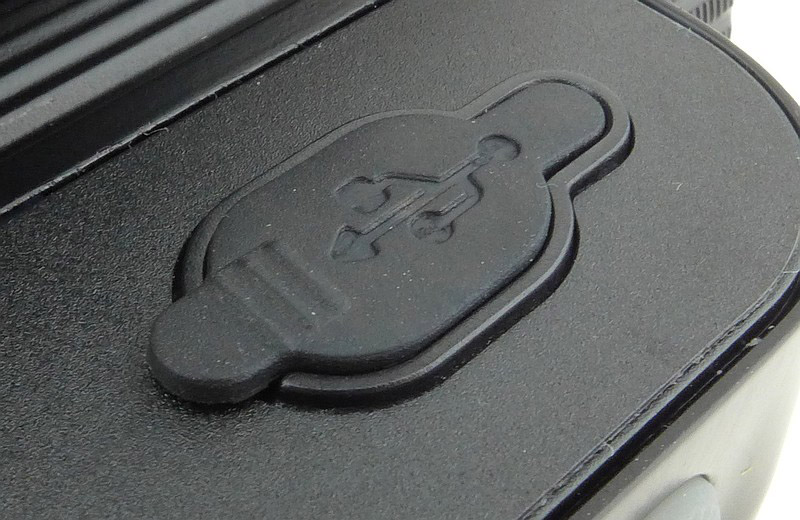
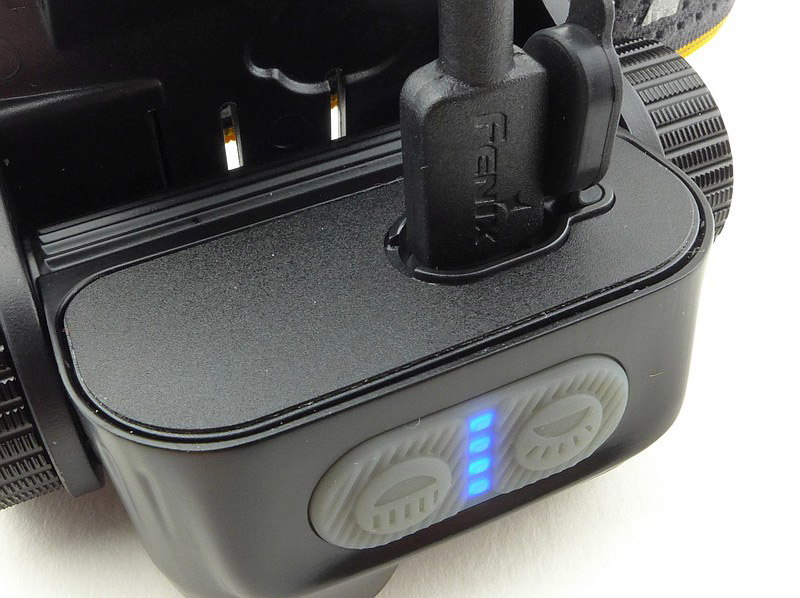
For a more stable fit to your head, the inside of the front part of the headband strap has a grippy strip. Flipping the HM65R forwards gives access to the USB-C charging port and shows the angle adjustment mechanism.


The beam:

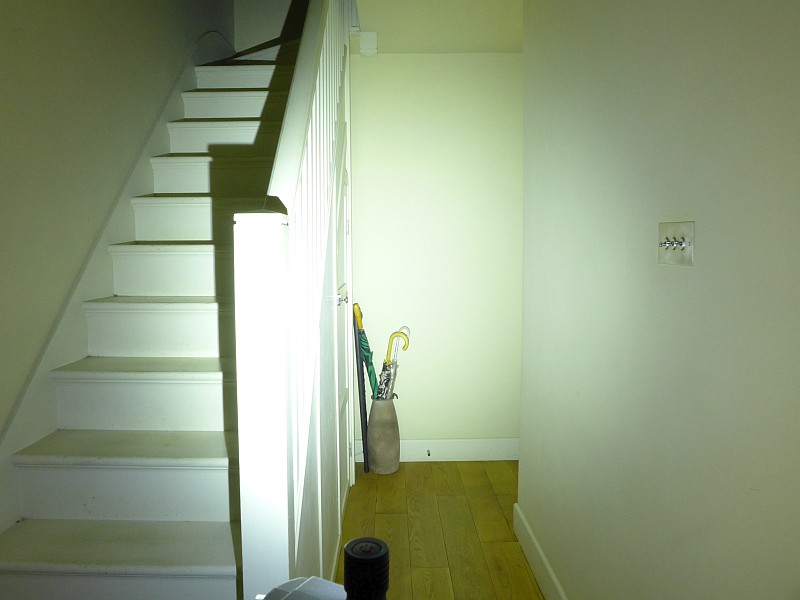
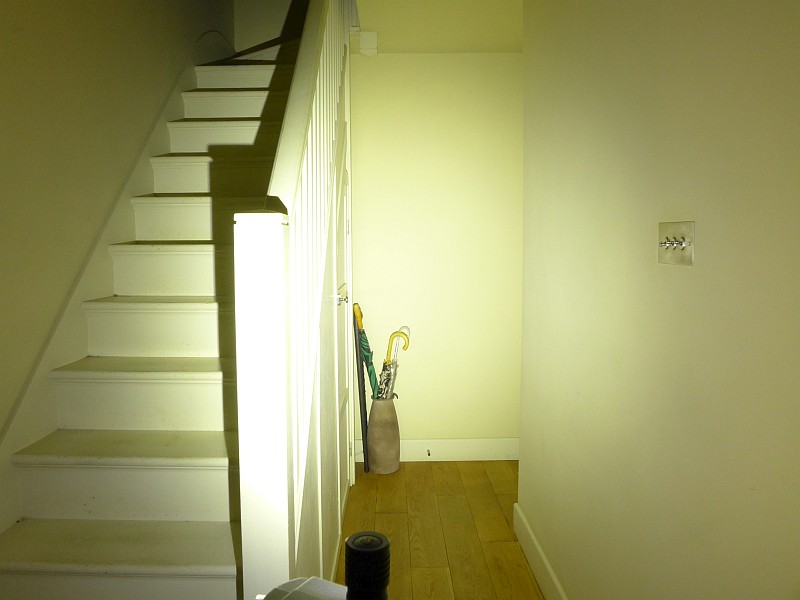
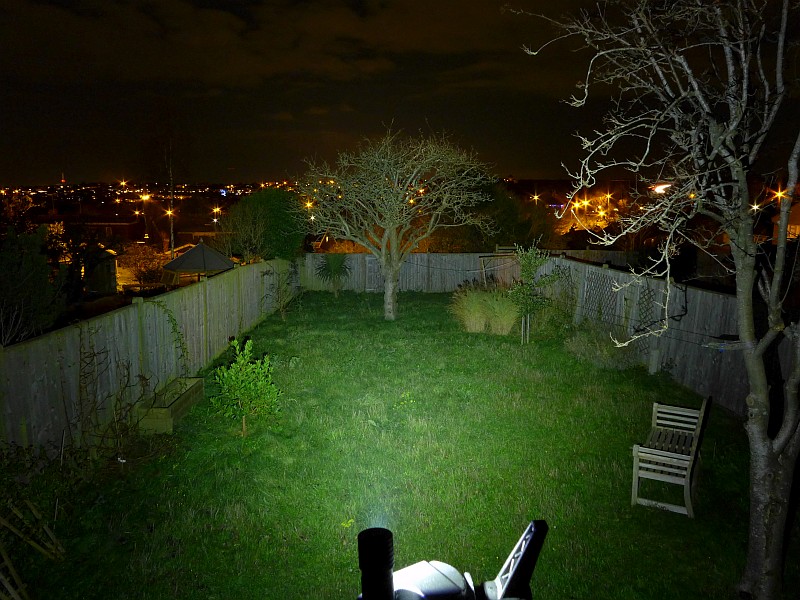
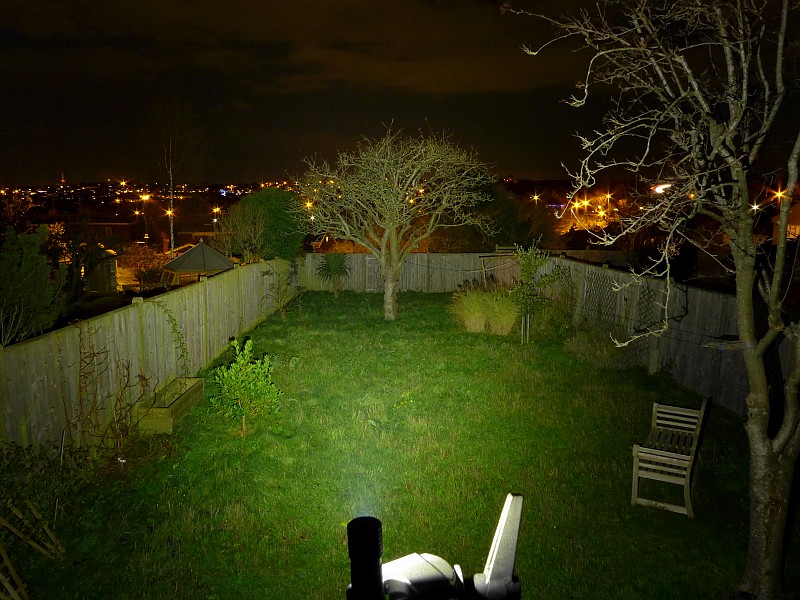
Please be careful not to judge tint based on images you see on a computer screen. Unless properly calibrated, the screen itself will change the perceived tint.

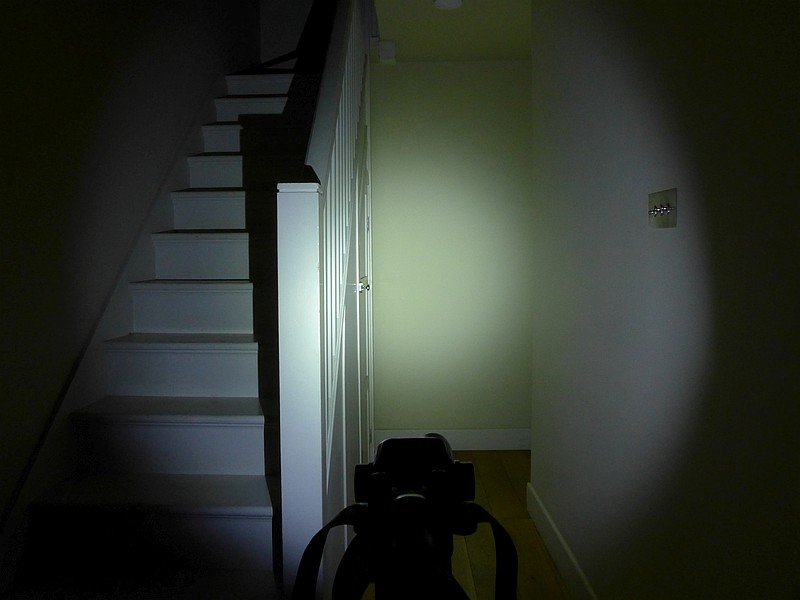
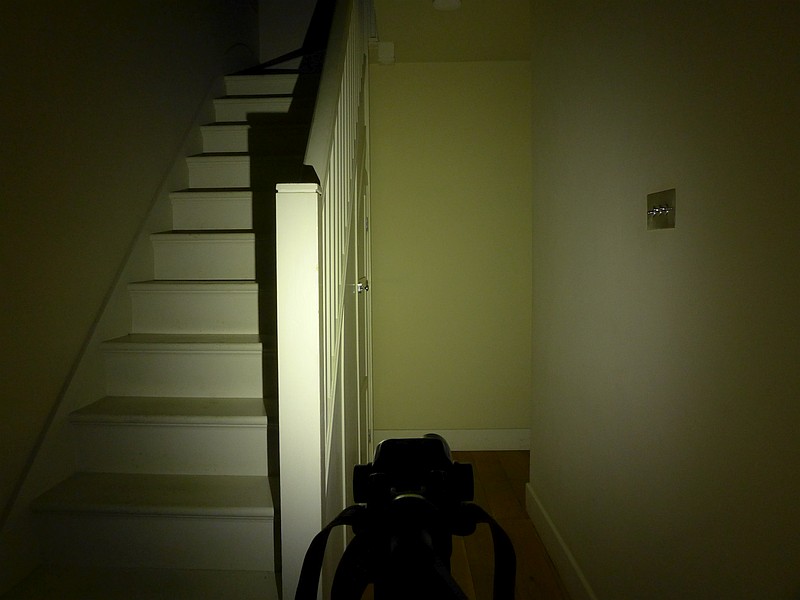
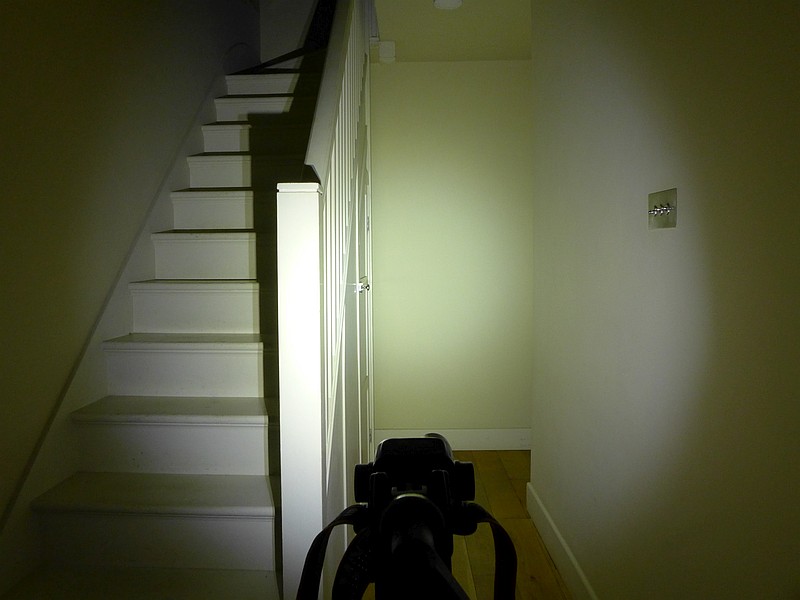
The indoor beamshot is intended to give an idea of the beam shape/quality rather than tint. All beamshots are taken using daylight white balance. The woodwork (stairs and skirting) are painted Farrow & Ball “Off-White”, and the walls are a light sandy colour called ‘String’ again by Farrow & Ball. I don’t actually have a ‘white wall’ in the house to use for this, and my wife won’t have one!

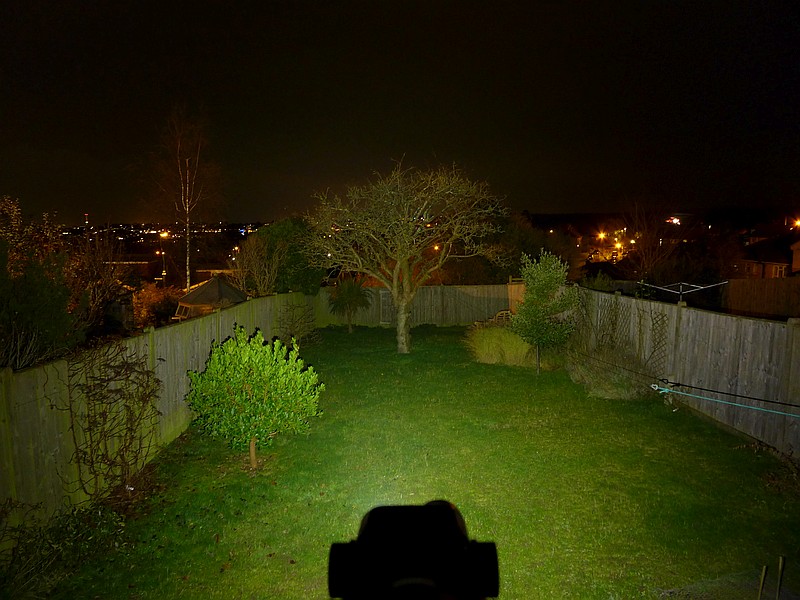
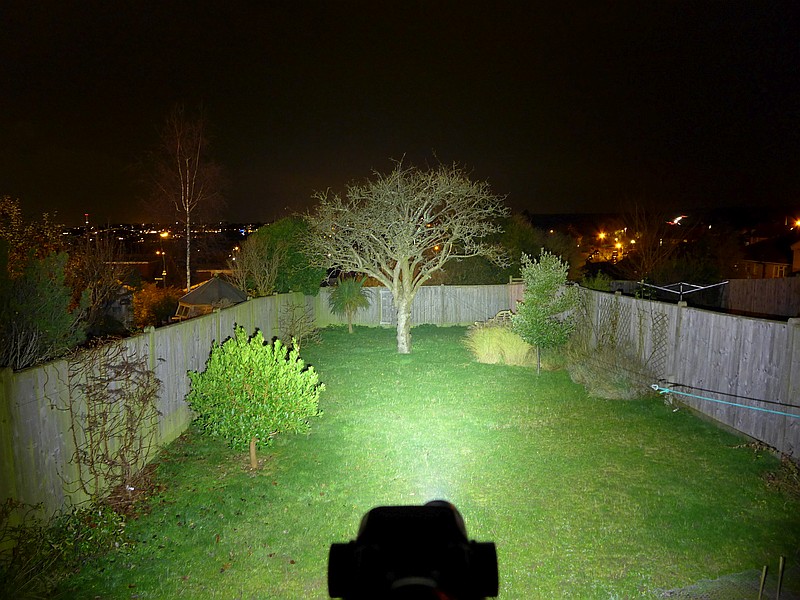
For both indoor and outdoor beamshots, the individual spot and flood beams are shown, then (as both can be turned on at the same time) the combined beam. Each of the photos in the set of three is at the same exposure and white balance.


Batteries and output:

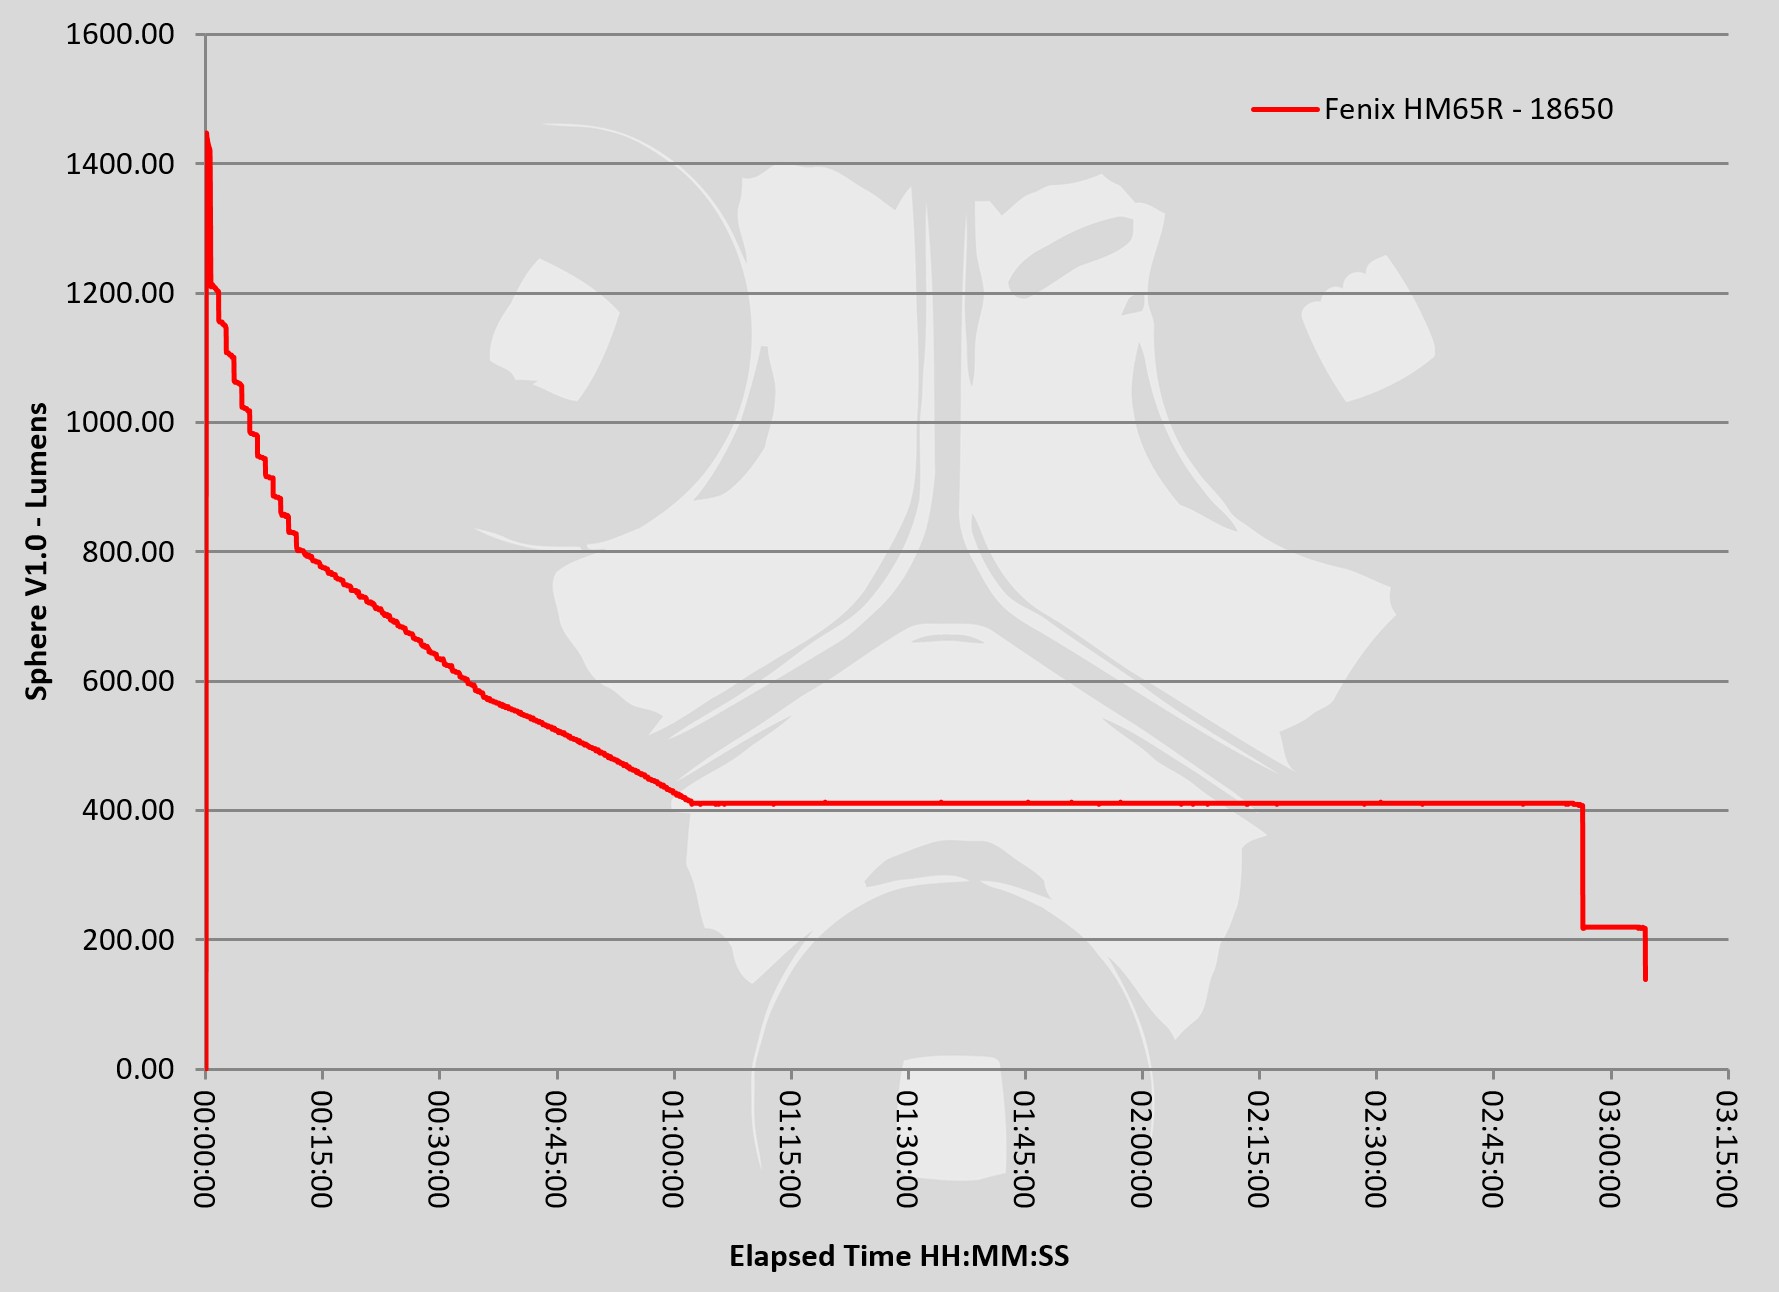
The HM65R runs on a supplied 3500mAh 18650 Fenix li-ion cell.

Please note, all quoted lumen figures are from a DIY integrating sphere, and according to ANSI standards. Although every effort is made to give as accurate a result as possible, they should be taken as an estimate only. The results can be used to compare outputs in this review and others I have published.

Take note of the very good (low) parasitic drain measurement.

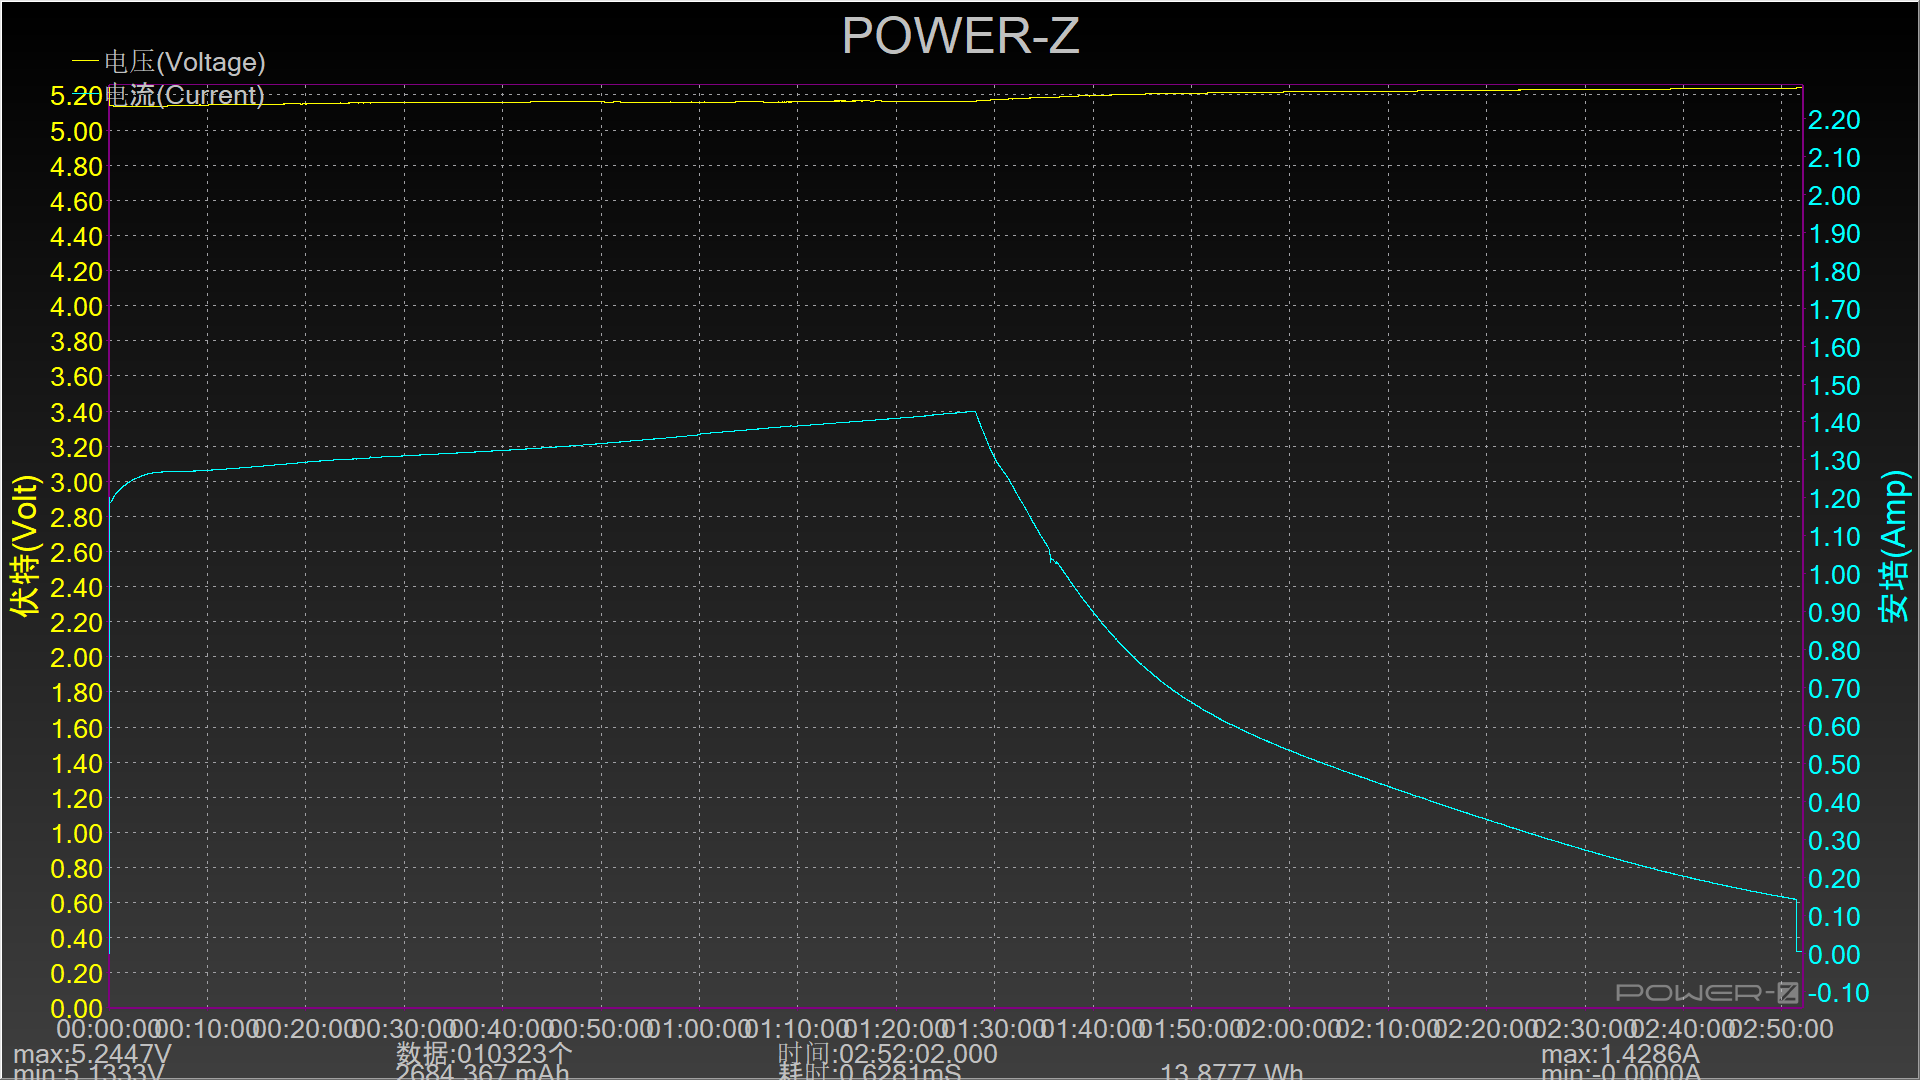
Also shown in this gallery is a charging graph for the built in USB-C charging. Although USB-C is capable of up to 3A, the HM65R seems to top-out at about 1.4A when charging.


The HM65R in use:

Straight off the bat, the HM65R makes itself a success with the stable and comfortable head strap (with top strap), and the choice of spot or flood beams (or both combined). Then, in using the high capacity 18650, you get a great runtime and powerful output (yet without too much weight), and the built in USB-C charging means you actually don’t need anything else – The HM65R is a complete kit.

There is one thing missing for me though, and that is a very low output. Even 9 lm, and even with this being on the flood beam, it is still too bright for dark adapted eyes. Frequently when I’m using headlamps, I will have dark adapted eyes (waking from sleep, or when I don’t want to disturb others); if only Fenix could squeeze in that lower mode, a sub 1 lm mode for both spot and flood output, it would make the HM65R a fantastic all-rounder.

If you want to go full blast, then your wish is the HM65R’s command – perfect visibility.


It is very helpful having the quick charge level gauge, with just a click letting you see if you will want to top up the battery.

Having used many Fenix headlamps over the years, and many competitors headlamps too, the HM65R definitely goes down as a choice for Pro users. I use the term ‘Pro’ to indicate this is a serious tool, capable of hard work, versatile and something worth investing in.

Review Summary
The views expressed in this summary table are from the point of view of the reviewer’s personal use. I am not a member of the armed forces and cannot comment on its use beyond that covered in the review.

Something that might be a ‘pro’ for one user can be a ‘con’ for another, so the comments are categorised based on my requirements. You should consider all points and if they could be beneficial to you.

_______________________________________________
What doesn’t work so well for me
_______________________________________________

Lacking a sub-lumen output level.
USB-C charging limited to 1.4A.

_______________________________________________
Things I like
_______________________________________________

Independently switch-able Spot and Flood beams.
Stable and comfortable head mount with top strap.
High capacity 18650 cell included.
Built in USB-C charging.
Very low (negligible) parasitic drain.
Nearly 1400 lm combined beam output.
Light weight.

Light Review: Olight H1 Nova Headlamp

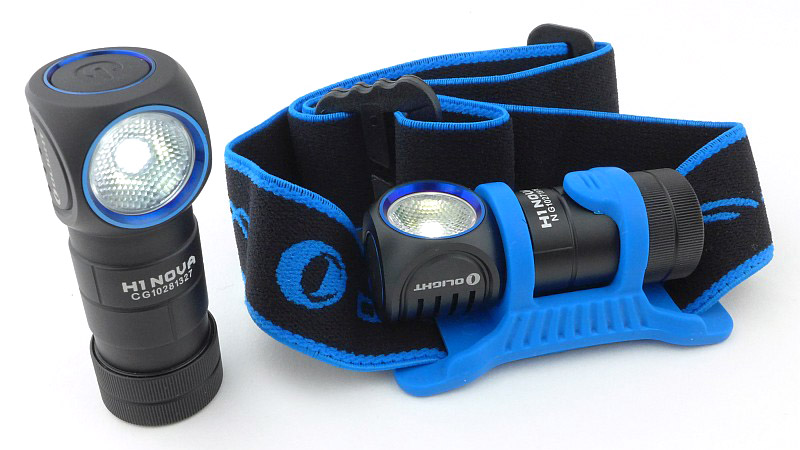
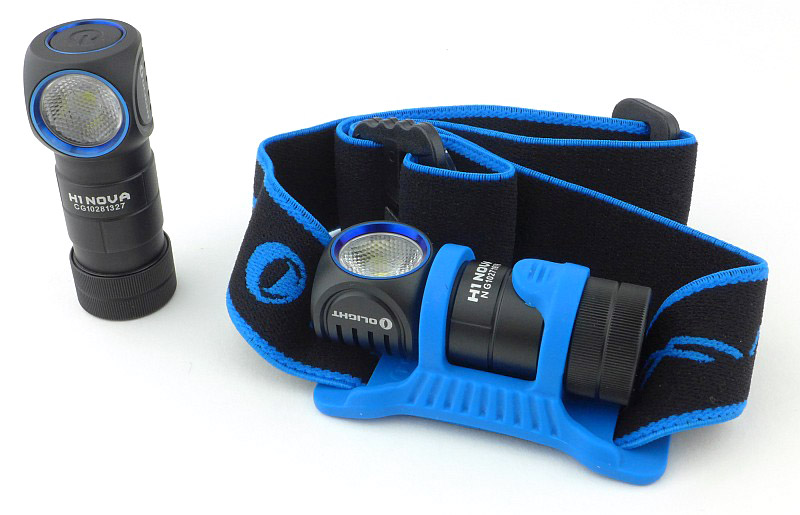
Inspired by their excellent S1 Baton pocket light (previously reviewed), Olight wanted to bring the same concept of an ultra compact body with high performance output to a headlamp. As will become clear throughout this review they have managed to do just that with the H1 Nova which is a headlamp and pocket light all in one.

Taking a more detailed look:

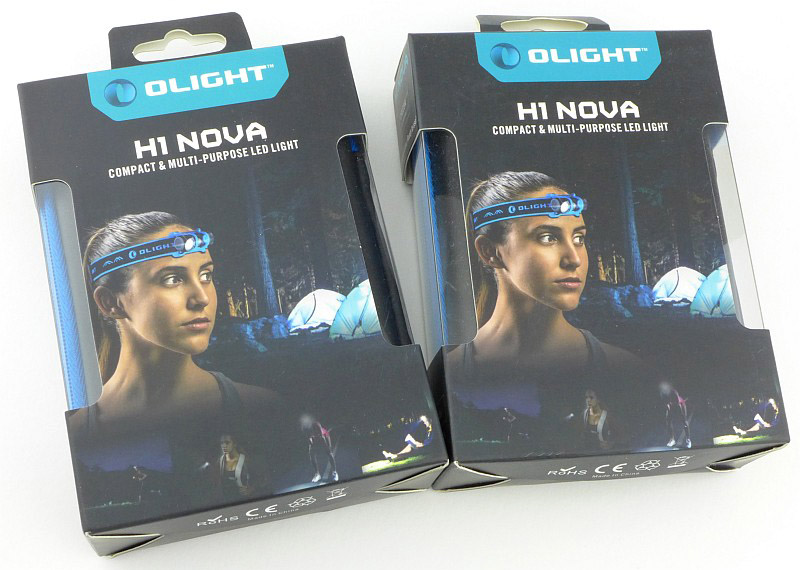
The reason there are two boxes here is that this review is looking at the CW – Cool White, and NW – Neutral White versions of the H1.

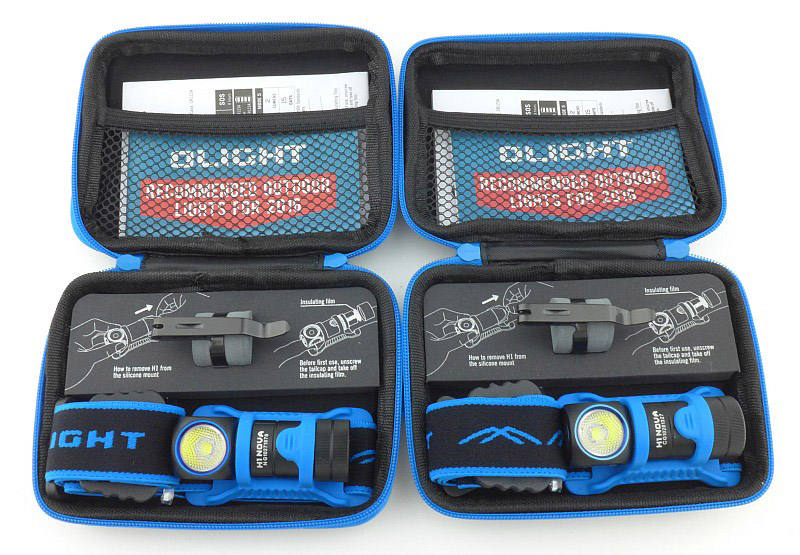
Inside the outer box is a zip-up carry case.

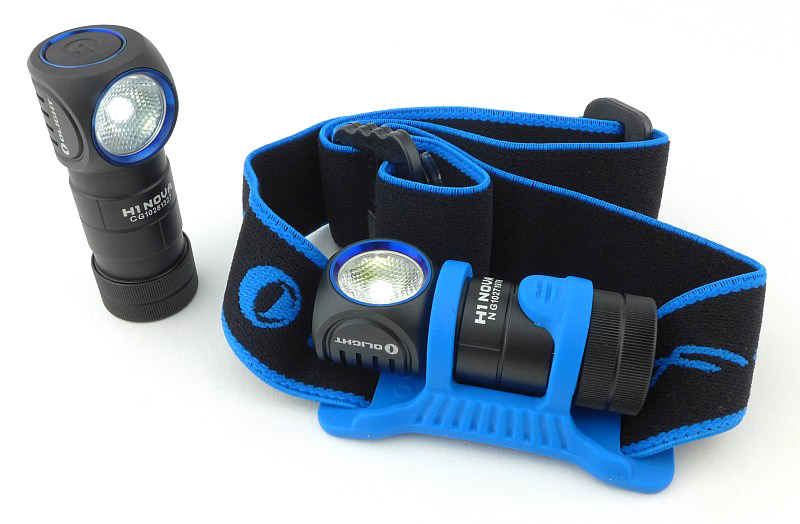
In each of the cases is the H1 in its headband mount, a pocket clip stored on a foam holder, and the instructions held in a mesh pocket.

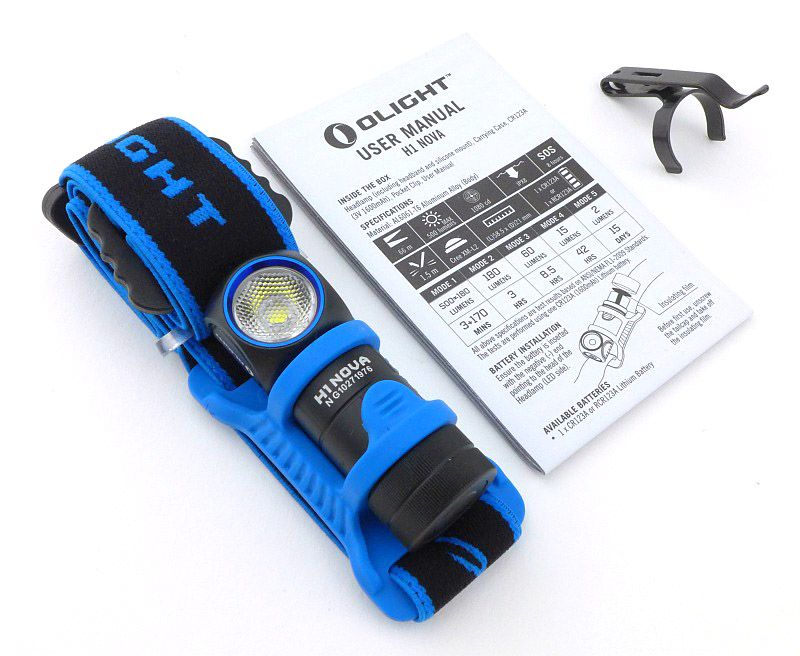
Laying out the contents of the case.

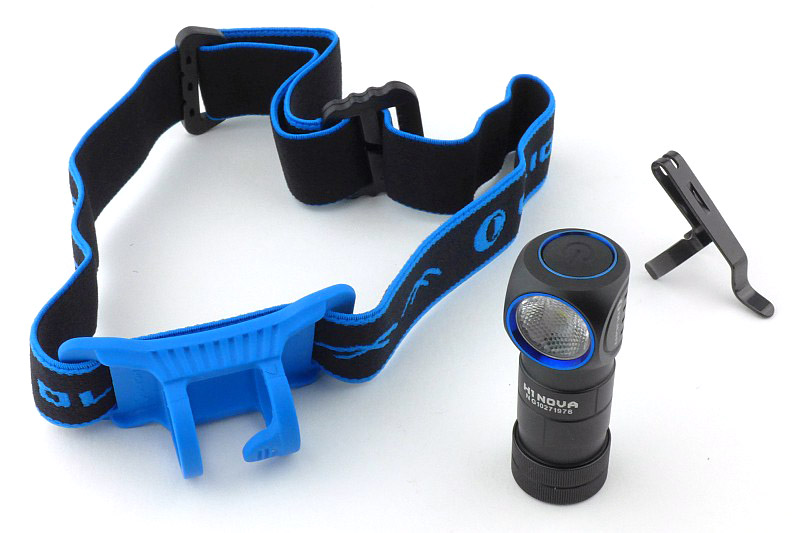
The main parts are the headband with rubber mount, the H1 Nova light, and a steel pocket clip.

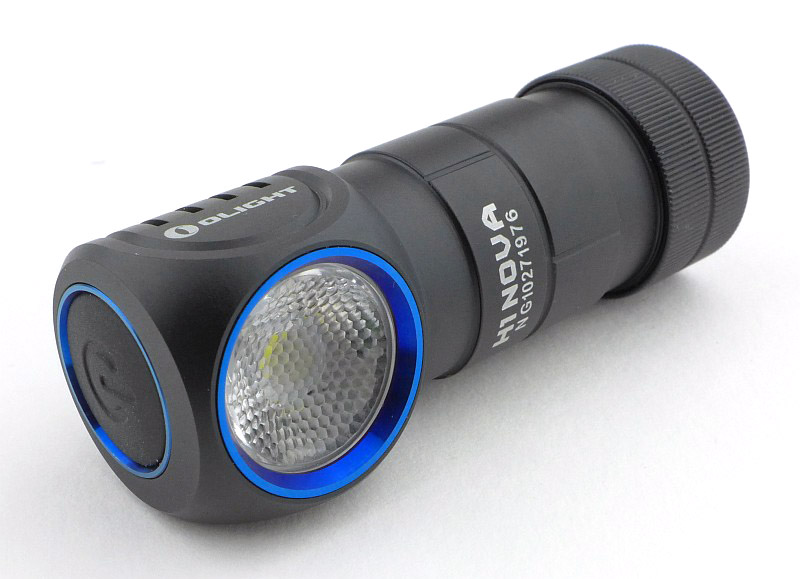
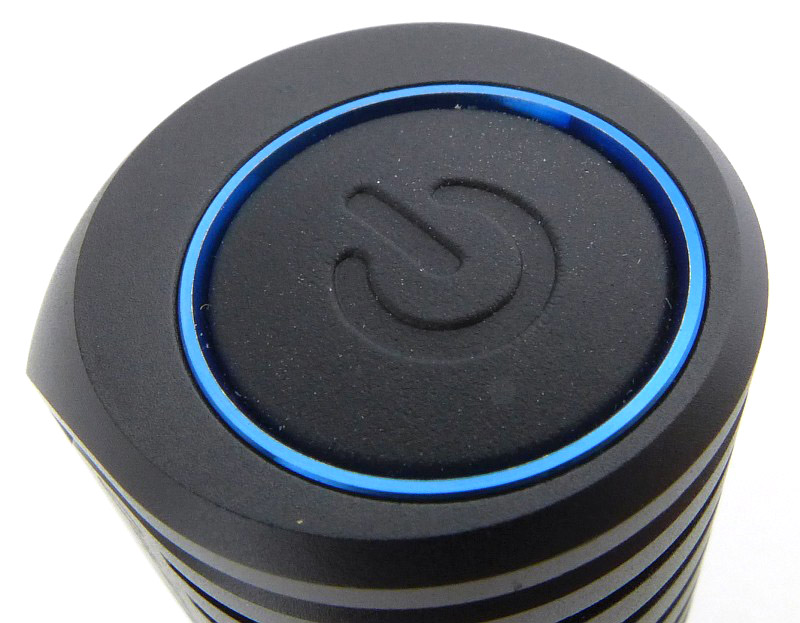
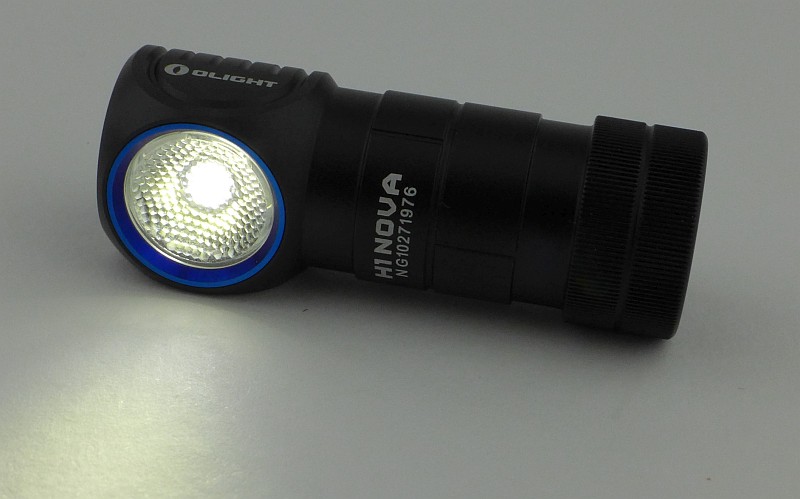
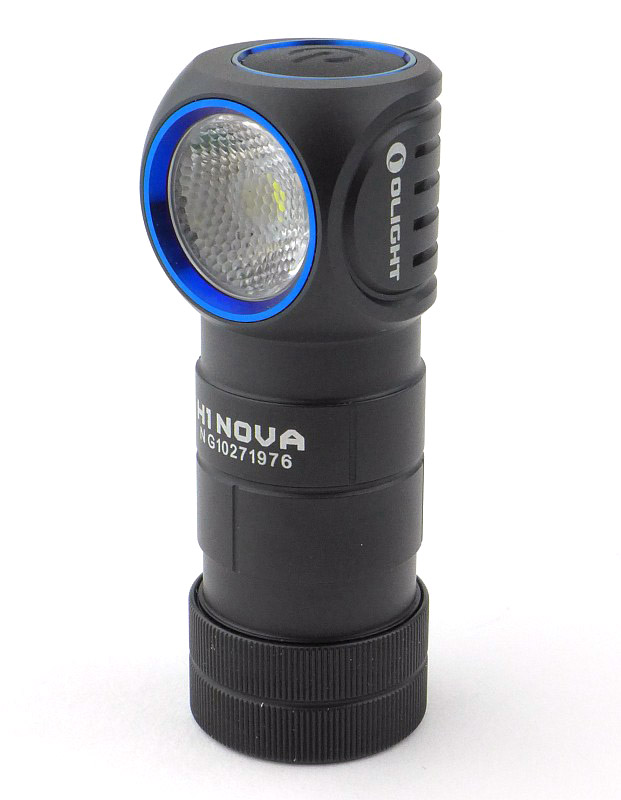
Just like the S1, the H1 has the blue highlights surrounding the lens and switch.

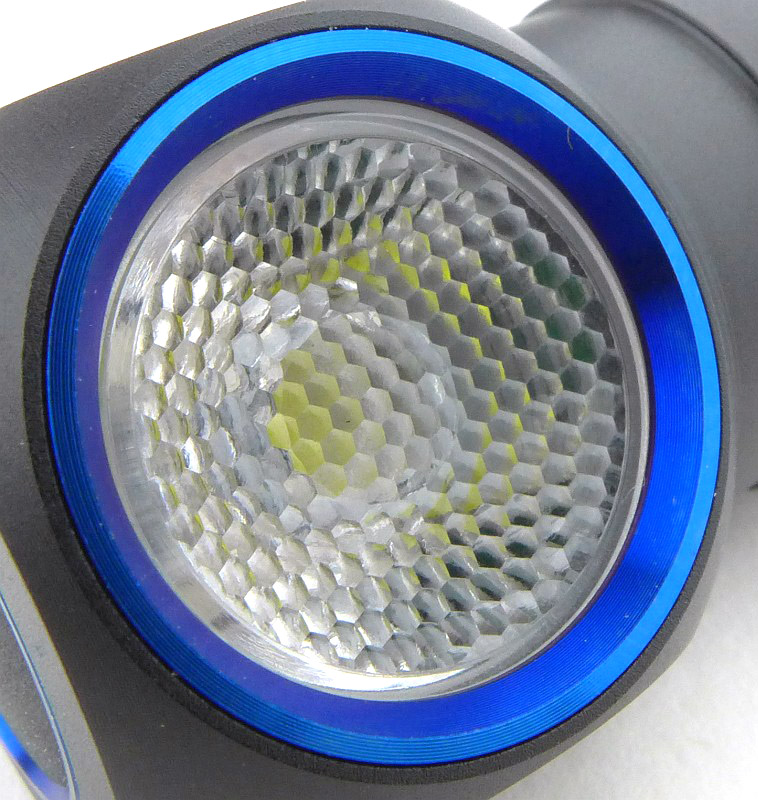
A TIR optic is used, but this also has a hexagonal diffuser pattern to give a flood beam to the XM-L2 LED.

On the top of the H1 is its rubber power switch. This is an electronic click switch.

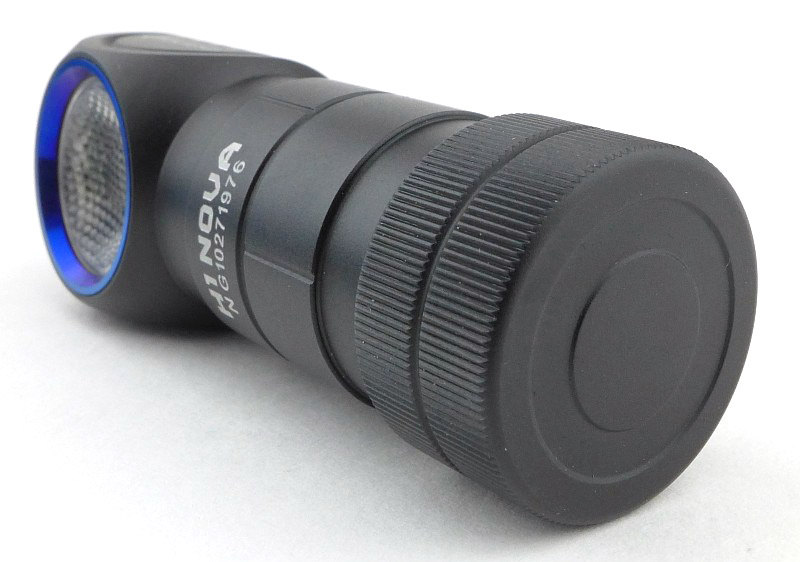
A plain tail-cap has a hidden magnet.

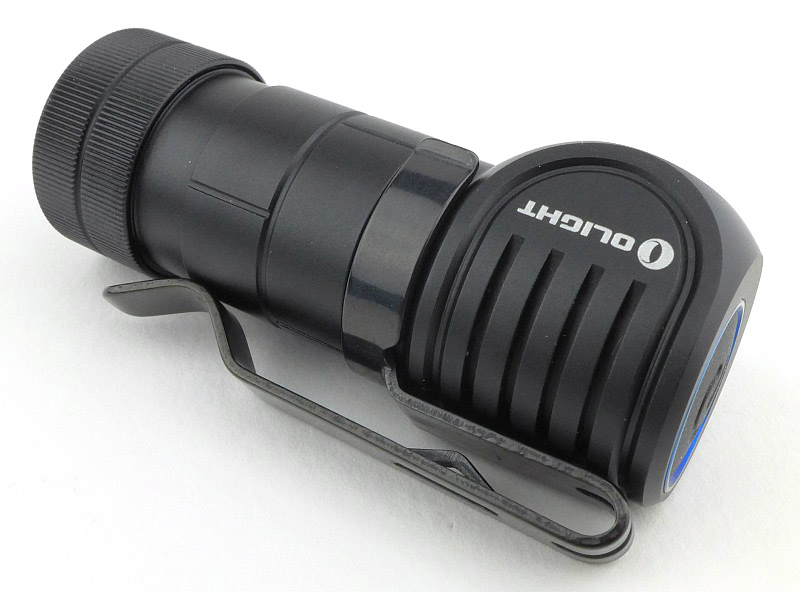
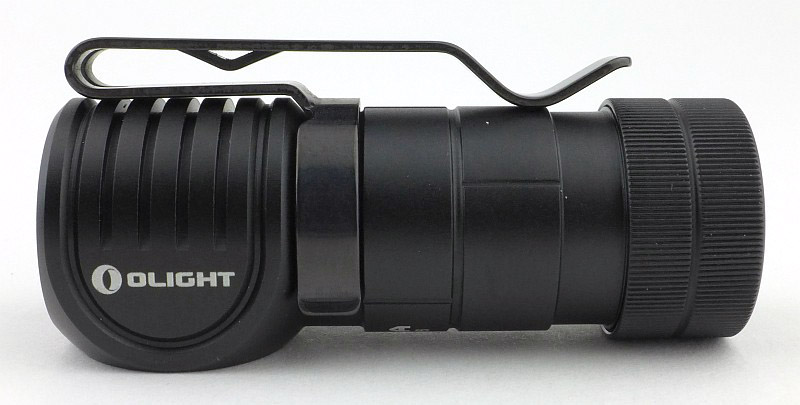
Though designed as a headlamp, the H1 also has a pocket clip that can be fitted either way up into one of the two grooves in the body.

It is a deep carry type of clip with a secondary ‘catch’ to help it hold onto a pocket edge.

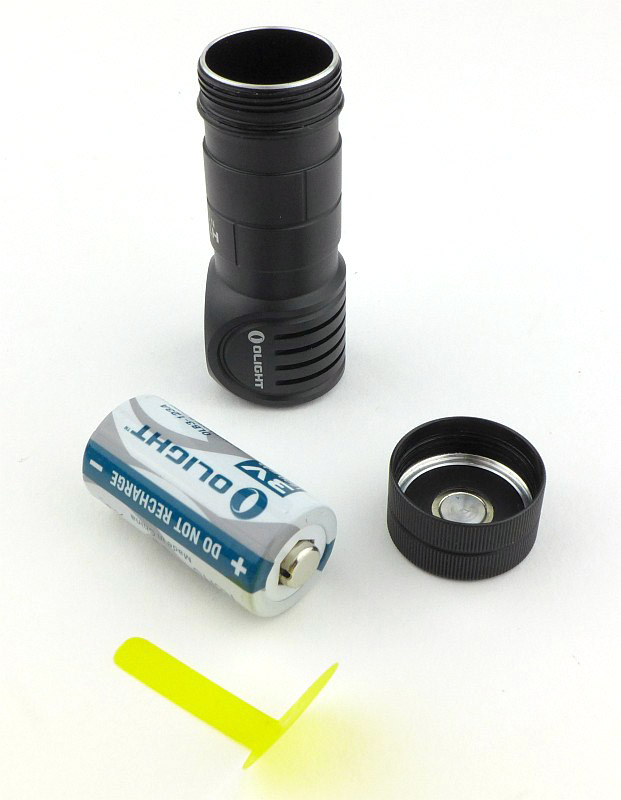
When it arrives, the H1 has a CR123 fitted inside it, but there is also a plastic insulator to stop the H1 from coming on, or having any parasitic drain.

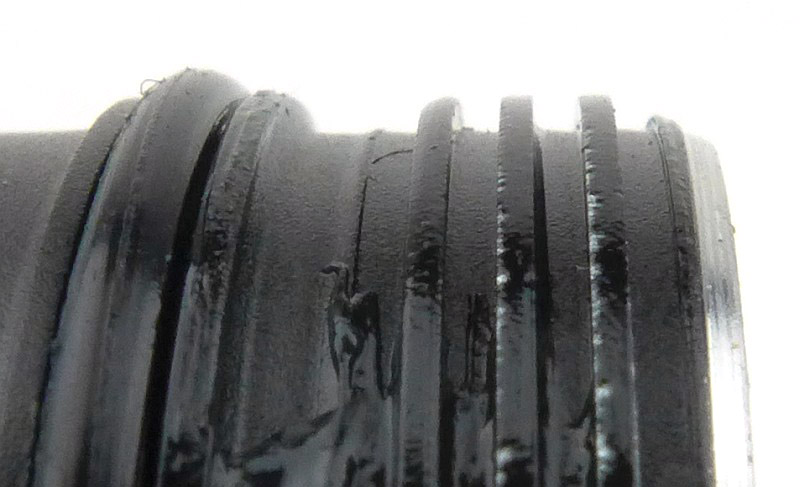
The threads are square cut. In this case there is some chipping to the anodised finish on one side of the thread.

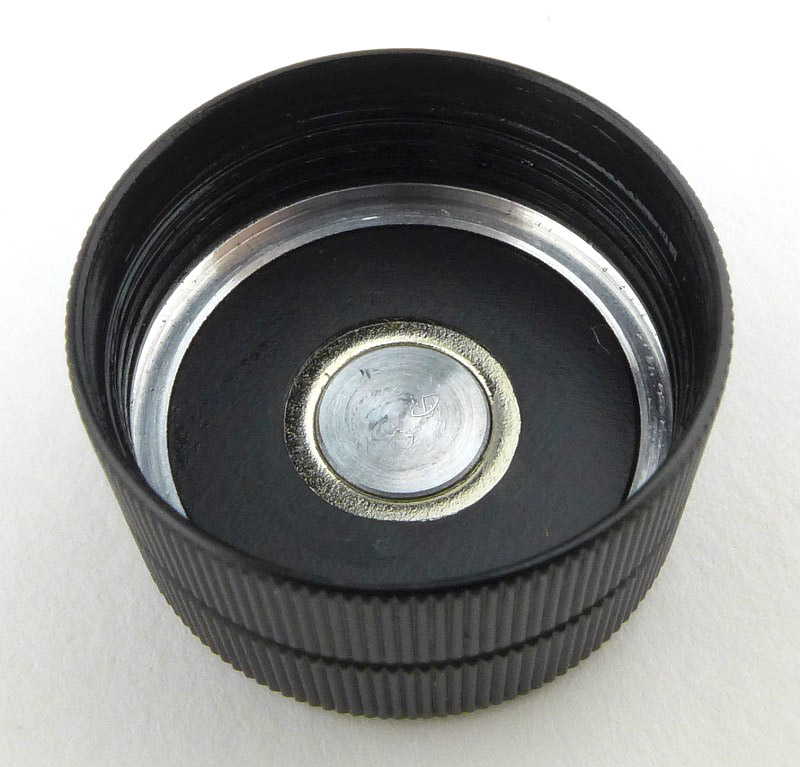
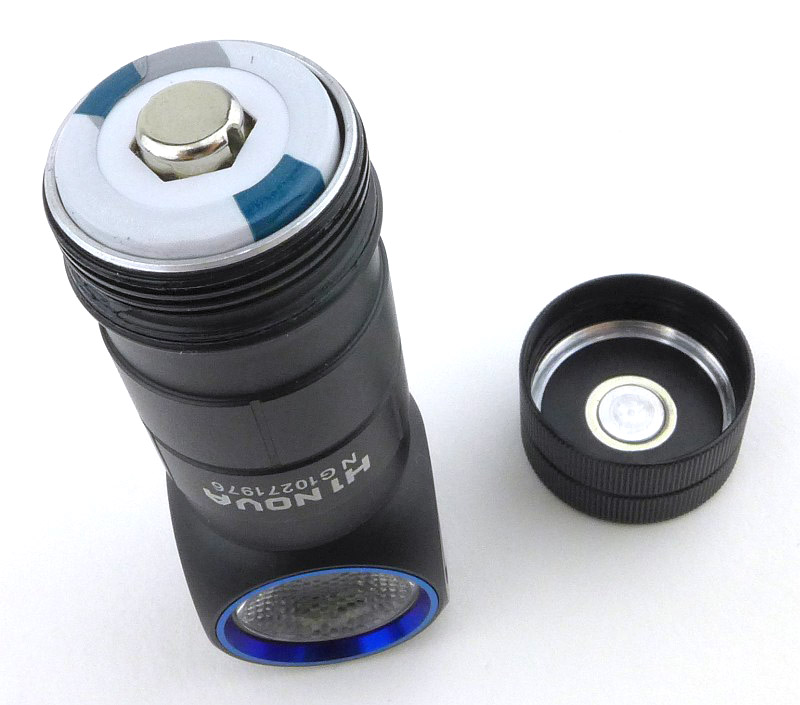
Inside, the tail-cap looks very simple. This is actually the positive contact so doesn’t have a spring. Surrounding the aluminium terminal, there is a ring of the tail-cap magnet visible.

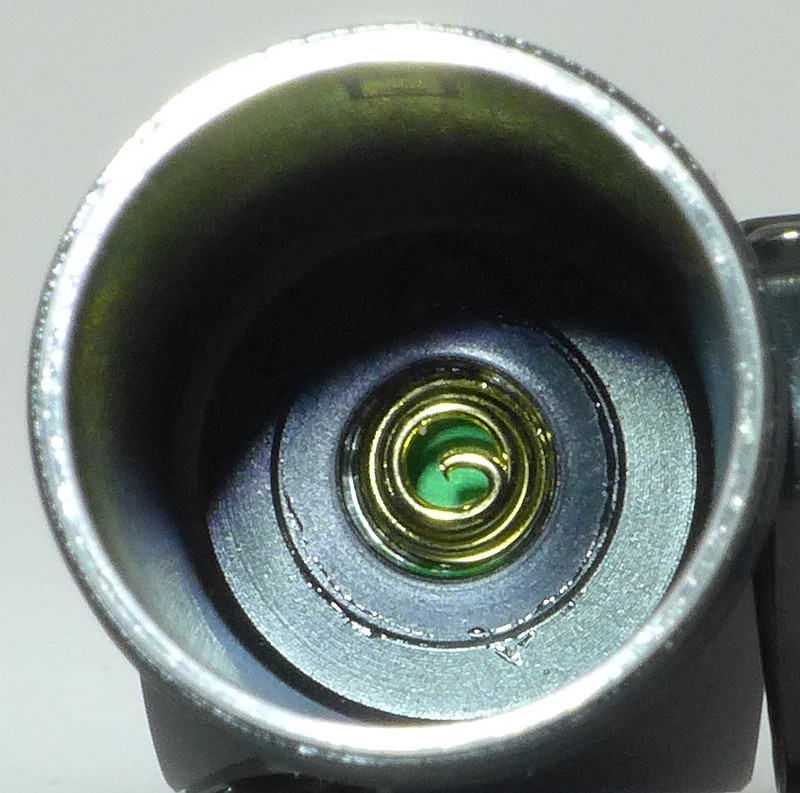
With the less conventional “negative into the tube” contact arrangement, there is a negative terminal spring contact inside the battery tube.

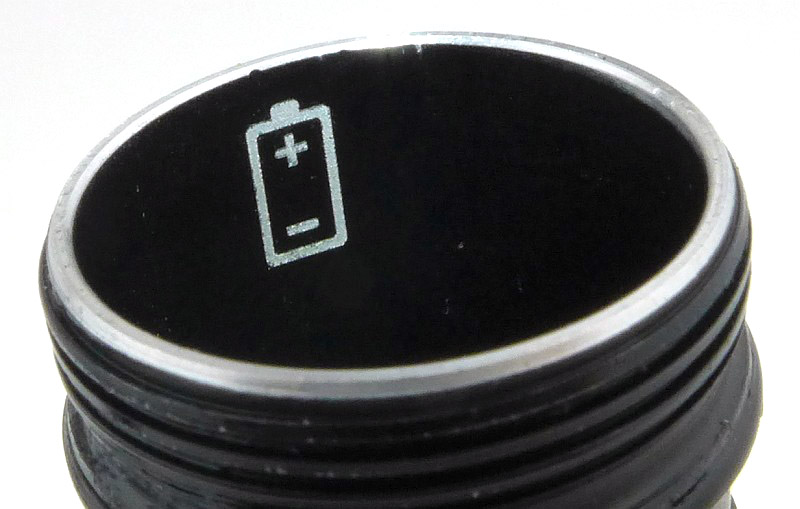
To remind you which way the battery goes in there is a guide marker inside the battery tube.

Refitting the cell after removing the transit insulator, the unconventional cell orientation has the positive terminal of the cell visible.

And we are ready to go.

With the NW and CW versions on test we can compare the beam tint in the next section.

The beam

Please be careful not to judge tint based on images you see on a computer screen. Unless properly calibrated, the screen itself will change the perceived tint.

The indoor beamshot is intended to give an idea of the beam shape/quality rather than tint. All beamshots are taken using daylight white balance. The woodwork (stairs and skirting) are painted Farrow & Ball “Off-White”, and the walls are a light sandy colour called ‘String’ again by Farrow & Ball. I don’t actually have a ‘white wall’ in the house to use for this, and the wife won’t have one!

In this first beamshot we have the CW version. All beamshot photos are taken with daylight white balance set. Of particular note is how wide the beam is, an excellent flood beam which, although it has a hotspot, this hotspot is large and surrounded by a super wide spill.

Now the NW version and the tint is significantly warmer than the CW and gentler on the eye.

Taking them outdoors, and back to the CW.

I didn’t quite get the beam alignment the same for these comparison photos, but the NW version appears to have a better reach.

Modes and User Interface:

There are five constant modes, Moon, Low, Medium, High and Turbo, plus an SOS mode. Access to these is controlled via the single electronic click switch.

To turn the H1 ON to the last used output level, click the switch once. Click again to turn OFF.
Note: Turbo is only memorised for 10 minutes after which is changes to Medium, and SOS is not memorised.

To change the output level, when ON, press and hold the switch to cycle through Moon (or Turbo), Low, Medium, High, Low etc.
Note: ‘normal’ brightness levels are Low, Medium and High.

For Moon mode, from OFF, press and hold the switch for 1s and the H1 will turn ON to Moon mode. This level is memorised.

For Turbo, from ON or OFF, rapidly double tap the switch. Double tap the switch again to change to the memorised output level.

For SOS, from ON or OFF, rapidly triple tap the switch. To exit SOS carry out any action with the side switch.

The H1 also has an electronic lockout to protect against accidental activation. To LOCK the H1, from OFF, press and hold the switch for 2s. After 1s the H1 will enter Moon mode, but continuing to hold the switch and the moon mode goes off again. The H1 is now Locked Out.

While locked, pressing and holding the switch for less than 1s will activate Moon mode momentarily, going off as soon as the switch is released. Holding it for 2s or more will unlock the H1.

To UNLOCK the H1, press and hold the switch for 2s or more. The Moon mode output will blink briefly to indicate it is unlocked and the H1 will be on in Moon mode.

With the anodised tail-cap threads there is also the option of a mechanical lockout by unscrewing the tail-cap 1/4 to 1/2 turn.

Batteries and output:

The H1 Nova runs on CR123 or RCR123.

To measure actual output, I built an integrating sphere. See here for more detail. The sensor registers visible light only (so Infra-Red and Ultra-Violet will not be measured).

Please note, all quoted lumen figures are from a DIY integrating sphere, and according to ANSI standards. Although every effort is made to give as accurate a result as possible, they should be taken as an estimate only. The results can be used to compare outputs in this review and others I have published.

___________________________________________ ________________________________ ________________________________
Olight H1 Nova Version using specified cell. I.S. measured ANSI output Lumens PWM frequency or Strobe frequency (Hz)
___________________________________________ ________________________________ ________________________________
Cool White Turbo – AW RCR123 575 0
Cool White Turbo – CR123 308 0
Cool White High – AW RCR123 193 0
Cool White Medium – AW RCR123 70 0
Cool White Low – AW RCR123 14 0
Cool White Moon – AW RCR123 2 0
Neutral White Turbo – AW RCR123 560 0
Neutral White High – AW RCR123 190 0
Neutral White Medium – AW RCR123 70 0
Neutral White Low – AW RCR123 14 0
Neutral White Moon – AW RCR123 2 0

There is parasitic drain but it is low. When using CR123, the drain was 19.6uA (8.15 years to drain the cell) and when using RCR123, the drain was 23.6uA (3.63 years to drain the cell).

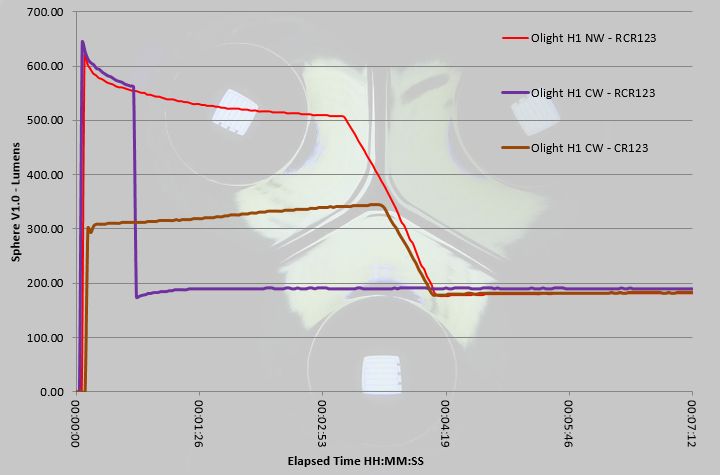
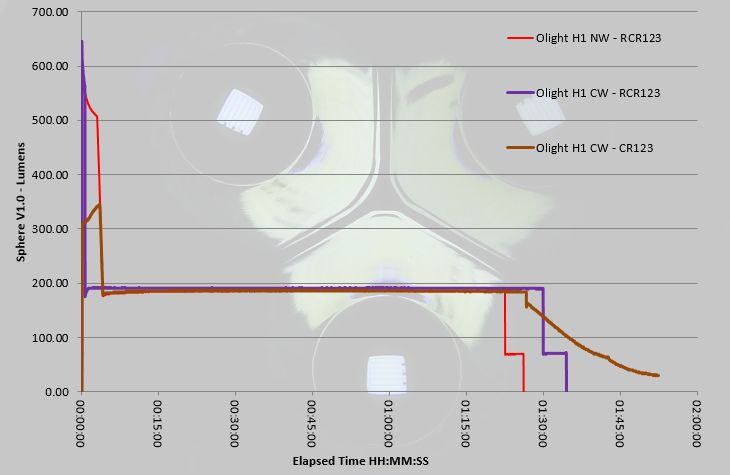
Initially looking at just the first part of the three runtime traces shown in the graph, and the first observation is that the H1 does not achieve full output on CR123 instead requiring a RCR123 for the full 500+ lm. Also note that for the maximum Turbo output the H1 is quite sensitive to the cell condition with the CW run only managing about 45s on Turbo before dropping to High, but the NW taking this to the full 3 minutes of Turbo before ramping down to High. There is more to discuss on this in the full length runtime graph.

Picking up from the previous comment, where the CW only ran at Turbo for 45s (possibly indicating a cell that was not fully charged) it actually managed a slightly longer runtime than the NW (which had the full 3 minutes of Turbo), so in reality the cell had the same level of charge, but the CW terminated Turbo earlier.
Also note that the supplied CR123 has managed approximately the same overall output (though it does tail off and gives a longer total runtime). What is important to note is that when using the RCR123, it’s protection kicks in and the output of the H1 does cut out completely around 5 minutes after dropping down to Medium. If used on Medium for long periods, you won’t have any warning a RCR123 is running low, it will just cut out.

Troubleshooting

This section is included to mention any minor niggles I come across during testing, in case the information helps anyone else.

No issues were encountered during testing.

As per the description of this section, this information is provided in case anyone else finds a similar ‘issue’ that might be fixed in the same way.

The H1 Nova in use

Honestly, before trying out the H1 Nova, I was never a fan of 1xCR123 headlamps. The reasons for this were that many would only work with primary cells (I definitely want the option of rechargeable), and the interface/beam/runtime never seemed a good fit to my needs.

Personally, the critical aspects in a headlamp are no PWM, a flood beam, direct access to moon mode, plus a comfortable headband. Add to this easy conversion to a pocket lamp, and the ability to use rechargeable cells, and you have a winning formula.

Though I prefer rechargeable cells, you often have the issue that output can shut off completely if the protection circuit kicks in. Unfortunately the H1 does have this slight issue, and it can be very disorienting to suddenly lose all light. As the H1 will drop from High to Medium when a RCR123 is getting low, if you are already on Medium, then you don’t get that warning and it will just go off. Using a primary cell completely removes this problem, so depending on your type of use you can pick the cell to suit.

With the switch being very low profile, which helps avoid accidental activation, I have found it difficult to operate reliably. When you don’t hit the middle of the button, but are more to the side, the click is not clean, or might not click at all. As soon as you find the middle of the button, it has a very precise action and works perfectly. Mounted on your head, finding that sweet spot on the button is not always easy, and if wearing gloves, forget it, so the compact design can work against the H1 in this way.

The beamshots really do speak for themselves, and the H1 has a beam that is so easy to get on with. A headlamp is predominately a task light, and when you are carrying out a task you don’t want to have to ‘point’ the beam with your head. When using the H1 as a headlamp you can just focus on the task in hand, and the fact the H1 pretty much disappears from your awareness is the signal it is working really well.

It is great that the H1 is capable of the Turbo output, however, I find that this is rarely used, it is just too bright for anything within arms reach. Moon mode is an essential, and the Low and Medium levels are just right for the vast majority of my needs. If out walking with it, I will use High sometimes when I want that bit more range, but even then Medium is my go-to level.

There is one feature I hadn’t really noticed that much, the gradual brightness changes: When turned on/off on medium, high, and turbo modes, it will turn on or off gradually. This mimics the characteristics of incan bulbs that have to heat up and cool down, making it much kinder to the eyes; Thank you Olight. The reason I hadn’t noticed this much was due to mainly using Low and Medium where the effect is less noticeable. It is more significant with the High and Turbo modes, and does make a difference.

I wouldn’t normally bother to mention the magnetic tail-cap except in passing, but I would like to make a point with the H1, to say that the strength of the magnet is one of the best I’ve come across. Often a magnetic tail-cap can be too aggressive and end up sticking to everything, yet with the H1 it is sufficient to hold the light where you put it, without ‘grabbing’ everything incessantly.

Considering this is based on the excellent S1 Baton, my one slight disappointment is that the parasitic drain is much higher. OK, it is only 20uA, but the S1 is 1uA. Parasitic drain is pure waste, especially with primary cells, so I’d have hoped to see this at the same level as the S1 instead of 20x more.

This does lead me to prefer using the mechanical lockout as this does kill the drain completely, but also the electronic lockout is not ideal to prevent accidental activation as this is too easy to unlock, and if squashed in a bag or pocket, it is very likely the button will be pressed for 2s or more.

Converting the H1 between headlamp and pocket light is very easy, and getting the light out of the rubber mount is no struggle at all. Regular fitting and removal of the pocket clip will mar the anodised finish, but there is not much that could be done about that, so you decide if you want to convert it to and from. I find it most useful as a headlamp, and a bit on the small and lose-able size when taken out of the mount.

So, overall I’ve been won round by this CR123 headlamp, which has been helped by how easy it is to carry (living in my coat pocket), by its very usable interface, the excellent beam, and comfort. There have been far fewer battery changes than I expected, so its practicality has been proven.

Review Summary

_______________________________________________ _______________________________________________
Things I like What doesn’t work so well for me
_______________________________________________ _______________________________________________
Compact and easy to carry. Though low, the parasitic drain is much higher than the S1 Baton.
Excellent flood beam. Electronic lockout too easy to unlock.
Runs on CR123 and RCR123. When used on RCR123 the cell protection is ultimately triggered, cutting the output completely.
Direct access to Moon mode (and Turbo). Sometimes difficult to press the switch in the right spot.
Very functional UI.
Useful level selection.
Soft ON/OFF is easy on the eyes.


Discussing the Review:

The ideal place to discuss this reviews is on a forum. If you started reading the shorter forum version of the review, but followed the link this full exclusive review, please return to that forum to discuss the review there.
If you read the review entirely on Tactical Reviews, please consider one of the following to join in any discussion.

CandlePowerForums – Flashlight Reviews Section (Largest and Friendliest Flashlight Community Forum)

EdgeMatters – Sponsored Reviews (UK based Forum for Knife Makers and Collectors)

Light Review: NITECORE Headlamps – T-360, HA20 and HC30

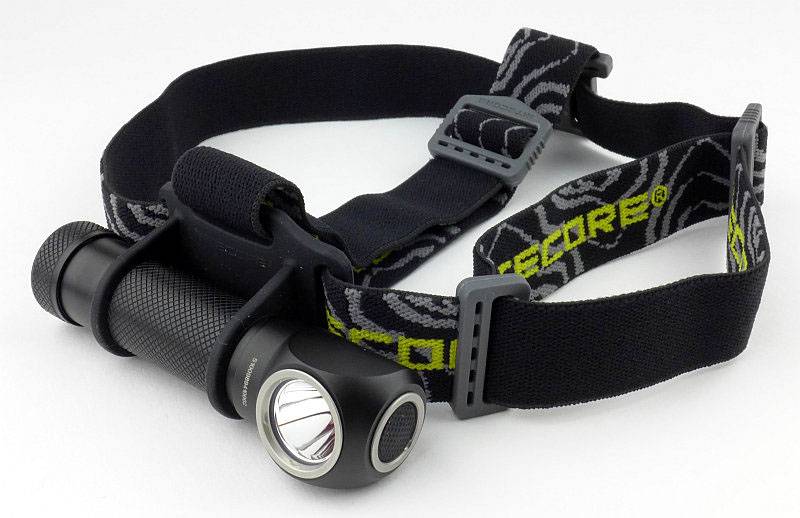
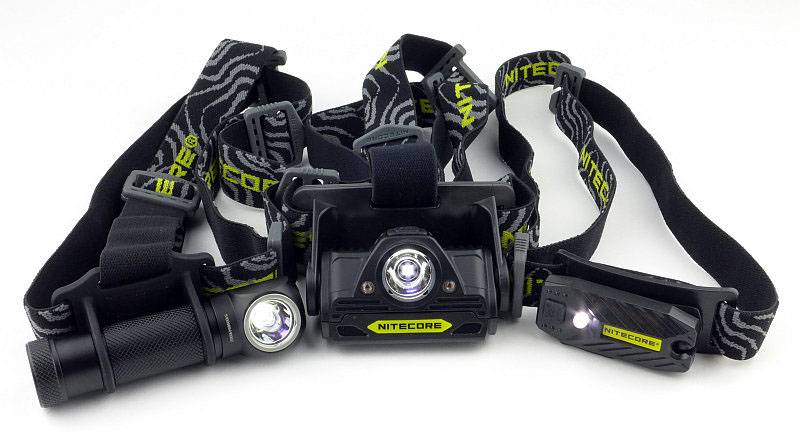
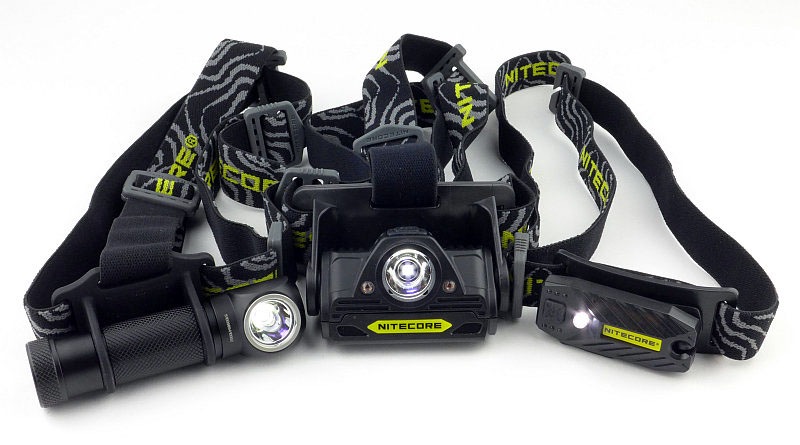
With the launch of three new headlamps from NITECORE, the T-360, HA20 and HC30, I’ve had the opportunity to compare them. Each one is very different and fits a different requirement. Have a look and see which one would be right for you.
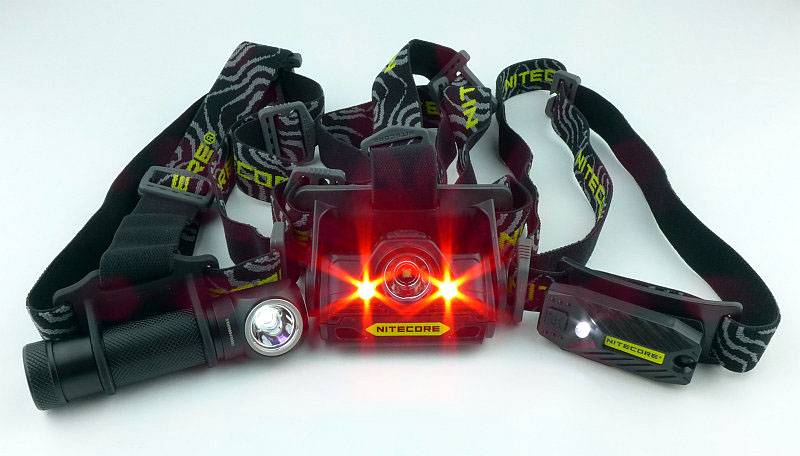
 photo 02 NITECORE headlamps group red P1160494.jpg

Taking a more detailed look at the T-360:

Before diving into the detail here are the three boxed lights together.
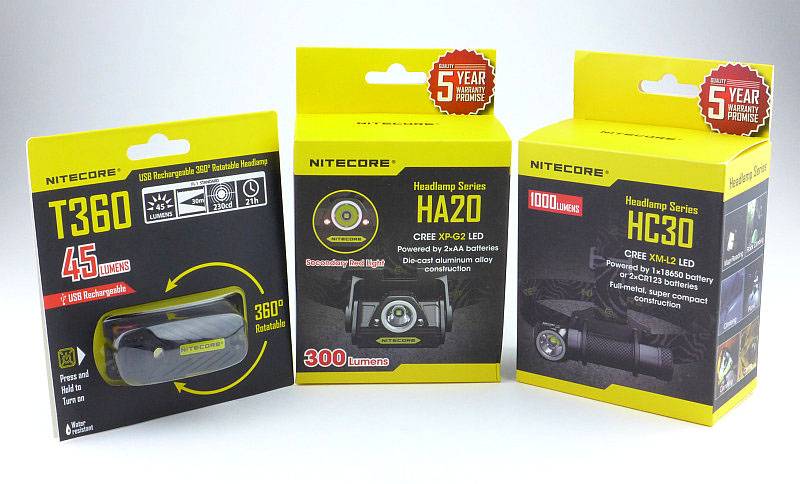
 photo 01 NITECORE headlamps boxed P1160364.jpg

For the T-360, as it has a built-in USB rechargeable cell, there is simply the T-360, a headband and the instructions in the box.
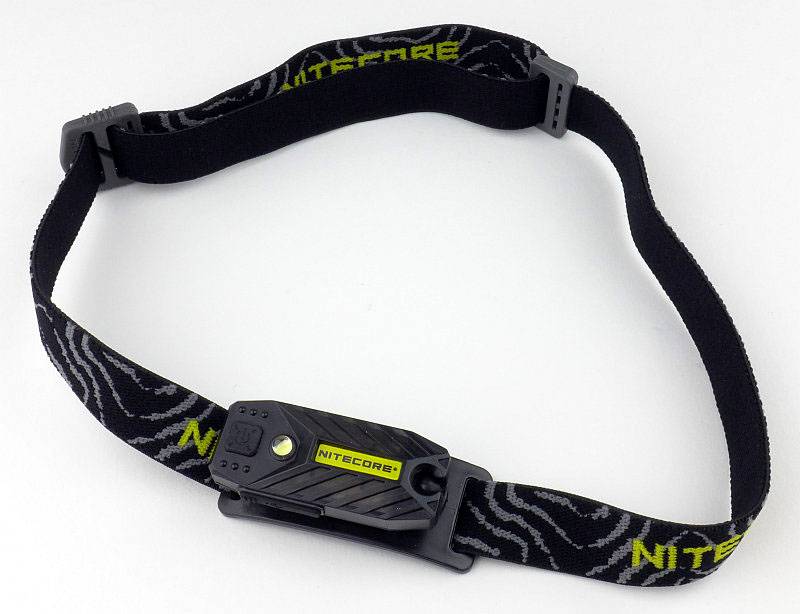
 photo 11 T-360 unboxed P1150736.jpg

Giving it its unique versatility, the T-360 has a ball joint around which the entire light head swivels and rotates.
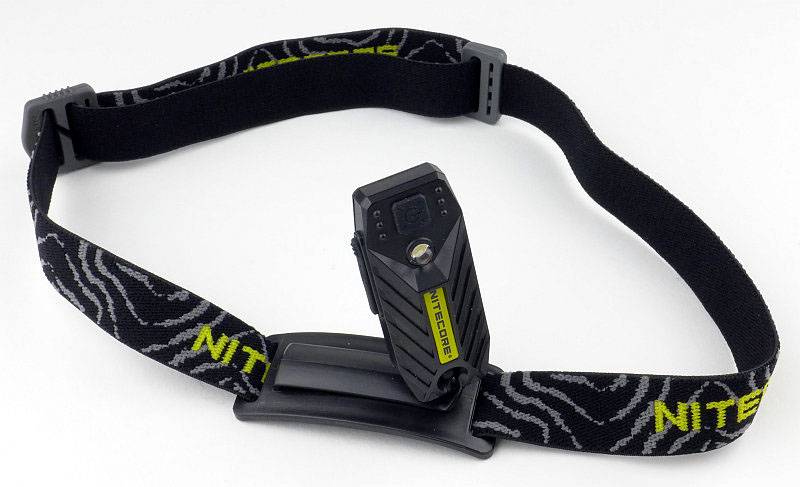
 photo 12 T-360 angle head P1150739.jpg

Just slipping in a gratuitous shot of several T-360s lined up.
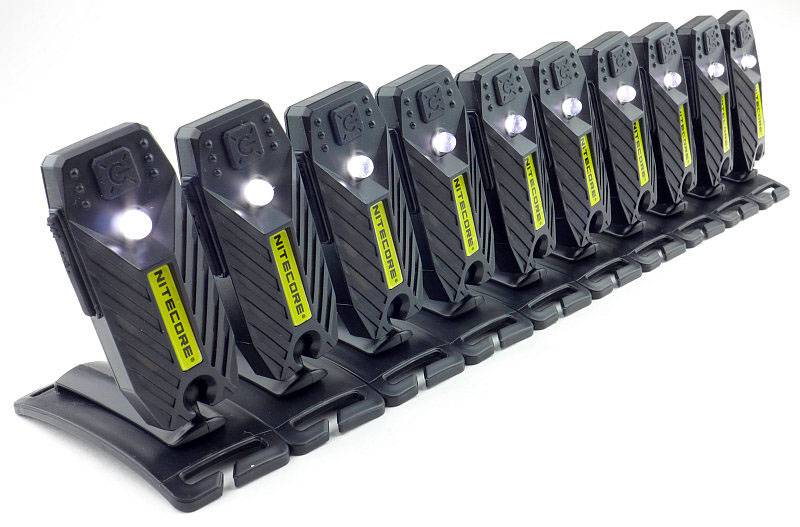
 photo 13 T-360 lineup P1150757.jpg

Being so small and light, you can keep a spare one on the same headband!
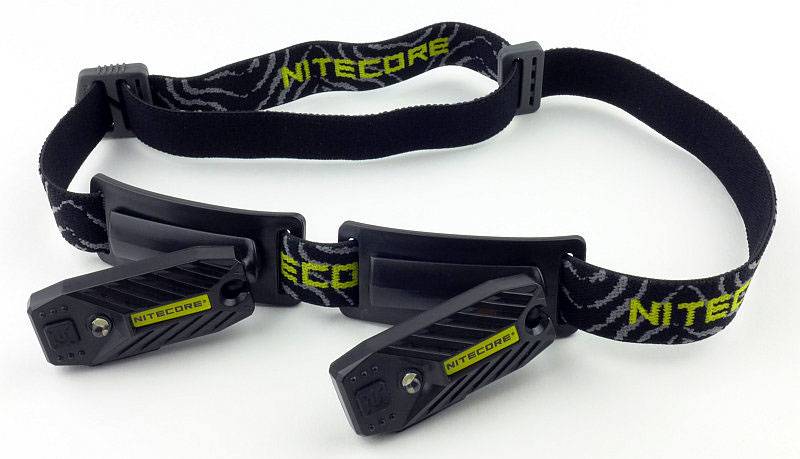
 photo 14 T-360 backup P1150795.jpg

Shown here in its head-mounted configuration with the spare T-360 as well.
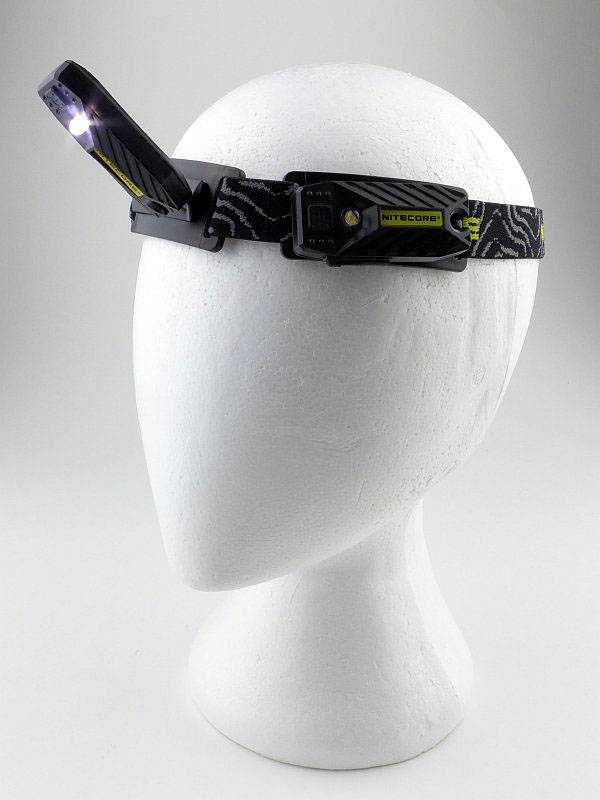
 photo 15 T-360 on head P1160352.jpg

Taking a more detailed look at the HA20:

For the HA20, as well as the light unit, there is the headband (with top strap) a special square-shaped O-ring and the instructions.
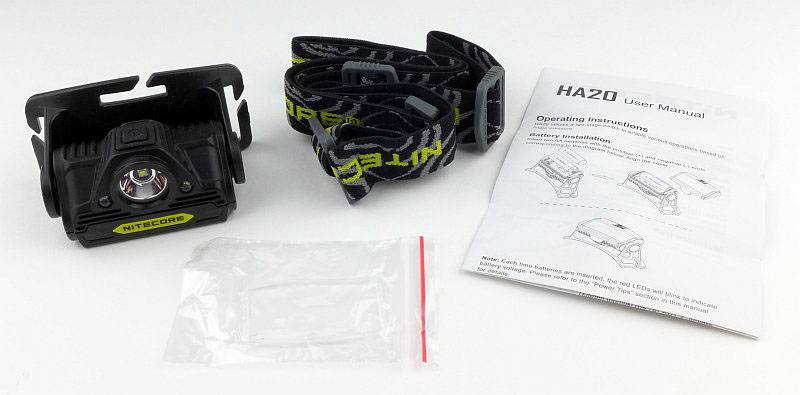
 photo 20 HA20 contents P1160368.jpg

Fitting the strap is very easy.
 photo 21 HA20 strap fitted P1160376.jpg

You can’t get to the battery compartment with the light unit rotated normally.
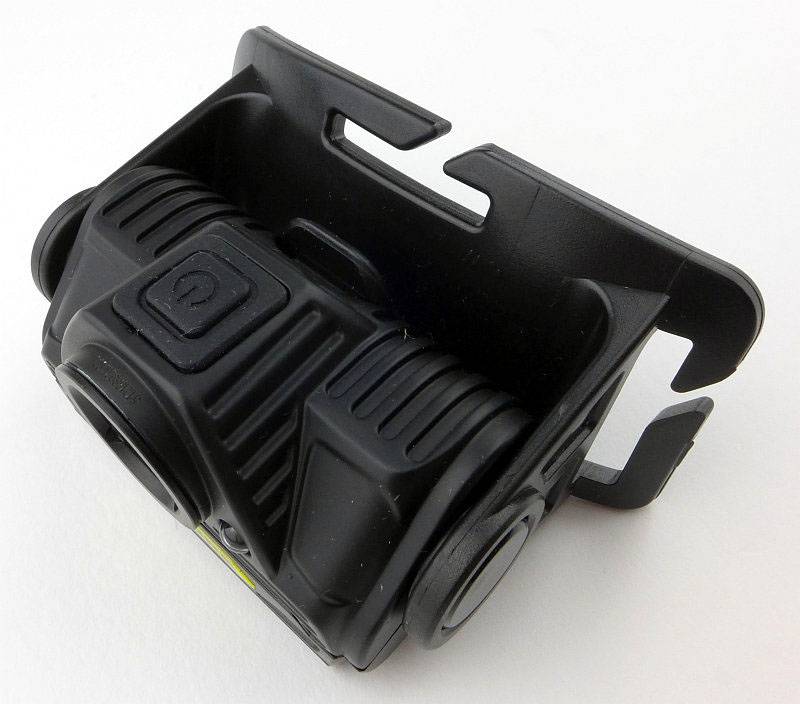
 photo 23 HA20 battery01 P1160387.jpg

First you need to rotate the unit forwards to expose the plastic tab.
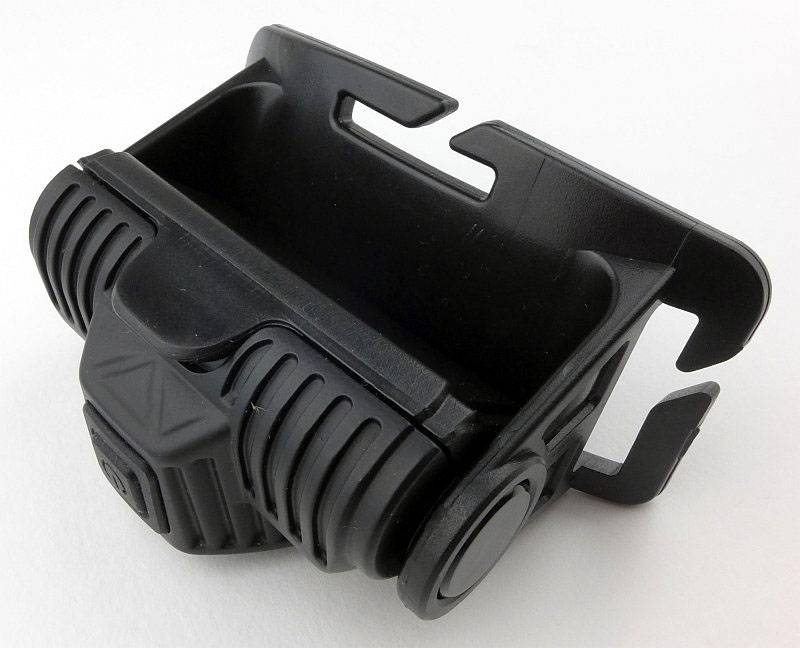
 photo 24 HA20 battery02 P1160389.jpg

Then you can pop the cover open.
 photo 25 HA20 battery03 P1160390.jpg

Finally you can rotate the light unit all the way back round to allow the door to come off.
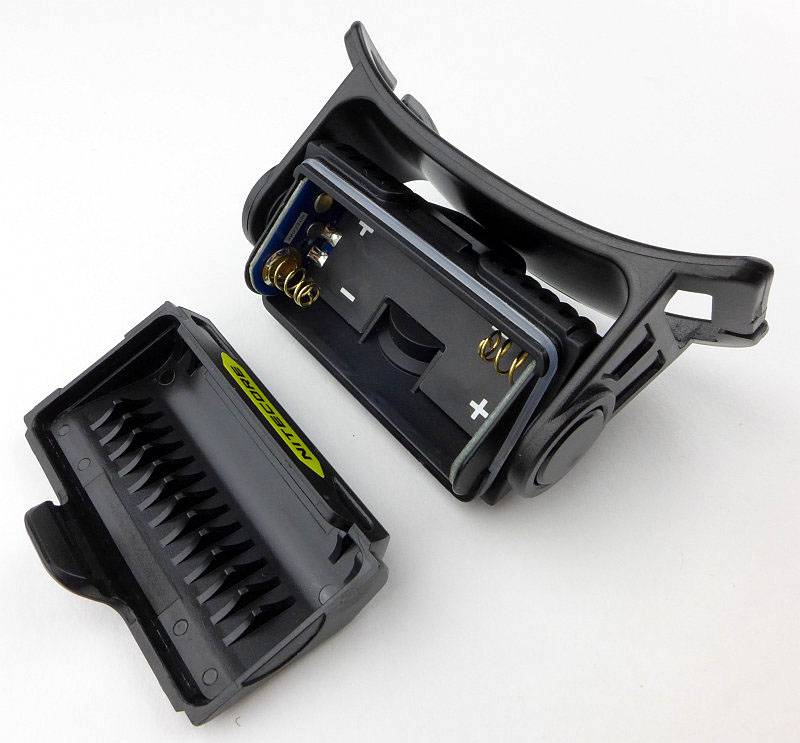
 photo 26 HA20 battery04 P1160394.jpg

Each end of the battery compartment has a set of sturdy terminals.
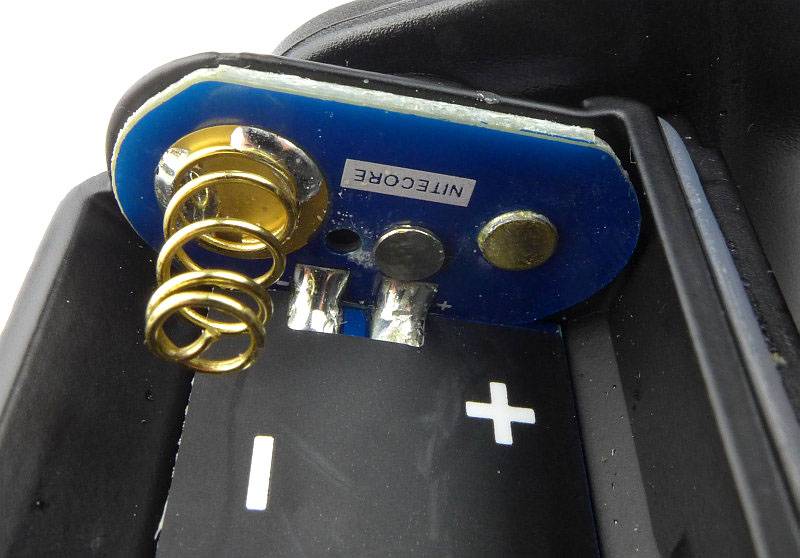
 photo 27 HA20 terminals P1160398.jpg

You have to fit the rear cell first then the front one.
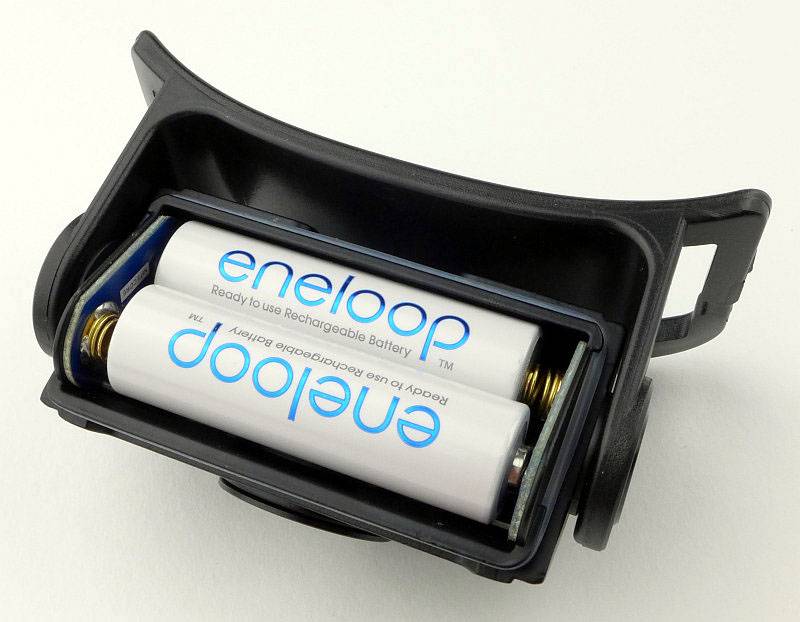
 photo 28 HA20 cells fitted P1160405.jpg

The HA20 has three LEDs, an XP-G2 LED and two F5 red LEDs.
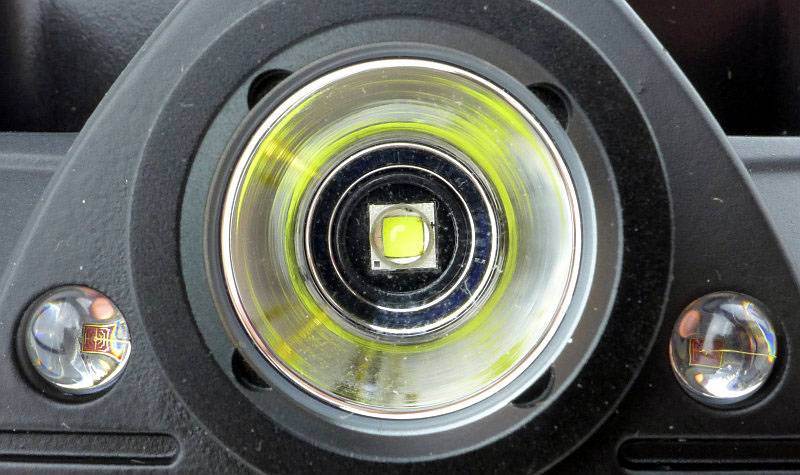
 photo 29 HA20 LEDs P1160414.jpg

A closer look at the main beam XP-G2 and its reflector.
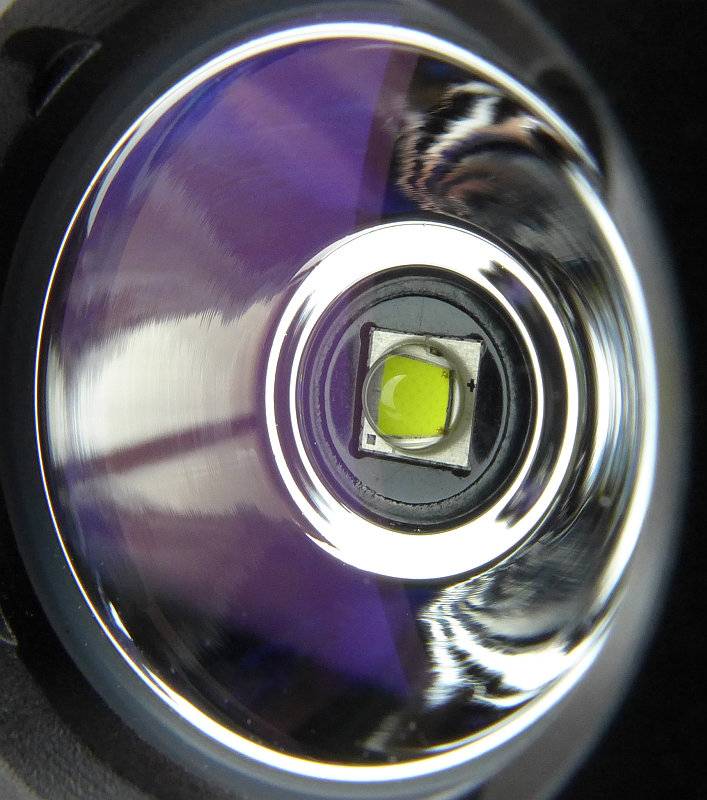
 photo 30 HA20 main LED P1160419.jpg

The elastic strap for the main headband is routed through the mount as shown.
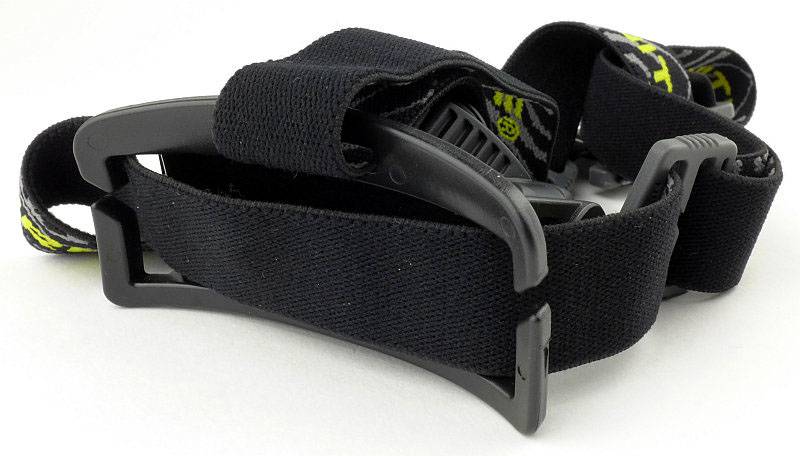
 photo 31 HA20 mount back P1160422.jpg

The top strap gives extra stability when wearing the headlamp.
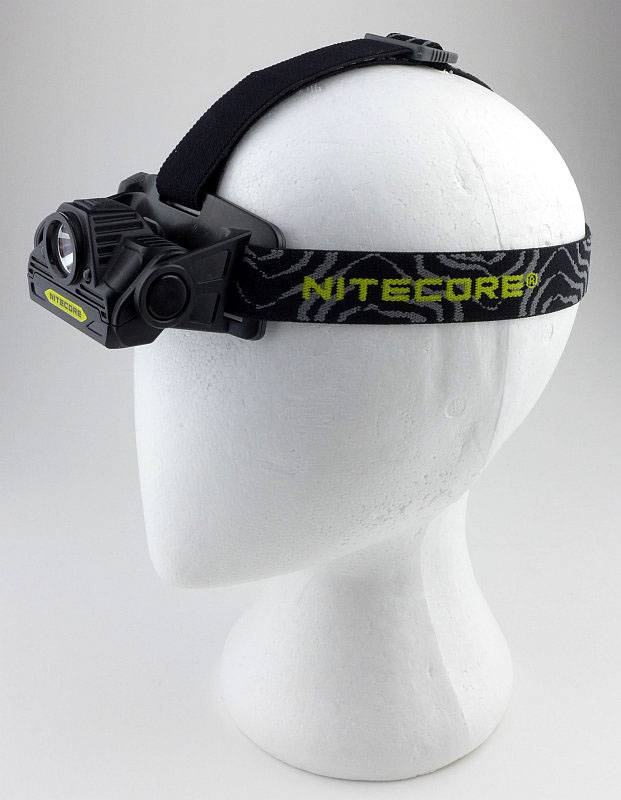
 photo 22 HA20 on head P1160382.jpg

Taking a more detailed look at the HC30:

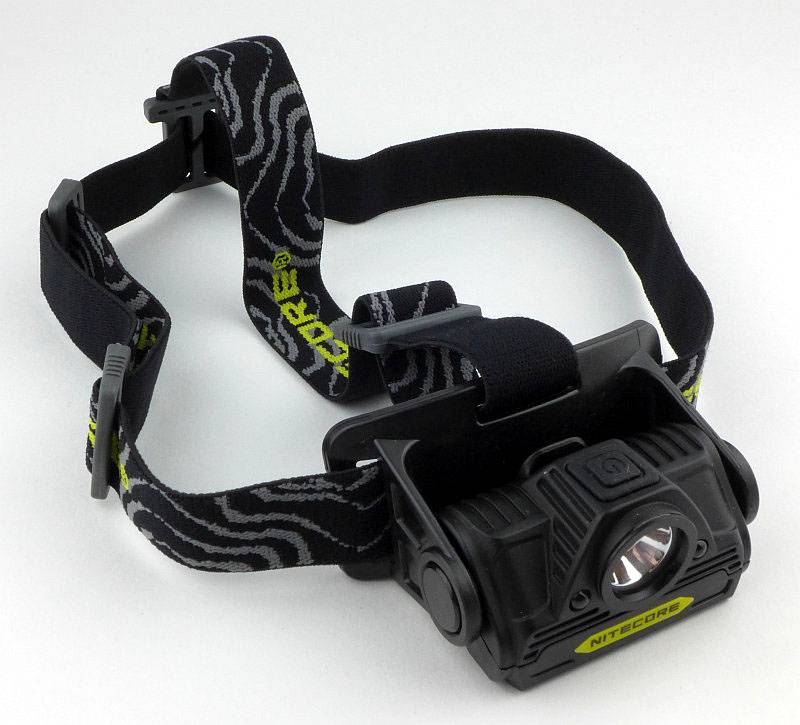
Of these three headlamps, the HC30 has more accessories as it includes two spare O-rings, a spare switch boot and clip as well as the HC30 itself, headband and instructions.
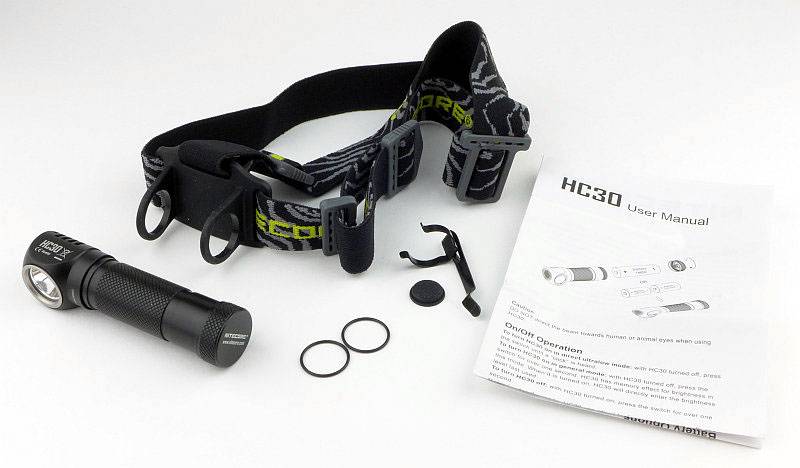
 photo 40 HC30 contents P1160425.jpg

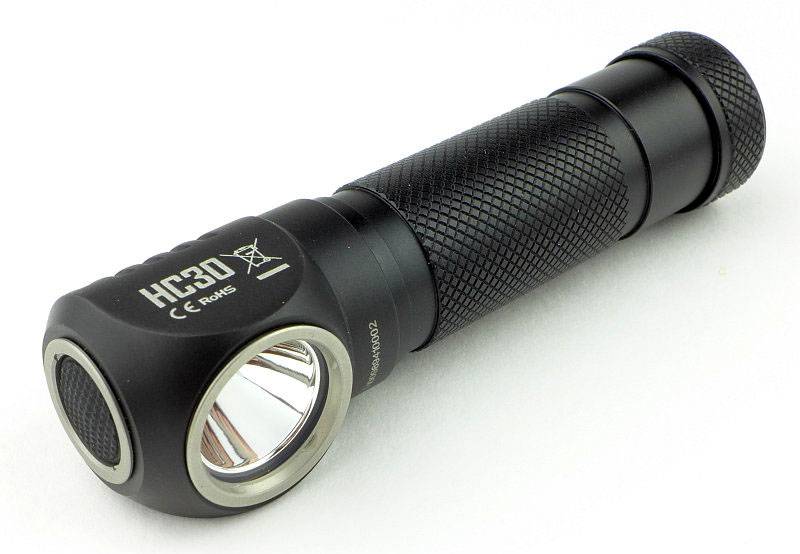
A very sleek design.
 photo 41 HC30 angle P1160431.jpg

On the head of the HC30 is a low profile rubber click switch.
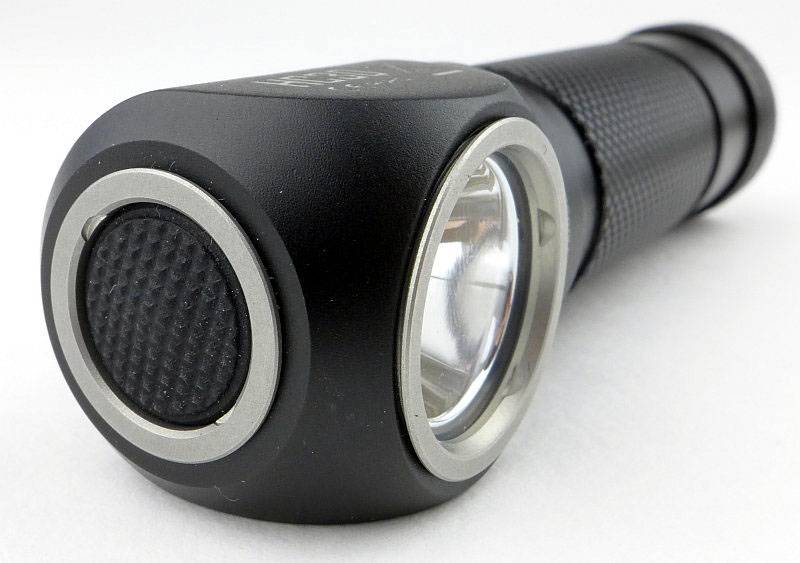
 photo 42 HC30 switch P1160435.jpg

When looking side on you can see the deeply cut heat-sink fins.
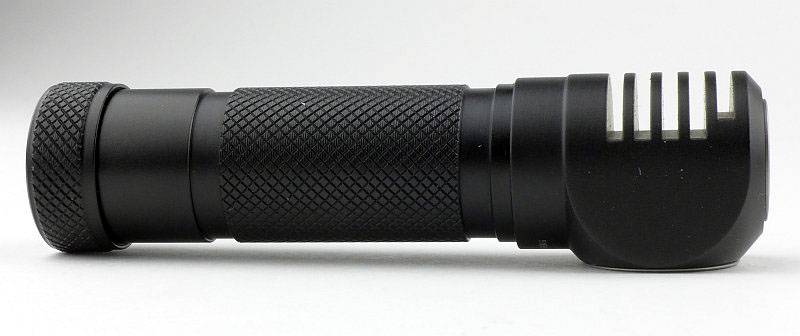
 photo 43 HC30 fins P1160441.jpg

The battery tube cap has been laser engraved with NITECORE’s logo.
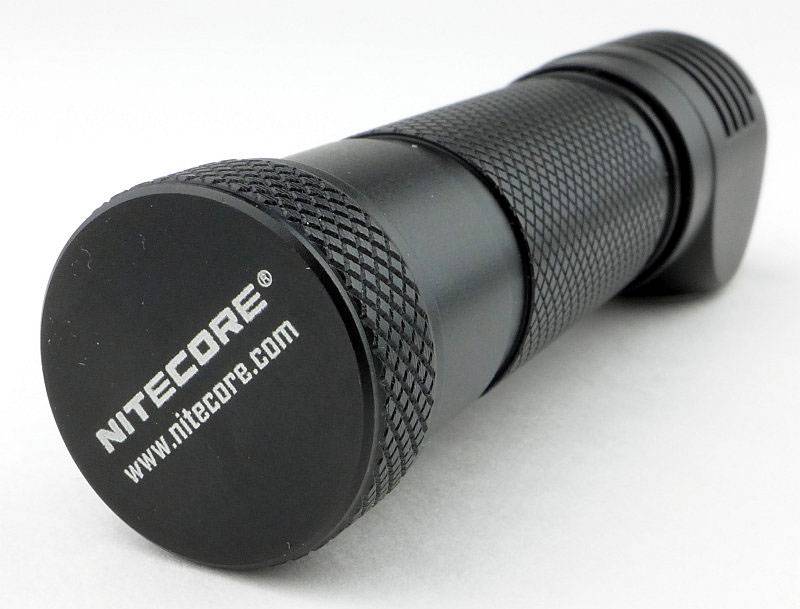
 photo 44 HC30 tailcap P1160443.jpg

Inside the tail-cap is a spring contact which has been tucked into a groove, removing the need for any circuit board and allowing the depth of the cap to be as shallow as possible.
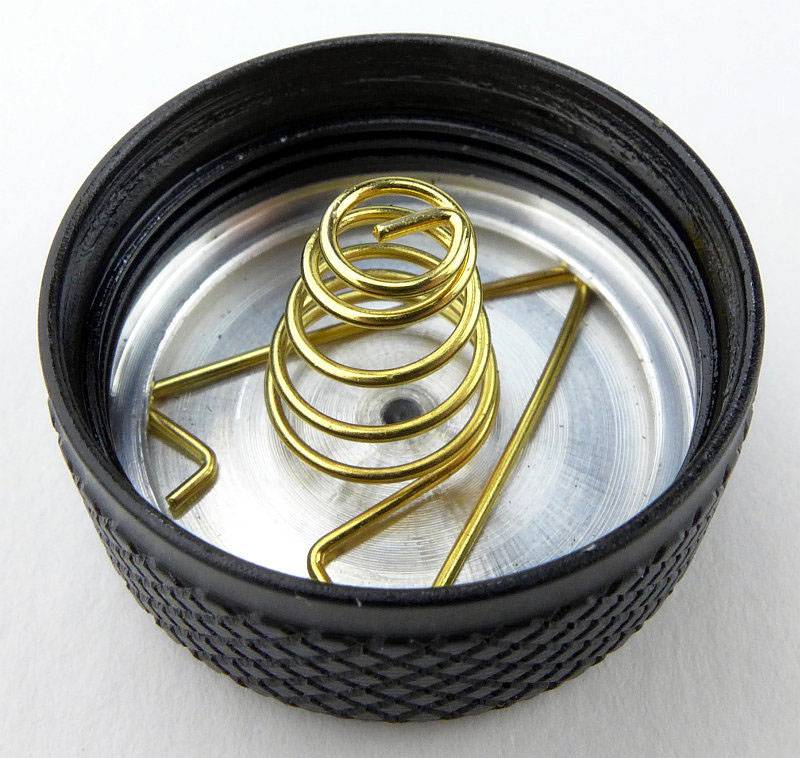
 photo 45 HC30 tailcap contact P1160446.jpg

The threads are Acme (trapezoid) in form, well lubricated and fully anodised (allowing lockout).
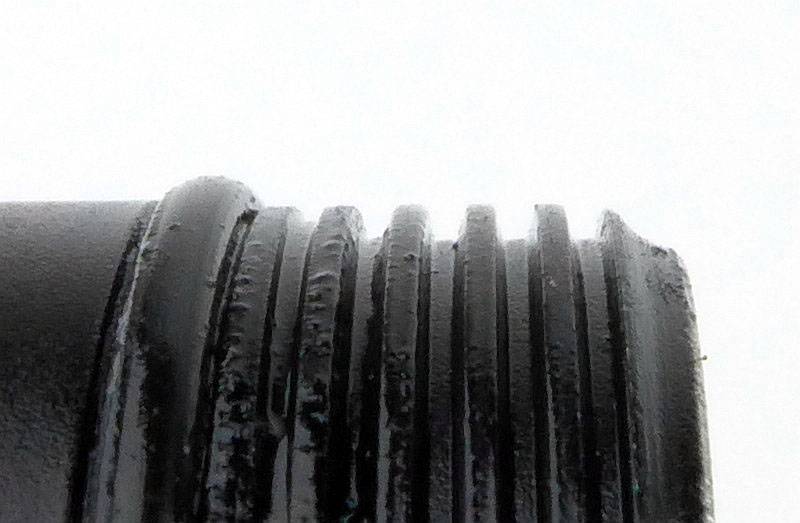
 photo 46 HC30 tailcap threads P1160451.jpg

Inside the battery tube you can see the physical reverse polarity protection (also requiring the use of button top cells).
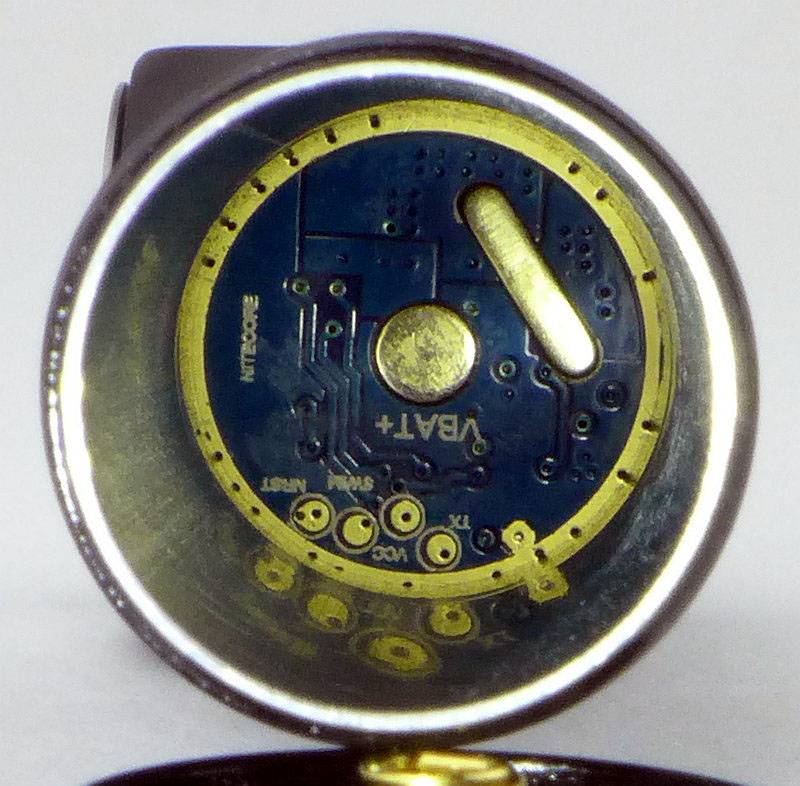
 photo 47 HC30 inside P1160455.jpg

Thanks to a well thought-out design, the HC30 is not much larger than the cell it uses. A very nice compact design.
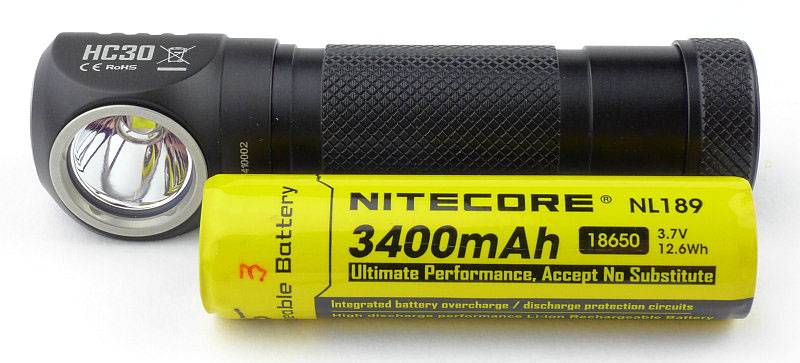
 photo 48 HC30 with cell P1160456.jpg

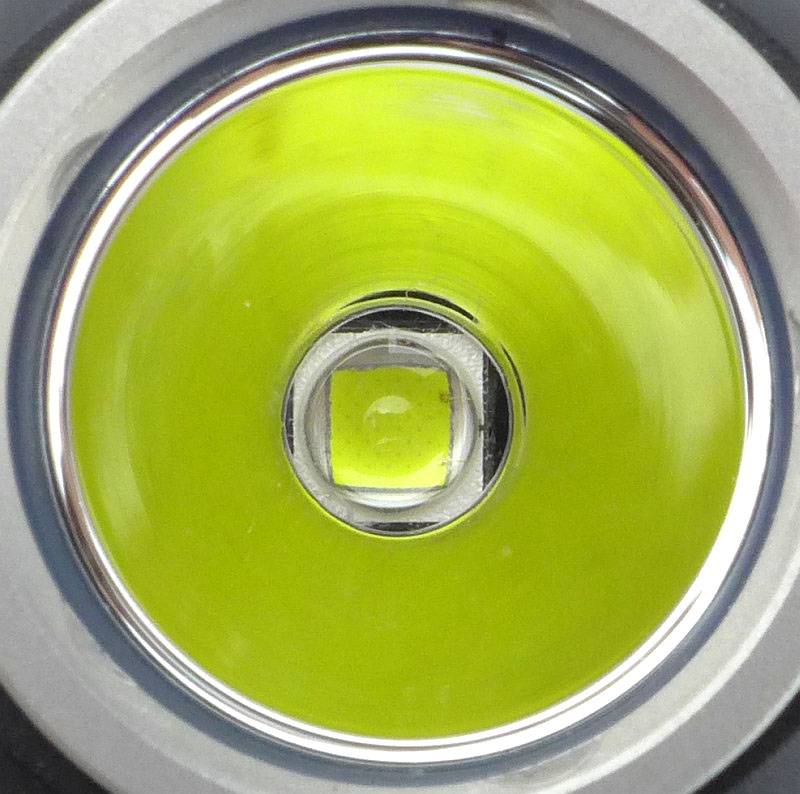
An XM-L2 LED is used.
 photo 49 HC30 LED P1160463.jpg

For such a compact design, the reflector is relatively deep.
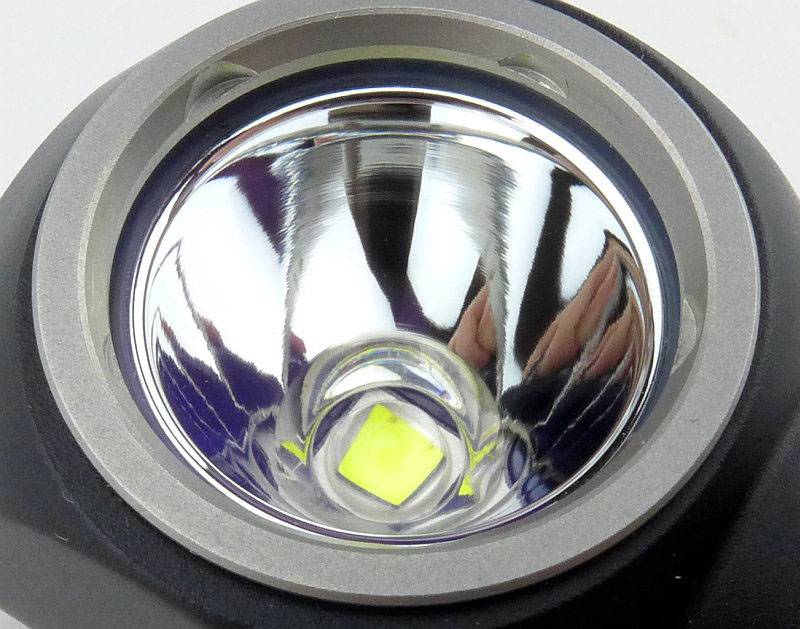
 photo 50 HC30 reflector P1160465.jpg

You can fit the optional clip into either groove giving an up or down position. With the clip fitted it does not fit into the headband mount properly.
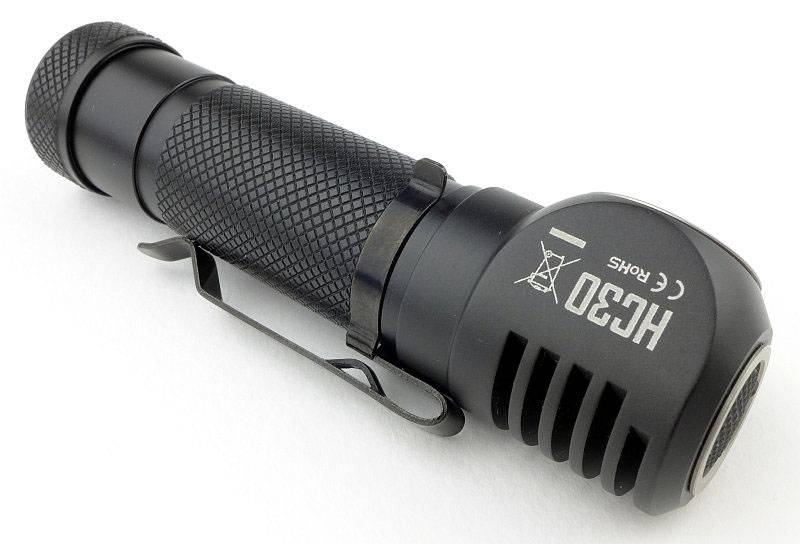
 photo 51 HC30 clip P1160471.jpg

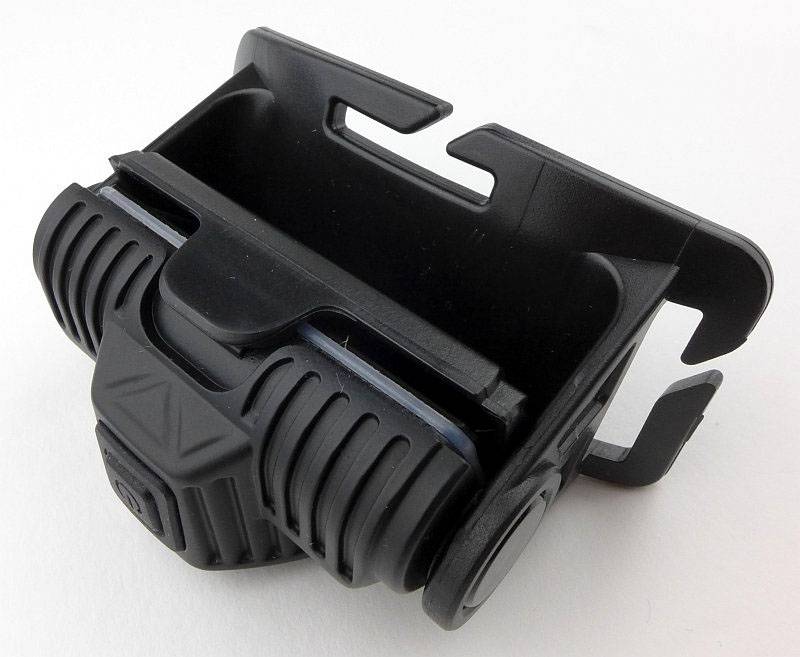
With the strap sitting against your head, and the mount being low profile, you have maximum comfort.
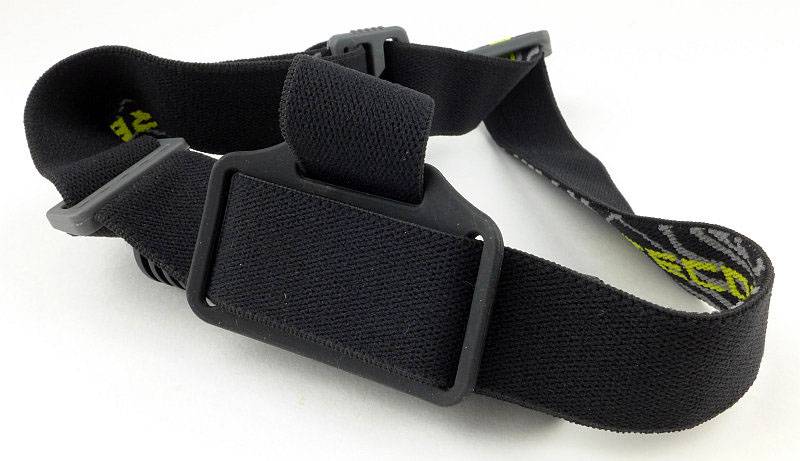
 photo 55 HC30 mount back P1160487.jpg

The fully assembled headlight.
 photo 52 HC30 in mount P1160473.jpg

On the head, the HC30 is very comfortable, light and stable.
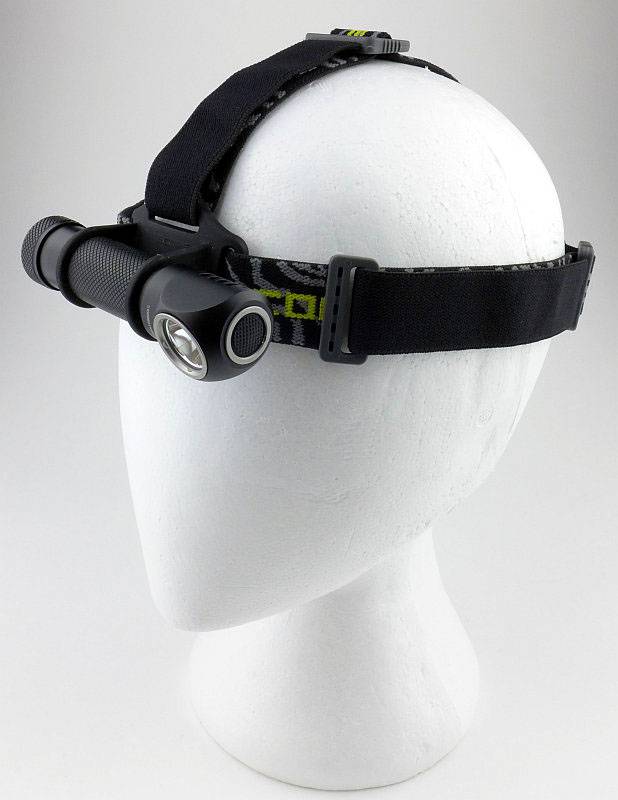
 photo 53 HC30 on head P1160479.jpg

The LED on the Ultra Low mode showing the dots on the phosphor surface – just because…
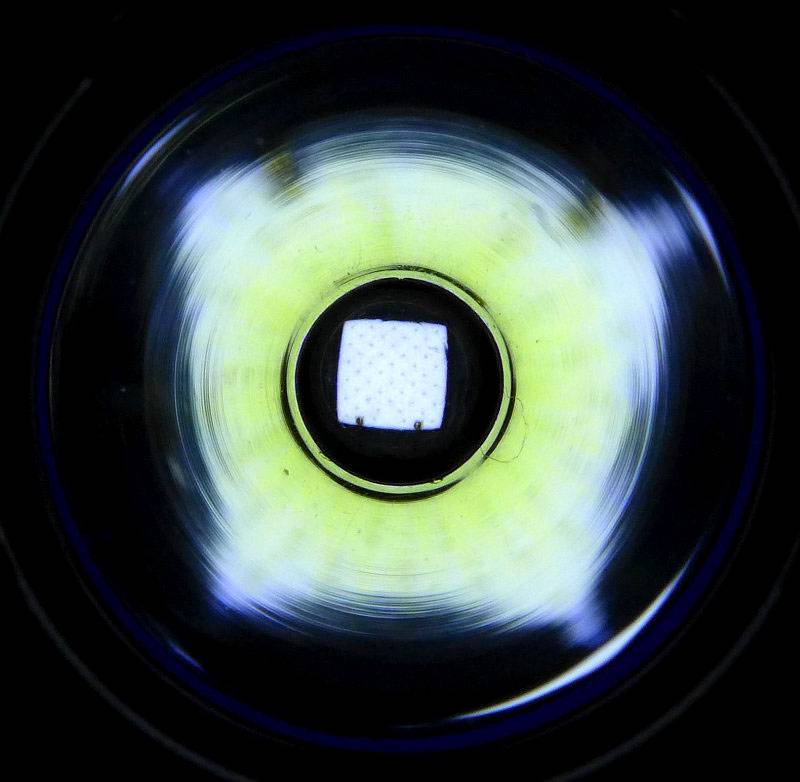
 photo 54 HC30 LED close low P1160485.jpg

The beam

Please be careful not to judge tint based on images you see on a computer screen. Unless properly calibrated, the screen itself will change the perceived tint.

The indoor beamshot is intended to give an idea of the beam shape/quality rather than tint. All beamshots are taken using daylight white balance. The woodwork (stairs and skirting) are painted Farrow & Ball “Off-White”, and the walls are a light sandy colour called ‘String’ again by Farrow & Ball. I don’t actually have a ‘white wall’ in the house to use for this, and the wife won’t have one!

Being a comparison review, we have the opportunity for some side-by-side (or top-to-bottom) comparisons using the same exposures. However BEFORE we start that comparison, as the T-360 is a tiny lightweight low powered light, to just get an idea of the beam, this first photo is at an exposure to give the best impression of the beam.
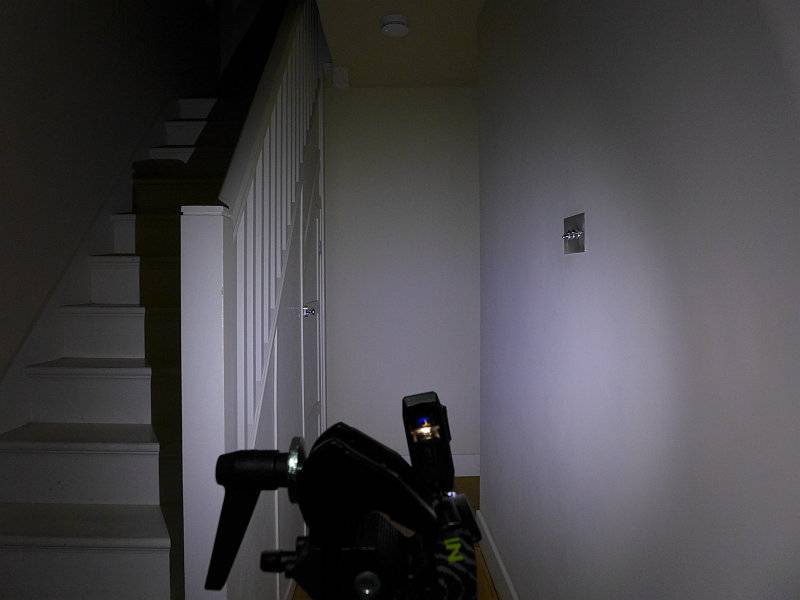
 photo 16 T-360 indoor beam P1170378.jpg

Now we start the comparison and the exposure has been set for the HA20 and HC30 to show correctly so the T-360 appears rather dim in comparison.
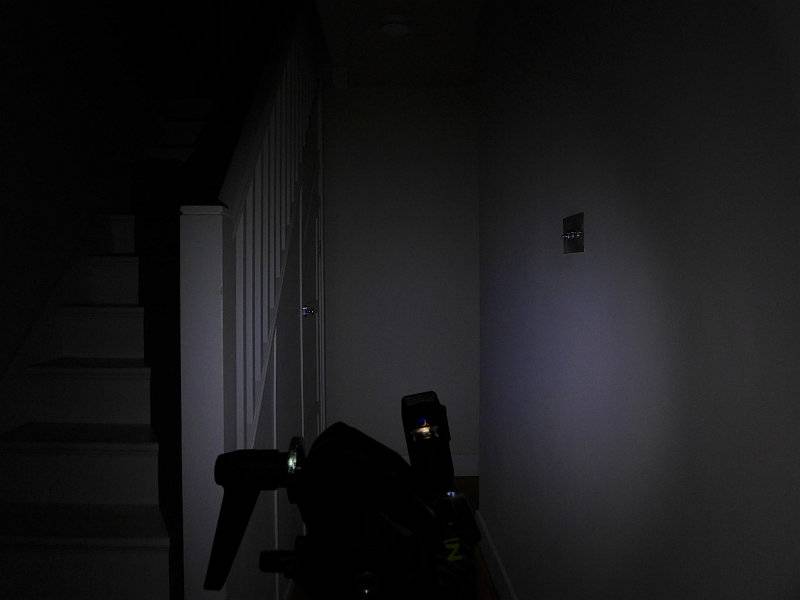
 photo 17 T-360 indoor beam exposure comparison P1170380.jpg

On the same exposure, the HA20 – there is a very defined hot-spot and a wide smooth spill.
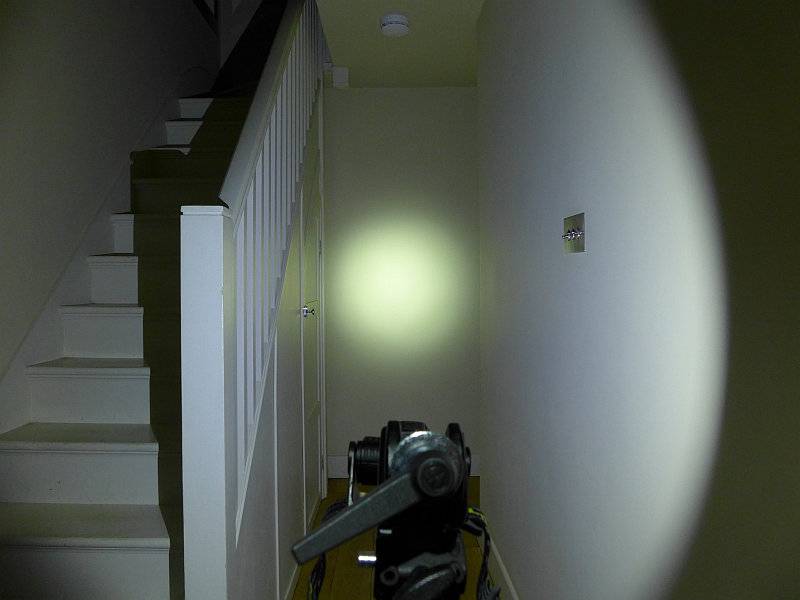
 photo 32 HA20 indoor beam exposure comparison P1170355.jpg

Again on the same exposure, the HC30 shows its power. It has a broad hot-spot and bright spill, but the spill is narrower than the HA20.
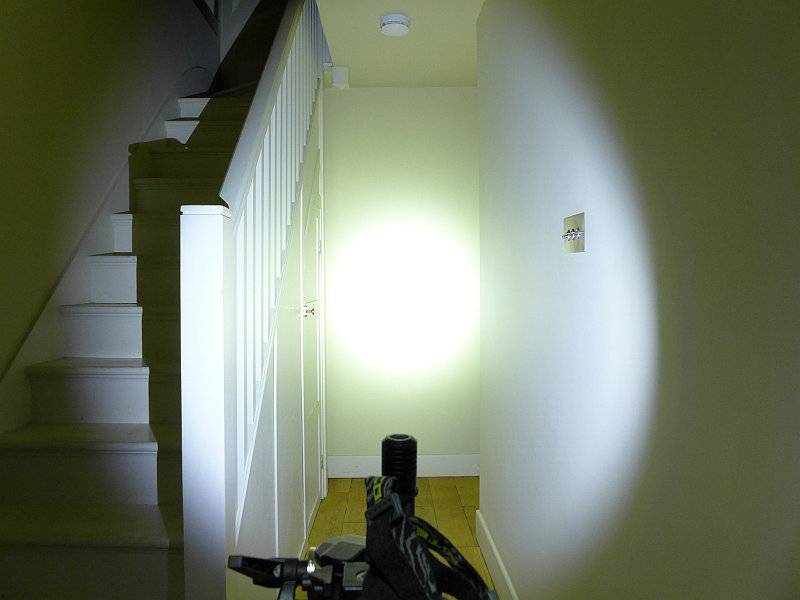
 photo 57 HC30 indoor beam exposure comparison P1170351.jpg

For the outdoor beamshots, the T-360 did not have enough power to show, so is not included.
As before the exposure has been fixed to allow the HA20 and HC30 to be directly compared. Starting here with the HA20. The purpose of it hot-spot becomes clear as the lower power of the HA20 needs this to extend the range.
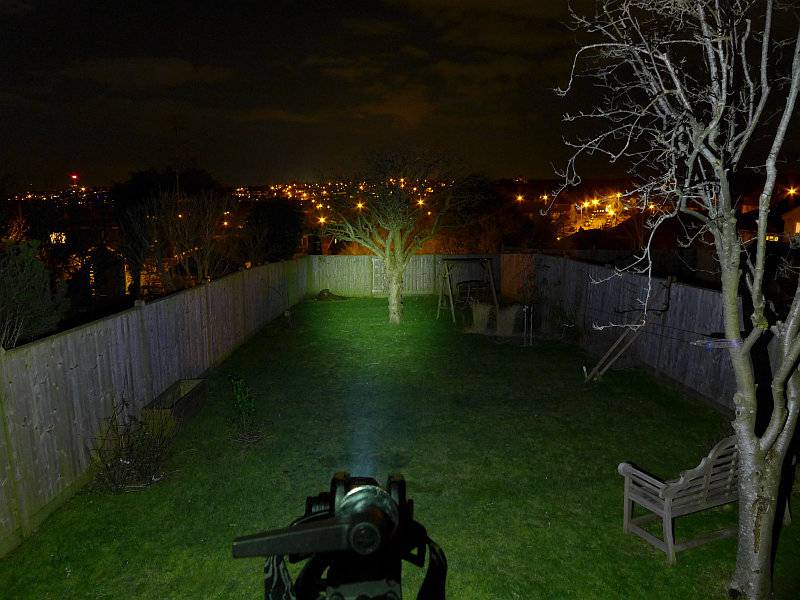
 photo 33 HA20 outdoor beam exposure comparison P1170273.jpg

The HC30, of course, has much more power and this is very clear in this direct comparison.
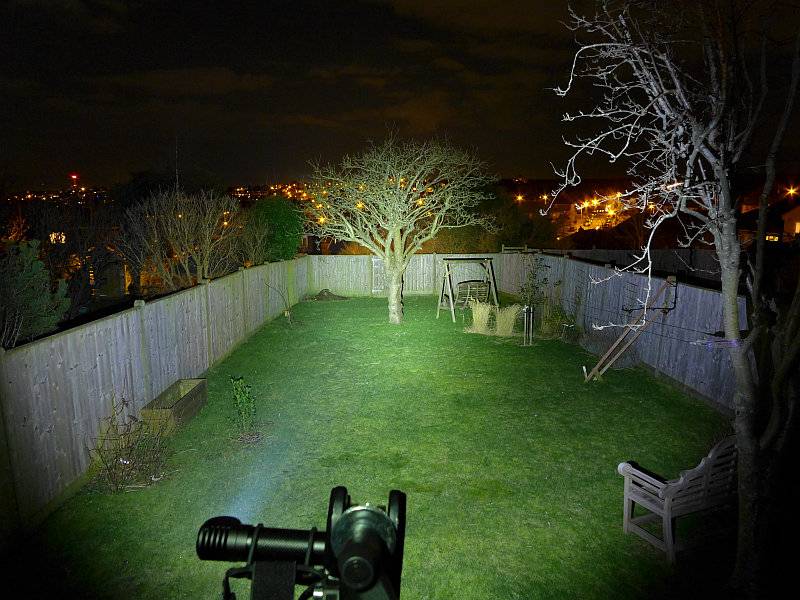
 photo 56 HC30 outdoor beam exposure comparison P1170270.jpg

Modes and User Interface:

Three different headlamps, and three very different interfaces.

T-360
–Control:
Single click button

–Modes:
High, Mid, Low and Flash/Strobe at 1Hz, 2Hz and 10Hz

–UI:
From OFF, press-and-hold the switch for over 1s to turn ON to Low. Press briefly to cycle through Mid, High, Low etc.
Press-and-hold again for 1s to turn OFF.
From OFF double-click the switch to enter flashing mode at 1Hz. Press briefly to cycle through 2Hz, 10Hz, 1Hz etc.
Press-and-hold for 1s to turn OFF.
There is no memory for constant of flashing modes. Both will always start from Low or 1Hz.

HA20
–Control:
Two-stage switch

–White Modes:
Turbo, High, Mid, Low, Ultra Low and ‘Special Modes’ (Police Warning/Location Beacon/SOS)
(Police Warning is a slow flashing mode at approximately 1Hz)

–Red Modes:
Constant, Flashing and Power Indicator.

–White UI:
From OFF press the switch fully until it clicks to turn ON.
While ON, half-press the switch to cycle through Low, Mid, High, Turbo, Ultra Low etc.
To switch OFF, press the switch fully until it clicks.
While ON, half-press the switch for over 1s to enter Special modes. Half-Press the switch to cycle through Police Warning, Location Beacon, SOS, Police Warning etc
To Exit Special modes and switch OFF, press the switch fully until it clicks.

–Red UI:
From OFF, half-press the switch for over 1s to turn on the Constant Red output.
To swap between constant and flashing Red output, half-press the switch.
To switch OFF, press the switch fully until it clicks.

–Power Indicator:
On first inserting cells into the HA20, the Red LEDs flash to indicate the battery voltage, first whole Volts, then after a pause 0.1V.
From OFF, half-press the switch briefly to indicate power level with one (<10%), two (<50%) or three (>50%) flashes.

HC30
–Control:
Single click button

–White Modes:
Turbo, High, Mid, Low, Lower and ‘Special Modes’ (Strobe/SOS/Location Beacon)
UI: From OFF press the switch to turn directly ON to Lower mode (regardless of the previously used mode).
From OFF, press-and-hold the switch for over 1s to turn ON to ‘Last used constant mode’.
From OFF, press-and-hold the switch for over 2s to turn ON to Turbo.
While ON press the switch briefly to cycle through Lower, Low, Mid, High, Turbo, Lower etc.
To turn OFF press-and-hold the switch for over 1s.
From OFF, double-click the switch to enter Strobe. While ON Strobe, press the switch briefly to cycle through SOS, Location Beacon, Strobe etc. To turn OFF, press-and-hold the switch for over 1s.

Batteries and output:

The T-360 runs on its built-in cell.
The HA20 runs on 2xAA (Alkaline, NiMh or L91).
The HC30 runs on 1×18650 (button top), 2xCR123 or 2xRCR123.

To measure actual output, I built an integrating sphere. See here for more detail. The sensor registers visible light only (so Infra-Red and Ultra-Violet will not be measured).

Please note, all quoted lumen figures are from a DIY integrating sphere, and according to ANSI standards. Although every effort is made to give as accurate a result as possible, they should be taken as an estimate only. The results can be used to compare outputs in this review and others I have published.

___________________________________________ ________________________________ ________________________________
Model/Mode using specified cell I.S. measured ANSI output Lumens PWM frequency or Strobe frequency (Hz)
___________________________________________ ________________________________ ________________________________
T-360/High – Built-in 62 0
T-360/Medium – Built-in 24 0
T-360/Low – Built-in 2 0
HA20/Turbo – AA Eneloop 342 0
HA20/High – AA Eneloop 202 0
HA20/Medium – AA Eneloop 106 0
HA20/Low – AA Eneloop 39 0
HA20/Ultra Low – AA Eneloop 2 0
HC30/Turbo – 18650 1058 0
HC30/High – 18650 503 0
HC30/Medium – 18650 245 0
HC30/Low – 18650 82 0
HC30/Ultra Low – 18650 2 0

Peak Beam intensity for the T-360 was not measured.
Peak Beam intensity for the HA20 measured 2800 lx @1m giving a beam range of 106 m.
Peak Beam intensity for the HC30 measured 6800 lx @1m giving a beam range of 165 m.

There is parasitic drain in the T-360 but this was not measured due to the built-in cell.
There is parasitic drain in the HA20; the drain was 194uA (1.23 years to drain the cells).
There is parasitic drain in the HC30; the drain was 51.5uA (6.87 years to drain the cell).

All shown on the same graph, the performance of each of these light is very different on maximum output.
The T-360 is very consistent for 30 minutes and then tails off to the point of being no use by 45 minutes.
The HA20 drops from maximum after around 10 minutes, and after stabilising again, remains consistent up to the last part of the run.
The HC30 however, has a strange behaviour which is only really noticeable using measuring equipment. After the initial drop after 5-6 minutes, the output rises, stabilises, then rises again before starting a gradual decline. Having a wide input voltage range from 3V to 8.4V, this will be a consequence of having to manage the quite different cell characteristics. Remember this is the maximum output, so it is testing the limits of the cell as well as the HC30. To the naked eye this behaviour doesn’t stand out.
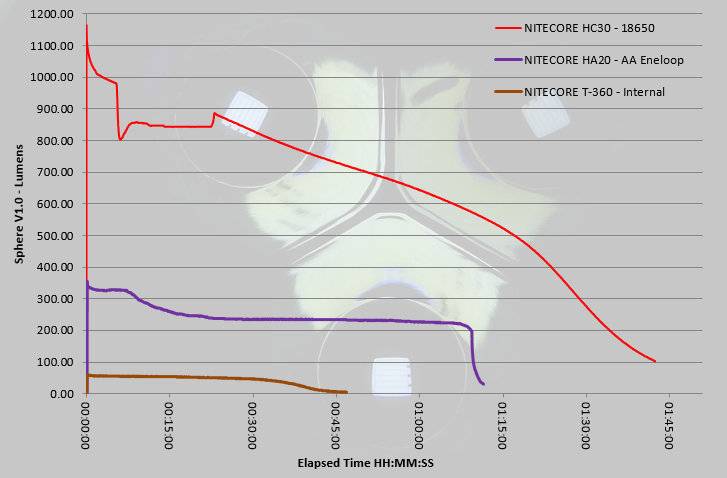
 photo NITECORE Headlamps HC30 HA20 T360 runtime.jpg

Troubleshooting

This section is included to mention any minor niggles I come across during testing, in case the information helps anyone else.

No issues were encountered during testing.

As per the description of this section, this information is provided in case anyone else finds a similar ‘issue’ that might be fixed in the same way.

The T-360, HA20 and HC30 in use

Do I have a favourite? Yes, but more on that later, as each of these headlamps gives you different benefits and capabilities.
—–
You are probably familiar with the NITECORE TUBE key-chain light. The T-360 is a spin off of this USB rechargeable featherweight light and gives you a featherweight headlamp. As I showed earlier it is so lightweight you can install two (or even three) on the same headband so you have hot-spares ready for when the cell becomes depleted. The T-360 means anyone can EDC a headlamp. Of course it is not just a headlamp as when you take it off the strap it will stand by itself, or can be clipped over a cap peak or pocket edge. Unlike the TUBE, the T-360 does not use any PWM so is superbly good to use on any level.

As shown in the head mounted photo, I have found the T-360 benefits from rotating the body out, so that it sticks out, when you use it. With the full flood beam, if you leave it flat on your forehead, half the light just goes upwards, so by rotating it as shown you can direct this down and make better us of the available light.
—–
Moving up in size and in power to the HA20. AA power is a significant benefit simply due to the ease of getting AA cells; this is not to be underestimated. This also makes it easier to give as a gift. With the HA20 there is a bit of a trade off in providing one of the features. The head has a really good range of adjustment, including upwards; The result of this is that the HA20 has been placed further from the head to provide the space to be able to rotate so far in the mount. With an aluminium body, this creates a slightly front-heavy design making the HA20 feel heavier on the head than it really is. Once you start moving about more it can become noticeable.

Still on the HA20, the two-stage button has proven to be a little difficult to work with. The half-press is somewhat indistinct so you are not entirely sure you have pressed it enough. The full-press is a substantial press needing the button to be pushed well into the switch boot.

Having Red light as an option in the same headlamp is one of the strong points. When I’m out hunting and using red light on the gun-light, the last thing I want is to then switch on a white light, so the pure red light (not filtered) is just what is needed. Just be aware that this is not ‘Star Party’ friendly red light as it is quite bright.
—–
Finally we have the bright and compact HC30. NITECORE have done really well in keeping the size down, and the HC30 is not much bigger than the 18650 it uses. A single 18650 is a great compromise for a headlamp as it typically has the energy of 3-4 AAs but weighs roughly the same as 2xAA(NiMh) cells and is a single cylinder (so more compact). This allows for greater output or longer runtimes from a smaller lighter headlamp. So as long as you are into li-ions (or happy to burn through CR123s), then it makes an ideal choice.

Even though it has only a single-stage button, the interface is very well thought out. With no delay at all you can click onto ‘Lower’, then cycle up to a level you want. Alternatively you can return straight to a previously used level if you are happy to press-and-hold for 1s. You also still have direct access to Turbo with a slightly longer press-and-hold of 2s. But there is more, as if you are into your flashing modes, a double-click brings them to life.

With all the modes available, I couldn’t have asked for more from this single button interface.

Comfort is top notch as the weight is kept close to your head (increasing stability) and the mount doesn’t touch you at all and has no hard/hot-spots.

For my own uses, I would have preferred a more flood orientated beam, but with its mixed use as a right-angle light and a headlamp the beam’s mix of flood and throw is very good.
—–
So could you spot my favourite? The HC30 has it, if I had to pick one.

Which would you pick?

Review Summary

_______________________________________________ _______________________________________________
Things I like What doesn’t work so well for me
_______________________________________________ _______________________________________________
T-360 – Featherweight. T-360 – Limited runtime with built-in cell./td>
T-360 – Easy to EDC. T-360 – Press-and-hold to turn on.
T-360 – MicroUSB rechargeable.
T-360 – Can be used as a clip light.
HA20 – Easy AA power. HA20 – Front heavy.
HA20 – White and Red output HA20 – Switch can be tricky to half-press reliably.
HA20 – Wide range of angle adjustment HA20 – Relatively high parasitic drain.
HA20 – Aluminium body for good heat-sinking.
HC30 – 1000lm output. HC30 – Cannot use flat-top cells.
HC30 – Super compact. HC30 – Ultra-Low mode could be lower.
HC30 – Excellent weight distribution.
HC30 – Can be used as a right-angle hand-held light.
HC30 – Direct access to Turbo, Ultra-Low and Strobe modes.
HC30 – Parasitic drain can be stopped by locking-out the tail-cap.

 photo 03 NITECORE headlamps group white P1160491.jpg


Discussing the Review:

Please feel free to add comments to the review, but the ideal place to freely discuss these reviews is on a forum. If you started reading the shorter forum version of the review, but followed the link this full exclusive review, please return to that forum to discuss the review there.
If you read the review entirely on Tactical Reviews, please consider one of the following to join in any discussion.

CandlePowerForums – Flashlight Reviews Section (Largest and Friendliest Flashlight Community Forum)

EdgeMatters – Sponsored Reviews (UK based Forum for Knife Makers and Collectors)

Light Review: ACEBEAM H10 Headlamp

The H10 is ACEBEAM’s most powerful Headlamp with an impressive 2000lm burst mode (using an IMR 18650) and uses the high power MT-G2 LED array.
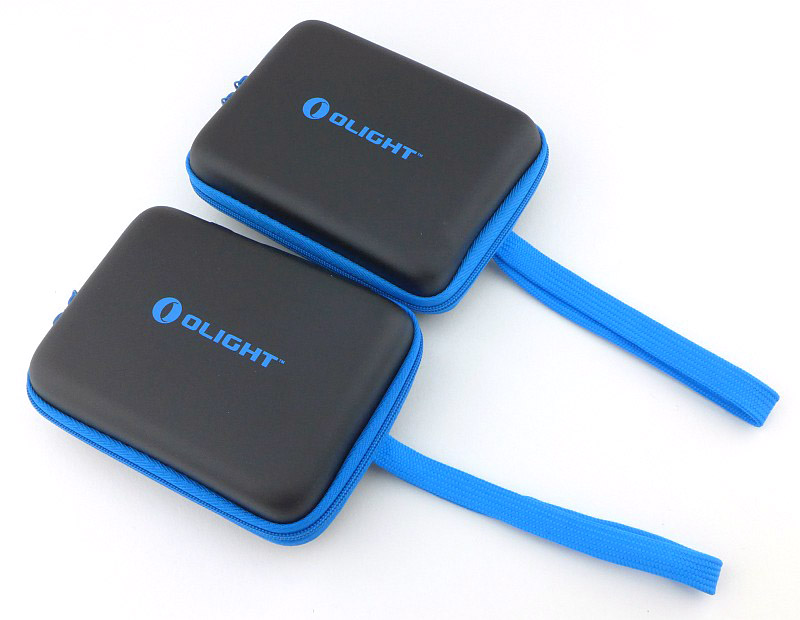
 photo 06 H10 angle P1150631.jpg

Taking a more detailed look:

Presentation is good with the ACEBEAM packaging. The box is sealed with a tamper evident tape.
 photo 01 H10 boxed P1150612.jpg

Inside there is a foam liner holding the contents in place.
 photo 02 H10 box open P1150614.jpg

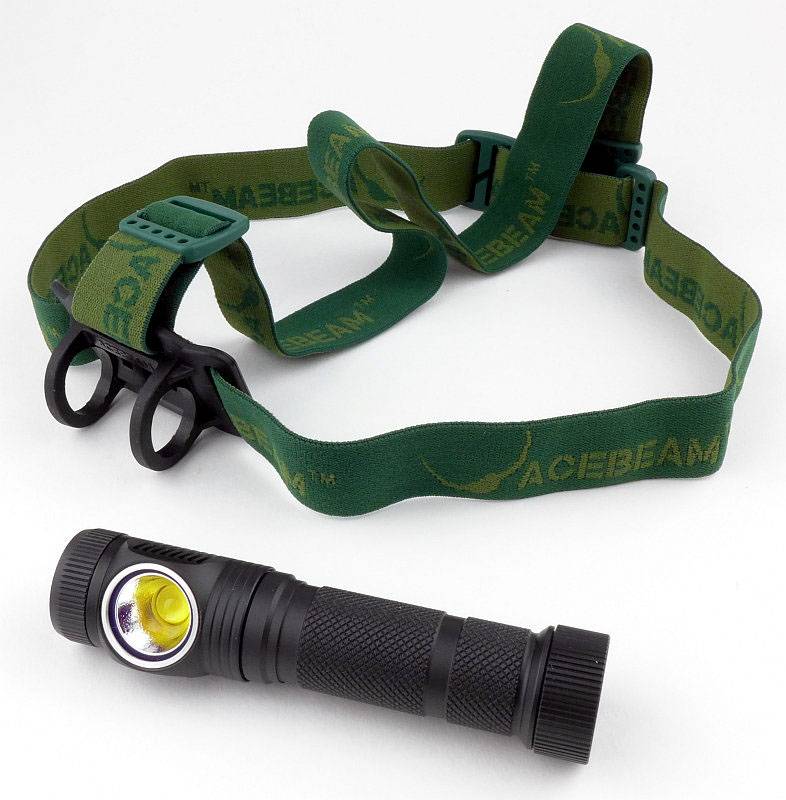
In the box there is the H10 (with unlabelled 18650 inside it), spare O-rings, pocket clip, headband and mount, plus the instructions.
 photo 03 H10 box contents P1150621.jpg

The headband is fully assembled and opens out like this.
 photo 04 H10 headband P1150625.jpg

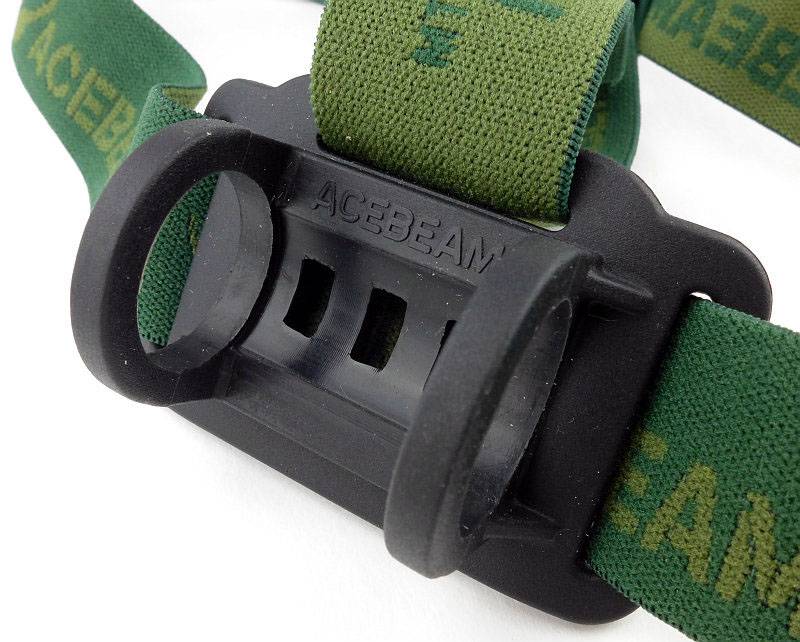
The headband mount has two retaining rings that line up with grooves in the body of the H10.
 photo 05 H10 holder P1150627.jpg

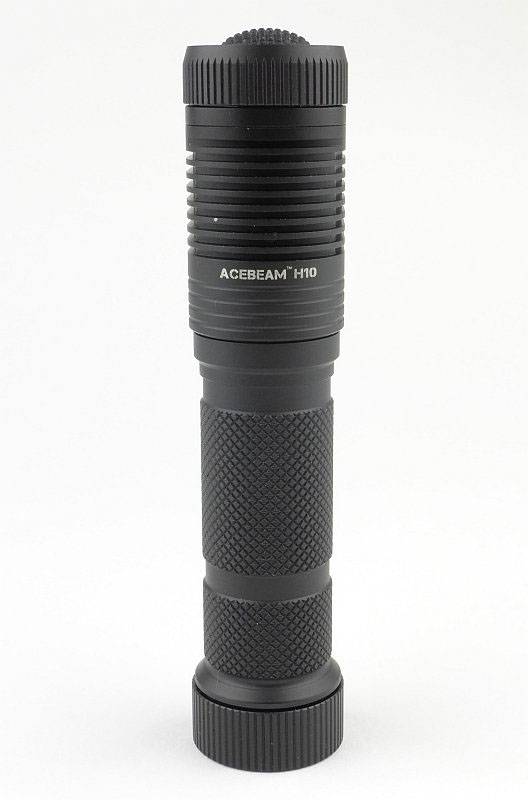
Looking at the back of the H10 you can see the shallow heat sink fins on the head, and the domed switch on top.
 photo 07 H10 tall P1150637.jpg

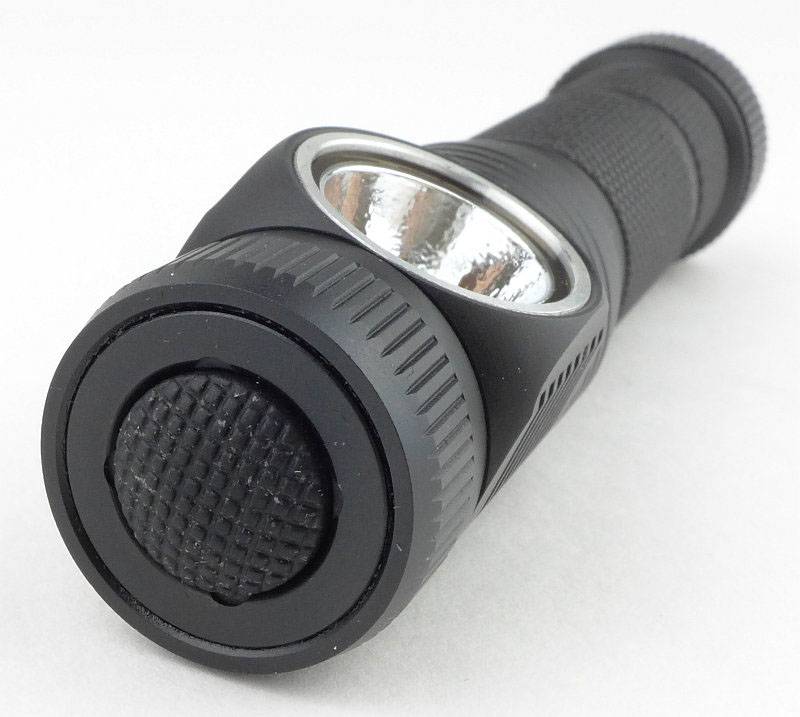
Surrounding the domed switch button is a rotating selector ring.
 photo 08 H10 switch P1150640.jpg

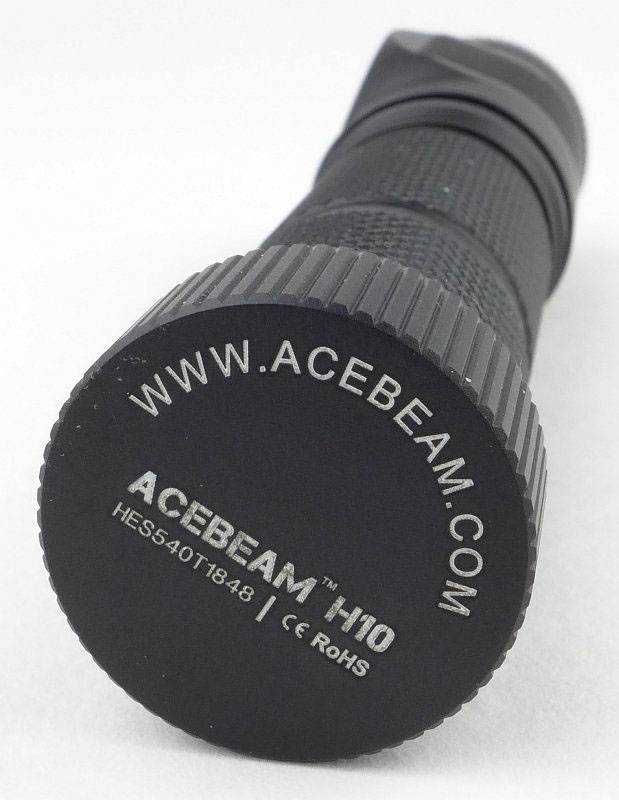
On the battery tube cap, the make, model and serial number are engraved.
 photo 09 H10 tailcap P1150643.jpg

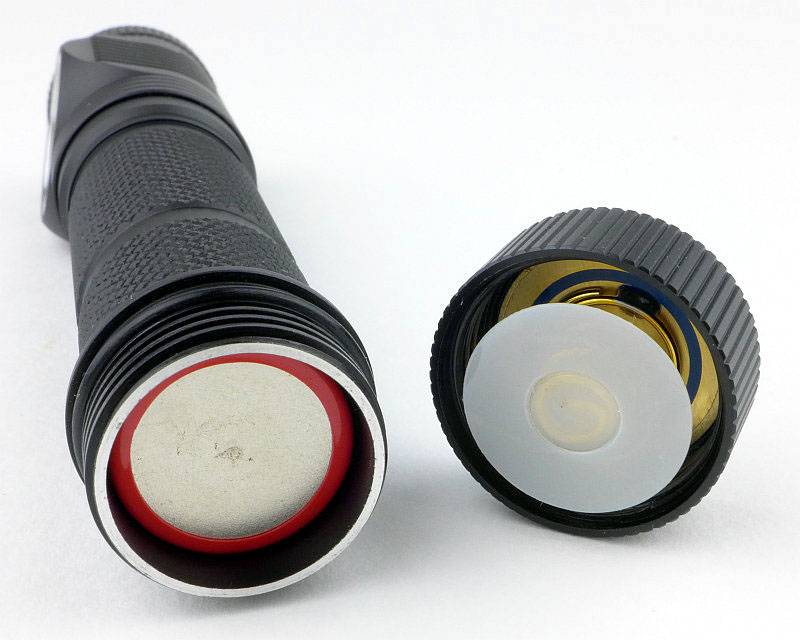
As we will see further on, there is parasitic drain, so for transit (and to prevent accidental activation) as the supplied 18650 is fitted inside the H10, an insulating disc is included to break the circuit and lock-out the H10. You need to discard that white plastic disc to use the H10.
 photo 10 H10 tailcap off P1150644.jpg

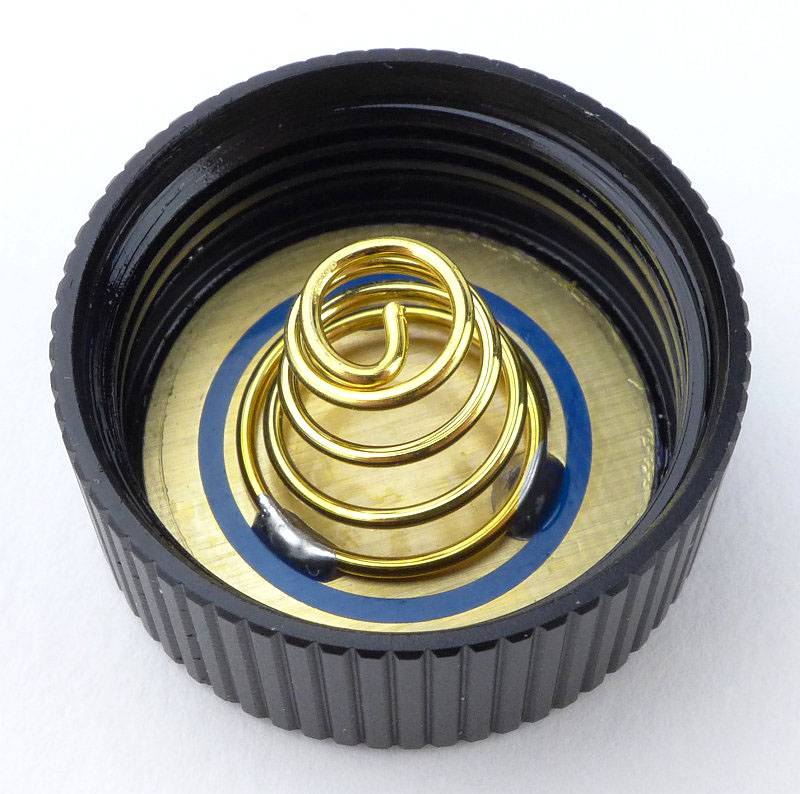
Inside the tail-cap the negative terminal is a spring. The top edge of the battery tube makes contact with the gold ring-terminal on the circuit board.
 photo 11 H10 tailcap P1150648.jpg

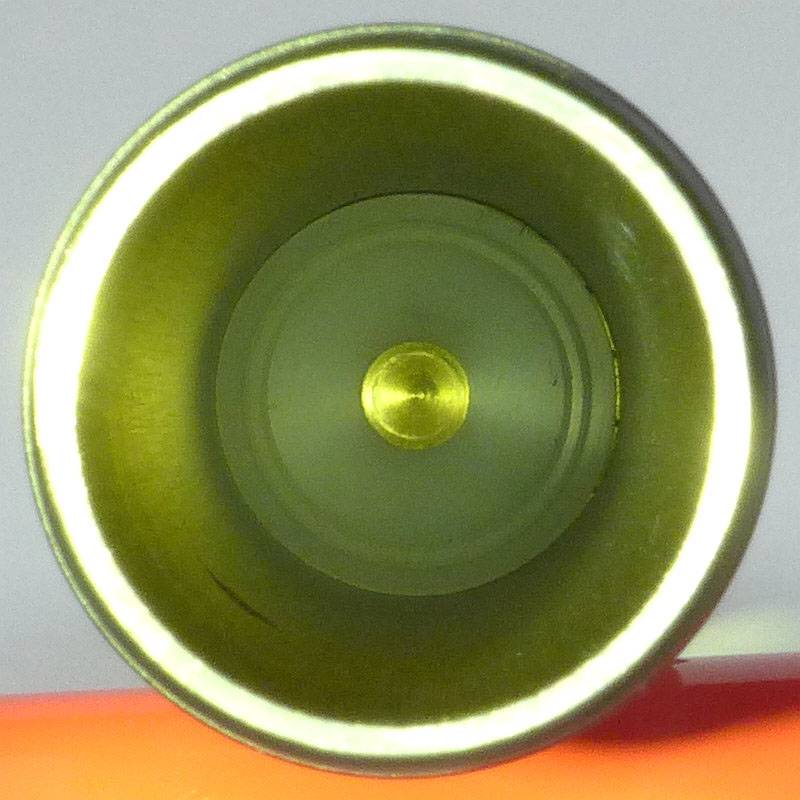
Peering inside the battery tube there is a simple positive terminal surrounded by a plastic insulator.
 photo 12 H10 inside P1150652.jpg

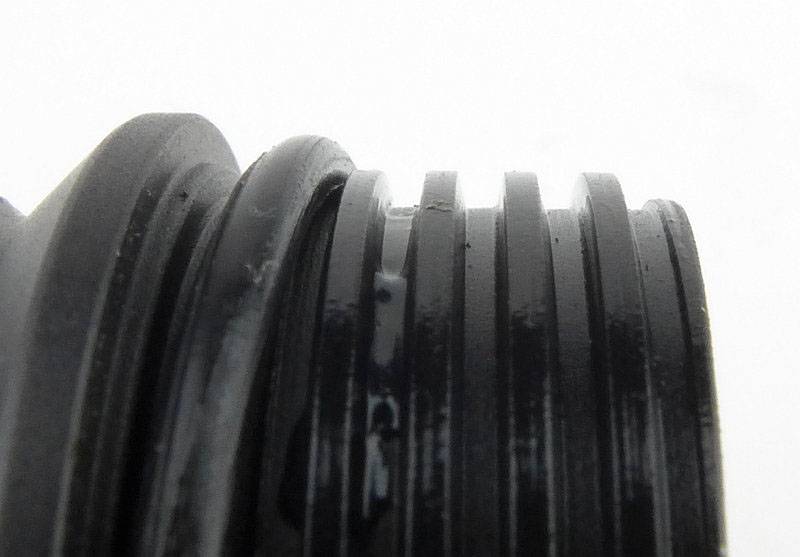
The threads are almost square, perfectly cut, fully anodised and well lubricated.
 photo 13 H10 threads P1150655.jpg

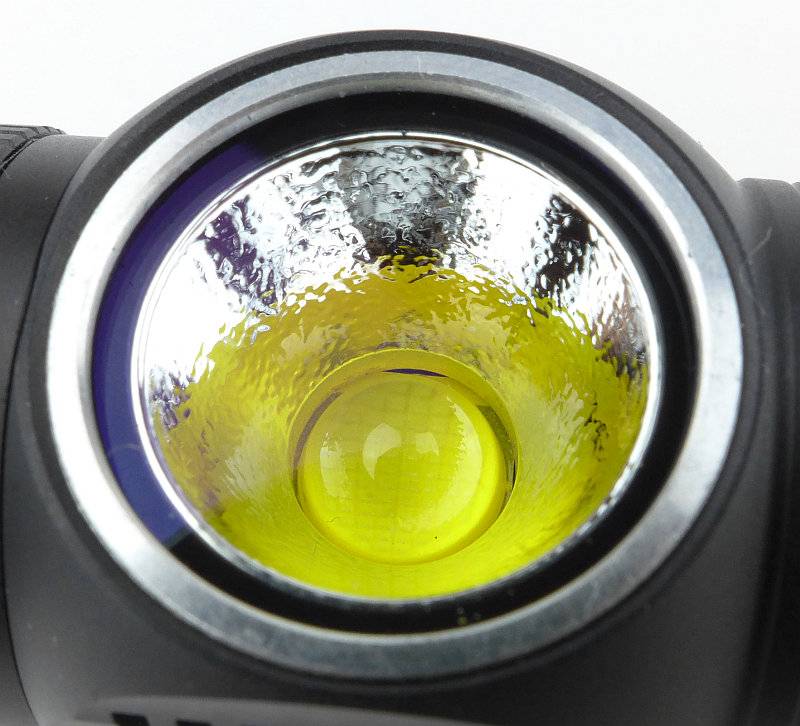
With a large MT-G2 LED the reflector is relatively small and is textured to further smooth the beam.
 photo 14 H10 reflector P1150660.jpg

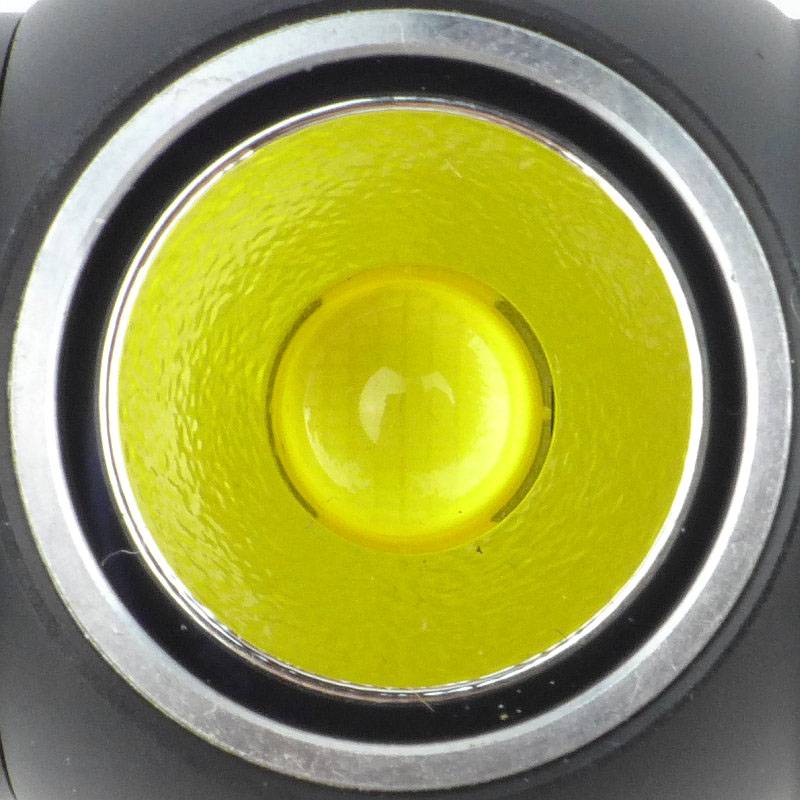
Looking straight at the MT-G2 LED.
 photo 15 H10 LED P1150662.jpg

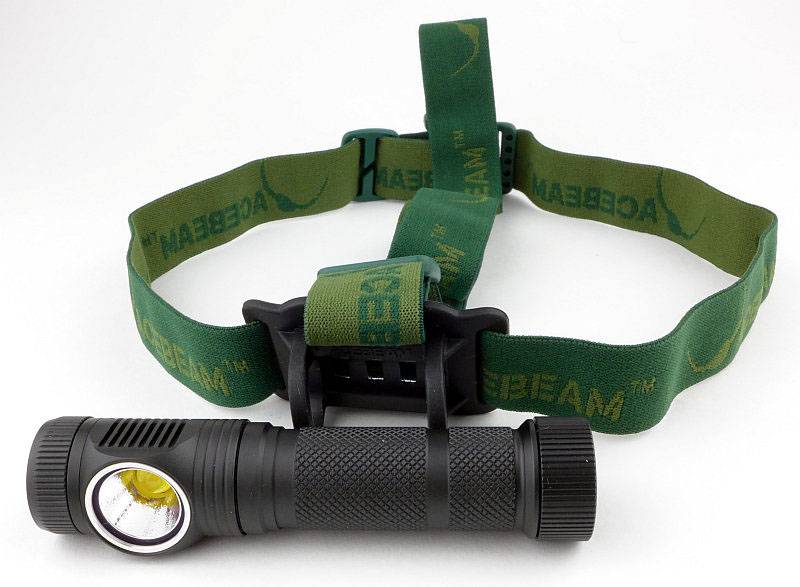
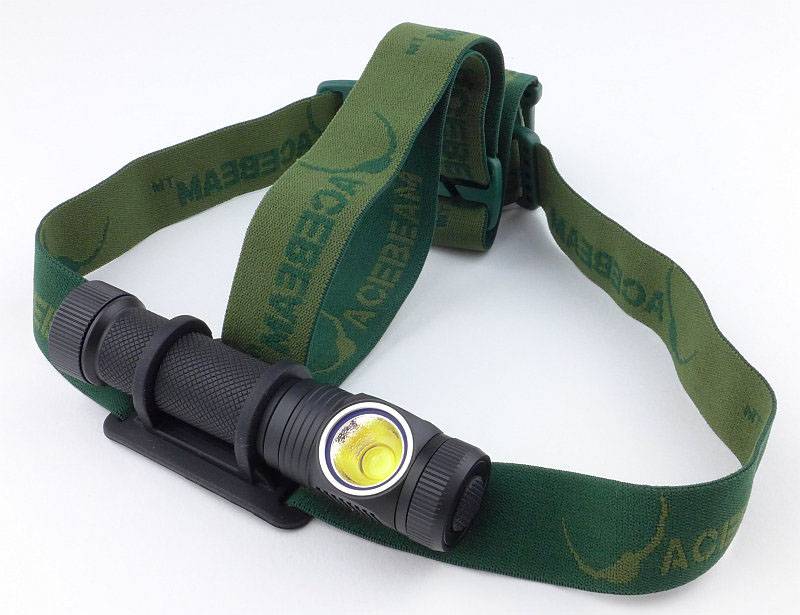
Of course the H10 can be used as a right-angle light, but it is intended as a headlamp. Here it is fitted in the headband mount.
 photo 16 H10 mounted P1150666.jpg

At the back, the top strap fits into the headband adjustment loop to help keep it centred.
 photo 17 H10 strap detail back P1150669.jpg

Though the mount is a soft rubber, the strap is threaded through the mount to keep the elastic strap itself against the user’s head. This provides maximum comfort.
 photo 18 H10 mount detail back P1150673.jpg

Some of the detail in the rubber mount’s moulding.
 photo 19 H10 mount detail front P1150682.jpg

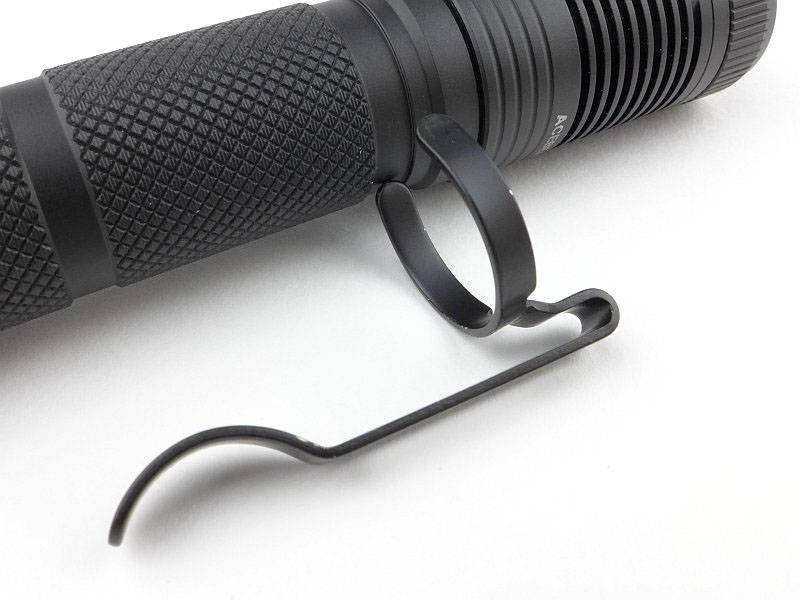
A pocket clip is provided for when the H10 is used out of the headband mount. It clips into either one of the grooves that are used for the headband mount. You cannot leave the clip on and fit it back into the headband mount properly. The clip is stiff to fit and has already marked the anodising.
 photo 20 H10 clip P1150687.jpg

The beam

Please be careful not to judge tint based on images you see on a computer screen. Unless properly calibrated, the screen itself will change the perceived tint.

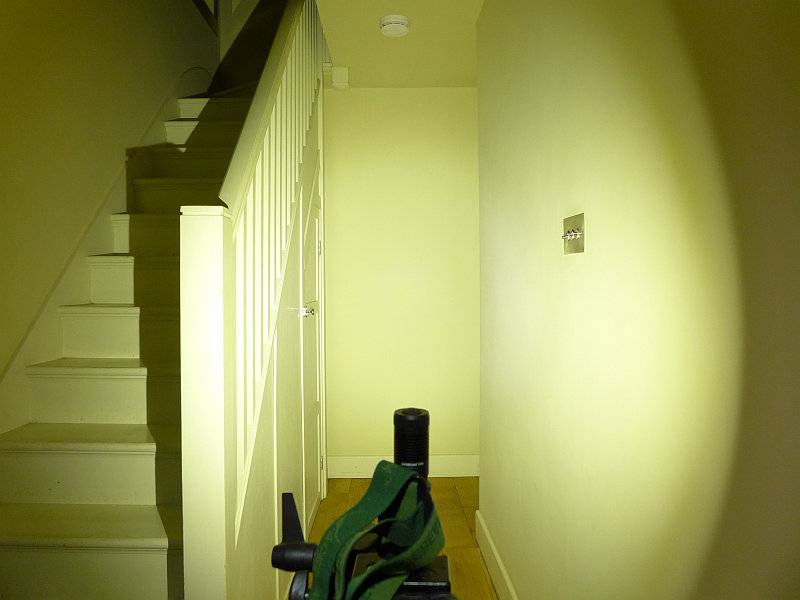
The indoor beamshot is intended to give an idea of the beam shape/quality rather than tint. All beamshots are taken using daylight white balance. The woodwork (stairs and skirting) are painted Farrow & Ball “Off-White”, and the walls are a light sandy colour called ‘String’ again by Farrow & Ball. I don’t actually have a ‘white wall’ in the house to use for this, and the wife won’t have one!

For most purposes, a headlamp benefits from a flood beam, as it is generally used as task light. The H10, with its large LED and small reflector doesn’t disappoint, with a wide and even flood beam.
 photo 22 H10 indoor beam P1170359.jpg

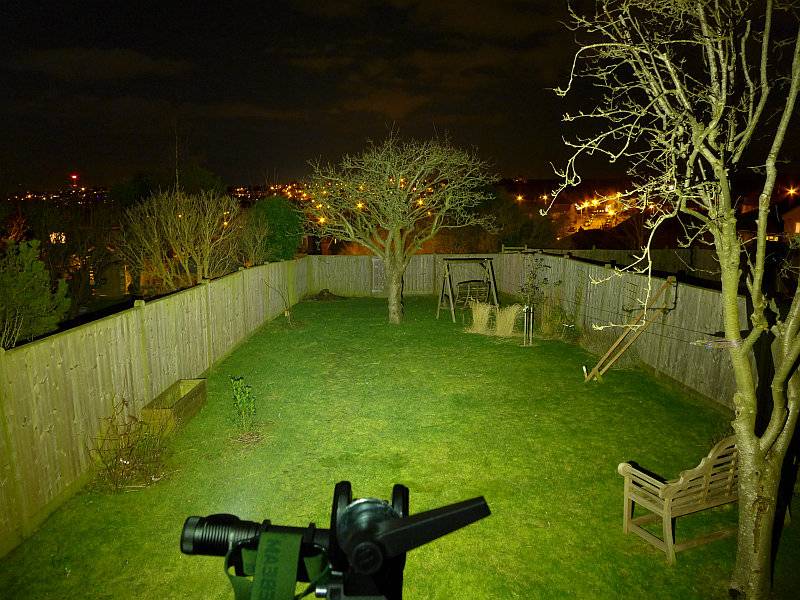
Moving outdoors, this headlamp does have enough power to give it some range despite the flood beam and the area is evenly lit.
 photo 21 H10 outdoor beam P1170276.jpg

Modes and User Interface:

The H10 has a two-stage domed button switch, and surrounding this a selector ring. The selector ring has four tactile stops for the four normal modes (1000lm, 500lm, 200lm, 30lm).

At any time (either from OFF or from any normal mode) a full press of the button gives you the maximum output 2000 lm Burst mode. When the button is released, the H10 returns to the previous state (either from OFF or any normal mode).

To turn onto a normal mode, half-press the button and hold for 2s. The H10 will then come onto the mode set by the selector ring. The mode can be pre-selected before turning on, or selected once the H10 is on.
To turn OFF, half-press the button and hold for 2s.

Batteries and output:

The runs on a supplied LG18650HE2 20A 2500mAh IMR 18650 cell, but can use any button top 18650 or 2xCR123, both of which will limit the maximum output.

To measure actual output, I built an integrating sphere. See here for more detail. The sensor registers visible light only (so Infra-Red and Ultra-Violet will not be measured).

Please note, all quoted lumen figures are from a DIY integrating sphere, and according to ANSI standards. Although every effort is made to give as accurate a result as possible, they should be taken as an estimate only. The results can be used to compare outputs in this review and others I have published.

___________________________________________ ________________________________ ________________________________
ACEBEAM H10 using supplied 20A IMR cell I.S. measured ANSI output Lumens PWM frequency or Strobe frequency (Hz)
___________________________________________ ________________________________ ________________________________
Burst 1940 0
High 998 0
Medium 481 0
Low 211 0
Firefly 31 0

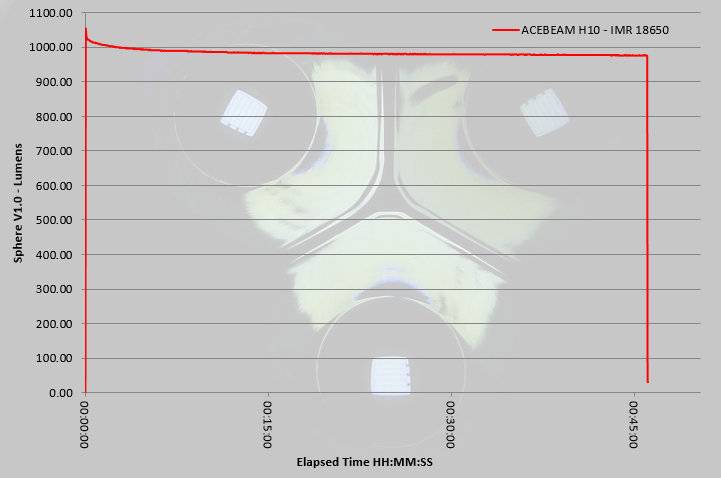
Peak Beam intensity measured 6800 lx @1m giving a beam range of 165 m.

There is parasitic drain at and average of approximately 62uA (it varies between 32 and 93uA) which would mean a fully charged 2500mAh cell will take 4.6 years to drain.

Due to the extreme nature of the 2000lm Burst mode and the requirement to keep the button pressed, the runtime was not measured for this output level. Instead the runtime was for the highest constant output level the 1000lm high mode. This 1000lm output is well regulated for as long as the cell can maintain it; a very good performance.
 photo ACEBEAM H10 runtime.jpg

Troubleshooting

This section is included to mention any minor niggles I come across during testing, in case the information helps anyone else.

No issues were encountered during testing.

As per the description of this section, this information is provided in case anyone else finds a similar ‘issue’ that might be fixed in the same way.

The ACEBEAM H10 in use

Two highlights of the H10 are its lovely smooth flood beam and the neutral/warm tint of the MT-G2 LED. These features allow you to focus entirely on the task you are doing and not even think about the headlamp.

A single 18650 makes for a comfortable weight to have head mounted, and thanks to the use of a top-strap as well, you don’t need to have the headband very tight for it to stay securely in place. A top-strap really does improve comfort. With the strap routed through the mount so that it is the strap itself that is against your forehead, again comfort is very good.

What I don’t like are interfaces that make you wait for the light to come on or go off, and unfortunately, the H10 requires a half-press, wait, and 2s later the light comes on (with the same for off). If you fully press the button by mistake you get the full 2000lm burst output, which is not a nice surprise, and you have to try again to get the H10 to come on. For every day use, I’d much prefer the on/off to be controlled by a simple click, and the burst to require a longer hold, but perhaps only 1s before it activates.

With gloves on, or with cold hands, I found the half-press unreliable, or at least my ability to find the half-press position. 2000lm when you wanted 30lm is not good.
Still, that beam is worth the wait when you are not rushing to do anything, and once on and running, the H10 melts away and you just have light.

Depending on how many lights you use, you might also not hit the right mode first time. There are no marks on the selector ring to indicate which mode you have chosen. A few simple marks would make the pre-selection of modes so much easier. If this was your main light you would quickly learn the positions, and there is a stop at each end of the selections, so you can simply turn it all the way one way until it stops, then count the clicks back to the mode you want.

Parasitic drain is acceptable, but with fully anodised threads you can lock-out the H10 easily.

The optional clip can be fitted into either groove on the body to give up or down positioning. Fitting is very stiff and does mark the anodising, so depending on if this bothers you, you may choose to make it a dedicated right-angle light or leave it as a headlamp. Swapping between the two will scratch the H10.

The H10 gives its specified outputs effortlessly including the impressive 2000lm burst mode (as long as you use IMR), and has not had any issues with heat. In normal use and for indoor jobs, I find the 1000 lm output too high so use it on 500lm or below. When outdoors I have ramped up to the 1000 lm mode but the added airflow seems to cope with the extra heat easily.

The lowest mode is named ‘firefly’…I would not want to meet the firefly that provides 31 lm! that 31 lm output with the flood beam is a great mode, and one I use a lot, but I’d prefer it if there was a 1lm or lower mode as a true firefly level.

Review Summary

_______________________________________________ _______________________________________________
Things I like What doesn’t work so well for me
_______________________________________________ _______________________________________________
2000 lm Burst mode. Half-Press-and-Hold for 2s to turn on and off.
Smooth flood beam. ‘Firefly’ mode a bit bright at 31 lm.
Secure and comfortable to wear. Mode selector ring has no markings.
Well regulated output. Pocket clip scratches the anodising.
Nice tint from the MT-G2 LED. Needs IMR for best performance.
20A IMR cell supplied.
Well spaced modes.

See ACEBEAM’s Website for more of the manufacturer’s specifications


Discussing the Review:

Please feel free to add comments to the review, but the ideal place to freely discuss these reviews is on a forum. If you started reading the shorter forum version of the review, but followed the link this full exclusive review, please return to that forum to discuss the review there.
If you read the review entirely on Tactical Reviews, please consider one of the following to join in any discussion.

CandlePowerForums – Flashlight Reviews Section (Largest and Friendliest Flashlight Community Forum)

EdgeMatters – Sponsored Reviews (UK based Forum for Knife Makers and Collectors)