Gear Review: NITECORE SC2 Charger and F1 Charger / Powerbank

With so many chargers to choose from, it can be difficult to pick one, so you may be looking for those models with a little more to offer. NITECORE’s SC2 and F1 chargers both have extra features that make them stand out, so let’s see what they are.

A few more details of the F1:

Starting with the smaller F1. Well ‘smaller’ doesn’t do it justice, this is tiny. I must also point out straight away, that this is not just a charger, but it is a powerbank as well. (NOTE: The F1 is only intended for charging Li-ion cells and needs a Li-ion for use as a USB powerbank.)
 photo 01 F1 boxed P1200108.jpg

Along with the F1, you get two rubber bands which are used to secure an 18650 in the charging slot. This is for when you use the F1 as a powerbank and want the cell to stay in place when you carry it.
 photo 02 F1 box contents P1200126.jpg

At one end of the F1 is a micro-USB socket which is used for the input power to charge the cell fitted into the F1.
 photo 03 F1 input P1200133.jpg

Switching to the other end, the F1 has a full size USB socket which can provide USB power output up to 1000mA.
 photo 04 F1 output P1200135.jpg

The F1 contacts are gold plated.
 photo 05 F1 contacts P1200140.jpg

With a spring loaded sliding contact, the F1 can be used for any of the following Li-ion cells; 26650/18650/17670/18490/17500/17335/16340(RCR123)/14500/10440.
 photo 07 F1 slider P1200150.jpg

Underneath is basic information about the input/output ratings of this charger/powerbank.
 photo 06 F1 underneath P1200144.jpg

A few more details of the SC2:

With the SC2 we have quite a step up in power, and one of the headline specifications is a 3A charge current (if using 3A in one slot the other can only provide 2A), ideal for IMR or high capacity cells. This charger is compatible with a huge list of cells including both Li-ion and Ni-Mh cells.
 photo 01 SC2 boxed P1220057.jpg

With the SC2 you get a suitable mains lead (in this case a UK plug) and the instructions. Don’t throw those instructions away, you will need them.
 photo 02 SC2 box contents P1220065.jpg

Relatively plain looking the SC2 is full of functionality.
 photo 03 SC2 angle top P1220075.jpg

On the top end of the SC2 are the inputs and outputs. The yellow figure-8 socket is for the mains lead. There is also a 12V DC input for use in a car. Above the mains input is a full size USB socket which provides up to 2.1A USB charging output.
 photo 04 SC2 inputs P1220078.jpg

Considering its capabilities, the layout is very simple. There is an indicator panel (lights only, no digits are displayed), two control buttons, and the two slots.
 photo 05 SC2 top P1220083.jpg

On the underneath there are four rubber feet and the list of supported cells.
 photo 06 SC2 underneath P1220084.jpg

It’s a huge list of supported cells; IMR / Li-ion / LiFePO4: 10340, 10350, 10440, 10500, 12340, 12500, 12650, 13450, 13500, 13650, 14350, 14430, 14500, 14650, 16500, 16340(RCR123), 16650, 17350, 17500,17650, 17670, 18350, 18490, 18500, 18650, 18700, 20700, 21700, 22500, 22650, 25500, 26500, 26650
Ni-MH(NiCd): AA, AAA, AAAA, C, D
 photo 07 SC2 compatibility P1220088.jpg

The contacts are the typical chrome plated type.
 photo 08 SC2 contacts P1220095.jpg

A nice detail is that the NITECORE name is stamped into the slider contact.
 photo 09 SC2 slider P1220099.jpg

All the various options are selected using the two buttons. The C and V represent the Current and Voltage settings you can select.
 photo 10 SC2 buttons P1220100.jpg

When first powered on, the SC2 shows a set of lights indicating the default of 2A charging current.
 photo 11 SC2 lights P1220107.jpg

What are they like to use?

The F1 is one of those ‘don’t need to think about it, just buy it’ products for me. Combining the function of a Li-ion charger and powerbank into a tiny, easy to carry, device just makes it a must have EDC device.
When you insert a cell, it also tells you the voltage, so will work as a cell checker as well. If you use li-ions and have a smart phone, you will want one of these.

I’ve given the review sample a really hard time, with the worst conditions being the F1 having a 26650 fitted and used as a powerbank for a set of USB lights that try to draw 3A. Considering this should only output 1A, the actual output current was around 1.5A. Like this it was allowed to run constantly all day for a couple of weeks, swapping the 26650 when required. During this time the F1 did get hot, but expecting this to become a destructive test due to the extended abuse, I was impressed to find the F1 survived this without any issues.

For more details, have a look at the instructions by clicking on this image for the full size version. (Depending on your browser you might need to ‘right-click’ and ‘open in new tab/window’.)

Hidden within the casing are three green indicator lights. These tell you the cell voltage when inserting a cell, the remaining capacity when using as a powerbank, or the charging status when charging a cell.
 photo 08 F1 lights P1200154.jpg

The ideal cell for powerbank use is an 18650, and the supplied rubber bands fit this size cell perfectly. This is how it looks when you have it ready to carry as a powerbank.
It is important to note that there is parasitic drain when in Powerbank configuration which in the sleep/low power mode measures at 390uA. When using a 3100mAh cell it will take 331 days to drain the cell.
According to the YZX Studio Power Monitor, the output of the USB charging port is ‘Android DCP 1.5A’ meaning the D+ and D- lines are shorted.
 photo 09 F1 powerbank P1200158.jpg

Once you are back at home/work, just top up the cell with any USB charging point. Of course another major advantage of the F1 as a powerbank is that you can carry spare cells for it, and swap as needed.
 photo 10 F1 charging P1200169.jpg

Now onto the SC2. This is a very versatile charger, but I have to say it has not been the easiest to work with. Using the defaults is easy. Turn it on, and pop in your cells, the SC2 will charge them quickly, but it is when you want to change modes that it hasn’t been that easy. Because of this I’m not even going to attempt to explain so you definitely will want to refer to these instructions. I did find that some double clicking was required to enter manual mode. This is not mentioned in the instructions, so if it is not responding as you expect, try a double click.
Click on this image for the full size version. (Depending on your browser you might need to ‘right-click’ and ‘open in new tab/window’.)

Here is an IMR cell (from the TM03) charging on defaults. It is now displaying a full charge, as during charging the current lights show the charging current, and the voltage lights are used to display charging status with three LEDs. Once the three LEDs remain on steady, the cell is fully charged.
 photo 12 SC2 lights with cell P1220112.jpg

It is important to note that due to the high charging current, the SC2 will terminate a little early. You don’t quite get a completely full charge. You can always pop the mostly full cell into another charger for that final top-up but you don’t really need to.
This graph has three traces on it and two of them compare the SC2 and D4 chargers (both used to charge the TM03s’s cell).
The SC2’s slightly early termination can be seen with the earlier drop to low mode at around 1h 20m. Considering the vast reduction in charging time, this minor loss in overall output is well worth it.
 photo TM03 runtime.jpg

There is one major design flaw with the SC2 sent to me. The numbers on the display to show current and voltage are only printed on the plastic film on the display. When you unpack the charger you normally expect to remove a protective film from the display. As you do this, you find the numbers come off as well!
I had to put the film back on after finding this which is why there are some bubbles under the film.
My advice is to NOT remove the protective film (unless you have confirmed the number are now printed on the actual display.
 photo 13 SC2 lights close P1220116.jpg

As explained in the user manual, Slot 2 and the USB charging output contend with each other. If the cell in Slot 2 is charging the USB output is stopped. So you can charge a cell in Slot 1 and a USB device at the same time, but if using Slot 2, only once the cell is charged does the USB charging work.
 photo 14 SC2 USB charging P1220122.jpg

Review Summary

The views expressed in this summary table are from the point of view of the reviewer’s personal use. I am not a member of the armed forces and cannot comment on its use beyond a cutting tool or field/hunting knife.

Something that might be a ‘pro’ for one user can be a ‘con’ for another, so the comments are categorised based on my requirements. You should consider all points and if they could be beneficial to you.

_______________________________________________ _______________________________________________
Things I like What doesn’t work so well for me
_______________________________________________ _______________________________________________
F1 – Tiny Li-Ion Charger. F1 – Parasitic drain could be lower.
F1 – Tiny Powerbank with changeable cell. F1 – Cell quite easily knocked even with rubber band.
F1 – charges from any micro-USB charger.
SC2 – Super Fast 3A Charger. SC2 – Display Labels Printed on removable protective film.
SC2 – USB charger output. SC2 – Mode changing a bit tricky.
SC2 – Huge list of compatible cells. SC2 – Cells not quite fully charged.
SC2 – Mains and 12V power options.


Discussing the Review:

Please feel free to add comments to the review, but the ideal place to freely discuss these reviews is on a forum. If you started reading the shorter forum version of the review, but followed the link this full exclusive review, please return to that forum to discuss the review there.
If you read the review entirely on Tactical Reviews, please consider one of the following to join in any discussion.

EdgeMatters – Sponsored Reviews (UK based Forum for Knife Makers and Collectors)

CandlePowerForums – Knife Reviews Section (Largest and Friendliest Flashlight Community Forum)

EDC Gear Review: Nite Ize S-Biner with SlideLock, MicroLock plus GearLine

There are some things that are so useful you can’t really image life without them. Nite Ize’s S-Biners are one of those designs that have simply integrated themselves into so many of my every-day activities I’d be lost without them. For some these will need no introduction, but if you haven’t used them before it is very likely the S-Biner is going to find a way into your selection of gear.

 photo 01 NiteIze S-Biner Group boxed P1210803.jpg

A few more details:

In the introduction image are all the versions of the S-Biner featuring in this review, which include the S-Biner – #10, S-Biner – #8, S-Biner SlideLock, S-Biner MicroLock, S-Biner® MicroLock® – Polycarbonate, KeyRack Locker® – Polycarbonate S-Biner® MicroLocks® and GearLine Organization System 4FT.

Moving forward I’m breaking this down into three groups, the larger S-Biners, micro S-Biners and the Gearline system.

Starting with the BIG S-Biner – #10 and S-Biner – #8, plus the S-Biner SlideLock.
 photo 02 NiteIze S-Biner Group1 P1210807.jpg

Here are the first set of S-Biners
 photo 04 NiteIze S-Biner Group1 unboxed P1210814.jpg

The packs say ‘BIG’, and big they are. These are the two largest S-Biner models. They only come in plastic versions and give you the option of a super-sized clip.
 photo 05 NiteIze S-Biner large in hand P1210818.jpg

Of course the SlideLock S-Biners are much more normal in size for clipping keys and anything else to bags, belts etc.
 photo 06 NiteIze S-Biner small in hand P1210829.jpg

With the SlideLock, you can see the black plastic slider on each gate. Here the top one is locked and the other unlocked.
 photo 11 NiteIze S-Biner slide P1210855.jpg

The instructions for the SlideLock are very clear, but you don’t need these, it is obvious how simply and easily they work.
 photo 03 NiteIze S-Biner lock P1210813.jpg

Looking in closer at the slider, it is shaped so that it won’t easily fall off the gate bar.
 photo 12 NiteIze S-Biner slider P1210858.jpg

In the locked position the gate is positively held closed so the S-Biner won’t get twisted off and become lost.
 photo 13 NiteIze S-Biner slide locked P1210865.jpg

Next up are the real key-ring sized S-Biner models the Micro-versions. In this case these all feature the micro-lock design.
 photo 07 NiteIze S-Biner Group2 P1210830.jpg

We have the standard metal S-Biner MicroLock, then the ultra-light Polycarbonate S-Biner® MicroLock®, and lastly the KeyRack Locker® – Polycarbonate S-Biner® MicroLocks® where the keyrack is metal and the S-Biners are Polycarbonate.
 photo 08 NiteIze S-Biner Group2 unboxed P1210841.jpg

The MicroLock is a stroke of genius. With the smaller clips you are often carrying vital objects like keys. Previously the smallest S-Biners were pretty secure, but with the MicroLock you remove all doubt.
In the middle is a small plastic arm which rotates. When aligned lengthways, the gates are unlocked, but when turned cross-ways and clicked into the locked position, both gates are locked shut. Sitting on these or otherwise giving them a hard time won’t shift those gates – believe me, I’ve given them a run for their money and the lock has not let me down.
 photo 09 NiteIze S-Biner micro close P1210846.jpg

Same hand (I take an XL size glove by-the-way) and these are as small as they can be, but still easy to use.
 photo 10 NiteIze S-Biner Group2 in hand P1210852.jpg

Lastly in this review is a logical extension of the usefulness of the S-Biner, and that is the GearLine. This is the GearLine Organization System 4FT.
 photo 15 NiteIze S-Biner gearline P1210873.jpg

This system contains 5 x #2 and 5 x #4 Plastic S-Biners on a special webbing strap with 2 x 12″ Gear Ties, one on each end.
 photo 16 NiteIze S-Biner gearline unboxed P1210880.jpg

The Gear Tie fresh out of the box.
 photo 17 NiteIze S-Biner gearline end P1210883.jpg

Along the webbing strap are a series of loops formed by the double layer of webbing.
 photo 18 NiteIze S-Biner gearline loop P1210887.jpg

Two sizes of plastic S-Biners are used (#2 and #4).
 photo 19 NiteIze S-Biner gearline sizes P1210891.jpg

Quickly comparing the S-Biners in the GearLine system and the three sizes of SlideLock S-Biners.
 photo 20 NiteIze S-Biner gearline comparing P1210894.jpg

Those Gear Ties just untwist and are a stronger version of twisty-ties.
 photo 21 NiteIze S-Biner gearline twist P1210900.jpg

What it is like to use?

Anyone leading an active life and who uses a variety of gear will need and use clips and karabiners of various types. The biggest revelation of the S-Biner design over karabiners is the double-gate. This keeps the item you are carrying secured separately to whatever you are attaching it to. A simple thing, but it means that when you open one gate or the other, you are either releasing the item, or taking the S-Biner off from the attachment point.
With a standard karabiner when you open the gate both the item carried and the fixing point can be released; not always what you want. Intended as true load-bearing devices, the karabiner is usually larger and heavier than you might want. Not only does the S-Biner take a karabiner to a more useful layout, but it is also not as big and heavy, as it is not intended to carry the weight of a person.

When preparing this review I wondered how I would show the extent to which I use these, but while standing there in my photo studio, I just patted myself down and pulled all these out of my pockets/belt. We’ll take these one at a time in a moment, but you see how integrated these are.
 photo 24 NiteIze S-Biner in use P1250369.jpg

So the biggest here is a torch/flashlight pouch which is clipped onto my belt or belt loop, or onto my backpack.
 photo 25 NiteIze S-Biner pouch P1250374.jpg

Mainly a marker, this Glo-Toob is left to flap about (normally on my backpack) so needs the extra security of a locking S-Biner.
 photo 26 NiteIze S-Biner glo-toob P1250377.jpg

A couple of work related items which need to go from one bag to another and the KeyRack holds a SecurID tag and a USB flash drive. There is normally another flash drive on here but it has been lent at this time.
 photo 27 NiteIze S-Biner serureid P1250381.jpg

On this kevlar cord retracting key ring is a MicroLock S-Biner that has been particularly heavily tested. Sat on, caught in doors and accidentally hooked onto this and that, the door entry tag has never come loose.
 photo 28 NiteIze S-Biner door tag P1250386.jpg

Then my keys. Pretty heavily loaded with more non-key items in the wrap, but outside the widgy pry-bar and a TUBE light are held securely with the plastic MicroLocks.
 photo 29 NiteIze S-Biner widgy P1250389.jpg

So that GearLine, where is it? When I go camping I do use this inside the tent, but it also has an every-day use, which for me is in the boot (trunk) of the car. Fixed between two headrest posts, the GearLine gives me lots of fixing points to stop various items moving round. Most often I use this to keep shopping bags from rolling around and emptying themselves, but other things go on and off the S-Biners.
 photo 23 NiteIze S-Biner gearline car P1250346.jpg

The only aspect of the S-Biner that occasionally causes a problem is that there is a groove in each hook where the gate bar sits when it is closed, and when taking the S-Biner out of a tight-fitting loop, sometimes this groove catches and makes it difficult to remove. Other clip designs also have this but the S-Biners somehow seem to catch more than most. I certainly forgive the design this minor flaw as overall the S-Biner makes the karabiner a practical true ever-day carry item and I would not be without them.

The BIG S-Biners also bring this practicality to a much larger scale. I carry the #10 S-Biner as a backpack hook and use it to hang the bag on tree limbs, rails and any other suitable hanging point up to the thickness of your wrist.

You have a choice of size, weights (plastic or metal), materials which are either stronger or anti-scratch as well as two types of lock.

Review Summary

The views expressed in this summary table are from the point of view of the reviewer’s personal use. I am not a member of the armed forces and cannot comment on its use beyond a cutting tool or field/hunting knife.

Something that might be a ‘pro’ for one user can be a ‘con’ for another, so the comments are categorised based on my requirements. You should consider all points and if they could be beneficial to you.

_______________________________________________ _______________________________________________
Things I like What doesn’t work so well for me
_______________________________________________ _______________________________________________
Double-Gate karabiner design. Sometimes catch when removing from tight loops.
Choice of Sizes. (seriously can’t think of anything else)
Choice of Materials.
Choice of two types of lock.
GearLine extends functionality.

 photo 14 NiteIze S-Biner group 1 2 P1210871.jpg


Discussing the Review:

Please feel free to add comments to the review, but the ideal place to freely discuss these reviews is on a forum. If you started reading the shorter forum version of the review, but followed the link this full exclusive review, please return to that forum to discuss the review there.
If you read the review entirely on Tactical Reviews, please consider one of the following to join in any discussion.

EdgeMatters – Sponsored Reviews (UK based Forum for Knife Makers and Collectors)

BladeForums – Knife Reviews (US based Forum for Knife Discussion)

CandlePowerForums – Knife Reviews Section (Largest and Friendliest Flashlight Community Forum)

EDC Gear Review: Leatherman MUT Multi-tool

The MUT (Military Utility Tool) is billed by Leatherman as “the first multi-tool that functions as both a tactical and practical tool for military, LE, or civilian shooters” and is packed full of functions not found in other multi-tools.
With so much detail to cover, this review has turned into a rather extended look at this interesting multi-tool, so has even more images than I normally include!

 photo 00 MUT feature P1200868.jpg

Talking through the features:

Before diving into all the detail, I wanted to have a look at a few more of the descriptions and specifications from Leatherman.

“The MUT features multiple areas on the tool threaded for cleaning rods and brushes and all the screwdriver bits are sized for standard military and civilian sighting adjustment work.”
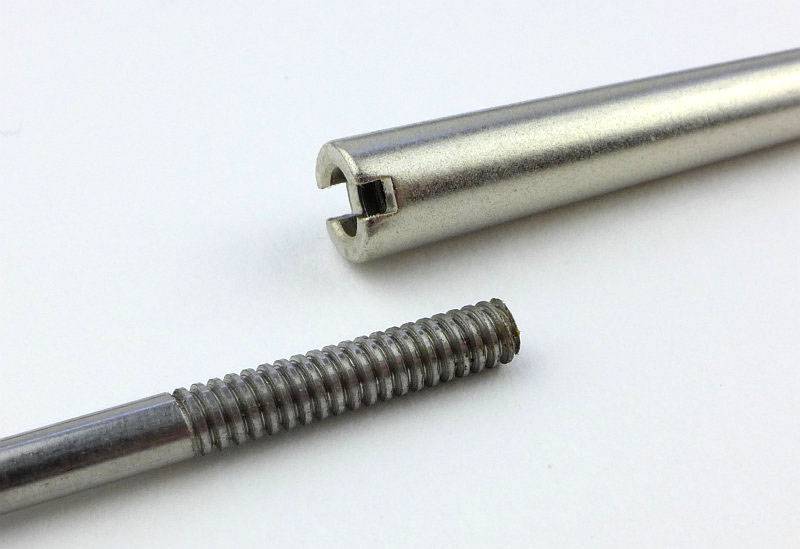
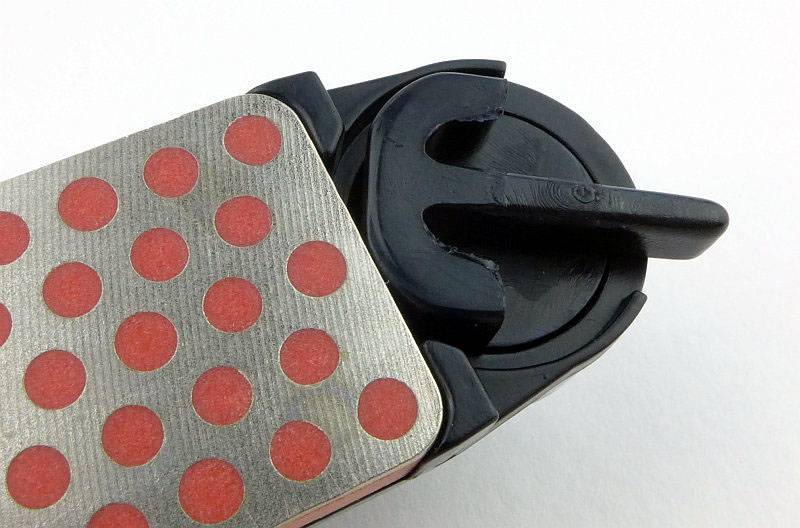
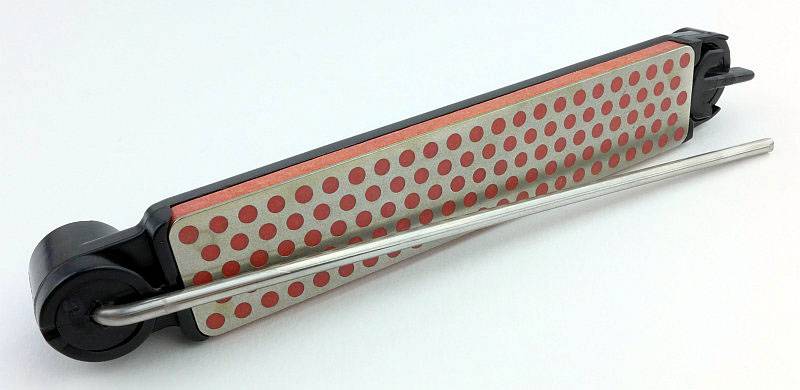
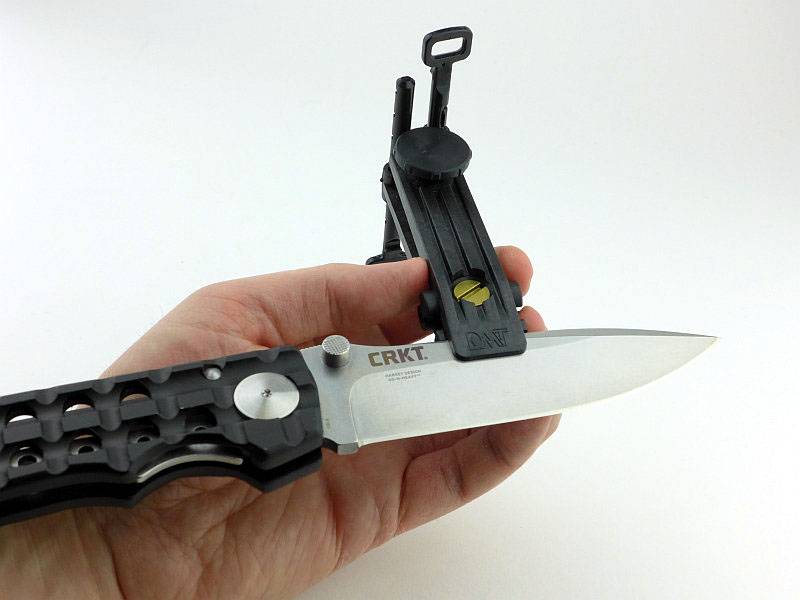
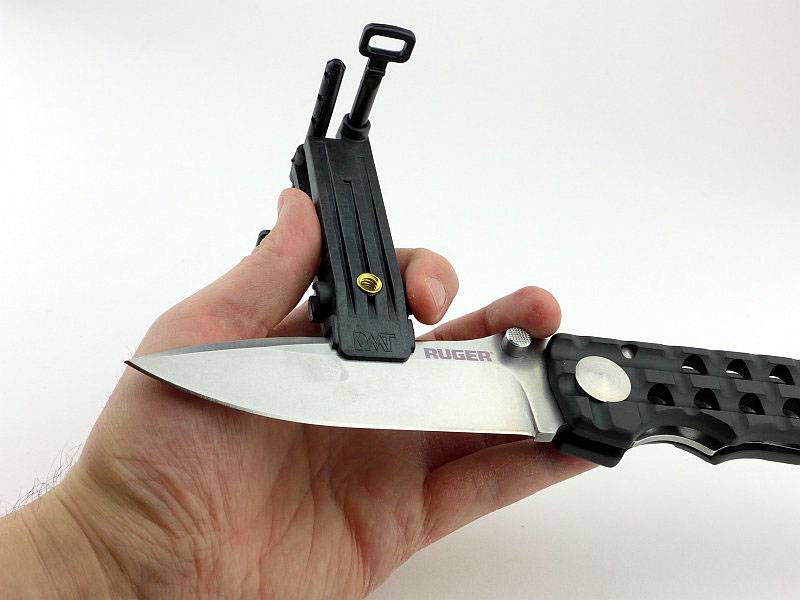
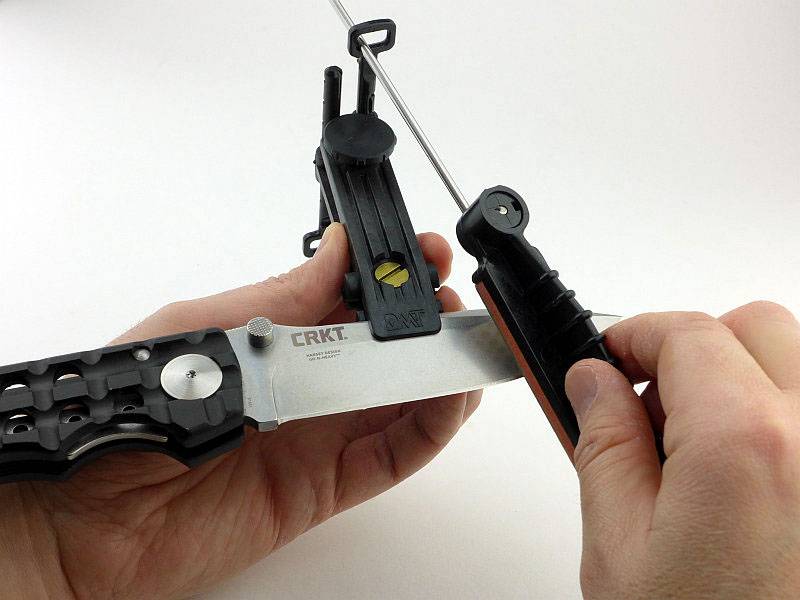
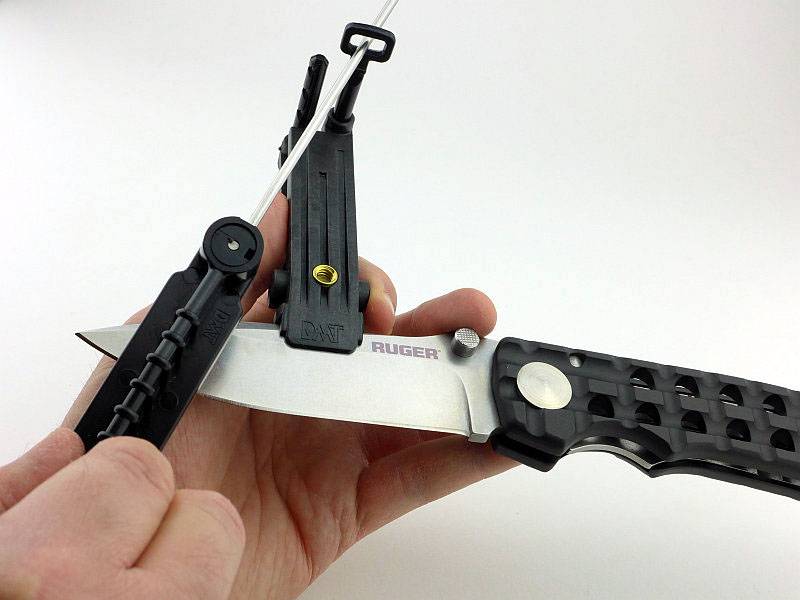
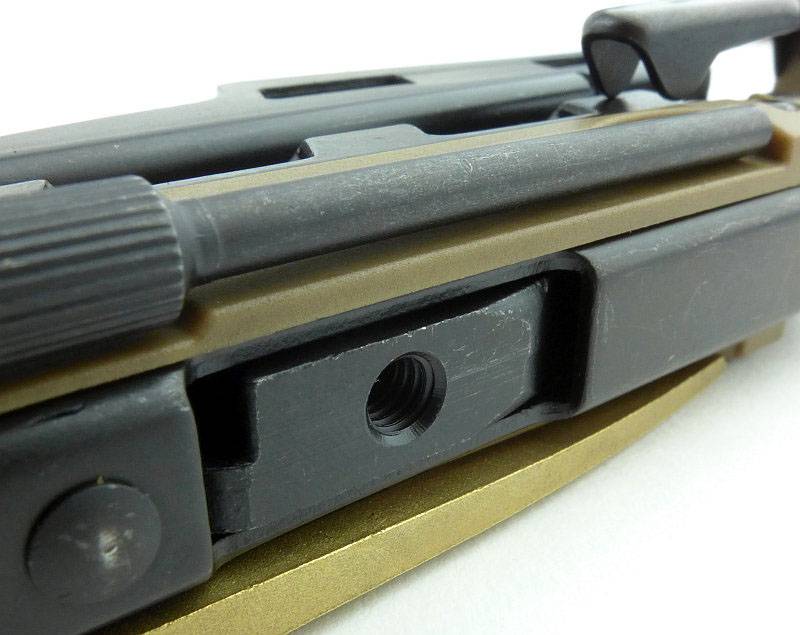
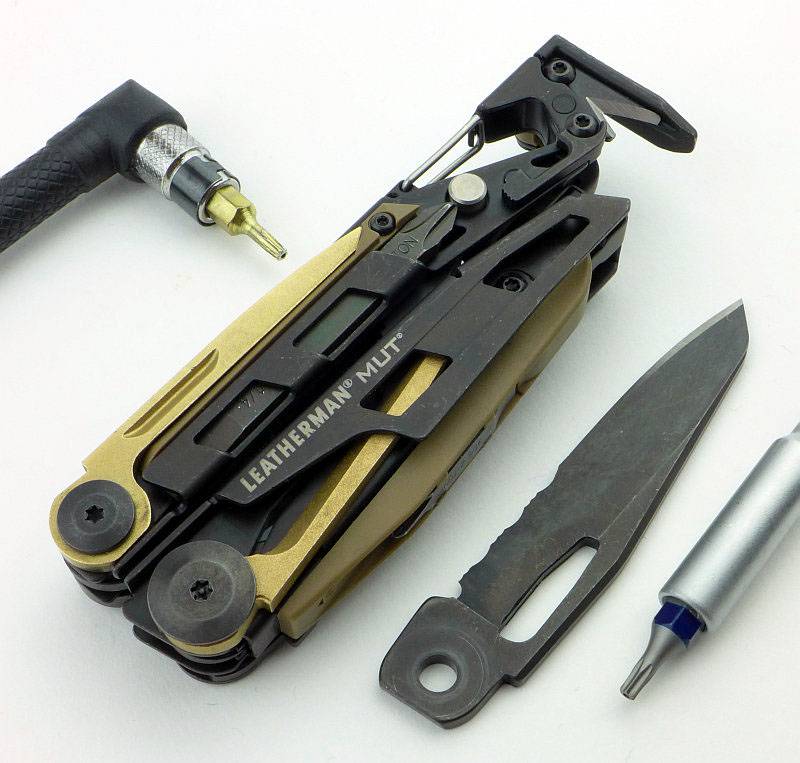
When it comes to cleaning rod/brush use, you have the choice of two main connection points, the threaded hole in the side of the MUT and the threaded post onto which the punch screws. Either can act as a substitute handle for a rod or brush. This is pretty good in theory, but in practice, for myself, it did not work terribly well. All my multi-part rods are based on the handle having the first rod section permanently attached to it. If you are missing this first part (so need the MUT as a handle), the rod will be too short to reach all the way through the barrel. Still a useful feature, as a brush can be directly fitted and used to scrub areas round the breech and into the chamber, and that in itself is worth it.

“Also built into the design of the tool is the flexibility to replace the most commonly used parts on the spot, using a simple Torx #8, keeping down-time to a minimum.”
This is an excellent feature. Also included with the review sample was the maintenance kit (details to follow), and this allows for replacement of the wire-cutter blades, punch, scraper and line cutter, so you can happily give all these plenty of use, knowing it is easy to bring them back to like-new performance once they wear out. Designing in replaceable parts, means you can buy the tool knowing it is a long term investment and can be maintained.

“With all this, a MOLLE sheath and scope adjustment wrench included, the Leatherman MUT may very well be the most efficient and useful piece in your kit.”
Unfortunately, despite the well designed sheath, the fact that the sight adjustment wrench is a separate item means it can more easily be lost.

On Leatherman’s website (at the time of writing), officially the specification is that the MUT has 16 tools (plus an additional wrench/sight tool). The first six items in the list, Needle-nose Pliers, Regular Pliers, Premium Replaceable Wire Cutters, Premium Replaceable Hard-wire Cutters, Stranded-wire Cutters and Electrical Crimper, are all aspects of the main pliers in the MUT.

 photo 78 MUT diagram P1210064.jpg

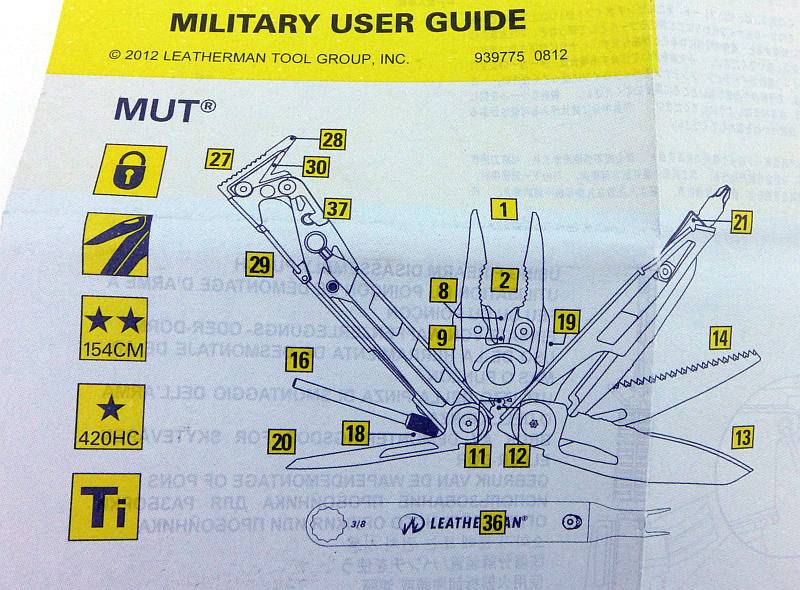
The rest of the list refers to more distinct tools, and is in fact a little light on detail. Taking those straight forward features first, you have the 420HC Combo Knife, Wood Saw, Replaceable Cutting Hook, Hammer, Bolt Override Tool, Replaceable Bronze Carbon Scraper, #8-32 Cleaning Rod/Brush Adapter, Replaceable Firearm Disassembly Punch, Karabiner/Bottle Opener, and a separate 3/8” Wrench and Front-Sight Adjustment Accessory.

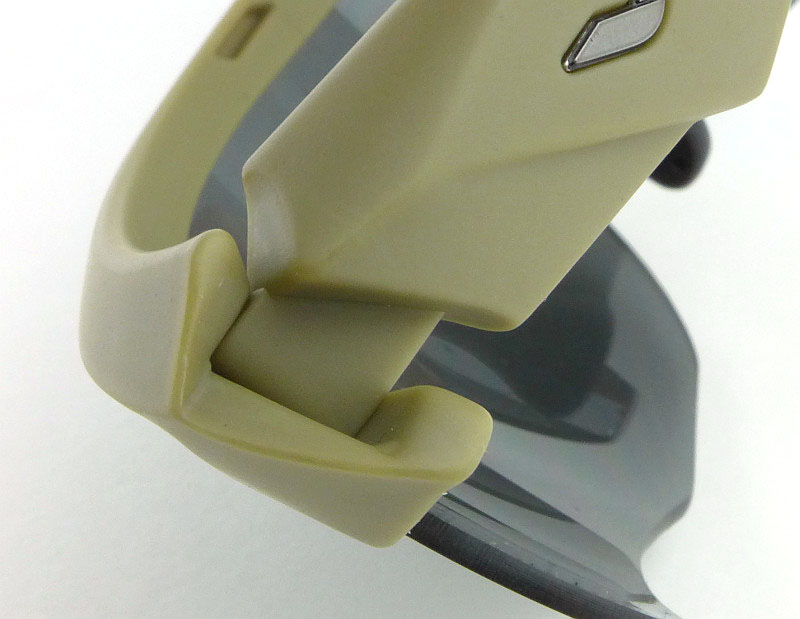
One of the less understood features is the Bolt Override Tool. Really all this consists of is a strong hook that you can use to drag back the bolt on an AR instead of using the charging handle (or something more dangerous like a knife), to free up a jammed cartridge. Thanks to the design of the MUT you can easily apply a lot of force to the bolt for those stubborn jams that require this.

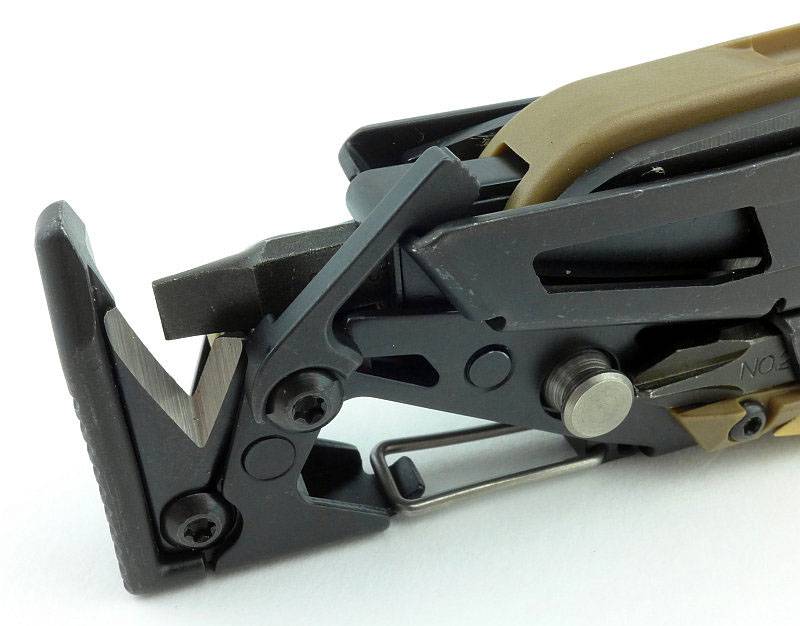
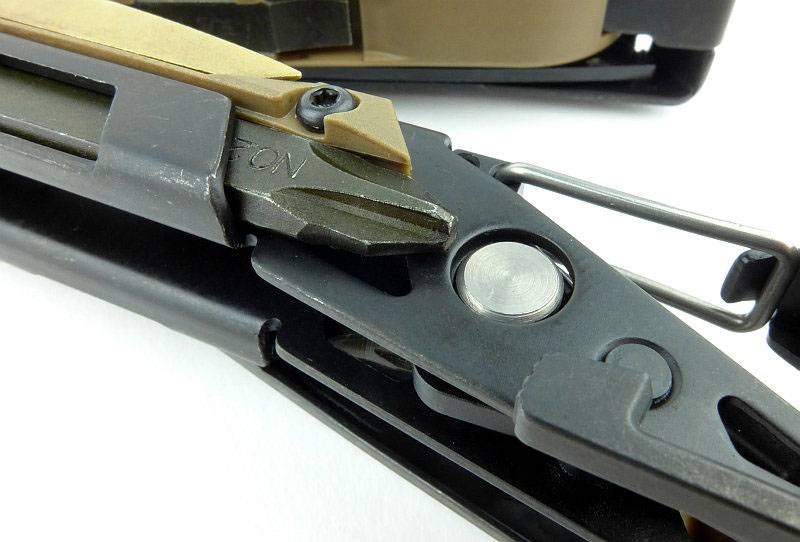
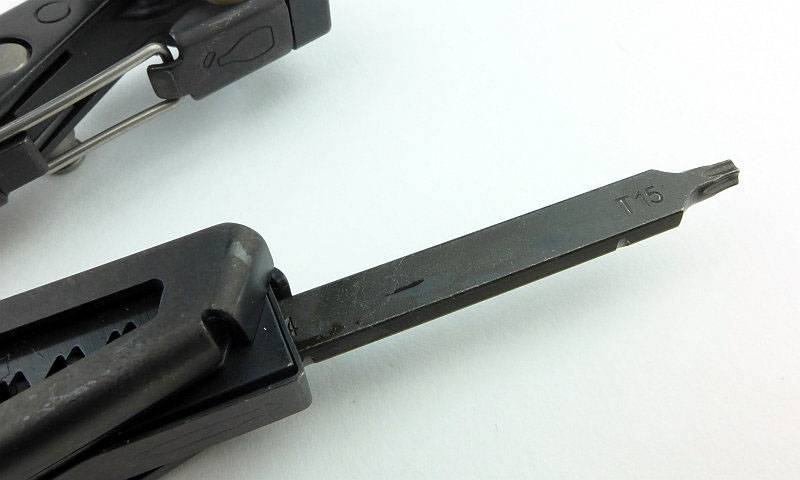
The last feature which is underplayed somewhat is the Large Bit Driver, which is a bit holder for the three double-ended screwdriver bits that are included in the MUT. The bits are the short PH1-2 + 3/16 Flat, plus the two long double-ended bits which have T15 + Hex 7/64, PH2 + 1/4 Flat. Of course with the Leatherman bit set, you can expand on this selection of bits.

Lastly for this section a few notes on some of the materials used in the MUT. The blade is made from 420HC Stainless Steel, an improved, high-carbon (HC) form of 420 stainless steel. The replaceable wire cutter blades are made from 154CM Stainless Steel. To prevent damage to steel parts, the carbon fouling scraper is made from Bronze. Then there is the tool coating of Black Oxide; Black oxide is a powder-based metal coating effective in reducing glare and reflection.

A few more details:

Before really getting our teeth into this review, I will mention once again that the full review has a total of 84 images in it, so shows a great deal of detail. If you want a close look at this tool, here it is.

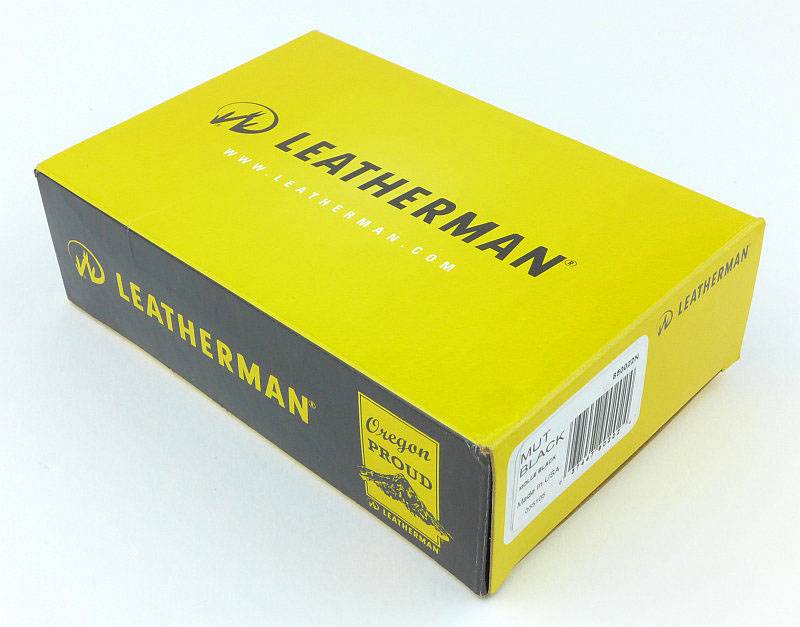
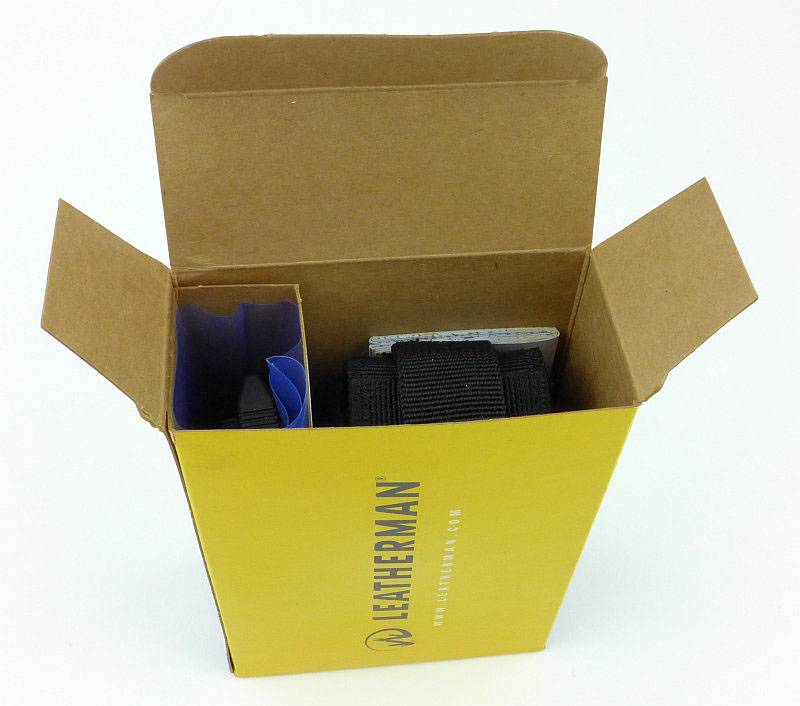
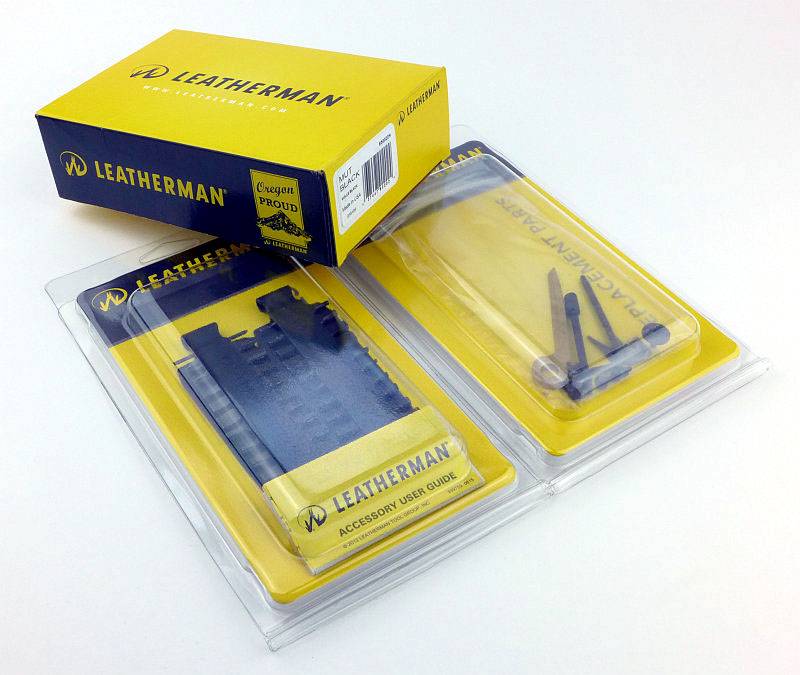
The MUT’s very yellow box.
 photo 01 MUT boxed P1200708.jpg

In the box, there is a separate compartment for the tool.
 photo 02 MUT box open P1200712.jpg

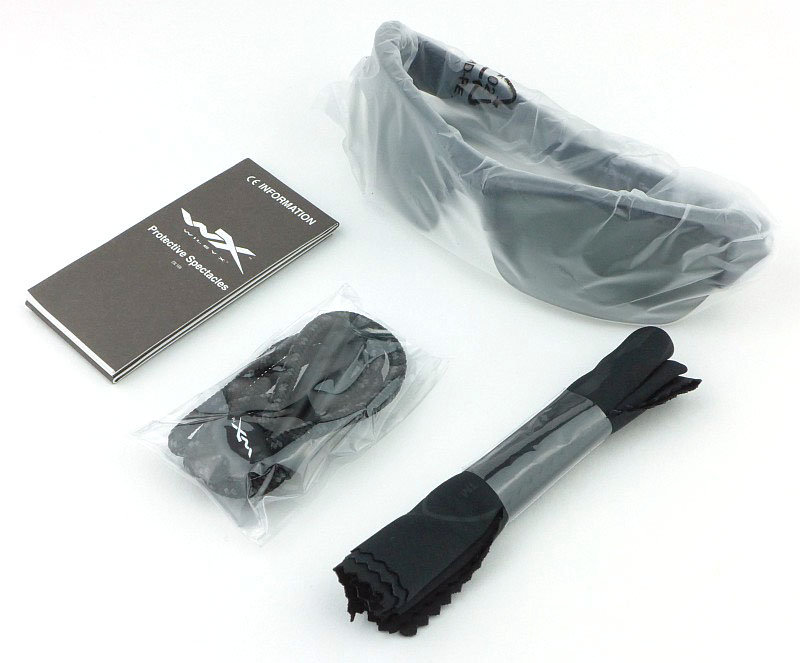
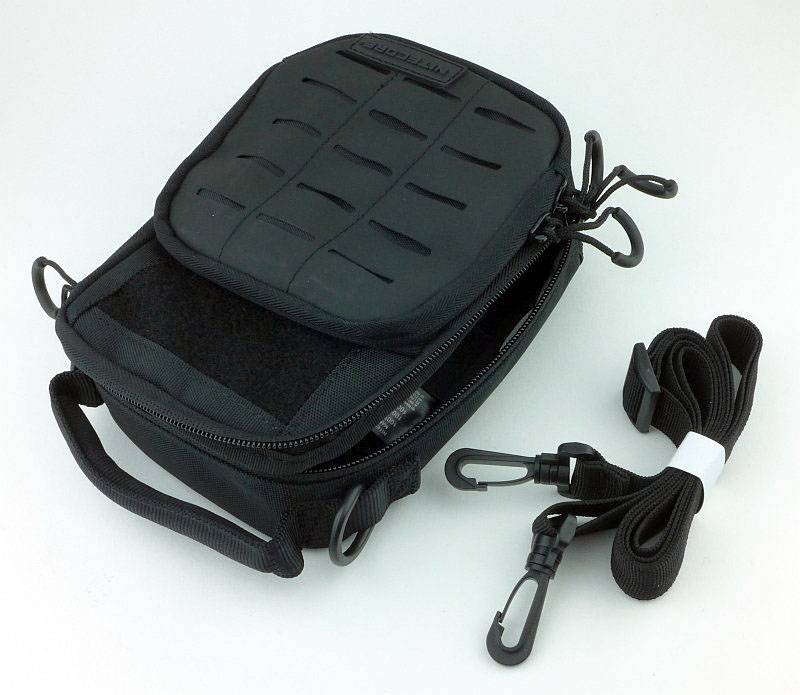
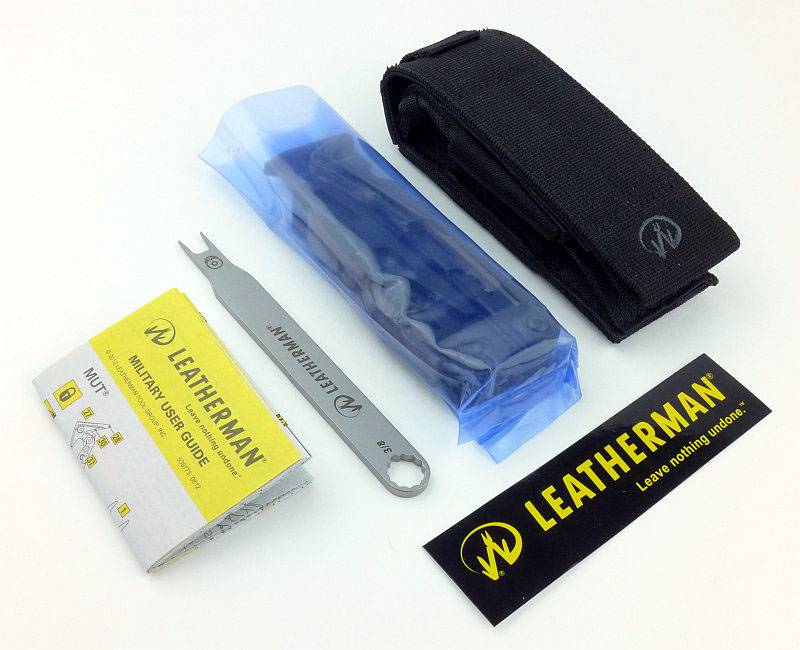
Here are the box contents laid out. You get the MUT, sight tool, holster, instructions and a sticker.
 photo 03 MUT box contents P1200716.jpg

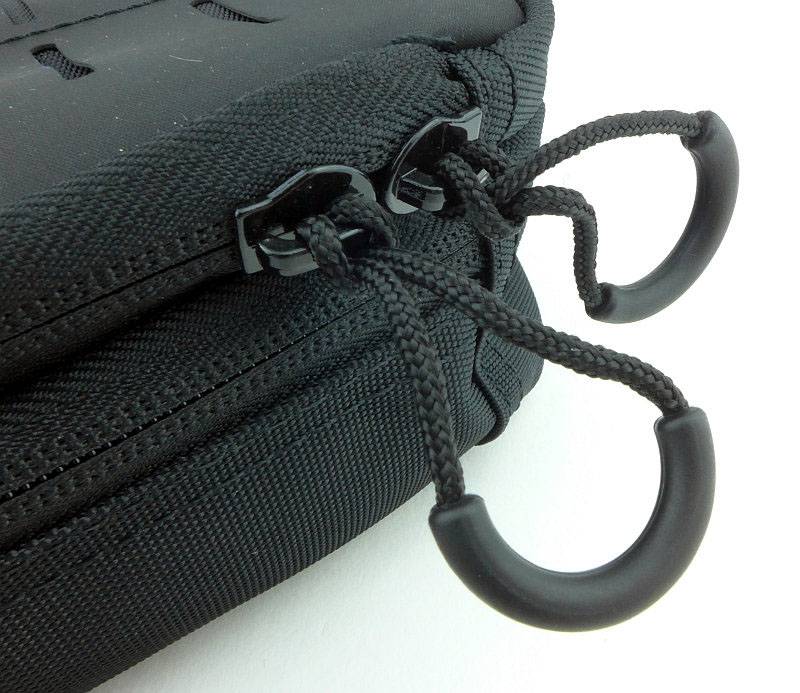
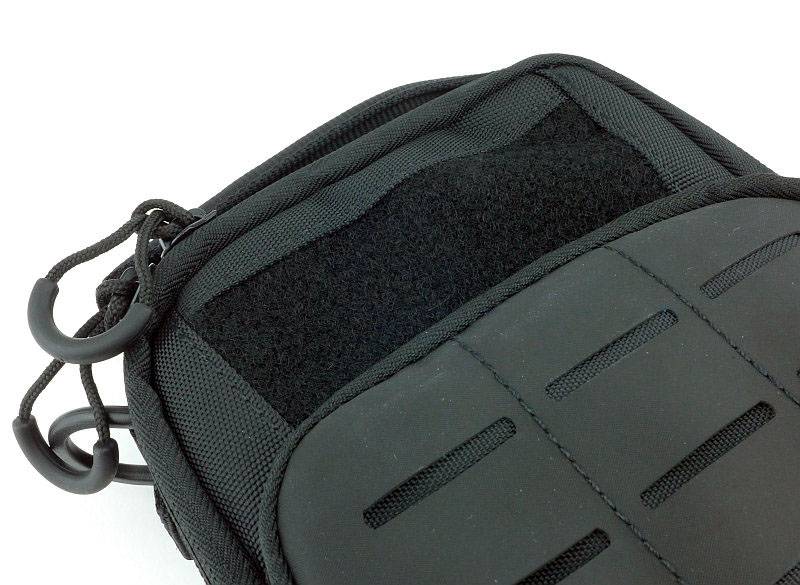
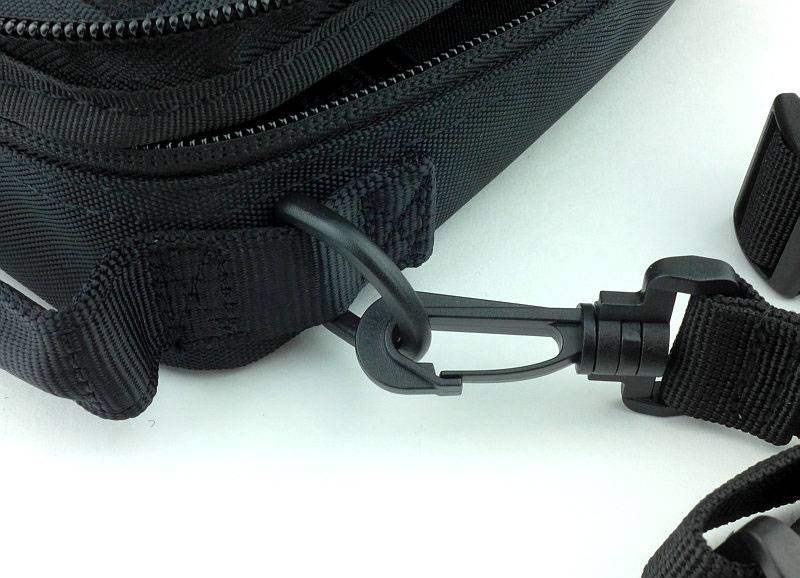
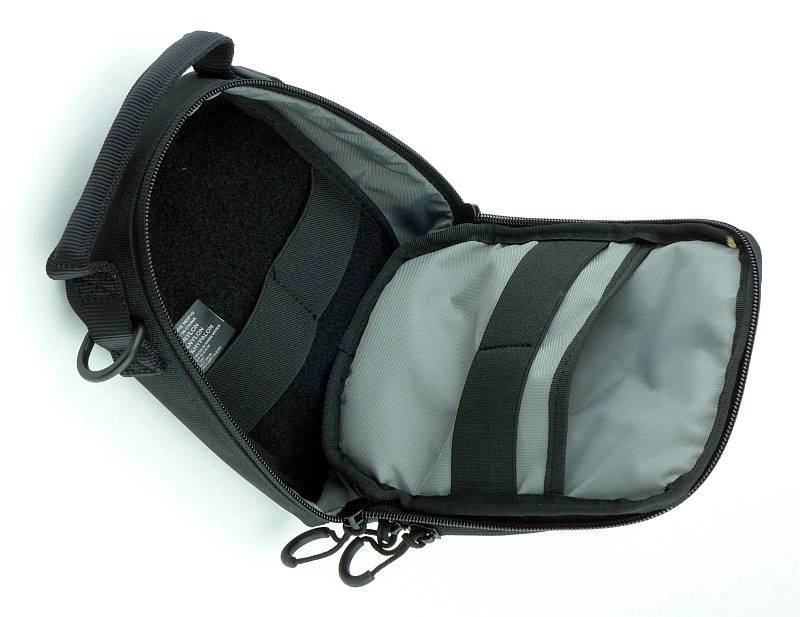
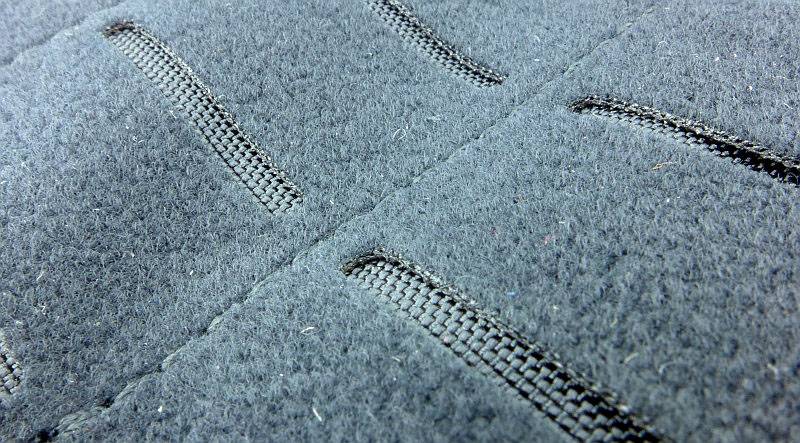
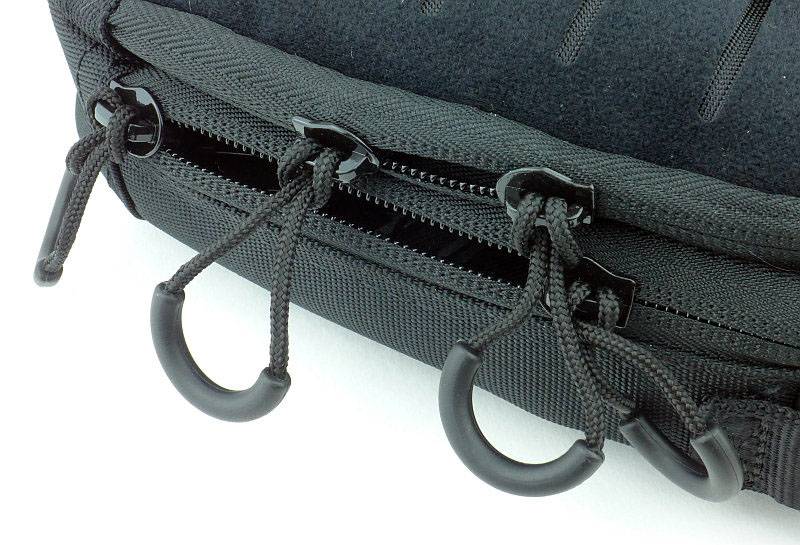
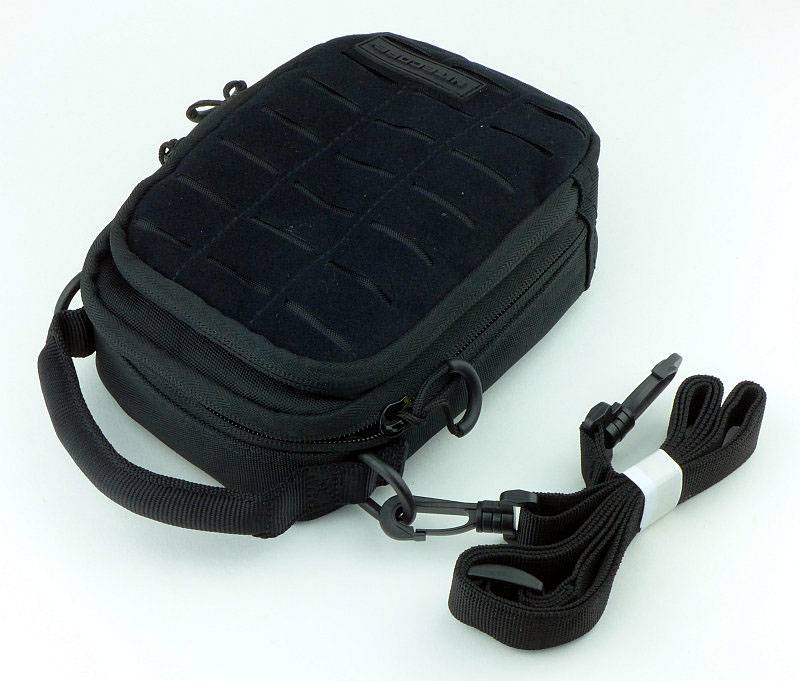
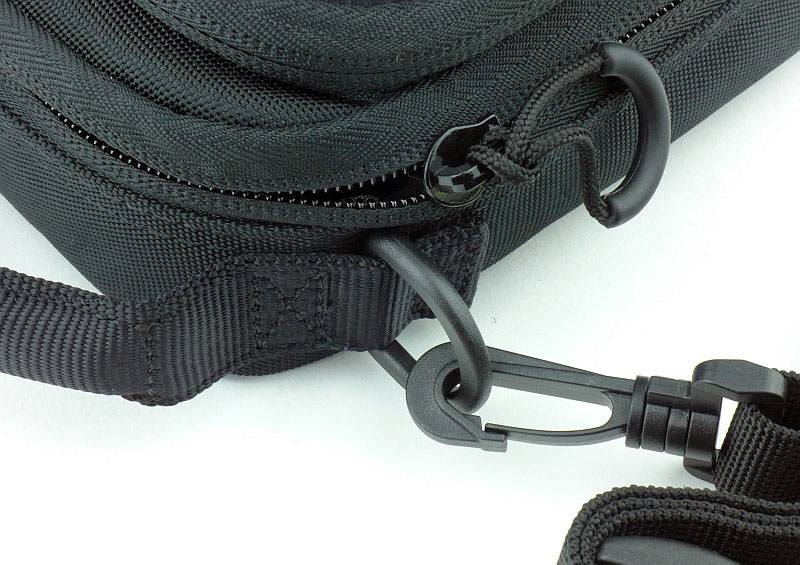
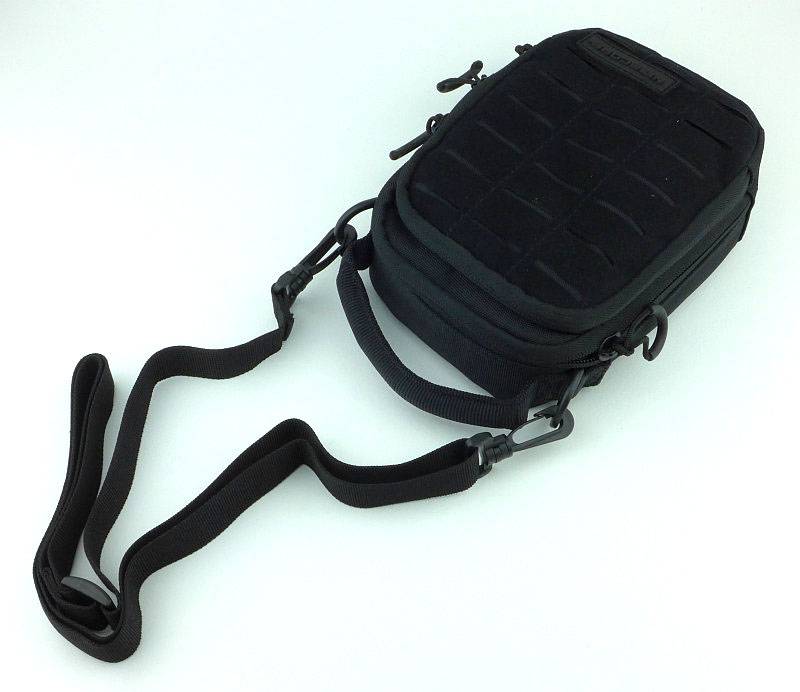
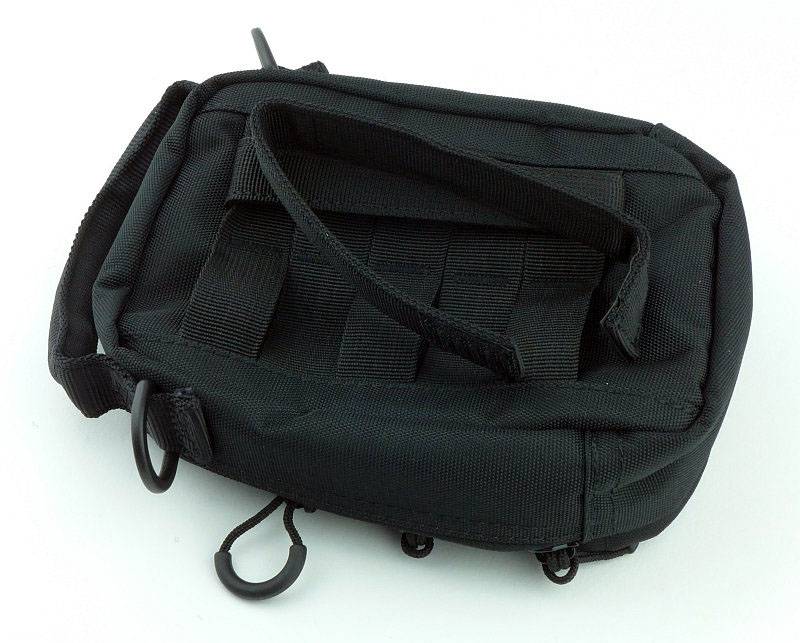
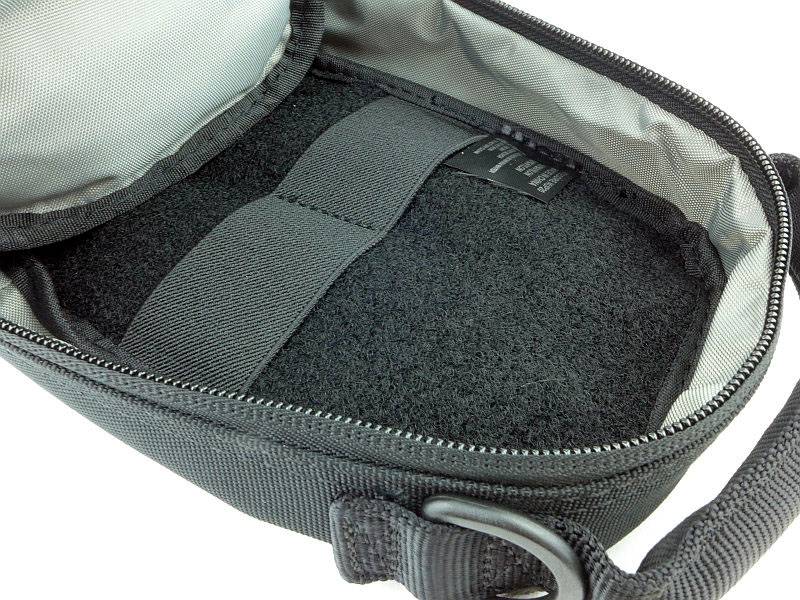
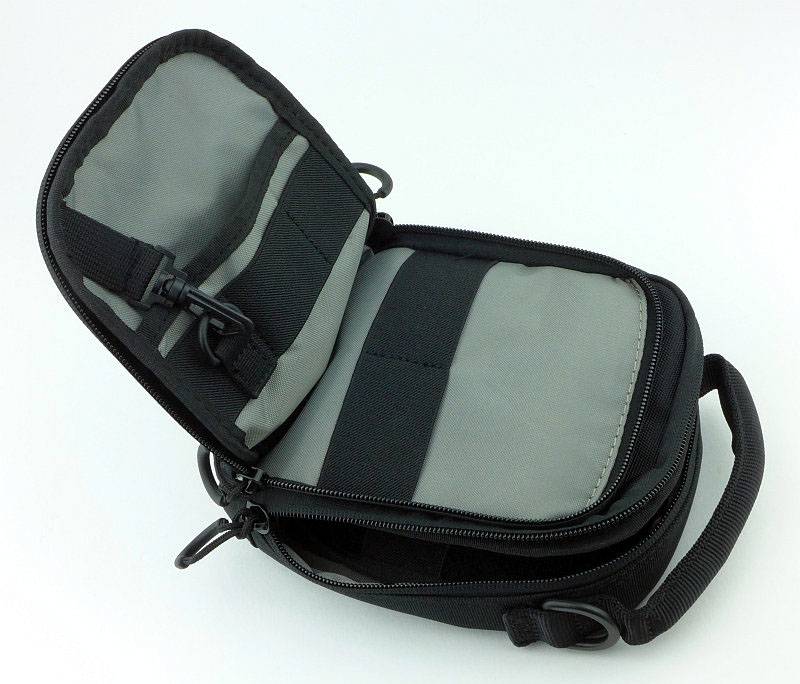
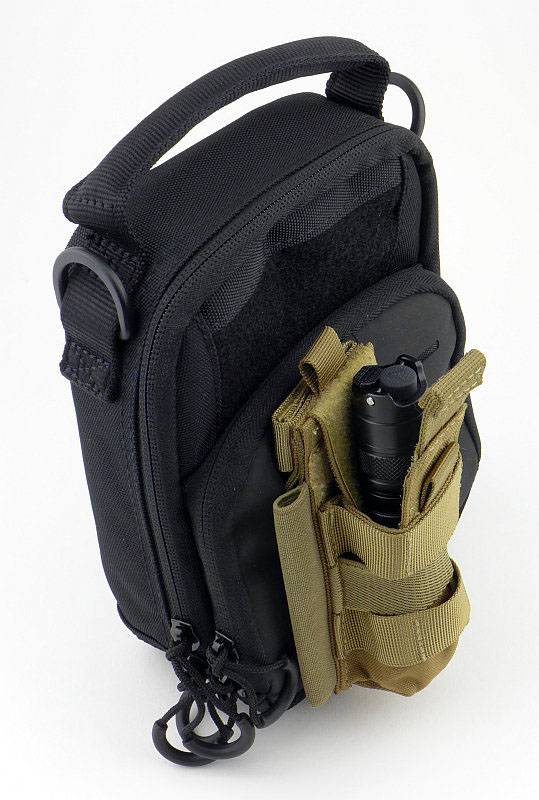
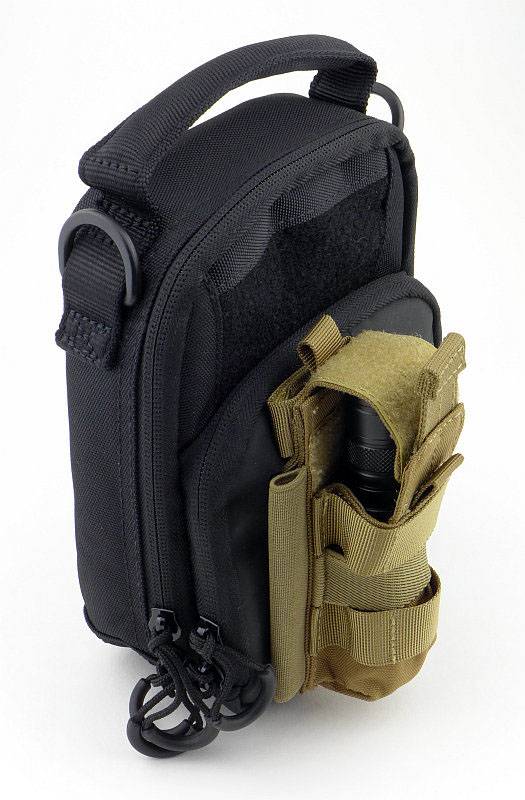
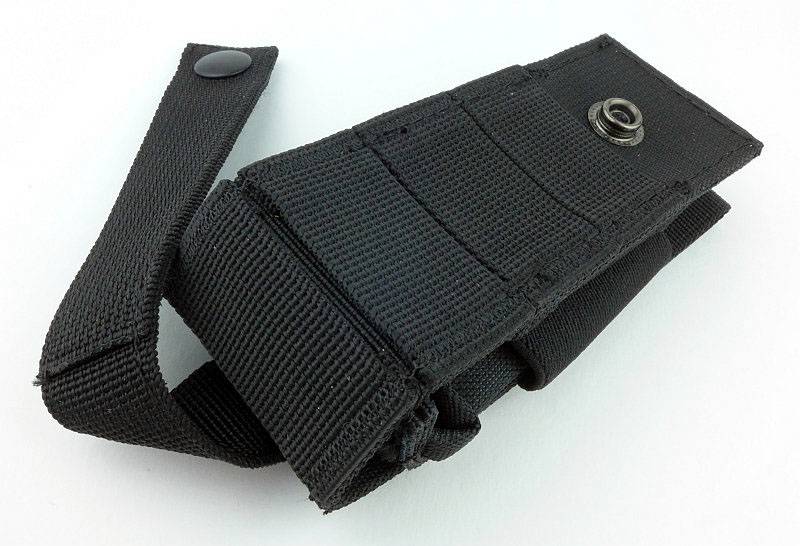
Personally I find the holster/sheath of a tool can make or break the user experience. In this case Leatherman have included a well made, versatile holster for the MUT. This is the holster fresh out of the box and with nothing inside it.
 photo 04 MUT holster P1200719.jpg

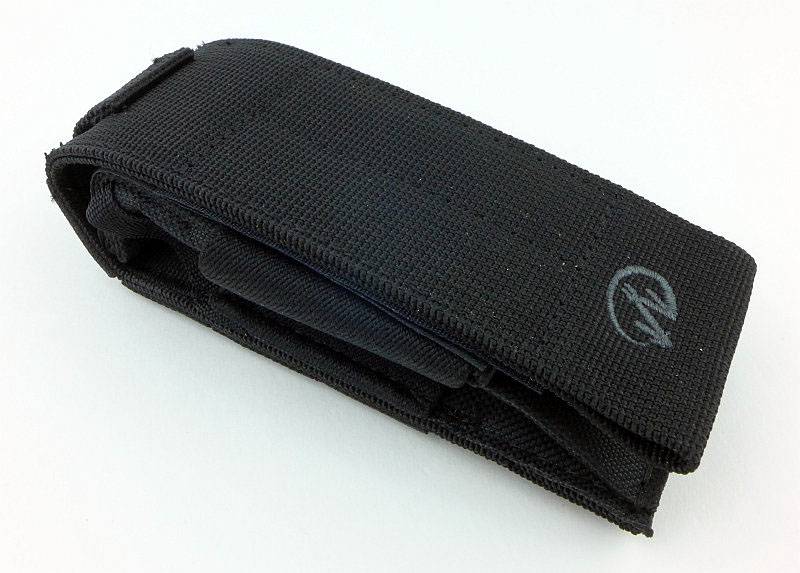
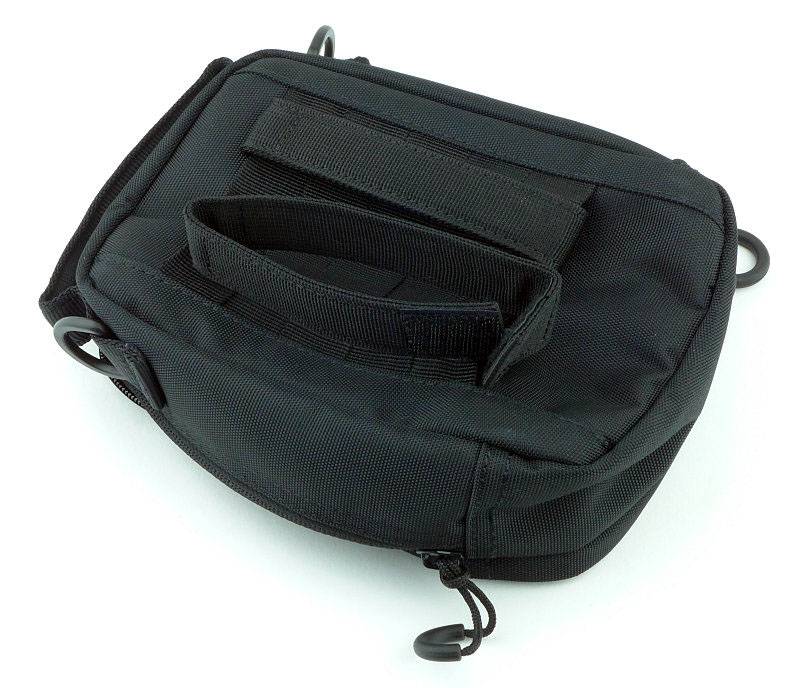
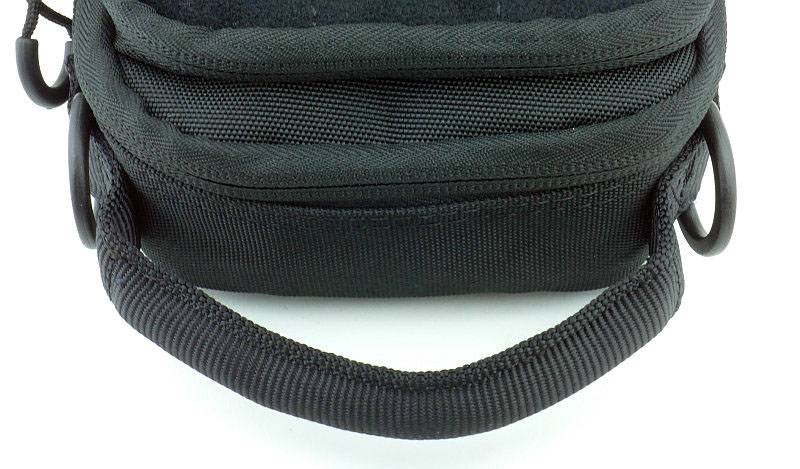
The side has an elasticated part to keep the holster in shape.
 photo 05 MUT holster side P1200722.jpg

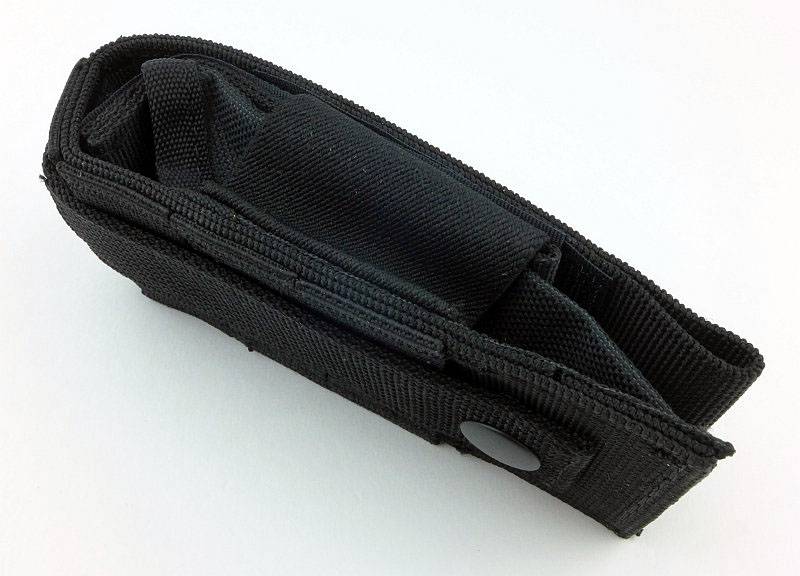
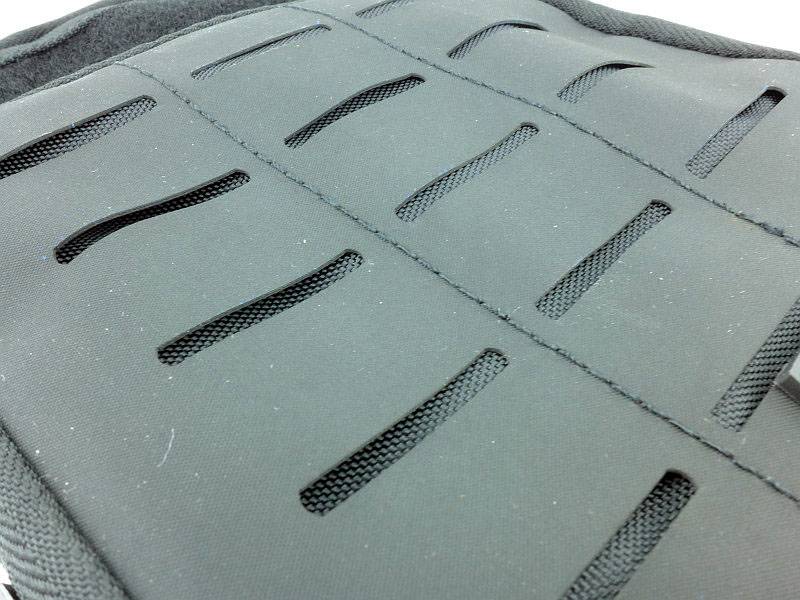
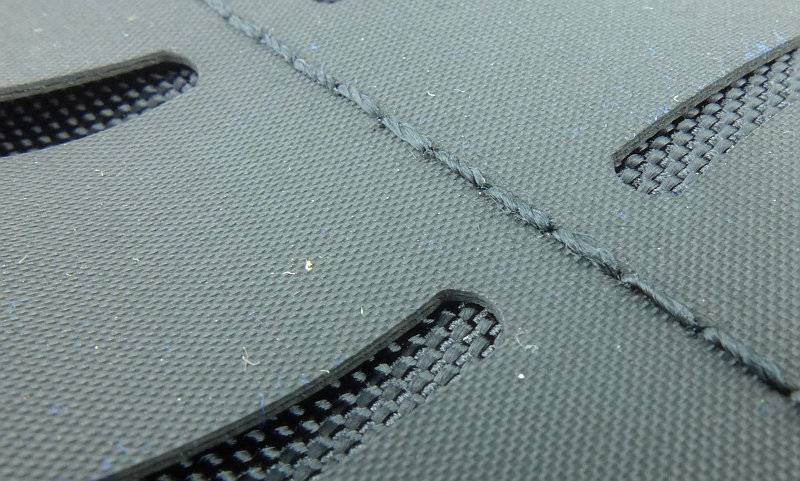
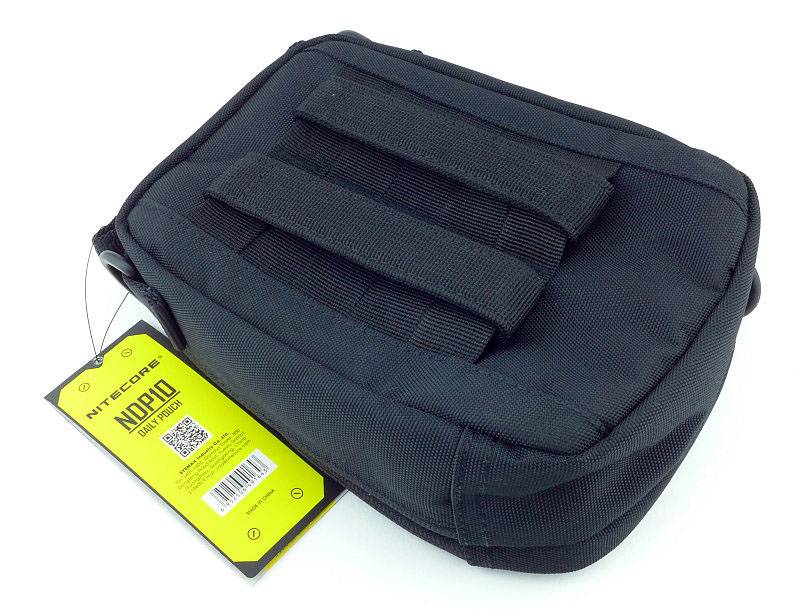
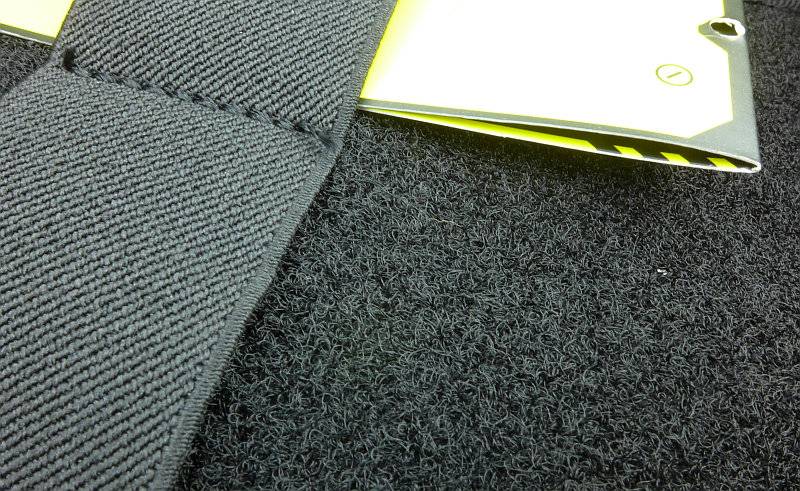
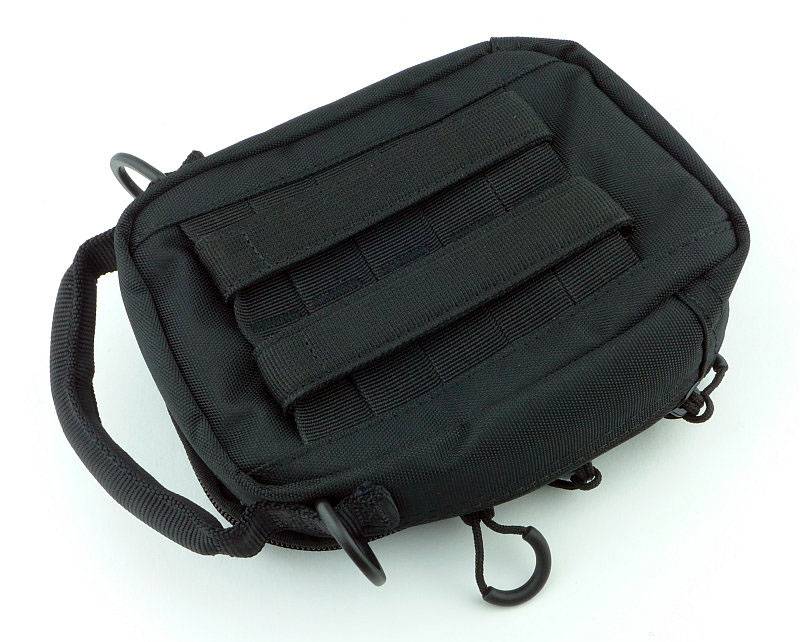
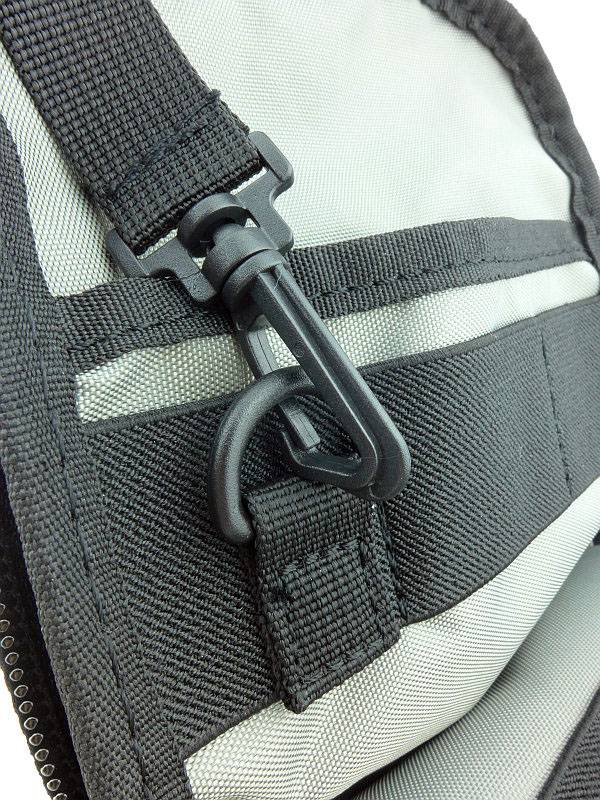
On the back is a PALS/MOLLE mounting that doubles as an adjustable width belt loop.
 photo 07 MUT holster MOLLE P1200730.jpg

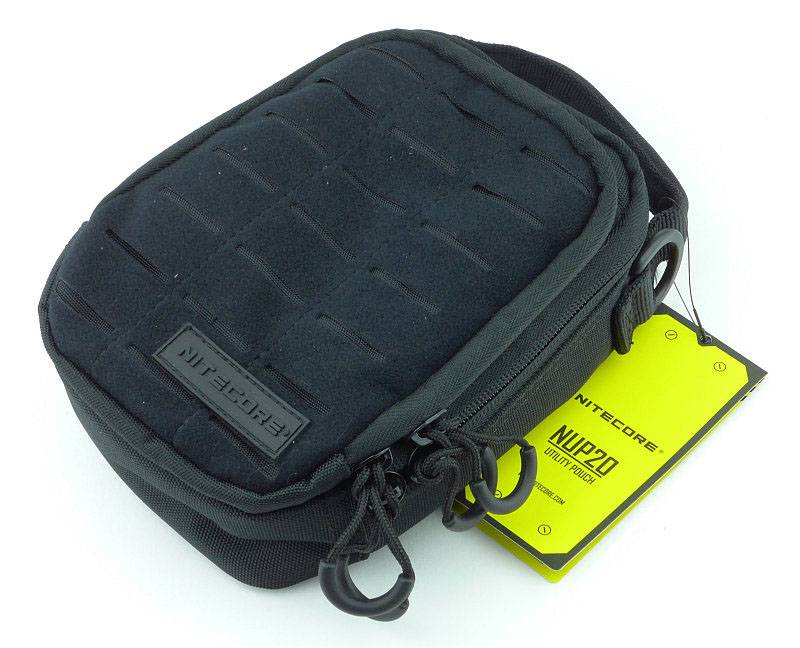
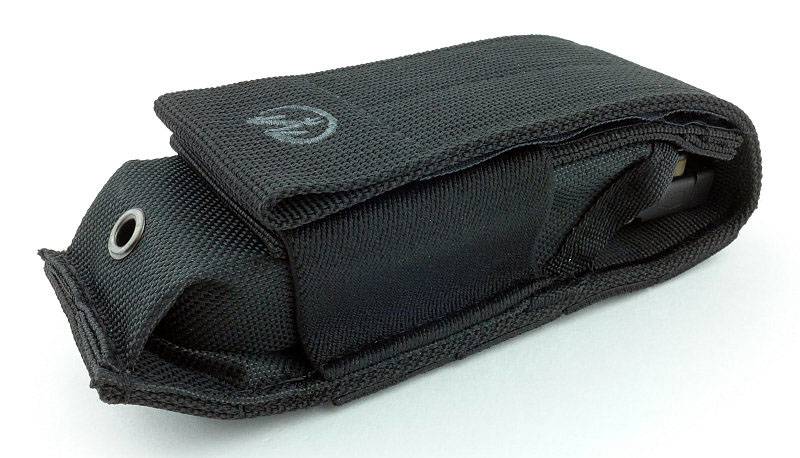
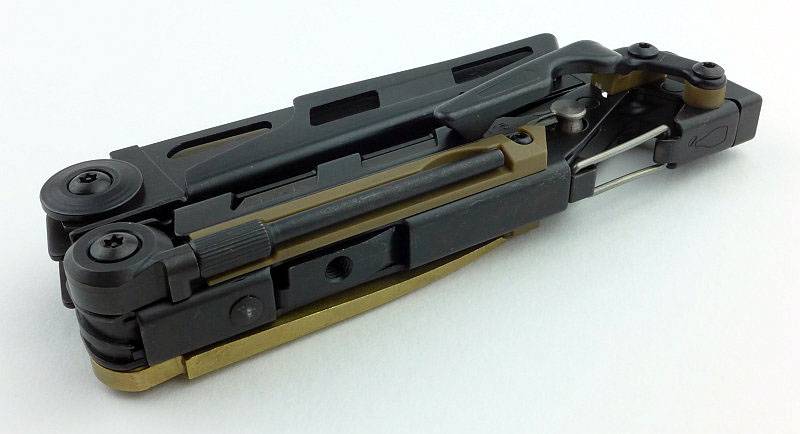
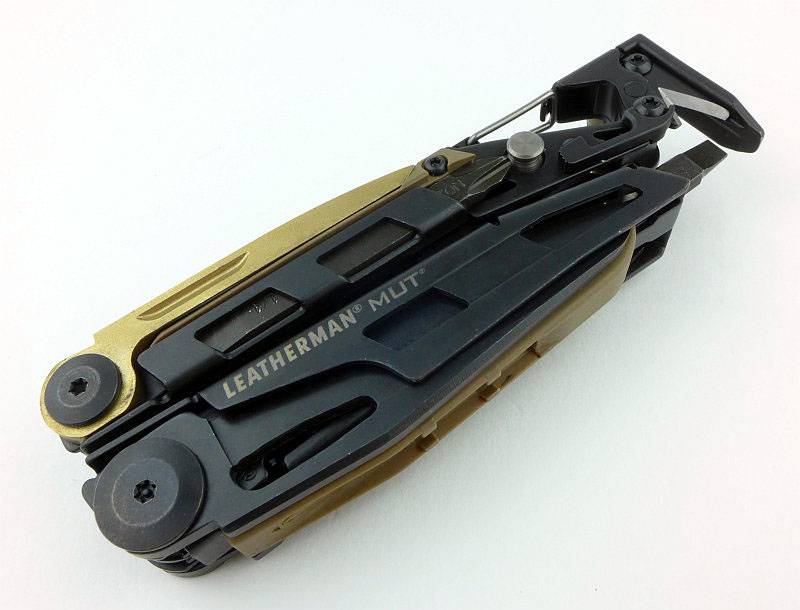
With the MUT inside the sheath the package is very neat.
 photo 10 MUT holstered P1200741.jpg

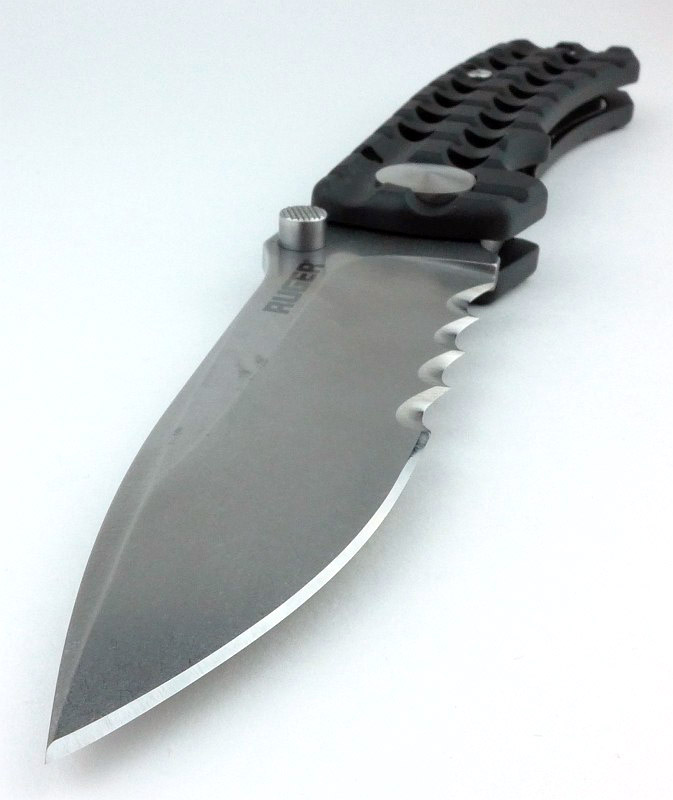
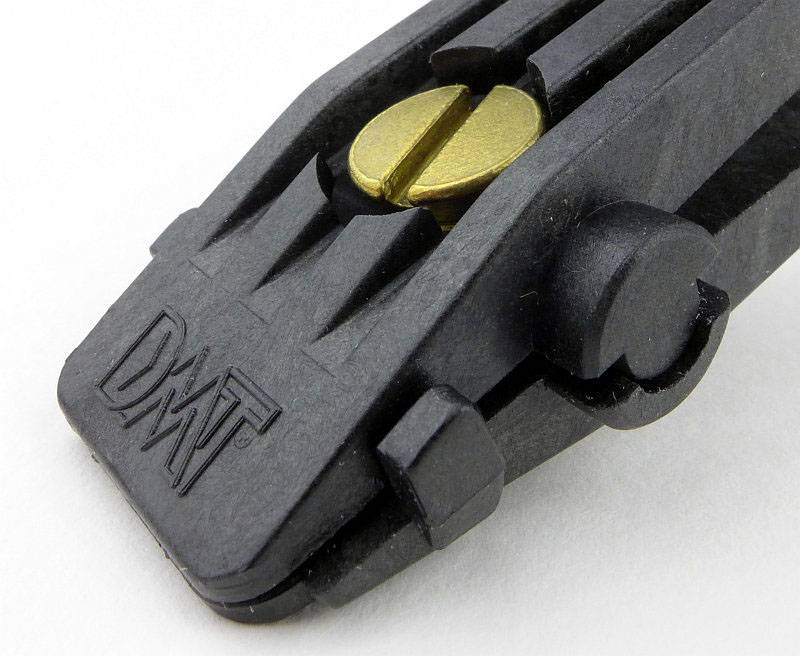
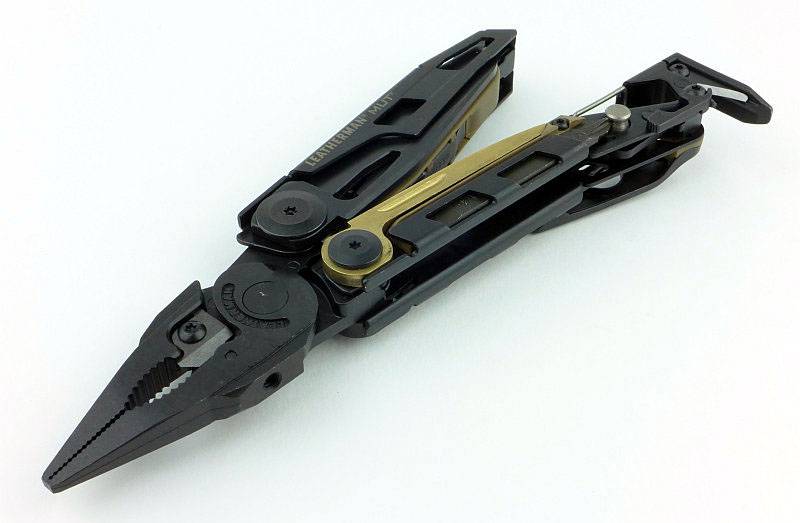
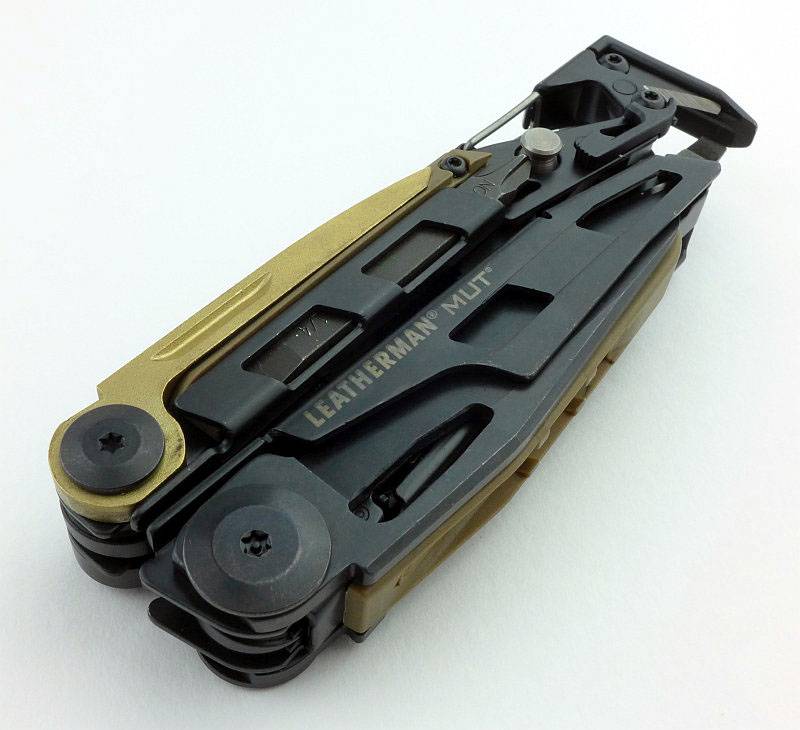
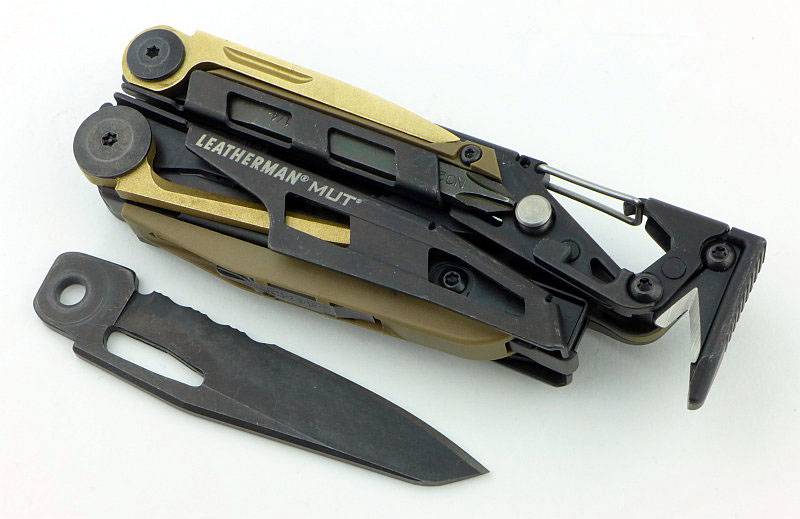
And here we have it, the MUT. We will cover more details as we go, but this is the side of the tool with the knife blade and carbon scraper.
 photo 13 MUT angle P1200749.jpg

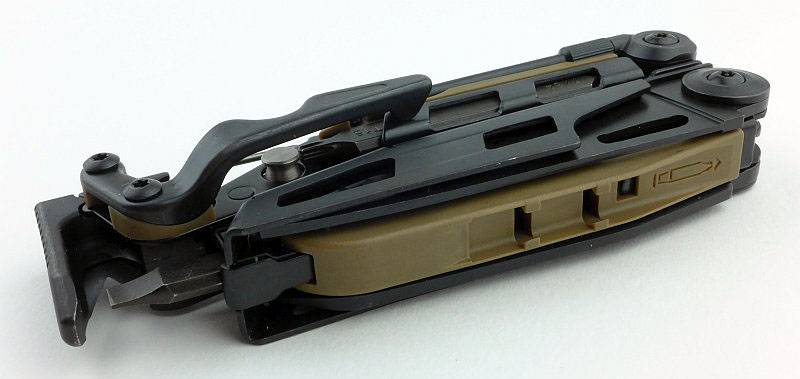
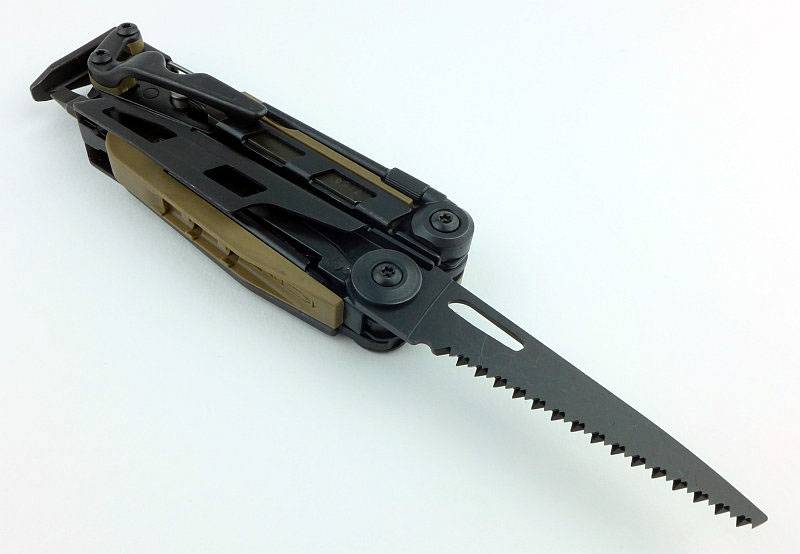
Flipping it over and on this side we have the saw and punch.
 photo 14 MUT angle reverse P1200751.jpg

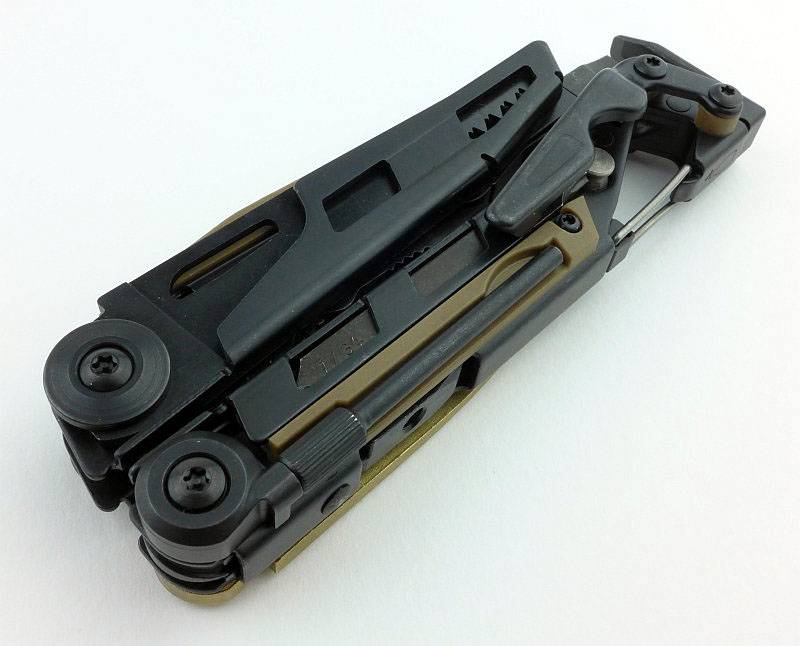
On one edge we have one cleaning rod attachment point and clip/bottle opener.
 photo 15 MUT side P1200756.jpg

The other edge has a slot to hold the small double-ended bit (here the bit is fitted into the bit holder). Also note the pocket clip which I found far too stiff to be of any real use.
 photo 16 MUT side2 P1200760.jpg

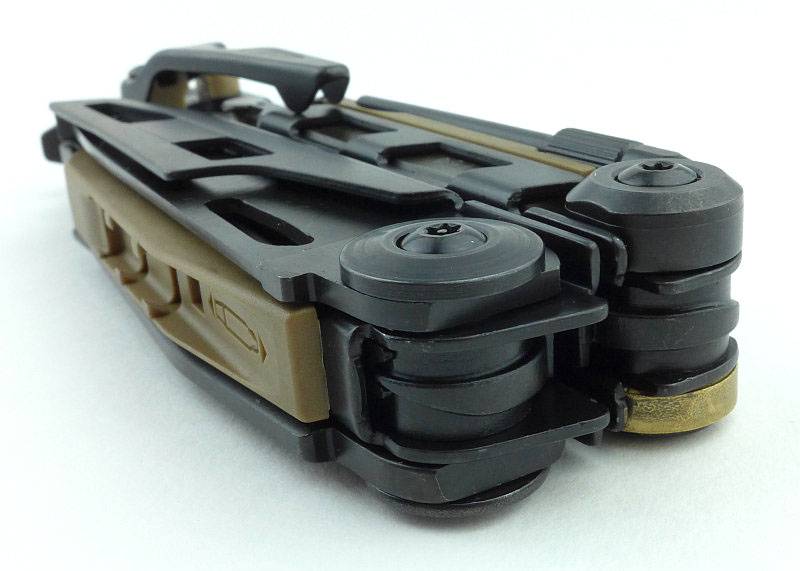
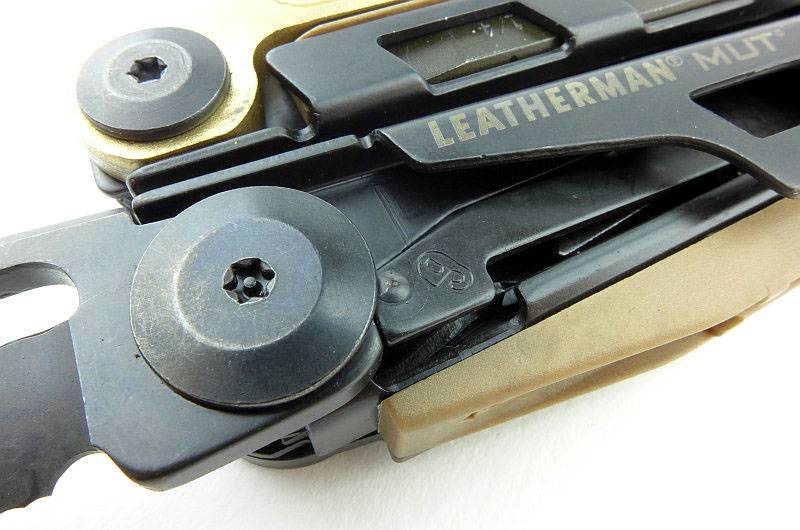
The MUT is basically held together by the main pliers pivot bolts.
 photo 17 MUT main pivot P1200763.jpg

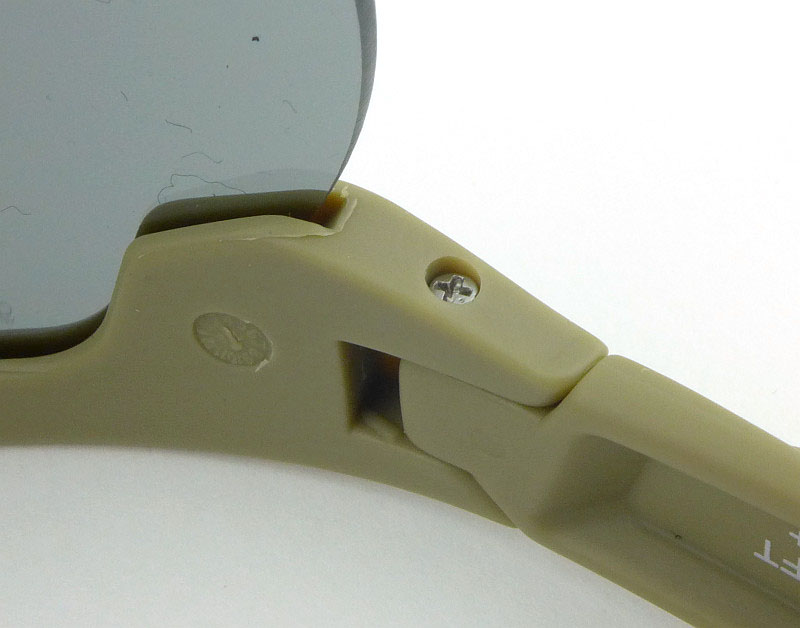
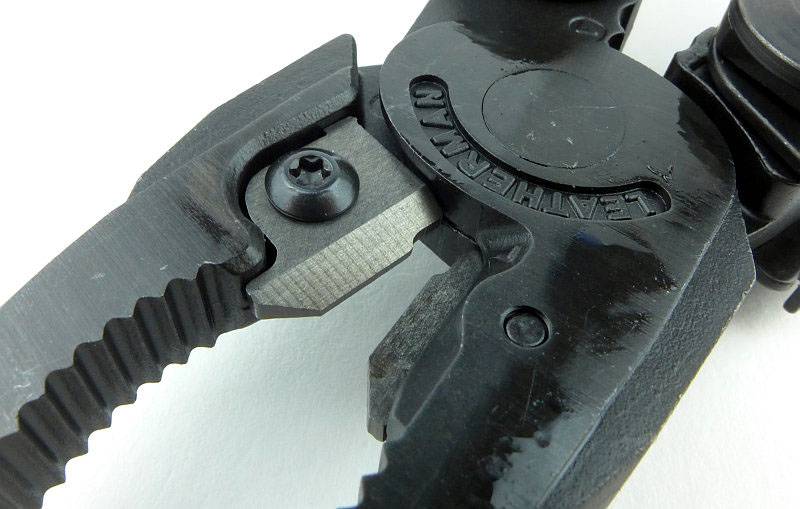
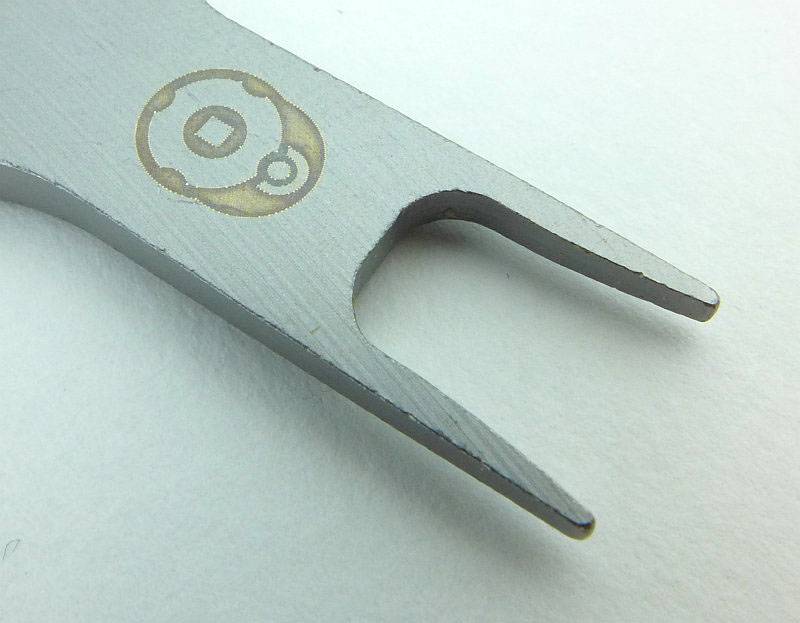
Integrated into the hammer/bolt-override tool is a replaceable cutter held in place with one T8 bolt.
 photo 18 MUT cutter P1200767.jpg

There are grip grooves cut into the hammer face, especially important as the hammer face is not that big.
 photo 19 MUT hammer P1200770.jpg

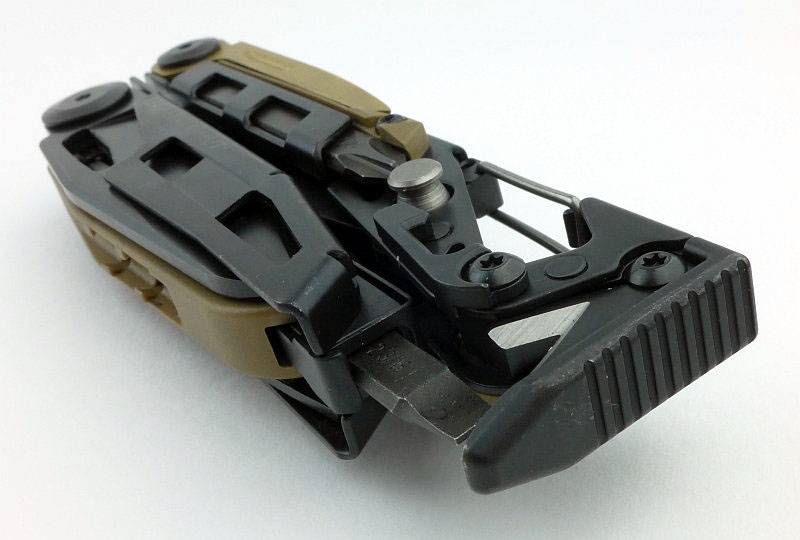
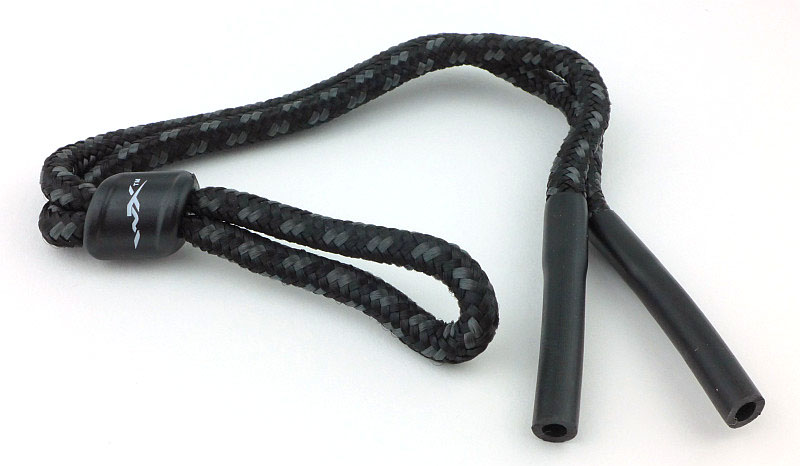
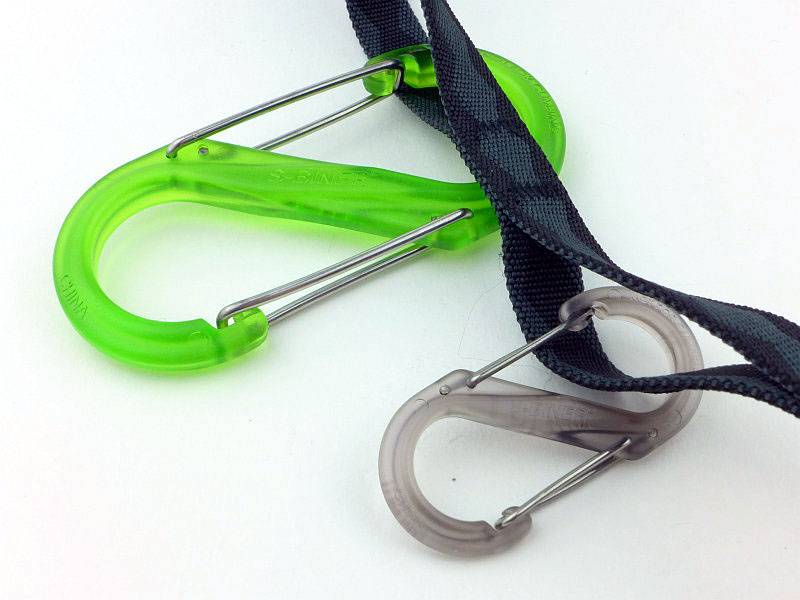
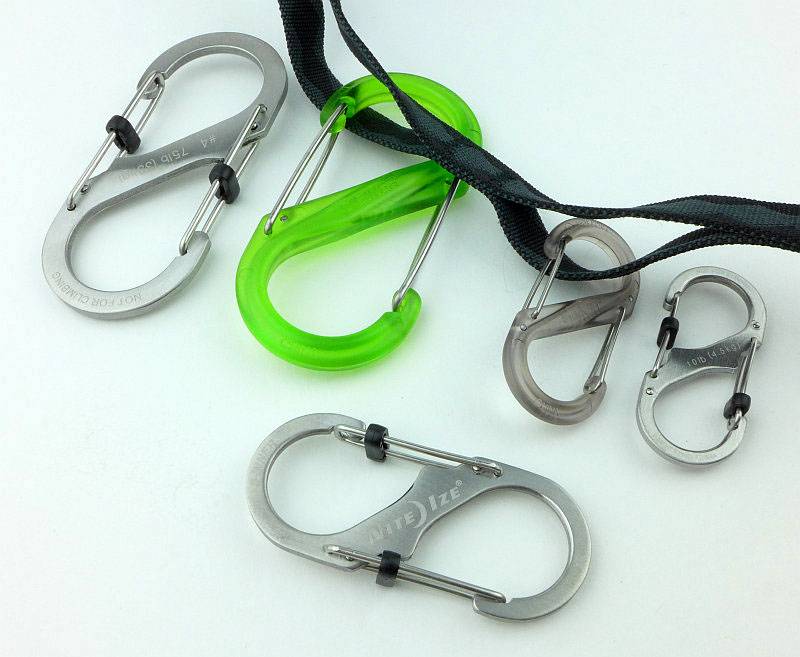
A karabiner style clip is integrated into the MUT allowing very easy attachment to cord loops or trouser belt loops (if they are strong enough). It also doubles as a bottle opener.
 photo 20 MUT clip P1200773.jpg

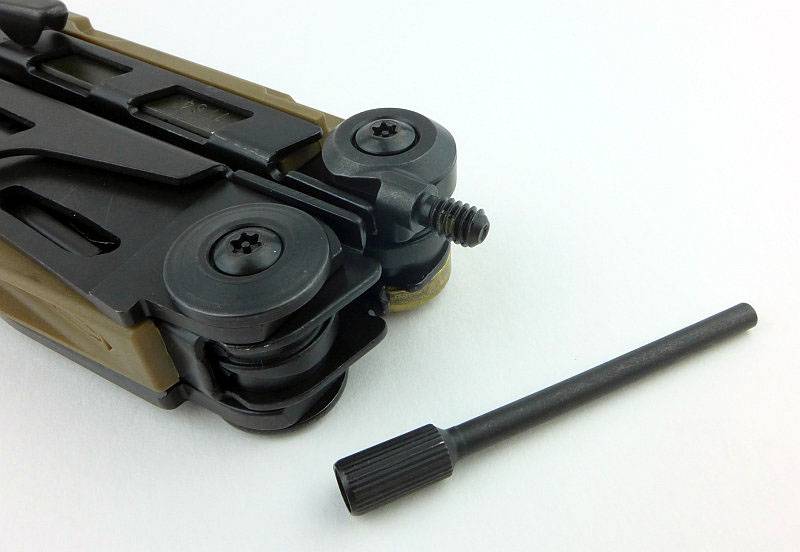
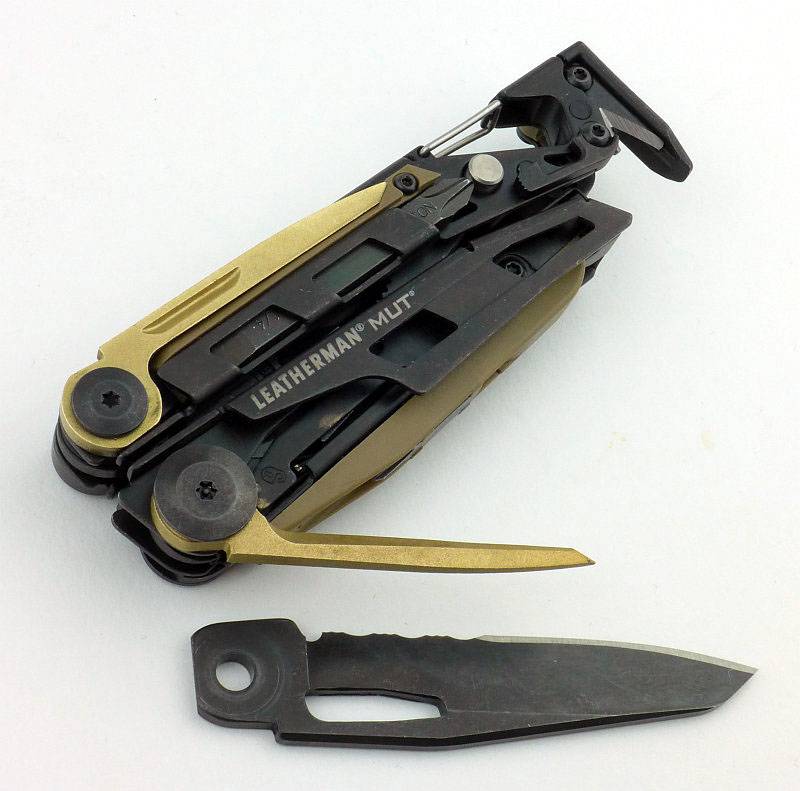
Located at the opposite end of the MUT to the hammer face, one of the main folding tools is a 1/8″ firearm disassembly punch.
 photo 21 MUT punch P1200777.jpg

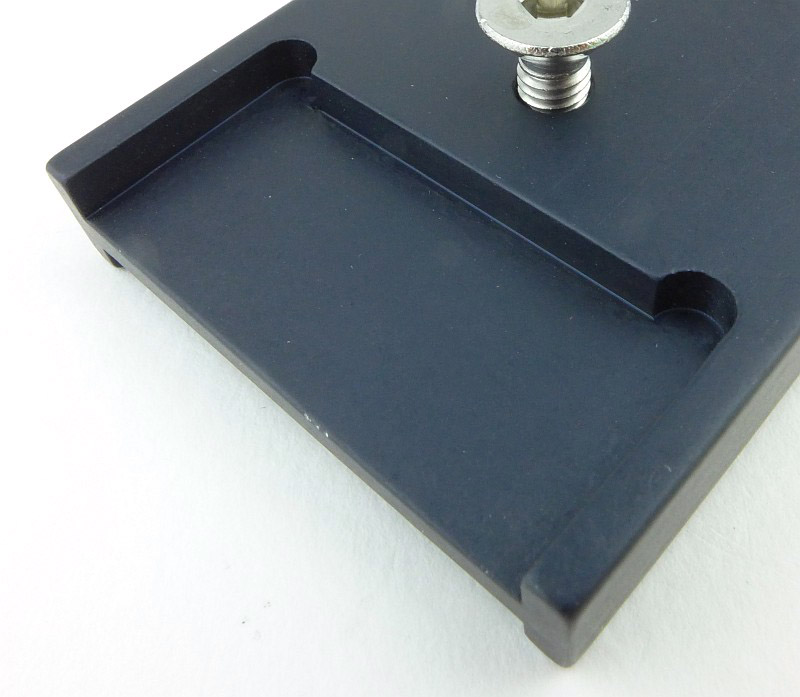
Getting in really close to the threaded hole (actually in the pliers jaw) allowing the MUT to be used as a handle for certain cleaning rods.
 photo 22 MUT cleaning rod P1200778.jpg

A plastic part on the opposite side is for holding the small screwdriver bit.
 photo 23 MUT bit channel P1200783.jpg

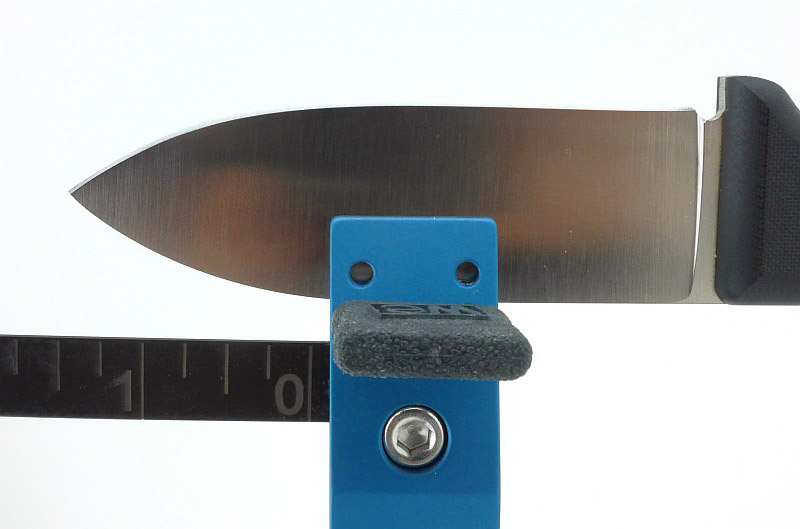
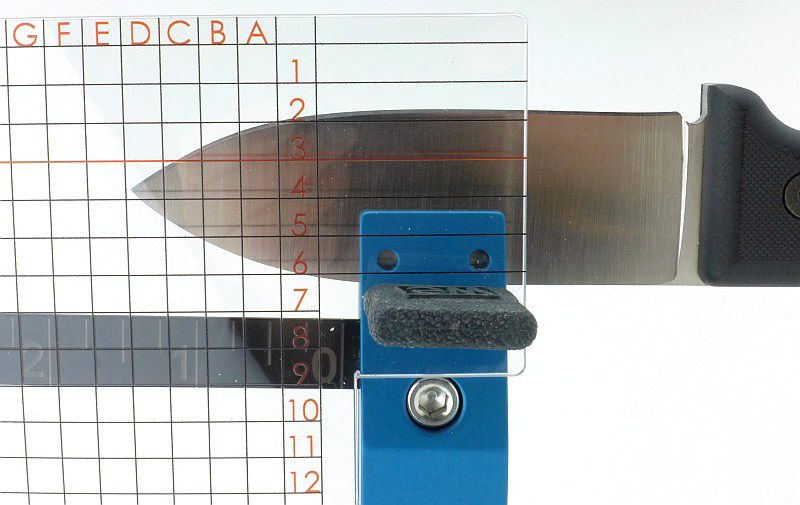
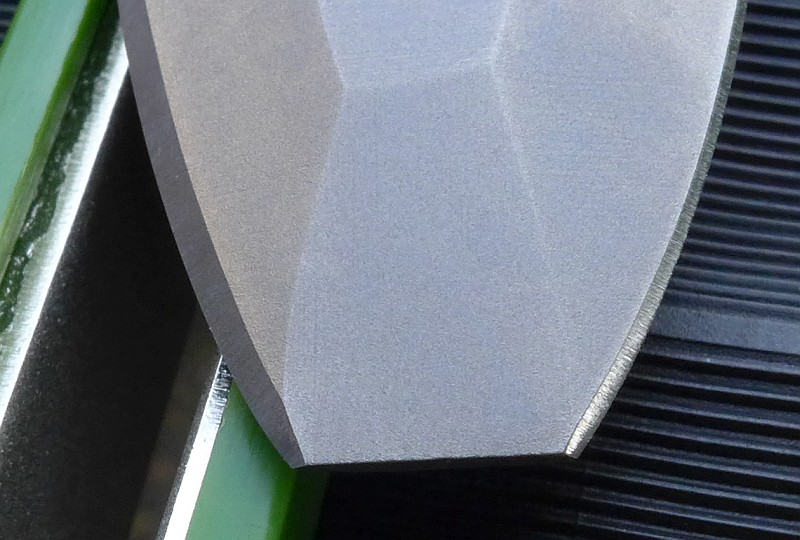
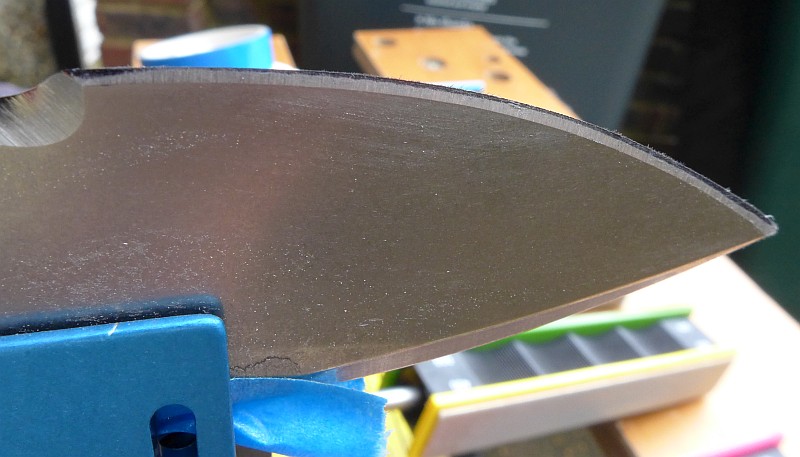
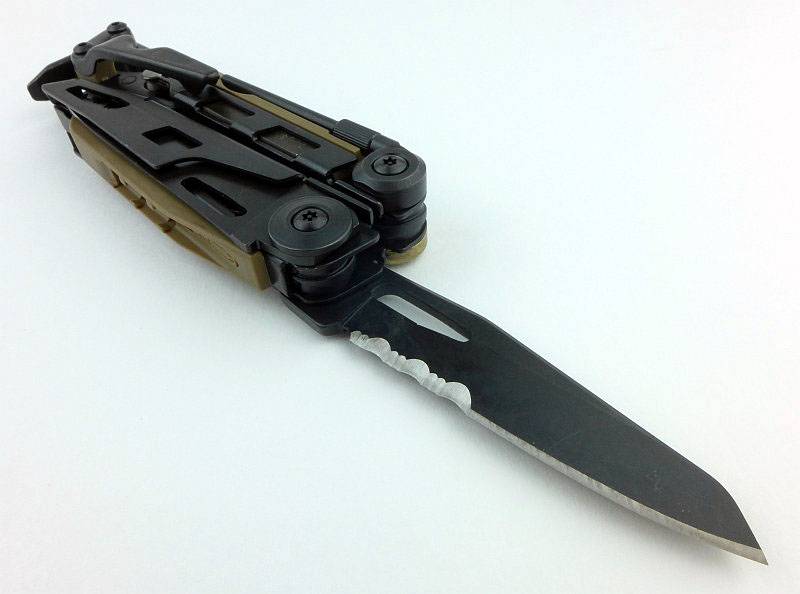
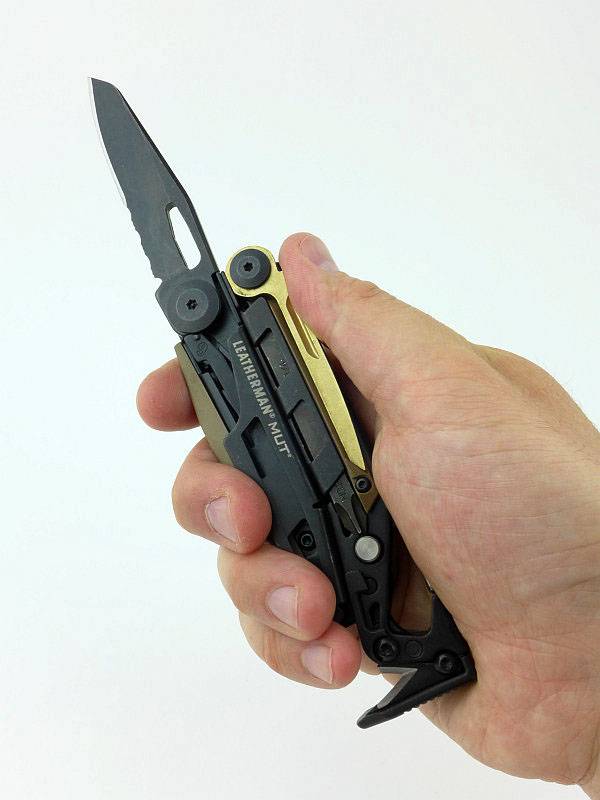
For its knife blade, the MUT uses a part serrated edge.
 photo 24 MUT main blade P1200789.jpg

To lock the blade, the MUT uses a liner-lock style sprung locking bar.
 photo 25 MUT main blade lock P1200793.jpg

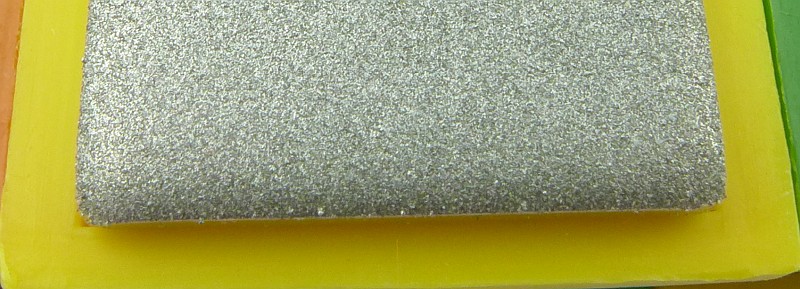
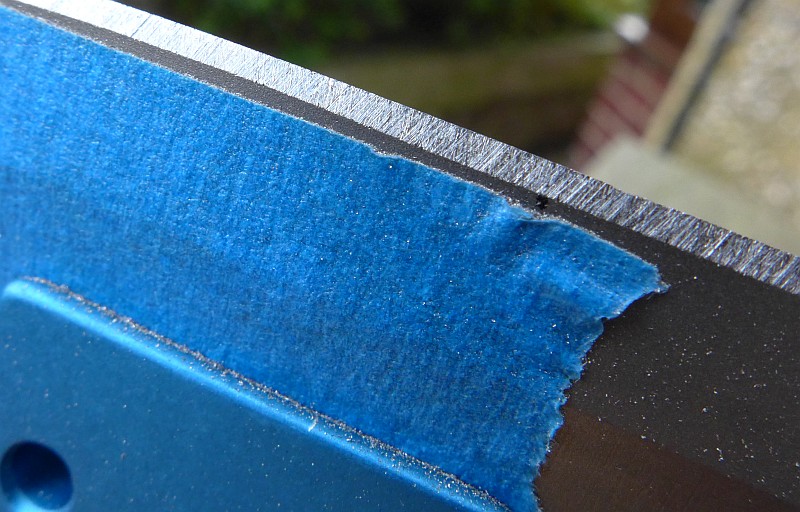
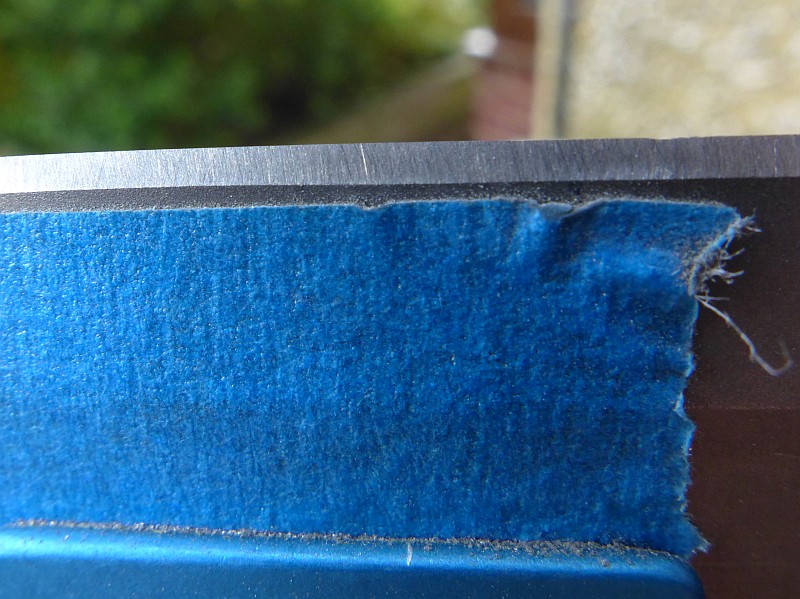
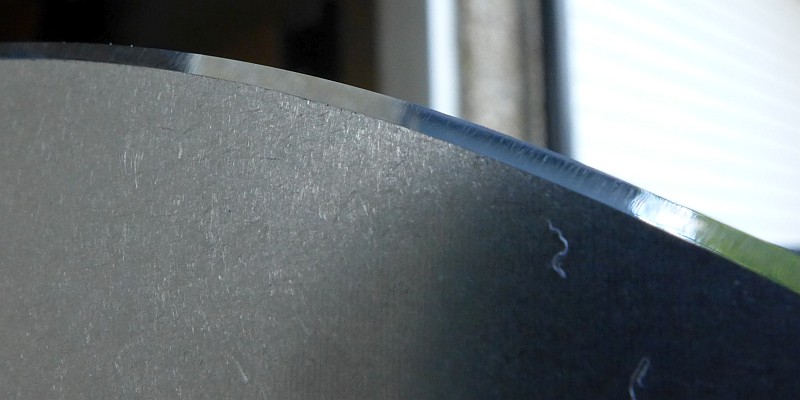
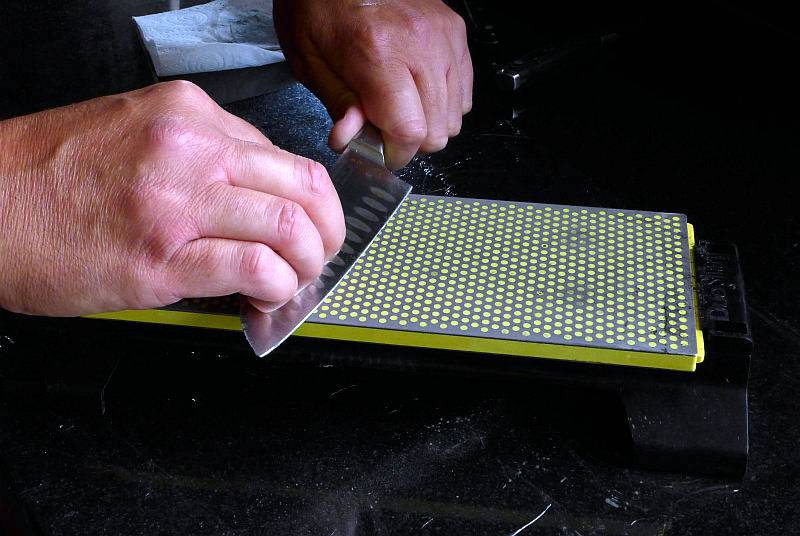
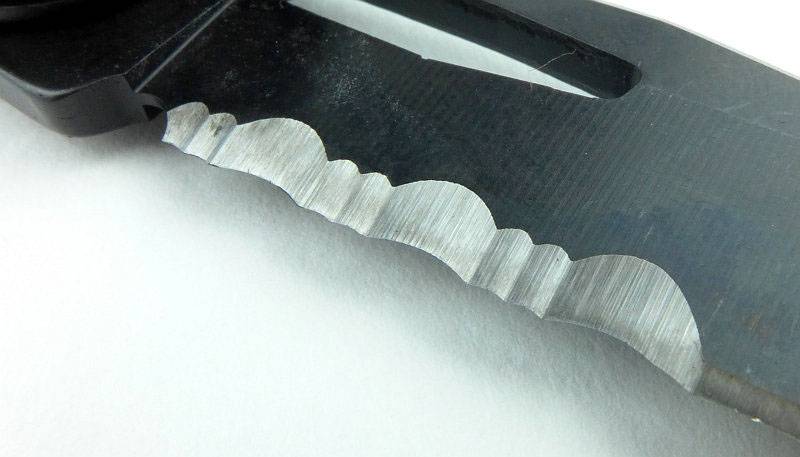
Viewed from the other side, you can now see that the plain edge is a double-sided bevel, but the serrated portion is a chisel grind.
 photo 26 MUT main blade P1200796.jpg

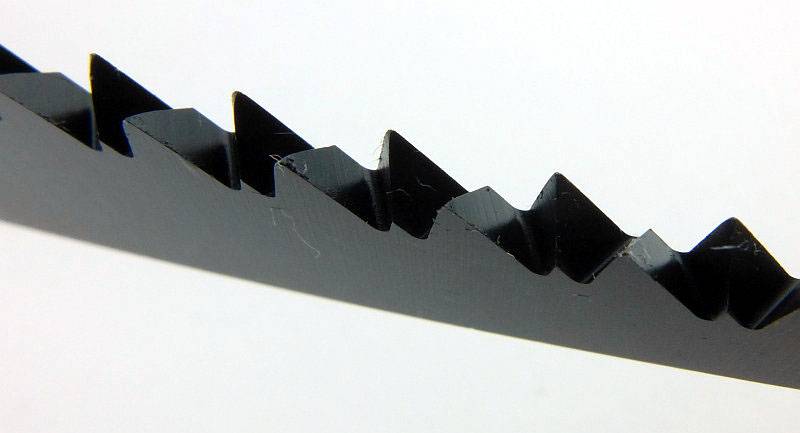
Close-up of the serrations.
 photo 27 MUT serrations P1200798.jpg

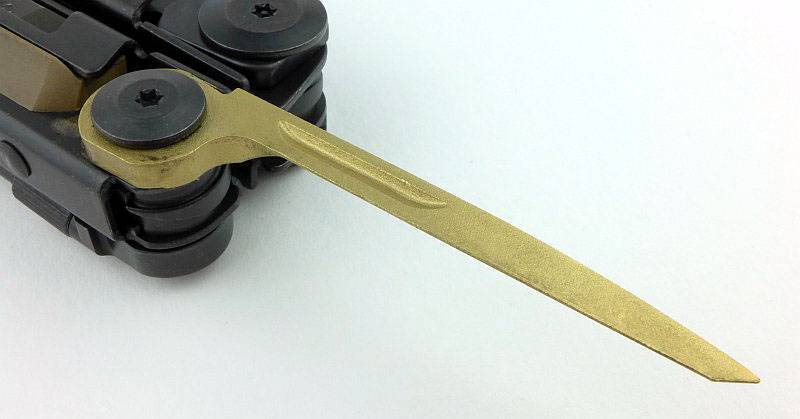
Opposite the knife blade is a similar sized wood saw.
 photo 29 MUT saw blade P1200805.jpg

Those saw teeth are unfortunately not as sharp as a well known SAK maker produces.
 photo 29 MUT saw teeth P1210020.jpg

The same liner-lock design is used for the saw.
 photo 30 MUT saw blade lock P1200807.jpg

Here that punch is fully open and you can push out roll-pins. If needed you can tap out stubborn pins by hitting the MUT’s hammer face.
 photo 31 MUT punch P1200811.jpg

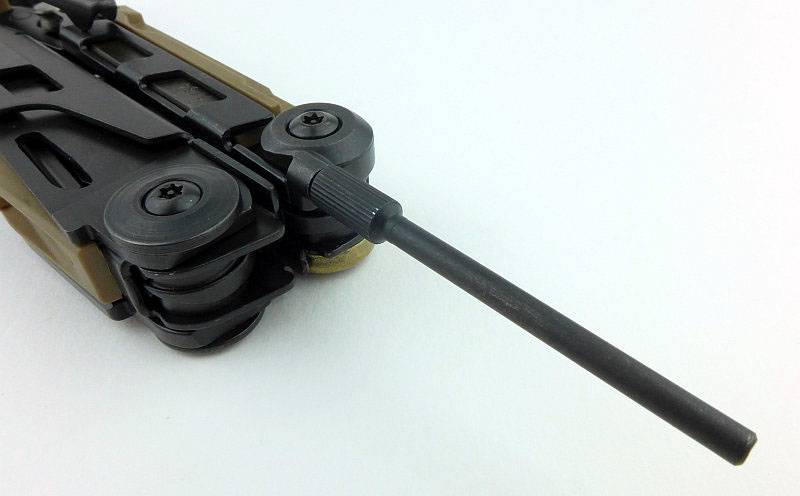
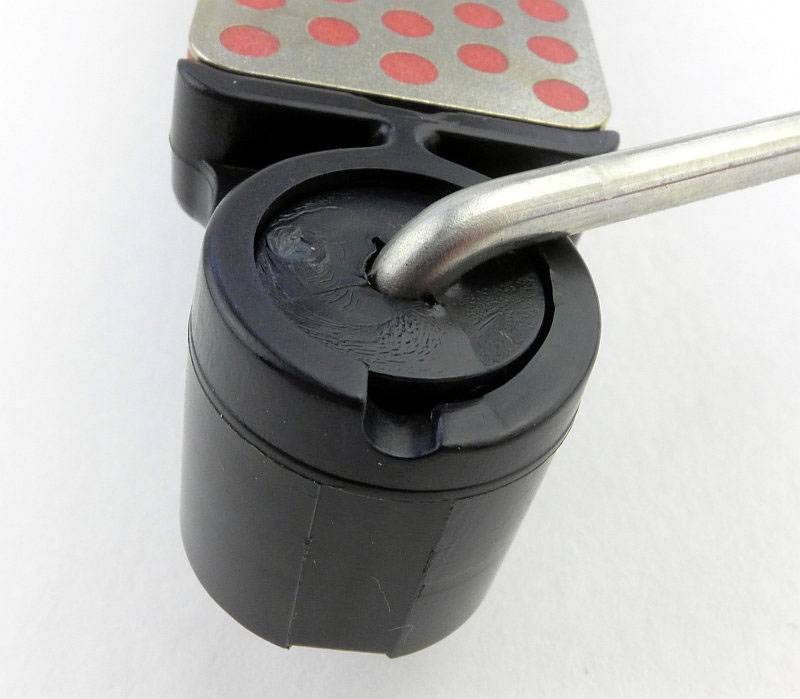
However, you can remove the punch itself and then use the MUT’s own hammer to knock out the pin. The screw-post which holds the punch in place can also be used for some cleaning brushes and rods.
 photo 32 MUT punch off P1200814.jpg

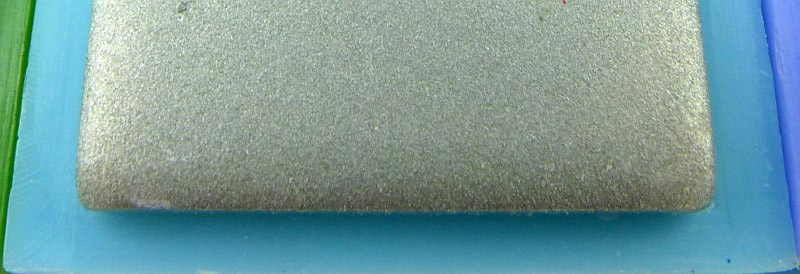
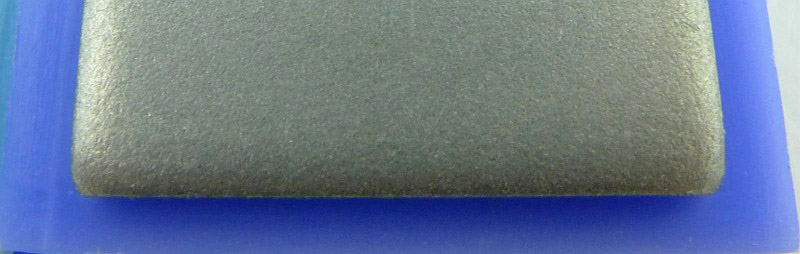
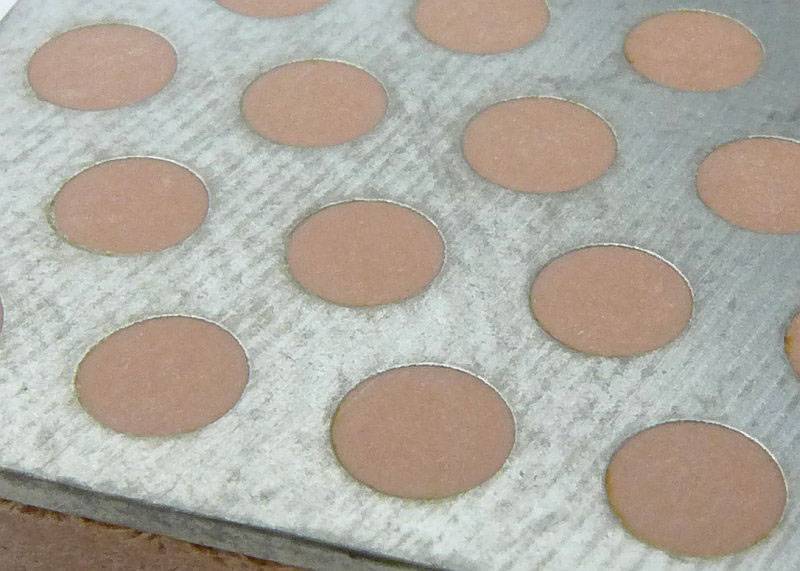
A great deal of thought has been put into the MUT and another aspect that shows this is the use of bronze for the carbon scraper. You can use this on steel parts without worrying about damaging the steel. As the bronze is intentionally soft, it will wear and is intended to be easily replaced by the user with the MUT accessory kit of replaceable parts.
 photo 33 MUT scraper P1200820.jpg

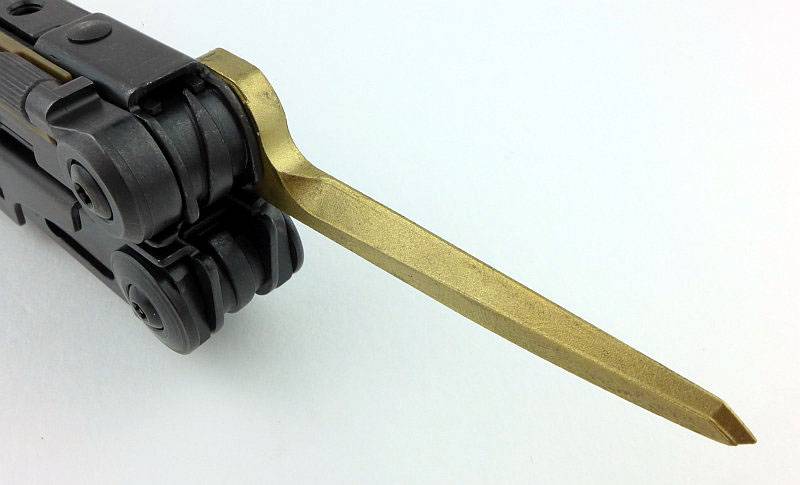
On the other side of the scraper is a thumb-nick for opening it out.
 photo 34 MUT scraper front P1200823.jpg

The karabiner style clip also doubles as a bottle opener.
 photo 35 MUT bottle open P1200827.jpg

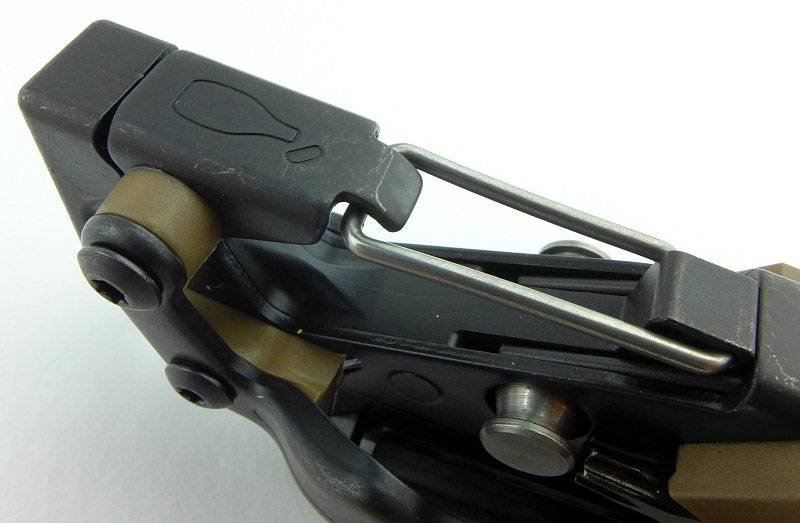
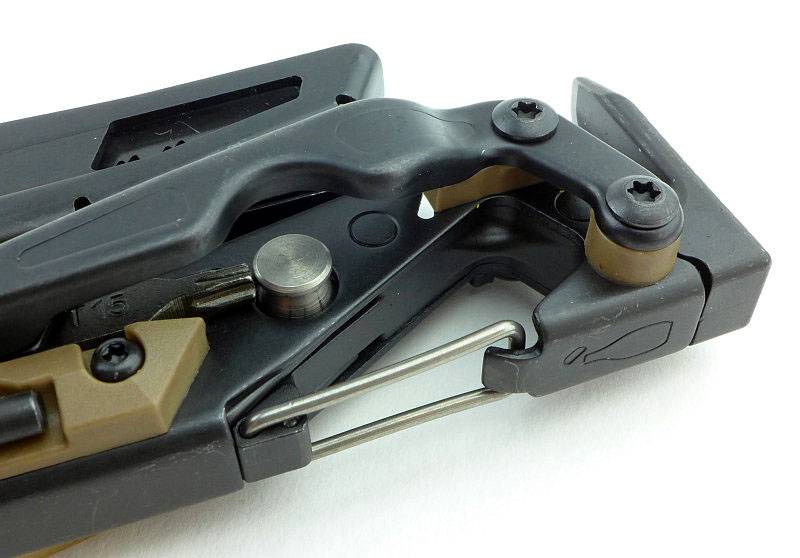
Perhaps more intended for use once the MUT has seen some wear and the pivots are no longer as tight, there is a handle-lock included in the MUT. Here it is shown in the locked position with the locking hook clipped into the other handle. Of course if you are not using the holster and have it clipped onto something, using this lock ensures the MUT handles stay closed.
 photo 36 MUT main lock P1200831.jpg

The handle lock is released by pulling it out like this.
 photo 37 MUT main lock released P1200834.jpg

When not in use the handle lock folds out of the way.
 photo 38 MUT main lock folded P1200835.jpg

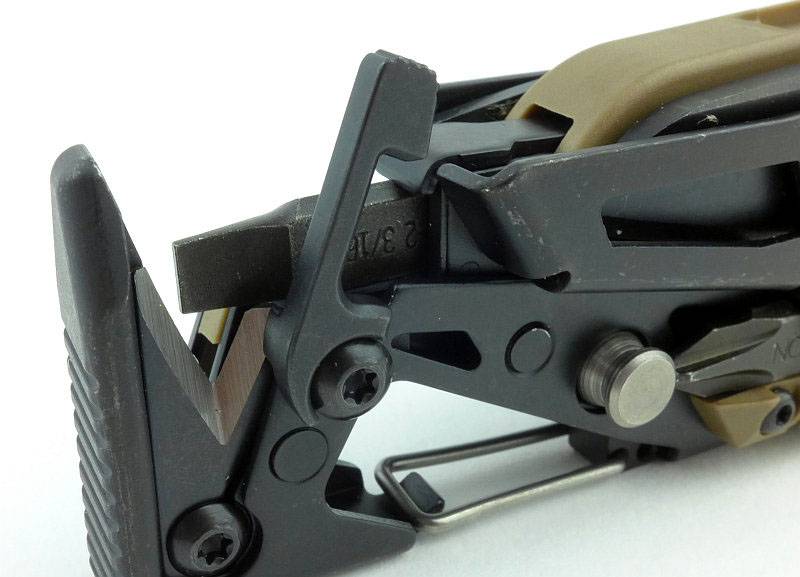
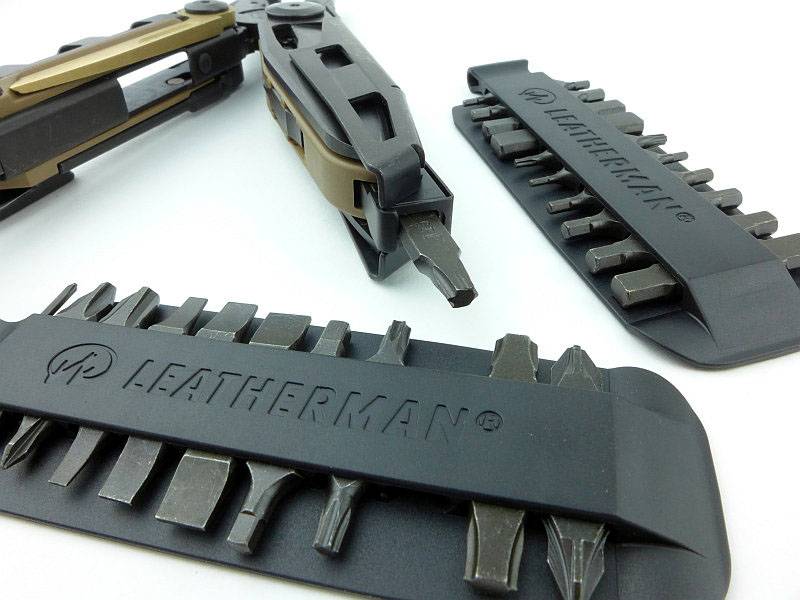
To access the bit holder the handle needs to be opened out as it can’t be used with the handles folded.
 photo 39 MUT bit holder P1200839.jpg

Each bit has a couple of small grooves either side which allow the bit holder to secure the bit.
 photo 41 MUT bit holder locked P1200852.jpg

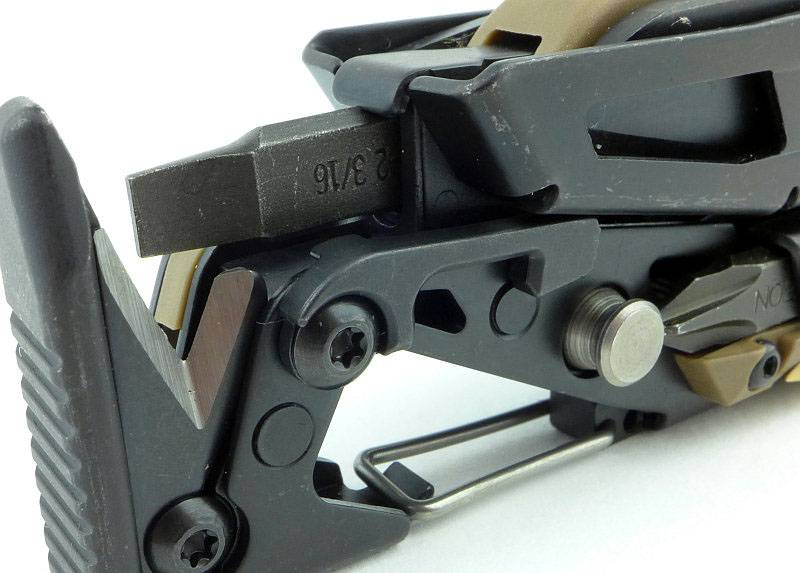
Pressing on the release plate pushes the bit hook away from the bit so that it can be pulled out of the holder.
 photo 42 MUT bit holder unlocked P1200854.jpg

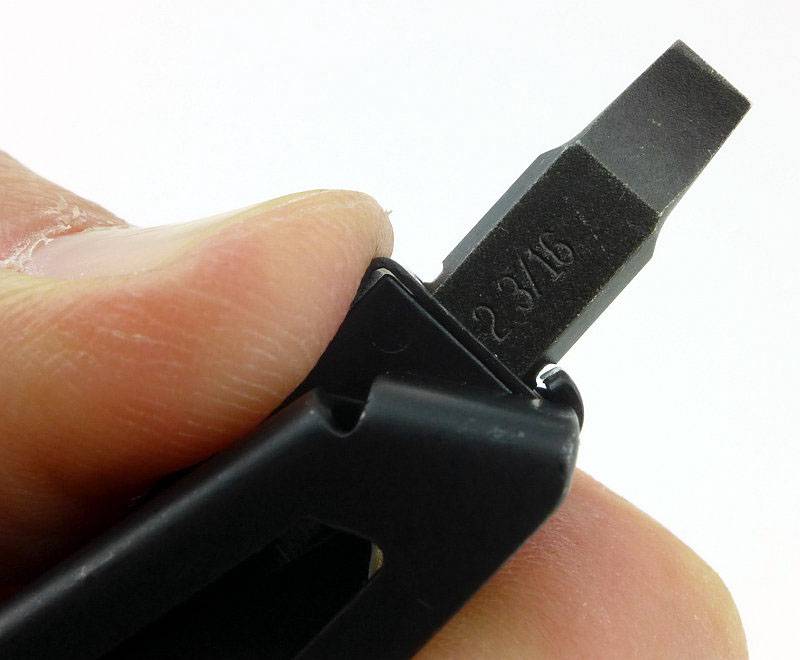
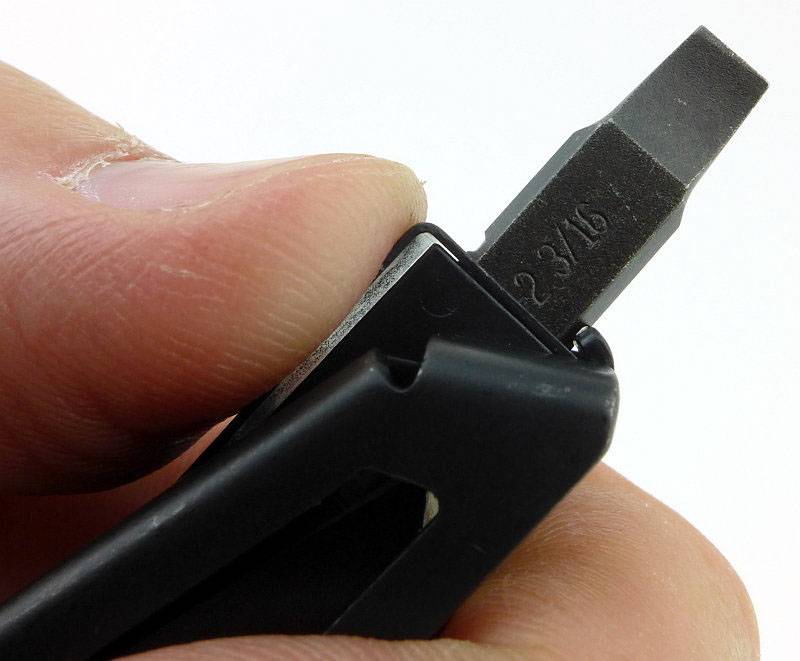
The bit can then be put back into place on the side of the MUT.
 photo 43 MUT bit channel P1200857.jpg

Requiring a very firm press the bit slides fully into place.
 photo 44 MUT bit channel filled P1200860.jpg

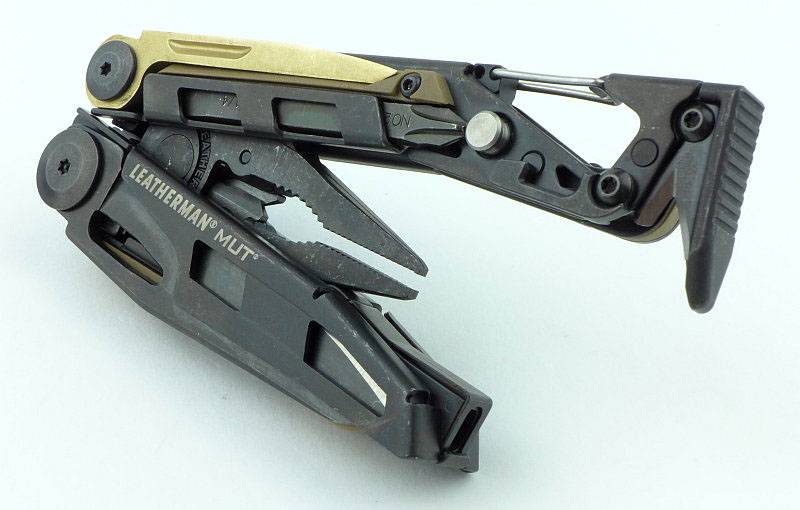
OK, time to get onto the pliers.
 photo 45 MUT pliers open P1200870.jpg

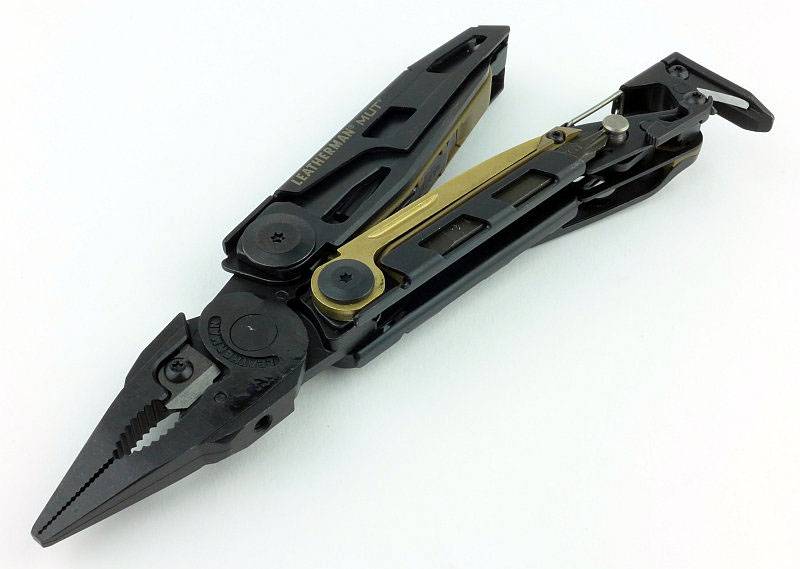
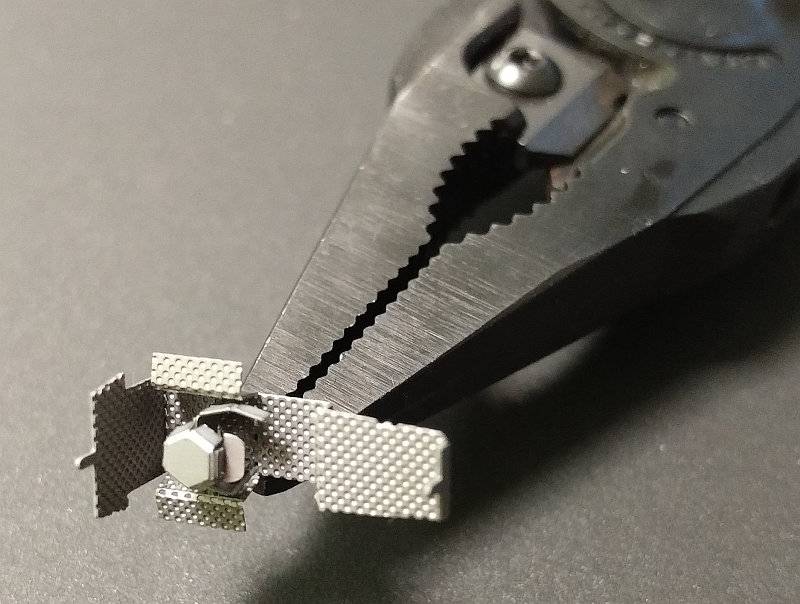
Leatherman use a hybrid jaw which is a blend of needle-nose and standard pliers.
 photo 46 MUT jaws P1200875.jpg

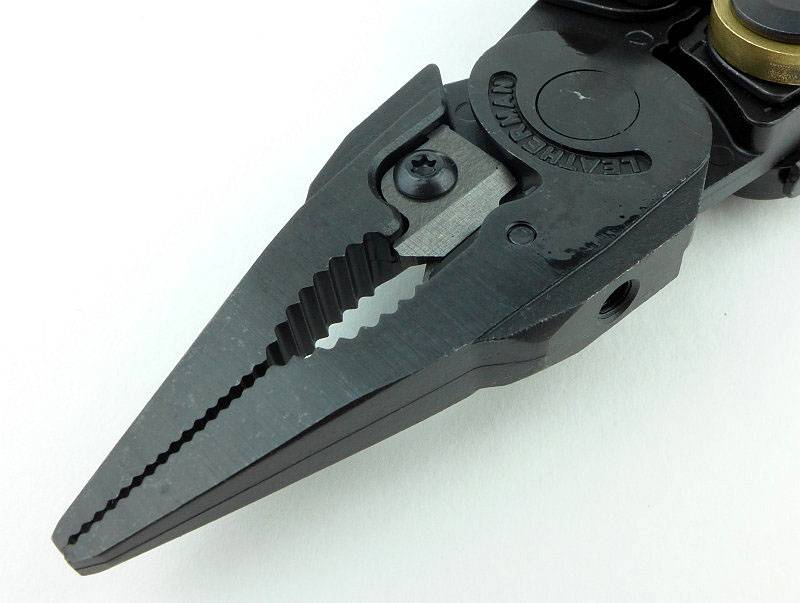
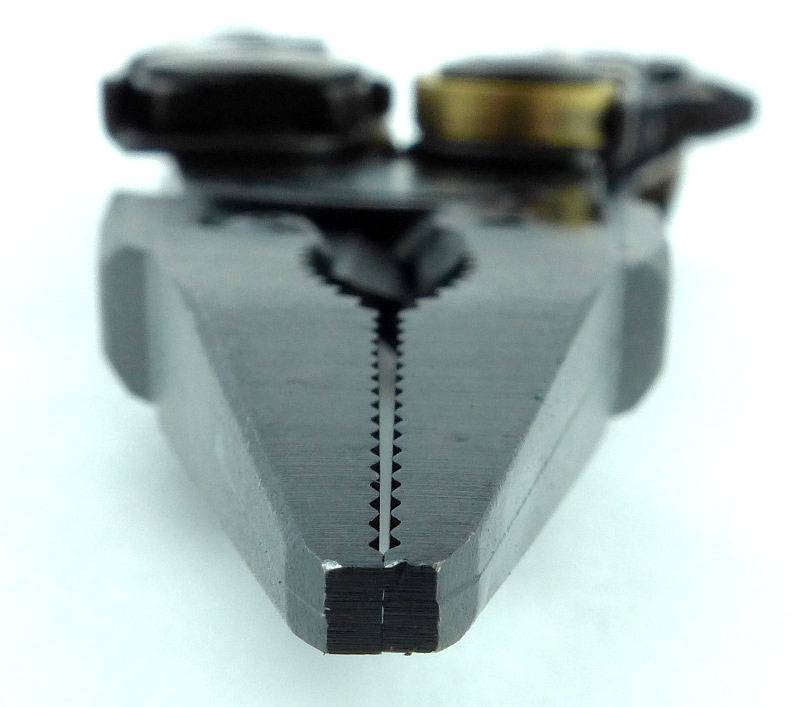
The jaw tips are well aligned and the very tip touches to give tweezer like gripping.
 photo 47 MUT jaw tips P1200877.jpg

A massive improvement over pliers with cutters that are formed directly from the jaw steel, is to use replaceable cutters. There are two benefits, with the first being that once blunted the pliers are not ruined, and the other being that the cutter material can be specifically chosen for higher performance. 154CM has been used for these cutters which is very tough and wear resistant. There is a step in the cutter edges that allows the cutter to grip and hold tougher wires that might slip forwards and keep them as close to the pivot as possible (for the best leverage), making the cut much easier.
 photo 48 MUT cutters P1200881.jpg

The last features of the pliers are a stranded wire cutter and crimping tool which sit the handle side of the jaws.
 photo 74 MUT crimpers P1210048.jpg

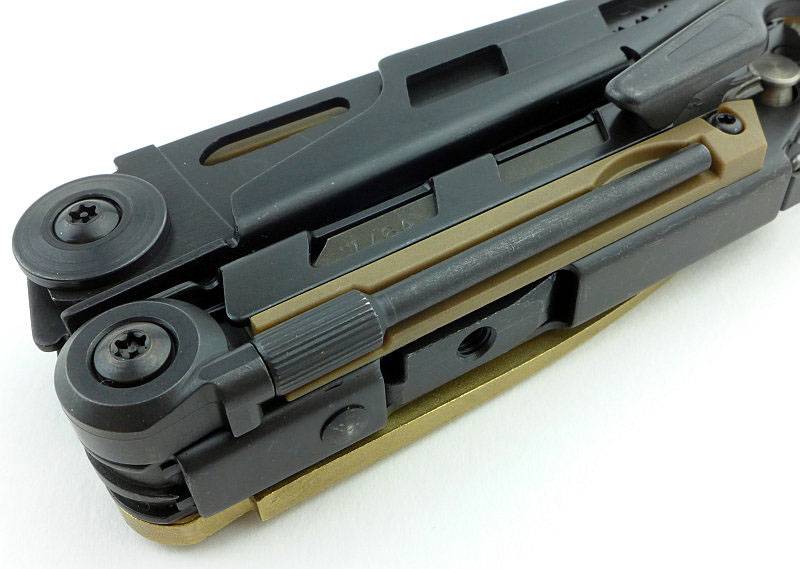
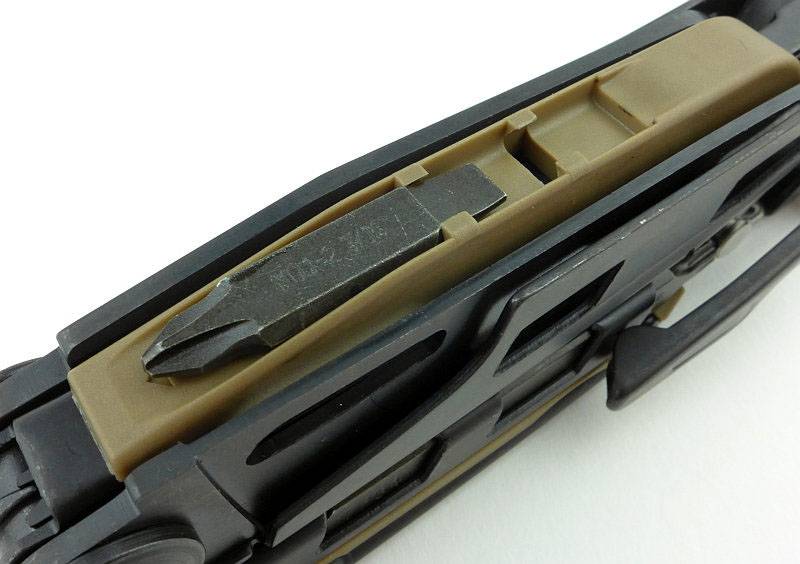
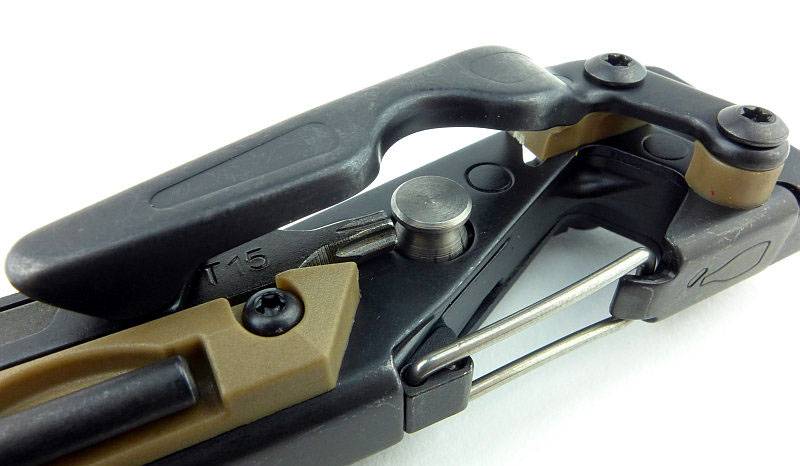
Fitted within the structure of the MUT are three double-ended screwdriver bits. We have already seen the one held in a plastic side panel, but there are two more that slide into one of the MUT’s handles. To keep them in place, there is a sliding button that clicks into place to block the driver bits falling out. Here it is preventing the bit from coming out.
 photo 50 MUT bit button P1200896.jpg

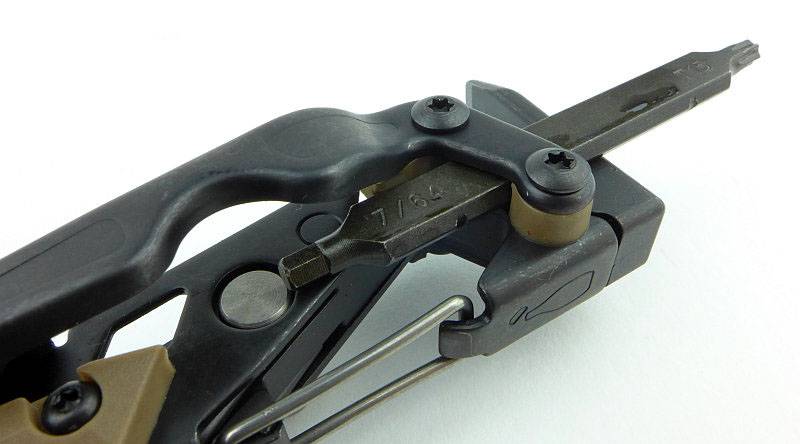
Pressing on the button moves it out of the way of the driver bit.
 photo 51 MUT bit button 2 P1200900.jpg

Which can then slide out so you can use it.
 photo 52 MUT long bit P1200903.jpg

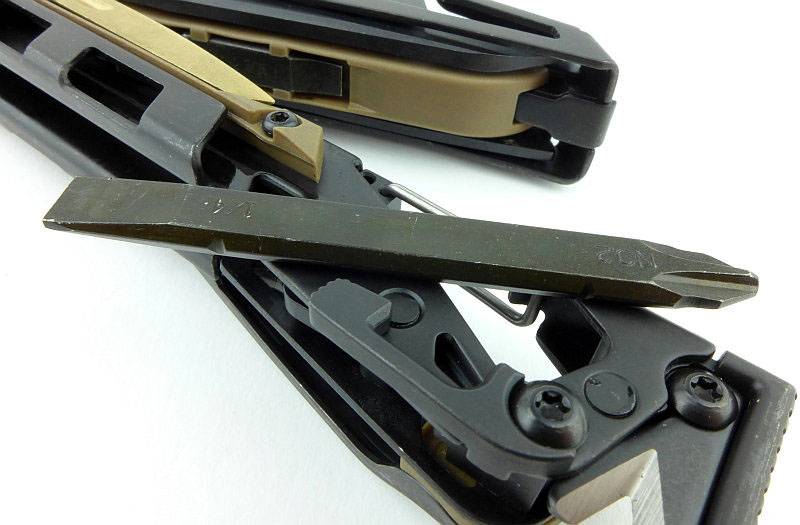
These long bits are too long to leave in place with the MUT handles folded, and give you extra reach for recessed screws.
 photo 53 MUT long bit fitted P1200906.jpg

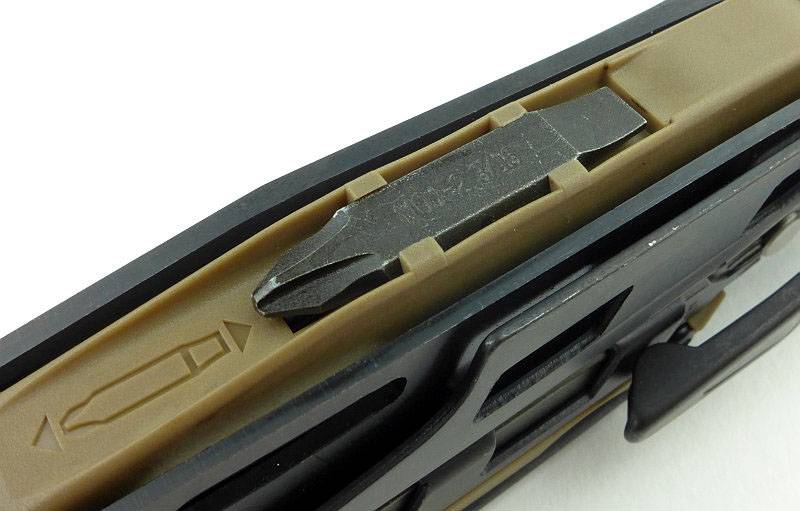
Turning the MUT over, the second long driver bit is hidden under the pocket clip. The same button holds this bit in place.
 photo 54 MUT bit button B P1200910.jpg

Pushing the button down allows this bit to slide out from under the pocket clip.
 photo 55 MUT long bit 2 P1200915.jpg

Here the second long bit is fitted into the bit holder.
 photo 56 MUT long bit fitted 2 P1200916.jpg

Taking a close look at the double-ended button used to hold the two long driver bits in place. To clicks to the left or right depending on the bit you want to access.
 photo 57 MUT bit button side P1200921.jpg

The sight tool is a separate item.
 photo 75 MUT sight tool P1210054.jpg

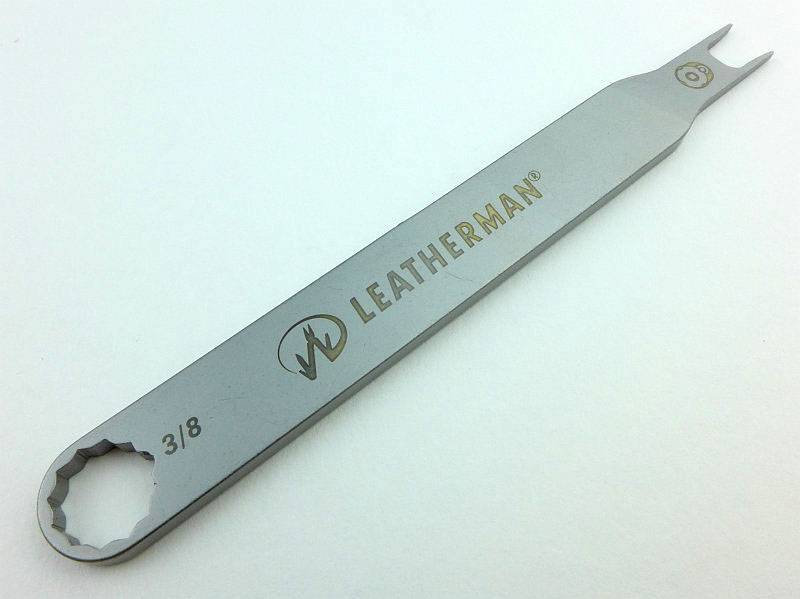
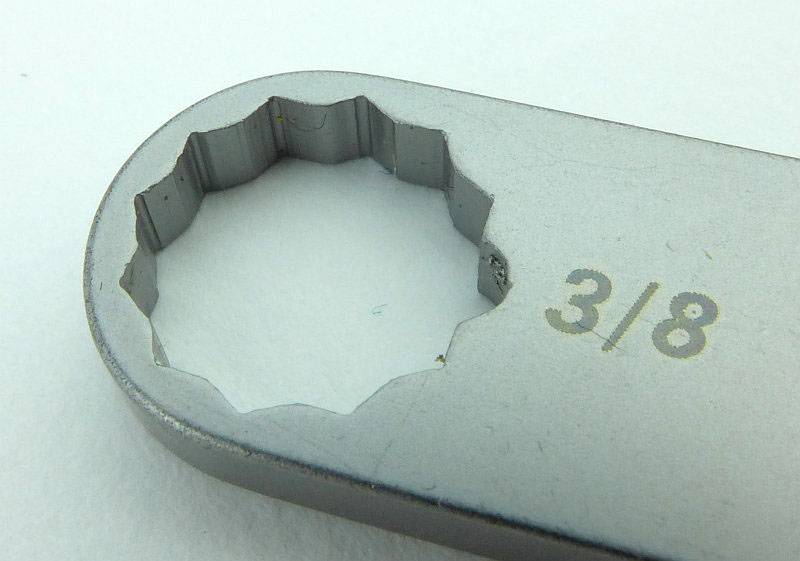
One end of this tool is a 3/8 wrench.
 photo 76 MUT sight tool end 1 P1210057.jpg

The other end is a foresight adjustment tool.
 photo 77 MUT sight tool end 2 P1210058.jpg

And there we have it, the MUT’s features covered, so next we are going to have a look at a couple of accessories.
 photo 71 MUT part open P1210010.jpg

A few more details of the MUT’s accessories:

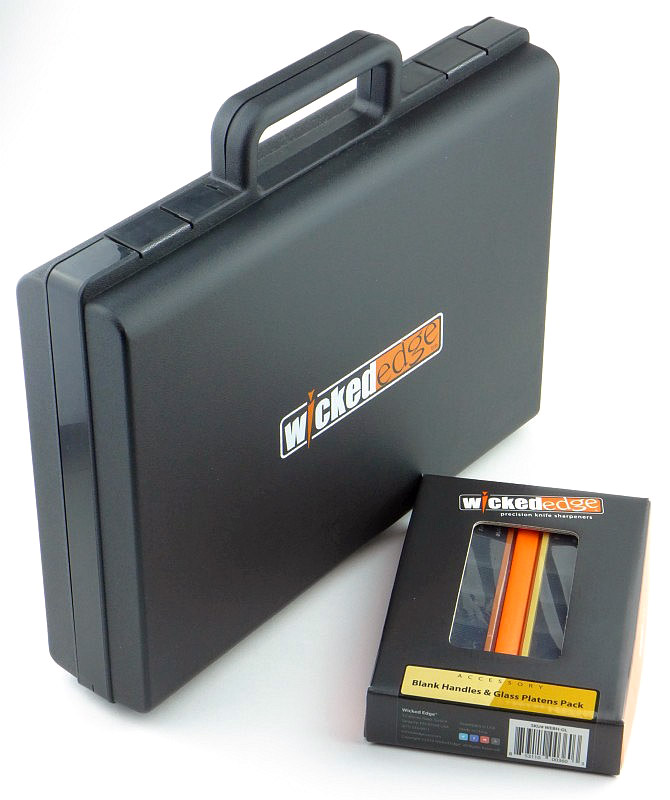
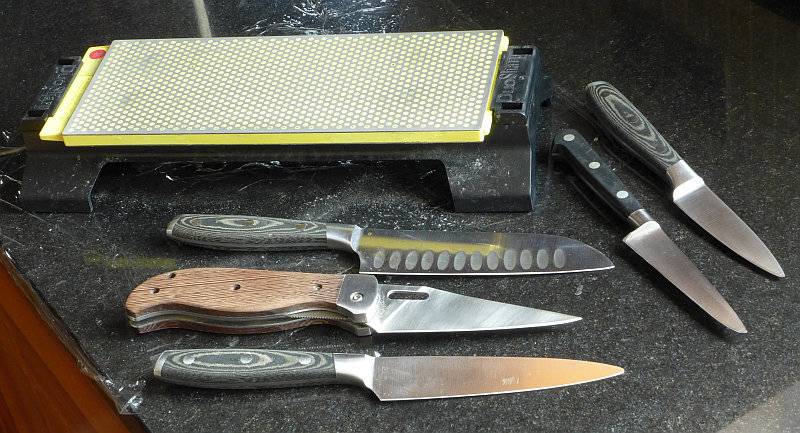
Along with the MUT, the additional bit-kit and MUT accessory kit were supplied.
 photo 58 MUT accessories boxed P1200933.jpg

The bit-kit has two strips of bits that fit the MUT’s bit holder and the accessory kit has a bag of several parts for the MUT.
 photo 61 MUT with accessories P1200952.jpg

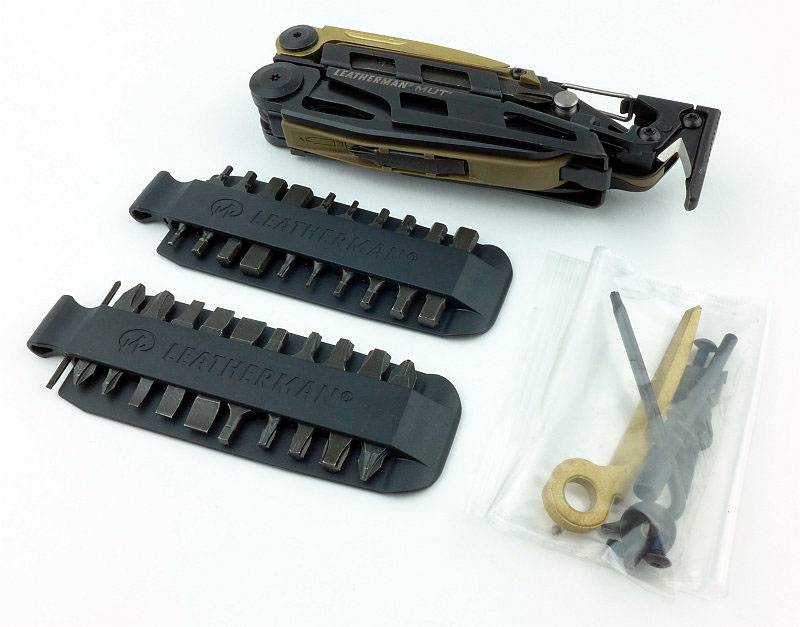
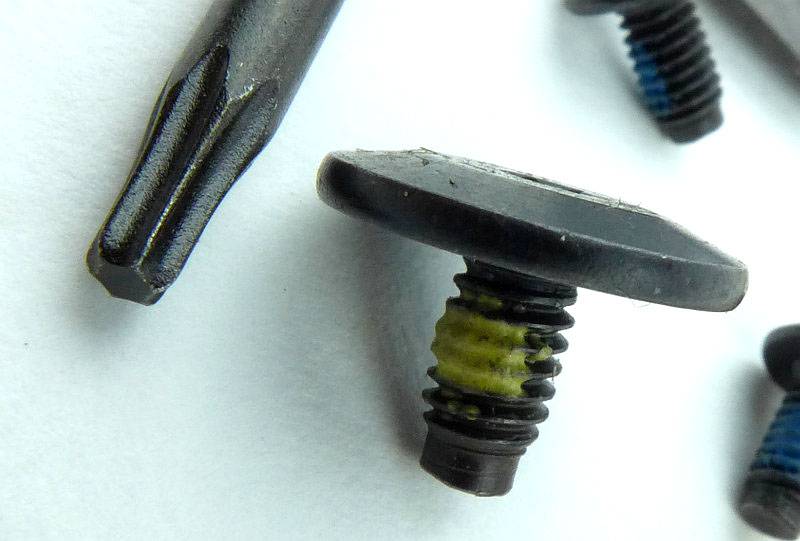
Laying this all out, the accessory kit has all the replaceable parts, cutter, wire-cutters, punch and scraper, plus replacement screws for fixing all of these parts.
 photo 59 MUT accessories unboxed P1200937.jpg

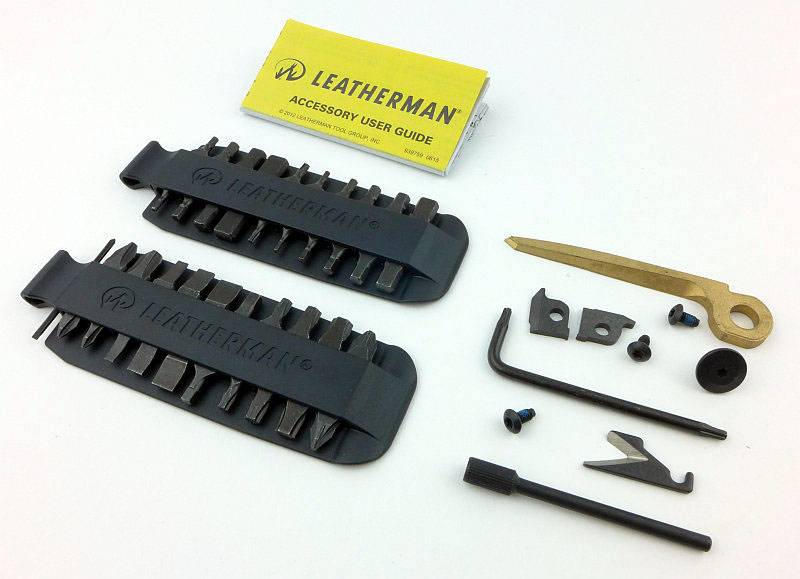
The screws even have a pre-application of thread-lock on them.
 photo 60 MUT accessories detail P1200948.jpg

Having the bit-kit massively enhances how useful the MUT’s screw driving capability is.
 photo 66 MUT bit set P1200970.jpg

What it is like to use?

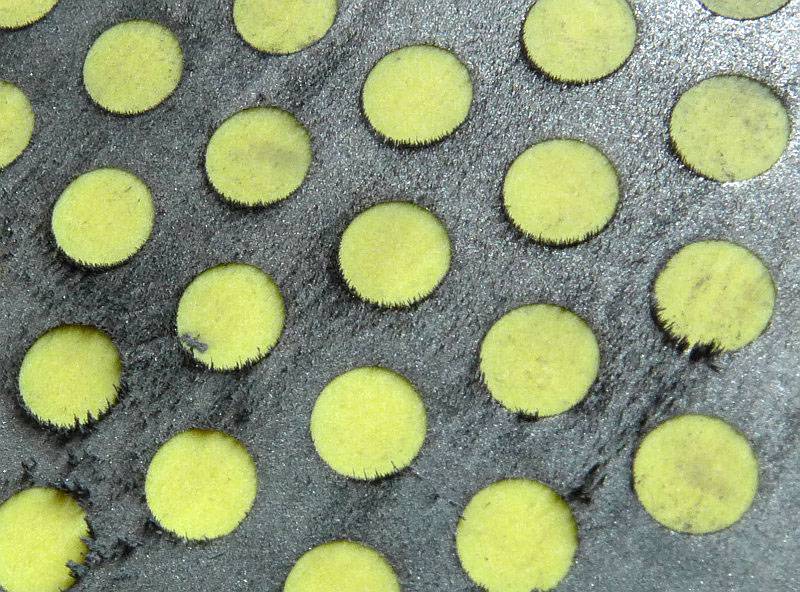
Starting from the first moment you get your hands on the MUT, I’ll have to talk about that Black Oxide coating! So, out of the box, you are going to get nice black hands. It certainly looks very anti-reflective when new, but part of that is the loose surface of black dust. Four or five baby wipes later and the MUT is looking slightly less black, but now isn’t shedding black onto your hands and everything it touches. My advice would be to give it a good wipe down before you do anything else. If you are jumping straight into cleaning a very dirty gun, then you will end up with black hands anyway, but it is worth the initial cleanup.

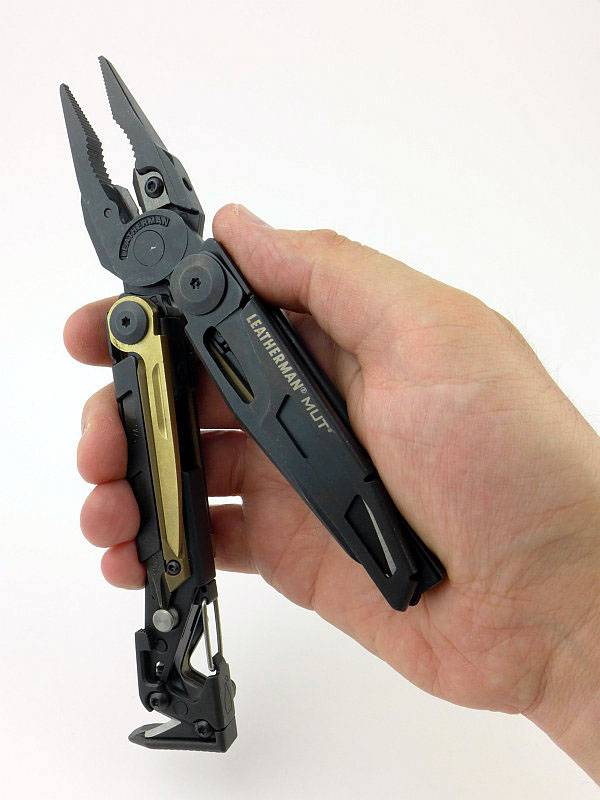
When you pick up the MUT it is clear this is a heavy duty multi-tool. It is not the largest I’ve used, but it certainly feels tough. (I take XL sized gloves.)
 photo 70 MUT in hand a P1200892.jpg

The knife in the MUT is a reasonable size, locks firmly and the blade is a sensible thickness too. This is one multi-tool blade that can do a reasonable amount of work. Unfortunately as a UK resident, this locking knife is something of a potential issue with EDC so I’ll take another look at that later.
An important thing to note here is the position of my little finger, and how it lines up with the cutter notch next to the hammer. If your finger starts to slip into the cutter notch, you certainly can get cut by it. If it were the other way round this would not be the case, as your palm could not get deep enough into the cutter notch. Just beware your finger doesn’t slip in under heavy use or when hammering.
NOTE: Leaving the small screwdriver bit in the bit holder helps guard against this happening.
 photo 70 MUT in hand knife P1210004.jpg

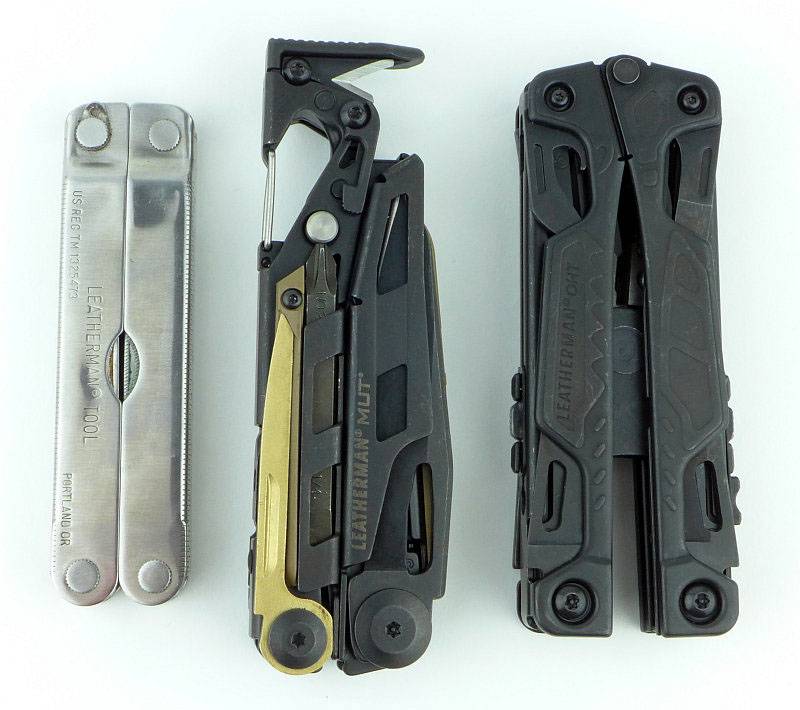
We’ve seen it in the hand, but here is a little size comparison between an original PST, the MUT and the OHT. Due to its out-the-front pliers deployment, the OHT looks quite large, but its build is not as heavy. The PST is quite compact and closer in size to the average multi-tool.
 photo 69 MUT size P1200995.jpg

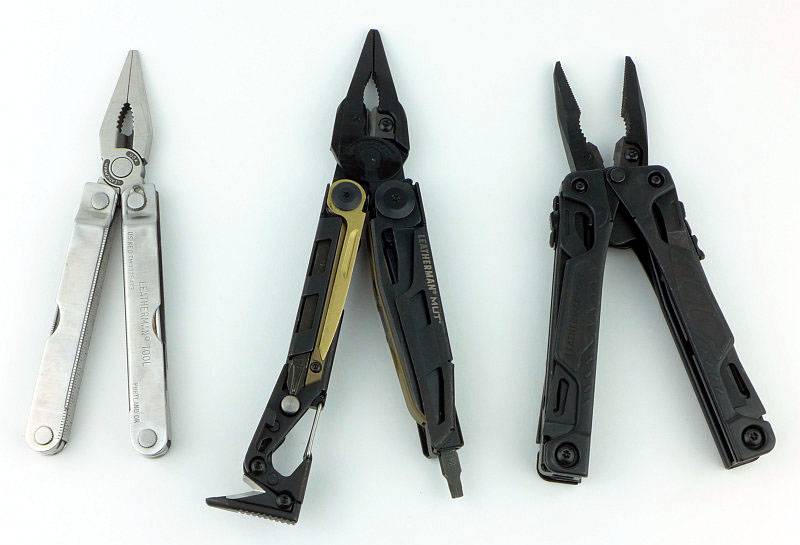
Then we unfold them all.
 photo 67 MUT size P1200984.jpg

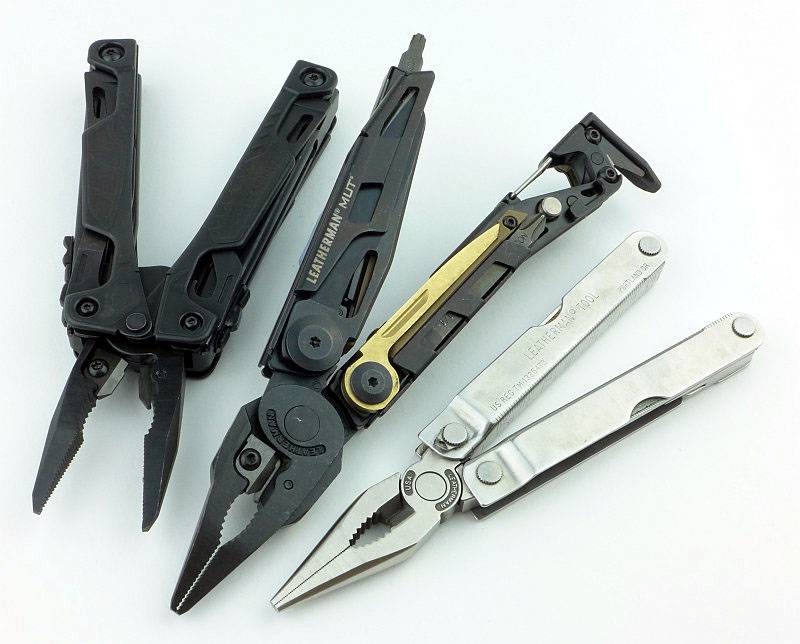
Despite the OHT initially looking quite big, with the MUT fully open, its presence is clearer.
 photo 68 MUT size P1200991.jpg

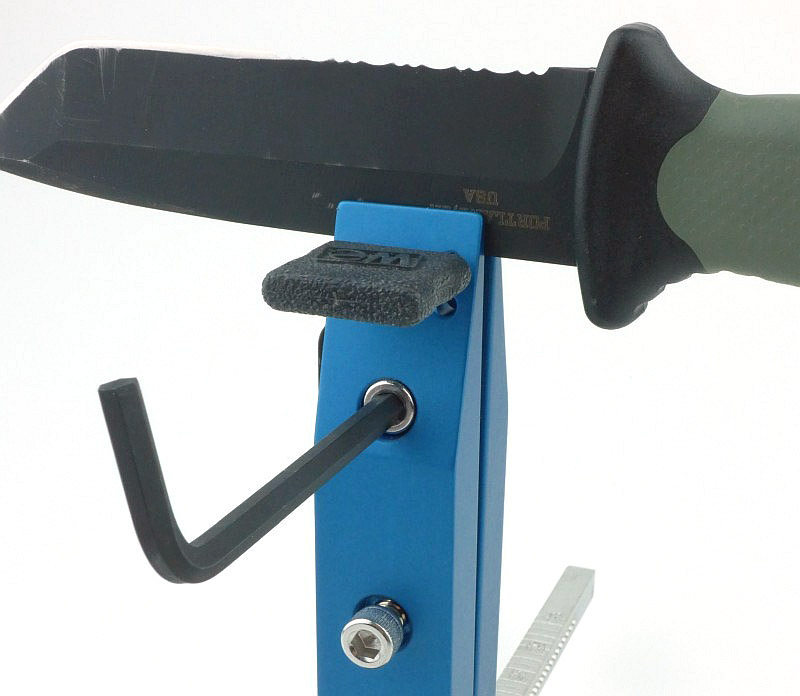
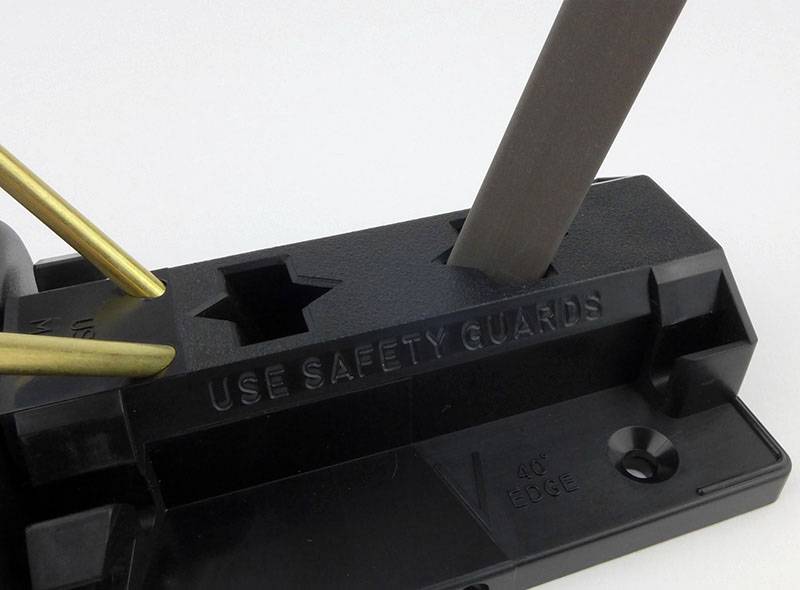
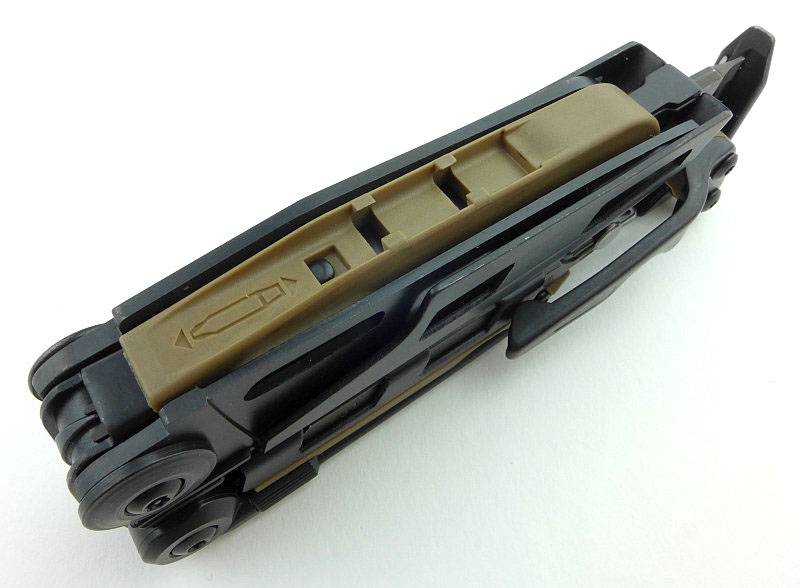
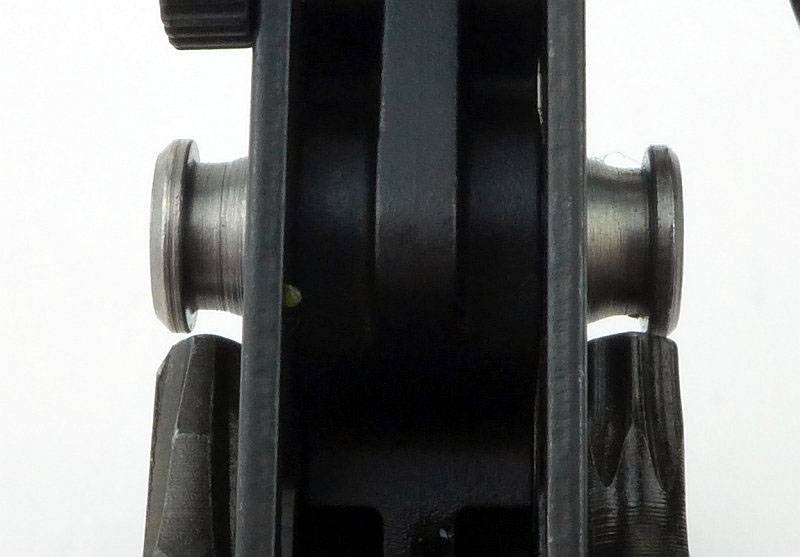
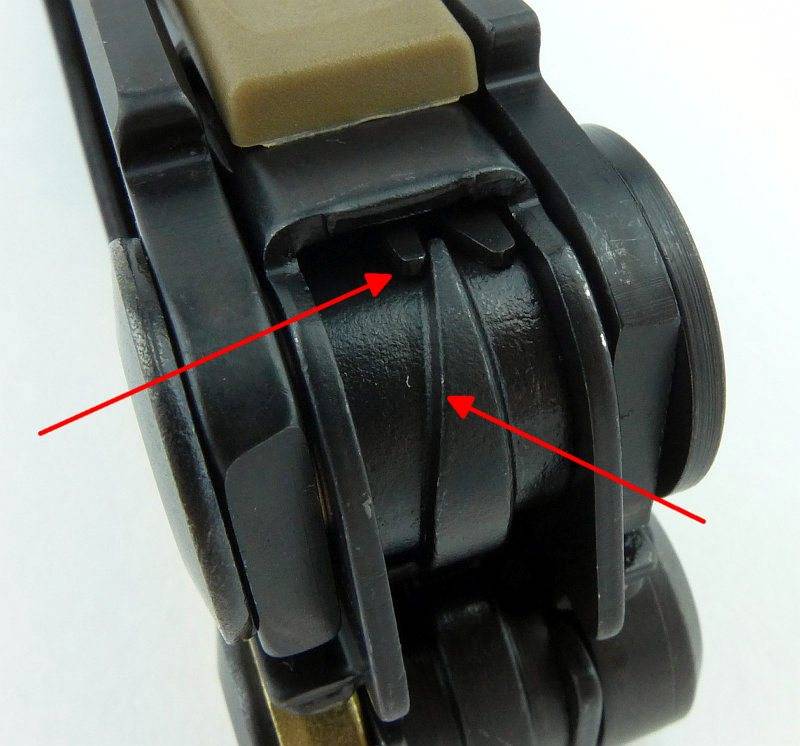
The MUT includes a safety feature that is used in other Leatherman multi-tools, but you might not have noticed. There is a safety lock to prevent the knife blade being opened when you are using the pliers.
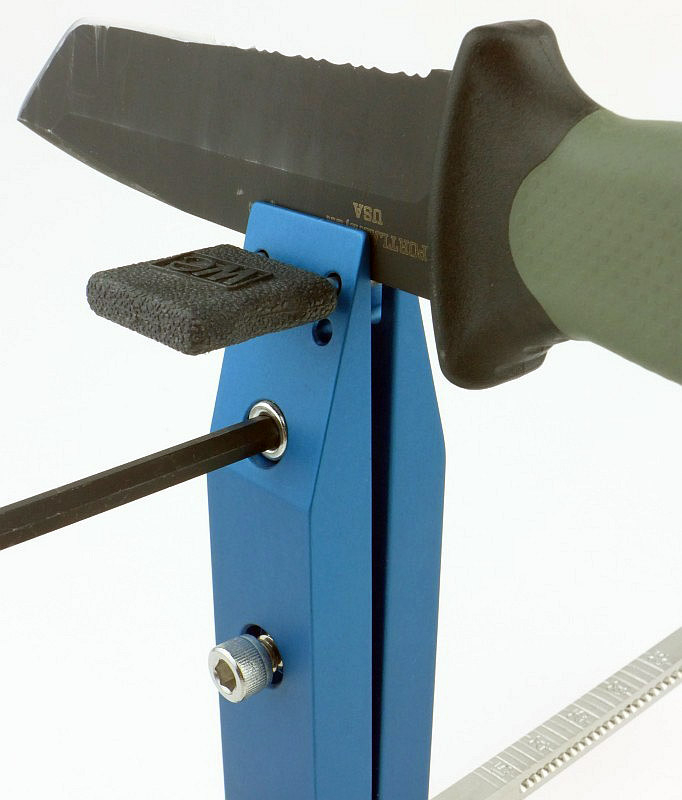
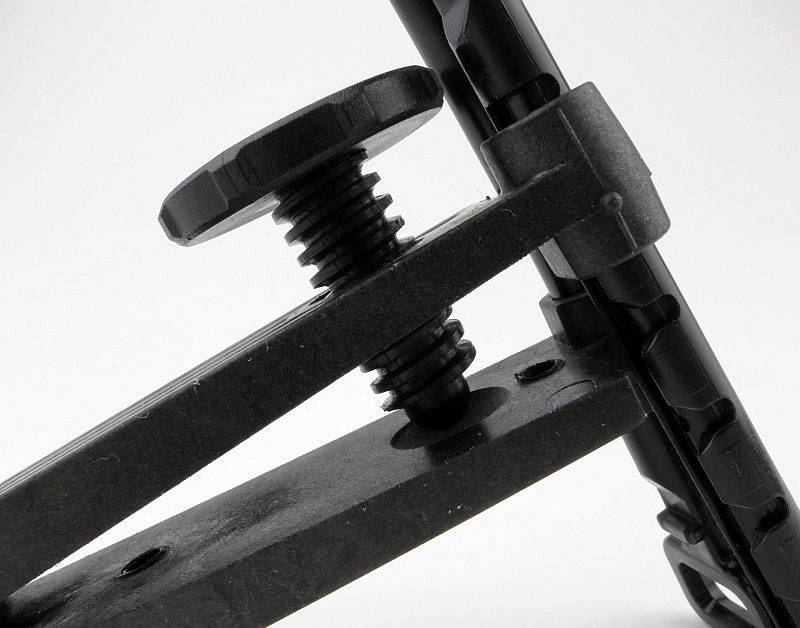
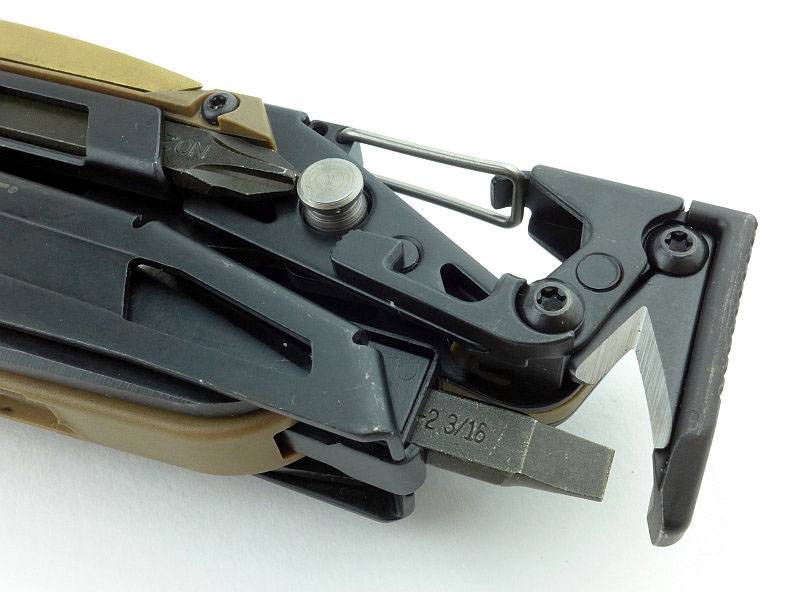
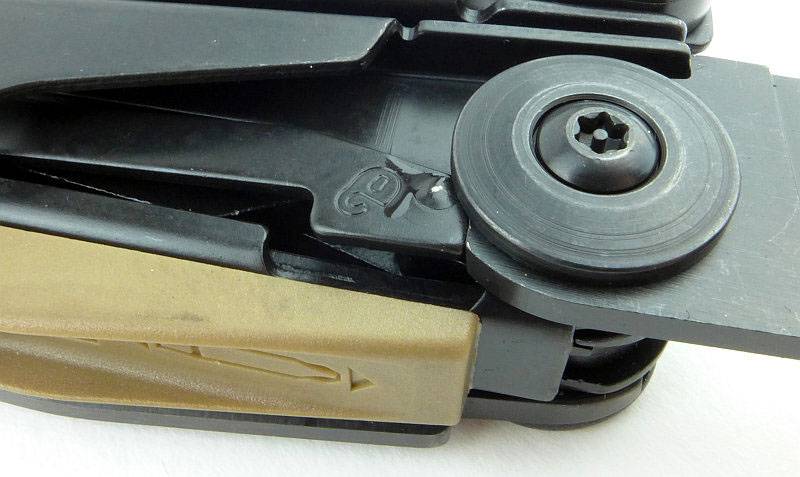
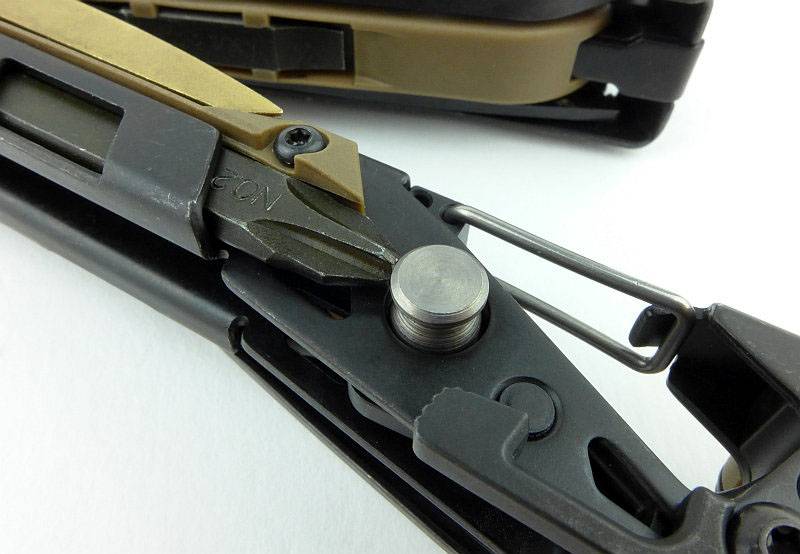
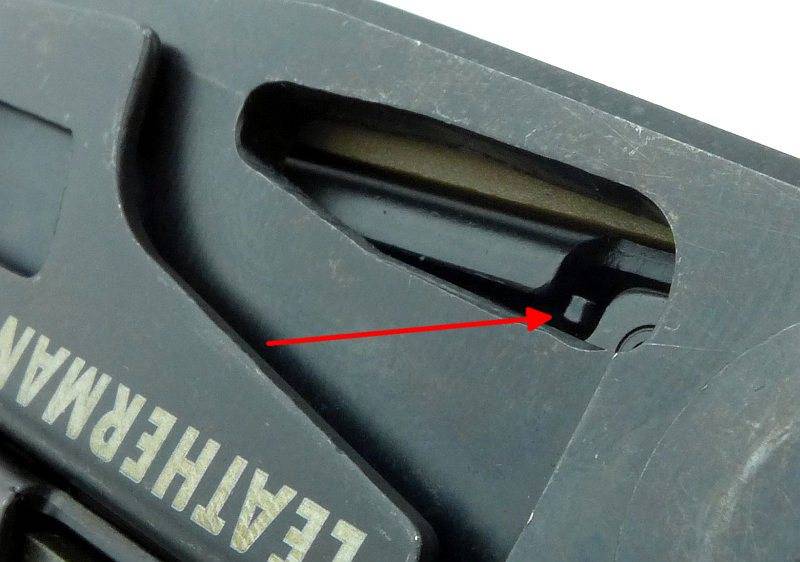
You might have spotted the cams which are included on the pliers’ handle pivots in some of the other photos. What you might not have seen is the metal arm which sits against one cam. Here the lower arrow shows the cam, and the upper arrow points to the safety lock arm. As you rotate the handle open to deploy the pliers, the safety lock rides up the cam slope, pushing the metal arm sideways.
 photo 73 MUT blade safety lock cam P1210025 002.jpg

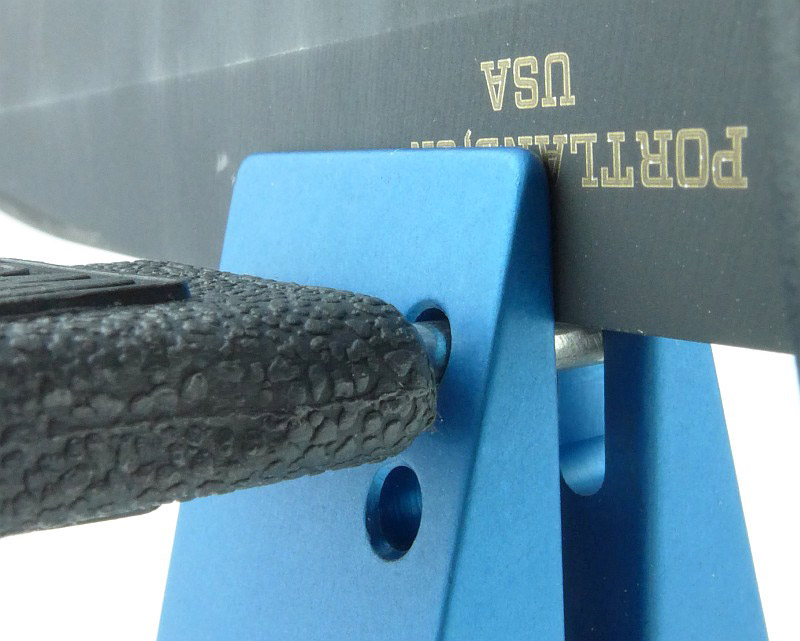
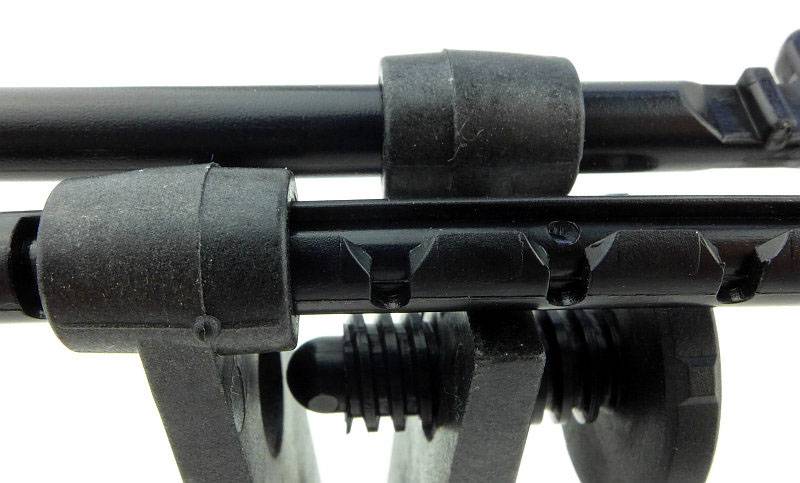
With the handles closed, and the knife blade able to open, if you look inside the opening hole, there is a small metal pin sitting back inside the handle as shown by the arrow.
 photo 63 MUT blade safety lock off arrow P1200963.jpg

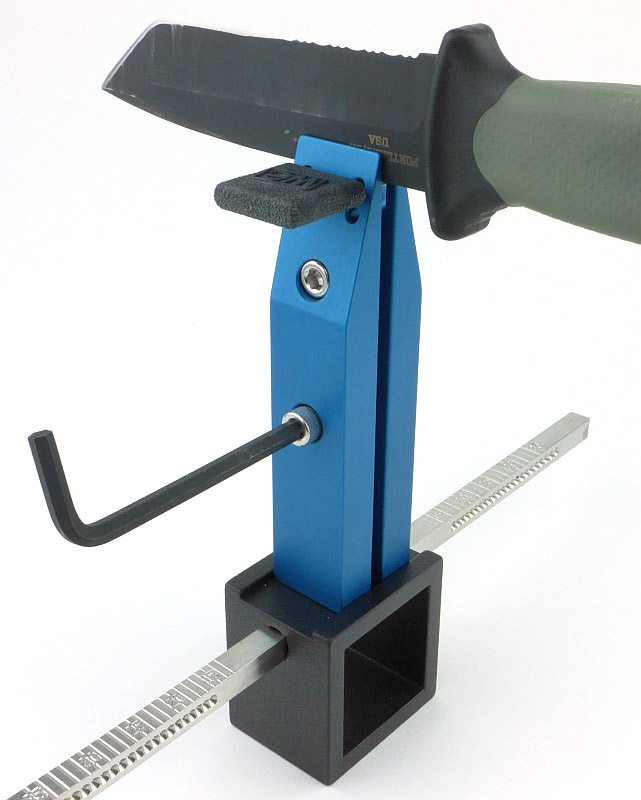
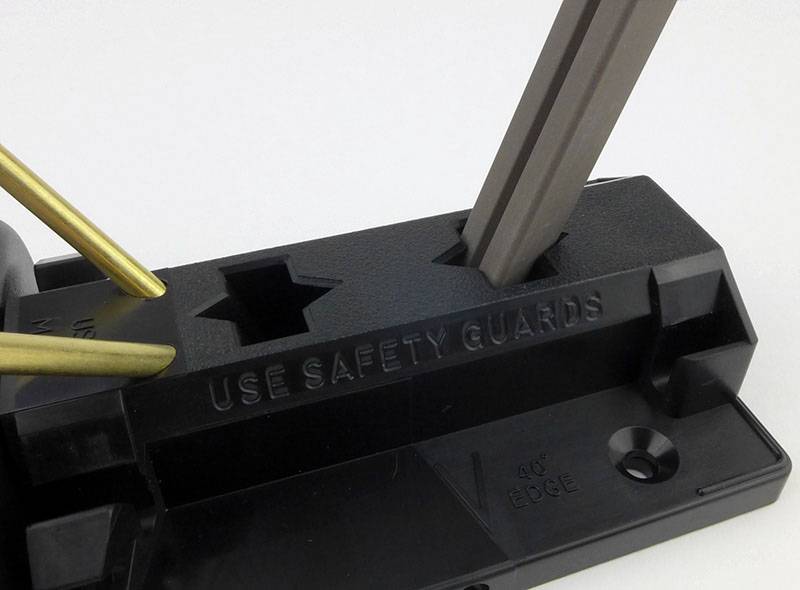
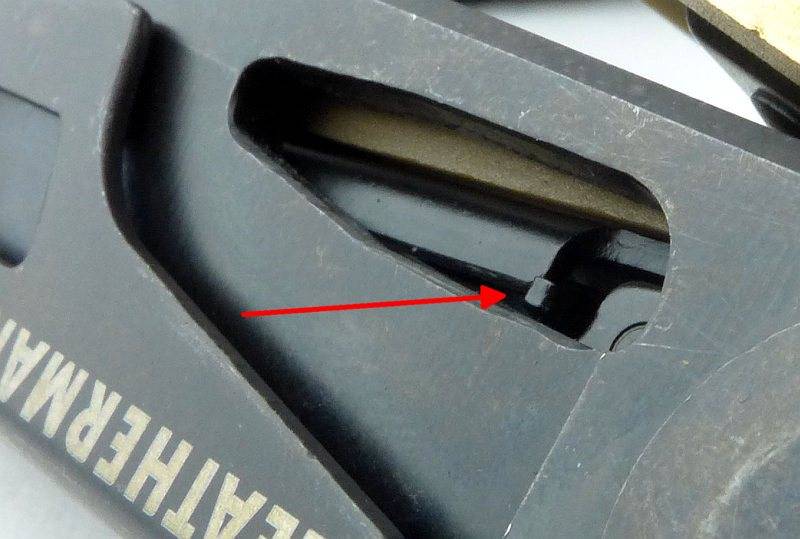
When the handles are opened, that cam pushes the safety lock out, placing the pin inside the opening hole. Like this you can’t open the blade as it is blocked. A small detail, but a really important one that stops what could be a nasty accident if the blade opened when using the pliers.
 photo 64 MUT blade safety lock on P1200964 002.jpg

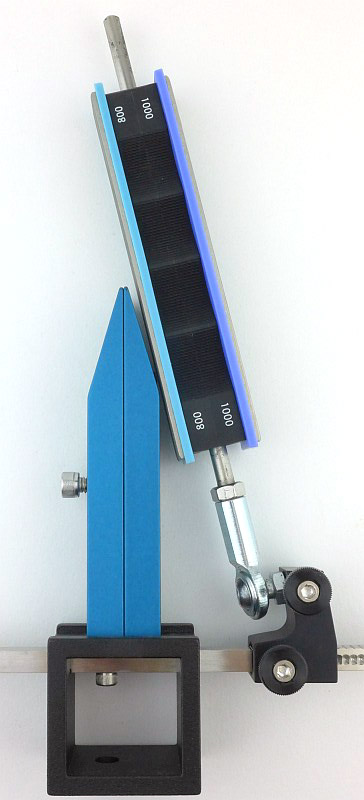
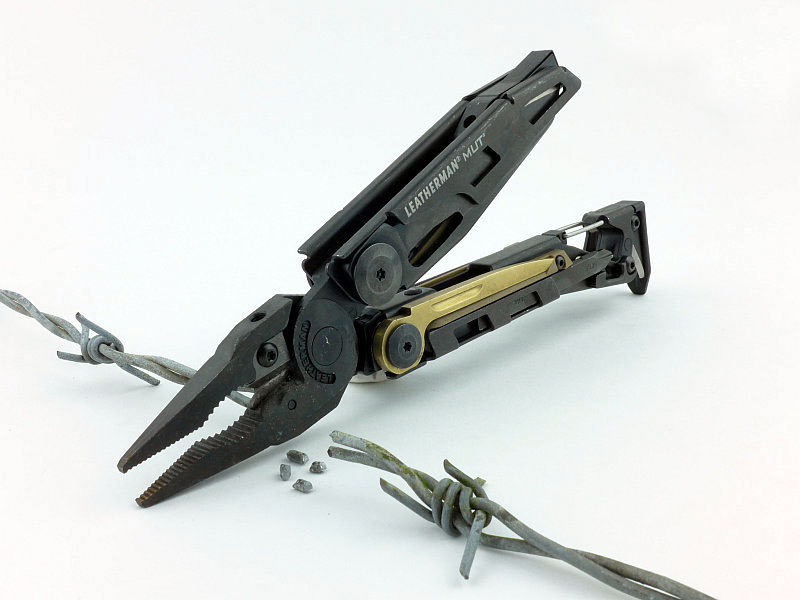
Taking the MUT out into the field and amongst the jobs it was needed for was some tidying up of barbed wire. Two gauges were being cut, a high tensile 2.5mm and a smaller 1.6mm.
 photo 83 MUT in the wild IMG_20160702_162230.jpg

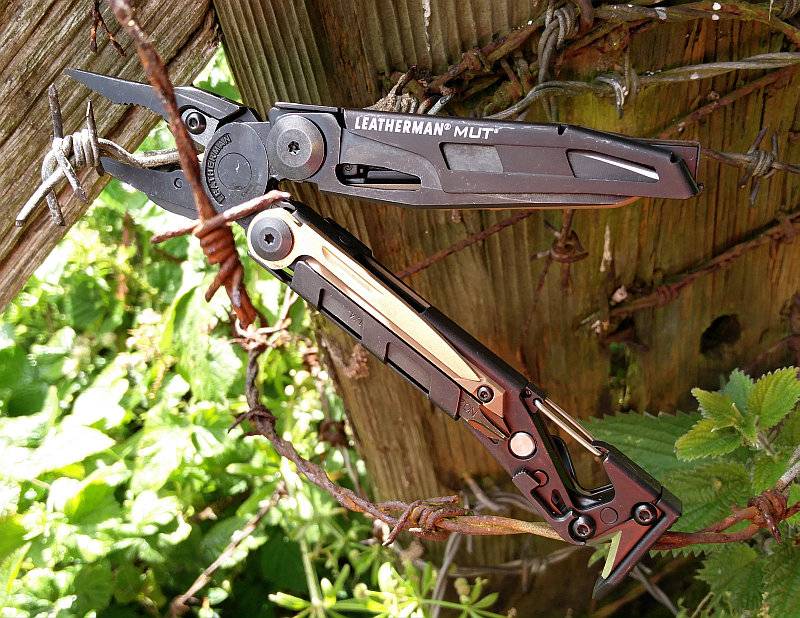
The MUT breezed through the 1.6mm, but the 2.5mm required a but more grunt, after a while I started to need to nip through one wire at a time purely due to fatigue.
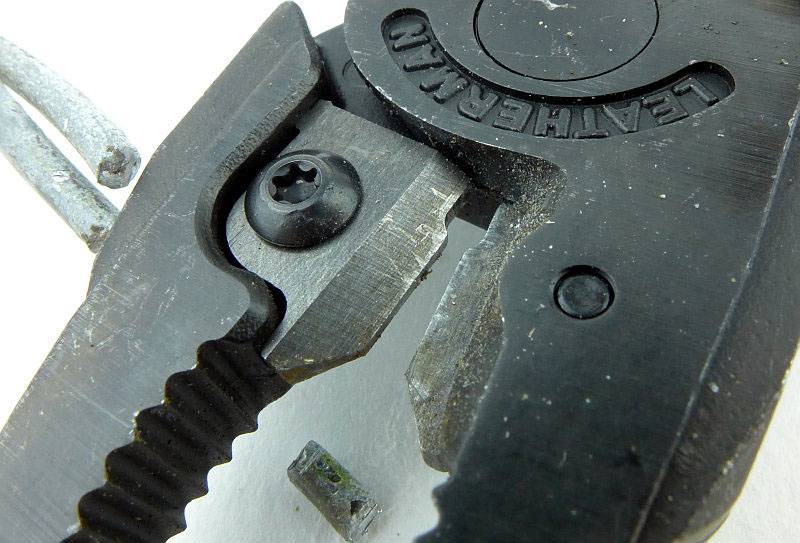
What was very impressive is the state of the 154CM cutters after a lot of work, they looked like this, pretty much untouched.
 photo 82 MUT barbed wire close P1210789.jpg

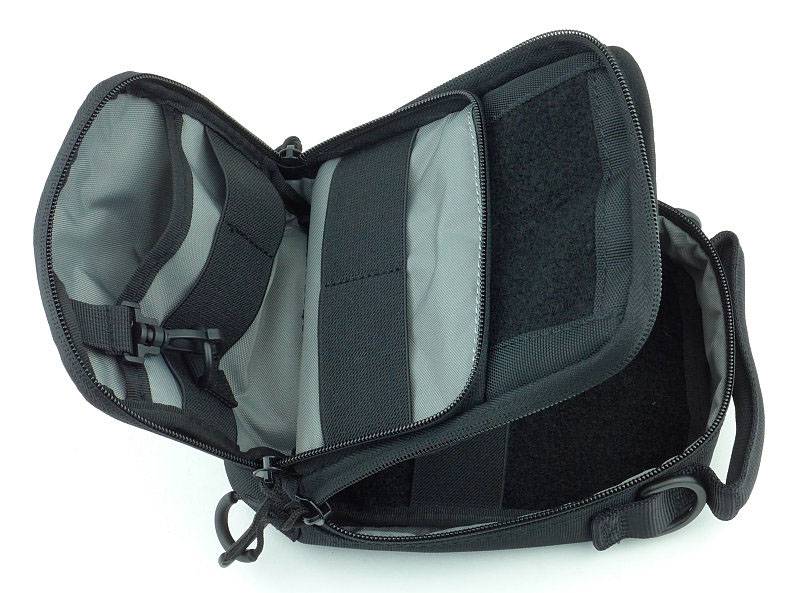
Carrying the MUT to be as fully prepared as possible means carrying the sight tool and extra bits. The sight tool fits into the pouch much better if laid next to the pocket clip like this before inserting it.
 photo 84 MUT sight tool holster P1250290.jpg

The front of the holster does have a pocket that nicely holds one of the bit sets, so here we have the MUT, sight tool, and one bit set.
 photo 85 MUT sight tool bits holster P1250295.jpg

Compared to the earlier photo of the MUT when it was on its own in the holster, the flap now sits higher up on the pouch front, but remains perfectly secure.
 photo 86 MUT holster full P1250296.jpg

If used for firearms maintenance, the fact the MUT has a knife blade in it is not really of any consequence as you have a gun with you. However I wanted to carry the MUT at all times, not just when out shooting. Being a UK resident, this means considering the knife carry laws, and being a locking knife the MUT is effectively classed as a fixed blade – so not UK EDC friendly.
 photo 87 MUT edc convert P1250309.jpg

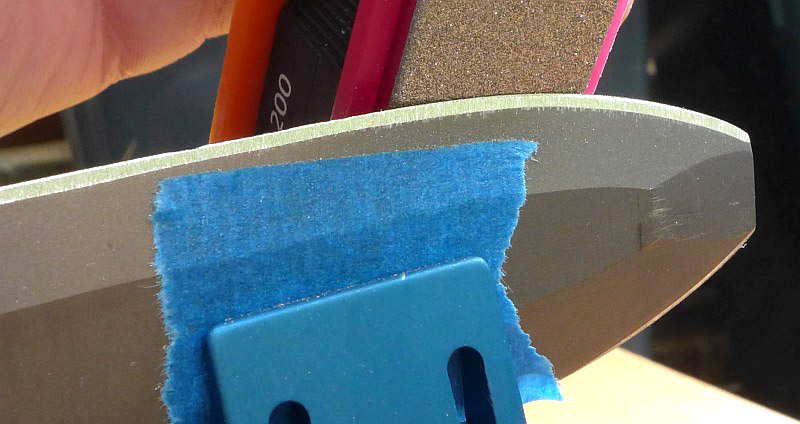
It turned out to be a very easy conversion, especially as the accessory kit has a spare bronze scraper which very nicely substitutes the knife blade.
 photo 88 MUT edc convert P1250324.jpg

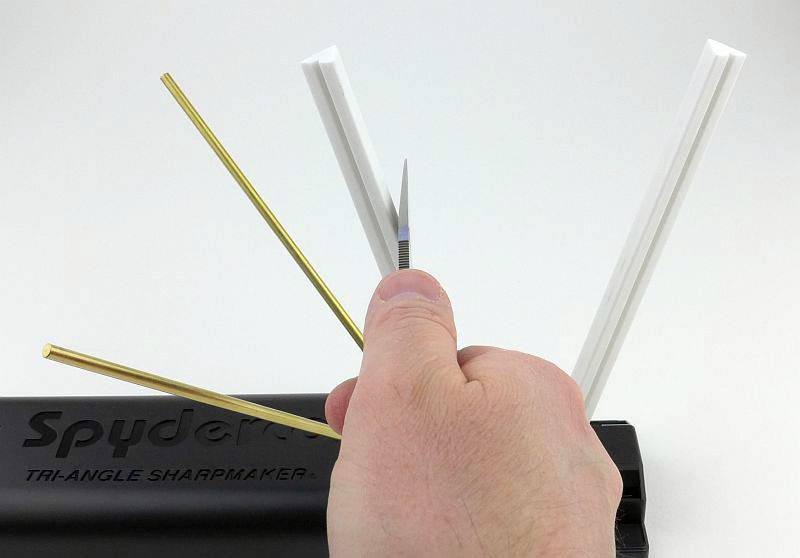
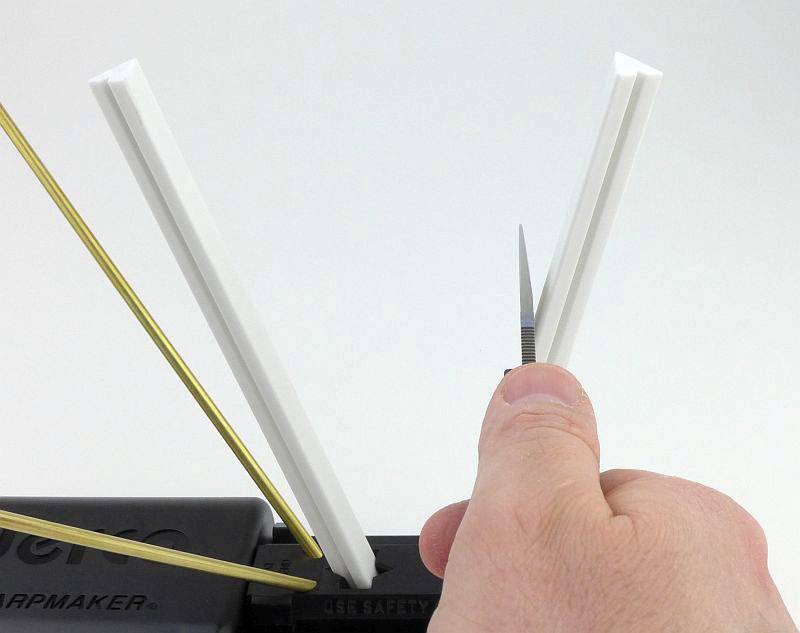
If you want to do this, you will need two T10 security bits to be able to undo the knife pivot. After doing this it is easy to substitute the knife blade for the spare scraper. You could use a couple of washers or something else to fill the space the knife blade occupied, so you don’t need to have the accessory kit to do this conversion (but you do need to add a spacer of some sort).
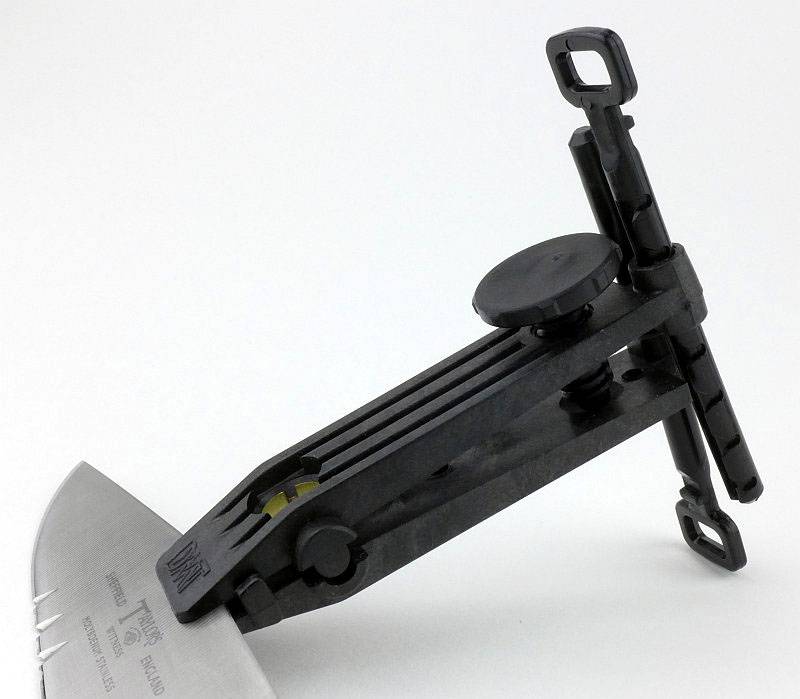
There is one thing to look out for if you use the scraper or similar long substitute. The blade safety lock still operates as you open the handles to use the pliers, so it needs space to move into. The scraper’s nail-nick works perfectly for this, so long as you line it up properly (as shown here). If you used washers, this wouldn’t be any concern.
 photo 89 MUT edc convert P1250319.jpg

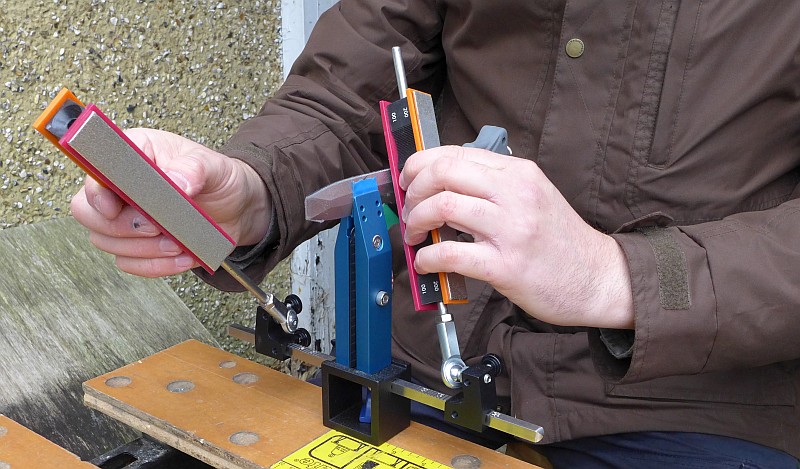
While undoing parts of the MUT, I decided to try out the ‘replaceable’ parts on it. Starting with the scraper and using the supplied T8 torx key, I hit a snag. The screw was very stiff, so much so that the T8 key stripped (with no damage to the screw). The supplied key had seemed a slightly loose fit, so I moved up to the next level; a mini screwdriver set which had T8, T9 and T10 bits. Actually the T9 was the best fit. This was a mini screwdriver, so not designed for heavy work, and after applying more and more force, the handle of the screwdriver started to turn around the shaft and the MUT’s screw still wasn’t moving.
So onto the next level and out to the garage. Going to a full sized screwdriver and in this case a T10 bit pressed very firmly into the screw, and finally it moved. The thread-lock used makes the turning motion very sticky, but the screw certainly won’t fall out on its own.
The moral of this story is not to rely on the Torx key provided with the accessory kit, and don’t go blindly for T8, but try out the T8, T9, and T10 bits you have to find the best fit.
 photo 91 MUT replace P1200947.jpg

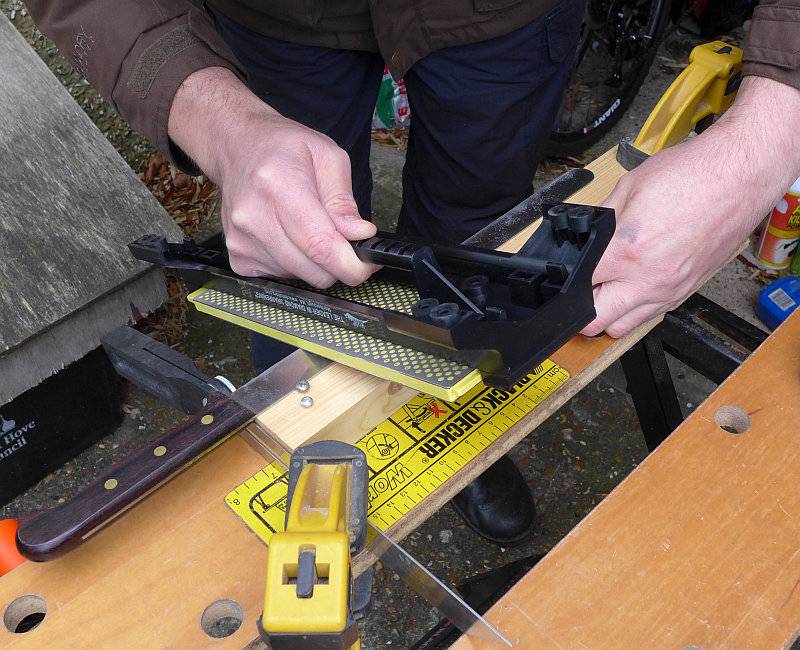
It has done plenty of heavy work, so how about something more delicate. I had a small sheet-metal Star Wars model to construct, and needed some needle-nose pliers. Roll in the MUT. Not necessarily the tool you might have though of for the job, but it did everything I asked it to. Here the MUT has shaped and assembled the pilot/cockpit of an X-wing fighter – pretty fiddly job, but the whole thing came together as well as it could.
 photo 90 MUT pilot IMG_20170104_171203.jpg

Review Summary

The views expressed in this summary table are from the point of view of the reviewer’s personal use. I am not a member of the armed forces and cannot comment on its use beyond a cutting tool or field/hunting knife.

Something that might be a ‘pro’ for one user can be a ‘con’ for another, so the comments are categorised based on my requirements. You should consider all points and if they could be beneficial to you.

_______________________________________________ _______________________________________________
Things I like What doesn’t work so well for me
_______________________________________________ _______________________________________________
Firearm orientated multi-tool. Handles are initially very stiff.
Heavy-duty build and performance. Pocket clip almost immovable.
All cutters are replaceable. Supplied Torx key in the accessory kit is not up to the job.
Strong knife blade. Sight tool is a separate piece.
Excellent holster. Saw is not very effective (but OK on green wood).
The unusual tools included are very effective – Punch, Hammer and Scraper. A finger can drop into the cutter notch.
Bit Holder extends functionality.
Powerful hybrid pliers.
Useful cleaning brush/rod attachment points.

 photo 00 MUT intro angle P1200745.jpg


Discussing the Review:

Please feel free to add comments to the review, but the ideal place to freely discuss these reviews is on a forum. If you started reading the shorter forum version of the review, but followed the link this full exclusive review, please return to that forum to discuss the review there.
If you read the review entirely on Tactical Reviews, please consider one of the following to join in any discussion.

EdgeMatters – Sponsored Reviews (UK based Forum for Knife Makers and Collectors)

BladeForums – Knife Reviews (US based Forum for Knife Discussion)

CandlePowerForums – Knife Reviews Section (Largest and Friendliest Flashlight Community Forum)

EDC Gear Review: NITECORE Utility and Daily Pouches – NUP10/20 and NDP10/20

NITECORE have gone beyond just portable lighting and have started designing products for EDC and daily carry. We now have the NUP10/20 Utility Pouch and the NPD10/20 Daily Pouch which give you plenty of carry options for all those essential bits of EDC gear.

 photo 00 NC Pouches intro P1230459.jpg

The details:

On test in this review are two of the four versions of these pouches, the NUP20 and NDP10. They arrive (like most bags) in a cellophane over-wrap.
 photo 01 NC Pouches wrapped P1230428.jpg

Starting with the NDP10, firstly let’s just cover the naming convention for these pouches. The NDP part means that this is the NITECORE Daily Pouch, and the NDP is either the 10 or 20 depending on the front panel. If this is 10, it has a ‘Hypalon’ Synthetic Rubber panel, or if 20, it has a ‘Velveteen’ Synthetic fabric front panel.
 photo 03 NC Pouches NPD10 P1230468.jpg

So this NDP10 pouch is the larger ‘Daily Pouch’ and it has the ‘Hypalon’ front panel.
 photo 05 NC Pouches NPD10 zip pulls P1230481.jpg

In keeping with the stealth appearance of the pouches, the rubber NITECORE logo has none of the usual yellow colouring.
 photo 06 NC Pouches NPD10 brand P1230484.jpg

If you haven’t come across Hypalon before, it is a synthetic rubber made of chlorinated and sulphonated polyethylene, noted for its resistance to chemicals, temperature extremes, and ultraviolet light.
 photo 07 NC Pouches NPD10 hypalon P1230487.jpg

A detail of the Hypalon’s surface and cut-outs.
 photo 08 NC Pouches NPD10 hypalon P1230489.jpg

Access to the comparments is via the zip closures, and NITECORE have made these zips very easy, with large zip-pulls having a semi-circular moulded loop.
 photo 09 NC Pouches NPD10 zip pulls P1230492.jpg

On this larger Daily Pouch, there is a small hook and loop patch-panel for personalising your pouch. On the NPD20 you can fix patches to the entire front panel, but the Hypalon prevents this on the NPD10.
 photo 10 NC Pouches NPD10 patch panel P1230495.jpg

There is a padded carry handle on the top of the pouch so it can be held like a small bag.
 photo 11 NC Pouches NPD10 handle P1230502.jpg

It also comes with a shoulder strap.
 photo 12 NC Pouches NPD10 plus strap P1230505.jpg

The shoulder strap clips onto D-rings either side of the handle.
 photo 13 NC Pouches NPD10 strap clip P1230509.jpg

On the back there is a PALS webbing attachment which is compatible with PALS/MOLLE systems.
 photo 04 NC Pouches NPD10 pals P1230471.jpg

Supplied with the NPD10 are two PALS connection strips which have a Velcro closure.
 photo 14 NC Pouches NPD10 PALS P1230514.jpg

Opening the main compartment, there is a pocket fixed to the front with an elastic organiser strip, and the rear of the main compartment has a full hook and loop surface for additional flexibility, plus another elastic organiser strip.
As the zips run all the way from one side to the other and have double zip-pulls, the access to these pouches is ambidextrous.
 photo 15 NC Pouches NPD10 main P1230518.jpg

The hook and loop organiser surface in the main compartment.
 photo 17 NC Pouches NPD10 main inside P1230534.jpg

Inside the front compartment, there is even more organisation for small items. Two elastic strips, a front pocket and a clip/D-ring fixing point for keys etc.
 photo 16 NC Pouches NPD10 front P1230527.jpg

Now we switch to the smaller NUP20. NITECORE Utility Pouch with ‘Velveteen’ Synthetic fabric front panel.
 photo 18 NC Pouches NUP20 P1230540.jpg

Again, in keeping with the stealth appearance of the pouches, the rubber NITECORE logo has none of the usual yellow colouring.
 photo 19 NC Pouches NUP20 logo P1230543.jpg

A closer look at the plush Velveteen Synthetic fabric front panel.
 photo 20 NC Pouches NUP20 patch front P1230547.jpg

As on all of the NITECORE pouches there are large zip-pulls for easy access.
 photo 21 NC Pouches NUP20 zip pulls P1230551.jpg

There is a padded carry handle on the top of the pouch so it can be carried like a small bag.
 photo 22 NC Pouches NUP20 handle P1230556.jpg

The Utility Pouch also has a shoulder strap.
 photo 23 NC Pouches NUP20 strap P1230560.jpg

This too clips onto D-rings each side of the handle.
 photo 24 NC Pouches NUP20 strap clip P1230561.jpg

The strap is a generous size so should accommodate wearing it over even large coats.
 photo 25 NC Pouches NUP20 strap fitted P1230566.jpg

On the back of the NUP20 is the same PALS attachment system as used on the Daily pouches.
 photo 26 NC Pouches NUP20 PALS P1230570.jpg

As before the PALS connection strips have a Velcro closure.
 photo 27 NC Pouches NUP20 PALS P1230574.jpg

In the main compartment, the layout is the same as with the Daily pouch, but the compartment is just smaller.
 photo 28 NC Pouches NUP20 main P1230578.jpg

It too has the hook and loop rear panel inside the main compartment.
 photo 29 NC Pouches NUP20 main detail P1230580.jpg

Using the same configuration as the NDP pouches the NUP 20 has two elastic strips, a front pocket and a clip/D-ring fixing point for keys etc. inside the front compartment.
 photo 30 NC Pouches NUP20 front P1230589.jpg

A closer look at the clip/D-ring.
 photo 31 NC Pouches NUP20 front clip P1230591.jpg

A very brief aside here looking at a couple of other NITECORE pouches/holsters, the NCP30, as one of these will appear in the next section.
 photo 32 NC Pouches NCP30 P1230597.jpg

What are they like to use?

The way you choose to carry your EDC gear is as personal as your choice of the gear itself. What you are doing and where you are going also completely changes the requirements of your carry system, so you will need a few options to suit these differing requirements. For any scenario, no one bag/pouch/system will suit everyone, and the way you fill that carrying system will also be unique. So really the best thing you can have are options, and the NITECORE pouches give you options.

Taking the larger Daily Pouch the NDP10, here I’ve shown one example of a set of gear I’ve been carrying.
 photo 33 NC Pouches NPD10 contents P1230765.jpg

This is a snapshot of a set of gear that changes depending on, well, the day. This is not an over-stuffed pouch as I don’t like ramming things to full capacity as it just makes it more difficult to find things, but the list here includes:

A fire-resistant Buff
Mini screwdriver set
3mm cord hank
Gorilla tape mini roll
Jaffa Gaffa tape mini roll
2mm cord hank
CountyComm Pico Grappling hook
NITECORE F1 charger/powerbank
NITECORE NL188 3100mAh 18650 cell
NITECORE USB cable
NITECORE P20UV
Mini adjustable spanner
Screwpop Magnetic Screwdriver
Chris Reeve Knives Large Inkosi
Fällkniven Flipstone Sharpener
NITECORE NWS20 Titanium Whistle
NITECORE NTP10 Titanium Pen
Sharpie Mini Marker
NITECORE SENS AA
Uncle Bill’s Sliver Gripper Tweezers
Burketek Pocket Wrench II
Gerber Bear Girls compact multi-tool
A ‘peak_wanderer’ Unseen Ring Spinner

Not too shabby, and prepared for the odd eventuality. Remember this was not crammed full, but was accessible.

Like this I was carrying the NDP10 inside a larger bag, using at as an organiser, and also separately with the shoulder strap. I found it a bit dense/heavy for PALS/MOLLE mounting.

As a bit of an aside, to free up a bit of space inside and to make access to the bigger light easier I decided to use the PALS feature on the front to fit the NCP30 pouch onto the NDP10.
 photo 35 NC Pouches NPD10 with pouch P1230791.jpg

From this angle you can see the PALS connection strap woven through the PALS panel.
 photo 36 NC Pouches NPD10 with pouch P1230793.jpg

The NCP30 has an elasticated body that holds onto the light so you don’t need to have a top flap covering it.
 photo 37 NC Pouches NPD10 with pouch open P1230799.jpg

If you are concerned though, you can bring a retaining flap out of the NCP30 to fully secure the light.
 photo 38 NC Pouches NPD10 with pouch closed P1230804.jpg

So, these NITECORE pouches give you options for organisation and carry of those essential EDC bits and pieces. In-bag carry, direct carry, on-bag carry and shoulder-strap carry options for sensible sized pouches that are small enough to be convenient and large enough to be useful.

Review Summary

The views expressed in this summary table are from the point of view of the reviewer’s personal use. I am not a member of the armed forces and cannot comment on its use beyond a cutting tool or field/hunting knife.

Something that might be a ‘pro’ for one user can be a ‘con’ for another, so the comments are categorised based on my requirements. You should consider all points and if they could be beneficial to you.

_______________________________________________ _______________________________________________
Things I like What doesn’t work so well for me
_______________________________________________ _______________________________________________
Choice of two pouch sizes that are small enough to be convenient and large enough to be useful. Would benefit from more dividers/separators inside main compartment.
Multi carry options – Shoulder, PALS/MOLLE, handle. Zip-pull loops can catch on things accidentally and be pulled open.
Smaller pouches can be attached to the front of these using hook/loop or PALS/MOLLE. PALS/MOLLE connection strips not the most secure with hook/loop closure.
Choice of front panel material.
1000D Corduroy construction.

 photo 34 NC Pouches NPD10 contents P1230775jpg.jpg


Discussing the Review:

Please feel free to add comments to the review, but the ideal place to freely discuss these reviews is on a forum. If you started reading the shorter forum version of the review, but followed the link this full exclusive review, please return to that forum to discuss the review there.
If you read the review entirely on Tactical Reviews, please consider one of the following to join in any discussion.

EdgeMatters – Sponsored Reviews (UK based Forum for Knife Makers and Collectors)

BladeForums – Knife Reviews (US based Forum for Knife Discussion)

CandlePowerForums – Knife Reviews Section (Largest and Friendliest Flashlight Community Forum)

Gear Review: DMT Aligner ProKit and DuoSharp 10″ Bench Stone

 photo 00-DMT-featureV2-P1180049.jpg

It is possible to put a great edge onto a knife with very basic equipment and a lot of time. However, with the ever harder and more abrasion resistant steels, diamond stones make it much easier and faster to achieve that edge. DMT are one of the best, if not the best, makers of diamond sharpening stones. If you have checked my ‘Recommended’ page you will have seen that DMT was actually already my favourite diamond sharpener brand, with a pair of DiaFolds (Coarse/Extra Coarse and Fine/Extra Fine) always with me for field maintenance.

In this review I’m looking at two very different sharpeners, a large bench stone (Duo Sharp 10″ Bench Stone) and a guided precision sharpening system (Aligner ProKit).

 photo 00 DMT both P1170999.jpg

“Getting your EDGE back”:

There are so many variations in knife design, size and purpose, and I shall continue to try and review as many as I can, but the one thing that they all have in common is a cutting edge, and it is that edge which makes a knife into a tool. When you buy a knife, the factory put an edge on the blade, but this can vary considerably in quality even from good manufacturers. Relying on the factory edge is like buying a car and only driving it as far as the original tank of fuel will take you. You can transform the performance of a knife, so it is worth investing in quality sharpening equipment.

Actually this section title uses the name of a sharpening service I offer to neighbours (100% going to charity), and is absolutely appropriate for anyone who wants to have the best performance from their cutting tools.

I’ve used just about every method of sharpening, both manual methods and powered. These range from the humble carborundum bench-stone to high-end guided sharpening systems, as well as various wet/dry grinders and belt sanders. Manual sharpening does take longer, but gives you greater control and removes less metal. Where Diamond sharpeners really stand out is the speed they cut, and a quality diamond stone can cut 6-10 times faster than other stones. That is a lot fewer strokes you need to make.

There are many diamond stones to choose from with very different prices. DMT claim the flattest sharpening surfaces with the highest quality of diamond particle and density of coating. I can’t examine this to confirm or deny their claim, but what I can say is that where other diamond stones have let me down and worn out quickly, the DMT stones I have, have worked very very hard and are still going strong.

A few more details of the Aligner ProKit:

The Aligner ProKit comes in a storage/carry case.
 photo 01 DMT Aligner Box P1180054.jpg

For this review DMT have also included the Extra-Extra-Fine stone (pink colour) so this is not normally in the ProKit pack. What is included are the three grits Coarse, Fine and Extra Fine, the stone holder/guide-rod, the Aligner adjustable clamp and guide, a tapered serration sharpening diamond coated rod plus the instructions.
 photo 02 DMT Aligner Box open P1180056.jpg

Laying everything out, this is what is in the box (remember the pink stone is not part of the ProKit).
 photo 03 DMT Aligner Box contents P1180061.jpg

As it can’t be fitted into the stone holder, the tapered rod has its own guide rod which screws into the widest end.
 photo 04 DMT Aligner serration rod thread P1180063.jpg

I don’t have a microscope to really go in ultra-close to the different grit stones, but this series of images at the same scale give an indication of the different grits.
First up is the Extra-Extra-Fine where the surface appears almost as if there were no particles in it.
 photo 05 DMT Aligner extra fine P1180066.jpg

Moving up to Extra-Fine and the surface is starting to take on a textured appearance.
 photo 06 DMT Aligner fine P1180067.jpg

With Fine you can see the grainy surface.
 photo 07 DMT Aligner medium P1180068.jpg

Finally with Coarse there is a distinct texture to the surface of the stone.
 photo 08 DMT Aligner coarse P1180069.jpg

Each of the different grit stones are fitted into the holder for use.
 photo 09 DMT Aligner holder P1180071.jpg

The stone is pressed into the pocket in the holder.
 photo 10 DMT Aligner holder P1180073.jpg

Then the lock at the end of the holder is turned to hold the stone securely in place.
 photo 11 DMT Aligner holder P1180074.jpg

A closer look at the rotating lock. Initially the fit of the stones into the holder is snug enough to not need the lock, but as you use it more they loosen up slightly and you do need to use the lock.
 photo 12 DMT Aligner holder lock P1180075.jpg

Being a portable kit, the stone holder has a folding guide rod. Here it is folded over the stone.
 photo 13 DMT Aligner holder folded rod P1180078.jpg

The rod hinges round and locks into place in the open position.
 photo 14 DMT Aligner holder rod hinge P1180079.jpg

Then we have the crucial part of a guided system, the guide itself. This is a clamp which fits onto the blade spine and has adjustable guide rings for the guide rods to run in.
 photo 15 DMT Aligner clamp P1180082.jpg

Looking in close at the clamp jaws. There is a brass screw for adjusting the width of the jaws.
 photo 16 DMT Aligner clamp jaws P1180084.jpg

With the jaws adjusted to the right size, a locking screw is used to tighten the jaws onto the blade.
 photo 17 DMT Aligner clamp lock screw P1180085.jpg

Each of the two guides have a number of positions they can be set to. Each of these positions has a groove moulded into the guide arm.
 photo 18 DMT Aligner clamp guide adjuster P1180087.jpg

Here we have the clamp fitted onto a blade and the guides set to position 3.
 photo 19 DMT Aligner clamp fitted P1180095.jpg

A few more details of the DuoSharp Bench Stone:

The box was shown earlier along with the Aligner ProKit. Inside the box you get the DuoSharp, a sharpening guide (showing other DMT products) and a set of rubber feet.
 photo 01 DMT Benchstone contents P1180008.jpg

There are eight feet which need to be fitted to the eight pegs (two in each corner).
 photo 02 DMT Benchstone feet P1180012.jpg

While the bench stone is upside-down one of its stand-out features can be seen – a handle. This is part of the DuoBase design.
 photo 03 DMT Benchstone handle P1180014.jpg

The handle means that you can take the stone to the blade instead of the blade to the stone. For larger blades this is ideal and makes the DMT benchstone pretty unique. Later on I show an example of exactly this with a ham knife.
 photo 04 DMT Benchstone handle P1180017.jpg

The Diamond stone slab is double-sided, so for the other grit you need to flip it over. It is held onto the base with two plastic clamps. Turning the base over you can see the two tabs that click into place. (you can also see the positions these can be put for the smaller 8″ stone.)
 photo 05 DMT Benchstone clamp P1180021.jpg

Simply pinch these together to release the stone clamp.
 photo 06 DMT Benchstone clamp release P1180023.jpg

You only need to remove one of the clamps to allow the stone to come free.
 photo 07 DMT Benchstone off P1180024.jpg

Fitting in with the colour coding across the DMT range the Red dot represents the Fine grit. The smaller blue dot shows what grit the other side of the stone has – in this case Blue/Coarse.
 photo 08 DMT Benchstone grit indicator P1180028.jpg

The DuoSharp 10″ benchstone has an ‘interrupted’ surface which helps clear the filings produced during use. There are a couple of pin marks into the plastic which probably relate to location pins used during the moulding of the plastic part.
 photo 10 DMT Benchstone holes P1180033.jpg

You can see how the diamond surface has been moulded into a plastic base-plate. One end has the elongated tab, only part of which fits under the stone clamp.
 photo 11 DMT Benchstone corner P1180036.jpg

The other end has a smaller tab for the stone clamp to hold.
 photo 12 DMT Benchstone other end P1180037.jpg

Flipping the stone over you can see the Blue grit indicator spot, this time with the smaller Red dot for the other side’s grit.
 photo 13 DMT Benchstone other grit P1180041.jpg

Fixing the stone back onto the base, first slide the tab under one stone clamp.
 photo 14 DMT Benchstone fitting P1180044.jpg

Then fit the second stone clamp.
 photo 15 DMT Benchstone fitting P1180047.jpg

Press the clamp down until it clicks into place.
 photo 16 DMT Benchstone fitting P1180049.jpg

For an idea of scale, here is the stone next to a Fällkniven F1. At 10″, this is a good sized stone.
 photo 17 DMT Benchstone size P1180050.jpg

What are they like to use?

Firstly, the Aligner fully packed in its box is not only compact, but is also light weight. This makes it a great kit to take with you on trips, to keep in the car, or to use to sharpen friends/relatives knives. With DMT diamond stones being used dry you also don’t need to carry any oils or lubricants, so overall it is very convenient.

Clamp based sharpening systems are limited by the capacity of the clamp. The Aligner’s clamp has a 6.5mm capacity if the adjustment screw is fully removed and reinserted one half turn. I’d prefer more than half a turn, so I think a 6mm blade thickness is a more realistic maximum.

It is best to have an ‘approach’ to keep your results consistent. In this case what I’m referring to is the clamp position. Moving this along the blade will change the angle the stone runs on the edge. So far my approach has been to fit the clamp in the centre of the cutting edge of the blade on every blade I sharpen. Working in this way, in future you will put the clamp into the same position for subsequent sharpening sessions.

As with this type of guided sharpening, once the clamp is fitted to the blade spine and locked on, sliding the guide rod into the guide ring you can now move the stone across the knife edge at a consistent angle.

If you are not used to working with this can be a little awkward. The instructions say to hold the knife handle in one hand and the stone holder in the other; personally I find it easier to hold the clamp in my left hand (I’m right handed) with the blade sitting on my hand. The feel is the same for both sides of the blade. If you have to hold the knife handle it means swapping round an moving the stone with your non-handed hand as well.
 photo 20 DMT Aligner sharpening P1180096.jpg

For narrow blades you should check for clearance (keeping the stone from wearing into the clamp). In this case there is plenty of room, but the blade is not narrow.
 photo 21 DMT Aligner sharpening P1180097.jpg

To select the right angle you can use the ‘Sharpie’ method (using a marker pen to blacken the edge bevel and check where the stone is cutting) and if necessary adjust the position of the guide rings. If you are using different settings for different blades, you will want to keep a note of the positions used for each blade to allow you to sharpen it properly next time without changing the bevel angle.
 photo 22 DMT Aligner sharpening P1180103.jpg

Once you are done, I find it best to leave the clamp on the blade when you test the edge in case you need to work on the edge a little more.
 photo 23 DMT Aligner done P1180105.jpg

Overall the Aligner is light and efficient, and the DMT diamond stones cut very well.

Update 20 Jan 2017
Following some discussions on the clamp being liable to flex as it is plastic, I wanted to show more clearly how I use the Aligner and similar guided sharpeners. In the instructions for the Aligner it show the stone being held under the knife and the knife being moved over the stone in a similar way to using a bench stone. This means you are holding the knife by its handle and pressing down onto the stone. Like this there is maximum room for flexing. However I have always used this type of guide differently.

I hold the clamp and allow the handle to rest onto my wrist for this side of the blade.
 photo 32 Aligner holding P1250263.jpg

And for the other side I again hold the clamp and support the handle (or blade depending on the blade length) with my third and fourth finger. This way round the blade also sits onto the pad of my thumb.
 photo 33 Aligner holding P1250265.jpg

In this way it is possible to support where the clamp holds onto the blade while you bring the stone to the blade.
 photo 30 Aligner holding and using P1250260.jpg

And the other way. Hopefully this show clearly why I haven’t had any actual issue with flexing from the plastic clamp.
 photo 31 Aligner holding and using P1250258.jpg

End of Update 20 Jan 2017

Now we move onto the DuoSharp Bench stone and the technique requiring most user skill. However due to its wide flat surface and diamond cutting efficiency it certainly seems to make sharpening this way much easier than on the carborundum stones I learnt on.
 photo 18 DMT Benchstone kitchen P1220149.jpg

The kitchen knives being sharpened are slightly magnetised due to being stored on a magnetic rack. The filings stand themselves up like this due to being magnetic themselves. A wipe over with a damp rag clears these off nicely.
 photo 19 DMT Benchstone kitchen filings P1220161.jpg

A few of the knives this stone breezed through.
 photo 20 DMT Benchstone kitchen knives P1220169.jpg

Now onto something a little more challenging, a 16″ ham knife. Ham knives are super flexible and thin, so are not easy to work onto a stone with.
 photo 21 DMT Benchstone ham knife P1230617.jpg

This blade had seen some abuse in the past and the edge was a bit wavy. I wanted to tidy it up and put together a very simple jig to keep the blade straight. A couple of stop-screws on a wooden base and some masking tape to keep it in place. To the right you can see an angle guide I setup for reference to help me stay on track.
 photo 22 DMT Benchstone ham knife jig P1230623.jpg

Using the handle on the back of the base I then used the bench stone hand-held. Working on the long and flexible blade in this way was so much easier and resulted in a corrected and hair-splitting edge (after a final strop).

The only real limitation with a large flat bench stone like this is with the recurve section of some blades. Those concave recurve sections just won’t get to touch the diamonds, but that is always the difficulty of a recurve blade.

Being able to hand hold the DuoSharp bench stone was an unexpected benefit of the DMT design and makes it much more versatile.

Review Summary

The views expressed in this summary table are from the point of view of the reviewer’s personal use. I am not a member of the armed forces and cannot comment on its use beyond a cutting tool or field/hunting knife.

Something that might be a ‘pro’ for one user can be a ‘con’ for another, so the comments are categorised based on my requirements. You should consider all points and if they could be beneficial to you.

_______________________________________________ _______________________________________________
Things I like What doesn’t work so well for me
_______________________________________________ _______________________________________________
Aligner package is lightweight for easy transport. Aligner guide clamp will only fit blades up to 6-6.5mm thick.
Aligner ensures you maintain a consistent angle. Aligner – One side of the blade is more awkward to work on than the other.
Aligner – Easy swapping of grits. Aligner – Clamp needs to be fitted tightly and can flex if pressing too hard.
Bench Stone – Large flat surface. Bench Stone – Large surface prevents recurve blades being sharpened.
Bench Stone – Handle included to allow hand-held use. Bench Stone – Rubber feet can fall off.
Bench Stone – Easily identifiable grits.
DMT stones can be used dry.
DMT diamond surface cuts very well.

 photo 00-DMT-featureV2-P1180049.jpg


Discussing the Review:

Please feel free to add comments to the review, but the ideal place to freely discuss these reviews is on a forum. If you started reading the shorter forum version of the review, but followed the link this full exclusive review, please return to that forum to discuss the review there.
If you read the review entirely on Tactical Reviews, please consider one of the following to join in any discussion.

EdgeMatters – Sponsored Reviews (UK based Forum for Knife Makers and Collectors)

BladeForums – Knife Reviews (US based Forum for Knife Discussion)

CandlePowerForums – Knife Reviews Section (Largest and Friendliest Flashlight Community Forum)

Knife Review: Buck Selkirk, Compadre Chopping Froe and Kinetic Fishing Spear

Buck’s Selkirk, Compadre Chopping Froe and Kinetic Fishing Spear were specifically chosen for this review to compliment each other for camp/survival tasks. Following a visit to Buck at IWA 2016 I’ve been able to give these a good workout to see how they fare.

 photo 0 07 trio P1030840.jpg

The Blade and Handle Geometry:

Most knife specifications have a basic description of the blade geometry, but in this section I will be taking a more detailed look at geometry and balance.
 photo 25 Selkirk grind P1180965.jpg

Using a set of gauges and precision measuring equipment including a Vernier protractor, callipers, fixed radius gauges and the unique Arc Master adjustable radius gauge (the one that looks like a crossbow).
 photo Knife measuring P1180483.jpg

These measurements have been tabulated and are presented along with a few reference blades (8″ Chef’s Knife, 5.5″ Santoku and the popular Fällkniven F1).

Key aspects such as the primary bevel angle, grind type, blade depth, blade thickness, length, weight are detailed, along with balance information.
 photo 54 Froe grind angle P1180981.jpg

The ‘Balance relative to the front of the handle’ tells you if the knife will feel front heavy, or if the weight is in your hand (a positive value means the weight is forward of the front of the handle). The ‘Balance relative to the centre of the handle’ indicates how close to a ‘neutral balance’ the knife has in the hand.
 photo 24 Selkirk balance P1180963.jpg

In the case of full convex grinds the approximate centre of the grind is used for the primary bevel angle estimate.

 photo Buck Parameters.jpg

Explained by the Maker:

The reasons for certain design choices may not be clear when simply looking at an object, so this section is intended to give an insight into the thinking behind a design by speaking to the designer themselves.

Unfortunately I can’t always get time with the designer so will use this section to include relevant information about the knife and its designer.

The following comments are noted from a walk-through that Joseph Piedmont kindly gave at SHOT Show.

Model 863, the Selkirk is Buck’s new survival knife which includes a fire-rod with whistle for signaling. The sheath is moulded plastic and features multi-carry capability that can be reconfigured to allow for vertical or horizontal carry, and even upside-down as a neck knife.

The knife itself is a flat-grind drop-point featuring a guard and a hammer pommel. The handle has custom micarta sides. The choil is left with its sharp ground edge to allow it to be used with the fire-starter and have a nice grip to get good sparks.

The Selkirk’s sheath has a nice crisp snap-in, really holding the knife, so you won’t have to worry about it falling out.

Chopping Froe model 108 is fitted with American walnut handles and a red powder coated 5160 blade. This is part of the camping and outdoor survival series. Red was chosen to tie in camping of yesteryear (where it was common to use red-headed hatchets), with the camping of today.

The knife was modelled from a Scandinavian tool with the same name used to chop kindling. Buck have modified it with the handle and putting a knife edge on it to make it more versatile. (Reader’s NOTE: a traditional froe has a dull edge, a handle at 90 degrees to the blade, and is use for controlling and advancing a split in a piece of wood)

The Buck froe has been given a very steep grind producing a wedge behind the knife edge. When splitting wood, the knife edge starts the cut, but the wedge takes over so the knife edge is not finishing the cut.

The black leather sheath protects the blade and the D-ring makes it really easy to connect it to your gear or hang it up.

The Kinetic Fishing spear is one of three new spears. This range goes from the smallest, the Hunt Spear, to the Two Tined Gig spear, and finally the 074 Fishing Spear. The fishing spear is the most involved design with two interconnecting pieces. In its folded-flat state the spear is covered front and back by a plastic sheath tied together with paracord. The paracord is held in place with a moulded pinch-grip making it quick and easy to secure and release. The two parts of the spear lock together to form a four point spear. It has the same chisel on the back as the other two spears, and crucially needs to be driven deep enough into the stick to engage the secondary wedge. The beauty of this design is that the sheath parts go from the flat packed configuration into a cross shaped safety cover for the four points when it is mounted.

One trick to be aware of when mounting the spear heads is to wrap the paracord onto the stick before pounding the spear into the end of the stick. This really tightens up the paracord giving a very secure fit.

A few more details of the Selkirk Survival Knife:

Before concentrating on the Selkirk, here are the boxes for all three together.
 photo 00 01 Buck Boxed P1180722.jpg

The Selkirk arrives in its sheath with ferrocerium rod and whistle, plus an instruction leaflet for the sheath mounting options and a warranty card.
 photo 01 Selkirk Contents P1180728.jpg

Though it looks like a Kydex type of sheath, it is a moulded plastic.
 photo 02 Selkirk Sheath front P1180731.jpg

On the back of the sheath, the belt loops can be removed and refitted in different positions.
 photo 03 Selkirk Sheath back P1180734.jpg

All the components lined up with the sheath, knife and ferrocerium rod/whistle.
 photo 04 Selkirk parts P1180740.jpg

The Selkirk has a nice deep blade with full flat grind.
 photo 05 Selkirk angle P1180743.jpg

Buck say that the pommel (rear bolster) can be used as an improvised hammer.
 photo 06 Selkirk pommel P1180745.jpg

Looking close up at the handle micarta sides you can see the semi-smooth finish and additional grip grooves.
 photo 07 Selkirk grip detail P1180748.jpg

An overall view of the handle. The layers in the micarta act as contour lines showing the shaping.
 photo 08 Selkirk grip P1180749.jpg

From a different angle you can see the palm swell and grip flaring.
 photo 20 Selkirk handle swells P1180787.jpg

A very close view of the choil and its sharp edges for striking the fire-rod.
 photo 09 Selkirk choil P1180752.jpg

Going closer still for a look at the point and how the cutting edge has been formed from a coarse grit followed by a polishing process.
 photo 10 Selkirk point P1180756.jpg

On the spine there is an area of jimping for the thumb to sit on. On this example this was well formed and not too sharp.
 photo 11 Selkirk jimping P1180758.jpg

Keeping on the up-close theme, the moulded sheath has the Buck logo moulded into it.
 photo 13 Selkirk sheath brand P1180768.jpg

Next to the fire-rod holder are the sheath screws which adjust the retention tension of the sheath. You can change how much force is needed to remove and insert the knife by adjusting these screws.
 photo 14 Selkirk sheath screws P1180769.jpg

On the lower part of the whistle is a bayonet fitting to hold the fire-rod in place. There is also a cord which can be stretched over the end of the rod to further secure it.
 photo 15 Selkirk ferro rod whistle P1180770.jpg

Inside the belt loop is a moveable adjuster block to cater for different width belts.
 photo 16 Selkirk belt loop adjuster P1180775.jpg

At the tip of the sheath there are metal rivets that provide tying points.
 photo 17 Selkirk sheath rivets P1180777.jpg

The overall impression of this knife is good, but its mass produced character is visible when you start looking and small details. Here the micarta handle is not a perfect fit.
 photo 18 Selkirk finish P1180782.jpg

Still looking for flaws, this time at the pommel, the grinding is not that precise and filler appears to have been used between the micarta and steel pommel.
 photo 19 Selkirk finish P1180784.jpg

The Selkirk with a couple of other well known knives to provide the scale. (Fällkniven F1 and a Spyderco UK Pen Knife)
 photo 22 Selkirk size P1180797.jpg

One last look at this knife before moving onto the Froe.
 photo 21 Selkirk angle P1180792.jpg

A few more details of the Compadre Chopping Froe:

First impressions are really good thanks to the leather sheath the Froe arrives in. The only other item in the box is the warranty card.
 photo 30 Froe contents P1180804.jpg

Immediately obvious are some nice touches like the retaining strap’s popper cover having Buck’s logo and name on it.
 photo 31 Froe popper P1180811.jpg

Also of note with the retaining strap is that the metal back of the popper that sits against the handle has been covered to prevent it marking the wooden handle.
 photo 51 Froe sheath popper back P1180883.jpg

There is a cut-out in the sheath that shows the Buck anvil logo cut into the blade.
 photo 32 Froe sheath detail P1180813.jpg

Pressed into the leather sheath is the Buck logo.
 photo 33 Froe sheath logo P1180815.jpg

The sheath is well stitched and riveted for extra strength.
 photo 34 Froe sheath stitching P1180818.jpg

On the back of the sheath the rolled rivet heads are not as neat as on the front, but fit with the rivet colour used for the hanging loop.
 photo 35 Froe sheath reverse P1180820.jpg

The rolled over heads of the rivets on the back of the sheath look like this.
 photo 36 Froe sheath rivet reverse P1180823.jpg

A nice heavy duty D-ring is used for the hanger.
 photo 37 Froe sheath hanger P1180826.jpg

Opening the two retaining straps allows the Froe to slide out.
 photo 38 Froe unsheathed P1180829.jpg

A very obvious label warning you not to strike the Froe’s blade with hardened tools is on the side of the blade. This is no different to traditional froes or any other blade you might baton with.
 photo 39 Froe warning P1180833.jpg

Whipping the label off gives you the full effect of the red powder coating.
 photo 40 Froe no label P1180835.jpg

The ‘tip’ of the blade shows the splitting wedge design of the blade grind.
 photo 41 Froe point wedge P1180840.jpg

There is a subtle choil next to the handle.
 photo 42 Froe choil P1180844.jpg

At the top of the blade next to the handle there is a hole in the blade. Though this could be used as a wrist strap attachment point, I would advise you to be very careful if you want to do this as it can become more dangerous than the tool coming out of the hand.
 photo 43 Froe hole P1180846.jpg

The American walnut handle slabs are held on with nice looking bolts.
 photo 44 Froe wooden handle P1180849.jpg

Blade stock used for the Froe is substantial.
 photo 45 Froe thick blade P1180853.jpg

Having a long handle, the Froe can be used with different grips.
 photo 46 Froe handle P1180857.jpg

looking along the Froe to show more of the contours of this tool.
 photo 47 Froe contours P1180859.jpg

There is a nice swell at the pommel to prevent slipping, but no striking surface. If you hammer on, or with, this tool you risk damaging the handle. This view also shows the handle is made from plywood, not solid wood, as this will be more resilient and resistant to cracking.
 photo 48 Froe pommel P1180863.jpg

A few more details of the Kinetic Fishing Spear:

And now for something completely different, a fishing spear.

Folding flat, the Kinetic Fishing Spear is very neat in its folded state.
 photo 60 Kinetic contents P1180889.jpg

This package is held together by a paracord tie and a pinch-grip.
 photo 61 Kinetic tie point P1180896.jpg

Pulling the end of the cord out of the pinch-grip you can start to unwind it.
 photo 62 Kinetic opening P1180897.jpg

Releasing one side of the plastic cover.
 photo 63 Kinetic opening P1180900.jpg

The pinch-grip has small teeth to hold onto the cord.
 photo 64 Kinetic tie teeth P1180903.jpg

The same piece of cord then releases the other side of the cover.
 photo 65 Kinetic opening P1180905.jpg

Fully unwound the cord comes completely off the cover.
 photo 66 Kinetic opening P1180908.jpg

Now you can slide off the lower cover.
 photo 67 Kinetic opening P1180911.jpg

And then the point covers, which also slide apart to give two separate pieces.
 photo 68 Kinetic opening P1180917.jpg

The shorter of the two parts of the spear head slides into a slot in the larger part.
 photo 69 Kinetic fitting together P1180918.jpg

This then rotates into place, and in this position cannot move backwards or forward.
 photo 70 Kinetic together P1180921.jpg

When assembled the spear suddenly looks very capable.
 photo 71 Kinetic together front P1180925.jpg

The smaller piece has the Buck logo on it.
 photo 72 Kinetic together angle P1180927.jpg

As does the larger piece.
 photo 77 Kinetic logo P1180946.jpg

A really cleaver feature is that the two pieces of the point guard slide together to form a cross shape.
 photo 73 Kinetic guard P1180935.jpg

This cross shaped guard can then cover the points of the assembled spear head.
 photo 74 Kinetic guard fitted P1180937.jpg

There is a barb on each of the four points.
 photo 75 Kinetic barb P1180939.jpg

A chisel point is provided on the tang of the larger piece of the spear that can both be used for some of the spear pole preparation, and to make it easier to drive into the end of the pole.
 photo 76 Kinetic axe P1180944.jpg

What are they like to use?

It is not that I expected anything to be bad about the Selkirk, but it has really surprised me just how good it has been for me to use. Not only that, but anyone I’ve handed it to has also been impressed with how good it feels in the hand.

Remembering that I take an XL size glove, this is how the Selkirk looks in the hand.
 photo 12 Selkirk in hand P1180767.jpg

The shaping of the handle is excellent. The palm swell is just enough to sit very naturally, and the curve of the handle allows your hand to work with the Selkirk. Flaring at the front and back of the handle stops you hand moving, and even working hard with this knife on hot days with sweaty hands didn’t cause any issues.
Resting between cutting jobs, the Selkirk just seems to stay in place in a relaxed hand, and when working I was never aware of the handle, instead all my focus was allowed to fall onto the cutting task and directing the blade. I did not expect this level of comfort and control.

I’m going to look at more of the Selkirk in use later on, but switching now to the fire-lighting capability of the Selkirk, and how well it strikes sparks from the ferrocerium rod.

As the product description from Buck specifically says the choil has been left with a sharp corner to use for striking sparks, I’ll start with this. Once you get through the outer coating of the new rod, you then start to get proper sparks. Using the choil does work OK, but is not that good.
 photo Buck Selkirk Choil Ferro 600px 200ms.gif

Flip the blade round and use the spine instead and you are rewarded with a bigger shower of sparks. So the specific feature of using the choil to strike sparks is a little redundant. What you do have is a choice of more or less sparks. Striking fewer sparks with the choil will wear the fire-rod away less and may be all you need.
 photo Buck Selkirk Spine Ferro 600px 200ms.gif

Scaling up in size we have the heavy Chopping Froe. Here the grip is closest to the pommel and gives the greatest striking advantage.
 photo 49 Froe in hand P1180872.jpg

For more control you can grip the Froe handle near the blade. This is good for finer chopping tasks, but the blade edge is not really sharp enough (due to the edge angle) for fine carving or slicing cuts.
 photo 50 Froe in hand P1180874.jpg

When I initially saw the rake of the Froe’s blade, I thought it would be awkward to use, and if working onto a chopping block, the angle does mean you can’t really strike down onto the block and have the edge strike squarely, you always end up cutting into the edge of the block.

Moving to free-cutting when you are chopping through branches or the trunks of smaller trees, then this rake actually ensure the edge strikes at a slight angle which does enhance the cutting power. The Froe is very efficient when used in this way.

The more I use the Buck Froe, the more I would compare it to a hatchet rather than a knife, but a hatchet with a very long edge and which does not need a precisely positioned strike to get a good result. The knife edge, despite being sharp enough, is not well suited to anything but chopping. The blade thickness and steep primary grind make it pretty hopeless for slicing cuts and the overall size/weight and rake make fine work difficult.

Finally a quick mention of the Kinetic Fishing Spear. Unfortunately I’ve not been able to spear any fish with it so far. Not due to always missing, but due to a lack of suitable fishing opportunities. Mounted it seems very capable and with an overall good balance, but unfortunately up to now that is as far as I can comment.

Mounting the Kinetic Fishing Spear

One small project that would cover all three of these Buck products is to make a shaft for the Kinetic fishing spear head. A quick visit to a local wooded site resulted in a pole for a first attempt.
 photo 0 01 Collecting staff P1030781.jpg

Working onto a cutting block I used the Froe to trim the pole to length and to prepare a baton for later. As you can see here the Froe has cut quite deeply into the edge of the cutting block.
 photo 0 02 trimming staff P1030809.jpg

The spear head needs a cross shaped split to fit into. For finer control than the Froe would provide, instead I went for batoning the Selkirk to create the split.
 photo 0 03 splitting pole P1030821.jpg

A quick clean up of the end of the pole.
 photo 0 04 remove bark P1030824.jpg

And setting the Kinetic spear head into place.
 photo 0 05 insert spear P1030827.jpg

Then using a cord wrap to hold the spear head firmly. (keeping the cord in a single piece and using a whipping technique to secure the ends.
 photo 0 06 cord wrap P1030831.jpg

All ready to go, the fearsome Kinetic spear and the partnership of the Selkirk and Froe.
 photo 0 07 trio P1030840.jpg

Onto another project, and in this instance I was making a wooden spoon. This requires some careful splitting of a small log, so again I whipped up a baton and used this for making the controlled split with the Froe.
 photo 01 spoon start P1190531.jpg

The splitting worked very well and the Froe also did a little rough shaping, before it became a little awkward to use due to the rake.
 photo 02 spoon split P1190535.jpg

Other tools were used, but it all started with the Froe.
 photo 03 spoon P1190550.jpg

While things were going well I decided to have another go at the spear’s pole. I found a rather good piece of hazel, and this time cleaned off all the bark with the Selkirk.
 photo Fishing spear 01 start P1190494.jpg

The size of the pole was chosen to suit the tang of the spear head.
 photo Fishing spear 02 closer P1190495.jpg

Pre-split using the Selkirk, the Kinetic spear head was then tapped into place.
 photo Fishing spear 03 cross P1190501.jpg

Wrapped tightly with paracord to secure the head. As the wood dries further the cord needs to be re-wrapped to stay tight.
 photo Fishing spear 04 whipped P1190508.jpg

Ready to go, the only issue, no suitable fishing spots round here.
 photo Fishing spear 05 overall P1190506.jpg

Review Summary

The views expressed in this summary table are from the point of view of the reviewer’s personal use. I am not a member of the armed forces and cannot comment on its use beyond a cutting tool or field/hunting knife.

Something that might be a ‘pro’ for one user can be a ‘con’ for another, so the comments are categorised based on my requirements. You should consider all points and if they could be beneficial to you.

_______________________________________________ _______________________________________________
Things I like What doesn’t work so well for me
_______________________________________________ _______________________________________________
Selkirk – Excellent handling. Selkirk – Fit/Finish is not the best.
Selkirk – Versatile sheath. Selkirk – Ferrocerium rod retention may not be secure if not using the cord loop.
Selkirk – All rounder FFG blade.
Selkirk – Hammer pommel.
Selkirk – Ferrocerium rod with Whistle.
Froe – Effective heavy chopper. Froe – Relatively expensive.
Froe – Great for splitting even large logs. Froe – Poor performance for other cutting tasks.
Froe – Very sturdy leather sheath. Froe – Blade rake is awkward when cutting onto a block.
Froe – Long Handle allows different grips.
Kinetic – Strong construction. Kinetic – Requires mounting before it can be used.
Kinetic – Guard can be used folded or assembled. Kinetic – It is necessary to hammer on the prongs to mount it.
Kinetic – Cord is provided.

 photo 00 02 Buck UnBoxed P1180950.jpg


Discussing the Review:

Please feel free to add comments to the review, but the ideal place to freely discuss these reviews is on a forum. If you started reading the shorter forum version of the review, but followed the link this full exclusive review, please return to that forum to discuss the review there.
If you read the review entirely on Tactical Reviews, please consider one of the following to join in any discussion.

EdgeMatters – Sponsored Reviews (UK based Forum for Knife Makers and Collectors)

BladeForums – Knife Reviews (US based Forum for Knife Discussion)

CandlePowerForums – Knife Reviews Section (Largest and Friendliest Flashlight Community Forum)

Gear Review: Walkstool ‘Comfort 65’ Portable Stool with Telescopic Legs

It was at IWA 2016 that I came across Walkstool on my way to another appointment. As soon as I saw their telescopic folding stools I felt they were worth further investigation, and after a demonstration by Pius Schmitt (who is featured in the Walkstool website videos) didn’t need any further persuasion; I knew this was something special.

 photo 13 walkstool featured P1190526.jpg

A little more background:

Background, but not about Walkstool, instead about me and portable seating. Maybe it is a sign of age, or maybe just being in favour of comfort, but I’ve used some form of portable seating whenever I could carry it on various trips and outings.

These have included shooting sticks, many different folding chairs and lots of different folding stools. In all cases, the only telescopic part of any design was on a few shooting sticks to give some degree of height adjustment but no real saving in carried size.

The compromises in size and weight have always resulted in anything comfortable being large and heavy and not very portable, and anything small and light being really quite uncomfortable and generally too short for comfort.

At IWA I was not looking for anything like Walkstool’s Comfort (65cm model on test here), but it simply stood out. As soon as I saw that there were several different sizes, that the legs were telescopic (making them nearly 50% smaller when folded, and giving you two sitting heights) and the strong comfortable seat, the Walkstool had me interested.

The Walkstool family with the two Basic models on the left (made in China) and the four Comfort models (made in Sweden).
 photo ws_family_screen.jpg

A few more details:

Each Walkstool comes in a carry bag that can be carried over your shoulder.
 photo 01 walkstool bag P1180579.jpg

When folded it is an extremely neat package.
 photo 02 walkstool folded P1180580.jpg

Wrapped round the seat is a strap with Velcro fastening to hold the stool tightly closed.
 photo 03 walkstool opening P1180584.jpg

Just tear back the free end of the strap to open.
 photo 04 walkstool opening P1180585.jpg

Once released the seat material starts to open up
 photo 05 walkstool opening P1180587.jpg

Strap released and ready to be opened.
 photo 06 walkstool opening P1180590.jpg

Opening out the seat, but not yet the legs. You can use the Walkstool in this configuration for a lower seating position, or to sit with a knee down to the ground.
 photo 07 walkstool half open P1180591.jpg

A special tri-bolt holds the legs together very strongly. Here you can see one of the leg release buttons (red) which is visible with the legs extended, and must be pressed in to allow the legs to retract. If you press the release button and pull the leg, you can remove it for cleaning.
 photo 08 walkstool detail leglocks P1180594.jpg

Ready to sit on the lower height.
 photo 10 walkstool half open P1180634.jpg

With legs extended you have a proper stool to sit on.
 photo 09 walkstool fully open P1180628.jpg

It is worth having a look at Walkstool’s video demonstration.

What it is like to use?

The first point to consider is that part of ‘using’ this stool is carrying it with you. It certainly is light enough to be an all day companion and you will want to take it with you rather than agonise over if it is worth the effort of carrying it.

I’ve carried it in three ways; firstly in the supplied bag, out of the bag and using the strap to secure it to my belt or a backpack, and finally actually fully inside a backpack.

Of these carry methods, my least favourite is using the carry bag. The strap is a string which has a tendency to want to slip off your shoulder. Not a design fault or problem, just a reason I would generally avoid this.

If I have a full size backpack I will simply pop the Walkstool inside the backpack, zip up and forget I have it with me until I want to use it. This is my preferred carry method.

Lastly the strap for folding up the Walkstool has intentionally been made longer than needed so that you can use this strap to attach it to something else. Walkstool show this being fixed to a belt, but I’ve also used it to attach the Walkstool to the outside of my backpack. Particularly useful if the backpack too small to fit the Walkstool fully inside. A minor annoyance on this subject though is that there is exposed ‘hook’ Velcro on the strap; this has a tendency to be very aggressive to other fabrics. I have used some Velcro ‘loop’ tape to cover this up, but it would be nice if this was included with the stool.

So many stools I’ve used in the past have been too short, and that makes you less stable and sitting on these becomes tiring. When looking at the Walkstool models I assumed I would find the tallest would suit me as I’m 6’2″ with relatively long legs. To my surprise, the Walkstool 75 (the largest) was too tall for me and it turns out the Comfort 65 was a much better match. If you can, try the different models, or at least consult the Walkstool size guide.

So you have it with you, and now it is time for a sit down. Extend the legs, open them out and sit in excellent comfort. I was doing a little whittling (with a Swedish knife, as it happens, the Fällkniven F1 Pro) and was perfectly comfortable and stable on the Walkstool.
 photo 13 walkstool featured P1190526.jpg

There are often instances where you want to be sitting lower, but not on the ground, perhaps if you are with a group of people not so well equipped who are sitting on the ground, or if you are working with several things and have them laid out on the ground.
Using the Walkstool with the legs retracted, you have this low height stool which can rock around the central point where the legs are connected, giving you mobility and the ability to turn.
 photo 12 walkstool sitting half open P1190529.jpg

Having this dual height is more useful than I thought it would be and is a unique feature made possible by the telescopic legs.

Quite simply I would not go back to anything else having used this folding stool, as nothing else I have ever seen provides so much comfort, quality and strength in such a small light package.

Review Summary

The views expressed in this summary table are from the point of view of the reviewer’s personal use. I am not a member of the armed forces and cannot comment on its use beyond a cutting tool or field/hunting knife.

Something that might be a ‘pro’ for one user can be a ‘con’ for another, so the comments are categorised based on my requirements. You should consider all points and if they could be beneficial to you.

_______________________________________________ _______________________________________________
Things I like What doesn’t work so well for me
_______________________________________________ _______________________________________________
Excellent comfort. More expensive than other folding stools.
Strong and stable. Exposed ‘hook’ Velcro tape.
Dual height. Potential for dirt to seize the telescopic legs (but legs are removable for cleaning).
Different sizes available.
Easy to carry.

See Walkstool’s Website for the sizing guide, Walkstools holding up a car and more. This review is included on the Walkstool Testimonial Page.


Discussing the Review:

Please feel free to add comments to the review, but the ideal place to freely discuss these reviews is on a forum. If you started reading the shorter forum version of the review, but followed the link this full exclusive review, please return to that forum to discuss the review there.
If you read the review entirely on Tactical Reviews, please consider one of the following to join in any discussion.

(You many need to use the forum’s ‘Search’ to find the review.)

EdgeMatters – Sponsored Reviews (UK based Forum for Knife Makers and Collectors)

CandlePowerForums (Largest and Friendliest Flashlight Community Forum)

Gear Review: ZTS MBT-1 Pulse Load Battery Tester

In the course of reviewing, I use rather a large number of primary and rechargeable cells. MyFenix generously sent Tactical Reviews a ZTS MBT-1 Pulse Load battery tester to help me keep track, and it has certainly proven its worth.

 photo 05 ZTS probe out P1150583.jpg

Taking a more detailed look:

Unlike many blister packs, the MBT-1 has an easy to open blister pack as it is closed by moulded poppers. This means you can use to store the MBT-1 in if you want.
 photo 01 ZTS boxed P1150570.jpg

There are two information leaflets included with the MBT-1.
 photo 02 ZTS unboxed P1150577.jpg

On the front panel are a set of contacts for the positive terminals of the various cells to be placed onto when testing them.
 photo 03 ZTS front P1150578.jpg

Tucked away neatly along the side is a test probe and its wire.
 photo 04 ZTS probe stowed P1150580.jpg

The probe pops out easily for use.
 photo 05 ZTS probe out P1150583.jpg

A closer look at the probe tip.
 photo 06 ZTS probe tip P1150587.jpg

This battery tester, runs on 4xAA batteries fitted into a compartment on the back.
 photo 07 ZTS back cover off P1150592.jpg

There is a simple display showing percentages from 10% to 100% capacity.
 photo 09 ZTS display P1150602.jpg

In case you misplace the instructions, there is a reminder on the front panel.
 photo 10 ZTS method P1150603.jpg

I’m not going to list all the exact cells as they are in the picture, but the tester works with Li-ion, various button cells, NiMh….
 photo 11 ZTS types P1150606.jpg

…loads more coin cells, Energizer L91 and L92, 1.5V Alkaline…
 photo 12 ZTS types P1150608.jpg

…12V and 6V Alkaline and 9V Alkaline.
 photo 13 ZTS types P1150609.jpg

Troubleshooting

This section is included to mention any minor niggles I come across during testing, in case the information helps anyone else.

No issues were encountered during testing.

As per the description of this section, this information is provided in case anyone else finds a similar ‘issue’ that might be fixed in the same way.

The MBT-1 in use

Even moderate battery users are going to appreciate the MBT-1. It is easy enough to lose track of which cells are which and then have to start again with new cells or recharging cells. Not so with the MBT-1 as it is so quick and easy to test a cell and find out its real condition. You can also check cells in remote controls, doorbells and other devices that would otherwise have no indication of the condition of the batteries.

Remember, this is not a voltage based tester, it is a pulse load tester. Cells can often recover their voltage when not loaded, so the reason this tester has so many test contact points for different cells, is because it is actually loading the cell to truly test how it responds when it will actually have to do some work (so needs to use the different responses at each contact point to work out the percentage).

Notice in this photo I have marked an X on the cell with a sharpie to indicate it has been used for a runtime test. Normally I simply discard these cells as I’ve taken the test light down to the ANSI cut-off, but as you can see here the MBT-1 has revealed that this cell still has 20% capacity left. Perfectly fine to use for some low output backup lights and not yet ready for the recycle bin.

I’ve even found that it can be worth testing new cells as I’ve had some turn out not to be matched perfectly for use in multi-cell lights.

The testing methodology is that even during the first set of pulse loads the cell may have recovered and give a false reading, so the recommendation is to test each cell three times. That last reading is the most accurate.

No more guessing with straight voltage readings, simple quick and effective testing.

Review Summary

_______________________________________________ _______________________________________________
Things I like What doesn’t work so well for me
_______________________________________________ _______________________________________________
Pulse load testing (not simply voltage). Relatively expensive.
Huge range of cells can be tested. Relatively bulky.
Very simple to use.
Allows for cells to be matched and graded.
Minimises wastage.

A big thanks to MyFenix for supporting Tactical Reviews with this ZTS MBT-1 Battery Tester (MyFenix is the Official UK Fenix Distributor).

Sunglasses Review: Wiley X MEGA Test – Saber, Twisted and Knife

I first came across Wiley X due to the fact they manufacture 5.11 Tactical’s range of sunglasses. It is a real compliment that 5.11 chose Wiley X, and when you see more of what Wiley X make you will understand why they are a brand you can trust if you want protection as well as style.

In this group review I’m looking at three very different pairs of glasses showing some of the key benefits Wiley X offer. On test we have the Sabre – wrap around ultra-protective shooting glasses, Twisted – the simplest glasses but in a special Stealth Grey frame, and Knife – using Wiley X’s Facial Cavity Seal making them as close fitting as goggles.
All three are in a non-polarized grey lens aimed at tactical use. For tactical use you want to avoid polarized lenses due to their tendency to cause issues with various device displays – it is just not worth the risk.
There is a lot to show as each of these models have features specific to Wiley X. Many of these features are repeated across the Wiley X range. The models in this MEGA review will help you understand what options you have.

Taking a more detailed look at the Saber:

There are several options for the Saber, from individual lenses to a full set, and this is the full triple lens set.

Everything is supplied in a Wiley X multi-lens case.

The case has two Velcro loops on the back for mounting to a belt/strap/etc.

Each component arrives wrapped in a protective plastic bag so it is in perfect condition when you first unpack it. After that, well, it is up to you.

In the case is the Saber with grey lens, a clear lens, orange lens, strap, cleaning cloth and instructions.

The set of lenses fresh out of its wrapping.

Each lens is a compound curve to fully wrap the eyes.

Taking a closer look round the Saber here it is from the front with arms folded.

And arms unfolded.

From the side.

Then from the inside.

The nose piece has fully adjustable rubber covered pads. You simply bend them to fit.

On the inside of the arm, the model name is printed on the ‘active’ section of the arm.

The first ‘active’ feature of the arm is that you can remove the rigid arm and replace it with a goggle style strap. First pull out the arm.

Plug in the first end of the strap.

Repeat with the other arm and strap end.

Instead of just pulling the arm out entirely, each arm has length adjustment to enable the best possible fit for each person.

The arm has four ‘stops’.

Being a frameless interchangeable lens system, you need to remove the arms and nose part and transfer these over to the lens you want to use. The fit of these parts is really quite firm.

Here we are 2/3 transferred over to the orange lens, just the second arm to move.

I found the easiest process was to pull the arm outward and then lift the hinge upward ensuring you don’t try to lever with the whole arm, instead applying pressure as close to the lens as possible. The arm then pops up.

Fitting the arm was easiest doing this the other way round, first seating the hinge side of the mount, pressing the arm inwards and then pushing down on the mount.

The clear lens almost disappears in the photo despite one of the Saber’s special features. The Sabre has the thickest lens, at 3mm thick, I’ve ever come across. This gives it probably the highest protection rating for any glasses of this type. With the bare lens you can see this thickness at the nose cut out.

Looking closer to where the brow foam padding is attached you can see the machining marks in the lens edge.

And next to a ruler with mm graduations.

Taking a more detailed look at the Twisted Stealth Grey:

The Twisted model originally came in a black frame, but with more demand for grey, Wiley X have released a special ‘Stealth Grey’ version.

With no additional lenses to carry, the case for the Twisted is the Wiley X standard case. You also get a sticker in the box.

Inside the case are the plastic wrapped glasses, a cleaning cloth, information leaflet and a neck strap.

Getting rid of some of the plastic wrap for a better look.

Taking a closer look round the Twisted here it is from the front with arms folded.

And arms unfolded.

From the side.

Then from the inside.

The arm is wide at the hinge which helps shade the wearer from light and debris coming from the side.

A detail of the hinge.

On the Twisted, the nose bridge is a fixed, moulded design. The surfaces are all rounded with no corners to dig in.

Taking a more detailed look at the Knife:

The last in this set is the Knife which features Wiley X’s facial cavity seal.

As well as the cased glasses and sticker, the Knife comes with an instruction leaflet for the facial cavity seal.

With the Knife you get a cleaning cloth, neck strap, and T-bar ‘goggle’ strap (more on that later).

Everything unwrapped.

Taking a closer look round the Knife here it is from the front with arms folded.

And arms unfolded.

From the side.

Then an inside view to show the facial cavity seal insert.

The Knife’s hinge.

Each arm has a mounting hole for the T-bar strap system. This is a strap to hold the glasses firmly onto the face. With the facial cavity seal, these glasses become almost goggles, so this system makes perfect sense as it keeps the seal good.

The T-bar strap fits in pointing downwards.

Then rotates back to lock in place. You can only release the strap by rotating the mount back down to the previous position.

Inside the arm you can see the T-bar in the locked position.

Here the knife has the goggle strap fully fitted.

It is possible to remove the facial cavity seal for cleaning or to use the glasses without the seal. There are times when the extra ventilation is needed.

The seal is specific to the model and is labelled for the Knife.

Here is the Knife without the seal.

The facial cavity seal has a soft foam edge to fit closely to the face.

Comparing the three:

We’ve spent some time looking at each one in detail, now a first quick comparison series.

And now with each one on a display head:

Troubleshooting

This section is included to mention any minor niggles I come across during testing, in case the information helps anyone else.

The standard neck straps that were supplied with the Twisted and Knife both failed with the rubber tubing splitting.
From the moment they were fitted there appeared to be stress lines in the rubber.

This line turned into a split.

Altogether I’ve had three of these straps, and all three have split.
As per the description of this section, this information is provided in case anyone else finds a similar ‘issue’ that might be fixed in the same way.

In use

Each of these Wiley X models was chosen to represent a different use or requirement, and provide an excellent representation of what Wiley X offer.
For the utmost in protection you need to choose a wrap-around lens as this does not reply on the frame, or how well individual lenses fit in the frame, for protection. You have a one-piece protector positioned over your eyes.
The Saber is exceptional in its lens thickness at 3mm and exceeds all the safety standards, military and civilian, for protective eyewear. It does this without any distortion to your vision. I am very sensitive to poor lens design and have used compound curvature lenses that distort the wearer’s view. The Saber has not caused any visual distortions or strange sensations at all.
The full wrap gives excellent all round vision well around your peripheral vision giving uninterrupted views, just like your uncovered eyes, but protected from bright conditions and flying objects. What this does mean is that you are not protected from glaring light such as low sun to your side which the arms of certain glasses would shade you from.
For use as shooting glasses or to guard against flying objects (not dust) the Saber will give you exceptional protection.
Adjustable arms allow the maximum comfort for most users. You also have a great deal of fit adjustment with the nose piece which can be bent to raise or lower the Saber and bring it closer or further from the face. Do not neglect this, you can get a fantastic fit and comfort by taking the time to adjust the nose piece, and don’t be afraid to experiment to find the optimum fit.

Of the three, the Twisted is the most conventional ‘fit’ with no actual adjustment. On this point, of course, unlike the Saber, the Twisted will not fit everyone, but Wiley X give you excellent size information for every model so you can look for those suitable for small, medium and large heads and also at the detailed specifications of lens width, arm length and bridge width to find your best fitting model.
The arms of the Twisted curve inwards to wrap around the head and provide a good level of grip to keep them in place. The entire frame flexes as you put them on, and acts like a spring to prevent sliding. Coupled with their light weight, this makes them some of the most securely fitting glasses I’ve used without creating hotspots and discomfort when wearing for extended periods.
With the lenses curving round, there is minimal frame visible in my peripheral vision, yet the wide arms protect from low-angle light coming in from the side. An excellent compromise, and one reason the Twisted has become my most worn of the three and great for driving as well as outdoor activities.
The Stealth Grey frame is also a bit different and it is good to have a break from the normal black.

Last up in this group is the Knife. Its key feature to look at is the FACIAL CAVITY SEAL which also appears on several other models, but provides a very specific function.
When you first put on a model with the FACIAL CAVITY SEAL they feel more like goggles than glasses and it can take a little while to get used to. However as you get used to it, the feeling becomes more comforting and the benefits can be very obvious.
The FACIAL CAVITY SEAL is designed to protect you from wind, fine dust and pollen as well as blocking light that normally leaks in around the edges of sunglasses.
I’ve found that in situations where I would want to wear a peaked hat, the FACIAL CAVITY SEAL provides sufficient protection from the light that would normally leak in around the frame that I didn’t need the hat.
Where the FACIAL CAVITY SEAL really shines is in wind and dust protection. Though normal sunglasses provide a degree of protection from wind, once it is coming from the side this is far less effective. Add in dust and your normal sunglasses are not much use. The FACIAL CAVITY SEAL immediately shields you from this and stops the blinking and squinting. You could use actual goggles, but Wiley X’s FACIAL CAVITY SEAL gives you the protection of goggles in a pair of sunglasses.
You also have the option of removing the seal and using the sunglasses as normal sunglasses. This is crucial as they do also come with some of the issues of goggles.
Although the FACIAL CAVITY SEAL has some venting built in, yes, just like goggles you do get fogging. I found that this was particularly bad when driving (due to the lack of airflow), and other situations where I was hot and there was little or no airflow.
When it is windy, the small vents seem to cope with preventing fogging very well, but once conditions are calm, you are at the mercy of the temperature of the sunglasses and your immediate humidity (a nice way of describing the body’s output of moisture).
Knowing that when using the FACIAL CAVITY SEAL you can get fogging is just something you need to work with. When the situation demands the extra protection, the Knife delivers exactly that.
Remember though, that unlike goggles, you can remove the seal and they become normal sunglasses.
Due to hyper sensitivity to light, I wear sunglasses 100% of the time during daylight hours when I’m outside, so get a lot of wearing time. I would never consider having only one pair of sunglasses and have many different types and styles. Just as most people have many shoes and jackets to suit different situations, I consider sunglasses the same in that you benefit from a choice of different features. (I’m also a lens quality perfectionist)

The reason for explaining that is that now I’ve experienced it, Wiley X’s FACIAL CAVITY SEAL has become an essential part of my eyewear options.

Sunglasses are not just sunglasses and are not just eye protection. These three different models give three very different experiences and features while ensuring your eyes are protected to standards above and beyond most requirements

Review Summary

_______________________________________________ _______________________________________________
Things I like What doesn’t work so well for me
_______________________________________________ _______________________________________________
Saber – 3mm thick super tough wrap-around lens
Saber – interchangeable lenses
Saber – adjustable nose bridge and arms
Twisted – Lightweight, comfortable and secure Twisted – supplied neck strap failed
Twisted – Stealth Grey frame option
Knife – FACIAL CAVITY SEAL technology Knife – fogging in still conditions
Knife – T-bar retention system Knife – supplied neck strap failed