Gear Review: KMFS Vantaedge Integral Sharpener

STOP! Join me in this KMFS Vantaedge sharpener review to find out exactly why the KMFS Vantaedge integral sharpener is UNIQUE amongst guided sharpeners. The KMFS Vantaedge uses reverse kinematics to adjust the stone position constantly so that the angle of the stone to the blade is always the same, regardless of the length, shape, depth or position of the knife blade in the clamp.

The KMFS Vantaedge integral is the first guided sharpener that is able to completely eliminate the cutting edge angle drift at the tip of the knife, and makes it incredibly easy to achieve absolutely precise repeated sharpening of the knife without needing to worry about what position it is clamped in.

And this angle block is at the heart of how it works (along with the height adjusting guide rod).

What’s in the box?:
This review features the standard KMFS Vantaedge Integral kit, plus the optional extras of the hover-spring kit, Ruby stone and diamond stropping kit.
The gallery below is a run through of all of these elements, starting with the Vantaedge integral kit in its plastic carry case, then the hover-spring with stroke limiter clips (used to limit the movement of the stone holder), the Ruby 3000 grit polishing stone and leather strops with diamond paste.


A good look round the KMFS Vantaedge integral Components – Things to look out for here are:
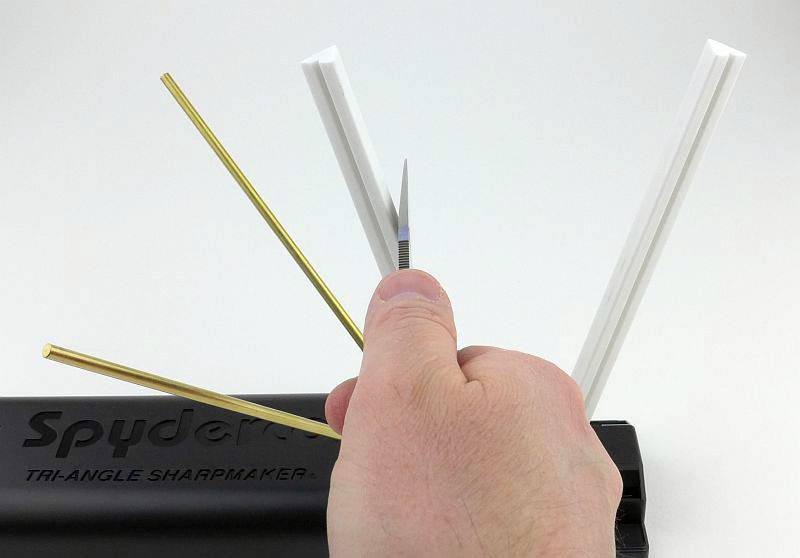
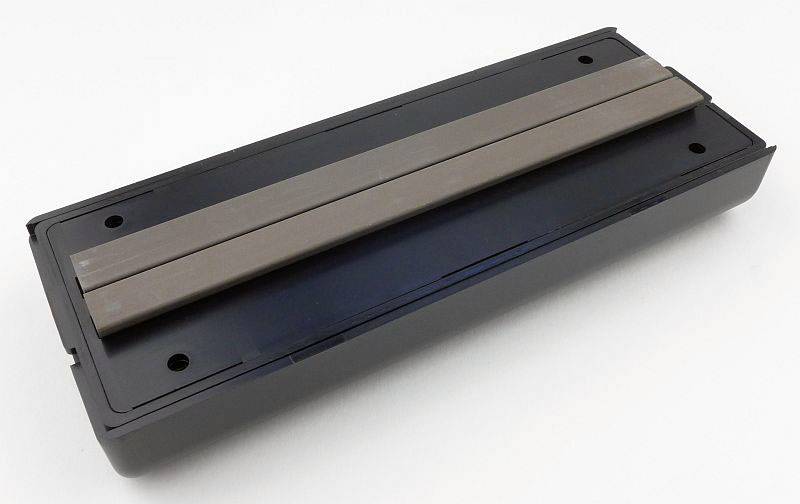
Taking all the parts of the Vantaedge Integral kit and laying them out on my guided sharpener board to look at them before fully assembling the sharpener. This gallery shows the standard kit with no optional extras.
Please ignore the clamping plate which is not part of the kit, but is what I use to hold various sharpeners onto this board; it is positioned middle-bottom of the first image and has a wing nut and hand wheel.
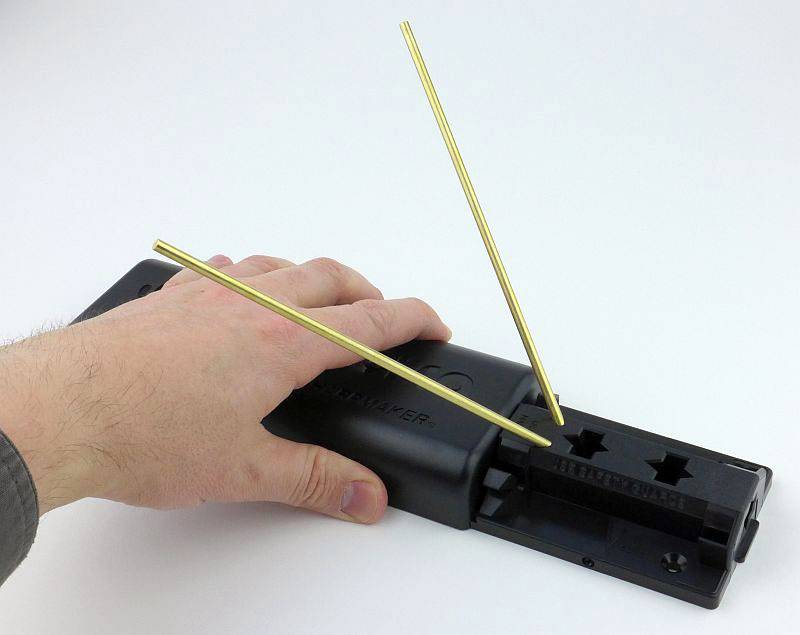
Stepping through the Vantaedge integral components, first is the base and support post, which are then assembled. Instead of using the fours screw fixing holes, I’ve used my clamping plate to hold one corner firmly in place on the board.
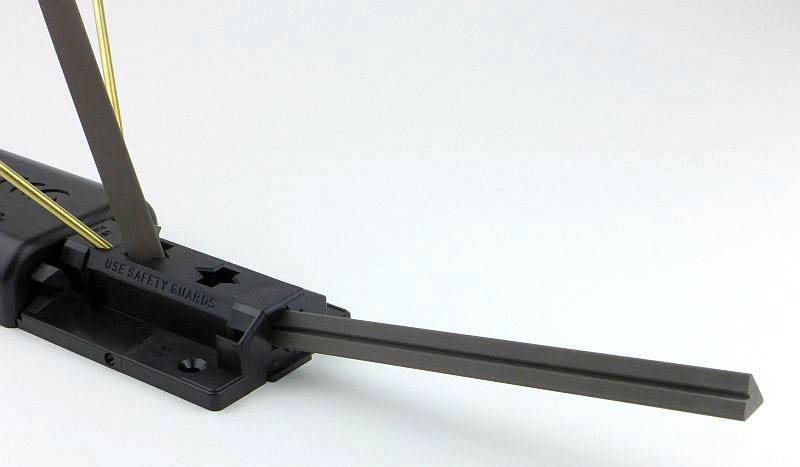
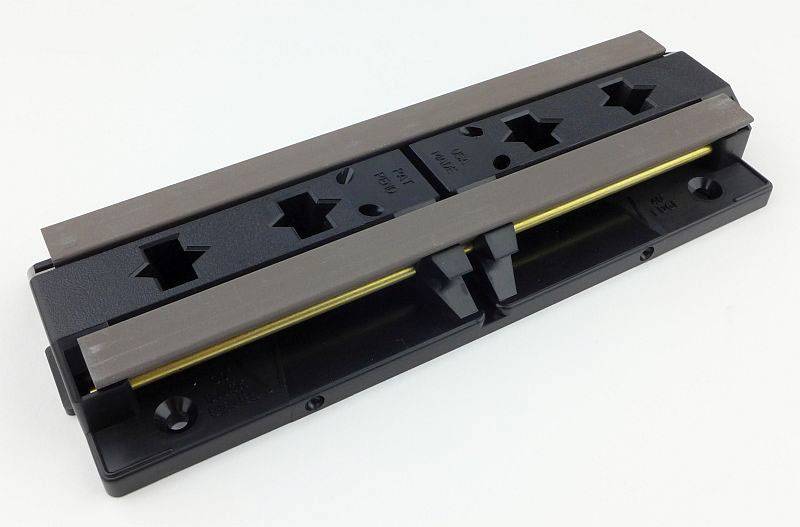
The knife clamp and vertical guide assembly fits onto the top of the support post. Consisting of two parts, the stone holder and rails slide together.
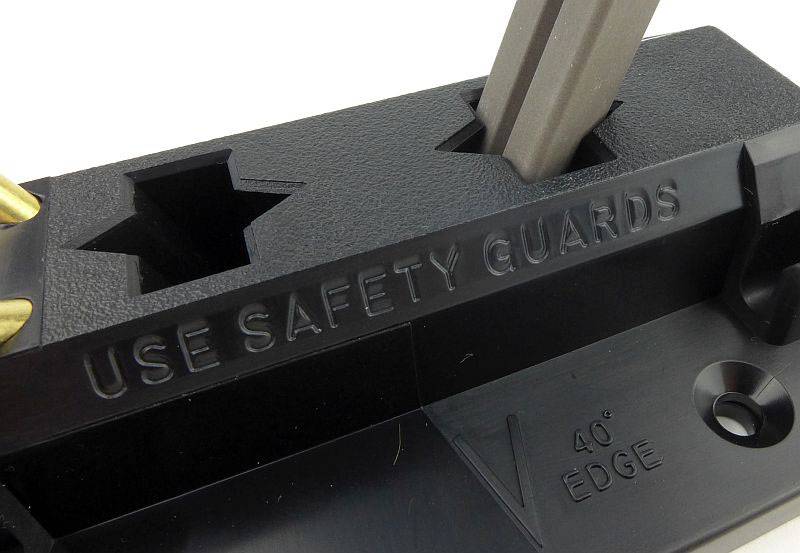
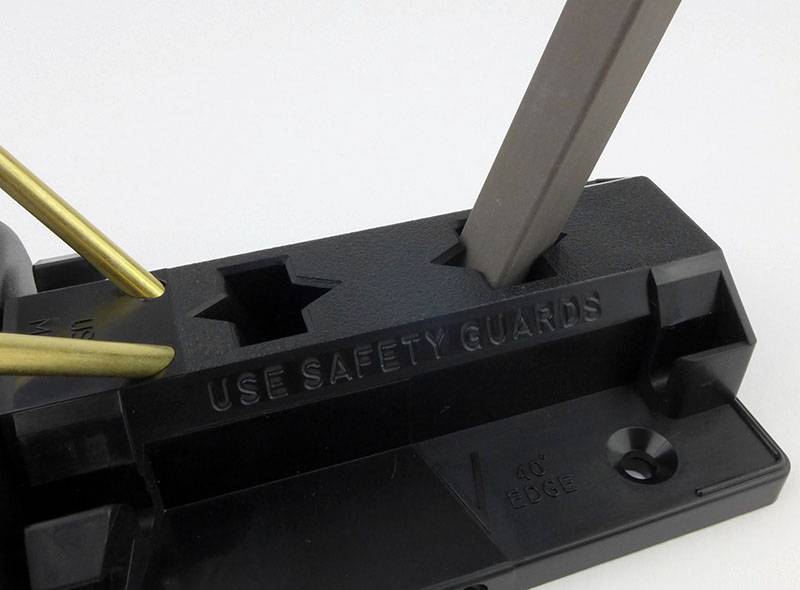
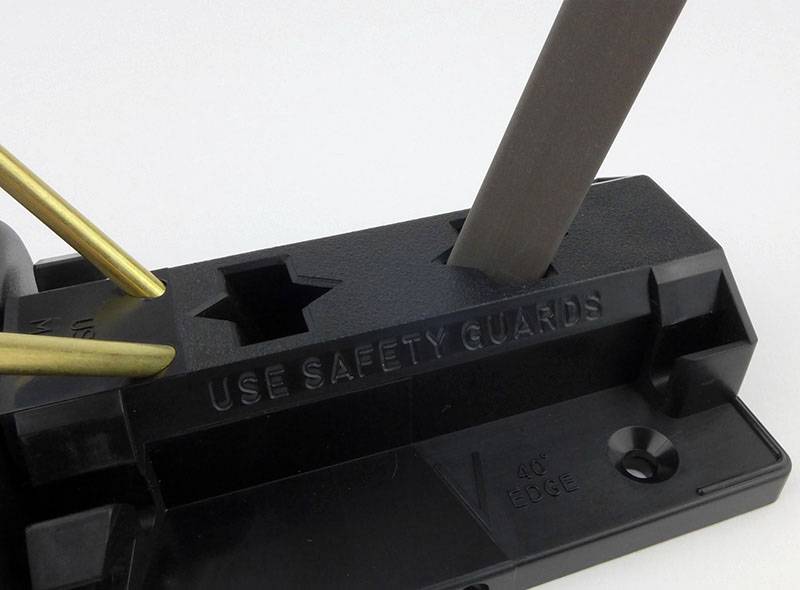
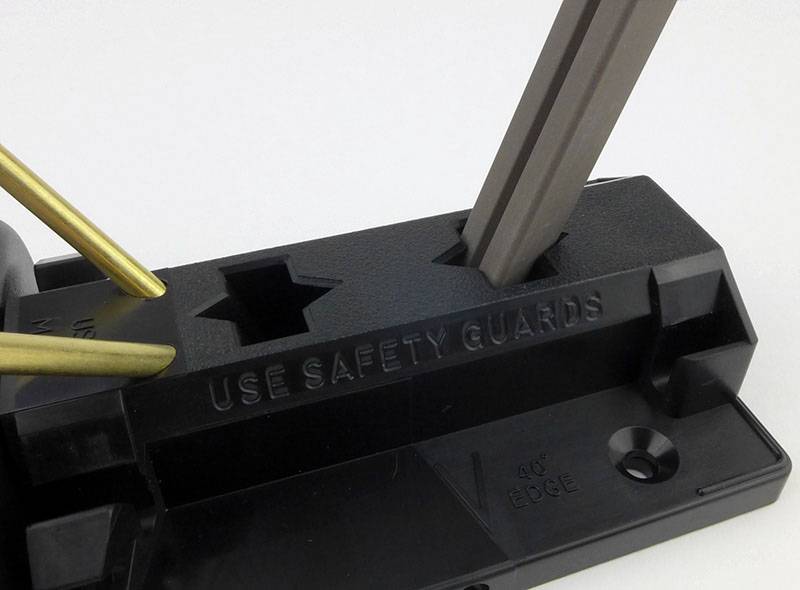
Now we move onto one of the central components of this unique design, the angle setting block. This has four fixed angles 15°, 17.5°, 20° and 22.5° with the bolt for the stone guide rails being fitted into the corresponding hole in the angle block. In this case my favoured 17.5°, and tightened fully down. Ready now to fit the stone you want to use in the spring loaded stone holder.


A good look round the assembled KMFS Vantaedge integral – Things to look out for here are:
Now fully assembled, we are ready to clamp a knife in the holder to start sharpening. It is when the knife is in place that the system can work to maintain the stone-to-edge angle at any point along the cutting edge.
When the standard kit is used as supplied, the angle is correctly created when you push down on the stone holder’s handle, which then lifts to angle block into place, locking in the angle. Adding in the hover-spring and the spring lifts the angle block so the stone is already at the set angle when you bring it down onto the knife edge.


A few re-profiled edges up close:

This section has been included show some high magnification photos of the re-profiled edges described in the next section. They do look a bit messy, but there are a couple of reasons for this. Firstly the stones are not run-in which makes the grit progression unsettled and unreliable leaving a lot of deeper scratches. And secondly, the lighting of the magnified camera is very unflattering showing all the worst aspects.
Also bear in mind these are the first views of a major reprofiling from about 45dps to 17.5dps so they are completely newly formed edges and subsequent resharpening with the finer grits will continue to improve them.


What is it like to use?

Please take a look at the videos produced for this review as these will give you some really detailed insights, lessons learned and tips.
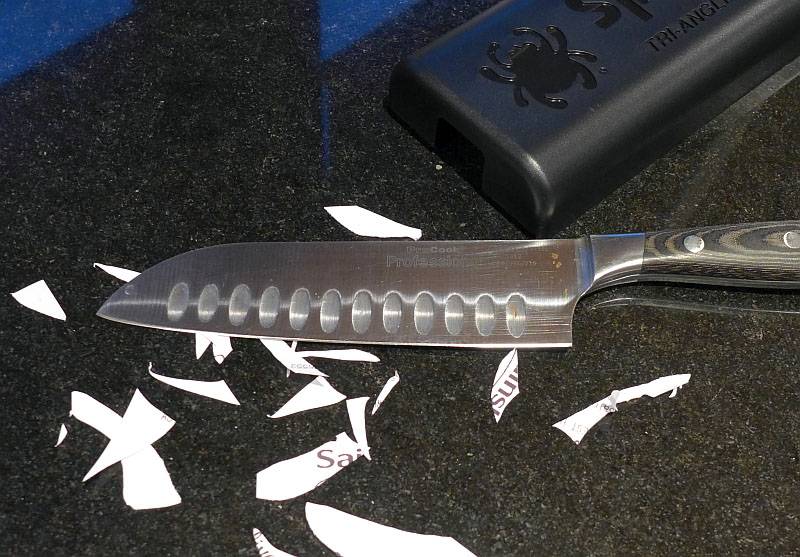
Out of necessity, and as it was a good test, I had a few knives needing a full edge reprofiling. This is a lot of work on a manual system and can frequently cause fatigue leading to mistakes. I normally use a belt grinder to do the major part of the reprofile, so doing this by hand is a bit of a shock to the system, but has been very revealing in the use of the Vantaedge.
Something I’ll drop in right away is that I would consider the hover spring and stroke limiter add-on an essential. Without this you have two issues. It is all too easy to allow the stone to drop to a lower working angle than you want and cut away the shoulder of the edge bevel accidentally (caused by not quite applying enough downward pressure on the stone handle to fully lock in the angle) – the hover spring eliminates this issue entirely.
Then the stroke limiters; also caused by being distracted and fatigued, it is easy to overshoot the edge with the stone and the protective brass pins that stop your hand reaching the cutting edge still allow the corner of the stone to ride up onto the primary bevel scratching it. This is cosmetic damage and annoying when you do it (I was annoyed with myself). The stroke limiter clips can be arranged along the guide rods to prevent this happening (wish I had known this before I started the first reprofile).
So this means the main two issues I have with the standard kit are completely resolved by the hover-spring and stroke limiter add-on; just get this optional extra you won’t look back.
With the hover-spring and stroke limiters in place, the main difficulty is working right to the very tip. You can improve this by re-clamping the knife to just work the tip, but I’ll explain a little more. The way the angle fixing mechanism works it also stops the stone twisting along its length. This was actually making the stone miss the tip of the knife unless you work right to, and frequently slipping off, the side of the stone. I became a little more forceful with the stone holder, flexing the twin rod guide to make it reach the very tip without slipping off. To be able to clamp the knife so that the tip is presented perpendicular to the stone’s stroke you end up having to use only one side of the clamp. The special function of the KMFS system allows this to work by locking-in the correct angle, but the blade is less stable. As long as you are aware of this characteristic of the Vantaedge you can work with it. I found it best to use a marker pen like a metalworker’s layout fluid to show me if I was missing any of the tip and make sure I then re-clamped or flexed the stone holder to catch it.
Changing sides of the blade was very easy, with the stone and guide rods lifting effortlessly out of the clamp, allowing you to lift and flip the clamp, then reinsert the rod and carry on. Swapping stones in the sprung stone holder was also super easy and quick.
I did give myself quite a job with the major reprofiling of three blades, and although there was a lot of metal needing to be removed, the Vantaedge was a pleasure to use. From one session to another, the blade can be removed, checked, and re-clamped with no effect on the resulting edge angle. So much better than having to ensure the blade is positioned as closely to how it was the last time (checking notebooks, and measuring how it is clamped), you no longer even have to think about this, just clamp and go.


Having initially given myself the worst job I could to do, I also threw in a couple of smaller folding knife touch ups. This was much, much, much easier. What I found with the smaller blades was that it worked better for me using only one of the clamping jaws to hold the blade, but allowing the spine to press against the tips of the other clamp jaw for support, and to give easier access to the blade tip on the smaller blade.

Some of the results are shown here, with both phonebook-type paper cuts and BESS measurements. These are 100% from the Vantaedge with the largest blade having a hair popping 176g edge.

Touch-ups will be very easy, and if you have the space to leave the Vantaedge assembled and ready to go, you’ll only need a minute or two to get back to full sharpness without any fuss.


Review Summary

The views expressed in this summary table are from the point of view of the reviewer’s personal use. I am not a member of the armed forces and cannot comment on its use beyond a cutting tool or field/hunting knife.

Something that might be a ‘pro’ for one user can be a ‘con’ for another, so the comments are categorised based on my requirements. You should consider all points and if they could be beneficial to you.

_______________________________________________
What doesn’t work so well for me
_______________________________________________

Overshooting with the stone scratches the primary bevel.
The very tip can be difficult to work properly.
If you don’t apply enough downward pressure the angle will be too low.
Hover-spring not included as standard (just get it).

_______________________________________________
Things I like
_______________________________________________

The MOST consistent angle of any guided sharpening system FULL STOP.
Never need to worry about clamping position, the angle will be correct.
Super smooth action thanks to linear bearings for all guide rods.
Quick and easy touch-ups.
3000 grit Ruby stone leaves a fantastic working edge.
Optional leather strops can be used with or without diamond paste.
Hover-spring kit with stroke limiters transforms the Vantaedge – get them.
Superb engineering and attention to detail.

Review Videos

Starting with a short format sixty second review:


Onto an Epic Review Movie feature length video covering many more details:


Discussing the Review:
Something new – will it work? A Tactical Reviews Subreddit.
TacticalReviewsChat on Reddit
Please visit there and start/join the conversation.

Gear Review: Spyderco Tri-Angle Sharpmaker (Sharpener)

Spyderco’s Tri-Angle Sharpmaker is a surprisingly versatile sharpening system (based on the V-sharpener concept), designed to be simple to use, and make it easy to maintain a consistent sharpening angle.

The details:

Let’s dive into the details and talk about it more in the next section.

The Tri-Angle Sharpmaker arrives in a combined cardboard/blister pack.
 photo 01 Sharpmaker boxed v2 P1170441.jpg

Included with the Sharpmaker is a set of instructions and an instructional DVD.
 photo 02 Sharpmaker box contents v2 P1170448.jpg

Breaking out all the parts, we have a lid to keep all the components in place, a base plate with various shaped holes, four high alumina ceramic stones/rods (a pair of brown/grey medium grit, and a pair of white fine grit) and very importantly two brass safety guard rods.
 photo 03 Sharpmaker parts P1170452.jpg

The FIRST thing you should do is to fit the guard rods (for whichever angle you are working to). Notice how the lid fits over the base at a halfway point to act as a handle.
 photo 04 Sharpmaker guards P1170458.jpg

These guard rods angle back over the user’s hand to prevent stray sharpening strokes testing the edge on your hand. This is all the more important for experienced users as they tend to work faster and with less care.
 photo 05 Sharpmaker holding P1170461.jpg

Just in case you forget – ‘USE SAFETY GUARDS’.
 photo 06 Sharpmaker reminder P1170463.jpg

The two types of stone included with the Sharpmaker (shown here in perfectly clean and unused condition).
 photo 18 Sharpmaker stones P1170503.jpg

So why are those holes the shape they are? It’s all very clever actually. The Tri-Angle Sharpmaker, comes with …. yes, tri-angular stones. The stones also have a groove in them for hooks and other pointed objects.
This means we have three different working surfaces on the stones, the flat side, a pointed corner, and the groove. Here we have the stone fitted into the base so that we use the flat surface.
 photo 08-Sharpmaker-stone-rotation-1-P1170470.jpg

Now, taking the stone out and rotating it, it can be fitted back into the base with the corner as the working surface.
 photo 09-Sharpmaker-stone-rotation-2-P1170471.jpg

Lastly the grooved flat surface is presented for working with. All with one hole that holds the stone at the correct angle.
 photo 10-Sharpmaker-stone-rotation-3-P1170472.jpg

Here we are, fully assembled with ‘stage one’ sharpening (the coarsest arrangement) and on the 40 degree inclusive angle.
 photo 11 Sharpmaker assembled P1170475.jpg

What it is like to use?

Some of my most used sharpening stones are a set of Spyderco pocket stones, so I know how well the Spyderco ceramic stones perform. However, once you start using diamond stones they can seem a little slow, especially on some of the super-steels.

Though not strictly a guided system, I’m going to consider it one to mention the very specific benefit of these systems, which even people with considerable sharpening experience should not dismiss. Quite simply, guided systems help reduce the amount of steel you need to remove to restore an edge. This means that as well as making the sharpening process easier for everyone, it also makes it more efficient. You only remove as much steel as is needed which prolongs the life of the blade and makes sharpening quicker.

With the triangular stones, this is one of the few systems that can sharpen serrations, and is also happy working on hawksbill and recurve blades. To understand fully why, we need only look at the four ‘grades’ of sharpening that are achieved from the two stones.

In order, from most coarse to finest, we have these configurations of the stones:

1. Brown/Grey stone Corners – Coarse edge reshaping
2. Brown/Grey stone Flats – Producing a utility edge (how Spyderco say that most new knives come)
3. White stone Corners – To achieve ‘butcher’ sharp.
4. White stone Flats – for the finest razor edge.

The Sharpmaker base also has two sets of holes which give an inclusive angle of 30 degrees or 40 degrees. In the design of the Sharpmaker, the 30 degree angle is primarily intended to be used for creating a ‘back bevel’ (to thin out the edge). Though some knives might be sharpened to this 30 degree angle, the 40 degree angle is considered by Spyderco to be the best compromise for most blades.

Serrations can be sharpened thanks to the corners of the stones, meaning steps 1 and 3 can be used. Spyderco recommend that only the step three (white stone corners) is used, as step one is a bit too aggressive. Serrations need a slightly different technique, as generally they are formed with a single bevel (chisel) grind. In this case you work only on one side for three or four strokes, then use a single stroke on the other side to remove the burr that forms.

For flexible blades, you only use the corners (steps 1 and 3) as it is difficult to keep the edge sitting on the flat surfaces.

Having covered some of the theory, let’s get back to looking at the way you use the Sharpmaker. Here is a knife in mid-stroke having started at the plunge/ricasso and being draw down and backwards towards the tip, to run the entire edge over the stone on one side.
 photo 13 Sharpmaker knife P1170484.jpg

Looking directly from behind the knife, this is the critical aspect for the Sharpmaker – you keep the blade held vertically at all times, the stone angle is then determined by the Sharpmaker. Visually, keeping the blade vertical is the easiest position to judge, much easier than any other angle.
 photo 14 Sharpmaker knife P1170485.jpg

Having given one side of the blade a stroke, swap to the other side. Then just keep alternating sides for each stroke. Once you have given each side 20 strokes, you can move to the next stone configuration, refining the edge each time.
 photo 15 Sharpmaker knife side 2 P1170488.jpg

MAKE SURE YOU USE THE SAFETY GUARDS – Can’t stress this enough. I’ve hit them several times during the testing for this review, and would have cut my hand if I had not fitted them.

In one end of the Sharpmaker is another hole for a stone, this time using only one stone at a much lower angle. With a single stone mounted in this position you can sharpen scissors in the same way as you sharpen a knife. Keeping the scissors vertical and stroking the blade across the stone. To take off the burr on scissors you need to use the other stone like a file and lay it onto the blade flat. Doing this will give you a better burr removal than just closing the scissors.
 photo 12 Sharpmaker scissors P1170479.jpg

Also included in the design are two bench-stone options. Using the top channels in the base gives you a wide stone surface for large blades.
 photo 16 Sharpmaker bench stone P1170489.jpg

Flipping the base over and it has two grooves that are close together for sharpening smaller tools like chisels.
 photo 17 Sharpmaker bench stone narrow P1170494.jpg

I’ve already mentioned a couple of characteristics of the Sharpmaker that become quite relevant to start with. Especially compared to diamond, the ceramic stones are not the fastest cutters, and add to this a design that helps keep the overall removal of metal to a minimum by maintaining the angle, and you get a sharpener that can be hard work if you need to reprofile a steep edge angle.

(NOTE: When new, the brown/grey stones have a slight glaze that initially slows the cutting down. This glaze will wear through after a few sharpening sessions, but you can rub the two new stones together to speed this up and improve the cutting performance sooner.)

When starting to use the Sharpmaker, your bevel might not be at 40 degrees, so you can use the marker pen test to see if your bevel angle matches the Sharpmaker. If your initial bevel angle is less than 40 degrees, then you can just touch up the very edge and you don’t need to fully reprofile. Here the remnants of the marker pen are visible where the stones have taken off the ink from the full edge bevel itself. If you find the 40 degree stone angle is only working on the back bevel you are going to need to reprofile.
 photo 19 Sharpmaker check P1250574.jpg

This knife which had a badly damaged edge (from being thrown in with the rest of the washing up) has been restored by running through all four stages and then tested with some thermal receipt paper which simply fell apart on the edge.
 photo 20 Sharpmaker test40 P1250590.jpg

As mentioned above, most sharpening systems actually improve with use, and it was during this session of sharpening a set of sewing scissors that the stones of the Sharpmaker really developed some bite. The difference is significant and you can feel the stones cutting much more aggressively than when new. Perhaps more so than with knives, the process of keeping the blade vertical and drawing it across the stone makes it so easy to sharpen scissors. It only took around 20 minutes in total to get all of these scissors cutting beautifully.
 photo 21 Sharpmaker Scissors P1260926.jpg

Not only is the Sharpmaker simple to use, it is simple to transport and set up. The ceramic stones are used dry so there is no oil/water mess while working, and you use normal kitchen/bathroom cleaning products to clean the stones when clogged. I take it with me to friends and family and into the office kitchen to touch up the edged casualties and give them new life.

The Tri-Angle Sharpmaker is NOT just a knife sharpener and I recommend you watch the Spyderco videos that show just how versatile this sharpener is.

Spyderco Sharpmaker – Introduction (1 of 4)

Spyderco Sharpmaker – Part 2 of 4

Spyderco Sharpmaker – Part 3 of 4

Spyderco Sharpmaker – Part 4 of 4

Review Summary

The views expressed in this summary table are from the point of view of the reviewer’s personal use. I am not a member of the armed forces and cannot comment on its use beyond a cutting tool or field/hunting knife.

Something that might be a ‘pro’ for one user can be a ‘con’ for another, so the comments are categorised based on my requirements. You should consider all points and if they could be beneficial to you.

_______________________________________________ _______________________________________________
Things I like What doesn’t work so well for me
_______________________________________________ _______________________________________________
Very easy to use – just keep the knife blade vertical. Can be a bit slow, especially on harder steels.
Extremely Portable. Initially requires reprofiling the edge to 40 degrees.
Hugely versatile sharpener for almost any cutting tool. Only two bevel angles available.
Ceramic stones need no oil or water in use and are easy to clean.
Minimum metal removal lengthens blade life.

 photo 11 Sharpmaker assembled P1170475.jpg


Discussing the Review:

The ideal place to discuss this reviews is on a forum. If you started reading the shorter forum version of the review, but followed the link this full exclusive review, please return to that forum to discuss the review there.
If you read the review entirely on Tactical Reviews, please consider one of the following to join in any discussion.

EdgeMatters – Sponsored Reviews (UK based Forum for Knife Makers and Collectors)

BladeForums – Knife Reviews (US based Forum for Knife Discussion)

CandlePowerForums – Knife Reviews Section (Largest and Friendliest Flashlight Community Forum)