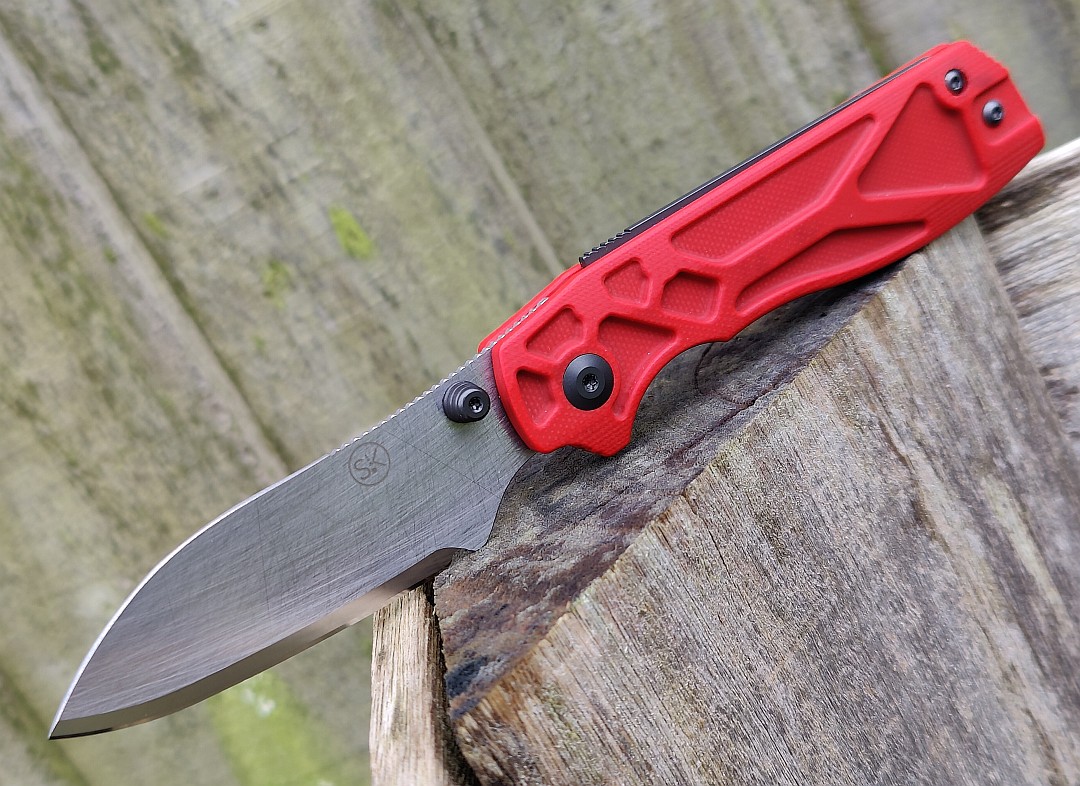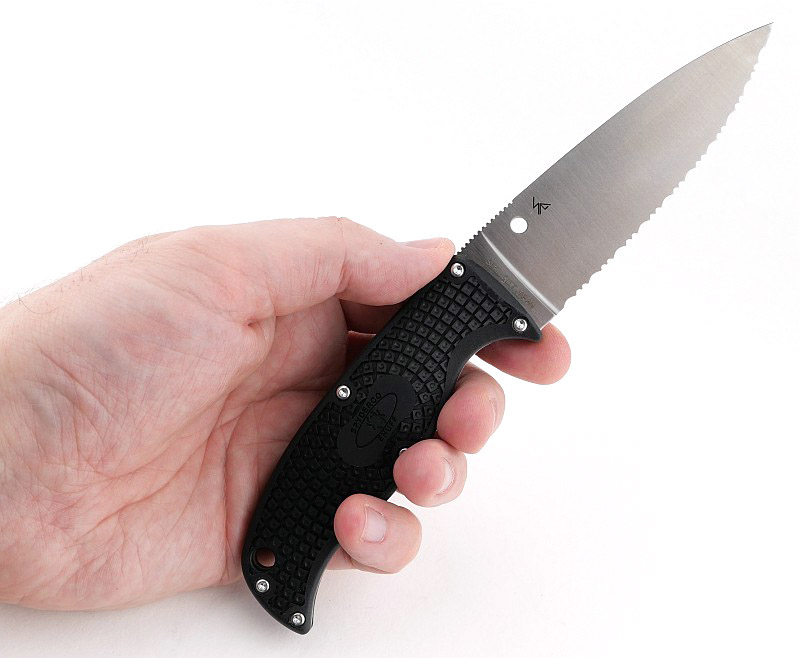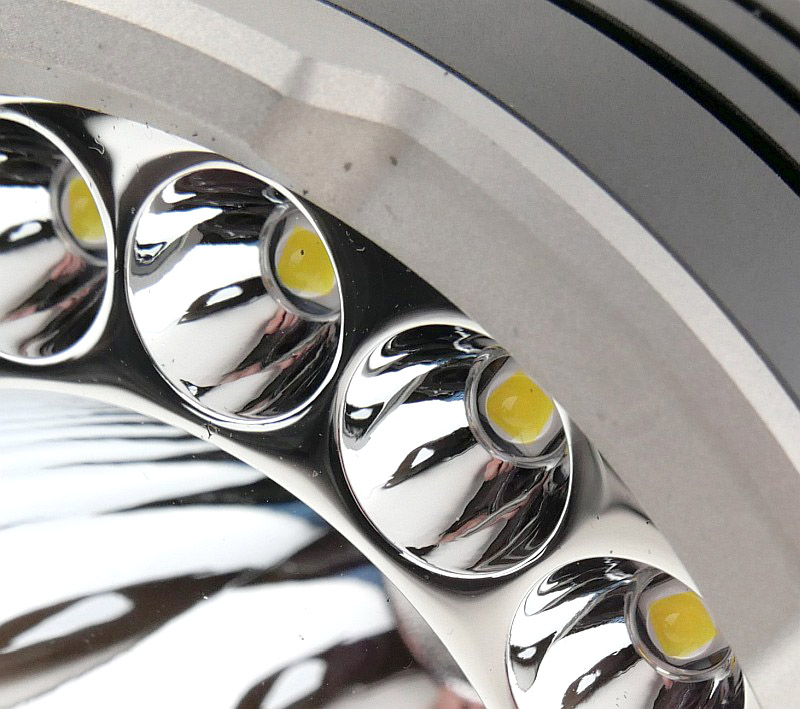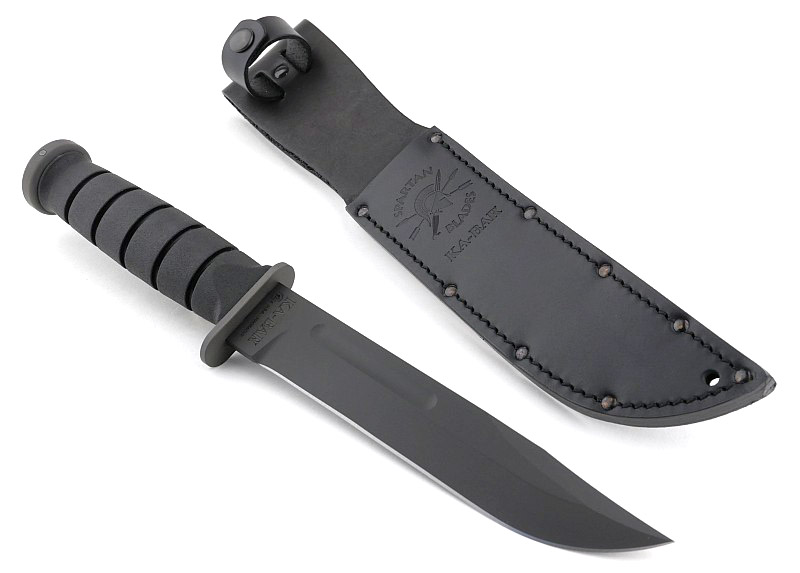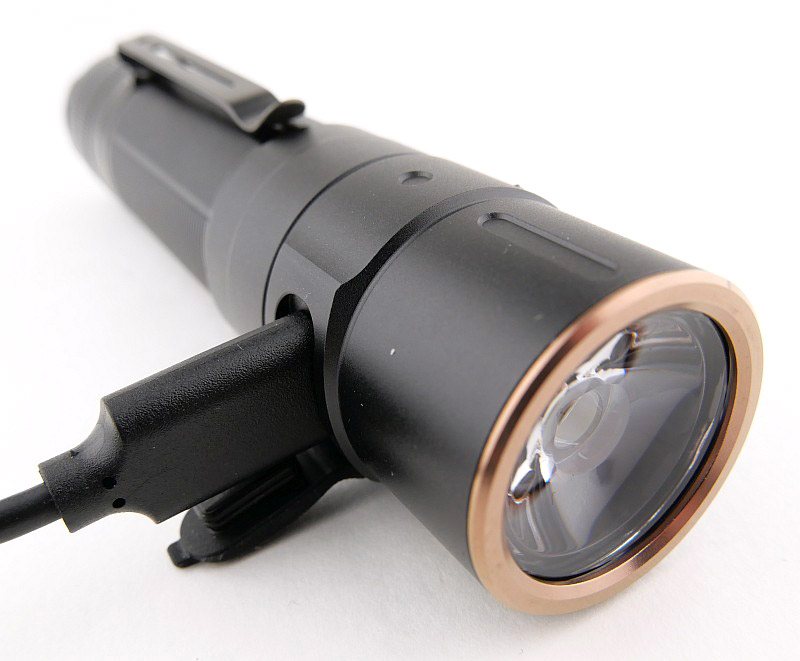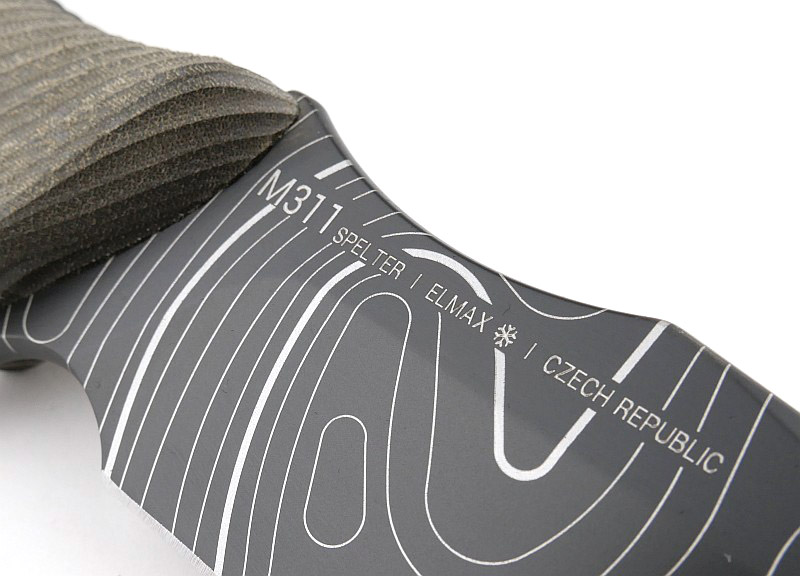
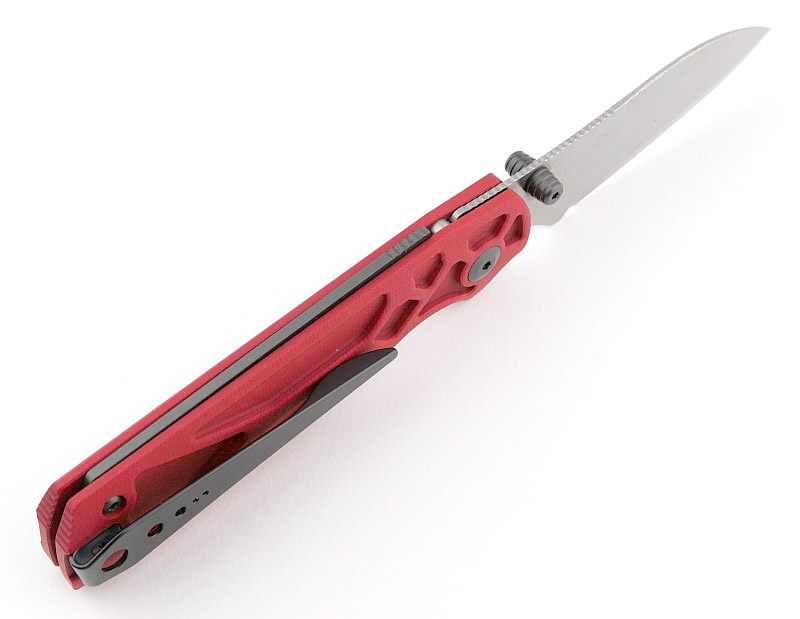
A Tungsten Carbide bladed knife! The Torino from Sandrin Knives features a blade made from Polyhedral Tungsten Carbide (PTC), a flexible grade of tungsten carbide that has superb edge retention and measures HRC 71 on the Rockwell scale.
The Torino’s blade also has a unique ‘raw carbide’ finish, giving it its striking appearance. Pivoting on ceramic ball bearings provides a super smooth opening and closing action, with the blade held securely open by a Recoil Lock mechanism.
Join me in this review of the Sandrin knives Torino for a thorough look at the knife.
Review Video
A thorough look at the Sandrin Knives Torino with the Tactical Reviews detailed technical specifications and close up view over the entire knife.
A few more details:
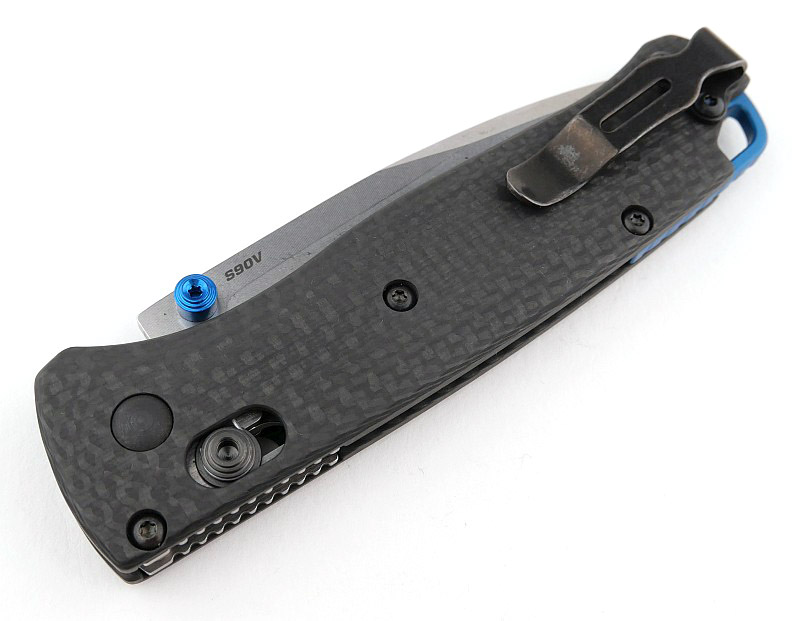
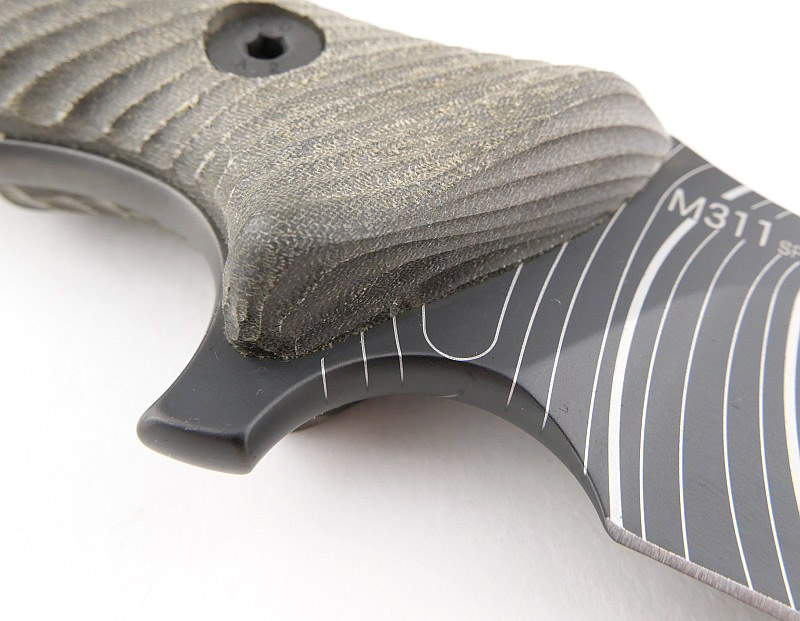
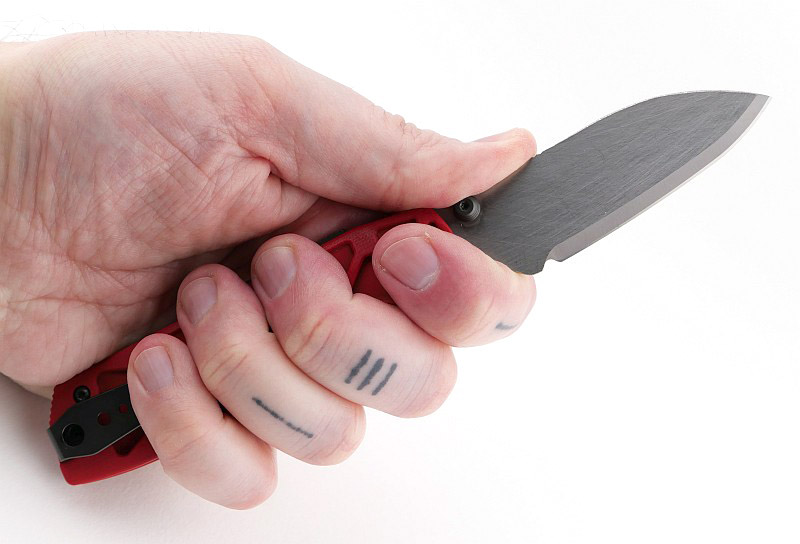
A good look round the Torino – Things to look out for here are:
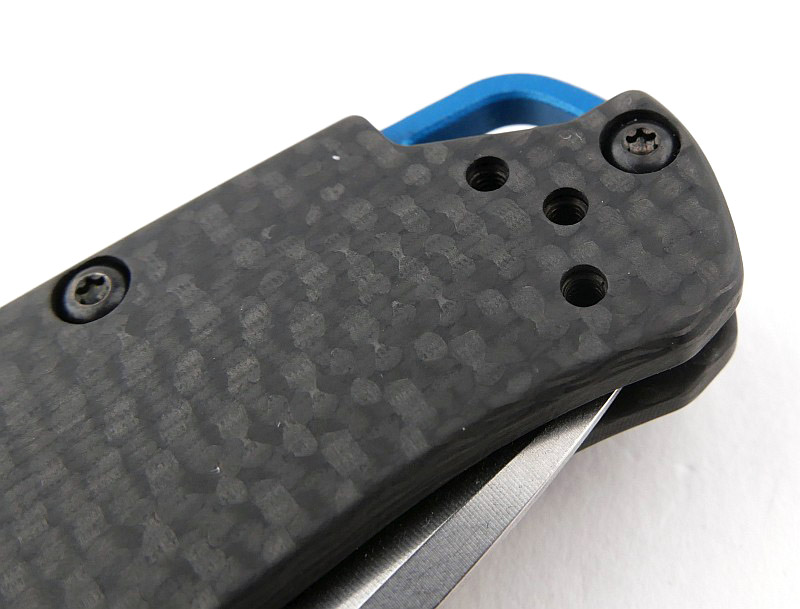
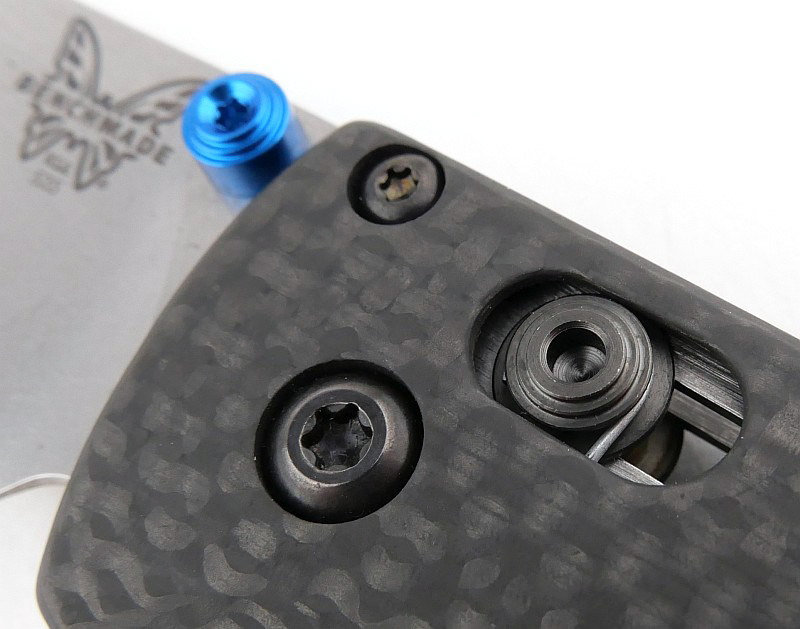
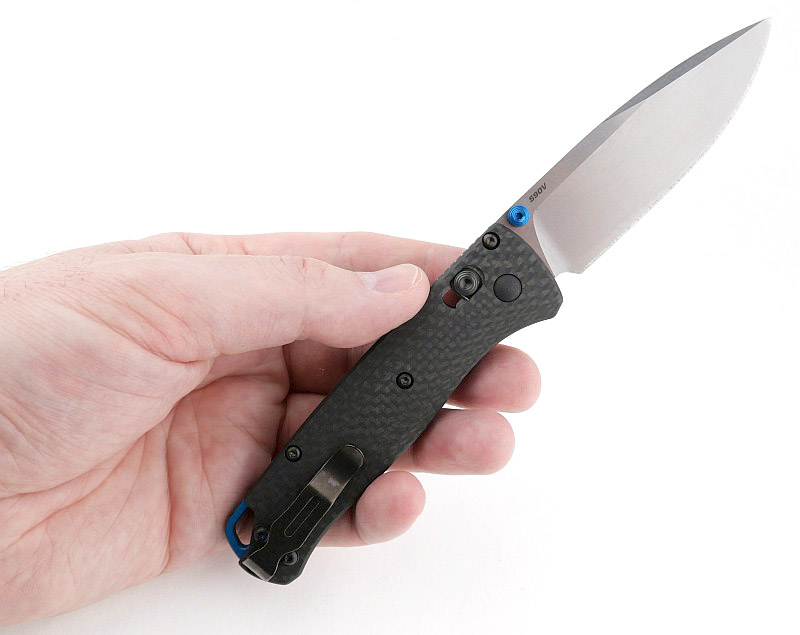
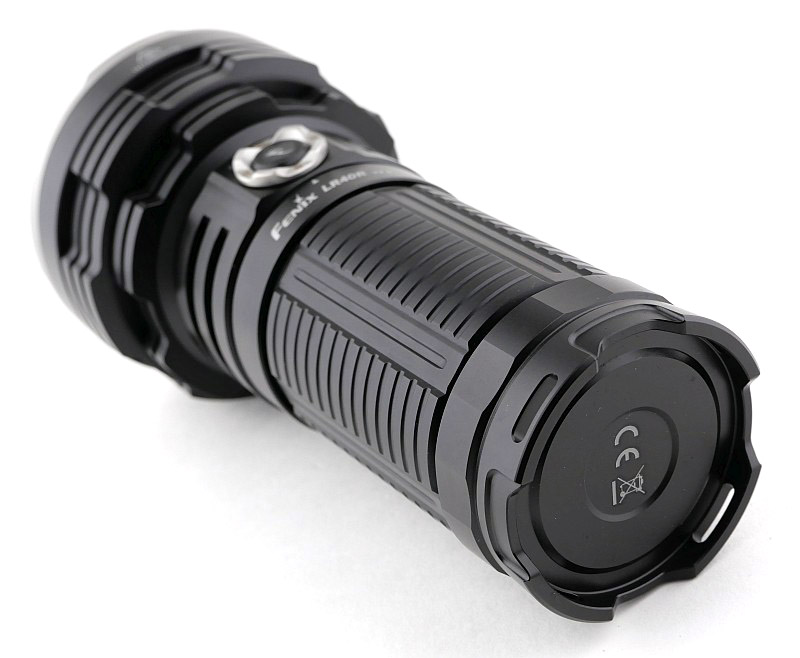
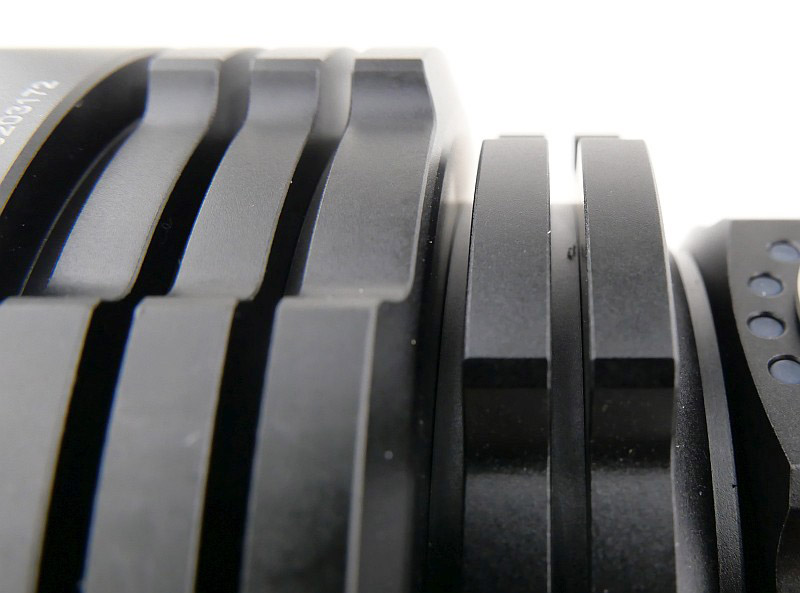
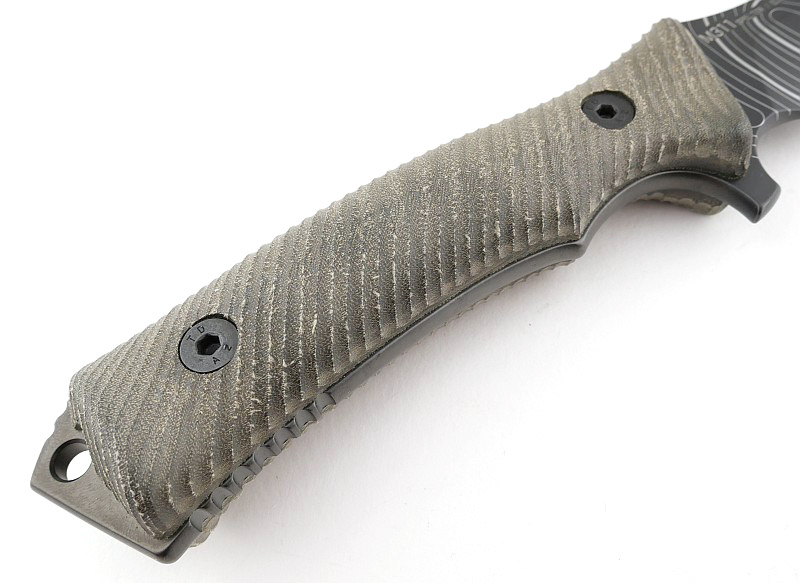
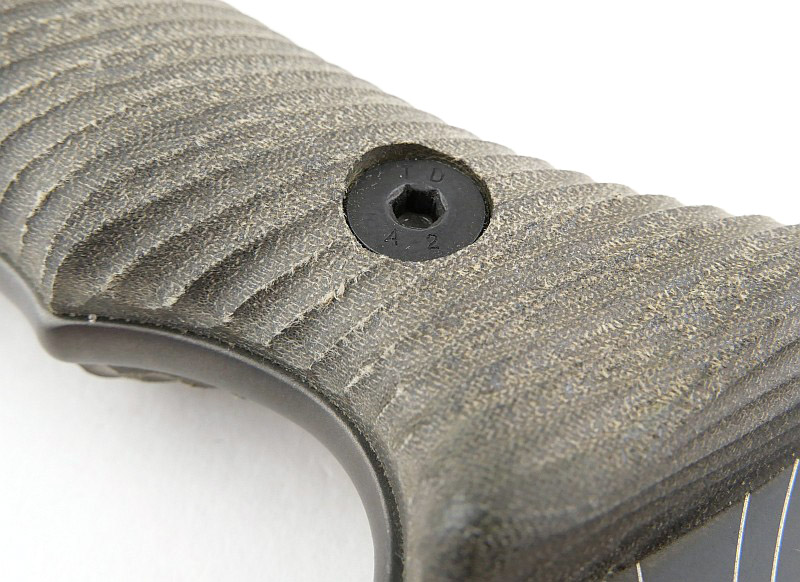
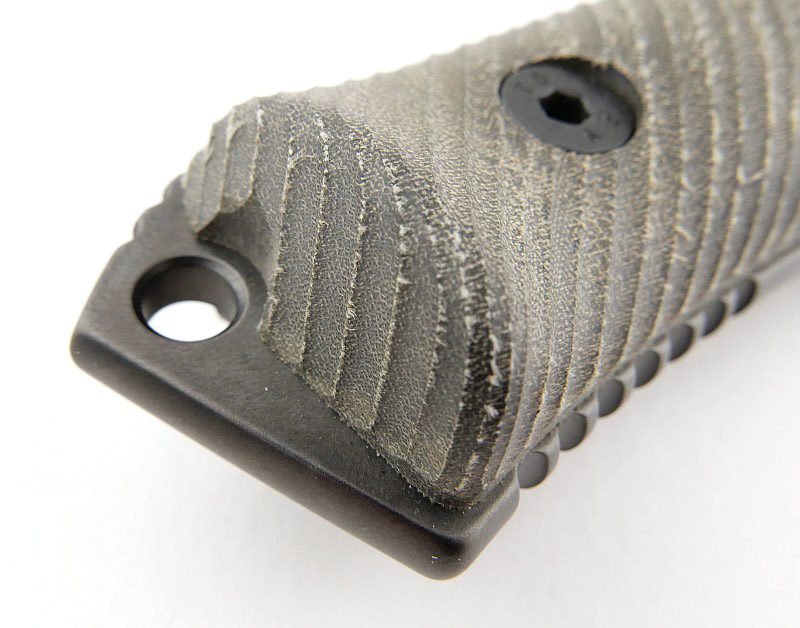
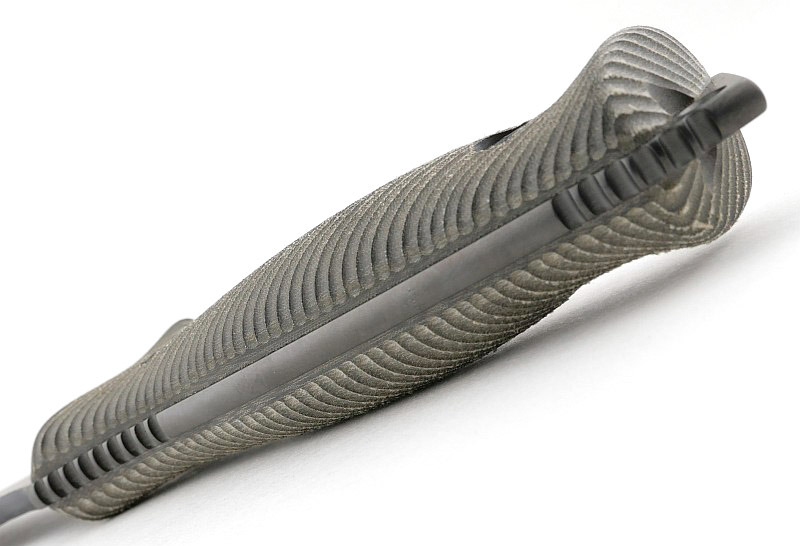
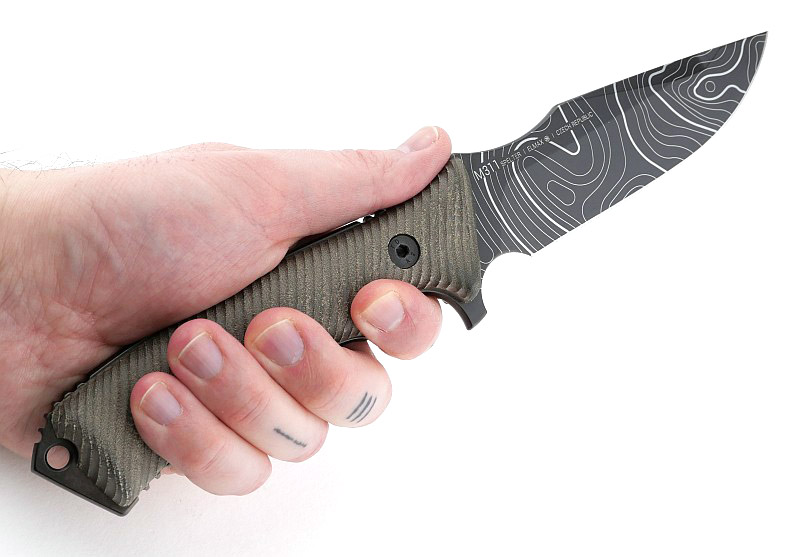
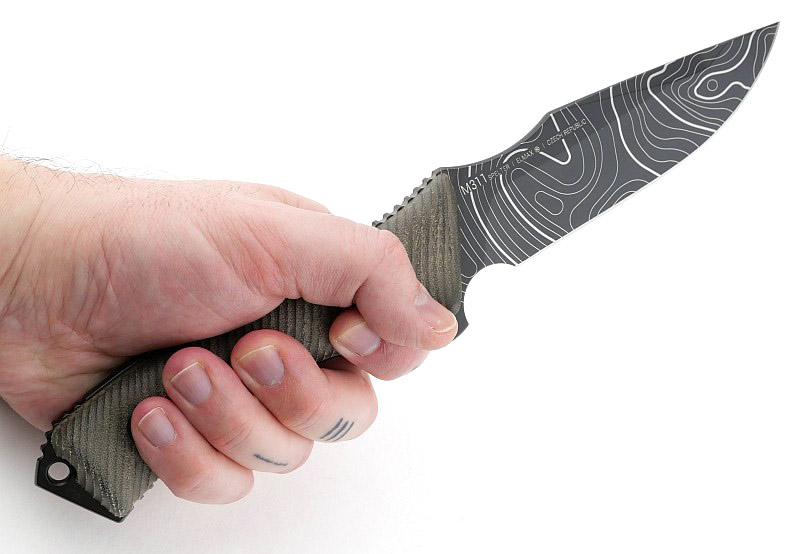
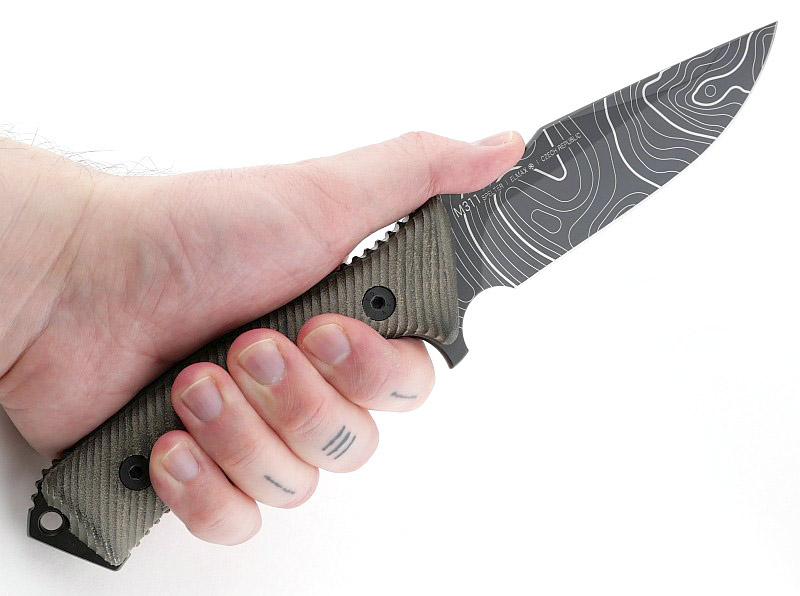
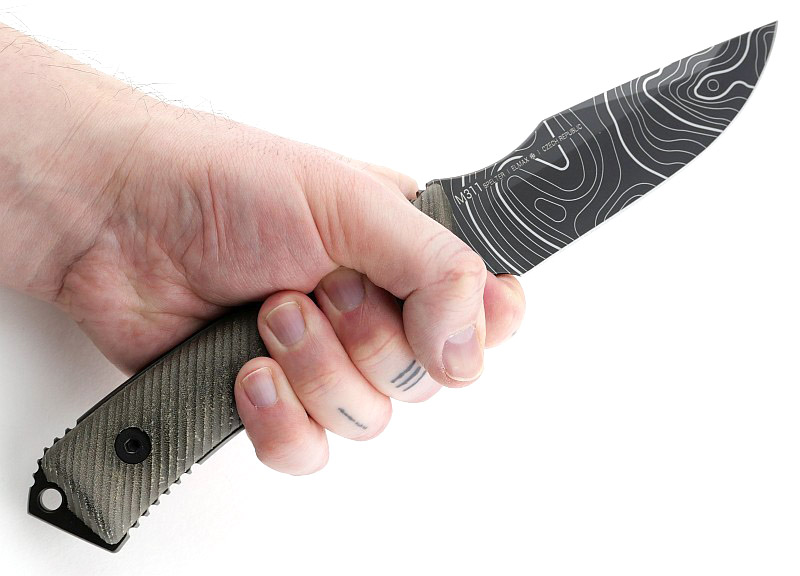
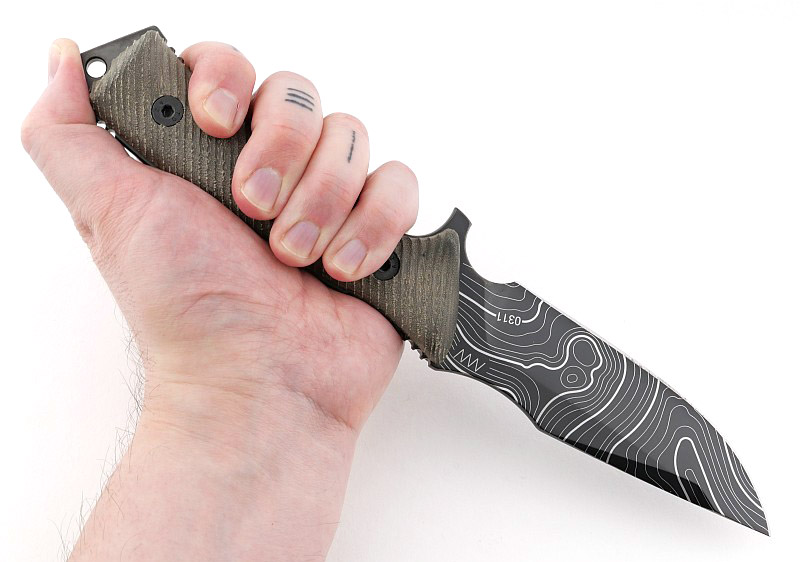
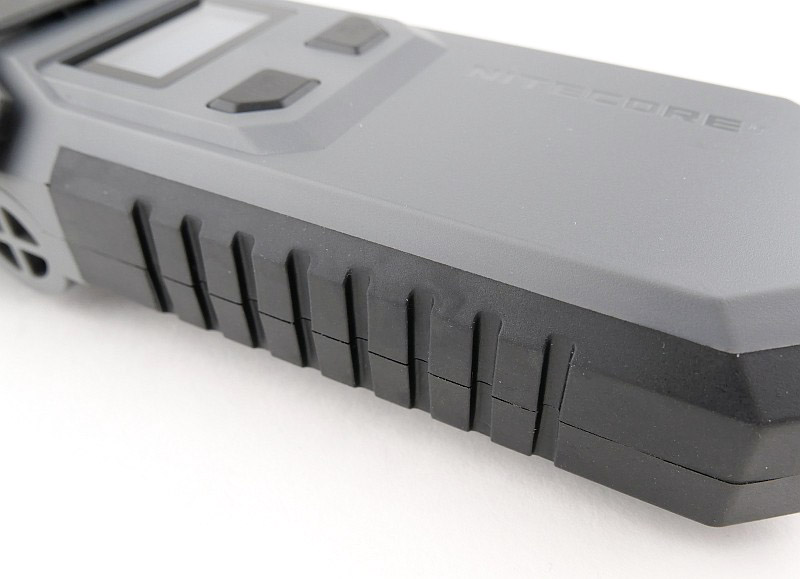
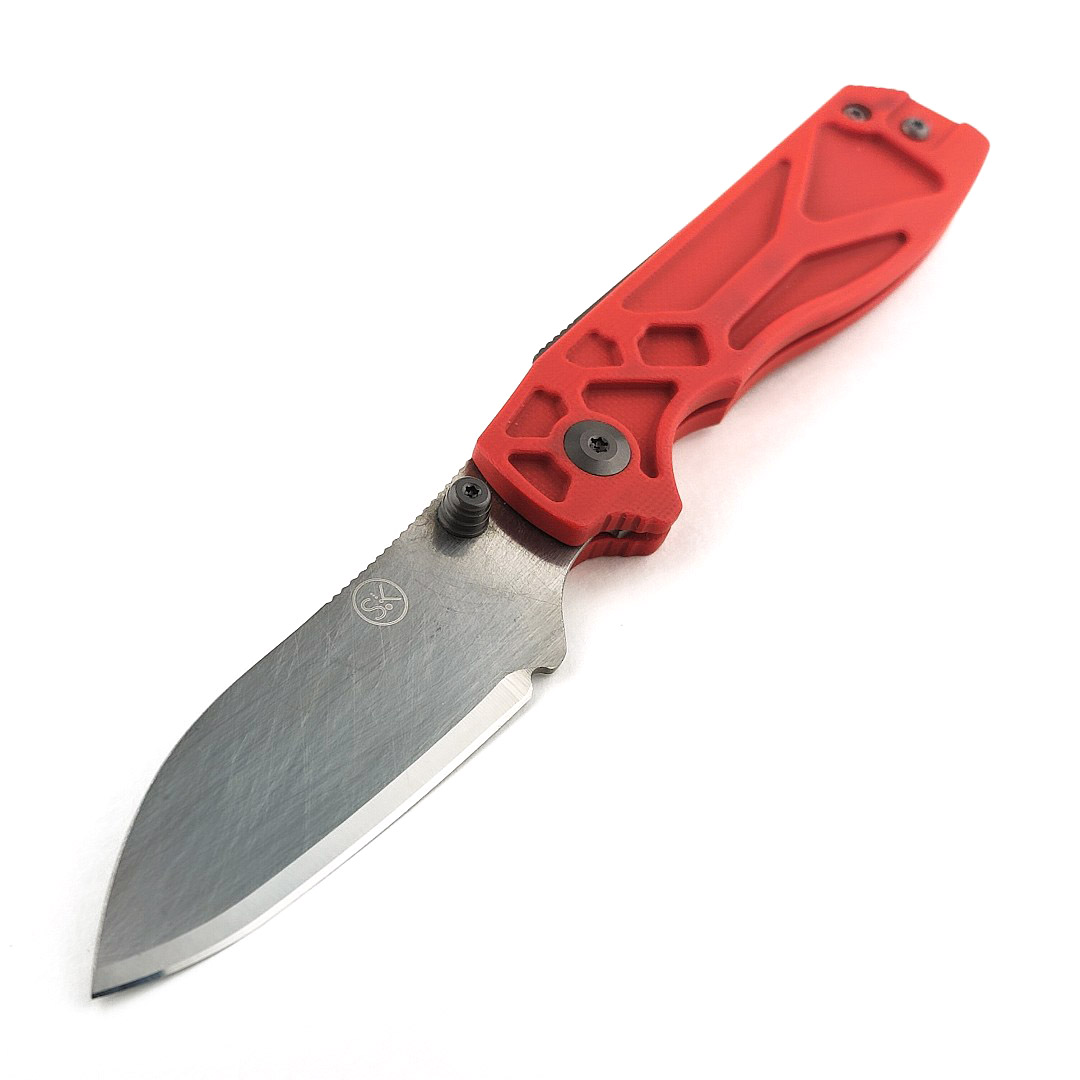
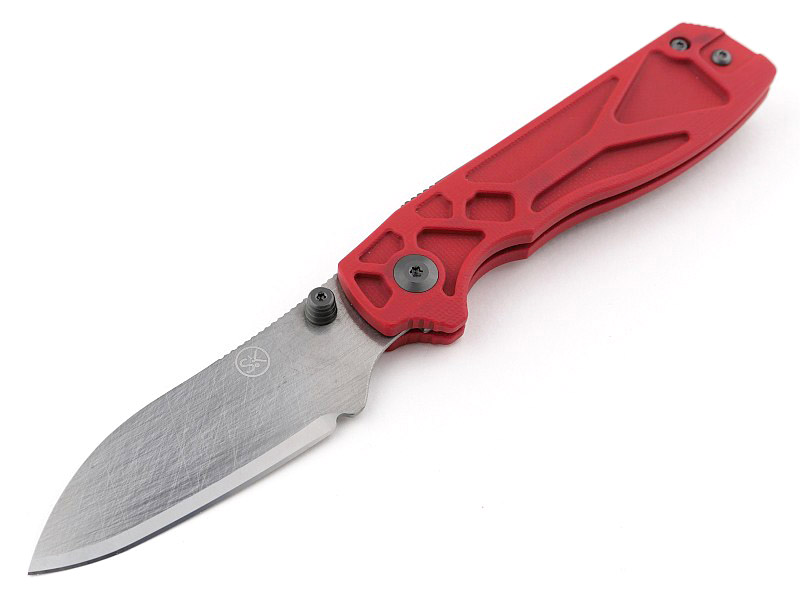
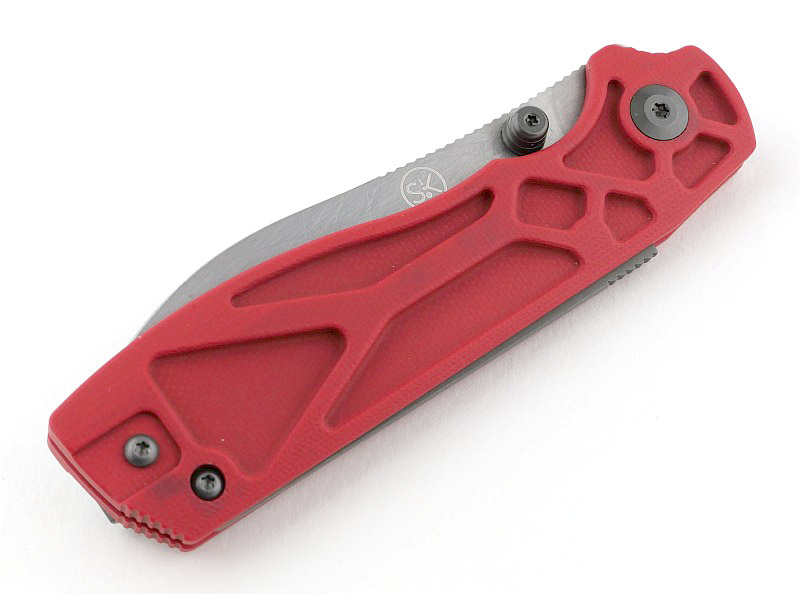
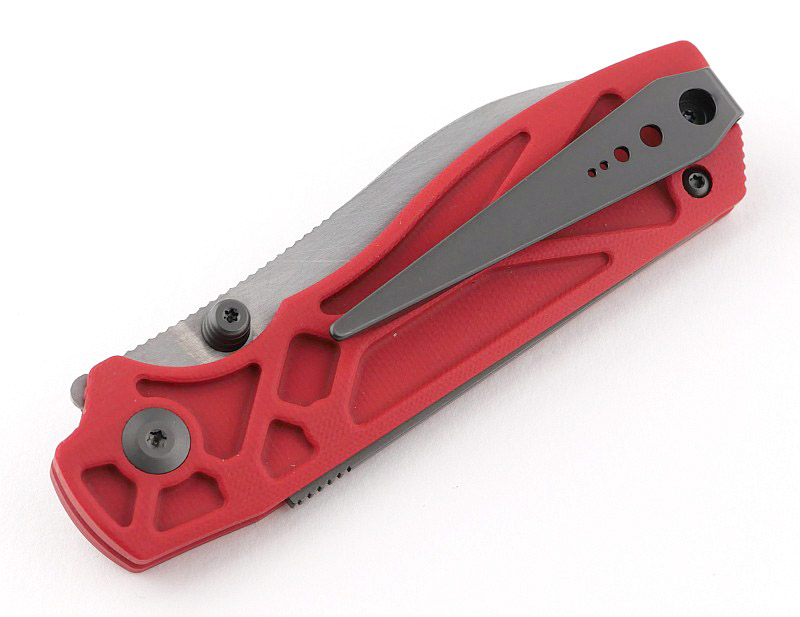
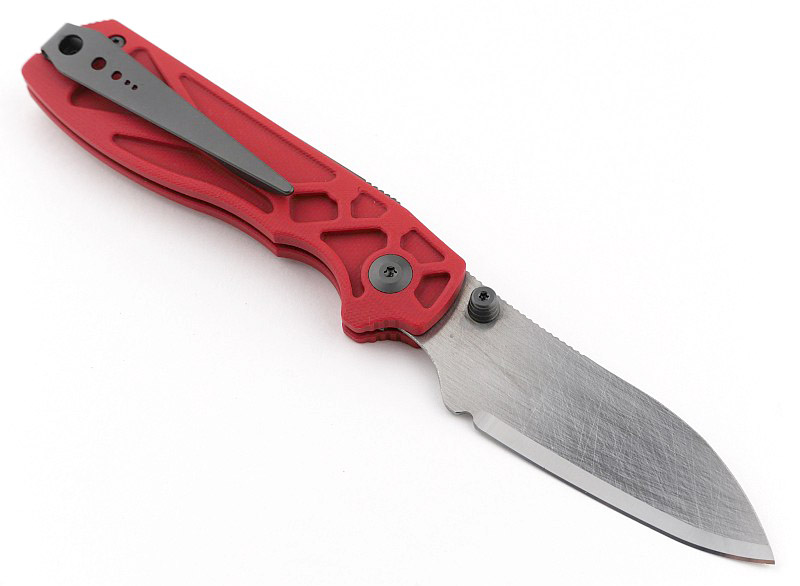
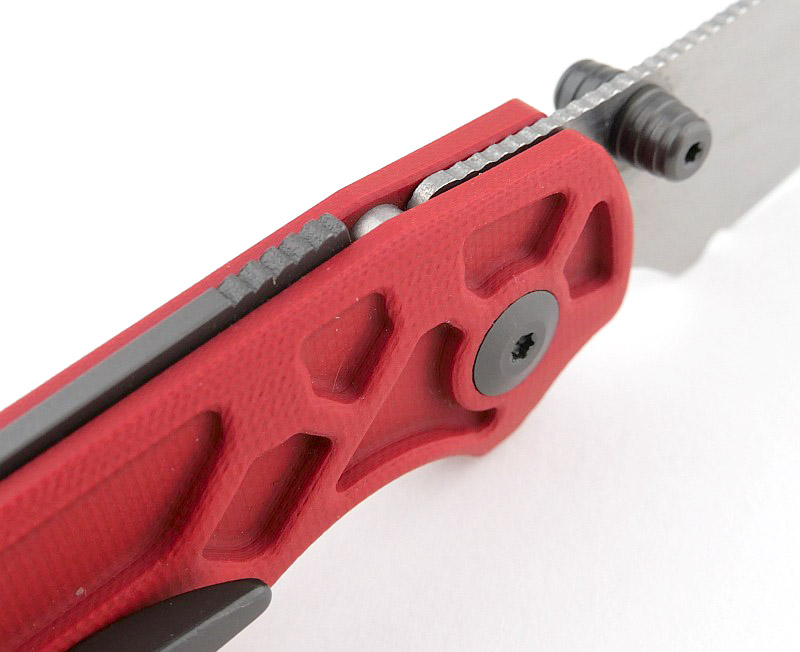
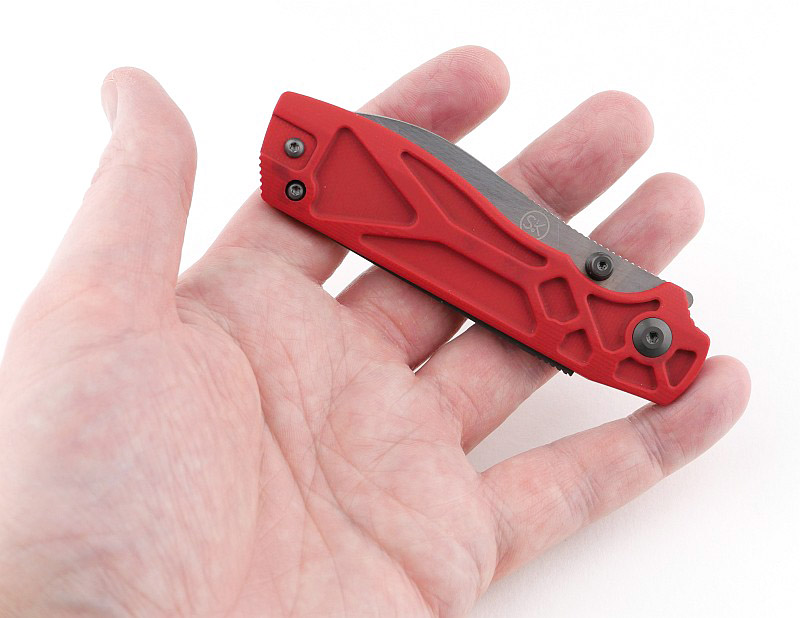
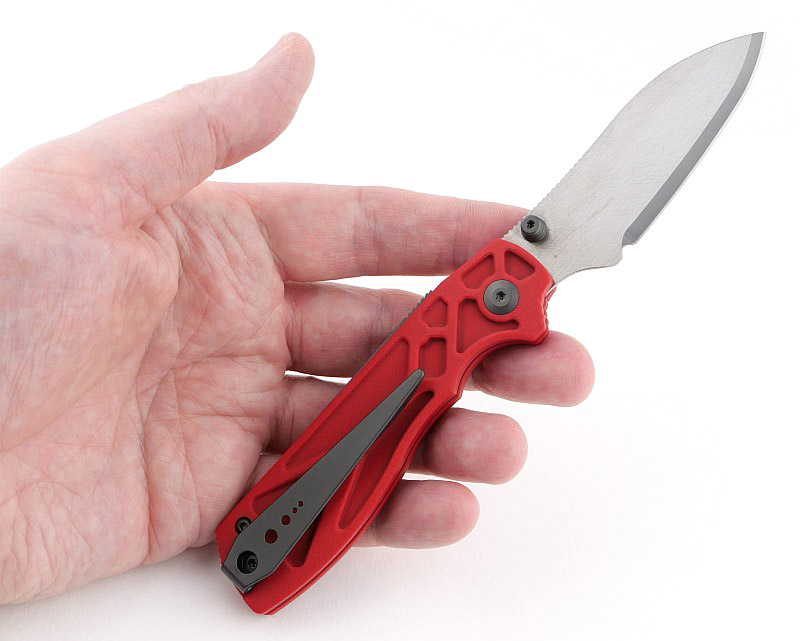
Using red, high visibility, milled G10 for the handles and a reverse-skeletonised design to reduce weight gives a very distinctive look to the Torino (even before you see the blade).
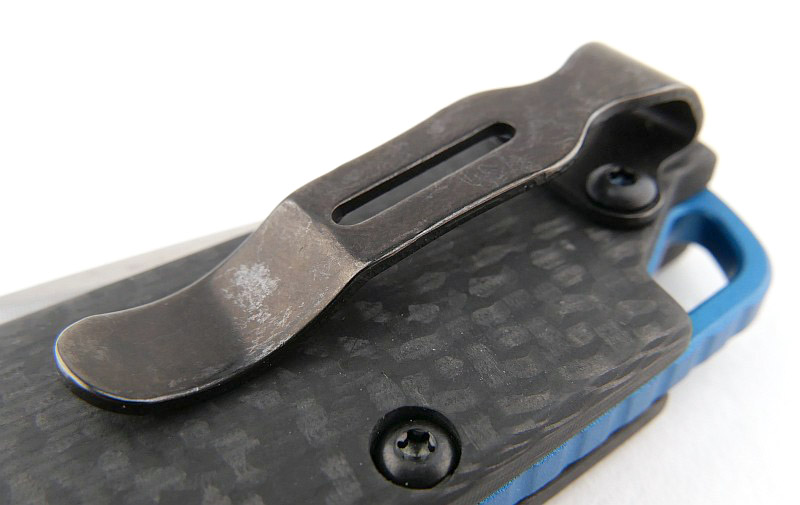
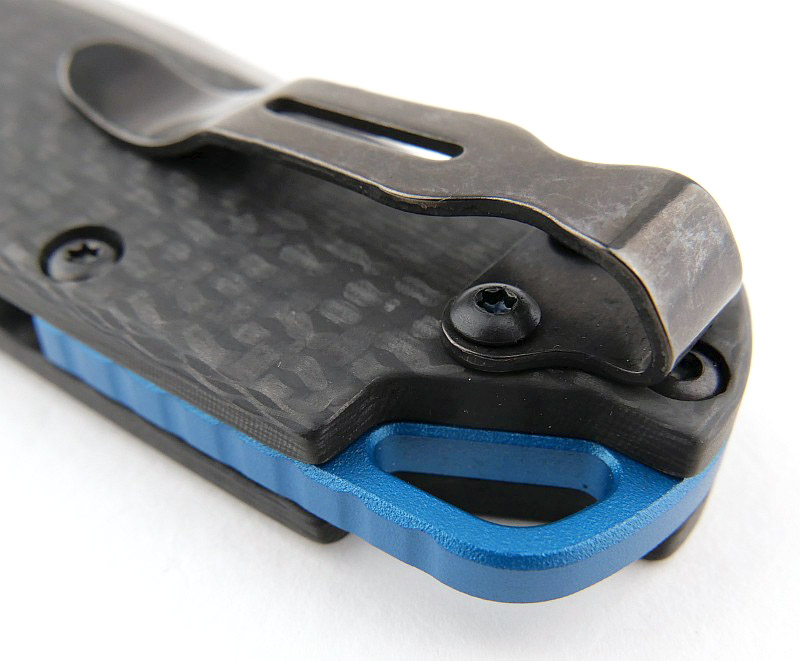
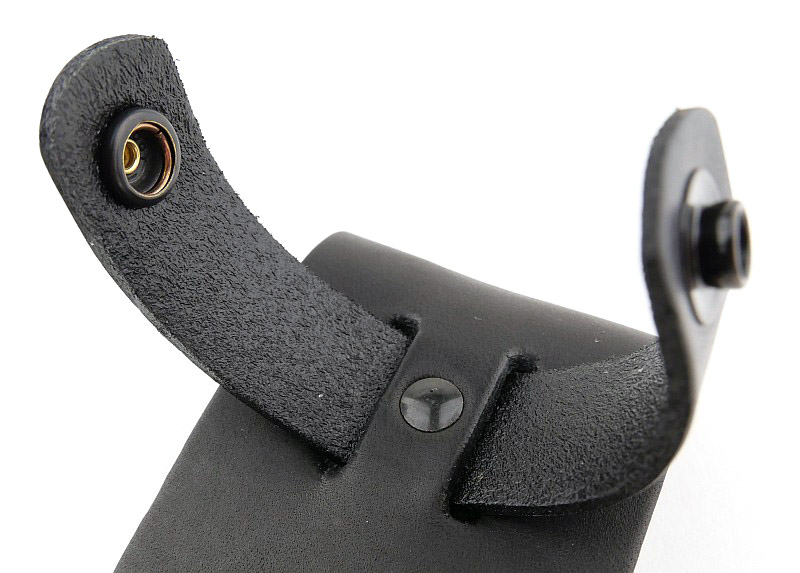
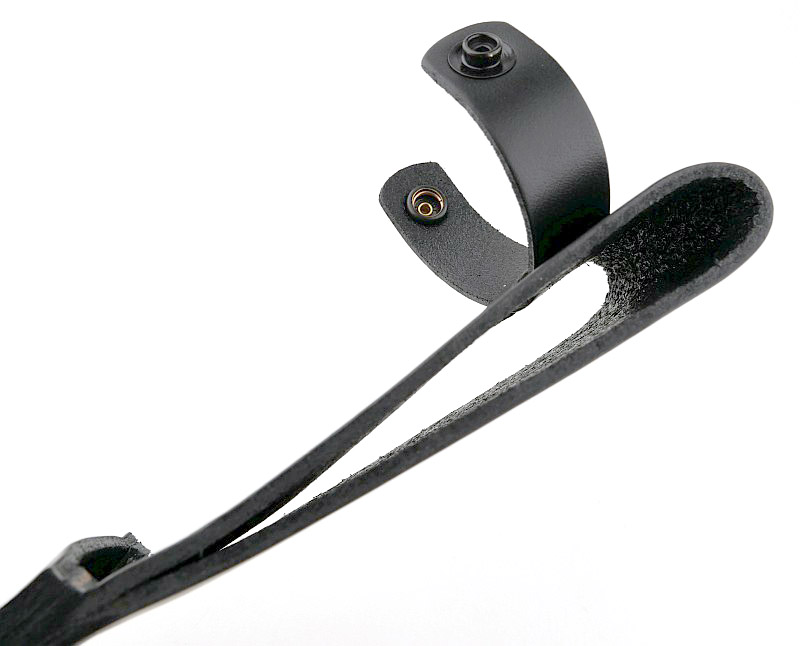
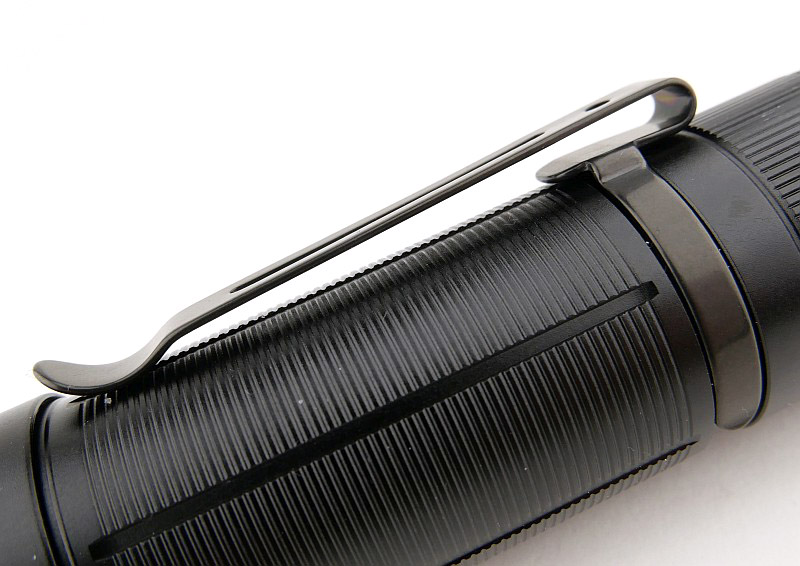
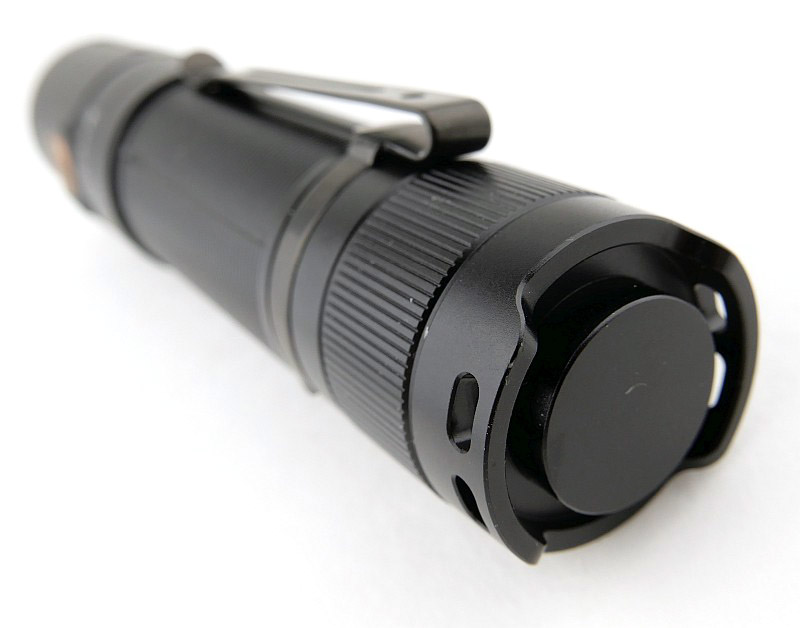
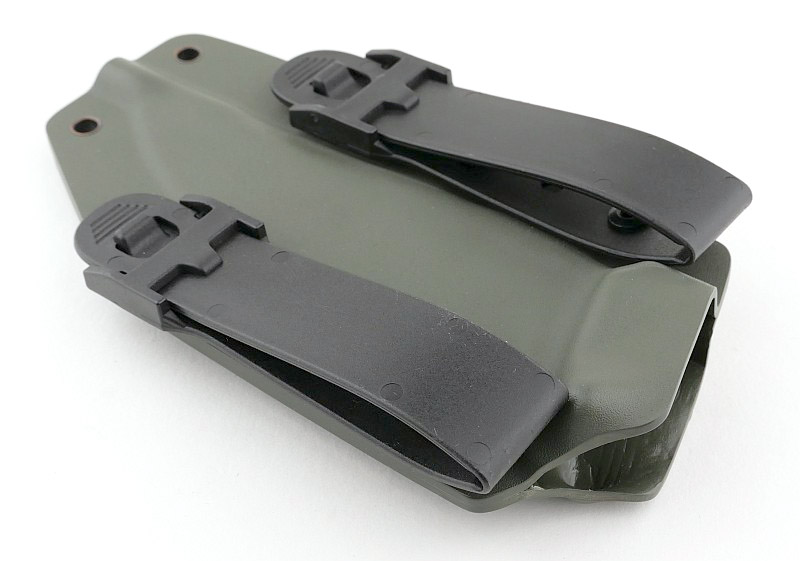
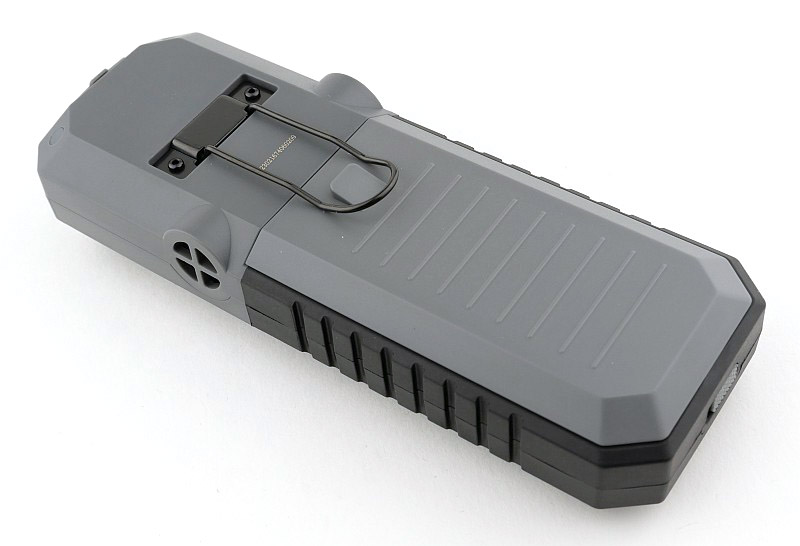
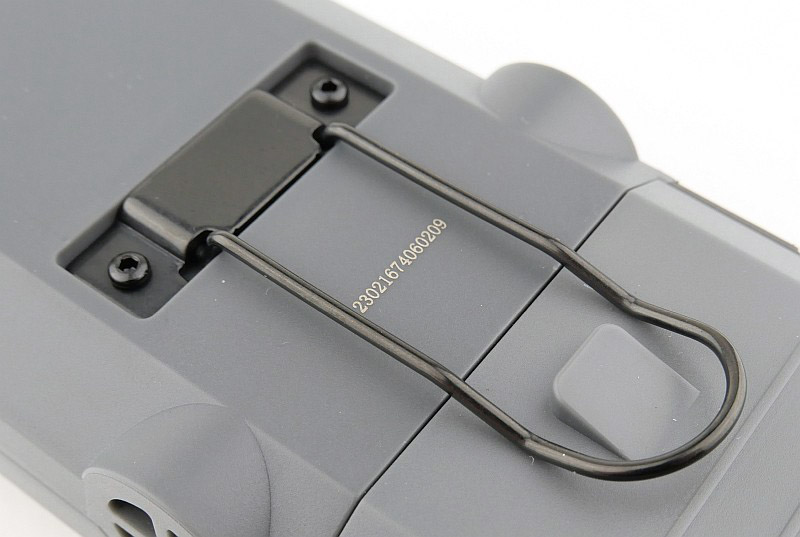
A black PVD coated pocket clip can be fitted on either side or removed completely.
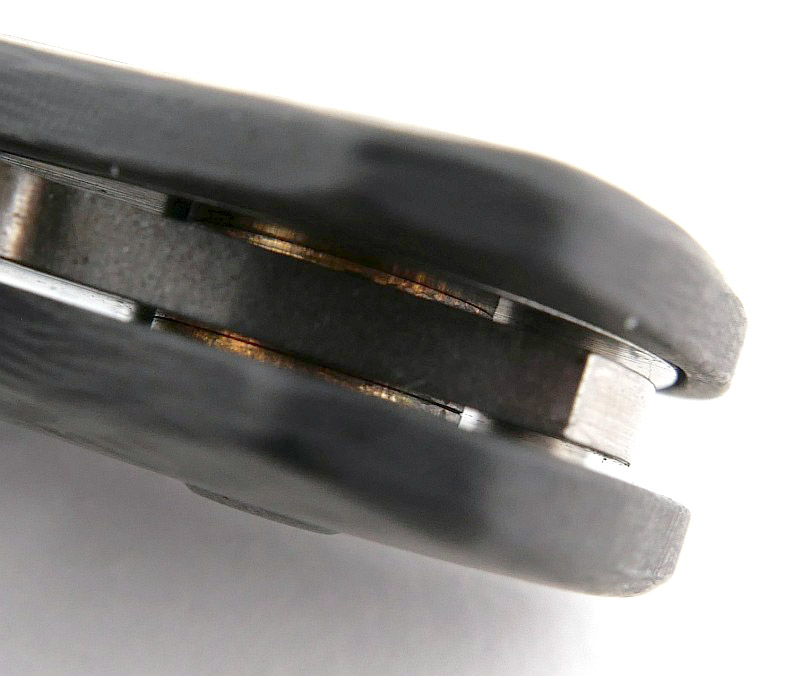
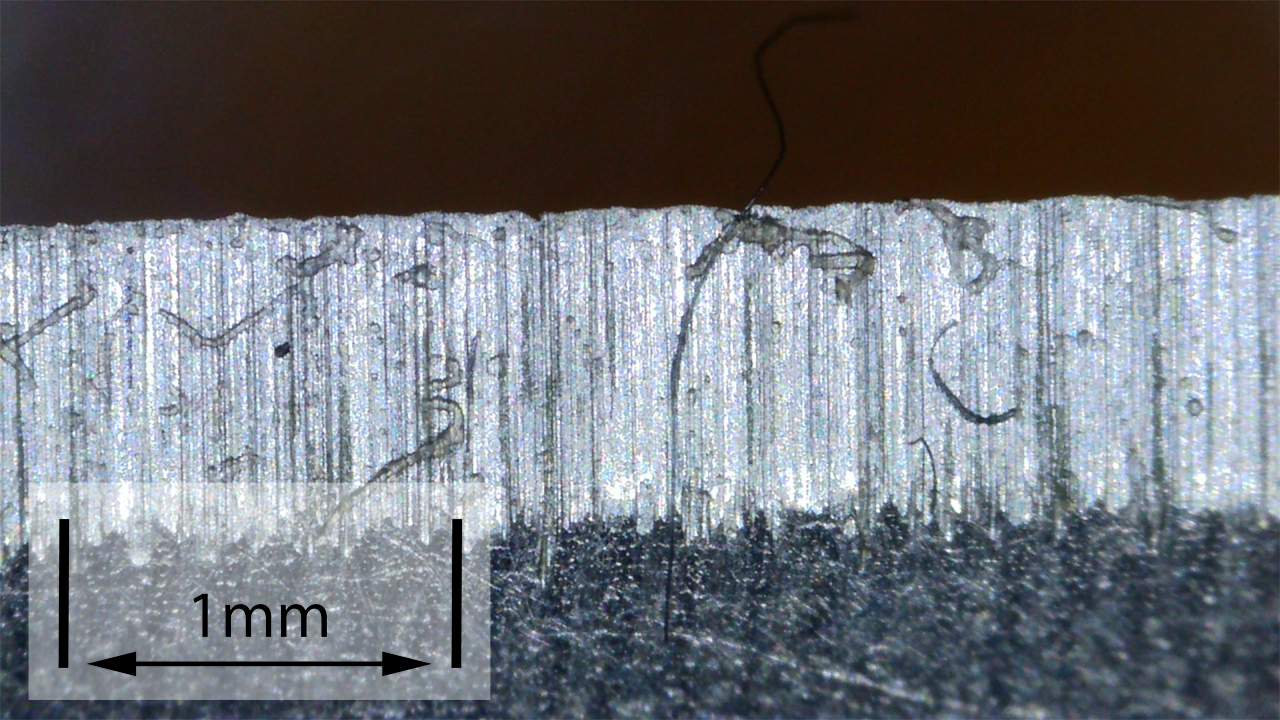
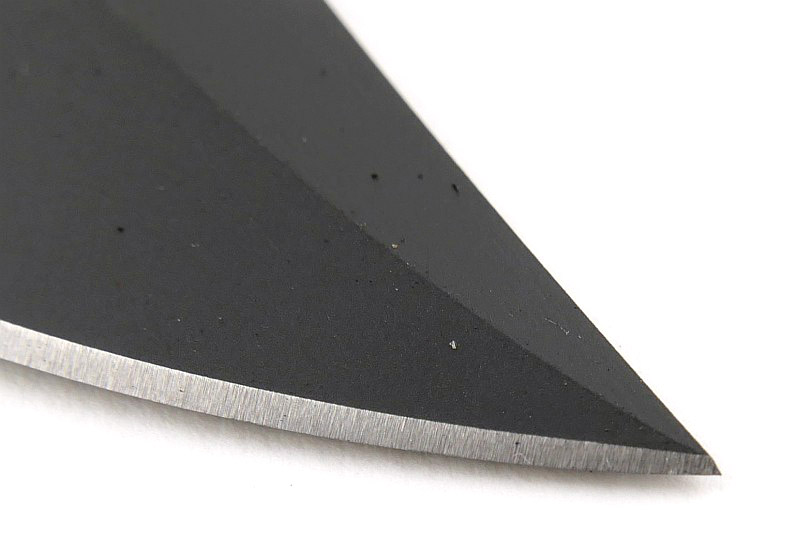
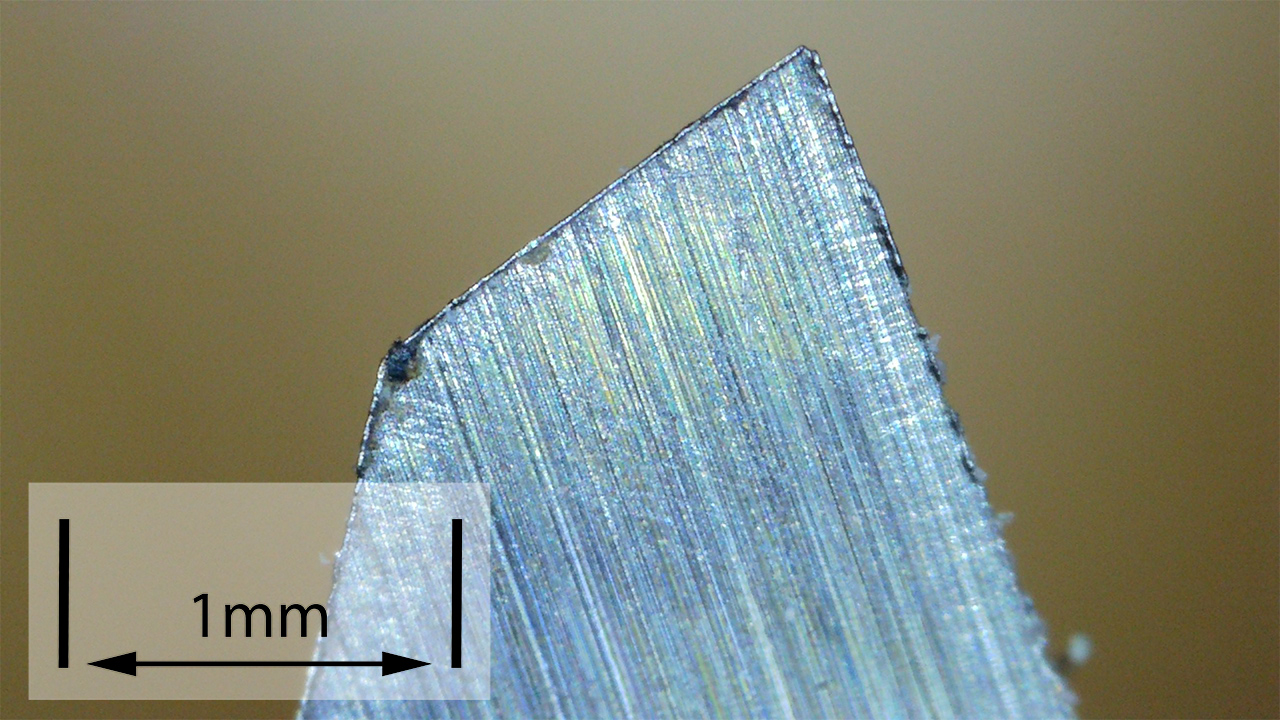
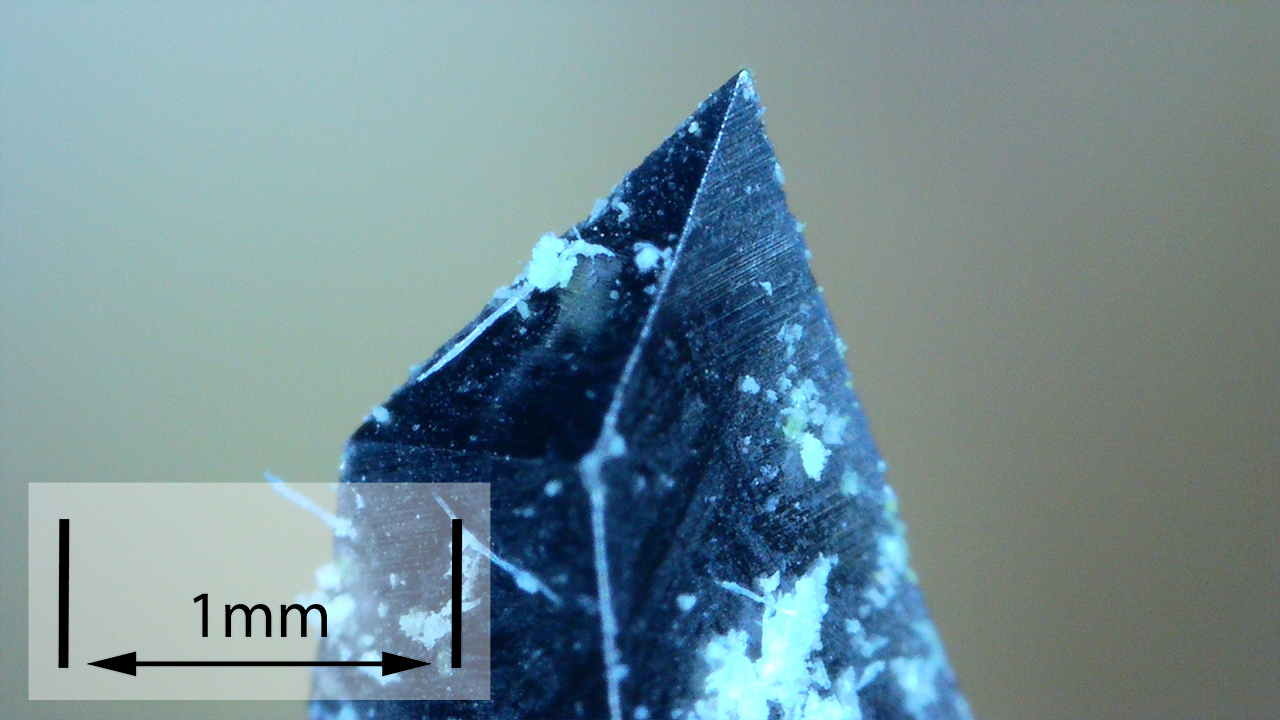
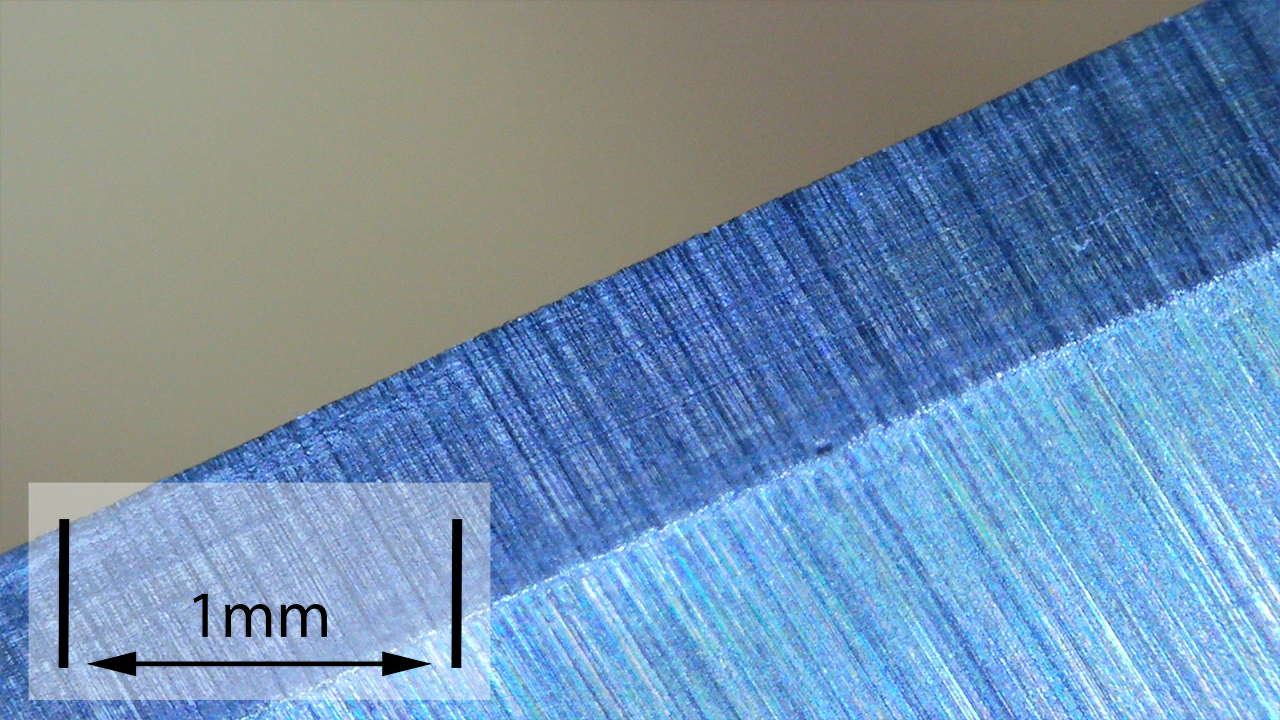
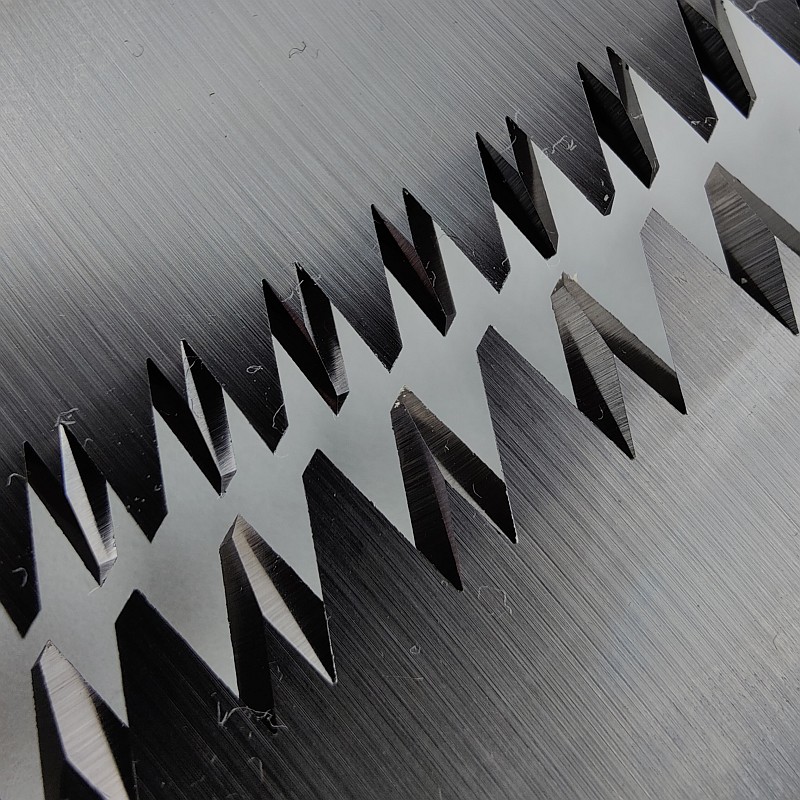
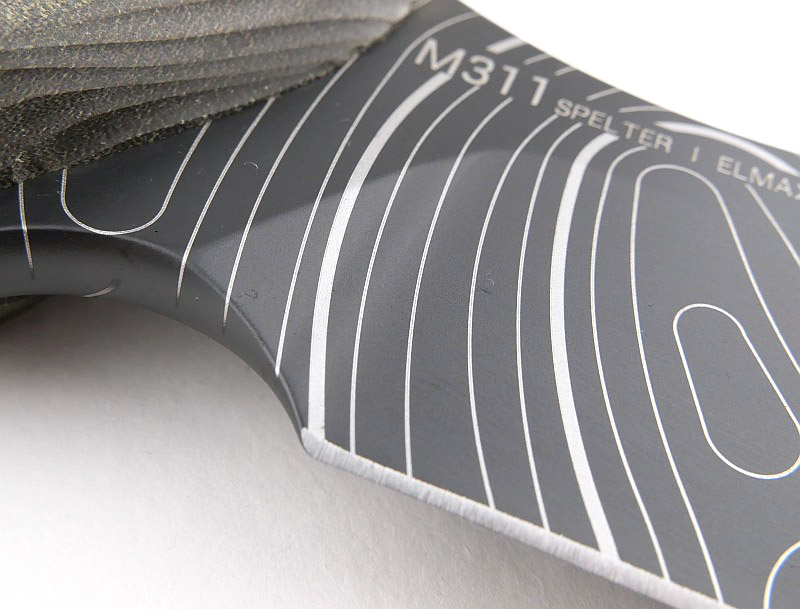
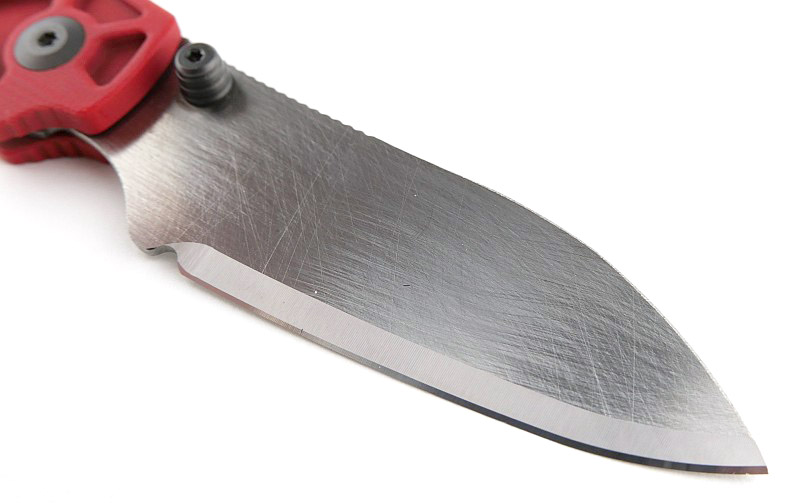
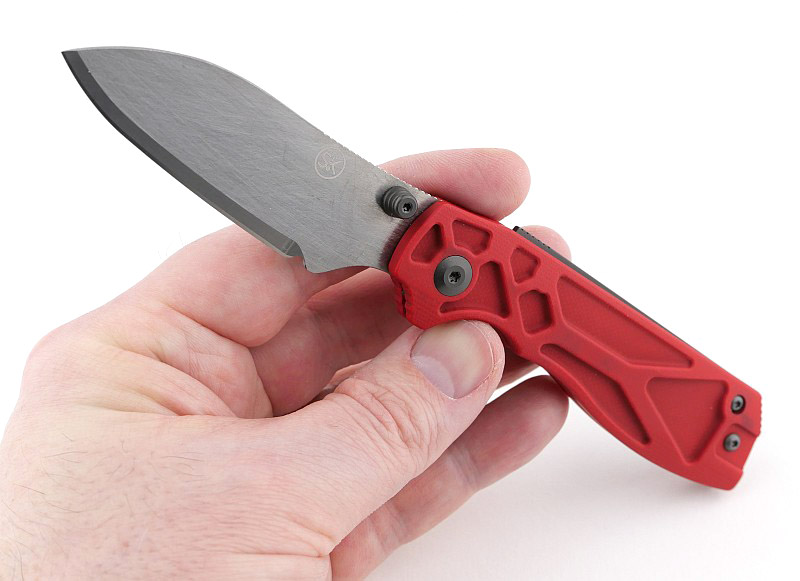
The Polyhedral Tungsten Carbide blade’s raw TC finish adds further to the distinctiveness of this knife combined with the fact the Torino’s blade is super slim at a maximum of only 1.2mm thick!
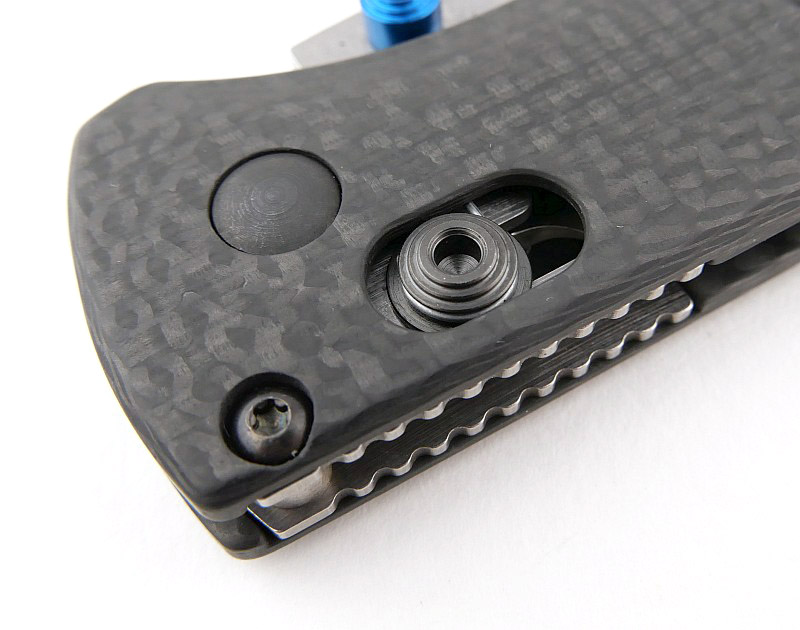
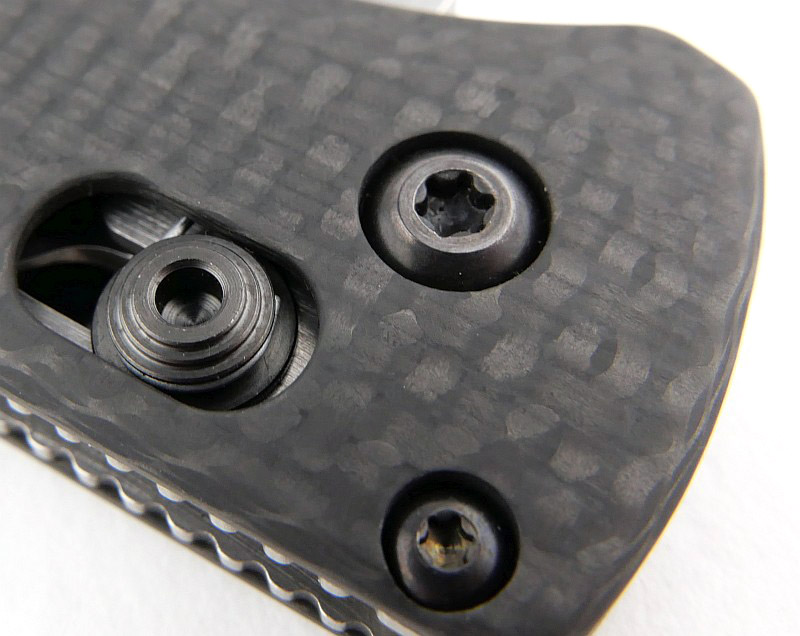
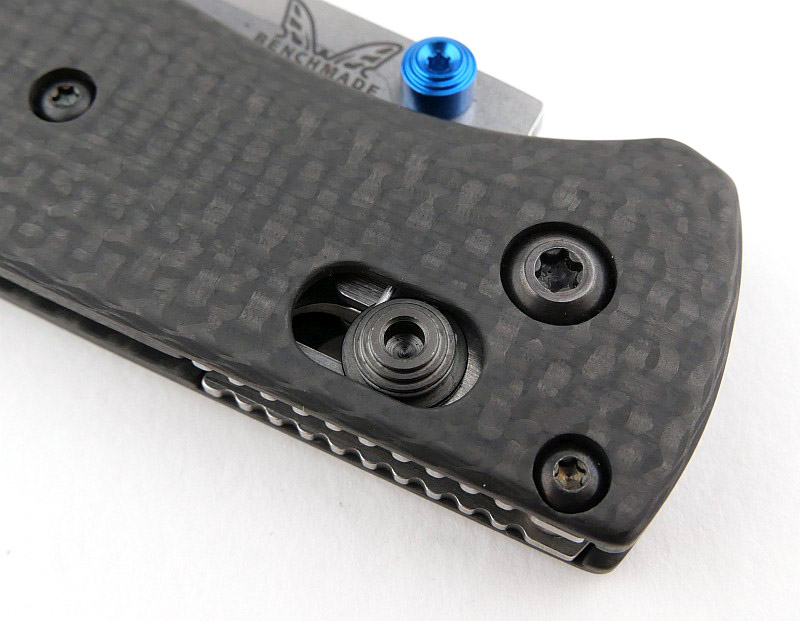
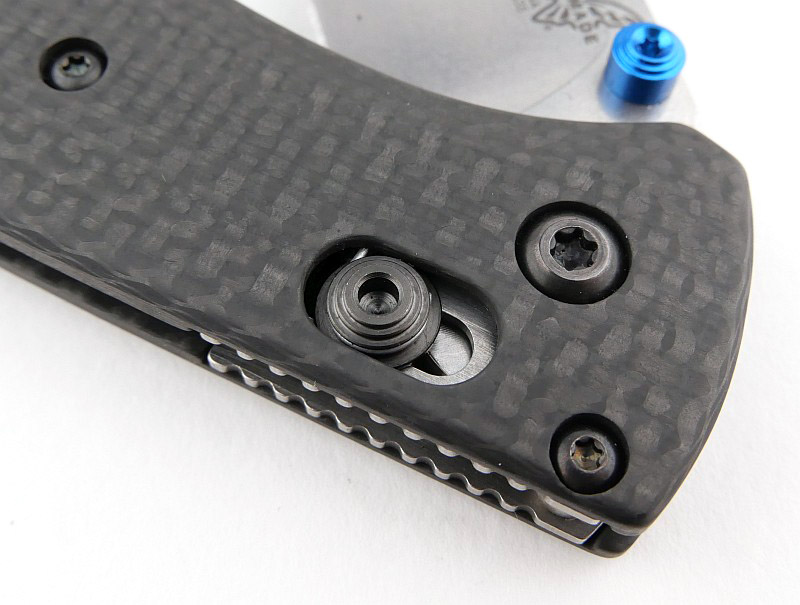
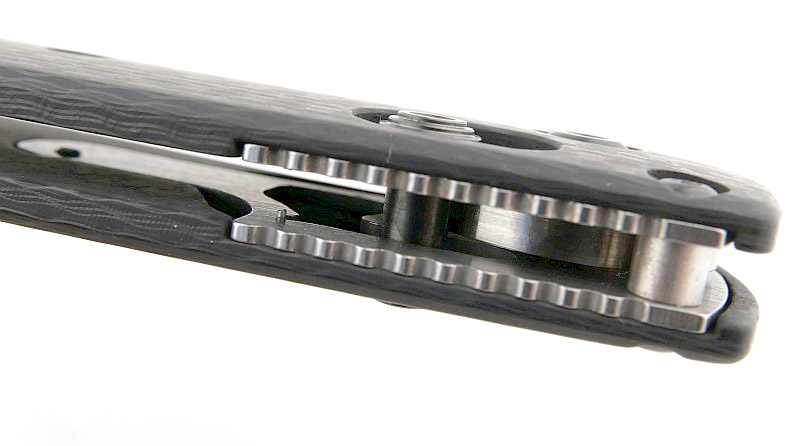
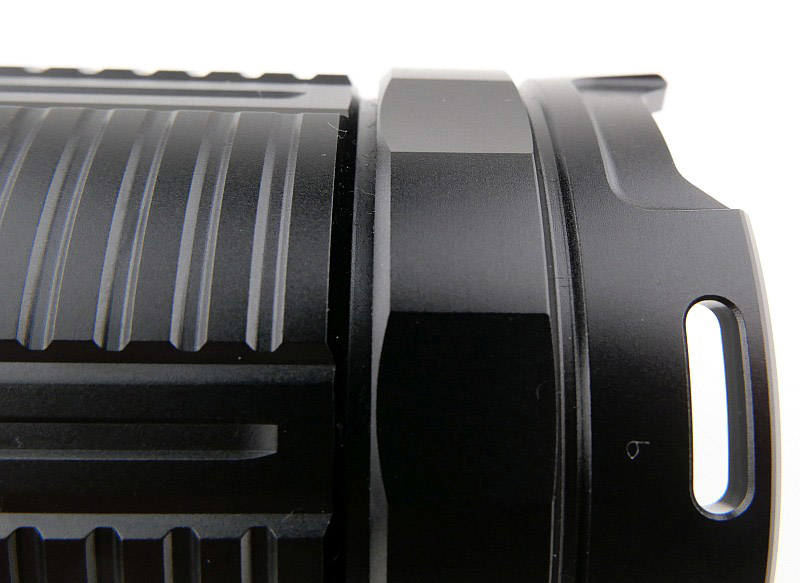
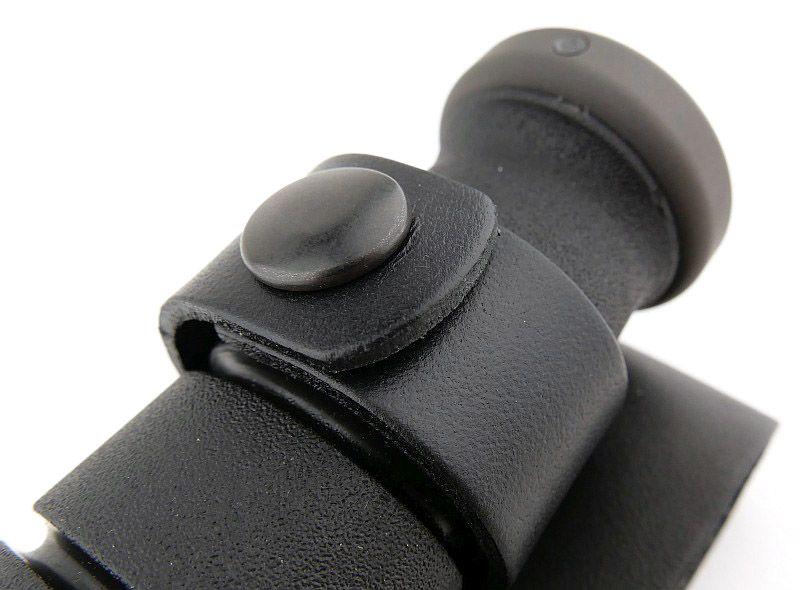
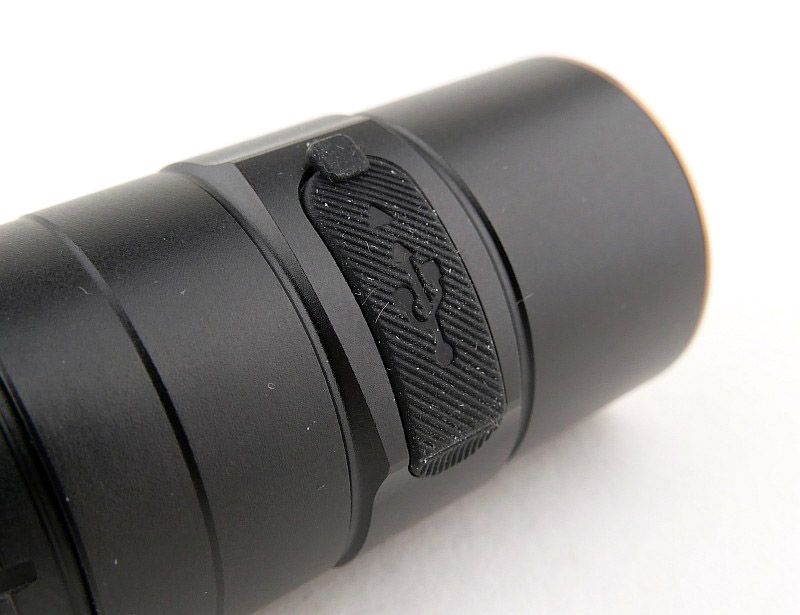
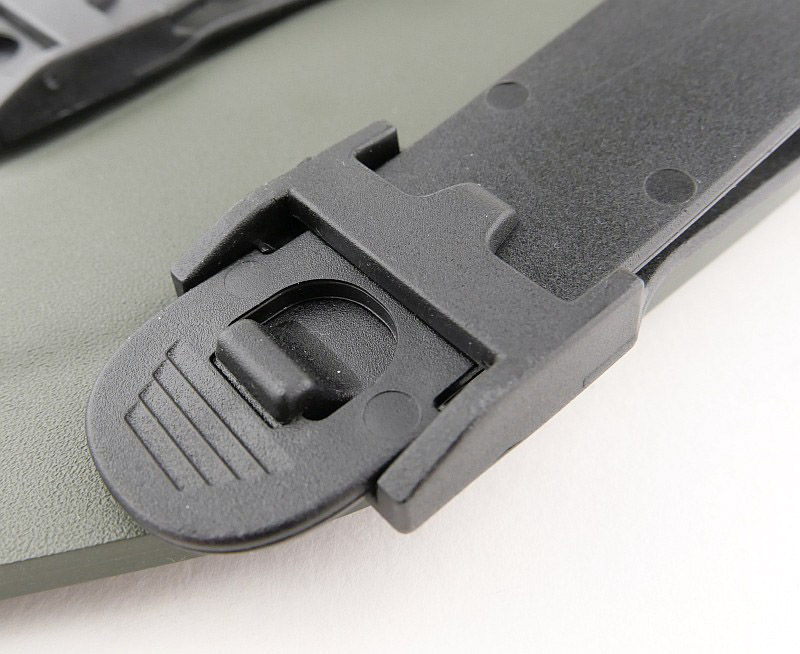
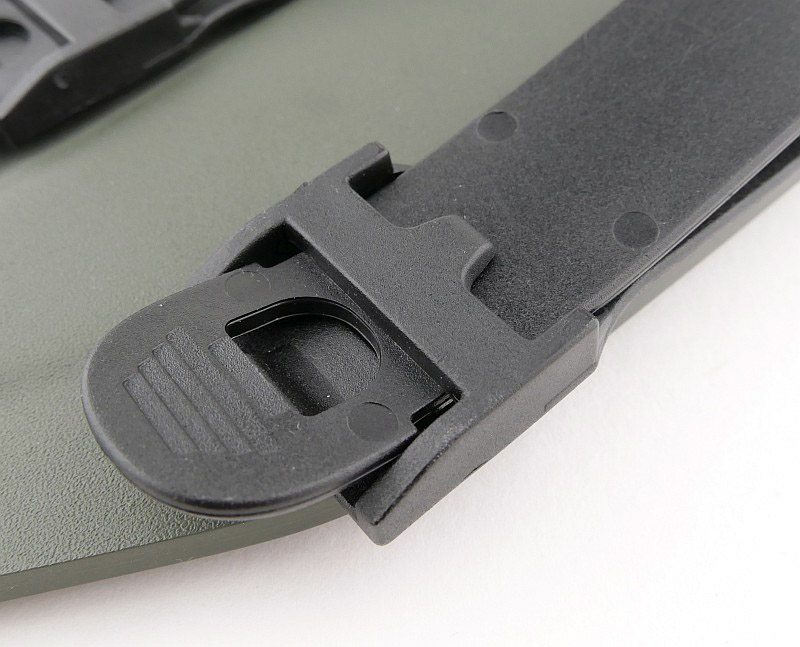
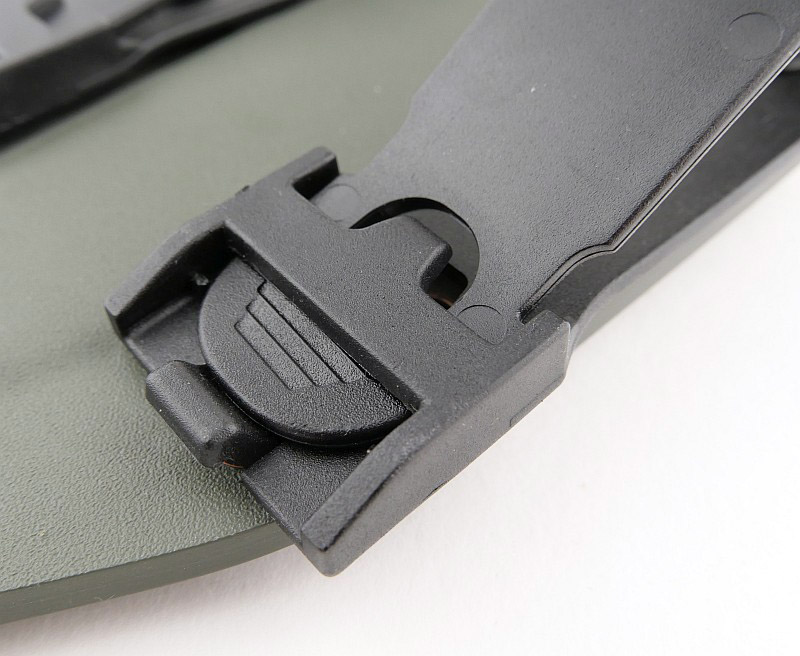
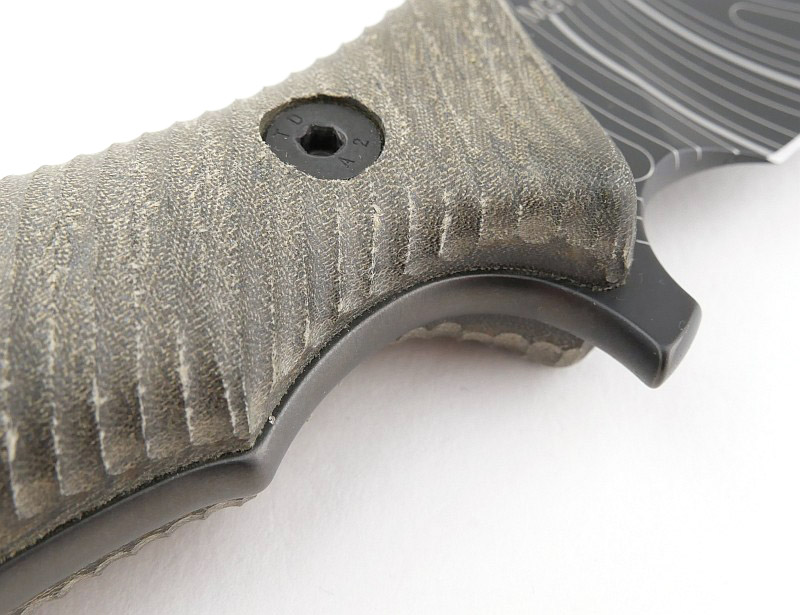
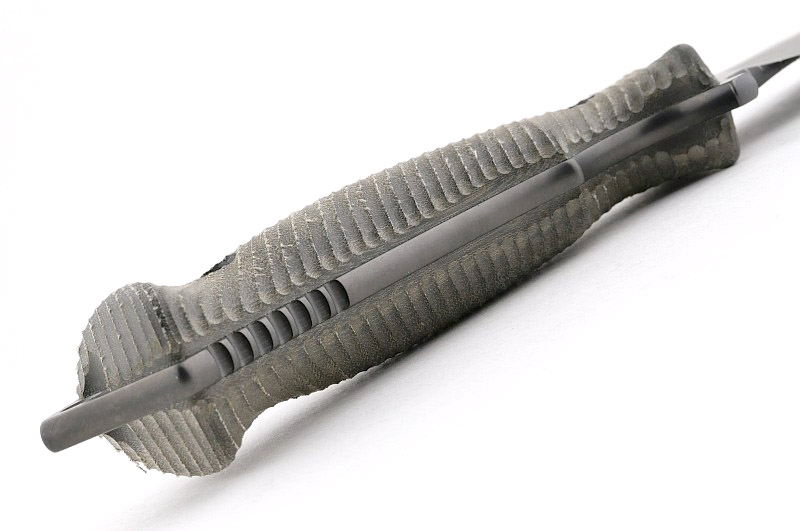
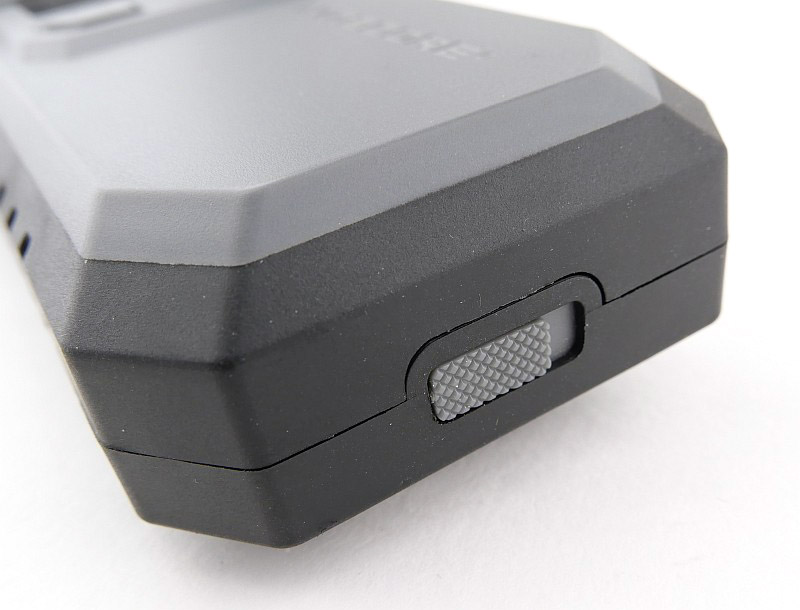
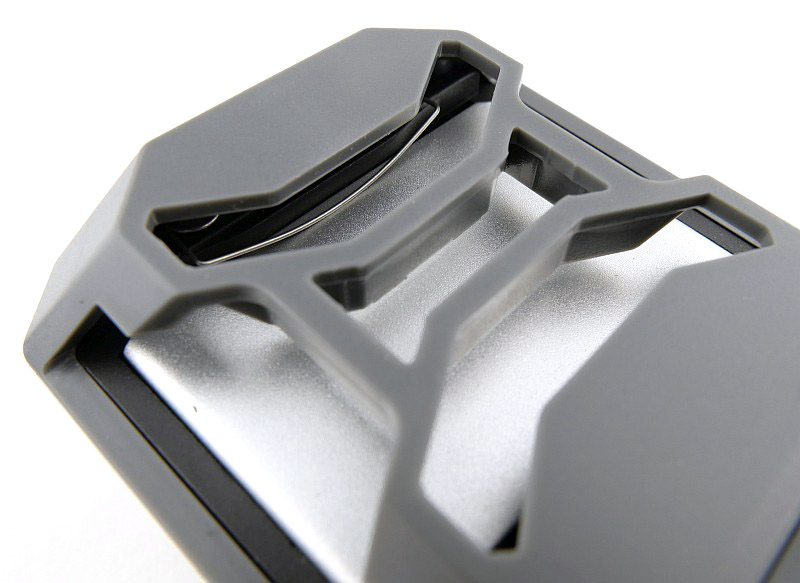
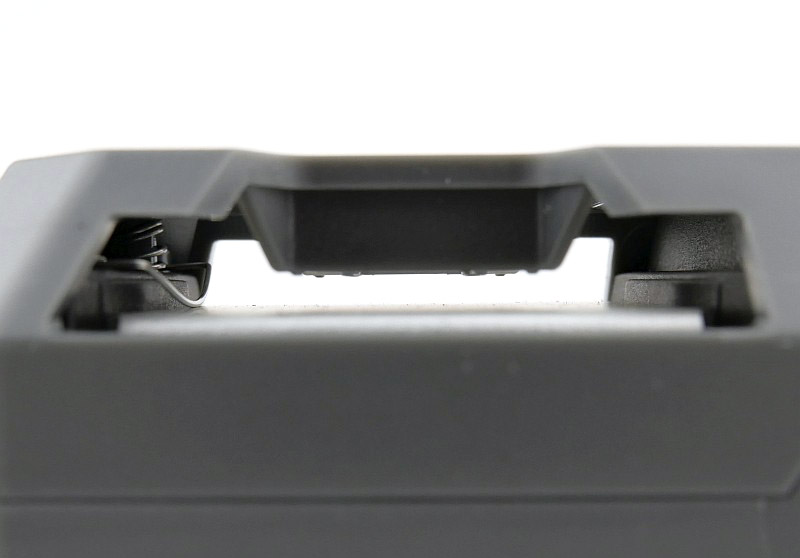
Sandrin Knives have used a Recoil Lock for the Torino with a sliding back spacer lock lever on the back of the handle.
PTC, being super-hard at HRC 71, gives the Torino’s blade a very different look on the primary and edge bevel grinds.

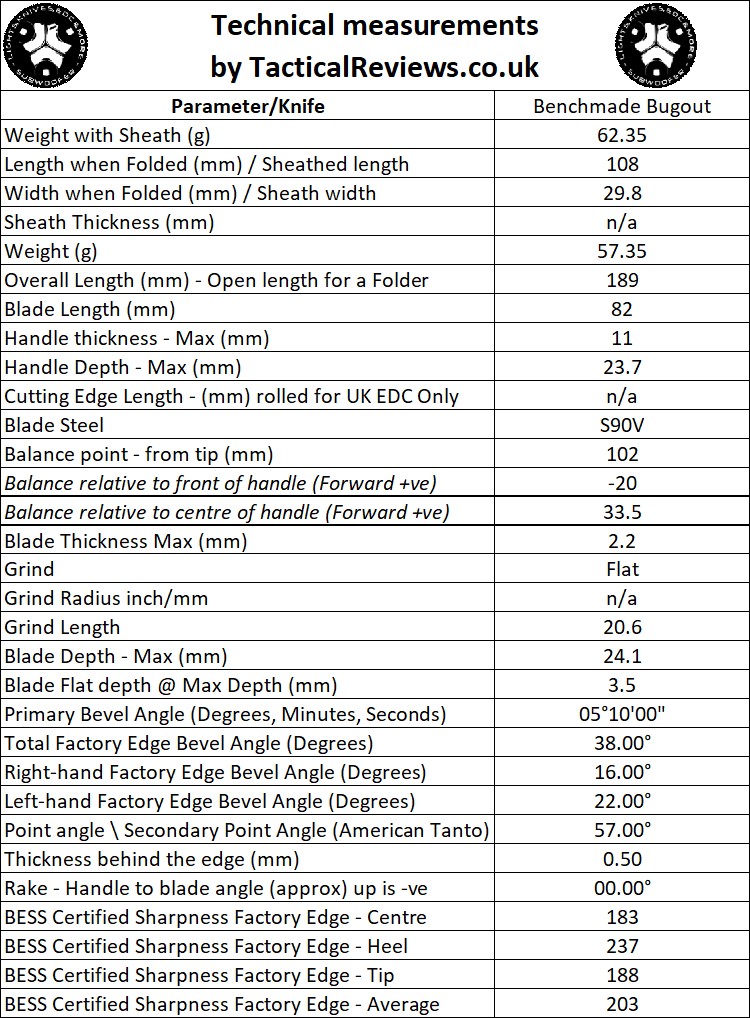
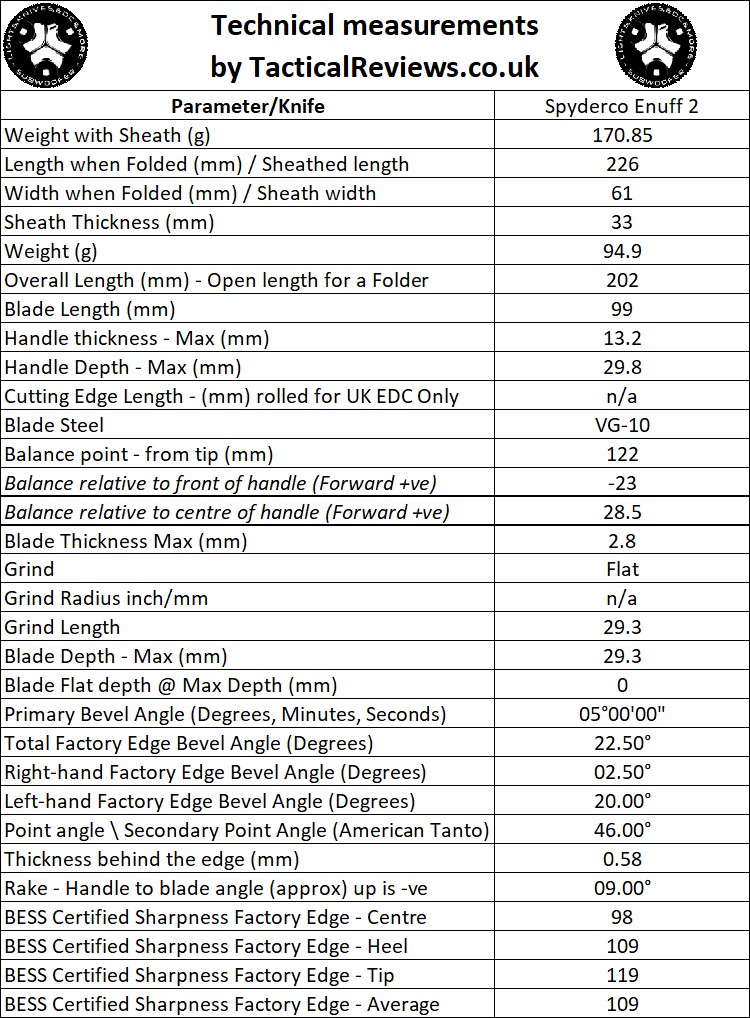
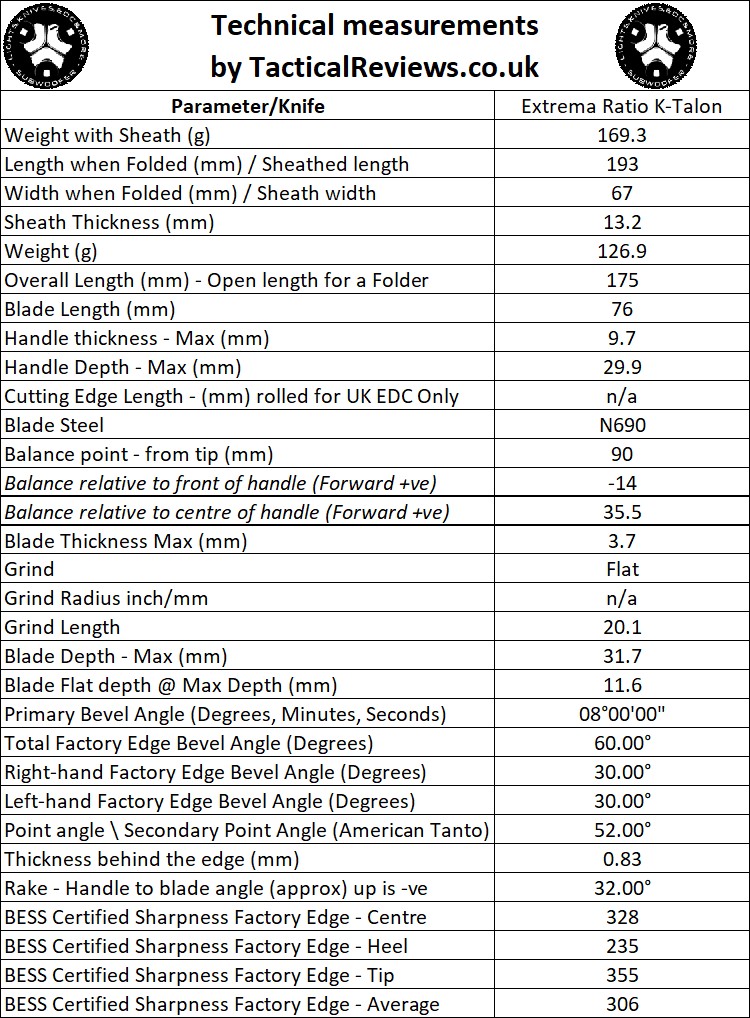
The Blade and Handle – Detailed Measurements:
For full details of the tests and measurements carried out and an explanation of the results, see the page – Knife Technical Testing – How It’s Done.
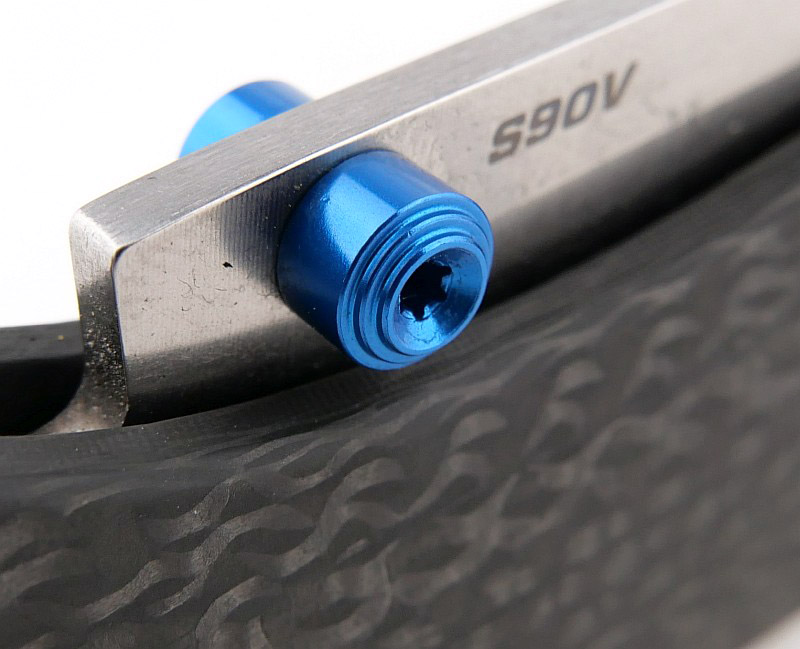
The blade is made from Polyhedral Tungsten Carbide.
Explained by the Maker:
With the unique material used for this knife blade, I’m including the manufacturer’s own description here for ease of reference.
An advancement in the science of blade materials, Sandrin knives are crafted from our patented Polyhedral Tungsten Carbide (PTC), a flexible grade of tungsten carbide that outperforms steel in edge retention. Measuring HRC 71 on the Rockwell scale of hardness, Torino retains its razor-sharp edge far beyond steel knives. We call this StaySharp Technology™. New for Torino is the blade’s raw carbide finish – its striking appearance is achieved by grinding the PTC with fine diamonds. Unlike steel, the Torino blade is completely rustproof making it suitable for both fresh and saltwater conditions. The blade’s thumb ramp features carefully executed jimping, while the rest of the spine and finger choil is chamfered for comfort.
Torino’s ceramic ball bearing action provides for a smooth opening and closing experience. A robust thumb stud provides for one handed blade deployment. But what really makes the Torino a modern marvel is a completely redesigned mechanism we call the Recoil Lock. This ingenious locking system is a gift to the knife community by knife wunderkind Snecx Tan, who refers to it as his PowerLock. Thank you, Snecx, for this remarkable innovation. The beauty of Tan’s recoil lock is the simple yet efficient design. The ambidextrous action delivers positive force (grip) to secure the blade in its rock-solid open position. Closing the knife is accomplished by sliding the backspacer to the rear, eliminating accidental blade unlock.
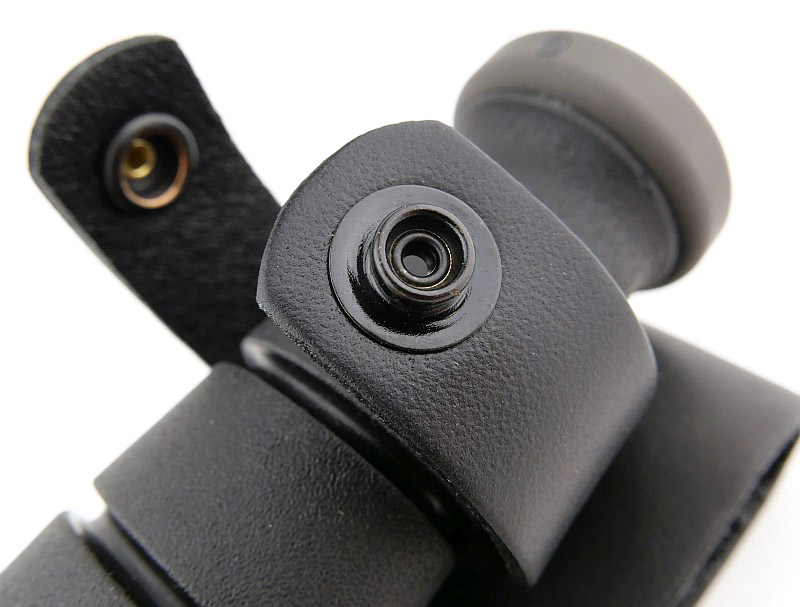
High-visibility red G-10 handles provide for quick acquisition in emergency situations. Stylized pockets serve to both reduce weight and add tactile feel for positive grip engagement. A reversible titanium pocket clip enables right- or left-hand carry and features our Fibonacci hole sequence design, a distinctive mathematical trademark of Sandrin Knives.
At only 2.29 ounces, Torino is so lightweight it practically disappears in your pocket. And, with a blade length of 2.95 inches, it’s also legal to carry in most jurisdictions.
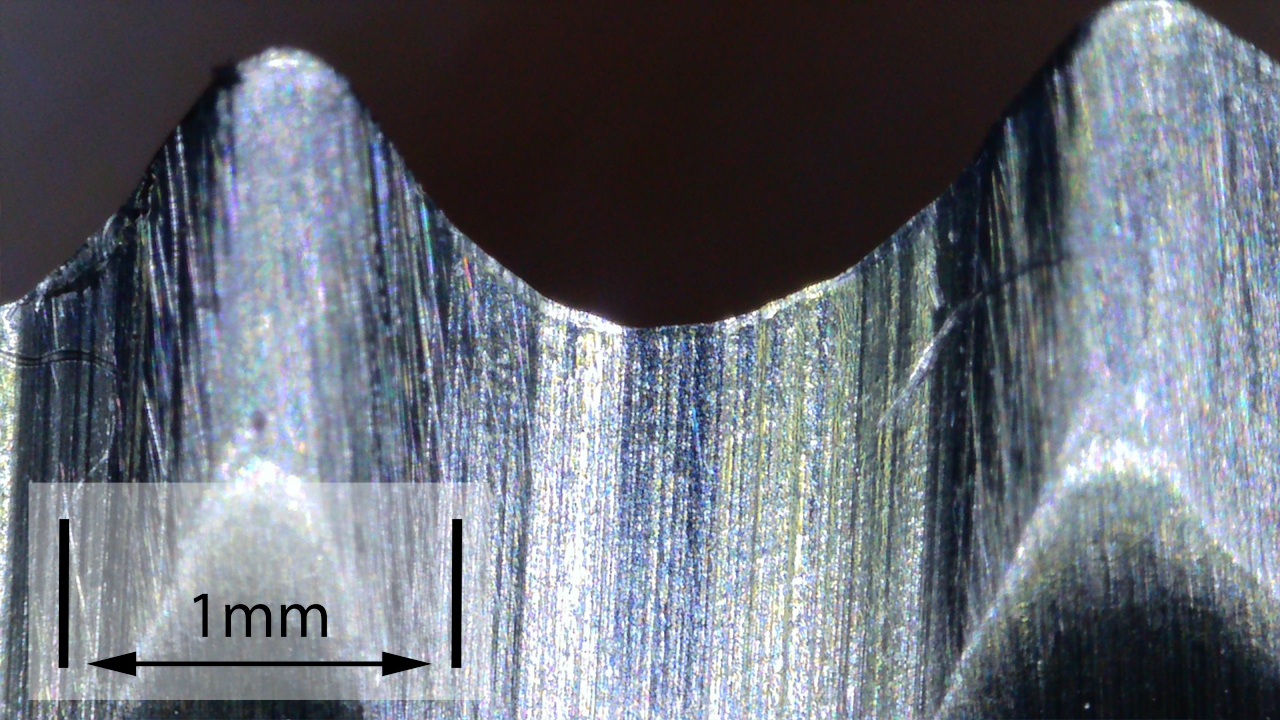
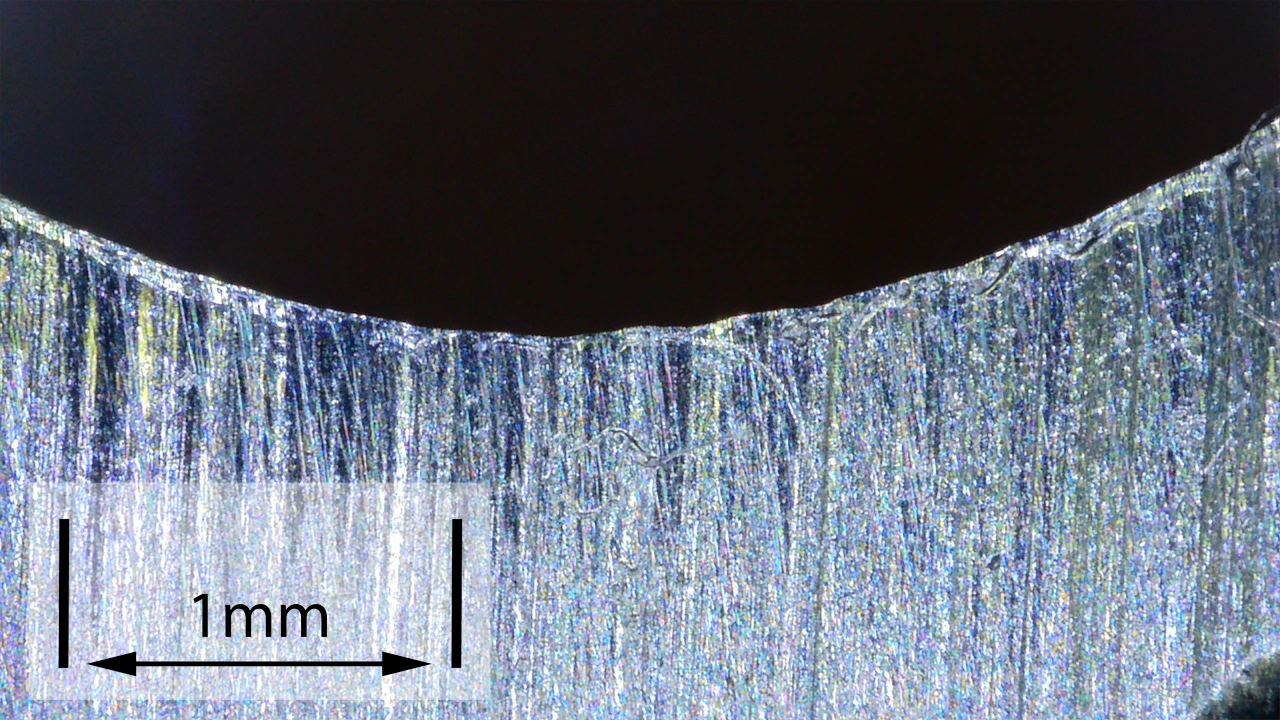
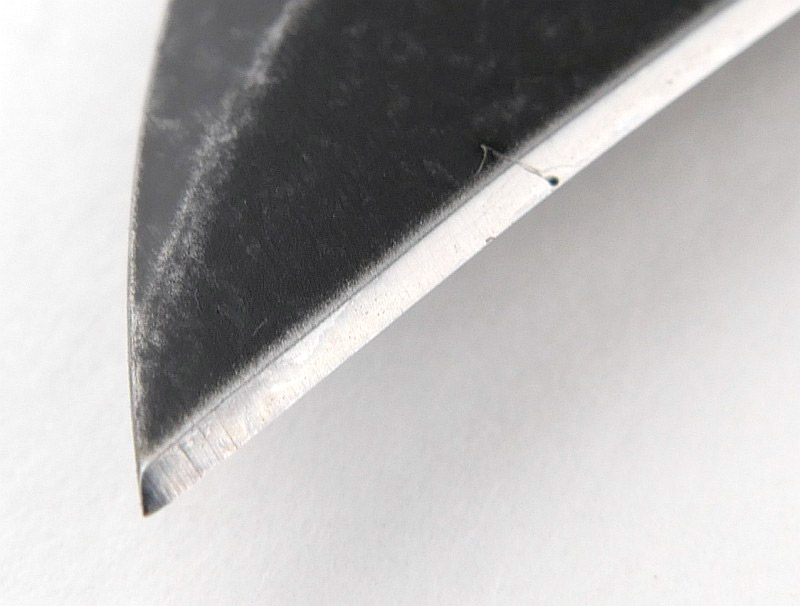
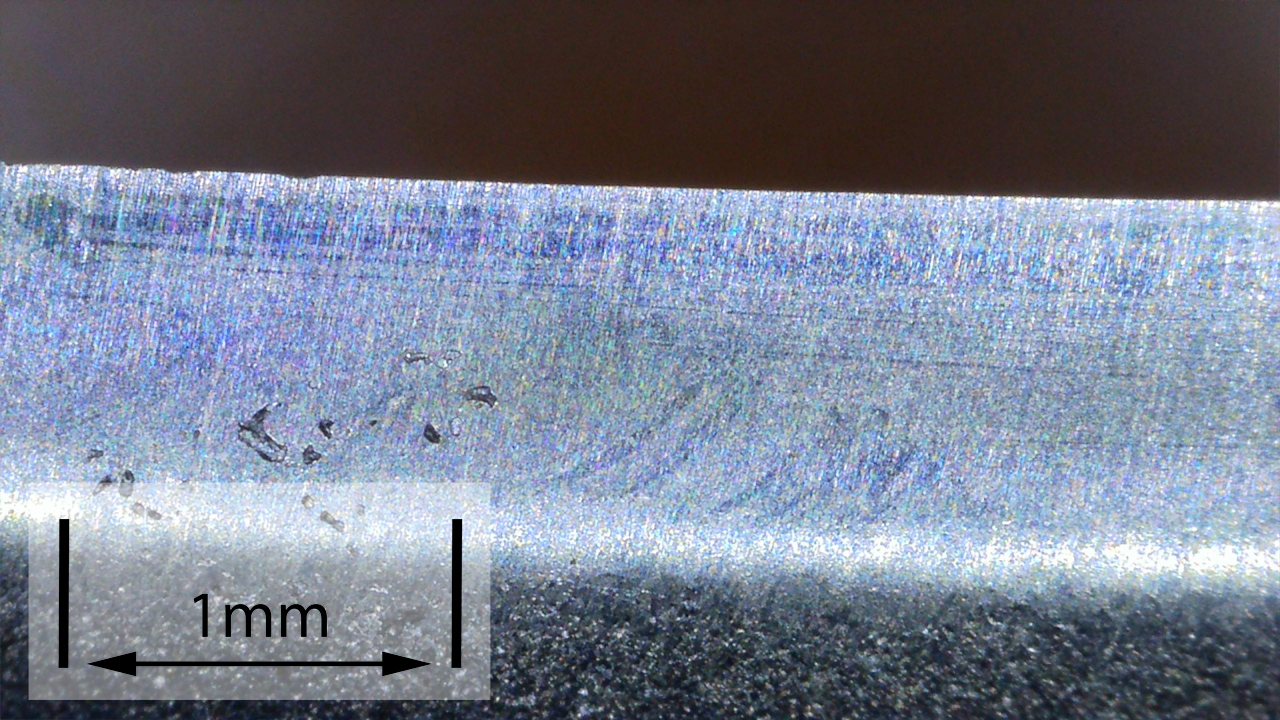
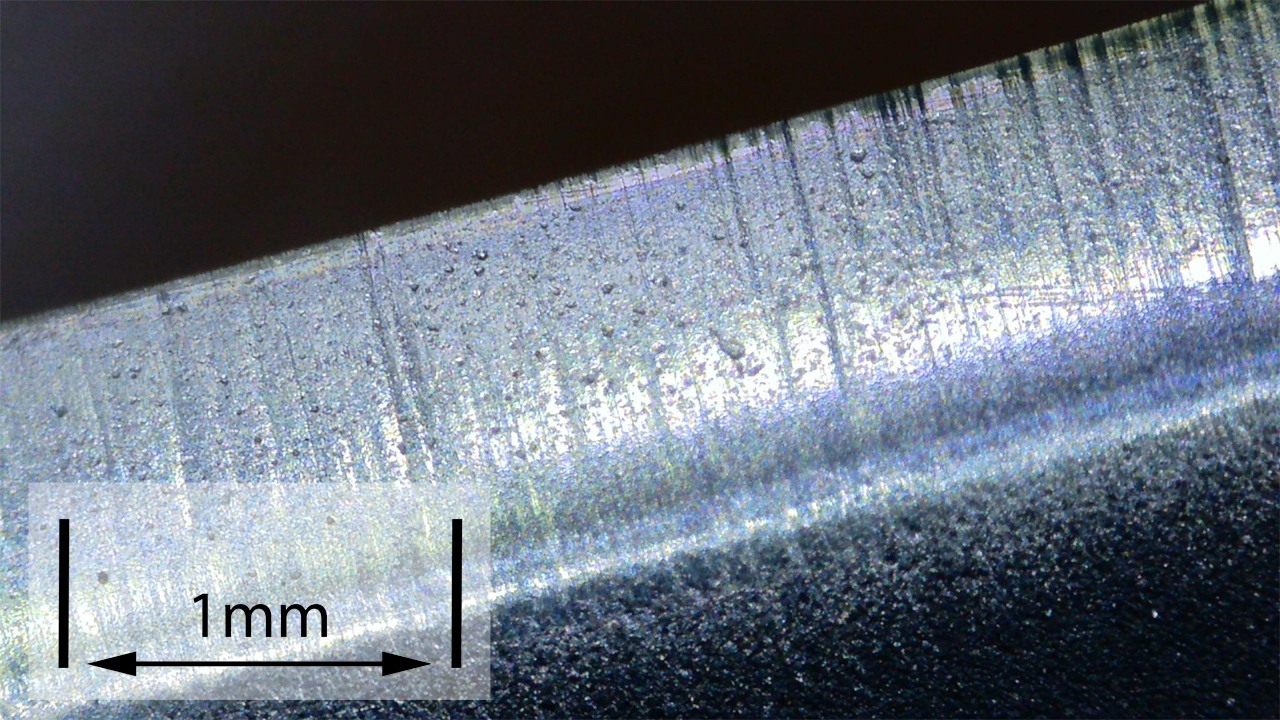
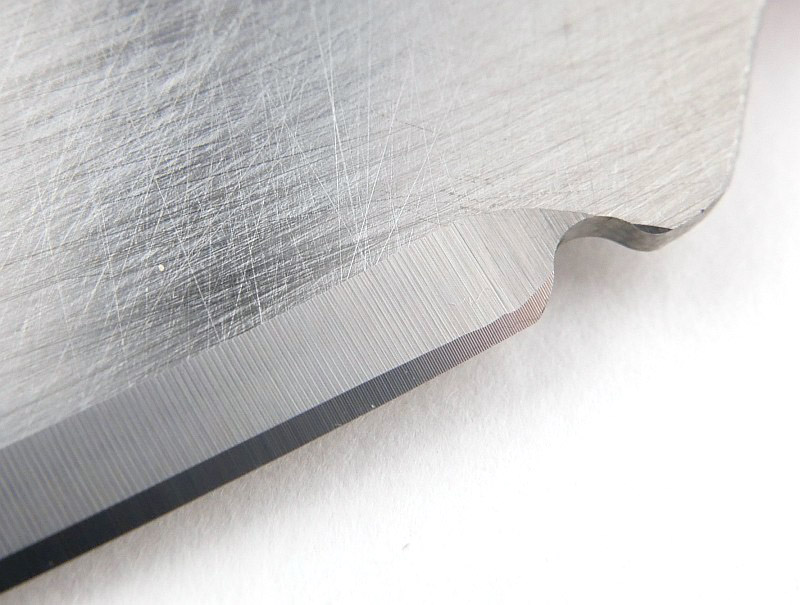
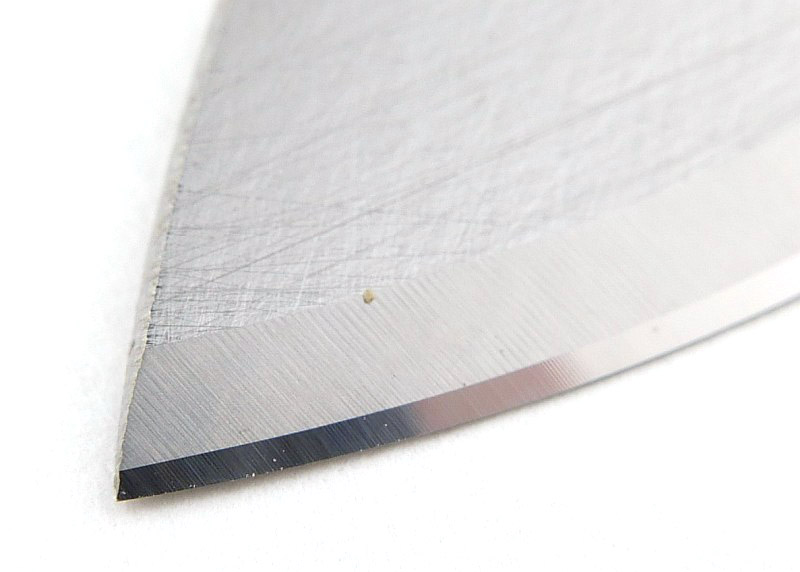
The Factory edge up close:
Followers of Tactical Reviews will know my views on factory edges, but to recap:
Anyone using a knife will need to sharpen it. That first factory edge is just like the first tank of fuel that a new car comes with (or first charge of the battery).
A good factory edge is a ‘nice to have’ but not a ‘make or break’ for a good knife, as you will be putting your own edge onto it soon enough.
The factory edge does however indicate the care a knife maker has put into the final finish.
It is for this reason Tactical Reviews measures factory edge sharpness and specifications, and includes this information in the detailed technical testing.
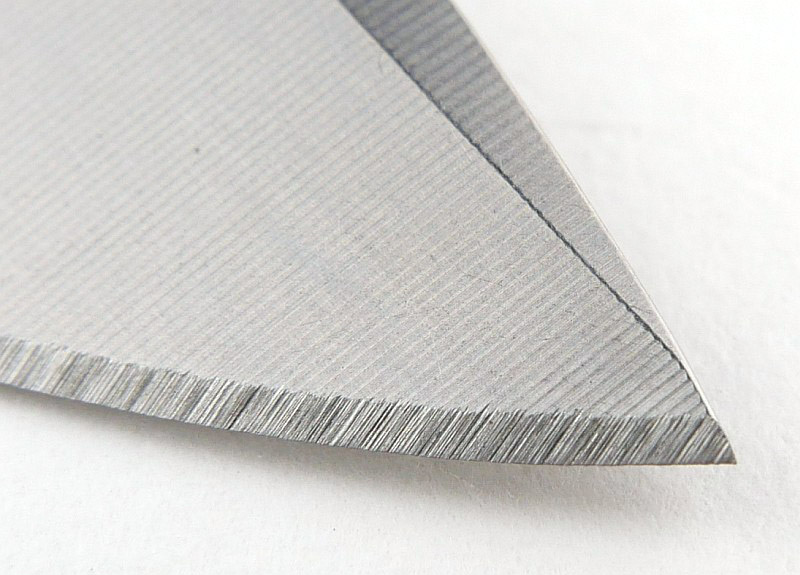
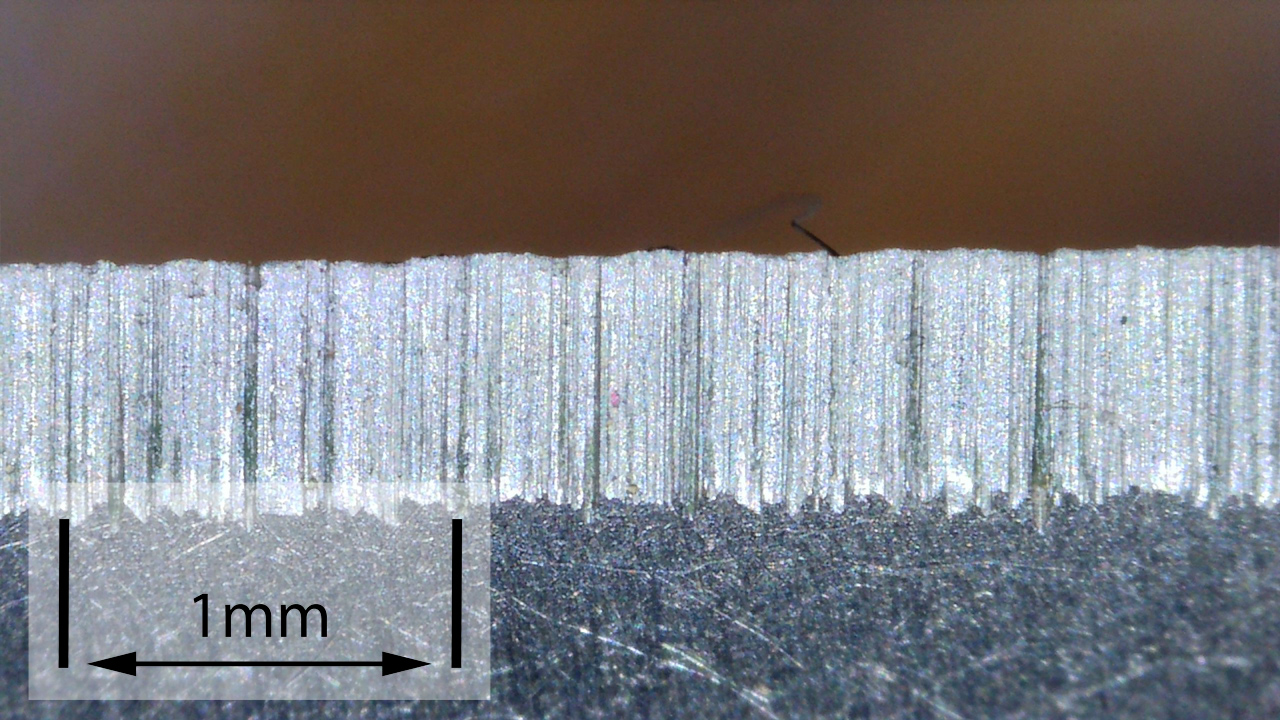
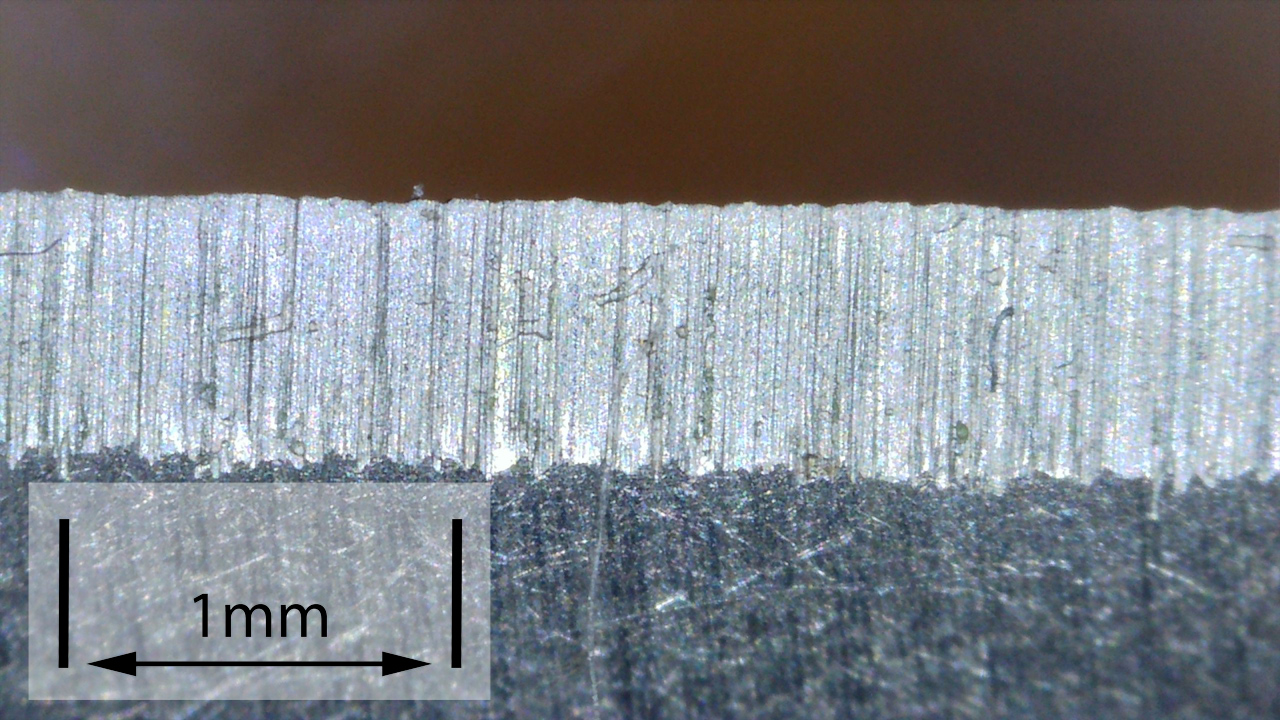
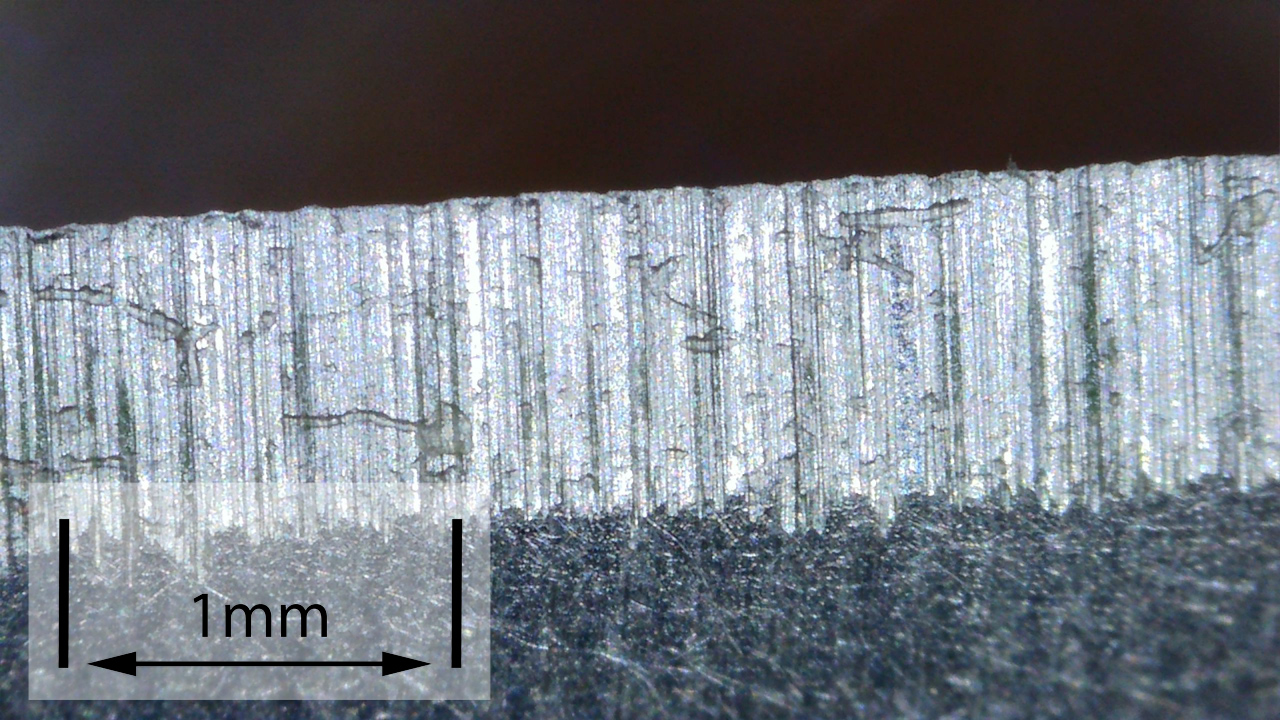
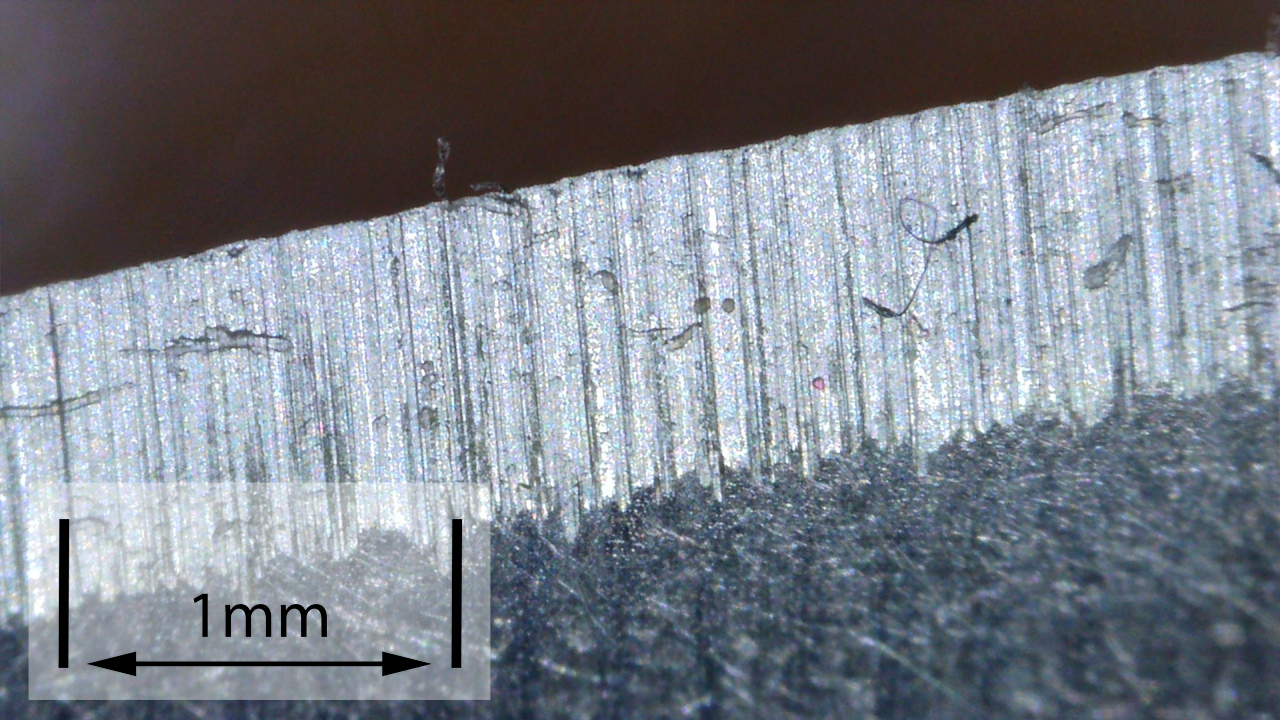
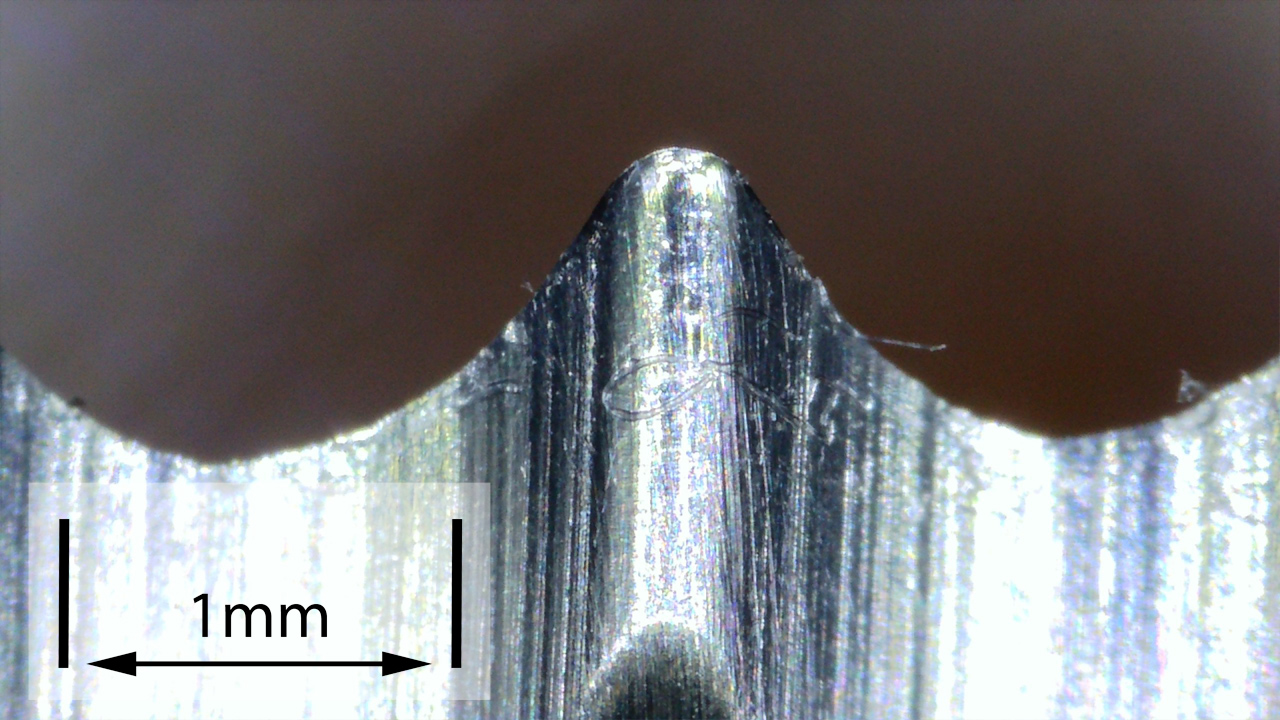
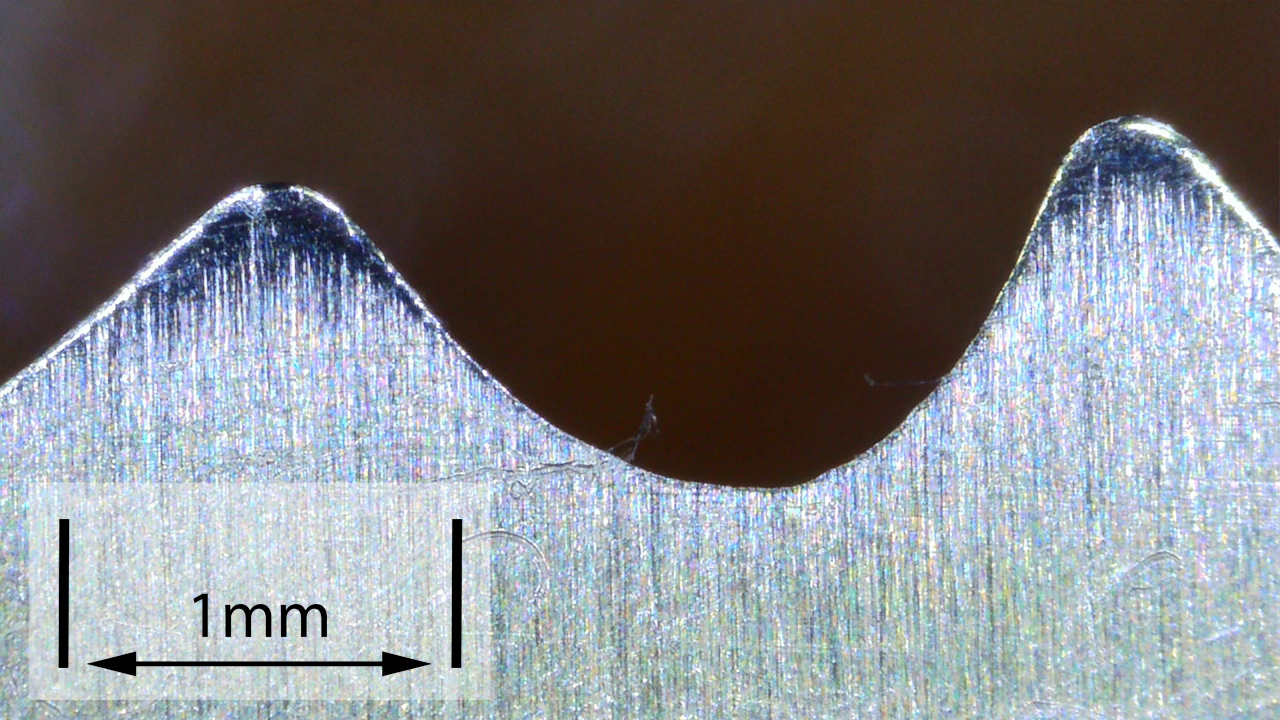
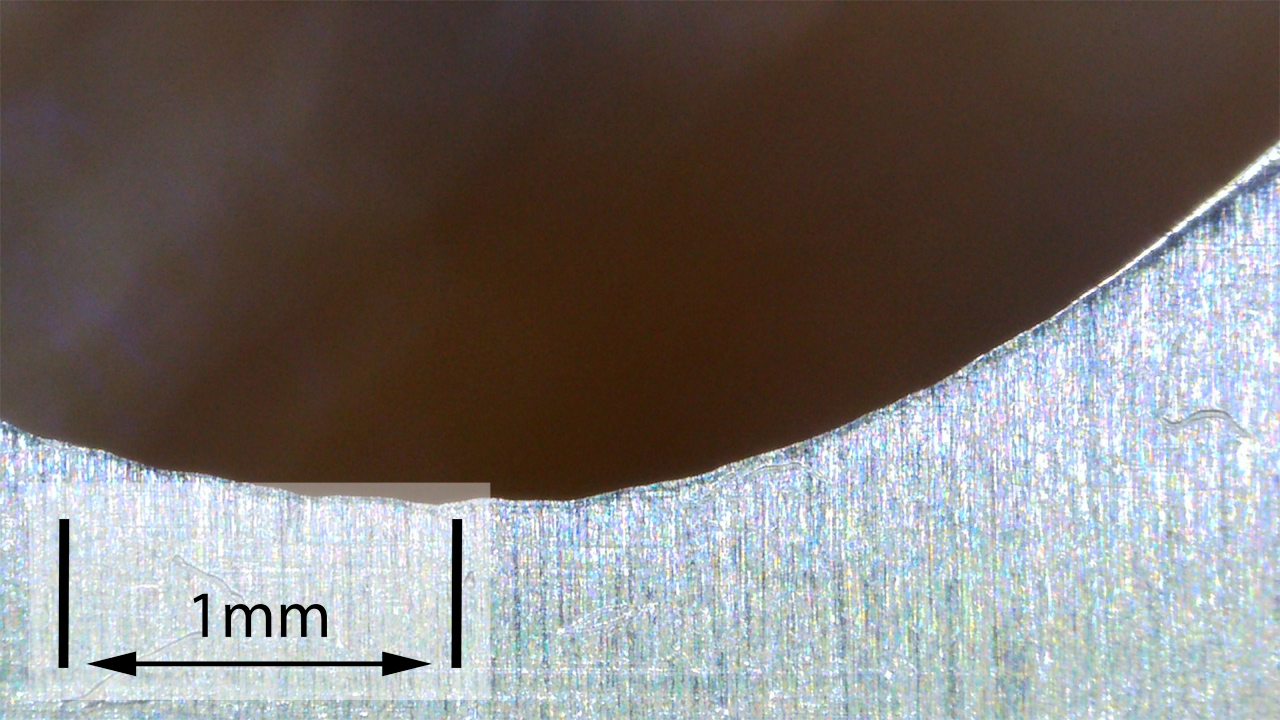
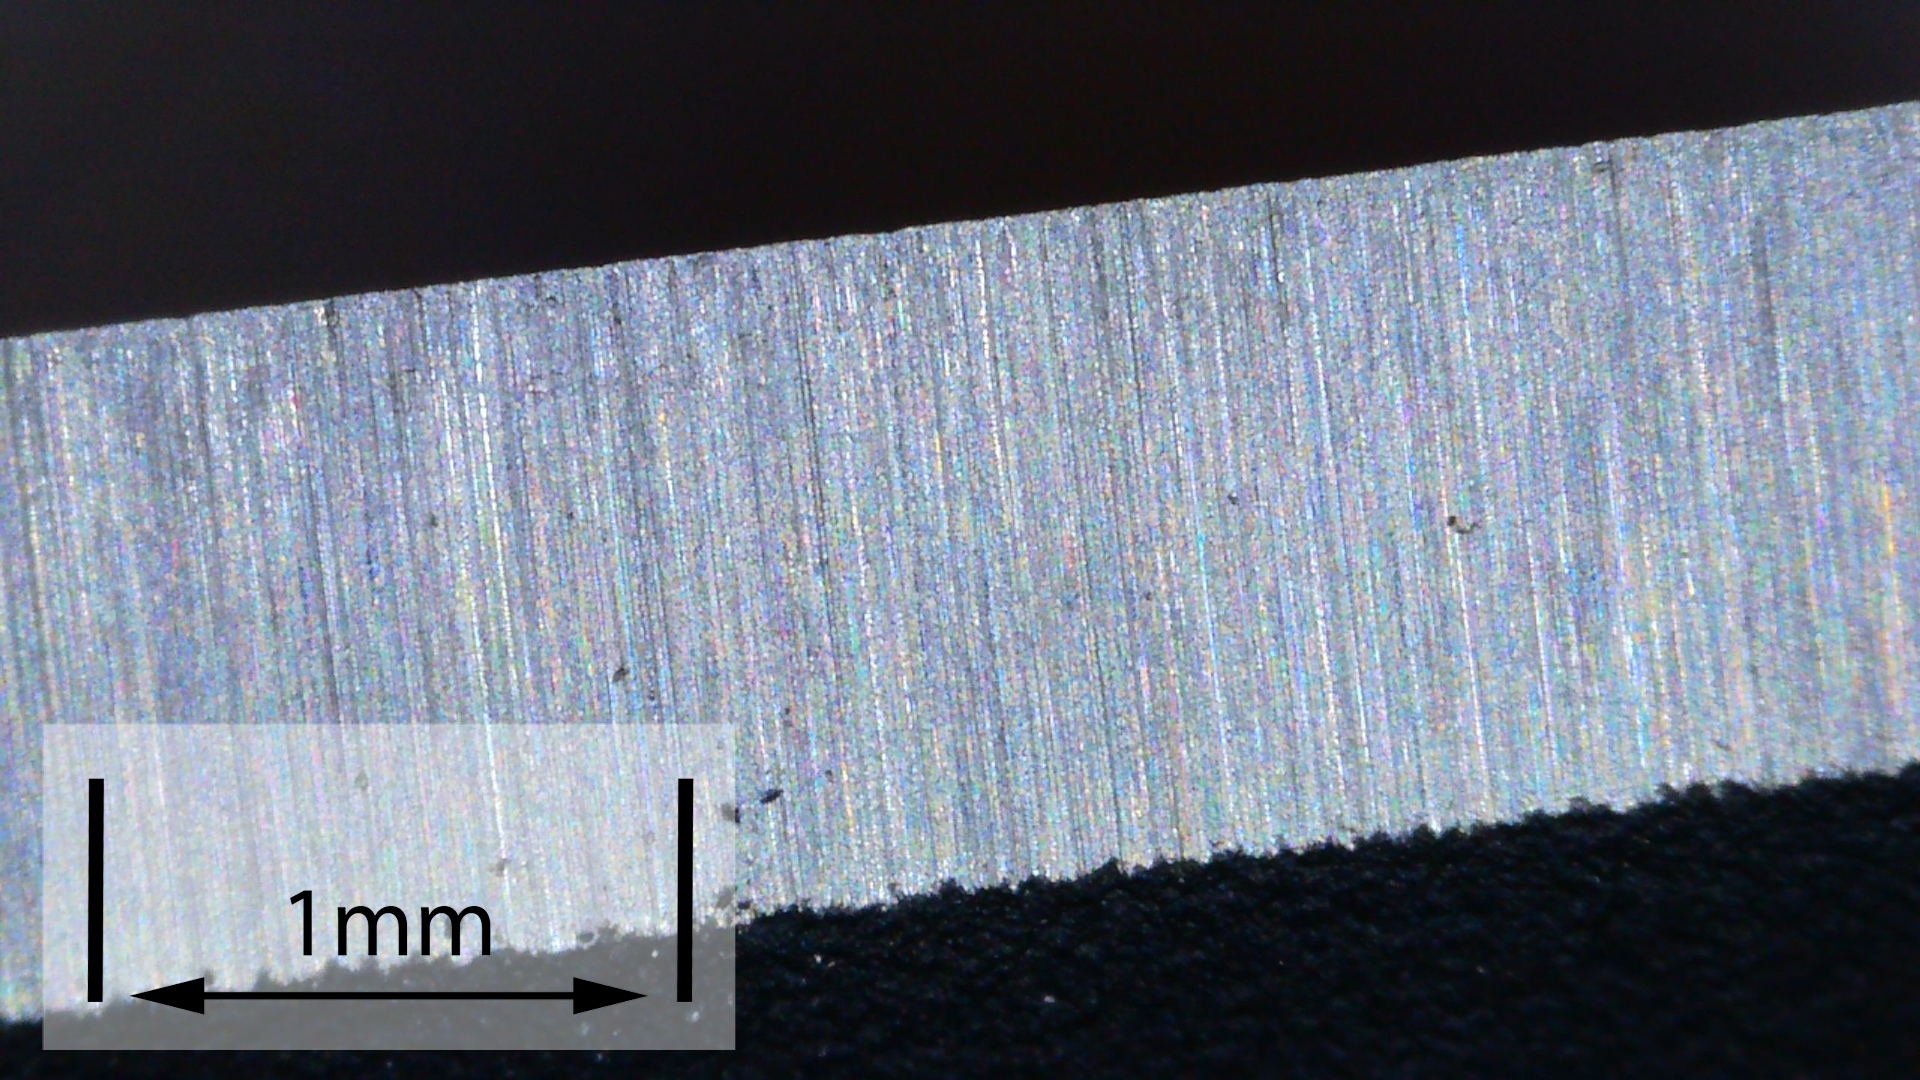
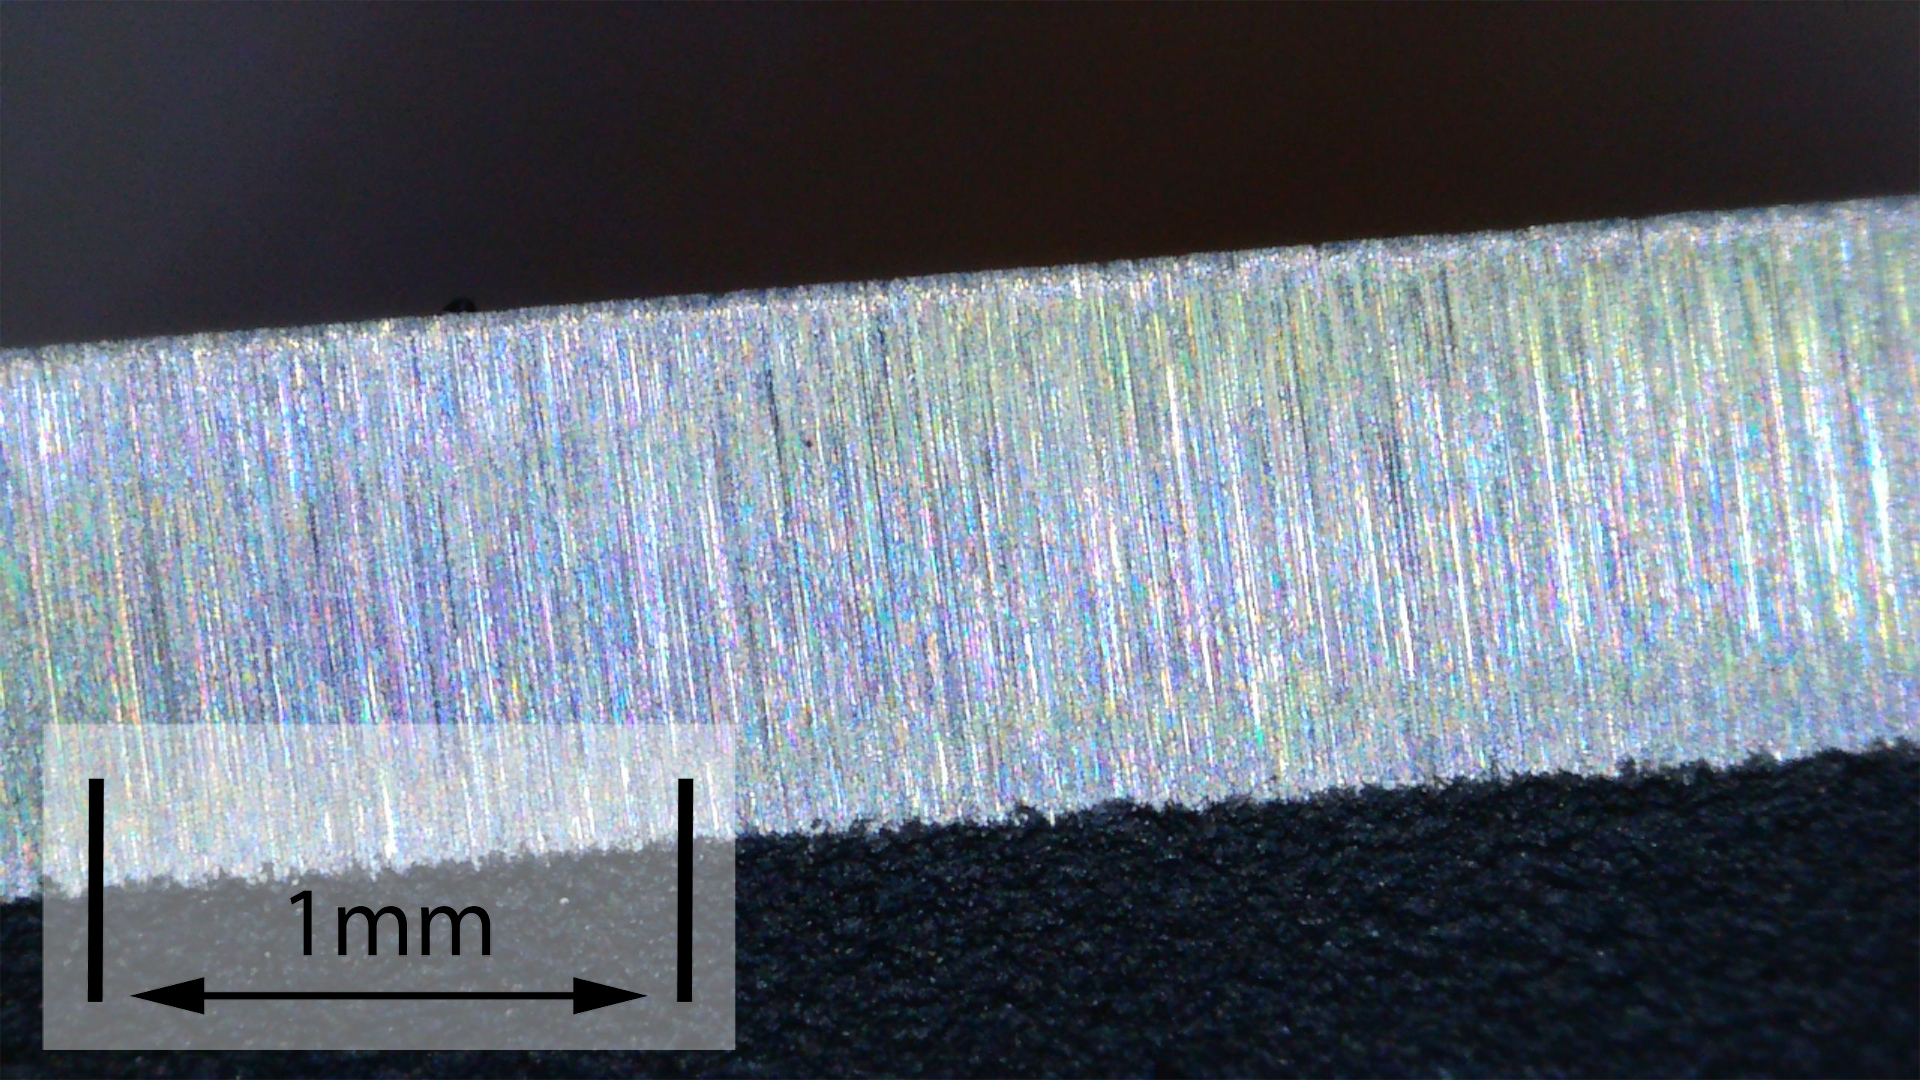
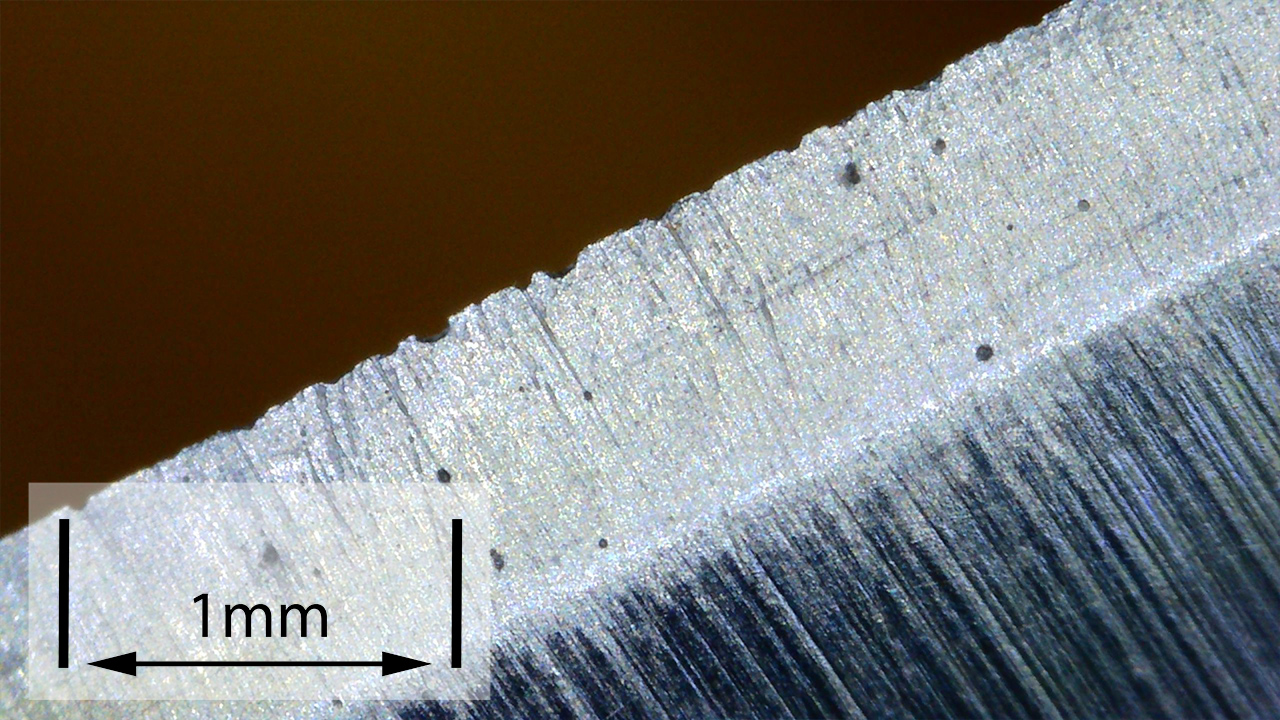
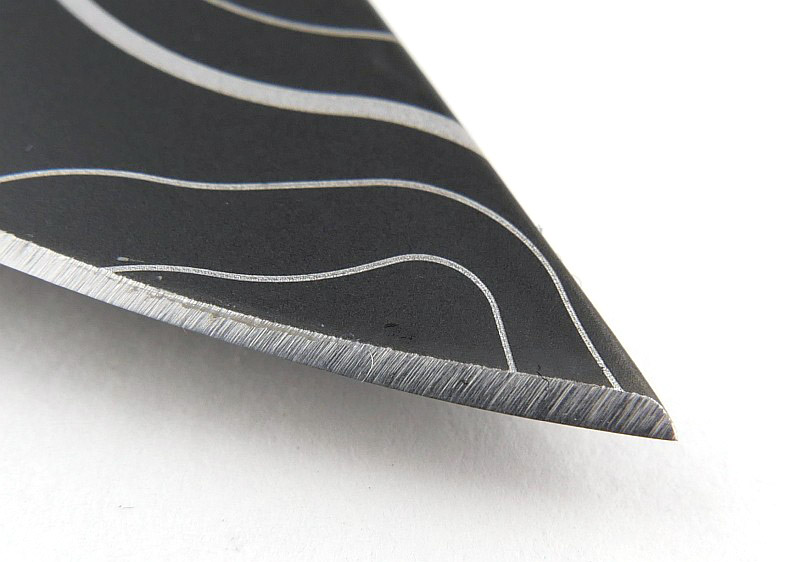
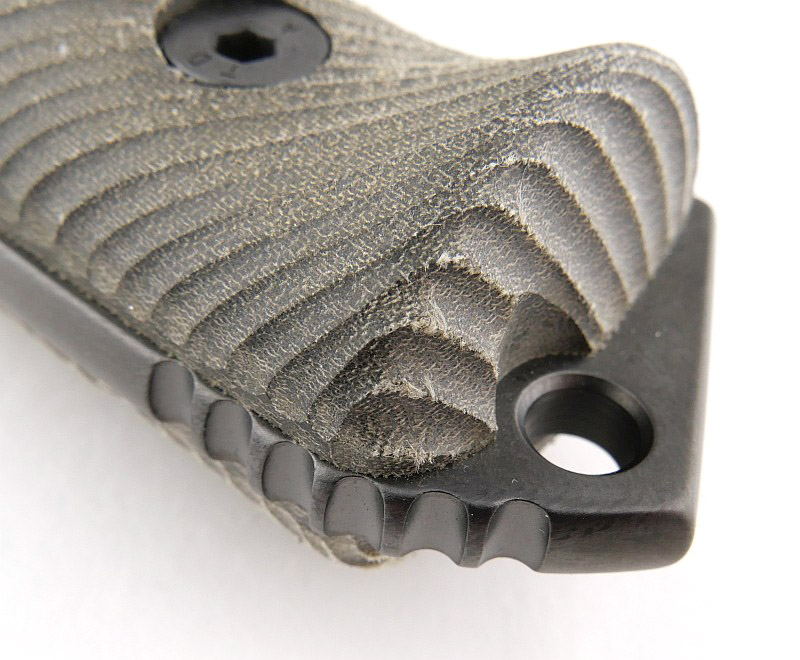
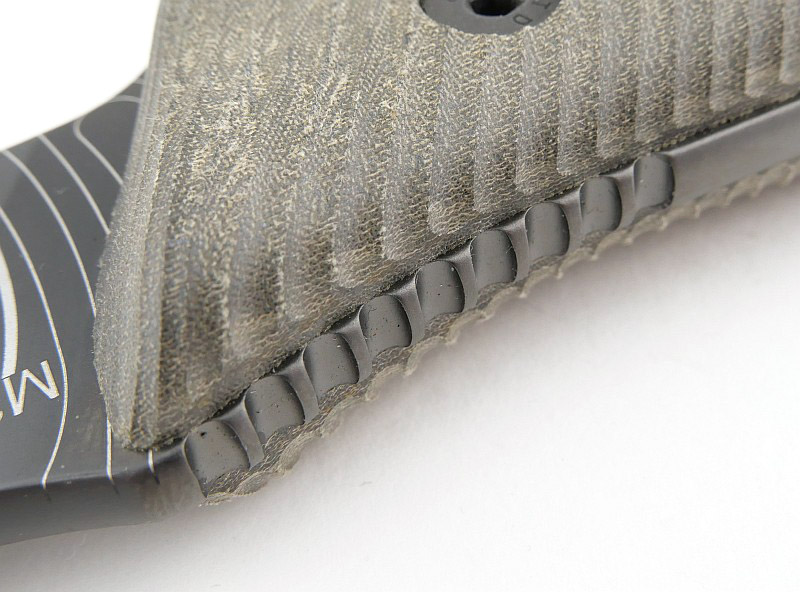
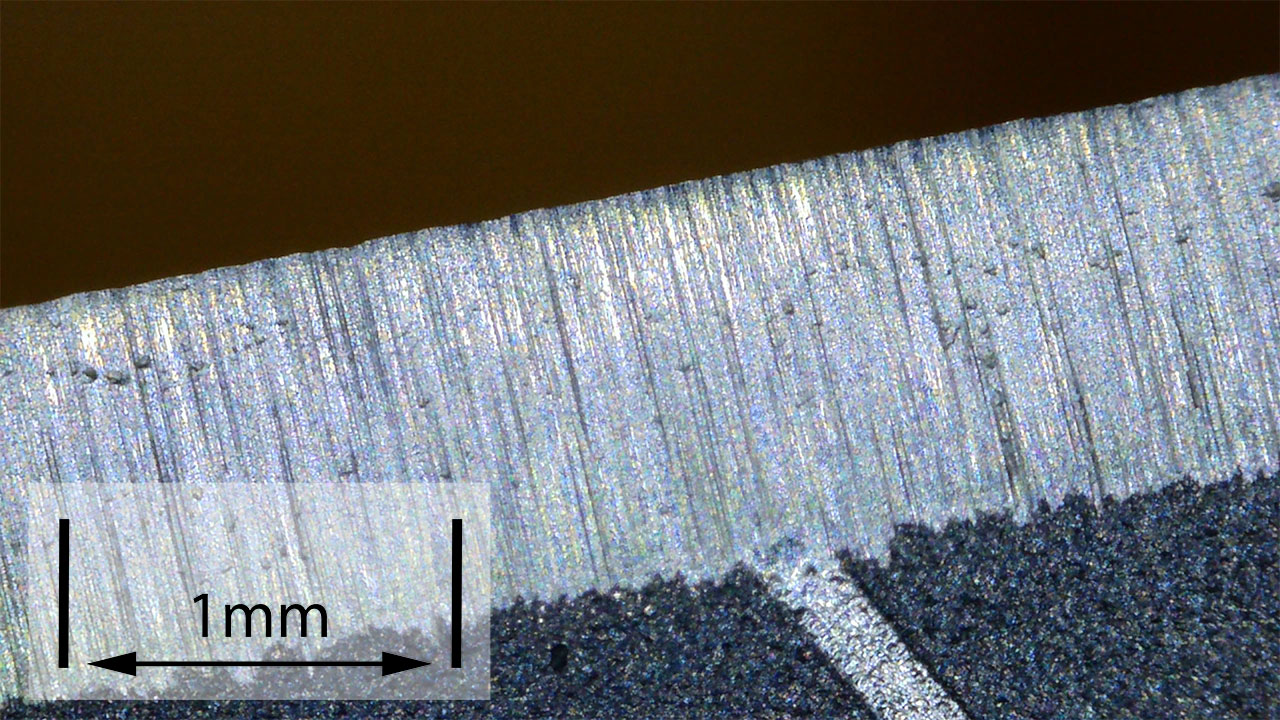
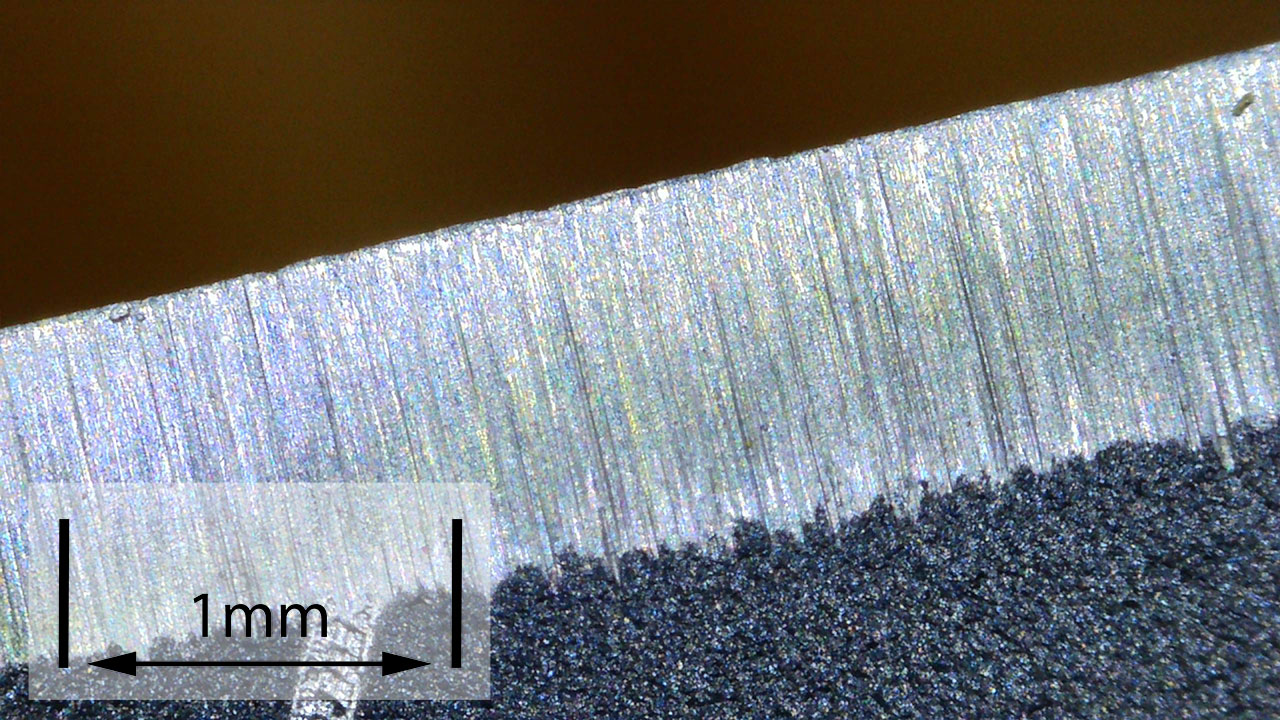
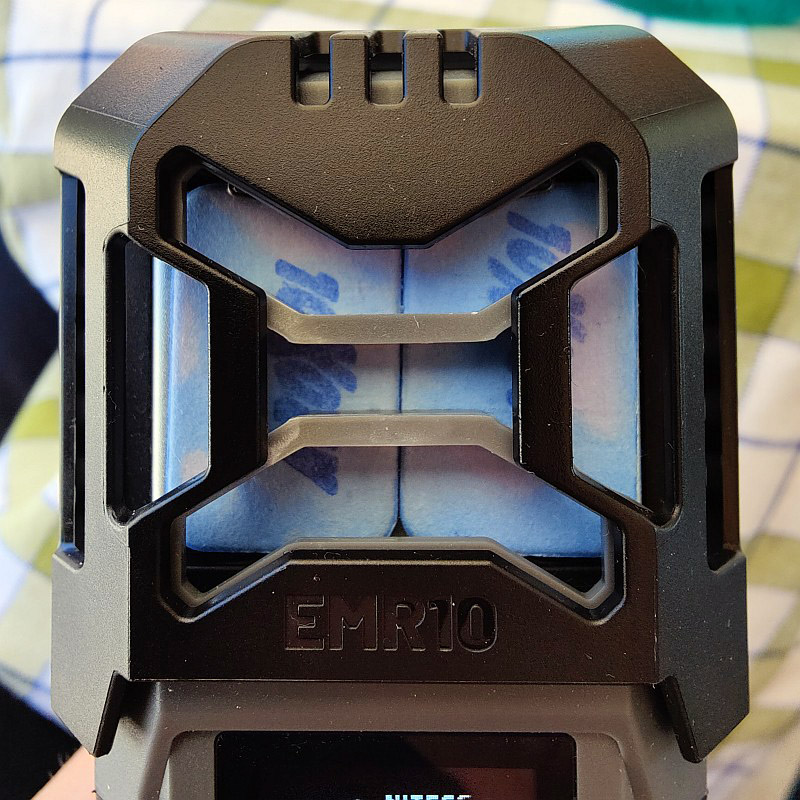
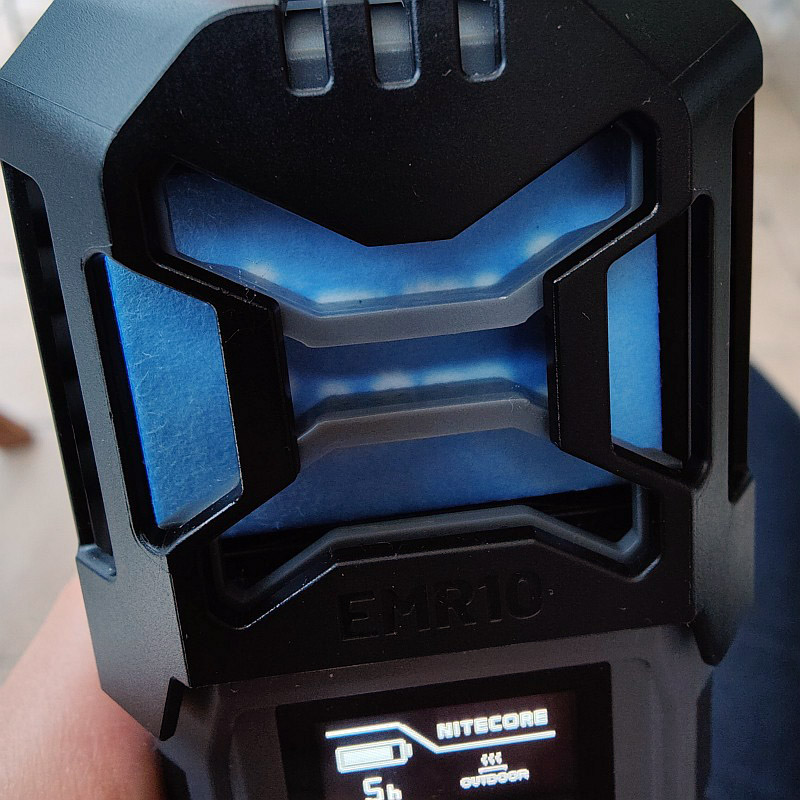
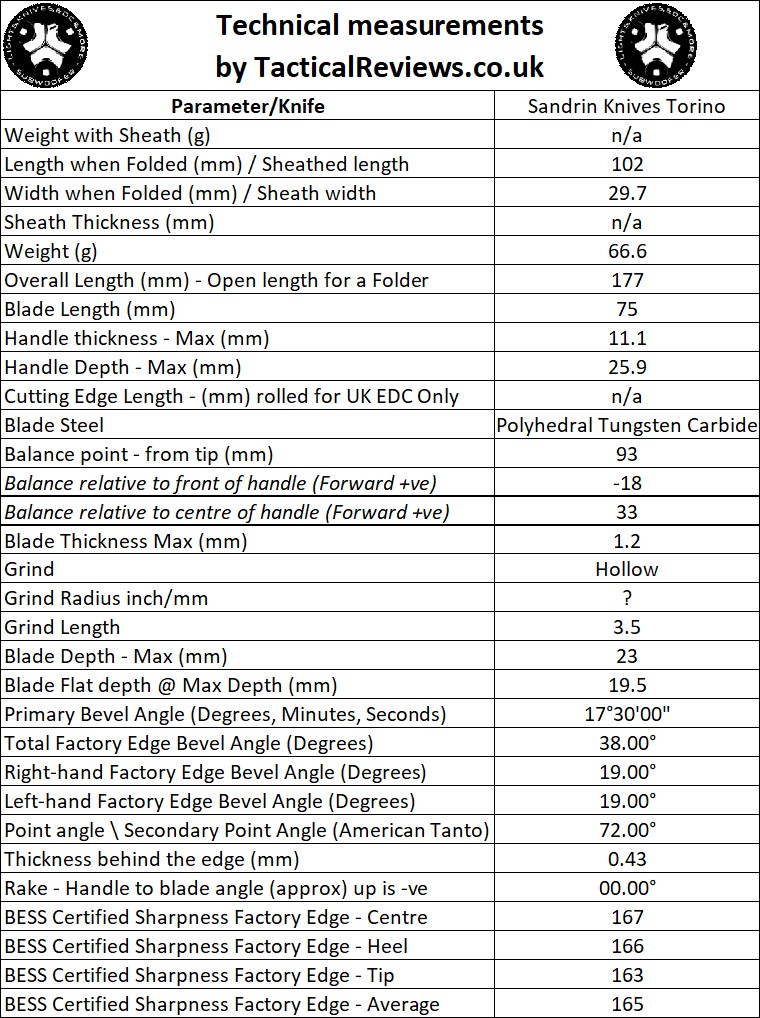
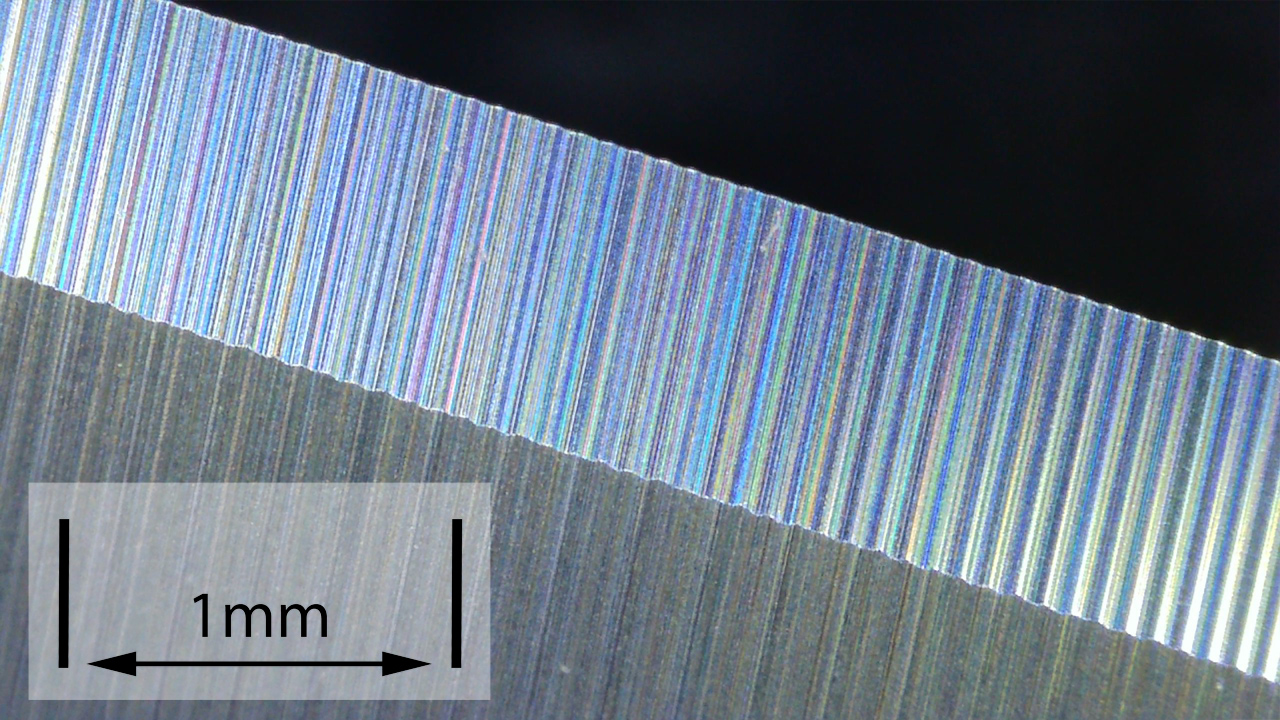
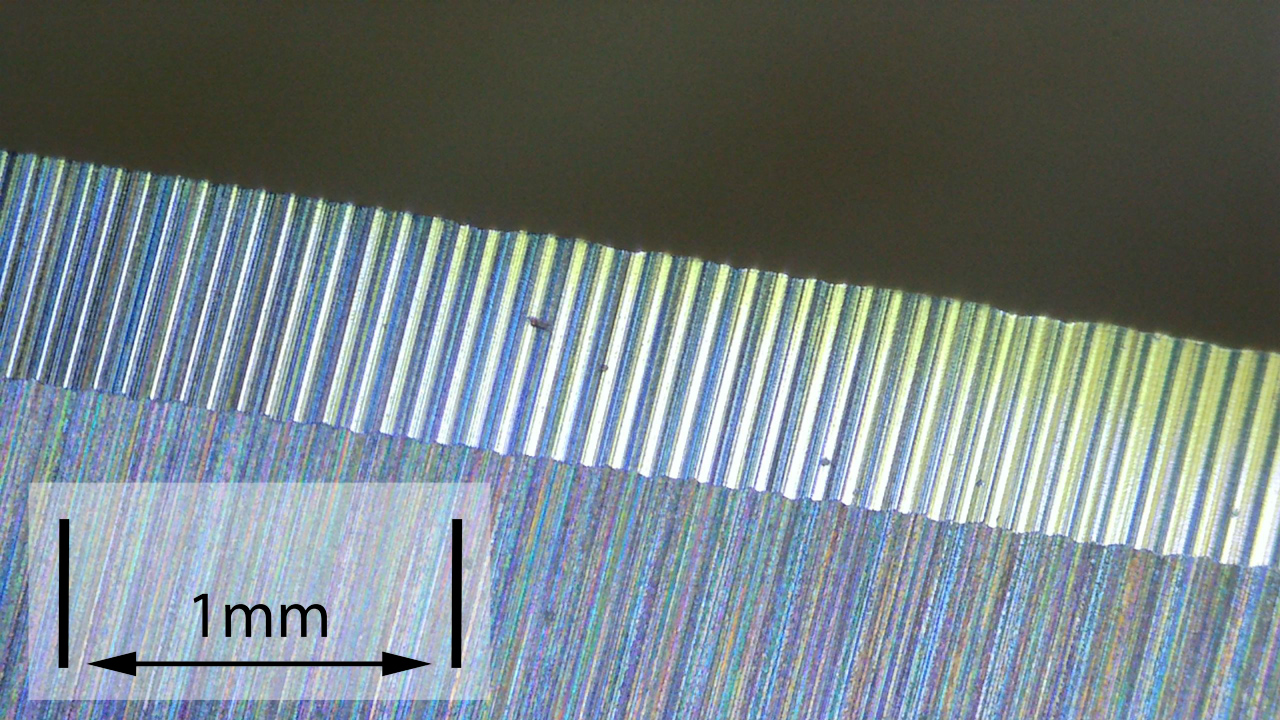
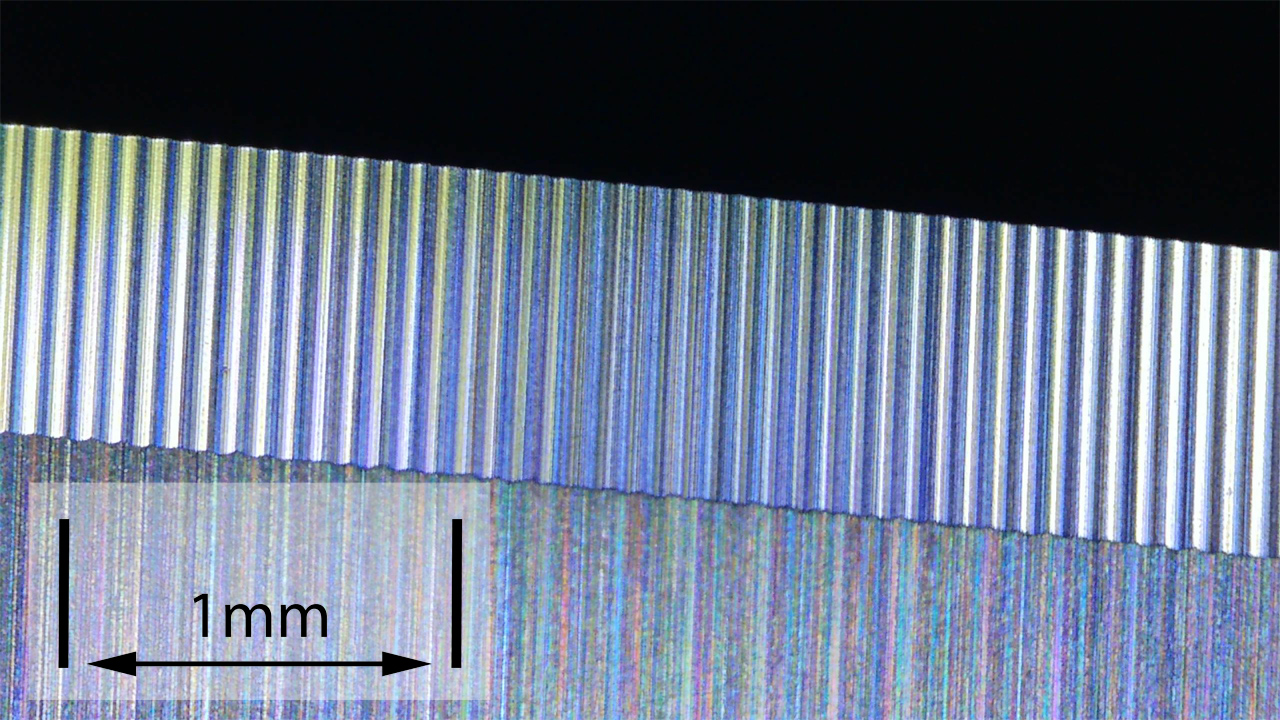
As a further look at the factory edge, this section has been added to include some high magnification photos of the factory edges.
The magnified images of the edge show the Torino’s blade’s different look. They also show what appears to be a micro-serration from the grinding process, which aids the cutting ability of this special material.

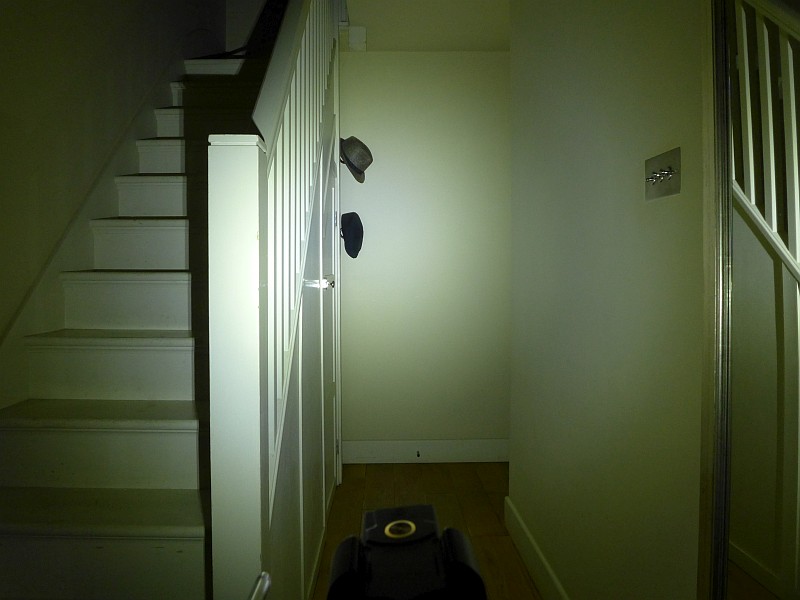
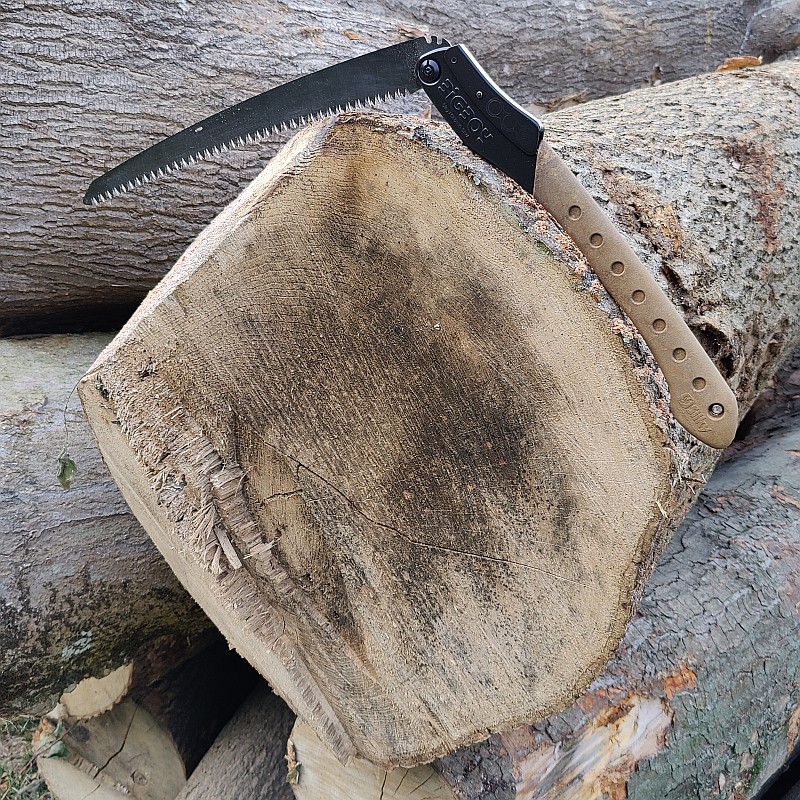
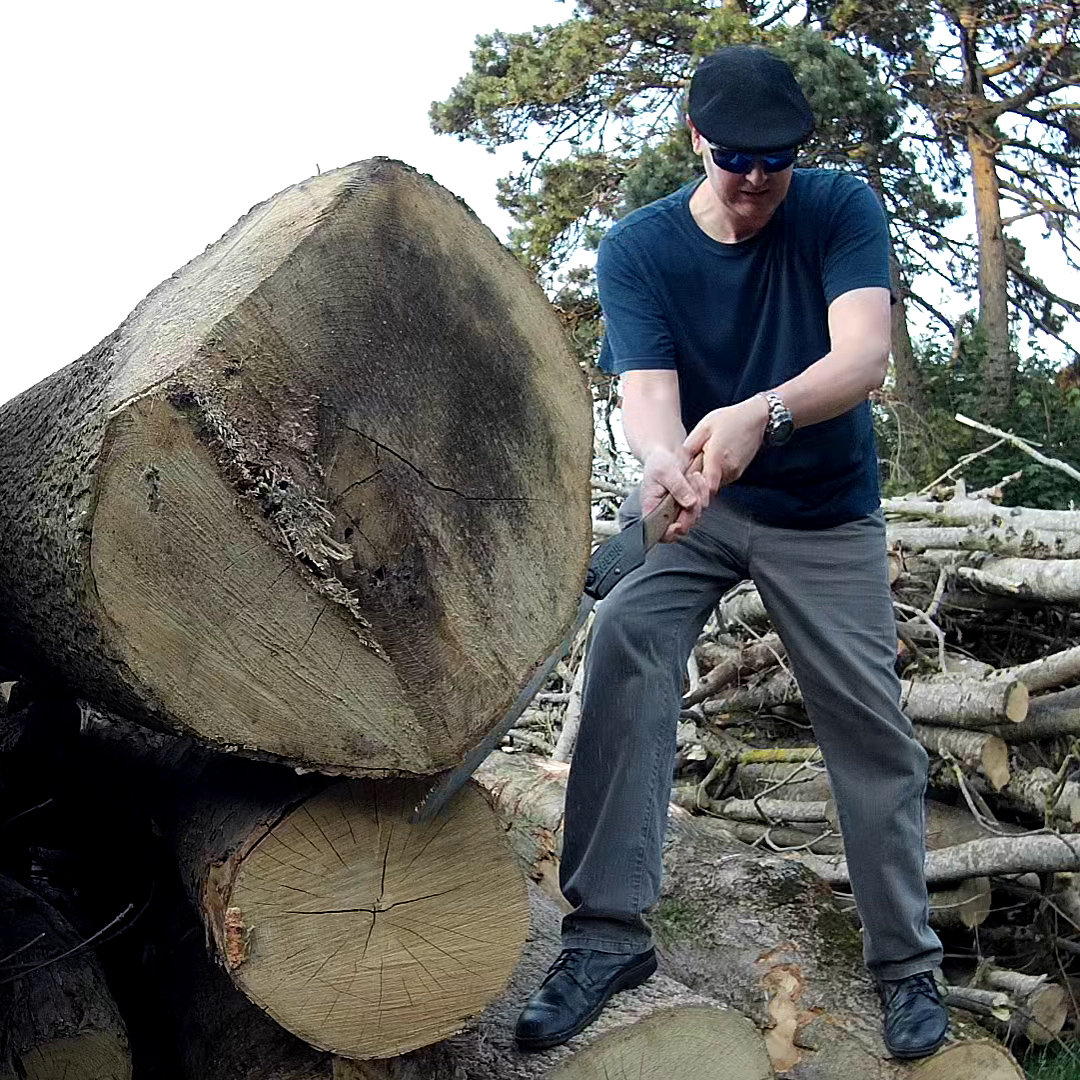
What is it like to use?
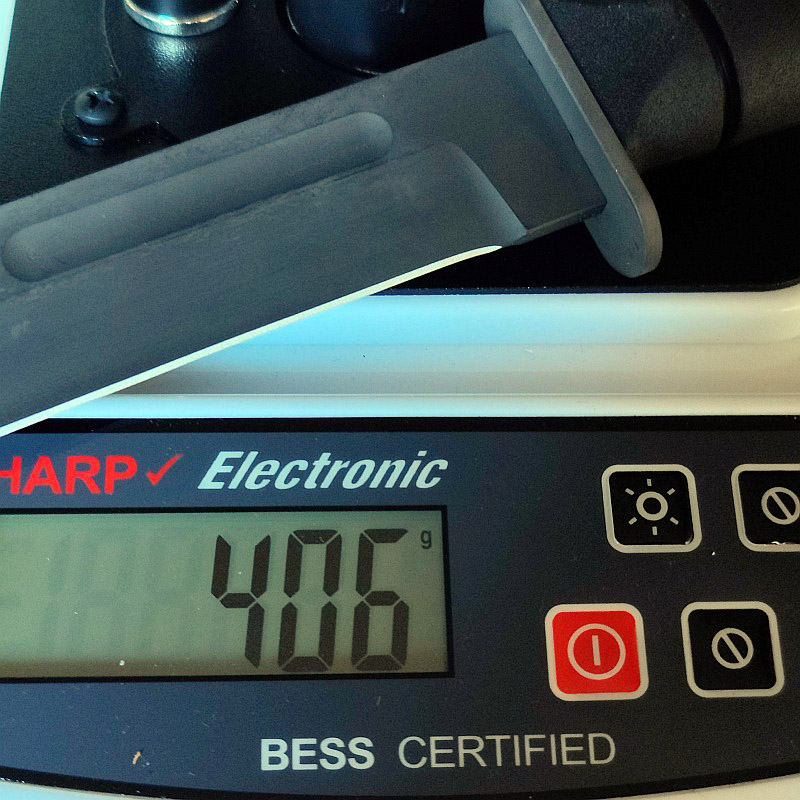
One of the most noticeable features of the Sandrin Knives Torino when you use it is the super-slim, super-slicey blade. The sharpness measurements for the factory edge, are in this case more important than most knives, as I suspect the PTC blade may be difficult to sharpen, and will almost certainly want diamond sharpeners.
Sandrin have supplied the Torino super sharp with the very impressive average BESS measurement of 165. I tend to sharpen a knife to less than 200 BESS, so this is sharper than my normal target sharpness.
Actually with it being so so hard, I’ve not yet worn the edge enough to want to sharpen it, so this aspect of using the PTC blade is to come later.
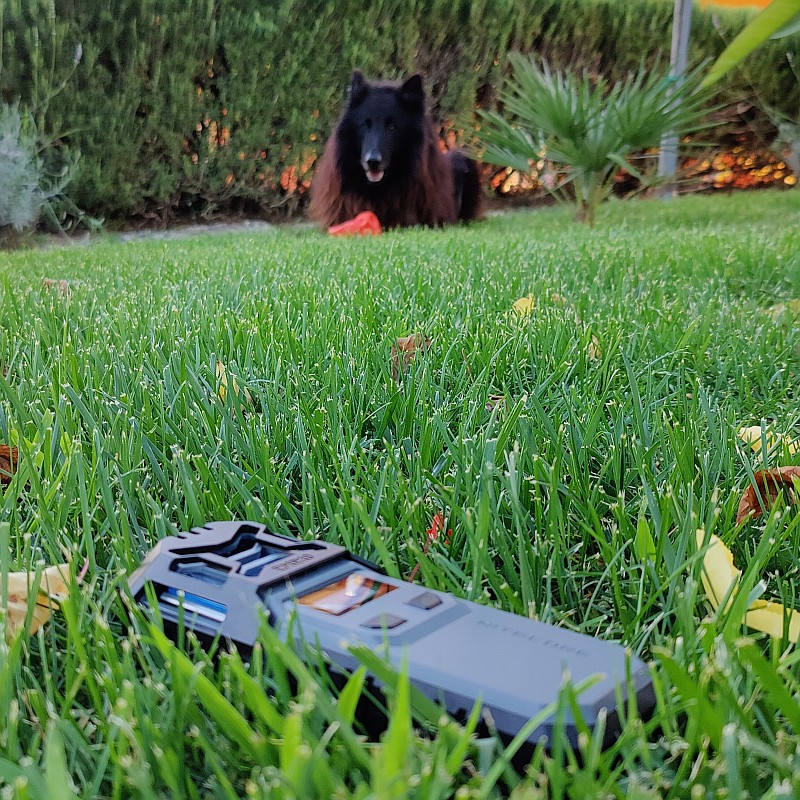
It certainly is lightweight and easy to carry.
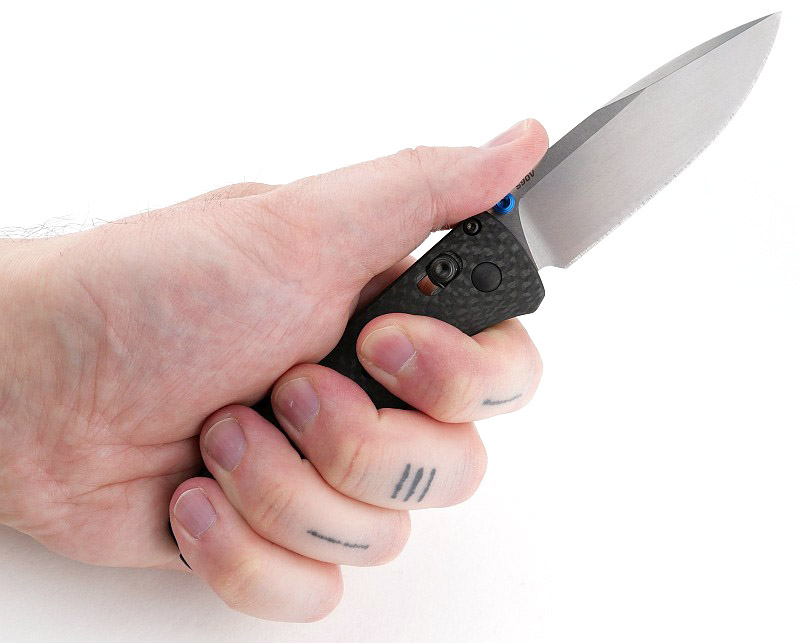
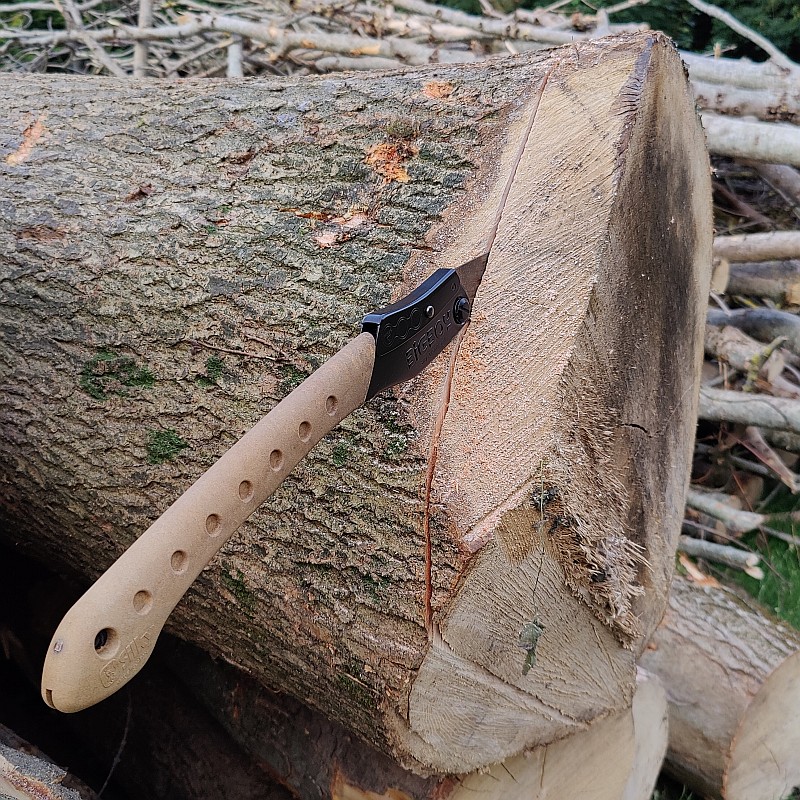
The jimping on the spine of the blade is useful, but with the blade being only 1.2mm thick, I find it quickly becomes uncomfortable to apply a lot of force directly onto the blade spine.
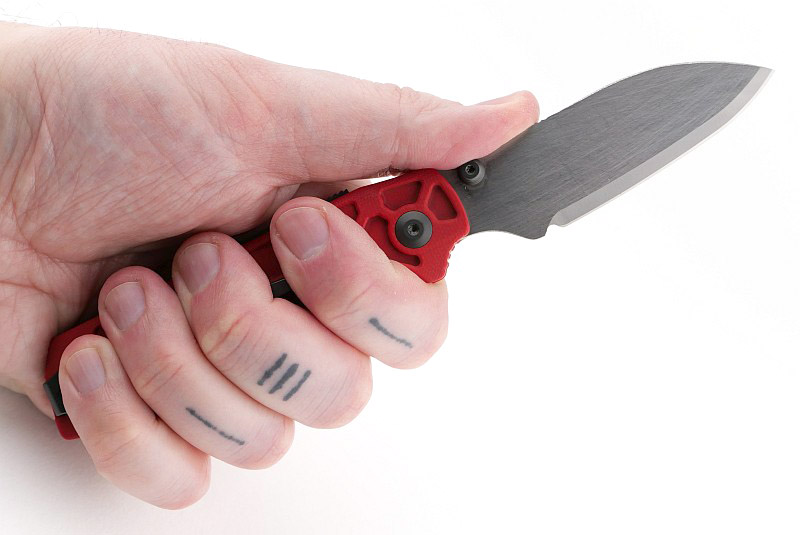
With the forward placed finger groove, choking up on the blade is natural and makes finer work really accurate.
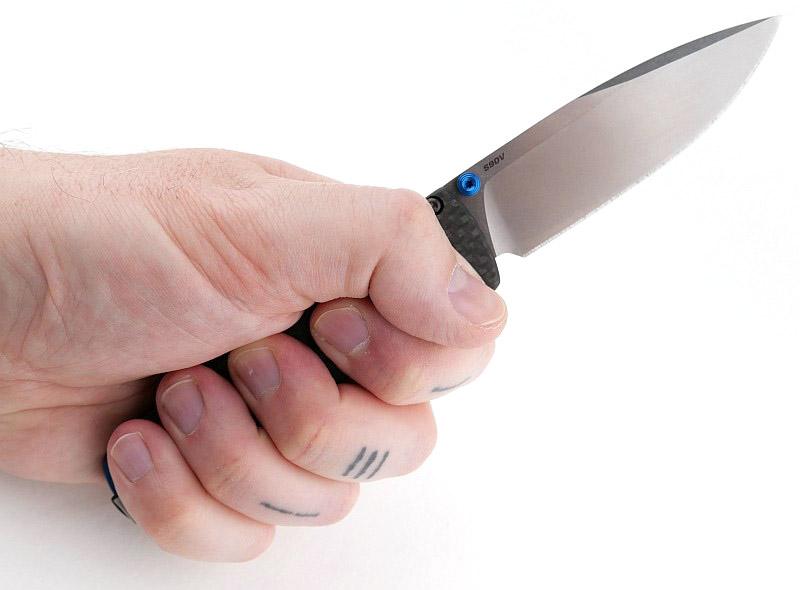
For me, the only aspect that lets the Torino down somewhat is the spring pressure on the recoil lock combined with the finish on the lock lever – together these make unlocking with the pad of your thumb uncomfortable and not entirely reliable. I find I tend to have to curl my finger or thumb over and use my nail to get sufficient purchase to release the lock. If the lock bar protruded a little more and the spring pressure was slightly less, I think this would come together nicely.
However, that said, the recoil lock does allow the Torino to remain slim and gives a reliable lock-up.
Review Summary
The views expressed in this summary table are from the point of view of the reviewer’s personal use. I am not a member of the armed forces and cannot comment on its use beyond a cutting tool or field/hunting knife.
Something that might be a ‘pro’ for one user can be a ‘con’ for another, so the comments are categorised based on my requirements. You should consider all points and if they could be beneficial to you.
_______________________________________________
What doesn’t work so well for me
_______________________________________________
High spring force on the recoil lock.
Lock lever too low profile.
_______________________________________________
Things I like
_______________________________________________
High-tech blade material – Polyhedral Tungsten Carbide
Fantastic factory edge with BESS of 165
Incredibly long lasting sharpness.
Blade is only 1.2mm thick!
Lightweight design.
Reverse-skeletonised G10 handle.
Low profile recoil lock.
Slick blade movement on ceramic bearings.
Double-sided thumb studs.
Ambidextrous deep-carry titanium pocket clip.