Light Review: Surefire E2D Defender and Stiletto

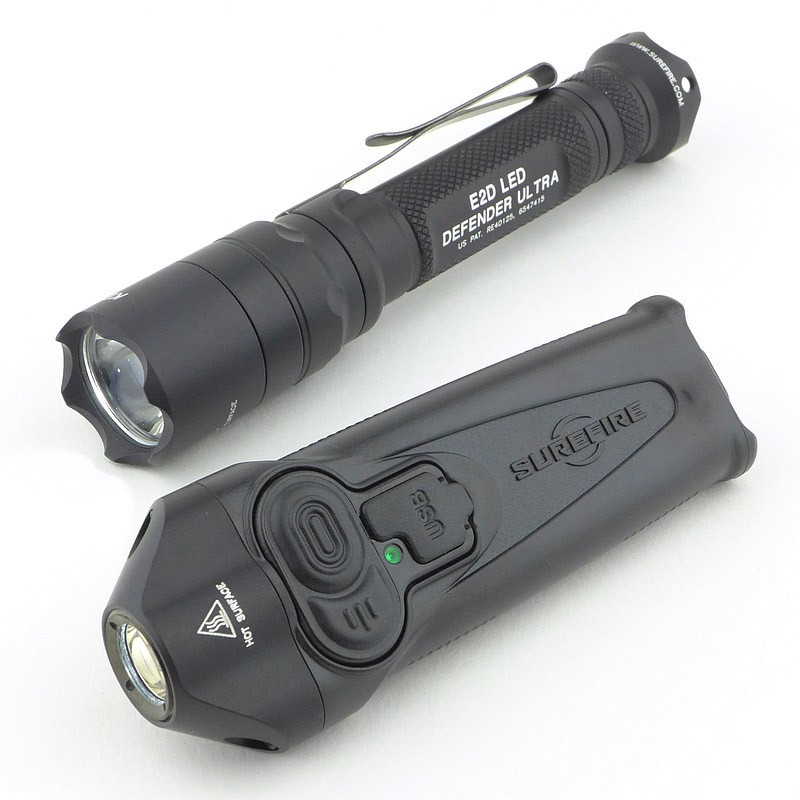
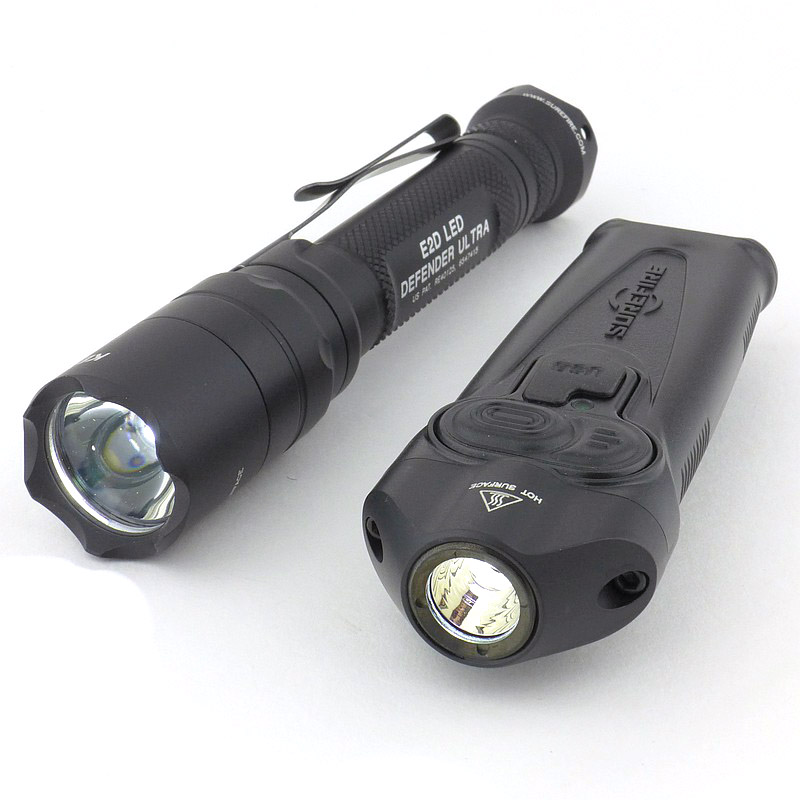
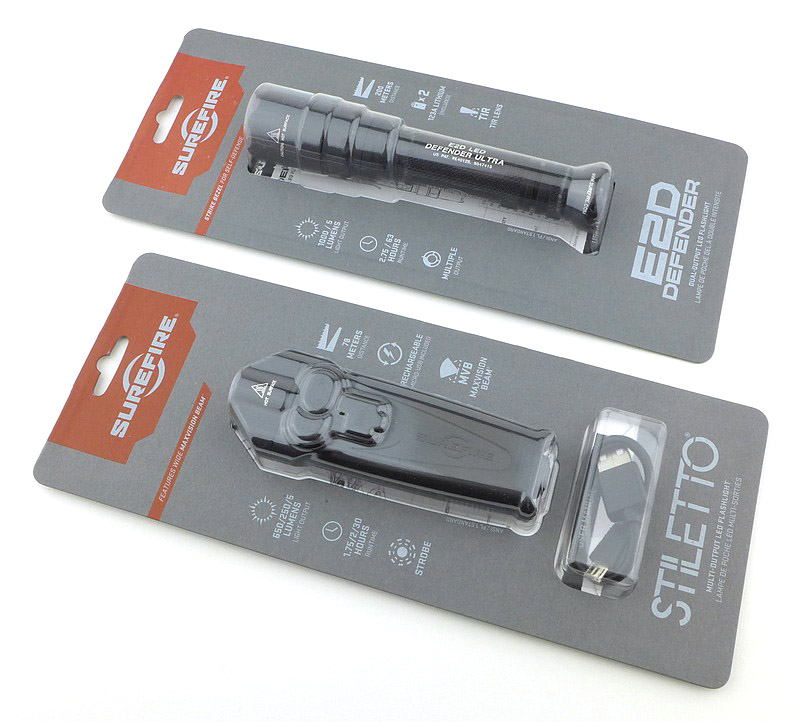
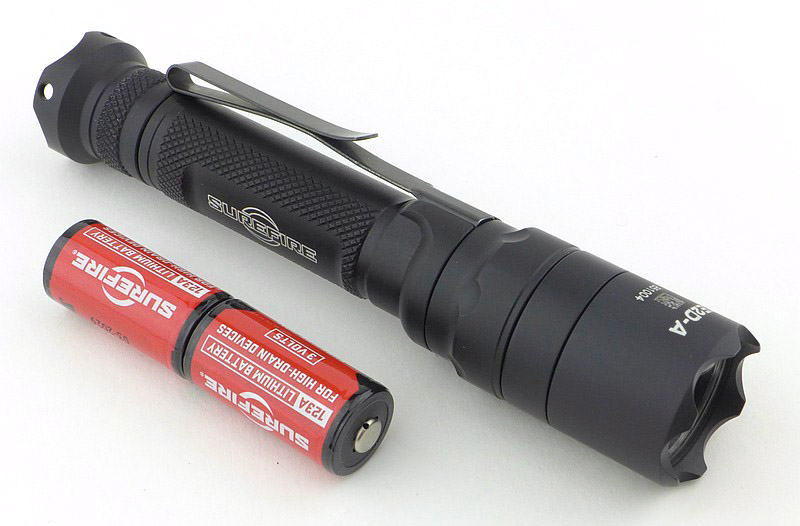
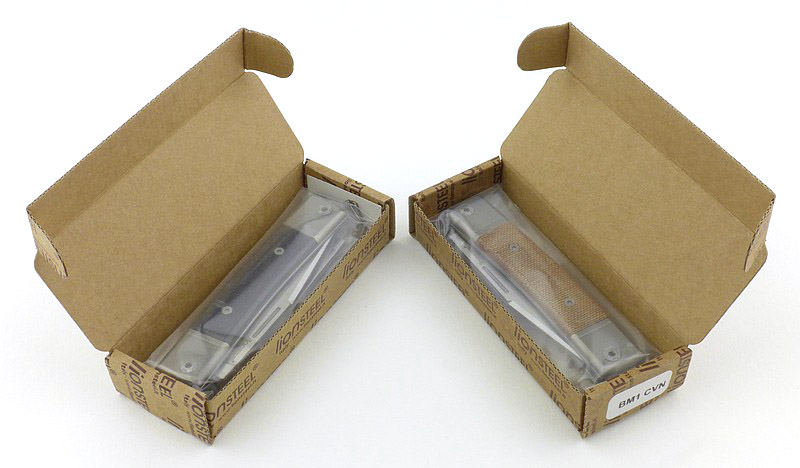
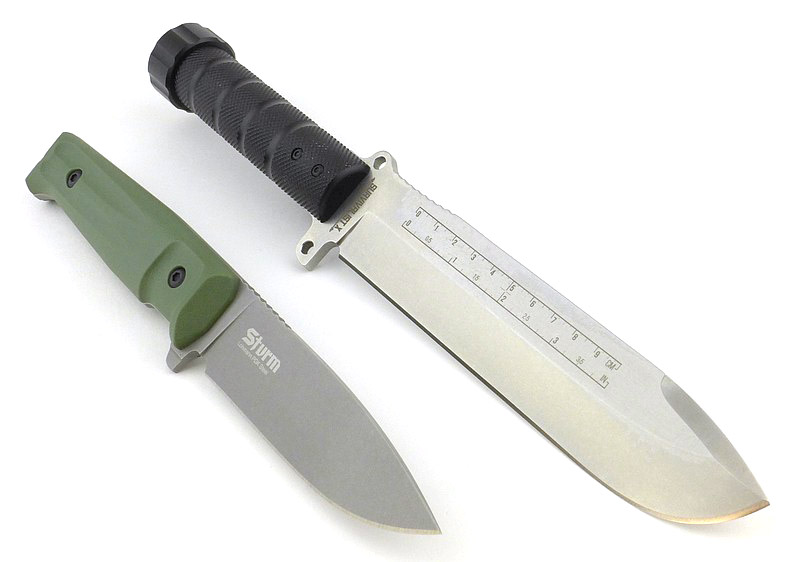
With Surefire, your main expectations might be high quality build and performance, so read on to see if these lights keep up with Surefire’s standards. In this review are two quite different models; the latest update of the classic Defender E2D (in this case the two-mode ‘Ultra’) and the EDC-optimised pocket-friendly USB-chargeable multi-mode, programmable Stiletto.

What are we looking at?:

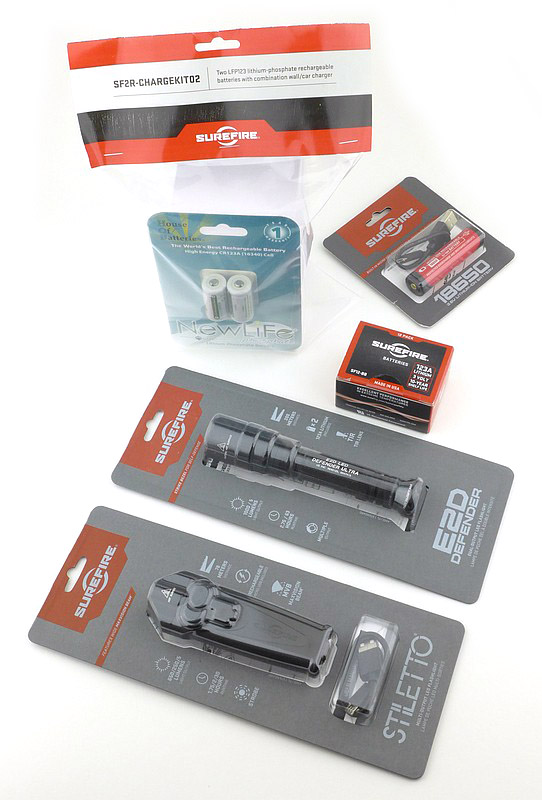
Though this review is all about the two headline lights, as well as primary cells I’ve been able to test the Surefire rechargeable cells for the Defender.


Moving onto the main feature let’s get into the details of these two.


Taking a more detailed look at the Stiletto:

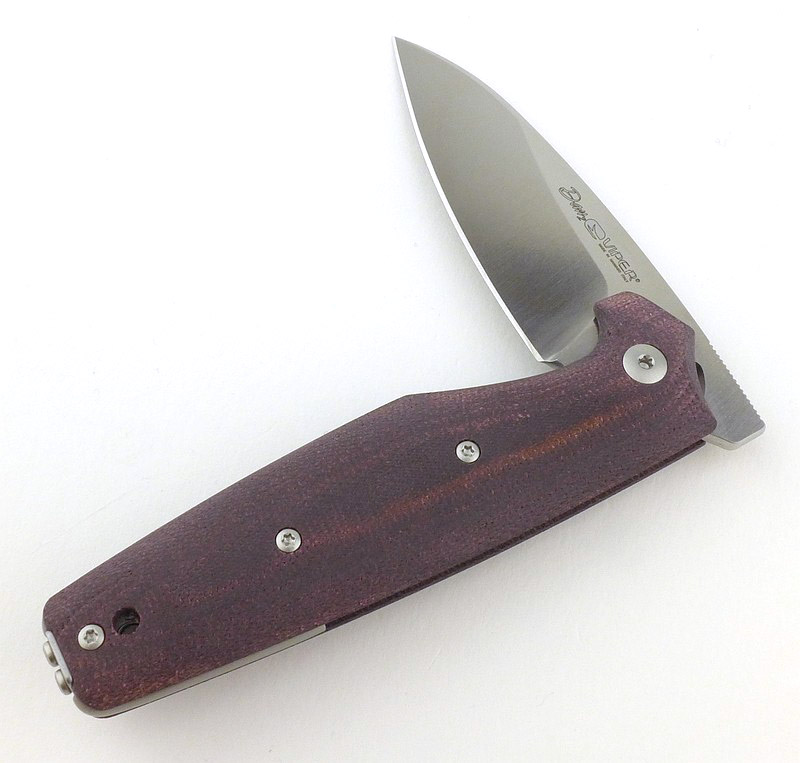
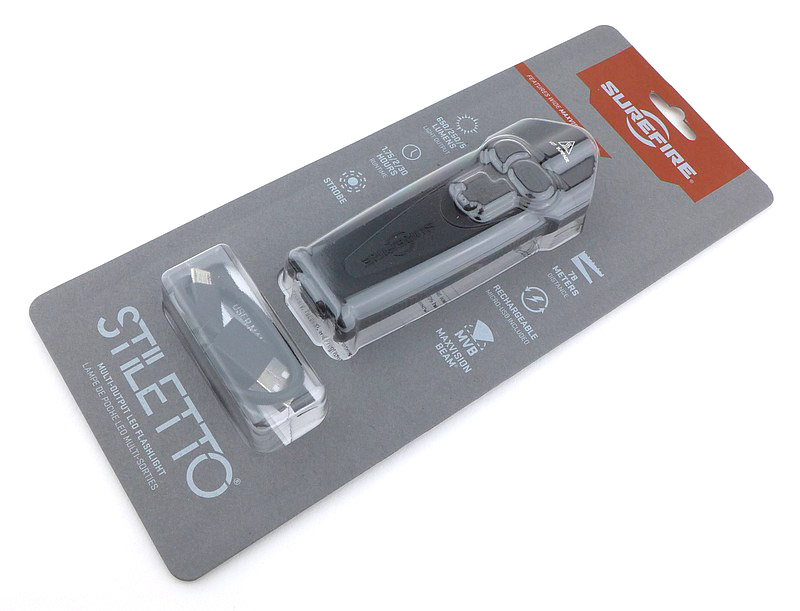
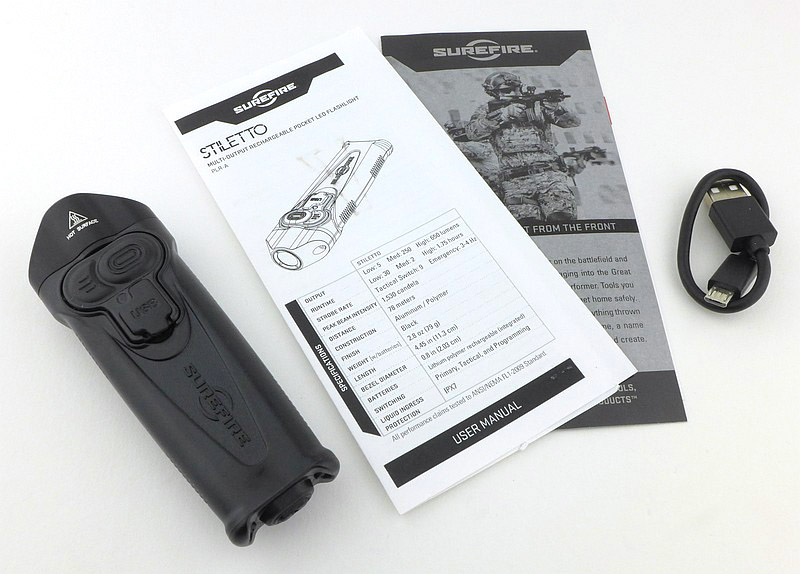
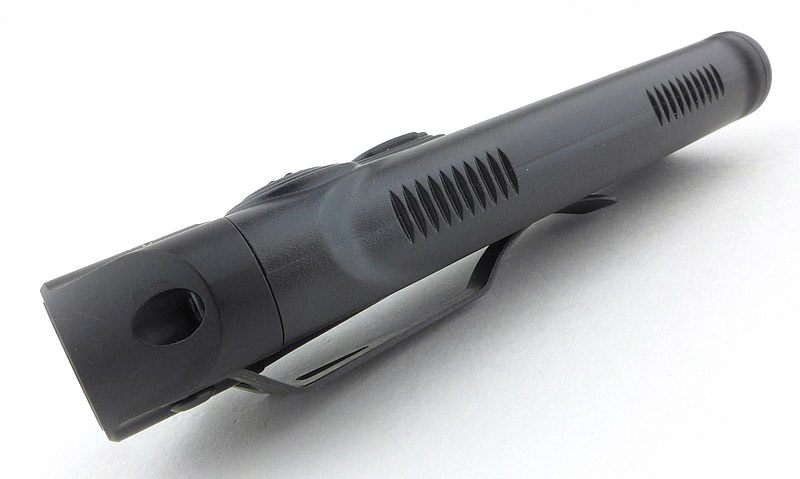
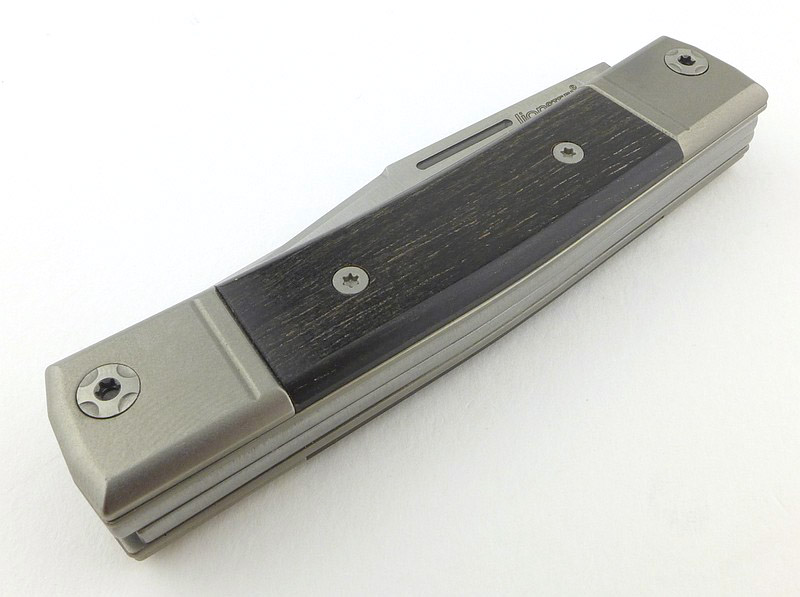
The Stiletto is a new style of light, taking on more of the form of a pocket knife and slipping into your pocket in the same way, and with a clip to hold it in place. To achieve this narrow profile it has a built-in battery and USB charging, allowing the shape to not be compromised by replaceable batteries.


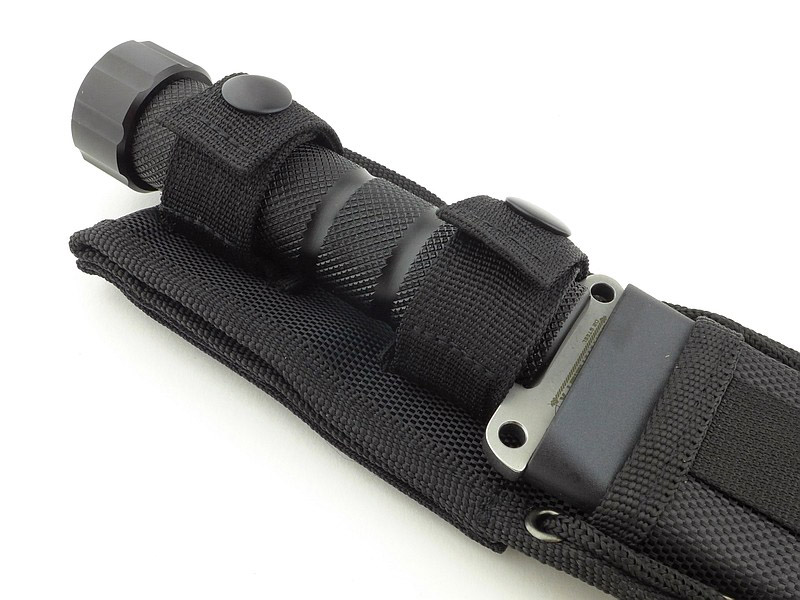
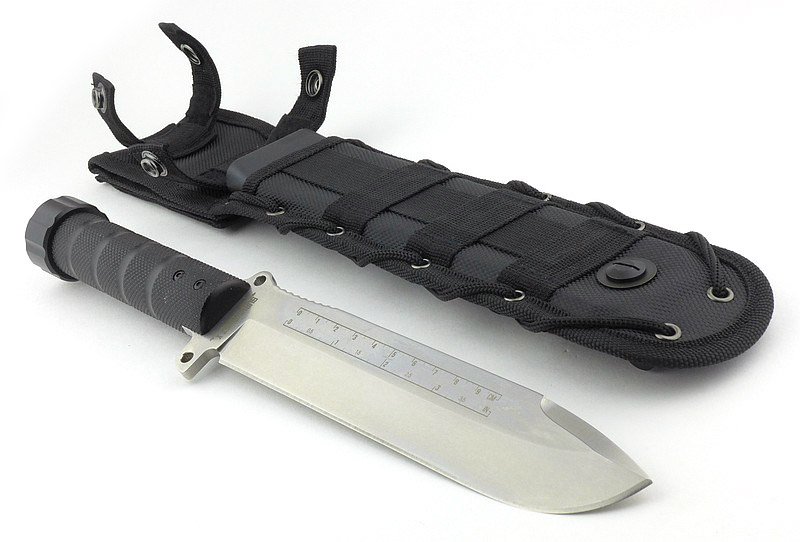
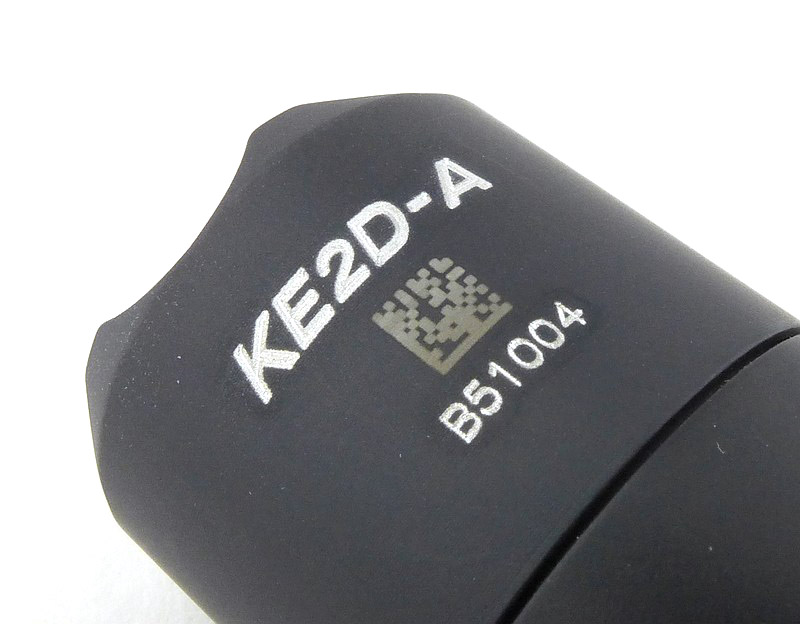
Taking a more detailed look at the Defender E2D Ultra:

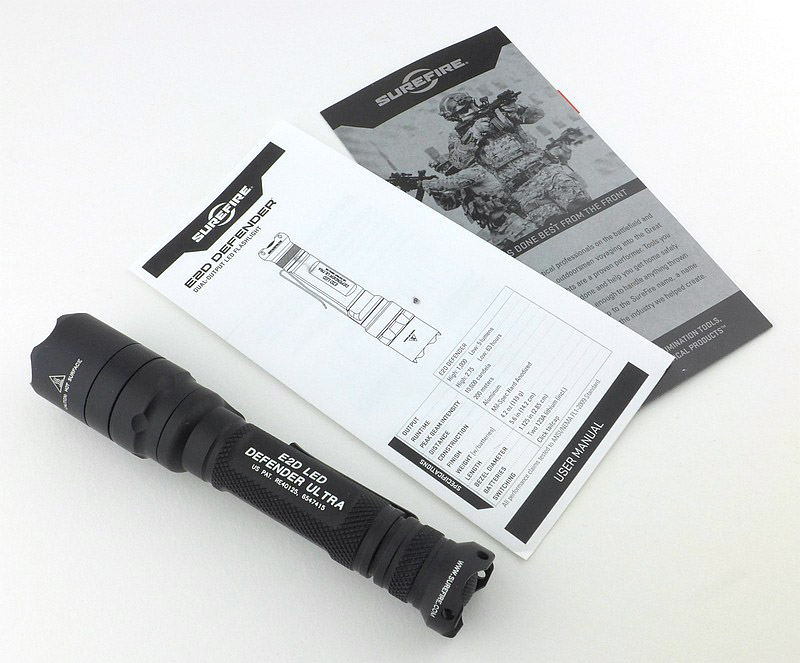
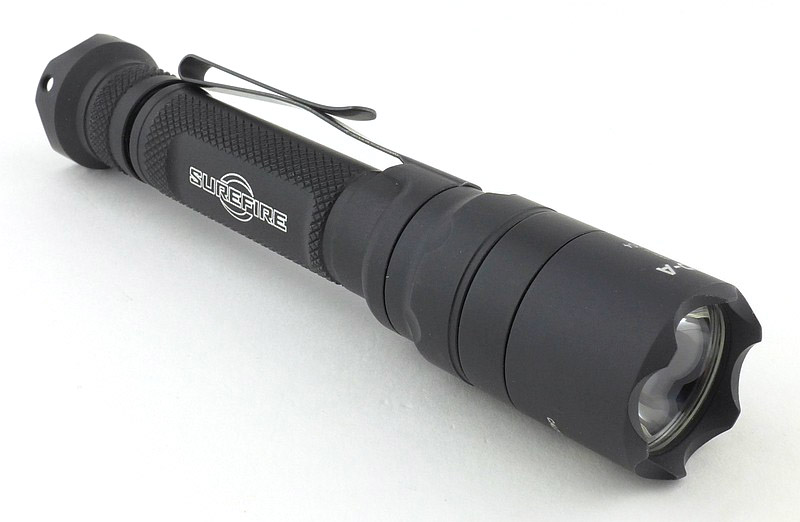
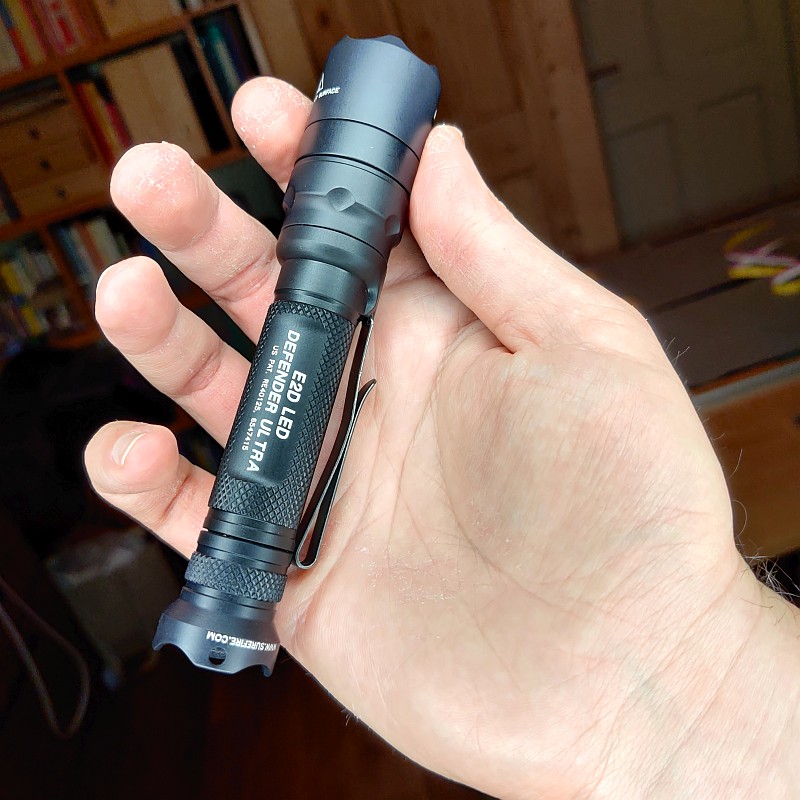
The Defender E2D is a classic Surefire model, bit it has moved with the times. Starting life as a incandescent bulb light with lens/reflector, it has grown to use LED and TIR optics. This latest version has raised the output to 1000lm+. It is mainly the head of the light that has changed in appearance compared to the earlier models you might know.


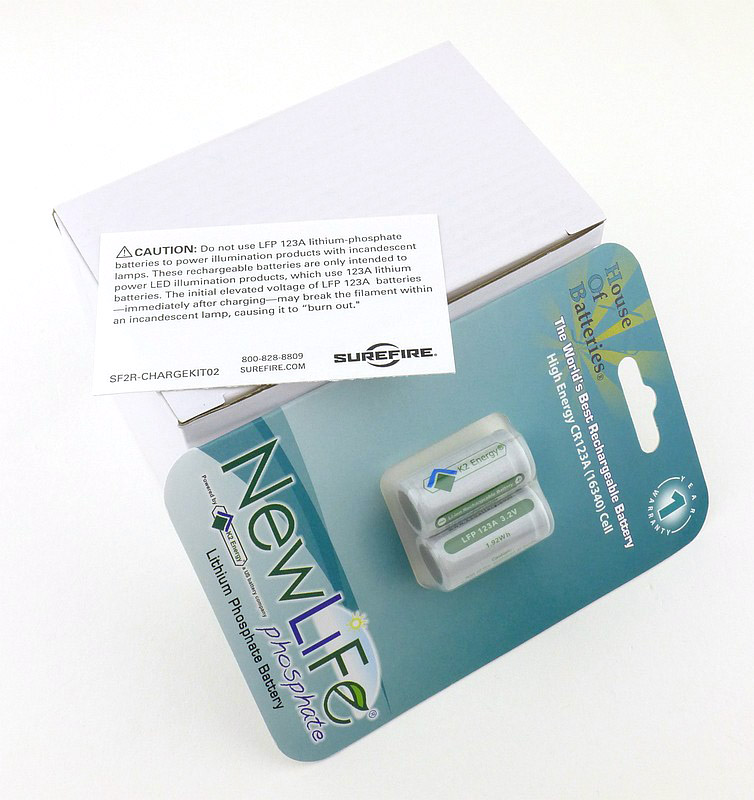
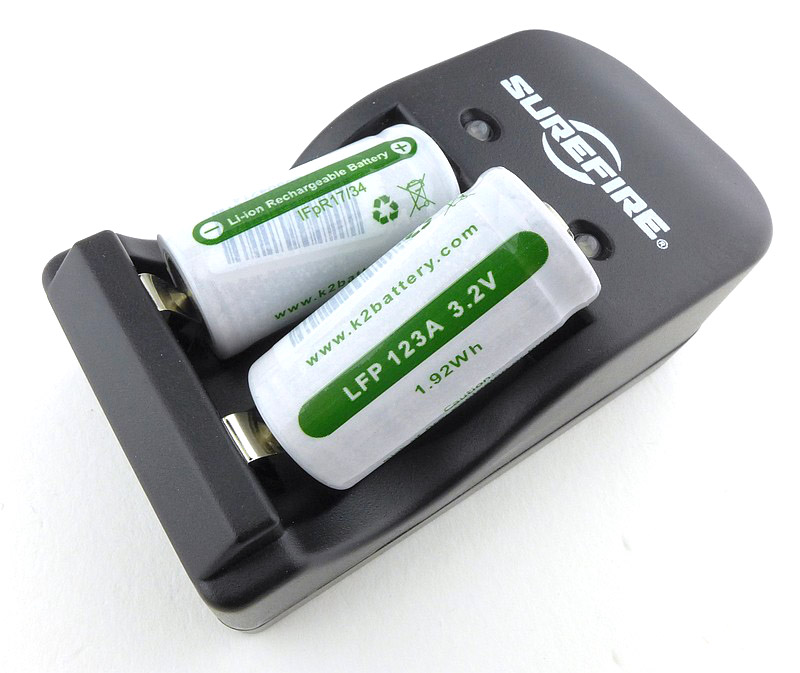
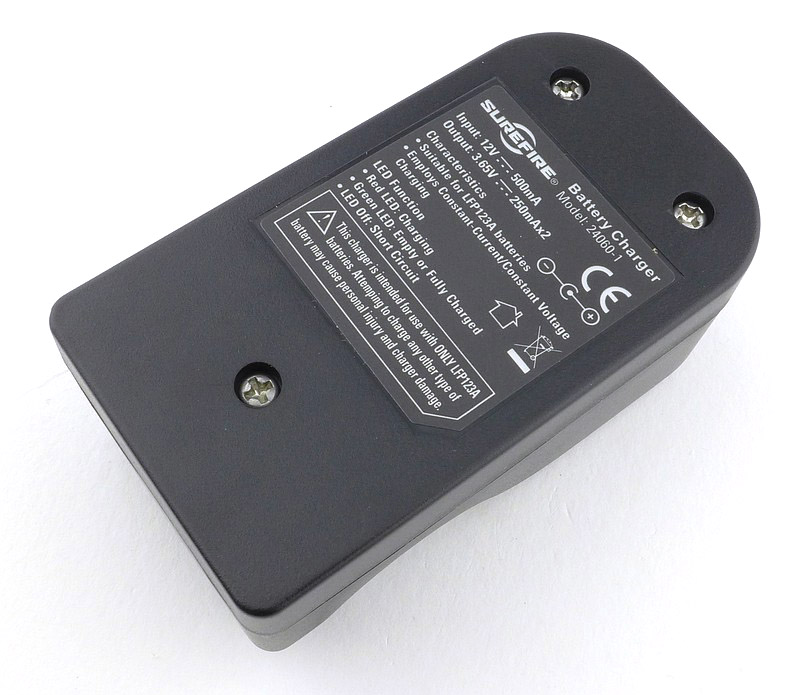
Surefire’s rechargeable CR123 option:

Surefire have been a little behind other manufacturers with regard to taking up rechargeable batteries. In years past, dedicated Surefire owners have had to find their own way, often going to the lengths of getting their battery tubes bored out to take 18650 cells plus a few other methods.
In this case, the cells themselves are not Surefire branded, instead Surefire have chosen K2 Energy’s Lithium Phosphate cells.


The beam

Please be careful not to judge tint based on images you see on a computer screen. Unless properly calibrated, the screen itself will change the perceived tint.

The indoor beamshot is intended to give an idea of the beam shape/quality rather than tint. All beamshots are taken using daylight white balance. The woodwork (stairs and skirting) are painted Farrow & Ball “Off-White”, and the walls are a light sandy colour called ‘String’ again by Farrow & Ball. I don’t actually have a ‘white wall’ in the house to use for this, and my wife won’t have one!

The character of each beam is really very different. Starting with the Defender and it’s mix of smooth hot-spot and spill beam giving a very useful all-round capability. The spill beam is surprisingly wide, so much so you can see the bezel crenellation shaping in the outer edge of the beam.

The Stiletto has a Surefire ‘MaxVision beam’; I’ve come across a few variations of this, but in essence they have all been quite wide and evenly lit to give you ease of vision at close to mid ranges. You will notice in the direct comparison that the Defender’s beam is actually wider than the Stiletto’s. This is even more noticeable in the outdoor beam-shots. The Stiletto however lacks the hot-spot and provides nicely even lighting.


Batteries and output:

To measure actual output, I built an integrating sphere. See here for more detail. The sensor registers visible light only (so Infra-Red and Ultra-Violet will not be measured).

Please note, all quoted lumen figures are from a DIY integrating sphere, and according to ANSI standards. Although every effort is made to give as accurate a result as possible, they should be taken as an estimate only. The results can be used to compare outputs in this review and others I have published.

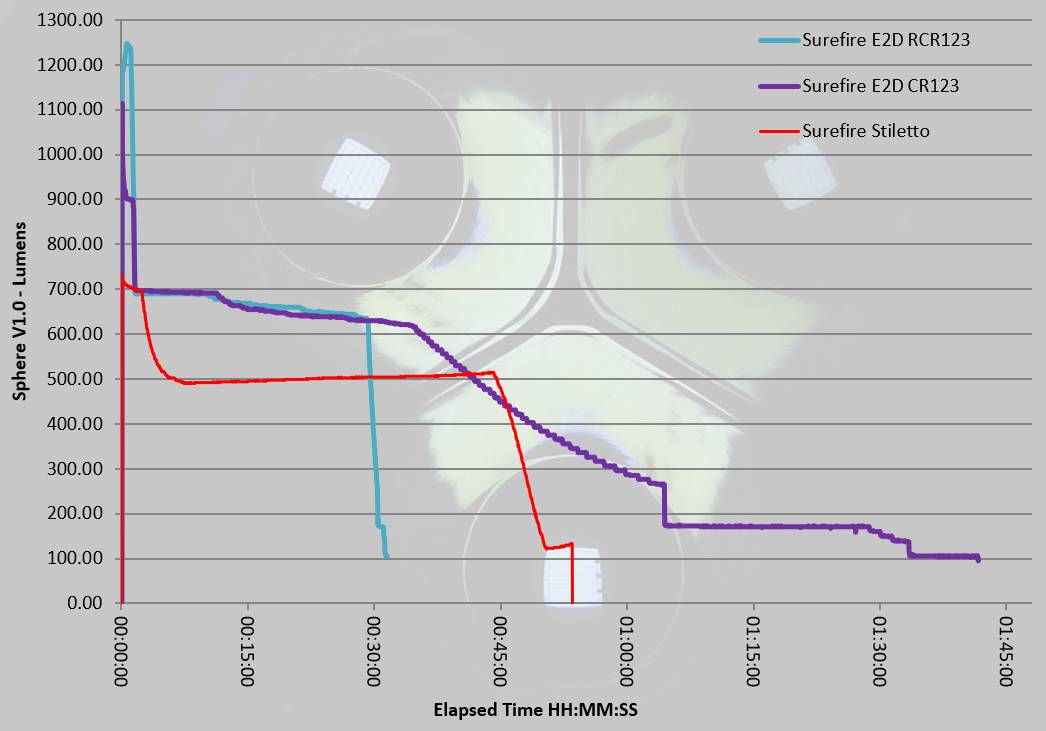
This is a table of measured results. PWM frequencies are recorded by an oscilloscope, and in some cases are clear and in others are more like superimposed noise. It only appeared that the Defender’s High beam when using the RCR123 cells showed any PWM. This is possibly due to power supply pulsing with the different voltage of the RCR123 cells which were able to produce a higher maximum output than on CR123.

In the runtime graphs, first check the start of the run and you can see how the RCR123 cells are capable of keeping that peak output from the Defender until the programmed slope-off of the output after 60s. However skip onto the full runtime and you can see the RCR123 cells run out after thirty minutes, but the CR123s go on a lot longer and with much more warning they are getting low. For ‘duty’ use you will still want to use CR123s, but the RCR123s give great guilt-free lumens.

Performance is solid from the Stiletto and output is more than good enough for EDC; 45 minutes of 500lm-plus output is impressive.


The Defender E2D Ultra and Stiletto in use

Though by no means a lesser light, there is perhaps slightly less to say about the Defender E2D, so I shall start with that. For me the ‘Ultra’ version is absolutely the one to have. The output levels are so opposite with a 9lm Low and a 1000lm+ High, these might seem too at odds to work well, but they do. If I could add one thing to the Defender E2D it would be a way to user program the Low to be the first mode, but without this the High-Low mode order ensures it lives up to its name.

Thanks to the beam shape and hot-spot, the 9lm mode does a great job for those daily needs of a bit of light. It hits the right balance of being low enough for complete darkness but not so low it is useless for anything but pitch black.

I have many 1000lm+ lights and many into the 5000lm+ level, yet the Defender seems to manage to appear brighter than similar output lights. I have never been left wanting by the Defender (running on the RCR123) with its solid performance and beam profile.

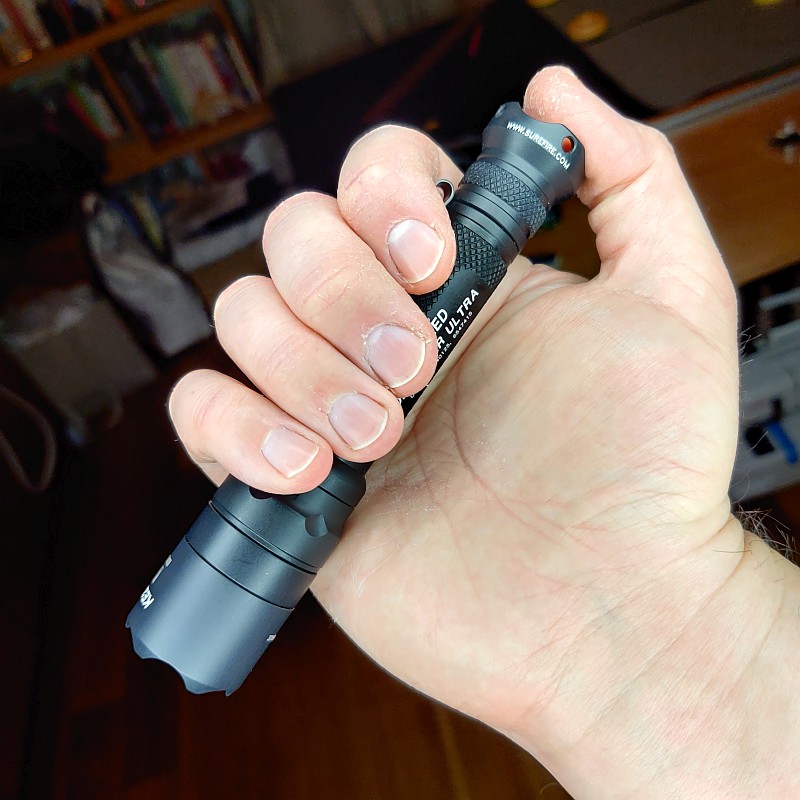
The slim body allows easy cigar gripping and general operation is what you expect from a tail-switch light.


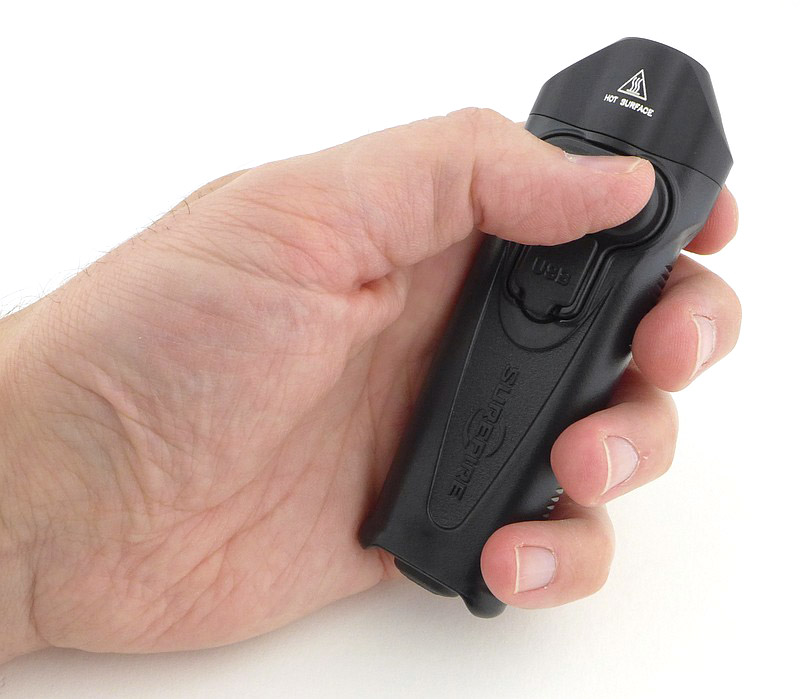
And the Stiletto, this is a very different concept and is very different to use. It’s flat profile and large pocket clip make it one of the easiest lights I’ve used to pocket carry. Ergonomics are a really strong point with the Stiletto. In general use you will find the main side-switch falls nicely under your thumb. Side-switches are far superior to tail switches for EDC tasks, and make it more comfortable to hold the light for extended periods with a low arm position.

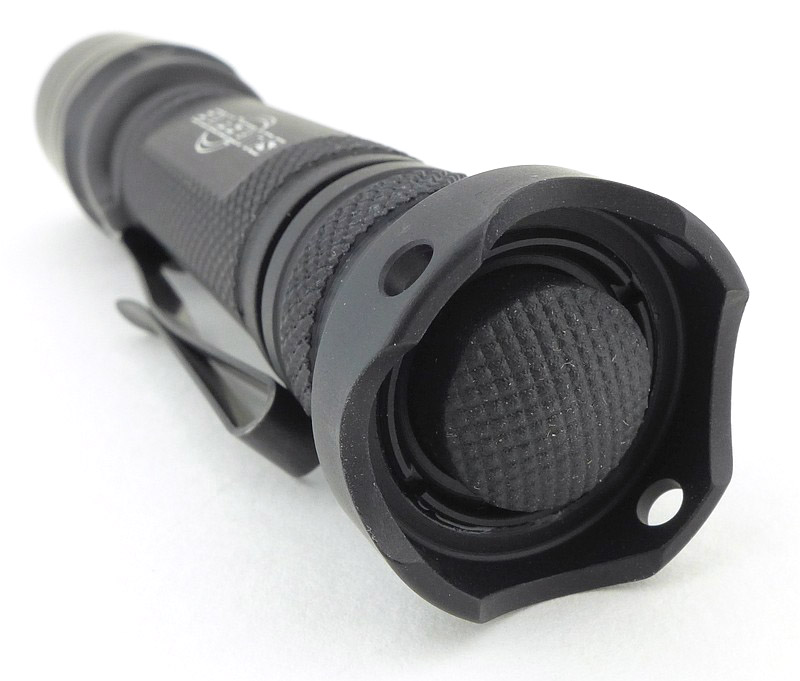
But of course, the Stiletto also has a tactical tail switch so you have the option of the high tactical grip with direct access to High. This leads me to the set of images in the gallery as I personally found the tail switch (which is quite stiff) gave me a few issues with grip and the Stiletto sliding forward. I had to use two methods to keep it stable; one was to hook my little finger just round the front of the aluminium head, and the other was to ensure I had the Stiletto rotated so I was gripping onto its width and not onto the flats. (check the gallery for examples) It has been fatiguing to use the tail-switch for longer periods, but with the streamlined shaping this is unavoidable.


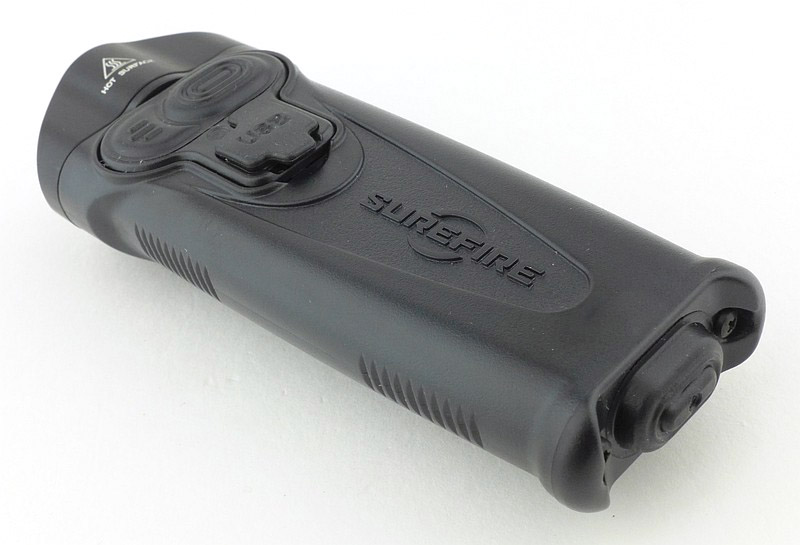
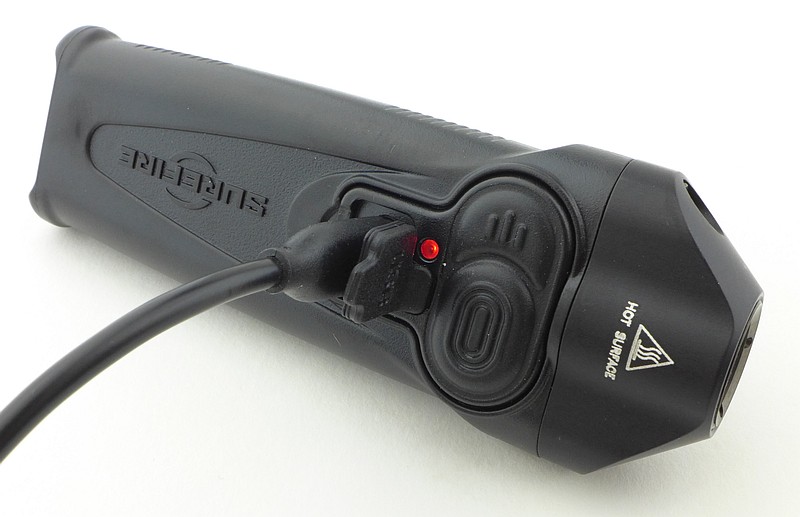
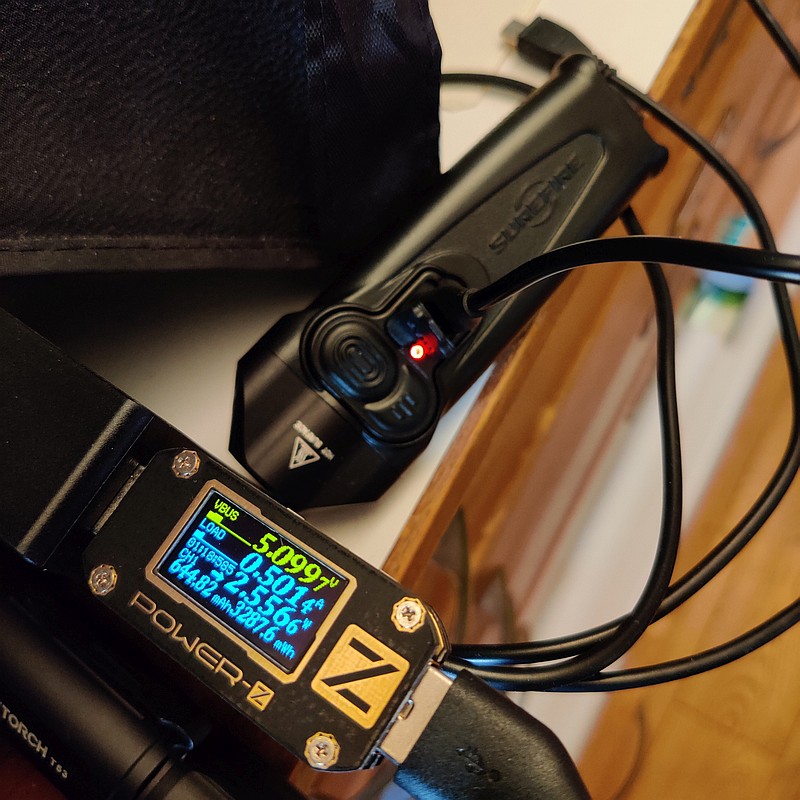
The Stiletto’s main power switch is one of three areas on the rubber side panel; I am mentioning this to describe something else to be aware of. To the left of the main switch is a programming switch, this has not caused any issues in general use. However, the USB charging port cover is something to be aware of as I have often found myself trying to turn it on by pressing this part as it is quite ‘button-like’. It is very easy to do this, especially if wearing gloves, so just needs a little awareness and grip adjustment to correct.

‘Programming switch’ – yes the Stiletto can be programmed, with each switch independently programmed into one of two modes. I definitely prefer the default mode and I’d only change if I were mainly going to use the Stiletto in High. Programming is very easy – you hold the programming switch down until the indicator shows blue and then press either the main-switch or tail-switch to toggle it between modes. This programming switch also activates the emergency strobe.

Having three levels and the ability to swap the order from L-H or H-L is very useful. The most used mode for me was the Low, followed by Medium. High was too powerful for most of my EDC uses, but great to have for quick blasts.

The previous gallery has two in-use photos on a pathway to compare these two lights. In the earlier beam-shot gallery you could see the effect of the even circle of light the Stiletto emits. Once you get outdoors and don’t have light bouncing round to fill in the areas beyond the outer edge of the beam – the tunnel vision effect becomes more pronounced. You can see with both the Defender and Stiletto aimed in the same way, the Defender view is complete where the Stiletto’s beam leaves you blind beyond the narrower circle of the beam. Using the Stiletto in unlit areas required more beam movement and scanning to see where your feet are going.

Review Summary

The views expressed in this summary table are from the point of view of the reviewer’s personal use. I am not a member of the armed forces and cannot comment on its use beyond that covered in the review.

Something that might be a ‘pro’ for one user can be a ‘con’ for another, so the comments are categorised based on my requirements. You should consider all points and if they could be beneficial to you.

I’m trying something slightly different and starting with what doesn’t work so well, so I can finish on a more positive note

_______________________________________________
What doesn’t work so well for me
_______________________________________________

Defender E2D Ultra – no direct access to Low.
Stiletto – tail-switch a bit too stiff to hold-on in tactical mode.
Stiletto – beam profile can cause tunnel vision in unlit outdoor areas.

_______________________________________________
Things I like
_______________________________________________

Defender E2D Ultra – Powerful output (that seems more than it is).
Defender E2D Ultra – Great beam profile.
Defender E2D Ultra – Excellent neutral beam colour.
Defender E2D Ultra – High and Low level.
Defender E2D Ultra – Lockout.
Defender E2D Ultra – Slim and easy to carry.
Defender E2D Ultra – Super quality build.
Stiletto – Very ‘pocket friendly’ shape.
Stiletto – Choice of modes.
Stiletto – Two switches, side and tail.
Stiletto – Programmable modes for switches.
Stiletto – USB chargeable.
Stiletto – Fuel gauge indicator.
Backed by Surefire’s guarantee.


Discussing the Review:

The ideal place to discuss this review is on the Tactical Reviews Facebook Page
Please visit there and start/join the conversation.

As well as the Tactical Reviews Facebook Page, please consider visiting one of the following to start/join in any discussion.

CandlePowerForums – Flashlight Reviews Section (Largest and Friendliest Flashlight Community Forum)

Knife Review: lionSTEEL bestMAN

I was first able to handle the lionSTEEL bestMAN folding knife at IWA 2019 – those were prototypes. The finished production knives shown in this review are further refined compared to the prototypes (which you might have seen on the @TacticalReviews Instagram). lionSTEEL have taken the traditional folding pocket knife and modernised it using the best materials and giving you the choice of two blade shapes, single or double bladed versions and five handle materials.

A few more details:

What’s in the box?:


A good look round the single blade bestMAN – Things to look out for here are:

Though looking very traditional, the bestMAN uses modern materials.


A good look round the double blade bestMAN – Things to look out for here are:

Packing in a second blade gives both available blade shapes in one knife. In this case a little more traditional with a wooden handle.


The Blade and Handle – Detailed Measurements:

For full details of the tests and measurements carried out and an explanation of the results, see the page – Knife Technical Testing – How It’s Done.

The blades are made from M390 steel.

Originally developed following the release of the Chris Reeve Knives Impinda, the bestMAN has been tested for opening and closing torque. The raw data is included but it is the average torque figures in bold that I would direct you to look at. Remember to check the technical testing link above for more on this.


What is it like to use?

After spending a lot of time carrying the single and double bladed versions, this feels the right place to start. Initially I would have been adamant that the double blade version was without doubt the one you had to have – two blades are better than one – one main blade and one left razor sharp as a backup – the whole ‘one is none’ thing. To a degree maybe, but I’ve gone the other way and found the single blade version to be my favourite. The reason being two-fold, firstly it is noticeably smaller and far less obtrusive in the pocket, and secondly it is much easier to open the blade. Nail-nicks are not ideal if your nails are softened by water or otherwise not very strong. With the single blade version you can pinch-grip the blade as well as using the nail-nick so opening is definitely easier.
The double blade version still has that advantage of giving both blade shapes and a second sharp edge, just with the burden of being a bit bigger.


If you do need to chose between the drop-point and wharncliffe, this might be easy if you have a firm favourite, and either way you won’t go wrong.
The straight cutting edge and lower point of the wharncliffe suits many EDC cutting tasks better for me than the drop-point.

Modifications:

No surprises for anyone reading my reviews, when I bring up the sharpening choil/rear point. Some of the bestMAN blades have a more pronounced cutting edge heel than others, but in general, not sufficient for my liking. I have made a minor modification to the blade heel to add a Victorinox style sharpening choil. Shown here is the double blade version with both blades modified.


Review Summary

The views expressed in this summary table are from the point of view of the reviewer’s personal use. I am not a member of the armed forces and cannot comment on its use beyond a cutting tool or field/hunting knife.

Something that might be a ‘pro’ for one user can be a ‘con’ for another, so the comments are categorised based on my requirements. You should consider all points and if they could be beneficial to you.

I’m trying something slightly different and starting with what doesn’t work so well, so I can finish on a more positive note

_______________________________________________
What doesn’t work so well for me
_______________________________________________

Double bladed version more difficult to open.

_______________________________________________
Things I like
_______________________________________________

Excellent M390 steel.
Nice traditional ‘friendly’ looking slip-joint.
Choice of two blade shapes.
Choice of single or double blade.
Choice of five handle materials.
Reliable design.
Smooth precise action.
Large nail-nick.


Discussing the Review:

The ideal place to discuss this review is on the Tactical Reviews Facebook Page
Please visit there and start/join the conversation.

As well as the Tactical Reviews Facebook Page, please consider visiting one of the following to start/join in any discussion.

BladeForums – Knife Reviews (US based Forum for Knife Discussion)

CandlePowerForums – Knife Reviews Section (Largest and Friendliest Flashlight Community Forum)

The BESS Exchange – A forum discussing technical aspects of sharpness and truly understanding your sharpening process.

Knife Review: Kizlyar Supreme – Sturm and Survivalist X

This review features two knives from Kizlyar Supreme, the Sturm and Survivalist X. I have a soft spot for hollow handle knives, and am always on the lookout for a properly made one that can be used without worrying it will come apart; this is what drew me to the Survivalist X hollow handle knife. To partner this we have the Sturm, a smaller general purpose blade, and for this review in a high hardness steel, PGK from German steel makers Lohmann.

As soon as I came across knife makers Kizlyar Supreme I was impressed with the range of great designs and was very keen to try out some of their knives. Kizlyar Supreme launched as a company in 2011 thanks to the enthusiasm and dedication of its founders, with the intention to provide great designs using high grade materials yet remain affordable.

A few more details:

What’s in the box?:

The boxed Sturm and Survivalist X.


A good look round the Sturm’s sheath – Things to look out for here are:

I’d go so far as to call the Sturm’s sheath a ‘technical mounting platform’ due to its mass of design features and practicality. As you will see in the photos, the sheath is indexed so the blade will only fit into it one way. Though not initially appearing ambidextrous, if the four bolts holding the sheath to the mount are removed, you can flip the sheath over to make it left-handed. While doing this you can also swap from vertical to horizontal carry by turning the mount 90 degrees.


A good look round the Sturm – Things to look out for here are:

The Sturm uses a handle Kizlyar Supreme use for several other models. The blade is a convenient size for most tasks and keeps thing simple with a full flat grind.


A good look round the Survivalist X’s sheath – Things to look out for here are:

Well, in terms of preparedness, even the Survivalist X’s sheath is ready for anything. Packed with features and utility it is certainly comprehensively equipped.


A good look round the Survivalist X – Things to look out for here are:

The survivalist X is a substantial knife, there is no missing its presence, and the hollow handle gives it a particular look and feel.


The Survivalist X’s hollow handle and capsule:

I’m sure we have all had those cheap and cheerful versions and found them not to live up to expectation, but be prepared for something entirely different.
Kizlyar Supreme have ensured there is the maximum amount of metal in the handle tube and blade tang to keep the strength very high. The view into the end of the handle shows the blade tang which comes right up to the base of the capsule, absolutely as far as possible.
Also shown are the capsule contents; fishing kit, wire, sewing kit with safety pin, matches and striker and plasters.


The Blade and Handle – Detailed Measurements:

For full details of the tests and measurements carried out and an explanation of the results, see the page – Knife Technical Testing – How It’s Done.

The Sturm’s blade is made from Lohmann PGK steel, and the Survivalist X’s from D2.


On the day it was measured, the Sturm in PGK steel had the best SET test result I had yet measured. The lower the Series 2 degradation (S2) figure is, the more resistant the edge is to being rolled. The recovery strop process shows if the edge was permanently damaged or chipped, or can be fully recovered.
Here you can see the PGK outperforming the D2 steel by a good margin. This is not saying the D2 is bad, in fact the D2 is good, just that the PGK performs better in this test.

Being a new steel to me, I checked the composition which is listed as:
Name – Lohmann PGK
Base – Fe
C – 1.2
Cr – 8.5
Mo – 1.5
V – 2
W – 1.5
Si – 1


What is it like to use?

Picking up the Sturm was like finding an old pair of shoes that fit perfectly. No adjusting or finding my way with this knife, instead just getting on with whatever task. The size of the Sturm is ideal for most of the general cutting tasks you might want a fixed blade for.

The lips of the sheath had arrived with some rough edges from the moulding and these were becoming annoying. Once trimmed off, the feel was transformed as when unsheathing the knife you push onto the lips with your thumb. The retention is a bit strong to just pull the Sturm out without the thumb lever, but is possible when you really have to.

Hollow handles – are they a love or hate thing? If the knife is not well made and the blade comes off, then clearly hate, but if the handle and blade are well fixed and don’t come loose, what then? The Survivalist X has had a hard time from me, heavy chopping and into hard woods; I wanted to see if I could get the blade to shift in the handle – so far not a hint of movement.

So, the Survivalist X’s blade/handle construction is solid and doesn’t look like a weak point at all, then we have the fact it is a round handle. True, a round handle is not the best as it lacks indexing for the grip. You do have to keep an eye on the blade orientation, and in heavy chopping it can spin and twist a little. Nothing unexpected there. The knurling gives good grip without being too abrasive. It is actually not a bad thing that you have to pay attention to the knife and your grip, and I’ve not found this to be a problem.

The Survivalist X is a heavy hitter, and is heavy to carry, so take it when you want a big camp knife, or don’t want to carry a hatchet as well as a knife.


One questionable feature for me is the bone cracker wedge on the Survivalist X’s spine; it is like nothing I’ve seen before. A big knife like this is also good for batoning larger logs, but this wedge damages the baton more than a straight spine. How often do you need to crack bones instead of cutting at the joints? Not sure about that.

I must also mention that the factory edges on both knifes were superb, with good angles, and in hard steels – though not essential, it is very nice to have super sharp blades out of the box.

The Sturm has several different steel choices and the PGK steel has been a really interesting one. I thought I had an issue when cutting packing straps as the edge seemed to dull straight away when cutting some of these, yet as you have seen before, it’s structural edge testing results very very good. I decided to change the edge angle, and it was very slow to sharpen on a belt, showing how hard and wear resistant the PGK steel is. After this reprofile I haven’t had anything similar happen, so it appears to have been an anomaly.

I also can’t quite work it out as a steel, as when I examine the edge for defects, I see reflections that would normally indicate edge damage, yet the Sturm remains sharp and cuts well, defying the normal observations. The bottom line here is that despite what I think I see, the Sturm keeps cutting.

Review Summary

The views expressed in this summary table are from the point of view of the reviewer’s personal use. I am not a member of the armed forces and cannot comment on its use beyond a cutting tool or field/hunting knife.

Something that might be a ‘pro’ for one user can be a ‘con’ for another, so the comments are categorised based on my requirements. You should consider all points and if they could be beneficial to you.

I’m trying something slightly different and starting with what doesn’t work so well, so I can finish on a more positive note

_______________________________________________
What doesn’t work so well for me
_______________________________________________

Sturm – The sheath lips needed mould flashings to be trimmed.
Survivalist X – For a ‘Survival’ Knife I’d prefer a more stainless steel than D2.
Survivalist X – The exposed press-studs scratch the handle.

_______________________________________________
Things I like
_______________________________________________

Sturm – Excellent handle comfort and indexing.
Sturm – Blade geometry works well.
Sturm – Range of steels to choose from.
Sturm – Hugely versatile sheath and mounting options.
Sturm – Secure, strap-free knife retention.
Sturm – Great general purpose size.
Sturm – The PGK steel just seems to keep on cutting.
Survivalist X – Very strong construction.
Survivalist X – Big hollow-handled knife – what is not to like?
Survivalist X – Fantastic chopping performance.
Survivalist X – Feature-packed sheath with lots of options.
Both – Very good factory edges.


Discussing the Review:

The ideal place to discuss this review is on the Tactical Reviews Facebook Page
Please visit there and start/join the conversation.

As well as the Tactical Reviews Facebook Page, please consider visiting one of the following to start/join in any discussion.

BladeForums – Knife Reviews (US based Forum for Knife Discussion)

CandlePowerForums – Knife Reviews Section (Largest and Friendliest Flashlight Community Forum)

The BESS Exchange – A forum discussing technical aspects of sharpness and truly understanding your sharpening process.

Knife Review: Oberland Arms Wuiderer Sepp

This review of the Oberland Arms Wuiderer Sepp knife is a natural follow-on from the previously published review of the Oberland Arms Jager Sepp knife, with both being designed by Tommaso Rumici to specifically meet requirements Matthias Hainich (Executive Director of OA) had for the knives. Though initially the Wuiderer Sepp was not the one I would have picked up first, its capabilities and versatility has made it my favourite little-big-knife.

A few more details:

What’s in the box?:

Actually this section is incorrectly named for the Oberland Arms knives, as they don’t have a box, but come in a zip-lock plastic bag; more like bulk supply standard issue kit than a retail product.


A good look round the Wuiderer Sepp’s Sheath – Things to look out for here are:

An interesting Kydex liner/fabric outer combination allowing for secure knife retention without additional straps, and the user can choose right or left handed configuration. The MOLLE strap fixture is unlike any other I have seen, only using a fabric tab to secure the strap.


A good look round the Wuiderer Sepp – Things to look out for here are:

This knife has inspired me to class it as a little-big-knife – the power and presence of a Big knife, but actually it is not that big. Come back to this gallery after reading the design insights in the ‘Explained by the Maker’ section.


Explained by the Maker:

The reasons for certain design choices may not be clear when simply looking at an object, so this section is intended to give an insight into the thinking behind a design by speaking to the designer themselves.

Tommaso Rumici has been kind enough to talk to me about this knife and the design process. This is part two of an interview first published in the review of the Oberland Arms Jager Sepp knife:

Still on the steel, are there any other factors or special processing/heat treatments to support the choice of D2 over other steels?

“In the past years, Viper has acquired a big know how about D2 heat treating. They usually do vacuum treatment, double tempering, and a final cryogenic phase. I can’t go more in details, but the final result is really interesting, on the field.
After 14 years in the knife industry, I’m convinced that a correct heat treatment is far more important than the alloy itself (obviously if we choose among good ones).
During my continuous studies and tests, several times I compared the same steel, treated by different manufacturers, with opposite results: one worked well, another seemed not even the same steel.”

Were the 3D milled handle scales something you had included in a design before? How was it working with this type of production? Did you do the 3D modelling?

“I wanted these knives to have a family feeling with the Oberland rifles, so I inspired to the texture applied to their AR15 handguards and magazines. In the past, David and Golia had milled scales, but this texture was developed for this project only.
The 3D was made directly by Viper. I usually prefer to do so, because every manufacturer uses different software and knows his machines, so the final result is far better.”

Can you talk me through the factors affecting the length and thickness of the blade, the choice of grind, the positioning of jimping, the sharpening choil and any other details you are particularly pleased with or think are absolutely essential?

“When I started working with Matthias, he was really clear about one point: his knives, like his rifles, are made for real operators, non for the tacticool audience, so he asked for performances above all. So we choose grind and thickness to achieve toughness and cutting ability.
The length of the blade, on the short one, follows German regulations. If I remember correctly blades under 12 cm are easier to carry, and they are enough for the fighter-utility role. The other one in an heavy camp knife, so the blade had to be bigger and longer.
The blade design was quite easy compared to the handle. Mr. Hainich asked for something extremely comfortable, with enough grip to work in every environment, and big enough to be used with every kind of military glove. that’s why this handle is so big, compared to civilian knives.”

How did the prototyping go (how many versions)?

“I always try to reach final design before the prototyping phase, and so we did during this project. After Viper made the first prototypes, Oberland checked and tested them, and needed only minimal modifications before the production.”

Thanks go to Tommaso for taking the time to share this.

The Blade and Handle – Detailed Measurements:

For full details of the tests and measurements carried out and an explanation of the results, see the page – Knife Technical Testing – How It’s Done.

The blade is made from D2 steel.


What is it like to use?

Again and again, due to its capabilities, the Wuiderer Sepp gives me the sense it is a much larger knife than it actually is. It is not a small knife, but neither is it a big camp blade, yet it has plenty of chopping/cutting power.
Viewed next to the Jager Sepp, which is a typical size for general purpose utility fixed blade, the Wuiderer Sepp is not that much larger, but has a wider blade and a more weight-forward configuration. By having the full-flat-grind blade, you gain significant slicing ability, helping it to slice as well as a much smaller blade would.

While writing this review my wife passed me a box of frutta di marzapane that needed opening. With the laptop on my lap, the knife I had to hand was the Wuiderer Sepp, so I popped it out of the sheath and my wife exclaimed, “What is that?! Where did that axe come from?!” as she hadn’t noticed the sheathed blade sitting next to me.

The reason for sharing this is that the Wuiderer Sepp is relatively unobtrusive, especially in the sheath. The wide blade definitely gives it more presence, as proven by my wife’s reaction to its appearance, but overall it is nothing like the size of many ‘camp’ style blades.

On the subject of the sheath, this is the only area I’m not so sure about, and only really due to the MOLLE straps. With only the fabric tabs posted through a slot in the strap to retain/hold the end, this does not provide much strength. Fully woven into the full set of PALS webbing, the loading is spread over several strips of webbing, so it should not pull on the strap fixing too much. But used as I showed in the sheath section, where the straps are used as a belt loop, this strap fixing is not very stable – ideally it should be properly fitted to webbing, or a separate belt MOLLE adapter.

Tommaso Rumici, the designer, has been impressed with the performance of Viper’s D2, achieved through their own heat treat recipe. I can only agree. The Structural Edge Testing results in the technical testing section are very impressive and equal performances from other manufacturers using M390 and PSF27, and the result is quite a bit better than Viper’s own N690 (confirming the choice of this D2/heat treat). The recovery result is also important as it shows that the edge stability has not been achieved at the cost of creating brittleness – the edge is rolling rather than chipping and can be stropped back. I have used the Wuiderer Sepp for very heavy chopping, carving and other tasks and the edge just keeps holding. When resharpening, I took the original 46 degree factory edge down to 40 degrees, and further heavy use has not caused any damage.

Using a full flat grind turns what could have been a less useful brute of a blade, into an excellent all-rounder. I’ve used this to chop through good sized branches, all the way to the other extreme of cutting soft sponge foam rubber to size, and it worked well for all jobs.

With its purposeful geometry the Wuiderer Sepp cuts above its weight with a big-knife feel for those heavier jobs. I’ve used the term earlier in the review, which comes from the fact it can cut like a BIG knife, without being big, so somehow ‘little-big-knife’ just seems appropriate; it makes me question the need for anything larger (or smaller).


Review Summary

The views expressed in this summary table are from the point of view of the reviewer’s personal use. I am not a member of the armed forces and cannot comment on its use beyond a cutting tool or field/hunting knife.

Something that might be a ‘pro’ for one user can be a ‘con’ for another, so the comments are categorised based on my requirements. You should consider all points and if they could be beneficial to you.

I’m trying something slightly different and starting with what doesn’t work so well, so I can finish on a more positive note

_______________________________________________
What doesn’t work so well for me
_______________________________________________

Concerned that the sheath MOLLE strap fixing (fabric tab) is not stable enough.
No specific belt carry option provided.
D2 is only a semi-stainless steel.

_______________________________________________
Things I like
_______________________________________________

Cuts well above its weight – a real ‘little-big-knife’.
Very comfortable hand-filling handle.
Very good blade indexing due to handle design.
Excellent edge retention and edge stability.
Sheath can easily be switched between right and left-handed.
Good at finer cutting tasks as well as chopping.
Stable sheath retention that will hold in tip-up carry.
Fantastic all-rounder.


Discussing the Review:

The ideal place to discuss this review is on the Tactical Reviews Facebook Page
Please visit there and start/join the conversation.

As well as the Tactical Reviews Facebook Page, please consider visiting one of the following to start/join in any discussion.

BladeForums – Knife Reviews (US based Forum for Knife Discussion)

CandlePowerForums – Knife Reviews Section (Largest and Friendliest Flashlight Community Forum)

The BESS Exchange – A forum discussing technical aspects of sharpness and truly understanding your sharpening process.

Gear Review: Wiley X Mega-Review! – Detection, Aspect and Vallus.

In this Wiley X Mega Review, I’m testing three recent models, the Detection, Aspect and Vallus. Each of these provide different looks, fit, features and lens specifications, giving this group a nice balanced mix. Since first finding Wiley X many years ago, I’ve not looked back when it comes to eye protection, lens quality, fit and style.

A little more Background:

In this group we have a flagship model, the Detection, with its set of five lenses to suit all lighting conditions without any reduction in eye protection. Frameless and with large wrap-around lenses the Detection is intended to provide maximum visibility and coverage ideal for, but not limited to, shooting.
Adding in the Aspect with emerald polarized lenses fills in more of the Wiley X offering, and the Vallus taking a third spot in this line-up rounds off a nicely balanced group.
Another crucial factor in the selection are those models in a size suited to my face. Wiley X offer a wide range of sizing options with the specifications clearly shown so you can find the right fit for you – another reason I find Wiley X difficult to beat.

The Detection:

What’s in the box?:


A good look round the Detection – Things to look out for here are:

Starting this gallery is a quick spin round the front, side and rear views, before moving onto the smaller details. Unlike most lens swapping glasses, the Detection lenses keep their nosepieces.


Lens swap on the Detection:

Most lens swapping designs have a moment of ‘should I be pulling/pushing that hard?’, but not with the Detection’s arm lock making swapping easier than any other I’ve used to date.


The Aspect:

What’s in the box?:


A good look round the Aspect – Things to look out for here are:

Starting this gallery is a quick spin round the front, side and rear views, before moving onto the smaller details. The Aspect has sprung hinges that allow the arms to both open up wider than the normal open position, to conform to larger heads, and also protect the hinges from over extension. This pair of Aspect glasses has the Emerald, polarized lenses for all the bells and whistles.


The Vallus:

What’s in the box?:


A good look round the Vallus – Things to look out for here are:

Starting this gallery is a quick spin round the front, side and rear views, before moving onto the smaller details. The Vallus is the most conventional in terms of ‘features’, but keeps thing simple and solid.


Technical Testing:

With a wide range of lenses, one of the specifications that is important to me is the light transmission. (I also have a hyper-sensitivity to light) using a fixed and stable light source and a lux meter, the transmission was measured to compare it to the Wiley X specifications. The results are shown as comments in the raw photos included in this gallery.


What it is like to use?

Truly an EDC for me, the time so far (as it does not end with this review) has given me some interesting material for three specific sections.

Protection test:

I couldn’t quite bring myself to shoot the brand new Wiley X models, but had an old pair of Wiley X made 5.11 Cavu glasses which were past their best. Testing these three new models inspired me to take the older Wiley X lenses out for a shootout!
Needing to choose silenced guns, I had a .410 shotgun, using .410 Long plus the Chiappa Little Badger in .22LR using subsonic hollow-point. Clearly the impact energy of the projectiles is quite different, but gives a stepping up of hitting power.

For the test, the glasses were held loosely and shot from around 15m. In both cases the lenses did come out of the frames, but had they been on a face, they would have been supported. The .410 was stopped by the lenses, but the .22 was not – still a very impressive result for a direct shot.


Wiley X saved me from serious eye injury:

It only has to happen once, so never let your guard down. Never, never go without eye protection even for seemingly safe jobs – the Wiley X Vallus has saved me from serious eye injury.

Despite spending plenty of time on ranges and using power tools and machinery, I have actually never had anything significant hit my eye protection. The mark on the lens shown in the gallery came from the freshly cut end of some coiled steel fencing wire that slipped from my grip and sprung straight into my face, with force, literally scoring a bullseye. Were it not for the Wiley X Vallus lens, I’d have been pulling out this wire from deep inside my eye; it all happened so quickly.

Initially I was annoying that it happened with a two week old pair of glasses, but I’d rather that than the alternative. I’m always super paranoid about eye protection, and in this case I have no doubt it would have been very bad, so am extremely glad it was Wiley X I was wearing.


Every day with Wiley X:

Readers who know me might remember I have a condition giving me hyper-sensitivity to light, and that this means I wear sunglasses every day at all times I am outside during daylight hours, and frequently indoors as well.

So when I say I have lived with these sunglasses from Wiley X, I have lived with them and worn them for hours and hours every day for months.

Detection – For shooting or any action sport, the Detection is superb. Its large wrap-around frameless lenses give you uninterrupted vision covering all your peripheral vision as well (good for picking up moving objects). The level of cover also ensures the highest level of protection from flying fragments.

Aspect – With glare being one of the worst things for my light sensitivity, polarized lenses are a real eye-saver. Generally I prefer the neutral type of lens (smoke/grey) so the Emerald is not something I might have jumped at, but if I allow myself to consider looks, well, these got more compliments than any eyewear I’ve worn before.

Aspect – The sprung arms on the Aspect afford it a level of comfort and ease of putting them on, but there is a small ‘feature’ which becomes more obvious over time. When you put them on, compared to arms without the sprung hinges, the Aspect will stay where it was when you let go. So if it is slightly crooked, the arms are not strong enough to straighten them on your face. You do need to ensure you put them straight. If you are popping them on and off quite a bit, this becomes more noticeable, where the standard hinge glasses, just snap into place, these don’t. A trade-off for the comfort.

Vallus – I’d not normally go for the non-polarized lens for my main eyewear, but the Vallus has claimed its spot thanks to the great comfort and excellent side protection due to the wide arms. The neutral colour lens works well, and not being polarized also means there are absolutely no ‘screen viewing issues’ which are a common hazard of the polarized lens.

Vallus – As described earlier, the Vallus has also actually saved the sight in my right eye, so I do have an even greater affection for them.


Review Summary

The views expressed in this summary table are from the point of view of the reviewer’s personal use. I am not a member of the armed forces and cannot comment on its use beyond that covered in the review.

Something that might be a ‘pro’ for one user can be a ‘con’ for another, so the comments are categorised based on my requirements. You should consider all points and if they could be beneficial to you.

I’m trying something slightly different and starting with what doesn’t work so well, so I can finish on a more positive note

_______________________________________________
What doesn’t work so well for me
_______________________________________________

Detection – lens holder in case can leave a mark on the lens which can be cleaned off. (Wiley X are already fixing this)
Aspect – Arm sprung hinge prevents the glasses auto-centring on your face.

_______________________________________________
Things I like
_______________________________________________

Detection – full coverage without the loss of any peripheral vision.
Detection – super easy lens swapping.
Detection – lenses to suit all lighting conditions.
Aspect – great comfort due to sprung arm hinges.
Aspect – fantastic Emerald polarized lens.
Vallus – light and comfortable.
Vallus – good side protection from wide arms.


Discussing the Review:

The ideal place to discuss this review is on the Tactical Reviews Facebook Page
Please visit and start/join the conversation.

Knife Review: Viper Tecnocut Dan 1 and Dan 2

Could the Dan (1 and 2) by Viper Tecnocut be the perfect EDC knife? It was during a meeting with Tommaso Rumici (the designer of the Dan) about a completely different fixed blade design of his, that Tommaso produced a Dan 2 from his pocket and handed it to me. We were still talking knives, but now onto something very different. Intended as an easy to carry, and as widely ‘EDC Legal’ as possible pocket knife (due to size and lack of a lock), the Dan gets so much right, it was an instant hit with me. Since then I’ve not been able to put it down. In this review of the Viper Dan 1 and 2, I take a very close look at this knife and why it works so well.

A few more details:

What’s in the box?:

The two knives in this review were provided without packaging or any accessories as they came directly from the Viper Tecnocut display stand at IWA 2019. This also means they have been handled and ‘played with’ by hundreds of people during the show, so might not be in perfect condition.

A good look round the Dan 1 in Zircote Wood – Things to look out for here are:

As you take in the details the quality of finish is clear, along with how sleek and efficient each of the design elements are.


A good look round the Dan 2 in Burgundy Canvas – Things to look out for here are:

Getting a sense for the different handle material, but the main difference is the wharncliffe blade of the Dan 2.


Explained by the Maker:

As I mentioned in the introduction, while at IWA 2019 I had the good fortune to both be introduced to this knife by, and able to talk about it with, its designer Tommaso Rumici.

Tommaso presenting the knife to me:

Rather than repeating the explanation, I’d recommend you visit Tommaso Rumici’s write up of the Dan here, where Tommaso gives you the background story of this excellent knife, including where the name came from.

With kind permission from Tommaso, here are a couple of his concept design sketches for the Dan.


The Blade and Handle – Detailed Measurements:

For full details of the tests and measurements carried out and an explanation of the results, see the page – Knife Technical Testing – How It’s Done.

Take note of some results, like the rolled cutting edge length, and thickness behind the edge, which are particularly relevant when comparing the Dan 1 and 2.

The blade is made from N690 steel.


What is it like to use?

It’s a really unusual design, being a cross between a friction-folder and a slip-joint. The Dan can be opened two-handed, or one-handed and although the opening/closing torque of the slip-joint mechanism is nothing to write home about, the protruding tang sits nicely under the thumb allowing you to hold the blade open.

This knife (either blade style) has actually converted me to pocket clip carry. Before ‘Dan’, I had not found a knife/clip design I felt comfortable with. It HAS to be deep carry, sticking up above the pocket edge is no good (for me). Then there is the clip and handle texture combination. My biggest complaint is how vicious most knife clips, particularly the underlying handle surface, are to the pocket material and edge; way beyond the need to hold it in place, and in some cases almost impossible to fit it onto the pocket or get it off again. If you like ripped pockets, great, but not me.

Instead the Dan (both handle materials on test), has the deep pocket carry clip with a clip spring strength that holds, and has not let it go astray, yet is easy to fit and remove. The handle material finish is smooth without being slippery, so provides some grip but is not overly abrasive to the pocket material.

I’ve been carrying this knife daily for 9 months now – pocket clip carry – totally unheard of for me.

Using the short tang (shorter than most friction folders) to open the knife one handed does require some care and concentration as it is very easy to turn the knife into your thumb pad (as ably demonstrated in the photos) and have it bite you. It does require a determined and positive approach to keep from cutting yourself.


Is it perfect? Clearly, as I’m about to show, for me it is not quite there, as I have made a couple of small modifications.

However the initial inspiration for this modification was entirely due to UK EDC carry law – a cutting edge less than 3″. Proven by many cases, this is typically a measurement of the cutting edge being rolled along a ruler, not the straight line measurement. With its sloping back handles, the Dan also has a longer cutting edge than blade length. Combining these factors, the Dan 1 falls foul, by 3mm, of the UK EDC legal carry requirement. I decided to rectify this with a Dremel and remove 3mm of cutting edge while at the same time creating a sharpening choil (which I prefer anyway).

With the success of the Dan 1 modification I decided I needed to do the same to the Dan 2 though this did not have the same EDC legal issue.

For me these are both now the closest I’ve yet found for a perfect EDC legal folding knife. OK, nothing is perfect, but these knives are superb!


Review Summary

The views expressed in this summary table are from the point of view of the reviewer’s personal use. I am not a member of the armed forces and cannot comment on its use beyond a cutting tool or field/hunting knife.

Something that might be a ‘pro’ for one user can be a ‘con’ for another, so the comments are categorised based on my requirements. You should consider all points and if they could be beneficial to you.

I’m trying something new this time and starting with what doesn’t work so well, so I can finish on a more positive note

_______________________________________________
What doesn’t work so well for me
_______________________________________________

The Dan 1 having a slightly over-long cutting edge for UK EDC Legal.
One-handed opening can be a little hazardous.

_______________________________________________
Things I like
_______________________________________________

Easy to carry streamlined design.
Deep-carry pocket friendly clip.
Ambidextrous pocket clip.
Non-locking friction-folder/slip-joint.
Widely Every-Day-Carry legal friendly (check local laws).
Choice of blade shape and handle material.
Blade tang can be gripped to prevent accidental closure.


Discussing the Review:

The ideal place to discuss this review is on the Tactical Reviews Facebook Page
Please visit there and start/join the conversation.

If you read the review entirely on Tactical Reviews, please consider visiting one of the following to start/join in any discussion.

BladeForums – Knife Reviews (US based Forum for Knife Discussion)

CandlePowerForums – Knife Reviews Section (Largest and Friendliest Flashlight Community Forum)

The BESS Exchange – A forum discussing technical aspects of sharpness and truly understanding your sharpening process.

Knife Review: Lionsteel B40 and M1

It was at IWA 2019 I first got to handle the new Lionsteel B40, but the show knives were pre-production samples as there were still a few manufacturing tweaks left to finalise; it took a little longer to get hold of this final production model. Another strong design by Mik Molletta, the B40 is intended as a bushcraft knife. For this review of the Lionsteel B40, I have also partnered it with the smaller M1 which makes for an ideal secondary/backup blade, and is small enough to be a (non-folding) pocket knife.

Onto the details:

What’s in the box?:

A quick look at the presentation. In this case, the B40 was a new production model, but the M1 was a ‘show knife’ straight from IWA, so might not have the full packaging.


Starting with the sheaths:

Both knives have leather sheaths, a material I prefer over any other for the sheath.


A good look round the B40 – Things to look out for here are:

The B40’s proportions and geometry make it look like many other bushcraft knives. This is as the design has to primarily fulfil the requirements of wood processing and portability.


A good look round the M1 – Things to look out for here are:

At the size it is, I can’t help but think of the M1 as a pocket knife that doesn’t fold. A pocket knife without the compromises a folding knife’s handle has, and without the concerns of a lock, slip-joint, or friction mechanism. A properly formed handle and no compromise in the strength of the blade.


The Blade and Handle – Detailed Measurements:

For full details of the tests and measurements carried out and an explanation of the results, see the page – Knife Technical Testing – How It’s Done.

The B40’s blade is made from Sleipner steel and the M1 from M390.


What it is like to use?

You might have noticed the orange; neither of these knives need to be orange, but for me the priority is not losing a tool in the outdoors. This makes the high visibility handles a great choice.

Before moving onto using these knives, I also had the opportunity to convert the B40 from orange G10 to more traditional wooden handles. Removing and swapping the handles is easy, but the tubular bolt is a tight fit in either handle material so you need to ‘unscrew’ it while applying some pressure to get them out. There is a major difference in the appearance, and feel, with the wooden handles. It is transformed into a traditional looking knife, and the wood feels lighter and possibly as if it has a little more grip. It also becomes a lot more camouflaged in the woods, so the choice is yours. I’ve popped the orange G10 back on.


I’m not a fan of pull-lanyards (the smaller piece of cord giving some extra grip with smaller knives), as I find them mostly getting in the way or flapping about annoyingly, so the M1 with its Titanium beaded pull-lanyard immediately had me considering removing it. STOP! I was wrong. For the M1, this pull-lanyard with bead works perfectly.
I’ve said it before, and I’ll say it again, the M1 is a non-folding pocket knife. The sheath might have a belt loop on it, but the overall size when sheathed is still easy enough to pop into a pocket. Now instead of having to choose a folder you can have a fixed blade.
To start with, the pull-lanyard gives you something to easily grab to take the M1 out of your pocket. Then when unsheathing it, although you can get enough grip by just holding the handle, by using the lanyard and its bead, you bring it into your hand so much more easily.
My hands take XL gloves and I find the M1’s handle to be a three-finger grip. The lanyard and bead, gives the fourth finger something to hold and add a little more stability.
I’m perfectly happy to admit when I’m wrong, and the M1 with its Titanium beaded lanyard has shown me I was wrong to consider removing it.

While on the subject of lanyards, without going into the safety arguments for and against, there is a design issue I’ve come upon with the B40 and its lanyard hole. This issue is thanks to the interestingly placed firesteel scraper. As shown in the next gallery, this scraper works very well without a lanyard cord, but should you wish to use a lanyard on the B40, you’ll be covering it in sparks every time you use the scraper. You might then find your lanyard unintentionally becomes tinder and gets burned away. I will be grinding a flat on the blade spine to use instead of the scraper provided.


The B40 hits that sweet spot in size where the handle is full size, allowing a strong grip, and the blade is small enough for power and control, and large enough to use for batoning without being cumbersome. This is why many bushcraft knives look quite similar, and are similar in size.

Use of Sleipner steel falls outside my preferences for a bushcraft knife. Being only a semi-stainless steel, it theoretically needs more care than a steel with higher stain resistance. On its own, this is only part of choosing the right steel, as frequently the reduction in stain resistance is combined with a steel that is easier to sharpen in the field. Sleipner is both hard (so harder to resharpen) and less stain resistance, so would normally have me looking elsewhere. But this is not my first Sleipner blade, and so far I’ve found the stain resistance to be much higher than indicated by its composition. None of the Sleipner blades have given me any issue with corrosion, and none have yet stained despite intentionally not caring for them. When sharpening, it is obvious the Sleipner steel has a high wear resistance, so does require some effort. Diamond stones definitely make this easier. After stropping off a burr formed during sharpening, the Sleipner steel has been giving a very good sharpness, so considering its wear resistance, it actually seems relatively easy to sharpen.

There is an interesting look to the B40’s handle with the flat grip faces having ‘corners’. At first glance these seem like they might become problematic hotspots in hard use. However the rest of the handle, where most of the grip pressure is applied, is rounded and comfortable. These ‘corners’ can be felt, but also provide positive resistance to the knife twisting in your hand.

A knife with a ‘scandi’ blade has become a very popular type of knife for bushcraft, and for good reason; the scandi blade is very good for working wood. But personally I find that to be its limiting factor as the blade’s specialist ability impacts on everything else you might ask of it.

With the B40’s blade, the design has been kept with a leaning a little more towards a utility blade, but with plenty of ability for hard work with wood. As you have seen in the previous gallery, the B40 handles wood very well.

For this review I included the M1 as a companion blade to the B40. Something to use for finer tasks, and as a backup blade. It is too small to choose to use for heavy tasks, but the blade stock used means that if you were caught out with only the M1 it would still be a very capable blade.

Using a full flat grind on the M1 makes its blade a much better slicer than its 3.2mm stock might otherwise dictate.

Lionsteel’s M1 is a knife you should not overlook. It is an excellent general purpose knife that is small enough to carry to pocket-carry. If only the UK knife carry laws permitted this as an EDC, but they do not, so it will unfortunately be limited to duties at home and will certainly be a backup blade for those times I can carry a fixed blade.

The partnership of the B40 and M1 has indeed worked very well.

Review Summary

The views expressed in this summary table are from the point of view of the reviewer’s personal use. I am not a member of the armed forces and cannot comment on its use beyond a cutting tool or field/hunting knife.

Something that might be a ‘pro’ for one user can be a ‘con’ for another, so the comments are categorised based on my requirements. You should consider all points and if they could be beneficial to you.

_______________________________________________
Things I like
_______________________________________________

B40 – Ideal size for its intended use – bushcraft.
B40 – Sleipner steel has taken and held a great edge.
B40 – Sleipner steel – so far no signs of corrosion.
B40 – Blade geometry allows greater flexibility than many bushcraft knives.
B40 – Quality leather sheath.
M1 – M390 steel takes and holds a great edge.
M1 – Full flat grind, makes it a great slicer.
M1 – Quality ‘pocket-sized’ leather sheath.
M1 – Highly functional pull-lanyard with Titanium bead.
M1 – Super useful fixed blade pocket-knife.

_______________________________________________
What doesn’t work so well for me
_______________________________________________

B40 – Firesteel scraper sparks onto lanyard (if fitted).
B40 – Sleipner steel – not so easy for in-the-field maintenance.
M1 – Belt loop is so tight as to be almost unusable.
M1 – Blade stock almost too thick at 3.2mm.


Discussing the Review:

The ideal place to discuss this review is on the Tactical Reviews Facebook Page
Please visit there and start/join the conversation.

If you read the review entirely on Tactical Reviews, please consider visiting one of the following to start/join in any discussion.

BladeForums – Knife Reviews (US based Forum for Knife Discussion)

CandlePowerForums – Knife Reviews Section (Largest and Friendliest Flashlight Community Forum)

The BESS Exchange – A forum discussing technical aspects of sharpness and truly understanding your sharpening process.