Knife Review: Spyderco Zoomer

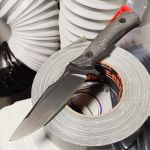
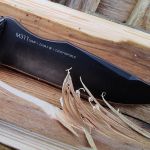
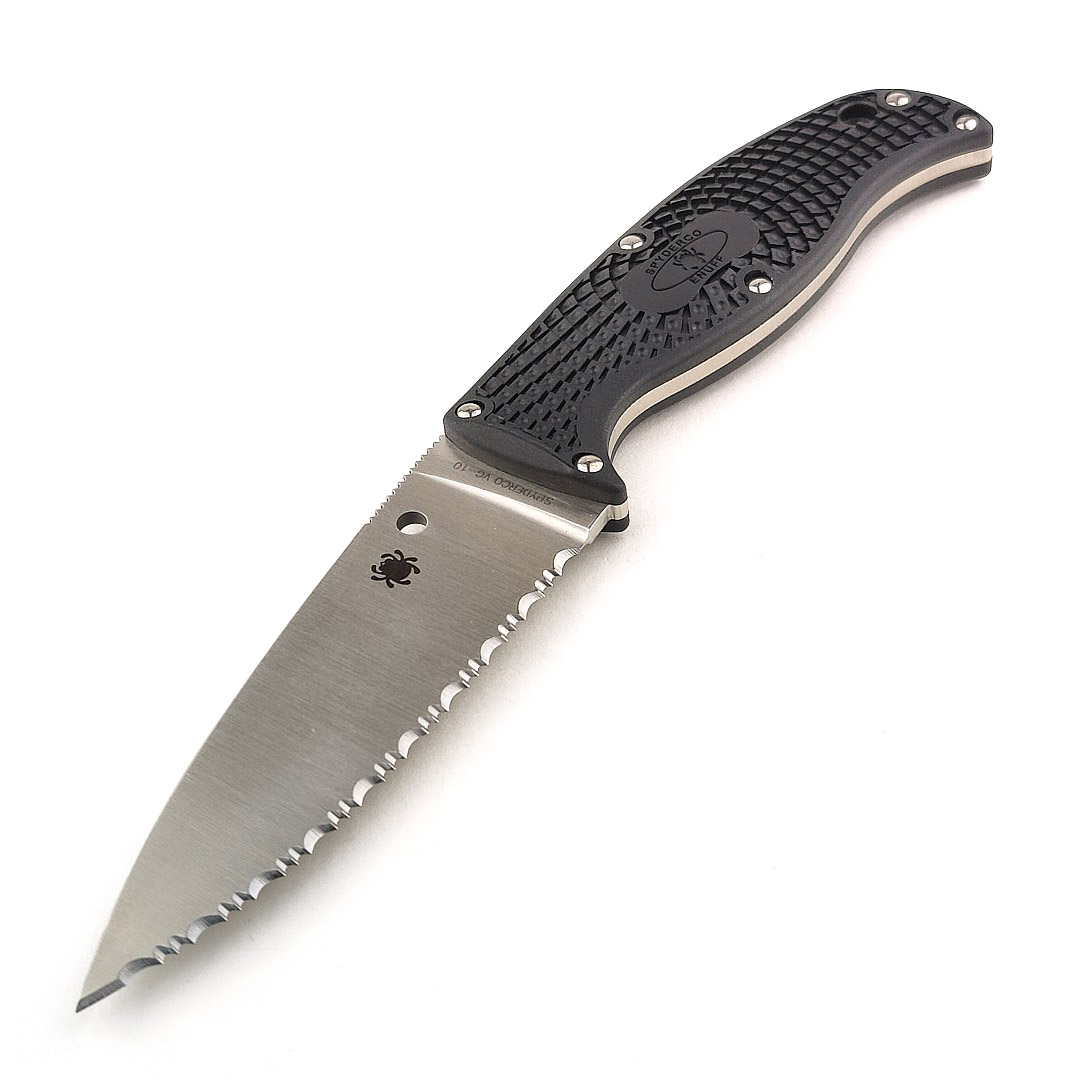
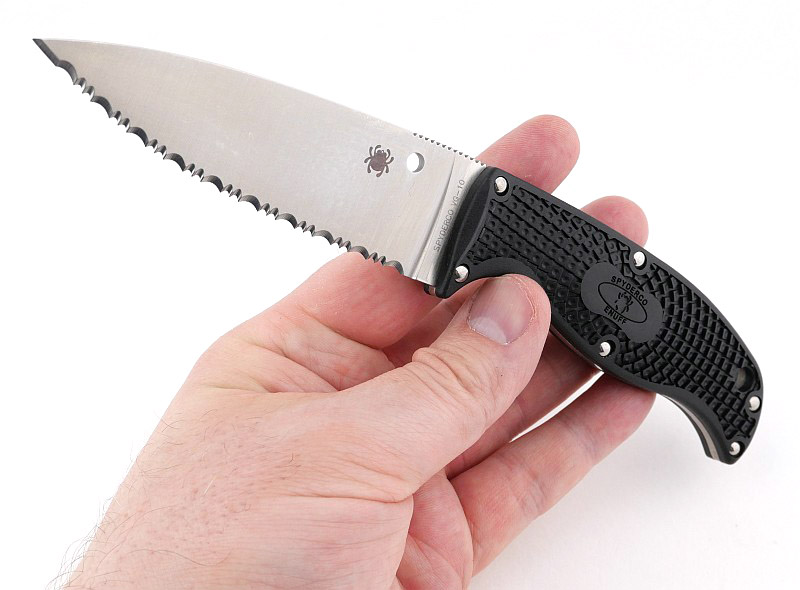
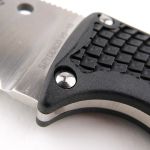
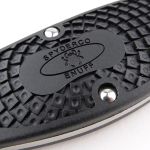
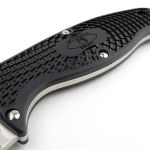
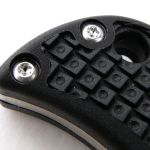
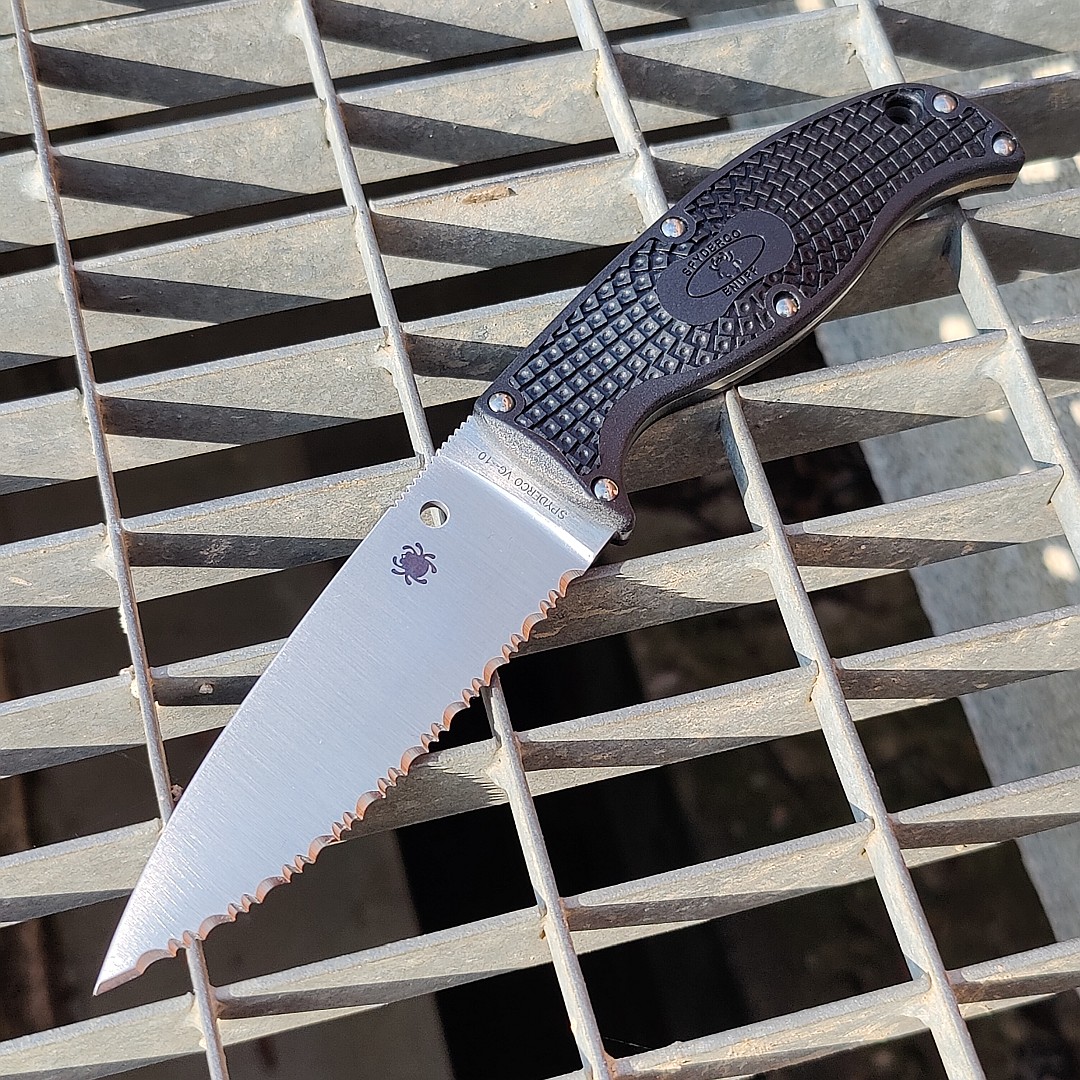
In this Spyderco Zoomer review, we will take in all the details of this innovative fixed-blade knife. The Zoomer was created specifically for bushcraft and wilderness survival, and was designed by Tom Zoomer. It features a CPM20V steel blade with classic hamaguri (convex) grind that ensures a breathtakingly sharp yet resilient cutting edge. Every design detail of the blade, handle and sheath has been considered to maximum comfort and efficiency of use.

Video Overview

This video is a detailed look at the Spyderco Zoomer. In the video we cover the main design details, look very close-up at the knife, and then take Tactical Reviews standard detailed technical measurements.


What’s in the box?:
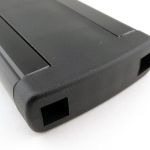
In fact there is no box – the Zoomer is presented in a zip-up pouch large enough to house the sheath and knife separately.


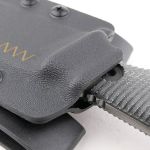
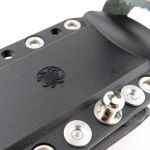
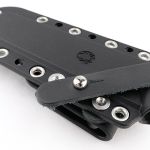
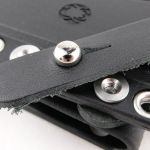
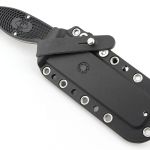
A good look round the Zoomer’s Sheath – Things to look out for here are:
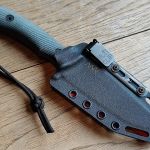
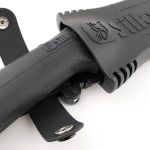
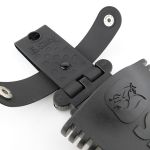
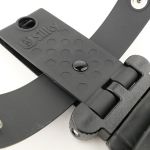
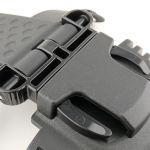
A significant component of the full package; the large leather sheath has been designed to not compromise on functionality at all. A gravity-retained knife-holder, more than a typical sheath, with the belt loop made so it allows the sheath to swing to a vertical position at all times. Constructed of a total of six layers of leather building up the structure and including a front mounted pouch left empty for you to fill yourself.


A good look round the Zoomer – Things to look out for here are:
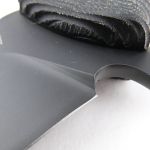
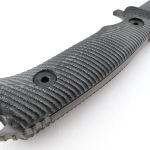
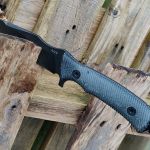
Even before you reveal the blade, the handle of the Zoomer immediately lets you know this is a special knife. Slipping off the blade cover and you can see the elegance of the full convex grind. Incorporated into the solid G-10 handles is an extended thumb support which is combined with a swept back plunge line. These features position the thumb directly behind the cutting edge near the handle for maximum pressure and control in this critical area of the blade.


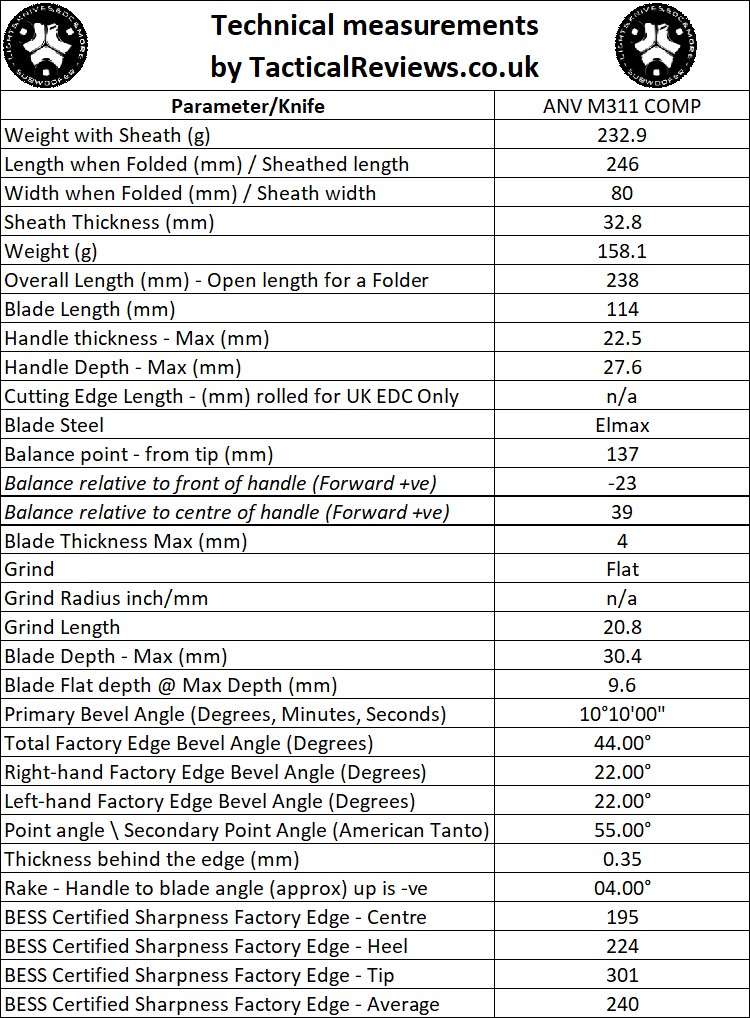
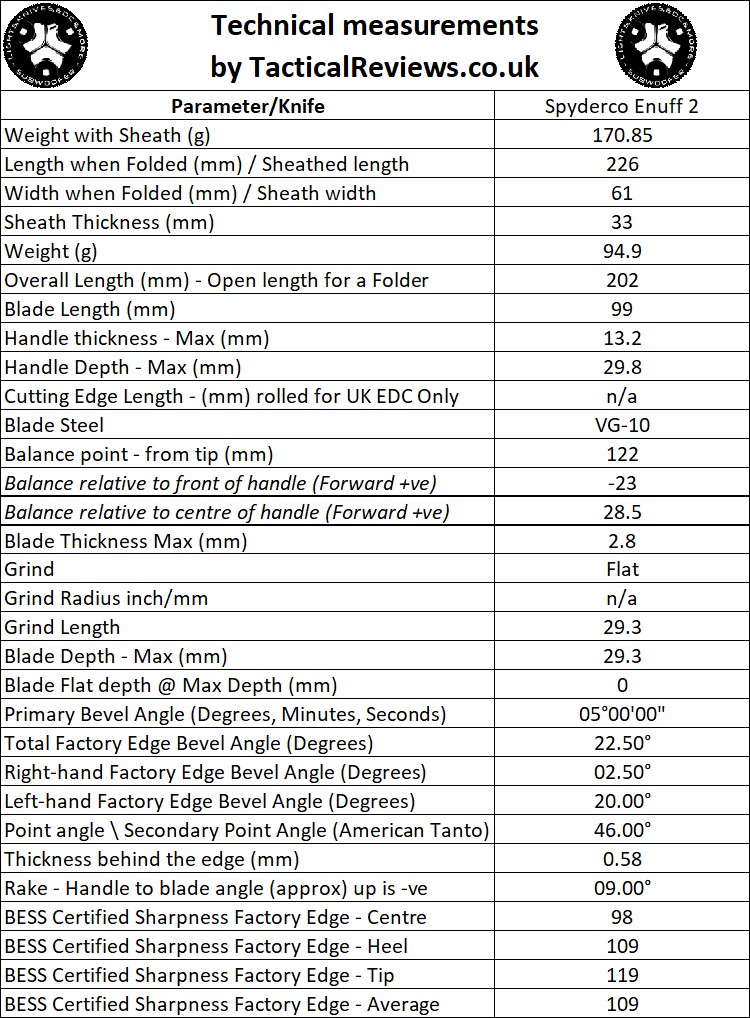
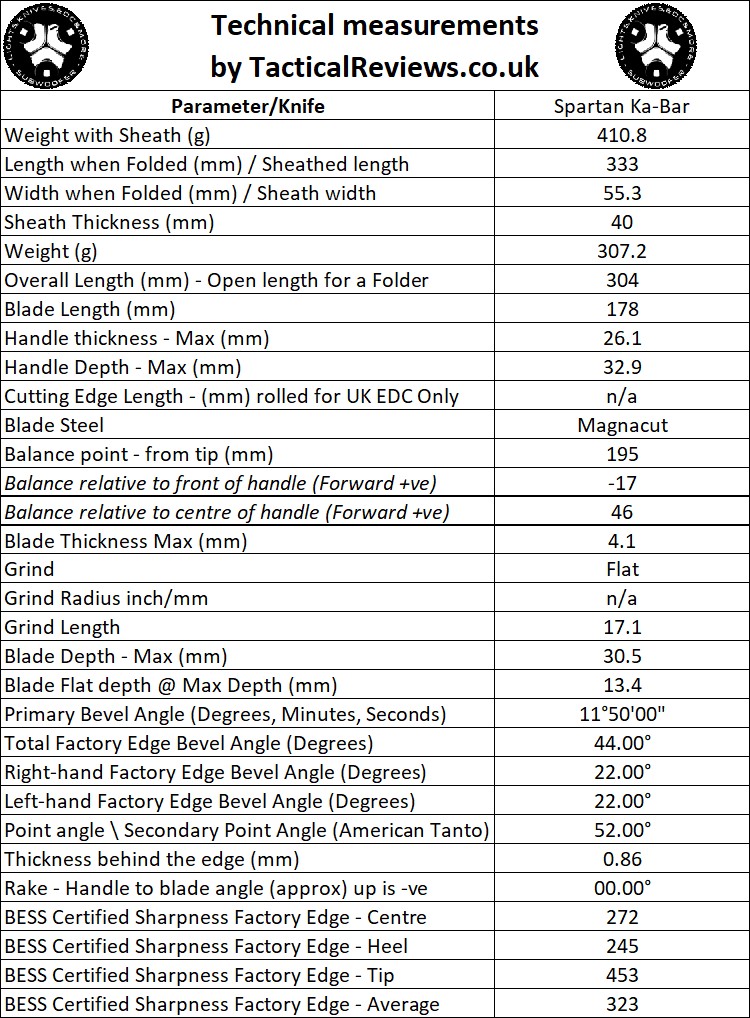
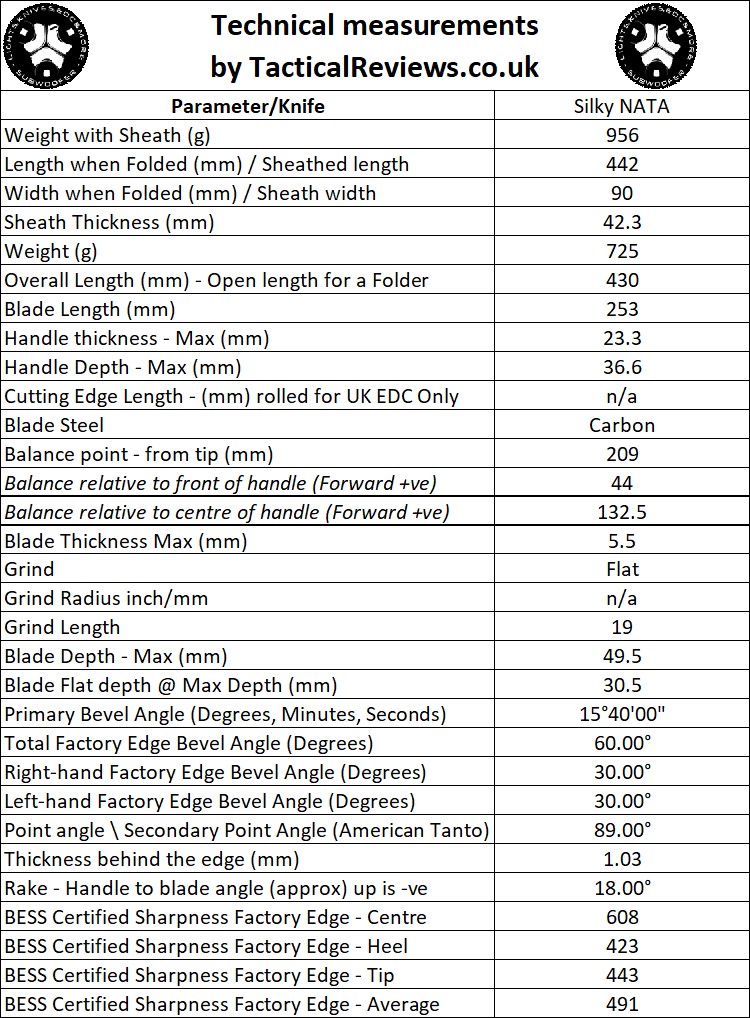
The Blade and Handle – Detailed Measurements:
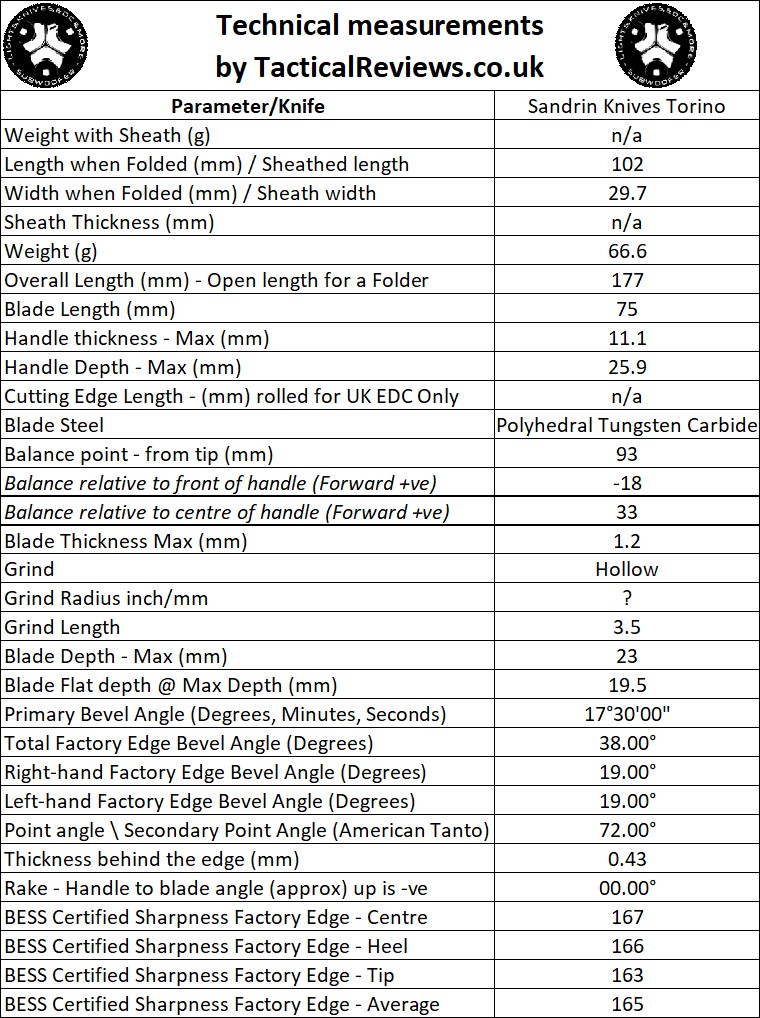
For full details of the tests and measurements carried out and an explanation of the results, see the page – Knife Technical Testing – How It’s Done.


The Factory edge up close:

Followers of Tactical Reviews will know my views on factory edges, but to recap:

Anyone using a knife will need to sharpen it. That first factory edge is just like the first tank of fuel that a new car comes with (or first charge of the battery).
A good factory edge is a ‘nice to have’ but not a ‘make or break’ for a good knife, as you will be putting your own edge onto it soon enough.
The factory edge does however indicate the care a knife maker has put into the final finish.
It is for this reason Tactical Reviews measures factory edge sharpness and specifications, and includes this information in the detailed technical testing.

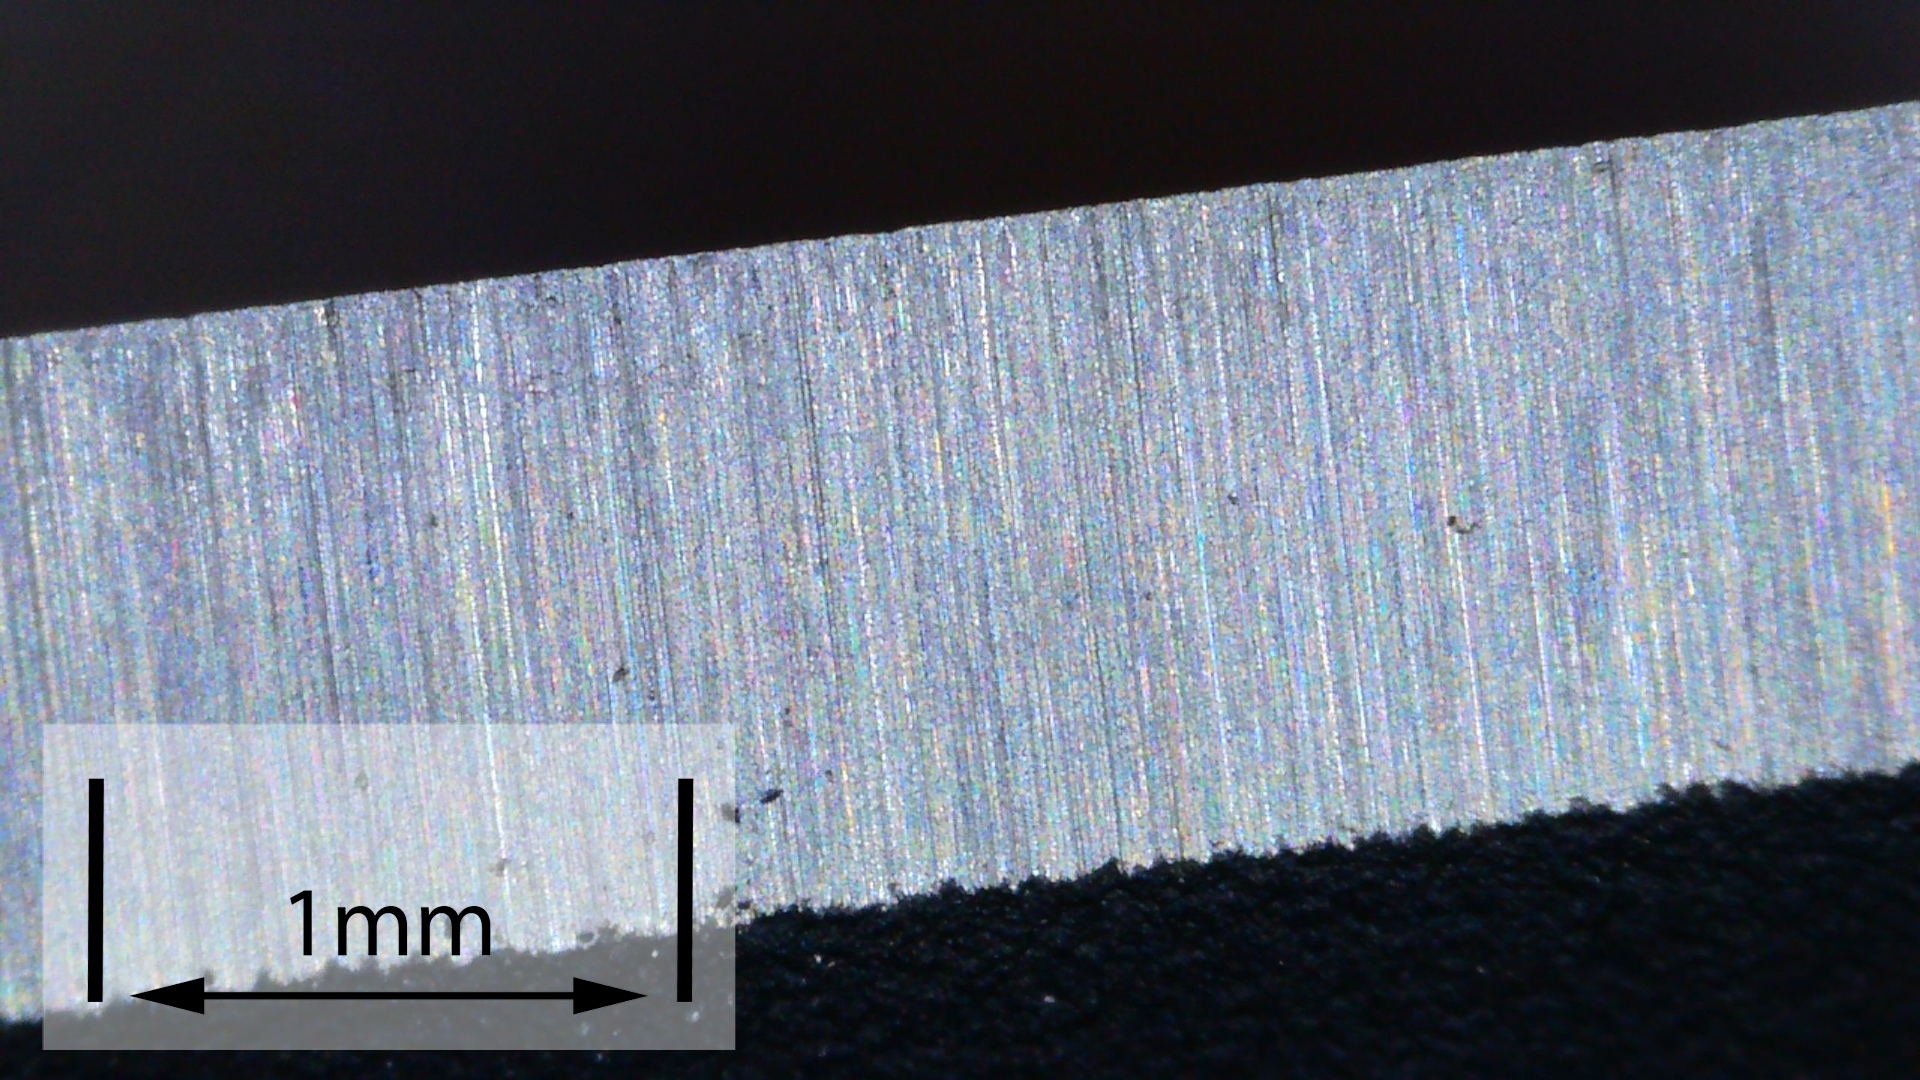
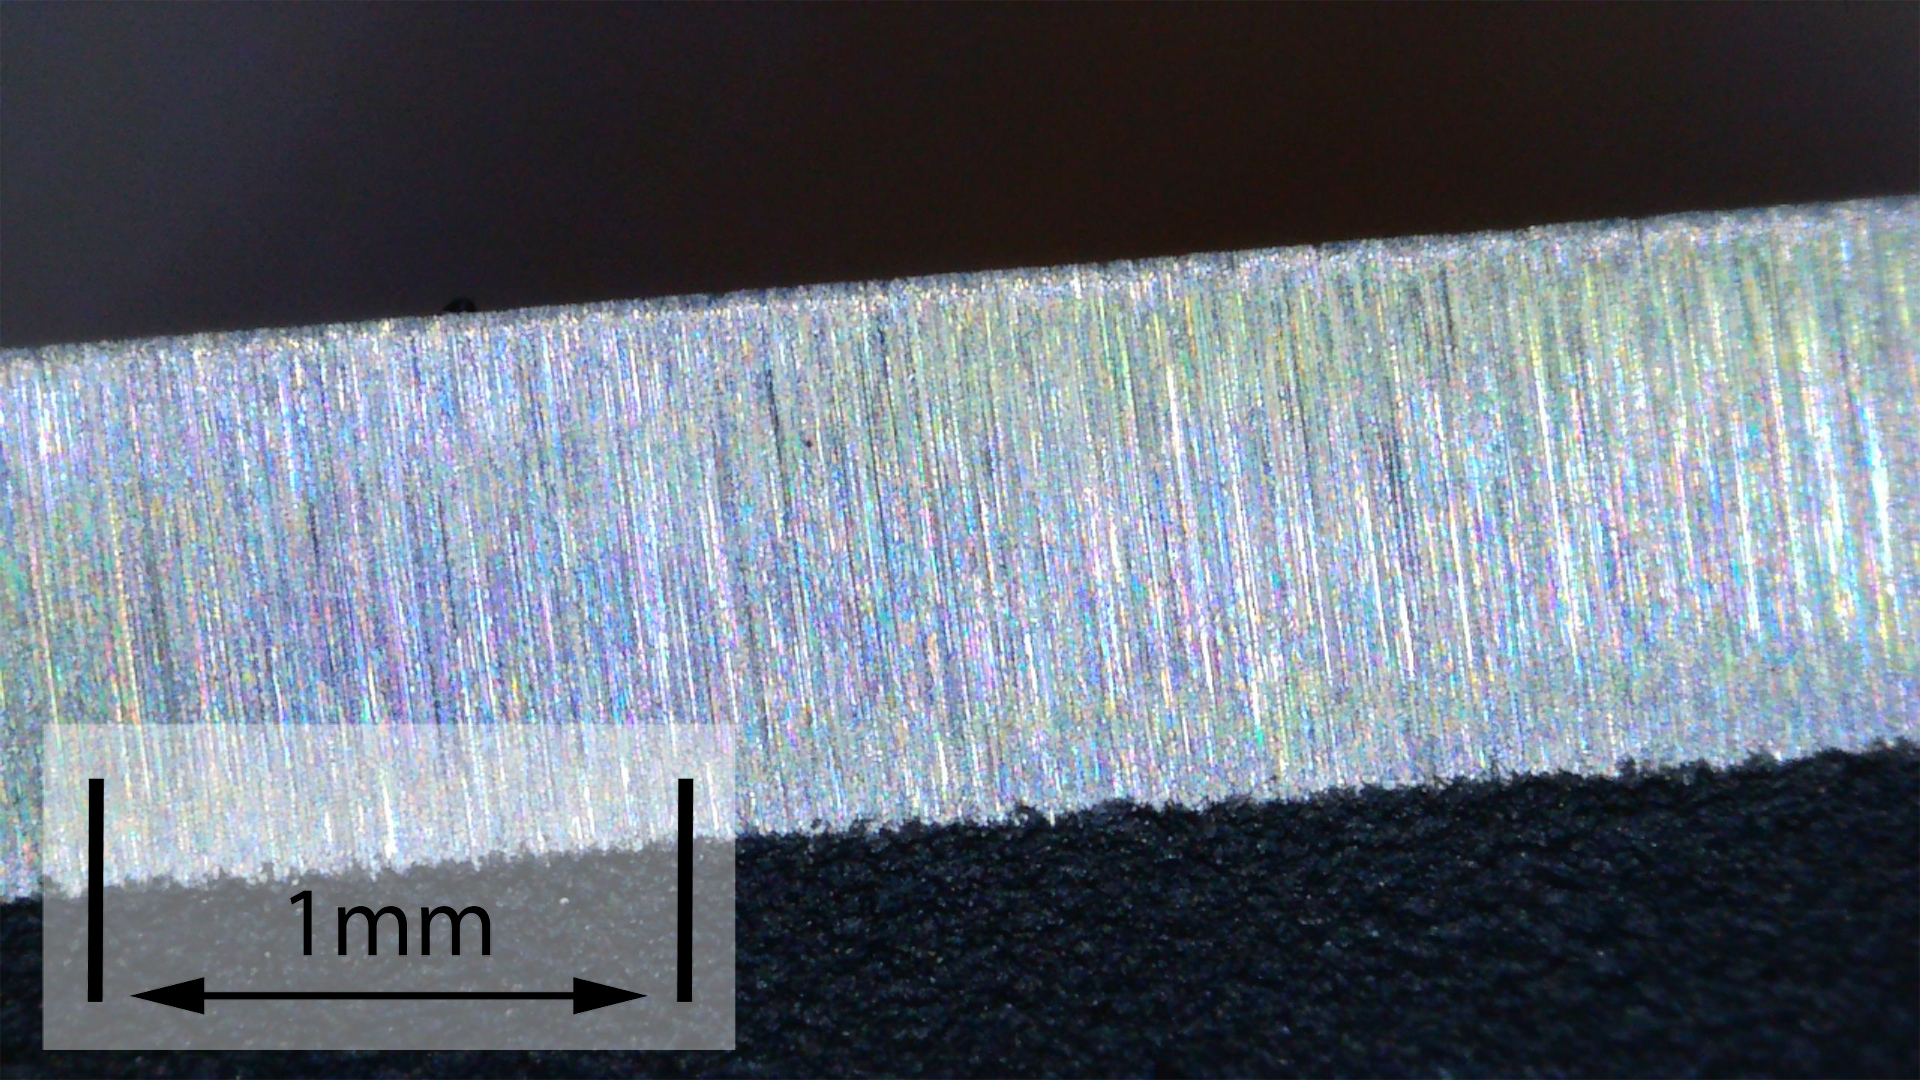
As a further look at the factory edge, this section has been added to include some high magnification photos of the factory edges.

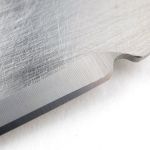
These images allow for a comparison of each side of the factory edge bevel. In this case we now have an explanation as to why the BESS measurements were not as good as the actually cutting ability. The factory edge is full of micro-serrations that make it cut very eagerly, but tend to not measure very well on the BESS scale.


What is it like to use?

An unexpected combination of supreme comfort and solidity seem to emanate from the Zoomer. Compared to most knives, the Zoomer’s sheath feels large and in danger of being unwieldy, but the size and drop-hanger style prove themselves to be a practical working tool.

Overall size of the Zoomer puts if right in that ideal all-rounder sizing. Large enough to handle bigger jobs and batoning (though be careful of the extended thumb support), and small enough to stay comfortable for very long periods of use.

Thanks to the convex grind, despite the factory edge sharpness measurements appearing unimpressive, the Zoomer cuts eagerly, and thanks to excellent ergonomics, effortlessly.

Oddly I frequently find myself thinking that the handle of the Zoomer is too comfortable and too smooth. Maybe it’s just the same way pyjamas are ‘too comfortable’.

The Zoomer really does handle like no other knife and actually has zero hot-spots on the grip, zero.


For quick access and easy storage, the sheath works very well, but despite this, I did find it slightly lacking in terms of security.
The weight of the sheath combined with the hanger design, do their best to keep the knife secure, but it is not completely reliable. Initially the sheath has some grip on the knife but with more use this loosened and you end up relying on gravity alone to keeping the knife in the sheath.
I was not happy to rely on this at all times and wanted to carry the knife more securely.
Fortunately the sheath has the front pouch with press-stud fastening. The simplest option would be to have a plain loop of paracord tied such that it went through the lanyard hole and was able to fit around the pouch flap holding the knife in the sheath when the pouch was closed. I found this solution made the loop of cord too long and the opening too large to be of use as a wrist strap.
Instead I decided to tie a lanyard that included a few snake knots and the larger diamond knot which could then be tucked inside the pouch and secured by closing the pouch flap. The tying and use of this knife retention idea is shown in the next gallery.

Instructions for tying these knots are on the Tactical Reviews Tying Lanyards Page.


In case you think ‘why did he use white paracord, that will get dirty very quickly?’ – this is why…it is glow in the dark.

Review Summary

The views expressed in this summary table are from the point of view of the reviewer’s personal use. I am not a member of the armed forces and cannot comment on its use beyond a cutting tool or field/hunting knife.

Something that might be a ‘pro’ for one user can be a ‘con’ for another, so the comments are categorised based on my requirements. You should consider all points and if they could be beneficial to you.

_______________________________________________
What doesn’t work so well for me
_______________________________________________

Knife retention relies entirely on gravity.
Handle is very smooth.
Convex edges can be more challenging to maintain.
Large sheath.

_______________________________________________
Things I like
_______________________________________________

Incredible levels of comfort.
Unique extended thumb support placing the thumb directly behind the cutting edge.
Full convex grind.
High ‘availability and accessibility’ afforded by the sheath’s drop-in and pick-up ‘knife pocket’.
Good sized pouch incorporated into the sheath.
Zero ‘hot spots’ allowing very long periods of working.
High performance CPM20V steel.

Gear Review: EDS II Screwdriver and EDC Wrench from BIGiDESIGN

BIGiDESIGN is producing so many awesome EDC tools, and in this review we are taking a detailed look at the BIGiDESIGN EDS II, the second, updated version of their unique Everyday Screwdriver, along with the BIGiDESIGN EDC Wrench a reimagining of an antique Swedish adjustable wrench.

Their original EDS, Everyday Screwdriver, was probably the first BIGiDESIGN product that I saw, and since then I bought their bolt action pen, a design that ingeniously adjusts to take most ballpoint refills on the market. Now I’ve been able to partner up the Bolt Action pen with the EDS II and EDC wrench making for an incredible EDC setup.

Video Overview

In this video we take a good look at a couple of lovely EDC gear designs from BIGiDESIGN. The EDS II, the second, updated version of their unique Everyday Screwdriver, along with the EDC Wrench, a small unique pocket friendly adjustable wrench.


What’s in the box; Part 1 the EDS II?:
For the three BIGiDESIGN products I have, the packaging follows the same layout. A slide out tray which has a compartment at one end that contains spares.


A good look round the EDS II – Things to look out for here are:
Overall layout of the EDS II is of an integral lock folding knife, but with a bit holder instead of a blade. A single thumb stud means this easier for a right-handed user. Explained in more detail in the video, there is a stop pin that both stops the bit holder arm in the right position when open, and also stops the spare bits sliding out of the front of the storage slot. The other end of the spare bit storage slot has a sprung ball to keep the bits in place. The integral lock action is easy to see as the bit holder is unfolded. Several magnets are used for keeping the spare bits in place and the main bit holder folded. In the EDS II an additional spare bit holder has been integrated into the lower section of bit holder arm. A total of four bits can be carried within the EDS II.


What’s in the box; Part 2 the EDC Wrench?:
Again, following the format of the other BIGiDESIGN products I have, the box has a slide out tray which includes a compartment at one end that contains spares.


A good look round the EDC Wrench – Things to look out for here are:
A reimagining of an old Swedish design, there is a sliding adjuster moved by a worm screw. BIGiDESIGN have added both a metric and imperial scale for setting the wrench ready to use. A low profile clip is fitted to the back and the EDC Wrench also includes a Ti bead on the lanyard. You can just see the slider retainer under the clip.


What it is like to use?

BIGiDESIGN have done something really special with the EDS, and now this updated EDS II, and given you not only a new experience of using and carrying a screwdriver, but one that is very practical as well.
It is not the smallest EDC bit holder available, nor does it include a ratchet, but instead it gives you a highly usable screwdriver with integrated bit storage for a total of four bits without needing anything else.
Having a swing-out bit holder extension arm, the EDS unfolds to a very practical conventional structure of handle, shank, and bit, so compared to many other small EDC screwdrivers it gives you a more usable tool.

That genius part of the design is mimicking an integral lock folding knife, having a thumb stud to swing the bit holder arm out of the folded position for one-handed operation. So satisfying to use!

However there is a little observation to note about how easy or difficult it is to open the EDS II. The arm’s retention in the folded position is due to a magnet in the body grabbing the bit that is in the bit holder. As you use the EDS II and swap bits around, you will find that a bigger bit, like the full size flat bit, is held by the magnet more firmly, so firmly it becomes very difficult to open using the thumb stud. Put a smaller bit into the holder and it becomes much easier to open again. So the bit you leave in the main bit holder arm changes the ease of opening the EDS II. I would have preferred that the arm retention was a detent (like a knife would use) or that the thumb stud had a bigger cut-out round it allowing more contact and an easier open.


Onto the partner tool here and the EDC Wrench, an infinitely more pocket friendly design than a standard adjustable wrench, there was one big flip for me, literally, in how I envisaged using it before actually getting my hands on one. That is the fact that with the adjustable slider being very much on one side of the tool, to use it and make contact with the nut, you have to flip it over so the ‘front’ of the tool is away from you (pocket clip towards you). Like this you can’t see the scale, and initially it just felt a bit odd, but is just how it works. Even with larger nuts, all except the very largest, you need to use it this way round.

Being a ring spanner, you do have to be able to pass the ring over the end of the job onto the nut, so can’t be used for certain jobs. If you hit those limits though, it is less likely an EDC type of job, so then you bring out the full size tools. Know the limits of your tools and don’t abuse them and you’ll get along just fine.


Talking of limits, and pushing them, the EDS II and EDC Wrench can nicely partner up for a bit more screw driving torque. There is just enough of the 1/4″ hexagonal bit showing to use the EDC Wrench to grip this and boost the turning force for stubborn screws. Not always possible, but if you have the space, this can save you having to go for bigger tools. In this case the EDC Wrench is used with the slider facing you as it needs to be this way round to grip that small section of the hex bit.

Both of these beautiful EDC tools are made from grade 5 titanium alloy and punch well above their weight, even more so together.


Review Summary

The views expressed in this summary table are from the point of view of the reviewer’s personal use. I am not a member of the armed forces and cannot comment on its use beyond that covered in the review.

Something that might be a ‘pro’ for one user can be a ‘con’ for another, so the comments are categorised based on my requirements. You should consider all points and if they could be beneficial to you.

_______________________________________________
What doesn’t work so well for me
_______________________________________________

EDS II – Difficult to open with larger bits installed.
EDS II – Thumb stud a bit too recessed.
EDC Wrench – Ring spanner design slightly restrictive.
EDC Wrench – Need to use with the slider away from you.

_______________________________________________
Things I like
_______________________________________________

EDS II – One-Handed Operation.
EDS II – Integral Frame-Lock Mechanism.
EDS II – Deep carry Pocket Clip.
EDS II – Uses any 1/4″ hex bit.
EDS II – Integral storage for four bits.
EDS II – 100% metal construction.
EDC Wrench – Infinitely adjustable.
EDC Wrench – SAE 3/16 – 3/4 in.
EDC Wrench – Metric 5 – 19 mm.
EDC Wrench – Solid Titanium Construction.
EDC Wrench – Removable Pocket Clip.

 
Discussing the Review:
The ideal place to discuss this review is on the Tactical Reviews Facebook Page
Please visit there and start/join the conversation.

Knife Review: MKM Hero

Join me in this review of the MKM Hero as we take in all the details of this superb new folding knife designed by Tommaso Rumici. Working with MKM (Maniago Knife Makers) Tommaso has focused on usability and versatility in a design that specifically delivers the ambidextrous features a real working knife needs.

Video Overview

This video includes a close look round the Hero, and then onto the measurements and specifications.


What’s in the box?:
The Hero arrives in what initially looks like a simple storage pouch, however, on the back are a couple of belt loops, meaning the pouch is actually a horizontal belt pouch as well. Within the pouch is a pocket that has a double-ended T6/T8 torx wrench and leaflet.


A good look round the Hero – Things to look out for here are:
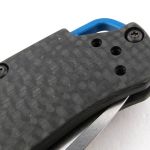
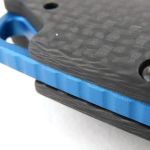
The version of the Hero in this review has the marbled carbon fibre handle. The liners and integrated bolsters are milled from one-piece of titanium with the handle slabs set into them. Cut into the reversible titanium clip is MKM’s distinctive mountainscape logo. The clip is held in place by two torx screws, making it easy to reverse the clip.
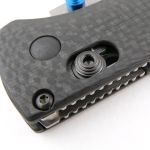
Double-sided stepped thumb studs allow ambidextrous blade opening. Choice of the back-lock is another intentional ambidextrous design feature. Jimping for extra thumb grip spans the blade and lock bar.


The Blade and Handle – Detailed Measurements:
For full details of the tests and measurements carried out and an explanation of the results, see the page – Knife Technical Testing – How It’s Done.

The blade is made from M390 steel.


What is it like to use?
I had the good fortune to be introduced to the Hero by its designer Tommaso Rumici, and get a run down of the features directly from the horse’s mouth. To my amusement, with this demonstration coming near the end of IWA 2022, and hands being well sanitised, and dried to a crisp, I managed to crack my thumb open on the Hero’s thumb stud and bleed all over the blade without actually cutting myself on the edge.
As I have got to know the Hero, there is one aspect I’m not so keen about, and that is that the thumb stud is a little on the pointy side. You do need to be careful to press onto the side of the stud and avoid pushing straight onto it to swing out the blade.
A good back-lock makes for a supremely practical layout in an ambidextrous focused knife. Unlike liner or integral locks, which are handed, the back-lock is predictable, reliable and absolutely identical in operation regardless of the hand holding the knife.
Where a lot of the design intent shows through is in its handling, and we must talk about the Hero’s handle. In terms of width, the Hero is actually pretty slim, so is nicely low profile in a pocket, but the depth and generous swell/hook at the butt of the handle is where the huge flexibility of grip positions and fantastic grip stability comes from.
For really controlled work, you can choke right up on the handle and place a finger on the guard/bolster bringing you to the cutting edge. At the complete opposite extreme grip position, taking a hold when you might want to use a chopping motion, thanks to the grip swell, you can take a secure grip of the very end of the handle with your first two fingers without worry of losing your hold on the Hero even when striking down with it.
Then you can take the middle ground with a standard grip and rest your thumb on the jimping that spans the end of the lock bar and blade for control and cutting force. When using this grip position, you can alter the angle the blade is presented by changing the pressure of your little finger on the butt hook. Doing this makes the knife swivel about your first finger, opening out, or closing in the position of the blade relative to your hand and making the blade extremely agile in use.
Exactly as intended, the Hero is big enough for most EDC tasks, and most general purpose jobs, yet not too big to put you off carrying it.


Review Summary

The views expressed in this summary table are from the point of view of the reviewer’s personal use. I am not a member of the armed forces and cannot comment on its use beyond a cutting tool or field/hunting knife.

Something that might be a ‘pro’ for one user can be a ‘con’ for another, so the comments are categorised based on my requirements. You should consider all points and if they could be beneficial to you.

_______________________________________________
What doesn’t work so well for me
_______________________________________________

Overly sharp thumb stud.

_______________________________________________
Things I like
_______________________________________________

Ideal blade size for most EDC tasks.
Multi-grip positions.
Super secure grip.
Back-lock.
Fully ambidextrous.
One-piece liner and bolster.
M390 steel.
Reversible clip.
Pouch includes belt loops.

 
Discussing the Review:
The ideal place to discuss this review is on the Tactical Reviews Facebook Page
Please visit there and start/join the conversation.
Knife Review: Spyderco Stovepipe

Spyderco’s Stovepipe is full of drama and built to perform as strongly as it looks. The Stovepipe is based on one of David Rydbom’s famous custom knives, ‘Bill the Butcher’ from Kingdom Armory. A powerful cleaver-style blade made from CPM 20CV, with titanium handles and clip, as well as being packed full of milled details, this all really makes the Stovepipe stand out as something special. Join me in this review of the Spyderco Stovepipe to take in all of its details.

Video Overview

This video takes in all the details of the Spyderco Stovepipe, a folding knife inspired by custom knife maker David Rydbom’s “Bill the Butcher” design; the Stovepipe blends dramatic style with serious performance. In the video I cover the main design details, look very close-up at the knife, and then take Tactical Reviews standard detailed technical measurements.


What’s in the box?:
Or, in this case ‘What’s in the pouch?’ as the Stovepipe does not come in a box but instead in a nice quality padded storage/carry pouch. The knife is in a bubble wrap bag and comes with the knife information leaflet and a round sticker.


A good look round the Spyderco Stovepipe – Things to look out for here are:
Starting with the knife straight out of its wrapping and with protective oil making it look blotchy. Under the pocket clip a round plastic protector ensures when you get it the clip to handle contact point is completely unmarked.
A ring around the milled pivot bolt provides an over-travel stop for the integral frame lock bar. The more you look at the Stovepipe, the more details you find. As you step through this gallery you will see all the small milled in features and incredible attention to detail.


Explained by the Maker:
The reasons for certain design choices may not be clear when simply looking at an object, so this section is intended to give an insight into the thinking behind a design by speaking to the designer themselves.

This is the Spyderco description of the Stovepipe:

Inspired by custom knife maker David Rydbom’s “Bill the Butcher” design, the Stovepipe blends dramatic style with serious performance. Its stout cleaver-shaped blade is crafted from 4mm (.157-inch) thick CPM® 20CV stainless steel and has a deep hollow grind for superior edge geometry. The handle is constructed from two slabs of solid titanium joined by a titanium backspacer. Both scales are painstakingly machined to create beautifully crowned outer surfaces and the reverse-side scale forms the foundation of the knife’s Reeve Integral Lock (R.I.L.) mechanism. The oversized pivot pin is machined with artistic accents and serves double duty as an overtravel stop for the lock bar. To allow convenient carry, the Stovepipe includes a machined titanium clip configured for right-side, tip-up carry. The clip, scales, backspacer, and blade all feature a no-nonsense, industrial-style stonewashed finish.

The Blade and Handle – Detailed Measurements:
For full details of the tests and measurements carried out and an explanation of the results, see the page – Knife Technical Testing – How It’s Done.


What is it like to use?
I find the Stovepipe a slight contradiction in that it is certainly built to work hard; materials, construction and strength are beyond question, but all the beautifully made details give the knife a lot of corners that are not hard-use friendly on your hands. The relatively compact size, despite the cleaver blade, and milled details creating lots of hot-spots mean that though capable of it, the Stovepipe isn’t a knife I would choose for heavy or extended jobs.

It looks fantastic and is both striking looking and by no means ‘usual’. Absolutely overflowing with interesting features, and a knife you will love looking at every time you bring it out to use.

The in-the-hand photos here show the Stovepipe in my XL-glove size hand. For me the Stovepipe has just enough handle for a solid grip and the blade length works for power cuts. The straight edge and blade tip present the cutting edge nicely for the type of EDC cutting I typically do.

One of the joys of the knife world is that there are so many designs, and so many purposes for a knife. The Stovepipe is an expensive knife, but one that justifies its price through quality of manufacture, intricate, intriguing and complex milling. Striking looks, with its origins in a proven custom design, the Spyderco Stovepipe is an outstanding cleaver-style knife.


Review Summary

The views expressed in this summary table are from the point of view of the reviewer’s personal use. I am not a member of the armed forces and cannot comment on its use beyond a cutting tool or field/hunting knife.

Something that might be a ‘pro’ for one user can be a ‘con’ for another, so the comments are categorised based on my requirements. You should consider all points and if they could be beneficial to you.

_______________________________________________
What doesn’t work so well for me
_______________________________________________

Too many ‘corners’ for comfortable extended use.
High price point.

_______________________________________________
Things I like
_______________________________________________

Superb quality and finish.
Packed with machined details.
CPM 20CV blade steel.
Super strong construction.
Very high quality storage case included.
Custom design in a production knife.
Striking stand-out looks.

 
Discussing the Review:
The ideal place to discuss this review is on the Tactical Reviews Facebook Page
Please visit there and start/join the conversation.

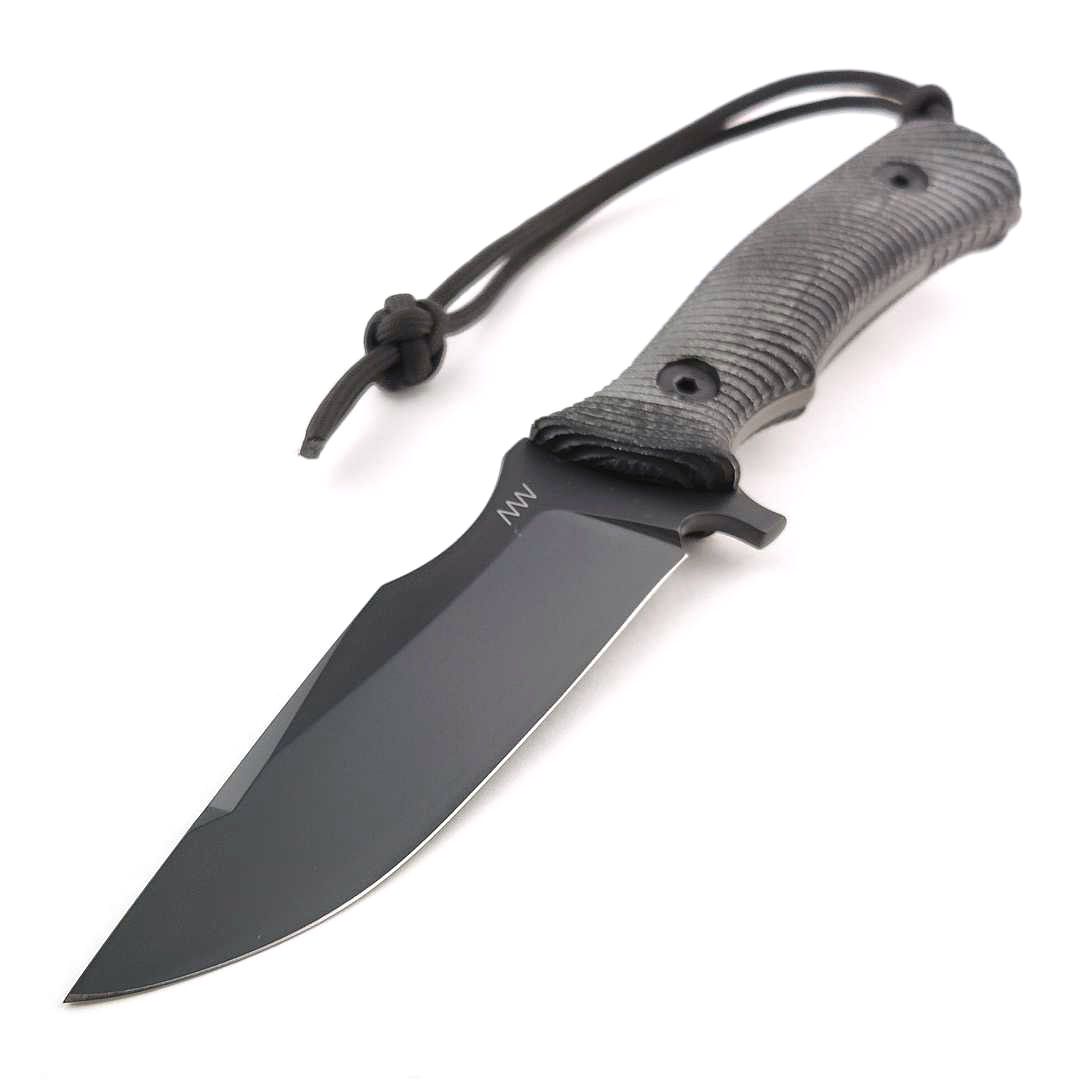
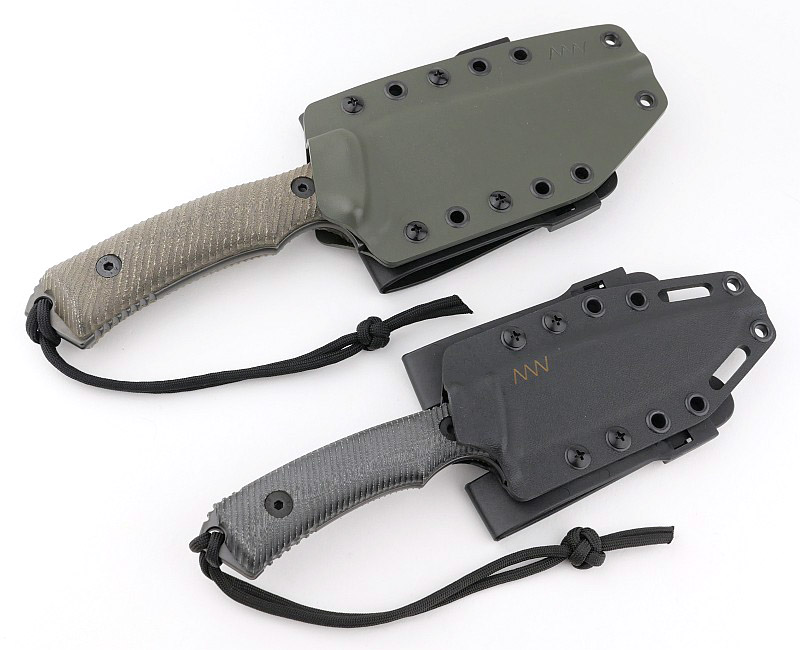
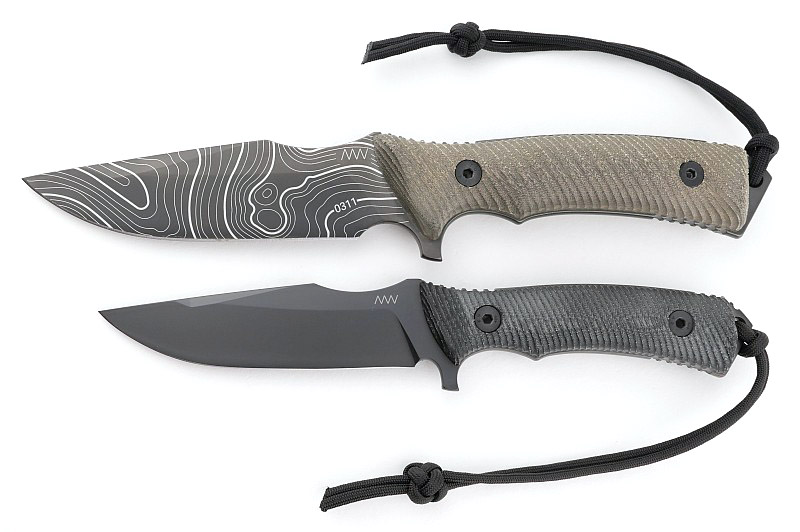
Knife Review: ANV Knives M200 Hard Task

Join me in this review of the ANV Knives (ACTA NON VERBA – Actions not words) M200 Hard Task, a knife that really stood out for me at IWA 2022. I’ve been fortunate to have the opportunity to really test it properly and be able to take in all the details of this distinctive knife, with subtle re-curve blade and curved grip that makes it handle so well.

Video Overview

Before moving onto the image galleries and insights into how it is to use, first, in this video we cover the main design details of the M200 Hard Task, look very close up and the knife, and then take Tactical Reviews standard detailed technical measurements.


What’s in the box?:
Cleanly presented, the M200 arrives simply sheathed and wrapped in a foam rubber sheet within the cardboard box.


A good look round the M200’s sheath – Things to look out for here are:
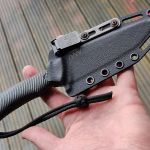
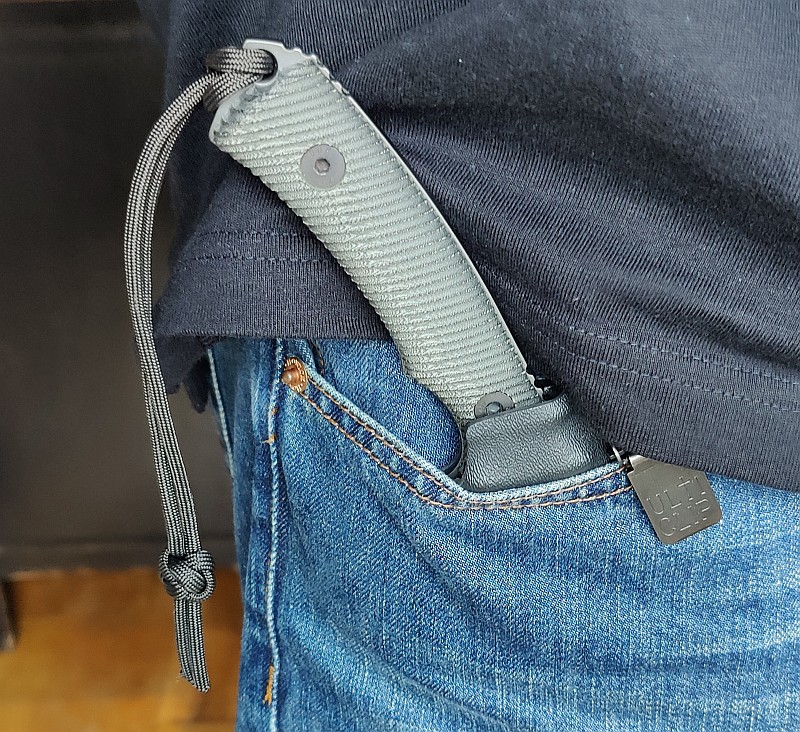
For the Hard Task’s sheath, ANV have gone for hard use Kydex. The two halves of the sheath are hollow riveted together, so you can choose any bolt-on mounting system. As delivered, the sheath has two 2M Molle straps fitted which can be woven into PALS webbing. However, a point to mention is that the 2M straps don’t have a cross-web themselves, so they are wrapped around two rows of the PALS webbing, and not actually woven in.
The molding is very precise, and where the handle grip sits within the mouth of the sheath, you can see the handle milled grip texture impressed in the Kydex which makes the retention very secure.


A good look round the M200 Hard Task – Things to look out for here are:

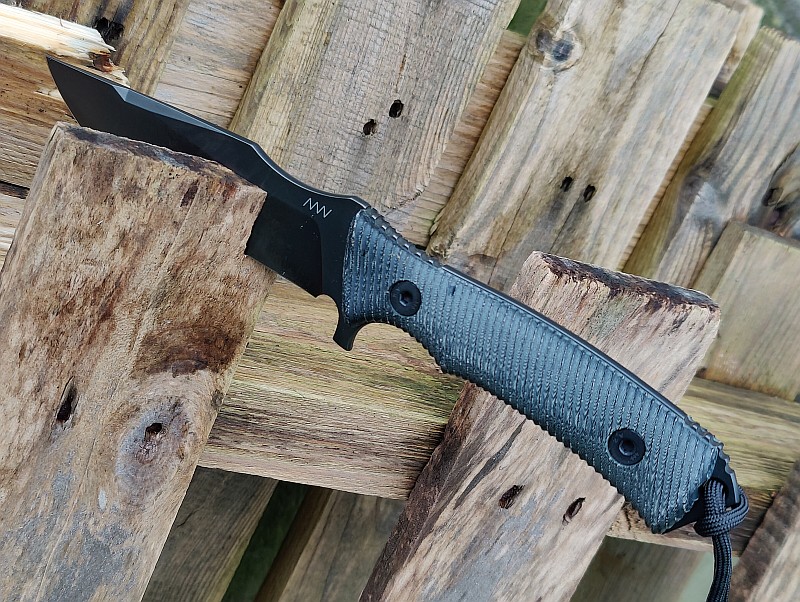
There is a subtle recurve on the M200’s flat ground blade. A nice feature ANV have included is a slightly enlarged sharpening choil, that is in fact a firesteel scraper. Grip on the M200 is excellent, with a shaped first finger groove, the milled texture G10 handle grips, and curved handle. A generous section of jimping on the spine for the thumb adds further grip. Also shown is the beautifully shaped palm swell adding yet more grip stability.


The Blade and Handle – Detailed Measurements:
For full details of the tests and measurements carried out and an explanation of the results, see the page – Knife Technical Testing – How It’s Done.

The blade is made from Sleipner steel.


What is it like to use?

Handling of the M200 is excellent, with the fully 3D shaped handle grips with palm swells and texture, plus the curved handle that sits in the hand so well. The ergonomics are a stand out aspect of the M200.
Sheathing and unsheathing is spot on, with the Kydex gripping the M200 securely, but the sheath shoulders giving a comfortable thumb rest to apply pressure to release the knife.
With the 2M MOLLE straps that are provided, these have a loop which is really too wide to belt mount, so unfortunately if you want to do anything other than MOLLE mount the M200, you will need to source and fit different mounts.
Pictured in this gallery is my normal fire steel. Not messing around with smaller versions, I have 13mm firesteels, which do not fit into the firesteel notch of the M200, so I had to dig out a smaller version to test it. I also found the curve on curve contact area seemed less eager to spark than a straight scraper. It worked, but if anything I’m tempted to cut in a straight scraper on the spine of the Hard Task myself.
In terms of size, the M200 hits that sweet spot of being big enough to do most jobs and not too big to be carried easily, or be unwieldy in use. The comfort and security of handling makes the M200 a joy to use.


Review Summary

The views expressed in this summary table are from the point of view of the reviewer’s personal use. I am not a member of the armed forces and cannot comment on its use beyond a cutting tool or field/hunting knife.

Something that might be a ‘pro’ for one user can be a ‘con’ for another, so the comments are categorised based on my requirements. You should consider all points and if they could be beneficial to you.

_______________________________________________
What doesn’t work so well for me
_______________________________________________

No belt mount provided.
Firesteel notch a bit small and not as effective as a straight scraper.

_______________________________________________
Things I like
_______________________________________________

Superb ergonomics and comfort.
Very secure grip.
Hard use Kydex sheath.
MOLLE mounting included.
Excellent fit and finish.
Ideal size for general utility use.

 
Discussing the Review:
The ideal place to discuss this review is on the Tactical Reviews Facebook Page
Please visit there and start/join the conversation.

As well as the Tactical Reviews Facebook Page, please consider visiting one of the following to start/join in any discussion.

BladeForums – Knife Reviews (US based Forum for Knife Discussion)

CandlePowerForums – Knife Reviews Section (Largest and Friendliest Flashlight Community Forum)

Knife Review: lionSTEEL H1

Join me in this review of the lionSTEEL H1, to take in all the details of this superb EDC fixed blade knife designed by Tommaso Rumici. This specific knife is a display model from IWA 2022 so might show a few imperfections. The H1 has a M390 blade, black G10 handle with grip ring, standard leather sheath plus also shown in this review with the optional Kydex sheath.

Video Overview

This video includes a close look round the H1, and then onto the measurements and specifications.


What’s in the box?:
As well as the standard H1 package, this review shows the optional Kydex sheath which is pictured next to the closed box. As standard, the H1 comes with the leather sheath and a lionSTEEL made keyring torx wrench.


A good look round the standard Leather Sheath – Things to look out for here are:
The H1’s standard leather sheath is packed full of features. Within the curved and flowing shaping of this sheath, it has a retaining strap secured with a press-stud, a ‘standard’ belt loop, along with two special loops that can be rotated and opened out to allow various belt or MOLLE carry configurations.


A good look round the optional Kydex Sheath – Things to look out for here are:
Giving you a more compact carry, the optional Kydex sheath has two special loops, like the leather sheath, that allow for various belt or MOLLE carry configurations, but without the fixed belt loop and retaining strap. The retaining strap is not needed due to the Kydex ‘clip in’ retention, so allowing for a much more streamlined sheath.


The details of the H1:
Starting off with the H1 sheathed in the leather sheath. A curvy knife in a curved and flowing sheath. Demonstrated in the last of the photos of the sheathed knife, if you are using the fixed belt loop, and if you wanted to tie-in the end of the handle tightly so it can’t catch on anything, you can swing the top loop over the end of the grip ring; not something you would do all the time, but an option.
The remaining photos take in details like the engravings, plunge line, jimping, grip ring finish, handle shaping/milling/texture, plus the overall lines of this knife.


The Blade and Handle – Detailed Measurements:
For full details of the tests and measurements carried out and an explanation of the results, see the page – Knife Technical Testing – How It’s Done.


What is it like to use?
Designed to combine the secure handling of the karambit’s grip ring with a knife blade much better suited to daily EDC tasks, this make the H1 an unusual shape that you might not immediately be drawn to.
Although I started with the two galleries in this section the other way round, I decided to look at the personal carry aspect first. Shown earlier in the review, the H1 can be MOLLE carried, so this is about carry directly on your person using the belt and additional loops on both the leather and Kydex sheathes.
For me the least successful carry is the standard drop belt loop. With the angles set into the sheath, the presentation is very awkward for me, and with the leather wrapping round the handle, re-sheathing the knife tends to result in cutting into the sheath each and every time. It is quick to deploy, but not to re-sheath.
Moving swiftly to horizontal carry and suddenly everything works much better. For the leather sheath you can mount it on your hip facing backwards. The leather sheath doesn’t really work for back carry, due to the retaining strap (this is where the kydex sheath really shines).
(Just to mention these photos are all for right-handed drawing.)
Last up is the kydex sheath on hip and back carry positions. Actually for the back carry I would have set the loops so that one was each side of the trouser belt loop to provide stability for drawing and re-sheathing. The lower profile kydex sheath is excellent, and shines in the back carry position.


So we’ve looked at carry, and now onto handling of the H1. Yes the H1 has a grip ring, but you don’t have to put a finger through it, you can also hold it like a standard grip and use the width of the ring to control the angle the blade presents. Worth remembering and not always putting a finger through the ring.
As you can see, though I take XL size gloves, the H1 is quite a compact knife. With the curve of the blade and the jimping on the spine, the H1 sits so well in the hand making it feel a simple extension of you.
Reverse grips are as natural as forward grip, and the ring is a size and finish that makes it super comfortable however you take hold of it.


I’ve always loved lionSTEEL’s leather sheaths, and the H1’s is a very good sheath. For me though, the optional Kydex sheath takes the H1 into a different league. I would recommend getting it. (If lionSTEEL could offer a sheath choice when buying so you could get the H1 without the leather sheath and just the Kydex one, all the better.) The slim H1 definitely benefits from the much slimmer Kydex sheath. This sheath also allows for ‘in pocket’ carry which the bulkier leather sheath does not.
Handling is where the H1 really excels with the versatile grip ring and curving handle and blade shape that fits into the hand beautifully. Between the H1 and H2 (the H2 which has a drop point blade), the sheep’s foot style blade shape presets the tip of the knife very well for point work, and the curved cutting edge slices easily.

Review Summary

The views expressed in this summary table are from the point of view of the reviewer’s personal use. I am not a member of the armed forces and cannot comment on its use beyond a cutting tool or field/hunting knife.

Something that might be a ‘pro’ for one user can be a ‘con’ for another, so the comments are categorised based on my requirements. You should consider all points and if they could be beneficial to you.

_______________________________________________
What doesn’t work so well for me
_______________________________________________

Relatively bulky leather sheath.
Awkward angle of standard belt loop.

_______________________________________________
Things I like
_______________________________________________

Highly ergonomic.
Grip ring provides security.
Optional Kydex sheath (recommended).
M390 blade steel.
Slim and easy to carry.
Horizontal belt mounting.
MOLLE compatible.
Adaptable sheath mounting loops.

 
Discussing the Review:
The ideal place to discuss this review is on the Tactical Reviews Facebook Page
Please visit there and start/join the conversation.
As well as the Tactical Reviews Facebook Page, please consider visiting one of the following to start/join in any discussion.

BladeForums – Knife Reviews (US based Forum for Knife Discussion)

CandlePowerForums – Knife Reviews Section (Largest and Friendliest Flashlight Community Forum)

Gear Review: Mjolnir III by Ostap Hel Knives

When it comes to EDC pocket jewellery, nothing beats a hand-made custom piece, and I’ve had my eye on the Mjolnir from Ostap Hel Knives for some time. Yes, Mjolnir is Thor’s hammer, and being capable of a knockout blow is very appropriate association, but of course the shape of Ostap’s Mjolnir is also like the old Norse symbols.
Join me in this review of the Mjolnir III from Ostap Hel Knives, the featured version is in carbon fibre.

Video Overview

This video is a detailed look at the Mjolnir III, and hopefully you can get a good feel for the quality of finish.


What it is like to use?
Without saying exactly how you might use the Mjolnir III (due to some more negative connotations), it is both EDC pocket jewellery and a self-defence aid.

The intended configuration for carrying the Mjolnir III is on its own with a lanyard, added for ease of getting it into your hand when needed. Shown here, it has the matching lanyard from Ostap Hel Knives which has a CF bead on the cord. With the CF version being so light, it has minimal pocket presence so can also feel a little difficult to home in on. So…

…picking up on the fact it has felt a little ‘detached’ from easily finding the CF Mjolnir III in my pocket, I wanted to try something a bit different and out there, and fit it as a lanyard stopper on another EDC item. In this case a slip-joint knife which already had a longish lanyard on it.
In this way, the knife provides the weight for easily finding it, and the Mjolnir III makes a fantastic ‘puller’ for getting the knife to hand, but also for then ease of getting the Mjolnir III into your hand.
Reversing the sense that the Mjolnir III is the lanyard stopper round to the knife being the lanyard stopper, and you can either allow the knife to hang out to the side, or take it into you palm while gripping the Mjolnir III between your fingers.
You can experiment with the lanyard length to see how it might work for you if you try this approach. Here the loose ends of the paracord are not yet woven into the lanyard to more easily allow adjustments before making the final configuration.
It has worked for me, it might work for you; try it before completely dismissing the idea.

Regardless of how you choose to carry it, the Mjolnir III is a pleasure to handle and carry. Despite there being no moving parts, it can be a worry-stone or fidget toy, as well as having an actual serious purpose – definitely worth the investment in a quality piece.


Review Summary

The views expressed in this summary table are from the point of view of the reviewer’s personal use. I am not a member of the armed forces and cannot comment on its use beyond that covered in the review.

Something that might be a ‘pro’ for one user can be a ‘con’ for another, so the comments are categorised based on my requirements. You should consider all points and if they could be beneficial to you.

I’m trying something slightly different and starting with what doesn’t work so well, so I can finish on a more positive note.

_______________________________________________
What doesn’t work so well for me
_______________________________________________

What is not to like?

_______________________________________________
Things I like
_______________________________________________

Beautifully crafted.
Choice of materials.
Easy to carry.
Might make all the difference in a tight situation.
Low profile.
Thor’s hammer in your pocket.

 
Discussing the Review:
The ideal place to discuss this review is on the Tactical Reviews Facebook Page
Please visit there and start/join the conversation.

Gear Review: TCH Handcuffs Twinlock Special – Part 3

This is Part 3 of a TCH (Total Control Handcuffs) Handcuffs Special three part review series featuring the TCH Twinlock cuffs. In Part 3 we will be looking at the 842 Rigid Twinlock cuffs with RCP5 Handcuff Pouch, NCG Neoprene Cuff Guard, plus an overview of handcuffing techniques. As a bonus, Part 3 also includes Tactical Reviews’ interpretation of the TOOOL universal handcuff key and ‘alternative’ prepping uses for handcuffs.
TCH Handcuffs Twinlock Special – Part 1 covered the 932 and 822 Twinlock cuffs, SK5 and SK6 keys, plus the 9201 belt pouch. TCH Handcuffs Twinlock Special – Part 2 included the 852 Folding Rigid Twinlock, 832 Superior Hinge Twinlock, TCH HR Handcuff Reducer plus the 9200 and 9215 Handcuff Pouches.
Join me here for Part 3 of the TCH Handcuffs Special review as we continue our look over these excellent cuffs and the Twinlock dual keyway design.

First look round the model 842 Rigid Twinlock cuffs:
These 842 cuffs are currently the go-to standard issue for the UK Police force, although not all issue cuffs will be the Twinlock option, but more likely the single lock version.
Rigid cuffs and their handling makes speedcuffing the norm, at least for the first wrist. From the first photo in this gallery the rotating arm of the cuffs are ‘back loaded’ ready for rapid cuffing.


The RCP5 Handcuff Pouch:
Being fully rigid, the 842s need a different approach for belt carry to all other folding cuffs. The RCP5 pouch has to hold these cuffs differently to any of the folding versions, and because of this the retaining strap has to use the military style press stud with a ‘dot’ that only opens from one side. The RCP5 comes with a warning label to inform you how to use this type of press-stud if you haven’t come across them before. The press-stud directly next to the cuffs is fitted so that the side against the cuffs cannot be pulled open from the cuff side, instead it can only be lifted open from the side away from the cuffs. Like this any pressure on the cuffs while carrying them can’t cause the retaining strap to open unintentionally.


NCG Neoprene Cuff Guard:
Provided for comfort during training only, this is not for use when restraining a suspect. During training all personnel will be cuffed and un-cuffed repeatedly, not always gently, and the NCG means the trainees need not suffer too much with speedcuffing and reverse stack practice.


Standard cuffing techniques:
Here we have a demonstration of the main cuffing methods using traditional chain cuffs and rigid cuffs with two TCH models. All methods are shown full body and zoomed in on the hands.
With chain models like the 822 you can only use ‘palm to palm’ (to the front), or ‘back to back’ (behind the back).
A fixed or hinge model now allows for the ‘stack’ where the hands face different directions through the cuffs.
So with the folding fixed 852 model here, we have ‘palm to palm’ (to the front), then ‘front stack’. Now moving to ‘back to back’ (behind the back), and then the ‘rear stack’. Rear stack is the most uncomfortable for the restrained person and should only be used if absolutely necessary.


Tactical Reviews’ interpretation of the TOOOL universal handcuff key:
Taking a slight aside during this review I came across the TOOOL (The Open Organisation Of Lockpickers) Universal handcuff key with information posted by ‘Deviant Ollam’. Taking this as inspiration I brought together ideas from other universal handcuff keys, and produced a few Tactical Reviews Universal handcuff keys. The TOOOL version was based on the Smith & Wesson Handcuff key, but as I was not able to source one at a sensible price, I decided to use the TCH key. In fact the key flag on the Smith & Wesson key is too long to fit into TCH cuffs, so for that key you have to file the key flag down. By starting with the TCH key, it already fits TCH cuffs perfectly. The width of the key flag slot is governed by the width of the junior hacksaw blade used to cut it.
Building on the TOOOL key, I also added a back-cut at 22 degrees. This allows for the key to be rocked back and forward in case the key flag is too long or short. It also gives more allowance for the key post size otherwise being too large. In short to give wiggle room to help open different cuffs.
In this gallery, the first image is of the first version I made. Next up is a second key but this time with the back-cut added, with the last image just showing the dimensions that were altered to make the key. there is no height shown for the key flag, as this was not modified from the original TCH key.


‘Alternative’ uses for handcuffs:
In terms of ‘Prepping’, handcuffs can actually be a very useful bit of kit to carry for several reasons. Here I am showing just three uses, as a bike lock, to secure a bag or other item you might want to leave for a few moments (in which time someone might take it). With the bag, clearly it doesn’t stop someone going through it, but is stops a quick snatch and run. And in the last photo, when you are resting, again to protect some possessions by preventing an easy theft.
Beyond these starter ideas, it can be used to hang items up, if required to secure someone that may be acting against you, as a rope weight if trying to throw a line to someone, to ‘hold’ a button down with the ratchet allowing adjustment as required. The list goes on for when you might need a second pair of hands.


TCH and the Twinlock:
A lot has been covered in this three part review, and hopefully you can see the quality, strength and reliability of TCH (chosen by the UK Police as the standard handcuff). The Twinlock concept makes for easier unlocking especially if the person is not cooperative so is well worth considering as when you want it, it will make a big difference.


Going back to Parts 1 and 2:

TCH Handcuffs Twinlock Special – Part 1 covered the 932 and 822 Twinlock cuffs, SK5 and SK6 keys, plus the 9201 belt pouch. TCH Handcuffs Twinlock Special – Part 2 included the 852 Folding Rigid Twinlock, 832 Superior Hinge Twinlock, TCH HR Handcuff Reducer plus the 9200 and 9215 Handcuff Pouches.

Video Review

This video covers all the TCH models that appear in the special three part review series, and will be included in all three parts of the review for ease of access. It might be worth taking a look over the image galleries before diving into the video.


Full list of TCH products featured in the three part special series:

832 Superior Hinge Twinlock
932 Lightweight Superior Hinge Twinlock
852 Folding Rigid Twinlock – Red grip
842 Rigid Twinlock
822 Superior Chain Twinlock – Black finish

Accessories –
SK5 Flat Swivel key
SK6 Tubular Swivel key
NCG Neoprene Cuff Guard
TCH HR Handcuff Reducer
TCH 9200 Handcuff Pouch (for 822)
TCH 9201 Handcuff Pouch (for 832/932)
TCH 9215 Handcuff Pouch (for 852)
TCH RCP5 Handcuff Pouch (for 842)

 
Discussing the Review:
The ideal place to discuss this review is on the Tactical Reviews Facebook Page
Please visit there and start/join the conversation.

Gear Review: TCH Handcuffs Twinlock Special – Part 2

This is Part 2 of a TCH (Total Control Handcuffs) Handcuffs Special three part review series featuring the TCH Twinlock cuffs. In Part 2 we will be looking at the 852 Folding Rigid Twinlock, 832 Superior Hinge Twinlock, TCH HR Handcuff Reducer plus the 9200 and 9215 Handcuff Pouches.
TCH Handcuffs Twinlock Special – Part 1 covered the 932 and 822 Twinlock cuffs, SK5 and SK6 keys, plus the 9201 belt pouch, and Part three will include the 842 Rigid Twinlock with RCP5 Handcuff Pouch, NCG Neoprene Cuff Guard along with handcuffing techniques, the TOOOL customised universal handcuff key and ‘alternative’ uses for handcuffs.
Join me here for Part 2 of the TCH Handcuffs Special review as we continue our look over these excellent cuffs and the Twinlock dual keyway design.

First look round the model 852 folding rigid handcuffs:
These 852 cuffs are in the ‘training colour’ of red, although there is no reason not to use red for restraint, the only difference is the colour of the plastic, and nothing else.
With the 852 folding rigid, although the first impression is ‘chunky’, but when you put them next to a pair of rigid cuffs, the space saving is clear. The folding mechanism makes them so much easier to carry but still gives you fully rigid cuffs.


The 852’s special hinge – Things to look out for here are:
The 852 takes the power and control of the rigid handcuff and adds a locking hinge to allow then to be folded for easier carry. As the cuffs are opened, a wide latch engages on each side of the hinge. The centre of the hinge has another keyway for a standard TCH handcuff key to unlock the hinge and allow the 852 to fold.


Twinlock security features:
As with the other Twinlock models, in this gallery I’m showing close-ups of the triple pawl locking mechanism, the double-lock pin mechanism, and a key fitted into the primary and secondary keyways. There is a difference in the key hole position and rotation for the primary and secondary keyways. Being a rigid model (folding but also rigid) the back-loading preparation of the rotating arm is relevant and one of these photos shows the 852 back-loaded.


Looking round the 9215 leather belt pouch:
A quick aside to look at the 9215 leather belt pouch made for the 852 cuffs. Constructed from heavy duty leather, it will stand up to hard use.


Looking round the 9200 leather belt pouch:
And the second pouch in this review is the 9200 leather belt pouch made for the hinged or chain cuff models. Here it is shown with the 832.


Model 832 – Superior hinged cuffs with Twinlock:
In part 1 we looked at the 932 which is the lightweight version of the all steel 832. Showing the main design features, this gallery looks more at the twinlock design with keys fitted to show the positions.


TCH HR Handcuff Reducer:
To allow for smaller wrists than average, TCH makes an insert for the cuffs that reduces the minimum size the cuff can hold securely. The insert slips in between the two halves of the double strand (the fixed part of the cuff), pushed up against the single strand rivet (Single strand being another term for the rotating arm). In this position the rotating arm can move past it and lock into place. With the reducer in place it is not possible to push the rotating arm all the way through the cuff, so it prevents speedcuffing.


Part 1 and coming up in Part 3:

TCH Handcuffs Twinlock Special – Part 1 covered the 932 and 822 Twinlock cuffs, SK5 and SK6 keys, plus the 9201 belt pouch.

Part three will include the 842 Rigid Twinlock with RCP5 Handcuff Pouch, NCG Neoprene Cuff Guard along with handcuffing techniques, the TOOOL customised universal handcuff key and ‘alternative’ uses for handcuffs.

Video Review

This video covers all the TCH models that appear in the special three part review series, and will be included in all three parts of the review for ease of access. It might be worth taking a look over the image galleries before diving into the video.


Full list of TCH products featured in the three part special series:

832 Superior Hinge Twinlock
932 Lightweight Superior Hinge Twinlock
852 Folding Rigid Twinlock – Red grip
842 Rigid Twinlock
822 Superior Chain Twinlock – Black finish

Accessories –
SK5 Flat Swivel key
SK6 Tubular Swivel key
NCG Neoprene Cuff Guard
TCH HR Handcuff Reducer
TCH 9200 Handcuff Pouch (for 822)
TCH 9201 Handcuff Pouch (for 832/932)
TCH 9215 Handcuff Pouch (for 852)
TCH RCP5 Handcuff Pouch (for 842)

 
Discussing the Review:
The ideal place to discuss this review is on the Tactical Reviews Facebook Page
Please visit there and start/join the conversation.
Gear Review: TCH Handcuffs Twinlock Special – Part 1

This is Part 1 of a TCH (Total Control Handcuffs) Handcuffs Special three part review series featuring the TCH Twinlock cuffs. After growing in size far beyond my originally intended group review, in this first part of the series we will be covering the 932 and 822 Twinlock cuffs, SK5 and SK6 keys, plus the 9201 belt pouch. The TCH Twinlock mechanism makes it much easier to unlock with a keyway on both sides of each cuff.
Parts 2 and 3 will include the 832, 852 and 842 cuffs, NCG Neoprene Cuff Guard, TCH HR Handcuff Reducer and the 9200, 9215 and RCP5 Handcuff Pouches, plus information on cuffing techniques and the TOOOL Universal Handcuff Key.
Join me here for Part 1 of the TCH Handcuffs Special review to start our look over these excellent cuffs and the Twinlock dual keyway design.

Video Review

This video covers all the TCH models that appear in the special three part review series, and will be included in all three parts of the review for ease of access. It might be worth taking a look over the image galleries before diving into the video.


Unpacking the model 932 handcuffs:


A good look round the 932 – Things to look out for here are:
The 932 is the lightweight Superior Hinge Twinlock model. The hinge means it folds, but prevents the cuffs twisting. With twisting prevented, ‘stacked’ cuffing techniques can be used (See part three for more details).
In this gallery you can also see the Twinlock feature with photos of each side of the cuffs in the fully open position. There is a difference in the key hole position and rotation for the primary and secondary keyways.


Twinlock security features:
With this first detailed look at a Twinlock model, in this gallery I’m showing close-ups of the ratchet teeth on the rotating arm, the triple pawl locking mechanism, the double-lock pin mechanism, and a key fitted into the primary and secondary keyways.

Looking round the 9201 leather belt pouch:
A quick aside to look at the 9201 leather belt pouch. Constructed from heavy duty leather, this pouch will take all the knocks you might give it.
Just about taking the 932 cuffs, but there is a version of this pouch with longer strap to better fit the hinged models.


Optional SK5 and SK6 duty keys:
For frequent use, and to improve handling of the standard handcuff key, TCH offer two optional bigger duty keys, the SK5 and SK6 both of which give you more leverage and are easier to use than the basic key.


Model 822 – traditional chain cuffs with Twinlock:
The most traditional cuff to be shown in this series of reviews is a chain cuff model, the 822. In this case it is in the black finish. Traditional this may be, but it also has the TCH Twinlock mechanism, so making it much easier to unlock with a keyway on both sides of each cuff. Also shown fitted in the 9201 belt pouch.


Coming up in Parts 2 and 3:

Next up in Part 2 will be the 852 Folding Rigid Twinlock, 832 Superior Hinge Twinlock, TCH HR Handcuff Reducer plus the 9200 and 9215 Handcuff Pouches.

Part three will include the 842 Rigid Twinlock with RCP5 Handcuff Pouch, NCG Neoprene Cuff Guard along with handcuffing techniques , the TOOOL customised universal handcuff key and ‘alternative’ uses for handcuffs.

Full list of TCH products featured in the three part special series:

832 Superior Hinge Twinlock
932 Lightweight Superior Hinge Twinlock
852 Folding Rigid Twinlock – Red grip
842 Rigid Twinlock
822 Superior Chain Twinlock – Black finish

Accessories –
SK5 Flat Swivel key
SK6 Tubular Swivel key
NCG Neoprene Cuff Guard
TCH HR Handcuff Reducer
TCH 9200 Handcuff Pouch (for 822)
TCH 9201 Handcuff Pouch (for 832/932)
TCH 9215 Handcuff Pouch (for 852)
TCH RCP5 Handcuff Pouch (for 842)

 
Discussing the Review:
The ideal place to discuss this review is on the Tactical Reviews Facebook Page
Please visit there and start/join the conversation.