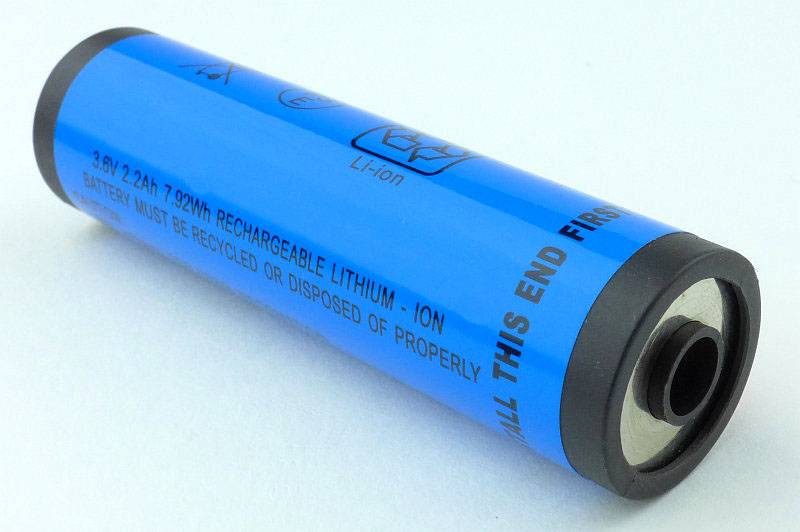
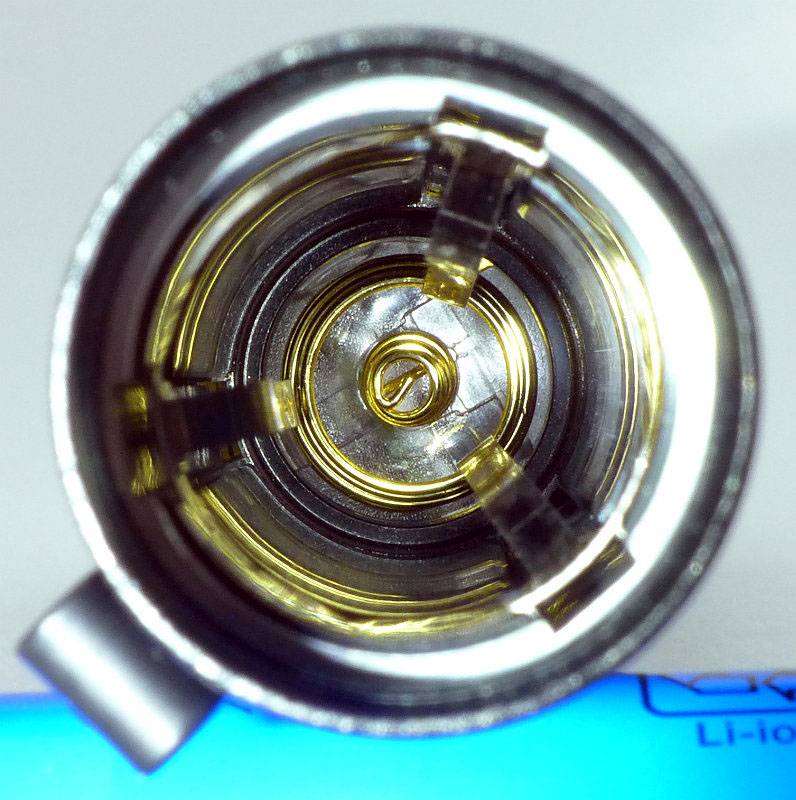
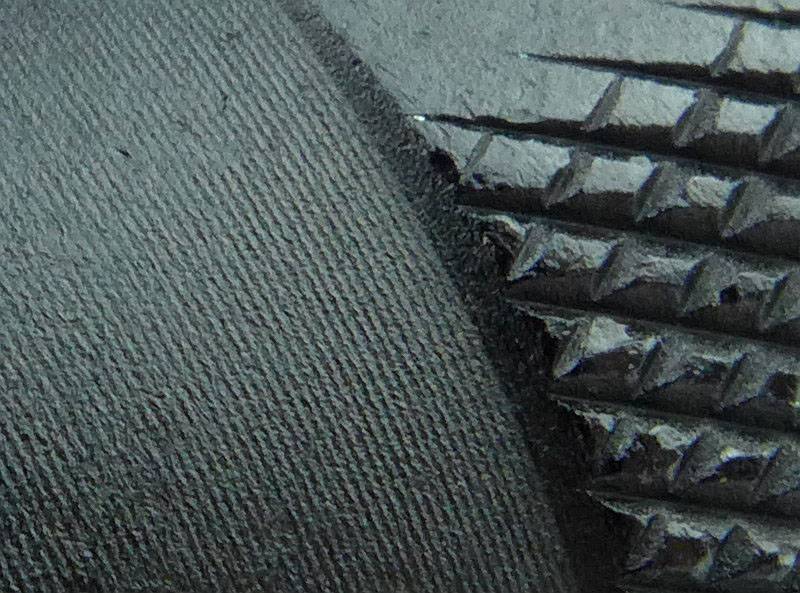
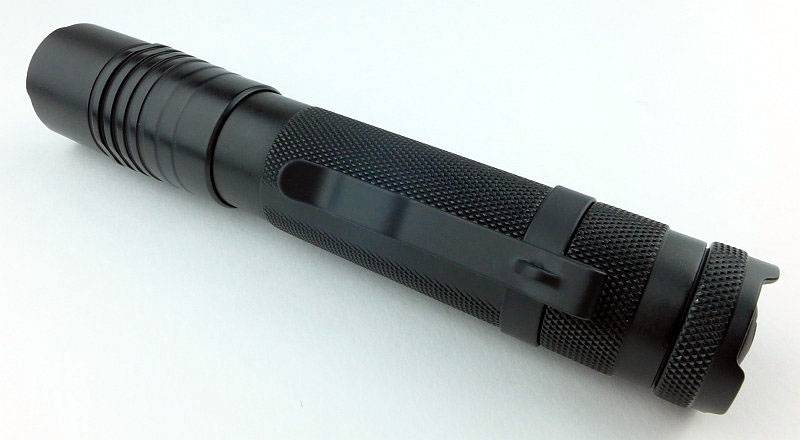
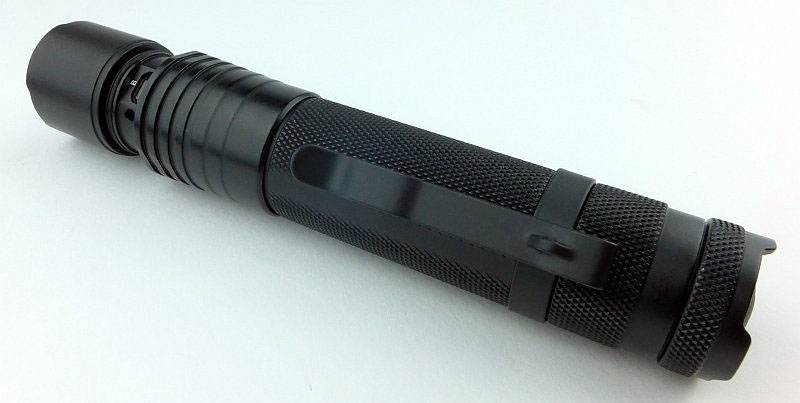
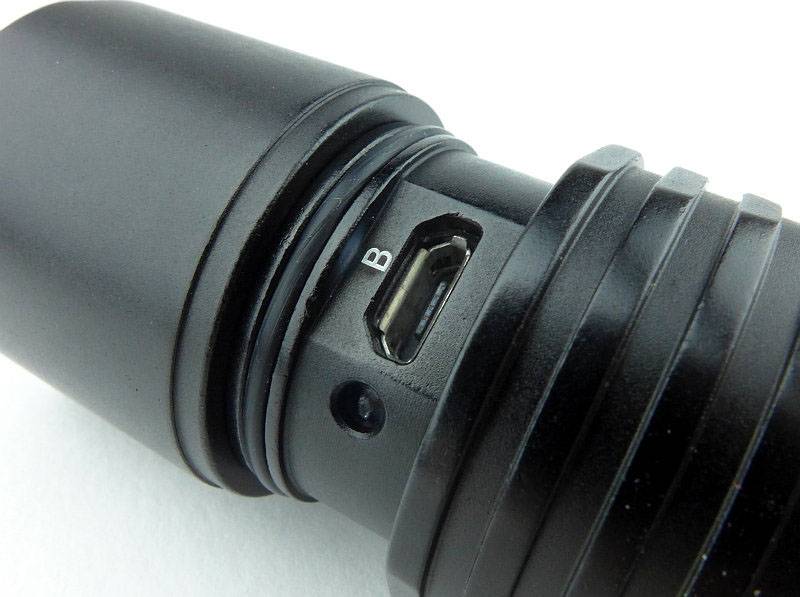
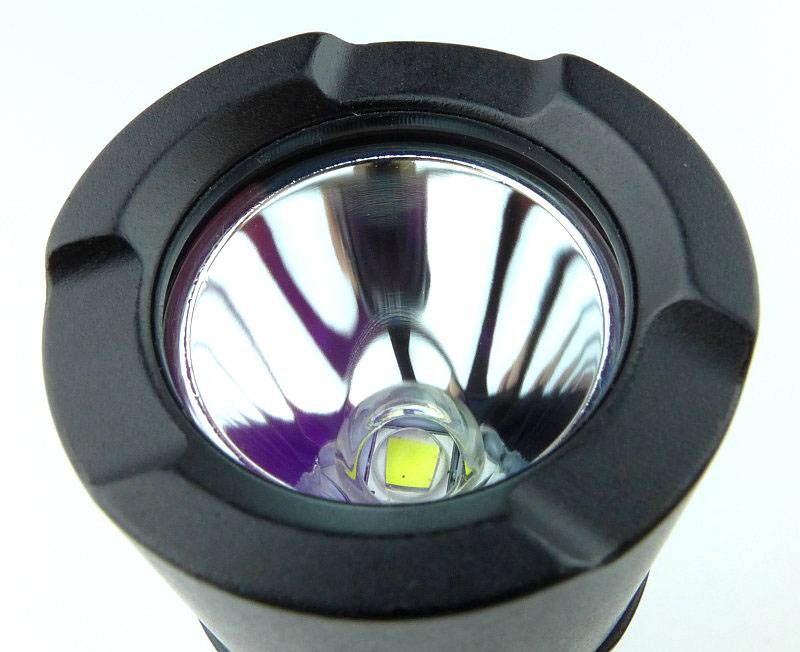
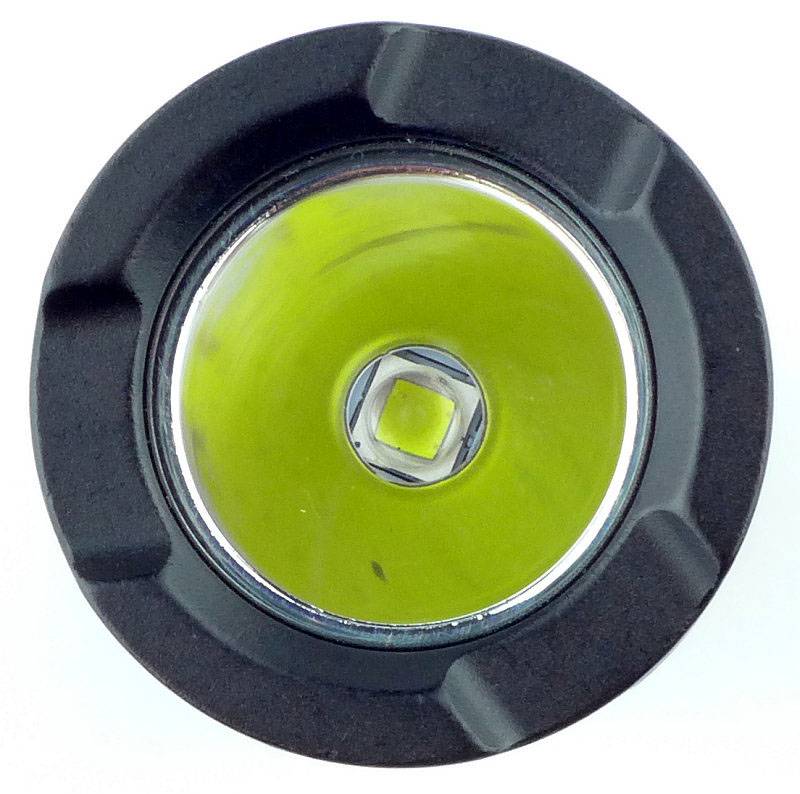
Light Review: Streamlight Dualie – 3AA Magnet, 2AA ATEX and Laser ATEX

Streamlight’s Dualie range are not the only dual-beam lights available, so might look familiar. The 3AA version is not new, but the 2AA ATEX and 3AA Laser ATEX are both recent additions for Streamlight, adding more options to this Intrinsically Safe range.
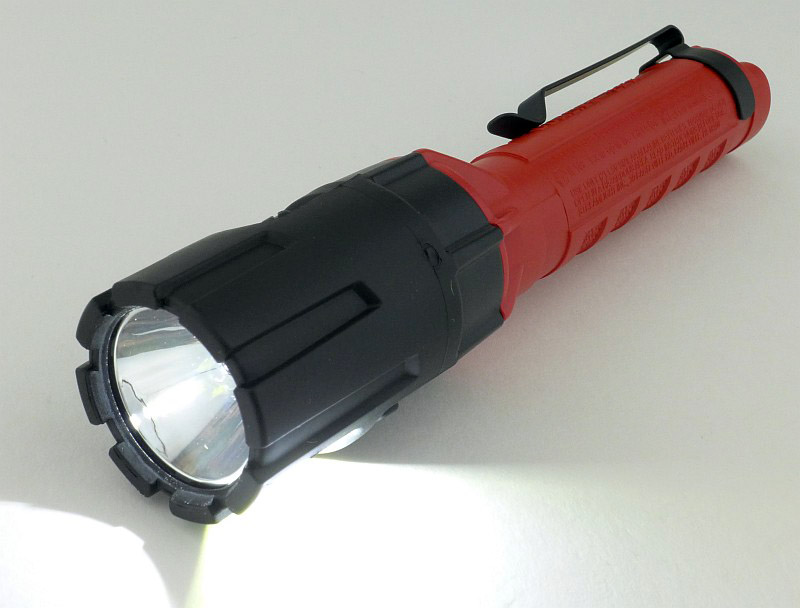
Taking a more detailed look at the Dualie 2AA ATEX:

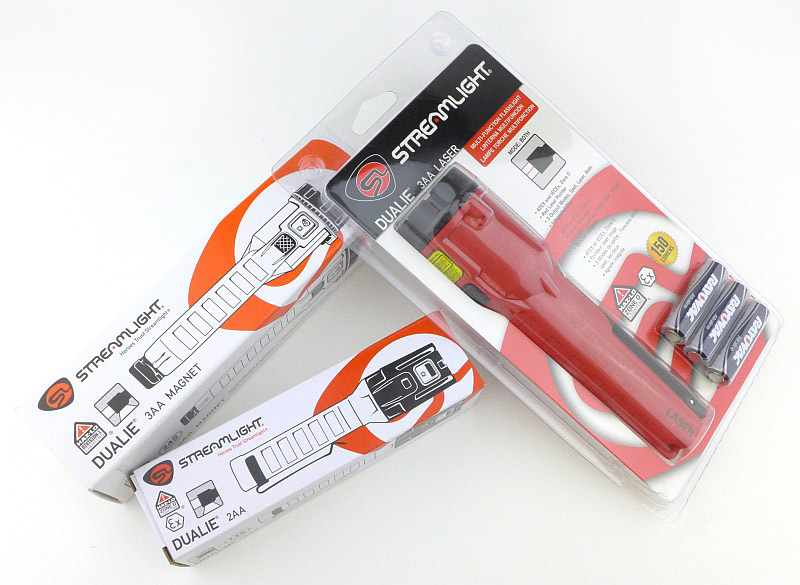
We are starting with a detailed look at the 2AA ATEX version, but before we do, here are all three Dualie lights on test in this review. The 2AA model arrives in a cardboard box like the 3AA Magnet, with the 3AA Laser in a plastic blister pack.
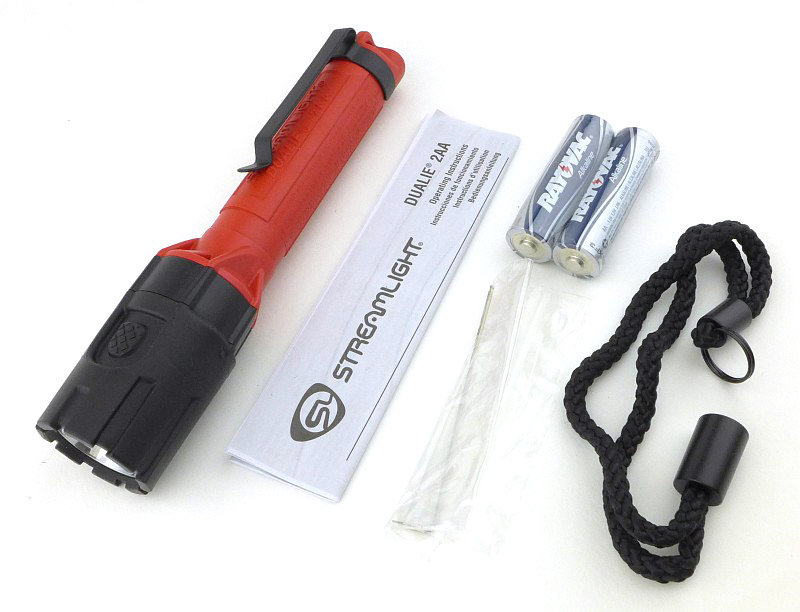
In the 2AA’s box along with the Dualie is a set of alkaline batteries, a wrist lanyard, an Allen key and the instructions.
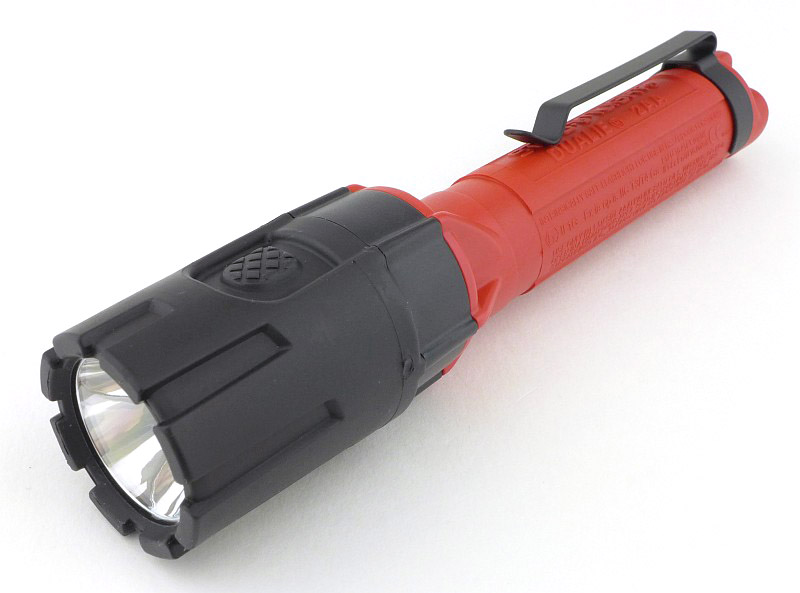
Immediately striking is the offset head design of the 2AA.
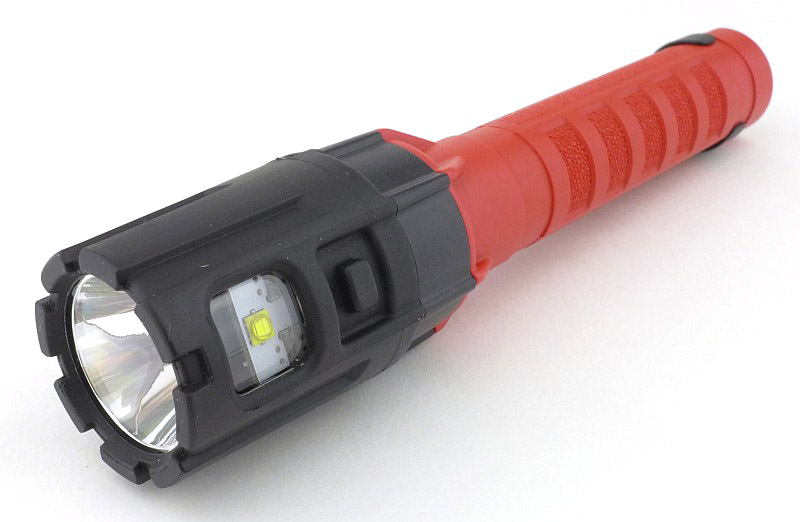
And this is why it is a Dualie. The flood-light LED in the side of the head.
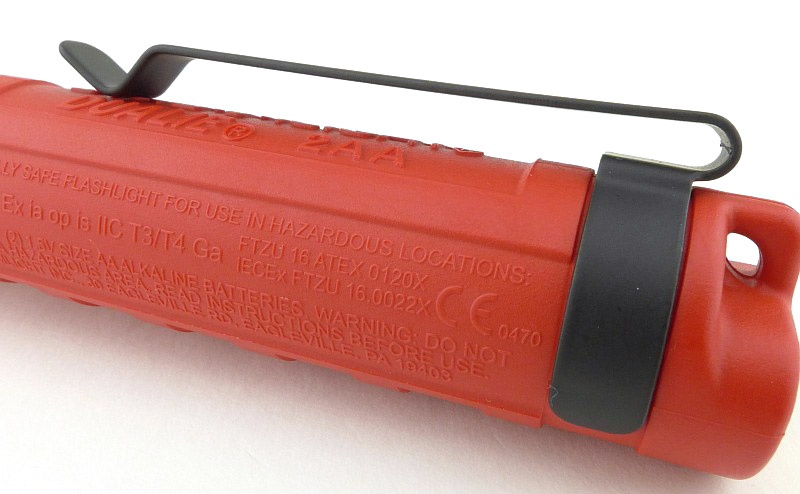
A better look at that unusual offset battery tube. The top of the pocket clip is kept level with the line of the head of the light.

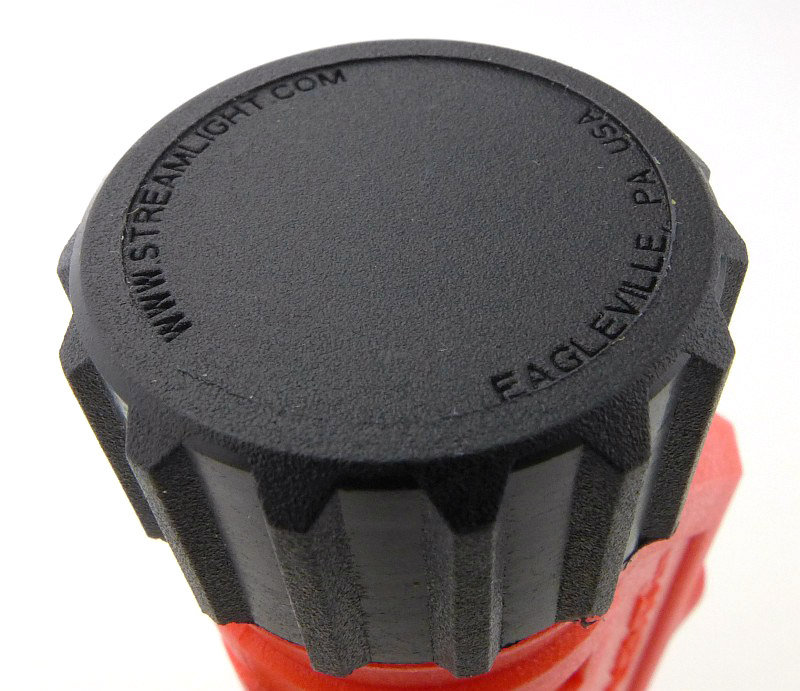
The tail has a lanyard hole, and also a magnet.
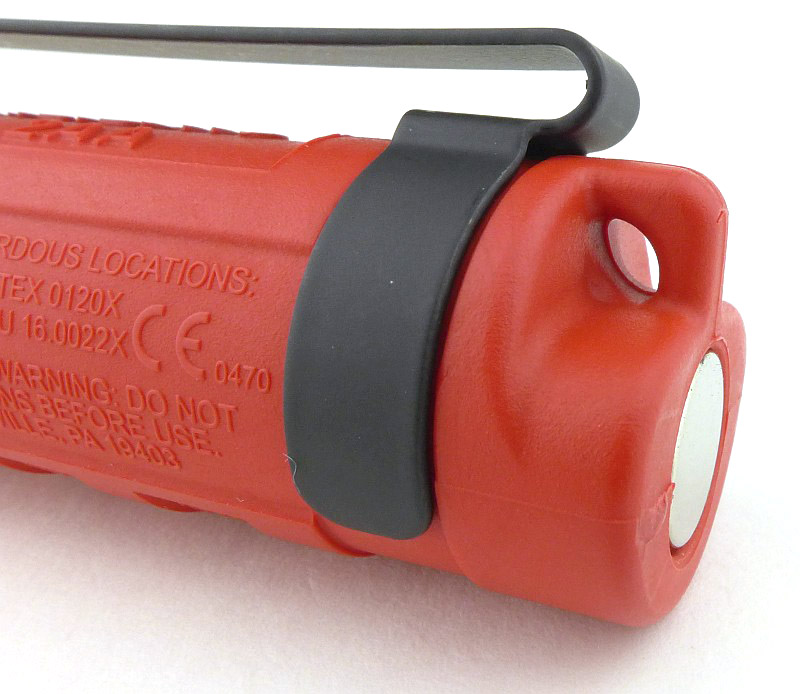
A simple, deep, steel pocket clip is fitted to the 2AA.
The main beam’s switch is the largest, and has a checkered grip pattern.
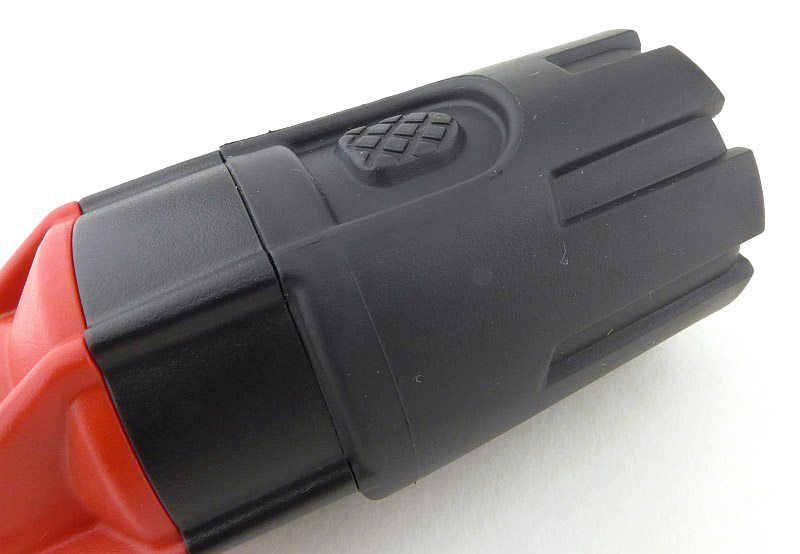
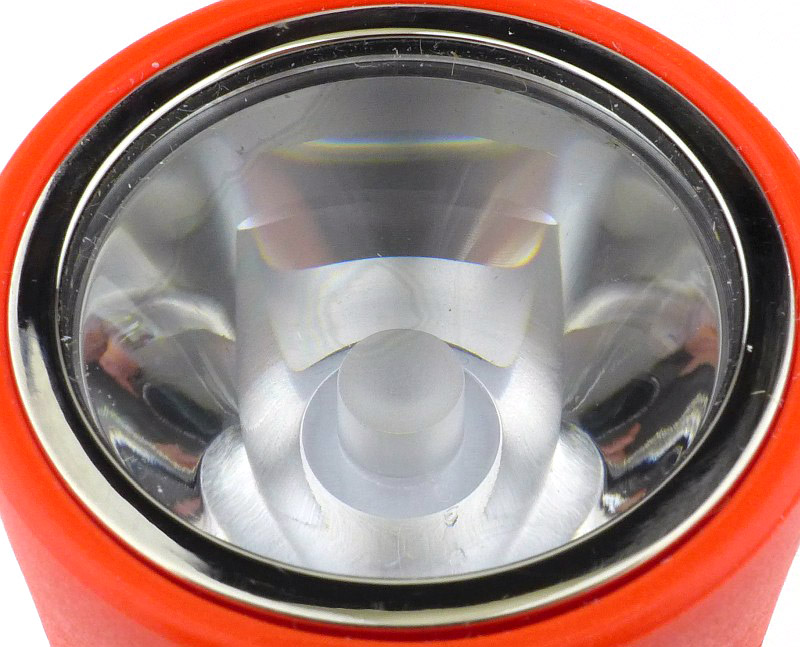
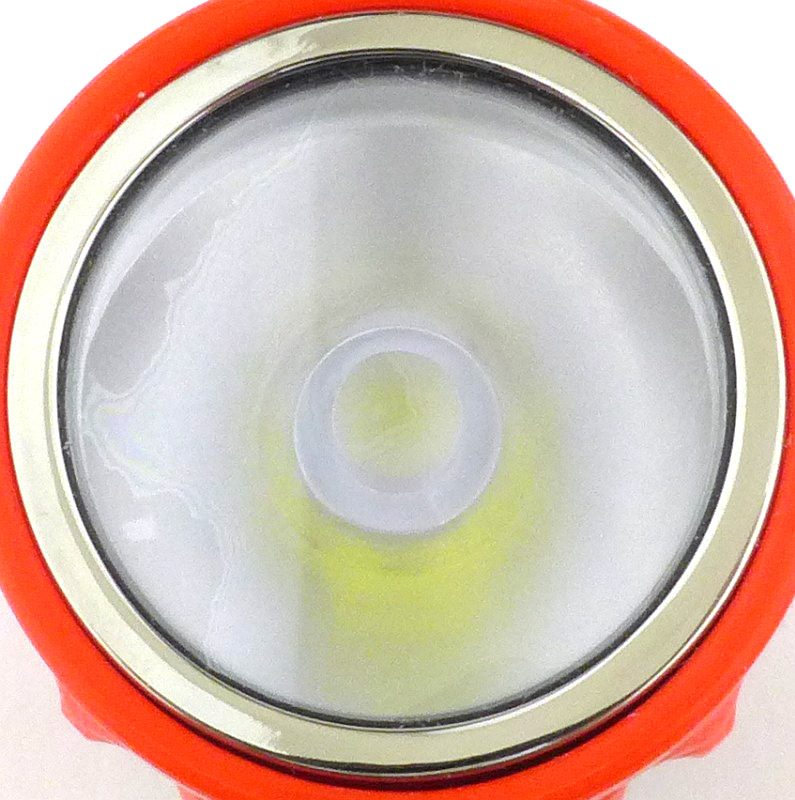
A close look at the 2AA’s main-beam reflector and LED.
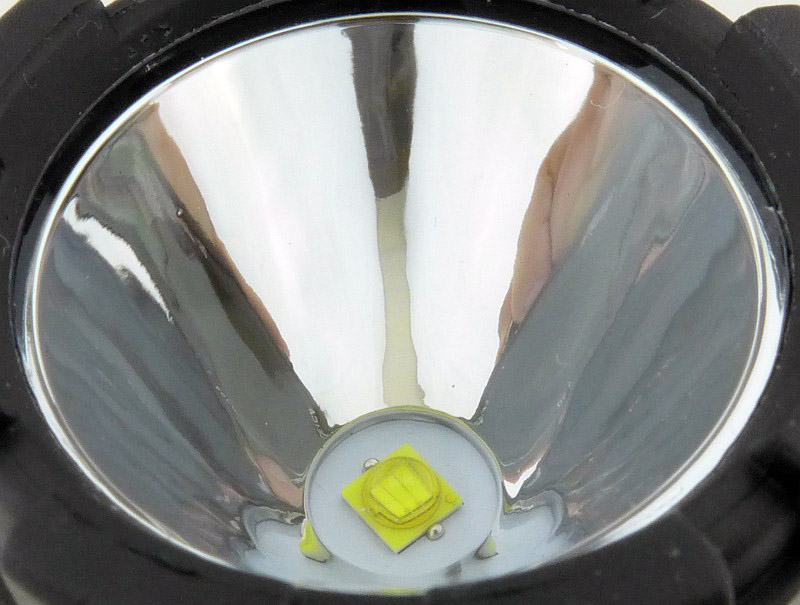
The same LED is used for the side mounted flood beam without any reflector. The side beam’s switch is smaller and has no checkering.
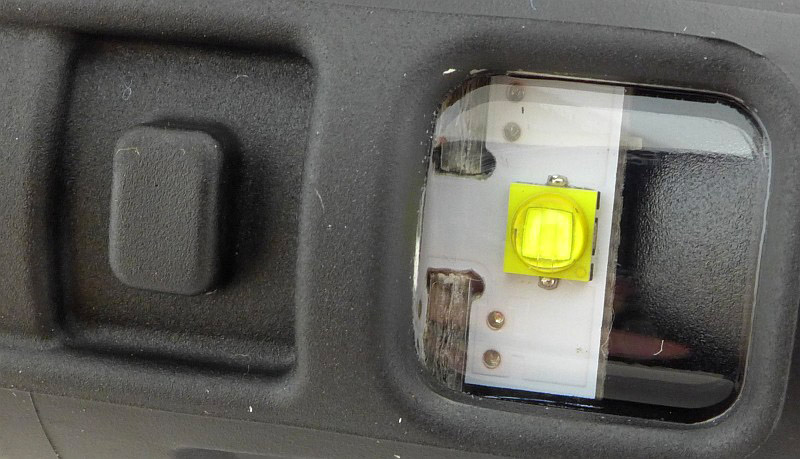
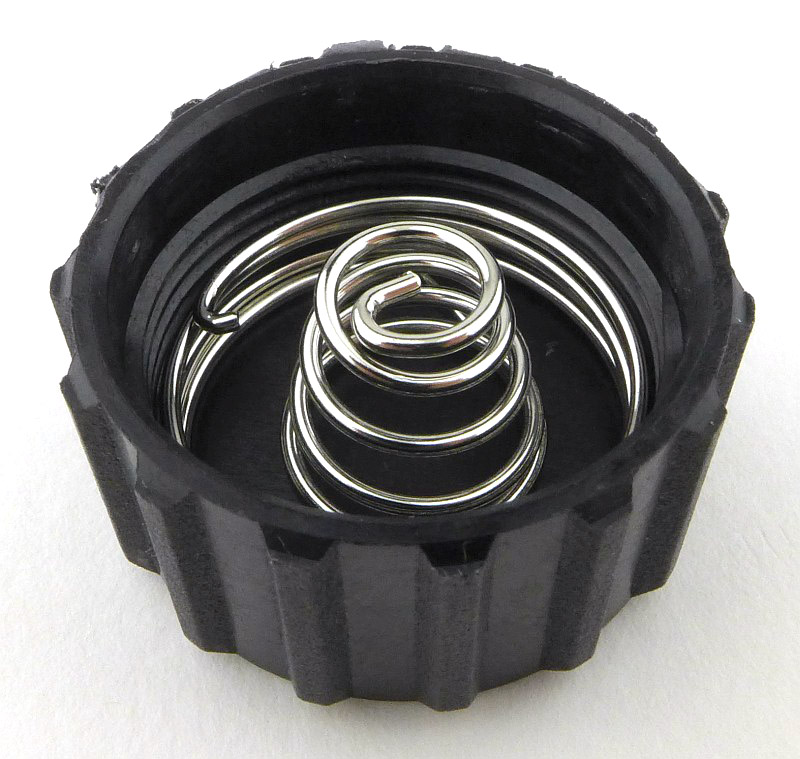
Inside the light’s head are two contacts made from coiled wire.
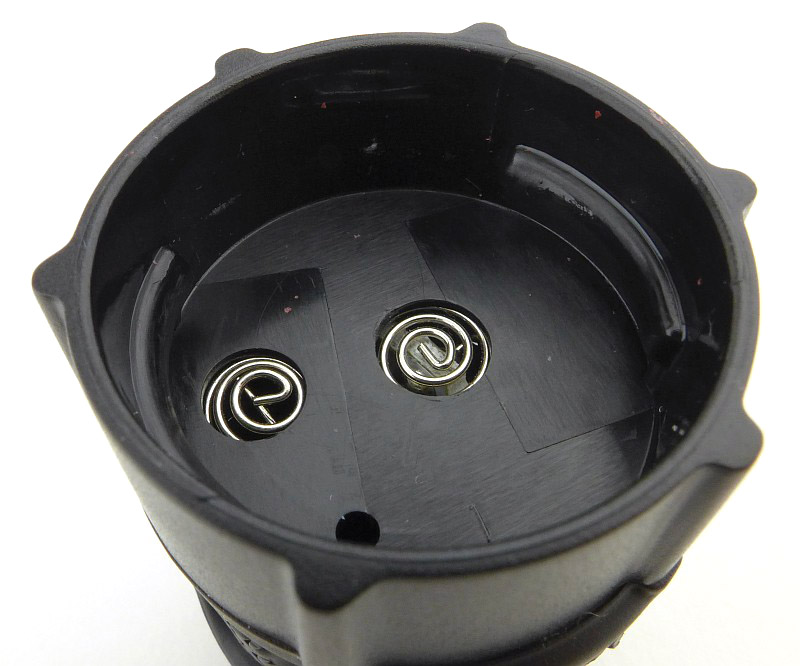
The coil contacts connect to the battery positive terminal and a contact built-in to the front of the battery tube. The other metal part visible here is the locking screw to fix the head in place.
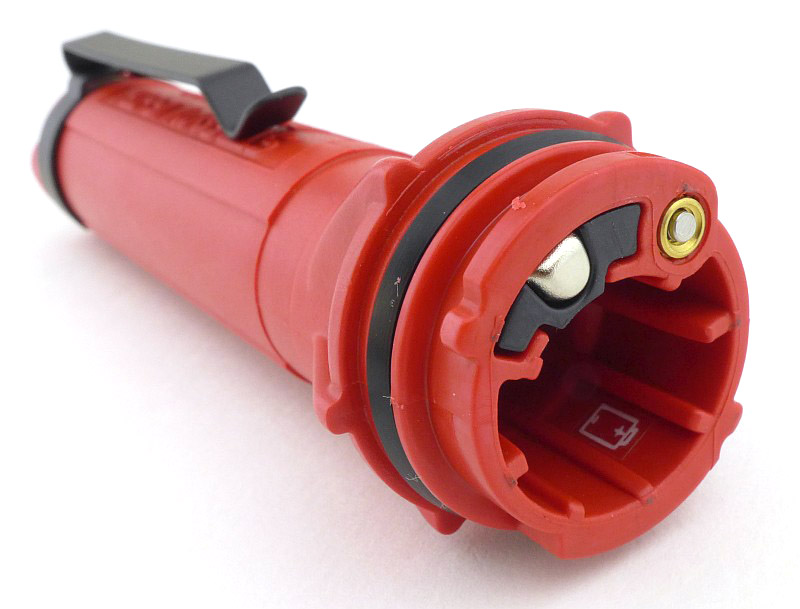
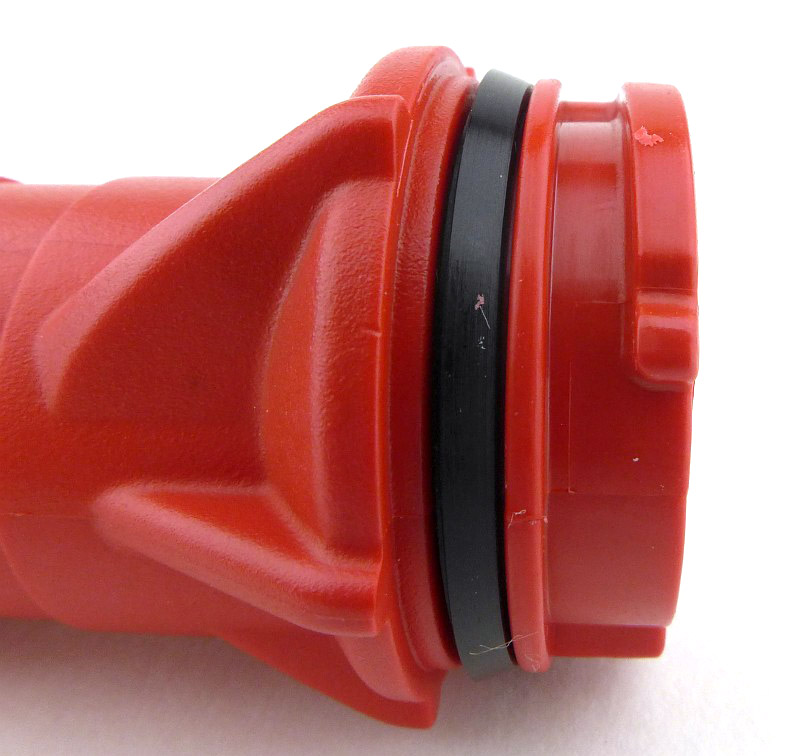
Instead of screw-threads, the 2AA uses a bayonet fixing for the head / battery tube fitting.
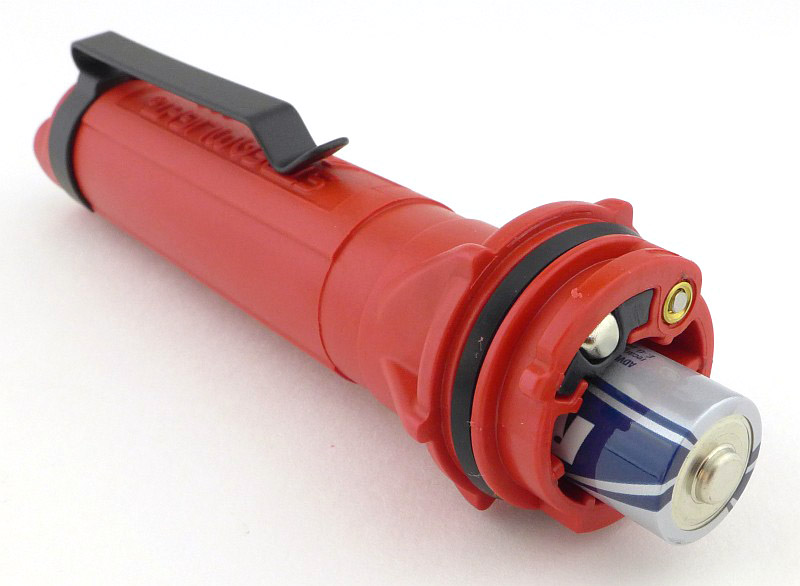
The batteries are now fitted into the body.
Now we see why there is an Allen key included. With the head fitted back onto the body, the locking screw can be tightened.
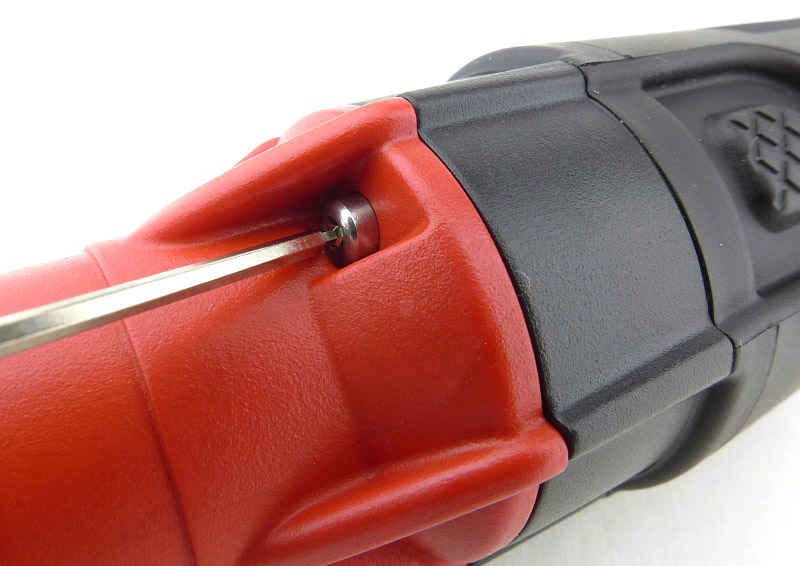
A requirement of certain Intrinsically Safe standards is that the batteries cannot be replaced in the hazardous environment. This is achieved by use of a locking screw to prevent the light being accidentally opened. Instead you need to use a tool to intentionally open the light.
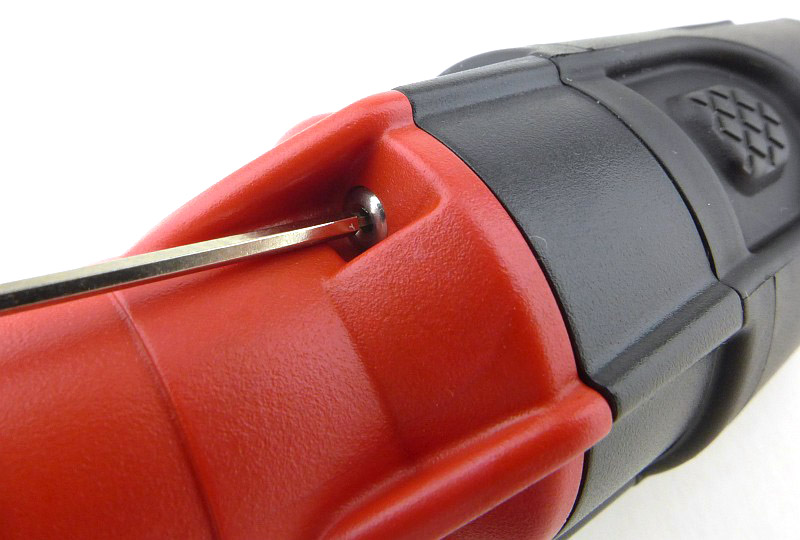
The head is now locked and can’t be taken off without the screw being loosened.
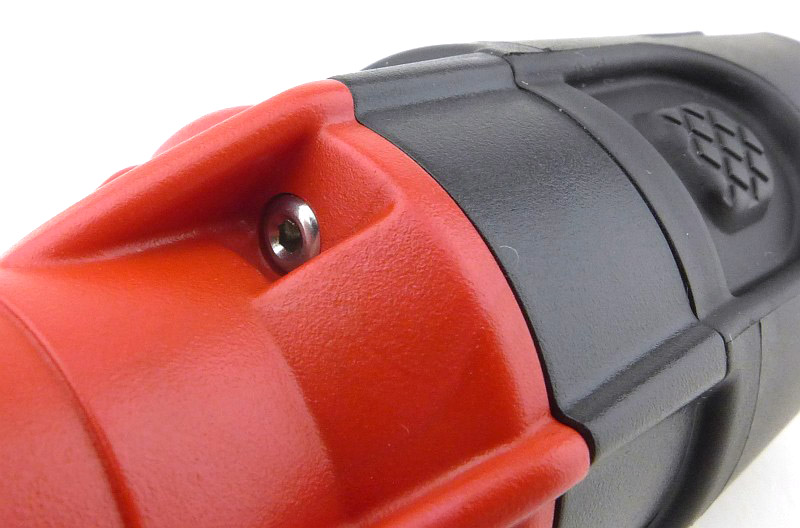
Ready to go.

Taking a more detailed look at the Dualie 3AA Magnet:

In the 3AA Magnet’s box along with the Dualie is a set of alkaline batteries, a wrist lanyard, and the instructions.
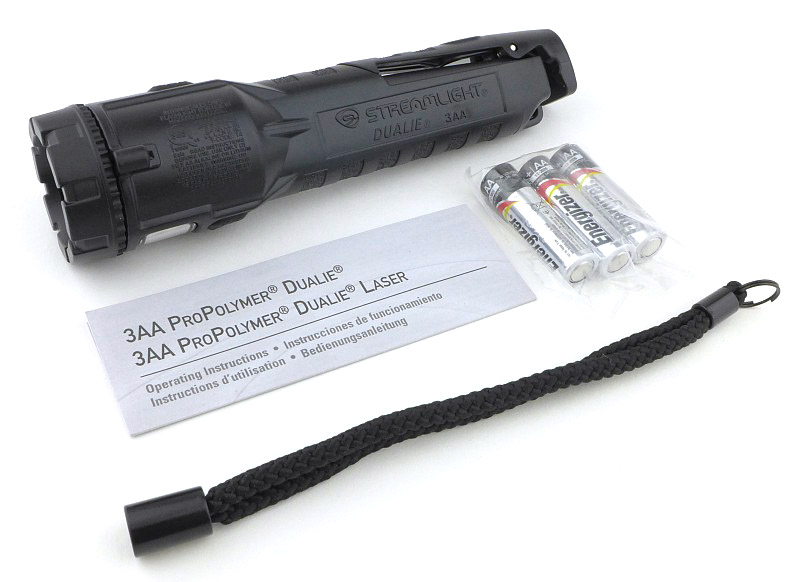
The Dualie 3AA Magnet’s name is due to the two powerful magnets that have been added for more hands free options.
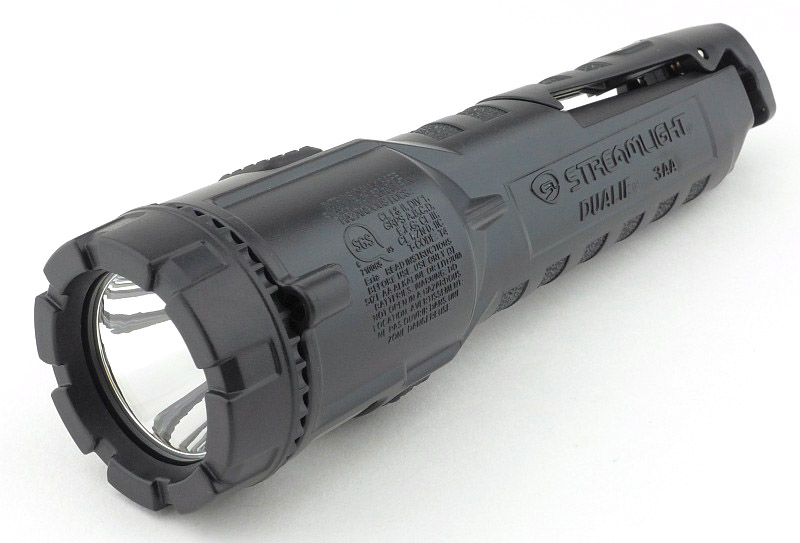
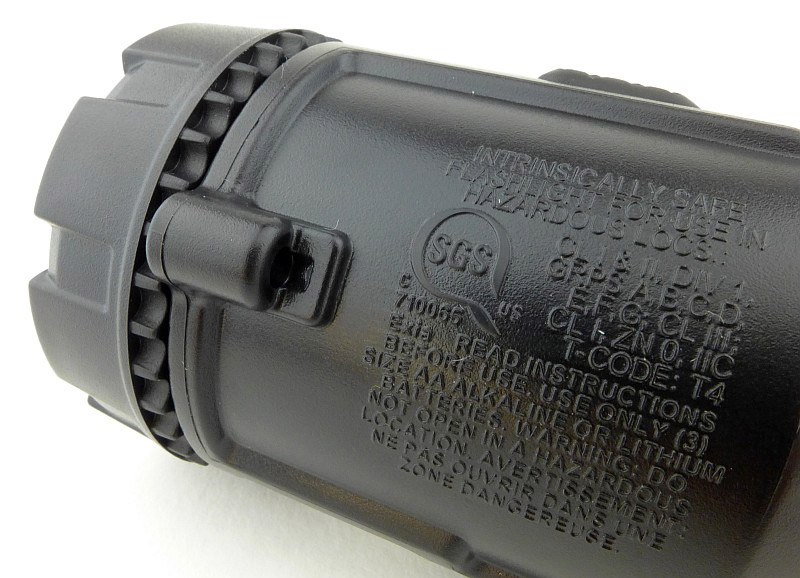
Not ATEX rated, but still intrinsically safe.
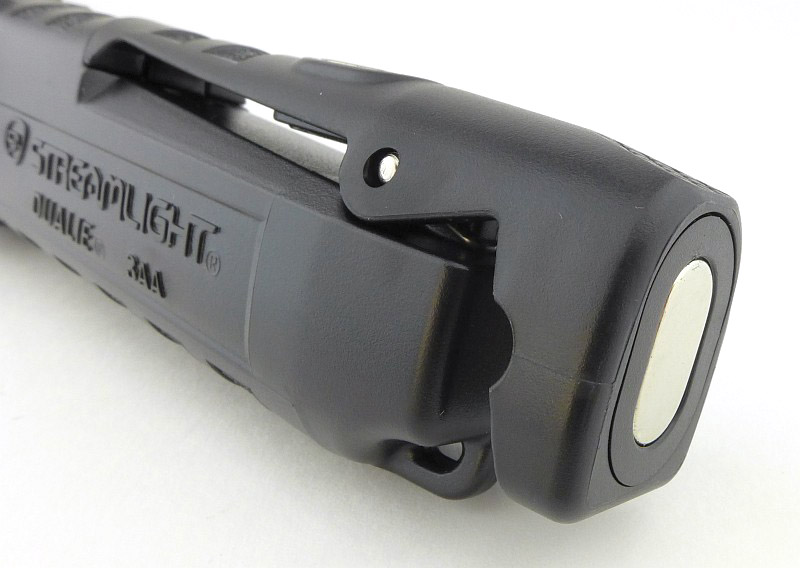
One of the magnets is in the very end of the tail which is part of the extended clip.
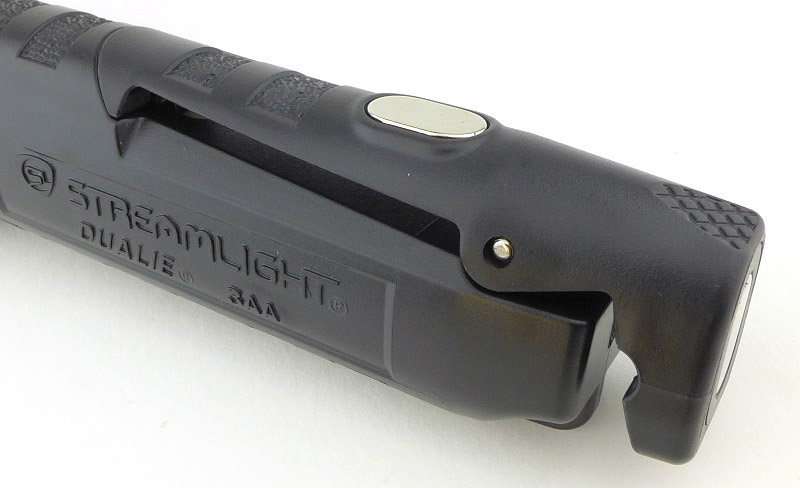
The other magnet is in the side of the clip.
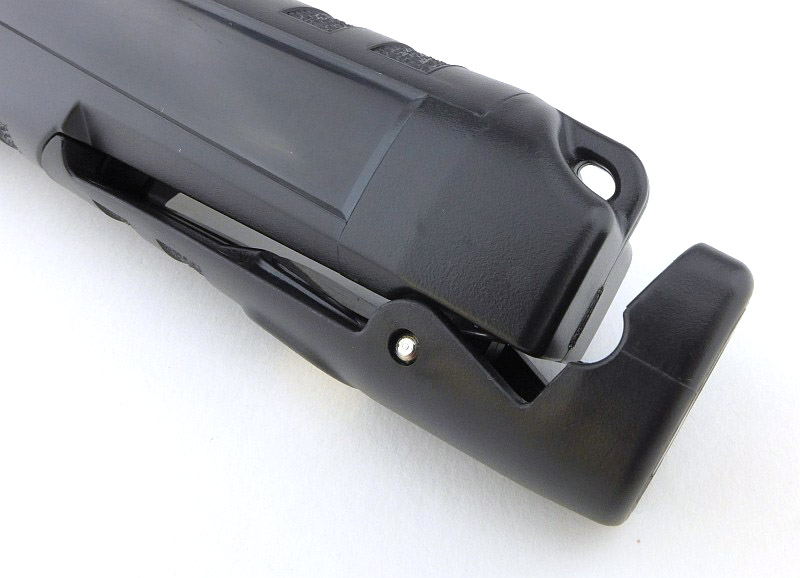
The clip extension also acts as a hook.
The main beam’s switch is the largest of the two, and has a checkered grip pattern.
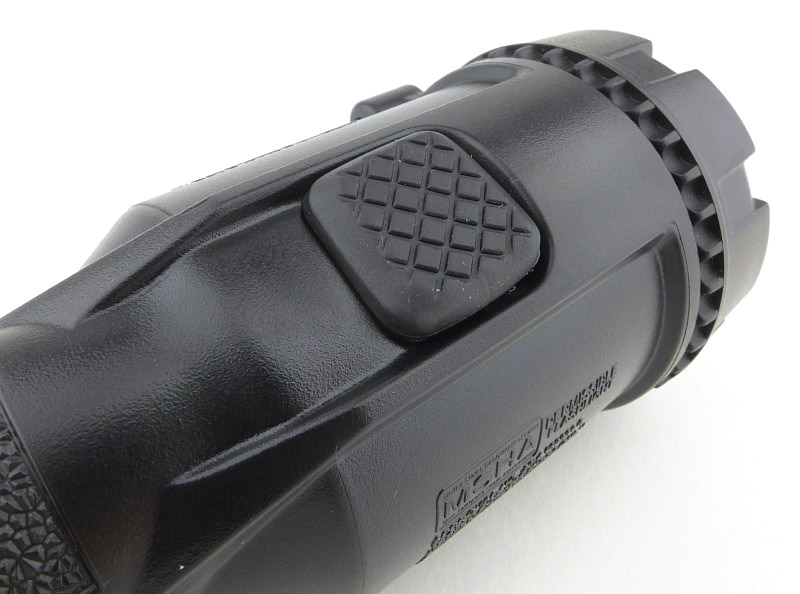
For the flood beam on the side there is a second slightly smaller switch which also has a checkered grip pattern.
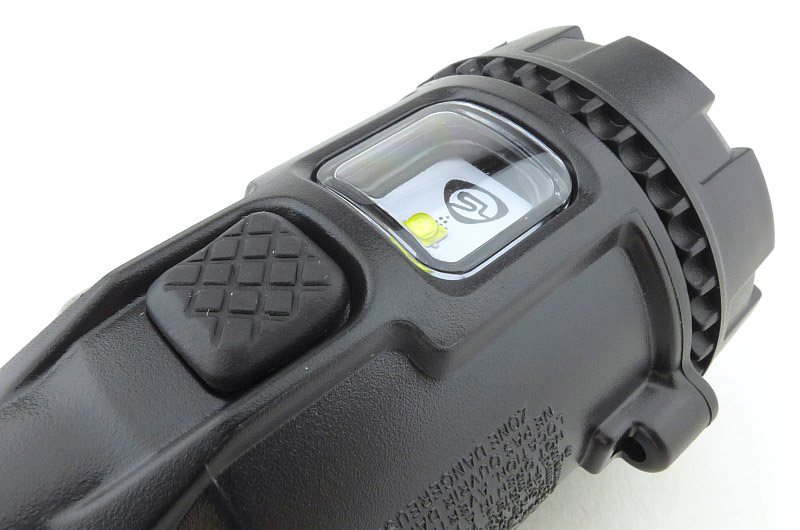
Looking into the main beam’s reflector and its LED.
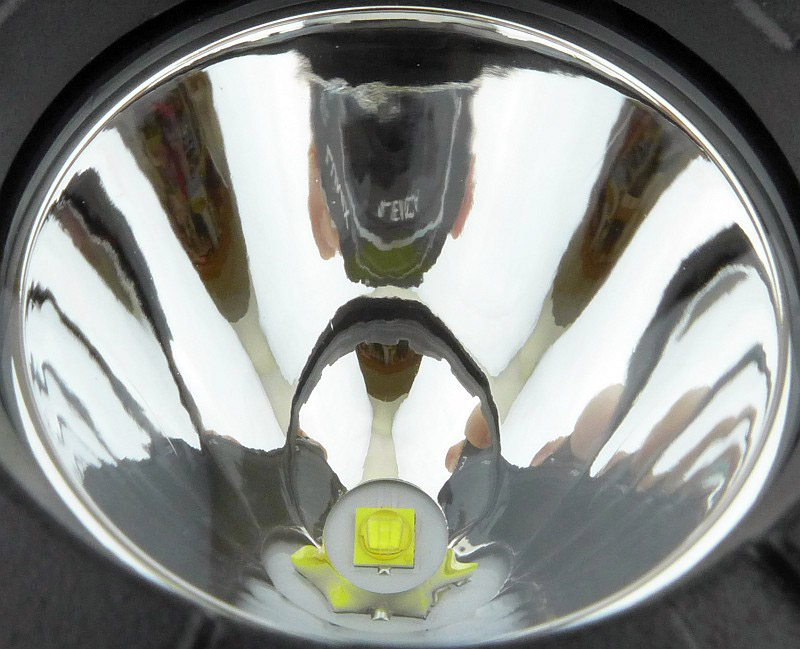
A full exposed LED with no reflector provides the flood beam.
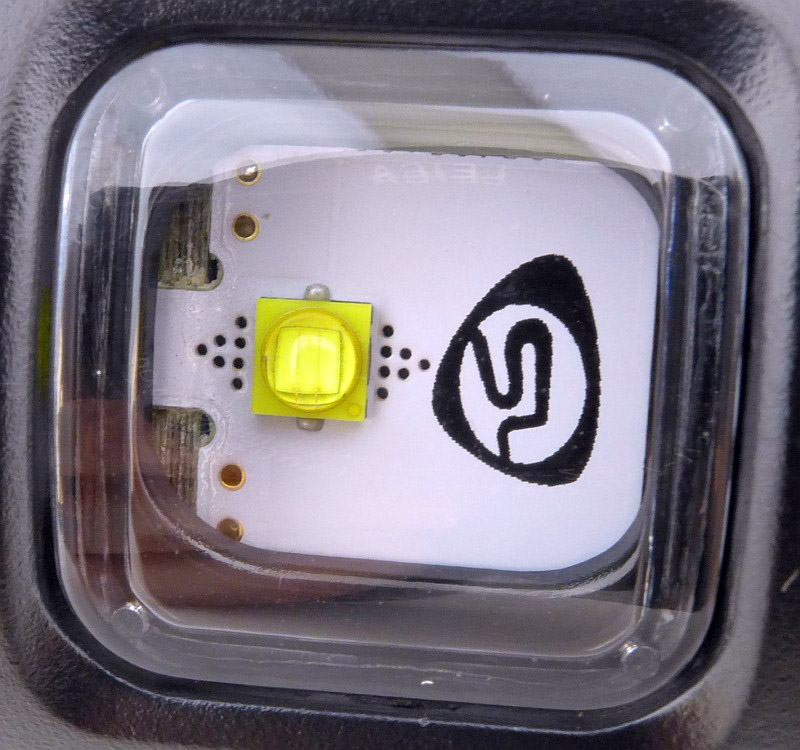
To access the battery caddy, the bezel unscrews from the front of the head.
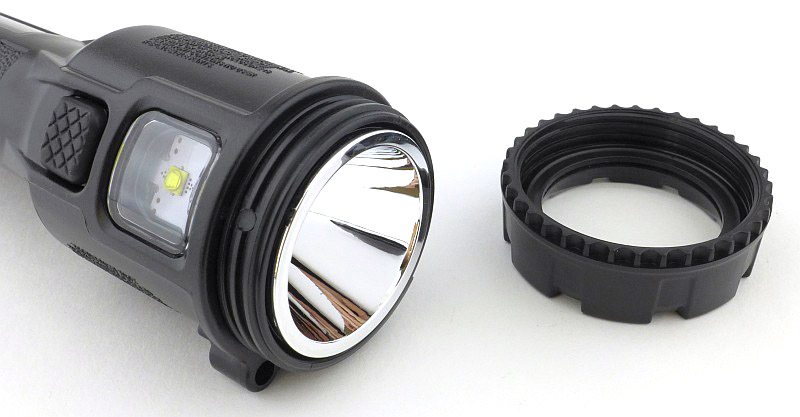
This then allows the main assembly / battery caddy to slide out of the body.
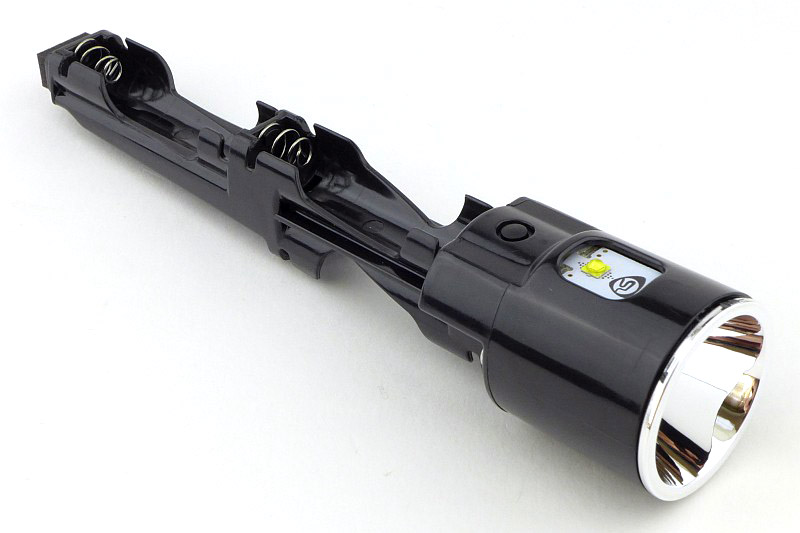
It is a self contained unit with reflector, LEDs, switches, and battery holders.
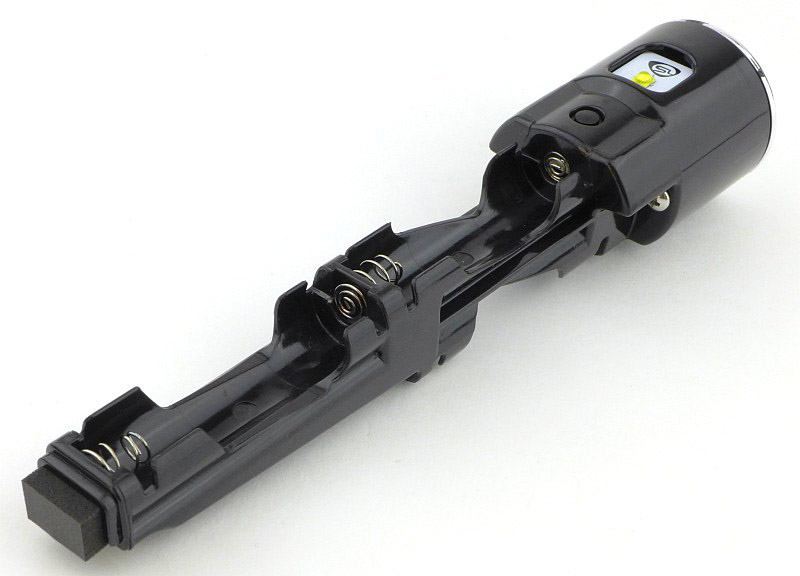
Each cell holder has spring contacts for the negative terminals.
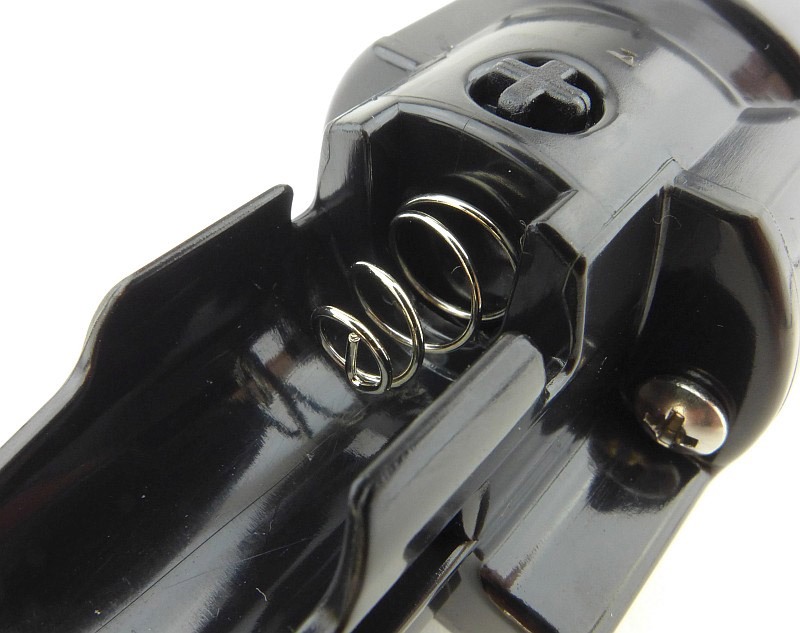
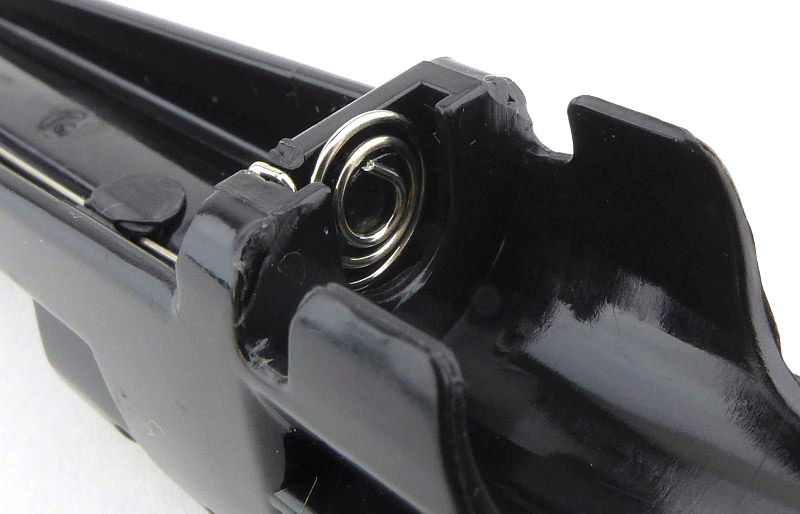
Plus a coiled positive terminal.
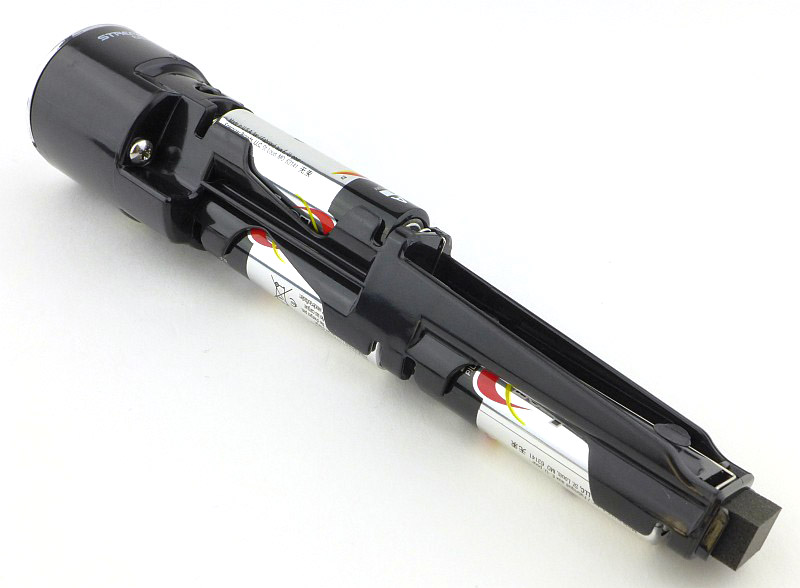
Two cells are fitted to one side, and a single cell into the other.
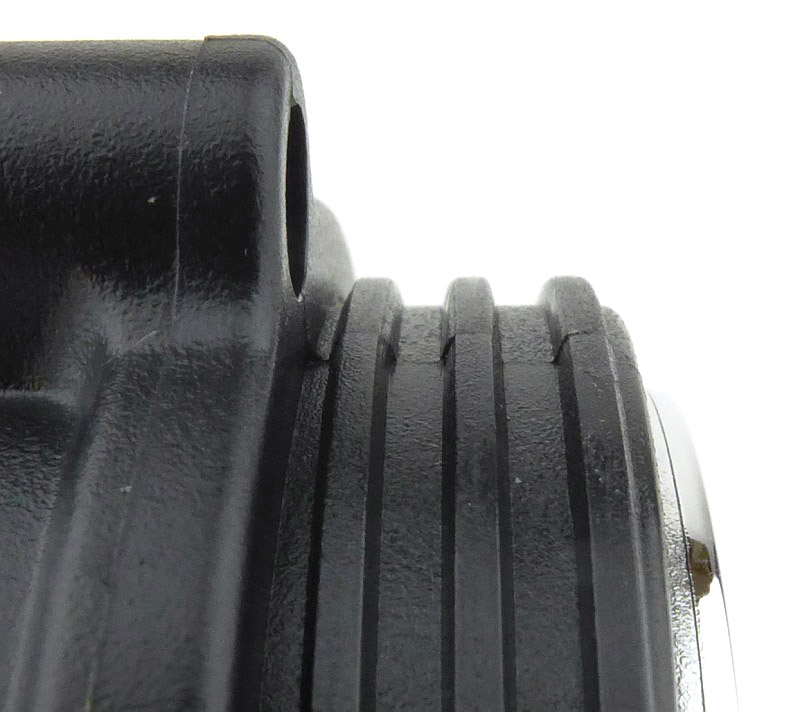
The threads for the bezel ring are moulded plastic.
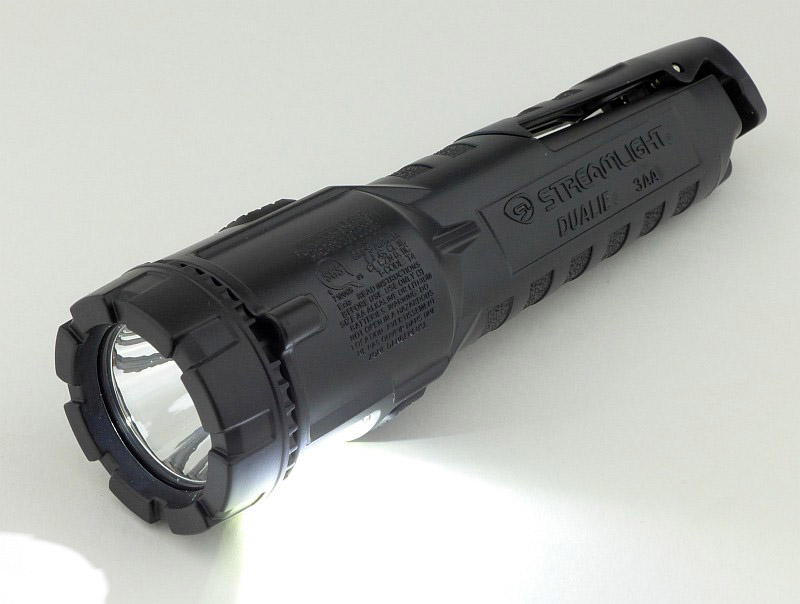
Off to work we go.
Taking a more detailed look at the Dualie Laser ATEX:

In the 3AA Laser’s packaging, along with the Dualie is a set of alkaline batteries, an Allen key and the instructions.
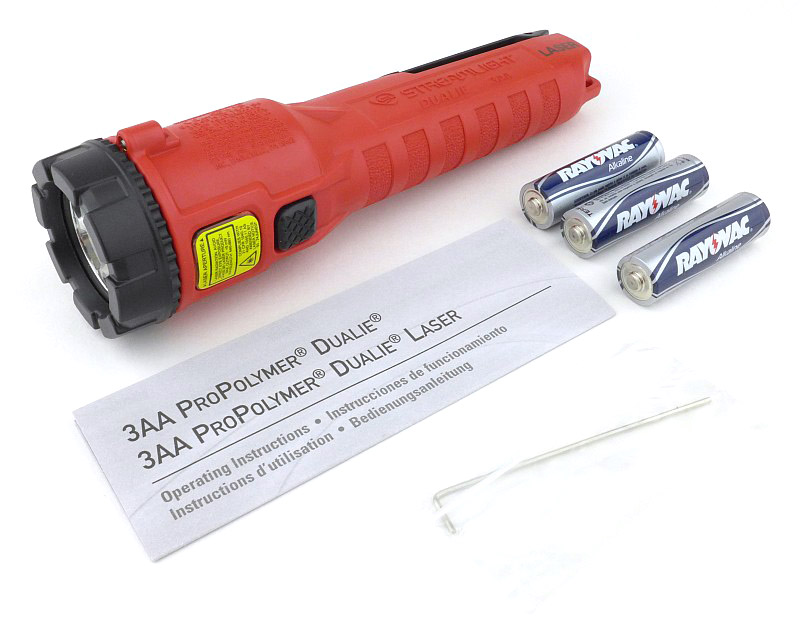
It the case of the 3AA Laser, the second beam is a red laser. Intended as a safe ‘pointer’ for communicating clearly what is being discussed in industrial environments.
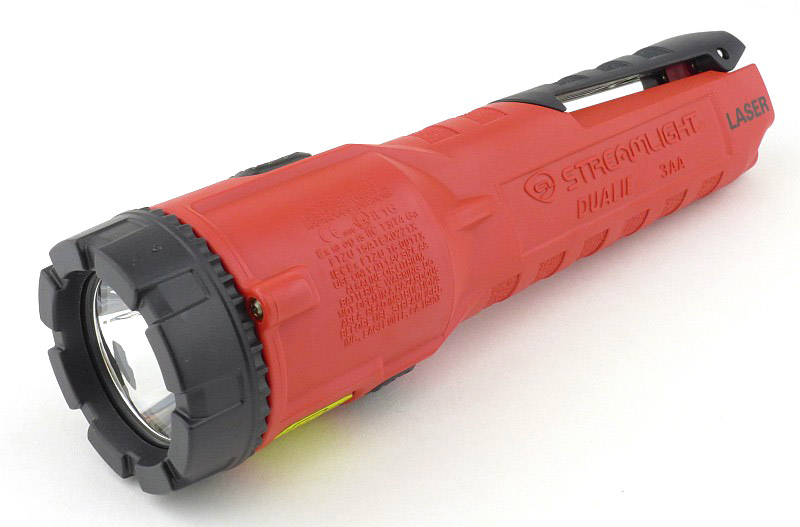
No mistaking what added feature this light has.
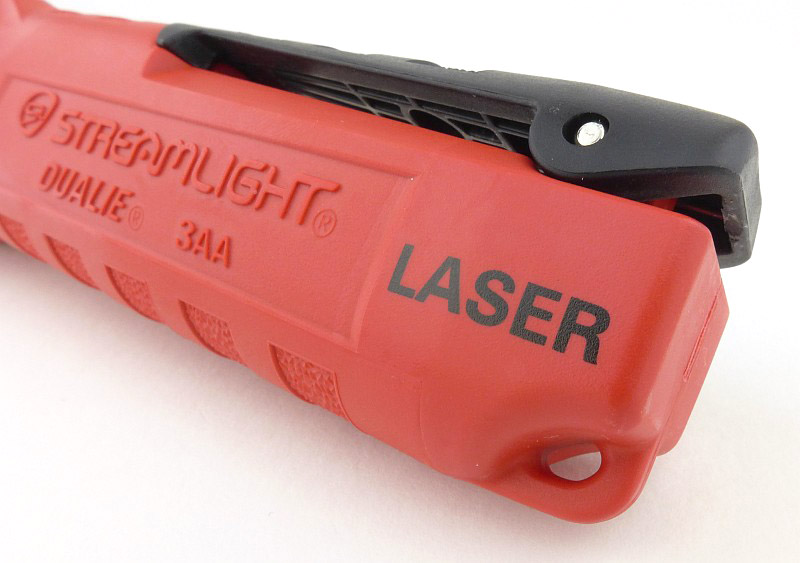
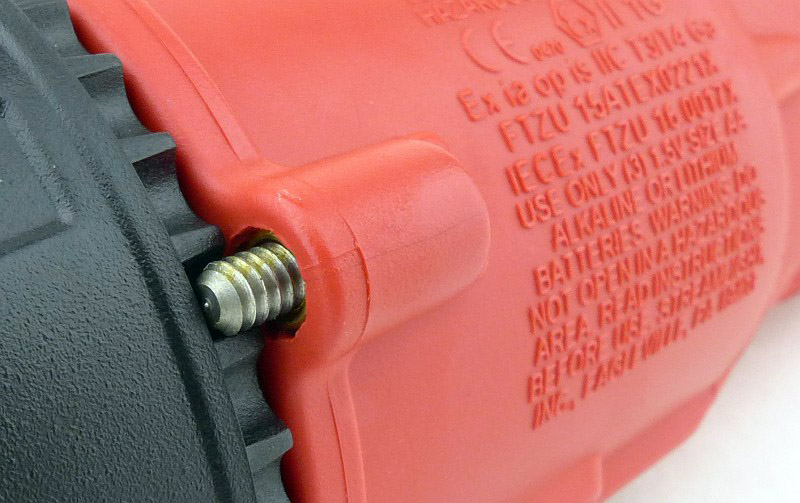
Intrinsically safe and ATEX rated. You might spot one of the ATEX requirements.
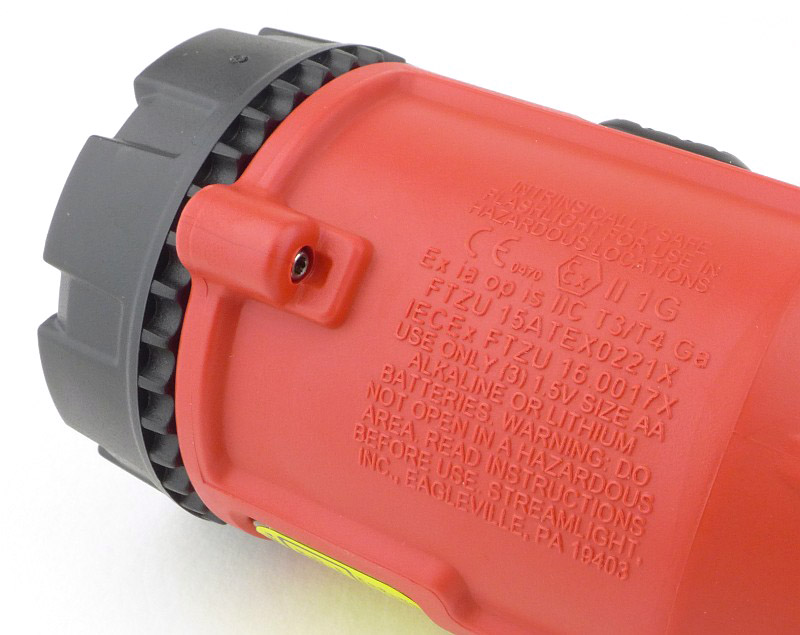
I was of course referring to the locking screw.
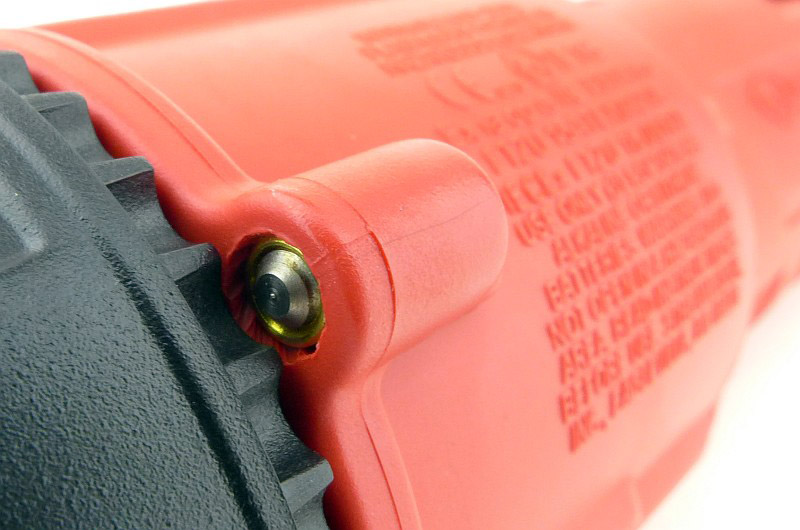
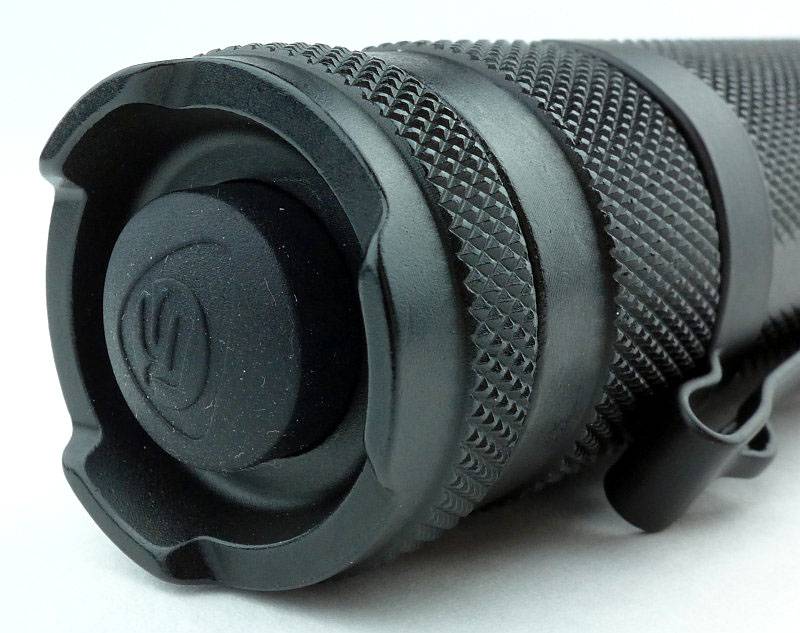
With the locking screw tightened you can see how it engages with the scalloped edge of the bezel ring, making it impossible to unscrew the bezel without intentionally undoing the screw.
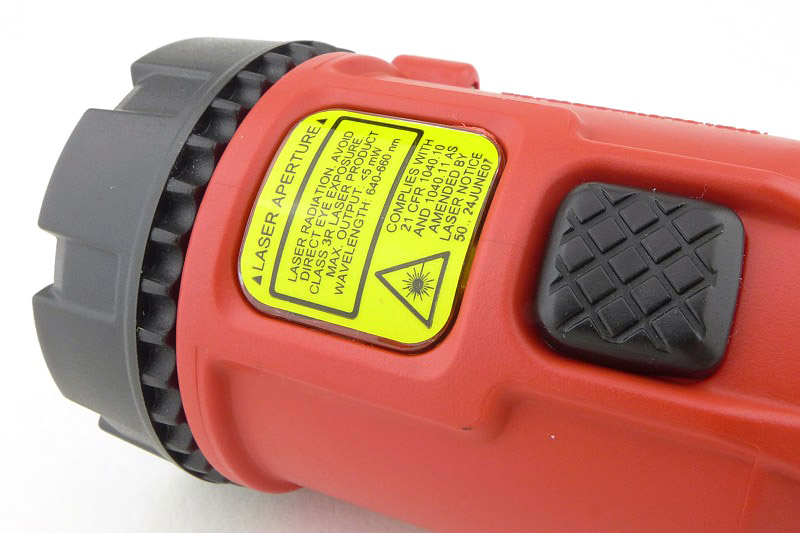
What would have been the window for the flood beam on other Dualie models is covered with a laser warning sticker.
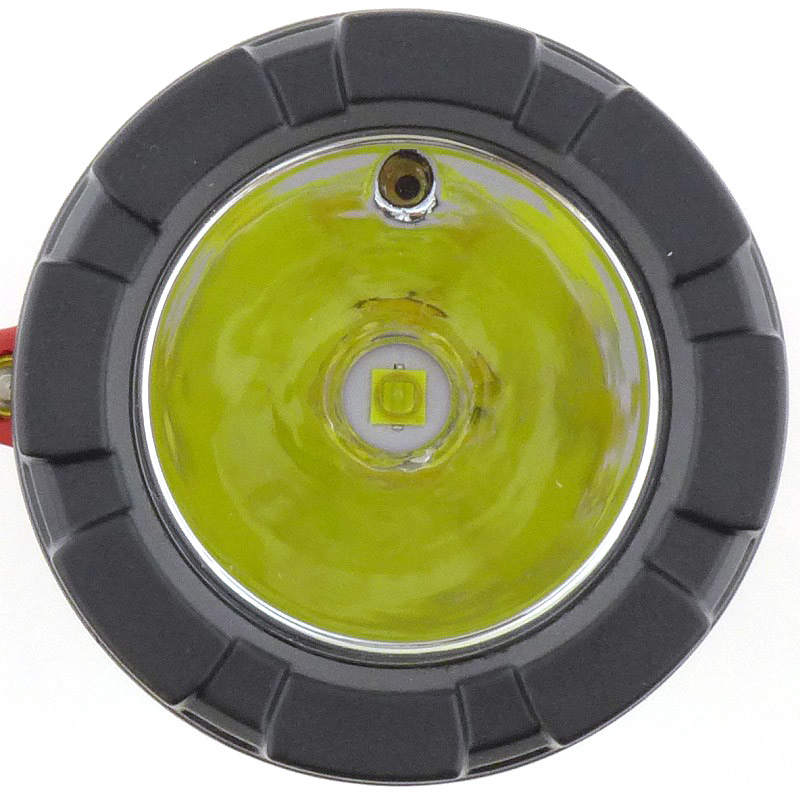
As the laser needs to be projected forwards like the main beam, the main beam’s reflector has been modified with a hole for the laser to shine through.
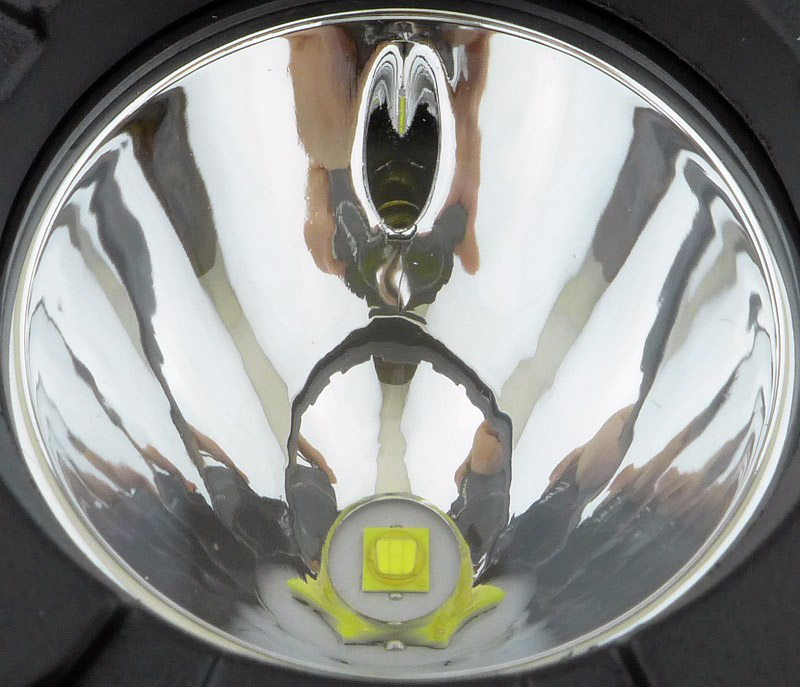
Another view of the hole for the laser.
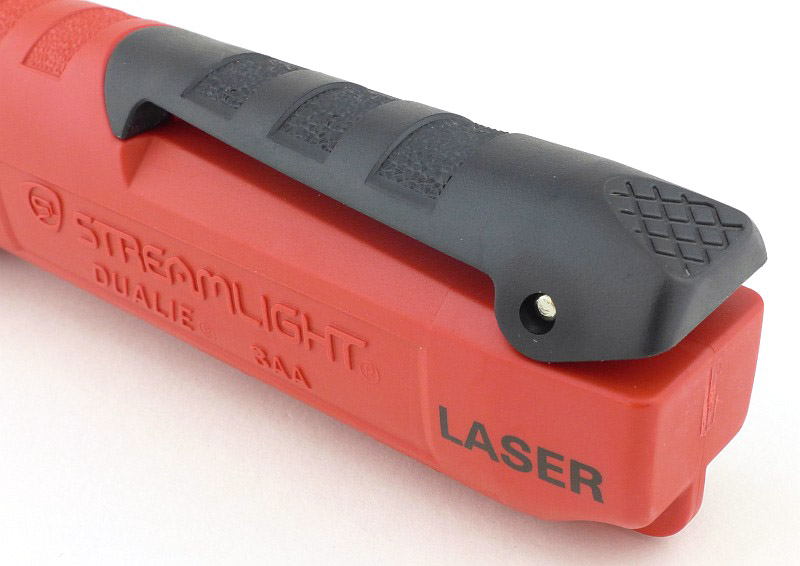
As the main purpose of the Laser model is to provide a safe pointer, the clip is a shorter version than on the Magnet model.
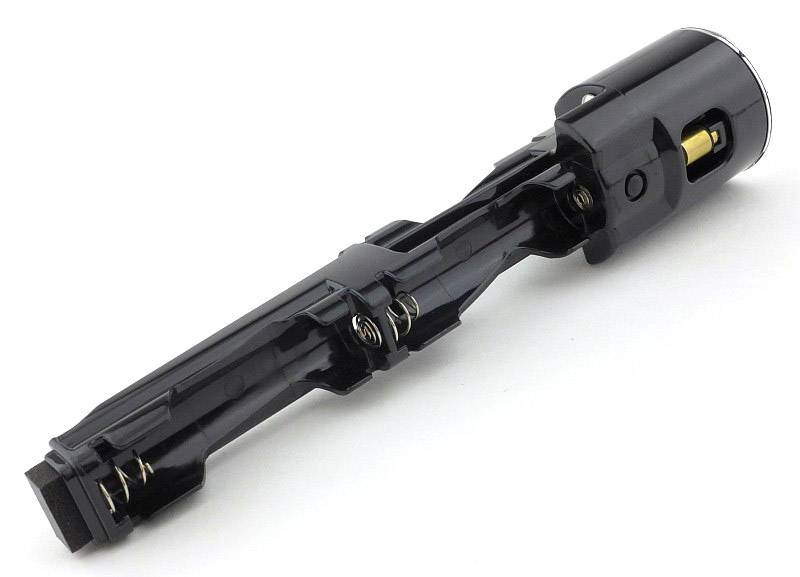
Just as with the previous 3AA model, there is a self contained assembly that is removed from the body which contains all the workings of the light.
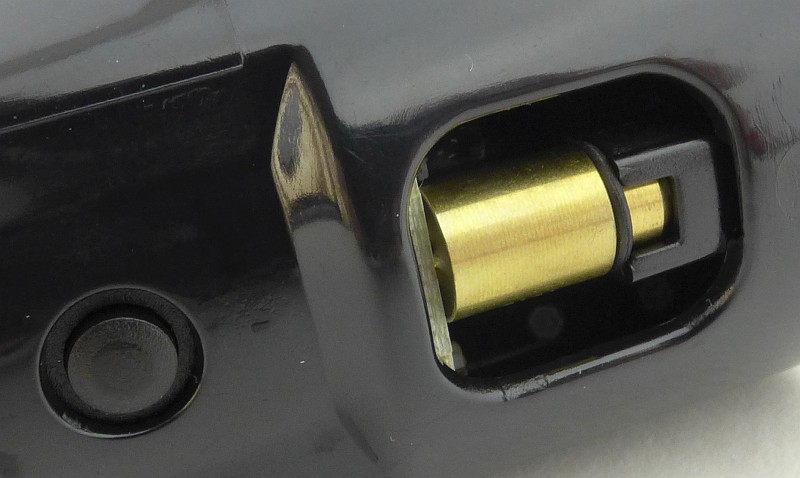
A brass pill contains the laser module.
Threads are moulded into the plastic body for the removable lens bevel.
The beam

Please be careful not to judge tint based on images you see on a computer screen. Unless properly calibrated, the screen itself will change the perceived tint.

The indoor beamshot is intended to give an idea of the beam shape/quality rather than tint. All beamshots are taken using daylight white balance. The woodwork (stairs and skirting) are painted Farrow & Ball “Off-White”, and the walls are a light sandy colour called ‘String’ again by Farrow & Ball. I don’t actually have a ‘white wall’ in the house to use for this, and the wife won’t have one!

With three lights, all with dual functions, there are several beam-shots to look at.

First up are the main beams of each and the 3AA Magnet.
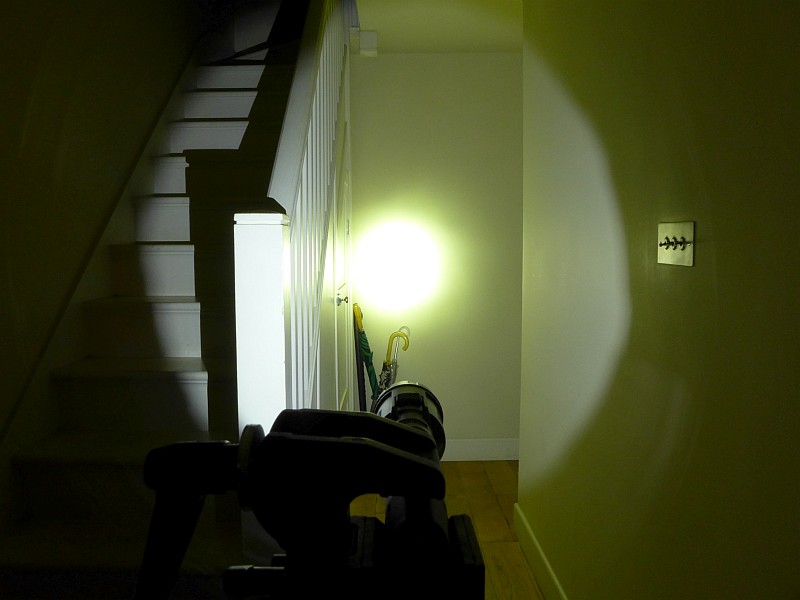
Next is the main beam of the 3AA Laser oddly, though its lumen output is virtually identical it appears brighter despite an identical exposure.
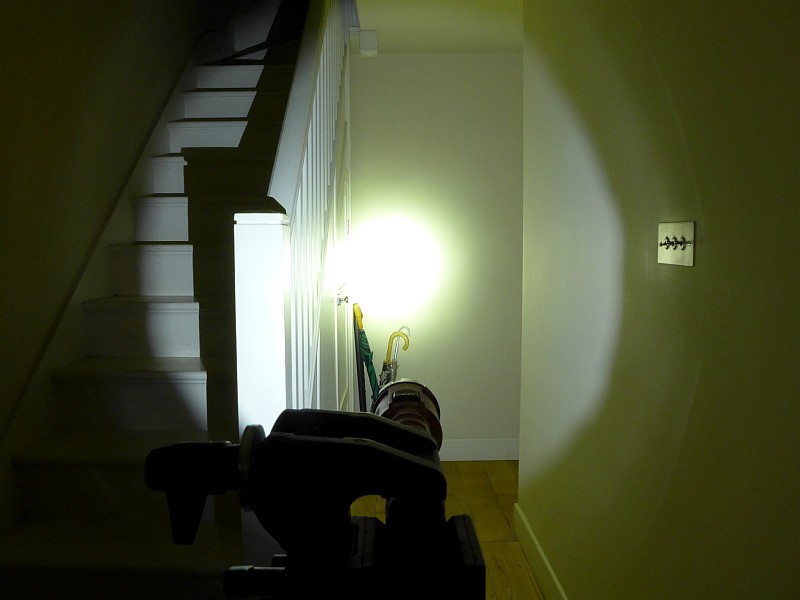
The 2AA’s main beam has a much wider spill than the 3AA models, but is noticeably dimmer.
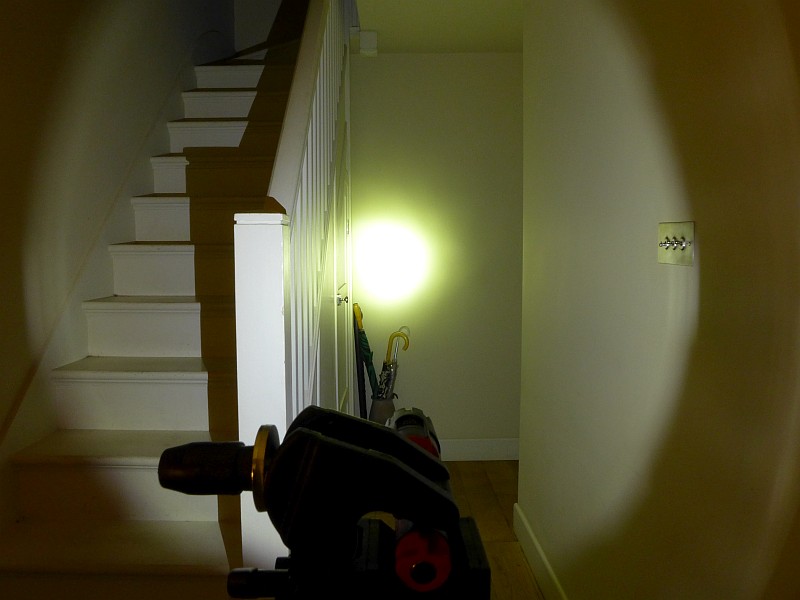
Secondary beams:
As it is the simplest to show, first we have the Laser’s pointer. That’s it. Using it with the main beam masks the spot so it is best not to do this.
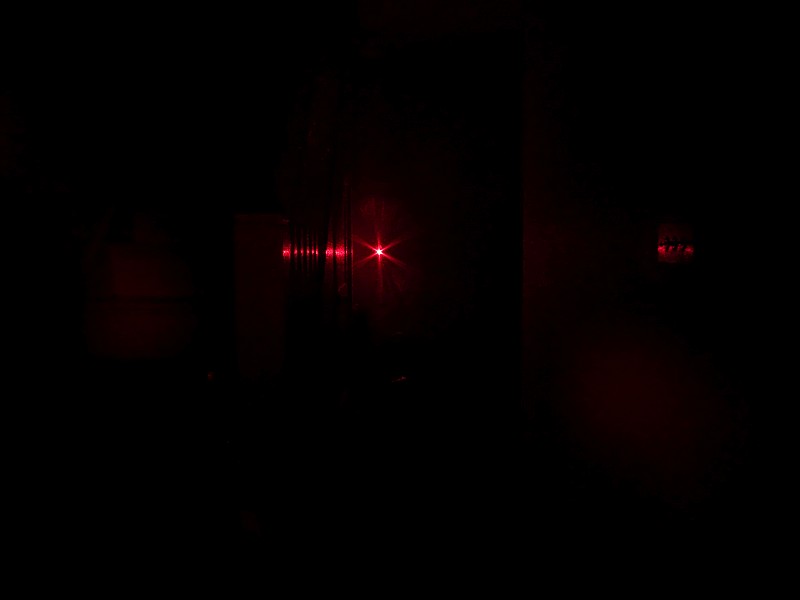
With the mix of spot and flood beams, the next set of beamshots show the different beams at a distance.

Here the 2AA starts with the main beam.
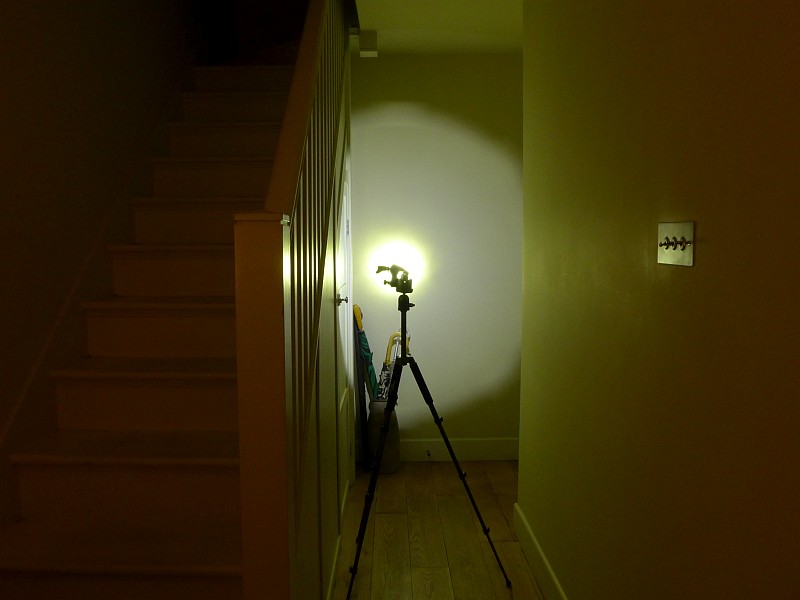
Then we go to Flood.
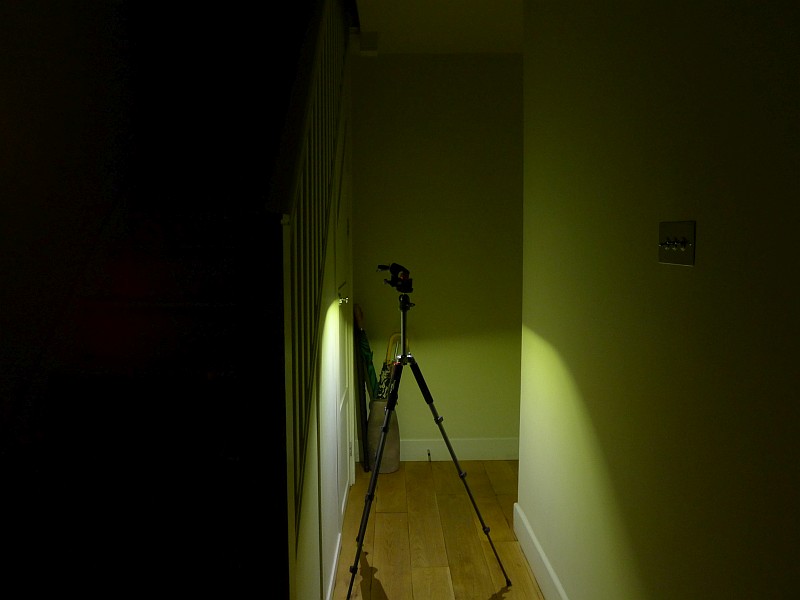
And then both flood and spot beams together.
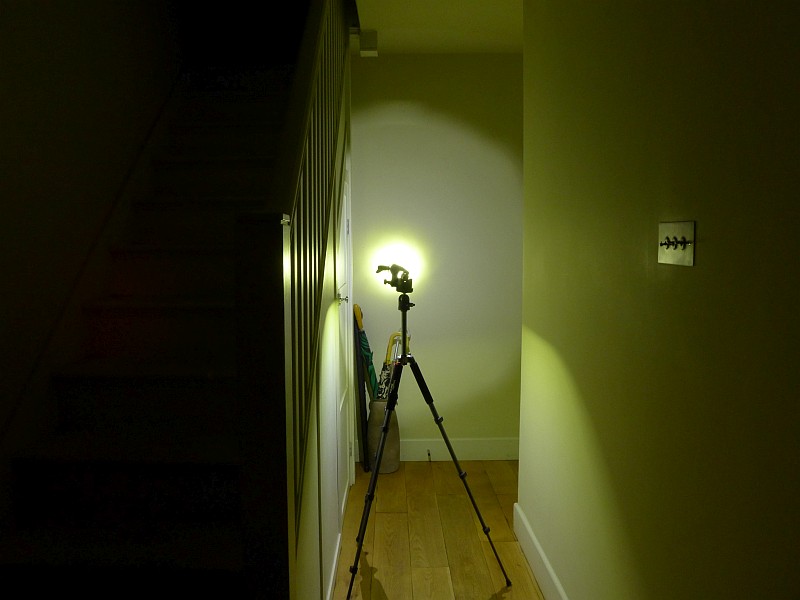
Changing to the 3AA Magnet starting with the main beam.
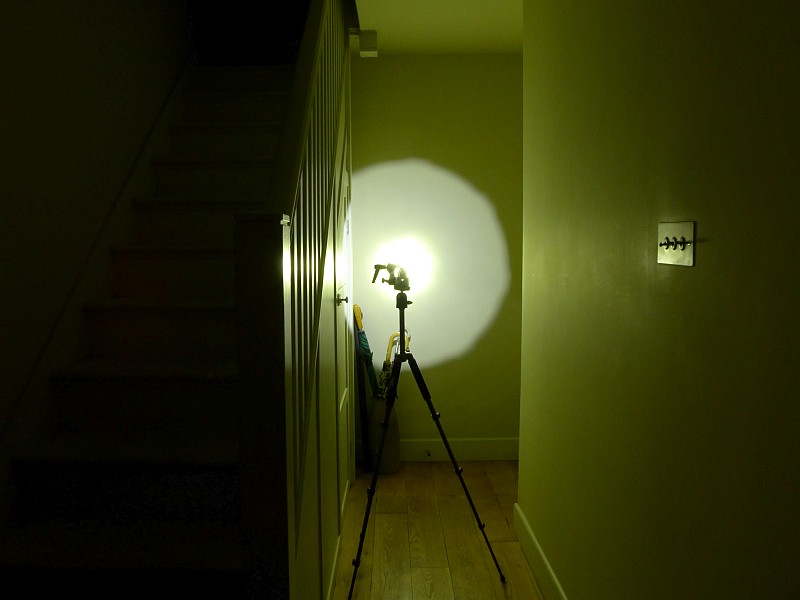
Then we go to Flood.
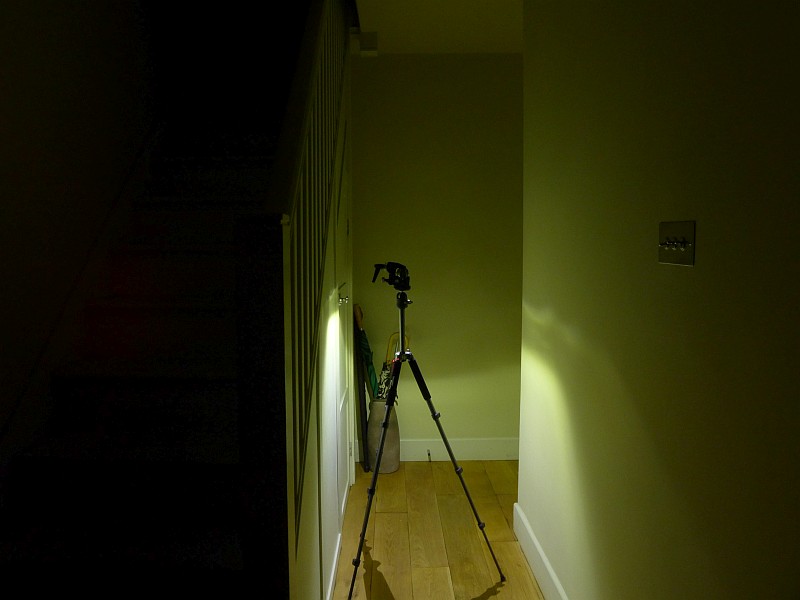
And then both flood and spot beams together.
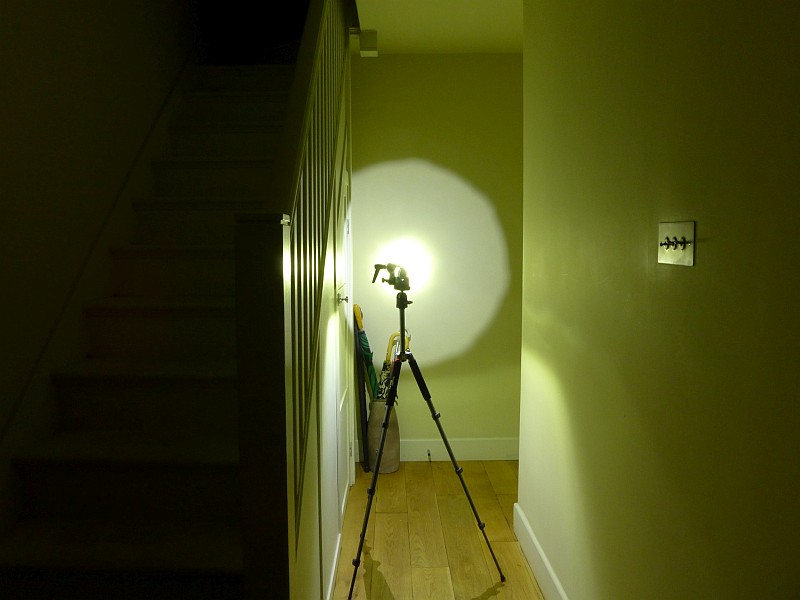
Now moving outdoors:

The 3AA Magnet; its relatively weak spill fades out and the spot is left.
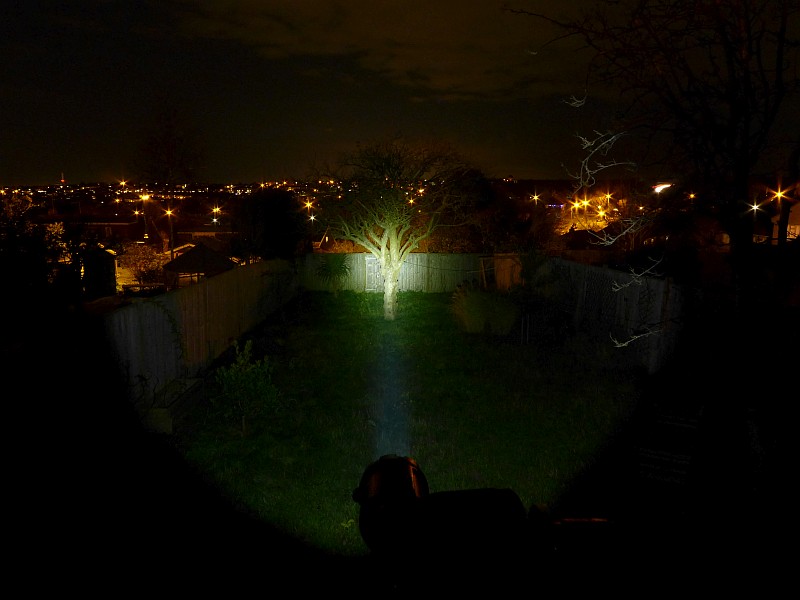
It is the same with the 3AA Laser.
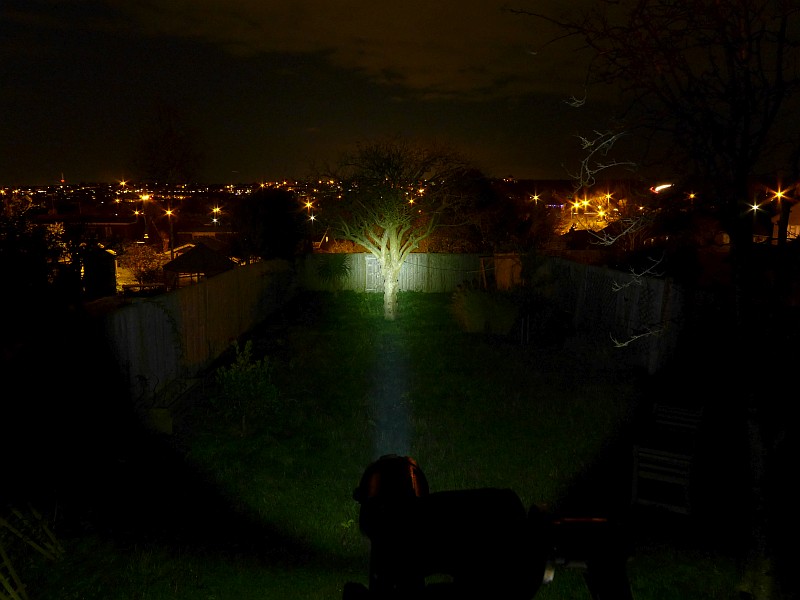
Spot the spot…
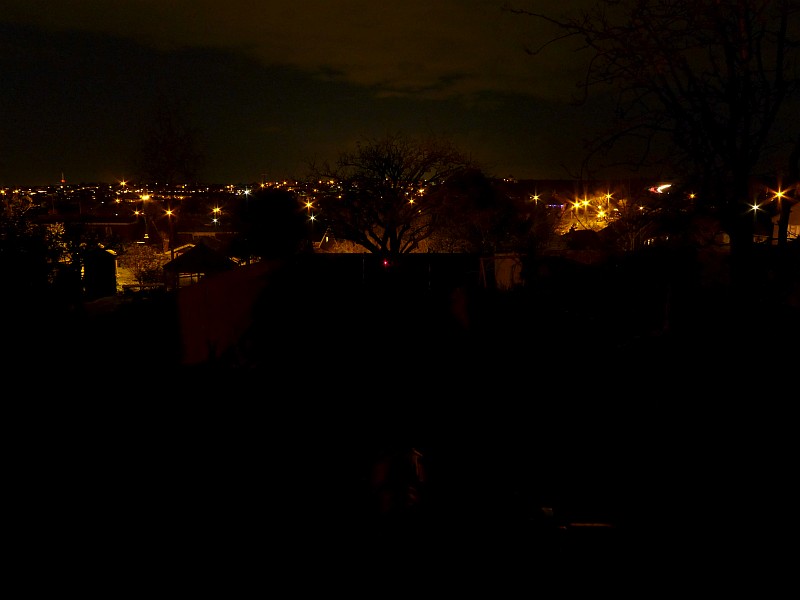
Outdoors the 2AA struggles.
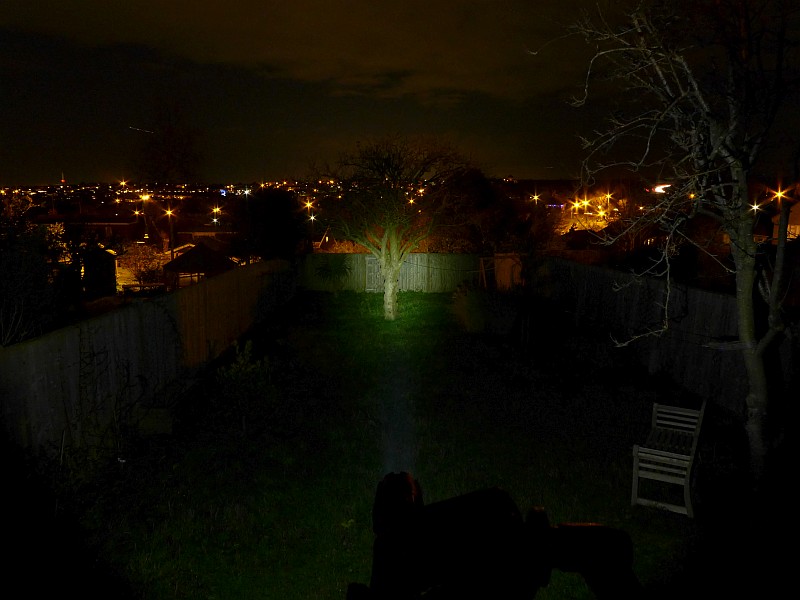
Modes and User Interface:

Operating the Dualie lights is as simple as it gets. Each of the two modes available in each light has its own switch. They can be used independently or together.

The main beam switch is a forward-click momentary type switch, and the secondary side beam switch is a reverse-click type.

Batteries and output:

The naming of each Dualie means there are no surprises that the 2AA runs on 2AA cells (alkaline or NiMh) and the 3AA runs on 3AA cells (alkaline or NiMh). The Laser is bases on the 3AA so runs on 3AA cells (alkaline or NiMh).

To measure actual output, I built an integrating sphere. See here for more detail. The sensor registers visible light only (so Infra-Red and Ultra-Violet will not be measured).

Please note, all quoted lumen figures are from a DIY integrating sphere, and according to ANSI standards. Although every effort is made to give as accurate a result as possible, they should be taken as an estimate only. The results can be used to compare outputs in this review and others I have published.

___________________________________________ ________________________________ ________________________________
Dualie model and mode. I.S. measured ANSI output Lumens PWM frequency or Strobe frequency (Hz)
___________________________________________ ________________________________ ________________________________
2AA – Main 103 0
2AA – Flood 75 0
2AA – Main + Flood 122 0
3AA – Main 142 0
3AA – Flood 101 0
3AA – Main + Flood 176 0
Laser – Main 147 0
Laser – Main + Laser 146 0

* Beacon and Strobe output measurements are only estimates as the brief flashes make it difficult to capture the actual output value.

There is no parasitic drain.

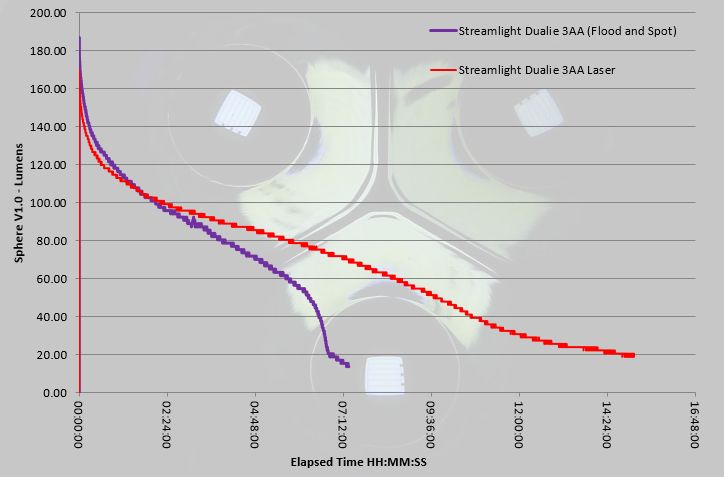
For the runtime tests, all measurements were taken with both beams on for all models. Putting all three runtime traces on the same graph, and the lower output 2AA model takes the runtime prize, but at a much lower output.
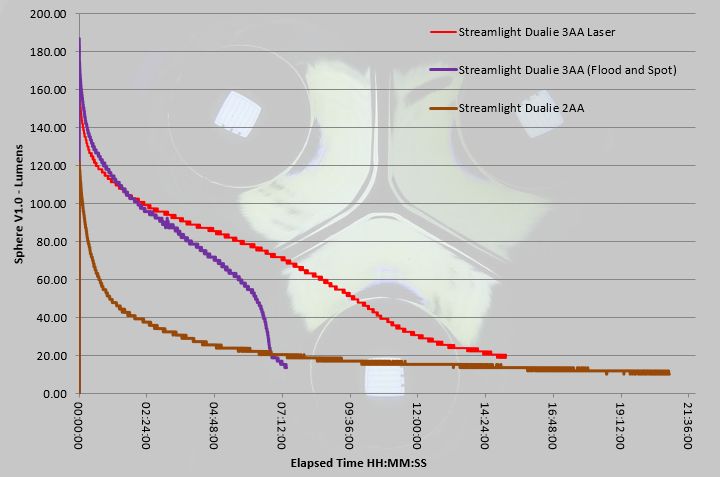
Removing the 2AA’s trace shows the two 3AA versions more clearly, and it is very obvious the Laser module draws much less power than the flood beam, as the runtime for the Laser is much longer.
Troubleshooting

This section is included to mention any minor niggles I come across during testing, in case the information helps anyone else.

No issues were encountered during testing.

As per the description of this section, this information is provided in case anyone else finds a similar ‘issue’ that might be fixed in the same way.

The Streamlight Dualies in use

Before looking at any other aspect, it is important to highlight that these Dualie lights are Intrinsically Safe. That really is what it says – Intrinsically Safe devices are specifically designed to limit electrical and thermal energy that might be available for ignition. It means they are effectively incapable of igniting specific explosive atmospheres. This is why generally Intrinsically Safe lights are relatively low powered, use alkaline primary cells, and are made from plastic.

Take the most typical domestic scenario; you get back home at night and smell gas in the house. You need light to find the main gas valve (which is in a cupboard) and to get to windows to air your home. Don’t touch that light switch, so what can you use in confidence? An intrinsically safe light specifically designed to be safe to operate in explosive atmospheres of course. As long as you check the certification matches the possible hazard (for example the 3AA Magnet says it is certified for methane / air mixtures only) before you really need it.

I keep a couple of Intrinsically Safe lights in the hall sideboard so I can get my hands on one straight away. I also keep a suitably rated one in the car and in the garage in case of fuel spillages.

Personally, as I don’t work in explosive atmospheres, I mostly keep Intrinsically Safe lights as standby backup lights rather than everyday use ones, but generally always have one close by. If you need this type of light for work, then you will know the regulations and exactly what your requirements are.

What is not clearly shown in the beamshots, is that there is an uneven corona around the hotspot with visible yellowing, they are definitely not the cleanest of beams. This doesn’t truly impact on their use, as it is only when you are white wall hunting and looking for beam defects that you really notice them. When you are getting on with a job, it doesn’t matter that much, and will be the least of your worries if you actually need their Intrinsically Safe aspect.

The magnets are strong enough in the two models that have tail magnets (the 2AA ATEX and 3AA Magnet), that they are able to hold the light at any angle. Taking the worst case, they will stick to a vertical steel surface and keep the light pointing horizontally. I’ve also found this to be true on steel bars as well, so not limited to flat surfaces. On the 3AA Magnet there is the additional magnet in the clip on the side of the light, providing more mounting angles. I use this side-mounted magnet for storage of the 3AA Magnet light, having it hold itself on the side of a metal cabinet ready for use.

It is important to compare like with like, and these Intrinsically Safe lights do not compete with the current Li-ion powered lights in terms of output and beam quality, but that is not a fair comparison. These are lights designed to be simple and safe to use just about anywhere. Two independent lighting functions operated by two switches, reliable and predictable AA power, light weight, tough and Intrinsically Safe. I’m certainly glad to have a few of these lights around.

Review Summary

_______________________________________________ _______________________________________________
Things I like What doesn’t work so well for me
_______________________________________________ _______________________________________________
Intrinsically Safe. Not the cleanest of beams.
AA powered. Switches need quite a firm press to click.
Simple to use.
Lightweight.
Reliable.
Tough.
Highly functional clips / magnets.


Discussing the Review:

The ideal place to discuss this reviews is on a forum. If you started reading the shorter forum version of the review, but followed the link this full exclusive review, please return to that forum to discuss the review there.
If you read the review entirely on Tactical Reviews, please consider one of the following to join in any discussion.

CandlePowerForums – Flashlight Reviews Section (Largest and Friendliest Flashlight Community Forum)

Light Review: Streamlight Super Siege Lantern

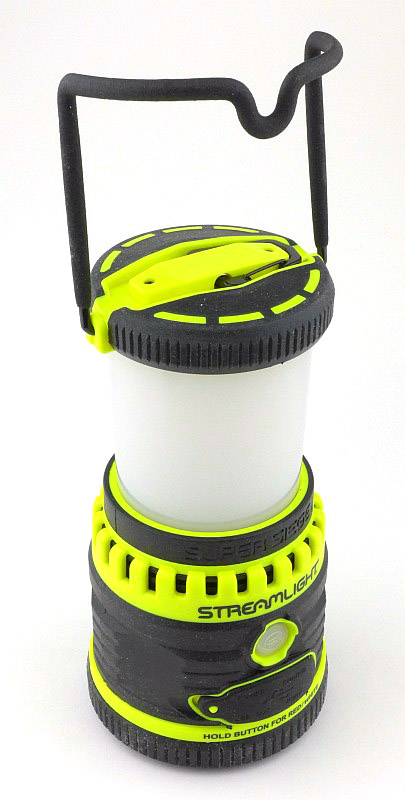
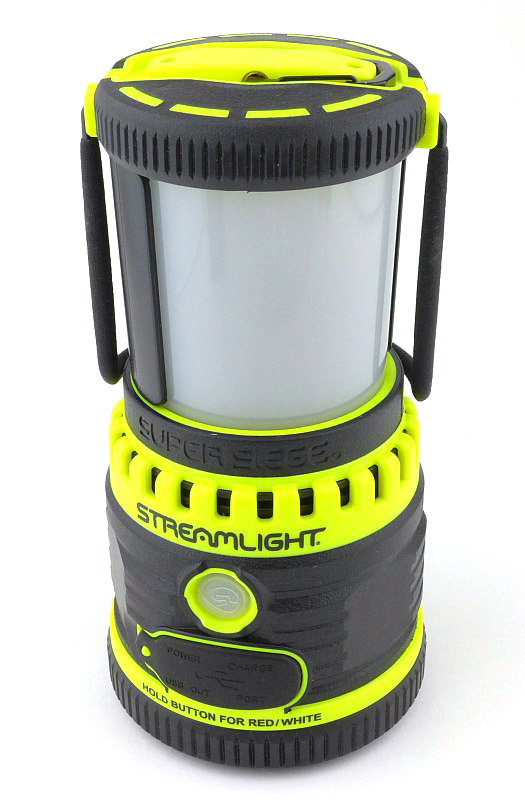
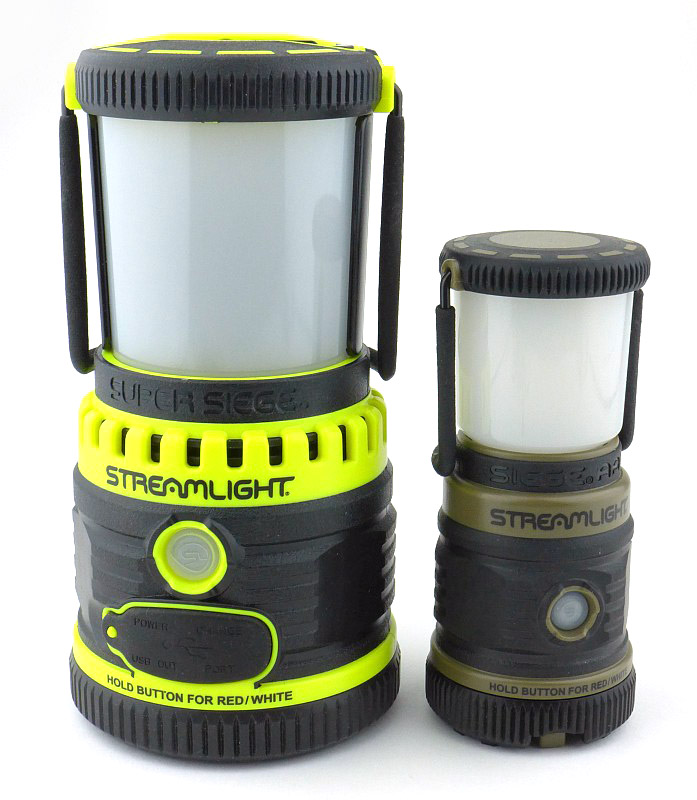
In its first incarnation, the Siege lantern was a full size D-cell powered light, shortly followed by the cute Siege AA (you guessed it, powered by AA-cells). But not yet finished, Streamlight have taken the lantern to another level with the Super Siege, which now features a built-in rechargeable battery and USB power bank function, along with an essential glare-guard for task lighting – it certainly is the Super Siege.

Taking a more detailed look:

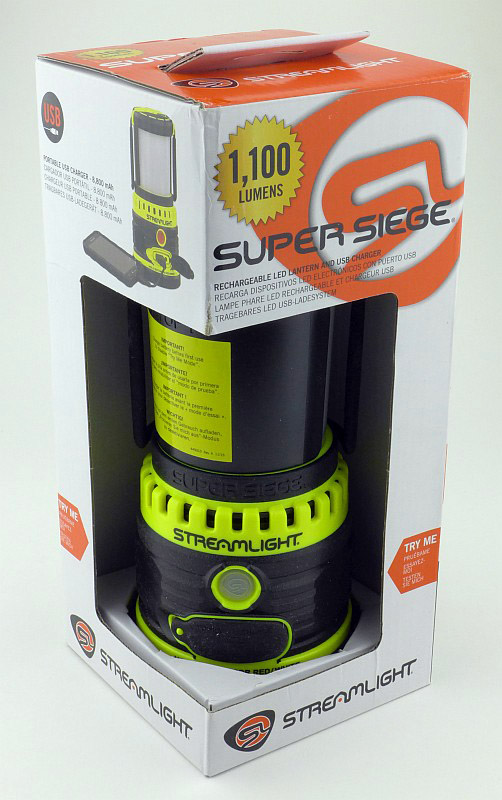
Aimed at attracting people in a retail store, the box is a semi-exposed ‘try-me’ type.

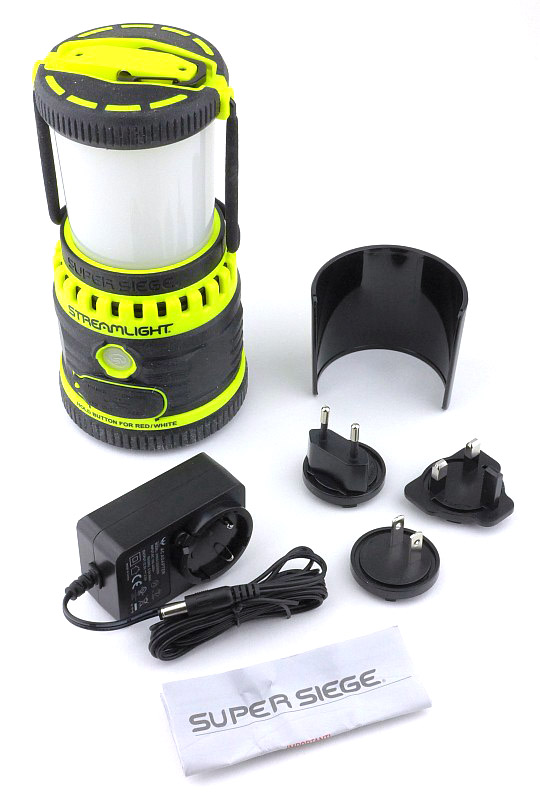
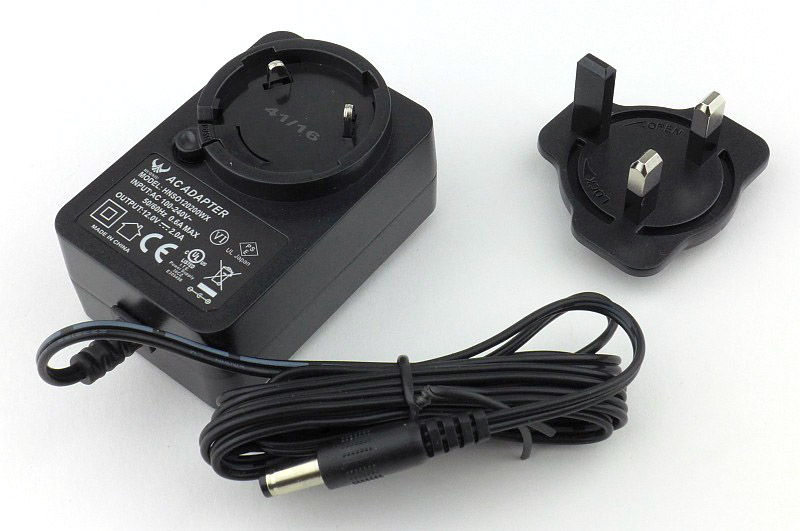
In the box we have the Super Siege, its glare guard, mains power adapter and a set of three plugs for it (US, UK and European), plus the instructions.

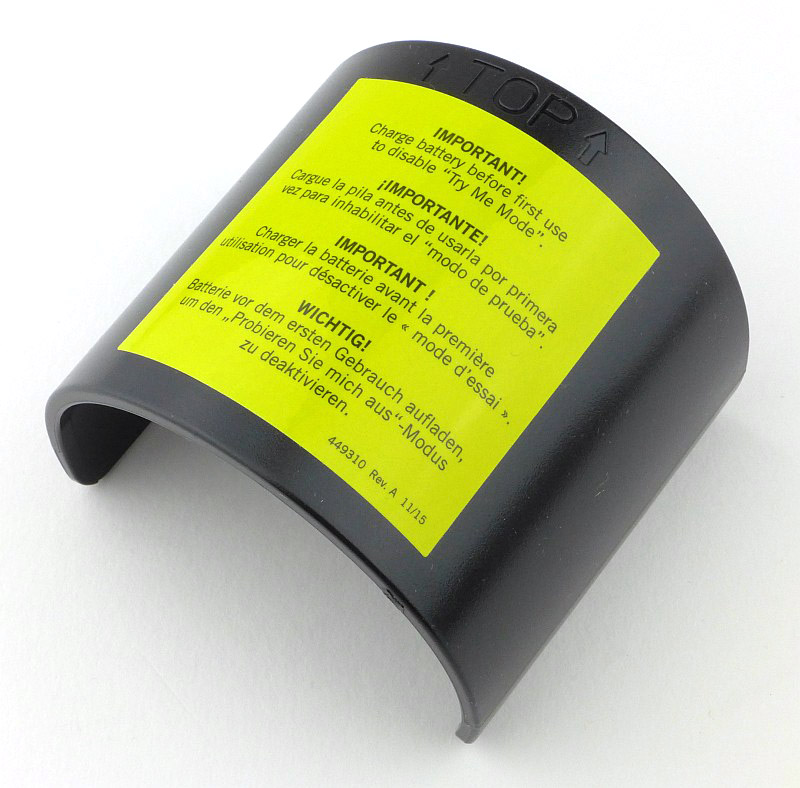
On the glare guard it tells you to give the Super Siege a full charge to disable the ‘try-me’ mode.

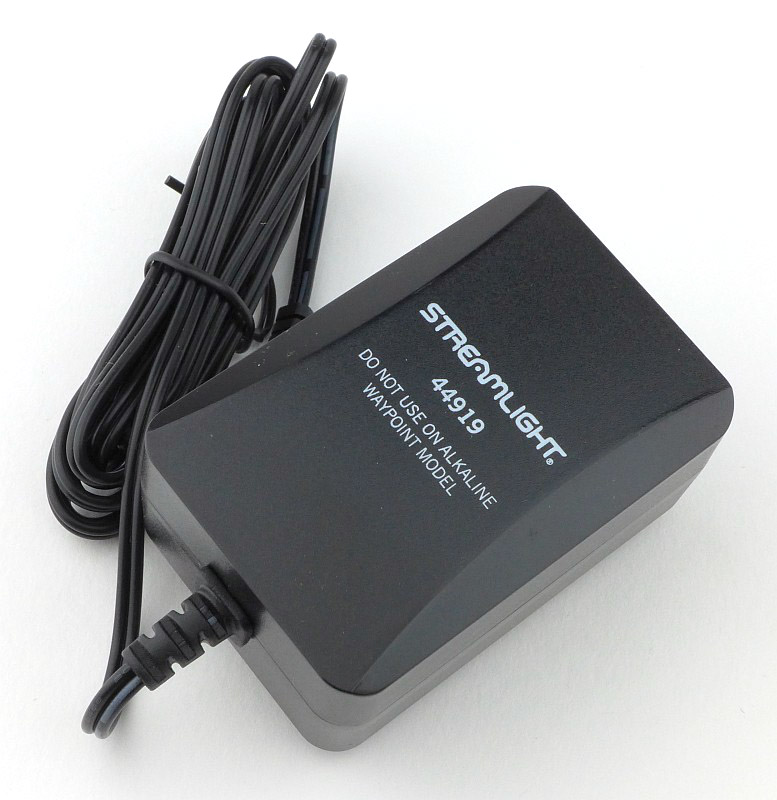
A Streamlight mains power adapter, which presumably also works with other rechargeable models as it tells you not to use it with the Alkaline Waypoint.

I need the UK plug, so here it is.

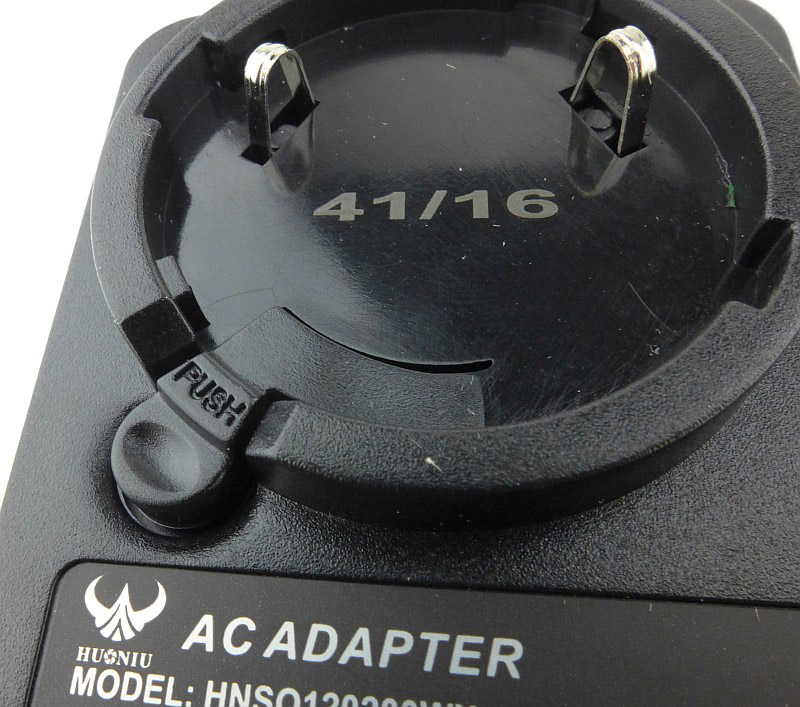
The mains adapter itself has a set of two contacts and a rotary connector for the plug. There is a release lever to allow you to easily swap over the plug type as and when needed.

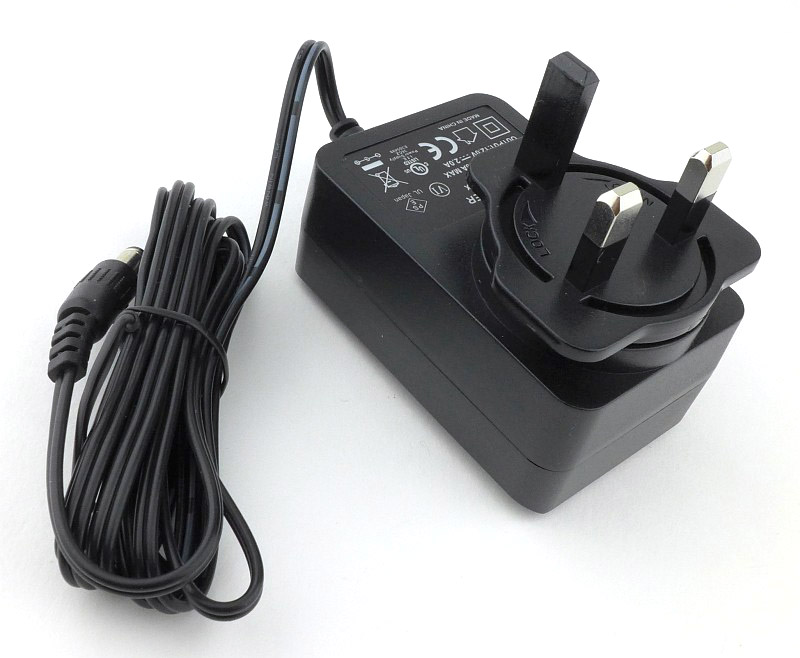
Ready to go with the plug fitted.

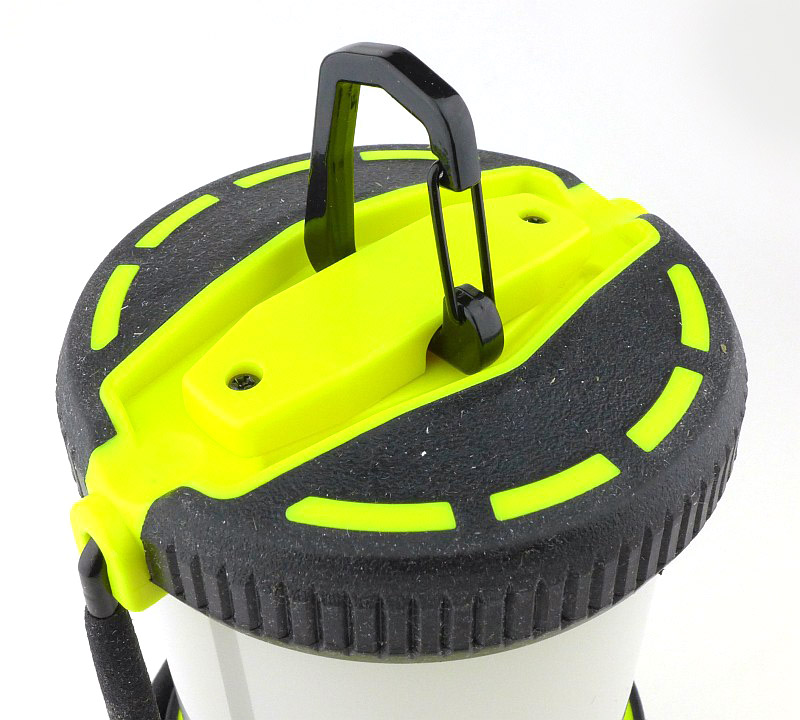
Wrapped round the Super Siege is a large carry handle and hook that lifts up.

There is also a much smaller hanging clip incorporated into the top. This clip allows for a more secure attachment and keeps the light as high as possible.

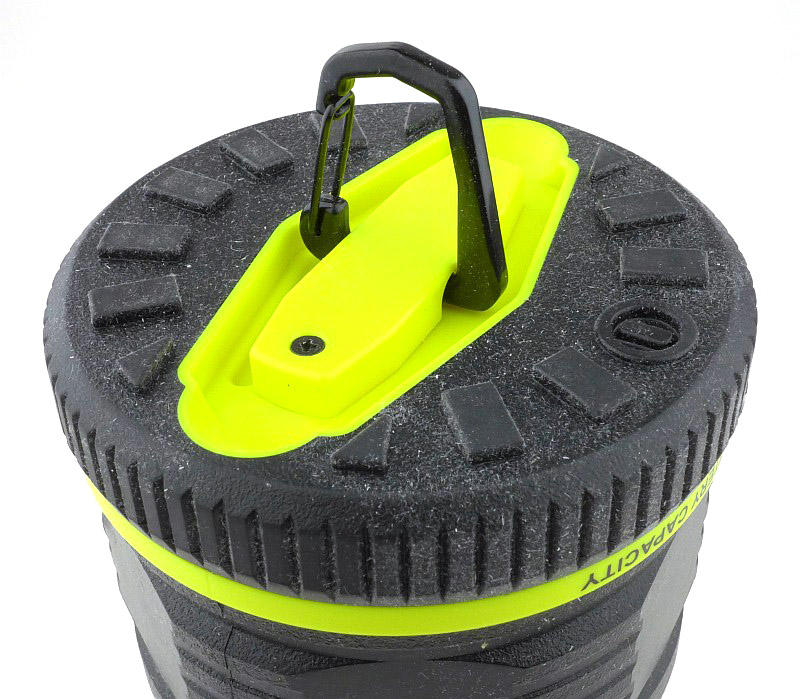
Flipping the lantern over, and there is an identical hanging clip in the bottom.

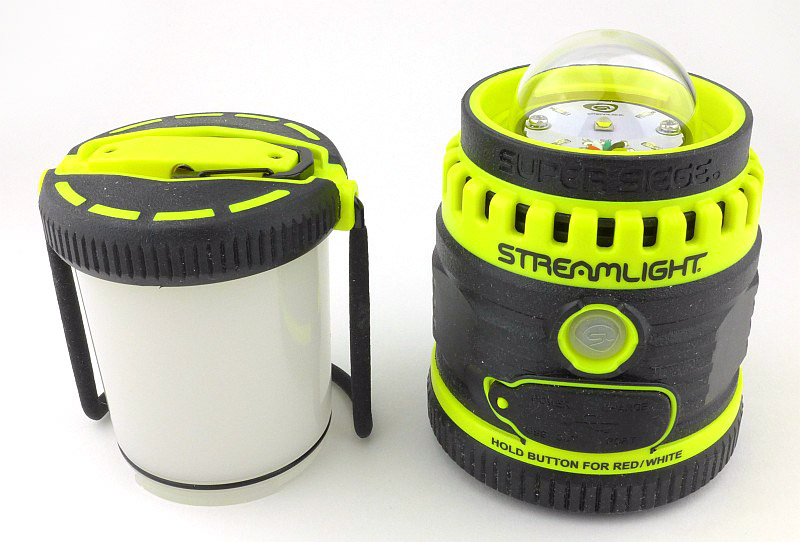
The hanging clip in the bottom makes more sense when you see that the diffuser for the main light can be removed exposing the protective dome over the Super Siege’s LEDs.

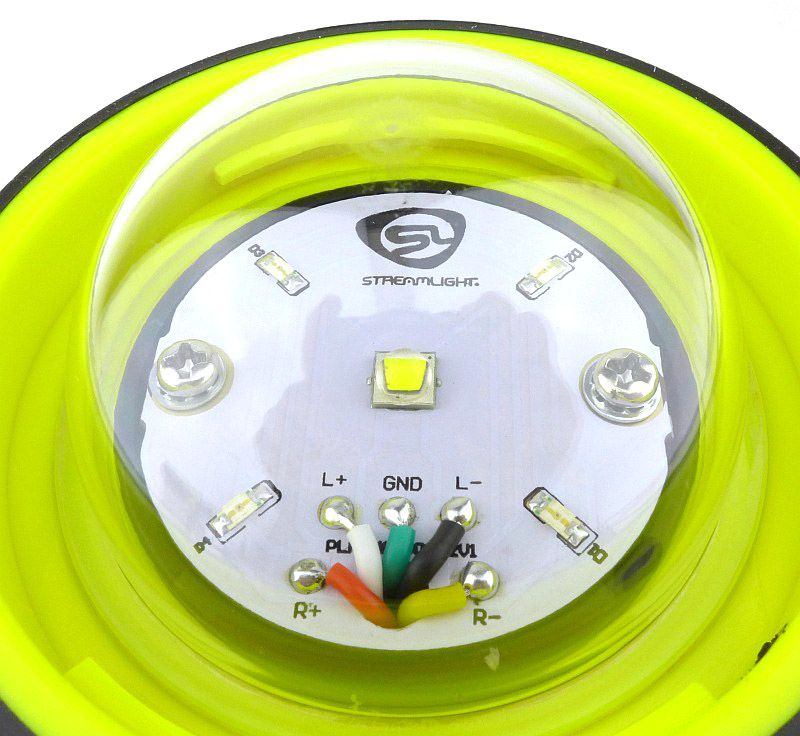
In the middle of the LED board is a white XM-L2 LED and round this are four red LEDs.

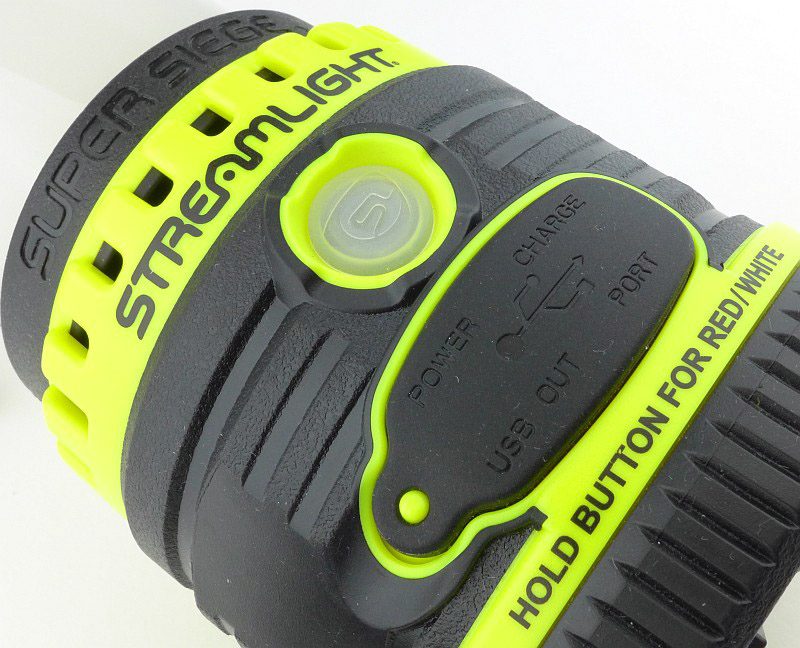
There is a single power switch on the Super Siege which also acts as an indicator light for both charging and using the light. Underneath that switch is a rubber protective cover hiding the charging port and USB power output.

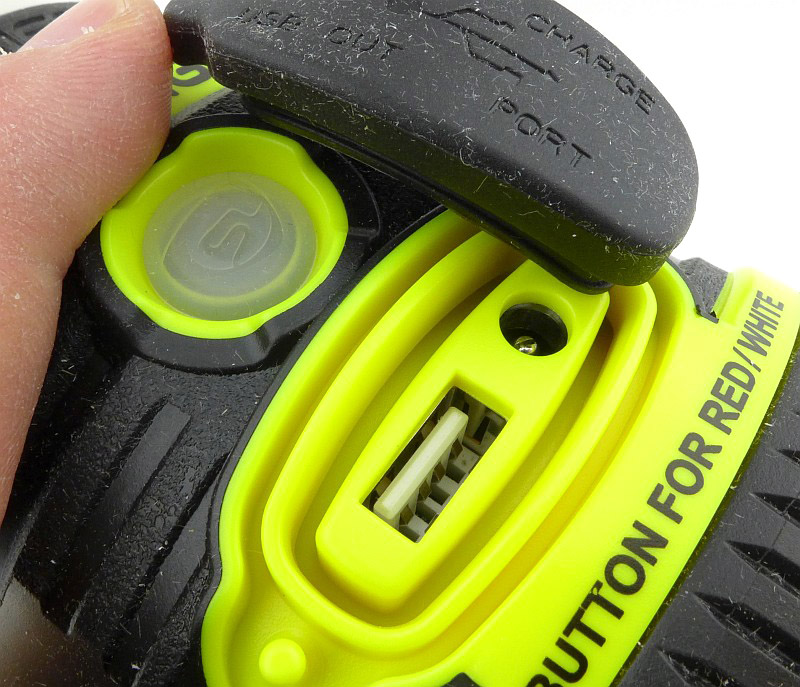
Lifting aside the port cover to show the charging port and USB power output.

Fitting the glare guard to the lantern’s diffuser makes the light output directional, and it covers just over half the diffuser.

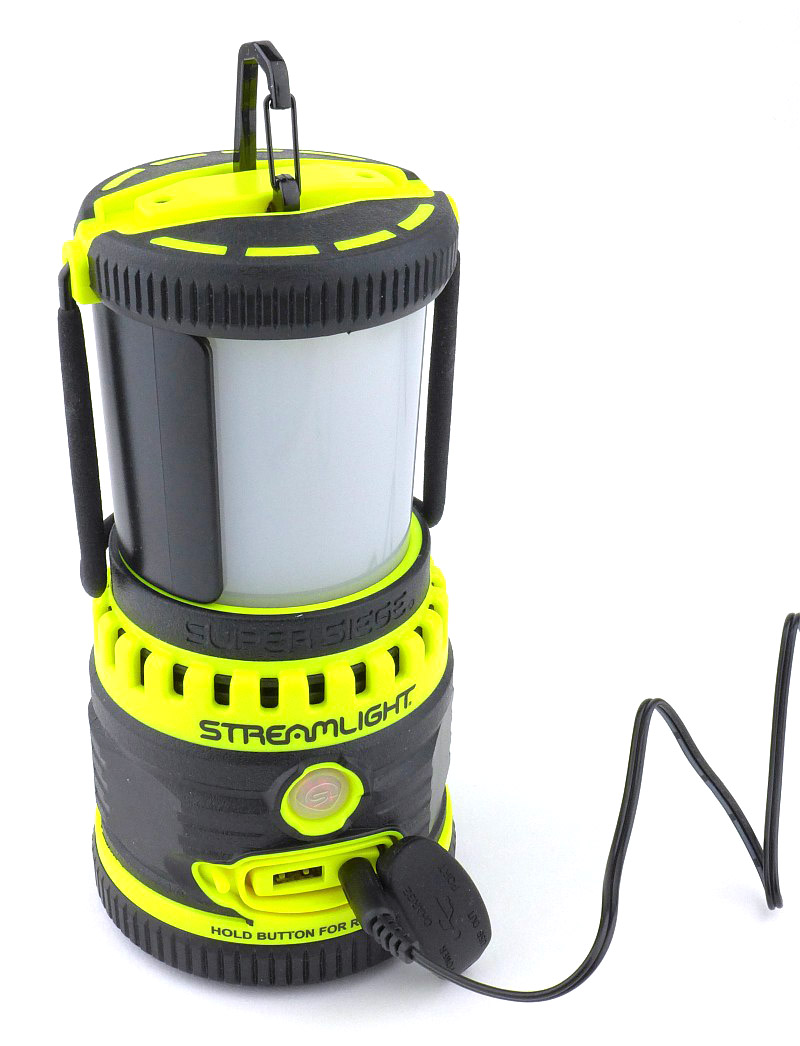
To charge the Super Siege, plug in the mains adapter and fit the round DC plug into the socket next to the USB port. Unfortunately the Super Siege cannot be charged from USB power.

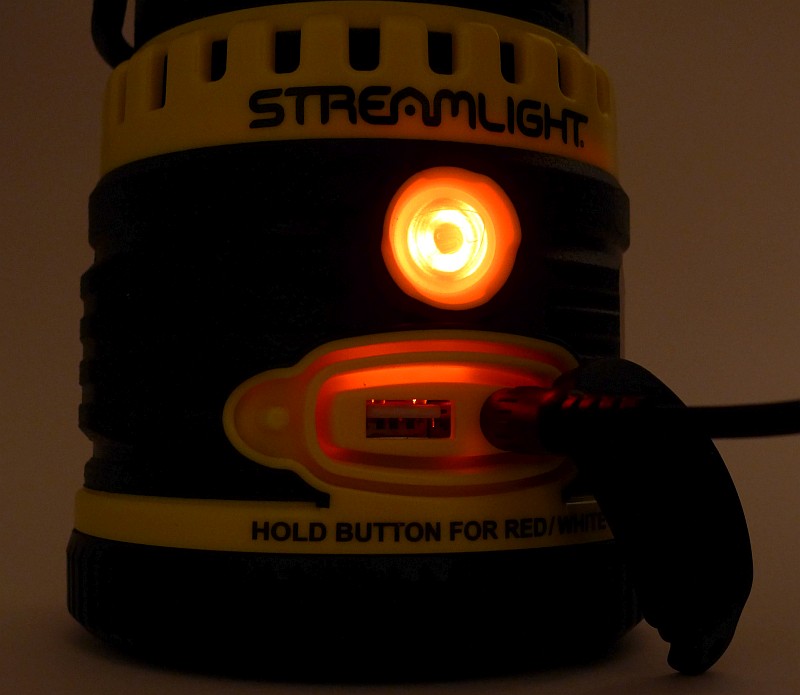
When charging the switch lights up red.

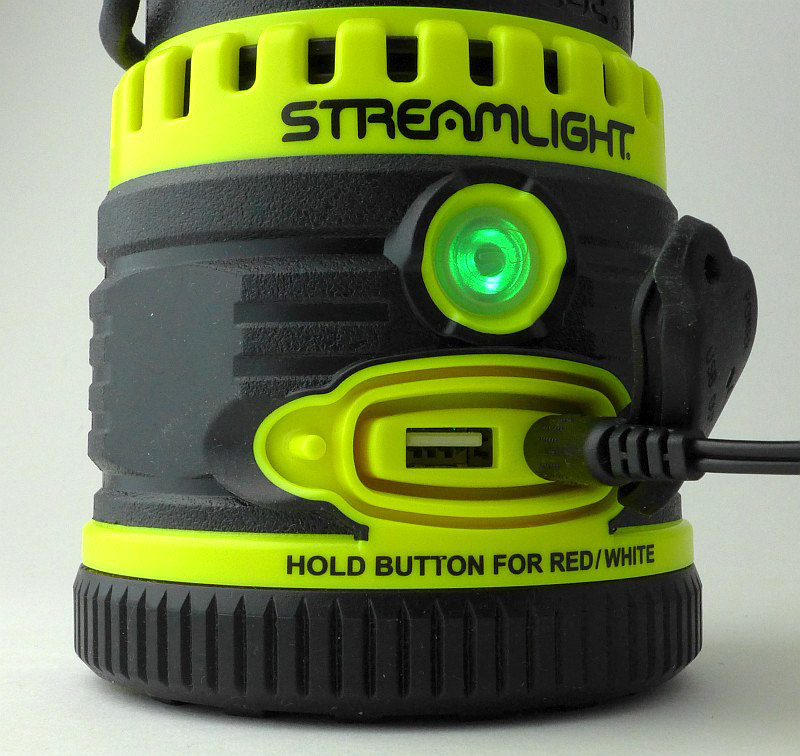
On reaching full charge the switch turns green.

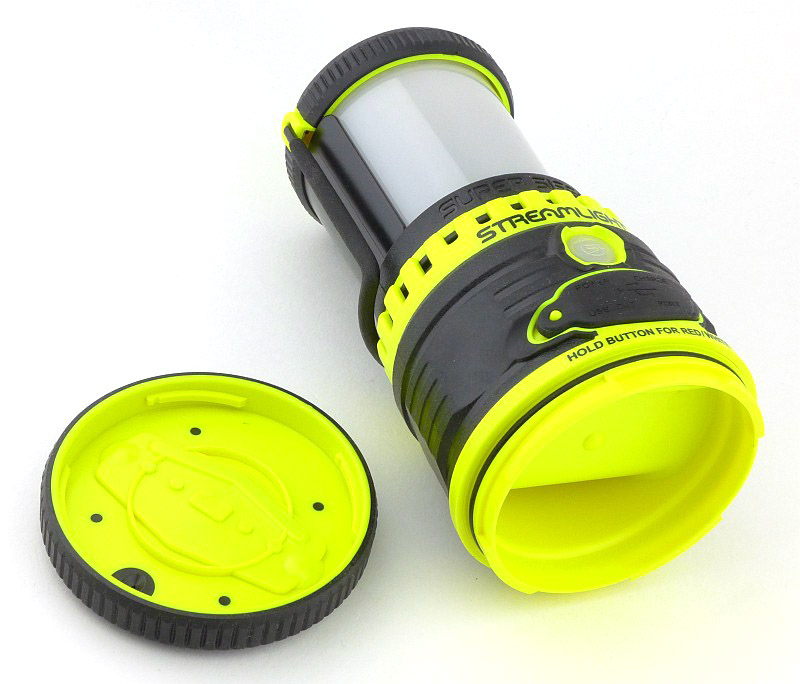
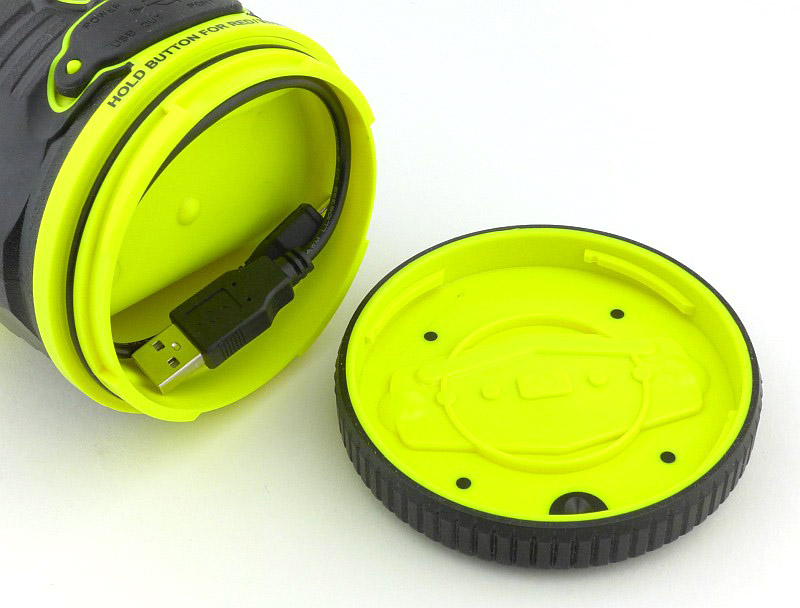
Not to be forgotten is that the base has a concealed storage compartment. Twist off the bottom to access this.

The beam

Please be careful not to judge tint based on images you see on a computer screen. Unless properly calibrated, the screen itself will change the perceived tint.

The indoor beamshot is intended to give an idea of the beam shape/quality rather than tint. All beamshots are taken using daylight white balance. The woodwork (stairs and skirting) are painted Farrow & Ball “Off-White”, and the walls are a light sandy colour called ‘String’ again by Farrow & Ball. I don’t actually have a ‘white wall’ in the house to use for this, and the wife won’t have one!

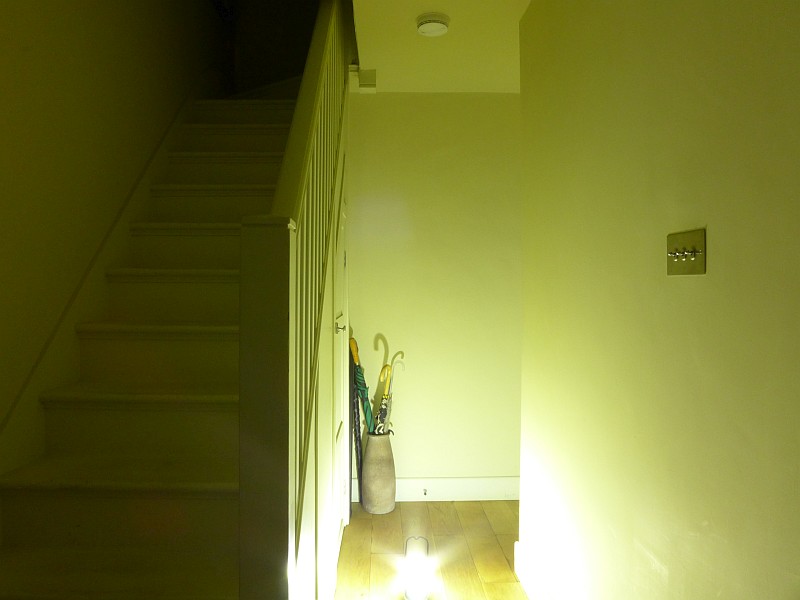
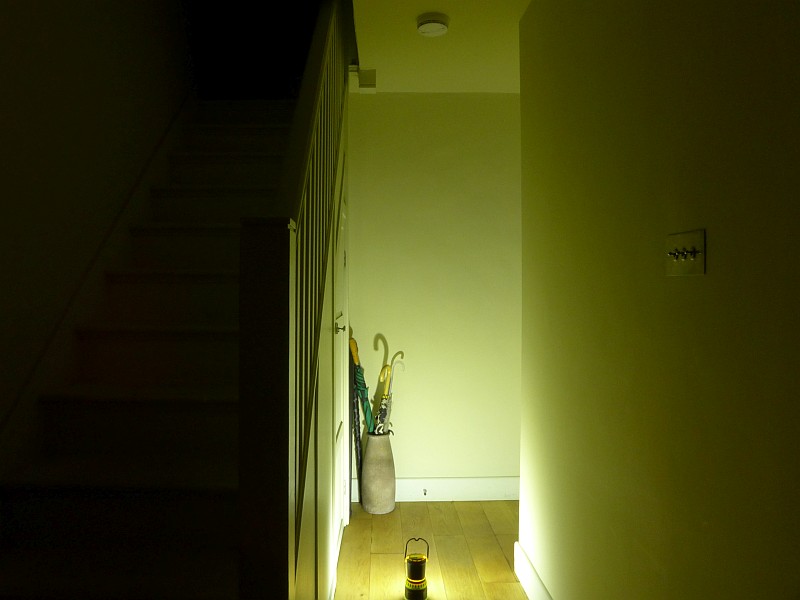
First up here is the White output with the standard 360 degree lantern beam. You can see the excellent wash of light, but also very clearly the thing I hate about lanterns, terrible glare.

Fit the glare guard and now we are talking. Obviously the total output is cut quite drastically, so it might be better in some cases to position something between you and the lantern, or hang it above your head, but if you are using it as a work light, this becomes ideal.

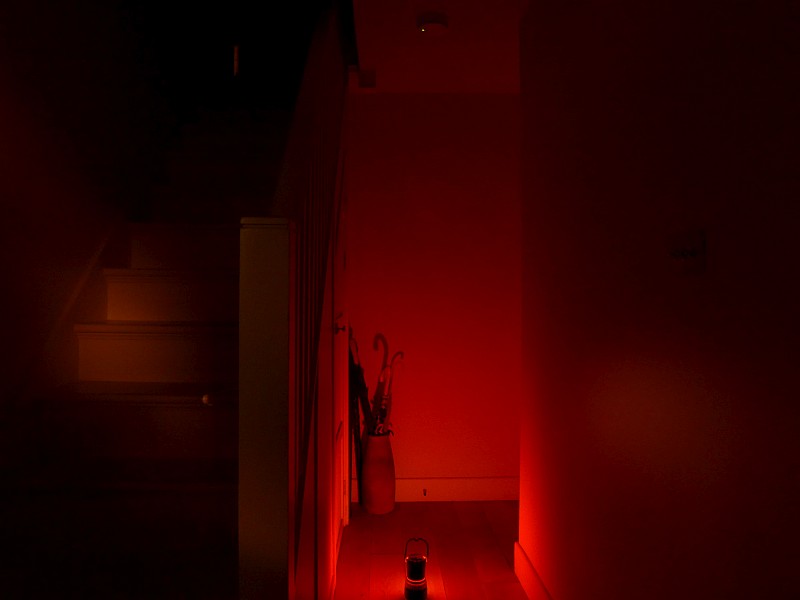
Red light is not as bad for glare, but mainly due to just being much dimmer.

Again the glare guard makes the Super Siege comfortable to use for any task.

Modes and User Interface:

All controlled via the single power switch there are three White Output Modes, Low, Medium, High, and three Red Output Modes, Low, High and SOS.

To turn the Super Siege ON briefly press the power switch. This will turn on to the last used constant output level (White or Red).

To change output level / mode, briefly press the switch again within 1.5 seconds of the last press. This will cycle through the available modes all the way to OFF.

If the Super Siege has been ON a mode for more than two seconds, one brief press of the switch will turn the light OFF.

To change the colour from White to Red, or Red to White, press and hold the switch for two seconds.

The USB Power Bank function will automatically start when a suitable device is connected. During charging the switch will light up to indicate the status of the battery. Green means full power, then the switch turns yellow, then red and finally flashing red when the battery is getting low.

Batteries and output:

The Super Siege runs on its built-in battery.

To measure actual output, I built an integrating sphere. See here for more detail. The sensor registers visible light only (so Infra-Red and Ultra-Violet will not be measured).

Please note, all quoted lumen figures are from a DIY integrating sphere, and according to ANSI standards. Although every effort is made to give as accurate a result as possible, they should be taken as an estimate only. The results can be used to compare outputs in this review and others I have published.

___________________________________________ ________________________________ ________________________________
Super Siege using built-in cell I.S. measured ANSI output Lumens PWM frequency or Strobe frequency (Hz)
___________________________________________ ________________________________ ________________________________
White High 1109 1000
White Medium 550 256
White Low 158 256
Red High 7 0
Red Low 2 0

* Beacon and Strobe output measurements are only estimates as the brief flashes make it difficult to capture the actual output value.

There is parasitic drain but it cannot be measured due to the construction of the light.

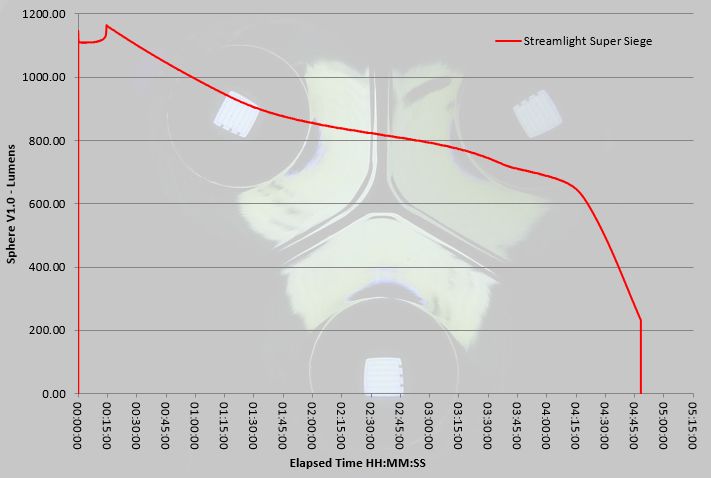
A very impressive performance on High for both the maximum output and the runtime. The specified ANSI output value is achieved, and the output does not drop below 600 lumens for over four hours. Finally, at not far off five hours, the Super Siege runs out and shuts off.

Troubleshooting

This section is included to mention any minor niggles I come across during testing, in case the information helps anyone else.

No issues were encountered during testing.

As per the description of this section, this information is provided in case anyone else finds a similar ‘issue’ that might be fixed in the same way.

The Super Siege in use

Lanterns were the first safe and convenient portable source of light. Although they have undergone many changes, the lantern has retained essentially the same appearance and function of area lighting. Just like the original Siege lantern, the Super Siege is a full size lantern, equivalent to most traditional lanterns. It is for those uses where size and weight are not an issue, if that is a priority, the smaller Siege AA becomes a good bet, but lacks the power and features the full size lantern gives.

The Super Siege uses its technological advantages to make it so much more than a portable area light. One of its first key features is so simple and could easily have been added to any lantern – the glare guard. For me this is one of the most critical features, and where I would normally avoid lanterns due to their glare, now I’m picking the Super Siege for all sorts of jobs.

As well as the full lantern and the task light configuration, the diffuser can also be removed to expose the LED dome cover, so you can run the Super Siege with fully exposed LEDs giving the ultimate in flood light. This however has extreme glare and only really works when hung up overhead. With the diffuser removed, the Super Siege is also much smaller. But beware, if you might need the Super Siege’s ability to float, it will only float with the diffuser fitted as this provides enough trapped air to give it sufficient buoyancy.

There are two aspects of the Super Siege that do not work that well. The switch illumination is very bright, and if using the low red output, the switch glows as brightly as the red LEDs do. This is very distracting and means that if you want a dim red light to maintain your eyes dark adaptation, you will find a bright green light shining out from the switch. This also impacts on the USB powerbank function, but more on the in a moment.

The second aspect, which I’m very disappointed to still see is the use of PWM. Especially in a lantern which floods the entire area with light, on the medium and low output levels, you see very obvious strobing effects when moving…at all. Please Streamlight, can you use current controlled output and not PWM?

The compartment in the base is an odd shape, but is useful for keeping a few things in. If nothing else you can keep a USB cable for charging various devices in this compartment.

And on the subject of the power bank feature, this is very useful in these days of so many devices that can be charged from USB. What you must consider however, is that any power you use to charge a device, be it phone, tablet, e-reader etc, is power you rob from the lantern’s light output. So be careful you don’t find yourself in the dark because you charge your phone up. What is a bit of a pity is that the Super Siege needs a 12V power adapter to charge it when the typical power bank these days is also chargeable via USB.

Using a USB power monitor I’ve run several ‘delivered power’ tests, all of which have been a consistent 25.7Wh from the 8800mAh battery. The theoretical power from a 8800mAh battery would be 32.56Wh, which means 79% of this is being delivered. A 21% loss is reasonable, but this could probably be better, as the brightly lit power switch remains on for the entire time the USB power bank feature is being used. The maximum observed output current for the USB power bank was 1.1A.

During use of the USB power bank, the switch illumination goes from green to yellow quite quickly. Watching the accumulated Wh delivered, the switch goes red after around 15Wh have been output, so there is still 40% battery left once the switch turns red. In fact the flashing red indication starts relatively soon afterwards. If I needed the Super Siege for light, I would definitely stop USB charging once the switch illumination turns red, as you at least know there is 40% left.

Ideal for camping, fishing and to have in a shed/loft or other unlit out-building. Altogether the Super Siege gives you a nice rounded package of features all of which are genuinely useful and not a gimmick.

Review Summary

_______________________________________________ _______________________________________________
Things I like What doesn’t work so well for me
_______________________________________________ _______________________________________________
Powerful 1100lm output. Uses PWM on all output levels.
USB power bank. Using the power bank reduces LED output runtime.
White and Red light output modes. Needs 12V power adapter to charge.
Glare-guard included for task lighting. Output cuts out completely when the battery is low.
Storage compartment in base.
Floats (as long as the main diffuser is fitted).


Discussing the Review:

The ideal place to discuss this reviews is on a forum. If you started reading the shorter forum version of the review, but followed the link this full exclusive review, please return to that forum to discuss the review there.
If you read the review entirely on Tactical Reviews, please consider one of the following to join in any discussion.

CandlePowerForums – Flashlight Reviews Section (Largest and Friendliest Flashlight Community Forum)
Light Review: Streamlight Vantage 180

Streamlight make some of the most useful articulated-head lights I’ve ever used. Lights like the Knucklehead, and Sidewinder bring an extra level of functionality with their adjustable heads. For this reason I was particularly excited to get my hands on their latest articulated light, Streamlight’s Vantage 180.

Taking a more detailed look:

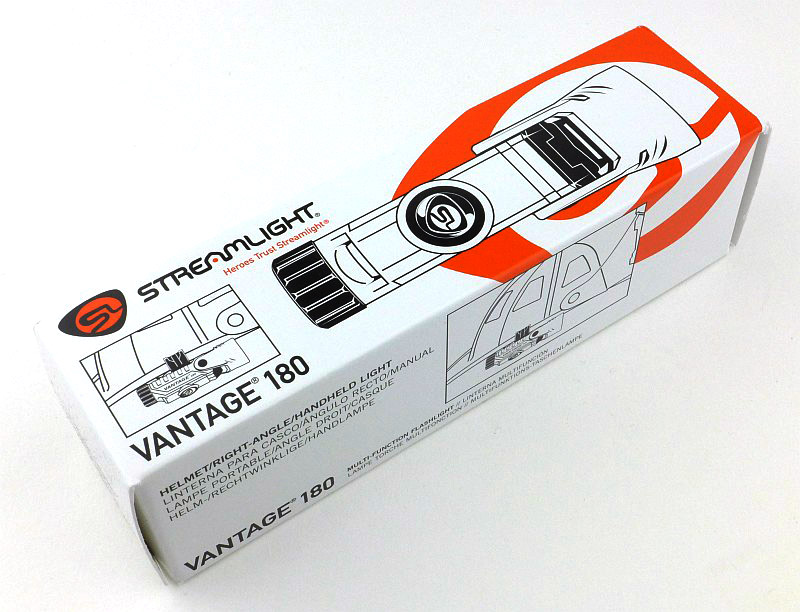
The Vantage arrives in a cardboard box.

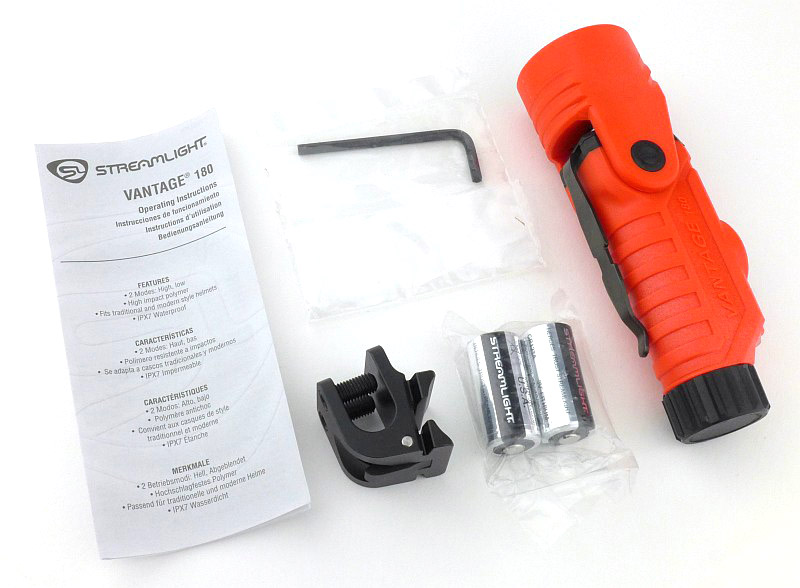
Inside is the Vantage 180, a pair of Streamlight branded CR123s, the helmet mount with Allen key, plus the instructions.

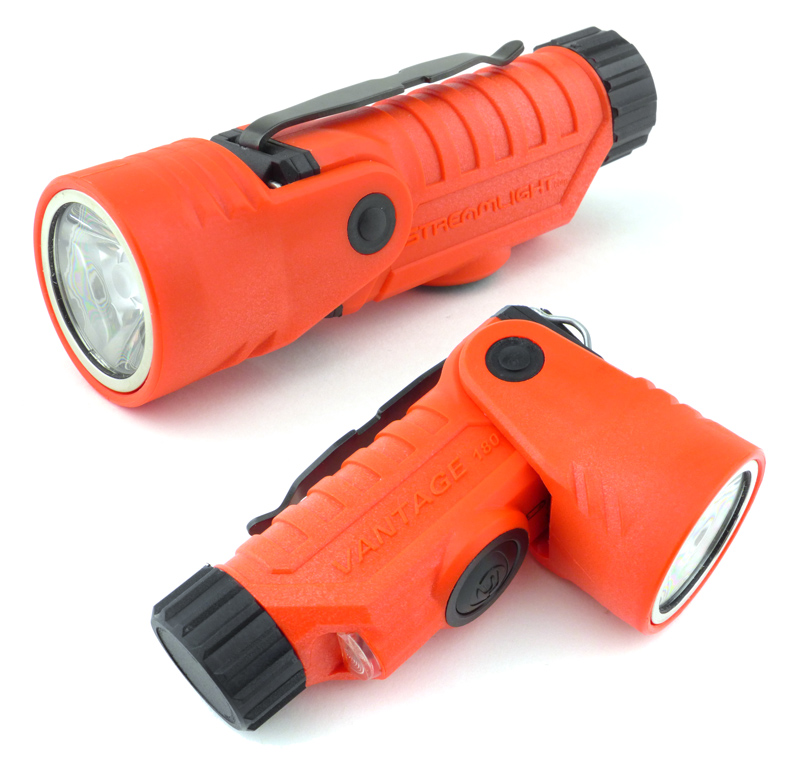
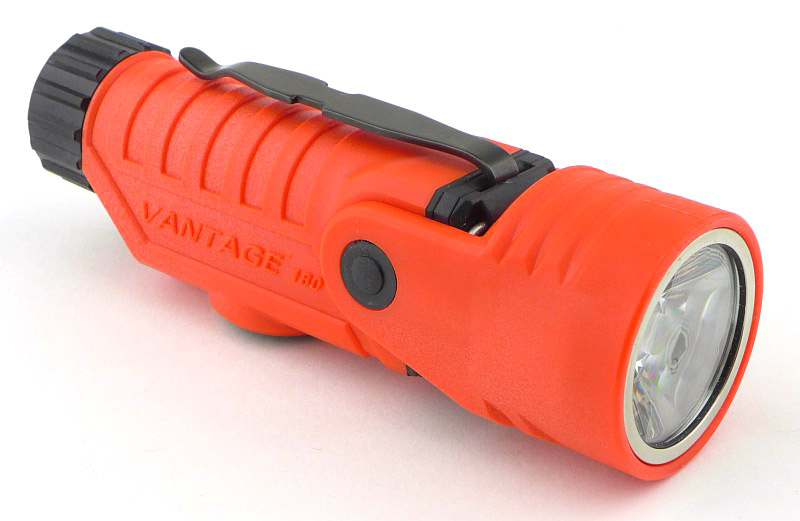
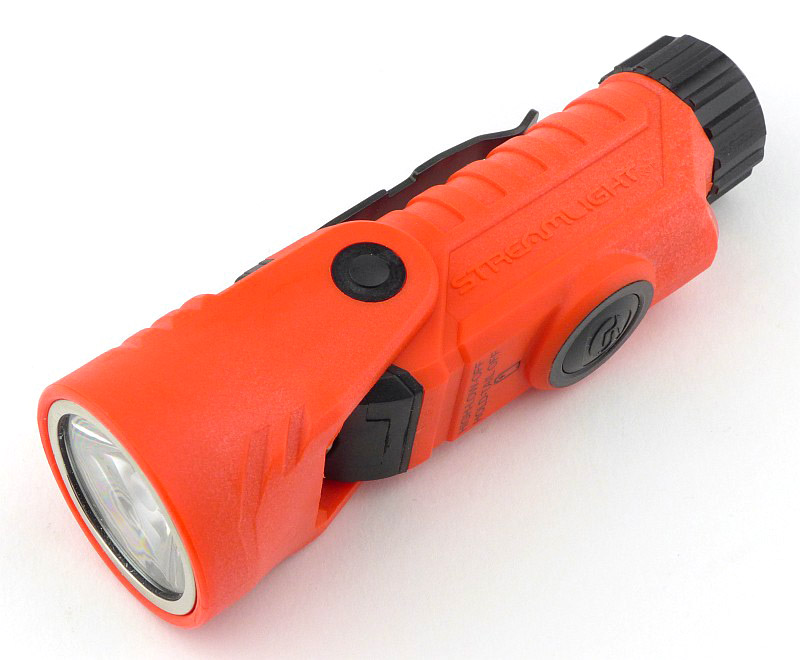
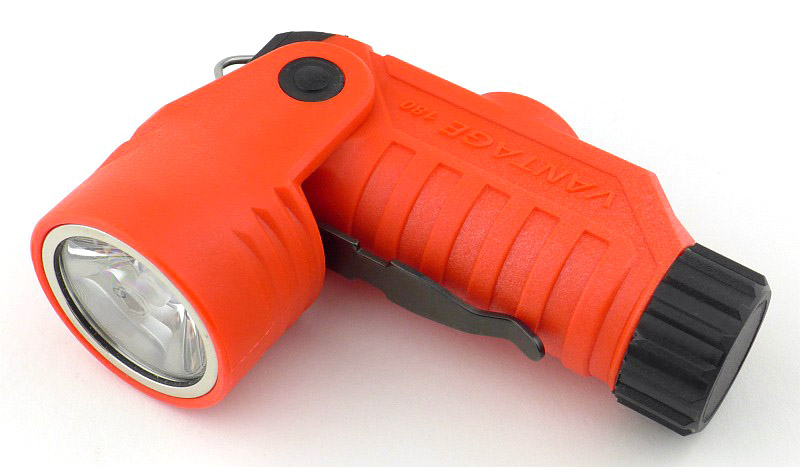
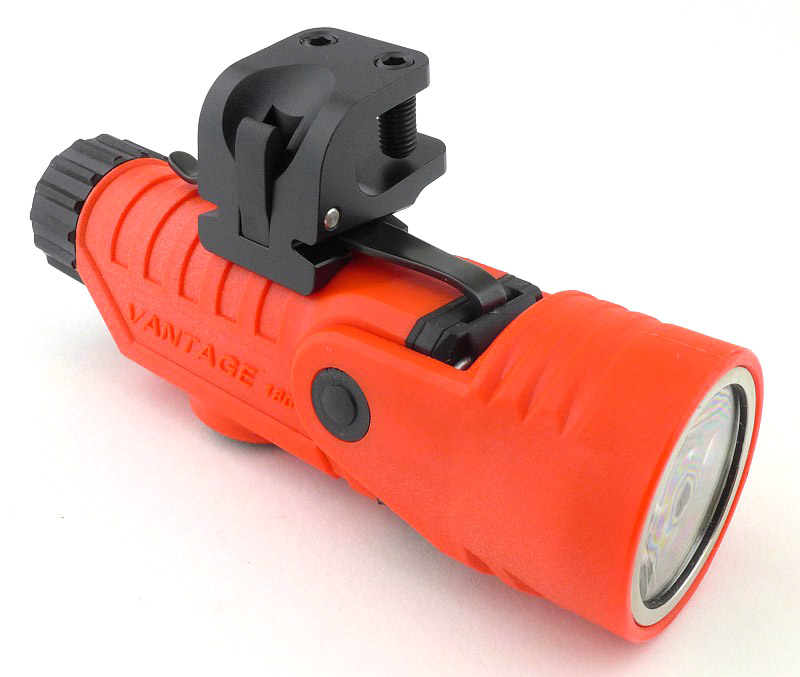
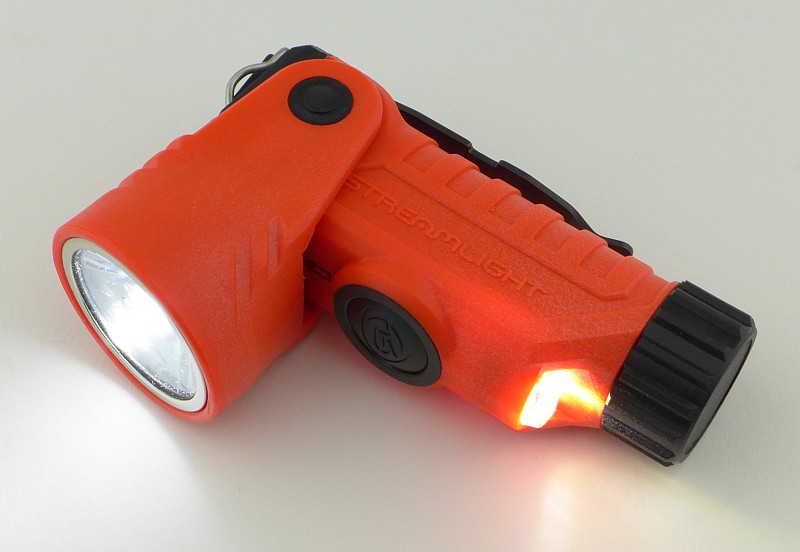
And here we have the, very orange, Vantage 180. On this side it has ‘Streamlight’ written.

On the other side it has ‘Vantage 180’.

Laying the Vantage 180 on its side shows where the switch is positioned. As you would expect, it is on the opposite side to the clip.

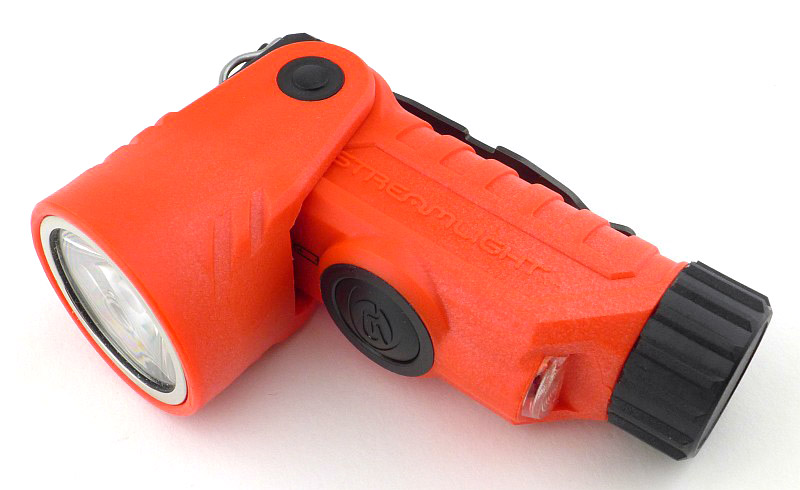
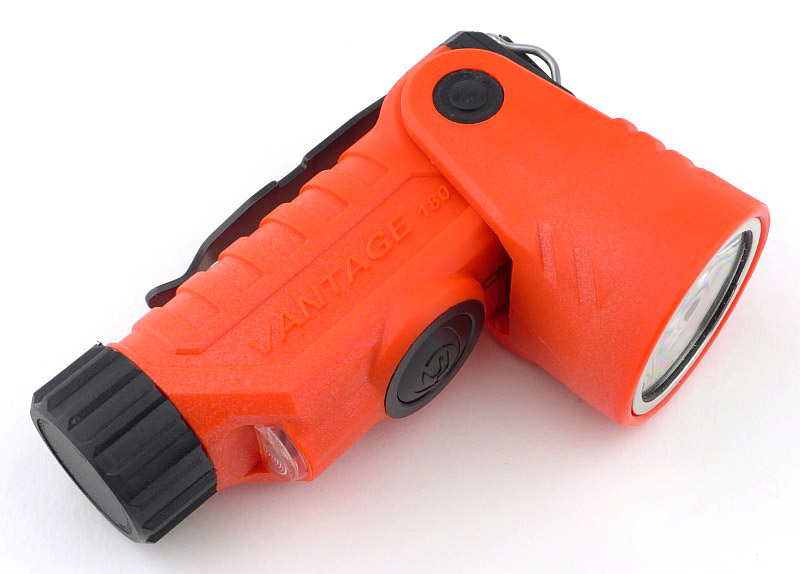
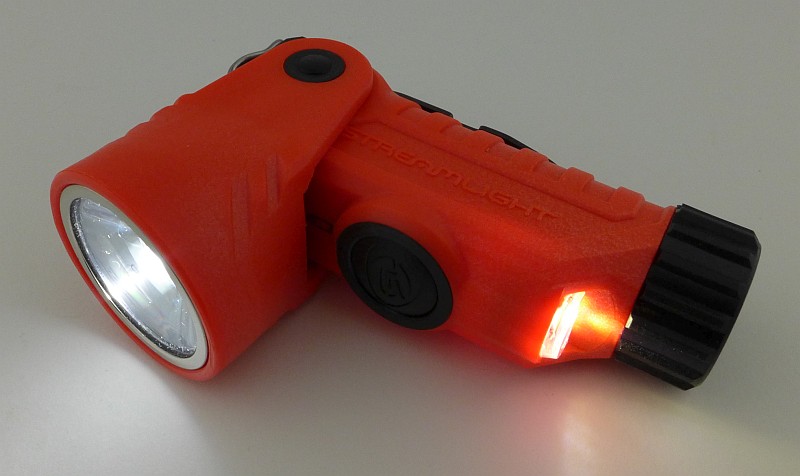
And now we get to the reason for the ‘180’ in the name. Here the head has been rotated 90 degrees to the front.

Then from the previous position, the head rotates a full 180 degrees all the way to the back. There are no click stops, instead it is held in place by friction, so the head can be adjusted to any angle between these two extremes.

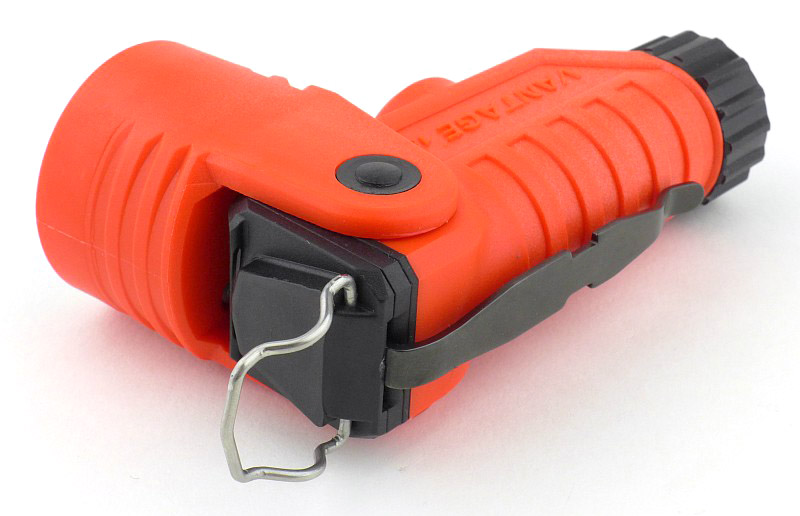
With the head either fully forward or backwards you can access the built-in turn out gear hook / hanging loop.

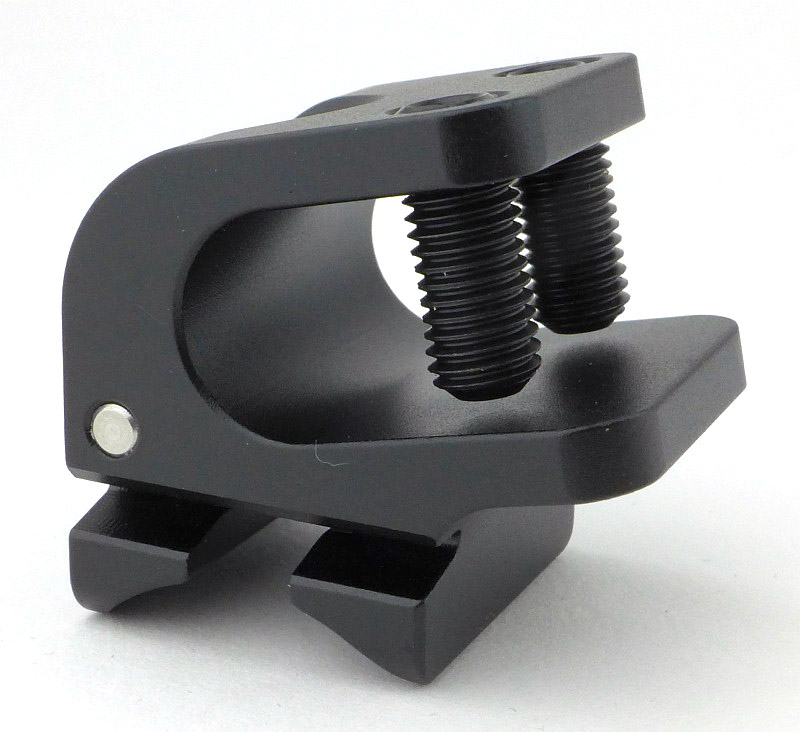
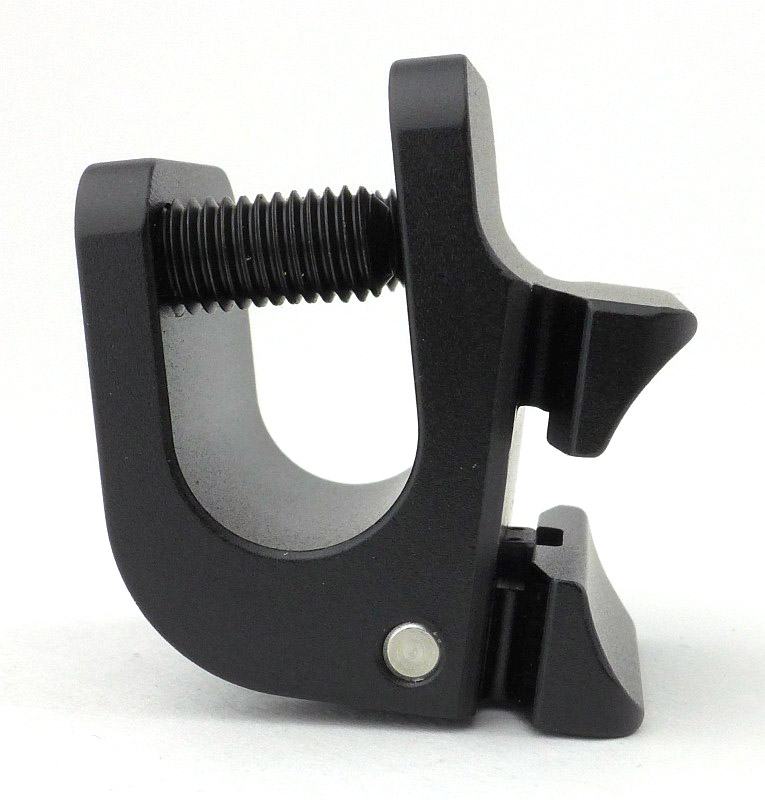
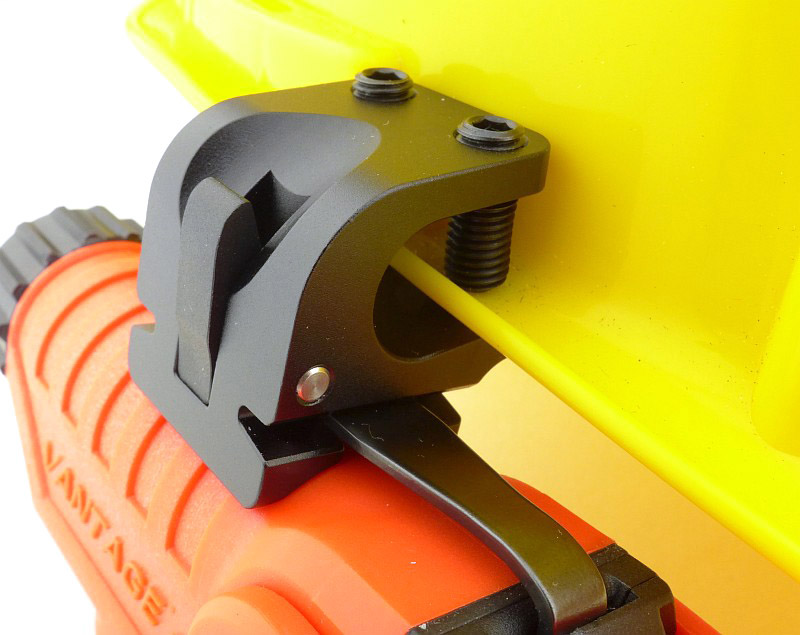
While we are looking at attachment options, there is a special helmet mount included with the Vantage 180. It is an anodised aluminium block with a few special features.

There is a deep helmet rim clamp. Using the supplied Allen keys, these two grub screws are backed right out to allow the mount to be placed over the rim of the helmet. This is specifically designed to fit US issue helmets, so might have limited success on other helmet designs around the world.

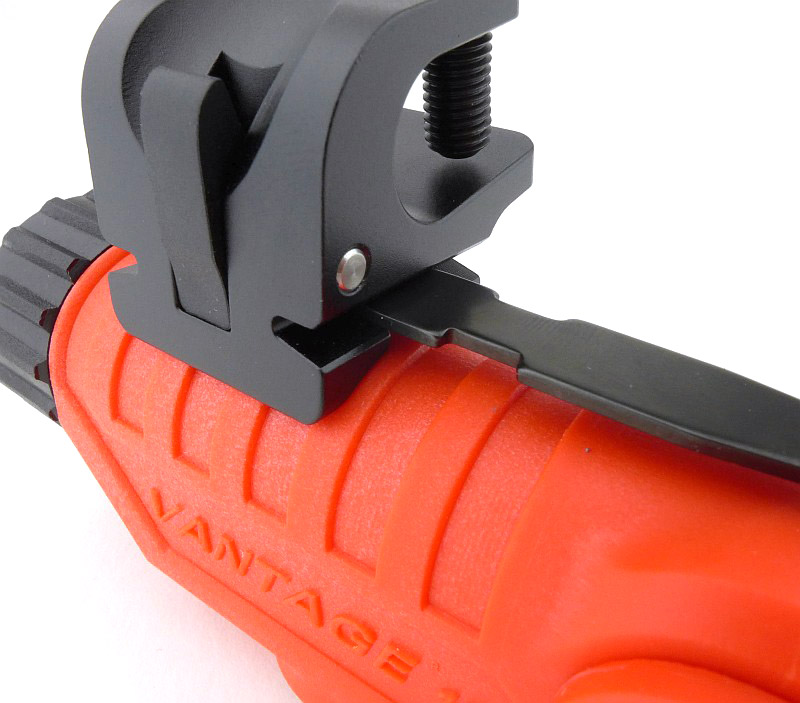
Then there is the side onto which the Vantage 180 clips. The round section fits against the Vantage 180’s body, and the T-shaped groove will allow the pocket clip to slide through.

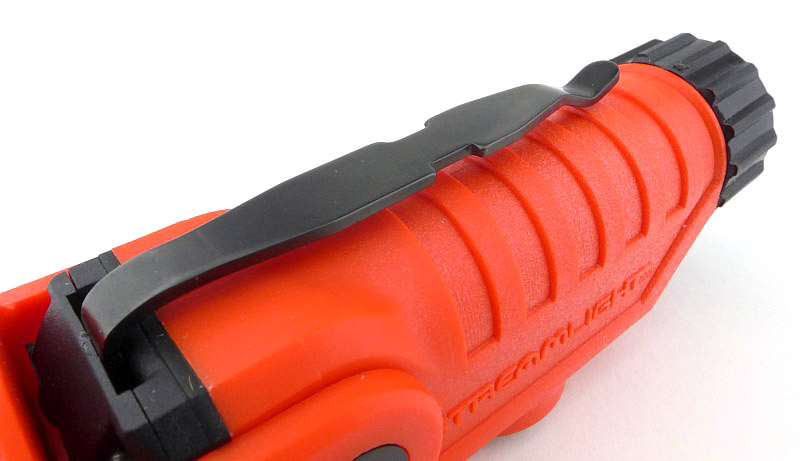
Something extra to mention while looking at the full pocket clip, is a feature that is visible bottom left in this photo; where the clip joins the body there is a slot. The pocket clip can be moved from side to side here, rotating the position of the clip around the body slightly and allowing the user to angle the Vantage 180 up to 15 degrees to either side while it is clipped to their gear.

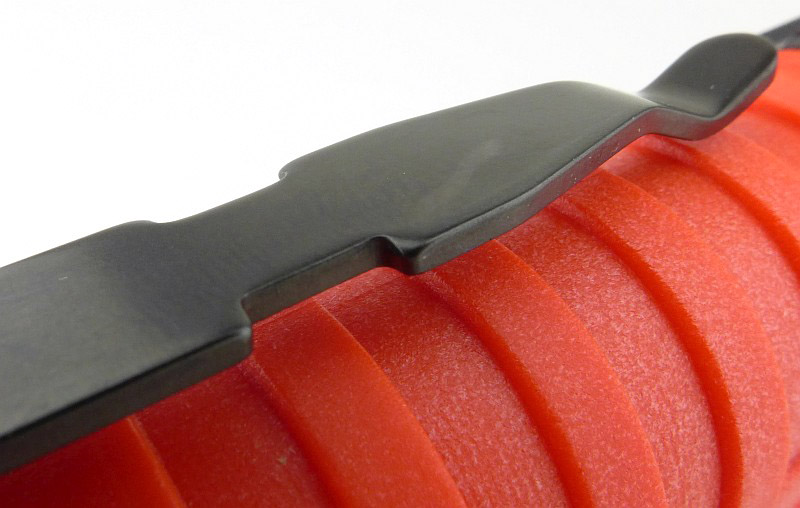
The feature of this clip that relates specifically to the helmet mount are the two notches each side of the clip. These are what the helmet mount latches on to so it doesn’t slide out of the mount,

Starting to slide the Vantage 180 into the mount. From this side you can see the mount’s release lever.

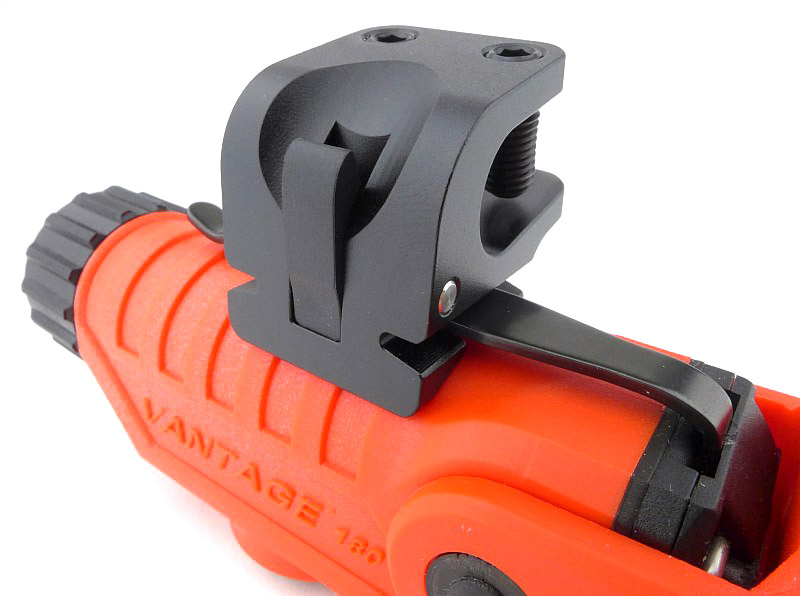
The mount is now locked in place on the clip.

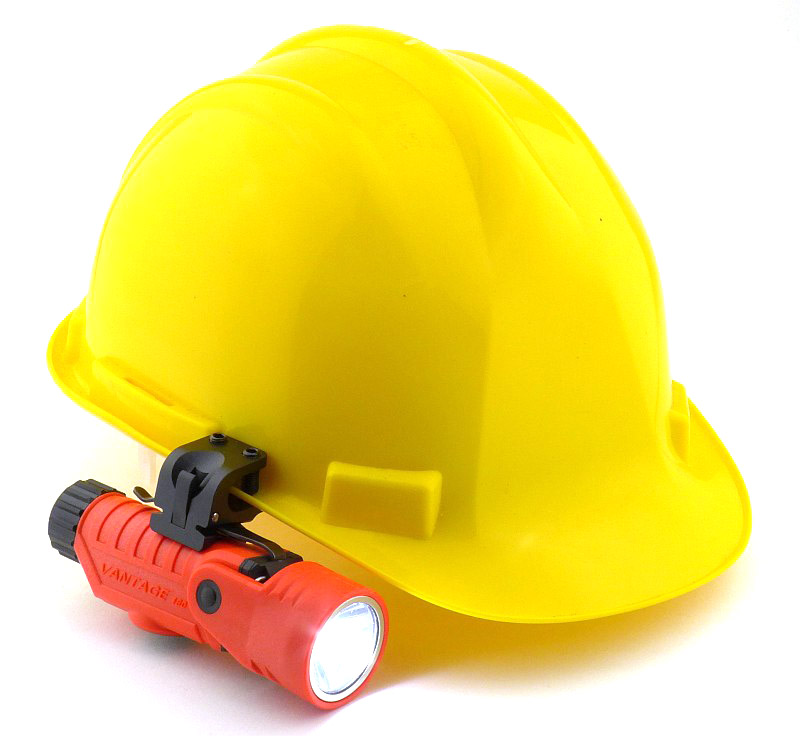
An overall view of the Vantage 180 fitted to the mount.

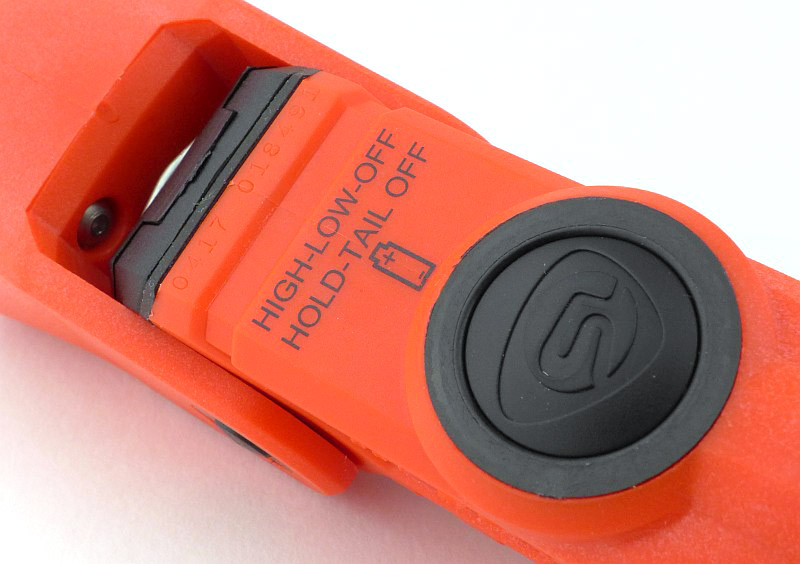
A brief reminder of the modes, and how to use them, is printed on the body (more on this later) along with the battery orientation.

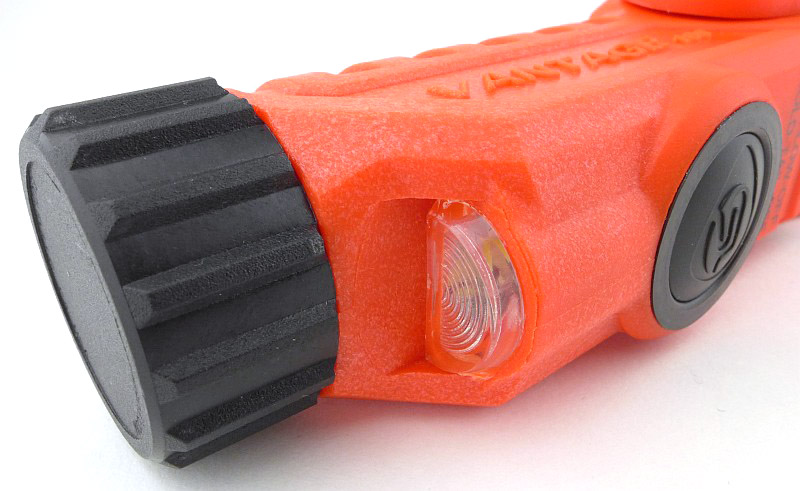
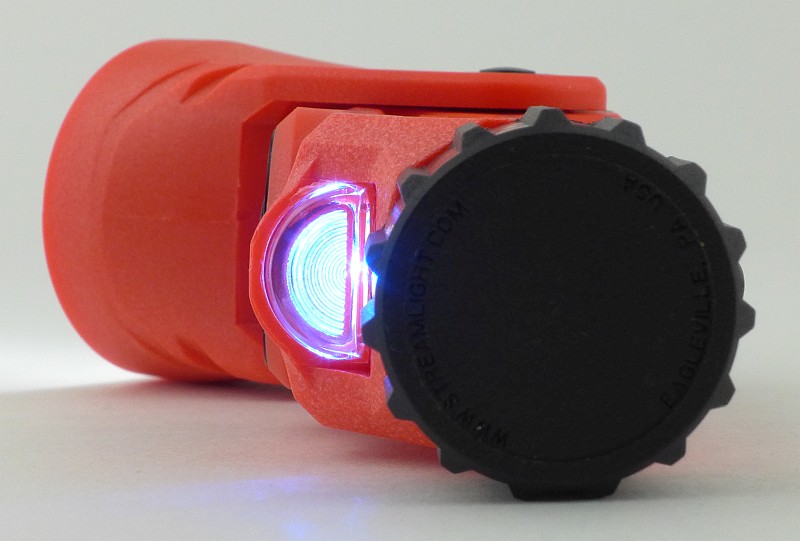
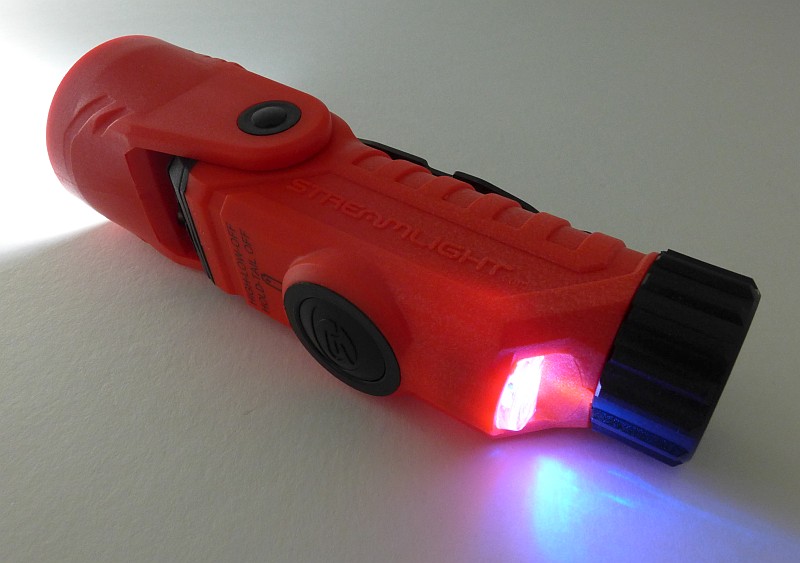
There is another special feature of the Vantage 180; it has two beams. This is the second beam, and is itself dual-purpose, either as a blue marker light, or a white secondary beam down-light (more on this later).

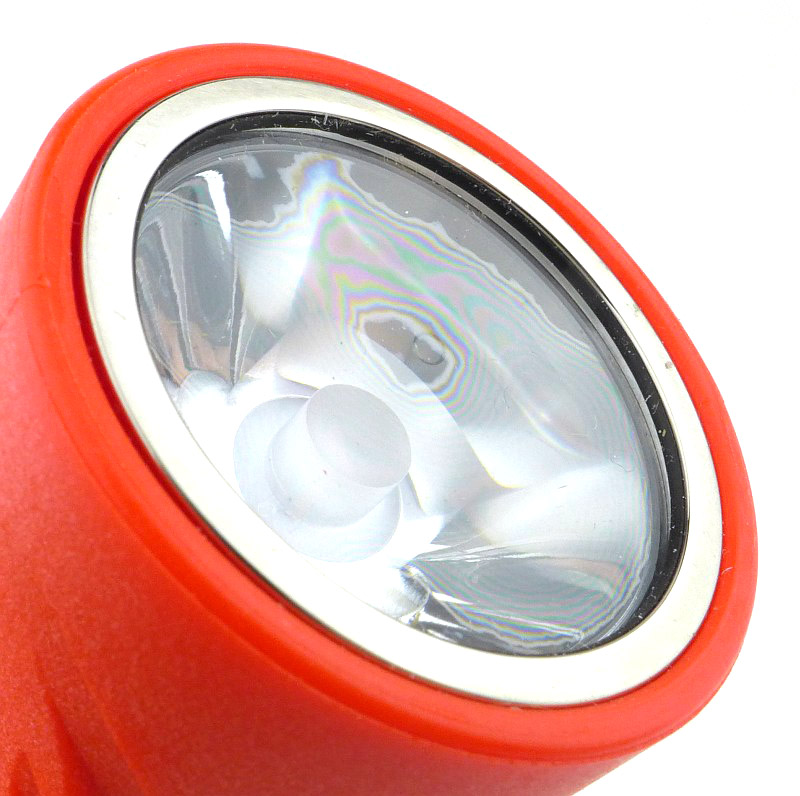
Here is a little mystery, I’ve not yet uncovered why there is an interference pattern visible (like oil on water) on the lens. It appears to be an additional layer on the lens front, but not one you are meant to remove, as there is no visible edge that would allow you to remove it. This doesn’t seem to affect the output in any way, so this is just an observation and appears to be normal.

A TIR optic is used.

And this means that when viewed from the front, you can’t see the LED.

The tail-cap has a deep grip pattern making it easy to hold onto.

The simplest of contact design is used, with a single coil spring fitted into the plastic tail-cap.

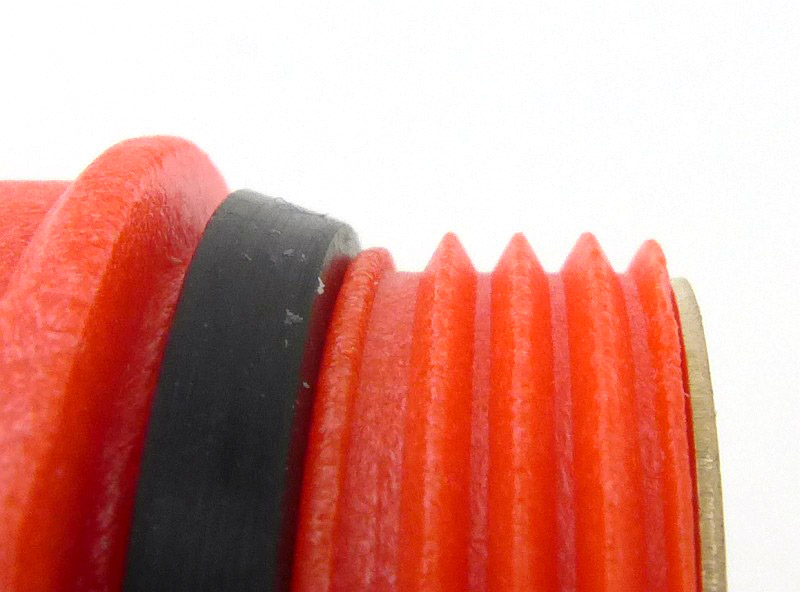
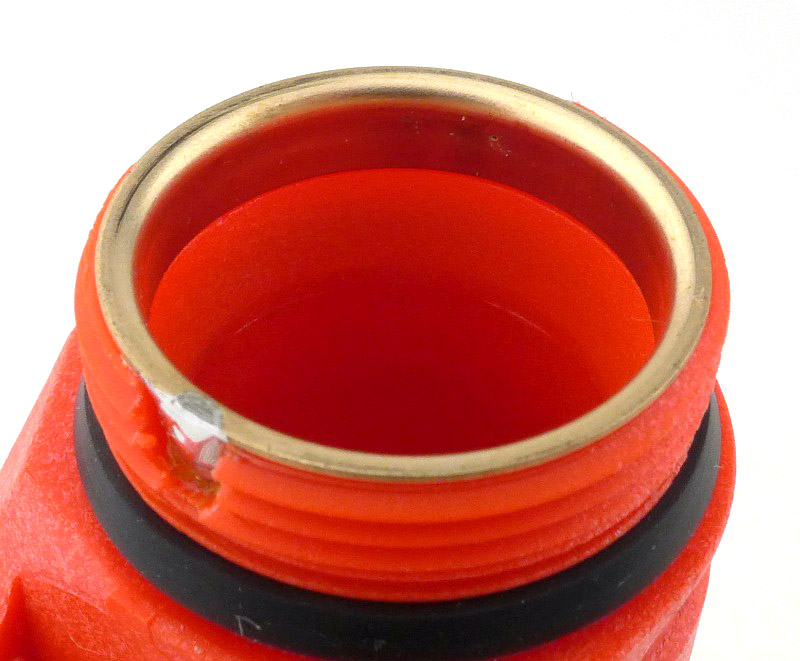
Though moulded plastic, the threads are sharp and well made. The O-ring is a wedge type.

Being a plastic body, the negative contact needs to connect to the head of the light. This is via a ring contact at the end of the battery tube which is soldered to a metal strip that runs through the battery tube.

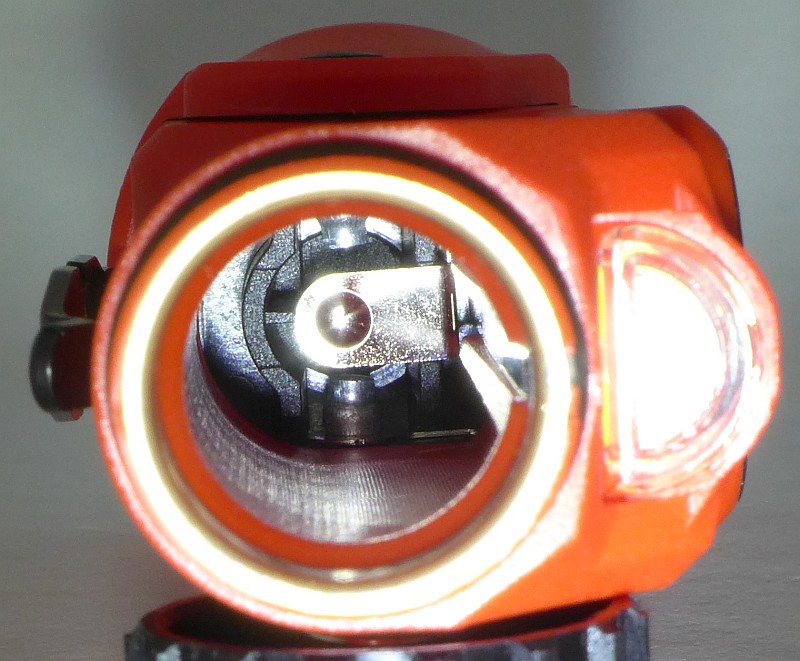
Looking into the battery tube you can see the positive contact.

With the head adjusted to 90 degrees, the secondary beam provides downward lighting.

That same secondary beam, also changes to a blue marker light.

The beam

Please be careful not to judge tint based on images you see on a computer screen. Unless properly calibrated, the screen itself will change the perceived tint.

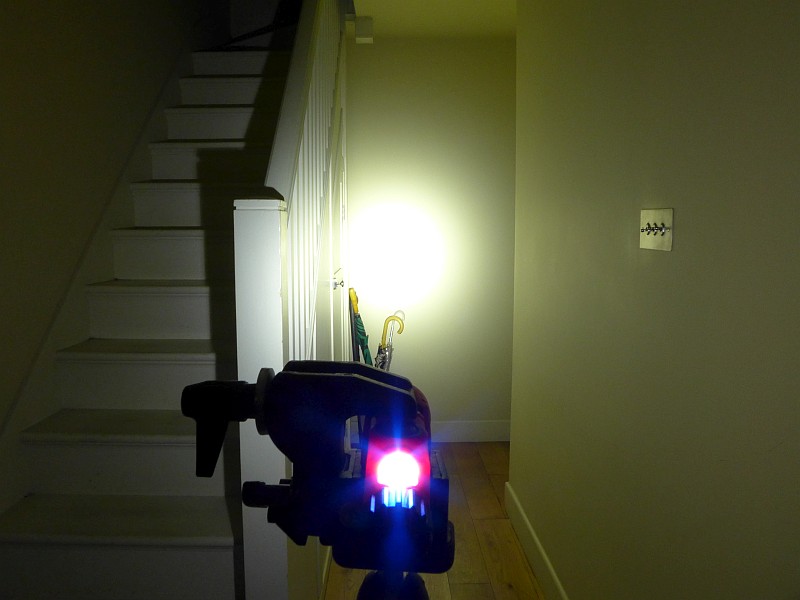
The indoor beamshot is intended to give an idea of the beam shape/quality rather than tint. All beamshots are taken using daylight white balance. The woodwork (stairs and skirting) are painted Farrow & Ball “Off-White”, and the walls are a light sandy colour called ‘String’ again by Farrow & Ball. I don’t actually have a ‘white wall’ in the house to use for this, and the wife won’t have one!

In this photo, the tail beam has been turned on and (with the head set to the straight position) is a relatively low output blue light.
The main beam is almost entirely hot-spot. The spill is useful, but is quite weak, so this can give a slight tunnel vision effect depending on the environment.

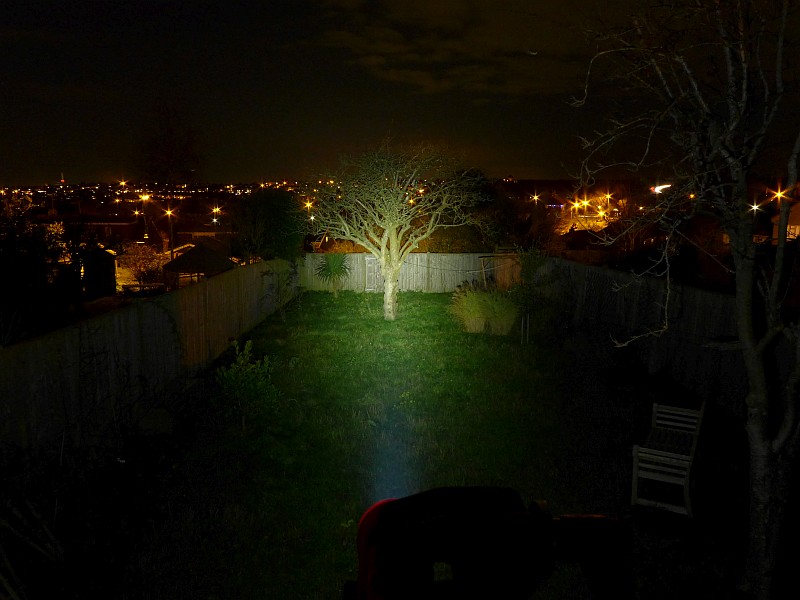
With more range the effect of the weak spill becomes more pronounced, and really the beam becomes just the hotspot.

Modes and User Interface:

The Vantage 180 has two constant output modes for the main beam, High and Low, and two different outputs for the secondary beam, white and blue.

To access High, press the switch once. If you press the switch again within 2s, the Low mode will be selected. Pressing once more within 2s turns the Vantage 180 OFF.

If either High or Low mode is activated, once it has been ON for at least 2s, a single press of the button will turn the Vantage 180 OFF.

The secondary beam is set to be either ON or OFF along with the main beam. The secondary beam cannot be used independently and can only be on if the main beam is on. Its white/blue setting is dictated by the head position.

To set toggle the secondary beam between being ON or OFF, with the Vantage 180 either ON or OFF (it doesn’t matter), press and hold the switch for more than 2s.

With the head set to the straight position, the secondary beam will be blue.

Angling the head towards being a right-angle light, and when the head gets to around 72 degrees, the secondary beam switches from blue to a brighter white.

Batteries and output:

The Vantage 180 runs on 2x CR123.

To measure actual output, I built an integrating sphere. See here for more detail. The sensor registers visible light only (so Infra-Red and Ultra-Violet will not be measured).

Please note, all quoted lumen figures are from a DIY integrating sphere, and according to ANSI standards. Although every effort is made to give as accurate a result as possible, they should be taken as an estimate only. The results can be used to compare outputs in this review and others I have published.

___________________________________________ ________________________________ ________________________________
Vantage 180 using specified cell I.S. measured ANSI output Lumens PWM frequency or Strobe frequency (Hz)
___________________________________________ ________________________________ ________________________________
High – CR123 269 0
Low – CR123 98 0

* Beacon and Strobe output measurements are only estimates as the brief flashes make it difficult to capture the actual output value.

There is parasitic drain; when using CR123, the drain was 23.2uA (6.88 years to drain the cells). The tail-cap can be unscrewed two full turns to lock-out the power and stop any drain. However this is enough to prevent the seal being effective, so the Vantage 180 would not be water resistant like this.

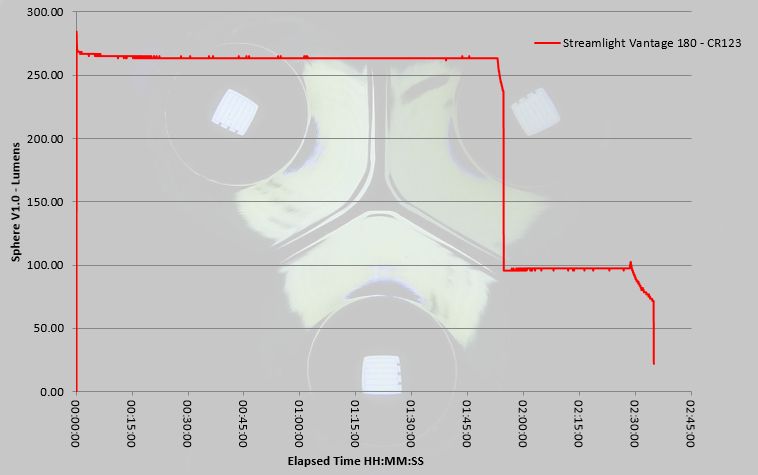
The runtime graph shows a nicely regulated output giving nearly two hours on High before the output drops to the Low level. Beyond two and a half hours the output then rapidly declines before dropping to a 22 lumen level which runs on for some time. The Vantage 180 doesn’t leave you in the dark and provides plenty of warning for a battery change.

Troubleshooting

This section is included to mention any minor niggles I come across during testing, in case the information helps anyone else.

No issues were encountered during testing.

As per the description of this section, this information is provided in case anyone else finds a similar ‘issue’ that might be fixed in the same way.

The Vantage 180 in use

Streamlight always manage to build in a great deal of functionality into lights like this, and the Vantage 180 does not disappoint. To start with, the ability to go from a conventional straight torch/flashlight to a right-angle light, or anywhere in between, is so useful. Even if this is when placing the Vantage 180 on a table or the ground to use as a task light, being able to adjust the head, allows it to work where a fixed head light just wouldn’t be much use.

Add to this the clip (with its own adjustment of 15 degrees each way) and hanging loop, and you have a highly functional work light, that will fit into just about any task you need to do.

Then there is the secondary beam. The blue tail-light is mainly for increasing your visibility to others, and this is mainly aimed at Emergency Response personnel who would wear the Vantage 180 on their helmet. For my own purposes, I can’t really think of a sensible use for this blue marker light.

However, rotate that head to activate the down-light, and the Vantage now has ground lighting along with the main beam if you have this fitted to your clothing (or lighting to let you see what you are writing etc.).

But we are not yet finished as there is that solid helmet mount. So as long as it fits the helmet you are using, or can be made to fit) you have a headlamp as well.

In this case it has been fitted to a basic hard-hat and nicely holds onto the rim.

Not everyone will use every feature of the Vantage 180, but you know that it has all that flexibility built-in which provides you with a lot of options.

Review Summary

_______________________________________________ _______________________________________________
Things I like What doesn’t work so well for me
_______________________________________________ _______________________________________________
Full 180 Degrees of head Rotation. Weak spill beam.
Secondary tail-light / down-light. Doesn’t use rechargeable batteries.
Clip can be adjusted 15 degrees either way. Only two output levels.
Helmet mount included.
Hanging loop built-in.
Unbreakable TIR optic.
Well regulated output.


Discussing the Review:

The ideal place to discuss this reviews is on a forum. If you started reading the shorter forum version of the review, but followed the link this full exclusive review, please return to that forum to discuss the review there.
If you read the review entirely on Tactical Reviews, please consider one of the following to join in any discussion.

CandlePowerForums – Flashlight Reviews Section (Largest and Friendliest Flashlight Community Forum)
Light Review: Streamlight ProTac HL USB and Portable USB Charger

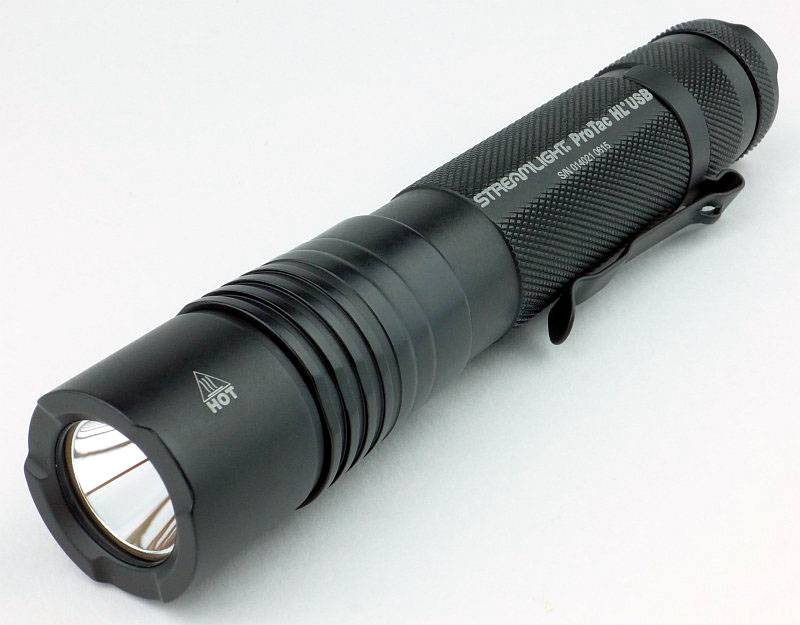
Streamlight have been adding USB power into their range and in this review we take a look at the ProTac HL USB along with the Portable USB Charger

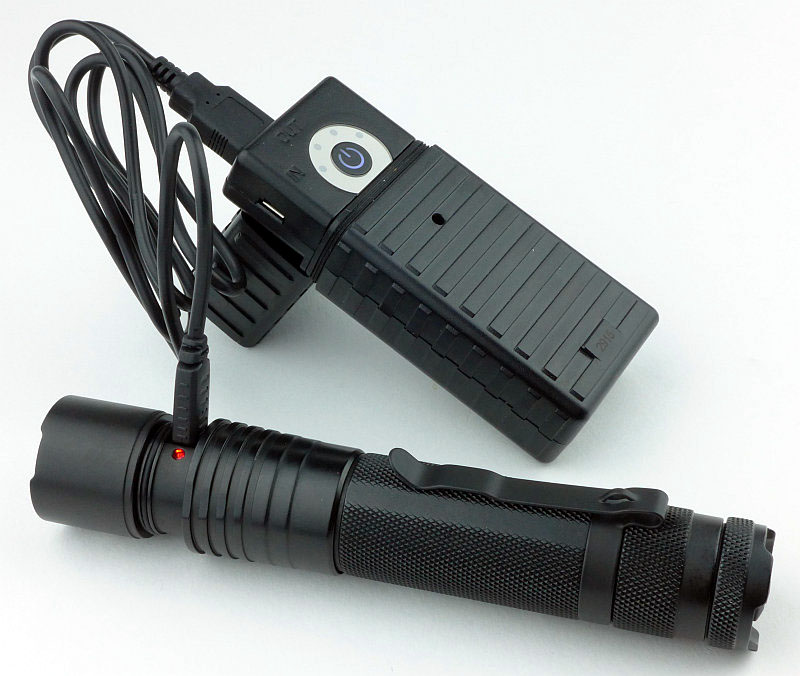
 photo 23 Protac HL USB plus charger P1170014.jpg

Taking a more detailed look:

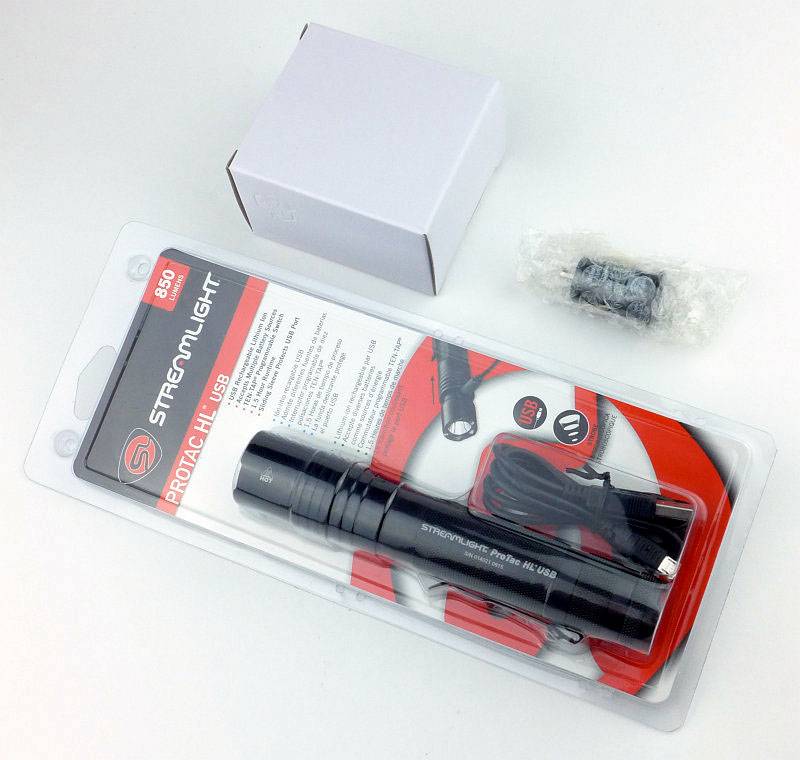
Everything shown here actually came in a completely plain white outer cardboard box (which didn’t really show up in these white background photos).
 photo 01 Protac HL USB boxed P1160952.jpg

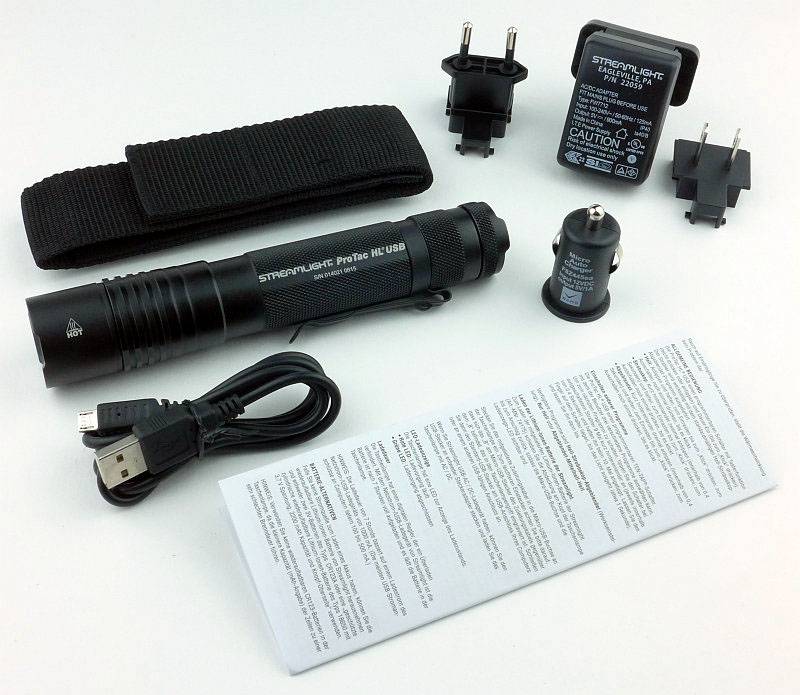
The package is comprehensive as it includes the ProTac HL USB, a holster, USB cable, mains USB charger and 12v Car USB charger.
 photo 02 Protac HL USB unboxed P1160958.jpg

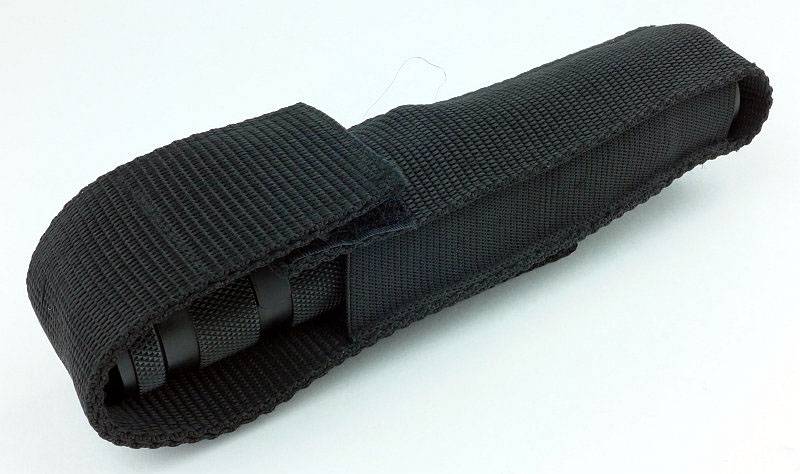
A simple holster is provided.
 photo 03 Protac HL USB holster1 P1160961.jpg

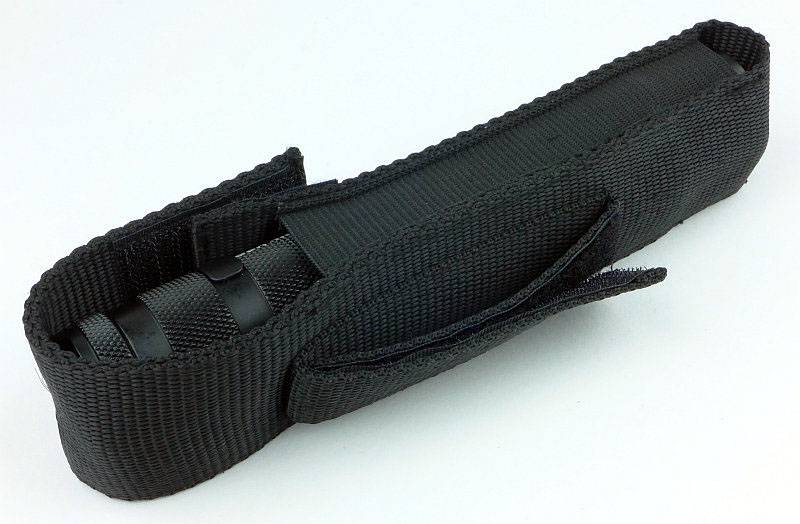
The belt loop has a Velcro closure so it can be fitted without taking your belt off.
 photo 04 Protac HL USB holster2 P1160963.jpg

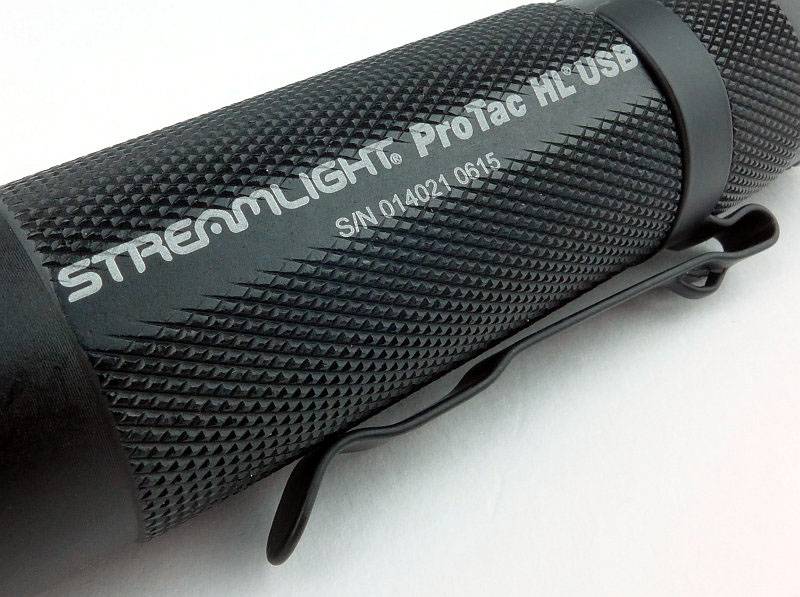
Laser-engraved on the side is the model and serial number. There is not enough flat space for the writing so it spills over onto the knurling.
 photo 06 Protac HL USB engraving P1160971.jpg

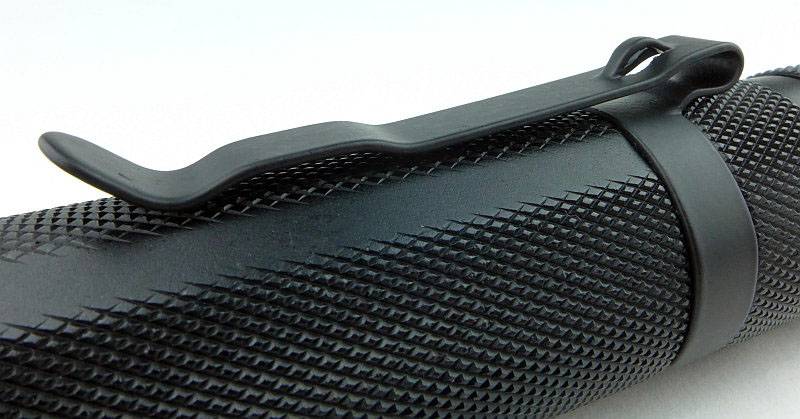
Already fitted is a removable, powder-coated, pocket clip.
 photo 07 Protac HL USB clip P1160974.jpg

As with most Streamlight lights, the main switch has the Streamlight logo.
 photo 08 Protac HL USB switch P1160977.jpg

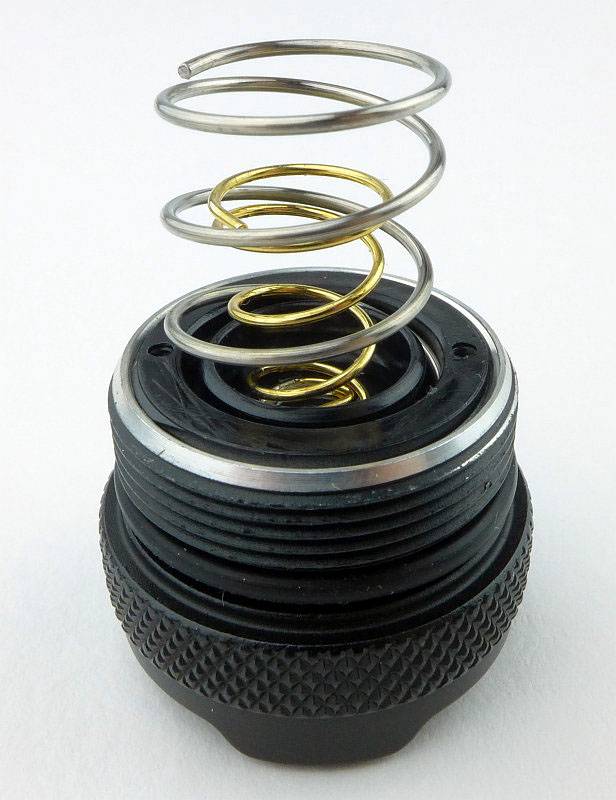
Taking the tailcap out reveals its long twin-springs. This is part of a special design catering for the use of the Streamlight proprietary 18650, standard 18650s and CR123 cells.
 photo 09 Protac HL USB tailcap P1160982.jpg

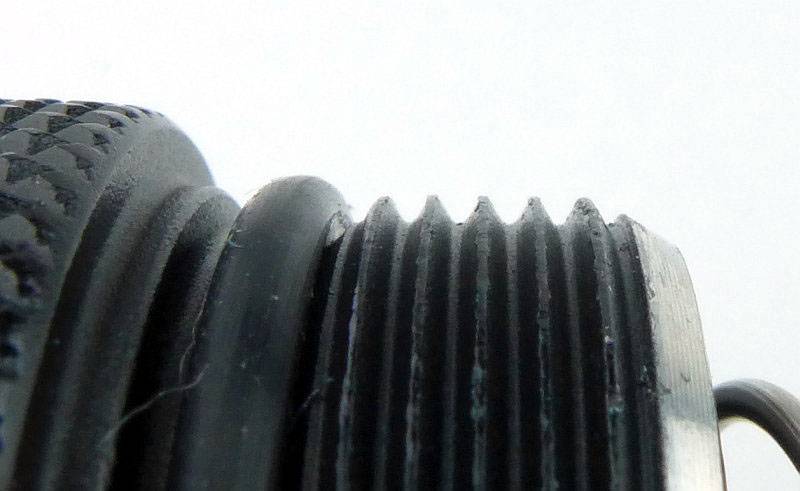
Standard fully-anodised threads are used.
 photo 10 Protac HL USB threads P1160984.jpg

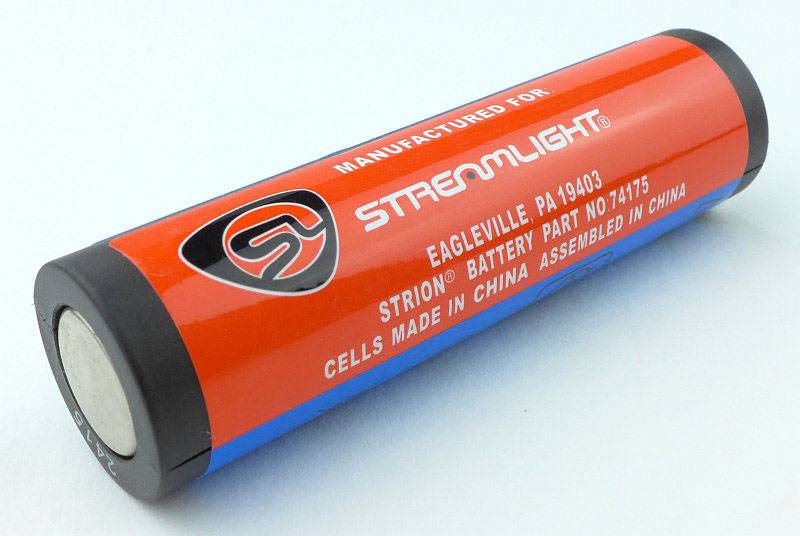
Streamlight’s proprietary 18650 cell has a full plastic casing with one standard negative terminal.
 photo 11 Protac HL USB battery1 P1160988.jpg

Swapping round to the front end of the cell, there is a dual pole contact system which relates to the built-in USB charging of the Protac HL USB.
 photo 12 Protac HL USB battery2 P1160990.jpg

For an 18650 light, the Protac HL uses a slightly larger tube than most, but this is due to the clever system to accommodate 18650 and CR123 cells without any rattle. Inside the battery tube are three sprung strips which keep whatever cells are being used securely in place.
 photo 13 Protac HL USB battery tube P1160994.jpg

While we are looking very closely, the surface texture has a subtle sheen.
 photo 14 Protac HL USB surface P1170003.jpg

So where is the USB part? Starting here with a reverse angle view with the USB port cover closed.
 photo 15 Protac HL USB reverse angle P1170006.jpg

Then with the port cover pulled back.
 photo 16 Protac HL USB reverse angle port P1170007.jpg

Under the port cover is a micro USB port and a charging indicator light.
 photo 17 Protac HL USB chaging port P1170011.jpg

Oddly the Protac HL doesn’t make full use of the size of the head, instead having a thick bezel and smaller reflector. For its diameter the reflector is relatively deep.
 photo 18 Protac HL USB reflector P1170015.jpg

Though Streamlight never specify the actual LED used, this sample has an XM-L2 LED.
 photo 19 Protac HL USB LED P1170024.jpg

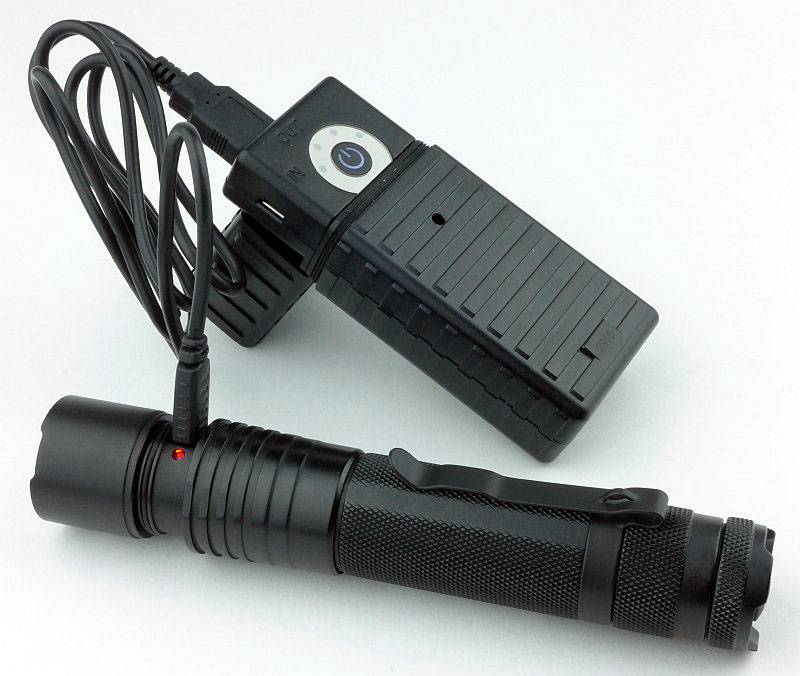
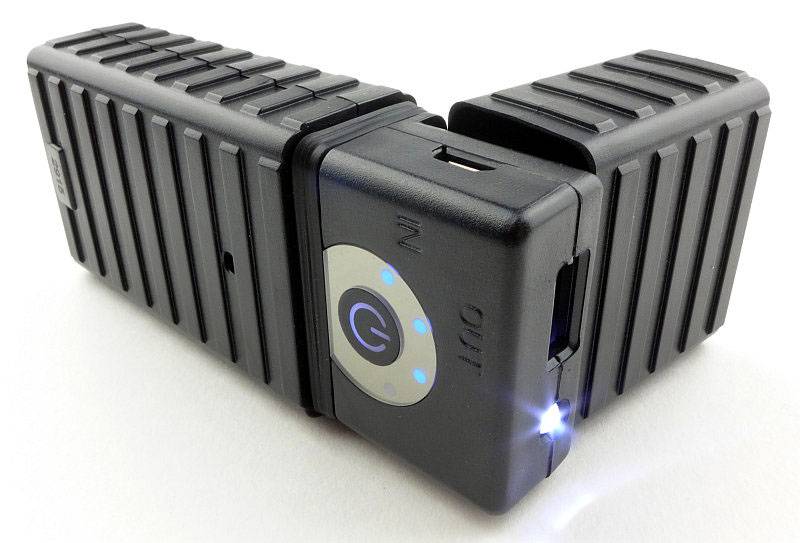
Of course, if you are out and about with no mains or car charger available, a Portable USB Charger is ideal for topping up the battery.
 photo 20 Protac HL USB charging P1170030.jpg

Taking a more detailed look at the Portable USB Charger:

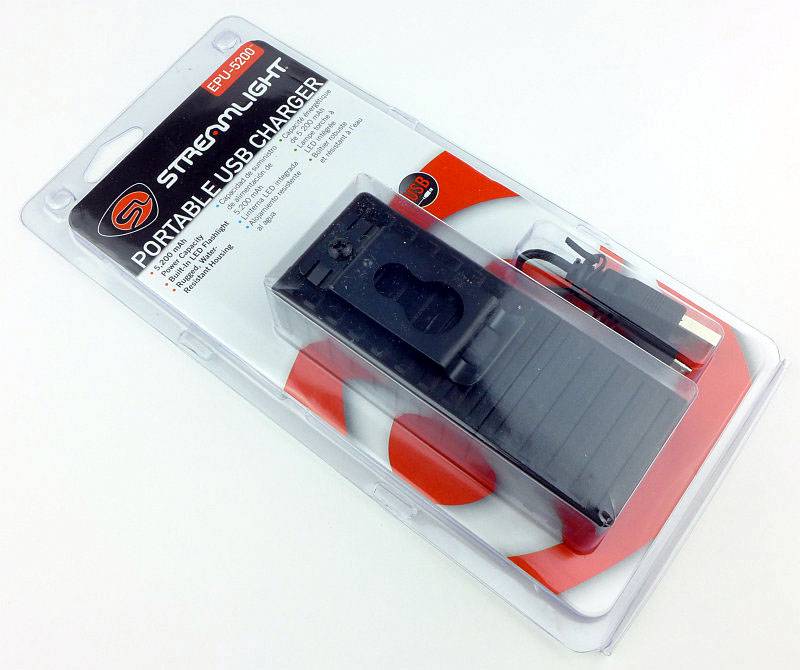
Taking a slight digression from the Protac HL USB light and onto the Streamlight Portable USB Charger. This is how it arrives.
 photo 01 Stream USB boxed P1120294.jpg

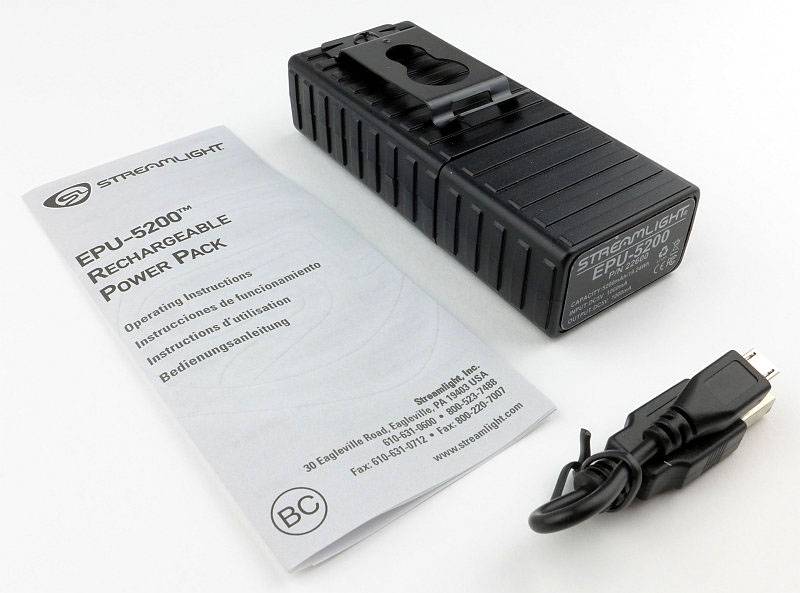
There is a short USB cable which you can use to charge it, or charge other devices, and the instructions.
 photo 02 Stream USB unboxed P1120297.jpg

A nice feature of the Streamlight powerbank is that is has a weatherproof cover over the ports. The cover is held on with an elasticated cord, so you need to positively pull it off.
 photo 03 Stream USB opening P1120305.jpg

Once opened the cover stays at an angle and cannot be lost. There is a 5mm LD built in which allows this to be used as a basic light and this has been switched on in this photo.
 photo 04 Stream USB open P1120320.jpg

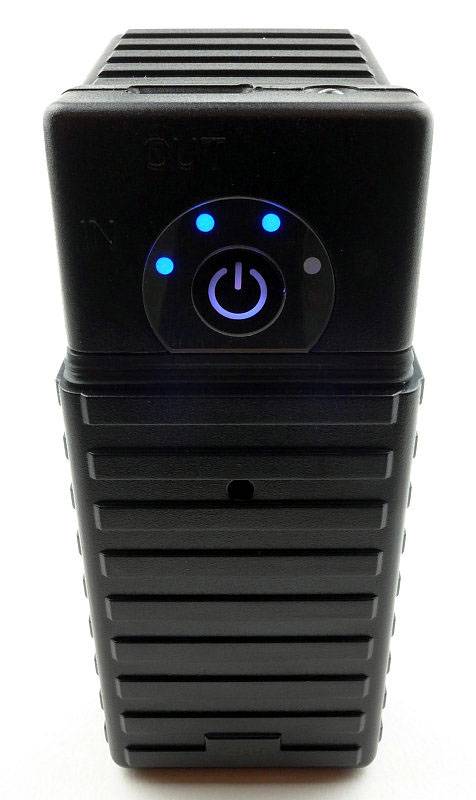
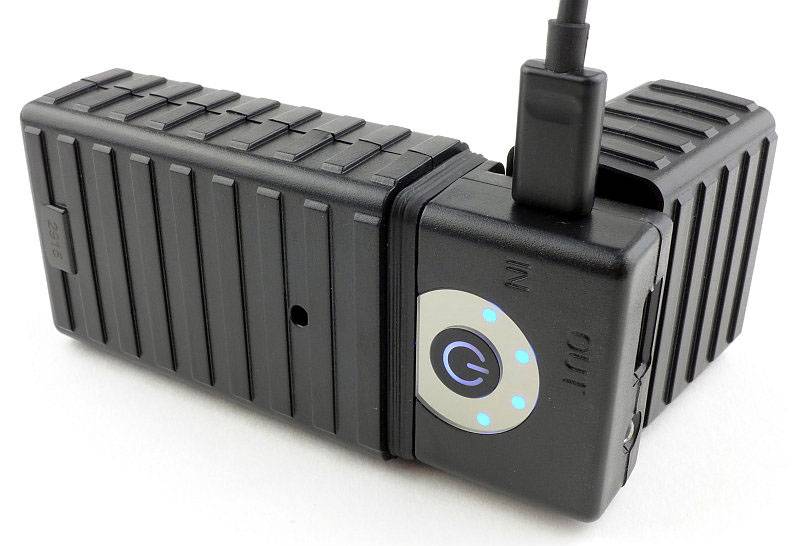
When you turn it on with a click of the power switch, there are four lights to indicate the state of charge. This is showing approximately 75% remaining.
 photo 05 Stream USB lights P1120316.jpg

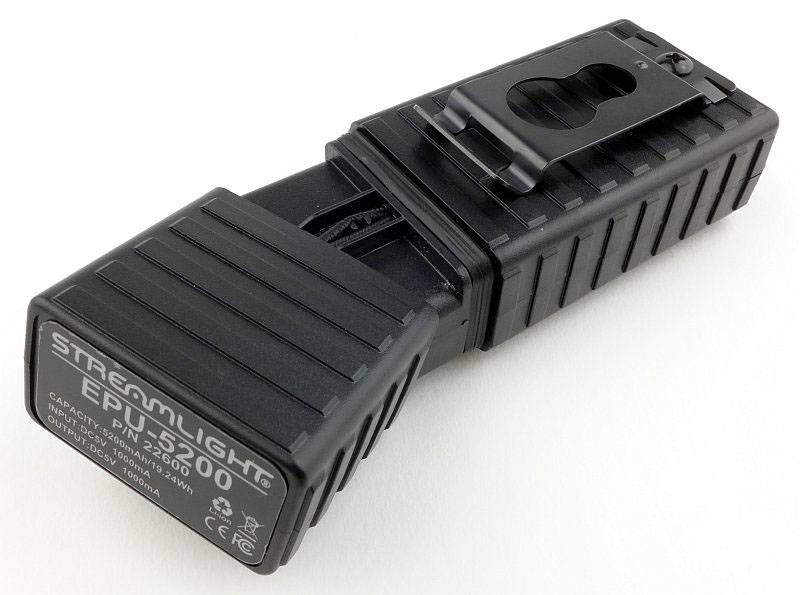
Though not specified as fully waterproof, the seal has a triple flange.
 photo 06 Stream USB seal P1120328.jpg

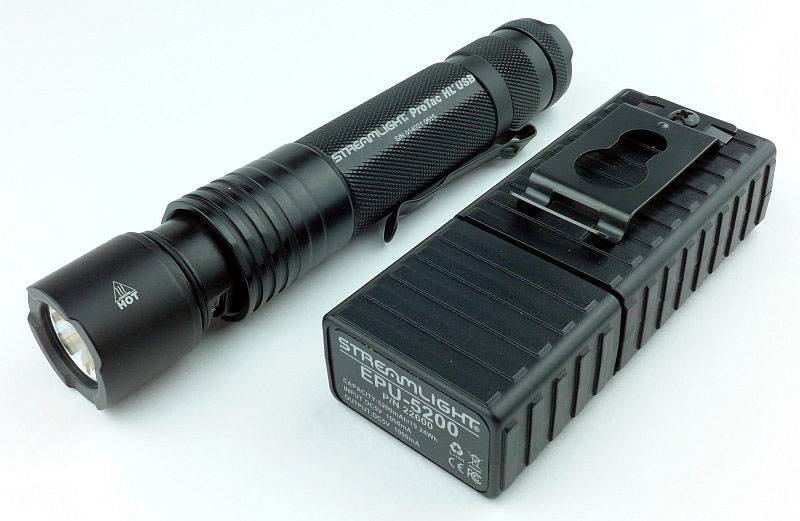
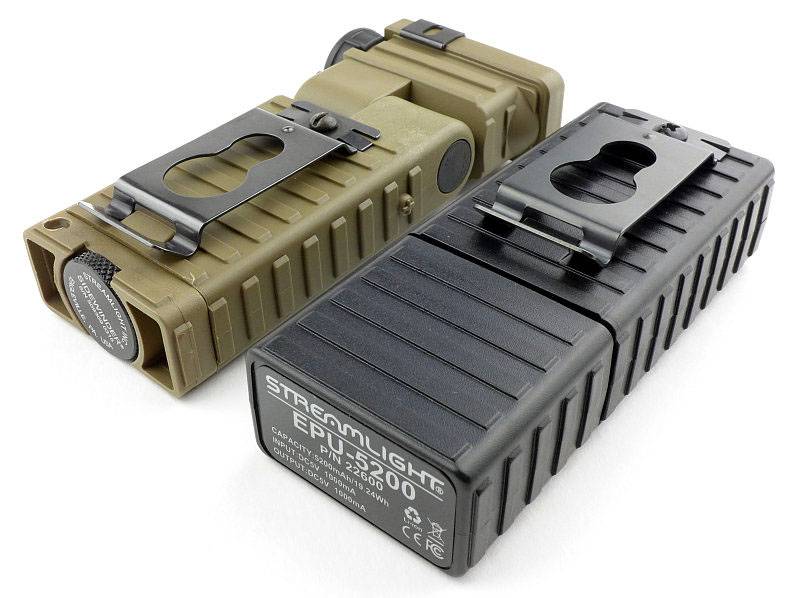
Thought it looked familiar? Well yes, it is rather reminiscent of the Streamlight Sidewinder.
 photo 07 Stream USB sidewinder P1120339.jpg

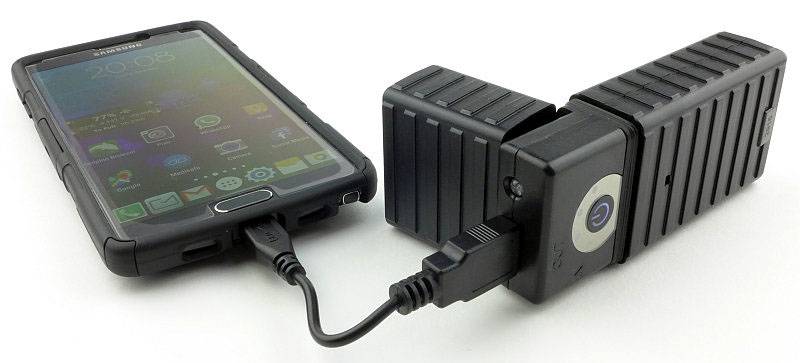
Any standard USB device can be charged.
 photo 08 Stream USB output P1120347.jpg

When charging the USB Portable Charger, the indicator lights tick up to show it is charging, with each 25% LED staying lit once that level of charge has been reached, and then all stay on once fully charged.
 photo 09 Stream USB input P1120857.jpg

Back to the ProTac HL USB …

The beam

Please be careful not to judge tint based on images you see on a computer screen. Unless properly calibrated, the screen itself will change the perceived tint.

The indoor beamshot is intended to give an idea of the beam shape/quality rather than tint. All beamshots are taken using daylight white balance. The woodwork (stairs and skirting) are painted Farrow & Ball “Off-White”, and the walls are a light sandy colour called ‘String’ again by Farrow & Ball. I don’t actually have a ‘white wall’ in the house to use for this, and the wife won’t have one!

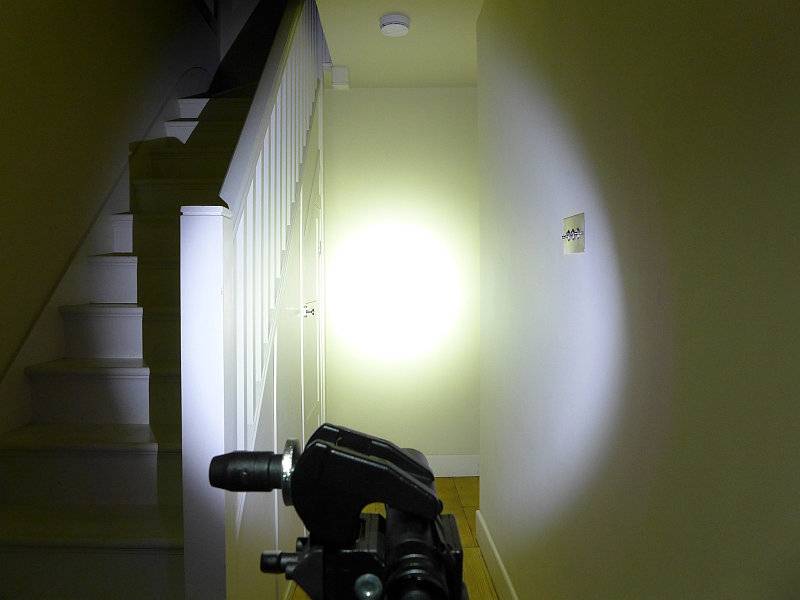
The beam is a pretty good all-rounder. There is a wide hotspot and usable spill.
 photo 22 Protac HL USB indoor beam P1170302.jpg

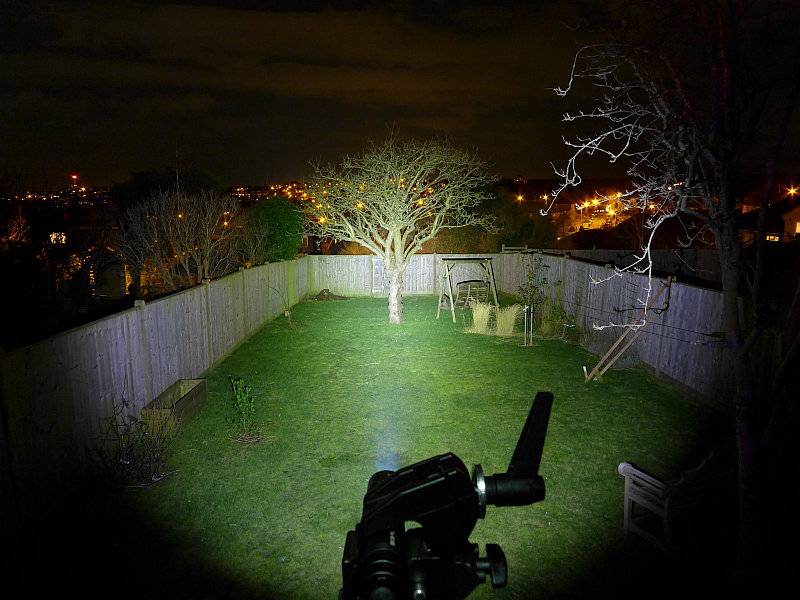
Giving it a bit of range and the beam smoothes out further and give a nice field of view.
 photo 21 Protac HL USB outdoor beam P1170237.jpg

Modes and User Interface:

Thanks to Streamlight’s TEN TAP programming, you have the choice of three different mode sets. These are:
High – Strobe – Low (Factory default)
High Only
Low – Medium – High

There is no mode memory so every time you use it, it will start from the first mode in the set. To access sub-modes, you use rapid half-presses of the switch.
For example, on the factory default mode set, one press gives you High, a rapid double tap gives you Strobe, and a rapid triple tap for Low.

The switch is a momentary ‘forward-clicky’ so once you have the mode you want, you can fully press the switch to click the mode on.

TEN TAP programming is simple. To cycle through the available mode sets, rapidly press the switch 9 times and then on the tenth hold it on. Continue to hold until the light goes off then release the switch. Doing this moves you to the next mode set, so simply repeat until you have the one you want.

Batteries and output:

The ProTac HL USB runs on its own rechargeable 18650 cell, any standard button top 1860 or 2x CR123. The manual also mentions not using RCR123, but only due to the lower capacity, not because it will damage the light.

To measure actual output, I built an integrating sphere. See here for more detail. The sensor registers visible light only (so Infra-Red and Ultra-Violet will not be measured).

Please note, all quoted lumen figures are from a DIY integrating sphere, and according to ANSI standards. Although every effort is made to give as accurate a result as possible, they should be taken as an estimate only. The results can be used to compare outputs in this review and others I have published.

___________________________________________ ________________________________ ________________________________
ProTac HL USB using supplied cell I.S. measured ANSI output Lumens PWM frequency or Strobe frequency (Hz)
___________________________________________ ________________________________ ________________________________
High 856 0
Medium 360 0
Low 92 0

* Beacon and Strobe output measurements are only estimates as the brief flashes make it difficult to capture the actual output value.

Peak Beam intensity measured 8700 lx @1m giving a beam range of 187m.

There is no parasitic drain.

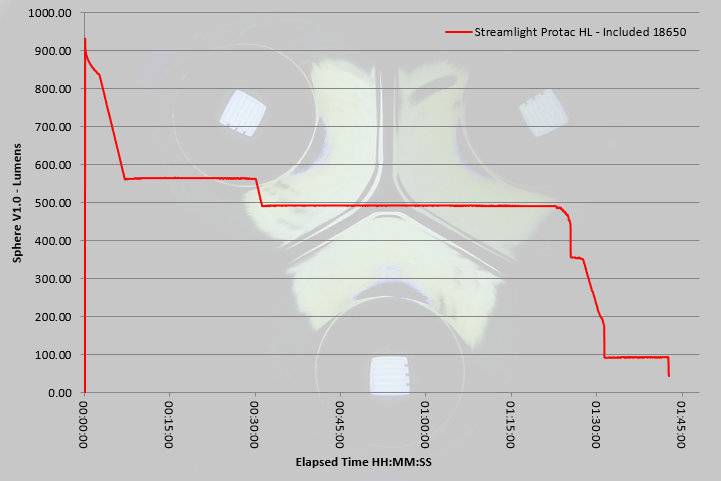
Maximum output is delivered in a burst format, lasting around 3 minutes before making a controlled reduction. Turning the light off and on again restarts the 3 minute burst. If left on permanently (as in this runtime test) the output initially reduces and then remains well regulated until it steps down slightly after 30 minutes. The remaining runtime is also well regulated right up to the point the cell runs low and output quickly drops.
 photo Streamlight Protac HL runtime.jpg

Troubleshooting

This section is included to mention any minor niggles I come across during testing, in case the information helps anyone else.

No issues were encountered during testing.

As per the description of this section, this information is provided in case anyone else finds a similar ‘issue’ that might be fixed in the same way.

The ProTac HL USB in use

Though the ProTac HL USB uses a wider battery tube than most 18650 lights, by keeping the head roughly the same size as the battery tube, overall the light is not overly bulky. With my XL glove sized hands, I find the ProTac HL USB a very comfortable size.

Tailstanding can be a useful feature, and the tailcap design allows for this, but what it means is that the switch is relatively recessed and can become a little difficult to press and click-on, especially when wearing gloves. It requires more of a stab with the tip of your thumb than a press with the pad.

I’ve always like the Streamlight TEN TAP programming, and wish there were more mode-sets available. My preference is for the Low-Medium-High mode set. What I really do like is that when then choosing your output level, this system keeps it very simple; you have a single tap, double tap, or 3 or more taps. If you rapidly press the switch 5 or 6 times you still get the third output level in the mode set. Timing on the mode changes seems to work very well and I always managed to get the mode I want.

Access to the USB charging port is easy as the cover is a simple slider. What does worry me is that the cover is retained only by the o-rings at each end. Once these o-rings wear the cover may not stay in place securely, so it might be better if there was a screw thread to hold it in place. This is a trade off between ease of use and reliability.

Great news is that in the ProTac HL USB Streamlight have not used PWM. All output levels are current controlled and a pleasure to use.

The included 18650 is only 2200 mAh; comparing this to current ‘normal’ capacities of 3400mAh it is somewhat behind the rest. There may be some reliability in a lower capacity cell, but this is slightly disappointing. Of course you can pop a 3400mAh 18650 in and use it, but you can’t charge it in the ProTac HL USB.

Being able to also use standard 18650 (button top) and CR123 cells is a great feature as you are not tied into the proprietary Streamlight cell and can carry backup cells. If you want to use the built-in charger then you have to use the Streamlight cell, but you get one with it so that is not a big issue. Streamlight’s anti-rattle battery tube works very well (but can be a bit tight on some 18650s) and stops CR123s making the light feel cheap as they don’t rattle about.

It may not be outstanding in terms of overall output, or for being compact, but the ProTac HL USB is a workhorse of a light and the package gives you a full kit of parts which can be used for other purposes. I use the mains and 12V USB chargers for my phone and the Portable USB Charger as well as the ProTac HL USB. Simple, programmable and rechargeable.

Review Summary

_______________________________________________ _______________________________________________
Things I like What doesn’t work so well for me
_______________________________________________ _______________________________________________
USB Rechargeable. Switch can be a little difficult to press.
Can use standard 18650 and CR123 cells. Charging port cover only held closed by o-rings.
No PWM. Supplied 18650 only 2200mAh
TEN TAP Programming.
Anti-Rattle battery tube.

 photo 05 Protac HL USB angle P1160965.jpg


Discussing the Review:

Please feel free to add comments to the review, but the ideal place to freely discuss these reviews is on a forum. If you started reading the shorter forum version of the review, but followed the link this full exclusive review, please return to that forum to discuss the review there.
If you read the review entirely on Tactical Reviews, please consider one of the following to join in any discussion.

CandlePowerForums – Flashlight Reviews Section (Largest and Friendliest Flashlight Community Forum)
EdgeMatters – Sponsored Reviews (UK based Forum for Knife Makers and Collectors)