Light Review: Streamlight Vantage 180

Streamlight make some of the most useful articulated-head lights I’ve ever used. Lights like the Knucklehead, and Sidewinder bring an extra level of functionality with their adjustable heads. For this reason I was particularly excited to get my hands on their latest articulated light, Streamlight’s Vantage 180.

Taking a more detailed look:

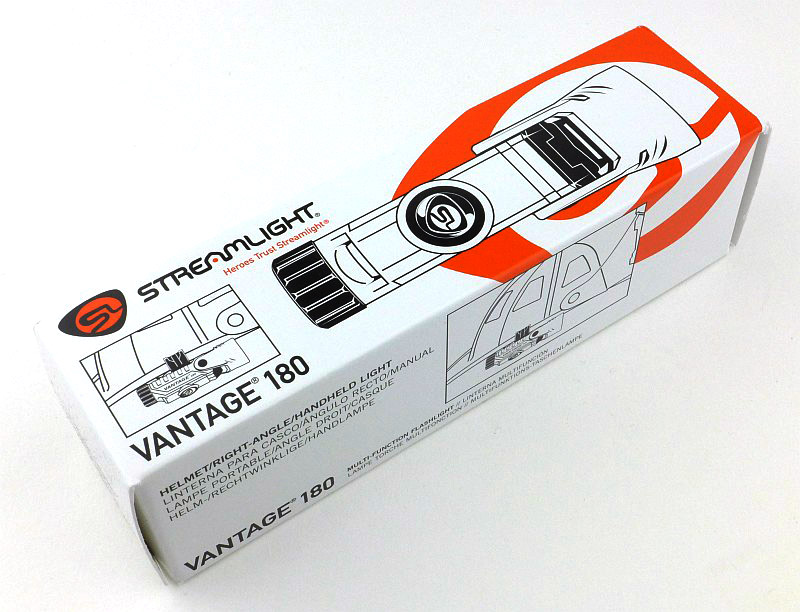
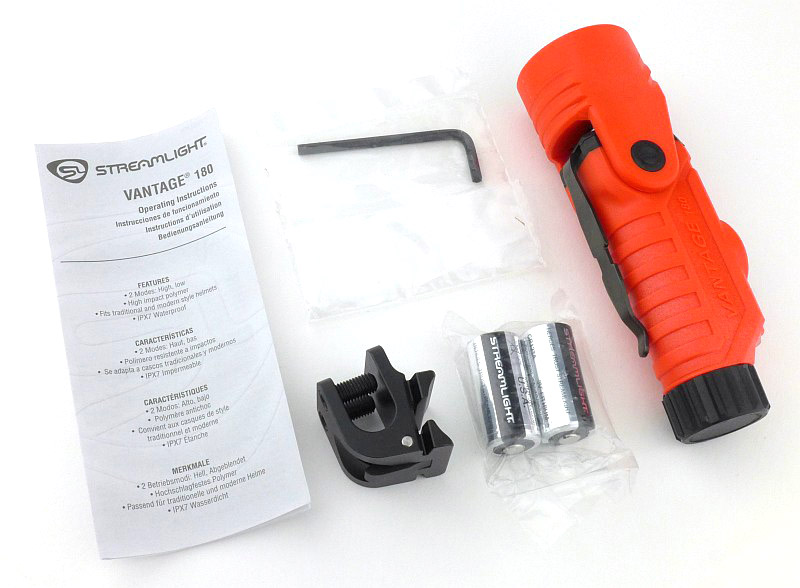
The Vantage arrives in a cardboard box.

Inside is the Vantage 180, a pair of Streamlight branded CR123s, the helmet mount with Allen key, plus the instructions.

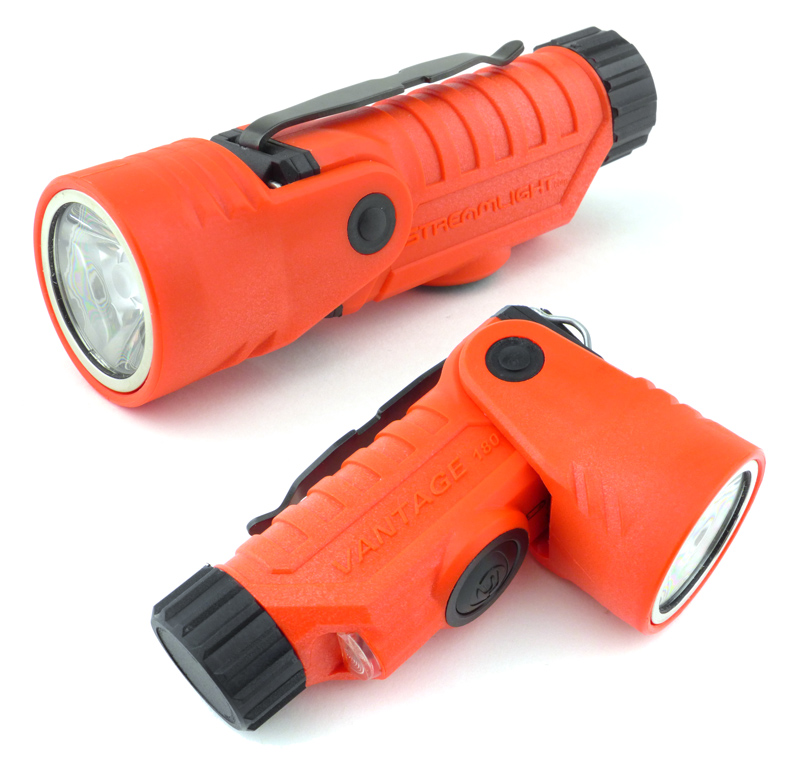
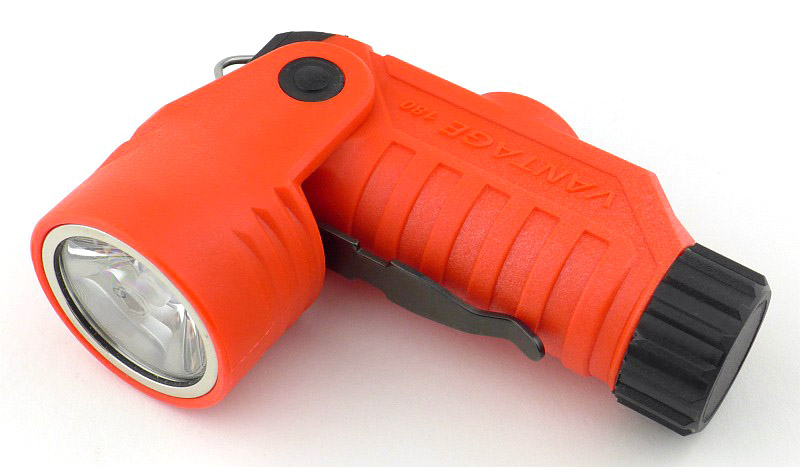
And here we have the, very orange, Vantage 180. On this side it has ‘Streamlight’ written.

On the other side it has ‘Vantage 180’.

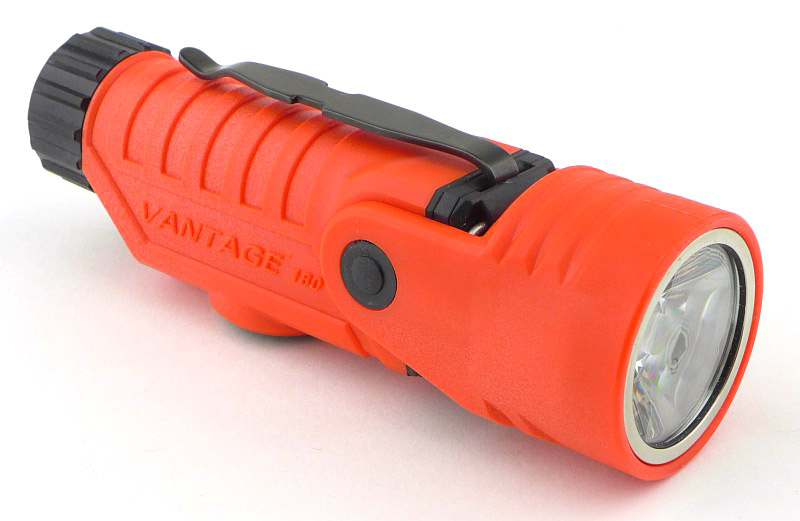
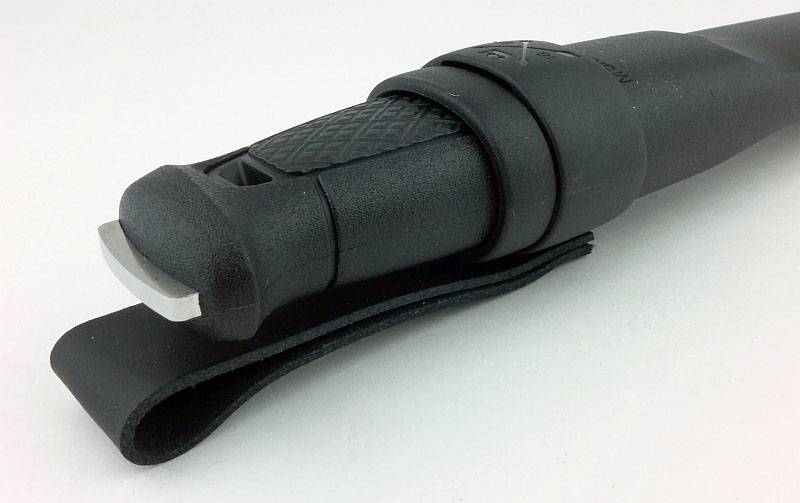
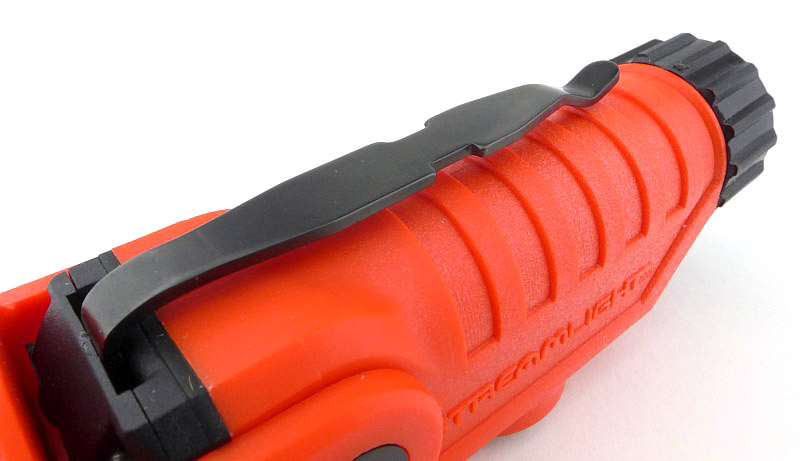
Laying the Vantage 180 on its side shows where the switch is positioned. As you would expect, it is on the opposite side to the clip.

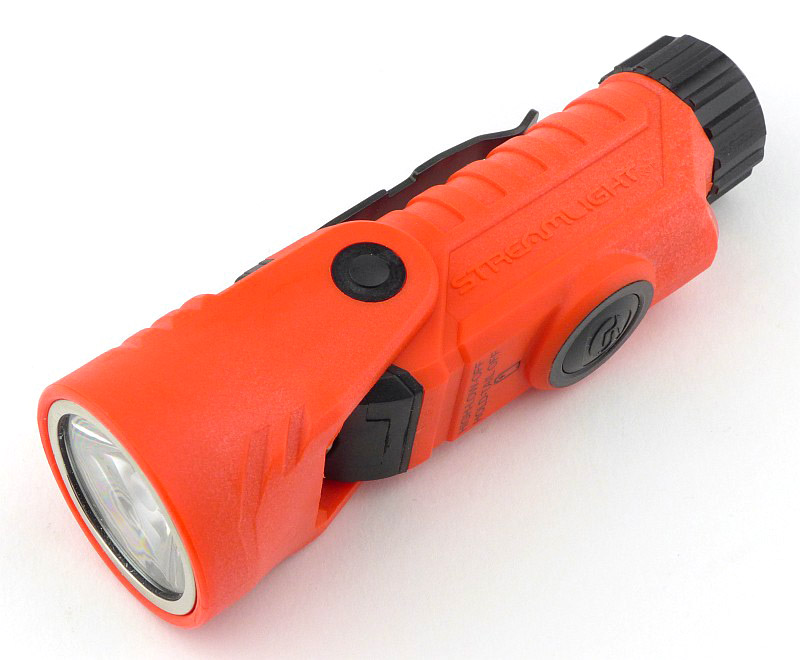
And now we get to the reason for the ‘180’ in the name. Here the head has been rotated 90 degrees to the front.

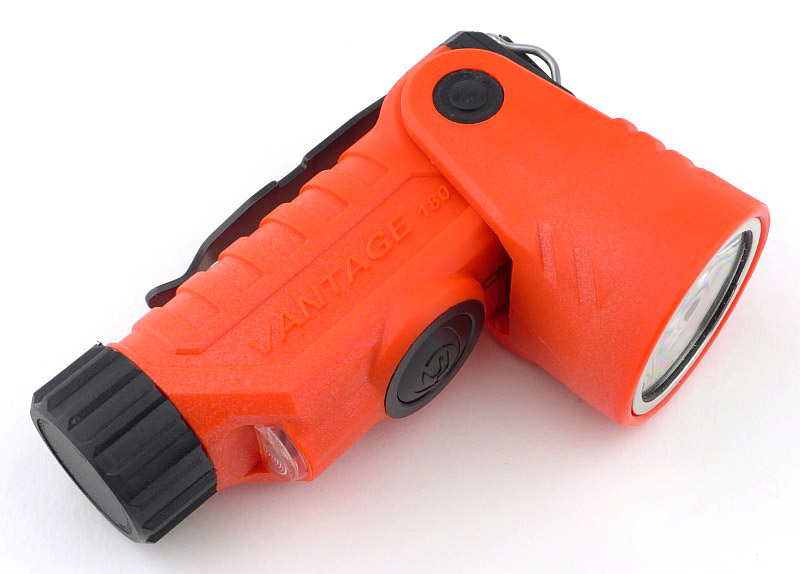
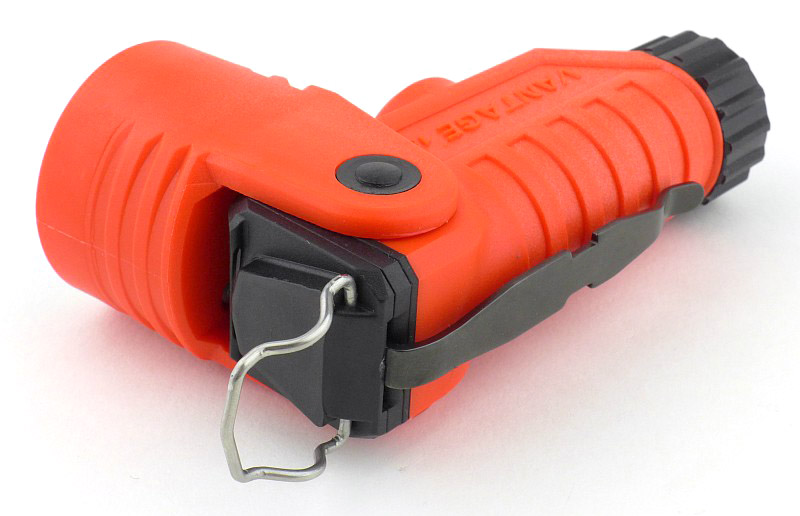
Then from the previous position, the head rotates a full 180 degrees all the way to the back. There are no click stops, instead it is held in place by friction, so the head can be adjusted to any angle between these two extremes.

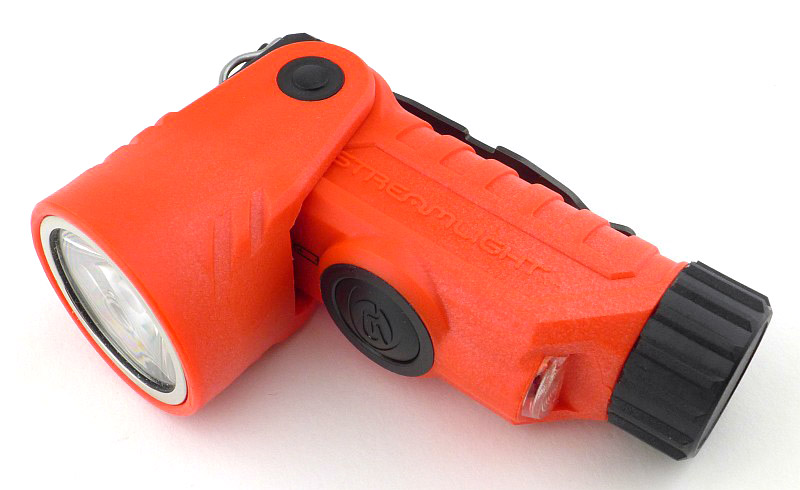
With the head either fully forward or backwards you can access the built-in turn out gear hook / hanging loop.

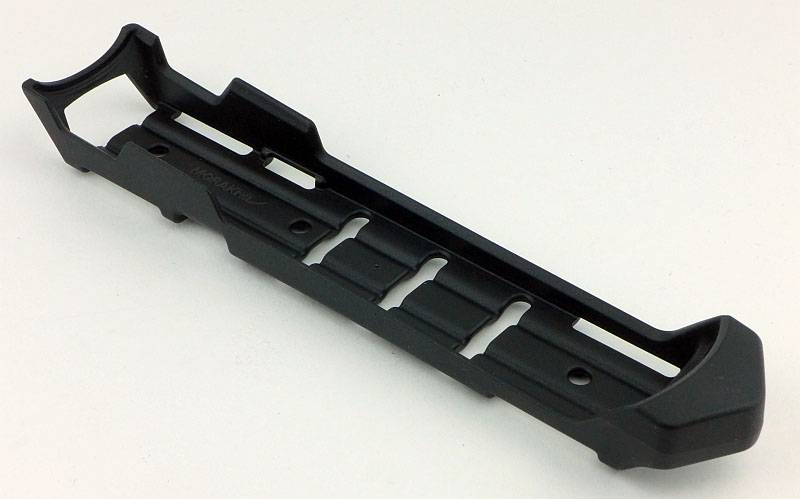
While we are looking at attachment options, there is a special helmet mount included with the Vantage 180. It is an anodised aluminium block with a few special features.

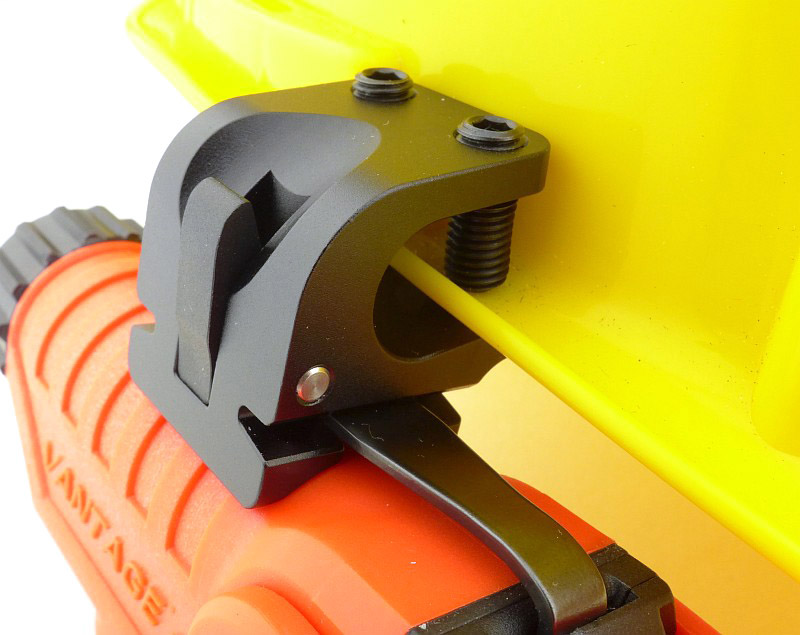
There is a deep helmet rim clamp. Using the supplied Allen keys, these two grub screws are backed right out to allow the mount to be placed over the rim of the helmet. This is specifically designed to fit US issue helmets, so might have limited success on other helmet designs around the world.

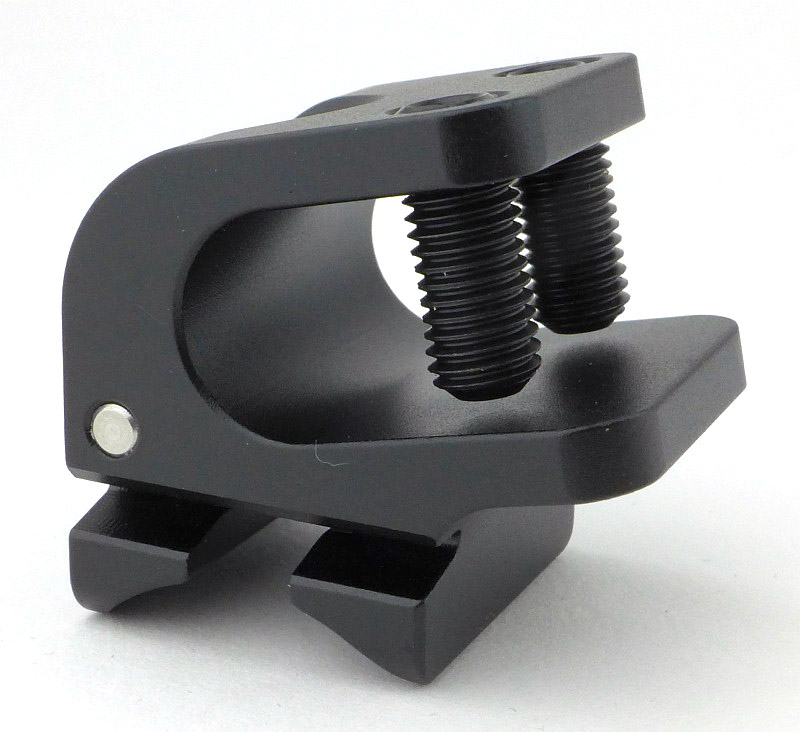
Then there is the side onto which the Vantage 180 clips. The round section fits against the Vantage 180’s body, and the T-shaped groove will allow the pocket clip to slide through.

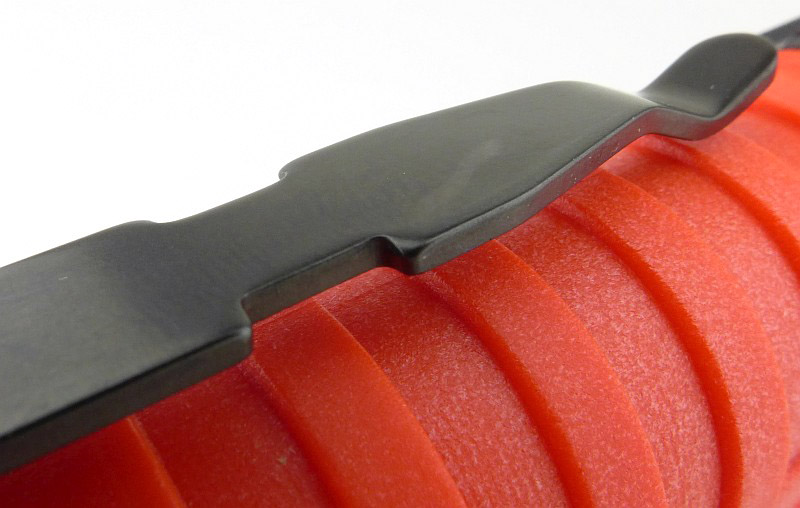
Something extra to mention while looking at the full pocket clip, is a feature that is visible bottom left in this photo; where the clip joins the body there is a slot. The pocket clip can be moved from side to side here, rotating the position of the clip around the body slightly and allowing the user to angle the Vantage 180 up to 15 degrees to either side while it is clipped to their gear.

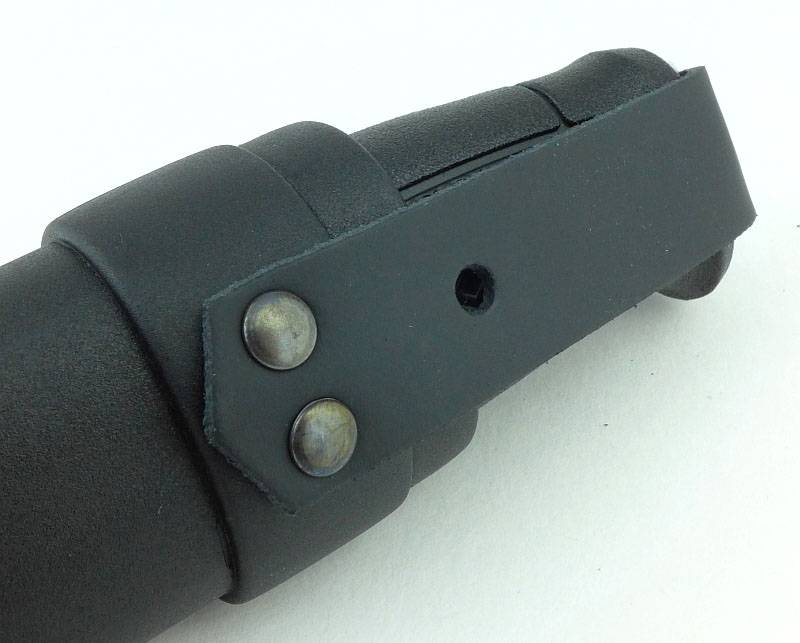
The feature of this clip that relates specifically to the helmet mount are the two notches each side of the clip. These are what the helmet mount latches on to so it doesn’t slide out of the mount,

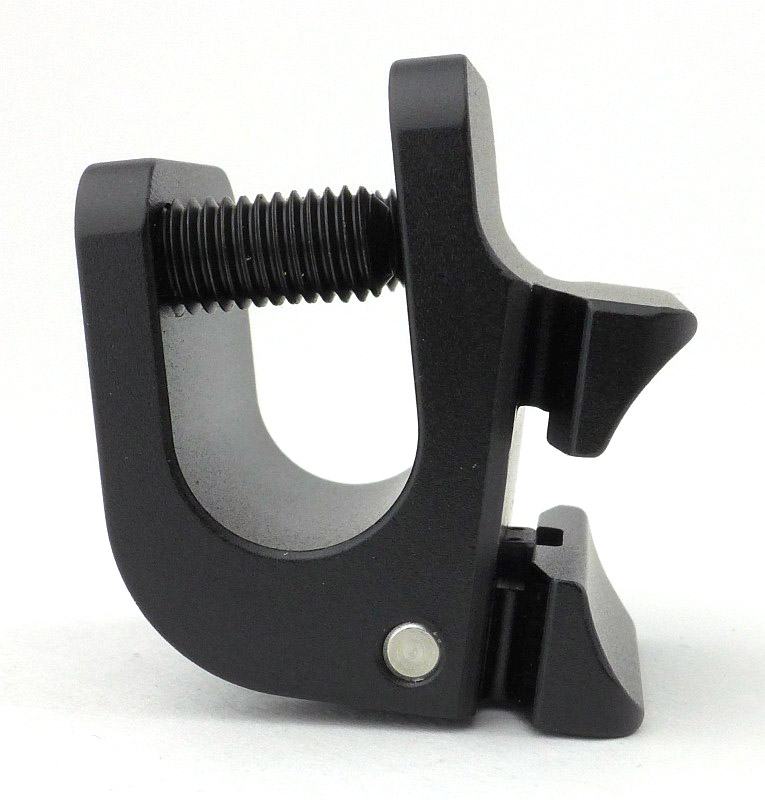
Starting to slide the Vantage 180 into the mount. From this side you can see the mount’s release lever.

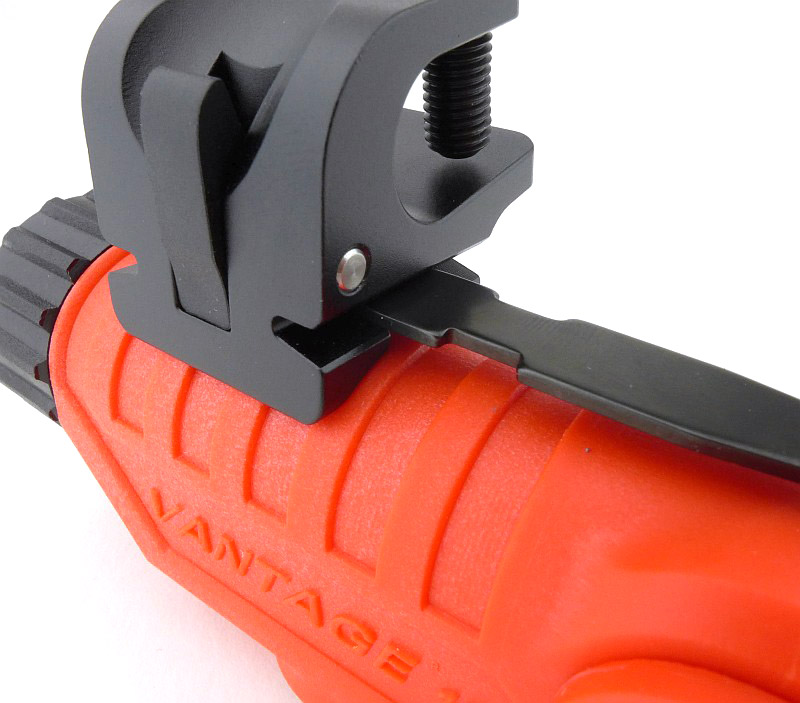
The mount is now locked in place on the clip.

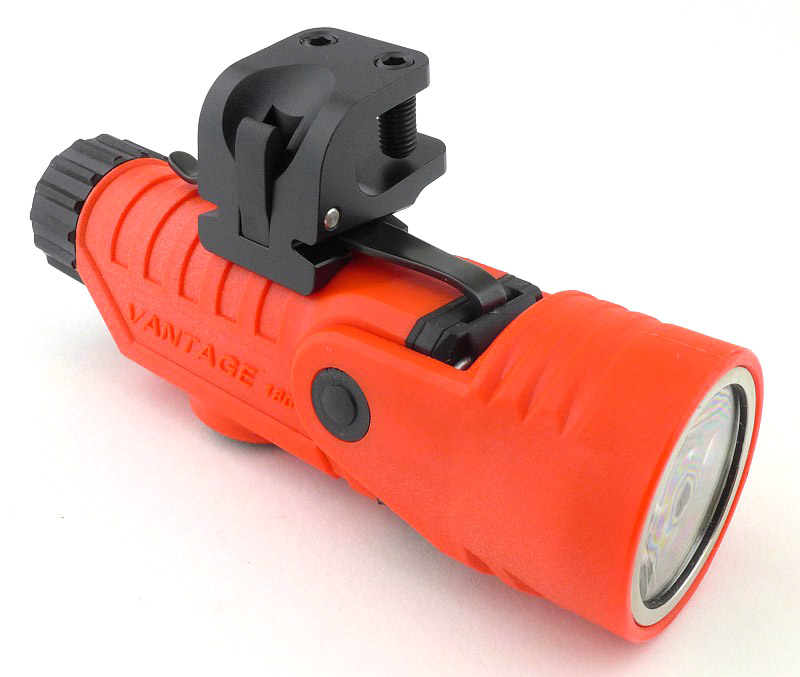
An overall view of the Vantage 180 fitted to the mount.

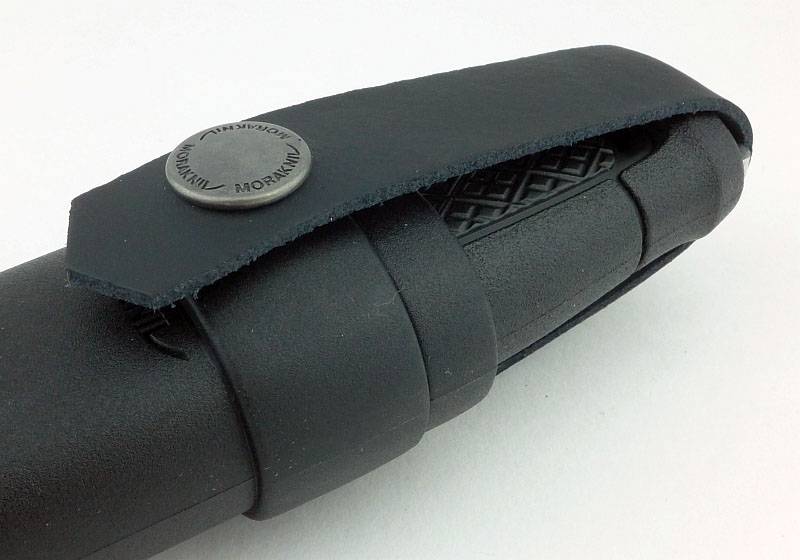
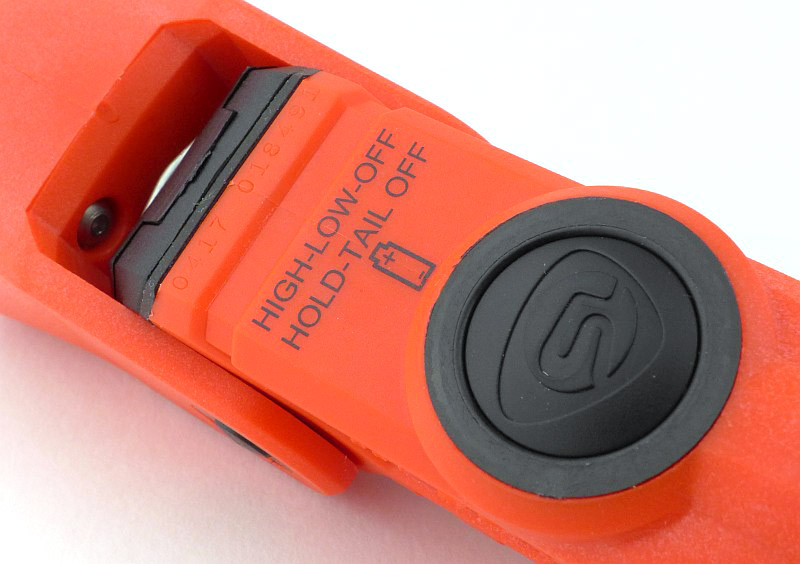
A brief reminder of the modes, and how to use them, is printed on the body (more on this later) along with the battery orientation.

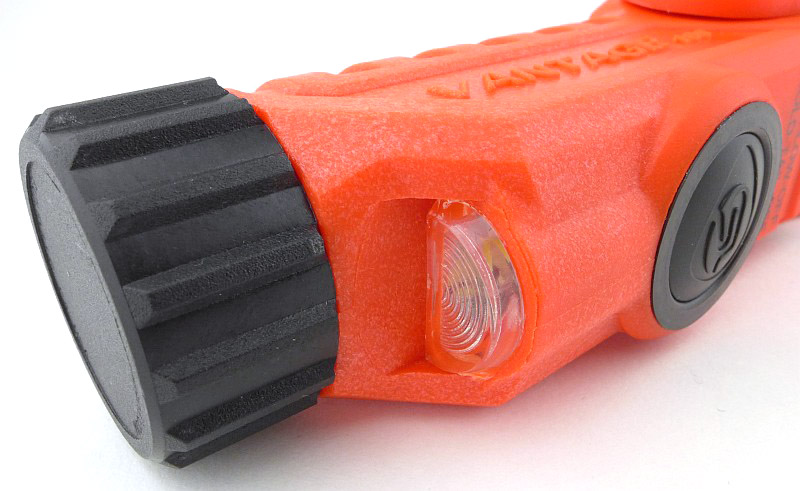
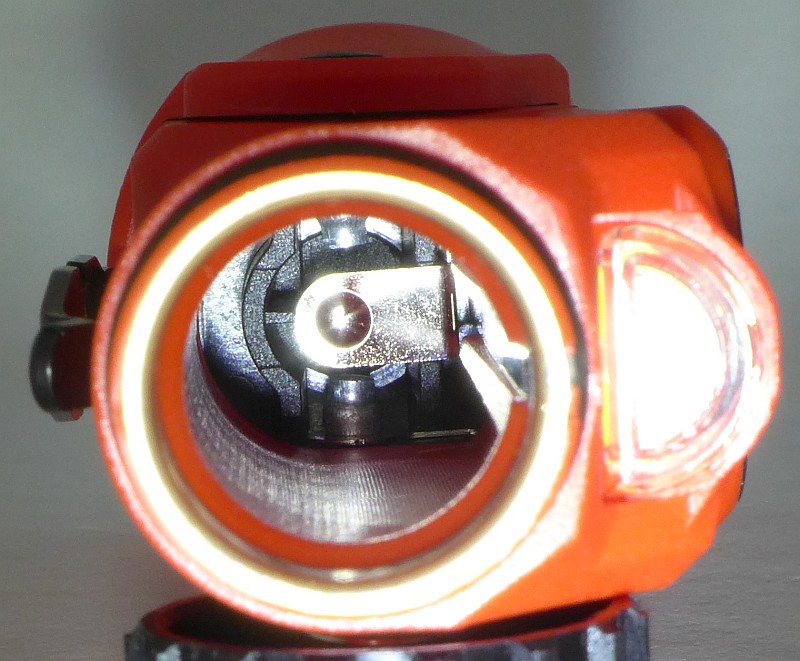
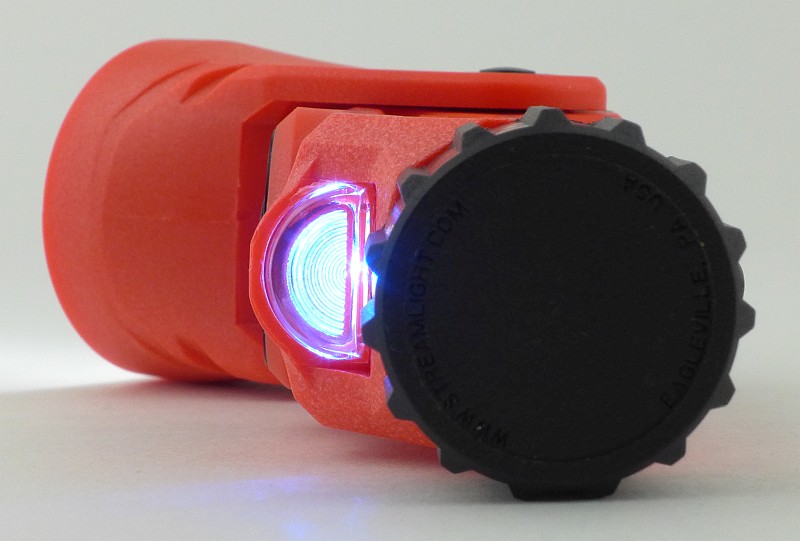
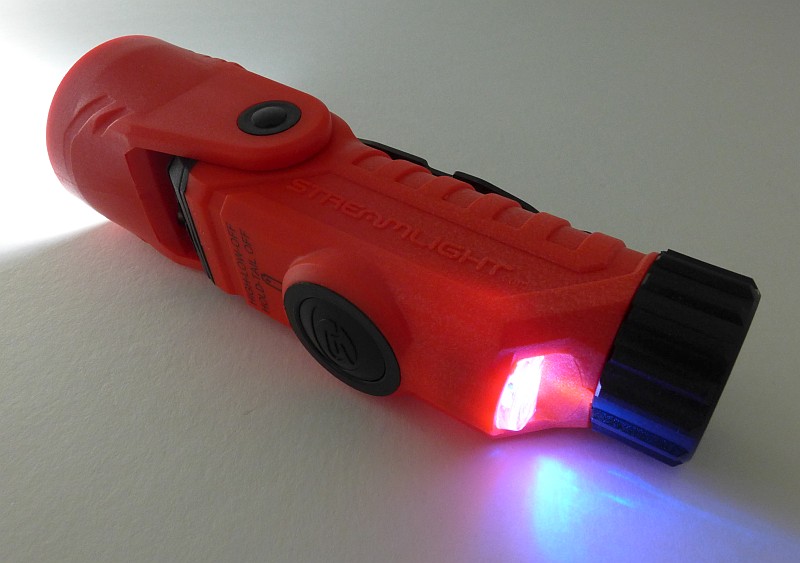
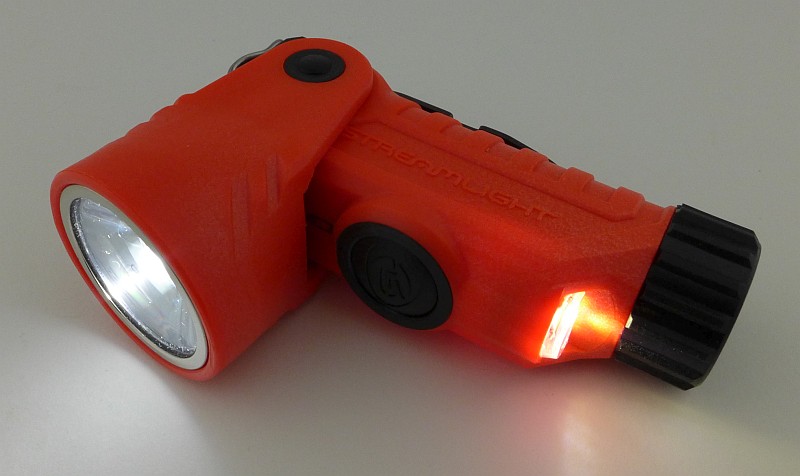
There is another special feature of the Vantage 180; it has two beams. This is the second beam, and is itself dual-purpose, either as a blue marker light, or a white secondary beam down-light (more on this later).

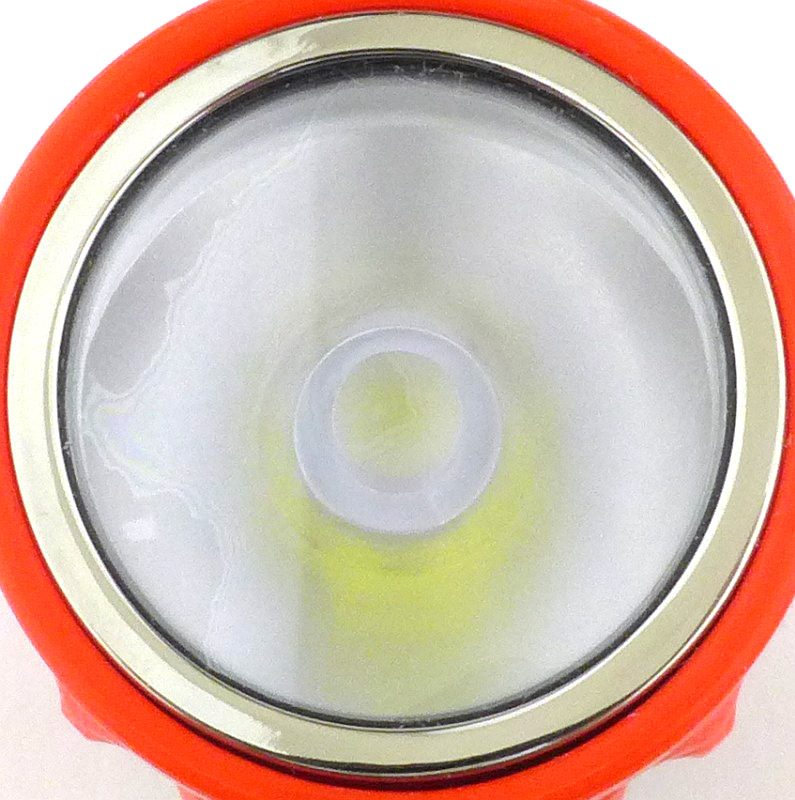
Here is a little mystery, I’ve not yet uncovered why there is an interference pattern visible (like oil on water) on the lens. It appears to be an additional layer on the lens front, but not one you are meant to remove, as there is no visible edge that would allow you to remove it. This doesn’t seem to affect the output in any way, so this is just an observation and appears to be normal.

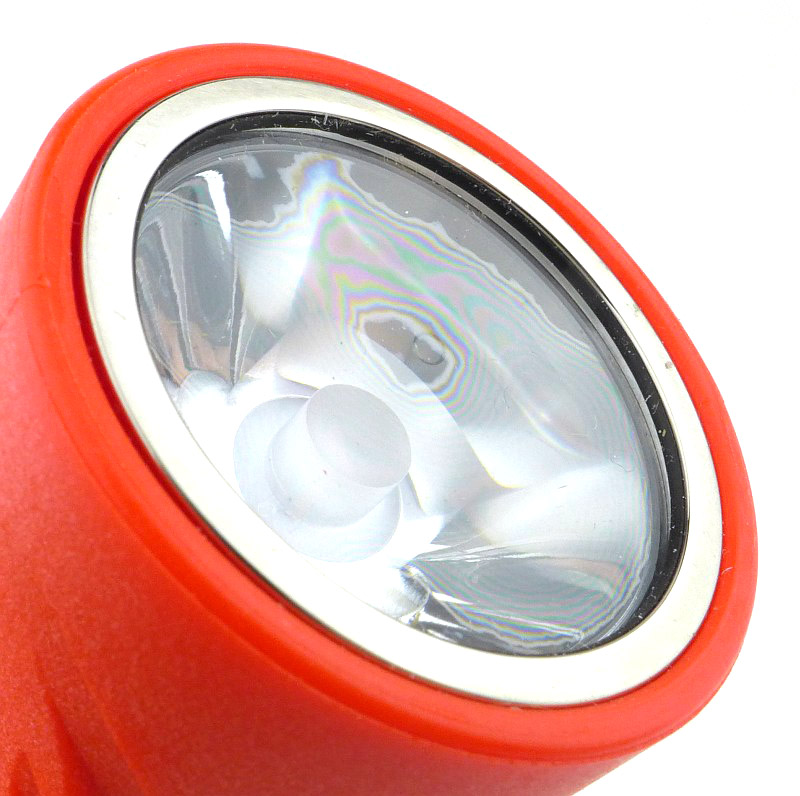
A TIR optic is used.

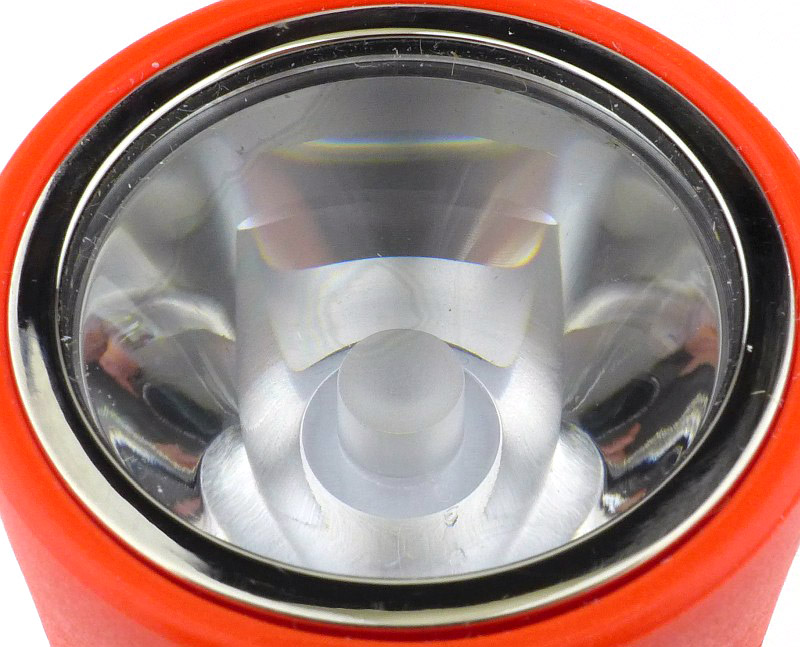
And this means that when viewed from the front, you can’t see the LED.

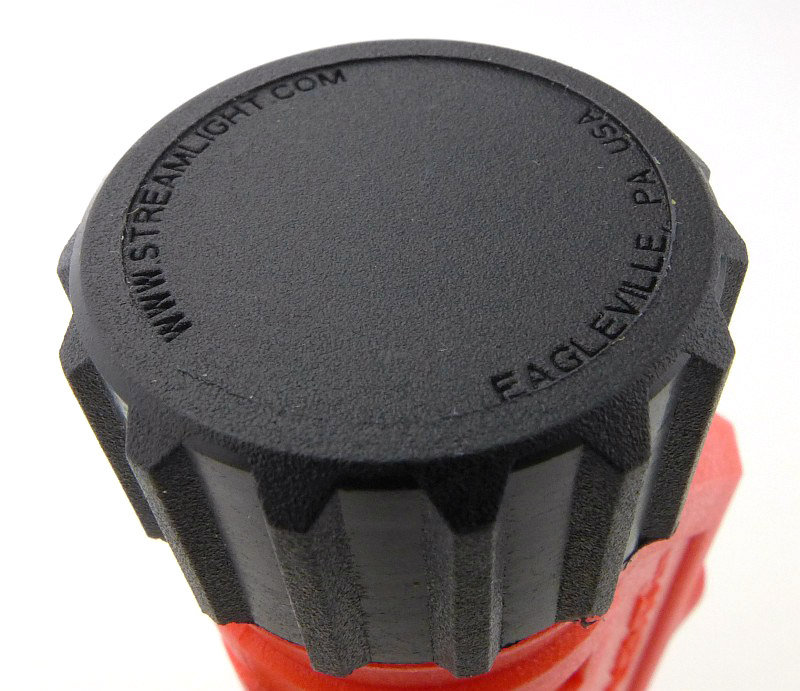
The tail-cap has a deep grip pattern making it easy to hold onto.

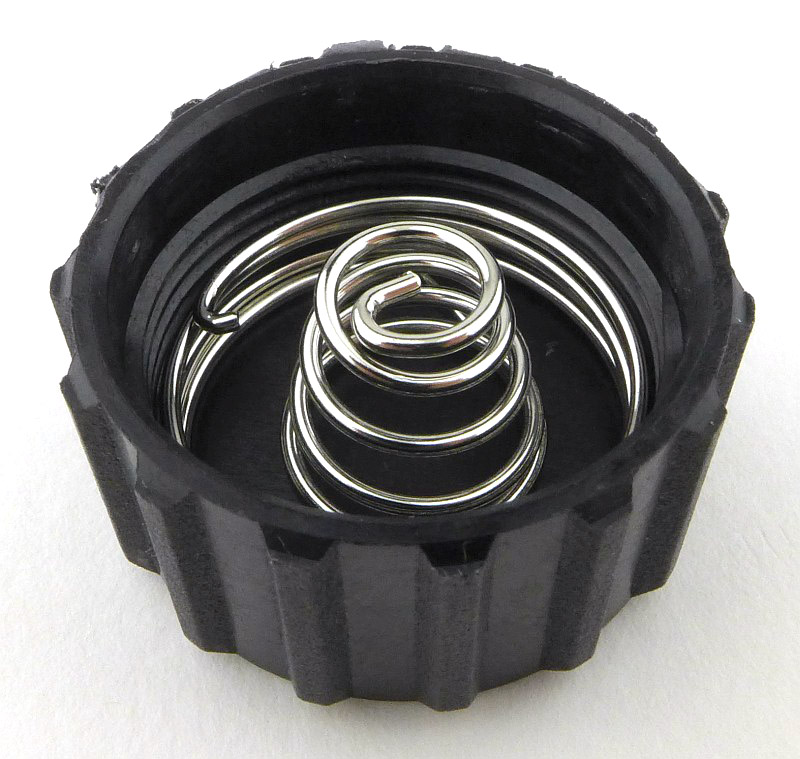
The simplest of contact design is used, with a single coil spring fitted into the plastic tail-cap.

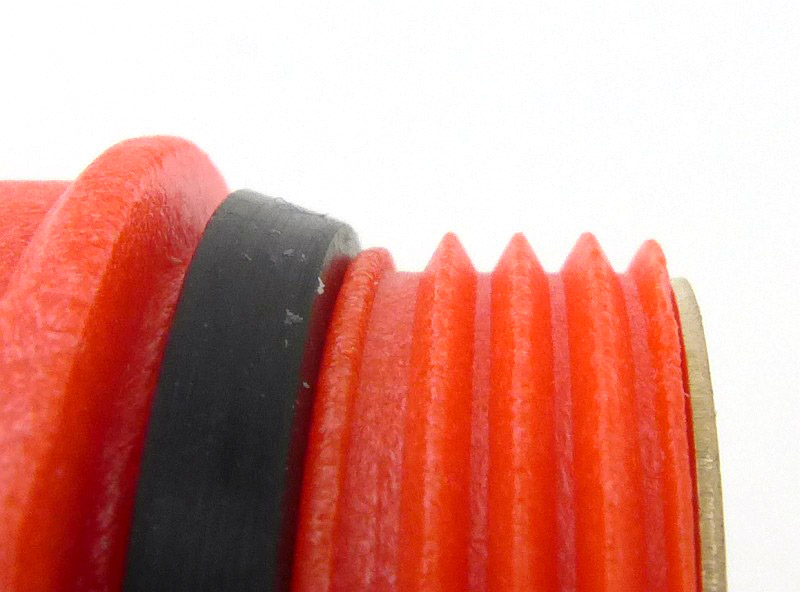
Though moulded plastic, the threads are sharp and well made. The O-ring is a wedge type.

Being a plastic body, the negative contact needs to connect to the head of the light. This is via a ring contact at the end of the battery tube which is soldered to a metal strip that runs through the battery tube.

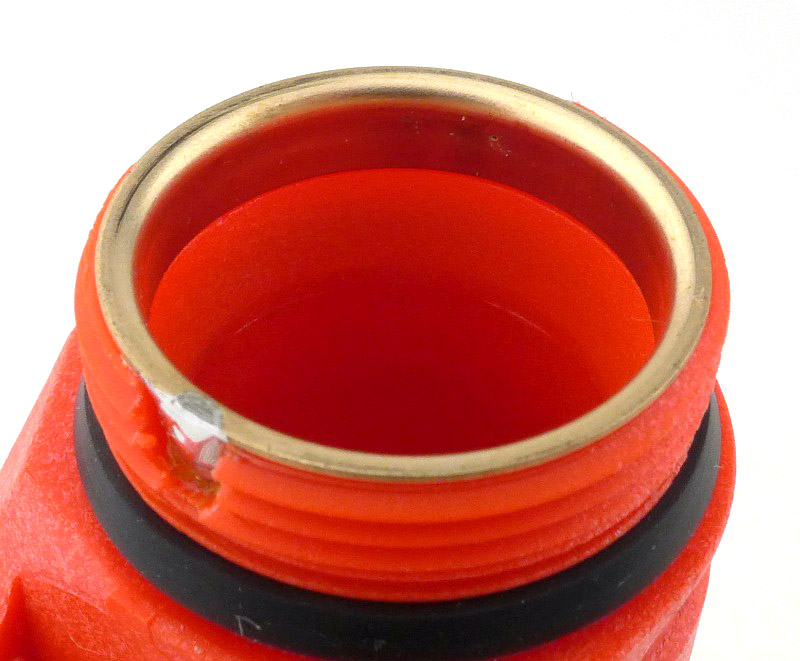
Looking into the battery tube you can see the positive contact.

With the head adjusted to 90 degrees, the secondary beam provides downward lighting.

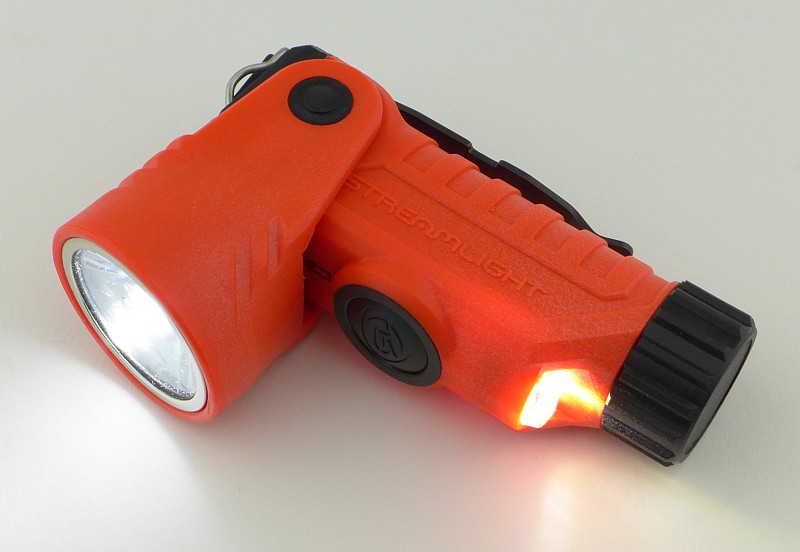
That same secondary beam, also changes to a blue marker light.

The beam

Please be careful not to judge tint based on images you see on a computer screen. Unless properly calibrated, the screen itself will change the perceived tint.

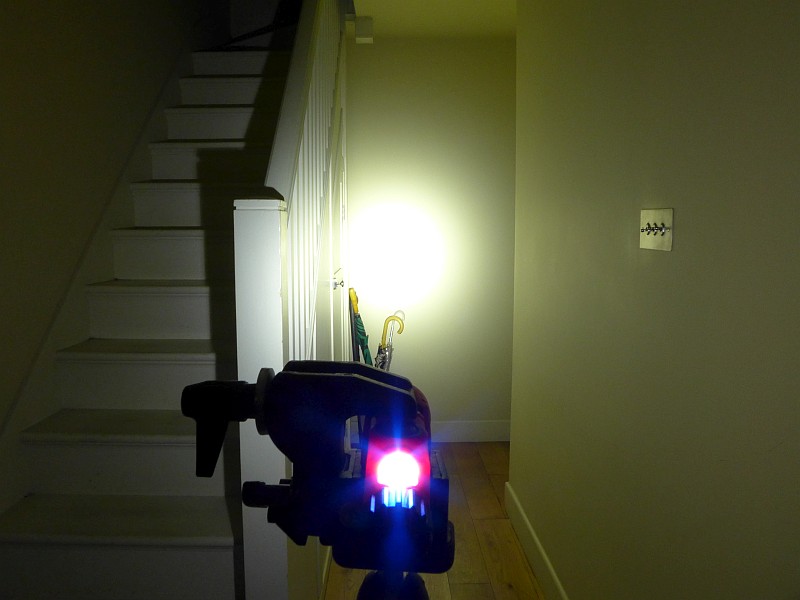
The indoor beamshot is intended to give an idea of the beam shape/quality rather than tint. All beamshots are taken using daylight white balance. The woodwork (stairs and skirting) are painted Farrow & Ball “Off-White”, and the walls are a light sandy colour called ‘String’ again by Farrow & Ball. I don’t actually have a ‘white wall’ in the house to use for this, and the wife won’t have one!

In this photo, the tail beam has been turned on and (with the head set to the straight position) is a relatively low output blue light.
The main beam is almost entirely hot-spot. The spill is useful, but is quite weak, so this can give a slight tunnel vision effect depending on the environment.

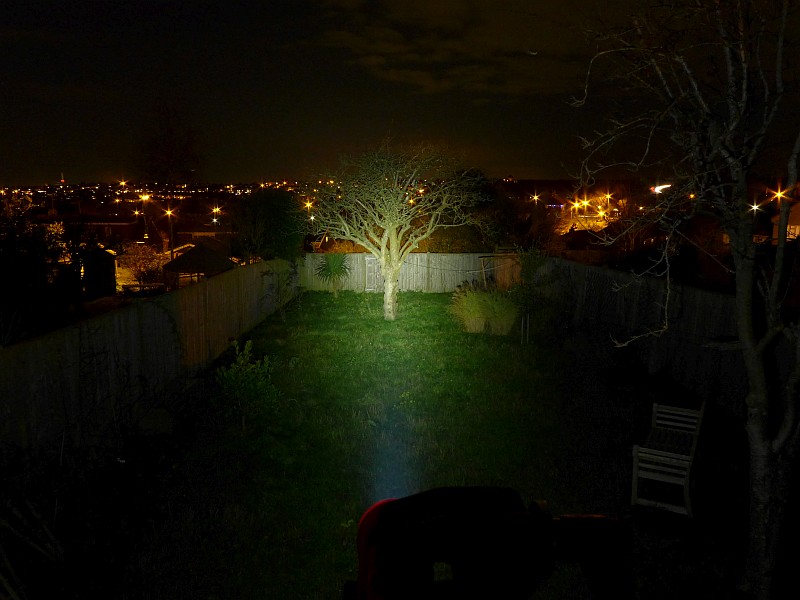
With more range the effect of the weak spill becomes more pronounced, and really the beam becomes just the hotspot.

Modes and User Interface:

The Vantage 180 has two constant output modes for the main beam, High and Low, and two different outputs for the secondary beam, white and blue.

To access High, press the switch once. If you press the switch again within 2s, the Low mode will be selected. Pressing once more within 2s turns the Vantage 180 OFF.

If either High or Low mode is activated, once it has been ON for at least 2s, a single press of the button will turn the Vantage 180 OFF.

The secondary beam is set to be either ON or OFF along with the main beam. The secondary beam cannot be used independently and can only be on if the main beam is on. Its white/blue setting is dictated by the head position.

To set toggle the secondary beam between being ON or OFF, with the Vantage 180 either ON or OFF (it doesn’t matter), press and hold the switch for more than 2s.

With the head set to the straight position, the secondary beam will be blue.

Angling the head towards being a right-angle light, and when the head gets to around 72 degrees, the secondary beam switches from blue to a brighter white.

Batteries and output:

The Vantage 180 runs on 2x CR123.

To measure actual output, I built an integrating sphere. See here for more detail. The sensor registers visible light only (so Infra-Red and Ultra-Violet will not be measured).

Please note, all quoted lumen figures are from a DIY integrating sphere, and according to ANSI standards. Although every effort is made to give as accurate a result as possible, they should be taken as an estimate only. The results can be used to compare outputs in this review and others I have published.

___________________________________________ ________________________________ ________________________________
Vantage 180 using specified cell I.S. measured ANSI output Lumens PWM frequency or Strobe frequency (Hz)
___________________________________________ ________________________________ ________________________________
High – CR123 269 0
Low – CR123 98 0

* Beacon and Strobe output measurements are only estimates as the brief flashes make it difficult to capture the actual output value.

There is parasitic drain; when using CR123, the drain was 23.2uA (6.88 years to drain the cells). The tail-cap can be unscrewed two full turns to lock-out the power and stop any drain. However this is enough to prevent the seal being effective, so the Vantage 180 would not be water resistant like this.

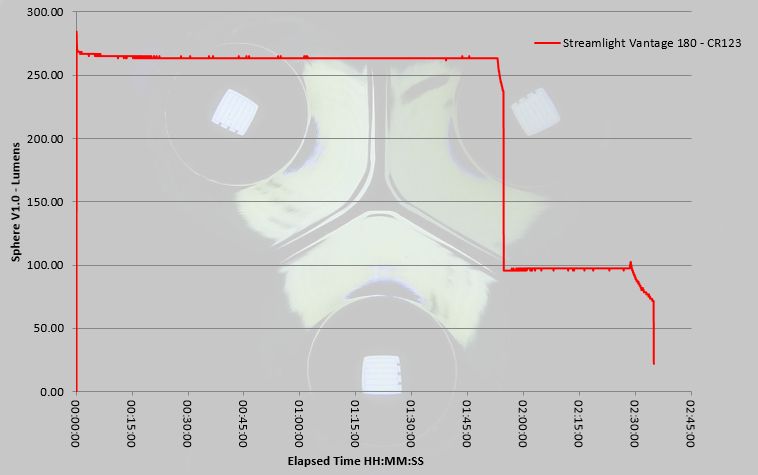
The runtime graph shows a nicely regulated output giving nearly two hours on High before the output drops to the Low level. Beyond two and a half hours the output then rapidly declines before dropping to a 22 lumen level which runs on for some time. The Vantage 180 doesn’t leave you in the dark and provides plenty of warning for a battery change.

Troubleshooting

This section is included to mention any minor niggles I come across during testing, in case the information helps anyone else.

No issues were encountered during testing.

As per the description of this section, this information is provided in case anyone else finds a similar ‘issue’ that might be fixed in the same way.

The Vantage 180 in use

Streamlight always manage to build in a great deal of functionality into lights like this, and the Vantage 180 does not disappoint. To start with, the ability to go from a conventional straight torch/flashlight to a right-angle light, or anywhere in between, is so useful. Even if this is when placing the Vantage 180 on a table or the ground to use as a task light, being able to adjust the head, allows it to work where a fixed head light just wouldn’t be much use.

Add to this the clip (with its own adjustment of 15 degrees each way) and hanging loop, and you have a highly functional work light, that will fit into just about any task you need to do.

Then there is the secondary beam. The blue tail-light is mainly for increasing your visibility to others, and this is mainly aimed at Emergency Response personnel who would wear the Vantage 180 on their helmet. For my own purposes, I can’t really think of a sensible use for this blue marker light.

However, rotate that head to activate the down-light, and the Vantage now has ground lighting along with the main beam if you have this fitted to your clothing (or lighting to let you see what you are writing etc.).

But we are not yet finished as there is that solid helmet mount. So as long as it fits the helmet you are using, or can be made to fit) you have a headlamp as well.

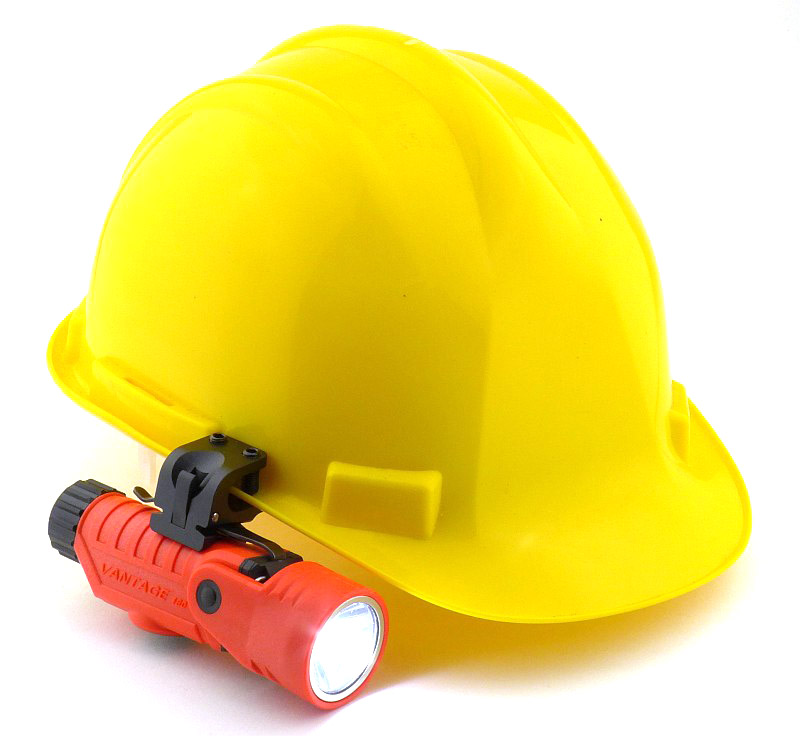
In this case it has been fitted to a basic hard-hat and nicely holds onto the rim.

Not everyone will use every feature of the Vantage 180, but you know that it has all that flexibility built-in which provides you with a lot of options.

Review Summary

_______________________________________________ _______________________________________________
Things I like What doesn’t work so well for me
_______________________________________________ _______________________________________________
Full 180 Degrees of head Rotation. Weak spill beam.
Secondary tail-light / down-light. Doesn’t use rechargeable batteries.
Clip can be adjusted 15 degrees either way. Only two output levels.
Helmet mount included.
Hanging loop built-in.
Unbreakable TIR optic.
Well regulated output.


Discussing the Review:

The ideal place to discuss this reviews is on a forum. If you started reading the shorter forum version of the review, but followed the link this full exclusive review, please return to that forum to discuss the review there.
If you read the review entirely on Tactical Reviews, please consider one of the following to join in any discussion.

CandlePowerForums – Flashlight Reviews Section (Largest and Friendliest Flashlight Community Forum)

Knife Review: Morakniv Garberg with Leather Sheath and Multi-Mount

Morakniv have released their first (long awaited) full tang knife, the Garberg. Dedicated Morakniv users have been asking for a full tang knife, as they want a hard-use version of the much loved Companion.

 photo 29 Garberg comparing P1240819.jpg

The Blade and Handle Geometry:

Most knife specifications have a basic description of the blade geometry, but in this section I will be taking a more detailed look at geometry and balance.
 photo 32 Garberg grind P1250050.jpg

Using a set of gauges and precision measuring equipment including a Vernier protractor, callipers, fixed radius gauges and the unique Arc Master adjustable radius gauge (the one that looks like a crossbow).
 photo Knife measuring P1180483.jpg

These measurements have been tabulated and are presented along with a few reference blades (8″ Chef’s Knife, 5.5″ Santoku and the popular Fällkniven F1).

Key aspects such as the primary bevel angle, grind type, blade depth, blade thickness, length, weight are detailed, along with balance information.
 photo 31 Garberg angle P1250046.jpg

The ‘Balance relative to the front of the handle’ tells you if the knife will feel front heavy, or if the weight is in your hand (a positive value means the weight is forward of the front of the handle). The ‘Balance relative to the centre of the handle’ indicates how close to a ‘neutral balance’ the knife has in the hand.
 photo 30 Garberg balance P1250042.jpg

In the case of full convex grinds the approximate centre of the grind is used for the primary bevel angle estimate.

 photo Garberg parameters.jpg

The blade is made from Swedish Stainless Steel (14C28N) steel.

Explained by the Maker:

The reasons for certain design choices may not be clear when simply looking at an object, so this section is intended to give an insight into the thinking behind a design by speaking to the designer themselves.

Unfortunately I can’t always get time with the designer so will use this section to include relevant information about the knife and its designer.

This is an interview with ‘Head of Production’ at Morakniv, Thomas Eriksson, from IWA 2017.
The discussion includes how the factory edge is created, maintained and also includes micro-bevels and zero-grinds. It is 16 minutes long, so you might want to come back to this after reading the rest of the review.

Video Edited with – Cyberlink Director Suite 5 (PowerDirector 15 and AudioDirector 7)
Camera – Panasonic HC-V770    Microphone – Tonor TN120308BL and/or Takstar SGC-598

A few more details:

Morakniv did not stop at just making the Garberg full-tang. There are two versions of the Garberg available; one with a full flap leather sheath, and the other with Morakniv’s Mulit-Mount sheath system. The first to arrive at Tactical Reviews was the leather sheath.
The image on the front of the box for the leather sheath version just shows the knife. The Multi-Mount’s box shows the sheathed knife.
 photo 01 Garberg boxed P1220689.jpg

Straight out of the box the knife is hidden by the premium quality leather flap sheath. It is obvious straight away this is a very good quality sheath.
 photo 02 Garberg unboxed P1220692.jpg

A close-up look at the press stud shows the attention to detail with the Morakniv logo embossed around the edges.
 photo 03 Garberg press-stud P1220695.jpg

The stitching uses a heavy duty 1mm thread, cleanly punched though the 3mm leather and the welt.
 photo 04 Garberg stitching P1220698.jpg

On the back, the belt loop is made of the same thick leather as the rest of the sheath.
 photo 06 Garberg belt loop P1220706.jpg

The top of the belt loop is fixed with two rivets, and the bottom with a single rivet.
 photo 07 Garberg sheath back P1220709.jpg

Lifting the flap shows that the main sheath is a deep/full sheath.
 photo 08 Garberg sheath open P1220711.jpg

At the top of the sheath opening, the stitching is complemented with a rivet to prevent the stitching at the top from being cut and unravelling the sheath.
 photo 09 Garberg sheath open P1220715.jpg

And here we are, the Garberg.
 photo 10 Garberg knife P1220718.jpg

Moving in close to the tip you can see the Scandi-grind and the polished cutting edge’s micro-bevel (see the video with Thomas Eriksson, from IWA 2017).
 photo 11 Garberg tip P1220722.jpg

Unlike most of the Morakniv knives, the Garberg has a ricasso, and a nicely radiused Scandi-plunge-line.
 photo 12 Garberg plunge P1220726.jpg

With the Garberg being intended as a hard-use knife, the handle material is not just any plastic, it is a specially chosen extra-rugged Polyamide.
 photo 13 Garberg handle P1220728.jpg

The full tang is exposed at the butt allowing for maximum strength and hammering without damaging the handle.
 photo 14 Garberg butt P1220733.jpg

To make it ideal for use with ferrocerium rods, the spine has been ground to have sharp corners. The logo is laser engraved onto one of the blade flats.
 photo 15 Garberg spine1 P1220737.jpg

This sharp edged spine extends the entire length to the tip.
 photo 16 Garberg spine2 P1220741.jpg

Not long after, the multi-mount version arrived. Note the picture on the box shows the knife sheathed in the multi-mount instead of the knife on its own.
 photo 20 Garberg multi P1240783.jpg

This time there are many more parts in the box. Included are the plastic holster, a basic belt loop, a locking strap, three hook and loop straps and the multi-mount itself.
 photo 21 Garberg multi contents P1240786.jpg

Taking the most basic components, the knife and plastic sheath.
 photo 23 Garberg multi sheath P1240796.jpg

Your first mounting option is the belt loop. This loop is fixed to a plastic ring that slides up the sheath and clicks into place.
 photo 24 Garberg multi loop P1240799.jpg

Next up is the locking-strap used to ensure the Garberg can’t come out of the sheath whatever angle it is mounted. This strap can be used with the multi-mount for the highest security (but not with the belt loop).
 photo 25 Garberg multi flap P1240802.jpg

The locking strap is made of leather for maximum performance and durability.
 photo 26 Garberg multi flap back P1240805.jpg

The multi-mount has many holes and slots to give you a great many fixing options, from screw holes to MOLLE/PALS.
 photo 22 Garberg multi base P1240791.jpg

A hook and loop strap is used to hold the sheath in the multi-mount. The locking strap also threads through part of the multi-mount so will keep the sheath securely in the multi-mount even if the hook and loop strap fails. You can also use cable ties in place of the hook and loop straps for a more permanent fixing.
 photo 27 Garberg in mount P1240808.jpg

What it is like to use?

To start to understand where the Garberg fits in, in terms of how it feels to use, let’s start by looking at in alongside the Companion and Bushcraft Black.
 photo 17 Garberg compared P1220761.jpg

Immediately obvious is the Garberg’s symmetrical handle. This is not an accident, the Garberg’s handle has been specifically designed to allow it to be held in a forward or reverse grip for greater versatility. Overall it is no bigger than the Bushcraft model, but does feel much more solid. The extra weight of the full tang gives the knife a very different feel, even though the blade stock is the same at 3.2mm.
The line of the spine is very similar to the Bushcraft, but the blade of the Garberg has more belly which adds a little more forward weight and reduces the tip angle. We’ll get onto more of it ‘in use’ a little later.
 photo 18 Garberg compared2 P1220765.jpg

Just looking at the two versions of the Garberg, how do you choose between them?
 photo 28 Garberg comparing P1240812.jpg

Clearly the knives are identical, so it all comes down to the way you want to carry it. For belt carry it has to be the leather sheath every time. This is a hard wearing and comfortable sheath and simply won’t let you down. Traditional materials that have proven themselves ideal for the task have been used, and Morakniv have not scrimped on this, using only premium 3mm thick leather.
The multi-mount covers just about any other carry option and even has a belt loop suitable for occasional use.
 photo 29 Garberg comparing P1240816.jpg

Following the huge success of the Companion and other Morakniv knives, the Garberg is an ideal all-round size. A comfortable size and weight which is up to as much work as you would ever really want to put a knife to. Any more blade length starts to bring you into chopping territory and reduced agility for finer tasks, any less and you start to lose wood processing ability.
 photo 19 Garberg in hand P1220770.jpg

Out into its natural habitat.
 photo 33 Garberg outdoor P1250152.jpg

Batoning can be carried out with no concerns at all thanks to the full tang. The sharp edged blade spine gives good grip on the baton, but it does mean the baton gets chewed up faster. The only reason this strike did not go all the way through in one hit, is that I didn’t want to cut into the limb I was resting it on.
 photo 34 Garberg baton P1250202.jpg

You would barely notice that I had been batoning away with this for nearly an hour, apart from a slight smear of sap there is not a mark on it.
 photo 35 Garberg cut P1250211.jpg

Possible mounting locations for the Multi-Mount are so numerous, I’ll just leave you to think of a few yourself, but here is where the Multi-Mount Garberg is currently residing.
In this photo I’ve pushed the rear seats of my car forward slightly to make it easier to photograph. Amongst a few other bits of kit the Multi-Mount is held onto the seat back with the hook part of the large hook and loop straps. Make sure you leave room to lift the knife out of the sheath.
 photo 37 Garberg car P1250356.jpg

In this instance mounting it horizontally resulted in the mount gradually working its way downward due to bumps in the road slowly splitting the hook fastner away from the seat back. Mounted vertically this doesn’t happen. The main downside I see to the Multi-Mount is that it is mainly suited to permanent or semi-permanent mounting and may be slow to move to another location or bag.
 photo 38 Garberg car P1250360.jpg

Throughout the heavy workout I gave the Garberg, there was no evidence of edge chipping or rolling, so it looks like Morakniv have got the hardness and toughness just right. I’m happy to give this a hard time, much more so than the half tang models.
 photo 40 Garberg shelter P1060923.jpg

Review Summary

The views expressed in this summary table are from the point of view of the reviewer’s personal use. I am not a member of the armed forces and cannot comment on its use beyond a cutting tool or field/hunting knife.

Something that might be a ‘pro’ for one user can be a ‘con’ for another, so the comments are categorised based on my requirements. You should consider all points and if they could be beneficial to you.

_______________________________________________ _______________________________________________
Things I like What doesn’t work so well for me
_______________________________________________ _______________________________________________
Knife – Full tang making this the most robust Morakniv knife. Knife – Thick blade less suited to fine work and food preparation.
Knife – 3.2mm blade stock gives very high strength.
Knife – Scandi grind well suited to wood processing.
Knife – Symmetrical handle allows for a variety of grip options.
Leather sheath – High quality construction. Leather sheath – Flap can slow down re-sheathing.
Leather sheath – Hard wearing 3mm leather used throughout.
Multi-Mount – Incredibly versatile mounting solution. Multi-Mount – Mainly suited to permanent mounting and can be slow to relocate.
Multi-Mount – The system also includes a standard belt hanger.

 photo 39 Garberg forest P1060909.jpg


Discussing the Review:

The ideal place to discuss this reviews is on a forum. If you started reading the shorter forum version of the review, but followed the link this full exclusive review, please return to that forum to discuss the review there.
If you read the review entirely on Tactical Reviews, please consider one of the following to join in any discussion.

EdgeMatters – Sponsored Reviews (UK based Forum for Knife Makers and Collectors)

BladeForums – Knife Reviews (US based Forum for Knife Discussion)

CandlePowerForums – Knife Reviews Section (Largest and Friendliest Flashlight Community Forum)