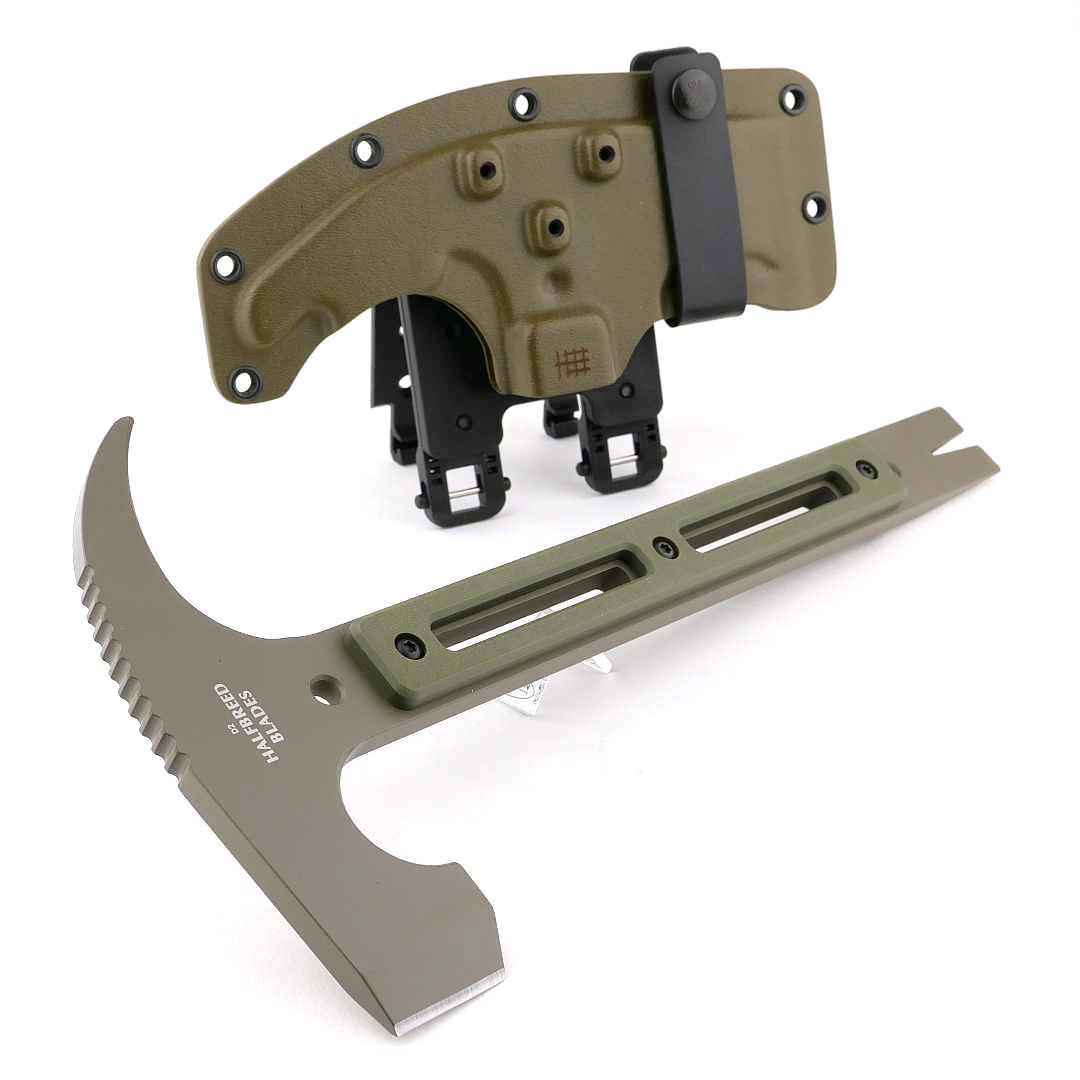
This detailed review of the MFE-01 (Rhino Tool) from Halfbreed Blades takes a close look at a tool bursting with design intent. A specialist Method of Entry (MOE) / Breaching tool that was developed for the Special Operations Engineer Regiment (SOER) by Halfbreed Blades’ sister brand Hardcore Hardware Australia, and is a NATO stock numbered tool.
Multi-function design make the MFE-01 ideally suited for prying, digging, chopping, hammering, cutting, smashing rock, defeating locks, smashing windows, breaking and raking windscreens and as a climbing aid. The entire tool is overbuilt for outstanding longevity and is made from 8mm Bohler K110 (D2) tool steel and G10.
The MFE-01 is widely in use globally amongst Military and Law Enforcement groups, and is highly sought after by civilian users thanks to its highly functional design.
Review Videos
Starting with a short format sixty second review:
Onto a full video review covering many more details:
A few more details:
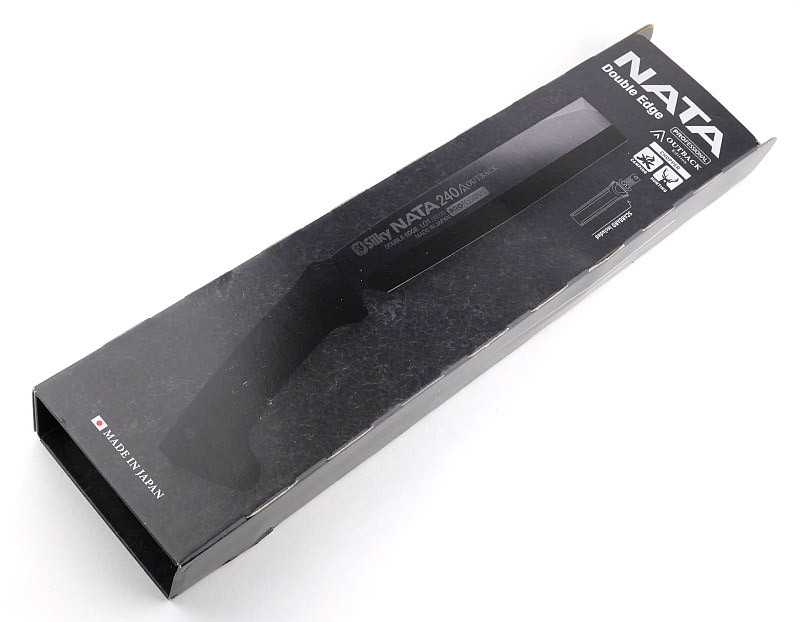
What’s in the box?:
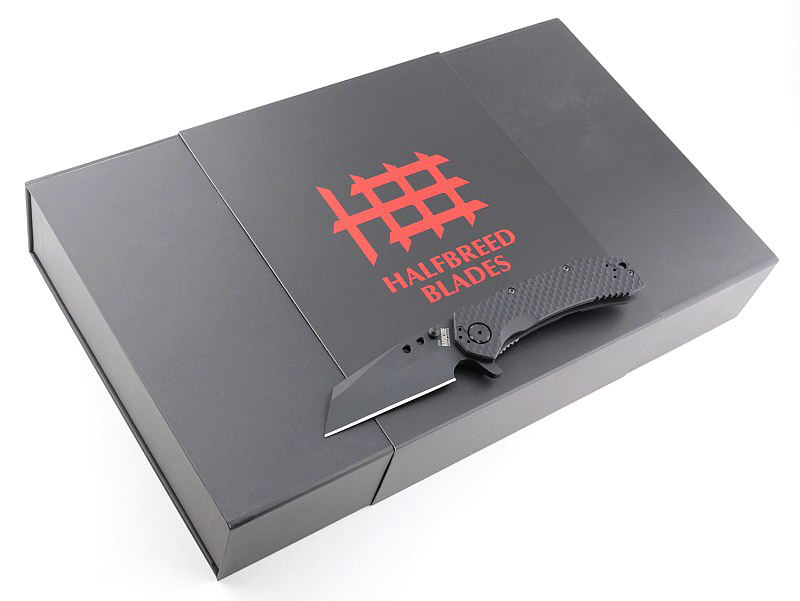
Considering the intent of the MFE-01 tool, and its likely deployment, the presentation box was a surprise, and a substantial one.
The box is shown with a Hardcore Hardware MILF folder and the one with my hand sticking into shot isn’t a mistake, but to give you some scale to appreciate the size of this box.
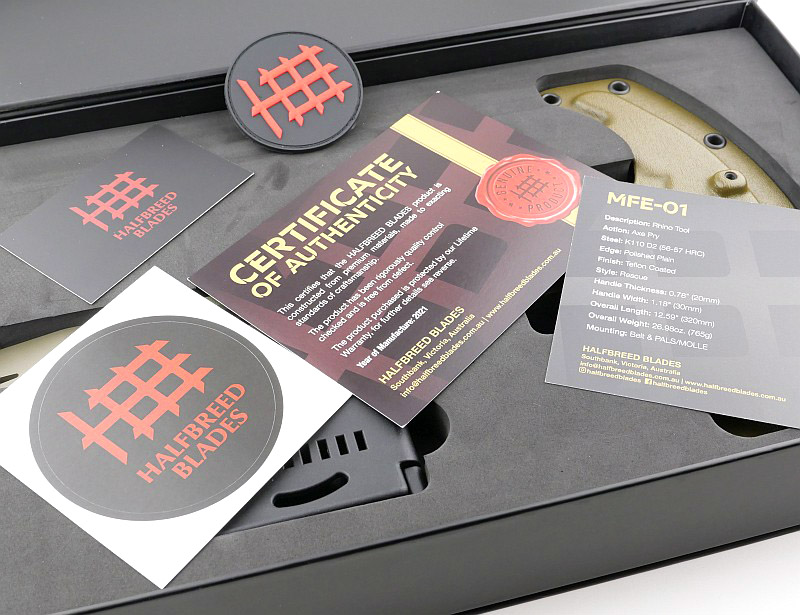
Opening it up and you have your fill of Halfbreed Blades contents; a rubber patch, catalogue, information sheet, certificate of authenticity and sticker.
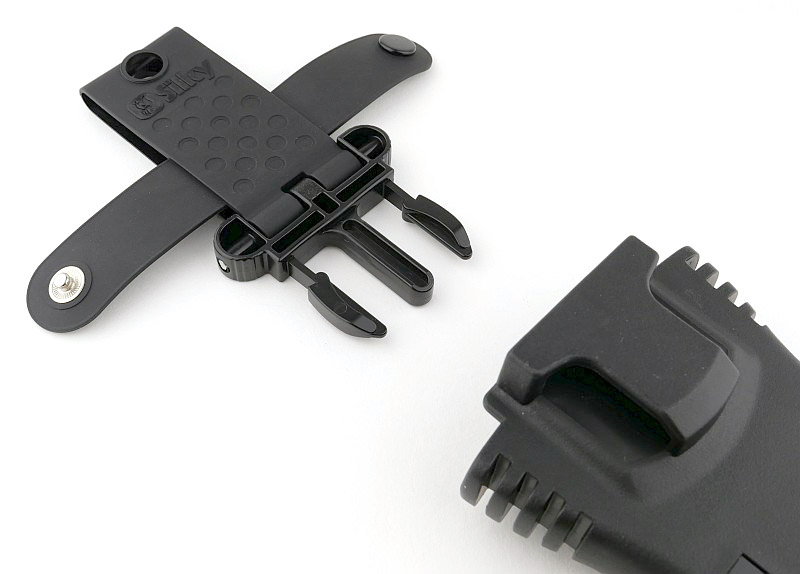
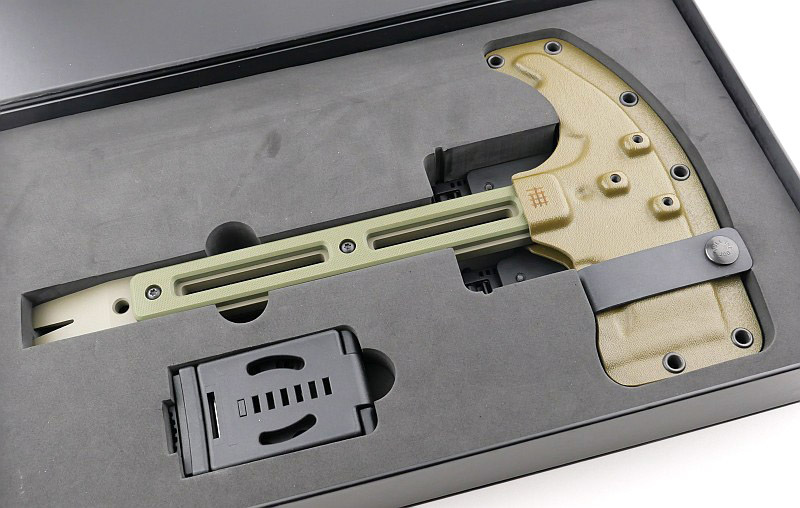
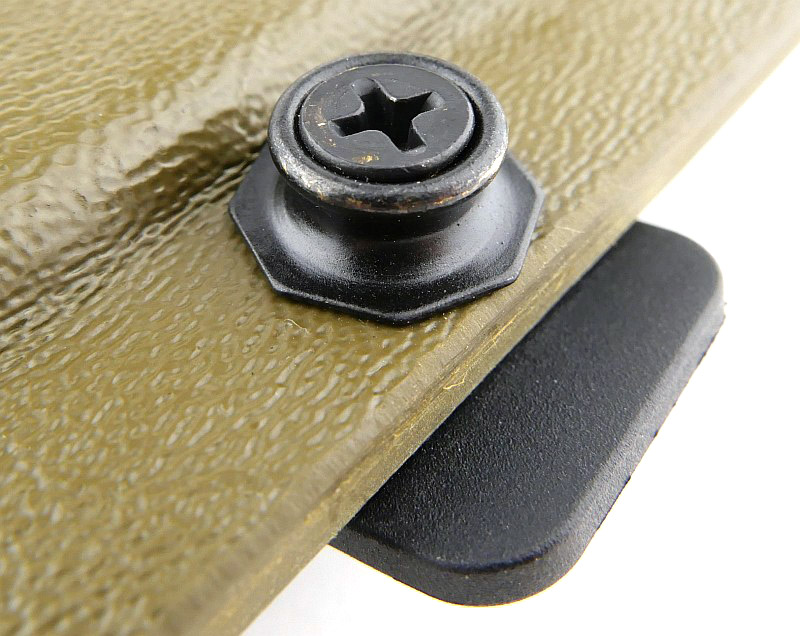
Putting these aside we get to the high density foam liner precisely cut out for the sheathed tool. The optional belt loop sits next to the main tool with the extra fixing screw tucked underneath it.


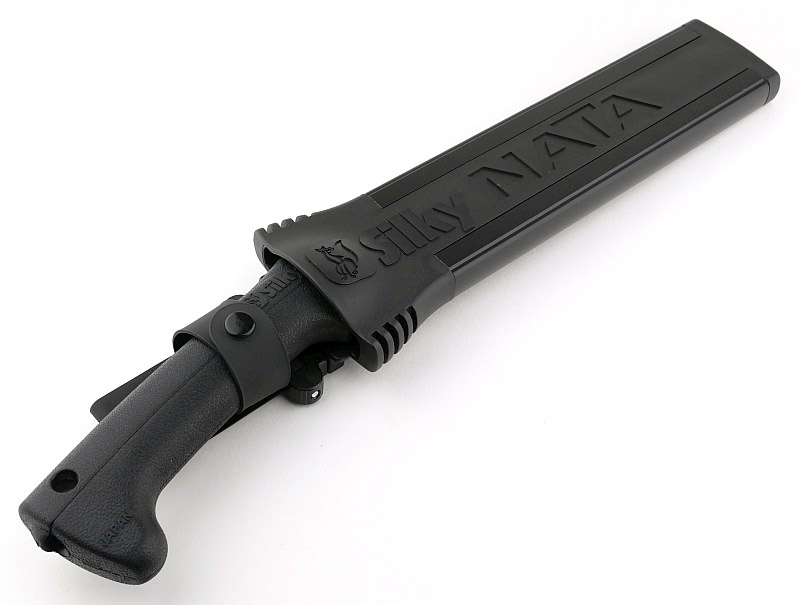
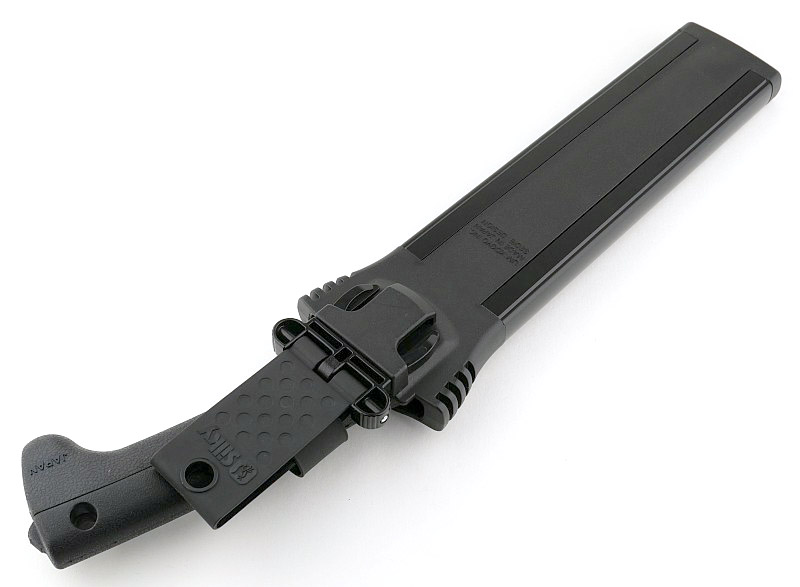
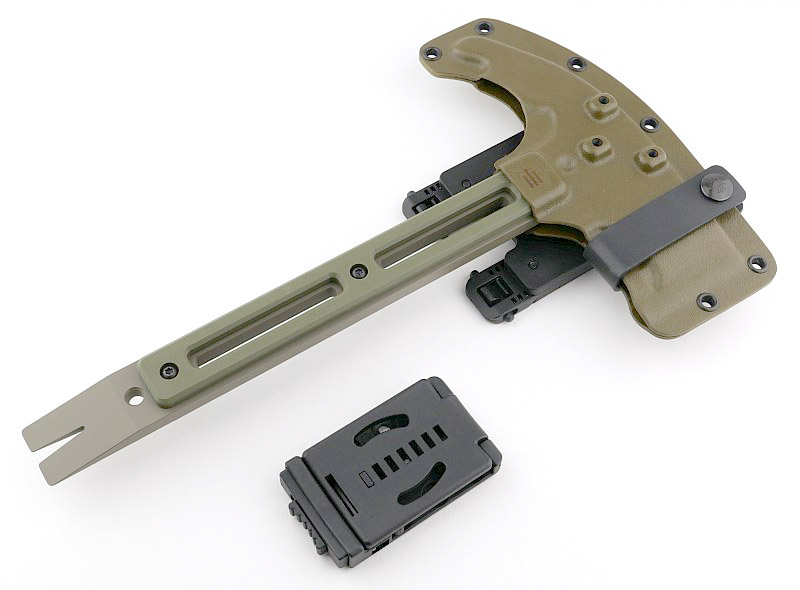
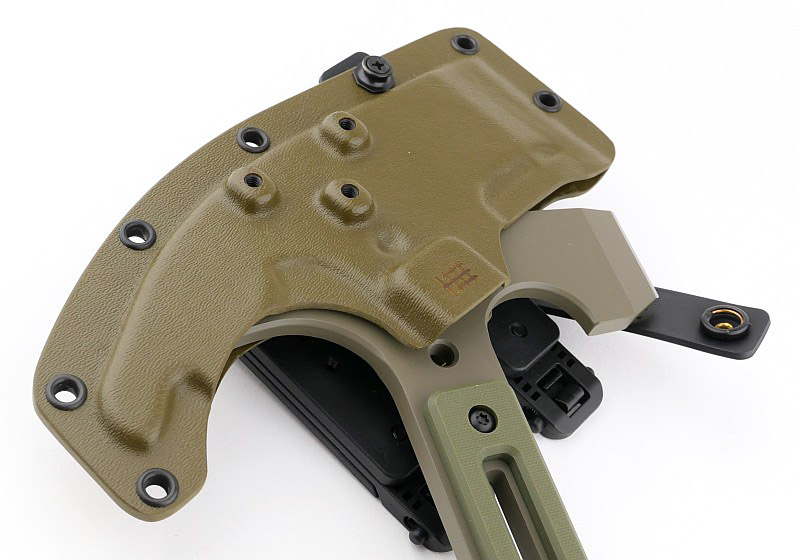
A good look round the Rhino Tool’s Sheath – Things to look out for here are:
I’ve said it before and will say it again, the sheath or carrier for a tool is as important as the tool it carries, not least as if it fails, you have no tool at all.
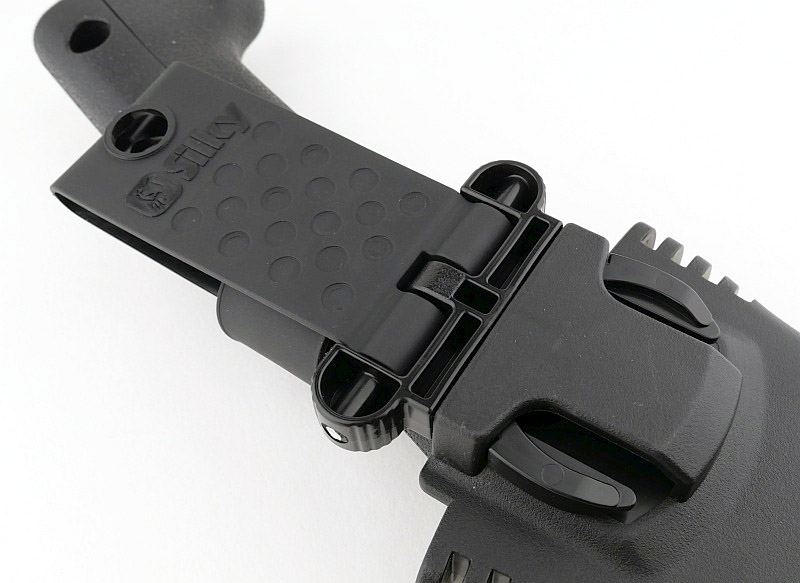
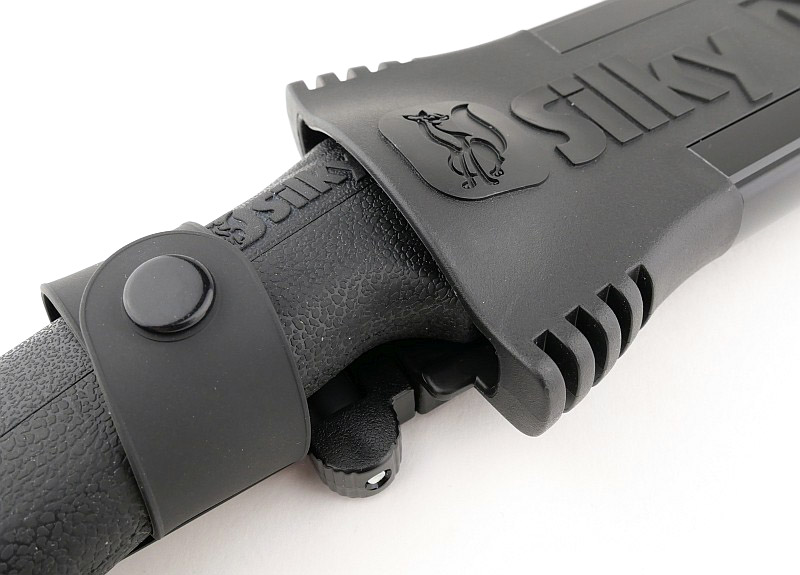
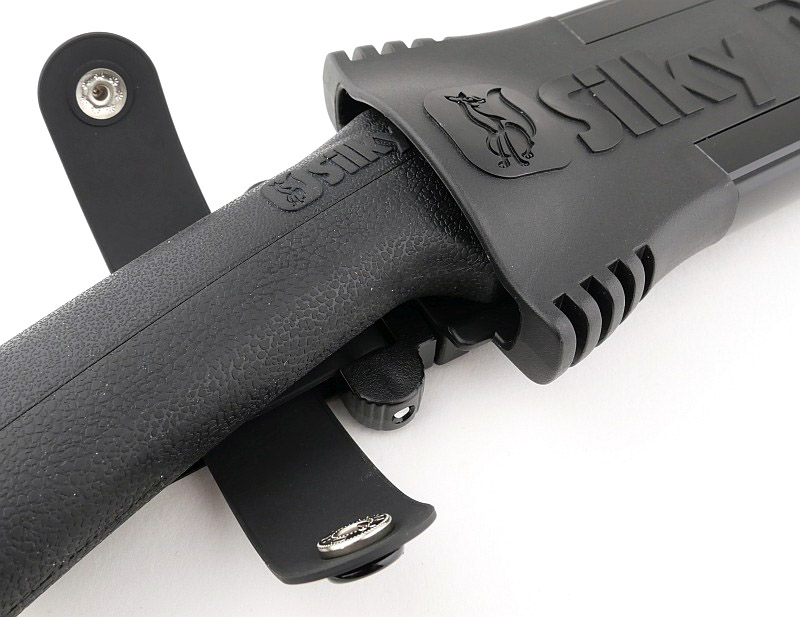
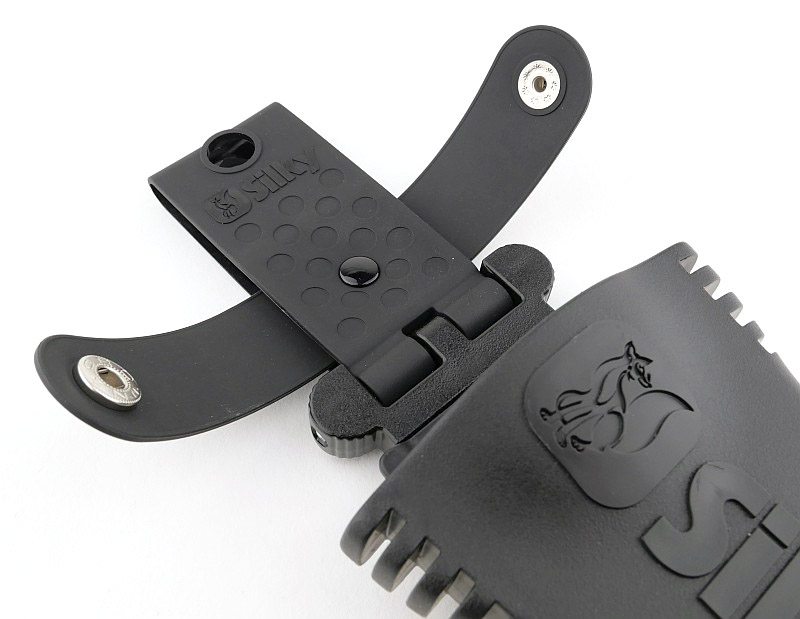
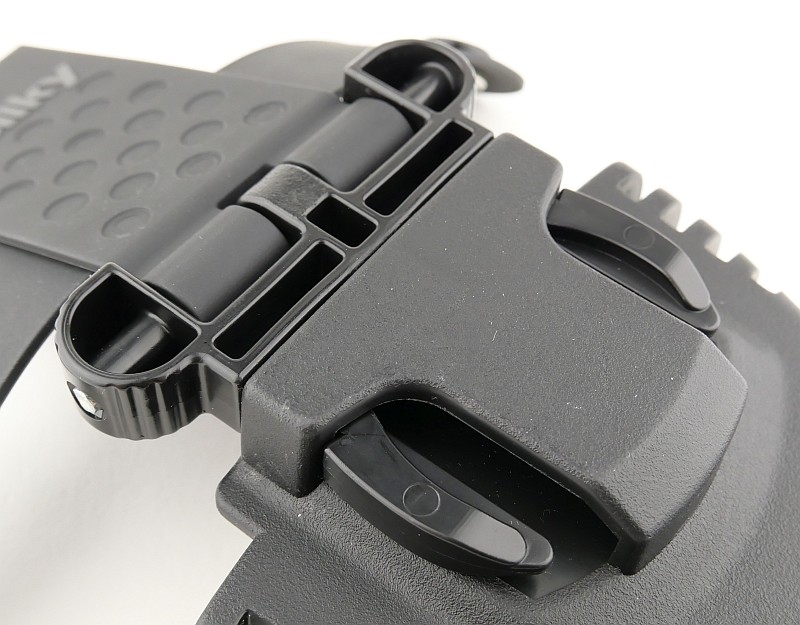
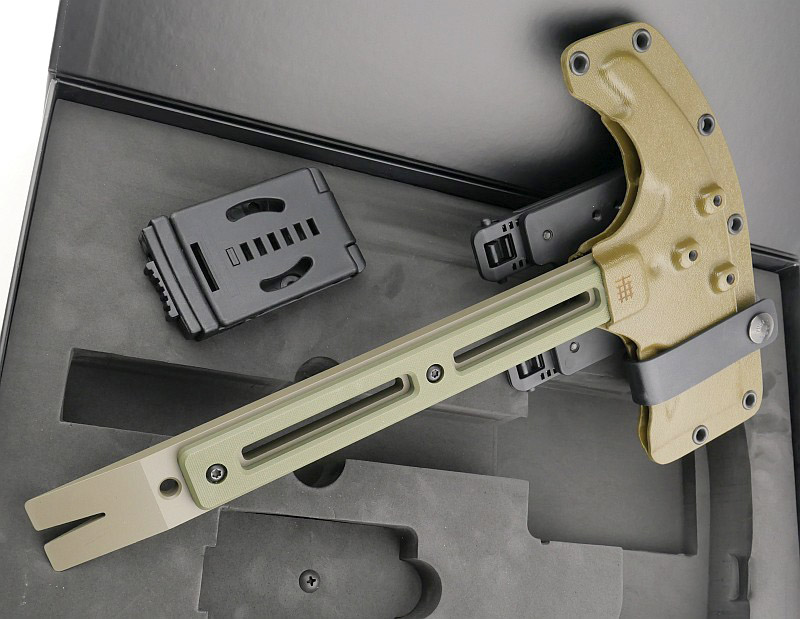
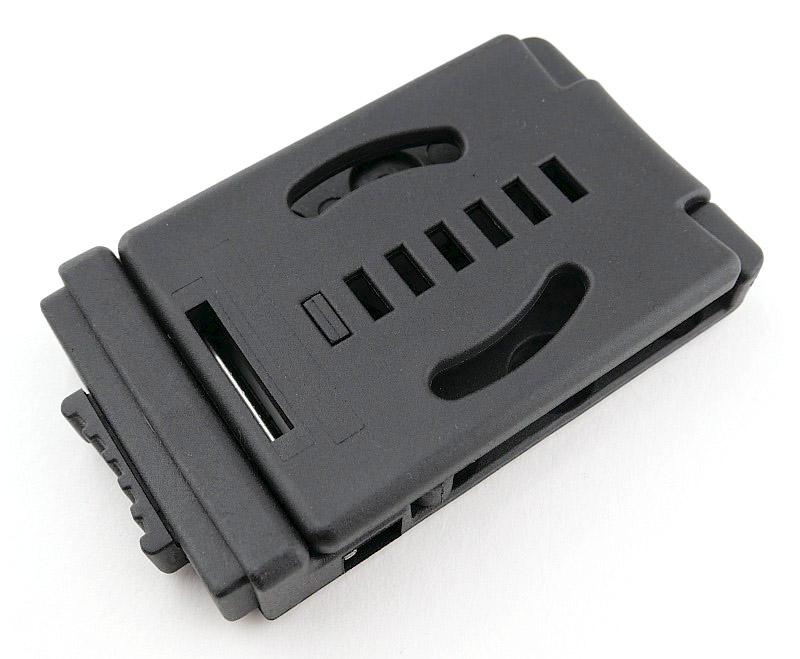
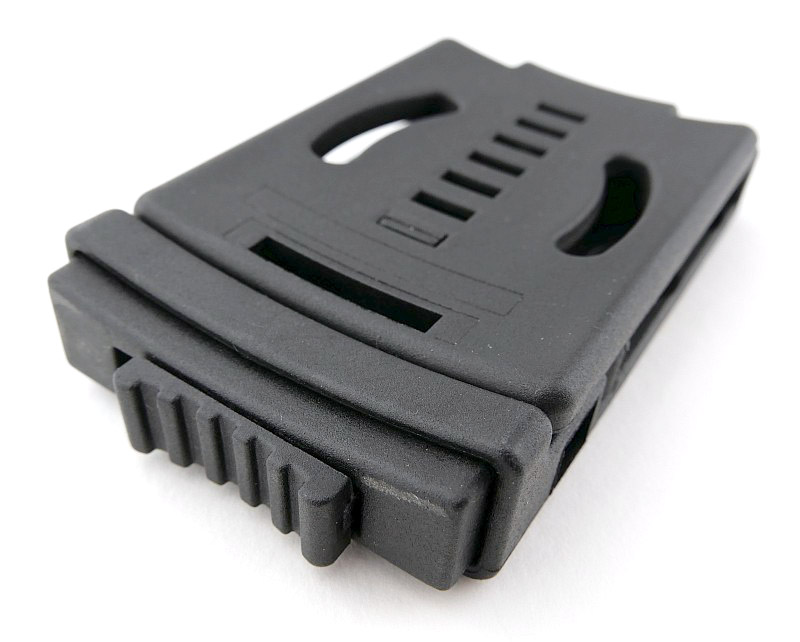
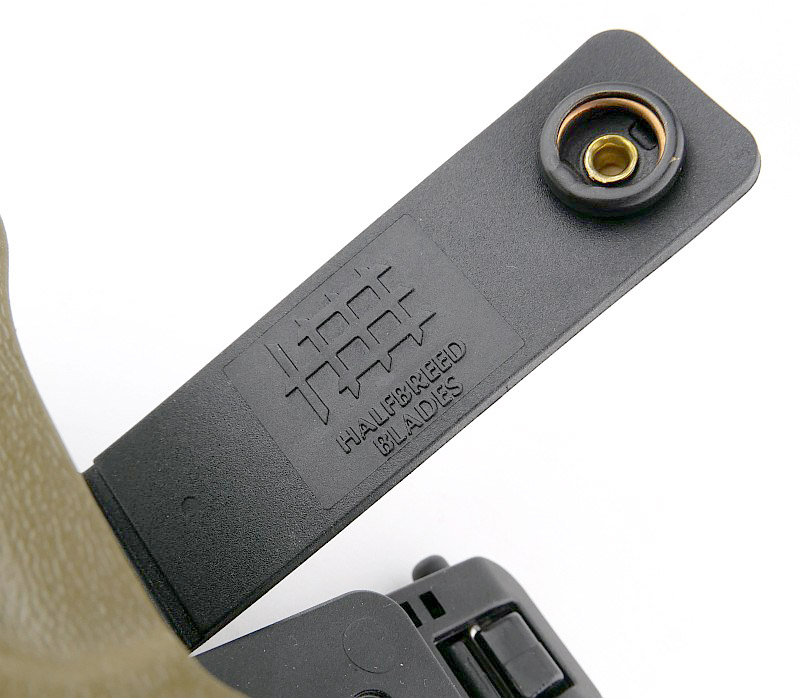
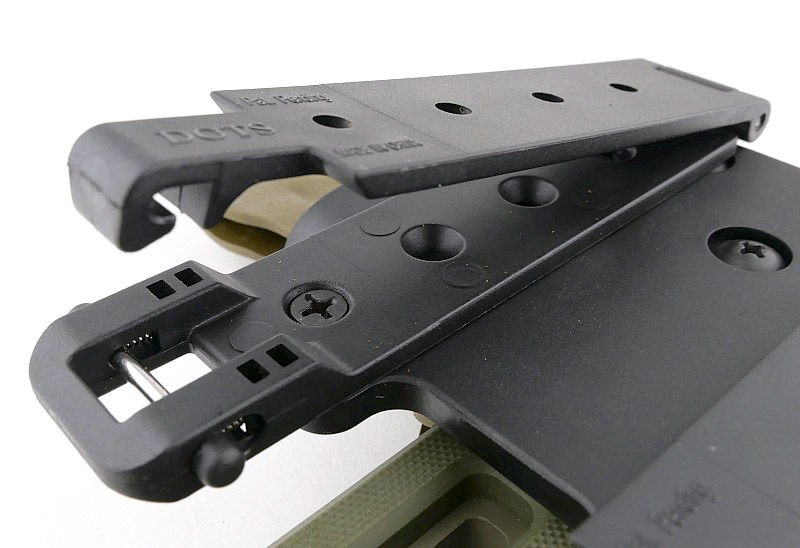
The MFE-01’s sheath has a lot to look at. First in the gallery is a closer view of the belt holder. The Rhino tool is quite a weight to have on your belt, so I’ve not opted to adopt this myself, but it is a strong and serious option if you want to carry it on a belt. Of course you might also have a pack where this it the best way to attach it so it might not be used for a belt anyway. It is a ‘DOTS’ belt holder with belt width setting, lock, release button, and can be mounted horizontally or vertically.
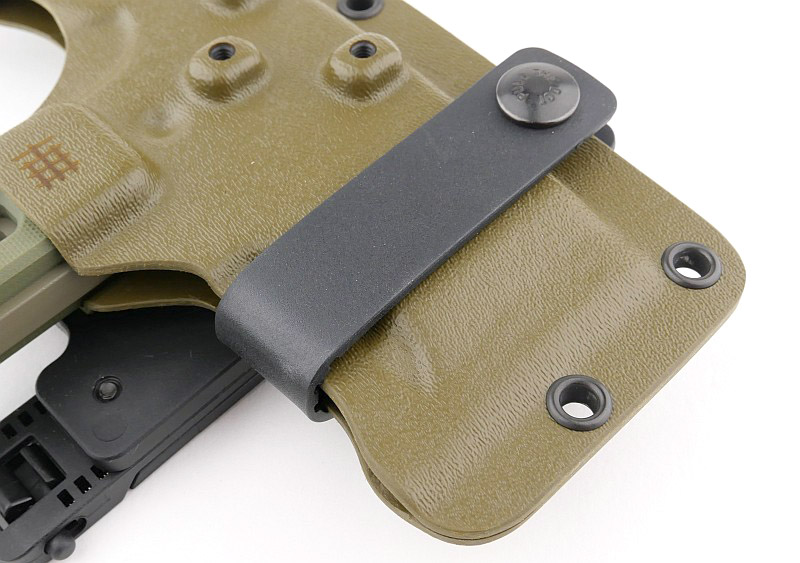
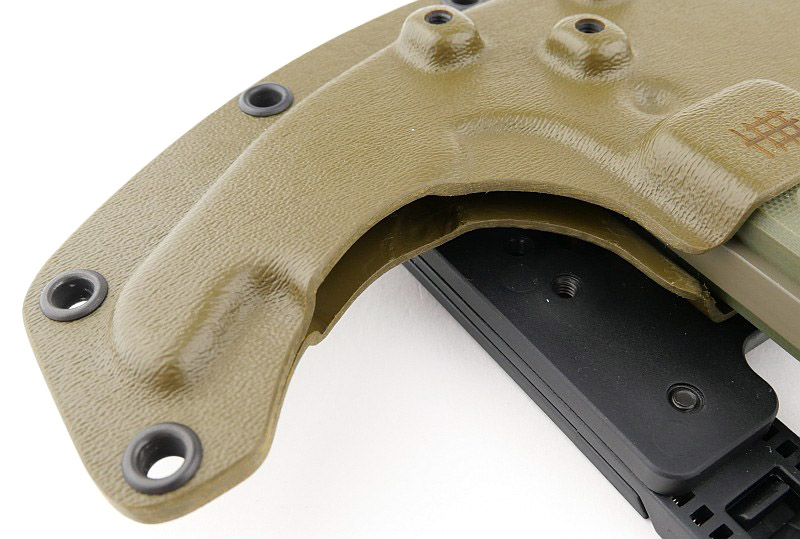
The sheath is Kydex with metal hollow rivets holding the halves together. Once clicked into place the tool stays put, but for maximum security there is a retention strap with a pull-the-dot press stud.
For the MOLLE or belt loop fixings, the nuts are captive in the Kydex, so all the fixing holes are permanently threaded and ready to use.
The rigid DOTS MOLLE mounts are fast and easy to use. The mounting screws for the full MOLLE mount are hidden under the two MOLLE straps, so you need to partially disassemble the mount to access the fixing screws if you want to replace the mount with the belt loop.


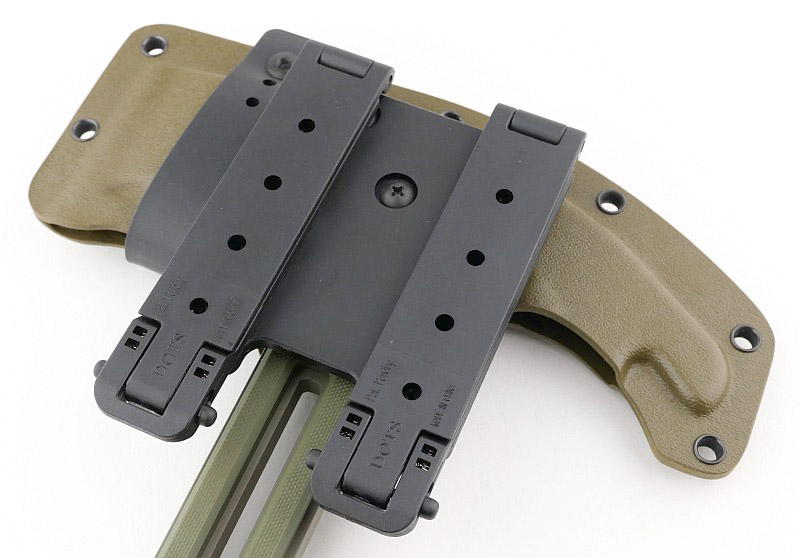


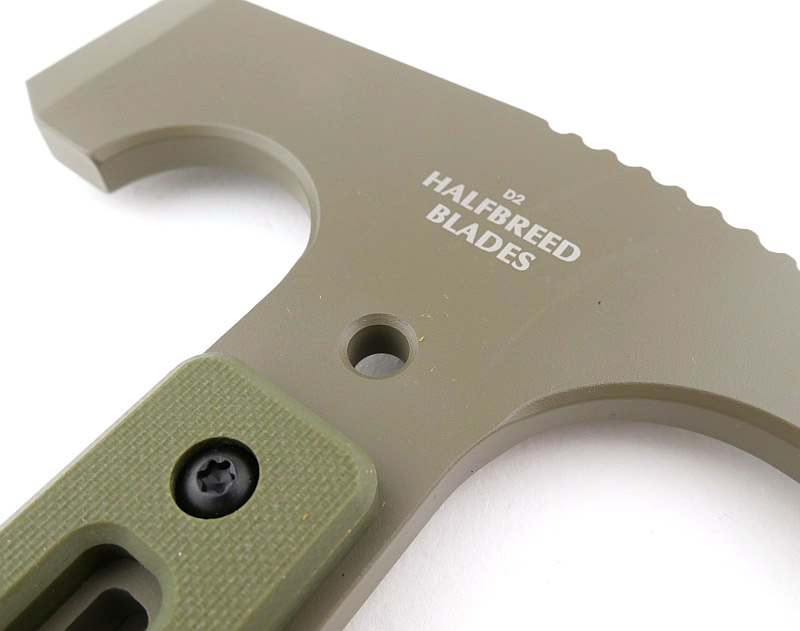
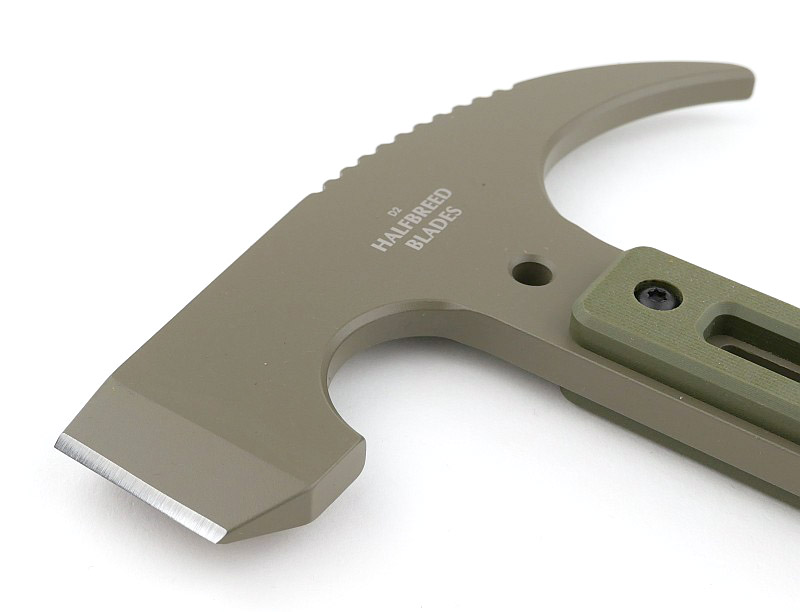
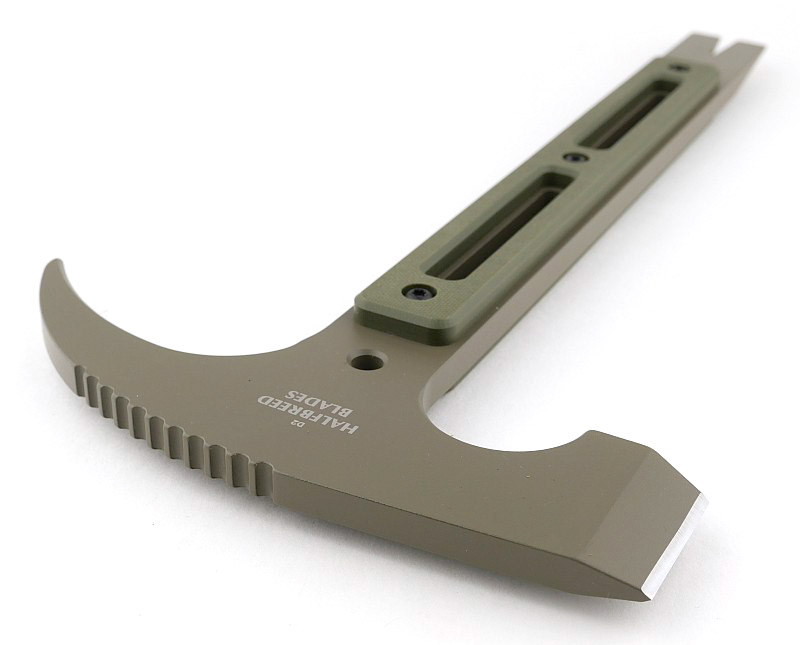
A good look round the MFE-01 Rhino Tool – Things to look out for here are:
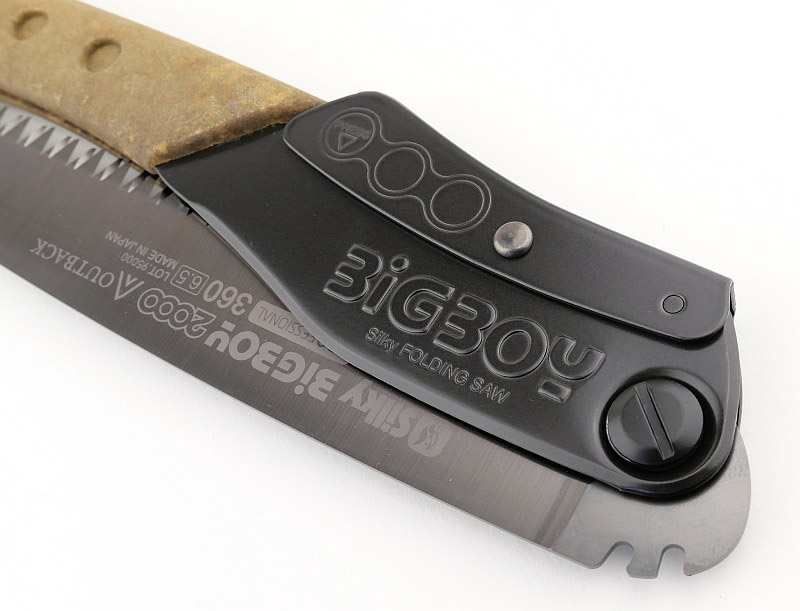
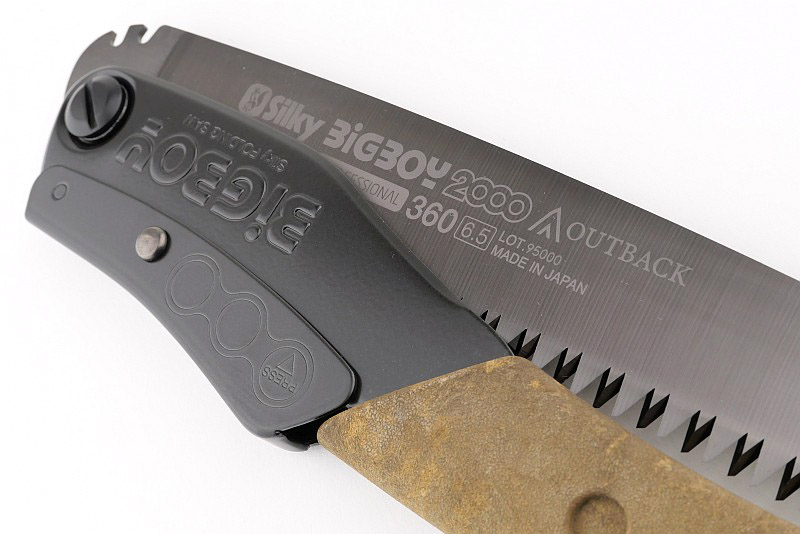
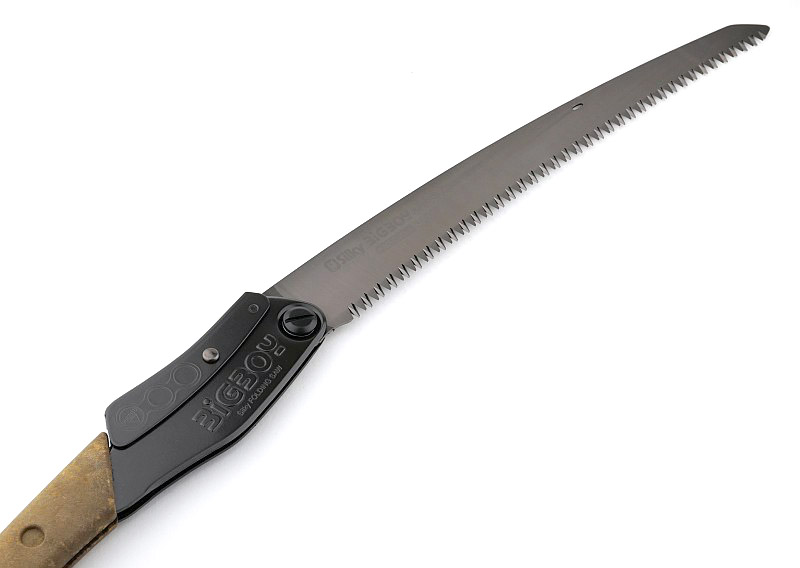
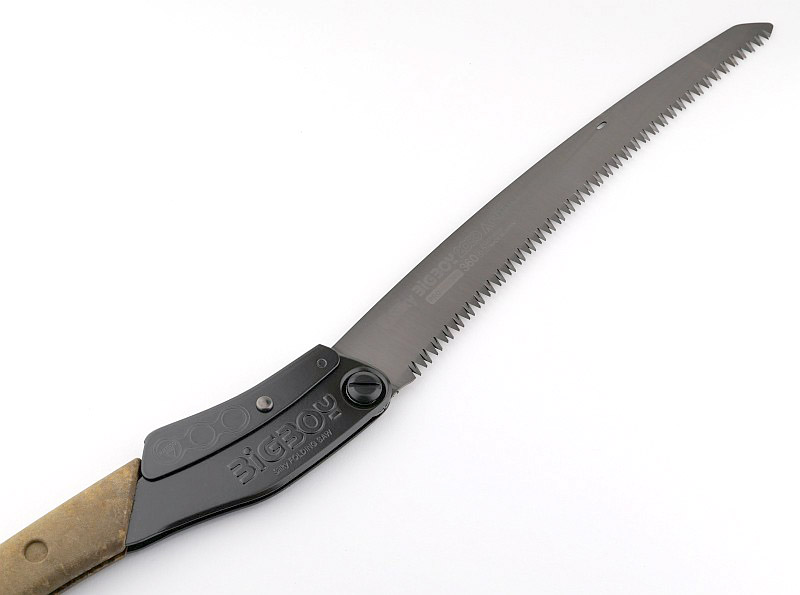
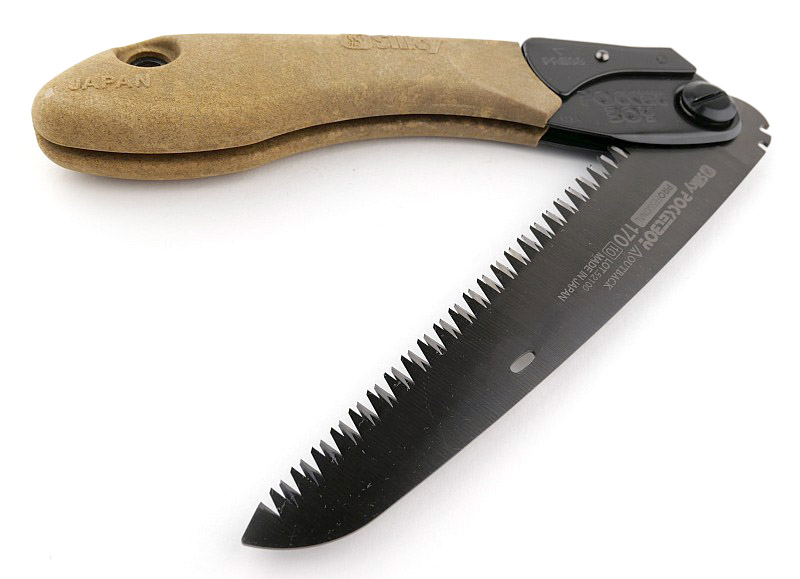
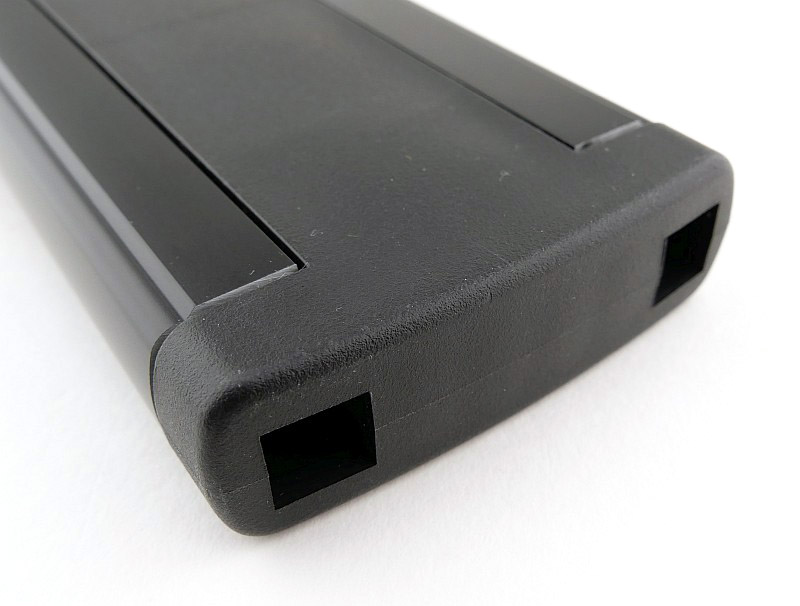
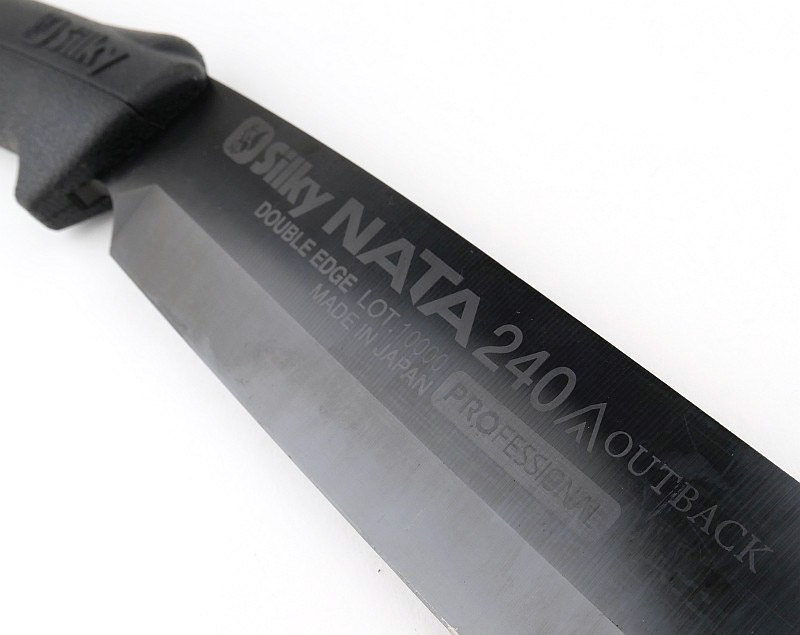
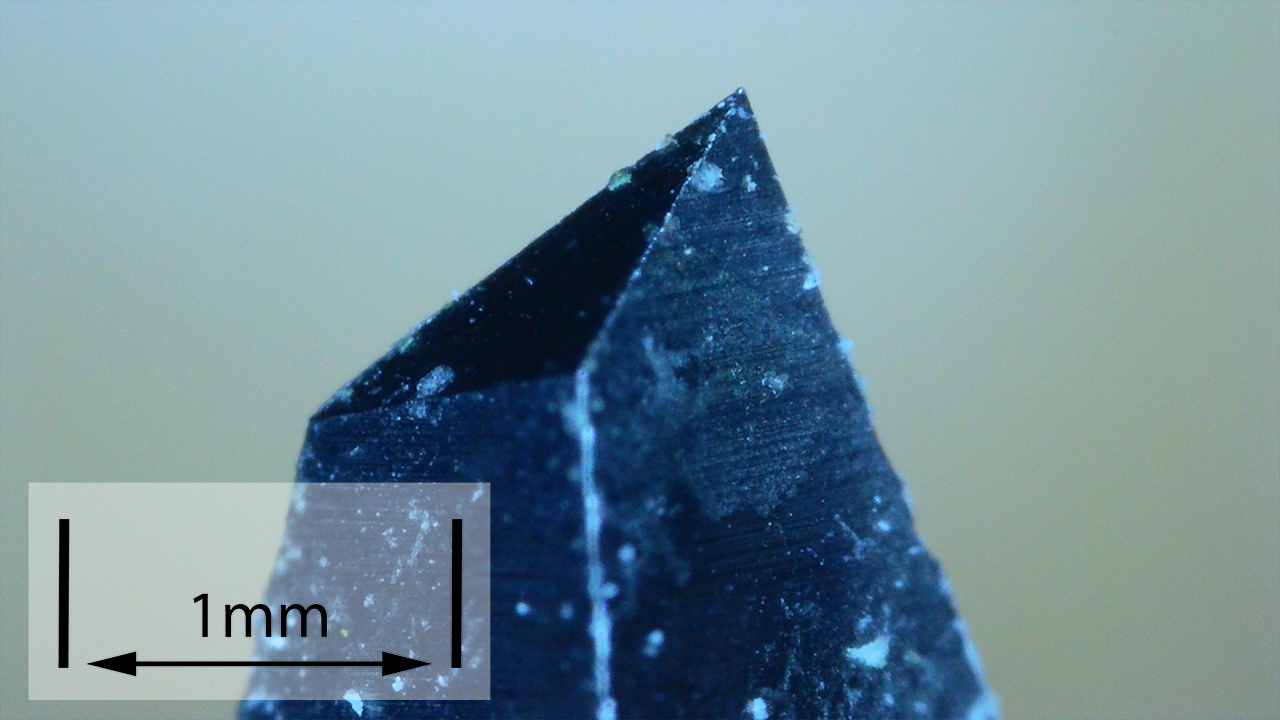
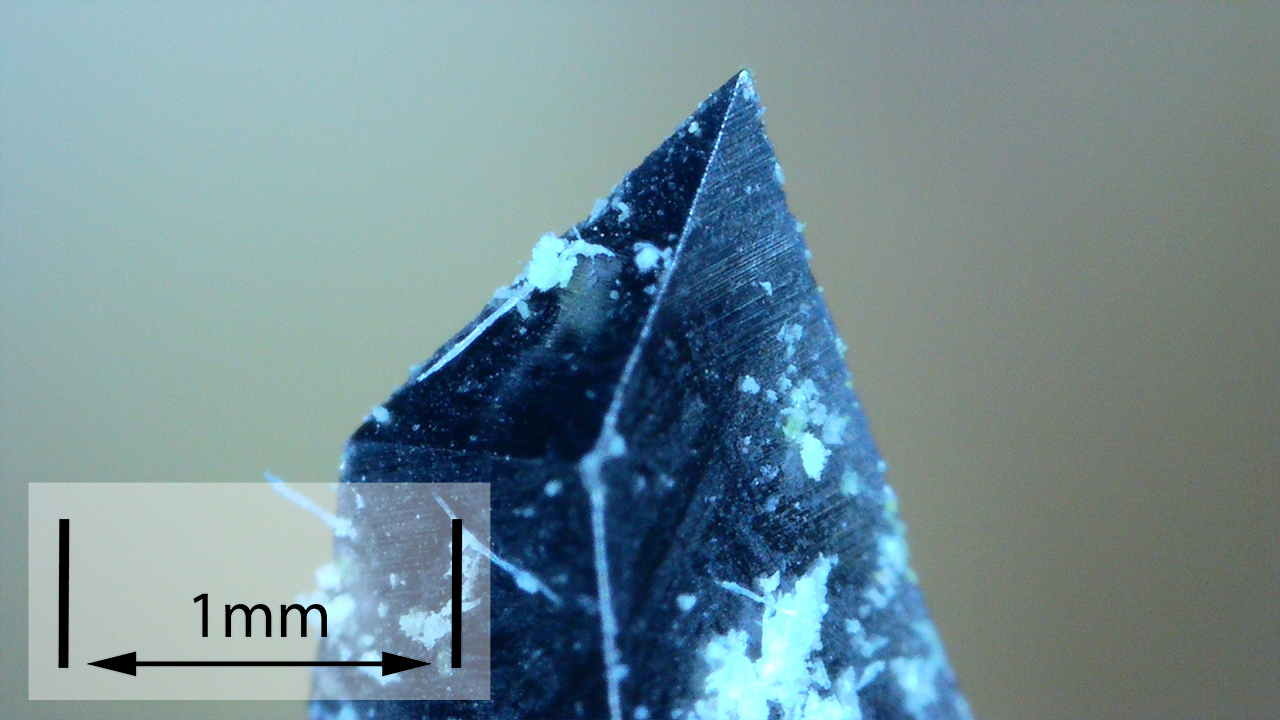
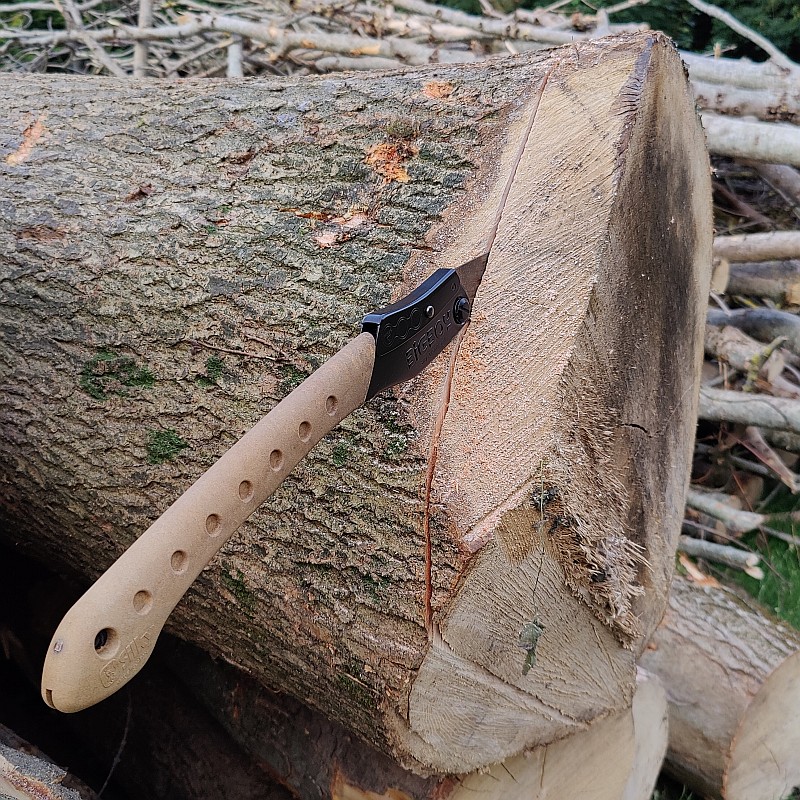
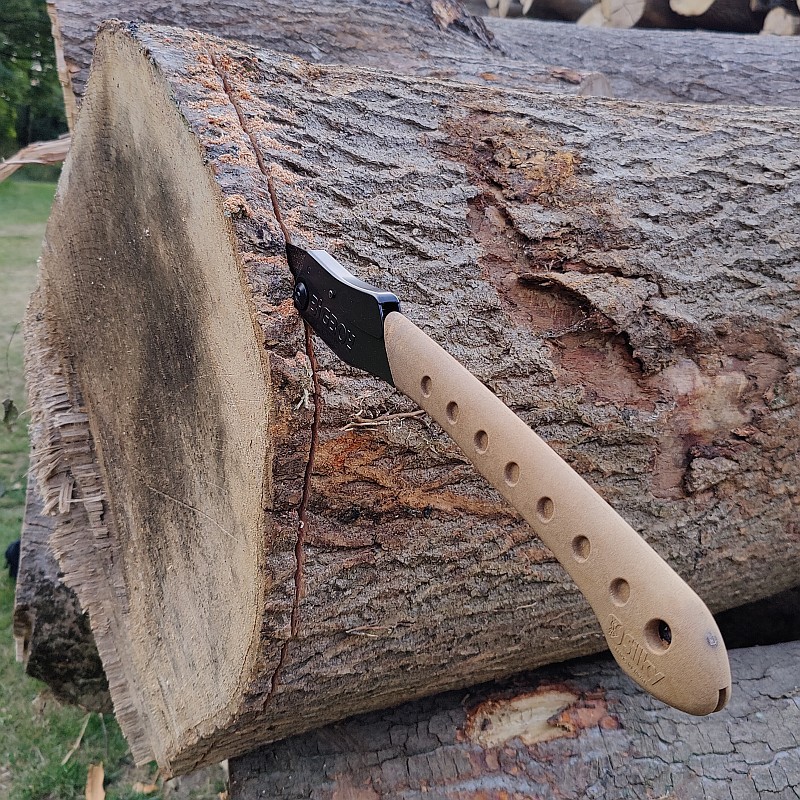
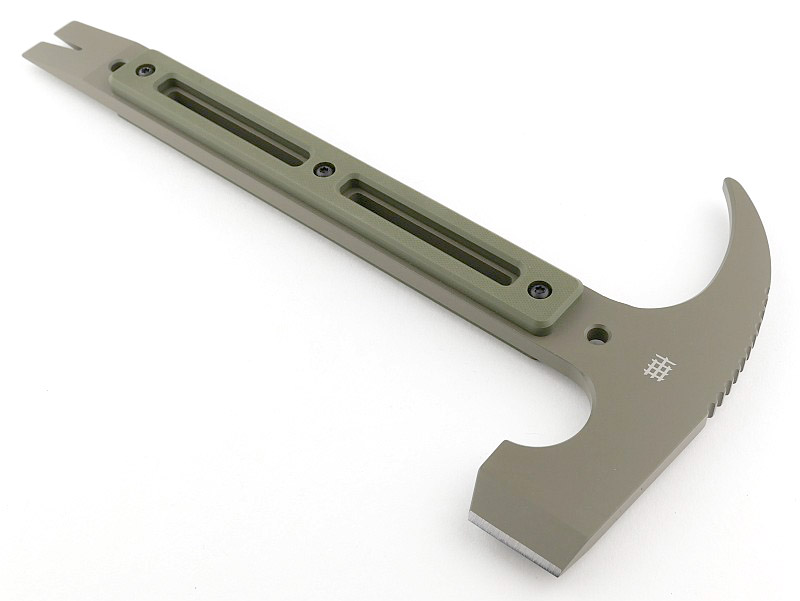
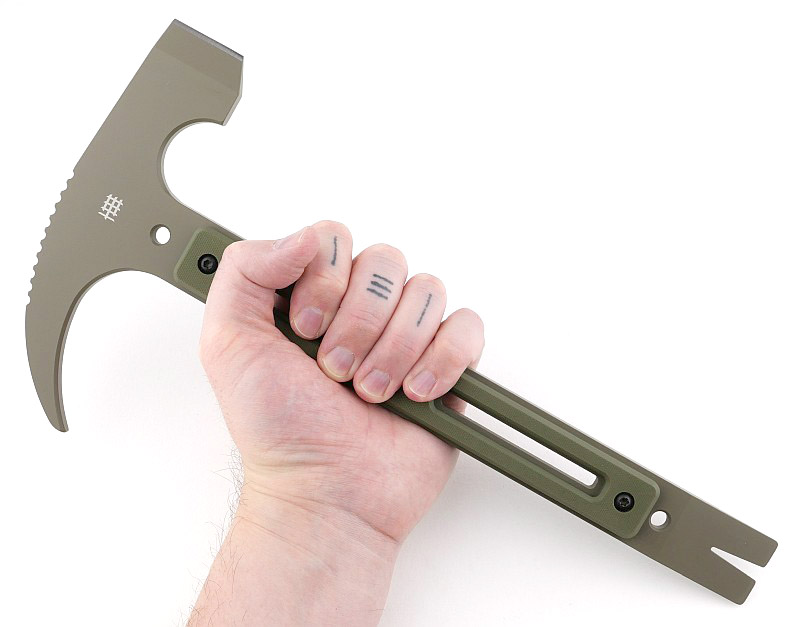
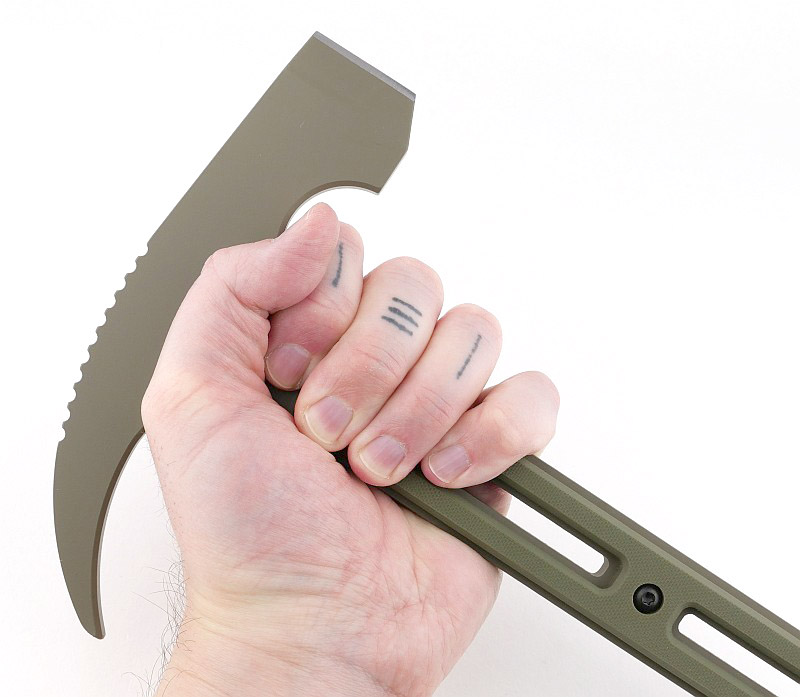
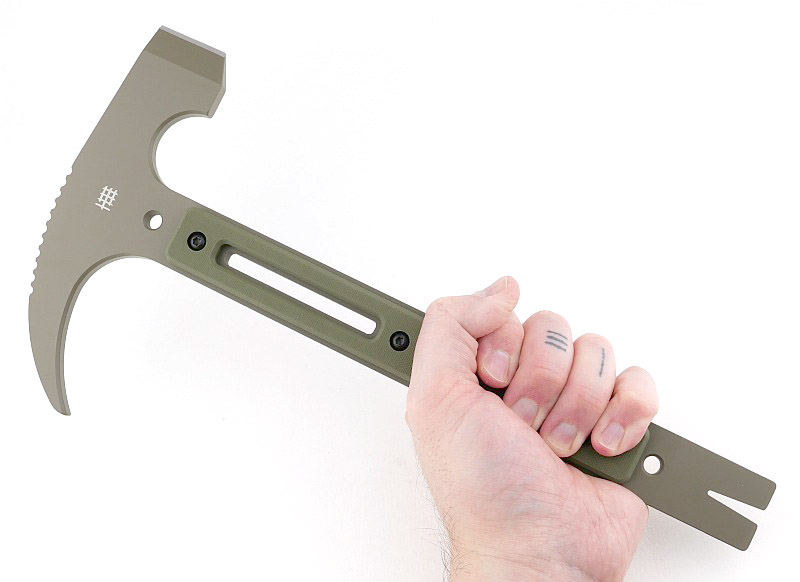
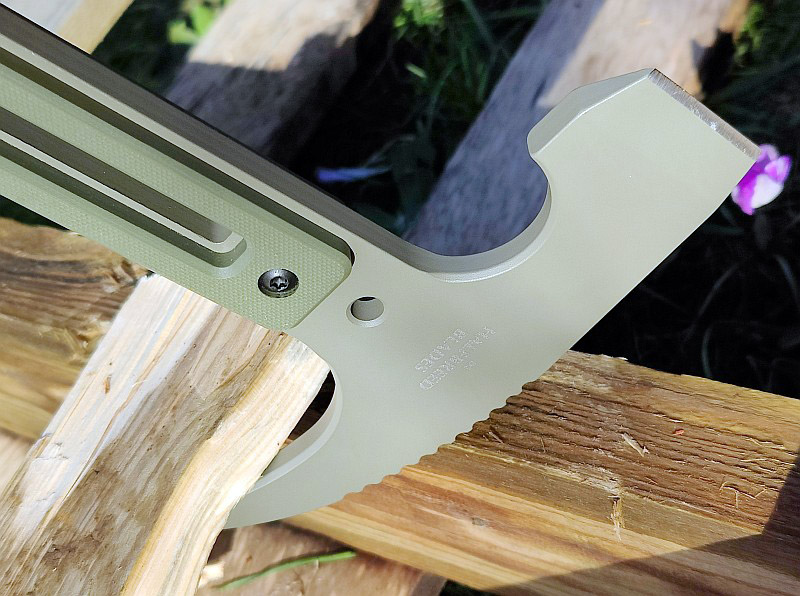
And here we have the MFE-01 Rhino tool. A slab of 8mm D2 steel with G10 slab handles – so take from that it is flat in overall form. When we get on to the in-use results, this is a factor in performance, but the main reason for the flatness is the requirement of being carried and not catching, digging in or otherwise impeding the user when they are not using it.
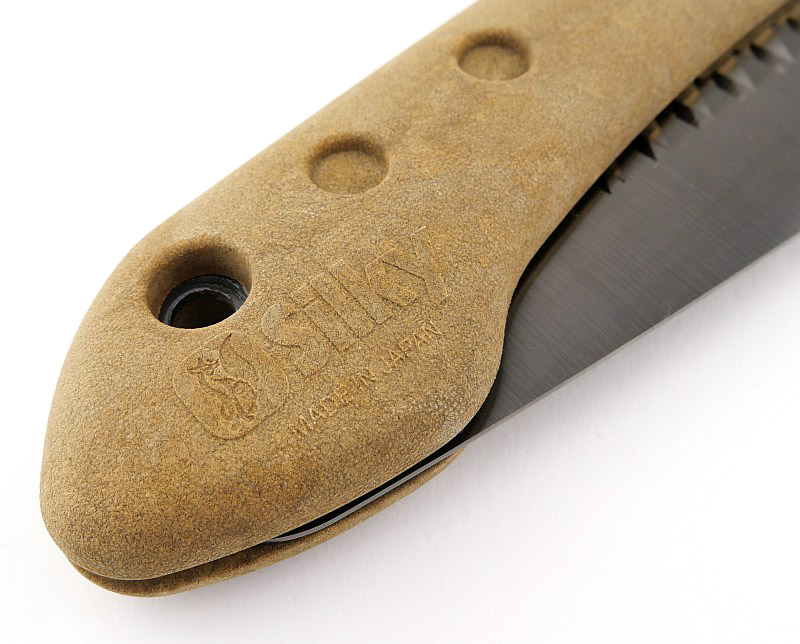
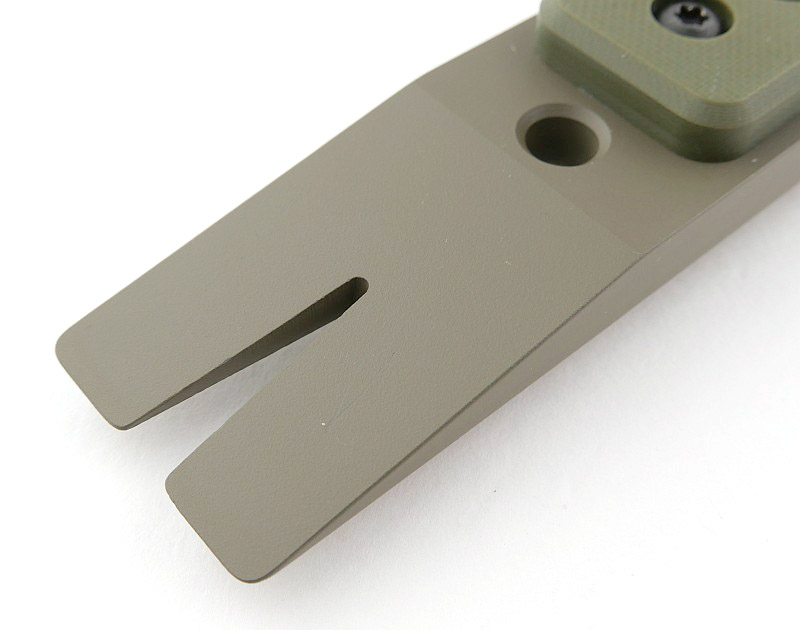
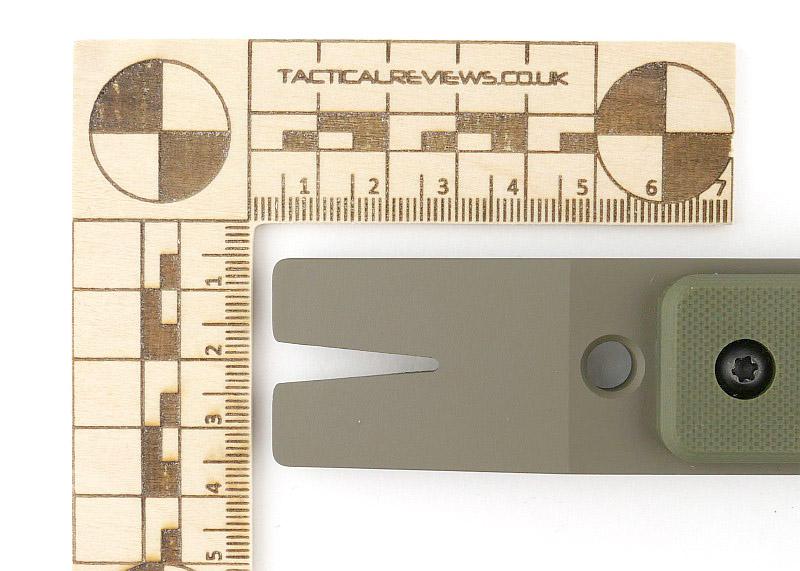
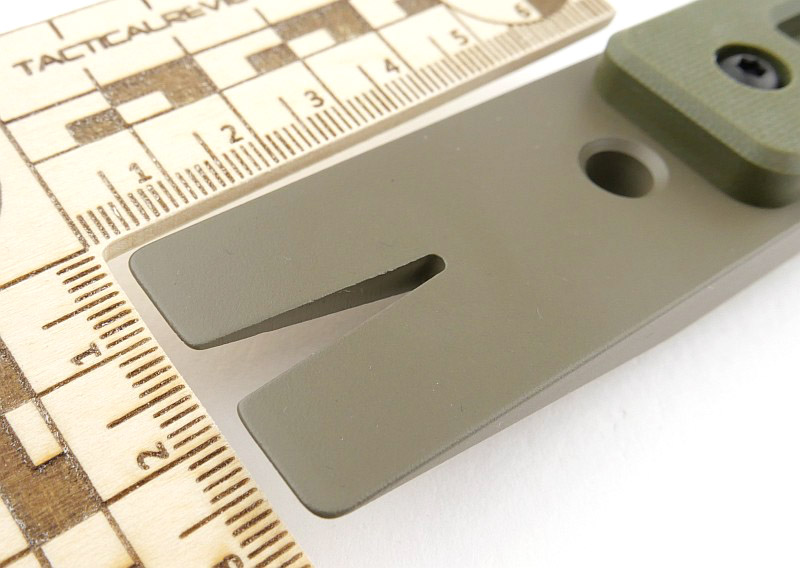
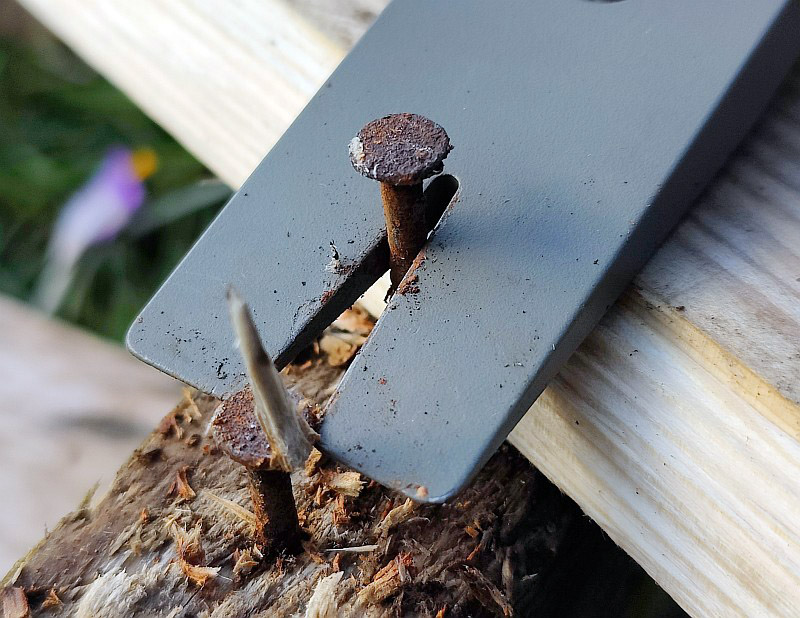
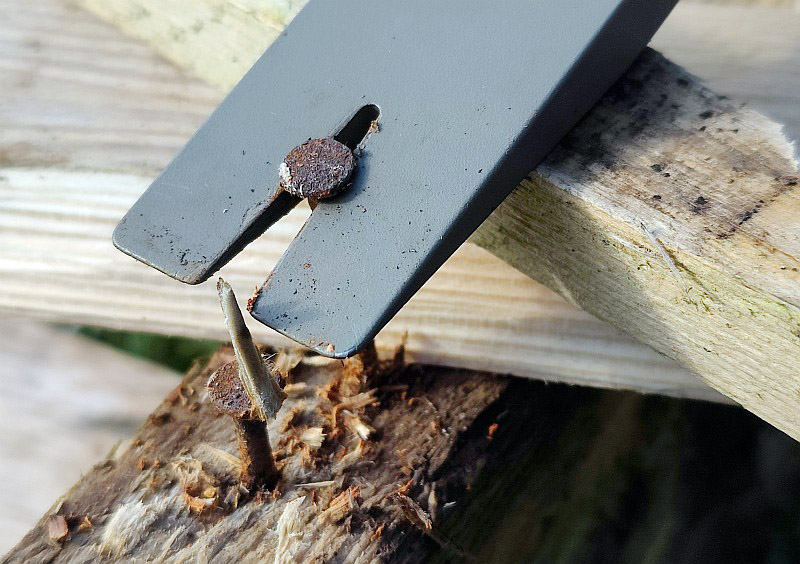
The prying end of the tool has a straight wedge with nail puller split. I specify a ‘straight’ wedge to indicate the pry tool does not have a levering bend, but is straight.
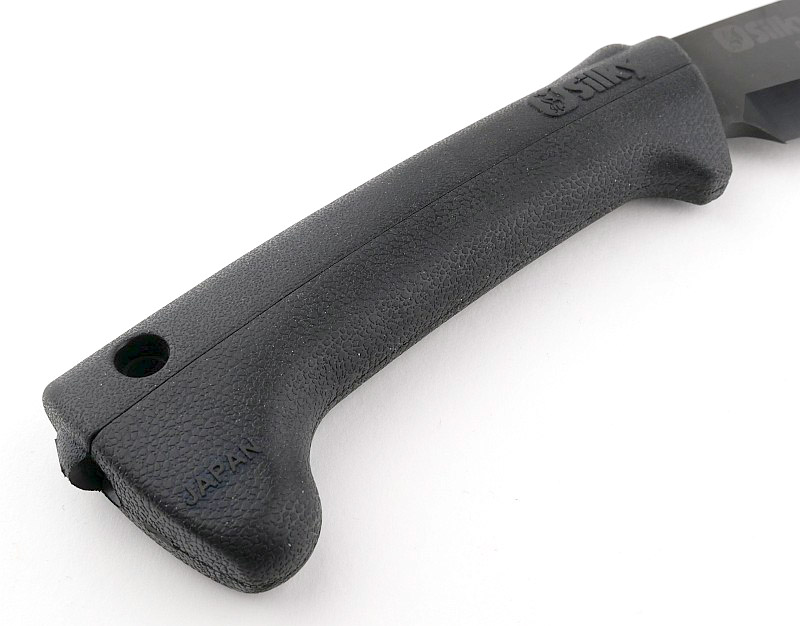
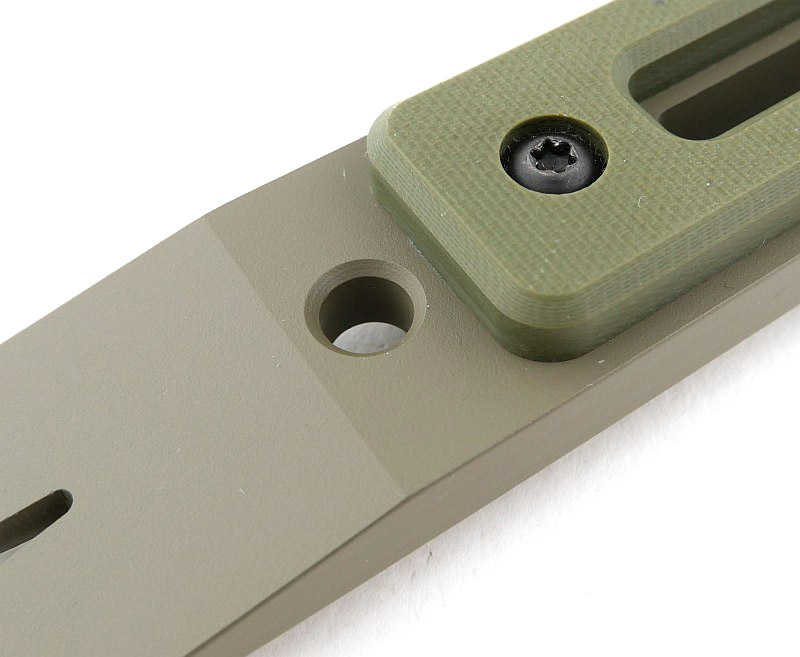
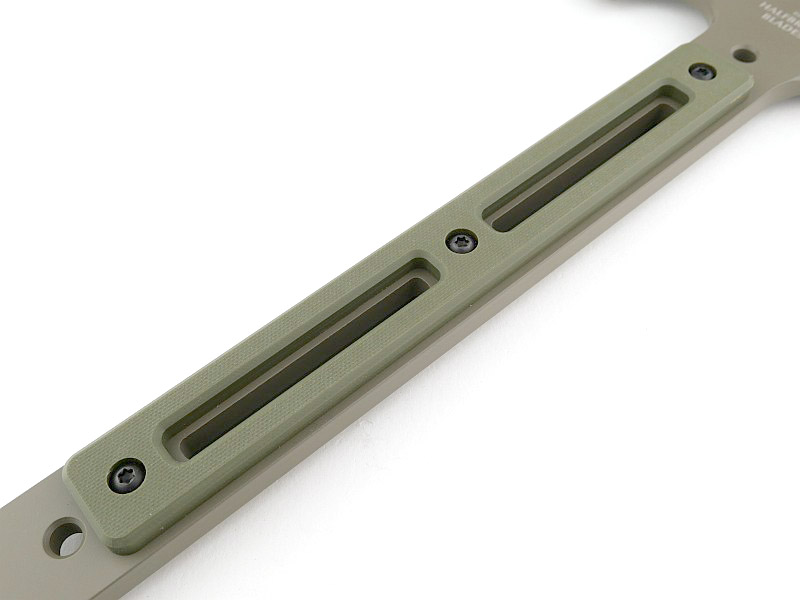
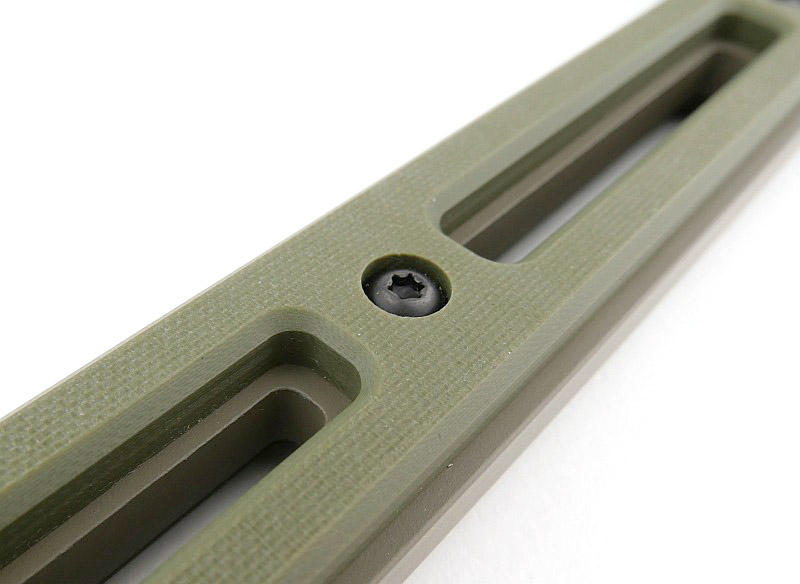
Just next to the pry tool is a lashing point through the shaft. The G10 handle slabs start just above this and are screwed onto the shaft. A slightly closer view shows the G10 layers.
As well as the round lashing hole, or lanyard hole, the handle has long slots that both reduce weight and can also have cord wrapped through then.
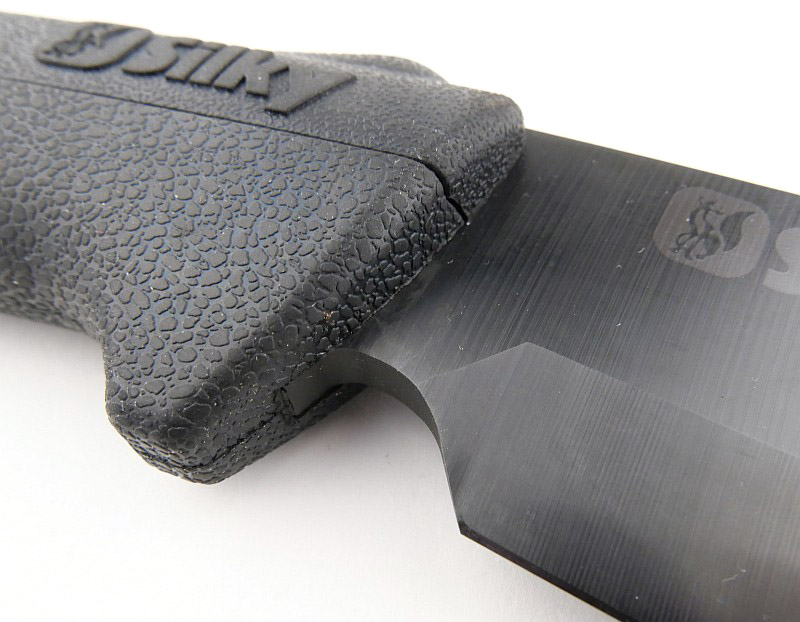
Moving up to the head, one of the main features is a versatile ratcheting claw; the jimping on the top allows you to work the claw into position step by step, giving a powerful ratcheting action.
Partnering the claw is a compact splitting head. This is not a axe for chopping wood as you might in bushcraft, but a powerful and focused striking point for splitting and smashing. The head is small for maximum striking power and the angles wide for edge stability and endurance.


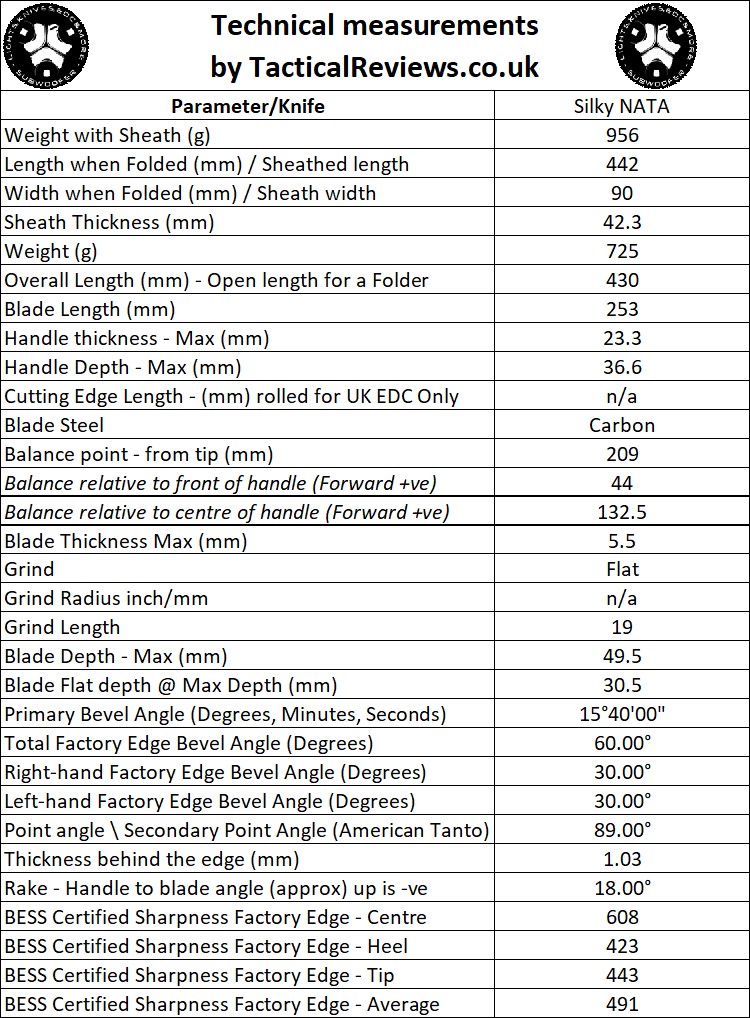
The Blade and Handle – Detailed Measurements:
This section is from knife testing measurements, and was carried out to give some of the aspects which are also relevant to this tool’s effectiveness and balance. Bear this in mind when looking through the values which are intended to assess knives not tools like this.
For full details of the tests and measurements carried out and an explanation of the results, see the page – Knife Technical Testing – How It’s Done.
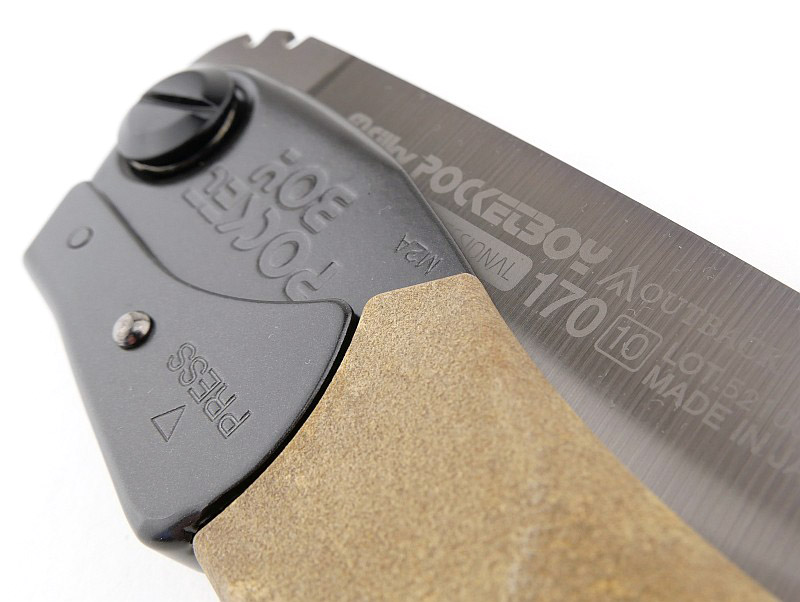
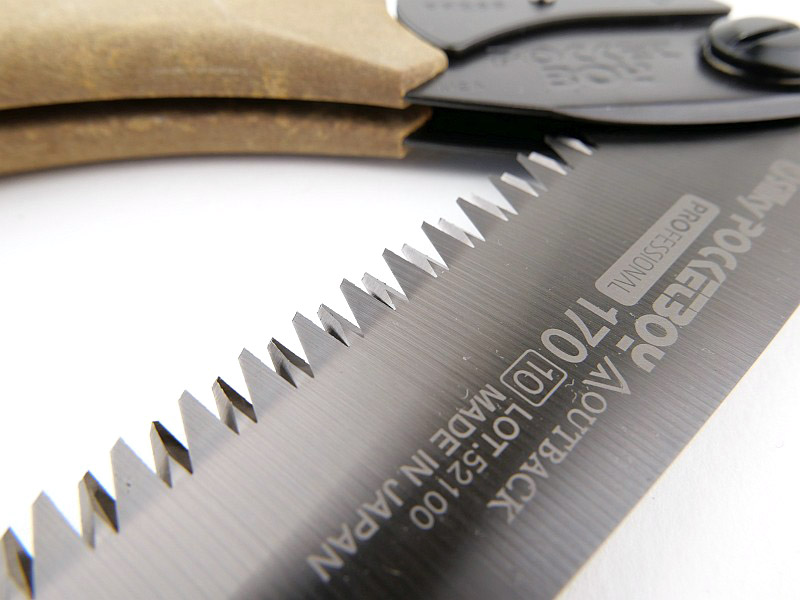
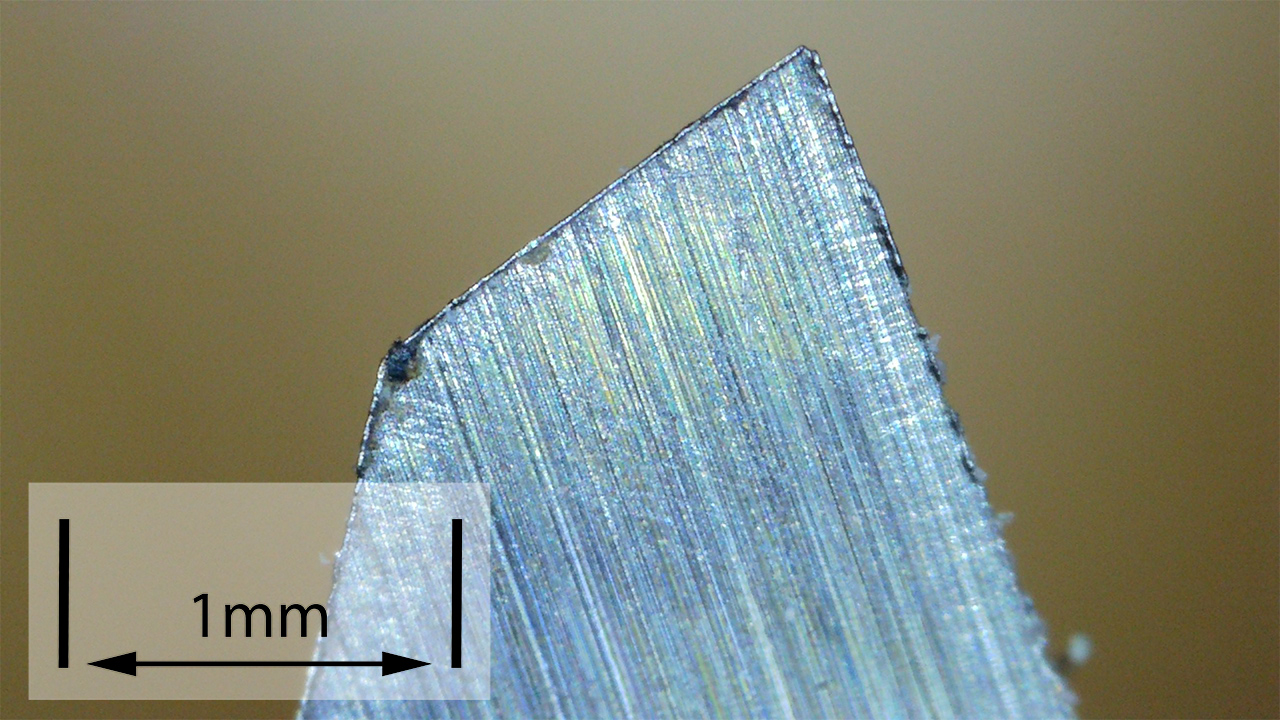
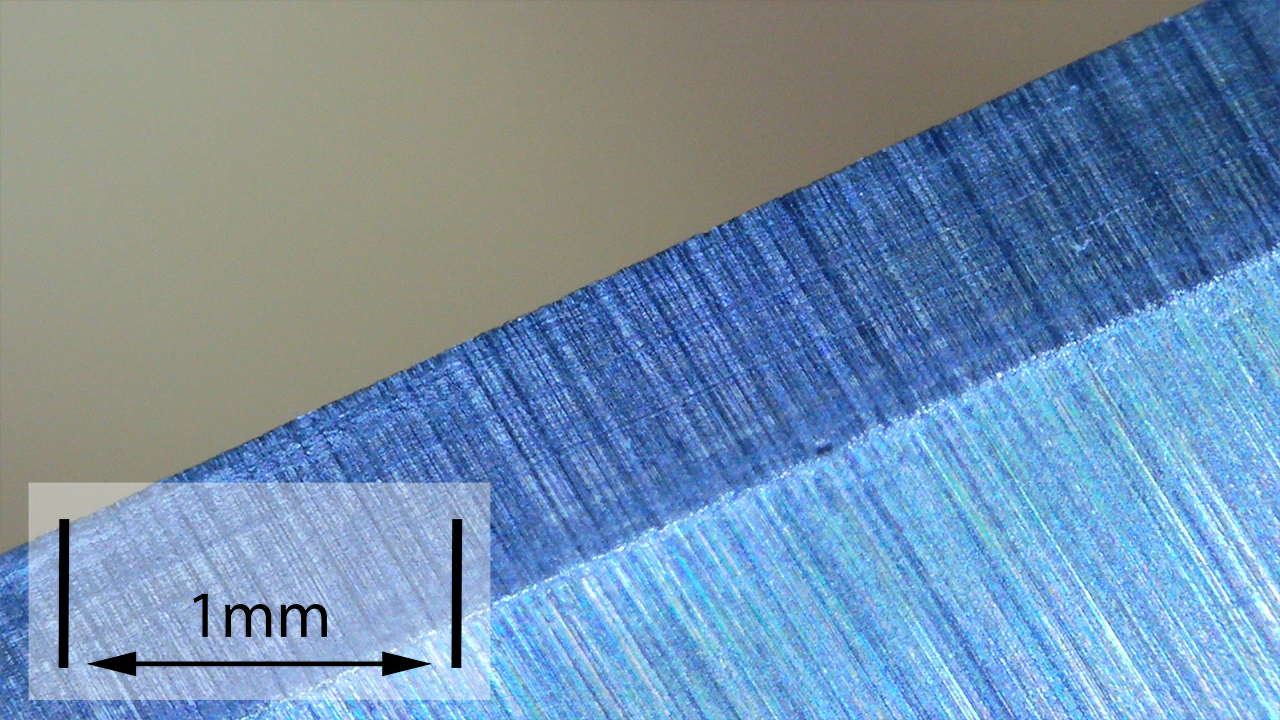
The blade is made from D2 steel.

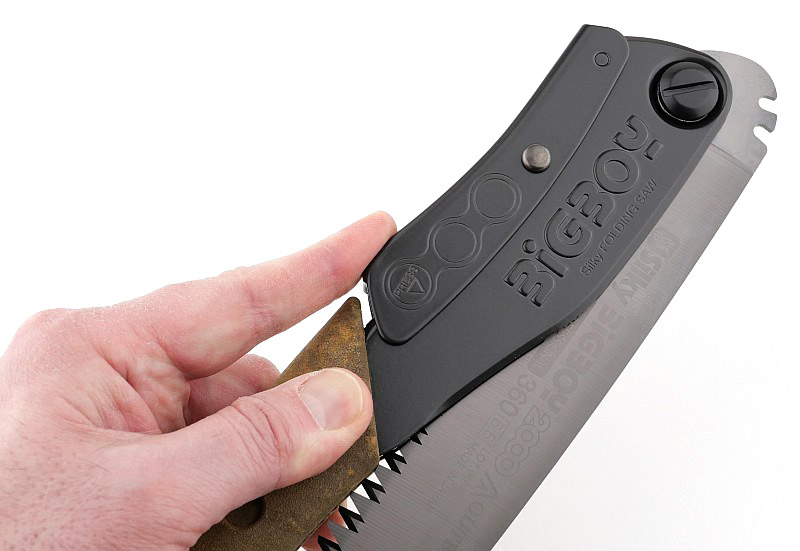
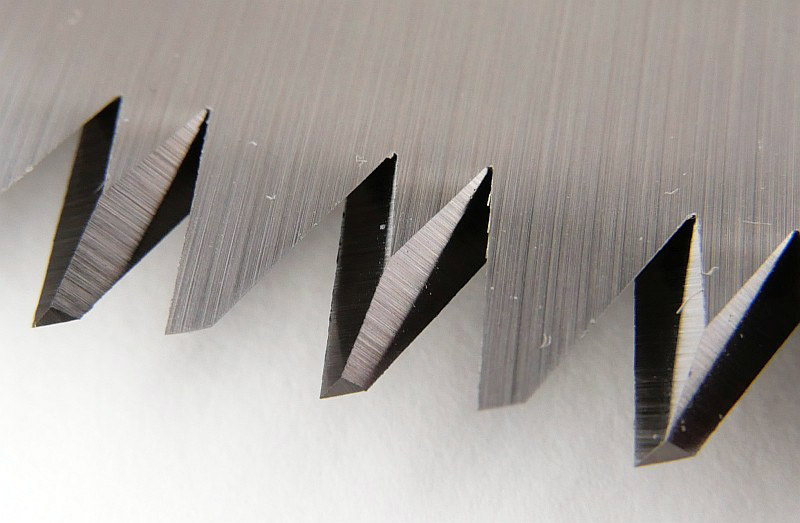
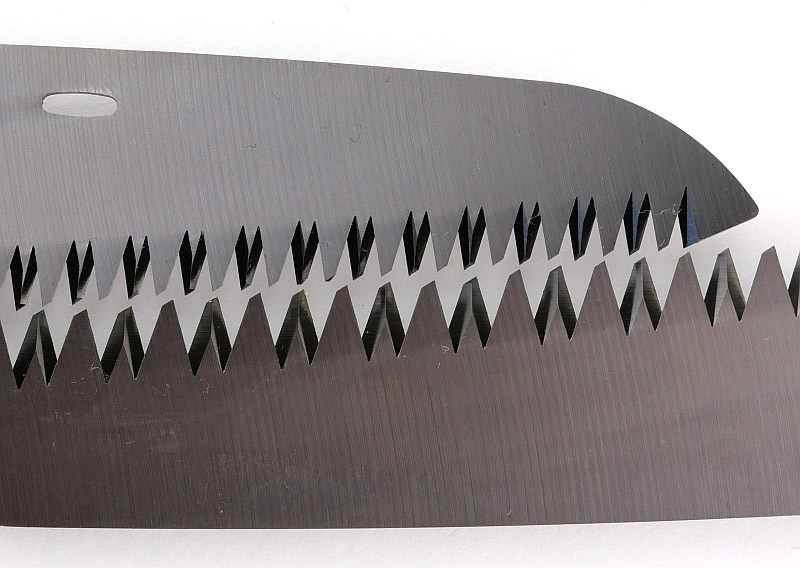
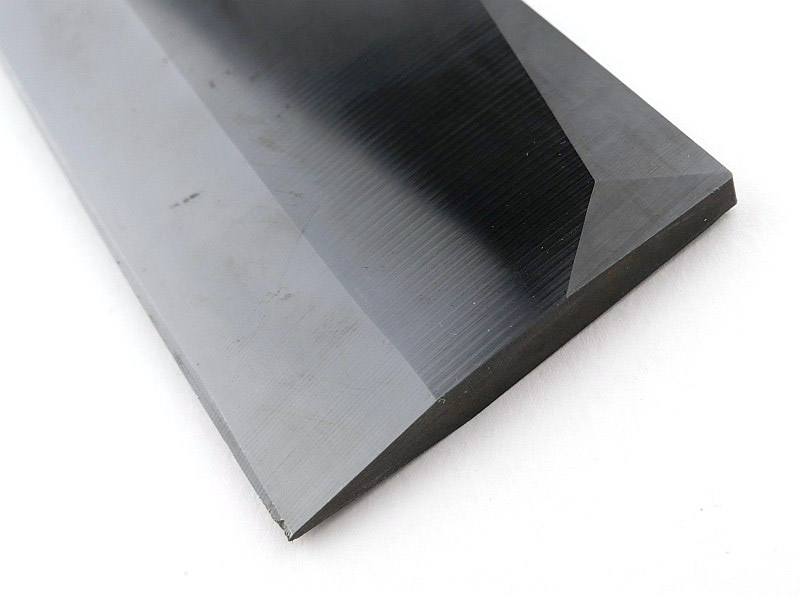
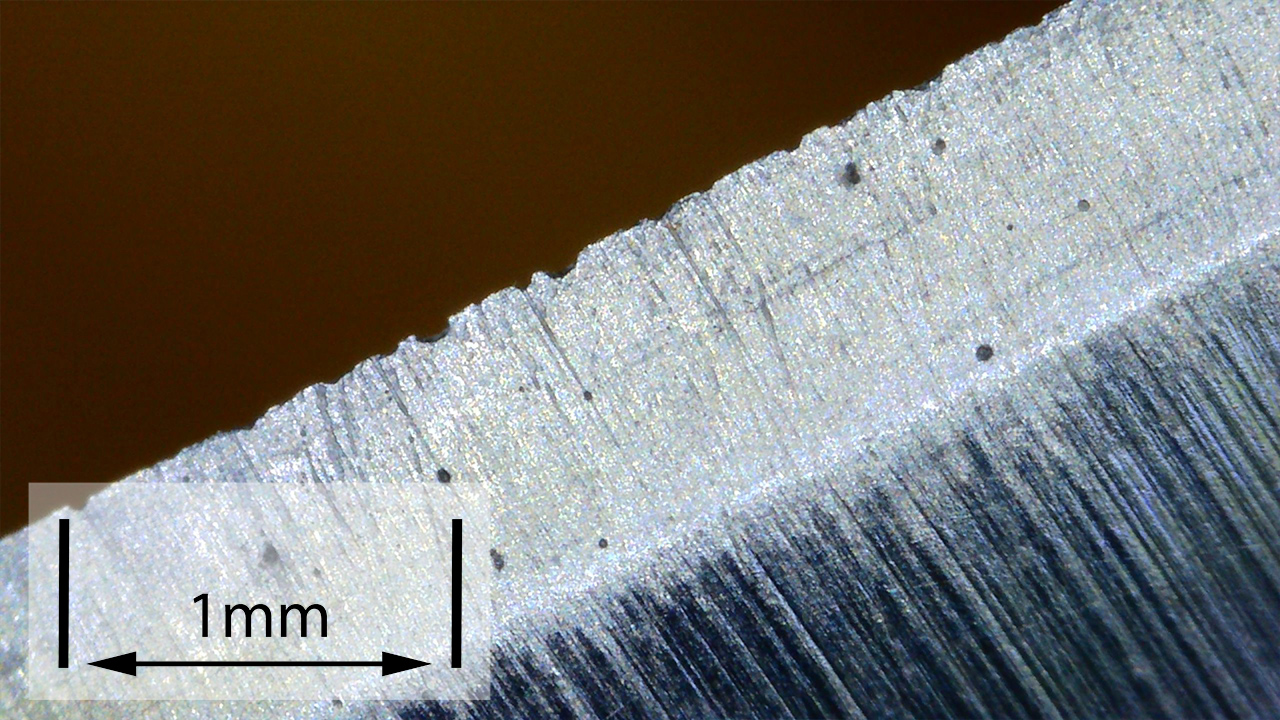
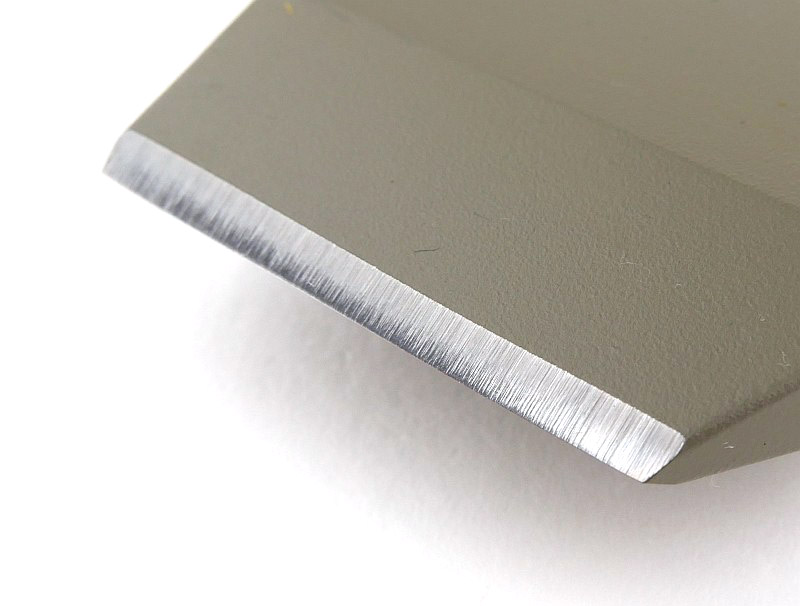
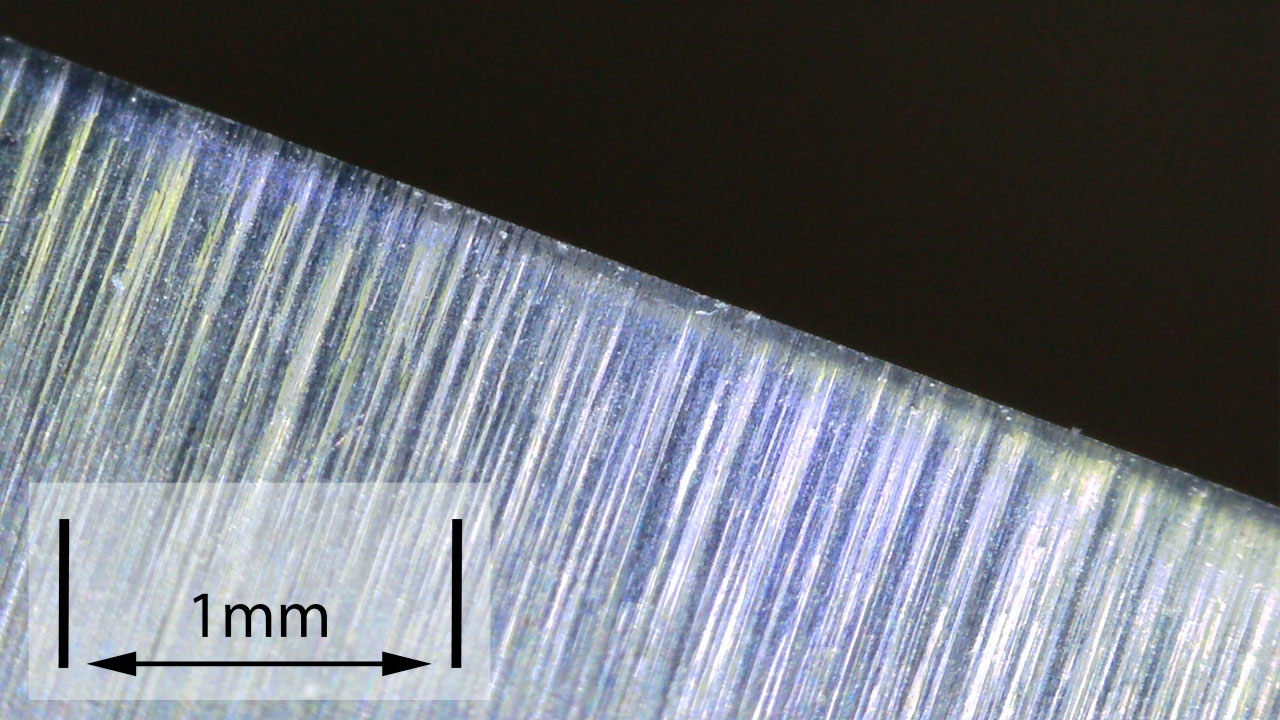
The Factory edge up close:
Followers of Tactical Reviews will know my views on factory edges, but to recap:
Anyone using a knife will need to sharpen it. That first factory edge is just like the first tank of fuel that a new car comes with (or first charge of the battery).
A good factory edge is a ‘nice to have’ but not a ‘make or break’ for a good knife, as you will be putting your own edge onto it soon enough.
The factory edge does however indicate the care a knife maker has put into the final finish.
It is for this reason Tactical Reviews measures factory edge sharpness and specifications, and includes this information in the detailed technical testing.
As a further look at the factory edge, this section has been added to include some high magnification photos of the factory edges.
Like the knife parameter measurements, this was included out of interest for the small factory cutting edge on the splitting head.


What is it like to use?
Let’s not forget, this is a military tool with a NATO Stock number, so when we look at this as a tool in itself, and for general use or prepping, the compromises of certain functions are absolutely intentional within the overall design.
This tool is intended to be carried into conflict, and, critically, to minimise how much it will impede the user’s movement when carrying it. This is a vital factor to keep in mind while assessing the tool in comparison to dedicated, larger and less easy to carry tools.
When considering the uses of a tool like this, it occurs to me that though this is termed a MOE or Method of Entry tool, this is also a Method of Escape/Exit tool. You might want to breach a door to enter or exit.
Basic ergonomics are of an easy to handle mid-weight hand tool. The G10 handle scales bulk up the 8mm steel to make for a comfortable hold. I’m only showing three of many possible grip positions here. In use you will grip the entire head as a handle when prying.
The action of sheathing and unsheathing is of rotating the head out of the sheath with the claw being the pivot point. Re-sheathing starts with hooking the claw into its socket and rotating the head into place.


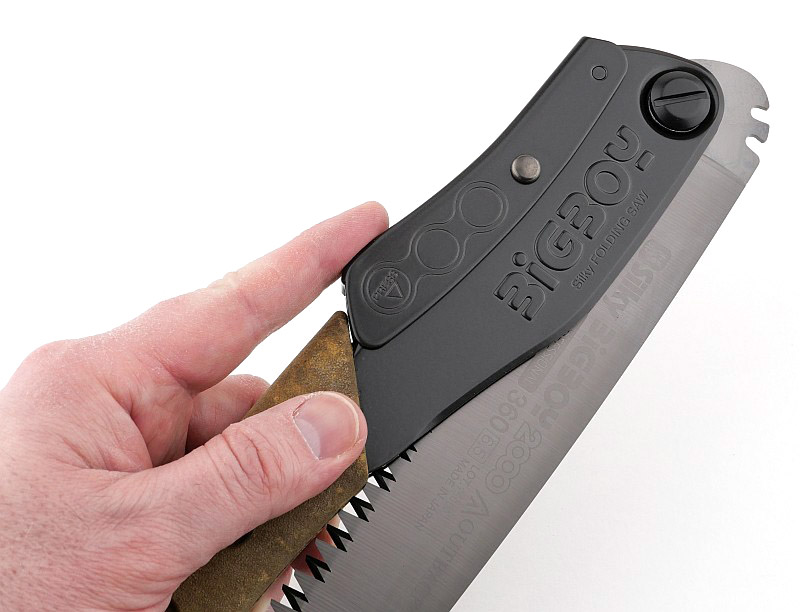
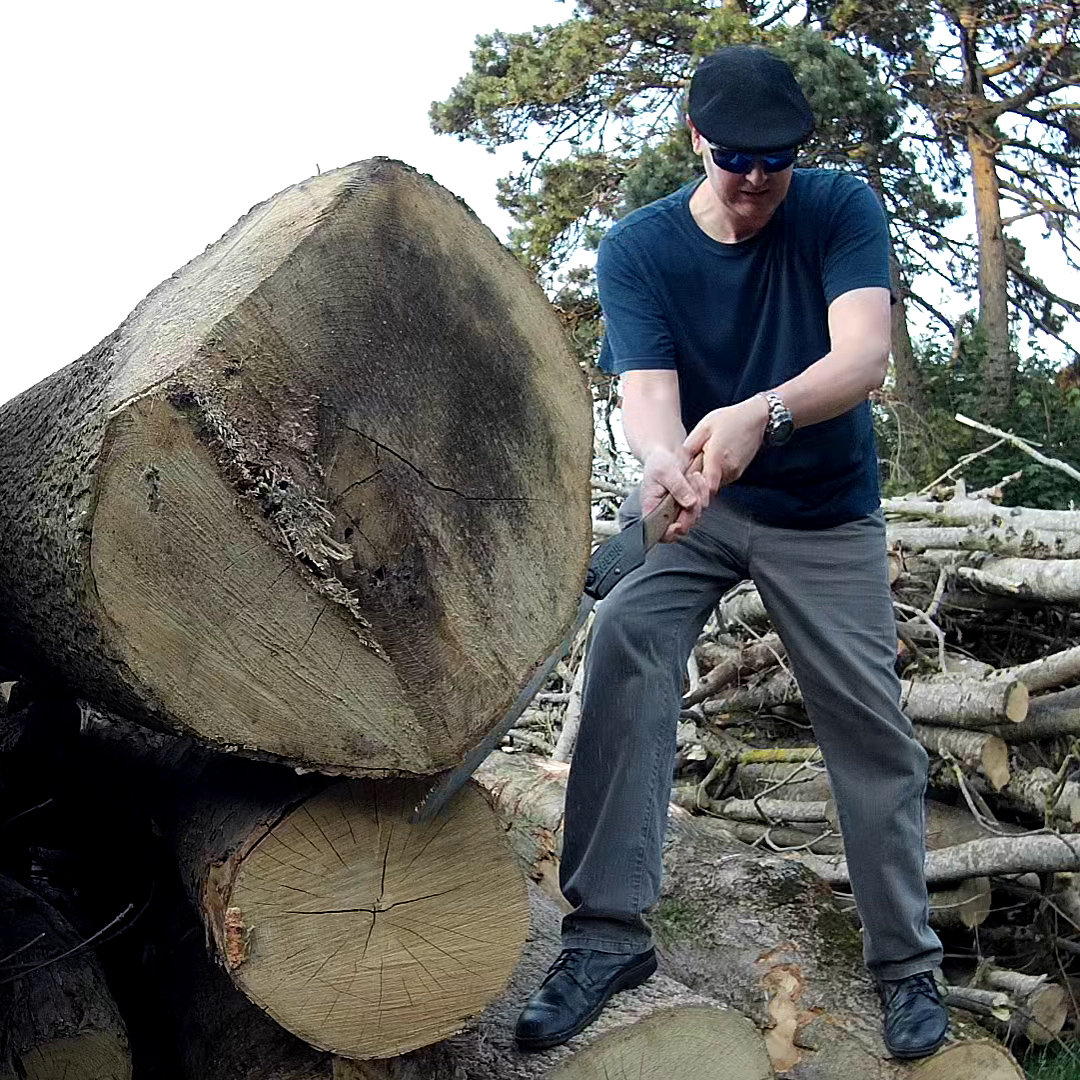
Starting off this next gallery are a few prying examples. This is actually the first completely straight prying tool I have ever used (of a good size, not counting pocket prybars). All dedicated prying tools have a bend or curve to allow levering and room for the handle to move and the pry head to lift. With a straight pry tool you typically need to use a different technique. Some prying tasks may have plenty of room to move, for example prying a crate open, but others, like lifting nails usually end up with running out of room to lever them out. A simple technique to eliminate this issue is to place a spacer piece under the pry tool and use this to lever over and provide the same lift as a bent pry tool. If you need more lift, add another spacer.
The claw tool has so many potential uses that I haven’t been able to try, from piercing, smashing, lifting, raking. My testing was of controlled lifting and applying force where I could not grip with my hand. Unfortunately the day at the wreckers yard didn’t work out, so I can’t report on vehicle tests.
Remembering the splitting head (not axe head) has a wide geometry for durability, you need to wield it for a smashing/splitting action more than chopping. It made quick work of dry pallet wood, a good indication of providing you with effective destructive power.


Assessing and testing this tool in more of a prepper, survival, and enthusiast’s point of view does slightly conflict with some of the military design requirements. The design, and its capabilities, are all specifically designed to meet a military brief. In this, the design of the MFE-01 meets the requirements, and a compromise in one aspect is due to a more important requirement.
Don’t compare the Rhino tool to a normal crowbar, axe, hammer or any other dedicated tool, instead it is a versatile and tough multi-tool for SHTF scenarios that will let you break things you otherwise couldn’t, while keeping it as easy and safe to carry as possible.
Review Summary
The views expressed in this summary table are from the point of view of the reviewer’s personal use. I am not a member of the armed forces and cannot comment on its use beyond a cutting tool or field/hunting knife.
Something that might be a ‘pro’ for one user can be a ‘con’ for another, so the comments are categorised based on my requirements. You should consider all points and if they could be beneficial to you.
_______________________________________________
What doesn’t work so well for me
_______________________________________________
The exposed pry prongs can dig into other kit.
Removal of the MOLLE hanger requires partial disassembly due to a concealed screw.
_______________________________________________
Things I like
_______________________________________________
Super tough design – ‘Rhino’ is a very appropriate name.
G10 handle has stood up to being levered against for prying.
Secure grip (despite absolutely straight handle).
Teflon coating holding up very well, even against pulling nails.
Very stable carry platform.
Secure sheath with positive action.
Failure of the G10 would not prevent the tool being used.
Solid, single piece, full tang construction.
Discussing the Review:
Something new – will it work? A Tactical Reviews Subreddit.
TacticalReviewsChat on Reddit
Please visit there and start/join the conversation.