Epic Knife Review: Aitor Jungle King Series 1, 2 and 3 – Part 2

Join me in the continuation of an epic super-detailed two-part review of the AITOR Jungle King knife series. For me, this style of knife focuses on the fun in outdoor knife use that is so often overlooked due to it being fashionable to dismiss any knife if it doesn’t have a full tang and latest super-steel. Let’s allow ourselves the simple enjoyment of using different knives, and with the Jungle King Series, Aitor have packed them with interesting and useful features.

This epic review of the Aitor Jungle King knives has so much detail I’ve had to split it into two parts. In this, the second part, we will explore using the plethora of features Aitor give you, and some valuable insights into these interesting knives.

See Part 1 for the technical details and photo galleries showing all the features. Read on here in Part 2 for practical testing and insights plus a unique insight into the madness of UK knife law.

The madness of UK Knife law (and the global epidemic):

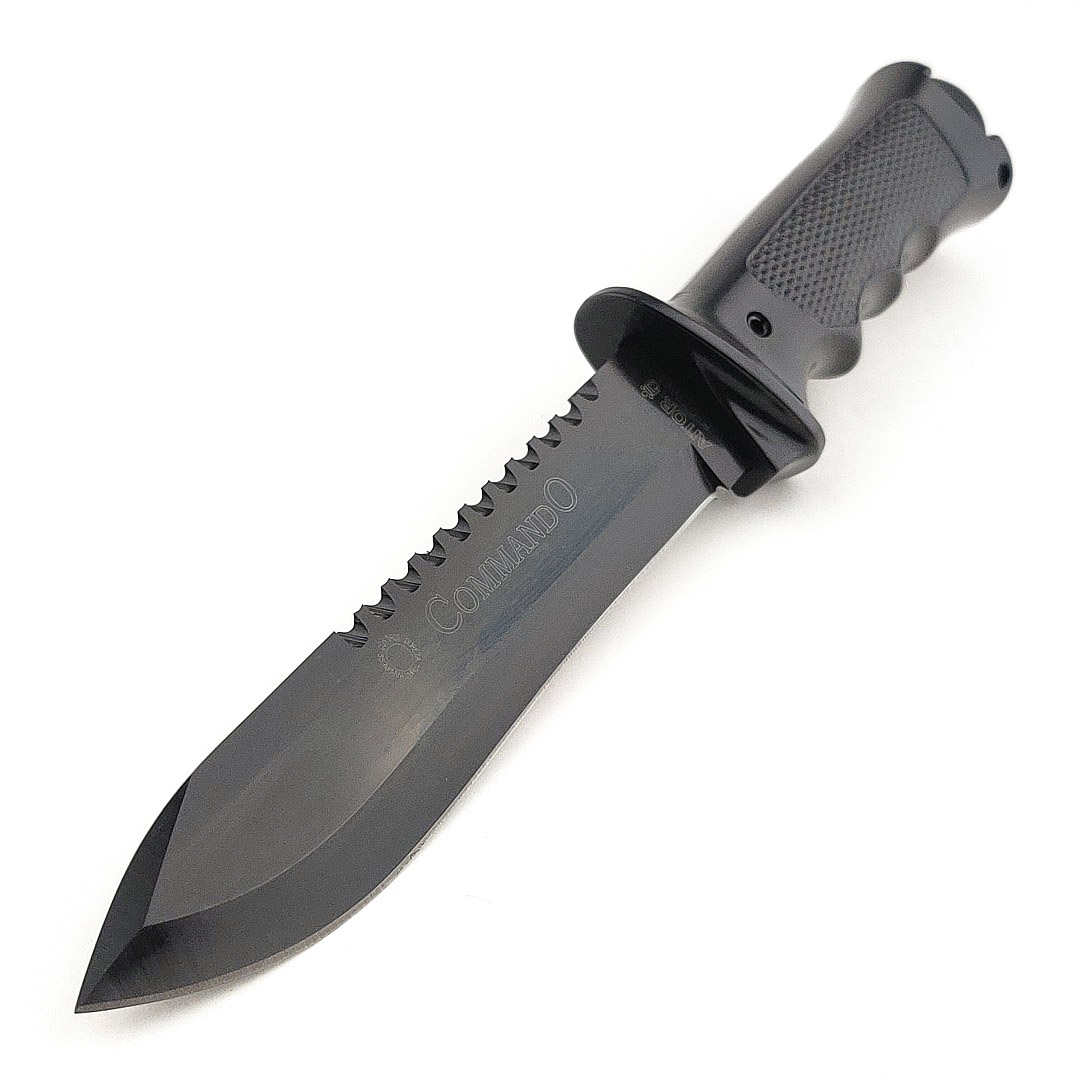
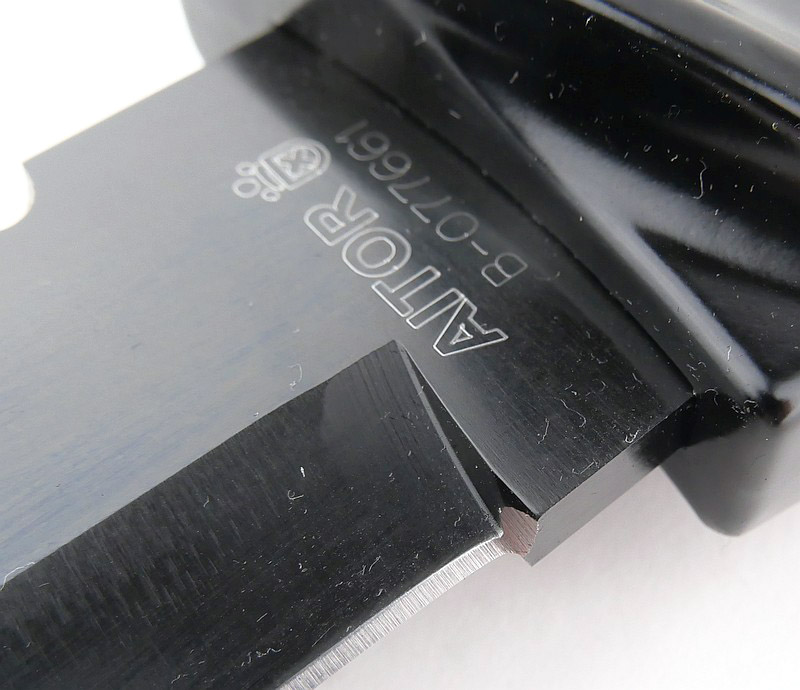
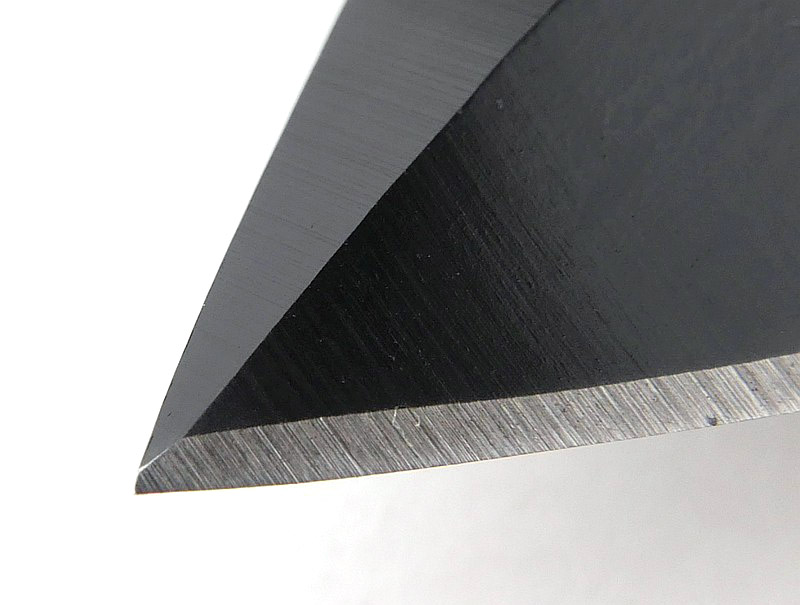
I’ve had to start Part 2 with this section for two main reasons. Firstly, in order not to break a new UK knife law “The Criminal Justice Act 1988 (Offensive Weapons) (Amendment, Surrender and Compensation) Order 2024″ when it came into force, I had to modify the Jungle King 1, as overnight this knife became an illegal offensive weapon in the UK, which was clearly a danger to society and must be destroyed.

Fortunately the relatively minor reshaping of the knife tip brought the Jungle King’s blade under this terrifying 8” threshold and filled it with fwuffy bunny wabbit love meaning the UK was safe again 🙂

In the gallery, the masking tape was used to mock up the required position for this modification and finalise the angle for this small reverse Tanto. Such a pity to have to make this alteration, but the tip strength will be higher with this modification. The material was removed using a belt grinder, and definitely proved the hardness and wear resistance of the Aitor heat treat as it did resist the change and take longer than expected. It was however worth it to feel I had made the country a safer place to live in (this was said with sarcasm).


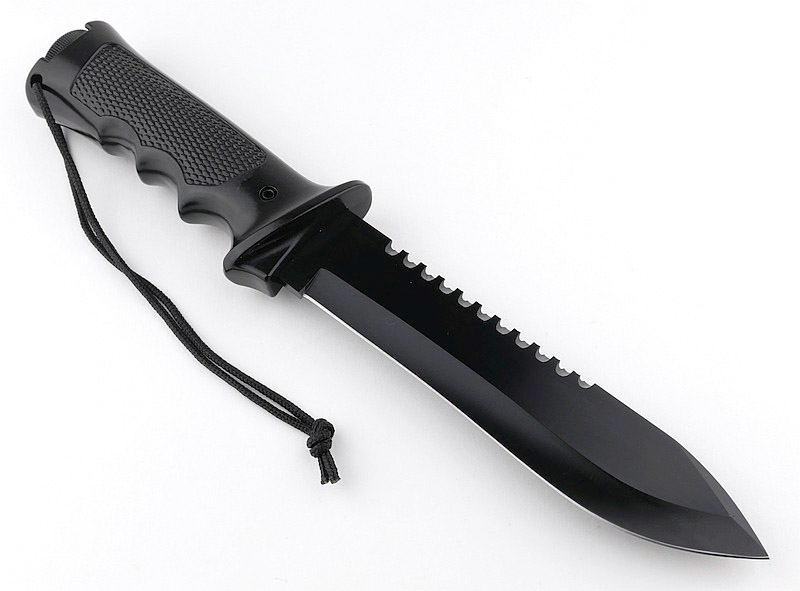
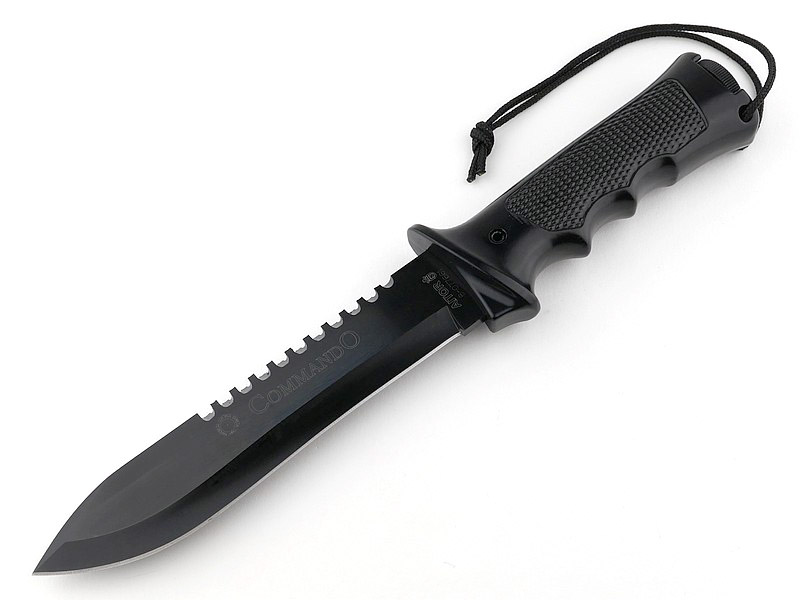
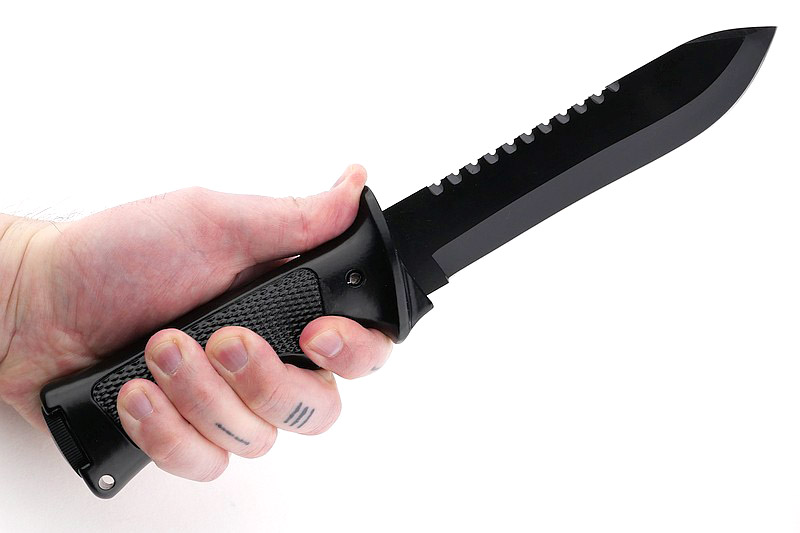
Comparison of size and handling:

I take an XL size Glove, and this gallery steps through the models from Jungle King 1 to 3 giving a sense of how they handle.


New Edges for All:

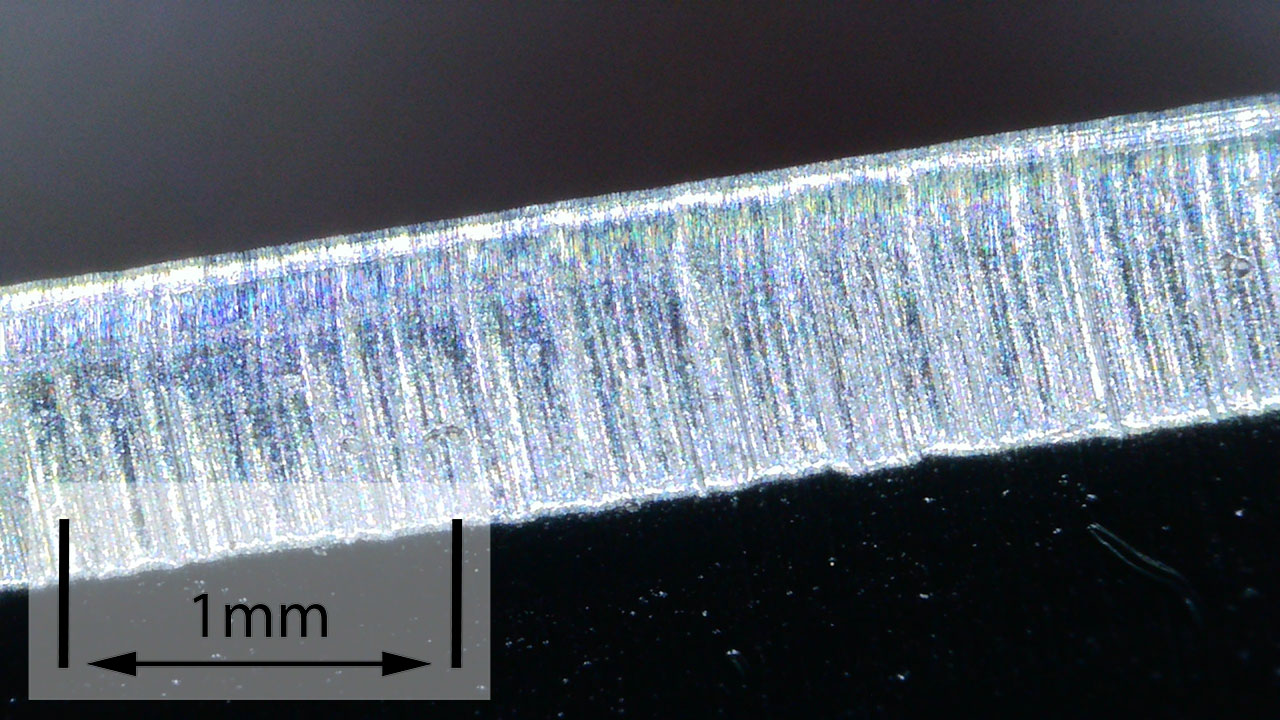
I did give myself quite a job with the major reprofiling of all three blades, and although there was a lot of metal needing to be removed, it was worth the effort as this has transformed all the Jungle King models.

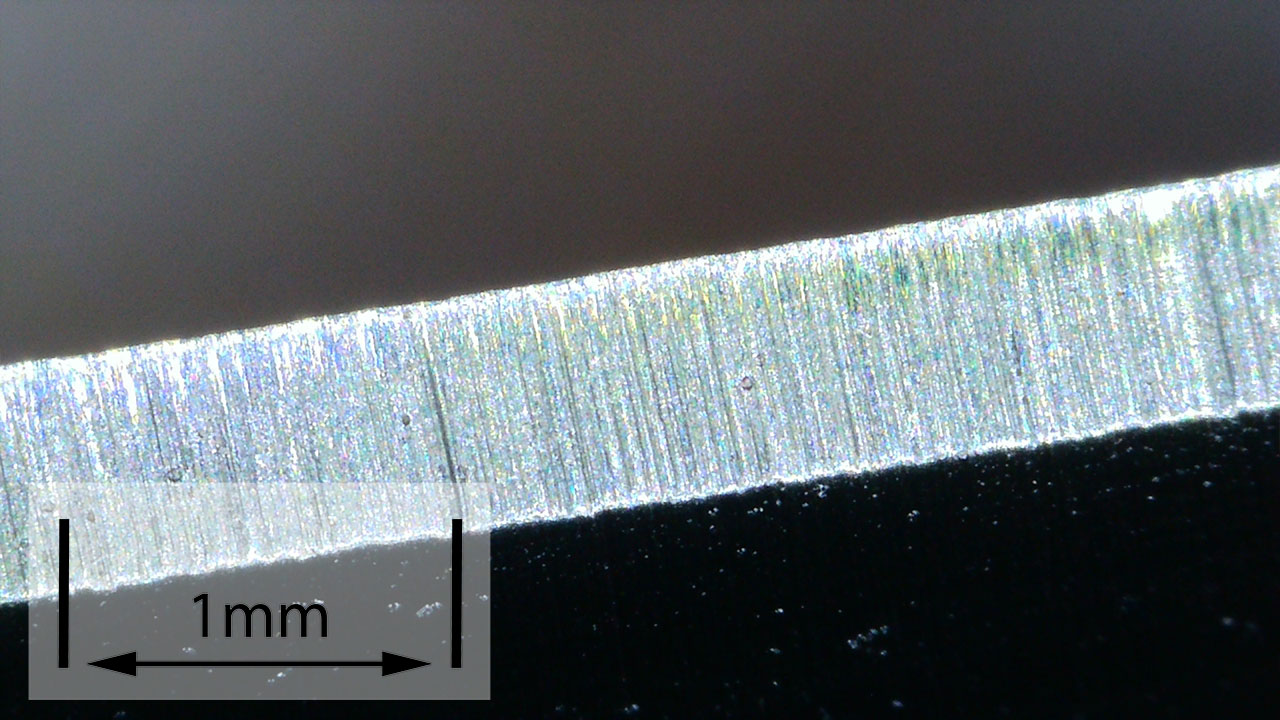
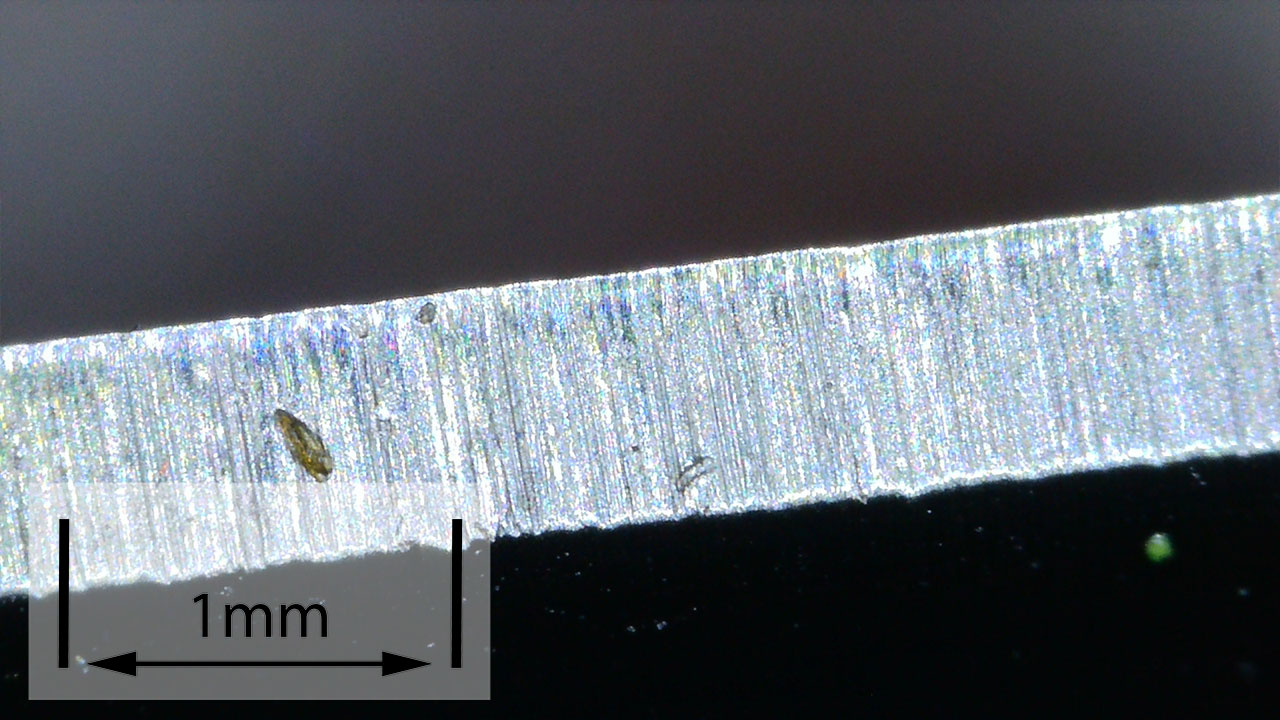
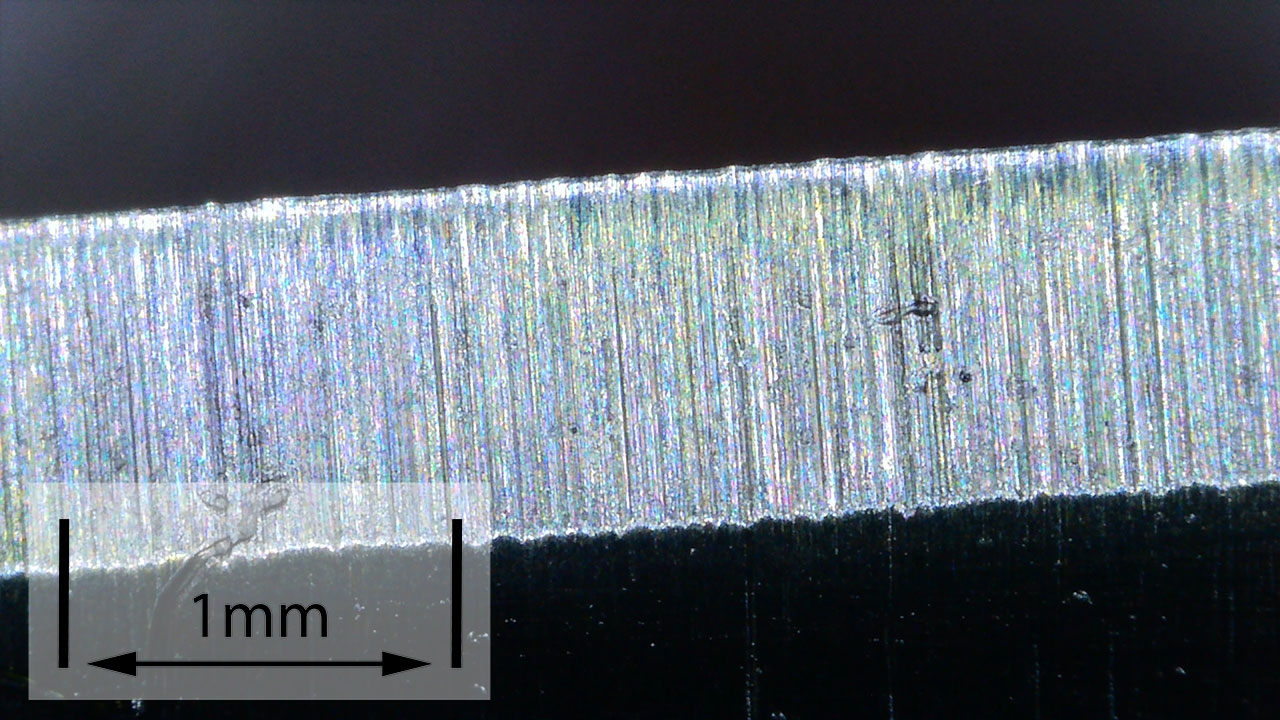
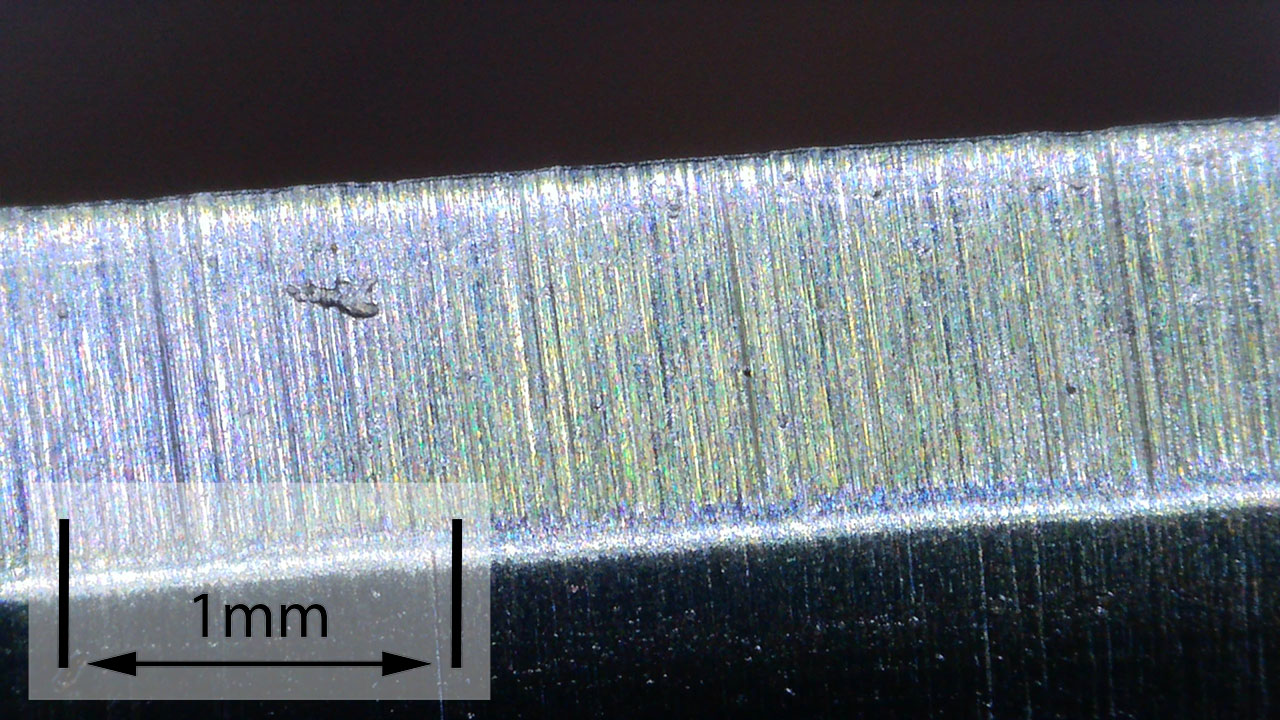
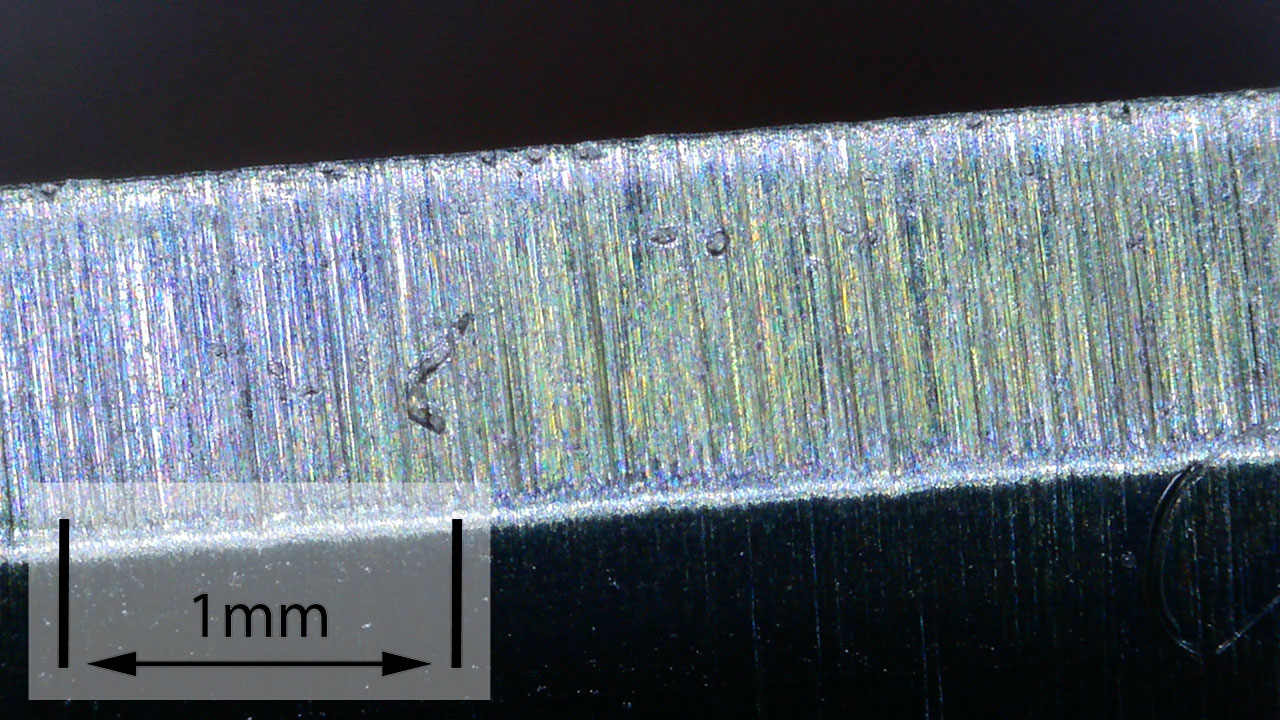
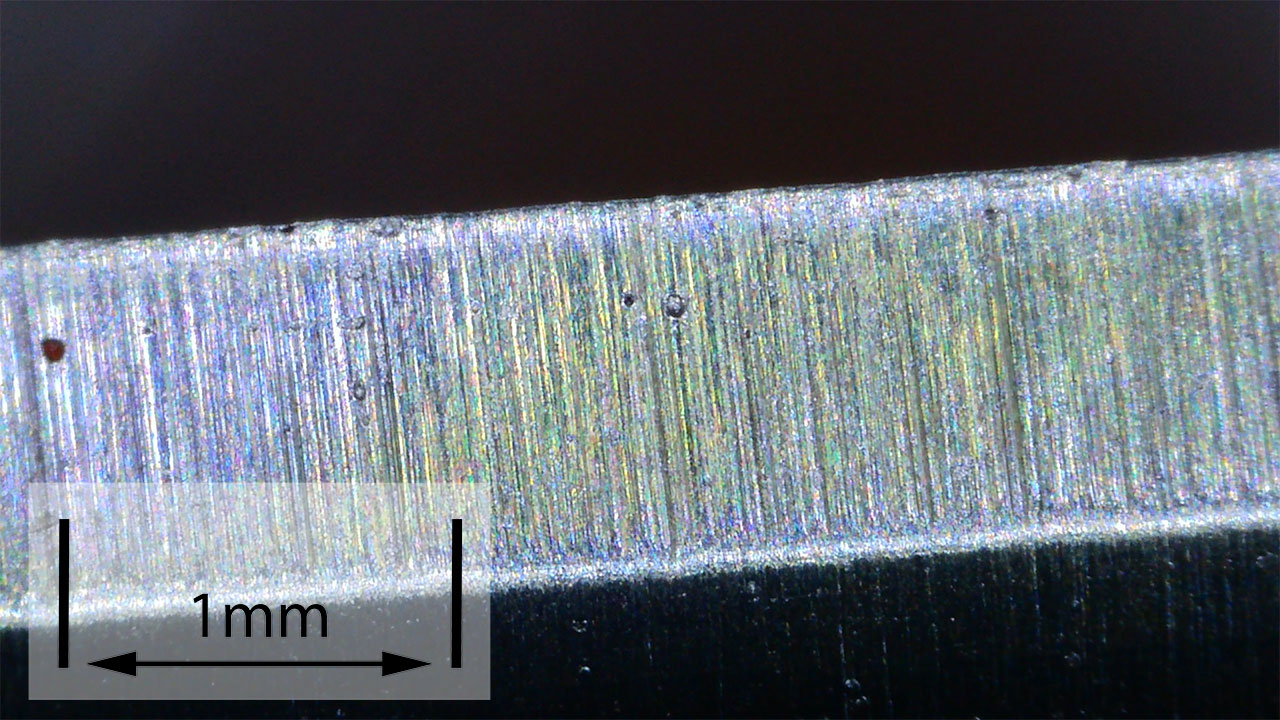
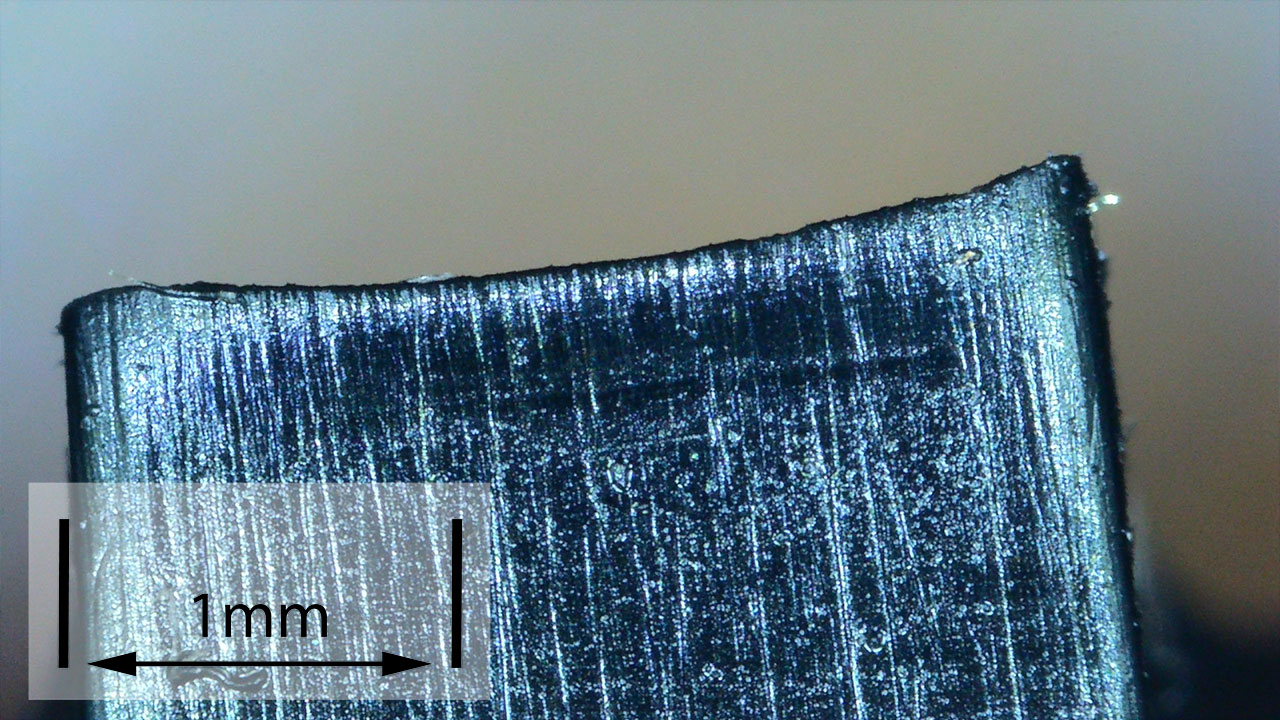
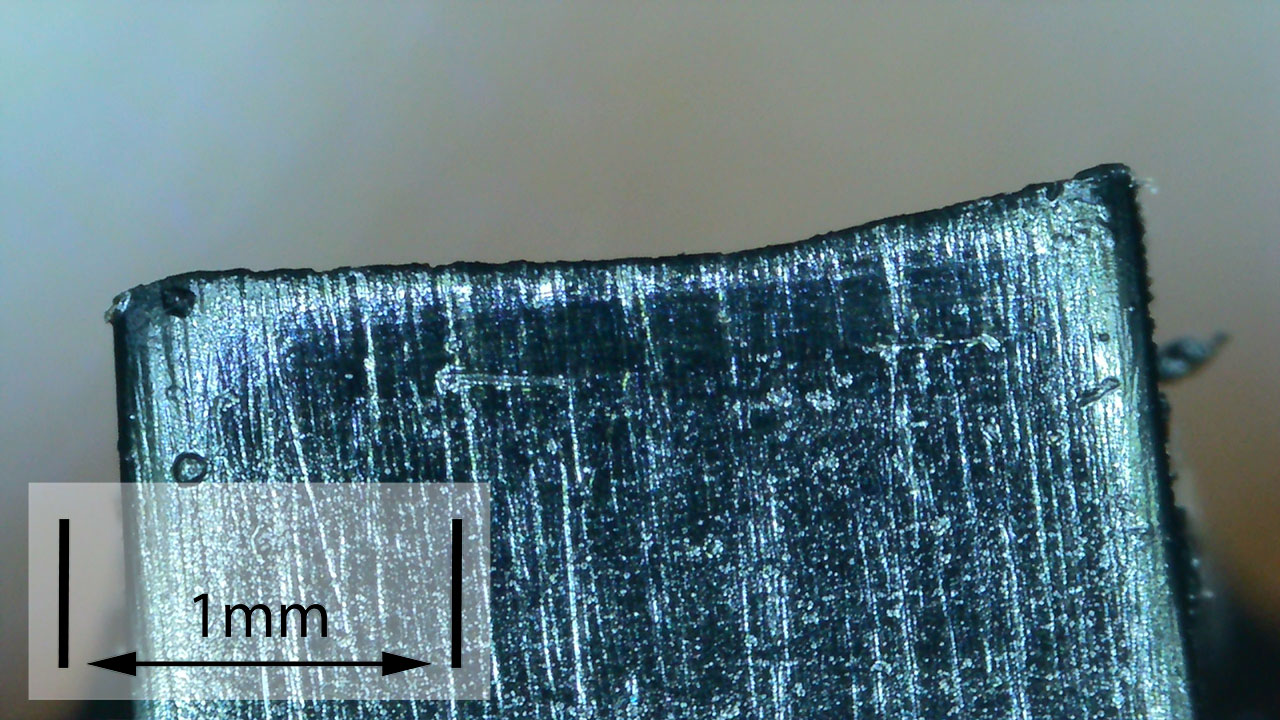
All blades were taken to 17.5 DPS.


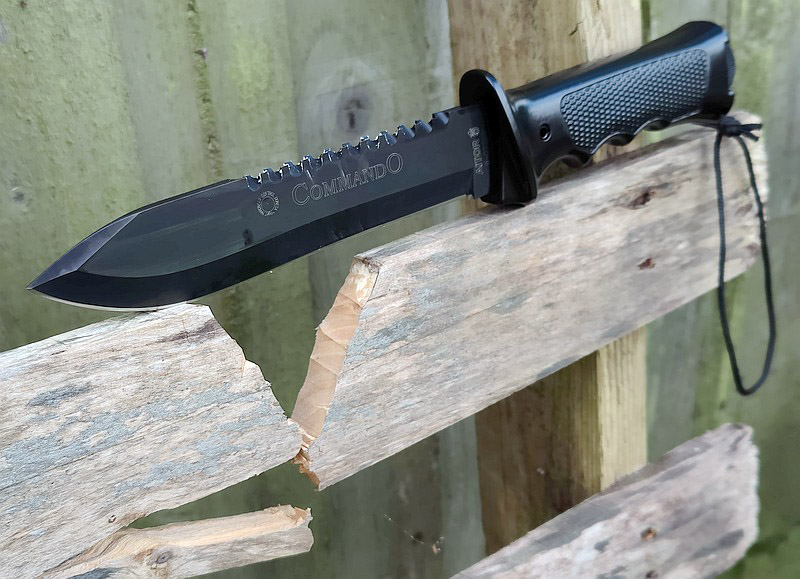
The Pallet Chop test:

This is a no-holds-barred chopping test. Initially chopping directly with the knife, and then, if required, using a baton to drive the blade into the board.
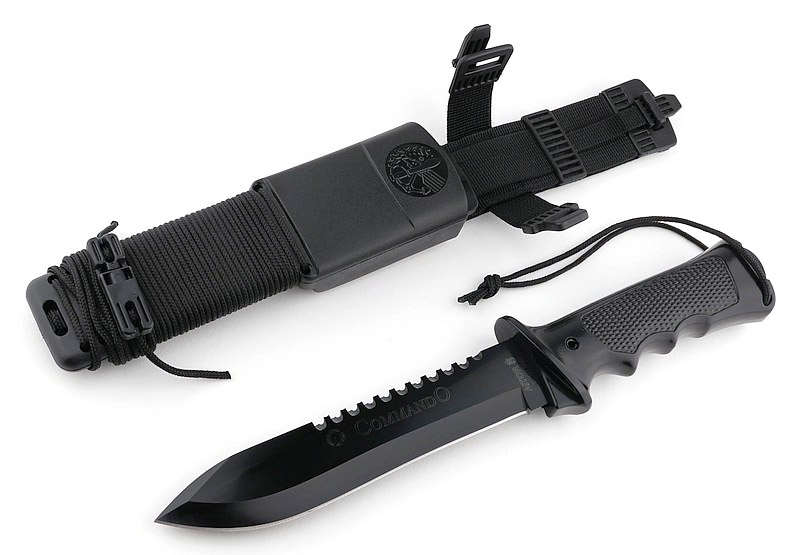
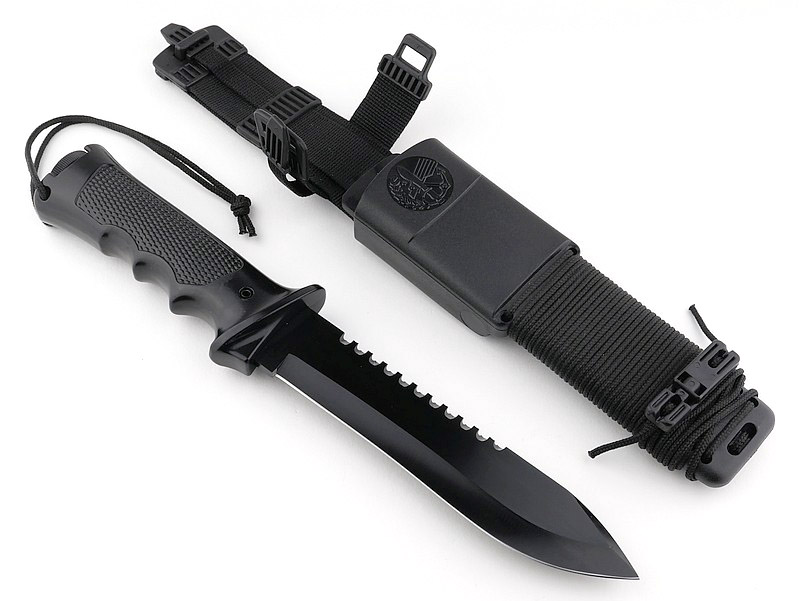
The Jungle King 1 simply blasts through this test under its own weight, a powerful chopper without any jarring or bounce. The difference in chopping with the Jungle King 2 is huge. Its weight, or lack of, in comparison to the Jungle King 1 makes it much less effective; so step in the baton. The blade profile is also a wider wedge, so takes more effort to drive it in deeply, and the angle of cut is critical. As the Jungle King 2 progresses through this cutting task, it becomes more difficult to do as it needs enough space for the baton to be able to strike the blade.
Last up is the Jungle King 3, lightweight and a plastic handle – so “what are you doing?” you might well ask. The point is to see if it could and what I found was a ‘Yes…but’ answer. Right here in this gallery, the Jungle King 3 was used as it is, with the tailcap and survival kit in place. After three strikes on the blade spine, the brass threaded insert broke free of the handle. The lesson is; don’t baton with the Jungle King 3 straight out of the sheath, however, this story is to be continued…
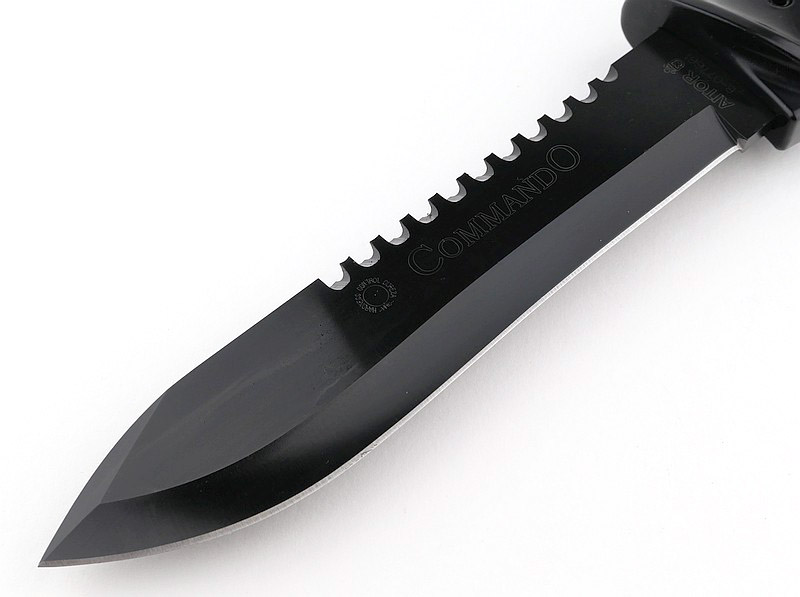
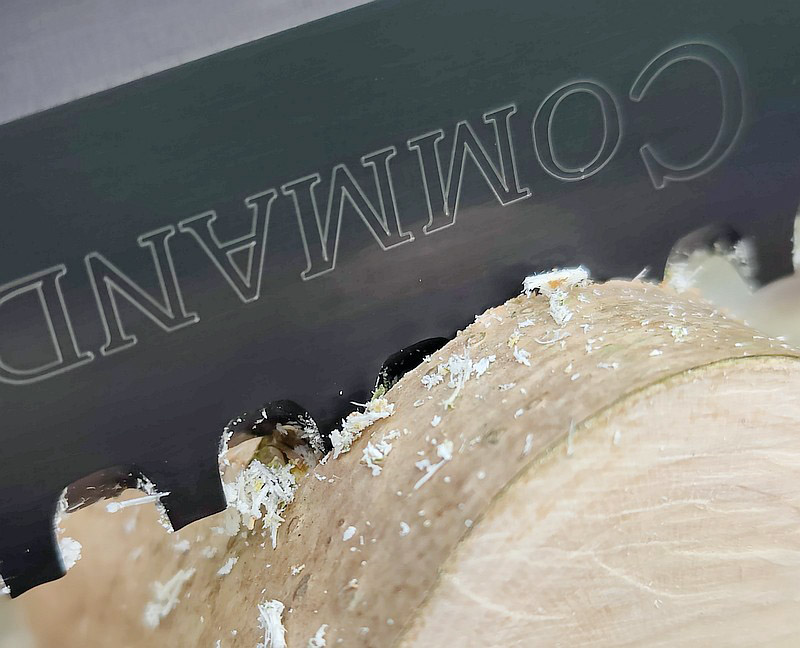
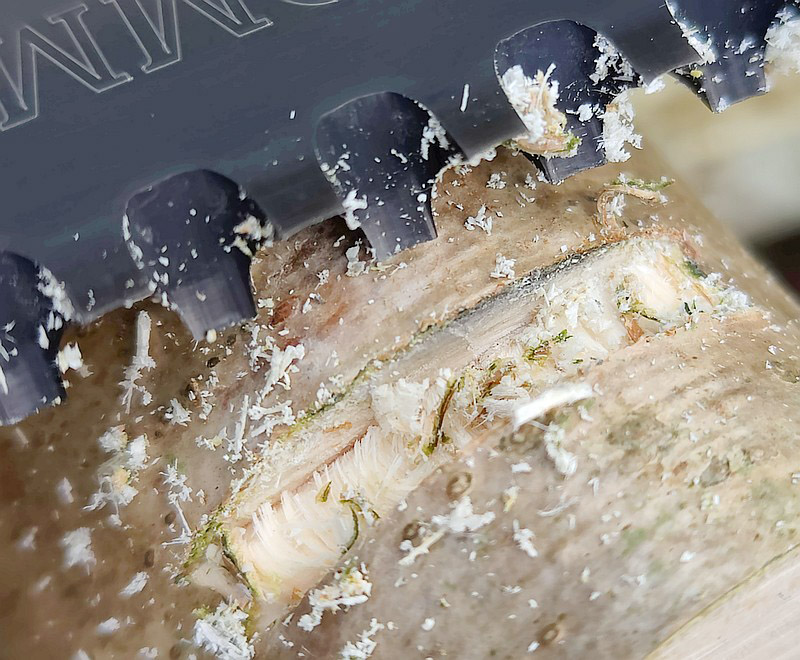
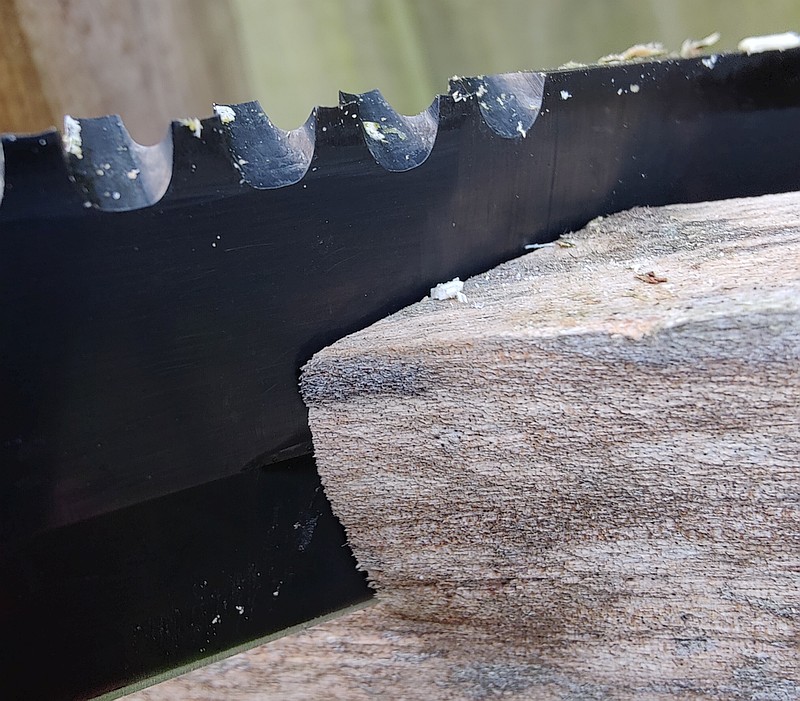
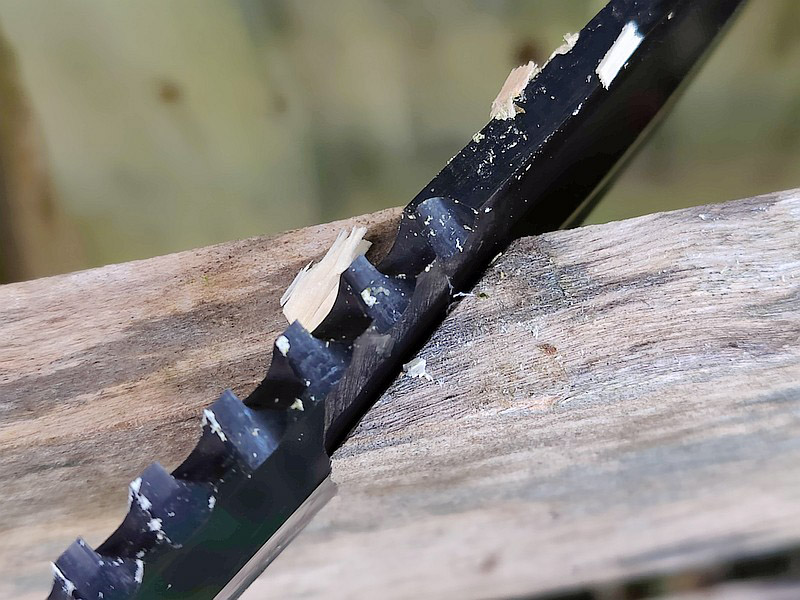

Aitor Saw-Backs:

With the Jungle King 1 and 2 featuring the Aitor Saw Back, how do these fare? As with almost all saws on the spine of a knife blade, it is best to consider these a notching tool rather than a full cross-cut saw. Depth of cut is limited to more or less the depth of the saw teeth before the saw starts to bind in the cut and progress stops as there is no clearance. The saw-backs do help give a square cut for making pegs, traps, cooking stands, so are useful, but won’t allow you to saw off branches.


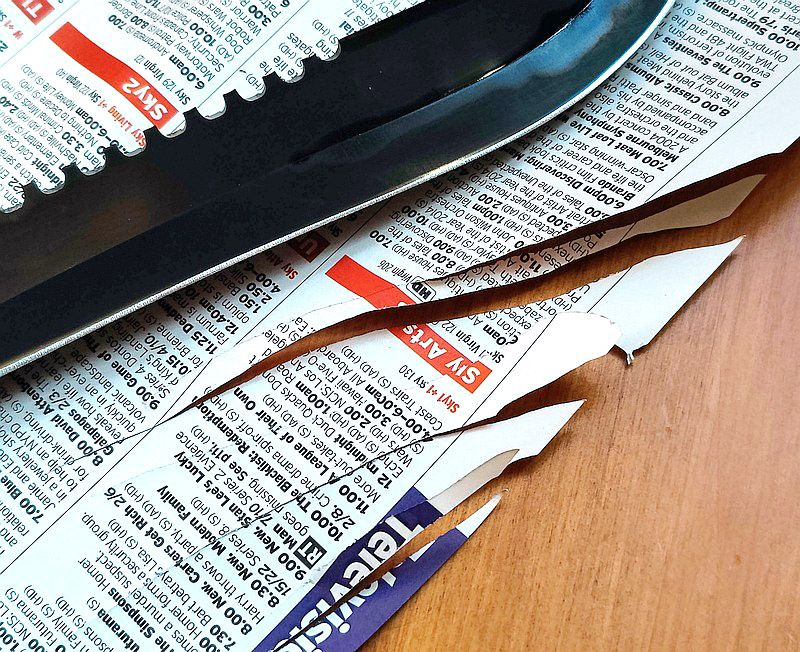
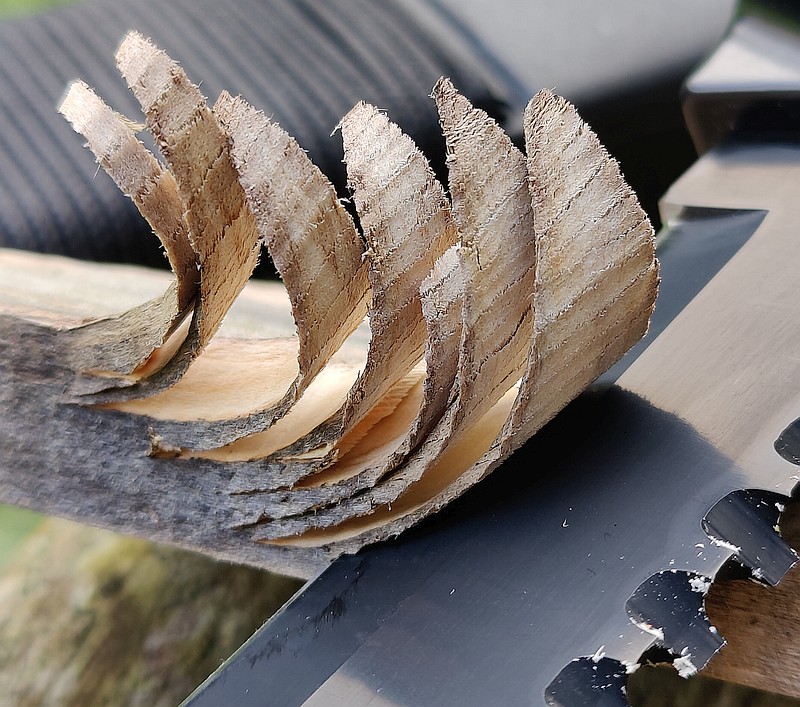
Camp Cutting and Fire Lighting:

Straight up I must say that initial out-of-the-box cutting tests were disappointing. I normally would try to use the factory edges as much as possible. However the edge reprofile, and sharpen to shaving sharp (less than 200 BESS shaves), has made the Jungle King knives eager cutters and a pleasure to use. The fineness and delicacy of cut the Jungle King 1 manages surprised me. The large blade and handle allowing for controlled power to be applied to the cuts. Moving to the Jungle King 2 and it feels so light in comparison, despite its all metal construction, and although also cutting very well, with good control, the advantages of the larger Jungle King 1 are apparent.
Lightest of all, the Jungle King 3 with the slimmest blade, has a tendency to bite in more deeply that you want, and its smaller size and weight becomes apparent as you feel it is harder work for the same tasks; but it is significantly lighter and easier to carry.
All the Jungle King knives stood up really well with the new edge geometry, holding their edges and not showing any damage.
The fire-lighting tests were a mix and match, with the magnesium block fire steel from the Jungle King 1, and using the easier to handle Jungle King 3 for striking and shaving the magnesium block. I chose to use the magnesium block mounted firesteel as the small fire steels in the survival kits are uncomfortable to hold during striking, so the magnesium block provides a stable platform for this. Unfortunately, during this test, the fire steel came away from the magnesium block, leaving me having to hold the firesteel on its own anyway.
Though not a requirement, the magnesium shavings do help get a flame going if the tinder is not perfectly dry, so try without first, but then you can always give it a boost if needed.


That Iconic Slingshot:

Such an overused word ‘iconic’ but it is true for Aitor’s Jungle King knives. Again one of those highly copied features, for the reason it is simply great fun. Would I expect to use it to hunt in a survival situation? Honestly, no, I’ve never been that good with a slingshot, and naturally available ammunition is not consistent in size, shape or weight. Like the lottery, if you don’t play you can’t win, so in desperate times an attempted shot is better than no shot. Added to that, for survival, when you finally might need to try, the slingshot bands are latex, and latex bands degrade over time, so unless you make sure to replace them every year or two with fresh bands, you may find they are unusable.
Initial testing here was with the Jungle King 1 and 2. When using the Jungle King 3 I found it significantly less comfortable to hold, with the smaller sheath digging into my hand more.
The slingshot bands appear to be the same specification, even if a slightly different colour. Assembly is very easy just pushing the ends of the bands over the slingshot arms. Drawing the slingshot makes the tubes grip onto the metal arms, so they don’t slide off.
For this plinking test I used ‘mud balls’ (clay slingshot ammo), and two factors presented very quickly. For each and every shot, the slingshot arms are knocked forward (as shown) out of position, so need to be pulled back into place for the next shot. Most seriously, after only five shots, the bands developed holes from the unfinished ends of the slingshot arms. At least one arm for each Jungle King model has a sharp corner which cut through the slingshot band. Testing was cut short as I did not want to continue with the damaged bands.


The Slingshot Fix:

After that initial testing session being cut short, I rounded off the ends of all the slingshot arms with a file, on all the Jungle King models. Not a perfect job by any means, but leaving no sharp corners. Then trimming off those damaged ends from the bands (at least this is an easy fix, by just shortening them a couple of centimetres) and going again.
Now, after I got tired (lost track of how many shots), there was no damage to the bands at all. I did get more accurate, but would not have expected to hit a rabbit, squirrel or bird sized target. Fun, just not if my life depended on it.


General use of the Jungle King knives:

This is a bit of a hotchpotch section to round up a few things in one last gallery. A reminder that you don’t need to be on jungle adventures to use these knives; I needed to cut some foam rubber to size and the large blade of the Jungle King 1 was ideal to give me the a perfectly clean wide flat cut. Slicing easily with the same untouched edge that was previously put to work for the pallet chop and cutting tests.
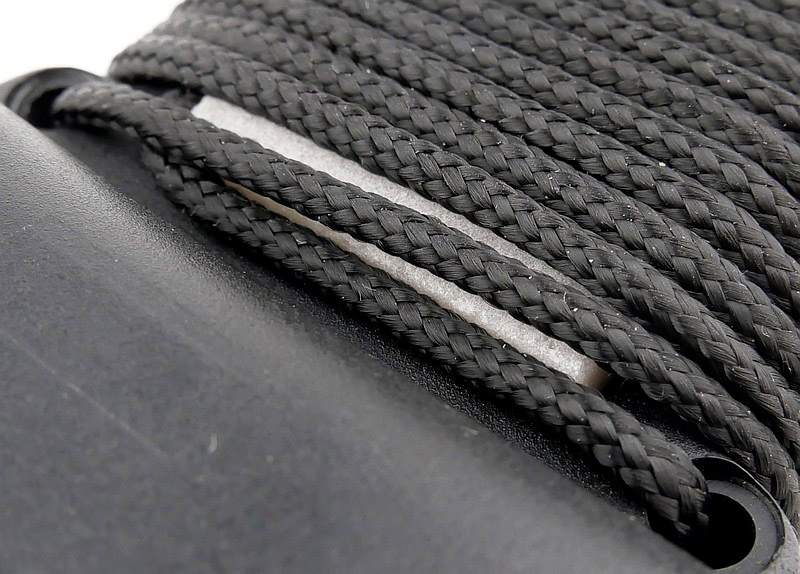
A note about the Jungle King 1’s sheath, and the slide-out tray plus metal sheath divider, which fell out. I suspect the slingshot practice session caused the metal divider to come loose, and the photos in the gallery show the correct way round for the metal divider to be fitted. The slightly upturned end actually provides some pressure on the blade of the knife to stabilise it in the sheath, so it must be fitted back in this way round.
For the final part of the gallery I am revisiting the Jungle King 3 batoning test where previously the brass threaded insert came loose. I took the brass insert out completely, cleaned it up and epoxied it back in place. I know I used more glue to fix it than there was before.
The main lesson learned was that actually you can baton with the Jungle King 3, but if you do, make sure you remove the tailcap and survival kit first. Without the tailcap in place the shock from the baton strikes won’t hit the threaded insert so hard. In fact what you see here was a full-on batoning session and only the smaller size of blade was slowing progress. No damage was sustained at all using the Jungle King 3 like this, and though I know the threaded insert is more firmly epoxied in place than it was originally, I think this approach would probably have been fine.


What is it like to use?

Are the Jungle King Knives the best survival knives you can buy? Would a modern military special forces team choose these knives for critical missions? I think not – But this is not the point.

The Jungle King knives are capable, if somewhat unwieldy, tools, with plenty of features. They are enjoyable to use and find uses for their features.

Working on the basis the Jungle King 3 is intended for a younger user (who can then progress to the Jungle King 1 or 2 in time), we consider it as a leisure knife to use while camping, and practice both general camp and survival skills.

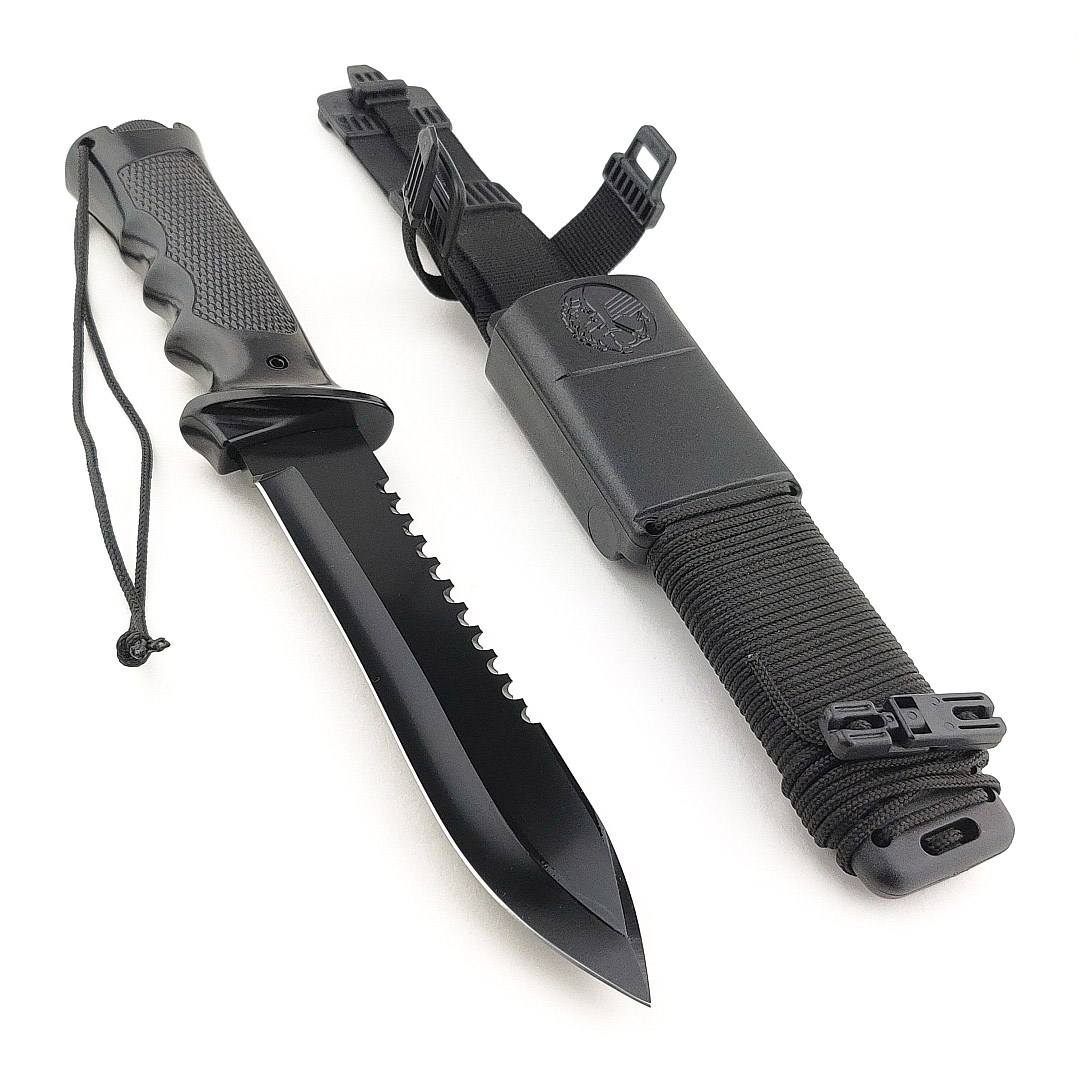
Though a seriously capable knife, the Jungle King 1, as a total package, is big and heavy, so you might not want to carry it far. Which brings us to the ‘Goldilocks’ model of the series, the Jungle King 2 – a practical carry option and still packed with features, including the secondary knife. It is understandable why this was copied so much.

As a Gen-Xer, these knives have been highly influential and are nostalgic; regardless of this, and current trends, let your hair down and have some fun with these strong and feature-packed knives.


Review Summary

The views expressed in this summary table are from the point of view of the reviewer’s personal use. I am not a member of the armed forces and cannot comment on its use beyond a cutting tool or field/hunting knife.

Something that might be a ‘pro’ for one user can be a ‘con’ for another, so the comments are categorised based on my requirements. You should consider all points and if they could be beneficial to you.

_______________________________________________
What doesn’t work so well for me
_______________________________________________

Sharp ends on slingshot arms damaging the rubbers.
Factory edges are disappointing.
UK Only – JK1 is no longer legal as the blade is over 8″.
Saw back cut depth very limited.
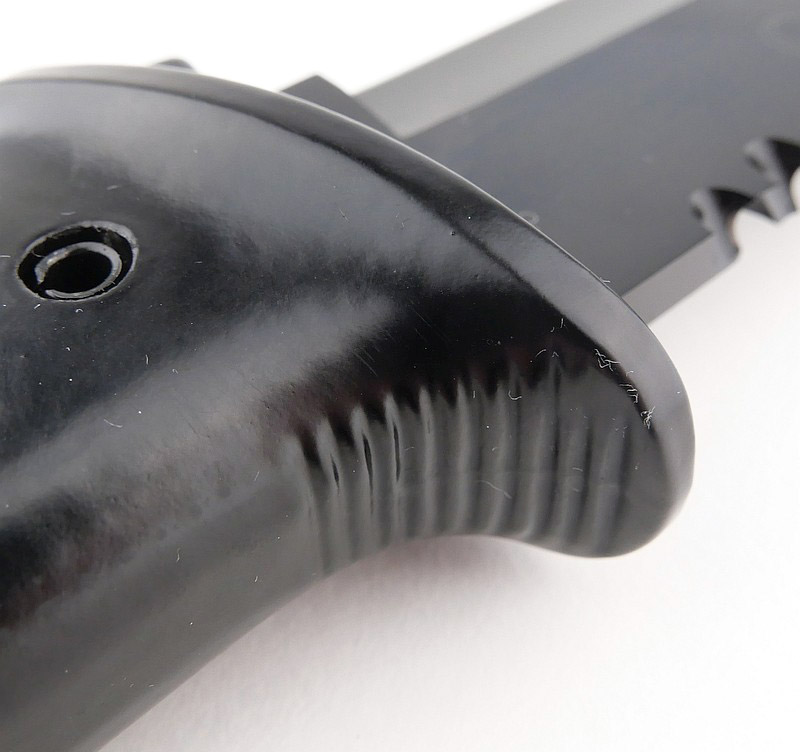
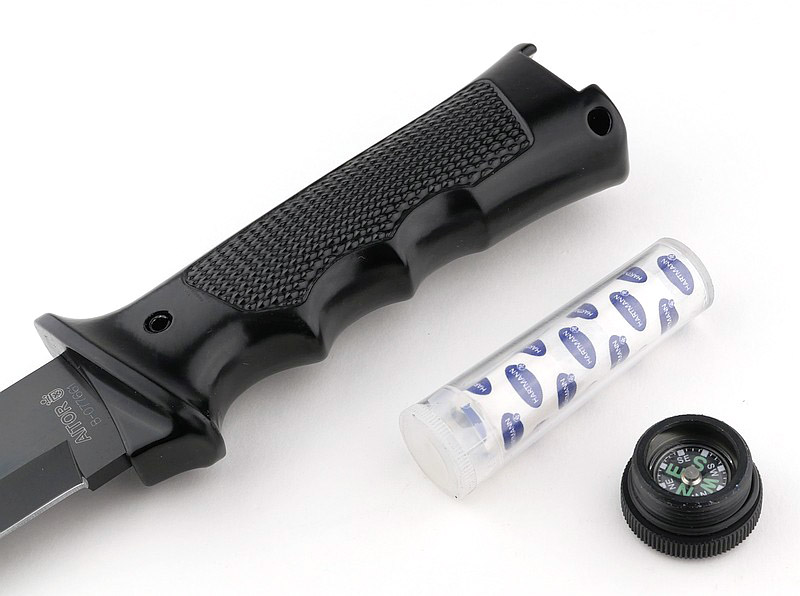
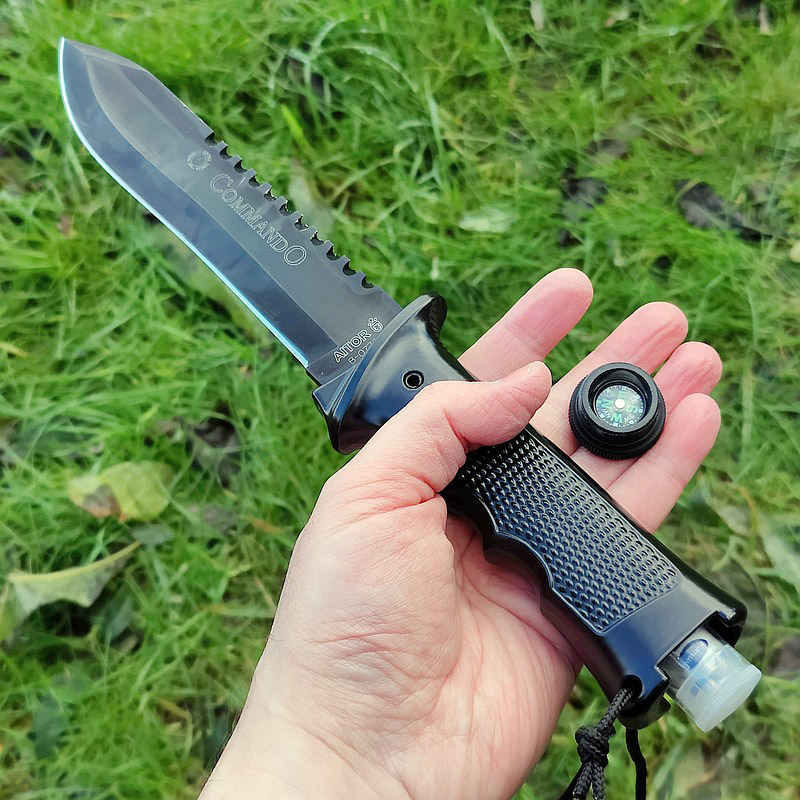
JK3 compass cannot be used while fitted to the handle.
A metal handle will be VERY cold to use in winter.

_______________________________________________
Things I like
_______________________________________________

Very robust all metal construction for JK1 and JK2.
Classic, Iconic and historically Influential design.
A choice of size to suit all.
Individually HRC hardness tested/verified blades.
Good edge performance and resilience during testing.
JK1 and JK2 include a secondary full tang knife.
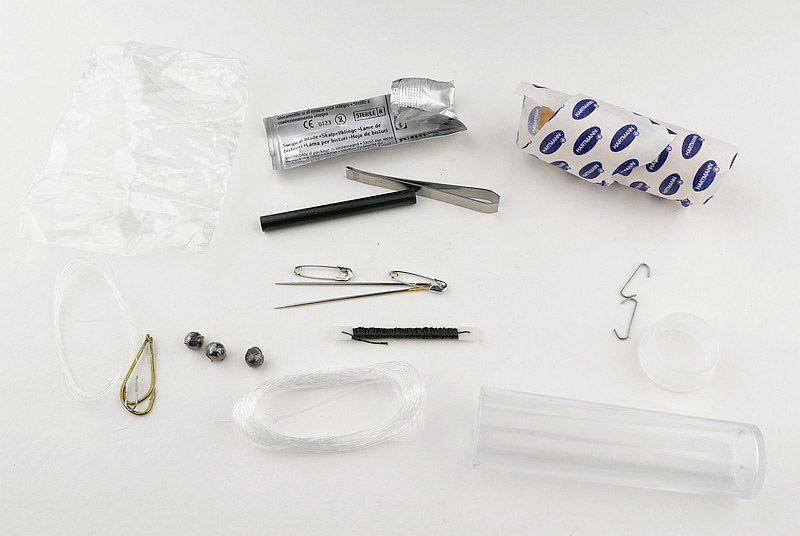
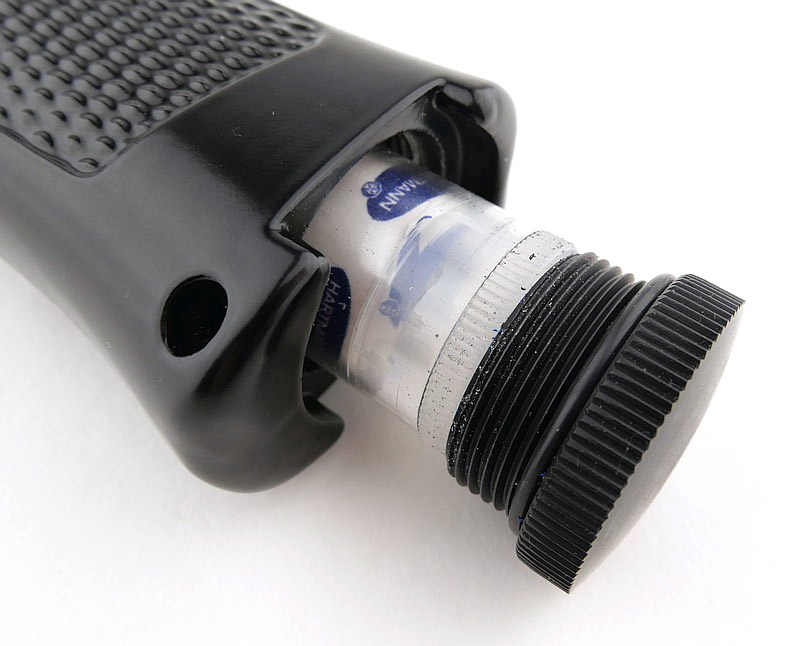
Hollow handles carry survival essentials.
Slingshot incorporated into all models.
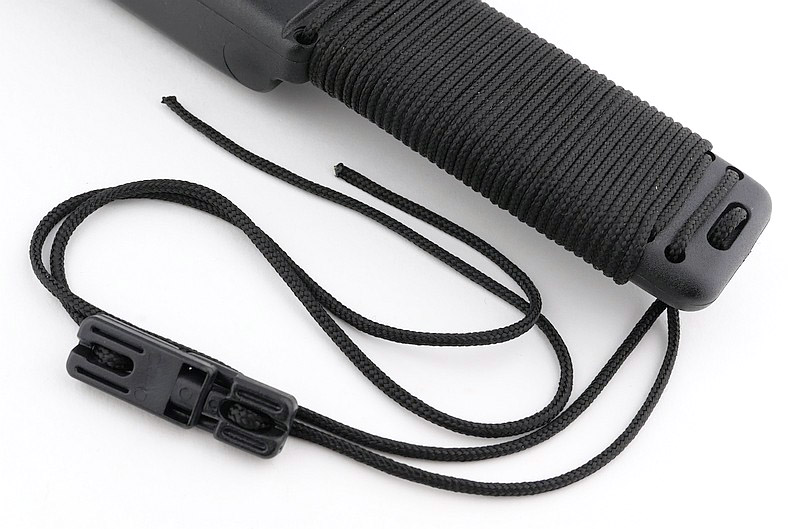
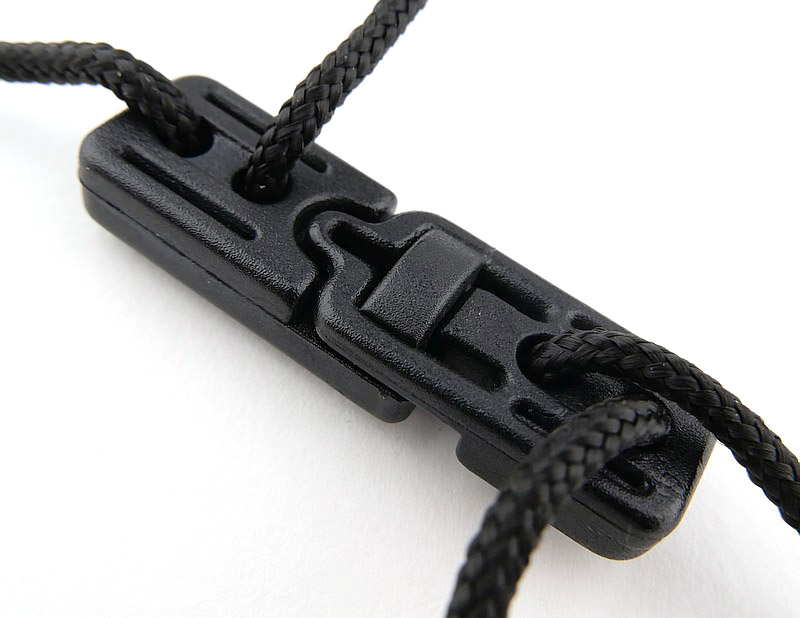
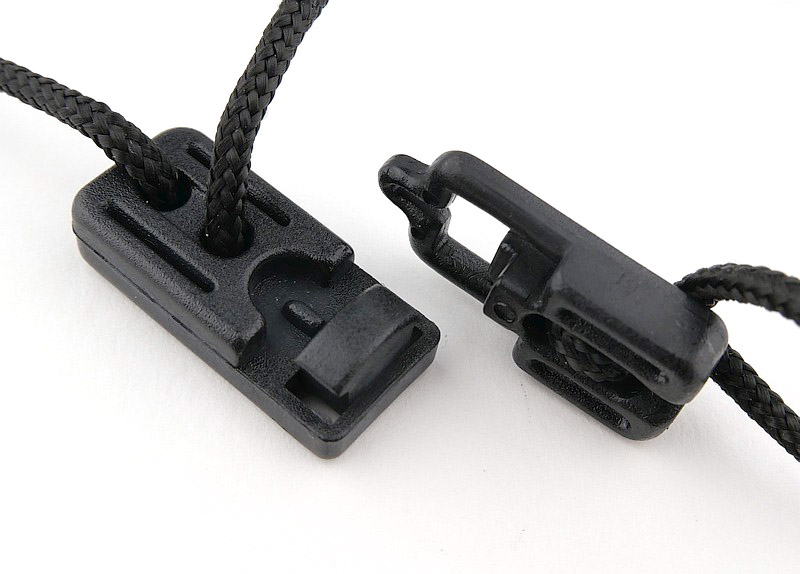
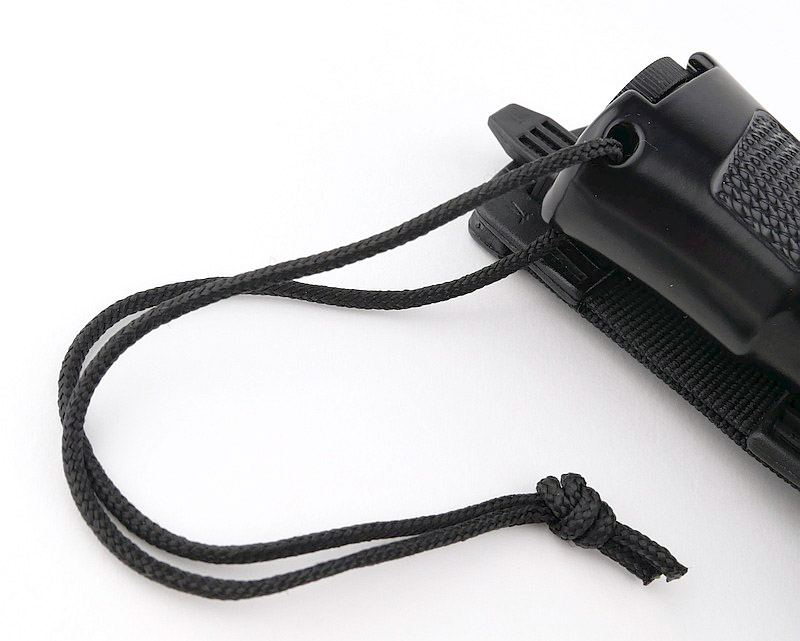
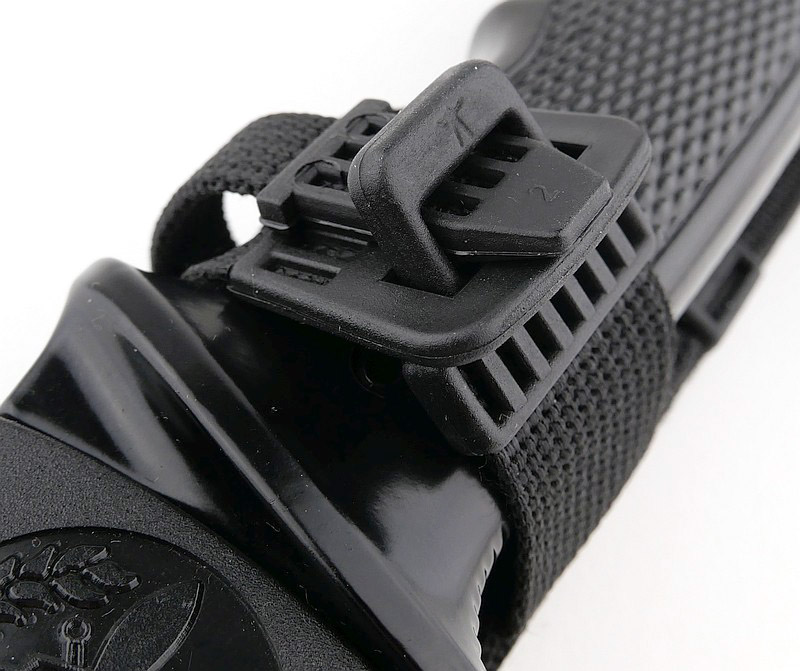
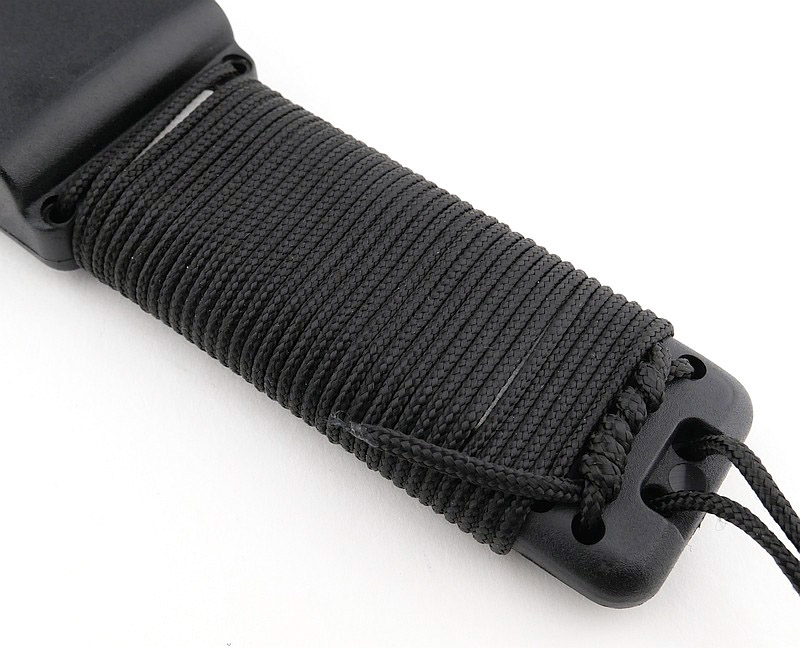
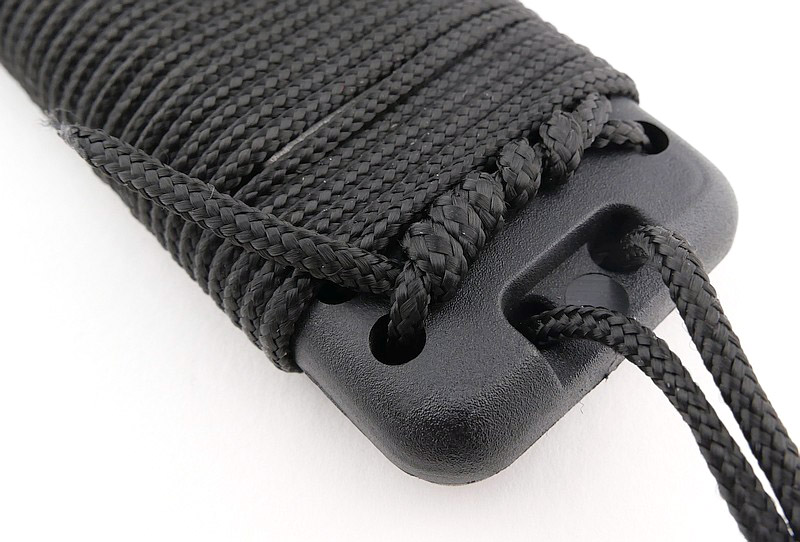
JK1 and JK2 include emergency cord.
JK1 and JK2 include a sharpening stone.
JK3 brings inclusivity for the younger user.
Fun to use.

Review Videos

Starting with a short format sixty second review of the Jungle King 1:


Starting with a short format sixty second review of the Jungle King 2:


Starting with a short format sixty second review of the Jungle King 3:


Onto a full video review covering many more details of all three:


Discussing the Review:
Something new – will it work? A Tactical Reviews Subreddit.
TacticalReviewsChat on Reddit
Please visit there and start/join the conversation.

Epic Knife Review: Aitor Jungle King Series 1, 2 and 3 – Part 1

Join me in an epic super-detailed two-part review of the AITOR Jungle King knife series, the Jungle King 1, 2 and 3. For me, this style of knife focuses on the fun in outdoor knife use that is so often overlooked due to the fashion to dismiss any knife if it doesn’t have a full tang and the latest super-steel. Let’s allow ourselves the simple enjoyment of using different knives and with the Jungle King Series, Aitor have packed them with interesting, fun and useful features.

This epic review of the Aitor Jungle King Series knives is has so much detail I’ve had to split it into two parts. In this, the first part, you can see all the design details and features of each model – a technical presentation. Part two will then explore using the plethora of functions Aitor give you.

The Jungle King I is one of the most famous knives on the market, and as we know it now, was released in 1985 following the huge increase in demand for this style of knife, first made popular due to the movie ‘First Blood’ and its sequels.

It was not long before the Jungle King II joined its bigger brother, and then went on to be (probably) the most copied design ever for this type of survival knife. It is these inferior copies that gave the style of knife a bad name. The Aitor Jungle King II is not the same, as the hollow handle is made of metal and is built for heavy use. Each blade is Rockwell hardness tested during production, proudly shown on the blade in the “Hardness Control” circle engraved to highlight this quality control check.

The Jungle King III is the little brother of the Jungle King knife series. Agile and fast, its design is versatile and functional make it a very capable tool. The Jungle King III joins the family and gives you a choice of size and weight.

Jungle King knives have been issued as part of basic military equipment by some armed forces, including the Special Operations Unit of Marine Spanish Armed Forces. Over the years, the Jungle King has been considered by many experts as the best survival knife in the world, pioneering and unique, being one of the best in its category. Its design, versatility and functionality make it very useful for survival.

The entire Jungle King Series (at the time of writing) is represented in this review, so we’ll be looking at the Jungle King 1, 2 and 3 (or I, II and III).

Jungle King 1 – What’s in the box?:

The Jungle King arrives in a cardboard box, simply the sheathed knife and nothing else. I’ve included an initial indication of size as here it is held in my XL glove size hand.


A good look round the Jungle King 1’s Sheath – Things to look out for here are:

For this gallery we are looking at just the sheath, not any of the extras in it. A simple cord leg strap with snap together fastener is included. Then, sorry, but I do need to use the word ‘iconic’ , we have the iconic folding slingshot arms. The main body of the sheath is wrapped in cord. The cord serves two purposes, first is that it will be a seriously useful survival item, the other is that while stored on the sheath is covers up the sheath mounted sharpening stone which you can see peeking out as I pushed the cord aside slightly.
For the retention strap Aitor use a quick-release toggle type of fastener, more commonly used on military MOLLE pouches. Reliable and strong and unlike a press stud it can’t loosen over time. Similarly, the belt loop also has the quick-release toggle to open and allow it to be fitted to a belt without undoing the belt.


A good look round the Jungle King 1’s Kit – Things to look out for here are:

We saw a hint of this in the previous gallery; tucked into the sheath is a slide-out tray, and a full tang secondary knife / multi-tool.
Held within the tray are the slingshot rubbers, a small glass vial, and a magnesium block with firesteel. The back of the tray has a cut-out to house the secondary knife, plus a signaling mirror. Also on the tray are some molded in reminders for signaling protocols.
So, we actually have a whole other knife, the Aitor Skinner JK1, a full tang multi-purpose blade, with gut hook, spanner, bottle / can opener, and flat head screwdriver. Plenty of holes are provided to lash this to a pole as a spear point.
For the details of the Jungle King I hollow handle kit, please see the feature length video.


A good look round the Jungle King 1 Knife – Things to look out for here are:

Onto the Jungle King Knife itself. Big and full-metal construction makes this a beast. The handle is cast from the same steel as the blade, and the tailcap is non-magnetic stainless steel, so this is full stainless steel construction. As well as being epoxied into the handle, the blade tang has a large roll-pin driven through it to make the join very strong, while the front part of the handle is extended to further support the blade to handle join.
A hollow grind is used for the primary bevel, and the Jungle King features a saw-back using Aitor’s unique pattern. Don’t miss the fact that during production each blade is individually HRC tested and this test indentation is identified with an engraving on the blade to highlight it. The sweeping swedge finishes off the classic blade shape.
Unscrewing the tail-cap reveals the survival capsule kit in the handle, and inside the tail-cap is a button compass. There is an o-ring to keep the handle compartment water tight, and inside the handle a spring is used to stop the capsule rattling, and helpfully push it out slightly as you open the handle. For the details of the Jungle King I hollow handle kit, please see the feature length video.


Jungle King 2 – What’s in the box?:

The Jungle King 2 arrives in a cardboard box, simply the sheathed knife and nothing else.


A good look round the Jungle King 2’s Sheath – Things to look out for here are:

For this gallery we are looking at just the sheath, not any of the extras in it. As with the Jungle King I, a simple cord leg strap with snap together fastener is included. Then, again, we have the iconic folding slingshot arms. The main body of the sheath is wrapped in cord. The cord serves two purposes, first is that it will be a seriously useful survival item, the other is that while stored on the sheath it covers up the sheath mounted sharpening stone, which you can see peeking out as I pushed the cord aside slightly.
As with the Jungle King 1, for the Jungle King 2’s retention strap, Aitor use a quick-release toggle type of fastener, more commonly used on military MOLLE pouches. Reliable and strong and unlike a press stud it can’t loosen over time. Similarly, the belt loop also has the quick-release toggle to open and allow it to be fitted to a belt without undoing the belt.


A good look round the Jungle King 2’s Kit – Things to look out for here are:

Tucked into the sheath is a slide out tray, and a just as with the Jungle King 1, includes a full tang secondary knife / multi-tool.
Held within the tray are just the slingshot rubbers as there is less space inside the Jungle King 2’s sheath. The back of the tray has a cut-out to house the secondary knife, plus a signaling mirror. Also on the tray are some molded in reminders for signaling protocols.
So we do have a whole other knife, the Aitor Skinner JKII, a full tang multi-purpose blade, with gut hook, spanner, bottle / can opener, and flat head screwdriver. Plenty of holes are provided to lash this to a pole as a spear point.


A good look round the Jungle King 2 Knife – Things to look out for here are:

Onto the Jungle King 2 Knife itself. As with the Jungle King 1, the handle is cast from the same steel as the blade, and the tailcap is non-magnetic stainless steel, so this is full stainless steel construction. As well as being epoxied the blade tang has a large roll-pin driven through it to make the join very strong while the front part of the handle is extended to further support the blade to handle join.
A hollow grind is used for the primary bevel, and the knife features a saw back using Aitor’s unique pattern. Don’t miss the fact that during production each blade is individually HRC tested and this test indentation is identified with an engraving on the blade to highlight it. The sweeping swedge finished off the classic spear-point blade shape.
Unscrewing the tail-cap reveals the survival capsule kit in the handle and inside the tail-cap is a button compass. There is an o-ring to keep the handle compartment water tight, and inside the handle a spring is used to stop the capsule rattling, and push it out slightly as you open the handle.


A good look round the Aitor Jungle King 2 Survival Capsule – Things to look out for here are:

The survival capsule…usually this is opened straight away and then quickly lost, or just never touched. Of course the idea is to pack in as many useful things as possible, which might help you or make some survival tasks easier. Aitor’s survival capsule contains two standard plasters, a sterile No. 23 scalpel blade, tweezers, fire-steel, two small safety pins, two sewing needles, some thread, plus a fishing kit consisting of three pre-tied hooks, a longer piece of line and three split shot. (Plus, don’t forget that they can sometimes oddly useful, the two staples that closed the bag containing the fishing kit.)
All these things are better to have and not need, than to need and not have.


Jungle King 3 – What’s in the box?:

In keeping with the rest of the series, the Jungle King 3 arrives in a cardboard box, simply the sheathed knife and nothing else.


A good look round the Jungle King 3’s Sheath – Things to look out for here are:

Being a simpler, smaller, lighter design for a younger user, the Jungle King 3 sheath keeps some of the character, but has less detail.

A simple cord leg-tie lace is included and needs to be knotted to use. Despite the simplification, Aitor have still included the iconic folding slingshot arms. The back of the sheath has a strip of webbing running along it (we’ll come back to this).
For the Jungle King 3, the retention strap uses a press stud and the belt loop has a quick-release toggle to open and allow it to be fitted to a belt without undoing the belt.


A good look round the Jungle King 3’s Kit – Things to look out for here are:

For the smallest in the Jungle King series, the sheath ‘kit’ is not really a kit, it comprises only the slingshot bands, tucked behind that webbing strip on the back of the sheath.


A good look round the Jungle King 3 Knife – Things to look out for here are:

Onto the Jungle King 3 Knife itself. Stepping away from the all metal construction, instead the handle is made from fibreglass-reinforced polyamide. As well as being epoxied into the handle, the blade tang has a roll-pin driven through it to strengthen the join.
A hollow grind is used for the primary bevel, and the spine has a double-bevel serrated edge. The Jungle King 3 is also individually HRC tested and this test indentation is identified with an engraving on the blade to highlight it.
For the Jungle King 3, the compass is always visible in the end of the tail-cap (although you do need to remove it to use it as the blade affects the compass direction). Unscrewing the tail-cap reveals the brass thread inserts used to ensure the threads last well. Inside the handle is a slim survival capsule kit plus a combination tool designed to fit round the capsule. This tool has a can/bottle opener, pry tool and flat head screwdriver.


The Blade and Handle – Detailed Measurements:
For full details of the tests and measurements carried out and an explanation of the results, see the page – Knife Technical Testing – How It’s Done.

The blade is made from MoVa / DIN 1.4116 which is identical to X50CrMOV15 steel.


The Factory edge up close:

Followers of Tactical Reviews will know my views on factory edges, but to recap:

Anyone using a knife will need to sharpen it. That first factory edge is just like the first tank of fuel that a new car comes with (or first charge of the battery).
A good factory edge is a ‘nice to have’ but not a ‘make or break’ for a good knife, as you will be putting your own edge onto it soon enough.
The factory edge does however indicate the care a knife maker has put into the final finish.
It is for this reason Tactical Reviews measures factory edge sharpness and specifications, and includes this information in the detailed technical testing.

As a further look at the factory edge, this section has been added to include some high magnification photos of the factory edges.

Remembering all these factory edges were around 500 BESS, which is not sufficient for my testing, they look quite good under magnification, but all needed to be reprofiled. The Jungle King 2 was the best of the three from the factory, but all these knives were utterly transformed by a good edge.

Jungle King 1


Jungle King 2


Jungle King 3


Part 1 ends here with the review videos included below. See Part 2 for all the practical testing and insights plus a unique insight into the madness of UK knife law.

Review Videos

Starting with a short format sixty second review of the Jungle King 1:


Starting with a short format sixty second review of the Jungle King 2:


Starting with a short format sixty second review of the Jungle King 3:


Onto a full video review covering many more details of all three:


Knife Review: Aitor Commando

The Legendary AITOR Commando – a Detailed Review of the Aitor Commando knife, taking a fresh look for 2025.

The Aitor Commando was originally developed together with the German manufacturer Mauser for the German Army. Designed to be a powerful, durable and reliable fixed blade knife. Ready for any situation, the robust blade is made of MoVa, and features a saw back. The lightweight and textured aluminium handle holds a comprehensive survival kit inside: Fishing set, sewing kit, tweezers, plasters and a scalpel blade.

This style of knife may have fallen out of favour for those demanding the most robust, full-tang blades made with super steels and other exotic materials, but there was a time when a well made hollow handle knife was king (and in fact even the poorly made copy that ended up giving them all a bad name). The reason they were so popular was because they are fun, and I have a feeling knife enthusiasts have forgotten about having fun with interesting designs that don’t need to be strong enough to survive being run over by a tank. I’m letting my hair down (all 3mm of it), shaking loose and letting myself enjoy picking up and using this classic design.

What’s in the box?:
Nice a simple, the knife is in the box. Nothing unnecessary, just a box to deliver the knife to you in.


A good look round the Commando’s Sheath – Things to look out for here are:

I’ve found the next two galleries in this Aitor Commando review have ended up quite a bit larger than usual, as there are many details to see. It is these details that all add to the overall interest and make the Commando a different experience.
At the base of the sheath there is a simple, adjustable, quick release leg strap cord, with the same cord used for the basic wrist lanyard. The knife retention strap uses a military style quick release pull tab closure. Pull the tab out, and the buckle opens freely. The same quick release pull-tab closure is used for the belt loop, allowing you to fit the sheath to your belt without undoing your belt.
Within the sheath is extra storage, (originally for small flares), allowing you to add whatever is most useful to you.
A length of cord wraps the lower section of the sheath, which covers up an integrated sharpening stone.


A good look round the Commando – Things to look out for here are:

Out of the box, the blackness of the blade finish is striking, making the whole package very ‘dark’. The Commando has presence, and overall the package is substantial. Unlike most traditional hollow handle knives, the Commando’s handle is a molded metal casting that allows for complex shaping, and includes three finger grooves, an integrated guard with thumb ramp, grip texturing panels and the fittings for the blade tang and the cap for the storage inside the handle. Recessed into the butt, and low profile, the screw-fit tail-cap can be gripped either side and unscrewed to access the handle storage compartment. With the tail-cap unscrewed, a survival capsule pops out and you find the tail-cap has a small compass in it. To both prevent rattle and to make access easy, a spring is fitted at the bottom of the handle compartment.
With a subtle weight-forward blade shape, spear point and saw back, the Commando has a purposeful appearance.


A good look round the Survival Capsule – Things to look out for here are:

The survival capsule…usually this is opened straight away and then quickly lost, or just never touched. Of course the idea is to pack in as many useful things as possible, which might help you or make some survival tasks easier. Aitor’s survival capsule contains two standard plasters, a sterile No. 23 scalpel blade, tweezers, fire-steel, two small safety pins, two sewing needles, some thread, plus a fishing kit consisting of three pre-tied hooks, a longer piece of line and three split shot. (Plus, don’t forget that they can sometimes oddly useful, the two staples that closed the bag containing the fishing kit.)
All these things are better to have and not need, than to need and not have.


The Blade and Handle – Detailed Measurements:
For full details of the tests and measurements carried out and an explanation of the results, see the page – Knife Technical Testing – How It’s Done.

The blade is made from MoVa steel. MoVa is identical in composition to the German blade steel 4116.


The Factory edge up close:

Followers of Tactical Reviews will know my views on factory edges, but to recap:

Anyone using a knife will need to sharpen it. That first factory edge is just like the first tank of fuel that a new car comes with (or first charge of the battery).
A good factory edge is a ‘nice to have’ but not a ‘make or break’ for a good knife, as you will be putting your own edge onto it soon enough.
The factory edge does however indicate the care a knife maker has put into the final finish.
It is for this reason Tactical Reviews measures factory edge sharpness and specifications, and includes this information in the detailed technical testing.

As a further look at the factory edge, this section has been added to include some high magnification photos of the factory edges.

Though just about serviceable, this factory edge was immediately re-profiled and a 17.5 DPS edge put on for testing. Also included in this gallery are close-ups of two of the saw teeth.


What is it like to use?

Straight away, picking up the Commando, its all metal construction gives it a feeling of solidity. It might indeed have a hollow handle, and it might have a short roll-pinned tang, and so may not be as strong as a similar sized full tang knife, but frankly who cares? Unlike many of the cheap clones (the clones giving the entire concept a bad name), the Aitor Commando is all-metal, so it is strong, certainly strong enough.
In the hand, the metal handle is cold (which is definitely noticeable in cold weather). The cast handle is however, very comfortable and ergonomic, at least in hands the size of mine. Smaller hands might find it less well fitting.
The molded finger grips help with stability, and the integrated thumb ramp in the guard works well. It helps that the handle is a generous length, as you do need to back-up along the handle to be able to place your thumb on the ramp.


The Saw-back – Anyone who has used a saw-back on a knife knows that these are really only a notching tool. You can’t get much downward pressure and the teeth are not set, so once you cut down enough to have the blade stock in the notch it becomes progressively harder to cut.
Here I’m showing a cut which has started to bind up on the blade, followed by showing the cut before and after tapping the saw and notch clean. The notch sides are nice and crisp, and this is useful for easily creating flat-sided notches, just not for full depth saw cuts.


Earlier I spoke of the deep black finish on the Commando’s blade. Following my initial sharpening, I use acetone to remove any stropping compound residue and generally clean up the blade. Of course this stripped off all the oil on the blade and shows the underlying matt black blade finish. Like any surface finish, oil always deepens the colour and once stripped off you see the true blade coating. You might also spot here where the forward part of the blade rubs more on the inside of the sheath where it is a tight finish, and has some rub marks in the blade finish. So don’t expect that deep deep black to last once you start using the Commando, but I actually prefer the ‘old black’ look.

Before testing the Commando, I wasn’t happy with the factory edge, so re-profiled to 17.5 DPS and stropped. The factory edge would not cleanly cut paper and card, but now I have a ‘telephone directory’ (or TV guide) slicer, which requires a saving sharp edge to cut without tearing.
Aitor’s Commando is a short tang hollow handle knife – can it chop? I gave it no quarter, and went for it chopping a tough pallet. Being a hollow-grind the depth of cut on each strike is slightly limited, but it still powered through without any concern. With a metal handle and metal roll pin, and a steel that has been left at the tougher end of hardening, the overall construction means this chopping was a walk in the park for the Commando. The new edge showing clean cuts all the way through.
It may be relatively weighty due to the all metal construction, but still lacks slightly on impact weight. As another test, I’ve switched to batoning the blade into the same type of wood, and am showing how once the blade gets past the shoulder of the hollow grind it stops making much progress. Viewed from above you can see how the blade is forcing apart the board and getting wedged in.
Not strictly feather-sticking, but making a tight series of cuts and the Commando outperformed my expectations. The large handle giving plenty of grip and the blade is long enough to allow it to be rested onto a cutting surface for extra control, and the Commando was slicing though this seasoned wood almost too easily.
At the end of testing the ‘telephone directory’ result was the same without any touch up or stropping, which was also beyond expectations.


Can you spot the deliberate mistake when getting my bearings? (The compass is pointing at the knife blade, not to the north.)

Times change, technology moves forward, and designs become outdated, preferences change, and for many this style of knife is a thing of the past. Hollow handle knives gained a poor reputation due to the vast number of cheap, horrifically-badly made hollow handle knives that quickly broke or bent, wouldn’t hold and edge and had dangerous sheaths. But this is not true of Aitor; The Aitor Commando quickly proves it is worthy of a place in your collection, a collection that are hopefully all ‘users’.
Aitor, established in 1939, have vast experience making hollow handle knives that are strong, hold an edge and make this style of knife worth adding into your lineup to give you something different and interesting to use, and the Commando happens to be a true classic.

Review Summary

The views expressed in this summary table are from the point of view of the reviewer’s personal use. I am not a member of the armed forces and cannot comment on its use beyond a cutting tool or field/hunting knife.

Something that might be a ‘pro’ for one user can be a ‘con’ for another, so the comments are categorised based on my requirements. You should consider all points and if they could be beneficial to you.

_______________________________________________
What doesn’t work so well for me
_______________________________________________

By current standards it is on the heavy side.
No visible drainage holes in the sheath.
Tight fit in the sheath (could have issues with a dirty blade).
Saw back cuts into the sheath (true of any saw back).

_______________________________________________
Things I like
_______________________________________________

Fun to use.
All metal construction.
Large ergonomic handle.
Generous storage in knife handle and sheath.
Survival capsule included in handle.
Integrated (backup) sharpener.
Includes emergency cord neatly wrapped on the sheath.
Pull-tab quick-release closures for retention strap and belt loop.
Saw-back works well for notching.
Takes and holds an edge well enough despite low hardness.
Lower hardness makes field maintenance easier.

Review Videos

Starting with a short format sixty second review:


Onto a full video review covering many more details:


Discussing the Review:
Something new – will it work? A Tactical Reviews Subreddit.
TacticalReviewsChat on Reddit
Please visit there and start/join the conversation.