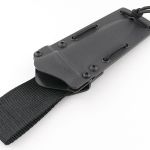
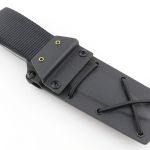
Knife Review: Benchmade Bugout 535-3

An even lighter, premium version of the already ultralight Benchmade Bugout, yes, that’s right. Join me in this is detailed review of the Benchmade 535-3, the special super-ultralight Bugout. Now, you say Carbon Fiber, I say Carbon Fibre, but let’s not worry about that (I might use either or both), and this is why the 535-3 is even lighter, as it has Carbon Fibre handles with the minimal steel inserts milled into them. The 535-3 is the Benchmade Bugout – Plus!

Review Videos

Starting with a short format sixty second review:


Onto a full video review covering many more details:

A few more details:

What’s in the box?:
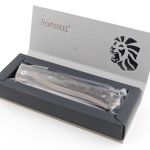
Very well presented in a foam lined box, the Bugout comes in a cloth bag that you can use to help keep the pocket fluff at bay. A clip/handle protector card also gives you information about the Benchmade Axis lock that the Bugout uses.


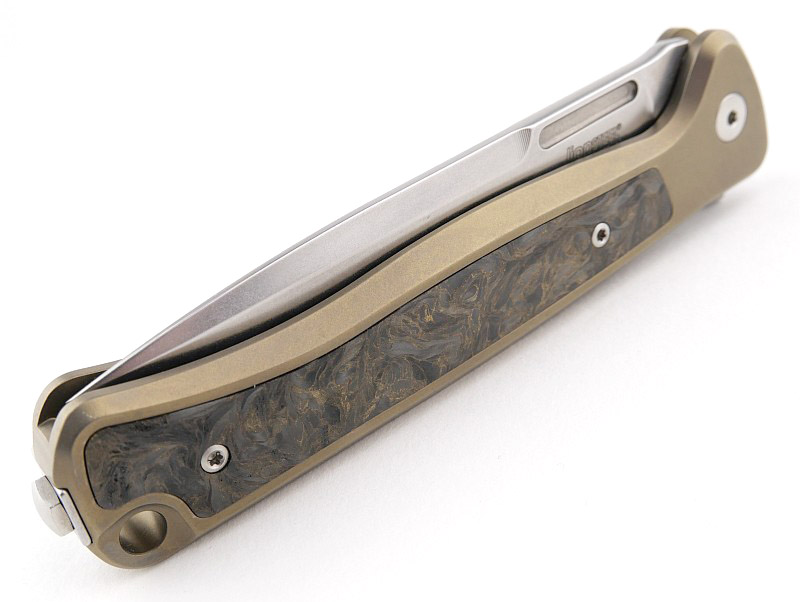
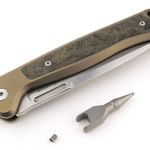
A good look round the Bugout 535-3 – Things to look out for here are:
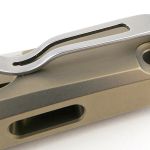
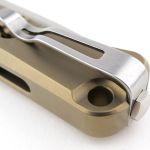
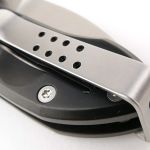
The Bugout uses a mini deep-carry steel pocket clip, that is removable and can be fitted on either side. Blue highlights on the spacer/lanyard hole and thumb stud, play beautifully off the black Carbon Fibre adding to the premium feel of this version of the Bugout.
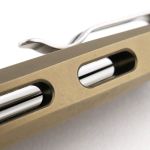
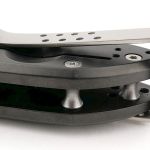
Ultralight construction means there is only the one spacer and otherwise clear space through the handles.
One side of the pivot bolt is capped, and the torx screw head on the other side only. Torx screws are used throughout for the construction.
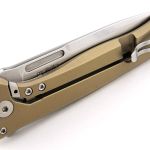
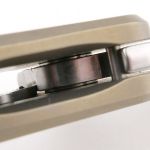
Looking in closely at the axis lock bar and how it moves as the blade is opened. The Bugout, despite being a lightweight knife, is also known for being tough, and the use of phosphor bronze washers adds to the robust and reliable build.
There is something about this particular blue and how it sings on the ambidextrous thumb studs.
And then we have the Bugout’s slim, flat ground blade. No weak points, and very ‘slicey’ (should be a word if it isn’t) with a very useful shape. The smooth plunge line ensures maximum strength and exposed heel-edge provides easy maintenance and a useful rear-point (there isn’t a sharpening choil, but the end of the edge closest to the handle is unobstructed and easy to sharpen). This detail is something I look for in all knives, but especially an EDC knife.


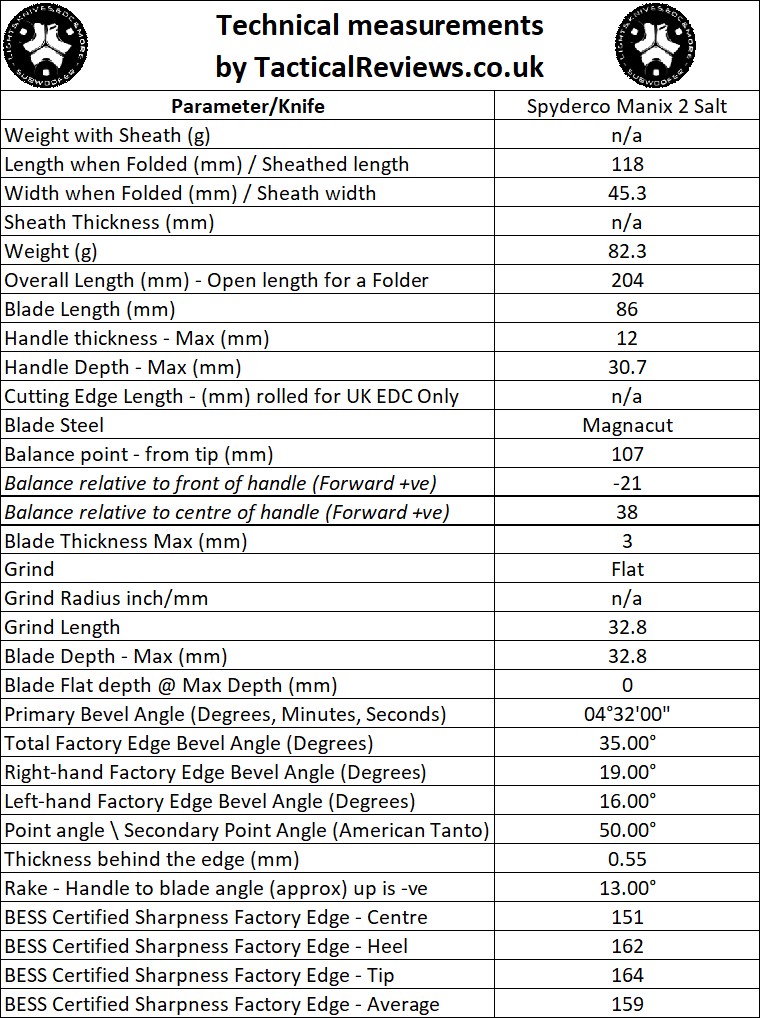
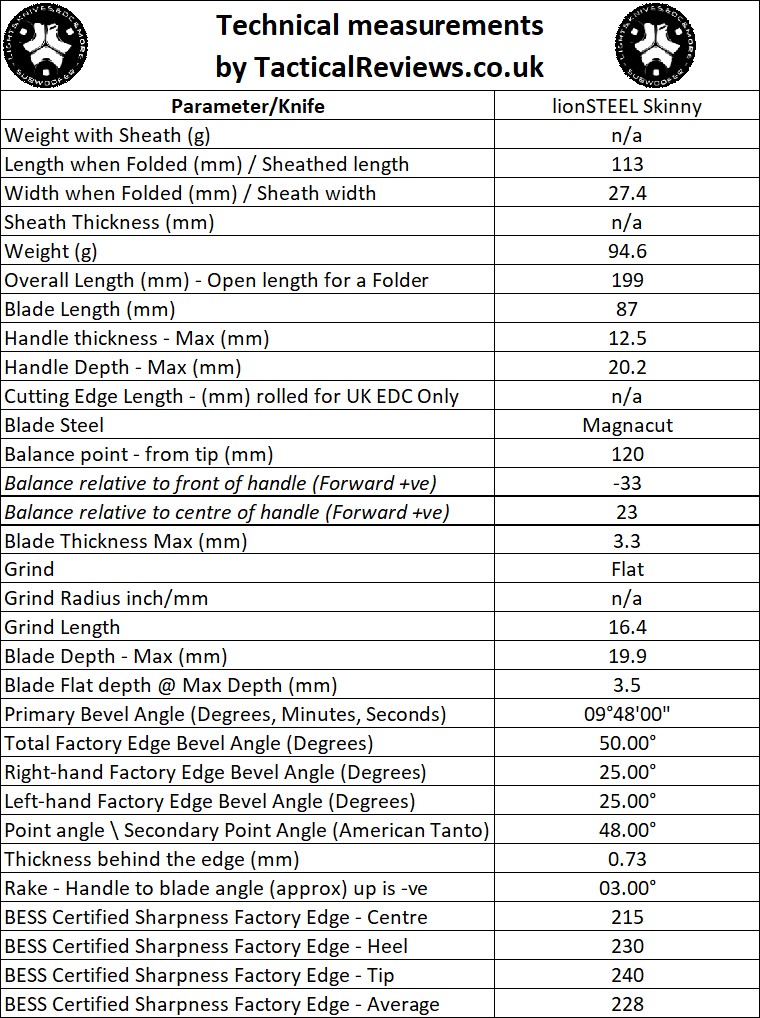
The Blade and Handle – Detailed Measurements:
For full details of the tests and measurements carried out and an explanation of the results, see the page – Knife Technical Testing – How It’s Done.

The blade is made from S90V steel.


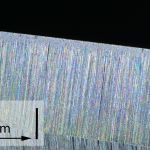
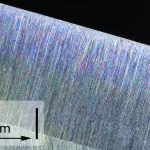
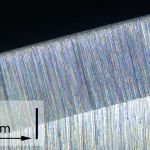
The Factory edge up close:

Followers of Tactical Reviews will know my views on factory edges, but to recap:

Anyone using a knife will need to sharpen it. That first factory edge is just like the first tank of fuel that a new car comes with (or first charge of the battery).
A good factory edge is a ‘nice to have’ but not a ‘make or break’ for a good knife, as you will be putting your own edge onto it soon enough.
The factory edge does however indicate the care a knife maker has put into the final finish.
It is for this reason Tactical Reviews measures factory edge sharpness and specifications, and includes this information in the detailed technical testing.

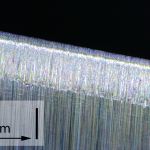
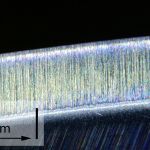
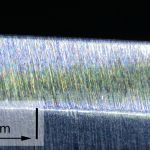
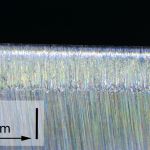
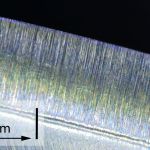
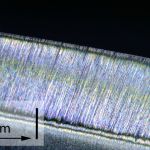
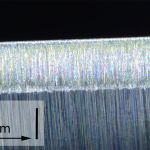
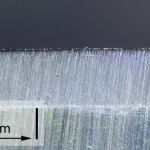
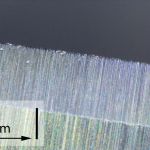
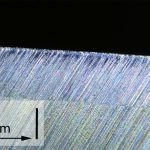
As a further look at the factory edge, this section has been added to include some high magnification photos of the factory edges.

Please be aware that these images were taken with the knife straight out of the box without any stropping and they do have some manufacturing residue visible on the edge.


What is it like to use?

The Bugout is a modern classic and has gained much favour and recognition. This is actually the first Bugout I’ve owned (not the first I’ve handled), so prior to this period of review testing I did not have much experience of using a Bugout. I’ve not been disappointed at all, quite the opposite.
With the 535-3 being the lightest Bugout to date, an already ultralight knife, it sits like a feather in your hand. The Carbon Fibre feels so light, comfortable and warm to the touch, you don’t want to put it down. How can it be so strong and so light?
Benchmade have also got the blade geometry spot on. Using a thinner blade, but not too thin, makes it slice exceptionally well. The exposed heel of the edge (similar to when a sharpening choil is used) makes sharpening of the entire edge easier. I find this secondary ‘point’ a very useful feature for fine work.
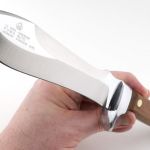
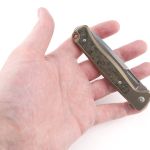
Shown here in my XL-glove-size hands, there is enough handle for a firm grip, while the overall knife is compact enough (and very slim) to forget you are even carrying it.


It’s proven its worth with all sorts of random jobs. Here a chandelier replacement candle tube being trimmed to length, and then its been out with me dealing with anything and everything else life has presented.
This edition with the Carbon Fibre handles has been making it so difficult to put down. It want’s you to carry it, it wants you to use it.
I hope this will remain a permanent part of the Benchmade Bugout line-up as it really is superb.


Review Summary

The views expressed in this summary table are from the point of view of the reviewer’s personal use. I am not a member of the armed forces and cannot comment on its use beyond a cutting tool or field/hunting knife.

Something that might be a ‘pro’ for one user can be a ‘con’ for another, so the comments are categorised based on my requirements. You should consider all points and if they could be beneficial to you.

_______________________________________________
What doesn’t work so well for me
_______________________________________________

Nothing to see here.
(There is no such thing as the ‘perfect’ knife, but I have nothing to complain about.)

_______________________________________________
Things I like
_______________________________________________

Super-Ultralight and slim.
Smooth, warm, comfortable Carbon Fibre handle.
Slim, strong blade.
S90V steel.
High-end fit and finish.
Deep carry clip.
Ambidextrous.
Demands to be handled and carried.

Knife Review: Spyderco Enuff 2

In this Spyderco Enuff 2 review, we will take in all the details of this fixed-blade knife. Enuff 2 is an expansion of the Enuff platform, designed by Spyderco’s Sal Glesser and originally created to emphasize the first few inches of the edge nearest the handle where most of the work is done. However, how much blade is “Enuff”, is a matter of opinion. For users who like the Enuff platform, but wanted just a bit more blade length, there’s the new Enuff 2.

Review Videos

Starting with a short format sixty second review:


Onto a full video review covering many more details:


A few more details:

What’s in the box?:
As you would expect from Spyderco.


A good look round the Enuff 2 sheath- Things to look out for here are:
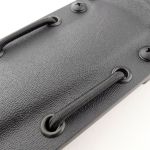
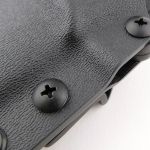
Formed of two molded plastic sections held together with metal eye rivets, the sheath is very slim. The belt clip makes the whole sheath quite a bit thicker, but can be removed easily if you are packing the knife away.
Out of the box, there is a secondary retention option of a leather strap. With the post that holds the end of the leather strap adding further bulk, this strap and its post are also easily removed if not needed.
The belt loop has a nice one-way system to prevent it accidentally coming off your belt. The sprung loop curls back under to catch onto the bottom of the belt and stop it pulling off.
The molded sheath lips grip the handle firmly making the extra strap redundant unless you want a secondary retention on the knife.


A good look round the Enuff 2 – Things to look out for here are:
Starting this gallery off with the tip protector on the knife; it even has the Spyderco logo on it! (which you will discard, but just saying)
This Enuff 2 has the full Spyderedge serrated edge. Keeping the Enuff 2 slim but with a very secure grip, it has the distinctive Spyderco FRN scales with unique grip pattern.
A generous section of the blade spine has jimping for the thumb to grip.
Flipping the knife over reveals a few differences form one side to the other. The handle screws being one of these, where on the reverse side they are torx screws, compared to the blank heads on the ‘front’. Also clear is the fact the Spyderedge is a chisel grind, so one side of the blade has no edge bevel at all, which is why the Spyderedge is so effective.


The Blade and Handle – Detailed Measurements:
For full details of the tests and measurements carried out and an explanation of the results, see the page – Knife Technical Testing – How It’s Done.

The blade is made from VG-10 steel.


The Factory edge up close:

Followers of Tactical Reviews will know my views on factory edges, but to recap:

Anyone using a knife will need to sharpen it. That first factory edge is just like the first tank of fuel that a new car comes with (or first charge of the battery).
A good factory edge is a ‘nice to have’ but not a ‘make or break’ for a good knife, as you will be putting your own edge onto it soon enough.
The factory edge does however indicate the care a knife maker has put into the final finish.
It is for this reason Tactical Reviews measures factory edge sharpness and specifications, and includes this information in the detailed technical testing.

As a further look at the factory edge, this section has been added to include some high magnification photos of the factory edges.

This gallery shows both sides and sizes of serrations with the chisel grind clearly evident.


What is it like to use?

This is the first Enuff knife I’ve used, so I can’t comment on the original Enuff. Even the longer Enuff 2 is still a compact fixed blade. Having such a flexible sheath means you can change things around, add alternative mounts, or strip it down to basics to keep it as slim and light as possible.

For me the full Spyderedge makes this more of a backup knife. Depending on your typical cutting tasks you might want the serrated edge for a lot of fibrous cuts, but for me this is a less common type of cut. Again, in this instance its advantage of being able to go without maintenance for a long time and still cut well is pushing me towards being an excellent backup knife. The plain edge version would be a great daily use tool.

A slight disappointment is the finish around the exposed tang which is not up to normal Spyderco standards. It might be this example, or a characteristic of the line. There is zero impact on performance, just on aesthetics.

Another observation is that the Spyderco Spyderedge on this knife is effectively a right-handed edge (the plain edge version would not have handedness), although everything else about the Enuff 2 is ambidextrous.

It is slim and light, and the Enuff design principles still hold true of the handle. I take XL size gloves, but the Enuff’s handle is still big enough for a firm and stable grip; it is not just the blade that is ‘Enuff’.


Review Summary

The views expressed in this summary table are from the point of view of the reviewer’s personal use. I am not a member of the armed forces and cannot comment on its use beyond a cutting tool or field/hunting knife.

Something that might be a ‘pro’ for one user can be a ‘con’ for another, so the comments are categorised based on my requirements. You should consider all points and if they could be beneficial to you.

_______________________________________________
What doesn’t work so well for me
_______________________________________________

Some areas of finish are not quite up to Spyderco standards.
Secondary retention strap seems unnecessary.

_______________________________________________
Things I like
_______________________________________________

Spyderedge serrations are super sharp.
Absolutely fantastic backup knife.
Reconfigurable sheath.
Secure and usable sheath retention.
Slim and easy to pack or carry.
Easy to handle and hold.
Large enough for most general tasks.
Excellent grip pattern.

It really is a ‘grate’ knife!!

 
Discussing the Review:
The ideal place to discuss this review is on the Tactical Reviews Facebook Page
Please visit there and start/join the conversation.

Light Review: Fenix LR40R V2.0

Fenix are updating and upgrading the already impressive LR40R, bringing us the LR40R V2.0. New, intuitive, combined rotary and push button switching design, uprated maximum output power in both light and power bank functions, and a new built-in battery pack with 3 x 5000mAh cells, taking onboard power to the max. Join me in this review of the Fenix LR40R V2.0 to see how it performs.

Review Videos

Starting with a short format sixty second review:


Onto a full video review covering many more details:


What is in the box?:


A good look round the LR40R V2.0’s holster – Things to look out for here are:
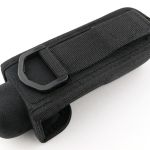
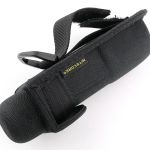
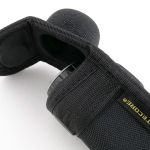
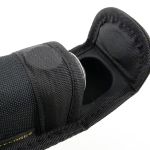
This is a holster style Fenix have used on several lights with larger heads, from the TK35 and many more. There is an adjustable band that fits round the head and can be left snug, or tightened right down. The body of the light slips into a tubular pouch. The holster has a fixed belt loop, Velcro belt loop and a D-loop hanger.


A good look round the LR40R V2.0 – Things to look out for here are:
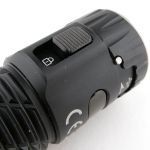
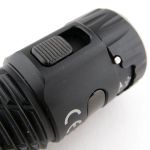
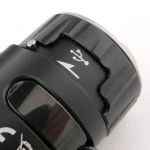
There is a lot to see here. Quickly focusing in on the combined rotary and click switch with charge indicator before moving onto some details of the finish and shaping of the body. Heat-sink fins are thick and shallow, making them very tough. Then the LED and Bezel details, showing the different flood and spot LEDs, plus the safety sensors that you can activate to protect the LR40R V2.0 from damaging object coming too close to it.
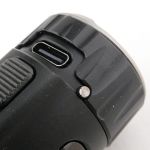
Lastly a few shots of the combined charging and power bank port.


The beam

Please be careful not to judge tint based on images you see on a computer screen. Unless properly calibrated, the screen itself will change the perceived tint.

The indoor beamshot is intended to give an idea of the beam shape/quality rather than tint. All beamshots are taken using daylight white balance. The woodwork (stairs and skirting) are painted Farrow & Ball “Off-White”, and the walls are a light sandy colour called ‘String’ again by Farrow & Ball. I don’t actually have a ‘white wall’ in the house to use for this, and my wife won’t have one!

For the LR40R V2.0 beamshots there are the individual spot, flood and then combined flood plus spot beamshots. In all cases the relative exposures are the same to show how the beams compare separately and combined.


Batteries and output:

The LR40R V2.0 runs on a built-in battery pack (3x5000mAh) designed to maximise performance for over size (not needing a battery caddy).

Please note, all quoted lumen figures are from a DIY integrating sphere, and according to ANSI standards. Although every effort is made to give as accurate a result as possible, they should be taken as an estimate only. The results can be used to compare outputs in this review and others I have published.

Take a close look at the headline figure for Spot/Flood Turbo!!

This gallery is packed with performance information.

First is the USB input charging trace, taking the LR40R V2.0 to full charge.
The next USB power trace is the power bank output from the LR40R V2.0, in this case used to charge a Oneplus 9 Pro phone. This is only part of the capacity of both phone and LR40R V2.0 and is only to represent the power bank output.

Now comes the full maximum output runtime trace, followed by just the first 60s of the same output.

Last are two thermal images, one from the start of runtime where the head of the LR40R V2.0 is hottest, then one which comes near the end of the runtime where in fact the battery pack is hotter than the head as the cells give their last bit of power.


The LR40R V2.0 in use

It is a serious light, for serious use and is both large and heavy, but at the same time, considering its performance, it is very compact. The next gallery below, showns the LR40R V2.0 in my hand (I take XL size gloves), it is perfectly comfortable while being completely hand filling. The weight is were this can become a bit tiring for more extended use. 850g isn’t much carried in a bag or on your belt, but nearly a kilogram filling your hand, and I’ve tended to do a bit of hand swapping when carrying for more than a few minutes.

Just like when deciding if a large camp knife or axe is worth carrying the weight when out in the wild, you will need to positively decide you want to carry the weight of the LR40R V2.0. If you want that 16000lm output, then it is worth the weight.

Multi-function devices tend to make compromises and I do prefer dedicated gear. However, with the LR40R V2.0 the only compromise made with regard to the inclusion of the power bank function is that if you do use this you are taking away your lighting capacity. The power bank output is excellent, the LR40R V2.0 as a power bank is far too heavy for this to ever be a primary function, but as an ‘can also do’ feature is well implemented. I would always prioritise the battery capacity of the LR40R V2.0 for light output, and only if there was really no other choice would I use it as a power bank.

Despite being familiar enough with the controls, I still find myself ‘hunting’ for the output I want. The switch labels are too small to easily distinguish the padlock from the parallel beam lines, spread beam lines or combined straight and spread lines, so whatever setting the ring switch is actually on, you end up turning it one way or the other to find the one you want.

Once you have decided on the rotary switch position you want to use, then swapping to the central click switch (press-and-hold for on and again for off) simplifies the choice enormously, just leaving the brief press (while on) to change output level.

Setting the ring to lockout (padlock) resets the controls, so when you then unlock, you can only initially rotate the selector ring to spot. From locked, this will always go on to the lowest spot mode, a useful reset (however the flood mode and combined flood/spot does remember the level it was last used on).


When you have so much power in such a small package, you do have potential for things to go wrong. The first level of protection is the lockout position on the mode ring. Carrying this light in a bag could be hazardous if it were to switch on, but the LR40R V2.0 has a simple lockout mode.

Add to this another protection feature that is built-in; a feedback sensor, measuring light reflected back at the LR40R V2.0 when the head is too close to a surface. When this protection is activated (it can be disabled), the maximum output is reduced when the feedback sensor is triggered, and automatically increases again once the head of the LR40R V2.0 moves far enough away from the obstruction. This is toggled on and off while in lockout mode; press and hold for 5-10s and two flashes means the protection is enabled, eight flashes means it has been turned off.

16,000 lumens gives you a true wall of light. These output levels totally eclipse the biggest performers of a few years ago. Yes the 16,000 lumens is a burst mode, but the LR40R V2.0 then settles on a solid 9,000 lumens for an extended run – this is the really impressive feat of the LR40R V2.0.

Review Summary
The views expressed in this summary table are from the point of view of the reviewer’s personal use. I am not a member of the armed forces and cannot comment on its use beyond that covered in the review.

Something that might be a ‘pro’ for one user can be a ‘con’ for another, so the comments are categorised based on my requirements. You should consider all points and if they could be beneficial to you.

_______________________________________________
What doesn’t work so well for me
_______________________________________________

Barely distinguishable mode label engravings.
Holster’s head securing strap can be a little fiddly.
Built-in battery ultimately restricts product lifetime.

_______________________________________________
Things I like
_______________________________________________

16,000 lumens burst.
Solid extended run at 9,000 lumens!
Clear 5 segment battery level indicator.
Safety ‘feedback sensor’ output downshifting.
Power bank function (USB-A).
Fast charging via USB-C (QC 2.0 and PD2.0)
Spot mode resets to low after being locked.
Belt holster included.

Knife Review: Spartan Blades USMC KA-BAR

Take a classic knife, let Spartan Blades perform their magic on it, including using MagnaCut for the blade steel, and you have the Ultimate Elite Edition USMC KA-BAR! This is a detailed Review of the Spartan Blades USMC KA-BAR made with CPM MagnaCut steel.

In this feature review we are looking at the PVD – Tungsten DLC (Flat Black) blade coating with similarly coated butt cap and guard, plus the black leather sheath. The Spartan Blades Elite USMC KA-BAR is also available in ZrN (Flat Dark Earth) and with black or coyote Kydex sheath.

I first saw this awesome knife at IWA 2023, and could not wait to get hold of one.

Review Videos

Starting with a short format sixty second review:


Onto a full video review covering many more details:


What’s in the box?:
Just to point out that the challenge coins and mini patch shown with the box here are not included as standard, but are extras you can order as well if you would like to.

You can see on the box that the USMC KA-BAR is part of the Spartan Blades Elite Grade range – top performance in every way.


A good look round the leather sheath – Things to look out for here are:
The black leather sheath is one of three sheath options. It is a traditional layout and construction, stitched and riveted, and made from high quality leather.
Very nicely embossed into the front is the Spartan Blades logo, along with KA-BAR trademark.
The retention strap is located near the butt, again following a traditional pattern of sheath design.


A good look round the knife – Things to look out for here are:
Unmistakable clip point blade with sabre grind and long fuller, all in a black finish. Deeply Laser engraved next to the guard is the large KA-BAR branding and tiny version of the Spartan Blades logo – plus that magic word MagnaCut. This KA-BAR has a straight, asymmetrical guard, and you can also see the rounded plunge line. For this Spartan Blades Elite version, the handle is Kraton G which is super durable polymer.
The butt cap is held in place with a interference fit pin that passes through the end of the tang. When looking at the knife tip close up, this shows the factory edge, matt/flat finish and the little flecks are from the leather sheath.


The Blade and Handle – Detailed Measurements:
For full details of the tests and measurements carried out and an explanation of the results, see the page – Knife Technical Testing – How It’s Done.

The blade is made from CPM MagnaCut steel.


The Factory edge up close:

Followers of Tactical Reviews will know my views on factory edges, but to recap:

Anyone using a knife will need to sharpen it. That first factory edge is just like the first tank of fuel that a new car comes with (or first charge of the battery).
A good factory edge is a ‘nice to have’ but not a ‘make or break’ for a good knife, as you will be putting your own edge onto it soon enough.
The factory edge does however indicate the care a knife maker has put into the final finish.
It is for this reason Tactical Reviews measures factory edge sharpness and specifications, and includes this information in the detailed technical testing.

As a further look at the factory edge, this section has been added to include some high magnification photos of the factory edges.


What is it like to use?

This is a knife design that has been in active service since 1942. Clearly a tried and tested design.

Before going into more about the Spartan KA-BAR, I wanted to pause a moment to look at a couple of other Spartan Blades Elite knives.

Spartan Blades, as well as producing their own fantastic designs, have brought at least one other all time classic back to life and up to date. Here is the Harsey Model II (original design), EK Commando knife (classic), as well as the latest KA-BAR.

And back to the subject of this review – the KA-BAR and how it handles. Shown here is a gallery of the knife in hand. I take XL size gloves.

Comfort and stability is excellent with the Kraton G polymer handle. Molded to represent the original stacked leather handle, but without any of the fragility or other issues a leather handle has. This material also provides excellent shock absorbency if batoning or striking with the blade.

The asymmetrical guard allows for the thumb to reach over easily and press down on the spine. It is a mid sized fixed blade and handles well for this class of knife.


In this final gallery, the first four images represent a cutting test carried out with the factory edge, and a 1″ manila hemp rope. It is a test I slightly regretted starting as the specially prepared rope turned out to be exceedingly tough to cut. I’ll explain why…

Rope cutting tests for me have always had a few flaws and the biggest of these being lacking consistency and being very wasteful, so I went and added my own twist. To overcome those issues, I tightly wrapped clean, new, rope in a brown paper strip with a water soluble gummed back. This was then allowed to dry and kept indoors to keep it fully dry.

The idea was to stabilise the fibres so each cut would be the same (instead of the rope structure collapsing and spreading), while at the same time allowing a thinner ‘slice’ of rope to be cut each time.

Well, unfortunately this was so stable, the rope was almost like a wooden dowel when trying to cut it, with virtually no give or flexibility. Because of this, each cut was very hard work and fatiguing.

Shown is the starting sharpness measurement (BESS 275g), some of the cuts and rope fibres, then the sharpness after 16 cuts (BESS 406). At this point I had to stop. The sharpness had dropped, but was still cutting well enough, and if I could have carried on, so could the knife thought the cuts were less clean.

One of the things I love when carrying this knife is that I have a classic design, but in the very latest materials. A proven design, but tougher and more reliable than ever. Truly an ‘Elite Grade’ knife from Spartan Blades.


Review Summary

The views expressed in this summary table are from the point of view of the reviewer’s personal use. I am not a member of the armed forces and cannot comment on its use beyond a cutting tool or field/hunting knife.

Something that might be a ‘pro’ for one user can be a ‘con’ for another, so the comments are categorised based on my requirements. You should consider all points and if they could be beneficial to you.

_______________________________________________
What doesn’t work so well for me
_______________________________________________

Being very picky – the laser engraving has ‘catchy’ raised edges.
The above point is very very picky!
Nothing else.

_______________________________________________
Things I like
_______________________________________________

Spartan Blades build quality.
CPM MagnaCut Steel.
Classic time-tested design.
Choice of leather or Kydex sheaths.
Kraton G handle material.
Hardwearing PVD flat/matt blade coating.

Light Review: Fenix E35R and E03R V2.0

Fenix are updating and upgrading two excellent EDC lights. The E03R V2.0 and E35R build on their predecessors and raise them to a higher level. Join me in this review of the Fenix E03R v2.0 and E35R to see how they perform and what improvements have been made.

Review Videos

For the E03R V2.0 first a short format sixty second review:


The short format sixty second review of the E35R:


Onto a full video review covering many more details of both:


What is in the box?:

A brief look over the contents of the box for each of these lights. Starting with the E03R v2.0 in its plastic clamshell inner. To remove the E03R V2.0 from the package needs the plastic tie that comes fitted through the lanyard hole. Without this you can’t get a grip on it ton pull it out of the very tight fitting packaging. It comes with a USB-C charging cable, small split keyring and instructions.
The E35R slides out of the outer cardboard box in a plastic tray. This comes with the battery already fitted, a USB-C charging cable, wrist strap and spare o-ring, plus the instructions.


A good look round the E03R V2.0 – Things to look out for here are:
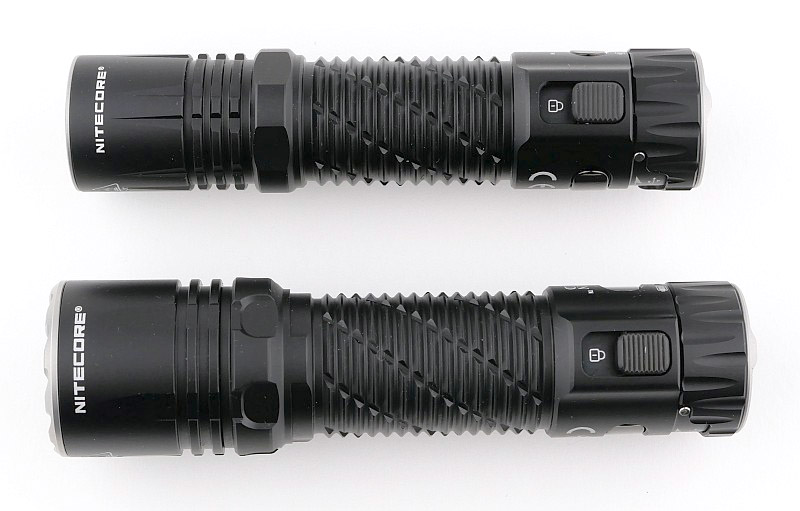
Before anything else, here is a side-by-side of the original E03R and the new V2.0. You can immediately see the increase in size that allows for the uprated output and runtime.

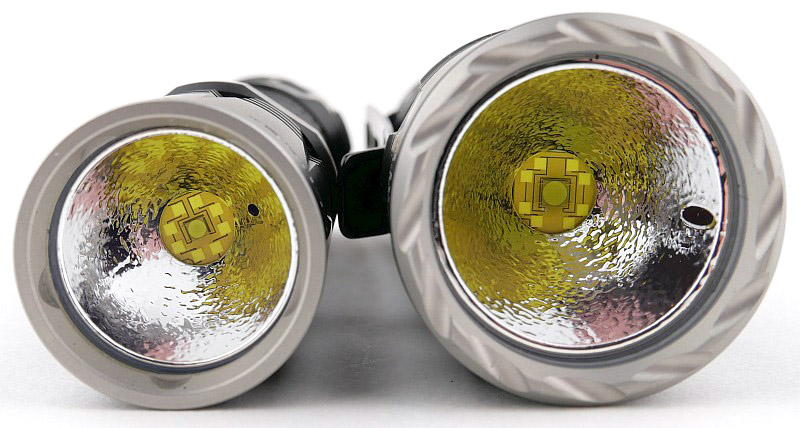
At the front is the twin TIR optic for the main white beam (with central optic for the Red beam). On the side is a rubber port cover for the USB-C charging port. The power switch has an outer illuminated ring. The switch’s centre also has an indicator light for the state of charge. Details of the split-ring keyring are shown.


Taking a more detailed look at the E35R:

The side by side comparison to the original E35 is included in the video earlier in the review. Most noticeable is the addition of the USB-C charging port. Visually, apart from that, the E35R is almost identical to the E35.

In case you think it is faulty out of the box, Fenix has included a label to remind you to remove the in-transit insulator which protects the E35R from discharging in storage. For the E35R, it is the head rather than tail that unscrews to access the battery compartment. The contacts in the head include physical reverse polarity protection. In the tail is a single strong coil spring to keep the 21700 5000mAh cell in place. The threads are near-square in profile. There is a bronze detail ring round the TIR optic to match the colour of the power switch. To indicate the battery level the centre of the power switch lights up either solid, or a flashing. A steel pocket clip is included. One other addition in the update is the E35R now having a magnetic tail.


The beam

Please be careful not to judge tint based on images you see on a computer screen. Unless properly calibrated, the screen itself will change the perceived tint.

The indoor beamshot is intended to give an idea of the beam shape/quality rather than tint. All beamshots are taken using daylight white balance. The woodwork (stairs and skirting) are painted Farrow & Ball “Off-White”, and the walls are a light sandy colour called ‘String’ again by Farrow & Ball. I don’t actually have a ‘white wall’ in the house to use for this, and my wife won’t have one!

This gallery starts with the E03R V2.0 indoors, white and red beams. The red beam exposure is intentionally longer to show the shape of the beam, not the relative brightness to the white. However, for the outdoor beamshots, the exposure for white and red is similar, and is intended to show the red beam range is, of course, very limited.
Then the last two beamshots are the E35R, showing the very strong performance.


Batteries and output:

The E03R V2.0 has a built in li-po 400mAh cell, and the E35R runs on a removable 21700 5000mAh cell.

These images are the charging traces for the E03R V2.0 and E35R.


Please note, all quoted lumen figures are from a DIY integrating sphere, and according to ANSI standards. Although every effort is made to give as accurate a result as possible, they should be taken as an estimate only. The results can be used to compare outputs in this review and others I have published.

When carrying out runtime tests, I always use a cooling fan to at least represent some of the cooling provided by your hands, and also the lower temperatures outside. Not using any cooling would be unrealistic.
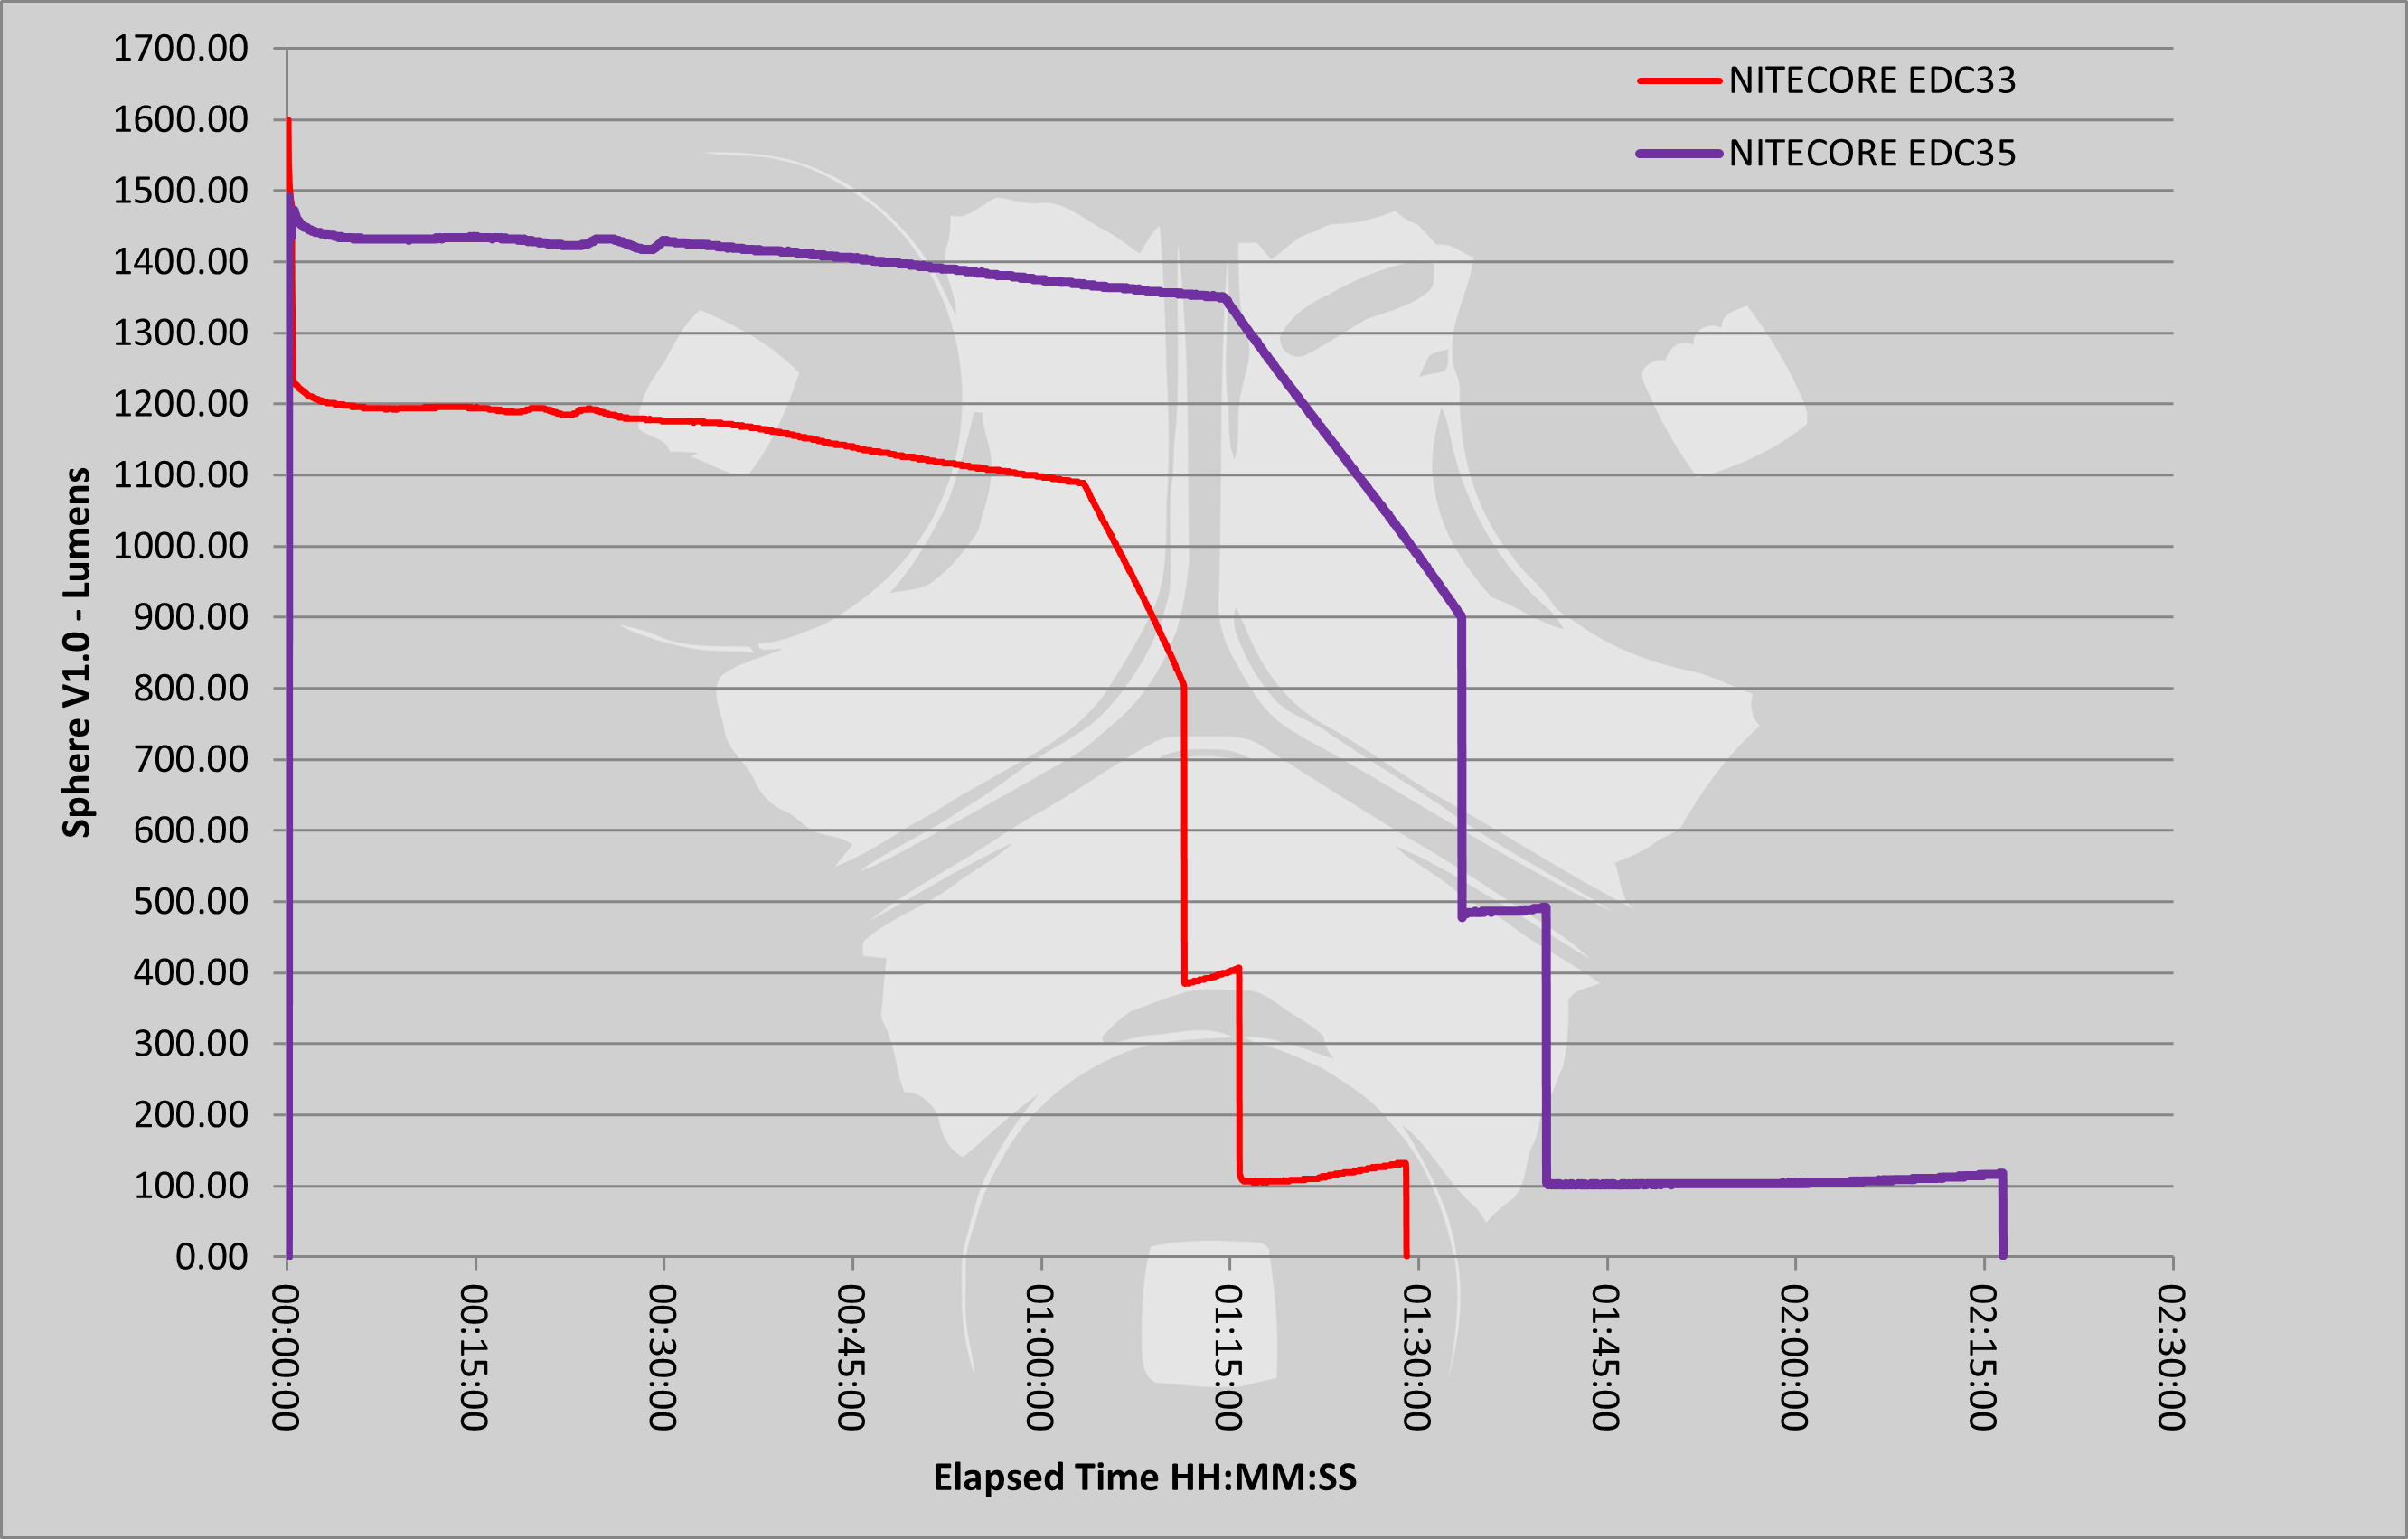
In this run of the E35R, there were actually three power cuts that stopped the cooling fan running (the logging was running on battery), and this corresponds with drops in the output due to the thermal regulation ramping down the output.
The E03R V2.0 output is very predictable and stable and needs no further comment.
In the gallery, the second image has the times of the power cuts marked so you can see the corresponding drops in the E35R’s output.
Showing just the start of the output trace, the final image in the gallery shows the thermal regulation controlling the output.


The E03R V2.0 and E35R in use

Since Fenix first previewed the E03R V2.0, the debate has been based largely around if they have made it too big for a key chain light. Ultimately only you can make that decision, but I’ve found it a very good size. Being slightly larger it is more readily to hand (easier to get a grip on), and the added functions raise its usefulness even more.

I particularly like the ‘breathe’ modes of the E03R V2.0. A soft locator light which give a confidence that when in an unfamiliar place you can activate the breathe mode and then always be able to find where the E03R V2.0 is.

For a light that is going to be knocking around, and in and out of pockets, the timing of the power switch activation seems spot on. I’ve not had any accidental activations, and not really bothered with the lockout. It is good to have the option, but so far no warm pockets.

Between these two lights, the interface is effectively the same, so it is very natural to pair them. Of course the E35R is a single white light LED that goes up to an amazing 3000lm output.

At that maximum output the E35R does get hot quickly, and as shown in the runtime graphs, cannot be maintained – but take a moment and look at those graphs again. The E35R, with good cooling, is running at over 1500lm for an hour. This is a solid performance for a EDC pocket light.

I would prefer one lower mode on the E35R, but for most people, the available modes are going to work well.

With the power button being relatively low profile, it can be a bit hit and miss to find, especially with gloves. To get around this, what I do is to line up the pocket clip so it is opposite the power switch. You then use the pocket clip to index your grip and find the power switch without looking.

The original E35 was a good powerful compact light. It was just slightly smaller and a little lighter, and just enough light wrapped around a 21700 cell. Fenix have now managed to also squeeze in the on-board charging and magnetic base which are worthy updates and make the E35R a complete package.

So far, on testing the magnetic base of the E35R, I’ve found issues with slippage if put onto a smooth vertical surface. The magnet holds the light, but the finish on the tail is so smooth, if the surface is also smooth the E35R usually slips and slides down. If the magnet is holding a horizontal surface it is very secure. It is less about the magnet’s strength and more about there being enough grip between the E35R and the surface to not slide downwards.

‘New and improved’ is often a false claim, but for this pair of EDC lights from Fenix, it really is.


Review Summary
The views expressed in this summary table are from the point of view of the reviewer’s personal use. I am not a member of the armed forces and cannot comment on its use beyond that covered in the review.

Something that might be a ‘pro’ for one user can be a ‘con’ for another, so the comments are categorised based on my requirements. You should consider all points and if they could be beneficial to you.

_______________________________________________
What doesn’t work so well for me
_______________________________________________

E35R – Could do with a lower mode for household use.
E35R – Tends to slide down smooth vertical magnetic surfaces.
Nothing else for either.

_______________________________________________
Things I like
_______________________________________________

E35R – 3000lm maximum output.
E35R – built around the 21700 cell.
E35R – simple and effective user interface.
E35R – magnetic tail.
E35R – built-in USB-C charging.
E03R V2.0 – ‘breath’ locator beacon mode.
E03R V2.0 – white and red output (and green in breath).
E03R V2.0 – built-in USB-C charging.
E03R V2.0 – great combination of size, weight, power and runtime.

Mega Review: Silky Outback – Nata, BigBoy and PocketBoy

Silky’s New Outback range has recently added the Nata Outback edition to compliment the BigBoy, GomBoy and PocketBoy Saws. All of the Outback range feature a black blade coating and are built for outdoor and survival use. The Outback saws have thick and rigid saw blades making them 100% outdoor proof. For the Outback range Silky applied a black coating of a unique nickel and tin blend to the entire blade, including the teeth. This provides a long blade life and an incredible cutting performance.
This Silky Outback review features the latest addition, the Nata Outback Edition, along with the largest and smallest saws in the range, the BigBoy and PocketBoy.
If you are in the UK you can find these at Woodlore (no affiliation, just where to find them – search for ‘Silky’ once there).

Review Videos

A trio of videos you can come back to, or find directly on the Tactical Reviews YouTube Channel.

Starting with a short format sixty second review:


Onto a full video review covering many more details of the BigBoy Saw:


The last of this trio is a full video review covering many more details of the Nata:


All the details:

Unpacking the BigBoy Saw:


A good look round the BigBoy – Things to look out for here are:

On the Outback edition, the pivot/lock is painted black and has an adjustable pivot screw. You can see the two blade stop groove positions in the blade. Due to its curved shape, the teeth of the BigBoy are not fully enclosed when folded, but you can keep it in the included nylon carrying case. The blade can be locked in two positions (more on that in ‘The Big Cut’).
The teeth have four cutting angles to leave a smooth surface after cutting.
The BigBoy is the largest folding saw in the Outback range, and is also shown here next to a Bahco Laplander for scale.


Unpacking the PocketBoy Saw:
Both saws include a case, the PocketBoy has a clear plastic case.


A good look round the PocketBoy – Things to look out for here are:
Exactly as with the BigBoy, the PocketBoy pivot/lock is painted black and has an adjustable pivot screw. You can see the two blade stop groove positions in the blade. The smaller saw has finer teeth which is shown in a side by side comparison. The blade can be locked in two positions and the teeth of the PocketBoy are fully enclosed when folded.
The PocketBoy is the smallest folding saw in the Outback range, and is also shown here next to BigBoy for scale.


The Nata’s sheath:
Packed with practicality, yet simple in design, the Nata’s sheath has a dangler belt loop with retaining strap that can be removed from the sheath. The thinking behind this is not to use the Nata’s sheath without the belt loop and retaining strap, but instead that while you are carrying it belt mounted, if you then want to sit or get into a vehicle, you can remove the sheath from the belt hanger without taking off your belt.
The sheath itself is mainly a gravity sheath that you drop the Nata into and lift out as needed. It has two metal edges that provide rigidity and prevent the Nata cutting through it over time. Large drainage holes ensure the sheath stays clear of rain water and can easily be flushed clean if it accumulates dirt/dust.


A good look round the Nata – Things to look out for here are:
Note: this is a used demo blade so will be showing signs of use.
A very utilitarian blocky blade shape gives you the weight and strength needed for effective chopping. This Outback edition is the first Nata to feature a new black oxide coating.
The rubber handle is removable, not as I originally thought, to replace the handle, but in fact to allow you to replace the blade and keep the handle, as Silky sell a replacement blade for the Nata.


The Blade and Handle – Detailed Measurements:
For full details of the tests and measurements carried out and an explanation of the results, see the page – Knife Technical Testing – How It’s Done.

The blade is made from Silky’s Japanese Carbon steel.


The Factory edge up close:

Followers of Tactical Reviews will know my views on factory edges, but to recap:

Anyone using a knife will need to sharpen it. That first factory edge is just like the first tank of fuel that a new car comes with (or first charge of the battery).
A good factory edge is a ‘nice to have’ but not a ‘make or break’ for a good knife, as you will be putting your own edge onto it soon enough.
The factory edge does however indicate the care a knife maker has put into the final finish.
It is for this reason Tactical Reviews measures factory edge sharpness and specifications, and includes this information in the detailed technical testing.

As a further look at the factory edge, this section has been added to include some high magnification photos of the factory edges.

In the following gallery are close up images of the BigBoy and Pocket saw teeth (they are used so show some saw dust), and the Nata in a section or unused edge and at the point of maximum wear from the demo use. The worn section shows the black coating is gone and the edge has damage.


What is it like to use? – Part 1 – The Big Cut
The question is, how large a log can you cut with the Silky Outback BiGBOY saw? Silky suggest the biggest size of log you should cut is half the length of the saw blade. Pffff! I’m not listening – La La La La La…….

So the Silky Outback BigBoy Big Cut Challenge was born.

The gallery in this Big Cut challenge shows the result of two visits to the log. The first visit was about 1 hour long, and the second 2.5 hours, and finally a third visit with a crowbar.

The log was not ‘green’ having been cut an unknown time before I got access to it, so the end I was cutting had dried. This caused significantly more effort. The Silky saws are so effective on green wood, but less so on dried timber.

During this cut, the two blade positions proved their worth and made angling the cut much easier, so, yes, you will be glad of them.

At the end of the first hour of cutting, progress felt good and I’d got a channel cut round the entire log but had to stop.

Visit two was a couple of weeks later, so the wood was drier and the cut had exposed the inner wood allowing it to dry more. After an hour and a half, progress slowed to a point I decided to stop as I’d reached an impasse.
Having checked the depth of cut all round I have an estimate of what is left uncut (the green circle).

I had really hit the limit of sensible progress for a few reasons:

The timber was not green wood, so much harder to cut.
Access was limited especially on the left side preventing free movement of the saw.
The depth of cut meant the sawdust did not clear, instead clogging the cut.
At the extreme depth of cut, only a few saw teeth were cutting. This was the biggest factor.

Wanting to confirm the actual cut I decided to use a crowbar to break away all the wood that was cut to leave only the last uncut part.

The conclusion of this test is that with enough time and full, clear, access to the log I think it would just be possible – if you really had to. I would definitely not choose to do this again!


What is it like to use? – Part 2 – all the rest
So back to the bread and butter use of the Silky Outback tools. Woodland, green wood, and camp tasks.

Using a long heavy blade for chopping instead of an axe head gives you quite a few advantages. You do not need to be so accurate with each strike, you can use the Nata for brush clearance as well (which you could not with an axe), and you can also use it for batoning and splitting large logs safely. A very effective tool.

It isn’t new as the Nata has been in Silky’s range for some time, but this version with coated blade and using the double bevelled edge version for the hard-use Outback range takes it to another level. (there is a chisel grind version of the standard Nata)

I’ve pushed the Silky saws to their limits for the size of cut you can make, but when you work within the limits Silky recommend you have an easy time. Green wood is devoured by the BigBoy, and for the smaller tree limbs the PocketBoy is very effective. Just keep to that rule of the diameter of log being half the length of the blade (not nearly twice like in the Big Cut). All of these types of saw cut on the pull stroke, which prevents blade bends, and gives excellent control of the cut.

For logs of the correct size, sawing is faster than more efficient and cleaner than chopping, so if you can carry a saw and chopping tool you make life a lot easier. Saw the logs, then split them with the Nata.


Review Summary

The views expressed in this summary table are from the point of view of the reviewer’s personal use. I am not a member of the armed forces and cannot comment on its use beyond a cutting tool or field/hunting knife.

Something that might be a ‘pro’ for one user can be a ‘con’ for another, so the comments are categorised based on my requirements. You should consider all points and if they could be beneficial to you.

_______________________________________________
What doesn’t work so well for me
_______________________________________________

(very little to say here)
BigBoy – the saw teeth are still partly exposed when folded.
Nata – the blade rattles in the sheath and can be a bit noisy when carrying.
(yup, really not much to say)

_______________________________________________
Things I like
_______________________________________________

BigBoy Outback Edition – devastatingly effective saw teeth.
BigBoy Outback Edition – two locked blade positions.
BigBoy Outback Edition – Comfortable and grippy wood/plastic composite handle.
BigBoy Outback Edition – zip up case included.
BigBoy Outback Edition – adjustable pivot tension.
BigBoy Outback Edition – black coated blade.
PocketBoy Outback Edition – effective saw teeth.
PocketBoy Outback Edition – two locked blade positions.
PocketBoy Outback Edition – Comfortable and grippy wood/plastic composite handle.
PocketBoy Outback Edition – plastic case included.
PocketBoy Outback Edition – adjustable pivot tension.
PocketBoy Outback Edition – black coated blade.
Nata Outback Edition – black oxide protective blade coating.
Nata Outback Edition – sheath can be unclipped from belt hanger.
Nata Outback Edition – long heavy chopping blade.
Nata Outback Edition – removable cushioning rubber handle.
Nata Outback Edition – suitable for chopping and brush clearing use.
Nata Outback Edition – Stable and strong double bevelled edge version.

 
Discussing the Review:
The ideal place to discuss this review is on the Tactical Reviews Facebook Page
Please visit there and start/join the conversation.
Knife Review: ANV M311 Spelter

Join me in this detailed review of the ANV – ACTA NON VERBA Knives M311 Spelter.

The M311 Spelter is a distinctive survival/tactical knife with a large number of options, so you can virtually create your own customised version of it. You can select from two blade shapes, two blade steels, four blade finishes, along with three handle and sheath colours.

In this feature review we are looking at the blade shape with choil, in Elmax steel, Topographic blade coating pattern, with Olive handle and sheath.

Review Videos

Starting with a short format sixty second review:


Onto a full video review covering many more details:


A few more details:

What’s in the box?:

Amazingly, this box has survived being unravelled to make it flat and a journey via checked luggage, then reassembled.

The knife comes wrapped in a foam sheet with a QC card.


A good look round the Sheath – Things to look out for here are:

For the sheath I’ve split it into two parts, with this one focusing on the main body of the sheath. It is a Kydex sheath held together with hollow eye rivets. This is the Olive colour sheath, but several other colours are available.
Knife retention is courtesy of the shaped lips at the mouth of the sheath that grip the front of the handle. There is sloped thumb ramp to provide leverage to push the sheath off the knife.
The hollow rivets mean you can fit a variety of straps, clips, cords, or other carrying systems, and also allows you to swap them over for left handed use.


A good look round the MOLLE / Belt fitting – Things to look out for here are:

Although the sheath design allows you to fit any other system you want to, the M311 Spelter sheath comes with 75mm 2M MOLLE systems straps bolted onto the sheath. The end of the strap fits through a loop and over a small tab to hold it in place.


A good look round the M311 knife and handle – Things to look out for here are:

And onto the superb M311 Spelter Knife. Remember there are two steels, and several blade finishes to choose from, so if you prefer a plain blade finish, you can have that. I rather like the Topo and its ‘0311’ elevation included in the contours. A really elegant swedge gives the effect of a harpoon style blade without actually being one, and there is a generous thumb rest forward of the jimping so you can get thumb pressure right over the cutting edge.
The handle is a mastery of 3D sculpting, and the milling lines in the micarta give excellent grip, adding to the already very stable hold you get from the palm swell, butt hook and finger groove. The handle is held on with 2 Allen head bolts.
This blade it the ‘with choil’ version.
The butt of the grip has a striking point and there is also jimping for a reverse grip hold.


The Blade and Handle – Detailed Measurements:
For full details of the tests and measurements carried out and an explanation of the results, see the page – Knife Technical Testing – How It’s Done.


The Factory edge up close:

Followers of Tactical Reviews will know my views on factory edges, but to recap:

Anyone using a knife will need to sharpen it. That first factory edge is just like the first tank of fuel that a new car comes with (or first charge of the battery).
A good factory edge is a ‘nice to have’ but not a ‘make or break’ for a good knife, as you will be putting your own edge onto it soon enough.
The factory edge does however indicate the care a knife maker has put into the final finish.
It is for this reason Tactical Reviews measures factory edge sharpness and specifications, and includes this information in the detailed technical testing.

As a further look at the factory edge, this section has been added to include some high magnification photos of the factory edges.


What is it like to use?

From the moment I picked it up, the M311 Spelter has become a firm favourite. I’m in love with the harpoonesque swedge on an eminently practically sized blade.
The two thumb positions, the first on the jimping at the front of the handle, and then onto the groove positioned behind the cutting edge let you find the ideal grip and pressure for whatever cutting job comes up.
I’m always a little cautious about using a choked-up grip with a finger into the choil, but it takes fine work to another level if you can do this safely.
Stability of grip is fantastic. The gallery below takes you through only some of the grip positions you could use, a standard grip with and without the thumb forward onto the jimping, thumb into the groove on the spine, choked up and a reverse grip.


It’s like your hand can dance all over the handle and find a comfortable and stable grip almost any which way. The swells and grip hook let you take a firm hold in so many ways.

A slight surprise for me, considering I take XL size gloves, was that the handle is almost on the large side. It certainly has plenty of room for use with thick gloves, and I’d take this over a handle being too small.

Even with quite a bit of use, the Kydex retention is still on the stiff side. For anyone intending to mount it handle down on a chest plate or other upside-down position, this is critical. I certainly would have no doubt the knife will not come out under its own weight even with a very active user, and will still need a firm thumb lever to unsheathe it.

The 2M MOLLE straps are not my favourite fitting, but even I do have to admit they are a very versatile system for a standard fitment from ANV. They are a bit of a jack of all trades as they can be belt mounted or MOLLE mounted, and will fit any belt you can find, while the hollow rivets then also allow use of cord to stabilise the sheath even more. And this is before you move onto possibly swapping them for some other mounting system which the sheath easily allows for. It is sold in the tactical range and this mount configuration definitely works well for the most common type of carry.

With no ‘hanger’, if belt mounted the M311 sits high on your body, but I do quite like this. It’s also easy enough to fashion your own belt hanger and wear it lower if you want to.

ANV’s M311 Spelter keeps asking to be used. That beautifully shaped grip makes it easy to find a hand position that suits the cutting job, whatever it is. Comfort is also excellent for extended hard use.


Review Summary

The views expressed in this summary table are from the point of view of the reviewer’s personal use. I am not a member of the armed forces and cannot comment on its use beyond a cutting tool or field/hunting knife.

Something that might be a ‘pro’ for one user can be a ‘con’ for another, so the comments are categorised based on my requirements. You should consider all points and if they could be beneficial to you.

_______________________________________________
What doesn’t work so well for me
_______________________________________________

Blade retention on the verge of being too strong.
Sheath is very wide, limiting some attachment positions.

_______________________________________________
Things I like
_______________________________________________

Superb balance of blade shape and size.
Sculpted handle gives excellent grip.
Key areas with jimping for secure forward and reverse grips.
Elmax steel (also available in Sleipner).
Flexible 2M MOLLE mounting system.
Large drainage hole for easy sheath maintenance.
Super comfortable handle for hard work.
Four blade finishes.
Three handle Colours.
Three sheath colours.
Sheath allows for many different mounting systems to be fitted.

 
Discussing the Review:
The ideal place to discuss this review is on the Tactical Reviews Facebook Page
Please visit there and start/join the conversation.
Gear Review: Nitecore EMR10 EMR20

In this review of the Nitecore EMR10 and EMR20 portable mosquito repellers / powerbanks, we take a detailed look at all aspects of their performance and function.

The EMR10 and EMR20 are two new devices from Nitecore combining portable insect repellers with a powerbank. The EMR10 has ultrasonic repellent, a repellent mat heater and a 10,000mAh powerbank, and the EMR20 is slightly smaller and simpler but without the ultrasonic function.

If, like me, you protect everyone else from mosquito bites, by being the one the mosquitoes make a beeline for, then you may be as pleased as I am to find the new Nitecore EMR10 and EMR20 portable insect repeller devices.

The thermal runtime graphs for these units are a first for Tactical reviews with the final graphs having 3500 manually entered data points!

Making his first appearance below is “Stoppo”, Tactical Reviews’ “don’t do that” guardian. Mosquitos beware, armed with the EMR units Stoppo says NO!

Review Videos

Starting with a short format sixty second review:


Onto a full video review covering many more details:


Looking closer at the EMR devices:

Both units boxed and unboxed, before we go into the finer detail.

What’s in the box – EMR10:
Along with the main unit are a charging cable, instructions and 10 of the double-size repellent mats.


A good look round the EMR10 – Things to look out for here are:
Of the two, it is a bigger and more feature packed unit, with the EMR10 there is a lot to see.
The OLED screen has a protector you need to take off. Notice the slider on the bottom, we’ll come back to that. Molded into the rubber section on the sides are some grip grooves. On each side are small ultrasonic speakers that emit a dual frequency repelling sound. On the back is a metal wire clip that is designed to work with MOLLE / PALS, pocket or belt use. The top has a USB-C port for charging and for use as a powerbank.
The repellent mat heater/holder has a retaining spring wire to keep the mat from falling out.
Then onto the EMR10’s biggest trick, the removable twin 21700 cells.


What’s in the box – EMR20:
Along with the main unit are a charging cable, instructions and 10 of the double-size repellent mats.


A good look round the EMR20 – Things to look out for here are:
The EMR20 is a smaller and simpler unit which has no grip texturing or screen. Instead it has a set of four indicator lights plus the power switch has dual coloured illumination. On the back is the same metal wire clip used by the EMR10 that is designed to work with MOLLE / PALS, pocket or belt use. The top has a USB-C port for charging and for use as a powerbank.
The repellent mat heater/holder has a retaining wire spring to keep the mat from falling out.


Batteries and output:

The following section is all the technical testing for both units. This includes temperature measurements for the repellent mat heater, plus power curves for charging each unit, and the powerbank output for each unit.

First up is the repellent mat heater output for both units. The test was carried out on the highest, ‘outdoor’ mode which takes the heater to the highest temperature.
The temperature measurement was taken by inserting a K-type thermocouple under a used mat to keep it pressed tightly against the heating plate and insulate it. Another ambient temperature thermometer was also recorded, making it three temperature measurements being monitored.
For this dual run I had to set a camera on time lapse photo to take a photo measurement every 30s. Unfortunately I had no computer logging so had to manually type each measurement – over 3500 of them!
The resulting graphs are very interesting. They show the temperature varying between an upper and lower limit. The EMR10 keeps the lower limit higher than the EMR20 and as a result uses more power and has a lower runtime. The graphs do speak for themselves, so take a bit of time to read these.
Also included are some thermal images of the EMRs during this test taken with a FLIR thermal camera.


The next gallery shows the USB input and output graphs for each unit. Charging graphs are from empty to full. The powerbank graphs show each unit charging a Oneplus phone on fast charging (9V output); they are not the full capacity of the powerbank, just to show the output characteristics which are excellent.

What it is like to use?

I want to start this section by introducing my very helpful assistant, Klaus. One of the things I was worried about with the EMR10’s ultrasonic repeller is if it would distress animals. Dog whistles are also ultrasonic (above human hearing range) so I needed to use the EMR10 around a dog to see what would happen. Not once did Klaus seem to react at all to the EMR10 negatively, or even pay any attention to it, so assuming he could hear it, it didn’t bother him. A good start.

Nitecore make and supply double size repellent mats. This is clearly the easiest way to load up the EMR10 and EMR20. It is possible to use two standard size mats instead giving you more flexibility.

You can see in one of the photos how the mats go almost white when the active ingredient has evaporated. The photo shows areas on the mat around the heat shielding that have gone white on this part used mat.

An observation relating to the EMR10’s display and capacity indication is that I’ve found the percentage show to not be accurate at all times. You can use the EMR10 while it is on charge. While doing this, the battery percentage always stays lower than it really is. You can see the input power as well on the screen and as this gets closer to being fully charged, the input watts gets lower and lower (the example here shows 10W input) but the percentage charge indicates it is much lower than it really is. Once you turn off the EMR10 it recovers and corrects itself. Just something to be aware of and I suspect relates to the charge percentage being based on the cell voltage which will of course be lower while the repeller is turned on.

I’ve been using both the EMR10 and EMR20 in a variety of indoor and outdoor locations carried separately or clipped onto a bag.


So how did they do?

Firstly, with me being apparently the finest of dining for mosquitos, if they are determined enough, you will still get bitten; I did. I’ve been bitten when covered in deet, so using repellent mats outdoors might deter some, but is not absolute protection.

It is not at all possible to properly measure the effectiveness of these repellers as the number of bites will also depend on the time, temperature, and hatching of the insects, so this can be impressions only.

Assuming the mats themselves are effective, I have been aware of the aroma coming from the mats. Considering this is outdoors, that is reassuring. Effectiveness is so subject to wind direction and strength, so you might not actually have any cover of the repellent and insects might reach you undeterred. Where the EMR10 has another string to its bow, is the ultrasonic repeller. The ultrasonic won’t be affected by wind, but having no active ingredient, it again relies on the mosquitos not being determined to bite.

NOTES on the repellent mats:

There are a few different active ingredients used in repellent mats, and these are also frequently in combination with Piperonyl butoxide. Prallethrin, Transfluthrin and D-Allethrin are the most common with Nitecore’s MRM10 Mosquito Repellent Mats using Prallethrin.

Piperonyl butoxide (PBO) is a man-made pesticide synergist. By itself, PBO is not designed to harm insects. Instead, it works with bug killers to increase their effectiveness. PBO is often combined with natural pyrethrins or man-made pyrethroids. It has been used in pesticide products since the 1950s, when it was first registered in the United States.

A repellent mat needs to be changed when it turns white. You can use Repellent Mats for a shorter period of time than the manufacture specifies and they will still be just as effective. However, if there is going to be several days between usages, you might want to keep the mats in their foil packaging or in a sealed plastic bag between uses.

Having used them a lot, the one feature I wish they had was an auto-off timer. Once you turn on either one of them, they will run until the battery is flat or you turn it off. I found that treating at critical times was more important than all night and I would have preferred to be able to fall sleep with the repeller turning itself off after an hour or two and leaving power to run on another night. On this subject, the EMR10 allows you to either only run on one of the 21700 cells, or carry spares.

The clip has a one-way design where it fits on much more easily than taking it off. Good for not losing it, but on occasion puts up a bit of a fight to take it off, especially from MOLLE more than from a pocket.

Initially I was dubious about how much I would want to use the powerbank function when I want the power for insect repelling. But, after travelling by air a few times with these devices, the use comes from having a powerbank to use on the plane, and once getting to where I really need the repeller, then recharge and only use it for the repellent. So like this, the two functions allow for infrequent use as a powerbank while travelling, but then change to only using them as repellers when not travelling.

While using the EMR10 and EMR20 I have been bitten. I am convinced I would have been bitten more without them. The most difficult aspect of their use is the protection zone they can provide. If you are walking, then the repellent vapour is trailing after you and not surrounding you. If there is wind, the repellent is blown away. In instances where you are not moving and there is wind, you need to put the device a few meters away from you and up-wind.

Some of the better results are for smaller or enclosed areas. Treating a tent, or a hammock net are idea uses. While on holiday, using it in a hotel or guest room works well.

Review Summary

The views expressed in this summary table are from the point of view of the reviewer’s personal use. I am not a member of the armed forces and cannot comment on its use beyond that covered in the review.

Something that might be a ‘pro’ for one user can be a ‘con’ for another, so the comments are categorised based on my requirements. You should consider all points and if they could be beneficial to you.

I’m trying something slightly different and starting with what doesn’t work so well, so I can finish on a more positive note.

_______________________________________________
What doesn’t work so well for me
_______________________________________________

No auto-off timer.
Clip can be awkward to remove.
USB-C port cover needs a firm hand to get it out of the way.

_______________________________________________
Things I like
_______________________________________________

Portable outdoor insect repellent device!!!
Double size repellent mats (and able to take two standard mats).
Powerbank function with rapid charge 9V output supported.
Up to 18W input power when charging.
Indoor and Outdoor modes.
Secure one-way clip.
EMR10 has replaceable cells.
EMR10 can run on one 21700 cell.
EMR10 OLED display is informative.
EMR10 also has an ultrasonic repellent.
Removable secondary heat shield.

 
Discussing the Review:
The ideal place to discuss this review is on the Tactical Reviews Facebook Page
Please visit there and start/join the conversation.
Knife Review: Extrema Ratio K-TALON

Extrema Ratio’s K-TALON is an elegant, super-slim karambit knife with a fixed, hooked hawksbill blade and grip-ring. K-TALON comes in two versions of blade finish, Dark Stone and Stone Washed, both shown in this review and the video.

This review of the Extrema Ratio K-TALON includes an in depth video with overview and detailed measurements, plus image galleries and more..

Detailed Video Examination

This video takes a detailed look at the K-TALON and also includes some tips on fitting an Ulti-Clip to the K-TALON’s Kydex sheath.


A few more details:

What’s in the box?:


A good look round the K-TALON sheath – Things to look out for here are:
Included in this review are the two optional clips; the Ulti-clip slim and the belt clip. The K-TALON’s sheath is slim, made from Kydex and has a drainage hole. The blade retention can be adjusted via the two fastenings at the mouth of the sheath. Out of the box, the sheath has a paracord neck lanyard. The Kydex is held together with hollow rivets and along with slots provides a variety of mounting/fixing options.


A good look round the K-TALON – Things to look out for here are:
K-TALON has a very slim profile and the grip-ring is generous enough to allow for gloved hands. This gallery shows the dark stone blade finish close up. The elegant curved blade has a fuller and the finish is beautifully precise.
Despite the very slim handle, the distinctive Extrema Ratio grip pattern is clearly evident – no mistaking this is an Extrema Ratio.


The Blade and Handle – Detailed Measurements:
For full details of the tests and measurements carried out and an explanation of the results, see the page – Knife Technical Testing – How It’s Done.

The blade is made from N690 steel.


The Factory edge up close:

Followers of Tactical Reviews will know my views on factory edges, but to recap:

Anyone using a knife will need to sharpen it. That first factory edge is just like the first tank of fuel that a new car comes with (or first charge of the battery).
A good factory edge is a ‘nice to have’ but not a ‘make or break’ for a good knife, as you will be putting your own edge onto it soon enough.
The factory edge does however indicate the care a knife maker has put into the final finish.
It is for this reason Tactical Reviews measures factory edge sharpness and specifications, and includes this information in the detailed technical testing.

As a further look at the factory edge, this section has been added to include some high magnification photos of the factory edges.


What is it like to use?
A hook-bladed karambit is typically associated with tactical uses and less so for general EDC. Actually in its more typical tactical usage scenario you would actually not use it for every day cutting; the condition of the edge needs to stay at its absolute sharpest for an instance when it is needed in an emergency.
I am not looking at it from this tactical point of view, but instead as an EDC blade. The hooked, hawksbill blade was initially developed as a utility knife and farming tool in Malaysia and the Philippines during the 11th century, so is very functional for certain types of cut.

As a utility / EDC knife, a hawksbill blade is very well suited to cutting cords, stripping wires, pruning plants, and cutting carpet or other sheet materials.

Though the profile is so slim, the K-TALON handles very well.


Although in this gallery I have only shown grips that use the grip ring, you can ignore the ring and just hold the handle without putting a finger though (see below). This gives even more positions to hold the K-TALON.

The karambit hawksbill curved blade works really well for some but not all tasks. Where it excels is in those cutting jobs where the curve of the blade can capture and control the cut. Cuts where a straight blade might slip off, or struggle to get purchase, the hawksbill blade grabs hold. In these instances the cut becomes much more controlled. In terms of EDC, as long as it is partnered with a straighter blade, the K-TALON makes for an exceptional addition in cutting power.

Review Summary

The views expressed in this summary table are from the point of view of the reviewer’s personal use. I am not a member of the armed forces and cannot comment on its use beyond a cutting tool or field/hunting knife.

Something that might be a ‘pro’ for one user can be a ‘con’ for another, so the comments are categorised based on my requirements. You should consider all points and if they could be beneficial to you.

_______________________________________________
What doesn’t work so well for me
_______________________________________________

It is too big to be a ‘neck knife’.
No belt clip supplied as standard.

_______________________________________________
Things I like
_______________________________________________

Excellent handling.
Grip ring is large enough for use with gloves.
Choice of two blade finishes.
Easy to carry due to the very low profile.
Adjustable tension sheath retention.
Easy to fit and adjust belt/clip attachments.

 
Discussing the Review:
The ideal place to discuss this review is on the Tactical Reviews Facebook Page
Please visit there and start/join the conversation.

Knife Review: Fällkniven PXL Folding Knife

In this review of the Fällkniven PXL (‘bm’ version – black micarta) folding knife, we take a very close look all over this beautiful liner lock.
Direct from the Fällkniven designer himself, Peter Hjortberger, is the statement that the PXL is the largest folder he will ever design; if you need a larger knife, then a fixed blade becomes the better choice. Fällkniven knives are practical tools, designed to work hard and efficiently, with the design intent firmly on performance and practicality.
The PXL now has an Elmax steel blade and comes with either black micarta or Elforyn (an imitation Ivory) handle scales.

Video Overview

This video is a detailed look at the Fällkniven PXLbm, from handling to technical measurements.


What’s in the box?:
The presentation box comes in a white card sleeve (making it almost disappear in the Tactical Reviews all white studio). Slipping the sleeve off to reveal the black box inside with the knife nestled in a foam liner.


A good look round the PXLbm – Things to look out for here are:
This gallery is intended to show lots of the design details up close, including how the knife is put together and how it functions.
The black micarta handles (with inset badge) are polished and have a precise fit to the liners and bolster. You can see the single position pocket clip, plus how it is attached. On the blade, the engraving, thumb stud, grind and choil. Designed with a liner lock, you can see the lock engagement and detent ball. There is a lot to take in.


The Blade and Handle – Detailed Measurements:
For full details of the tests and measurements carried out and an explanation of the results, see the page – Knife Technical Testing – How It’s Done.

The blade is made from Elmax steel.


The Factory edge up close:

Followers of Tactical Reviews will know my views on factory edges, but to recap:

Anyone using a knife will need to sharpen it. That first factory edge is just like the first tank of fuel that a new car comes with (or first charge of the battery).
A good factory edge is a ‘nice to have’ but not a ‘make or break’ for a good knife, as you will be putting your own edge onto it soon enough.
The factory edge does however indicate the care a knife maker has put into the final finish.
It is for this reason Tactical Reviews measures factory edge sharpness and specifications, and includes this information in the detailed technical testing.

As a further look at the factory edge, this section has been added to include some high magnification photos of the factory edges.

NOTE: pay attention to the scale shown in the images and the near zero-grind; there is only a very small micro-bevel visible for the PXL’s factory edge.


What is it like to use?

My impression is that all of the Fällkniven folders I have handled have a similar ‘crisp’ feel to the finish. What I mean by this is that the edges of the liners, and lock-bar are on the verge of being sharp. Where another material or component is directly next to the liner, this provides a seamless transition and overall this personal observation doesn’t impact on usability at all. Gripping the knife to make cuts, you have the smooth rounded parts of the handle and bolster touching your hand. It’s more when you explore the knife (as if a worry stone) and your fingers find the inner edges of the liner are noticeable. It is most evident when unlocking the blade as where you press on the lock bar also has a crisp edge to it.

On first checking the knife in this review, there was some lock-stick. The crisp edge where you press on the lock bar to release it made this stand out more. Rubbing over the lock surface with a pencil sorted the initial lock-stick straight away and this has not come back.

Also on first looking over the PXL I had wondered if the narrow looking thumb stud might be hard on the thumb to operate – this was unfounded and it is well suited to the knife’s action.

Now, let’s talk pocket clips; so the PXL has a compact pocket clip and this is in the typically less popular tip-down orientation. On discussing this with Peter Hjortberger, the reasoning behind this is to provide a pocket clip which has minimal impact on the grip and handling of the knife. Like this it is also less disruptive to the overall design to not add additional clip positions. It is certainly true that no pocket clip makes the grip of a knife more comfortable.
For Fällkniven, a pocket clip is seen as advertising that you are carrying a knife, which is often not ideal in a public place. Because of this most folding models in the Fällkniven line up do not have a clip at all, although they are being added to three folding knife models, the PXL, the PXLx and the PCx.

Although described as a ‘large folder’ (and the XL in the model name), to me this is more of a medium size folder. It is a good fit to the hand, being neither too small to get a good grip, nor too large for the pocket. In my hands (taking XL size gloves) it is a very comfortable fit.


The simple combination of brushed stainless and polished micarta makes the PXL an elegant EDC companion. The compact pocket clip does provide a way to secure the knife to your pocket or to webbing or any other fixing point that suits. I would tend to carry with the clip holding it to an internal divider or pocket in a bag, rather than a trouser pocket. When using it in a trouser pocket the compact clip fits very well, neatly fitting over the edge seam of the pocket and holding securely.

Steel technology moves on, and I am slightly conflicted over the change to a single steel blade construction from Fällkniven. I did always like the visible San-mai line that a layered Fällkniven blade displayed, but now the (overall beneficial) switch to solid Elmax takes the San-mai line away. Of course the distinctive convex grind still makes the blade unmistakably Fällkniven in both looks and cutting ability.

That convex edge – seriously sharp and fine factory edge, and the grind makes it a very effective cutter.


Review Summary

The views expressed in this summary table are from the point of view of the reviewer’s personal use. I am not a member of the armed forces and cannot comment on its use beyond a cutting tool or field/hunting knife.

Something that might be a ‘pro’ for one user can be a ‘con’ for another, so the comments are categorised based on my requirements. You should consider all points and if they could be beneficial to you.

_______________________________________________
What doesn’t work so well for me
_______________________________________________

Some slightly sharp edges on the liners and lock release.
Initial lock-stick – this has gone with use and pencil lead.

_______________________________________________
Things I like
_______________________________________________

Elmax blade steel at HRC 62.
Convex near-zero-grind edge. (Very fine micro-bevel)
Compact pocket clip has minimal effect on handling.
Elegant design and finish.
Precision action.
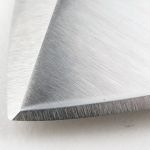
Comfortable grip for hard work.
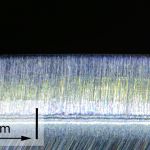
A knife built to last and hand down the generations.

 
Discussing the Review:
The ideal place to discuss this review is on the Tactical Reviews Facebook Page
Please visit there and start/join the conversation.