Gear Review: Nordic Heat Handwarmer and USB Powerbank 10,000mAh

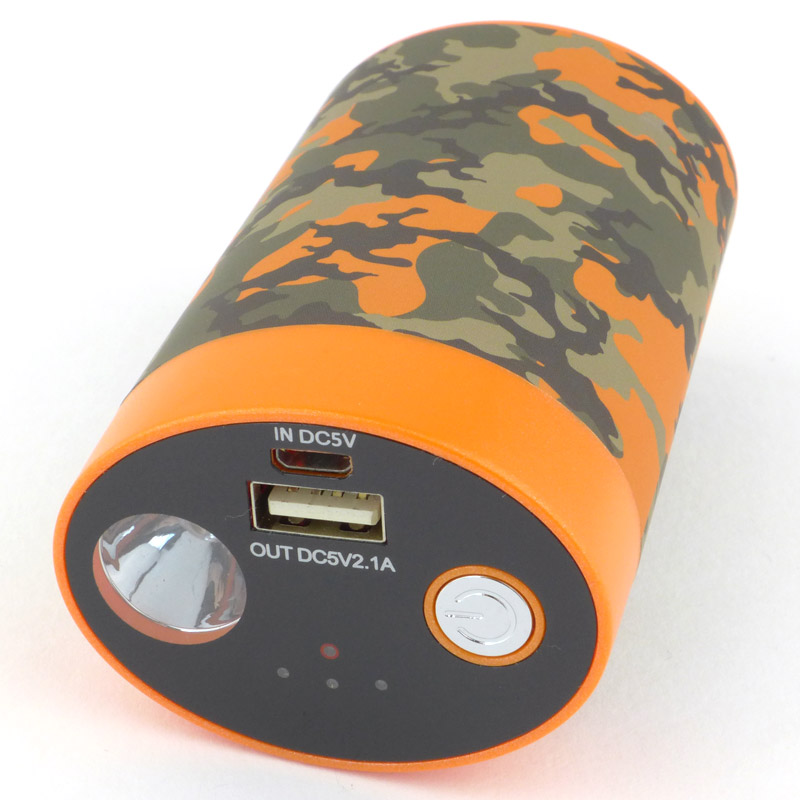
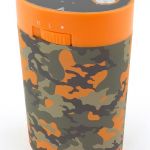
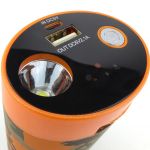
After just popping by for a chat with the nice folks of Nordic Heat at IWA, I found myself leaving with their Large Handwarmer / USB Powerbank. In this review of the Nordic Heat 10,000mAh Handwarmer and USB Powerbank, as well as getting a good feel for it, I have carried out some detailed measurements of output performance for both the heating and USB powerbank.


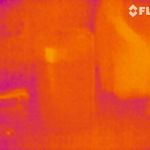
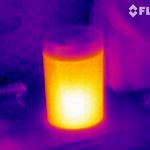
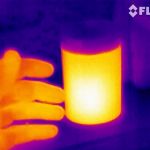
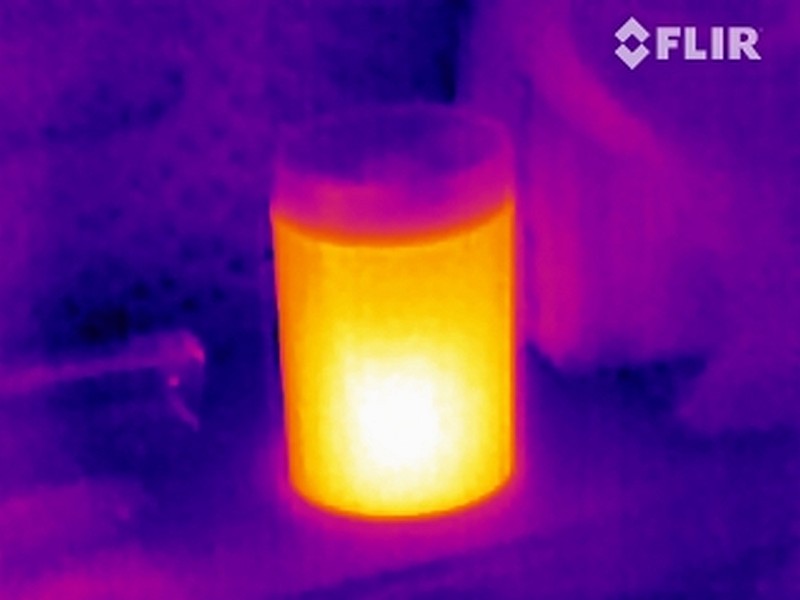
Thermal image taken with FLIR Scout TK

A few more details:

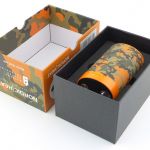
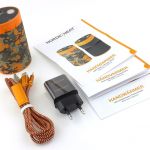
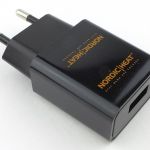
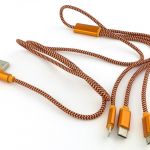
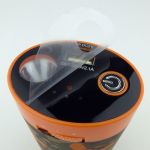
What’s in the box?:

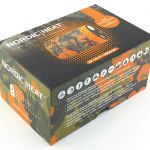
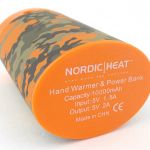
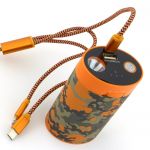
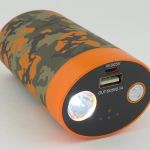
This is how the Large Handwarmer / USB Powerbank arrives.


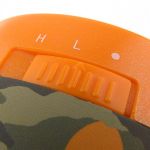
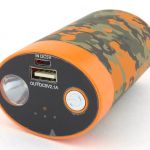
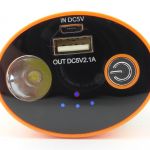
A good look round the Handwarmer / USB Powerbank:

It’s a simple concept really, it gets hot, and can charge your phone (or other USB device). Here are the details.


In The Laboratory:

For these tests, I wanted to measure the actual performance of the USB powerbank aspects and then move onto the heat output.
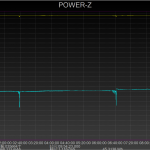
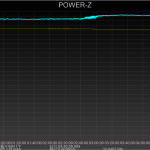
First are a couple of USB power traces for both charging using the supplier charger and cable and then with the powerbank discharging into a large load, again using the supplied cable.
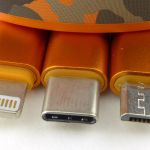
Being a special triple connector cable, I suspect there is some intentional throttling as it only charges at 1A, and for the output it only manages around 1.3A with the supplied cable.


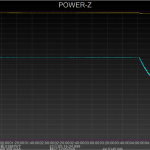
Now, putting aside the supplied charger and cable and recharging with a high power USB charger (6A) and high current cable, the powerbank charges at 2A.

Then seeing what output we get using a high current USB-A to USB-C cable into the large load. Now the powerbank outputs 2.4 – 2.5A. From the graph it does look like this is pushing the output to its limits as we see some power switching noise, but a very solid performance.


A measurement I was not able to make a graph of is the cumulative output measured charging phones. This came to 32.873Wh or 6913.2mAh.


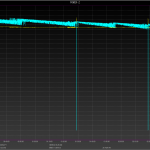
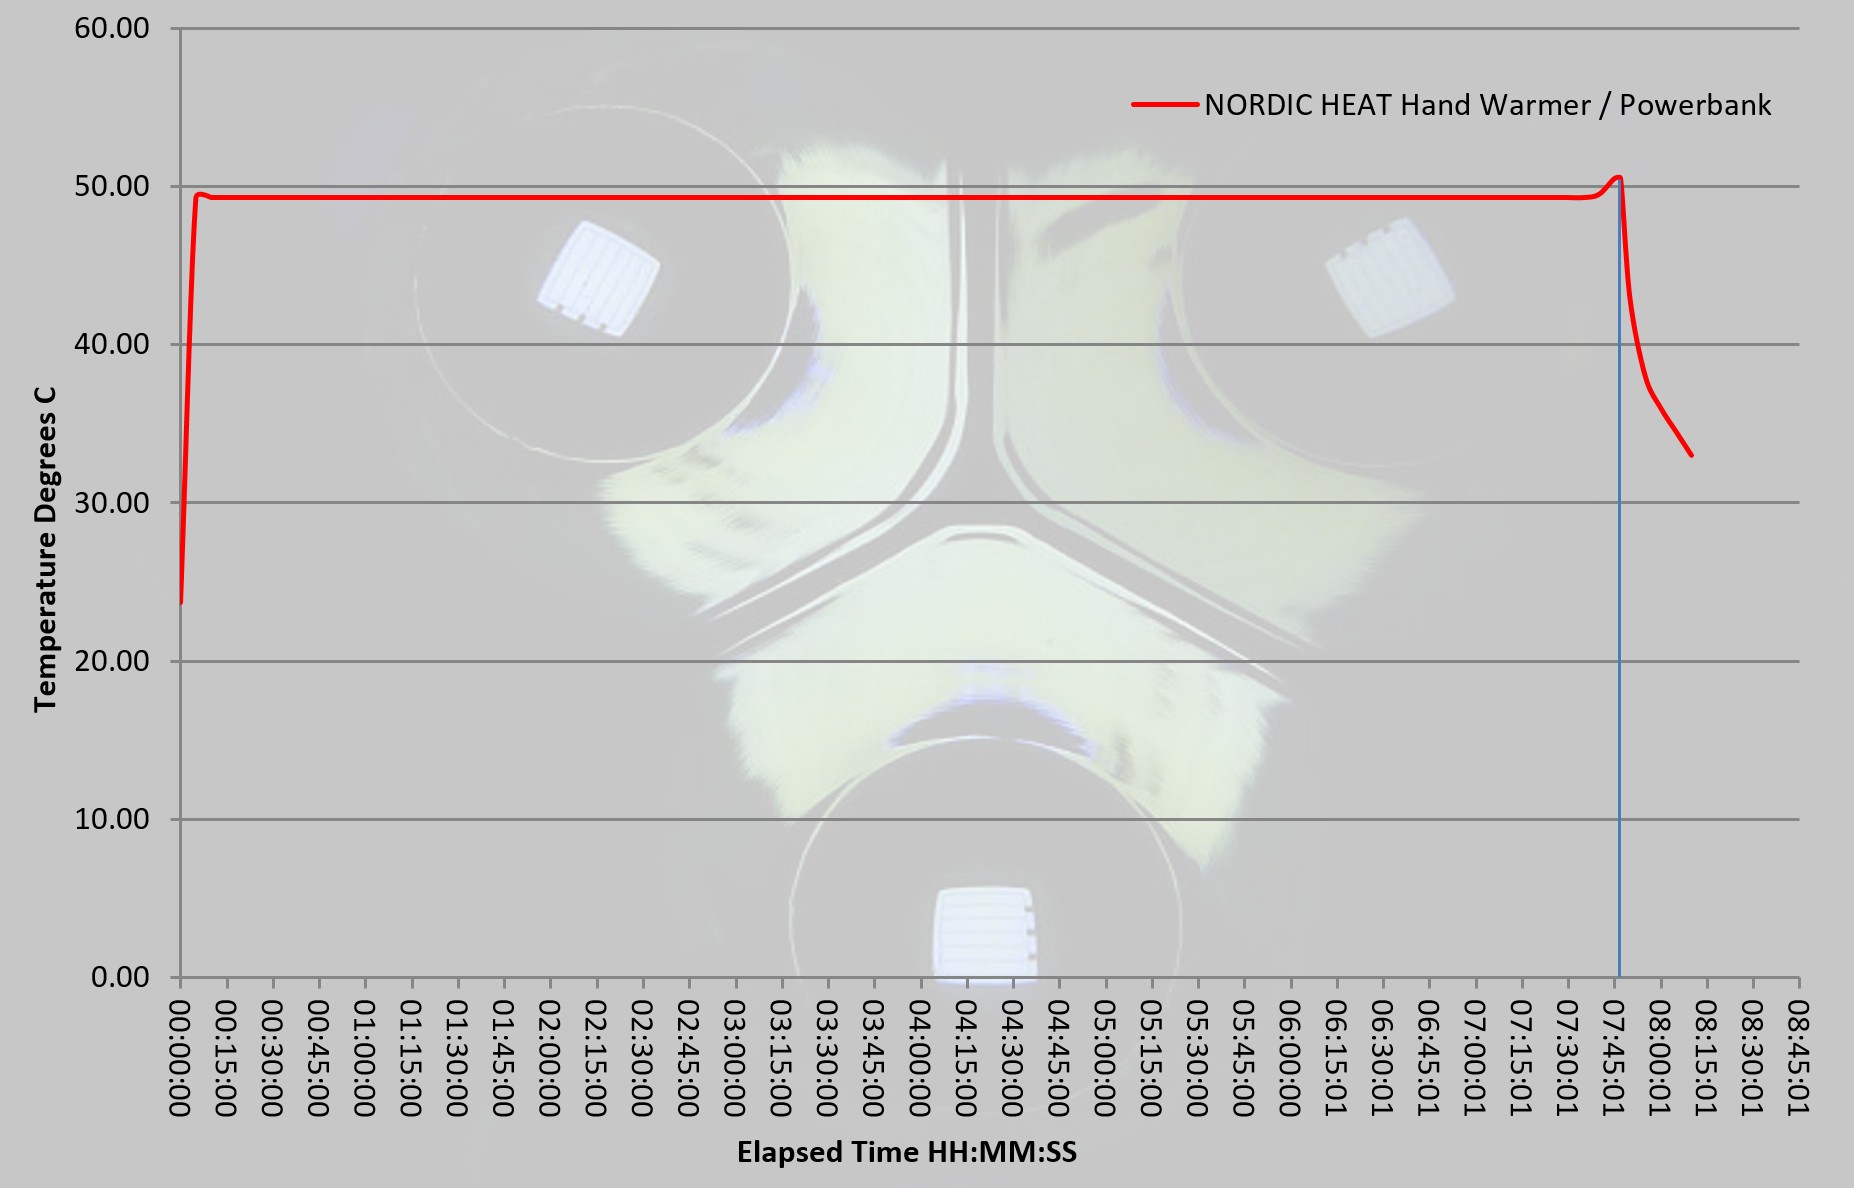
To test the heating output of this handwarmer, a dual probe digital thermometer was used to measure the ambient and surface temperature of the handwarmer. This allows the ambient temperature to be taken away from the surface temperature to remove external temperature variations. The measurements were logged (by video) and used for this graph.

The temperature shown is Degrees C above ambient, and as you can see the output is fantastically stable.

What it is like to use?

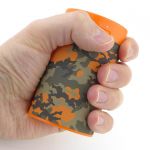
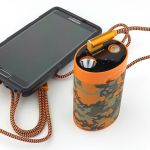
Nordic Heat have two sizes of handwarmer/powerbank. As you can see, this larger version, is a good handful for a hand that takes an XL glove size. The smaller version might be a better fit for some, but this does compromise on heating time and USB output power, a compromise worth considering.

There is a built-in light which you access via the power button. It can make the handwarmer into a torch with a very long runtime. A useful and usable addition. Just remember that you are taking from the available power for hand warming or device charging.

Our growing reliability on mobile phones and tablets makes powerbanks almost a necessity, especially in remote areas. Performance as a powerbank is good (see the technical testing section), and you can power up devices with a solid 2A output.


Not quite qualifying as technical testing, I thought it was important to check the heat distribution of the handwarmer to ensure it didn’t have cold spots or problems with heat distribution. So for this I aimed a FLIR Scout TK at it. In this set of images, we start with a control shot with the handwarmer off and left to reach ambient temperature. There is little contrast in the image as there isn’t really any heat gradient apparent. After switching on the handwarmer and leaving it to get up to temperature the heated portion stands out clearly. The heat distribution is nice and even and extends fully over the body, with only the unheated plastic top remaining cooler. In the last image I put my warm, uncovered, hand into view to show how the handwarmer is properly above body temperature and will provide good heating.


Do you need one? Well, do you have a USB powered mobile device – then that is yes for its powerbank capability. Do you like cold hands and feet? No, then that is yes for the handwarmer / heating facility.

Why did I say feet? During testing I found that this wasn’t just something to take when venturing outdoors, but any time you want a heat pack. I’ve used it to warm up my feet in a cold bed, to apply heat to a pulled muscle, to preheat hands prior to putting non-heated gloves on, and generally provide comfort where a bit of warmth helps.

The on-demand heat is where this wins over every other heating option. No boiling water, microwaving gels, lighting a fuel catalyser, just switch on and off as required, anywhere.

Review Summary

The views expressed in this summary table are from the point of view of the reviewer’s personal use. I am not a member of the armed forces and cannot comment on its use beyond a cutting tool or field/hunting knife.

Something that might be a ‘pro’ for one user can be a ‘con’ for another, so the comments are categorised based on my requirements. You should consider all points and if they could be beneficial to you.

_______________________________________________
Things I like
_______________________________________________

Good battery capacity.
2A+ USB output.
Over 7.5h heating on a full charge.
Excellent heat distribution.
Useful to also have a light.
Comes with cable and charger.

_______________________________________________
What doesn’t work so well for me
_______________________________________________

Supplied USB cable seems to limit output to 1A.
Supplied charger only provides 1A.

Light Review: Streamlight Super Siege Lantern

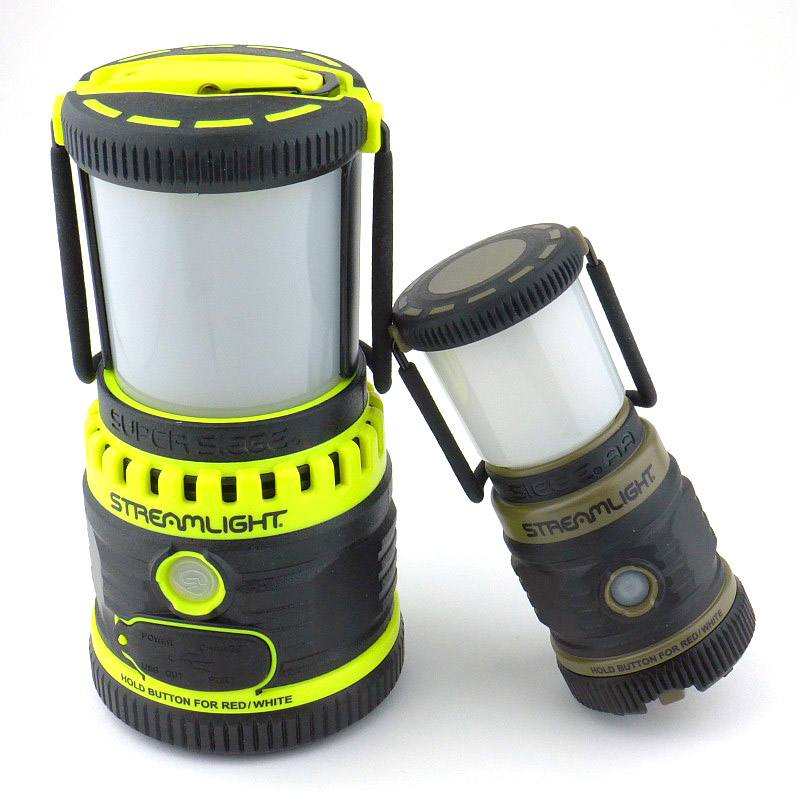
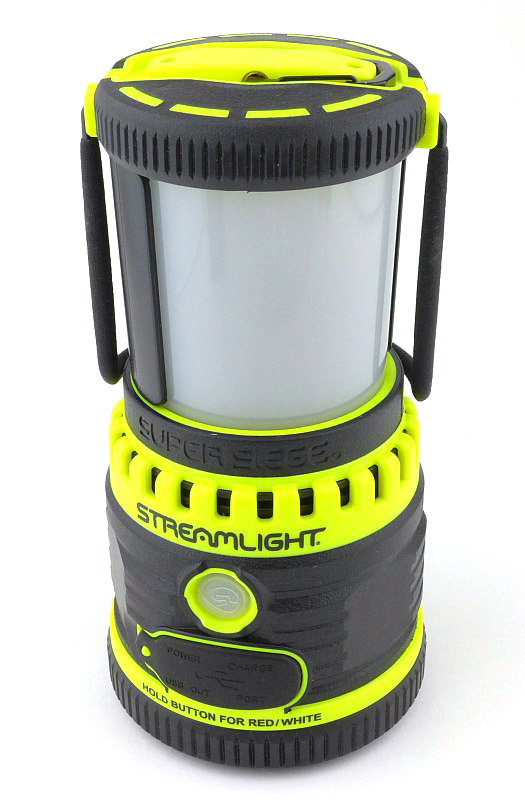
In its first incarnation, the Siege lantern was a full size D-cell powered light, shortly followed by the cute Siege AA (you guessed it, powered by AA-cells). But not yet finished, Streamlight have taken the lantern to another level with the Super Siege, which now features a built-in rechargeable battery and USB power bank function, along with an essential glare-guard for task lighting – it certainly is the Super Siege.

Taking a more detailed look:

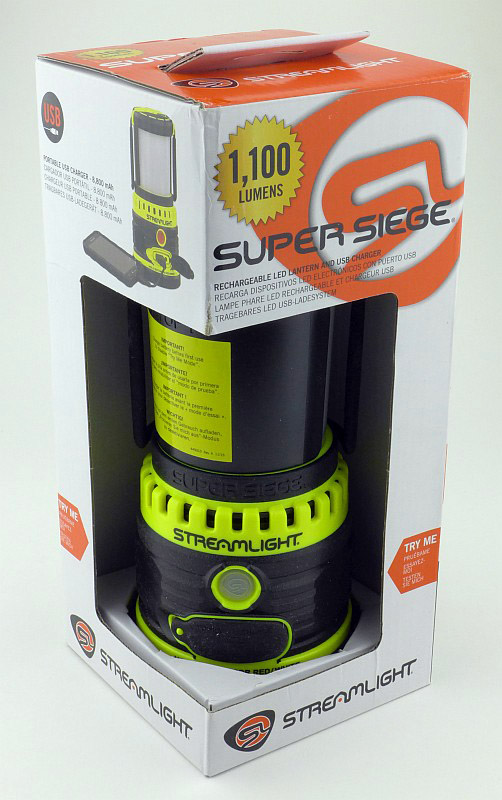
Aimed at attracting people in a retail store, the box is a semi-exposed ‘try-me’ type.

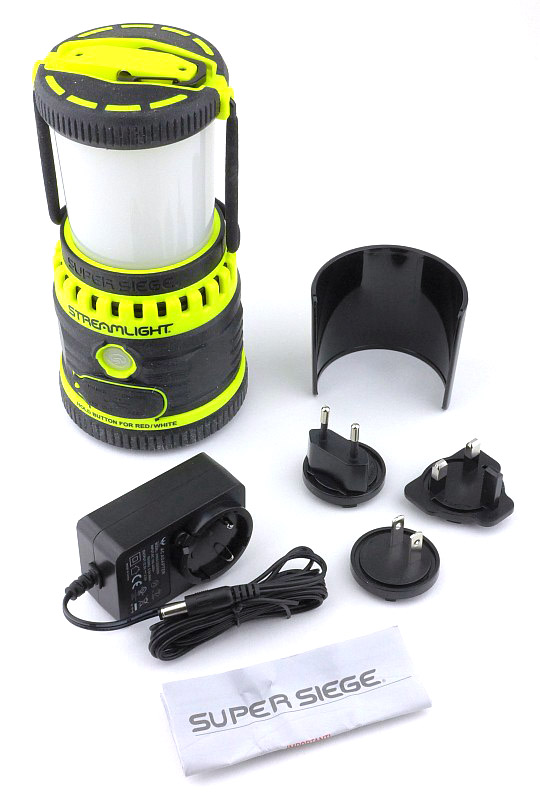
In the box we have the Super Siege, its glare guard, mains power adapter and a set of three plugs for it (US, UK and European), plus the instructions.

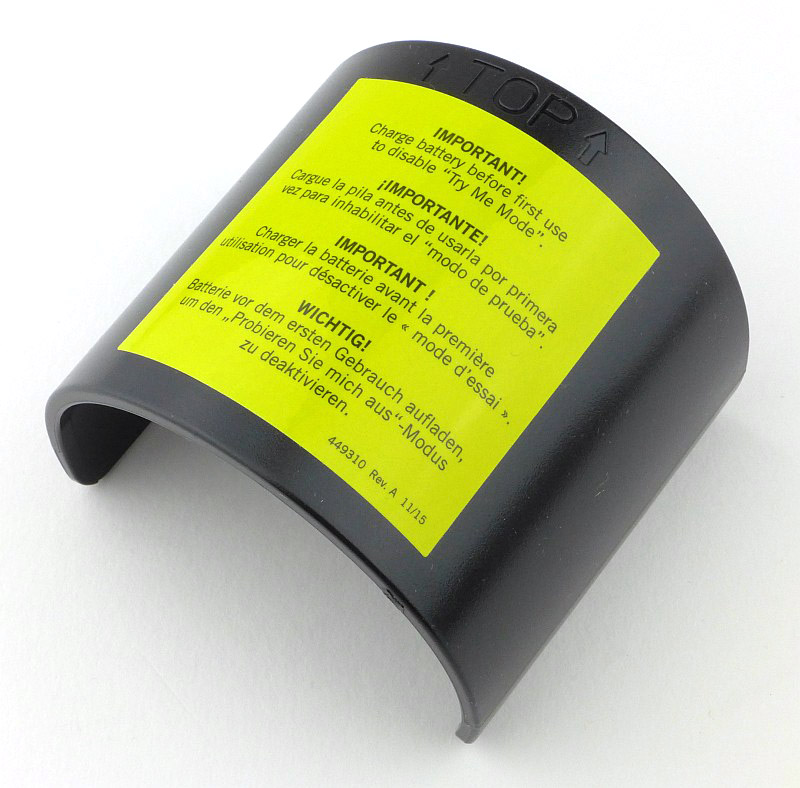
On the glare guard it tells you to give the Super Siege a full charge to disable the ‘try-me’ mode.

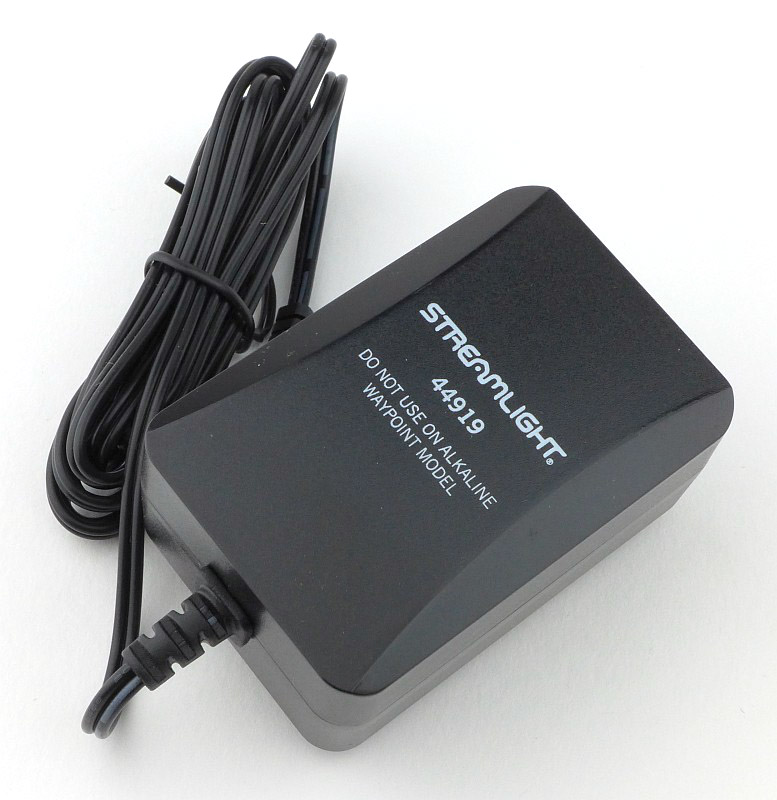
A Streamlight mains power adapter, which presumably also works with other rechargeable models as it tells you not to use it with the Alkaline Waypoint.

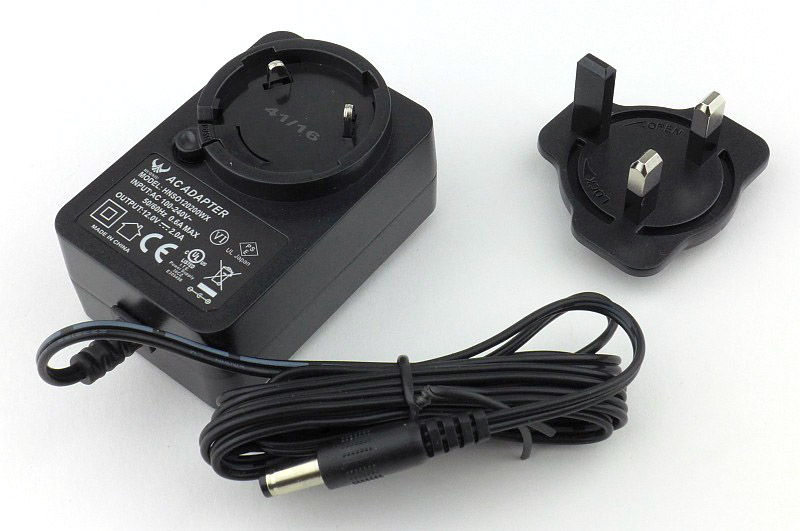
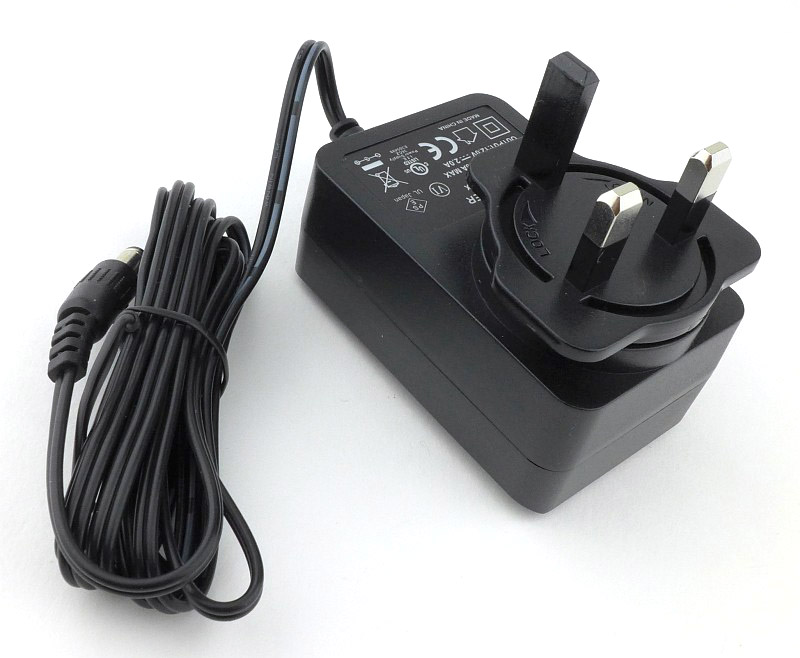
I need the UK plug, so here it is.

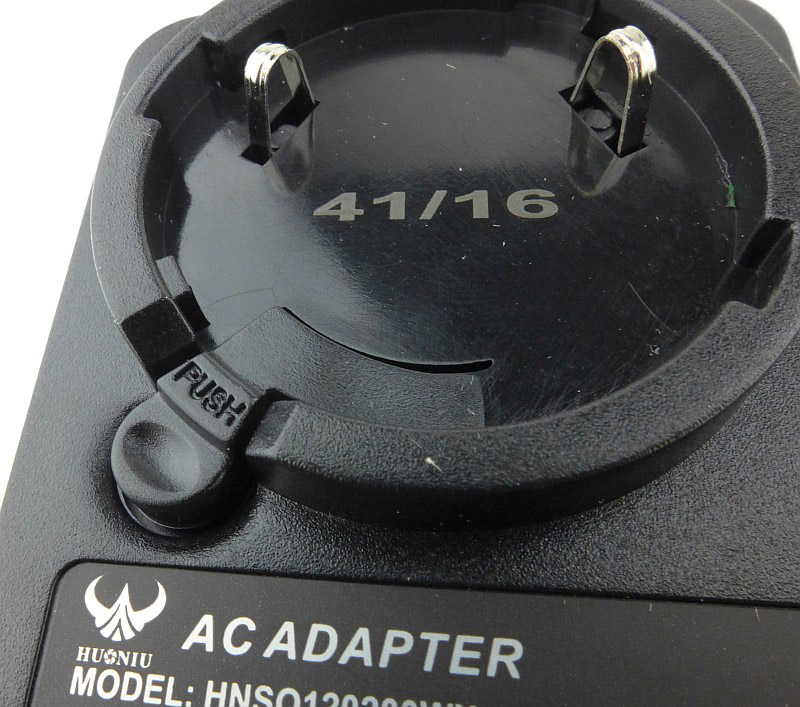
The mains adapter itself has a set of two contacts and a rotary connector for the plug. There is a release lever to allow you to easily swap over the plug type as and when needed.

Ready to go with the plug fitted.

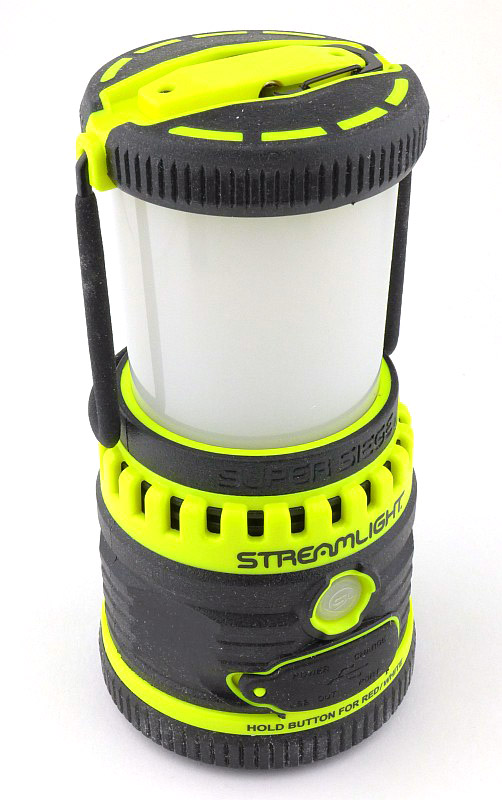
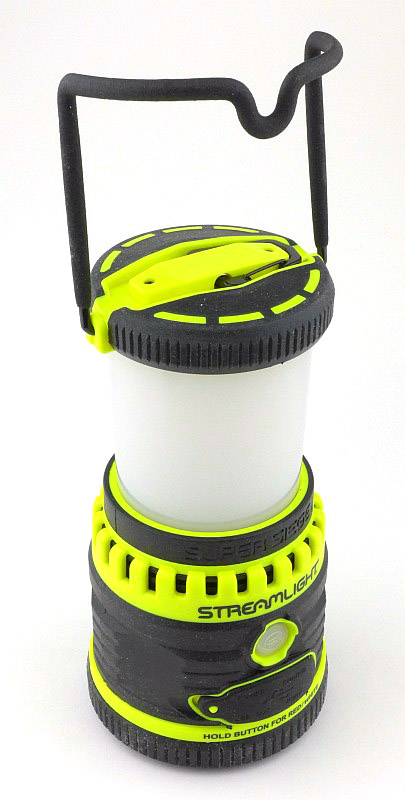
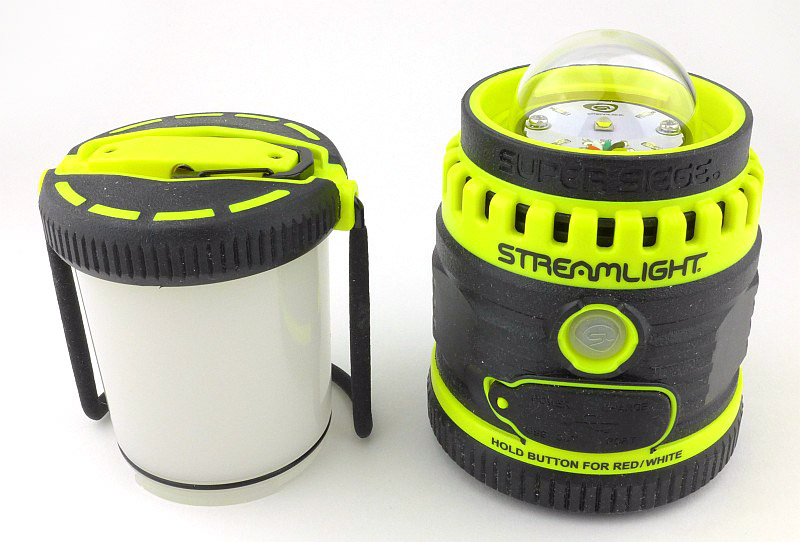
Wrapped round the Super Siege is a large carry handle and hook that lifts up.

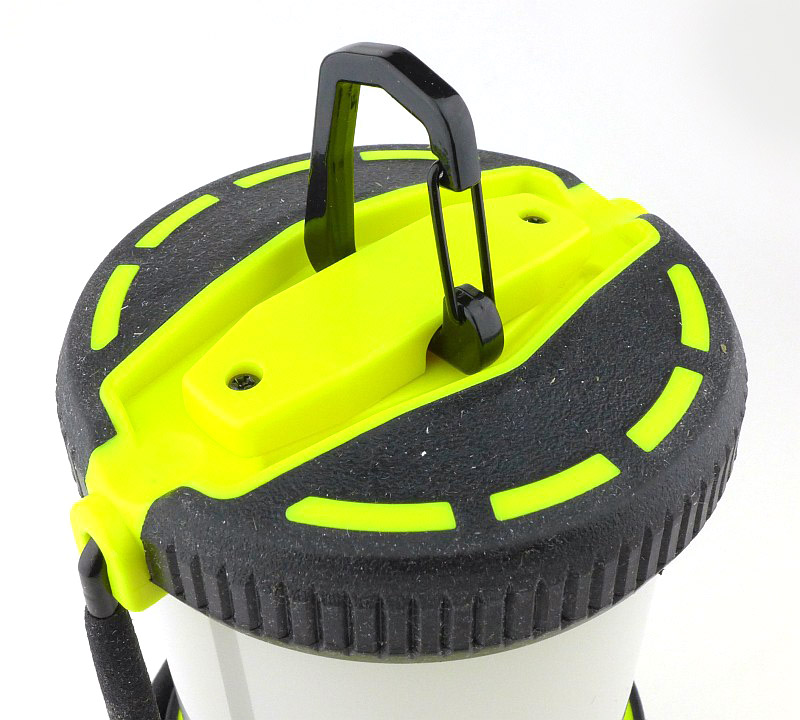
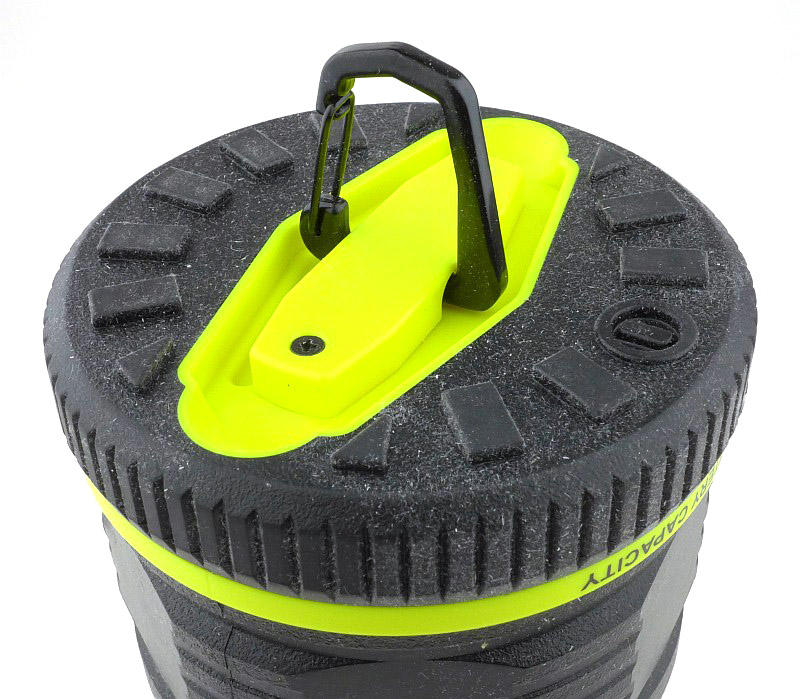
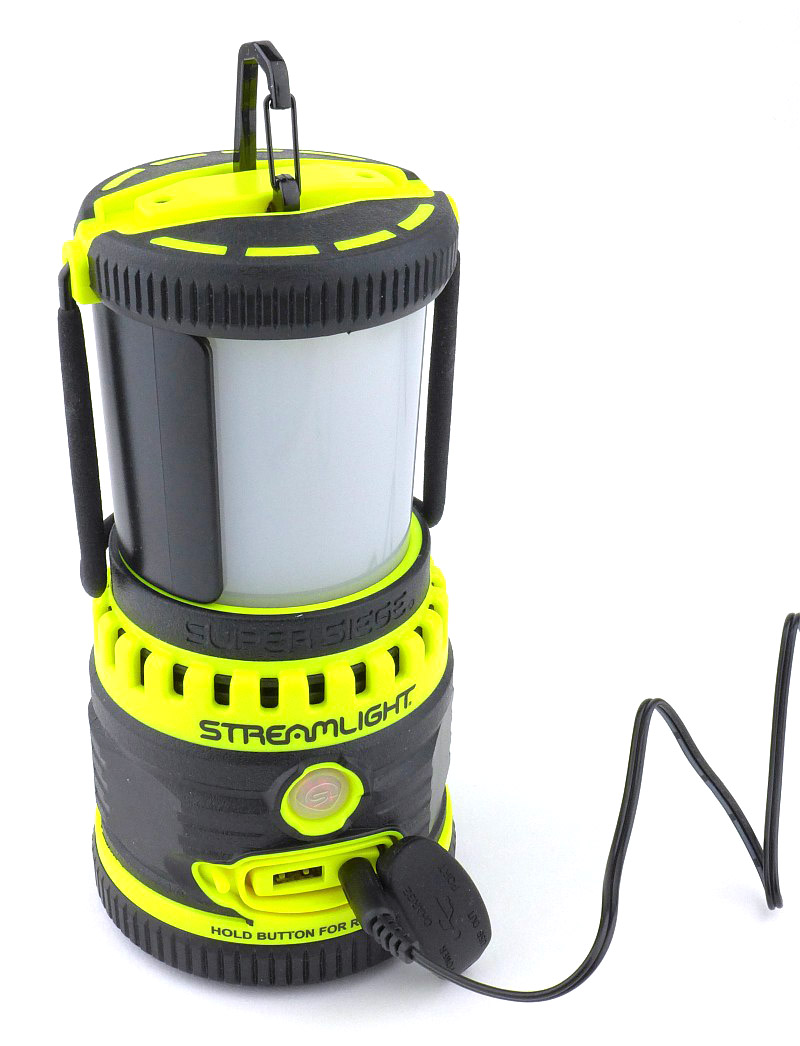
There is also a much smaller hanging clip incorporated into the top. This clip allows for a more secure attachment and keeps the light as high as possible.

Flipping the lantern over, and there is an identical hanging clip in the bottom.

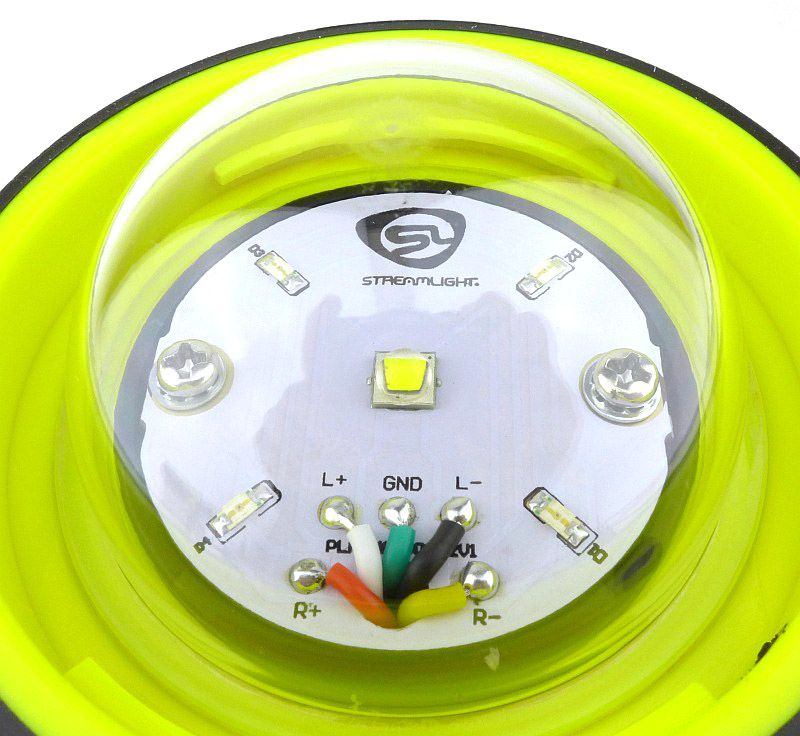
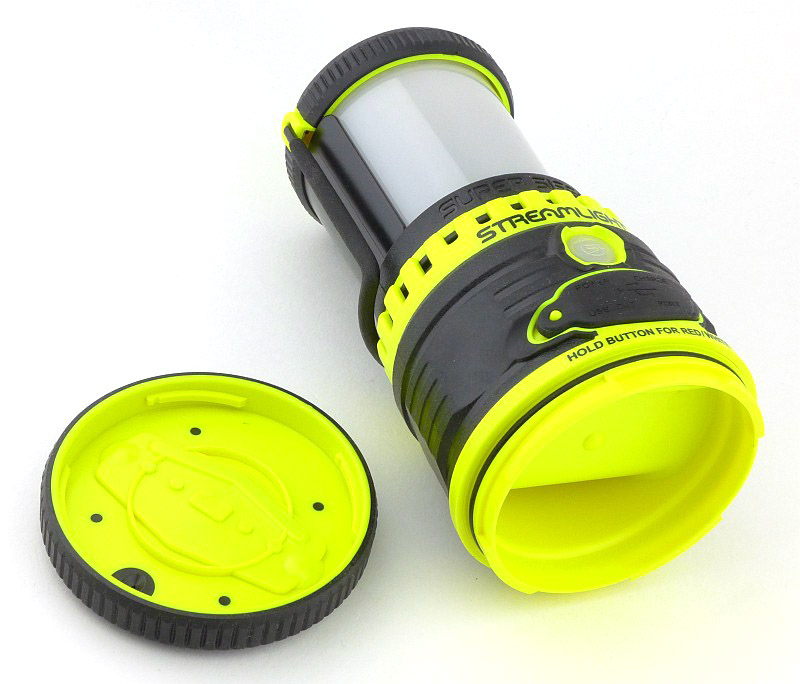
The hanging clip in the bottom makes more sense when you see that the diffuser for the main light can be removed exposing the protective dome over the Super Siege’s LEDs.

In the middle of the LED board is a white XM-L2 LED and round this are four red LEDs.

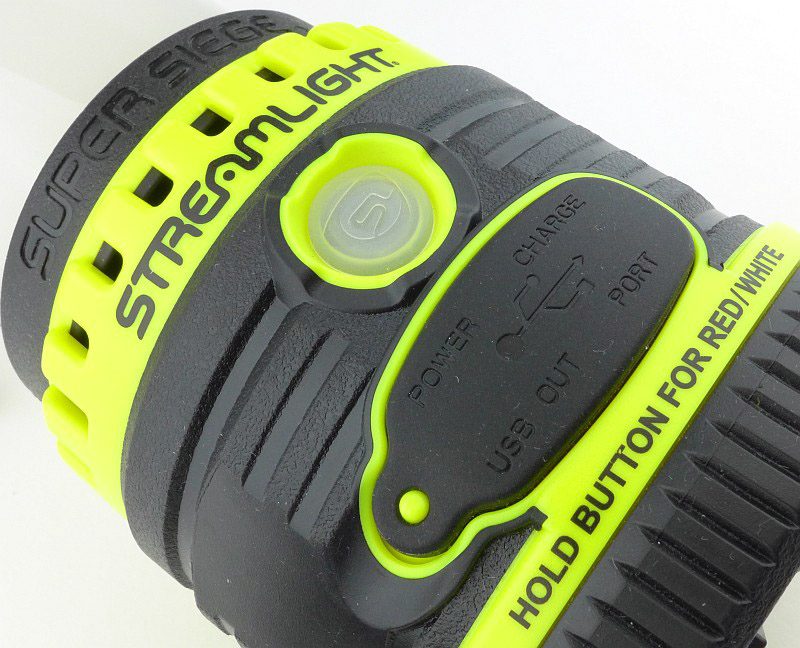
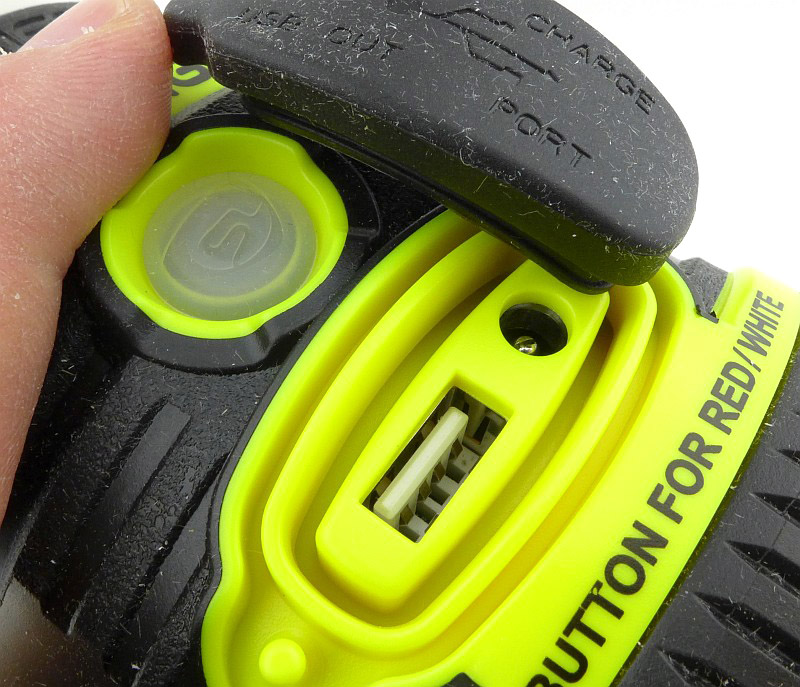
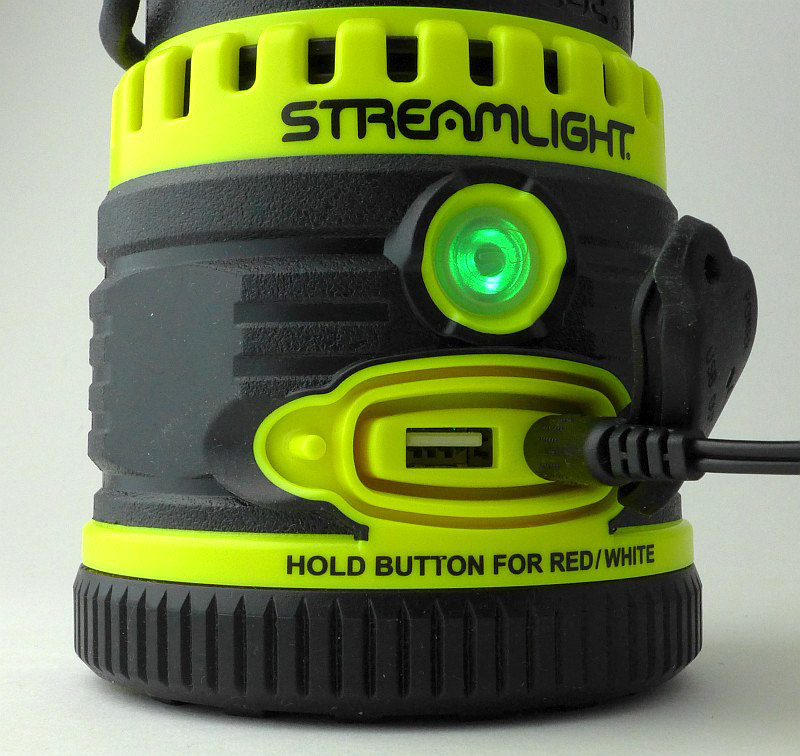
There is a single power switch on the Super Siege which also acts as an indicator light for both charging and using the light. Underneath that switch is a rubber protective cover hiding the charging port and USB power output.

Lifting aside the port cover to show the charging port and USB power output.

Fitting the glare guard to the lantern’s diffuser makes the light output directional, and it covers just over half the diffuser.

To charge the Super Siege, plug in the mains adapter and fit the round DC plug into the socket next to the USB port. Unfortunately the Super Siege cannot be charged from USB power.

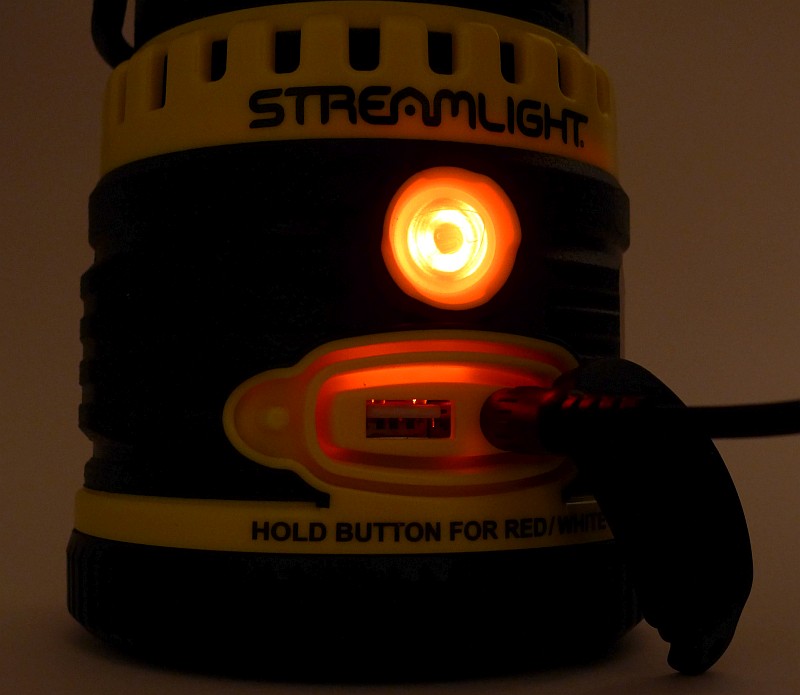
When charging the switch lights up red.

On reaching full charge the switch turns green.

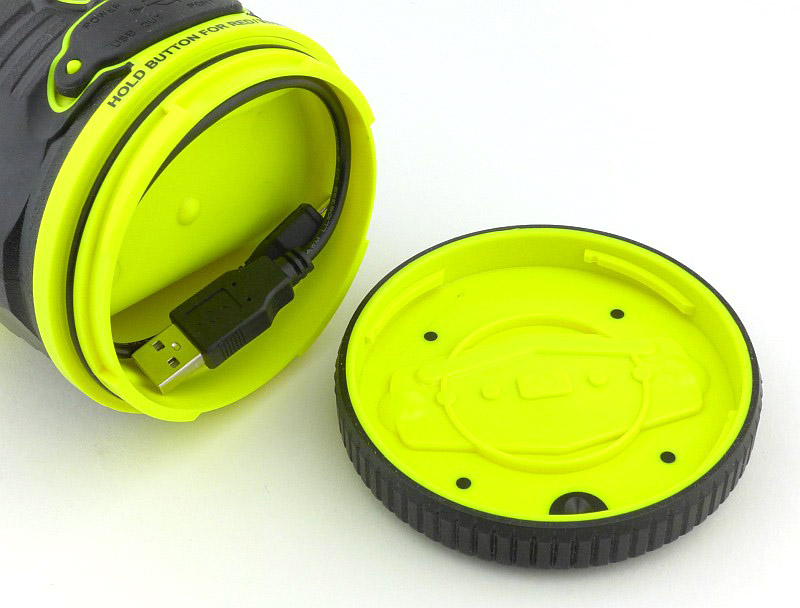
Not to be forgotten is that the base has a concealed storage compartment. Twist off the bottom to access this.

The beam

Please be careful not to judge tint based on images you see on a computer screen. Unless properly calibrated, the screen itself will change the perceived tint.

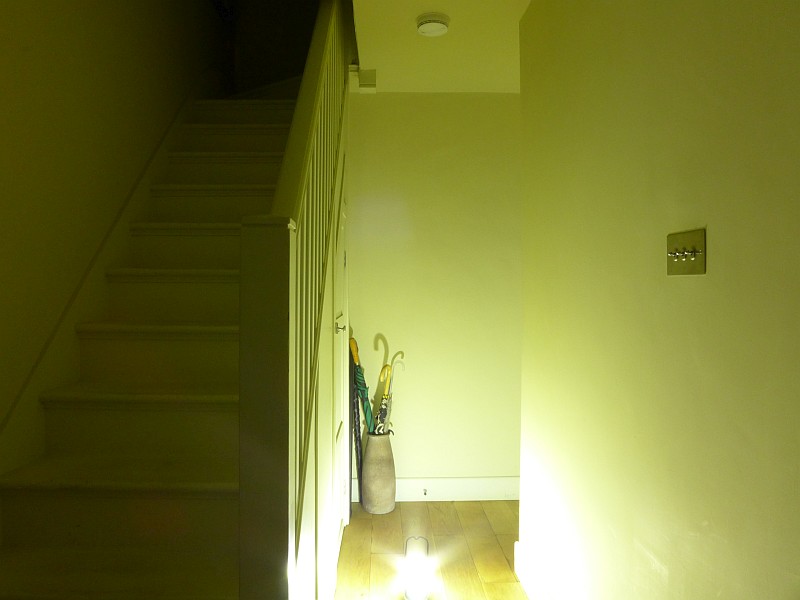
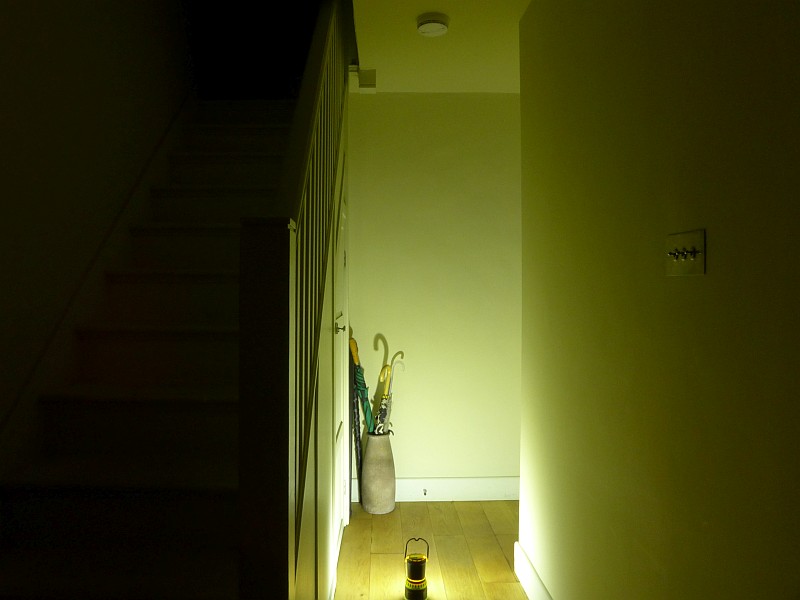
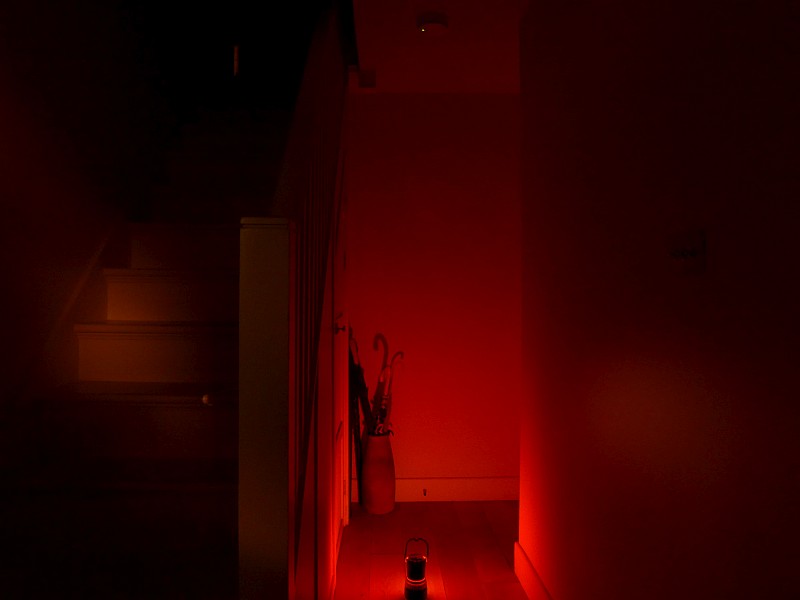
The indoor beamshot is intended to give an idea of the beam shape/quality rather than tint. All beamshots are taken using daylight white balance. The woodwork (stairs and skirting) are painted Farrow & Ball “Off-White”, and the walls are a light sandy colour called ‘String’ again by Farrow & Ball. I don’t actually have a ‘white wall’ in the house to use for this, and the wife won’t have one!

First up here is the White output with the standard 360 degree lantern beam. You can see the excellent wash of light, but also very clearly the thing I hate about lanterns, terrible glare.

Fit the glare guard and now we are talking. Obviously the total output is cut quite drastically, so it might be better in some cases to position something between you and the lantern, or hang it above your head, but if you are using it as a work light, this becomes ideal.

Red light is not as bad for glare, but mainly due to just being much dimmer.

Again the glare guard makes the Super Siege comfortable to use for any task.

Modes and User Interface:

All controlled via the single power switch there are three White Output Modes, Low, Medium, High, and three Red Output Modes, Low, High and SOS.

To turn the Super Siege ON briefly press the power switch. This will turn on to the last used constant output level (White or Red).

To change output level / mode, briefly press the switch again within 1.5 seconds of the last press. This will cycle through the available modes all the way to OFF.

If the Super Siege has been ON a mode for more than two seconds, one brief press of the switch will turn the light OFF.

To change the colour from White to Red, or Red to White, press and hold the switch for two seconds.

The USB Power Bank function will automatically start when a suitable device is connected. During charging the switch will light up to indicate the status of the battery. Green means full power, then the switch turns yellow, then red and finally flashing red when the battery is getting low.

Batteries and output:

The Super Siege runs on its built-in battery.

To measure actual output, I built an integrating sphere. See here for more detail. The sensor registers visible light only (so Infra-Red and Ultra-Violet will not be measured).

Please note, all quoted lumen figures are from a DIY integrating sphere, and according to ANSI standards. Although every effort is made to give as accurate a result as possible, they should be taken as an estimate only. The results can be used to compare outputs in this review and others I have published.

___________________________________________ ________________________________ ________________________________
Super Siege using built-in cell I.S. measured ANSI output Lumens PWM frequency or Strobe frequency (Hz)
___________________________________________ ________________________________ ________________________________
White High 1109 1000
White Medium 550 256
White Low 158 256
Red High 7 0
Red Low 2 0

* Beacon and Strobe output measurements are only estimates as the brief flashes make it difficult to capture the actual output value.

There is parasitic drain but it cannot be measured due to the construction of the light.

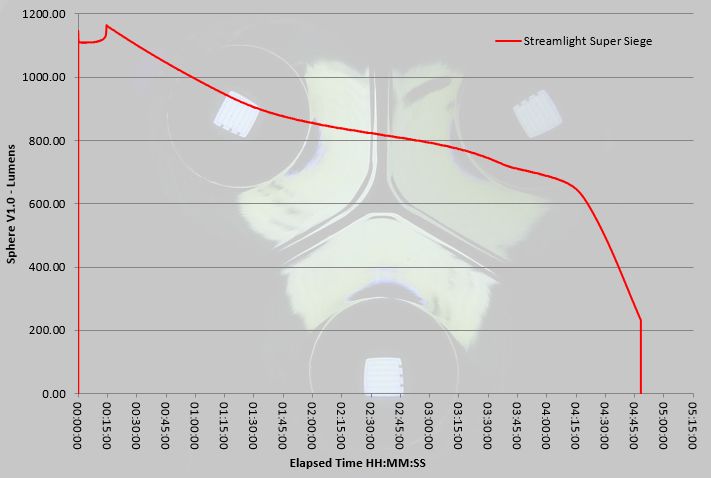
A very impressive performance on High for both the maximum output and the runtime. The specified ANSI output value is achieved, and the output does not drop below 600 lumens for over four hours. Finally, at not far off five hours, the Super Siege runs out and shuts off.

Troubleshooting

This section is included to mention any minor niggles I come across during testing, in case the information helps anyone else.

No issues were encountered during testing.

As per the description of this section, this information is provided in case anyone else finds a similar ‘issue’ that might be fixed in the same way.

The Super Siege in use

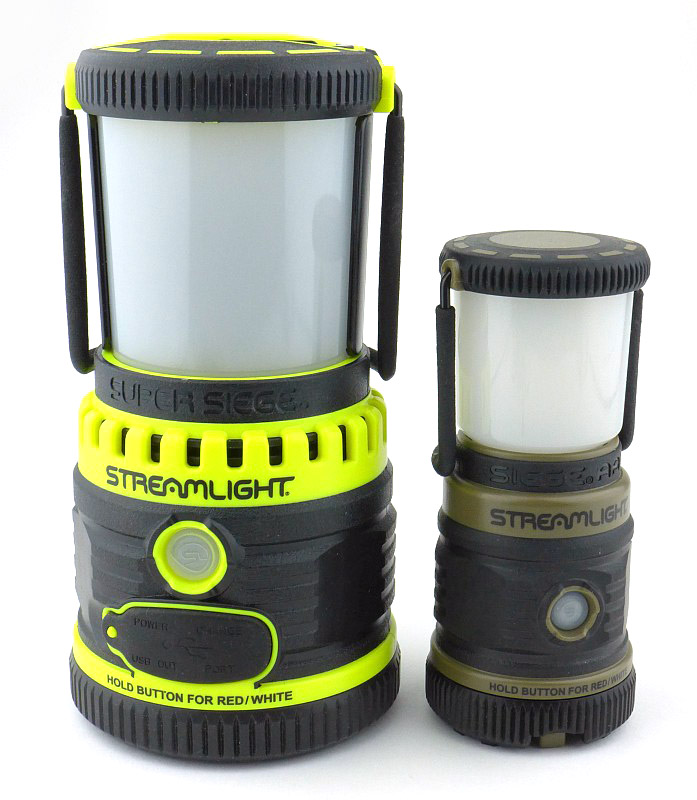
Lanterns were the first safe and convenient portable source of light. Although they have undergone many changes, the lantern has retained essentially the same appearance and function of area lighting. Just like the original Siege lantern, the Super Siege is a full size lantern, equivalent to most traditional lanterns. It is for those uses where size and weight are not an issue, if that is a priority, the smaller Siege AA becomes a good bet, but lacks the power and features the full size lantern gives.

The Super Siege uses its technological advantages to make it so much more than a portable area light. One of its first key features is so simple and could easily have been added to any lantern – the glare guard. For me this is one of the most critical features, and where I would normally avoid lanterns due to their glare, now I’m picking the Super Siege for all sorts of jobs.

As well as the full lantern and the task light configuration, the diffuser can also be removed to expose the LED dome cover, so you can run the Super Siege with fully exposed LEDs giving the ultimate in flood light. This however has extreme glare and only really works when hung up overhead. With the diffuser removed, the Super Siege is also much smaller. But beware, if you might need the Super Siege’s ability to float, it will only float with the diffuser fitted as this provides enough trapped air to give it sufficient buoyancy.

There are two aspects of the Super Siege that do not work that well. The switch illumination is very bright, and if using the low red output, the switch glows as brightly as the red LEDs do. This is very distracting and means that if you want a dim red light to maintain your eyes dark adaptation, you will find a bright green light shining out from the switch. This also impacts on the USB powerbank function, but more on the in a moment.

The second aspect, which I’m very disappointed to still see is the use of PWM. Especially in a lantern which floods the entire area with light, on the medium and low output levels, you see very obvious strobing effects when moving…at all. Please Streamlight, can you use current controlled output and not PWM?

The compartment in the base is an odd shape, but is useful for keeping a few things in. If nothing else you can keep a USB cable for charging various devices in this compartment.

And on the subject of the power bank feature, this is very useful in these days of so many devices that can be charged from USB. What you must consider however, is that any power you use to charge a device, be it phone, tablet, e-reader etc, is power you rob from the lantern’s light output. So be careful you don’t find yourself in the dark because you charge your phone up. What is a bit of a pity is that the Super Siege needs a 12V power adapter to charge it when the typical power bank these days is also chargeable via USB.

Using a USB power monitor I’ve run several ‘delivered power’ tests, all of which have been a consistent 25.7Wh from the 8800mAh battery. The theoretical power from a 8800mAh battery would be 32.56Wh, which means 79% of this is being delivered. A 21% loss is reasonable, but this could probably be better, as the brightly lit power switch remains on for the entire time the USB power bank feature is being used. The maximum observed output current for the USB power bank was 1.1A.

During use of the USB power bank, the switch illumination goes from green to yellow quite quickly. Watching the accumulated Wh delivered, the switch goes red after around 15Wh have been output, so there is still 40% battery left once the switch turns red. In fact the flashing red indication starts relatively soon afterwards. If I needed the Super Siege for light, I would definitely stop USB charging once the switch illumination turns red, as you at least know there is 40% left.

Ideal for camping, fishing and to have in a shed/loft or other unlit out-building. Altogether the Super Siege gives you a nice rounded package of features all of which are genuinely useful and not a gimmick.

Review Summary

_______________________________________________ _______________________________________________
Things I like What doesn’t work so well for me
_______________________________________________ _______________________________________________
Powerful 1100lm output. Uses PWM on all output levels.
USB power bank. Using the power bank reduces LED output runtime.
White and Red light output modes. Needs 12V power adapter to charge.
Glare-guard included for task lighting. Output cuts out completely when the battery is low.
Storage compartment in base.
Floats (as long as the main diffuser is fitted).


Discussing the Review:

The ideal place to discuss this reviews is on a forum. If you started reading the shorter forum version of the review, but followed the link this full exclusive review, please return to that forum to discuss the review there.
If you read the review entirely on Tactical Reviews, please consider one of the following to join in any discussion.

CandlePowerForums – Flashlight Reviews Section (Largest and Friendliest Flashlight Community Forum)

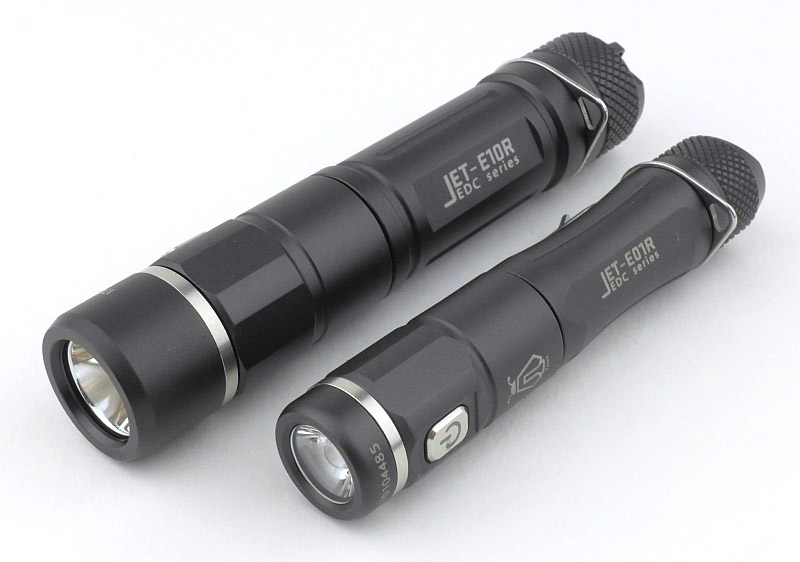
Light Review: Jetbeam E01R and E10R USB Rechargeable EDC lights

Jetbeam are taking the concept of USB rechargeable EDC lights to a new level of convenience with their super compact E01R (AAA) and E10R (AA/14500), by hiding the charging port so well you would never guess they had this feature just by looking at them.

Taking a more detailed look at the E01R:

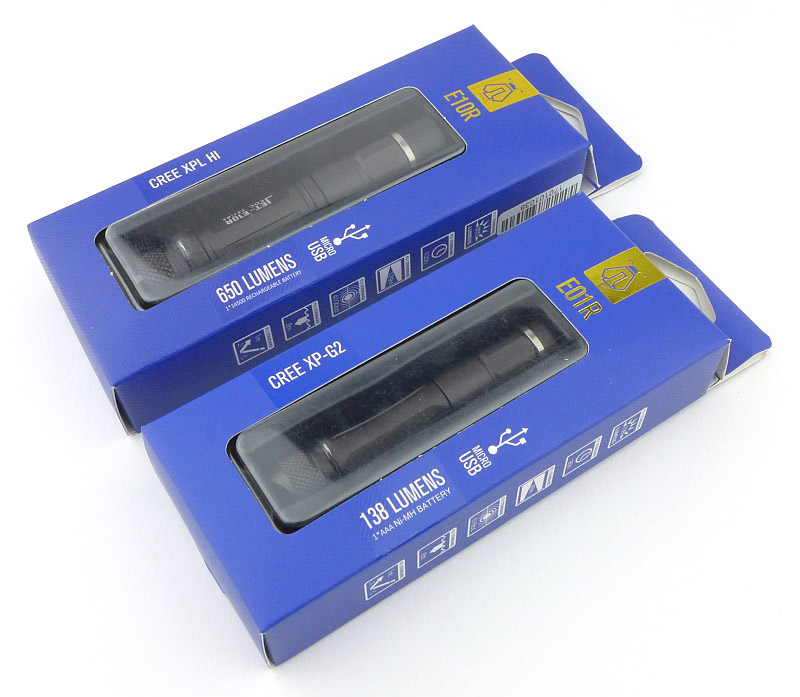
Before we go into the detail of the E01R, these are the boxes for both the E01R and E10R models.
Included with the E01R is a USB cable, spare O-ring, quality lanyard, and the instructions.
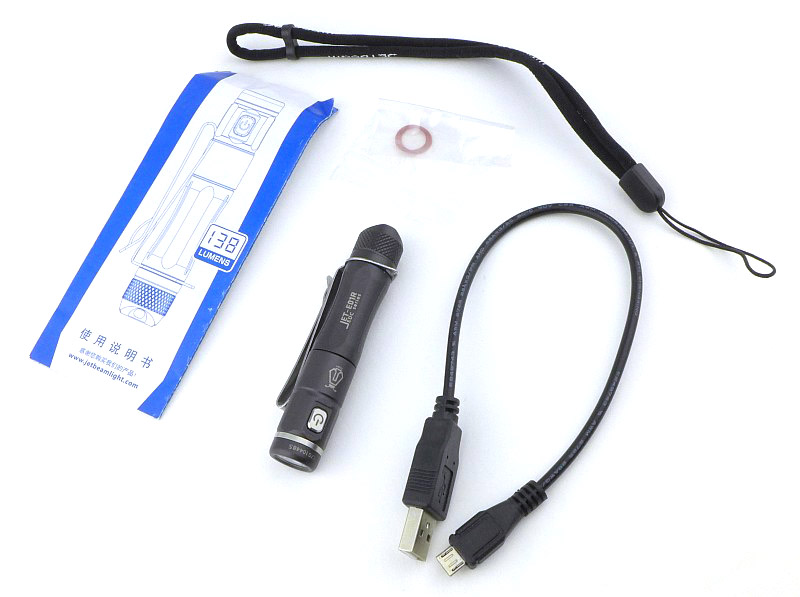
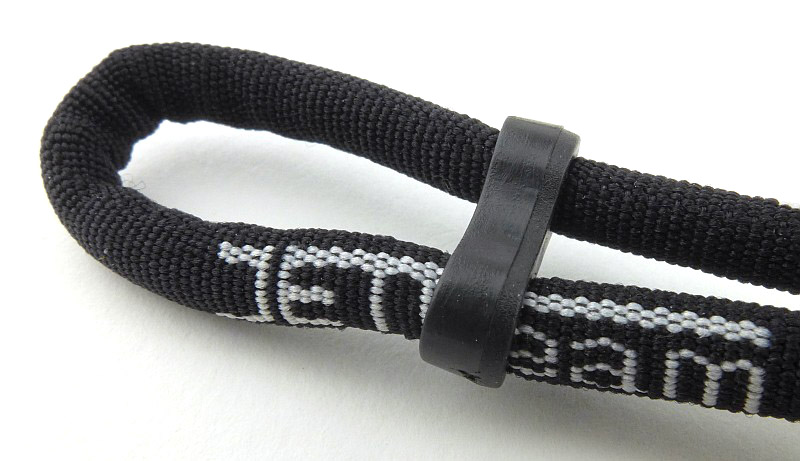
Not to gloss over that lanyard, the cord is a type of piping with a round cross-section.
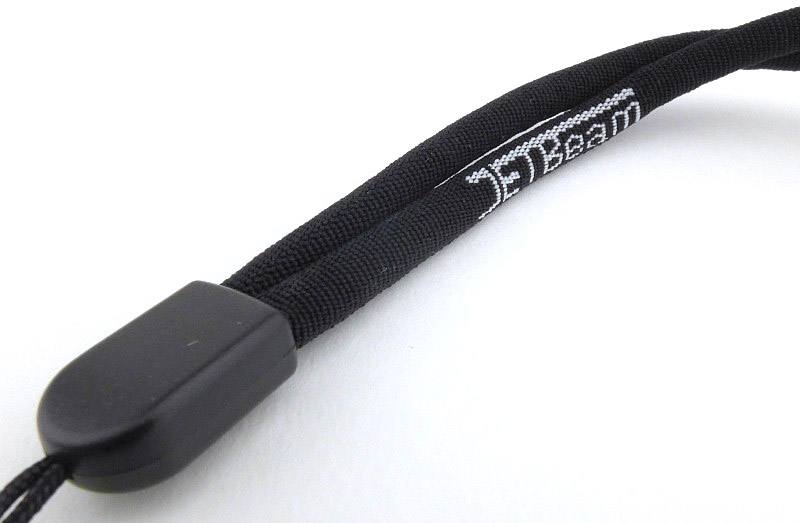
This has a sliding toggle to allow you to secure it to your wrist.
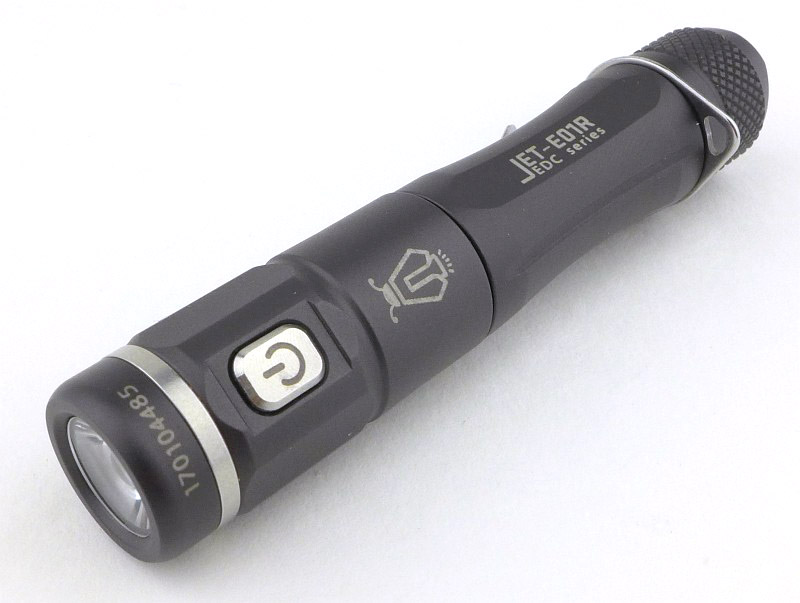
Fit and finish is excellent all over this light.
The E01R has a two way clip allowing for carry either way up, and also allowing it to be fitted to a baseball cap peak to act as a headlamp.
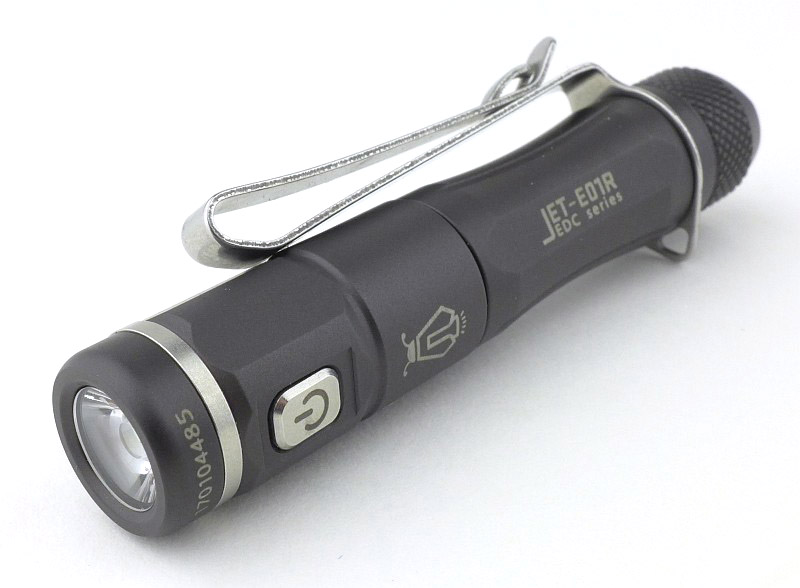
A lanyard hole is included in the tail-cap and in the pocket clip.
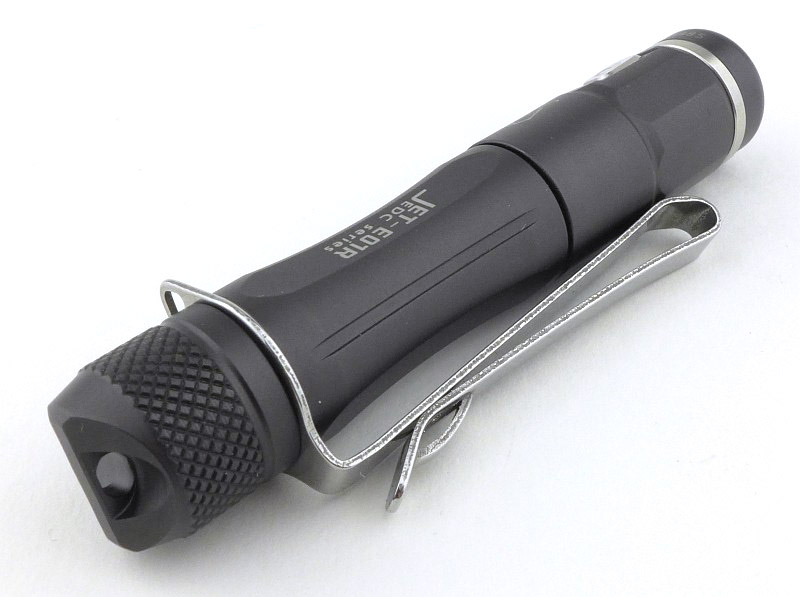
The power switch is a small metal button on the side of the light’s head.

Though not an ultra compact AAA light, the E01R is still nice and small.
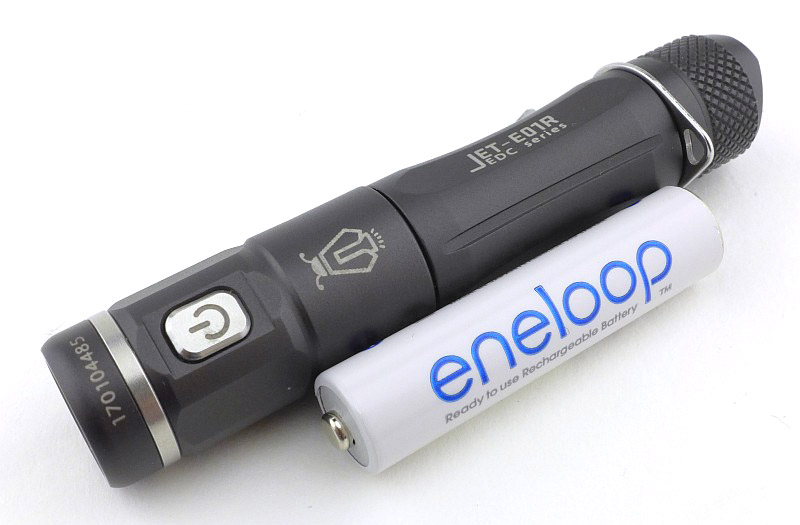
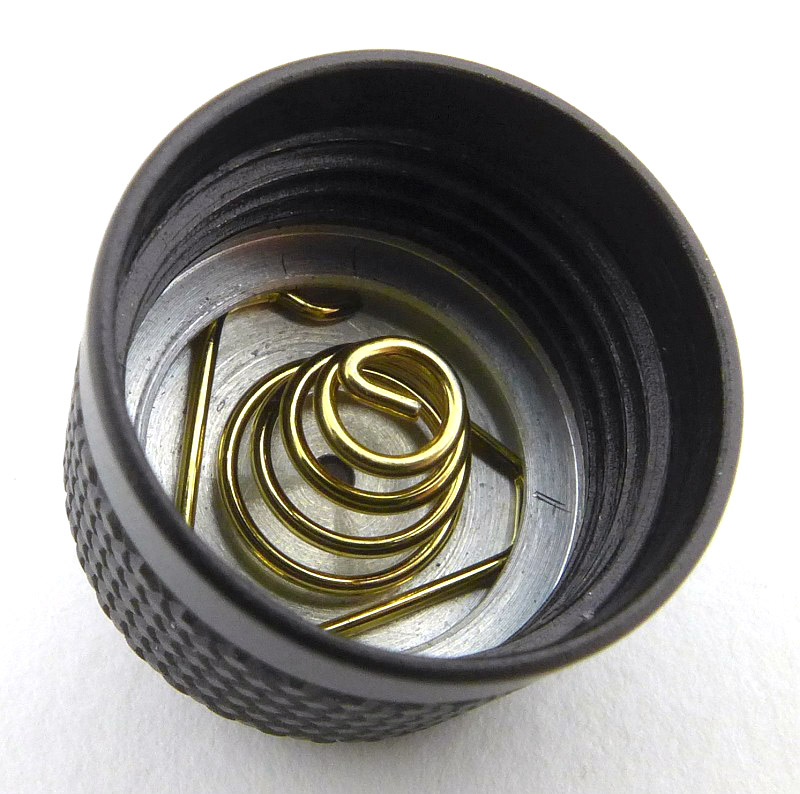
Inside the tail-cap is a gold plated spring terminal.
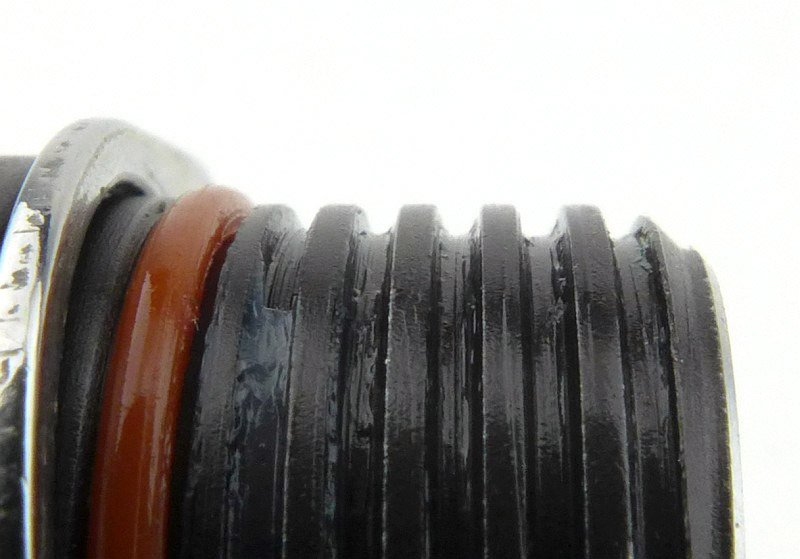
The threads are almost square, and are well lubricated.
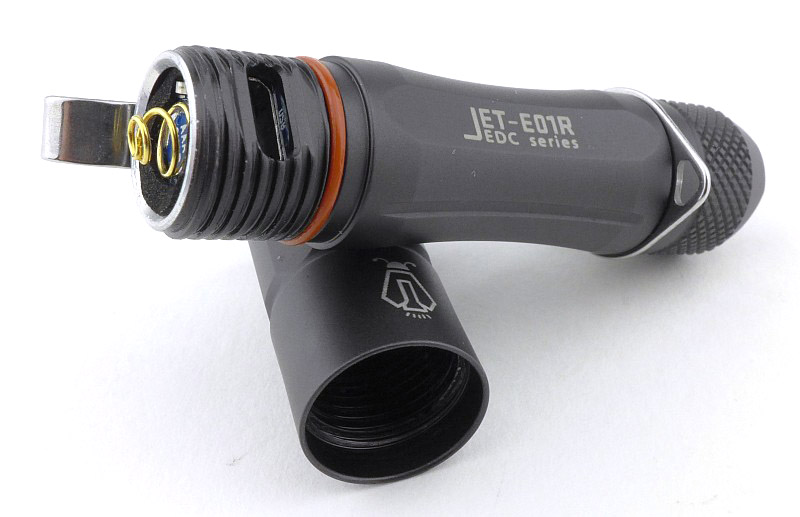
And this is the trick up the E01R’s sleeve. Unscrew the head of the light to reveal the micro-USB charging port.
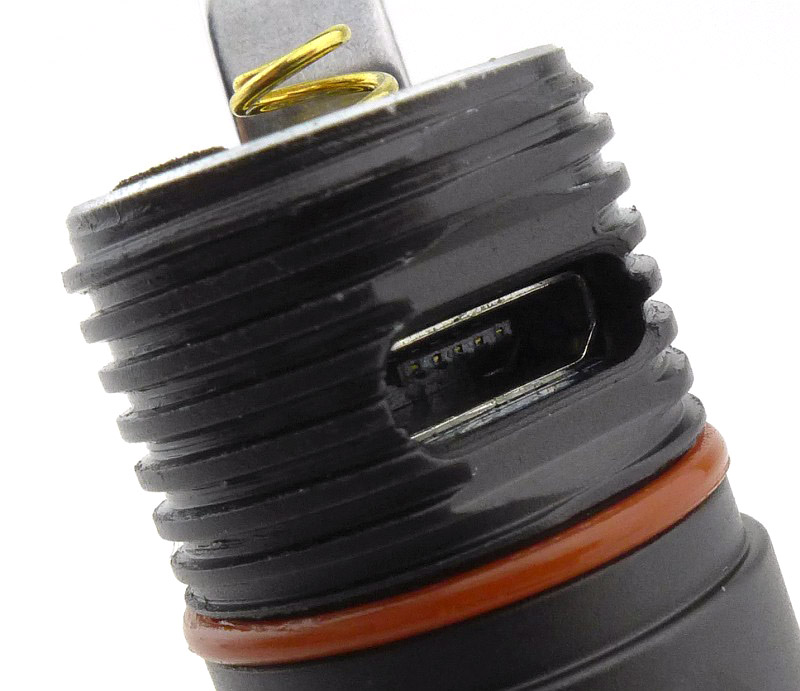
A closer look at the charging port and threads.
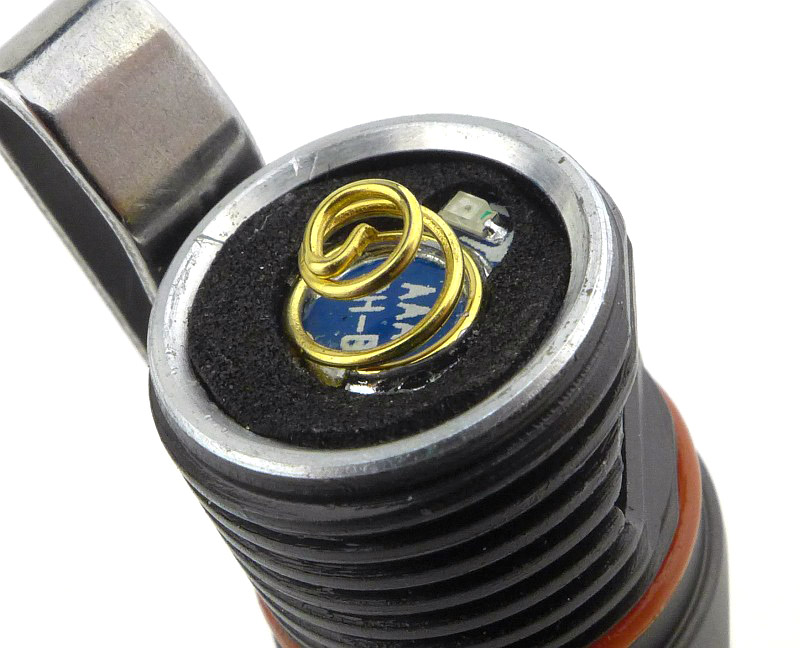
With the head removed, you do not see the battery, instead there is a set of contacts for the connection to the head once refitted. Just next to the spring (at about 2 o’clock) is the indicator LED for charging.
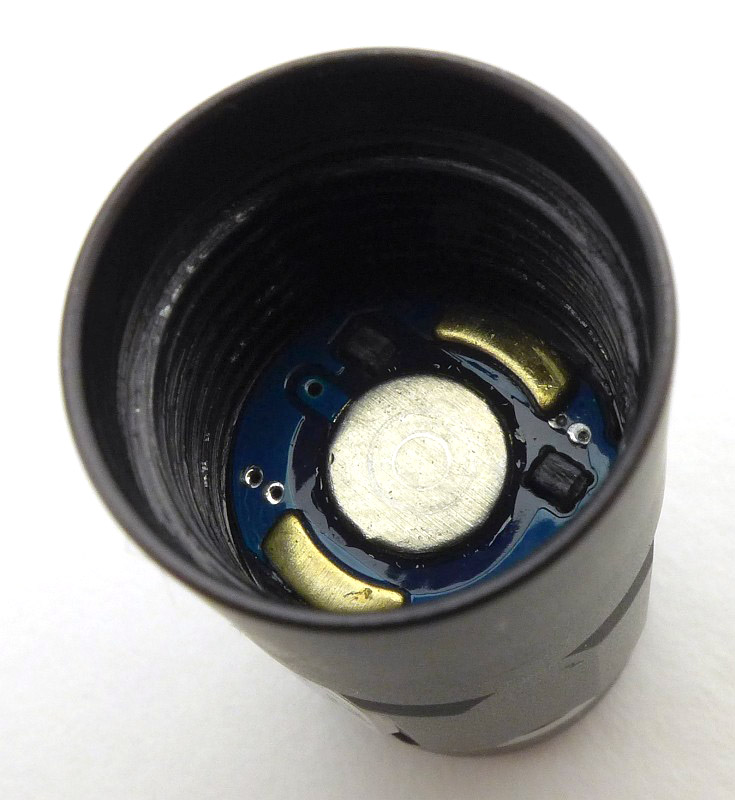
Inside the head are the matching set of contacts.
For the E01R, there is a TIR optic with an XP-G2 LED hidden at its centre.
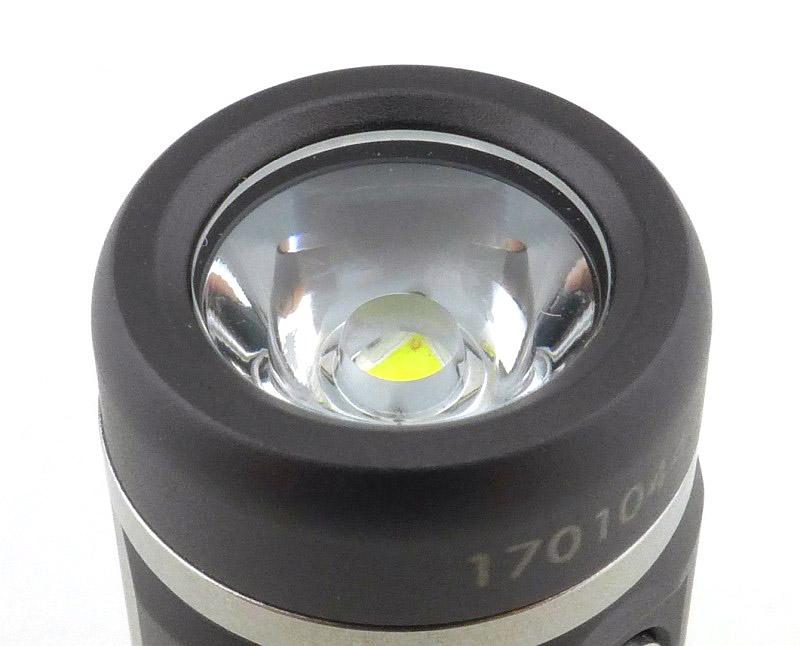
Unlike a lot of TIR optics, you can just about see the LED.
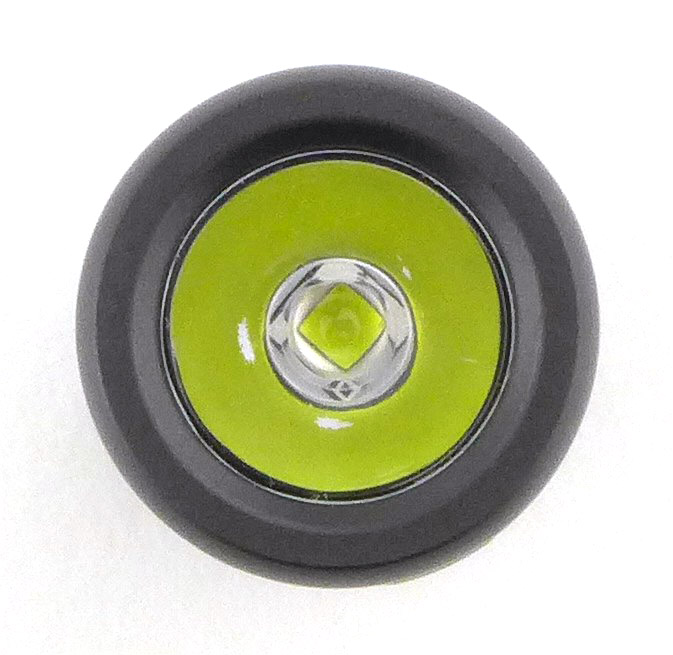
Charging the cell in the E01R is easy, simply plug in the powered USB cable. The E01R is small, as you can see by how large the USB plug looks.

Taking a more detailed look at the E10R:

Changing over to the E10R, and exactly as with the E01R there is a USB cable, spare O-ring, quality lanyard, and the instructions.
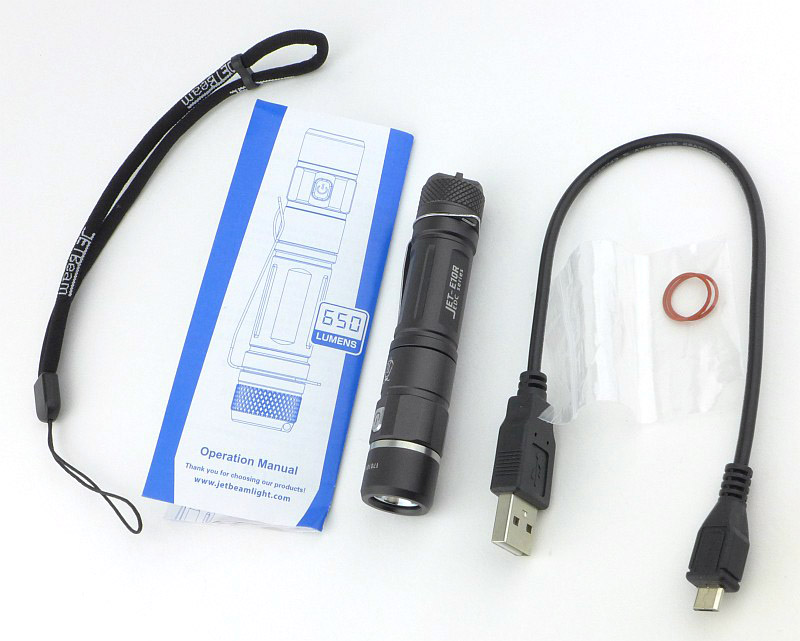
Again the fit and finish is excellent, giving the light a refined look.
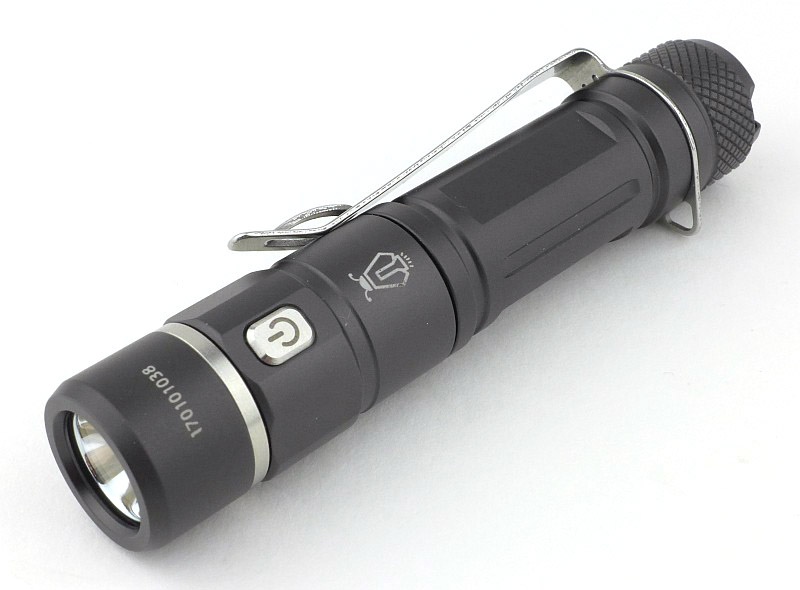
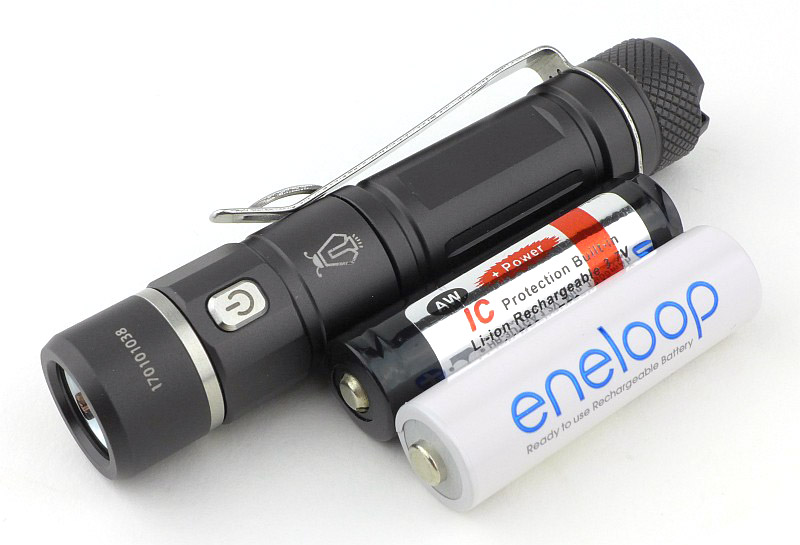
The E10R is similar in size, relative to the battery, like the E01R is compared to its battery (so not the smallest AA light). Here the E10R is shown next to its two power source options,the NiMh AA (Eneloop), and a 14500 (an AW 14500).
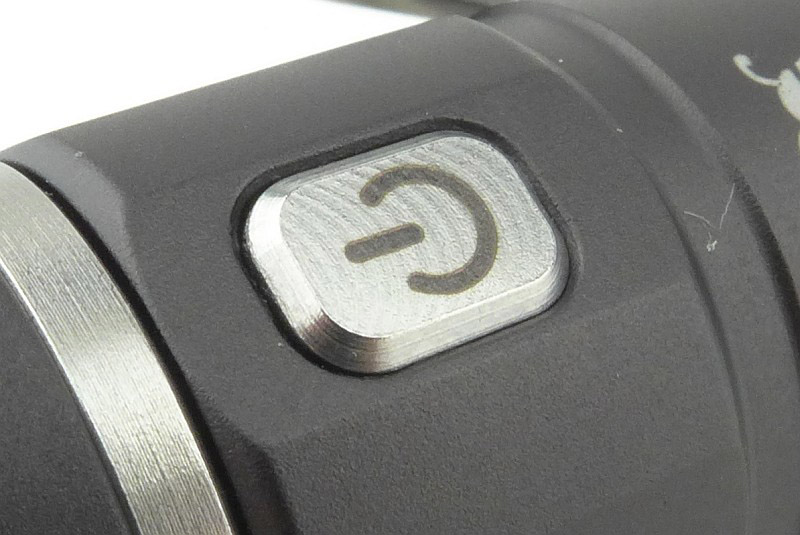
A small metal button is used for the power switch, which is exactly the same size as the one on the E01R.
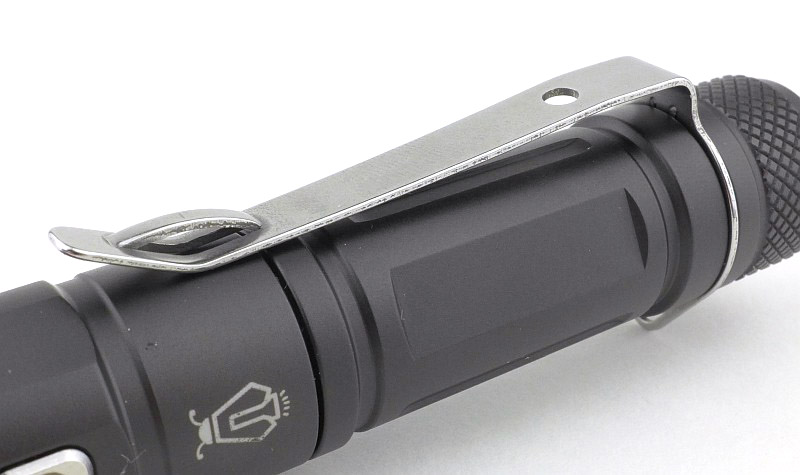
Both the clip and the tail-cap have lanyard holes in them.
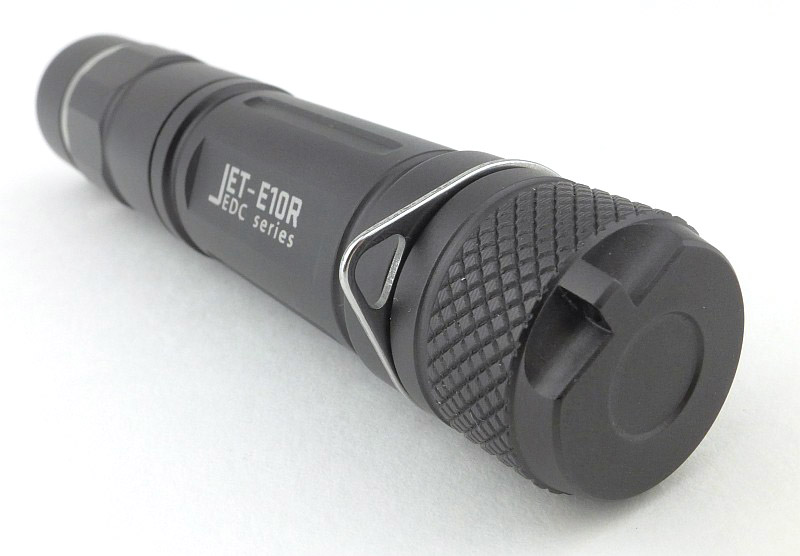
In the case of the E10R, the clip is a standard type. Even without the tail-cap loosened it is free to rotate to any position around the body.
Inside the tail-cap is a gold plated spring terminal.
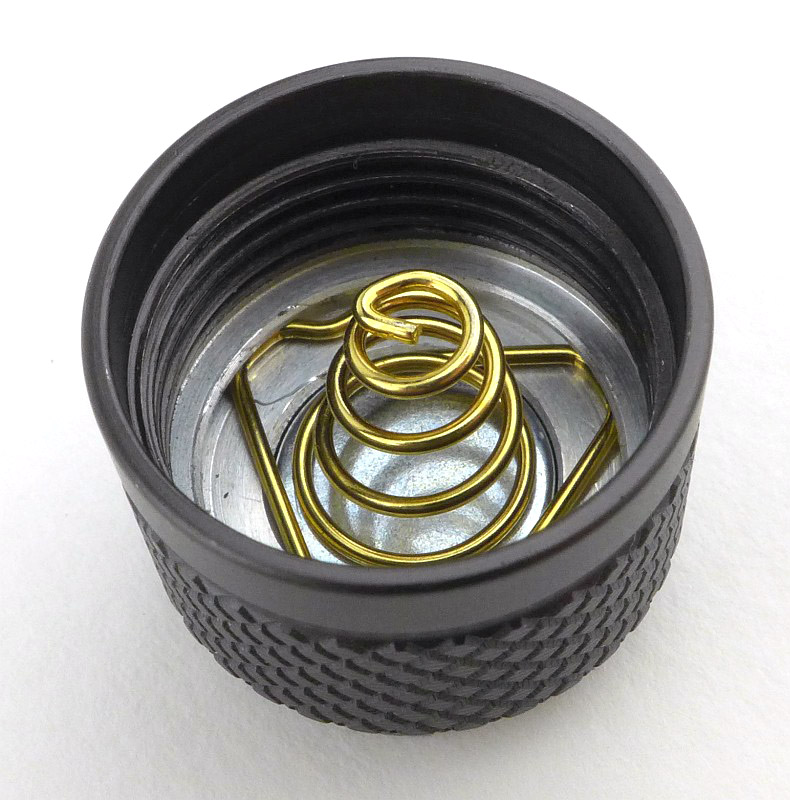
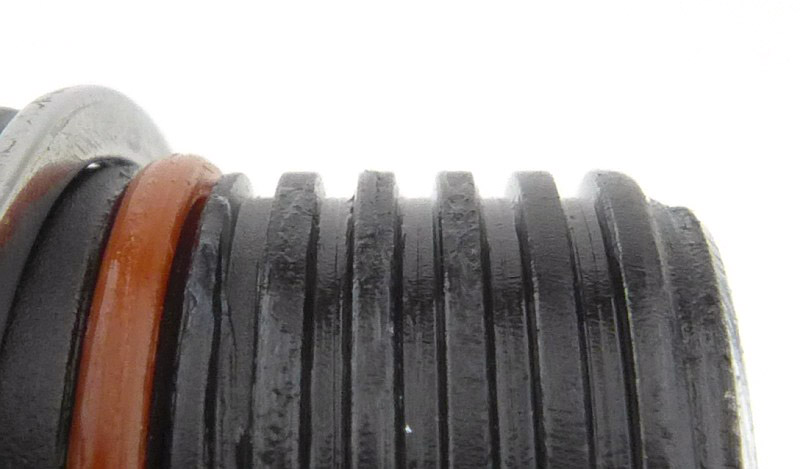
The threads are almost square, and are well lubricated.
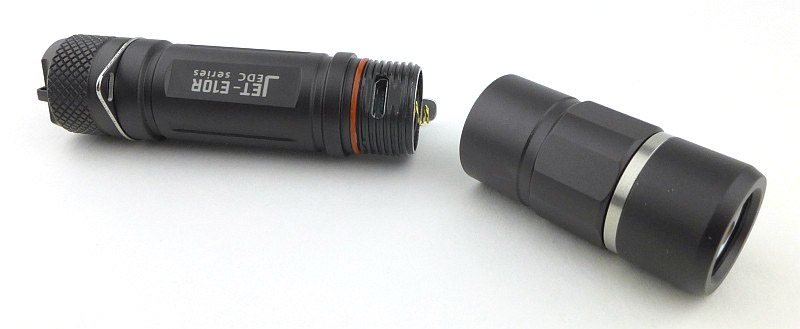
And like the E01R, unscrew the head of the E10R to reveal the micro-USB charging port.
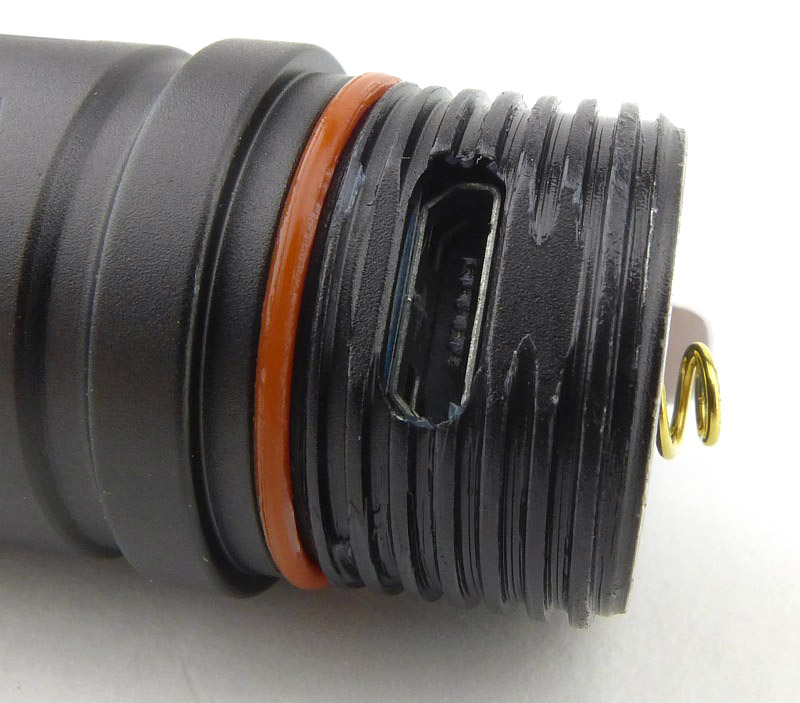
A closer look at the micro-USB charging port and threads.
With the head removed, you do not see the battery, instead there is a set of contacts for the connection to the head once refitted. Just next to the spring (at about 2 o’clock here) is the indicator LED for charging.
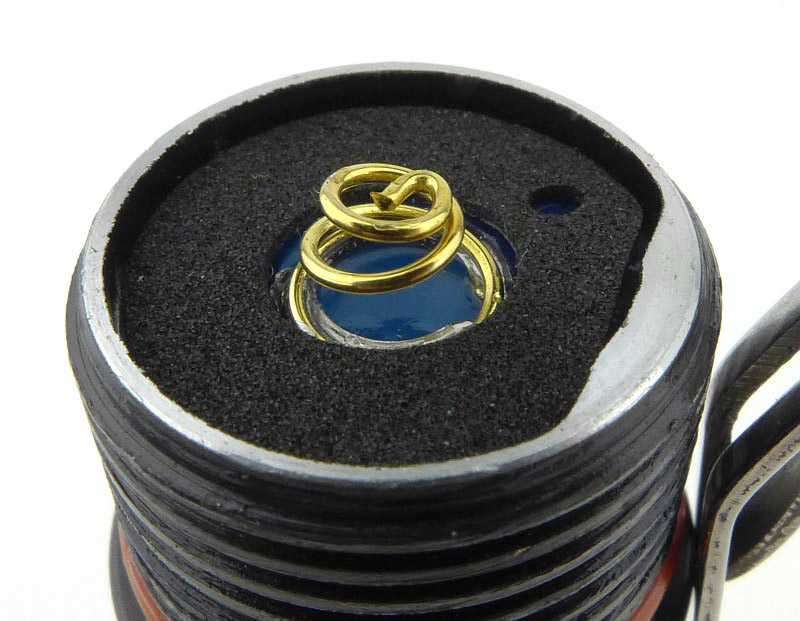
Inside the head are the matching set of contacts.
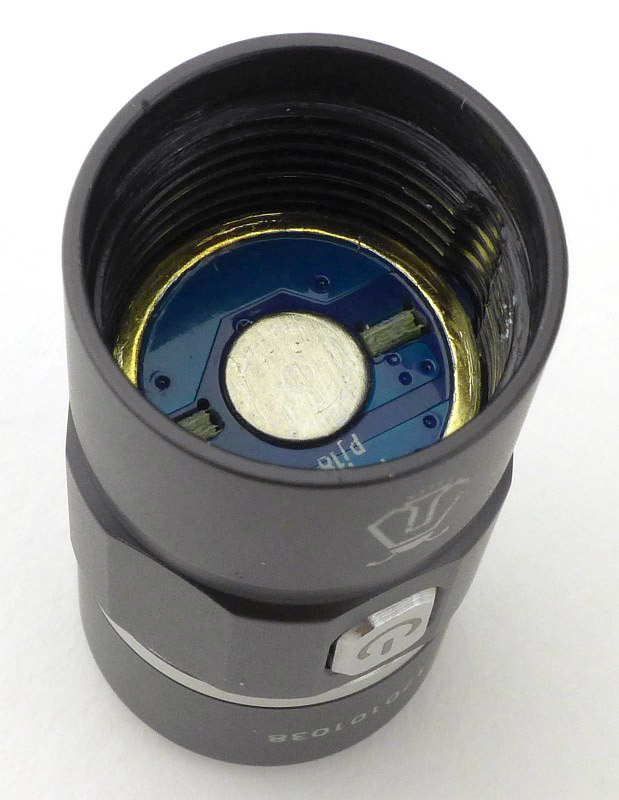
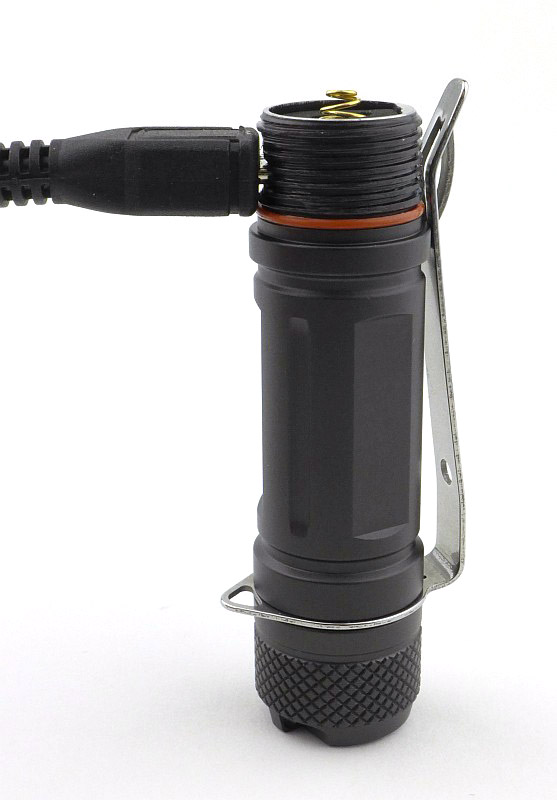
Charging the cell in the E10R is easy, simply plug in the powered USB cable.
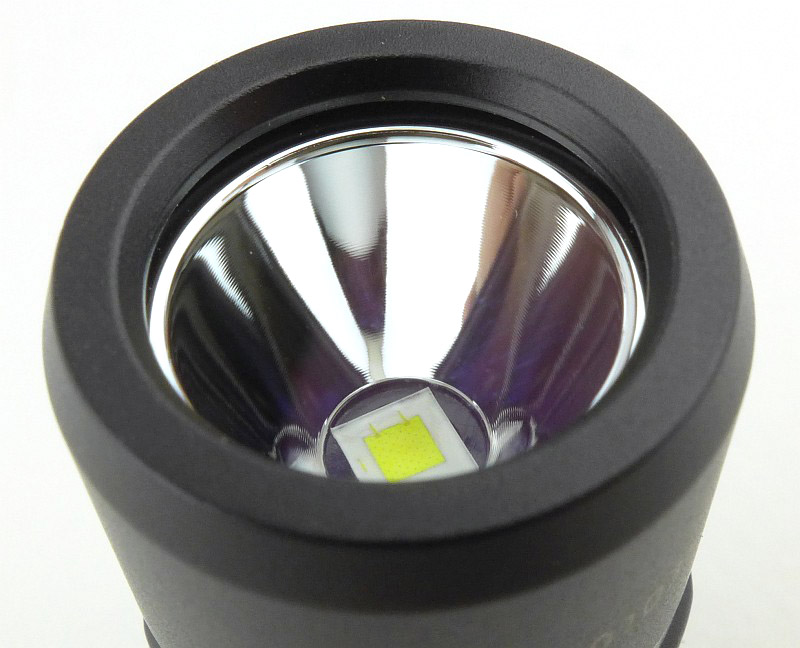
For the E10R, there is a smooth reflector with an XP-L HI LED at its centre.
The charging indicator LED is slightly hidden by a foam PCB cover. Here it is lit, showing the E10R is charging.
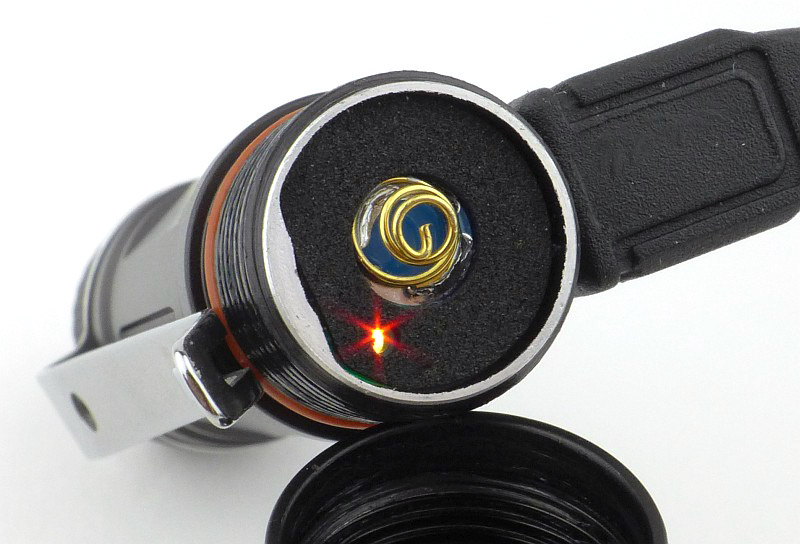
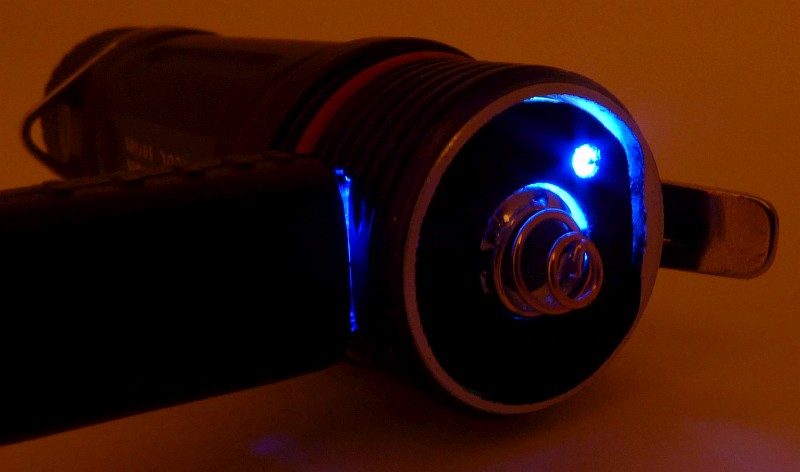
Indicating a 14500 is now fully charged, the charging light shows blue. (this is red if a NiMh is used)
The beam

Please be careful not to judge tint based on images you see on a computer screen. Unless properly calibrated, the screen itself will change the perceived tint.

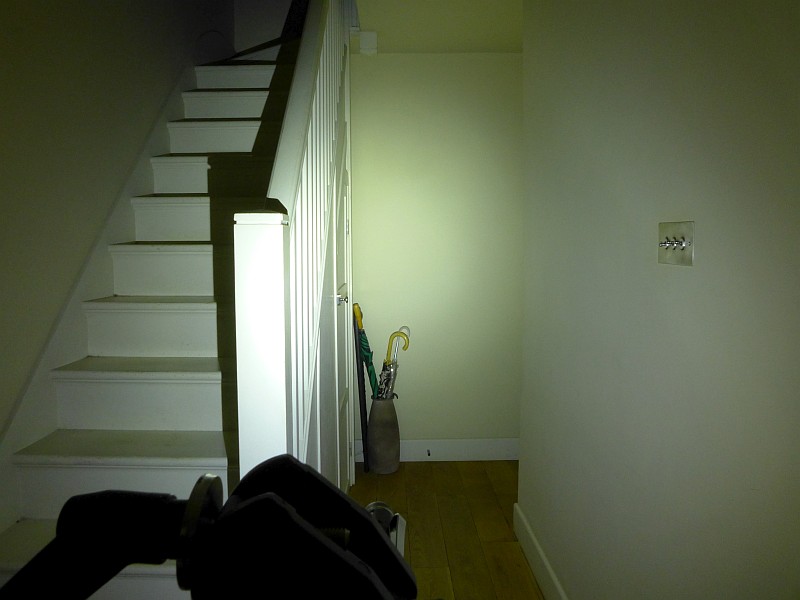
The indoor beamshot is intended to give an idea of the beam shape/quality rather than tint. All beamshots are taken using daylight white balance. The woodwork (stairs and skirting) are painted Farrow & Ball “Off-White”, and the walls are a light sandy colour called ‘String’ again by Farrow & Ball. I don’t actually have a ‘white wall’ in the house to use for this, and the wife won’t have one!

Although the beginning of the review starts with the E01R, for the beamshots, I’m starting with the E10R’s beam. The combination of the small focused SMO reflector and XP-L HI LED gives a strong hotspot and wide usable spill. A good mixture for a compact EDC light with the output power a 14500 allows.
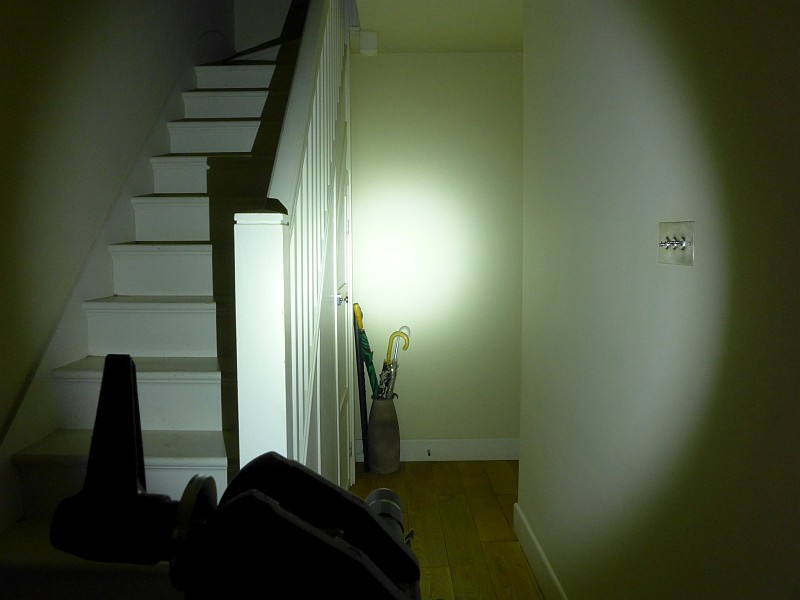
At exactly the same exposure, the E01R looks a bit weak; this exposure is included to allow a direct comparison.
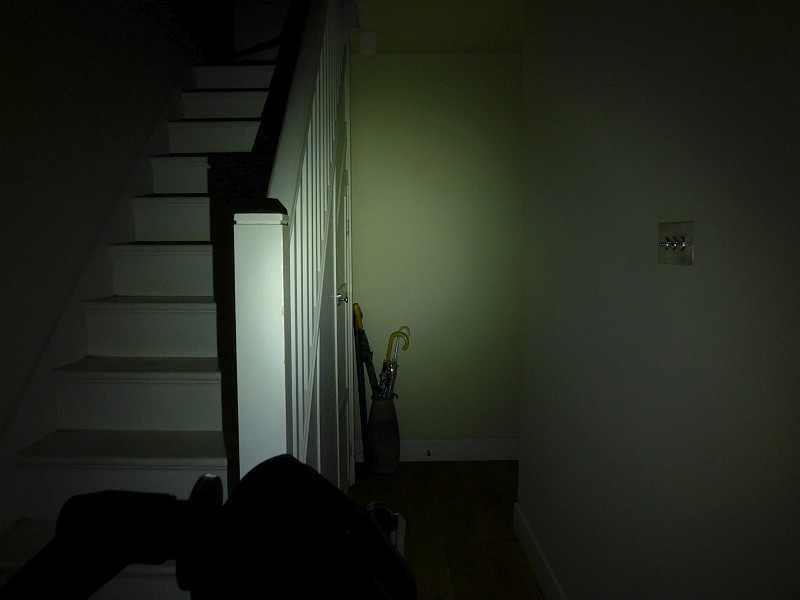
Adjusting the exposure to show the E01R’s beam more how your eyes would see it, we have a lovely wide smooth beam with a soft and gentle hotspot. A really useful close range beam.
Moving outdoors, and the E10R on 14500 has a reasonable power to give it a bit of range.
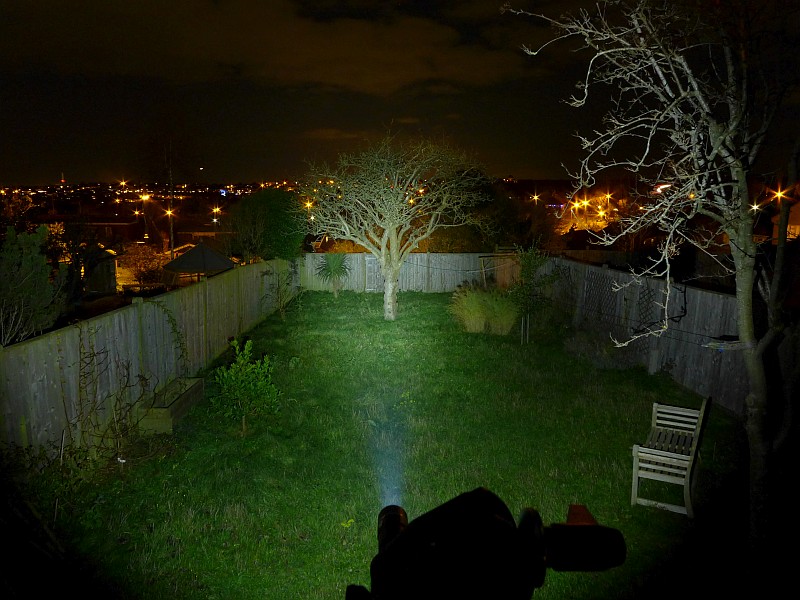
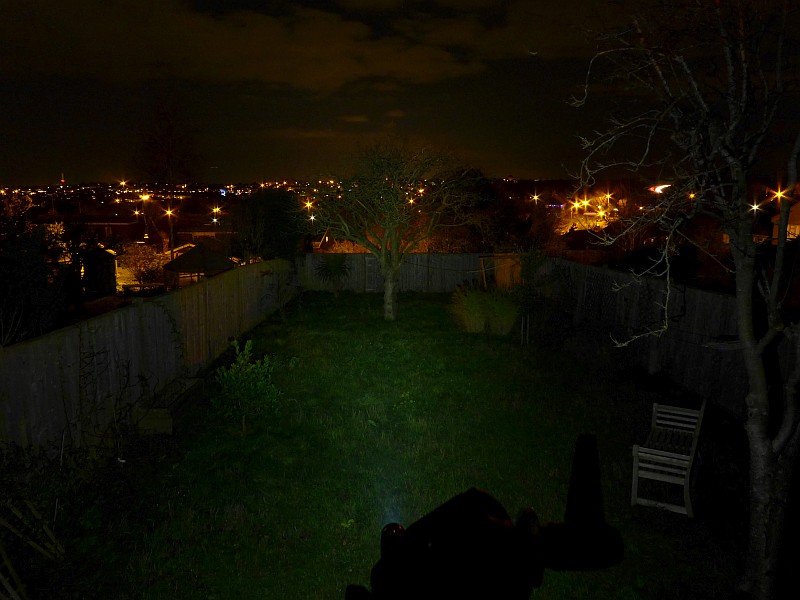
The same cannot be said about the E01R as its wide beam runs out of steam very quickly. But don’t forget this is a AAA light.
Modes and User Interface:

Both the E01R and E10R operate in exactly the same way. The only UI difference is the charging indicator.

There are three modes, High, Medium and Low, plus a Strobe mode.

To turn the E01R/E10R ON, briefly press the switch. The last used constant mode is memorised.
To cycle through the modes High, Medium, Low, High, with the E01R/E10R ON, briefly press the switch.
To turn the E01R/E10R OFF, press and hold the switch for 2s.
To access Strobe mode, with the E01R/E10R ON or OFF, rapidly double tap the switch.
To exit Strobe, either briefly press the switch (to change to a constant mode), or press and hold the switch for 2s (to turn OFF).

When charging the E01R, a red light is shown during charging. When fully charged, the red light goes out.
When charging the E10R, using AA the red and green lights come on during charging. When fully charged, the green light goes out.
When charging the E10R, a red light is shown during charging. When fully charged, the blue light is shown.

Both the E01R and E10R have an electronic lockout of the switch. To Lock, from OFF, press and hold the switch for four seconds. The LED will start to blink indicating the Lockout was successful.

To Unlock, press and hold the switch for four seconds, the last use mode will come on.

Batteries and output:

The E01R runs on NiMh AAA (or AAA Alkaline without charging feature).
The E10R runs on NiMh AA (or AA Alkaline without charging feature) or Li-ion 14500.

To measure actual output, I built an integrating sphere. See here for more detail. The sensor registers visible light only (so Infra-Red and Ultra-Violet will not be measured).

Please note, all quoted lumen figures are from a DIY integrating sphere, and according to ANSI standards. Although every effort is made to give as accurate a result as possible, they should be taken as an estimate only. The results can be used to compare outputs in this review and others I have published.

___________________________________________ ________________________________ ________________________________
E01R or E10R using specified cell I.S. measured ANSI output Lumens PWM frequency or Strobe frequency (Hz)
___________________________________________ ________________________________ ________________________________
E01R High – AAA 111 0
E01R Medium – AAA 22 0
E01R Low – AAA 2 0
E10R High – AW 14500 457 0
E10R High – AA 164 0
E10R Medium – AA 39 0
E10R Low – AA 3 0

* Beacon and Strobe output measurements are only estimates as the brief flashes make it difficult to capture the actual output value.

There is parasitic drain in both lights. The drain in the E01R when using NiMh AAA was 41.3uA (2.21 years to drain the cell). The drain in the E10R when using NiMh AA was 69.8uA (3.11 years to drain the cell). The drain in the E01R when using 14500 was 86uA (1.19 years to drain the cell).

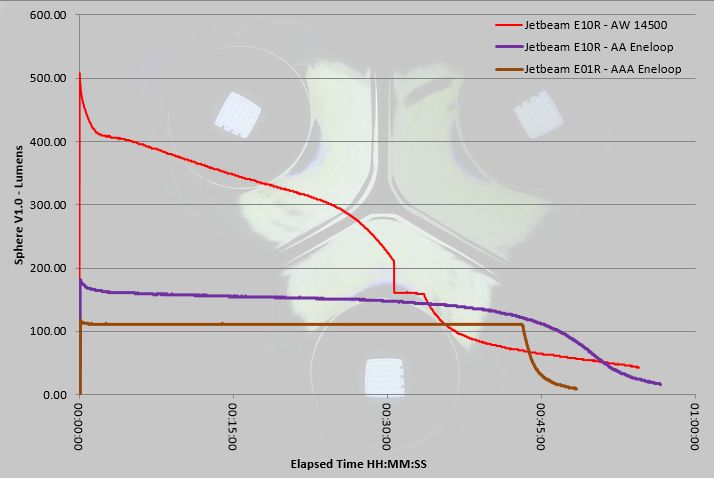
Where a light has built in charging, to best show how it really performs, the batteries have been charged using the built-in charger; This will show if cells are undercharged. First, note the totally flat output from the E01R, exhibiting excellent regulation on the output. Though the E10R is using an AA NiMh with 2100mAh (compared to the AAA’s 800mAh), overall the performance of the E10R using AA is much closer to the E01R than you might expect when the E10R has nearly three times the cell capacity. This is either due to the built-in charger not fully charging the cell, or the driver circuit showing some inefficiency when powered by AA. The 14500 is where the E10R comes to life with nearly 500lm output, staying above 300lm for 25 minutes and only stepping down to below 200lm after 30 minutes.
Troubleshooting

This section is included to mention any minor niggles I come across during testing, in case the information helps anyone else.

The first E01R supplied would not charge. This seemed to be due to a connection issue with the micro-USB port. Jetbeam promptly replaced this under warranty and the replacement has functioned perfectly.

As per the description of this section, this information is provided in case anyone else finds a similar ‘issue’ that might be fixed in the same way.

The E01R/E10R in use

Many USB rechargeable EDC lights have built-in batteries. Though very convenient, this means there is no option of replacing the battery with a fresh cell if you need more light than one cell will give you. Both the E01R and E10R run from standard cells, so whether you use the built-in charging, or not, you can still swap out empty cells for fresh as needed. Both will also run on an alkaline cell, so you are covered in all ways.

Unlike those convenient EDC lights with built-in cells, the E01R and E10R give you that extra level of confidence. Crucially of course you get the performance of a ‘proper’ light.

By hiding the USB charging port inside the head, the port is protected by the O-ring seal of the head. A simple design feature which makes the light just as waterproof as any other non-rechargeable light. This has got to be one of the most important aspects of the way Jetbeam have designed the charging of theses lights; in the majority of cases a USB charging port does compromise the waterproofing – not here.

My main criticism of these lights is with the UI. Firstly the button is quite small and sometimes not easy to hit first time. Secondly the fact that you need to press and hold the switch for 2s to turn it off is quite annoying. Personally I’d much rather the output went on and off with a brief press, and the mode change was a 2s press, but unfortunately it is not.

Another minor annoyance, but probably unavoidable, is that the clips press onto the side of the head, meaning they rub against the anodising as you unscrew the head for recharging. I lift the clip slightly before unscrewing the head to avoid wearing the anodising prematurely – many wouldn’t bother.

Finding the switch can prove challenging by feel, so it can be a little frustrating when you miss the button. I have made this a bit more reliable by lining up the clip so it is opposite the button, but the clip is not held tightly and can still rotate, so this method can end up failing. Also, in gloves, you have no hope at all of finding where the button is, so end up working your way round the head until you hit the right spot. The flip side to this is that the lines of these lights are very streamlined and clean looking.

Moving past these niggles, and onto the beams, the E01R has an outstanding EDC beam. Wide, smooth and perfect for short distance and indoor use. It is also surprisingly bright even with only 111lm. The levels are very well chosen, with Medium being the most useful for general purposes. Neither model includes a genuinely low, low, moon mode, but the low level at 2-3lm is probably more useful for those situations where you want a low level but your eyes are not fully dark adapted; even if they are, the 2lm level is not shockingly bright (it is amazing how little light your eyes really need if given the chance).

More and more lights are including USB recharging, simply because it is much more convenient to charge the battery without taking it out, (and you don’t need to buy a dedicated charger). Jetbeam have achieved this with the E01R and E10R without compromising the style, integrity or function of the lights, and in the E10R have a charger that can charge NiMh and Li-ion!

Review Summary

_______________________________________________ _______________________________________________
Things I like What doesn’t work so well for me
_______________________________________________ _______________________________________________
Fully concealed, and O-ring protected, USB charging port. Power switch is fiddly.
Can run on NiMh or Alkaline (and Li-ion for the E10R). Need to hold the switch for 2s to turn off.
Excellent EDC beam. Pocket clip is always free to rotate.
E01R has perfectly regulated output.
E10R’s charging indicator shows if it is NiMh or Li-ion.
Lockout with 1/4 turn of tail-cap.


Discussing the Review:

The ideal place to discuss this reviews is on a forum. If you started reading the shorter forum version of the review, but followed the link this full exclusive review, please return to that forum to discuss the review there.
If you read the review entirely on Tactical Reviews, please consider one of the following to join in any discussion.

CandlePowerForums – Flashlight Reviews Section (Largest and Friendliest Flashlight Community Forum)

Light Review: Olight R50 Seeker

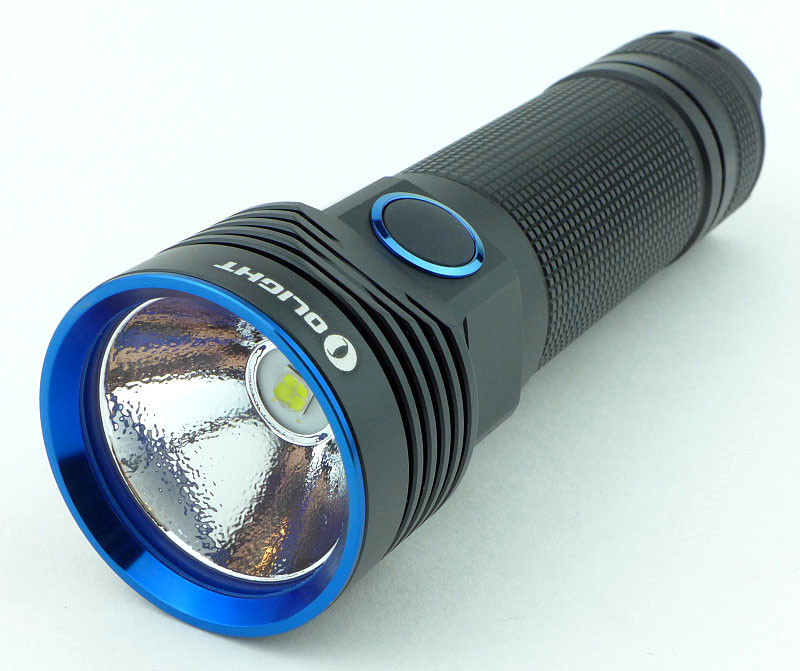
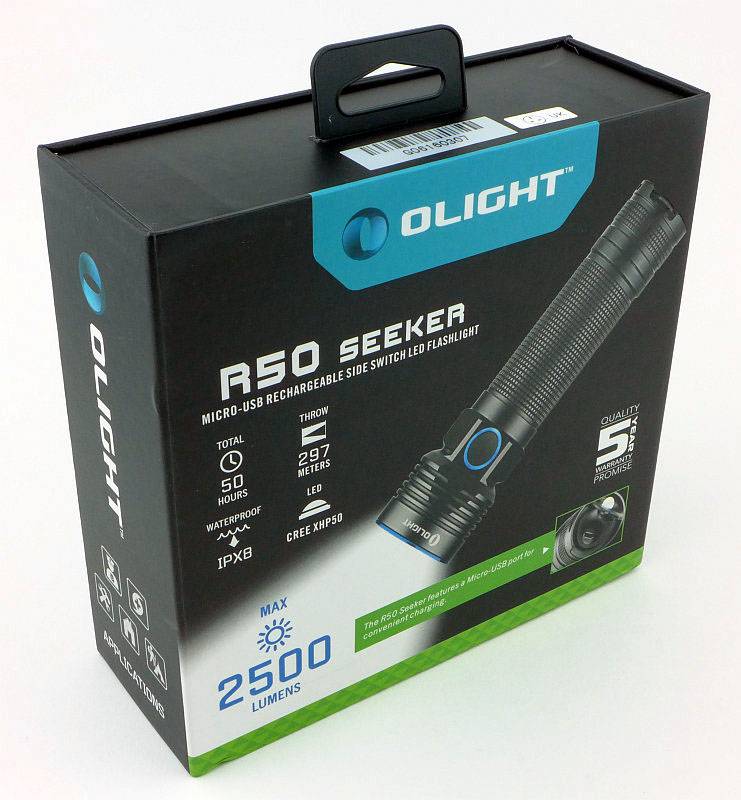
Olight’s R50 Seeker is a handy sized powerhouse using a 26650 cell and the XHP50 LED allowing it to give you 2500lms in an easily carried package; built-in USB charging adds to its flexibility.

 photo 08 Olight R50 angle P1220569.jpg

Taking a more detailed look:

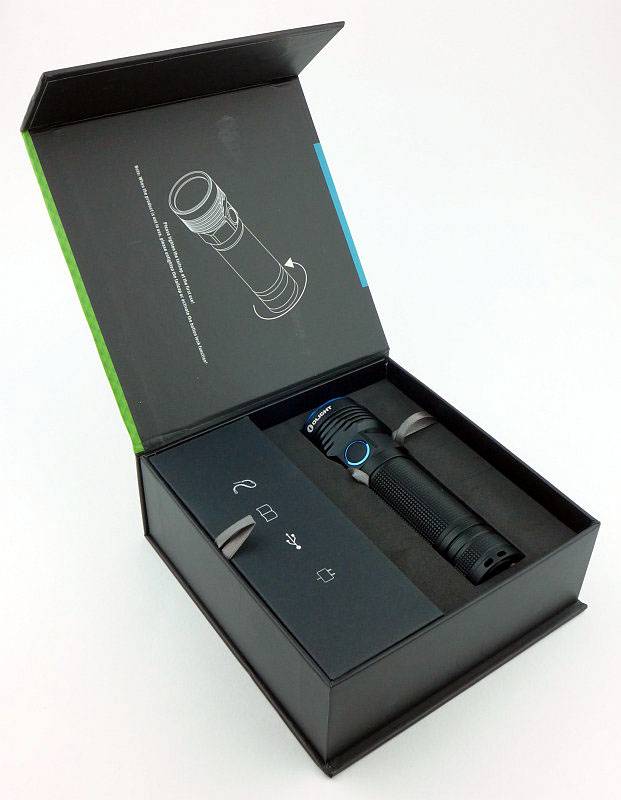
The R50 arrives in something more like a presentation box than just ‘packaging’.
 photo 01 Olight R50 boxed P1220538.jpg

The box has a lid which is held shut with magnets.
 photo 02 Olight R50 box open P1220544.jpg

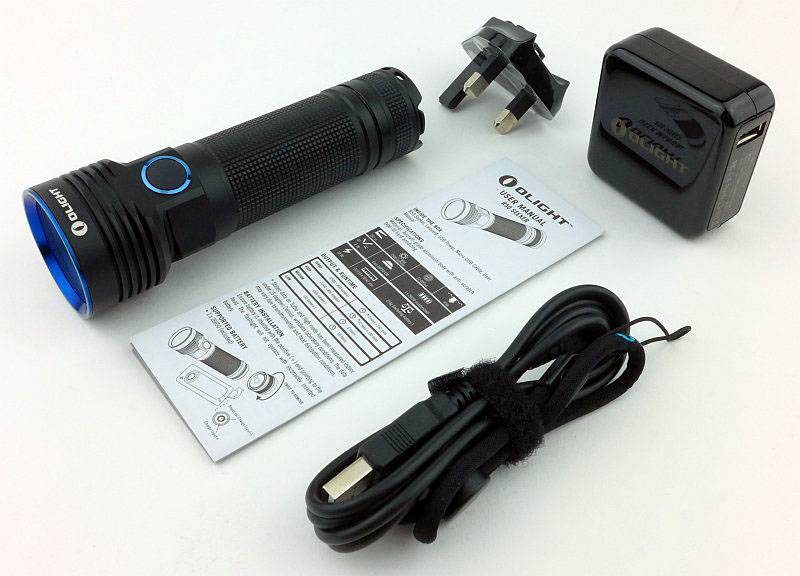
Taking everything out you have the R50, instructions, charger, charger plug adaptor, USB cable and lanyard.
 photo 03 Olight R50 box contents P1220548.jpg

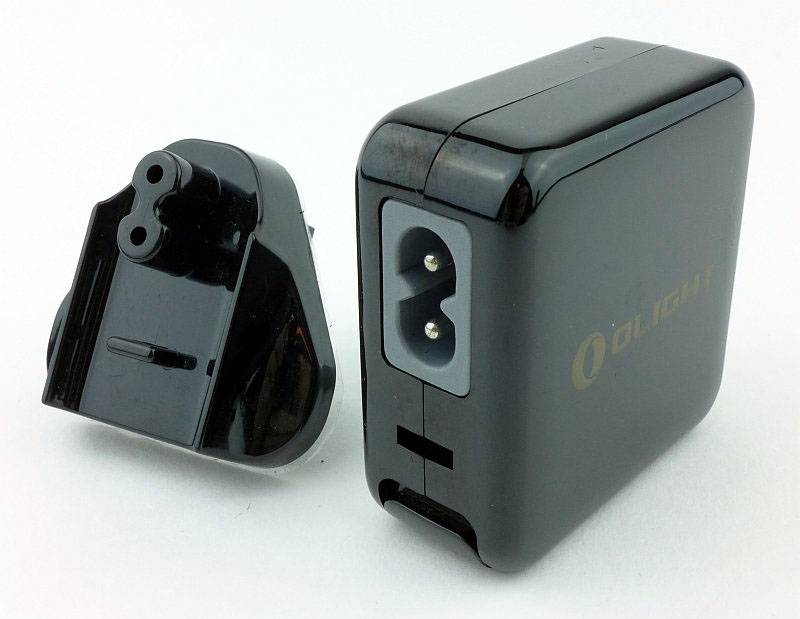
Before you can use the charger you need to fit your local plug adaptor.
 photo 04 Olight R50 charger apart P1220552.jpg

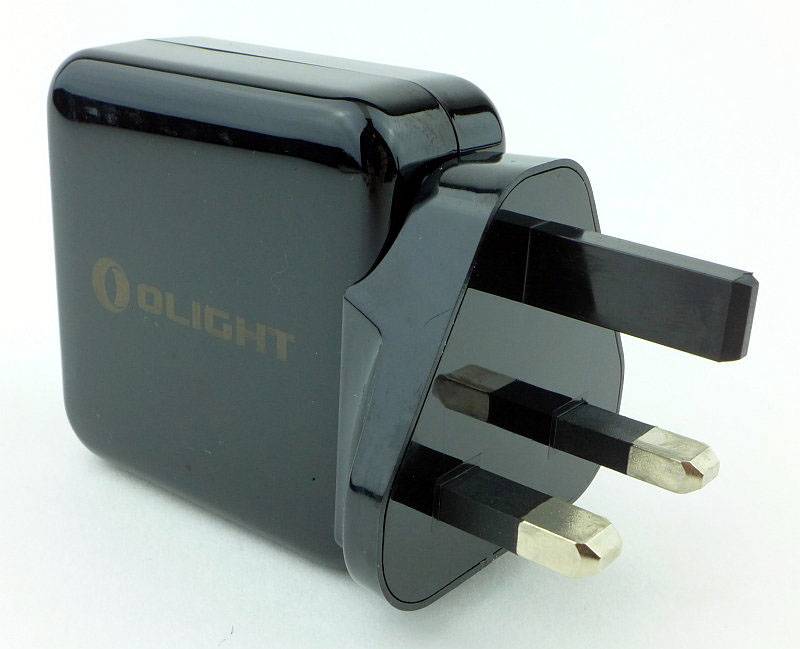
The adaptor clicks into place.
 photo 05 Olight R50 charger together P1220555.jpg

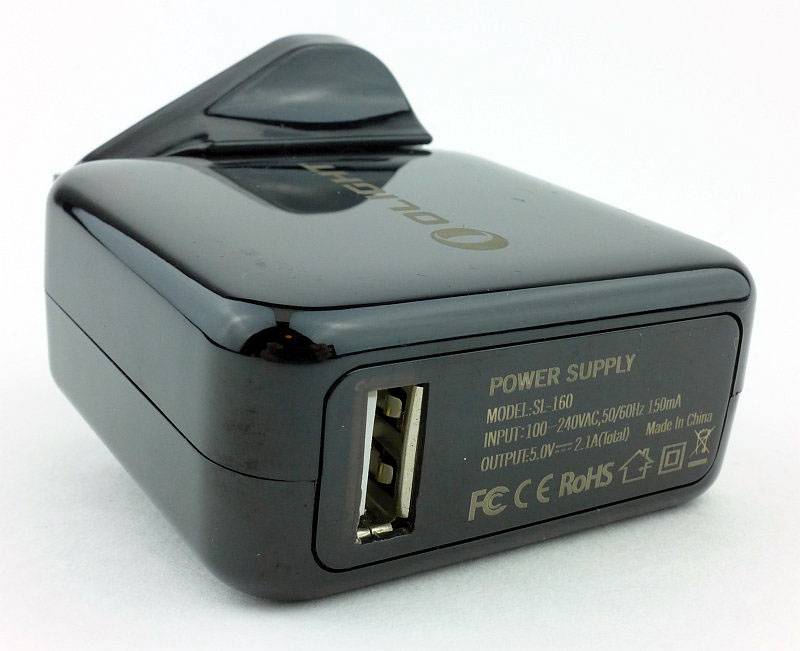
The charger is multi-voltage and with a 2.1A output.
 photo 06 Olight R50 charger info P1220560.jpg

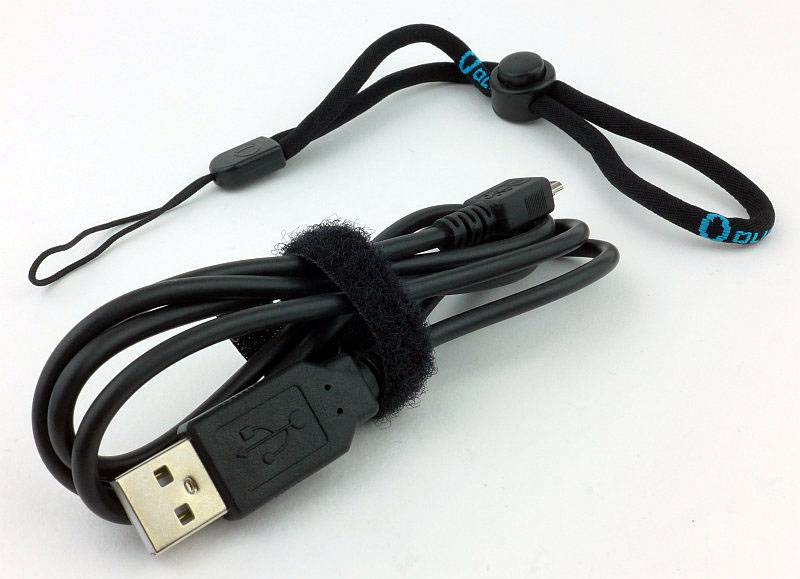
Separating out the USB cable and lanyard. The lanyard has a very nice ‘fabric tube’ wrist loop.
 photo 07 Olight R50 cable lanyard P1220563.jpg

A good looking light with blue bezel an switch rings.
 photo 10 Olight R50 angle P1220576.jpg

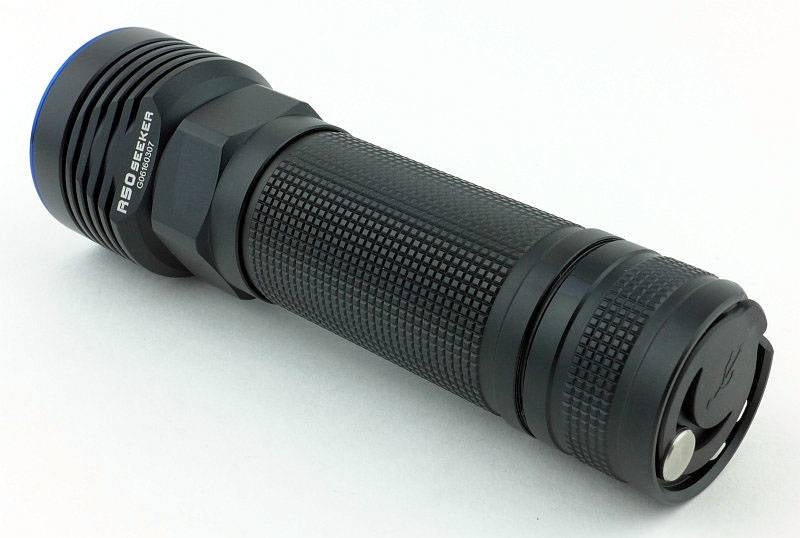
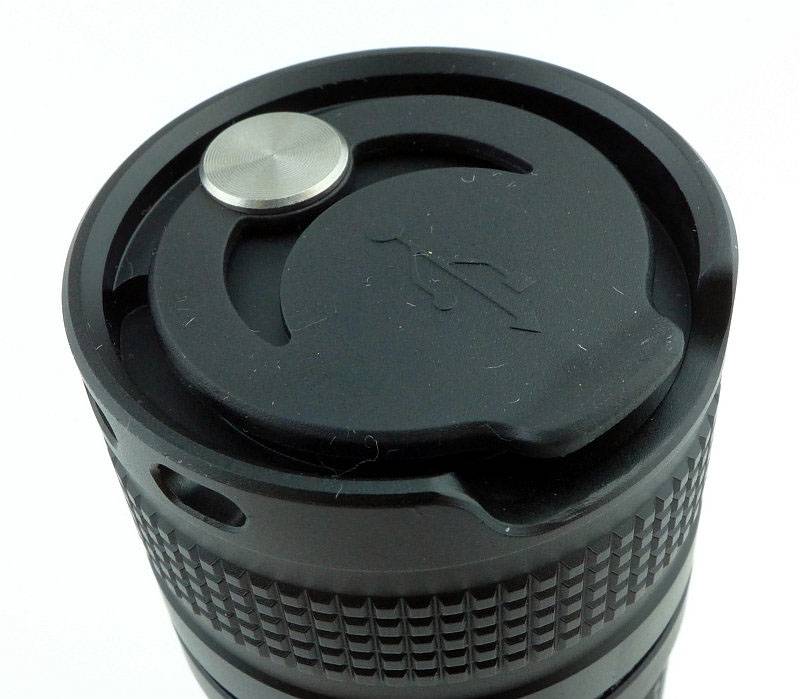
Looking from the rear you can see the USB charging port cover in the tail-cap.
 photo 09 Olight R50 rear angle P1220574.jpg

The main power switch is low profile, but big enough to be easy to use.
 photo 11 Olight R50 switch P1220580.jpg

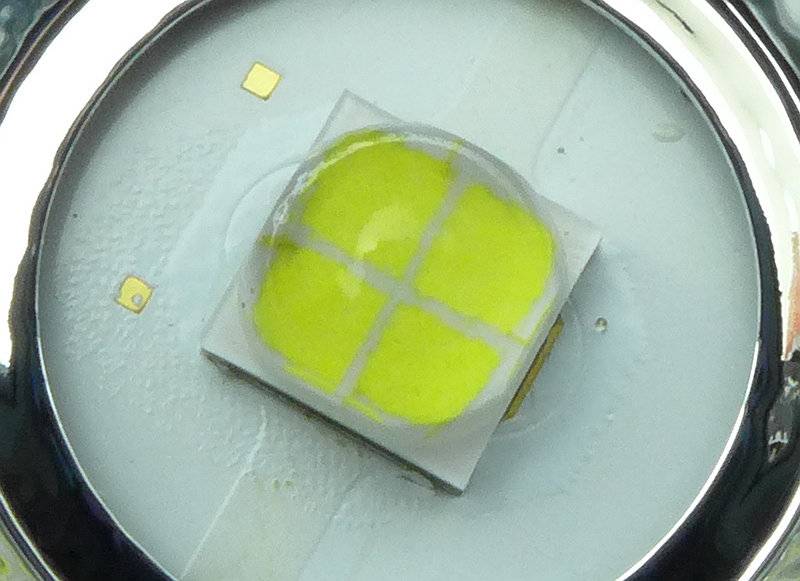
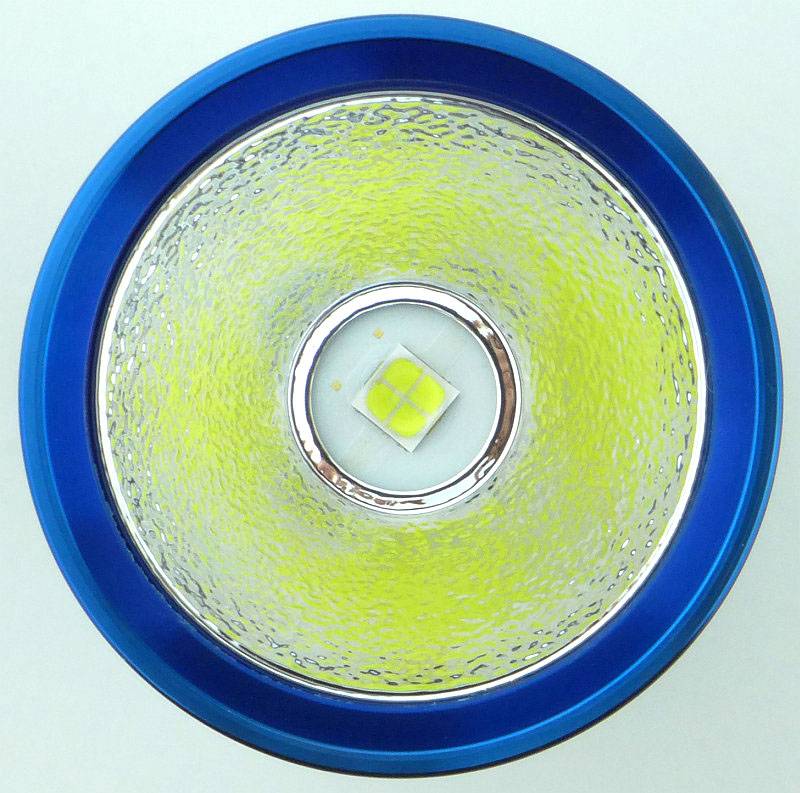
Diving in close to the quad die XHP50 LED.
 photo 13 Olight R50 LED close P1220597.jpg

Surrounding the LED is a textured reflector.
 photo 14 Olight R50 reflector P1220606.jpg

Flipping round to the other end, there is a rubber charging port cover in the tail-cap.
 photo 15 Olight R50 port cover P1220610.jpg

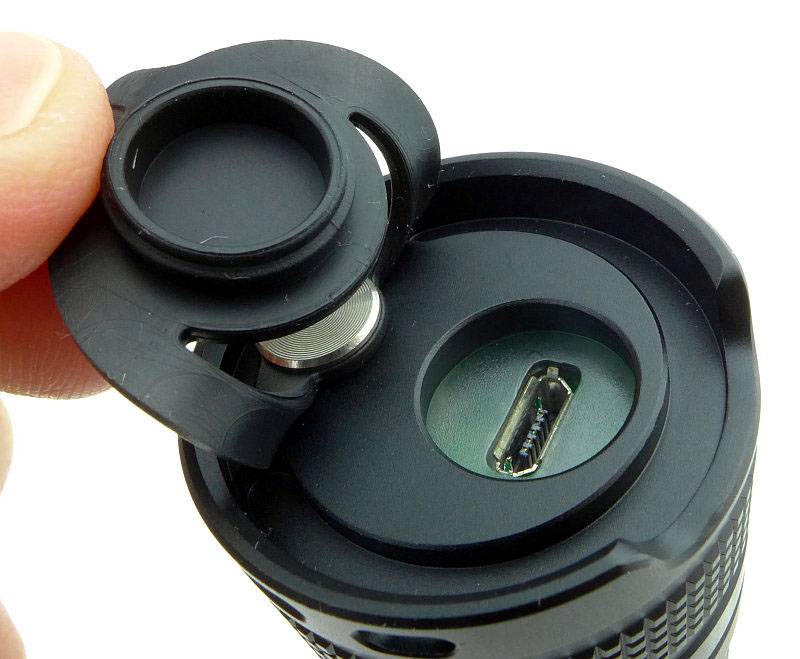
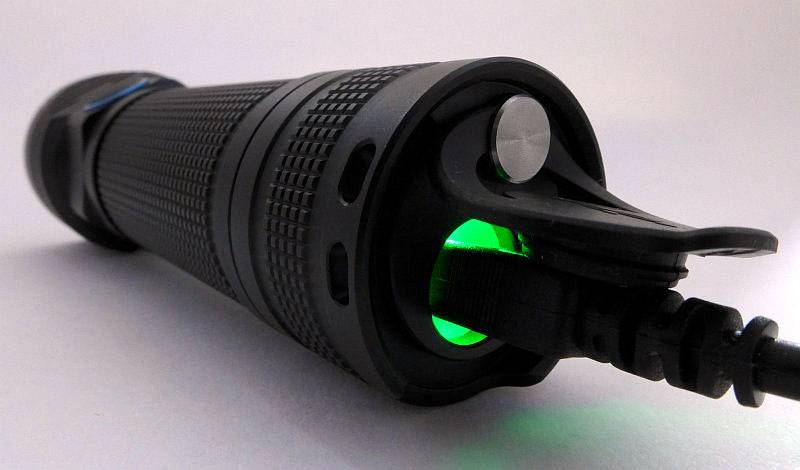
Pulling this aside exposes the micro-USB socket.
 photo 16 Olight R50 port open P1220615.jpg

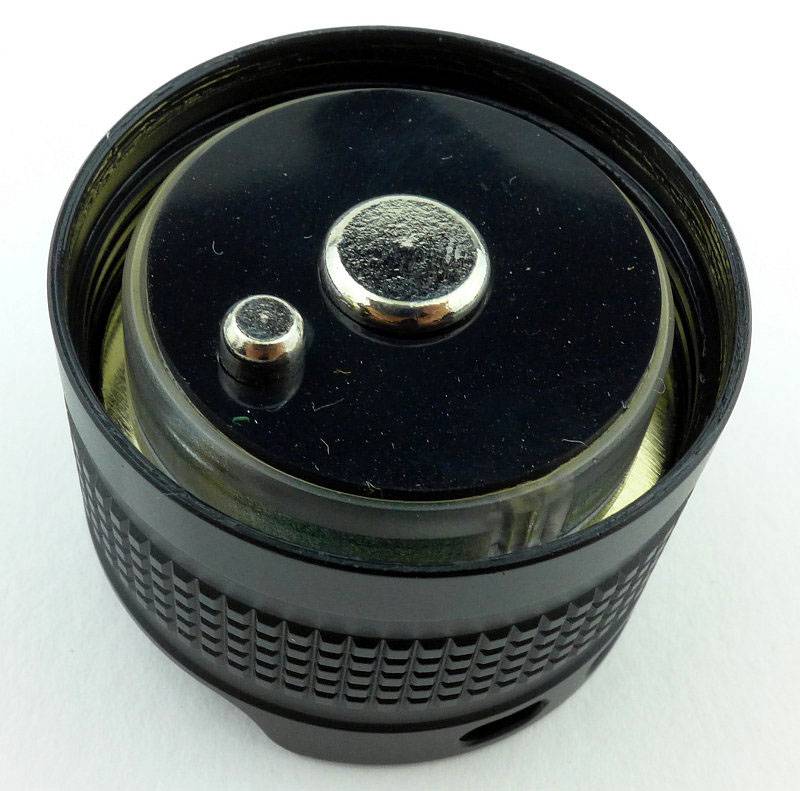
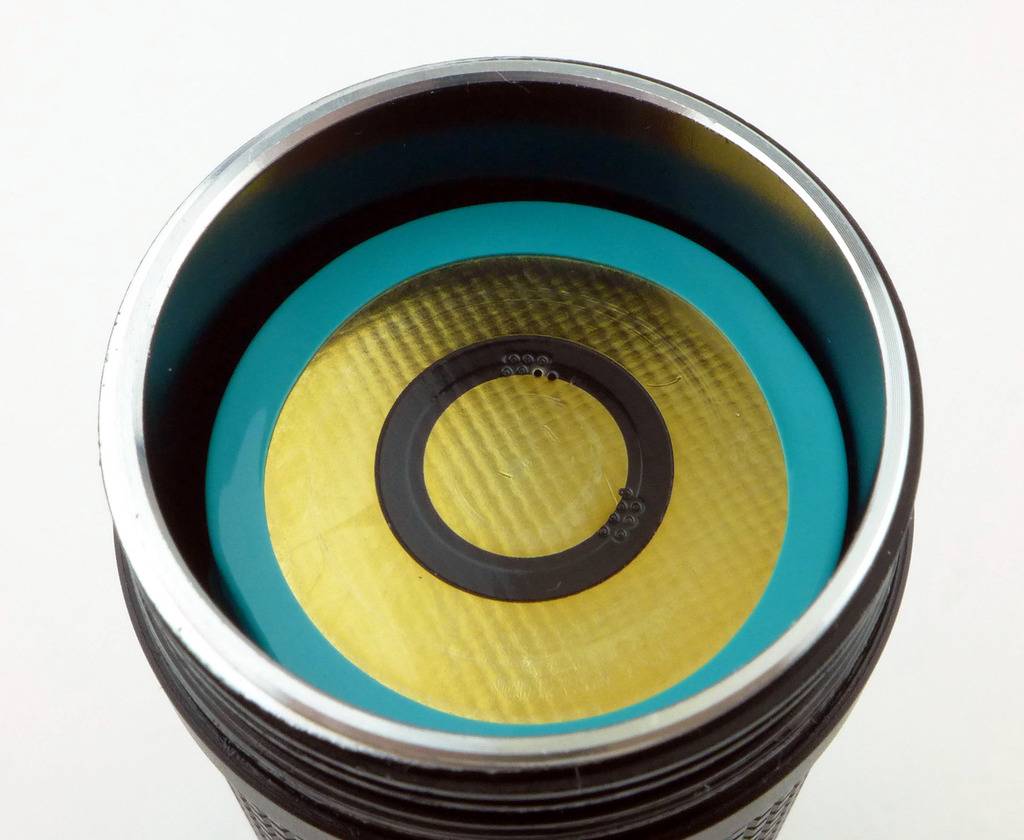
Inside the tailcap, there are three contacts; a ring contact for the end of the battery tube, and two sprung button contacts.
 photo 17 Olight R50 contacts P1220616.jpg

The tail-cap end of the cell has two contacts to match the two in the tail-cap.
 photo 18 Olight R50 cell contacts P1220621.jpg

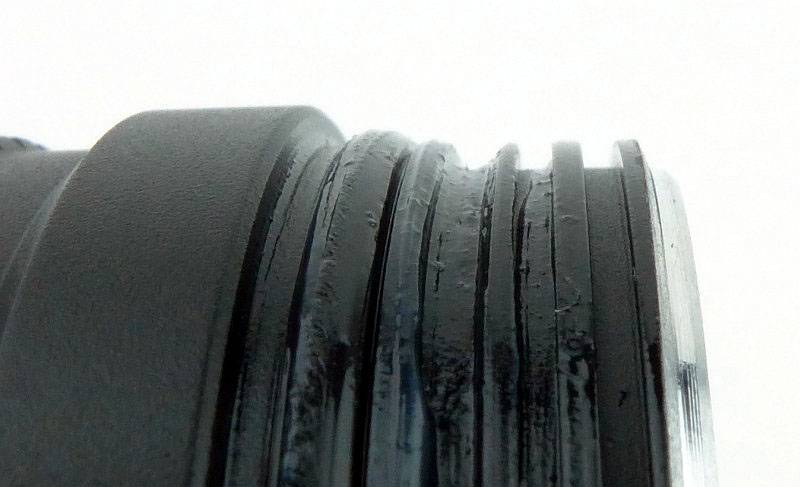
Threads are square cut.
 photo 19 Olight R50 threads P1220624.jpg

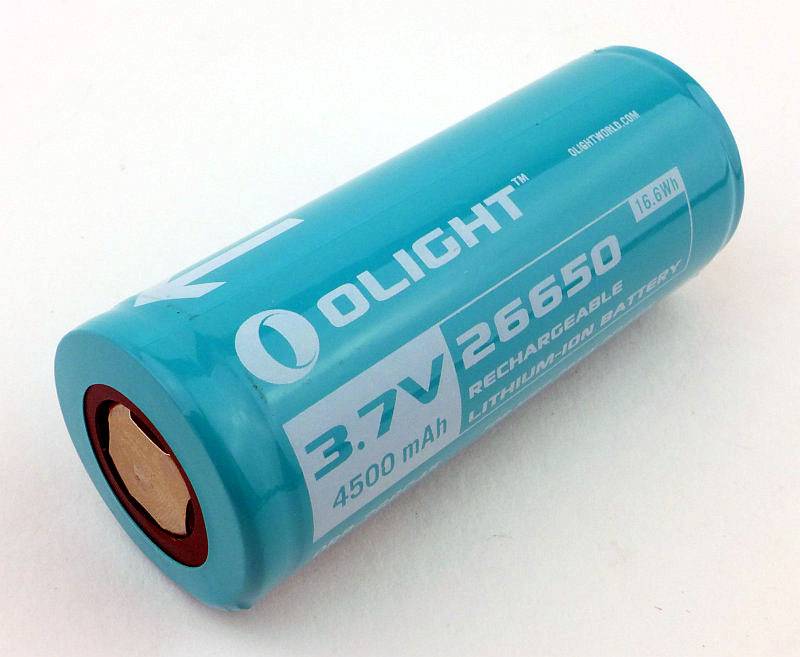
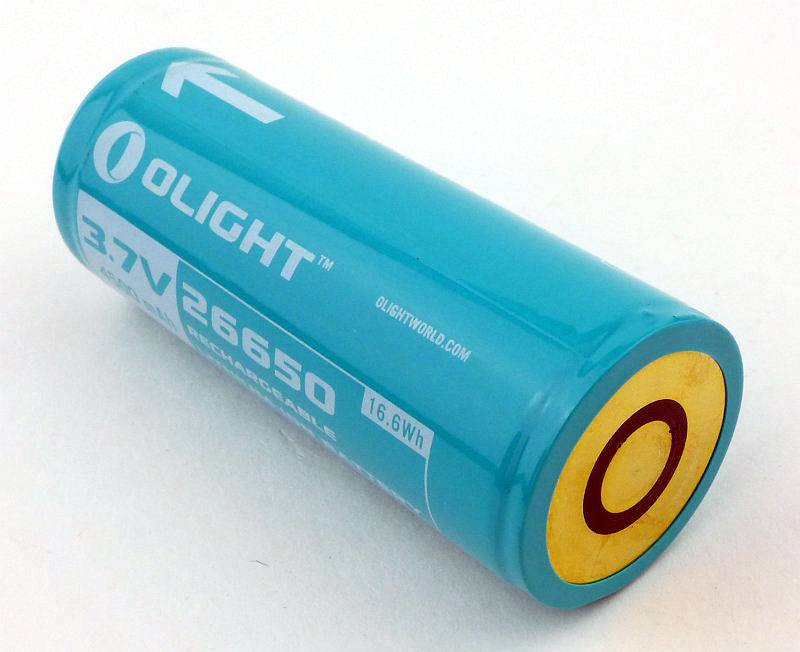
Supplied with the R50 is a proprietary Olight 26650 cell.
 photo 20 Olight R50 cell P1220628.jpg

This cell has the twin contacts on the ‘negative’ end of the cell, and an arrow on the side to indicate which way to insert it.
 photo 21 Olight R50 cell P1220630.jpg

Peering inside the battery tube to look at the positive contact.
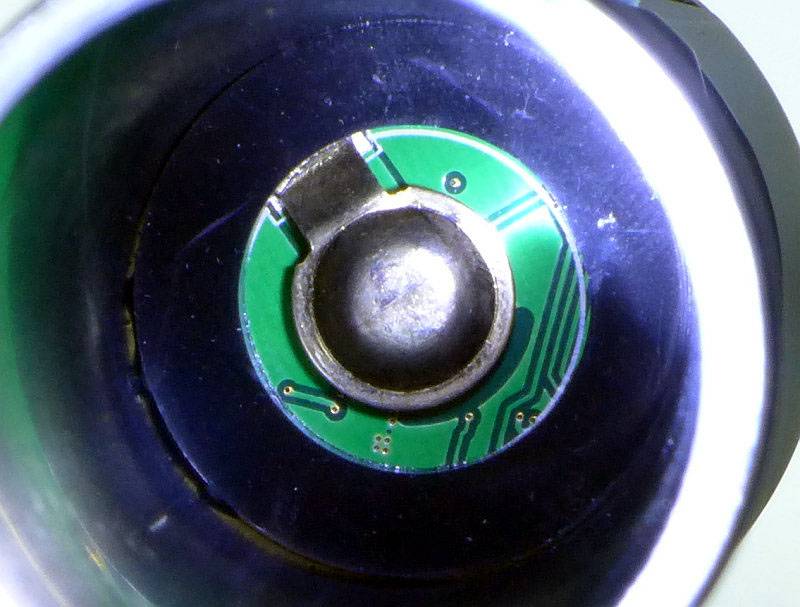
 photo 22 Olight R50 internal contact P1220633.jpg

The beam

Please be careful not to judge tint based on images you see on a computer screen. Unless properly calibrated, the screen itself will change the perceived tint.

The indoor beamshot is intended to give an idea of the beam shape/quality rather than tint. All beamshots are taken using daylight white balance. The woodwork (stairs and skirting) are painted Farrow & Ball “Off-White”, and the walls are a light sandy colour called ‘String’ again by Farrow & Ball. I don’t actually have a ‘white wall’ in the house to use for this, and the wife won’t have one!

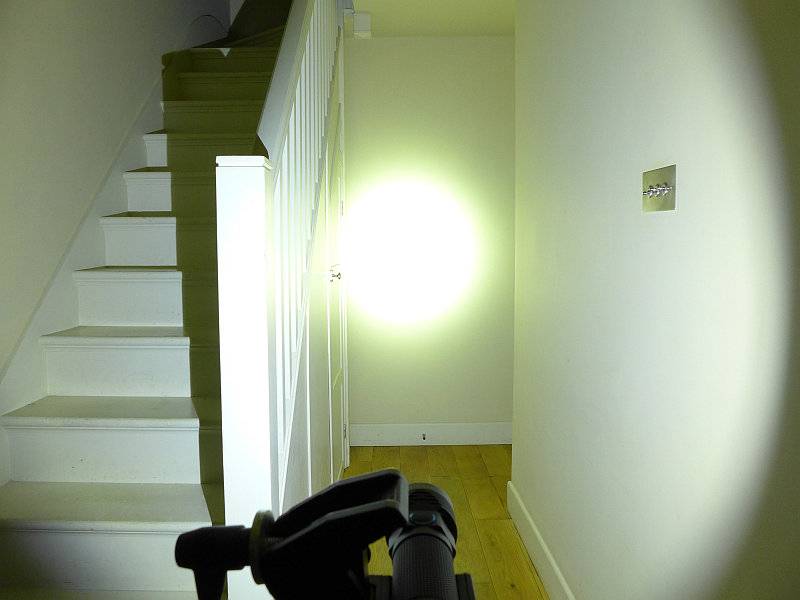
The R50 manages to combine a very wide spill with a bright hotspot.
 photo 29 Olight R50 indoor beam P1240719.jpg

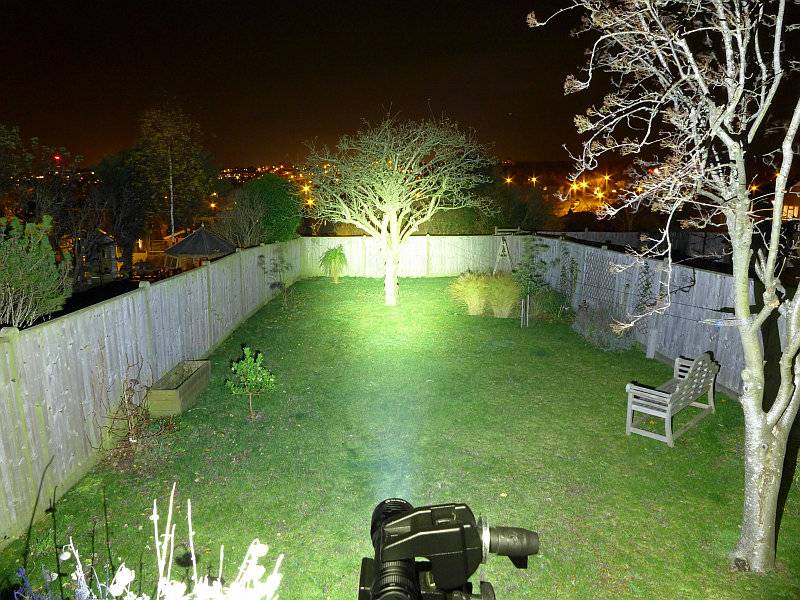
Taking it outside and that wide beam lights up everything near you and the broad hotspot has good range.
 photo 28 Olight R50 outdoor beam P1240671.jpg

Modes and User Interface:

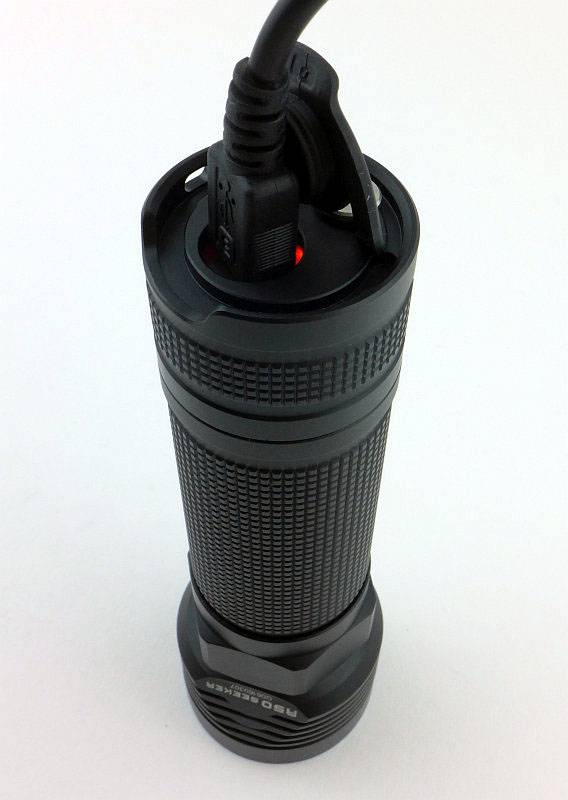
Before we get into the controls, we need to charge the R50. After connecting the USB cable there is a red charging indicator light next to the USB socket.
 photo 25 Olight R50 charging P1220651.jpg

Once fully charged this turns green.
 photo 26 Olight R50 charged P1220668.jpg

To turn ON to the last used constant mode, click the side switch once.
To turn ON to Turbo directly, double-click the side switch.
To turn ON to Strobe, triple-click the side switch.
To turn ON to Low mode directly, press and hold the side switch for 1s.

To change brightness level, with the R50 ON, press and hold the switch to cycle through Low – Medium – High – Low etc.

To turn OFF, click the side switch.

There is a memory for the last used ‘normal’ mode (Low, Medium, or High) but High is only memorised for 10 minutes after which the R50 goes back to Medium.

There are two ways to lockout the R50:
1. Unscrew the tail-cap a half turn.
2. Press and hold the side switch (from OFF) for over 2s. (After 1s the R50 will come onto Low, but after 2s it will go off again as it enters lockout.)

To exit lockout use the corresponding method to the lockouts above:
1. Tighten the tailcap.
2.Press and hold the switch for 3s.

Batteries and output:

The R50 Seeker runs on a proprietary 26650 cell. The instructions do not mention support for standard 26650 cells, however I have tried this and the R50 does function (though does not accommodate very long cells) apart from the charging not working.

To measure actual output, I built an integrating sphere. See here for more detail. The sensor registers visible light only (so Infra-Red and Ultra-Violet will not be measured).

Please note, all quoted lumen figures are from a DIY integrating sphere, and according to ANSI standards. Although every effort is made to give as accurate a result as possible, they should be taken as an estimate only. The results can be used to compare outputs in this review and others I have published.

___________________________________________ ________________________________ ________________________________
Olight R50 using supplied 26650 cell I.S. measured ANSI output Lumens PWM frequency or Strobe frequency (Hz)
___________________________________________ ________________________________ ________________________________
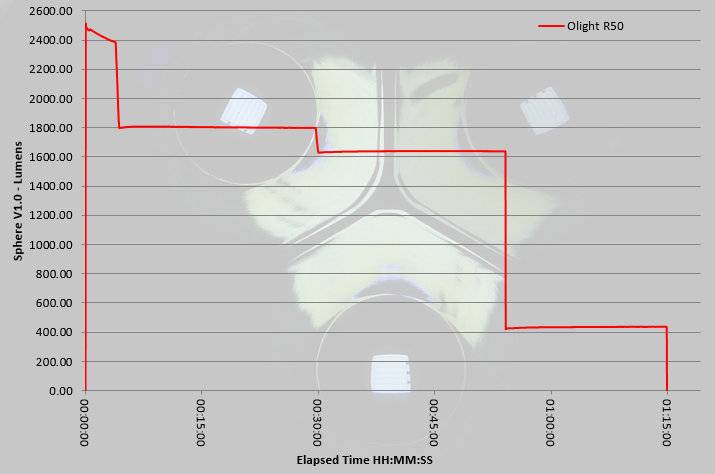
Turbo 2479 0
High 1281 0
Medium 440 0
Low 39 0

* Beacon and Strobe output measurements are only estimates as the brief flashes make it difficult to capture the actual output value.

Peak Beam intensity measured 22000 lx @1m giving a beam range of 297 m.

There is parasitic drain at 52uA. When using the included 4500mAh cell, it will take 9.87 years to drain the cell.

A very impressive output for a compact light. During extended use, the Turbo stepping down from nearly 2500lm to 1800lm is not noticeable and while running at 1800lm starts to generate a good amount of heat. Even with the step down at 30 minutes to around 1650lm you don’t really notice, and it is only once you get to about 50 minutes and the R50 steps down to the medium output of 440lm that you see a drop in output.
 photo Olight R50 runtime.jpg

Troubleshooting

This section is included to mention any minor niggles I come across during testing, in case the information helps anyone else.

No issues were encountered during testing.

As per the description of this section, this information is provided in case anyone else finds a similar ‘issue’ that might be fixed in the same way.

The R50 Seeker in use

For such a usable and useful light I am disappointed Olight did not include a holster. Even though it uses the 26650 cell, so has a thicker tube than the common 18650 size light, Olight have kept the overall size very compact and comfortable to hold. It may not be jeans-pocket sized, it is easily coat-pocket sized.

Output is extremely impressive and does meet the specified 2500lm. This does drop to 1800 after 3 minutes, but that reduction is barely noticeable and the R50 continues to impress. Everyone who has seen me using the R50 has said “that is bright” and asked what it is; a real talking point.

One area where I think Olight has really cracked it, is the interface. It is the same, or very similar, to many of the other Olight lights with a single side switch, so you will recognise the way it works. Giving the user direct access to the maximum and minimum levels, whatever you last used, makes this a real winner. Another nice touch is the way that the ‘normal’ mode (from a single click of the side switch) will not memorise High beyond 10 minutes of being off, it means that whatever you were doing with the R50, worst case you might get Medium if you turn it on without thinking. Not so much you get blinded and yet powerful enough.

These days you won’t really find yourself unable to find a USB charger at work or at home. The R50 comes with a quality 2A charger anyway, but while you are away from home you will be able to top up the R50 easily enough. The instructions specifically don’t mention using any other 26650 cells, but being the rebel I am, I popped one in. Clearly the charging function is not going to work, but the R50 itself did work, so you can carry a spare 26650 if you want. Just beware that the R50’s tube is not that long, so some 26650 cells may be too long. Check it fits before you rely on it.

There is some shaping at the head, but the R50 effectively has no anti-roll feature, you need to put it down head-down or tail-down. It does tail-stand very well.

Running the R50 on Turbo also provides you with a hand-warmer as it does heat up quite a lot. Given a cold evening, this certainly is a welcome feature. If you decide to tail-stand the R50 on Turbo you will hit the over-heat protection, so expect the output to drop if you let it get really hot.

Personally I find the R50 hits a real sweet spot in terms of size, ergonomics and output. Give me a side-switch light any day, add to that a cell which is large enough to sustain a significant output and a great all-rounder beam, keep it small enough to pop into a coat pocket and you have a winner. I’ll forgive it the proprietary cell for the fact that this has convenient built-in USB charging, doesn’t need anything else to be bought to use it, but can use standard 26650 cells, so gets round the normal limitation of proprietary cell lights.

Review Summary

_______________________________________________ _______________________________________________
Things I like What doesn’t work so well for me
_______________________________________________ _______________________________________________
2500lm from a compact light. Requires the proprietary cell for built-in charging.
Excellent UI using an ergonomic side switch. No holster supplied.
Can run on a standard 26650 – Unofficially. No Anti-Roll.
Direct access to Maximum and Minimum modes.
Regulated output.
All-rounder beam.

 photo 24 Olight R50 angle on P1220636.jpg


Discussing the Review:

Please feel free to add comments to the review, but the ideal place to freely discuss these reviews is on a forum. If you started reading the shorter forum version of the review, but followed the link this full exclusive review, please return to that forum to discuss the review there.
If you read the review entirely on Tactical Reviews, please consider one of the following to join in any discussion.

CandlePowerForums – Flashlight Reviews Section (Largest and Friendliest Flashlight Community Forum)
EdgeMatters – Sponsored Reviews (UK based Forum for Knife Makers and Collectors)