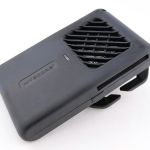
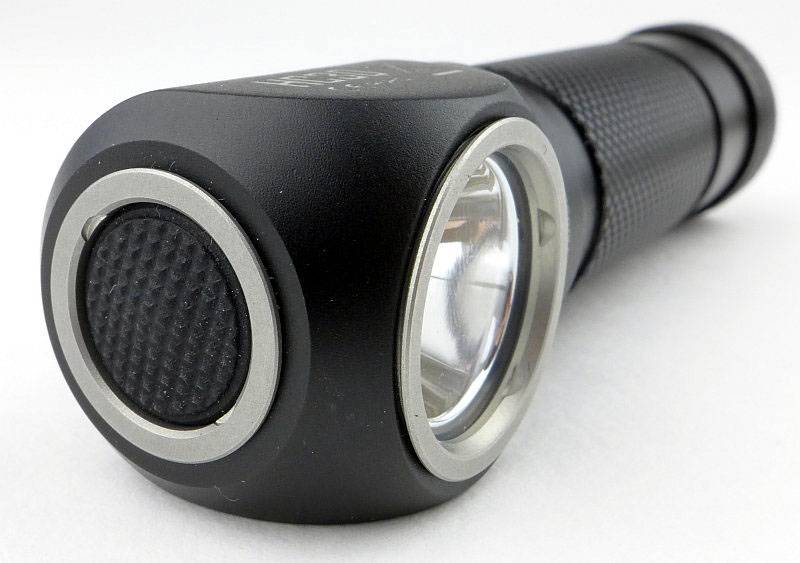
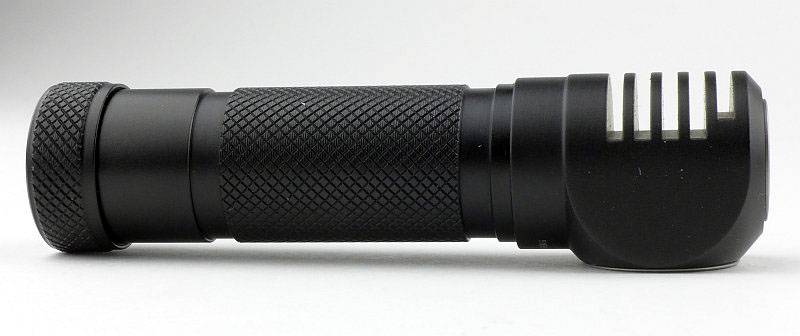
Gear Review: Nitecore EMR05 EMR06

This detailed review of the Nitecore EMR05 and EMR06 portable mosquito repellers, includes all aspects of their performance and function.

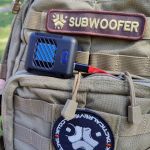
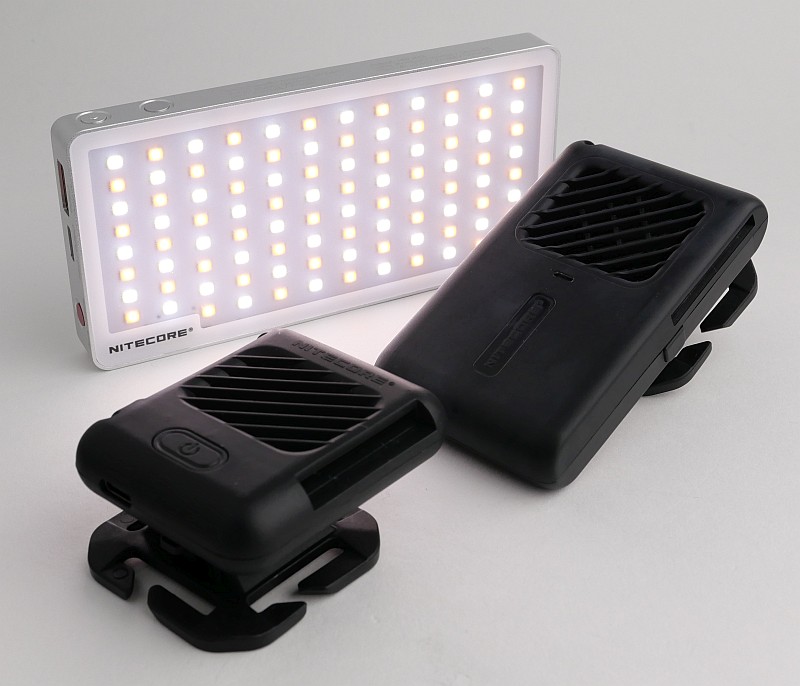
The EMR05 and EMR06 are two new devices from Nitecore giving you ultra-portable insect repellers with the lowest weight-cost possible.

The EMR06 has a built-in battery, so is self-powered, and the EMR05 is smaller still, as it needs external power from a power bank.

If, like me, you protect everyone else from mosquito bites, by being the one the mosquitoes make a beeline for, then you may be as pleased as I am to find the new Nitecore EMR05 and EMR06 portable insect repeller devices.

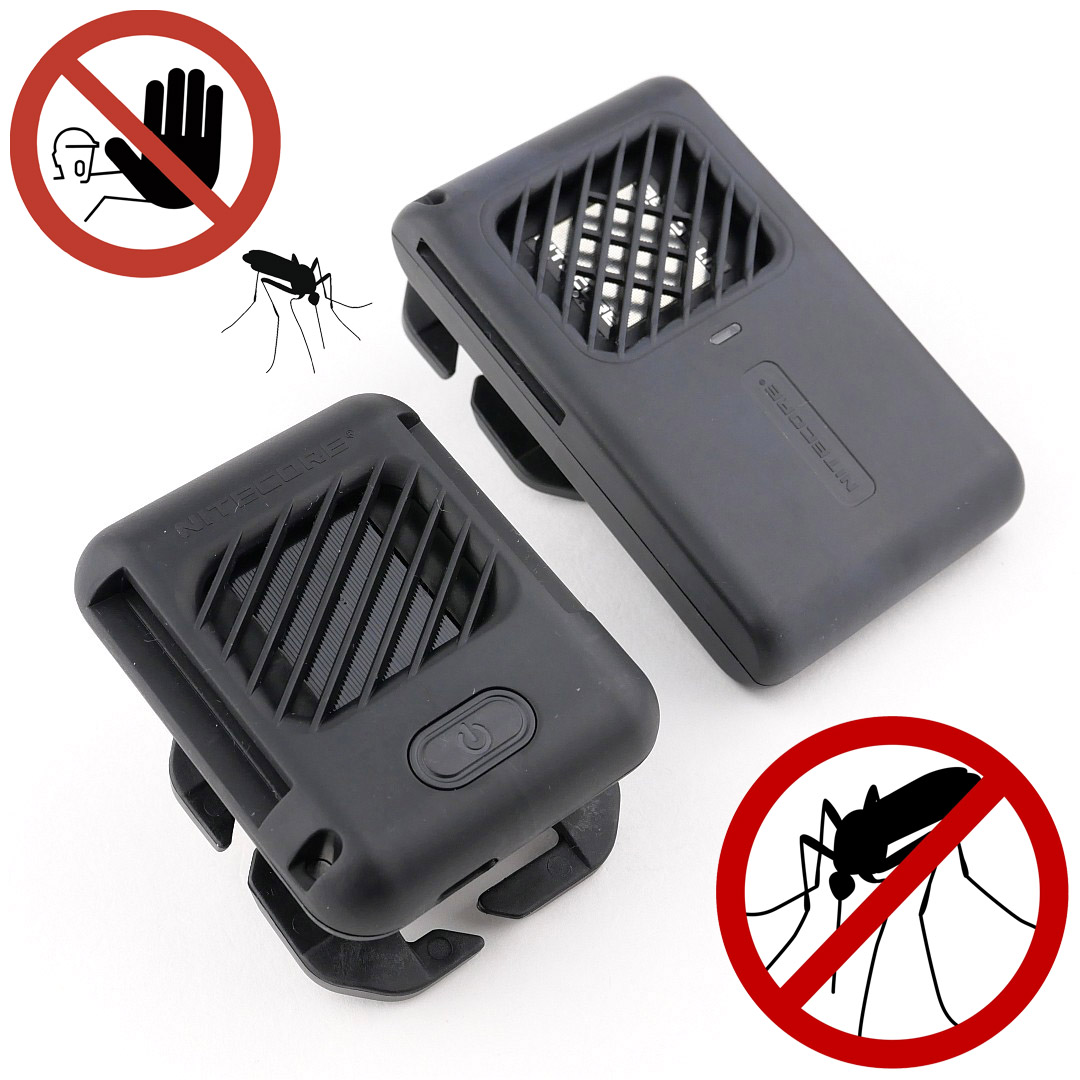
Making his second appearance below is “Stoppo”, Tactical Reviews’ “don’t do that” guardian. Mosquitos beware, armed with the EMR units Stoppo says NO!

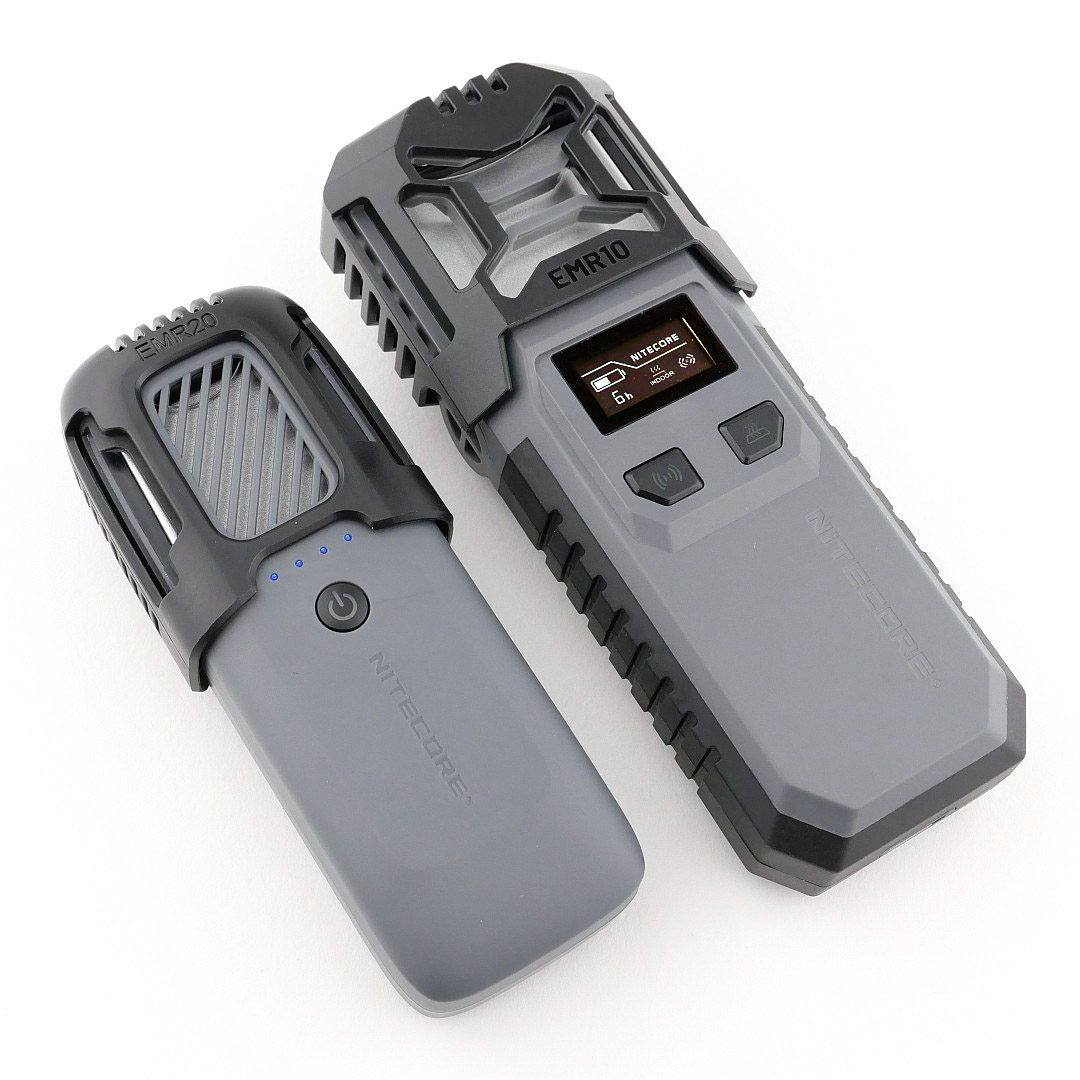
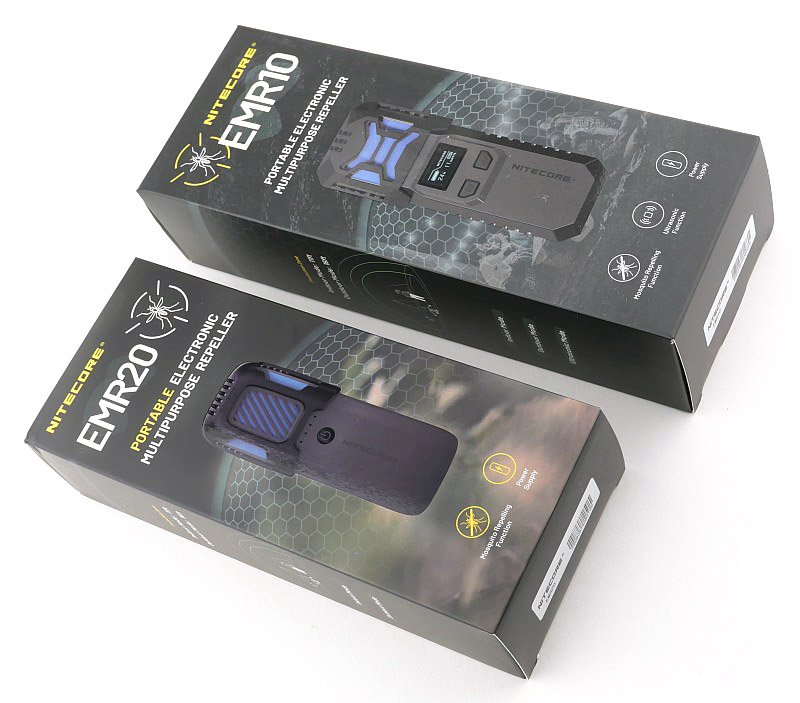
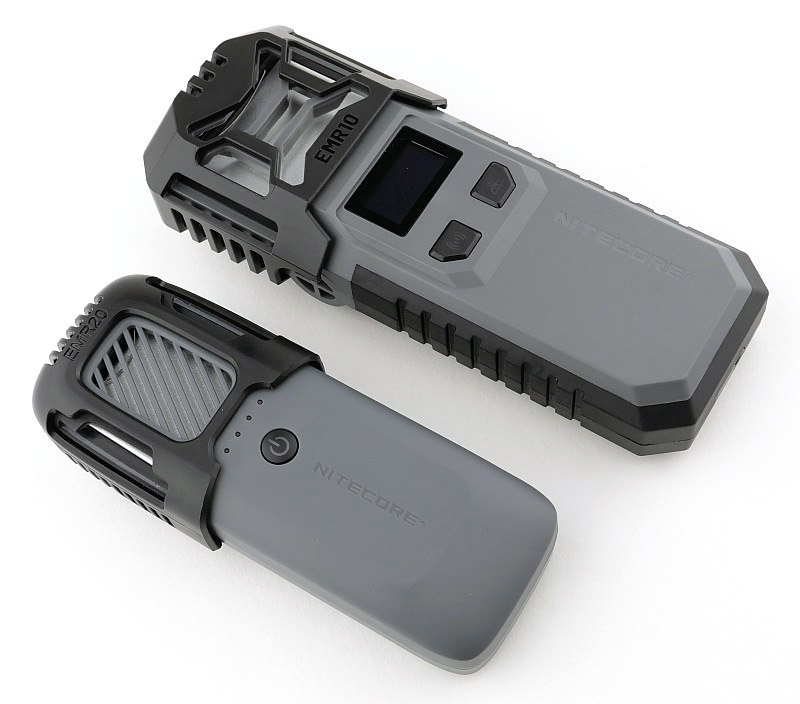
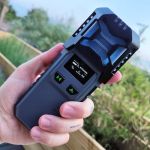
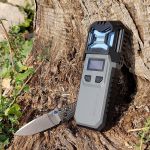
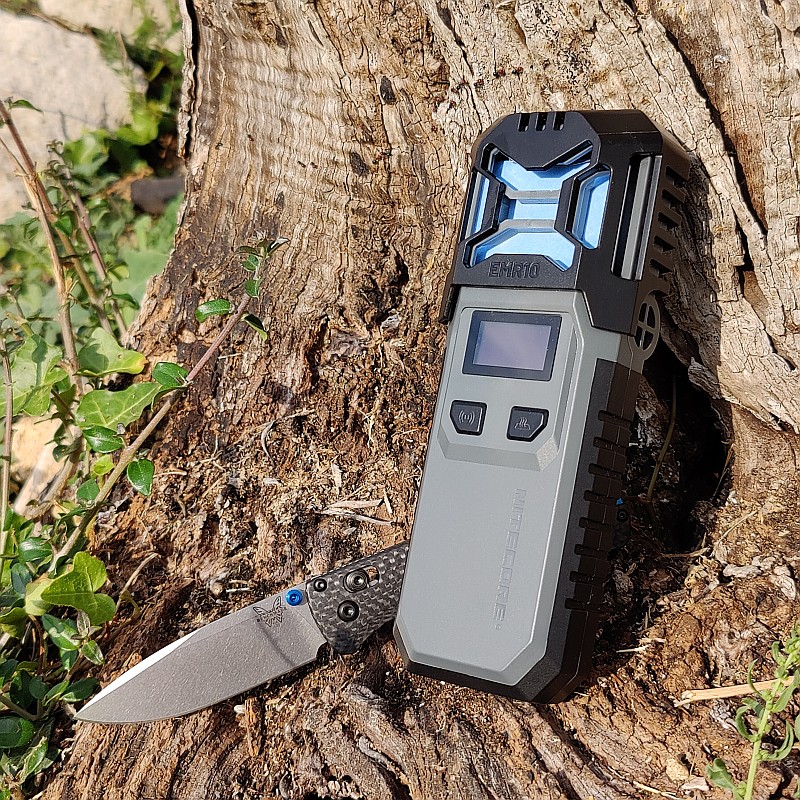
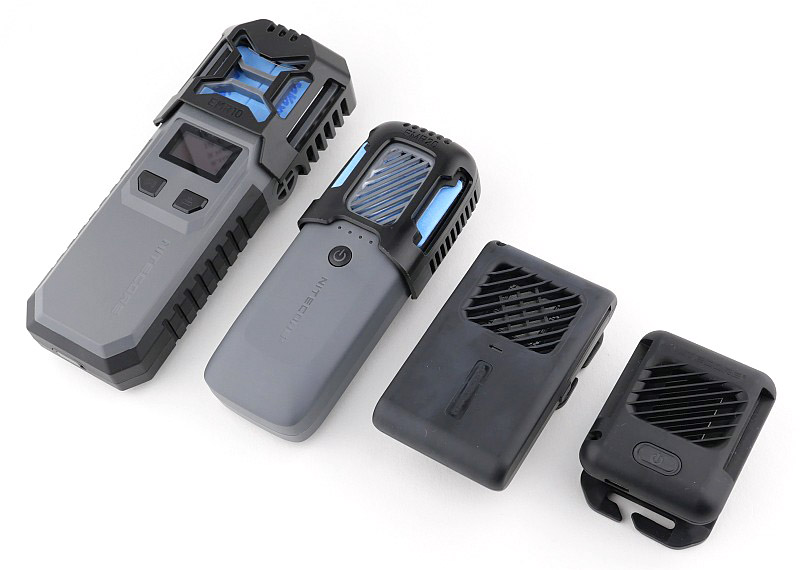
With the EMR05 and EMR06 bringing you ultra-portable versions of insect repellers, you can see just how much smaller they are compared to the EMR10 and EMR20.
Review Videos

Starting with a short format sixty second review:


Onto a full video review covering many more details:


A few more details:

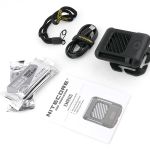
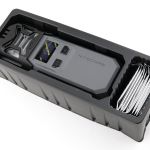
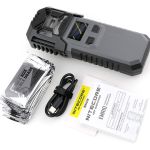
What’s in the box?:
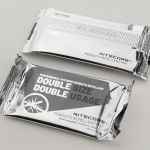
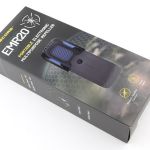
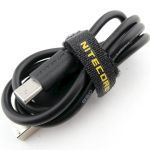
Both the EMR05 and EMR06 are covered here. Each has a USB-C cable, wrist lanyard, and some repellent mats.


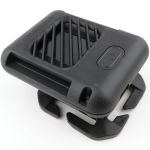
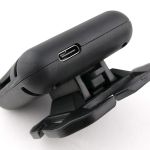
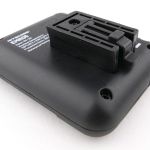
A good look round the EMR05 – Things to look out for here are:
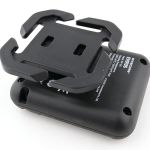
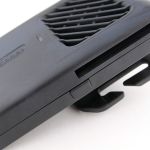
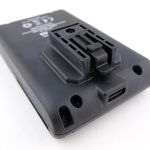
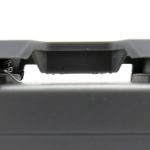
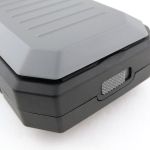
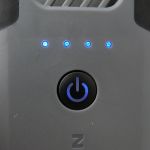
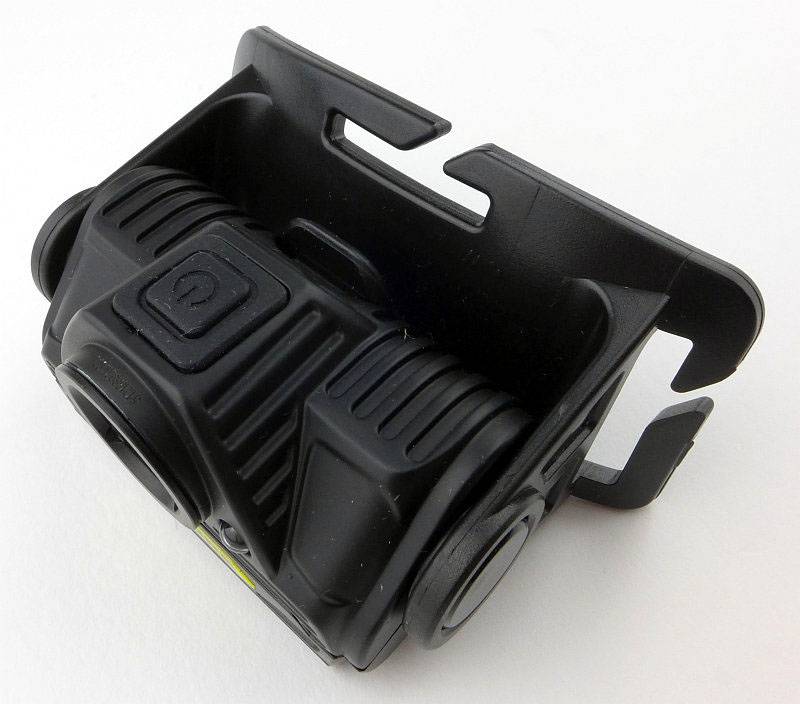
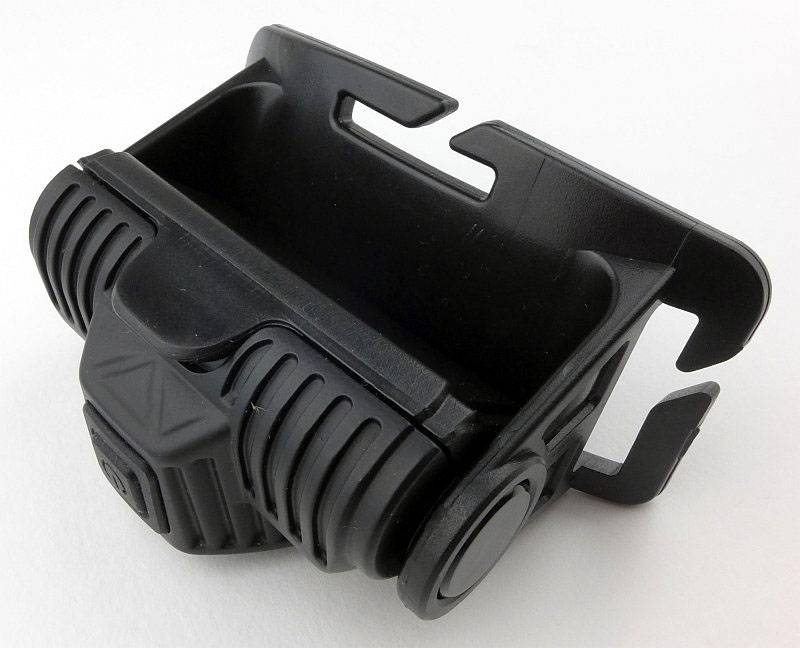
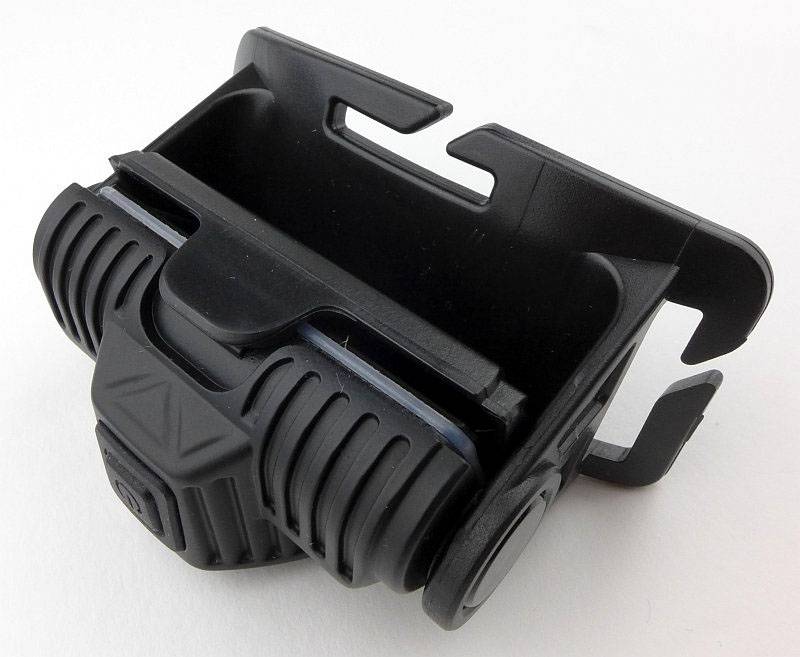
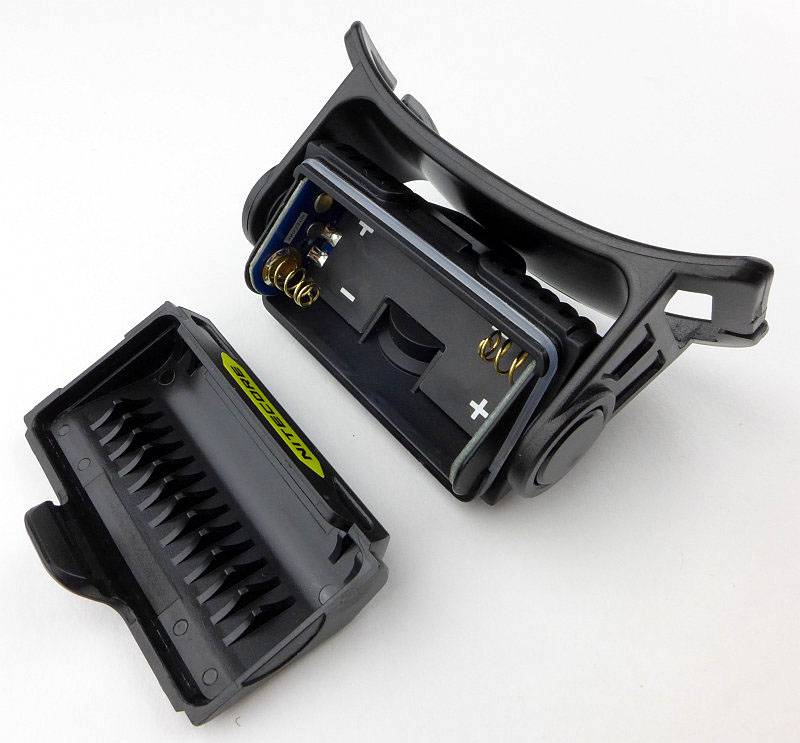
The EMR05 is keeping things to the bare minimum. A power switch with indicator light, the slot for the repellent mat, USB-C port for power and a mounting system. Nitecore’s MOLLE mount system is really neat and effective.


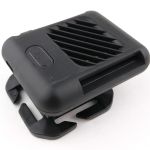
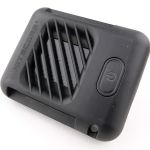
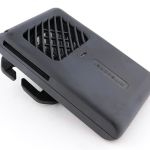
A good look round the EMR06 – Things to look out for here are:
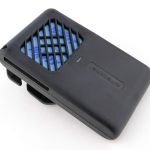
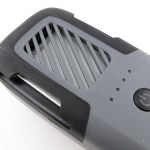
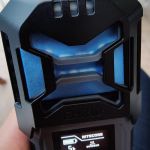
The EMR06 introduces a built-in battery while otherwise similarly keeping things to the bare minimum. A power switch, indicator light, the slot for the repellent mat, USB-C port for charging and a mounting system. Nitecore’s MOLLE mount system is the same here, so you can see the increased size of the EMR06, yet it is still very compact.


Technical Testing:
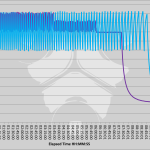
Both EMR units were setup with a modified repellent mat that held a thermocouple probe under it and positioned over the heating plate. This logged the temperature during the run.

Some notes on the graphs:
The EMR06 was logged first, then the EMR05. About halfway through the EMR06 measurement, my thermocouple data logger started to include a lot of noise from the optical USB PC link. When no logging was taking place the readings were consistent, but as soon as the logging was turned on the readings showed noise. So the second half of the EMR06 trace has noise, but if you ignore the noise on the trace you can see the underlying trend of temperature variation during the run. The behaviour of the EMR06 did change throughout the run.
For the EMR05, the noise is present for the entire run, but you can still clearly see a different temperature control profile to the EMR06.
Remember that the EMR05’s runtime depends on the input power source, so here is just stopped as there was enough run to see its behaviour.

In the second graph the view is zoomed in for the first 30 minutes of the run to show the temperature control profile of each unit better.

Also included in the section are the measurements of the operating current for the EMR05, and the charging current for the EMR06. The EMR05 is shown during the temperature logging measurements while drawing power from a Nitecore power bank, and with the thermocouple in place.


What it is like to use?
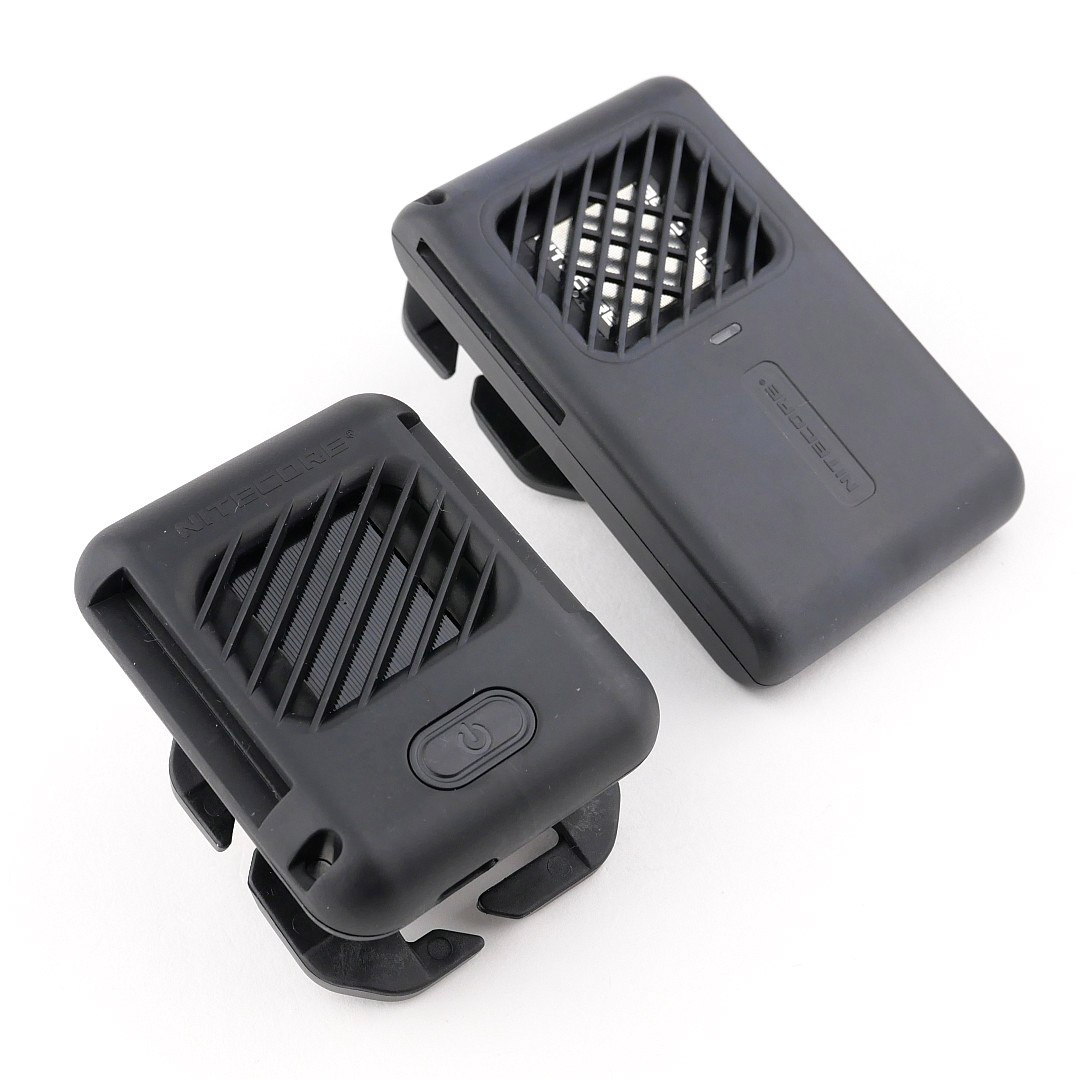
Compared to the previously reviewed EMR10 and EMR20, these two units are so small and light, why wouldn’t you carry them? Clipped to your bag, you don’t even notice you are carrying them.

Nitecore make and supply double size repellent mats. This is clearly the easiest way to load up the EMR05 and EMR06. It is possible to use two standard size mats instead giving you more flexibility.

The EMR05 needs a power bank to run from. It is highly likely you would be carrying you power bank of choice anyway, for charging various items, so with the EMR05, you can just run this from any power bank you happen to have, or a plug-in charger if you are in a hotel. I’m carrying the Nitecore SCL10 power bank as it is (amazingly) also a superb video light.


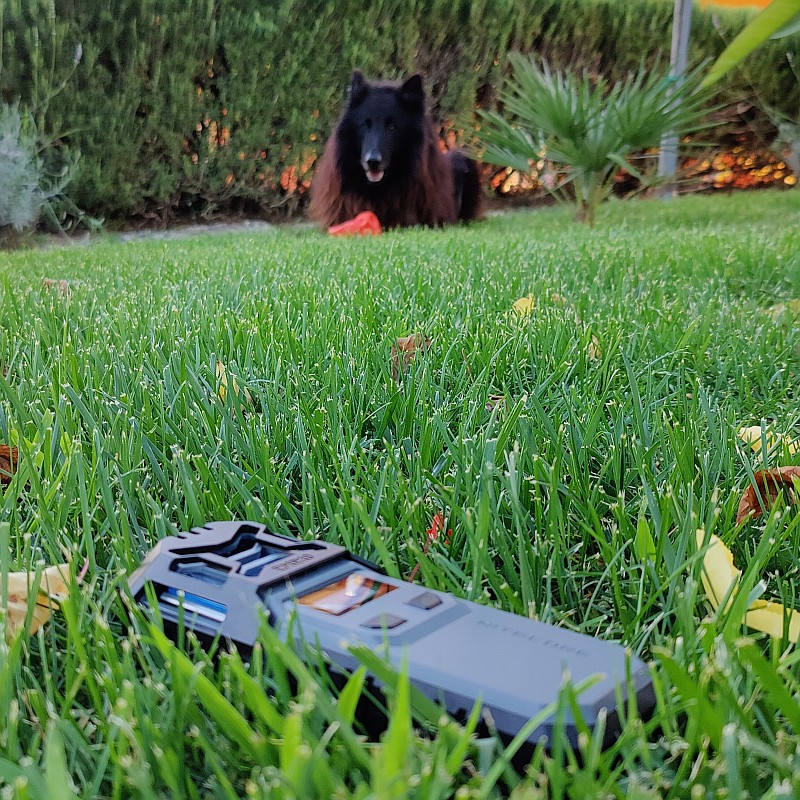
I’ve been using both the EMR05 and EMR06 in a variety of indoor and outdoor locations carried separately or clipped onto a bag.

So how did they do?

Firstly, with me being apparently the finest of dining for mosquitos, if they are determined enough, you will still get bitten; I did. I’ve been bitten when covered in deet, so using repellent mats outdoors might deter some, but is not absolute protection.

It is not at all possible to properly measure the effectiveness of these repellers as the number of bites will also depend on the time, temperature, and hatching of the insects, so this can be impressions only.

Assuming the mats themselves are effective, I have been aware of the aroma coming from the mats. Considering this is outdoors, that is reassuring. Effectiveness is so subject to wind direction and strength, so you might not actually have any cover of the repellent and insects might reach you undeterred.

NOTES on the repellent mats:

There are a few different active ingredients used in repellent mats, and these are also frequently in combination with Piperonyl butoxide. Prallethrin, Transfluthrin and D-Allethrin are the most common with Nitecore’s MRM10 Mosquito Repellent Mats using Prallethrin.

Piperonyl butoxide (PBO) is a man-made pesticide synergist. By itself, PBO is not designed to harm insects. Instead, it works with bug killers to increase their effectiveness. PBO is often combined with natural pyrethrins or man-made pyrethroids. It has been used in pesticide products since the 1950s, when it was first registered in the United States.

A repellent mat needs to be changed when it turns white. You can use Repellent Mats for a shorter period of time than the manufacture specifies and they will still be just as effective. However, if there is going to be several days between usages, you might want to keep the mats in their foil packaging or in a sealed plastic bag between uses.

Just like I wanted with the larger EMR10 and EMR20, the one feature I wish they both had was an auto-off timer. Once you turn on either one of them, they will run until the battery (or power bank) is flat or you turn it off. I found that treating at critical times was more important than all night and I would have preferred to be able to fall sleep with the repeller turning itself off after an hour or two and leaving power to run on another night.

While using the EMR05 and EMR06 I have been bitten. I am convinced I would have been bitten more without them. The most difficult aspect of their use is the protection zone they can provide. If you are walking, then the repellent vapour is trailing after you and not surrounding you. If there is wind, the repellent is blown away. In instances where you are not moving and there is wind, you need to put the device a few meters away from you and up-wind.

Some of the better results are for smaller or enclosed areas. Treating a tent, or a hammock net are idea uses. While on holiday, using it in a hotel or guest room works well.

Review Summary

The views expressed in this summary table are from the point of view of the reviewer’s personal use. I am not a member of the armed forces and cannot comment on its use beyond that covered in the review.

Something that might be a ‘pro’ for one user can be a ‘con’ for another, so the comments are categorised based on my requirements. You should consider all points and if they could be beneficial to you.

I’m trying something slightly different and starting with what doesn’t work so well, so I can finish on a more positive note.

_______________________________________________
What doesn’t work so well for me
_______________________________________________

No auto-off timer.

_______________________________________________
Things I like
_______________________________________________

Ultra-Portable compact outdoor insect repellent devices!
Double size repellent mats (and able to take two standard mats).
Versatile MOLLE mount system.
USB-C ports on both.
EMR05 can run from any power bank.
EMR06 can run/charge from any power bank.
EMR06 has a small built-in battery allowing 3 hours independent use.
 
Discussing the Review:
Something new – will it work? A Tactical Reviews Subreddit.
TacticalReviewsChat on Reddit
Please visit there and start/join the conversation.

Gear Review: Nitecore EMR10 EMR20

In this review of the Nitecore EMR10 and EMR20 portable mosquito repellers / powerbanks, we take a detailed look at all aspects of their performance and function.

The EMR10 and EMR20 are two new devices from Nitecore combining portable insect repellers with a powerbank. The EMR10 has ultrasonic repellent, a repellent mat heater and a 10,000mAh powerbank, and the EMR20 is slightly smaller and simpler but without the ultrasonic function.

If, like me, you protect everyone else from mosquito bites, by being the one the mosquitoes make a beeline for, then you may be as pleased as I am to find the new Nitecore EMR10 and EMR20 portable insect repeller devices.

The thermal runtime graphs for these units are a first for Tactical reviews with the final graphs having 3500 manually entered data points!

Making his first appearance below is “Stoppo”, Tactical Reviews’ “don’t do that” guardian. Mosquitos beware, armed with the EMR units Stoppo says NO!

Review Videos

Starting with a short format sixty second review:


Onto a full video review covering many more details:


Looking closer at the EMR devices:

Both units boxed and unboxed, before we go into the finer detail.

What’s in the box – EMR10:
Along with the main unit are a charging cable, instructions and 10 of the double-size repellent mats.


A good look round the EMR10 – Things to look out for here are:
Of the two, it is a bigger and more feature packed unit, with the EMR10 there is a lot to see.
The OLED screen has a protector you need to take off. Notice the slider on the bottom, we’ll come back to that. Molded into the rubber section on the sides are some grip grooves. On each side are small ultrasonic speakers that emit a dual frequency repelling sound. On the back is a metal wire clip that is designed to work with MOLLE / PALS, pocket or belt use. The top has a USB-C port for charging and for use as a powerbank.
The repellent mat heater/holder has a retaining spring wire to keep the mat from falling out.
Then onto the EMR10’s biggest trick, the removable twin 21700 cells.


What’s in the box – EMR20:
Along with the main unit are a charging cable, instructions and 10 of the double-size repellent mats.


A good look round the EMR20 – Things to look out for here are:
The EMR20 is a smaller and simpler unit which has no grip texturing or screen. Instead it has a set of four indicator lights plus the power switch has dual coloured illumination. On the back is the same metal wire clip used by the EMR10 that is designed to work with MOLLE / PALS, pocket or belt use. The top has a USB-C port for charging and for use as a powerbank.
The repellent mat heater/holder has a retaining wire spring to keep the mat from falling out.


Batteries and output:

The following section is all the technical testing for both units. This includes temperature measurements for the repellent mat heater, plus power curves for charging each unit, and the powerbank output for each unit.

First up is the repellent mat heater output for both units. The test was carried out on the highest, ‘outdoor’ mode which takes the heater to the highest temperature.
The temperature measurement was taken by inserting a K-type thermocouple under a used mat to keep it pressed tightly against the heating plate and insulate it. Another ambient temperature thermometer was also recorded, making it three temperature measurements being monitored.
For this dual run I had to set a camera on time lapse photo to take a photo measurement every 30s. Unfortunately I had no computer logging so had to manually type each measurement – over 3500 of them!
The resulting graphs are very interesting. They show the temperature varying between an upper and lower limit. The EMR10 keeps the lower limit higher than the EMR20 and as a result uses more power and has a lower runtime. The graphs do speak for themselves, so take a bit of time to read these.
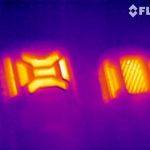
Also included are some thermal images of the EMRs during this test taken with a FLIR thermal camera.


The next gallery shows the USB input and output graphs for each unit. Charging graphs are from empty to full. The powerbank graphs show each unit charging a Oneplus phone on fast charging (9V output); they are not the full capacity of the powerbank, just to show the output characteristics which are excellent.

What it is like to use?

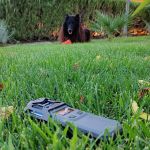
I want to start this section by introducing my very helpful assistant, Klaus. One of the things I was worried about with the EMR10’s ultrasonic repeller is if it would distress animals. Dog whistles are also ultrasonic (above human hearing range) so I needed to use the EMR10 around a dog to see what would happen. Not once did Klaus seem to react at all to the EMR10 negatively, or even pay any attention to it, so assuming he could hear it, it didn’t bother him. A good start.

Nitecore make and supply double size repellent mats. This is clearly the easiest way to load up the EMR10 and EMR20. It is possible to use two standard size mats instead giving you more flexibility.

You can see in one of the photos how the mats go almost white when the active ingredient has evaporated. The photo shows areas on the mat around the heat shielding that have gone white on this part used mat.

An observation relating to the EMR10’s display and capacity indication is that I’ve found the percentage show to not be accurate at all times. You can use the EMR10 while it is on charge. While doing this, the battery percentage always stays lower than it really is. You can see the input power as well on the screen and as this gets closer to being fully charged, the input watts gets lower and lower (the example here shows 10W input) but the percentage charge indicates it is much lower than it really is. Once you turn off the EMR10 it recovers and corrects itself. Just something to be aware of and I suspect relates to the charge percentage being based on the cell voltage which will of course be lower while the repeller is turned on.

I’ve been using both the EMR10 and EMR20 in a variety of indoor and outdoor locations carried separately or clipped onto a bag.


So how did they do?

Firstly, with me being apparently the finest of dining for mosquitos, if they are determined enough, you will still get bitten; I did. I’ve been bitten when covered in deet, so using repellent mats outdoors might deter some, but is not absolute protection.

It is not at all possible to properly measure the effectiveness of these repellers as the number of bites will also depend on the time, temperature, and hatching of the insects, so this can be impressions only.

Assuming the mats themselves are effective, I have been aware of the aroma coming from the mats. Considering this is outdoors, that is reassuring. Effectiveness is so subject to wind direction and strength, so you might not actually have any cover of the repellent and insects might reach you undeterred. Where the EMR10 has another string to its bow, is the ultrasonic repeller. The ultrasonic won’t be affected by wind, but having no active ingredient, it again relies on the mosquitos not being determined to bite.

NOTES on the repellent mats:

There are a few different active ingredients used in repellent mats, and these are also frequently in combination with Piperonyl butoxide. Prallethrin, Transfluthrin and D-Allethrin are the most common with Nitecore’s MRM10 Mosquito Repellent Mats using Prallethrin.

Piperonyl butoxide (PBO) is a man-made pesticide synergist. By itself, PBO is not designed to harm insects. Instead, it works with bug killers to increase their effectiveness. PBO is often combined with natural pyrethrins or man-made pyrethroids. It has been used in pesticide products since the 1950s, when it was first registered in the United States.

A repellent mat needs to be changed when it turns white. You can use Repellent Mats for a shorter period of time than the manufacture specifies and they will still be just as effective. However, if there is going to be several days between usages, you might want to keep the mats in their foil packaging or in a sealed plastic bag between uses.

Having used them a lot, the one feature I wish they had was an auto-off timer. Once you turn on either one of them, they will run until the battery is flat or you turn it off. I found that treating at critical times was more important than all night and I would have preferred to be able to fall sleep with the repeller turning itself off after an hour or two and leaving power to run on another night. On this subject, the EMR10 allows you to either only run on one of the 21700 cells, or carry spares.

The clip has a one-way design where it fits on much more easily than taking it off. Good for not losing it, but on occasion puts up a bit of a fight to take it off, especially from MOLLE more than from a pocket.

Initially I was dubious about how much I would want to use the powerbank function when I want the power for insect repelling. But, after travelling by air a few times with these devices, the use comes from having a powerbank to use on the plane, and once getting to where I really need the repeller, then recharge and only use it for the repellent. So like this, the two functions allow for infrequent use as a powerbank while travelling, but then change to only using them as repellers when not travelling.

While using the EMR10 and EMR20 I have been bitten. I am convinced I would have been bitten more without them. The most difficult aspect of their use is the protection zone they can provide. If you are walking, then the repellent vapour is trailing after you and not surrounding you. If there is wind, the repellent is blown away. In instances where you are not moving and there is wind, you need to put the device a few meters away from you and up-wind.

Some of the better results are for smaller or enclosed areas. Treating a tent, or a hammock net are idea uses. While on holiday, using it in a hotel or guest room works well.

Review Summary

The views expressed in this summary table are from the point of view of the reviewer’s personal use. I am not a member of the armed forces and cannot comment on its use beyond that covered in the review.

Something that might be a ‘pro’ for one user can be a ‘con’ for another, so the comments are categorised based on my requirements. You should consider all points and if they could be beneficial to you.

I’m trying something slightly different and starting with what doesn’t work so well, so I can finish on a more positive note.

_______________________________________________
What doesn’t work so well for me
_______________________________________________

No auto-off timer.
Clip can be awkward to remove.
USB-C port cover needs a firm hand to get it out of the way.

_______________________________________________
Things I like
_______________________________________________

Portable outdoor insect repellent device!!!
Double size repellent mats (and able to take two standard mats).
Powerbank function with rapid charge 9V output supported.
Up to 18W input power when charging.
Indoor and Outdoor modes.
Secure one-way clip.
EMR10 has replaceable cells.
EMR10 can run on one 21700 cell.
EMR10 OLED display is informative.
EMR10 also has an ultrasonic repellent.
Removable secondary heat shield.

 
Discussing the Review:
The ideal place to discuss this review is on the Tactical Reviews Facebook Page
Please visit there and start/join the conversation.

Light Review: Nitecore TM20K – 20,000 Lumens!

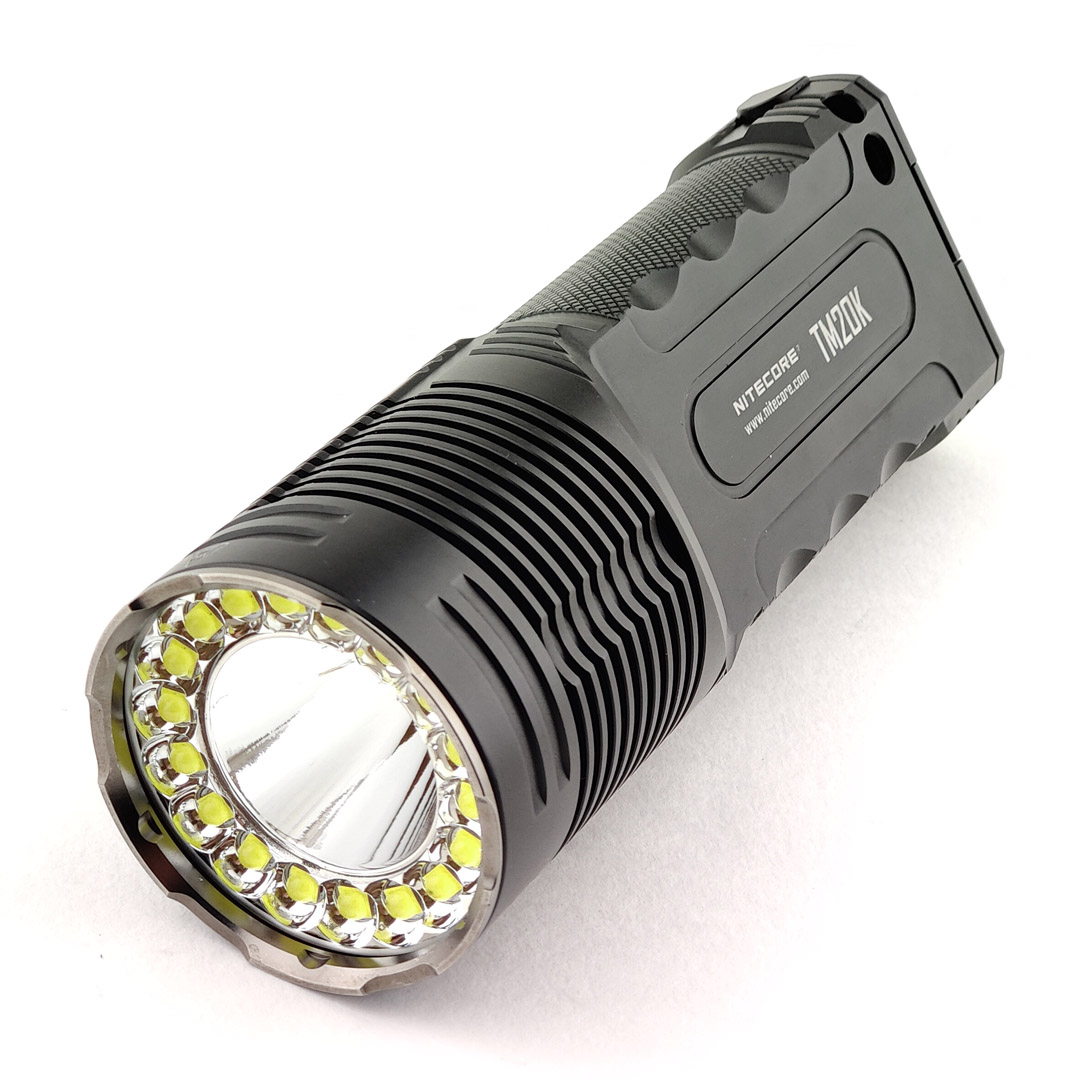
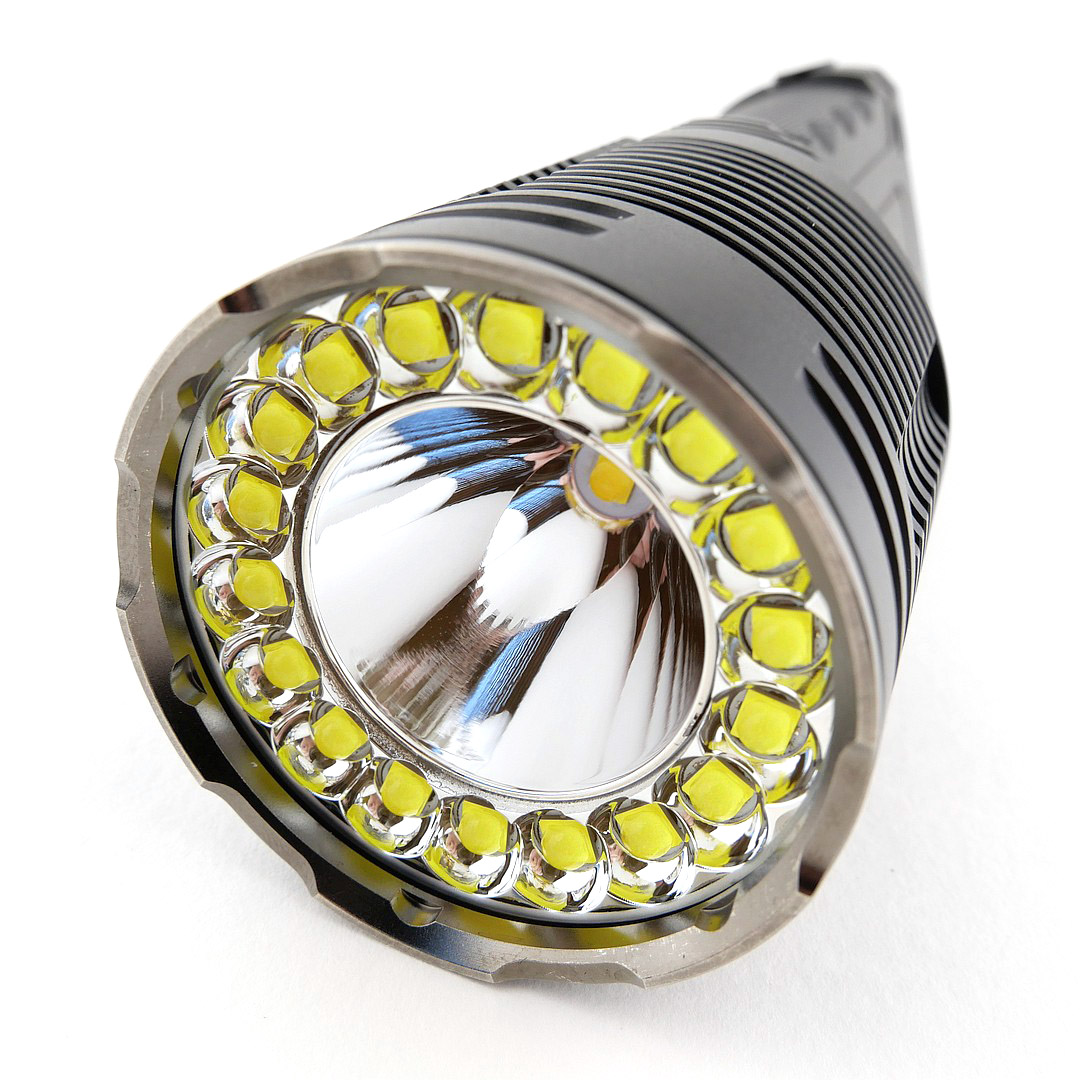
Nitecore’s Tiny Monsters have always been punchy performers, from the first one I tested, (the TM11) all the way through to another Monster light that is Tiny compared to its output. Join me in this Nitecore TM20K review, 20K being the 20,000 Lumens, yes, 20,000 Lumens output from a palm sized light. As well as a look round the TM20K, this review includes output measurements, runtime graphs, and beamshots to give you the true story of its performance. It really is a Monster!

Video Overview

This video is an overview of the TM20K with a first look over the light before we get onto more details and the measurements.


What is in the box?:
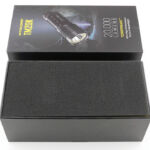
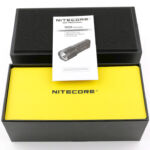
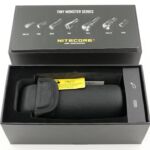
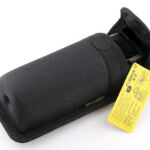
This gallery shows the TM20K’s packaging and what is included. The holstered TM20K, a USB-C charging cable, a lanyard, and a thin cord for threading the lanyard.
There is also a look over the belt holster and how the top flap opens.


A good look round the TM20K – Things to look out for here are:
First, do not turn the TM20K straight on out of the box! There is a blue protective plastic film over the lens that will melt and make a mess of the front of the light, so make sure to take this off.
The body of the TM20K is a single piece, and this is not broken by any battery doors, as the TM20K has a built-in battery and is USB-C rechargeable.
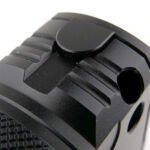
The lanyard hole is next to the charging port and mode switch. On the opposite side to the mode switch is the selector toggle switch with lockout setting.
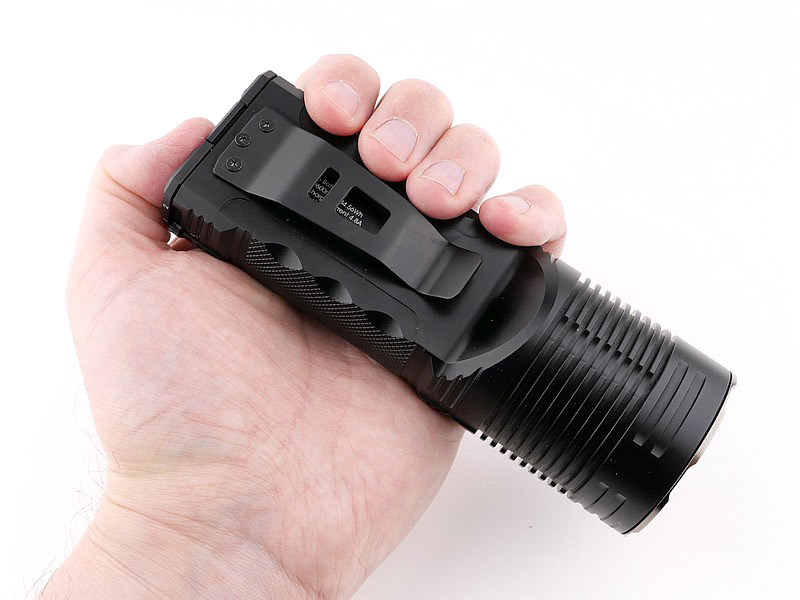
One of the flat sides has a wide steel belt clip. Also shown are the small heat sink fins and grip knurling.
On the tail of the TM20K you find the power button, tactical switches and the charging port.


The beam

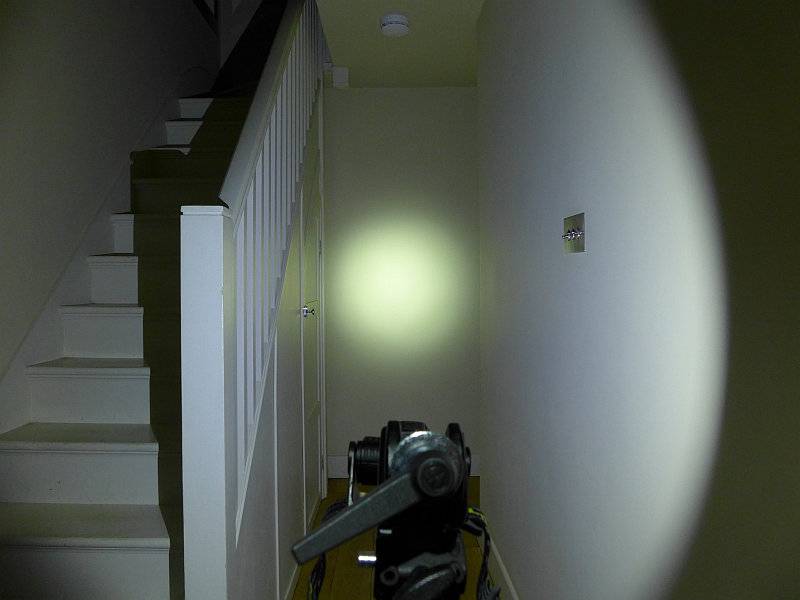
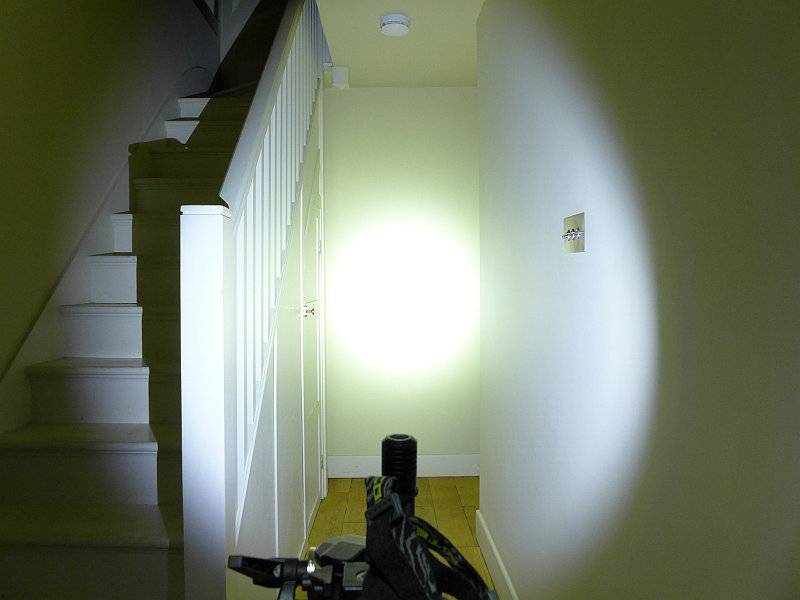
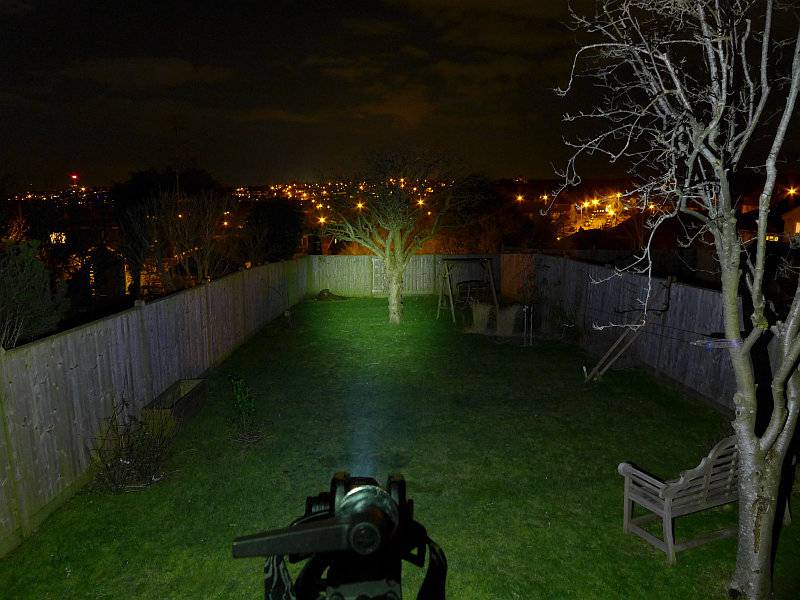
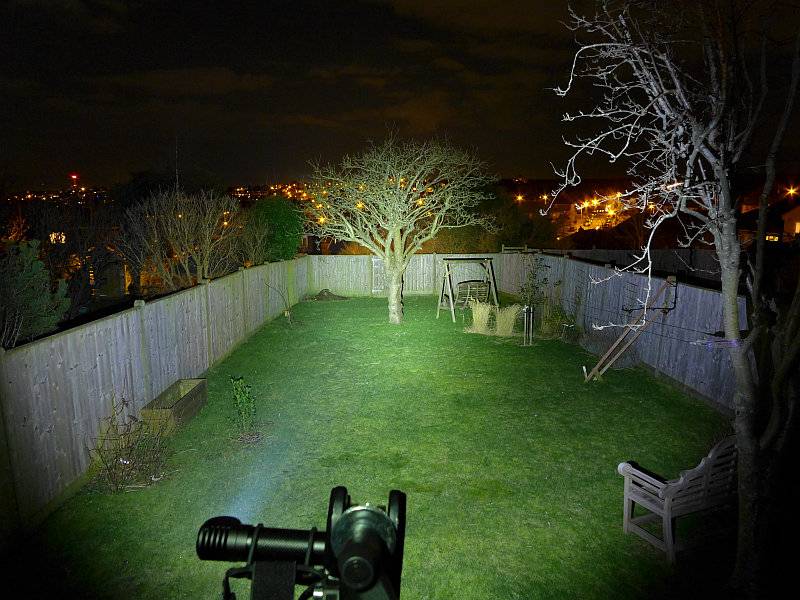
Please be careful not to judge tint based on images you see on a computer screen. Unless properly calibrated, the screen itself will change the perceived tint.

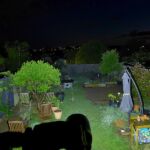
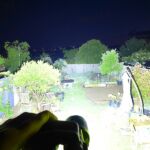
The indoor beamshot is intended to give an idea of the beam shape/quality rather than tint. All beamshots are taken using daylight white balance. The woodwork (stairs and skirting) are painted Farrow & Ball “Off-White”, and the walls are a light sandy colour called ‘String’ again by Farrow & Ball. I don’t actually have a ‘white wall’ in the house to use for this, and my wife won’t have one!

For the beamshot comparison I used three output modes. The Daily mode ‘Floodlight’ and ‘Spotlight’ special output levels plus the ‘Turbo’ 20,000 Lumen mode.

Indoors are only the ‘Floodlight’ and ‘Spotlight’ modes as Turbo is too bright. Then moving outdoors with the same modes (around the 2,000 Lumen level), and then with the same exposure, the Turbo output. 20,000 lumens really lights things up!!


Batteries and output:

The TM20K runs on a built in battery made of 2 x 21700 4800mAh cells.

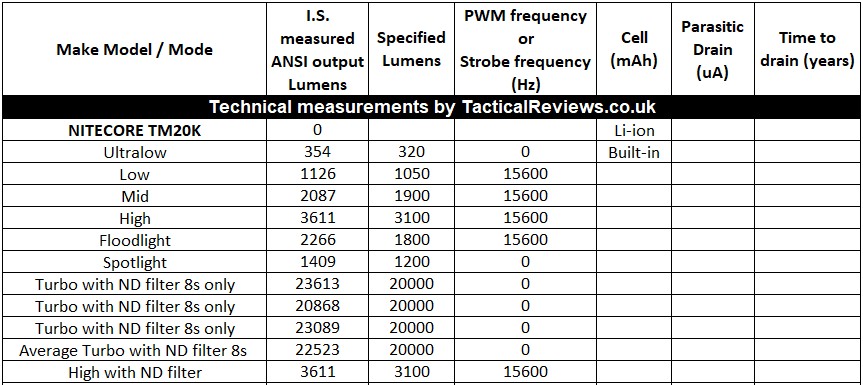
Please note, all quoted lumen figures are from a DIY integrating sphere, and according to ANSI standards. Although every effort is made to give as accurate a result as possible, they should be taken as an estimate only. The results can be used to compare outputs in this review and others I have published.

19 XP-L2 LEDs to blast out 20,000 lumens.

When working with any lights with an output over 5,000 lumens, I need to make modifications to the integrating sphere. For the TM20K, due to the extreme output and small size, it is limited to short bursts of the 20,000 lumen Turbo output. So the output table is a little different to most of the reviews I carry out.

Half the table is normal, then where it starts to list an ND filter, this is a ‘neutral density’ filter that simply cuts the light reaching the sensor by approximately 90%. Reference readings are taken to ensure the filter factor is correct, and a set of measurements were taken. With the short 8s burst of Turbo, several readings were taken and averaged. All of this is included in the table.

The graphs in this gallery show a few different things. First is a trace of the charging current consumed when charging the TM20K.
Next up is the runtime trace for High output. Due to the Turbo output being a burst mode only, for the full runtime, the graph shows the output for the high output level.
Now we have two copies of the same graph, the first shows all the traces taken to check the behaviour during the ANSI 30 second measurement time.

Shown first is an initial ‘High’ ANSI output trace (Section 1), then the Turbo button held for 30s (Section 2) where the output drops to High after 8s. Section 3 shows what happens when you intentionally use Burst, Burst, Burst until the TM20K won’t output Turbo any more.

As the ANSI output should be measured at 30s, the 8s Turbo output would mean ‘ANSI Turbo’ measurement was 3611 lm, so this means we can’t actually state an ANSI Turbo output and instead I have gone for ‘max at switch on’ for the value of Turbo, and this is what was used in the output table.


The TM20K in use

20,000 lumens in the palm of your hand, here it is:

And as a starting point I have to say the TM20K is scary bright! As well as that it heats up so quickly on Turbo you really know this is pumping out the power.

Being about the size of a 2x 18650 light used to be, the TM20K is noticeably heavier and more dense than this older class of light, a sign it is packed with performance.

The supplied holster is very nicely made and is a rigid style with flip-top lid style opening. When belt mounted you need to pull the holster body away from you to allow the lid to hinge open far enough to get the TM20K out. This might have worked better flipping open away from you. The magnetic closure is a nice touch and allows for silent opening (without the ‘tearing’ sound of Velcro).

One of the most important features for a light like this is the lockout; yes the ‘not outputting any light’ feature. Absolutely critical as the output is so high, if contained it will be dangerous.

Lockout should always be easier to activate than to deactivate, and Nitecore have made it very easy. Slide the toggle switch to the padlock and once it has been there for 2s the TM20K is locked.

While locked, if you slide the toggle to 1 or 2, the power button flashes five times to let you know it is locked. Unlocking requires two switches to be used at the same time. Holding the mode switch down as you slide the toggle switch from lockout to position 1 or 2 with the beam turning on briefly to let you know unlocking was successful.

All of that to talk about the TM20K not outputting anything, well, you will be very happy about this feature.

In terms of handling and the interface, although the TM20K lists ‘tactical’ modes, the layout of buttons and ease of access to them would not be my choice for use in a pressured situation. General use, and even search and rescue use, but not reaction or time critical scenarios where you might miss buttons or press ones you didn’t mean to.
Onto those 20,000 lumens. You get a burst of 8s at this level. If you immediately reactivate Turbo, you can do this two further times (three times before a cooling off period) where the thermal protection prevents the TM20K from going above High mode even using the Turbo button. So from cold, 24 consecutive seconds of 20,000 lumen output. Measured and confirmed as shown in the output table and graphs, all from a palm sized light. This is seriously impressive.

Going to the other extreme, I would have preferred a mode lower than 350lm. This is the ‘ultra-low’ mode on the TM20K. Even if you are breaking out the Tiny Monster, there is still a practical lower level for every day use and 350lm is too high, so this is a light to bring out when you want a lot of light.

Considering the size, that performance on High giving a hour of solid output, 45 minutes of which is over 3000lm, does make this a workhorse, even if you ignore the Turbo output.

Not forgetting my previous comments about the tactical mode, the momentary output in this mode is great for searching especially when other people are around and you don’t want to blind them.

My preference is always for removable/replaceable batteries, but the other side to this is the guaranteed performance of the cells chosen by Nitecore to power this Tiny Monster, and the simplification of the design as it doesn’t need a battery door. Being a super high performance light, the cell characteristics are critical, so we can take the built-in cells as a positive point.

20,000 lumens is shocking and astounding from a pocket sized light, well done Nitecore.


Review Summary
The views expressed in this summary table are from the point of view of the reviewer’s personal use. I am not a member of the armed forces and cannot comment on its use beyond that covered in the review.

Something that might be a ‘pro’ for one user can be a ‘con’ for another, so the comments are categorised based on my requirements. You should consider all points and if they could be beneficial to you.

_______________________________________________
What doesn’t work so well for me
_______________________________________________

‘Ultra-low’ mode is still 350 lumens.
Holster lid opening into your body is a bit awkward.

_______________________________________________
Things I like
_______________________________________________

20,000 Lumen burst output.
Excellent Lockout implementation.
Momentary and latching operation.
Fixed Flood and Spot special modes.
Instant access twin Turbo switches.
Very compact for the output performance.
Quality holster included.
19 XP-L2 LEDs.

Tactical Reviews at IWA 2018

This year was the 45th edition of IWA OutdoorClassics at the Exhibition Centre Nuremberg with 1,558 exhibitors and almost 47,000 trade visitors from around the world.
Exhibitors from almost 60 countries and trade visitors from about 130 countries gave the 45th edition of IWA OutdoorClassics even more of an international flavour than last year.

Tactical Reviews was there, and included here is a gallery of products that caught my eye as I went round the vast exhibition. Of course this is only a small taste of what was on show, with excellent products from Pohl Force, MecArmy, Mantis, Luminox, Armourlite/Isobrite, Morakniv, Nordic Pocket Saw, Hultafors, ZT, Victorinox, Leatherman, Fox, Oberland Arms, Buck, SOG, Nitecore, DYX, Wiley X, Spyderco, Chris Reeve Knives and Nordic Heat.
(When viewing the gallery, click on the image to remove the description, click again to bring it back)

Gear Review: NITECORE SC2 Charger and F1 Charger / Powerbank

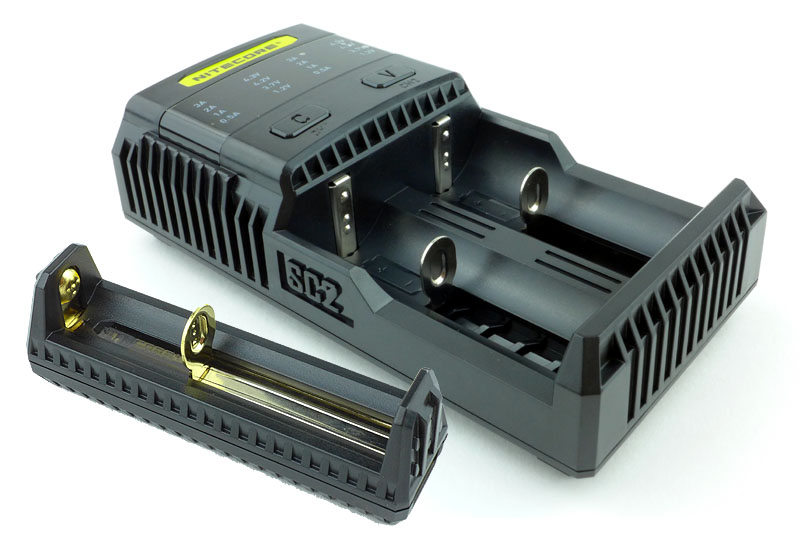
With so many chargers to choose from, it can be difficult to pick one, so you may be looking for those models with a little more to offer. NITECORE’s SC2 and F1 chargers both have extra features that make them stand out, so let’s see what they are.

A few more details of the F1:

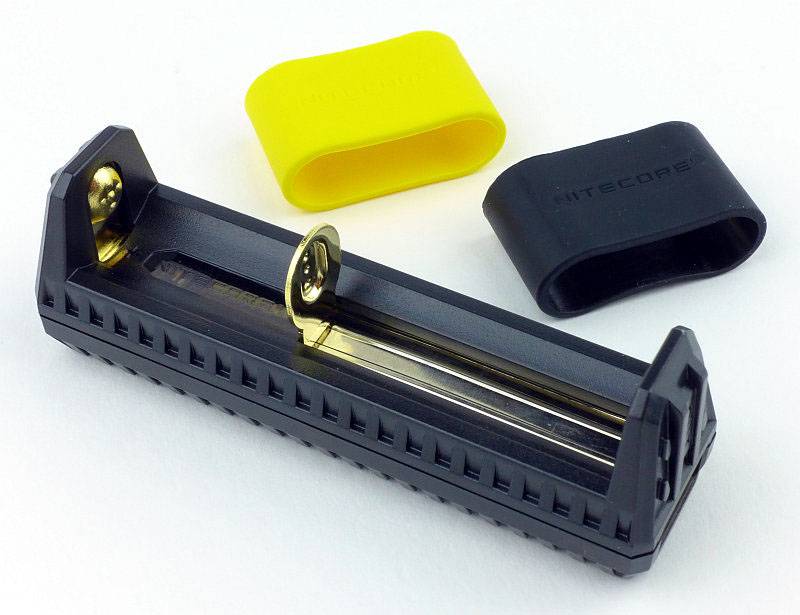
Starting with the smaller F1. Well ‘smaller’ doesn’t do it justice, this is tiny. I must also point out straight away, that this is not just a charger, but it is a powerbank as well. (NOTE: The F1 is only intended for charging Li-ion cells and needs a Li-ion for use as a USB powerbank.)
 photo 01 F1 boxed P1200108.jpg

Along with the F1, you get two rubber bands which are used to secure an 18650 in the charging slot. This is for when you use the F1 as a powerbank and want the cell to stay in place when you carry it.
 photo 02 F1 box contents P1200126.jpg

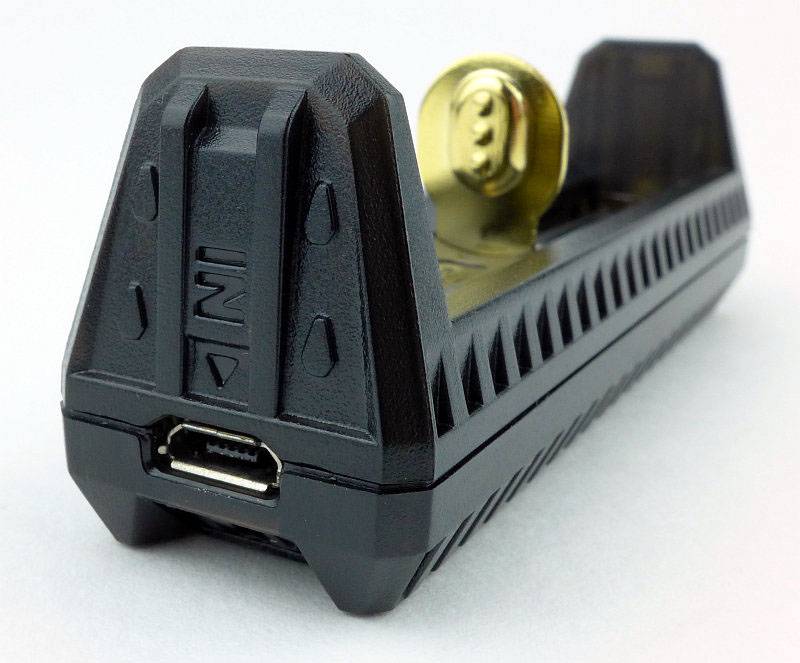
At one end of the F1 is a micro-USB socket which is used for the input power to charge the cell fitted into the F1.
 photo 03 F1 input P1200133.jpg

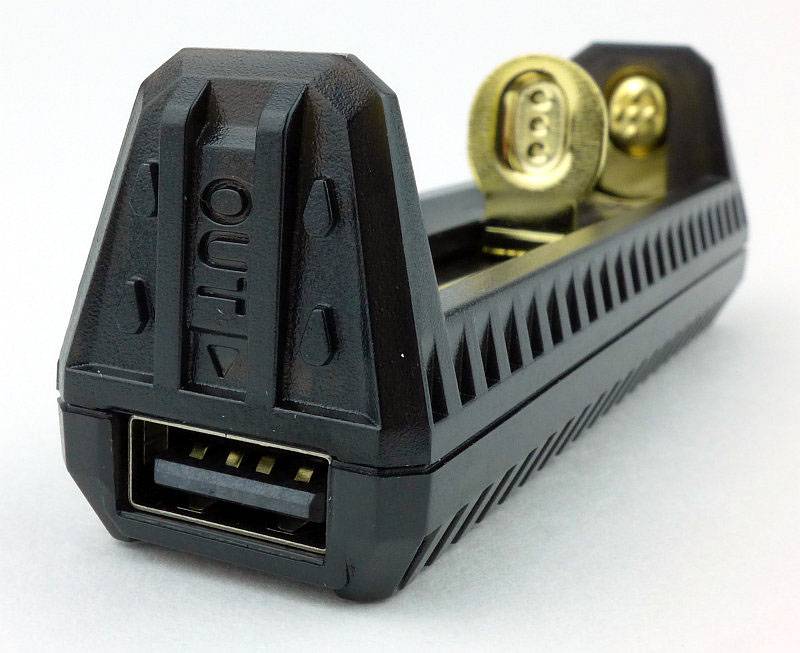
Switching to the other end, the F1 has a full size USB socket which can provide USB power output up to 1000mA.
 photo 04 F1 output P1200135.jpg

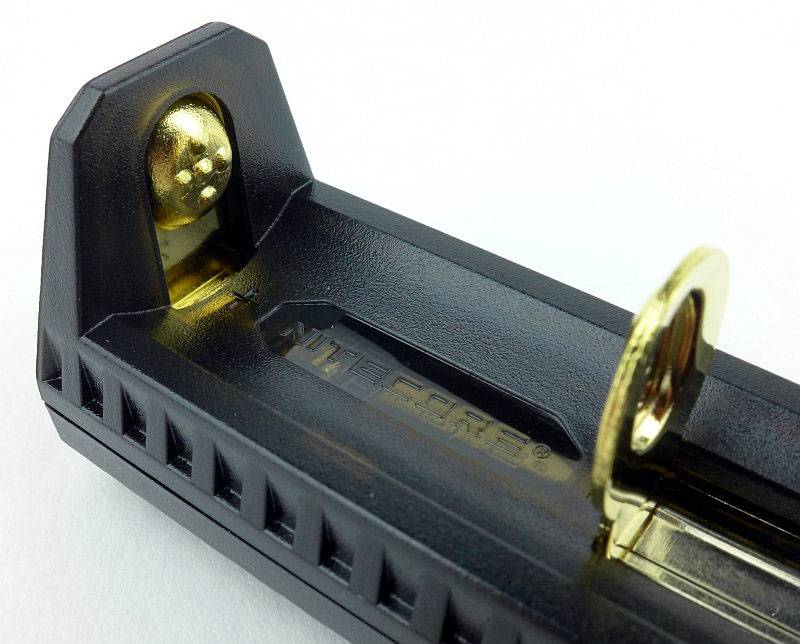
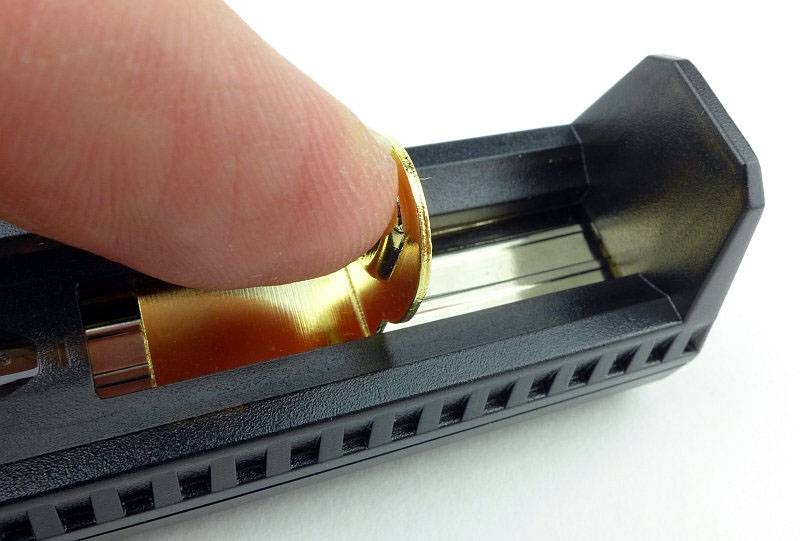
The F1 contacts are gold plated.
 photo 05 F1 contacts P1200140.jpg

With a spring loaded sliding contact, the F1 can be used for any of the following Li-ion cells; 26650/18650/17670/18490/17500/17335/16340(RCR123)/14500/10440.
 photo 07 F1 slider P1200150.jpg

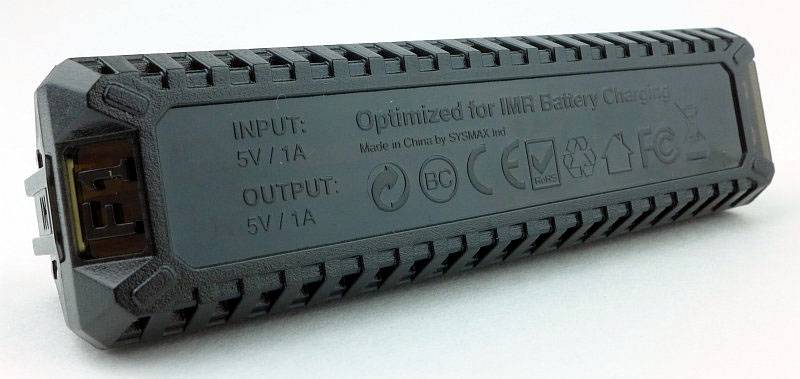
Underneath is basic information about the input/output ratings of this charger/powerbank.
 photo 06 F1 underneath P1200144.jpg

A few more details of the SC2:

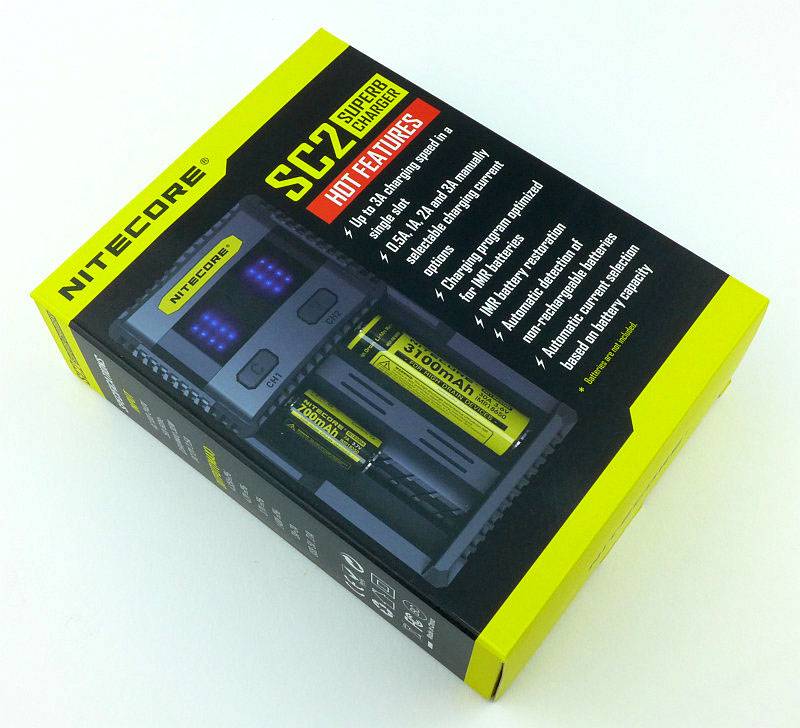
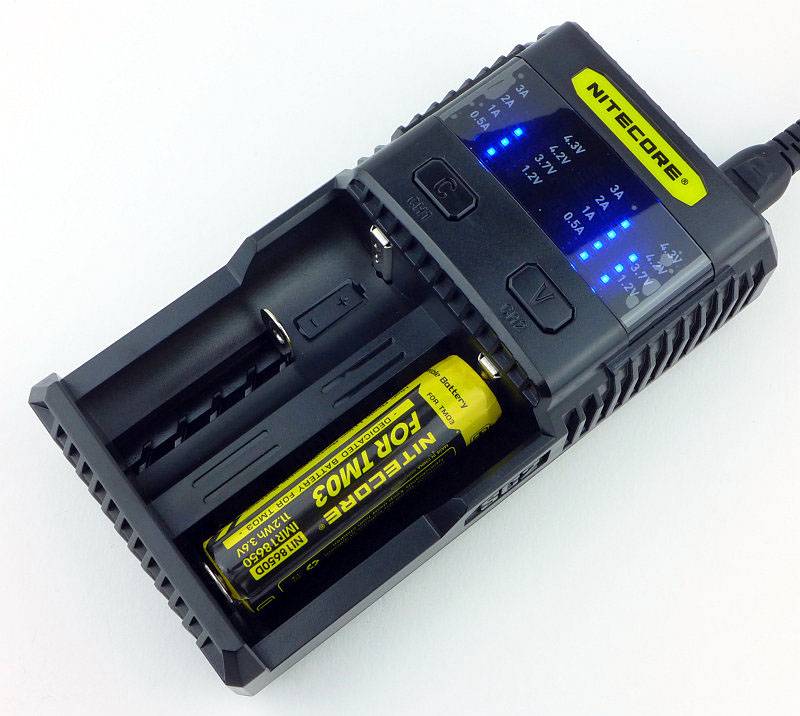
With the SC2 we have quite a step up in power, and one of the headline specifications is a 3A charge current (if using 3A in one slot the other can only provide 2A), ideal for IMR or high capacity cells. This charger is compatible with a huge list of cells including both Li-ion and Ni-Mh cells.
 photo 01 SC2 boxed P1220057.jpg

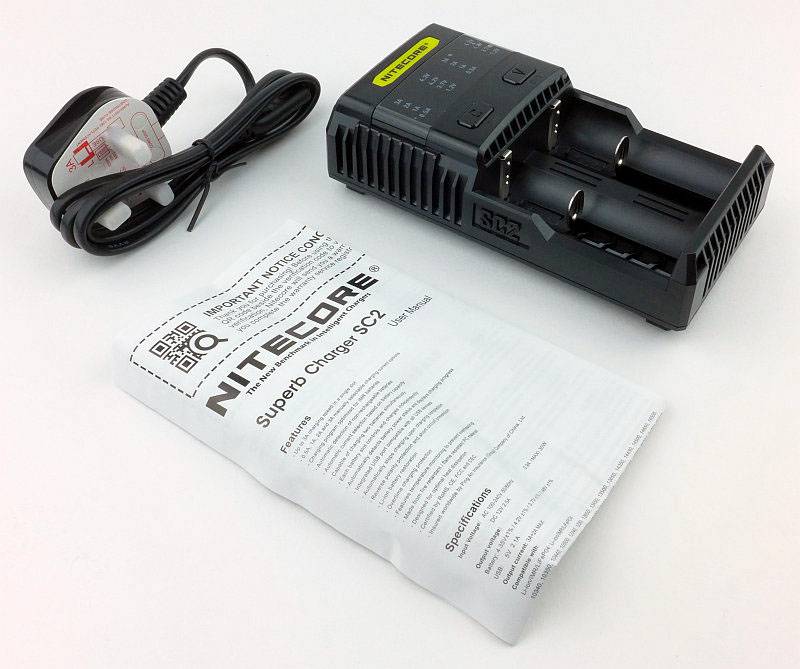
With the SC2 you get a suitable mains lead (in this case a UK plug) and the instructions. Don’t throw those instructions away, you will need them.
 photo 02 SC2 box contents P1220065.jpg

Relatively plain looking the SC2 is full of functionality.
 photo 03 SC2 angle top P1220075.jpg

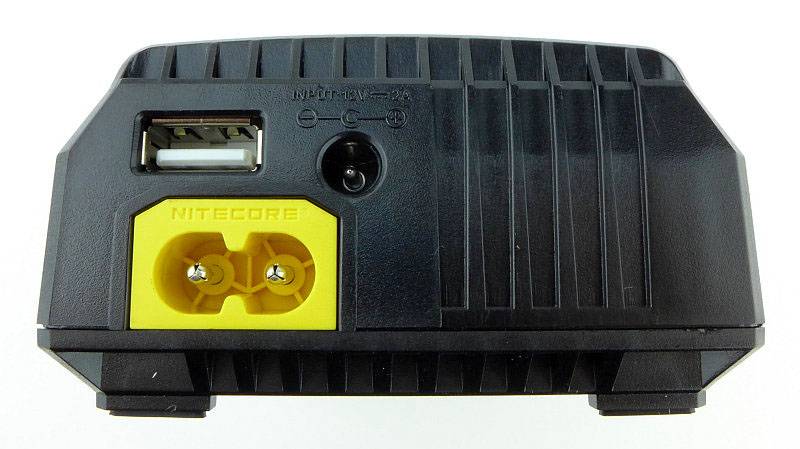
On the top end of the SC2 are the inputs and outputs. The yellow figure-8 socket is for the mains lead. There is also a 12V DC input for use in a car. Above the mains input is a full size USB socket which provides up to 2.1A USB charging output.
 photo 04 SC2 inputs P1220078.jpg

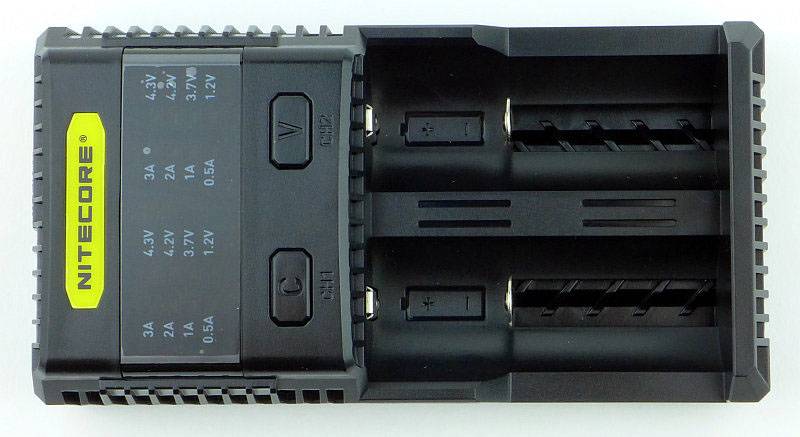
Considering its capabilities, the layout is very simple. There is an indicator panel (lights only, no digits are displayed), two control buttons, and the two slots.
 photo 05 SC2 top P1220083.jpg

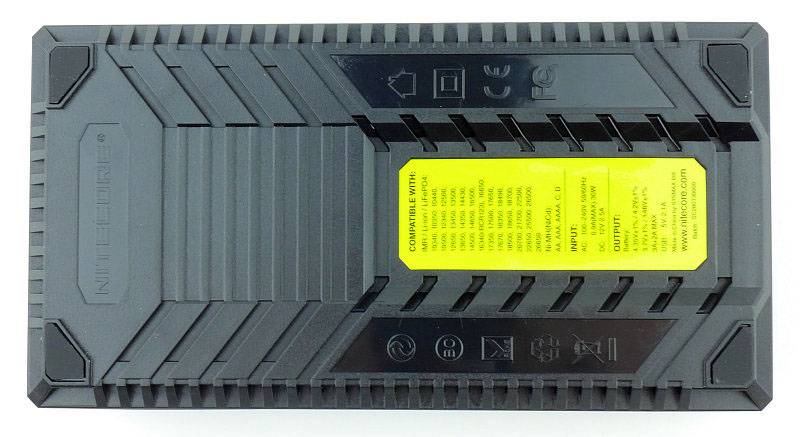
On the underneath there are four rubber feet and the list of supported cells.
 photo 06 SC2 underneath P1220084.jpg

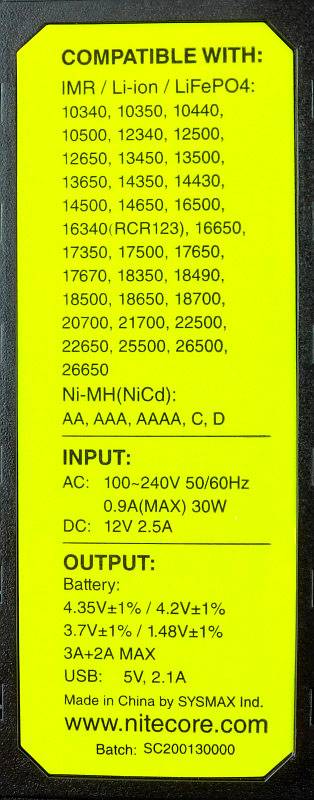
It’s a huge list of supported cells; IMR / Li-ion / LiFePO4: 10340, 10350, 10440, 10500, 12340, 12500, 12650, 13450, 13500, 13650, 14350, 14430, 14500, 14650, 16500, 16340(RCR123), 16650, 17350, 17500,17650, 17670, 18350, 18490, 18500, 18650, 18700, 20700, 21700, 22500, 22650, 25500, 26500, 26650
Ni-MH(NiCd): AA, AAA, AAAA, C, D
 photo 07 SC2 compatibility P1220088.jpg

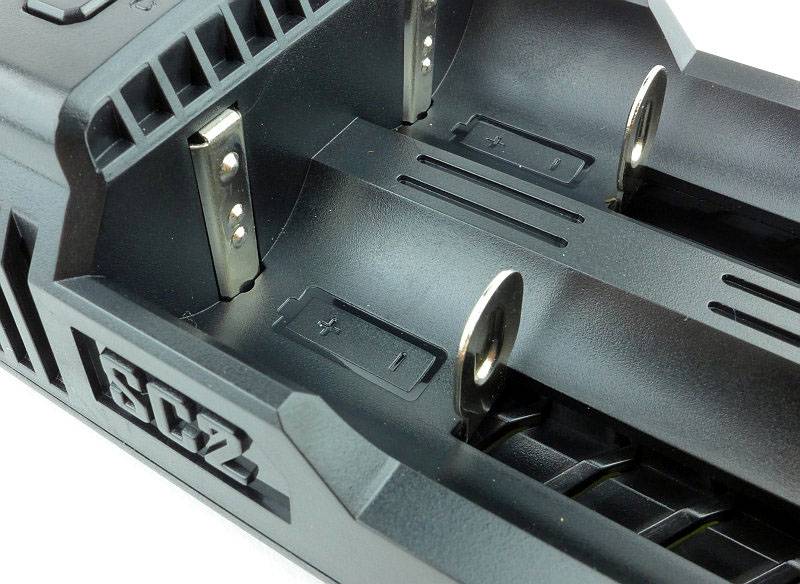
The contacts are the typical chrome plated type.
 photo 08 SC2 contacts P1220095.jpg

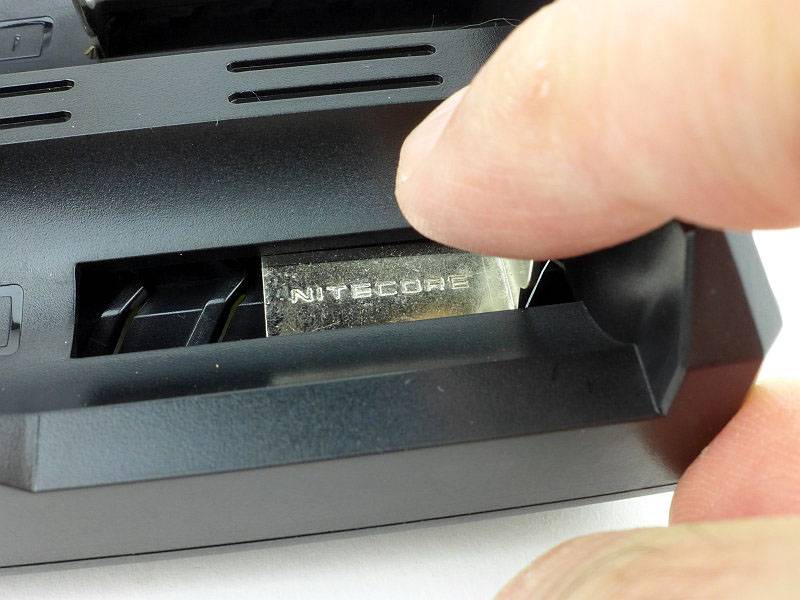
A nice detail is that the NITECORE name is stamped into the slider contact.
 photo 09 SC2 slider P1220099.jpg

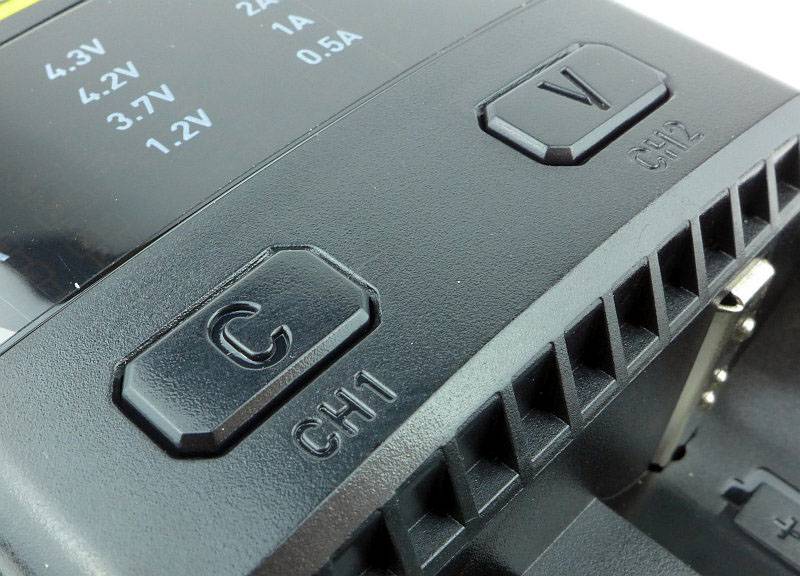
All the various options are selected using the two buttons. The C and V represent the Current and Voltage settings you can select.
 photo 10 SC2 buttons P1220100.jpg

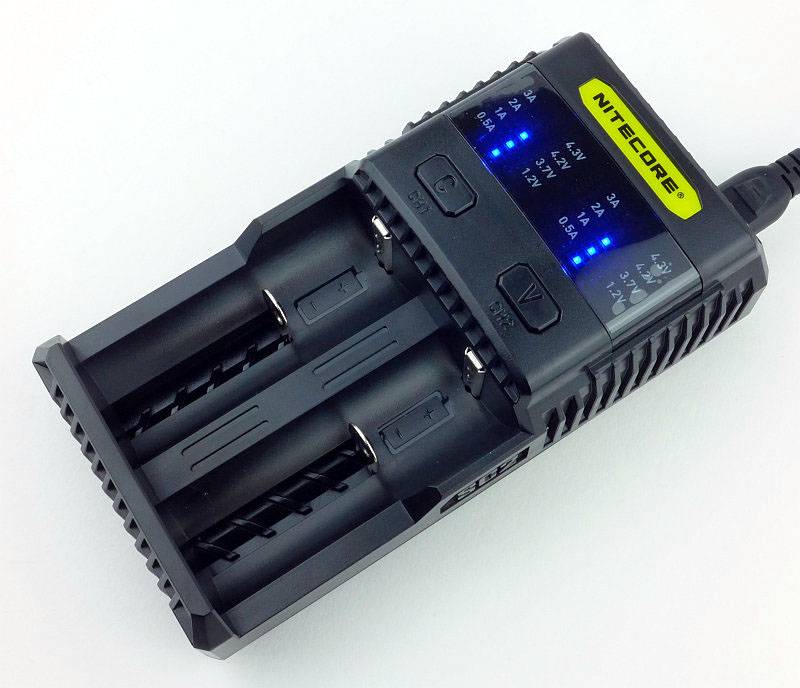
When first powered on, the SC2 shows a set of lights indicating the default of 2A charging current.
 photo 11 SC2 lights P1220107.jpg

What are they like to use?

The F1 is one of those ‘don’t need to think about it, just buy it’ products for me. Combining the function of a Li-ion charger and powerbank into a tiny, easy to carry, device just makes it a must have EDC device.
When you insert a cell, it also tells you the voltage, so will work as a cell checker as well. If you use li-ions and have a smart phone, you will want one of these.

I’ve given the review sample a really hard time, with the worst conditions being the F1 having a 26650 fitted and used as a powerbank for a set of USB lights that try to draw 3A. Considering this should only output 1A, the actual output current was around 1.5A. Like this it was allowed to run constantly all day for a couple of weeks, swapping the 26650 when required. During this time the F1 did get hot, but expecting this to become a destructive test due to the extended abuse, I was impressed to find the F1 survived this without any issues.

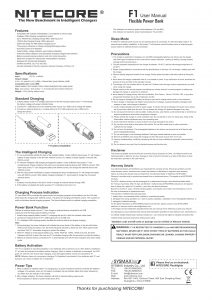
For more details, have a look at the instructions by clicking on this image for the full size version. (Depending on your browser you might need to ‘right-click’ and ‘open in new tab/window’.)

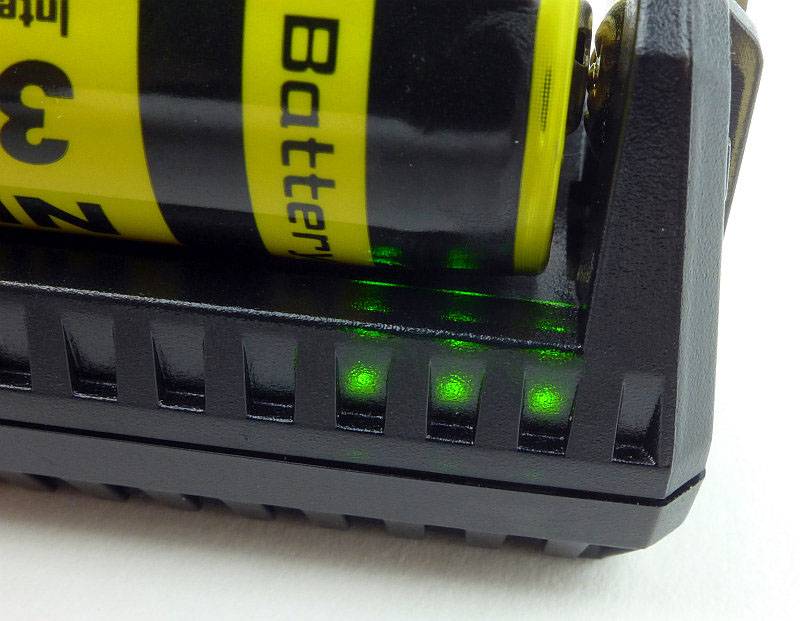
Hidden within the casing are three green indicator lights. These tell you the cell voltage when inserting a cell, the remaining capacity when using as a powerbank, or the charging status when charging a cell.
 photo 08 F1 lights P1200154.jpg

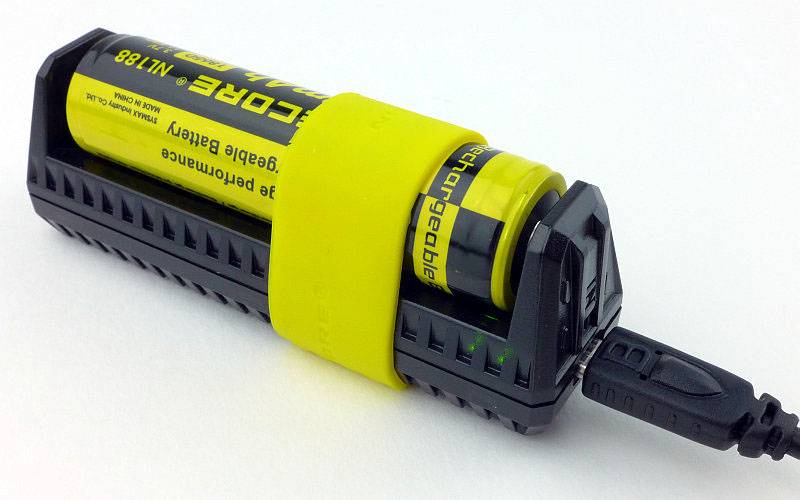
The ideal cell for powerbank use is an 18650, and the supplied rubber bands fit this size cell perfectly. This is how it looks when you have it ready to carry as a powerbank.
It is important to note that there is parasitic drain when in Powerbank configuration which in the sleep/low power mode measures at 390uA. When using a 3100mAh cell it will take 331 days to drain the cell.
According to the YZX Studio Power Monitor, the output of the USB charging port is ‘Android DCP 1.5A’ meaning the D+ and D- lines are shorted.
 photo 09 F1 powerbank P1200158.jpg

Once you are back at home/work, just top up the cell with any USB charging point. Of course another major advantage of the F1 as a powerbank is that you can carry spare cells for it, and swap as needed.
 photo 10 F1 charging P1200169.jpg

Now onto the SC2. This is a very versatile charger, but I have to say it has not been the easiest to work with. Using the defaults is easy. Turn it on, and pop in your cells, the SC2 will charge them quickly, but it is when you want to change modes that it hasn’t been that easy. Because of this I’m not even going to attempt to explain so you definitely will want to refer to these instructions. I did find that some double clicking was required to enter manual mode. This is not mentioned in the instructions, so if it is not responding as you expect, try a double click.
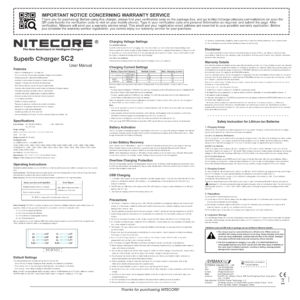
Click on this image for the full size version. (Depending on your browser you might need to ‘right-click’ and ‘open in new tab/window’.)

Here is an IMR cell (from the TM03) charging on defaults. It is now displaying a full charge, as during charging the current lights show the charging current, and the voltage lights are used to display charging status with three LEDs. Once the three LEDs remain on steady, the cell is fully charged.
 photo 12 SC2 lights with cell P1220112.jpg

It is important to note that due to the high charging current, the SC2 will terminate a little early. You don’t quite get a completely full charge. You can always pop the mostly full cell into another charger for that final top-up but you don’t really need to.
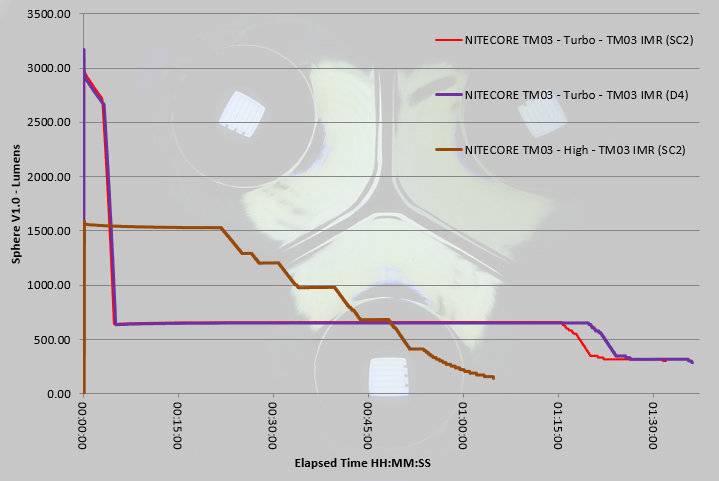
This graph has three traces on it and two of them compare the SC2 and D4 chargers (both used to charge the TM03s’s cell).
The SC2’s slightly early termination can be seen with the earlier drop to low mode at around 1h 20m. Considering the vast reduction in charging time, this minor loss in overall output is well worth it.
 photo TM03 runtime.jpg

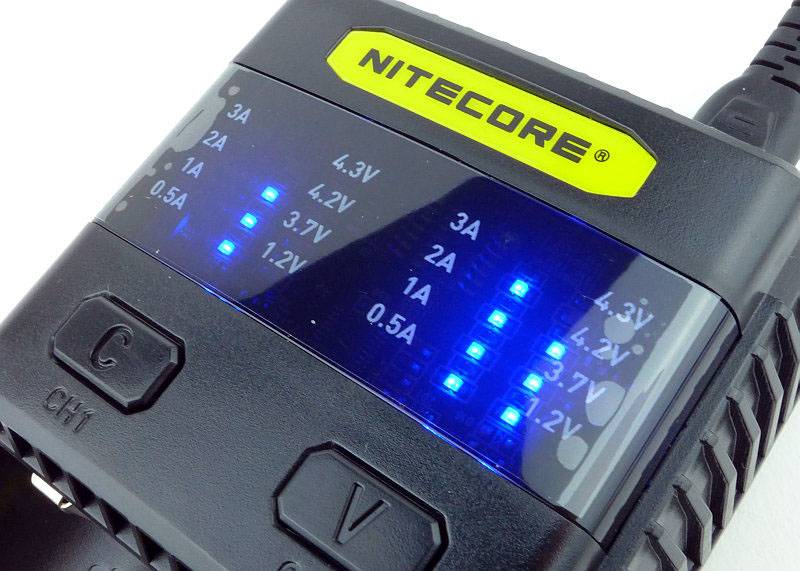
There is one major design flaw with the SC2 sent to me. The numbers on the display to show current and voltage are only printed on the plastic film on the display. When you unpack the charger you normally expect to remove a protective film from the display. As you do this, you find the numbers come off as well!
I had to put the film back on after finding this which is why there are some bubbles under the film.
My advice is to NOT remove the protective film (unless you have confirmed the number are now printed on the actual display.
 photo 13 SC2 lights close P1220116.jpg

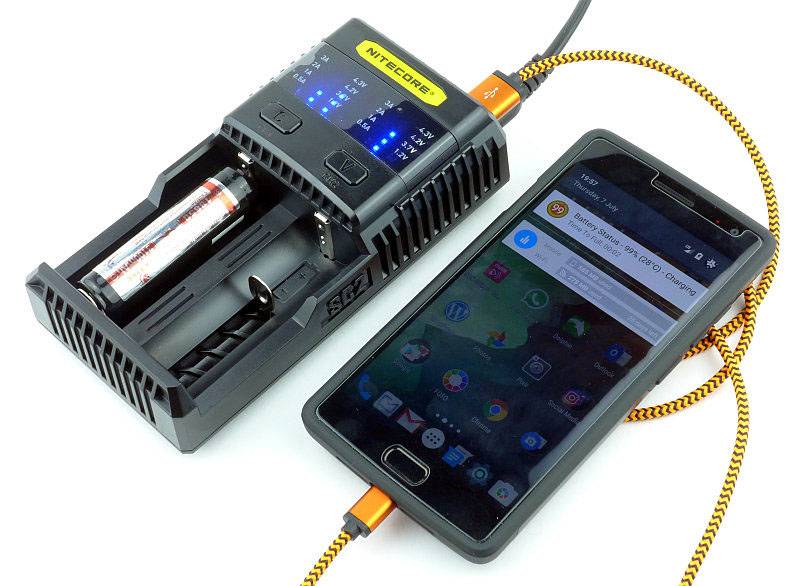
As explained in the user manual, Slot 2 and the USB charging output contend with each other. If the cell in Slot 2 is charging the USB output is stopped. So you can charge a cell in Slot 1 and a USB device at the same time, but if using Slot 2, only once the cell is charged does the USB charging work.
 photo 14 SC2 USB charging P1220122.jpg

Review Summary

The views expressed in this summary table are from the point of view of the reviewer’s personal use. I am not a member of the armed forces and cannot comment on its use beyond a cutting tool or field/hunting knife.

Something that might be a ‘pro’ for one user can be a ‘con’ for another, so the comments are categorised based on my requirements. You should consider all points and if they could be beneficial to you.

_______________________________________________ _______________________________________________
Things I like What doesn’t work so well for me
_______________________________________________ _______________________________________________
F1 – Tiny Li-Ion Charger. F1 – Parasitic drain could be lower.
F1 – Tiny Powerbank with changeable cell. F1 – Cell quite easily knocked even with rubber band.
F1 – charges from any micro-USB charger.
SC2 – Super Fast 3A Charger. SC2 – Display Labels Printed on removable protective film.
SC2 – USB charger output. SC2 – Mode changing a bit tricky.
SC2 – Huge list of compatible cells. SC2 – Cells not quite fully charged.
SC2 – Mains and 12V power options.


Discussing the Review:

Please feel free to add comments to the review, but the ideal place to freely discuss these reviews is on a forum. If you started reading the shorter forum version of the review, but followed the link this full exclusive review, please return to that forum to discuss the review there.
If you read the review entirely on Tactical Reviews, please consider one of the following to join in any discussion.

EdgeMatters – Sponsored Reviews (UK based Forum for Knife Makers and Collectors)

CandlePowerForums – Knife Reviews Section (Largest and Friendliest Flashlight Community Forum)

Light Review: NITECORE TM03 (Tiny Monster)

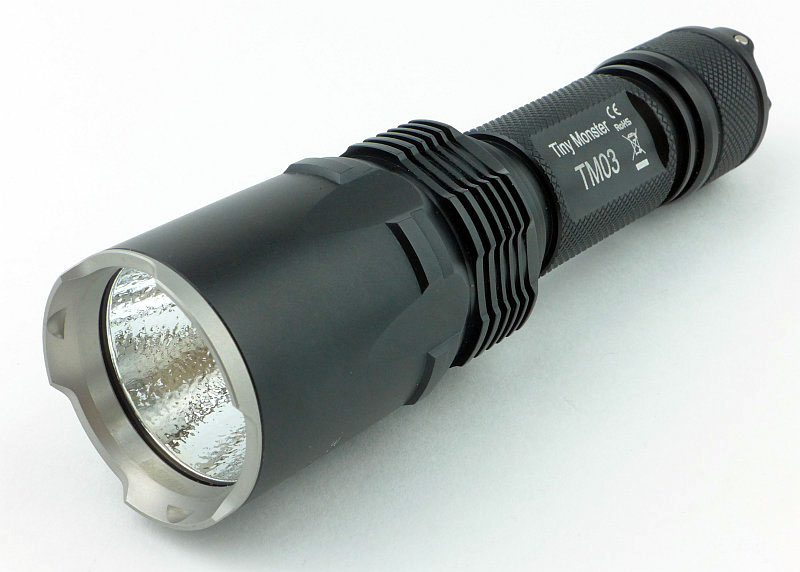
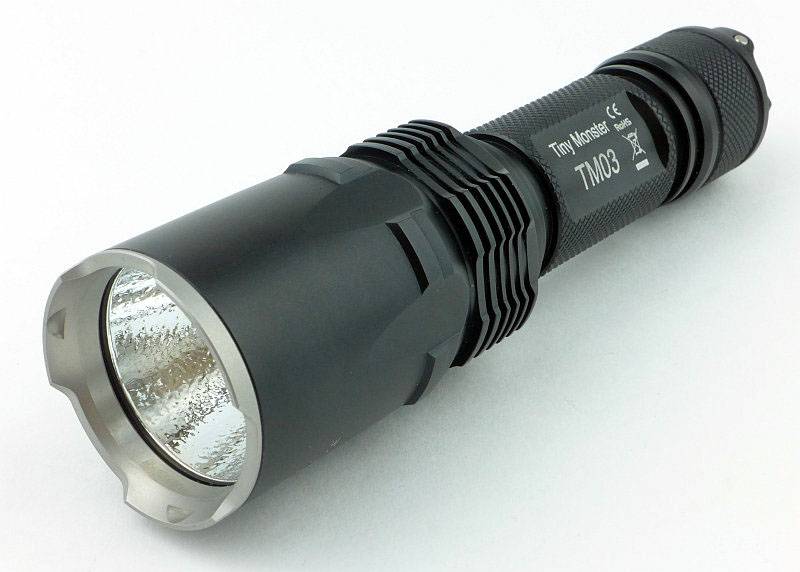
NITECORE have been expanding the Tiny Monster line and with the TM03 have shrunk the monster performance into a single 18650 size light. Now it is even easier to carry Tiny Monster performance with you in the form of the world’s most powerful 1x 18650 light.

 photo 00 TM03 feature P1210997.jpg

Taking a more detailed look:

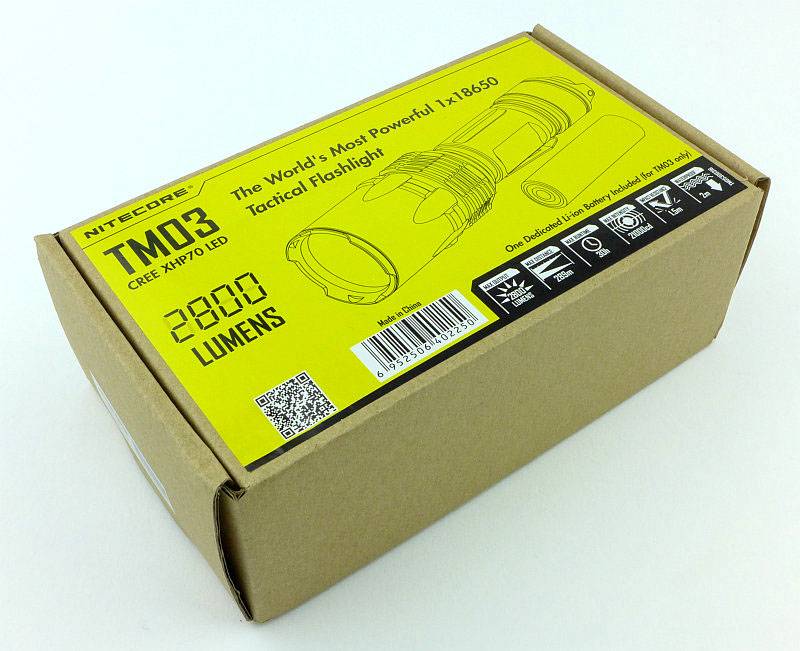
Following the other TM series lights, the TM03 comes in a tough cardboard box.
 photo 01 TM03 boxed P1210968.jpg

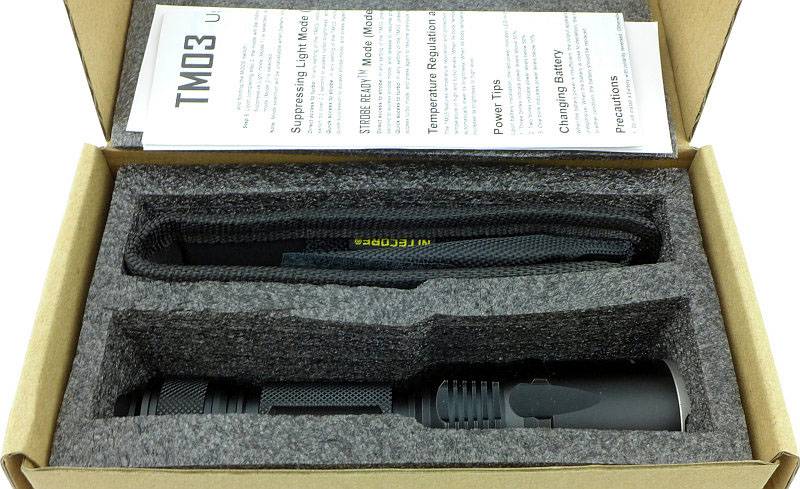
The light is held in place with a strong closed cell foam.
 photo 02 TM03 box open P1210973.jpg

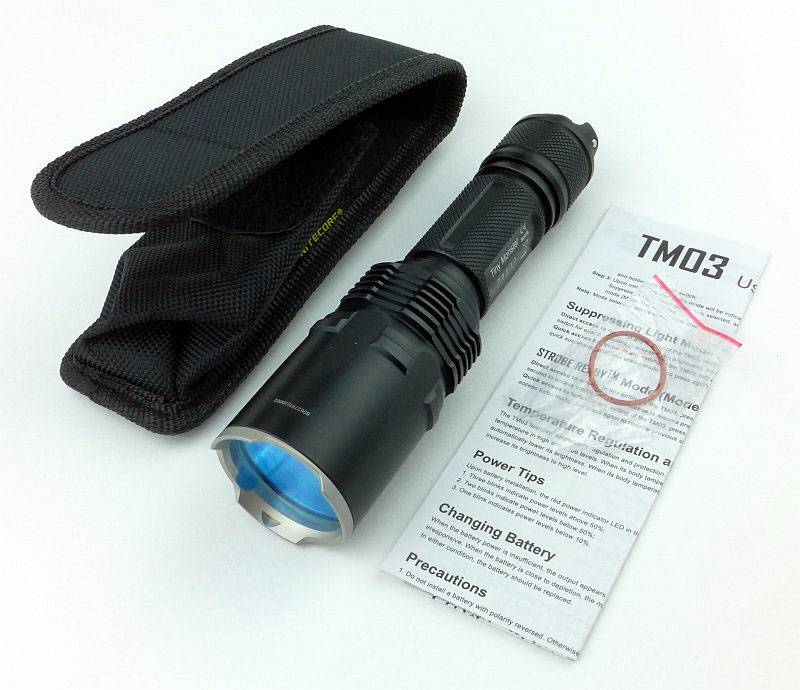
Along with the TM03, a holster, the instructions and a spare o-ring are provided.
 photo 03 TM03 box contents P1210979.jpg

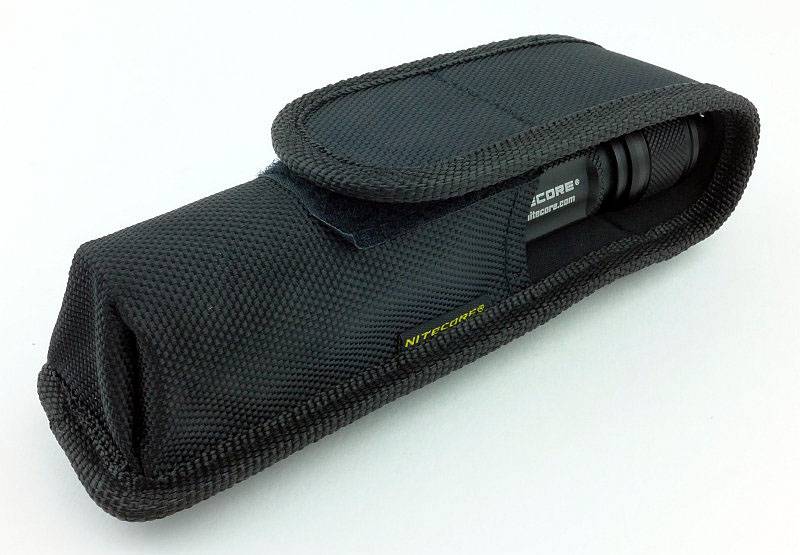
Before we look at the TM03 in more detail, let’s look at the holster. Here it is with the TM03 inside.
 photo 04 TM03 holstered P1210983.jpg

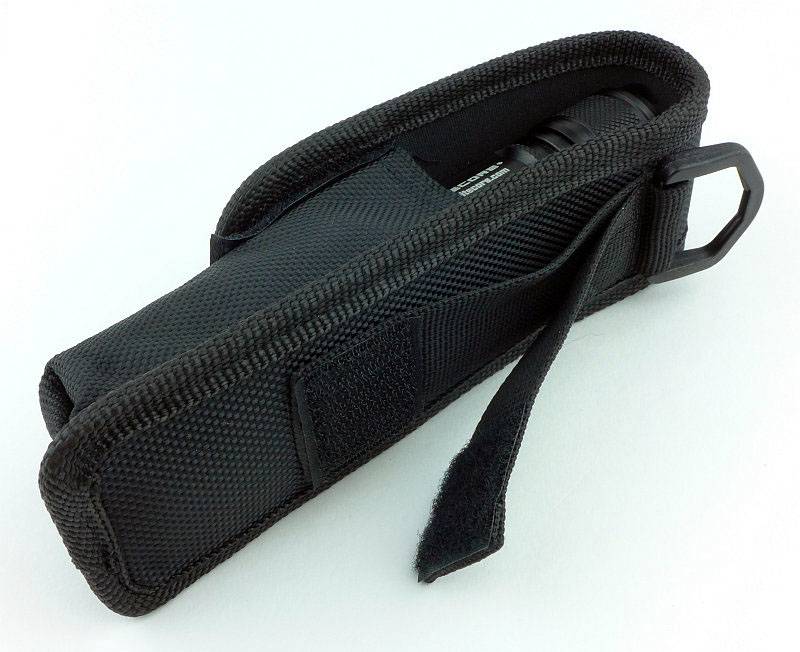
You have the choice of D-loop, fixed loop, or Velcro loop.
 photo 05 TM03 holster loops P1210986.jpg

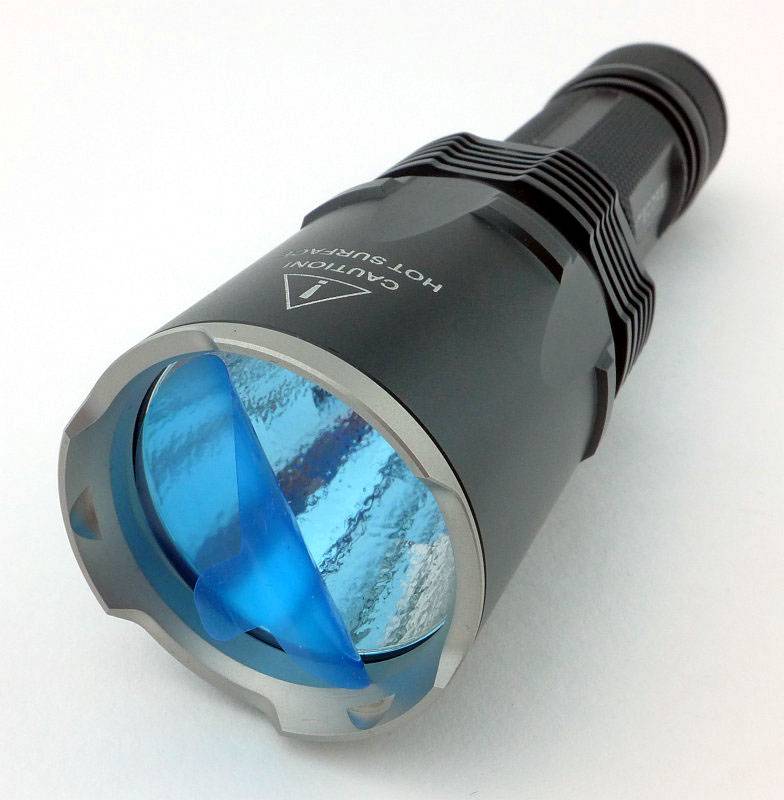
There is a blue plastic lens protector on the front when it arrives. You MUST remove this before trying the TM03 at all as it will melt and make a mess of the lens if you don’t.
 photo 06 TM03 protector P1210991.jpg

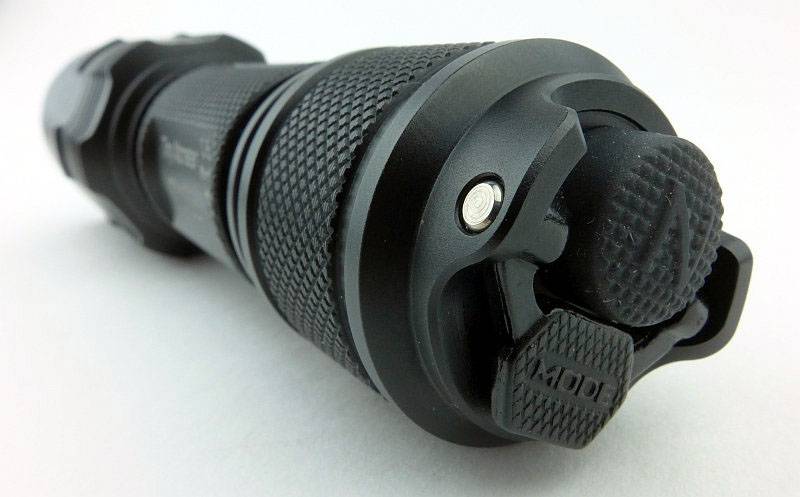
As with the NITECORE Precise series, the TM03 has a dual switch tail-cap. One is a forward clicky standard switch and the other is a metal paddle MODE switch.
 photo 07 TM03 switches P1220001.jpg

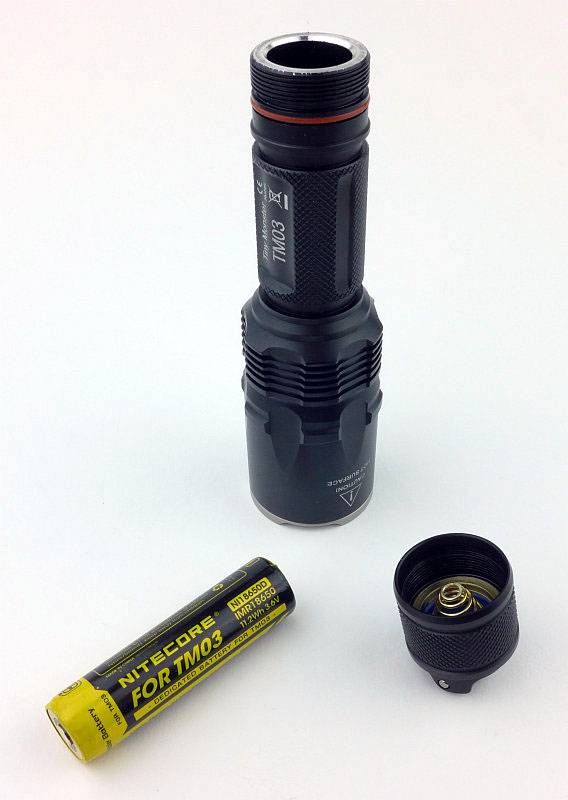
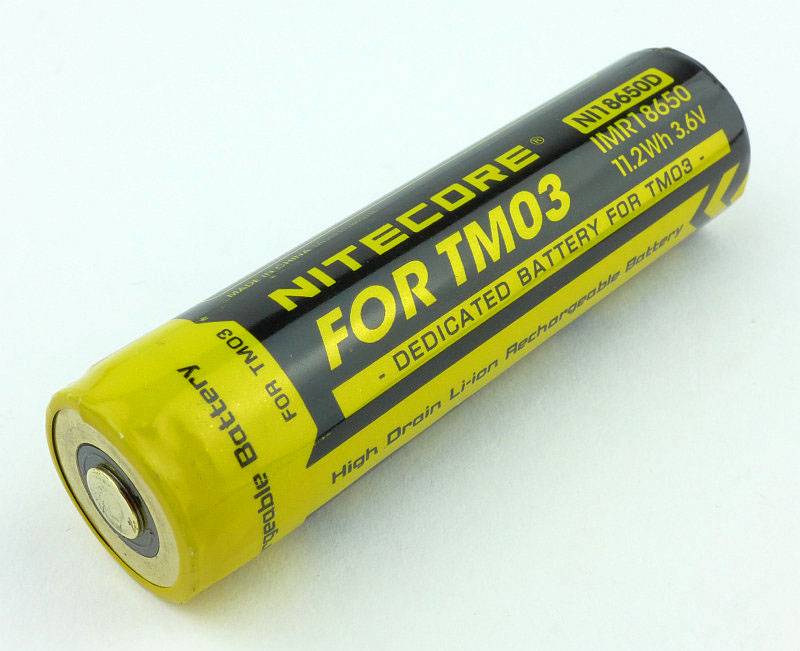
Supplied in the TM03 is a special IMR cell, clearly labelled ‘FOR TM03’. It is normal 18650 size, so this gives you and idea of the overall size of the TM03.
 photo 08 TM03 cell out P1220005.jpg

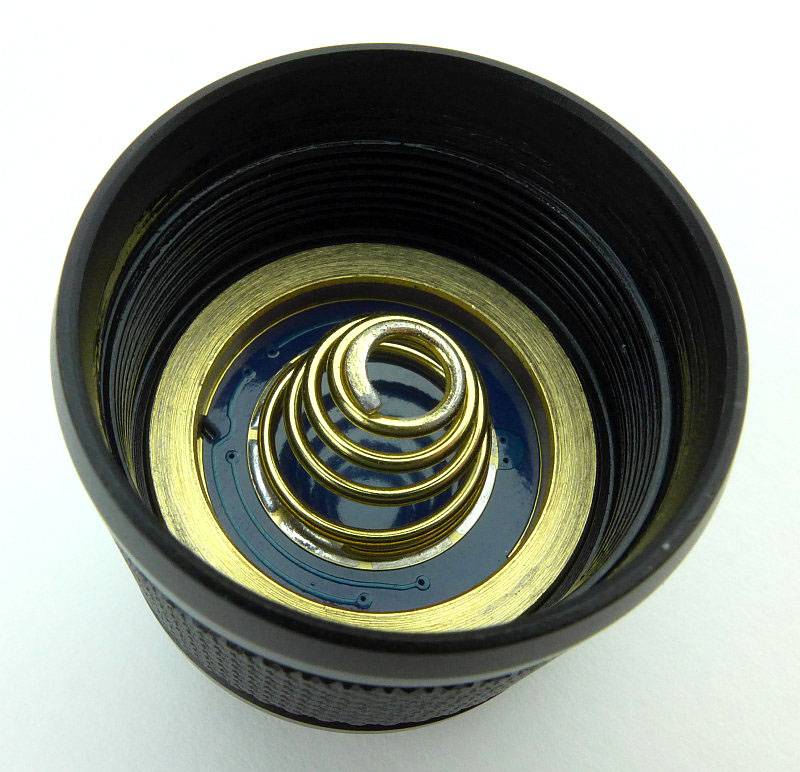
In the tailcap are the two normal contacts.
 photo 09 TM03 tailcap contacts P1220008.jpg

Mainly for heat-sinking, the TM03 has a heavy duty thick walled battery tube.
 photo 10 TM03 tube wall P1220011.jpg

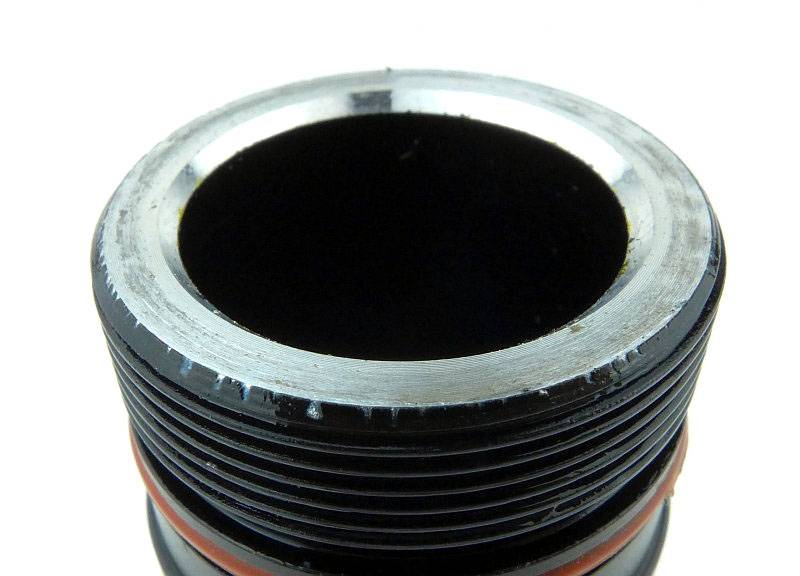
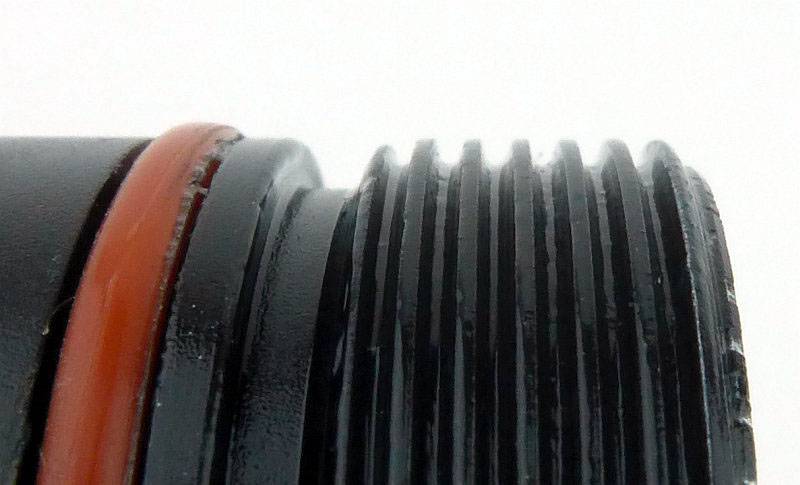
Standard threads are used for the tail-cap.
 photo 11 TM03 threads P1220012.jpg

Back to the dedicated 18650 IMR cell. Notice the dual contacts at the front.
 photo 12 TM03 cell P1220018.jpg

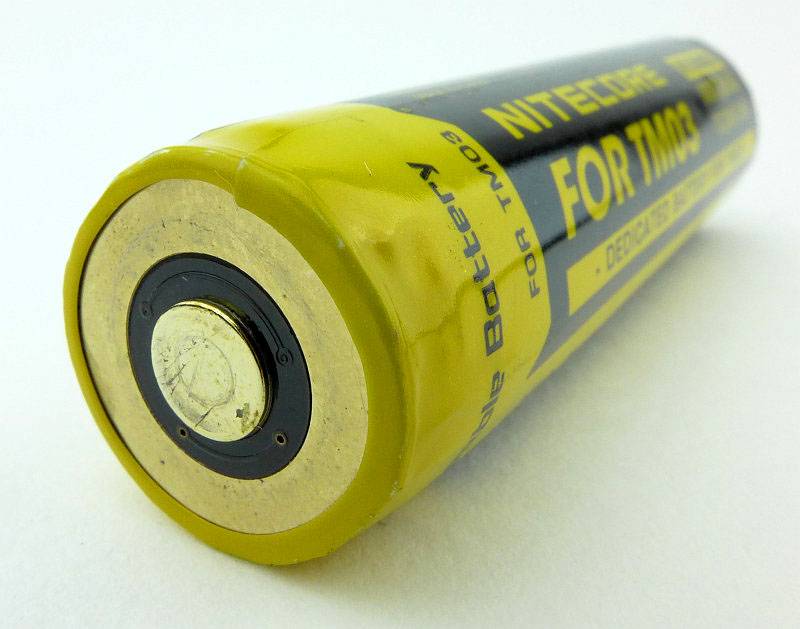
Taking a closer look at the dual contacts on what would normally be the positive end of the cell.
 photo 13 TM03 positive P1220021.jpg

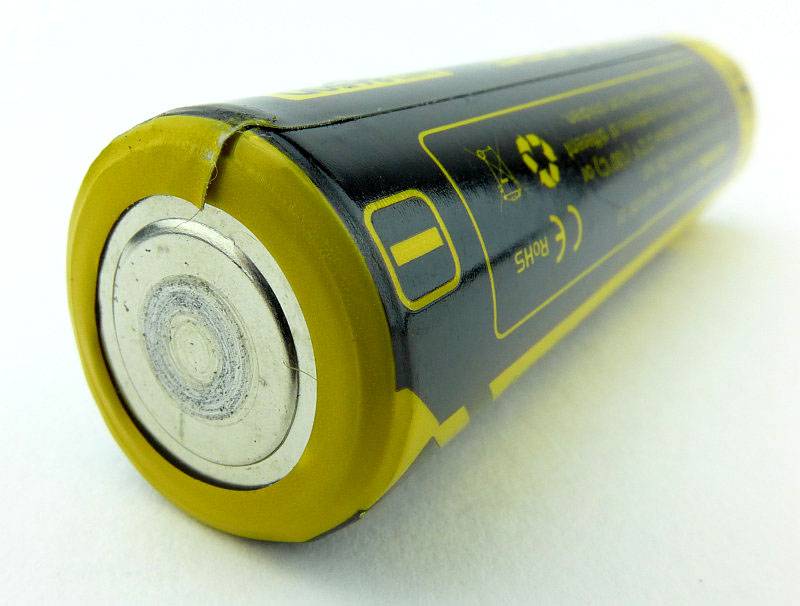
The negative terminal of the cell is standard.
 photo 14 TM03 negative P1220024.jpg

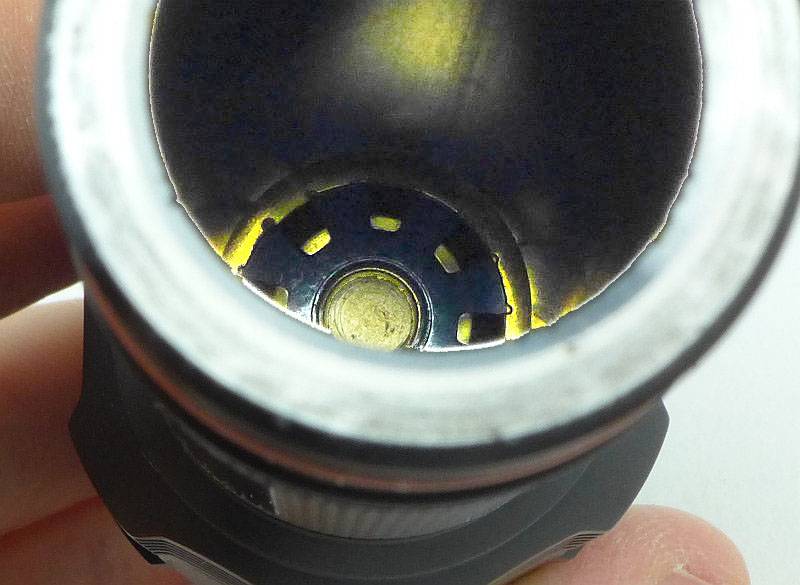
Peering inside the battery tube you can make out the positive contact as well as the secondary contacts surrounding it.
 photo 15 TM03 head contacts P1220028.jpg

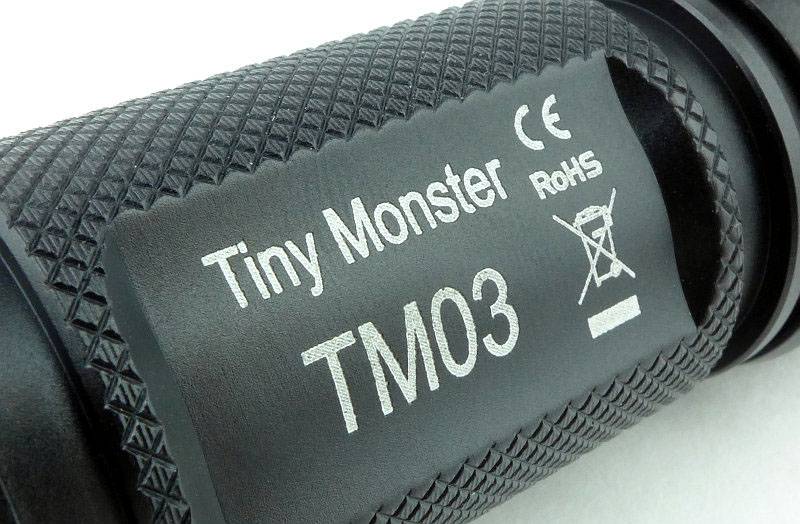
Finish is to a high standard as is the engraving.
 photo 16 TM03 engraving P1220030.jpg

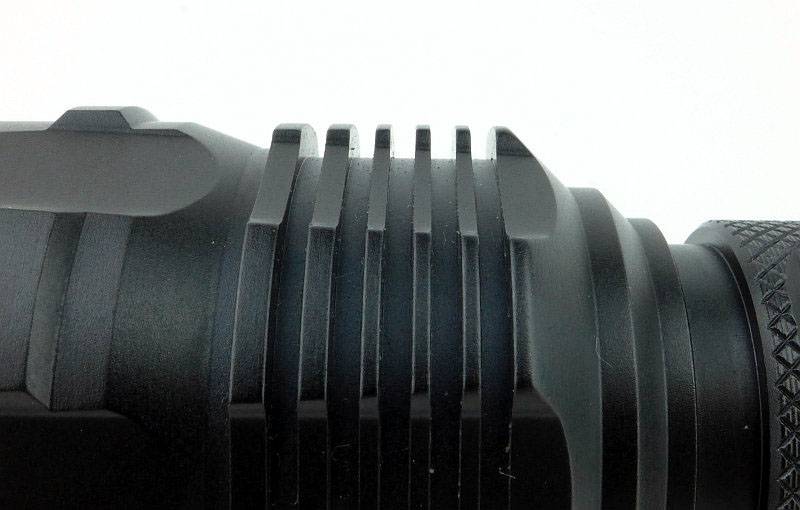
Despite the high output, the cooling fins are shallow.
 photo 17 TM03 fins P1220033.jpg

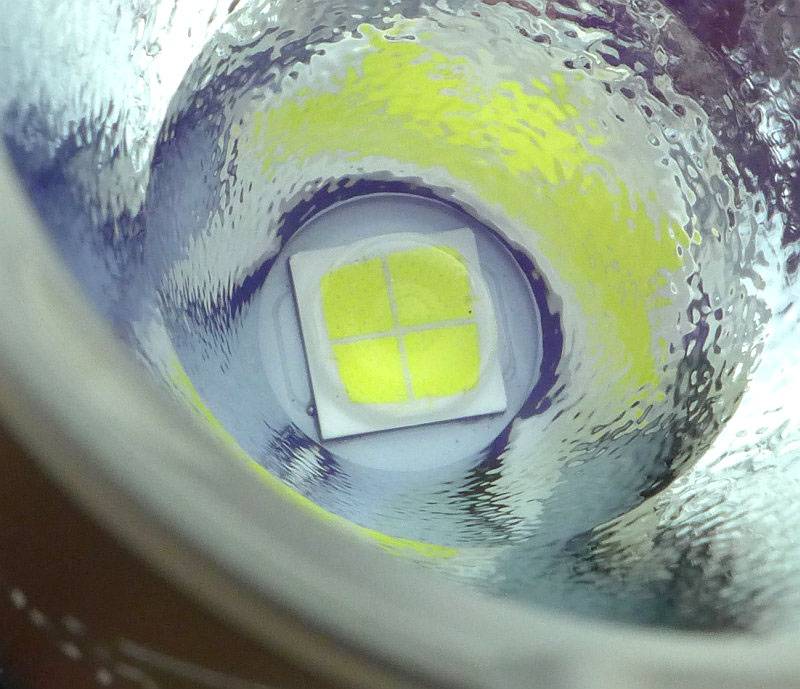
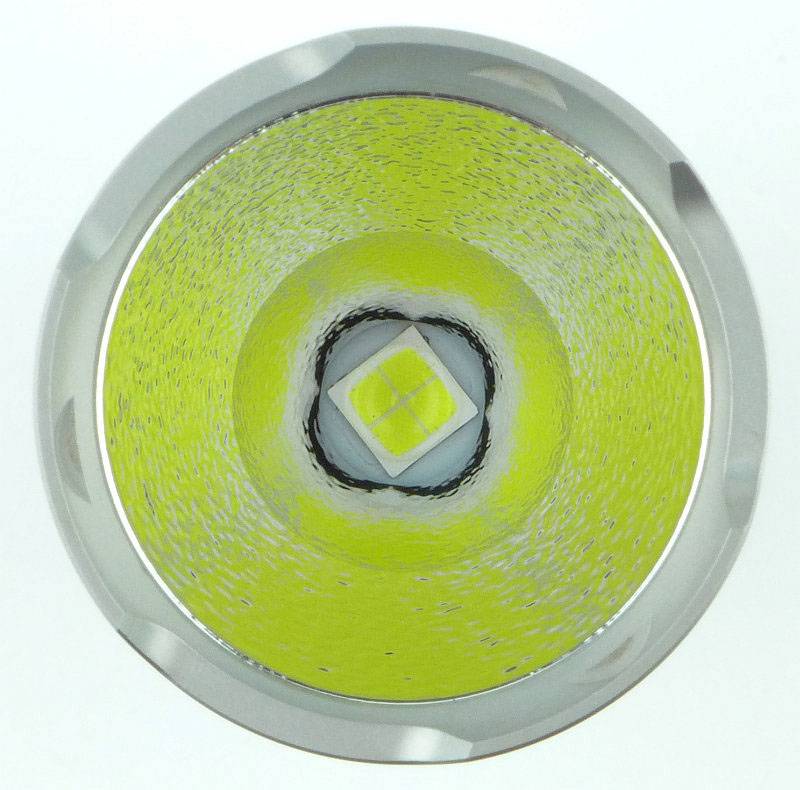
Here is the heart of this Tiny Monster, its monster XHP70 Quad die LED.
 photo 18 TM03 XHP70 LED close P1220045.jpg

The reflector is textured to give a smoother beam, but the reflector also has two profiles specifically controlling how much spill and hotspot the TM03 has.
 photo 19 TM03 XHP70 LED P1220053.jpg

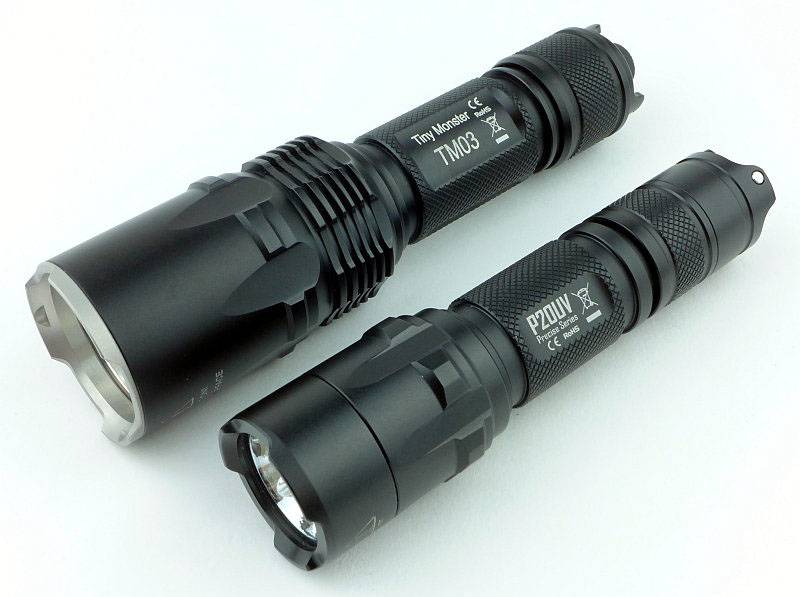
Putting the TM03 next to a normal 18650 light, it is slightly bigger and heavier in build, but has performance that outshines the standard light by a long way.
 photo 20 TM03 size P1220127.jpg

The beam

Please be careful not to judge tint based on images you see on a computer screen. Unless properly calibrated, the screen itself will change the perceived tint.

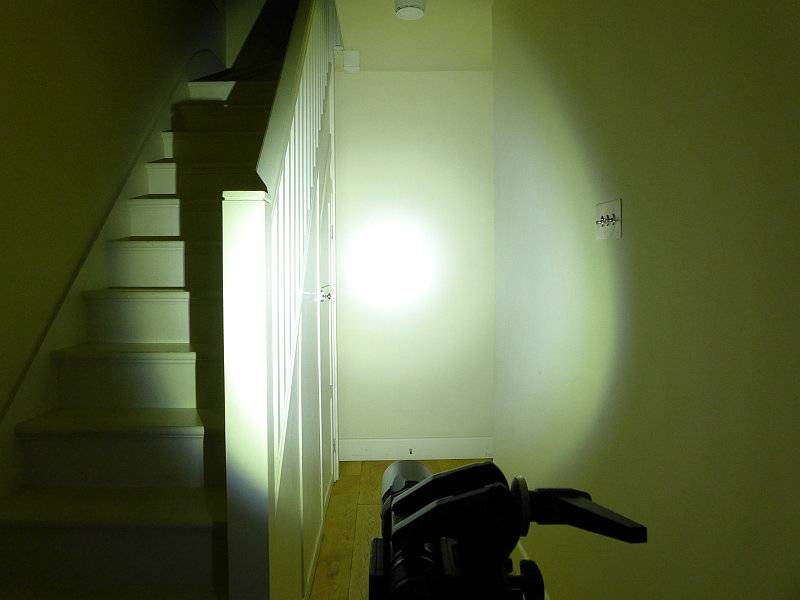
The indoor beamshot is intended to give an idea of the beam shape/quality rather than tint. All beamshots are taken using daylight white balance. The woodwork (stairs and skirting) are painted Farrow & Ball “Off-White”, and the walls are a light sandy colour called ‘String’ again by Farrow & Ball. I don’t actually have a ‘white wall’ in the house to use for this, and the wife won’t have one!

With such high output, and indoor shot can easily be overblown, so this is not a representation of how bright the beam is, but the characteristics of the beam. Exposure has been adjusted to show the hotspot, spill, and outer spill. For such a large LED, there is quite a defined hotspot, and the spill is a medium width.
 photo 21 TM03 indoor beam P1230313.jpg

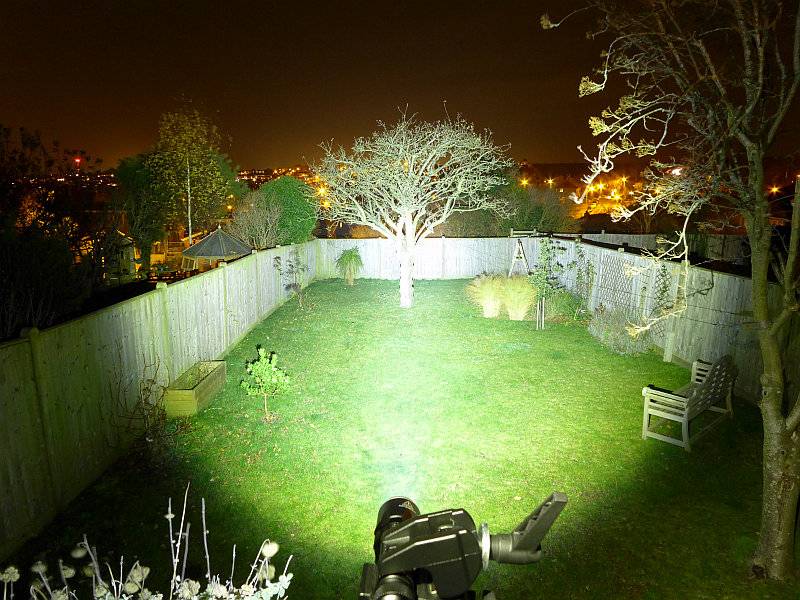
Then we go outdoors, and blast the full 2800lm , and this is the effect you get. The TM03 is bright, and it is very compact. Nice!
 photo 23 TM03 outdoor beam P1240710.jpg

Modes and User Interface:

The TM03 has four constant modes (Turbo, High, Mid and Low) and one flashing (Strobe) mode, controlled by a dual-switch tail-cap.

Basic operation is with the forward-clicky switch; half press for momentary access to the last used constant mode, and fully press and click to turn the TM03 ON to the last used constant mode. (Release or click again to switch off).

When ON, pressing the MODE switch cycles through the output modes – Low, Mid, High, Turbo, Low etc.

The TM03 allows you to set up the direct access operation of the MODE switch in two different modes – Suppressing Light, or STROBE READY.

To swap between these two modes:
Switch the TM03 OFF
Remove and replace the battery.
Within 60s of replacing the battery tighten the tail-cap while pressing and holding the MODE switch.
The TM03 will then flash once to indicate Suppressing Light, and two for STROBE READY.

In Suppressing Light mode:
Direct access to Turbo – in any mode including OFF, press and hold the MODE switch. Release to return to previous output.
Quick access to Strobe – in any mode including OFF, press the MODE switch twice in quick succession. Press again to return to previous output.

In STROBE READY mode:
Direct access to Strobe – in any mode including OFF, press and hold the MODE switch. Release to return to previous output.
Quick access to Turbo – in any mode including OFF, press the MODE switch twice in quick succession. Press again to return to previous output.

When inserting the battery, a red light in the tail-cap flashes to indicate battery power. Three blinks for above 50%, two blinks for below 50% and one blink for less than 10%.

Batteries and output:

The TM03 runs on a supplied proprietary IMR call with dual contacts on one end, but will also run at a severely reduced output on a normal 18650.

To measure actual output, I built an integrating sphere. See here for more detail. The sensor registers visible light only (so Infra-Red and Ultra-Violet will not be measured).

Please note, all quoted lumen figures are from a DIY integrating sphere, and according to ANSI standards. Although every effort is made to give as accurate a result as possible, they should be taken as an estimate only. The results can be used to compare outputs in this review and others I have published.

___________________________________________ ________________________________ ________________________________
NITECORE TM03 using specified cell I.S. measured ANSI output Lumens PWM frequency or Strobe frequency (Hz)
___________________________________________ ________________________________ ________________________________
Turbo – TM03 IMR 2804 0
High – TM03 IMR 1501 0
Medium – TM03 IMR 632 0
Low – TM03 IMR 34 0
Max – ‘Normal’ AW IMR 259 0

* Beacon and Strobe output measurements are only estimates as the brief flashes make it difficult to capture the actual output value.

Peak Beam intensity measured 21300 lx @1m giving a beam range of 292 m.

There is parasitic drain and due to the dual contact at the head of the light there is drain at the head, and drain at the tailcap. When using the TM03’s IMR cell, the drain was 1.7mA at the head and 15uA at the tailcap. Taking the worst of these as the only significant value, it is the head drain that is relevant as it will take only 76 days to drain the cell.

NOTE: The use of the AW IMR cell for the ‘normal’ 18650 test was to prove that the throttling of output was not due to a bad cell. The TM03 is drastically throttled when not using the supplied cell and this is no reflection on the AW cell.

This graph has three traces on it to show a couple of specific aspects, including comparing a couple of NITECORE chargers, the SC2 and D4 (both used to charge the TM03s’s cell), and also showing the characteristics depending on if you start in Turbo or High.
The SC2 is a rapid charger, well suited to IMR cells. Due to charging at a higher current, it also tends to terminate earlier. This can be seen with the earlier drop to low mode at around 1h 20m. Considering the vast reduction in charging time, this minor loss in overall output is well worth it.
Then look at the overall characteristics when starting on Turbo where after the initial 2800lm burst, the output drops right down to the 630lm Mid level output, and then continues on this until the cell is depleted.
When starting on High, the output remains on High until the cell can no longer maintain the output and starts to drop in stages, gradually reducing at 20m all the way through to 1h from turn on.
Effectively if you want more light for longer, either stay on High, or you’ll have to switch it OFF and ON again to get Turbo (as long as it is not too hot), and expect not to have much runtime.
 photo TM03 runtime.jpg

Troubleshooting

This section is included to mention any minor niggles I come across during testing, in case the information helps anyone else.

No issues were encountered during testing.

As per the description of this section, this information is provided in case anyone else finds a similar ‘issue’ that might be fixed in the same way.

The TM03 in use

Normally I don’t like to start with a negative, but the TM03 does have one issue, and that is particularly with the Suppression Mode. I have found that when closing the holster flap over the TM03’s tail-cap, it is easy to press (or more dangerously – nearly press) the MODE switch enough to activate direct access Turbo. This means that inside the holster the TM03 bursts into life with all 2800lm. It gets hot VERY fast. Now I also said ‘more dangerously – nearly press’, and the reason it is more dangerous, is that the TM03 is now on a hair trigger needing only a tiny pressure on the holster to bring on the Turbo output. I was putting the TM03 into a drawer and as it nestled against some other items Turbo came on. Luckily I noticed, but I could easily have closed that drawer – for the last time.
So my first comment is that if using the holster you need to undo the tail-cap a half turn (a quarter is not enough) to lock-out the TM03.

Now onto the good stuff. This is a very bright light. Even these days when people are used to high output lights, the TM03 still surprises with its compact size. It is not much bigger than standard 1x 18650 lights, but is a lot more powerful. The heavy build is reassuring and is certainly needed for heat-sinking. I never had the sense the TM03 was getting too hot.

My own views on tactical lighting requirements gathered from various members of the armed services and law enforcement are that Strobe is not the preferred output, but very bright is. The TM03 does VERY bright, very well.

Of course with the fundamental law of portable lighting that you can only have two of the three factors – Bright, Small, Long Runtime, the TM03 looses out in runtime. Mainly this is because if you have the TM03 on you, why would you bother with the Low mode? You will be enjoying all those lumens, using bursts of Turbo, and all too soon it does start to struggle. Not the fault of the TM03, but just a factor to be aware of – this is a Tiny Monster after all.

It was worth the extra effort required to check the parasitic drain at the head, as this explains why after only short periods of storage, the runtime is even more reduced. This level of drain is bad. It is easy to pop a light in a drawer for three months at a time, and in that time the TM03 will be dead. Even if you undo the tail-cap slightly, this doesn’t stop the double pole in the head making contact and draining the cell, you need to remove the cell completely.

With regard to using other 18650 cells, NITECORE have severely hobbled the output on the TM03 when not using its dedicated double pole IMR. The maximum output I managed to get was around 250lm. It does mean that you know you can still have enough light to see by if you carry a normal 18650 as a spare, but once that dedicated IMR is depleted, you need to recharge before you get the TM performance again. At least you know it will work as a backup, and with such extreme performance it is sensible to protect the light and the user from ‘unknown’ cells.

If you want a pocket rocket, the TM03 will not disappoint, and brings custom level performance to a production light.

Review Summary

_______________________________________________ _______________________________________________
Things I like What doesn’t work so well for me
_______________________________________________ _______________________________________________
2800lm on a single 18650!! Direct access via the MODE switch too easily activated by the holster flap.
Solid build. High Parasitic Drain.
Direct access to TURBO. Uses a proprietary cell for full performance.
Sturdy holster provided.
Supplied with cell so you only need a charger.


Discussing the Review:

Please feel free to add comments to the review, but the ideal place to freely discuss these reviews is on a forum. If you started reading the shorter forum version of the review, but followed the link this full exclusive review, please return to that forum to discuss the review there.
If you read the review entirely on Tactical Reviews, please consider one of the following to join in any discussion.

CandlePowerForums – Flashlight Reviews Section (Largest and Friendliest Flashlight Community Forum)

EdgeMatters – Sponsored Reviews (UK based Forum for Knife Makers and Collectors)

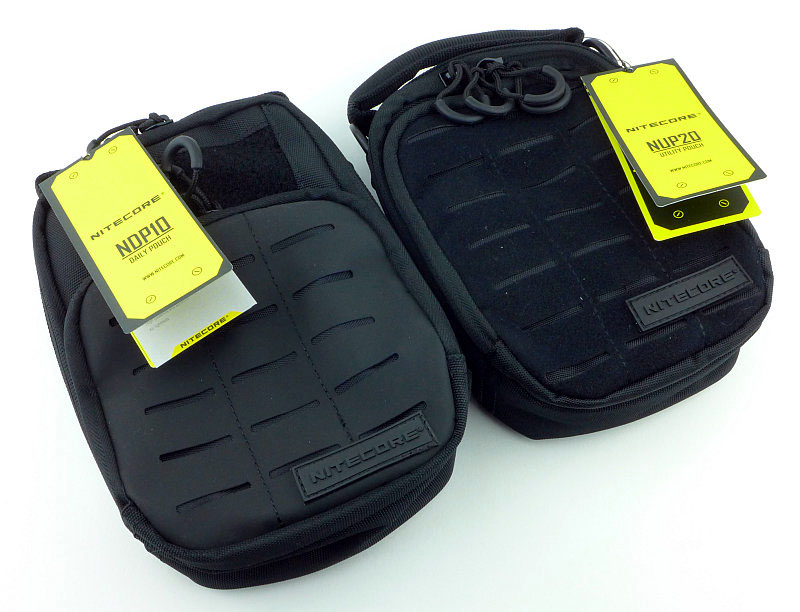
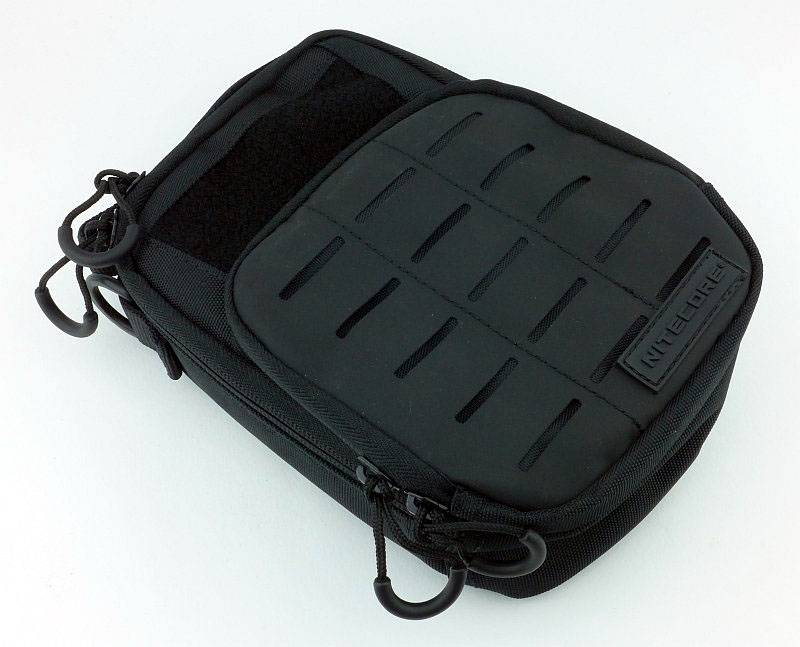
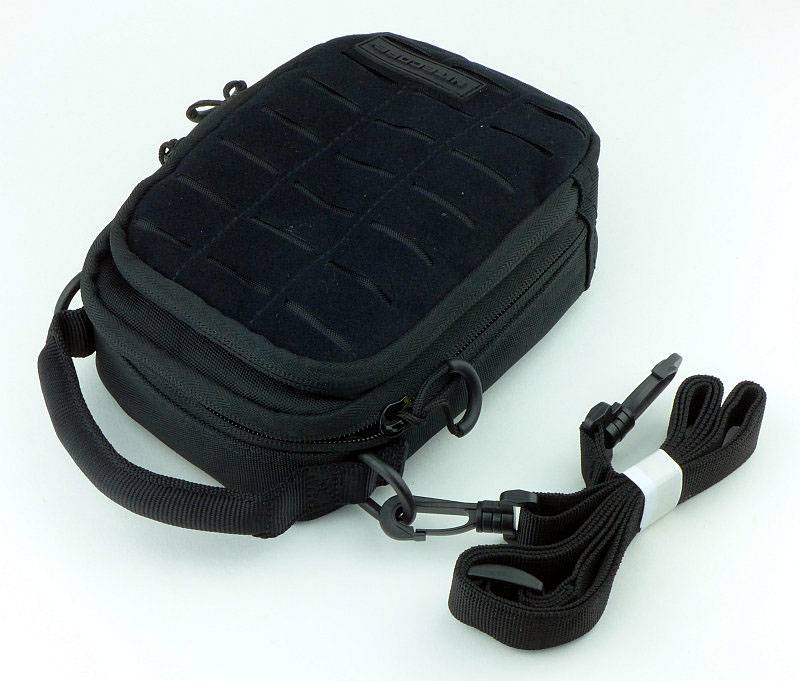
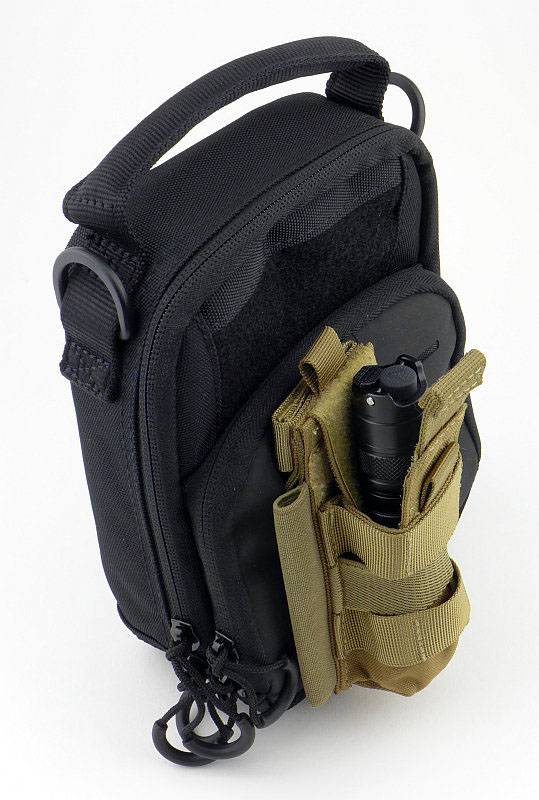
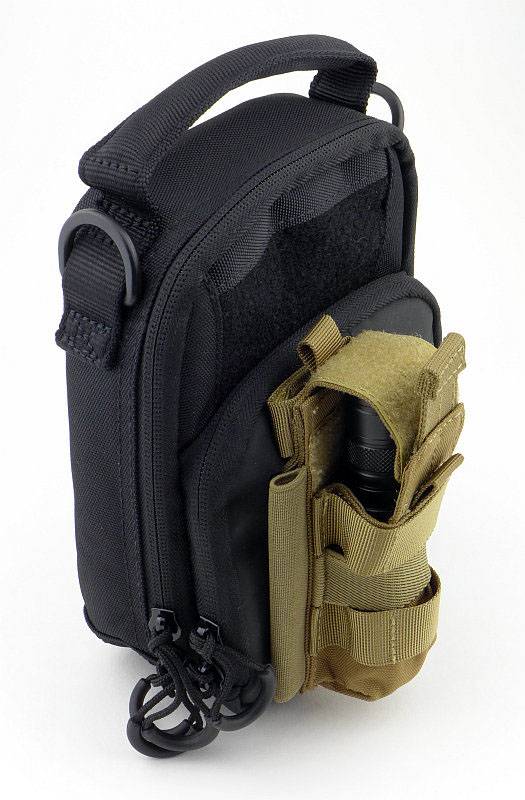
EDC Gear Review: NITECORE Utility and Daily Pouches – NUP10/20 and NDP10/20

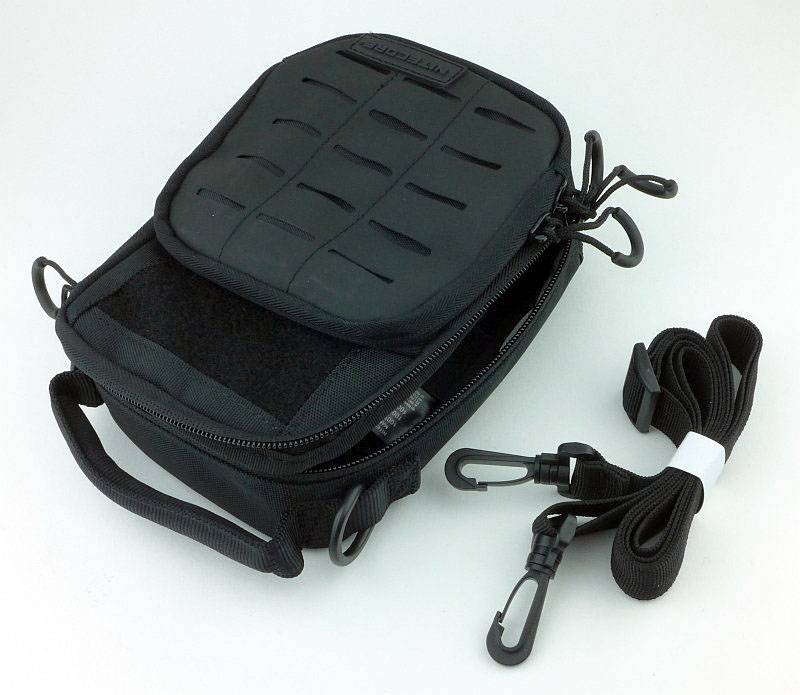
NITECORE have gone beyond just portable lighting and have started designing products for EDC and daily carry. We now have the NUP10/20 Utility Pouch and the NPD10/20 Daily Pouch which give you plenty of carry options for all those essential bits of EDC gear.

 photo 00 NC Pouches intro P1230459.jpg

The details:

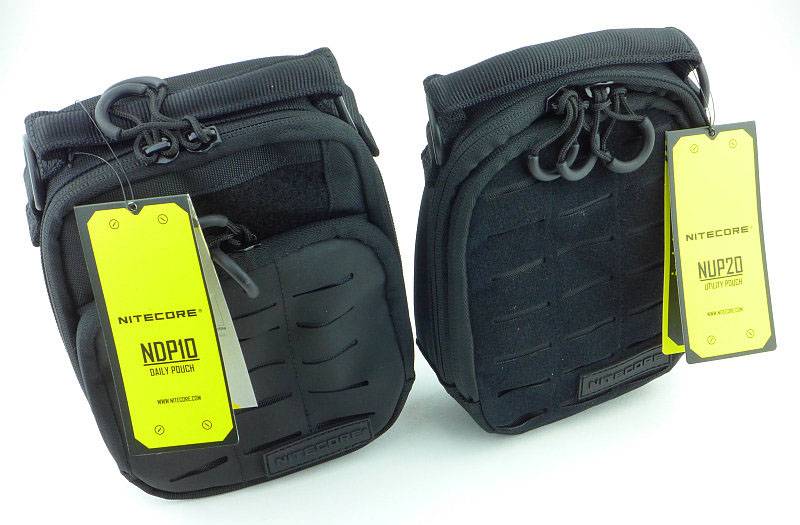
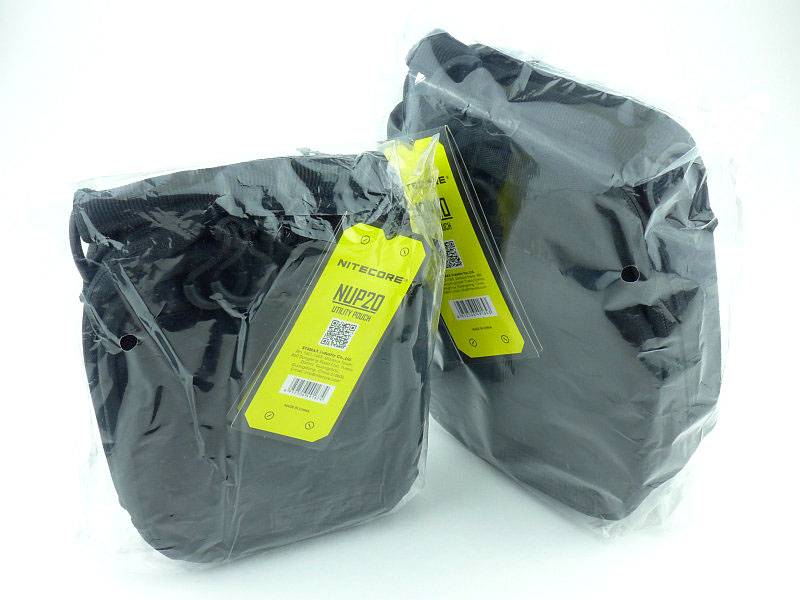
On test in this review are two of the four versions of these pouches, the NUP20 and NDP10. They arrive (like most bags) in a cellophane over-wrap.
 photo 01 NC Pouches wrapped P1230428.jpg

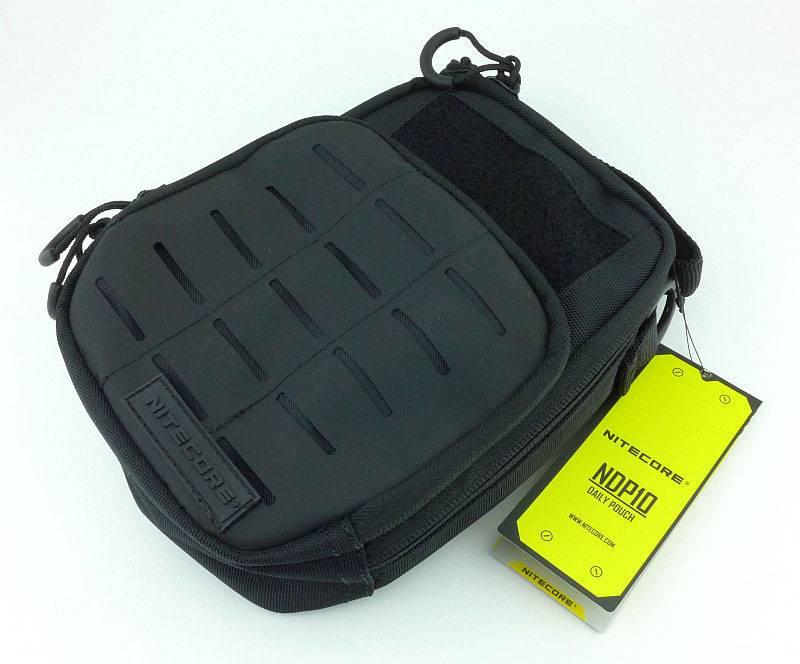
Starting with the NDP10, firstly let’s just cover the naming convention for these pouches. The NDP part means that this is the NITECORE Daily Pouch, and the NDP is either the 10 or 20 depending on the front panel. If this is 10, it has a ‘Hypalon’ Synthetic Rubber panel, or if 20, it has a ‘Velveteen’ Synthetic fabric front panel.
 photo 03 NC Pouches NPD10 P1230468.jpg

So this NDP10 pouch is the larger ‘Daily Pouch’ and it has the ‘Hypalon’ front panel.
 photo 05 NC Pouches NPD10 zip pulls P1230481.jpg

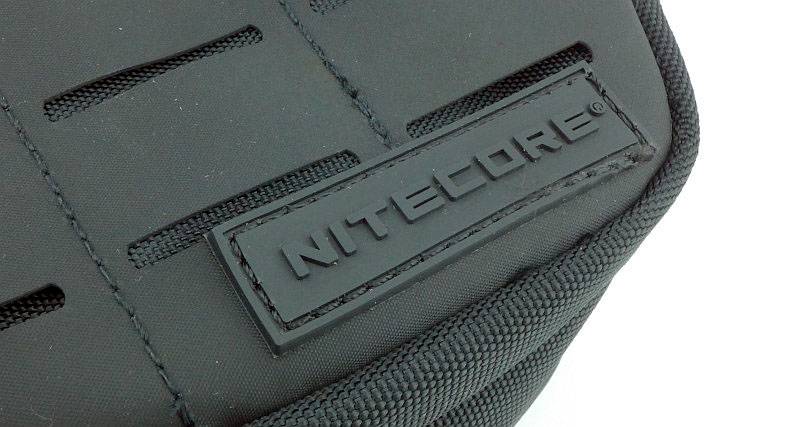
In keeping with the stealth appearance of the pouches, the rubber NITECORE logo has none of the usual yellow colouring.
 photo 06 NC Pouches NPD10 brand P1230484.jpg

If you haven’t come across Hypalon before, it is a synthetic rubber made of chlorinated and sulphonated polyethylene, noted for its resistance to chemicals, temperature extremes, and ultraviolet light.
 photo 07 NC Pouches NPD10 hypalon P1230487.jpg

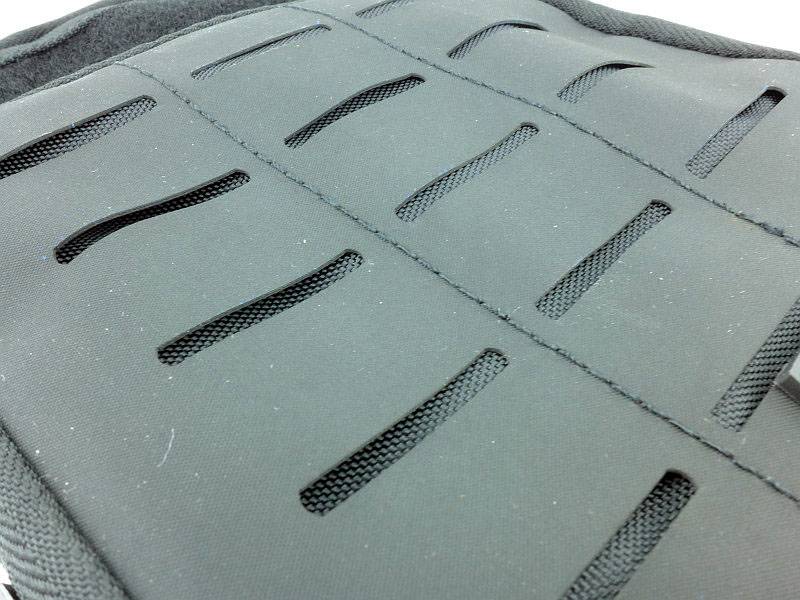
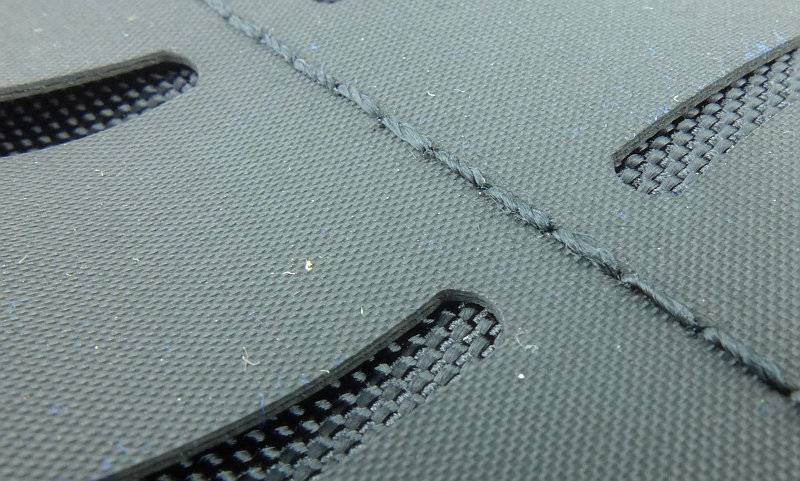
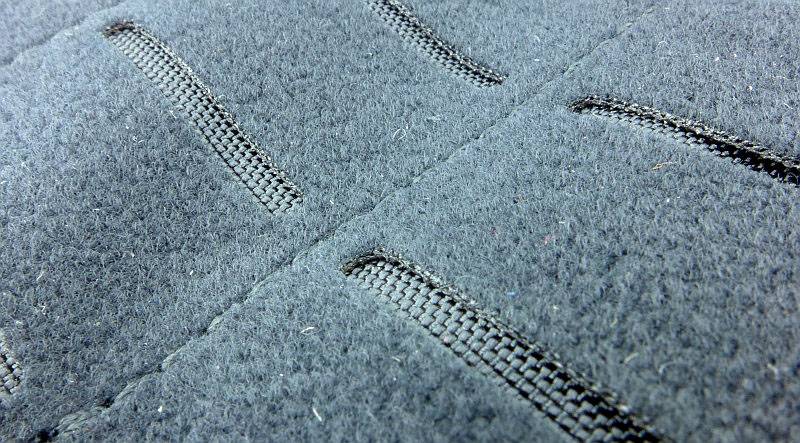
A detail of the Hypalon’s surface and cut-outs.
 photo 08 NC Pouches NPD10 hypalon P1230489.jpg

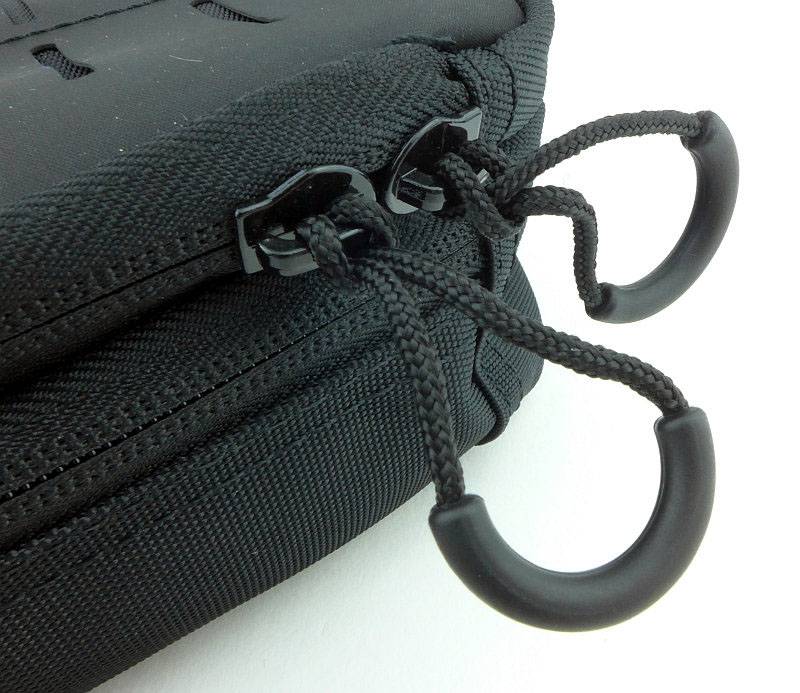
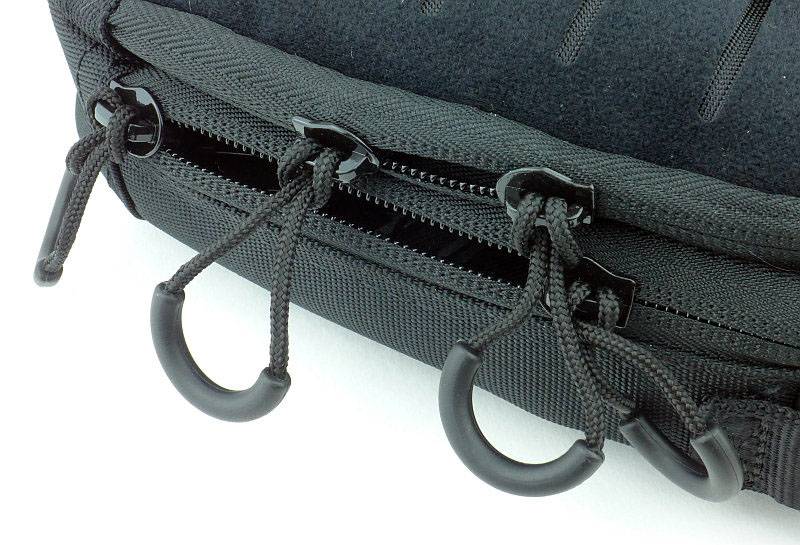
Access to the comparments is via the zip closures, and NITECORE have made these zips very easy, with large zip-pulls having a semi-circular moulded loop.
 photo 09 NC Pouches NPD10 zip pulls P1230492.jpg

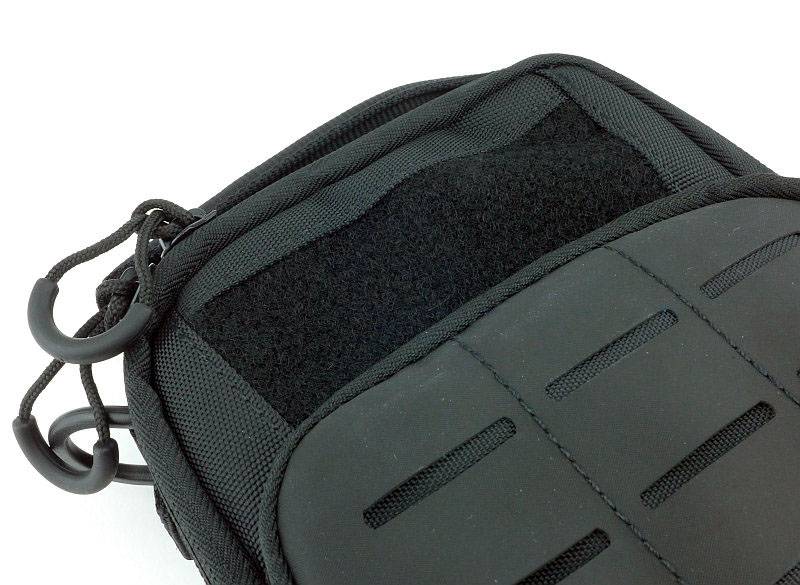
On this larger Daily Pouch, there is a small hook and loop patch-panel for personalising your pouch. On the NPD20 you can fix patches to the entire front panel, but the Hypalon prevents this on the NPD10.
 photo 10 NC Pouches NPD10 patch panel P1230495.jpg

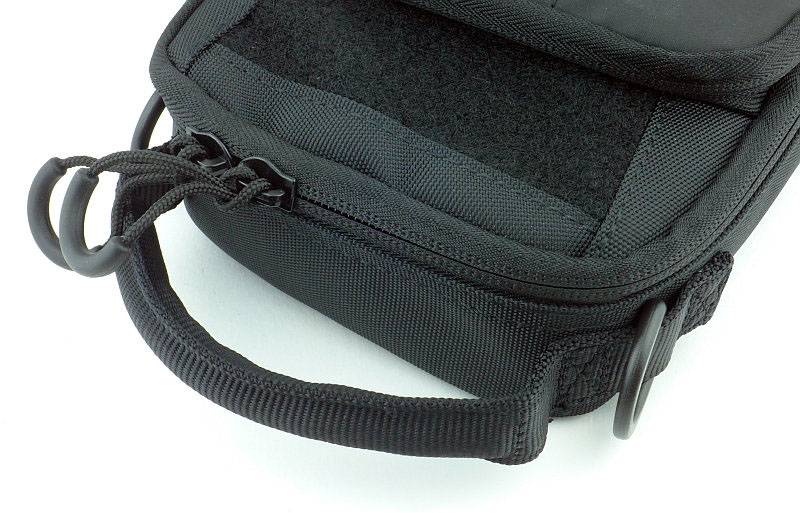
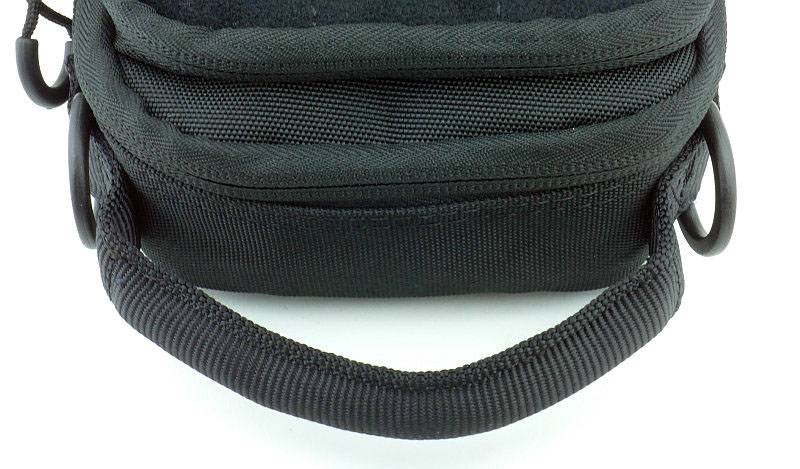
There is a padded carry handle on the top of the pouch so it can be held like a small bag.
 photo 11 NC Pouches NPD10 handle P1230502.jpg

It also comes with a shoulder strap.
 photo 12 NC Pouches NPD10 plus strap P1230505.jpg

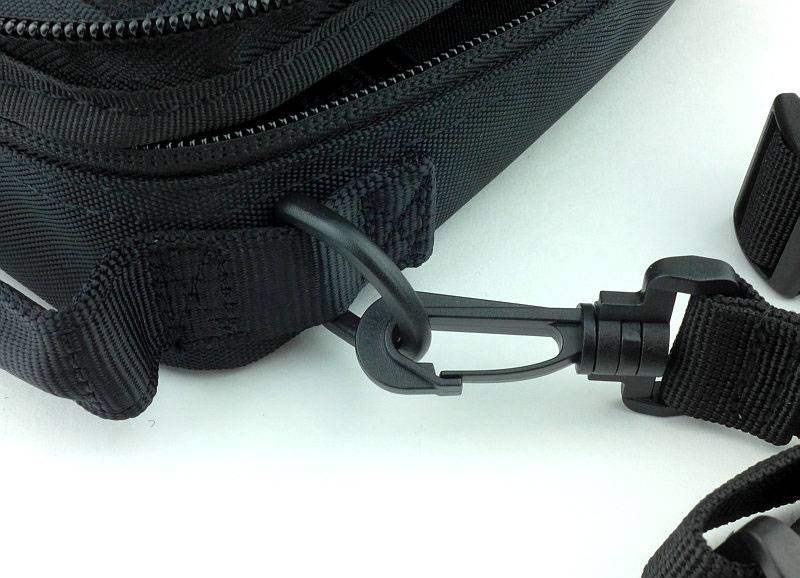
The shoulder strap clips onto D-rings either side of the handle.
 photo 13 NC Pouches NPD10 strap clip P1230509.jpg

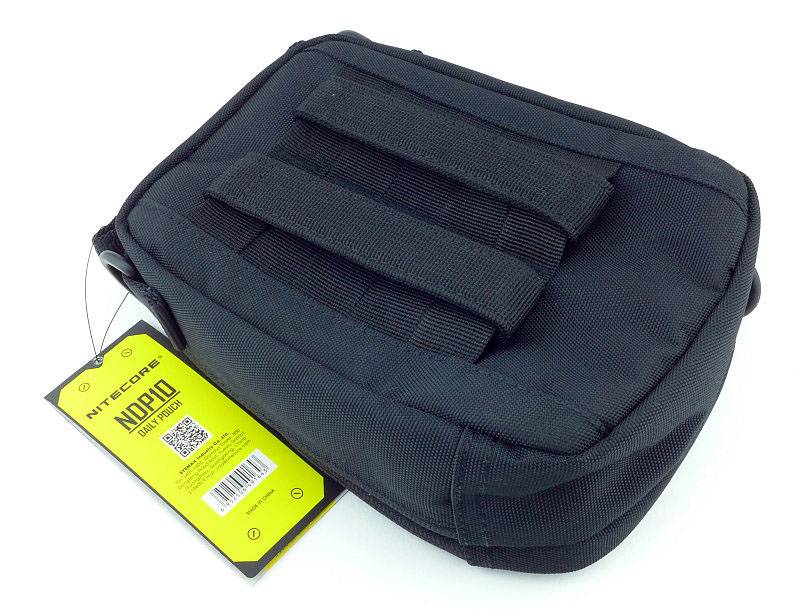
On the back there is a PALS webbing attachment which is compatible with PALS/MOLLE systems.
 photo 04 NC Pouches NPD10 pals P1230471.jpg

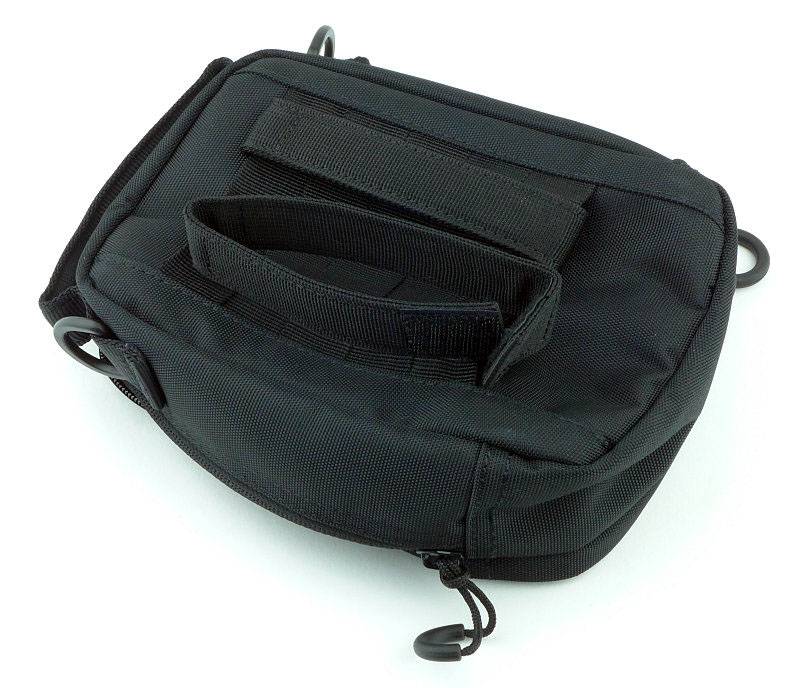
Supplied with the NPD10 are two PALS connection strips which have a Velcro closure.
 photo 14 NC Pouches NPD10 PALS P1230514.jpg

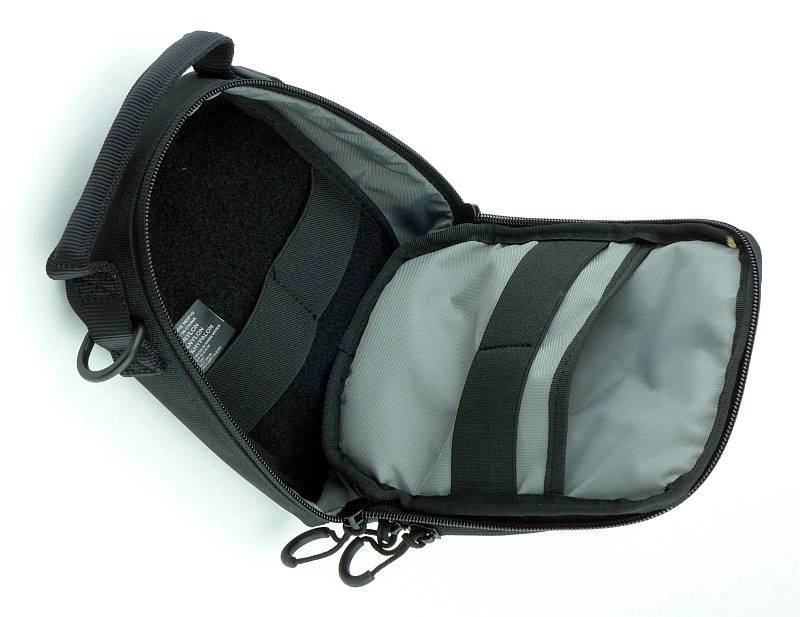
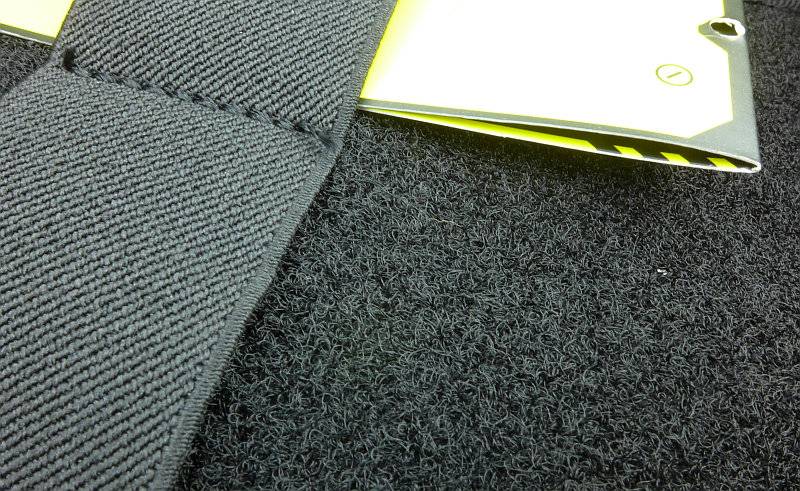
Opening the main compartment, there is a pocket fixed to the front with an elastic organiser strip, and the rear of the main compartment has a full hook and loop surface for additional flexibility, plus another elastic organiser strip.
As the zips run all the way from one side to the other and have double zip-pulls, the access to these pouches is ambidextrous.
 photo 15 NC Pouches NPD10 main P1230518.jpg

The hook and loop organiser surface in the main compartment.
 photo 17 NC Pouches NPD10 main inside P1230534.jpg

Inside the front compartment, there is even more organisation for small items. Two elastic strips, a front pocket and a clip/D-ring fixing point for keys etc.
 photo 16 NC Pouches NPD10 front P1230527.jpg

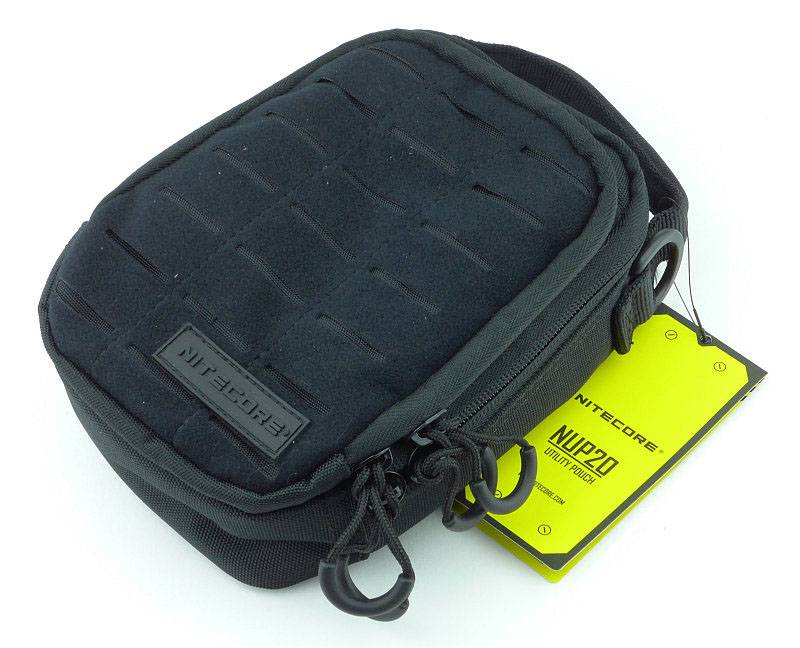
Now we switch to the smaller NUP20. NITECORE Utility Pouch with ‘Velveteen’ Synthetic fabric front panel.
 photo 18 NC Pouches NUP20 P1230540.jpg

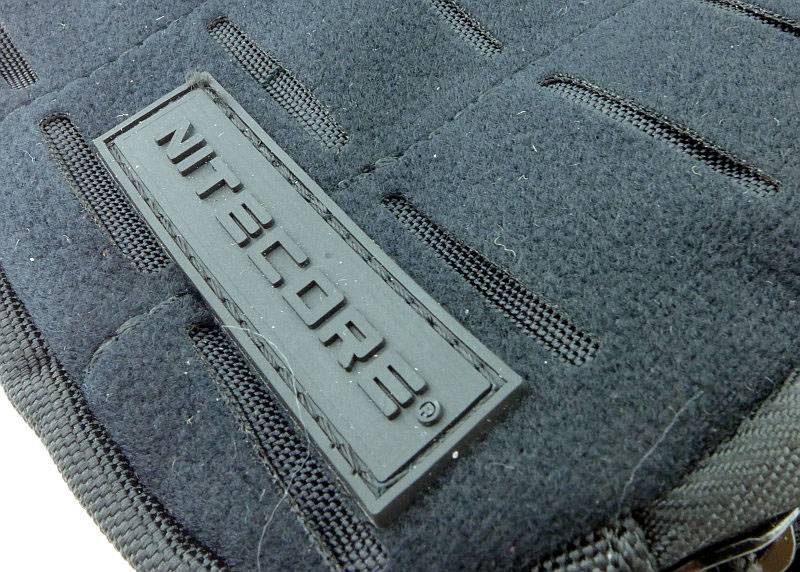
Again, in keeping with the stealth appearance of the pouches, the rubber NITECORE logo has none of the usual yellow colouring.
 photo 19 NC Pouches NUP20 logo P1230543.jpg

A closer look at the plush Velveteen Synthetic fabric front panel.
 photo 20 NC Pouches NUP20 patch front P1230547.jpg

As on all of the NITECORE pouches there are large zip-pulls for easy access.
 photo 21 NC Pouches NUP20 zip pulls P1230551.jpg

There is a padded carry handle on the top of the pouch so it can be carried like a small bag.
 photo 22 NC Pouches NUP20 handle P1230556.jpg

The Utility Pouch also has a shoulder strap.
 photo 23 NC Pouches NUP20 strap P1230560.jpg

This too clips onto D-rings each side of the handle.
 photo 24 NC Pouches NUP20 strap clip P1230561.jpg

The strap is a generous size so should accommodate wearing it over even large coats.
 photo 25 NC Pouches NUP20 strap fitted P1230566.jpg

On the back of the NUP20 is the same PALS attachment system as used on the Daily pouches.
 photo 26 NC Pouches NUP20 PALS P1230570.jpg

As before the PALS connection strips have a Velcro closure.
 photo 27 NC Pouches NUP20 PALS P1230574.jpg

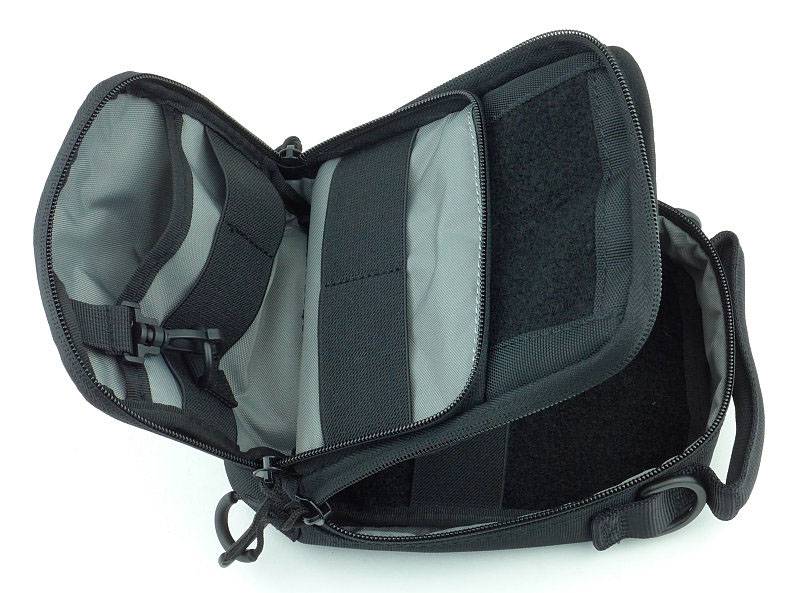
In the main compartment, the layout is the same as with the Daily pouch, but the compartment is just smaller.
 photo 28 NC Pouches NUP20 main P1230578.jpg

It too has the hook and loop rear panel inside the main compartment.
 photo 29 NC Pouches NUP20 main detail P1230580.jpg

Using the same configuration as the NDP pouches the NUP 20 has two elastic strips, a front pocket and a clip/D-ring fixing point for keys etc. inside the front compartment.
 photo 30 NC Pouches NUP20 front P1230589.jpg

A closer look at the clip/D-ring.
 photo 31 NC Pouches NUP20 front clip P1230591.jpg

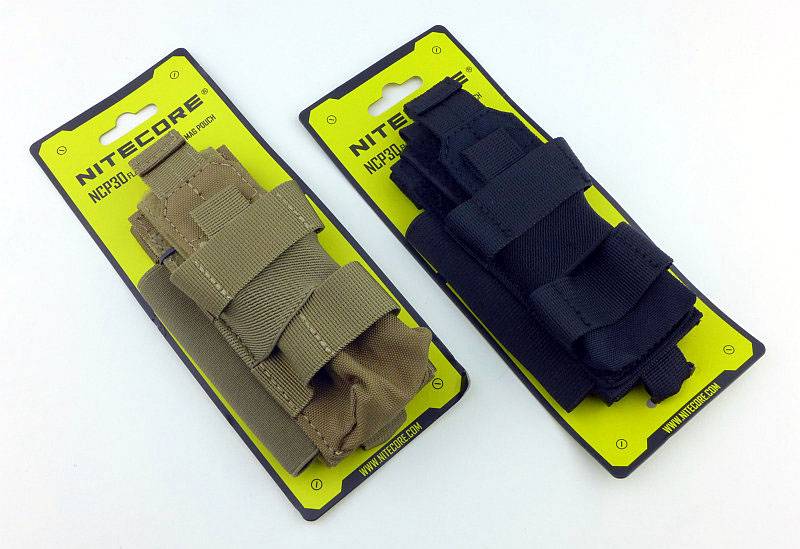
A very brief aside here looking at a couple of other NITECORE pouches/holsters, the NCP30, as one of these will appear in the next section.
 photo 32 NC Pouches NCP30 P1230597.jpg

What are they like to use?

The way you choose to carry your EDC gear is as personal as your choice of the gear itself. What you are doing and where you are going also completely changes the requirements of your carry system, so you will need a few options to suit these differing requirements. For any scenario, no one bag/pouch/system will suit everyone, and the way you fill that carrying system will also be unique. So really the best thing you can have are options, and the NITECORE pouches give you options.

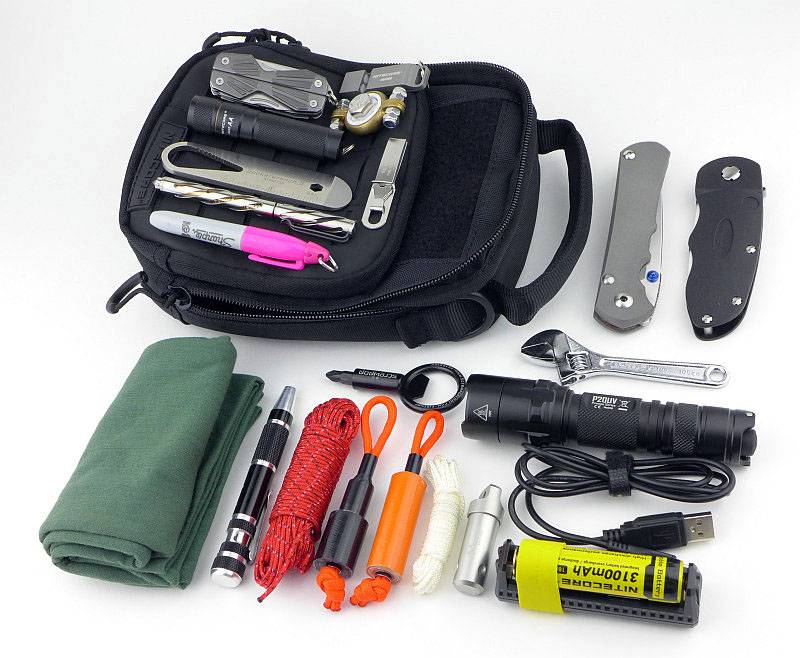
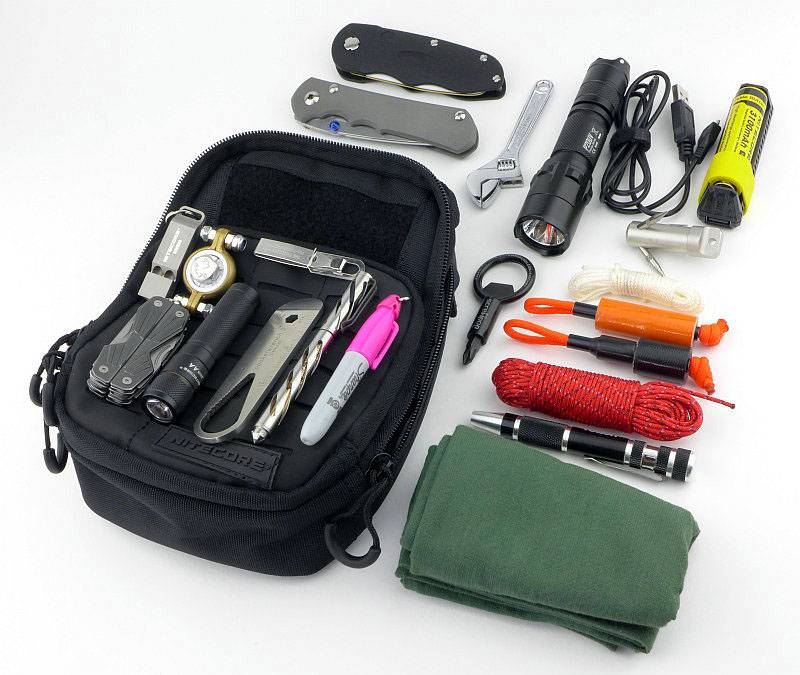
Taking the larger Daily Pouch the NDP10, here I’ve shown one example of a set of gear I’ve been carrying.
 photo 33 NC Pouches NPD10 contents P1230765.jpg

This is a snapshot of a set of gear that changes depending on, well, the day. This is not an over-stuffed pouch as I don’t like ramming things to full capacity as it just makes it more difficult to find things, but the list here includes:

A fire-resistant Buff
Mini screwdriver set
3mm cord hank
Gorilla tape mini roll
Jaffa Gaffa tape mini roll
2mm cord hank
CountyComm Pico Grappling hook
NITECORE F1 charger/powerbank
NITECORE NL188 3100mAh 18650 cell
NITECORE USB cable
NITECORE P20UV
Mini adjustable spanner
Screwpop Magnetic Screwdriver
Chris Reeve Knives Large Inkosi
Fällkniven Flipstone Sharpener
NITECORE NWS20 Titanium Whistle
NITECORE NTP10 Titanium Pen
Sharpie Mini Marker
NITECORE SENS AA
Uncle Bill’s Sliver Gripper Tweezers
Burketek Pocket Wrench II
Gerber Bear Girls compact multi-tool
A ‘peak_wanderer’ Unseen Ring Spinner

Not too shabby, and prepared for the odd eventuality. Remember this was not crammed full, but was accessible.

Like this I was carrying the NDP10 inside a larger bag, using at as an organiser, and also separately with the shoulder strap. I found it a bit dense/heavy for PALS/MOLLE mounting.

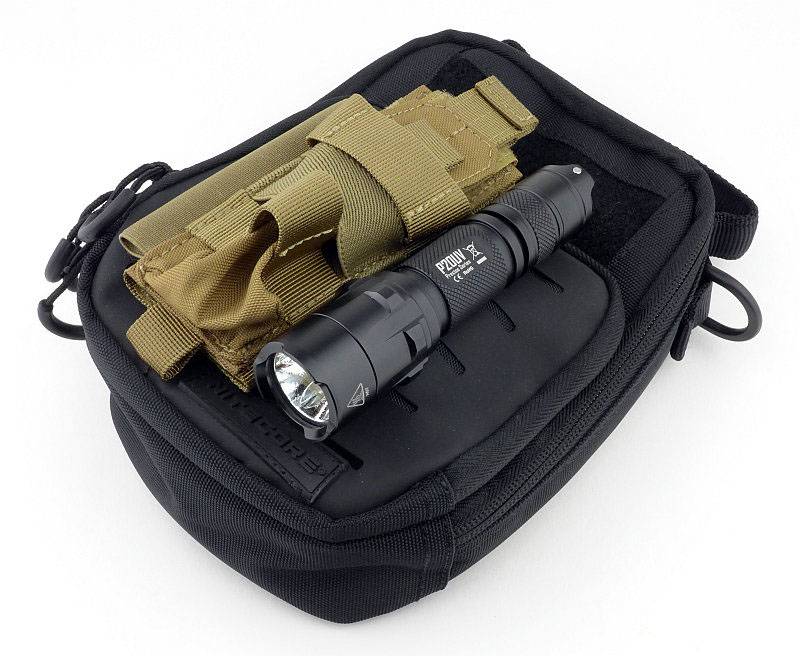
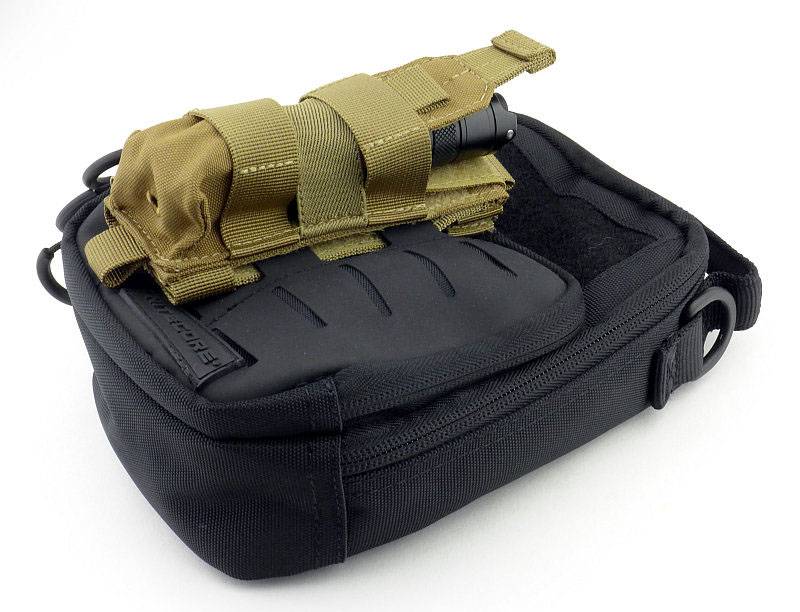
As a bit of an aside, to free up a bit of space inside and to make access to the bigger light easier I decided to use the PALS feature on the front to fit the NCP30 pouch onto the NDP10.
 photo 35 NC Pouches NPD10 with pouch P1230791.jpg

From this angle you can see the PALS connection strap woven through the PALS panel.
 photo 36 NC Pouches NPD10 with pouch P1230793.jpg

The NCP30 has an elasticated body that holds onto the light so you don’t need to have a top flap covering it.
 photo 37 NC Pouches NPD10 with pouch open P1230799.jpg

If you are concerned though, you can bring a retaining flap out of the NCP30 to fully secure the light.
 photo 38 NC Pouches NPD10 with pouch closed P1230804.jpg

So, these NITECORE pouches give you options for organisation and carry of those essential EDC bits and pieces. In-bag carry, direct carry, on-bag carry and shoulder-strap carry options for sensible sized pouches that are small enough to be convenient and large enough to be useful.

Review Summary

The views expressed in this summary table are from the point of view of the reviewer’s personal use. I am not a member of the armed forces and cannot comment on its use beyond a cutting tool or field/hunting knife.

Something that might be a ‘pro’ for one user can be a ‘con’ for another, so the comments are categorised based on my requirements. You should consider all points and if they could be beneficial to you.

_______________________________________________ _______________________________________________
Things I like What doesn’t work so well for me
_______________________________________________ _______________________________________________
Choice of two pouch sizes that are small enough to be convenient and large enough to be useful. Would benefit from more dividers/separators inside main compartment.
Multi carry options – Shoulder, PALS/MOLLE, handle. Zip-pull loops can catch on things accidentally and be pulled open.
Smaller pouches can be attached to the front of these using hook/loop or PALS/MOLLE. PALS/MOLLE connection strips not the most secure with hook/loop closure.
Choice of front panel material.
1000D Corduroy construction.

 photo 34 NC Pouches NPD10 contents P1230775jpg.jpg


Discussing the Review:

Please feel free to add comments to the review, but the ideal place to freely discuss these reviews is on a forum. If you started reading the shorter forum version of the review, but followed the link this full exclusive review, please return to that forum to discuss the review there.
If you read the review entirely on Tactical Reviews, please consider one of the following to join in any discussion.

EdgeMatters – Sponsored Reviews (UK based Forum for Knife Makers and Collectors)

BladeForums – Knife Reviews (US based Forum for Knife Discussion)

CandlePowerForums – Knife Reviews Section (Largest and Friendliest Flashlight Community Forum)

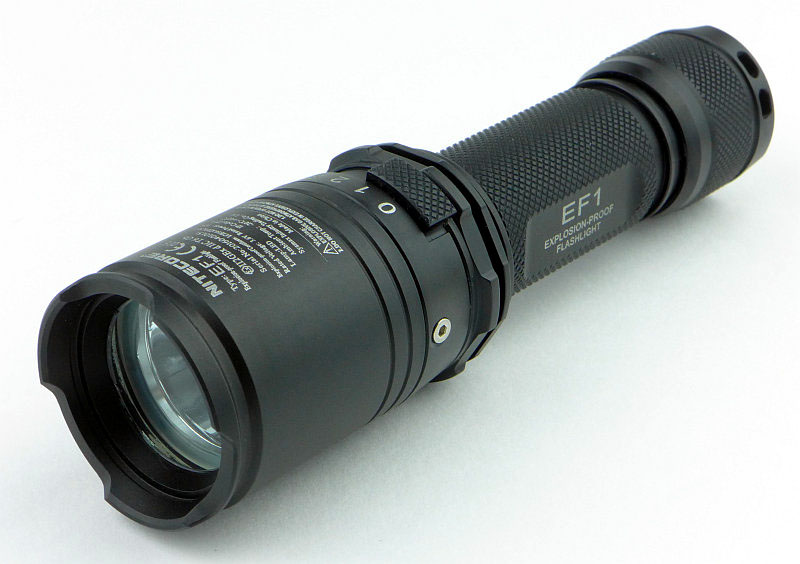
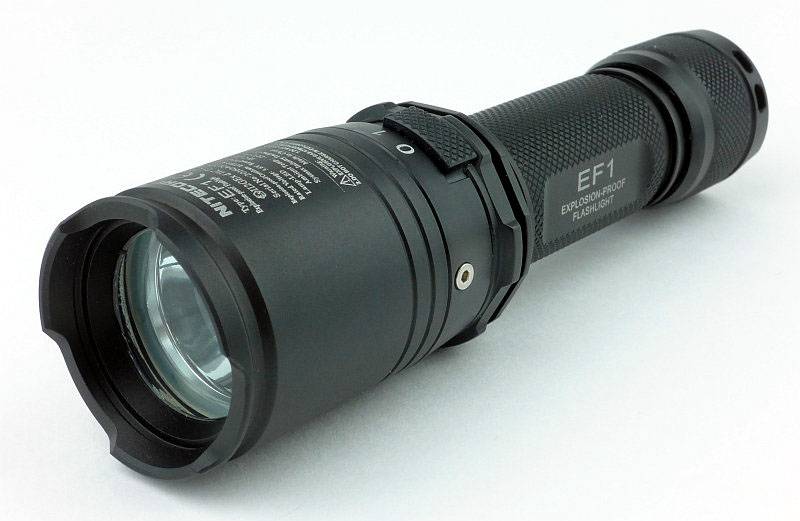
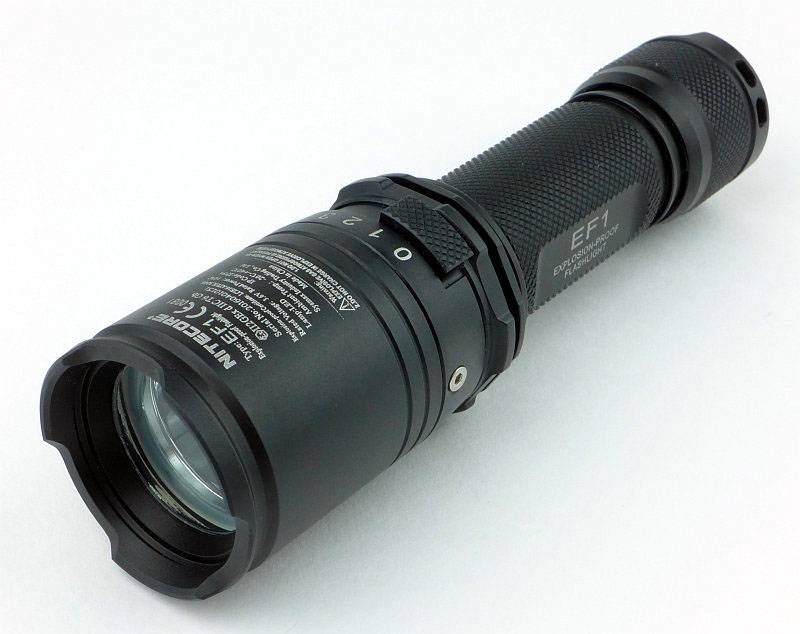
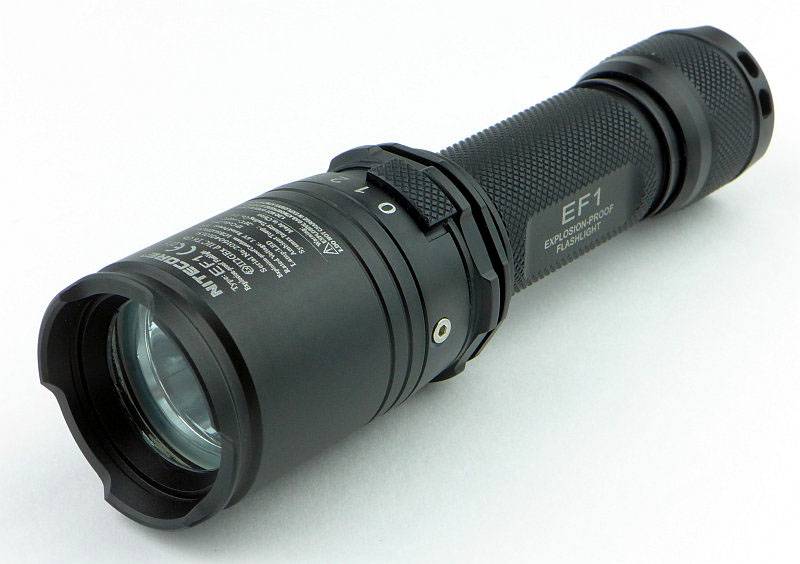
Light Review: Nitecore’s Explosion Proof EF1

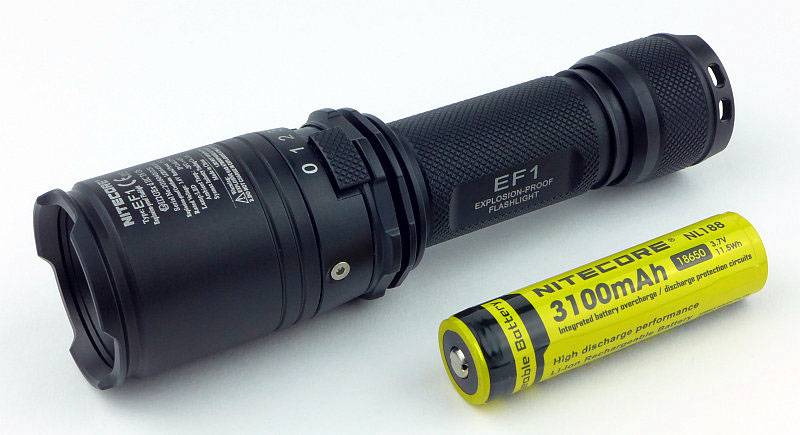
With the EF1, NITECORE have confidently entered the market for hazardous environment equipment, with a light which can be used in the petroleum exploration, petrochemical and chemical industries, as it is rated as a Type II non-mine explosion-proof electrical appliance.

 photo 00 EF1 Feature P1200195.jpg

Taking a more detailed look:

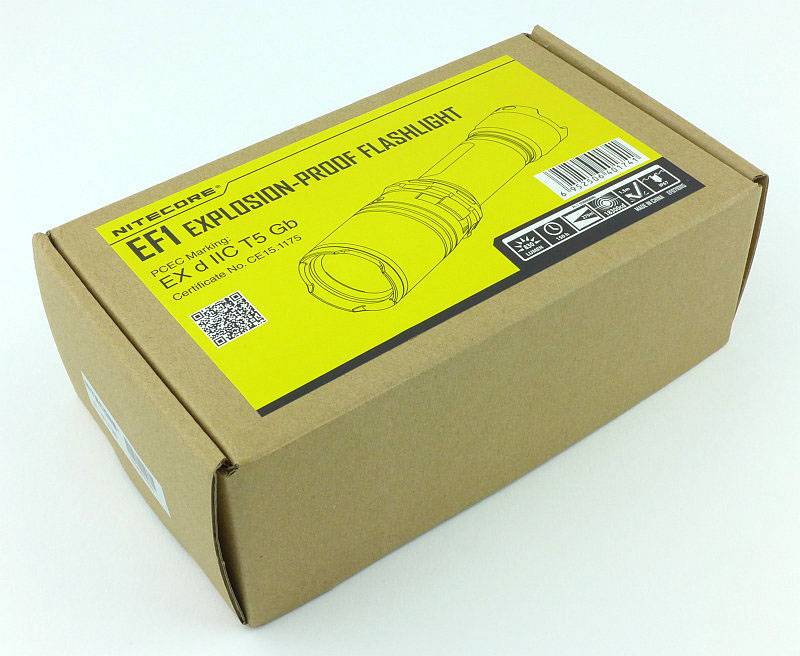
The EF1 arrives in a box like the ones used for the TM series.
 photo 01 EF1 boxed P1200173.jpg

Closed cell foam is used as the liner.
 photo 02 EF1 box open P1200177.jpg

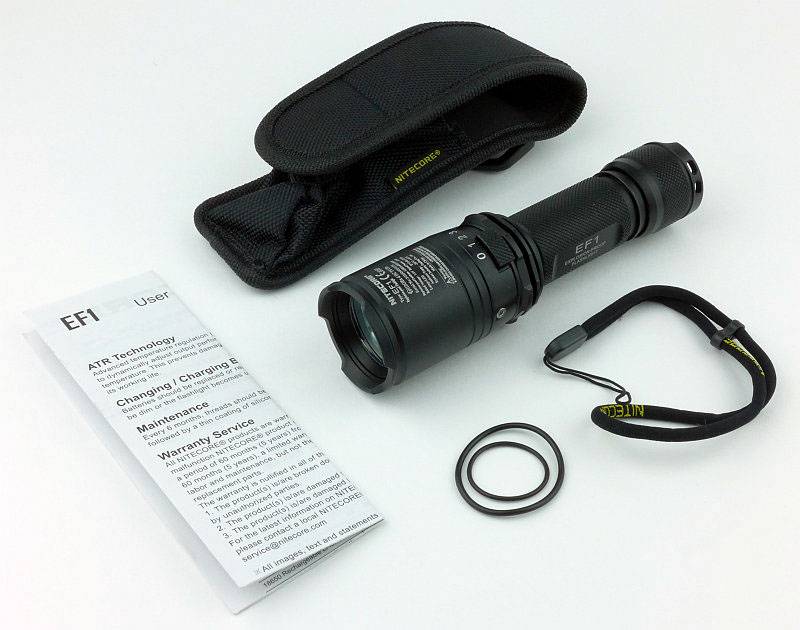
With the EF1 you get a holster, lanyard, spare o-rings and the instructions.
 photo 03 EF1 box contents P1200185.jpg

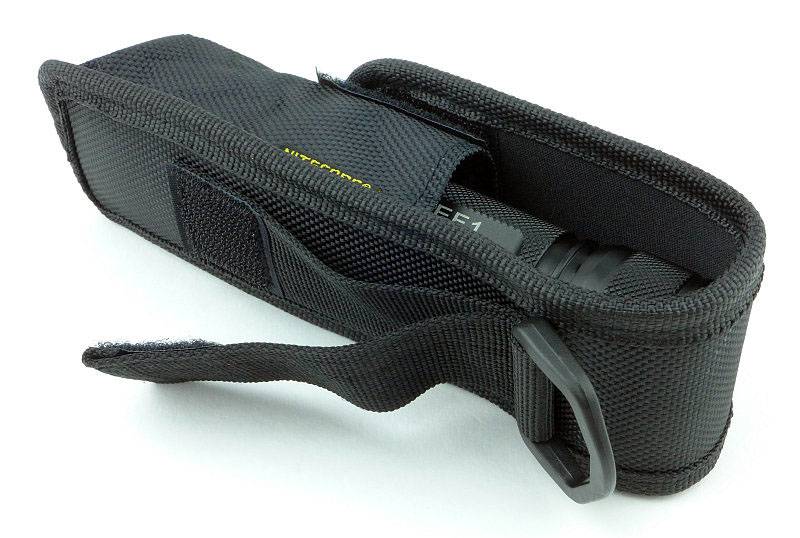
The EF1 in its holster.
 photo 04 EF1 holster P1200188.jpg

On the back it has a fixed loop, a D-loop and a Velcro closed loop.
 photo 05 EF1 holster loops P1200191.jpg

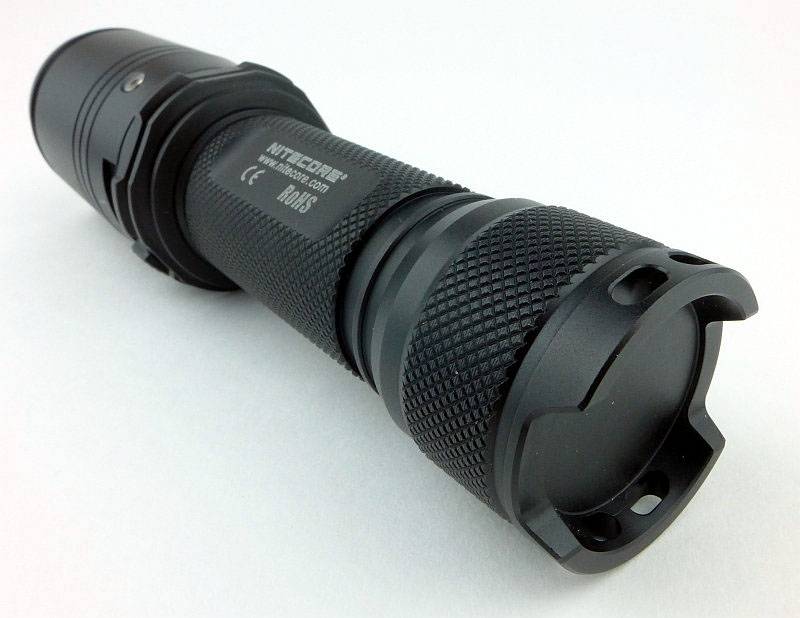
It is a chunky light, but that is due to its heavy build for the Explosion Proof rating.
 photo 06 EF1 angle P1200197.jpg

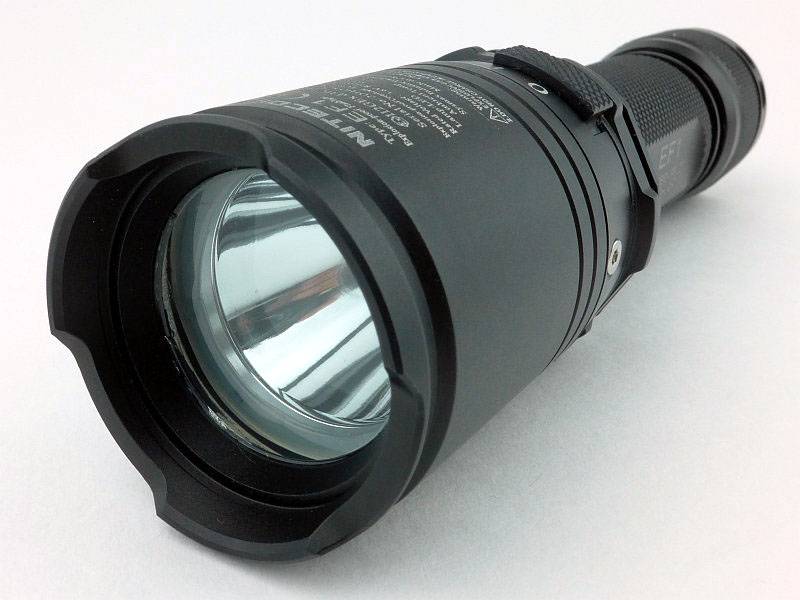
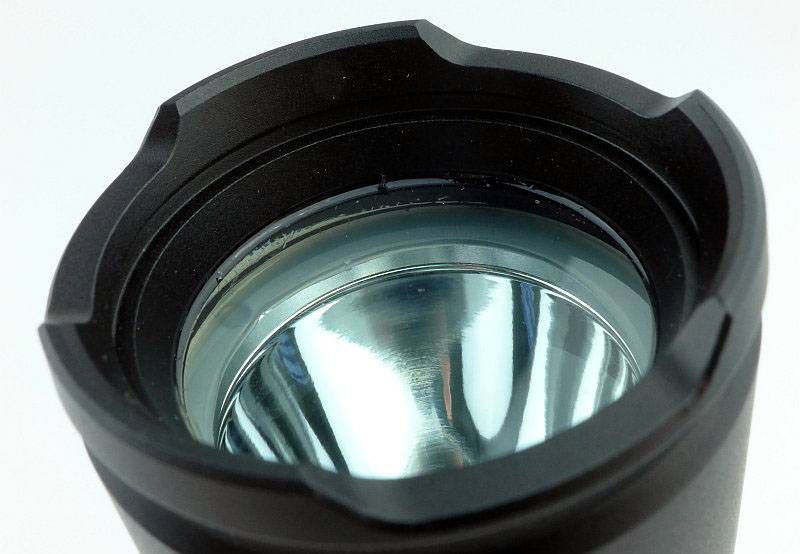
The lens is very thick making it look like a dive light.
 photo 07 EF1 lens P1200203.jpg

On the side it proudly states its explosion proof status.
 photo 08 EF1 engraving P1200205.jpg

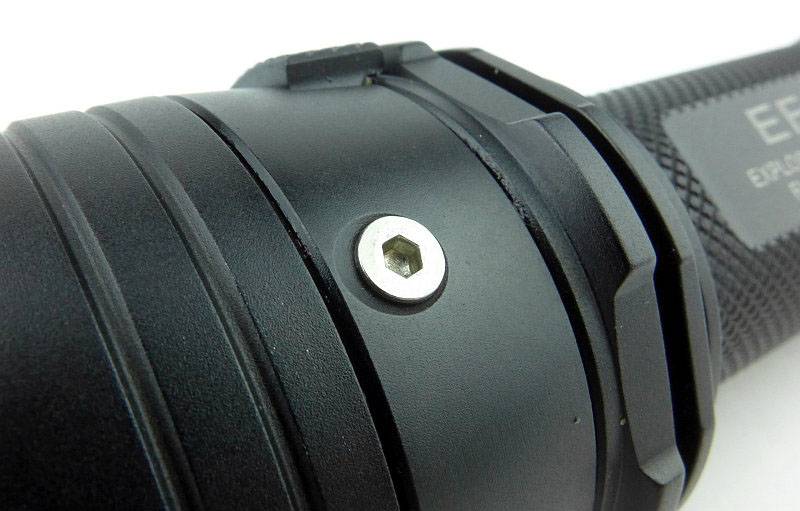
There are a couple of exposed screws on the head that seem to hold parts of the magnetic switch together.
 photo 09 EF1 screw P1200207.jpg

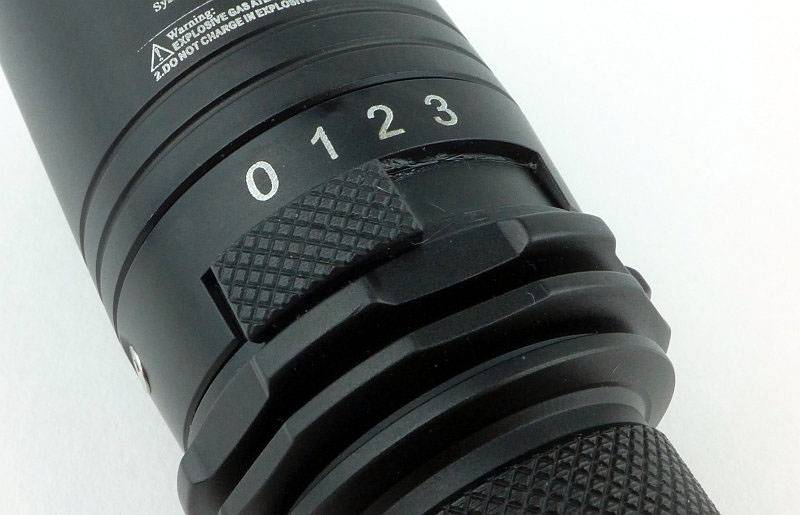
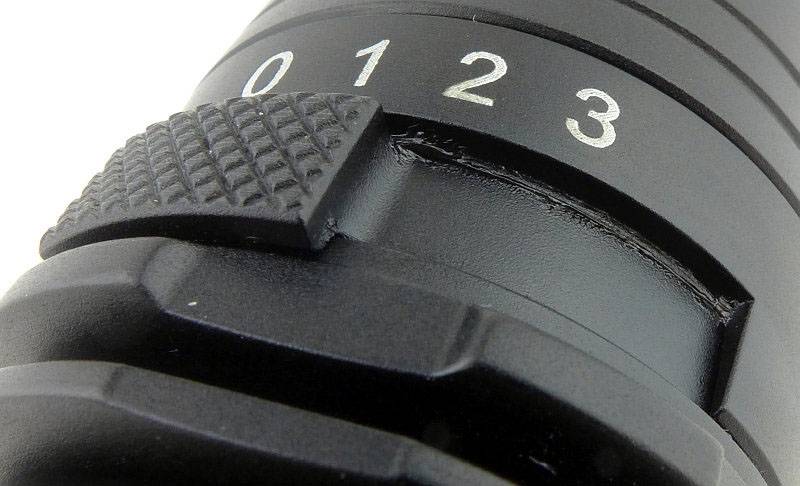
The switch is a rotating/sliding switch with four positions.
 photo 10 EF1 switch P1200210.jpg

It is difficult to really show how thick this lens is, but it is thick – 10mm thick.
 photo 11 EF1 lens P1200220.jpg

A view from the tail-cap end.
 photo 12 EF1 tail view P1200227.jpg

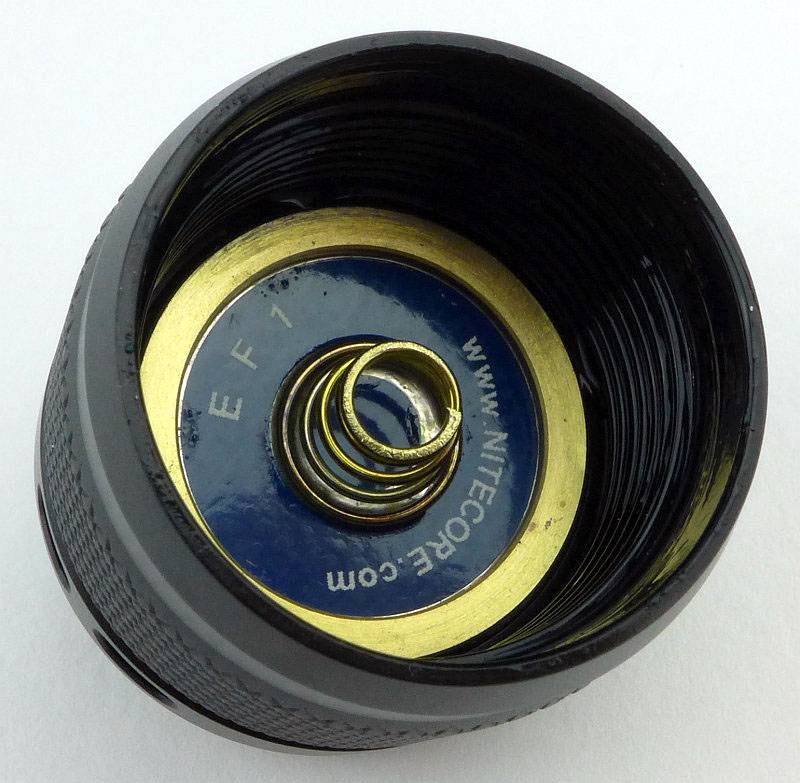
Inside the tail-cap is a spring and ring terminal.
 photo 13 EF1 tail contacts P1200235.jpg

That is one thick battery tube with a minimum thickness of 3mm.
 photo 14 EF1 battery tube P1200237.jpg

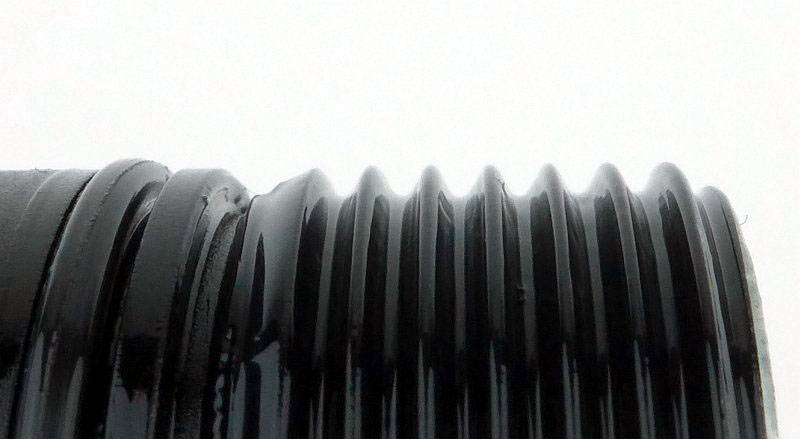
A long section of well lubricated standard threads are used for the tail-cap. They are fully anodised, so you can physically lock out the EF1 by unscrewing the tail-cap slightly.
 photo 15 EF1 battery threads P1200245.jpg

With a battery being inserted you see how thick that battery tube is.
 photo 16 EF1 battery insert P1200248.jpg

Peering deep into the battery tube for a view of the positive contact.
 photo 17 EF1 head contacts P1200256.jpg

The XM-L2 U3 LED sits in a smooth reflector.
 photo 18 EF1 LED P1200261.jpg

It is a relatively deep reflector to focus the beam.
 photo 18 EF1 reflector P1200264.jpg

Next to an 18650 cell you can see the heavy build of this light.
 photo 19 EF1 size P1200286.jpg

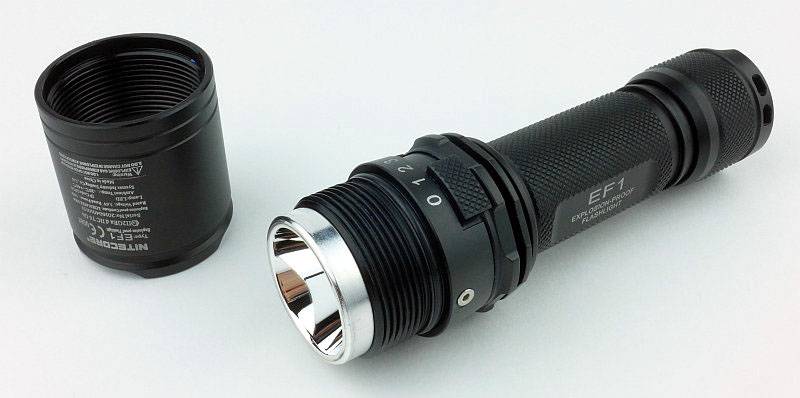
Slightly surprisingly, the head does unscrew giving access to the reflector and LED. This may be to provide access to the o-ring to allow it to be inspected.
 photo 20 EF1 head off P1200290.jpg

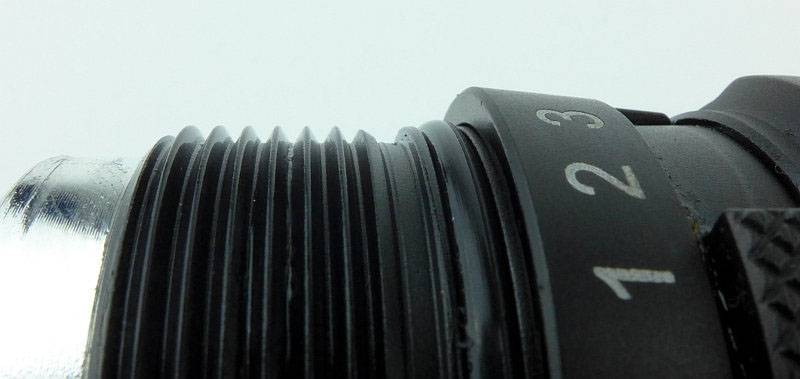
The detail of those threads for the front part of the light.
 photo 21 EF1 head threads P1200291.jpg

The beam

Please be careful not to judge tint based on images you see on a computer screen. Unless properly calibrated, the screen itself will change the perceived tint.

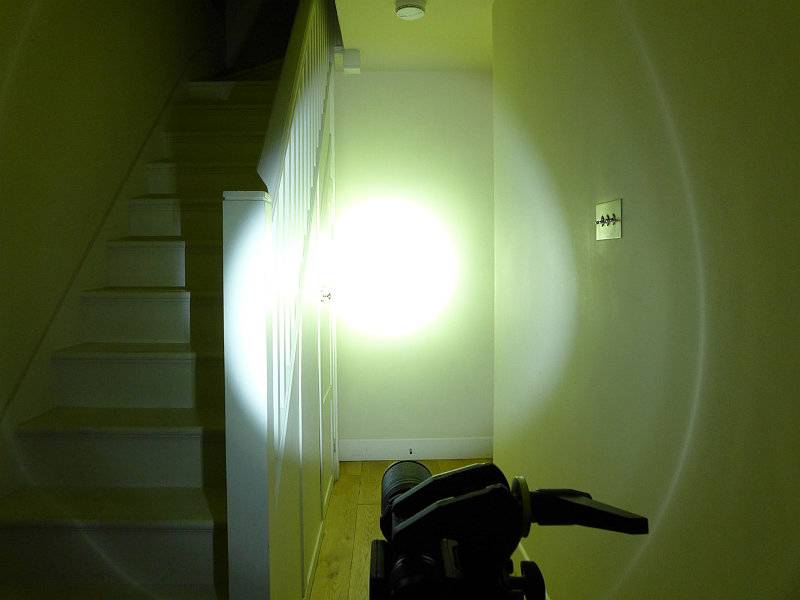
The indoor beamshot is intended to give an idea of the beam shape/quality rather than tint. All beamshots are taken using daylight white balance. The woodwork (stairs and skirting) are painted Farrow & Ball “Off-White”, and the walls are a light sandy colour called ‘String’ again by Farrow & Ball. I don’t actually have a ‘white wall’ in the house to use for this, and the wife won’t have one!

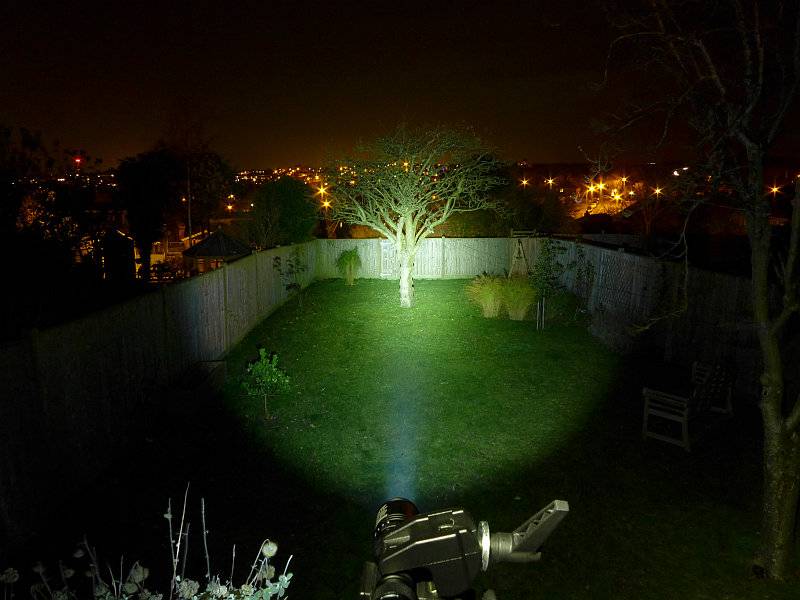
Starting off indoors, the EF1’s beam is narrow overall. There is a relatively average sized hotspot, but only a very narrow spill around this. This appears much more suited to inspection duties than general lighting for getting around.
 photo 23 EF1 indoor beam P1230323.jpg

Giving it some more range outdoors and that narrow spill is still an obvious characteristic.
 photo 28 EF1 outdoor beam P1240708.jpg

Modes and User Interface:

Nitecore have kept the interface of the EF1 very simply. There is a four position sliding switch, OFF (0), Low (1), Medium (2) and High (3).

Simply slide the switch to the position you want. There is nothing more to it.

Batteries and output:

The EF1 runs on either 1x 18650 or 2x CR123.

To measure actual output, I built an integrating sphere. See here for more detail. The sensor registers visible light only (so Infra-Red and Ultra-Violet will not be measured).

Please note, all quoted lumen figures are from a DIY integrating sphere, and according to ANSI standards. Although every effort is made to give as accurate a result as possible, they should be taken as an estimate only. The results can be used to compare outputs in this review and others I have published.

___________________________________________ ________________________________ ________________________________
EF1 using specified cell I.S. measured ANSI output Lumens PWM frequency or Strobe frequency (Hz)
___________________________________________ ________________________________ ________________________________
High – NL189 729 0
Medium – NL189 341 100
Low – NL189 5 217

* Beacon and Strobe output measurements are only estimates as the brief flashes make it difficult to capture the actual output value.

Peak Beam intensity measured 13900 lx @1m giving a beam range of 236m.

There is parasitic drain which varies between 2.68 and 1.2 mA. When using a 3100mAh 18650 it will take 48-108 days to drain the cell. This is very bad for a standby light.

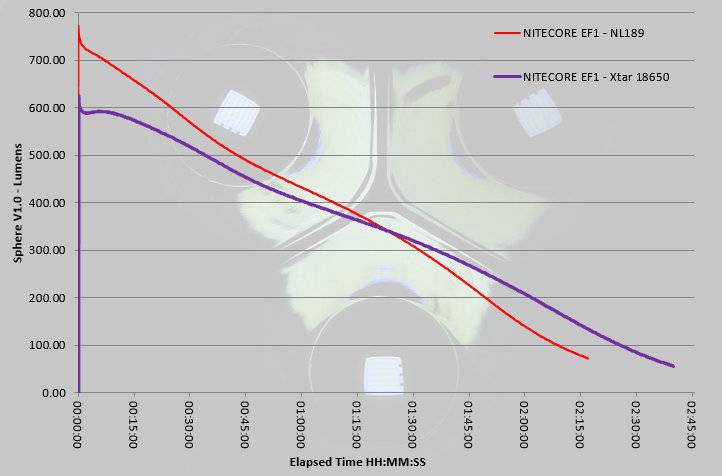
Initially I was testing the EF1 with an Xtar 3100mAh 18650, but the output figures were not up to specification. Subsequently I re-ran these tests with a Nitecore NL189. With the NL189 the ANSI output was higher, but as you can see the runtime was overall lower. Output is not regulated and drops off during the entire run. In the environments in which you would use this light, you definitely don’t want a sudden drop in output at the wrong time, so this is a better runtime profile to have.
 photo EF1 runtime plus Xtar.jpg

Troubleshooting

This section is included to mention any minor niggles I come across during testing, in case the information helps anyone else.

No issues were encountered during testing.

As per the description of this section, this information is provided in case anyone else finds a similar ‘issue’ that might be fixed in the same way.

The EF1 in use

Before we get any further we must clarify what ‘Explosion proof’ actually means. Firstly, it does not mean you can drop a bomb on it! Instead it relates to the world of hazardous environment equipment, for which there are many different and very specific standards for the various classifications of hazard. The safest equipment are ‘Intrinsically Safe’ devices which are intrinsically incapable of igniting hazardous atmospheres even if destroyed, as no component within them can achieve ignition, including the cells. Then there are the ‘Explosion-Proof’ ratings where the device does indeed contain enough energy to ignite explosive gasses, but critically, should the device have been opened in that hazardous atmosphere and contain an explosive mixture which can be ignited, if there is a small explosion within the device, that explosion is completely contained and cannot propagate into the surrounding atmosphere. The ‘Explosion Proof’ rating is protection from internal explosions.

Now we have got that clear, a direct consequence of the explosion proof rating is that the build is very heavy. Putting the EF1 next to a two cell light, the P36 shows how even though it is a single 18650 light, it really has presence. We are looking at one very tough light.
 photo 22 EF1 size p36 P1200296.jpg

With it being a very solid build, and having a sliding switch, actually the EF1 could also be very suited to diving use. While carrying out my Dive Knives 2016 – Mega Test Review I also took the EF1 with me, but wasn’t able to get any in-use shots. It was ceratinly taken to depths greater than the 1.5m specified, but not more than 10m where I was diving.
One thing I did put the EF1 through was the dive knife corrosion testing (details in the Dive Knives 2016 – Mega Test Review) and this is what happened to the EF1.
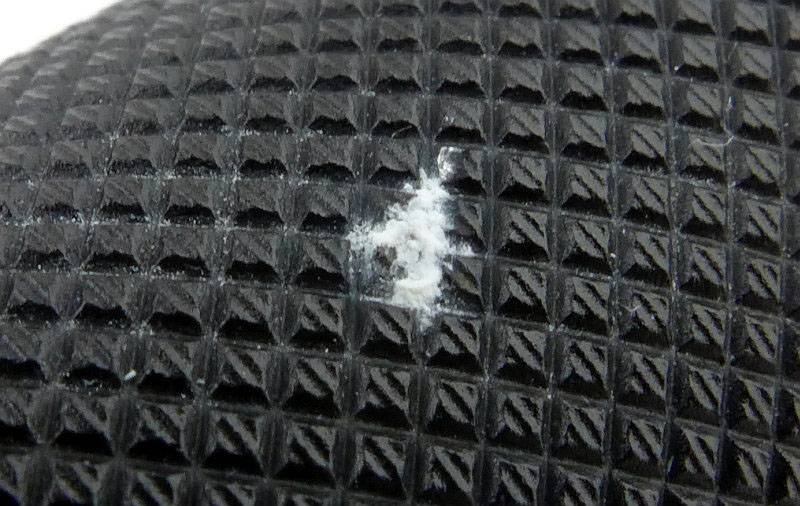
Taking in the overall view, the most obvious sign is a small white patch on the handle.
 photo 24 EF1 corrosion P1230810.jpg

Going in closer we can see this is a patch of aluminium corrosion from the salt water exposure. There must have been a small flaw in the anodising for this to have happened.
 photo 25 EF1 corrosion P1230823.jpg

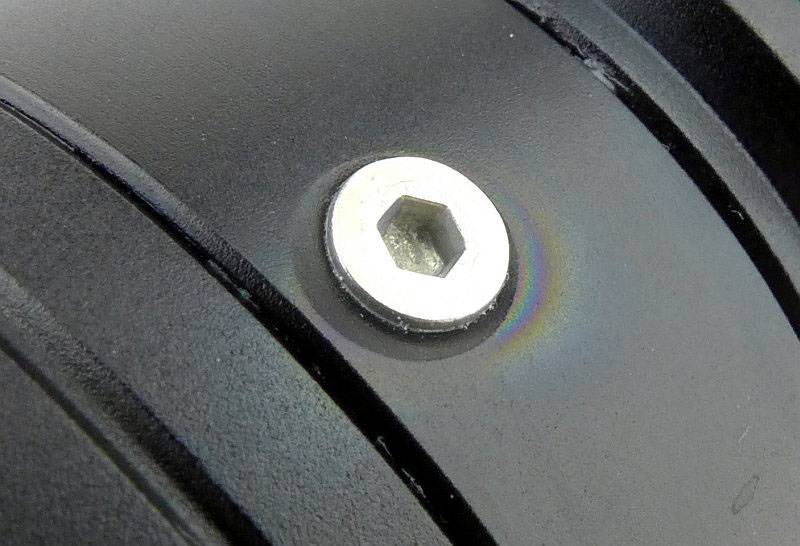
Just next to one screw on the head was a rainbow like colouring on the anodising looking like an oil film. It was perfectly dry and free of oil, and this was only visible after the corrosion test.
 photo 26 EF1 corrosion P1230817.jpg

The last visible effect was that the grease around the sliding switch turned a dark brown/black colour, so was not an inert grease.
 photo 27 EF1 corrosion P1230820.jpg

There were no issues with the EF1 following this intensive corrosion test, and it is still functioning perfectly.

Though we tend to prefer smaller and easier to carry lights, there is a certain satisfaction to carrying the tank-like EF1. Its weight is comforting and there is nothing fragile about it. The slider switch is positive and simple to use and needs no explanation. There is a noticeable delay in the switch response, most notable when switching the EF1 on from OFF. It is probably only 0.3s or thereabouts, but you move the switch, then the EF1 turns on after that brief pause. The same when changing levels.
For my own use, the biggest issue is the mode spacing. It has a useful 5lm Low mode, but then jumps to 341lm. It definitely could have done with something around 80lm-100lm mark instead of jumping right up to 340lm. When the 5lm is not enough, that jump can be blinding.

Not working in a hazardous environment myself, I can’t say if the beam profile is a good fit for this type of use. It certainly seems to be an inspection type of beam rather than one for general use and getting about. I found it too narrow for navigating on rough ground as the hotspot was giving peripheral blindness when shining it at the ground. It is fine for longer distances, just not good closer up.

For the domestic user, there is the attraction of the Explosion Proof rating particularly in case of gas leaks. Personally I have several gas-safe lights including intrinsically safe lights. Those intrinsically safe lights however are all AA Alkaline powered, so the EF1 with its Li-ion power means the output is much higher, and I would consider it totally safe to use in a domestic gas leak situation. Some users would argue that any waterproof light will be safe to use, but this is wrong. If you change the battery and the explosive atmosphere gets inside the light, turning it on could create an explosion that would break out of a normal waterproof light. It would have been fine if you hadn’t opened it, but you did. With the EF1 this would not matter, as if this internal explosion did occur, the EF1 can withstand it – I know what I’d rather be holding.

Review Summary

_______________________________________________ _______________________________________________
Things I like What doesn’t work so well for me
_______________________________________________ _______________________________________________
Explosion Proof rating. Big jump in output from Low (5lm) to Medium (341lm).
Simple sliding switch. High parasitic drain – remember to lock out the tail-cap.
Predictable gradual drop in output (no sudden cut-out). Narrow spill limits versatility.
Extremely solid build. PWM used on Medium and Low modes.
Excellent corrosion resistance.
Holster supplied.

 photo 00 EF1 Feature P1200217.jpg


Discussing the Review:

Please feel free to add comments to the review, but the ideal place to freely discuss these reviews is on a forum. If you started reading the shorter forum version of the review, but followed the link this full exclusive review, please return to that forum to discuss the review there.
If you read the review entirely on Tactical Reviews, please consider one of the following to join in any discussion.

CandlePowerForums – Flashlight Reviews Section (Largest and Friendliest Flashlight Community Forum)

EdgeMatters – Sponsored Reviews (UK based Forum for Knife Makers and Collectors)

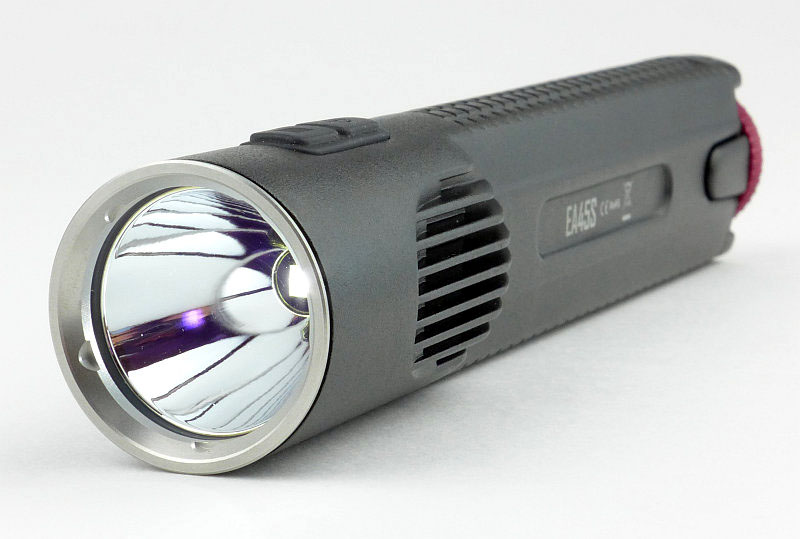
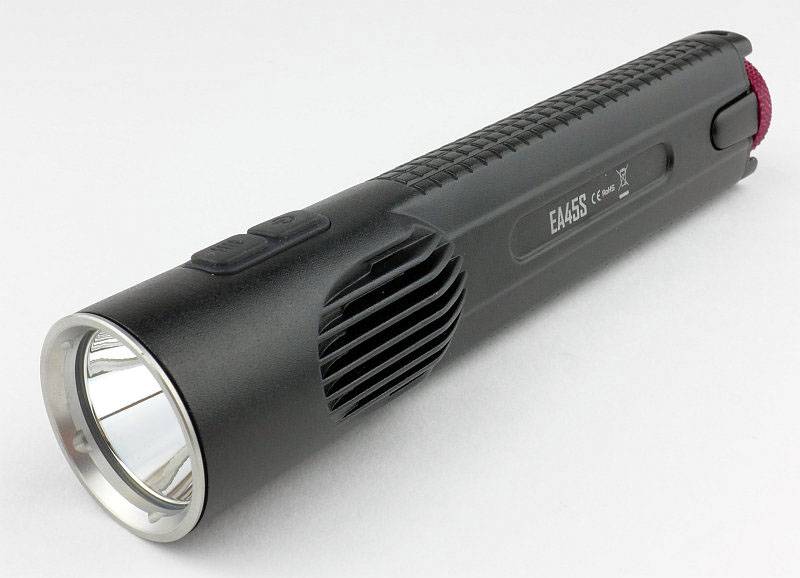
Light Review: NITECORE EA45S

NITECORE’s first die-cast unibody light was the revolutionary EC4 (check the index page for a review link). Developing the idea further, we now have a 4xAA thrower using a similar format die-cast ‘unibody’, the EA45S.

 photo 06 EC45S angle 2 P1150998.jpg

Taking a more detailed look:

NITECORE’s familiar cardboard packaging is used.
 photo 01 EC45S Boxed P1150979.jpg

Inside the box is the EA45S, a wrist lanyard, holster and instructions.
 photo 02 EC45S Box contents P1150985.jpg

Holsters are always appreciated and this is well made.
 photo 03 EC45S holstered 1 P1150988.jpg

You have the choice of a fixed belt loop, Velcro belt loop and a D-ring.
 photo 04 EC45S holstered 2 P1150991.jpg

A very distinct feature is the red tail-cap screw that the ‘S’ versions of the die-cast lights have.
 photo 07 EC45S rear angle P1160006.jpg

There is a dual side-switch for operating the EA45S.
 photo 08 EC45S switch detail P1160011.jpg

Heat sink fins are cast into the body. Thanks to the die-cast body there is an uninterrupted heat-path from these fins (and the rest of the body) to the LED board mount.
 photo 09 EC45S heat fins P1160012.jpg

At the base of a smooth reflector is the EA45S’s XP-L Hi V3 LED.
 photo 11 EC45S LED P1160016.jpg

Looking more closely at the XP-L Hi V3 LED.
 photo 12 EC45S LED close P1160026.jpg

NITECORE’s die-cast lights use an unusual tail-cap design. It has lugs to engage with the body, the contact board, and a thumbscrew.
 photo 13 EC45S tailcap contacts P1160030.jpg

Looking slightly left of centre in this photo, you can see the threads which are almost entirely hidden.
 photo 14 EC45S tailcap threads P1160032.jpg

Those threads engage with a small section of threading inside the body.
 photo 15 EC45S internal threads P1160035.jpg

Here you can see the EA45S next to the four AAs it holds.
 photo 16 EC45S with cells P1160042.jpg

The beam

Please be careful not to judge tint based on images you see on a computer screen. Unless properly calibrated, the screen itself will change the perceived tint.

The indoor beamshot is intended to give an idea of the beam shape/quality rather than tint. All beamshots are taken using daylight white balance. The woodwork (stairs and skirting) are painted Farrow & Ball “Off-White”, and the walls are a light sandy colour called ‘String’ again by Farrow & Ball. I don’t actually have a ‘white wall’ in the house to use for this, and the wife won’t have one!

Designed for throw, the EA45S has a very defined and strong hotspot.
 photo 19 EC45S indoor beam P1170299.jpg

Giving it a bit more range to work with, you can clearly see the power of the beam which is very impressive considering its 4xAA power source.
 photo 20 EC45S outdoor beam P1170234.jpg

Modes and User Interface:

The EA45S has a total of five constant modes (Turbo, High, Medium, Low, Ultra-Low) and three flashing modes (Strobe, Beacon and SOS). Like many other NITECORE lights this is controlled by a dual button.

From OFF, to switch ON to the last used steady white output, briefly press the Power switch. When ON, press the Mode switch to cycle through Turbo -> Ultra-Low -> Low -> Mid -> High back to Turbo etc. To switch OFF briefly press the Power switch.

From OFF, for direct access to Ultra-Low, press and hold the Power switch for more than 1s.

From OFF, for direct access to Turbo, press and hold the Mode switch for more than 1s.

To access White flashing modes, from ON, press and hold the Mode switch for more than 1s. This will activate strobe. Press and hold the Mode switch for more than 1s again to switch to Beacon mode. Press and hold the Mode switch for more than 1s once more to activate SOS.
Once activated, pressing the mode switch briefly returns the EA45S to the previous steady mode, or a brief press of the Power switch will turn the EA45S OFF.

There is a ‘Standby’ mode which uses brief low power flashes of the blue switch indicator LED to act as a locator to allow you to find the EA45S in complete darkness. To activate Standby, from ON press and hold the power switch for over 1s until the blue switch light comes on. Although low power, the flashes are bright enough to disturb someone’s sleep. Exiting standby mode is achieved by switching on the EC4. When using Standby mode the drain is increased but the should still last a year in this mode. Turn ON and OFF again to exit standby.

There is a lockout mode included. With the EA45S ON, press and hold both buttons simultaneously for 1s to enter lockout. When entering Lockout, the EA45S will turn off and give a brief flash of the main beam as you release the buttons. Like this the buttons will not turn the EA45S on. Thanks to the button design this can be done easily with the thumb. To exit Lockout press and hold both buttons simultaneously for 1s and the EA45S will turn ON in the last used mode.

Lastly when first inserting cell/s into the EA45S or briefly pressing the mode switch when OFF, the blue switch light will flash to indicate the battery charge level. It flashes once, twice, or three times. Three flashes indicates full power.

Batteries and output:

The EA45S runs on 4xAA, Alkaline or NiMh. NiMh will give the best performance.

To measure actual output, I built an integrating sphere. See here for more detail. The sensor registers visible light only (so Infra-Red and Ultra-Violet will not be measured).

Please note, all quoted lumen figures are from a DIY integrating sphere, and according to ANSI standards. Although every effort is made to give as accurate a result as possible, they should be taken as an estimate only. The results can be used to compare outputs in this review and others I have published.

___________________________________________ ________________________________ ________________________________
NITECORE EA45S using Eneloop AA I.S. measured ANSI output Lumens PWM frequency or Strobe frequency (Hz)
___________________________________________ ________________________________ ________________________________
Turbo 912 0
High 476 0
Medium 238 0
Low 63 0
Ultra-Low 2 0

* Beacon and Strobe output measurements are only estimates as the brief flashes make it difficult to capture the actual output value.

Peak Beam intensity measured 43100 lx @1m giving a beam range of 415 m.

There is parasitic drain at 102.6uA (2.33 years to drain the cells).

The EA45S does indeed hit 1000lm at switch on, but this drops to a still impressive 912 ANSI lumens. The output gradually declines to around 800lm approximately 7 minutes after switch on, and then remains steady for the remainder of the runtime (just dropping to 750lm) before trailing off sharply once the cells are depleted.
 photo NITECORE EC45S runtime.jpg

Troubleshooting

This section is included to mention any minor niggles I come across during testing, in case the information helps anyone else.

No issues were encountered during testing.

However, I did have a couple of issues with the tail-cap threads not engaging properly. It requires a very firm pressure during the entire fitting of the tail-cap to fit smoothly. The thumb wheel has a convenient smooth depression which allows you to press onto it firmly with your finger while turning the screw.

As per the description of this section, this information is provided in case anyone else finds a similar ‘issue’ that might be fixed in the same way.

The EA45S in use

For those that have followed my reviews for a while, you will most likely know I have always loved the 2xAA format for being easy and comfortable to hold. I’ve tested other 4xAA lights which have had the four cells all together (making quite a handful) or 2×2 as in the EA45S. Thanks to the die-cast unibody and lack of cell holder, the EA45S takes this 4xAA format and fits it into a more compact body.

The EA45S has just pushed out the 2xAA as my favourite size/shape, and put itself firmly into pole position with its compact 2×2 4xAA cell layout. It is really comfortable to hold, stable, thanks to the rectangular cross section, and just the right size and weight.

 photo 18 EC45S in hand P1160052.jpg

This is a bigger light than I would EDC, but when I need a step up in performance and runtime without going to something really large, the EA45S fits the bill (and hand) nicely. It is also perfectly reasonable to just throw into a backpack even if you might not need it.

Of course with its throw biased beam, it can be a little fatiguing to use indoors. The Ultra-Low and Low modes are really all you will want to use when inside. Other than that the EA45S’s beam comes into its own. Peering into an engine bay, or deep into storage (loft, or other large space), the throw helps you to see clearly. Outside you can really appreciate the throw the XP-L Hi V3 LED gives you, and how comfortable it is to hold (I might have mentioned that before).

The surface finish on the EA45S is HAIII hard anodised, which can prove challenging on die-cast aluminium, but NITECORE have achieved an excellent quality finish. At first this surface might appear to be a powder-coat due to the graininess, but this is due to having to pre-treat (sand-blast) the die-cast surface before anodising.

A couple of other observations, there is a degree of cell rattle when you knock the EA45S or put it down, but this does not happen with normal handling. Also for use wearing gloves the switches can be a little tricky to hit just right.

Certainly in the sample I have, you have to be careful fitting the tail-cap. Removing it presents no issues, but due to the contact spring strength, it does need constant pressure on it to ensure the threads start and run properly all through the tightening. The thumb-wheel has a shallow smooth depression which makes it easy to apply pressure and turn the wheel to tighten it.

Thanks to the unibody design, heat transfer is managed with ease; nothing gets particularly hot with the entire body acting as a heat-sink.

There are other 4xAA lights with similar output, but NITECORE have delivered it with a superbly ergonomic design. I liked the EC4, but really love the EA45S.

Review Summary

_______________________________________________ _______________________________________________
Things I like What doesn’t work so well for me
_______________________________________________ _______________________________________________
Excellent ergonomics. Tail-cap can be cross-threaded easily.
Over 900lm from four AAs. Beam can be fatiguing at close range.
415m beam range. Parasitic drain could be lower (but is acceptable).
Stable when tail-standing.
Direct access to Ultra-Low and Turbo.

 photo 05 EC45S angle 1 P1150993.jpg


Discussing the Review:

Please feel free to add comments to the review, but the ideal place to freely discuss these reviews is on a forum. If you started reading the shorter forum version of the review, but followed the link this full exclusive review, please return to that forum to discuss the review there.
If you read the review entirely on Tactical Reviews, please consider one of the following to join in any discussion.

CandlePowerForums – Flashlight Reviews Section (Largest and Friendliest Flashlight Community Forum)

EdgeMatters – Sponsored Reviews (UK based Forum for Knife Makers and Collectors)

Light Review: NITECORE Headlamps – T-360, HA20 and HC30

With the launch of three new headlamps from NITECORE, the T-360, HA20 and HC30, I’ve had the opportunity to compare them. Each one is very different and fits a different requirement. Have a look and see which one would be right for you.

 photo 02 NITECORE headlamps group red P1160494.jpg

Taking a more detailed look at the T-360:

Before diving into the detail here are the three boxed lights together.
 photo 01 NITECORE headlamps boxed P1160364.jpg

For the T-360, as it has a built-in USB rechargeable cell, there is simply the T-360, a headband and the instructions in the box.
 photo 11 T-360 unboxed P1150736.jpg

Giving it its unique versatility, the T-360 has a ball joint around which the entire light head swivels and rotates.
 photo 12 T-360 angle head P1150739.jpg

Just slipping in a gratuitous shot of several T-360s lined up.
 photo 13 T-360 lineup P1150757.jpg

Being so small and light, you can keep a spare one on the same headband!
 photo 14 T-360 backup P1150795.jpg

Shown here in its head-mounted configuration with the spare T-360 as well.
 photo 15 T-360 on head P1160352.jpg

Taking a more detailed look at the HA20:

For the HA20, as well as the light unit, there is the headband (with top strap) a special square-shaped O-ring and the instructions.
 photo 20 HA20 contents P1160368.jpg

Fitting the strap is very easy.
 photo 21 HA20 strap fitted P1160376.jpg

You can’t get to the battery compartment with the light unit rotated normally.
 photo 23 HA20 battery01 P1160387.jpg

First you need to rotate the unit forwards to expose the plastic tab.
 photo 24 HA20 battery02 P1160389.jpg

Then you can pop the cover open.
 photo 25 HA20 battery03 P1160390.jpg

Finally you can rotate the light unit all the way back round to allow the door to come off.
 photo 26 HA20 battery04 P1160394.jpg

Each end of the battery compartment has a set of sturdy terminals.
 photo 27 HA20 terminals P1160398.jpg

You have to fit the rear cell first then the front one.
 photo 28 HA20 cells fitted P1160405.jpg

The HA20 has three LEDs, an XP-G2 LED and two F5 red LEDs.
 photo 29 HA20 LEDs P1160414.jpg

A closer look at the main beam XP-G2 and its reflector.
 photo 30 HA20 main LED P1160419.jpg

The elastic strap for the main headband is routed through the mount as shown.
 photo 31 HA20 mount back P1160422.jpg

The top strap gives extra stability when wearing the headlamp.
 photo 22 HA20 on head P1160382.jpg

Taking a more detailed look at the HC30:

Of these three headlamps, the HC30 has more accessories as it includes two spare O-rings, a spare switch boot and clip as well as the HC30 itself, headband and instructions.
 photo 40 HC30 contents P1160425.jpg

A very sleek design.
 photo 41 HC30 angle P1160431.jpg

On the head of the HC30 is a low profile rubber click switch.
 photo 42 HC30 switch P1160435.jpg

When looking side on you can see the deeply cut heat-sink fins.
 photo 43 HC30 fins P1160441.jpg

The battery tube cap has been laser engraved with NITECORE’s logo.
 photo 44 HC30 tailcap P1160443.jpg

Inside the tail-cap is a spring contact which has been tucked into a groove, removing the need for any circuit board and allowing the depth of the cap to be as shallow as possible.
 photo 45 HC30 tailcap contact P1160446.jpg

The threads are Acme (trapezoid) in form, well lubricated and fully anodised (allowing lockout).
 photo 46 HC30 tailcap threads P1160451.jpg

Inside the battery tube you can see the physical reverse polarity protection (also requiring the use of button top cells).
 photo 47 HC30 inside P1160455.jpg

Thanks to a well thought-out design, the HC30 is not much larger than the cell it uses. A very nice compact design.
 photo 48 HC30 with cell P1160456.jpg

An XM-L2 LED is used.
 photo 49 HC30 LED P1160463.jpg

For such a compact design, the reflector is relatively deep.
 photo 50 HC30 reflector P1160465.jpg

You can fit the optional clip into either groove giving an up or down position. With the clip fitted it does not fit into the headband mount properly.
 photo 51 HC30 clip P1160471.jpg

With the strap sitting against your head, and the mount being low profile, you have maximum comfort.
 photo 55 HC30 mount back P1160487.jpg

The fully assembled headlight.
 photo 52 HC30 in mount P1160473.jpg

On the head, the HC30 is very comfortable, light and stable.
 photo 53 HC30 on head P1160479.jpg

The LED on the Ultra Low mode showing the dots on the phosphor surface – just because…
 photo 54 HC30 LED close low P1160485.jpg

The beam

Please be careful not to judge tint based on images you see on a computer screen. Unless properly calibrated, the screen itself will change the perceived tint.

The indoor beamshot is intended to give an idea of the beam shape/quality rather than tint. All beamshots are taken using daylight white balance. The woodwork (stairs and skirting) are painted Farrow & Ball “Off-White”, and the walls are a light sandy colour called ‘String’ again by Farrow & Ball. I don’t actually have a ‘white wall’ in the house to use for this, and the wife won’t have one!

Being a comparison review, we have the opportunity for some side-by-side (or top-to-bottom) comparisons using the same exposures. However BEFORE we start that comparison, as the T-360 is a tiny lightweight low powered light, to just get an idea of the beam, this first photo is at an exposure to give the best impression of the beam.
 photo 16 T-360 indoor beam P1170378.jpg

Now we start the comparison and the exposure has been set for the HA20 and HC30 to show correctly so the T-360 appears rather dim in comparison.
 photo 17 T-360 indoor beam exposure comparison P1170380.jpg

On the same exposure, the HA20 – there is a very defined hot-spot and a wide smooth spill.
 photo 32 HA20 indoor beam exposure comparison P1170355.jpg

Again on the same exposure, the HC30 shows its power. It has a broad hot-spot and bright spill, but the spill is narrower than the HA20.
 photo 57 HC30 indoor beam exposure comparison P1170351.jpg

For the outdoor beamshots, the T-360 did not have enough power to show, so is not included.
As before the exposure has been fixed to allow the HA20 and HC30 to be directly compared. Starting here with the HA20. The purpose of it hot-spot becomes clear as the lower power of the HA20 needs this to extend the range.
 photo 33 HA20 outdoor beam exposure comparison P1170273.jpg

The HC30, of course, has much more power and this is very clear in this direct comparison.
 photo 56 HC30 outdoor beam exposure comparison P1170270.jpg

Modes and User Interface:

Three different headlamps, and three very different interfaces.

T-360
–Control:
Single click button

–Modes:
High, Mid, Low and Flash/Strobe at 1Hz, 2Hz and 10Hz

–UI:
From OFF, press-and-hold the switch for over 1s to turn ON to Low. Press briefly to cycle through Mid, High, Low etc.
Press-and-hold again for 1s to turn OFF.
From OFF double-click the switch to enter flashing mode at 1Hz. Press briefly to cycle through 2Hz, 10Hz, 1Hz etc.
Press-and-hold for 1s to turn OFF.
There is no memory for constant of flashing modes. Both will always start from Low or 1Hz.

HA20
–Control:
Two-stage switch

–White Modes:
Turbo, High, Mid, Low, Ultra Low and ‘Special Modes’ (Police Warning/Location Beacon/SOS)
(Police Warning is a slow flashing mode at approximately 1Hz)

–Red Modes:
Constant, Flashing and Power Indicator.

–White UI:
From OFF press the switch fully until it clicks to turn ON.
While ON, half-press the switch to cycle through Low, Mid, High, Turbo, Ultra Low etc.
To switch OFF, press the switch fully until it clicks.
While ON, half-press the switch for over 1s to enter Special modes. Half-Press the switch to cycle through Police Warning, Location Beacon, SOS, Police Warning etc
To Exit Special modes and switch OFF, press the switch fully until it clicks.

–Red UI:
From OFF, half-press the switch for over 1s to turn on the Constant Red output.
To swap between constant and flashing Red output, half-press the switch.
To switch OFF, press the switch fully until it clicks.

–Power Indicator:
On first inserting cells into the HA20, the Red LEDs flash to indicate the battery voltage, first whole Volts, then after a pause 0.1V.
From OFF, half-press the switch briefly to indicate power level with one (<10%), two (<50%) or three (>50%) flashes.

HC30
–Control:
Single click button

–White Modes:
Turbo, High, Mid, Low, Lower and ‘Special Modes’ (Strobe/SOS/Location Beacon)
UI: From OFF press the switch to turn directly ON to Lower mode (regardless of the previously used mode).
From OFF, press-and-hold the switch for over 1s to turn ON to ‘Last used constant mode’.
From OFF, press-and-hold the switch for over 2s to turn ON to Turbo.
While ON press the switch briefly to cycle through Lower, Low, Mid, High, Turbo, Lower etc.
To turn OFF press-and-hold the switch for over 1s.
From OFF, double-click the switch to enter Strobe. While ON Strobe, press the switch briefly to cycle through SOS, Location Beacon, Strobe etc. To turn OFF, press-and-hold the switch for over 1s.

Batteries and output:

The T-360 runs on its built-in cell.
The HA20 runs on 2xAA (Alkaline, NiMh or L91).
The HC30 runs on 1×18650 (button top), 2xCR123 or 2xRCR123.

To measure actual output, I built an integrating sphere. See here for more detail. The sensor registers visible light only (so Infra-Red and Ultra-Violet will not be measured).

Please note, all quoted lumen figures are from a DIY integrating sphere, and according to ANSI standards. Although every effort is made to give as accurate a result as possible, they should be taken as an estimate only. The results can be used to compare outputs in this review and others I have published.

___________________________________________ ________________________________ ________________________________
Model/Mode using specified cell I.S. measured ANSI output Lumens PWM frequency or Strobe frequency (Hz)
___________________________________________ ________________________________ ________________________________
T-360/High – Built-in 62 0
T-360/Medium – Built-in 24 0
T-360/Low – Built-in 2 0
HA20/Turbo – AA Eneloop 342 0
HA20/High – AA Eneloop 202 0
HA20/Medium – AA Eneloop 106 0
HA20/Low – AA Eneloop 39 0
HA20/Ultra Low – AA Eneloop 2 0
HC30/Turbo – 18650 1058 0
HC30/High – 18650 503 0
HC30/Medium – 18650 245 0
HC30/Low – 18650 82 0
HC30/Ultra Low – 18650 2 0

Peak Beam intensity for the T-360 was not measured.
Peak Beam intensity for the HA20 measured 2800 lx @1m giving a beam range of 106 m.
Peak Beam intensity for the HC30 measured 6800 lx @1m giving a beam range of 165 m.

There is parasitic drain in the T-360 but this was not measured due to the built-in cell.
There is parasitic drain in the HA20; the drain was 194uA (1.23 years to drain the cells).
There is parasitic drain in the HC30; the drain was 51.5uA (6.87 years to drain the cell).

All shown on the same graph, the performance of each of these light is very different on maximum output.
The T-360 is very consistent for 30 minutes and then tails off to the point of being no use by 45 minutes.
The HA20 drops from maximum after around 10 minutes, and after stabilising again, remains consistent up to the last part of the run.
The HC30 however, has a strange behaviour which is only really noticeable using measuring equipment. After the initial drop after 5-6 minutes, the output rises, stabilises, then rises again before starting a gradual decline. Having a wide input voltage range from 3V to 8.4V, this will be a consequence of having to manage the quite different cell characteristics. Remember this is the maximum output, so it is testing the limits of the cell as well as the HC30. To the naked eye this behaviour doesn’t stand out.
 photo NITECORE Headlamps HC30 HA20 T360 runtime.jpg

Troubleshooting

This section is included to mention any minor niggles I come across during testing, in case the information helps anyone else.

No issues were encountered during testing.

As per the description of this section, this information is provided in case anyone else finds a similar ‘issue’ that might be fixed in the same way.

The T-360, HA20 and HC30 in use

Do I have a favourite? Yes, but more on that later, as each of these headlamps gives you different benefits and capabilities.
—–
You are probably familiar with the NITECORE TUBE key-chain light. The T-360 is a spin off of this USB rechargeable featherweight light and gives you a featherweight headlamp. As I showed earlier it is so lightweight you can install two (or even three) on the same headband so you have hot-spares ready for when the cell becomes depleted. The T-360 means anyone can EDC a headlamp. Of course it is not just a headlamp as when you take it off the strap it will stand by itself, or can be clipped over a cap peak or pocket edge. Unlike the TUBE, the T-360 does not use any PWM so is superbly good to use on any level.

As shown in the head mounted photo, I have found the T-360 benefits from rotating the body out, so that it sticks out, when you use it. With the full flood beam, if you leave it flat on your forehead, half the light just goes upwards, so by rotating it as shown you can direct this down and make better us of the available light.
—–
Moving up in size and in power to the HA20. AA power is a significant benefit simply due to the ease of getting AA cells; this is not to be underestimated. This also makes it easier to give as a gift. With the HA20 there is a bit of a trade off in providing one of the features. The head has a really good range of adjustment, including upwards; The result of this is that the HA20 has been placed further from the head to provide the space to be able to rotate so far in the mount. With an aluminium body, this creates a slightly front-heavy design making the HA20 feel heavier on the head than it really is. Once you start moving about more it can become noticeable.

Still on the HA20, the two-stage button has proven to be a little difficult to work with. The half-press is somewhat indistinct so you are not entirely sure you have pressed it enough. The full-press is a substantial press needing the button to be pushed well into the switch boot.

Having Red light as an option in the same headlamp is one of the strong points. When I’m out hunting and using red light on the gun-light, the last thing I want is to then switch on a white light, so the pure red light (not filtered) is just what is needed. Just be aware that this is not ‘Star Party’ friendly red light as it is quite bright.
—–
Finally we have the bright and compact HC30. NITECORE have done really well in keeping the size down, and the HC30 is not much bigger than the 18650 it uses. A single 18650 is a great compromise for a headlamp as it typically has the energy of 3-4 AAs but weighs roughly the same as 2xAA(NiMh) cells and is a single cylinder (so more compact). This allows for greater output or longer runtimes from a smaller lighter headlamp. So as long as you are into li-ions (or happy to burn through CR123s), then it makes an ideal choice.

Even though it has only a single-stage button, the interface is very well thought out. With no delay at all you can click onto ‘Lower’, then cycle up to a level you want. Alternatively you can return straight to a previously used level if you are happy to press-and-hold for 1s. You also still have direct access to Turbo with a slightly longer press-and-hold of 2s. But there is more, as if you are into your flashing modes, a double-click brings them to life.

With all the modes available, I couldn’t have asked for more from this single button interface.

Comfort is top notch as the weight is kept close to your head (increasing stability) and the mount doesn’t touch you at all and has no hard/hot-spots.

For my own uses, I would have preferred a more flood orientated beam, but with its mixed use as a right-angle light and a headlamp the beam’s mix of flood and throw is very good.
—–
So could you spot my favourite? The HC30 has it, if I had to pick one.

Which would you pick?

Review Summary

_______________________________________________ _______________________________________________
Things I like What doesn’t work so well for me
_______________________________________________ _______________________________________________
T-360 – Featherweight. T-360 – Limited runtime with built-in cell./td>
T-360 – Easy to EDC. T-360 – Press-and-hold to turn on.
T-360 – MicroUSB rechargeable.
T-360 – Can be used as a clip light.
HA20 – Easy AA power. HA20 – Front heavy.
HA20 – White and Red output HA20 – Switch can be tricky to half-press reliably.
HA20 – Wide range of angle adjustment HA20 – Relatively high parasitic drain.
HA20 – Aluminium body for good heat-sinking.
HC30 – 1000lm output. HC30 – Cannot use flat-top cells.
HC30 – Super compact. HC30 – Ultra-Low mode could be lower.
HC30 – Excellent weight distribution.
HC30 – Can be used as a right-angle hand-held light.
HC30 – Direct access to Turbo, Ultra-Low and Strobe modes.
HC30 – Parasitic drain can be stopped by locking-out the tail-cap.

 photo 03 NITECORE headlamps group white P1160491.jpg


Discussing the Review:

Please feel free to add comments to the review, but the ideal place to freely discuss these reviews is on a forum. If you started reading the shorter forum version of the review, but followed the link this full exclusive review, please return to that forum to discuss the review there.
If you read the review entirely on Tactical Reviews, please consider one of the following to join in any discussion.

CandlePowerForums – Flashlight Reviews Section (Largest and Friendliest Flashlight Community Forum)

EdgeMatters – Sponsored Reviews (UK based Forum for Knife Makers and Collectors)