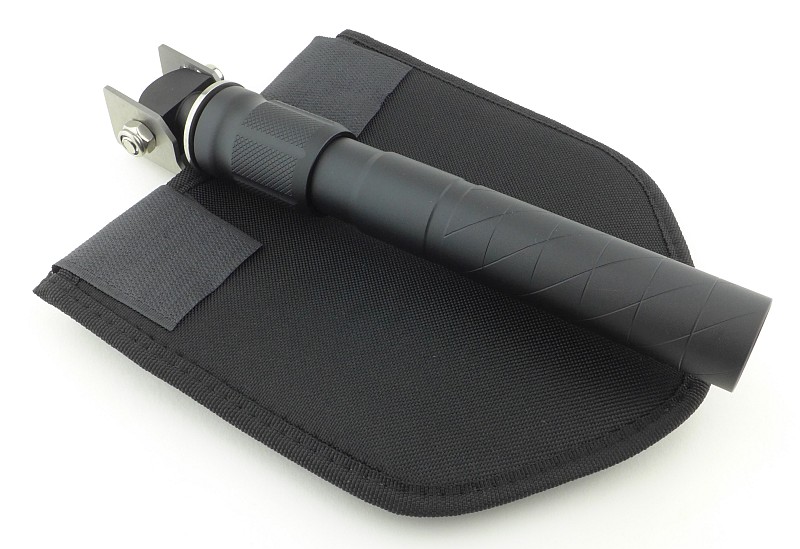
Who doesn’t like a light-stick? Apart from the need for emergency marker lights, there is something great about a tube that just glows, and the main problem with chemical light sticks is that when they are on, they are on; until they go out forever. Nextorch have taken the light-stick and made it battery powered and even more versatile with its GLO-TOOB range. Now the reusable super durable emergency / safety marker light has an on-off switch and flashing modes, and can survive immersion up to depths of 3500m!
Taking a more detailed look at the GT-AAA:
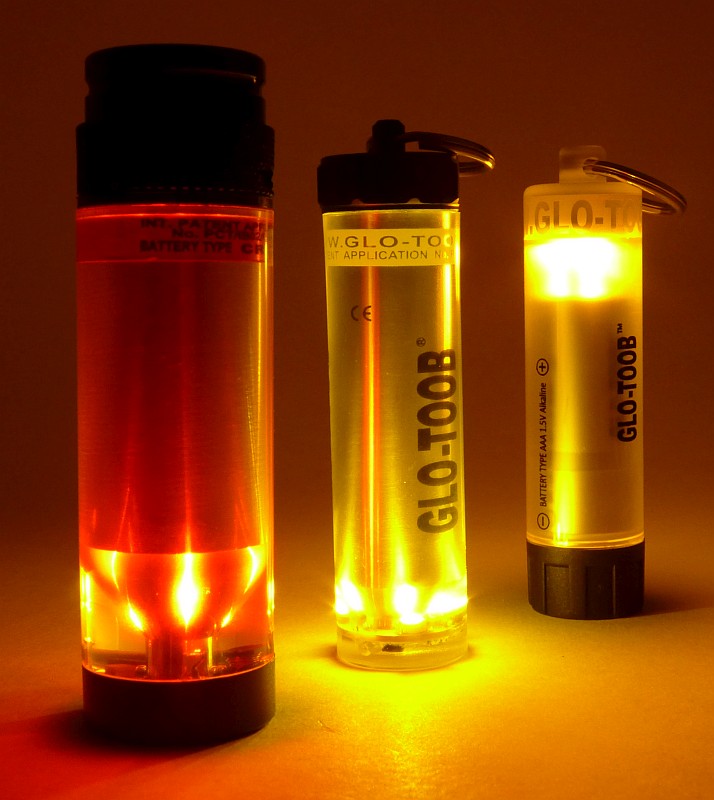
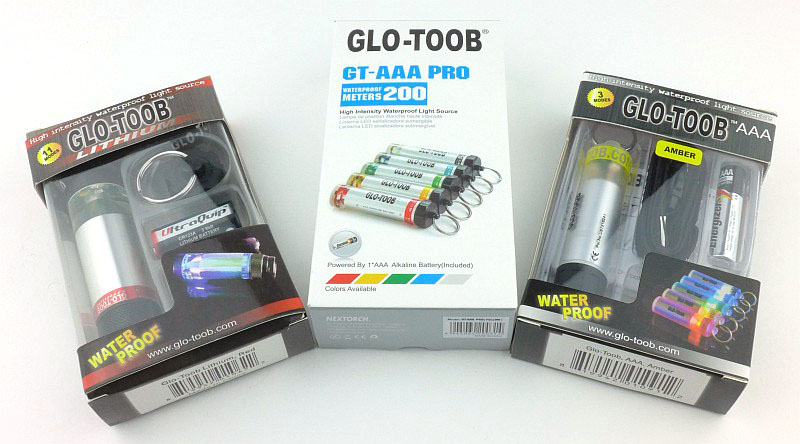
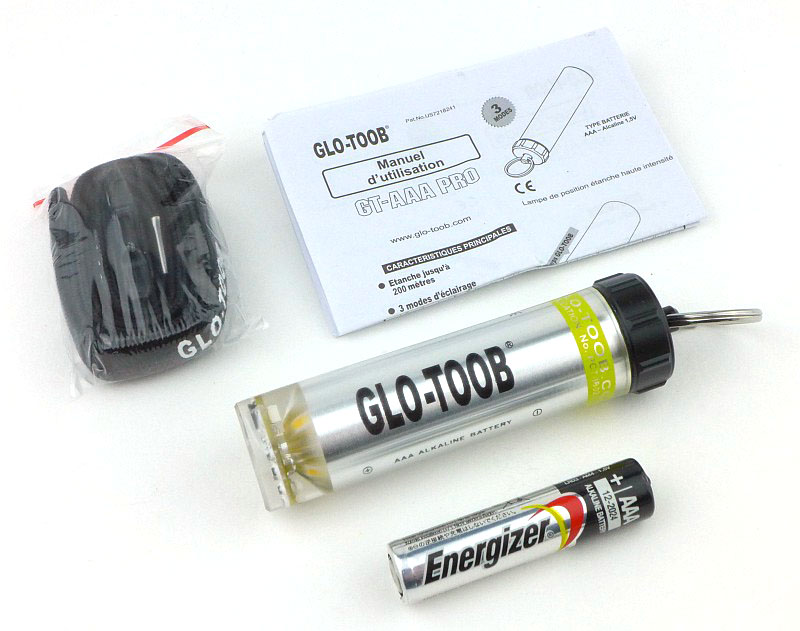
We are going to start with the standard AAA model the GT-AAA, but first here are the three that are on test in their boxes. The Lithium and AAA models are in the older packaging, with the Lithium being the original model. The GT-AAA Pro is a more recent addition and uses updated packaging. One crucial difference between the models is their depth rating for waterproofing. The GT-AAA has the lowest rating at 60m, the GT-AAA Pro is good to 200m, and the ultimate is the GT-LITHIUM which will go to 3500m. (That is not a typo it really is three thousand five hundred metres.)
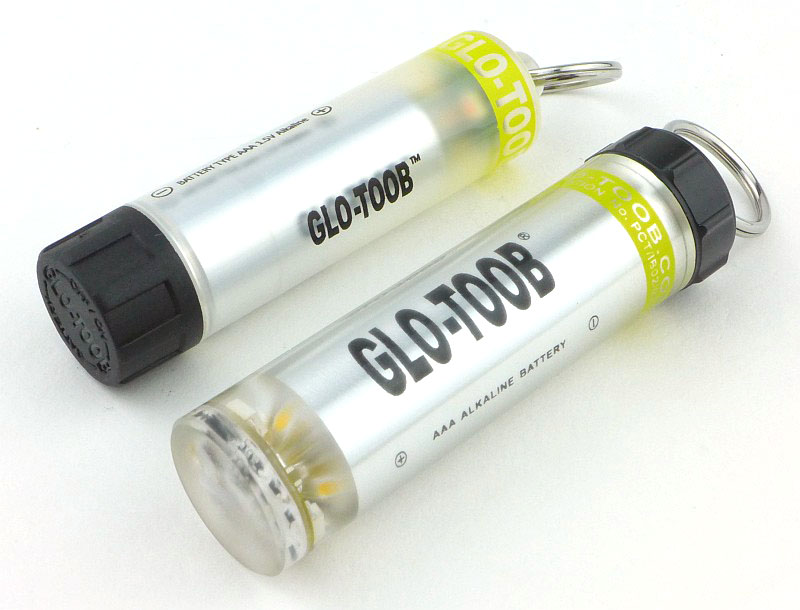
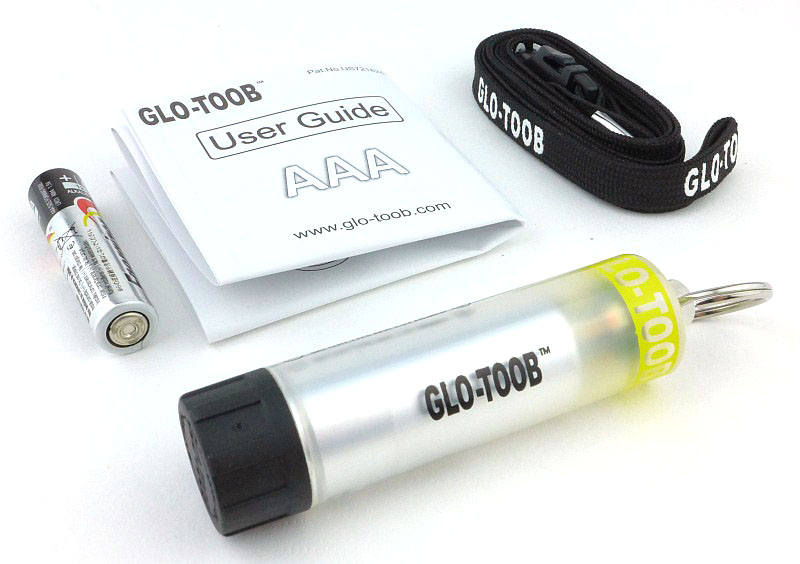
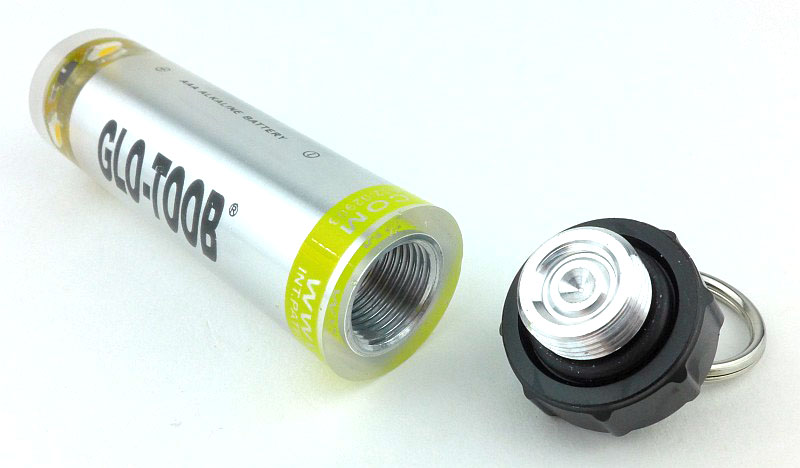
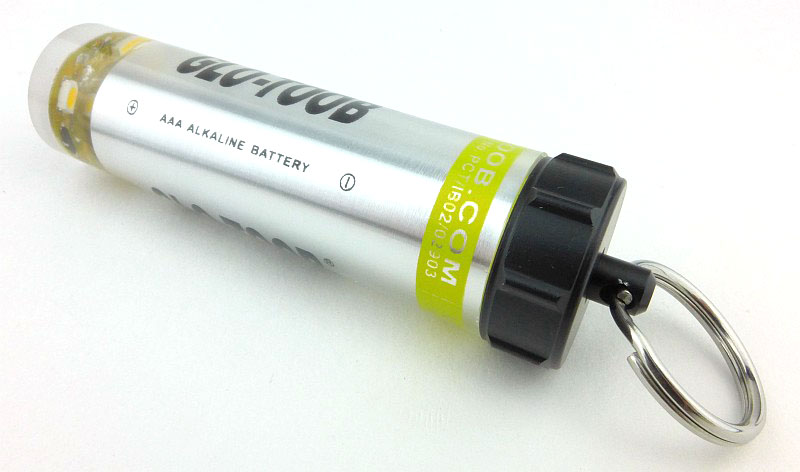
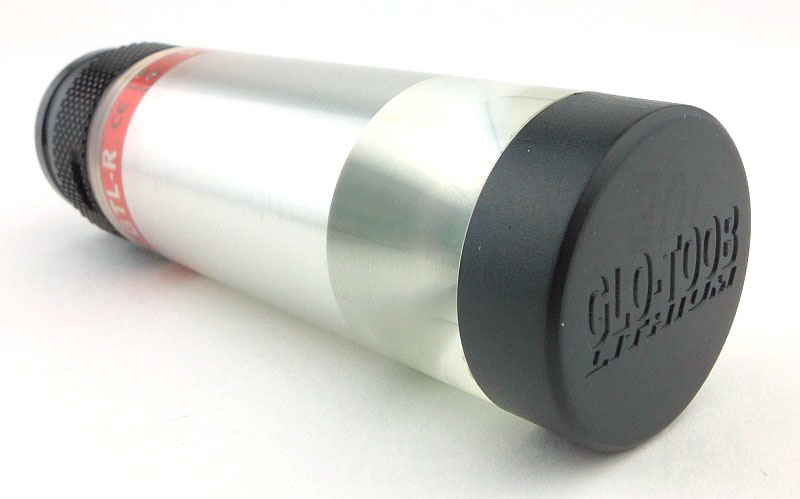
Back to the GT-AAA, the simplest and cheapest model, and this is what is in the box.
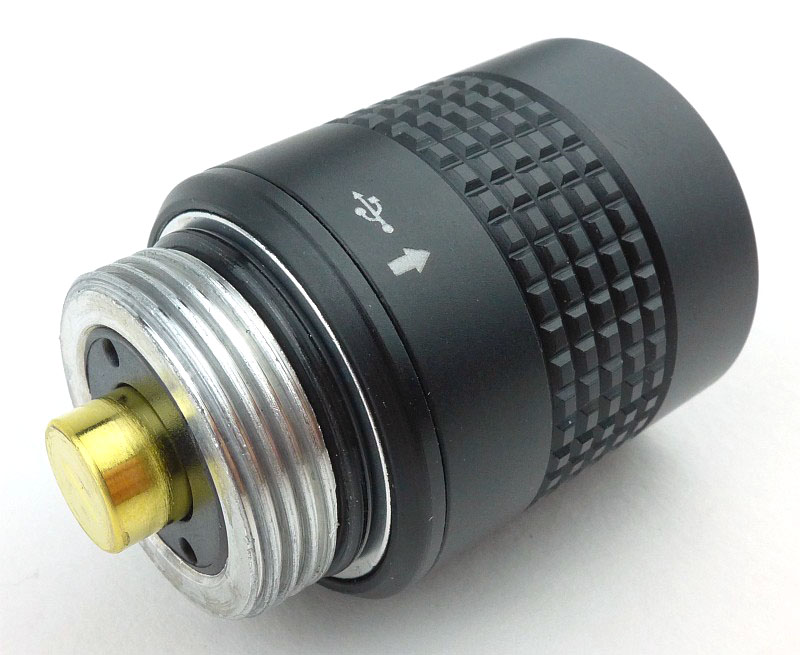
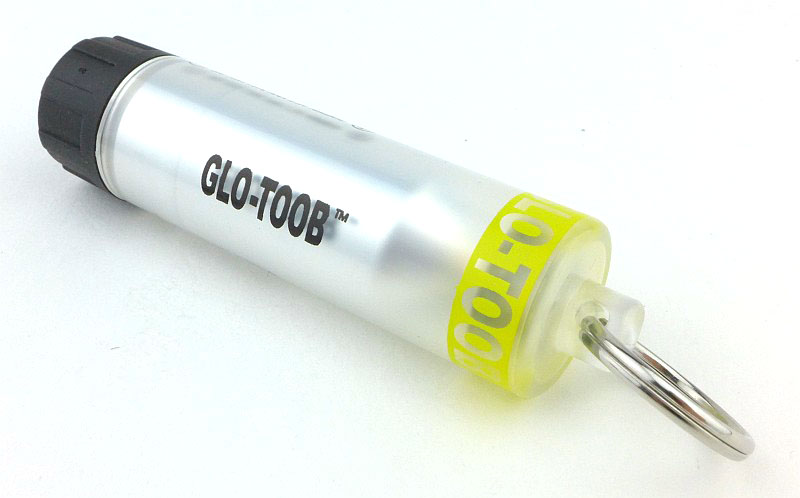
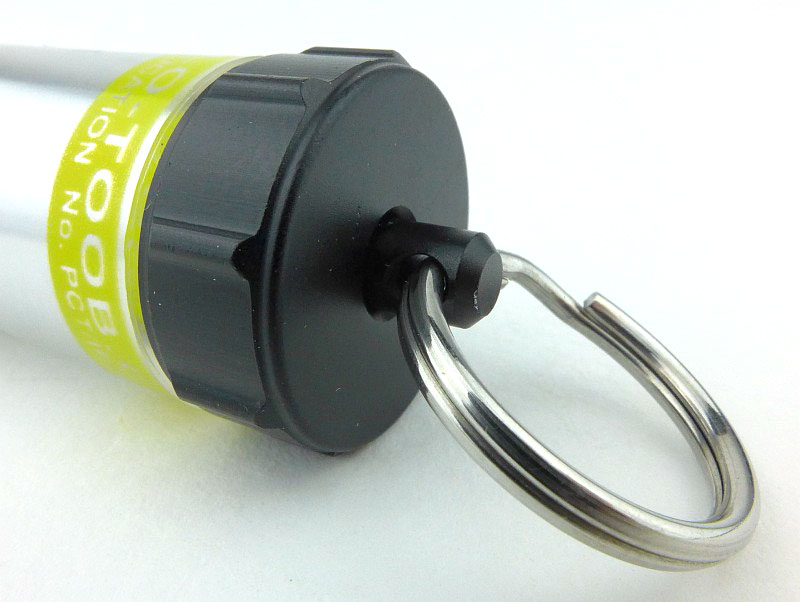
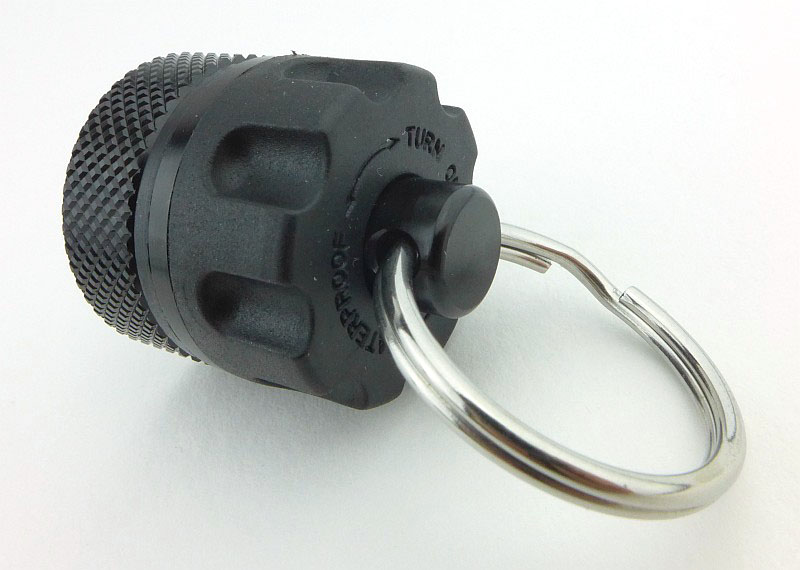
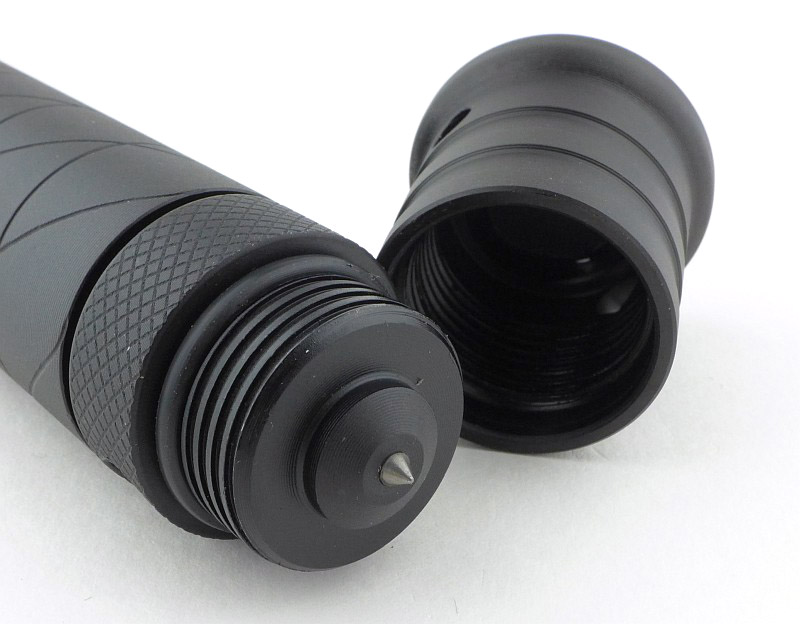
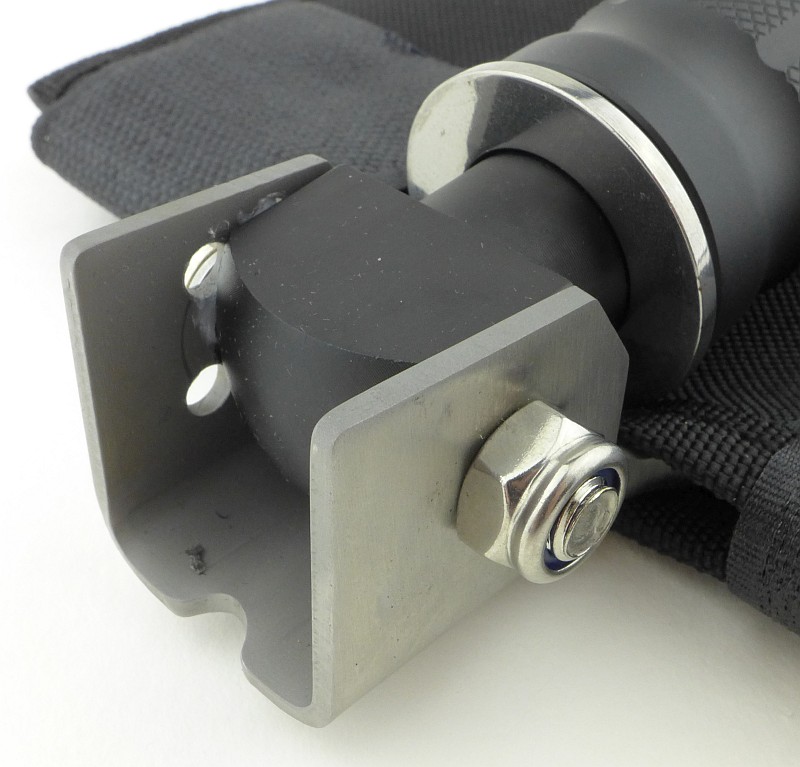
With a frosted casing, the GT-AAA has a keyring on one end and the black twist cap on the other.
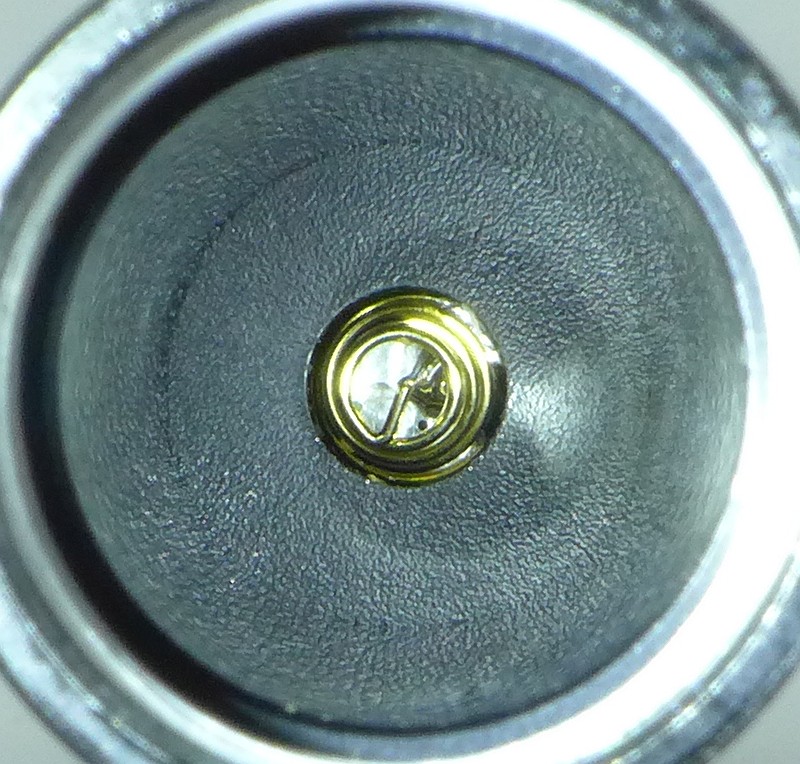
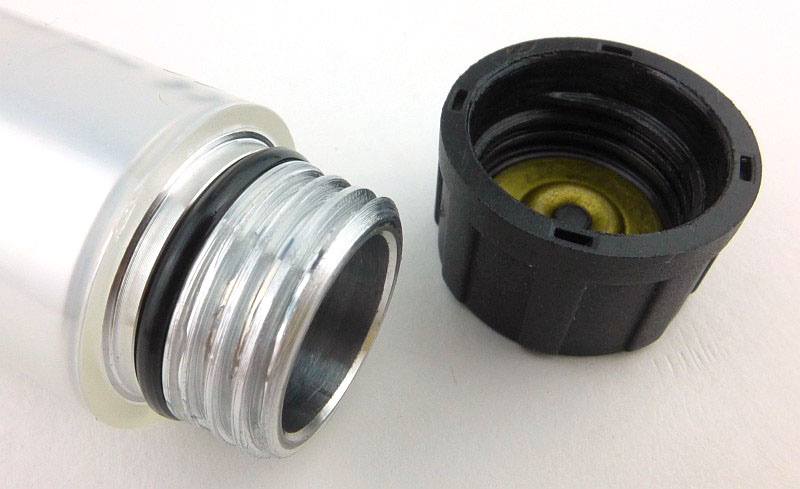
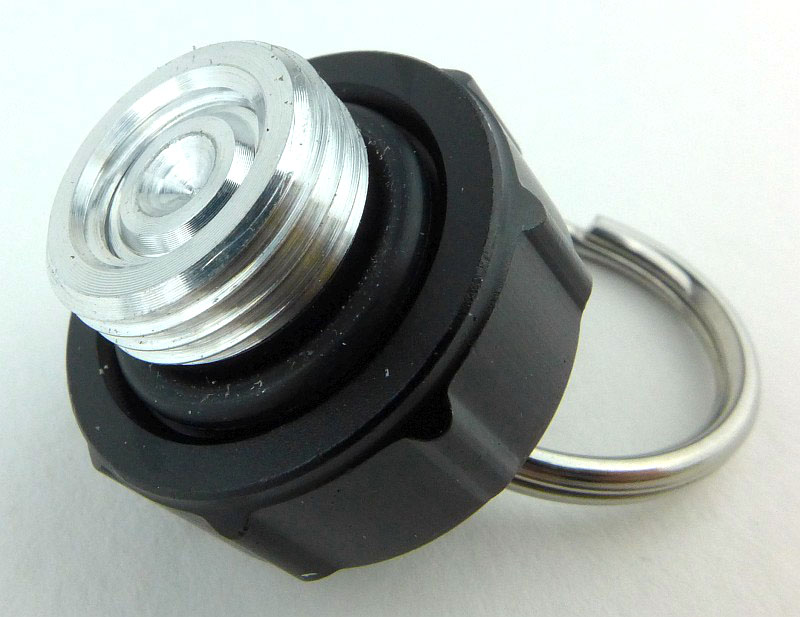
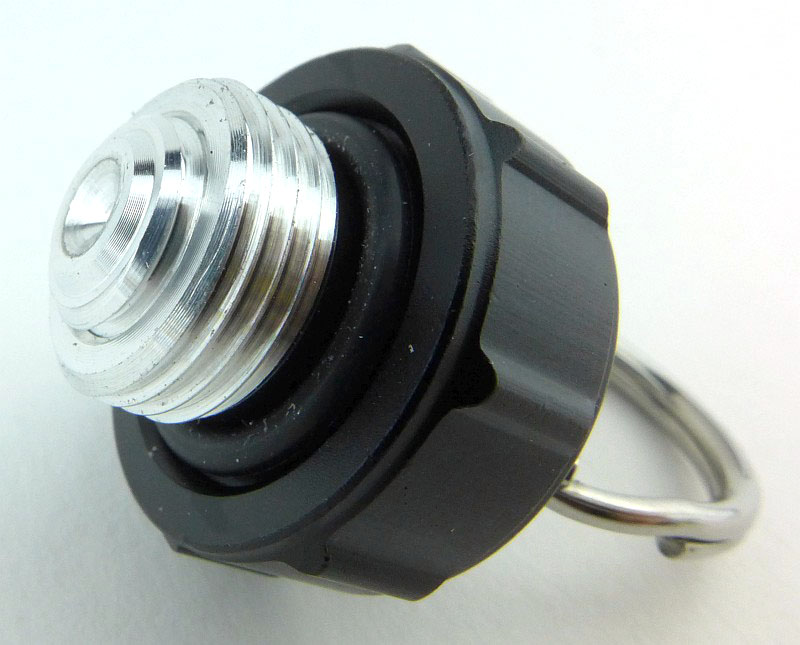
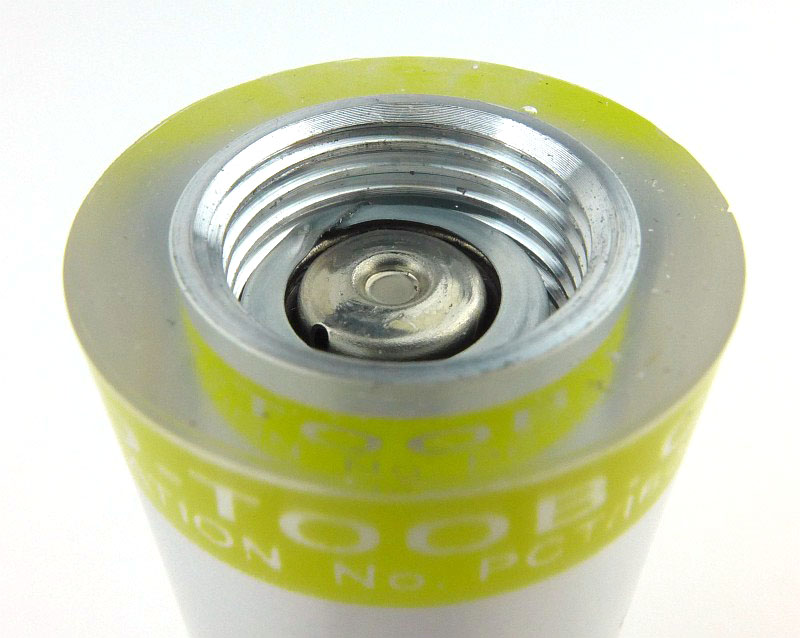
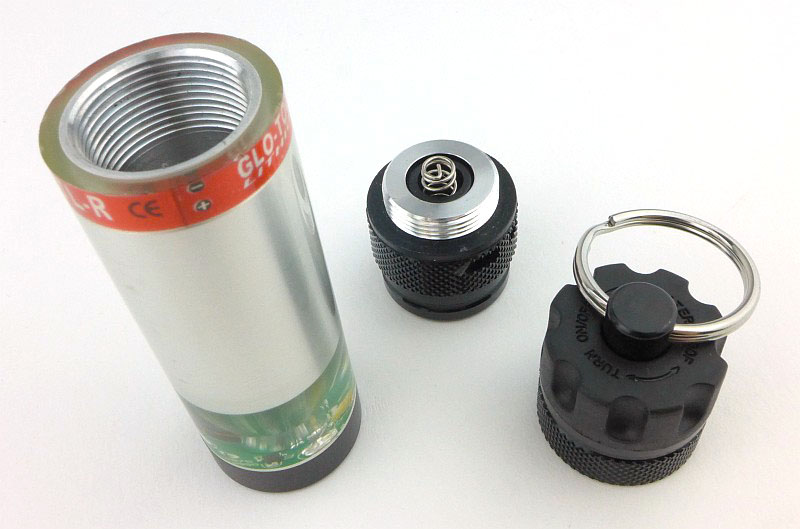
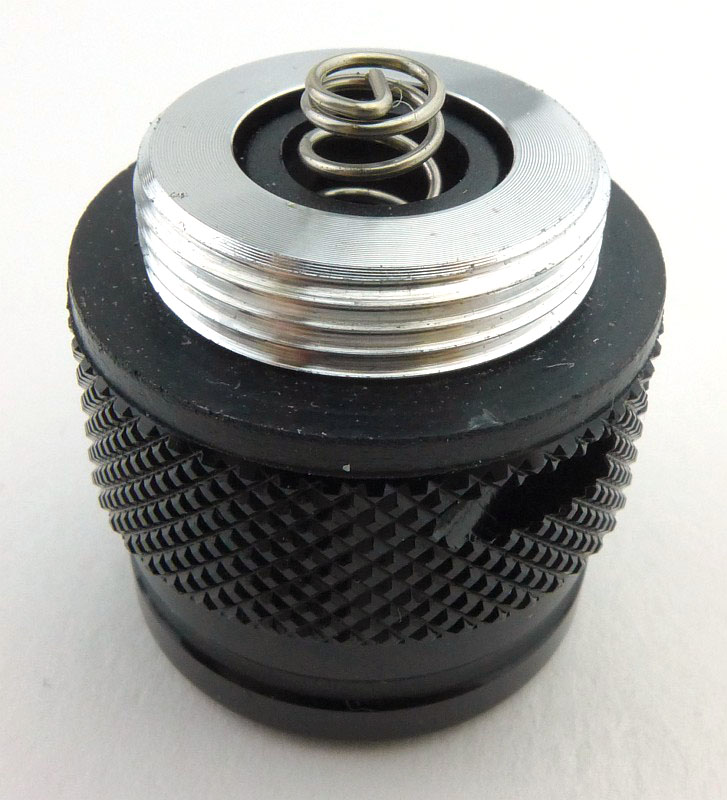
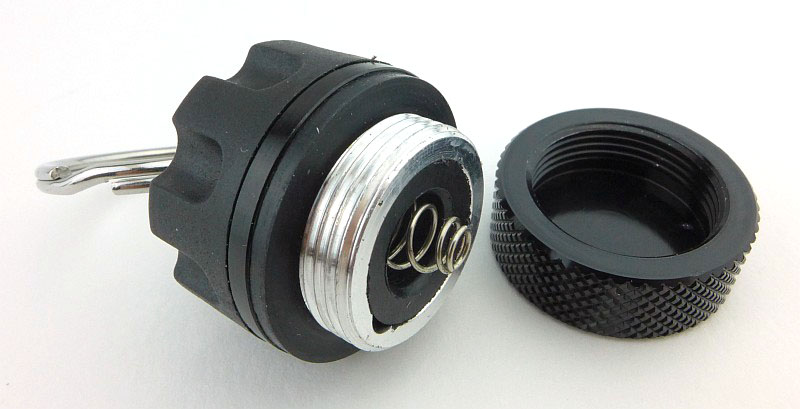
Taking that black twist cap off, there is a very simple metal contact disk with raised centre.

The twist-cap’s plastic threads fit onto the aluminium threads of the battery tube.
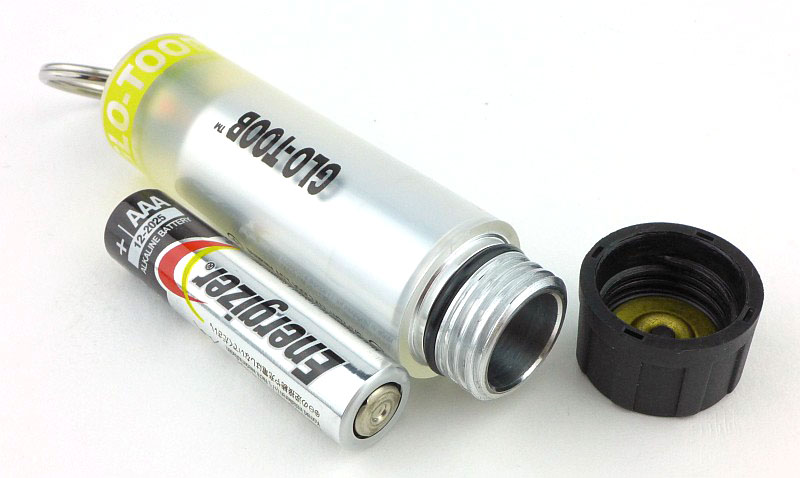
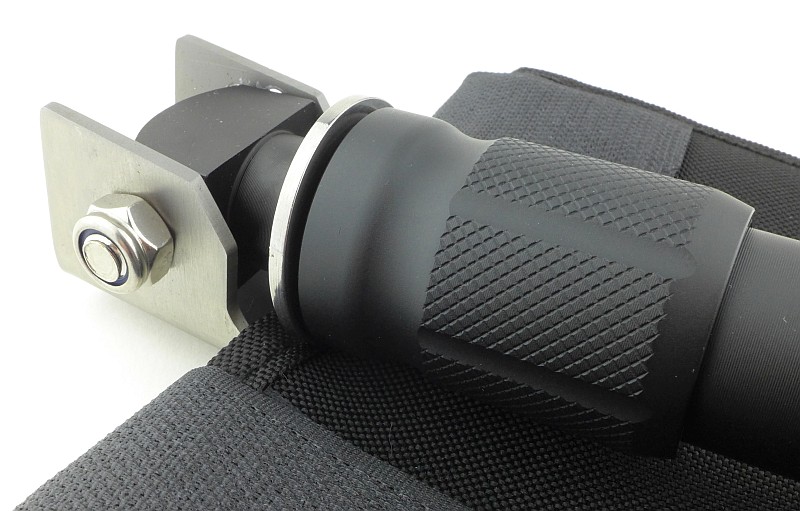
With an AAA cell next to the GT-AAA you see how big it is.
With the cell inserted, its end slightly protrudes due to the internal spring. This forms part of the ultra simple switching mechanism.

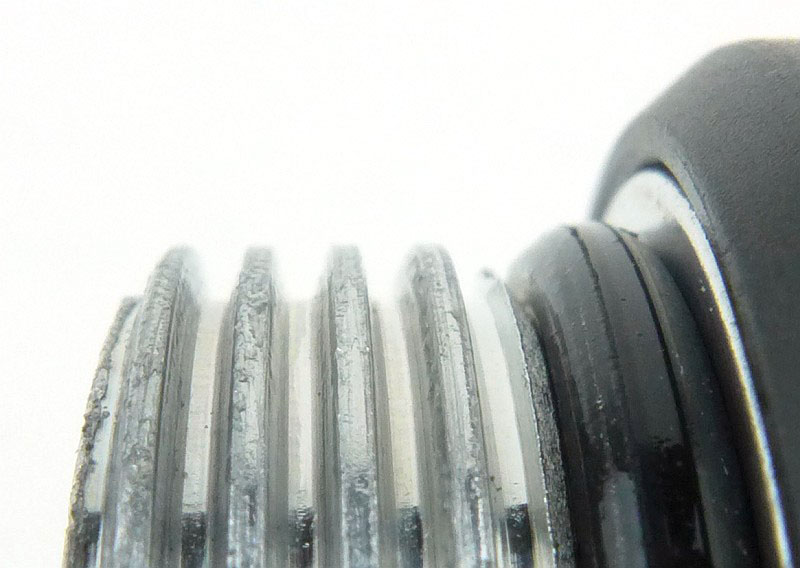
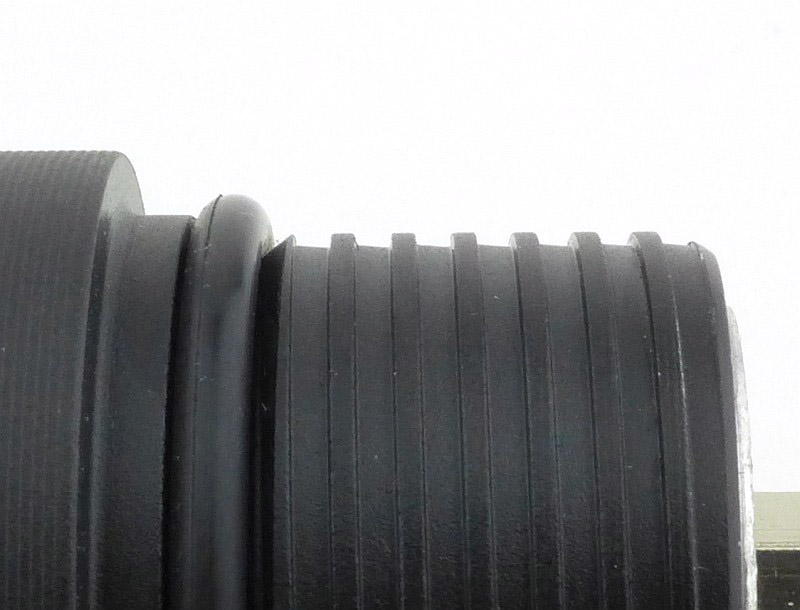
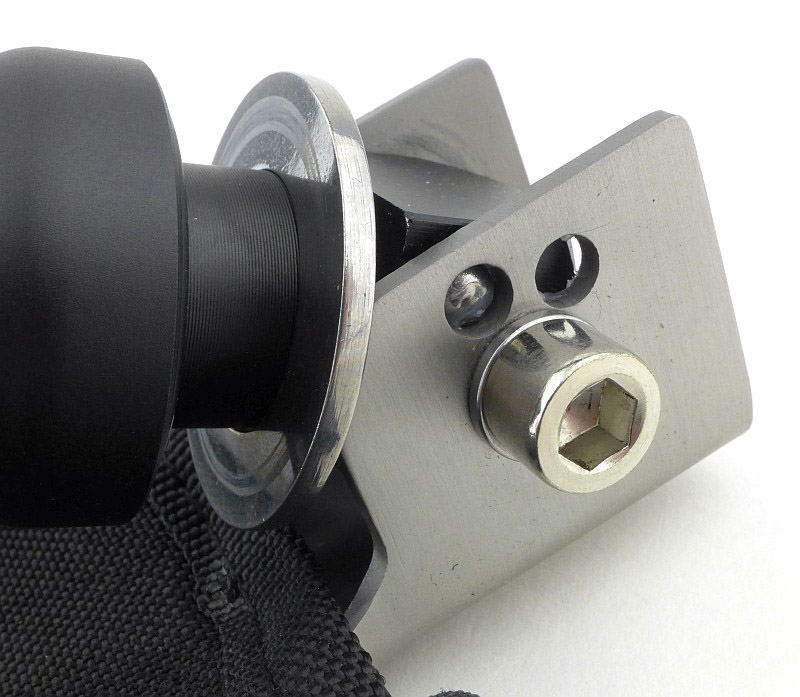
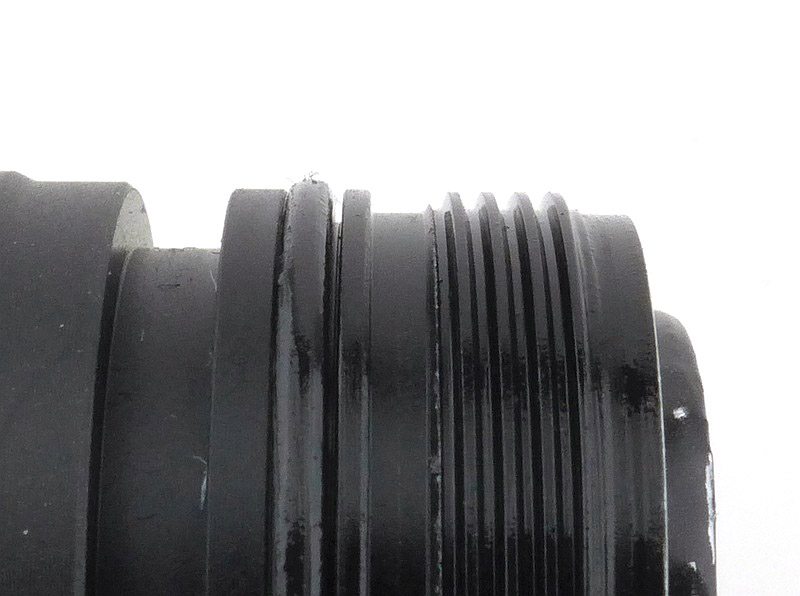
A close up of the threads and O-ring (the end of the battery is also just visible).

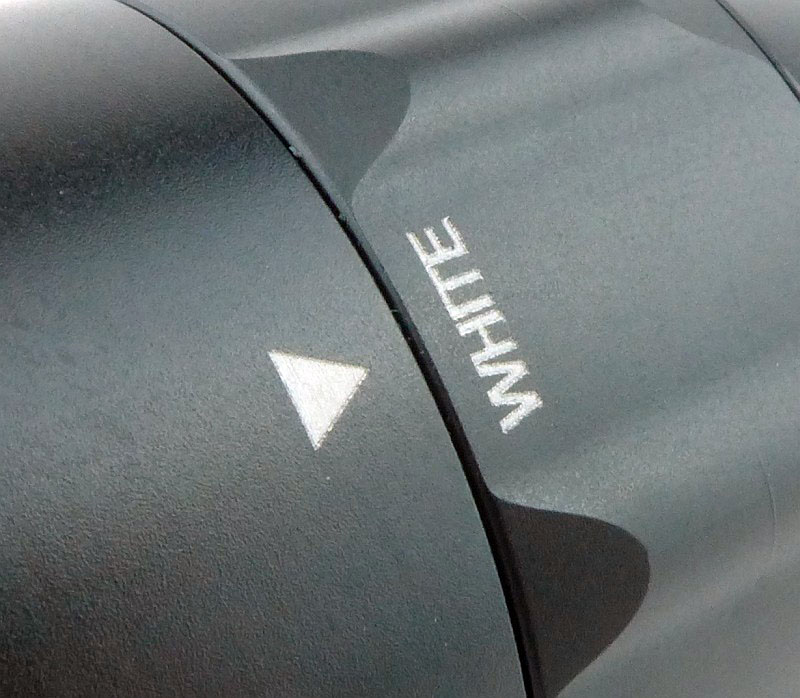
Directions for turning the light on and off are marked in the twist-cap.
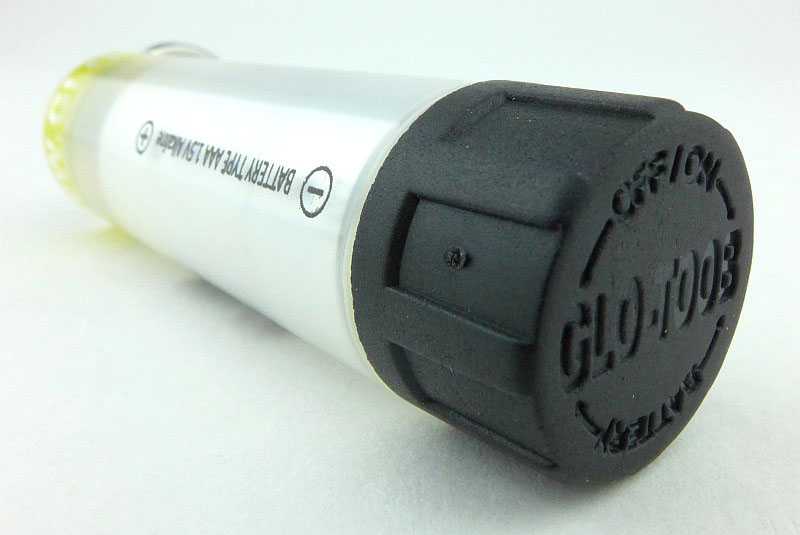
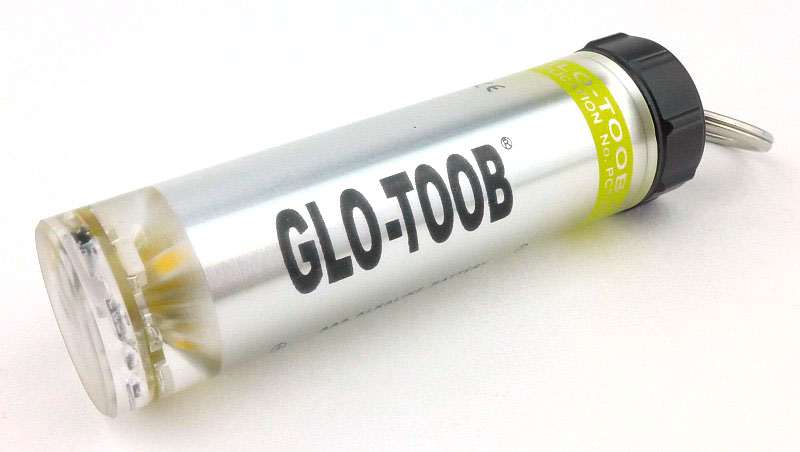
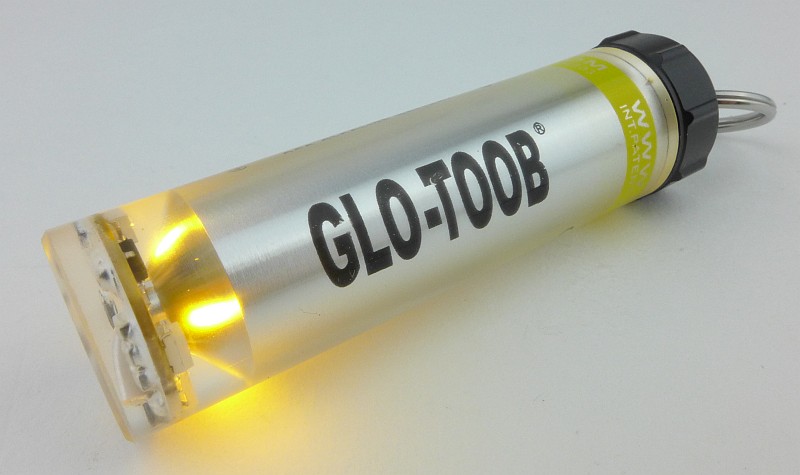
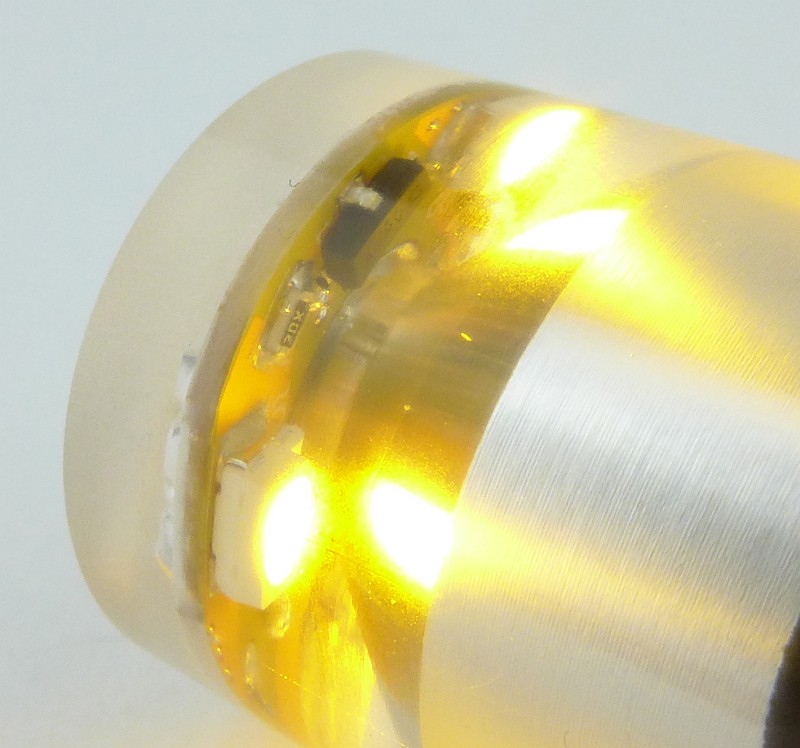
The LEDs are at the opposite end to the battery cap \ switch which is the keyring end of the GT-AAA.
Taking a more detailed look at the GT-AAA Pro:
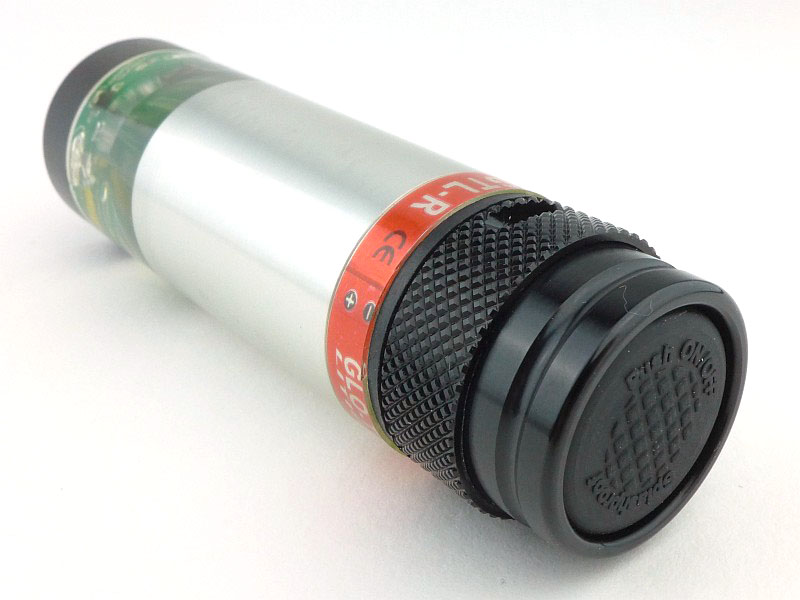
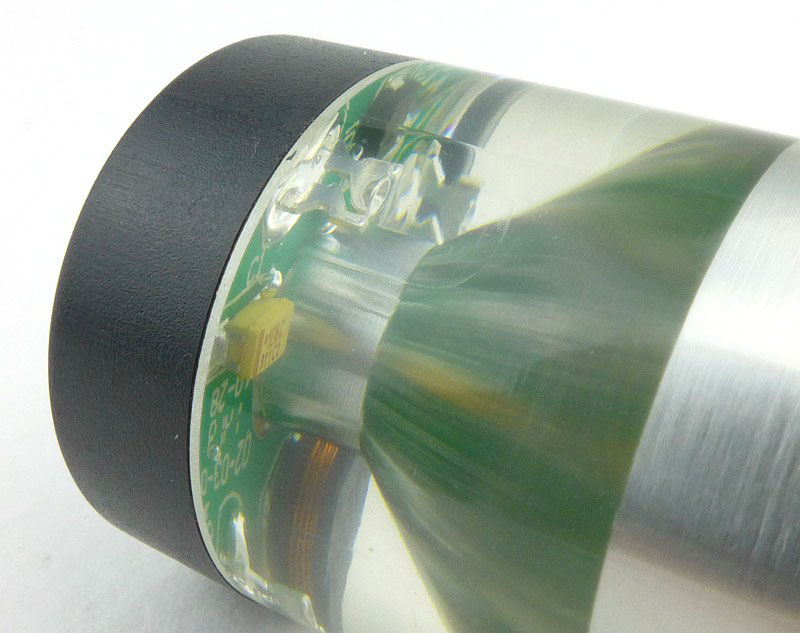
There is nothing wrong with the basic AAA model, but the GT-AAA Pro immediately looks much more serious with its clear body and metal battery cap / switch.
Thanks to the clear body, you can see a bit more about what makes the GT-AAA Pro tick (or glow).
You can make out the PCB and LEDs through the casing.
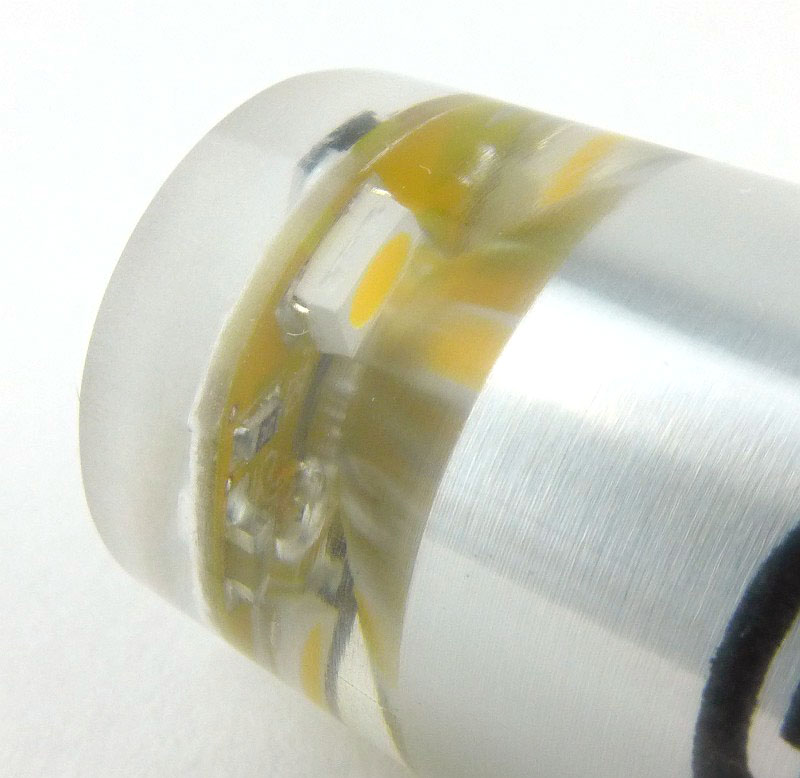
The very end is a frosted finish, and this disguises the other side of the PCB.

In the case of the GT-AAA Pro, the keyring is fitted to a metal post making it much more robust. This also forms part of the switch mechanism; instead of the entire cap being rotated, the keyring and its post are twisted to activate the light.
The entire end cap is metal, so has metal threads instead of plastic.
Look at the middle of the cap. This is the cap in the OFF position.
Twisting the keyring pushes the middle of the cap forward and turns it ON.
With the battery fitted you can see how the middle of the battery cap will make contact with the battery terminal when it pushes out. The cell wrapper acts as an insulator allowing this switching method to work.
On the side are markings to confirm which way round the battery goes in. This follows the almost universal ‘positive terminal in’ direction.
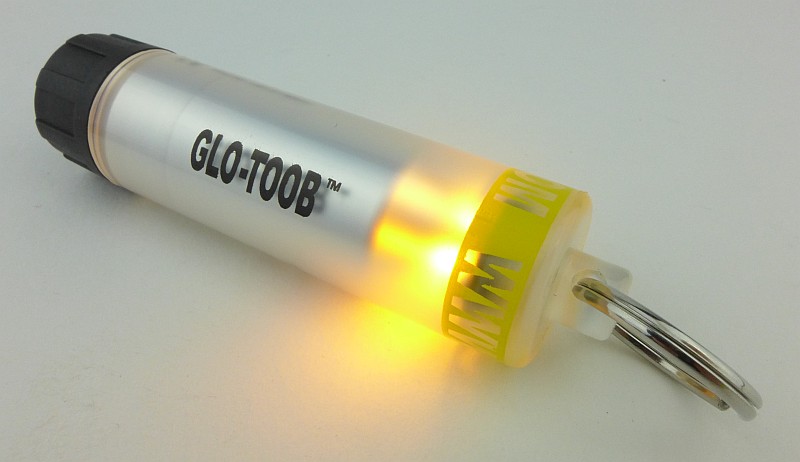
The GT-AAA Pro switched ON.
A closer look at the lit up LEDs.
Taking a more detailed look at the GT-LITHIUM:
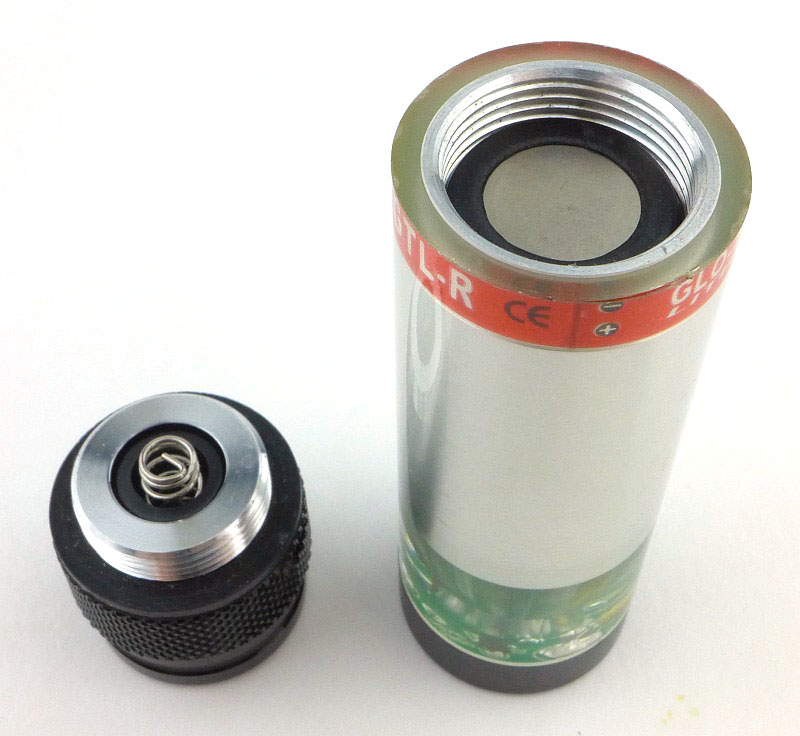
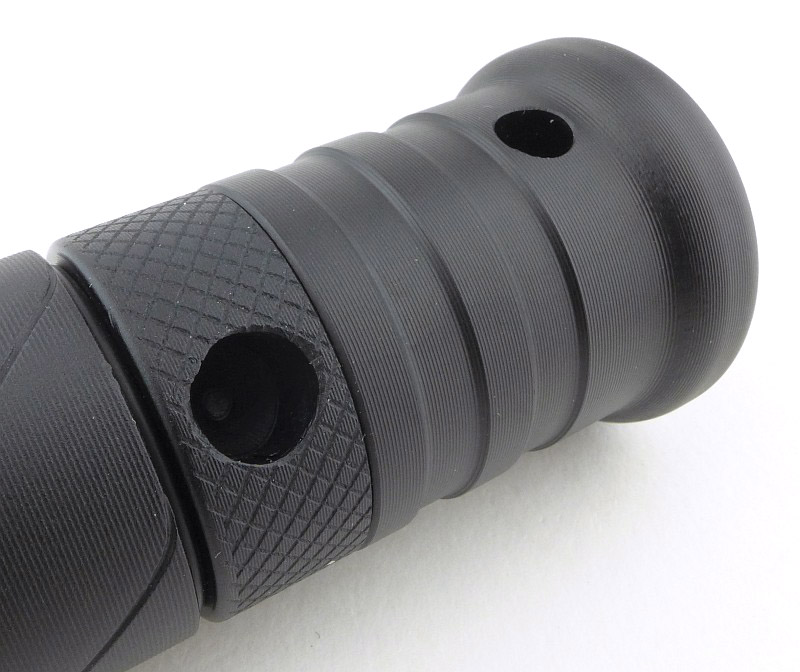
Last up is the most serious of all of the GLO-TOOBs, the LITHIUM. Notice that there is a switch cap already fitted, plus a second cap with keyring.

Already fitted to the GLO-TOOB LITHIUM is a click switch. This is mostly metal, but with a rubber switch boot.
On the opposite end of the GLO-TOOB is a black plastic end cap which the other models don’t have.
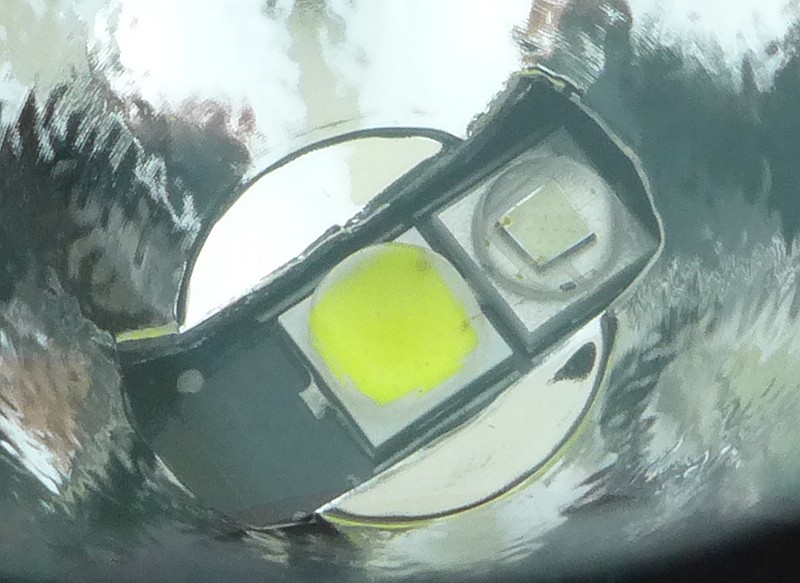
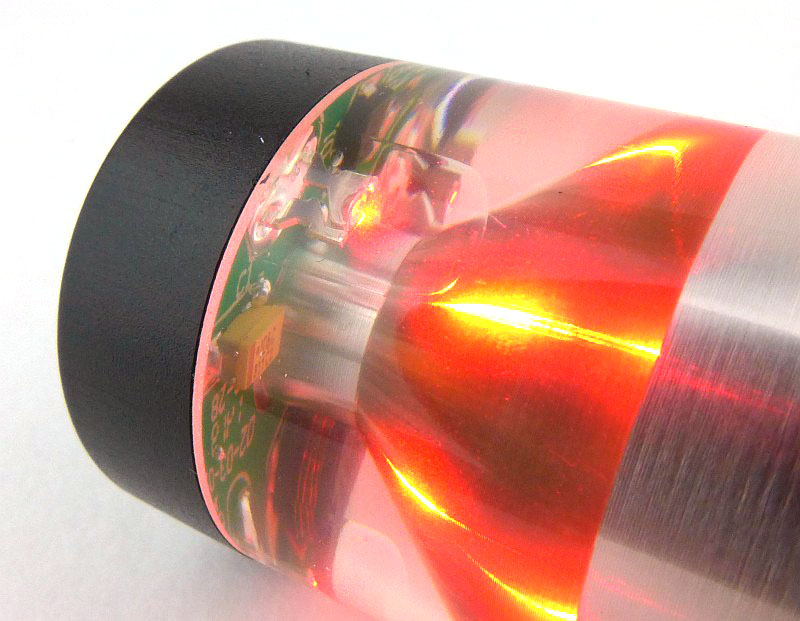
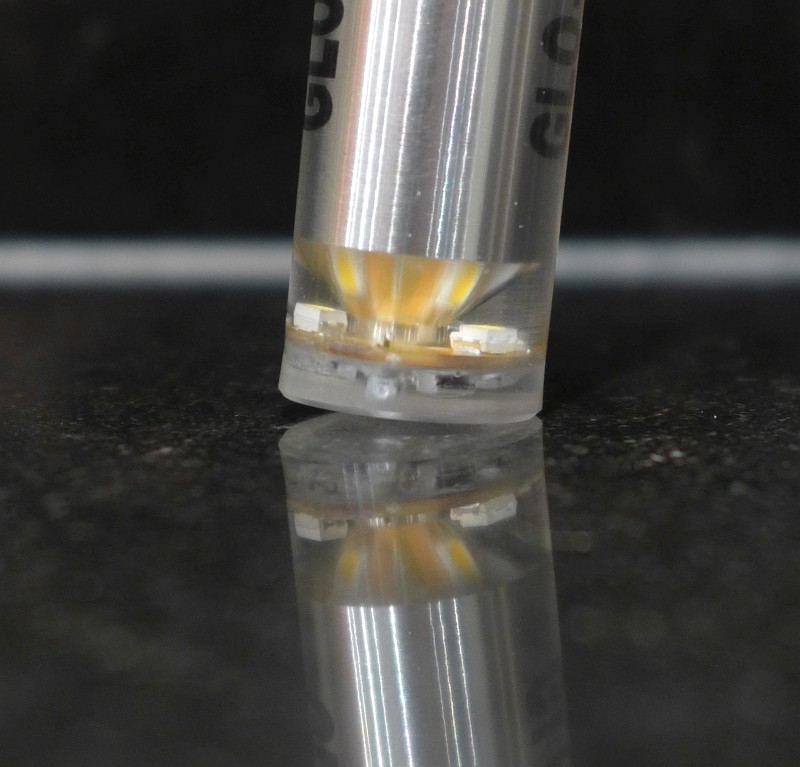
Having a clear body, like the GT-AAA Pro, you can look inside at the LEDs. In this case 5mm type LEDs are used, but the LED’s clear casing almost disappears in the clear resin used for the body of this light.
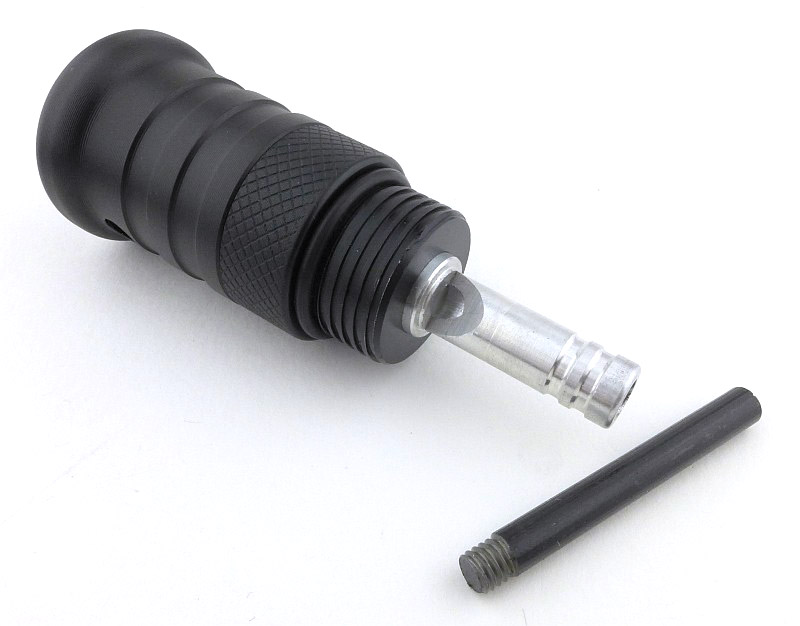
The click cap might be easy to use, but for the ultimate in resilience you need to use the diving cap switch (twist switch with keyring), so let’s swap them over.
While we are swapping them over, the contacts on the click switch look like this.
Unlike the GT-AAA Pro, here the keyring and its post are fixed (and you use them to screw the cap into place), with a plastic rotating switch ring instead.
To keep the contacts totally fresh, there is a metal protective cap supplied with the twist switch cap.
Now the protective cap is fitted to the click switch.
A CR123 fitted into the GT-LITHIUM. Battery orientation is marked in the red coloured band.
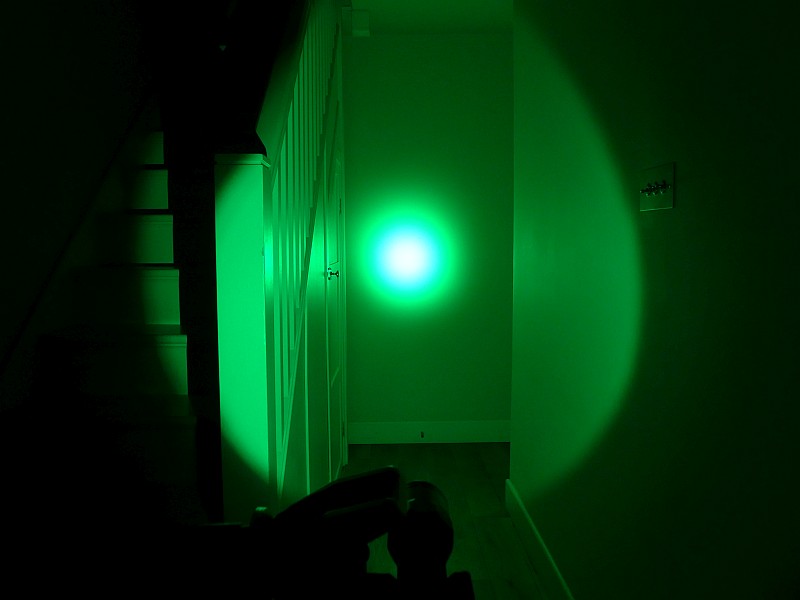
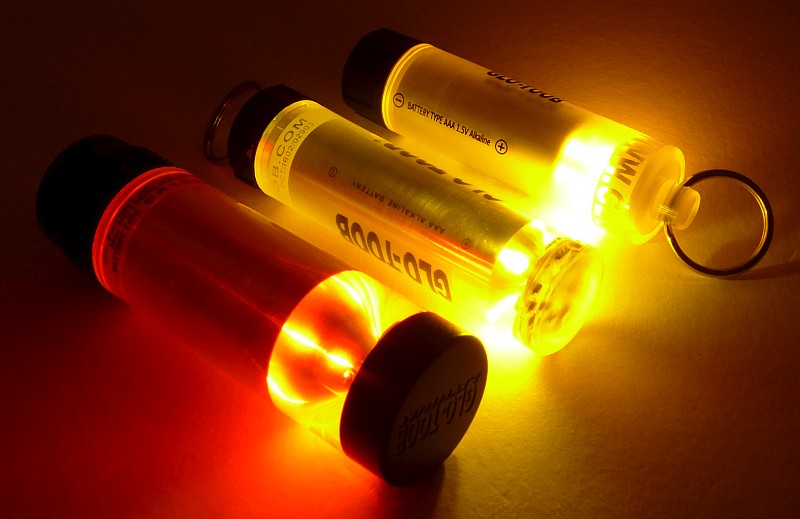
This version is the Red LED one.

A closer look at the lit up LED.
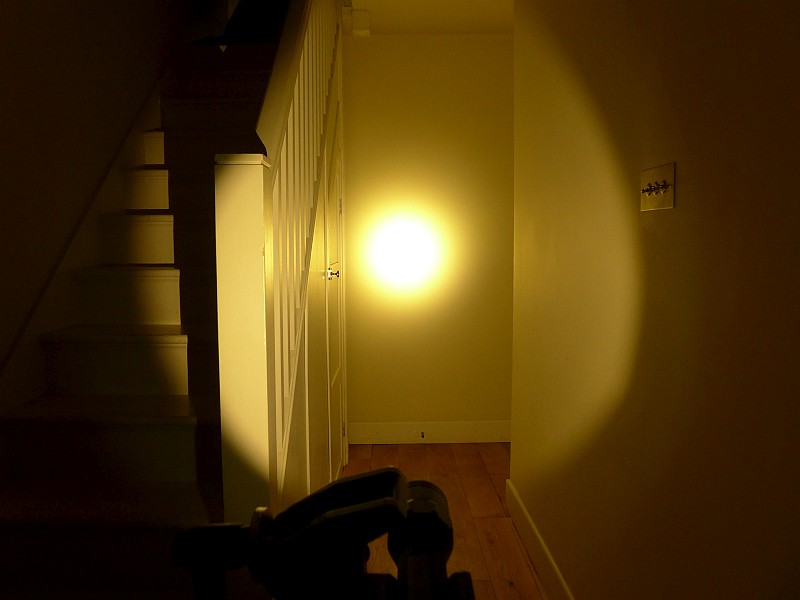
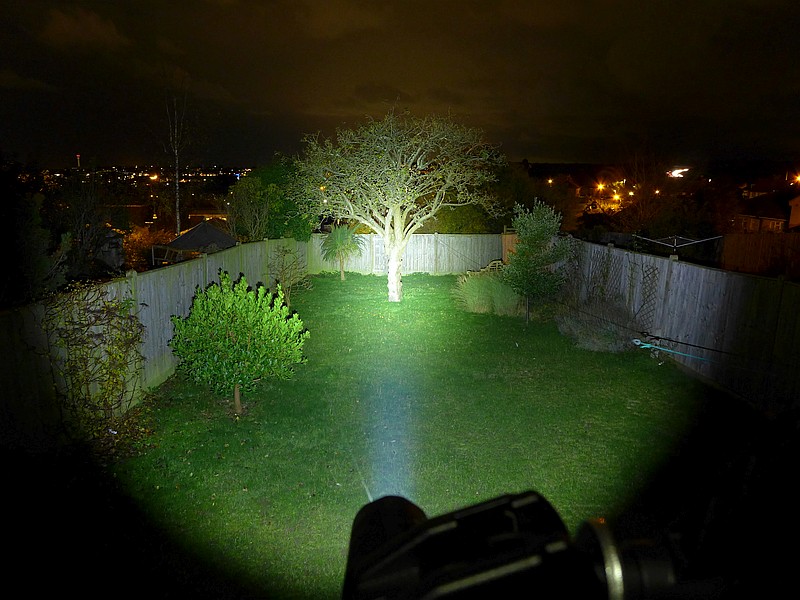
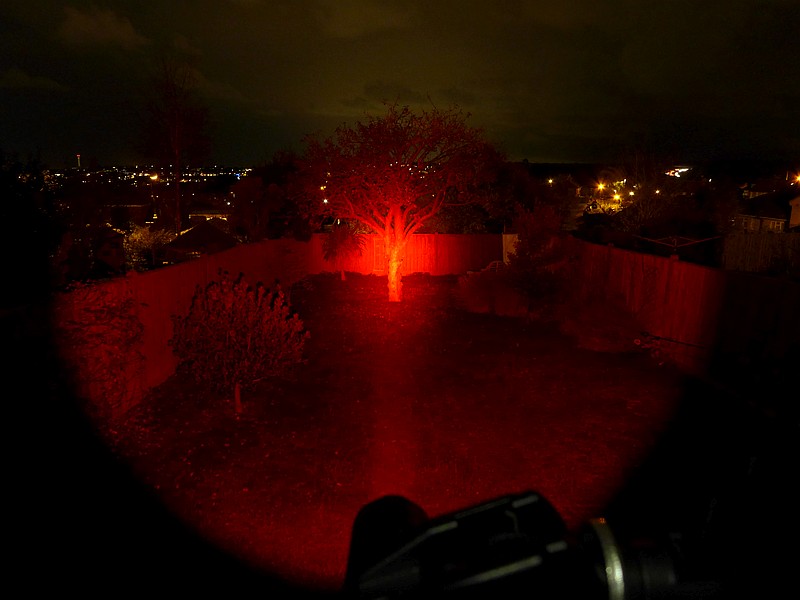
The beam
Please be careful not to judge tint based on images you see on a computer screen. Unless properly calibrated, the screen itself will change the perceived tint.
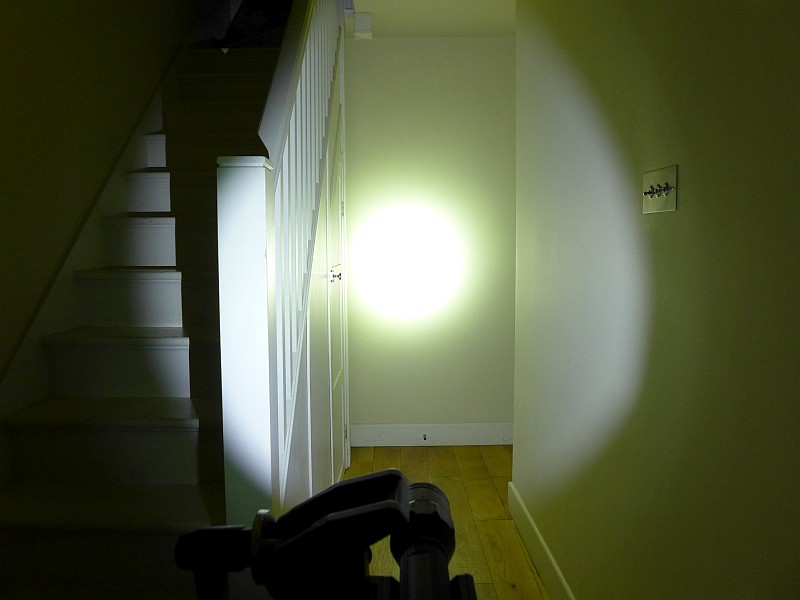
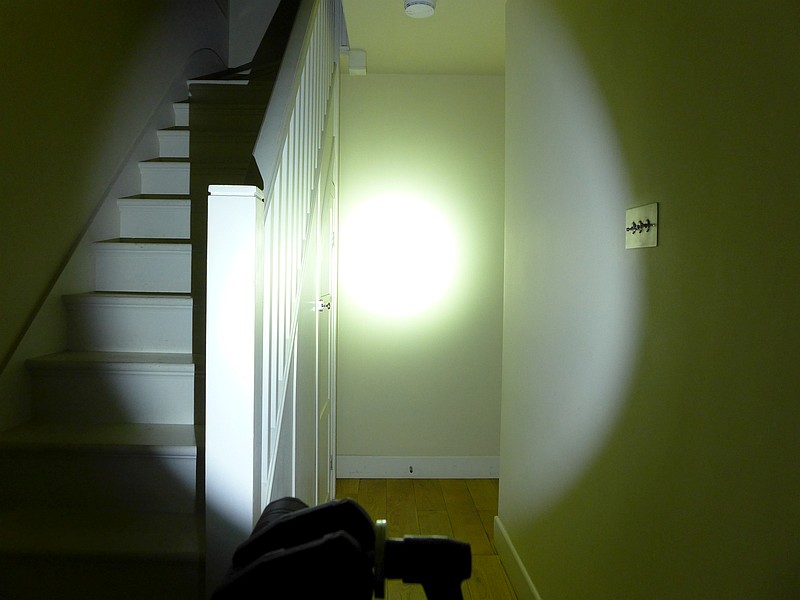
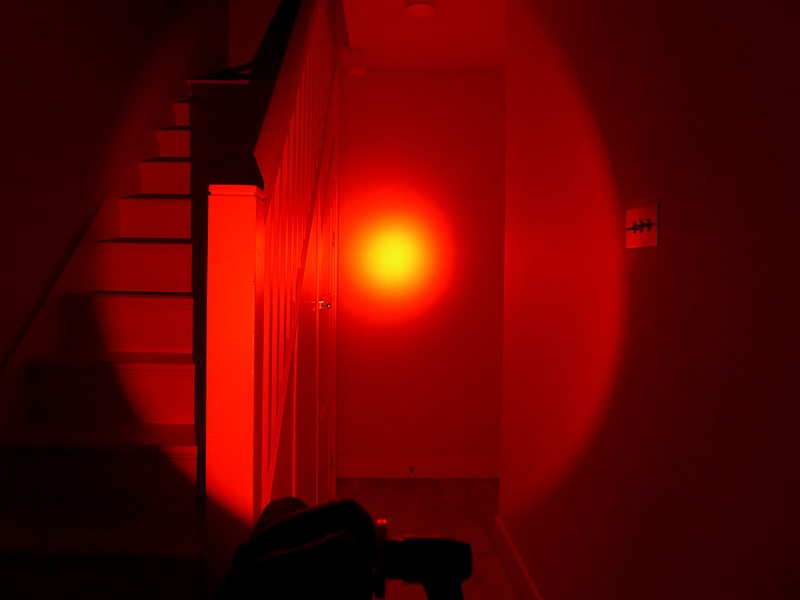
The indoor beamshot is intended to give an idea of the beam shape/quality rather than tint. All beamshots are taken using daylight white balance. The woodwork (stairs and skirting) are painted Farrow & Ball “Off-White”, and the walls are a light sandy colour called ‘String’ again by Farrow & Ball. I don’t actually have a ‘white wall’ in the house to use for this, and the wife won’t have one!
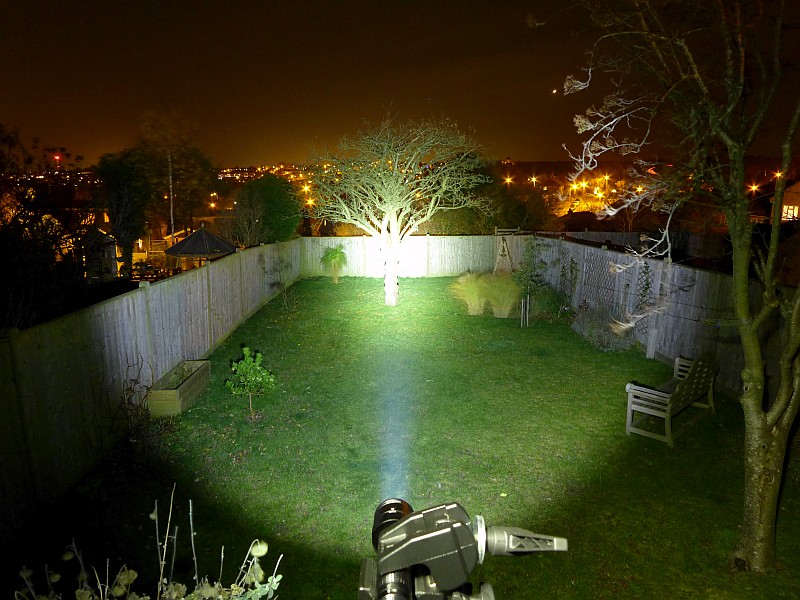
Clearly, being light-stick style, marker lights, there is not really a ‘beam’ to show, instead I’m showing each one at a short distance (3-4m) from the camera.
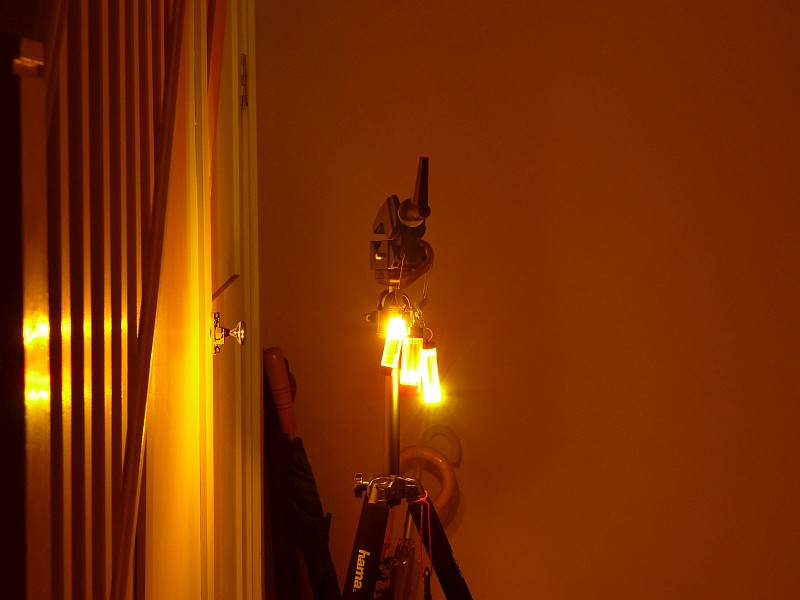
This is the GT-AAA; actually all three are hanging next to each other on a clip.
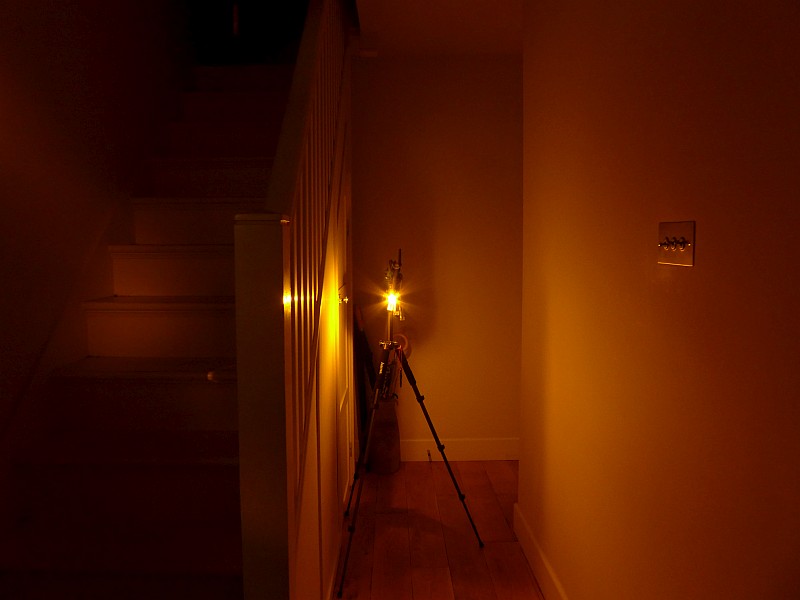
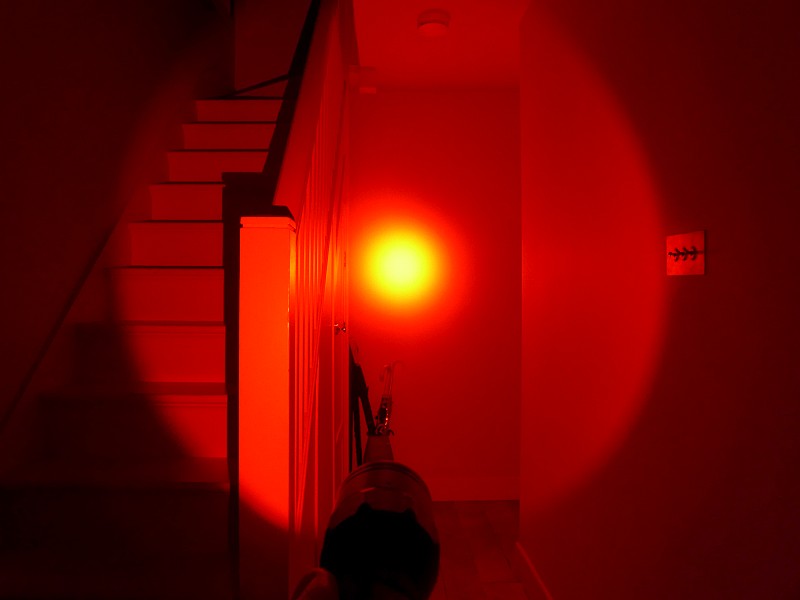
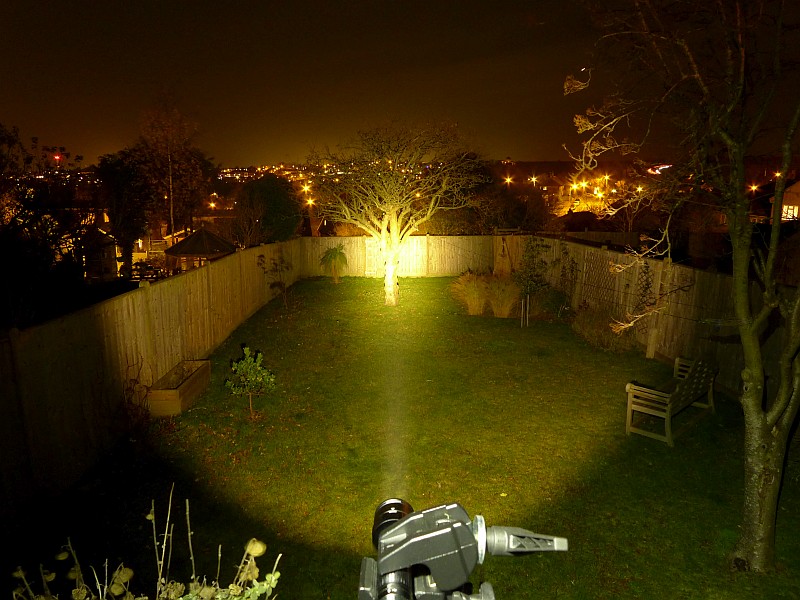
At the same exposure, this is the GT-LITHIUM.
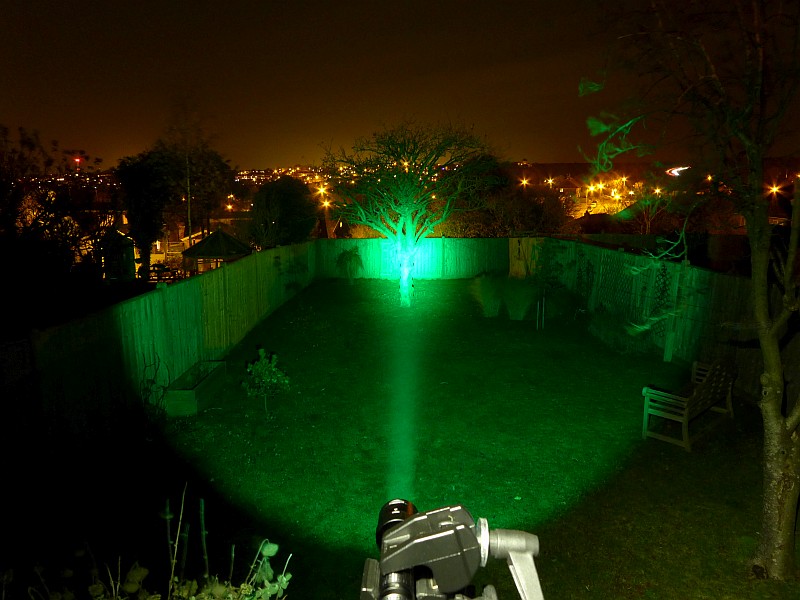
With the GT-AAA Pro up last. This appears quite a bit brighter than the GT-AAA.

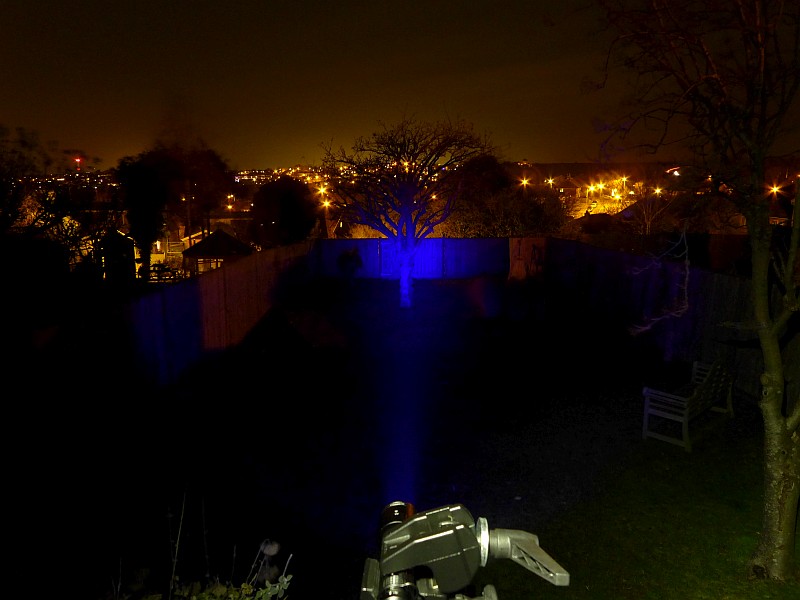
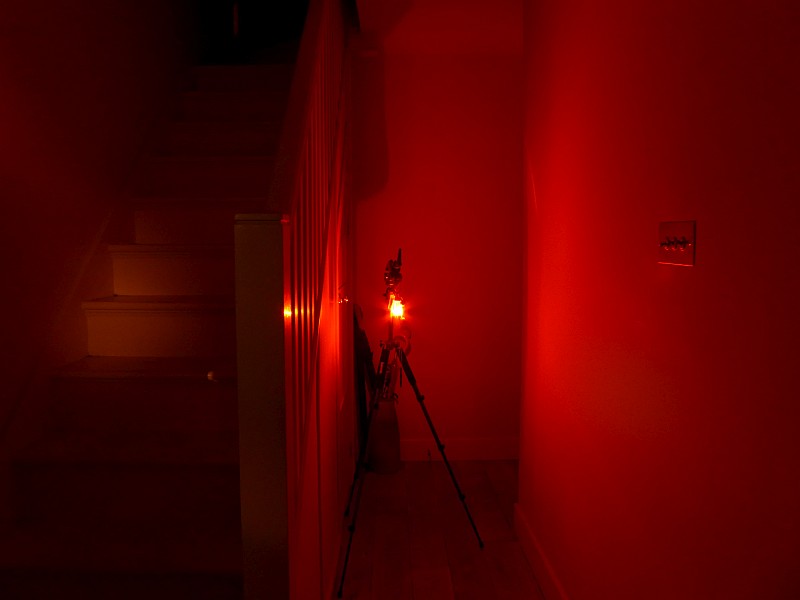
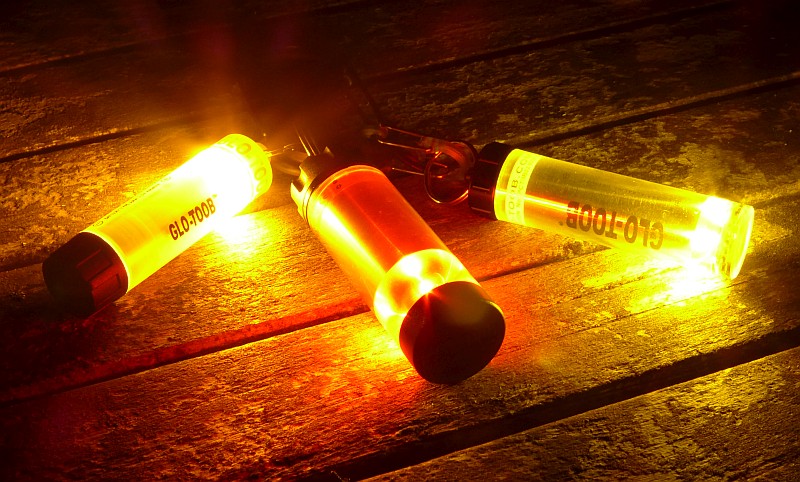
All of them on at the same time. The red of the GT-LITHIUM is a bit drowned out.

The camera is set to daylight WB (as is the case with all my beamshots) to try to make colour and tint as clear as possible. The amber GT-AAA and GT-AAA Pro take over, masking the GT_LITHIUM’s red colour.
Modes and User Interface:
Each of the GLO-TOOBs is slightly different in its operation so we’ll take them one at a time:
The GT-AAA has three modes, High, Low(25%) and Flash.
To switch ON, tighten the entire end cap.
To cycle through the available modes twist-ON, then twist-OFF, and back on again within 2s and repeat to change from High – Low – Flash – High etc.
To Switch OFF, loosen the entire end cap.
The GT-AAA Pro has three modes, High, Low(25%) and Flash.
To switch ON, turn the keyring as if tightening a screw.
To cycle through the available modes twist-ON, then twist-OFF, and back on again within 2s and repeat to change from High – Low – Flash – High etc.
To Switch OFF, turn the keyring as if loosening a screw.
The GT-LITHIUM has 11 modes, Equal Flash, Beacon Strobe, Fast Strobe, Slow Strobe, SOS, Pulse, Half Flash, Bounce, Ramp Up, 100% Constant On and 25% Constant On.
To switch ON to the memorised mode, either click the switch or turn the end cap.
To switch OFF, either click the switch or turn the end cap.
To set the current output mode, switch ON, count 5s, then switch OFF and ON again. Now you can cycle through the available modes (in the order above) by turning it OFF and ON again until you get to the one you want. To ‘fix’ that mode, simply leave it ON for 4s and it will be memorised.
Batteries and output:
The GT-AAA and GT-AAA Pro run on a single AAA Alkaline cell, and the GT-LITHIUM runs on a CR123.
To measure actual output, I built an integrating sphere. See here for more detail. The sensor registers visible light only (so Infra-Red and Ultra-Violet will not be measured).
Please note, all quoted lumen figures are from a DIY integrating sphere, and according to ANSI standards. Although every effort is made to give as accurate a result as possible, they should be taken as an estimate only. The results can be used to compare outputs in this review and others I have published.
| ___________________________________________ |
________________________________ |
________________________________ |
| GLO-TOOB model using specified cell |
I.S. measured ANSI output Lumens |
PWM frequency or Strobe frequency (Hz) |
| ___________________________________________ |
________________________________ |
________________________________ |
| GT-AAA High – AAA Alkaline |
10 |
0 |
| GT-AAA Low – AAA Alkaline |
2 |
166 |
| GT-AAA Strobe – AAA Alkaline |
10 |
10.5 |
| GT-AAA Pro High – AAA Alkaline |
9 |
0 |
| GT-AAA Pro Low – AAA Alkaline |
3 |
0 |
| GT-AAA Pro Strobe – AAA Alkaline |
9 |
4 |
| GT-AAA Lithium High – CR123 |
3 |
0 |
| GT-AAA Lithium Low – CR123 |
1 |
500 |
* Beacon and Strobe output measurements are only estimates as the brief flashes make it difficult to capture the actual output value.
There is no parasitic drain on any model.
With such low outputs and long runtimes I have not included a runtime graph for any model.
Troubleshooting
This section is included to mention any minor niggles I come across during testing, in case the information helps anyone else.
There was one slightly odd observation with the GT-AAA Pro. During the first few full runs (turning it onto high with a fresh cell, and leaving it to run until is went off) the PCB end of it started to dome out, as if there was some pressure building inside. It was also observed when fitting a mostly depleted cell and then leaving it on high.
I suspect the cell might have been gassing, and this pressure blowing the PCB out a little.
It was not observed after the fourth cell was used, so might have been connected to something on the PCB creating a pressure build up.
Not being able to replicate it any further, I asked Nextorch about it and they replaced the GLO-TOOB. The replacement did not exhibit this behaviour at all.
As per the description of this section, this information is provided in case anyone else finds a similar ‘issue’ that might be fixed in the same way.
The GLO-TOOBs in use
With the GLO-TOOB lights being marker lights, in general, to use them you simply attach the light to whatever you want to mark. The main aspects to discuss here are the user interfaces and battery change.
Each of the three models in the review is constructed differently so despite being similar overall they do feel quite different in use.
Starting with the lowest end model, the GT-AAA, and to operate this you have to turn the entire black cap. Of all three this is the stiffest to operate, and though not requiring much force to turn it, it does require reasonable force to be able to grip the cap strongly enough that you can turn it. This is due to the cap being relatively smooth to hold.
The operation is simple, very immediate and easy to judge as the cap position is obvious. The High output level is clear and has a useful level of light, but in comparison to the other GLO-TOOBs in this review, the Low uses a low frequency PWM making it quite obvious, and the flashing mode is a bit manic, being more of a strobe than a beacon.
Stepping up to the GT-AAA Pro, and there is a leap in performance and build. This time the battery cap is metal, and has a central threaded post which is used to operate the light. Starting with a battery change, you then screw in the cap, and tighten fully; at all times this cap is fully tightened. Now to operate the light, you twist that threaded post using the keyring (or you can hold the ring in place and twist the body. This action is super smooth and possibly the easiest action of all the GLO-TOOBs. It does seem a little vague though as it lacks any real feel until the unit comes on. At this point the action stiffens and becomes a bit grindy; I am slightly worried about over tightening this switch as it might crush the battery.
In terms of output, the High mode is great, making it so much nicer to use. And when it comes to the flashing mode, though not quite a ‘beacon’ the flashes are much slower than the GT-AAA and so much easier to be around. The increased waterproofing and the significantly better low and flashing modes make this Pro model a worthy upgrade to the GT-AAA.
Lastly, the much more serious Lithium model. It is more expensive than the AAA models, but one important reason you might consider this the ‘serious’ version, comes from the CR123A cell’s shelf life. You can put a fresh CR123 in this and leave it for 10 years and it will work. I’d certainly not expect the same out of an alkaline cell. In addition to the power source, the build of the GT-LITHIUM is seriously strong, and it has a ‘diving’ switch cap designed to make this usable to 3500m depth. Not many people will even use that level of waterproofing, but it does mean that overall you are getting a massively robust light. Optionally you can also use the click switch cap instead for a different way of using it.
Now we also have 11 modes to choose from, and my biggest complaint is finding it hard to choose one, as they each provide a different mix of visibility and attention grabbing. My favourite visible but not too manic is the ‘pulse’ mode, with another that works well for me is ‘Bounce’. The others are each so good, you have trouble choosing between them; the only one I’ll never use is the Fast Strobe. Depending on your application, battery life might be a consideration, so the total time the LEDs are lit are a factor. In this case the Slow Strobe or Beacon Strobe would be good choices.
Both switch cap types are equally easy to use. In some ways the click cap makes mode selection easier, but doesn’t have the solid hanging ring or levels of waterproofing as the diving switch cap does. The twist action is a smooth ‘detent’ 1/4 turn to go between on and off. Grip is very good with the deep scallops round the ring.
Unlike the GT-AAA Pro, when fitting the diving switch to the GT-LITHIUM, you now use the keyring to twist the cap on tightly; you can’t use the twist ring itself as it moves.
One of my main reasons to use this type of marker light is as additional safety lighting when cycling. Typically attached to something behind me, I don’t get to see it, so because I like these, I am constantly looking for an excuse to use them. Things like tent marking, or even leaving a slow strobe on my car dashboard when parking the car at night in a public car park are amongst the ‘excuses’ I’ve come up with.
If you like light sticks then these GLO-TOOBs should be on your shopping list.
Review Summary
| _______________________________________________ |
_______________________________________________ |
| Things I like |
What doesn’t work so well for me |
| _______________________________________________ |
_______________________________________________ |
| ‘On-Demand’, reusable light stick. |
GT-AAA uses PWM for low mode. |
| Incredible 3500m waterproofing on the GT-LITHIUM. |
Light not as evenly spread along the length as a chemical light stick. |
| GT-LITHIUM has 11 modes to choose from. |
Currently limited to AAA or CR123 cells (an AA option would be great). |
| Choice of 3 modes for the AAA versions. |
|
| Keyring makes it easy to attach. |
|
| Super tough and resilient. |
|
Discussing the Review:
The ideal place to discuss this reviews is on a forum. If you started reading the shorter forum version of the review, but followed the link this full exclusive review, please return to that forum to discuss the review there.
If you read the review entirely on Tactical Reviews, please consider one of the following to join in any discussion.
CandlePowerForums – Flashlight Reviews Section (Largest and Friendliest Flashlight Community Forum)
EdgeMatters – Sponsored Reviews (UK based Forum for Knife Makers and Collectors)


.")