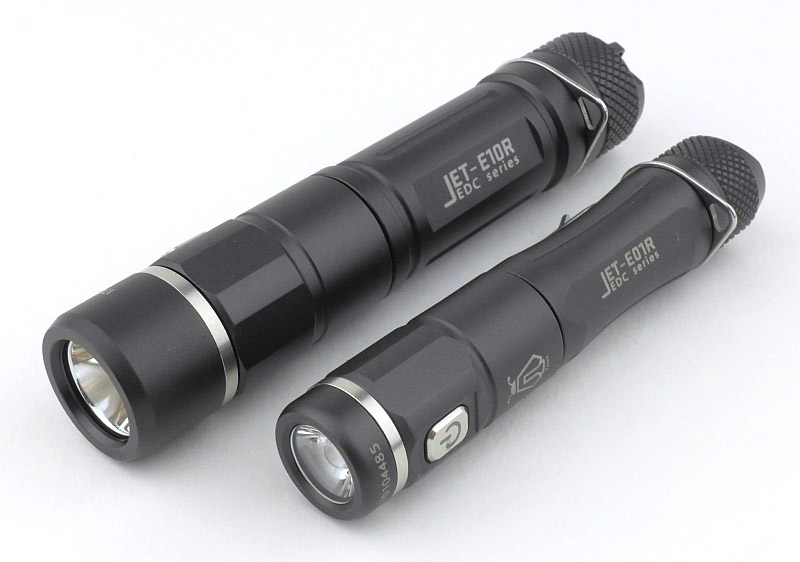
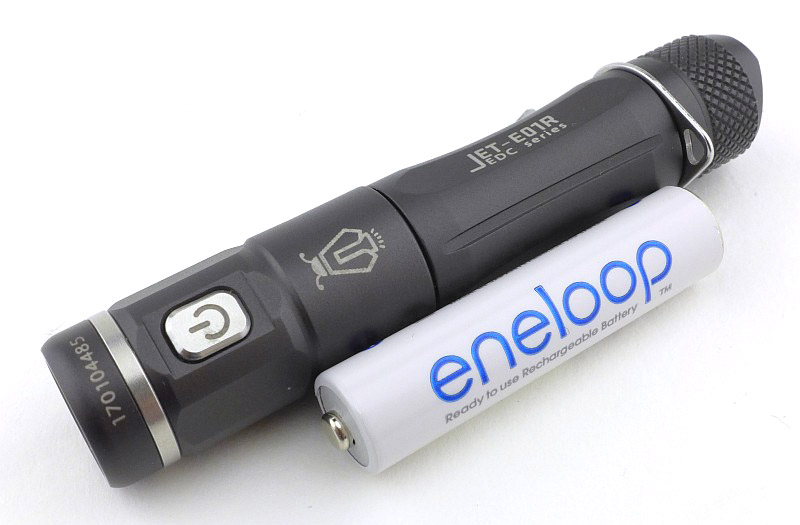
Jetbeam are taking the concept of USB rechargeable EDC lights to a new level of convenience with their super compact E01R (AAA) and E10R (AA/14500), by hiding the charging port so well you would never guess they had this feature just by looking at them.

Taking a more detailed look at the E01R:
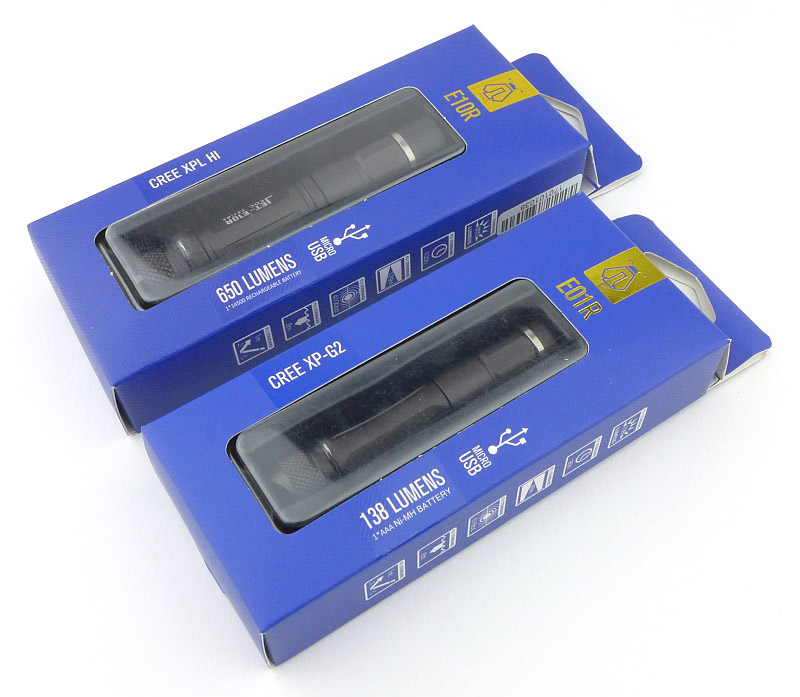
Before we go into the detail of the E01R, these are the boxes for both the E01R and E10R models.
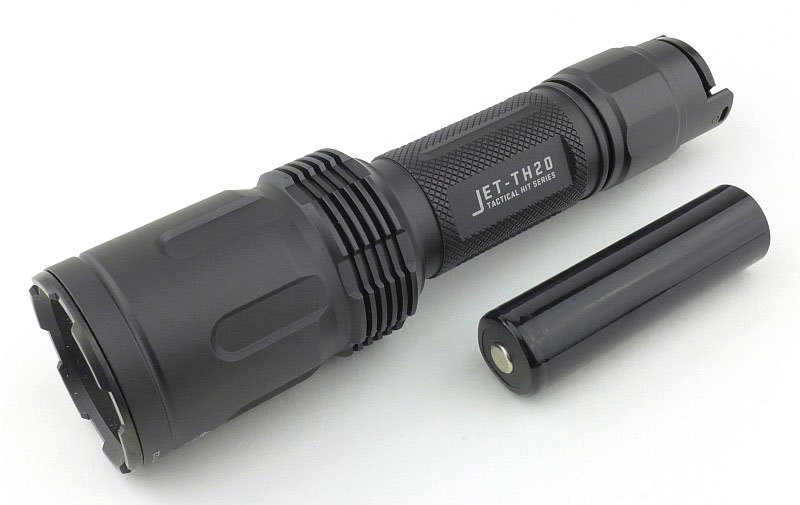
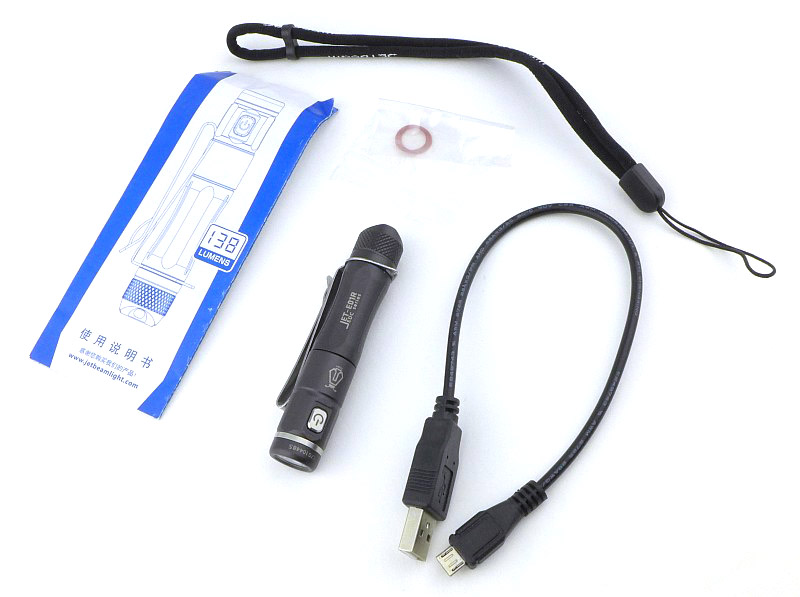
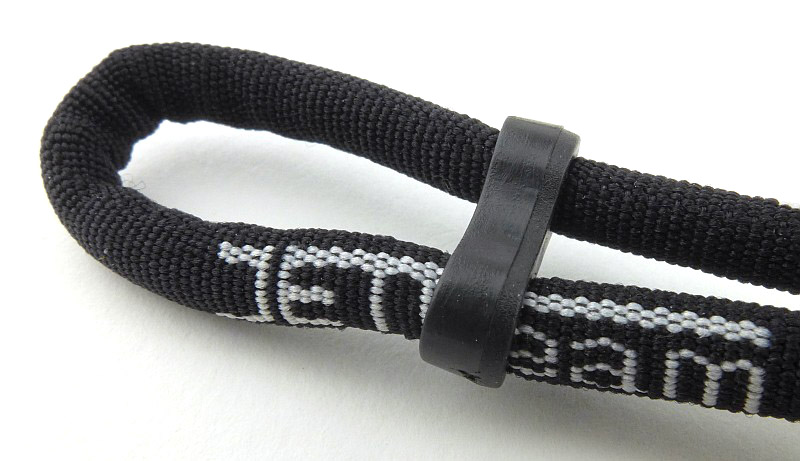
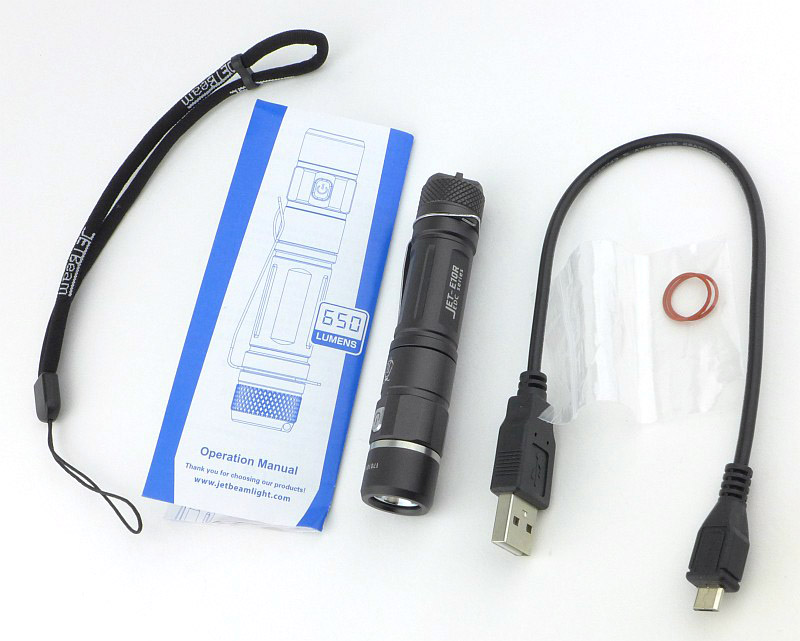
Included with the E01R is a USB cable, spare O-ring, quality lanyard, and the instructions.
Not to gloss over that lanyard, the cord is a type of piping with a round cross-section.
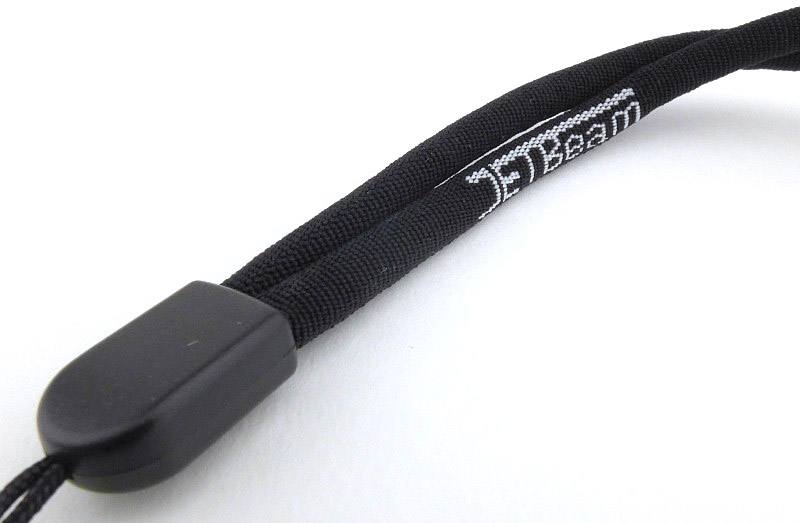
This has a sliding toggle to allow you to secure it to your wrist.
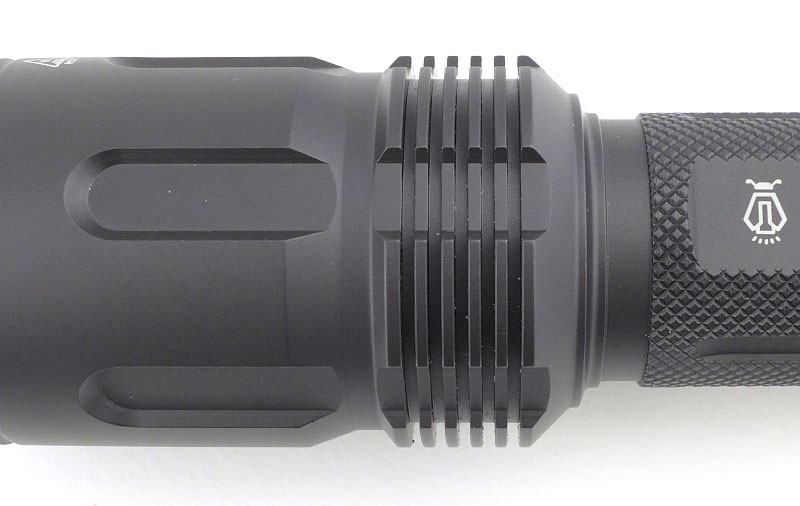
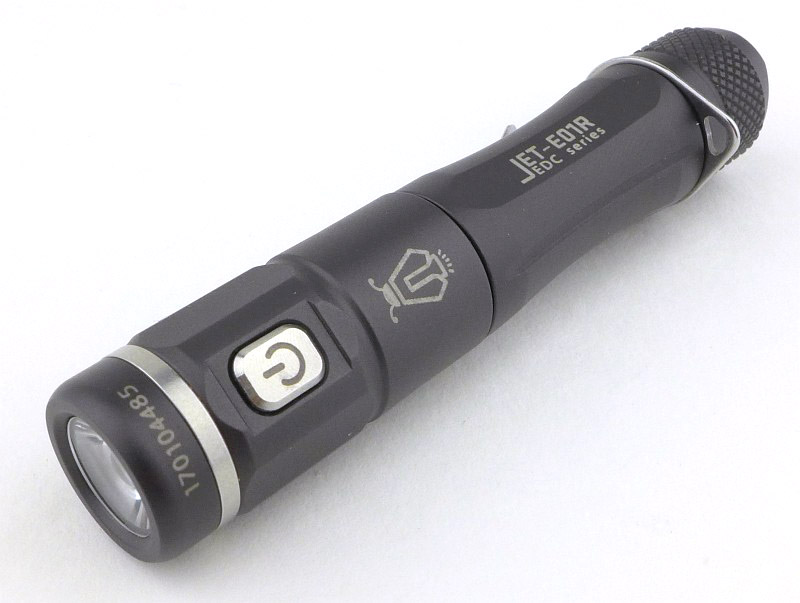
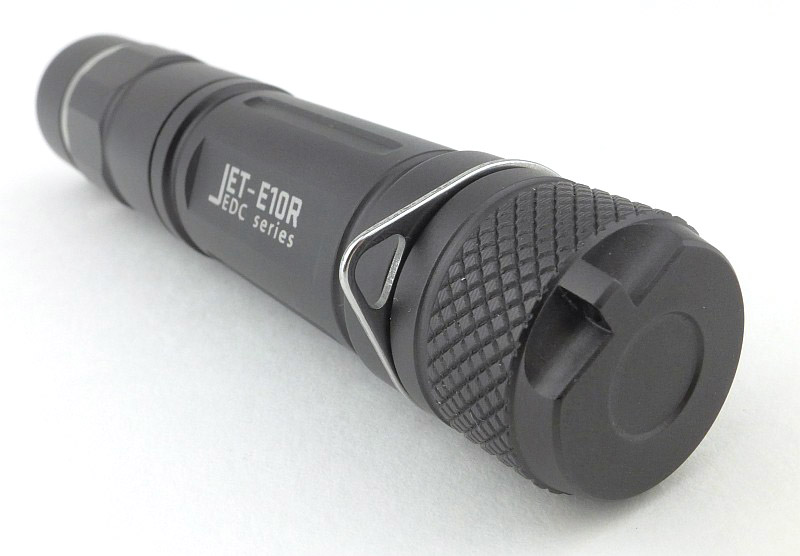
Fit and finish is excellent all over this light.
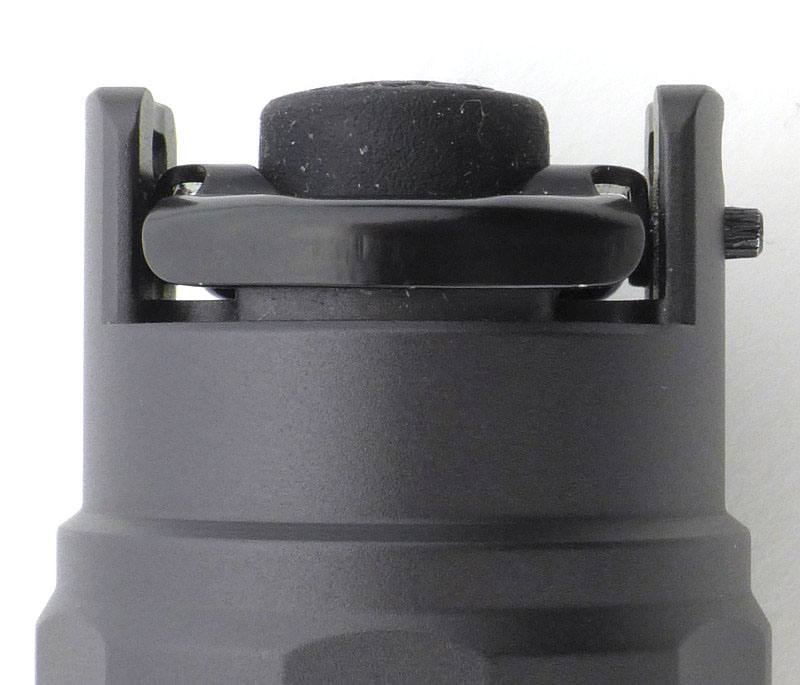
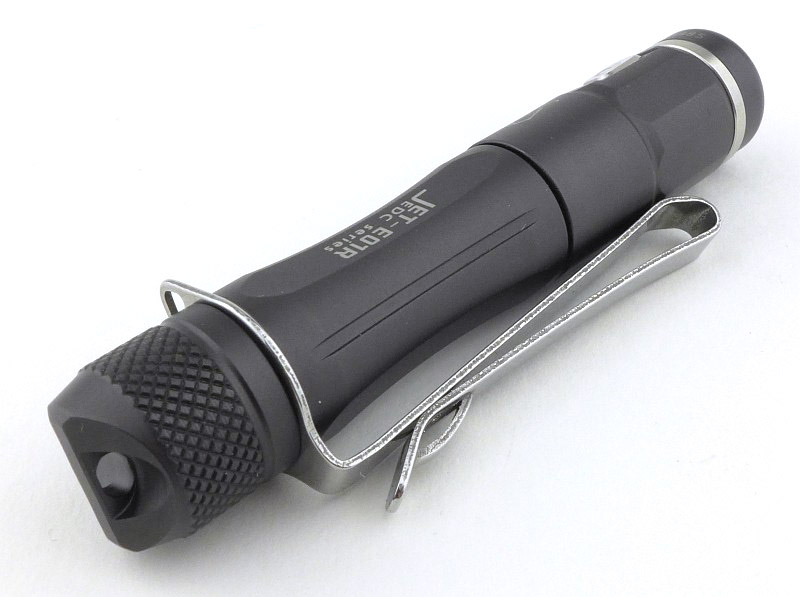
The E01R has a two way clip allowing for carry either way up, and also allowing it to be fitted to a baseball cap peak to act as a headlamp.
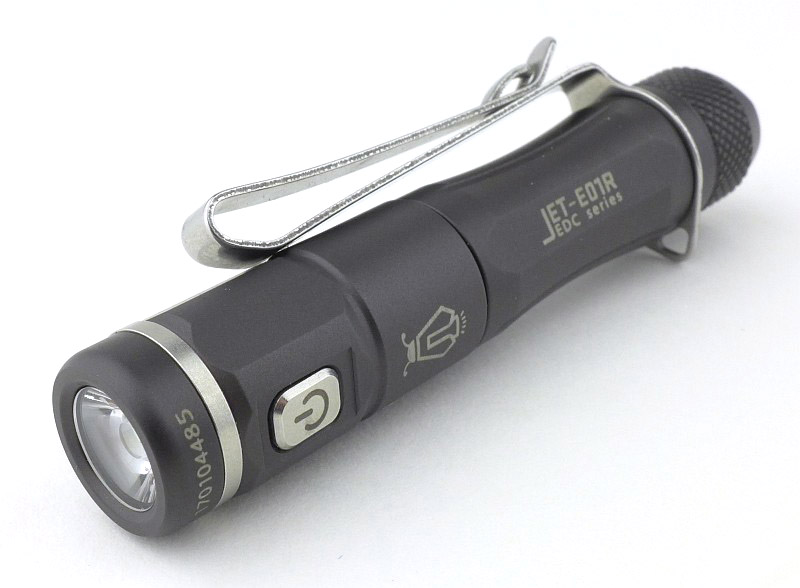
A lanyard hole is included in the tail-cap and in the pocket clip.
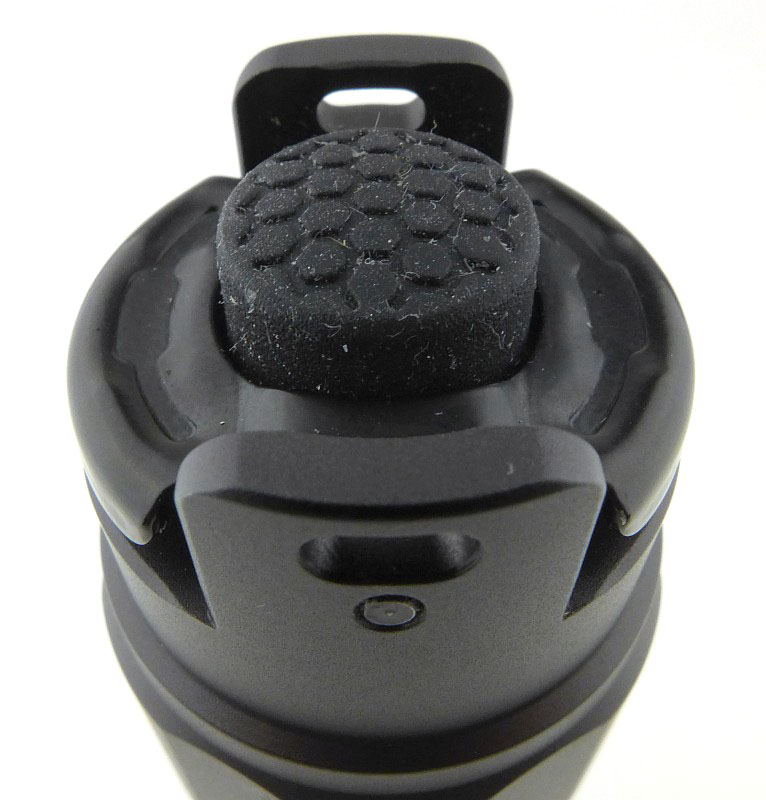
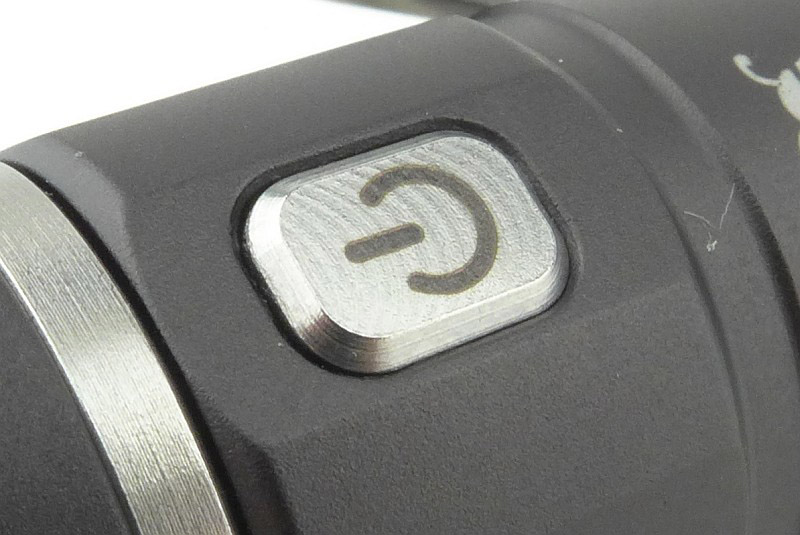
The power switch is a small metal button on the side of the light’s head.

Though not an ultra compact AAA light, the E01R is still nice and small.
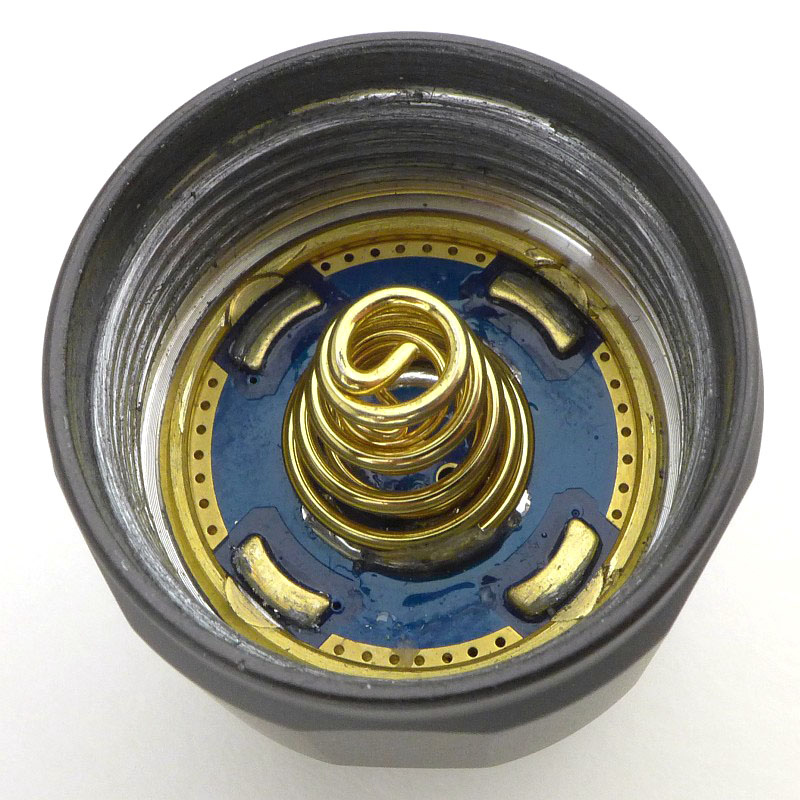
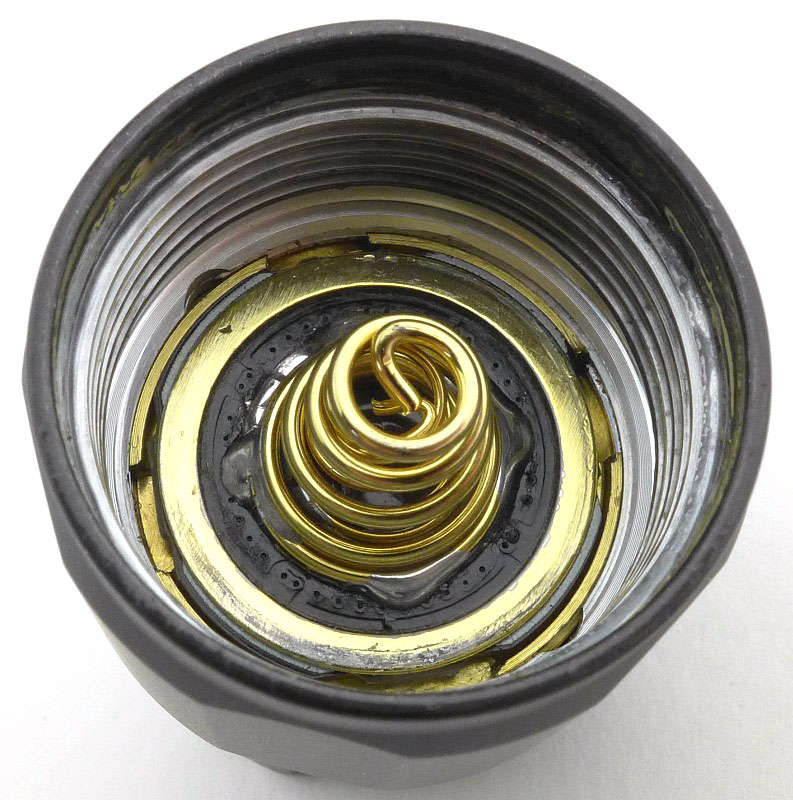
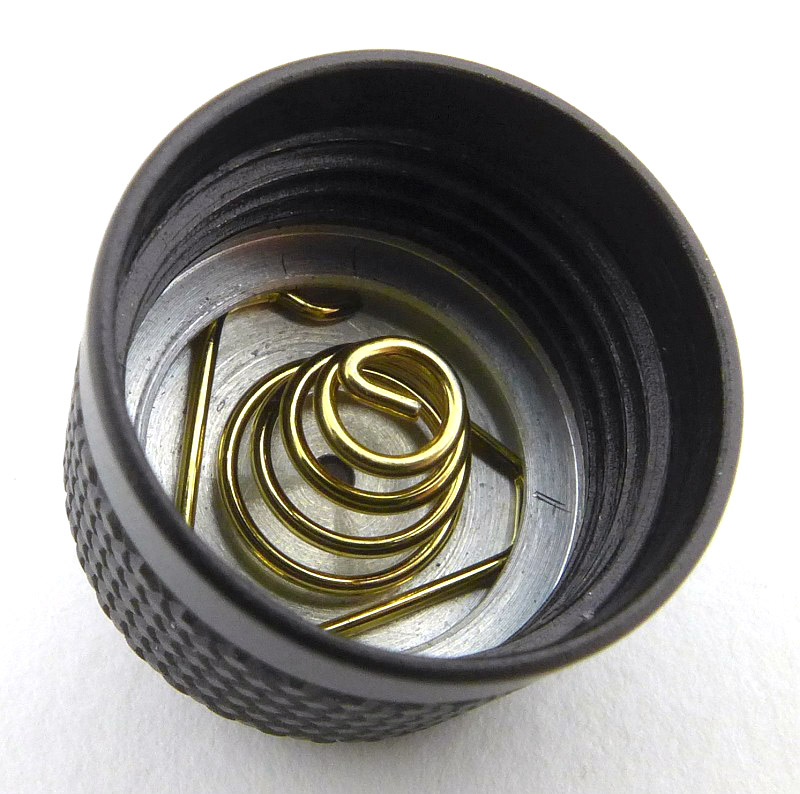
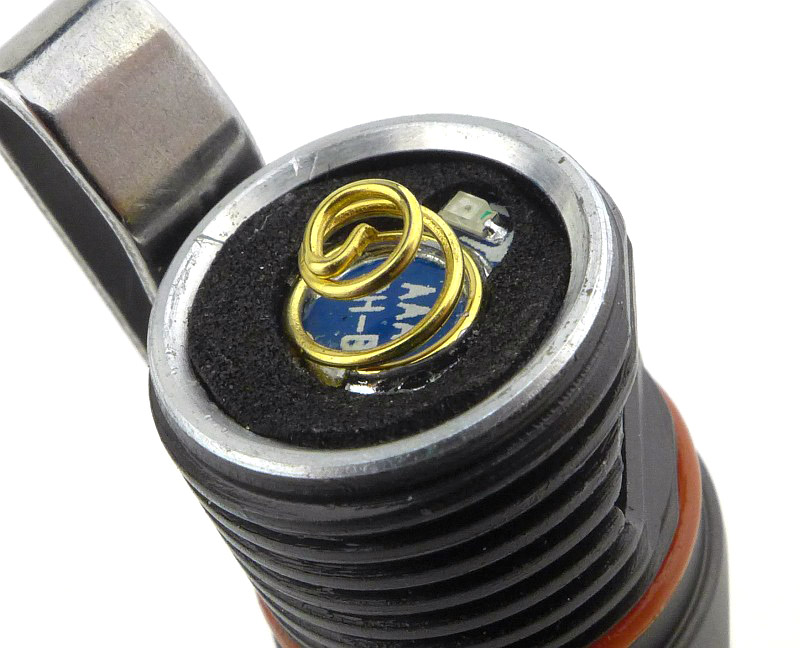
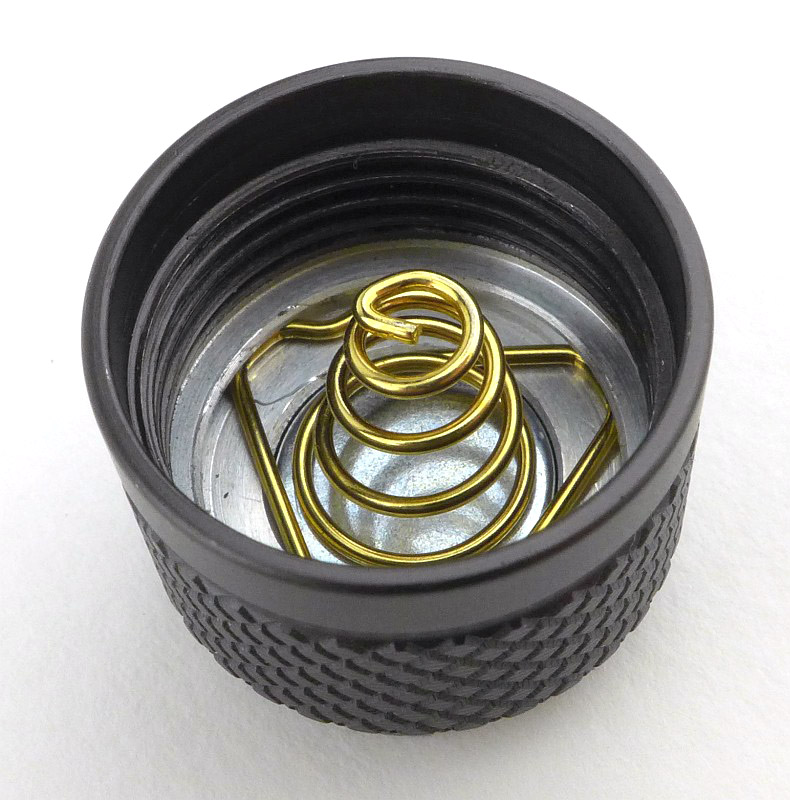
Inside the tail-cap is a gold plated spring terminal.
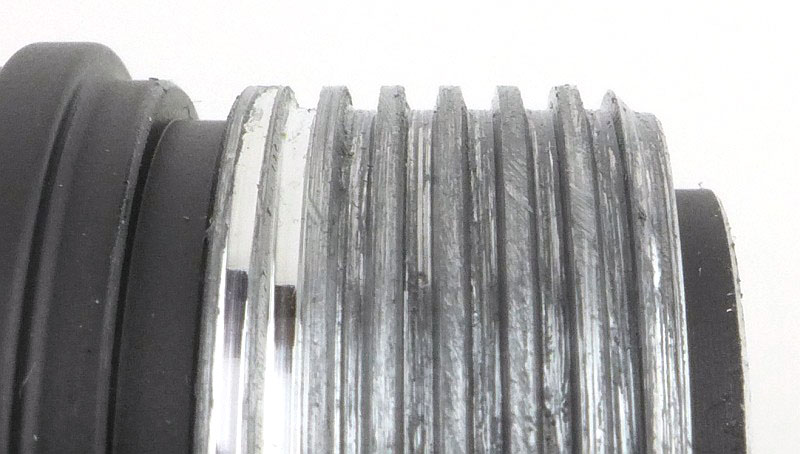
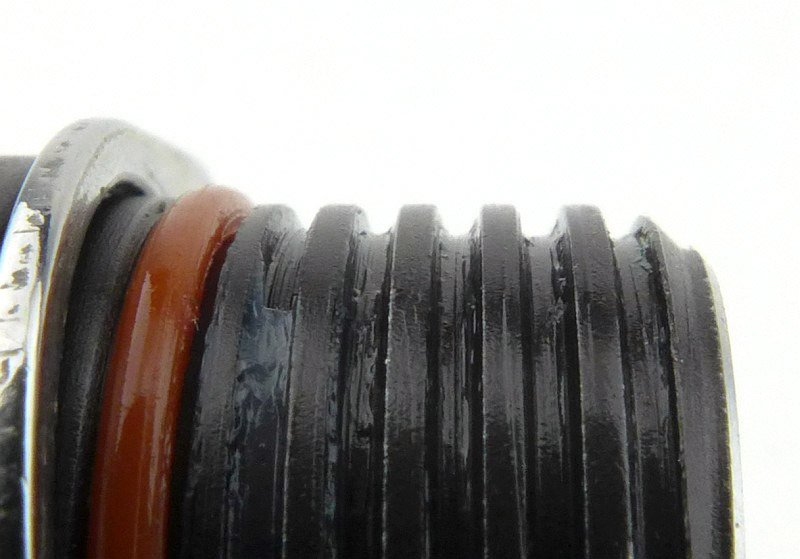
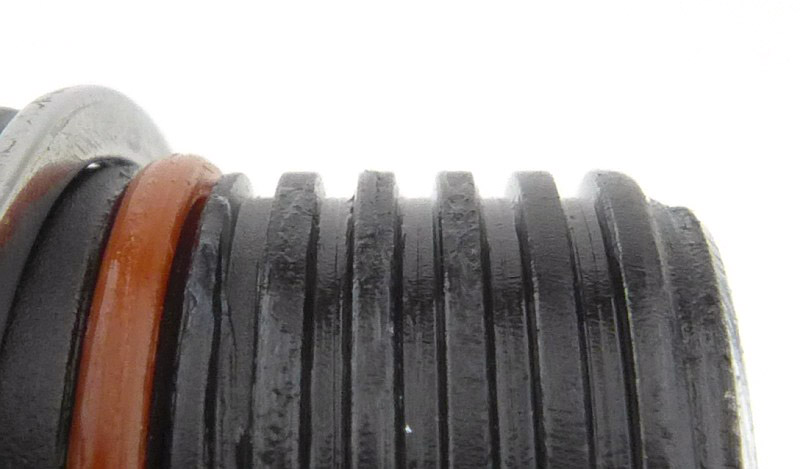
The threads are almost square, and are well lubricated.
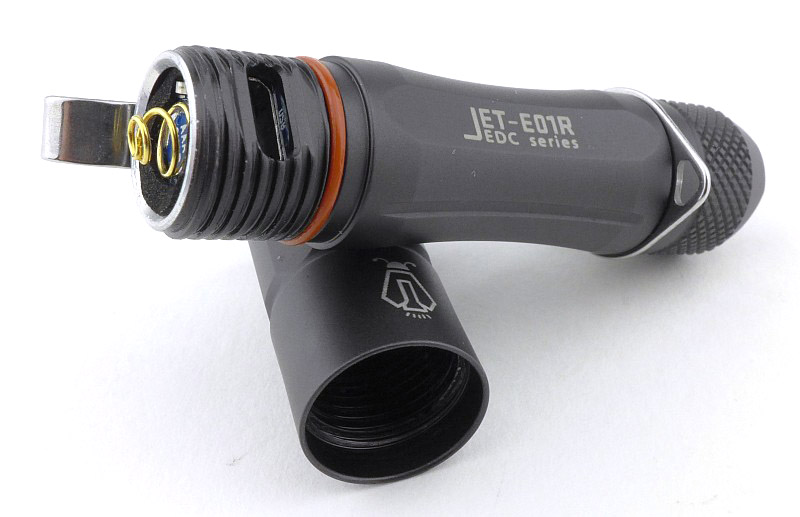
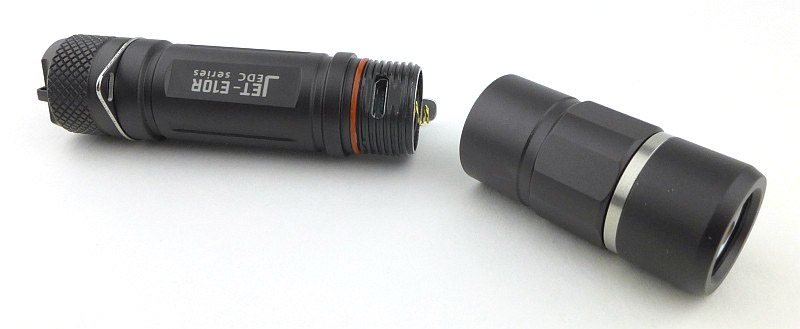
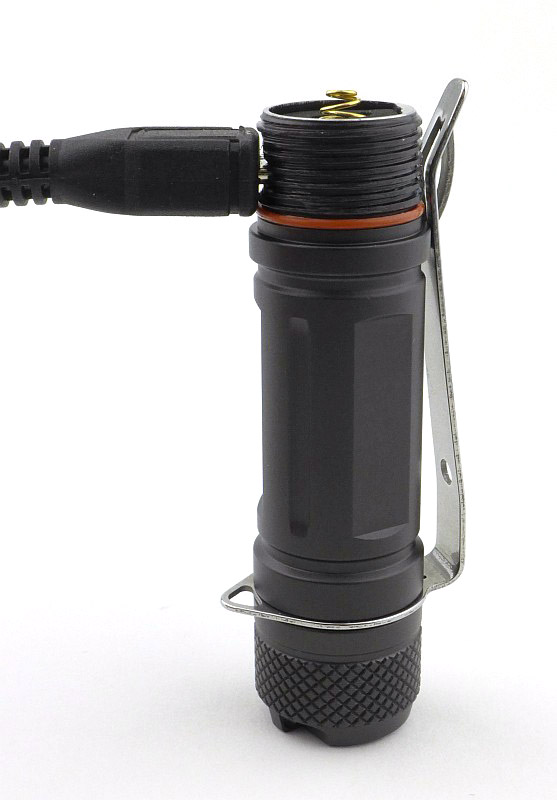
And this is the trick up the E01R’s sleeve. Unscrew the head of the light to reveal the micro-USB charging port.
A closer look at the charging port and threads.
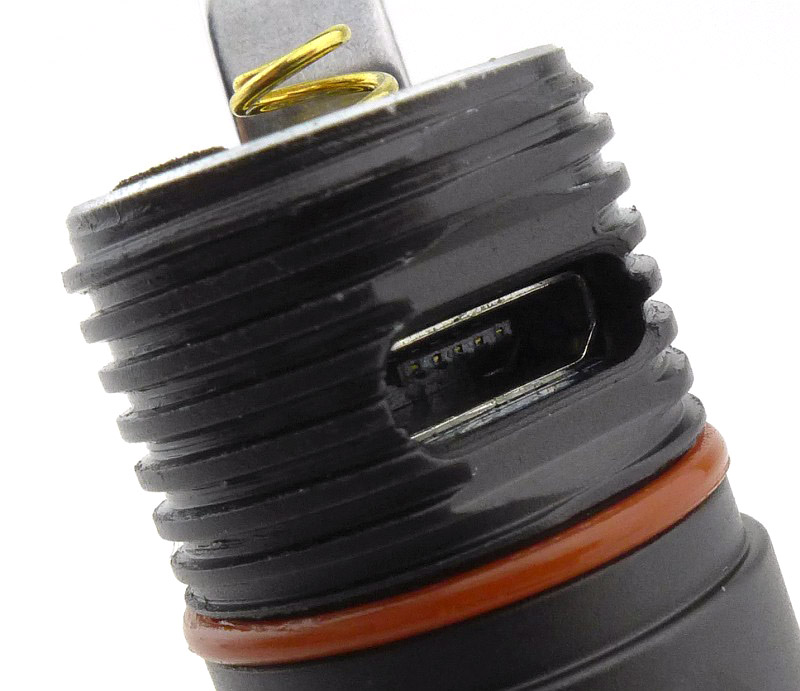
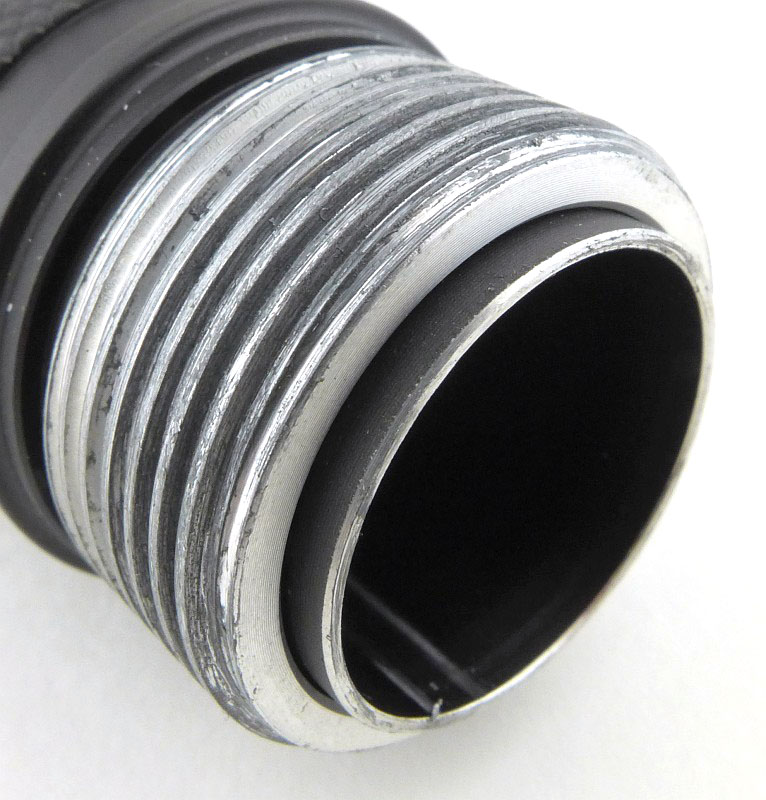
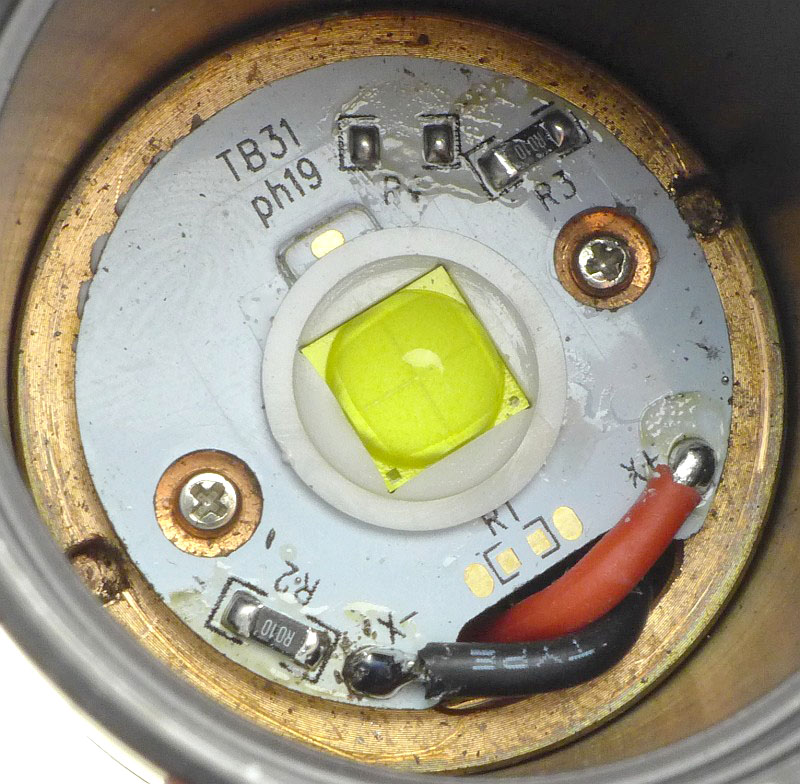
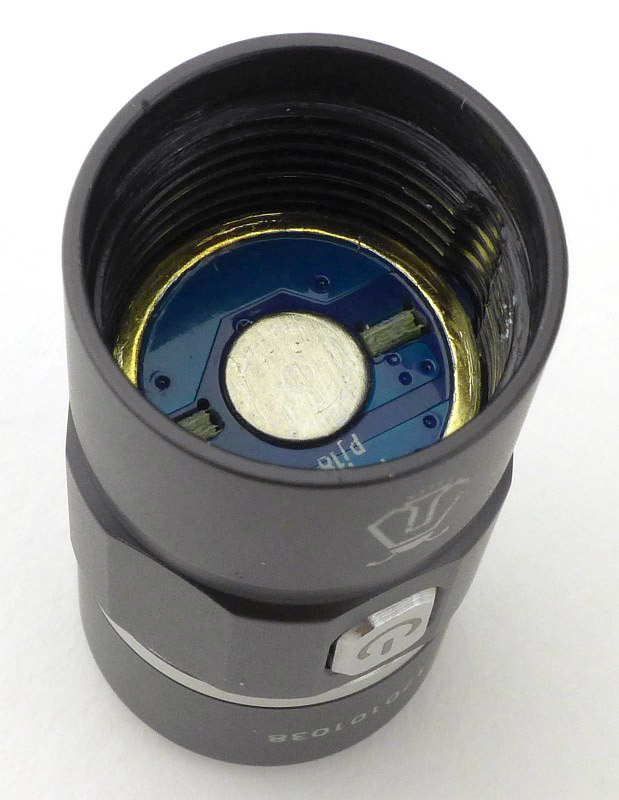
With the head removed, you do not see the battery, instead there is a set of contacts for the connection to the head once refitted. Just next to the spring (at about 2 o’clock) is the indicator LED for charging.
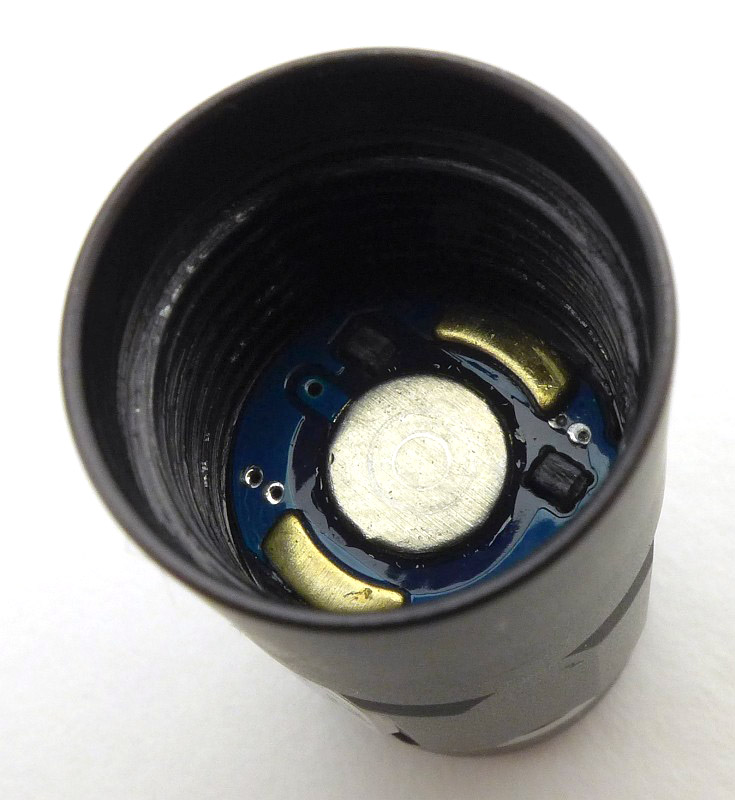
Inside the head are the matching set of contacts.
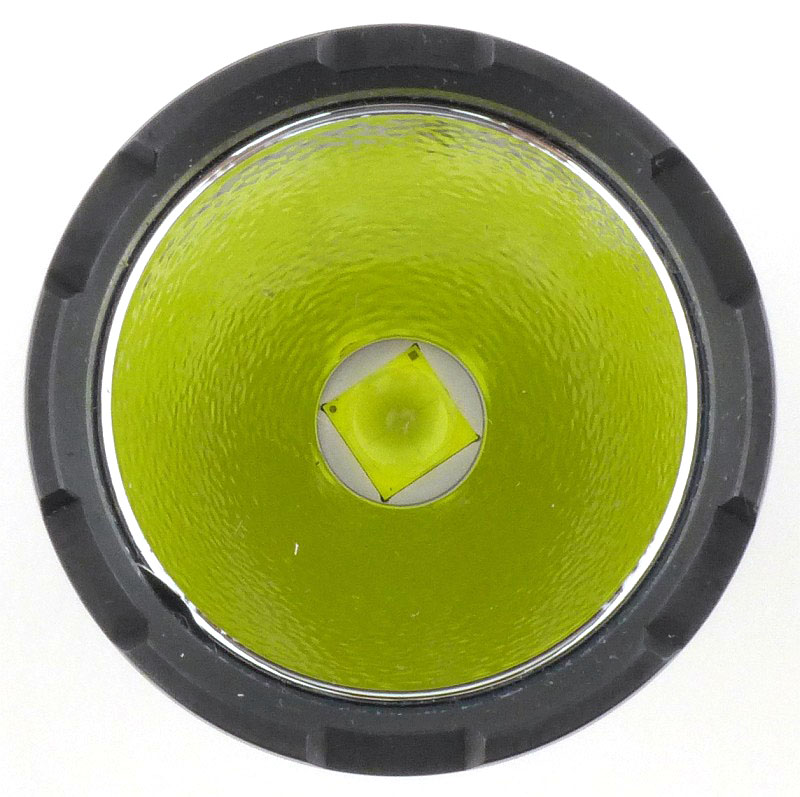
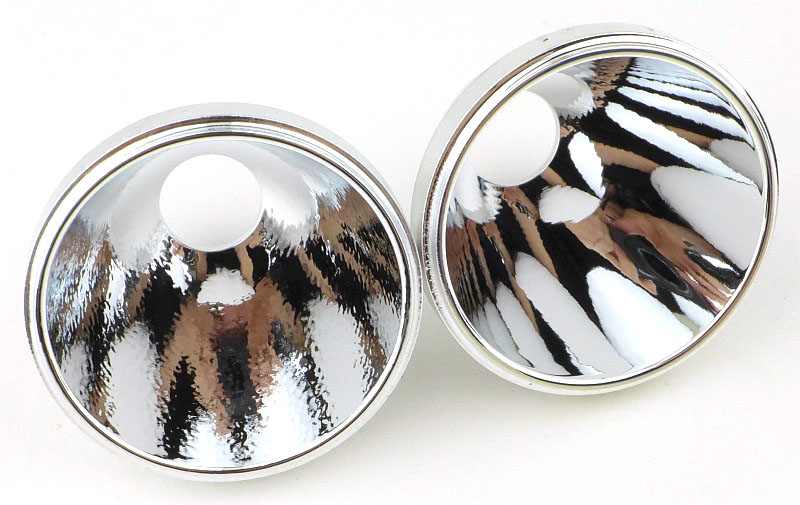
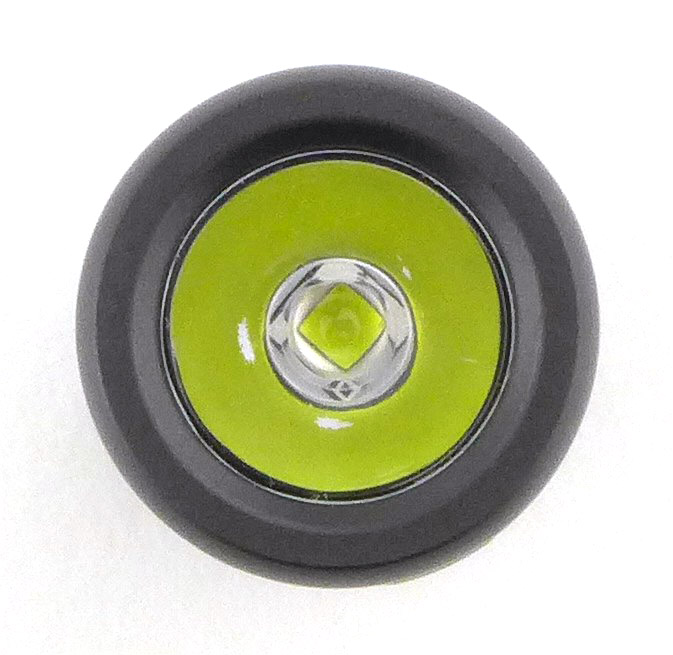
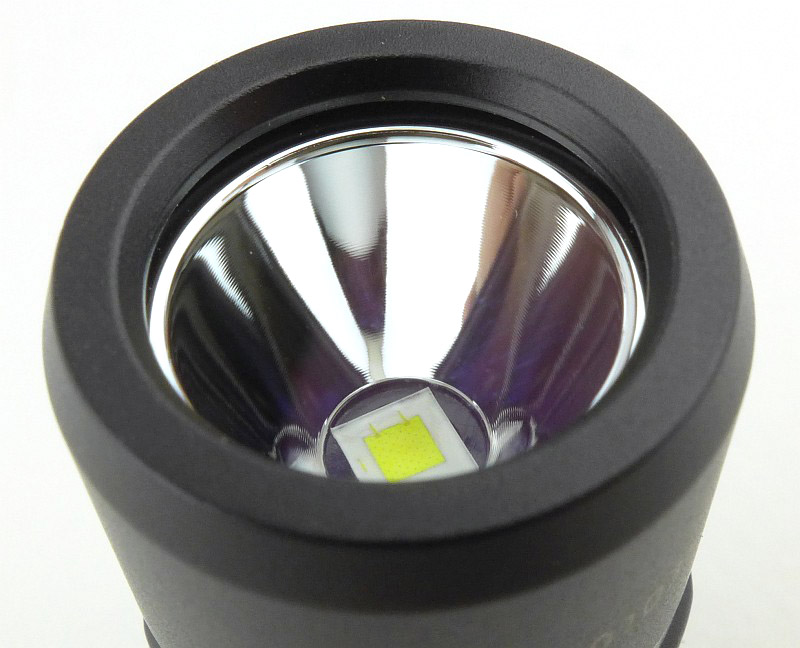
For the E01R, there is a TIR optic with an XP-G2 LED hidden at its centre.
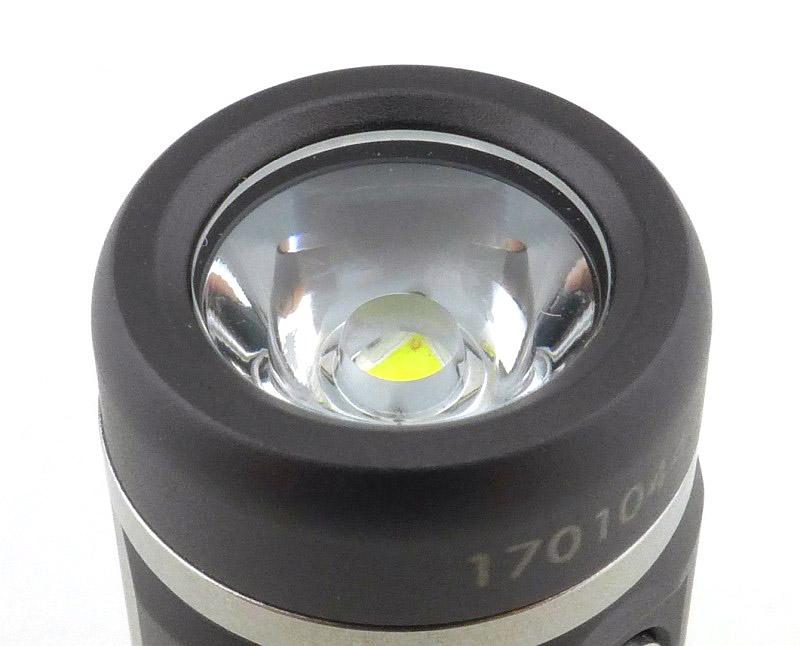
Unlike a lot of TIR optics, you can just about see the LED.
Charging the cell in the E01R is easy, simply plug in the powered USB cable. The E01R is small, as you can see by how large the USB plug looks.

Taking a more detailed look at the E10R:
Changing over to the E10R, and exactly as with the E01R there is a USB cable, spare O-ring, quality lanyard, and the instructions.
Again the fit and finish is excellent, giving the light a refined look.

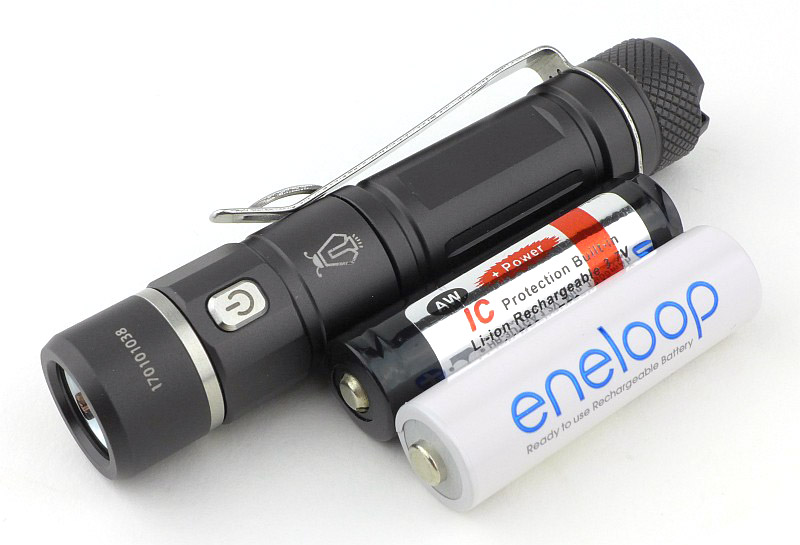
The E10R is similar in size, relative to the battery, like the E01R is compared to its battery (so not the smallest AA light). Here the E10R is shown next to its two power source options,the NiMh AA (Eneloop), and a 14500 (an AW 14500).
A small metal button is used for the power switch, which is exactly the same size as the one on the E01R.
Both the clip and the tail-cap have lanyard holes in them.
In the case of the E10R, the clip is a standard type. Even without the tail-cap loosened it is free to rotate to any position around the body.

Inside the tail-cap is a gold plated spring terminal.
The threads are almost square, and are well lubricated.
And like the E01R, unscrew the head of the E10R to reveal the micro-USB charging port.
A closer look at the micro-USB charging port and threads.

With the head removed, you do not see the battery, instead there is a set of contacts for the connection to the head once refitted. Just next to the spring (at about 2 o’clock here) is the indicator LED for charging.

Inside the head are the matching set of contacts.
Charging the cell in the E10R is easy, simply plug in the powered USB cable.
For the E10R, there is a smooth reflector with an XP-L HI LED at its centre.
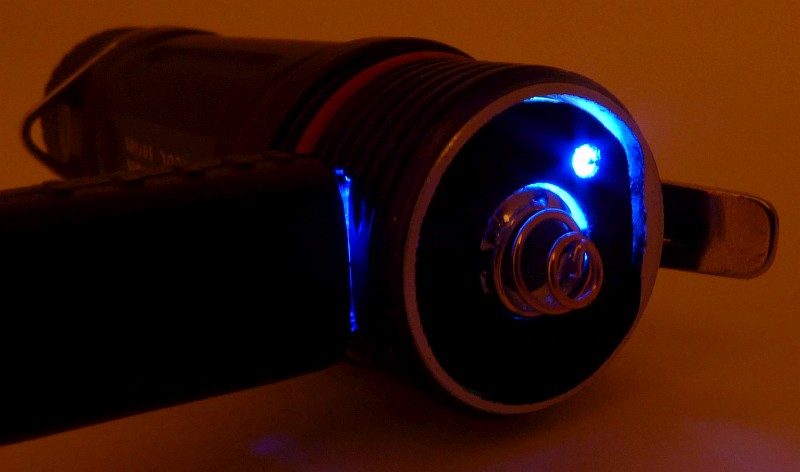
The charging indicator LED is slightly hidden by a foam PCB cover. Here it is lit, showing the E10R is charging.

Indicating a 14500 is now fully charged, the charging light shows blue. (this is red if a NiMh is used)
The beam
Please be careful not to judge tint based on images you see on a computer screen. Unless properly calibrated, the screen itself will change the perceived tint.
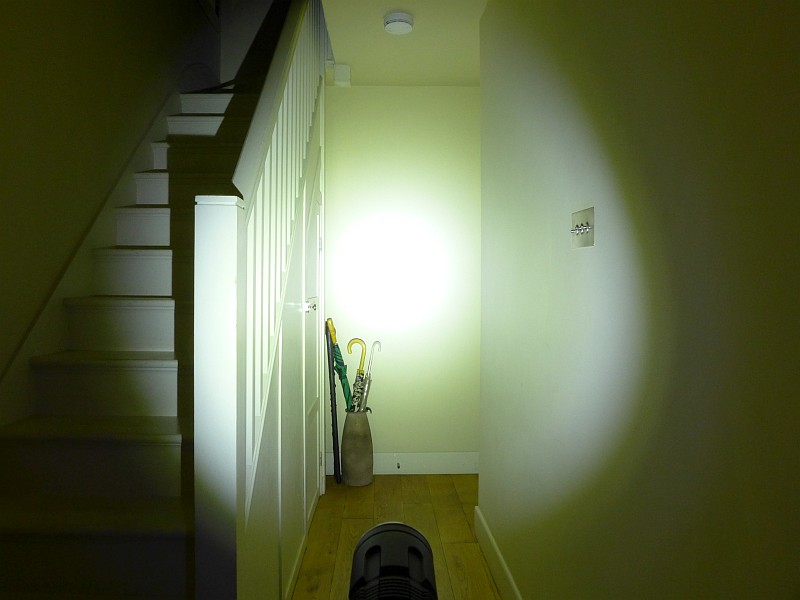
The indoor beamshot is intended to give an idea of the beam shape/quality rather than tint. All beamshots are taken using daylight white balance. The woodwork (stairs and skirting) are painted Farrow & Ball “Off-White”, and the walls are a light sandy colour called ‘String’ again by Farrow & Ball. I don’t actually have a ‘white wall’ in the house to use for this, and the wife won’t have one!
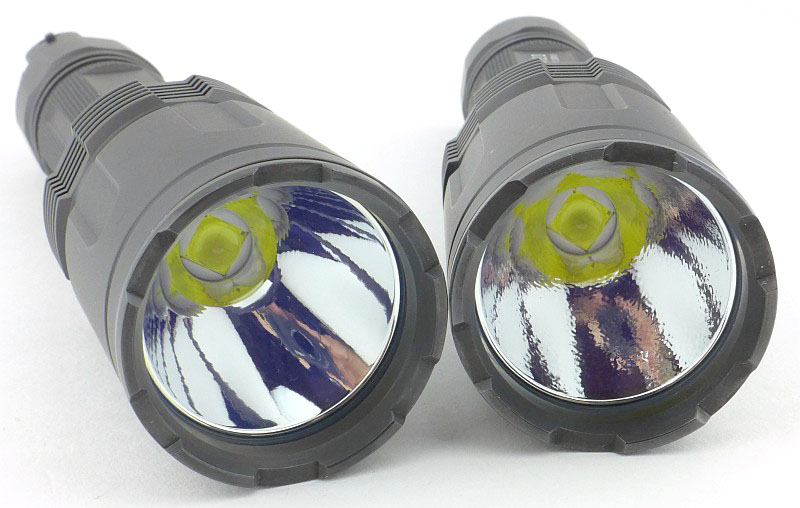
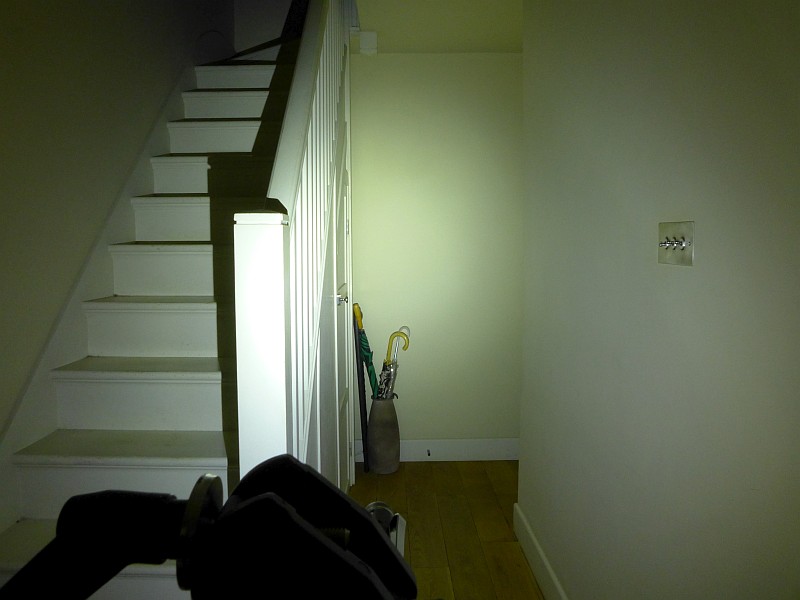
Although the beginning of the review starts with the E01R, for the beamshots, I’m starting with the E10R’s beam. The combination of the small focused SMO reflector and XP-L HI LED gives a strong hotspot and wide usable spill. A good mixture for a compact EDC light with the output power a 14500 allows.
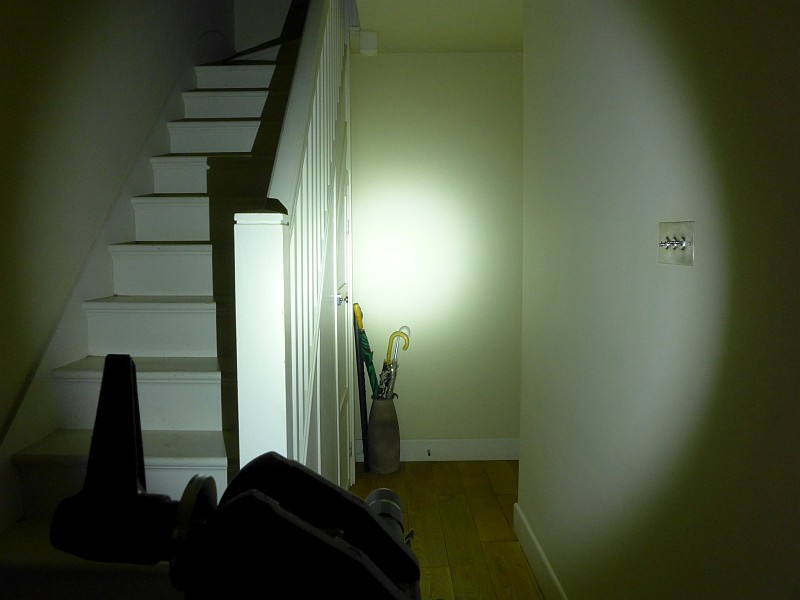
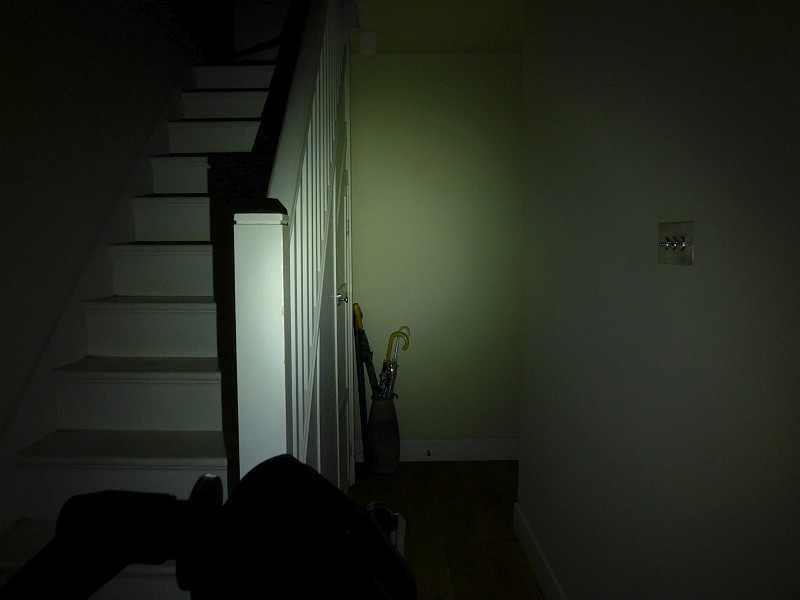
At exactly the same exposure, the E01R looks a bit weak; this exposure is included to allow a direct comparison.
Adjusting the exposure to show the E01R’s beam more how your eyes would see it, we have a lovely wide smooth beam with a soft and gentle hotspot. A really useful close range beam.
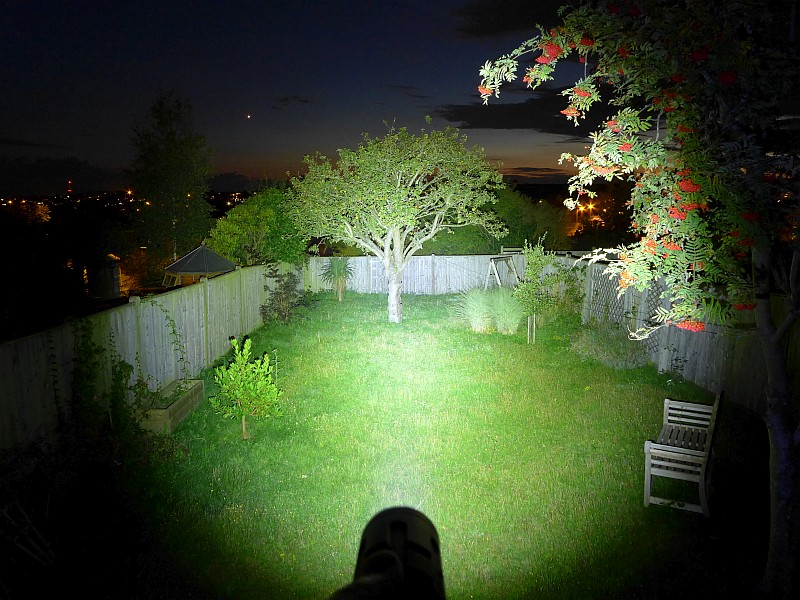
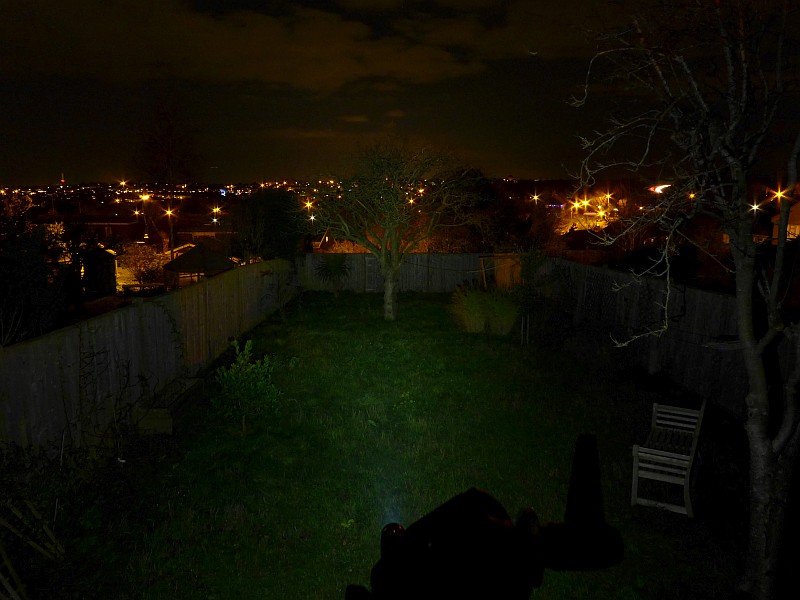
Moving outdoors, and the E10R on 14500 has a reasonable power to give it a bit of range.
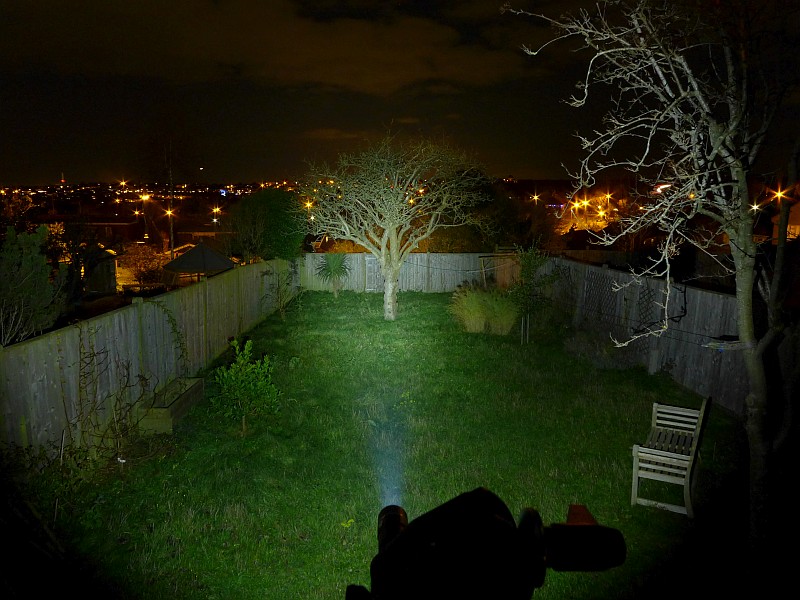
The same cannot be said about the E01R as its wide beam runs out of steam very quickly. But don’t forget this is a AAA light.
Modes and User Interface:
Both the E01R and E10R operate in exactly the same way. The only UI difference is the charging indicator.
There are three modes, High, Medium and Low, plus a Strobe mode.
To turn the E01R/E10R ON, briefly press the switch. The last used constant mode is memorised.
To cycle through the modes High, Medium, Low, High, with the E01R/E10R ON, briefly press the switch.
To turn the E01R/E10R OFF, press and hold the switch for 2s.
To access Strobe mode, with the E01R/E10R ON or OFF, rapidly double tap the switch.
To exit Strobe, either briefly press the switch (to change to a constant mode), or press and hold the switch for 2s (to turn OFF).
When charging the E01R, a red light is shown during charging. When fully charged, the red light goes out.
When charging the E10R, using AA the red and green lights come on during charging. When fully charged, the green light goes out.
When charging the E10R, a red light is shown during charging. When fully charged, the blue light is shown.
Both the E01R and E10R have an electronic lockout of the switch. To Lock, from OFF, press and hold the switch for four seconds. The LED will start to blink indicating the Lockout was successful.
To Unlock, press and hold the switch for four seconds, the last use mode will come on.
Batteries and output:
The E01R runs on NiMh AAA (or AAA Alkaline without charging feature).
The E10R runs on NiMh AA (or AA Alkaline without charging feature) or Li-ion 14500.
To measure actual output, I built an integrating sphere. See here for more detail. The sensor registers visible light only (so Infra-Red and Ultra-Violet will not be measured).
Please note, all quoted lumen figures are from a DIY integrating sphere, and according to ANSI standards. Although every effort is made to give as accurate a result as possible, they should be taken as an estimate only. The results can be used to compare outputs in this review and others I have published.
| ___________________________________________ | ________________________________ | ________________________________ |
| E01R or E10R using specified cell | I.S. measured ANSI output Lumens | PWM frequency or Strobe frequency (Hz) |
| ___________________________________________ | ________________________________ | ________________________________ |
| E01R High – AAA | 111 | 0 |
| E01R Medium – AAA | 22 | 0 |
| E01R Low – AAA | 2 | 0 |
| E10R High – AW 14500 | 457 | 0 |
| E10R High – AA | 164 | 0 |
| E10R Medium – AA | 39 | 0 |
| E10R Low – AA | 3 | 0 |
* Beacon and Strobe output measurements are only estimates as the brief flashes make it difficult to capture the actual output value.
There is parasitic drain in both lights. The drain in the E01R when using NiMh AAA was 41.3uA (2.21 years to drain the cell). The drain in the E10R when using NiMh AA was 69.8uA (3.11 years to drain the cell). The drain in the E01R when using 14500 was 86uA (1.19 years to drain the cell).
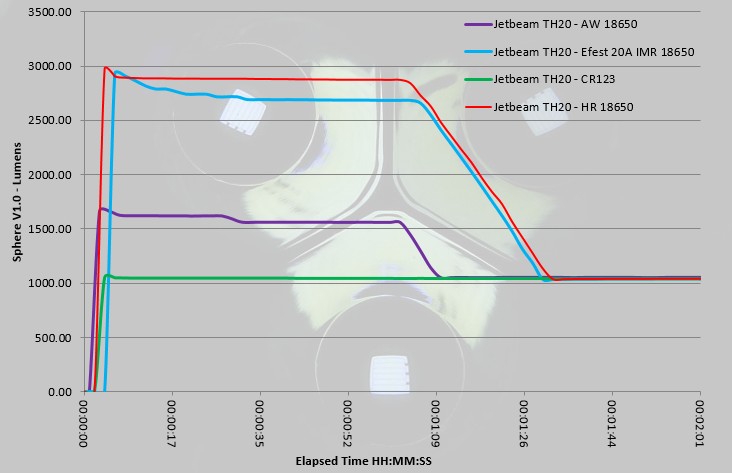
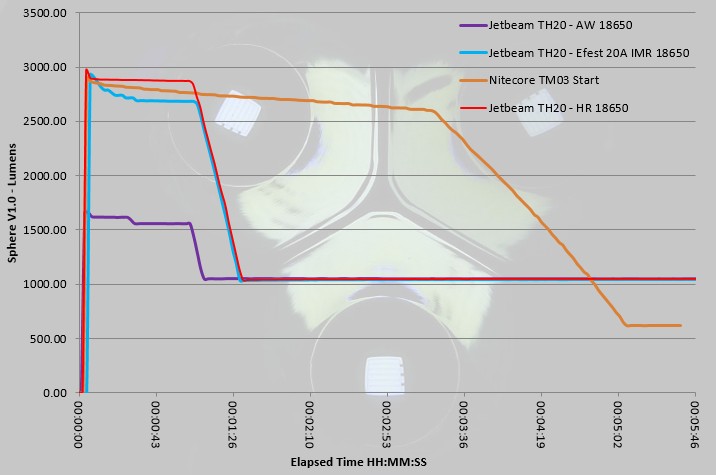
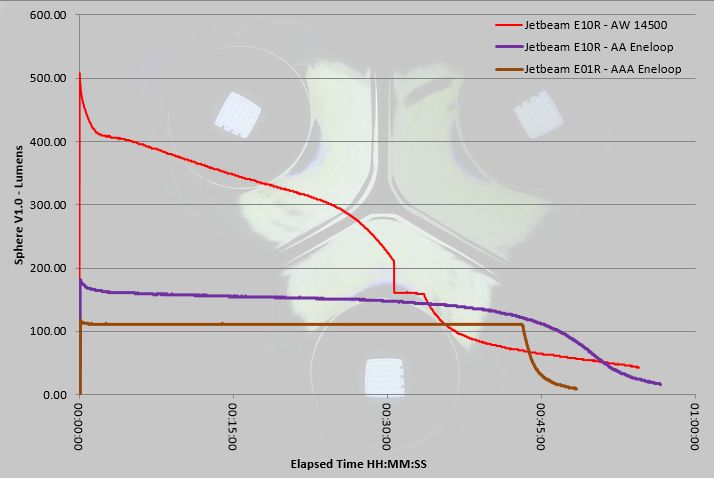
Where a light has built in charging, to best show how it really performs, the batteries have been charged using the built-in charger; This will show if cells are undercharged. First, note the totally flat output from the E01R, exhibiting excellent regulation on the output. Though the E10R is using an AA NiMh with 2100mAh (compared to the AAA’s 800mAh), overall the performance of the E10R using AA is much closer to the E01R than you might expect when the E10R has nearly three times the cell capacity. This is either due to the built-in charger not fully charging the cell, or the driver circuit showing some inefficiency when powered by AA. The 14500 is where the E10R comes to life with nearly 500lm output, staying above 300lm for 25 minutes and only stepping down to below 200lm after 30 minutes.
Troubleshooting
This section is included to mention any minor niggles I come across during testing, in case the information helps anyone else.
The first E01R supplied would not charge. This seemed to be due to a connection issue with the micro-USB port. Jetbeam promptly replaced this under warranty and the replacement has functioned perfectly.
As per the description of this section, this information is provided in case anyone else finds a similar ‘issue’ that might be fixed in the same way.
The E01R/E10R in use
Many USB rechargeable EDC lights have built-in batteries. Though very convenient, this means there is no option of replacing the battery with a fresh cell if you need more light than one cell will give you. Both the E01R and E10R run from standard cells, so whether you use the built-in charging, or not, you can still swap out empty cells for fresh as needed. Both will also run on an alkaline cell, so you are covered in all ways.
Unlike those convenient EDC lights with built-in cells, the E01R and E10R give you that extra level of confidence. Crucially of course you get the performance of a ‘proper’ light.
By hiding the USB charging port inside the head, the port is protected by the O-ring seal of the head. A simple design feature which makes the light just as waterproof as any other non-rechargeable light. This has got to be one of the most important aspects of the way Jetbeam have designed the charging of theses lights; in the majority of cases a USB charging port does compromise the waterproofing – not here.
My main criticism of these lights is with the UI. Firstly the button is quite small and sometimes not easy to hit first time. Secondly the fact that you need to press and hold the switch for 2s to turn it off is quite annoying. Personally I’d much rather the output went on and off with a brief press, and the mode change was a 2s press, but unfortunately it is not.
Another minor annoyance, but probably unavoidable, is that the clips press onto the side of the head, meaning they rub against the anodising as you unscrew the head for recharging. I lift the clip slightly before unscrewing the head to avoid wearing the anodising prematurely – many wouldn’t bother.
Finding the switch can prove challenging by feel, so it can be a little frustrating when you miss the button. I have made this a bit more reliable by lining up the clip so it is opposite the button, but the clip is not held tightly and can still rotate, so this method can end up failing. Also, in gloves, you have no hope at all of finding where the button is, so end up working your way round the head until you hit the right spot. The flip side to this is that the lines of these lights are very streamlined and clean looking.
Moving past these niggles, and onto the beams, the E01R has an outstanding EDC beam. Wide, smooth and perfect for short distance and indoor use. It is also surprisingly bright even with only 111lm. The levels are very well chosen, with Medium being the most useful for general purposes. Neither model includes a genuinely low, low, moon mode, but the low level at 2-3lm is probably more useful for those situations where you want a low level but your eyes are not fully dark adapted; even if they are, the 2lm level is not shockingly bright (it is amazing how little light your eyes really need if given the chance).
More and more lights are including USB recharging, simply because it is much more convenient to charge the battery without taking it out, (and you don’t need to buy a dedicated charger). Jetbeam have achieved this with the E01R and E10R without compromising the style, integrity or function of the lights, and in the E10R have a charger that can charge NiMh and Li-ion!
Review Summary
| _______________________________________________ | _______________________________________________ |
| Things I like | What doesn’t work so well for me |
| _______________________________________________ | _______________________________________________ |
| Fully concealed, and O-ring protected, USB charging port. | Power switch is fiddly. |
| Can run on NiMh or Alkaline (and Li-ion for the E10R). | Need to hold the switch for 2s to turn off. |
| Excellent EDC beam. | Pocket clip is always free to rotate. |
| E01R has perfectly regulated output. | |
| E10R’s charging indicator shows if it is NiMh or Li-ion. | |
| Lockout with 1/4 turn of tail-cap. |
Discussing the Review:
The ideal place to discuss this reviews is on a forum. If you started reading the shorter forum version of the review, but followed the link this full exclusive review, please return to that forum to discuss the review there.
If you read the review entirely on Tactical Reviews, please consider one of the following to join in any discussion.
CandlePowerForums – Flashlight Reviews Section (Largest and Friendliest Flashlight Community Forum)