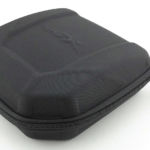
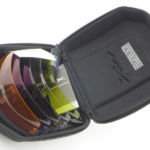
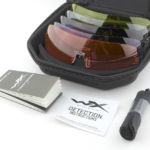
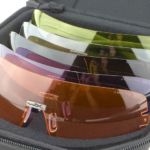
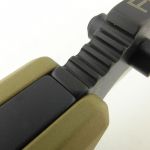
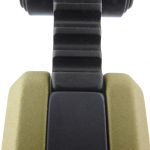
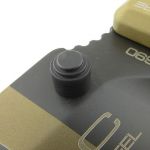
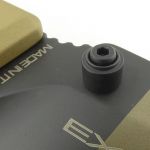
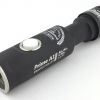
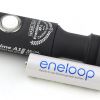
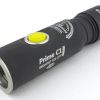
Light Review: Fenix PD 32 V2.0

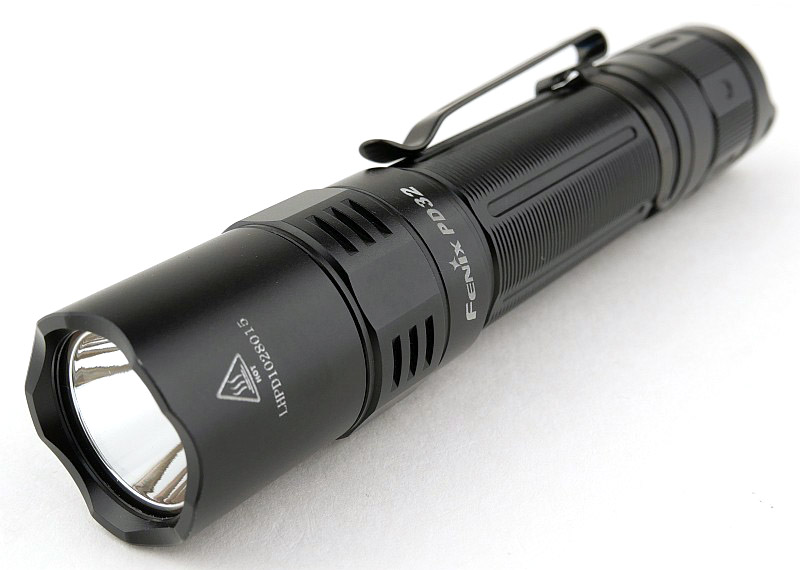
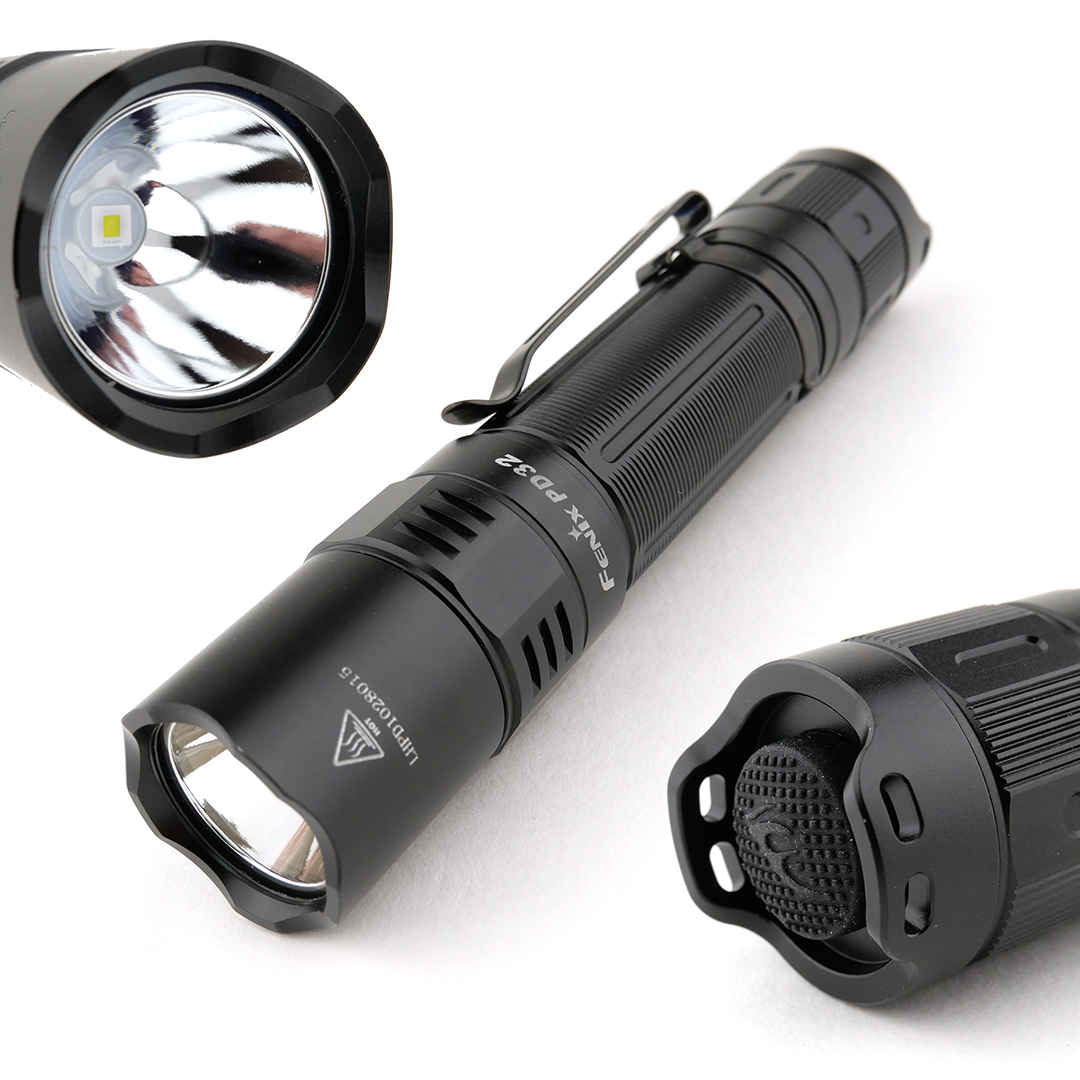
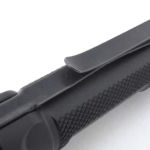
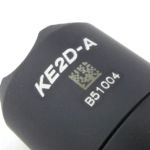
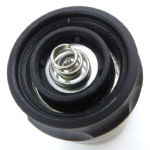
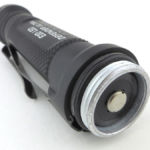
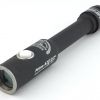
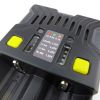
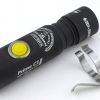
The Fenix PD32 V2.0 is quite different from its predecessor, with a new soft-action two-stage tail switch instead of the earlier model’s tail and side switch configuration. With this new layout also comes a significant boost in output and a slimmer profile. In this review of the Fenix PD32 V2.0 I’ve tested actual output, runtime and other technical measurements along with detailed examination of the design in video and photos.

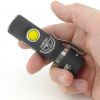
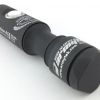
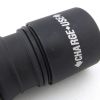
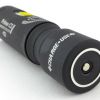
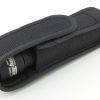
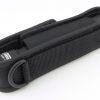
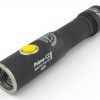
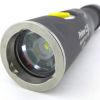
A good look round the Fenix PD32 V2.0:
This example was an early final production model and came without the packaging. The video also shows the measurement of parasitic drain.


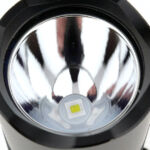
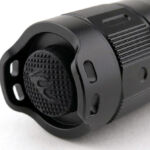
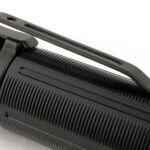
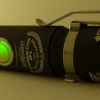
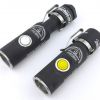
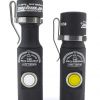
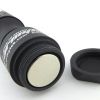
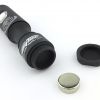
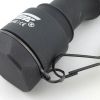
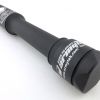
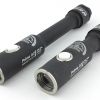
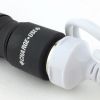
Gallery of the details:


The beam

Please be careful not to judge tint based on images you see on a computer screen. Unless properly calibrated, the screen itself will change the perceived tint.

The indoor beamshot is intended to give an idea of the beam shape/quality rather than tint. All beamshots are taken using daylight white balance. The woodwork (stairs and skirting) are painted Farrow & Ball “Off-White”, and the walls are a light sandy colour called ‘String’ again by Farrow & Ball. I don’t actually have a ‘white wall’ in the house to use for this, and my wife won’t have one!

The beam is tuned more towards throw, which is quite clear in both the indoor and outdoor beamshots.


Batteries and output:

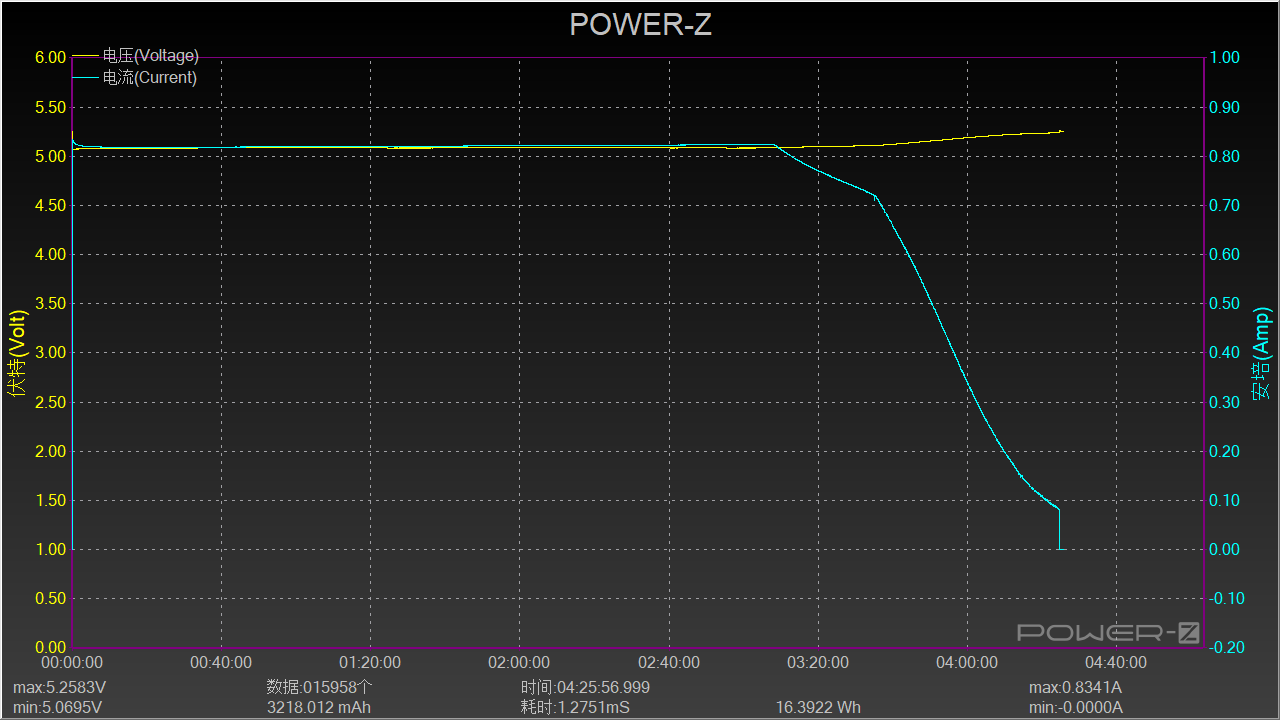
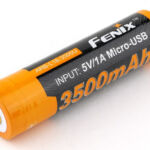
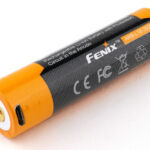
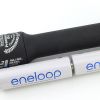
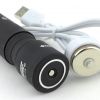
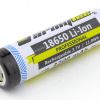
The Fenix PD32 V2.0 runs on a micro-USB chargeable 18650 3500mAh cell. Below is the charging trace for this cell. A full charge taking around 4 hours.

Please note, all quoted lumen figures are from a DIY integrating sphere, and according to ANSI standards. Although every effort is made to give as accurate a result as possible, they should be taken as an estimate only. The results can be used to compare outputs in this review and others I have published.

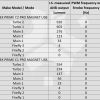
Of note here are some of the comments in the PWM column. There isn’t any classic PWM but instead a noise remnant in the output meaning there is a slight wavering in the output at high frequency and this is not at all visible.


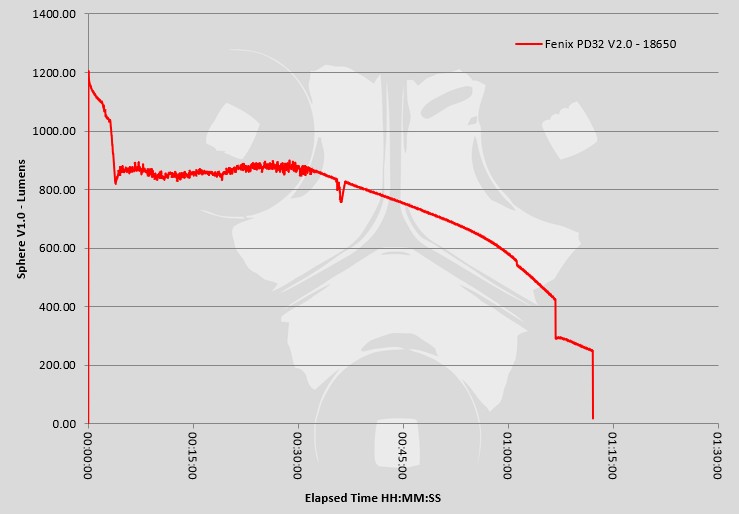
Actual measured runtime output trace for maximum output.


The Fenix PD32 V2.0 in use

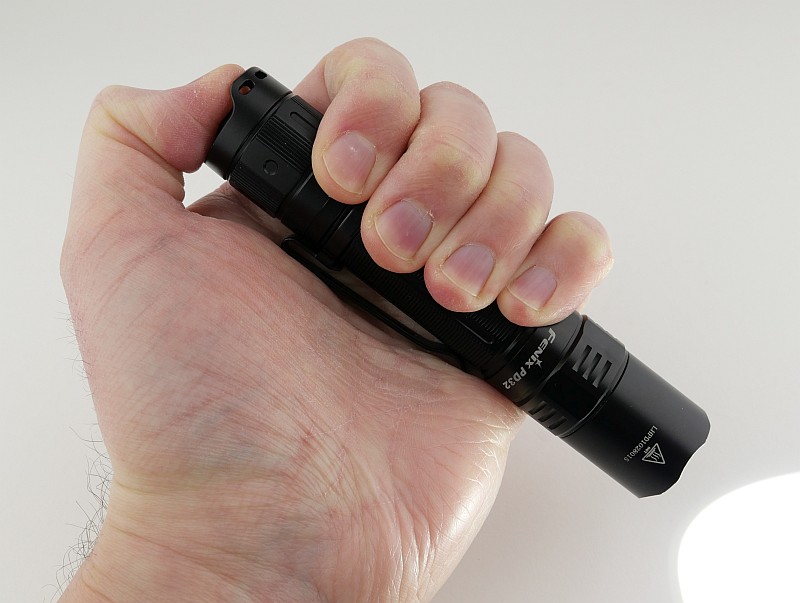
Next to a 2xAA light, the single 18650 (or 2x CR123) size of light is one of the best to hold. The Fenix PD32 V2.0 is a very comfortable size and shape with a head not much bigger than the battery tube. General form and size make for a very handy light.


For me, the tailcap layout is a compromise due to having the ability to tail-stand. The raised sections, which also provide lanyard attachment points, do obstruct the tail switch and make it more difficult to access as you have to ‘reach over’ these. For momentary use, this can work quite well as it makes it harder to push far enough for the second stage of the switch.
On a purely ‘tactical’ use case, a two-stage switch (which also changes modes) would not be my choice for a high-stress situation. I’d prefer a single function tail switch with the separate mode switch.
The soft-action of the two stage switch is a nice feature. The second stage, click-to-latch-the-output-ON, is silent. Far too many switches have loud clicks, so this is a breath of fresh air in this sense.
Readers of my other reviews will know I’m not a fan of strobe, and the strobe for the PD32 is accessed with a 0.5s hold of the switch’s second stage. This is a good implementation as you can start with a full power blast of light and it goes into the strobe, so overall a full face of light and then strobe.
Mode spacing feels a bit uneven towards being too bright on the medium mode; my preference would have been more like a 200-250lm – the measured output on medium was 429lm, higher than the specified 350lm.
With a beam profile tuned towards throw, it is still surprisingly useable for closer ranges, and the low mode has been absolutely fine for indoor use. Once you get to the longer ranges outdoor that tuned beam gives you a great reach for a compact light.

Review Summary
The views expressed in this summary table are from the point of view of the reviewer’s personal use. I am not a member of the armed forces and cannot comment on its use beyond that covered in the review.

Something that might be a ‘pro’ for one user can be a ‘con’ for another, so the comments are categorised based on my requirements. You should consider all points and if they could be beneficial to you.

_______________________________________________
What doesn’t work so well for me
_______________________________________________

Slightly restricted access to tail-switch.
Medium mode too high.
Slow recharging using cell’s built-in USB charging.

_______________________________________________
Things I like
_______________________________________________

Soft-action two-stage tail switch.
Silent switching.
Good implementation of strobe.
Well tuned beam profile.
Impressive beam range.
Compact.

As well as the Tactical Reviews Facebook Page, please consider visiting one of the following to start/join in any discussion.

CandlePowerForums – Flashlight Reviews Section (Largest and Friendliest Flashlight Community Forum)

Light Review: Surefire E2D Defender and Stiletto

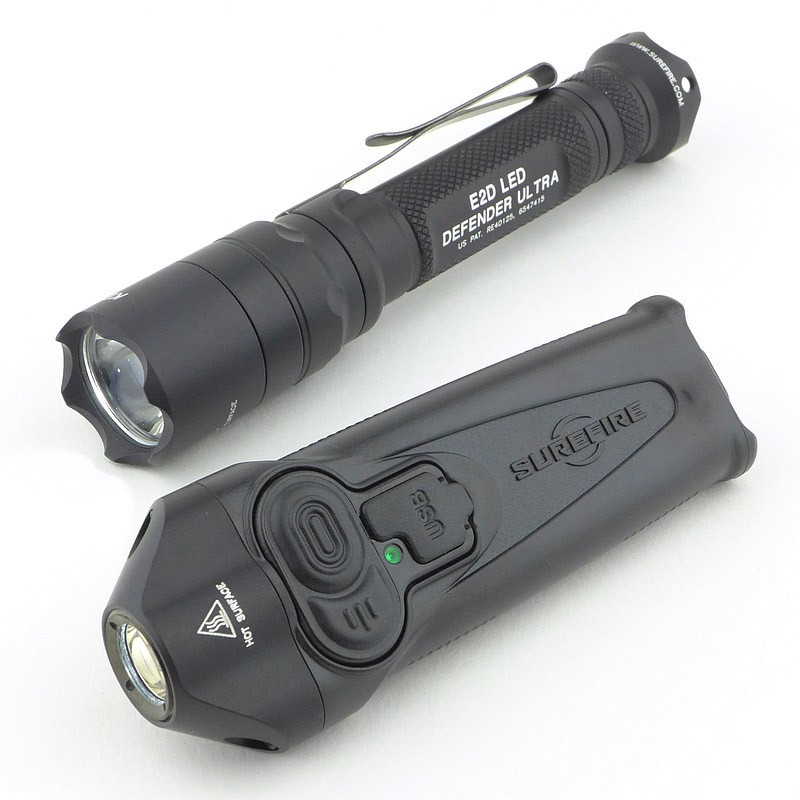
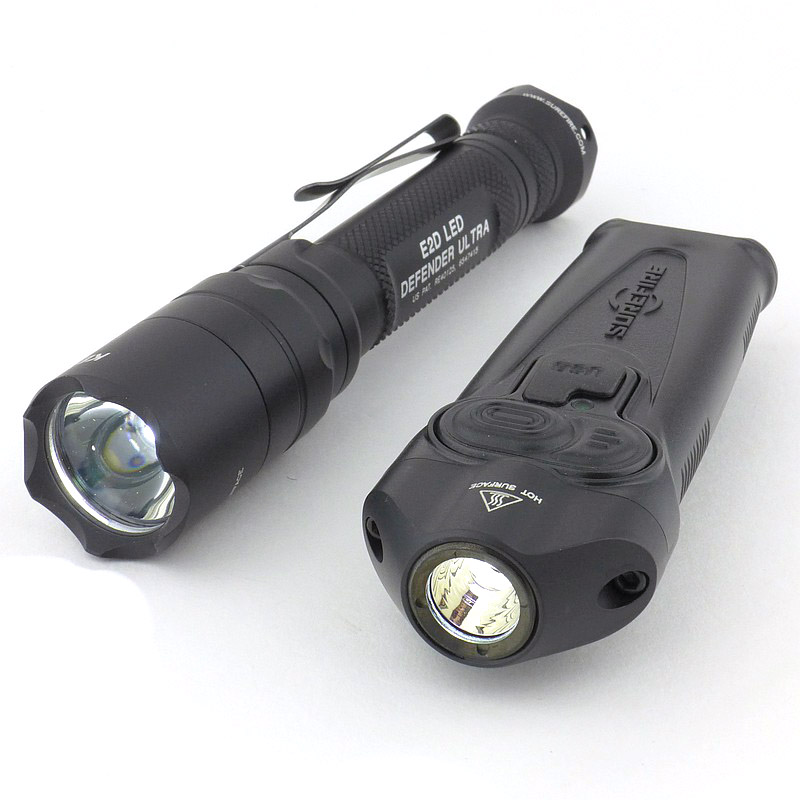
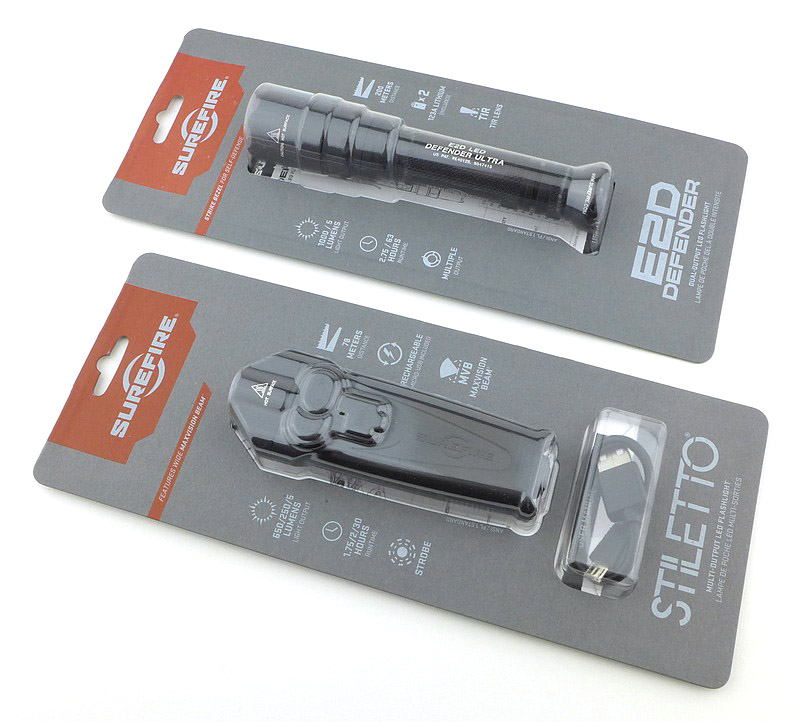
With Surefire, your main expectations might be high quality build and performance, so read on to see if these lights keep up with Surefire’s standards. In this review are two quite different models; the latest update of the classic Defender E2D (in this case the two-mode ‘Ultra’) and the EDC-optimised pocket-friendly USB-chargeable multi-mode, programmable Stiletto.

What are we looking at?:

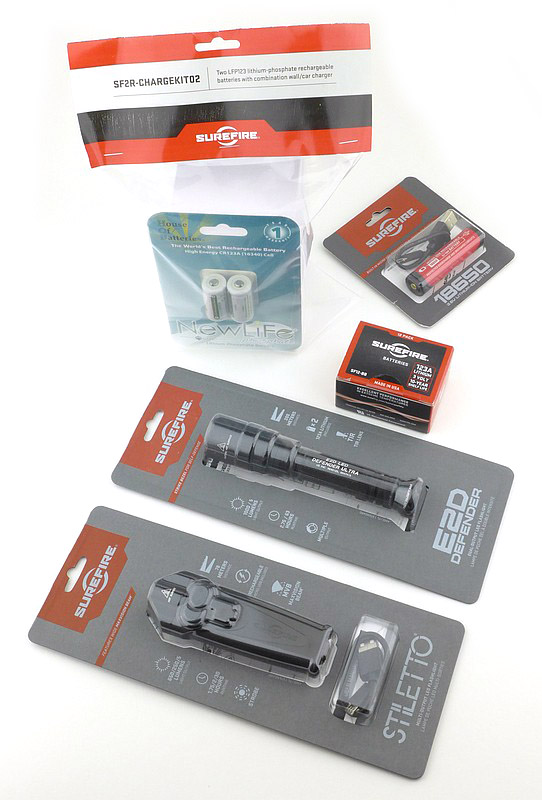
Though this review is all about the two headline lights, as well as primary cells I’ve been able to test the Surefire rechargeable cells for the Defender.


Moving onto the main feature let’s get into the details of these two.


Taking a more detailed look at the Stiletto:

The Stiletto is a new style of light, taking on more of the form of a pocket knife and slipping into your pocket in the same way, and with a clip to hold it in place. To achieve this narrow profile it has a built-in battery and USB charging, allowing the shape to not be compromised by replaceable batteries.


Taking a more detailed look at the Defender E2D Ultra:

The Defender E2D is a classic Surefire model, bit it has moved with the times. Starting life as a incandescent bulb light with lens/reflector, it has grown to use LED and TIR optics. This latest version has raised the output to 1000lm+. It is mainly the head of the light that has changed in appearance compared to the earlier models you might know.


Surefire’s rechargeable CR123 option:

Surefire have been a little behind other manufacturers with regard to taking up rechargeable batteries. In years past, dedicated Surefire owners have had to find their own way, often going to the lengths of getting their battery tubes bored out to take 18650 cells plus a few other methods.
In this case, the cells themselves are not Surefire branded, instead Surefire have chosen K2 Energy’s Lithium Phosphate cells.


The beam

Please be careful not to judge tint based on images you see on a computer screen. Unless properly calibrated, the screen itself will change the perceived tint.

The indoor beamshot is intended to give an idea of the beam shape/quality rather than tint. All beamshots are taken using daylight white balance. The woodwork (stairs and skirting) are painted Farrow & Ball “Off-White”, and the walls are a light sandy colour called ‘String’ again by Farrow & Ball. I don’t actually have a ‘white wall’ in the house to use for this, and my wife won’t have one!

The character of each beam is really very different. Starting with the Defender and it’s mix of smooth hot-spot and spill beam giving a very useful all-round capability. The spill beam is surprisingly wide, so much so you can see the bezel crenellation shaping in the outer edge of the beam.

The Stiletto has a Surefire ‘MaxVision beam’; I’ve come across a few variations of this, but in essence they have all been quite wide and evenly lit to give you ease of vision at close to mid ranges. You will notice in the direct comparison that the Defender’s beam is actually wider than the Stiletto’s. This is even more noticeable in the outdoor beam-shots. The Stiletto however lacks the hot-spot and provides nicely even lighting.


Batteries and output:

To measure actual output, I built an integrating sphere. See here for more detail. The sensor registers visible light only (so Infra-Red and Ultra-Violet will not be measured).

Please note, all quoted lumen figures are from a DIY integrating sphere, and according to ANSI standards. Although every effort is made to give as accurate a result as possible, they should be taken as an estimate only. The results can be used to compare outputs in this review and others I have published.

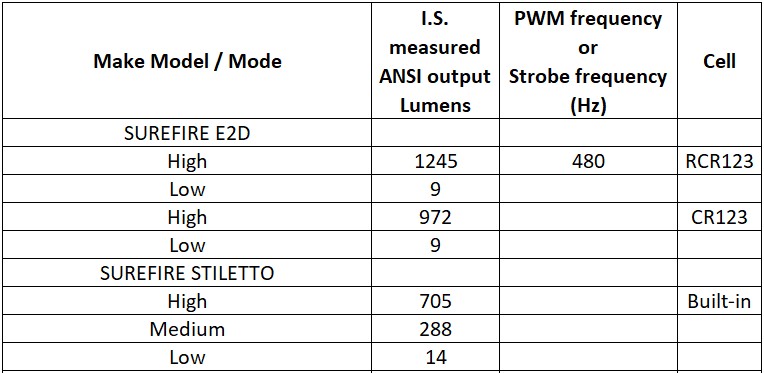
This is a table of measured results. PWM frequencies are recorded by an oscilloscope, and in some cases are clear and in others are more like superimposed noise. It only appeared that the Defender’s High beam when using the RCR123 cells showed any PWM. This is possibly due to power supply pulsing with the different voltage of the RCR123 cells which were able to produce a higher maximum output than on CR123.

In the runtime graphs, first check the start of the run and you can see how the RCR123 cells are capable of keeping that peak output from the Defender until the programmed slope-off of the output after 60s. However skip onto the full runtime and you can see the RCR123 cells run out after thirty minutes, but the CR123s go on a lot longer and with much more warning they are getting low. For ‘duty’ use you will still want to use CR123s, but the RCR123s give great guilt-free lumens.

Performance is solid from the Stiletto and output is more than good enough for EDC; 45 minutes of 500lm-plus output is impressive.


The Defender E2D Ultra and Stiletto in use

Though by no means a lesser light, there is perhaps slightly less to say about the Defender E2D, so I shall start with that. For me the ‘Ultra’ version is absolutely the one to have. The output levels are so opposite with a 9lm Low and a 1000lm+ High, these might seem too at odds to work well, but they do. If I could add one thing to the Defender E2D it would be a way to user program the Low to be the first mode, but without this the High-Low mode order ensures it lives up to its name.

Thanks to the beam shape and hot-spot, the 9lm mode does a great job for those daily needs of a bit of light. It hits the right balance of being low enough for complete darkness but not so low it is useless for anything but pitch black.

I have many 1000lm+ lights and many into the 5000lm+ level, yet the Defender seems to manage to appear brighter than similar output lights. I have never been left wanting by the Defender (running on the RCR123) with its solid performance and beam profile.

The slim body allows easy cigar gripping and general operation is what you expect from a tail-switch light.


And the Stiletto, this is a very different concept and is very different to use. It’s flat profile and large pocket clip make it one of the easiest lights I’ve used to pocket carry. Ergonomics are a really strong point with the Stiletto. In general use you will find the main side-switch falls nicely under your thumb. Side-switches are far superior to tail switches for EDC tasks, and make it more comfortable to hold the light for extended periods with a low arm position.

But of course, the Stiletto also has a tactical tail switch so you have the option of the high tactical grip with direct access to High. This leads me to the set of images in the gallery as I personally found the tail switch (which is quite stiff) gave me a few issues with grip and the Stiletto sliding forward. I had to use two methods to keep it stable; one was to hook my little finger just round the front of the aluminium head, and the other was to ensure I had the Stiletto rotated so I was gripping onto its width and not onto the flats. (check the gallery for examples) It has been fatiguing to use the tail-switch for longer periods, but with the streamlined shaping this is unavoidable.


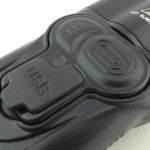
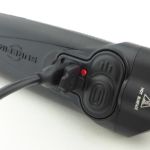
The Stiletto’s main power switch is one of three areas on the rubber side panel; I am mentioning this to describe something else to be aware of. To the left of the main switch is a programming switch, this has not caused any issues in general use. However, the USB charging port cover is something to be aware of as I have often found myself trying to turn it on by pressing this part as it is quite ‘button-like’. It is very easy to do this, especially if wearing gloves, so just needs a little awareness and grip adjustment to correct.

‘Programming switch’ – yes the Stiletto can be programmed, with each switch independently programmed into one of two modes. I definitely prefer the default mode and I’d only change if I were mainly going to use the Stiletto in High. Programming is very easy – you hold the programming switch down until the indicator shows blue and then press either the main-switch or tail-switch to toggle it between modes. This programming switch also activates the emergency strobe.

Having three levels and the ability to swap the order from L-H or H-L is very useful. The most used mode for me was the Low, followed by Medium. High was too powerful for most of my EDC uses, but great to have for quick blasts.

The previous gallery has two in-use photos on a pathway to compare these two lights. In the earlier beam-shot gallery you could see the effect of the even circle of light the Stiletto emits. Once you get outdoors and don’t have light bouncing round to fill in the areas beyond the outer edge of the beam – the tunnel vision effect becomes more pronounced. You can see with both the Defender and Stiletto aimed in the same way, the Defender view is complete where the Stiletto’s beam leaves you blind beyond the narrower circle of the beam. Using the Stiletto in unlit areas required more beam movement and scanning to see where your feet are going.

Review Summary

The views expressed in this summary table are from the point of view of the reviewer’s personal use. I am not a member of the armed forces and cannot comment on its use beyond that covered in the review.

Something that might be a ‘pro’ for one user can be a ‘con’ for another, so the comments are categorised based on my requirements. You should consider all points and if they could be beneficial to you.

I’m trying something slightly different and starting with what doesn’t work so well, so I can finish on a more positive note

_______________________________________________
What doesn’t work so well for me
_______________________________________________

Defender E2D Ultra – no direct access to Low.
Stiletto – tail-switch a bit too stiff to hold-on in tactical mode.
Stiletto – beam profile can cause tunnel vision in unlit outdoor areas.

_______________________________________________
Things I like
_______________________________________________

Defender E2D Ultra – Powerful output (that seems more than it is).
Defender E2D Ultra – Great beam profile.
Defender E2D Ultra – Excellent neutral beam colour.
Defender E2D Ultra – High and Low level.
Defender E2D Ultra – Lockout.
Defender E2D Ultra – Slim and easy to carry.
Defender E2D Ultra – Super quality build.
Stiletto – Very ‘pocket friendly’ shape.
Stiletto – Choice of modes.
Stiletto – Two switches, side and tail.
Stiletto – Programmable modes for switches.
Stiletto – USB chargeable.
Stiletto – Fuel gauge indicator.
Backed by Surefire’s guarantee.


Discussing the Review:

The ideal place to discuss this review is on the Tactical Reviews Facebook Page
Please visit there and start/join the conversation.

As well as the Tactical Reviews Facebook Page, please consider visiting one of the following to start/join in any discussion.

CandlePowerForums – Flashlight Reviews Section (Largest and Friendliest Flashlight Community Forum)

Knife Review: Oberland Arms Wuiderer Sepp

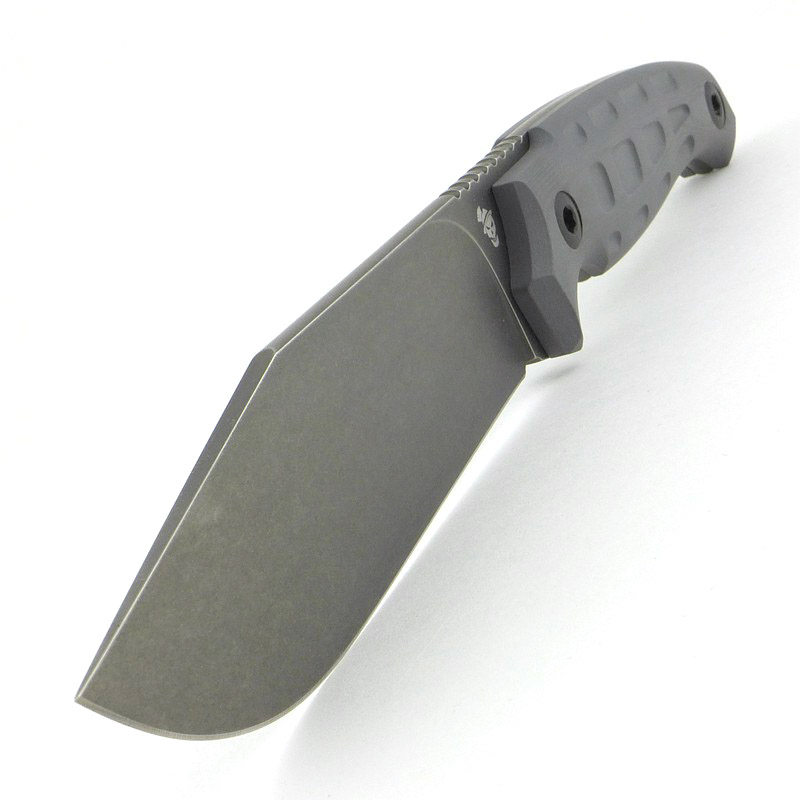
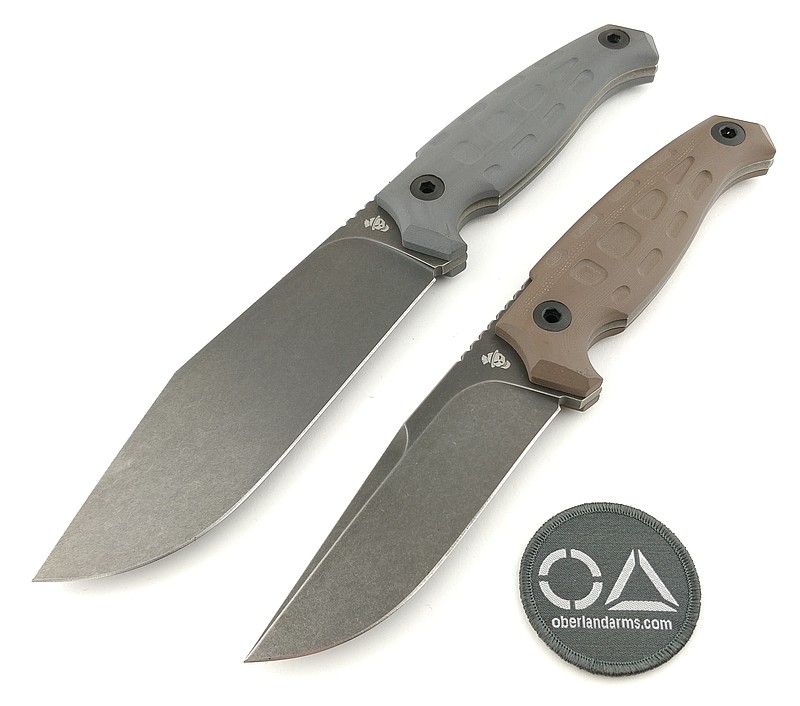
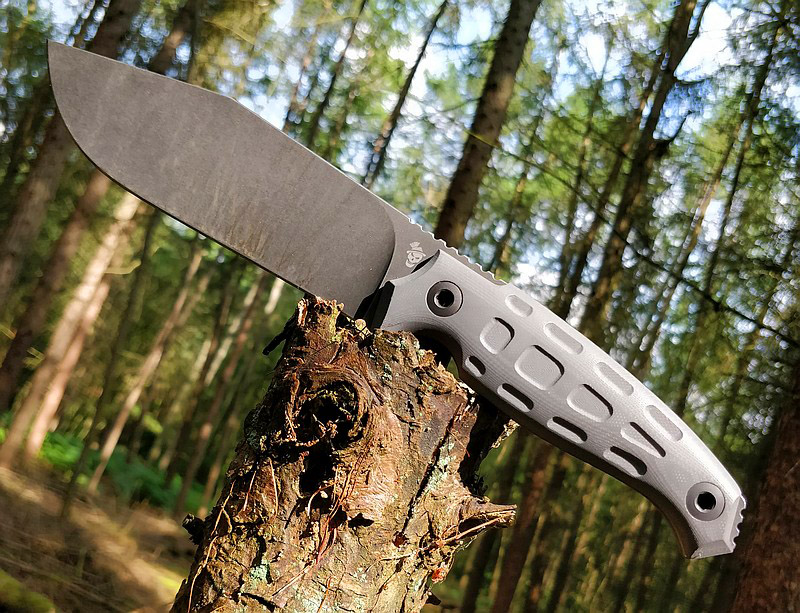
This review of the Oberland Arms Wuiderer Sepp knife is a natural follow-on from the previously published review of the Oberland Arms Jager Sepp knife, with both being designed by Tommaso Rumici to specifically meet requirements Matthias Hainich (Executive Director of OA) had for the knives. Though initially the Wuiderer Sepp was not the one I would have picked up first, its capabilities and versatility has made it my favourite little-big-knife.

A few more details:

What’s in the box?:

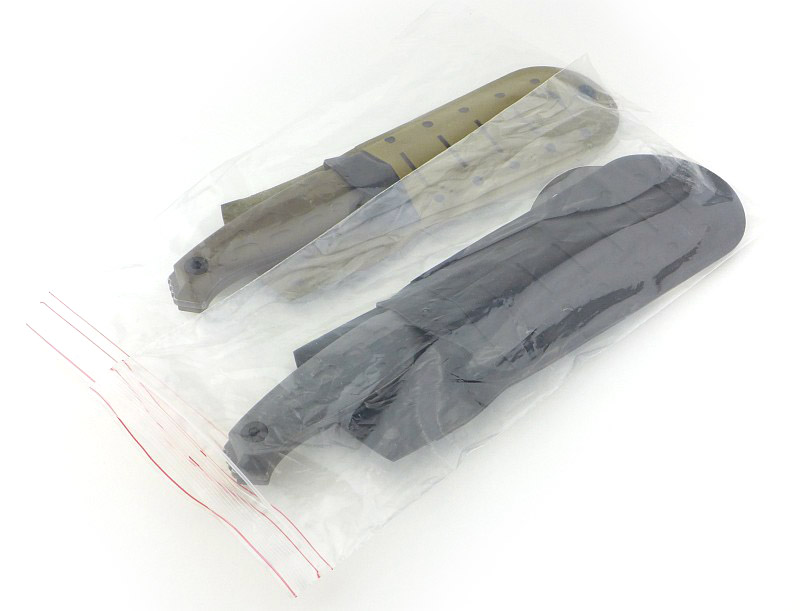
Actually this section is incorrectly named for the Oberland Arms knives, as they don’t have a box, but come in a zip-lock plastic bag; more like bulk supply standard issue kit than a retail product.


A good look round the Wuiderer Sepp’s Sheath – Things to look out for here are:

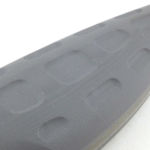
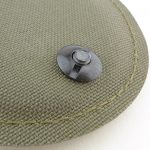
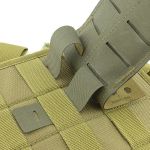
An interesting Kydex liner/fabric outer combination allowing for secure knife retention without additional straps, and the user can choose right or left handed configuration. The MOLLE strap fixture is unlike any other I have seen, only using a fabric tab to secure the strap.


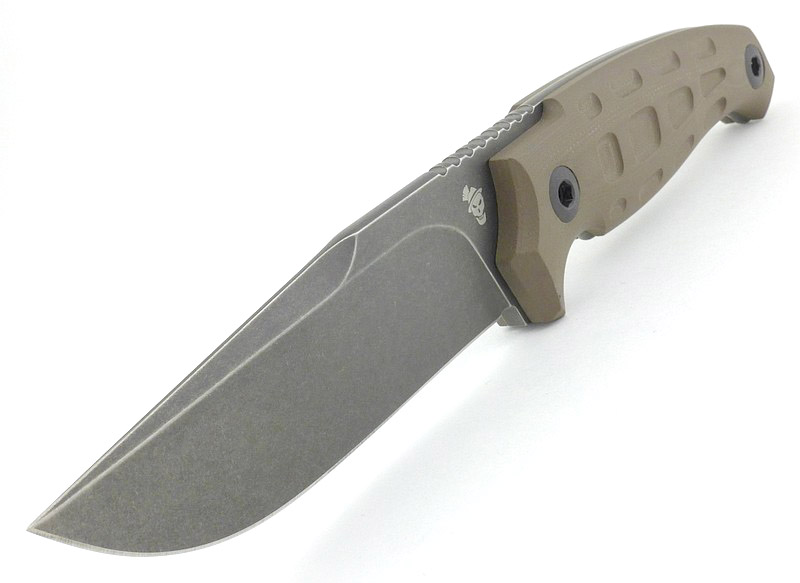
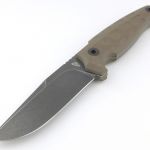
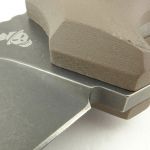
A good look round the Wuiderer Sepp – Things to look out for here are:

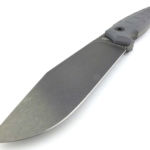
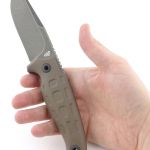
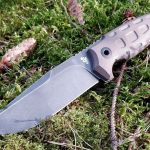
This knife has inspired me to class it as a little-big-knife – the power and presence of a Big knife, but actually it is not that big. Come back to this gallery after reading the design insights in the ‘Explained by the Maker’ section.


Explained by the Maker:

The reasons for certain design choices may not be clear when simply looking at an object, so this section is intended to give an insight into the thinking behind a design by speaking to the designer themselves.

Tommaso Rumici has been kind enough to talk to me about this knife and the design process. This is part two of an interview first published in the review of the Oberland Arms Jager Sepp knife:

Still on the steel, are there any other factors or special processing/heat treatments to support the choice of D2 over other steels?

“In the past years, Viper has acquired a big know how about D2 heat treating. They usually do vacuum treatment, double tempering, and a final cryogenic phase. I can’t go more in details, but the final result is really interesting, on the field.
After 14 years in the knife industry, I’m convinced that a correct heat treatment is far more important than the alloy itself (obviously if we choose among good ones).
During my continuous studies and tests, several times I compared the same steel, treated by different manufacturers, with opposite results: one worked well, another seemed not even the same steel.”

Were the 3D milled handle scales something you had included in a design before? How was it working with this type of production? Did you do the 3D modelling?

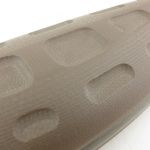
“I wanted these knives to have a family feeling with the Oberland rifles, so I inspired to the texture applied to their AR15 handguards and magazines. In the past, David and Golia had milled scales, but this texture was developed for this project only.
The 3D was made directly by Viper. I usually prefer to do so, because every manufacturer uses different software and knows his machines, so the final result is far better.”

Can you talk me through the factors affecting the length and thickness of the blade, the choice of grind, the positioning of jimping, the sharpening choil and any other details you are particularly pleased with or think are absolutely essential?

“When I started working with Matthias, he was really clear about one point: his knives, like his rifles, are made for real operators, non for the tacticool audience, so he asked for performances above all. So we choose grind and thickness to achieve toughness and cutting ability.
The length of the blade, on the short one, follows German regulations. If I remember correctly blades under 12 cm are easier to carry, and they are enough for the fighter-utility role. The other one in an heavy camp knife, so the blade had to be bigger and longer.
The blade design was quite easy compared to the handle. Mr. Hainich asked for something extremely comfortable, with enough grip to work in every environment, and big enough to be used with every kind of military glove. that’s why this handle is so big, compared to civilian knives.”

How did the prototyping go (how many versions)?

“I always try to reach final design before the prototyping phase, and so we did during this project. After Viper made the first prototypes, Oberland checked and tested them, and needed only minimal modifications before the production.”

Thanks go to Tommaso for taking the time to share this.

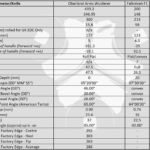
The Blade and Handle – Detailed Measurements:

For full details of the tests and measurements carried out and an explanation of the results, see the page – Knife Technical Testing – How It’s Done.

The blade is made from D2 steel.


What is it like to use?

Again and again, due to its capabilities, the Wuiderer Sepp gives me the sense it is a much larger knife than it actually is. It is not a small knife, but neither is it a big camp blade, yet it has plenty of chopping/cutting power.
Viewed next to the Jager Sepp, which is a typical size for general purpose utility fixed blade, the Wuiderer Sepp is not that much larger, but has a wider blade and a more weight-forward configuration. By having the full-flat-grind blade, you gain significant slicing ability, helping it to slice as well as a much smaller blade would.

While writing this review my wife passed me a box of frutta di marzapane that needed opening. With the laptop on my lap, the knife I had to hand was the Wuiderer Sepp, so I popped it out of the sheath and my wife exclaimed, “What is that?! Where did that axe come from?!” as she hadn’t noticed the sheathed blade sitting next to me.

The reason for sharing this is that the Wuiderer Sepp is relatively unobtrusive, especially in the sheath. The wide blade definitely gives it more presence, as proven by my wife’s reaction to its appearance, but overall it is nothing like the size of many ‘camp’ style blades.

On the subject of the sheath, this is the only area I’m not so sure about, and only really due to the MOLLE straps. With only the fabric tabs posted through a slot in the strap to retain/hold the end, this does not provide much strength. Fully woven into the full set of PALS webbing, the loading is spread over several strips of webbing, so it should not pull on the strap fixing too much. But used as I showed in the sheath section, where the straps are used as a belt loop, this strap fixing is not very stable – ideally it should be properly fitted to webbing, or a separate belt MOLLE adapter.

Tommaso Rumici, the designer, has been impressed with the performance of Viper’s D2, achieved through their own heat treat recipe. I can only agree. The Structural Edge Testing results in the technical testing section are very impressive and equal performances from other manufacturers using M390 and PSF27, and the result is quite a bit better than Viper’s own N690 (confirming the choice of this D2/heat treat). The recovery result is also important as it shows that the edge stability has not been achieved at the cost of creating brittleness – the edge is rolling rather than chipping and can be stropped back. I have used the Wuiderer Sepp for very heavy chopping, carving and other tasks and the edge just keeps holding. When resharpening, I took the original 46 degree factory edge down to 40 degrees, and further heavy use has not caused any damage.

Using a full flat grind turns what could have been a less useful brute of a blade, into an excellent all-rounder. I’ve used this to chop through good sized branches, all the way to the other extreme of cutting soft sponge foam rubber to size, and it worked well for all jobs.

With its purposeful geometry the Wuiderer Sepp cuts above its weight with a big-knife feel for those heavier jobs. I’ve used the term earlier in the review, which comes from the fact it can cut like a BIG knife, without being big, so somehow ‘little-big-knife’ just seems appropriate; it makes me question the need for anything larger (or smaller).


Review Summary

The views expressed in this summary table are from the point of view of the reviewer’s personal use. I am not a member of the armed forces and cannot comment on its use beyond a cutting tool or field/hunting knife.

Something that might be a ‘pro’ for one user can be a ‘con’ for another, so the comments are categorised based on my requirements. You should consider all points and if they could be beneficial to you.

I’m trying something slightly different and starting with what doesn’t work so well, so I can finish on a more positive note

_______________________________________________
What doesn’t work so well for me
_______________________________________________

Concerned that the sheath MOLLE strap fixing (fabric tab) is not stable enough.
No specific belt carry option provided.
D2 is only a semi-stainless steel.

_______________________________________________
Things I like
_______________________________________________

Cuts well above its weight – a real ‘little-big-knife’.
Very comfortable hand-filling handle.
Very good blade indexing due to handle design.
Excellent edge retention and edge stability.
Sheath can easily be switched between right and left-handed.
Good at finer cutting tasks as well as chopping.
Stable sheath retention that will hold in tip-up carry.
Fantastic all-rounder.


Discussing the Review:

The ideal place to discuss this review is on the Tactical Reviews Facebook Page
Please visit there and start/join the conversation.

As well as the Tactical Reviews Facebook Page, please consider visiting one of the following to start/join in any discussion.

BladeForums – Knife Reviews (US based Forum for Knife Discussion)

CandlePowerForums – Knife Reviews Section (Largest and Friendliest Flashlight Community Forum)

The BESS Exchange – A forum discussing technical aspects of sharpness and truly understanding your sharpening process.

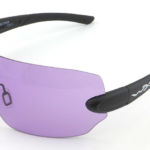
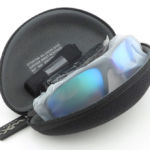
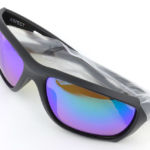
Gear Review: Wiley X Mega-Review! – Detection, Aspect and Vallus.

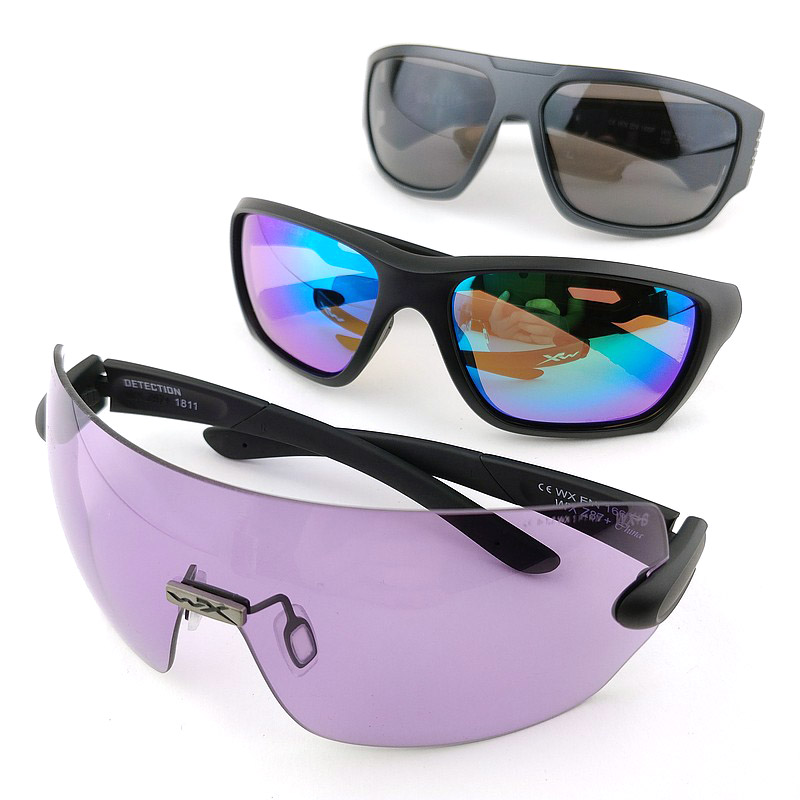
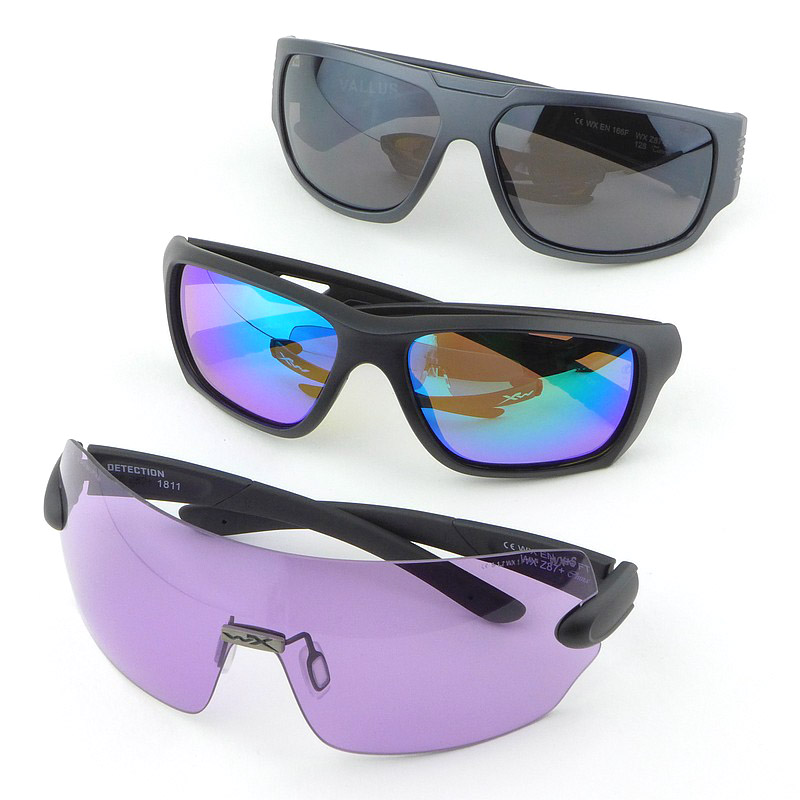
In this Wiley X Mega Review, I’m testing three recent models, the Detection, Aspect and Vallus. Each of these provide different looks, fit, features and lens specifications, giving this group a nice balanced mix. Since first finding Wiley X many years ago, I’ve not looked back when it comes to eye protection, lens quality, fit and style.

A little more Background:

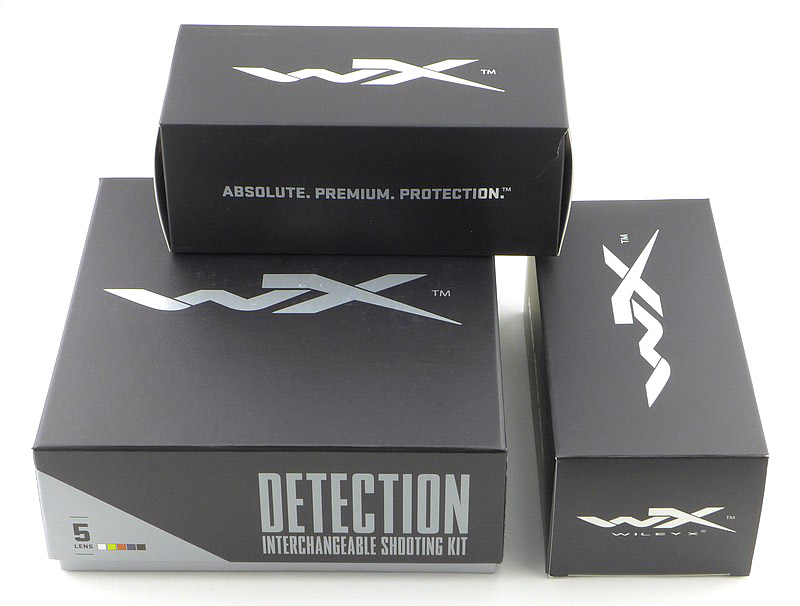
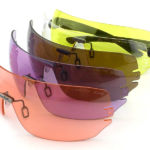
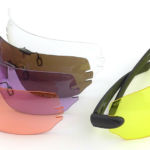
In this group we have a flagship model, the Detection, with its set of five lenses to suit all lighting conditions without any reduction in eye protection. Frameless and with large wrap-around lenses the Detection is intended to provide maximum visibility and coverage ideal for, but not limited to, shooting.
Adding in the Aspect with emerald polarized lenses fills in more of the Wiley X offering, and the Vallus taking a third spot in this line-up rounds off a nicely balanced group.
Another crucial factor in the selection are those models in a size suited to my face. Wiley X offer a wide range of sizing options with the specifications clearly shown so you can find the right fit for you – another reason I find Wiley X difficult to beat.

The Detection:

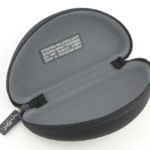
What’s in the box?:


A good look round the Detection – Things to look out for here are:

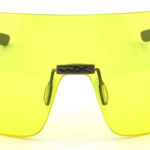
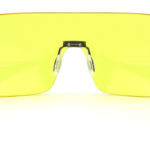
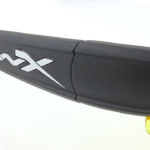
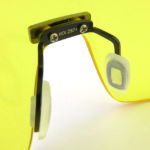
Starting this gallery is a quick spin round the front, side and rear views, before moving onto the smaller details. Unlike most lens swapping glasses, the Detection lenses keep their nosepieces.


Lens swap on the Detection:

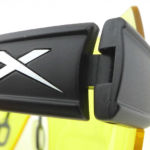
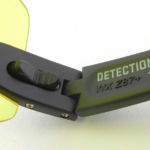
Most lens swapping designs have a moment of ‘should I be pulling/pushing that hard?’, but not with the Detection’s arm lock making swapping easier than any other I’ve used to date.


The Aspect:

What’s in the box?:


A good look round the Aspect – Things to look out for here are:

Starting this gallery is a quick spin round the front, side and rear views, before moving onto the smaller details. The Aspect has sprung hinges that allow the arms to both open up wider than the normal open position, to conform to larger heads, and also protect the hinges from over extension. This pair of Aspect glasses has the Emerald, polarized lenses for all the bells and whistles.


The Vallus:

What’s in the box?:


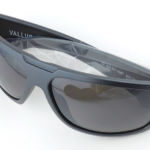
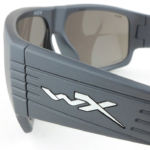
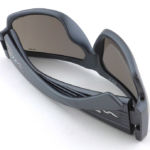
A good look round the Vallus – Things to look out for here are:

Starting this gallery is a quick spin round the front, side and rear views, before moving onto the smaller details. The Vallus is the most conventional in terms of ‘features’, but keeps thing simple and solid.


Technical Testing:

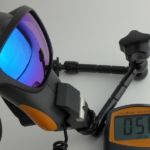
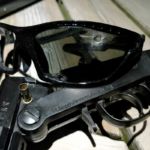
With a wide range of lenses, one of the specifications that is important to me is the light transmission. (I also have a hyper-sensitivity to light) using a fixed and stable light source and a lux meter, the transmission was measured to compare it to the Wiley X specifications. The results are shown as comments in the raw photos included in this gallery.


What it is like to use?

Truly an EDC for me, the time so far (as it does not end with this review) has given me some interesting material for three specific sections.

Protection test:

I couldn’t quite bring myself to shoot the brand new Wiley X models, but had an old pair of Wiley X made 5.11 Cavu glasses which were past their best. Testing these three new models inspired me to take the older Wiley X lenses out for a shootout!
Needing to choose silenced guns, I had a .410 shotgun, using .410 Long plus the Chiappa Little Badger in .22LR using subsonic hollow-point. Clearly the impact energy of the projectiles is quite different, but gives a stepping up of hitting power.

For the test, the glasses were held loosely and shot from around 15m. In both cases the lenses did come out of the frames, but had they been on a face, they would have been supported. The .410 was stopped by the lenses, but the .22 was not – still a very impressive result for a direct shot.


Wiley X saved me from serious eye injury:

It only has to happen once, so never let your guard down. Never, never go without eye protection even for seemingly safe jobs – the Wiley X Vallus has saved me from serious eye injury.

Despite spending plenty of time on ranges and using power tools and machinery, I have actually never had anything significant hit my eye protection. The mark on the lens shown in the gallery came from the freshly cut end of some coiled steel fencing wire that slipped from my grip and sprung straight into my face, with force, literally scoring a bullseye. Were it not for the Wiley X Vallus lens, I’d have been pulling out this wire from deep inside my eye; it all happened so quickly.

Initially I was annoying that it happened with a two week old pair of glasses, but I’d rather that than the alternative. I’m always super paranoid about eye protection, and in this case I have no doubt it would have been very bad, so am extremely glad it was Wiley X I was wearing.


Every day with Wiley X:

Readers who know me might remember I have a condition giving me hyper-sensitivity to light, and that this means I wear sunglasses every day at all times I am outside during daylight hours, and frequently indoors as well.

So when I say I have lived with these sunglasses from Wiley X, I have lived with them and worn them for hours and hours every day for months.

Detection – For shooting or any action sport, the Detection is superb. Its large wrap-around frameless lenses give you uninterrupted vision covering all your peripheral vision as well (good for picking up moving objects). The level of cover also ensures the highest level of protection from flying fragments.

Aspect – With glare being one of the worst things for my light sensitivity, polarized lenses are a real eye-saver. Generally I prefer the neutral type of lens (smoke/grey) so the Emerald is not something I might have jumped at, but if I allow myself to consider looks, well, these got more compliments than any eyewear I’ve worn before.

Aspect – The sprung arms on the Aspect afford it a level of comfort and ease of putting them on, but there is a small ‘feature’ which becomes more obvious over time. When you put them on, compared to arms without the sprung hinges, the Aspect will stay where it was when you let go. So if it is slightly crooked, the arms are not strong enough to straighten them on your face. You do need to ensure you put them straight. If you are popping them on and off quite a bit, this becomes more noticeable, where the standard hinge glasses, just snap into place, these don’t. A trade-off for the comfort.

Vallus – I’d not normally go for the non-polarized lens for my main eyewear, but the Vallus has claimed its spot thanks to the great comfort and excellent side protection due to the wide arms. The neutral colour lens works well, and not being polarized also means there are absolutely no ‘screen viewing issues’ which are a common hazard of the polarized lens.

Vallus – As described earlier, the Vallus has also actually saved the sight in my right eye, so I do have an even greater affection for them.


Review Summary

The views expressed in this summary table are from the point of view of the reviewer’s personal use. I am not a member of the armed forces and cannot comment on its use beyond that covered in the review.

Something that might be a ‘pro’ for one user can be a ‘con’ for another, so the comments are categorised based on my requirements. You should consider all points and if they could be beneficial to you.

I’m trying something slightly different and starting with what doesn’t work so well, so I can finish on a more positive note

_______________________________________________
What doesn’t work so well for me
_______________________________________________

Detection – lens holder in case can leave a mark on the lens which can be cleaned off. (Wiley X are already fixing this)
Aspect – Arm sprung hinge prevents the glasses auto-centring on your face.

_______________________________________________
Things I like
_______________________________________________

Detection – full coverage without the loss of any peripheral vision.
Detection – super easy lens swapping.
Detection – lenses to suit all lighting conditions.
Aspect – great comfort due to sprung arm hinges.
Aspect – fantastic Emerald polarized lens.
Vallus – light and comfortable.
Vallus – good side protection from wide arms.


Discussing the Review:

The ideal place to discuss this review is on the Tactical Reviews Facebook Page
Please visit and start/join the conversation.

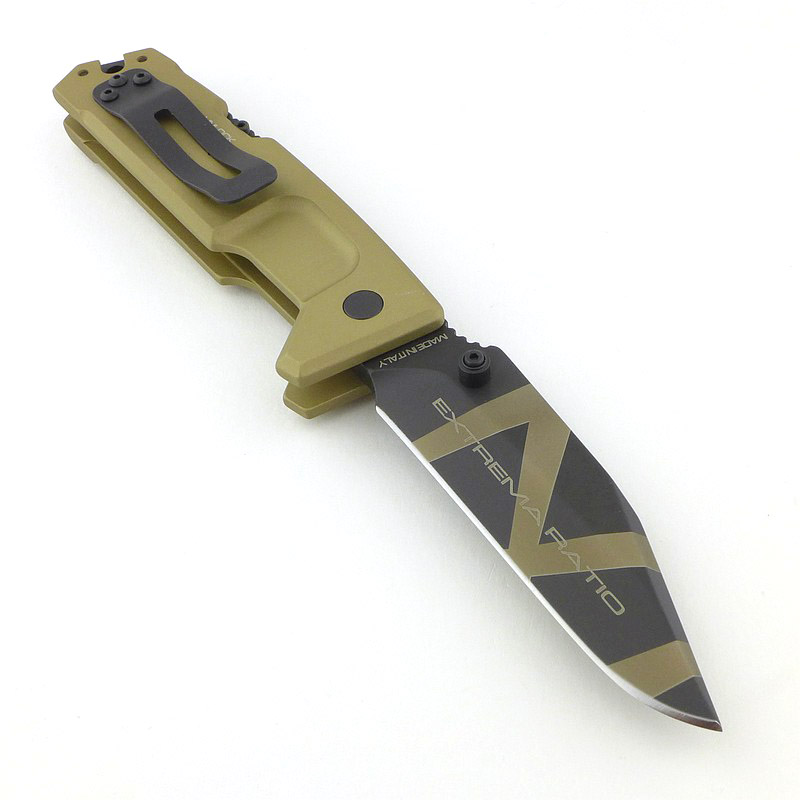
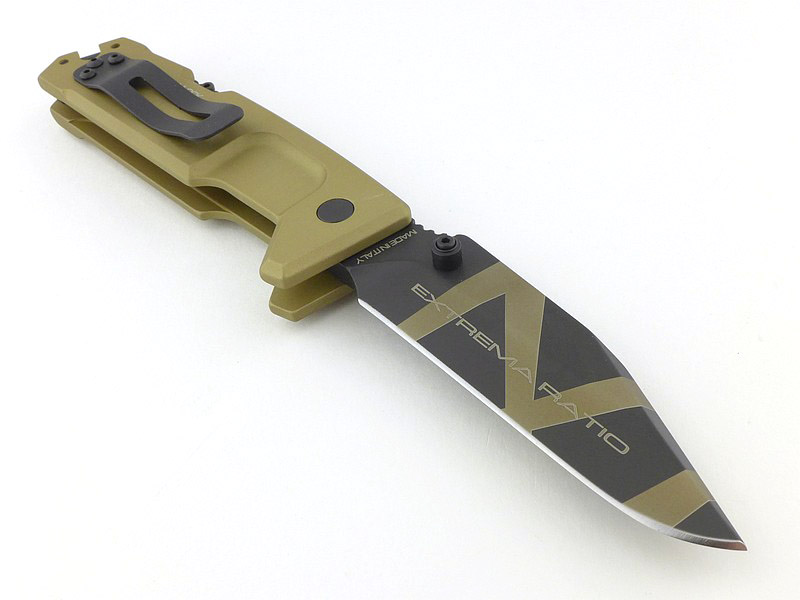
Knife Review: Extrema Ratio Fulcrum II D Desert Warfare

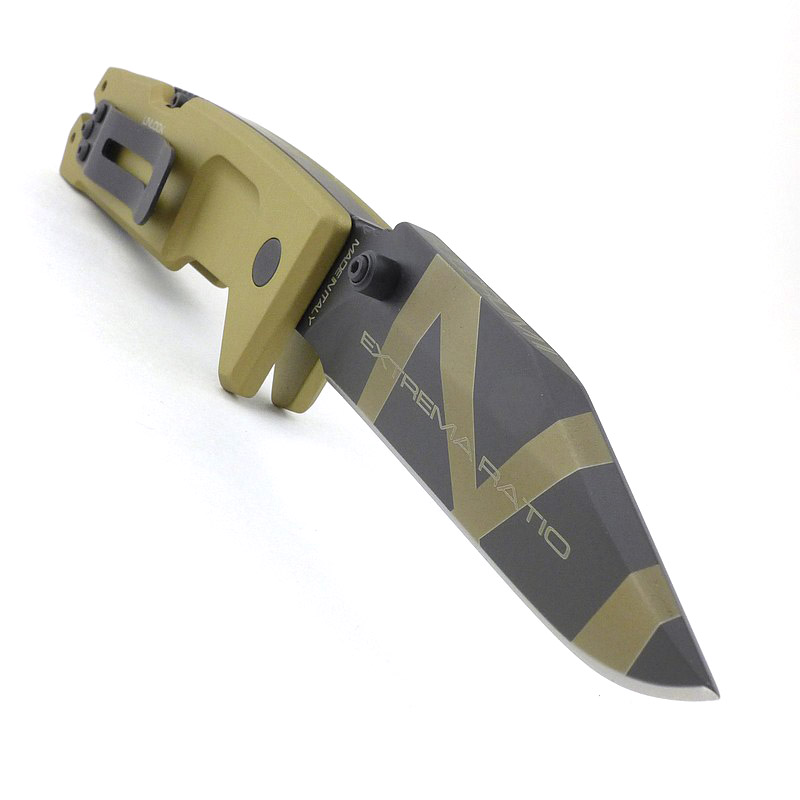
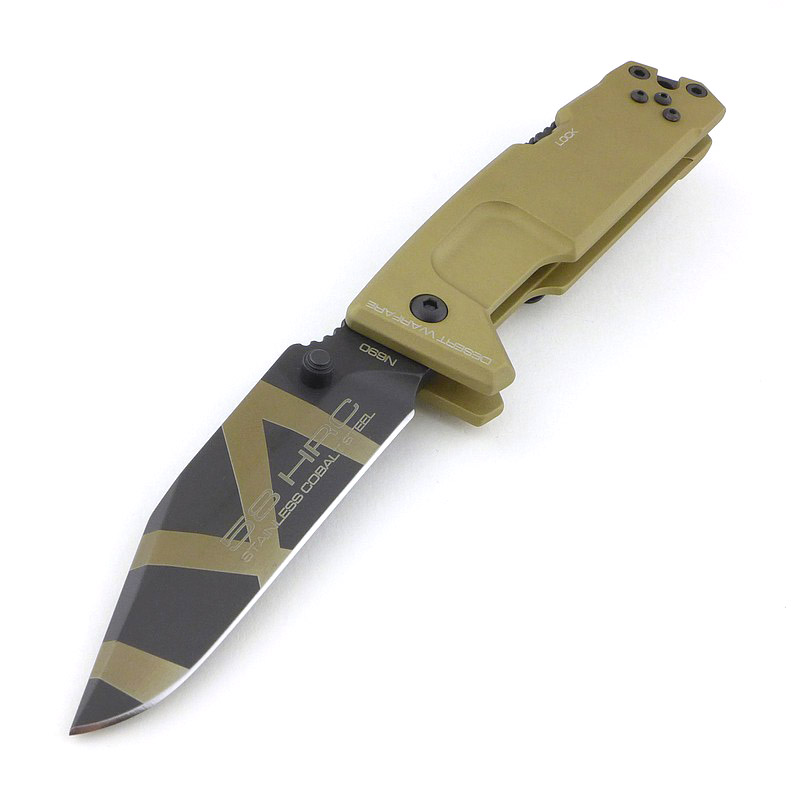
Extrema Ratio have built a reputation for making super strong knives; in this review of the Fulcrum II D ‘Heavy Folder’, we are taking that detailed ‘Tactical Reviews look’ at this re-launched folding knife. ‘Overbuilt’ is often used to describe knives with heavy construction, but is not how I would describe Extrema Ratio’s Fulcrum II. ‘Overbuilt’ suggests excessive design, but behind every Extrema Ratio design is a purpose and intent to give the owner confidence in a tool that won’t let them down. Initially I was sceptical – would the build of the Fulcrum II hamper its usefulness? But it has surprised me; read on to find out more.

A few more details:

What’s in the box?:


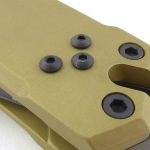
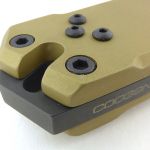
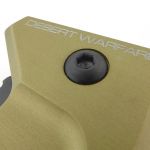
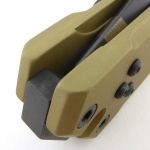
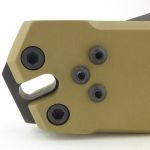
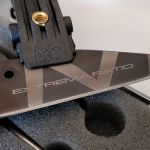
A good look round the Fulcrum II – Things to look out for here are:

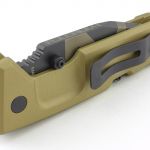
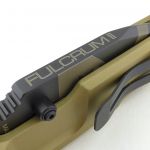
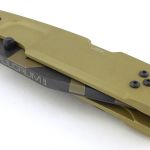
As you look round the Fulcrum II you will see how the design has been kept simple yet functional and how solid every part is.


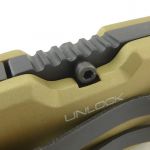
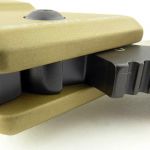
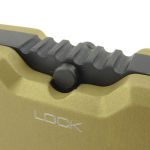
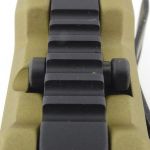
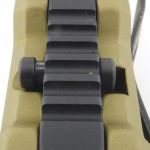
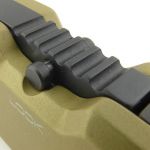
The Locking-Lock:

There are other knives that have a secondary lock to secure the main lock of an open folder, and there are assisted-openers that have a safety lock to prevent the blade springing open in your pocket, but I have yet to come across another folding knife with a secondary lock quite like the one on the Fulcrum II.
A back-lock mechanism uses the lock-bar’s spring to hold the blade in the folded position and then to keep the lock engaged when the blade is open. The lock-bar needs to move to allow the blade to open and close.
In the Fulcrum II, there is a secondary manual lock that locks the lock-bar itself, preventing from moving at all. This means if the blade is closed, it cannot be opened, and if opened the lock cannot be released to allow it to fold. This single secondary lock can secure the blade in either the opened or closed position.
As this is not something that would be obvious to everyone, one use-case for this is to prevent someone taking the folded knife off you and then using it against you (unless they know). The more likely use being to effectively make the folding knife a fixed blade knife ensuring that it cannot be accidentally closed.


Explained by the Maker:


The following text is from Extrema Ratio’s own product description.

This model is the evolution of the FULCRUM Folder (out of production since 2005), the first folding knife produced by Extrema Ratio according to the specifics of an Italian counter-terrorism unit. The FULCRUM II is basically identical to its predecessor, the only variations being the addition of a reversible clip and a partially lowered surface on the handle which improves the ergonomics and makes operating the opening pin easier. A manual security lock holds the BACK-LOCK mechanism lever, preventing accidental unlocking of the blade block during heavy-duty use. It can also be used to lock the knife closed in the event it’s taken away from the user: then the FULCRUM cannot be opened, even if the mechanism is often irrevocably damaged. The back of the flat-ground blade offers a comfortable resting point for the thumb. The tempered steel tang can be used as glass breaker and is provided with a hole to affix a security cord. Available versions: FULCRUM II D BLACK, FULCRUM II D DESERT WARFARE, FULCRUM II D BLACK RUVIDO, FULCRUM II T BLACK, FULCRUM II T DESERT WARFARE, FULCRUM II T BLACK RUVIDO.

The Blade and Handle – Detailed Measurements:

Now even more detailed!

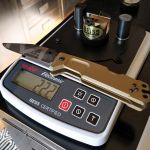
Taking things far beyond most knife specifications, in this section I will be carrying out a detailed examination of geometry, balance, edge bevels, factory sharpness and structural edge testing using the industry leading measuring tools.

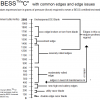
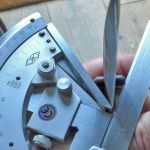
These measuring tools include a Vernier protractor, callipers, fixed radius gauges, the unique Arc Master adjustable radius gauge, Edge On Up’s BESS Certified PT50A and SET tester along with CATRA’s Hobbigoni LASER Edge Protractor.
The BESS ‘C’ scale of sharpness (Brubacher Edge Sharpness Scale) will be used to verify the sharpness of the factory edge and allow the knife to be brought to a minimum standard sharpness before testing a blade’s cutting performance.


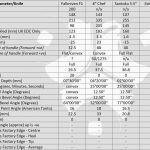
The measurements have been tabulated and are presented along with a few reference blades. The ‘Balance relative to the front of the handle’ tells you if the knife will feel front heavy, or if the weight is in your hand (a positive value means the weight is forward of the front of the handle). The ‘Balance relative to the centre of the handle’ indicates how close to a ‘neutral balance’ the knife has in the hand.

The first table in this gallery shows the standard review measurements, however, this is one of the first reviews on Tactical Reviews to feature a new measurement. Using the Edge On Up Structural Edge Tester (SET) to measure the resistance of a knife’s edge to rolling.

This is to be expanded upon in future articles, but for now, in the SET results the key factors are:
Series 1 Degradation – how much damage the edge suffers from one edge rolling cycle. The damage is represented by an increase in the BESS ‘C’ score. (Averages also shown for A and B)
Series 2 Degradation – how much damage the edge suffers from one further edge rolling cycle. (Averages also shown for A and B)
Degradation after strop – has the edge been permanently damaged/chipped or can it be recovered with stropping? A negative number means it actually improved from the starting figure, suggesting there may have already been some rolling of the edge before testing. (Averages also shown for A and B)


The blade is made from BöHLER N690 STEEL (58HRC).

What it is like to use?

Before I could really appreciate the Fulcrum II, the edge needed reworking. Embarking upon this revealed a few things you should be aware of.

The factory edge was very steep, a total inclusive angle of 64 degrees. Taking the BESS sharpness measurements with an average score of 409,and a small thick blade, you have a less than eager cutter. Should you wish to use it as an extraction tool and cut through metal sheeting and pry with it, this edge will quite likely serve you well, but I wanted to know if this knife would also serve for daily tasks.

With such a thick blade and a primary blade grind at 21 degrees my intention was to take the edge angle to 40 degrees inclusive. I’d generally take a pocket knife to 30 degrees inc, but this is not a normal pocket knife and the edge bevel would be getting a bit too wide.

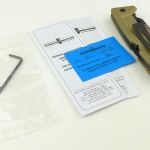
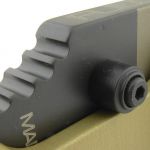
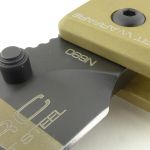
So, check this first photo in the gallery and you will see that the thumb stud creates an angle of about 53 degrees in relation to the edge bevel, making sharpening to anything less than this difficult. The only option is to remove it. Thankfully Extrema Ratio have made the thumb-stud removable and provided the Allen key for it, so no problem there. However, remember that the blade-stop in the closed position IS the thumb-stud, so once you take it off, don’t go closing the blade or you will undo all your hard work.

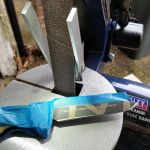
The major edge bevel angle change was carried out with a small belt grinder. It was taken to a burr and stropped to remove the burr, but I could never quite get it as sharp as I wanted. This might be that the belt needs changing, but before confirming that, I just moved onto a DMT Aligner kit and got the edge shaving sharp. The new edge bevel is significantly wider than the factory edge bevel, especially at the tip (about 4mm wide), so it does change the look somewhat.


In all honesty, on first starting to use the Fulcrum II with the factory edge, I was underwhelmed and thinking I now had an overly heavy folder that was not much use to me; despite having a very satisfying presence. However, the 20dps (degrees per side) edge has totally transformed the Fulcrum II. I cannot recommend enough just putting this edge angle on it straight out of the box.

Changing the edge angle to an inclusive 40 degrees makes this a properly usable knife. You can now appreciate its substantial feel and operation along with its, now useful, cutting performance.

Despite this new edge bevel angle transforming it, the Fulcrum II does still have a very thick blade. It is never going to slice like a thin blade – but who cares?! That clunk of the lock as you open it, the handle size and ergonomics – you know you are holding heavy duty metal.

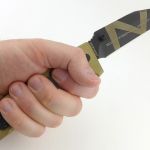
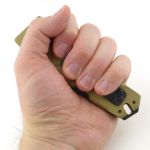
Ergonomics are good and functional even with the angular look. Thumb-stud opening is firm but not stiff. If anything is over stiff, it is the back-lock spring. Unlocking the blade is quite tough, and I need to change grip specifically to one where I can apply maximum force to the lock – I can’t see this ever releasing accidentally due to a firm grip.

I do find the secondary lock very satisfying. Perhaps oddly, I like locking it closed, keeping the blade safely folded and stopping curious people opening it. Then the secondary lock on the open knife making it close to a fixed blade. This extra level of certainty adding an extra dimension to the Fulcrum II. If I were to express a minor doubt, it is the amount of engagement of this secondary lock. The secondary locking button overlaps the handle slab (to create the block) and does so with less than 1mm of overlap. Enough to function, but not quite in fitting with the solidity of everything else.

Putting it to woodworking duty, the Fulcrum II was a pleasure to use. I didn’t want to stop carving. The new edge bevel, being quite wide, gives it a semi-scandi effect and it was just eating up stick after stick. I did remove the pocket clip as, for me, this significantly improved the ability to work with it for extended periods.

This knife demands attention. Attention simply due to its build and presence, and the attention you need to give it to get it set up right, as you will need to put that proper working edge on it to be able to appreciate it. I like big and heavy folders as long as they can be put to real work – exactly what I’ve been doing with the Fulcrum II.


Review Summary

The views expressed in this summary table are from the point of view of the reviewer’s personal use. I am not a member of the armed forces and cannot comment on its use beyond a cutting tool or field/hunting knife.

Something that might be a ‘pro’ for one user can be a ‘con’ for another, so the comments are categorised based on my requirements. You should consider all points and if they could be beneficial to you.

_______________________________________________
Things I like
_______________________________________________

Proper ‘Heavy Folder’ with respected pedigree.
Secondary lock, completely locking the blade open or closed.
Excellent fit and finish.
Very satisfying action.
Large finger guard.
Ambidextrous pocket clip.
Not that heavy despite solid build.

_______________________________________________
What doesn’t work so well for me
_______________________________________________

Factory edge far too steep at 64 degrees.
Thumb-stud needs to be removed for sharpening.
Relatively shallow blade for its thickness.
For hard use it is much easier on the hands without the pocket clip.
The primary lock is a bit too stiff.
No pouch supplied.


Discussing the Review:

The ideal place to discuss this reviews is on a forum. If you started reading the shorter forum version of the review, but followed the link this full exclusive review, please return to that forum to discuss the review there.
If you read the review entirely on Tactical Reviews, please consider one of the following to join in any discussion.

BladeForums – Knife Reviews (US based Forum for Knife Discussion)

CandlePowerForums – Knife Reviews Section (Largest and Friendliest Flashlight Community Forum)

The BESS Exchange – A forum discussing technical aspects of sharpness and truly understanding your sharpening process.

Knife Review: Oberland Arms Jager Sepp

Finding Oberland Arms’ knives was an outstanding highlight of IWA 2018, and it became a mission of mine to review them. A happy coincidence that one other IWA 2018 highlight happened to be another knife designed by Tommaso Rumici who is the designer of the Jager Sepp on review here.
Everything came together nicely at IWA 2019, meetings with Tommaso, Viper Tecnocut and Matthias Hainich of Oberland Arms, and here is the first of two reviews for Oberland Arms knives (the Wuiderer Sepp is currently in testing).

A few more details:

No unnecessary frills with packaging that will just be discarded, the Jager Sepp and Wuiderer Sepp arrive in a plastic bag.

Starting with the sheath:

This is the one part not designed by Tommaso Rumici, but instead by the team at Oberland Arms. It has a lot of interesting features shown in the gallery.


A good look round the Jager Sepp – Things to look out for here are:

Overall there is a real sense of purpose and lack of unnecessary frills on the Jager Sepp.


Explained by the Maker:

The reasons for certain design choices may not be clear when simply looking at an object, so this section is intended to give an insight into the thinking behind a design by speaking to the designer themselves.

Tommaso Rumici has been kind enough to talk to me about this knife and the design process. I am also reviewing the larger Oberland Arms ‘Wuiderer Sepp’. The interview with Tommaso is in two parts, with this review containing Part 1:

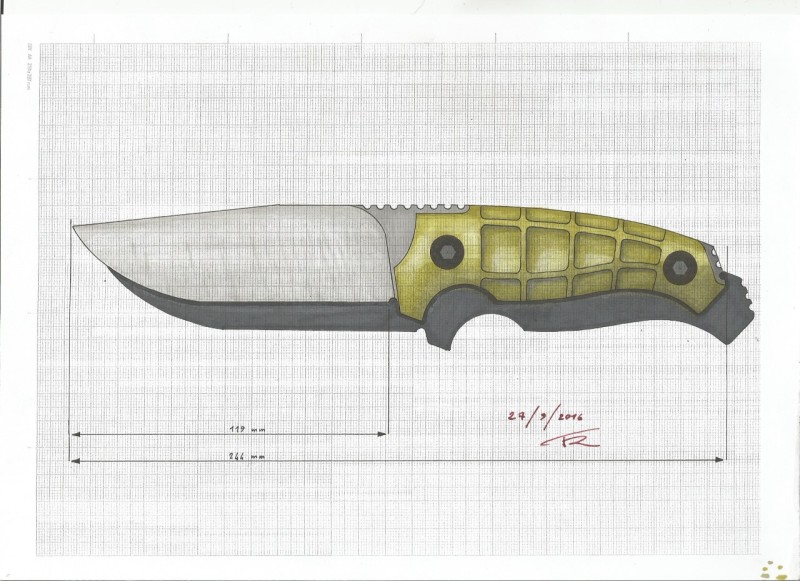
This image of the first sketch of the final design of the Jager Sepp has been kindly provided to me by Tommaso Rumici.

How did you get involved with Oberland Arms to design these knives?

“Me and Matthias Hainich, CEO of Oberland Arms, met during an IWA Show. I was helping at Viper’s booth, and he was looking for someone to produce knives for his brand. At the beginning, we started with a lightly modified version of the Viper David, then we continued with exclusive designs, made for Oberland following his specifications and requests.”

Can you talk me through the design brief, and how far developed it was when given to you?
“During September 2016, Mr. Hainich sent me a list of specifications for the new knife, with some indications about the tasks it would have been able to accomplish, and a few examples of existing knives with the same characteristics.
The new knife was going to be a fixed blade, with green or coyote G10 handle, 11,9cm blade with 5mm thickness, flat grind, with stonewashed finish, and a Kydex/Nylon sheath.
I started working, exchanging emails with Matthias, and before October we arrived to the final design of the smaller one.
Since Mr. Hainich is a fan of my Carnera, we also tried a bigger blade with a similar Bowie design (but smaller than Carnera’s one, which is too big for a military knife). This blade became the bigger one.
(The Wuiderer Sepp.)

At the end, we had a meeting with Mr. Miniutti (Viper), and checked everything before production. During that meeting, we decided for the Black Stonewashed PVD, and to work on three different handles: OD green, coyote and wolf grey G10.”

There was a repeated question I got when talking to others about these knives – why D2?
AISI D2 is a good steel for hard working tools. It holds a good edge, it’s tougher than a lot of “inox”, and more stainless than high carbon steels, like 1095. It isn’t the latest alloy invented but, in my opinion, it’s a great choice for a military knife, that can be abused or lost in the field, because it gives you great performances, it’s difficult to break, while keeping a great price/performances balance.
Speaking of the real life, I tested several D2 knives made by Viper, and I’m really satisfied about how they work. Especially the Viper Tank, designed to be an heavy outdoor tool.

Part 2 of this interview will be in the Oberland Arms Wuiderer Sepp Review.

In the Lab – Technical Testing!:

Now even more detailed!

Taking things far beyond most knife specifications, in this section I will be carrying out a detailed examination of geometry, balance, edge bevels, factory sharpness and structural edge testing using the industry leading measuring tools.

These measuring tools include a Vernier protractor, callipers, fixed radius gauges, the unique Arc Master adjustable radius gauge, Edge On Up’s BESS Certified PT50A and SET tester along with CATRA’s Hobbigoni LASER Edge Protractor.
The BESS ‘C’ scale of sharpness (Brubacher Edge Sharpness Scale) will be used to verify the sharpness of the factory edge and allow the knife to be brought to a minimum standard sharpness before testing a blade’s cutting performance.


The measurements have been tabulated and are presented along with a few reference blades. The ‘Balance relative to the front of the handle’ tells you if the knife will feel front heavy, or if the weight is in your hand (a positive value means the weight is forward of the front of the handle). The ‘Balance relative to the centre of the handle’ indicates how close to a ‘neutral balance’ the knife has in the hand.

The first image in this gallery shows the standard review measurements, however, this is the first review on Tactical Reviews to feature a new measurement. Using the Edge On Up Structural Edge Tester (SET) to measure the resistance of a knife’s edge to rolling.

This is to be expanded upon in future articles, but for now, in the SET results the key factors are:
Series 1 Degradation – how much damage the edge suffers from one edge rolling cycle. The damage is represented by an increase in the BESS ‘C’ score. (Averages also shown for A and B)
Series 2 Degradation – how much damage the edge suffers from one further edge rolling cycle. (Averages also shown for A and B)
Degradation after strop – has the edge been permanently damaged/chipped or can it be recovered with stropping? A negative number means it actually improved from the starting figure, suggesting there may have already been some rolling of the edge before testing. (Averages also shown for A and B)


What it is like to use?

Of Oberland Arms’ three fixed blade knives (at the time of review), the Jager Sepp would be the all-rounder in terms of size (the main reason I’m testing it first). With a 12cm blade (just under 5″) it is in that ideal general-purpose-blade length. The high, almost full, flat grind gives the blade strength combined with powerful cutting ability.

Good handle design provides immediate indexing of the blade, comfort and grip options. On picking up the Jager Sepp, this is what strikes you straight away. It just sits in your hand, balanced nicely on your first finger, nimble and ready to work; a natural extension of your hand. The grip is a generous size without being overly large, and its size and shape have not presented me with any hotspots when working it hard. Grip indexing works almost as well in a reverse grip, considering the forward grip has that first finger groove, this is impressive.

For a working knife, three elements are as important as each other. The blade, the handle and the sheath. In some cases the sheath can become the most important element, as a knife is no good to you if it is lost, or you can’t get to it when you need to. The Oberland Arms sheath is a great mix of clever design ideas and hits a lot of sweet spots.

The nylon outer shell holds a kydex liner, meaning no additional knife retention is needed, the kydex lips hold the Jager Sepp firmly in place even when mounted handle-down. A thumb ramp is incorporated into the kydex so you can easily unsheathe the knife quietly and in full control.

Ambidextrous use is catered for in the simplest way; the kydex liner is held in the outer sheath with a single bolt. This allows you to remove the kydex liner and flip it round for left-handed use – an excellent solution. I’ll cover more on the sheath in a dedicated gallery following this one.

On its first venture into the outdoors, I went with the factory edge, but found this a little too steep an angle (52 degrees), so took this to a total inclusive of 35 degrees. I find this a good compromise when I don’t want to go all the way to 30 degrees, but want a finer edge than a typical 40 degree.

OK, perhaps the elephant in the room – D2 steel. Once the wonder steel of legend, then becoming more mainstream, before being mostly discarded in favour of steels designed specifically for the knife industry. Is it too hard to sharpen, does it chip, does it rust, does that edge last well?

The SET testing results, included for the first time ever in a knife review, have been shown in isolation, as at the time of writing this test is still not fully proven. What I can say is that the results were in line with what I expected of D2. Those figures are a strong performance and the ability to recover means that there was no chipping. I’d say the heat treat on this by Viper Tecnocut has got it just right.

D2 by its very nature is going to be a bit harder to sharpen. Although I use a belt grinder, it is easy to feel how hard the steel is to sharpen, and the Jager’s blade was firm but not excessive. The only chipping I have experienced was when I dropped the knife onto a stone!

I’ve given the blade no special treatment, but also no abuse, and I was keen to get a patina to add to the stonewashed PVD (being stonewashed a lot of the PVD has been polished off), but so far neither the bare edge bevel not any other part of the knife have shown any corrosion.


The Oberland Arms nylon sheath has MOLLE compatible straps that are unlike any others I’ve seen so warrant a more detailed look. In this gallery I’m fitting it to a drop leg platform.

Before getting onto this is does lead me to mention why I chose to fit it to a drop-leg. With MOLLE straps, I typically arrange them so as to form a belt loop for the majority of my testing. The strap fixing design on the Oberland Arms sheath is not strong enough to do this with confidence. Unlike a press-stud fixing the fabric tabs were becoming deformed when making a simple belt loop and I had to use some auxiliary MOLLE strap I have (for pouches without any straps).

Going onto PALS webbing, the strap design is perfectly strong enough, and the effect is for the cross webbing to take the load. For a full weave, you will need to remove the kydex liner. In this gallery I did not do that, so the last weave is left undone.


Review Summary

The views expressed in this summary table are from the point of view of the reviewer’s personal use. I am not a member of the armed forces and cannot comment on its use beyond a cutting tool or field/hunting knife.

Something that might be a ‘pro’ for one user can be a ‘con’ for another, so the comments are categorised based on my requirements. You should consider all points and if they could be beneficial to you.

_______________________________________________
Things I like
_______________________________________________

Superb ergonomics / indexing / comfort.
High flat grind.
D2 with very good heat treat.
Great all-rounder size.
Versatile, ambidextrous sheath.

_______________________________________________
What doesn’t work so well for me
_______________________________________________

Sheath MOLLE straps – question over durability.
Sheath MOLLE straps – not strong enough for a simple belt loop configuration.
D2 – some would question using this steel in a premium knife.


Discussing the Review:

The ideal place to discuss this reviews is on a forum. If you started reading the shorter forum version of the review, but followed the link this full exclusive review, please return to that forum to discuss the review there.
If you read the review entirely on Tactical Reviews, please consider one of the following to join in any discussion.

BladeForums – Knife Reviews (US based Forum for Knife Discussion)

CandlePowerForums – Knife Reviews Section (Largest and Friendliest Flashlight Community Forum)

The BESS Exchange – A forum discussing technical aspects of sharpness and truly understanding your sharpening process.

Light Review: Armytek Prime Pro – PART 3 – The Results

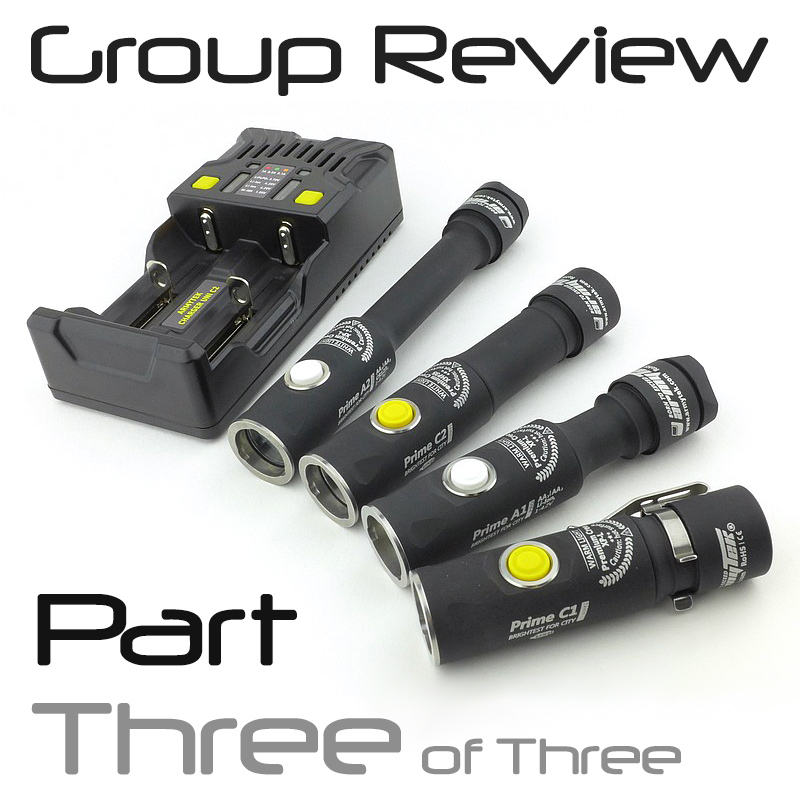
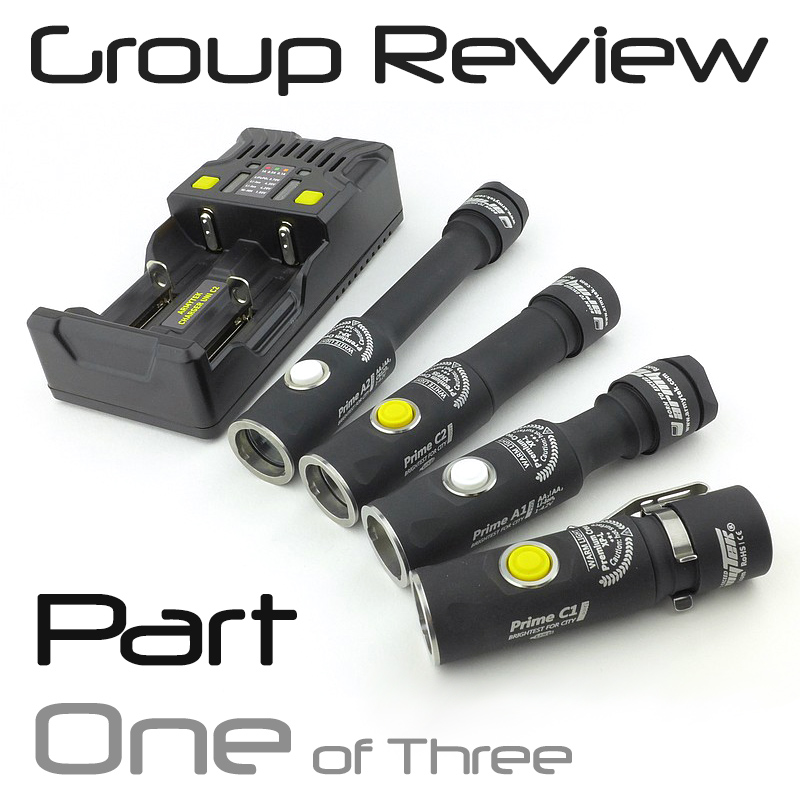
In ‘Part Three’ we get to see how these lights really perform, what the beams look like, their output figures and insights into what they are really like to use. – This is Part Three of a group review of four models of Armytek’s ‘Prime Pro’ range of lights (plus the Armytek Uni C2 charger). When embarking upon this review I had not expected to generate quite so much content, so have had to split the review into three parts to make it more manageable. You will find links to these as each part becomes available.

Index:

Each title here will become an active link once it has been published.
Part One – A Detailed look at the Prime Pro Magnet USB C1 and C2.
Part Two – A Detailed look at the Prime Pro A1, A2 and Uni C2 Charger.
Part Three – Beamshots, Technical Testing and What they are like to use.

The beam

Please be careful not to judge tint based on images you see on a computer screen. Unless properly calibrated, the screen itself will change the perceived tint.

The indoor beamshot is intended to give an idea of the beam shape/quality rather than tint. All beamshots are taken using daylight white balance. The woodwork (stairs and skirting) are painted Farrow & Ball “Off-White”, and the walls are a light sandy colour called ‘String’ again by Farrow & Ball. I don’t actually have a ‘white wall’ in the house to use for this, and my wife won’t have one!

There are a couple of key things to mention before you dive in and look at the beamshots. It is possible to make lights look very bright or very dim, regardless of their actual output, by adjusting exposure. So when you look at these don’t be swayed by the ‘apparent brightness’ instead concentrate on the beam quality. the intention is to show how the beam looks, not how bright it is. that is shown definitively in the next section.

This gallery also contains firefly comparison beamshots, and uses the original Predator V1.2 as a reference. These Prime Pro lights have Excellent firefly output.


Batteries and output:

To measure actual output, I built an integrating sphere. See here for more detail. The sensor registers visible light only (so Infra-Red and Ultra-Violet will not be measured).

Please note, all quoted lumen figures are from a DIY integrating sphere, and according to ANSI standards. Although every effort is made to give as accurate a result as possible, they should be taken as an estimate only. The results can be used to compare outputs in this review and others I have published.

The runtime graphs contain a lot of detail. One clear aspect of the control systems of these lights is that they maintain a constant output level as long as they can before stepping down to another level.

The gallery also contains the tables of output figures. Note that when I have ‘0’ for the output on firefly modes, this is actually below the threshold of measurement for the equipment I have and is clearly not actually 0. The Prime Pro A1 is measured with AA and 14500.


* Beacon and Strobe output measurements are only estimates as the brief flashes make it difficult to capture the actual output value.

Charging results were a little bit unexpected for a couple of reasons. When checking the cells in the C1 and C2 after the included chargers indicated a full charge gave the following measurements:
C2 – 4.13V
C1 – 4.06V
Both seem low, but when checking these cells with a ZTS loading tester they both indicated 100% charge.
The C1 and C2 USB chargers are interchangeable so I tried them both on the C1.
With the charger that came with the C2, after a full charge the result was:
C1 – 4.15V
Using the Uni C2 charger the cells measured 4.16V once taken off the charger.

There is parasitic drain but is incredibly low in all models. The following list the drain in uA and how many years it would take to drain the cell(s).
Armytek Prime C1 Pro – 1×18350 – 2.8uA – 36.67 years
Armytek Prime C2 Pro – 1×18650 – 6.5uA – 56.16 years
Armytek Prime A1 Pro – 1xAA – 3.9uA – 55.58 years
Armytek Prime A1 Pro – 1×14500 – 3.8uA – 22.52 years
Armytek Prime A2 Pro – 2xAA 2S1P – 2.3uA – 94.24 years

The Prime Pro models in use:

I don’t want to come across biased, but I really do love these Armytek Prime Pro lights! If you give me a side-switch, choice of warm or cool output, no-PWM and properly-low firefly/moon modes, you will make me happy. So for these lights that is ‘check’, ‘check’, ‘check’, ‘check’ – bingo.

In terms of form-factor, AA lights have always been a favourite of mine. Now, with the NiMh cell becoming a preferred option for power (thanks to LSD cell technology, high output current, and inherent safety), with the added benefit of easy to find backup cells, the Prime Pro A1 and A2 become solid choices.

For that extra level of output power (thanks to li-ion power) and in-light charging convenience, the C1 and C2 step up.

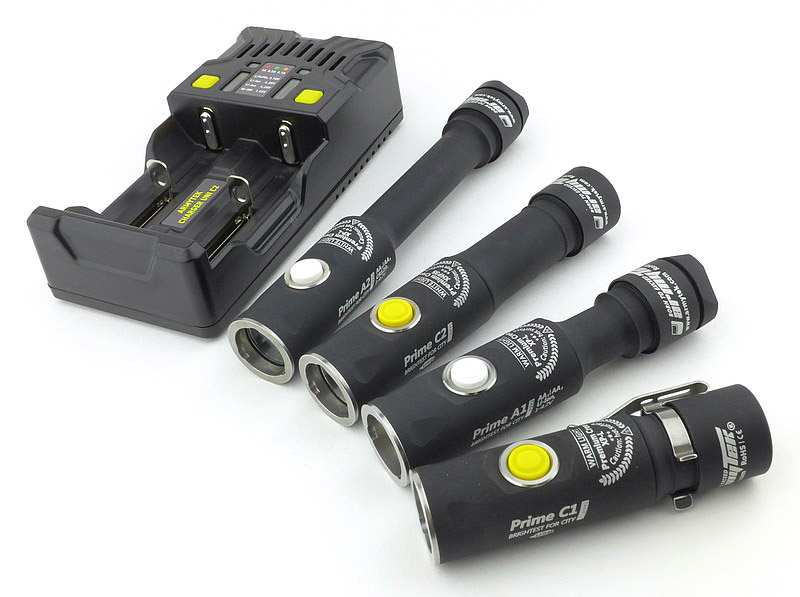
To see how each of these compares in size, this is the full line-up together and then individual profile photos. Bear in mind for those individual shots that the head is the same diameter in each.


Normally I tend not to use the clips on lights, and often don’t fit them at all. All of these Prime Pro models seemed to be particularly ‘rolly’, wanting to find the lowest point of anywhere I put them down by rolling to it. So in this case, the clip has proven essential to stop them going wandering off and I’ve fitted it to all four lights. Although I am not particularly using the clip for clipping it to anything, as well as preventing them rolling, having the clip also provides indexing to make getting onto the switch quicker, and has been perfectly comfortable to have on the light. In this case I’d thoroughly recommend fitting the clip.

You can certainly get smaller EDC lights, but both the C1 and A1 are perfectly acceptable sizes to carry and not being too small, are comfortable and easy to use. For EDC, the C2 is pushing things a bit for me, and the A2 is for a larger bag. In terms of handling though, the A2 is a winner with the universally good handling 2xAA form-factor.

All these lights have an illuminated switch, and this illumination provides battery level information and a location function for the C1 and C2. For me the only time this switch illumination has slightly interfered is with the firefly modes. The instructions say the switch does not flash in firefly modes, but actually it does flash a couple of times when you first switch it on, and the flashes are about as bright as the firefly output itself. So when using these lights with dark adapted eyes, I find the need to keep the switch fully covered with my thumb for the first 10s or so until the switch flashes stop.

The programmability of these lights means you can change whether the location function is on or not (for the C1 and C2). When on, this uses the switch flashes all the time whether the light is on or not, allowing you to find it in a dark place. It does also mean that these switch flashes keep going all the time even in Firefly mode so the previous paragraph becomes more significant for firefly mode users. With Armytek’s low current circuit design you can leave this on permanently and not worry about draining the battery.

Also including a real Tactical monetary mode really adds another dimension. Make sure you correctly pre-select the mode you want to use, as in Tactical mode you can’t change level. Then to activate, from OFF, unscrew the tailcap slightly, press and hold the switch, and tighten the tailcap – you are now in Tactical mode. To get out of Tactical mode is not done the same way – you have to press and hold the switch (so it comes ON), then loosen the tailcap, then let go of the switch. Now when you tighten the tailcap again it will come ON, but be back in normal mode. If you don’t remember the difference of turning this mode on and off you can get stuck in Tactical mode.


A quick word on the in-light charging and the Uni C2 charger. In all cases the li-ion cell has not been taken up to a ‘full’ 4.20V, yet the discharge results have been good. For the health of the cells themselves it is actually good to not take them to an absolute 100% each time. So for every day use and frequent topping up, the Uni C2 won’t overwork your cells. Its memory means that if charging LiFePO4 cells and a power cut were to happen, it will safely continue the charging cycle for these cells – this is a detail often not included.

Magnetic abilities are a mixed bag for me. I’ve never been keen on the metal-to-metal contact these magnetic holding systems tend to use, plus their tendency to grab onto anything magnetic in bags and pockets. There are times a magnet holding your light is massively helpful though, so with the A1 and A2, their removable magnet is the perfect solution as you have a choice – thank you Armytek! With the C1 and C2 models on test here, you don’t have that choice due to the charger; but if you like magnetic tails on your lights then it is ideal.

With their feature packed user interface, you get great versatility. However, despite the single side-switch, these are not lights to give to non-technical people. With the variety of input clicks and wide variation in output levels, I can see those who are unfamiliar with multi-mode lights getting in a muddle.

Armytek’s interfaces are cleverly designed to give you great flexibility and functionality, I certainly appreciate the attention to detail.

Review Summary

_______________________________________________
Things I like
_______________________________________________

Side Switch.
True ‘Firefly’ low level output.
Warm or Cool tint versions.
No PWM.
Great UI with plenty of modes.
A1 and A2 have a removable magnet.
C1 and C2 have in-light USB charging.

_______________________________________________
What doesn’t work so well for me
_______________________________________________

Completely round design, so tend to roll if the clip is not fitted.
Proprietary USB charger.
Charger termination voltage seems a little low.


Discussing the Review:

The ideal place to discuss this reviews is on a forum. If you started reading the shorter forum version of the review, but followed the link this full exclusive review, please return to that forum to discuss the review there.
If you read the review entirely on Tactical Reviews, please consider one of the following to join in, or start, a discussion.

CandlePowerForums – Flashlight Reviews Section (Largest and Friendliest Flashlight Community Forum)

Light Review: Armytek Prime Pro – PART 2 – A1 / A2 / Uni C2

In ‘Part Two’ we will be taking a first look at the Prime Pro A1 and A2, plus the Uni C2 Charger. – This is Part Two of a group review of four models of Armytek’s ‘Prime Pro’ range of lights (also included with the Prime Pro lights was the Armytek Uni C2 charger). When embarking upon this review I had not expected to generate quite so much content, so have had to split the review into three parts to make it more manageable. You will find links to these as each part becomes available.

Index:

Each title here will become an active link once it has been published.
Part One – A Detailed look at the Prime Pro Magnet USB C1 and C2.
Part Two – A Detailed look at the Prime Pro A1, A2 and Uni C2 Charger.
Part Three – Beamshots, Technical Testing and What they are like to use.

Taking a more detailed look at the A1:

As we go through the details of each light, for some there will be common features. In this case I may only show that feature for one of the models. In this part we have the A1 and A2 which are very similar as really the only difference is the cell and length of the battery tube. If you think a detail has been overlooked, check the similar model for that detail.


Taking a more detailed look at the A2:


Taking a look at the Uni C2 charger:

Rechargeable cells are the provider of ‘guilt free lumens’ so I hope you will be using them whenever possible. The Uni C2 is Armytek’s complimentary multi-chemistry auto charger, and is a perfect match for these lights and with its long list of supported cells, most of your other lights too.


Modes and User Interface:

This section is common across Part One and Two of the review to allow you to compare functions easily. It contains extracts from Armytek’s instruction manuals. Check the Armytek website for downloads of the full versions of these.


That is the end of Part Two.


Discussing the Review:

The ideal place to discuss this reviews is on a forum. If you started reading the shorter forum version of the review, but followed the link this full exclusive review, please return to that forum to discuss the review there.
If you read the review entirely on Tactical Reviews, please consider one of the following to join in, or start, a discussion.

CandlePowerForums – Flashlight Reviews Section (Largest and Friendliest Flashlight Community Forum)

Light Review: Armytek Prime Pro – PART 1 – C1 / C2 USB Magnet

Armytek have always impressed me with how much functionality they manage to pack into the control systems of their lights. (I still keep a Predator V1.2 with S-tek driver in my bedside table drawer). This group review is of four models of their ‘Prime Pro’ range of lights (also included with the Prime Pro lights was the Armytek Uni C2 charger). When embarking upon this review I had not expected to generate quite so much content, so have had to split the review into three parts to make it more manageable. You will find links to these as each part becomes available.

In ‘Part One’ we will be taking a first look at the Prime Pro Magnet USB rechargeable models, the C1 and C2.

Index:

Each title here will become an active link once it has been published.
Part One – A Detailed look at the Prime Pro Magnet USB C1 and C2.
Part Two – A Detailed look at the Prime Pro A1, A2 and Uni C2 Charger.
Part Three – Beamshots, Technical Testing and What they are like to use.

Taking a more detailed look at the C1:

As we go through the details of each light, for some there will be common features. In this case I may only show that feature for one of the models. In this part we have the C1 and C2 which are very similar as really the only difference is the cell and length of the battery tube. If you think a detail has been overlooked, check the similar model for that detail.


Taking a more detailed look at the C2:


Modes and User Interface:

This section is common across Part One and Two of the review to allow you to compare functions easily. It contains extracts from Armytek’s instruction manuals. Check the Armytek website for downloads of the full versions of these.


That is the end of Part One. Keep an eye out for Part Two – A Detailed look at the Prime Pro A1, A2 and Uni C2 Charger.


Discussing the Review:

The ideal place to discuss this reviews is on a forum. If you started reading the shorter forum version of the review, but followed the link this full exclusive review, please return to that forum to discuss the review there.
If you read the review entirely on Tactical Reviews, please consider one of the following to join in, or start, a discussion.

CandlePowerForums – Flashlight Reviews Section (Largest and Friendliest Flashlight Community Forum)

CLASSIC Light Review: ArmyTek Predator G2 V2.0 and Predator X V2.0 dual Review

This review of the ArmyTek Predator G2 V2.0 and Predator X V2.0 lights is a classic from 2013, and is part of the Classic Series of reviews to be published on Tactical Reviews. The original versions of the Classic Series Reviews used a well known image host who will be cutting off the visiblity of 3rd party hosted images at the end of 2018.

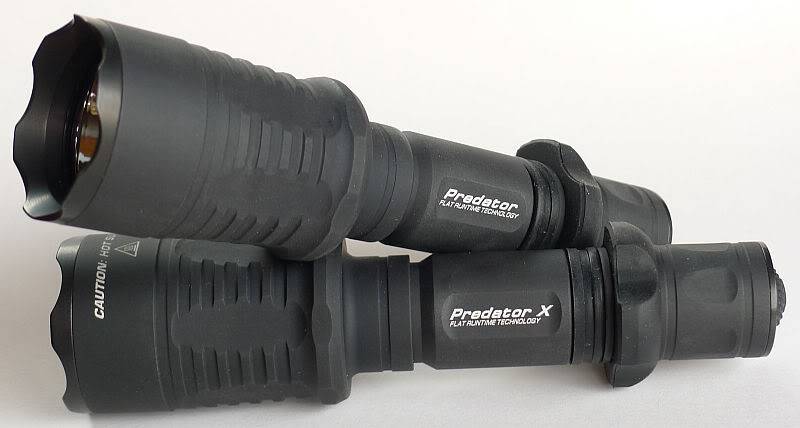
As consumers, and as flashlight enthusiasts, we are spoiled for choice as there many excellent lights on the market. There are a fewer number of outstanding lights, and in my opinion the ArmyTek Predator V2.0 (in whichever version you prefer) is outstanding.

In this review I have two versions of the ArmyTek Predator V2.0 on test, the Predator G2 (fitted with the XP-G2 R5 LED) and the Predator X (fitted with an XM-L U2).
Initial Impressions:

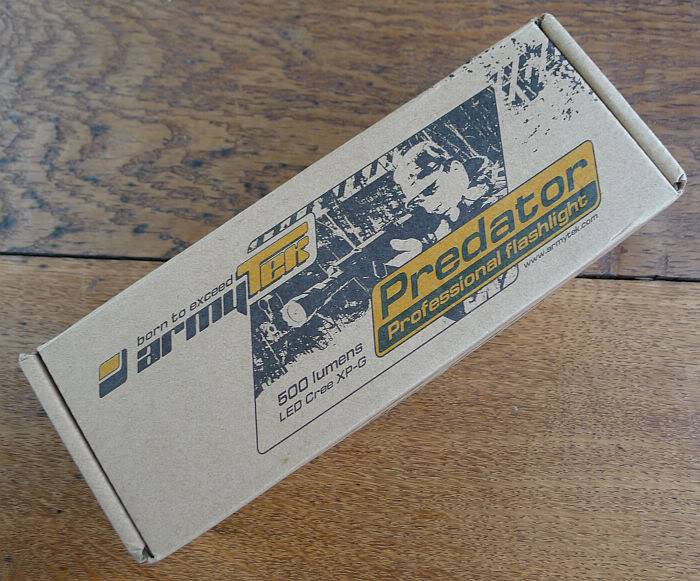
The ArmyTek Predator arrives in simple packaging that belies its incredible versatility.

The V2.0 still sports the matt anodised surface of the original Predator. This feels different to standard smooth anodising and gives the Predator a covert appearance. The finish seems to make the Predator feel less cold to touch and has good grip.

Compared to the Predator V1.2, the V2.0 has a new removable silicon rubber tactical grip ring, updated removable pocket clip, slightly larger diameter head/reflector (about 5mm bigger), is slightly shorter overall (about 6mm shorter) and has an updated selection of emitters. Initially slightly dubious about a rubber grip ring, this is very comfortable and secure to hold.

In designing the Predator, ArmyTek have managed to make what appears to be an incredibly robust and a truly military-grade light.

When you pick up the instruction sheet, your jaw might drop when you see just what the Predator is capable of, but DON’T PANIC, as you can use the Predator in its default configuration. If you are feeling a little more adventurous it doesn’t take too long to get into programming it. (Plus I’ve put together a Predator Programming Crib Sheet which will hopefully help make it simpler to do – more on that in the User Interface section)

What is in the box:

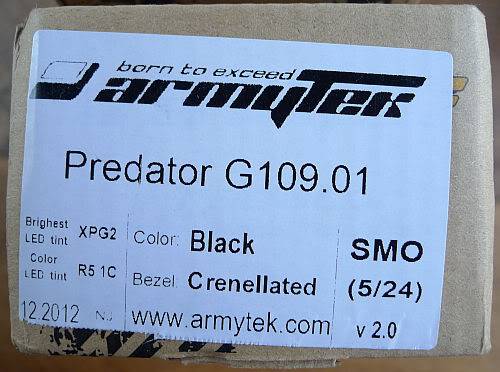
The two versions of the Predator v2.0 on test are the XP-G2 R5 (1C tint) Smooth Reflector with 5º hotspot and 24º spill
And the XM-L U2 (1C tint) Smooth Reflector with 8º hotspot and 55º spill.
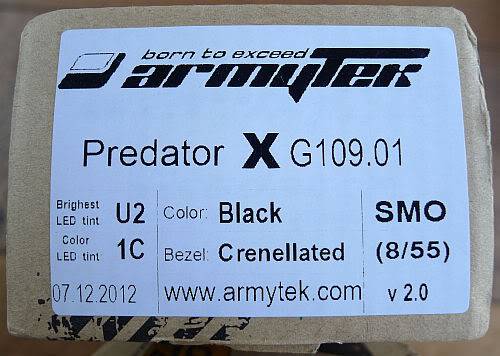
Both arrived in identical boxes (just the labels shown above on the end of the box being different).
And both look the same inside.
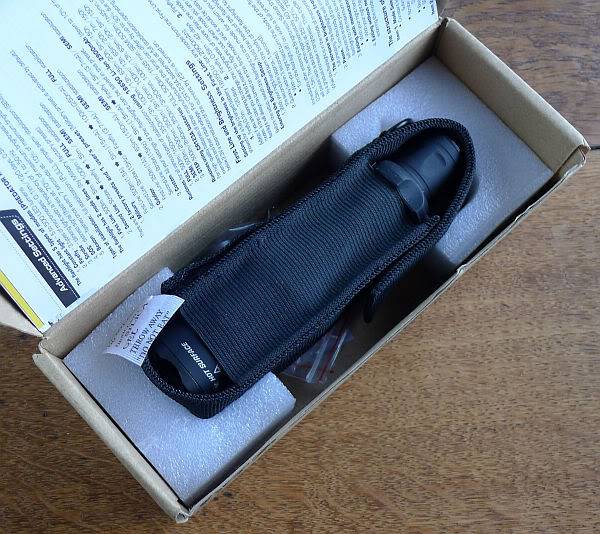
Each Predator comes with a bezel-down holster, lanyard, pocket clip, two spare o-rings, spare switch boot, and a rubber blanking ring to use if you remove the tactical grip ring. (as both are the same I’ve only shown the Predator X)
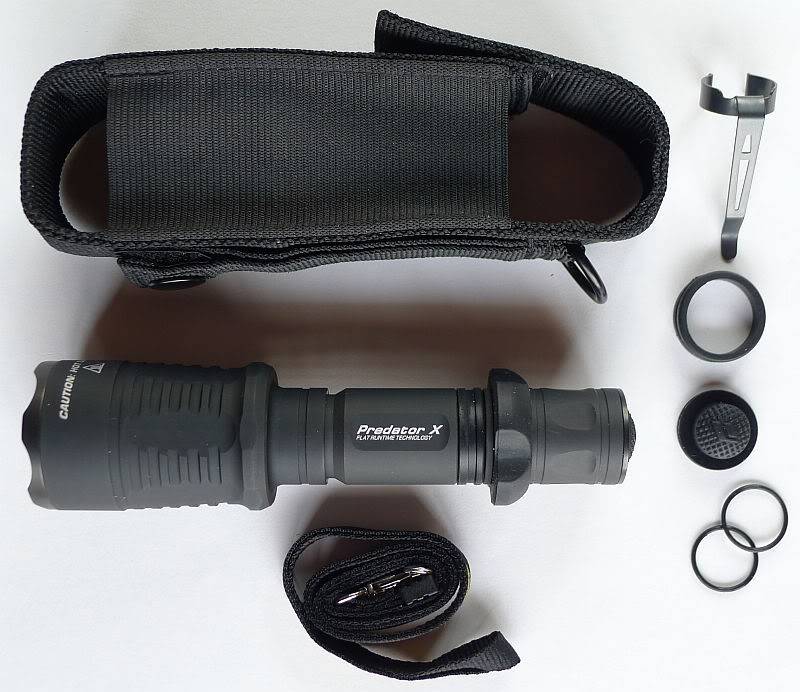
This is the Predator X with XM-L U2.

Taking a closer look and looking inside:

When taking a closer look, most aspects of the body design are identical, so will only be shown once. The LEDs and reflectors will be shown for the G2 and X models

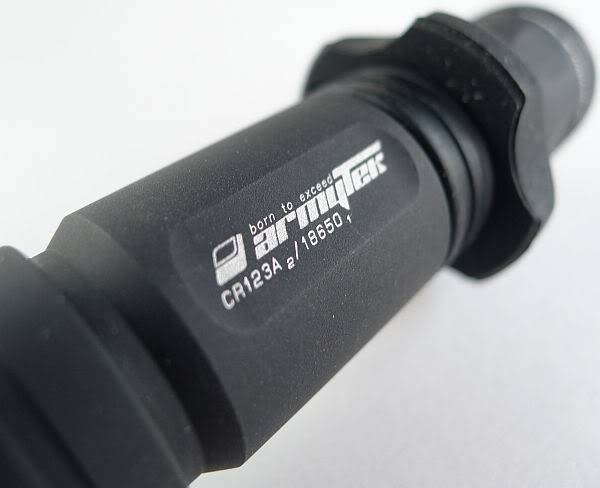
The side of the battery tube has two flat areas with the logo and model.
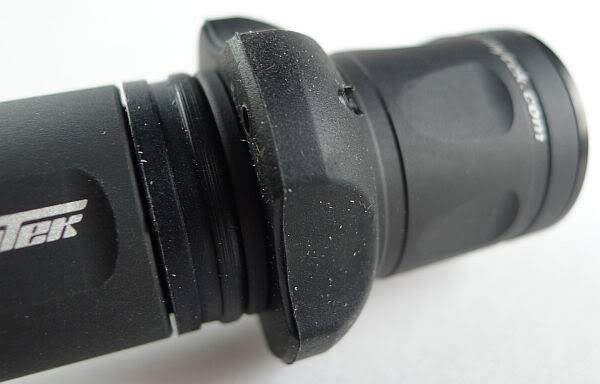
The Predator V2.0 now has a removable silicon rubber tactical grip ring which has a hole for fixing a lanyard through.
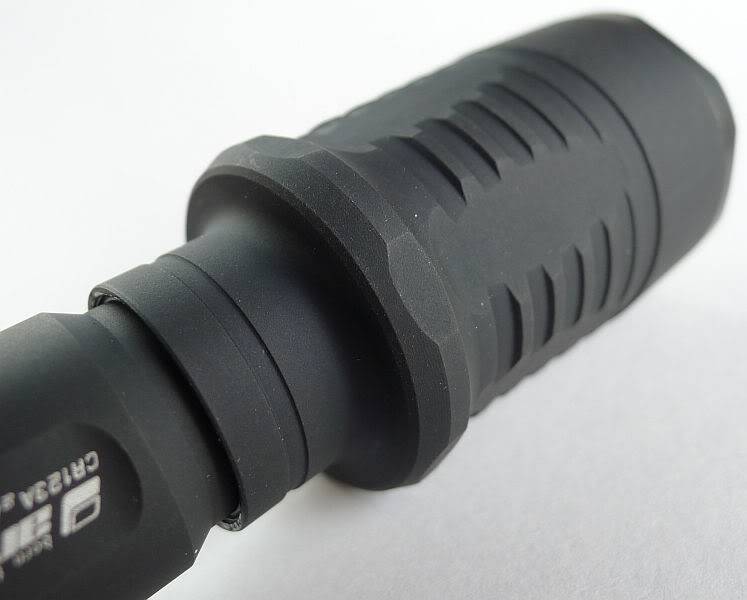
The head of the light has anti-roll flats (which combined with the grip ring keep it stable on a flat surface).
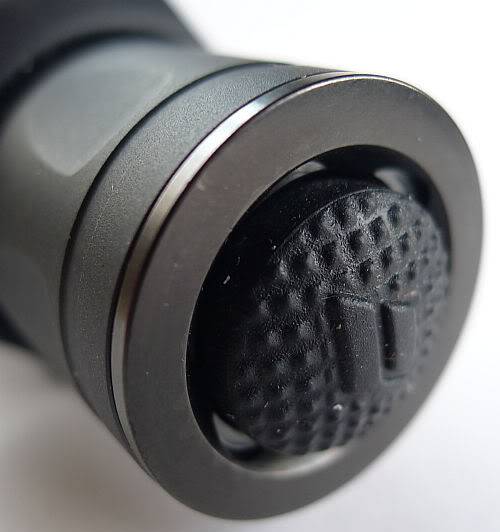
Another change from the earlier version is the tail-cap switch, which no longer sports crenulations, making the button easier to press and reducing the length of the tail-cap. The switch boot retaining ring looks like it will be a bit more challenging to remove though, now that it is smooth.
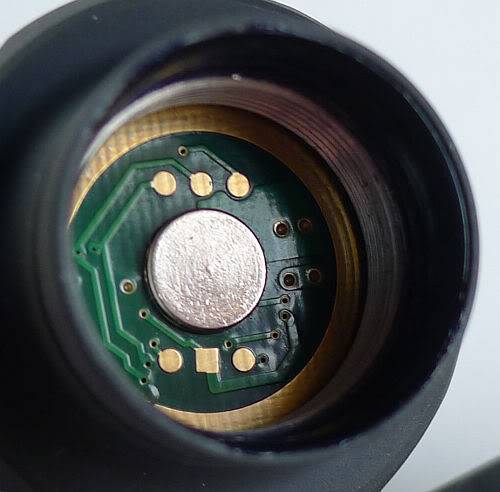
The positive contact is a raised metal pad. The battery tube ring-shaped contact is slightly raised, but has texture that makes it look like a raised part of the PCB rather than a metal contact ring, so this may not be as robust as the positive contact.
At the head end of the battery tube, the threads are bare. Two o-rings are used to seal the battery tube.
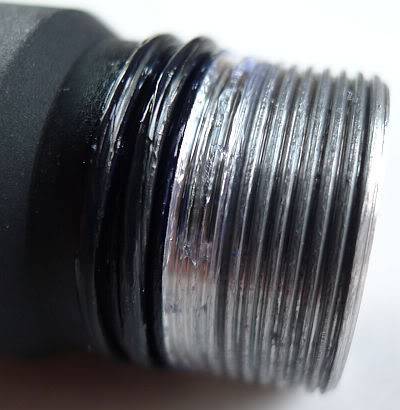
The threads are standard and cleanly cut. As supplied they are well lubricated.
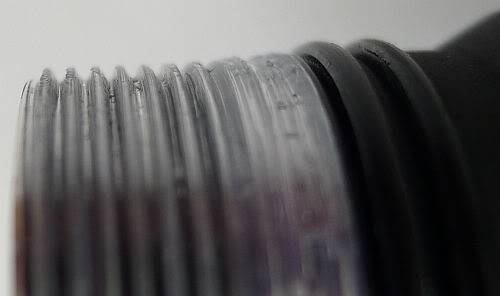
At the tail-cap end there are also two o-rings and the threads are anodised. Again as supplied they are well lubricated.
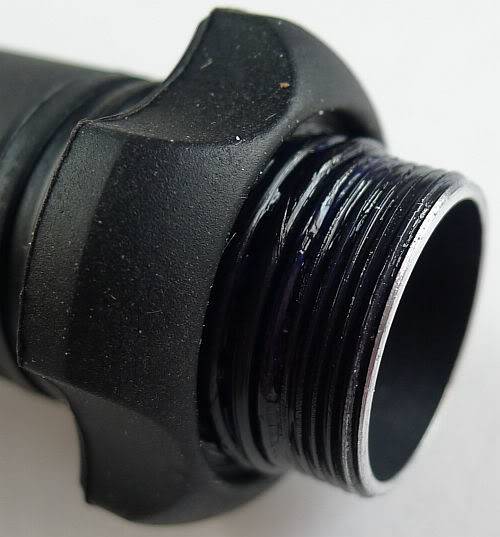
The negative terminal in the tailcap is a strong spring with a metal cap to increase surface contact area and stabilise the end of the spring.
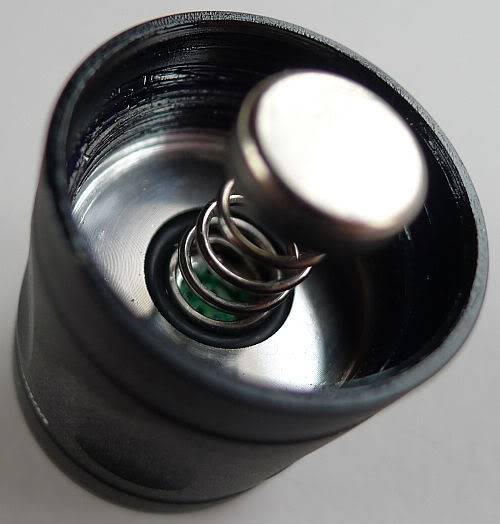
First LED is the Predator X’s XM-L U2.
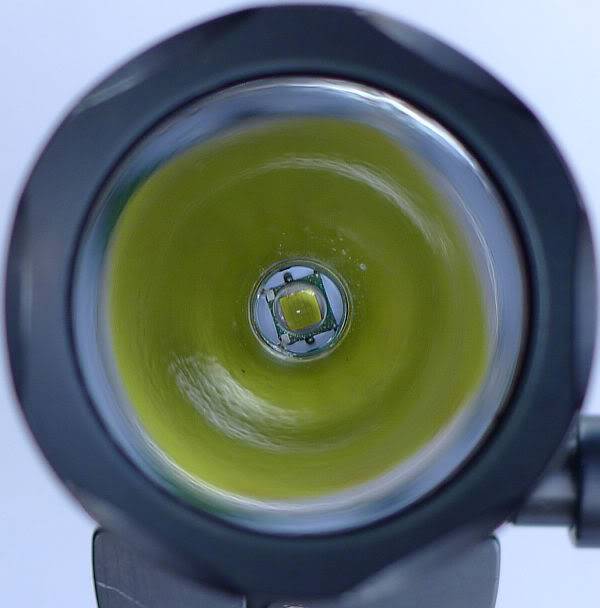
A closer look.
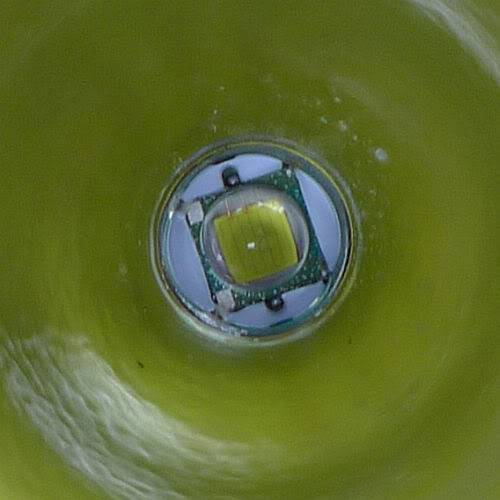
Looking into the deep well finished reflector of the Predator G2 for a first look at the XP-G2 LED
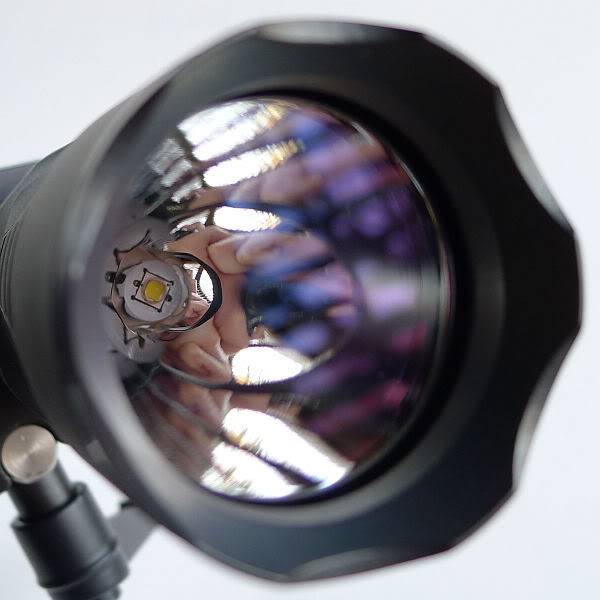
And straight into the reflector
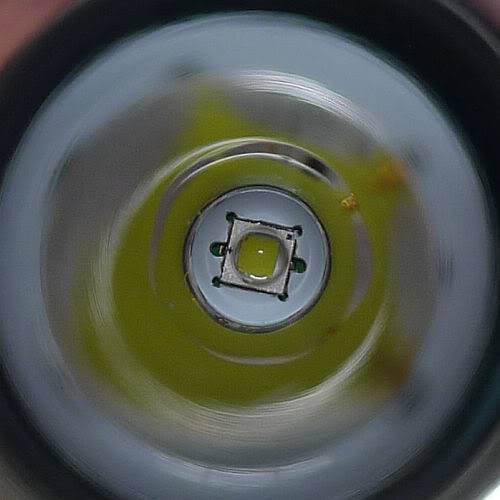
Looking a little closer the G2’s surface is more even than the XP-G with a lack of visible conductor strips.
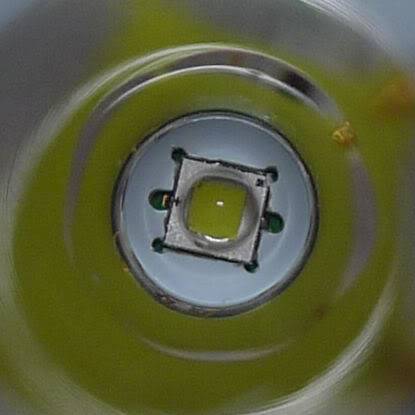
Modes and User Interface:

The Predator’s user interface has two inputs. The first is the forward-clicky tail switch, and the second is the head being tightened or loosened.

With the head tightened you are using what ArmyTek refer to as Line 1 modes.

With the head loose, you are using the Line2 modes.

Each ‘Line’ can have multiple output modes. By default Line 1 has three constant output levels (equivalent to say Max, Medium and Low), and Line 2 has one flashing and one constant (strobe and brighter of three ‘firefly’ modes).

To change mode within the ‘Line’ you are using, either loosen then tighten (or tighten then loosen if using Line 2) quickly to move to the next output mode in that ‘Line’.

As supplied, you can just start to use the Predator like this, and you don’t HAVE to do any programming to customise it……..but you can, so why not.

This is where the Predator really is outstanding. No other light I know of gives the user so much control. It can be quite daunting at first when you take a look at the instructions:

(click to open the full size version of each page)

You are able to set the:

Number of output levels for each ‘Line’
What each and every output level (constant and firefly, strobe, SOS or beacon) is within the ‘Line’ (Line 1 only uses constant and firefly outputs)
Line memorisation on or off
The output stabilisation for each ‘Line’ (Full, Semi or Step)
The power source type (2xCR123 or 2xRCR123 or 1x 18650 Li-ion or 1×18650 LiFePO4)
Reset to factory defaults or use custom presets.

Also included is a battery voltage check feature which will indicate the battery voltage with a set of flashes.

Now that is outstanding!

Initially I found consulting the full double sided A3 sheet of instructions a bit overwhelming when trying to make a few changes, so I put together a single side of A4 as a set of condensed programming notes:

(click to open the full size version)
This summarises the three main tasks:

Setting up the Line 1 modes output levels.
Using the main Setup menu to configure the majority of options.
Displaying the battery voltage

You will still need to consult the ArmyTek instructions for the detail and planning what you want to set up, but hopefully this condensed guide will help you actually carry out the programming.

So with all of this choice, the biggest problem is deciding how you want to customise it.

Batteries and output:

The Predator can run on2xCR123 or 2xRCR123 or 1x 18650 Li-ion or 1×18650 LiFePO4.

Although you can get away without bothering to change the power source in the menu, doing so optimises the Predator to work with the chosen power source (effectively changing the lower cut off voltage and therefore the low battery warning voltage). This allows you to safely use unprotected Li-ions as the Predator itself will prevent damage to the cell once the low voltage limit has been reached.

When set to 2xCR123 the Predator will run them down to 2V allowing you to get the most out of them.

Due to the terminal design, the Predator can use button or flat top cells. However I did come across one issue when trying to use AW’s 3100mAh cells.

AW’s 3100mAh cells have three raised dots on the negative terminal. When screwing the tail-cap on, the metal cap on the Predator’s negative terminal spring, catches on these dots and gets dragged sideways. As you can see here, the battery terminal has a groove scored into it when this happened.
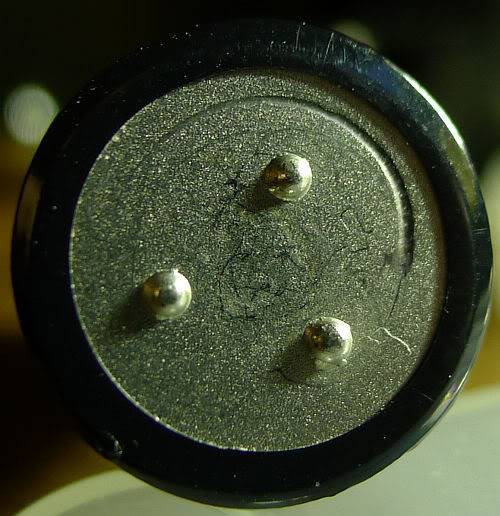
Inside the tail-cap there is similar damage where the negative terminal cap dug in. When this happened the tail-cap switch was bypassed and the light came on without the switch being pressed.
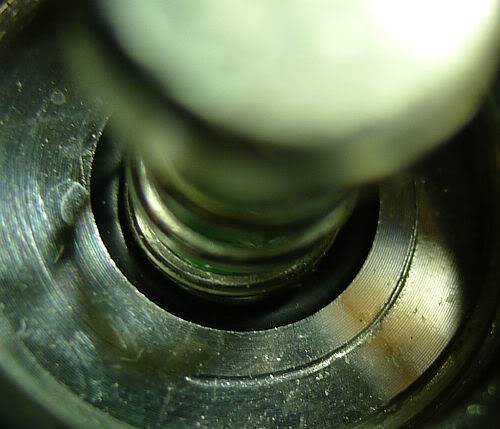
This only happened due to the raised dots. The AWs are the only cells I have with this design feature, but unfortunately it means you cannot use them with the Predator.

Due to this, all testing was carried out with Fenix ARB-L2 18650 cells and CR123 primary cells.

To measure actual output, I built an integrating sphere. See here for more detail. The sensor registers visible light only (so Infra-Red and Ultra-Violet will not be measured).

Please note, all quoted lumen figures are from a DIY integrating sphere, and according to ANSI standards. Although every effort is made to give as accurate a result as possible, they should be taken as an estimate only. The results can be used to compare outputs in this review and others I have published.

Predator G2 using ARB-L2 I.S. measured ANSI output Lumens PWM frequency (Hz)
Military (default) High 497 0
Military (default) Medium 84 0
Military (default) Low 5 0

(High on CR123 was 487lm)

All output modes are free of any sign of PWM.

Predator X using ARB-L2 I.S. measured ANSI output Lumens PWM frequency (Hz)
Military (default) High 593 0
Military (default) Medium 84 0
Military (default) Low 3 0

(High on CR123 was 586lm)

As mentioned previously the Predator uses three different types of output stabilisation (see the instructions for more details), including FULL stabilisation which maintains the specified output level without dropping at all until the battery can no longer maintain that output.

The default configuration is for the Line 1 modes to be run as FULL stabilisation, so this is how I tested the maximum output runtime test.

First up is the G2. At the end of the runtime, the trace becomes noisy – at this point the Predator started to flash to indicate the battery was low. The low battery flash continued for over half an hour giving you light you could find your way about with. Switching off and on in Line 1 resulted in no output. Changing to Line 2 while off did allow further use on firefly modes.
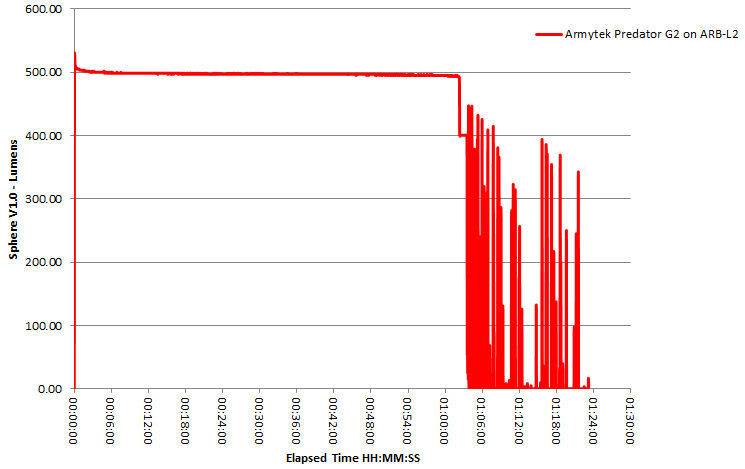
Next is the Predator X. Again at the end of the runtime, the trace becomes noisy – at this point the Predator started to flash to indicate the battery was low. The low battery flash continued for over half an hour giving you light you could find your way about with. Switching off and on in Line 1 resulted in no output. Changing to Line 2 while off did allow further use on firefly modes.
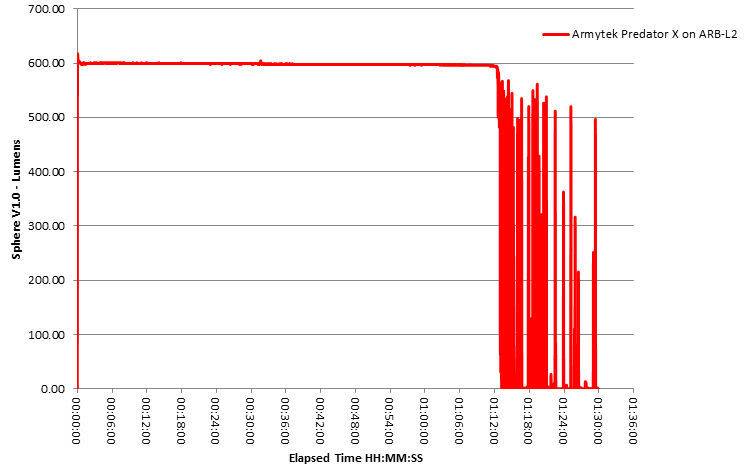
Another aspect of the Predator’s output that must not be looked over are the excellent ‘firefly’ modes. At a specified 0.1lm, 0.5lm and 1.5lm these are too low for my integrating sphere to measure. Bearing in mind that ArmyTek have specified their outputs as at the LED, the real output of these firefly modes is probably even less.

On the lowest mode, looking straight into the G2 shows the emitter’s surface structure.
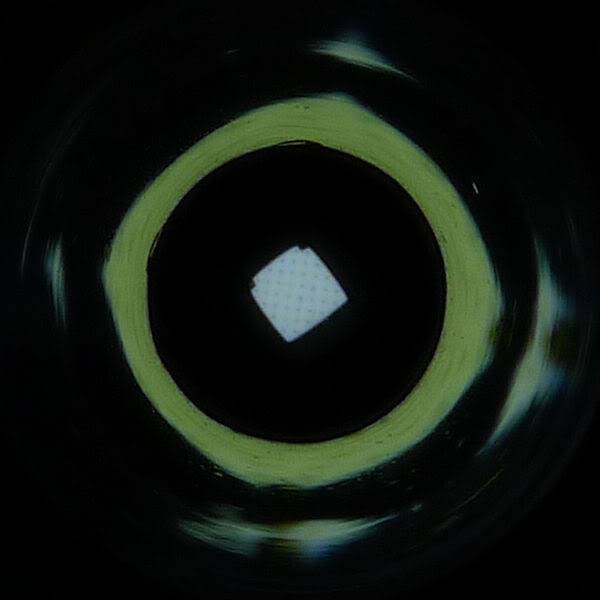
The Predator X goes even lower
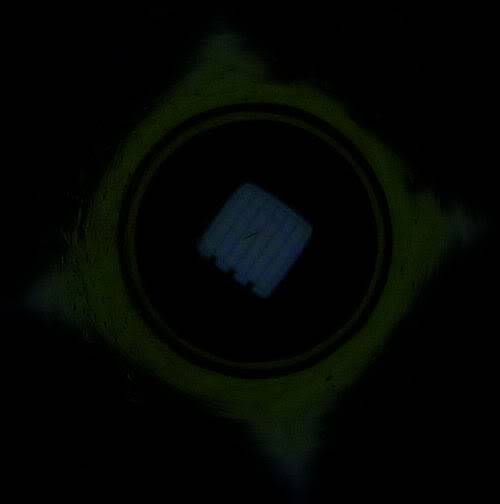
As I can’t measure these low outputs, here are the two Predators next to two other well known low output lights.

Far left is the Quark AA on moon mode, then the Predator G2, Predator X and the Photon Freedom Micro all on their lowest modes.
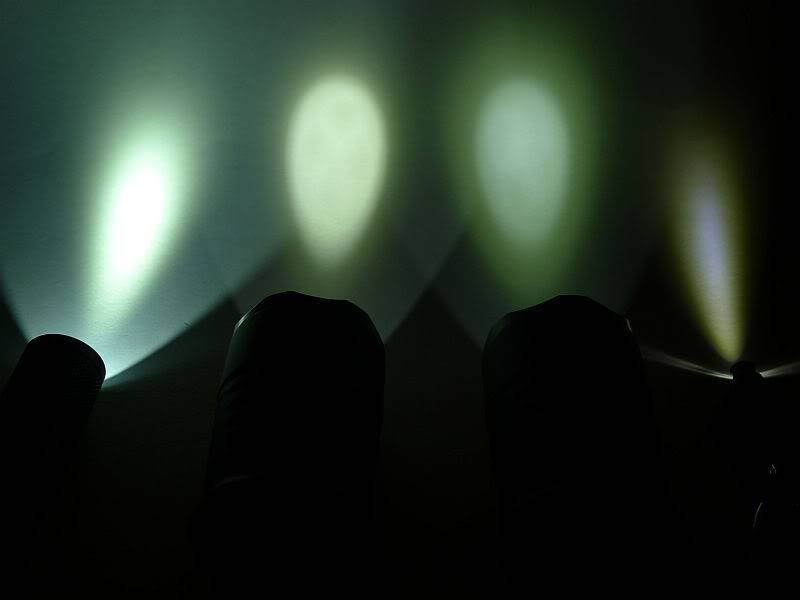
Interestingly the Predator X’s lowest output appears to be about half that of the G2 version. Both are significantly lower than the Quark Moon mode and the Predator X is not far off the Photon Freedom Micro which is one of the lowest outputs out there (but the Photon achieves this with a terrible PWM whereas the Predator’s output has no PWM).

In The Lab

NEW for Winter 2012 ANSI standards include maximum beam range. This is the distance at which the intensity of light from an emitter falls to 0.25lux (roughly the same as the lux from a full moon). This standard refers only to the peak beam range (a one dimensional quantity), so I am expanding on this and applying the same methodology across the entire width of the beam. From this data it is possible to plot a two-dimensional ‘beam range profile’ diagram which represents the shape of the illuminated area.

In order to accurately capture this information a test rig was constructed which allows a lux meter to be positioned 1m from the lens and a series of readings to be taken at various angles out from the centre line of the beam. As the rig defines a quadrant of a circle with a radius of 1m, all the readings are taken 1m from the lens, so measuring the true spherical light intensity. The rig was designed to minimise its influence on the readings with baffles added to shield the lux meter from possible reflections off the support members.

The distance of 1m was chosen as at this distance 1lux = 1 candela and the maximum beam range is then calculated as the SQRT(Candela/0.25) for each angle of emission.

In this plot, the calculated ANSI beam ranges are plotted as if viewed from above (for some lights there may also be a side view produced) using a CAD package to give the precise ‘shape’ of the beam.

Starting with the 5m range grid, the G2’s beam profile.
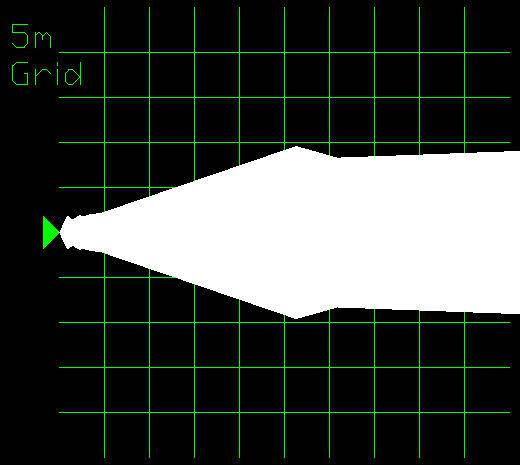
And the Predator X’s on the 5m range grid. Although the spill of the G2 is specified as 5º hotspot and 24º spill and the Predator X with 8º hotspot and 55º spill, although the Predator X does have a stronger spill, the difference is not as obvious as it is in the beamshots.
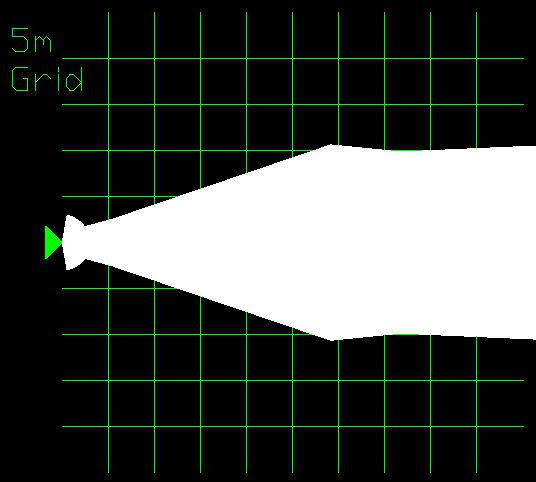
However zooming out to the 50m grid shows a bigger difference with the G2 being a strong thrower.
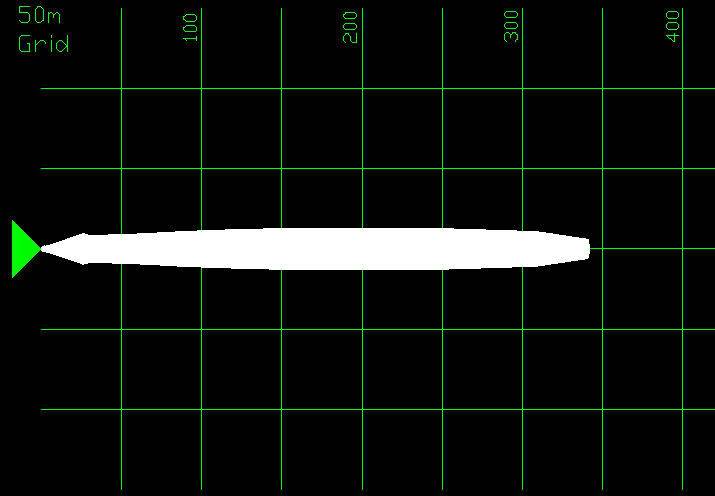
And the Predator X having a generally wider beam up to 150m (with the broader spill using up the extra output of the Predator X).
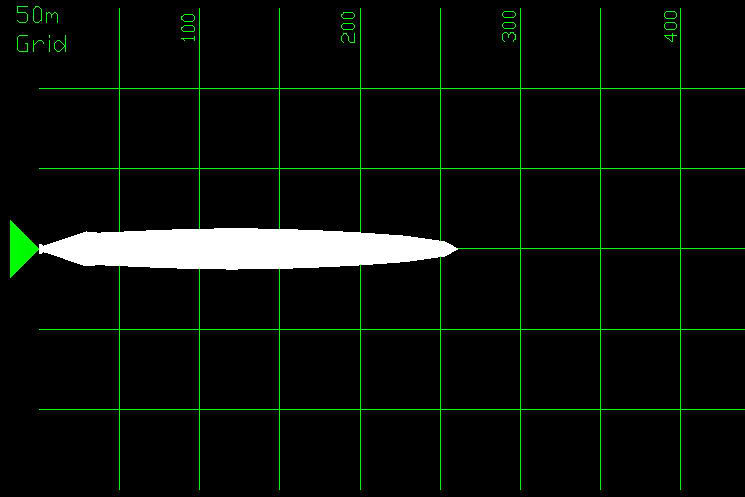
The beam

The G2 version’s beam is very smooth with a very even and round hotspot

Underexposing the beam shot shows the very bright and round small hotspot

The outdoor beam shot confirms how good the throw of the Predator G2 is.
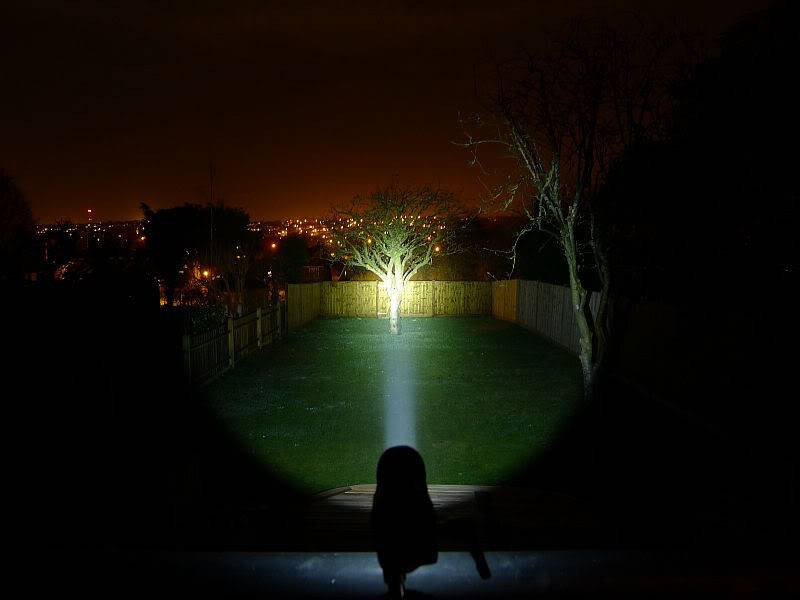
The Predator X’s beam has a much brighter spill and much wider hotspot.

The difference between the Predator X and G2 version being even more obvious outdoors (same exposure setting as the G2)

What it is really like to use…
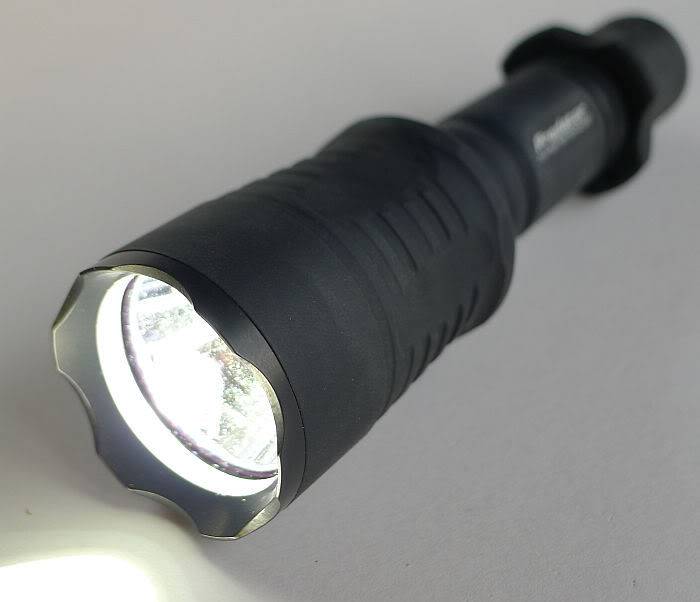
The older Predator V1.2’s tail switch was always a bit stiff to operate. It is nice to see that ArmyTek have addressed this with the new Predator V2.0 as the switch requires much less force to operate.

The holster supplied is designed for bezel down carry, and is a ‘gentle fit’ as the elasticated side panels hold the Predator gently while allowing very easy insertion and removal.

You can use it straight out of the box, but knowing what the Predator is capable of I programmed the G2 version with:

Line 1 – as default Military mode
Line 2 – 0.1lm, 0.5lm, 1.5lm, beacon, strobe (with auto memorisation)

And the Predator X as:

Line 1 – as default Military mode
Line 2 – 0.1lm, 0.5lm, 1.5lm
(in this configuration Line 2 (loose) will always give a firefly mode and Line 1 (tight) a brighter mode, so just make sure it is loose and it will be on a firefly output)

….these are my preferences, at least for now…

The Predator G2 is one of the best throwers I have used, not in absolute range, but in the fantastic beam quality and a very good range. At longer distances where the spill fades away, the Predator G2 projects a perfect disc of light, like a spotlight, allowing you to scan areas a long way away.

The Predator X provides a more even spread of light so has a smaller overall range but lights up a wider area. This is better for closer and indoor use than the G2.

Both beam profiles are excellent, and it is difficult to pick a favourite as the G2 has better throw, but the X has the lower firefly output and higher maximum output. I sense a CPF resolution to the problem of deciding – simply get both.

The new tactical grip ring feels really comfortable, much more so than metal grip rings, and with my XL hands (well that is my glove size) the Predator is a good fit in my hand. The softer touch tail switch with forward clicky action makes for easy, silent momentary use, and coupled with the ultra-low output levels is perfect for night time forays.

I’ve kept the default full stabilisation on Line 1 as the totally consistent output regardless of the state of the battery is excellent. The low battery warning means you are not plunged into darkness even when using full stabilisation, and as the two ‘Lines’ can be set with different stabilisation modes you could easily program the same output levels in each ‘Line’ but with different stabilisation – one for times when maximum performance is needed and one for when extended runtime is preferred.

For an idea of the size of the Predator V2.0 compared to other 1×18650/2xCR123 lights, here they are shown with (from the left to right) the FOURSEVENS Maelstrom X7, Fenix TK15 and Fenix TK22. It is the size of the excellent quality reflector that makes the Predator slightly longer and it is this reflector that gives the Predator such a great beam.
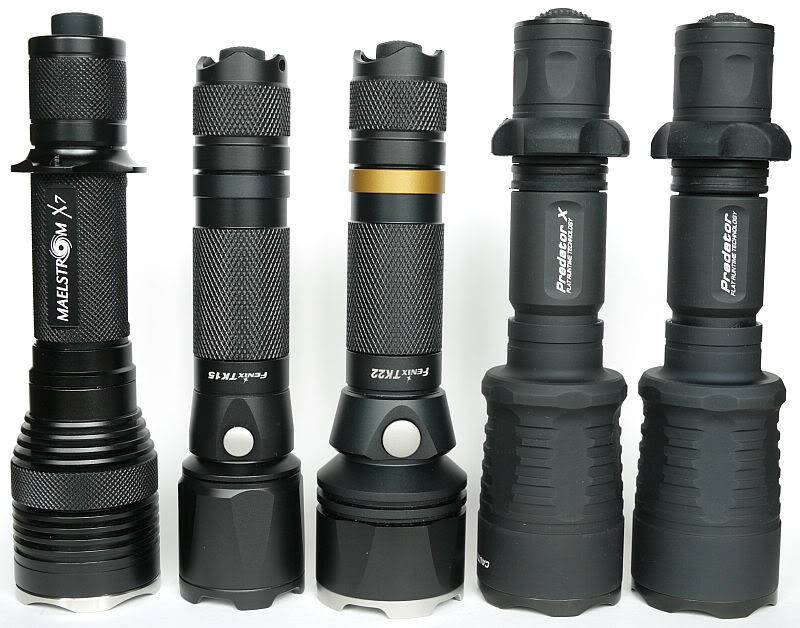
I still feel slightly restless about whether I have the Predator G2 and X set up just as I want them. With so many options it makes you wonder. But of course the joy is that you can change the configuration any time you like. The only slight issue being that you need to plan this as you really need the instructions in front of you for reference if you are going to make a change (it is not something I would do out in the field).

The build quality, beam quality and extensive features and customisation options really do make this an outstanding light, and genuinely one of my all-time favourites. The Predator is a light you’ll make up any excuse to use it ‘just for the sake of using it’, well I do.
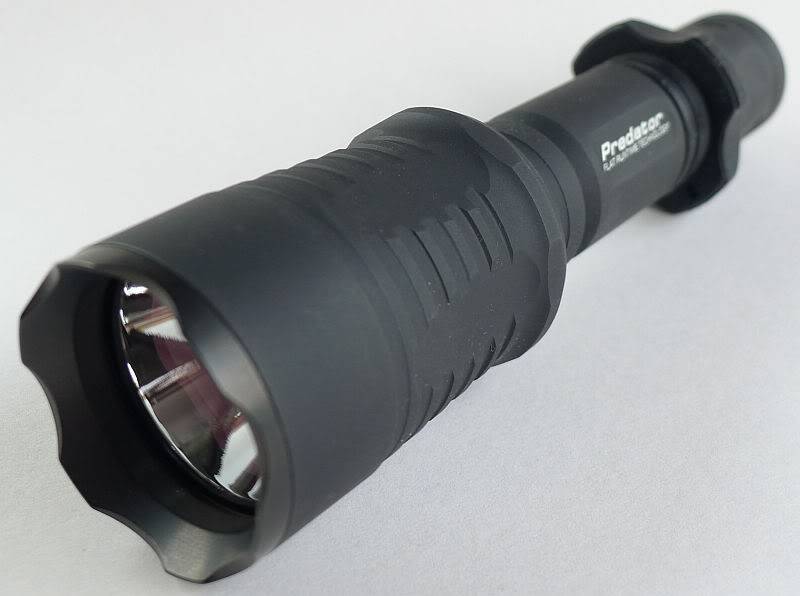
Test samples provided by ArmyTek for review.