Gear Review: EDS II Screwdriver and EDC Wrench from BIGiDESIGN

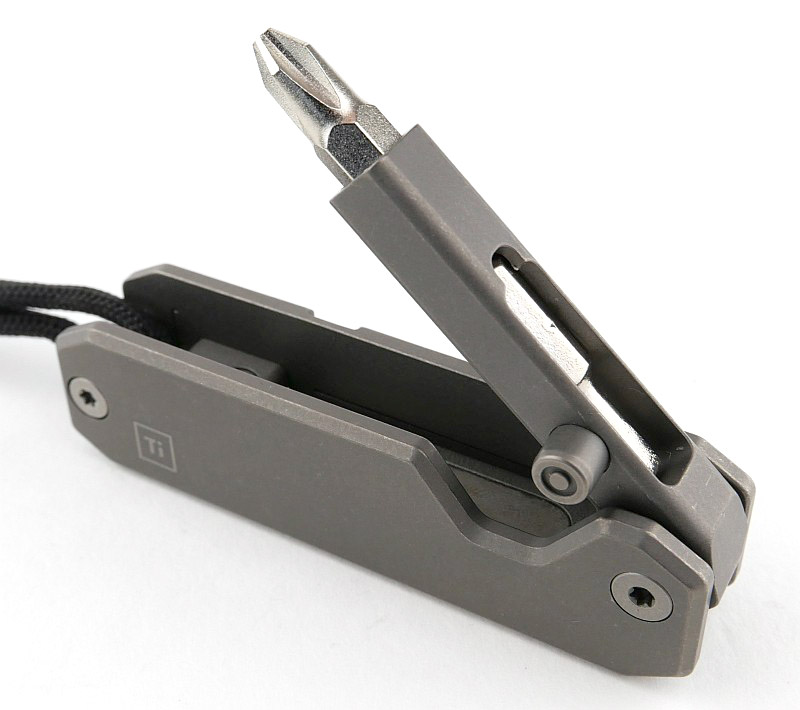
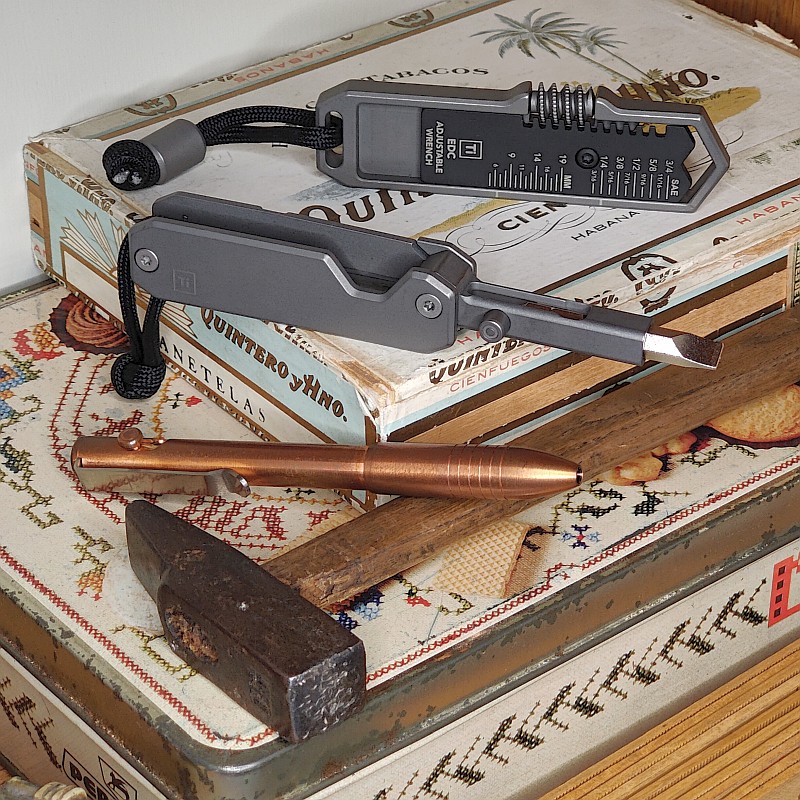
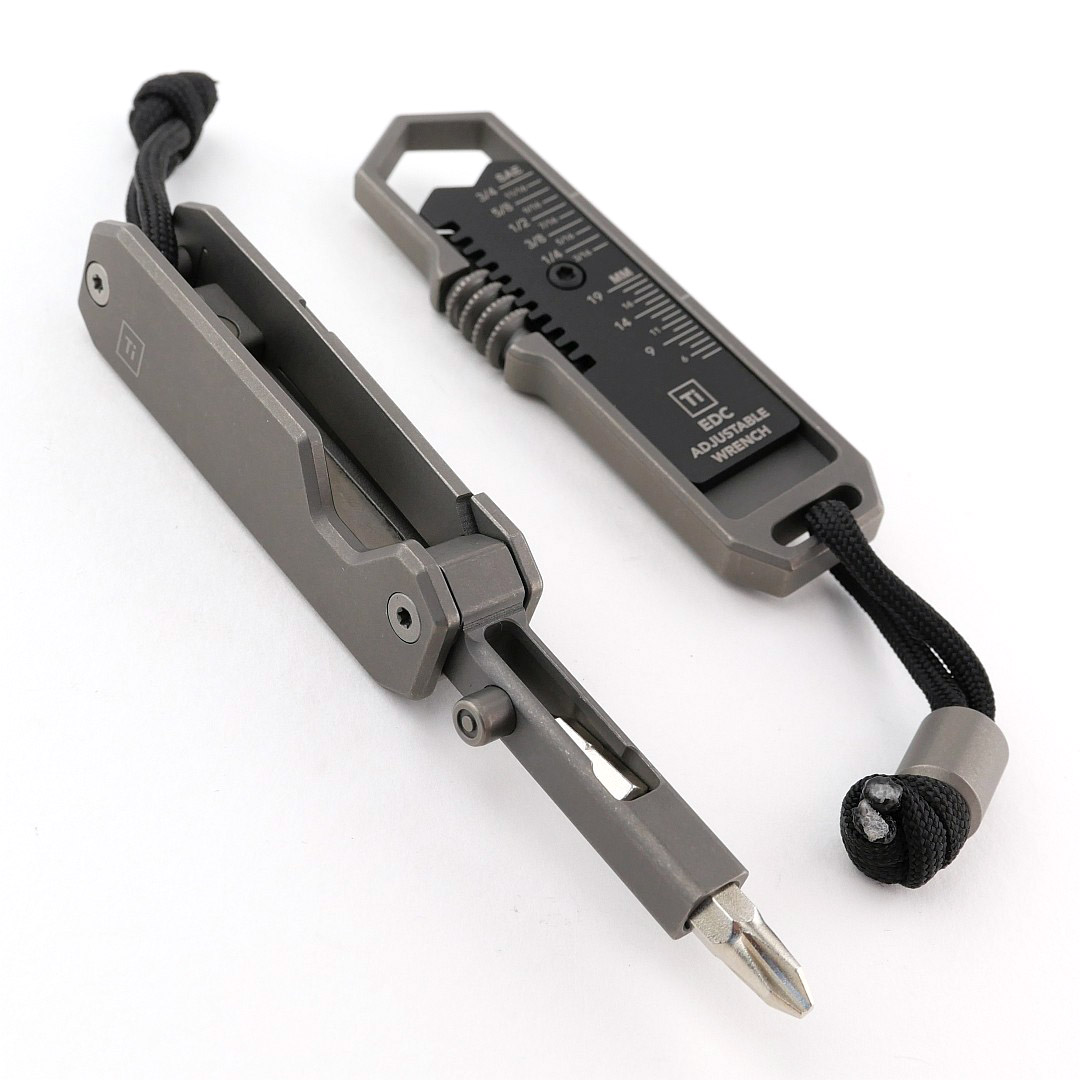
BIGiDESIGN is producing so many awesome EDC tools, and in this review we are taking a detailed look at the BIGiDESIGN EDS II, the second, updated version of their unique Everyday Screwdriver, along with the BIGiDESIGN EDC Wrench a reimagining of an antique Swedish adjustable wrench.

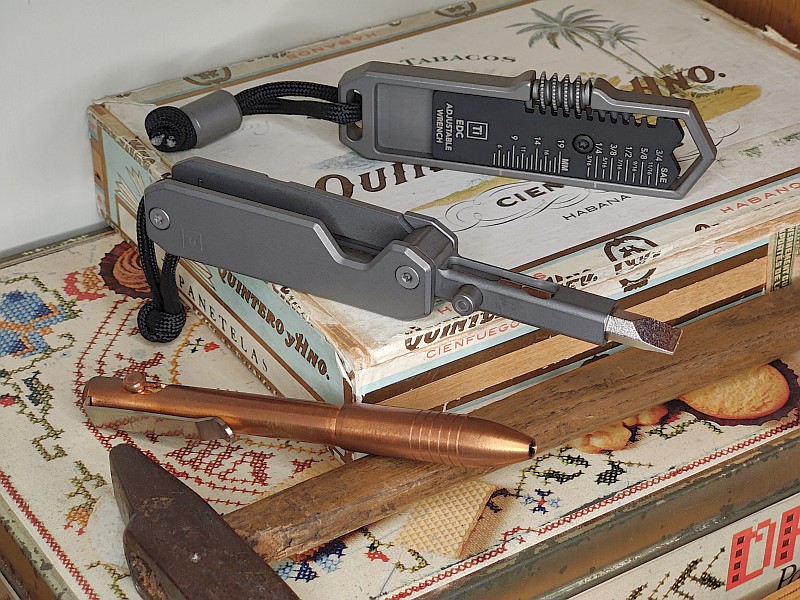
Their original EDS, Everyday Screwdriver, was probably the first BIGiDESIGN product that I saw, and since then I bought their bolt action pen, a design that ingeniously adjusts to take most ballpoint refills on the market. Now I’ve been able to partner up the Bolt Action pen with the EDS II and EDC wrench making for an incredible EDC setup.
Video Overview

In this video we take a good look at a couple of lovely EDC gear designs from BIGiDESIGN. The EDS II, the second, updated version of their unique Everyday Screwdriver, along with the EDC Wrench, a small unique pocket friendly adjustable wrench.


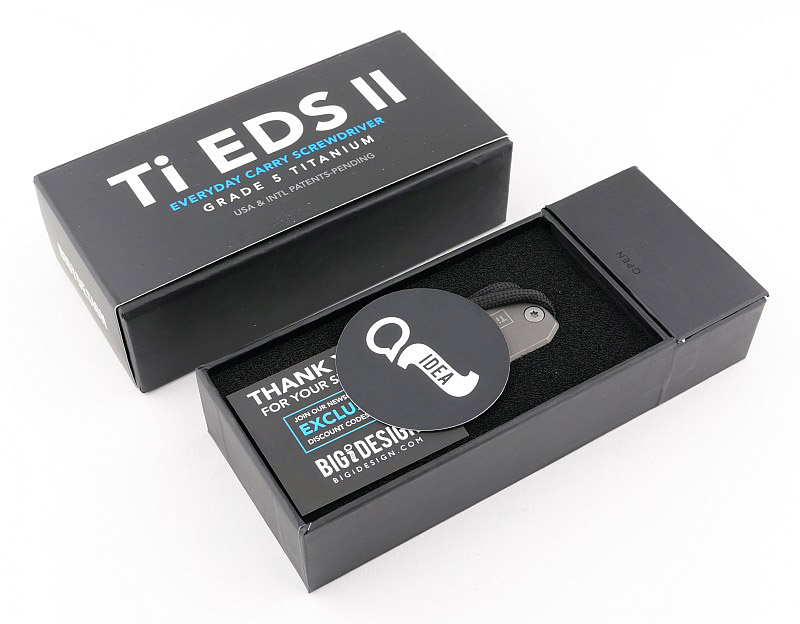
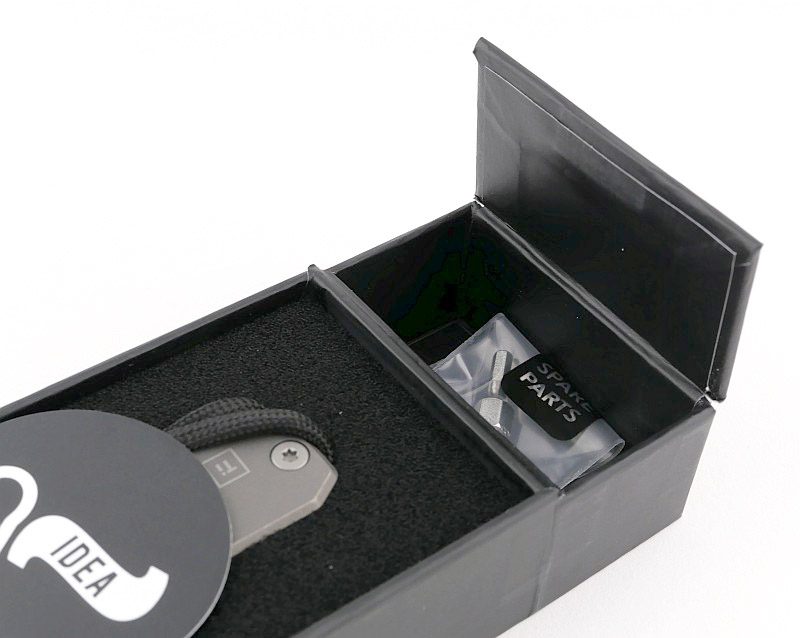
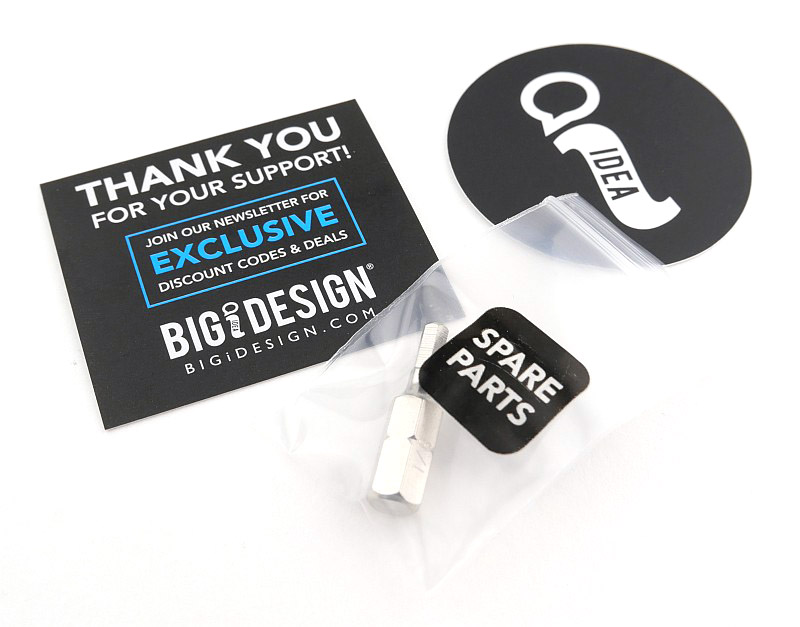
What’s in the box; Part 1 the EDS II?:
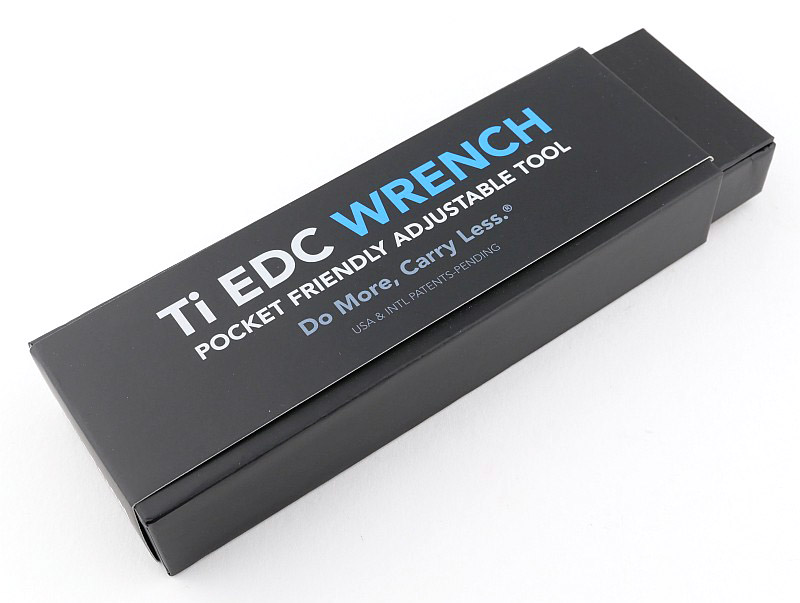
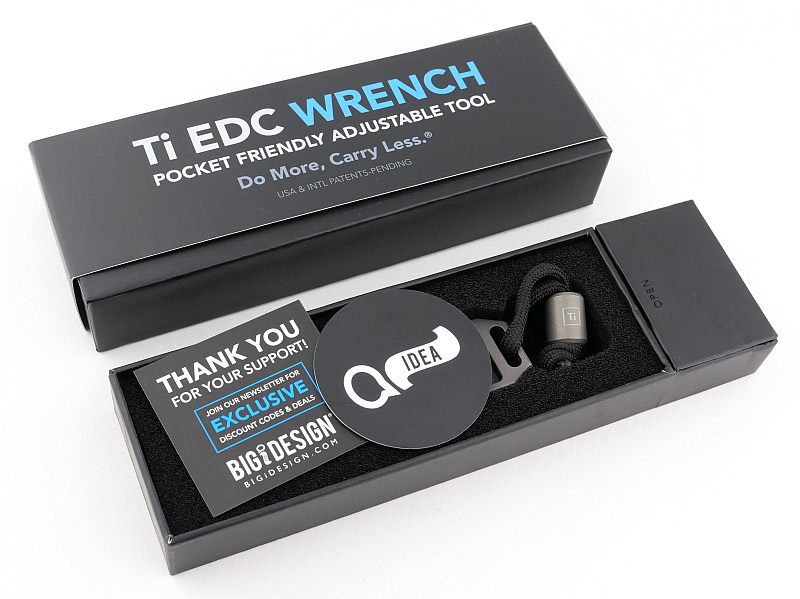
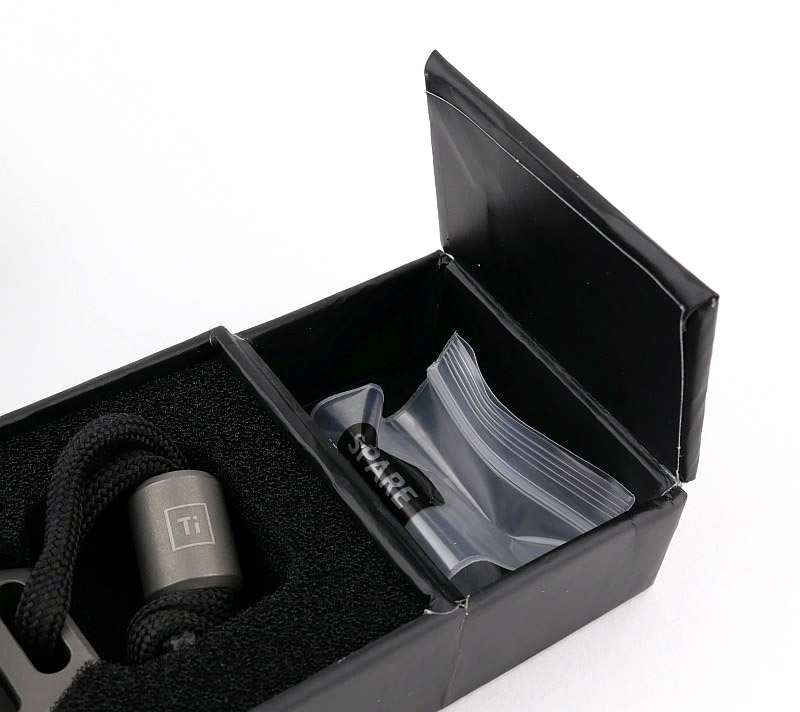
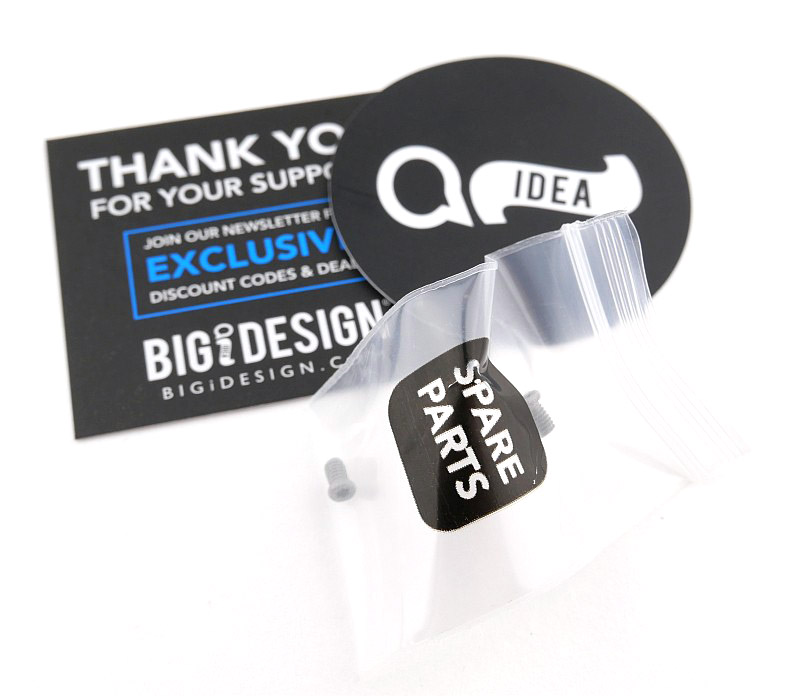
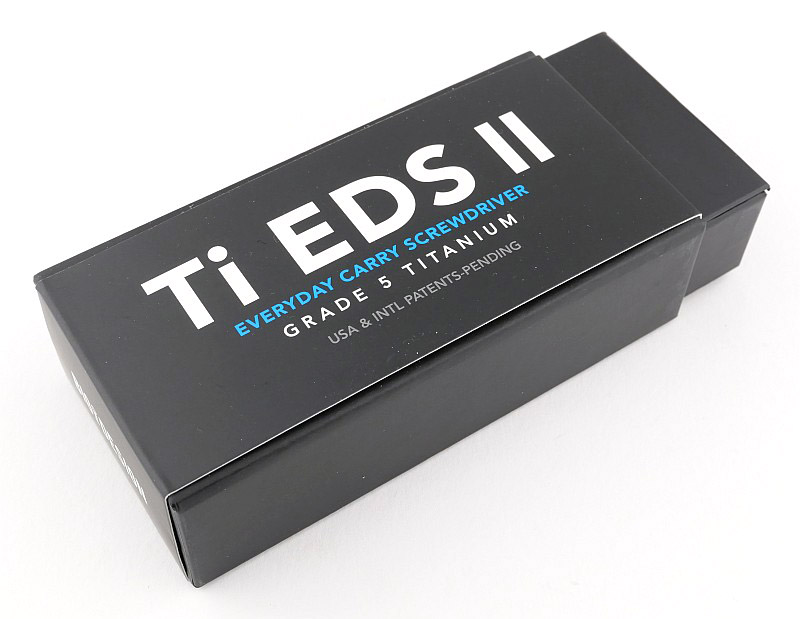
For the three BIGiDESIGN products I have, the packaging follows the same layout. A slide out tray which has a compartment at one end that contains spares.


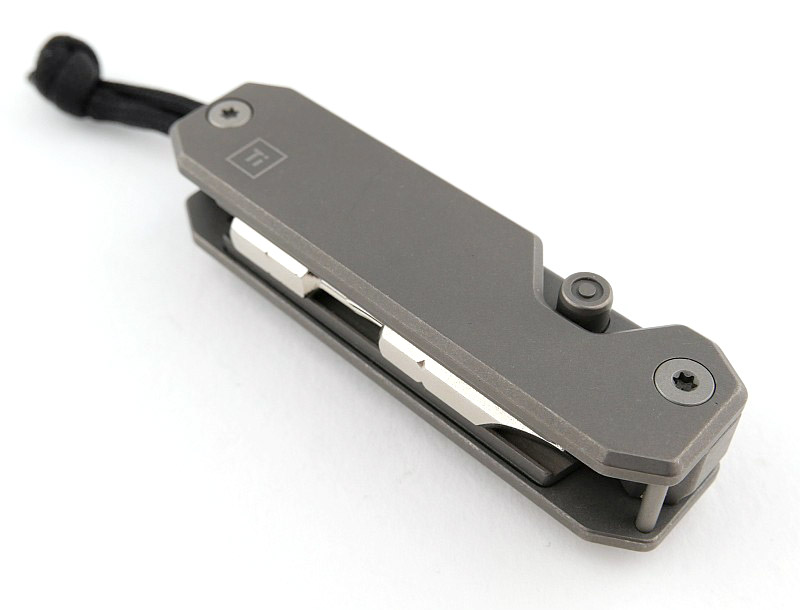
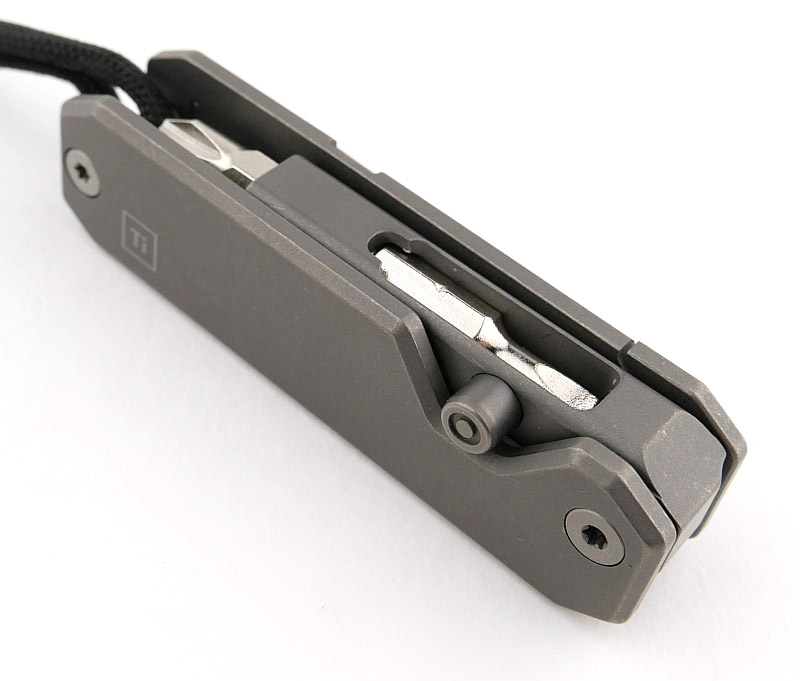
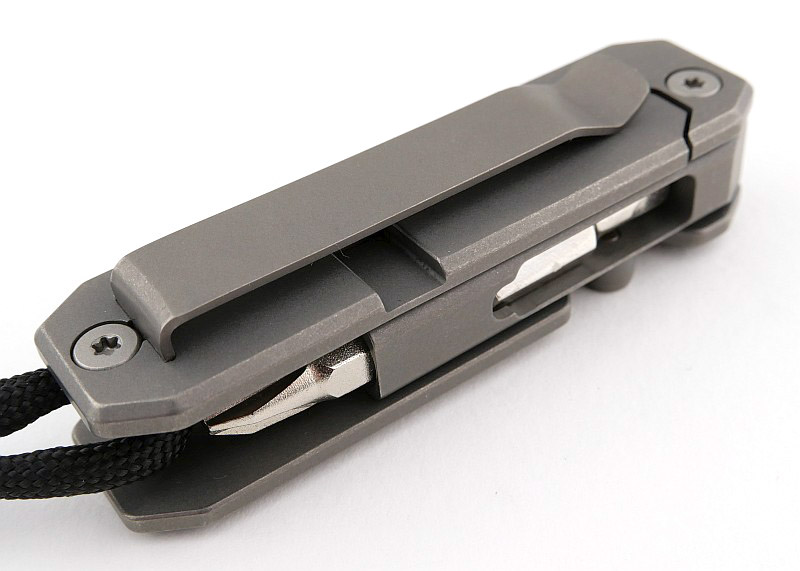
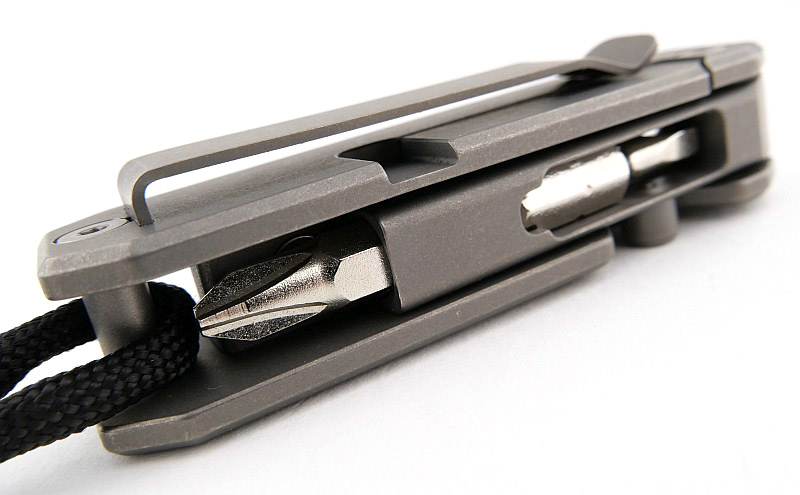
A good look round the EDS II – Things to look out for here are:
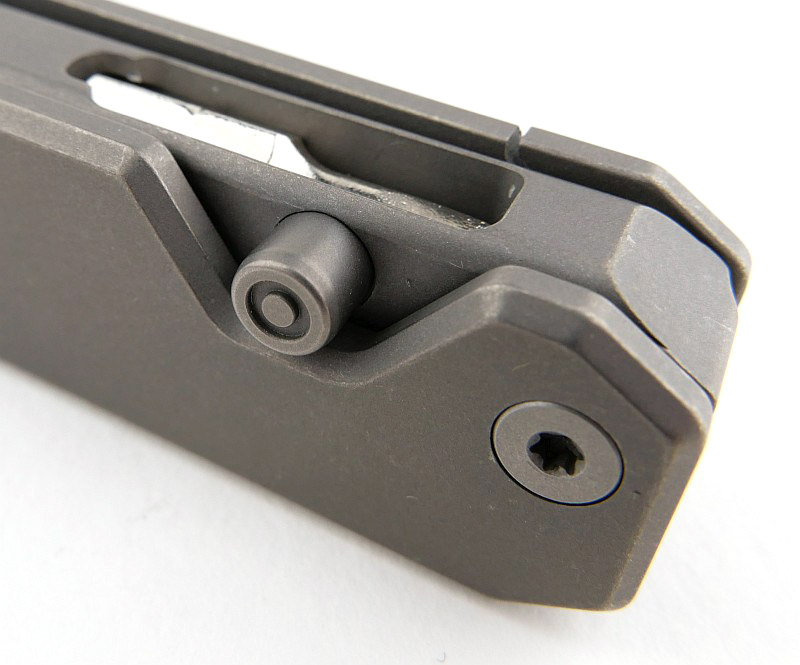
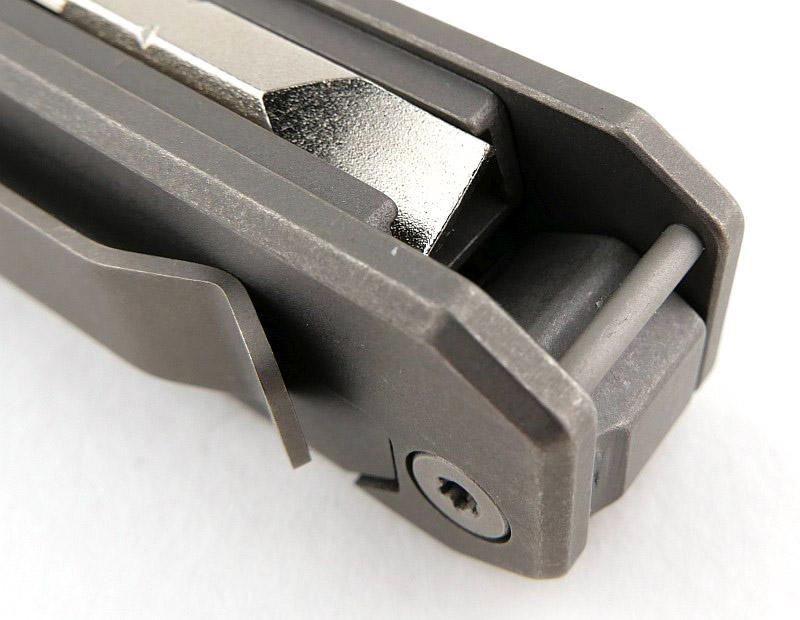
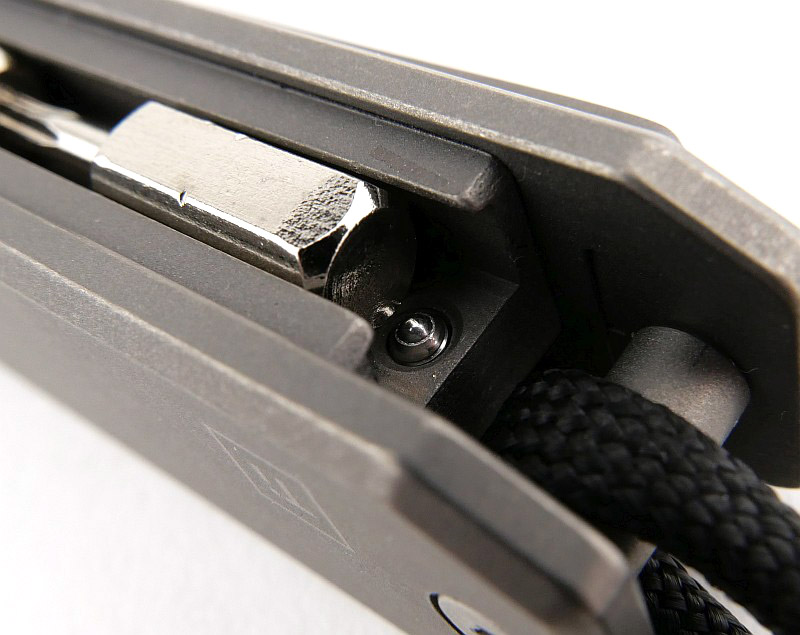
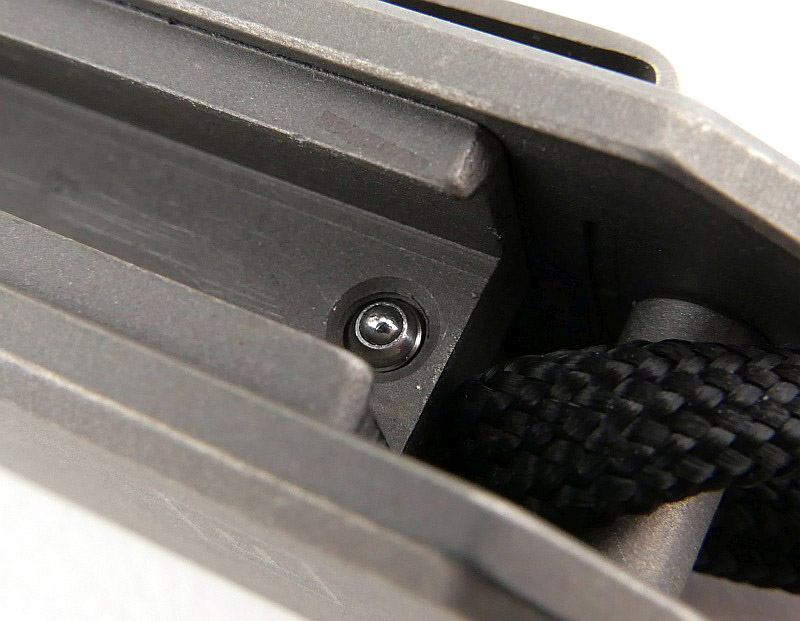
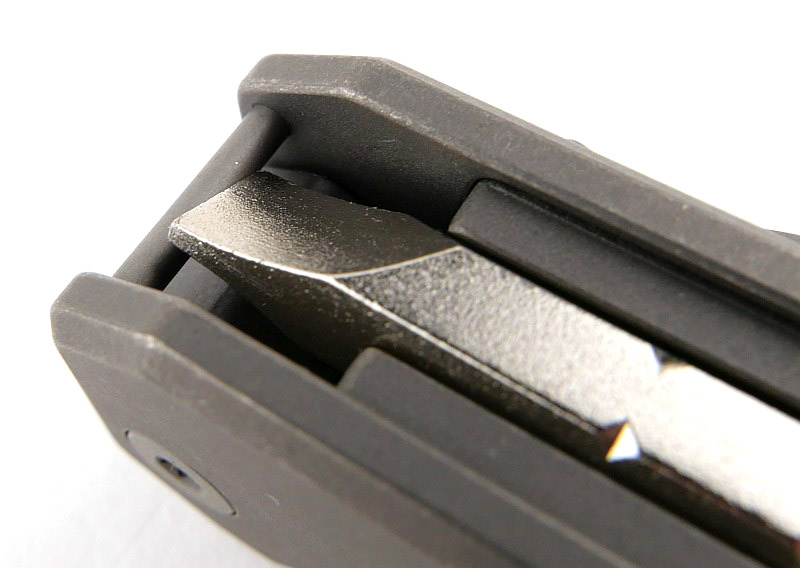
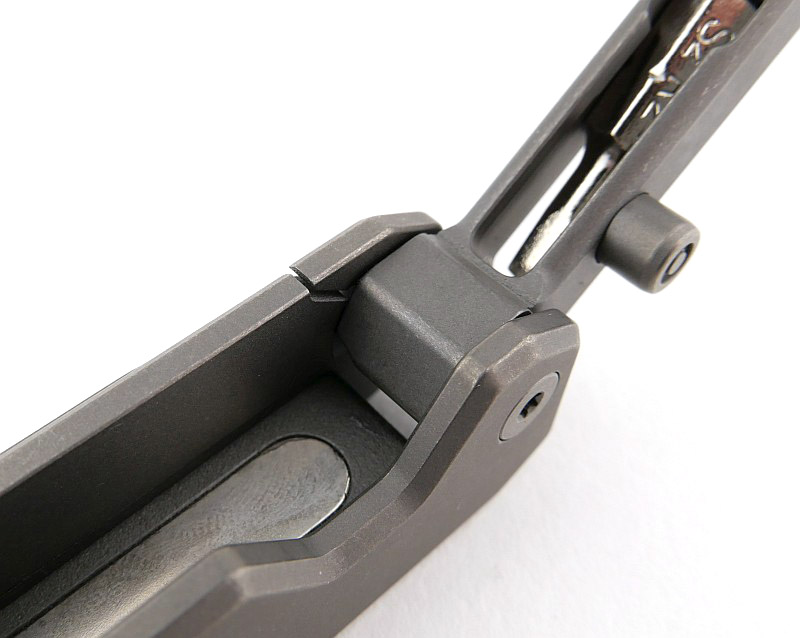
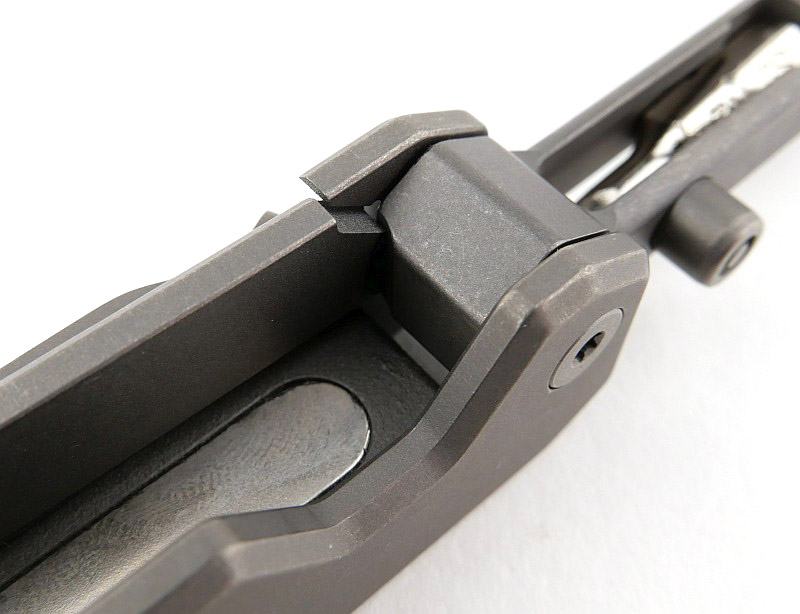
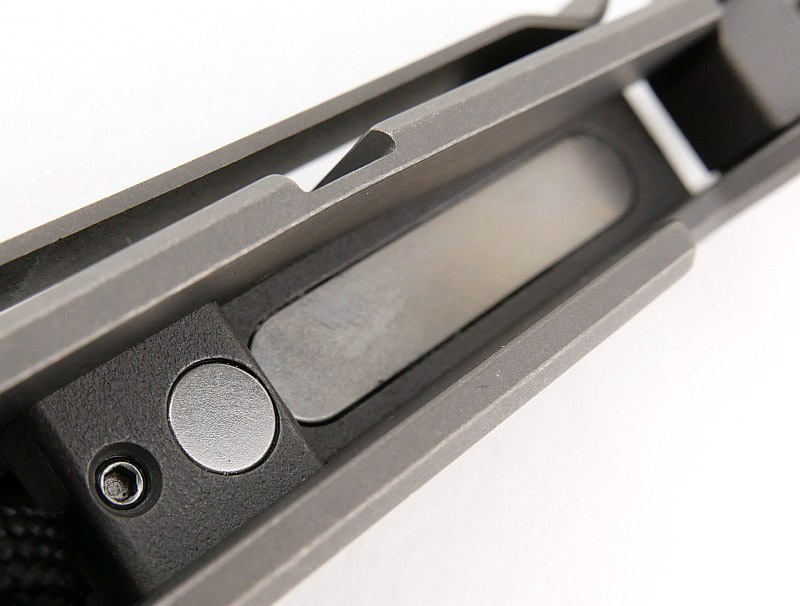
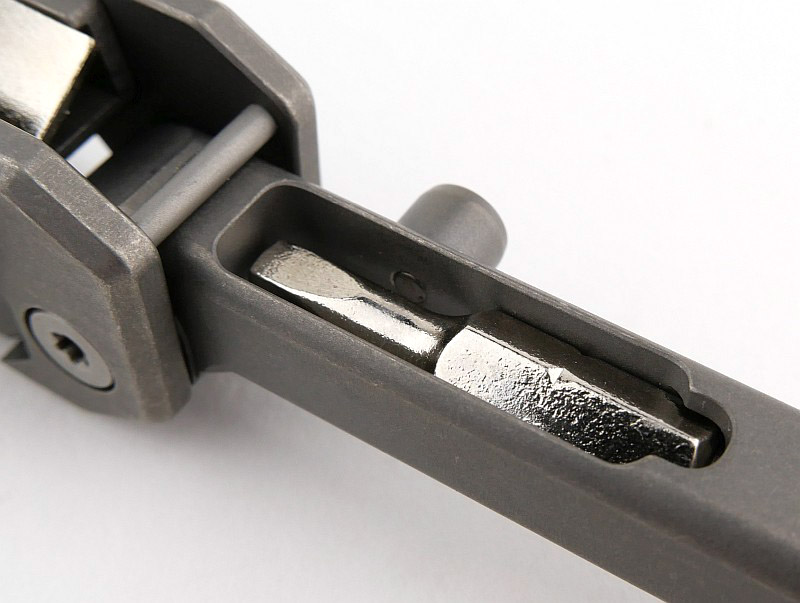
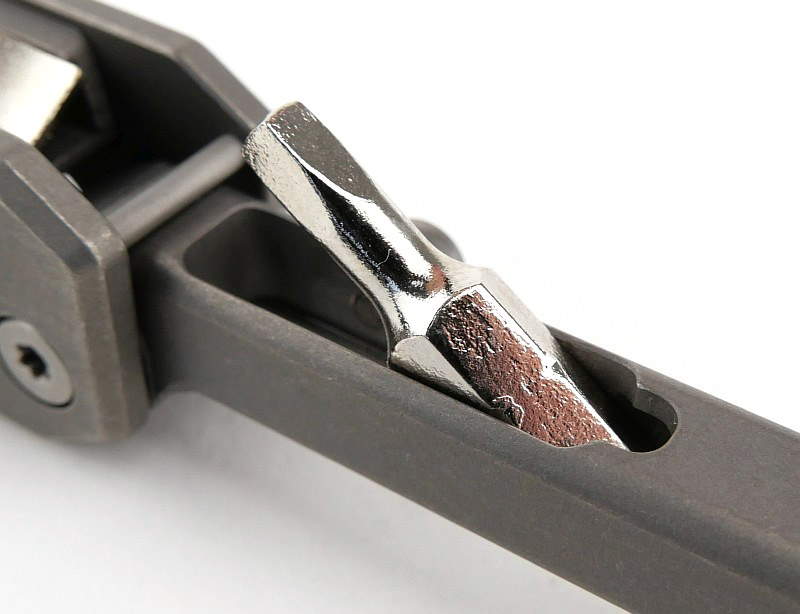
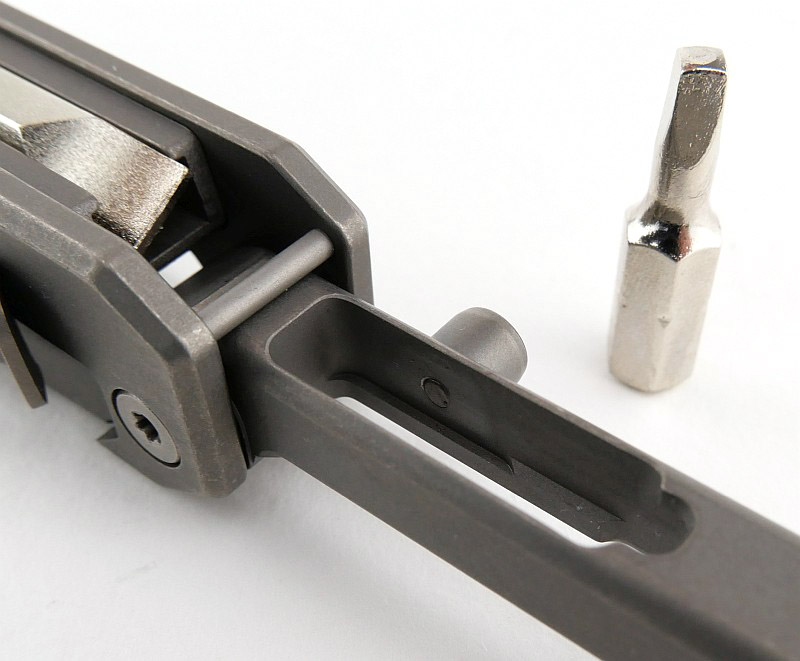
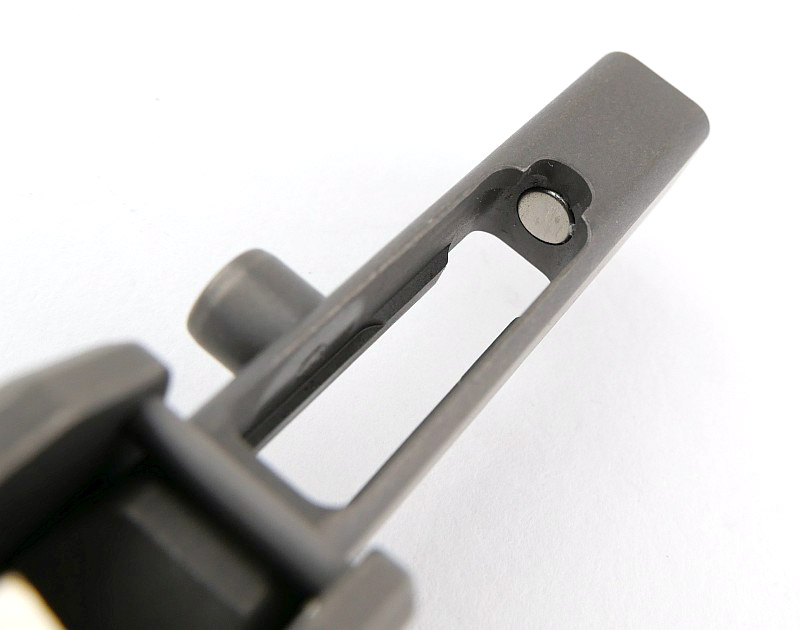
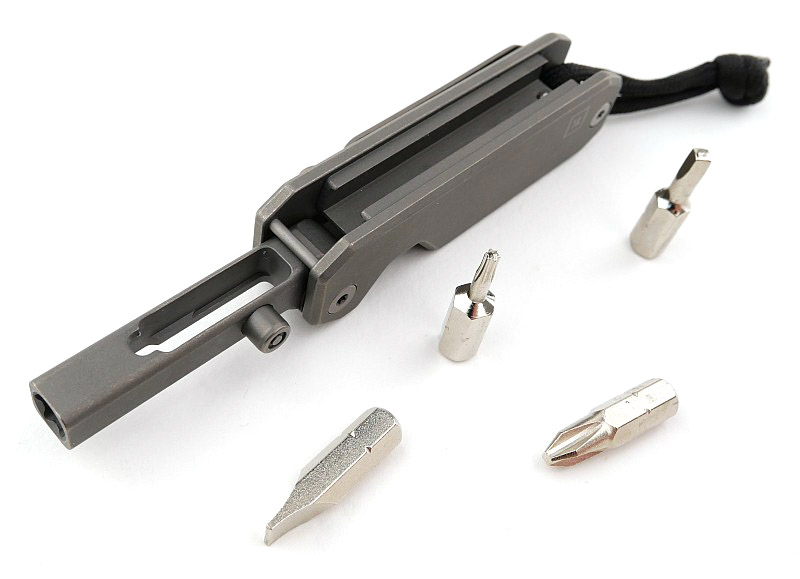
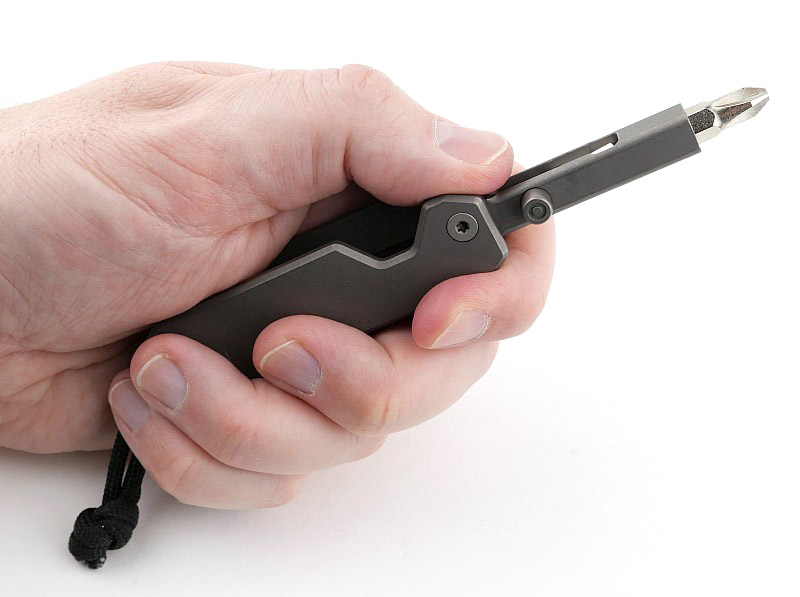
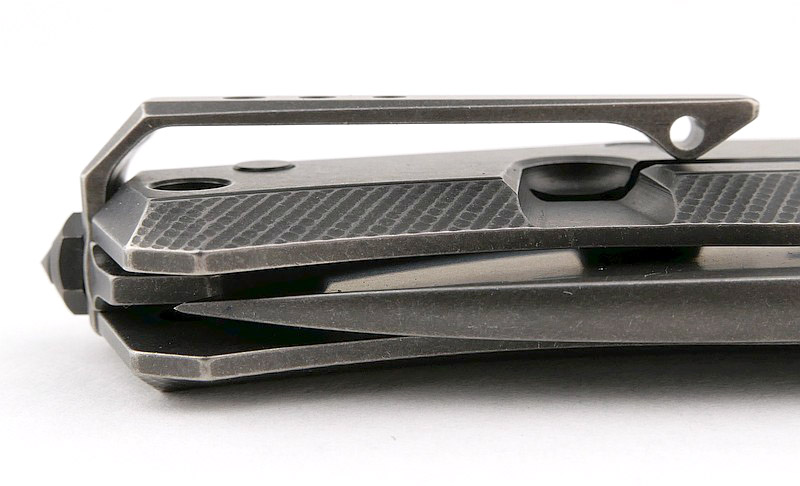
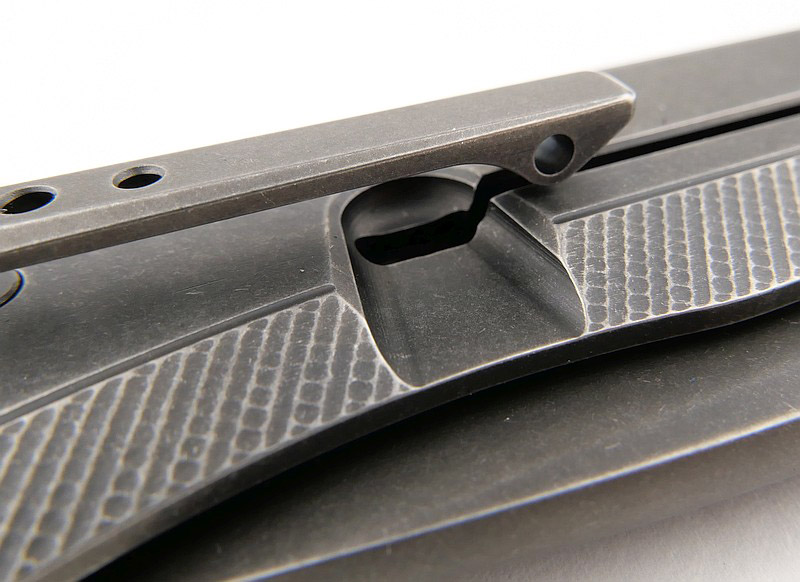
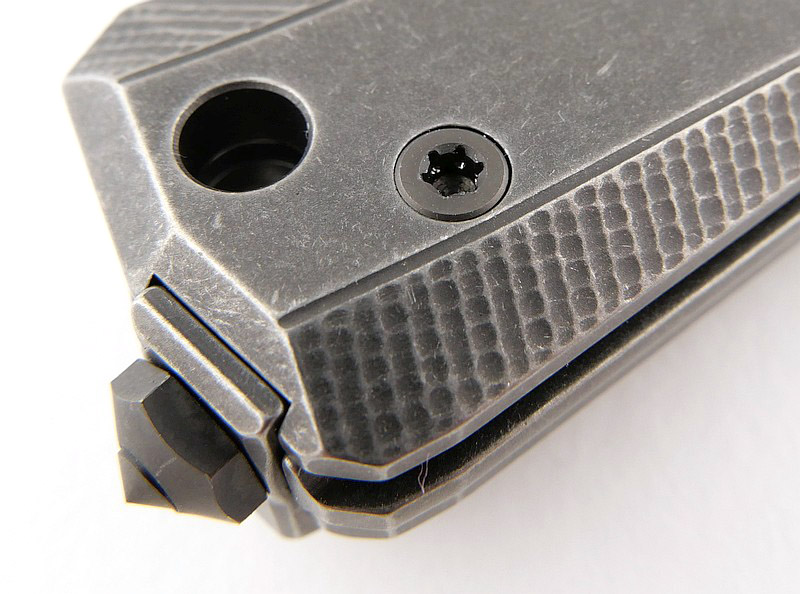
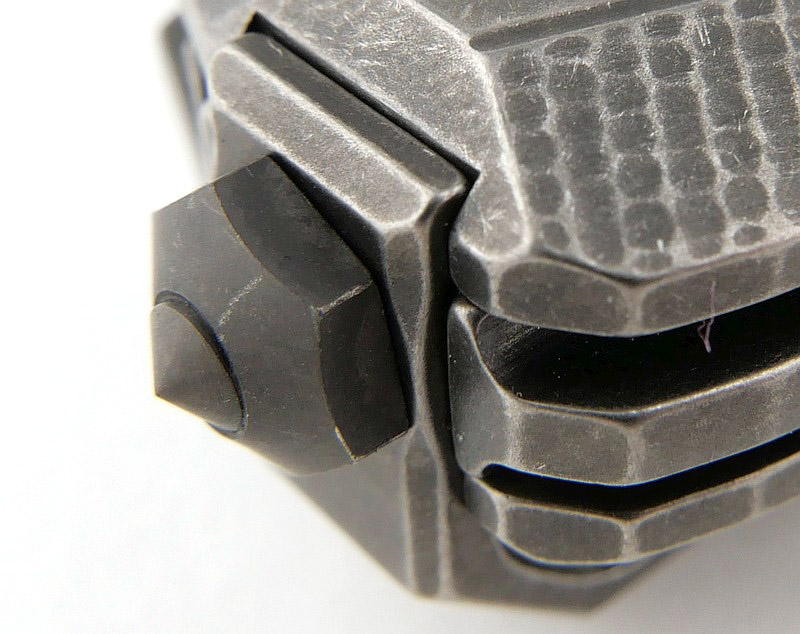
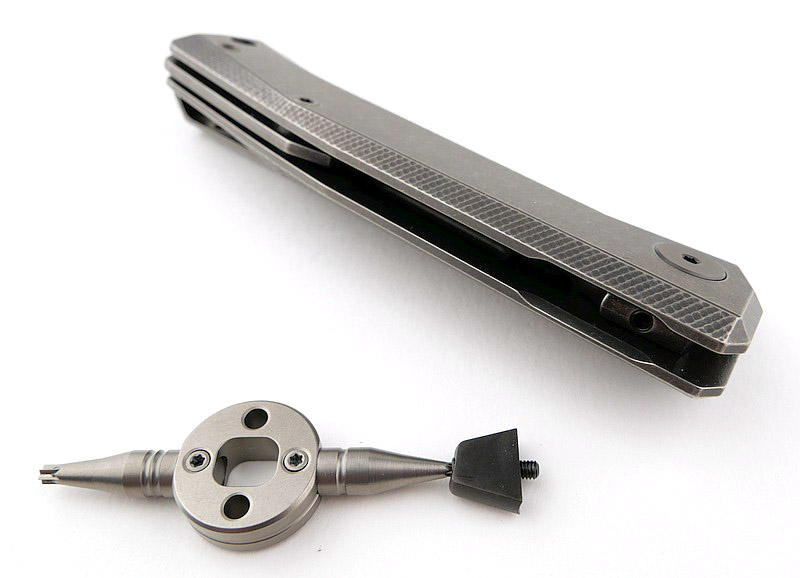
Overall layout of the EDS II is of an integral lock folding knife, but with a bit holder instead of a blade. A single thumb stud means this easier for a right-handed user. Explained in more detail in the video, there is a stop pin that both stops the bit holder arm in the right position when open, and also stops the spare bits sliding out of the front of the storage slot. The other end of the spare bit storage slot has a sprung ball to keep the bits in place. The integral lock action is easy to see as the bit holder is unfolded. Several magnets are used for keeping the spare bits in place and the main bit holder folded. In the EDS II an additional spare bit holder has been integrated into the lower section of bit holder arm. A total of four bits can be carried within the EDS II.


What’s in the box; Part 2 the EDC Wrench?:
Again, following the format of the other BIGiDESIGN products I have, the box has a slide out tray which includes a compartment at one end that contains spares.


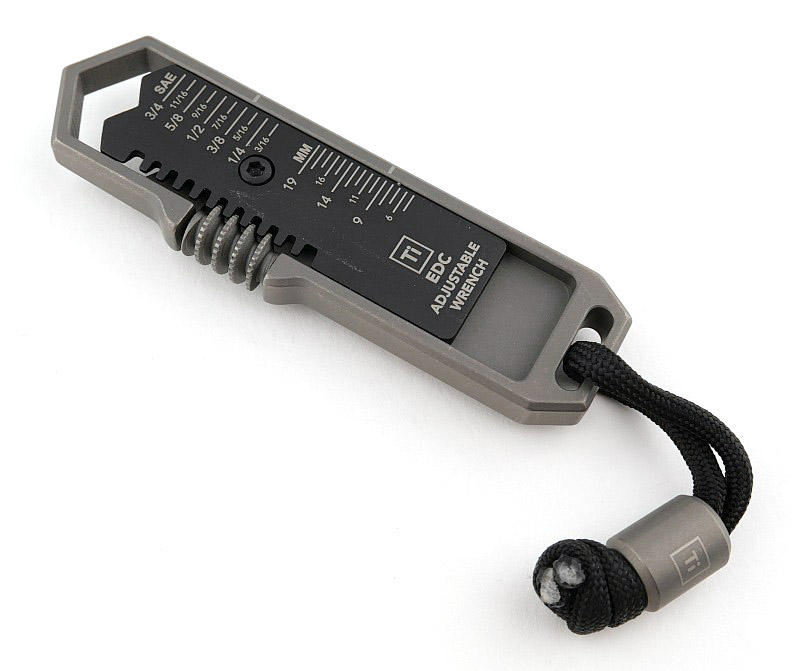
A good look round the EDC Wrench – Things to look out for here are:
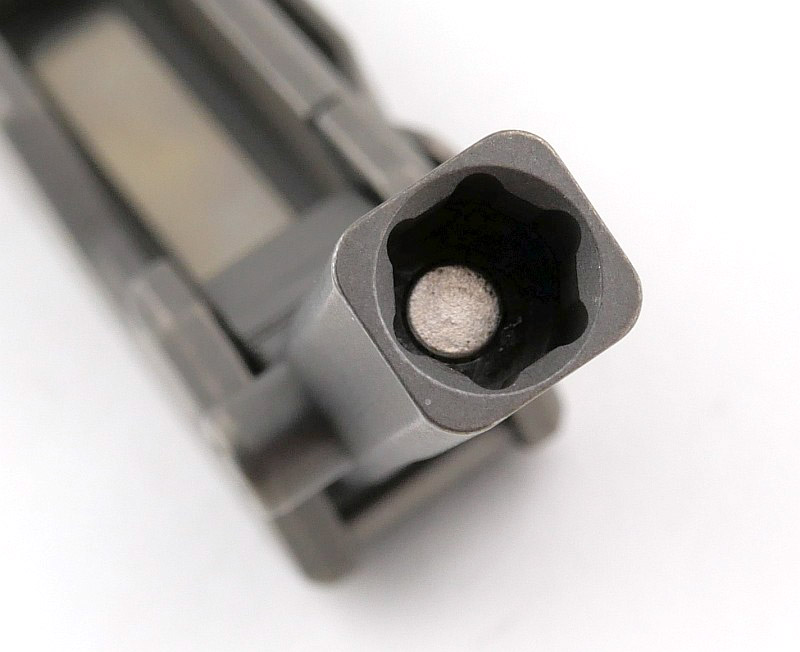
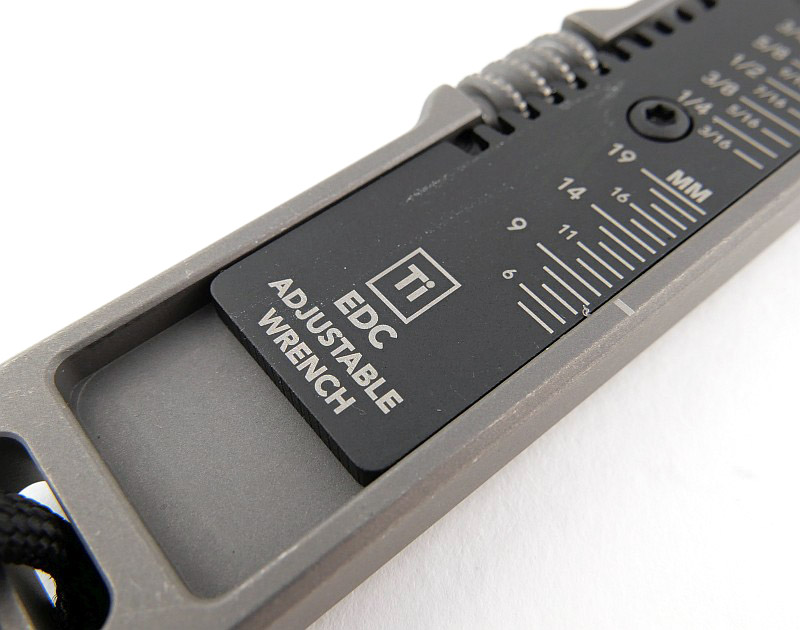
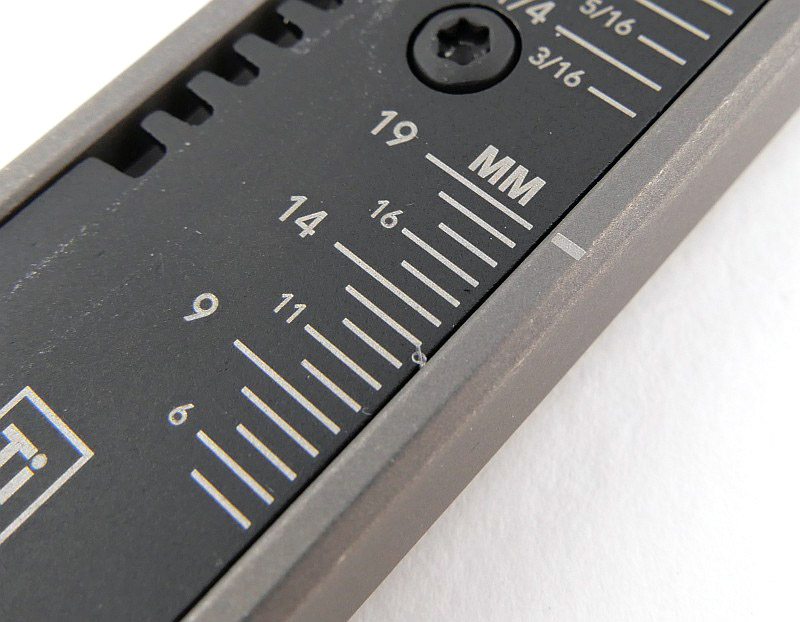
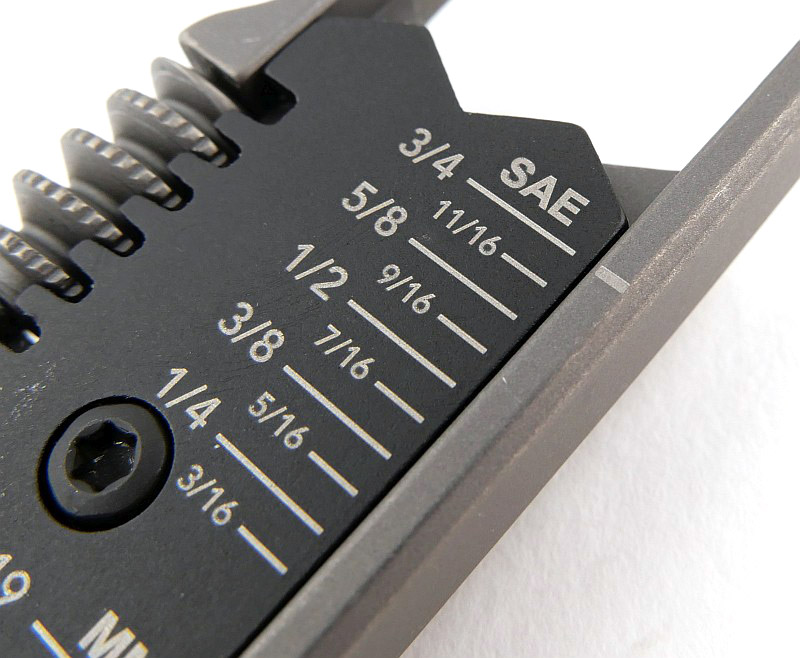
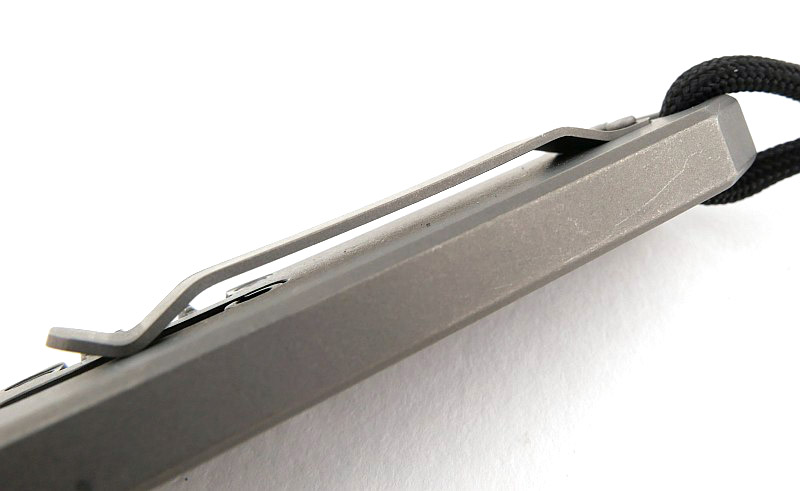
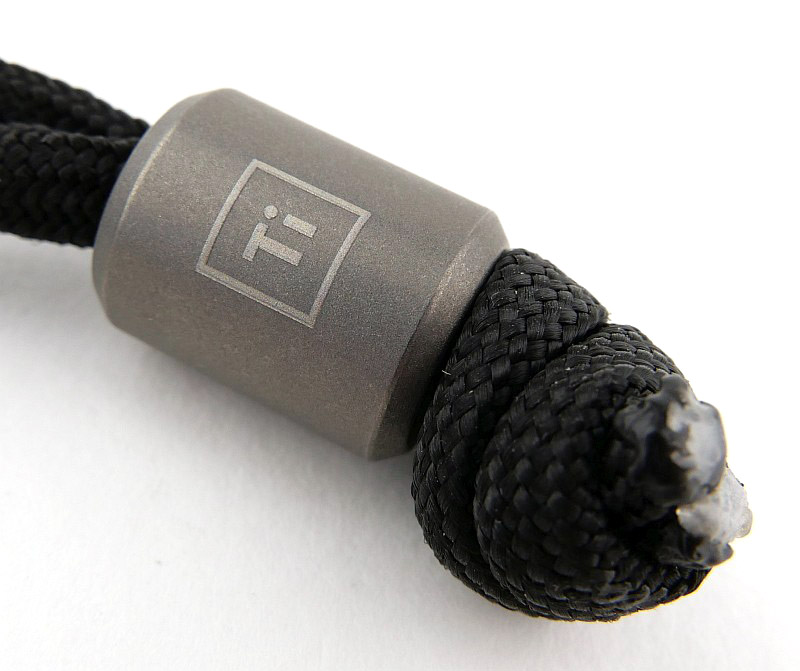
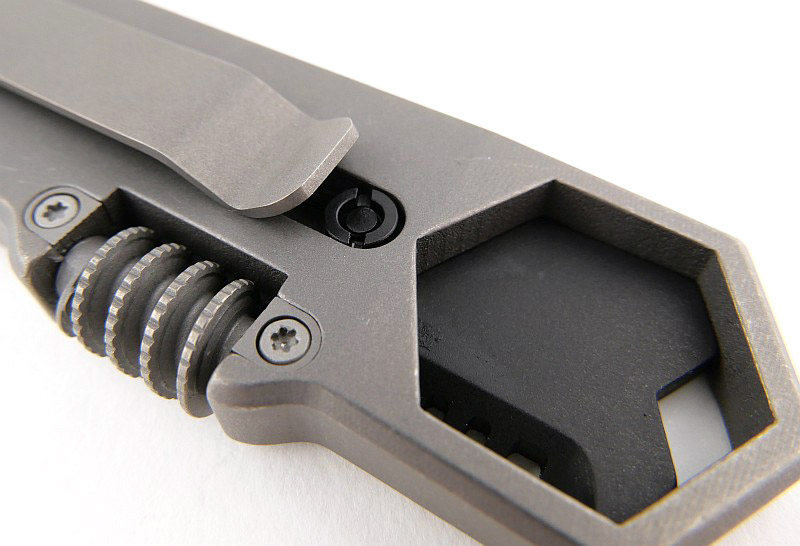
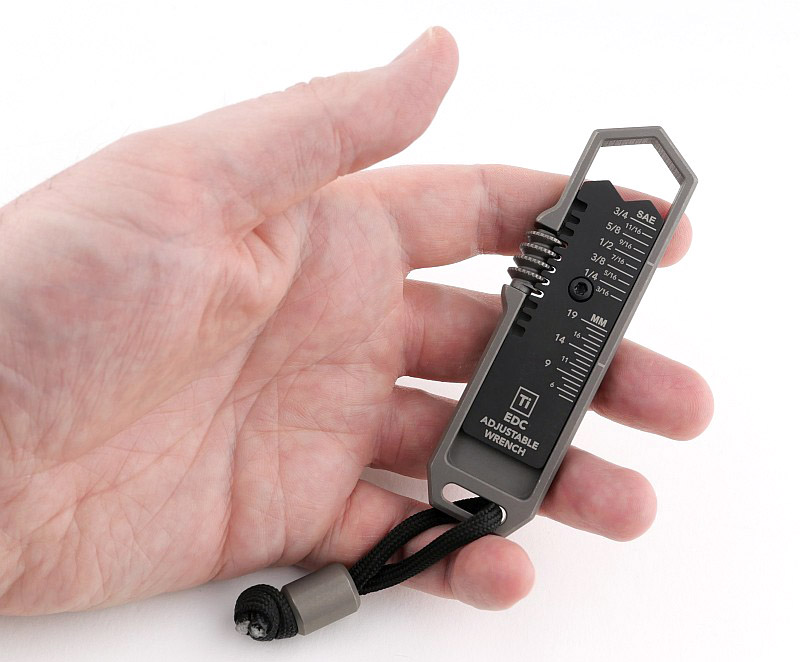
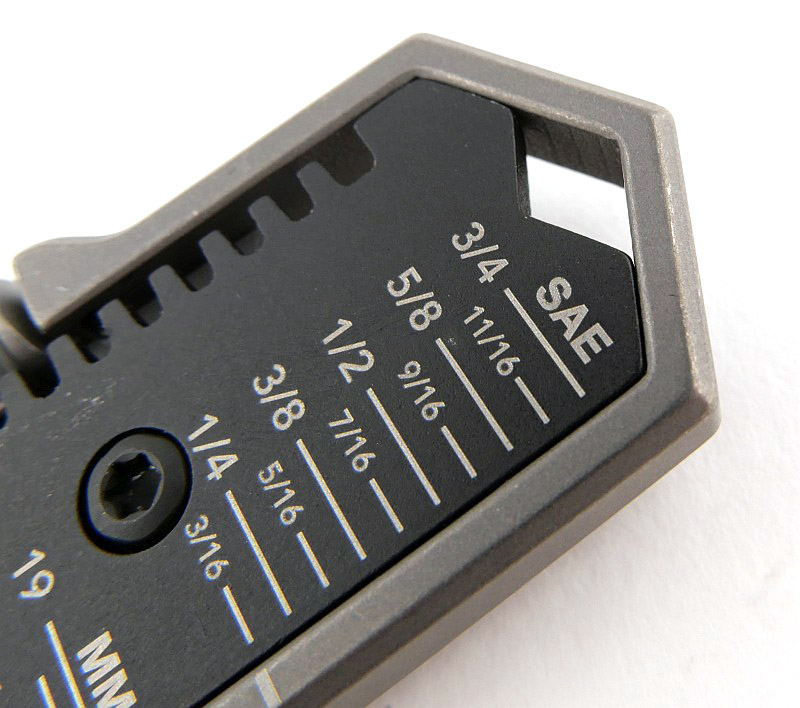
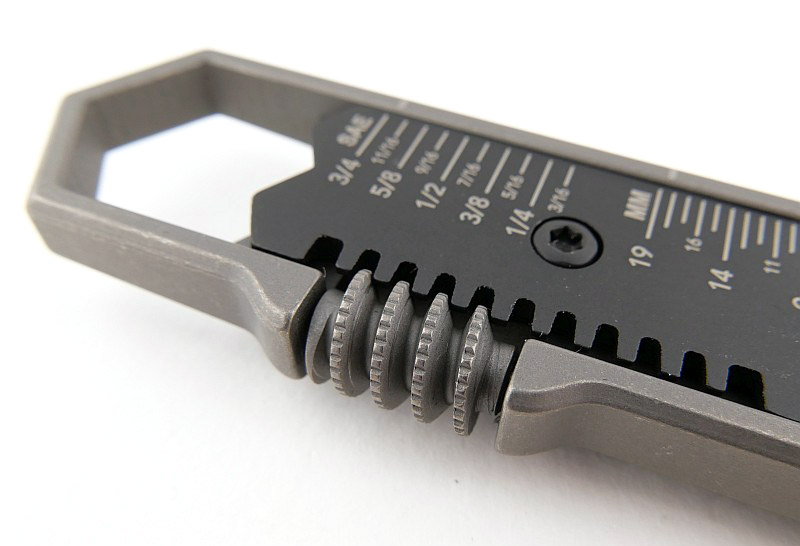
A reimagining of an old Swedish design, there is a sliding adjuster moved by a worm screw. BIGiDESIGN have added both a metric and imperial scale for setting the wrench ready to use. A low profile clip is fitted to the back and the EDC Wrench also includes a Ti bead on the lanyard. You can just see the slider retainer under the clip.


What it is like to use?

BIGiDESIGN have done something really special with the EDS, and now this updated EDS II, and given you not only a new experience of using and carrying a screwdriver, but one that is very practical as well.
It is not the smallest EDC bit holder available, nor does it include a ratchet, but instead it gives you a highly usable screwdriver with integrated bit storage for a total of four bits without needing anything else.
Having a swing-out bit holder extension arm, the EDS unfolds to a very practical conventional structure of handle, shank, and bit, so compared to many other small EDC screwdrivers it gives you a more usable tool.
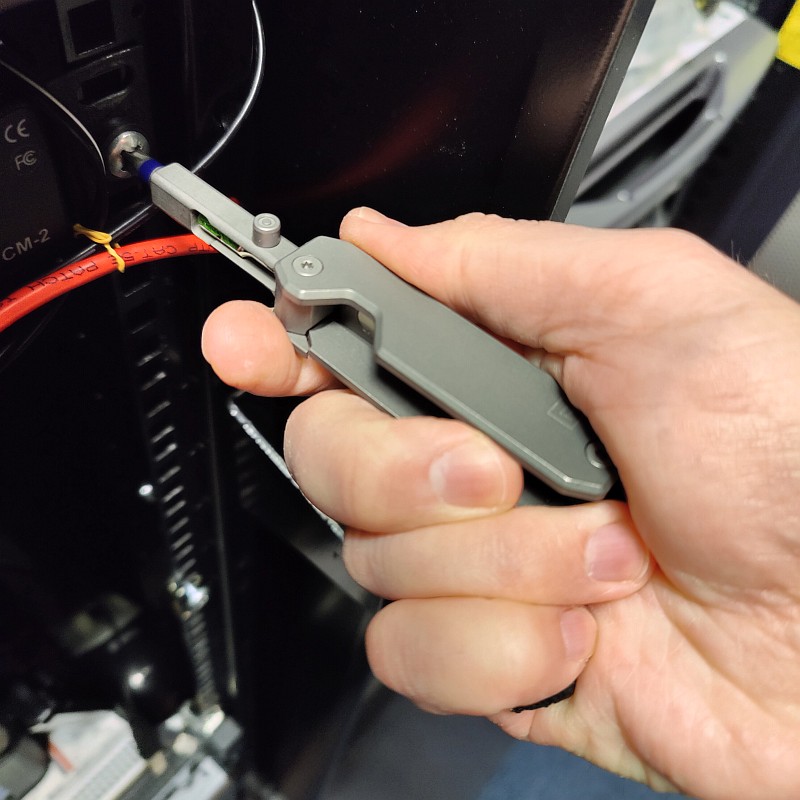
That genius part of the design is mimicking an integral lock folding knife, having a thumb stud to swing the bit holder arm out of the folded position for one-handed operation. So satisfying to use!

However there is a little observation to note about how easy or difficult it is to open the EDS II. The arm’s retention in the folded position is due to a magnet in the body grabbing the bit that is in the bit holder. As you use the EDS II and swap bits around, you will find that a bigger bit, like the full size flat bit, is held by the magnet more firmly, so firmly it becomes very difficult to open using the thumb stud. Put a smaller bit into the holder and it becomes much easier to open again. So the bit you leave in the main bit holder arm changes the ease of opening the EDS II. I would have preferred that the arm retention was a detent (like a knife would use) or that the thumb stud had a bigger cut-out round it allowing more contact and an easier open.


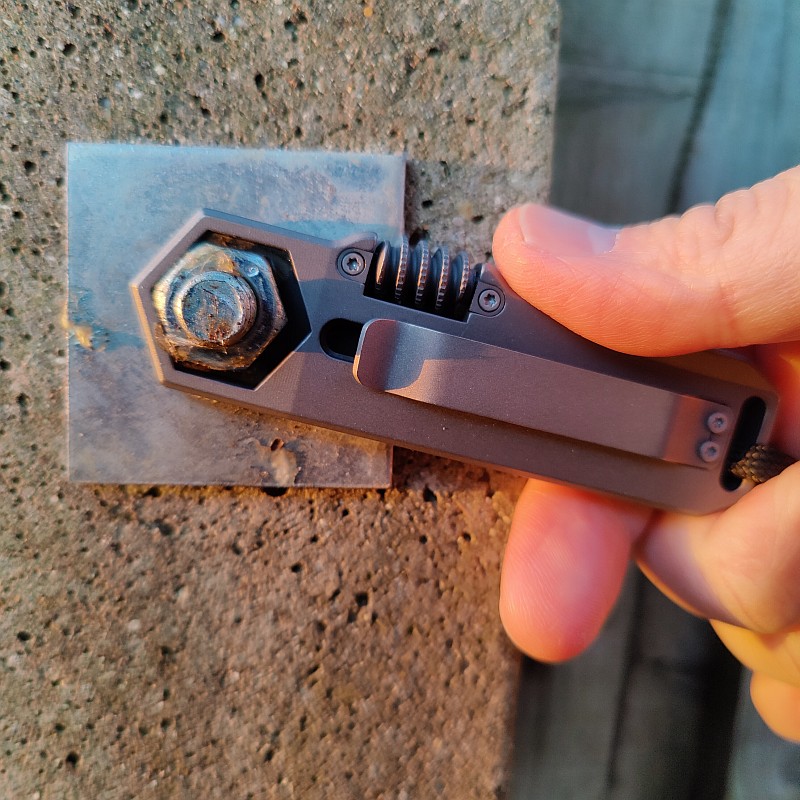
Onto the partner tool here and the EDC Wrench, an infinitely more pocket friendly design than a standard adjustable wrench, there was one big flip for me, literally, in how I envisaged using it before actually getting my hands on one. That is the fact that with the adjustable slider being very much on one side of the tool, to use it and make contact with the nut, you have to flip it over so the ‘front’ of the tool is away from you (pocket clip towards you). Like this you can’t see the scale, and initially it just felt a bit odd, but is just how it works. Even with larger nuts, all except the very largest, you need to use it this way round.
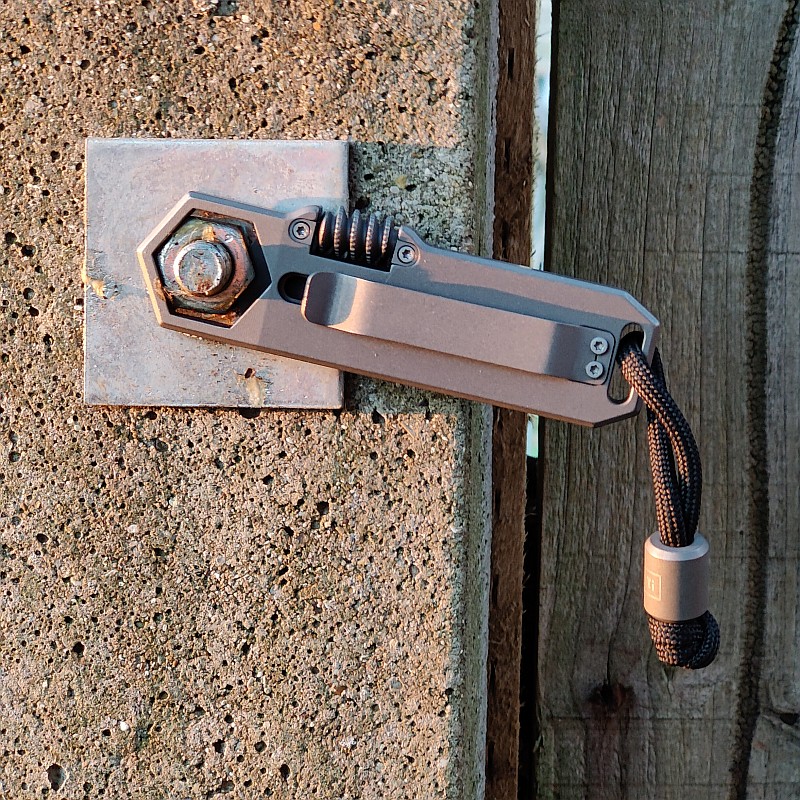
Being a ring spanner, you do have to be able to pass the ring over the end of the job onto the nut, so can’t be used for certain jobs. If you hit those limits though, it is less likely an EDC type of job, so then you bring out the full size tools. Know the limits of your tools and don’t abuse them and you’ll get along just fine.


Talking of limits, and pushing them, the EDS II and EDC Wrench can nicely partner up for a bit more screw driving torque. There is just enough of the 1/4″ hexagonal bit showing to use the EDC Wrench to grip this and boost the turning force for stubborn screws. Not always possible, but if you have the space, this can save you having to go for bigger tools. In this case the EDC Wrench is used with the slider facing you as it needs to be this way round to grip that small section of the hex bit.
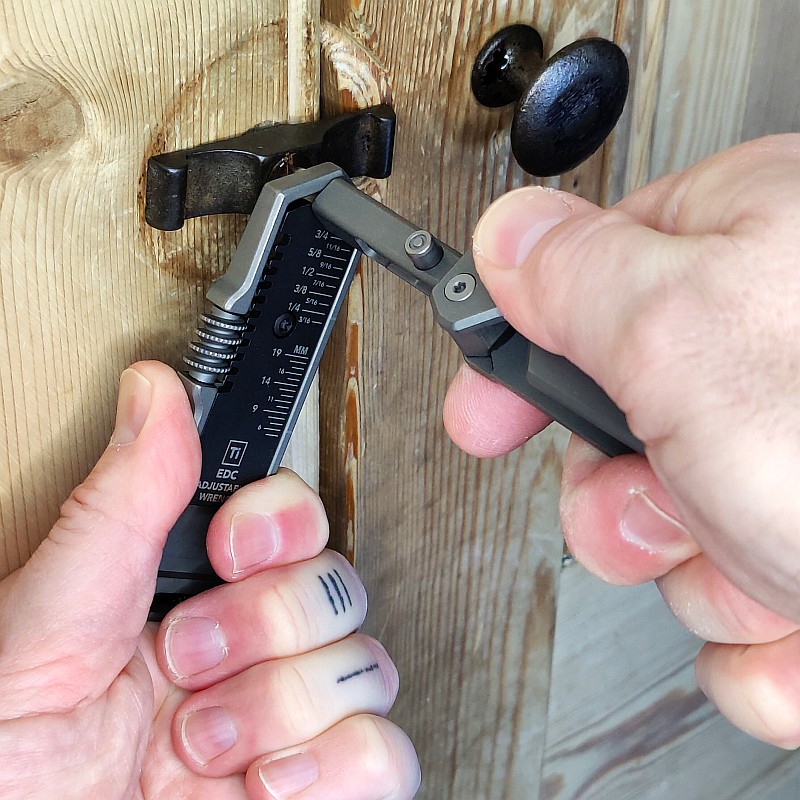
Both of these beautiful EDC tools are made from grade 5 titanium alloy and punch well above their weight, even more so together.


Review Summary

The views expressed in this summary table are from the point of view of the reviewer’s personal use. I am not a member of the armed forces and cannot comment on its use beyond that covered in the review.

Something that might be a ‘pro’ for one user can be a ‘con’ for another, so the comments are categorised based on my requirements. You should consider all points and if they could be beneficial to you.

_______________________________________________
What doesn’t work so well for me
_______________________________________________

EDS II – Difficult to open with larger bits installed.
EDS II – Thumb stud a bit too recessed.
EDC Wrench – Ring spanner design slightly restrictive.
EDC Wrench – Need to use with the slider away from you.

_______________________________________________
Things I like
_______________________________________________

EDS II – One-Handed Operation.
EDS II – Integral Frame-Lock Mechanism.
EDS II – Deep carry Pocket Clip.
EDS II – Uses any 1/4″ hex bit.
EDS II – Integral storage for four bits.
EDS II – 100% metal construction.
EDC Wrench – Infinitely adjustable.
EDC Wrench – SAE 3/16 – 3/4 in.
EDC Wrench – Metric 5 – 19 mm.
EDC Wrench – Solid Titanium Construction.
EDC Wrench – Removable Pocket Clip.

 
Discussing the Review:
The ideal place to discuss this review is on the Tactical Reviews Facebook Page
Please visit there and start/join the conversation.

Knife Review: Spyderco Stovepipe

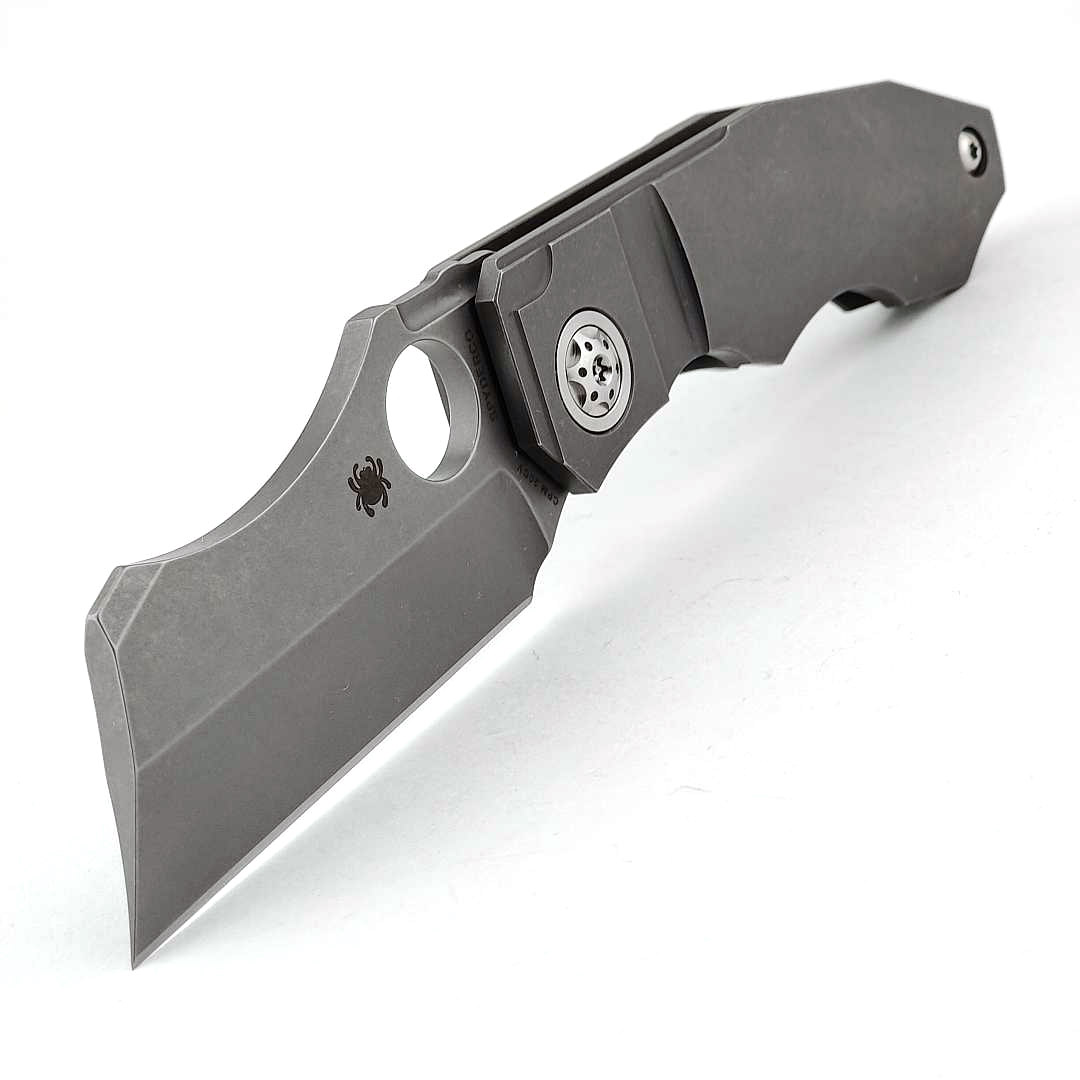
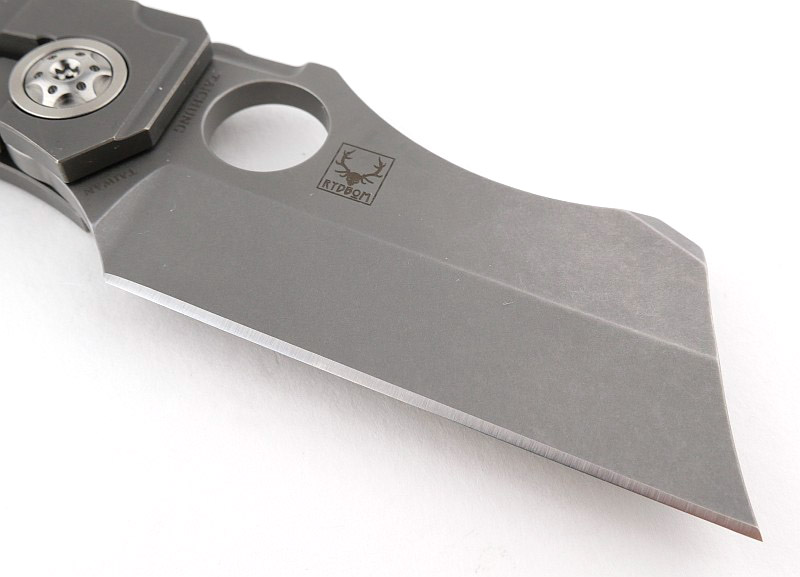
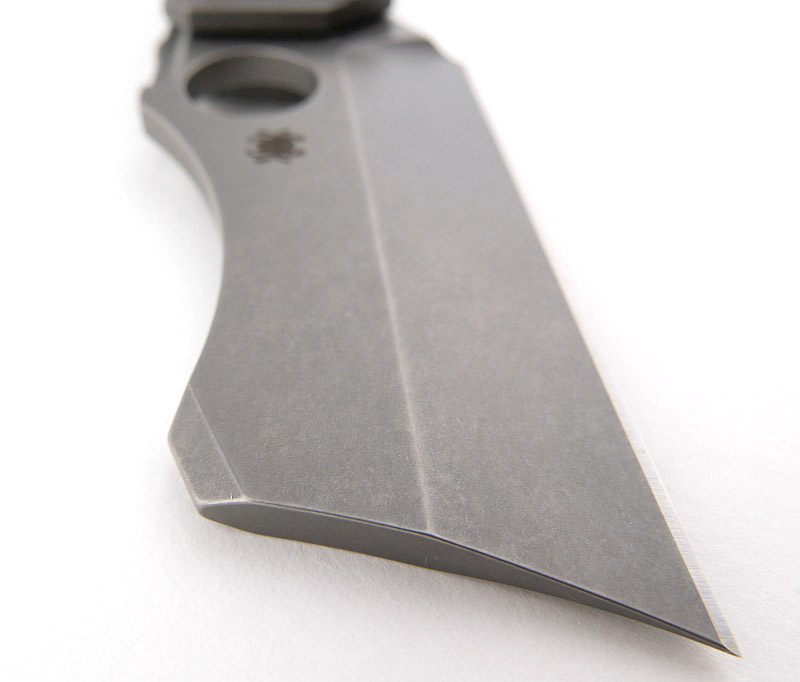
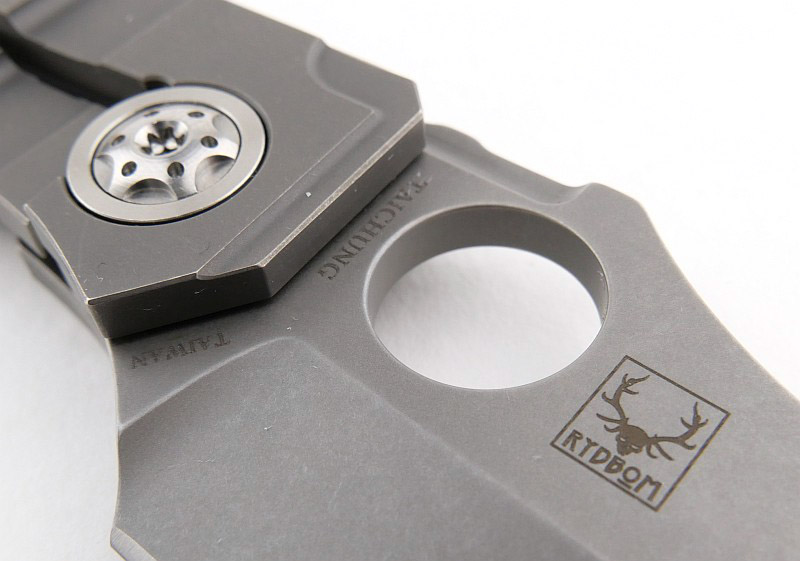
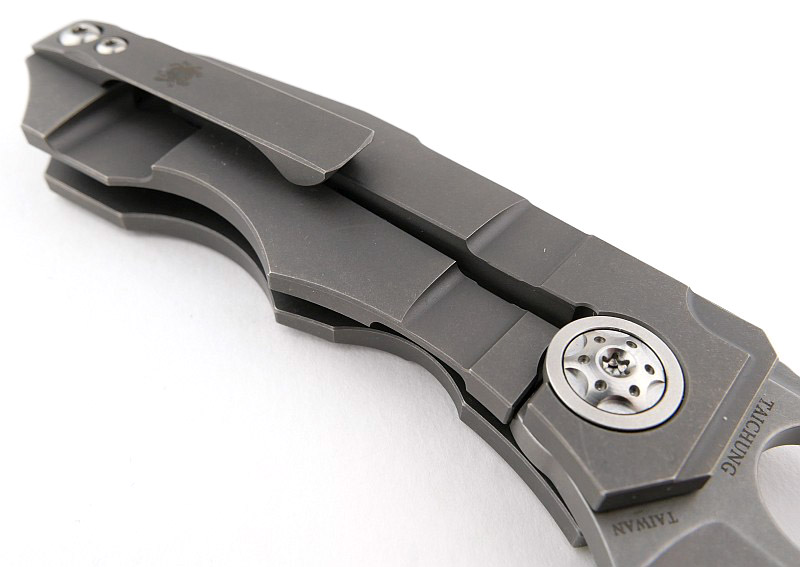
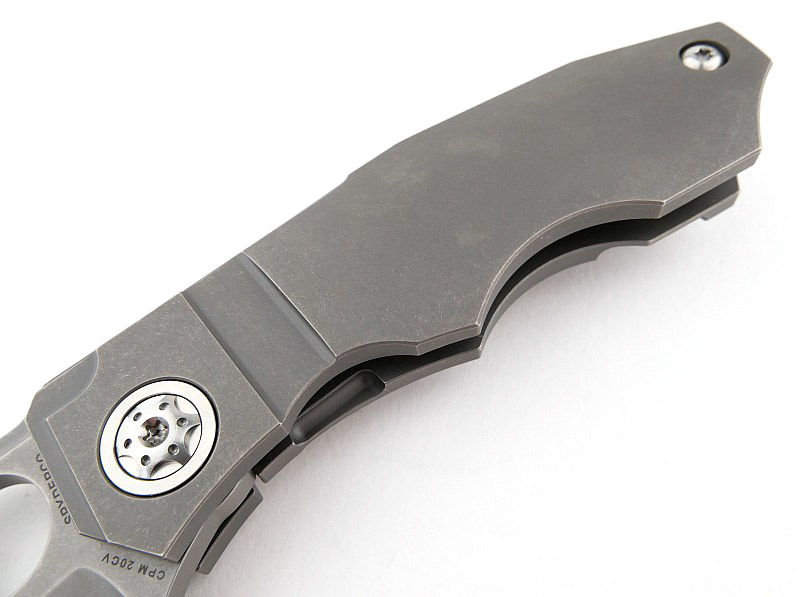
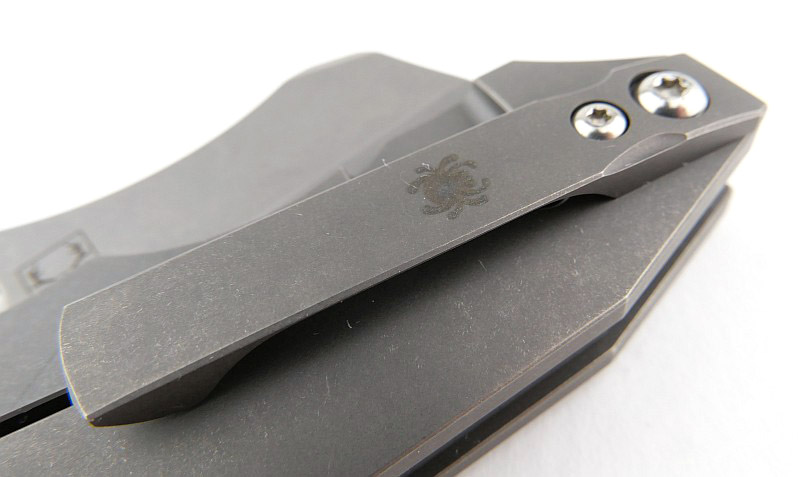
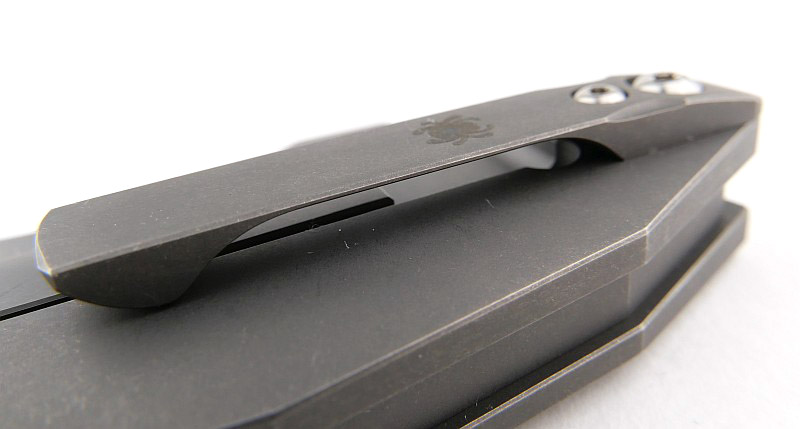
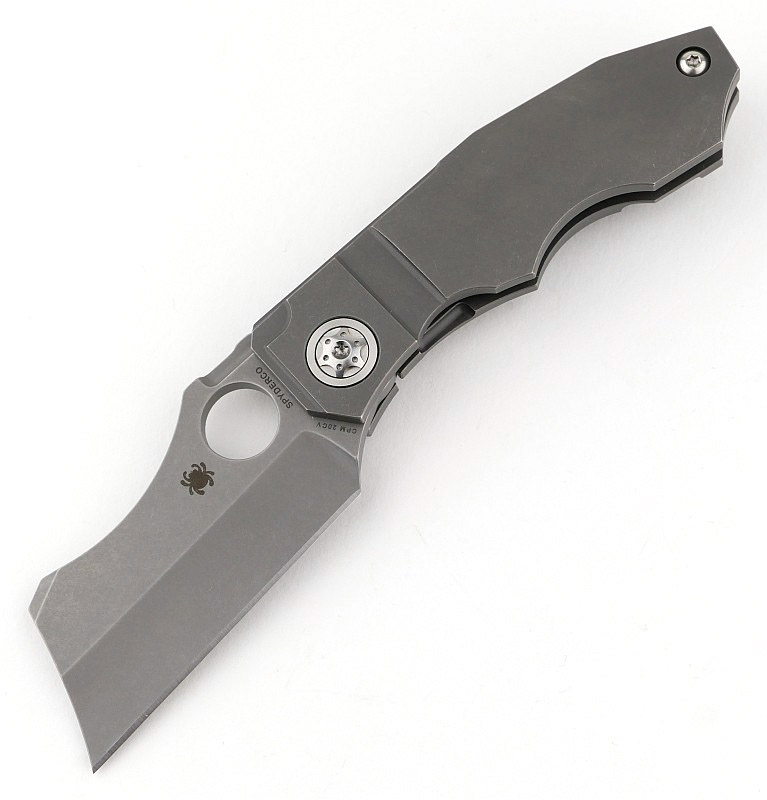
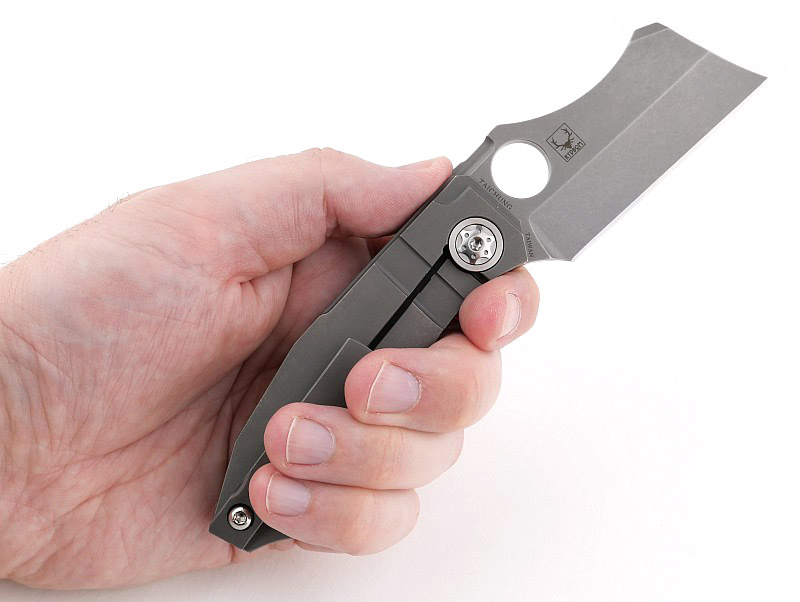
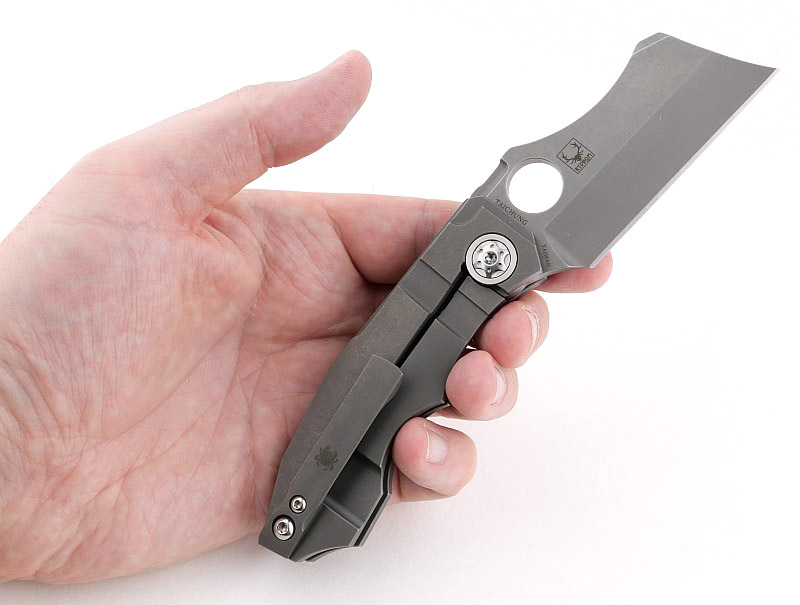
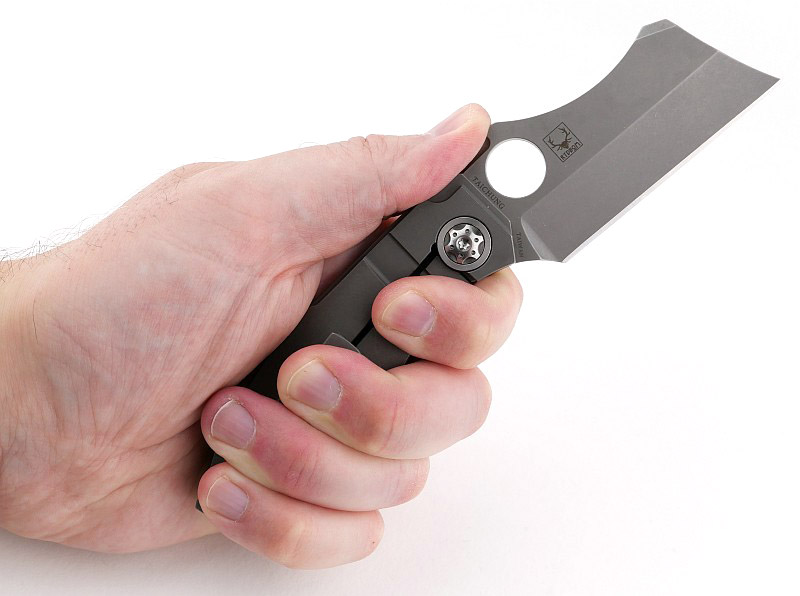
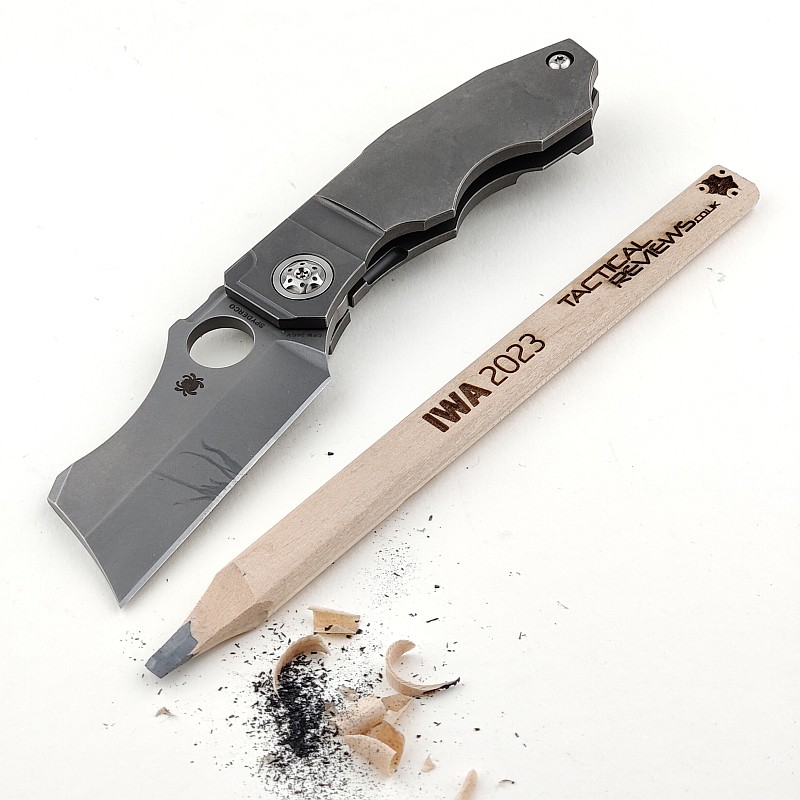
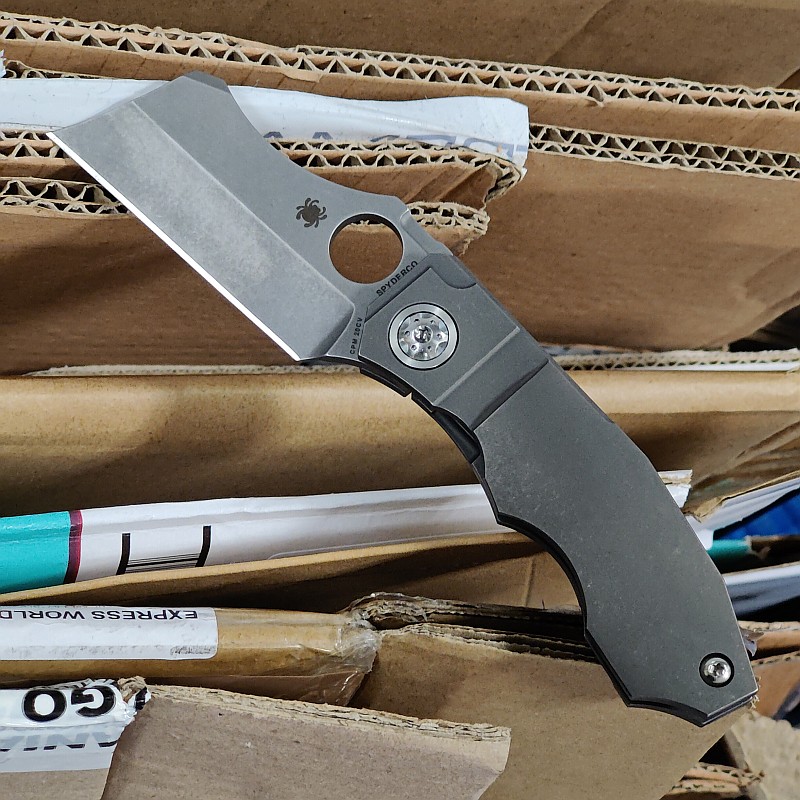
Spyderco’s Stovepipe is full of drama and built to perform as strongly as it looks. The Stovepipe is based on one of David Rydbom’s famous custom knives, ‘Bill the Butcher’ from Kingdom Armory. A powerful cleaver-style blade made from CPM 20CV, with titanium handles and clip, as well as being packed full of milled details, this all really makes the Stovepipe stand out as something special. Join me in this review of the Spyderco Stovepipe to take in all of its details.

Video Overview

This video takes in all the details of the Spyderco Stovepipe, a folding knife inspired by custom knife maker David Rydbom’s “Bill the Butcher” design; the Stovepipe blends dramatic style with serious performance. In the video I cover the main design details, look very close-up at the knife, and then take Tactical Reviews standard detailed technical measurements.


What’s in the box?:
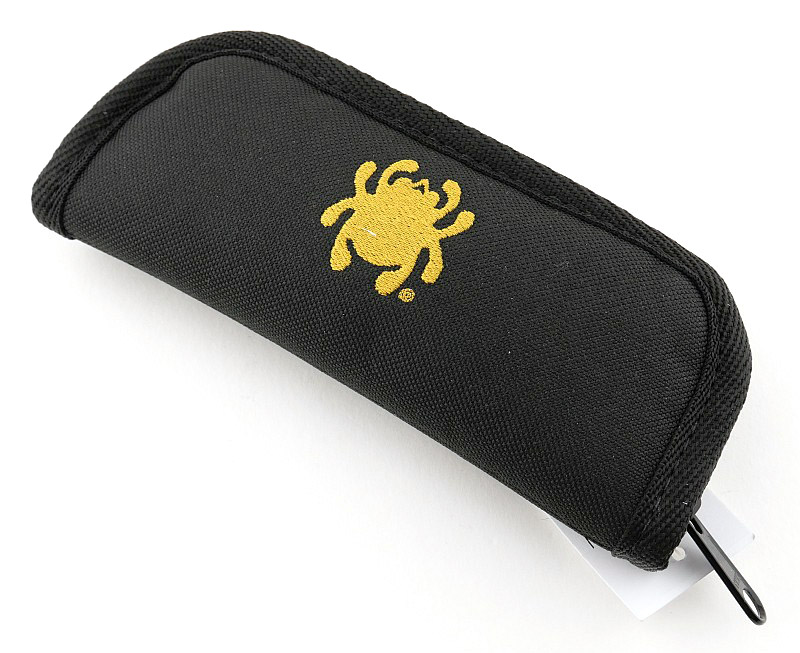
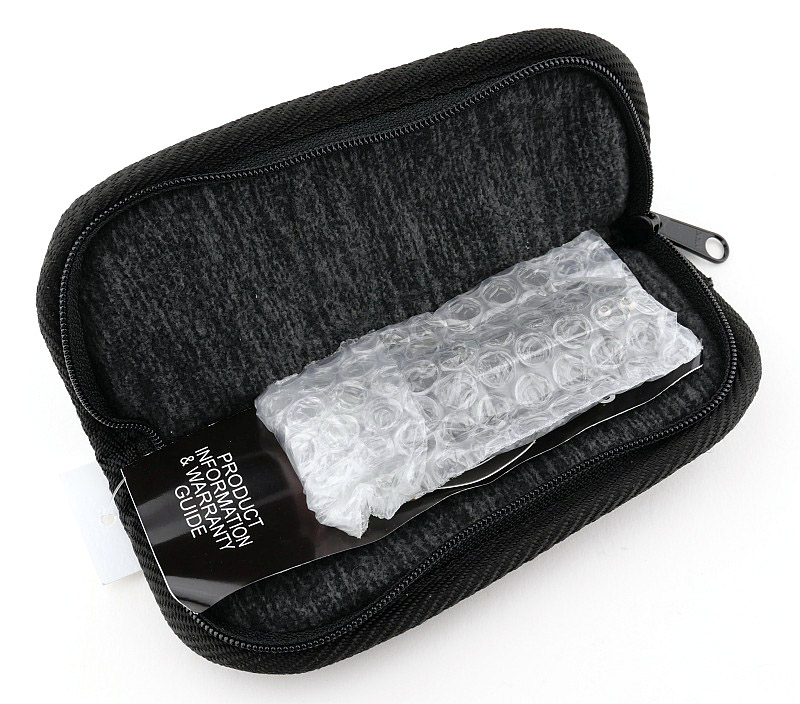
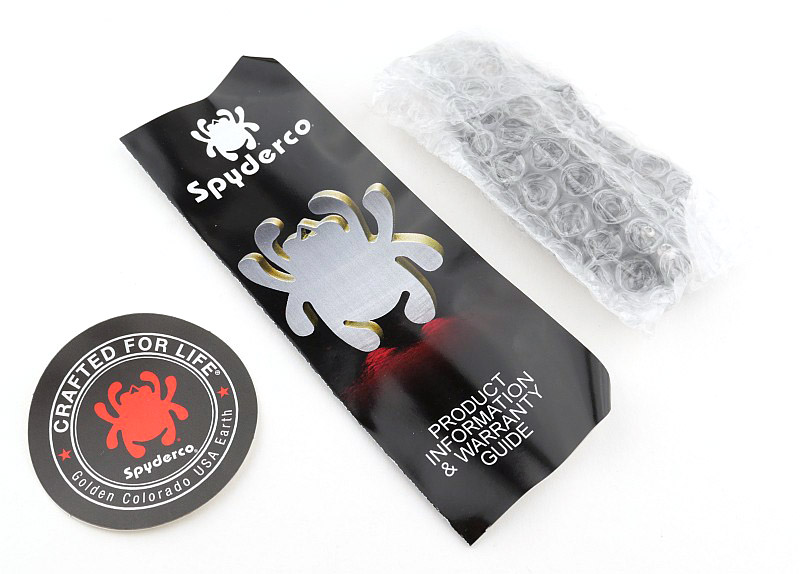
Or, in this case ‘What’s in the pouch?’ as the Stovepipe does not come in a box but instead in a nice quality padded storage/carry pouch. The knife is in a bubble wrap bag and comes with the knife information leaflet and a round sticker.


A good look round the Spyderco Stovepipe – Things to look out for here are:
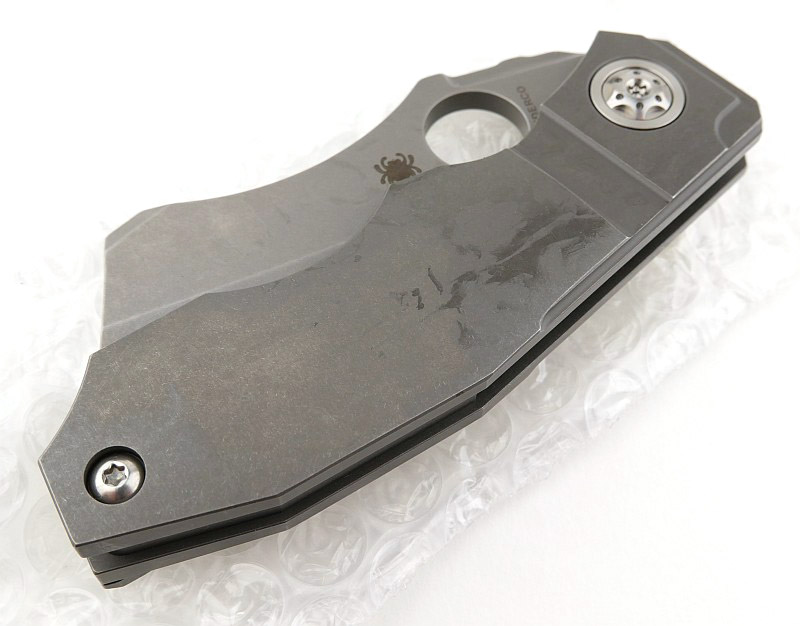
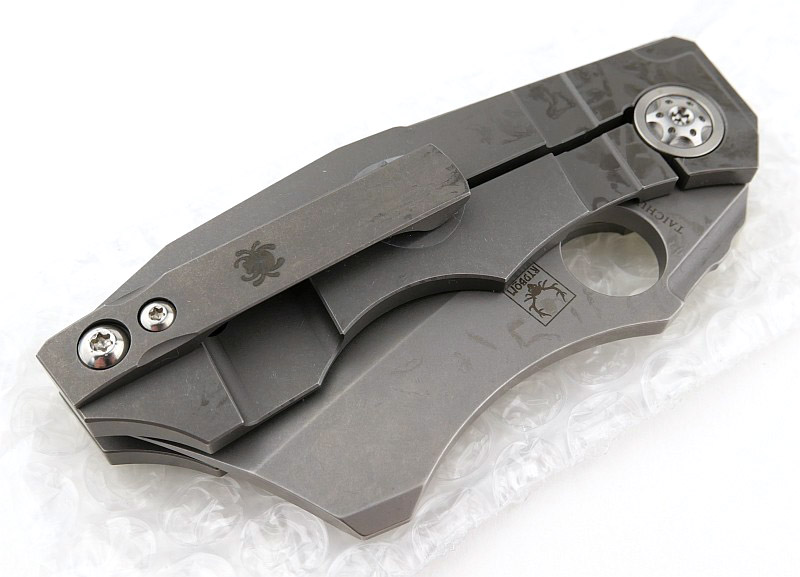
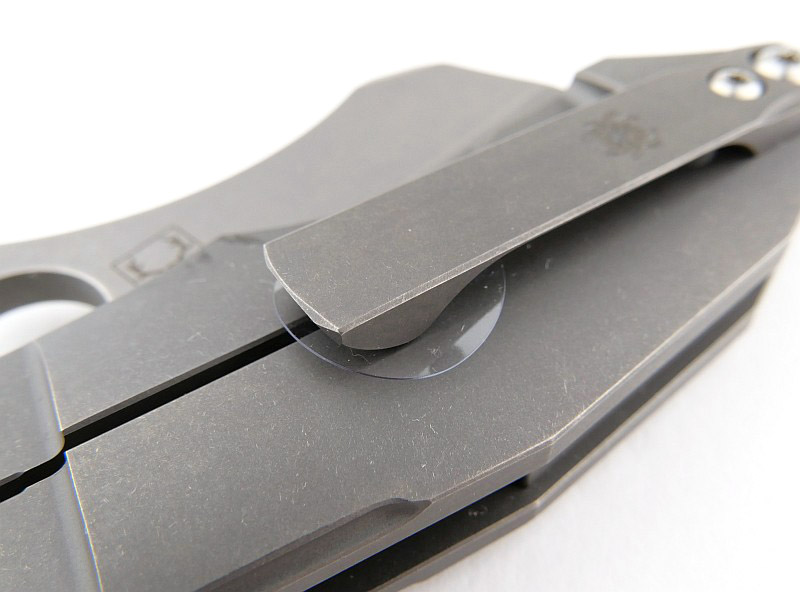
Starting with the knife straight out of its wrapping and with protective oil making it look blotchy. Under the pocket clip a round plastic protector ensures when you get it the clip to handle contact point is completely unmarked.
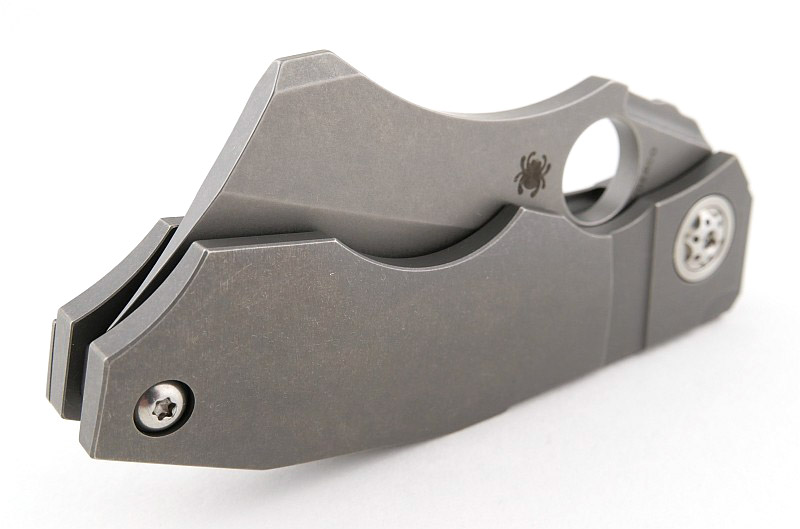
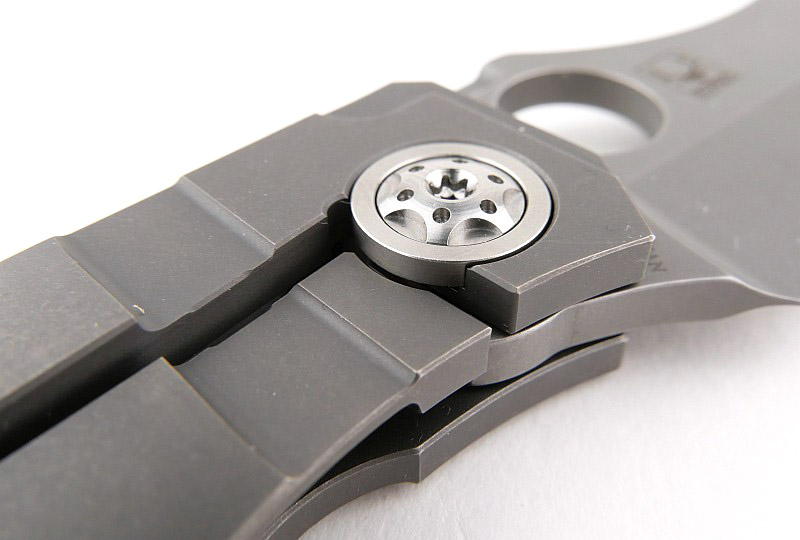
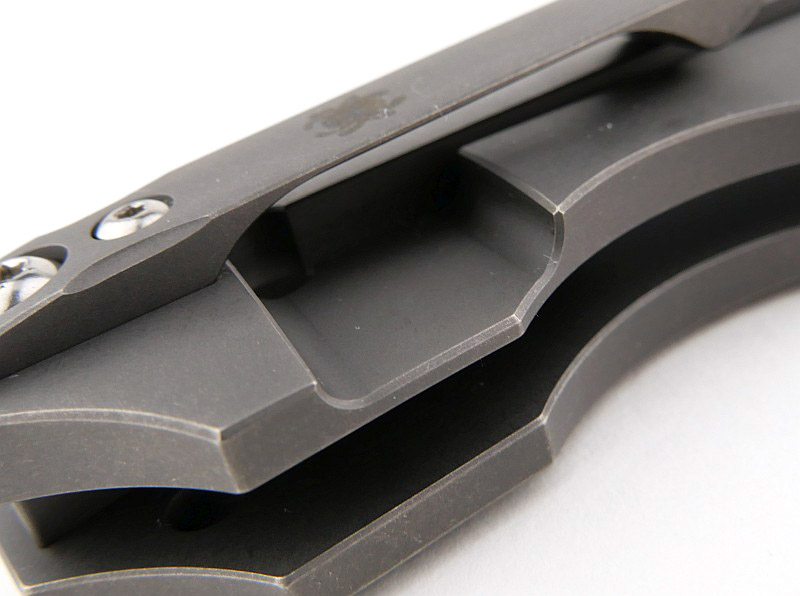
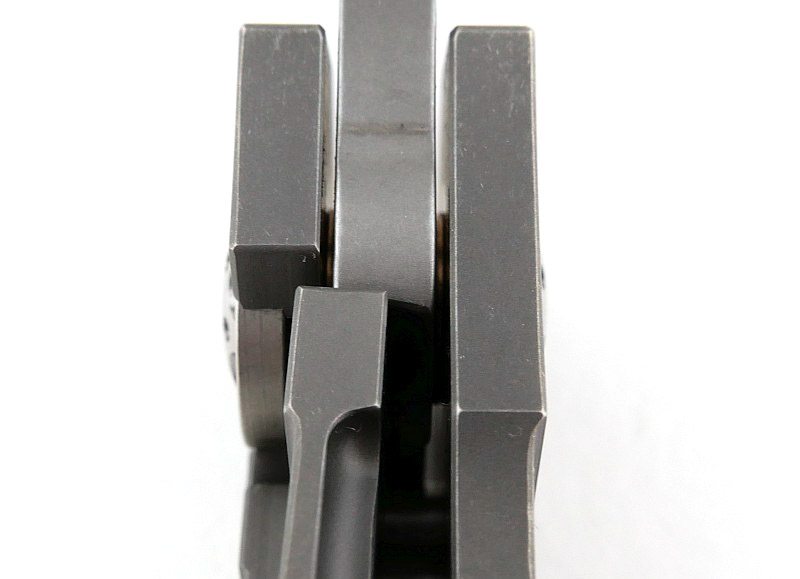
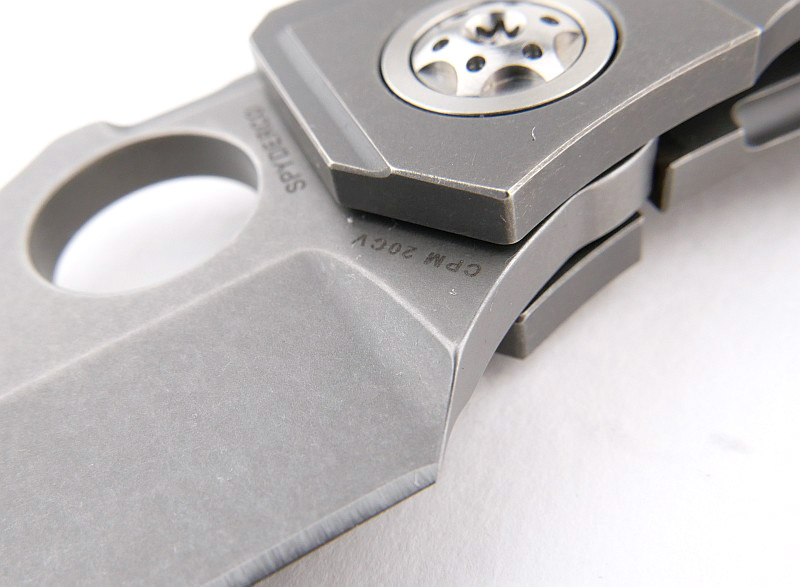
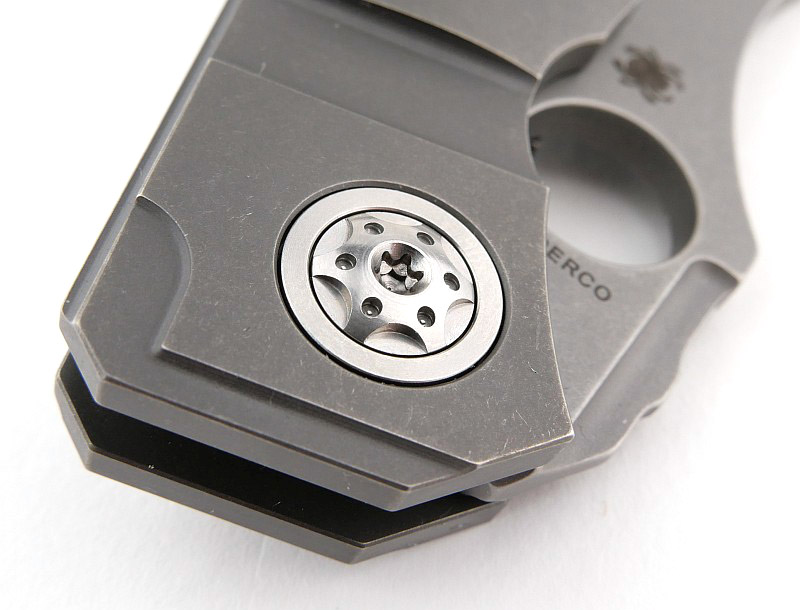
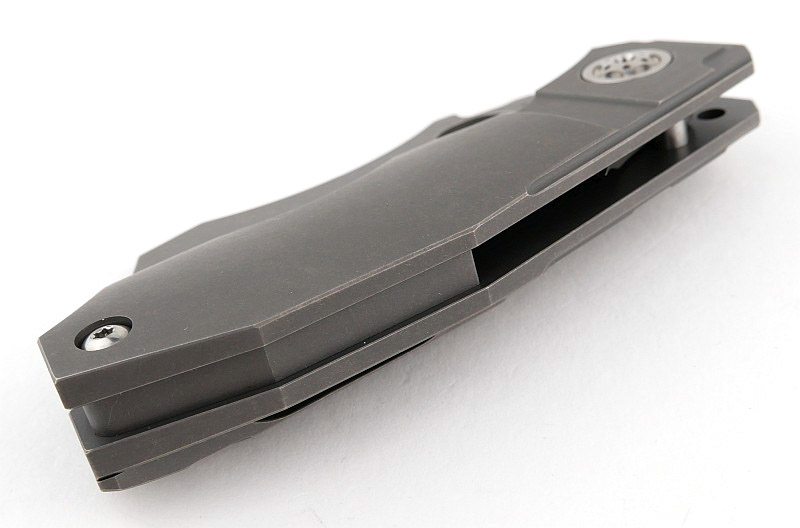
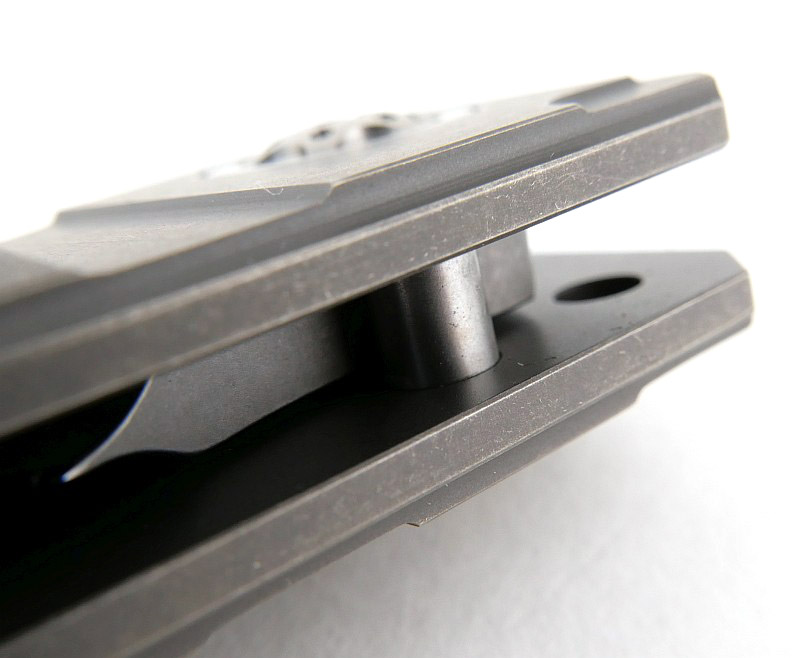
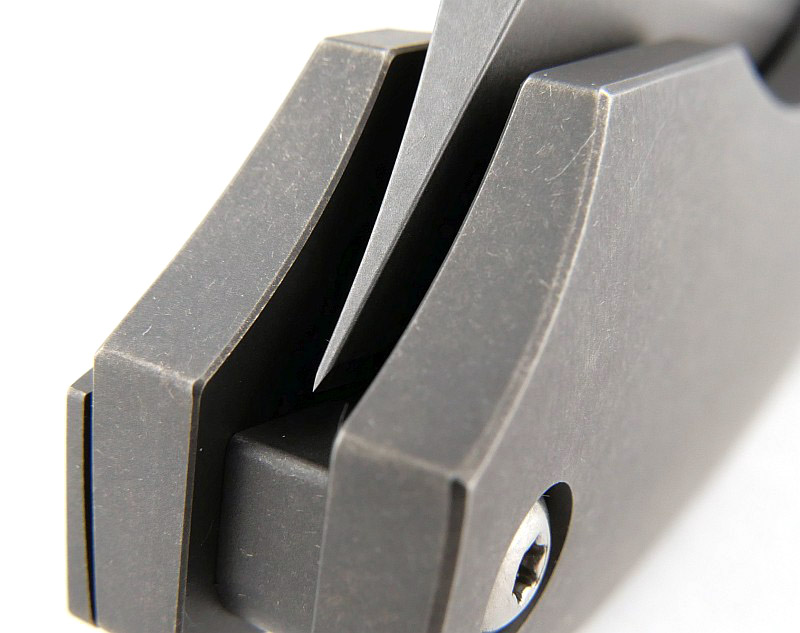
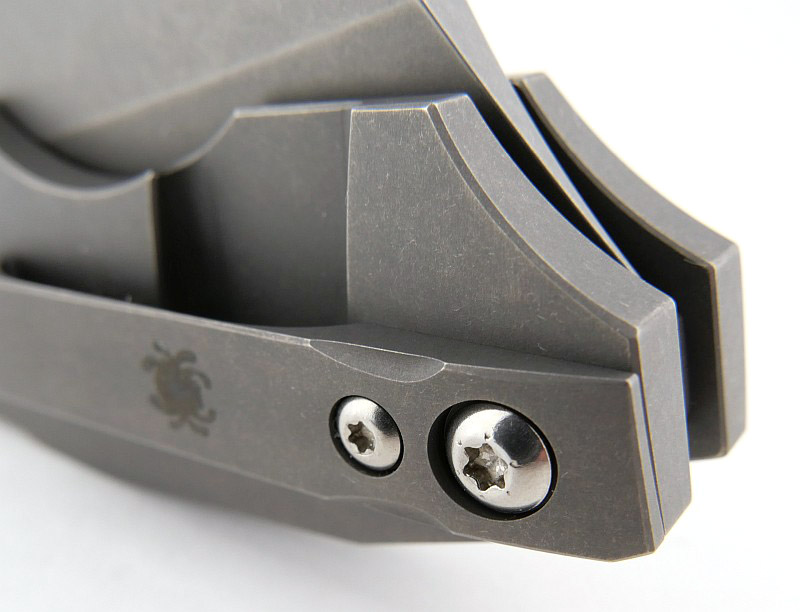
A ring around the milled pivot bolt provides an over-travel stop for the integral frame lock bar. The more you look at the Stovepipe, the more details you find. As you step through this gallery you will see all the small milled in features and incredible attention to detail.


Explained by the Maker:
The reasons for certain design choices may not be clear when simply looking at an object, so this section is intended to give an insight into the thinking behind a design by speaking to the designer themselves.

This is the Spyderco description of the Stovepipe:

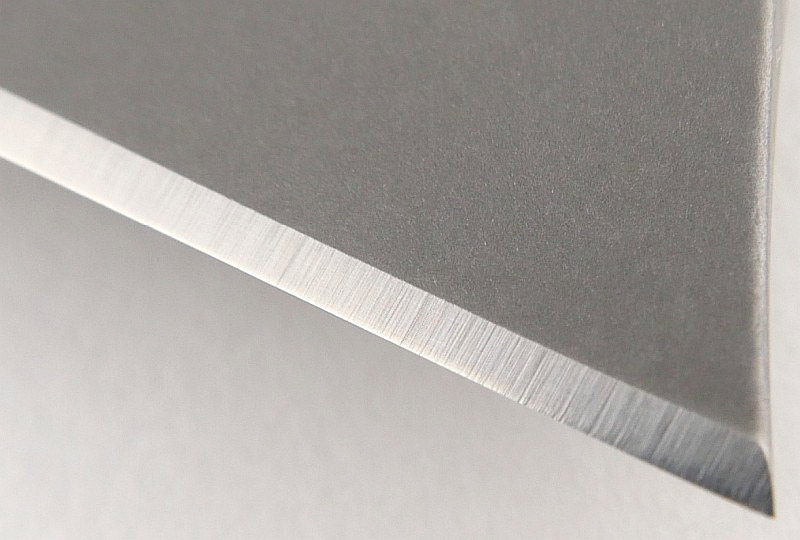
Inspired by custom knife maker David Rydbom’s “Bill the Butcher” design, the Stovepipe blends dramatic style with serious performance. Its stout cleaver-shaped blade is crafted from 4mm (.157-inch) thick CPM® 20CV stainless steel and has a deep hollow grind for superior edge geometry. The handle is constructed from two slabs of solid titanium joined by a titanium backspacer. Both scales are painstakingly machined to create beautifully crowned outer surfaces and the reverse-side scale forms the foundation of the knife’s Reeve Integral Lock (R.I.L.) mechanism. The oversized pivot pin is machined with artistic accents and serves double duty as an overtravel stop for the lock bar. To allow convenient carry, the Stovepipe includes a machined titanium clip configured for right-side, tip-up carry. The clip, scales, backspacer, and blade all feature a no-nonsense, industrial-style stonewashed finish.

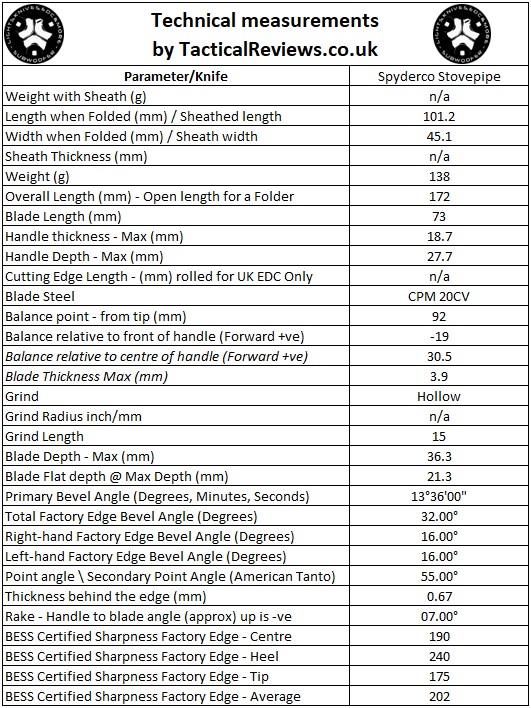
The Blade and Handle – Detailed Measurements:
For full details of the tests and measurements carried out and an explanation of the results, see the page – Knife Technical Testing – How It’s Done.


What is it like to use?
I find the Stovepipe a slight contradiction in that it is certainly built to work hard; materials, construction and strength are beyond question, but all the beautifully made details give the knife a lot of corners that are not hard-use friendly on your hands. The relatively compact size, despite the cleaver blade, and milled details creating lots of hot-spots mean that though capable of it, the Stovepipe isn’t a knife I would choose for heavy or extended jobs.

It looks fantastic and is both striking looking and by no means ‘usual’. Absolutely overflowing with interesting features, and a knife you will love looking at every time you bring it out to use.

The in-the-hand photos here show the Stovepipe in my XL-glove size hand. For me the Stovepipe has just enough handle for a solid grip and the blade length works for power cuts. The straight edge and blade tip present the cutting edge nicely for the type of EDC cutting I typically do.

One of the joys of the knife world is that there are so many designs, and so many purposes for a knife. The Stovepipe is an expensive knife, but one that justifies its price through quality of manufacture, intricate, intriguing and complex milling. Striking looks, with its origins in a proven custom design, the Spyderco Stovepipe is an outstanding cleaver-style knife.


Review Summary

The views expressed in this summary table are from the point of view of the reviewer’s personal use. I am not a member of the armed forces and cannot comment on its use beyond a cutting tool or field/hunting knife.

Something that might be a ‘pro’ for one user can be a ‘con’ for another, so the comments are categorised based on my requirements. You should consider all points and if they could be beneficial to you.

_______________________________________________
What doesn’t work so well for me
_______________________________________________

Too many ‘corners’ for comfortable extended use.
High price point.

_______________________________________________
Things I like
_______________________________________________

Superb quality and finish.
Packed with machined details.
CPM 20CV blade steel.
Super strong construction.
Very high quality storage case included.
Custom design in a production knife.
Striking stand-out looks.

 
Discussing the Review:
The ideal place to discuss this review is on the Tactical Reviews Facebook Page
Please visit there and start/join the conversation.
Knife Review: lionSTEEL Myto

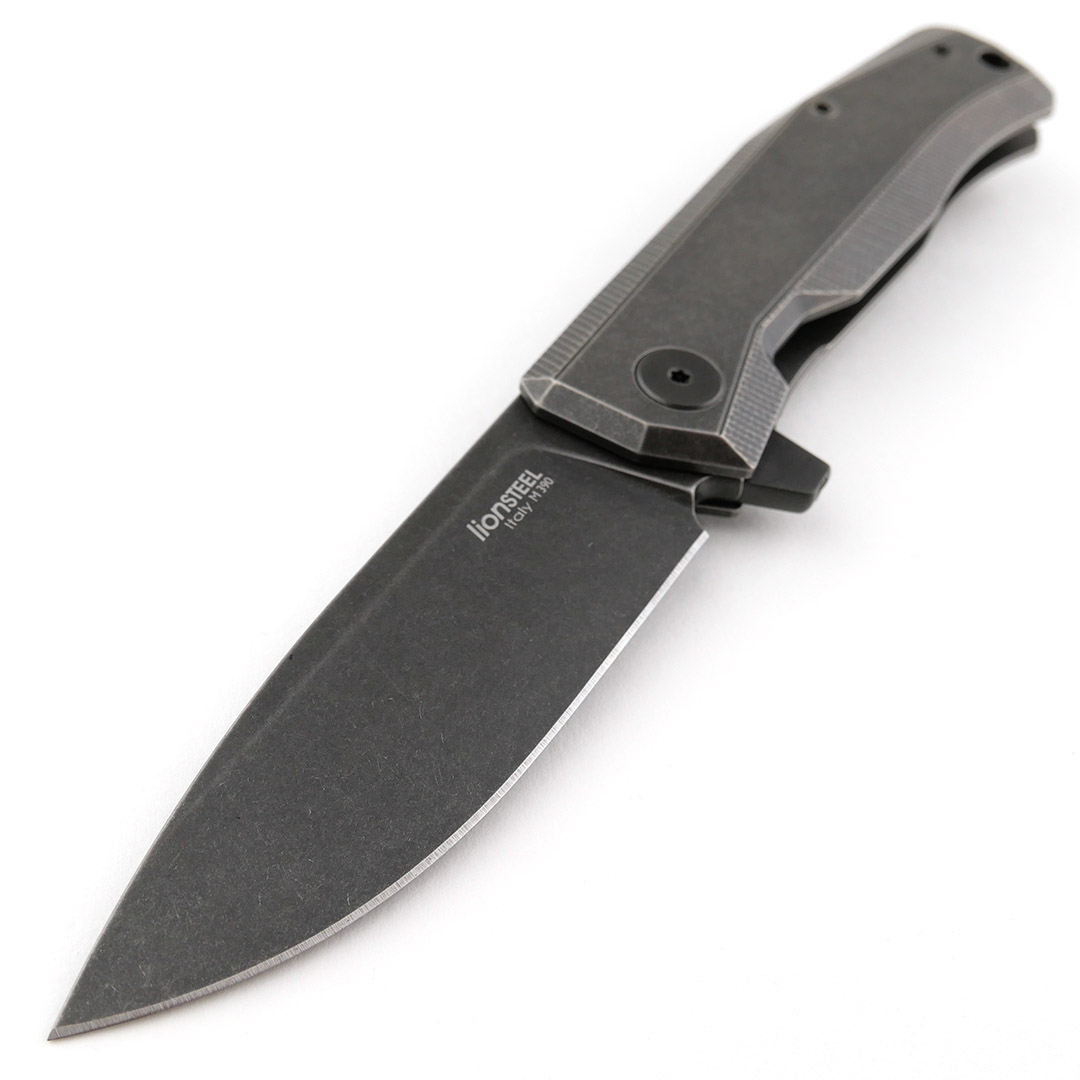
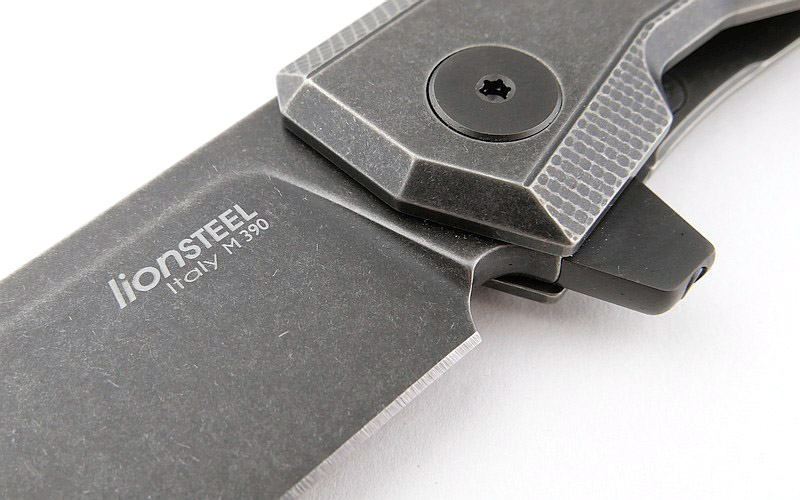
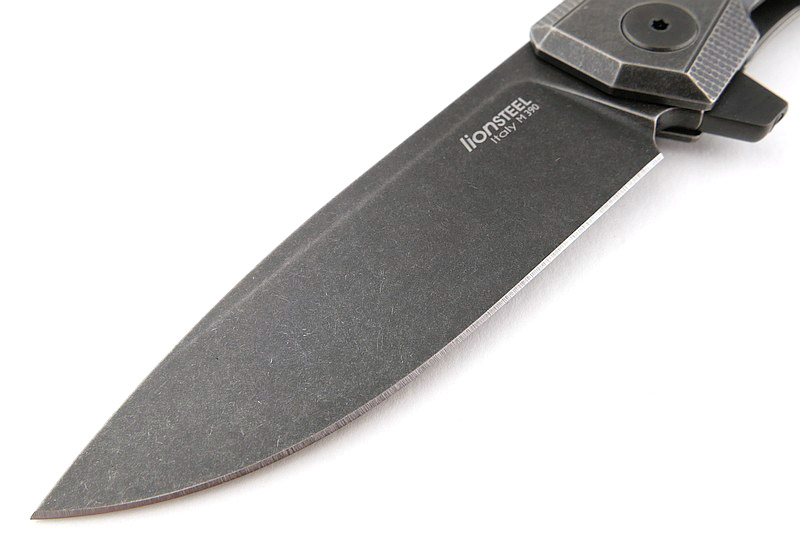
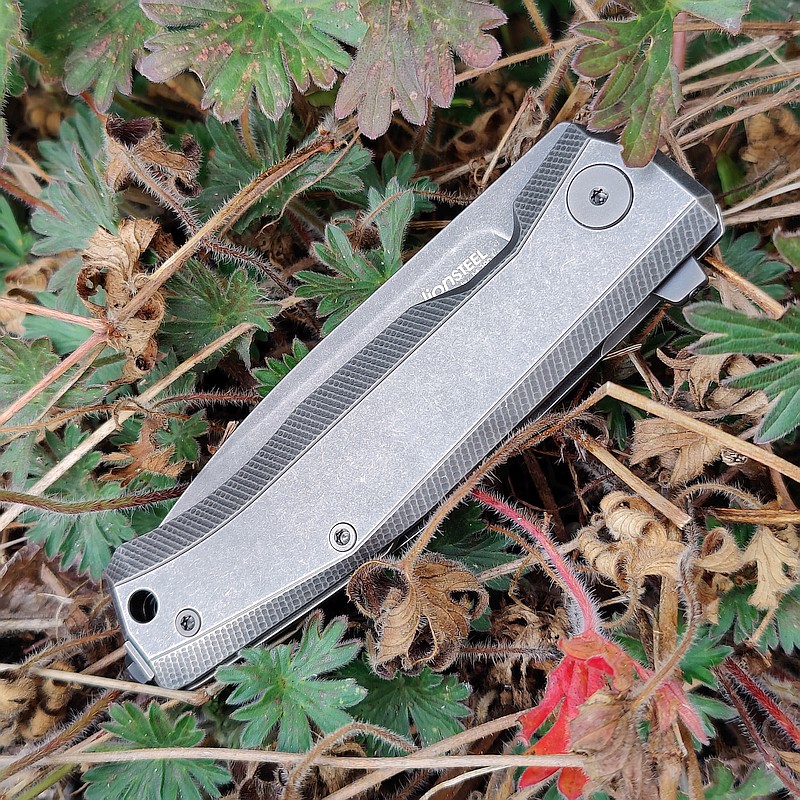
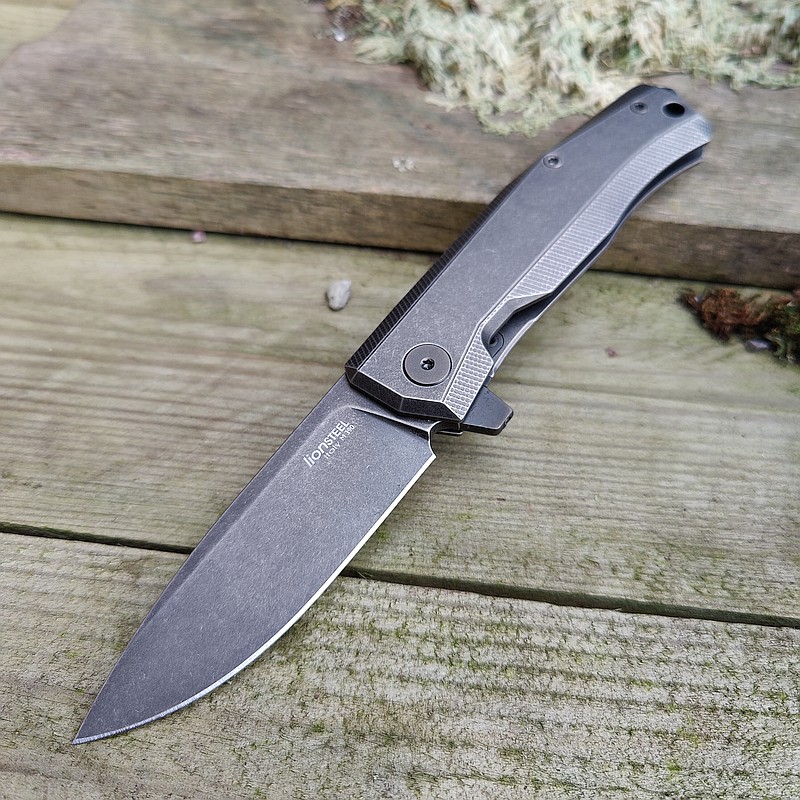
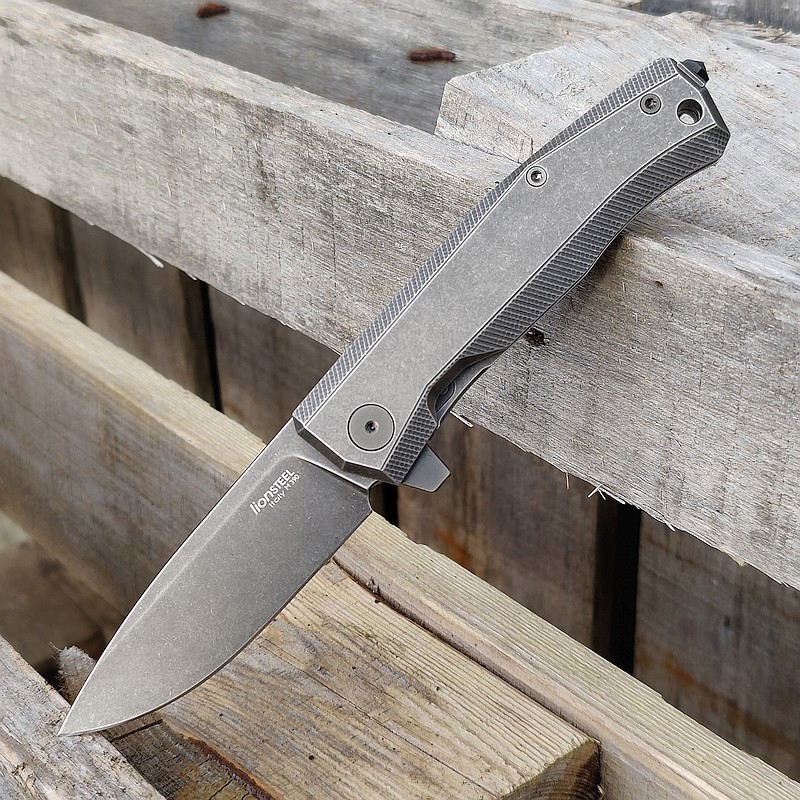
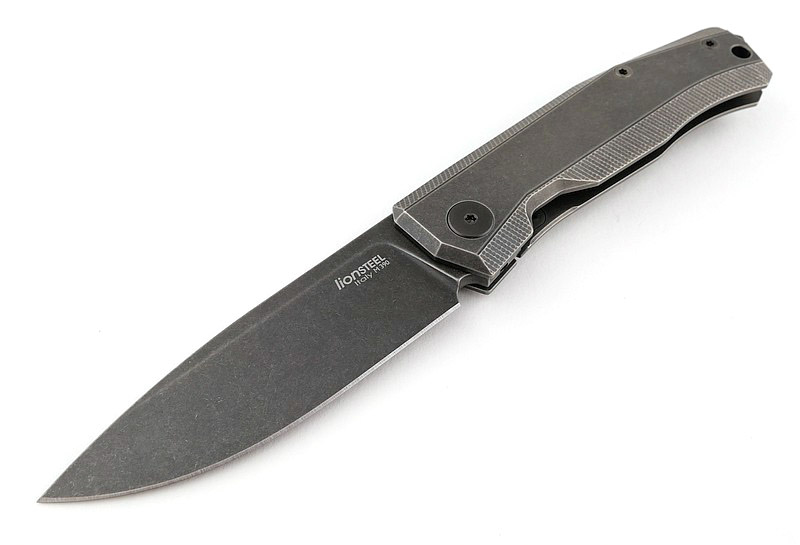
The lionSTEEL Myto is a superb EDC knife designed by Mik Molletta, with Titanium handles, M390 blade and a removable flipper tab. The version on test has a black stonewashed finish on the handles and blade. Join me in this review of the lionSTEEL Myto for a really detailed look over the design and technical specifications of this excellent EDC knife.

Video Overview

This video is a detailed look at the Myto, from handling to technical measurements. Hopefully something for everyone and you should have a better idea how the knife handles.


A few more details:

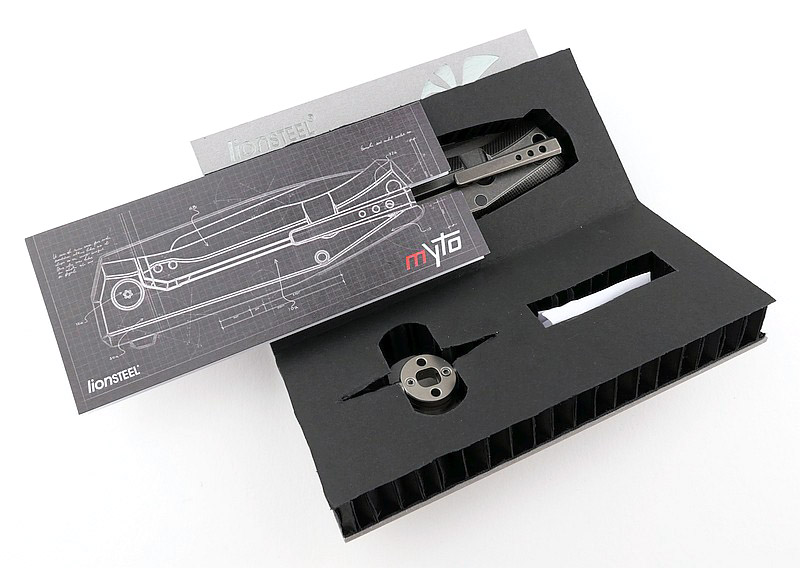
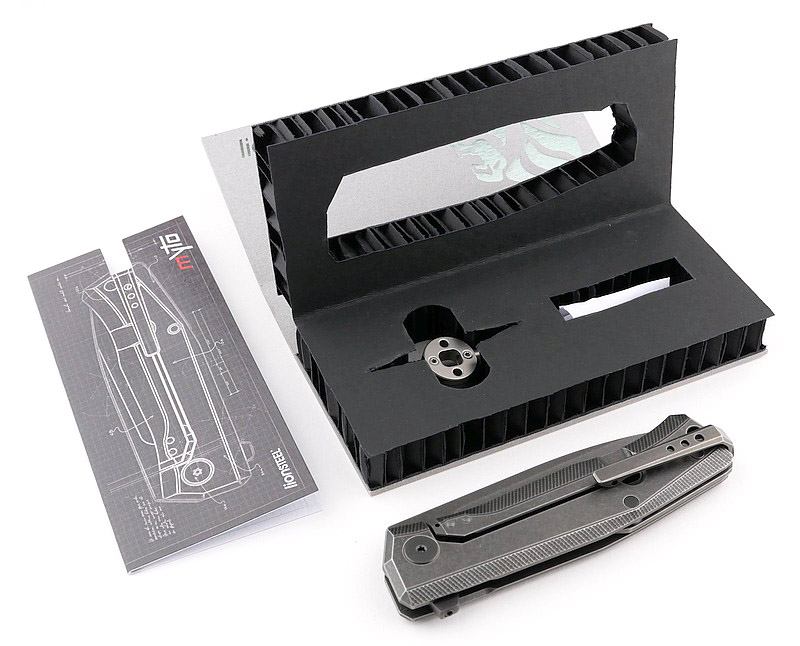
What’s in the box?:
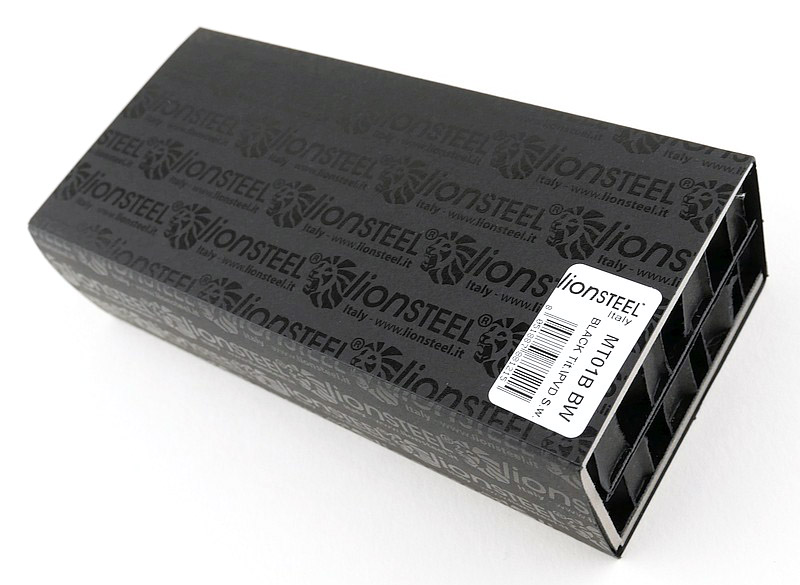
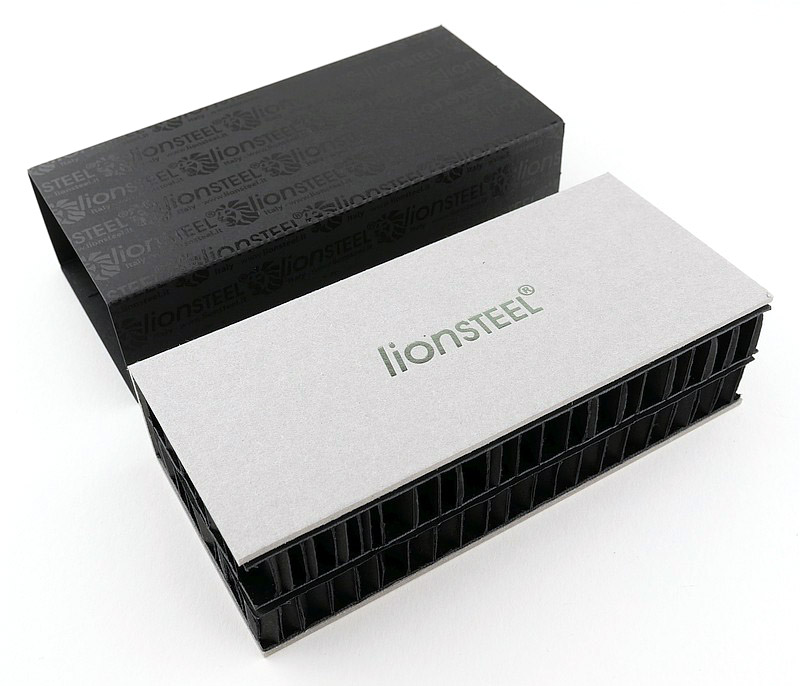
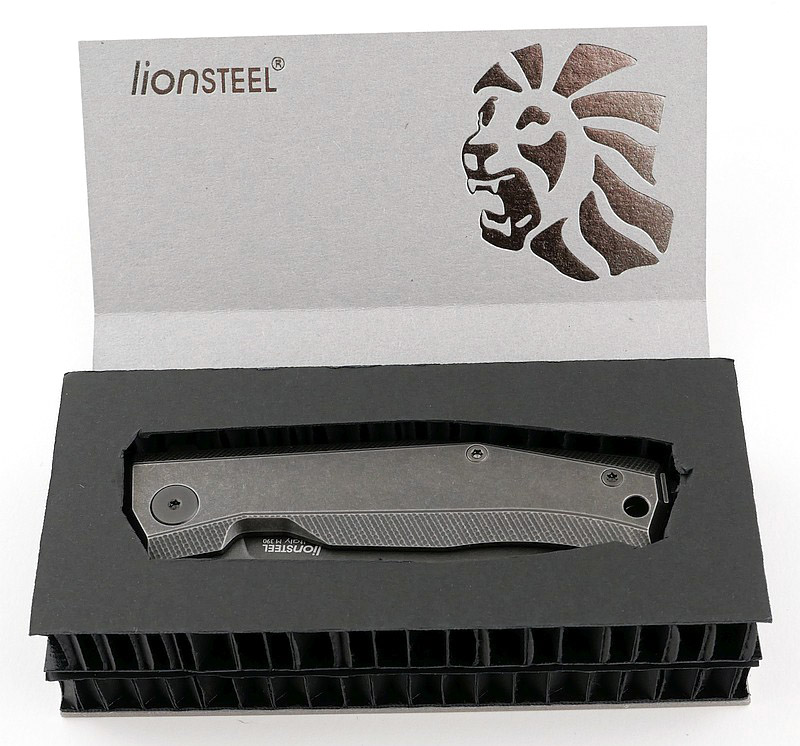
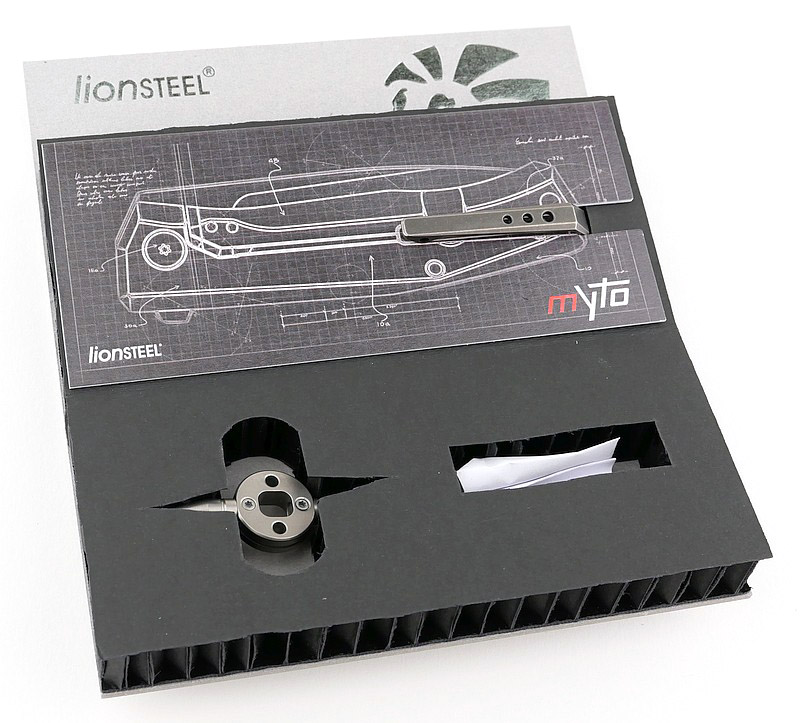
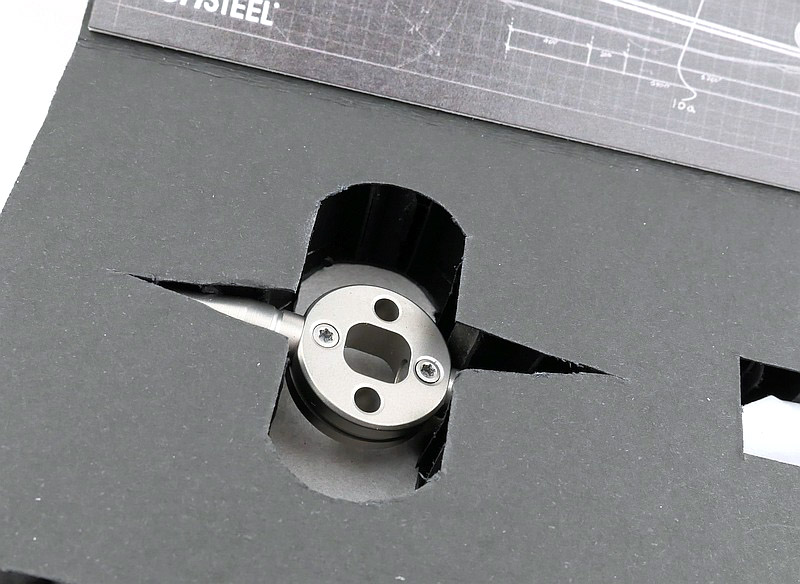
Arriving on lionSTEEL’s ‘recyclable’ packaging, this is how it arrives.


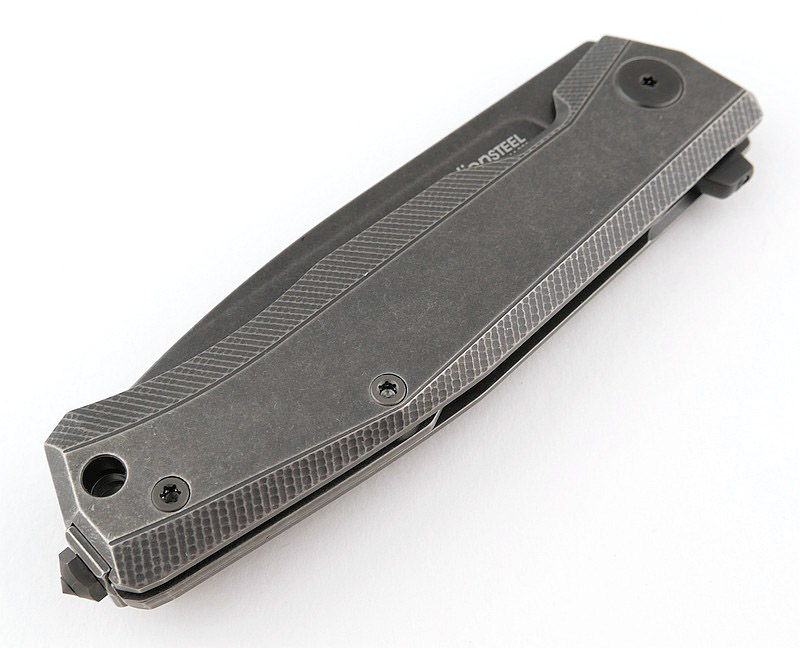
A good look round the Myto – Things to look out for here are:
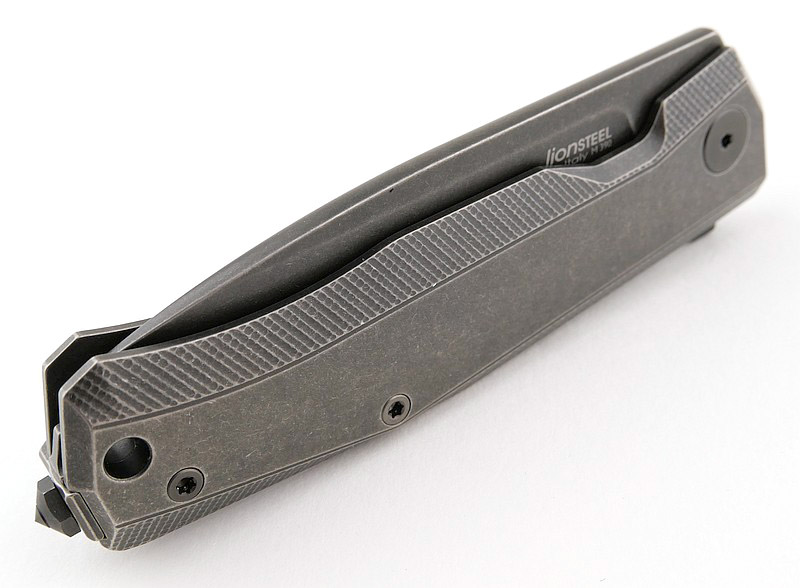
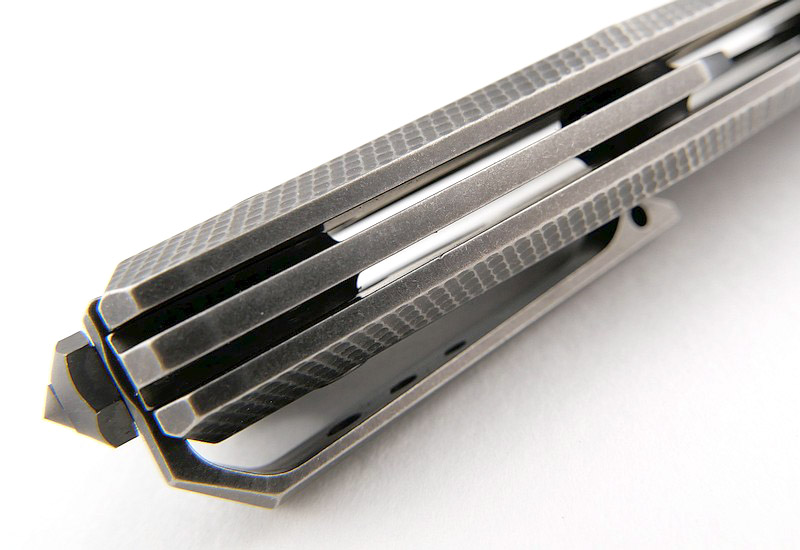
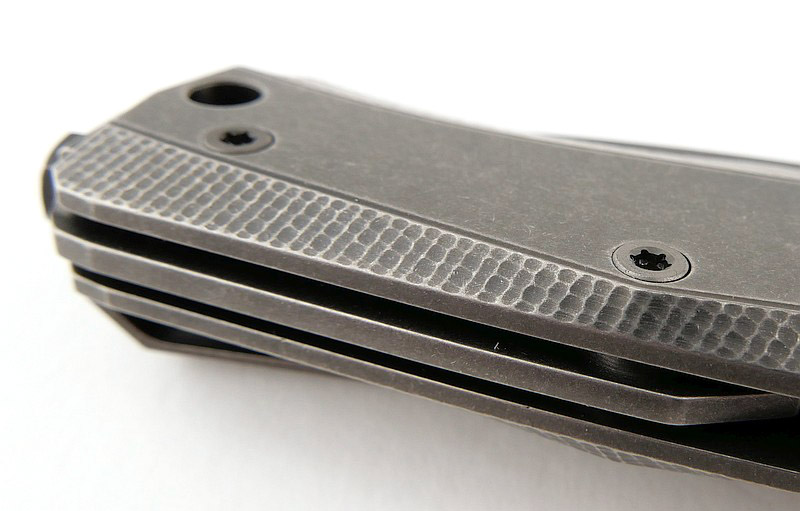
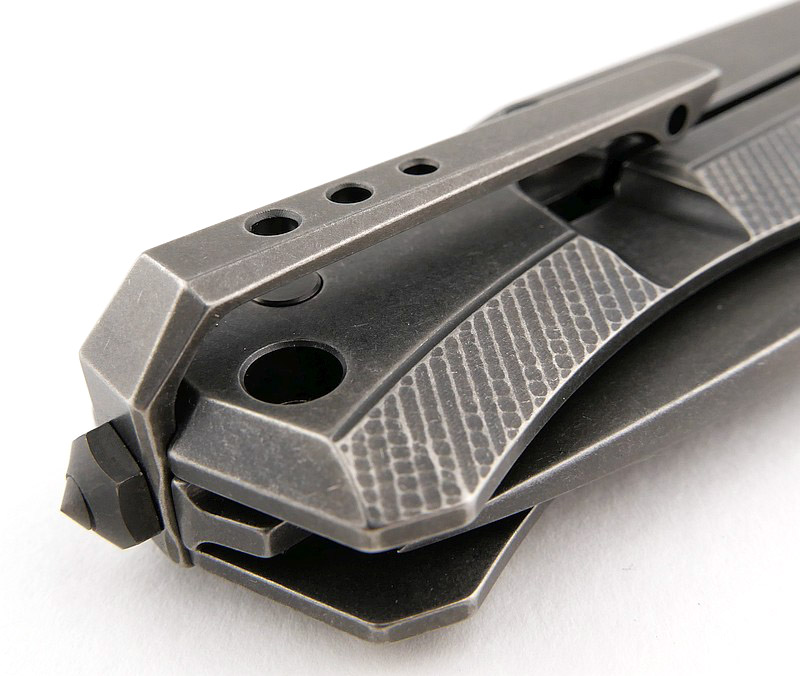
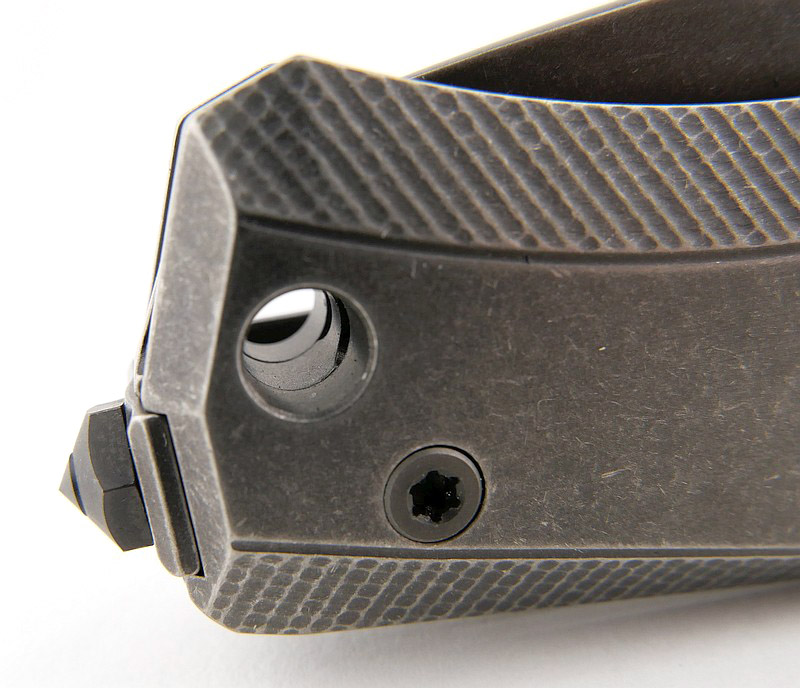
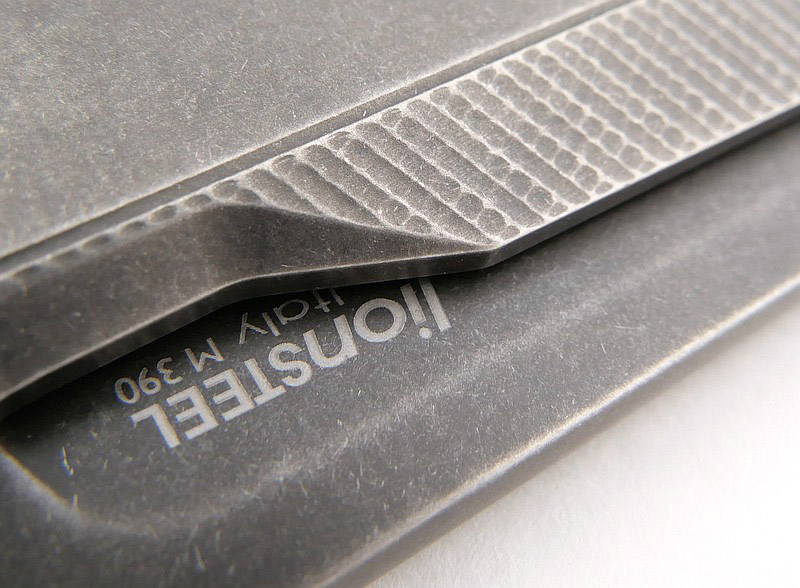
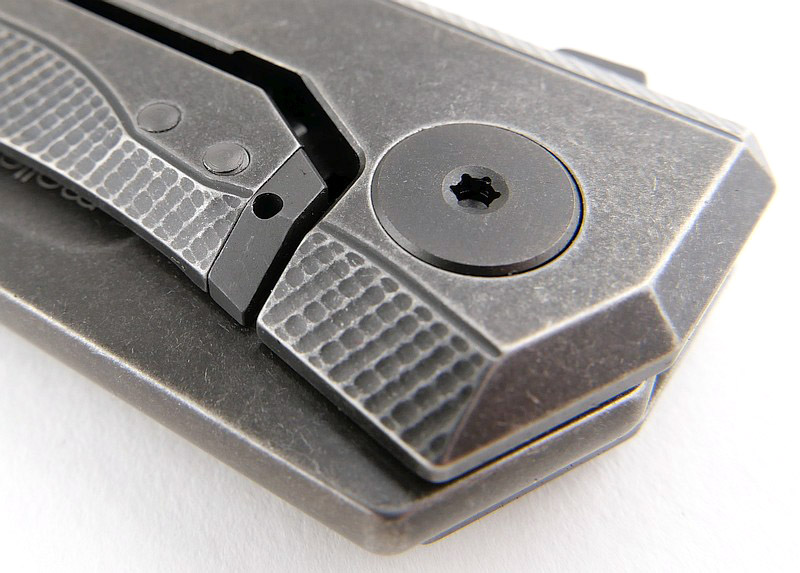
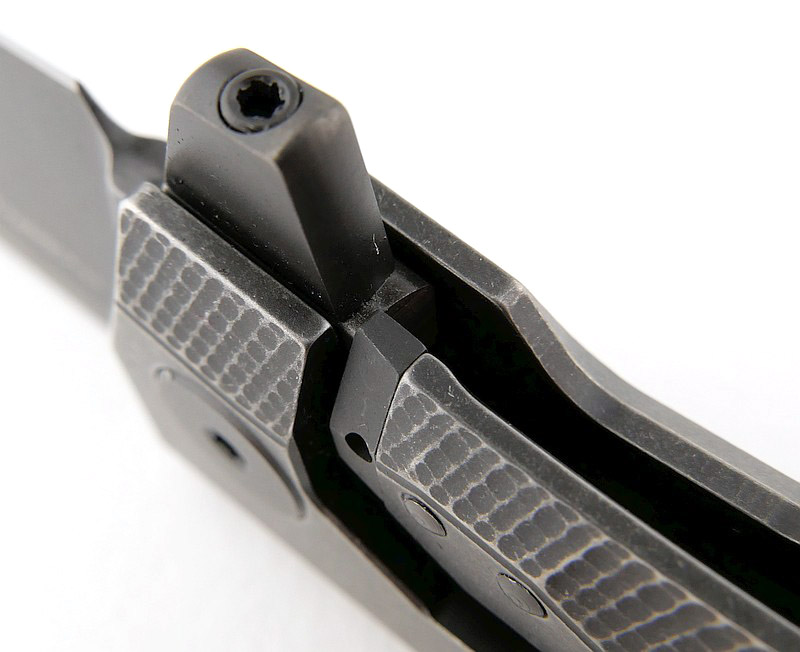
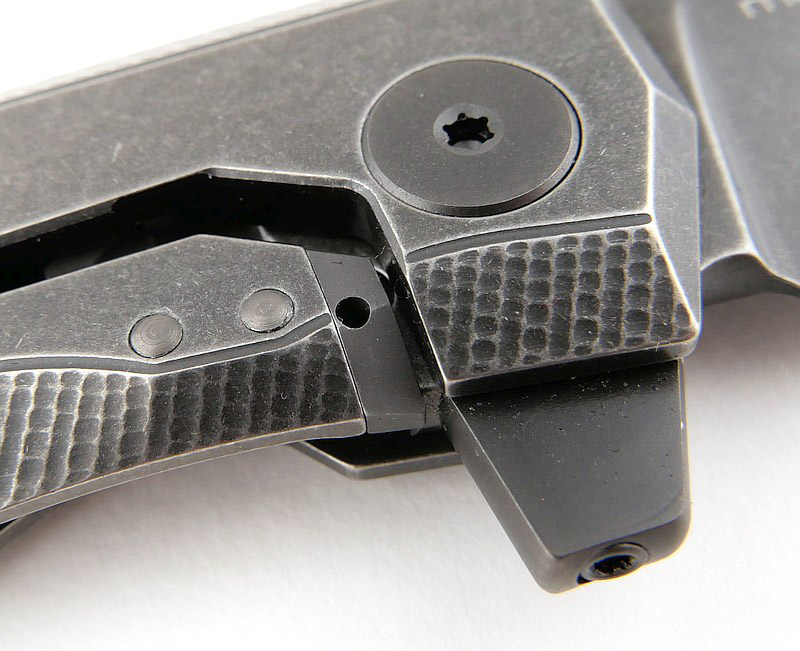
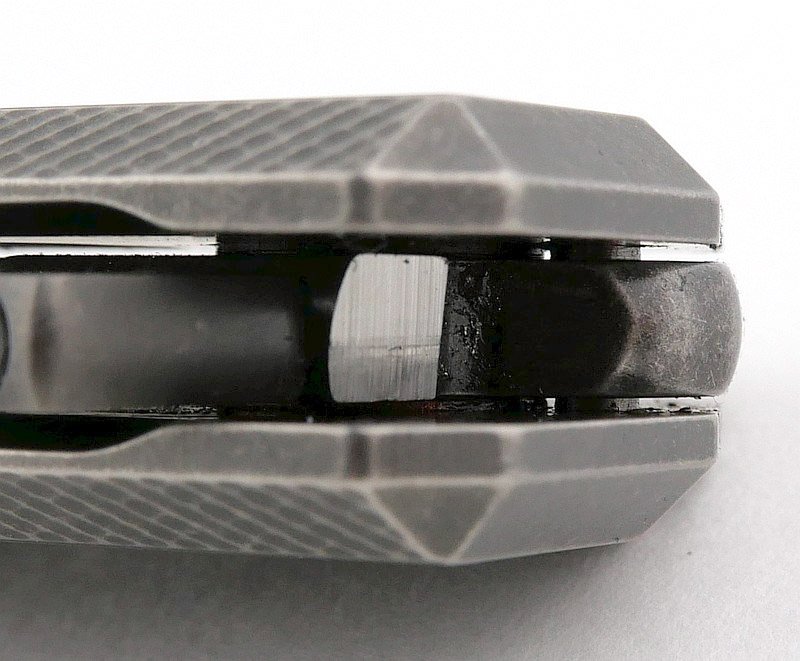
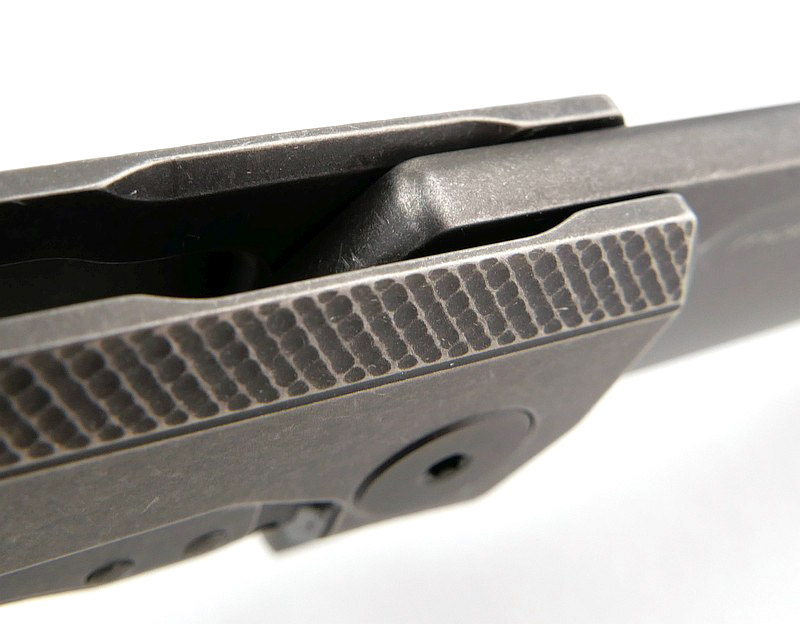
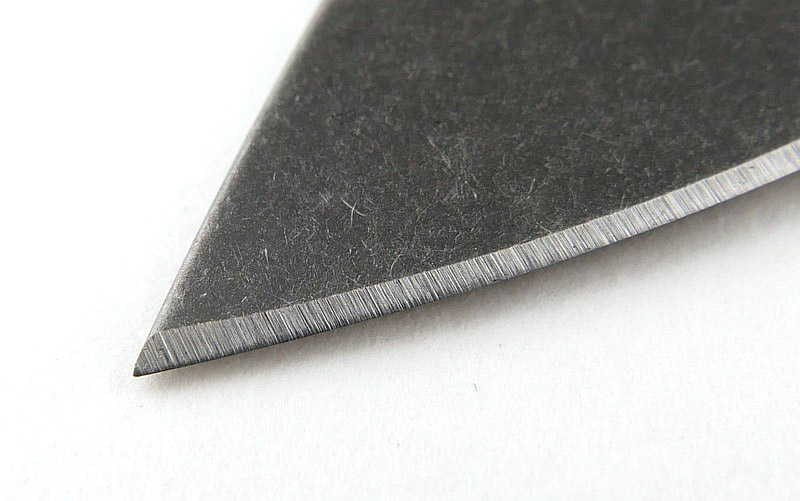
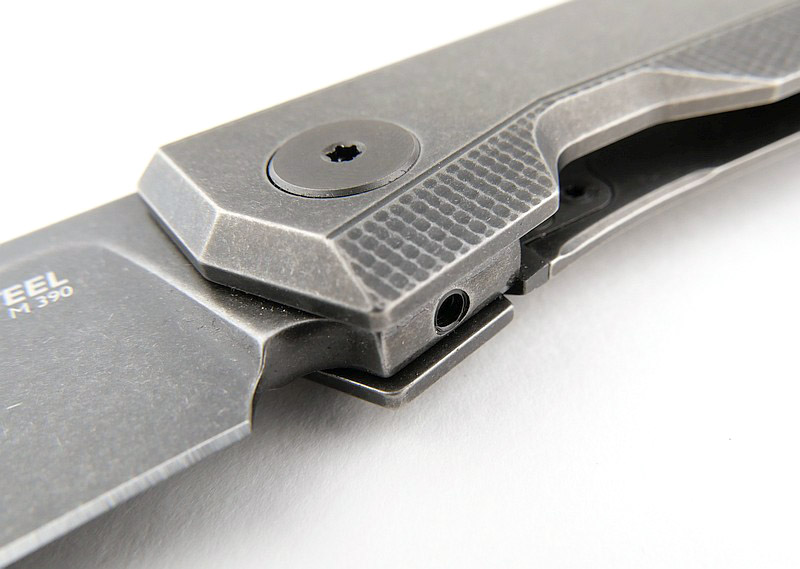
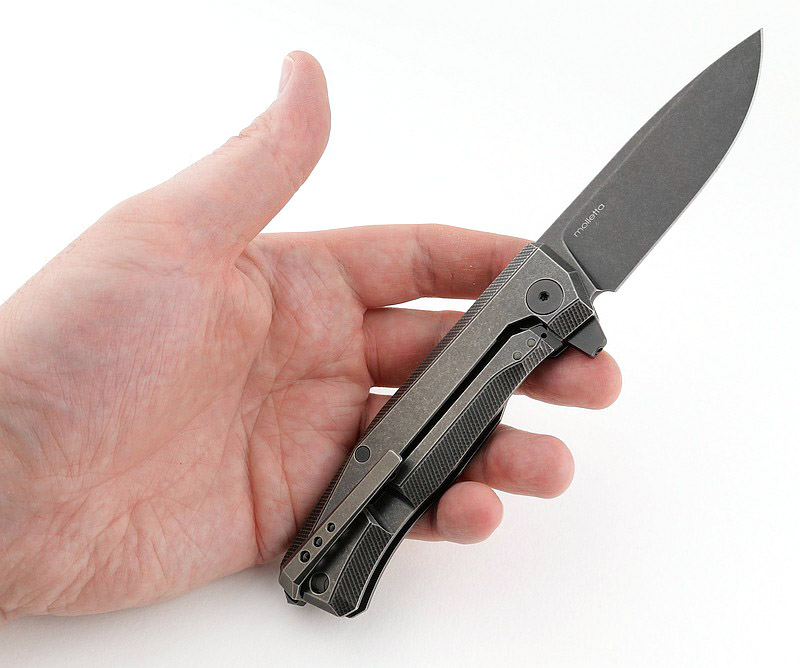
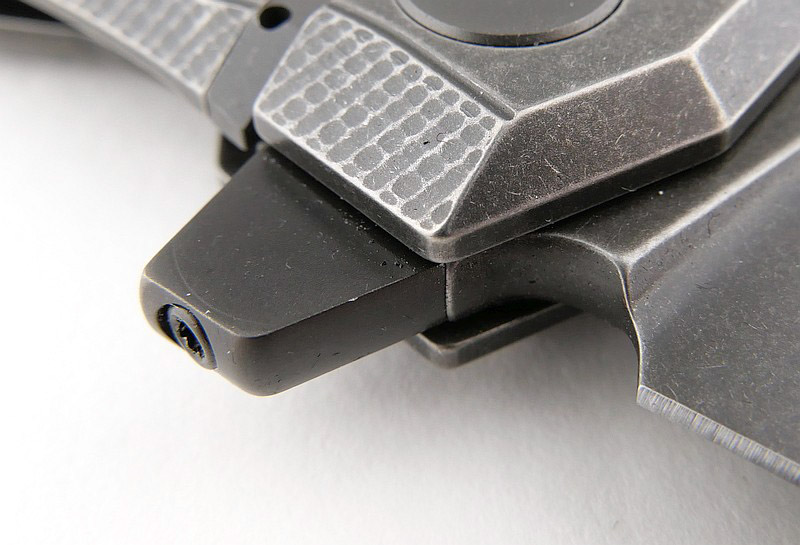
Overall fit and finish is flawless, even with the unforgiving close up photos. As you go through the gallery you will see the details of form (such as round the lock bar spring, or pocket clip, or lanyard hole, or flipper tab etc.) One detail you have to look closely for is the hidden stop pin which is just visible in one of the images. This version in the stonewash finish gives it a nice soft look, ready to be put to use.


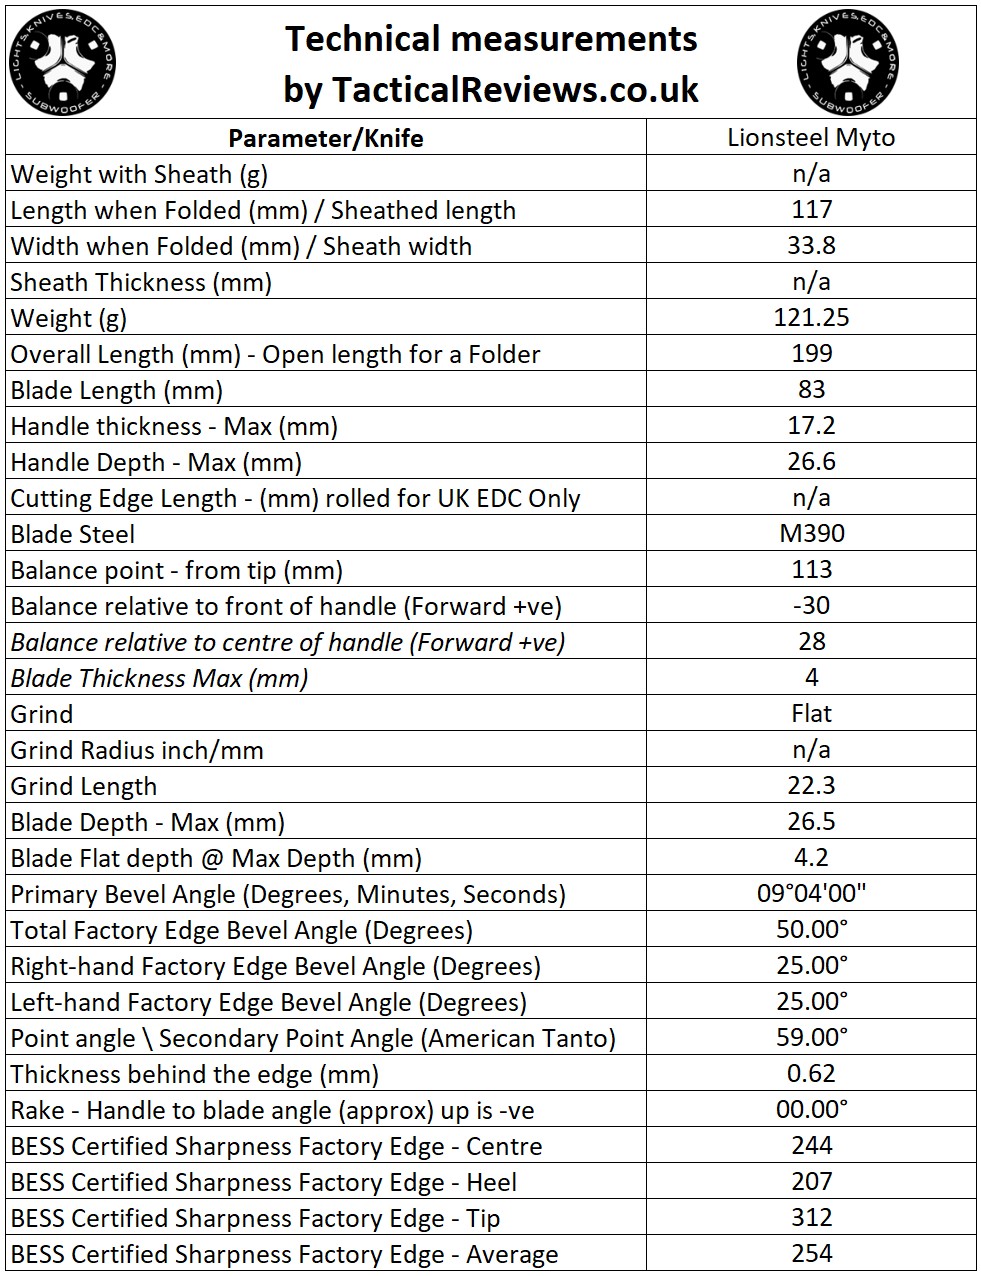
The Blade and Handle – Detailed Measurements:
For full details of the tests and measurements carried out and an explanation of the results, see the page – Knife Technical Testing – How It’s Done.

The blade is made from M390 steel.


The Factory edge up close – NEW FOR 2022!:

Followers of Tactical Reviews will know my views on factory edges, but to recap:

Anyone using a knife will need to sharpen it. That first factory edge is just like the first tank of fuel that a new car comes with (or first charge of the battery).
A good factory edge is a ‘nice to have’ but not a ‘make or break’ for a good knife, as you will be putting your own edge onto it soon enough.
The factory edge does however indicate the care a knife maker has put into the final finish.
It is for this reason Tactical Reviews measures factory edge sharpness and specifications, and includes this information in the detailed technical testing.

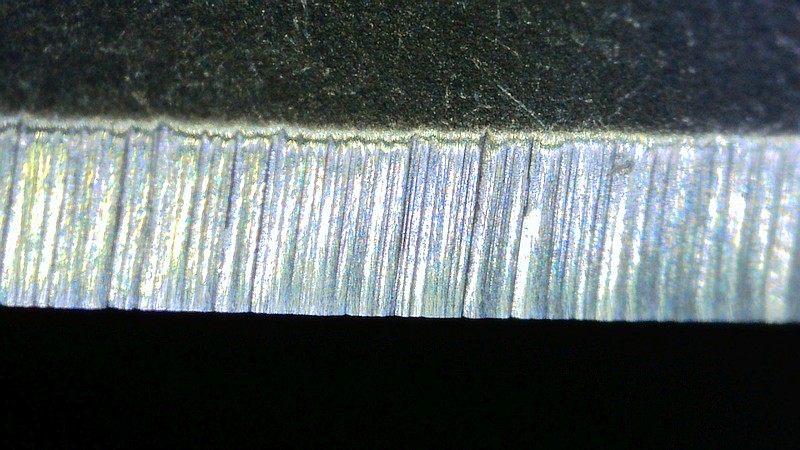
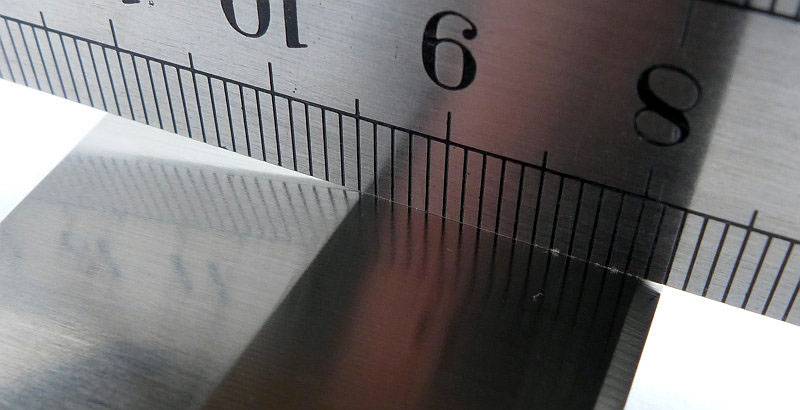
As a further look at the factory edge, this section has been added to include some high magnification photos of the factory edges.

Though not the best BESS sharpness measurements, this close up of the edge shows the texturing in the edge that makes it really cut well.


What is it like to use?

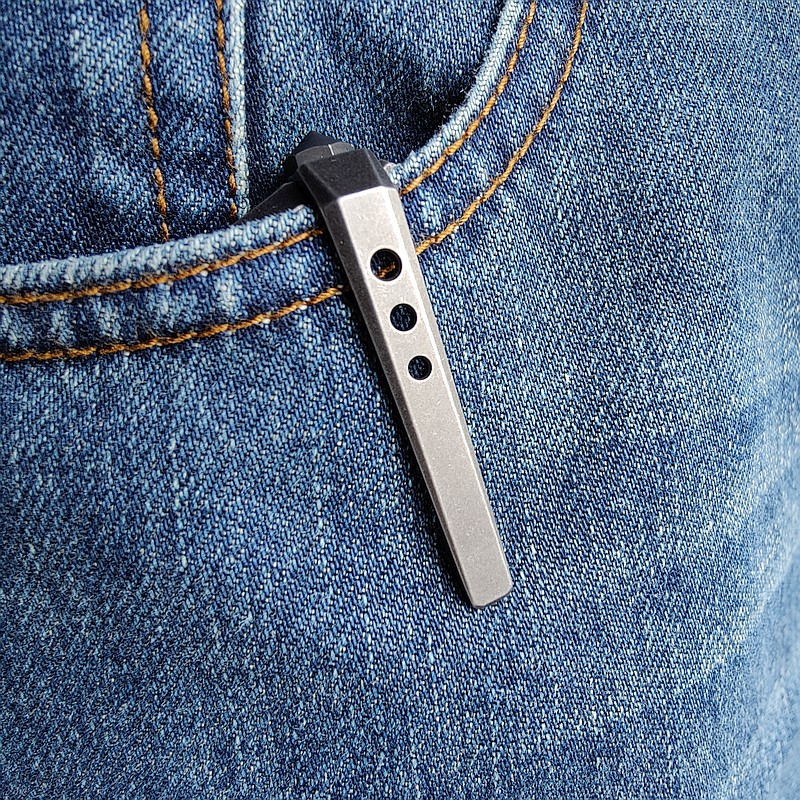
Inobtrusive and easy to carry are a couple of first impressions which make a great EDC knife. One thing I wasn’t so sure about when I first picked up the Myto was the solid pocket clip; it seemed too stiff and like it would be difficult to use. I’ve been proven completely wrong on that as actually the clip eases over the edge of a pocket without a struggle, but then is a bit harder to take off, so making it secure.


With the blade on bearings, the flip open is super slick, as you can see in the video. It really doesn’t take any effort at all to flip to the locked position and you can develop a nice slow lazy flip with the blade reliably locking, or really snap it out. The detent if firm without being harsh so you never have to fight with it.

It’s not the first lionSTEEL with removable flipper tab, and you might question the benefits of such a feature. Consider the pros and cons for a flipper. As pros, you might have fast deployment, and built-in finger guard. As cons, one of the most frequent complaints it the messy tab sticking out and the action appearing like a flick knife and in many places or situations causing distress to non-knife people.
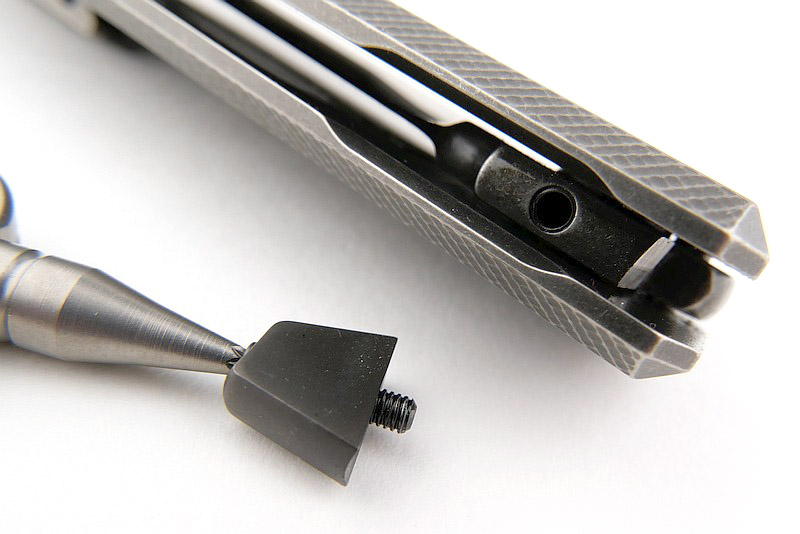
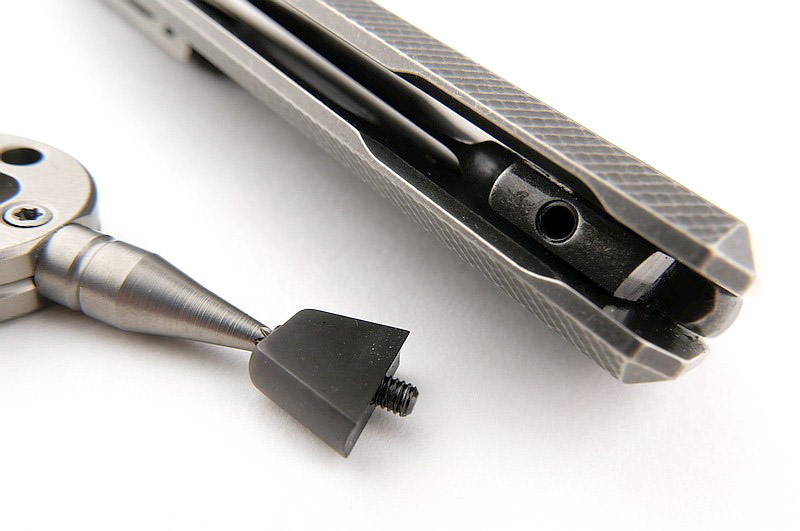
So if you want a sleeker looking knife, and one which requires a steady and inoffensive two-handed opening, you undo one screw and off comes the flipper tab. You can then change your mind, just want to mix it up again, or go fidget flipping and on goes the tab.
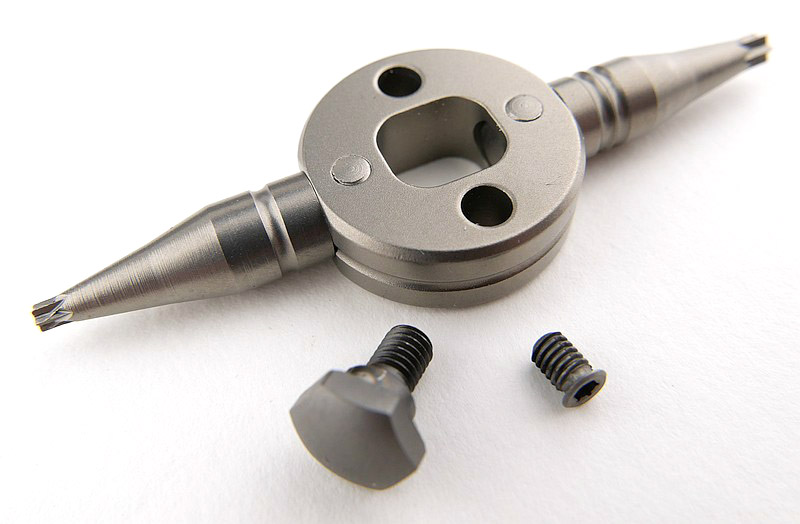
I did find the tab itself was not perfectly in line due to the removable system, and in trying to get it lined up better I over torqued the supplied tool and started to twist off the end of the torque driver, so beware of this when refitting the tab.
If you have the facility you will likely use it, giving you two slightly different knives in one. I have several folders I wish had the same feature.


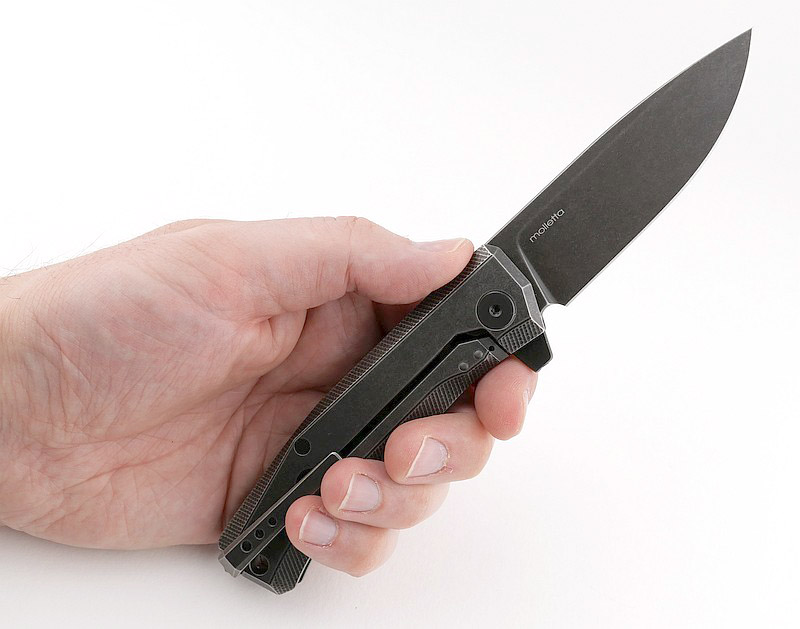
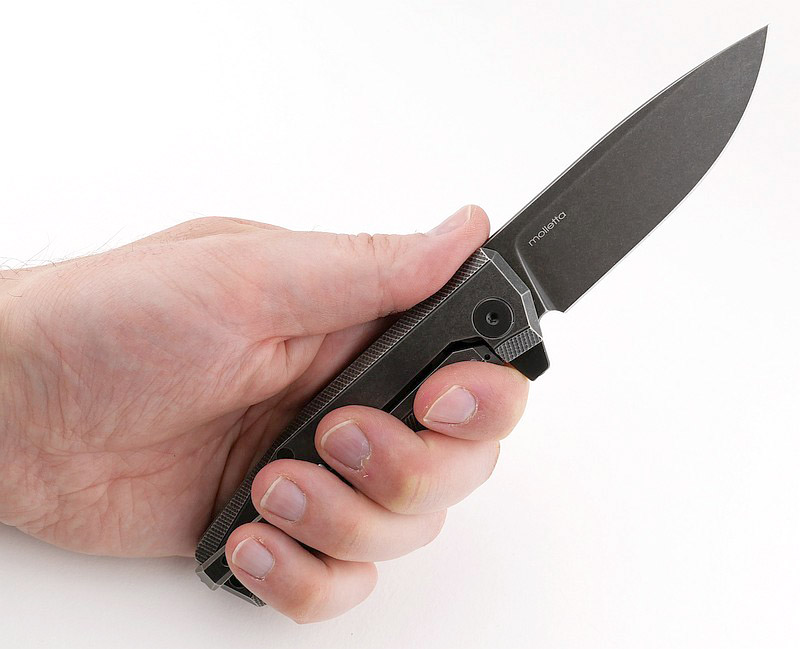
In terms of size, the Myto fits in very well in the 3/3.5″ blade length category ideal for general purpose every day tasks. The strong lock and flipper tab/finger guard allow you to work hard with this knife.

I take an XL size glove, and in my hand I can take a full grip and the handle is large enough so that my hand doesn’t have the corners of the butt digging in, instead just extending slightly out of my hand. At the front, the flipper tab acting as a finger guard, keeps the position of the knife safely under control. Just right.


lionSTEEL’s superb engineering stands out the moment you pick up the Myto with absolutely nothing seeming out of place or ‘could be better’, instead everything just being right. Refined, easy to carry and strong blade with great slicing power.

Review Summary

The views expressed in this summary table are from the point of view of the reviewer’s personal use. I am not a member of the armed forces and cannot comment on its use beyond a cutting tool or field/hunting knife.

Something that might be a ‘pro’ for one user can be a ‘con’ for another, so the comments are categorised based on my requirements. You should consider all points and if they could be beneficial to you.

_______________________________________________
What doesn’t work so well for me
_______________________________________________

Flipper tab is slightly wonky due to removable system.
Easy to over-torque the supplied tool.
Solid clip feels very stiff.
Glass breaker is scratchy.

_______________________________________________
Things I like
_______________________________________________

Quality engineering.
M390 blade steel performance.
Excellent EDC size of knife.
‘ReF’ Removable Flipper tab system.
Elegant and refined design.
Blade geometry makes for a great slicer.
Solid and slick blade action.
Clip can be fitted for left or right handed use.

 
Discussing the Review:
The ideal place to discuss this review is on the Tactical Reviews Facebook Page
Please visit there and start/join the conversation.
As well as the Tactical Reviews Facebook Page, please consider visiting one of the following to start/join in any discussion.

BladeForums – Knife Reviews (US based Forum for Knife Discussion)

CandlePowerForums – Knife Reviews Section (Largest and Friendliest Flashlight Community Forum)

Knife Review: Promate Dive Knives – Barracuda, Scuba, Seal Folder, KF505 Blunt and Line Cutter (Dive Knives 2016 – Detail Review)

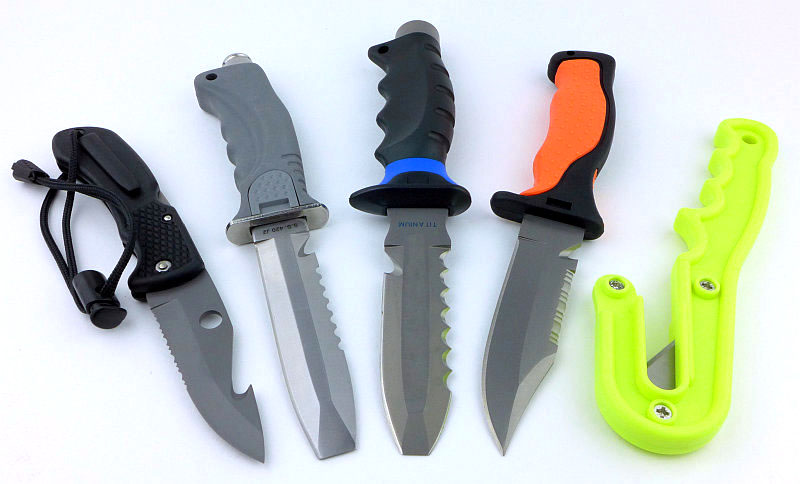
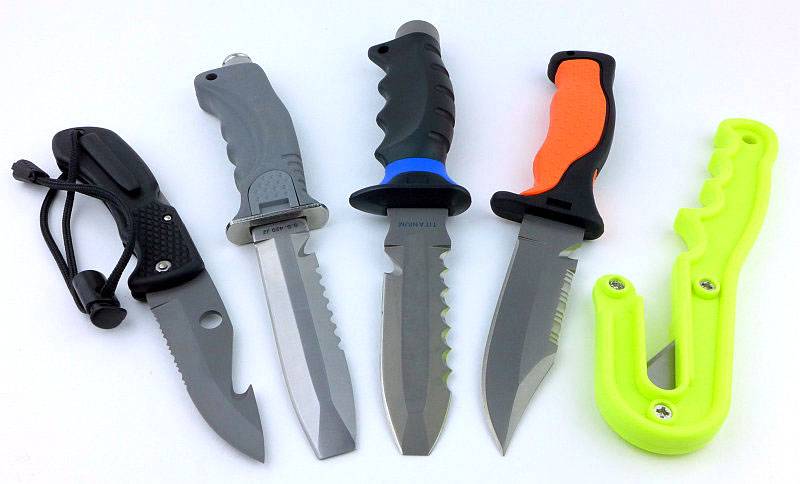
This review provides further details for the five Promate dive knives (Barracuda Blunt Ti, KF593 Ti, KF090 Seal Folder Ti, KF505 Blunt and KF001 Line Cutter) which could not be included in the Dive Knives 2016 – Mega Test Review. Promate is a Full line manufacturer of scuba diving equipment and snorkeling gear including regulators, instruments, buoyancy compensators, masks, snorkels, fins, knives, boots, gloves and bags.

 photo 87 Promate intro P1210559.jpg

The Blade and Handle Geometry:

Most knife specifications have a basic description of the blade geometry, but in this section I will be taking a more detailed look at geometry and balance.

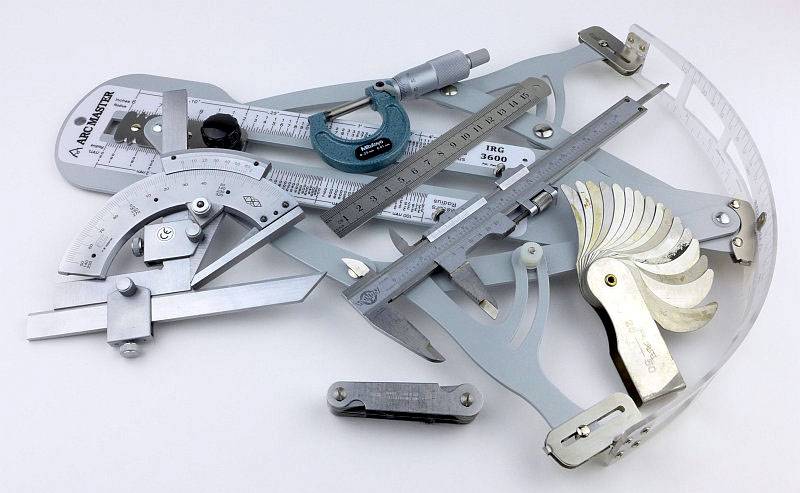
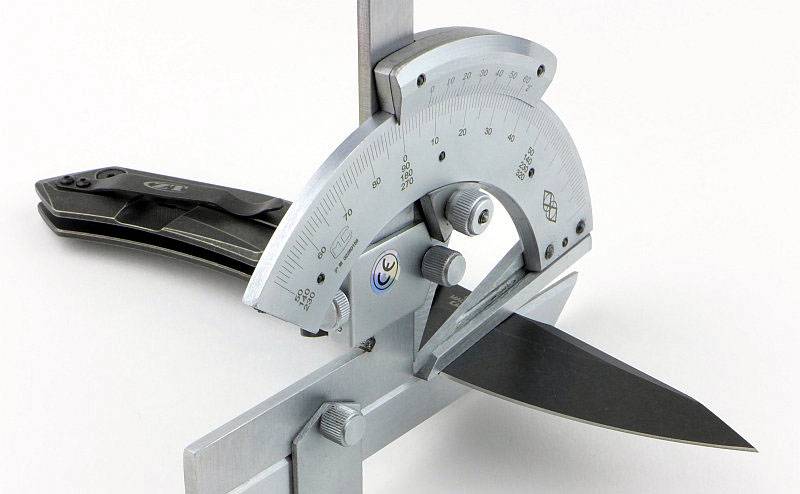
Using a set of gauges and precision measuring equipment including a Vernier protractor, callipers, fixed radius gauges and the unique Arc Master adjustable radius gauge (the one that looks like a crossbow).
 photo Knife measuring P1180483.jpg

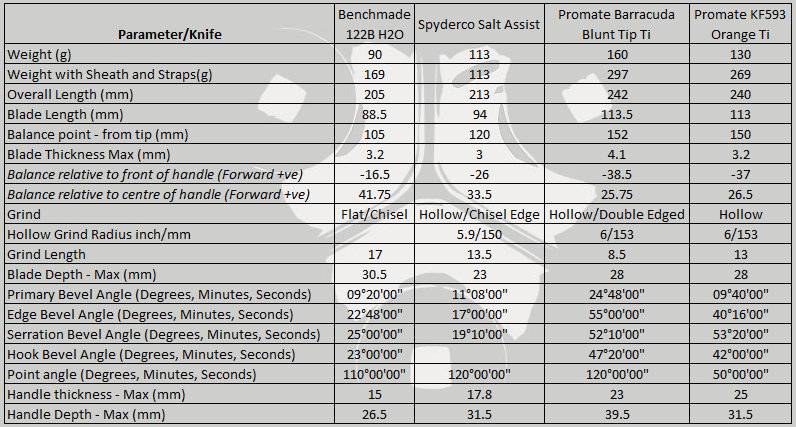
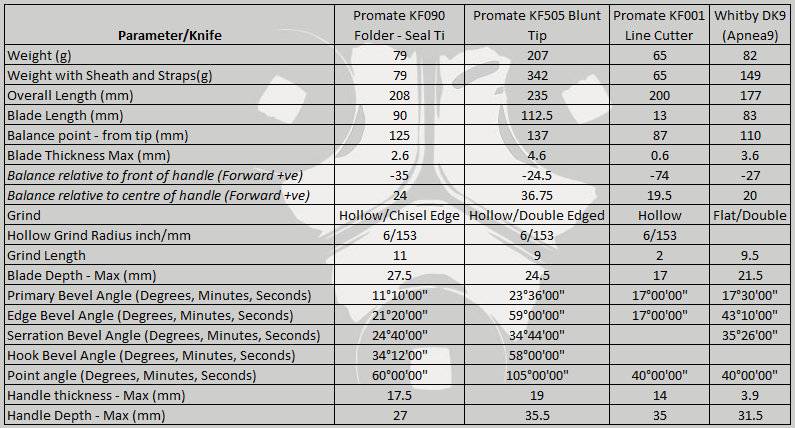
These measurements have been tabulated and are presented along with other blades.

Key aspects such as the primary bevel angle, grind type, blade depth, blade thickness, length, weight are detailed, along with balance information.
The ‘Balance relative to the front of the handle’ tells you if the knife will feel front heavy, or if the weight is in your hand (a positive value means the weight is forward of the front of the handle). The ‘Balance relative to the centre of the handle’ indicates how close to a ‘neutral balance’ the knife has in the hand.

In the case of full convex grinds the approximate centre of the grind is used for the primary bevel angle estimate.

The measurements are presented alongside some of the other knives from the Dive Knives 2016 – Mega Test Review

As there are five Promate cutting tools, these are logged across two tables.
 photo Dive Knives Parameters 1 of 3.jpg

 photo Dive Knives Parameters 2 of 3.jpg

A few more details of the KF001 Line Cutter:

There are five models from Promate and a huge amount of detail to cover, so each one will have its own “A few more details…” section.
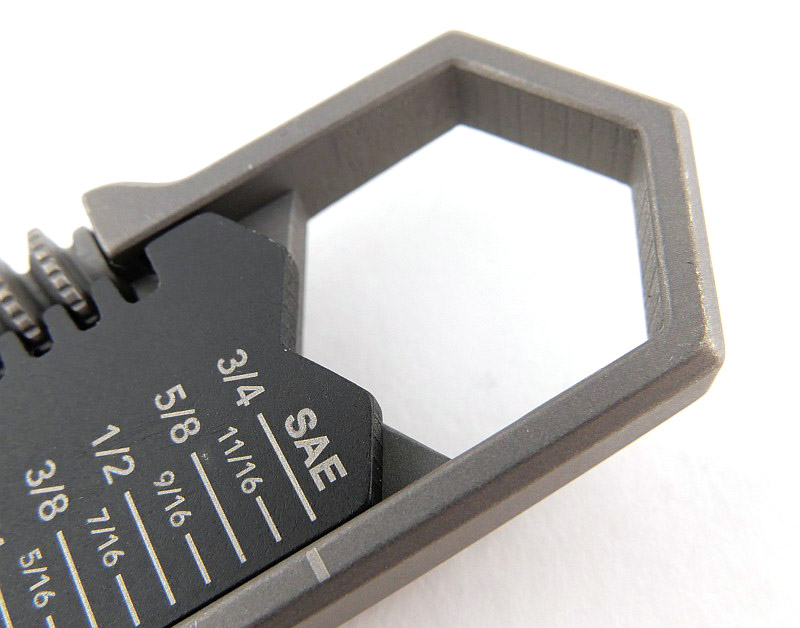
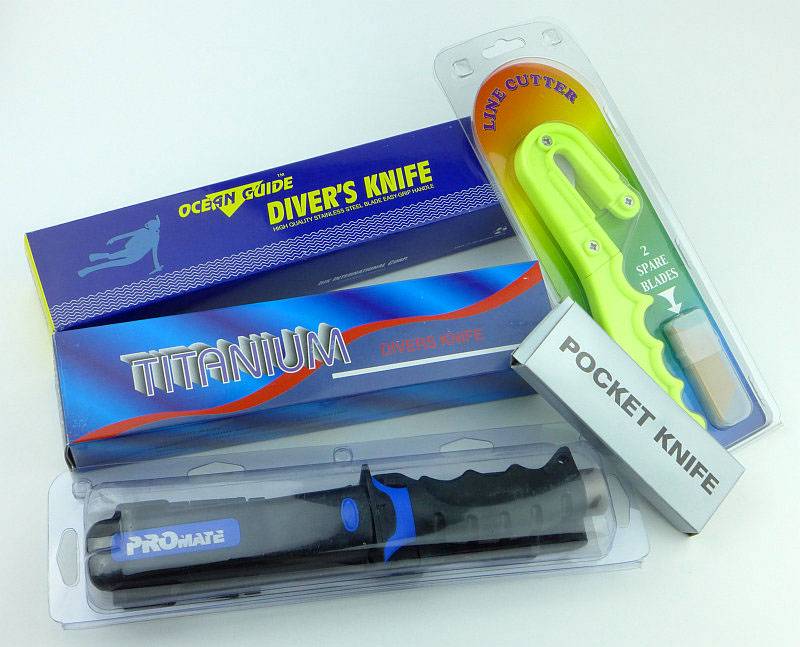
 photo 01 Promate boxed P1210106.jpg

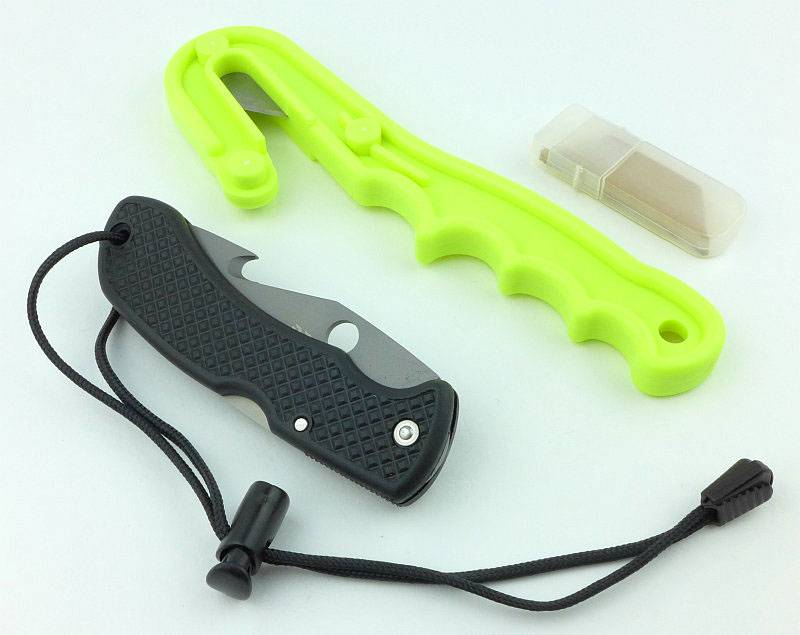
The first two we will look at are the ones that are not fixed blade sheath knives, the Seal Folder and Line Cutter.
 photo 02 Promate first two P1210122.jpg

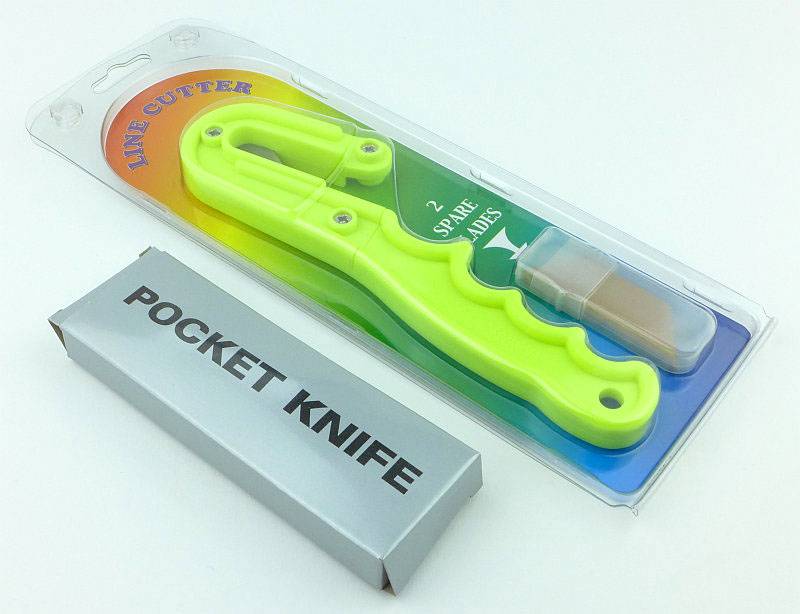
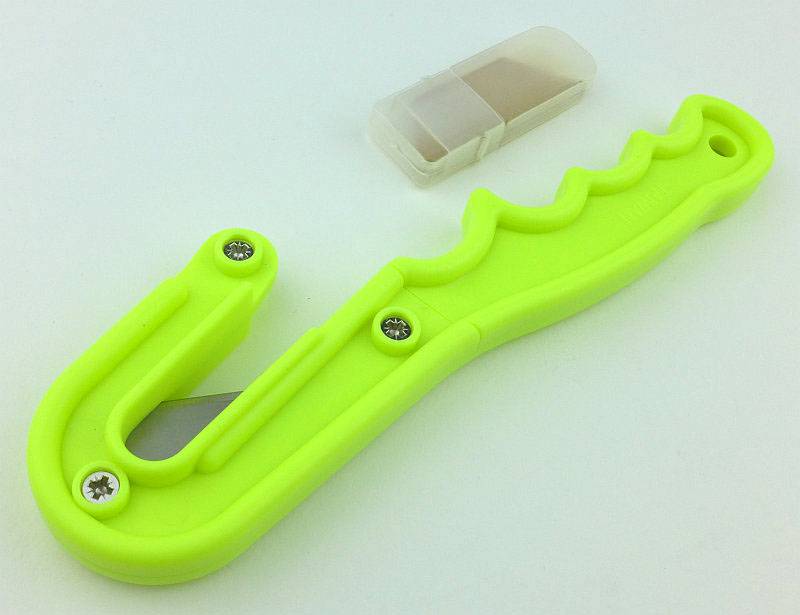
Fresh out of the box.
 photo 03 Promate first two unboxed P1210127.jpg

A small container is supplied with the line cutter.
 photo 04 Promate line cutter P1210131.jpg

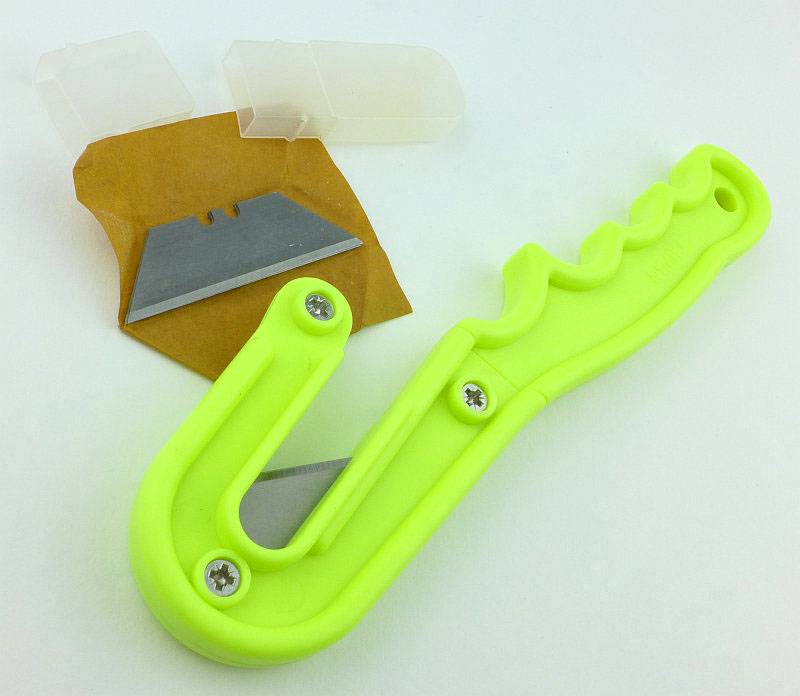
This contains two spare blades wrapped in oil paper.
 photo 06 Promate line cutter spare blade P1210138.jpg

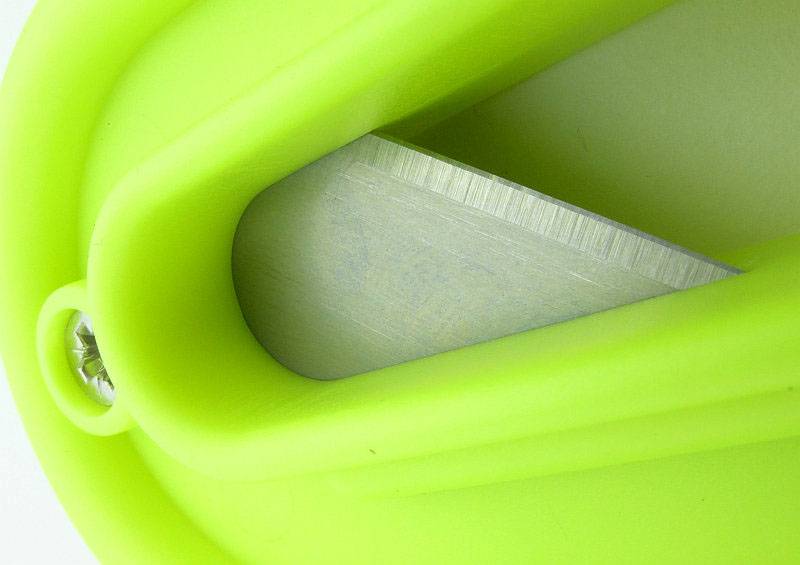
A close up of the blade in the line cutter.
 photo 05 Promate line cutter blade P1210137.jpg

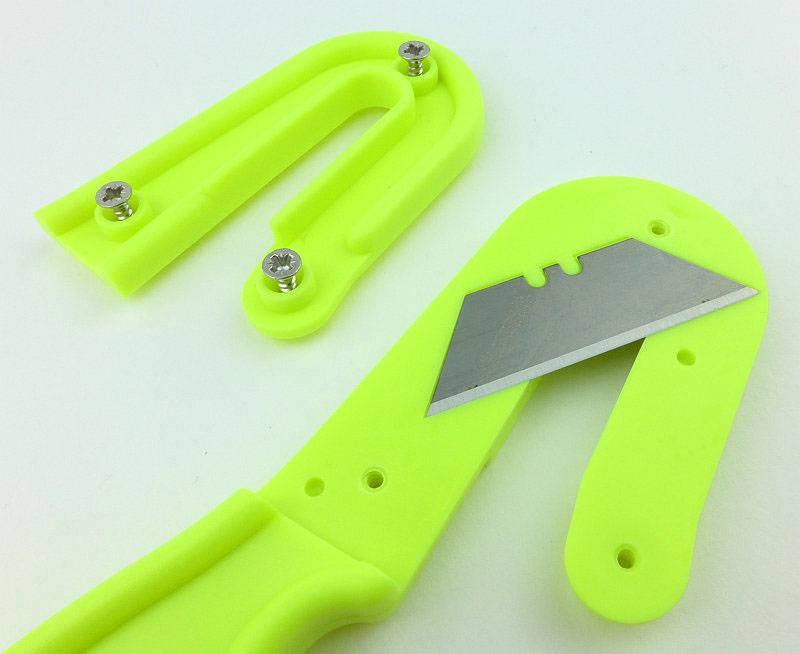
Taking out the three screws holding the line cutter together allows you to see how the standard utility blade fits inside.
 photo 07 Promate line cutter blade swap P1210158.jpg

It is a generous size so is easy to handle.
 photo 08 Promate line cutter in hand P1210161.jpg

A few more details of the KF090 Seal Folder Ti:

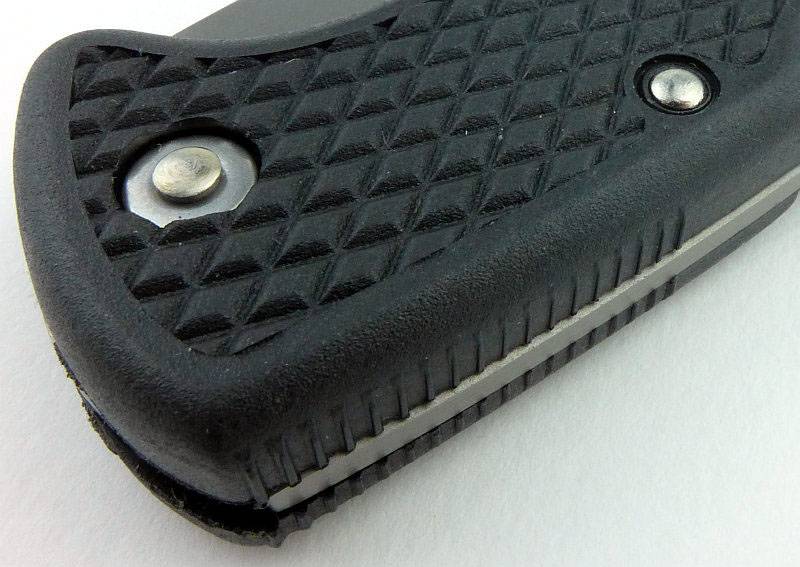
An adjustable wrist strap is supplied fitted to the Seal folder.
 photo 09 Promate Ti Folder P1210165.jpg

The pivot is riveted and cannot be adjusted.
 photo 10 Promate Ti Folder pivot P1210167.jpg

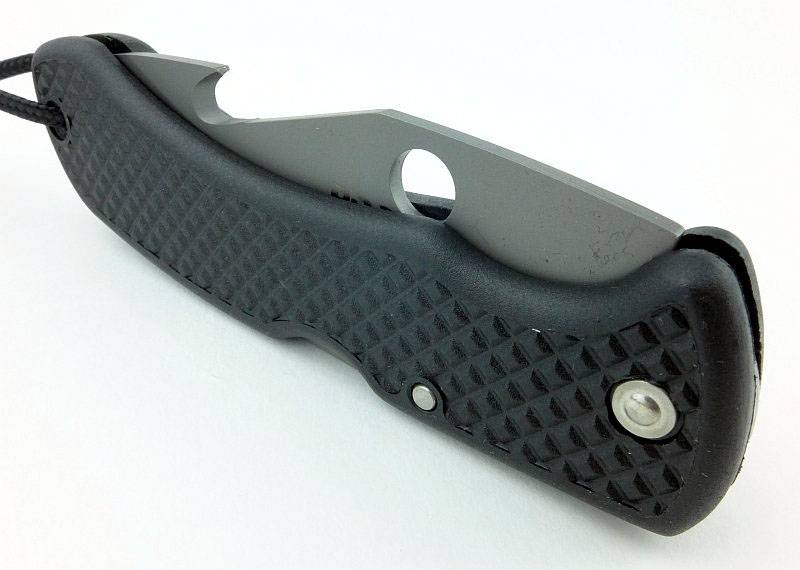
On one side there is a plastic pocket clip.
 photo 11 Promate Ti Folder clip P1210168.jpg

From this side you can see the blade pivot and lock bar pivot rivet heads.
 photo 12 Promate Ti Folder pivot rivet P1210173.jpg

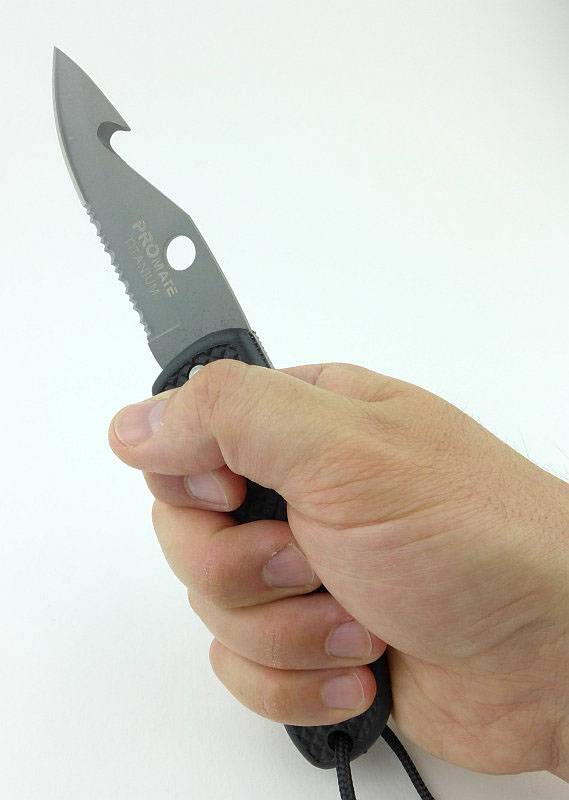
As a specialist knife, the Seal folder has an unusual cutting hook which is accessible even with the blade folded.
 photo 13 Promate Ti Folder folded P1210178.jpg

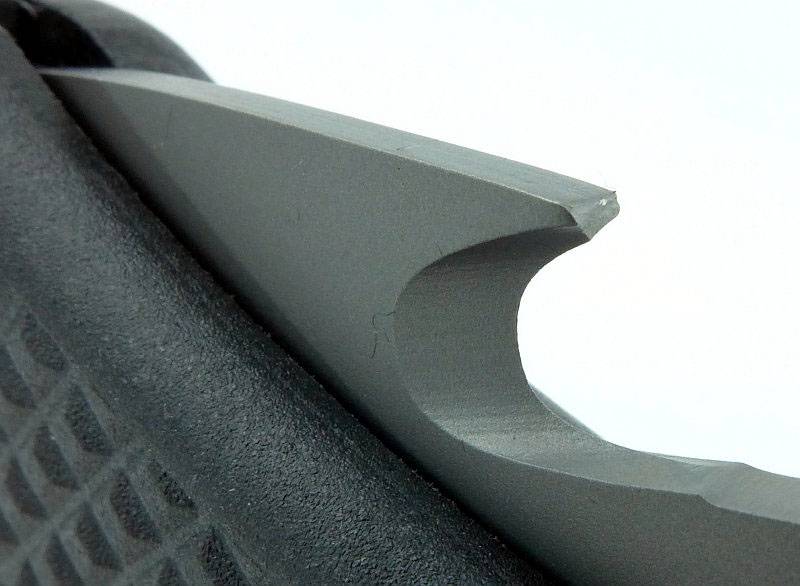
A closer look at the cutting hook.
 photo 14 Promate Ti Folder hook P1210181.jpg

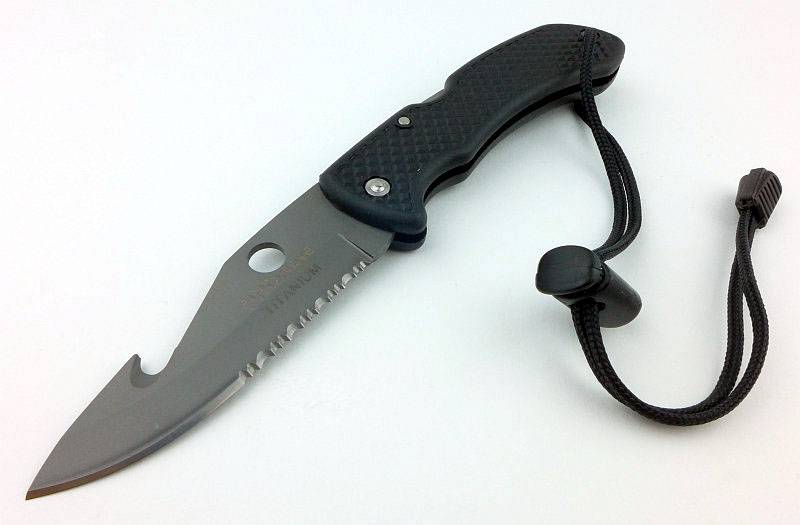
The blade is part serrated and there is a small thumb opening hole.
 photo 15 Promate Ti Folder open P1210184.jpg

In case you had forgotten, it is made of titanium. The serrations are well formed.
 photo 17 Promate Ti Folder serration P1210192.jpg

When you look at the reverse of the blade, you can see that this knife uses only a single bevel edge.
 photo 18 Promate Ti Folder blade back P1210200.jpg

Going in closer to the back of the serrations.
 photo 19 Promate Ti Folder serration back P1210201.jpg

And also the plain edge.
 photo 20 Promate Ti Folder plain back P1210206.jpg

Not a large knife, the Seal folder is still a comfortable size.
 photo 21 Promate Ti Folder in hand P1210212.jpg

A few more details of the Barracuda Blunt Ti:

Promate’s Barracuda comes in Steel and Titanium versions, as well as blunt and pointed tips. The fully diving orientated blade design with Titanium and a blunt tip was chosen for the review.
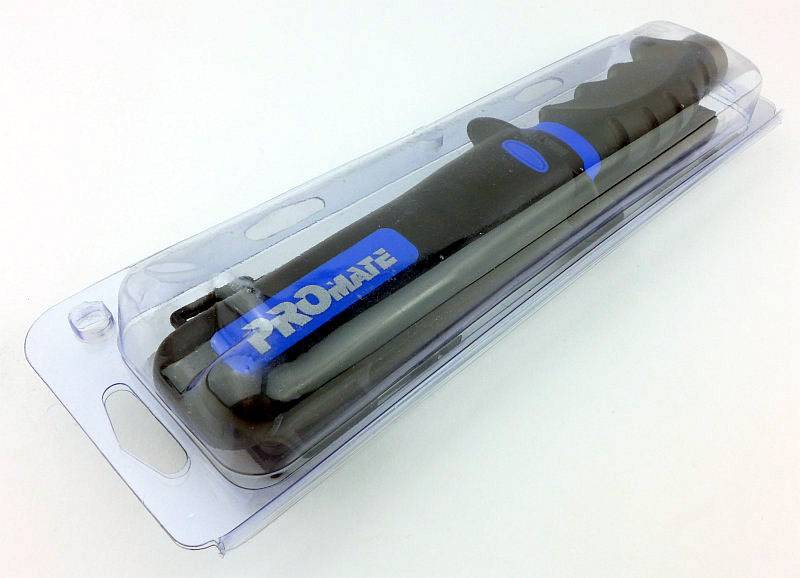
 photo 23 Promate Barracuda boxed P1210224.jpg

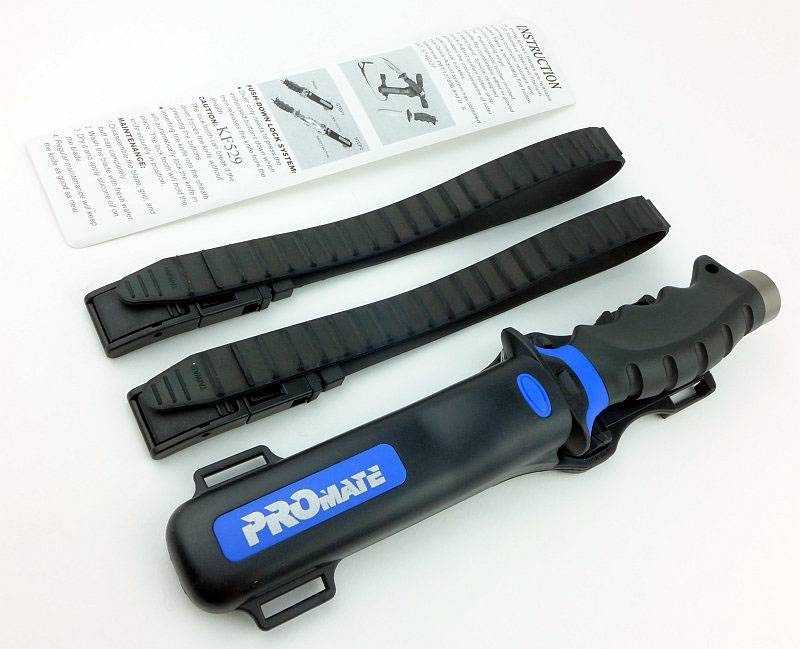
Supplied with the knife are two rubber straps and an instruction leaflet.
 photo 24 Promate Barracuda box contents P1210227.jpg

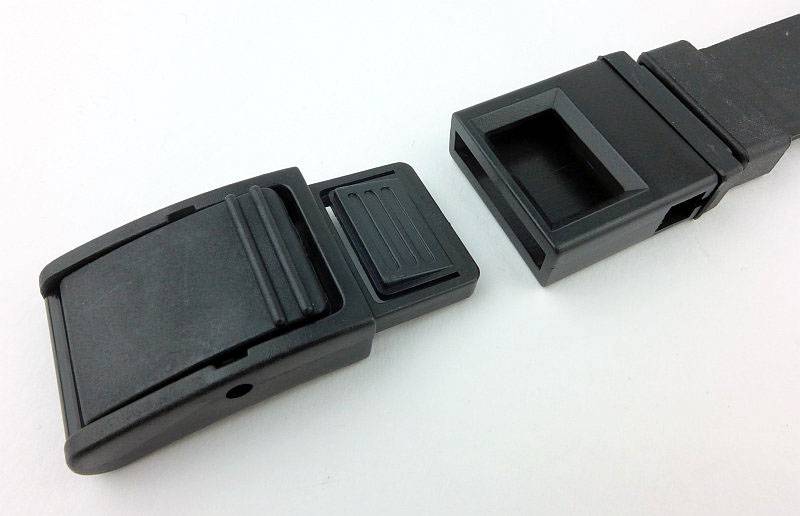
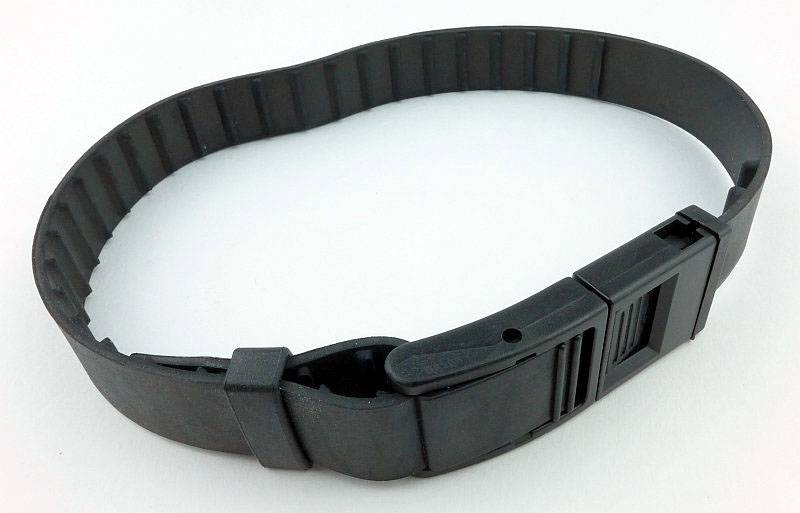
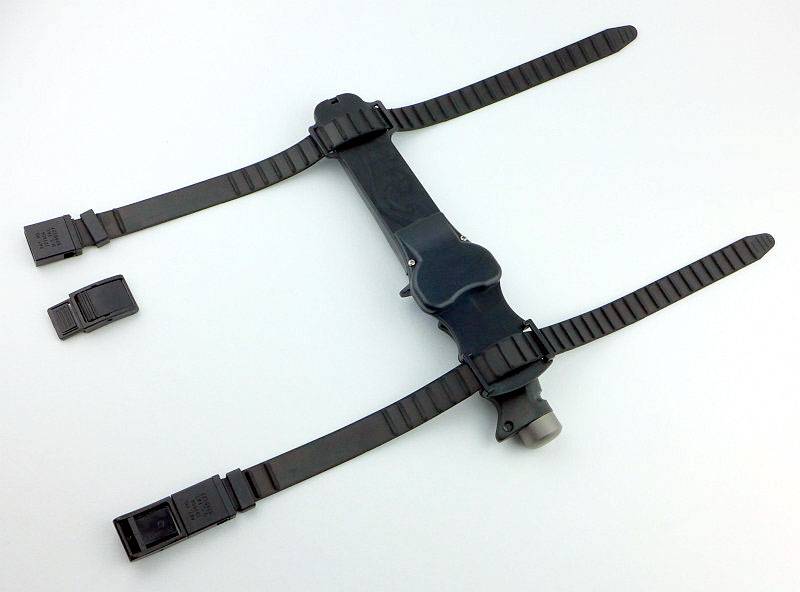
The strap has quick release buckles.
 photo 25 Promate Barracuda strap clip P1210235.jpg

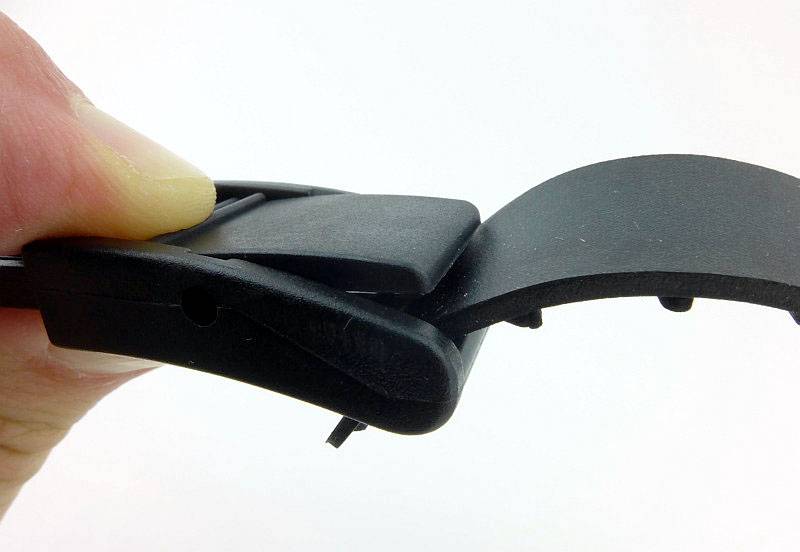
Each buckle has a sprung loaded adjustment clip to grip the rubber strap.
 photo 26 Promate Barracuda strap adjust P1210239.jpg

A strap in its fully assembled state. However this now cannot be fitted to the sheath. You need to take it apart, thread it through the slots and then reassemble it.
 photo 27 Promate Barracuda strap P1210242.jpg

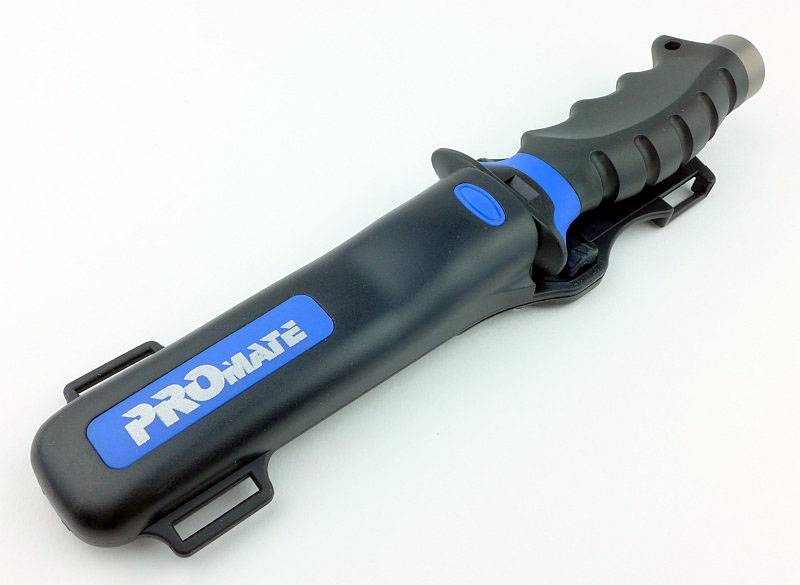
Before unsheathing the knife for the first time.
 photo 28 Promate Barracuda sheathed P1210247.jpg

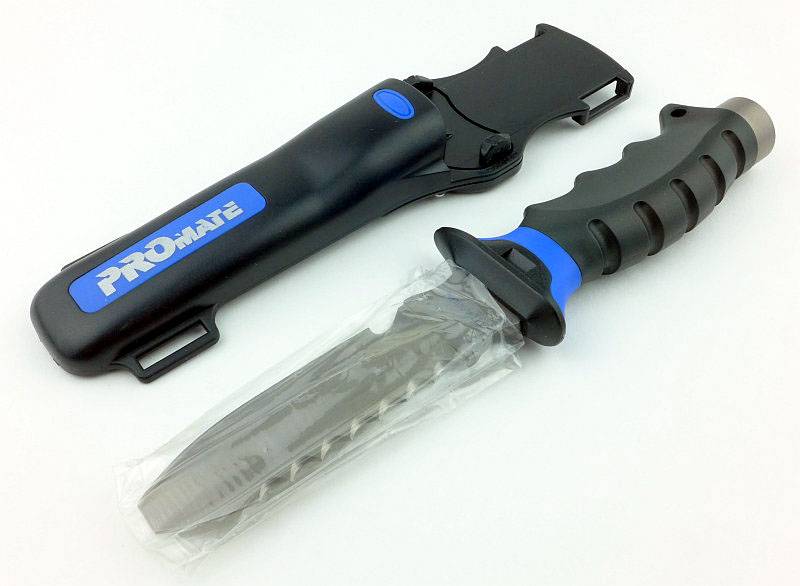
Inside the sheath the blade is wrapped in plastic.
 photo 29 Promate Barracuda unsheathed P1210251.jpg

With the knife out, you can see the ambidextrous retention clip.
 photo 30 Promate Barracuda sheath P1210254.jpg

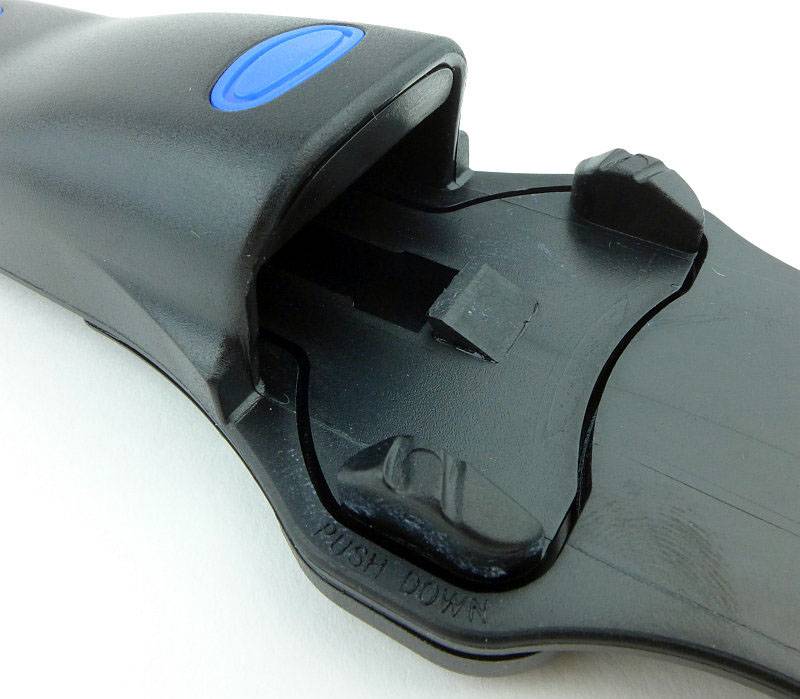
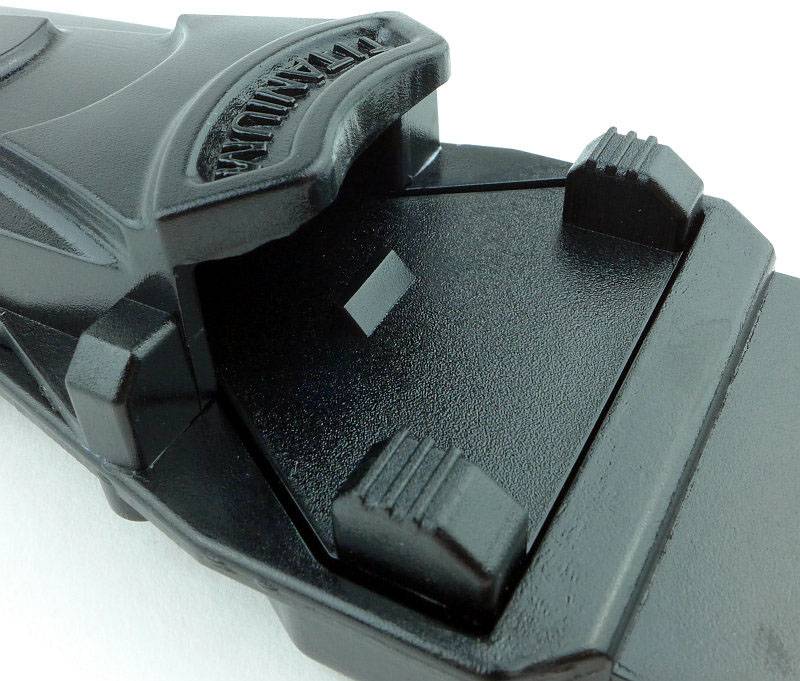
The retention clip is a sprung plate with a catch in the centre and a release button each side.
 photo 31 Promate Barracuda clip P1210257.jpg

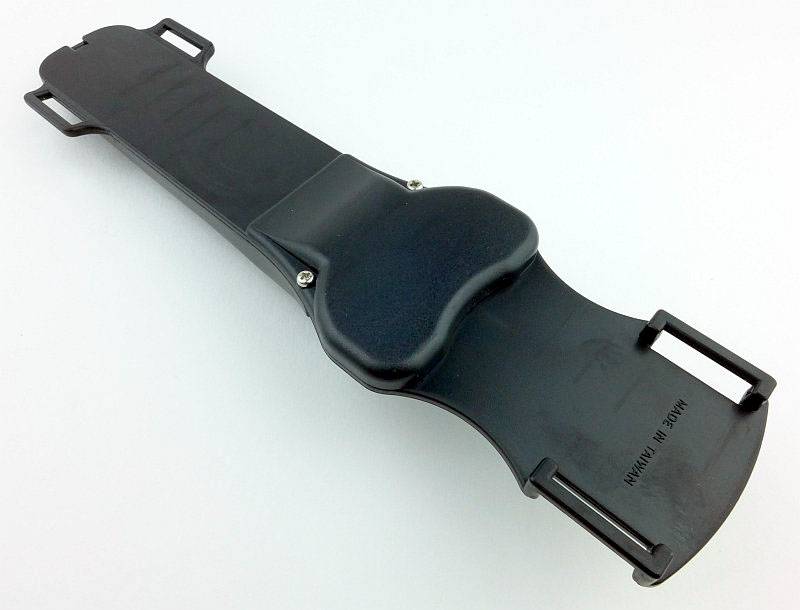
A quick look at the back of the sheath.
 photo 32 Promate Barracuda sheath back P1210262.jpg

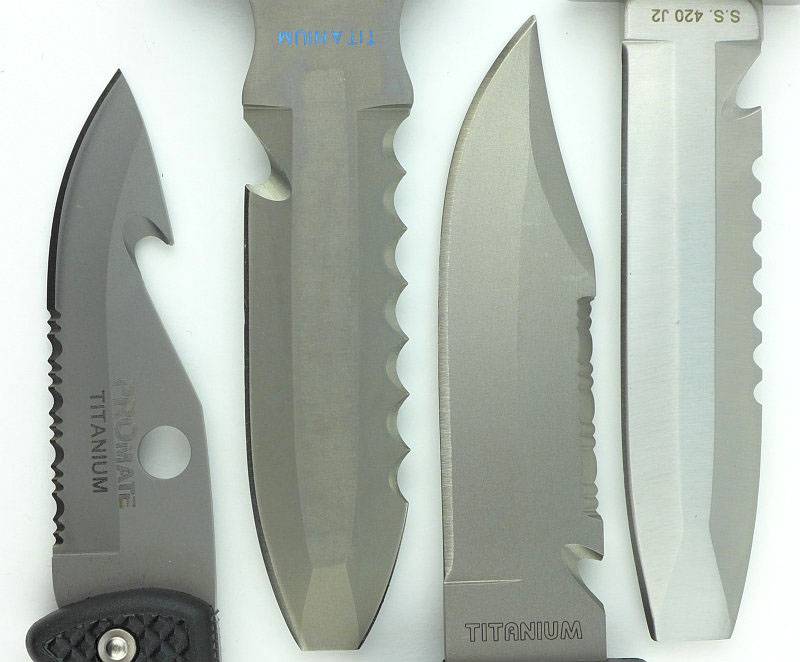
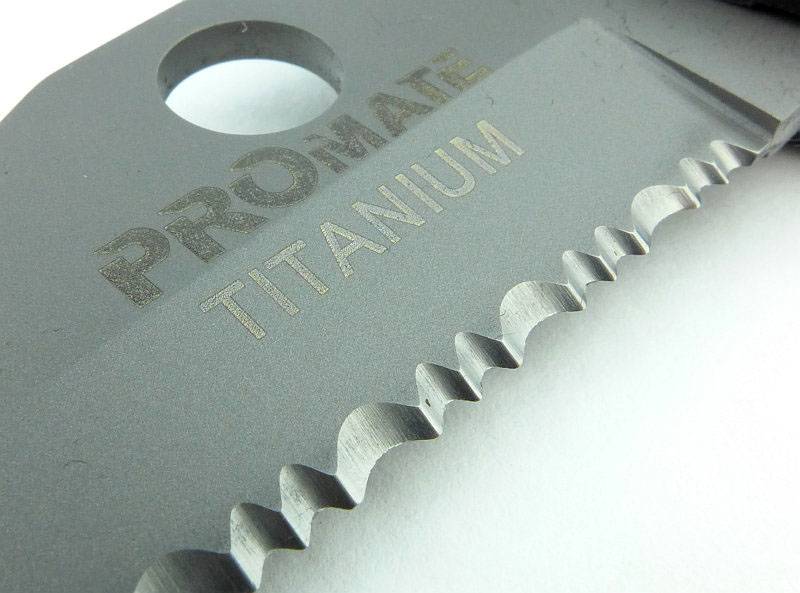
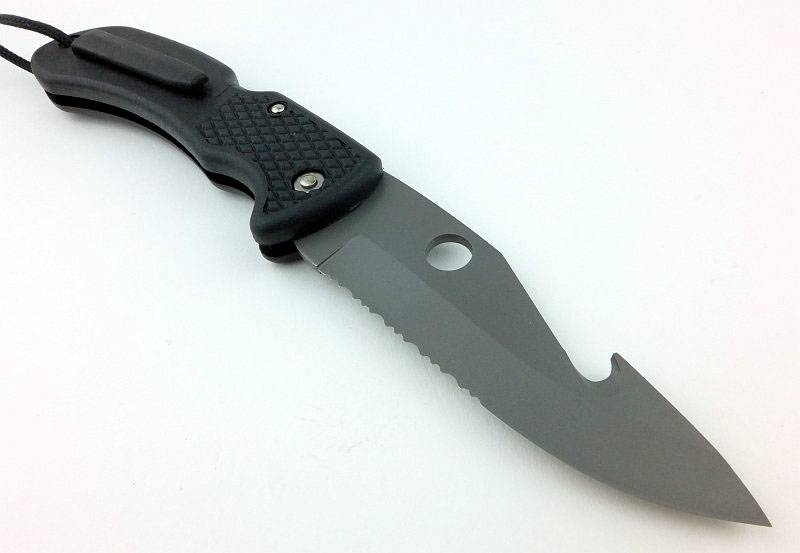
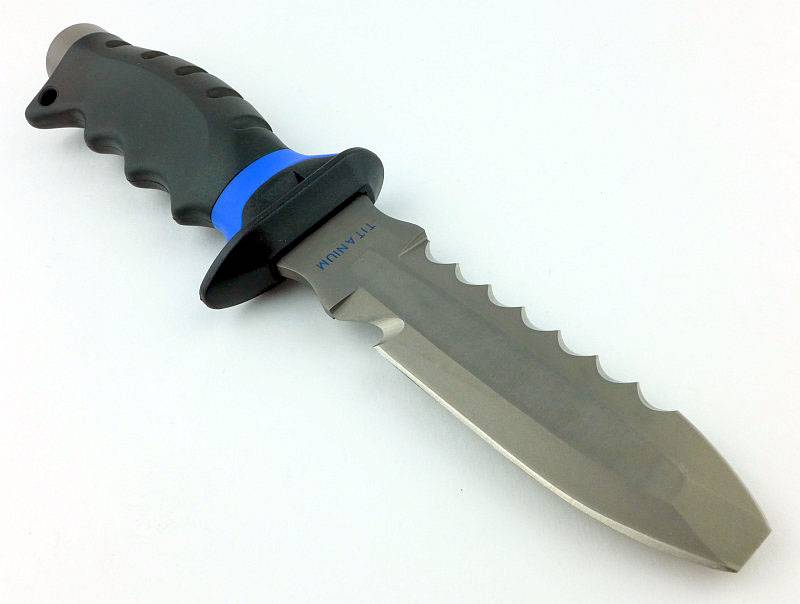
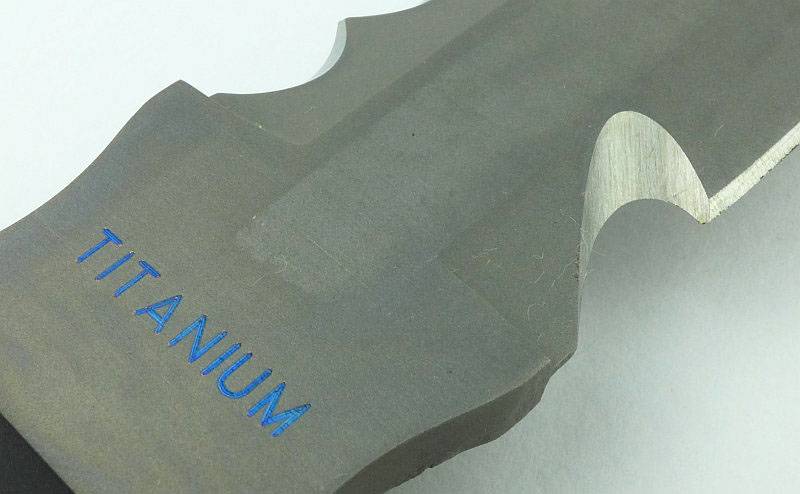
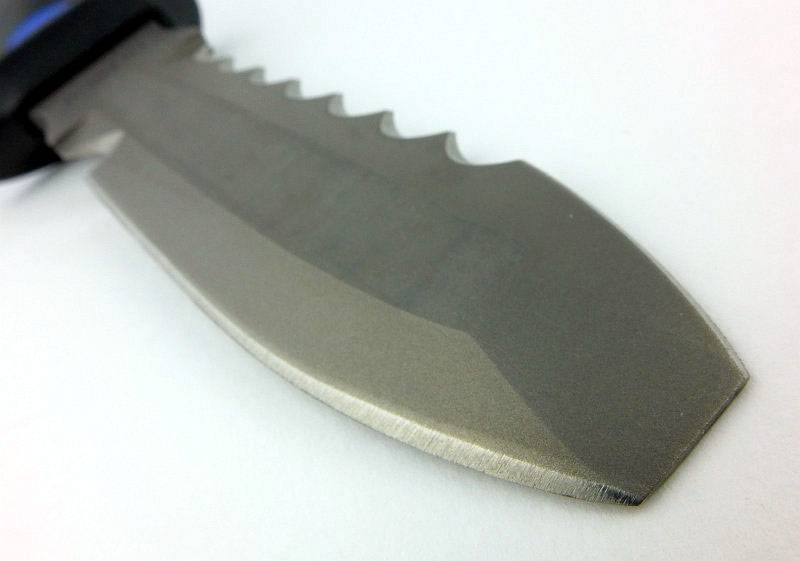
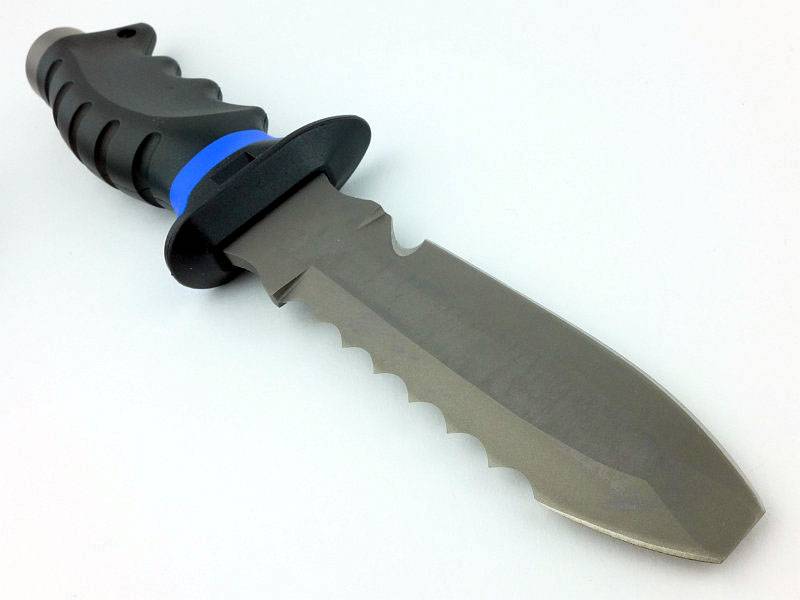
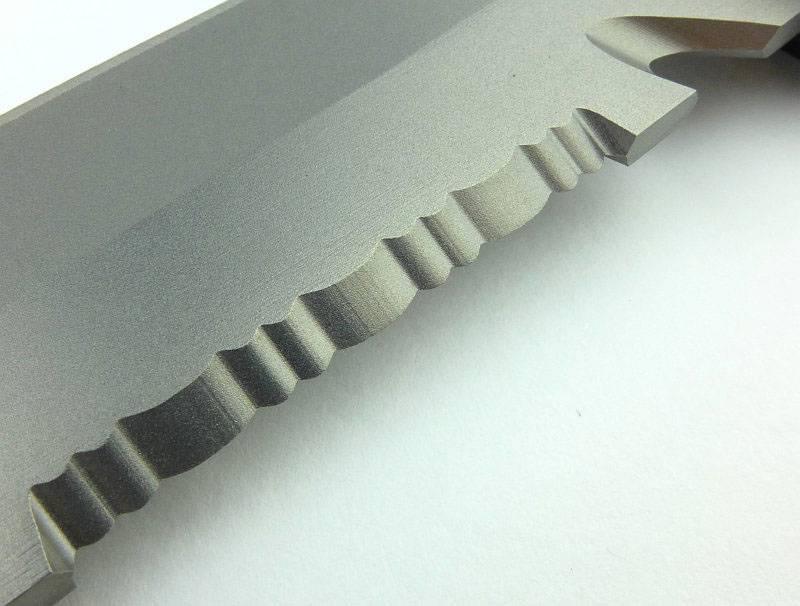
A fully featured blade made of titanium which has a cutting hook, plain edge, prying blunt tip, smaller plain edge leading into a section of large serrations.
 photo 33 Promate Barracuda angle P1210272.jpg

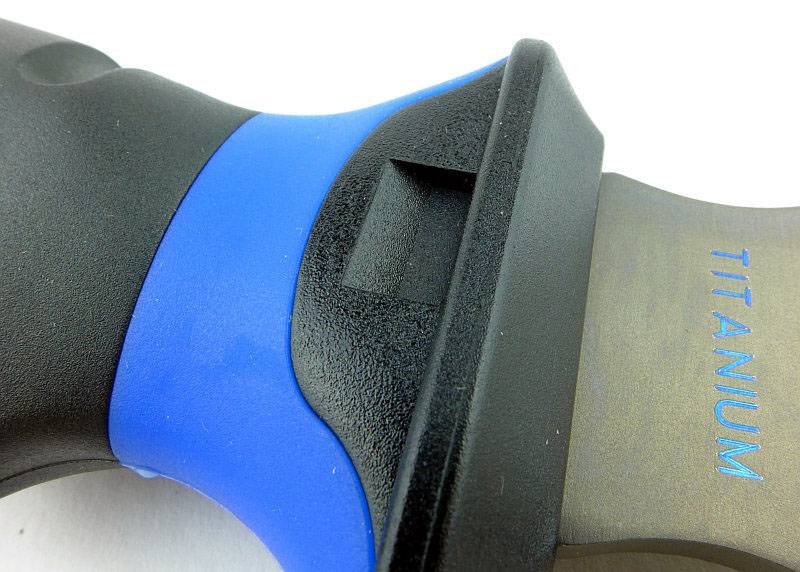
Clearly marked as being made of titanium.
 photo 34 Promate Barracuda titanium P1210274.jpg

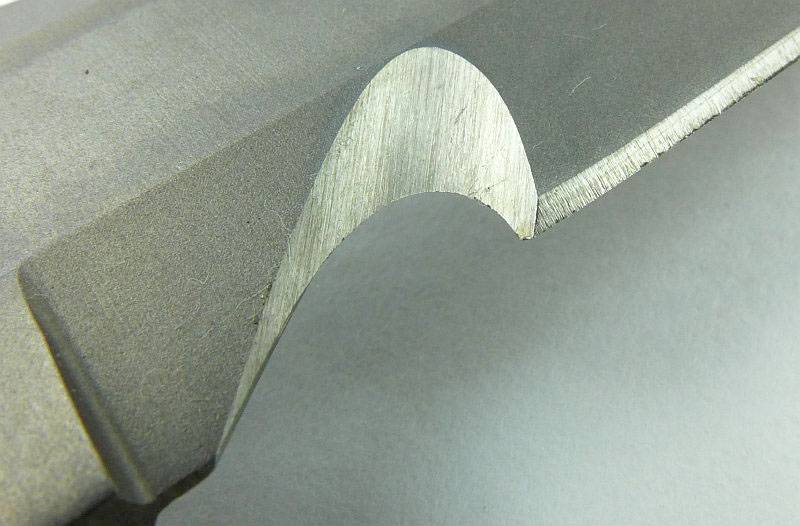
A cutting hook is included near the handle.
 photo 35 Promate Barracuda hook P1210280.jpg

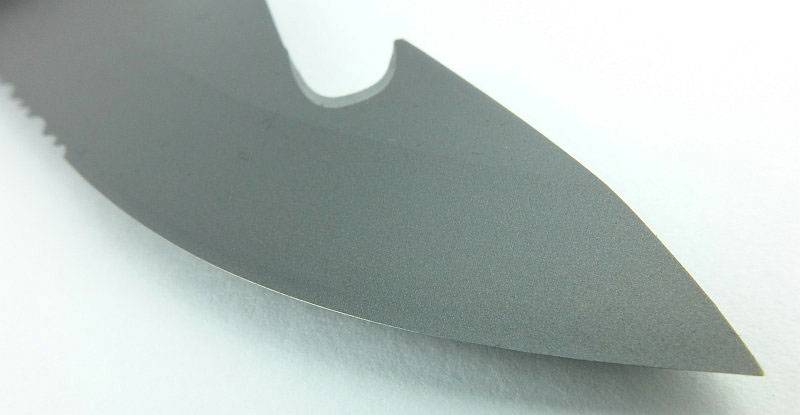
The blunt tip is shaped nicely for prying, tapered but not too thin at the end.
 photo 36 Promate Barracuda blunt P1210284.jpg

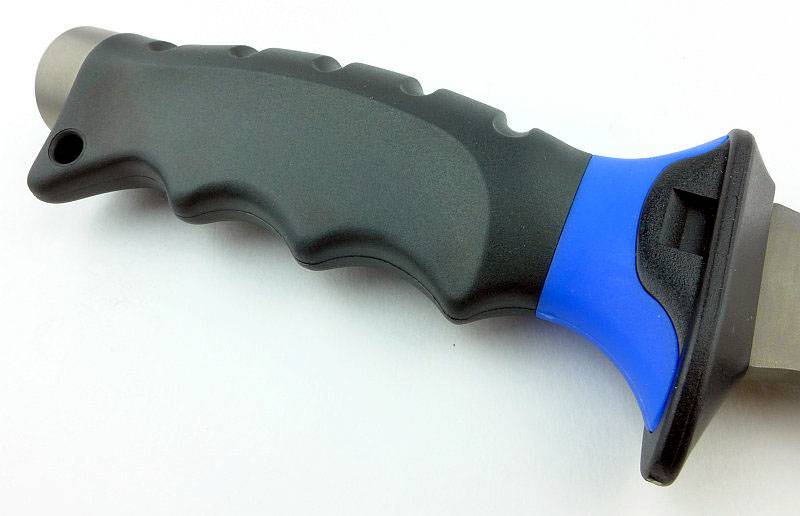
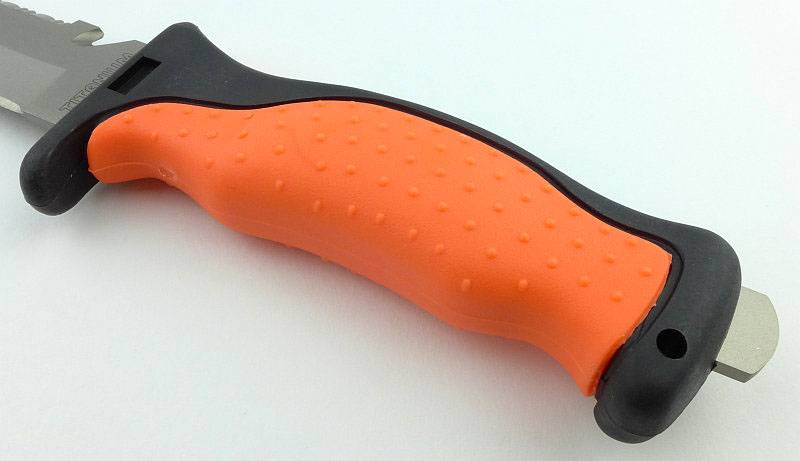
Contoured more heavily than any of the other handles, the Barracuda provides excellent grip in all conditions.
 photo 37 Promate Barracuda handle P1210287.jpg

Just at the guard area is the indentation that the retention clip holds on to.
 photo 38 Promate Barracuda catch P1210289.jpg

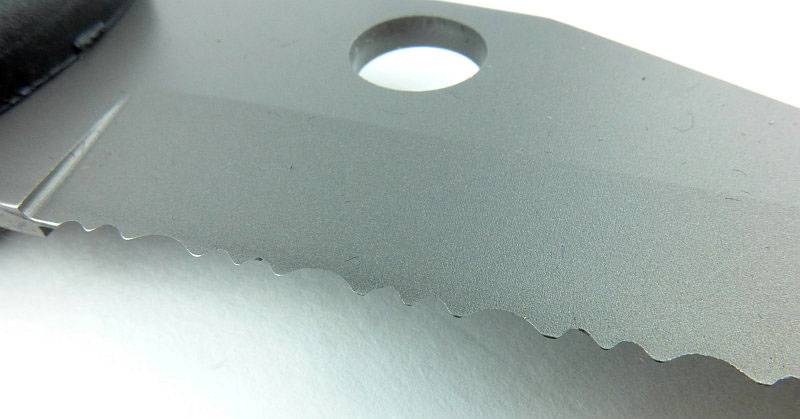
The back of the blade reveals that the serrations are cut with a single bevel, but the plain edges are double bevelled.
 photo 39 Promate Barracuda blade back P1210293.jpg

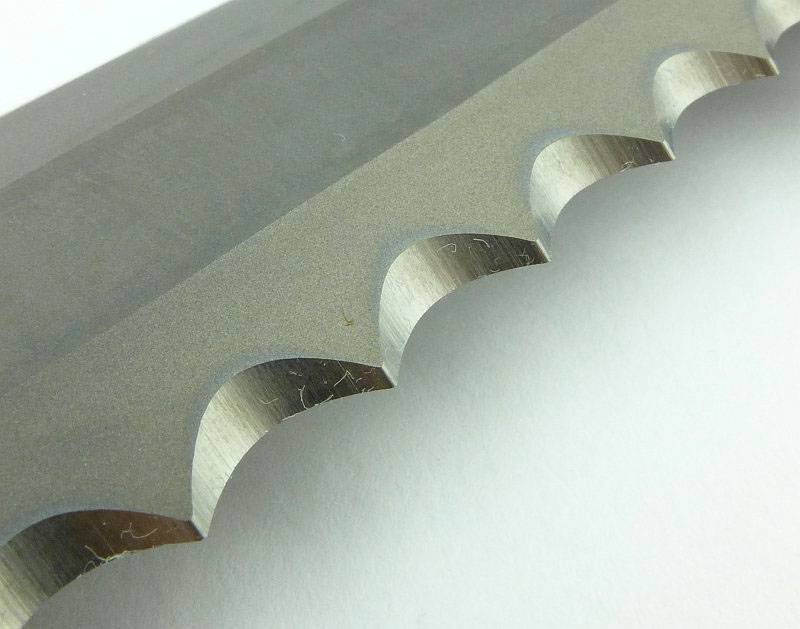
Nicely cut, the serrations are larger than any others I’ve used.
 photo 41 Promate Barracuda serration P1210306.jpg

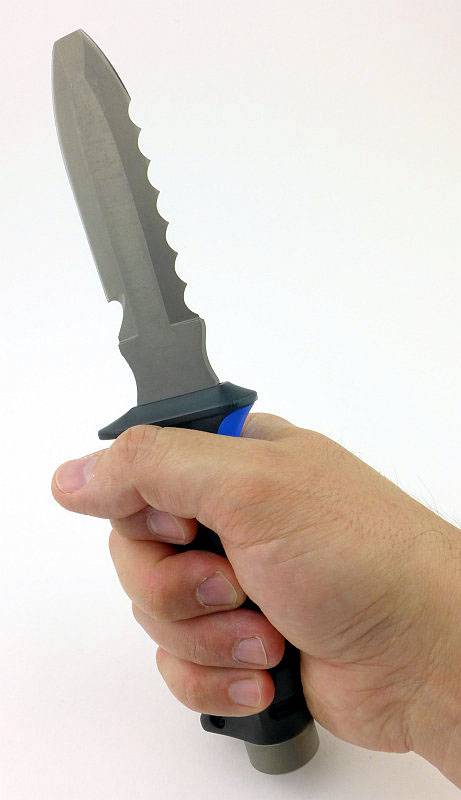
For scale, I take XL size gloves.
 photo 42 Promate Barracuda in hand P1210311.jpg

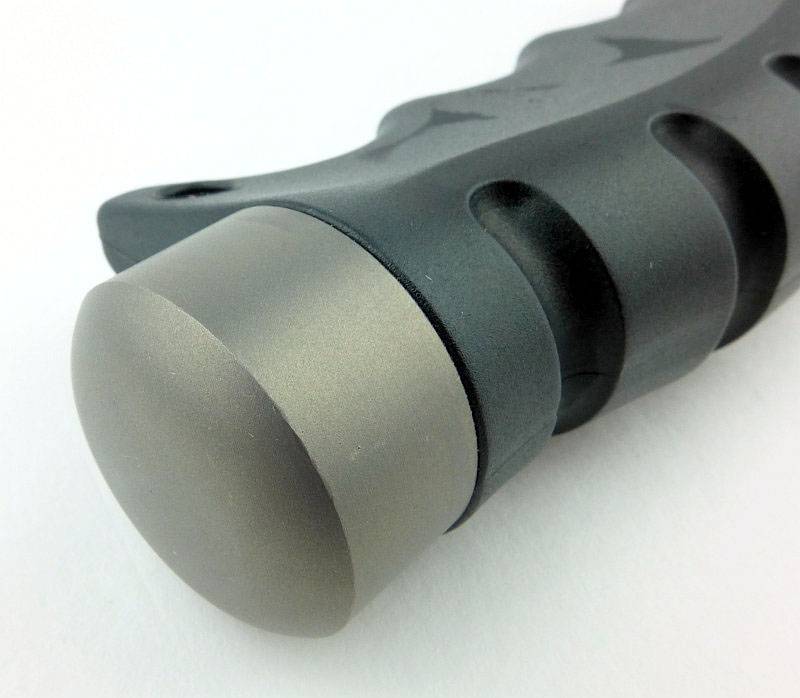
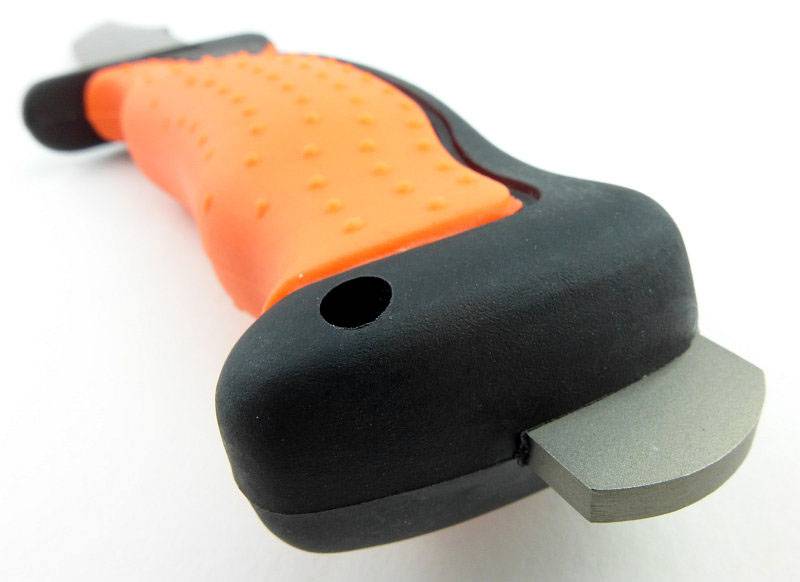
The butt has a large hammer striking surface. This is made of Titanium, so is not up to very heavy work.
 photo 43 Promate Barracuda hammer P1210314.jpg

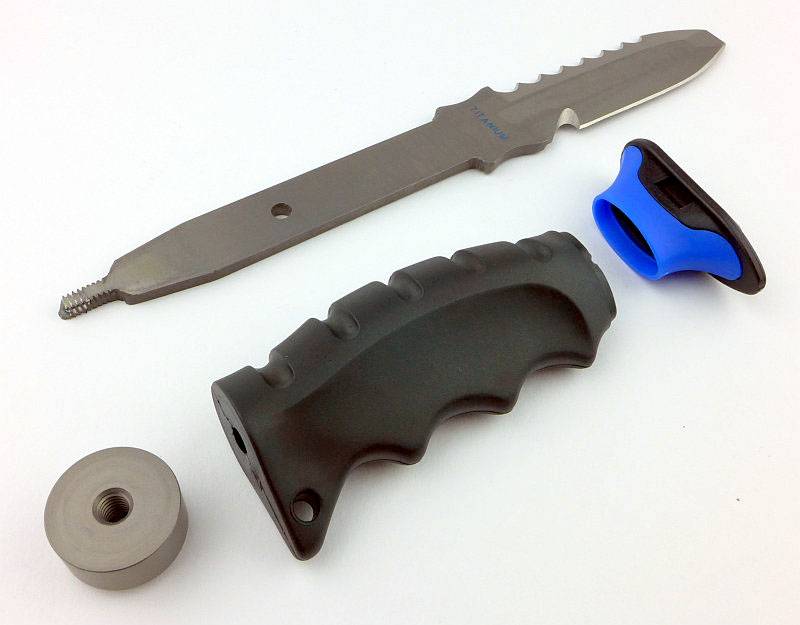
Though it doesn’t need any cleaning for corrosion prevention, the Barracuda does fully disassemble.
 photo 44 Promate Barracuda apart P1210335.jpg

As mentioned earlier, the straps need to be threaded through the loops before fitting the quick release buckles.
 photo 45 Promate Barracuda straps P1210340.jpg

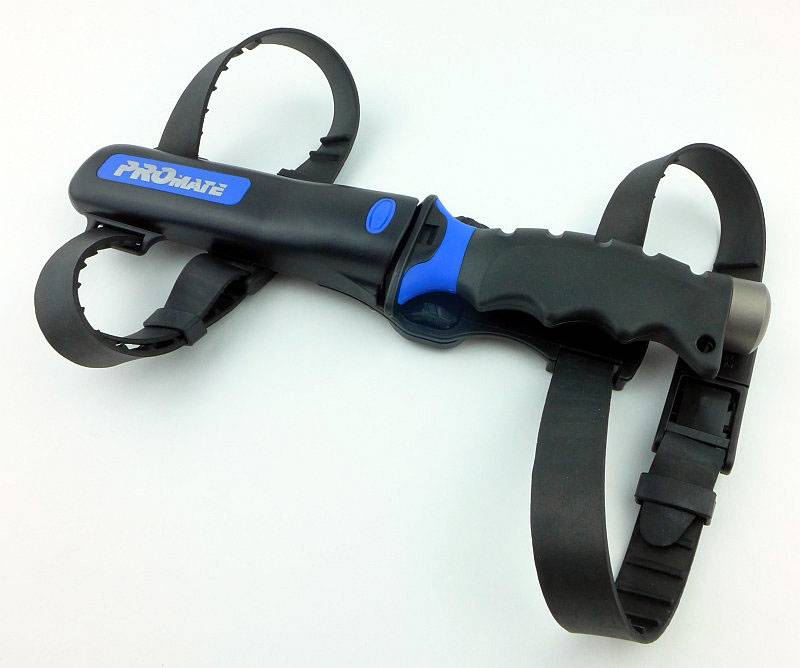
Fully assembled and ready for work.
 photo 46 Promate Barracuda straps P1210361.jpg

A few more details of the KF593 Ti:

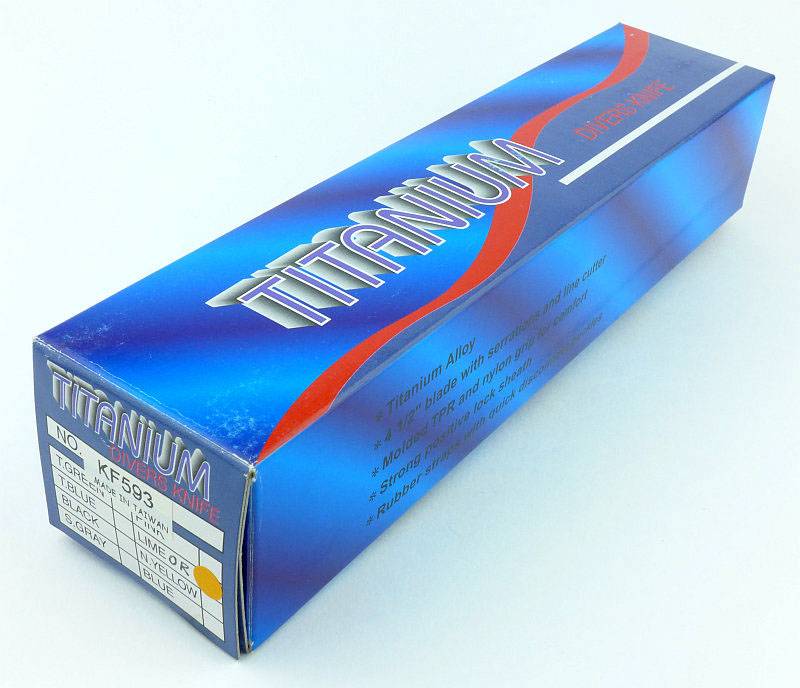
This is a knife which has had a little more exposure than most and you might recognise it as it was featured in a few episodes of Bear Grylls ‘Man vs Wild’. It is also known unofficially as the Promate ‘Scuba’ Knife, but officially only as the KF593. There is a blunt tip version as well.

The KF593’s box.
 photo 47 Promate scuba box P1210371.jpg

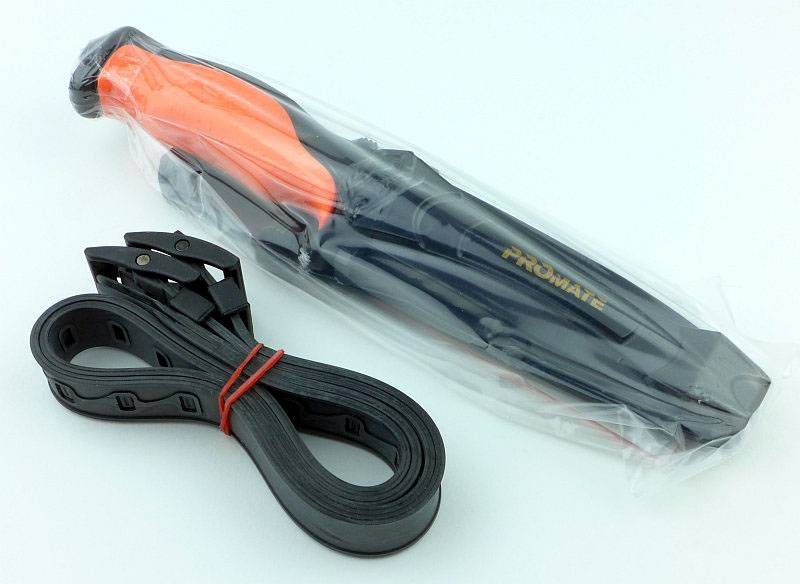
Inside the box the knife comes wrapped in plastic. Also include are two rubber straps.
 photo 48 Promate scuba contents P1210373.jpg

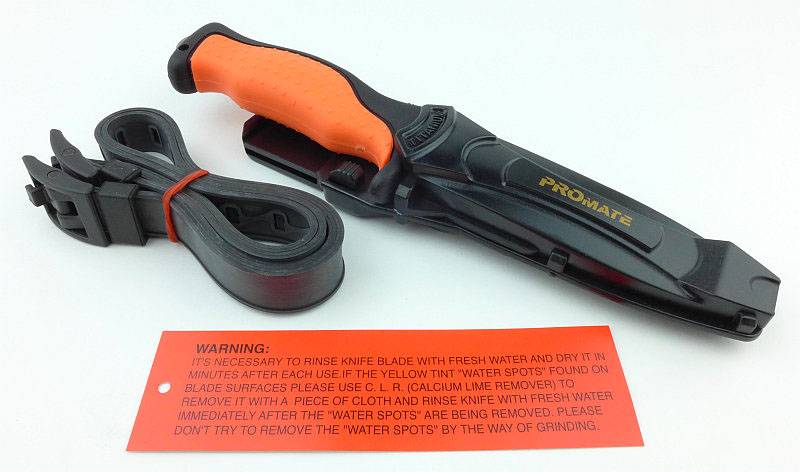
With the wrapping off. There is a warning card included regarding care for the knife, however, this advice proved unnecessary.
 photo 49 Promate scuba contents P1210380.jpg

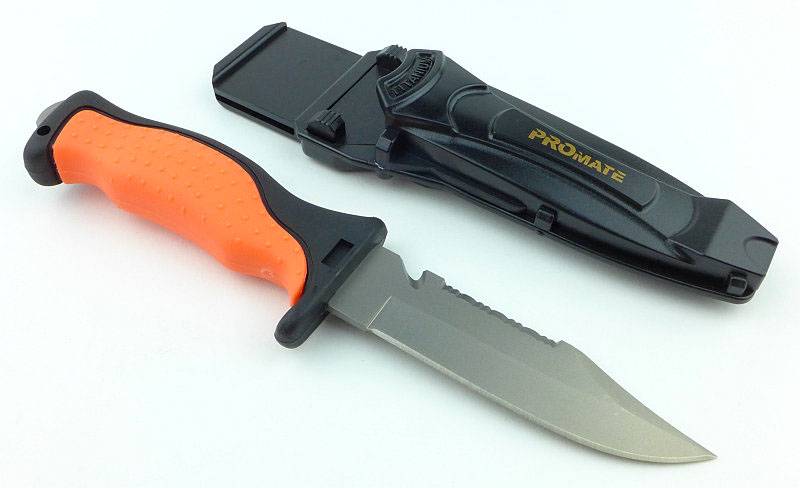
The KF593 fresh out of the box.
 photo 50 Promate scuba unsheathed P1210384.jpg

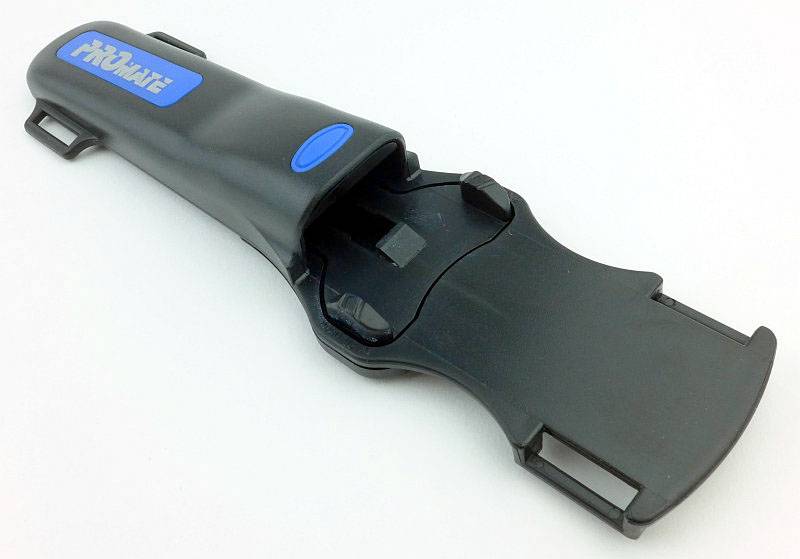
One of the great features of the KF593 is the retention system of the sheath. There is a sprung plate with two release buttons and a catch.
 photo 51 Promate scuba sheath lock P1210396.jpg

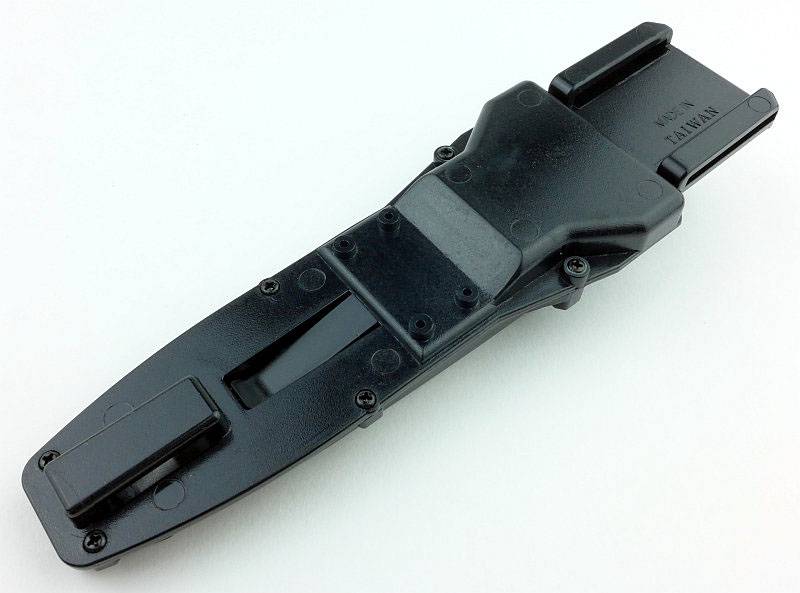
Looking at the back of the sheath, you can see the lower strap loop serves as a drainage hole. there is also a plastic spring which pushes against the blade when it is in the sheath the prevent rattling.
 photo 52 Promate scuba sheath back P1210403.jpg

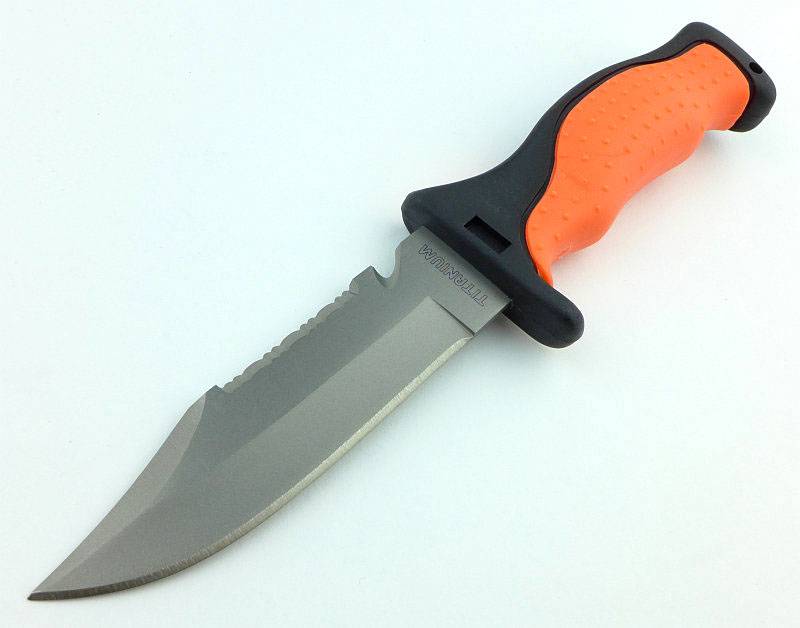
This knife has alternative colour options for the handle. The orange part of the handle can be grey or blue.
 photo 53 Promate scuba angle P1210404.jpg

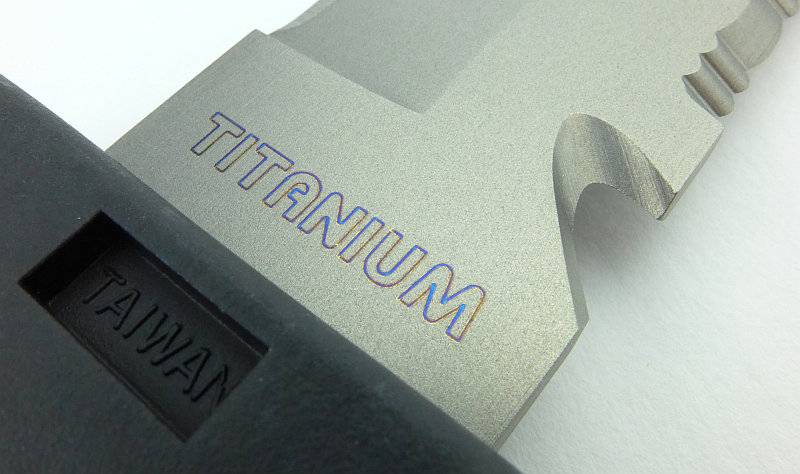
In case you forget, this is a titanium blade. Being a dive knife there is a line cutter hook.
 photo 54 Promate scuba hook P1210409.jpg

An unusual ‘reverse’ set of serrations are on the blade spine.
 photo 55 Promate scuba serrations P1210416.jpg

The full tang protrudes through the handle and provides a narrow hammer.
 photo 56 Promate scuba hammer P1210422.jpg

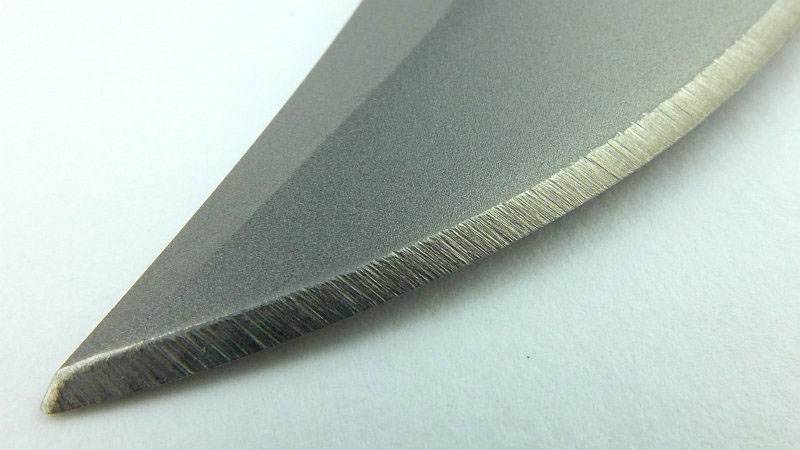
As supplied, the factor edge looks quite coarse, but cuts well enough.
 photo 57 Promate scuba edge P1210426.jpg

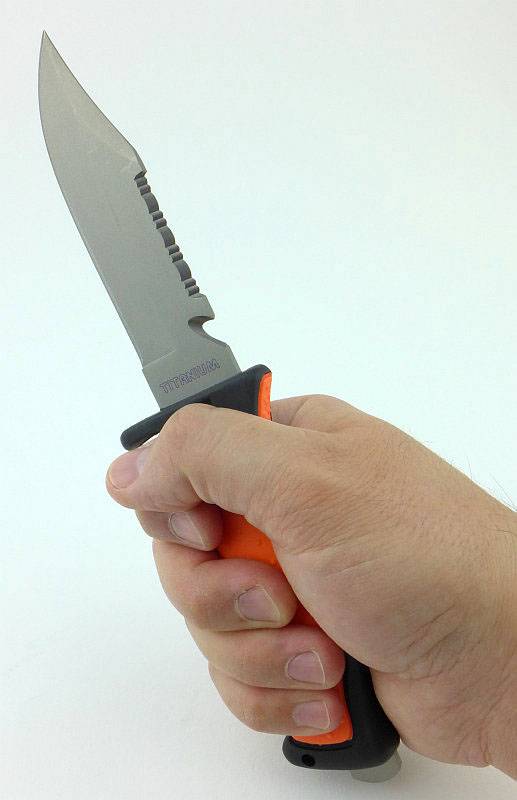
A nice mid-sized knife. (I take XL size gloves.)
 photo 58 Promate scuba in hand P1210431.jpg

The coloured rubber insert gives a good amount of grip.
 photo 59 Promate scuba handle P1210434.jpg

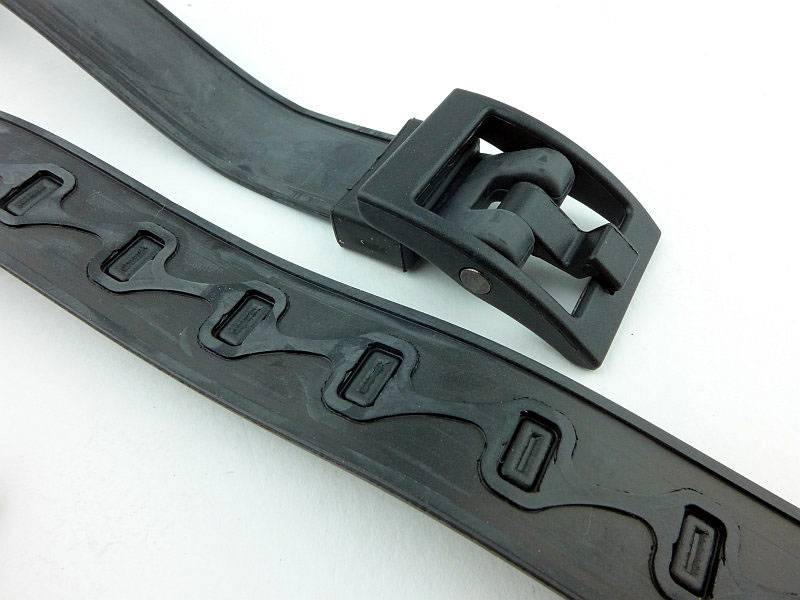
Rather than quick release buckles, this knife uses belt buckle type fastenings. Note that the holes in the strap are actually filled in. The first time you use any of them you need to push the buckle prong through the rubber in the hole.
 photo 60 Promate scuba strap P1210442.jpg

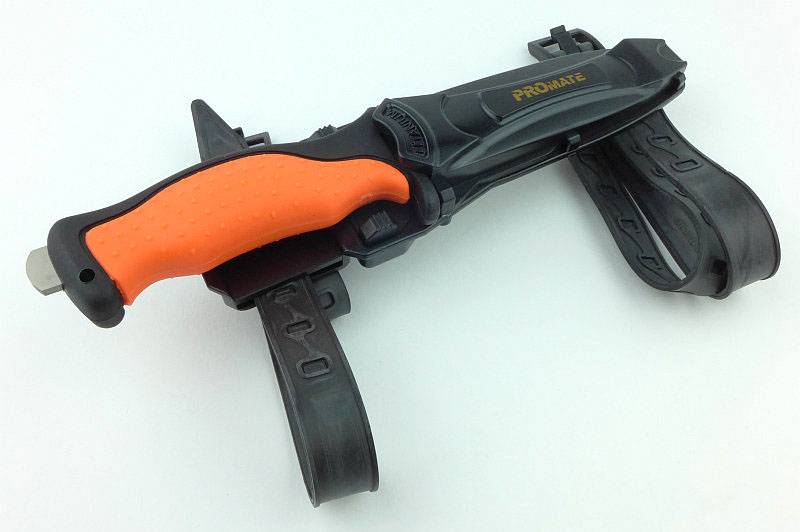
These straps are very quick and easy to set up and use.
 photo 61 Promate scuba with straps P1210444.jpg

A few more details of the KF505 Blunt:

And onto the last one of the Promate knives, the steel bladed KF505.
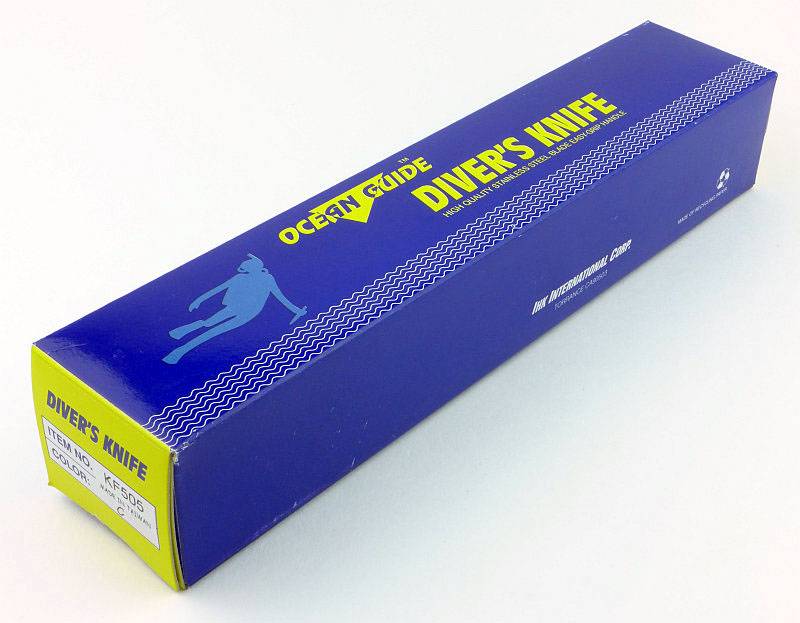
 photo 62 Promate steel box P1210448.jpg

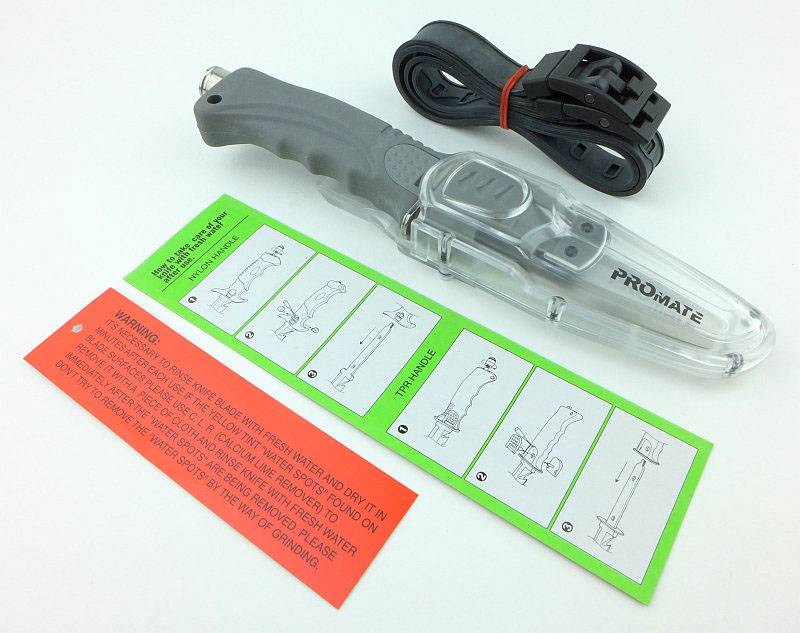
In the box is the sheathed knife, rubber straps, care instructions and disassembly instructions.
 photo 63 Promate steel box contents P1210458.jpg

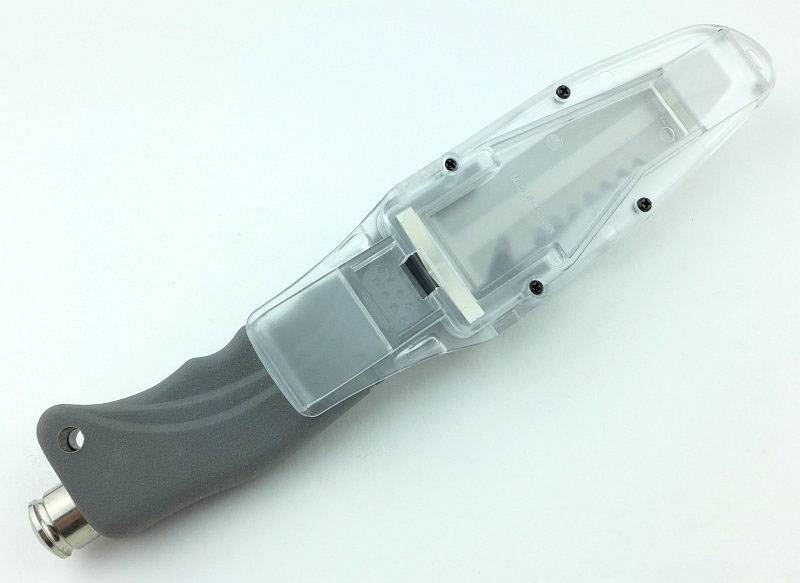
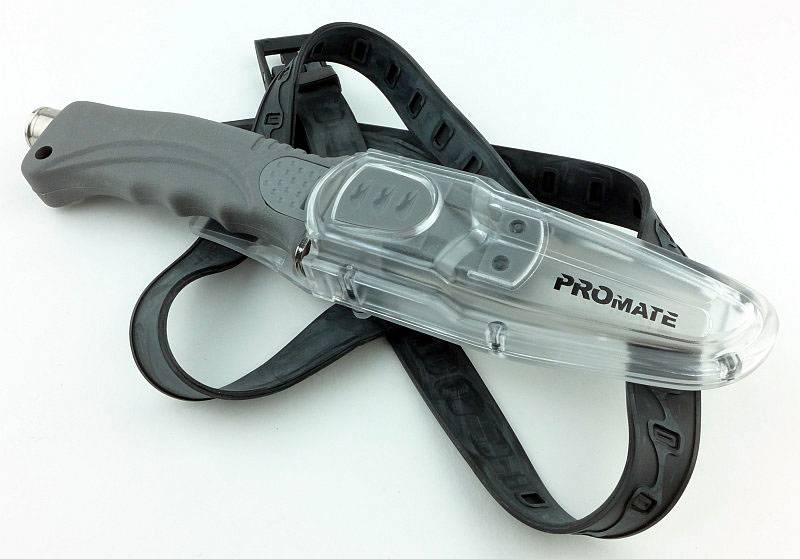
The clear sheath is an option for this knife.
 photo 64 Promate steel sheath back P1210461.jpg

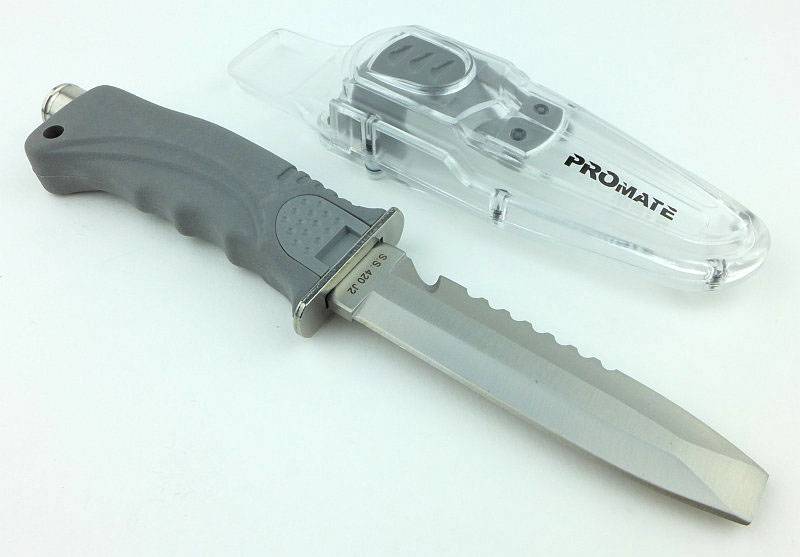
A box-fresh KF505.
 photo 65 Promate steel unsheathed P1210464.jpg

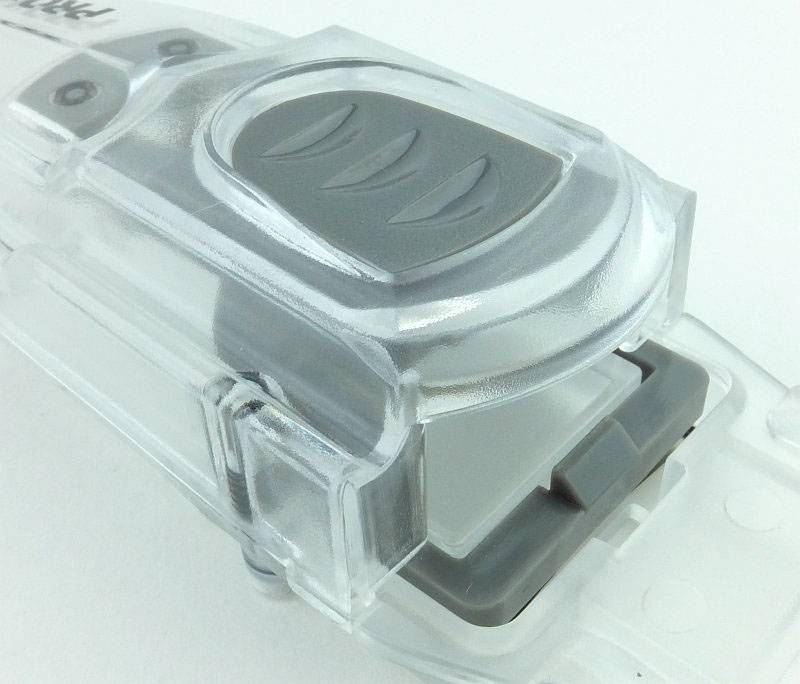
Compared to the titanium knives a different sheath retention system used. A single release button on the front of the sheath is connected to a catch at the rear.
 photo 66 Promate steel sheath lock P1210467.jpg

Before moving onto some details let’s look at both sides of the blade.
 photo 67 Promate steel angle P1210478.jpg

The other side of the blade.
 photo 68 Promate steel angle P1210485.jpg

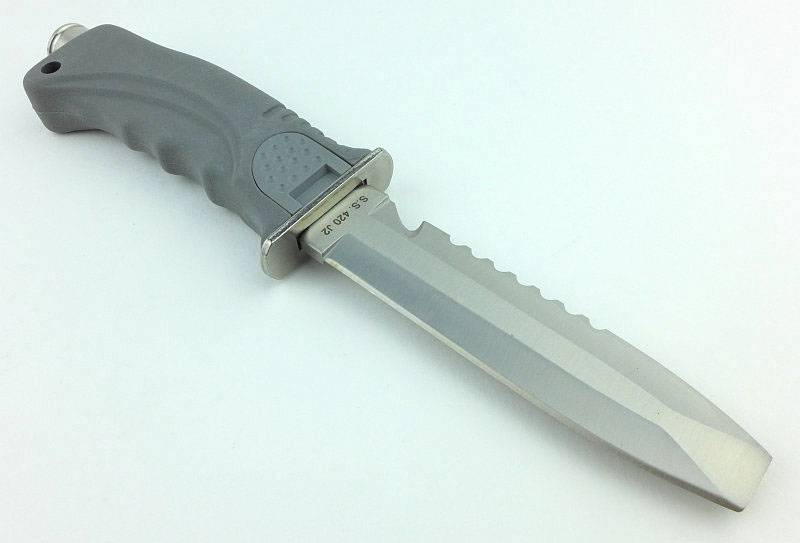
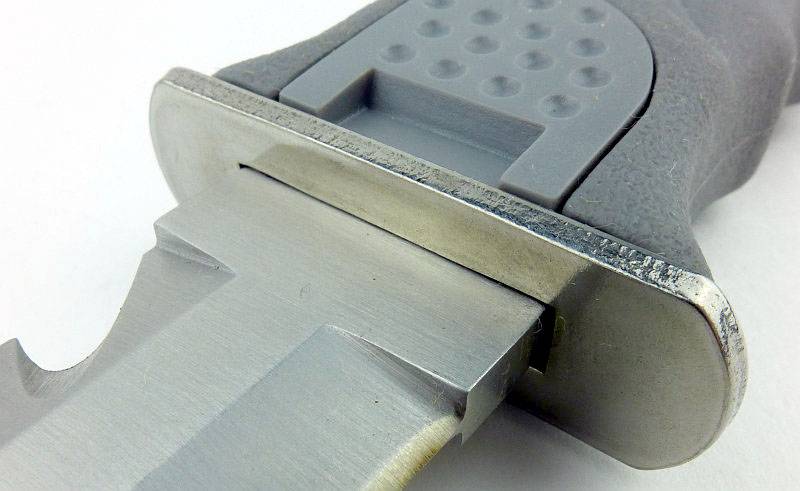
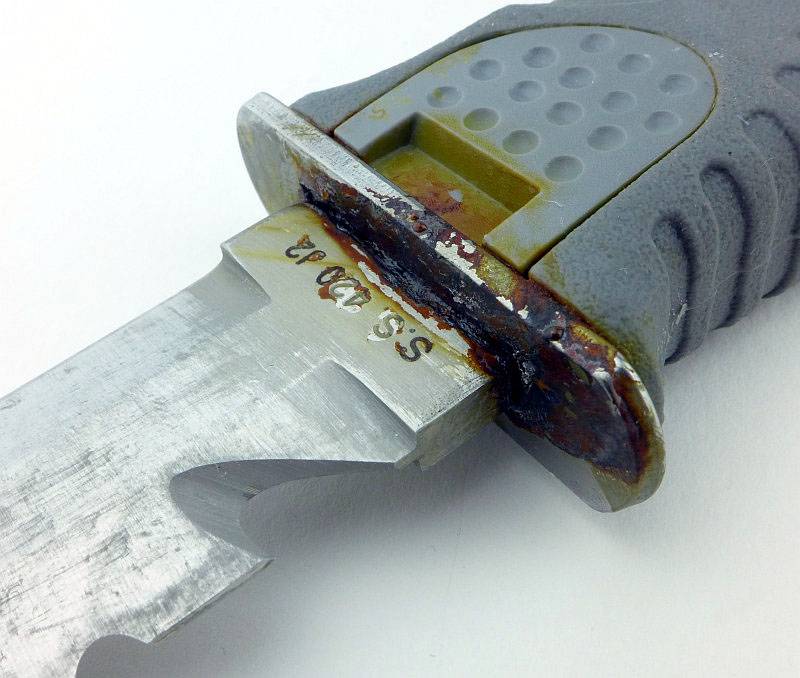
An unspecified stainless steel is used for the guard. Check the corrosion results later.
 photo 69 Promate steel guard P1210487.jpg

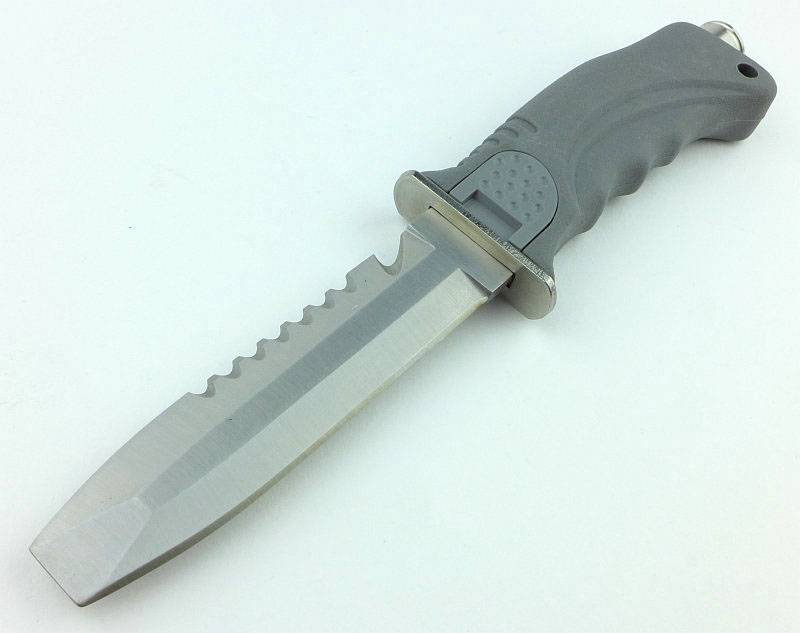
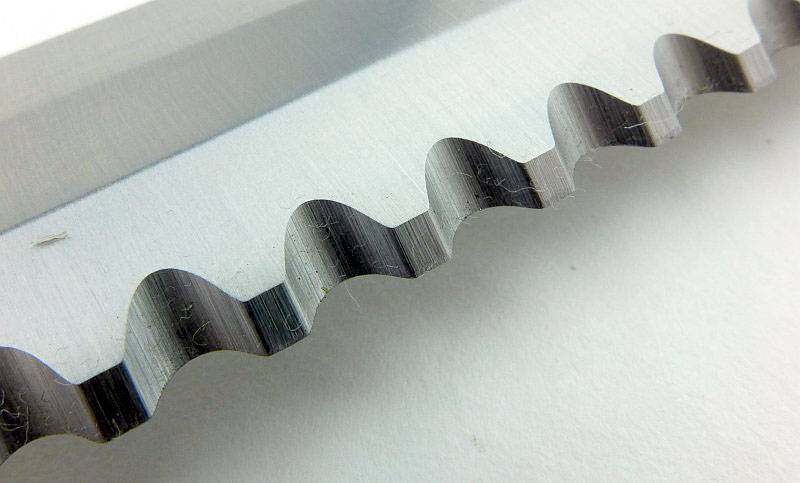
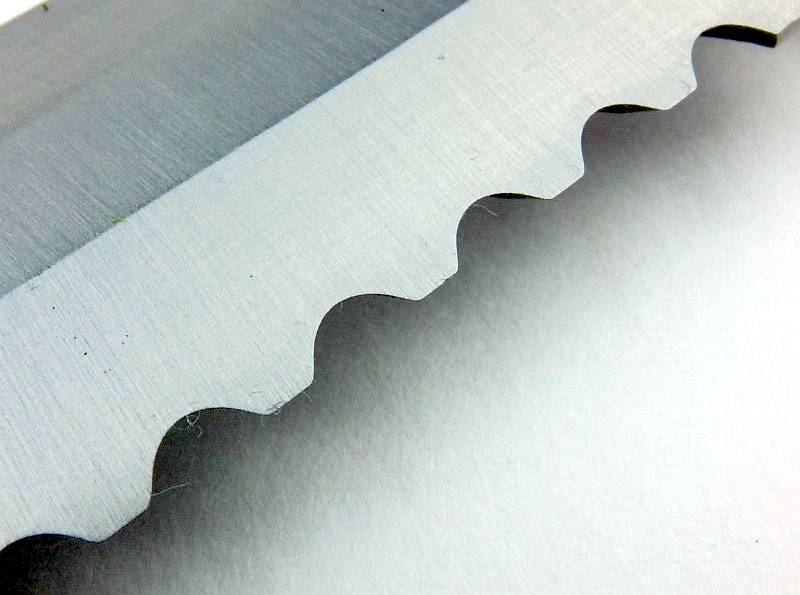
The serrations are cut with a single bevel.
 photo 72 Promate steel serrations P1210492.jpg

The use of a single bevel is clear when looking at the other side.
 photo 73 Promate steel serration back P1210496.jpg

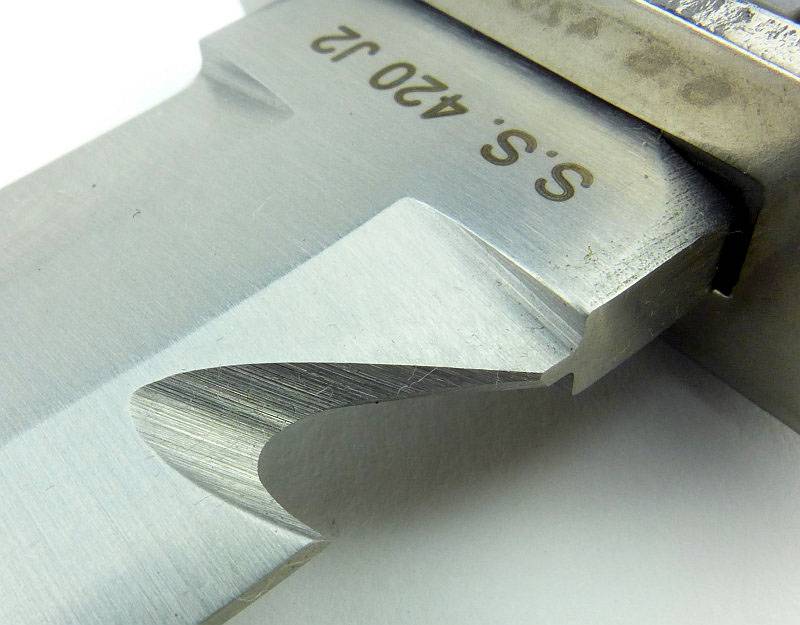
A line cutting hook is ground into the blade near the handle. Note the steel designation on the blade – Stainless Steel 420 J2.
 photo 74 Promate steel hook P1210498.jpg

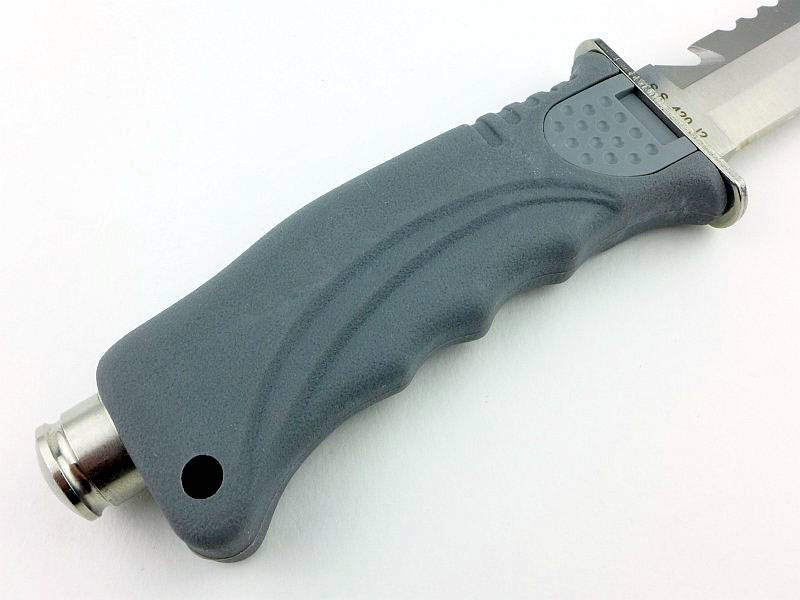
This knife uses a one-piece rubber handle.
 photo 75 Promate steel handle P1210509.jpg

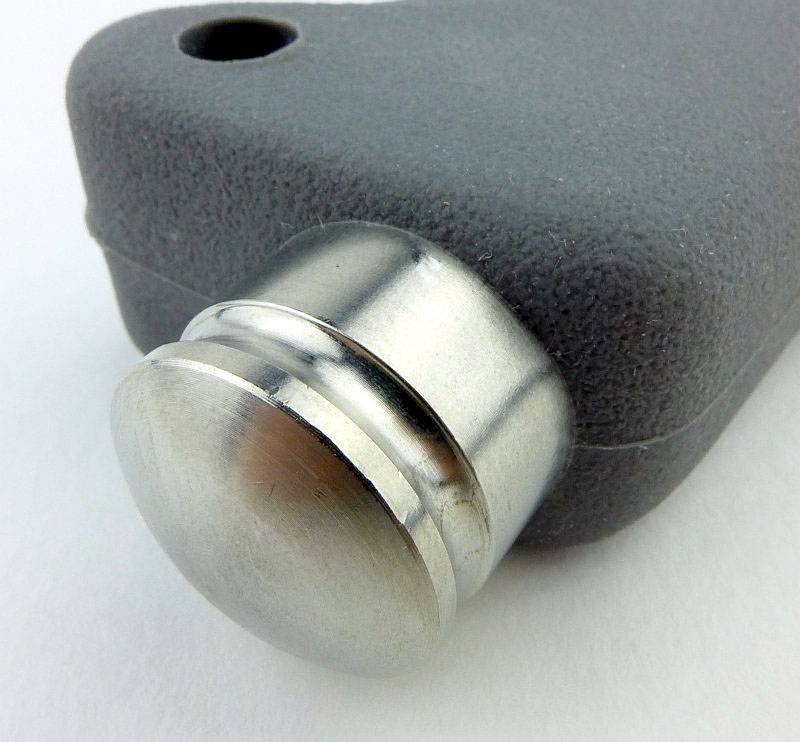
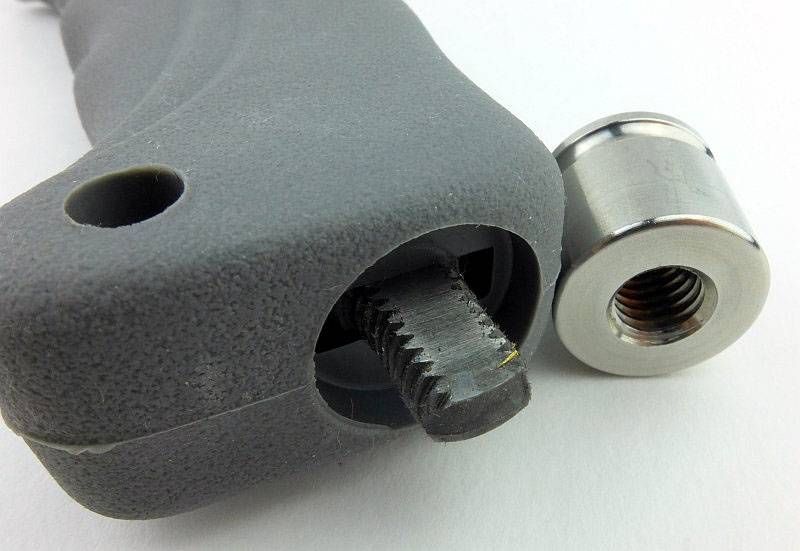
The tang nut acts as a hammer.
 photo 76 Promate steel hammer P1210513.jpg

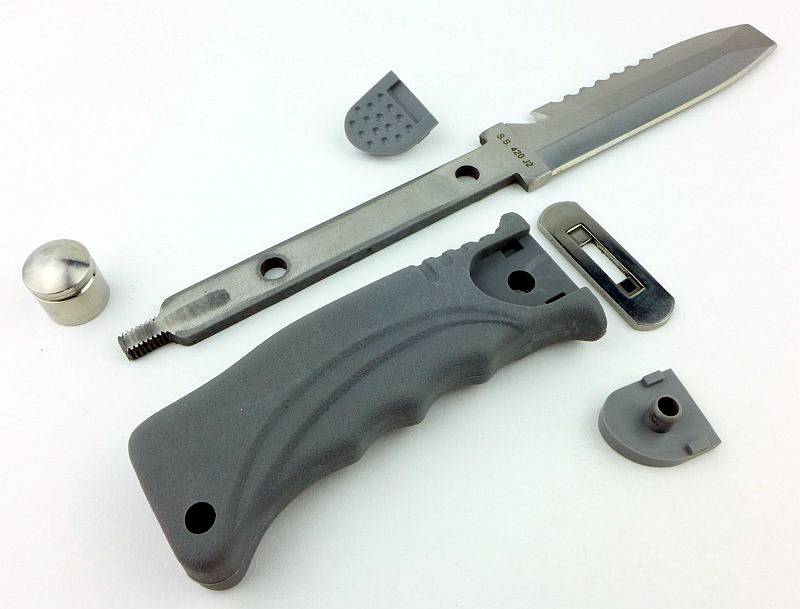
Starting to disassemble the knife by taking the tang nut off.
 photo 77 Promate steel hammer off P1210517.jpg

And fully disassembled.
 photo 78 Promate steel apart P1210528.jpg

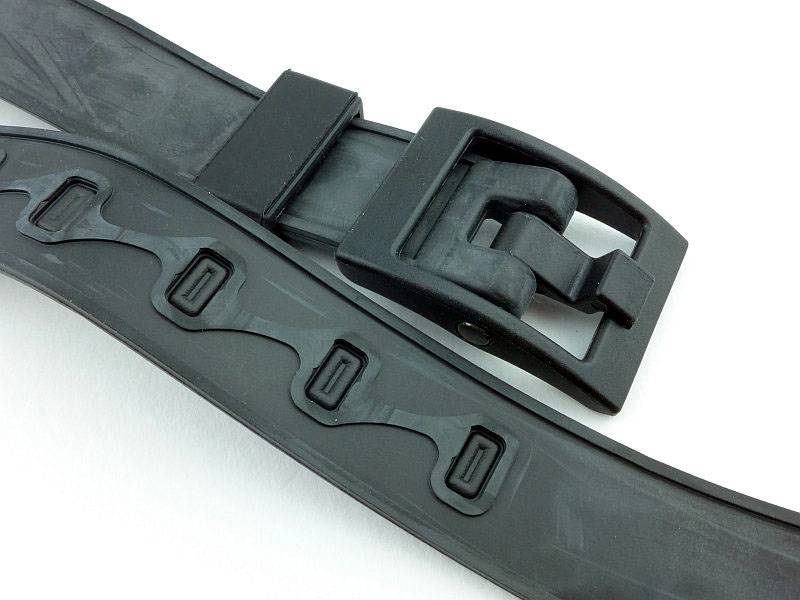
The rubber straps have standard belt buckle type fixings.
 photo 79 Promate steel strap P1210531.jpg

This design of strap make it very quick and easy to get everything put together ready for use.
 photo 80 Promate steel with straps P1210534.jpg

Like the previous model this is a medium sized knife.
 photo 82 Promate steel in hand P1210541.jpg

What are they like to use?

With several very different offerings from Promate, the cutting results were varied and also not as I expected. The best performer in the cutting tests was actually the Seal folder with Ti blade. This maintenance-free small titanium bladed folder makes a fantastic backup knife. The other knives were mainly let down in the cutting tests by the factory edges, and are more capable given a bit of work getting a good edge.
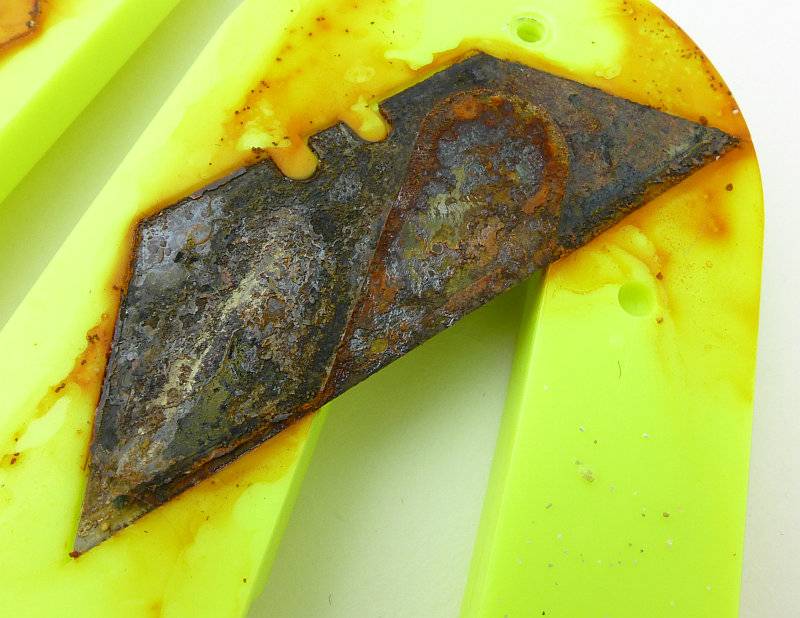
The biggest surprise was the performance of the dedicated line cutter; using only a standard steel utility blade as the cutting edge, the corrosion testing really took its toll on this (details to follow). With a new blade, initial tests were that this was a very good cutter, so if you can find stainless utility blades they would be a better option.
See the Dive Knives 2016 – Mega Test Review for more information on the cutting test results.

Though a really excellent cutter, the Seal knife had a small issue that was easily fixed, but one worth being aware of.
The sharp eyed might have spotted that when looking at the ‘H’ (where the blade spine and lock bar touch), the lock bar is slightly raised. This gave me concern over how well the lock would function. Proven correct, I found the lock failed under mild pressure to close the blade.
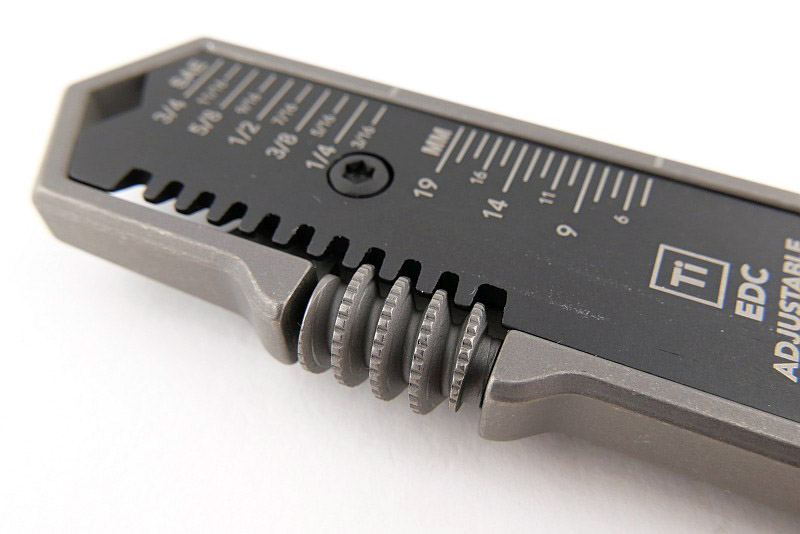
 photo 22 Promate Ti Folder H P1210213.jpg

Taking a closer look at the locking surfaces, these appeared to be raw pressings so the fit was not good, and the blade tang hook was not catching the lock bar well. There is a simple fix for that….
 photo 22 Promate Ti Folder lock P1210364.jpg

Without having to take the knife apart, the blade tang hook can be cleaned up with a file (and the Ti files easily) to give a much better flat locking surface. Be careful not to go at this too much as taking more material than necessary will result in a blade that has play in the locked position. File a bit then test, and repeat. Once corrected, the locked blade was solid and the result was worth having to do this.
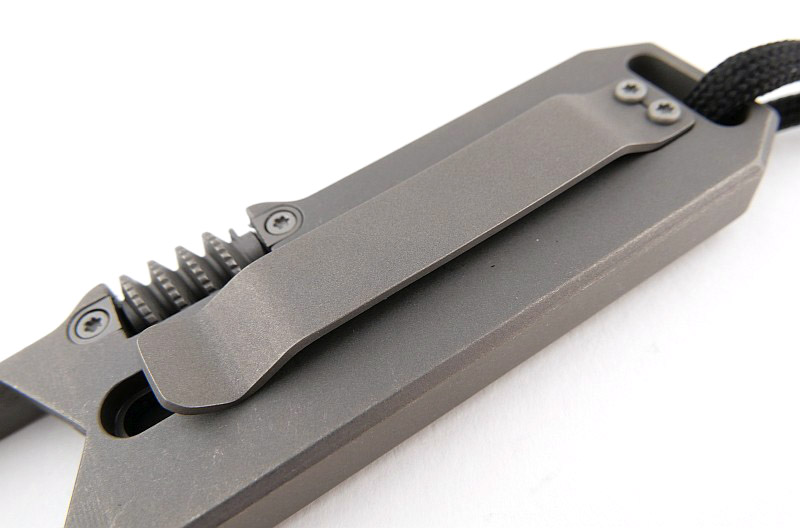
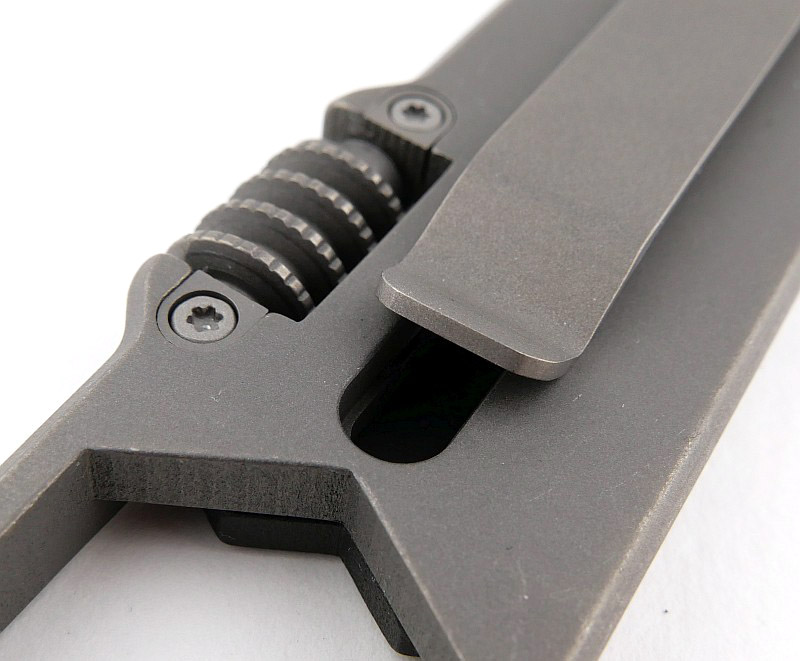
 photo 22 Promate Ti Folder lock P1210377.jpg

Earlier I mentioned the line cutter having disappointing cutting results, well this is why – Oh dear! The corrosion testing certainly hit the weak spot of this design – standard carbon steel blades. Cheap and easy to replace, but the rust starts as soon as it gets wet.
 photo 84 Promate line cutter corrosion P1230148.jpg

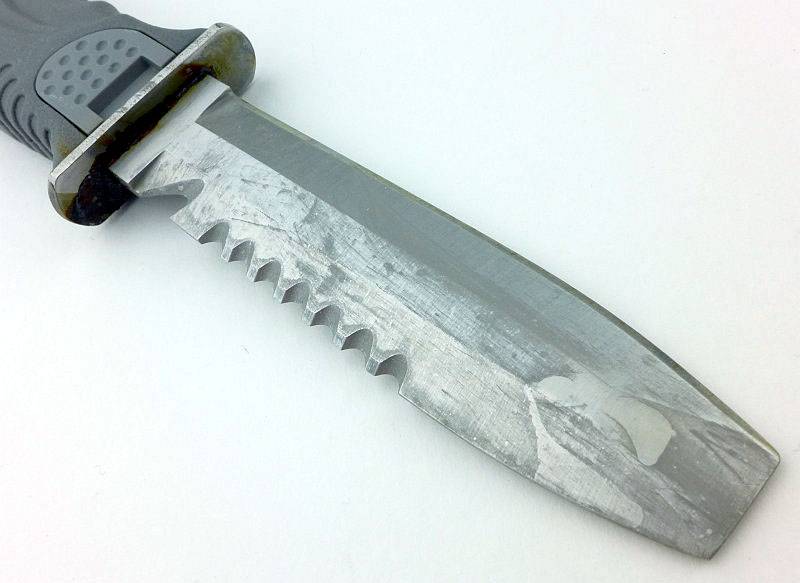
The corrosion tests threw up a surprise with the stainless steel knife. Typically, non-cutting stainless parts have a higher grade of stain resistance (with lower cutting ability), but in this case the worse corrosion was to the guard (though the hammer pommel was completely free of corrosion). The blade had a light frosting, but the guard was heavily corroded. After a cleanup, the guard was found to have deep pitting, and the clean-up (using a soak in cider vinegar) actually etched the guard heavily while making the blade nice and shiny.
 photo 85 Promate steel corrosion P1230009.jpg

The blade itself was relatively untouched and the frosting cleaned off with vinegar.
 photo 86 Promate steel corrosion P1230013.jpg

Ergonomics of the Promate knives is excellent, with easy to use, and secure, sheath retention along with great straps.

Folders are a contentious subject for diving, as the action of opening can be a make or break moment for the diver. The opening hole in the Seal folder is a little small, and being experienced in one-handed-opening (OHO) I did find this to be perfectly usable even with gloves, but with tired, cold hands and very thick gloves I suspect it will become increasingly difficult. There is also the exposed cutting hook to consider. This hook was actually a very poor cutter as it was not very sharp as supplied; with it being exposed, this lack of sharpness is actually a benefit. The Seal’s blade is worth carrying this knife for, with very good cutting ability and excellent serrations.

Overall it is clear these Promate knives are designed very well for divers, and the added bonus of zero corrosion on the titanium blades make them well worth considering.

Review Summary

The views expressed in this summary table are from the point of view of the reviewer’s personal use. I am not a member of the armed forces and cannot comment on its use beyond a cutting tool or field/hunting knife.

Something that might be a ‘pro’ for one user can be a ‘con’ for another, so the comments are categorised based on my requirements. You should consider all points and if they could be beneficial to you.

_______________________________________________ _______________________________________________
Things I like What doesn’t work so well for me
_______________________________________________ _______________________________________________
Titanium blades require no post-dive cleanup. The steel knife and cutter suffered corrosion.
Excellent blade retention. Factory edges not very good.
Comfortable leg straps. Serrations are too coarse for smaller ropes.
Handle design provides a very secure grip.
Sheaths are ambidextrous.

 photo 83 Promate line up P1210543v2.jpg


Discussing the Review:

Please feel free to add comments to the review, but the ideal place to freely discuss these reviews is on a forum. If you started reading the shorter forum version of the review, but followed the link this full exclusive review, please return to that forum to discuss the review there.
If you read the review entirely on Tactical Reviews, please consider one of the following to join in any discussion.

EdgeMatters – Sponsored Reviews (UK based Forum for Knife Makers and Collectors)

BladeForums – Knife Reviews (US based Forum for Knife Discussion)

CandlePowerForums – Knife Reviews Section (Largest and Friendliest Flashlight Community Forum)

Knife Review: Zero Tolerance 0095BW Flipper (S35VN blade, Titanium Handle, ‘BlackWash’ Finish)

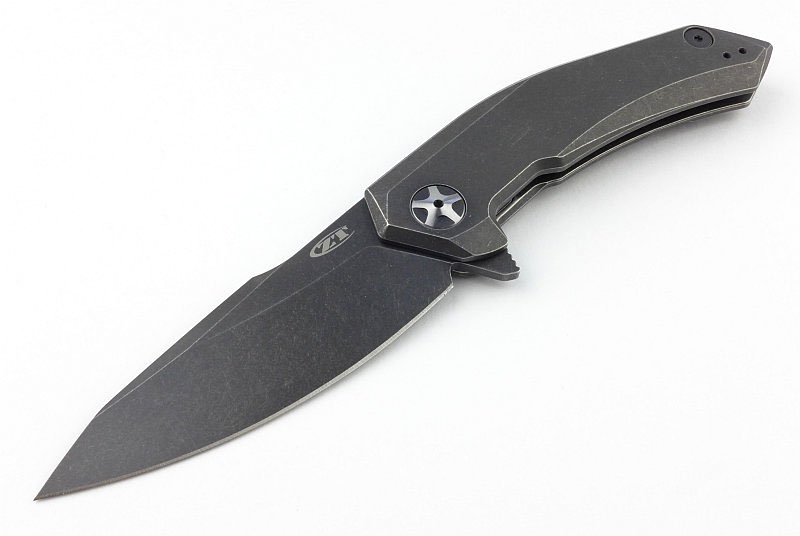
One of Zero Tolerance’s new knives for 2016, the 0095BW is one which initially did not particularly stand out for me, but as I’ve got to know it better, I’ve found I very nearly missed out on a real gem.

 photo 19 ZT 0095BW open angle lockbar P1180414.jpg

The Blade and Handle Geometry:

Most knife specifications have a basic description of the blade geometry, but in this section I will be taking a more detailed look at geometry and balance.
 photo 32 ZT 0095BW grind P1180524.jpg

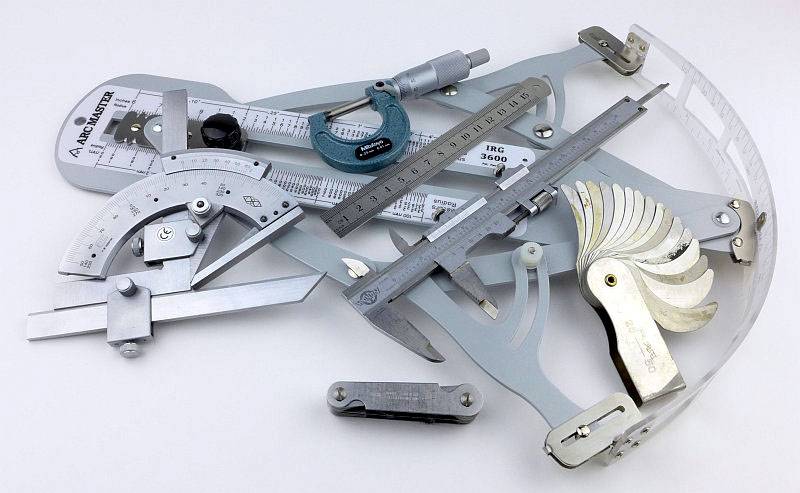
Using a set of gauges and precision measuring equipment including a Vernier protractor, callipers, fixed radius gauges and the unique Arc Master adjustable radius gauge (the one that looks like a crossbow).
 photo Knife measuring P1180483.jpg

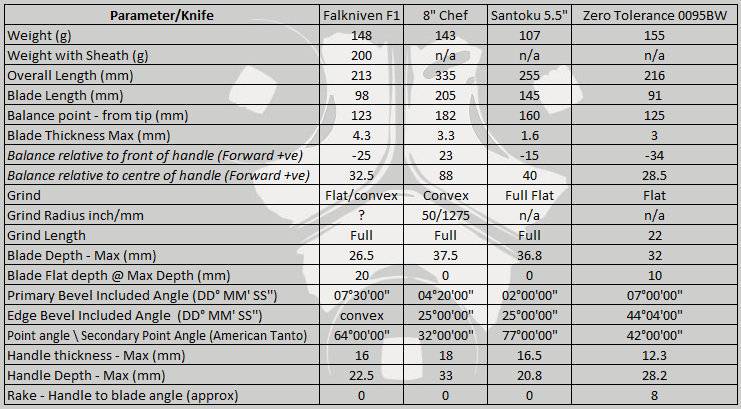
These measurements have been tabulated and are presented along with a few reference blades (8″ Chef’s Knife, 5.5″ Santoku and the popular Fällkniven F1).

Key aspects such as the primary bevel angle, grind type, blade depth, blade thickness, length, weight are detailed, along with balance information.
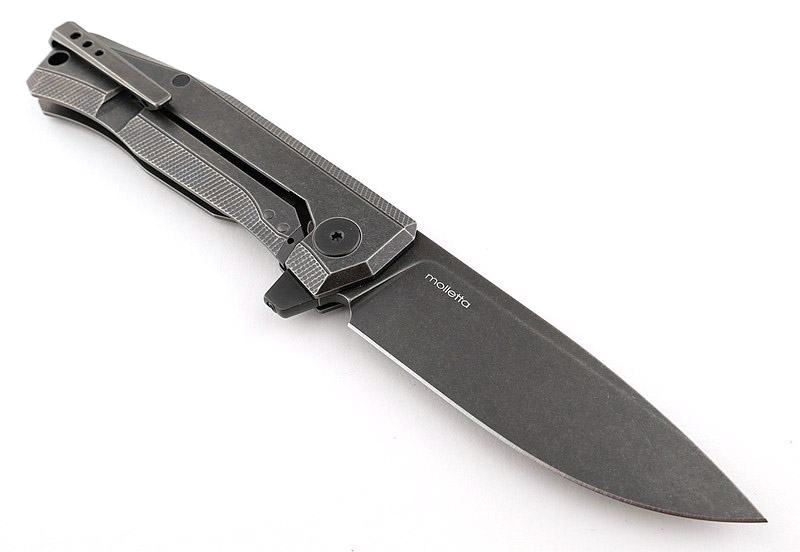
 photo 33 ZT 0095BW measure P1180531.jpg

The ‘Balance relative to the front of the handle’ tells you if the knife will feel front heavy, or if the weight is in your hand (a positive value means the weight is forward of the front of the handle). The ‘Balance relative to the centre of the handle’ indicates how close to a ‘neutral balance’ the knife has in the hand.
 photo 31 ZT 0095BW balance P1180523.jpg

In the case of full convex grinds the approximate centre of the grind is used for the primary bevel angle estimate.

 photo 0095BW Parameters2.jpg

The blade is made from S35VN steel.

A few more details:

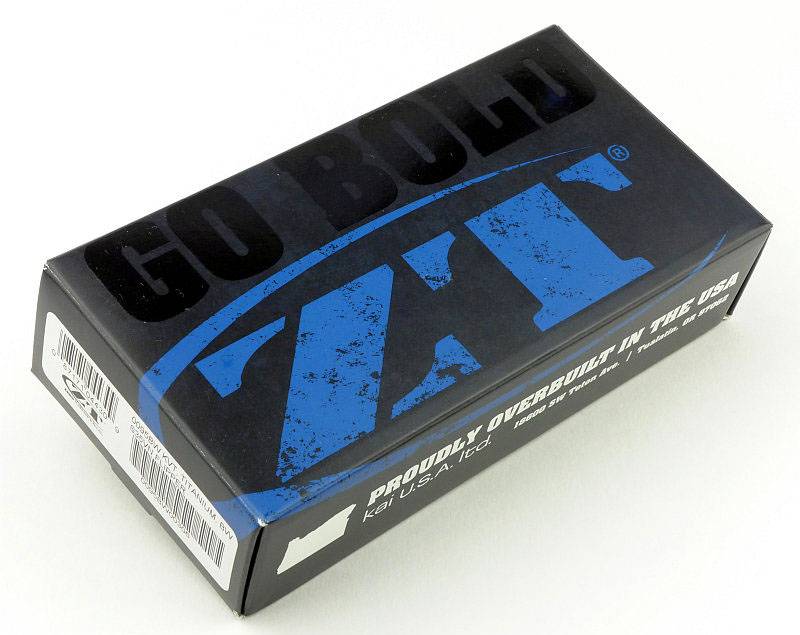
The 0095BW’s box.
 photo 01 ZT 0095BW boxed P1180348.jpg

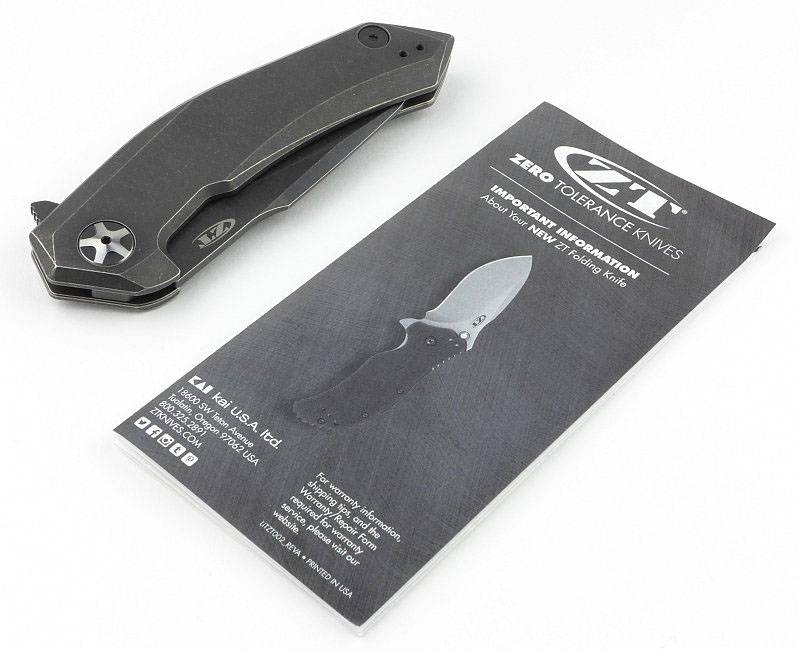
Inside was the 0095BW and a generic ZT information leaflet.
 photo 02 ZT 0095BW box contents P1180351.jpg

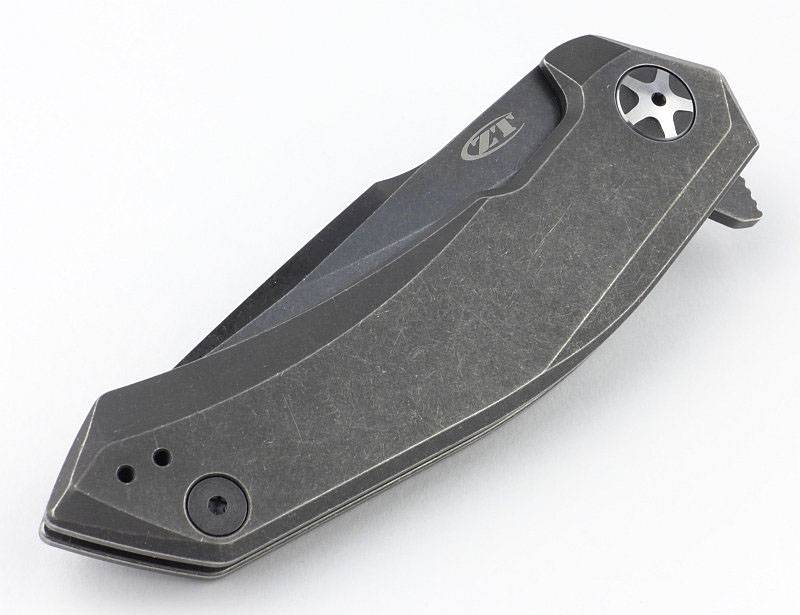
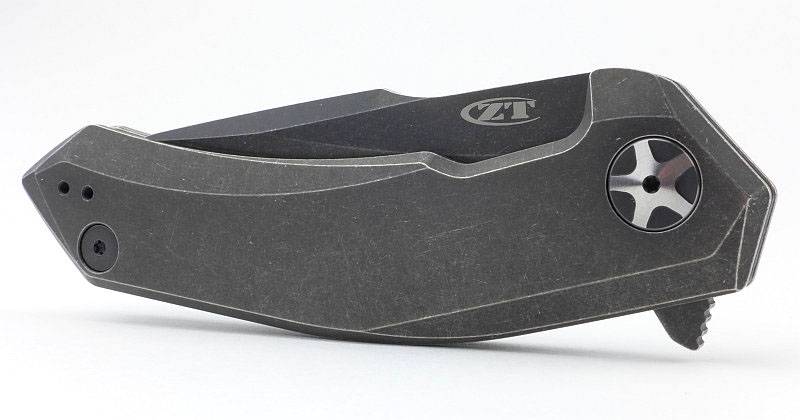
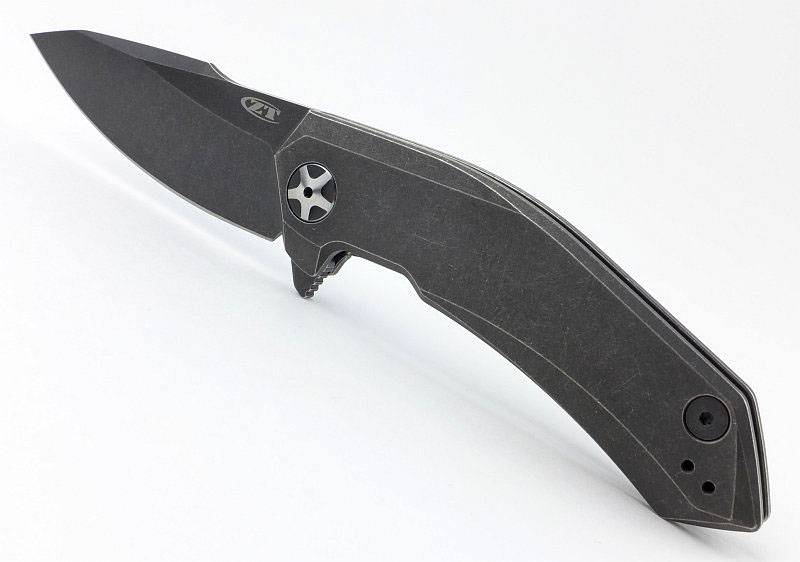
Quiet and subtle, the 0095BW’s stonewashed ‘BlackWash’ finish makes it inconspicuous.
 photo 03 ZT 0095BW closed angle P1180354.jpg

Nicely picking up the edges, the stonewashed finish allows you to really appreciate all the design details and flow of the lines.
 photo 04 ZT 0095BW closed angle lockbar P1180356.jpg

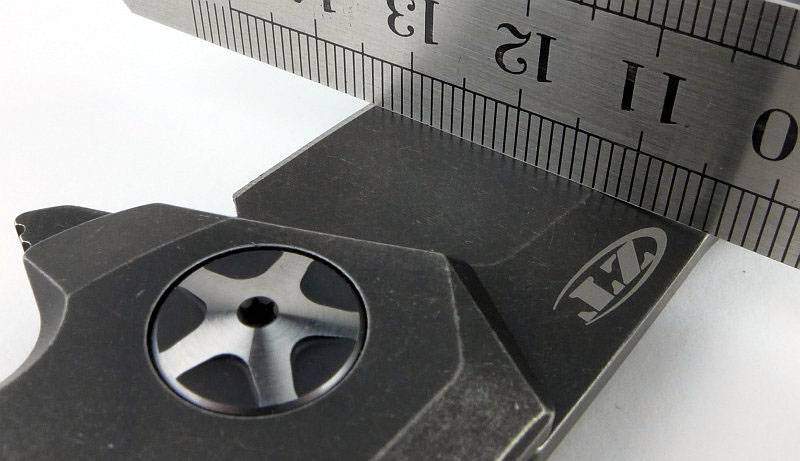
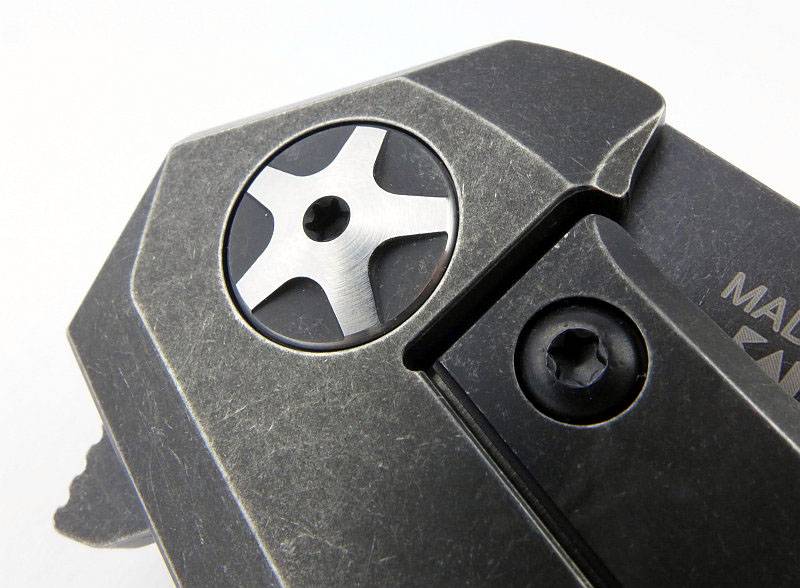
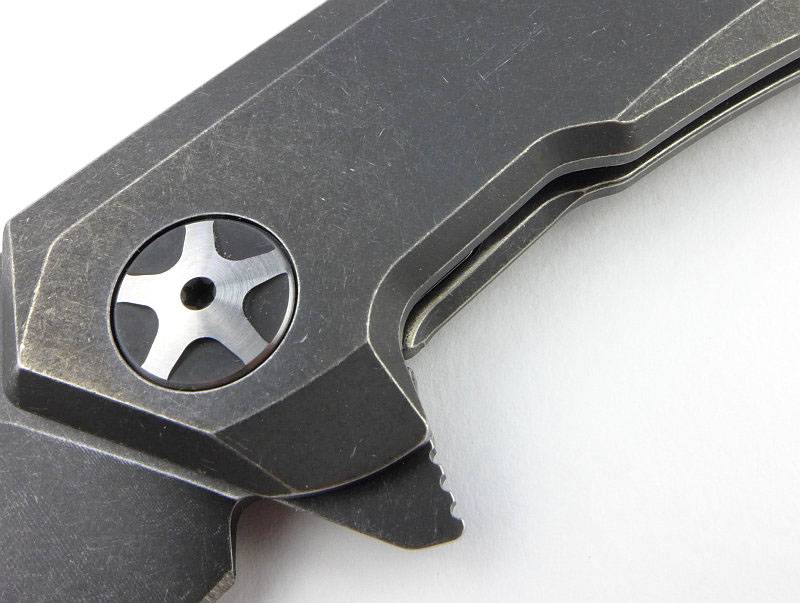
A two-tone pivot adds a decorative element.
 photo 05 ZT 0095BW pivot bolt P1180361.jpg

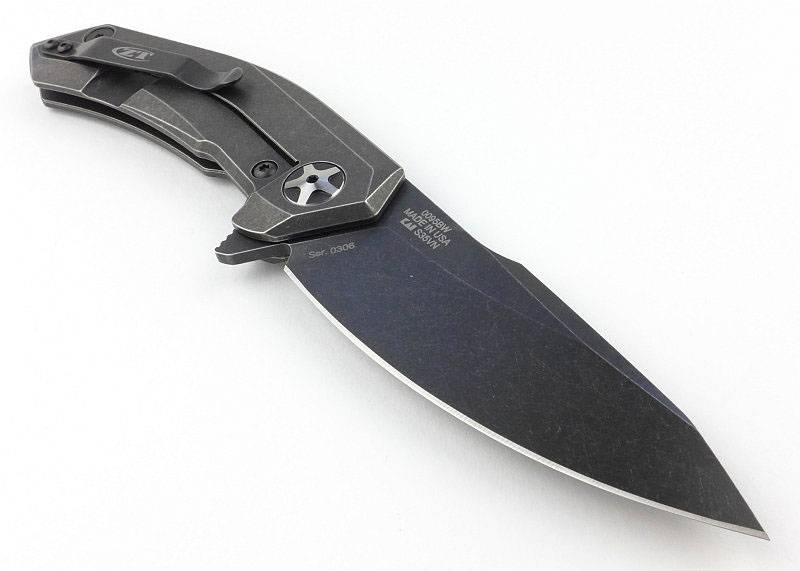
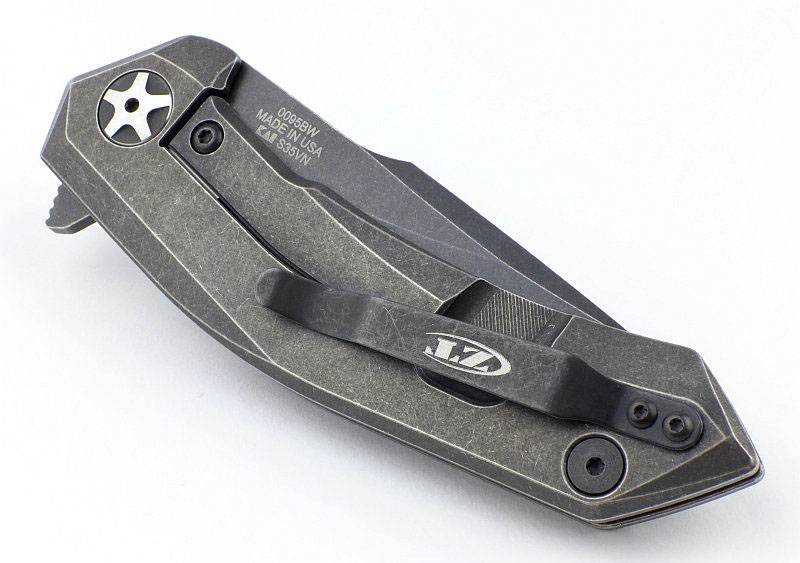
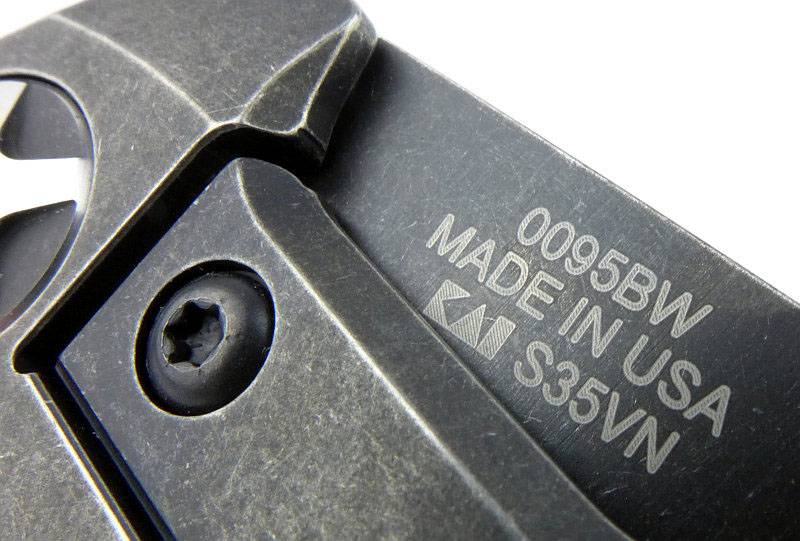
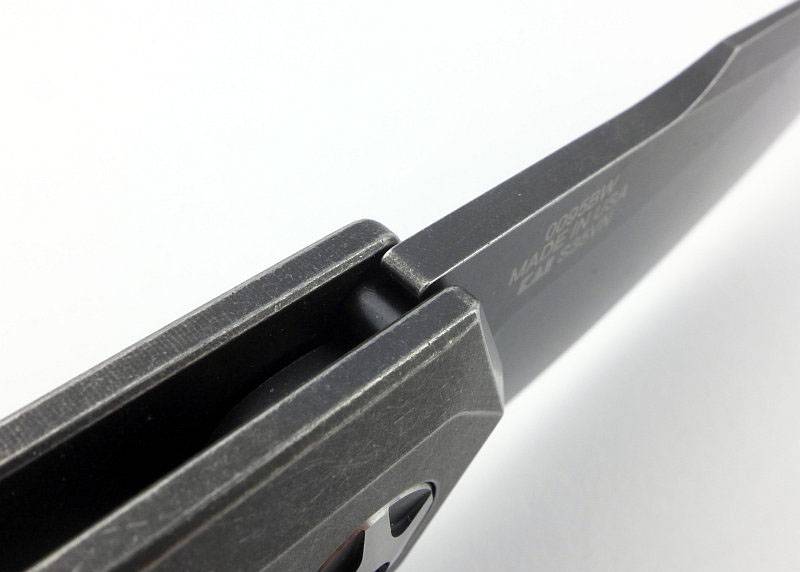
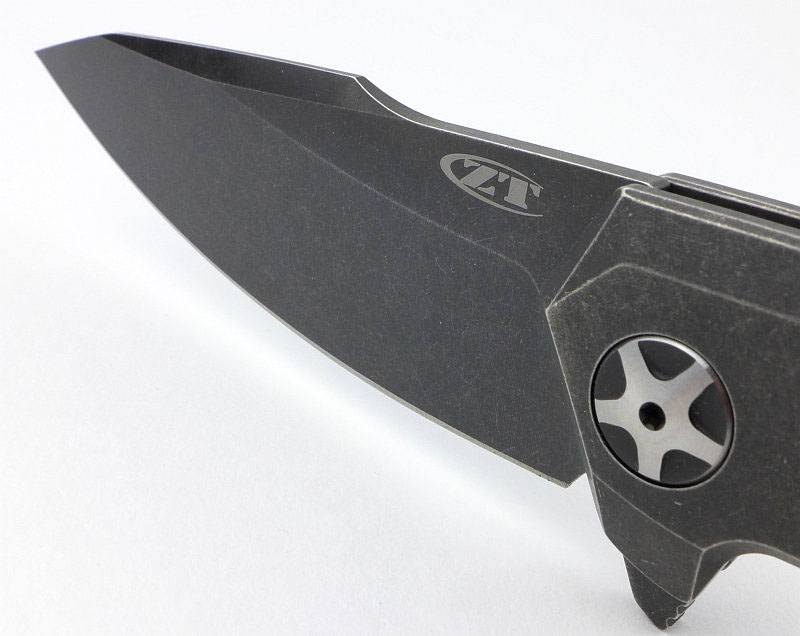
Blade and handle blend into each other with the stonewashed finish, and on this side the model, ‘made in’ and KAI logo can be seen on the blade. Also note the bolt head holding the hardened lockbar insert onto the Titanium lockbar.
 photo 06 ZT 0095BW model P1180363.jpg

The blade is perfectly centred (even if I’ve not quite captured that in this photo).
 photo 06b ZT 0095BW blade centring P1180367.jpg

Despite such an understated, almost ‘used’ look, the 0095BW is a stunning looking knife.
 photo 07 ZT 0095BW closed side P1180371.jpg

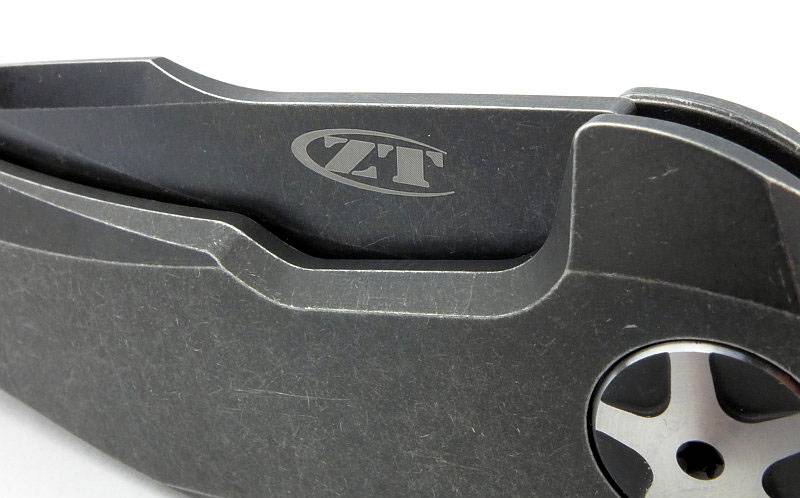
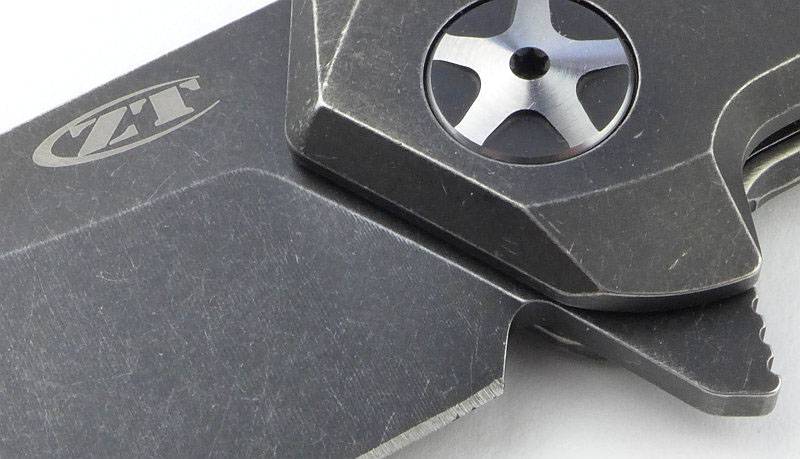
On the other side of the blade is the ZT logo which sits into the lock release cut-out.
 photo 08 ZT 0095BW logo P1180373.jpg

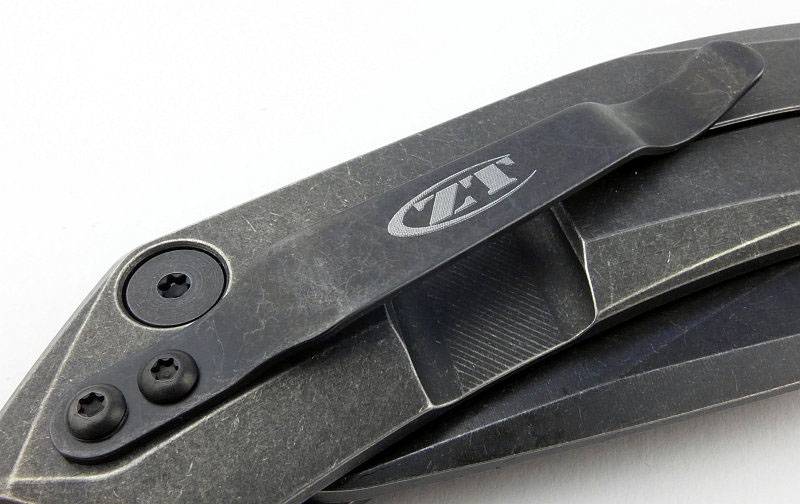
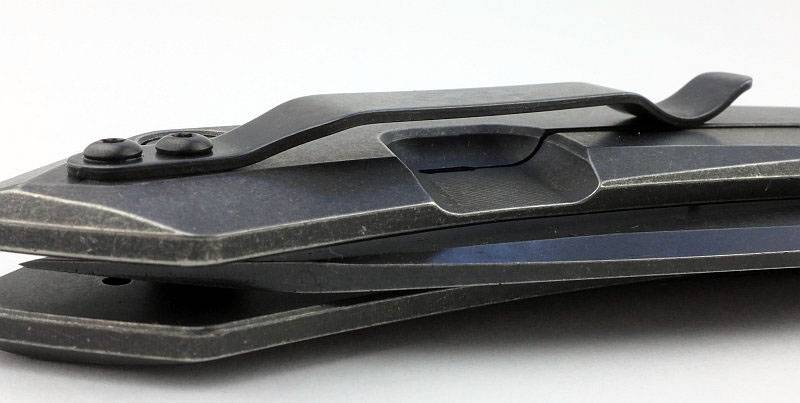
The removable clip also has the ZT logo. Also note how it sits at an angle such that it does not press on the lock bar, but instead on the side of the handle.
 photo 09 ZT 0095BW clip P1180374.jpg

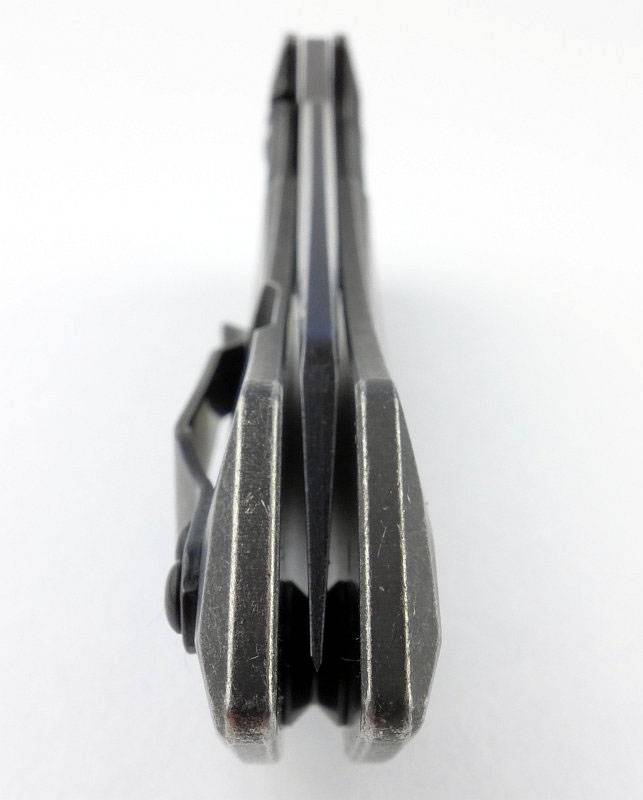
Taking a lower angle view, you can see the thinned area of the handle (under the clip) that creates the lock bar spring.
 photo 09 ZT 0095BW lock spring P1180377.jpg

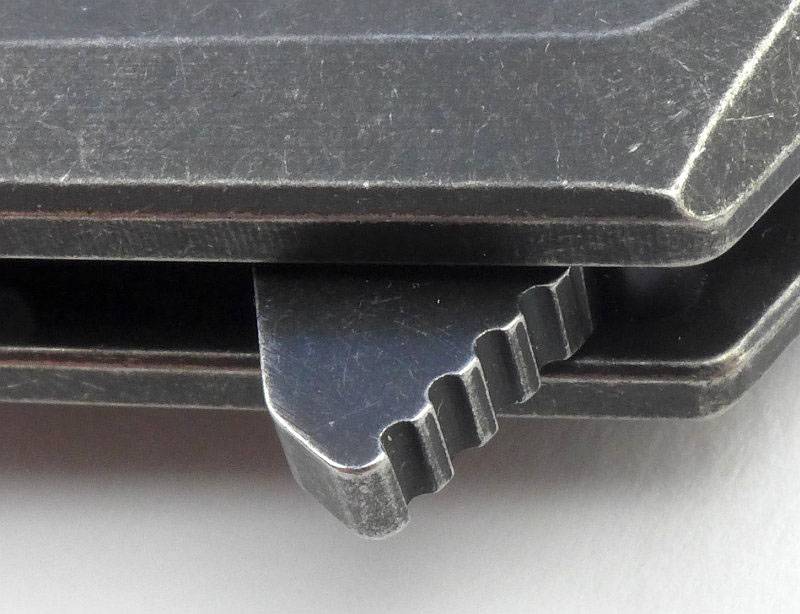
Ready for action the flipper (which doubles as a finger guard) has jimping to provide a good grip.
 photo 10 ZT 0095BW flipper P1180386.jpg

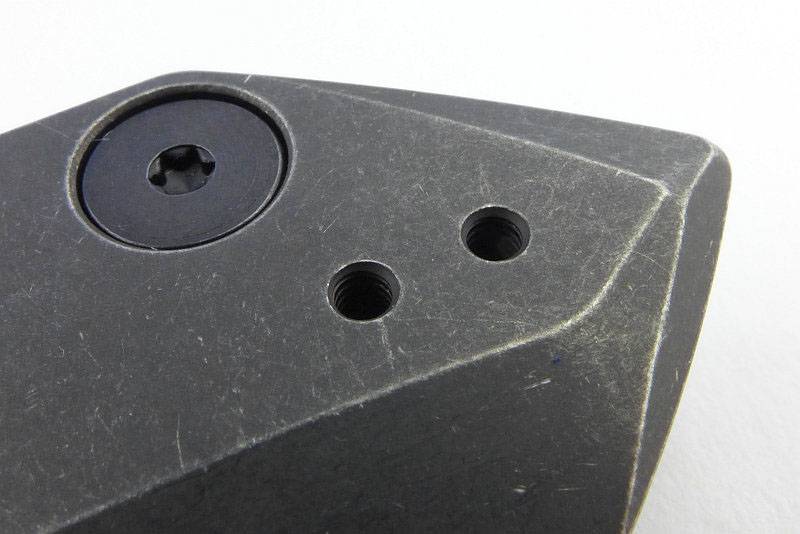
Ready for the clip to be mounted on either side, the 0095BW has the threaded holes for tip-up carry either way round.
 photo 11 ZT 0095BW clip holes P1180387.jpg

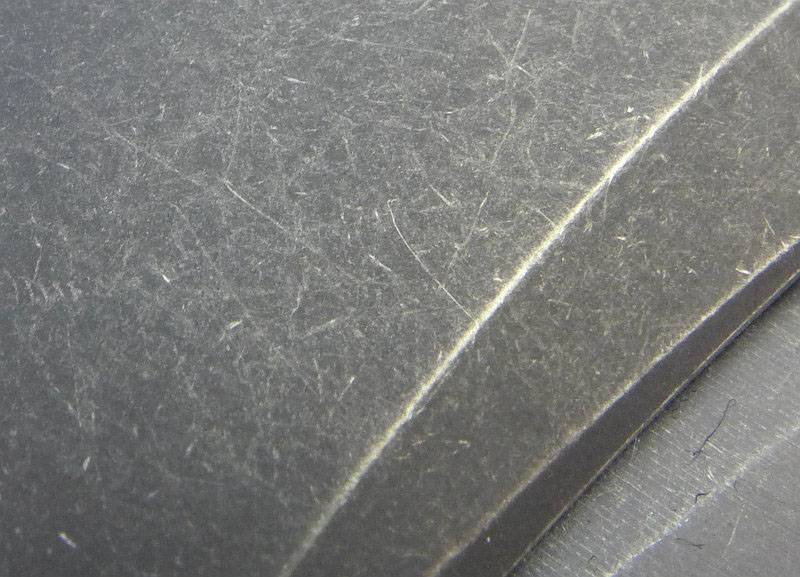
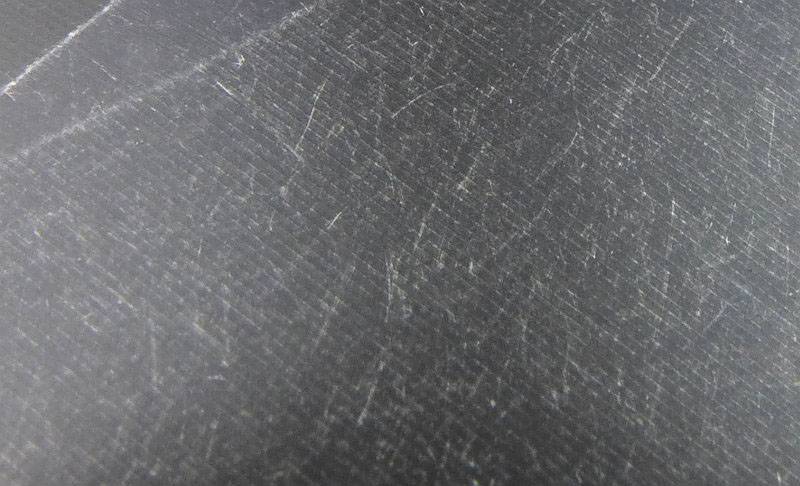
A close view of the stonewashed finish on the handle. This gives an even overall ‘worn’ look, which really helps further marks blend in. The 0095BW is asking to be used.
 photo 12 ZT 0095BW finish P1180392.jpg

With the blade open you can now see the lockbar release cut-out, and the where you press on the lockbar to release the blade. Notice as well how the lines of the handle flow into the flipper.
 photo 14 ZT 0095BW flipper open P1180399.jpg

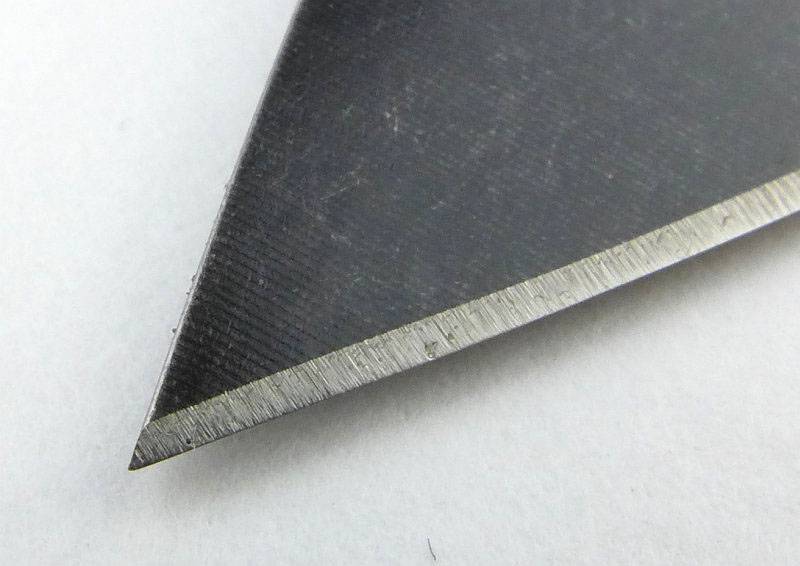
A close-up of the blade tip.
 photo 15 ZT 0095BW tip P1180402.jpg

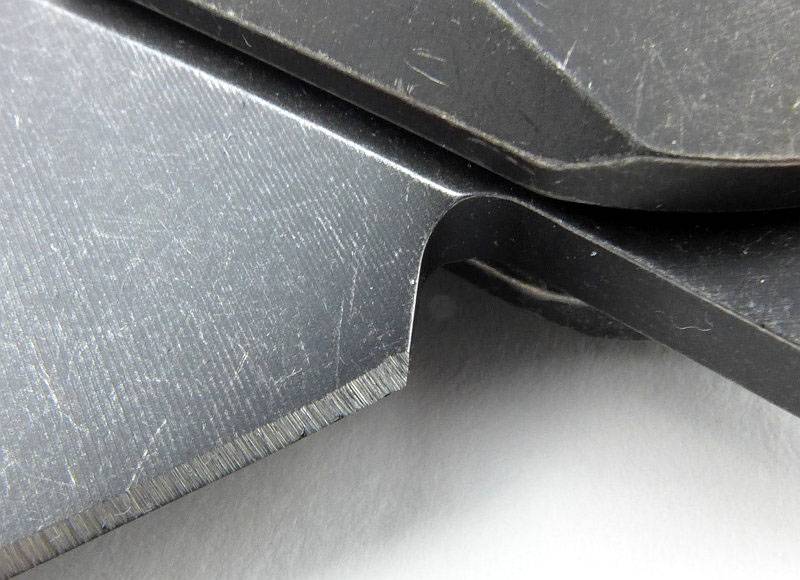
One of those details I consider a must-have, the 0095BW has a choil to terminate the edge and allow proper sharpening.
 photo 16 ZT 0095BW choil P1180404.jpg

Like the handle, the blade has a stonewashed finish. The main difference here is that the blade grinding lines are visible through the finish.
 photo 17 ZT 0095BW blade finish P1180410.jpg

A well rounded plunge line follows the handle’s front edge.
 photo 18 ZT 0095BW plunge line P1180412.jpg

Out of the box, lock engagement is not that deep. However the lockup is rock solid. As it wears this will gradually increase the engagement.
 photo 21 ZT 0095BW lock engagement P1180418.jpg

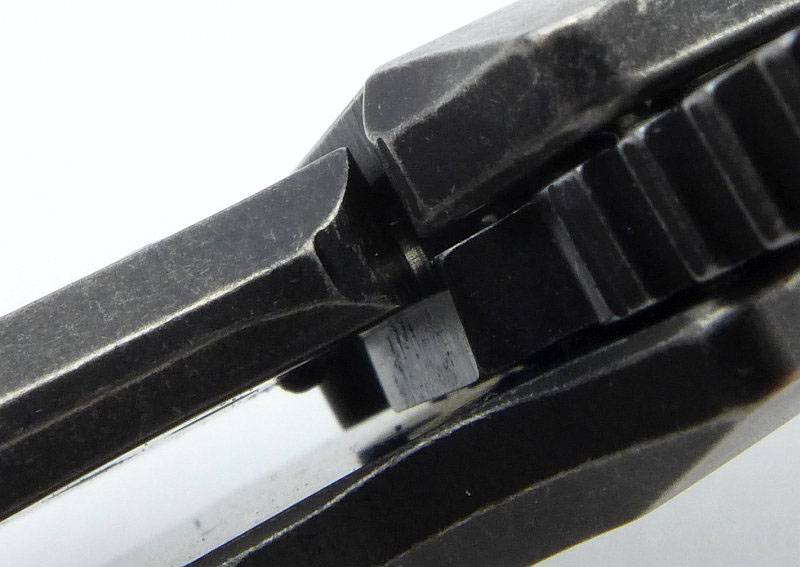
The blade stop is a pin set into the handle, but set into blind holes so it cannot be seen on the side of the handle.
 photo 22 ZT 0095BW blade stop P1180428.jpg

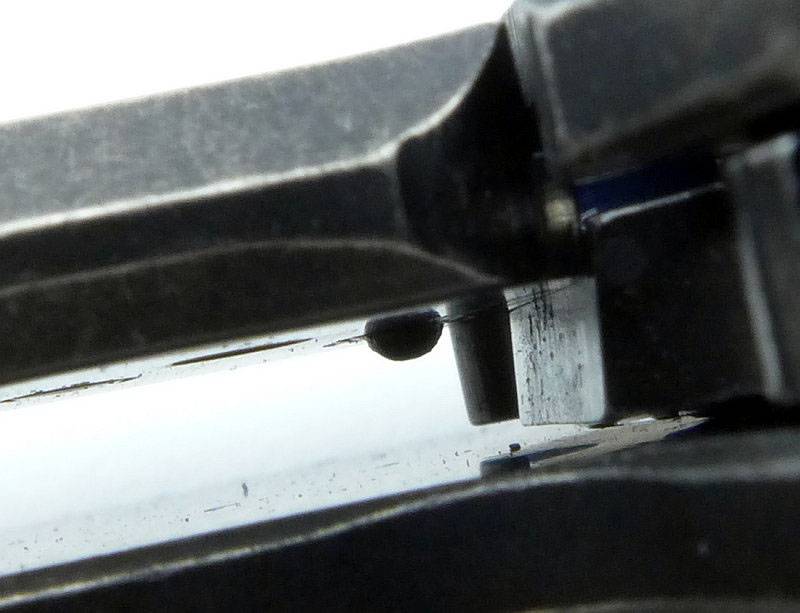
Giving it the really snappy opening is the detent ball which holds the blade closed until enough pressure is applied to the flipper.
 photo 28 ZT 0095BW detent P1180472.jpg

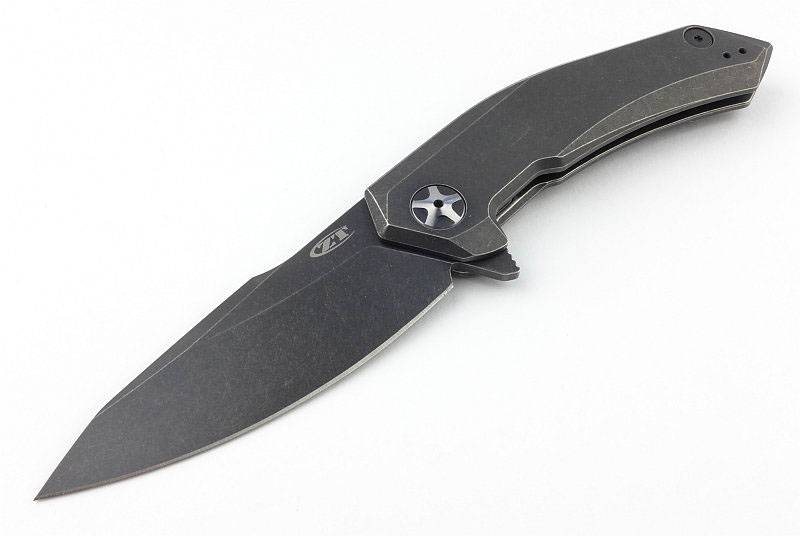
A curving handle acts like a palm swell. The harpoon blade design is one of my favourite blade shapes.
 photo 23 ZT 0095BW open angle P1180431.jpg

Another look at that harpoon design.
 photo 24 ZT 0095BW harpoon P1180437.jpg

What it is like to use?

Again this knife surprised me, as in contrast to its modest appearance (mainly thanks to the stonewashed finish), the 0095BW displays modern lines and has particularly good slicing and piercing ability. The blade cuts very aggressively and eagerly.

With a narrow point angle, the tip cuts very deeply (frequently deeper than you might want) and means you have to be wary of this. The high flat grind makes this almost a full flat grind and as such it slices very well. Add to this the blade being only 3mm thick and it makes those deep slicing cuts very easily.

The 0095BW is a good size folder with 3 1/2″ blade, yet remains slim, light and easy to pocket due to the Titanium used for the handles. This cuts both ways though, and does make the handle a little thin for heavy or extended work. As an EDC blade for sporadic cutting, the compromise is ideal.

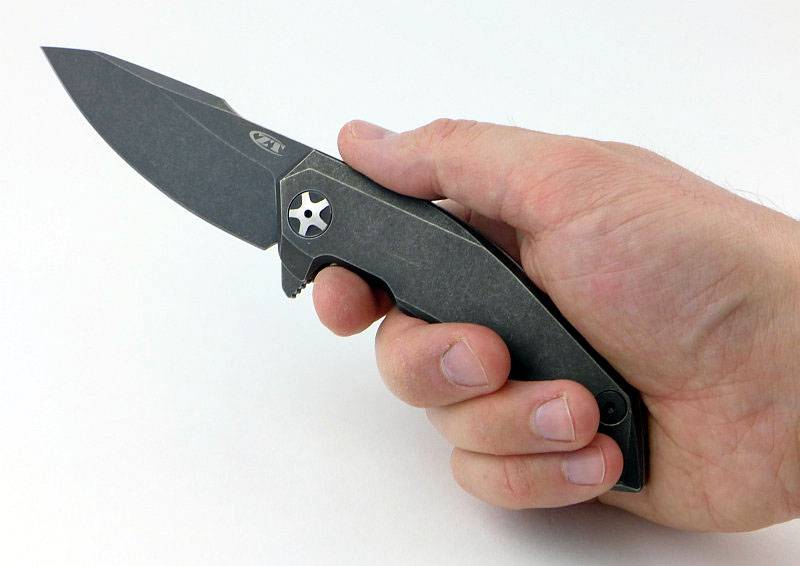
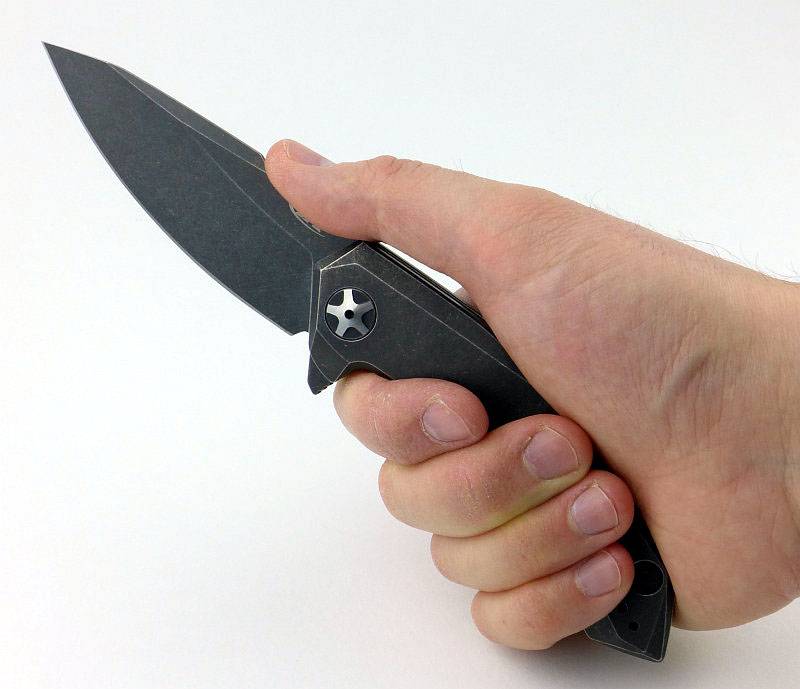
Holding for a piercing cut, the flipper serves as a finger guard and gives you a solid surface to push forward with. (I take XL size gloves)
 photo 25 ZT 0095BW in hand P1180454.jpg

Taking up a power grip, the harpoon blade shape fits in perfectly with a thumb positioned on the spine for a stronger cutting force. The curve of the handle sitting nicely into your palm.
 photo 26 ZT 0095BW in hand P1180456.jpg

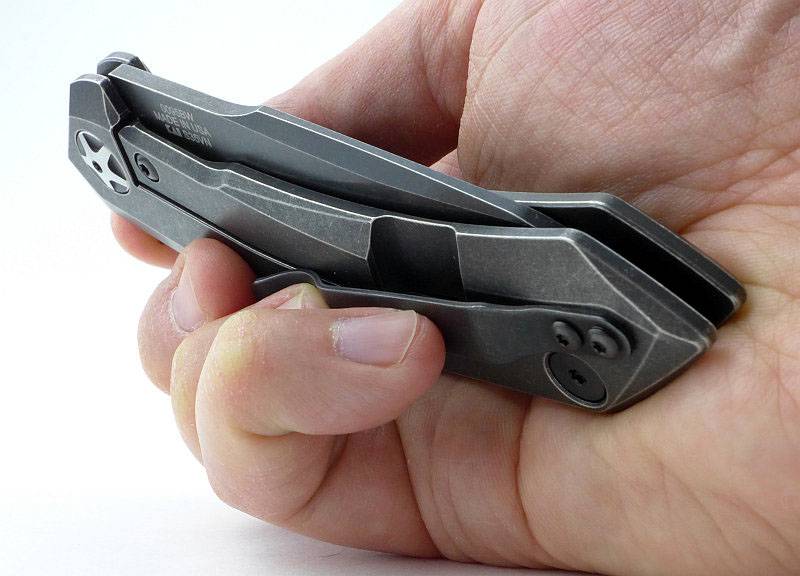
While looking at grip, a small aside to take a look at a common issue people have with flippers – that of finding them difficult to flip. The most common reason people have difficulty with flippers that use integral locks, is the accidental pressure on the lock bar. The lock bar has the blade retention detent, and is you push on the lock bar you effectively prevent the detent from slipping and so stop the blade deploying. You need to ensure that when you grip the closed knife you keep your fingers off the lock bar, and if you do this, sliiiiCK, the blade flies open and locks firmly. For a knife where the pocket clip sits fully on the lock bar (not the case here) you need to watch that as well.
 photo 29 ZT 0095BW opening grip P1180474.jpg

Once you have the hang of gripping the knife correctly for the flip, it starts to become addictive and usually your flipping session ends with someone shouting at you to “STOP IT” (or is it just me that has that happen?).

In terms of its flip, this is one area Zero Tolerance have worked hard to get right. The design of the detent allows a good amount of force to build and then a clean release of that force as the blade breaks free. Using ZT’s KVT ball-bearing makes the blade motion super smooth, in fact if you push the lock bar out slightly to stop the detent ball pressing on the side of the blade, the blade will swing smoothly under its own weight. The result of a tuned detent combined with the KVT ball-bearing, is a very positive blade deployment which you might even think is assisted. Lock-up is absolutely solid with no play at all.

A quick mention of the ZT BlackWash finish – this is a bit like getting stonewashed jeans, it has almost been worn-in for you. The finish makes it look used, and easily masks any further marks from use, so unlike other types of finish that can be painful to see the first signs of use on, the 0095BW is just asking to be used.

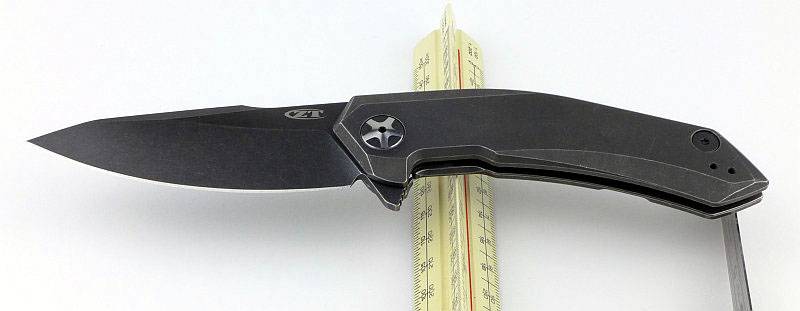
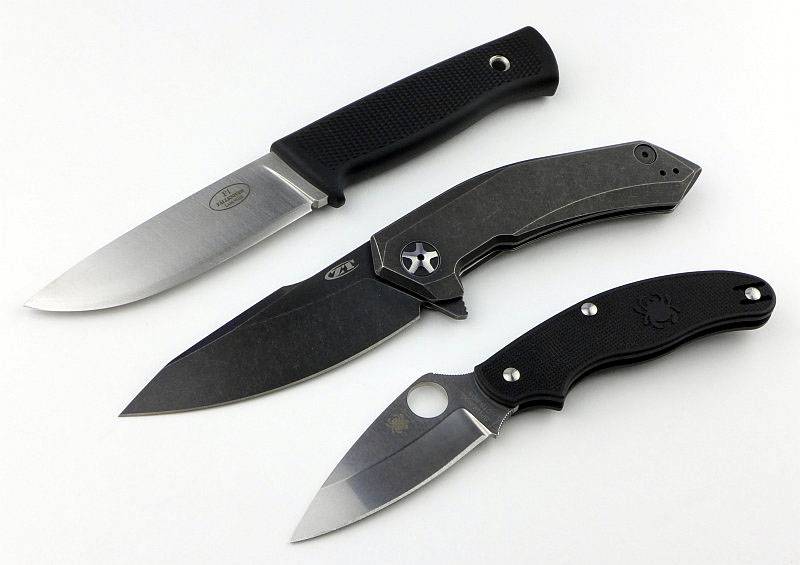
To give an idea of scale, here it is next to the Fällkniven F1 and a Spyderco UK Pen Knife.
 photo 27 ZT 0095BW size P1180458.jpg

Review Summary

The views expressed in this summary table are from the point of view of the reviewer’s personal use. I am not a member of the armed forces and cannot comment on its use beyond a cutting tool or field/hunting knife.

Something that might be a ‘pro’ for one user can be a ‘con’ for another, so the comments are categorised based on my requirements. You should consider all points and if they could be beneficial to you.

_______________________________________________ _______________________________________________
Things I like What doesn’t work so well for me
_______________________________________________ _______________________________________________
Understated look using ZT’s BlackWash finish. Handle too slim for extended use or heavy cutting.
Extremely effective for slicing or piercing. Blade tip makes it easy to cut too deeply.
Silky and positive flip action. Pivot bearing is not sealed so could attract dust and grit.
Light weight. Careful placement of fingers required for an easy flip.
Slim design is easy to pocket. Can become slippery with wet or greasy hands due to a lack of grip patterns or jimping.
Uses S35VN steel.
KVT pivot ball-bearing.
Reversible clip.
Excellent fit and finish.

 photo 13 ZT 0095BW open angle P1180395.jpg


Discussing the Review:

Please feel free to add comments to the review, but the ideal place to freely discuss these reviews is on a forum. If you started reading the shorter forum version of the review, but followed the link this full exclusive review, please return to that forum to discuss the review there.
If you read the review entirely on Tactical Reviews, please consider one of the following to join in any discussion.

EdgeMatters – Sponsored Reviews (UK based Forum for Knife Makers and Collectors)

BladeForums – Knife Reviews (US based Forum for Knife Discussion)

CandlePowerForums – Knife Reviews Section (Largest and Friendliest Flashlight Community Forum)